We continue our series of screen-used TNG jumpsuit examinations with this Dr. Beverly Crusher uniform from season 1, again courtesy of Star Trek collector extraordinaire Angelo Cifaldi. 🙂
In this corresponding video, I discuss some of the highlights from the following post:
Aside from being a lovely costume in its own right, there are quite a few interesting differences to both of the previous two uniforms I recently posted about (Tasha Yar and Ensign Sito, respectively).
Very special thanks to Angelo and to my Ko-Fi supporters for helping make this possible.
FABRIC COLOR
As is often the case with screen-used costumes, perhaps the most surprising thing about this Dr. Crusher season 1 uniform was the actual color of the fabric.
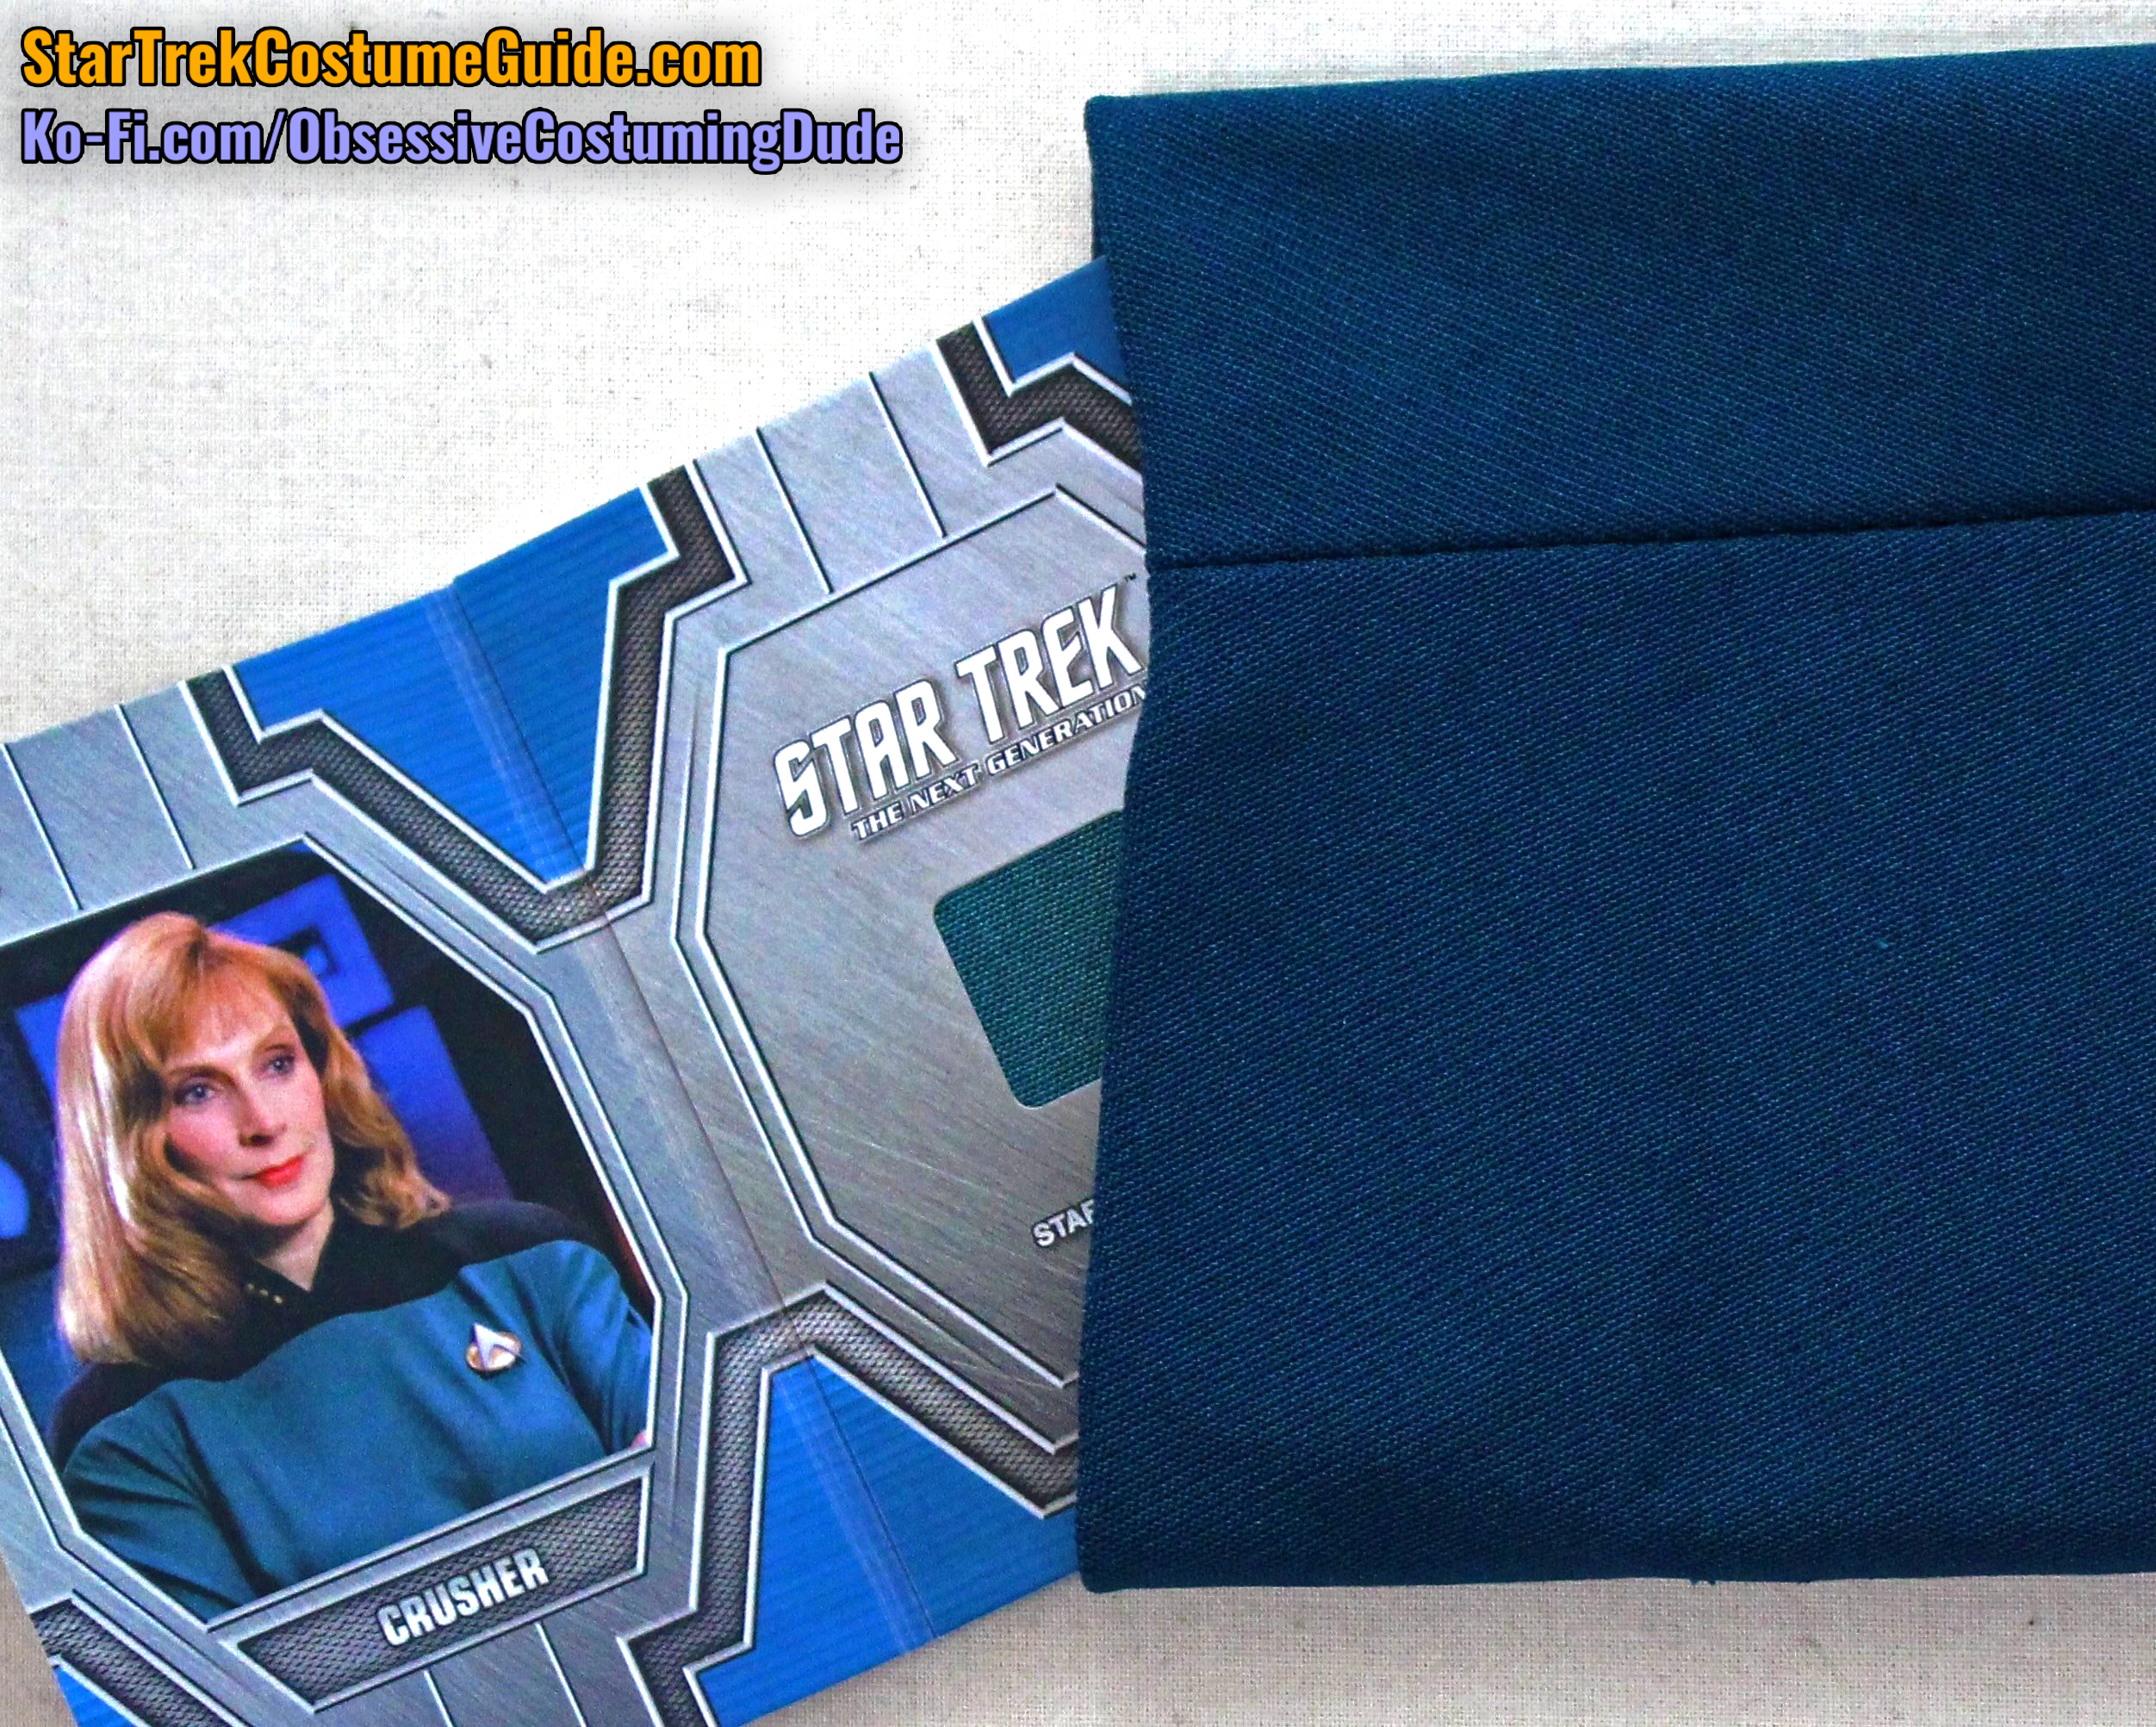
It was a very dark, deep teal – significantly darker than the Dr. Crusher and Counselor Troi costume cards I have of their later-style uniforms.
However, unlike the aforementioned Dr. Pulaski uniform, the color of this Dr. Crusher jumpsuit was surprisingly close to how it usually looked in the show.
TNG, 1x4 “Code of Honor” (left) and 1x25 “Conspiracy” (right)
The best way I can think of to describe the actual color is, “navy teal.”
Here are some direct color-comparison photos with the aforementioned costume cards, in a variety of lighting conditions.
Outside, sunlight
Outside, shade
Indoors, with flash
Indoors, no flash
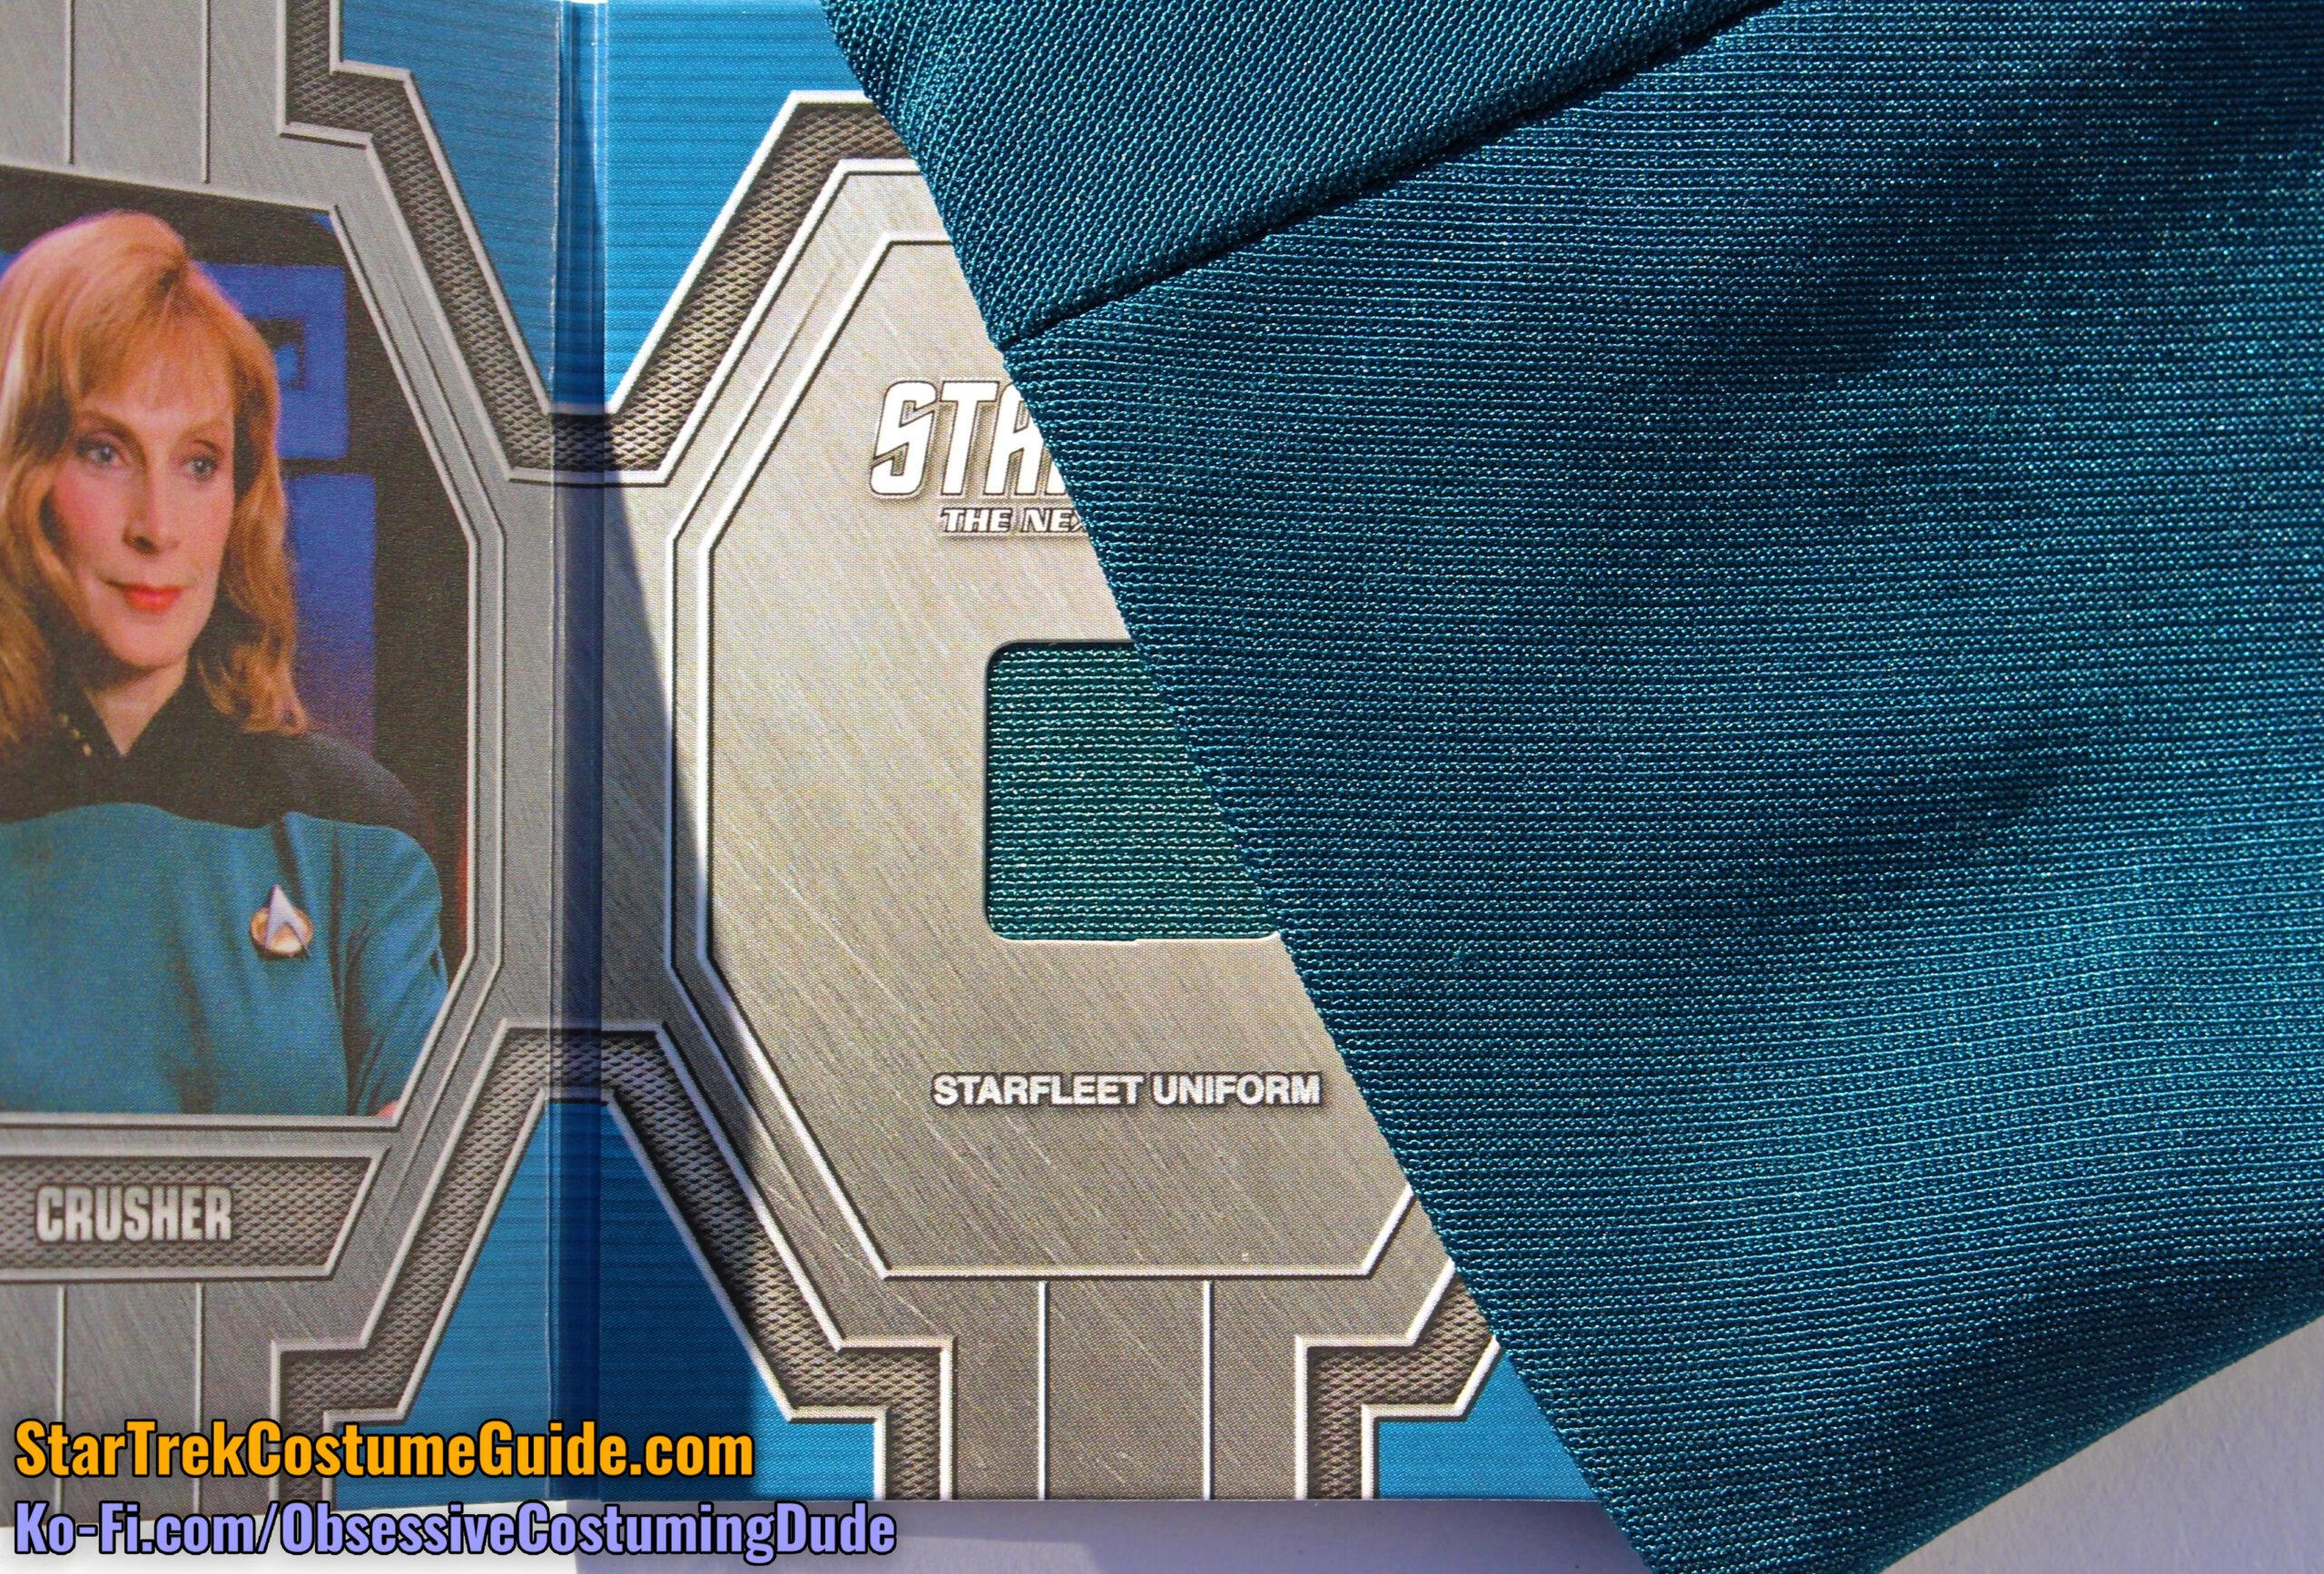
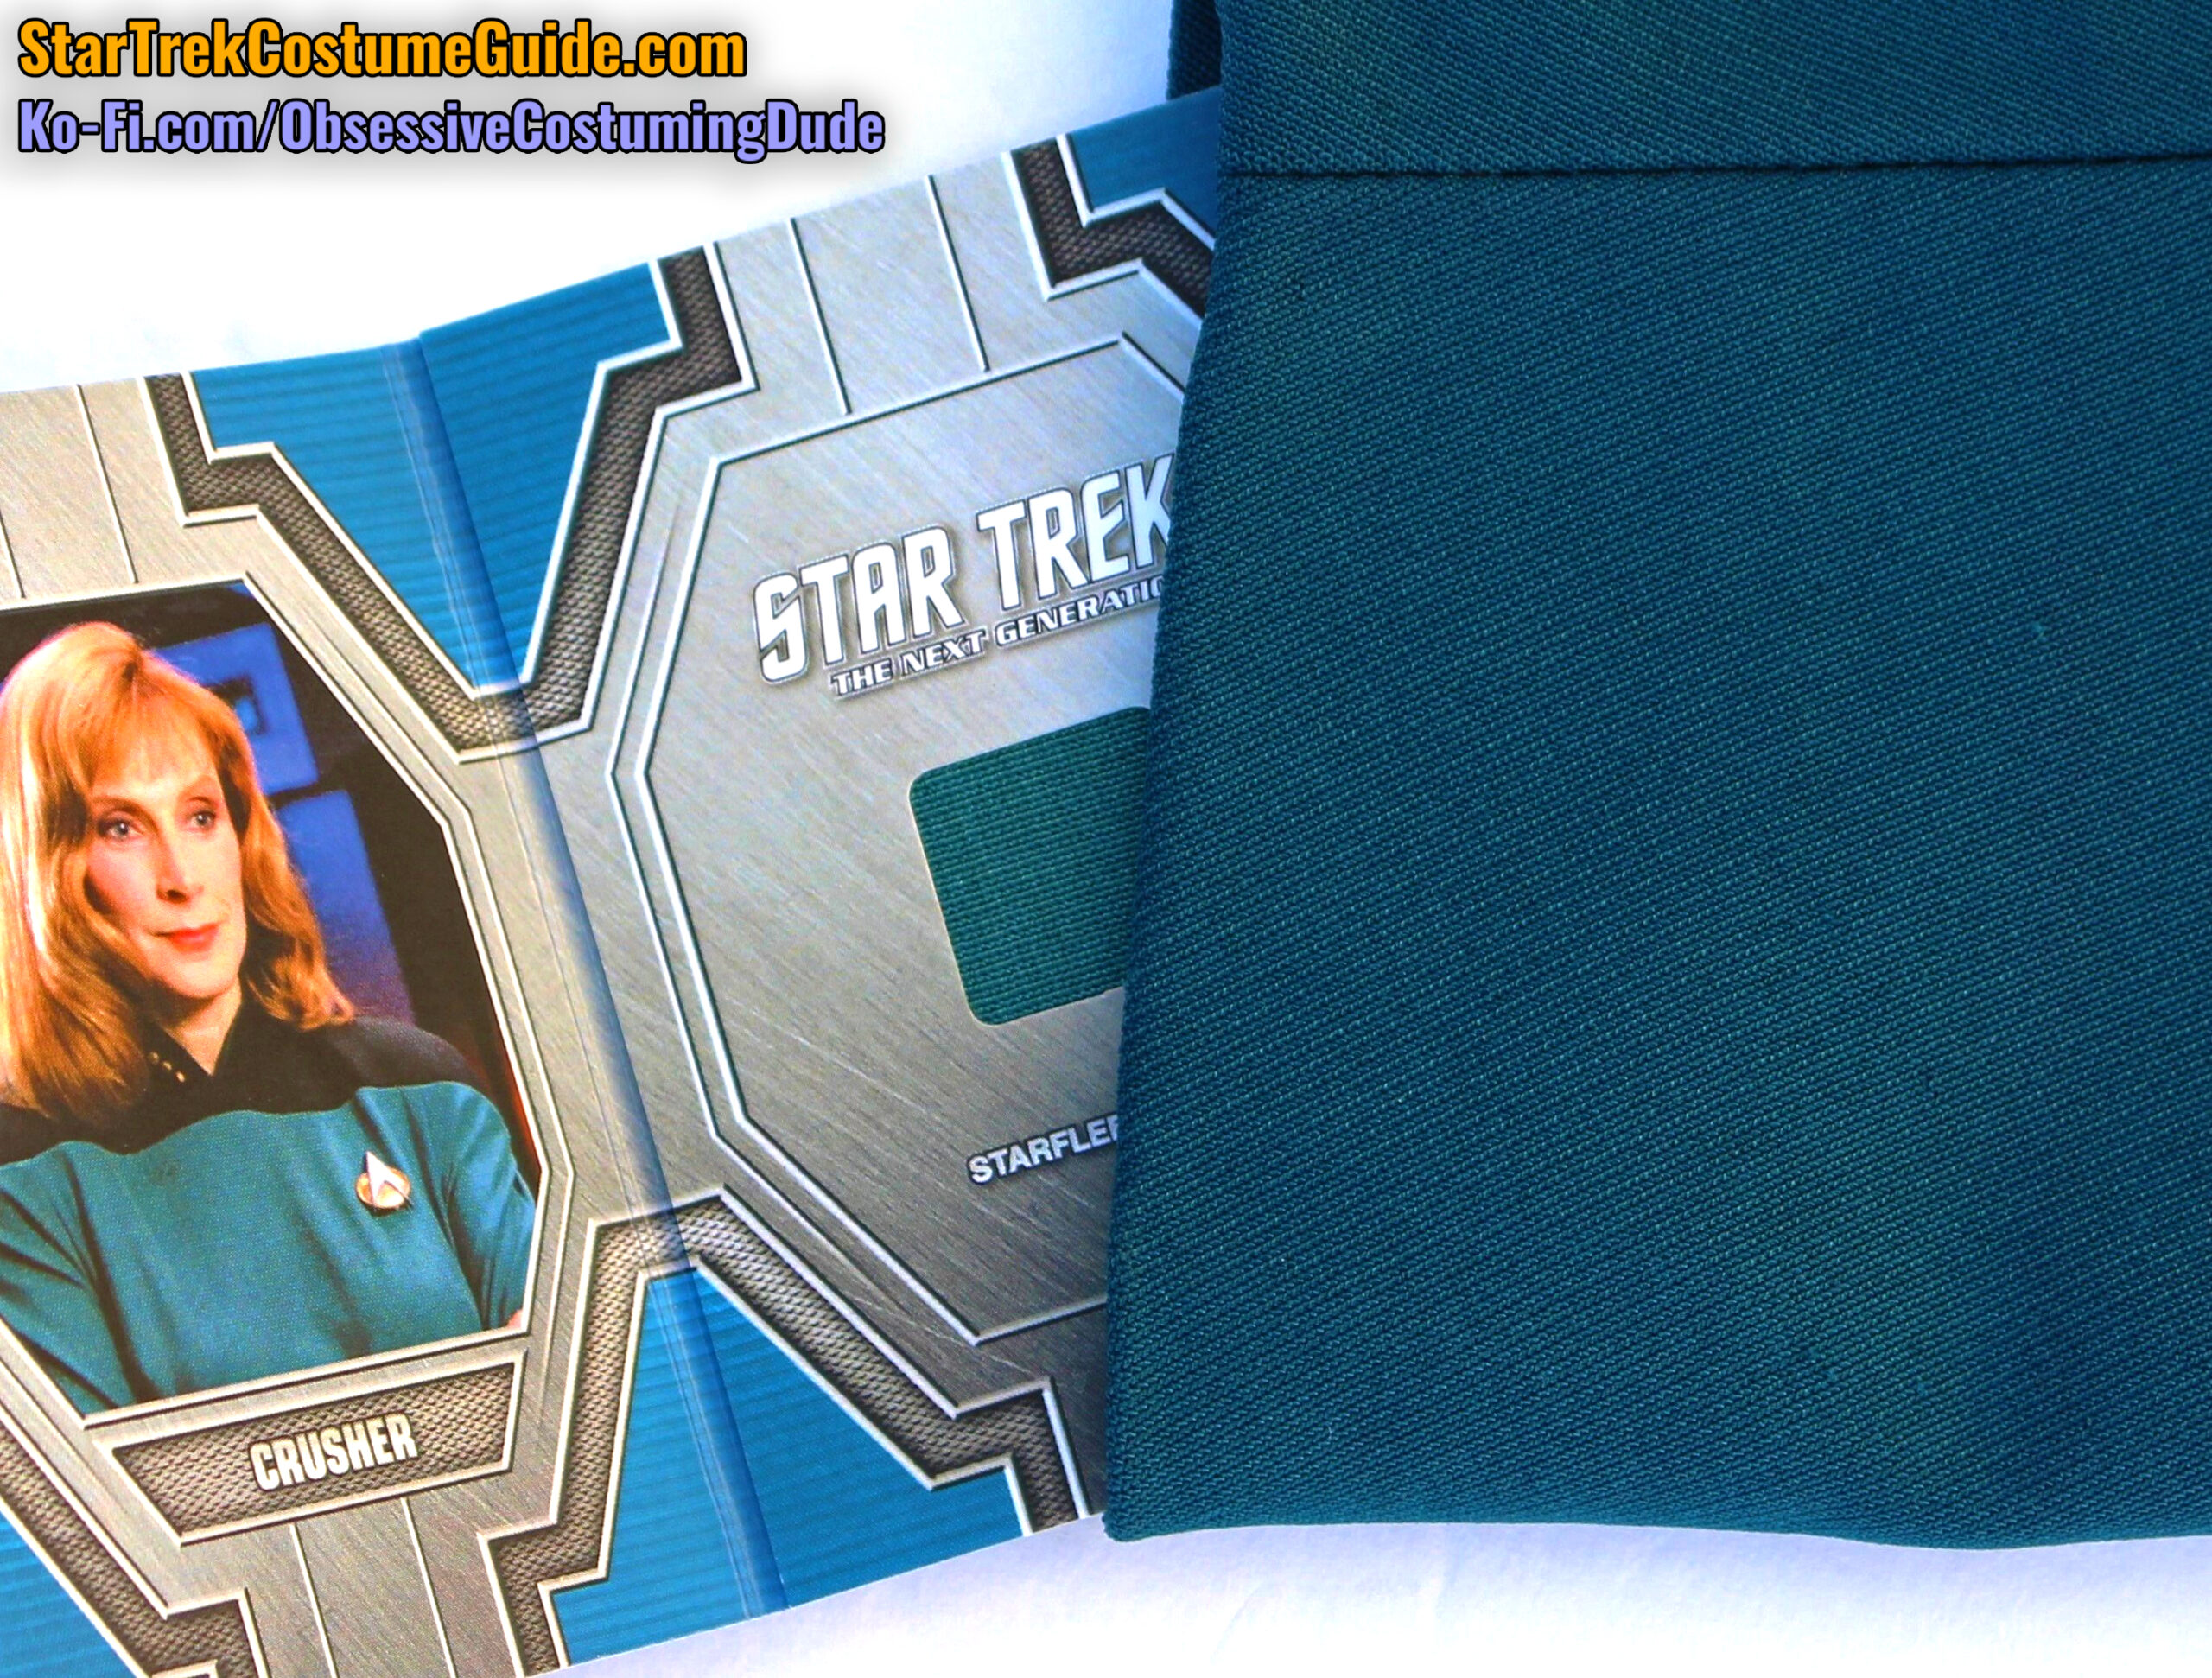
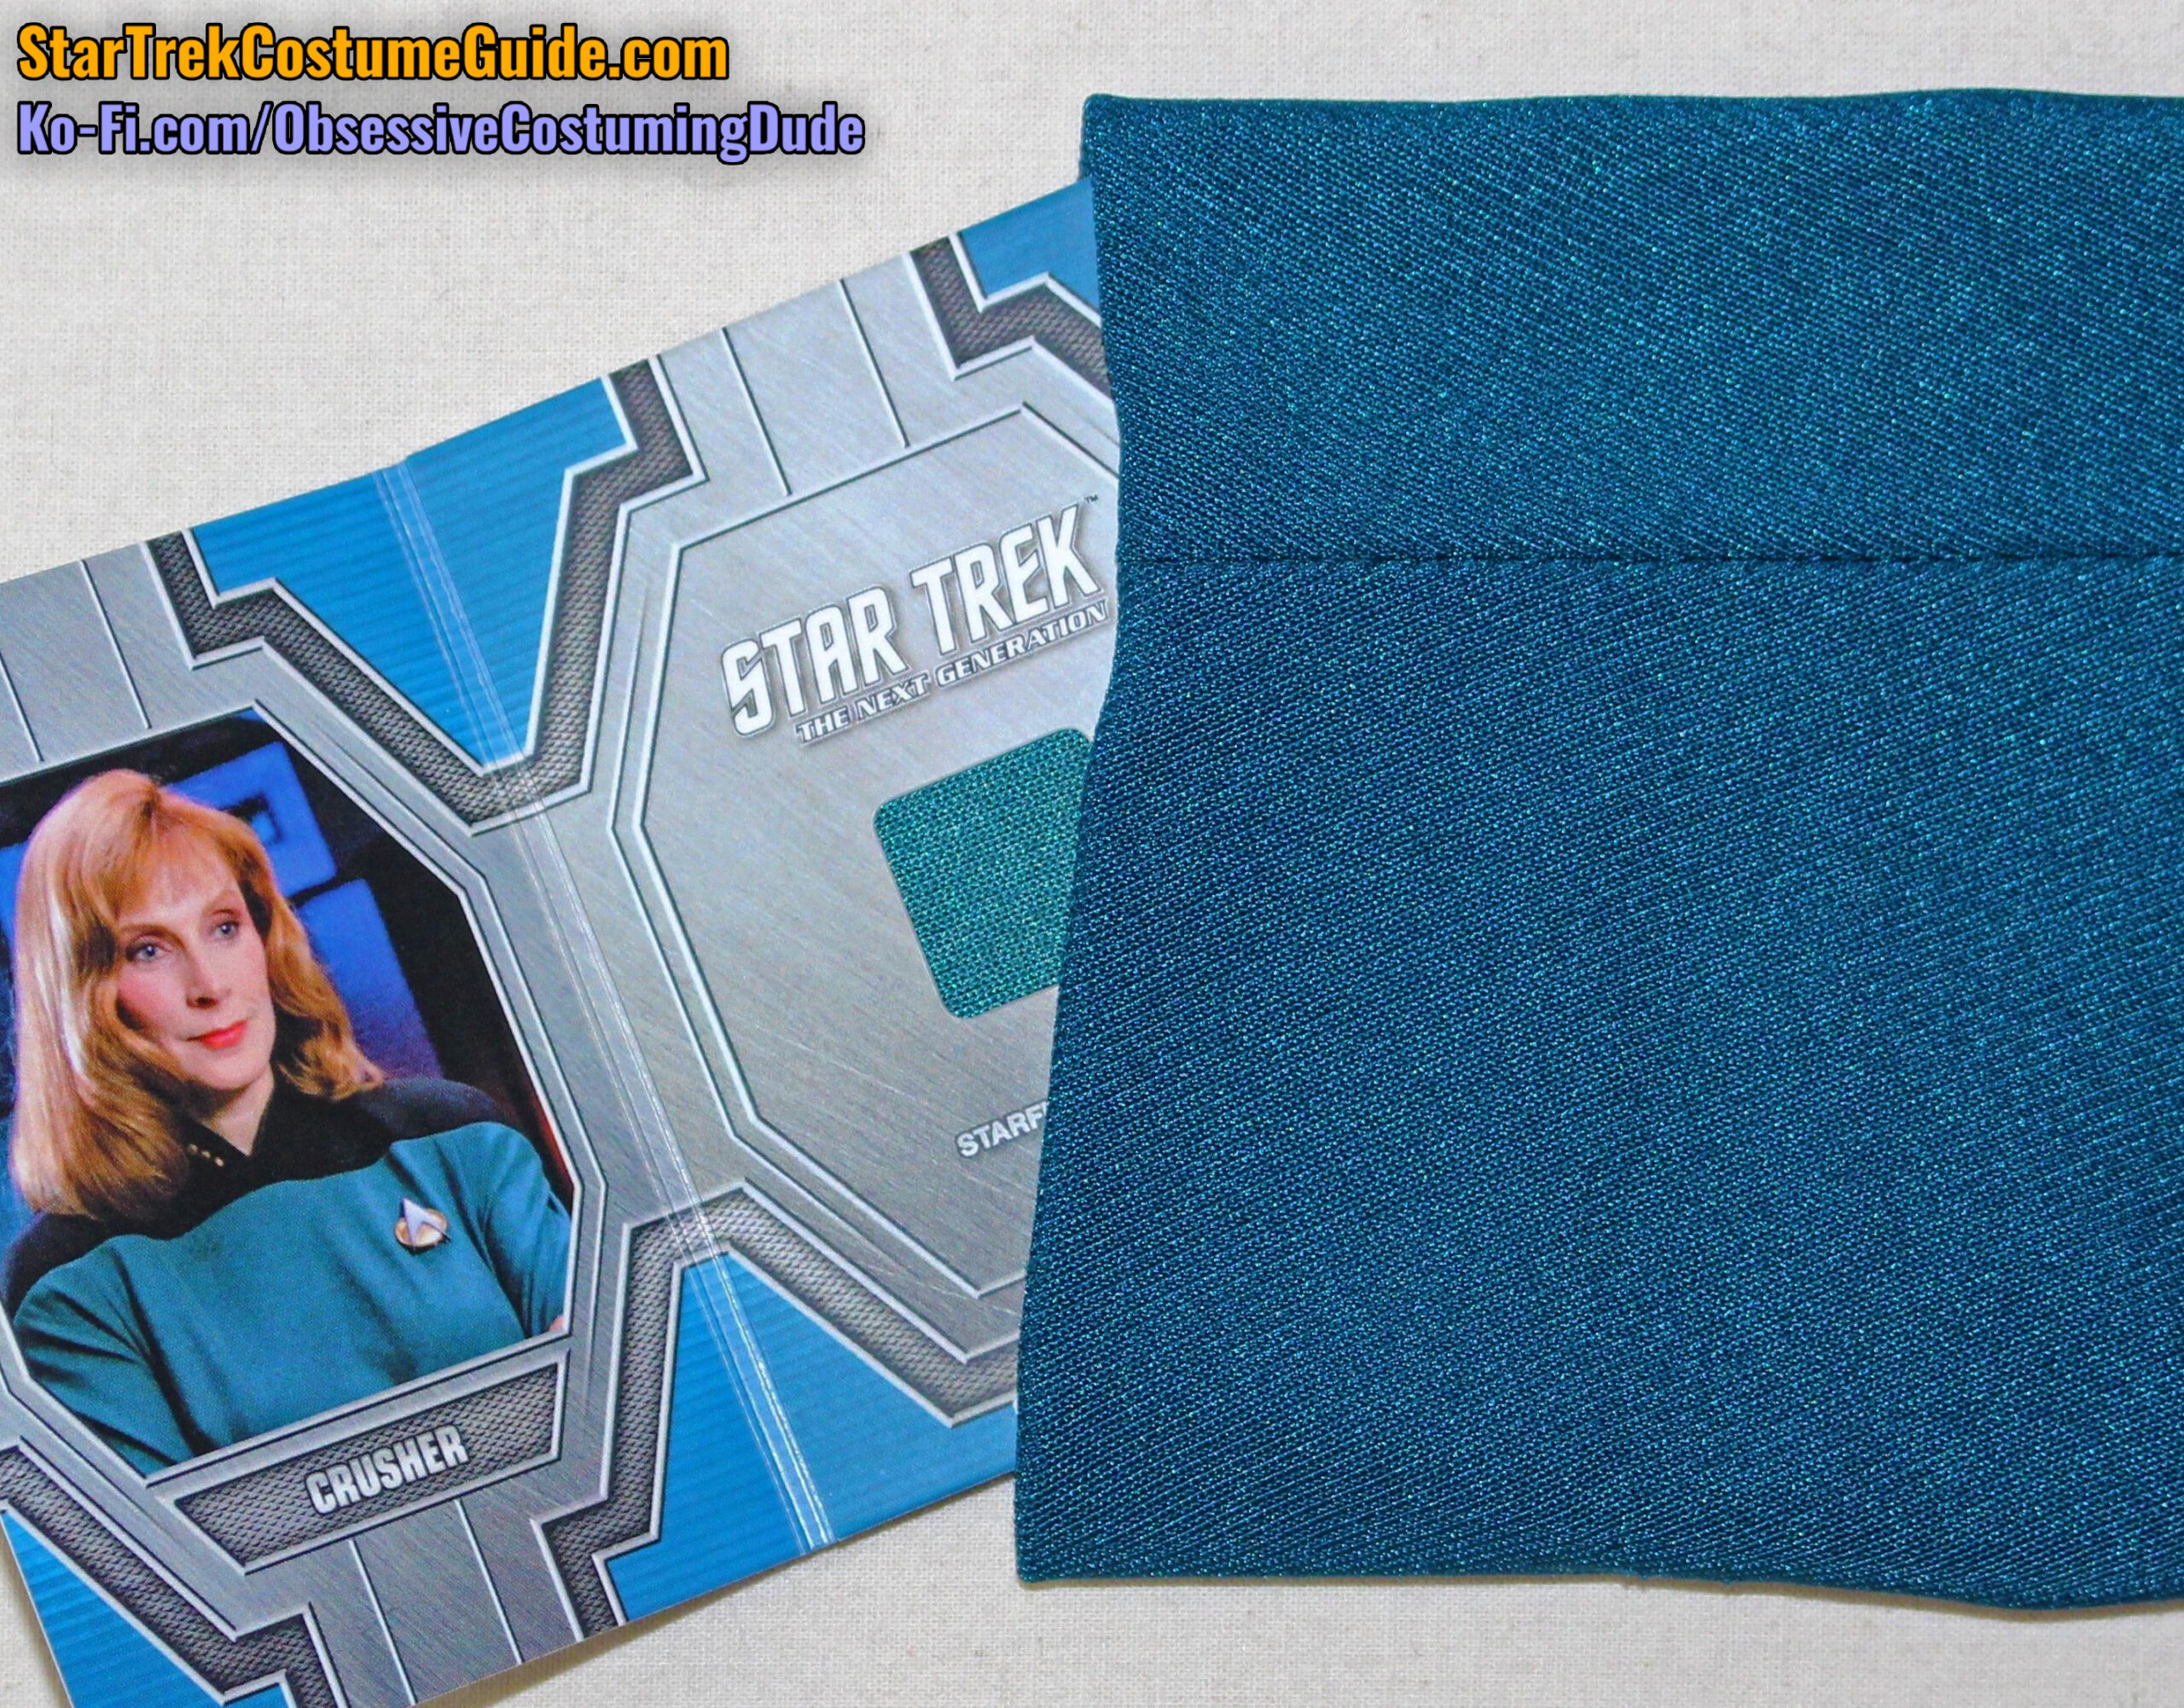
Here is a direct comparison between the screen-used season 1 jumpsuit and the swatch of one of her later uniforms, which I believe to have been from seasons 5-6.
As you can see, the color difference is striking.
Outside, sunlight
Outside, shade
Indoors, with flash
Indoors, no flash
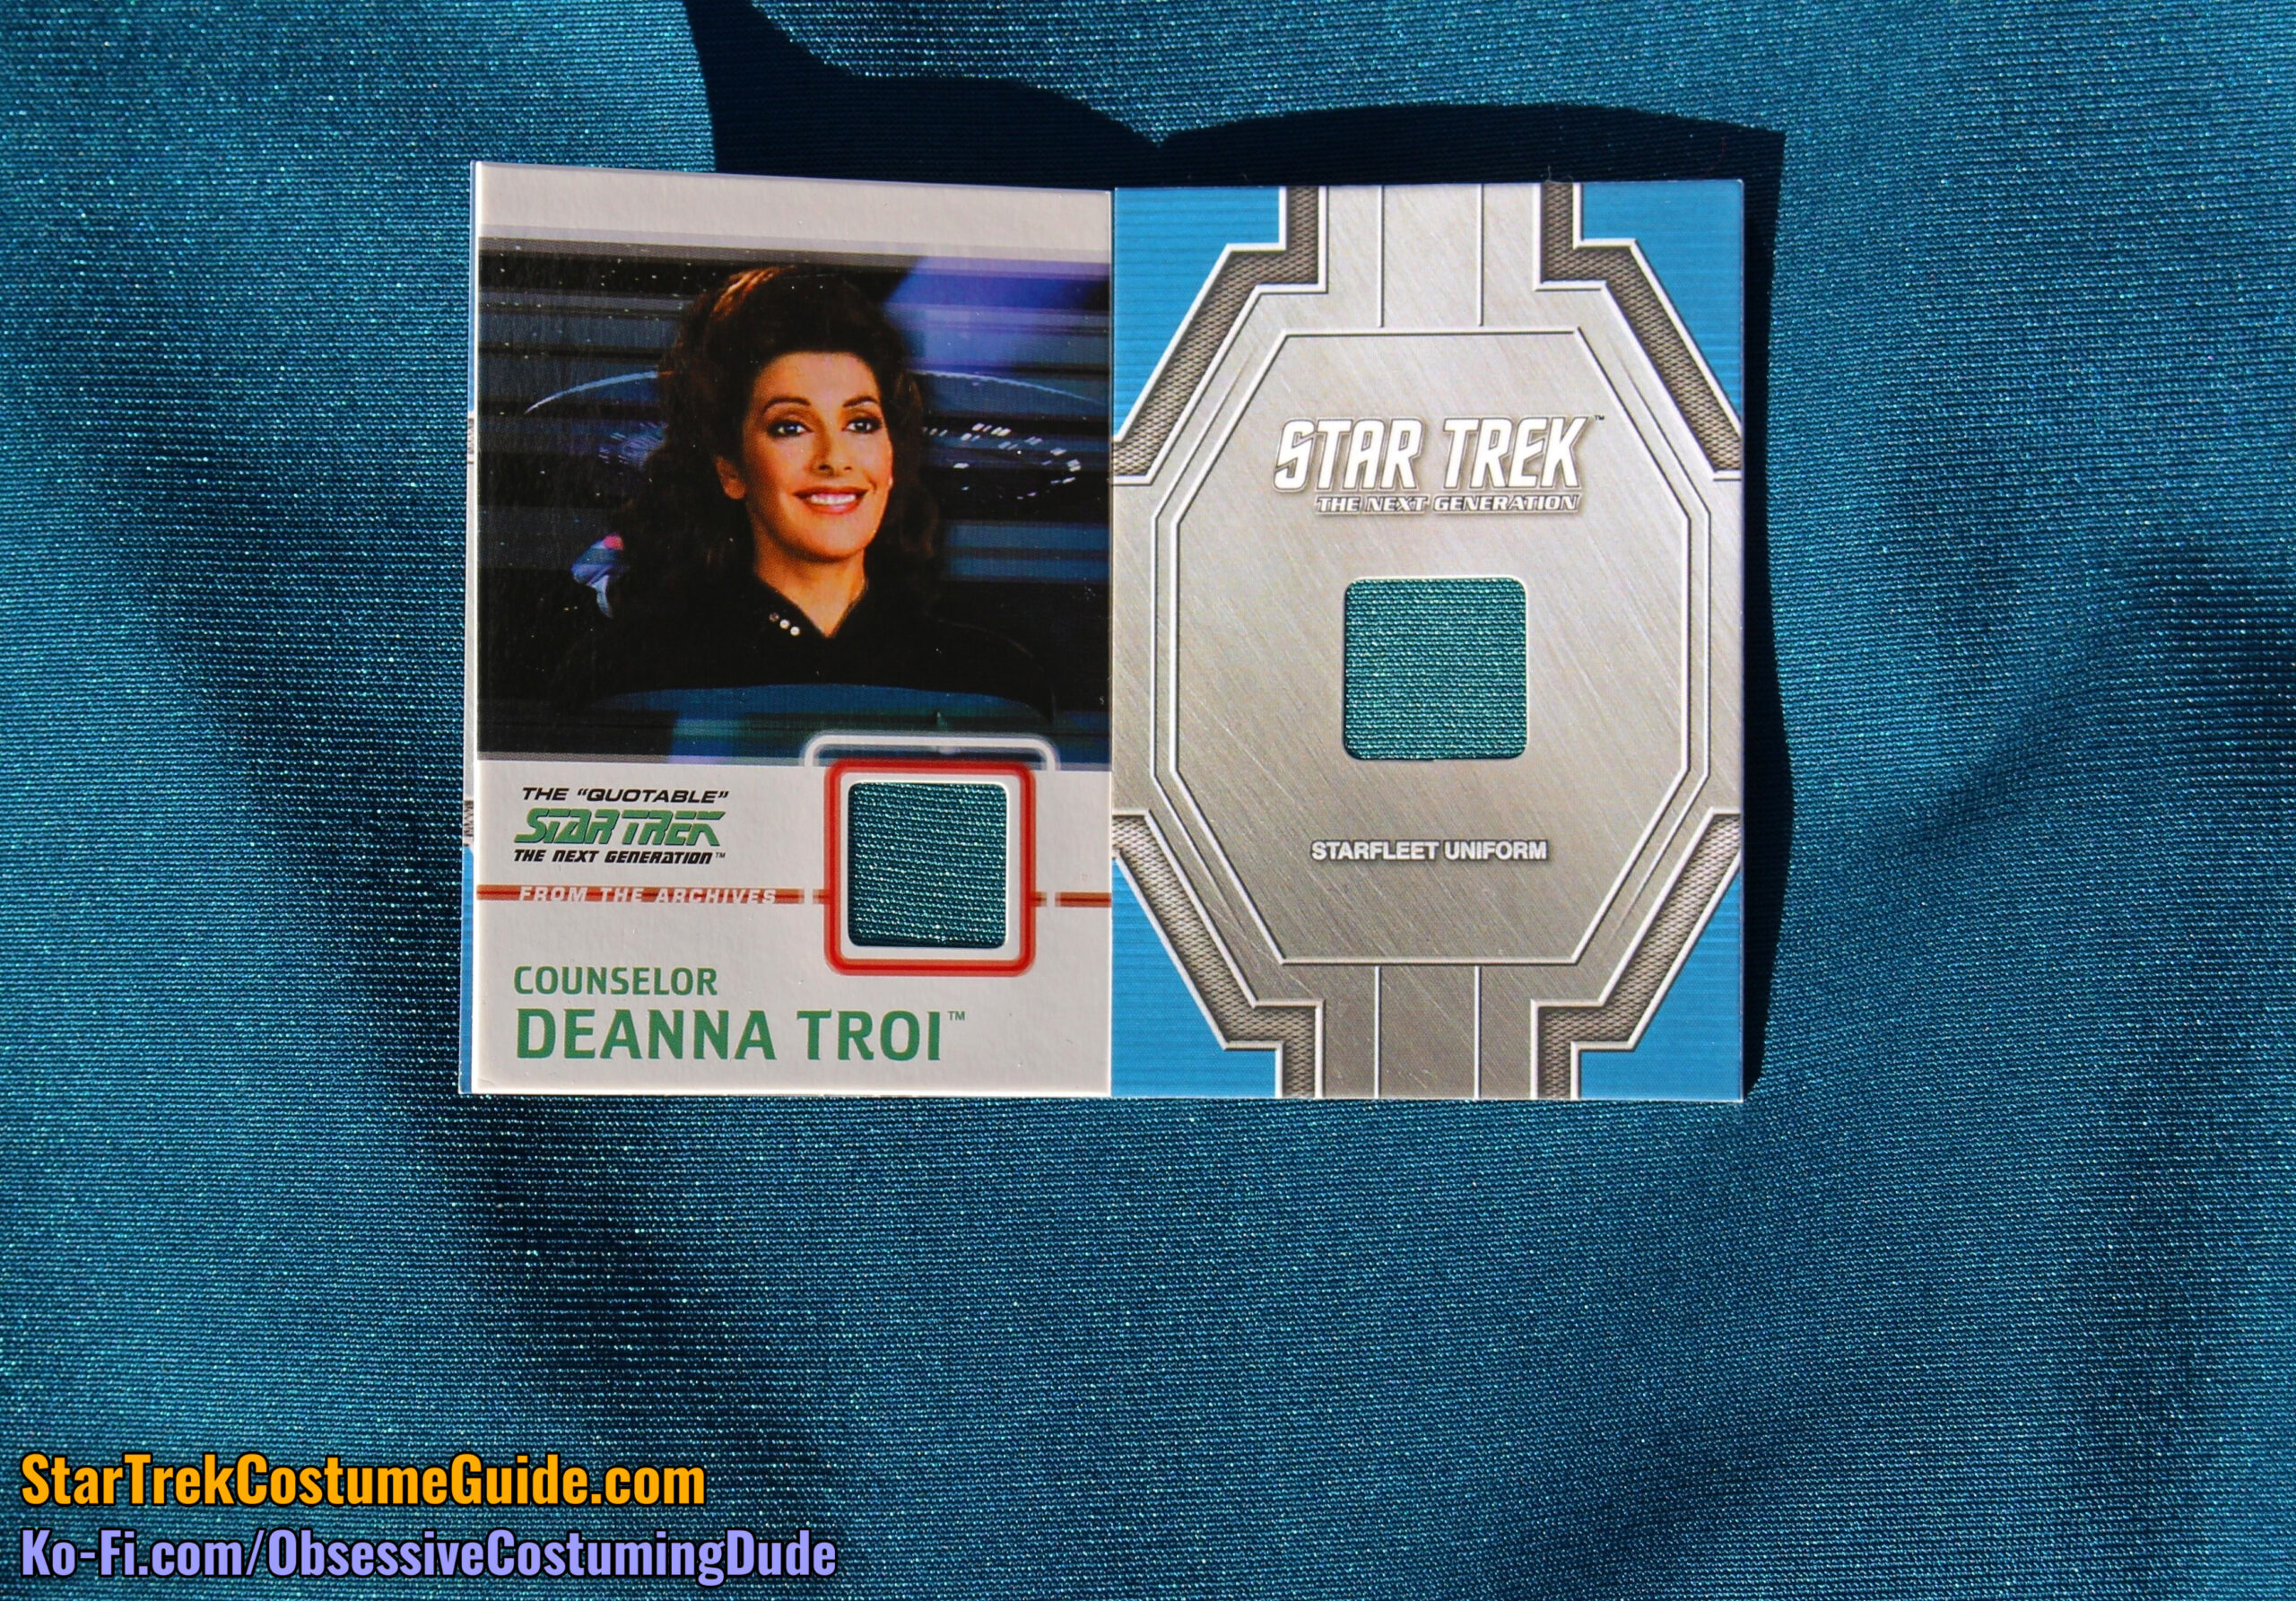
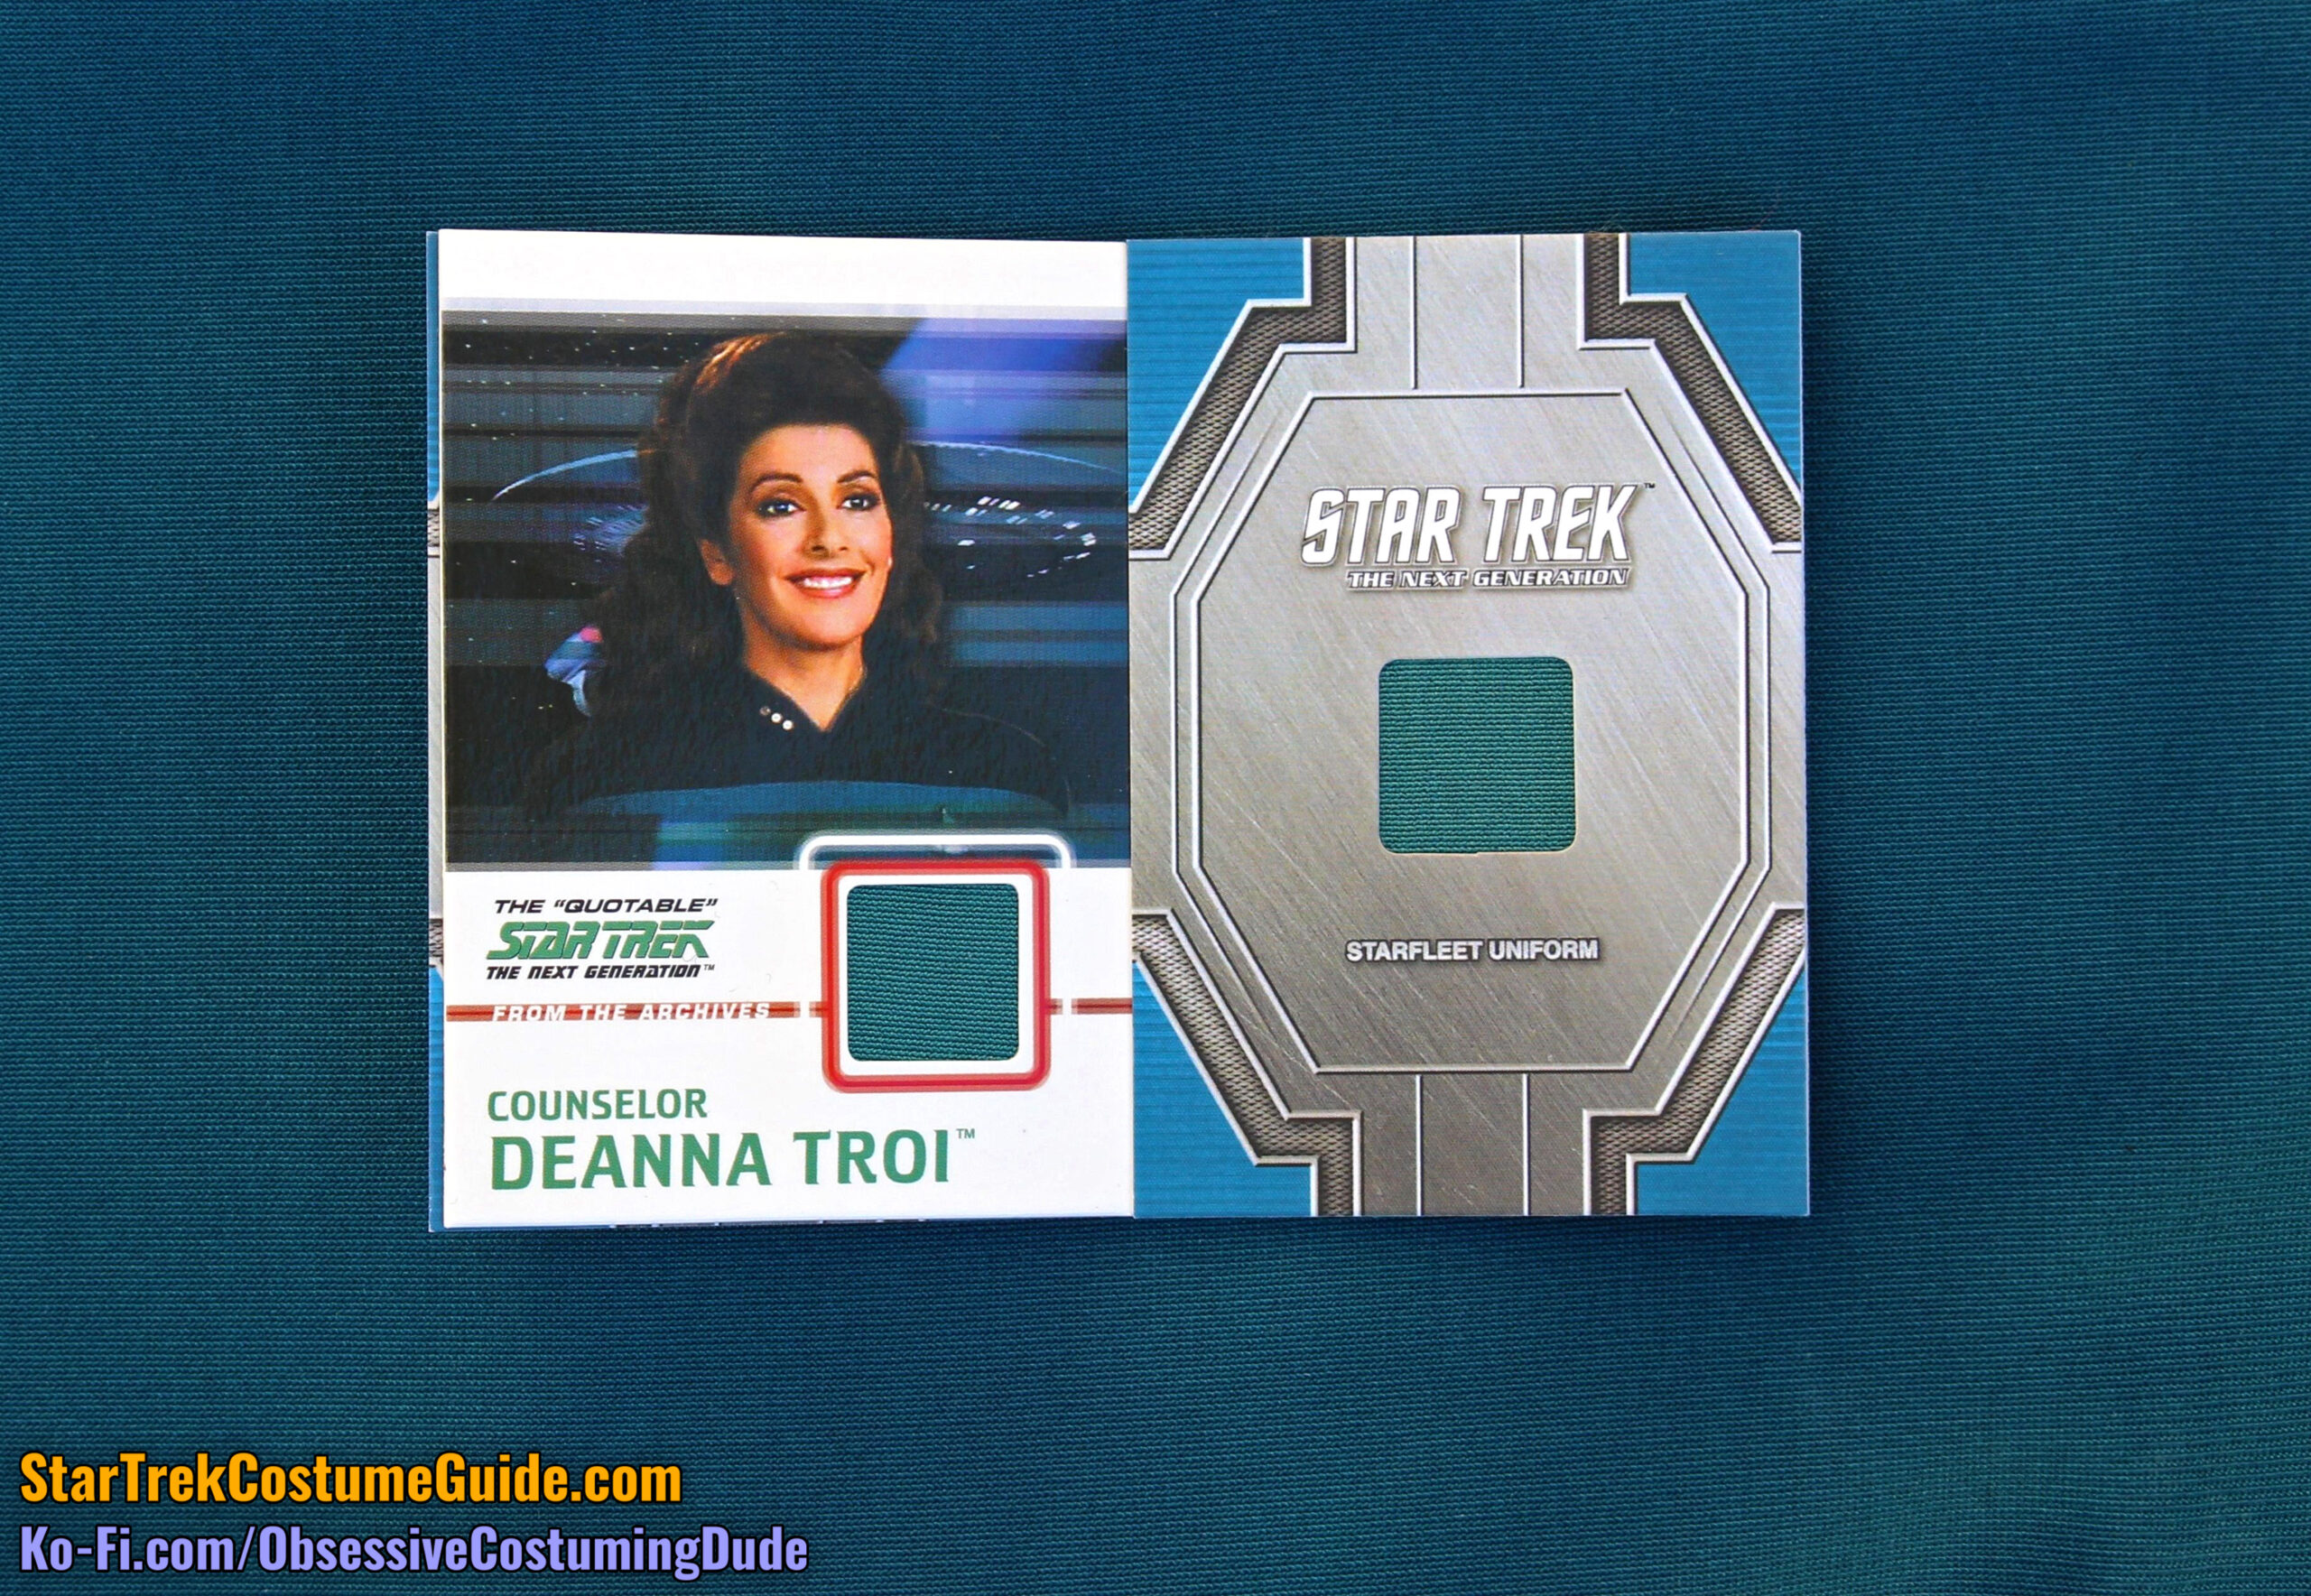
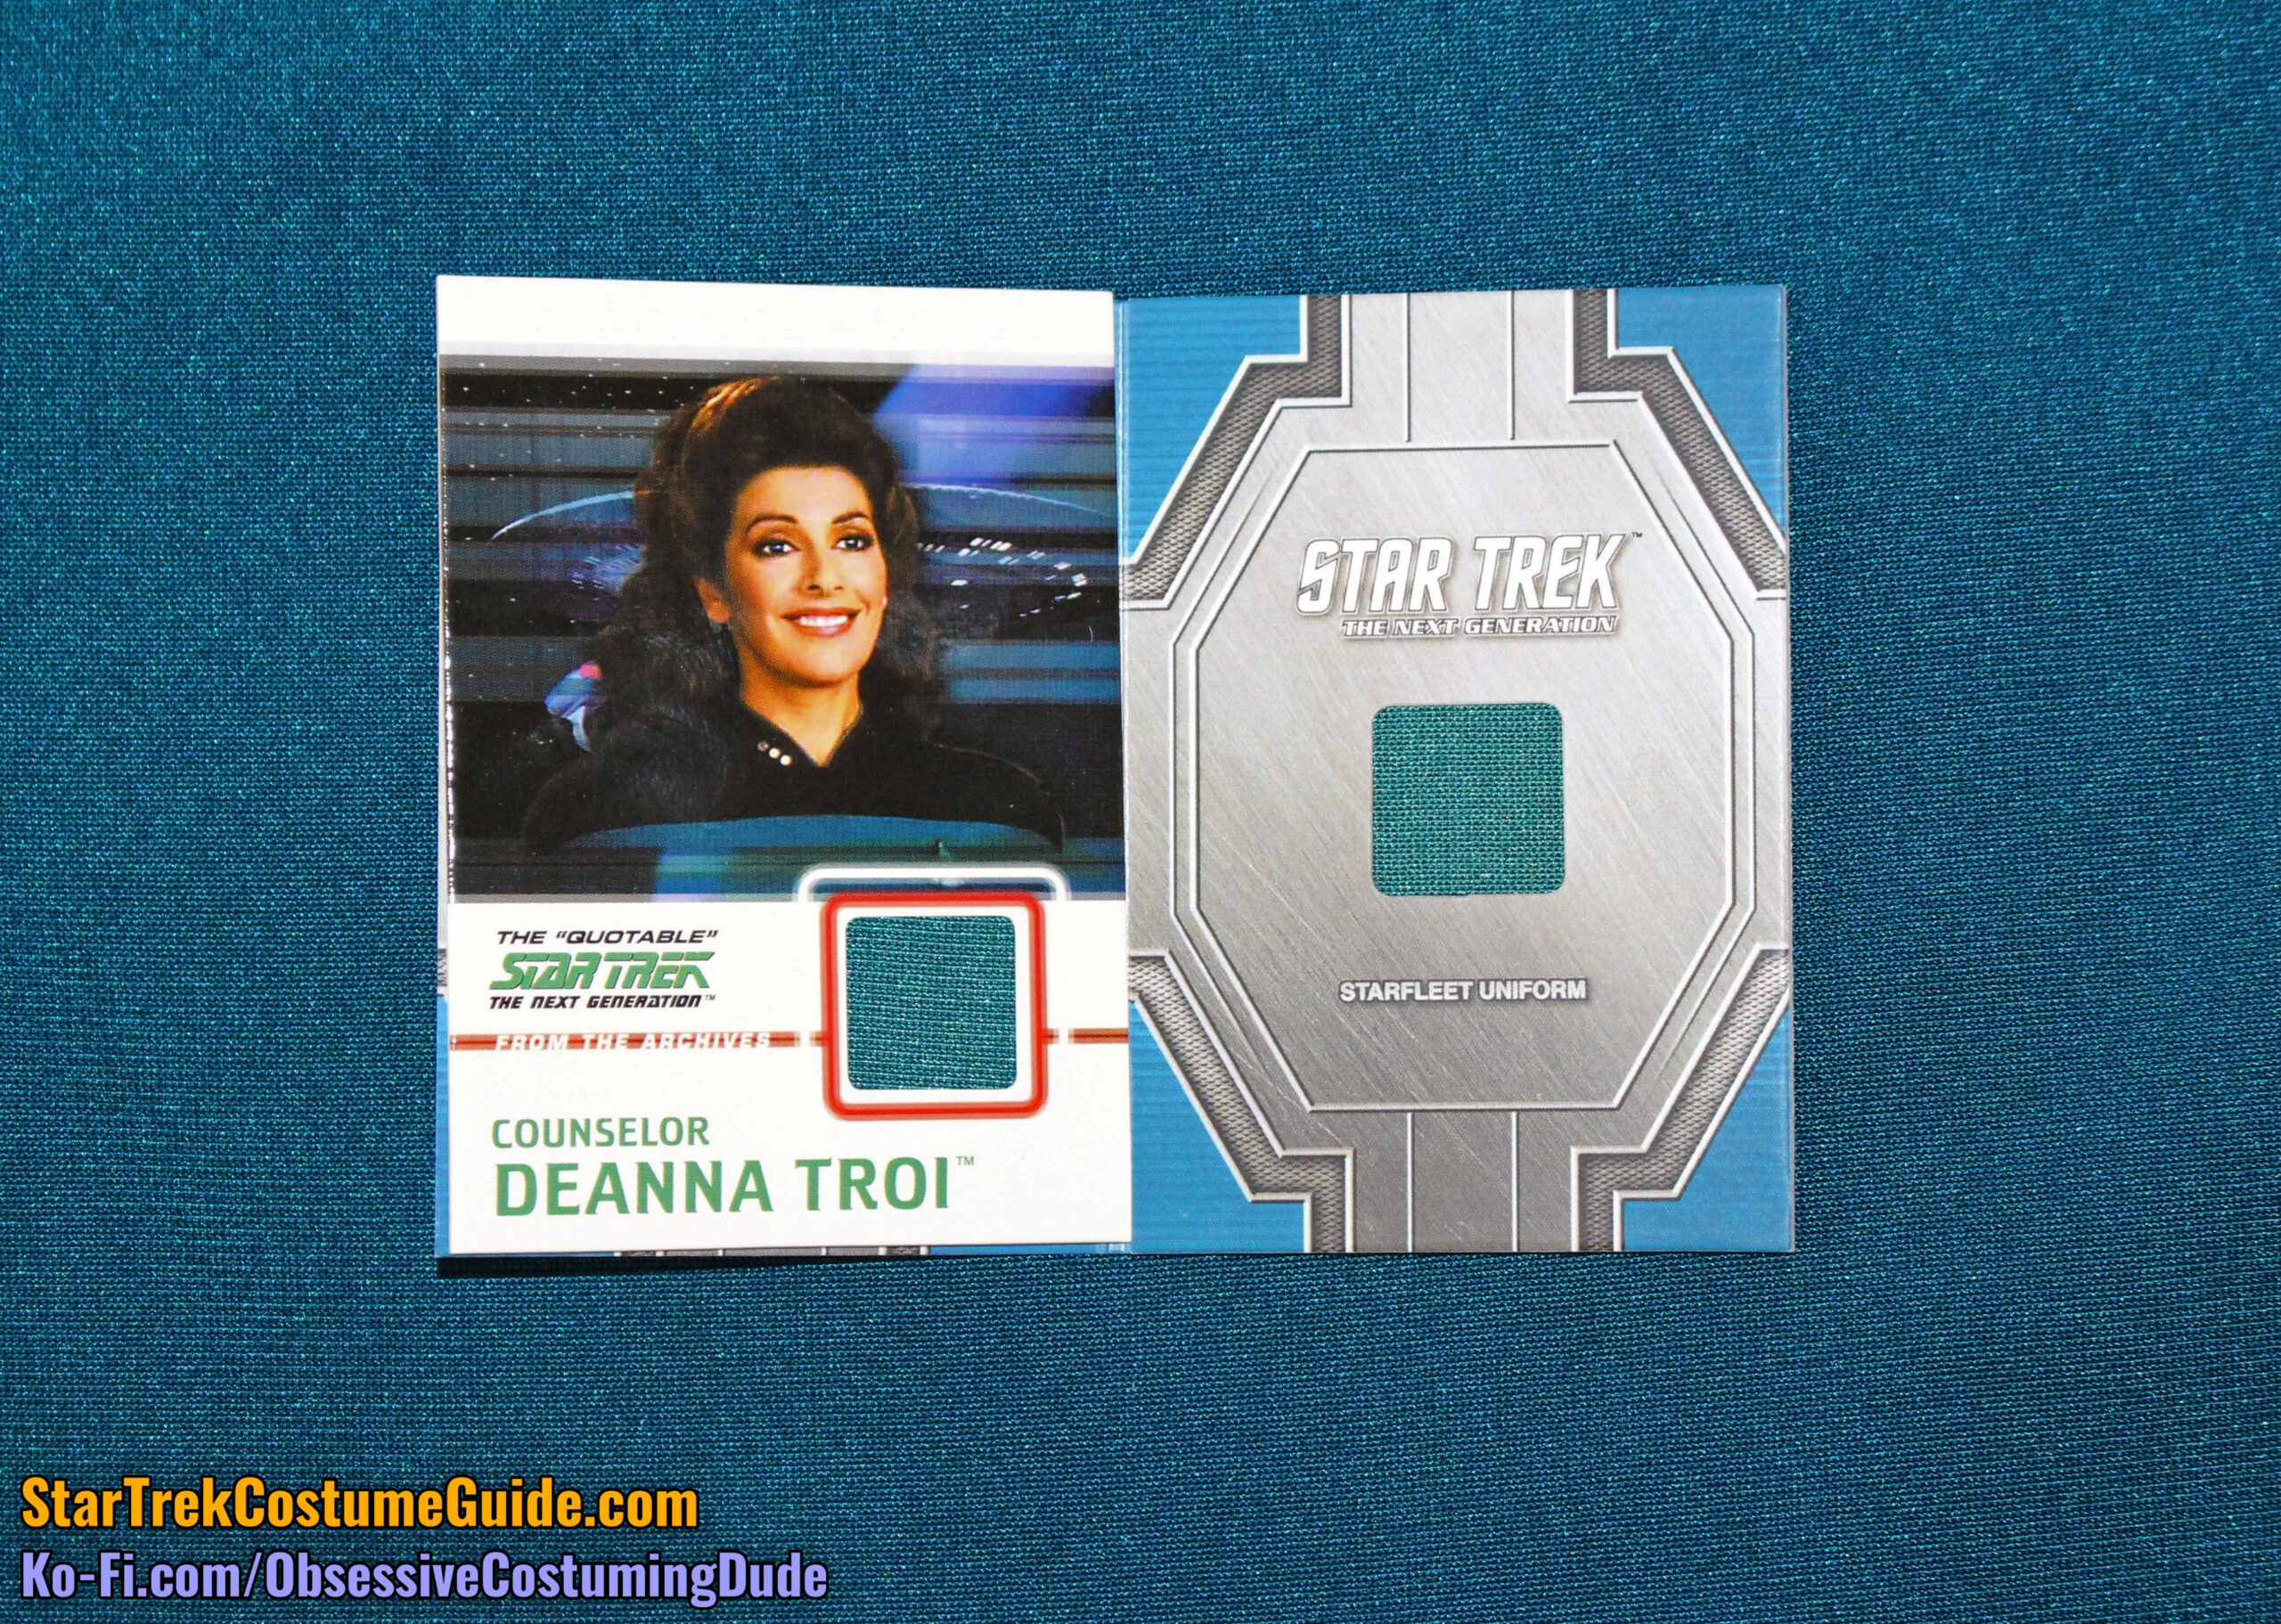
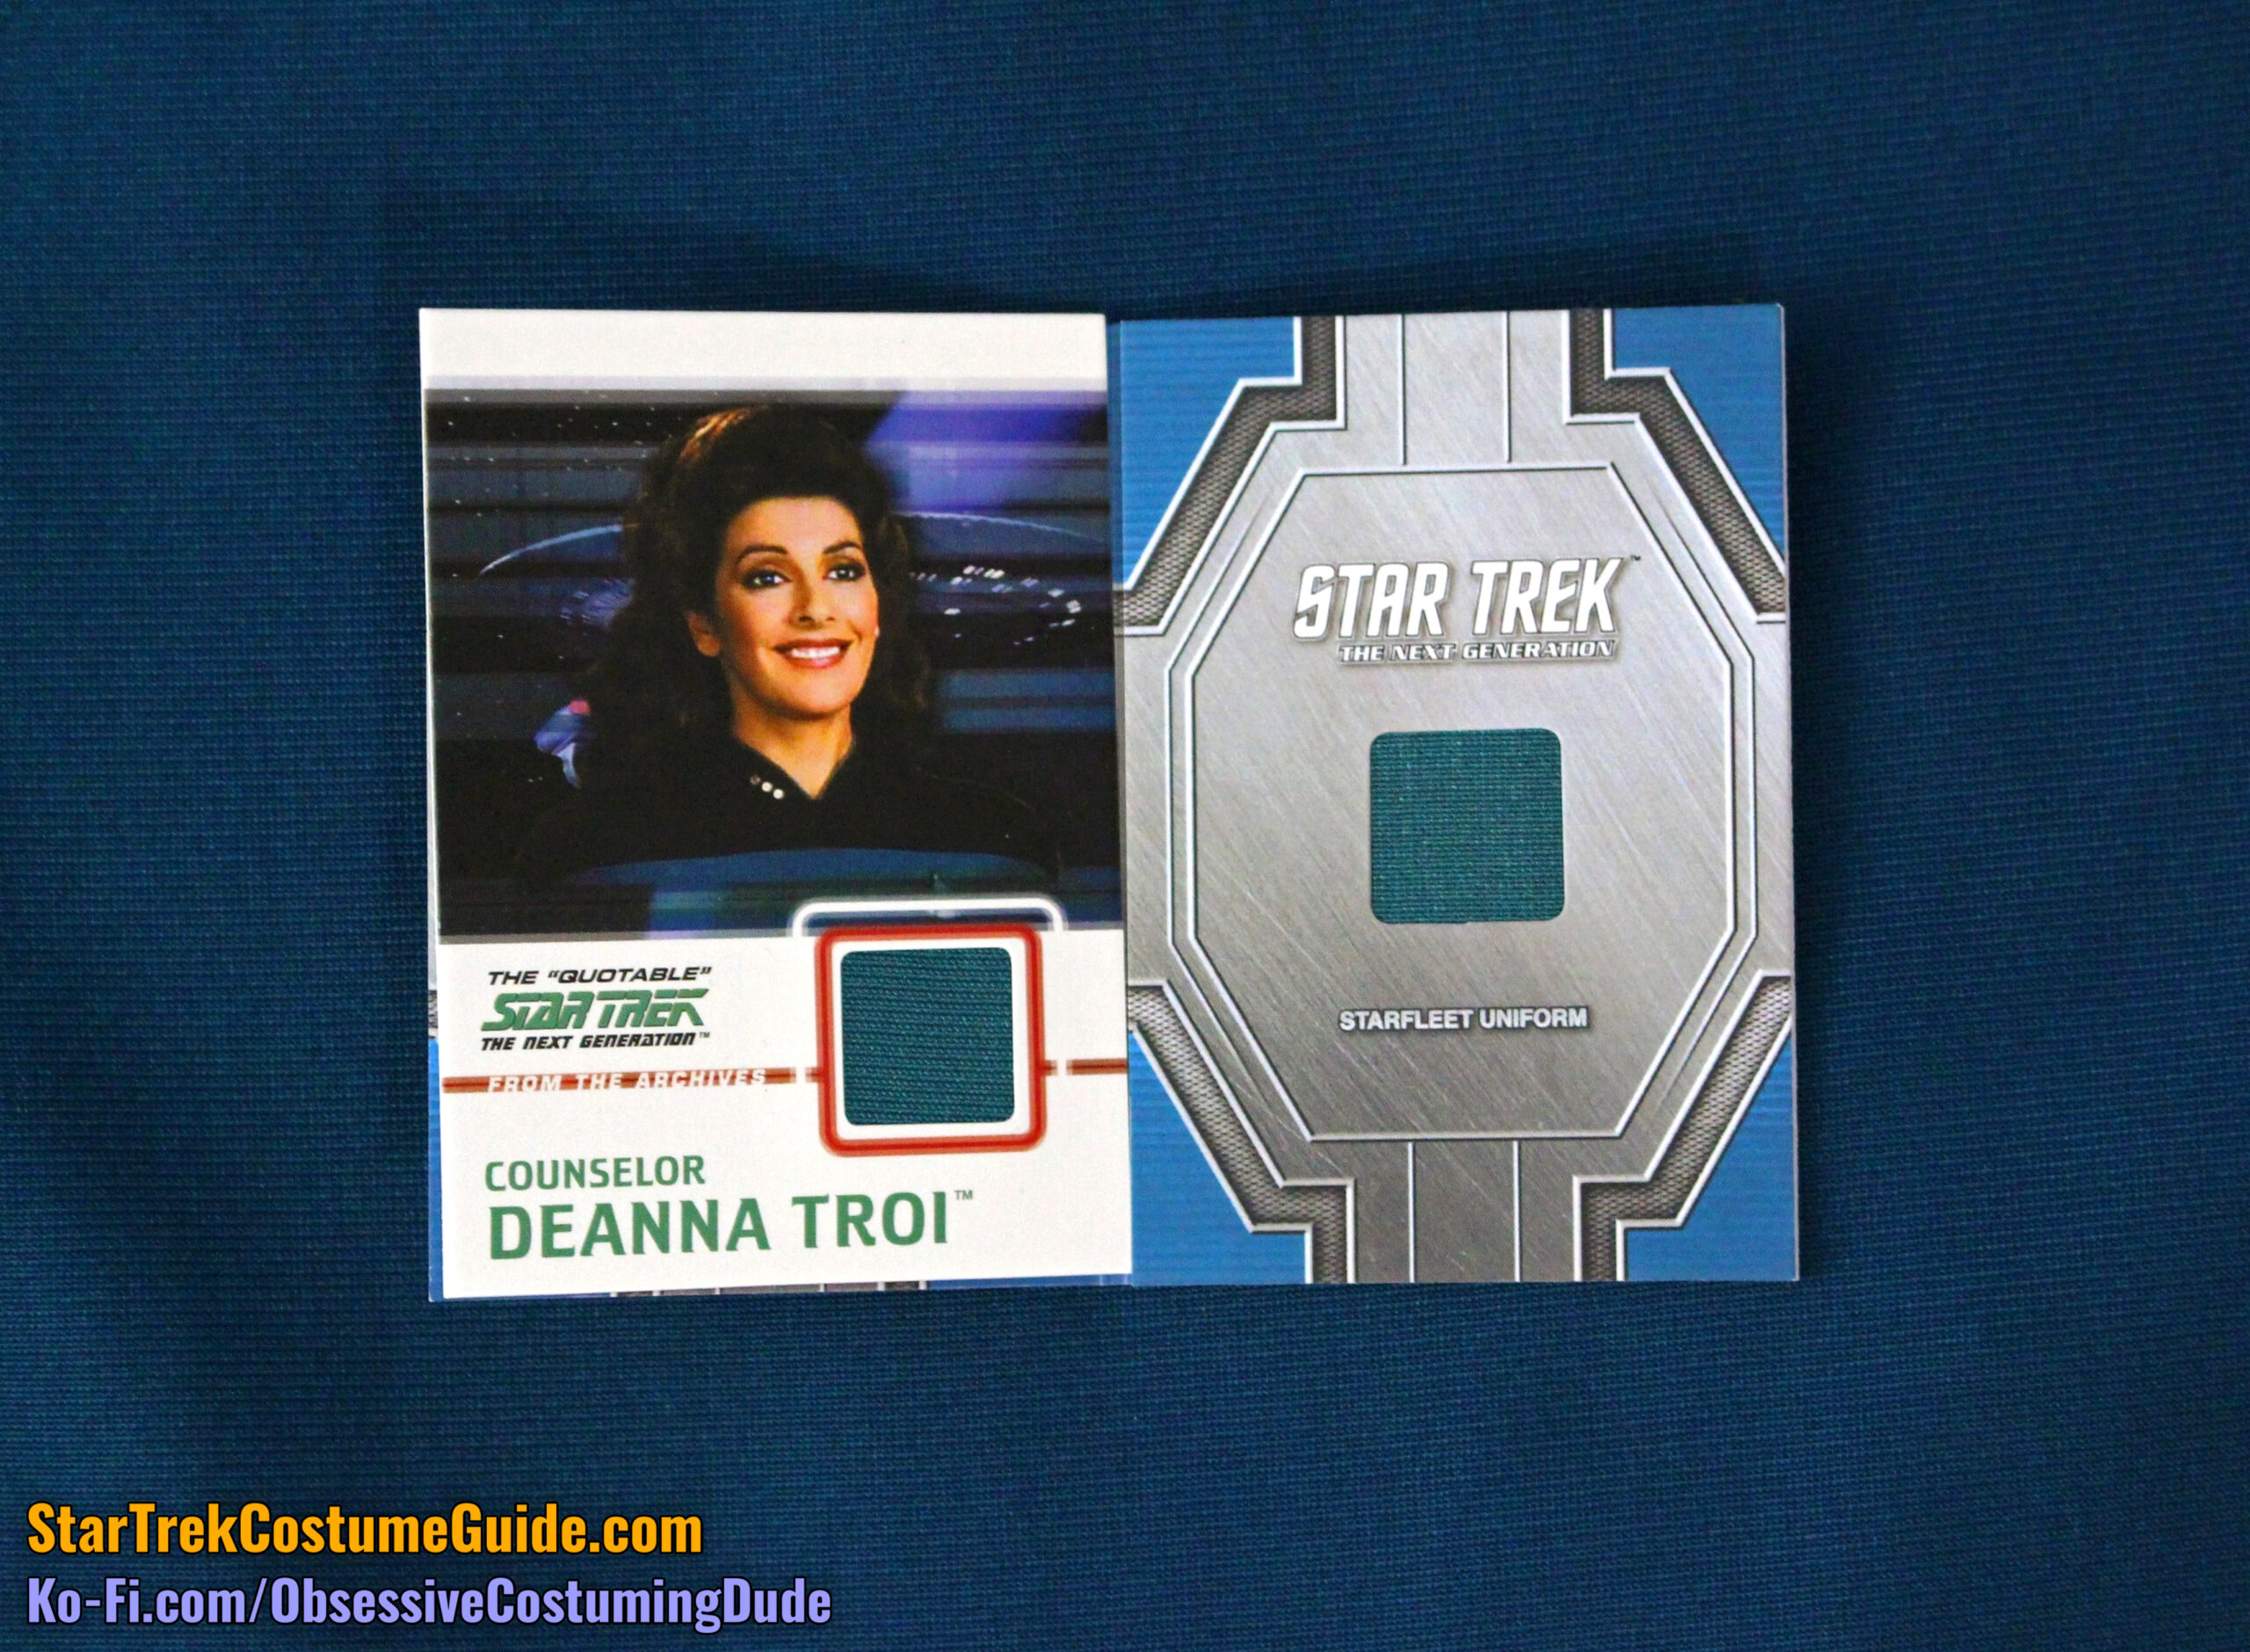
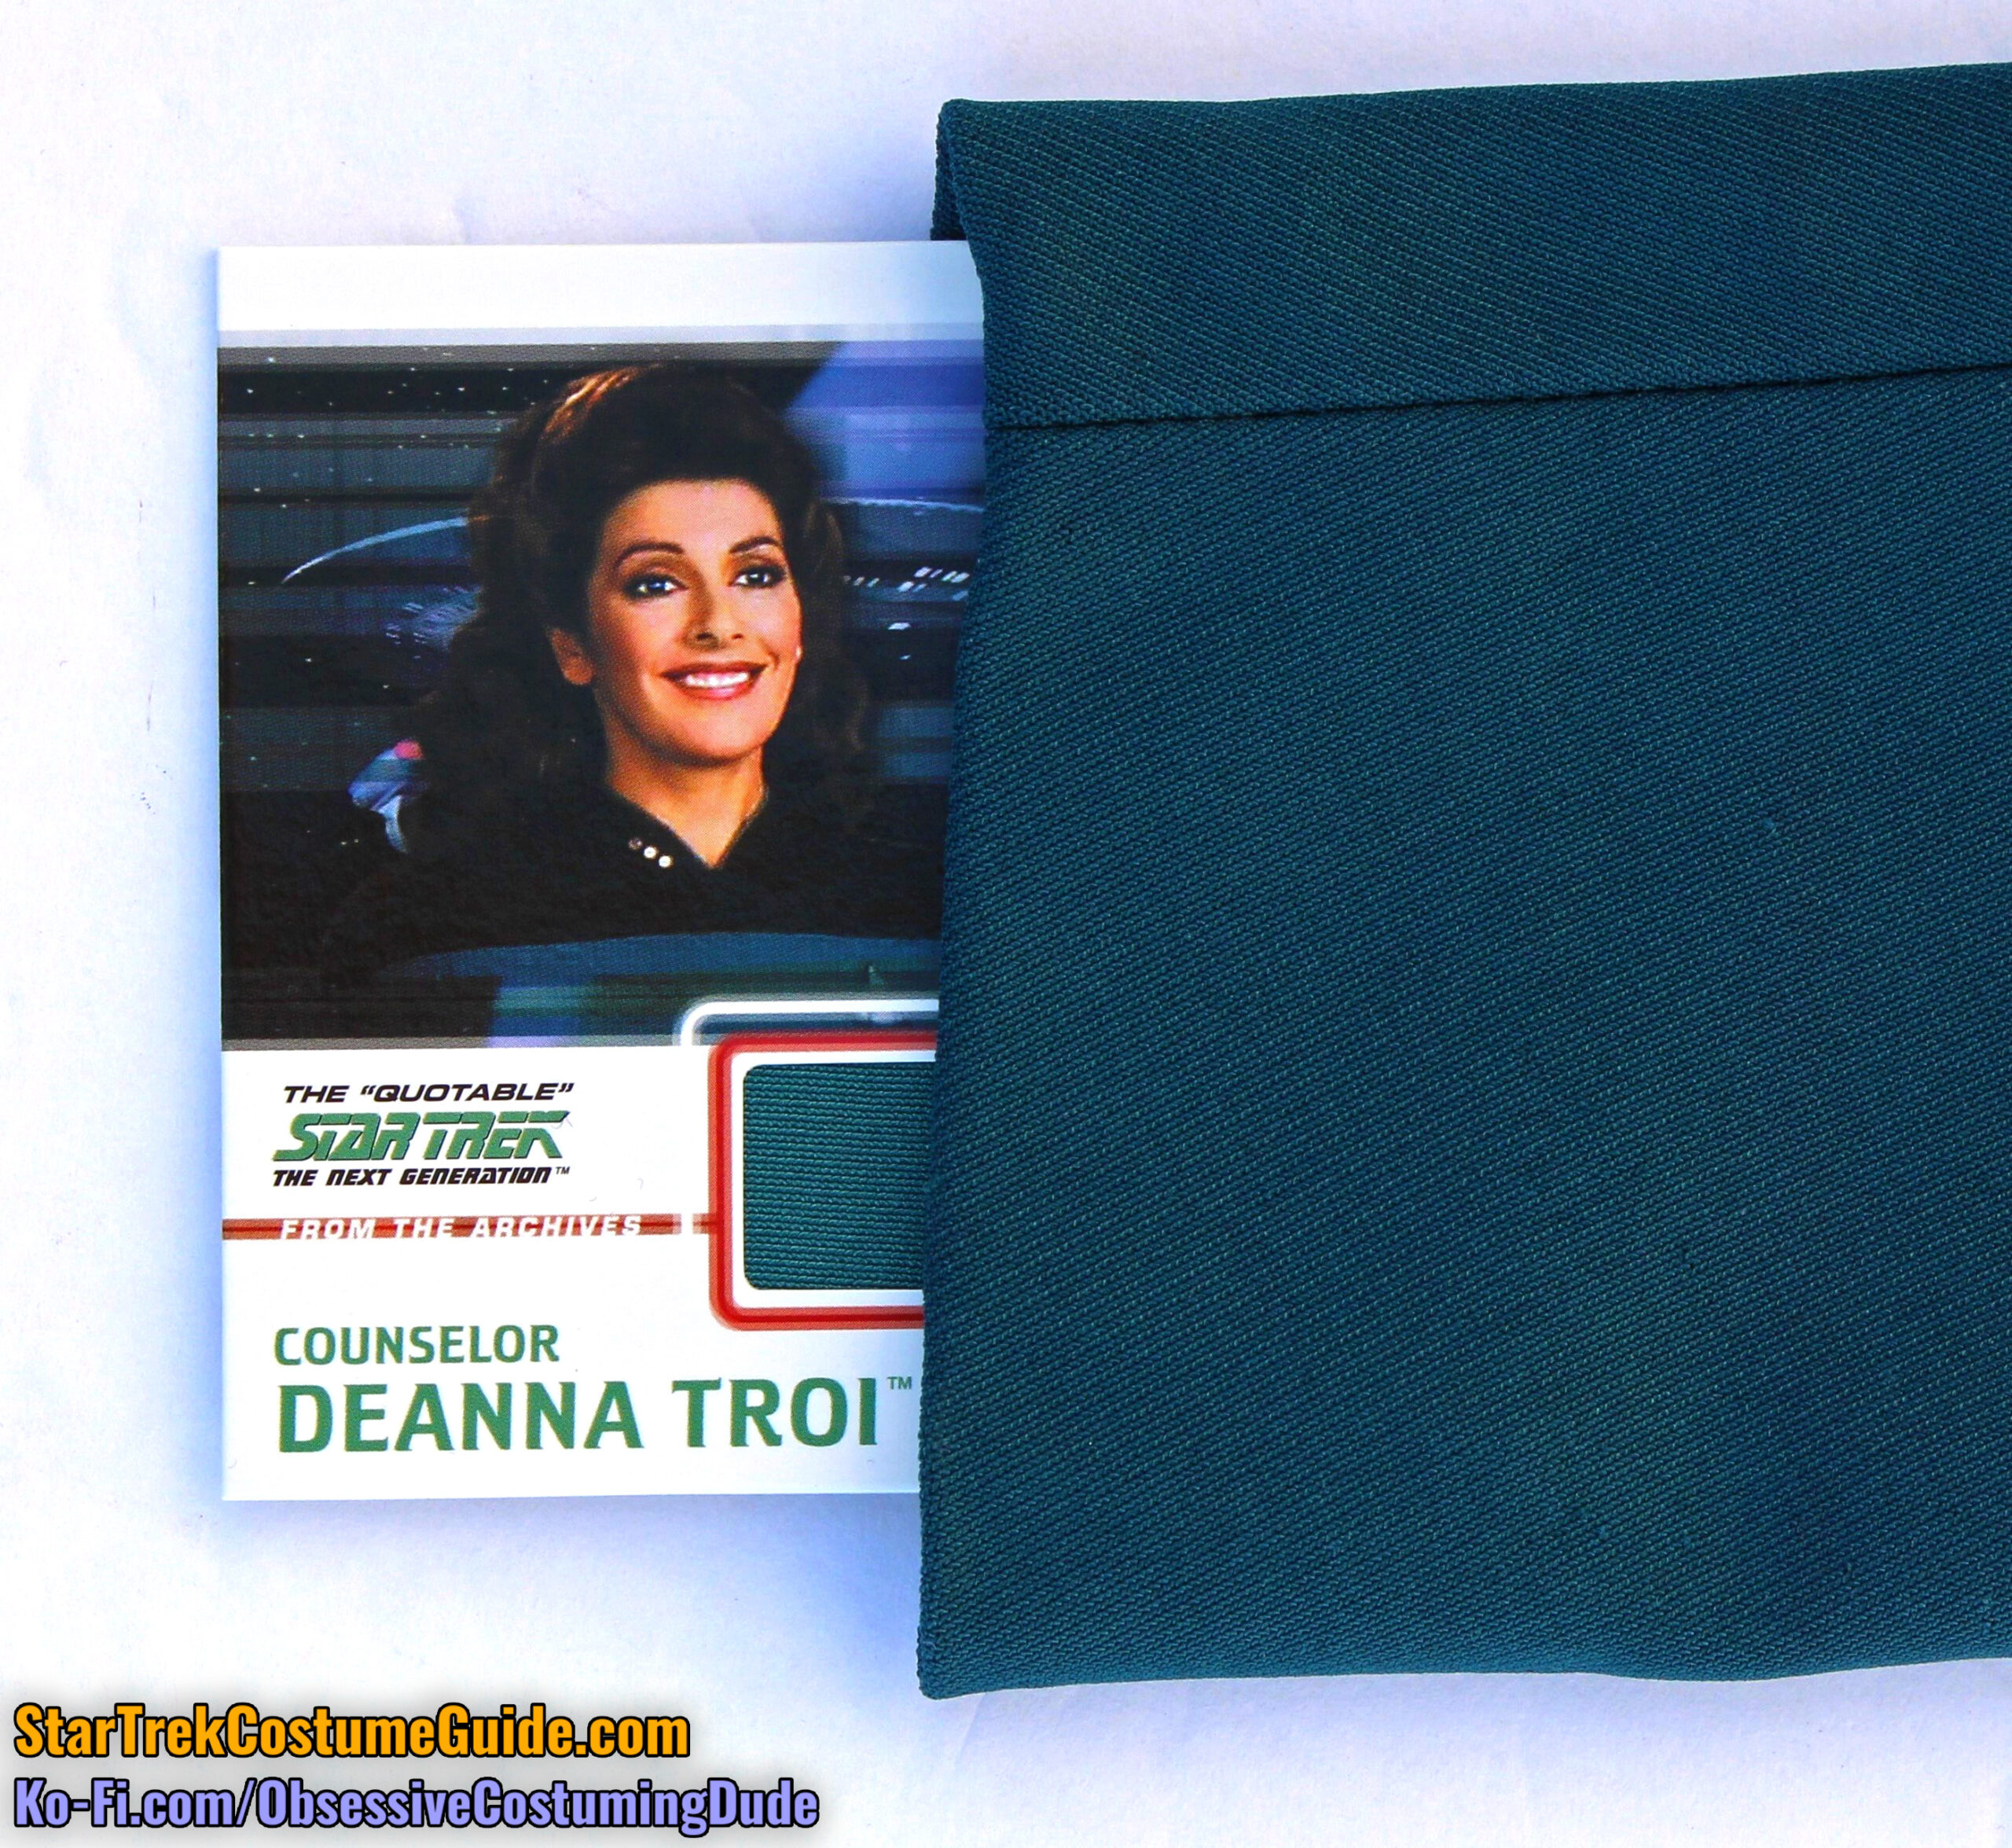
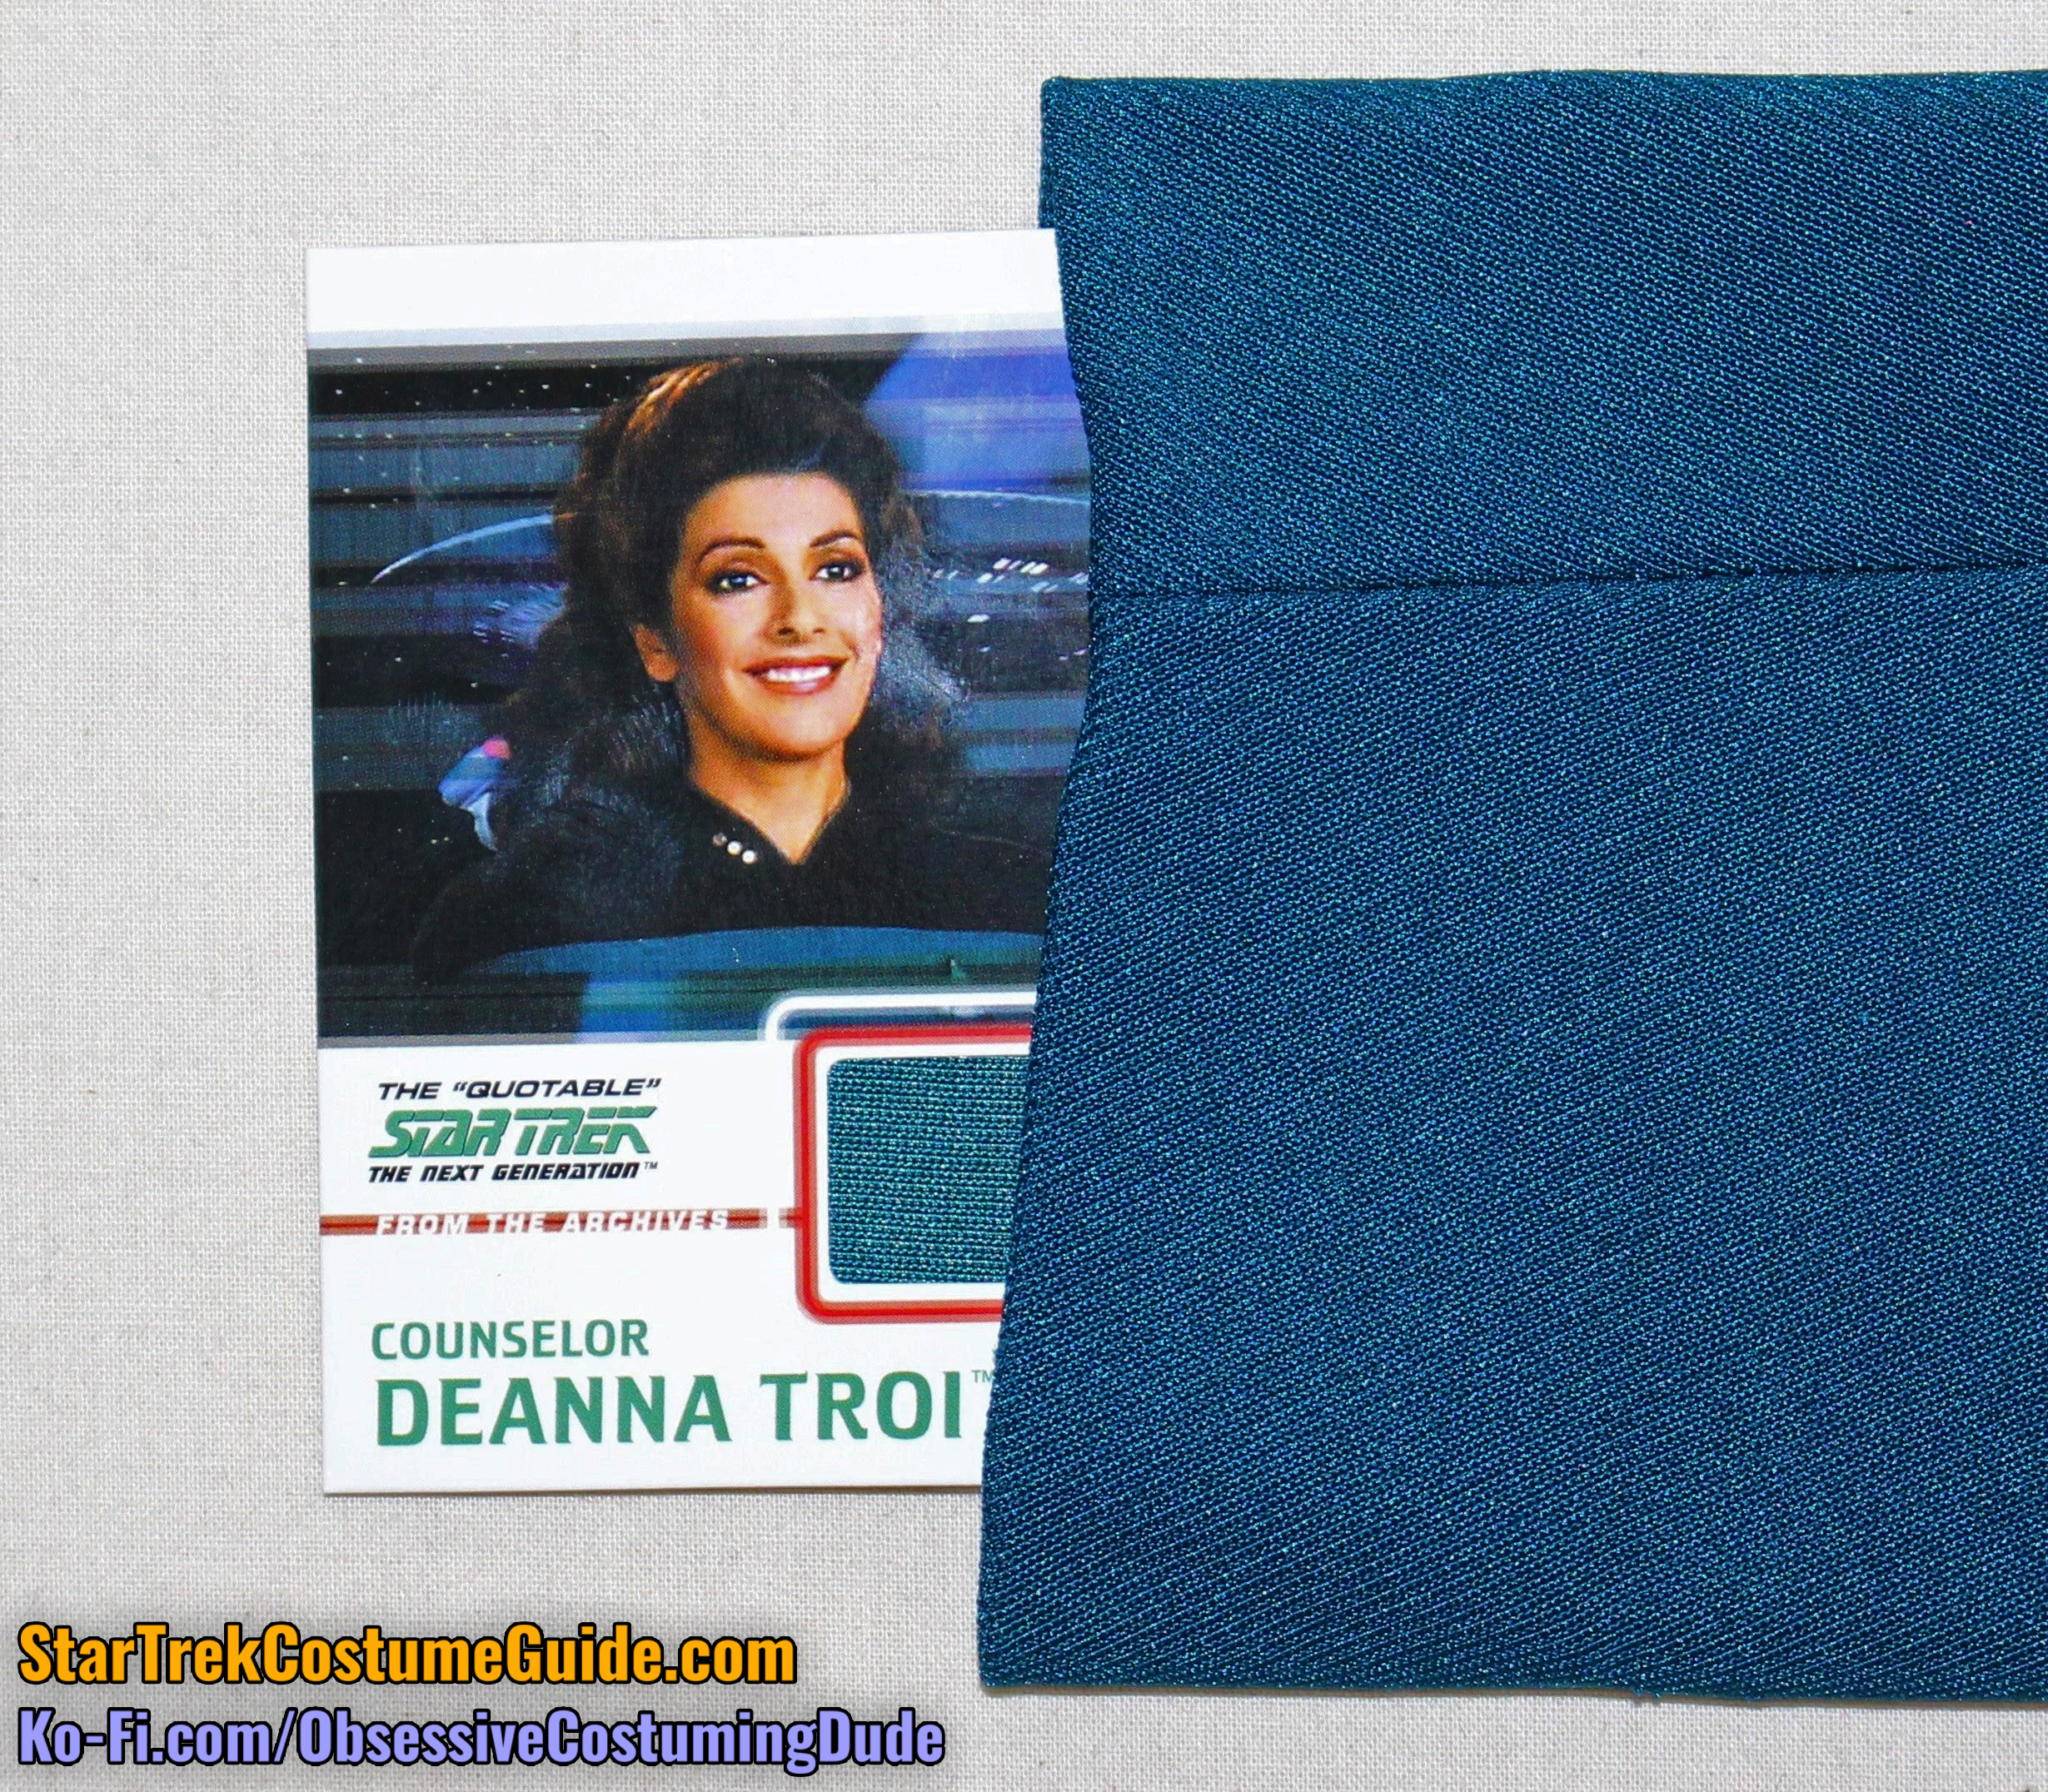
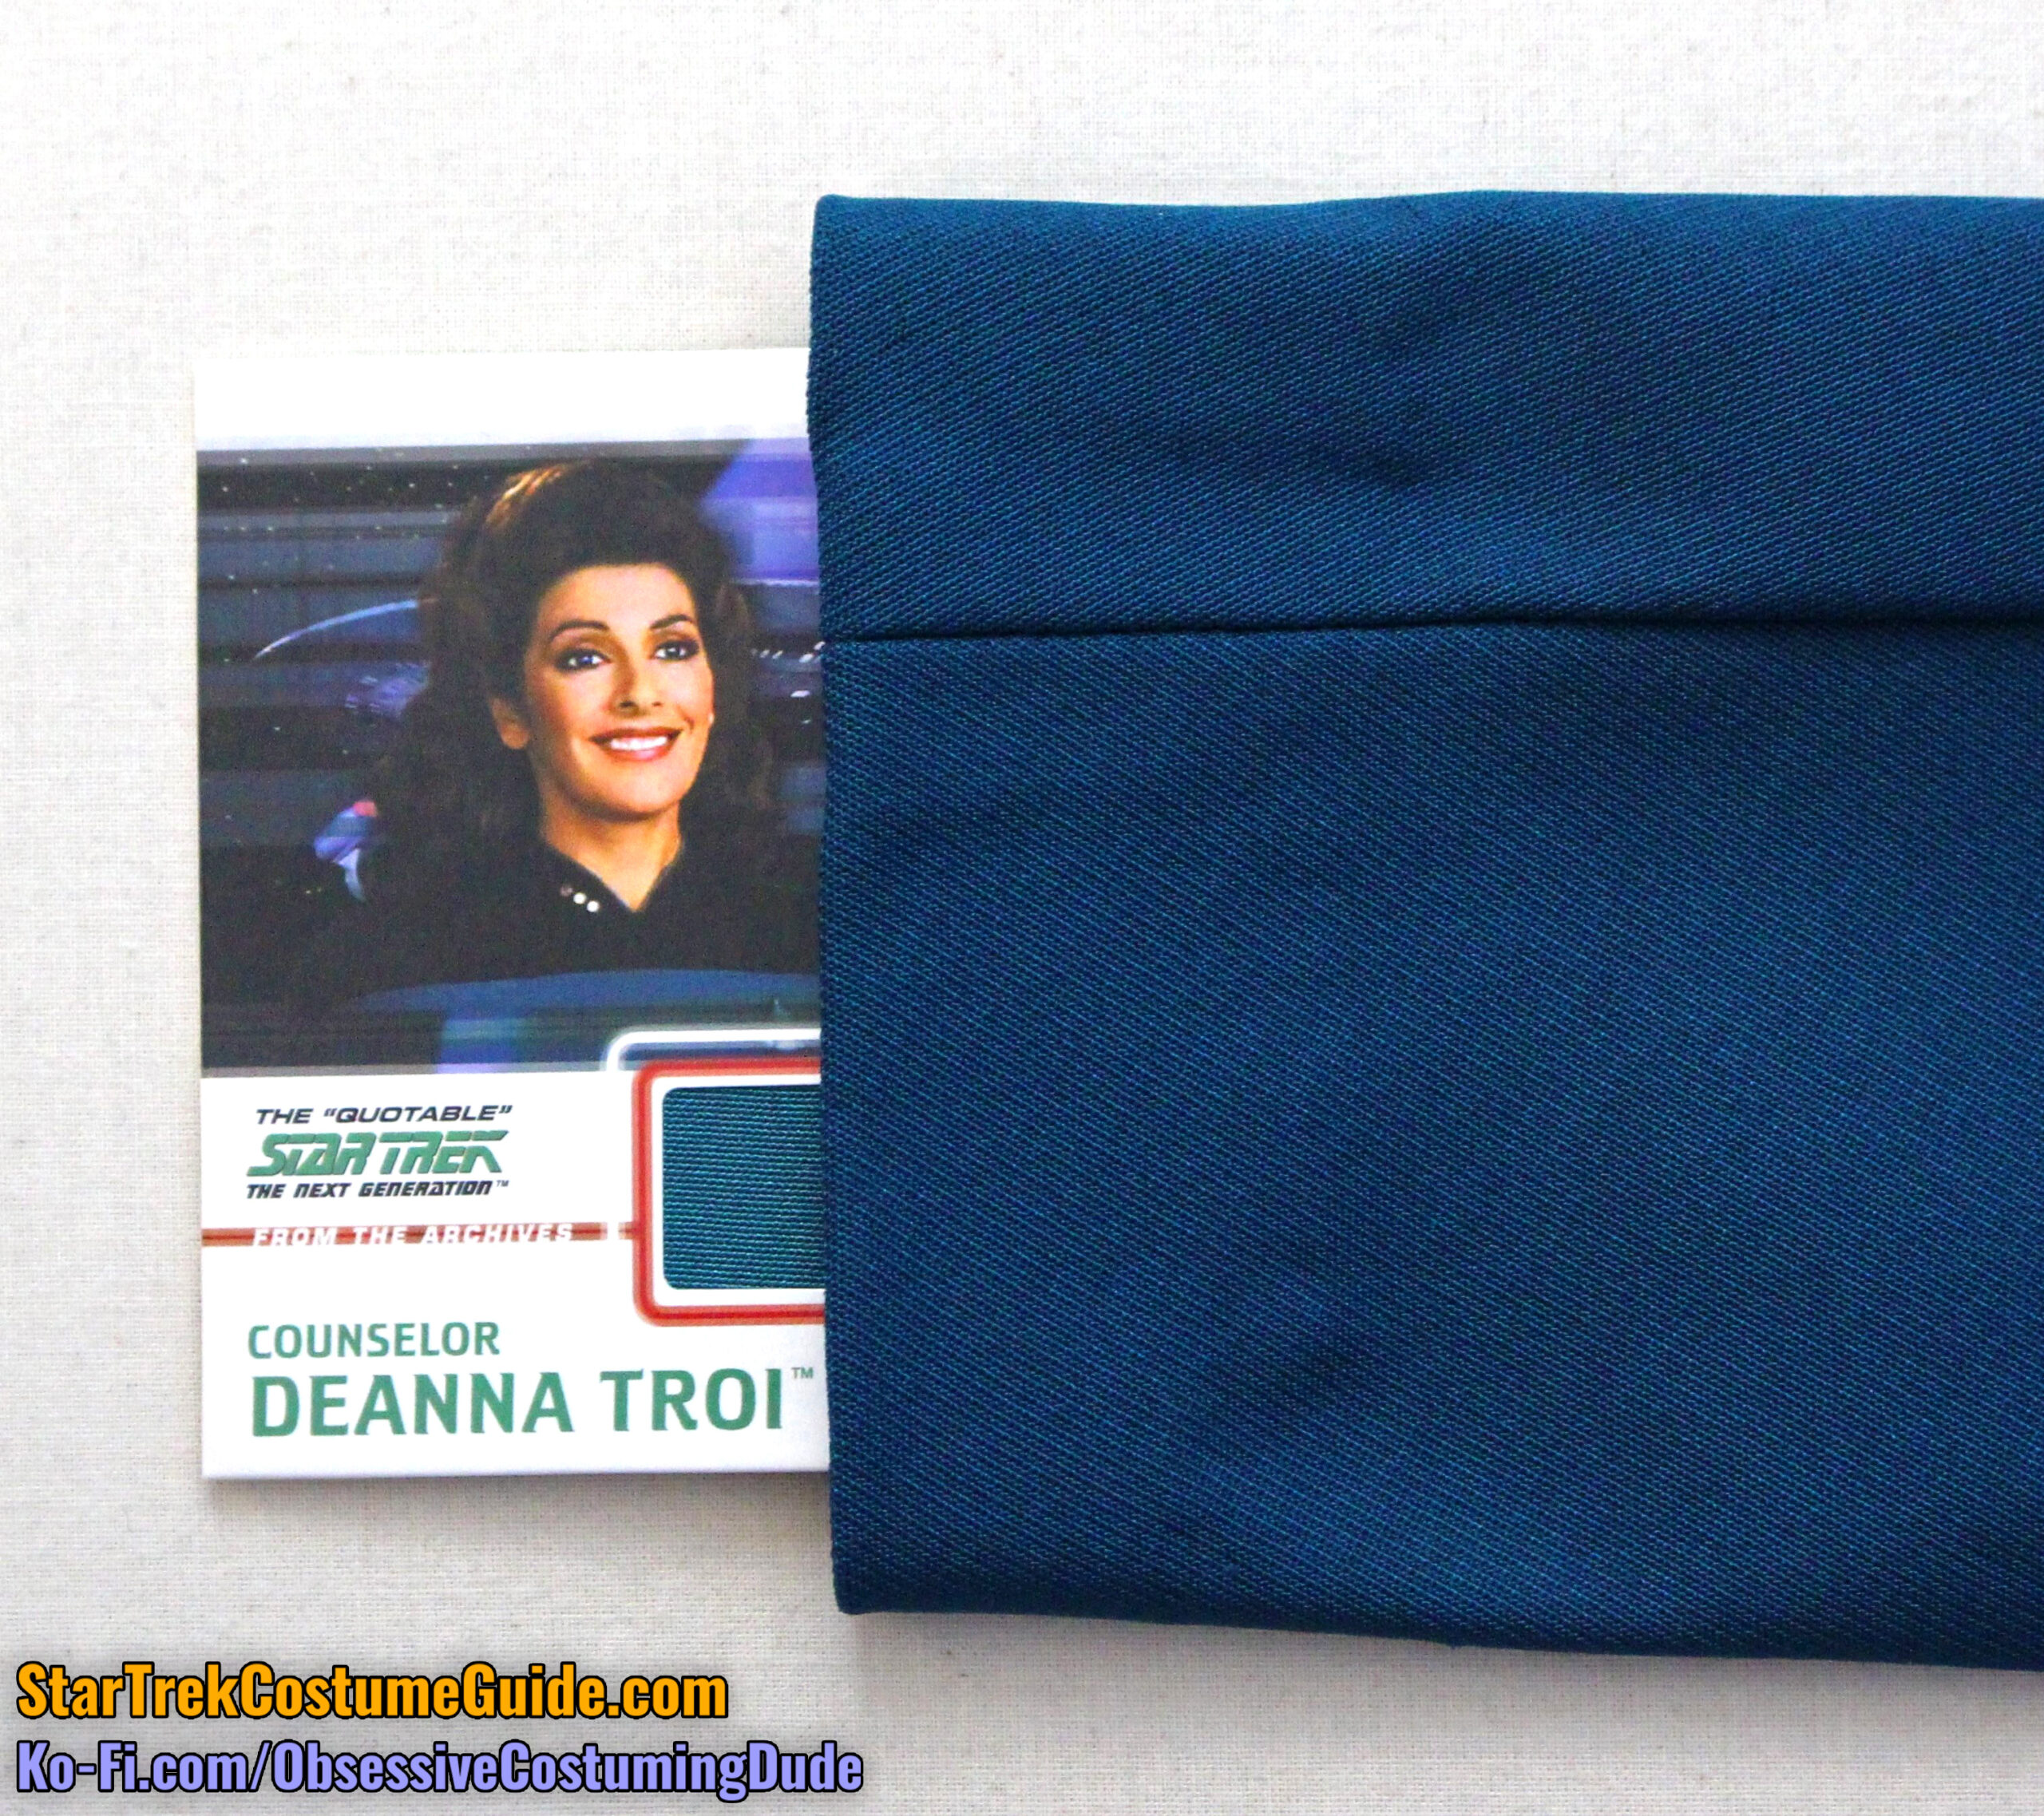
And here is a direct comparison between the Beverly Crusher jumpsuit and the Deanna Troi swatch, which I believe to have been from seasons 6b-7.
Outside, sunlight
Outside, shade
Indoors, with flash
Indoors, no flash
Observe that even though the Deanna swatch is slightly darker and bluer than the Beverly swatch, the season 1 jumpsuit was still considerably darker than both.
(I plan to specifically discuss the evolution of the TNG-era division colors in one or more future blog posts. I suggest subscribing to my “Costume Guide” e-mail newsletter to hear about new posts and resources like these.)
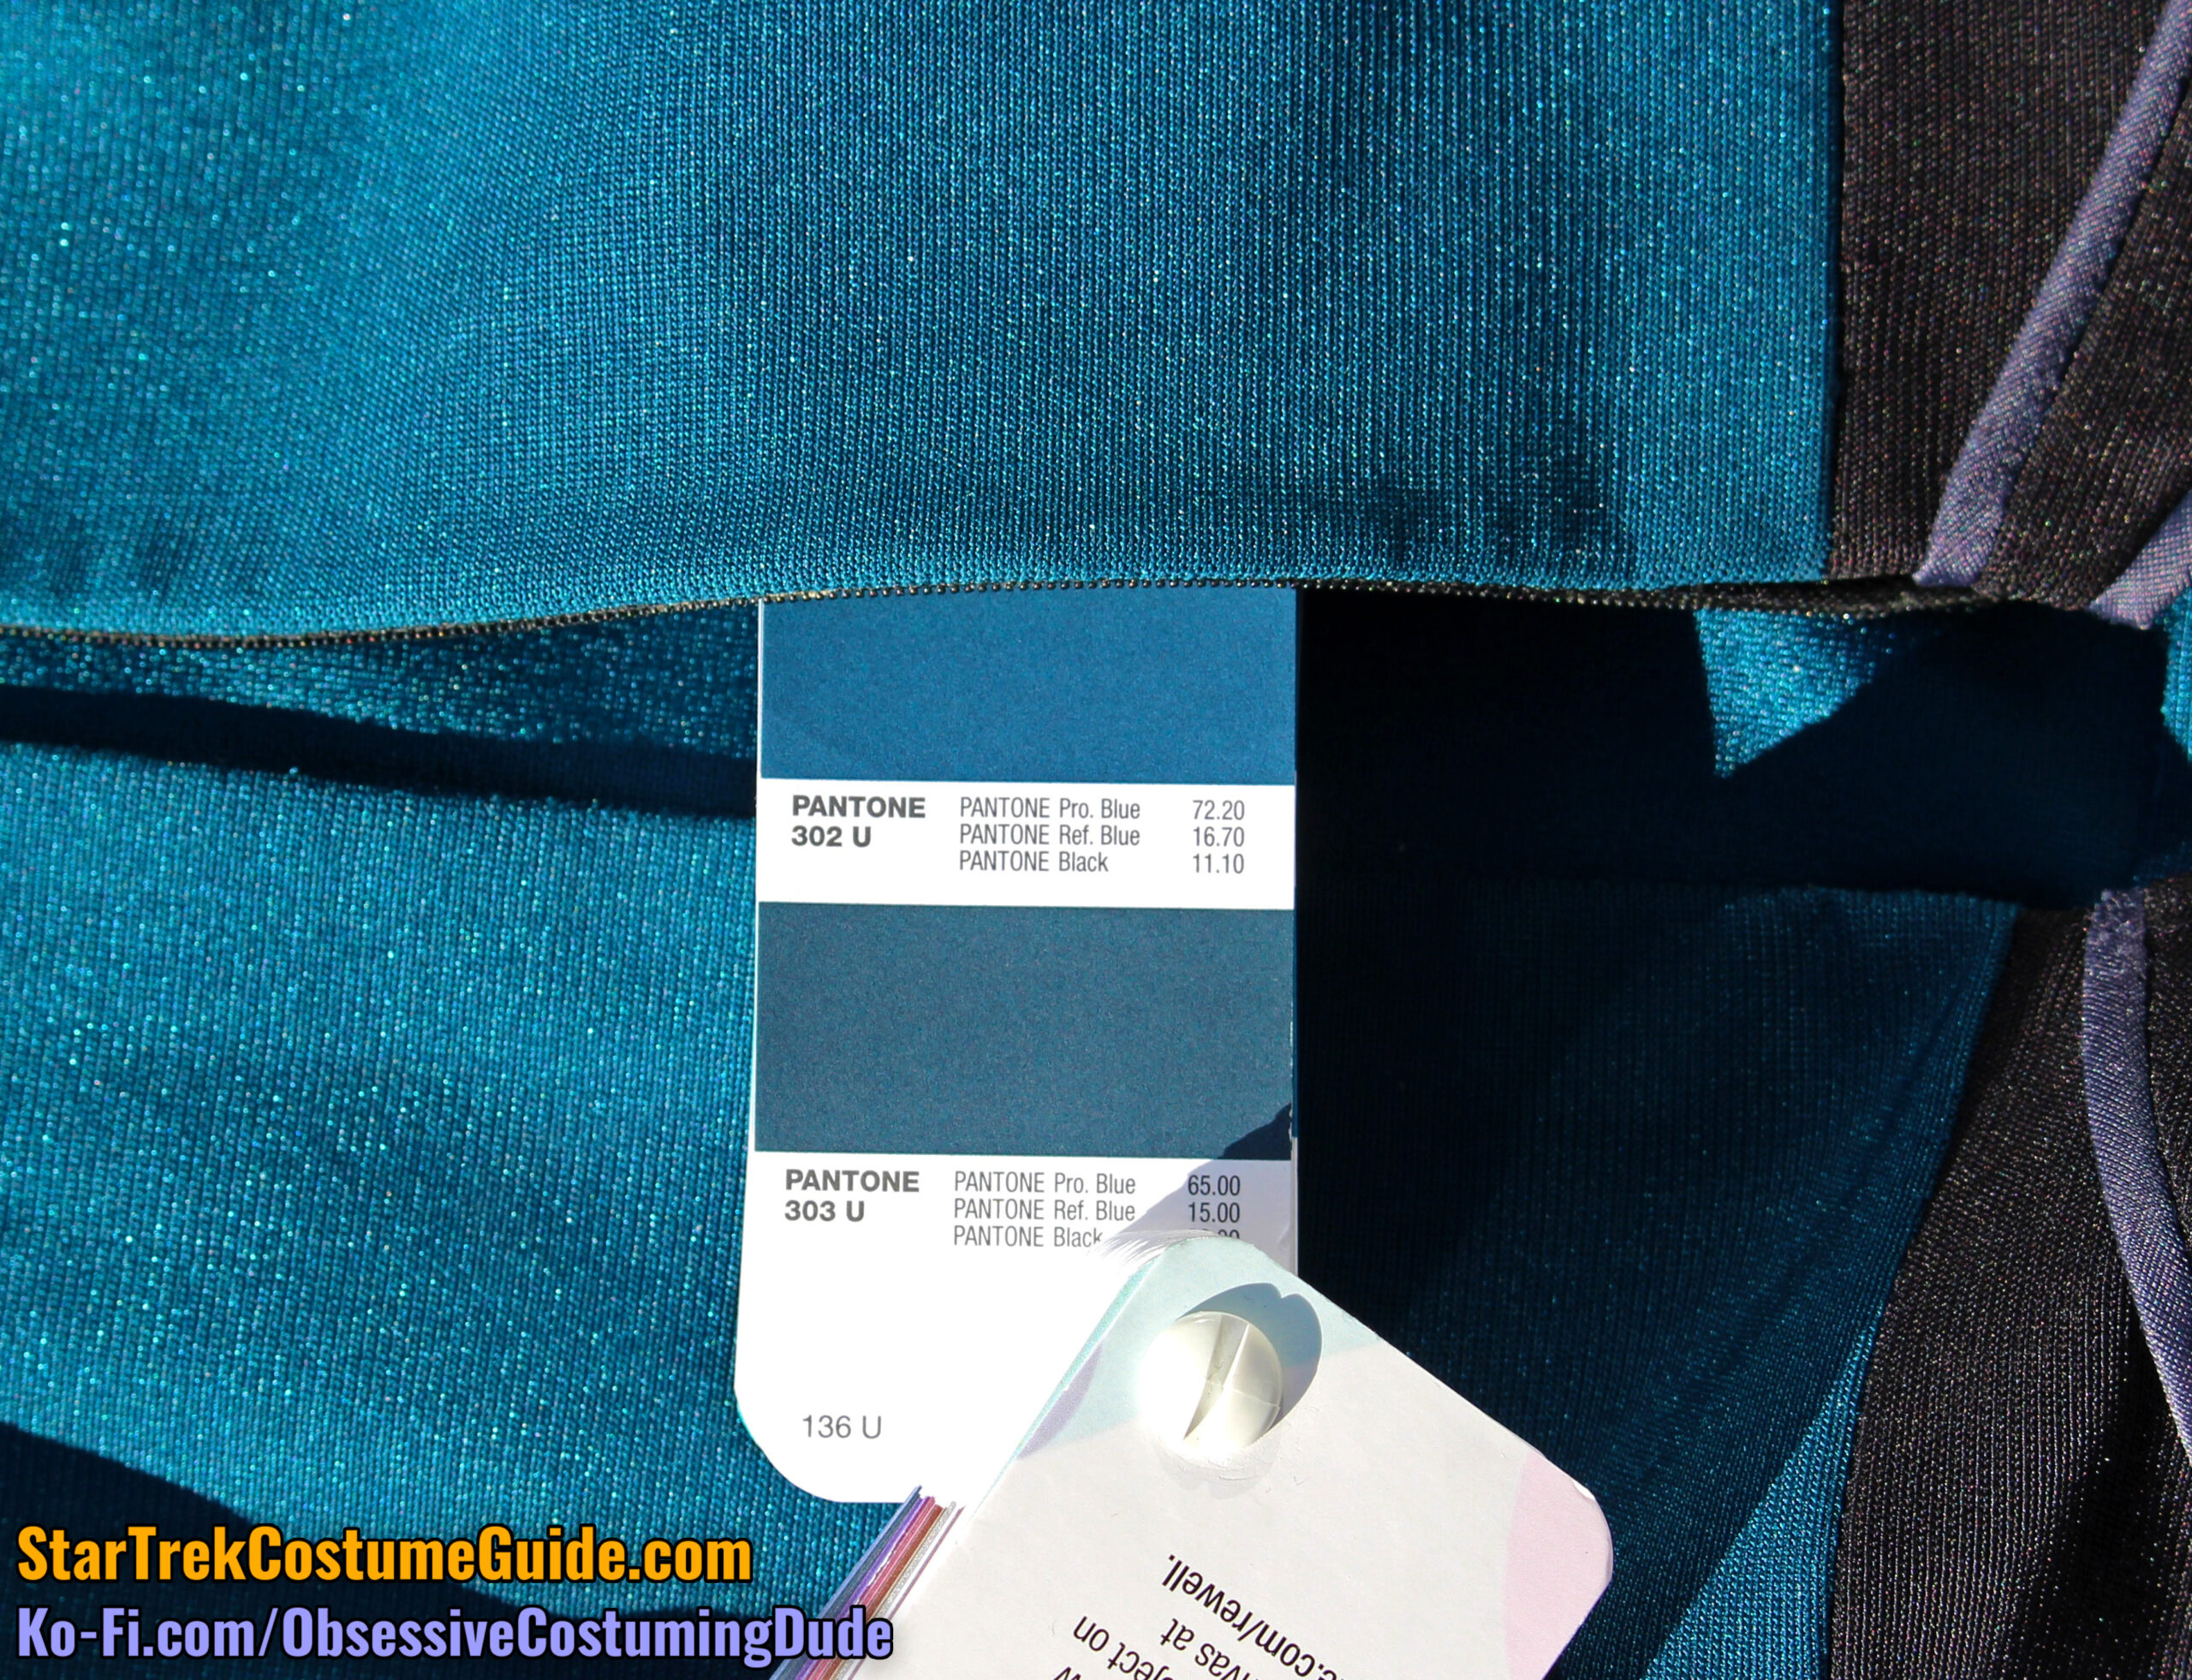
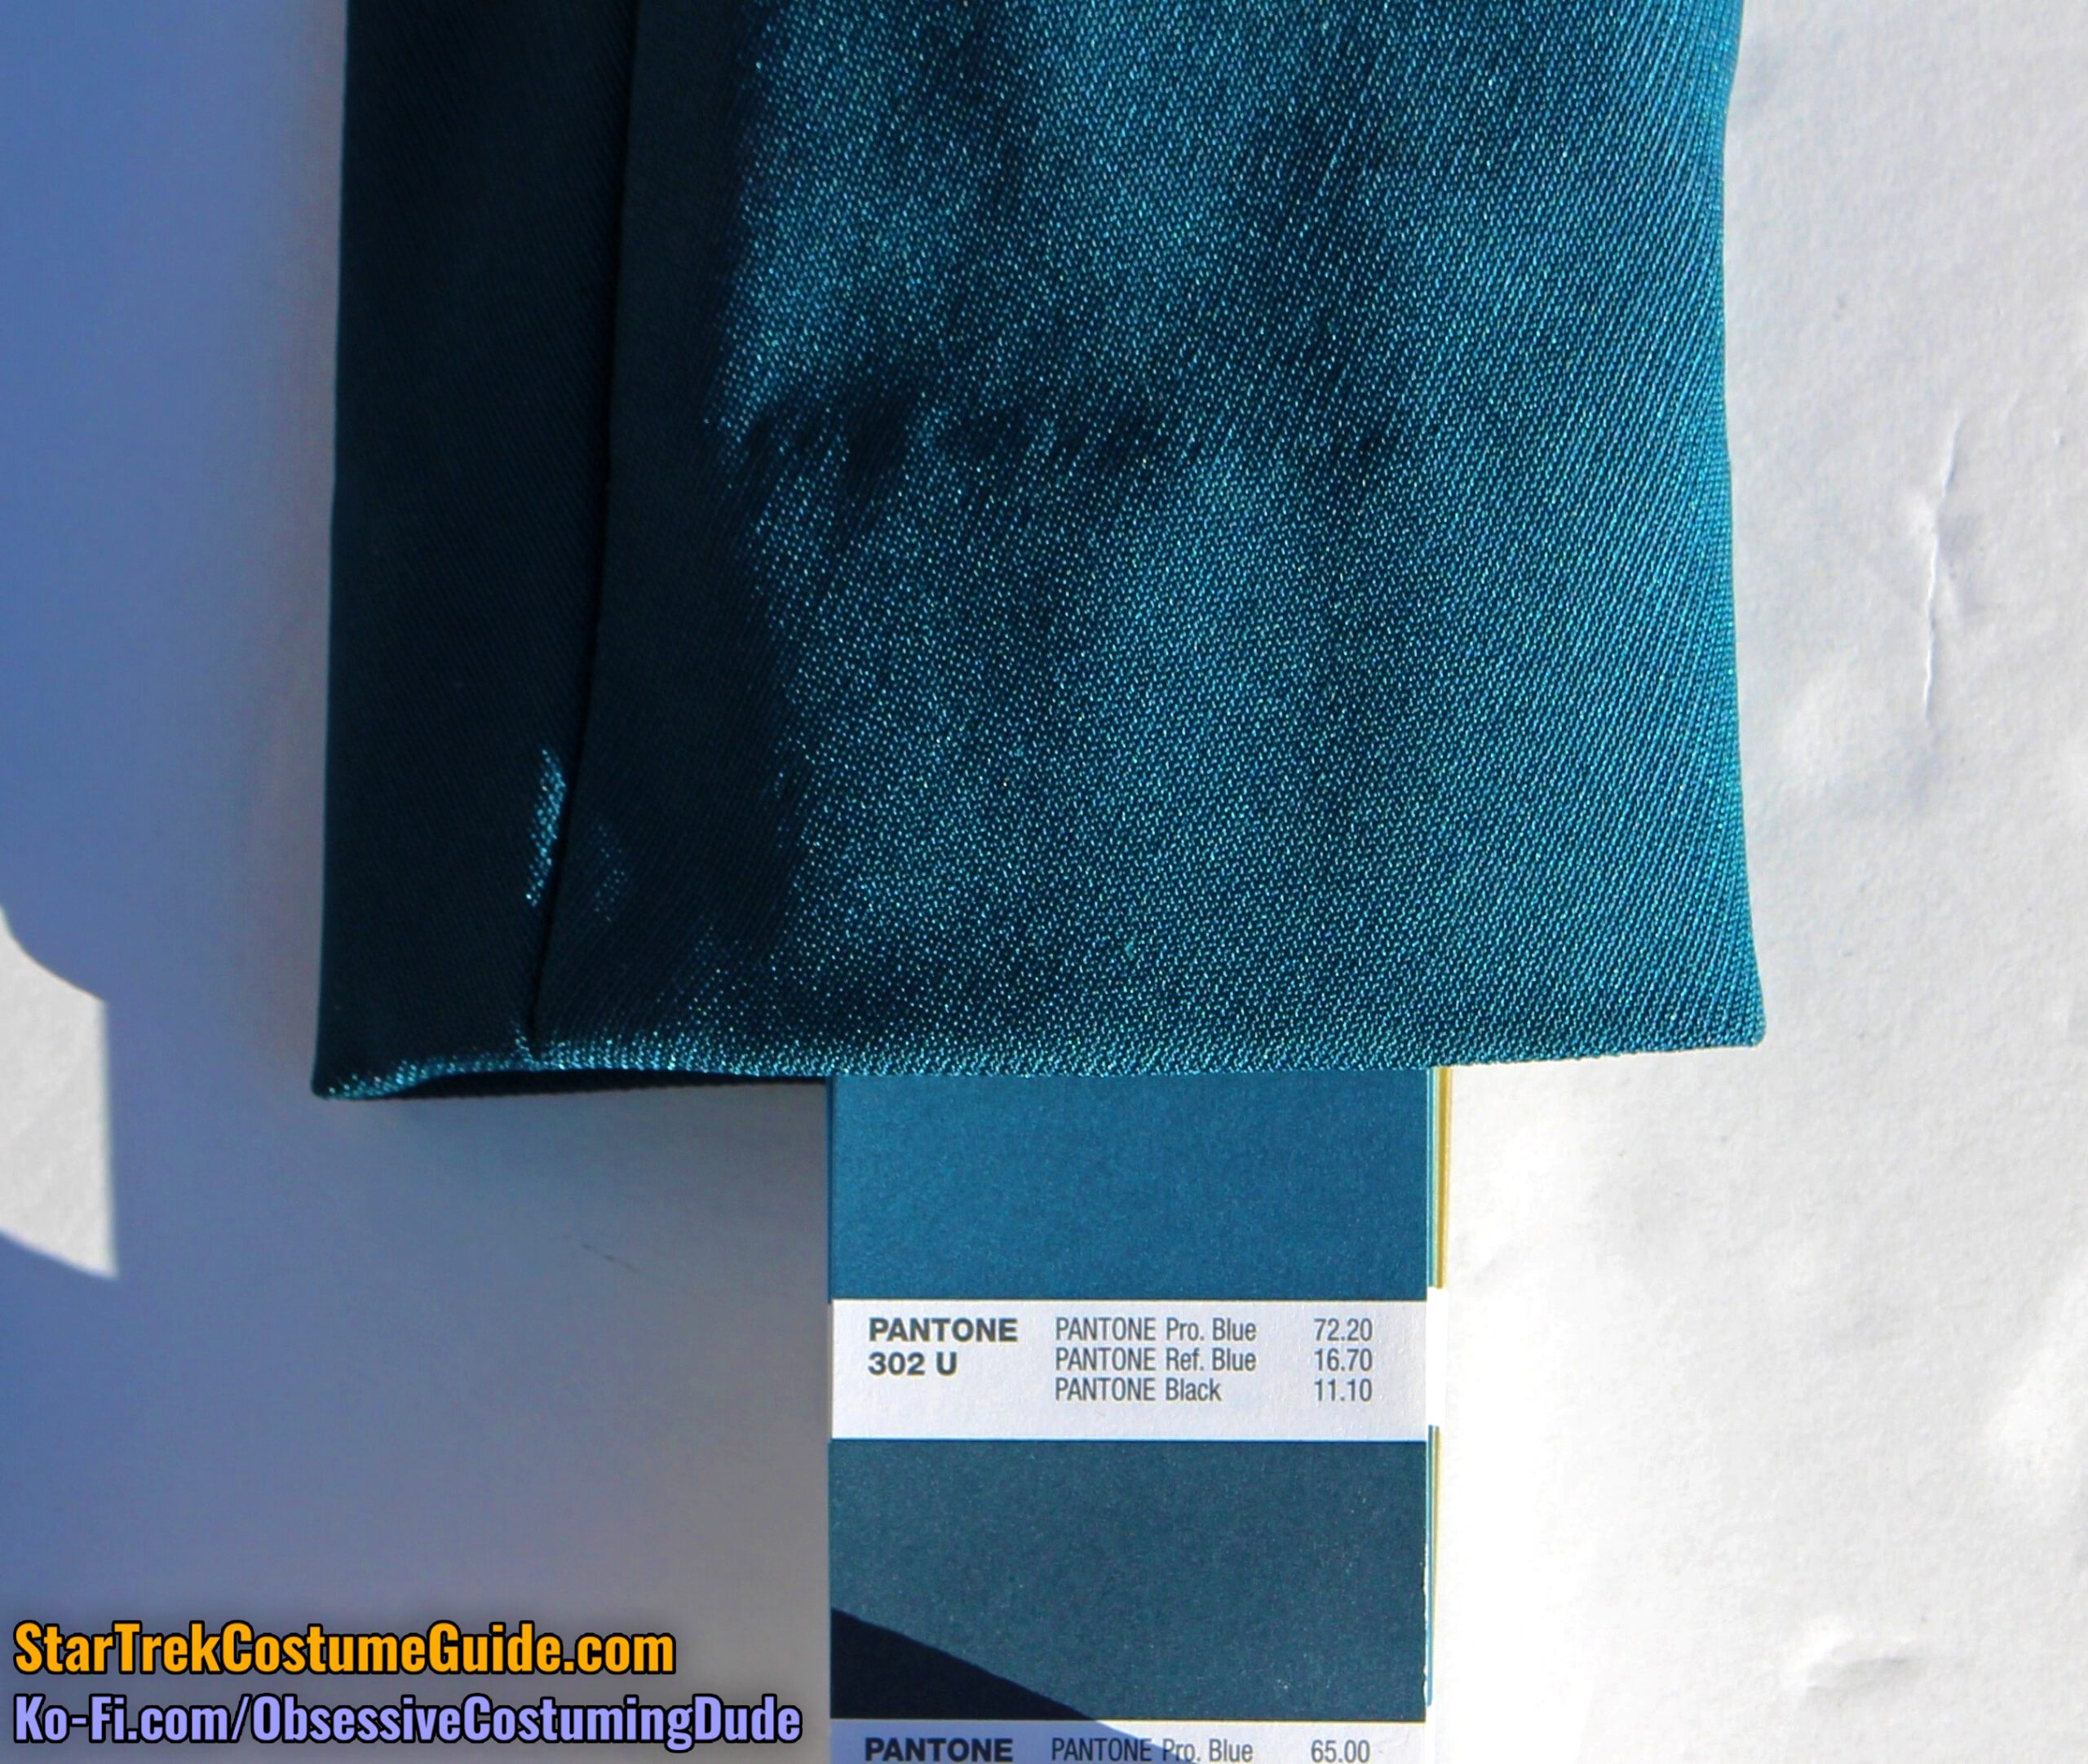
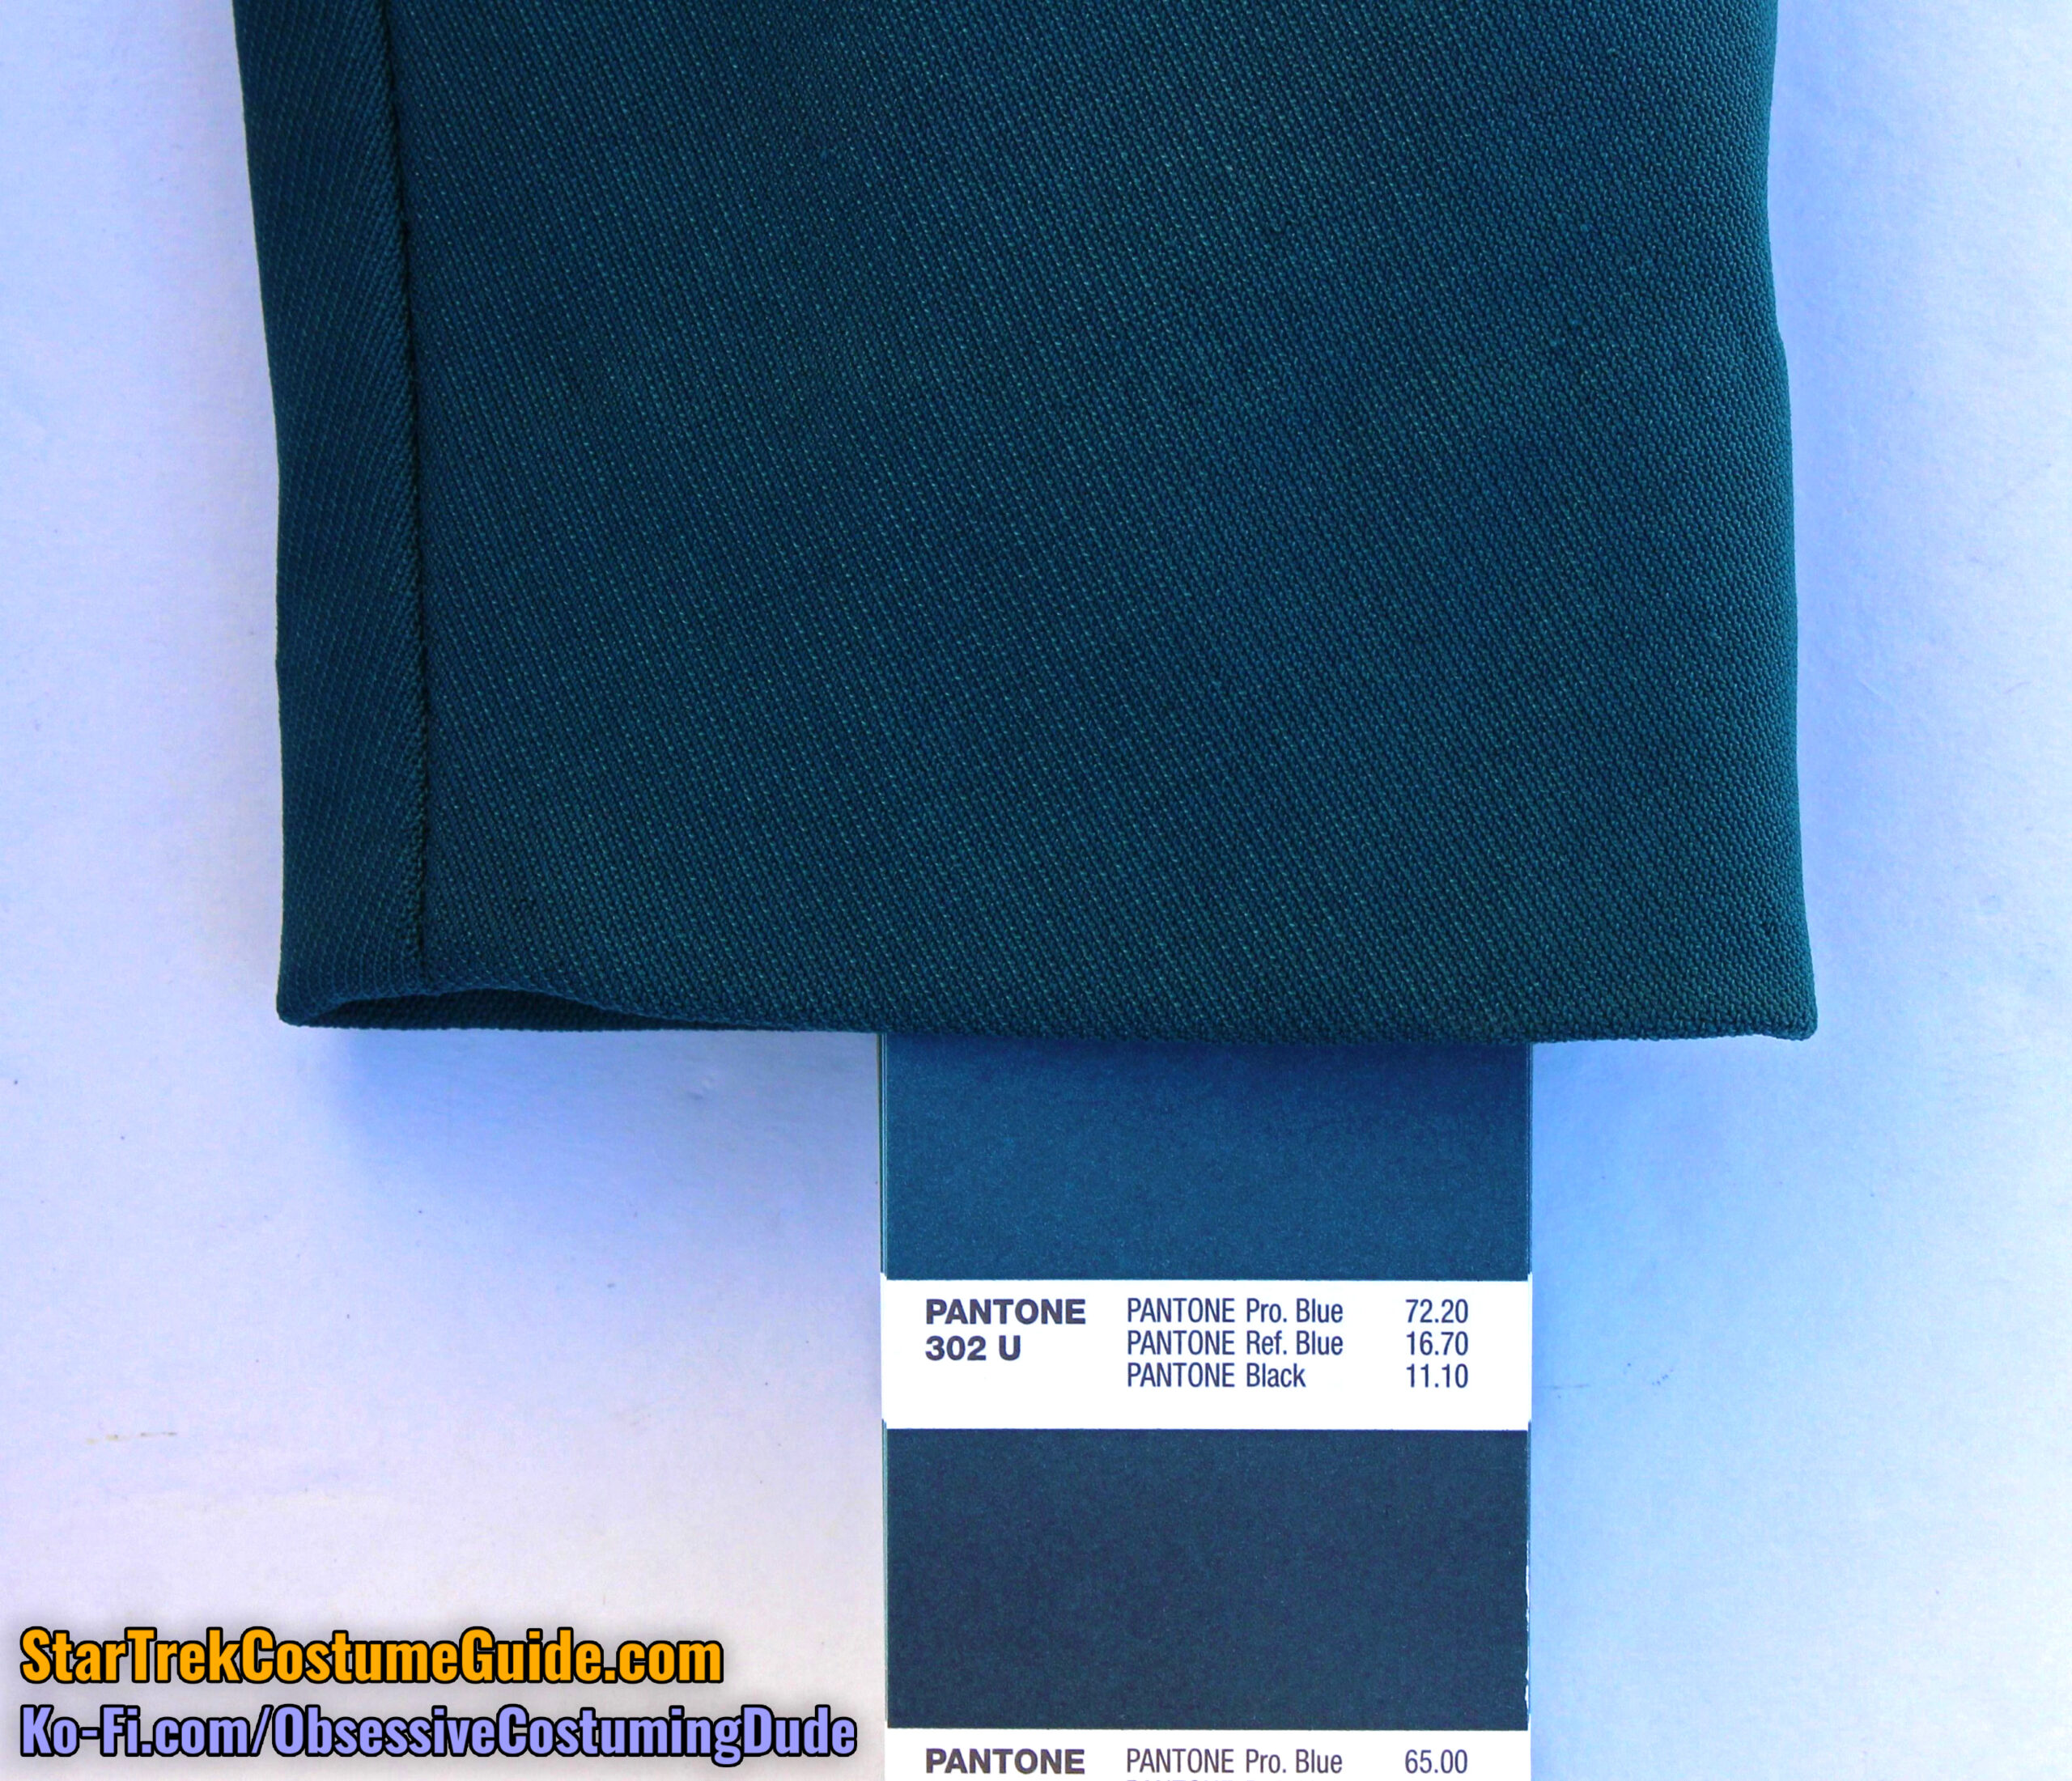
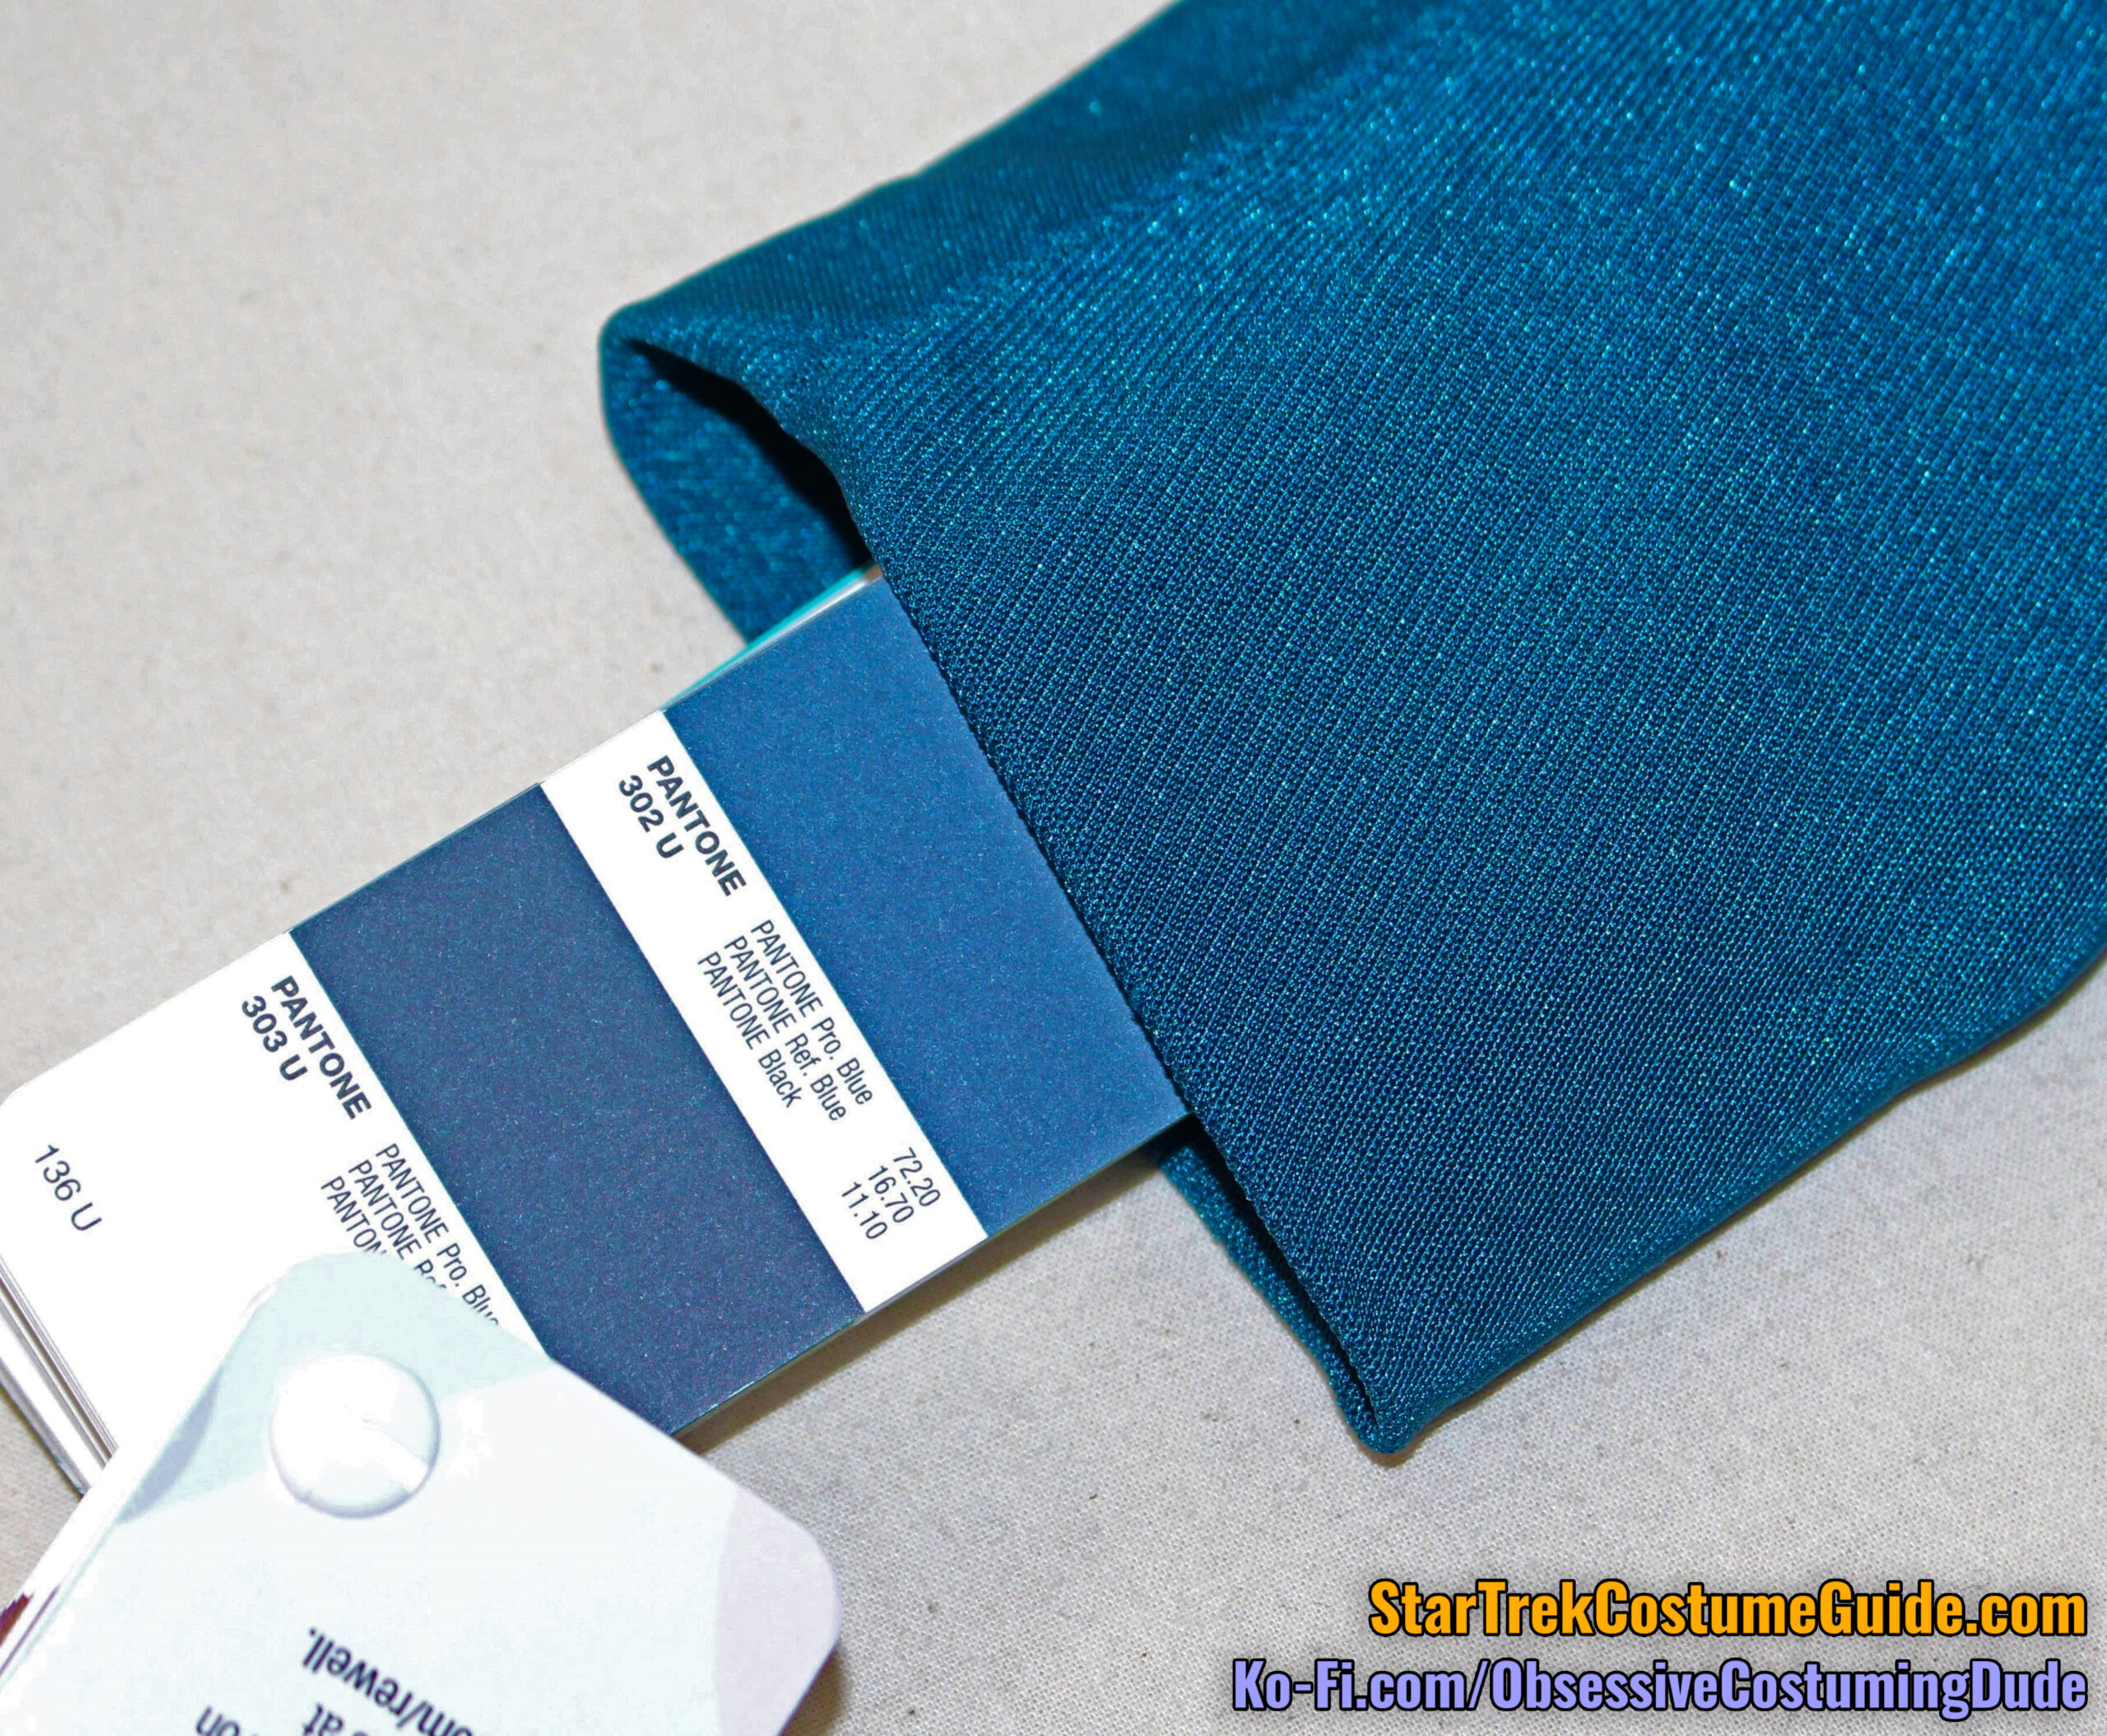
For those of you who have access to a Pantone book, see color #302 U (pictured below in a variety of lighting conditions) is a close representation of the screen-used fabric color.
Outside, sunlight
Outside, sunlight
Outside, shade
Indoors, with flash
Indoors, no flash
(Obviously the photo with flash is rubbish, but I’ve included it anyway for the sake of thoroughness.)
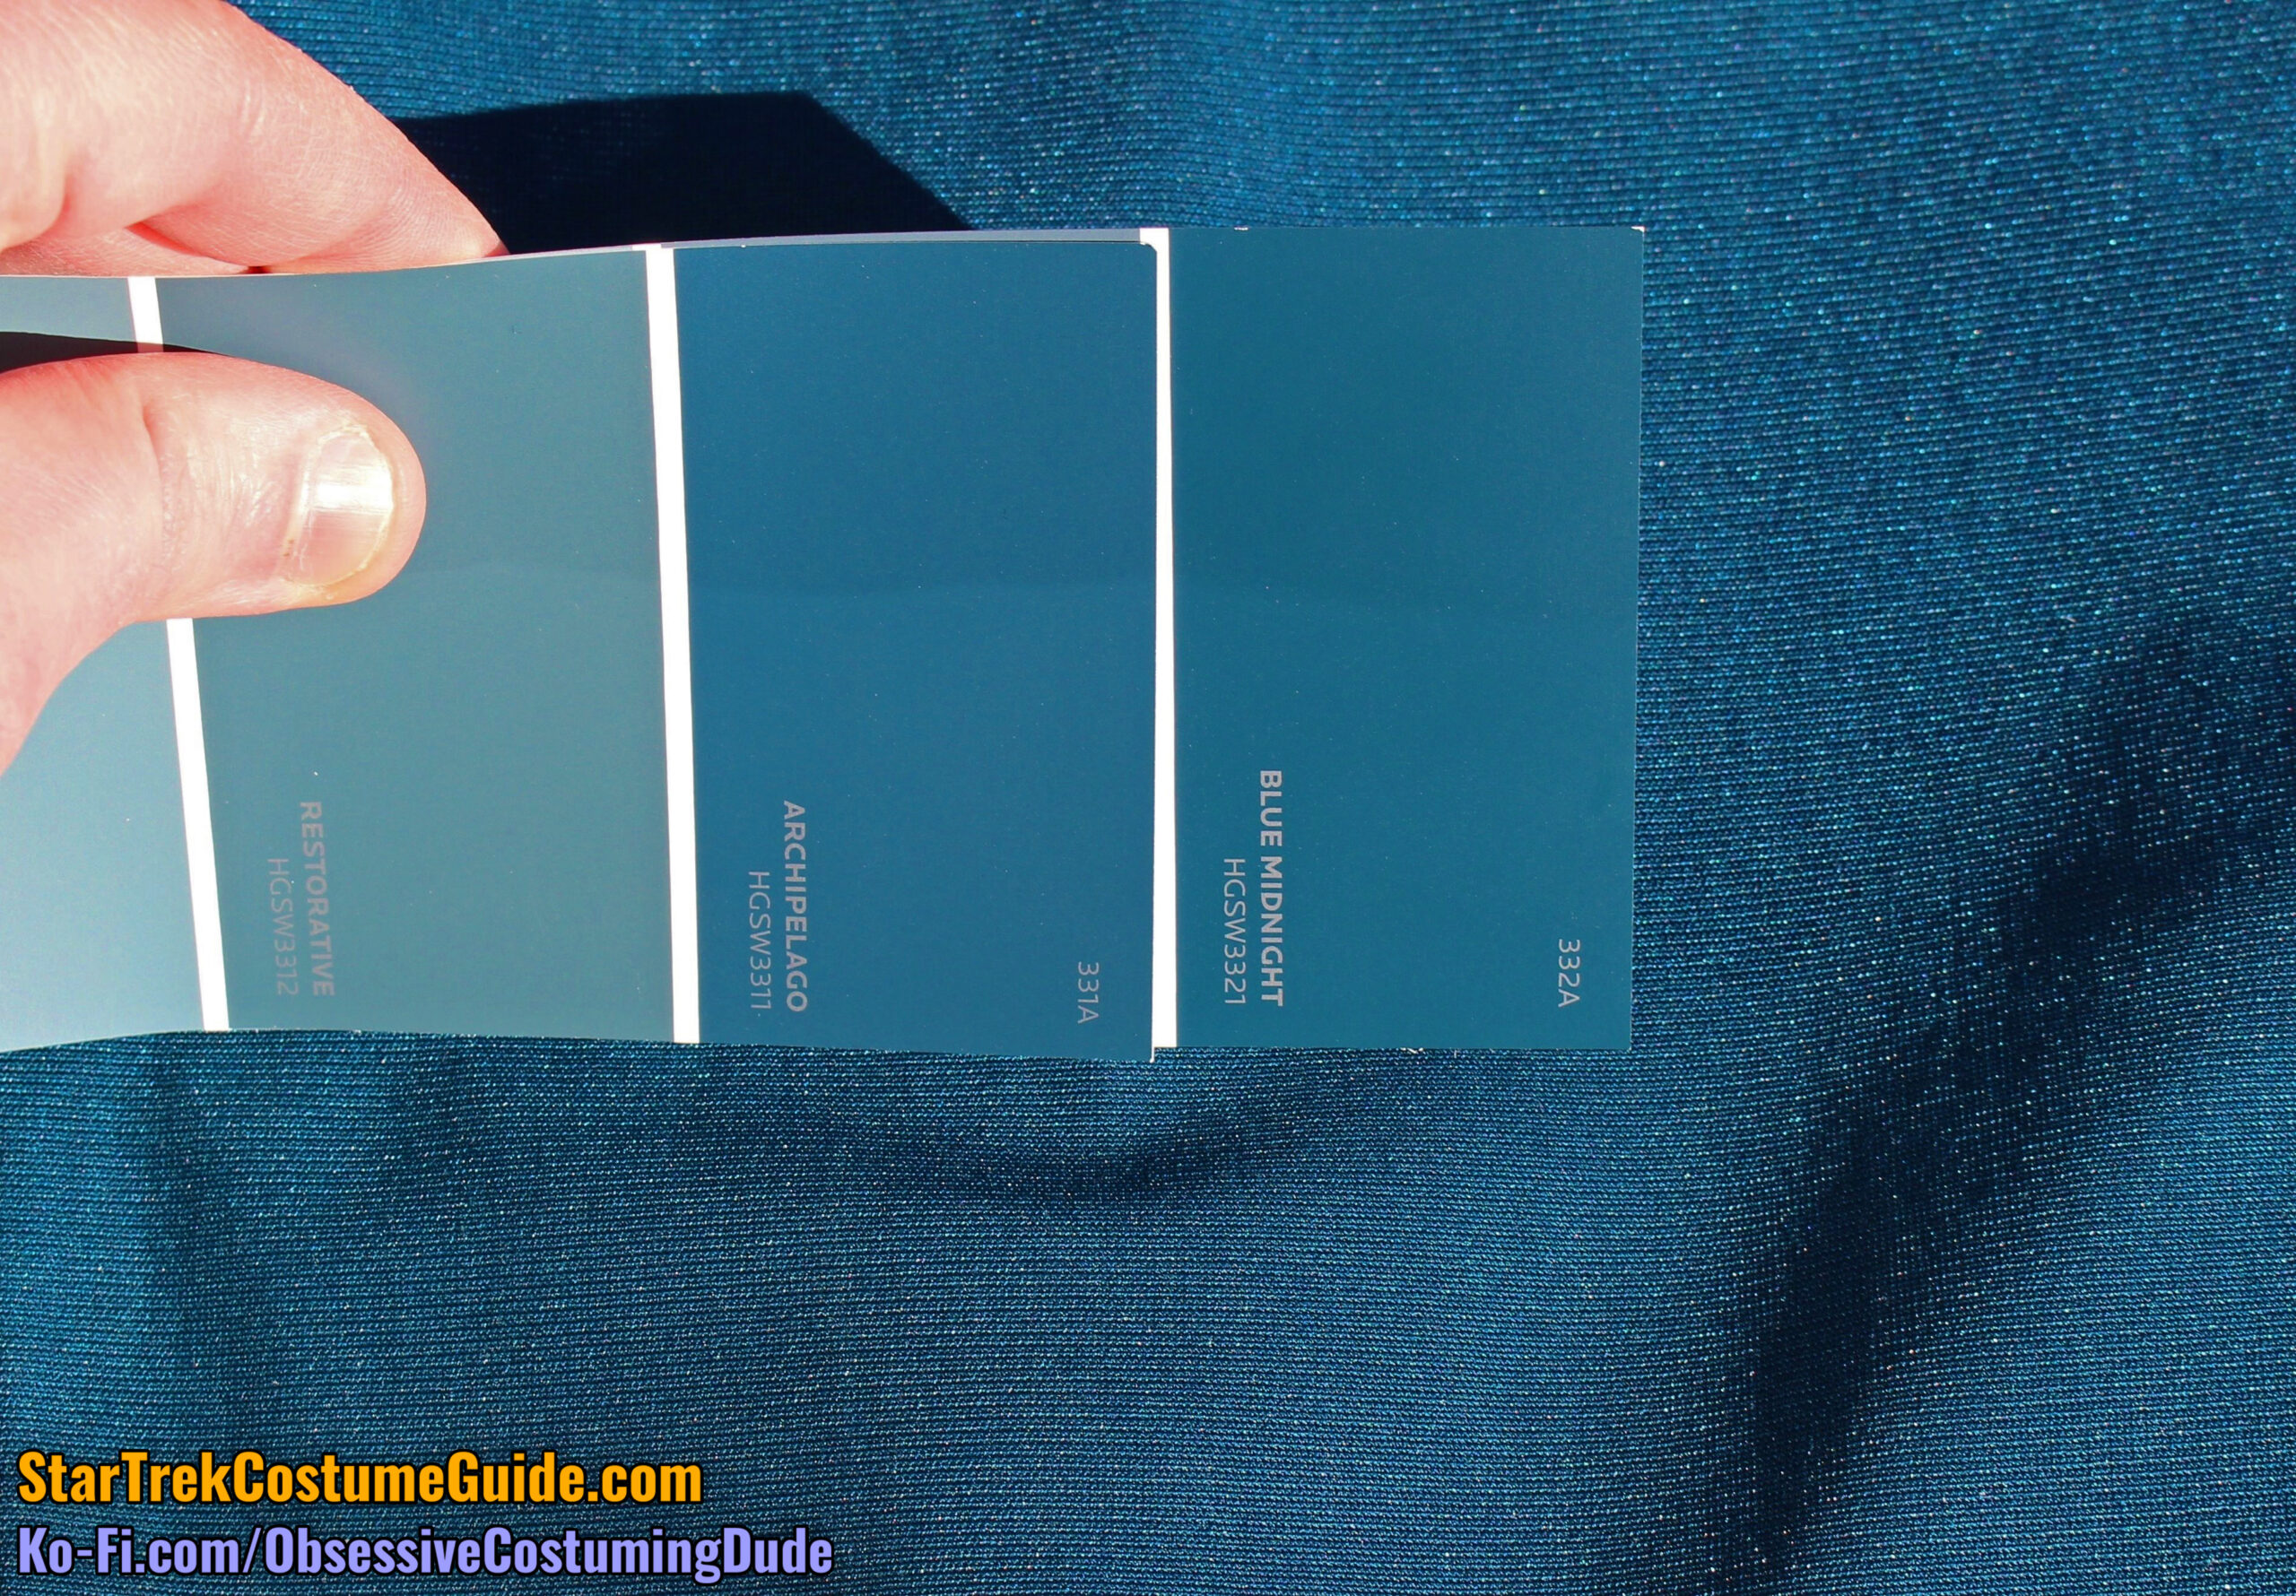
Alternatively, you can head to your local hardware/paint store and pick up a few paint chips as references for the original fabric color.
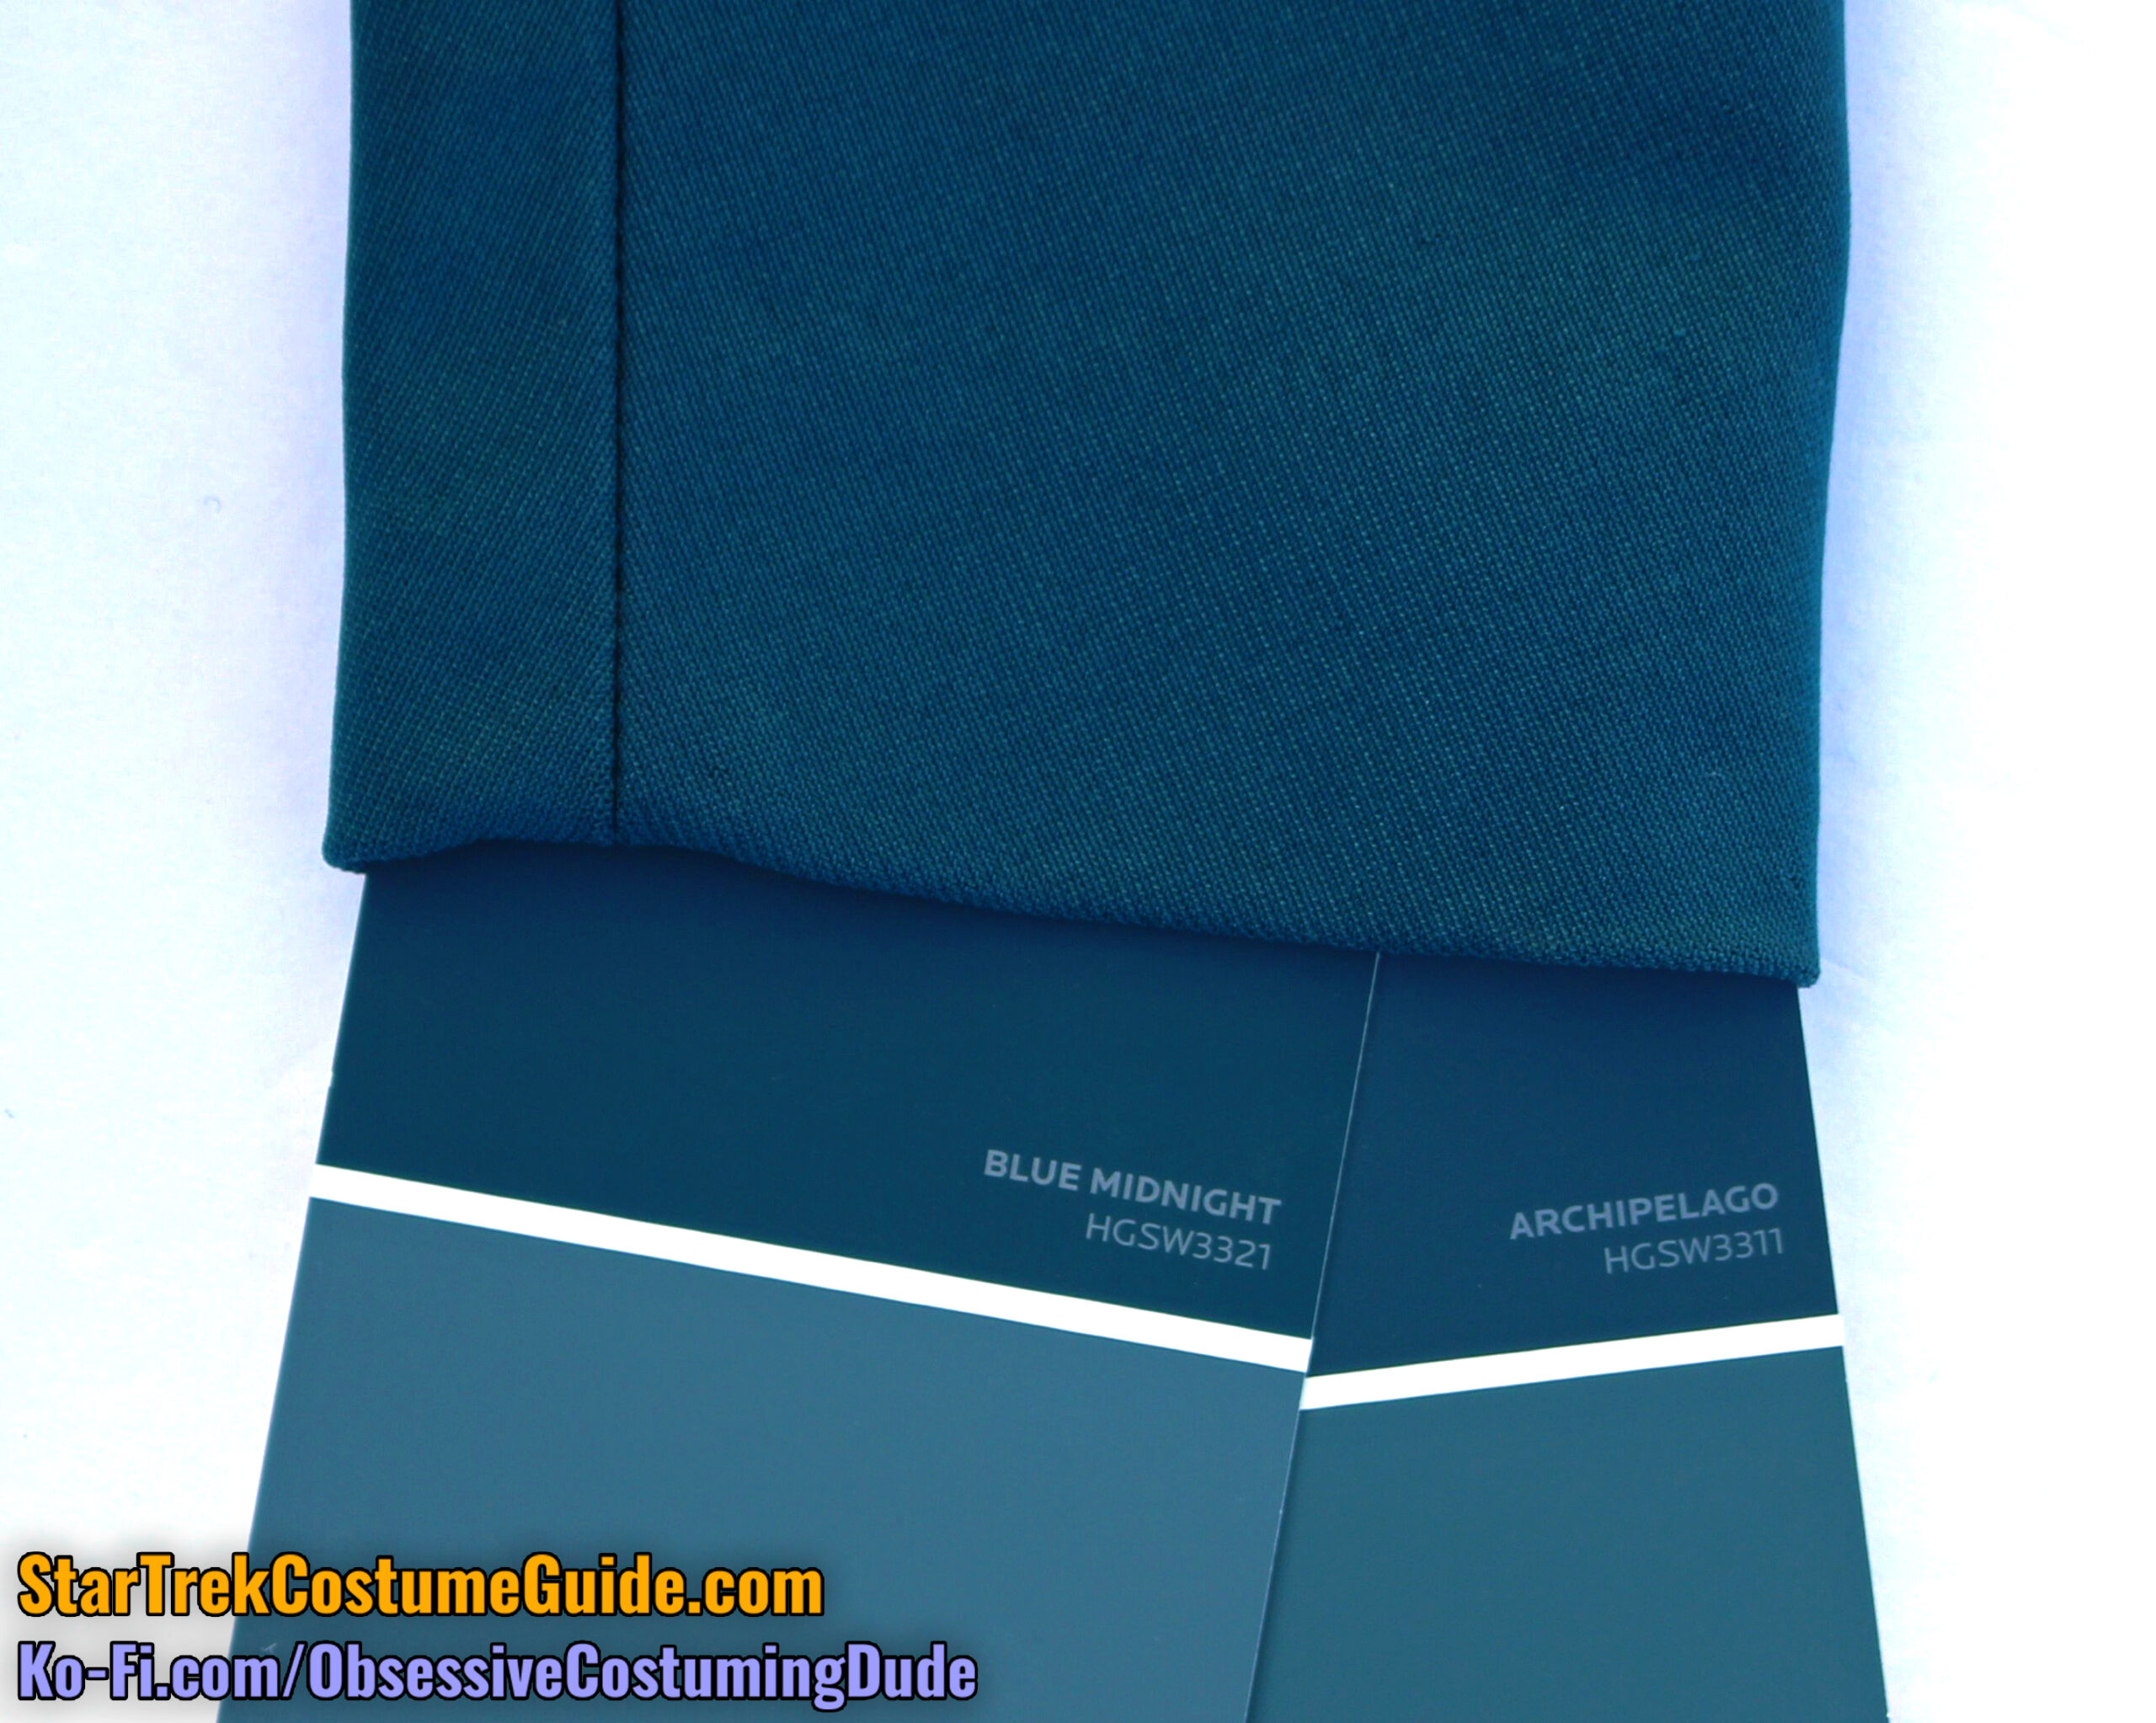
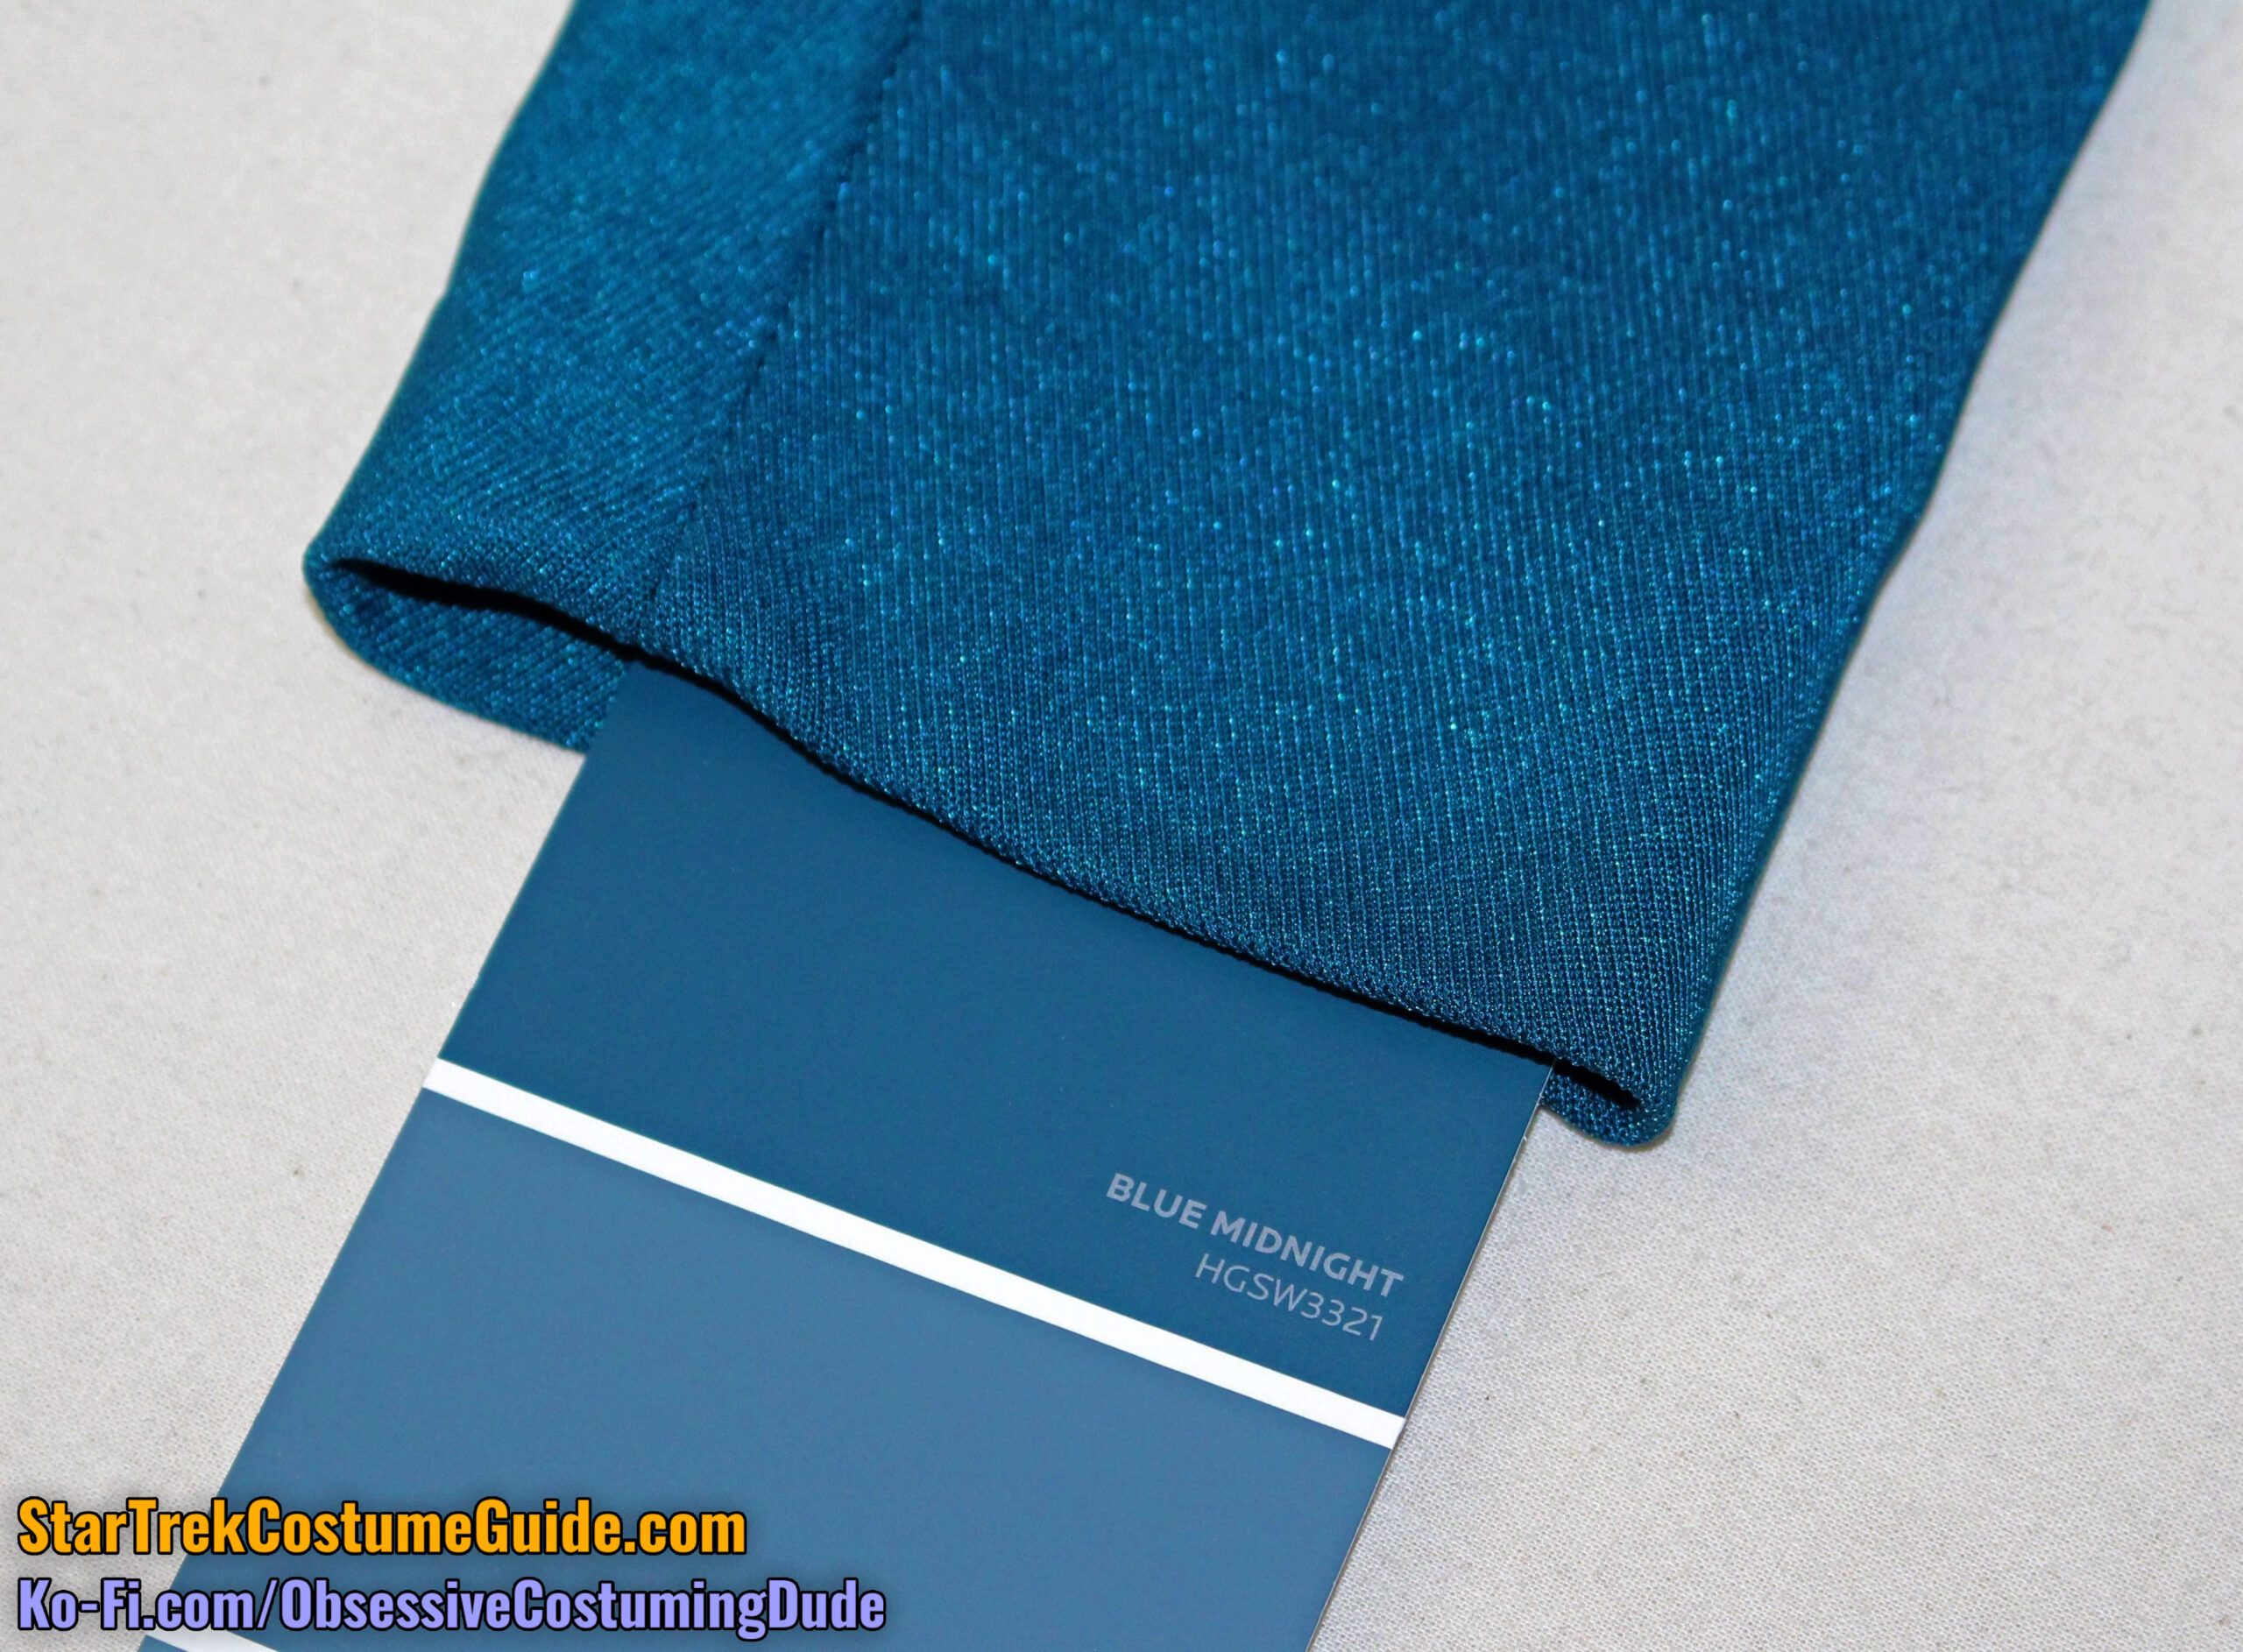
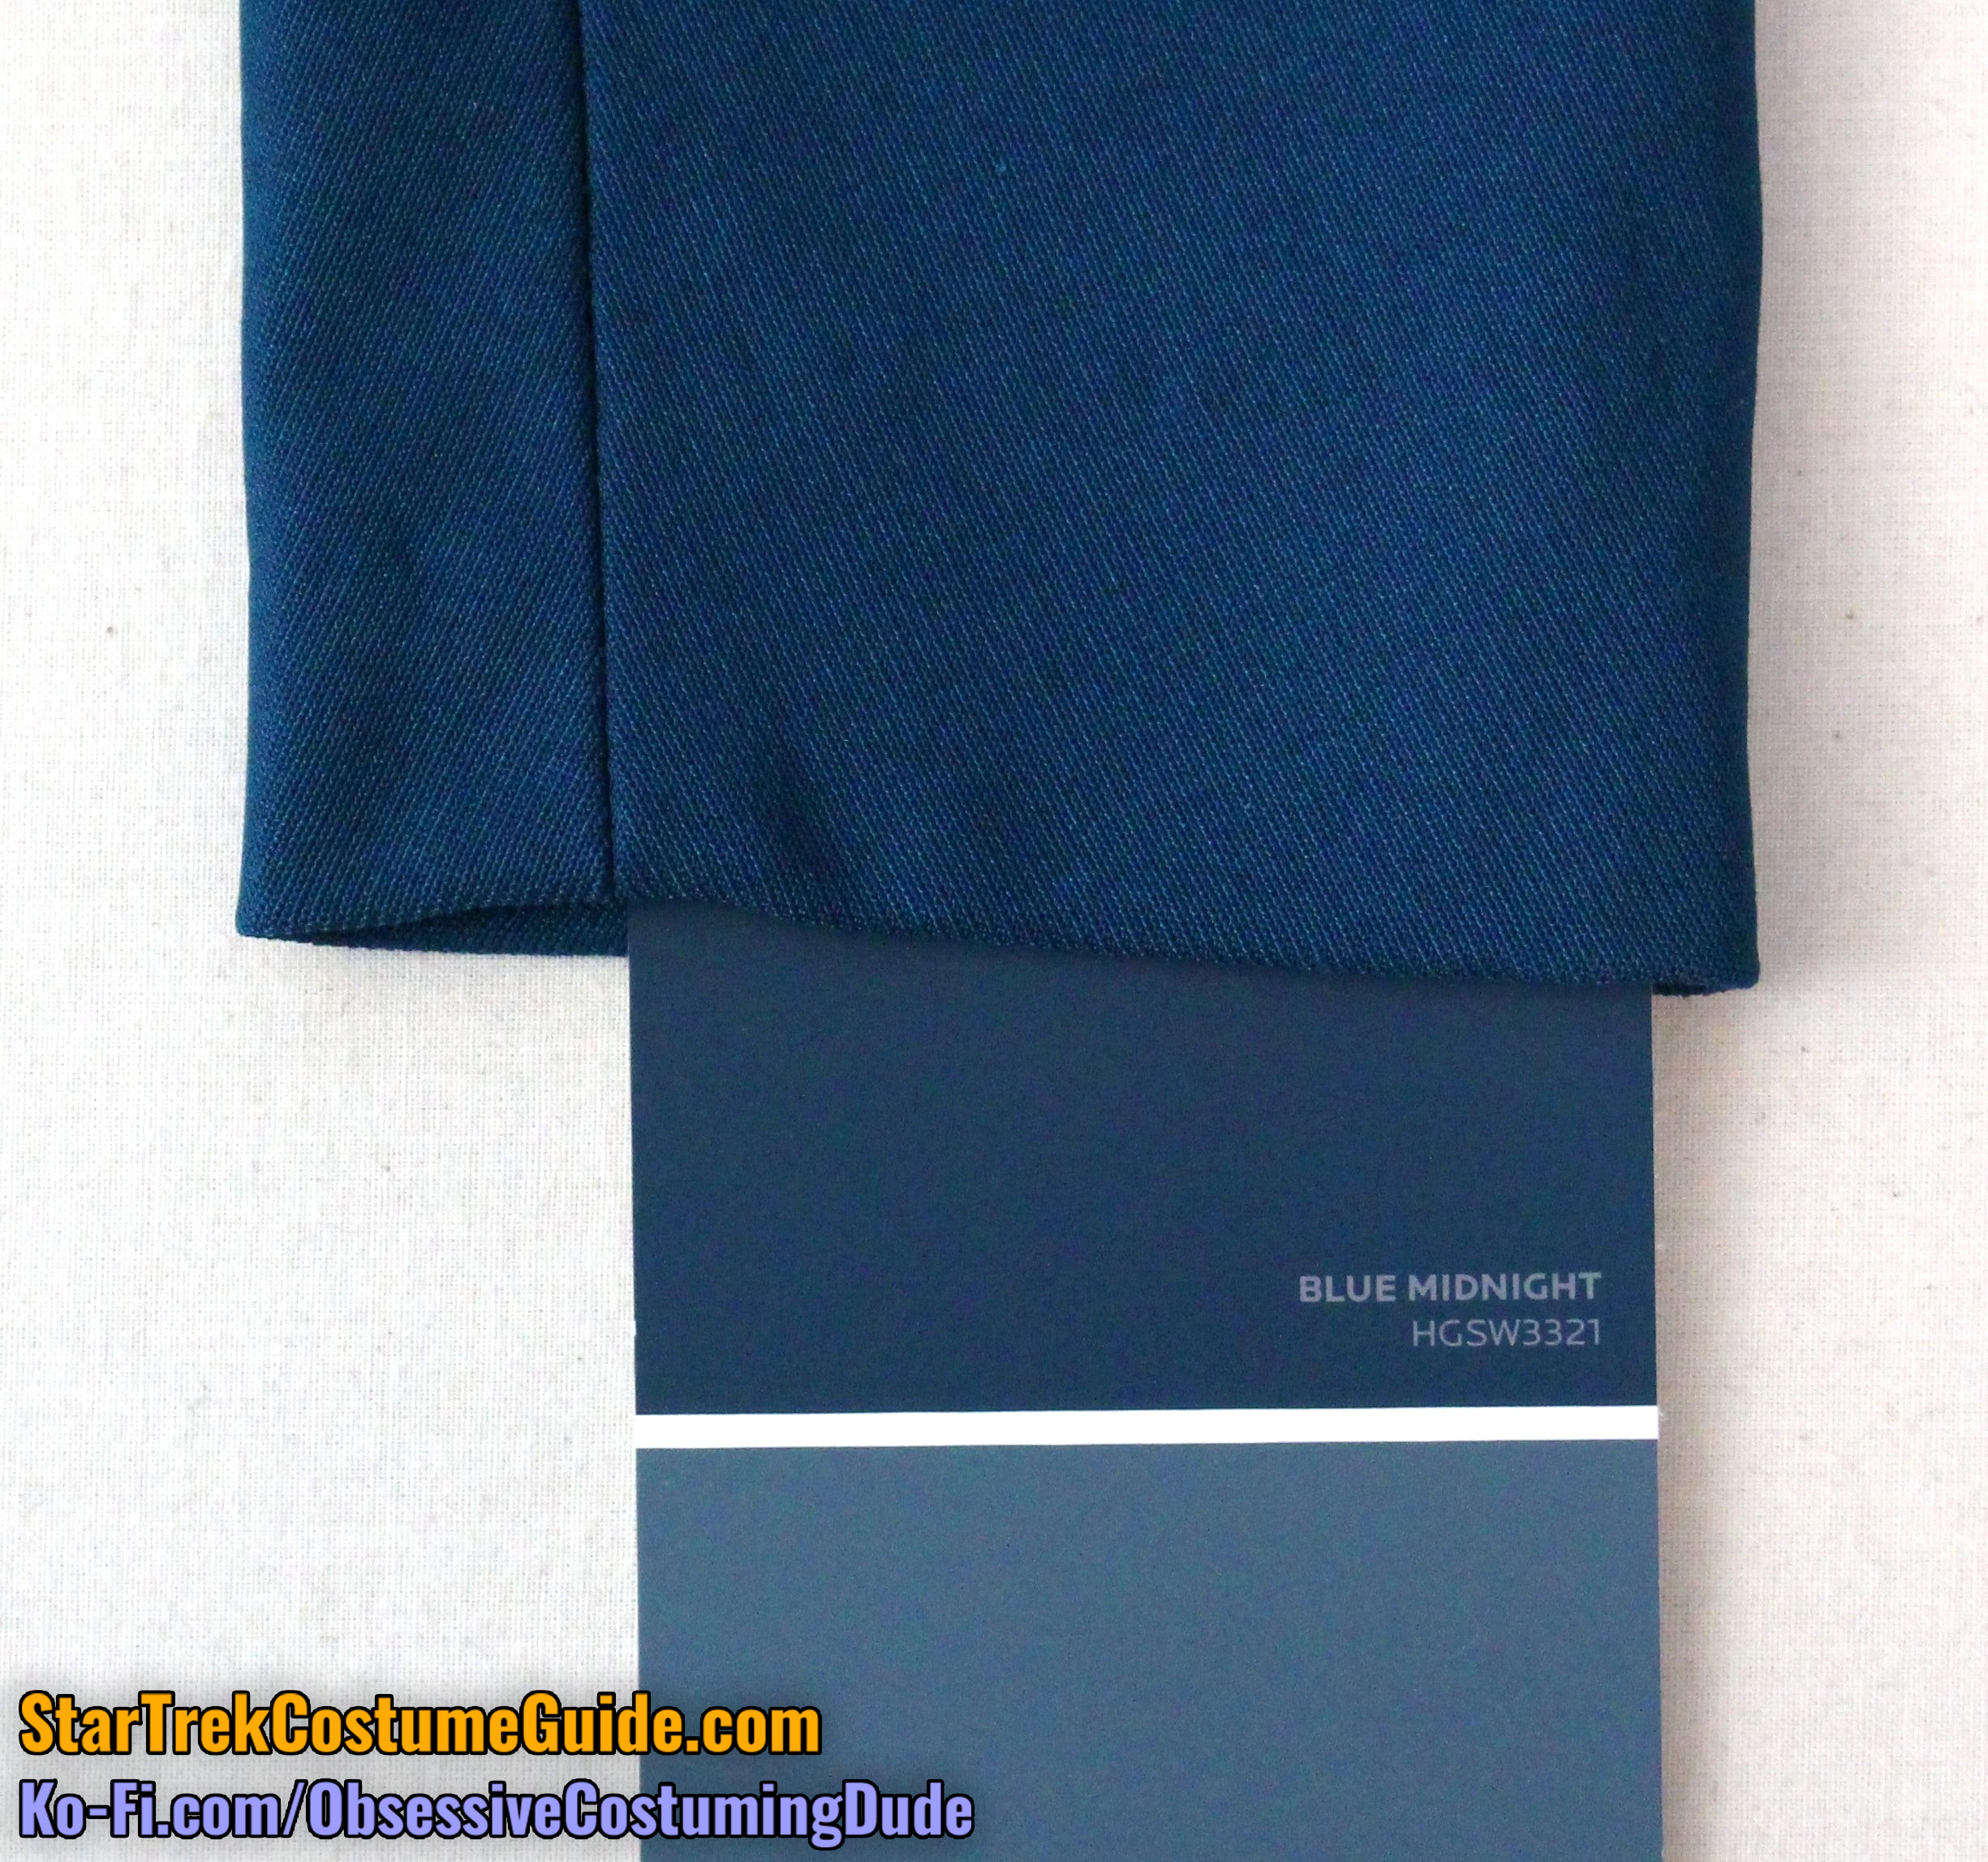
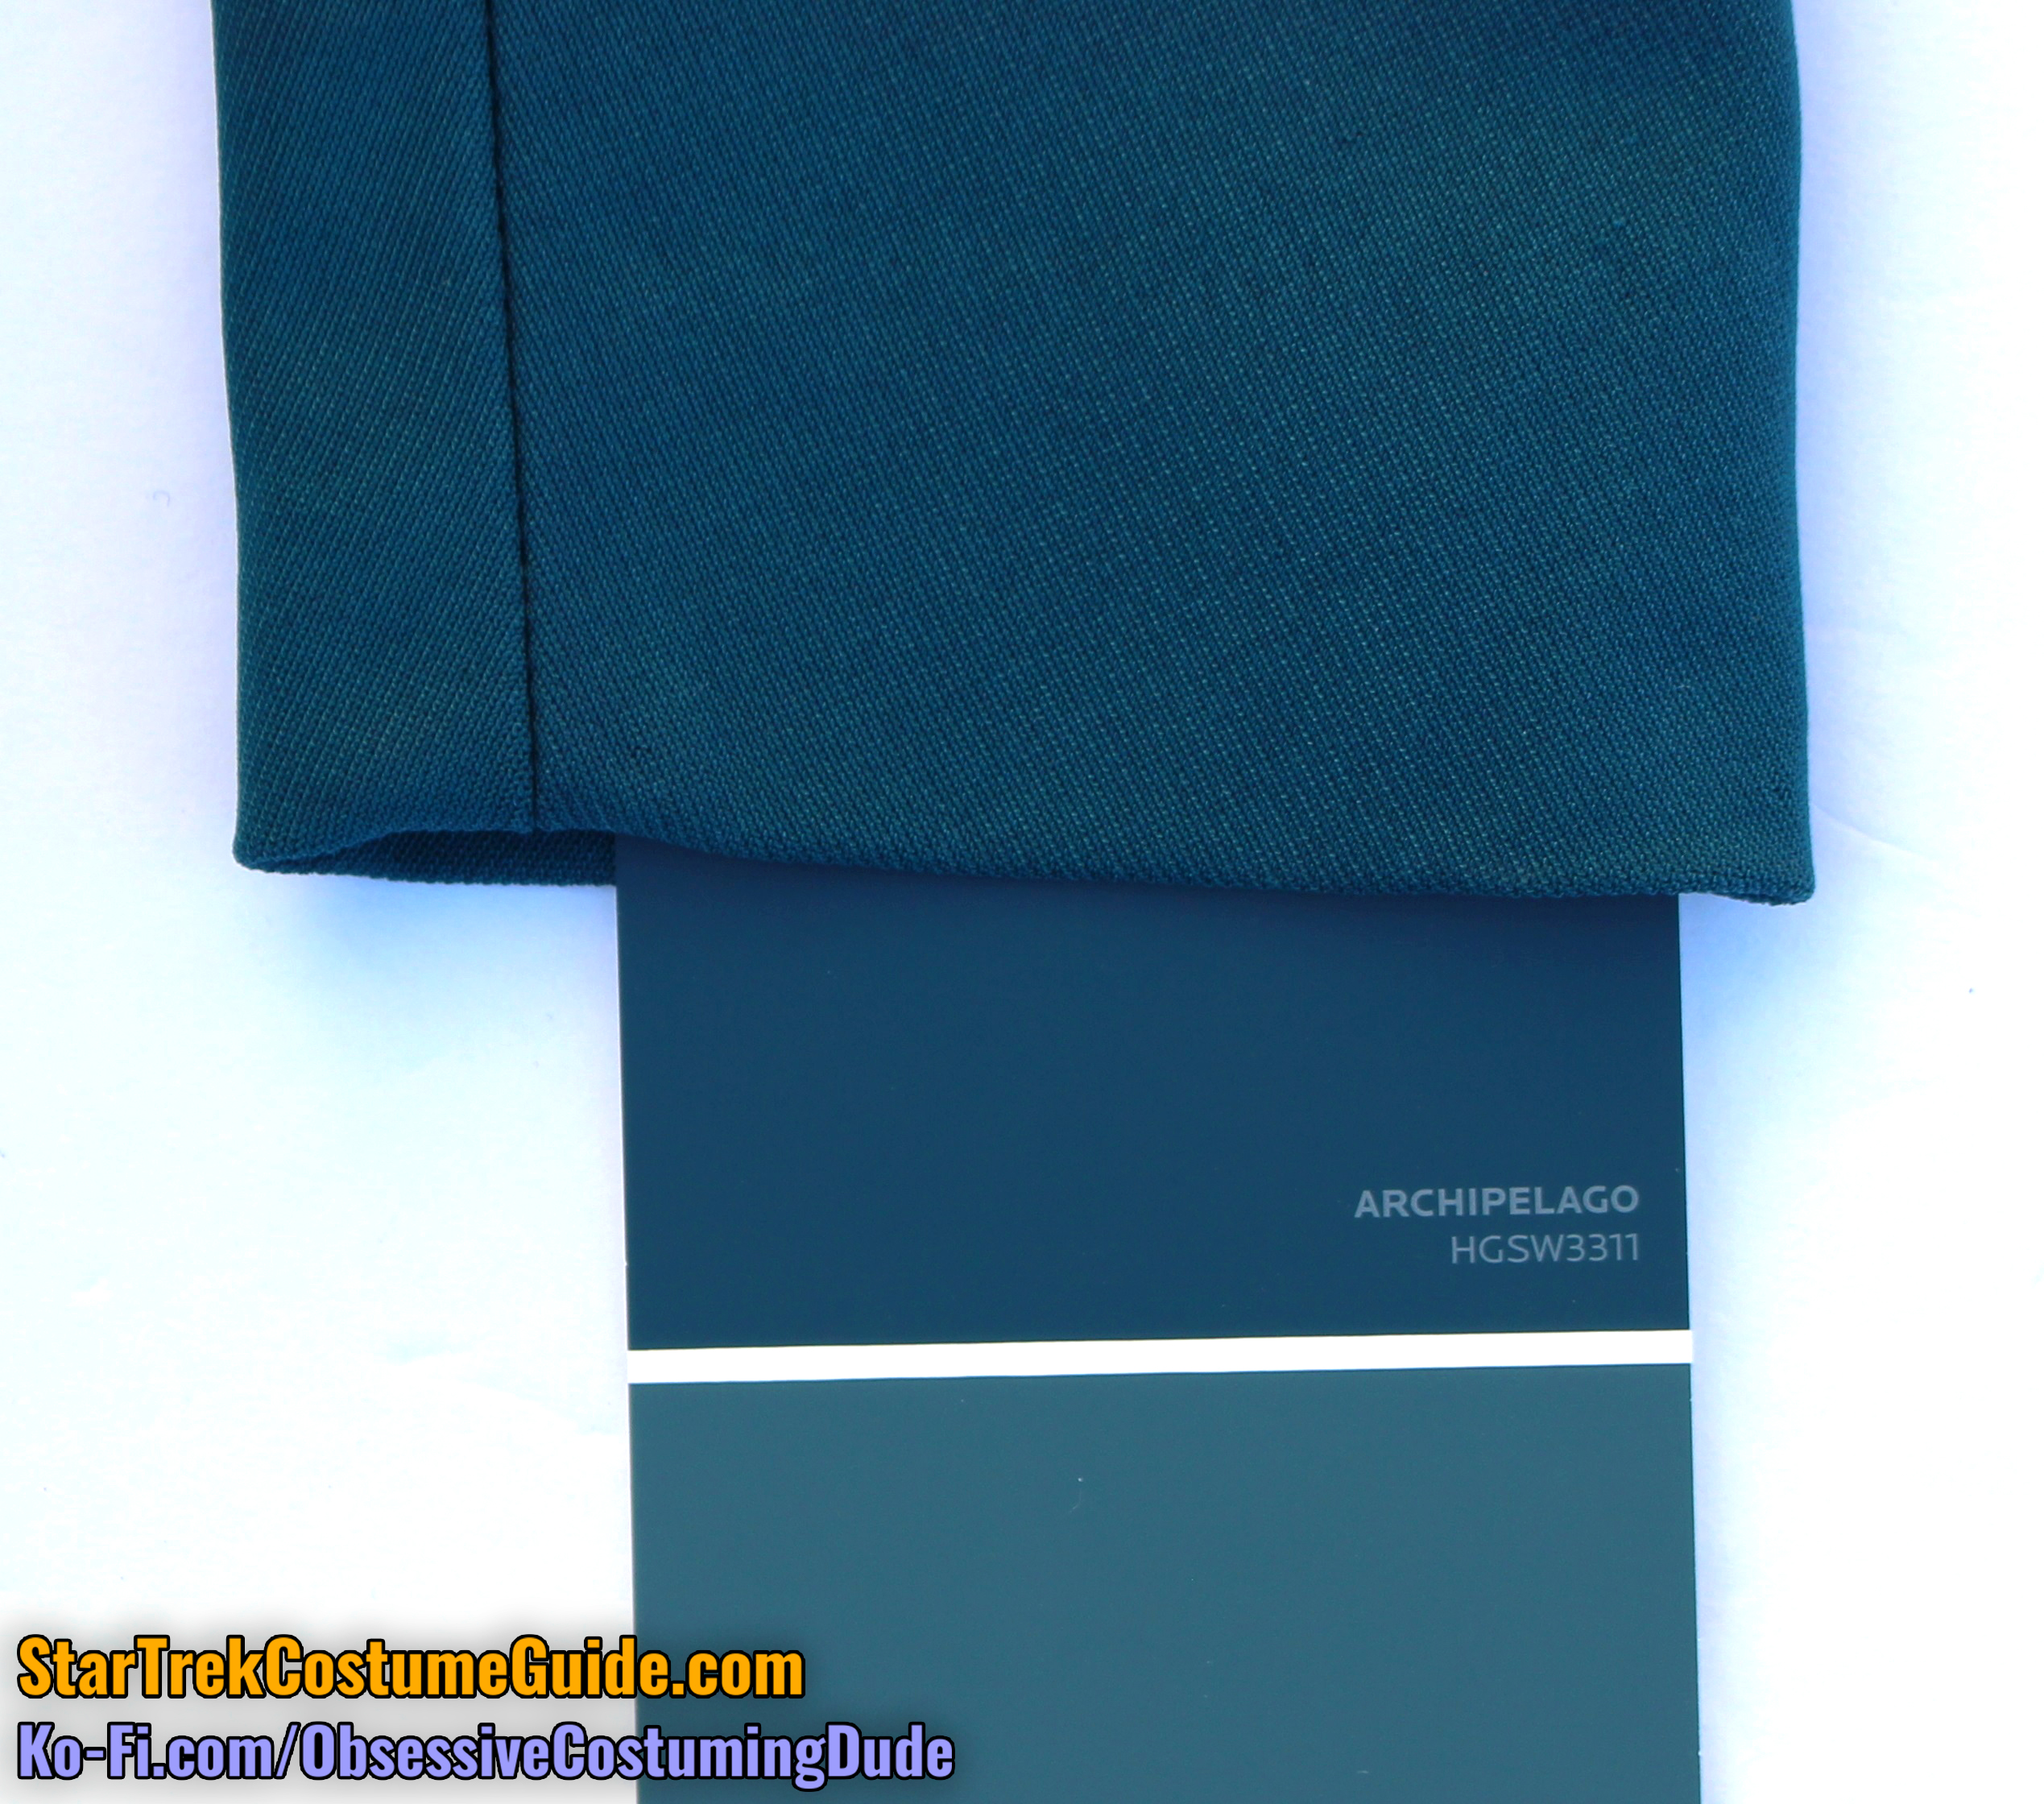
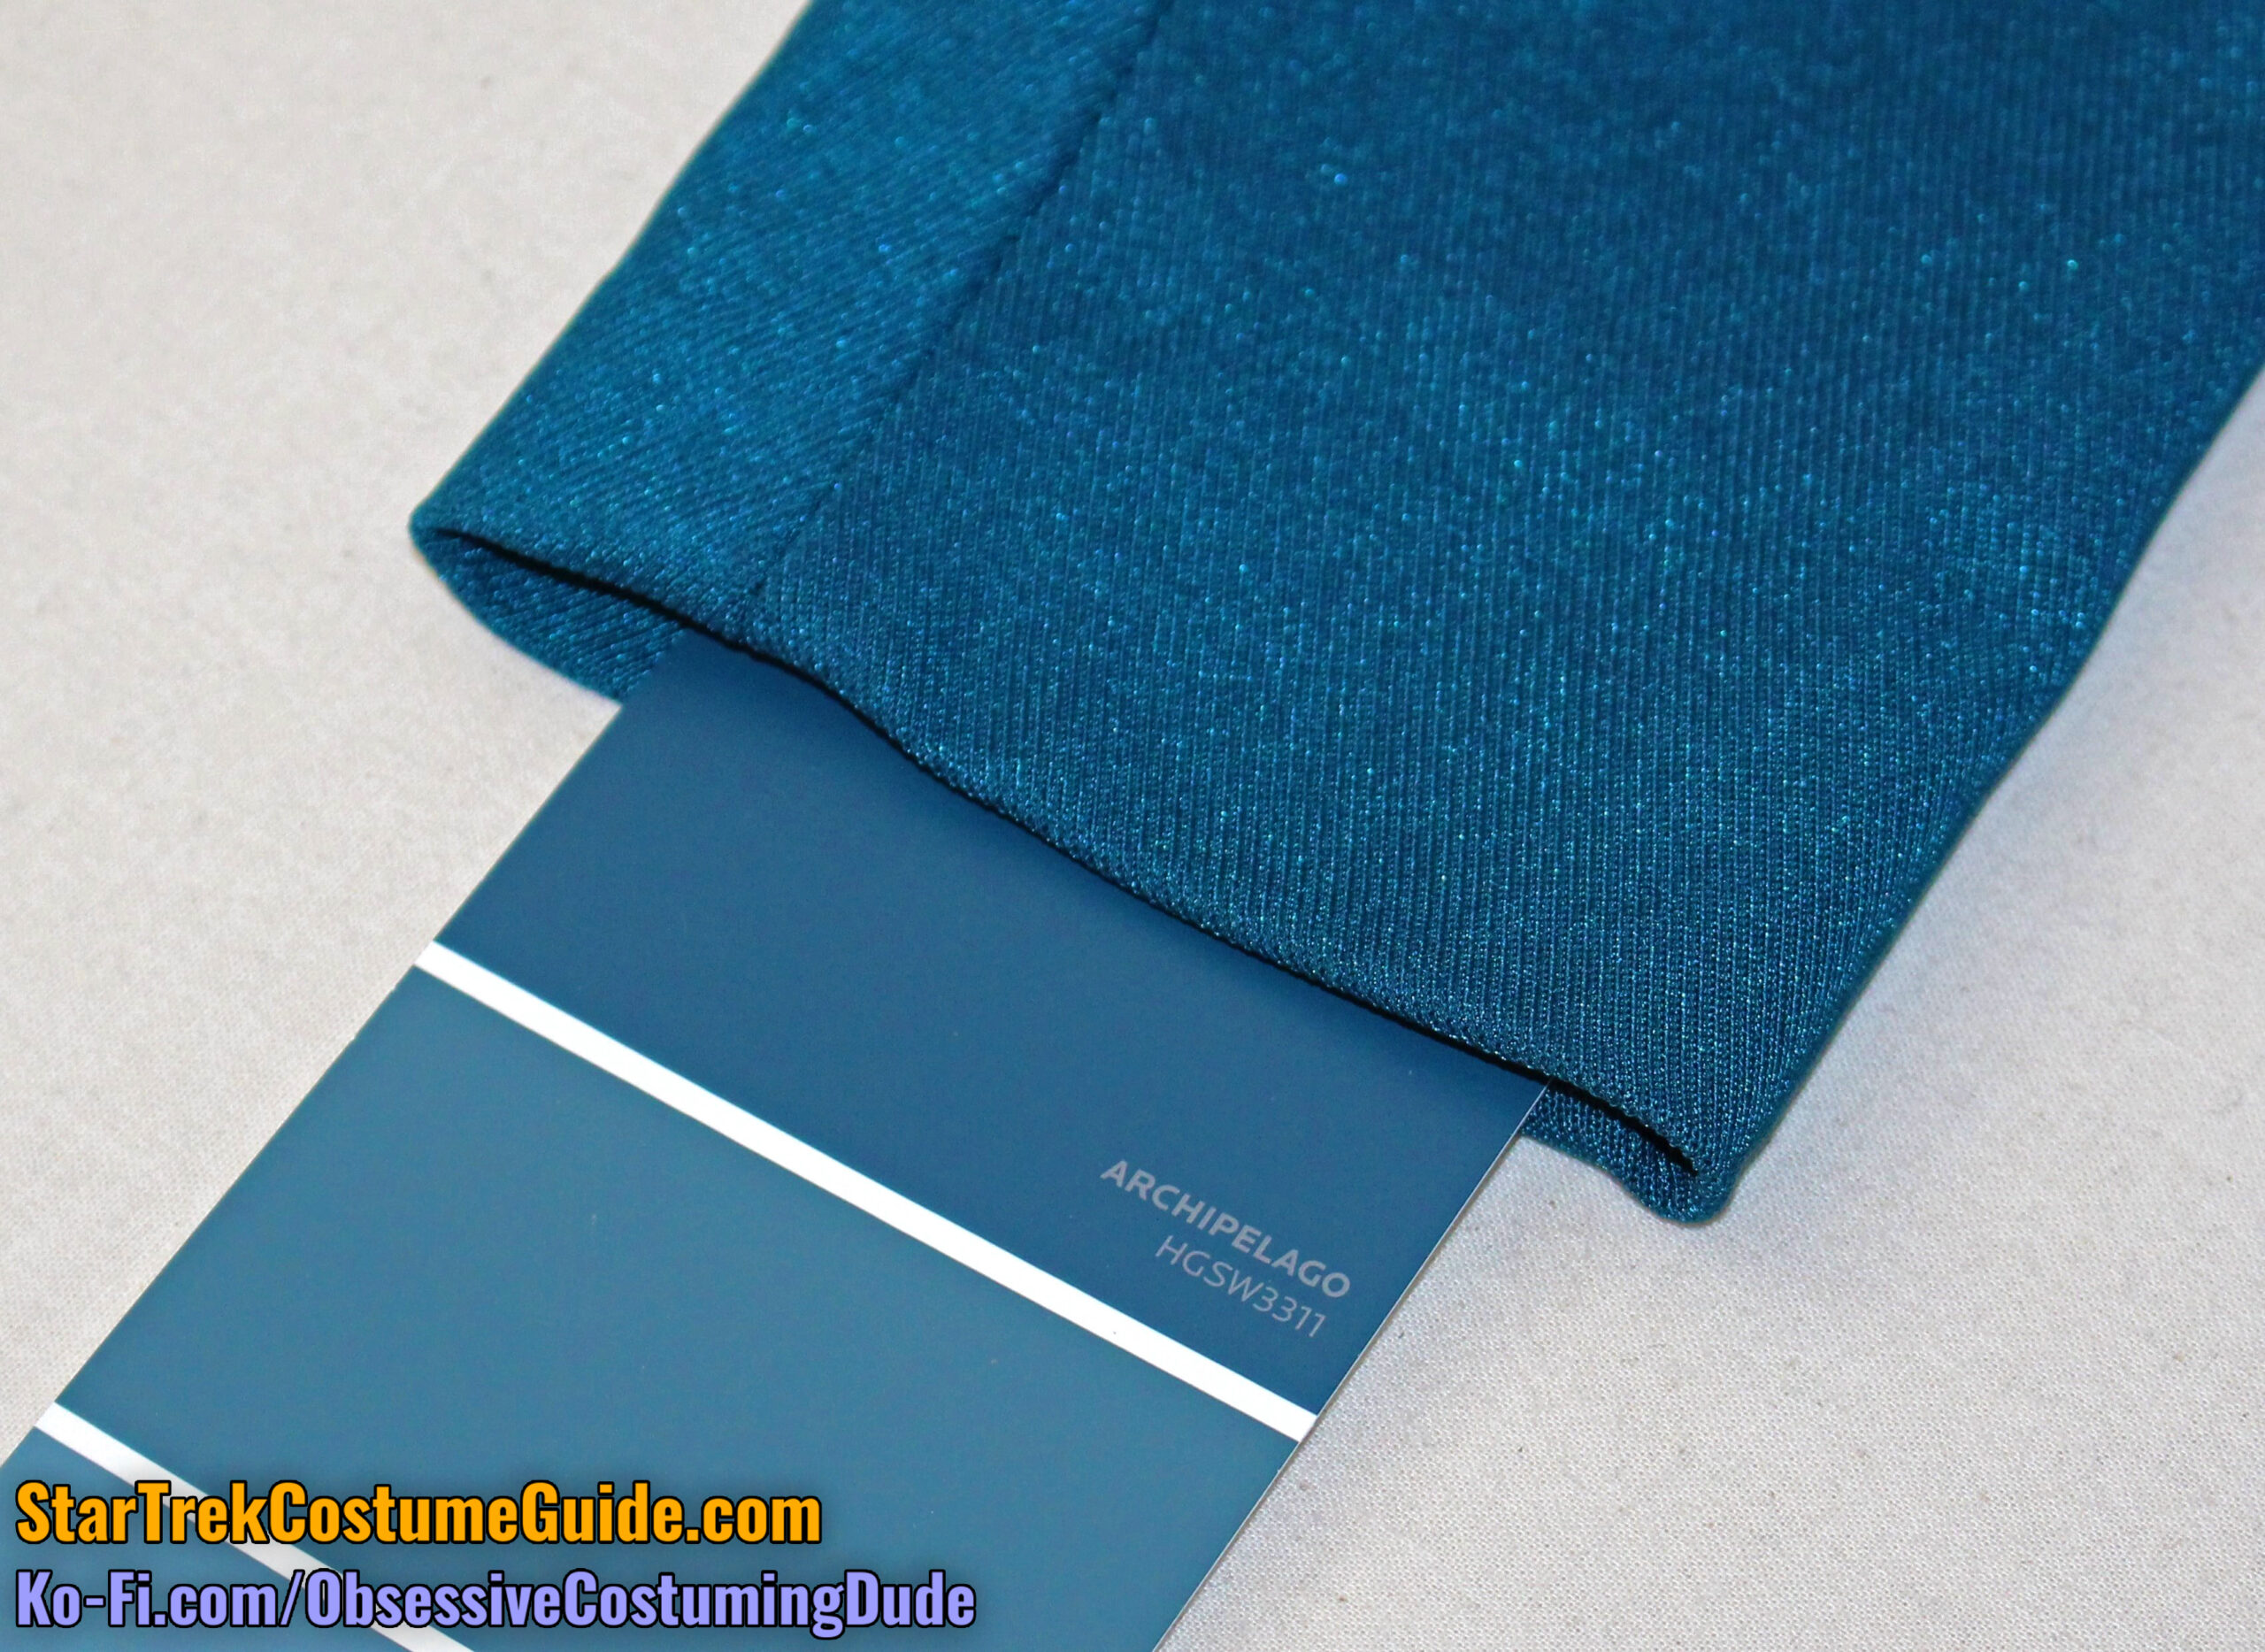
Sherwin-Williams #HGSW3311 “Archipelago” (card #331A) and #HGSW3321 “Blue Midnight” (card #332A) were fairly close matches.
I’d say the “Blue Midnight” was slightly closer, but both are quite close.
Outside, sunlight
Outside, shade
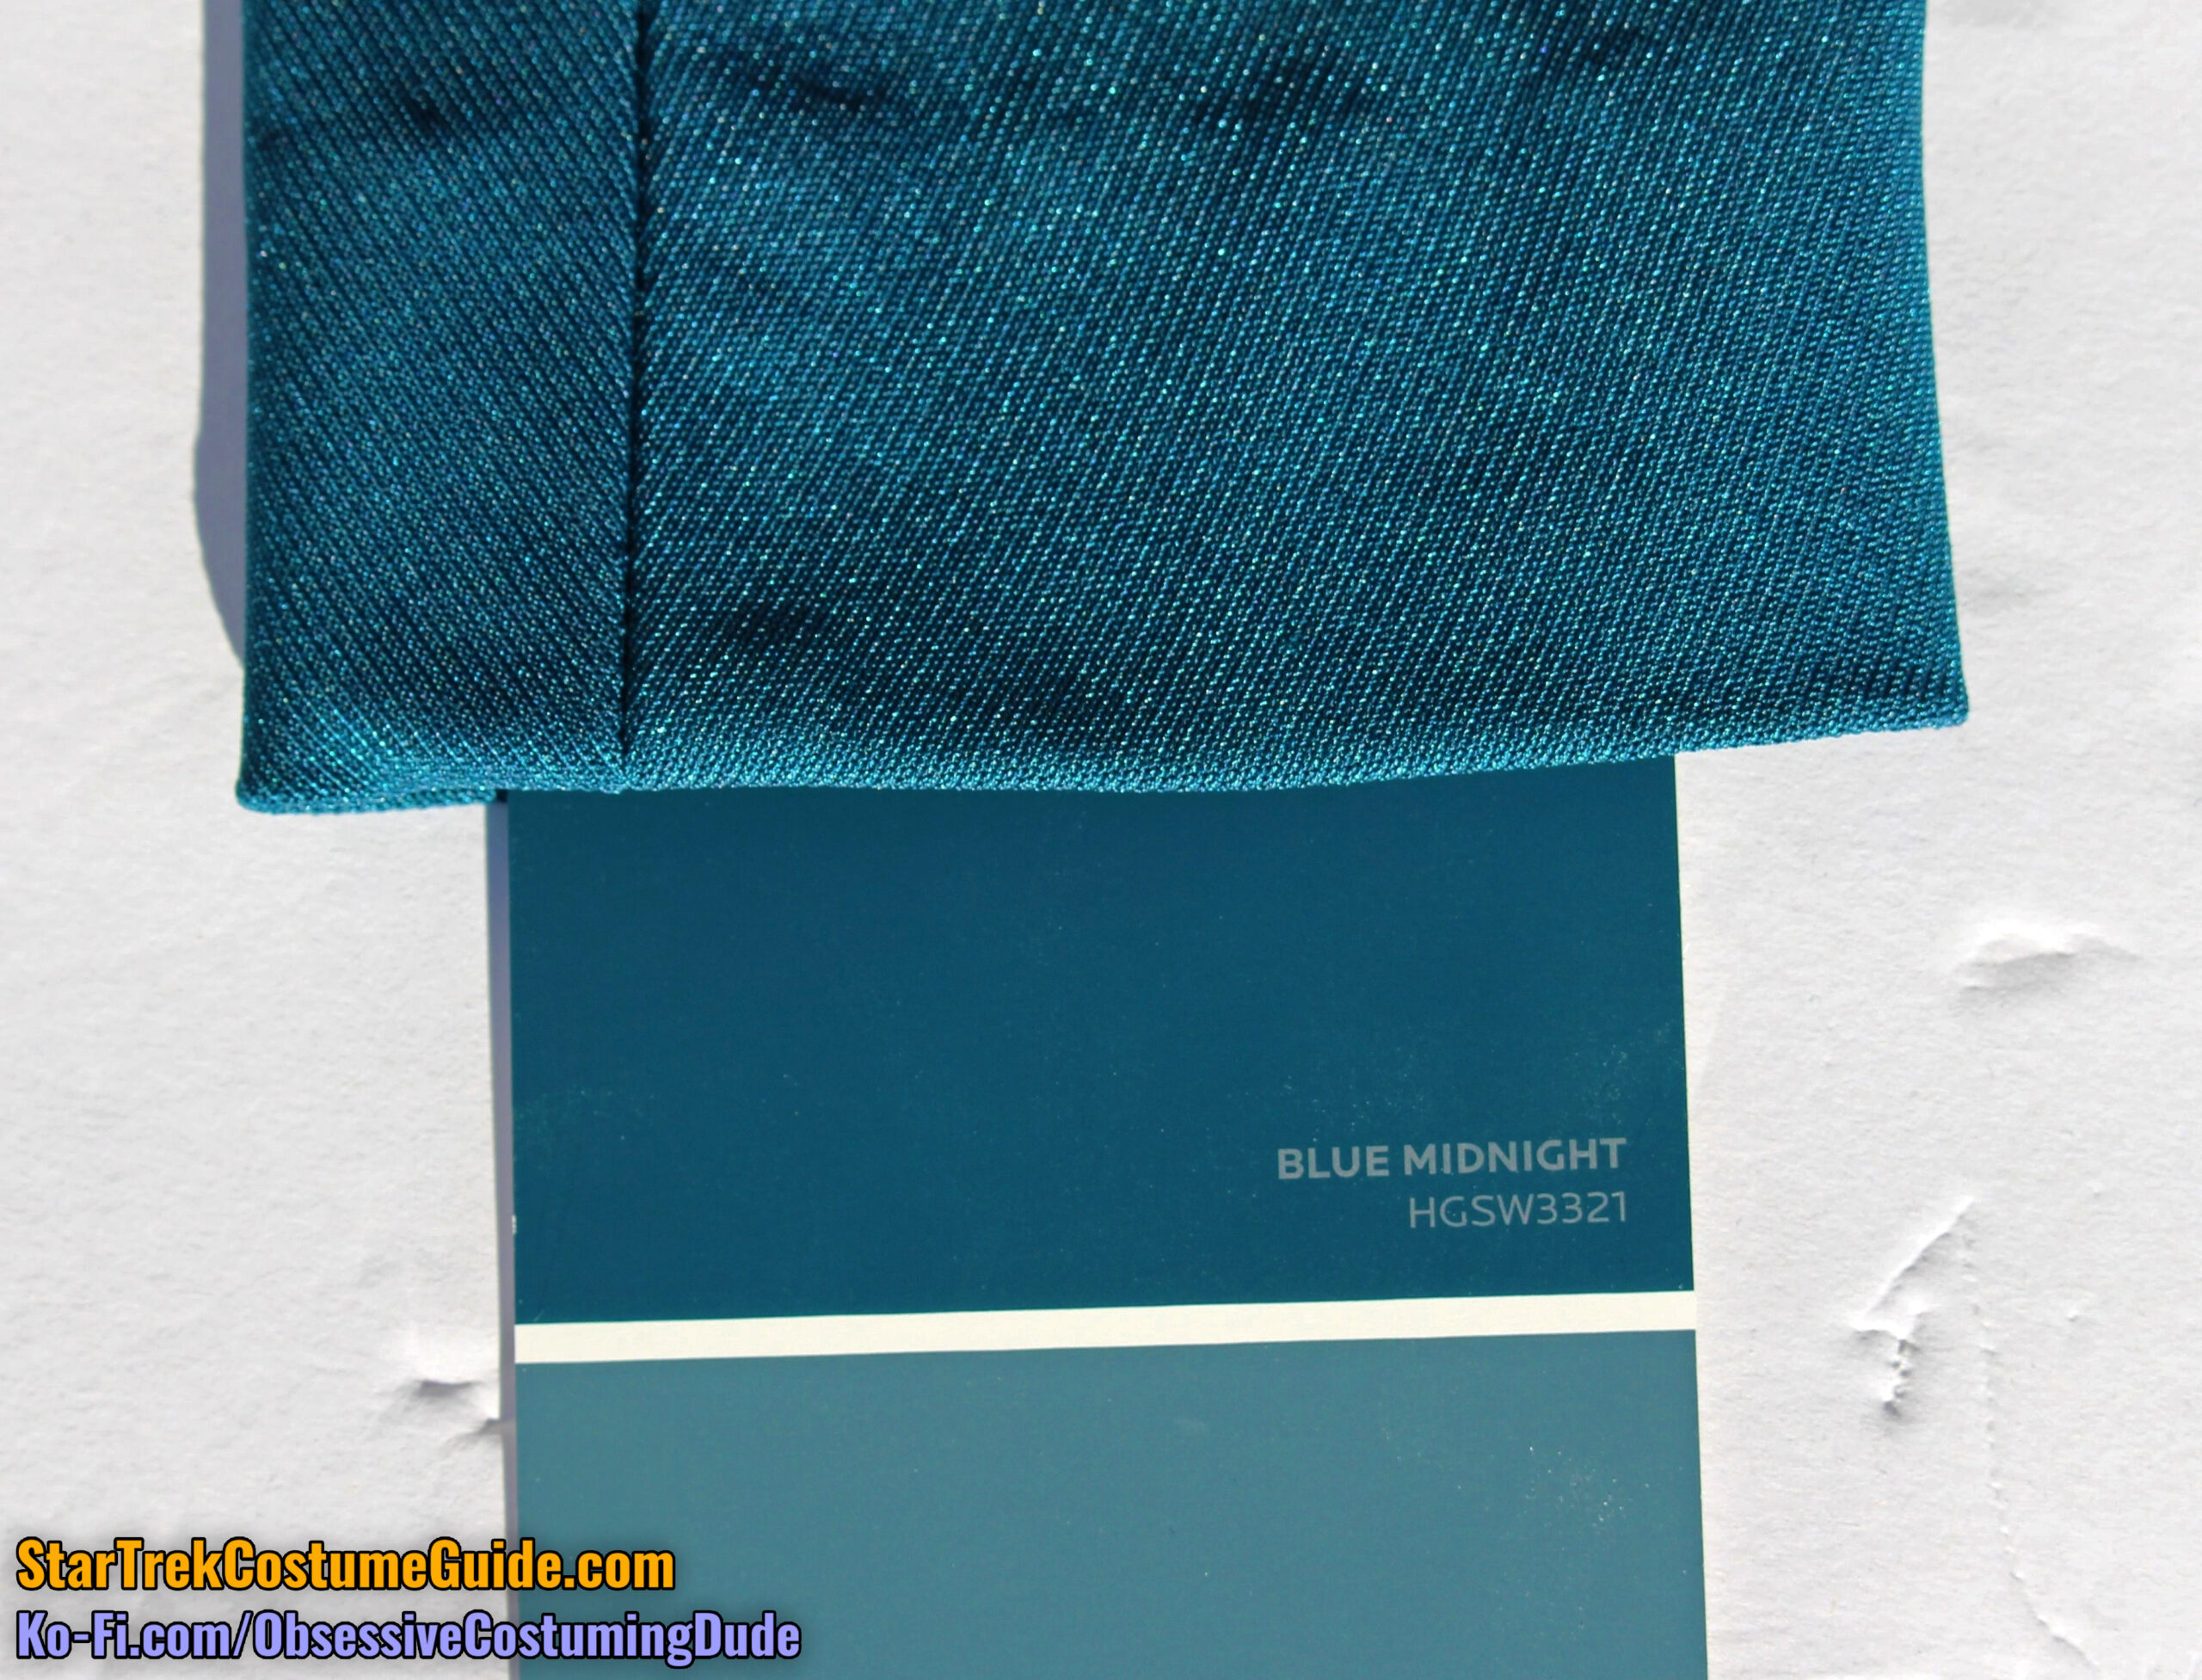
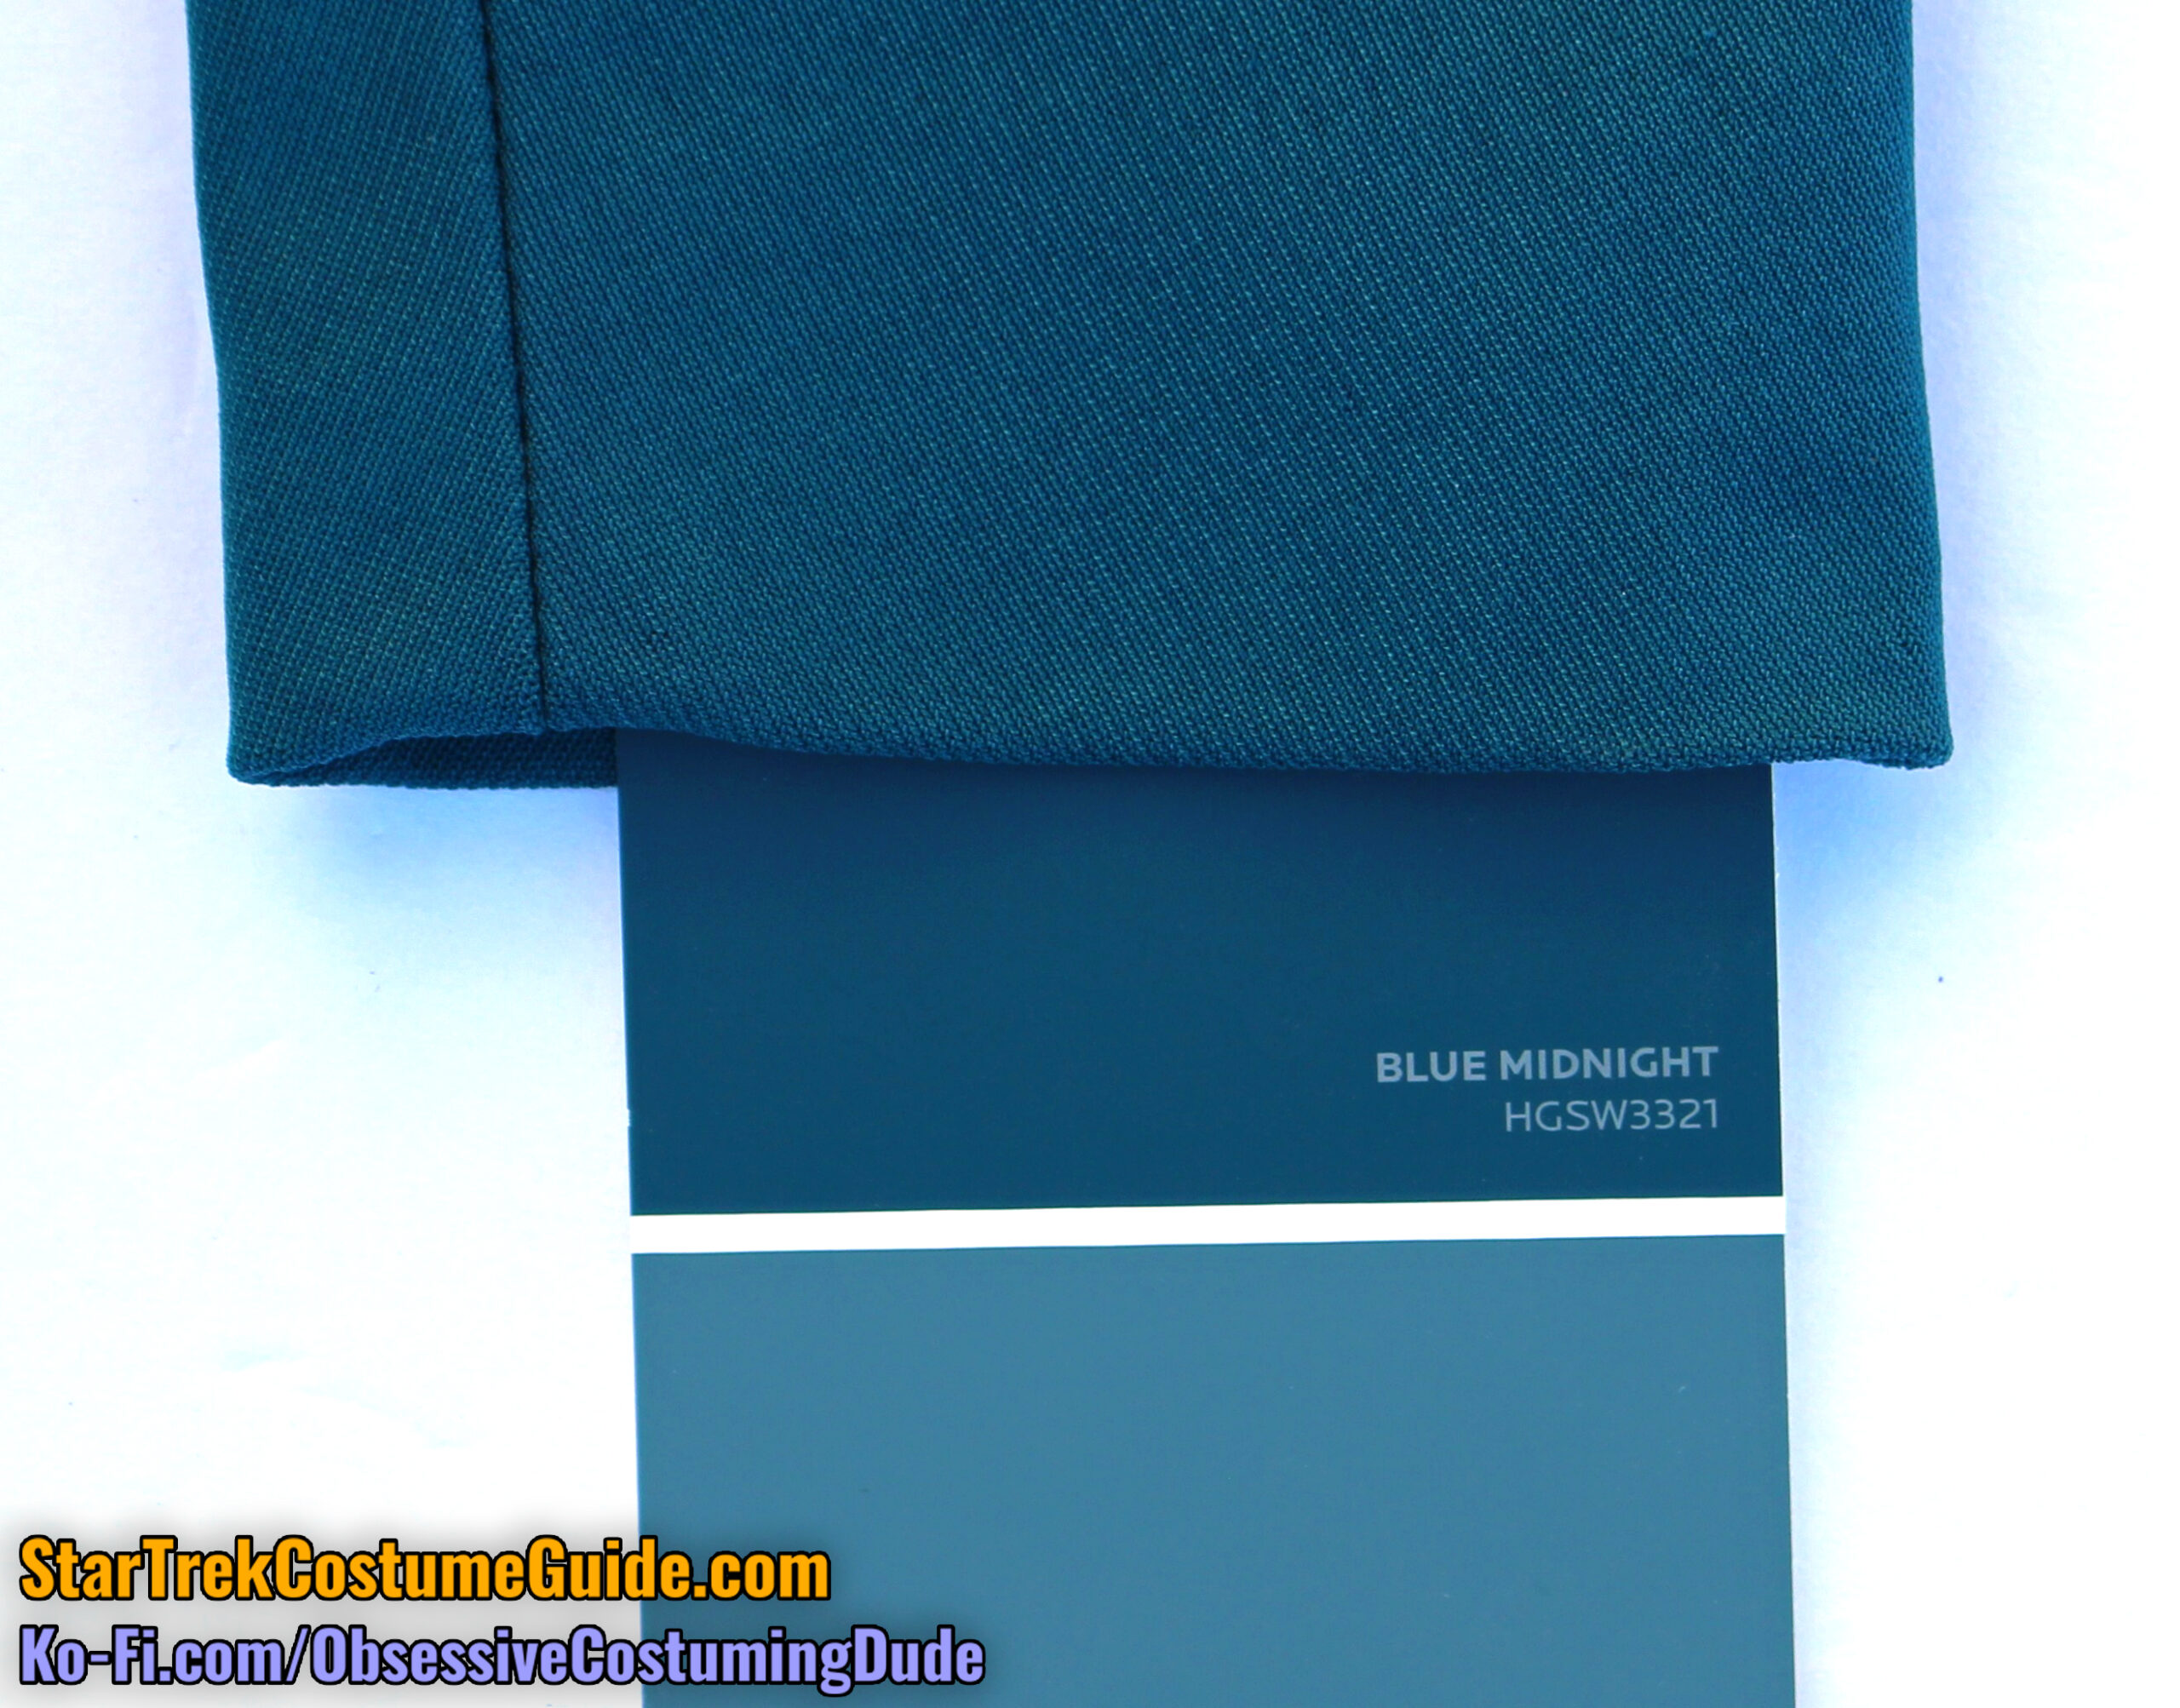
Here are some comparison photos with the “Blue Midnight” color.
Outside, sunlight
Outside, shade
Indoors, with flash
Indoors, no flash
And here are some comparison photos with the “Archipelago” color.
Outside, sunlight
Outside, shade
Indoors, with flash
Indoors, no flash
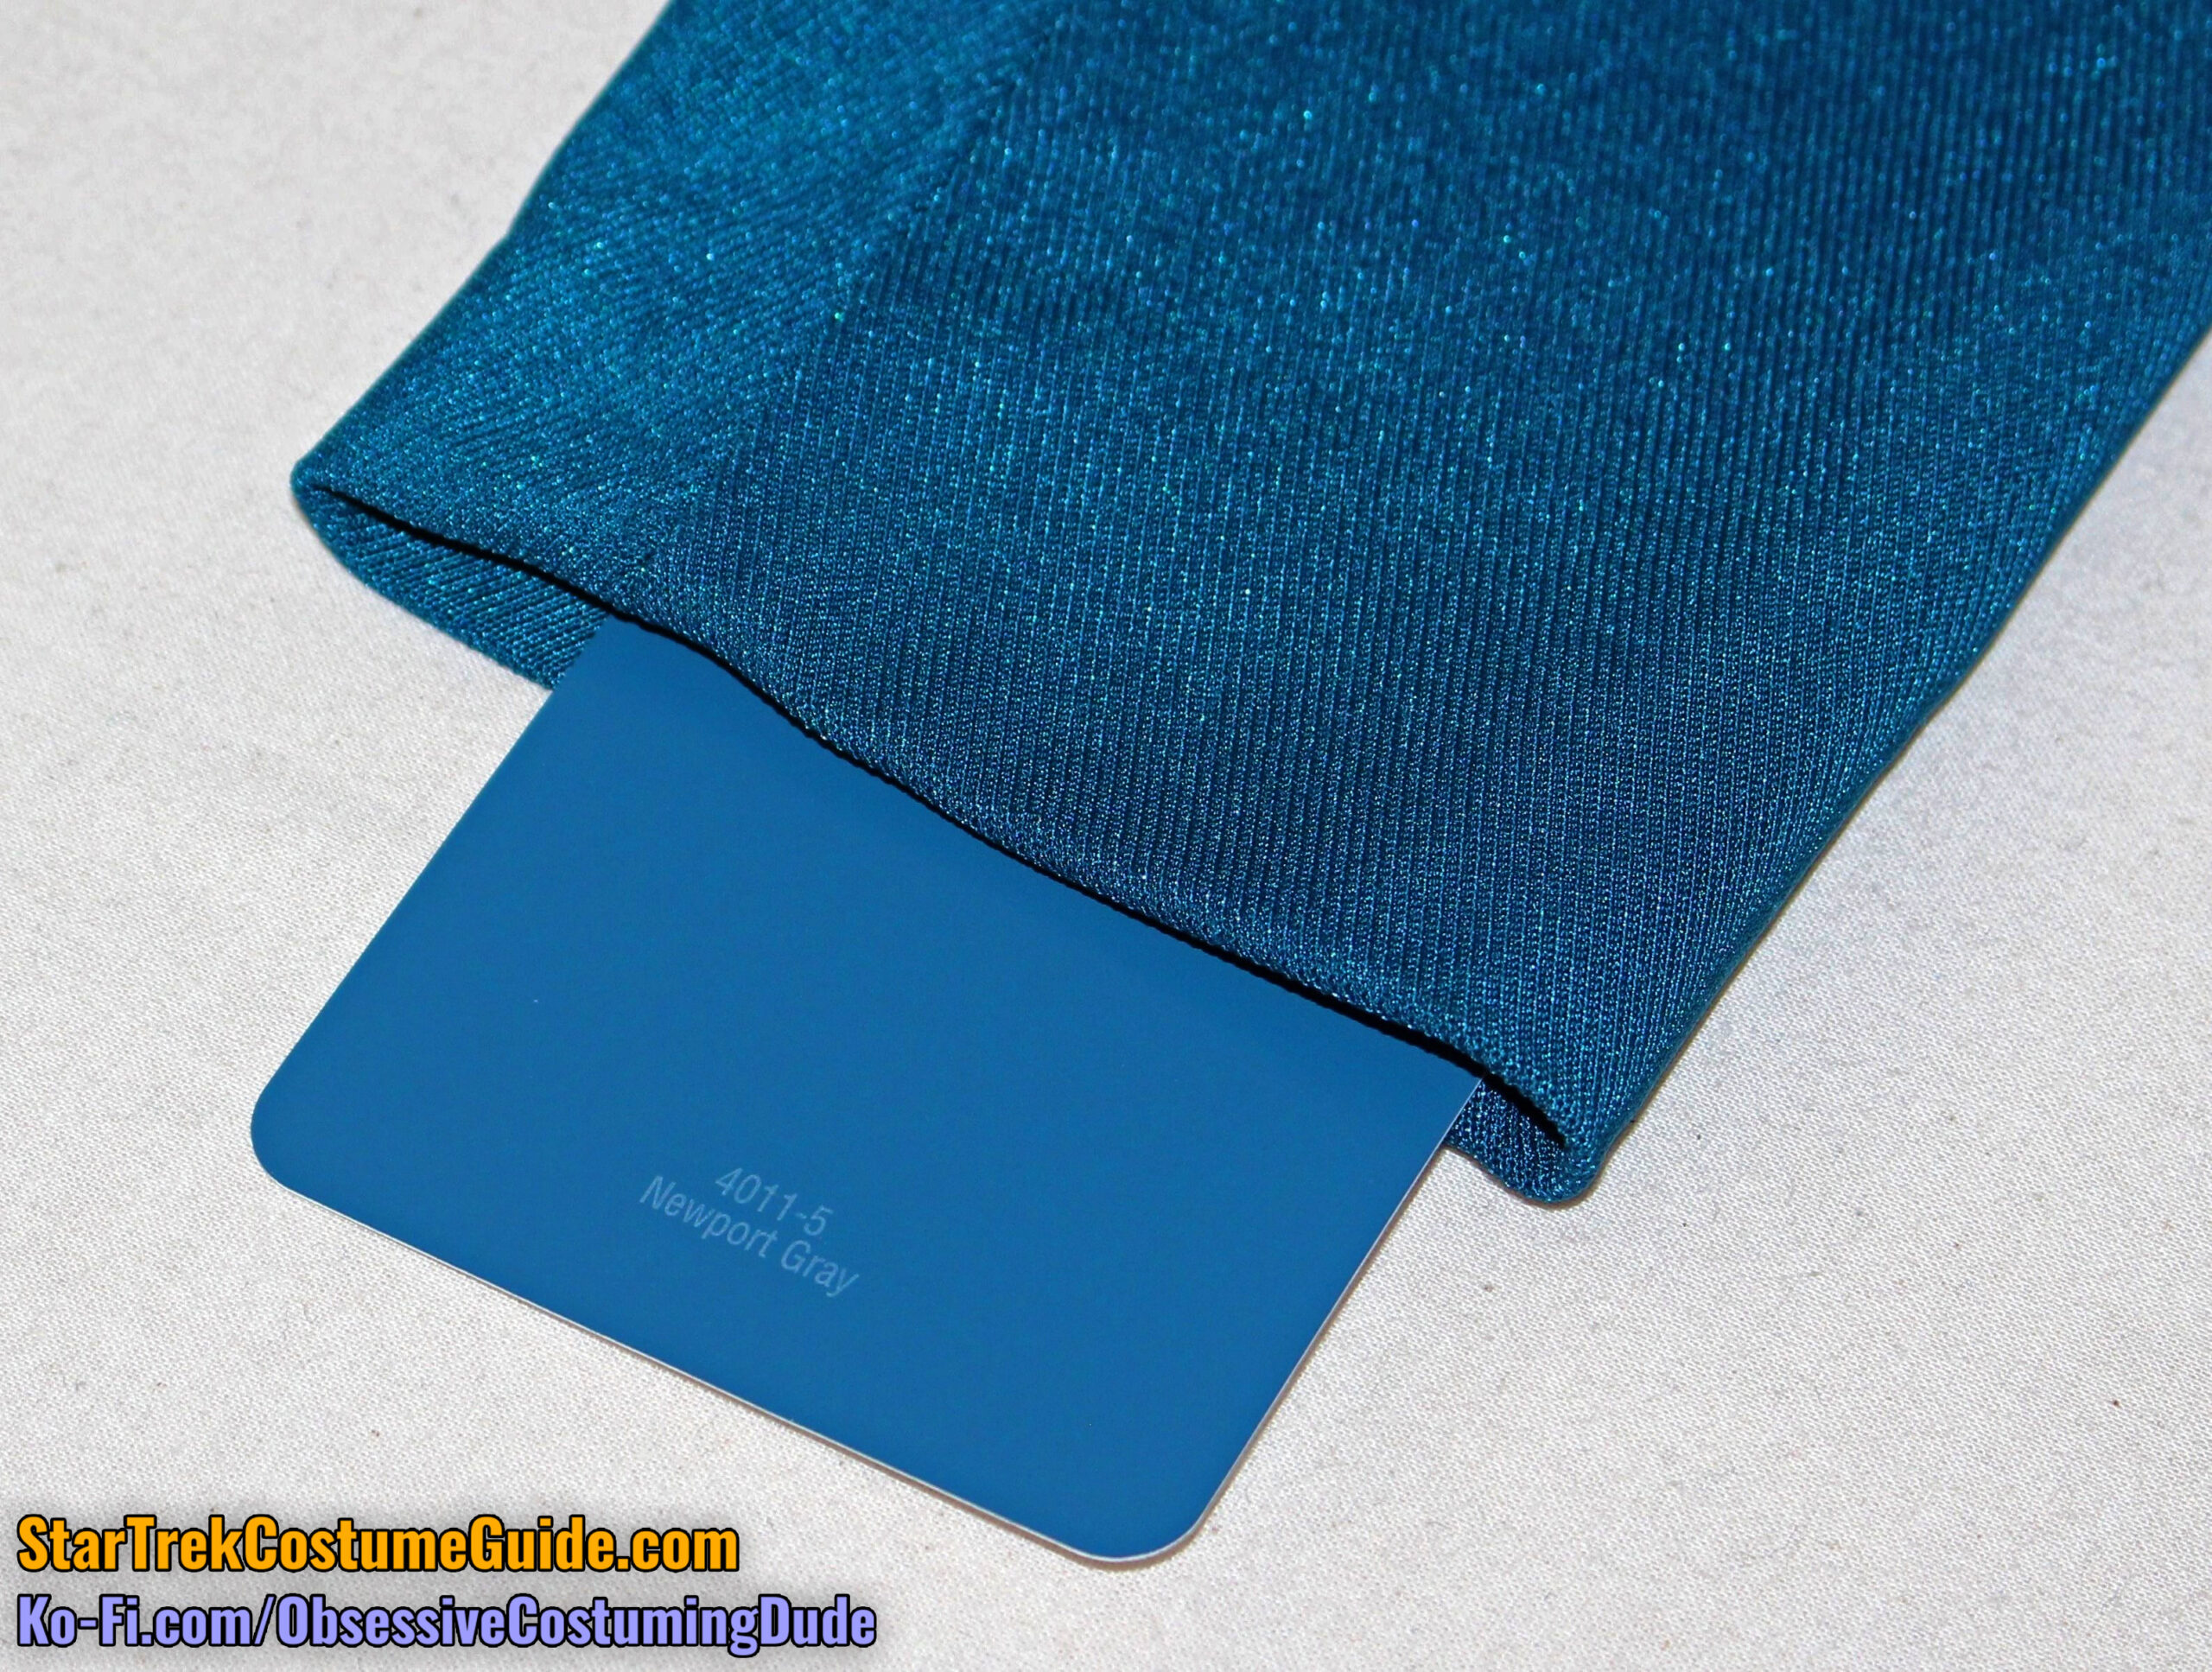
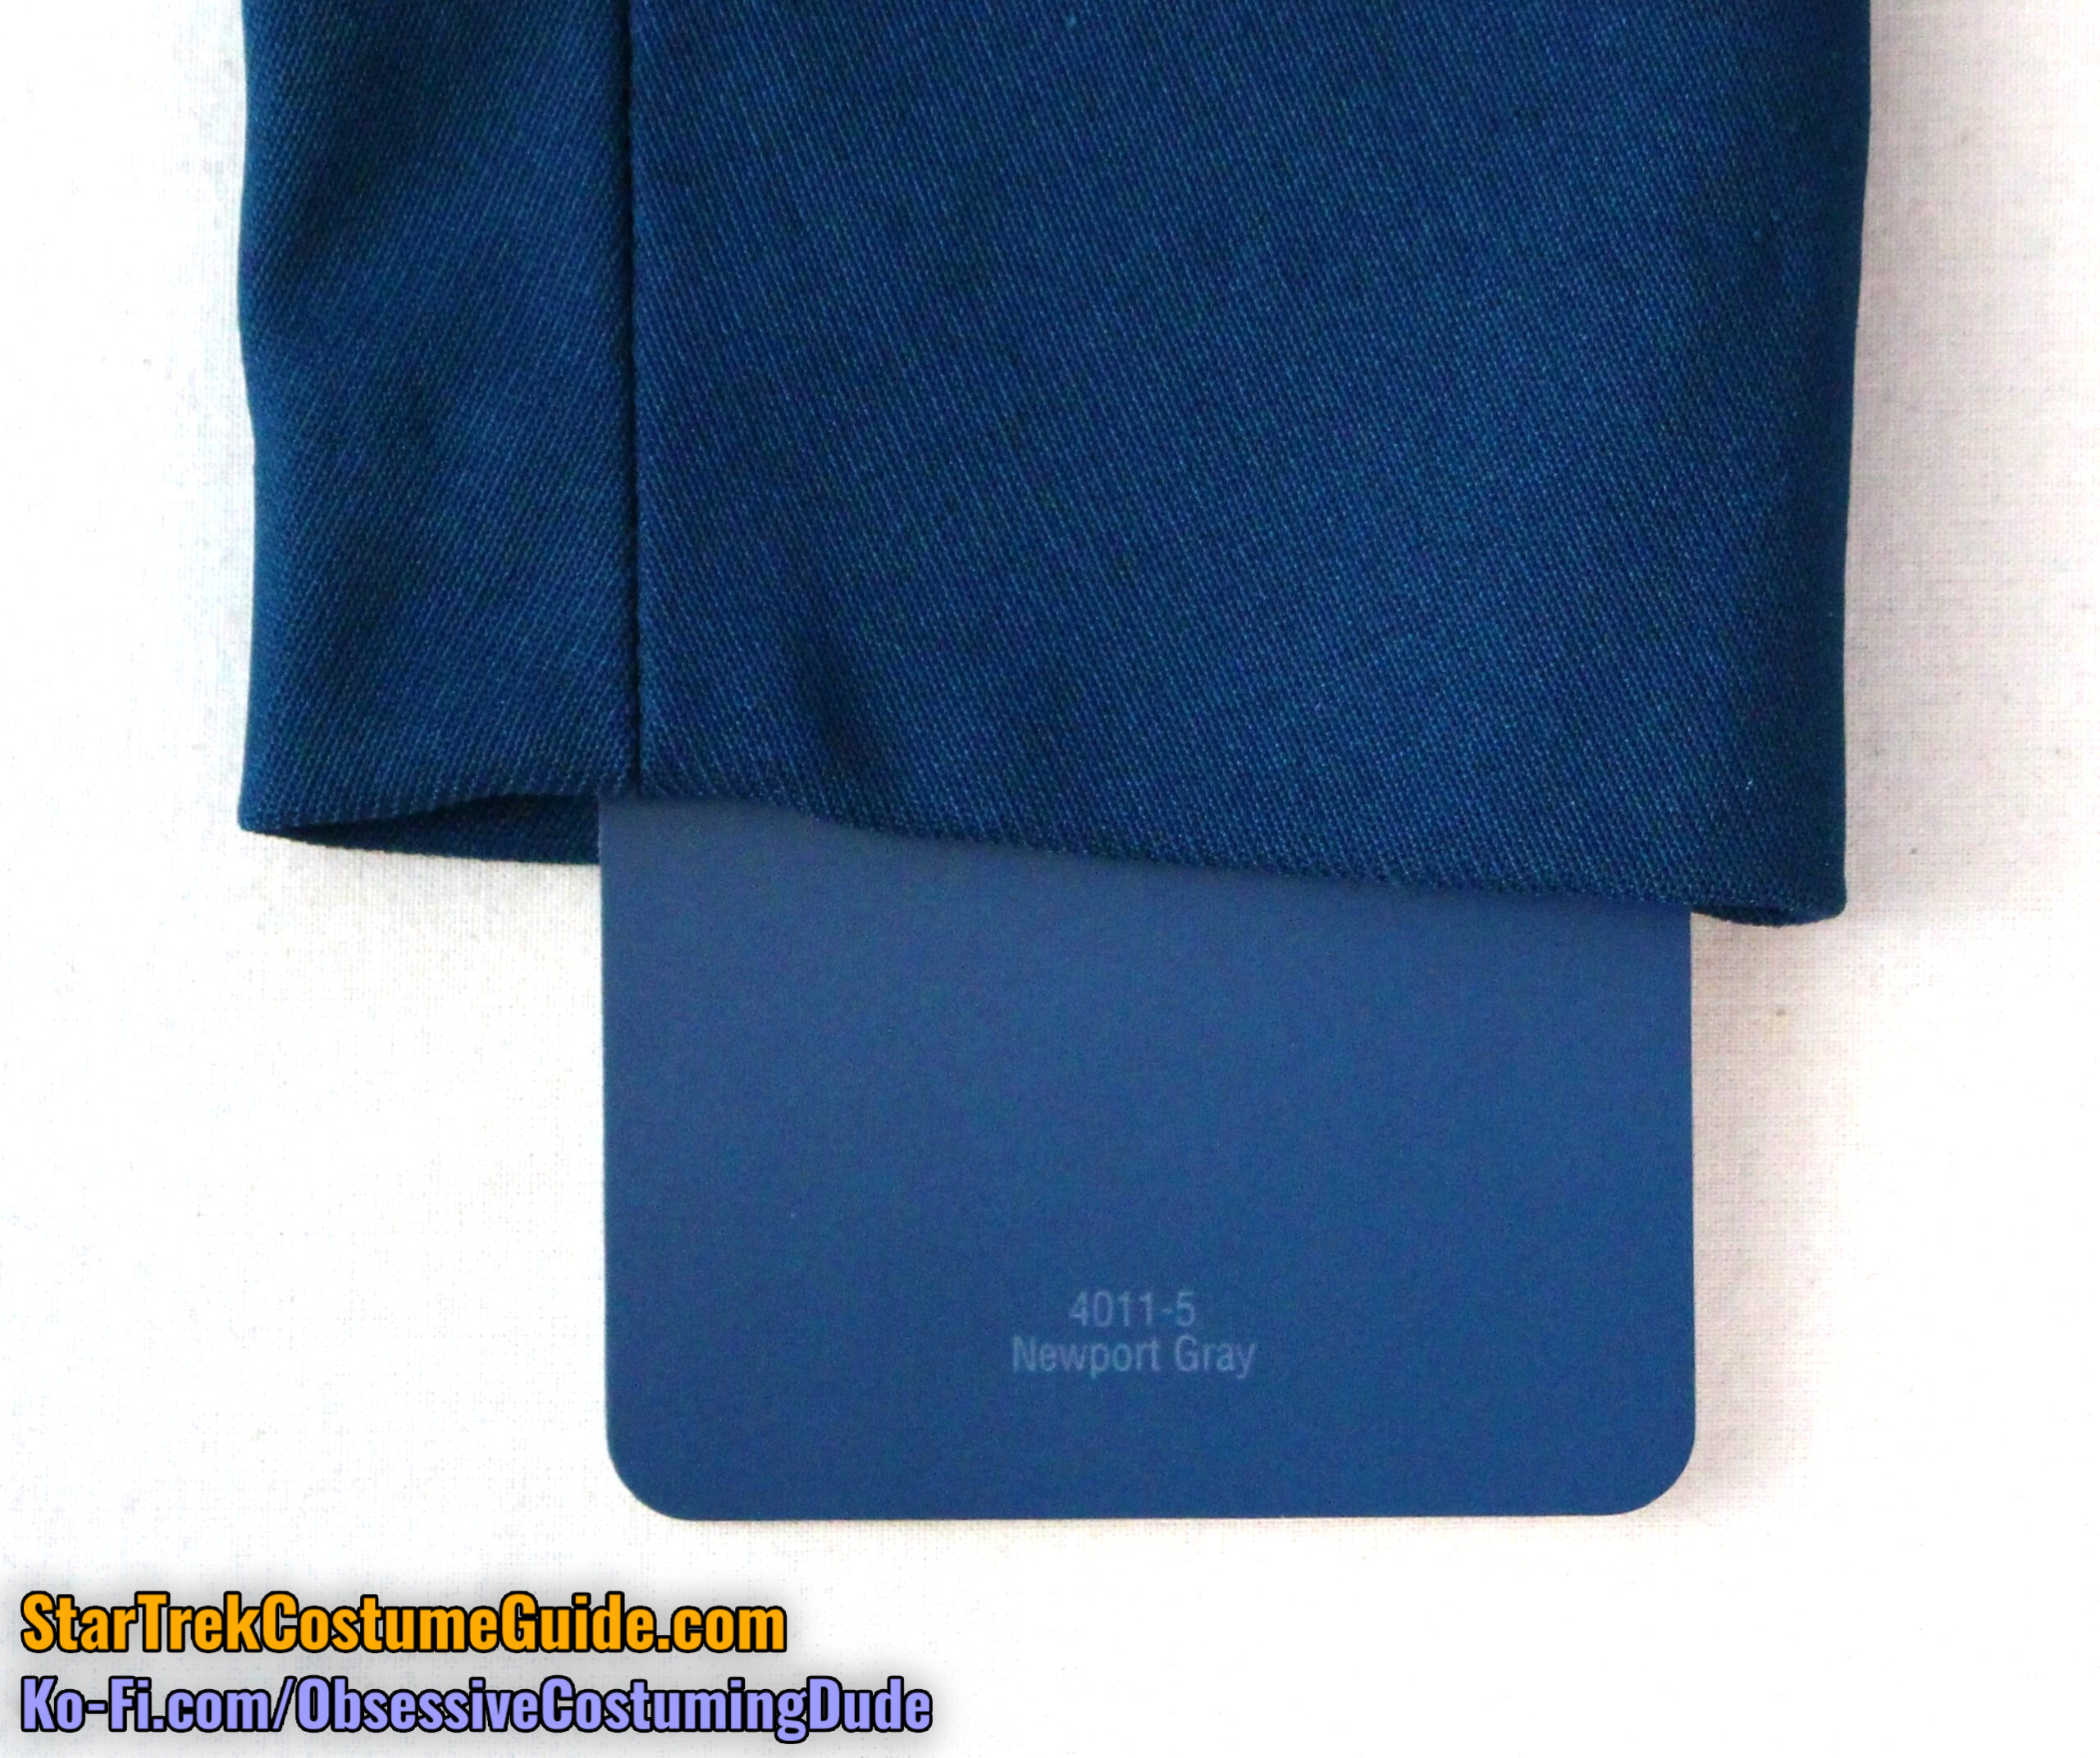
Although it doesn’t always photograph favorably, perhaps the closest paint chip I found to the screen-used fabric color was Valspar #4011-5, “Newport Gray.”
Indoors, with flash
Indoors, no flash
It’s a bit too neutral and not quite dark enough, but it is very close.
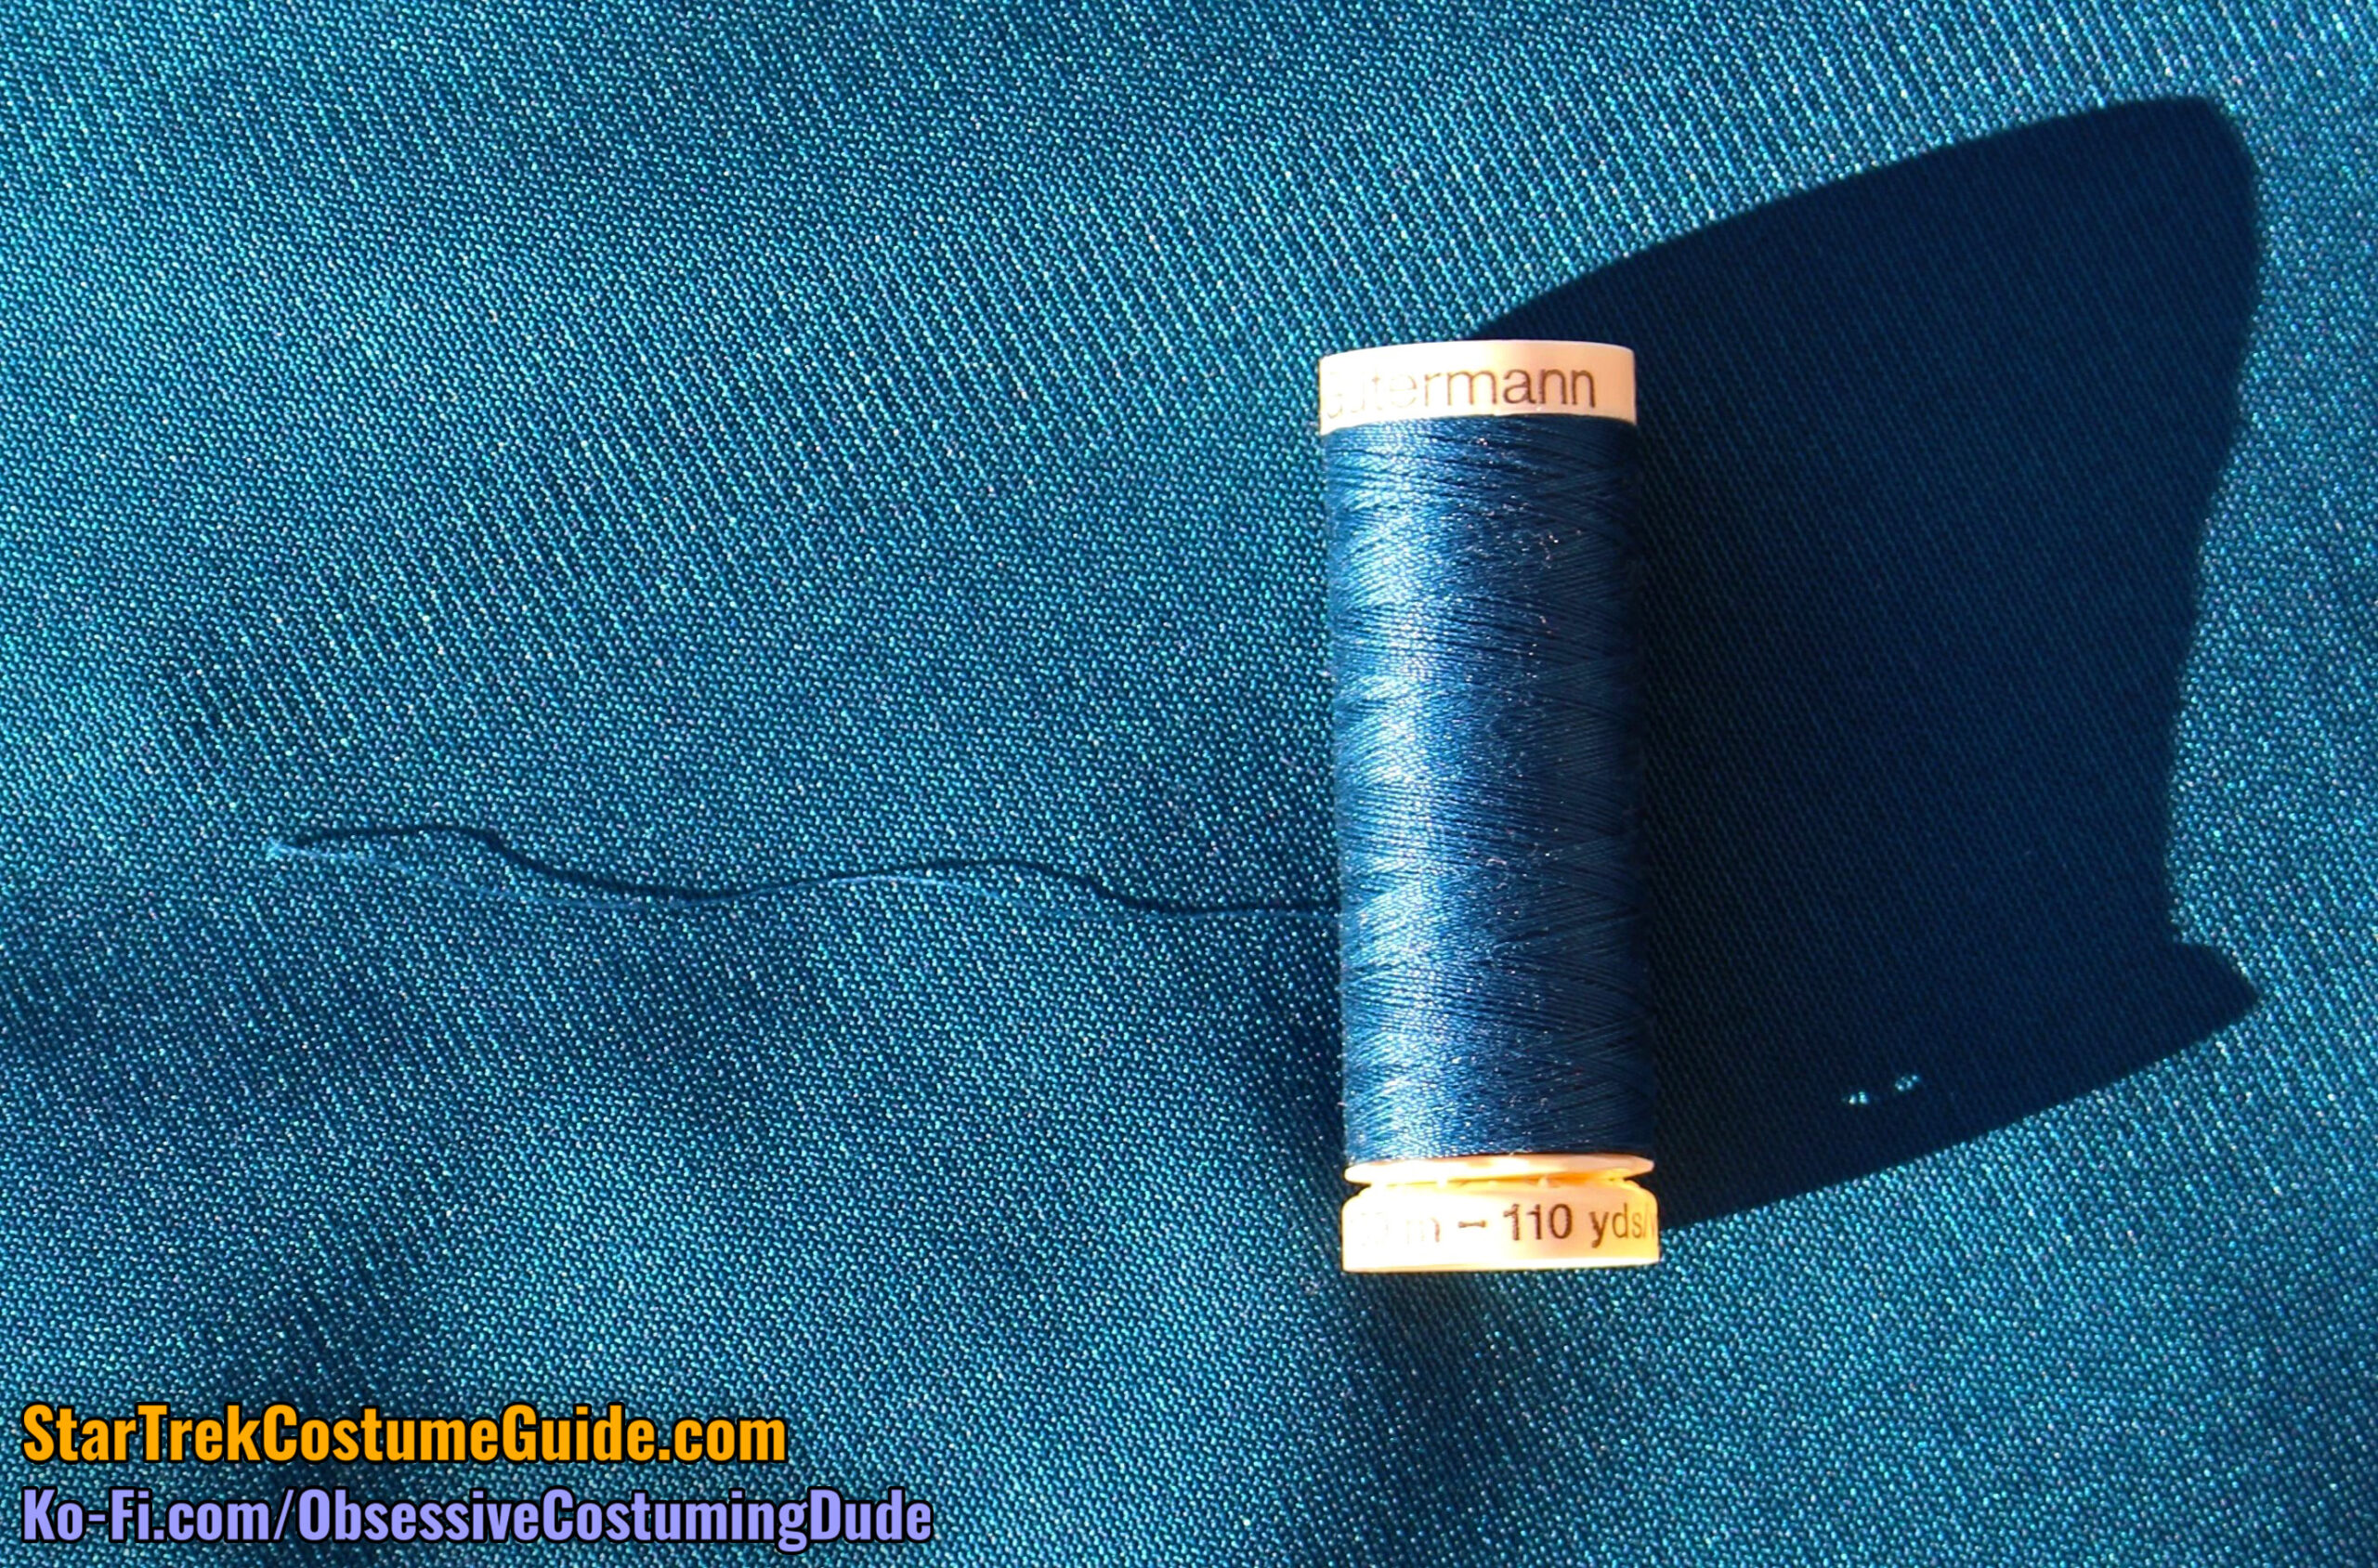
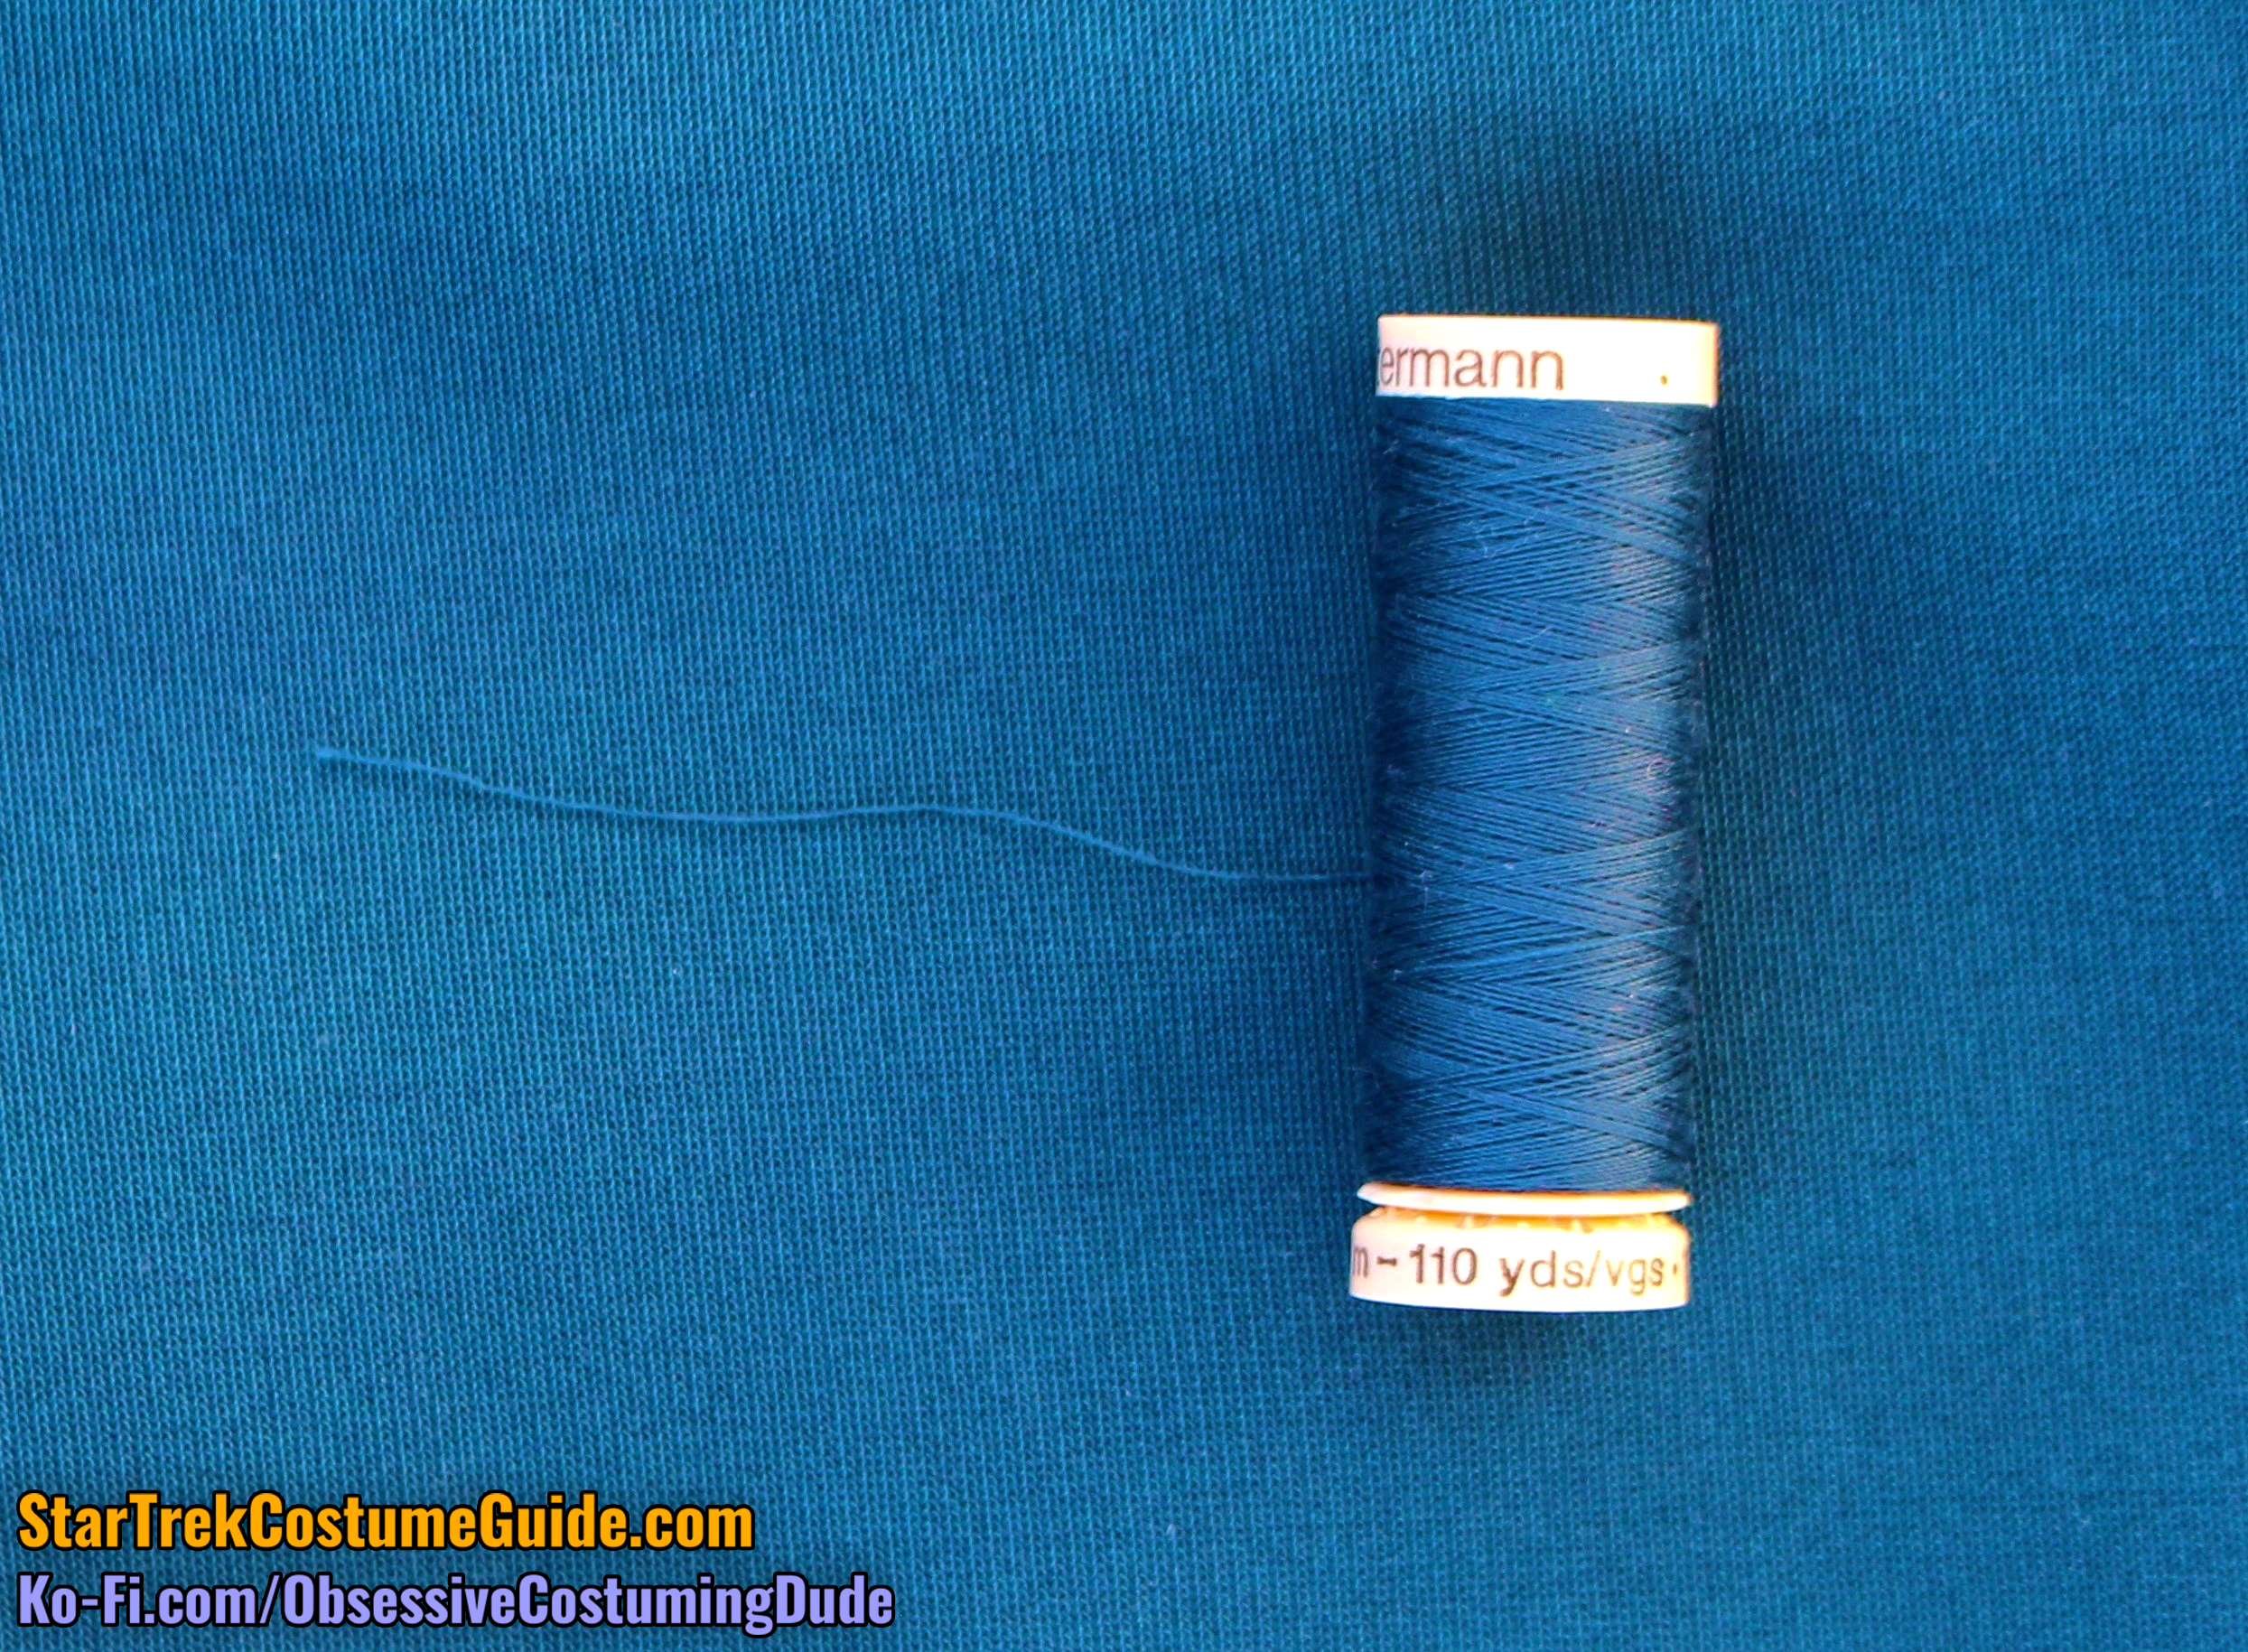
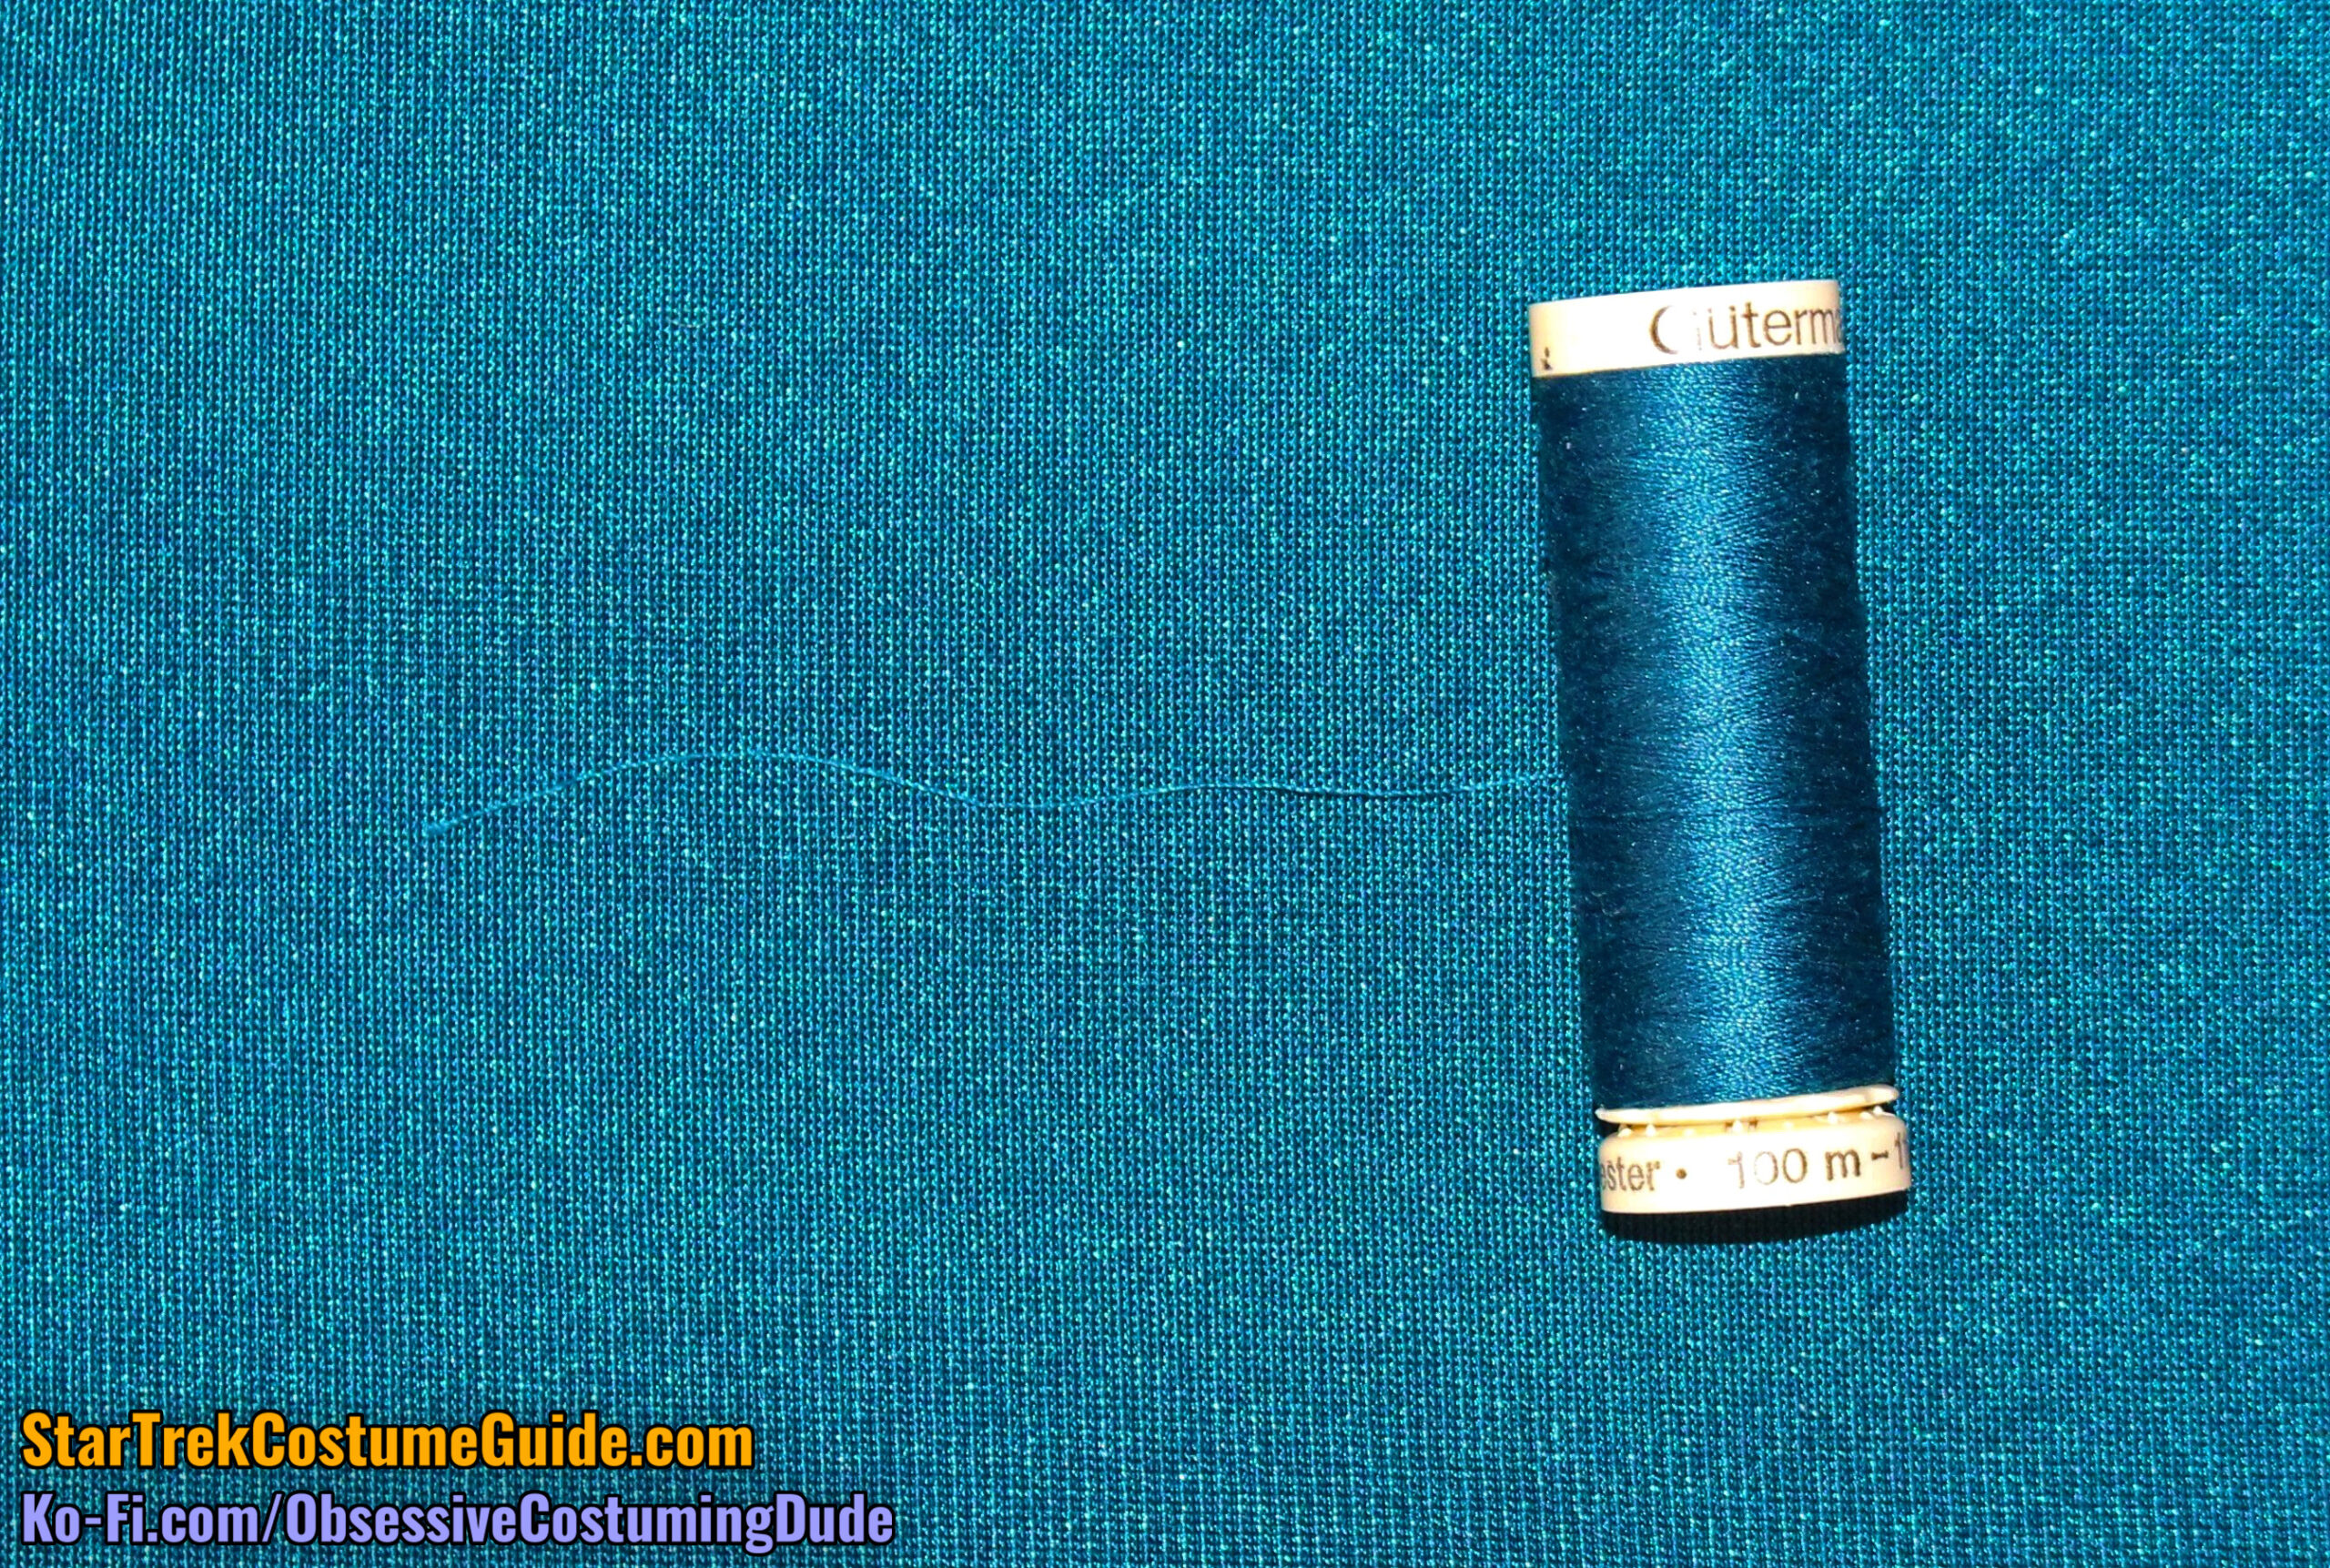
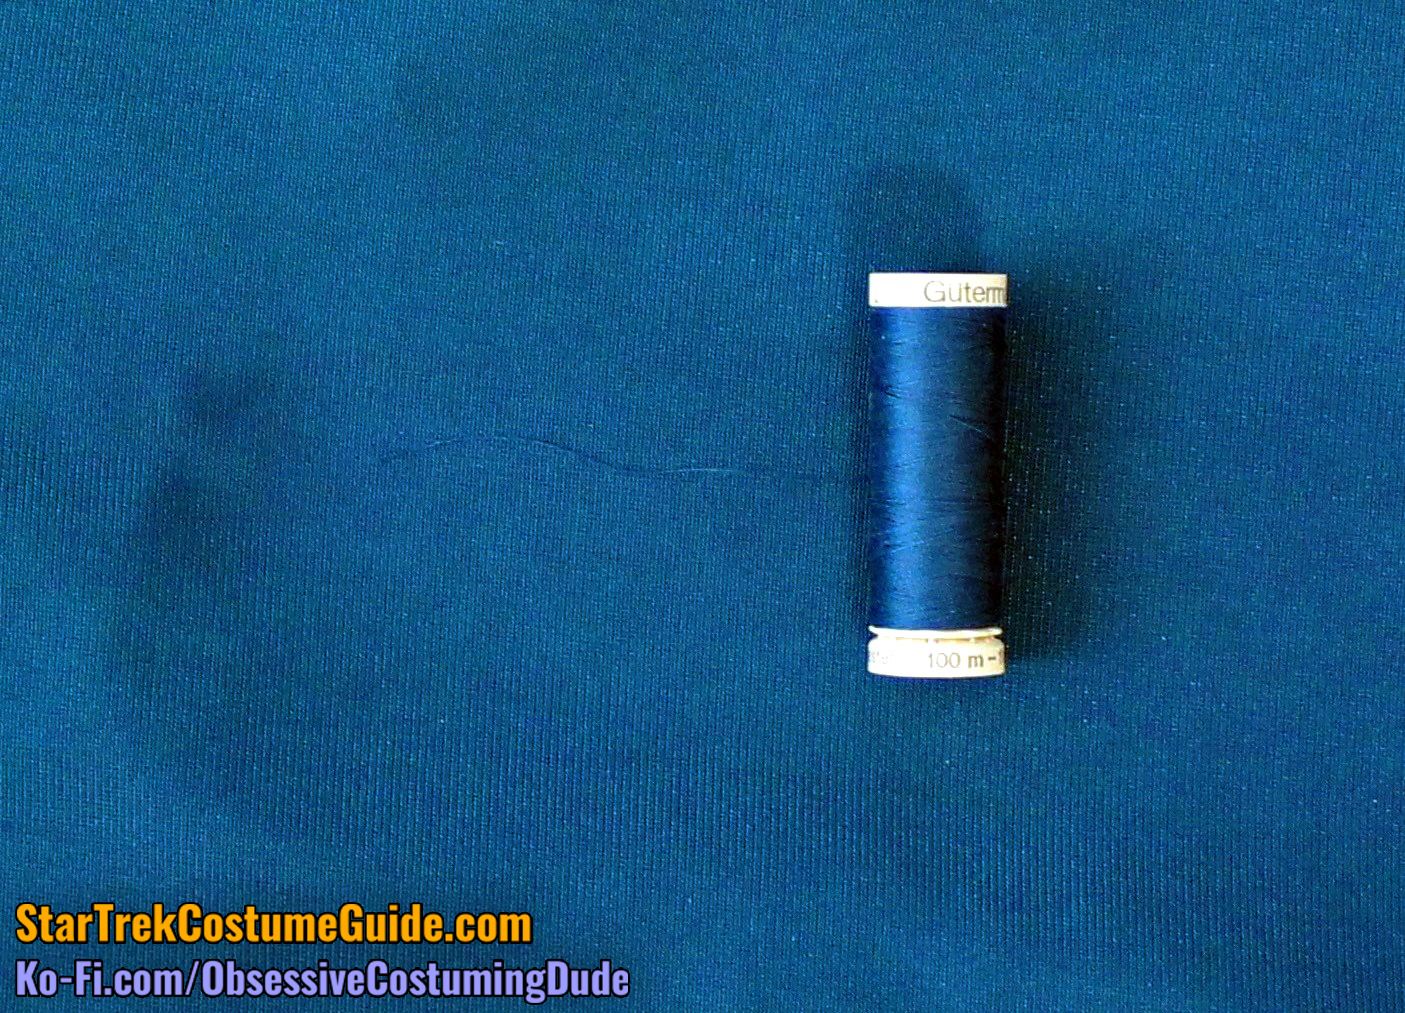
And finally, Gütermann #637 was the closest thread color I found to the original fabric at my local JoAnn.
Outside, sunlight
Outside, shade
Indoors, with flash
Indoors, no flash
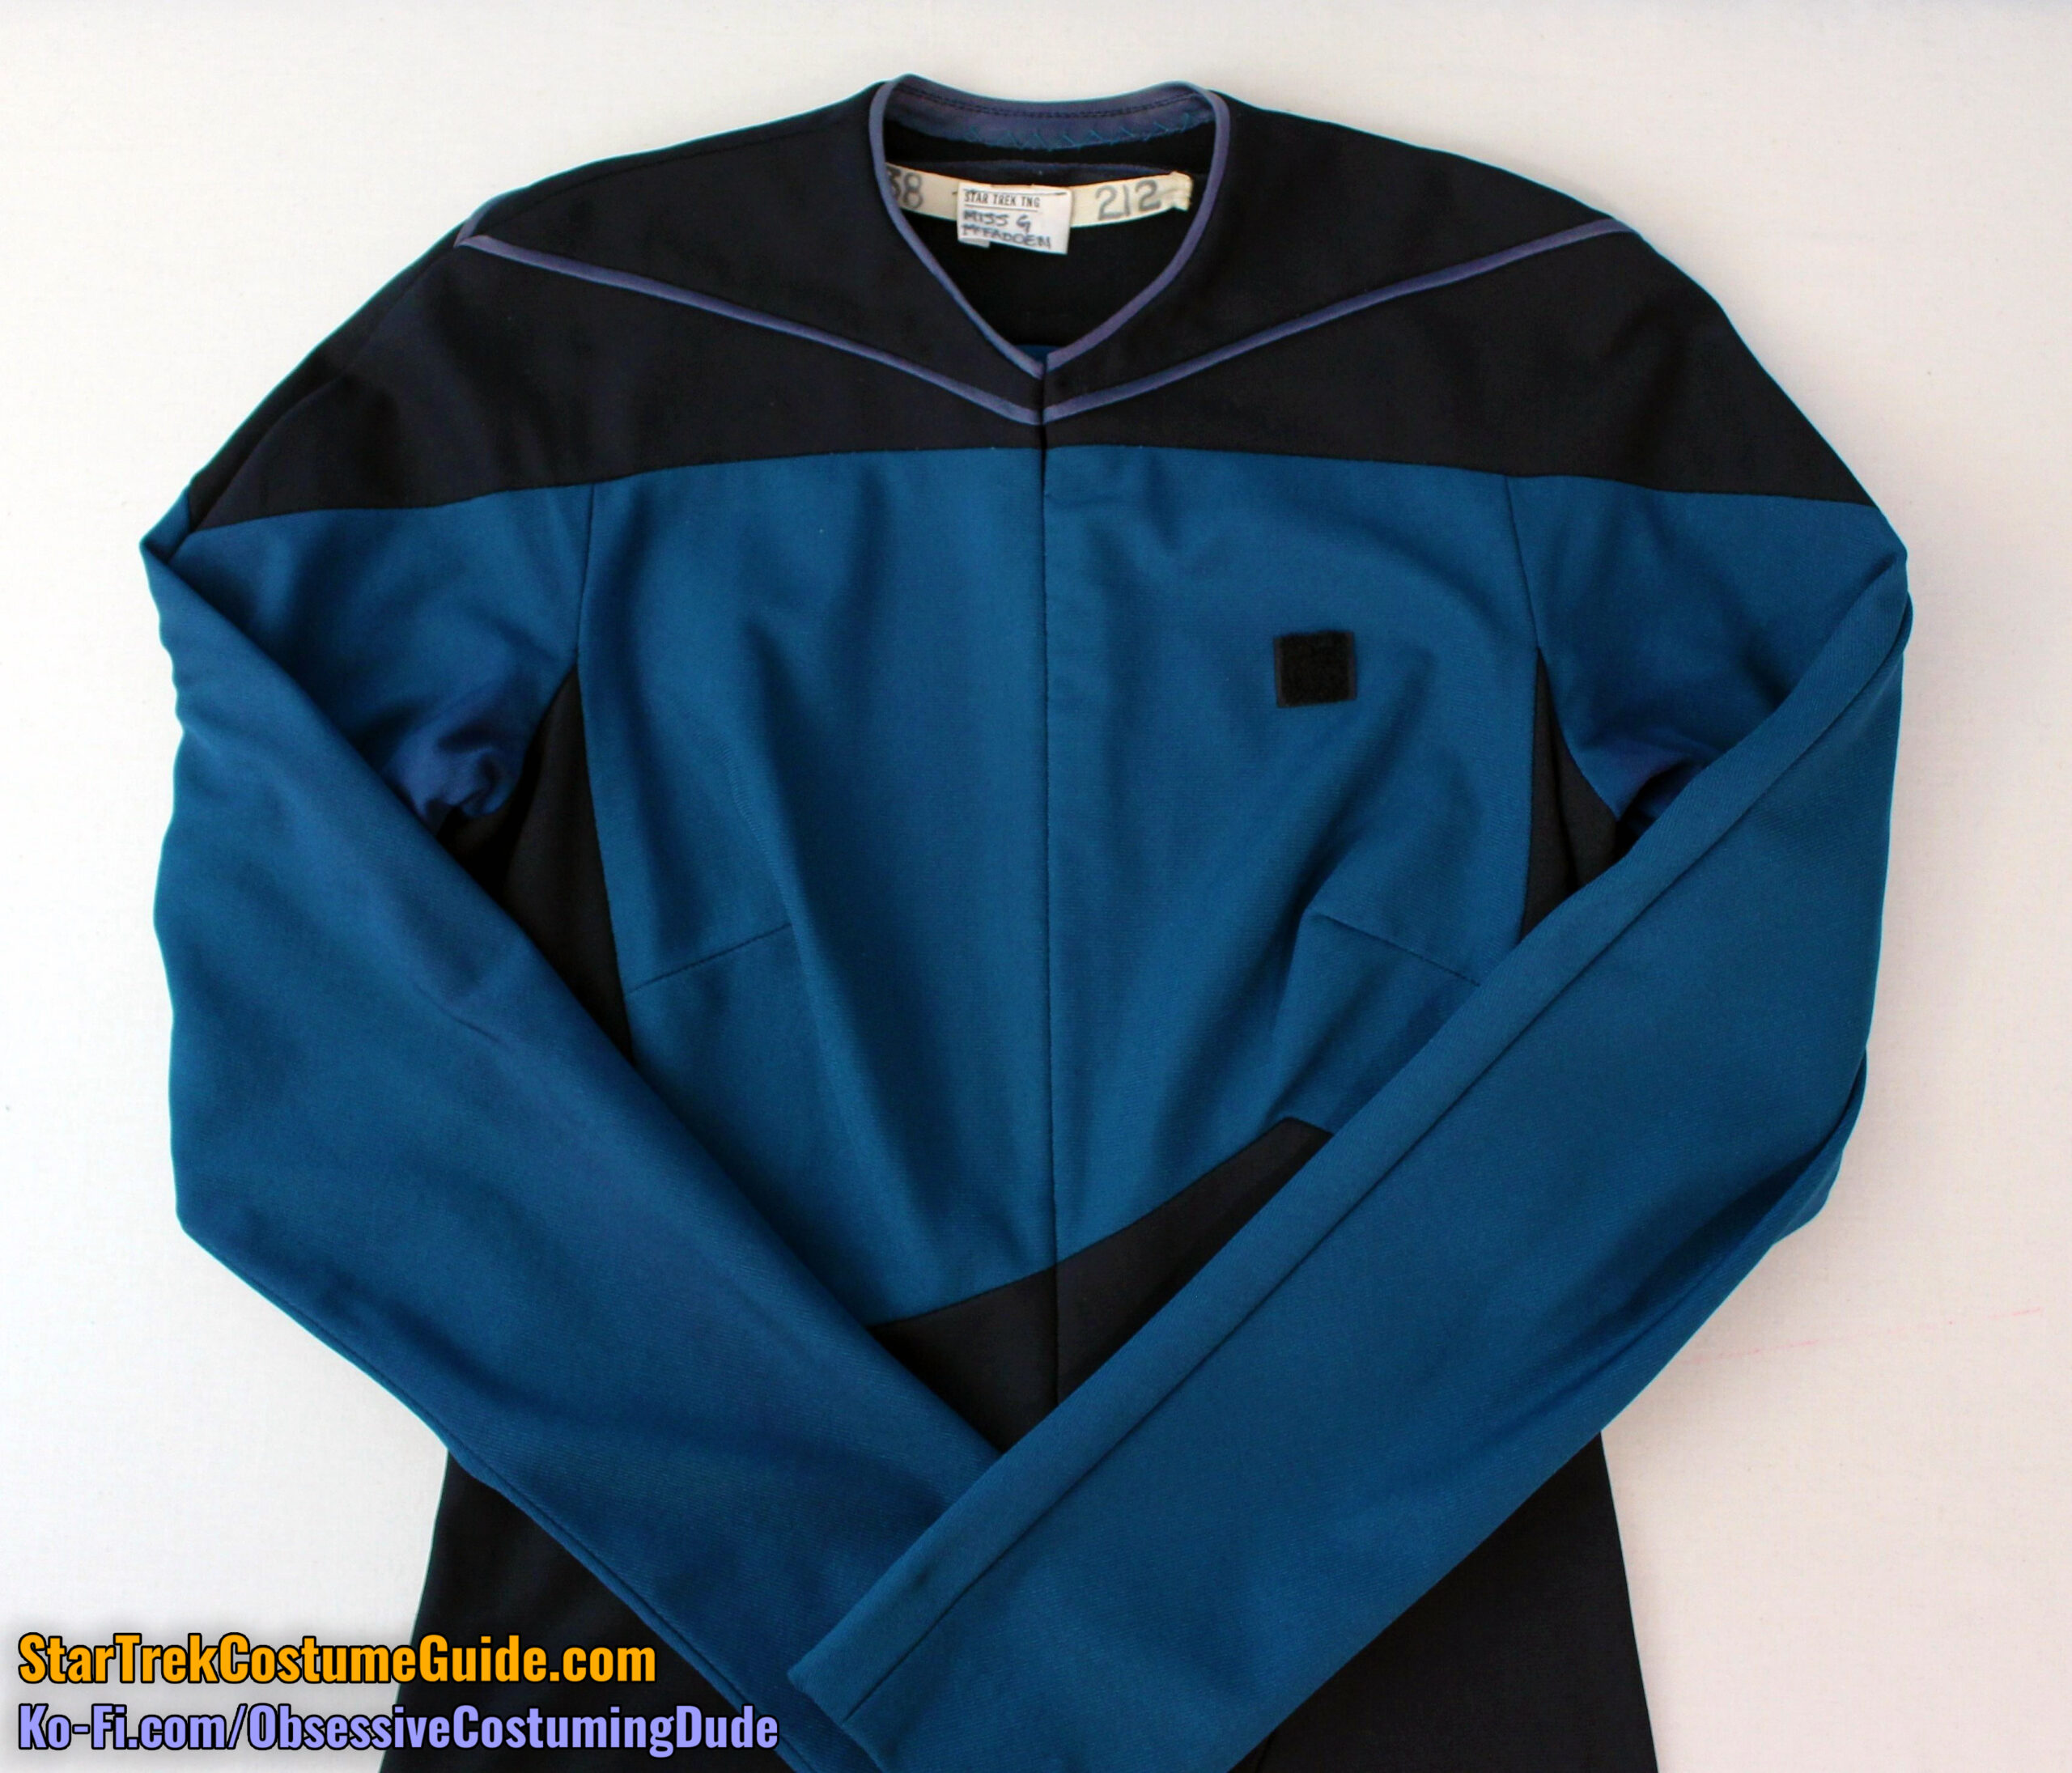
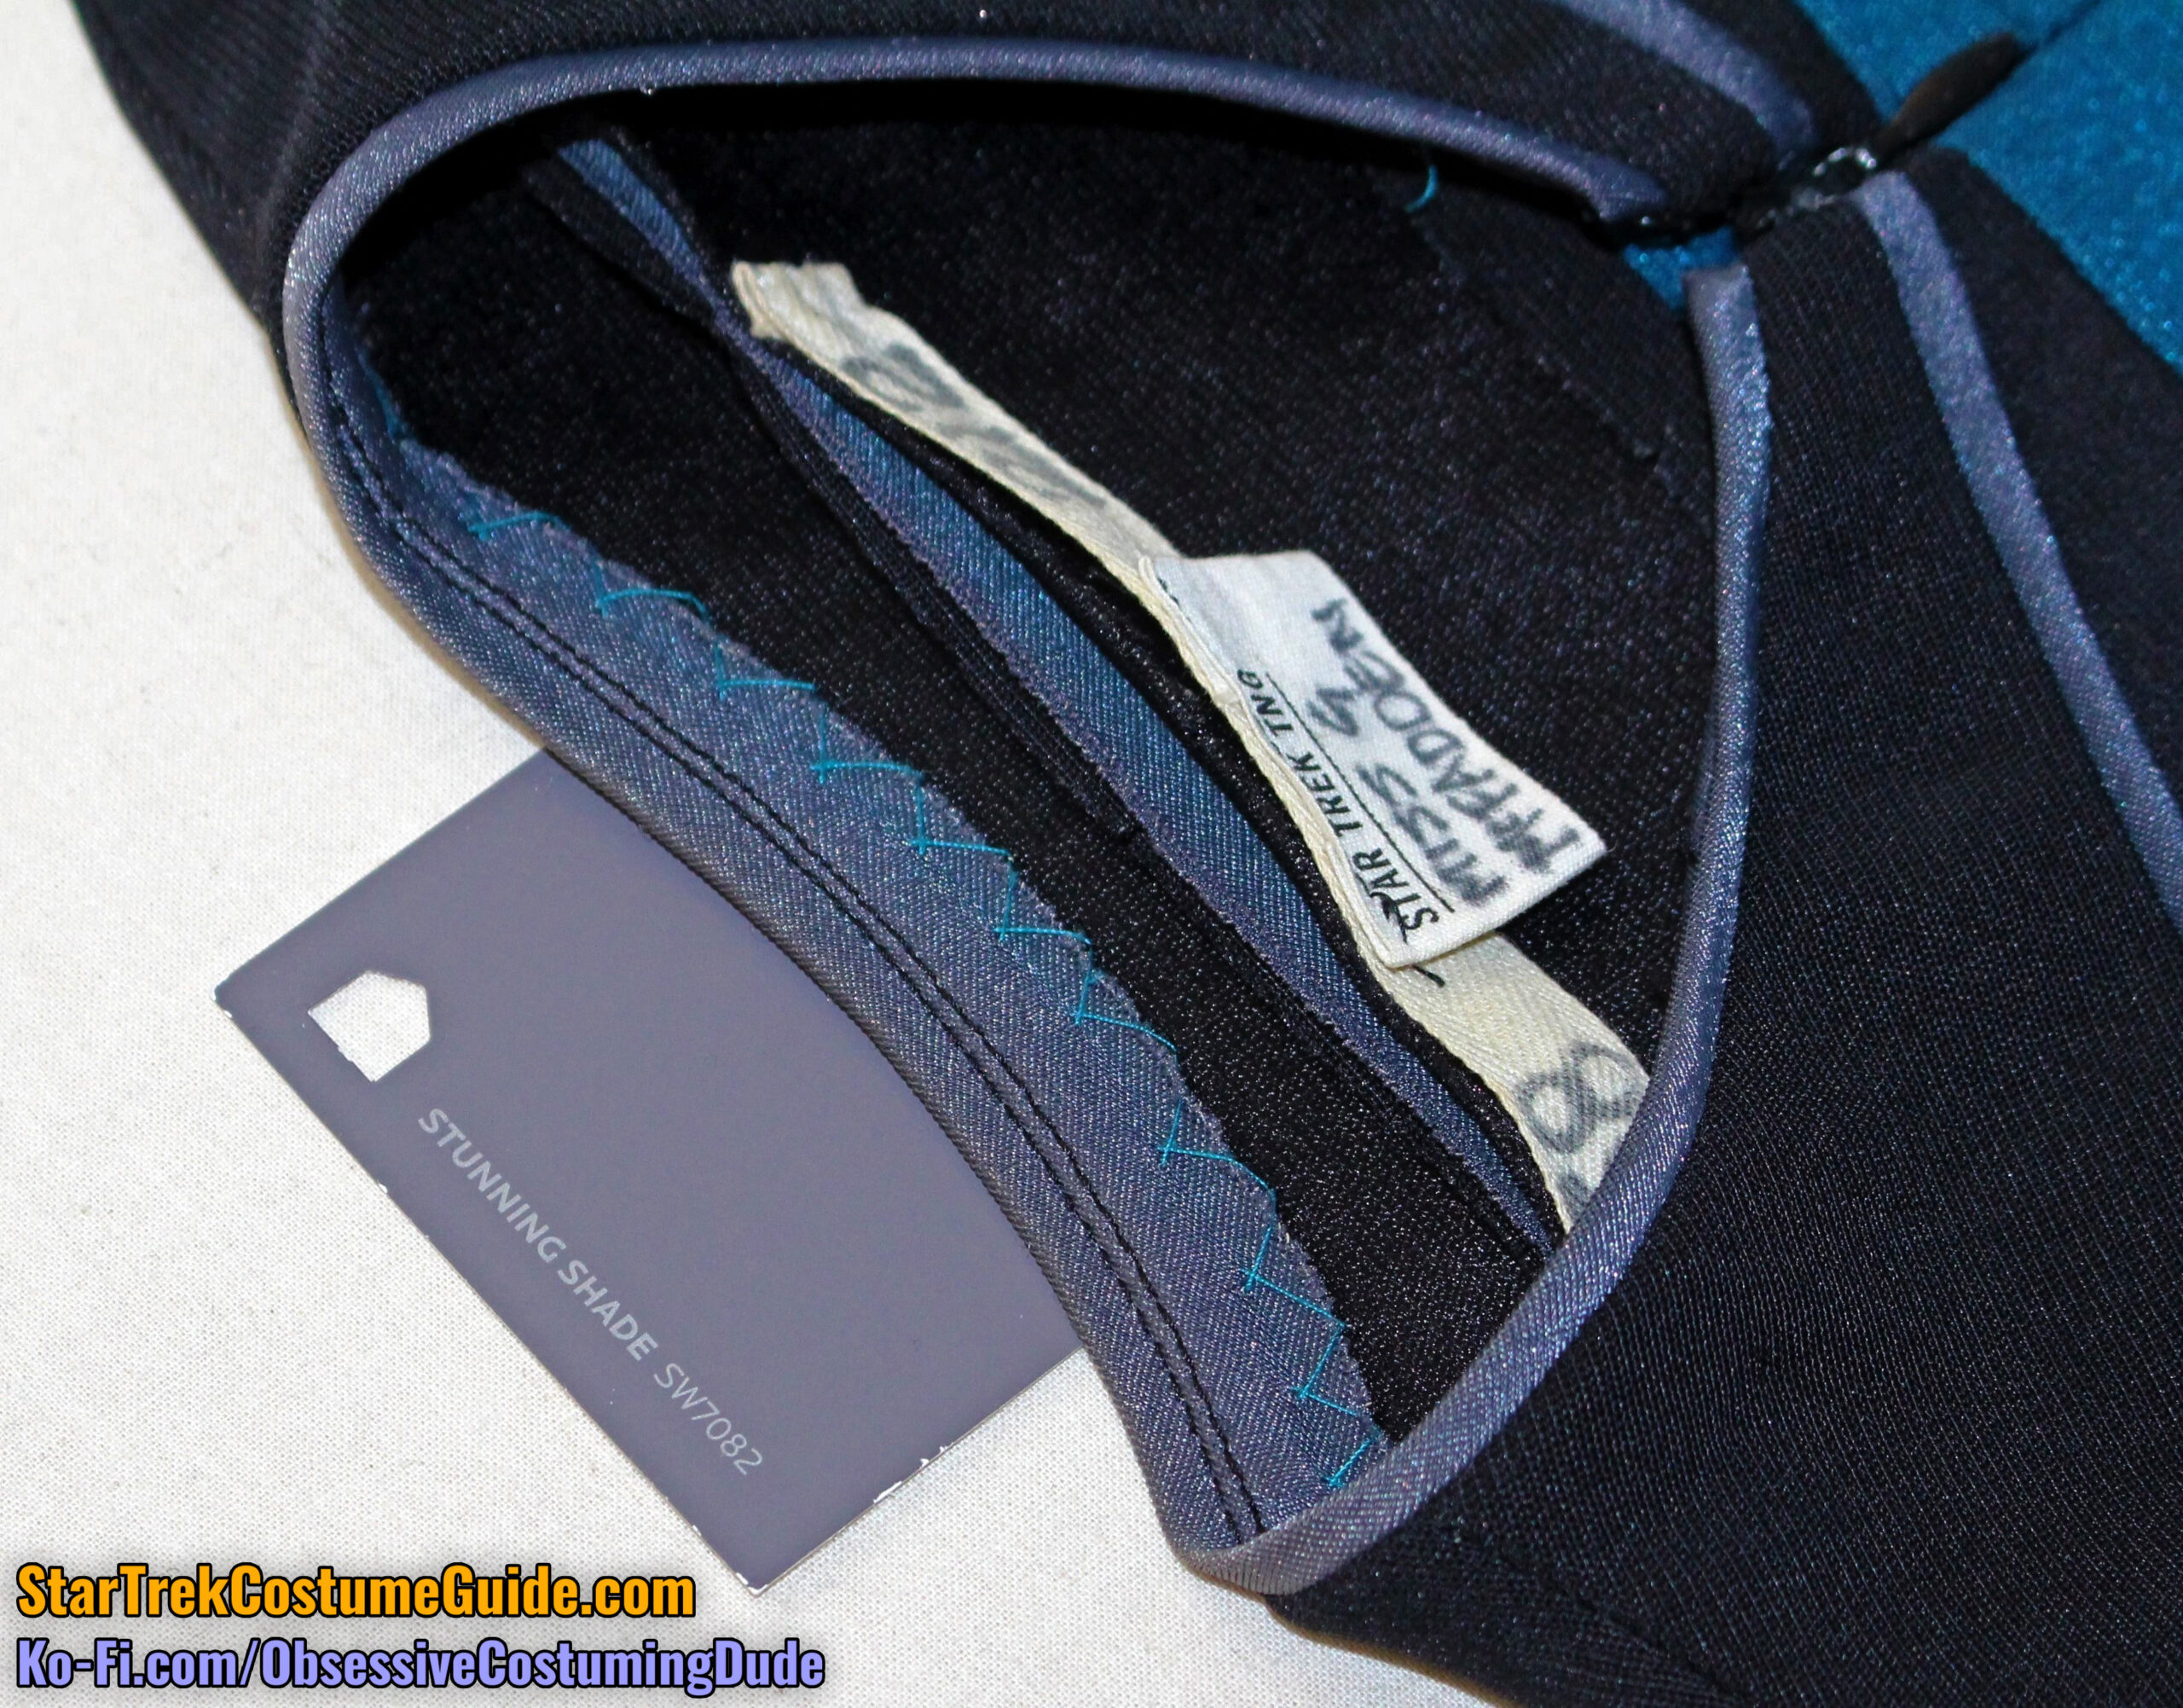
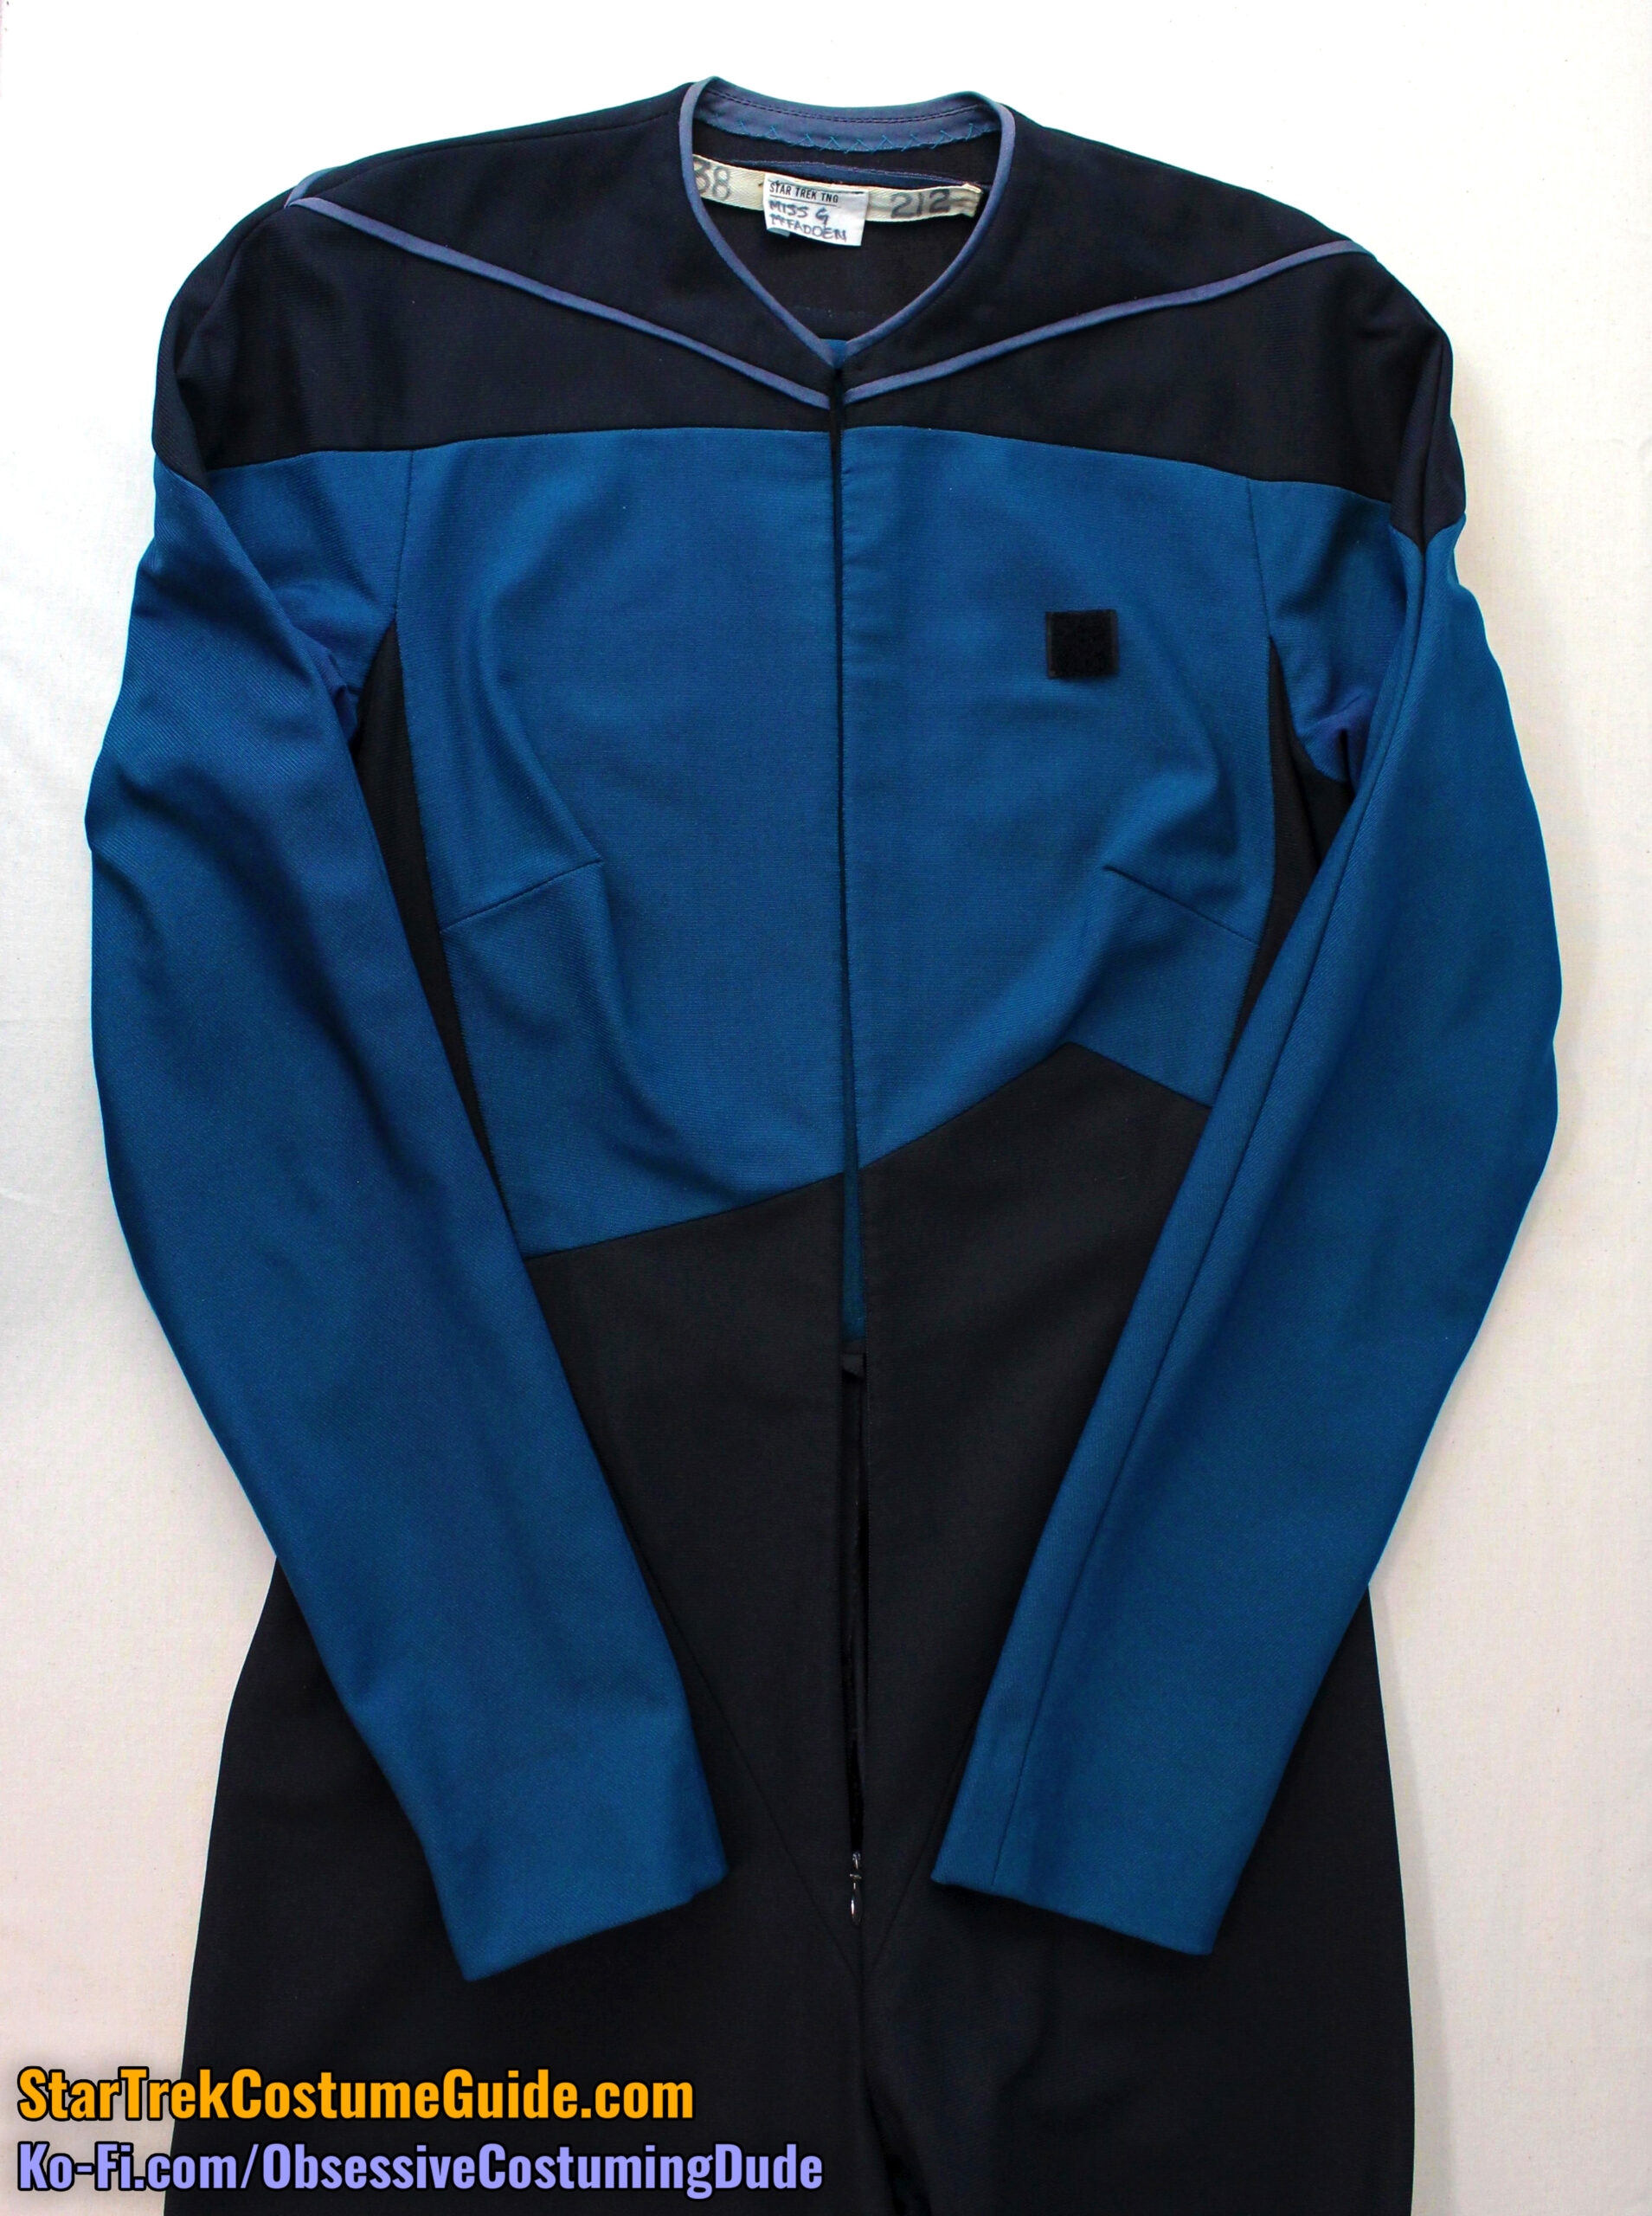
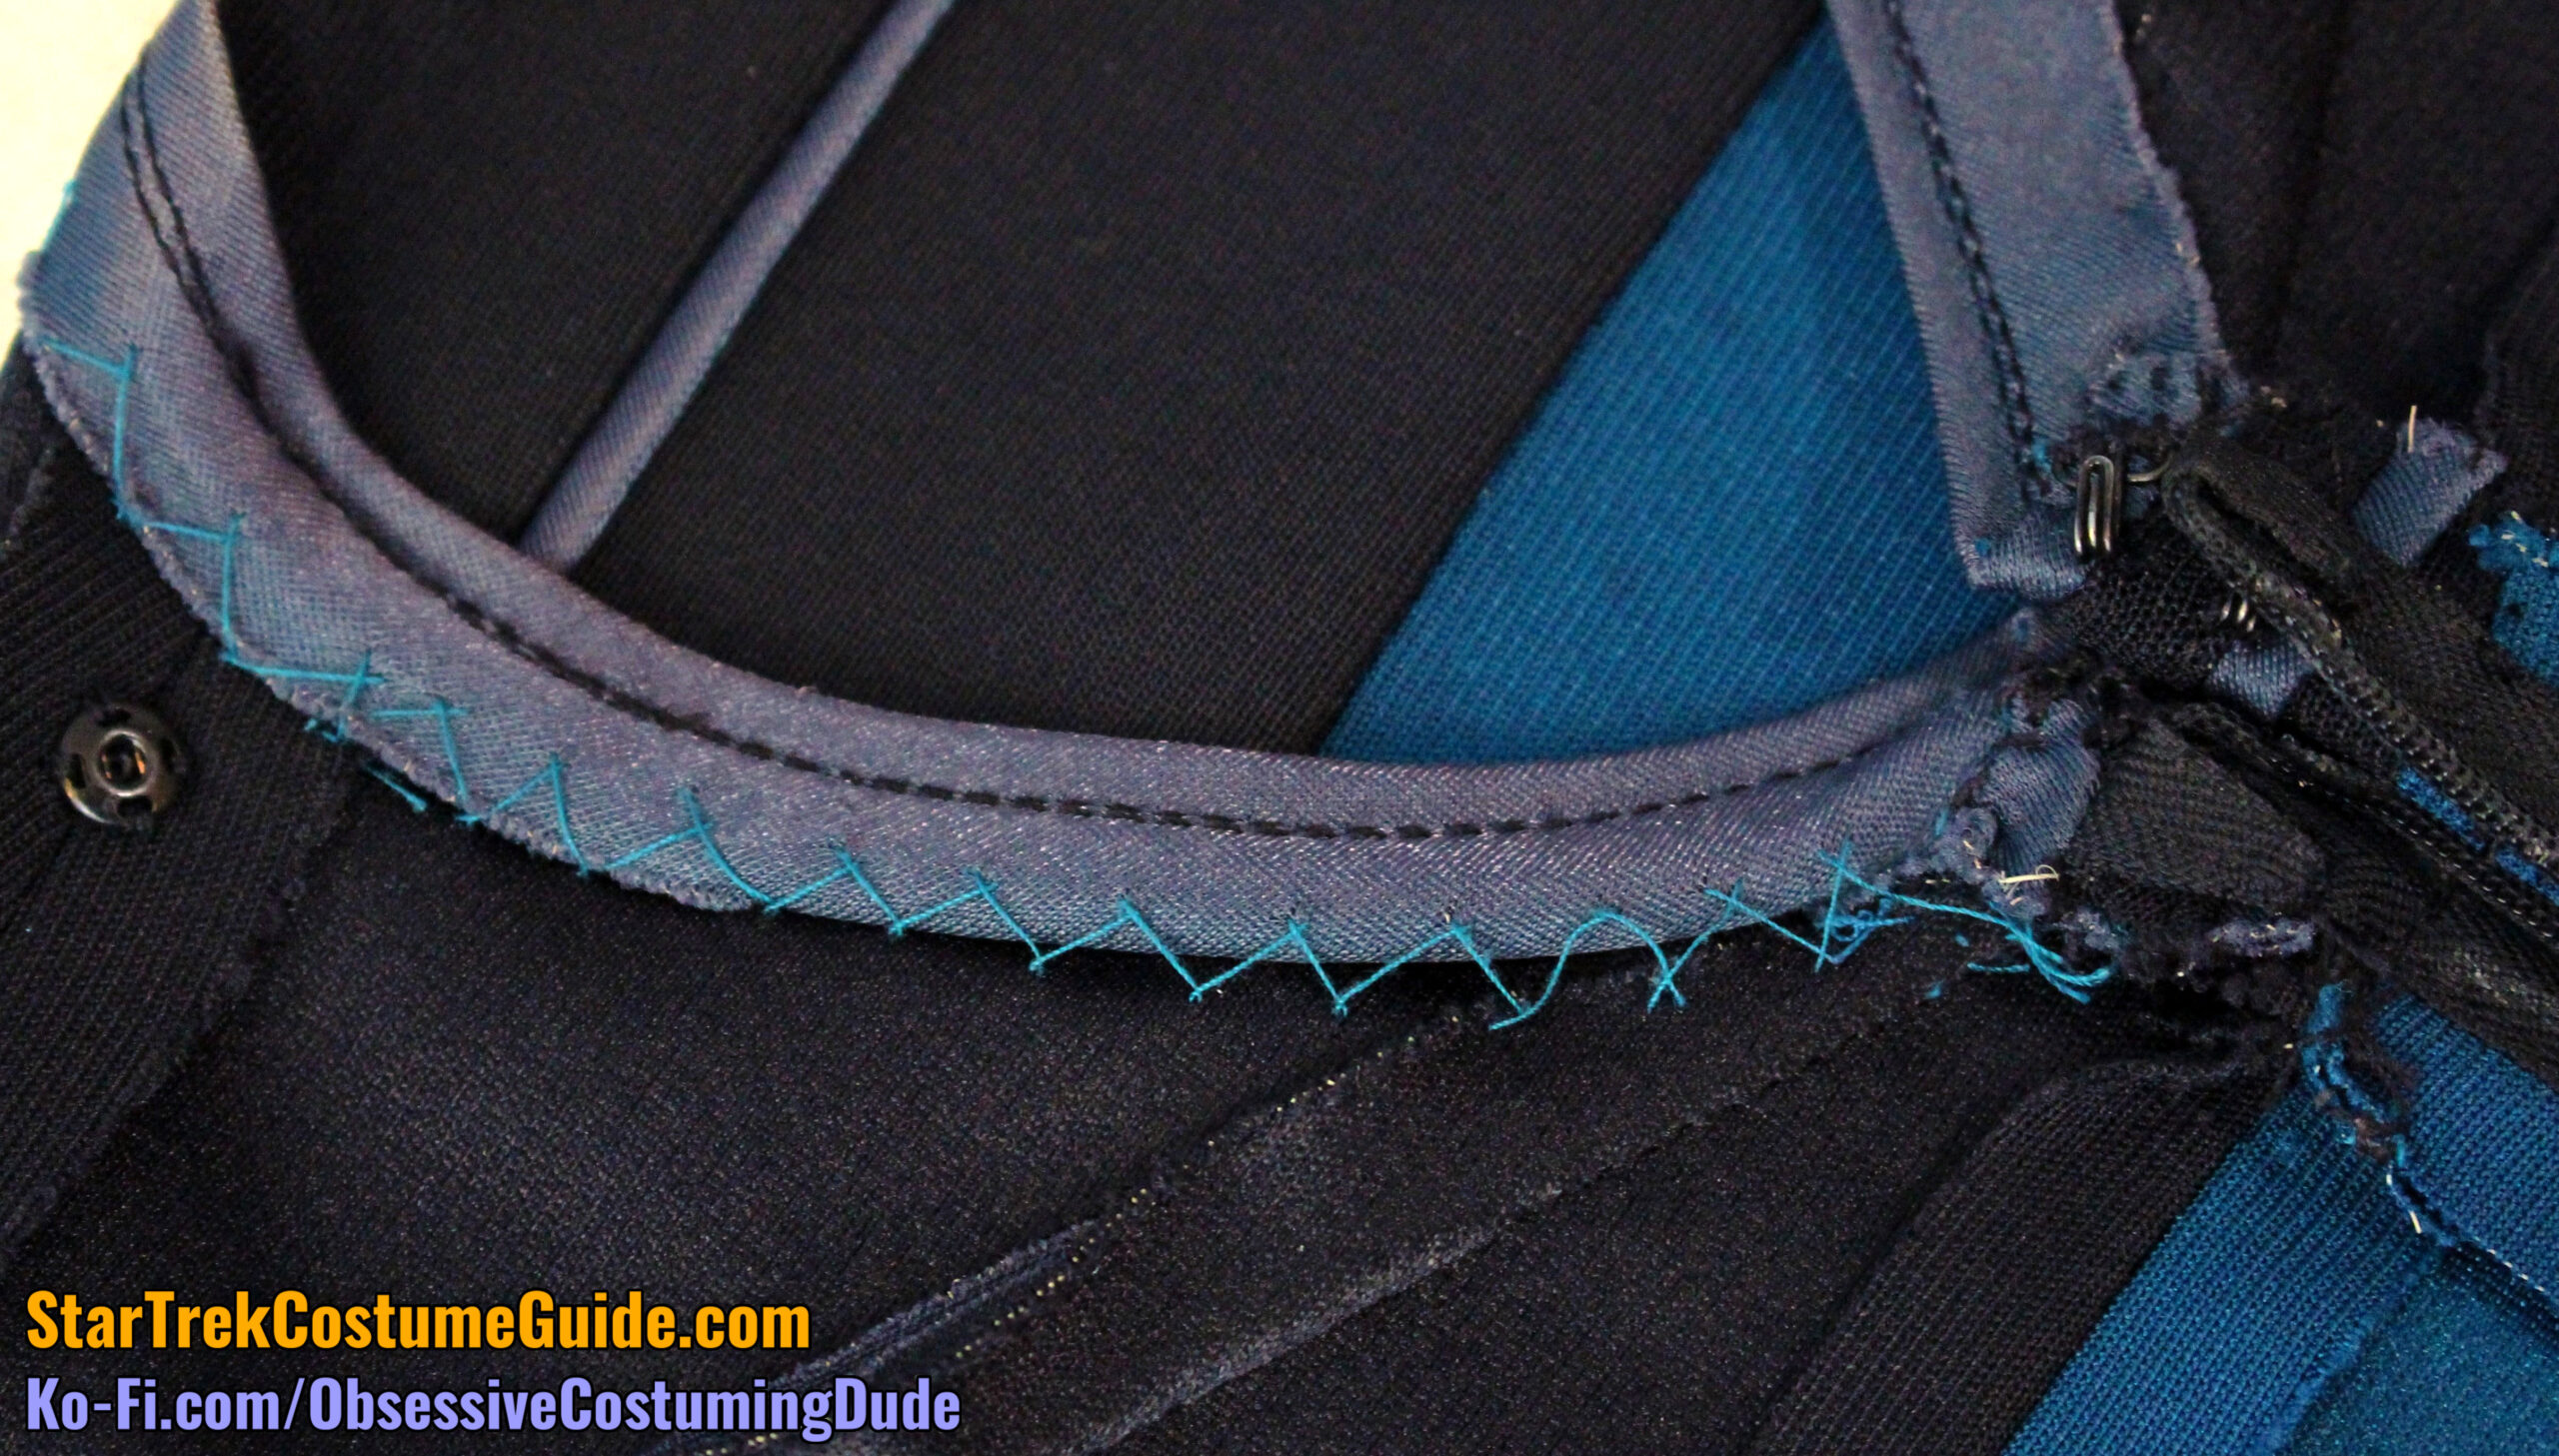
Surprisingly, if you look closely at the very first photo above, you may notice that the neckline/yoke trim wasn’t teal, but a sort of lavender/gray color!
(I have a theory as to why, which I’ll get to shortly.)
For what it’s worth, Pantone #2397 U was the closest match I found to the trim color.
Indoors, with flash
Indoors, no flash
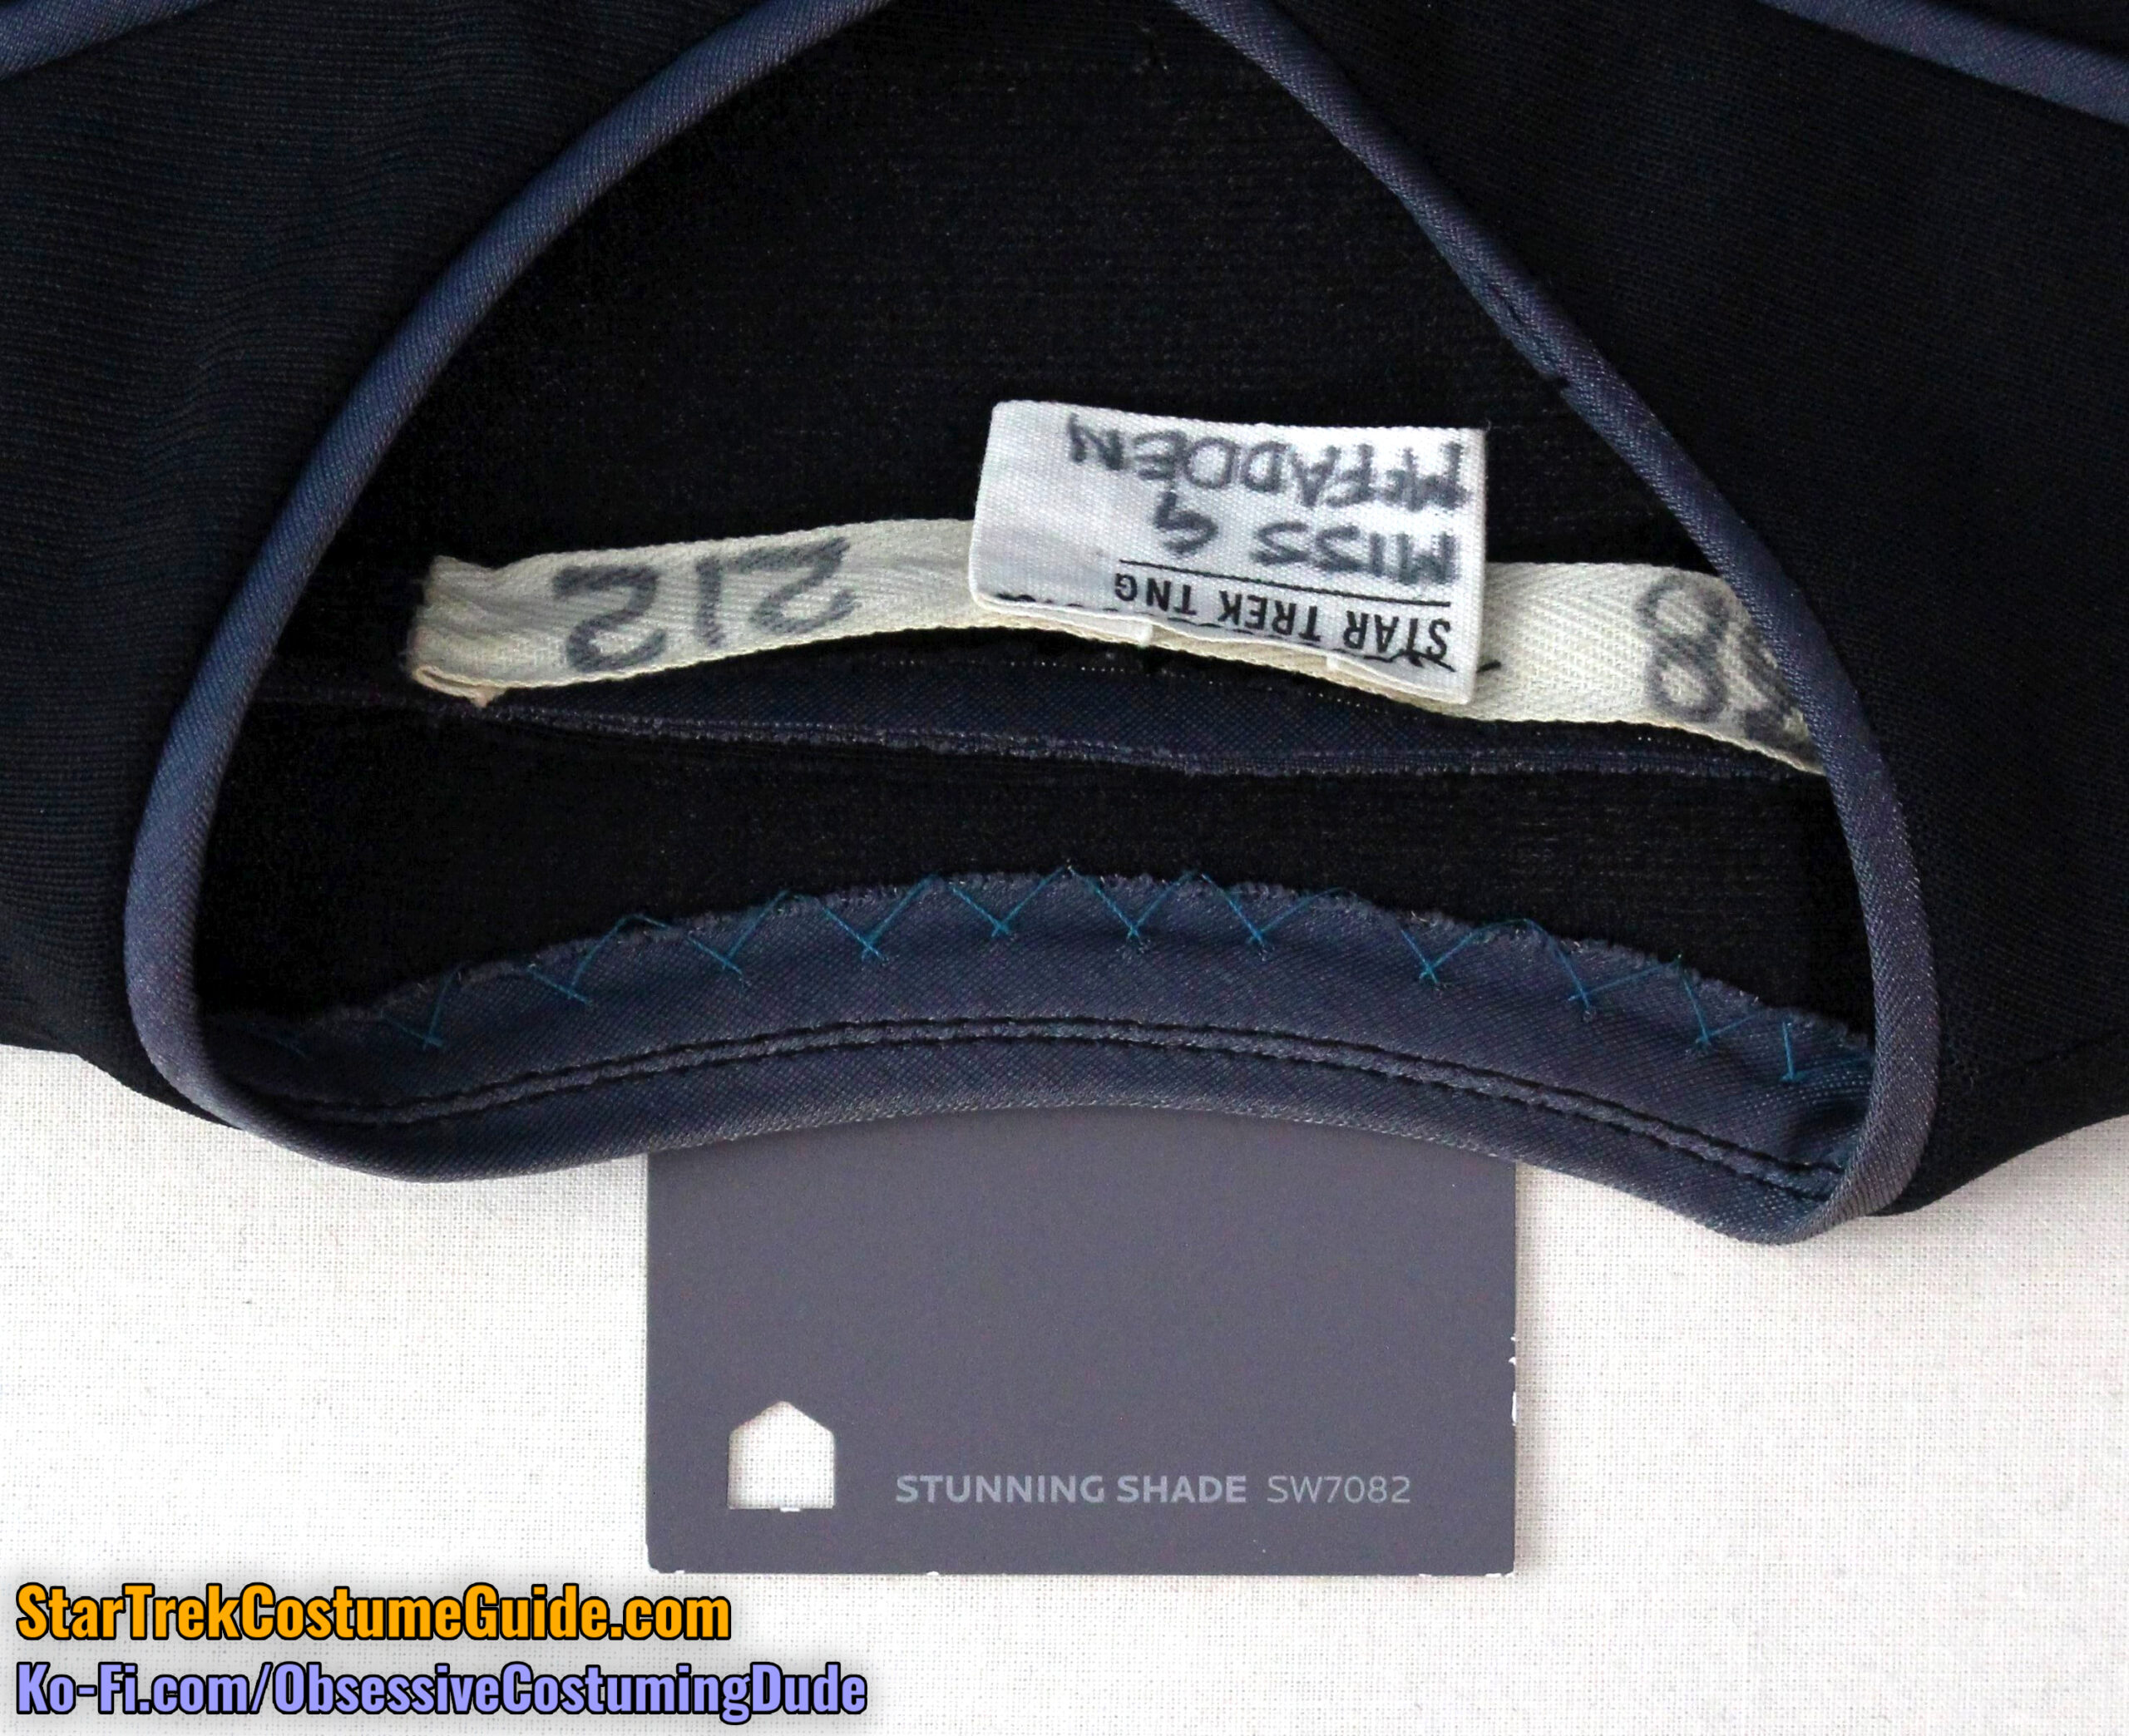
Alternatively, you can reference the Sherwin-Williams paint chip #SW7082, “Stunning Shade” as a close(-ish) representation of the neckline/trim color.
Indoors, with flash
Indoors, no flash
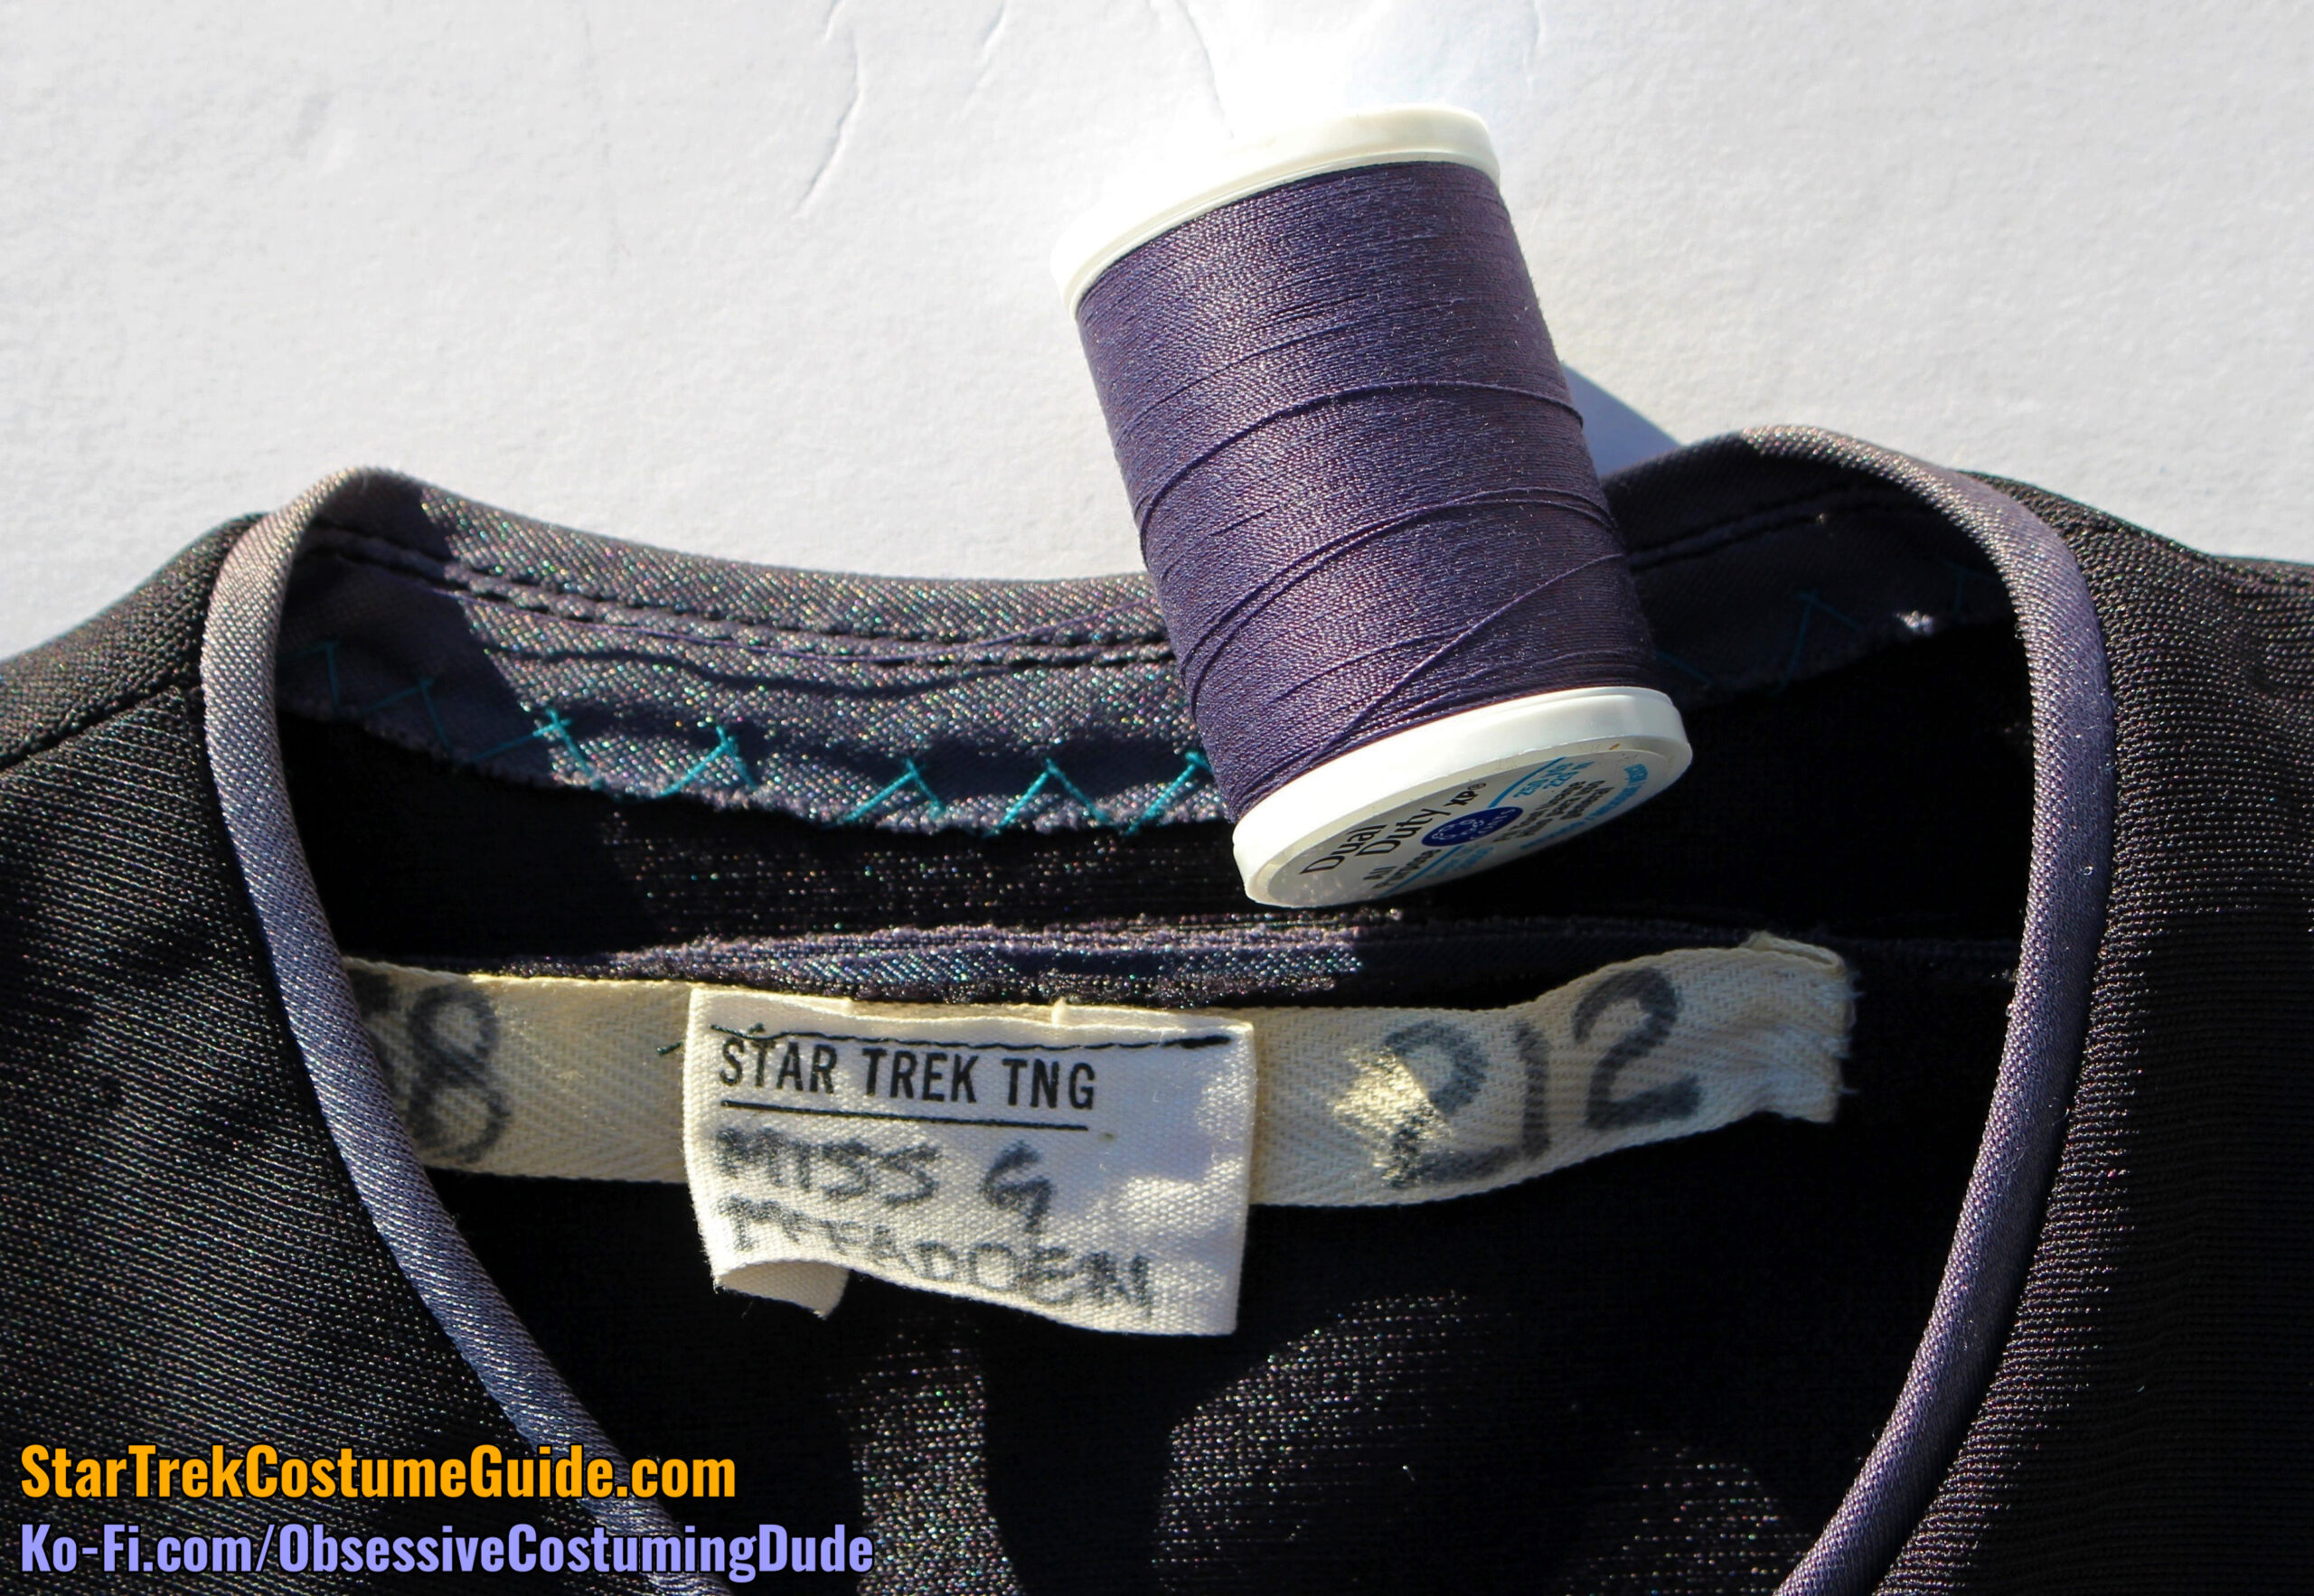
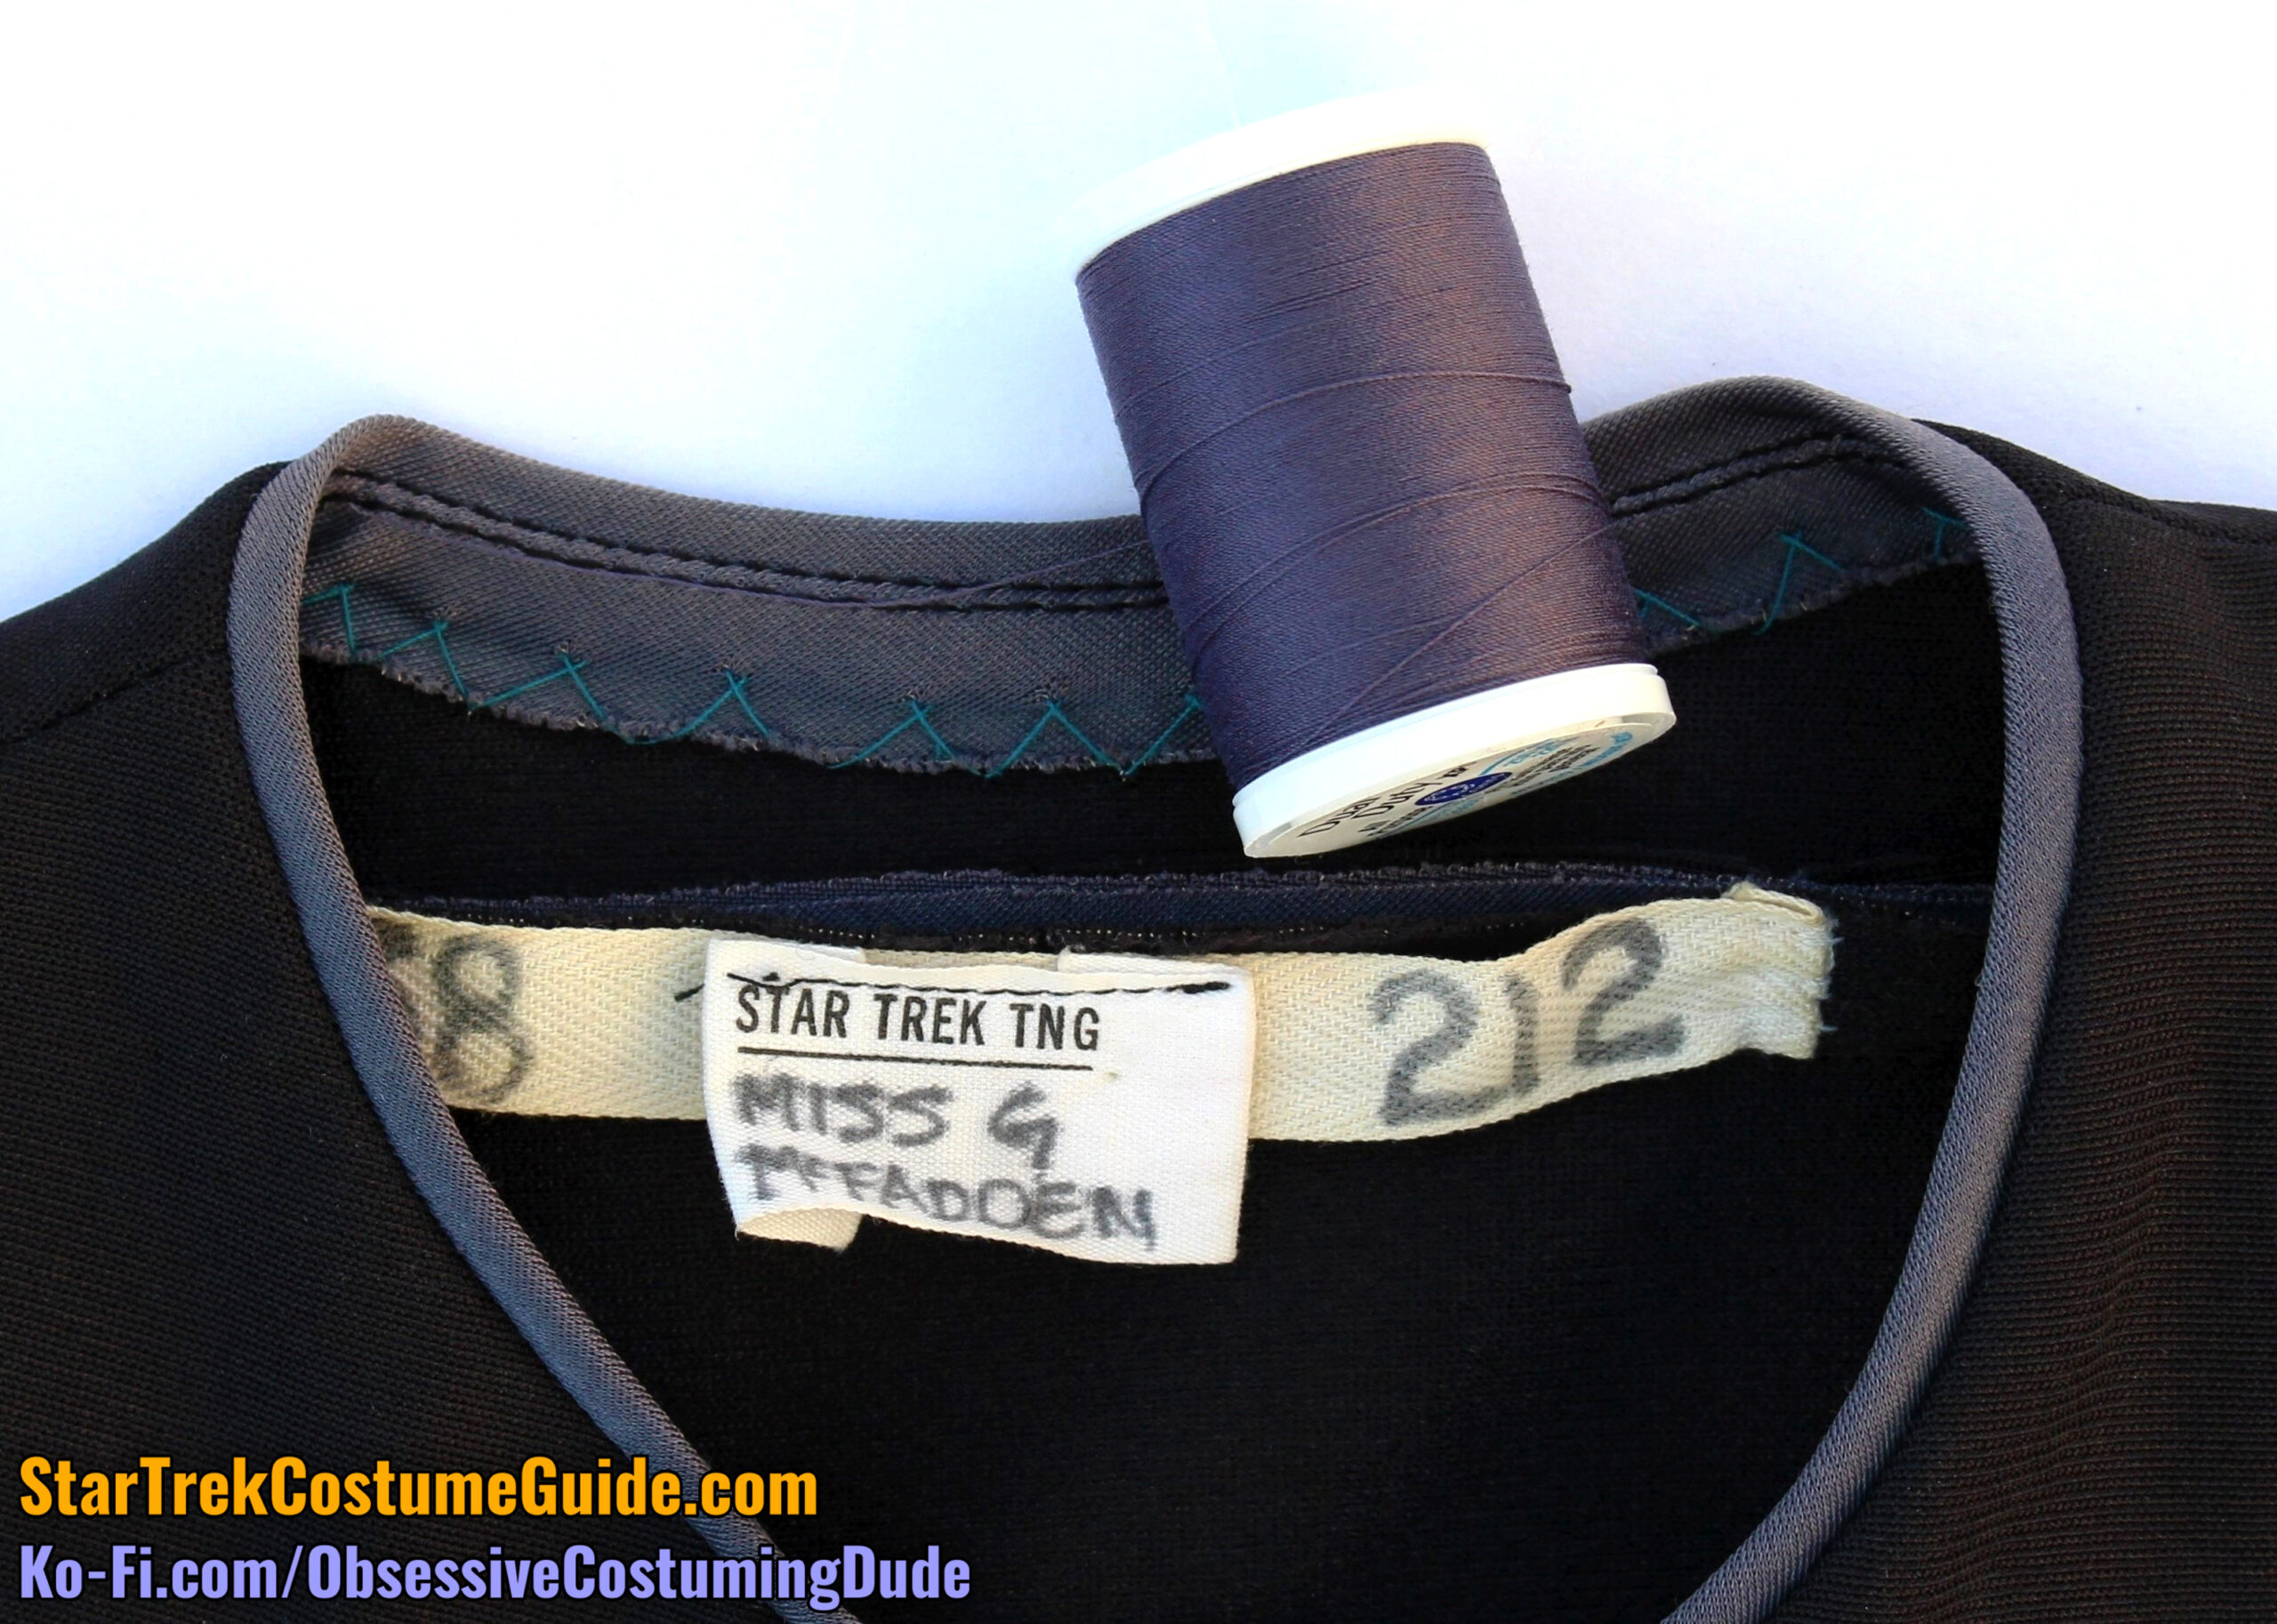
Coats & Clark thread color #4920, “Gunmetal Navy” was the closest thread color I found to the trim fabric at my local JoAnn.
Outside, sunlight
Outside, shade
Indoors, with flash
Indoors, no flash
Those should all help give you a good idea of the actual fabric colors. 🙂
EXTERIOR DIMENSIONS and CONSTRUCTION
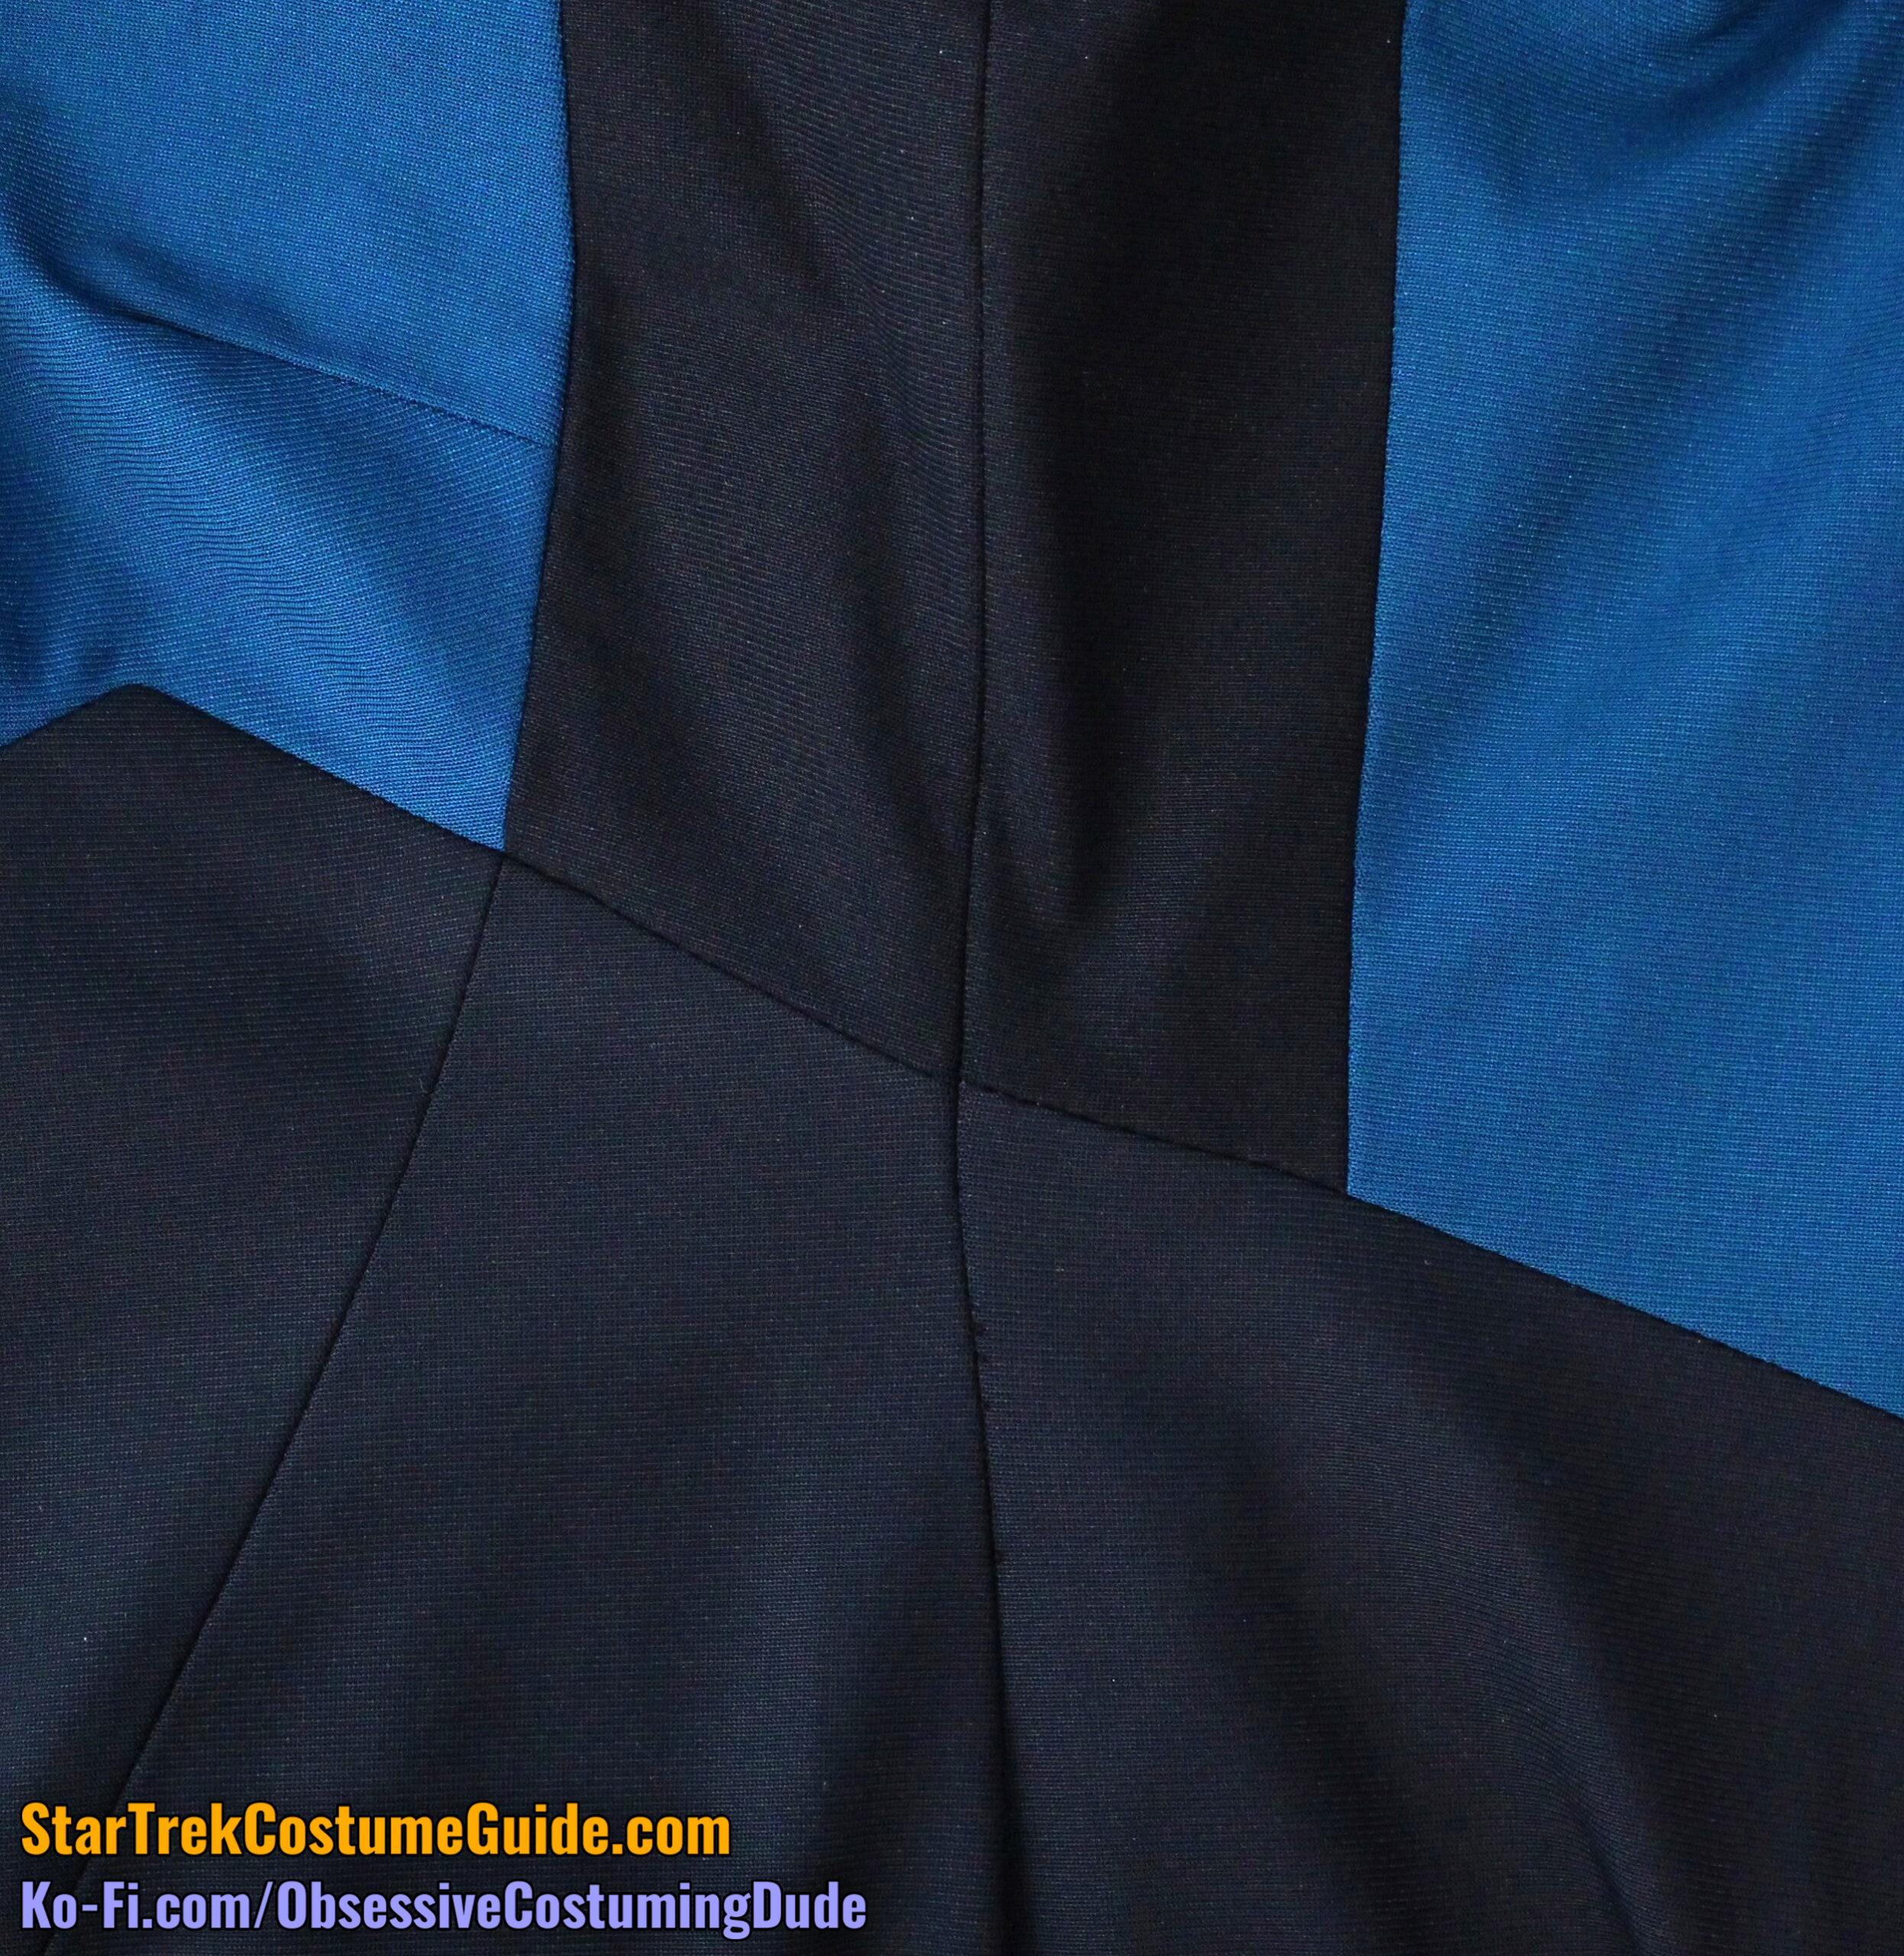
After documenting the color as best I could, I grabbed my measuring tape and began the process of documenting the jumpsuit’s dimensions and construction, generally working from the top down; front, then back; outside, then inside.
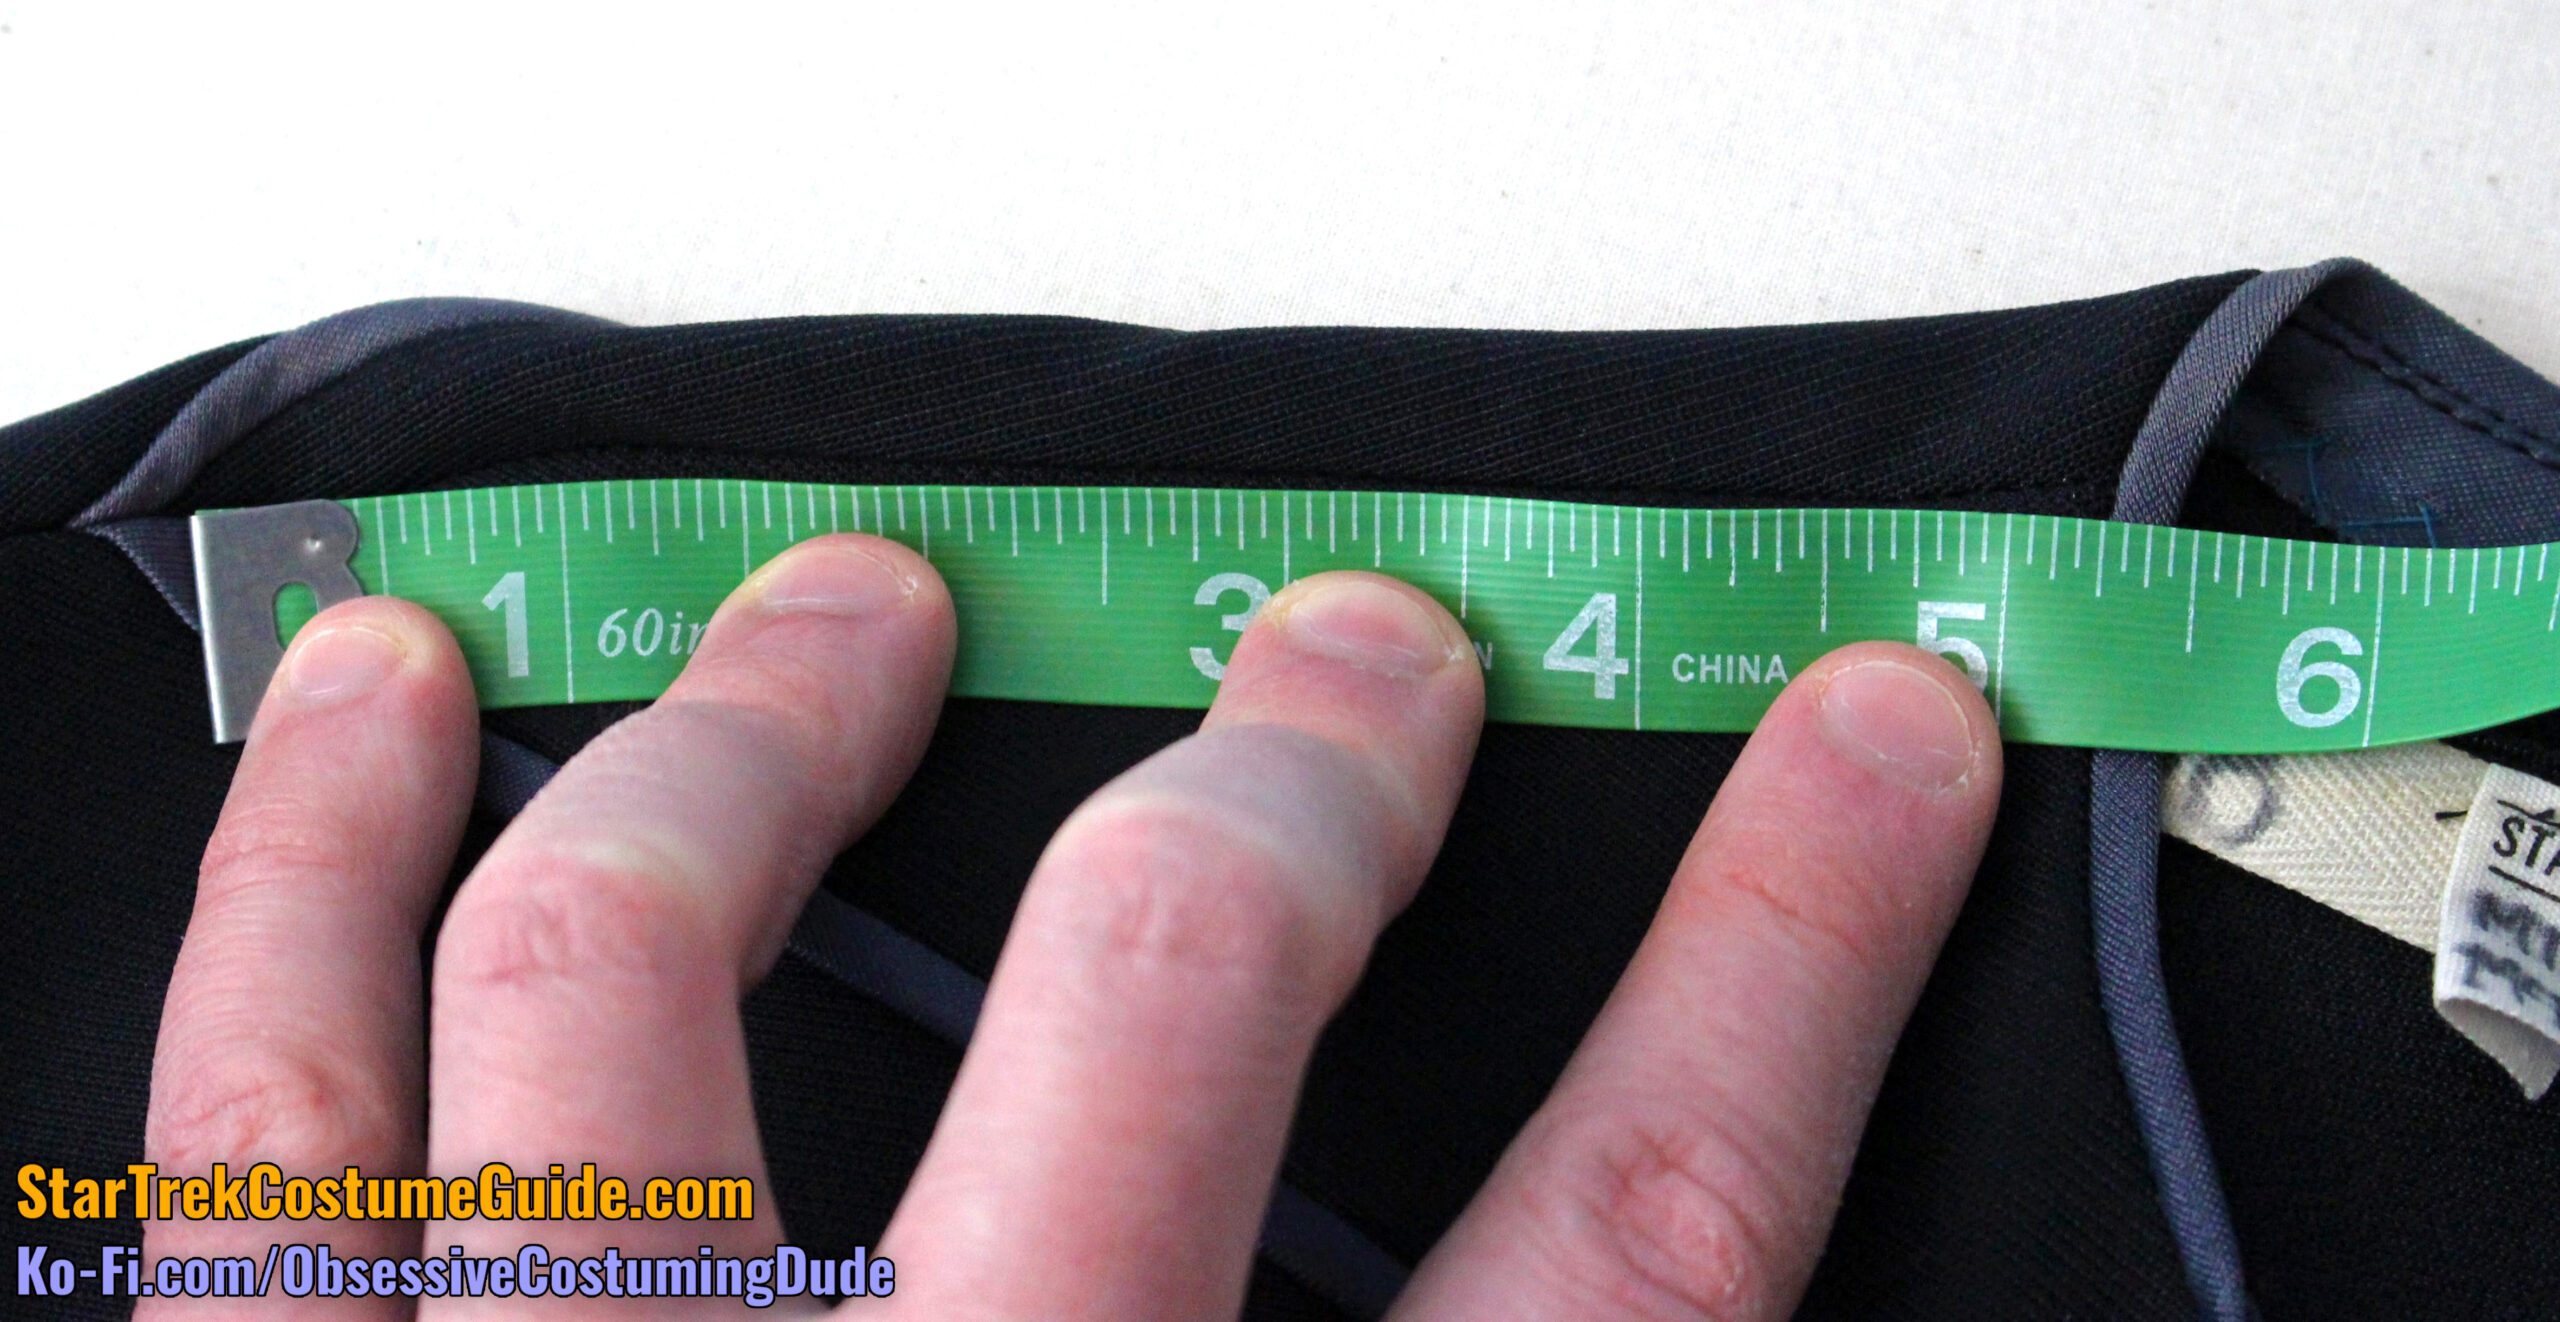
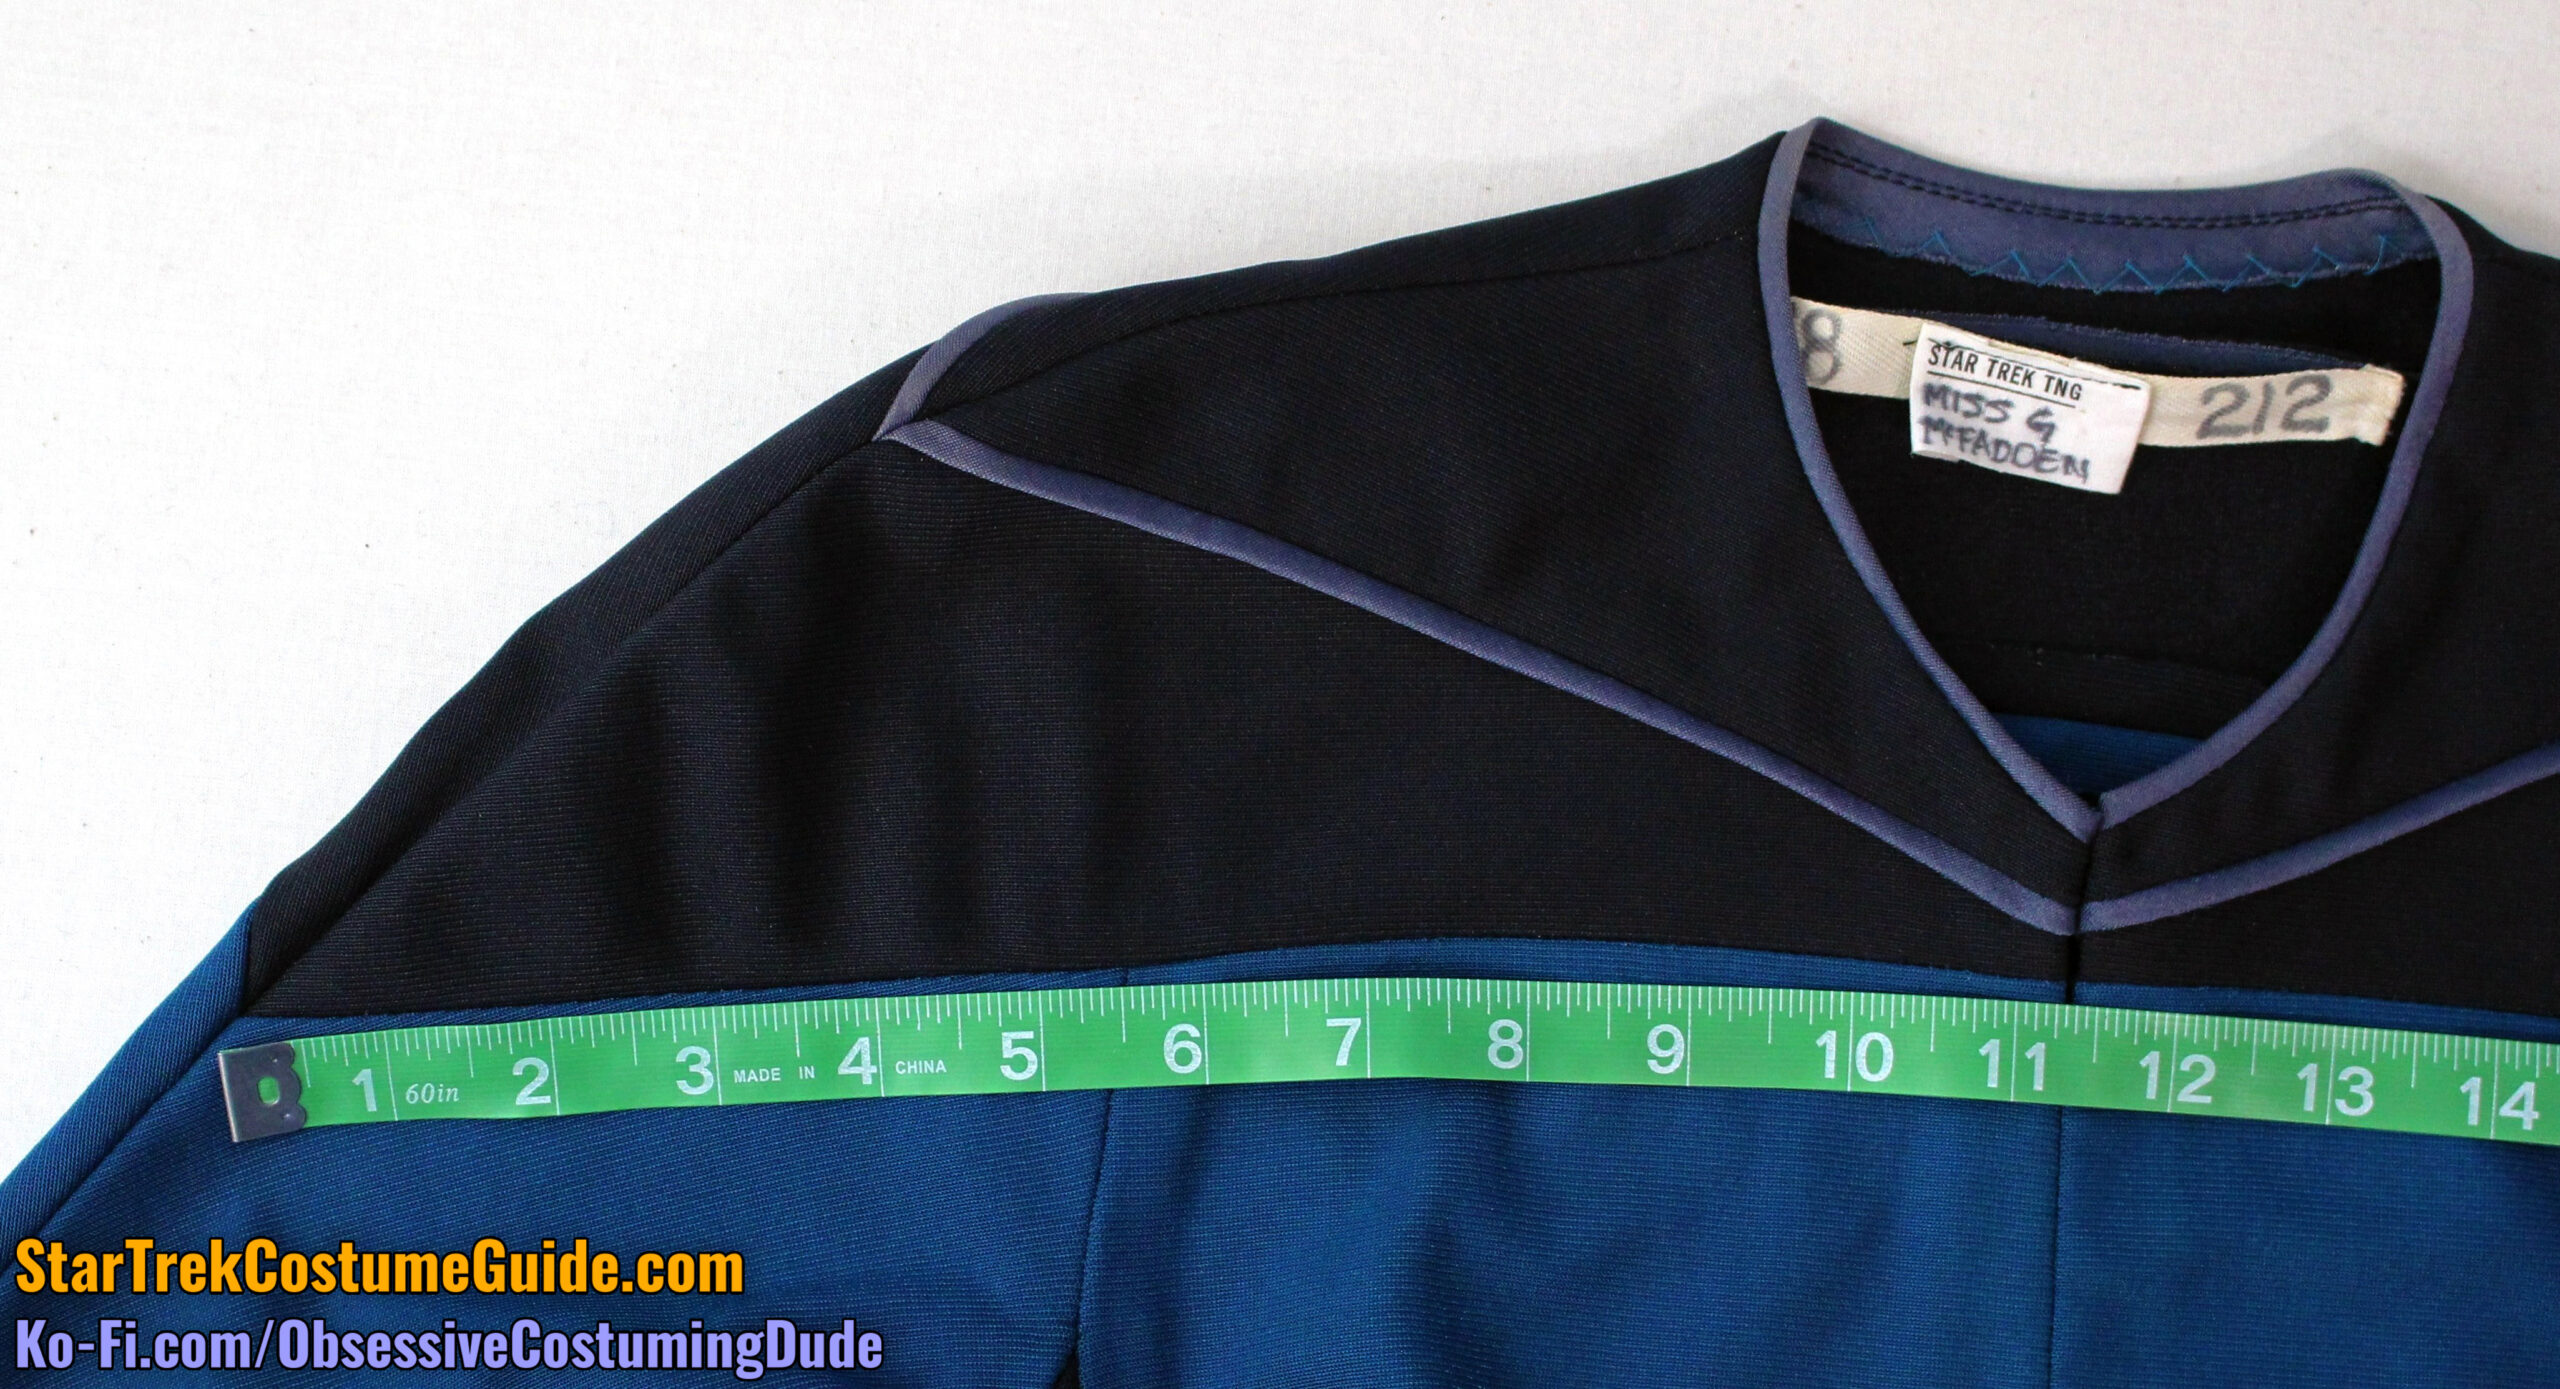
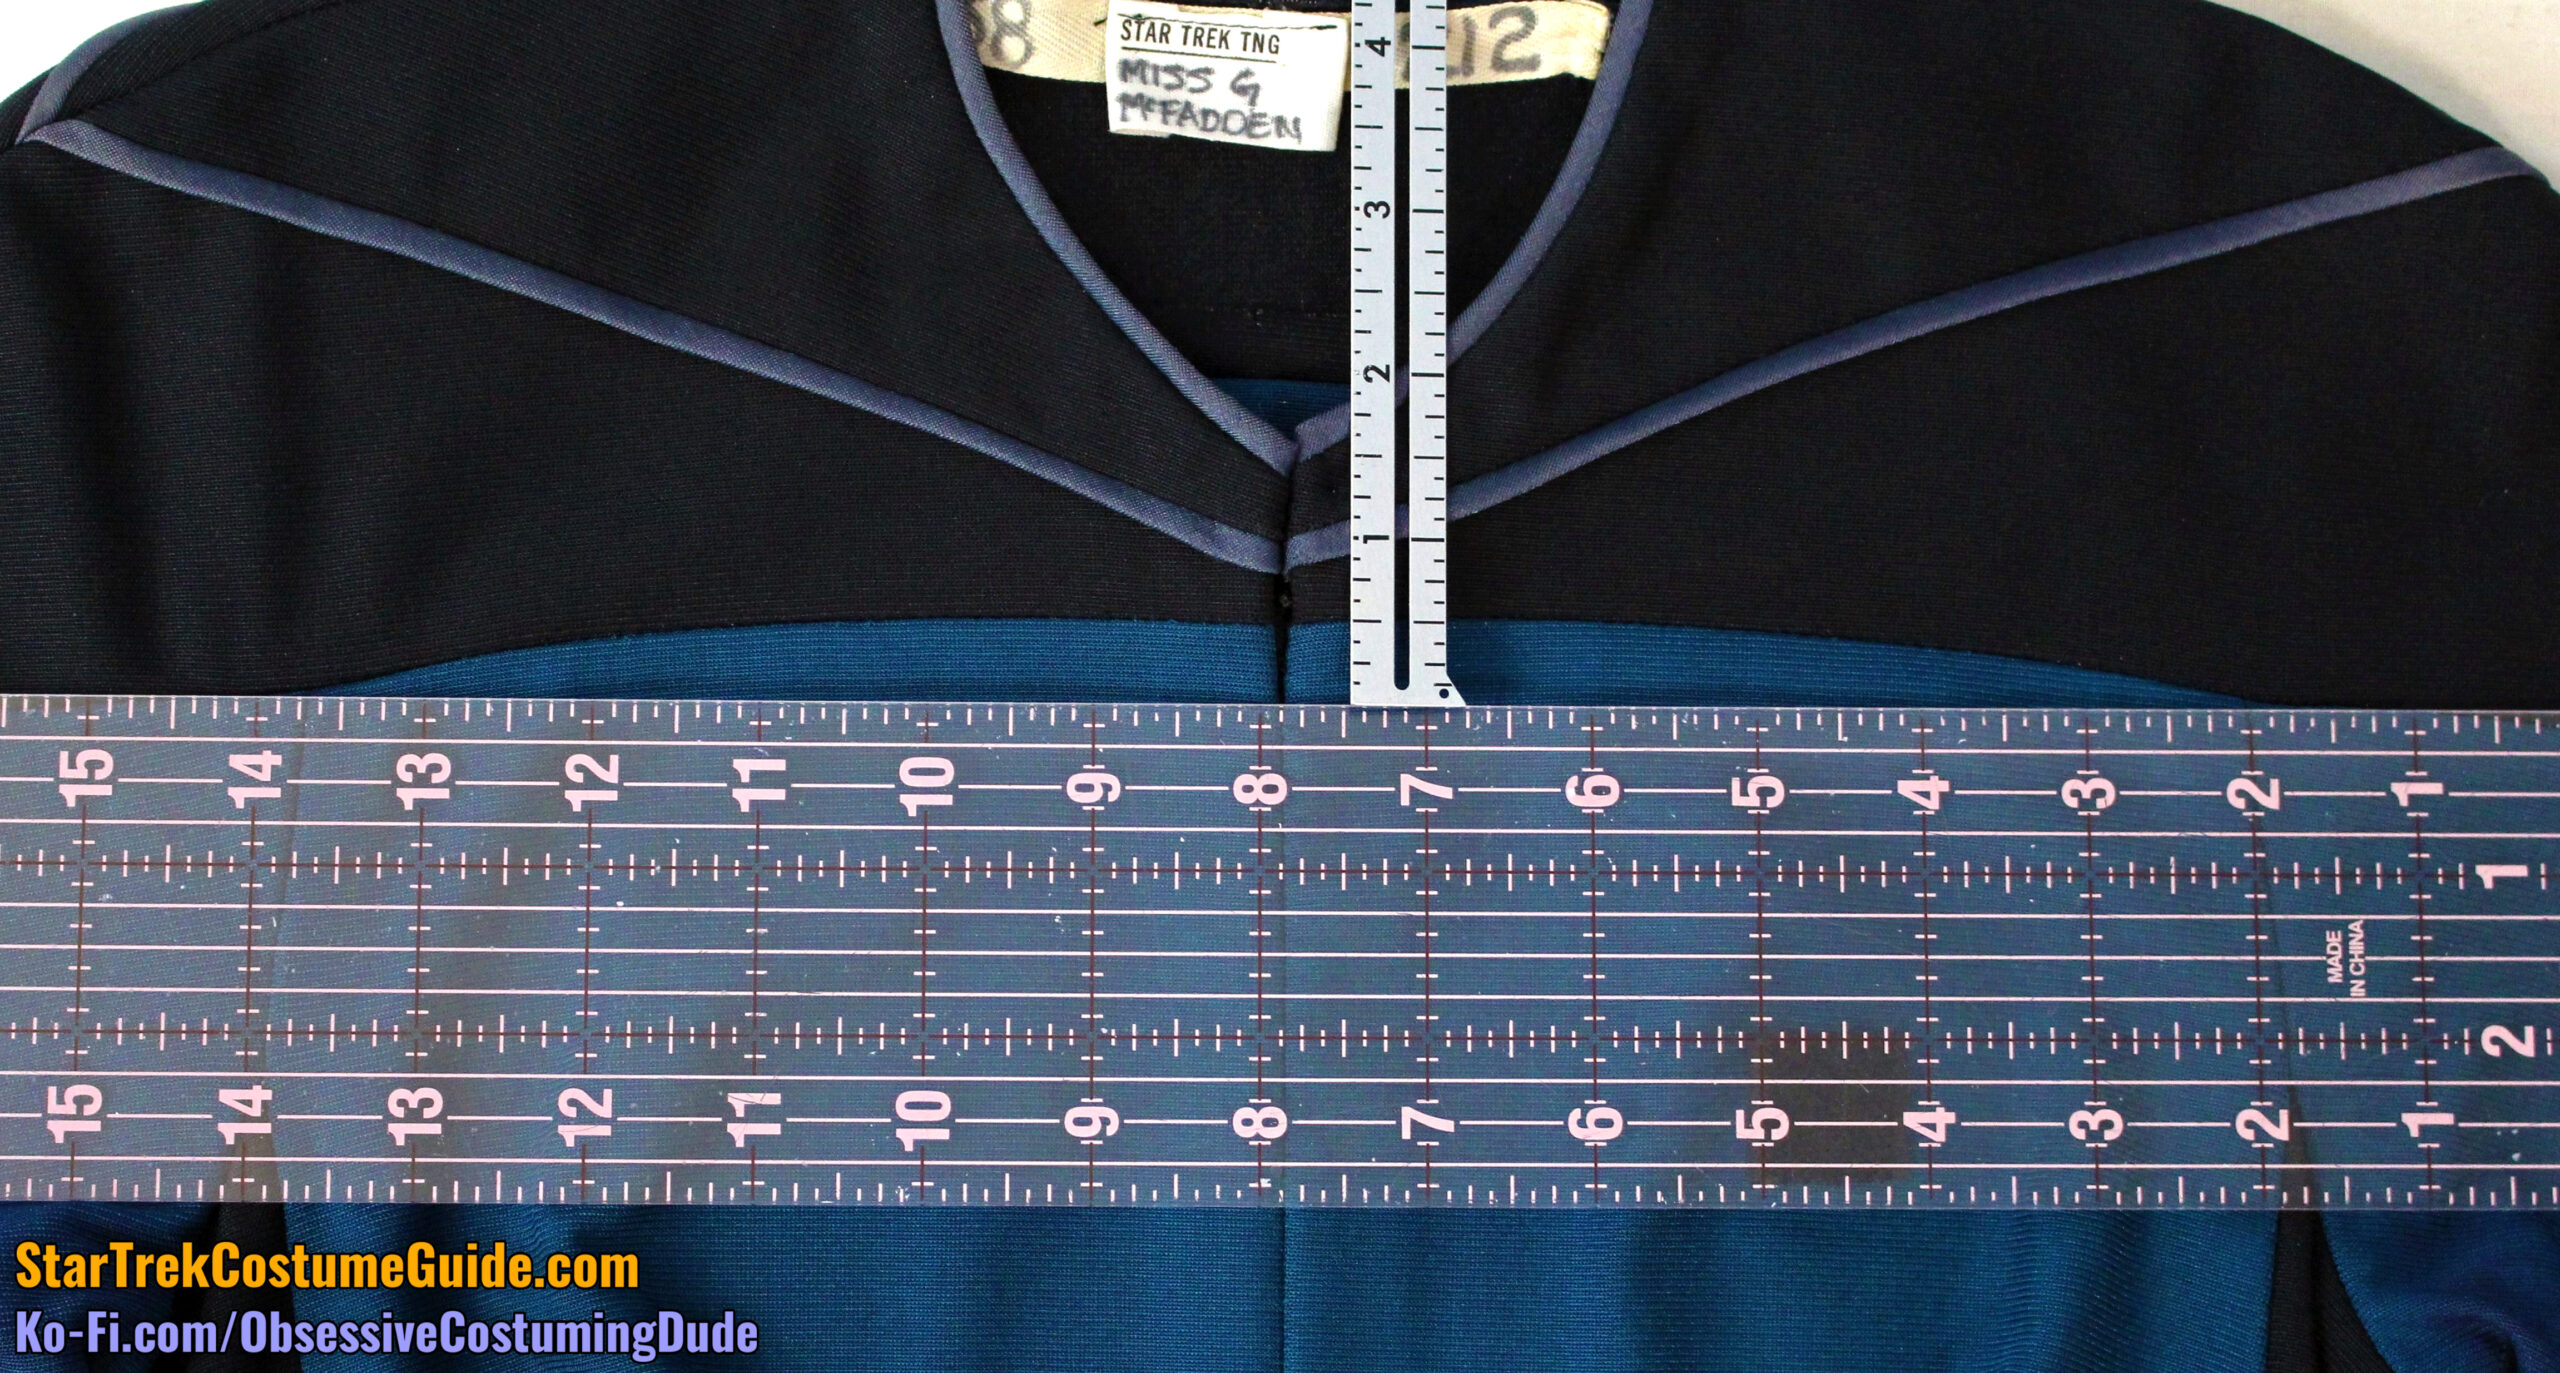
The neckline on Beverly’s jumpsuit was 4 ¾” wide at the shoulder seam (sans neckline trim).
Incidentally, these specific front yoke proportions were helpful in determining when this specific uniform was seen in the show.
After hunting (and squinting) a lot, I believe I spotted this particular uniform in the episode, “The Battle.”
TNG, 1x19 “The Battle”
Unfortunately, I can’t say for sure whether or not she wore this specific jumpsuit in any other episodes; while she obviously had plenty of screen time over the course of the season, she was often either too far away or not facing the camera, or her jumpsuit details were obscured by her hair or lab coat.
I was able to rule out quite a few other episodes (or at least scenes in those episodes), but the only time I was able to spot (what appears to be) this specific uniform was in the aforementioned episode.
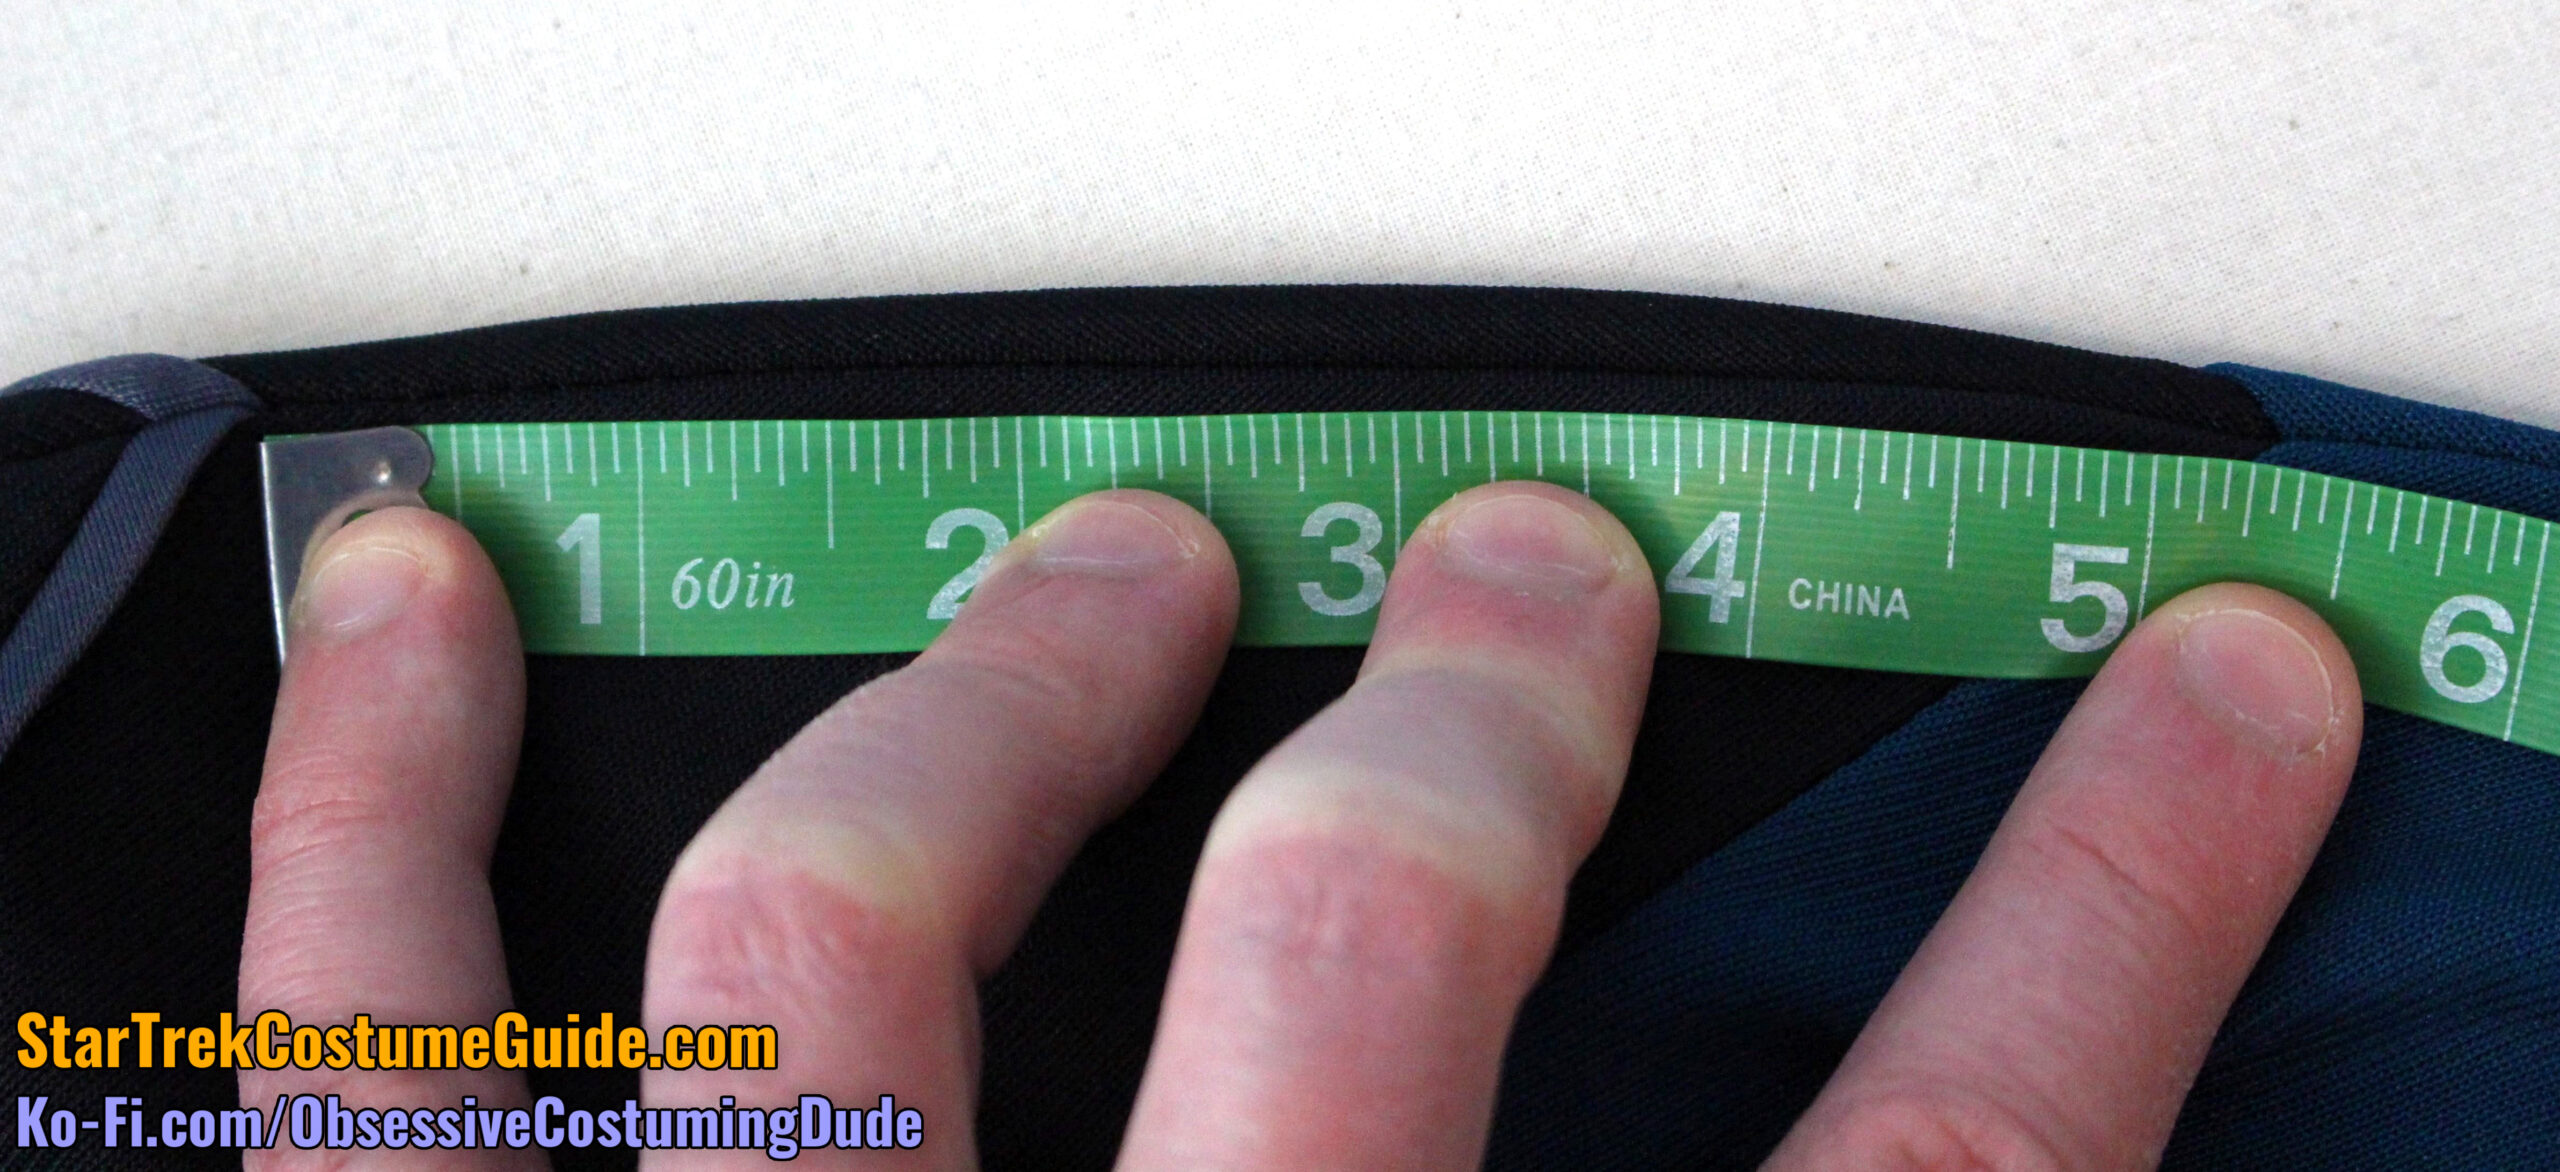
Both front yokes were 4 ½” deep at the shoulder seams.
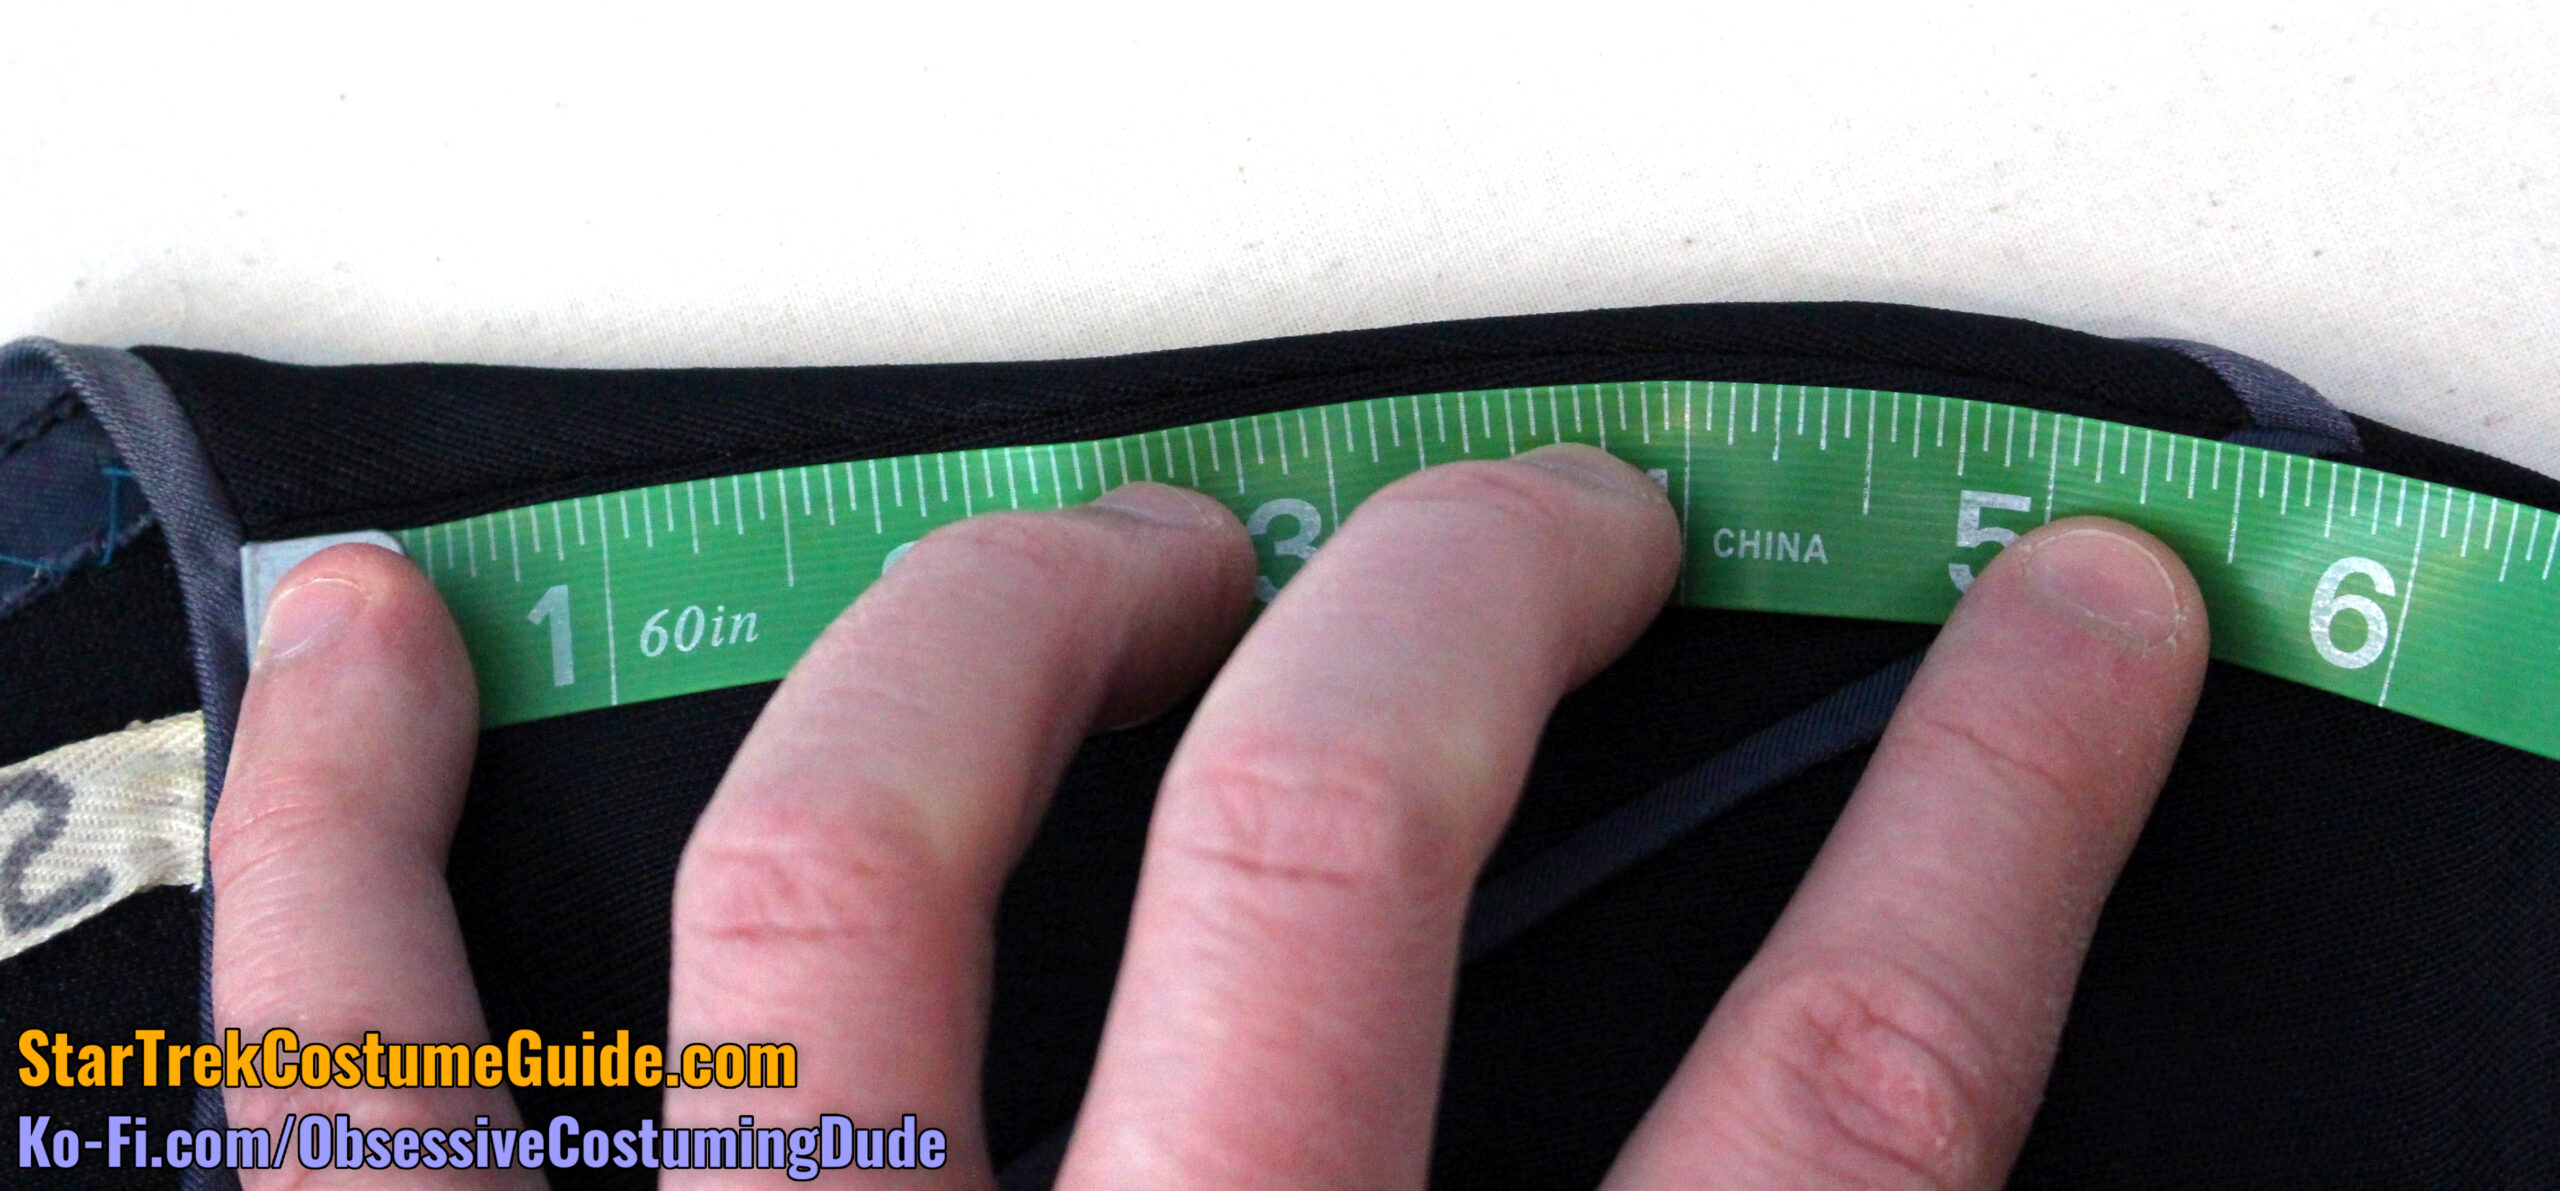
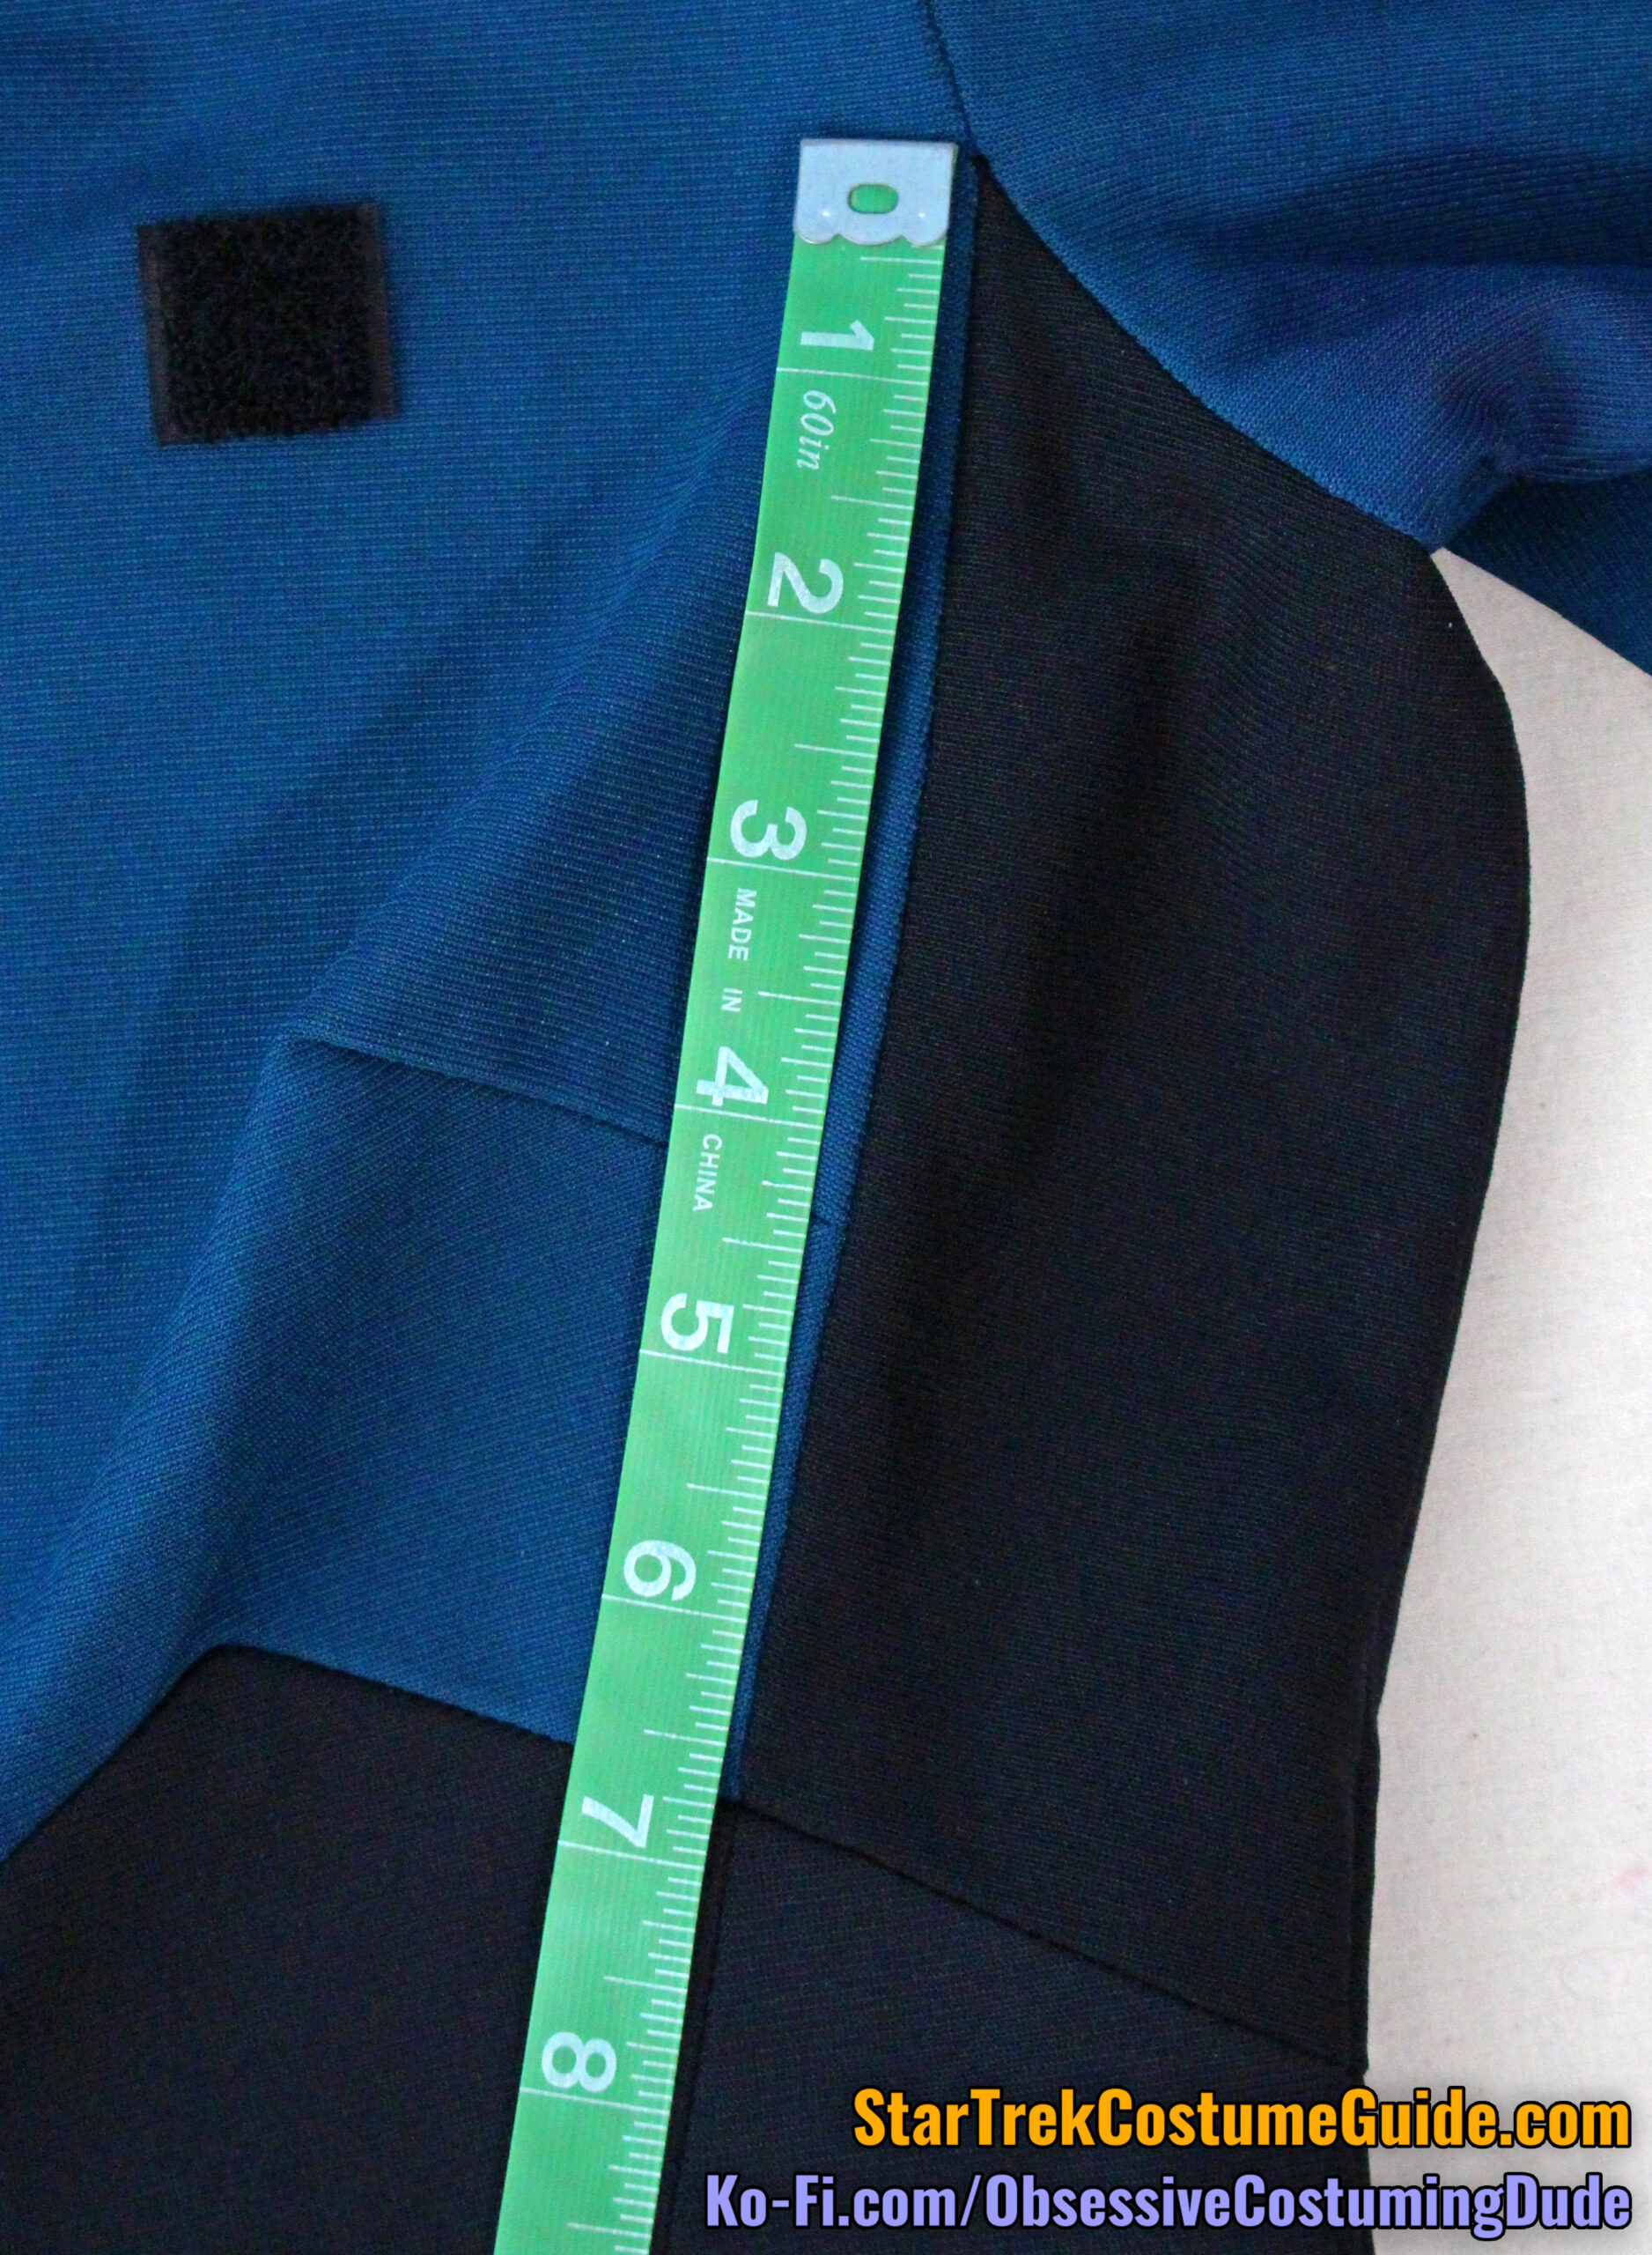
The right upper yoke/shoulder seam was 5 ¼” (measured from the outer edge of the neckline trim to the upper edge of the yoke piping).
However, the left upper yoke/shoulder seam was ¼” longer, measuring 5 ½”.
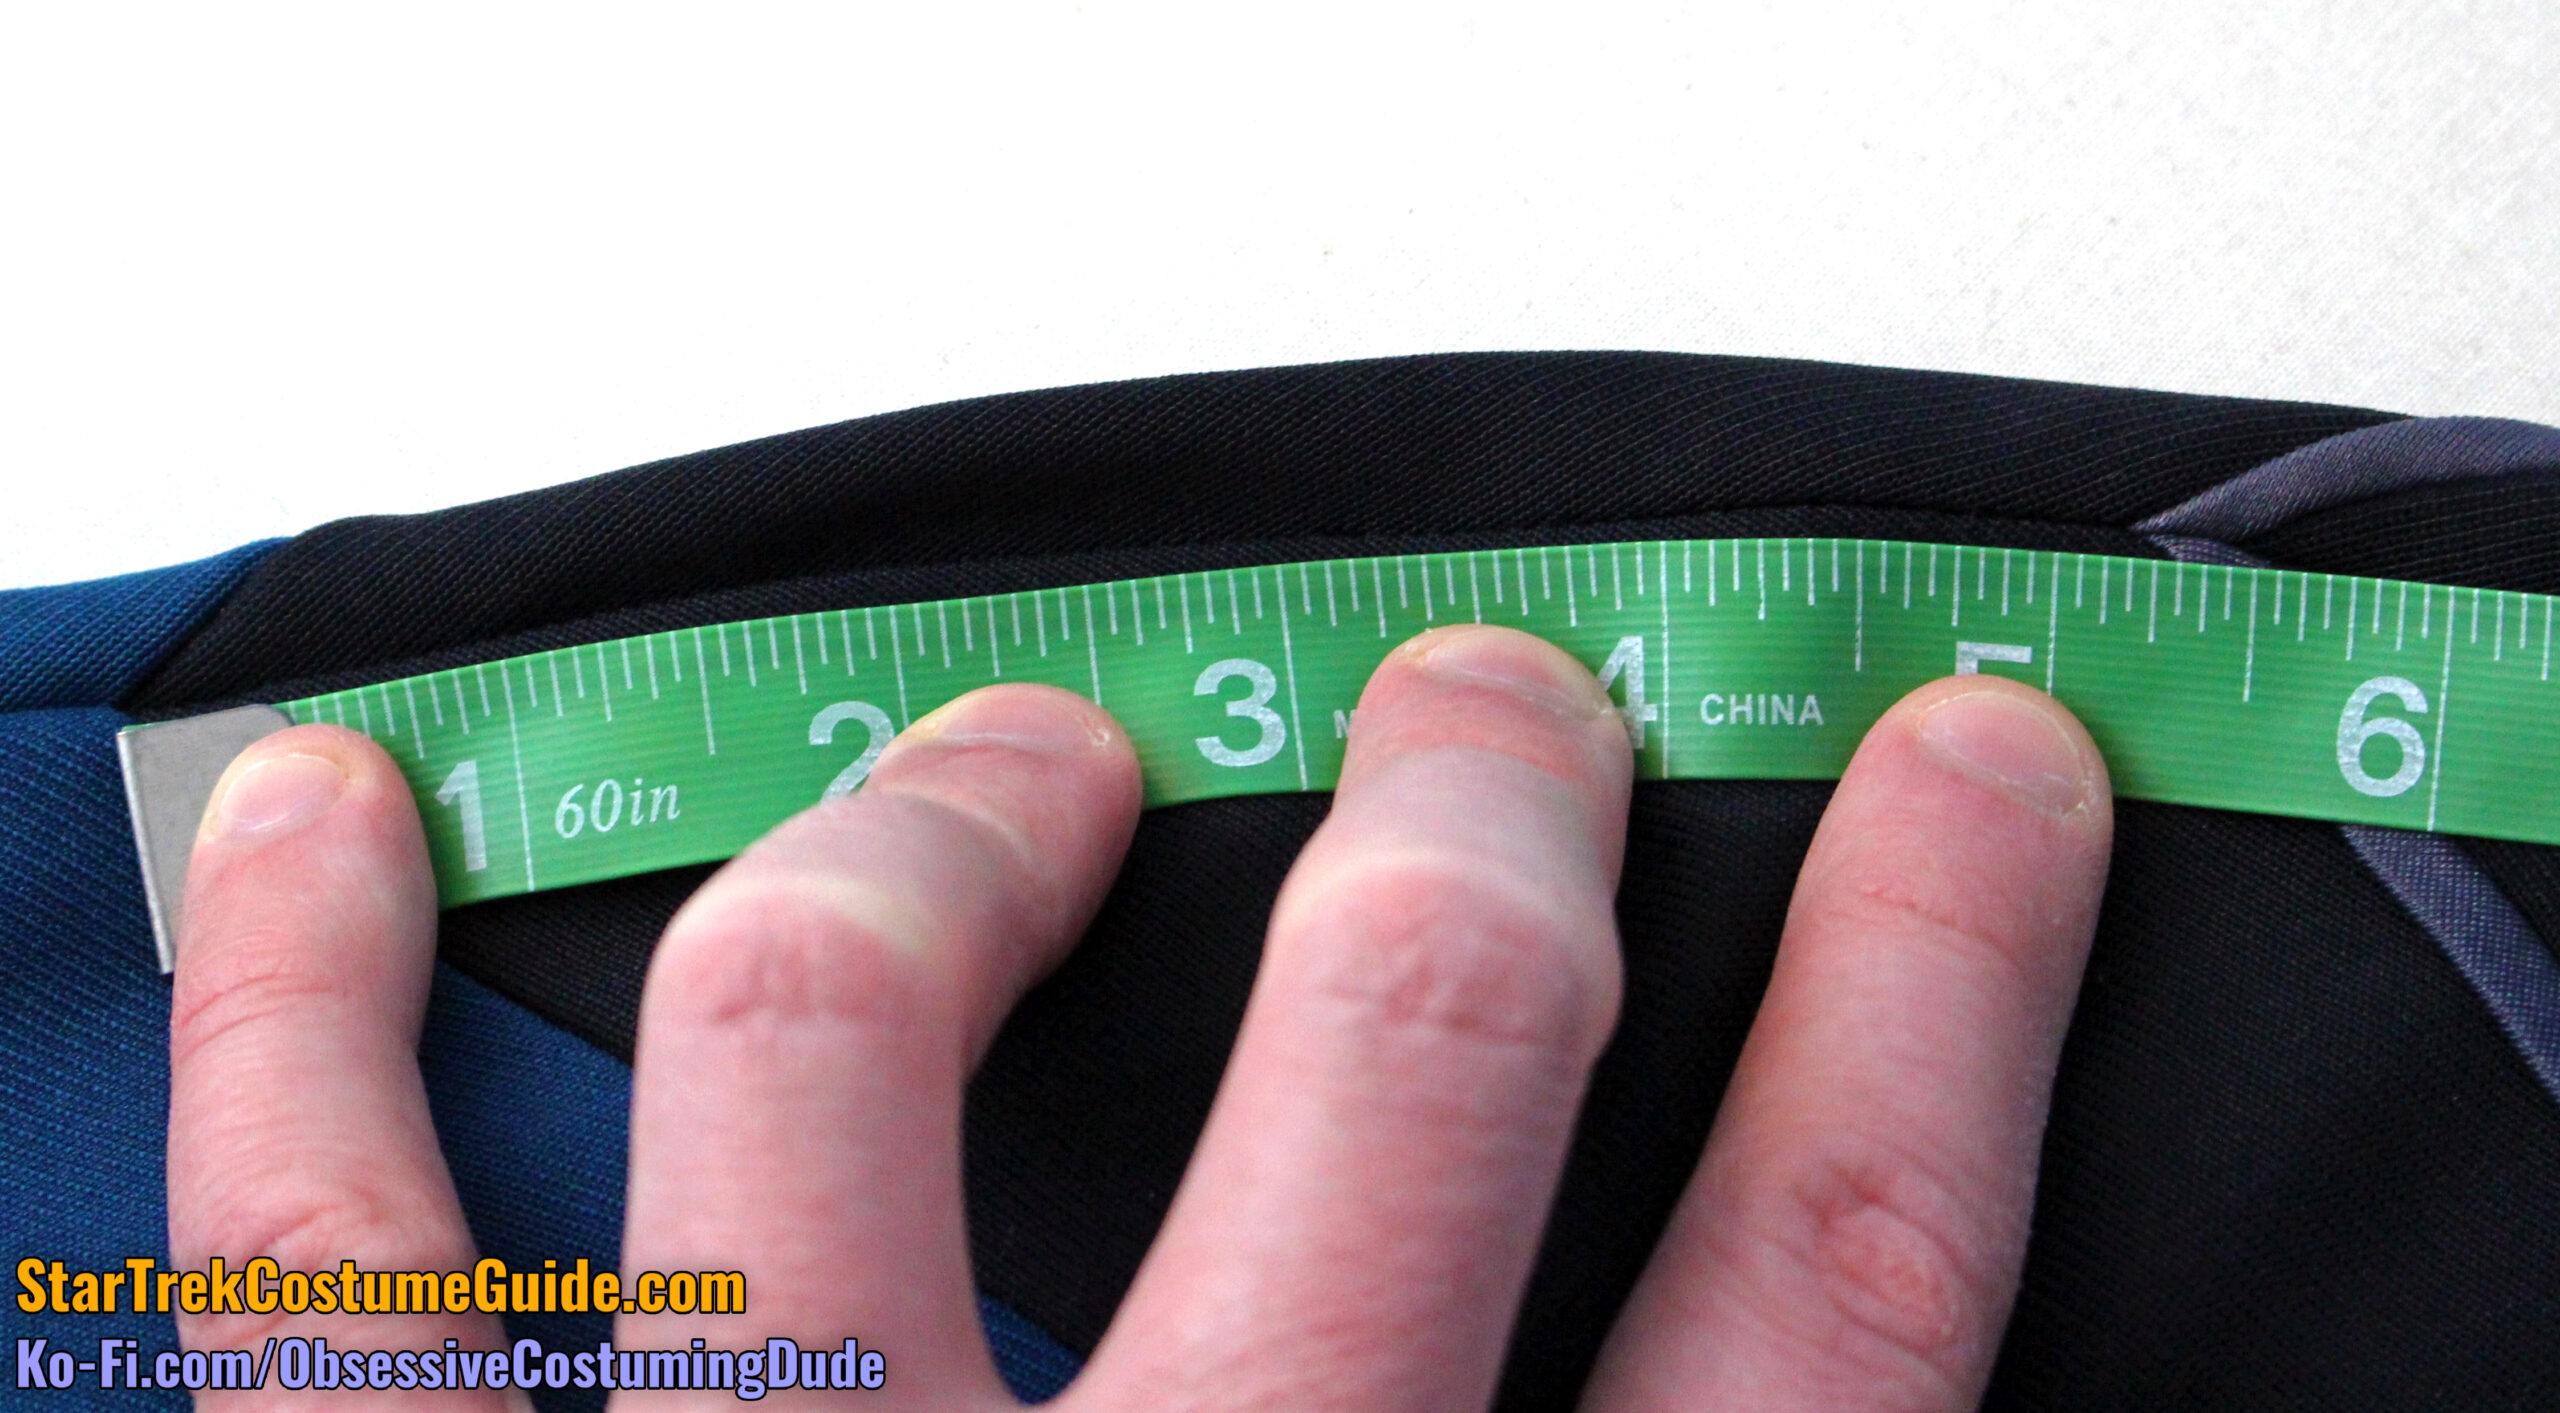
Both yokes extended onto the sleeves 5 ¼” (measured from the lower edge of the yoke piping to the lower/outer corners of the yokes).
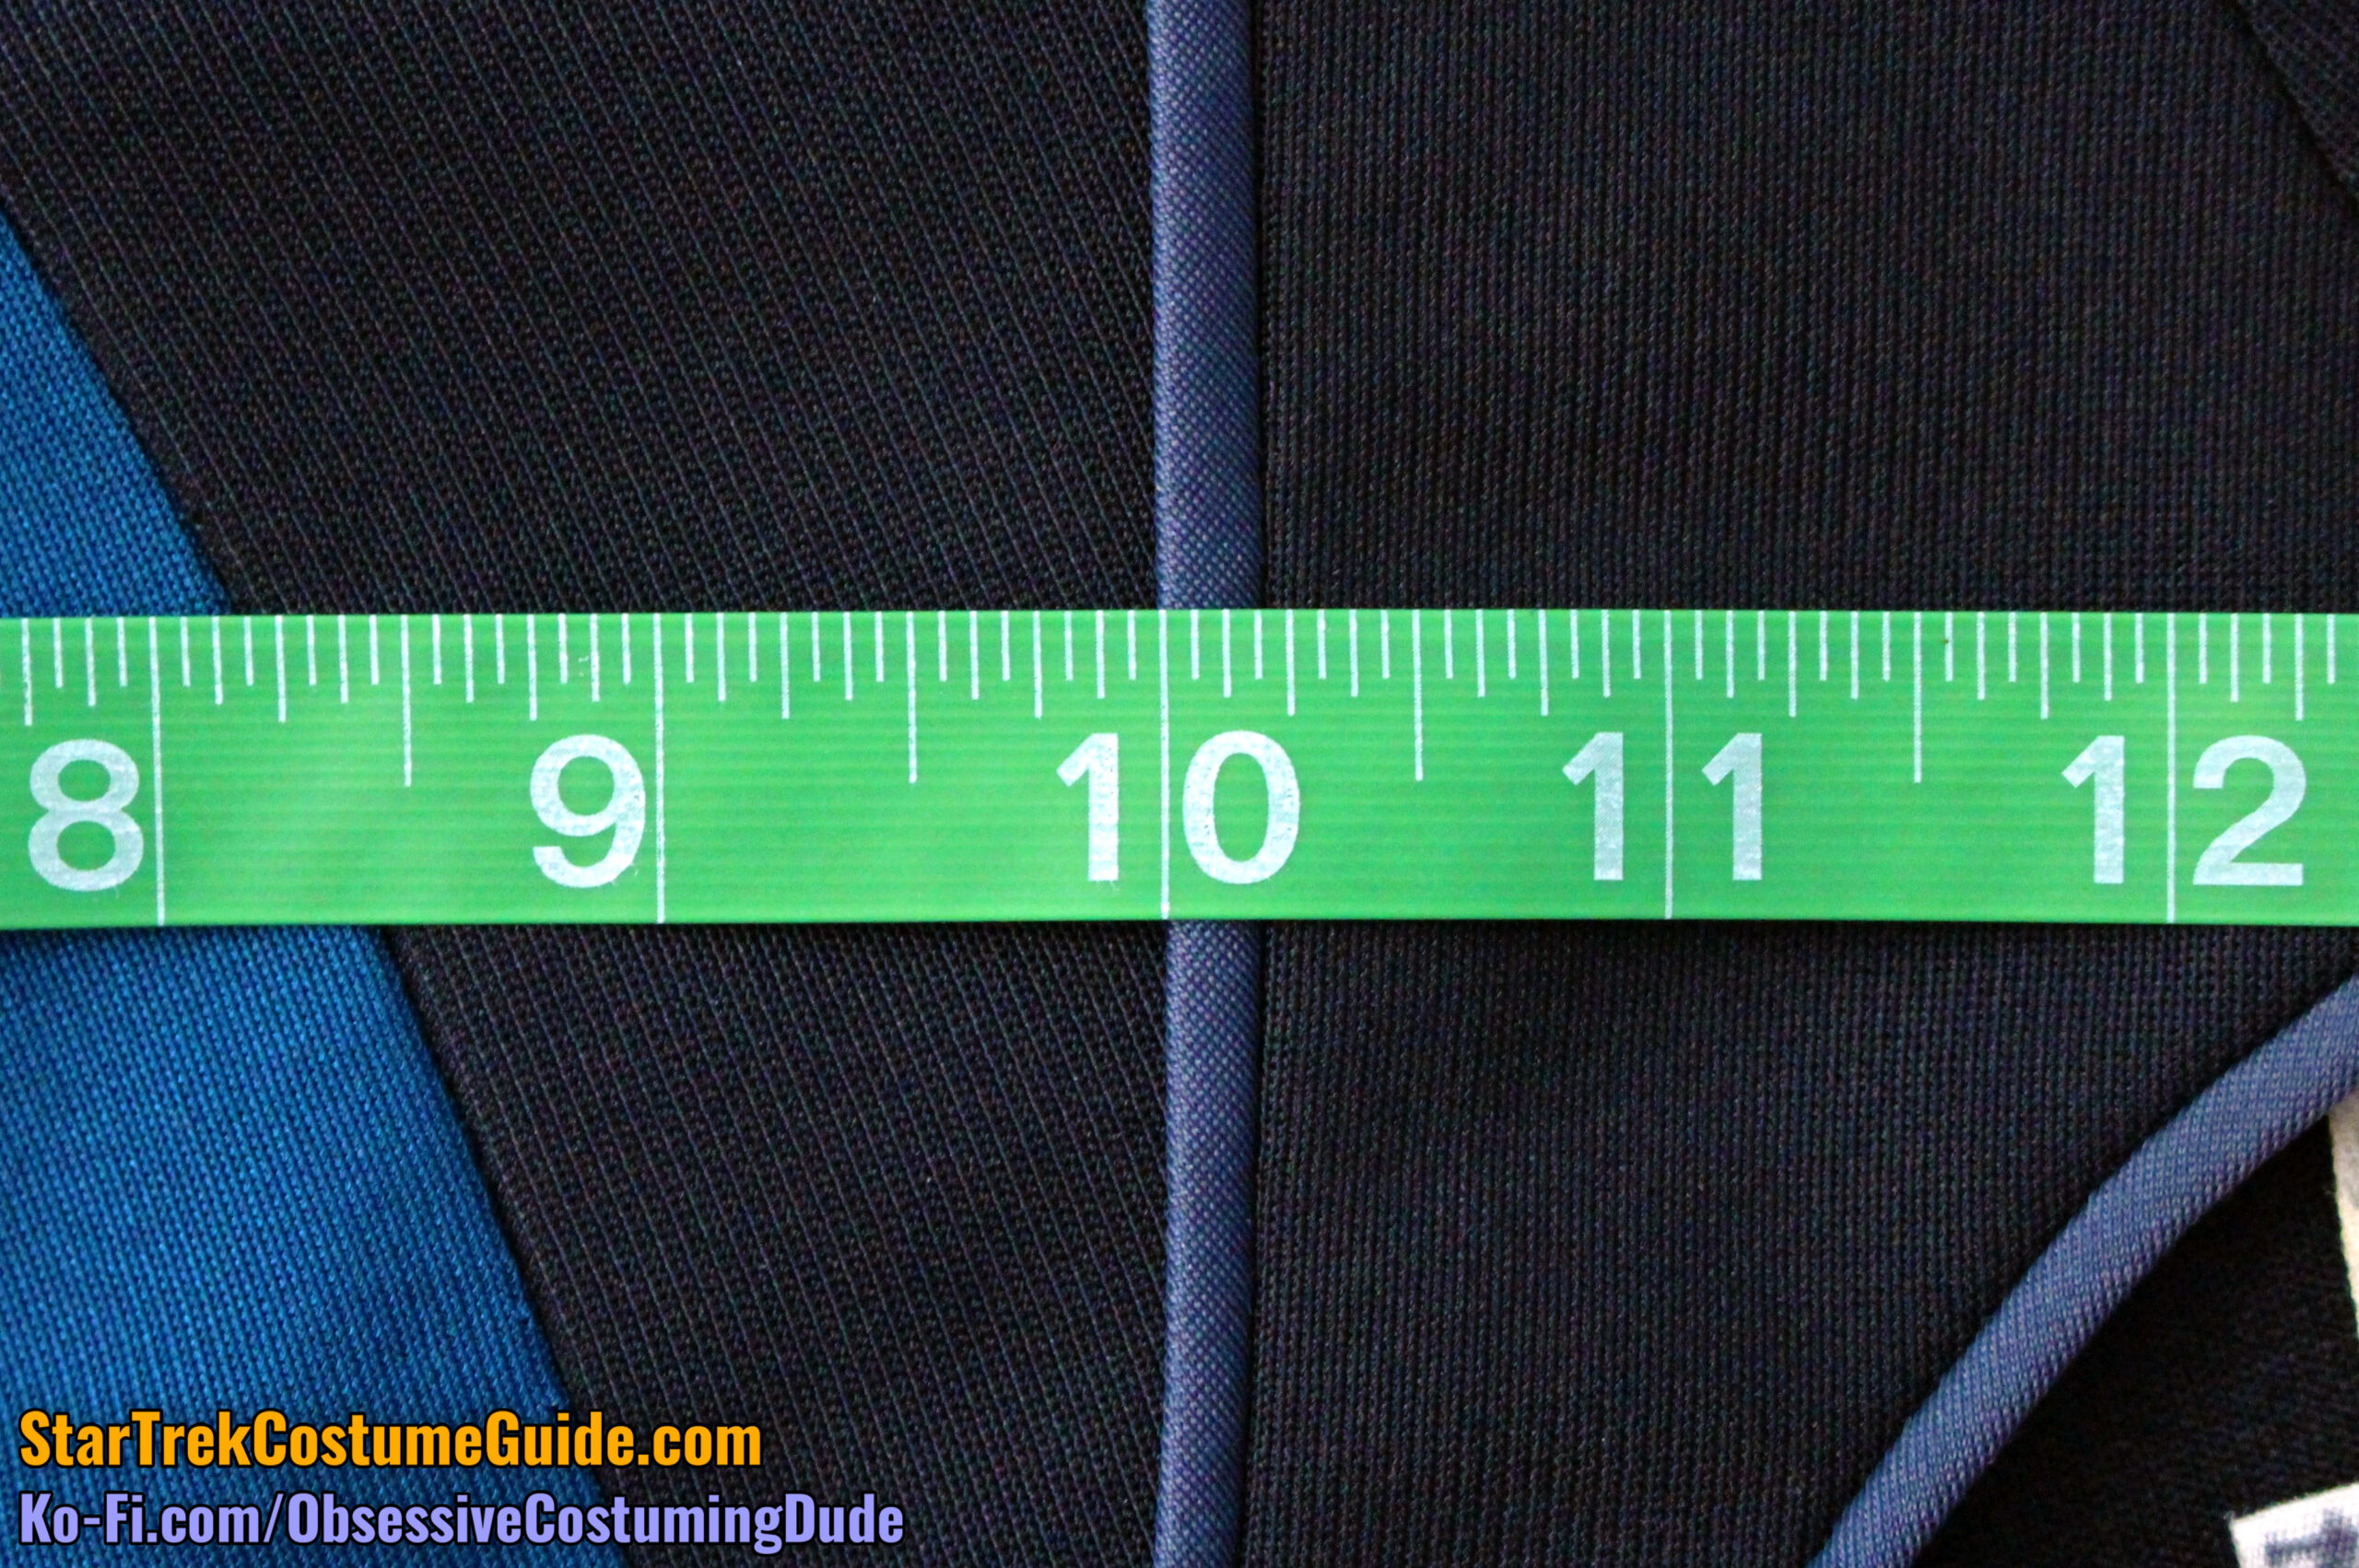
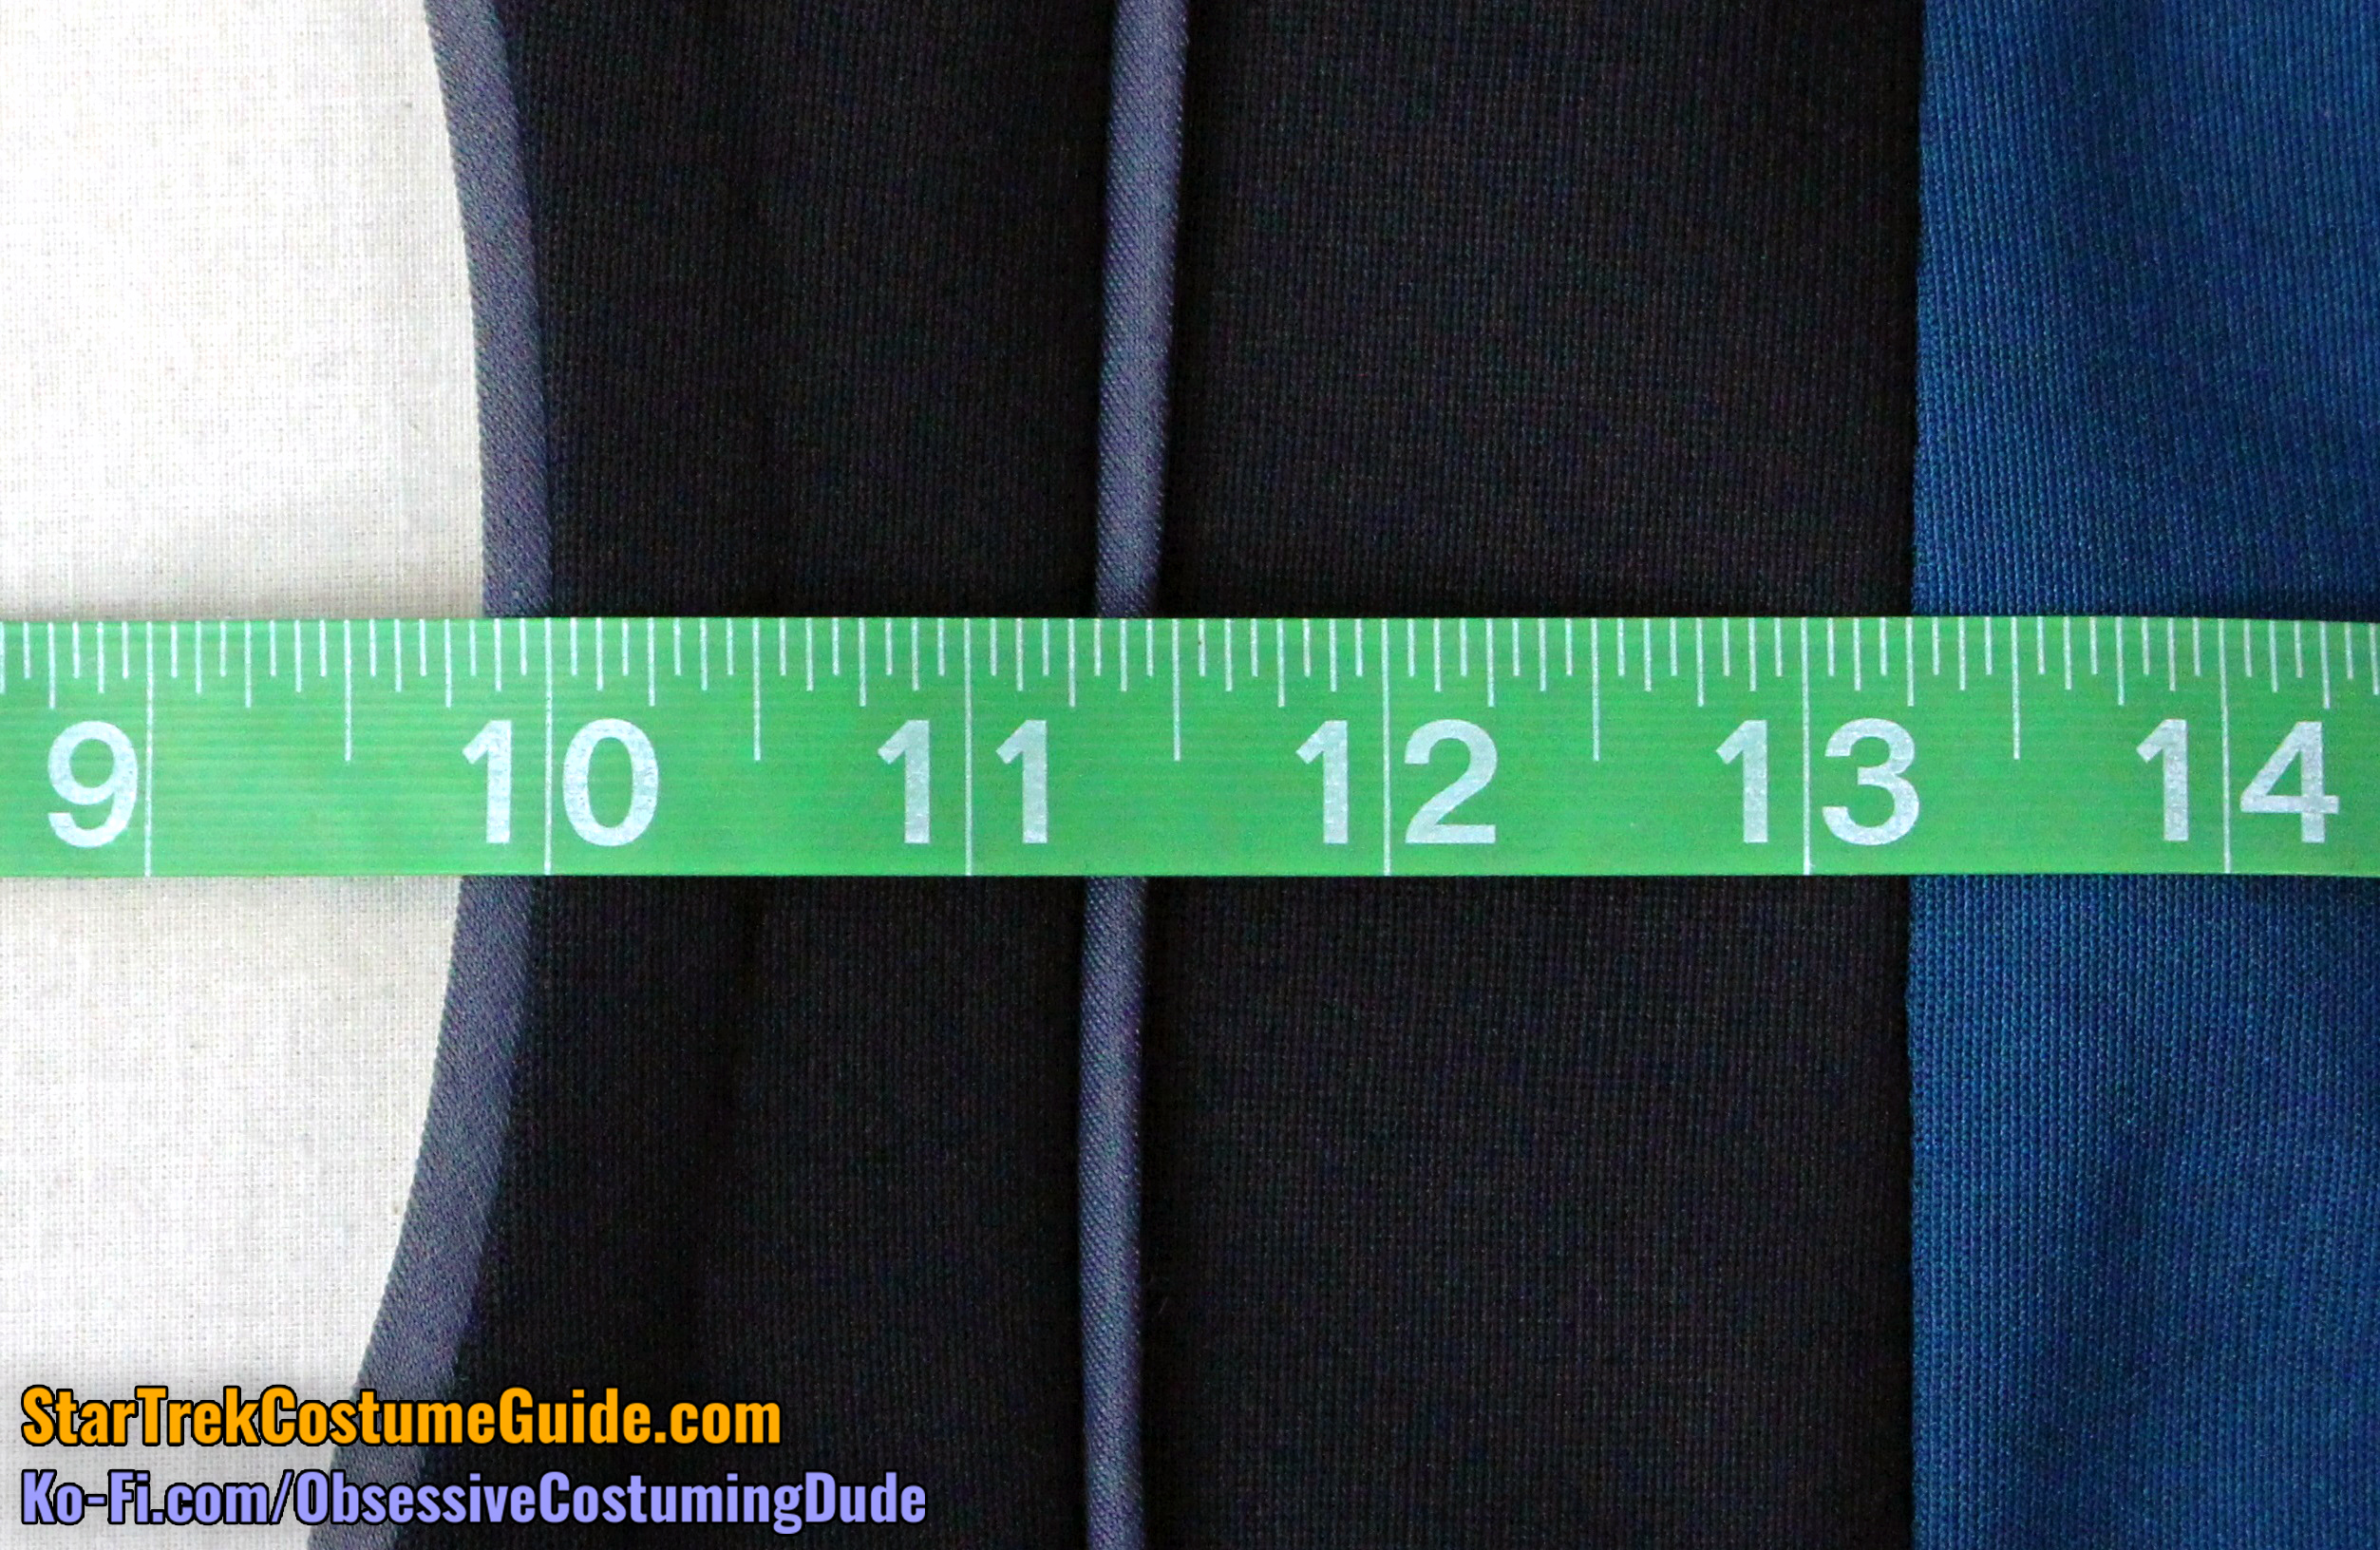
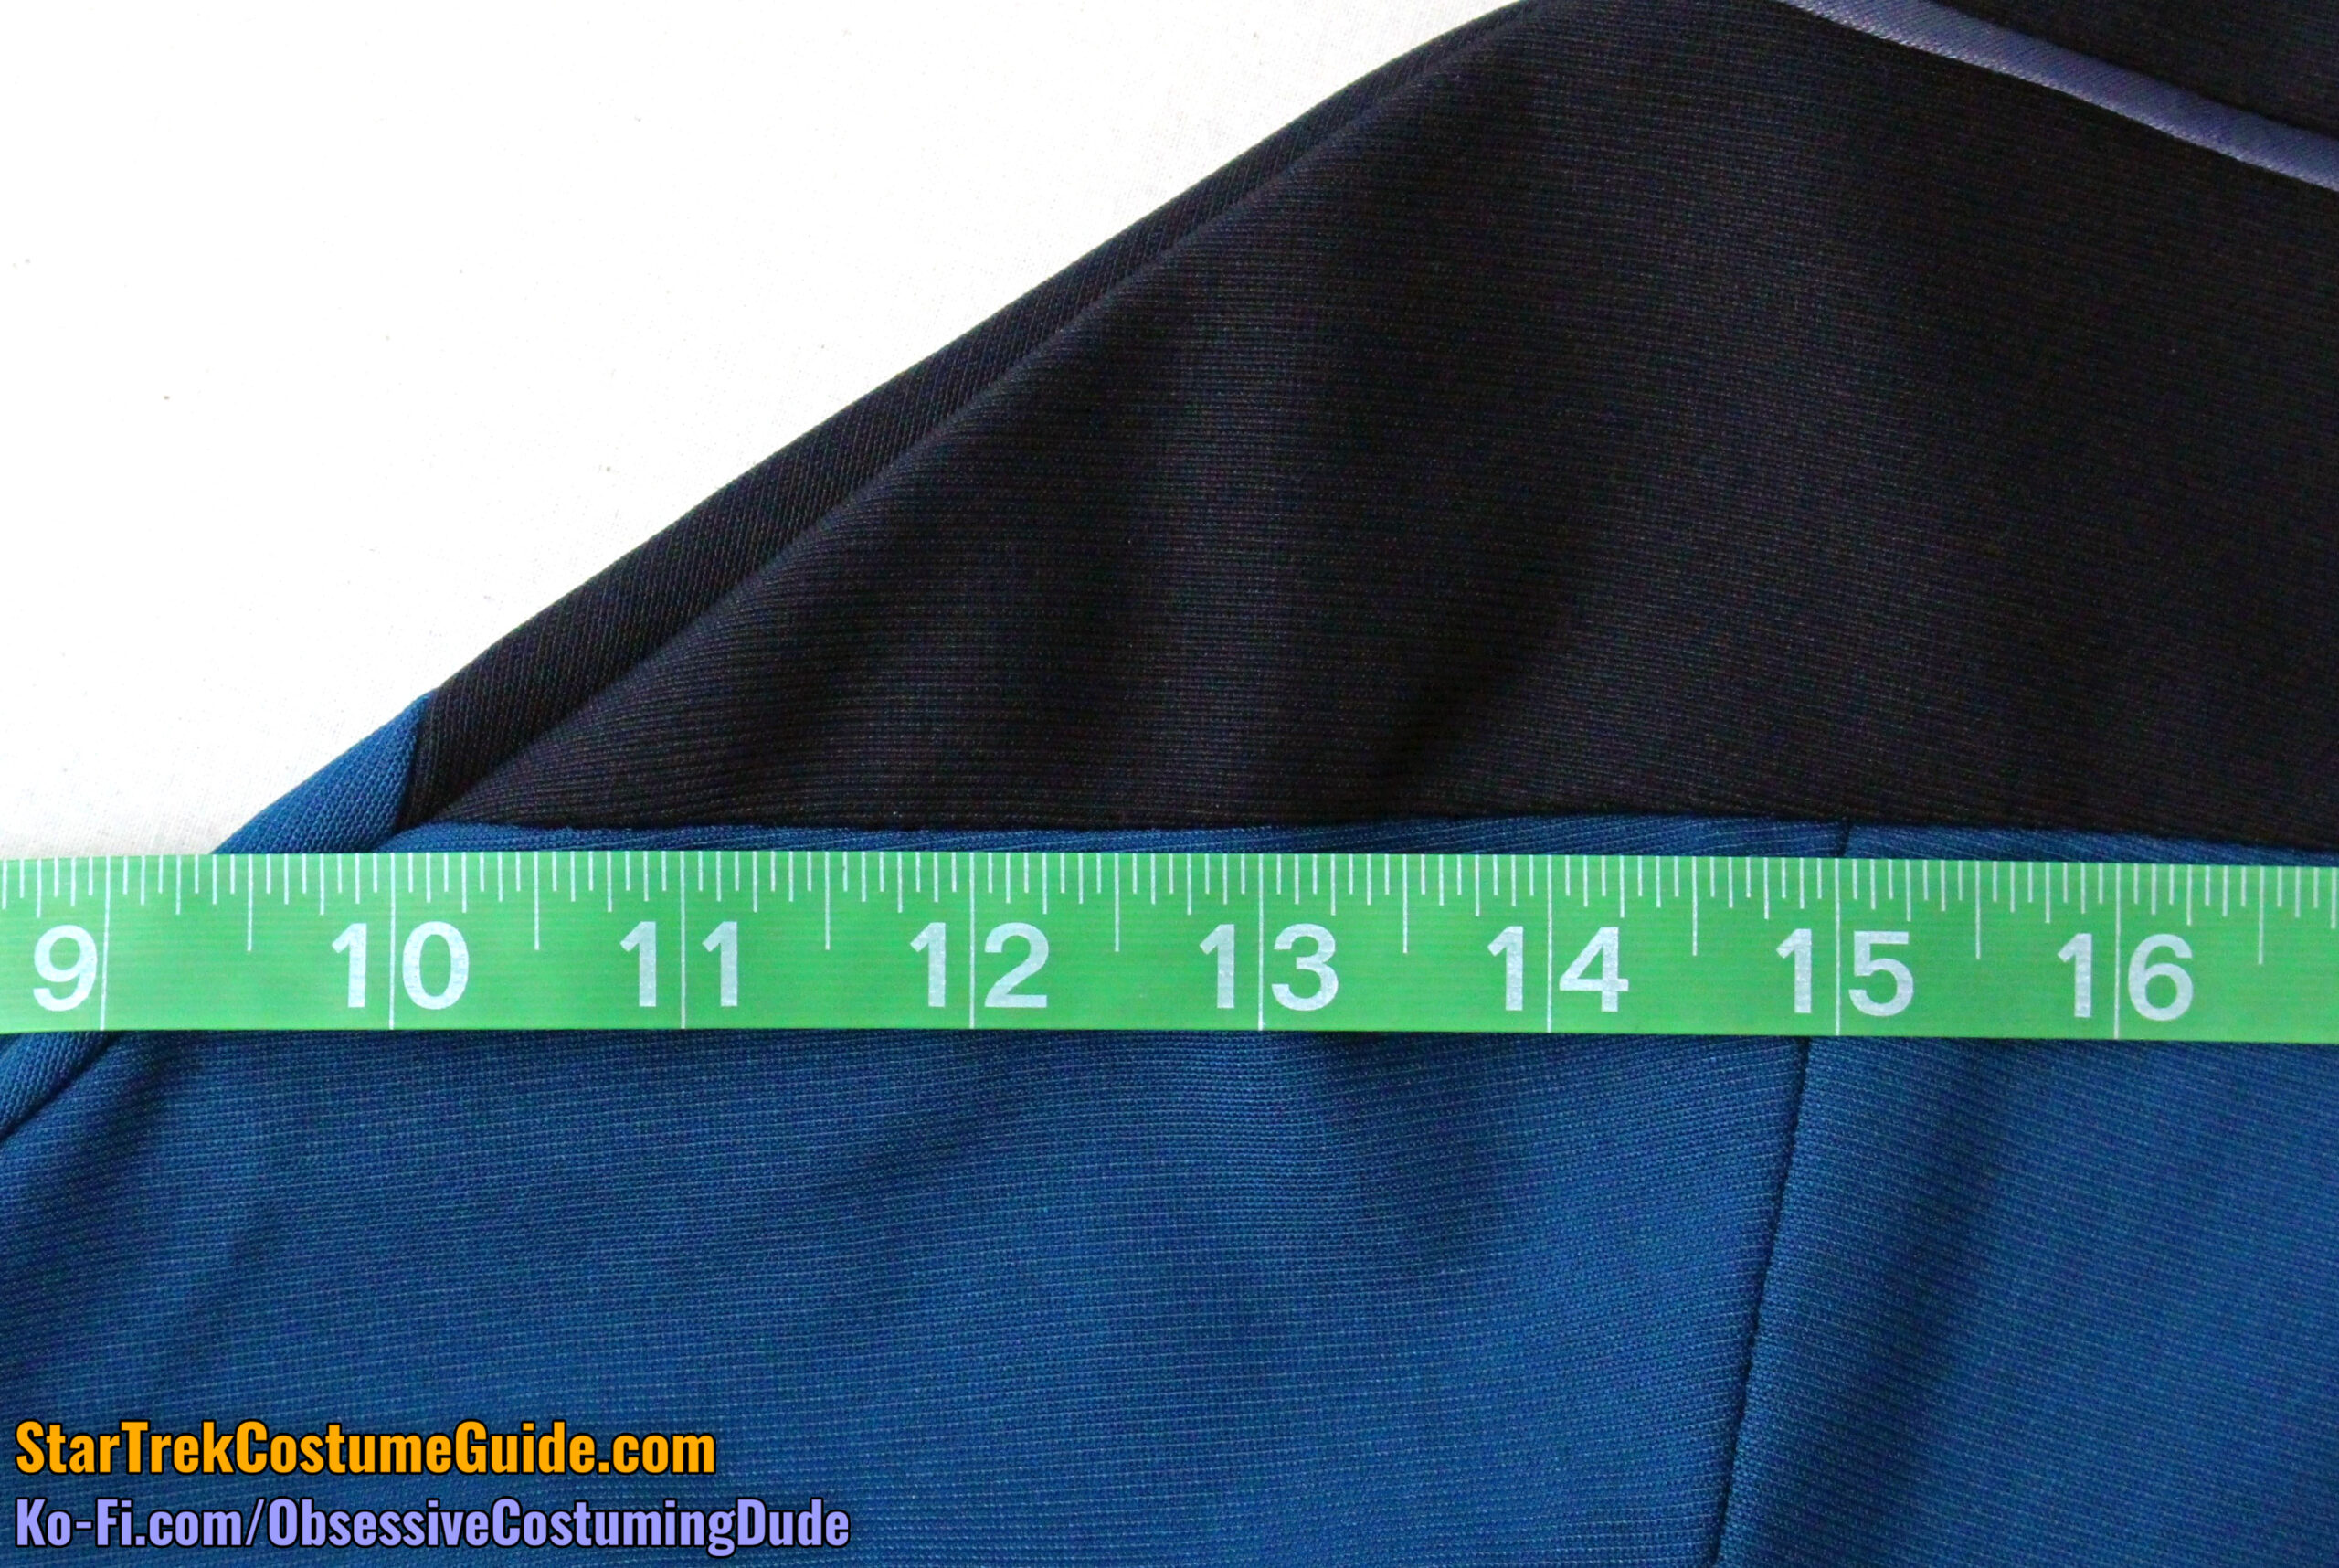
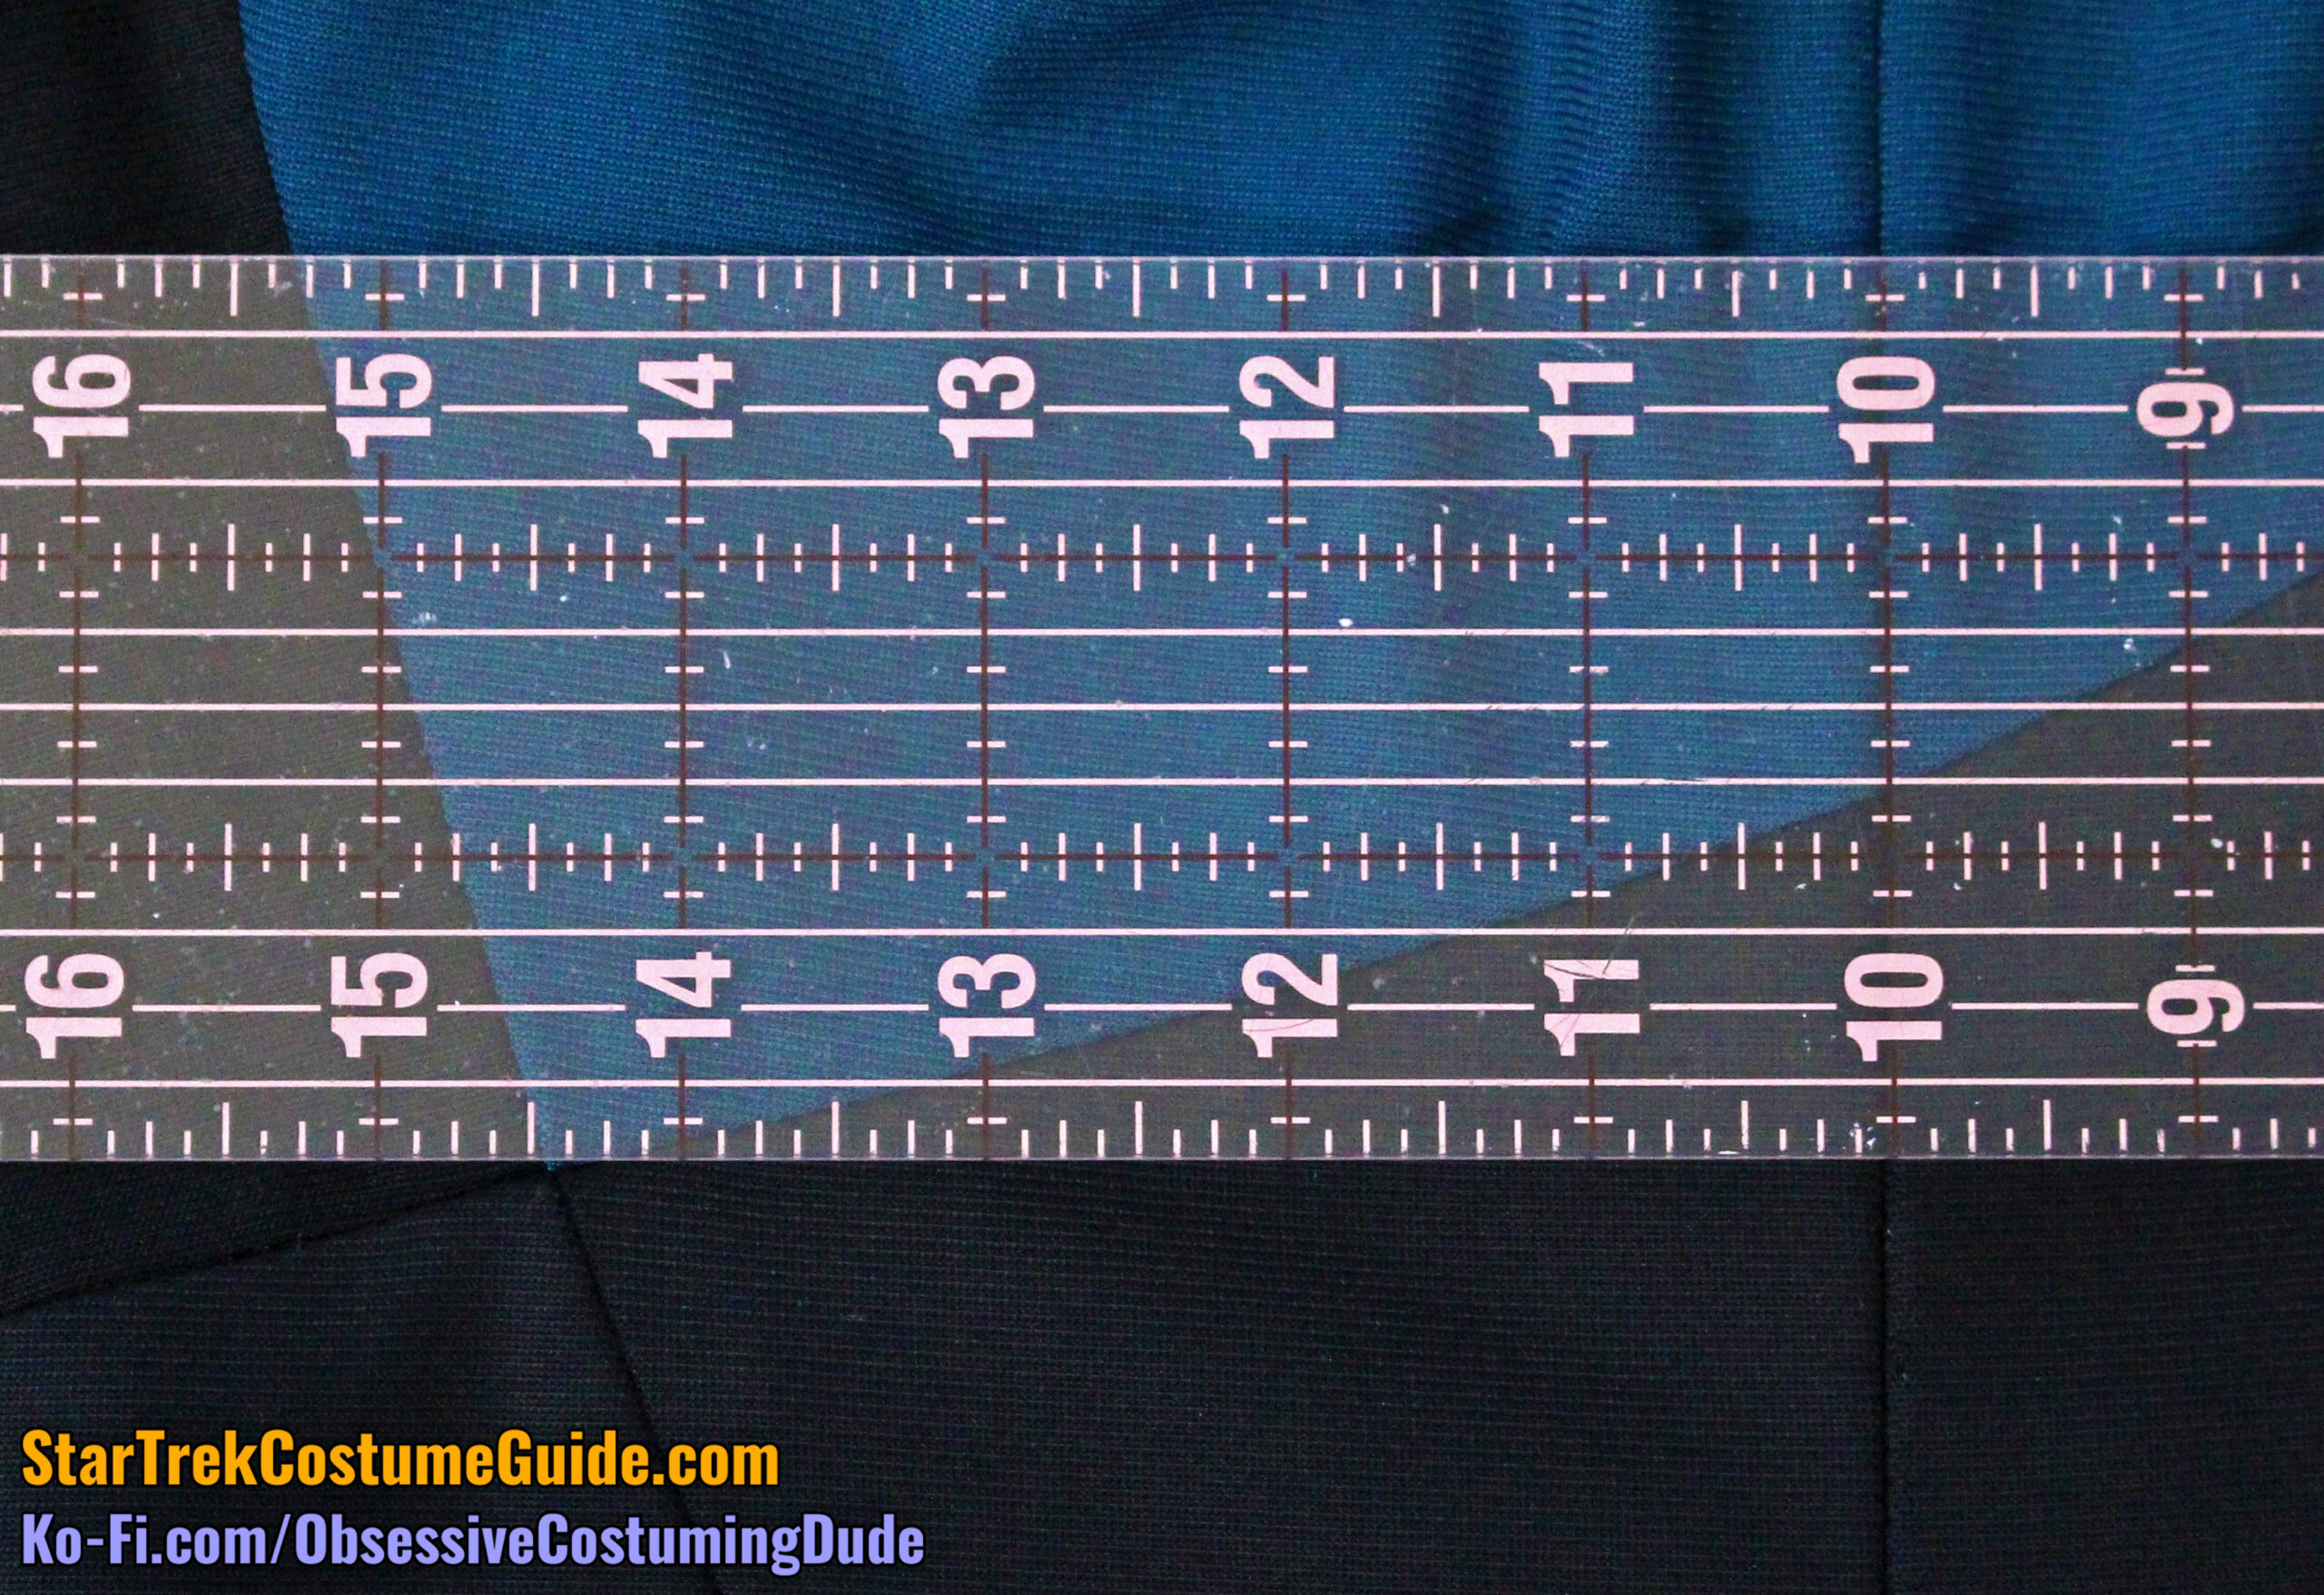
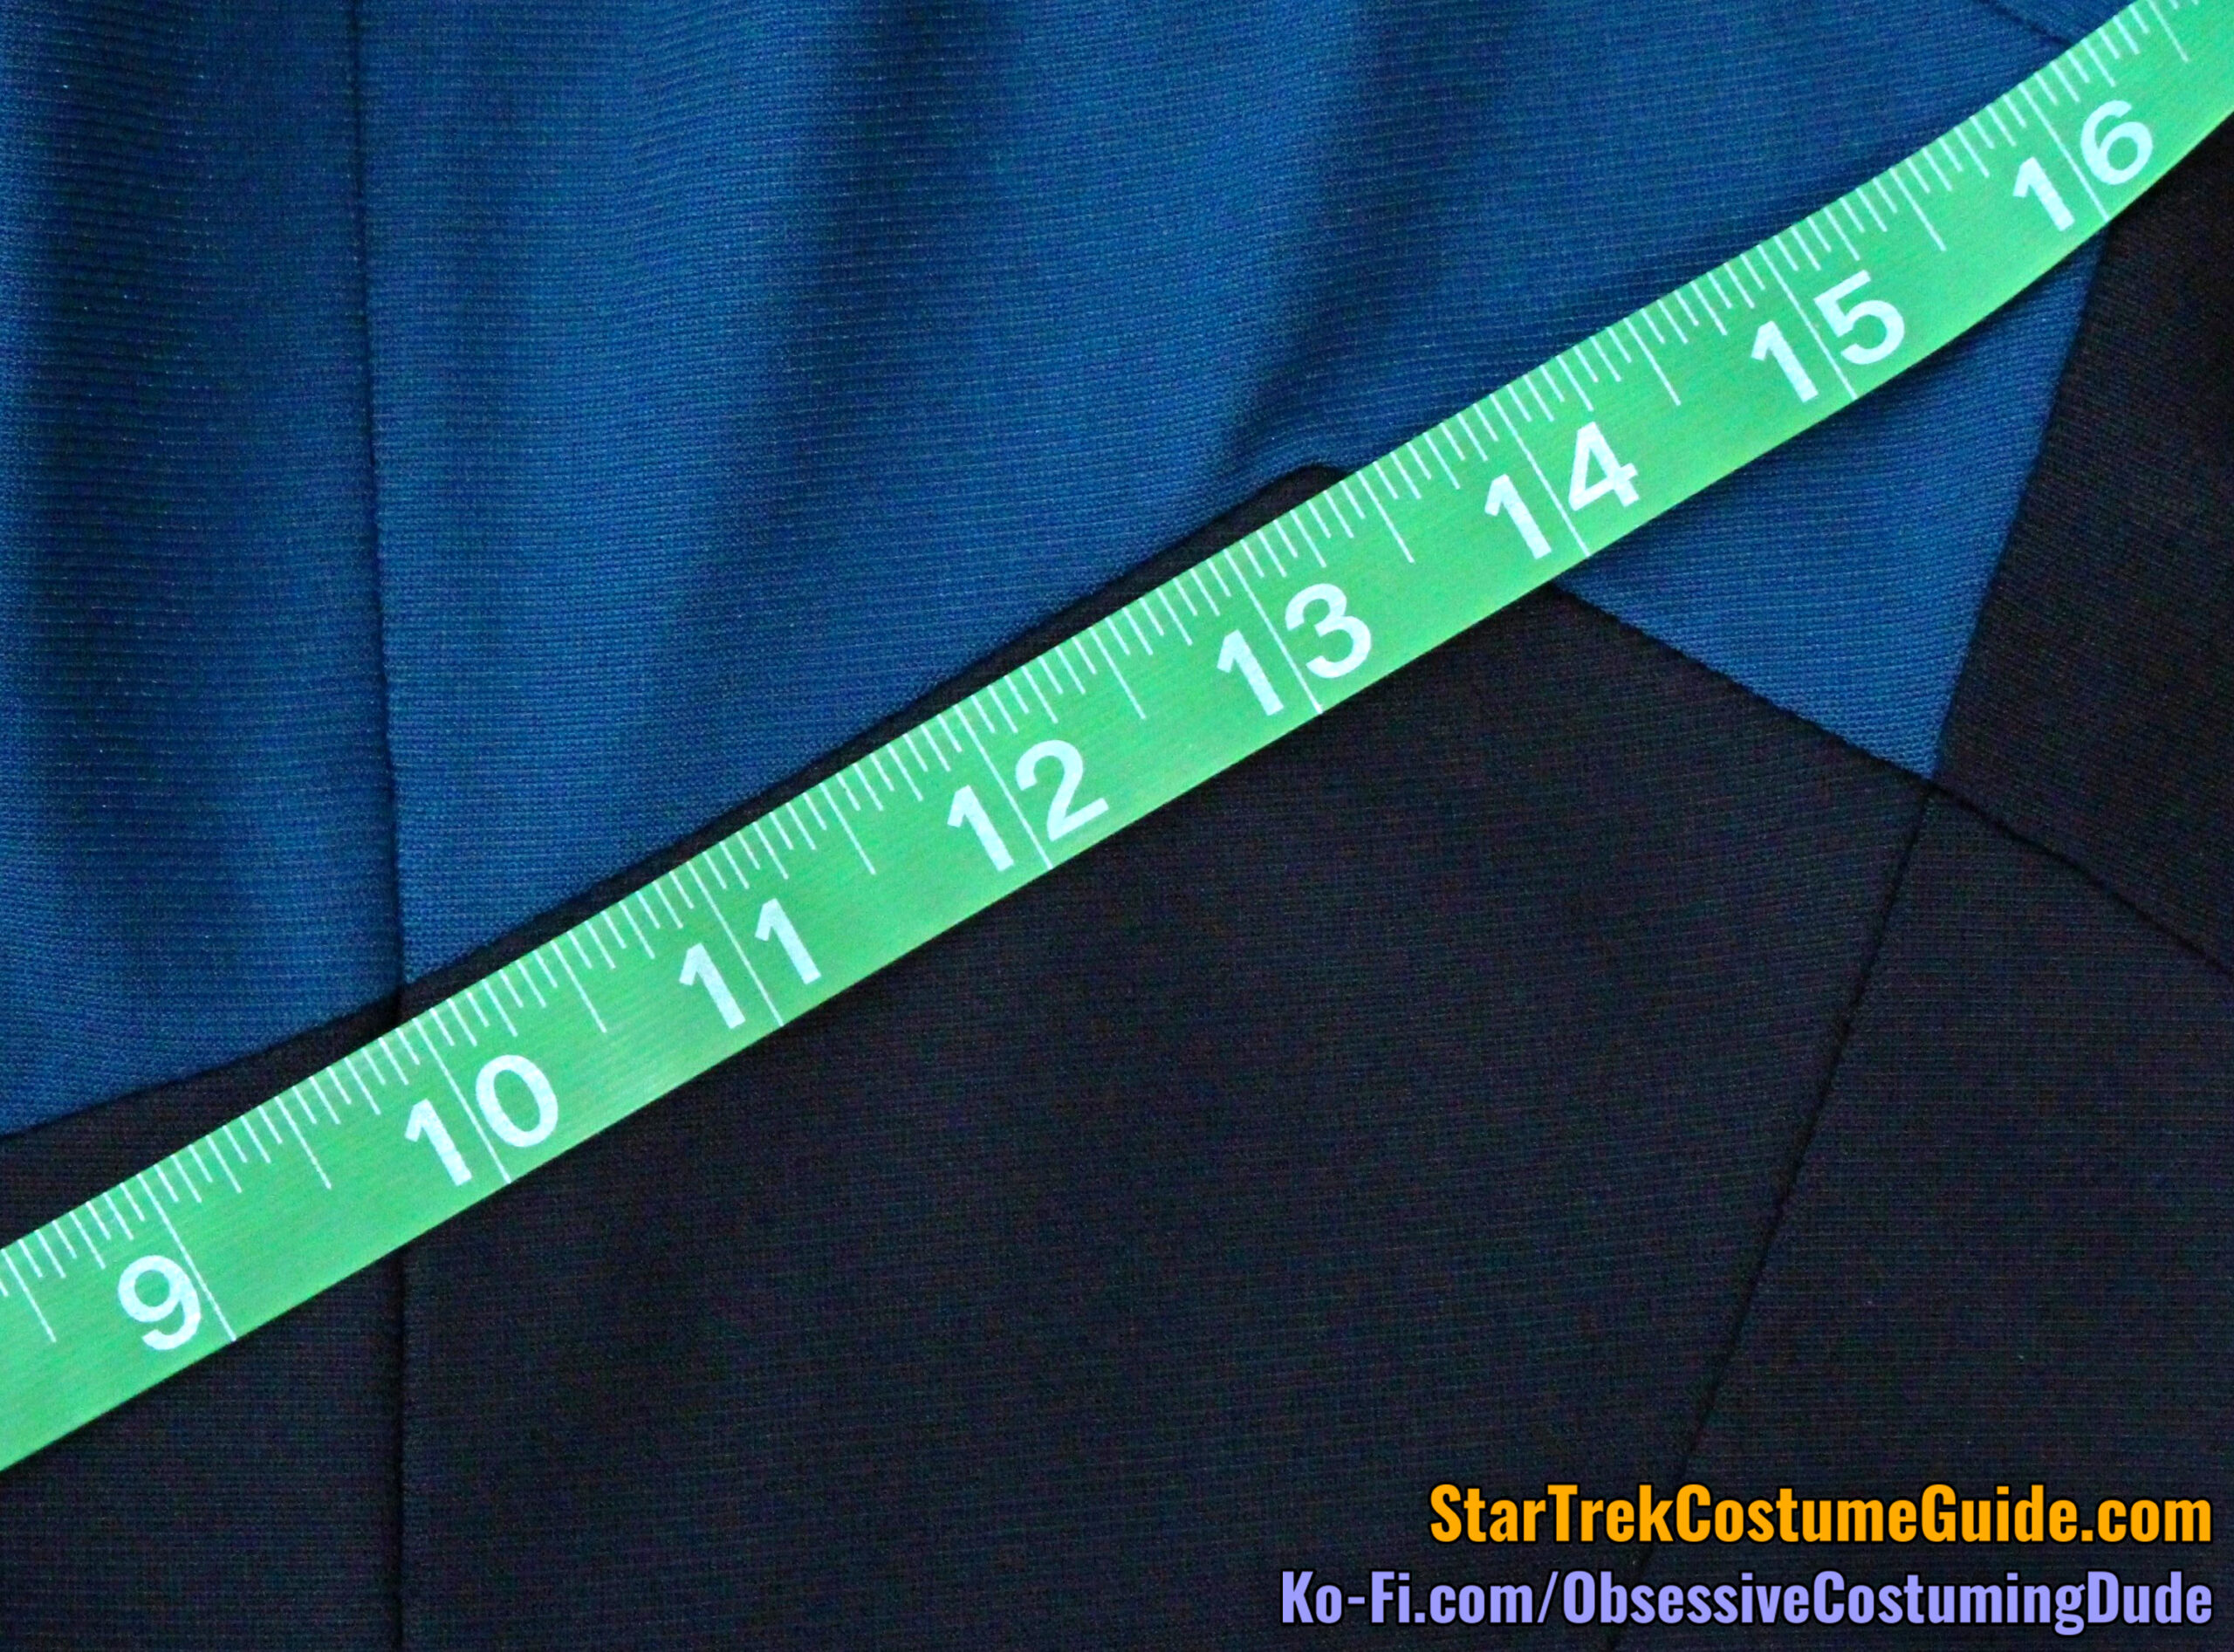
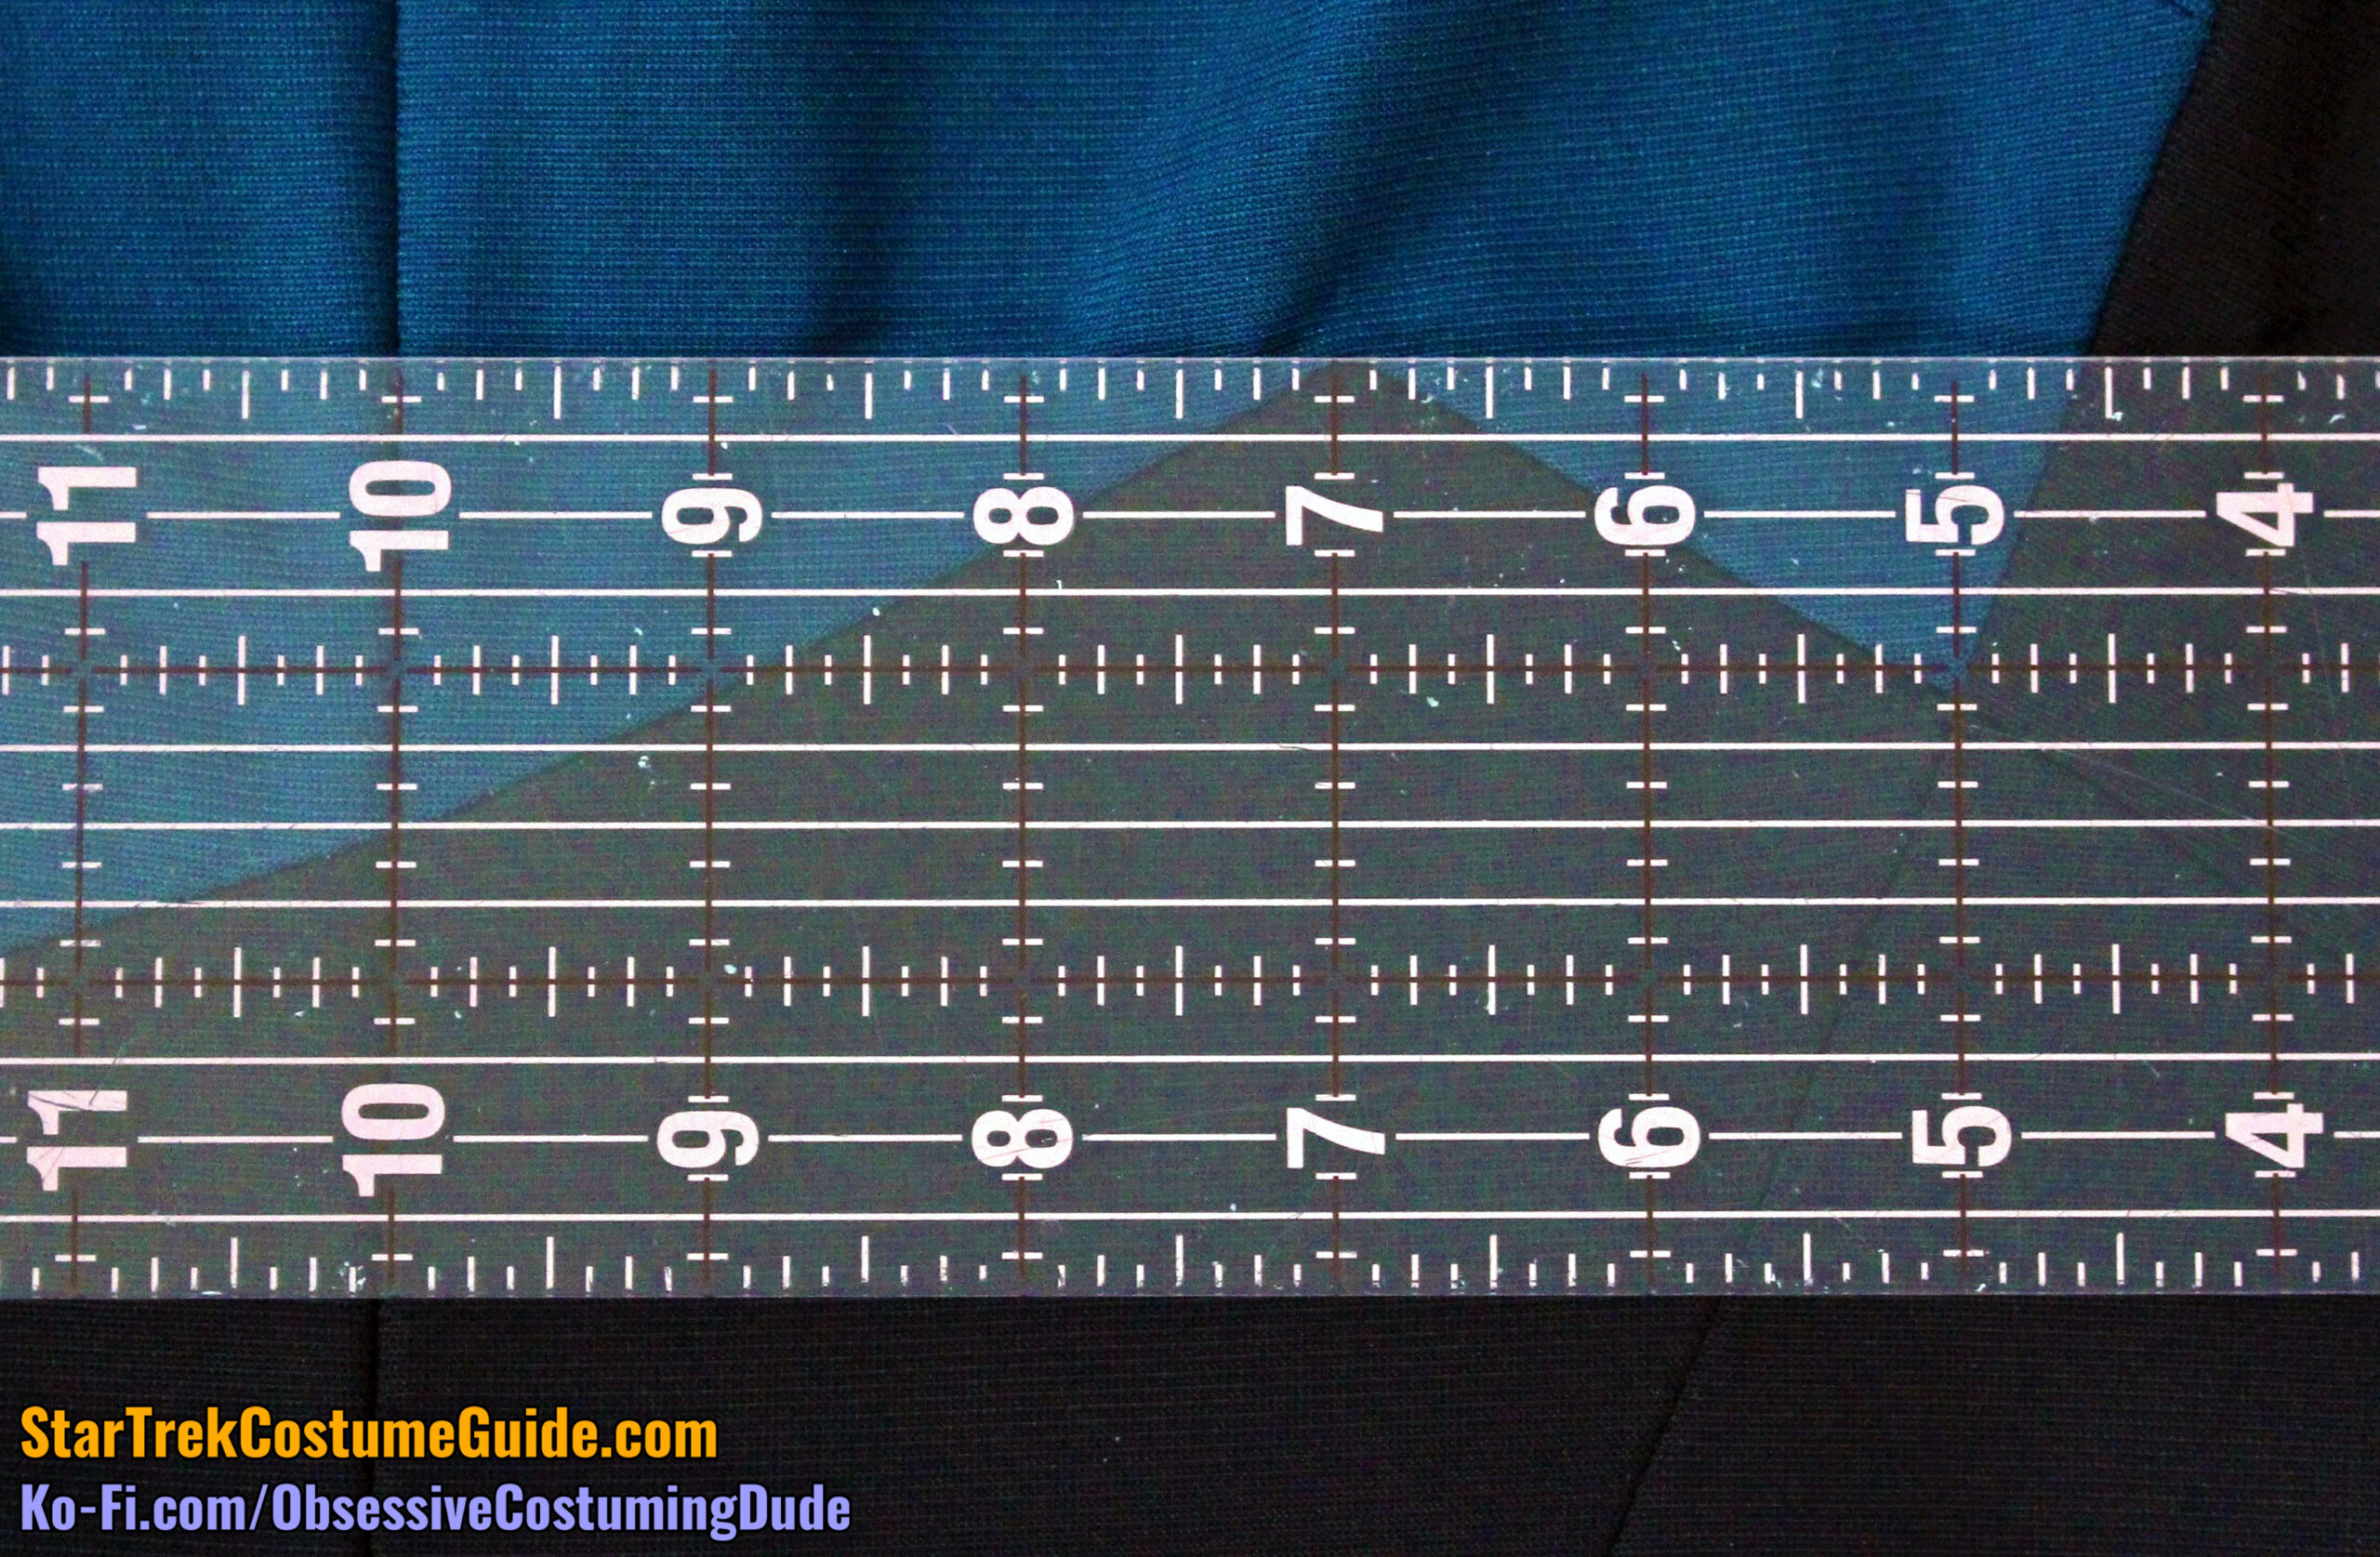
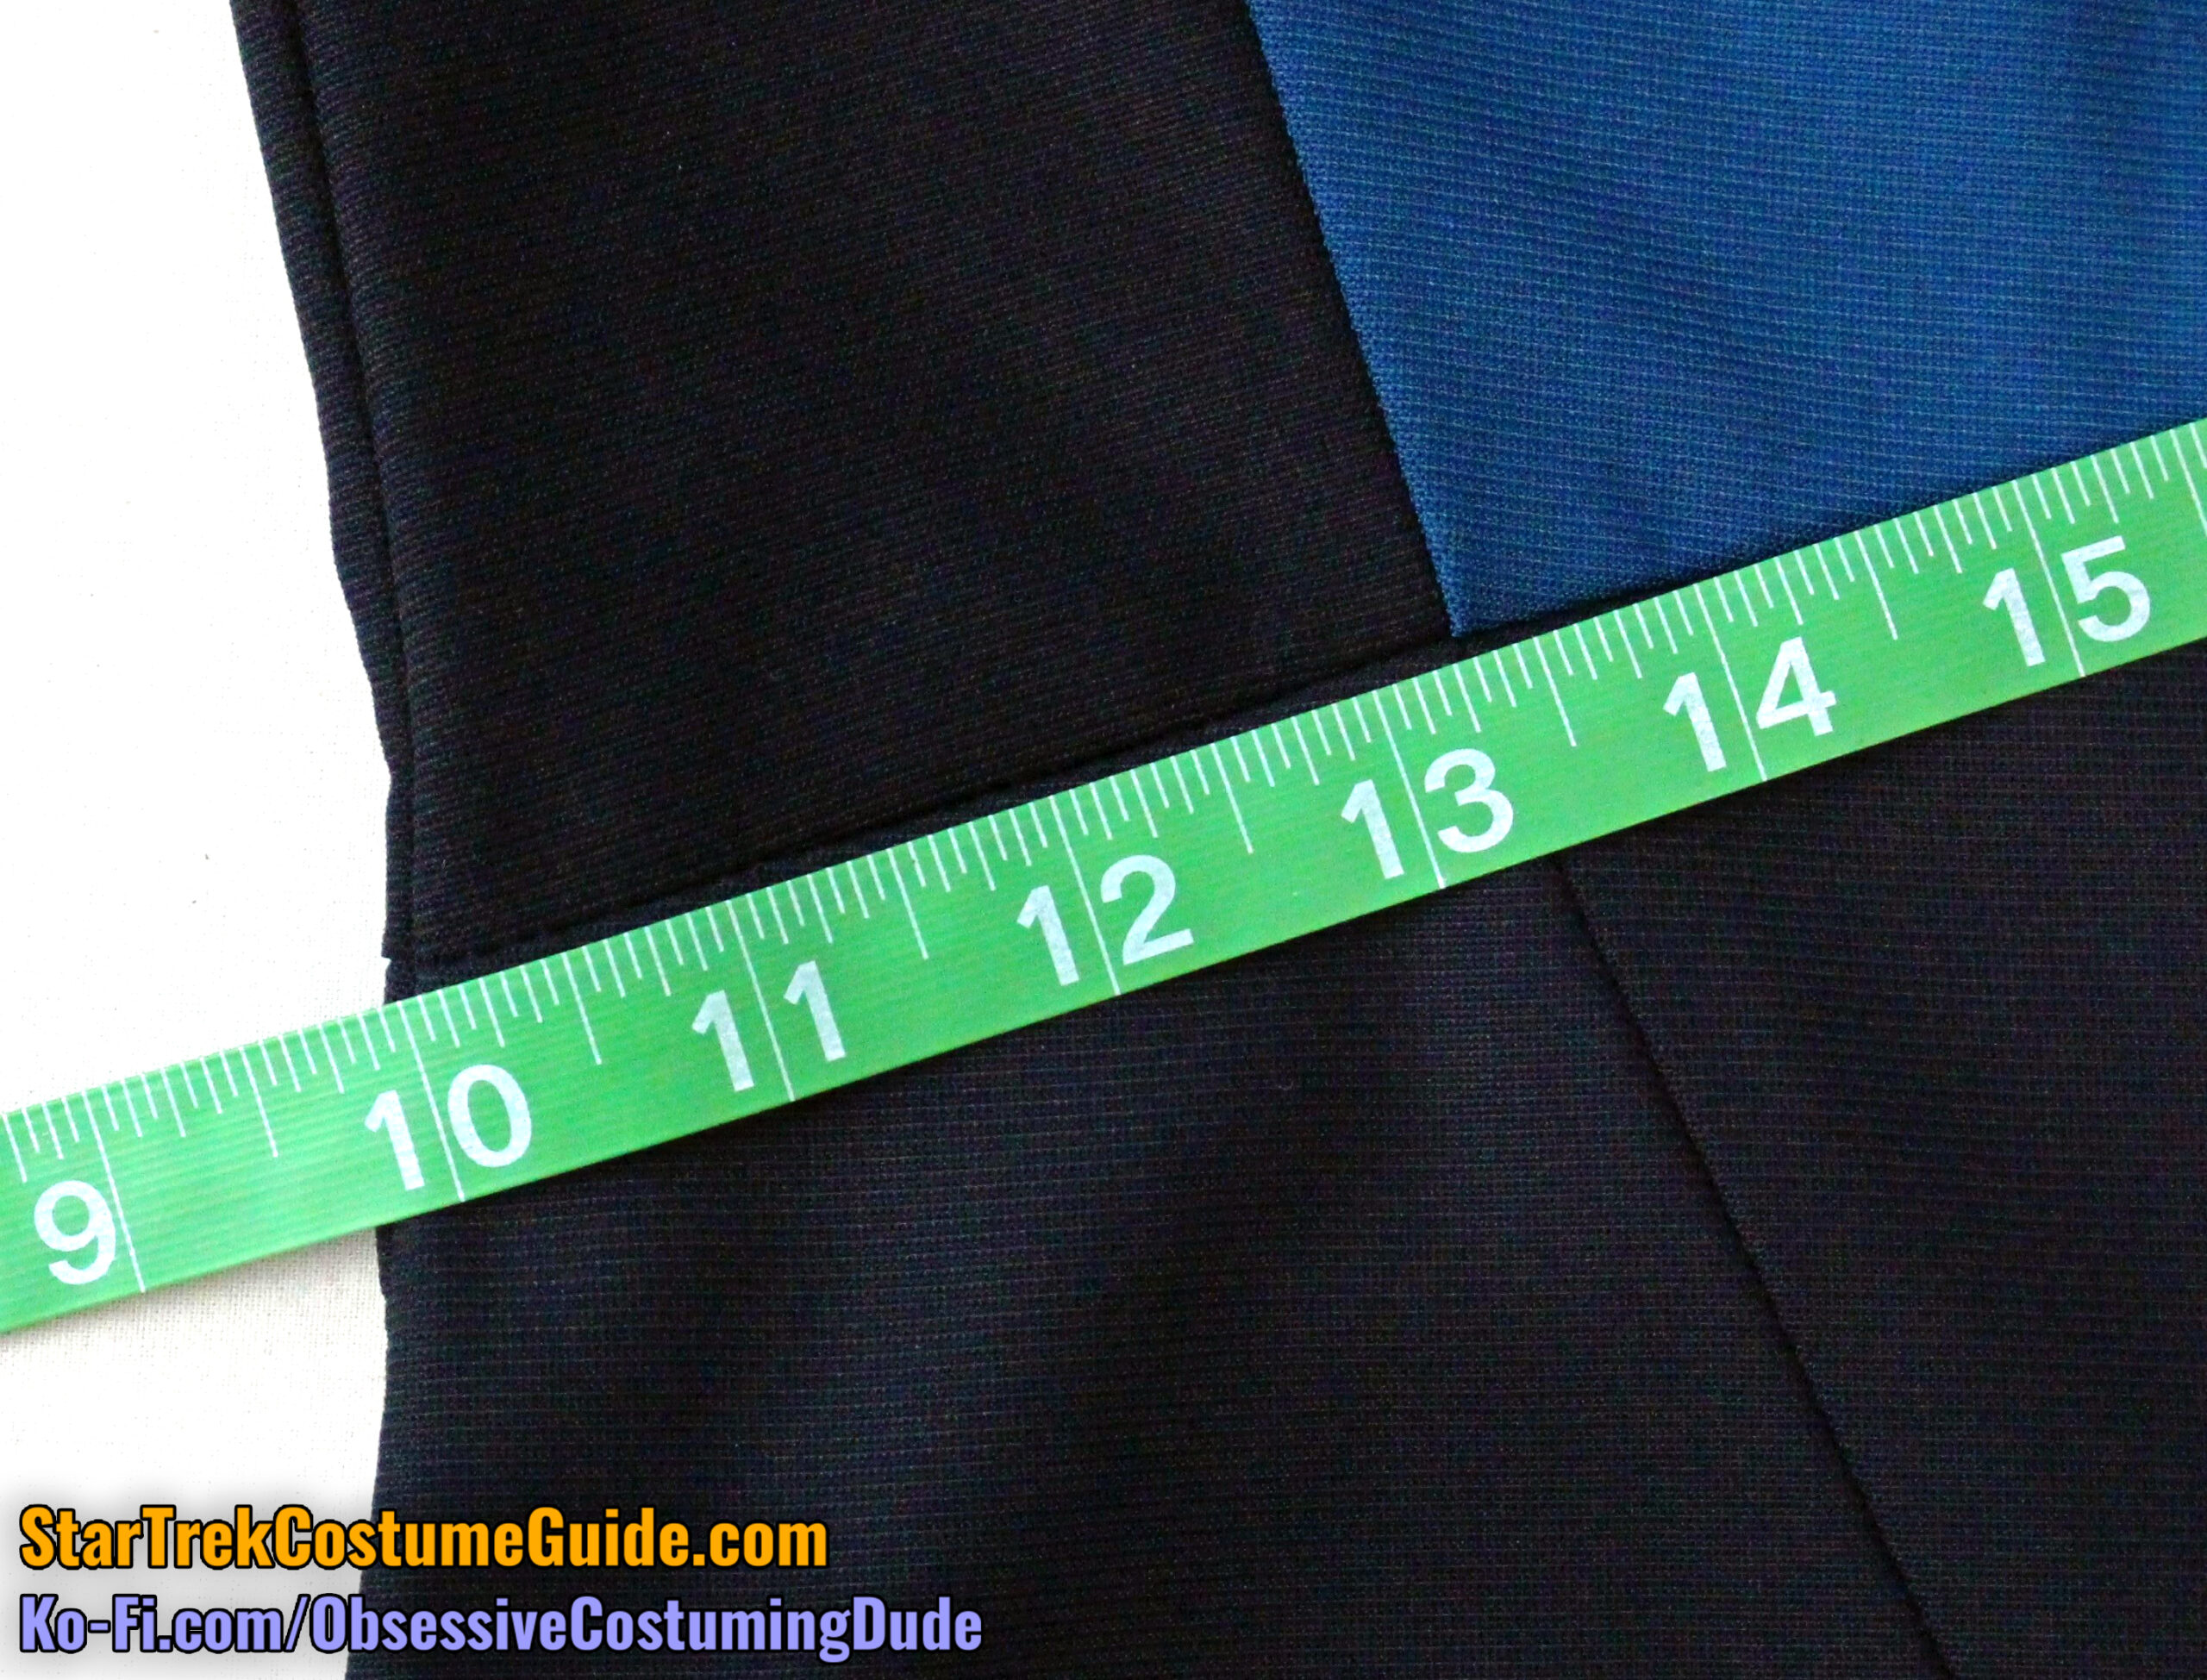
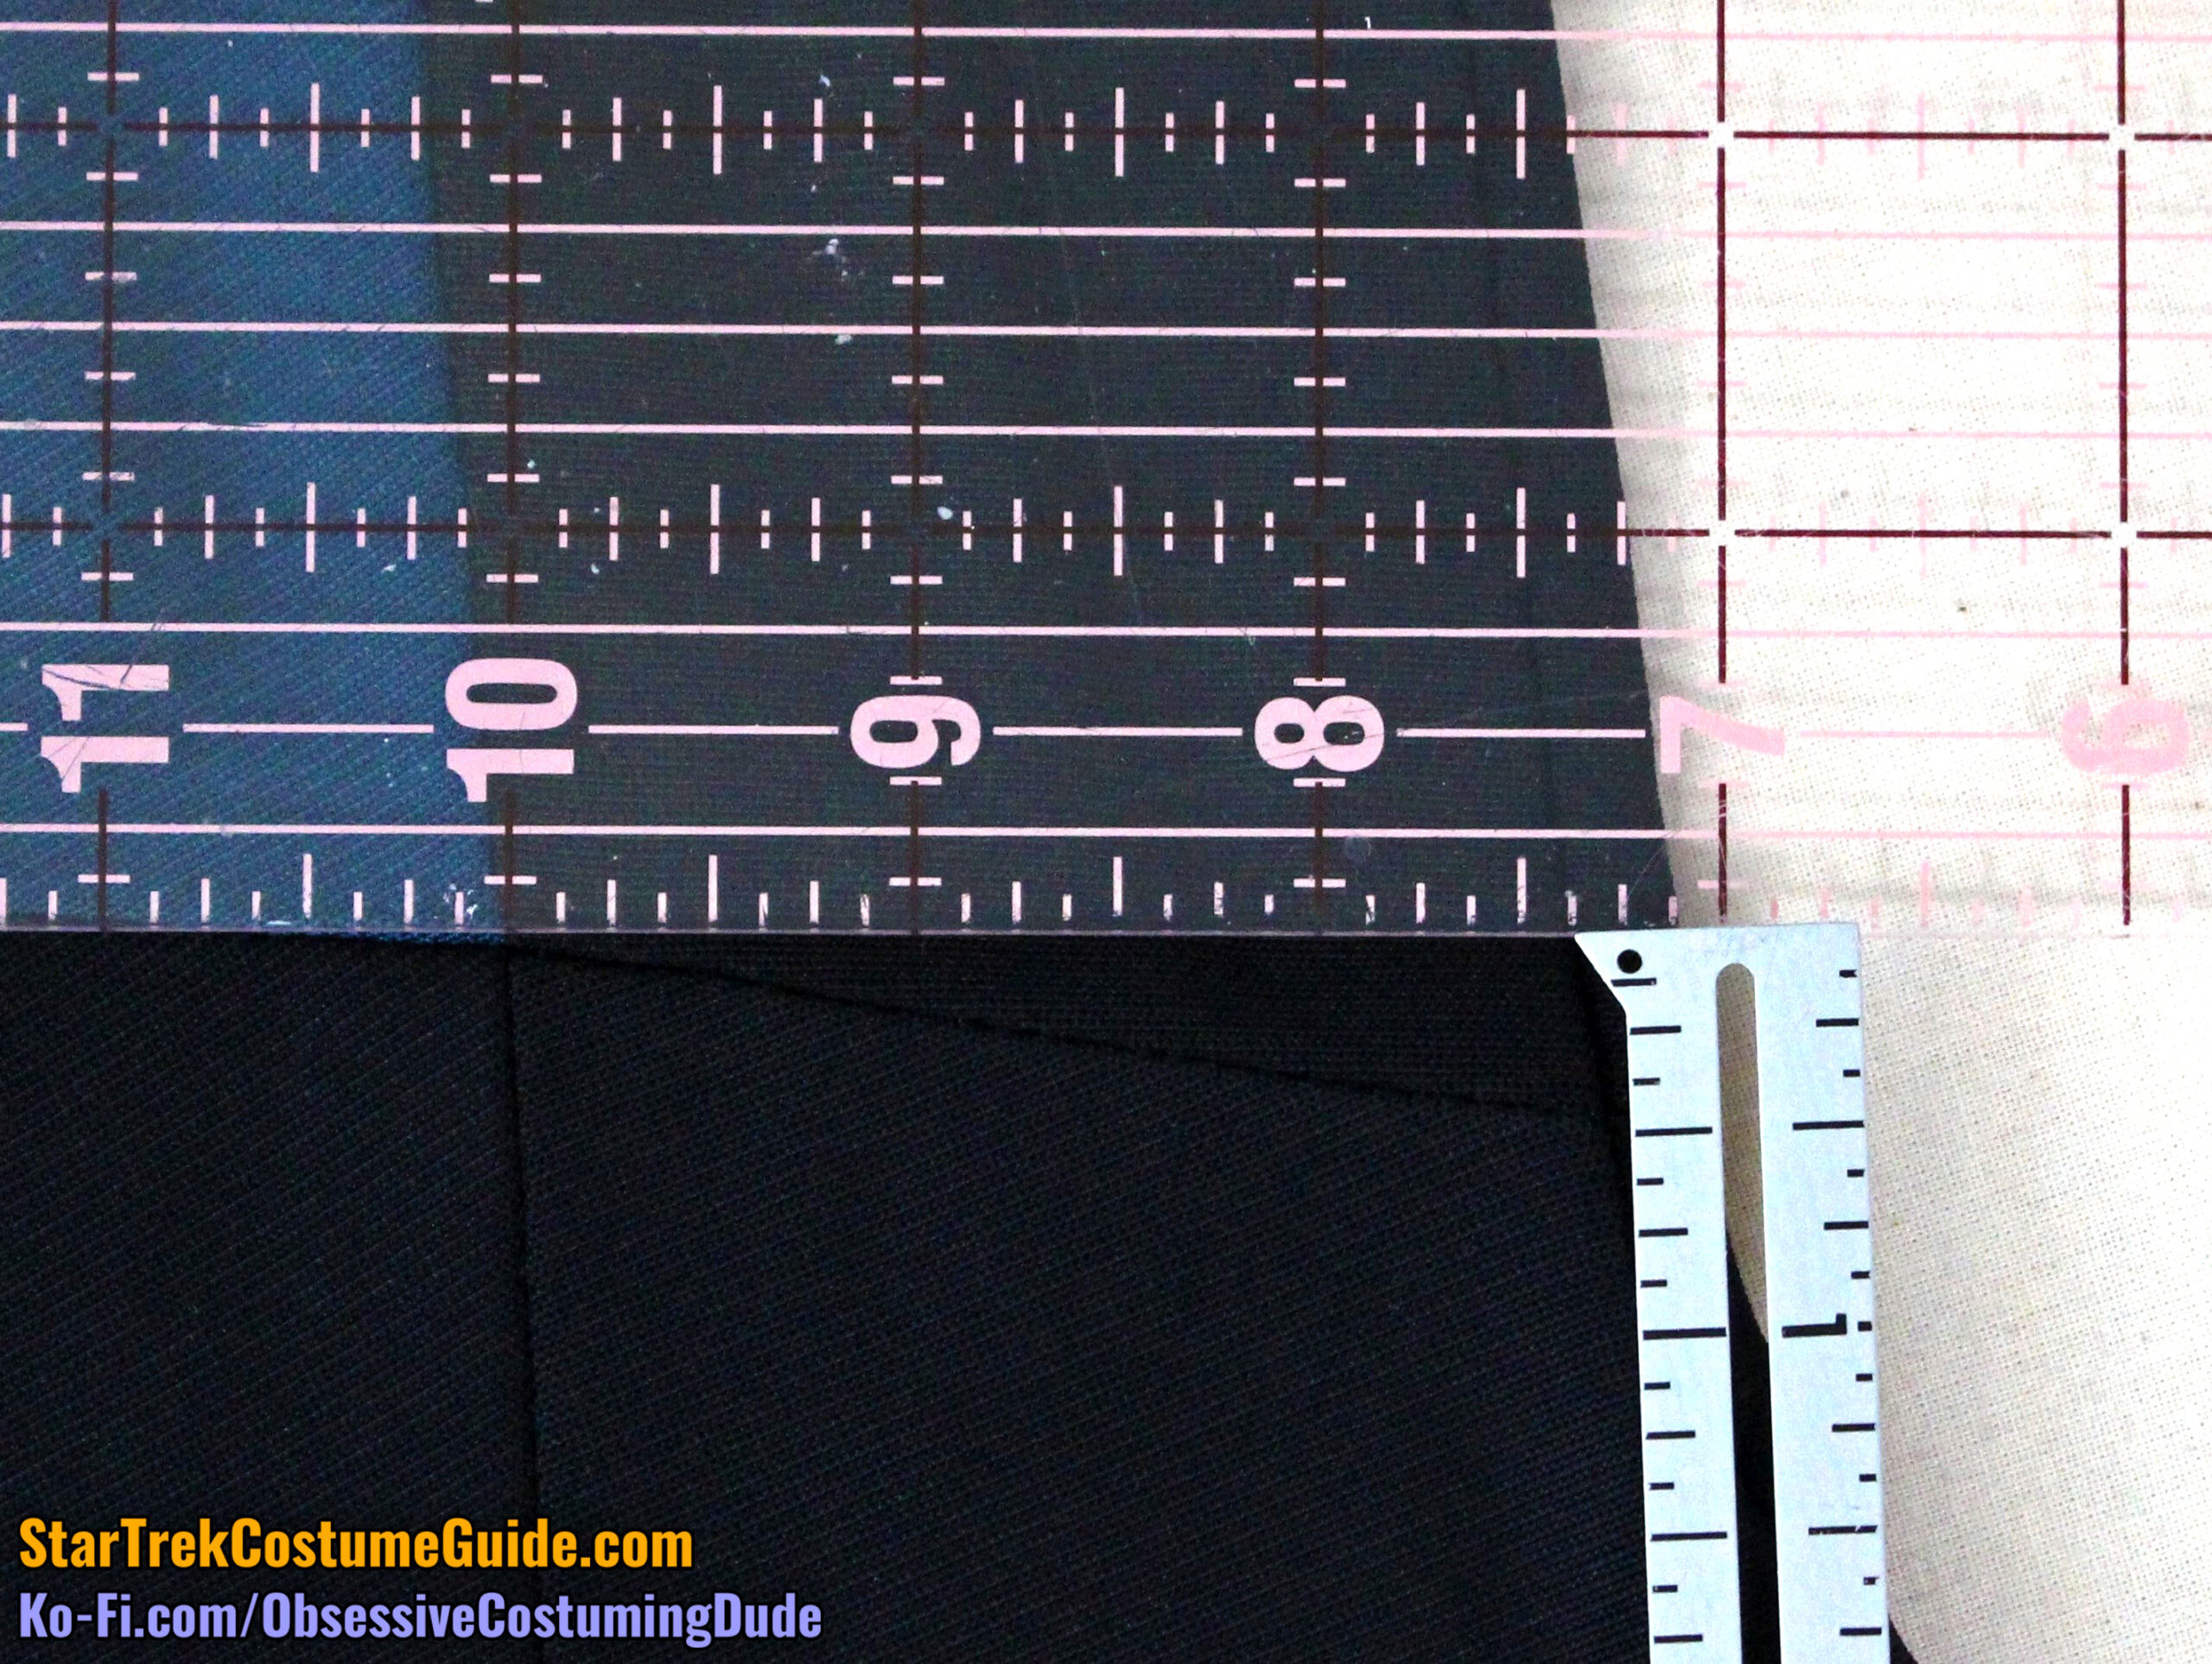
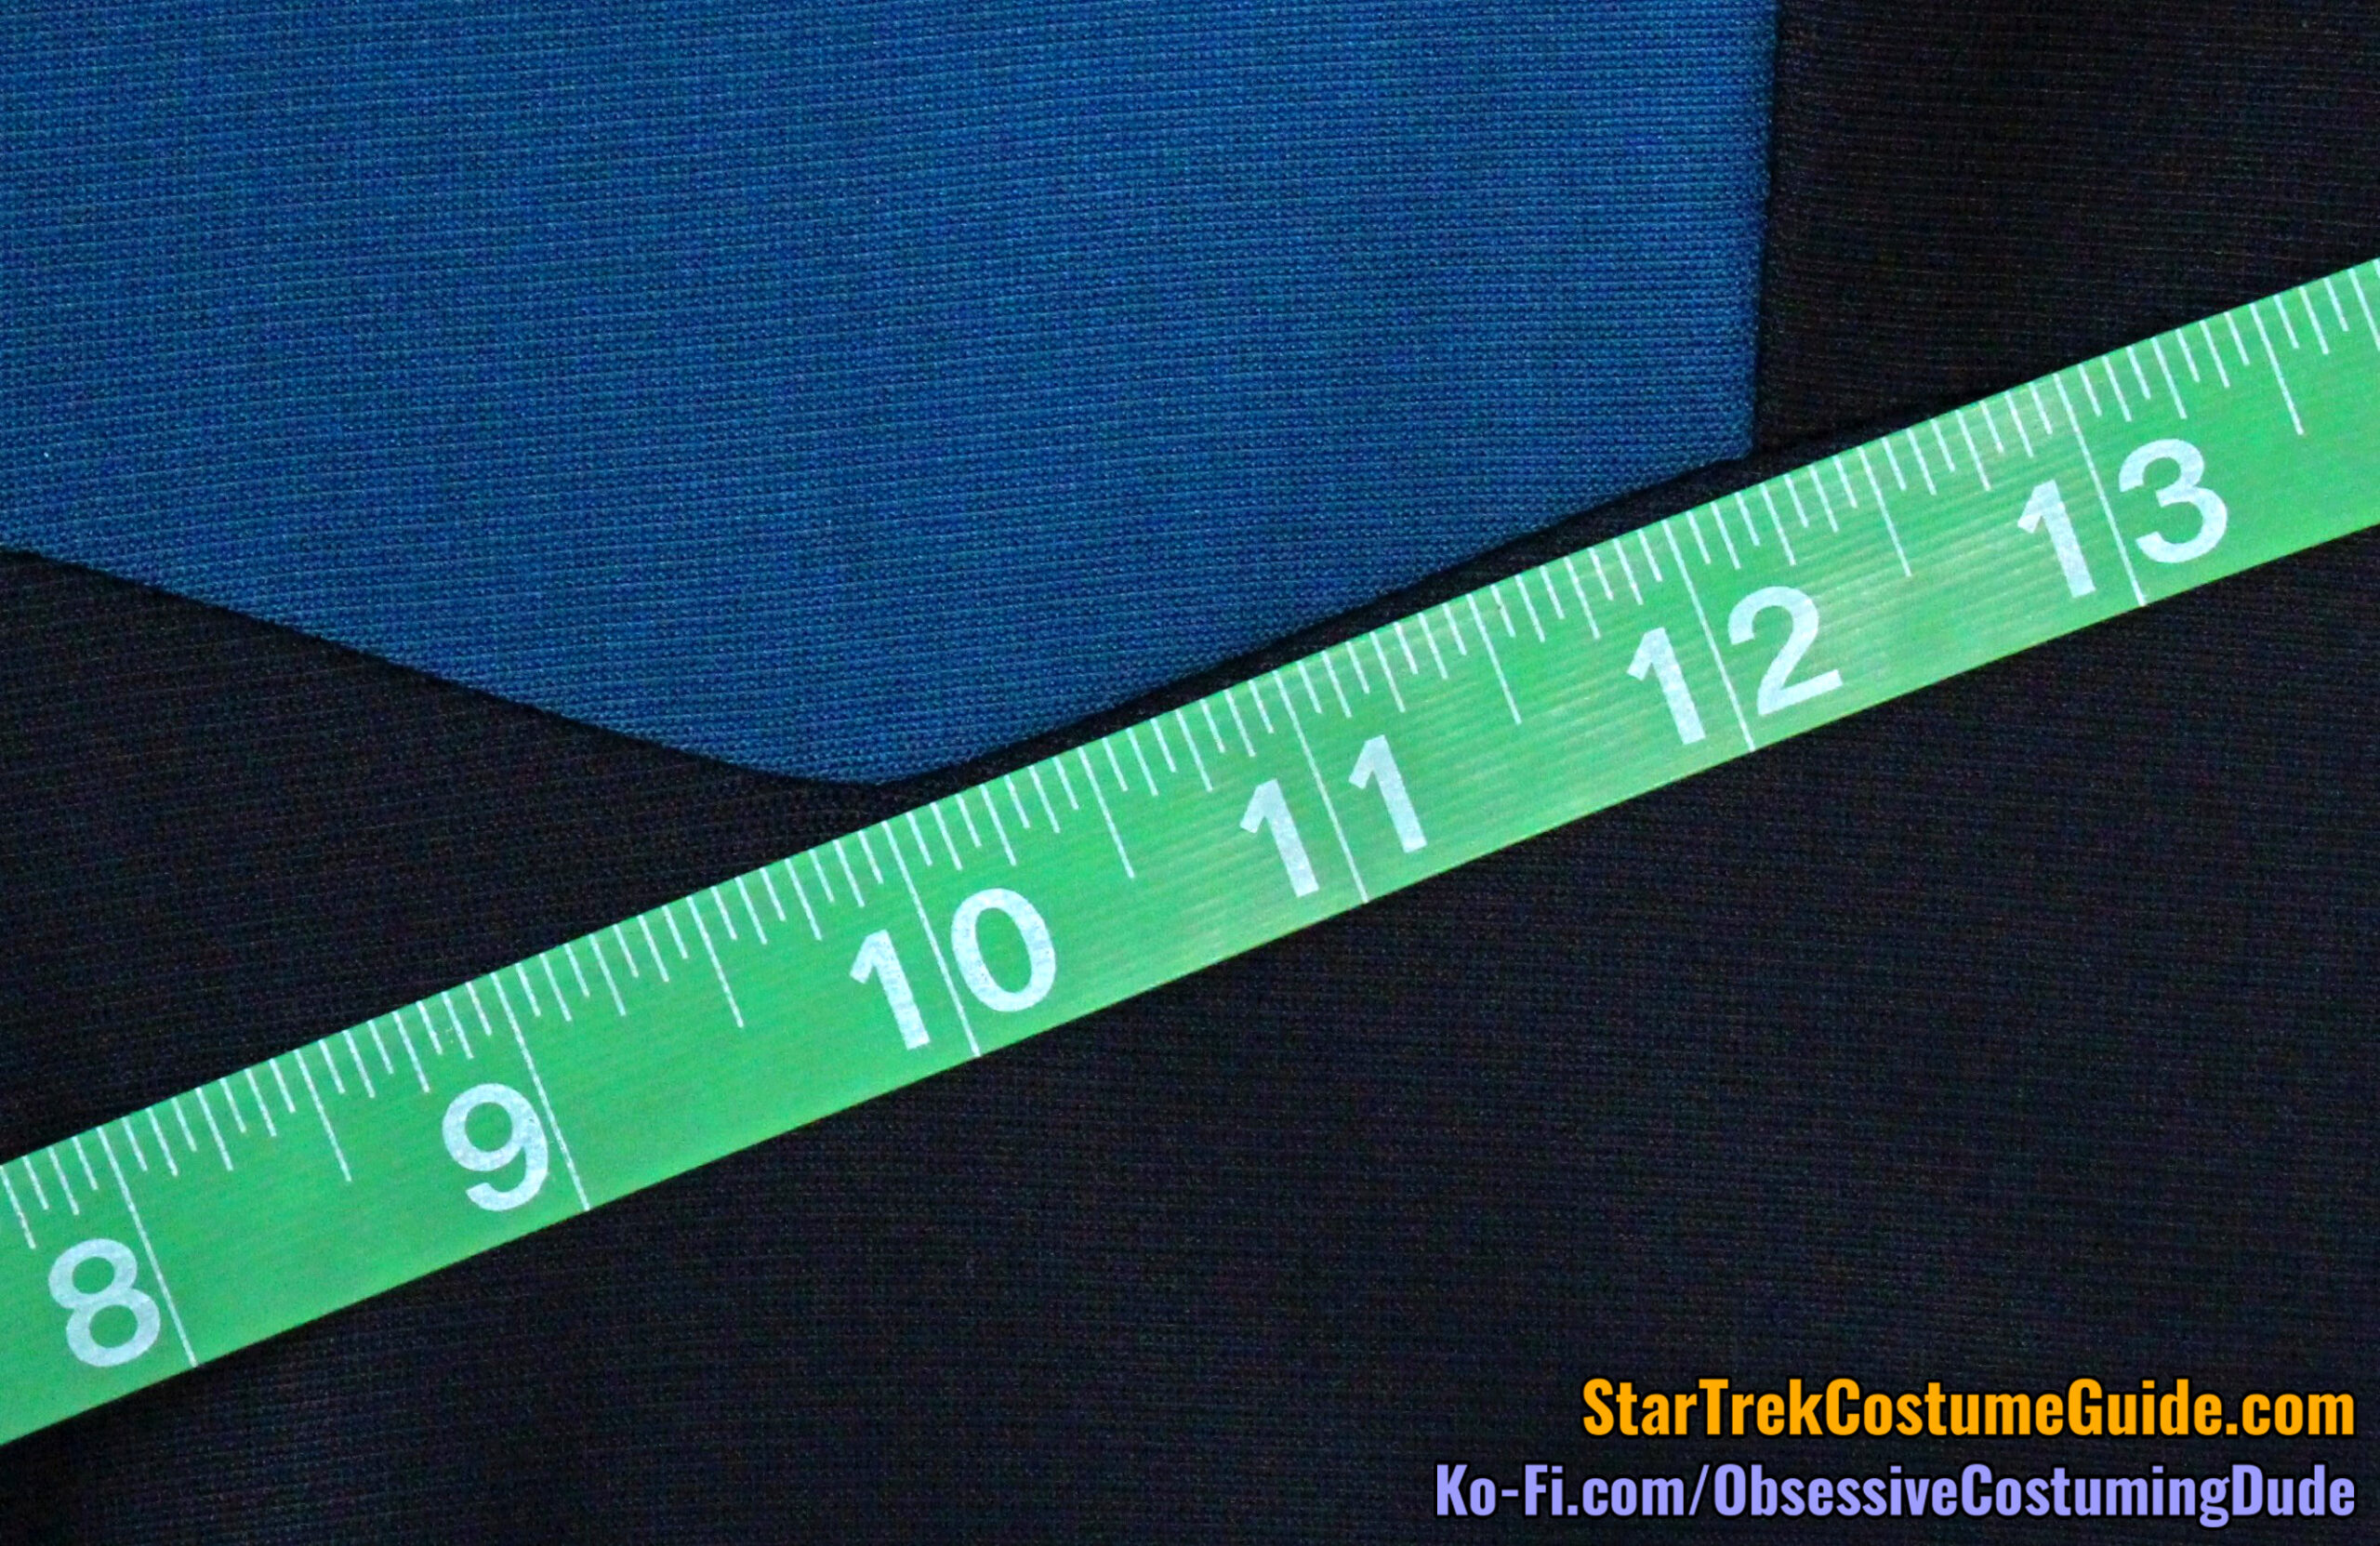
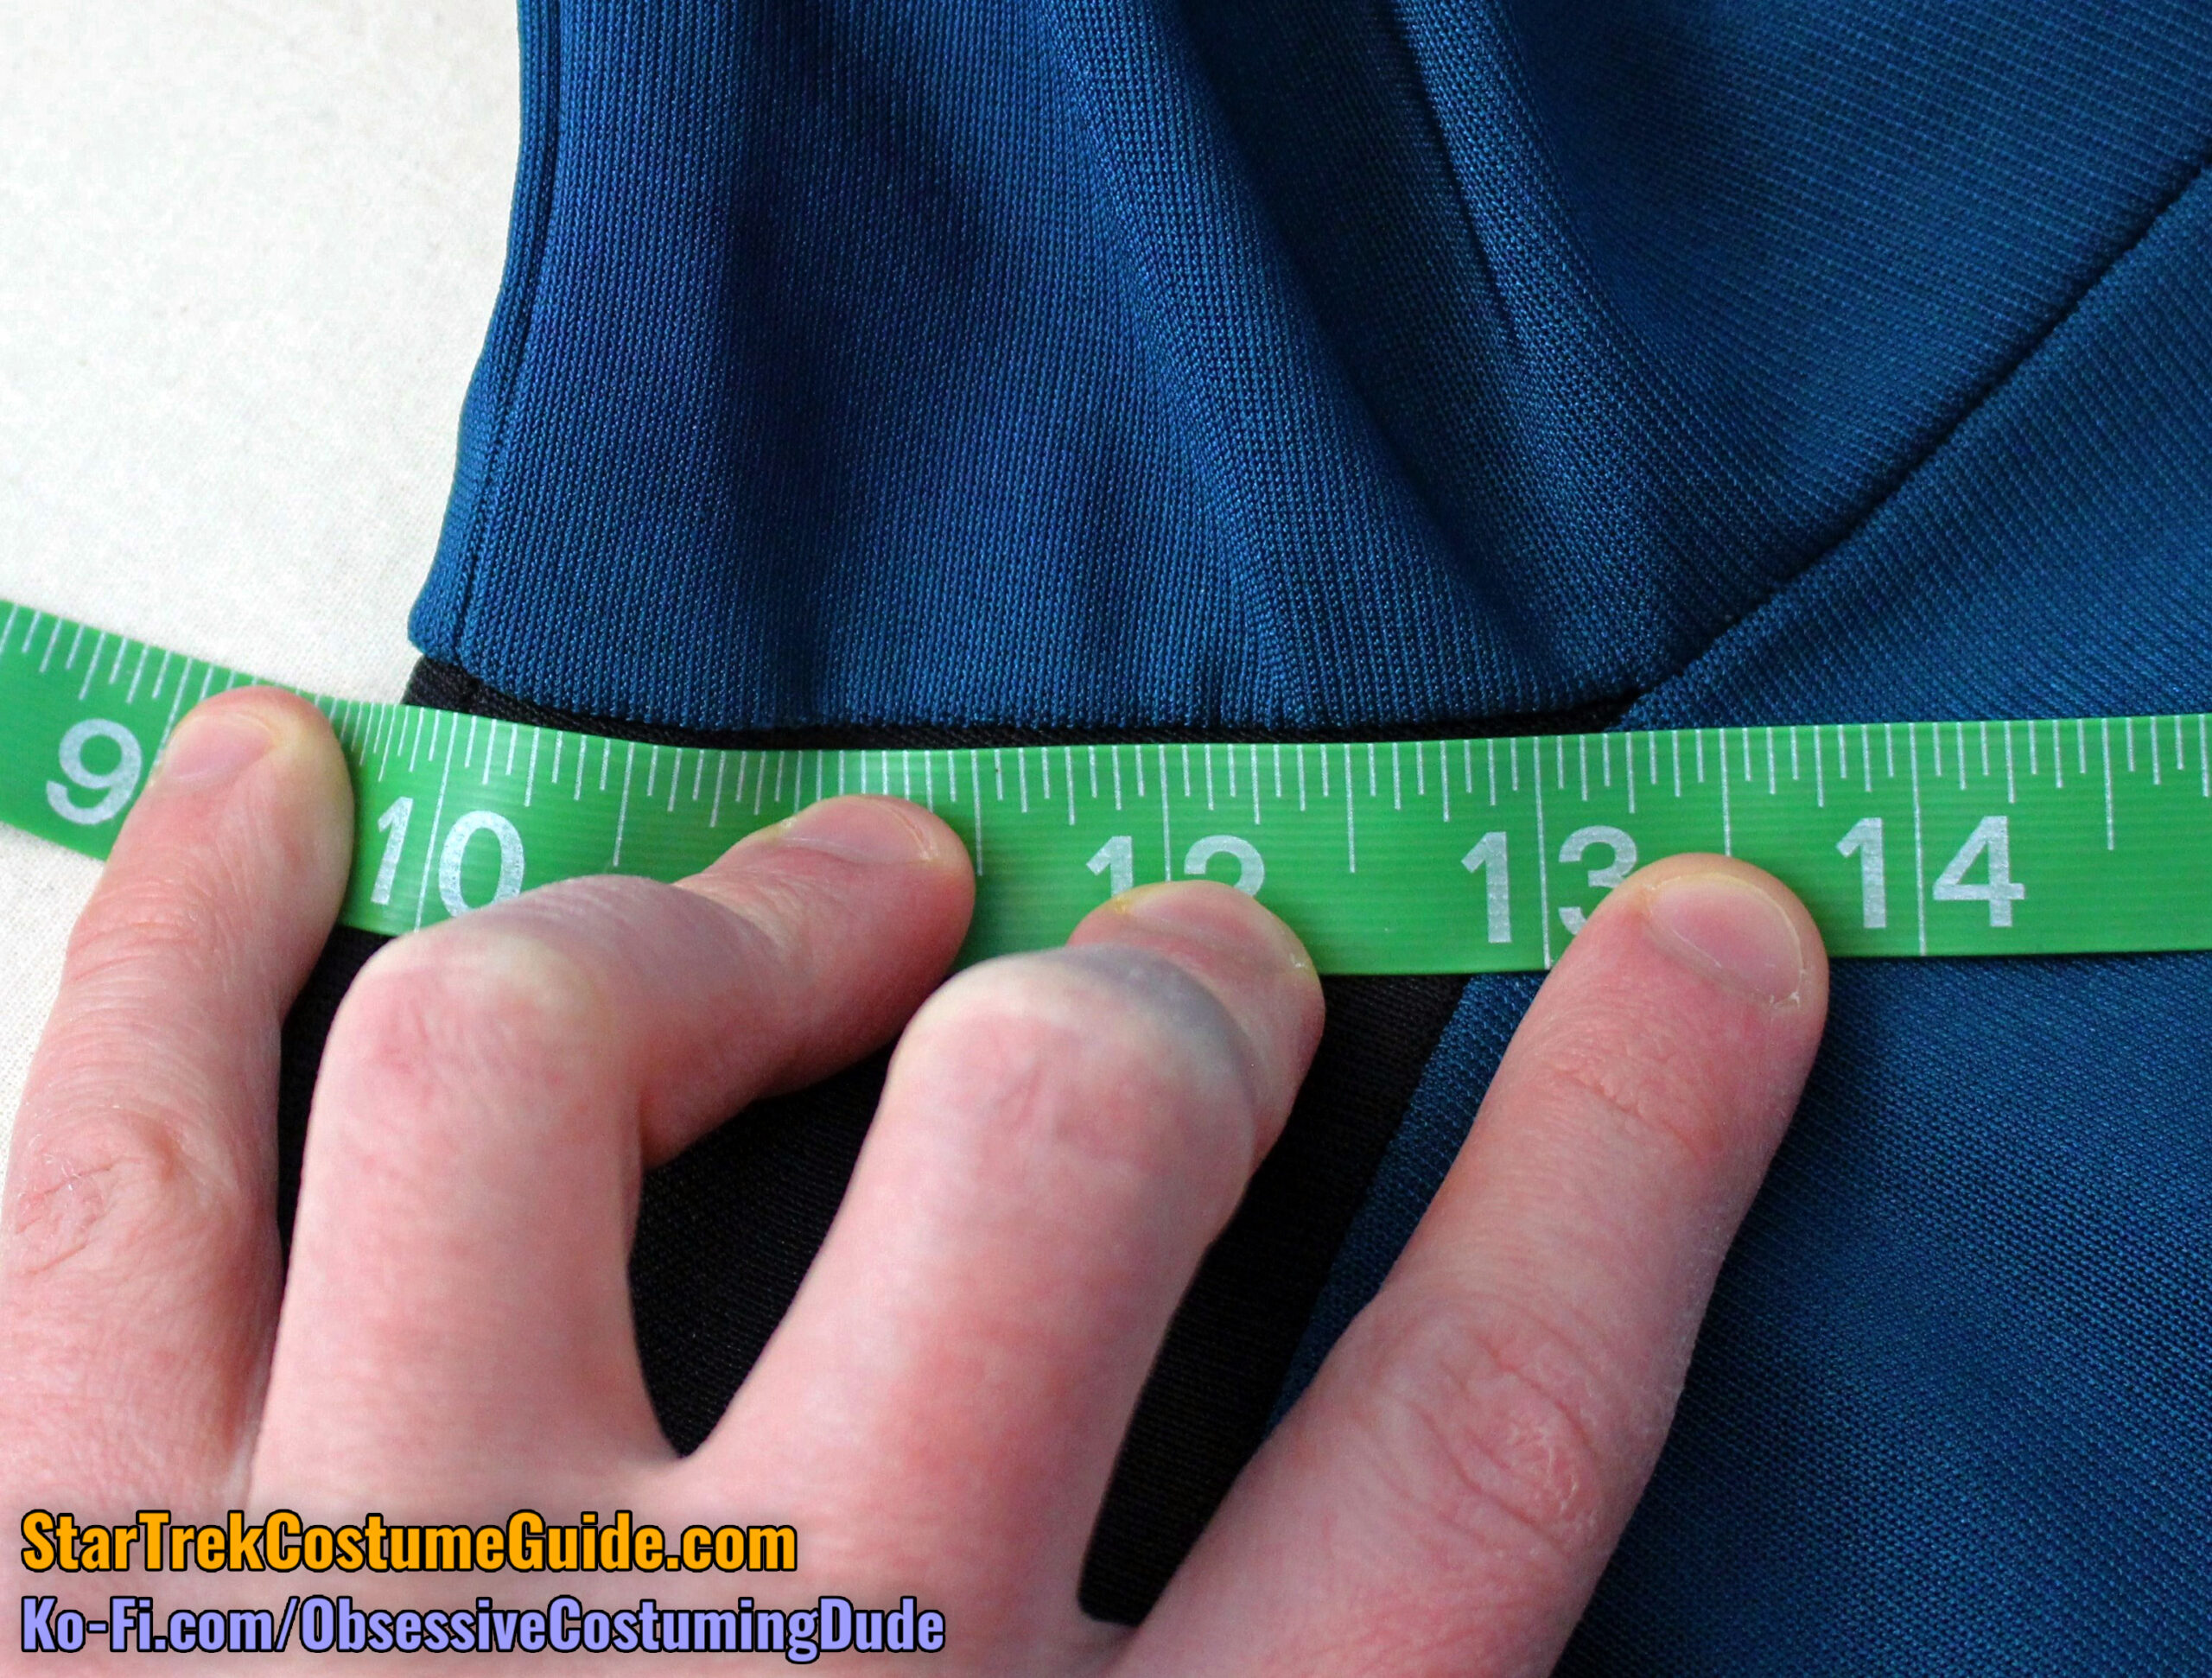
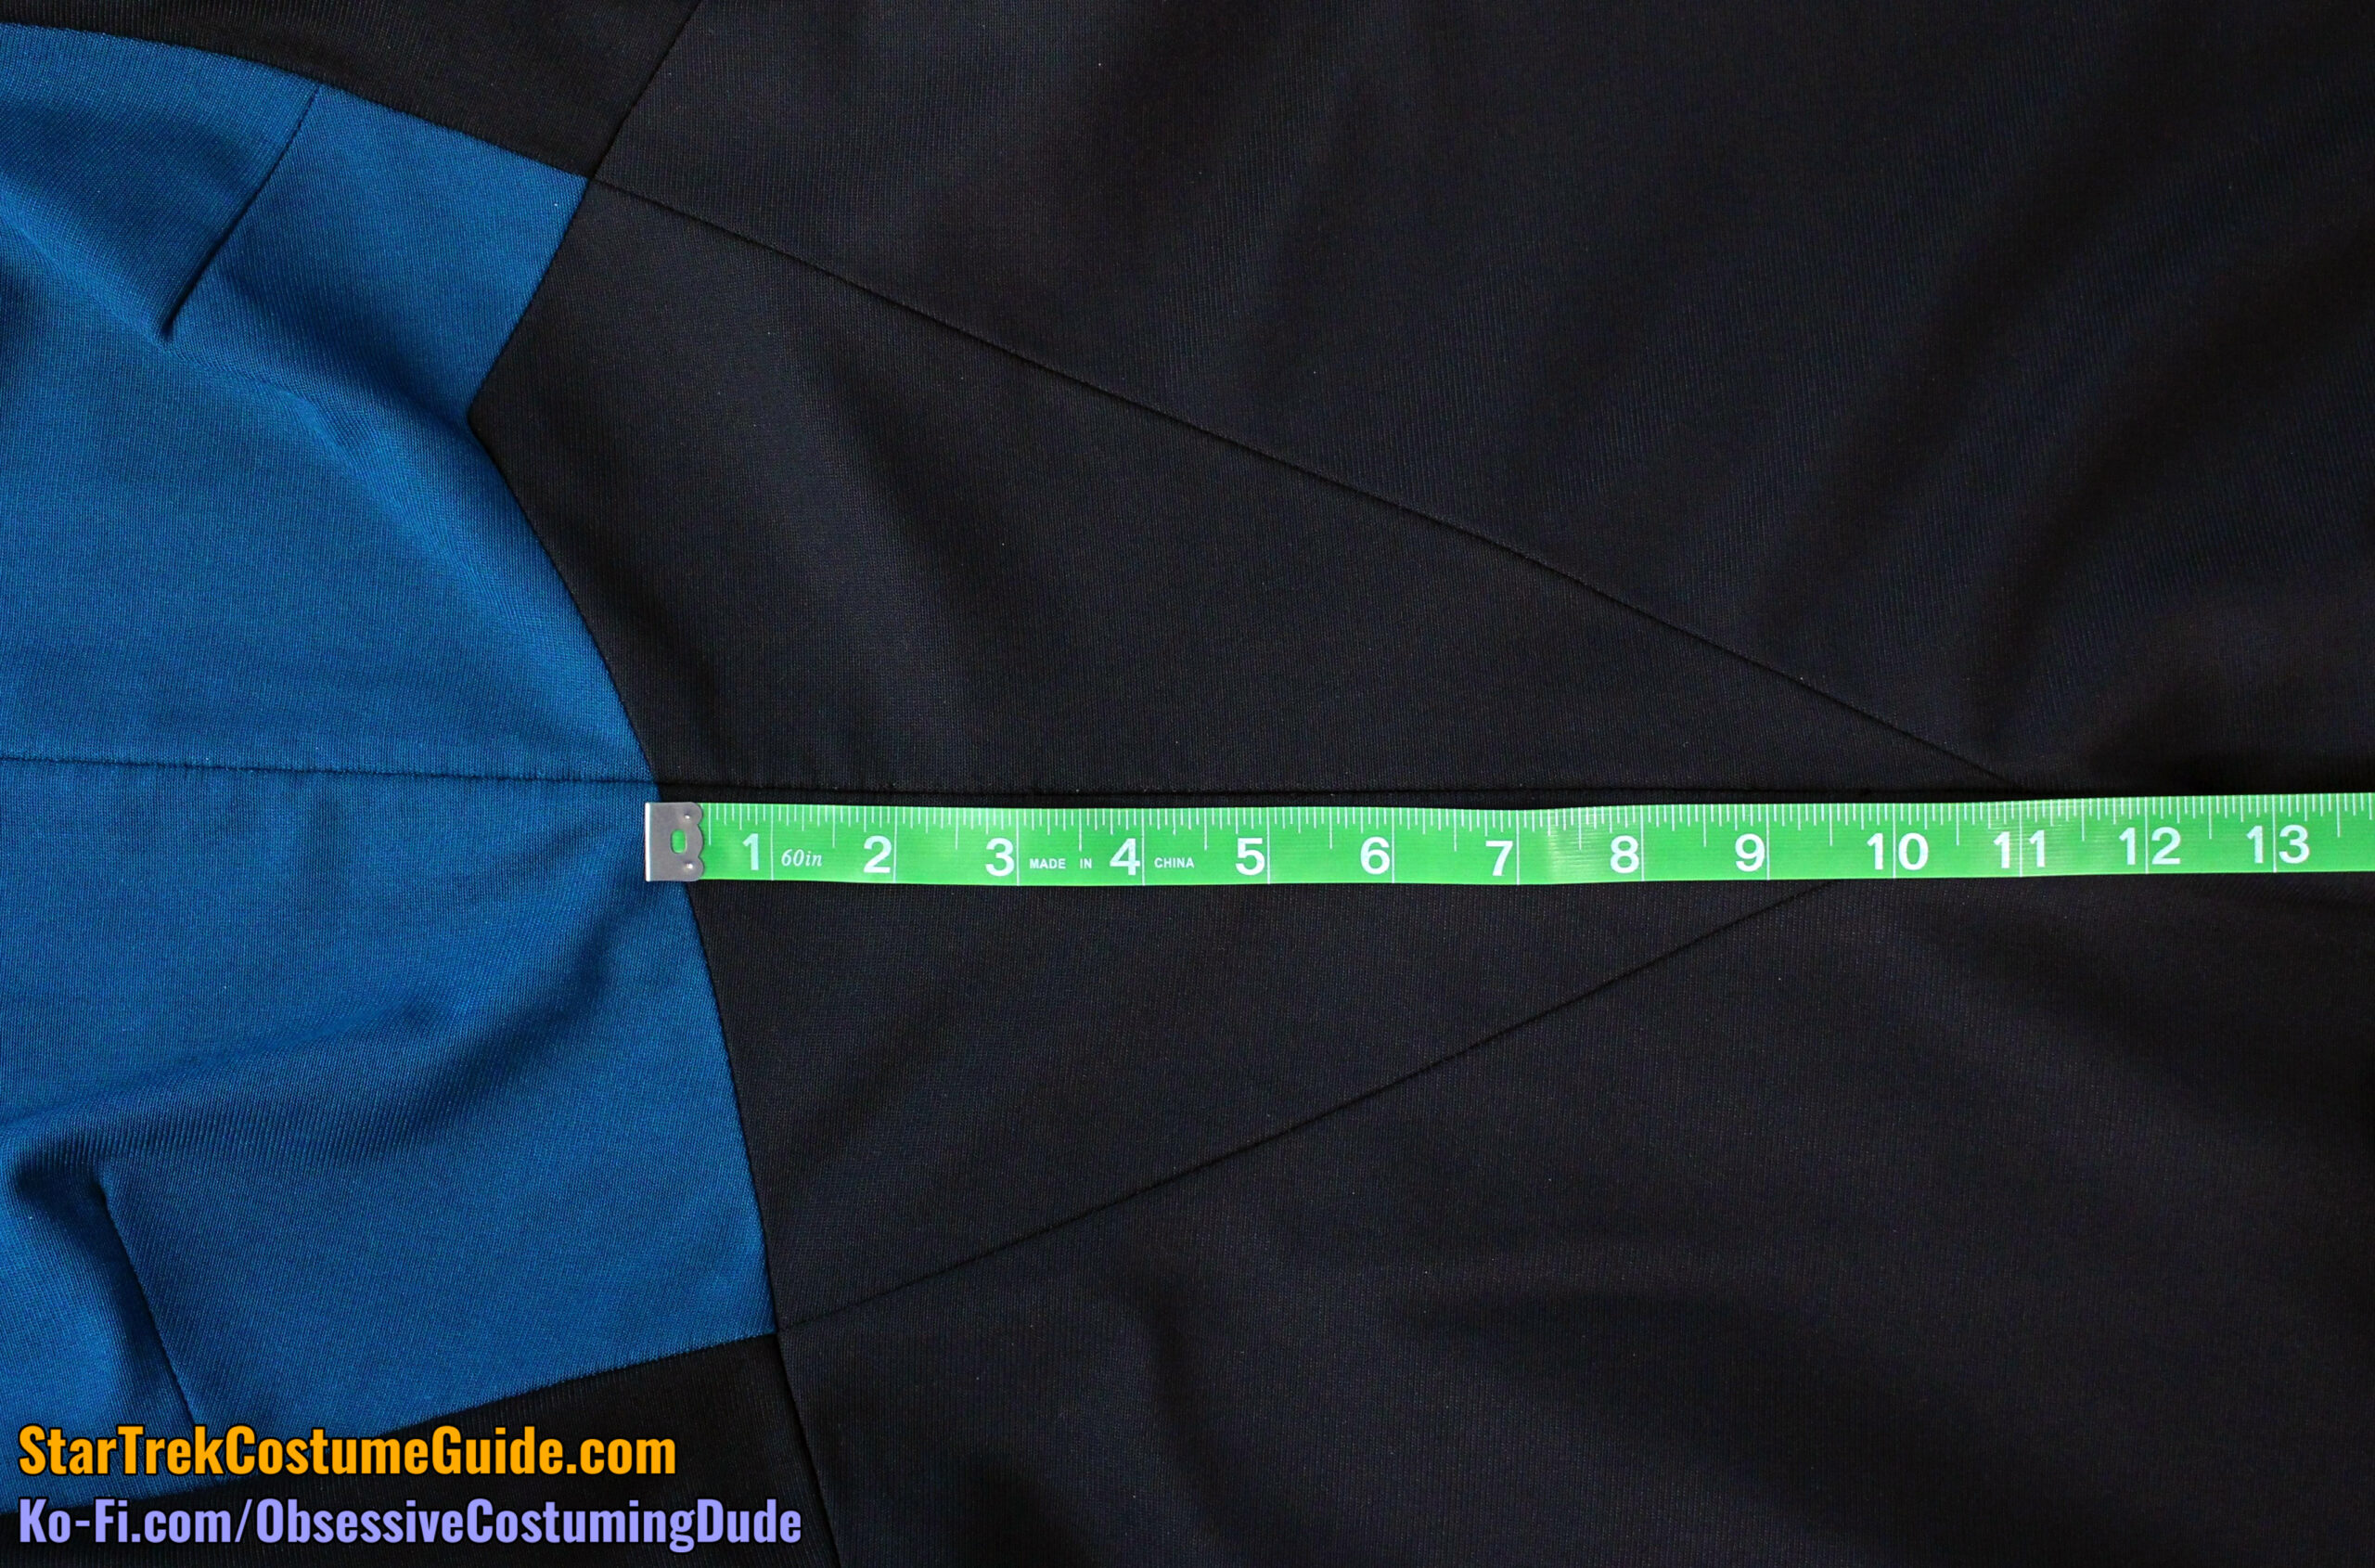
The lower front yoke seam was 11 ⅜” total, measured from the center front to the lower/outer corners on the sleeve.
Of this total seam line, 5 ⅞” was allocated to the upper front body, and 5 ½” extended onto the upper front sleeve.
Using the horizontal “weave” of the jumbo spandex as a guide, we can see that the lower front yoke seam gradually curved downward ½” from the center front to the armscye.
The front yoke continued to curve downward another ¼” from the armscye to the lower/outer corner.
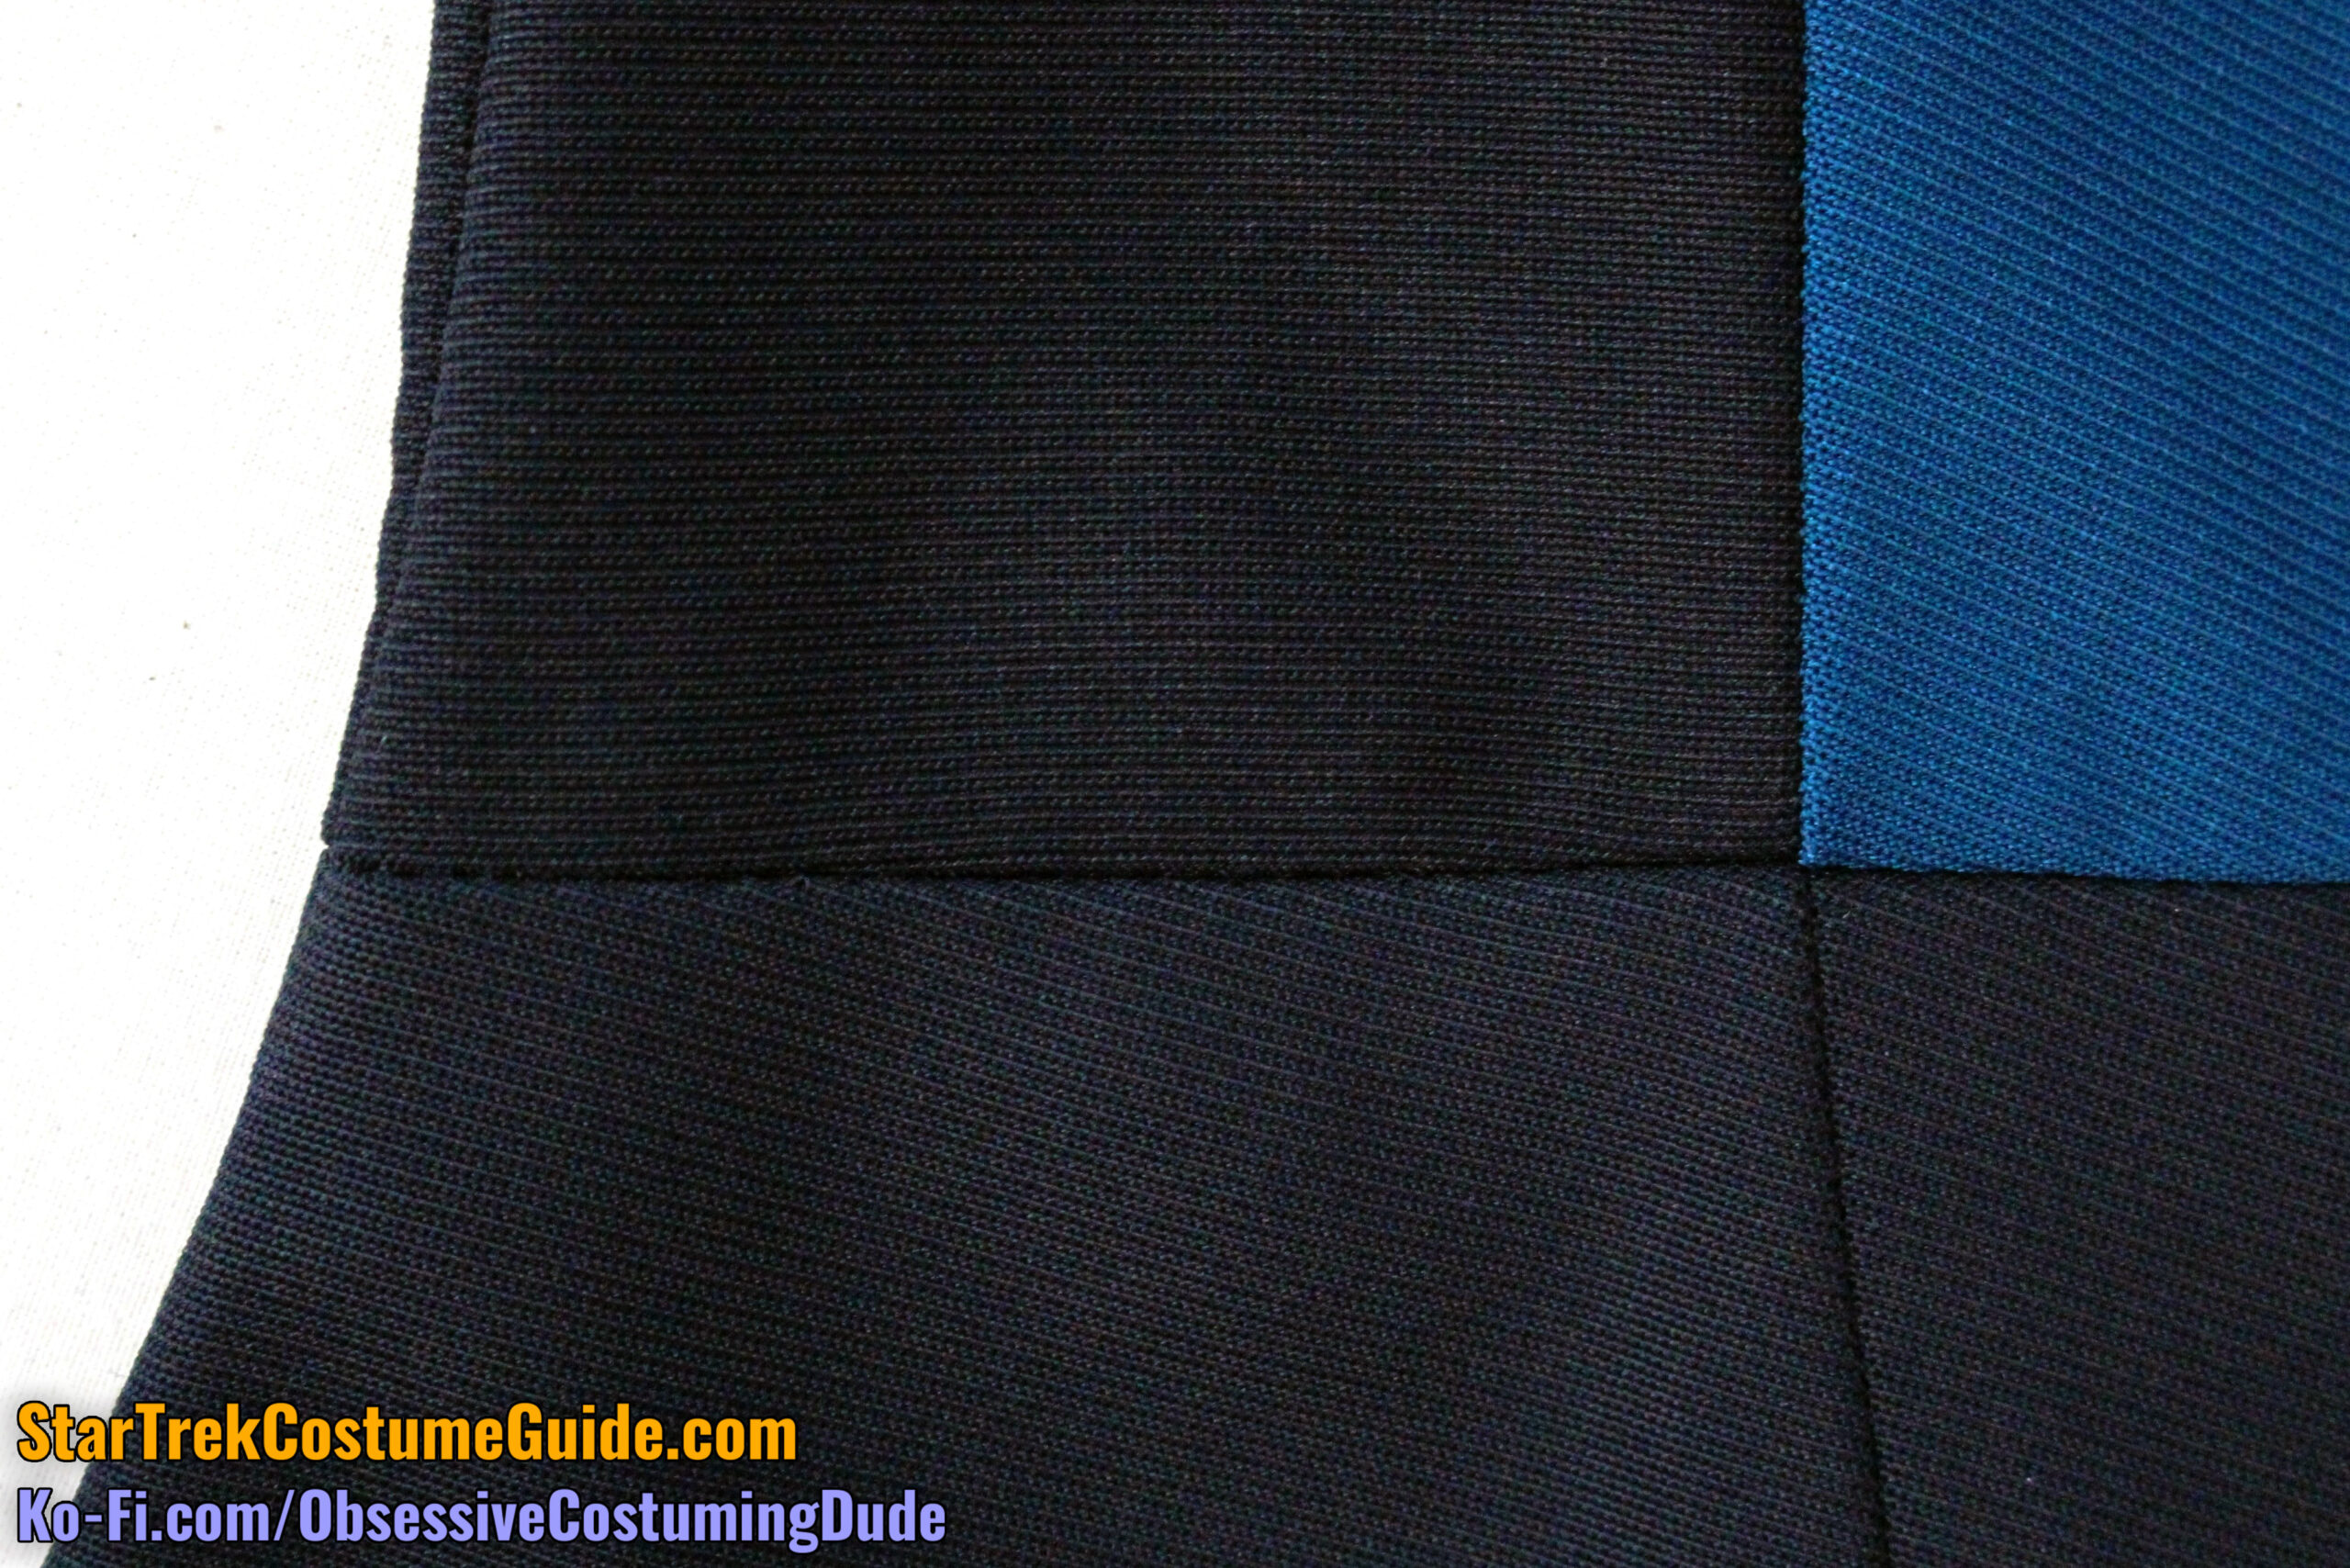
Like on the front, the back yoke piping was usually 3/16” but occasionally narrowed down to about ⅛”.
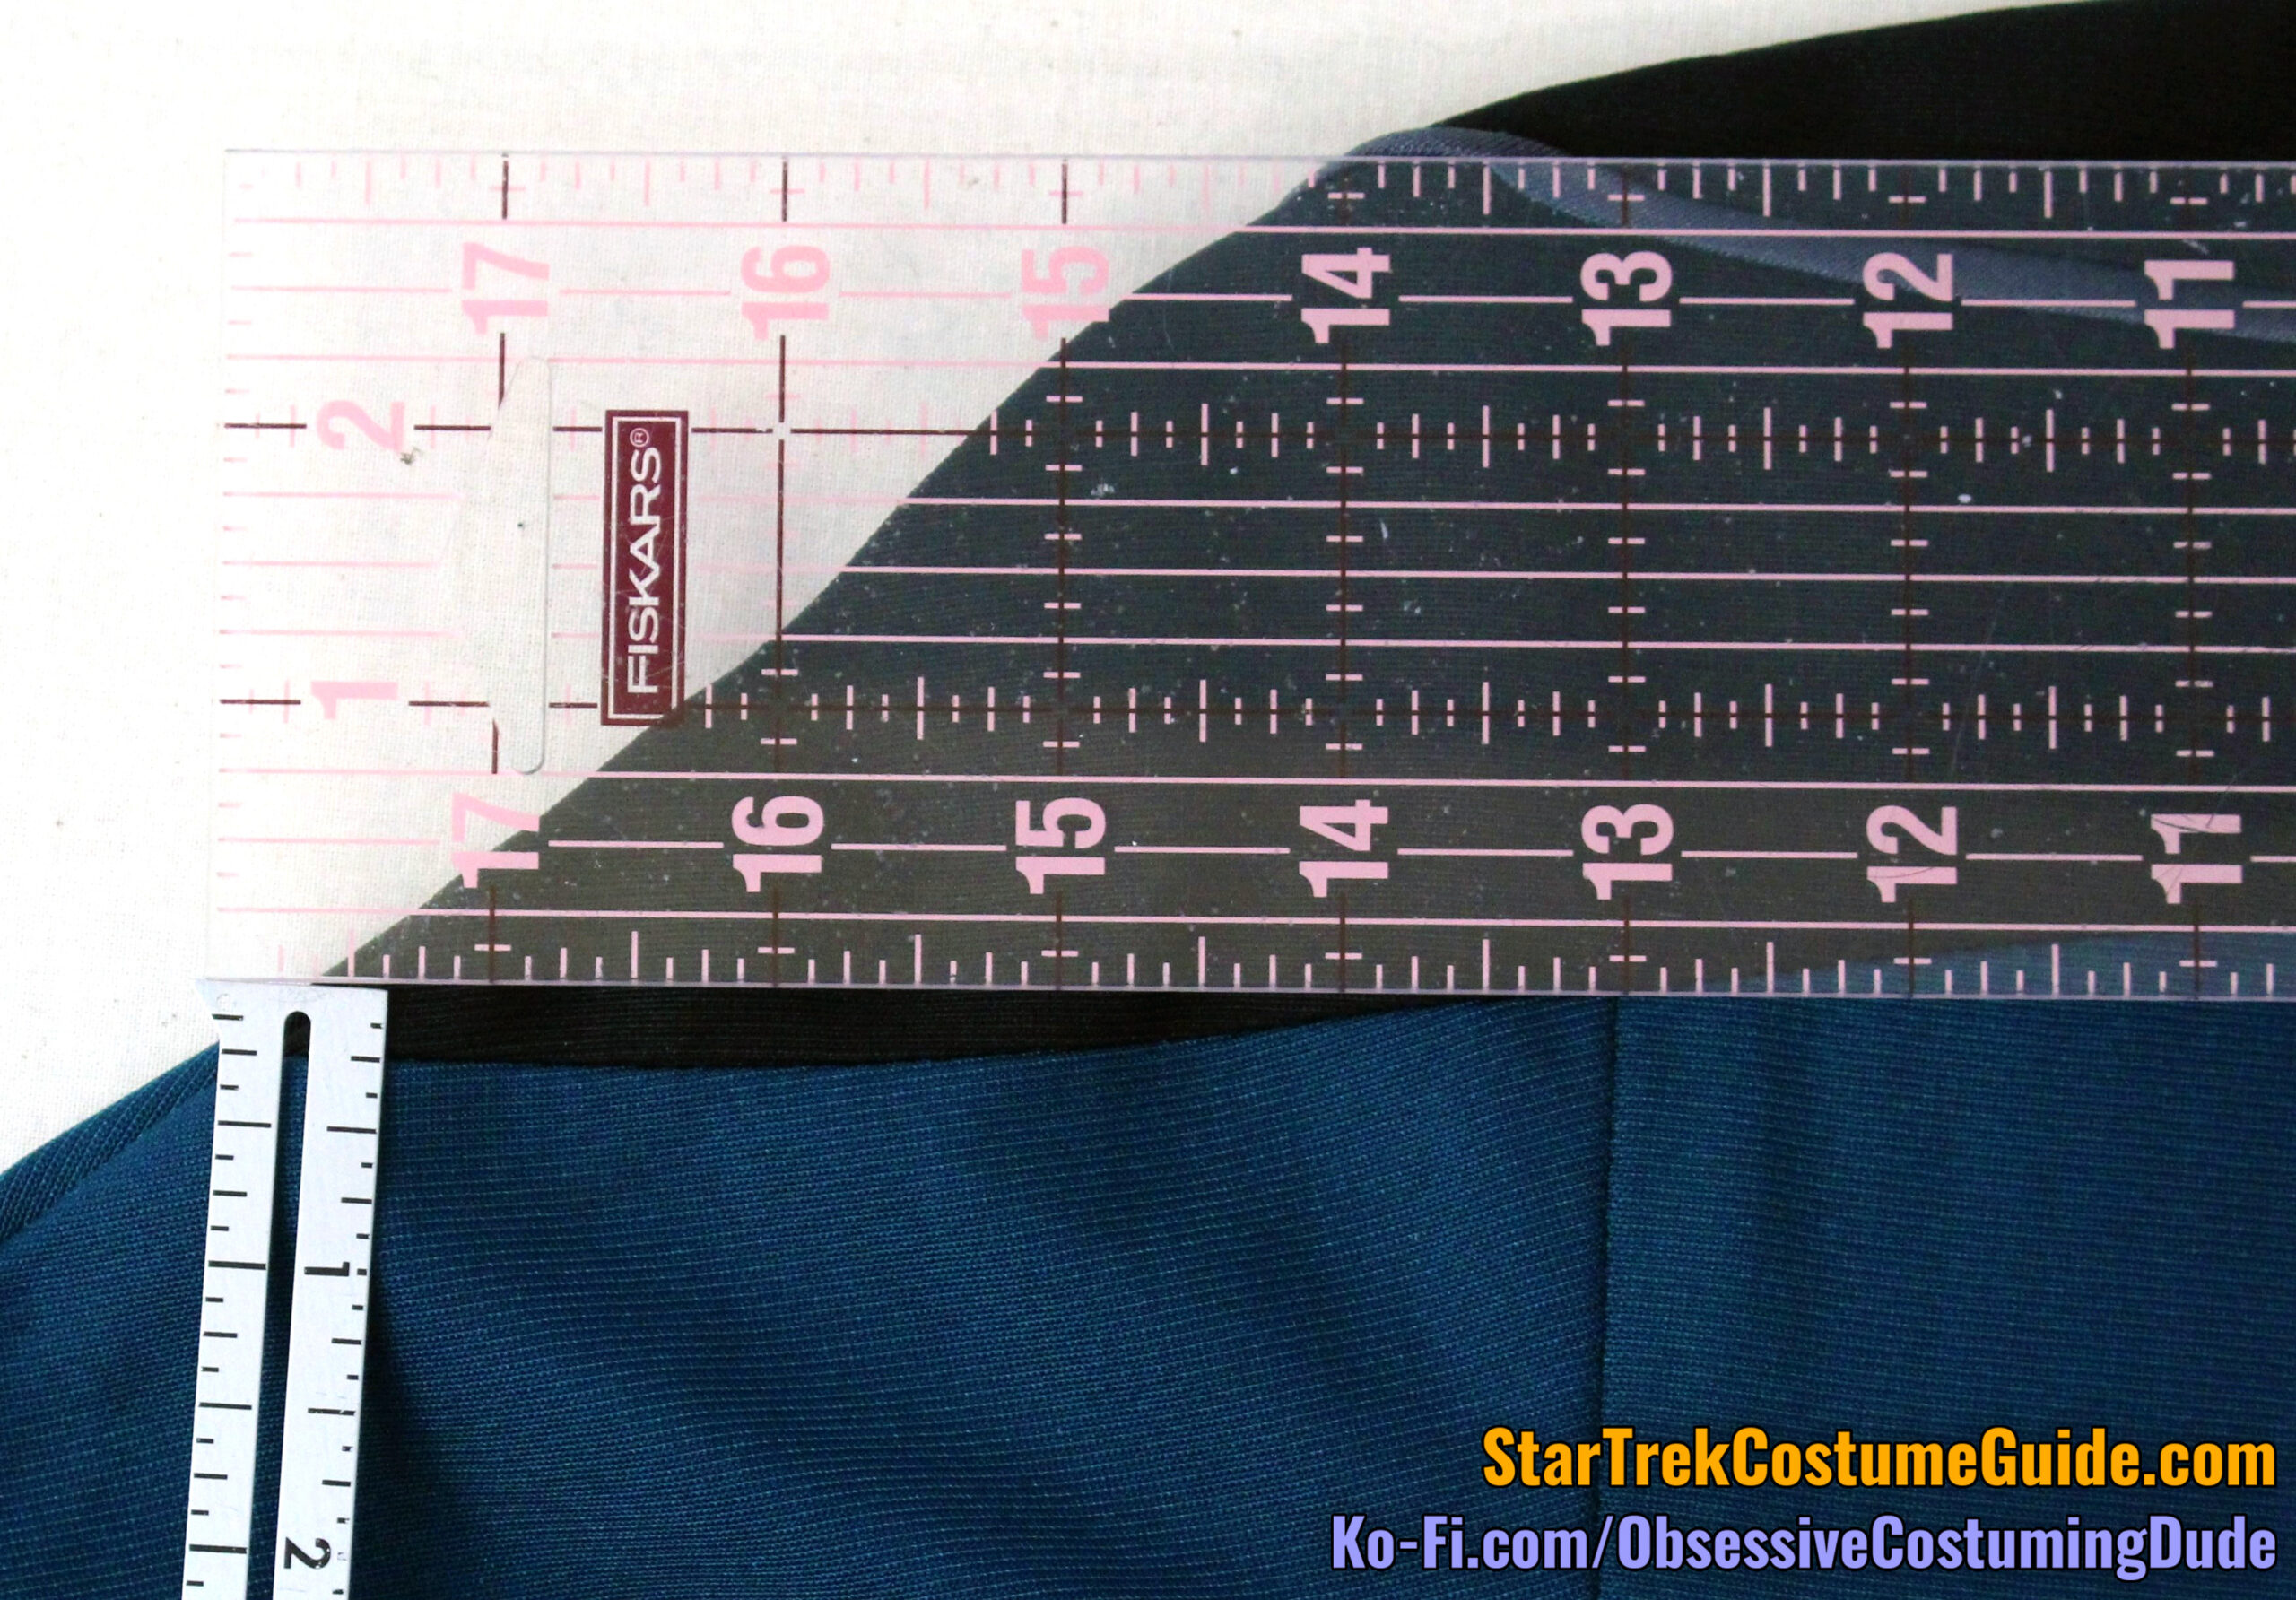
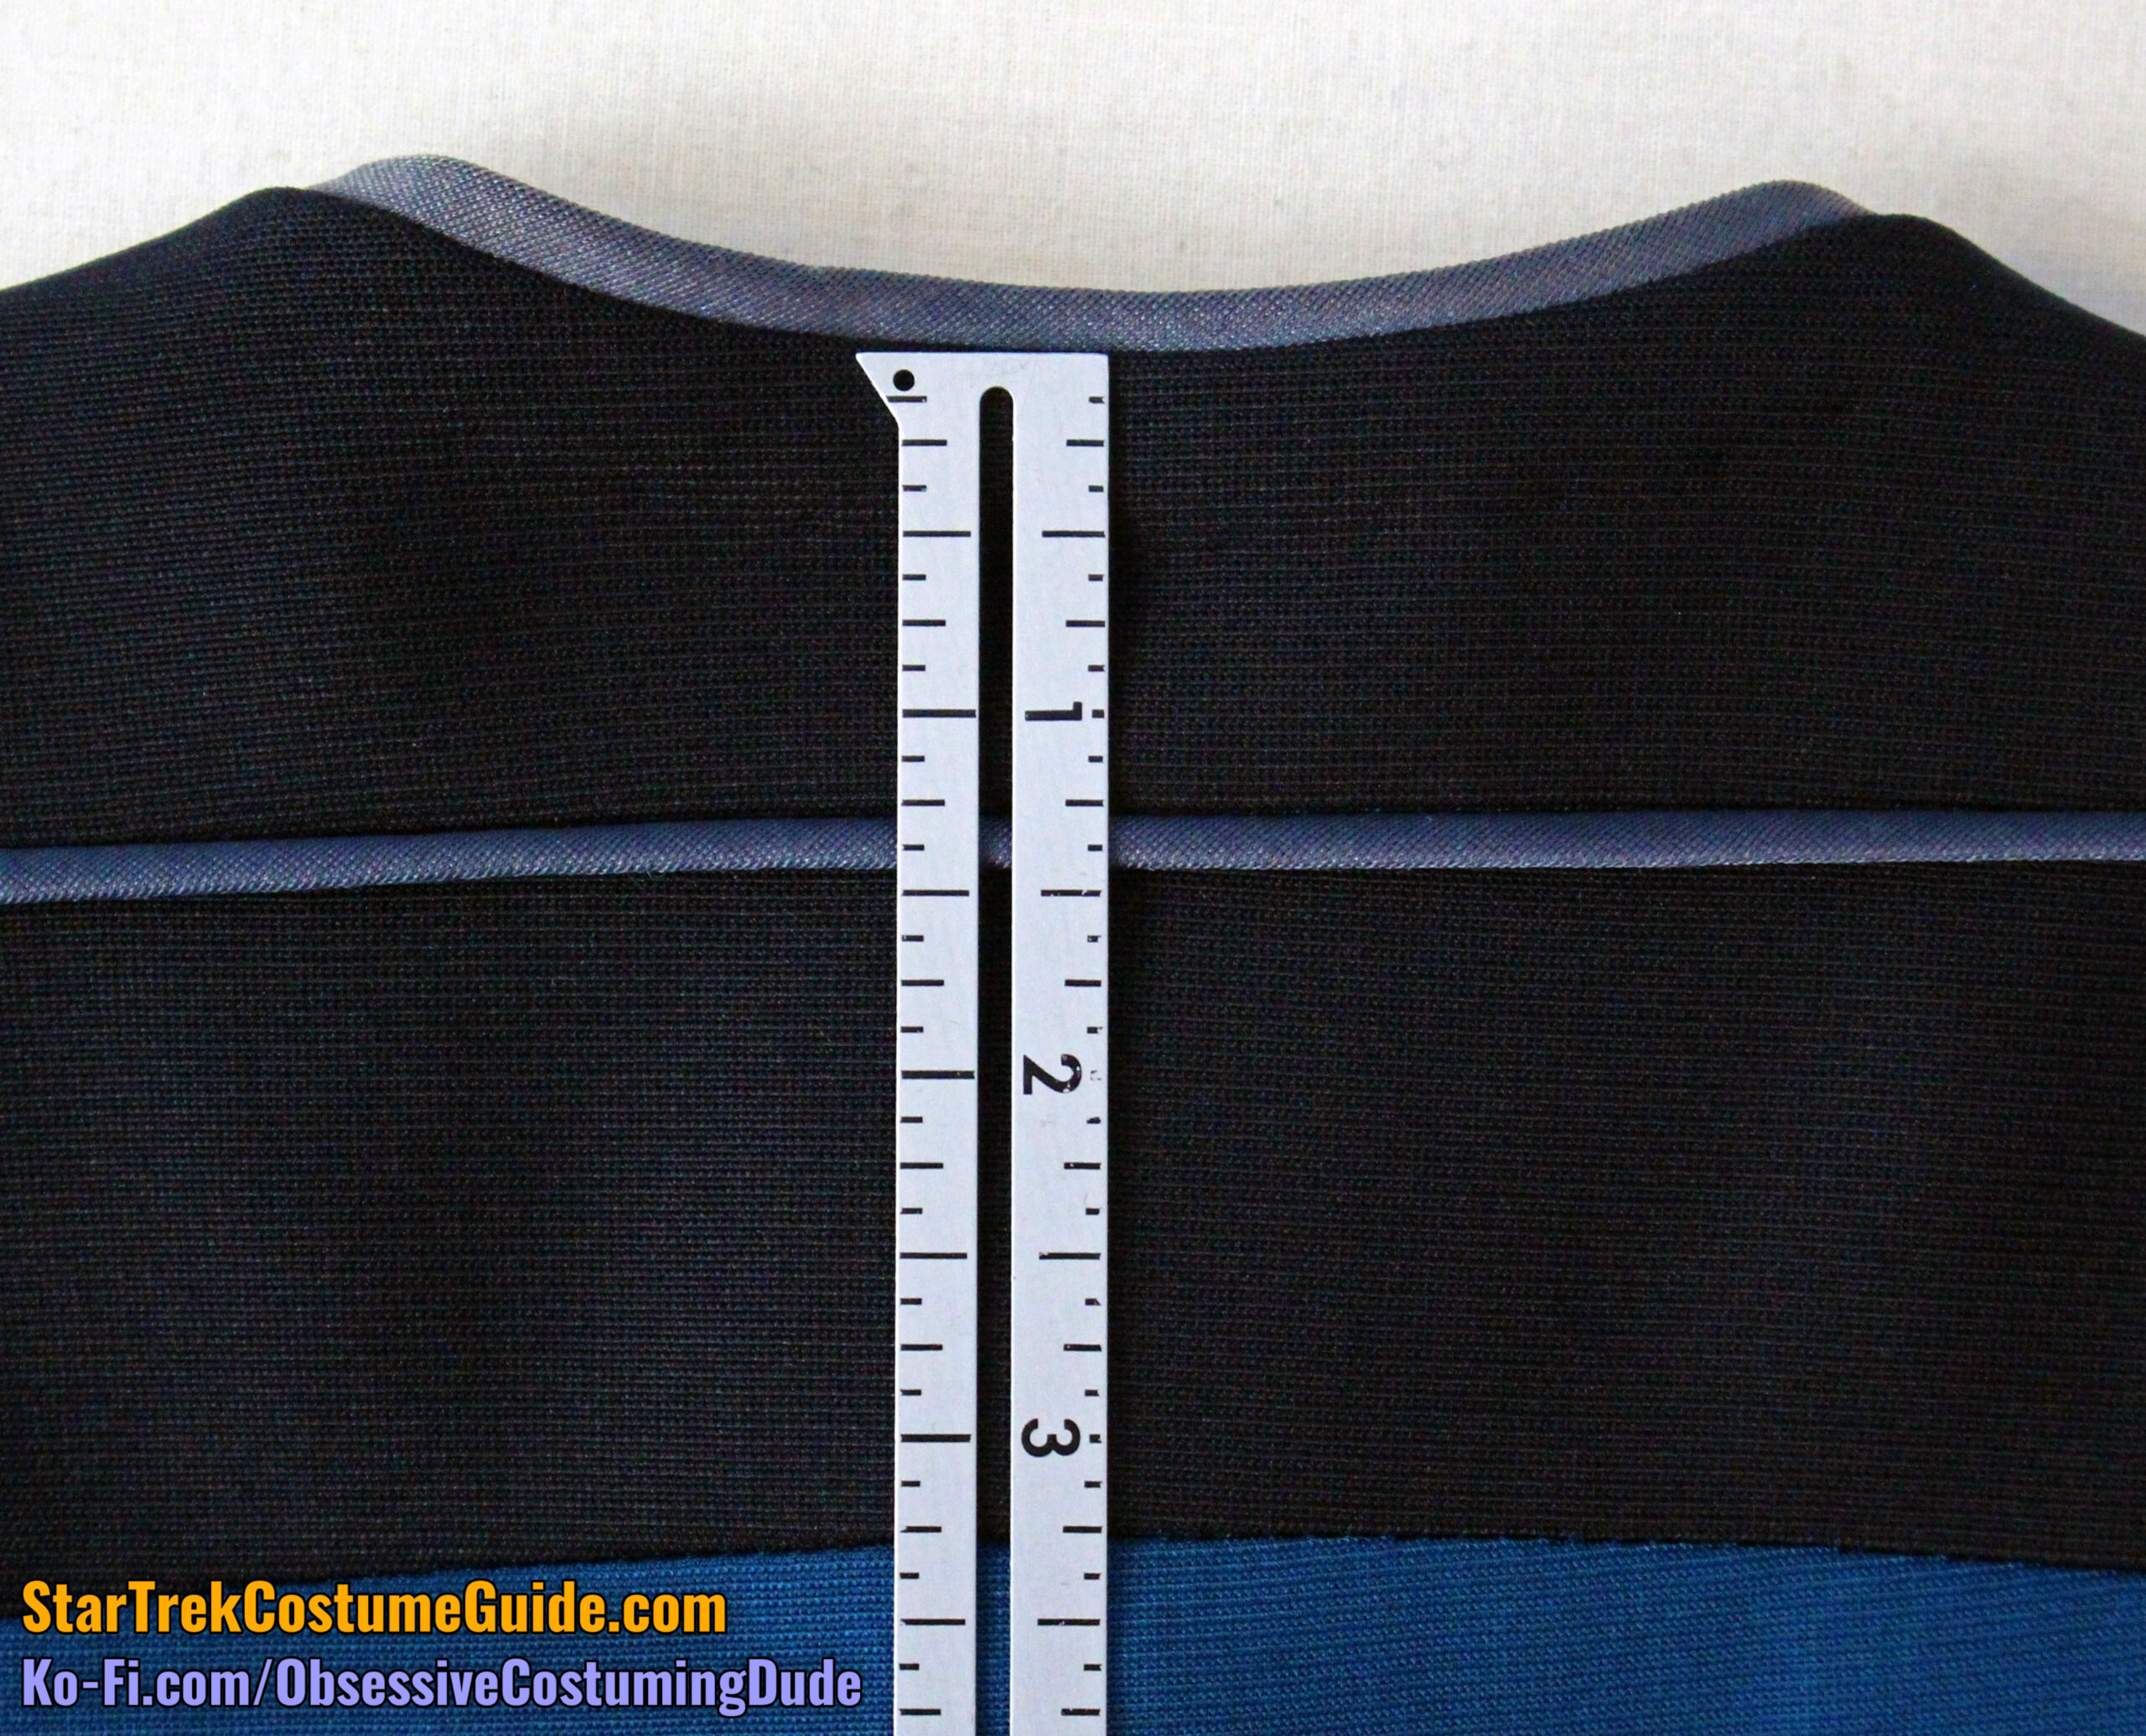
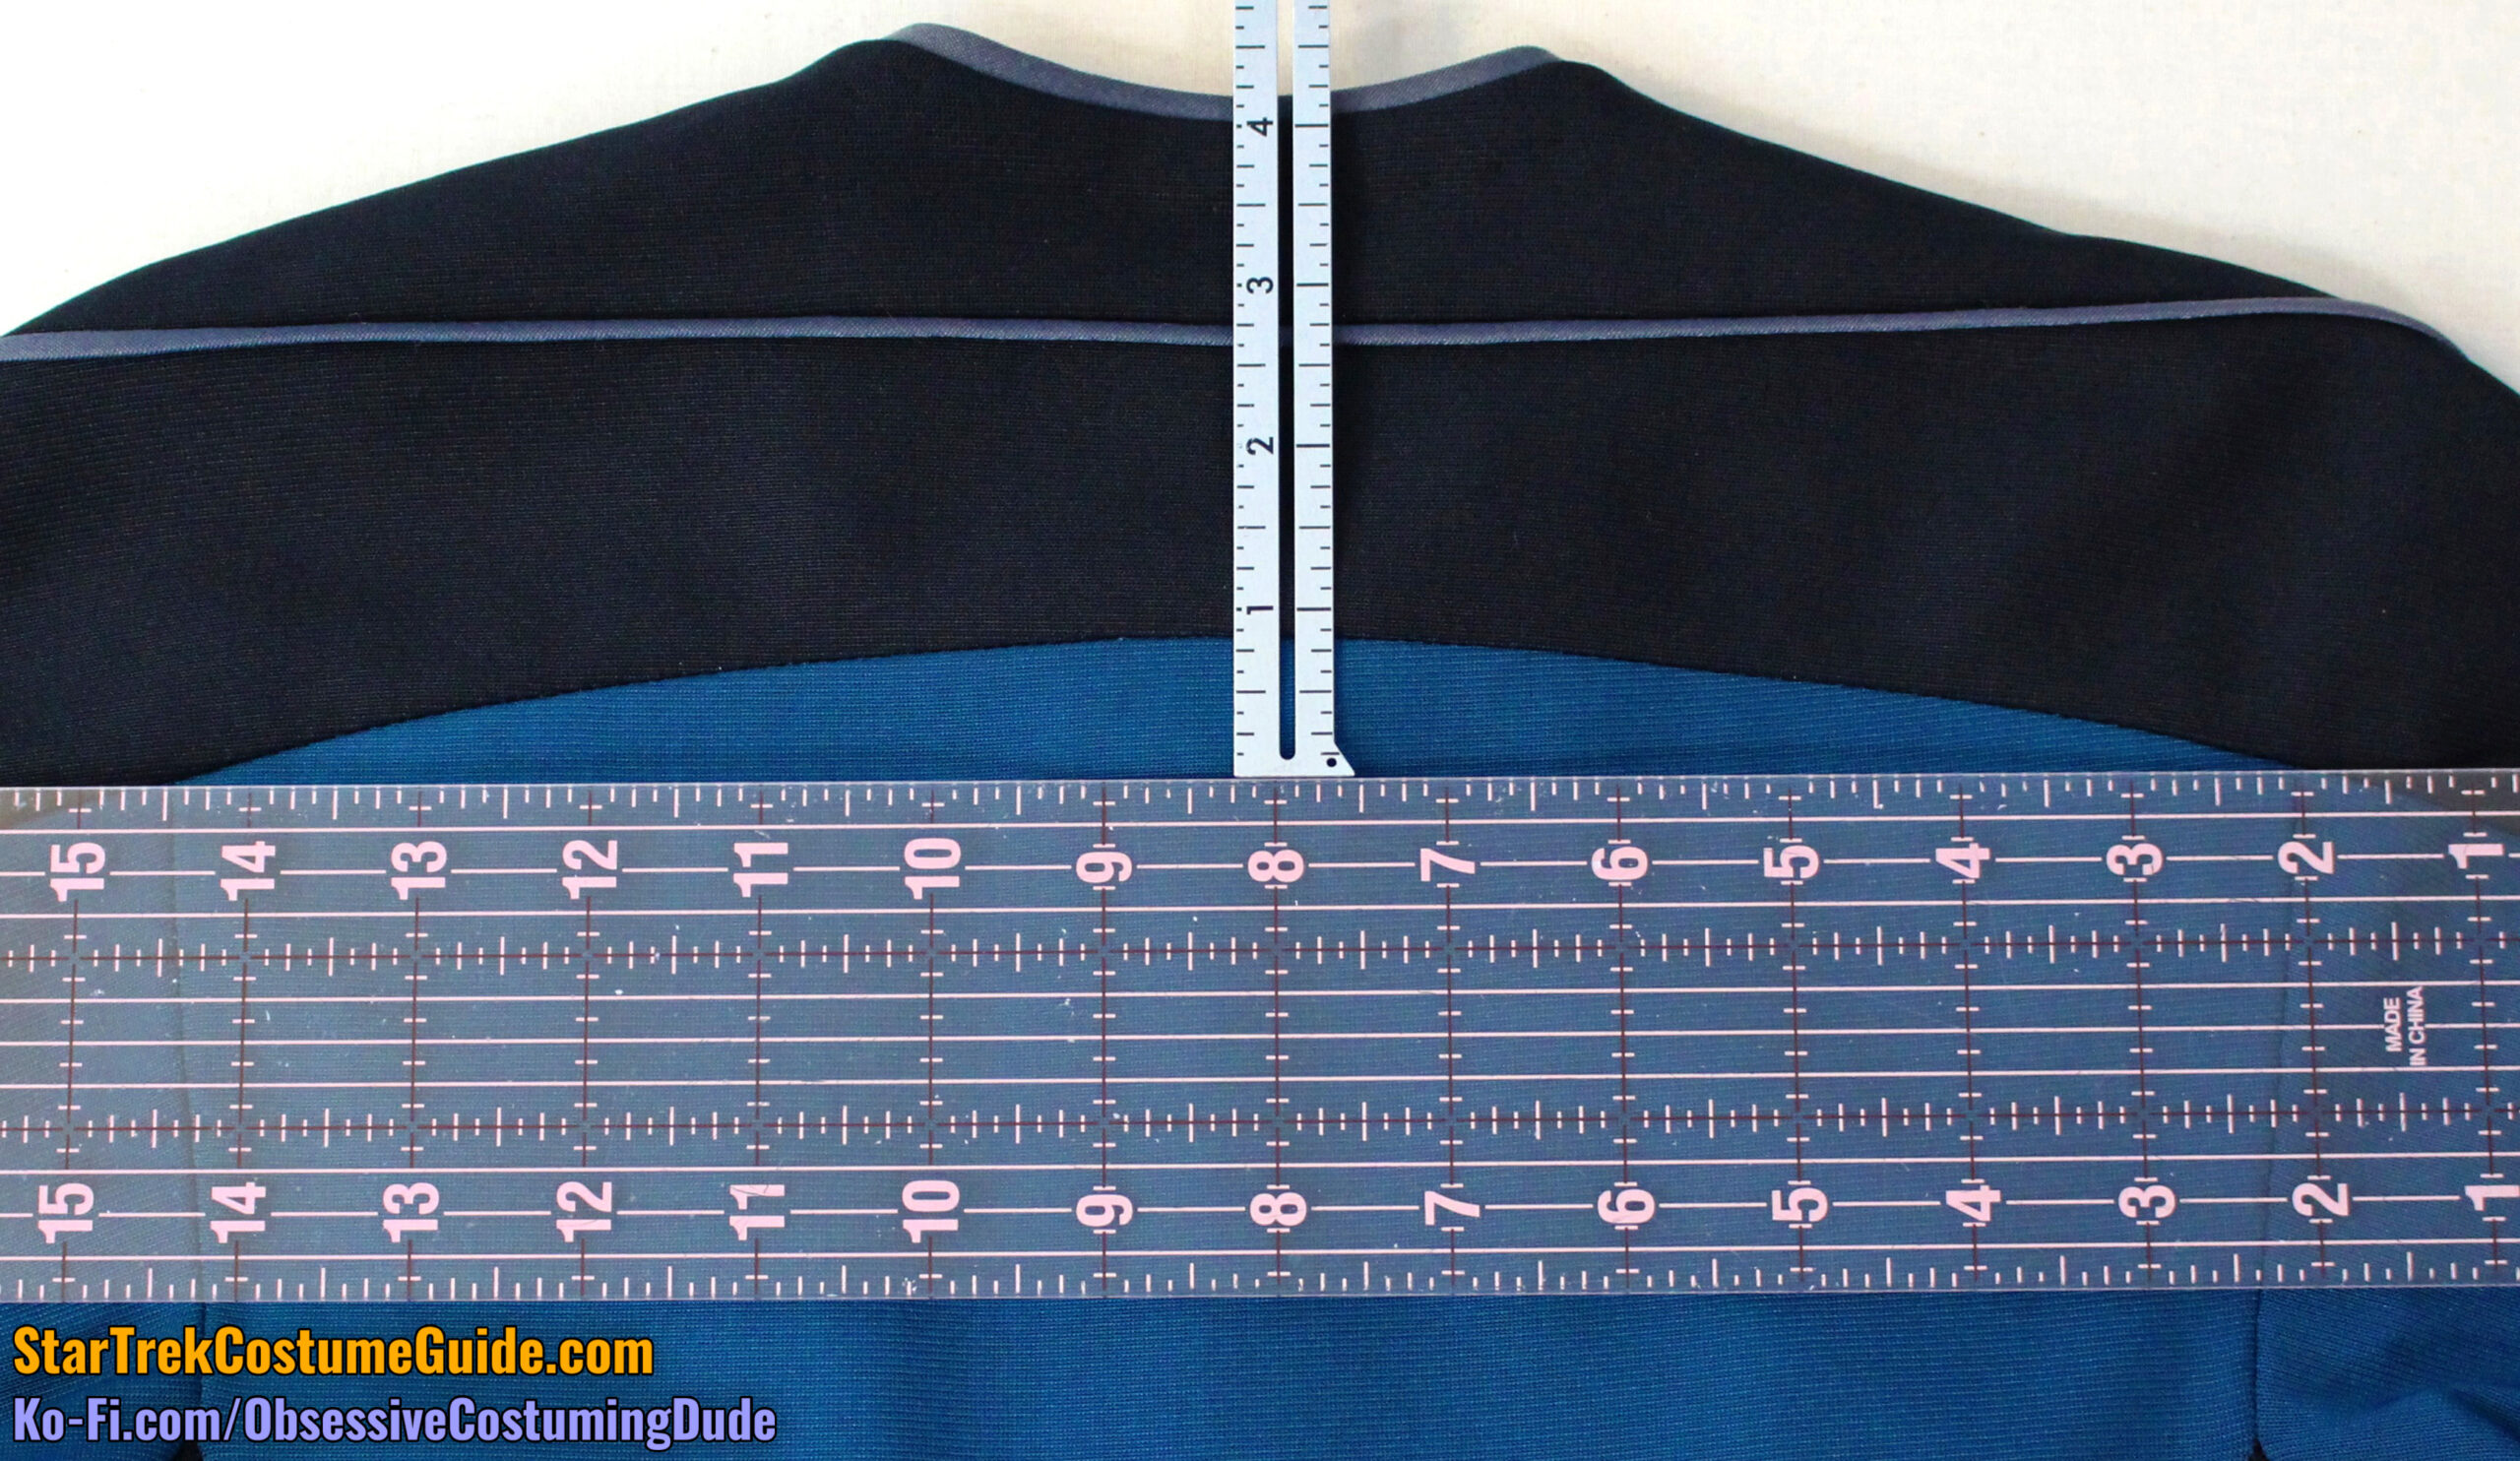
The back yoke was 3 ¼” deep at the center back (sans neckline trim).
The upper yoke was 1 ¼” deep, and the lower yoke was 2” deep (including the yoke piping).
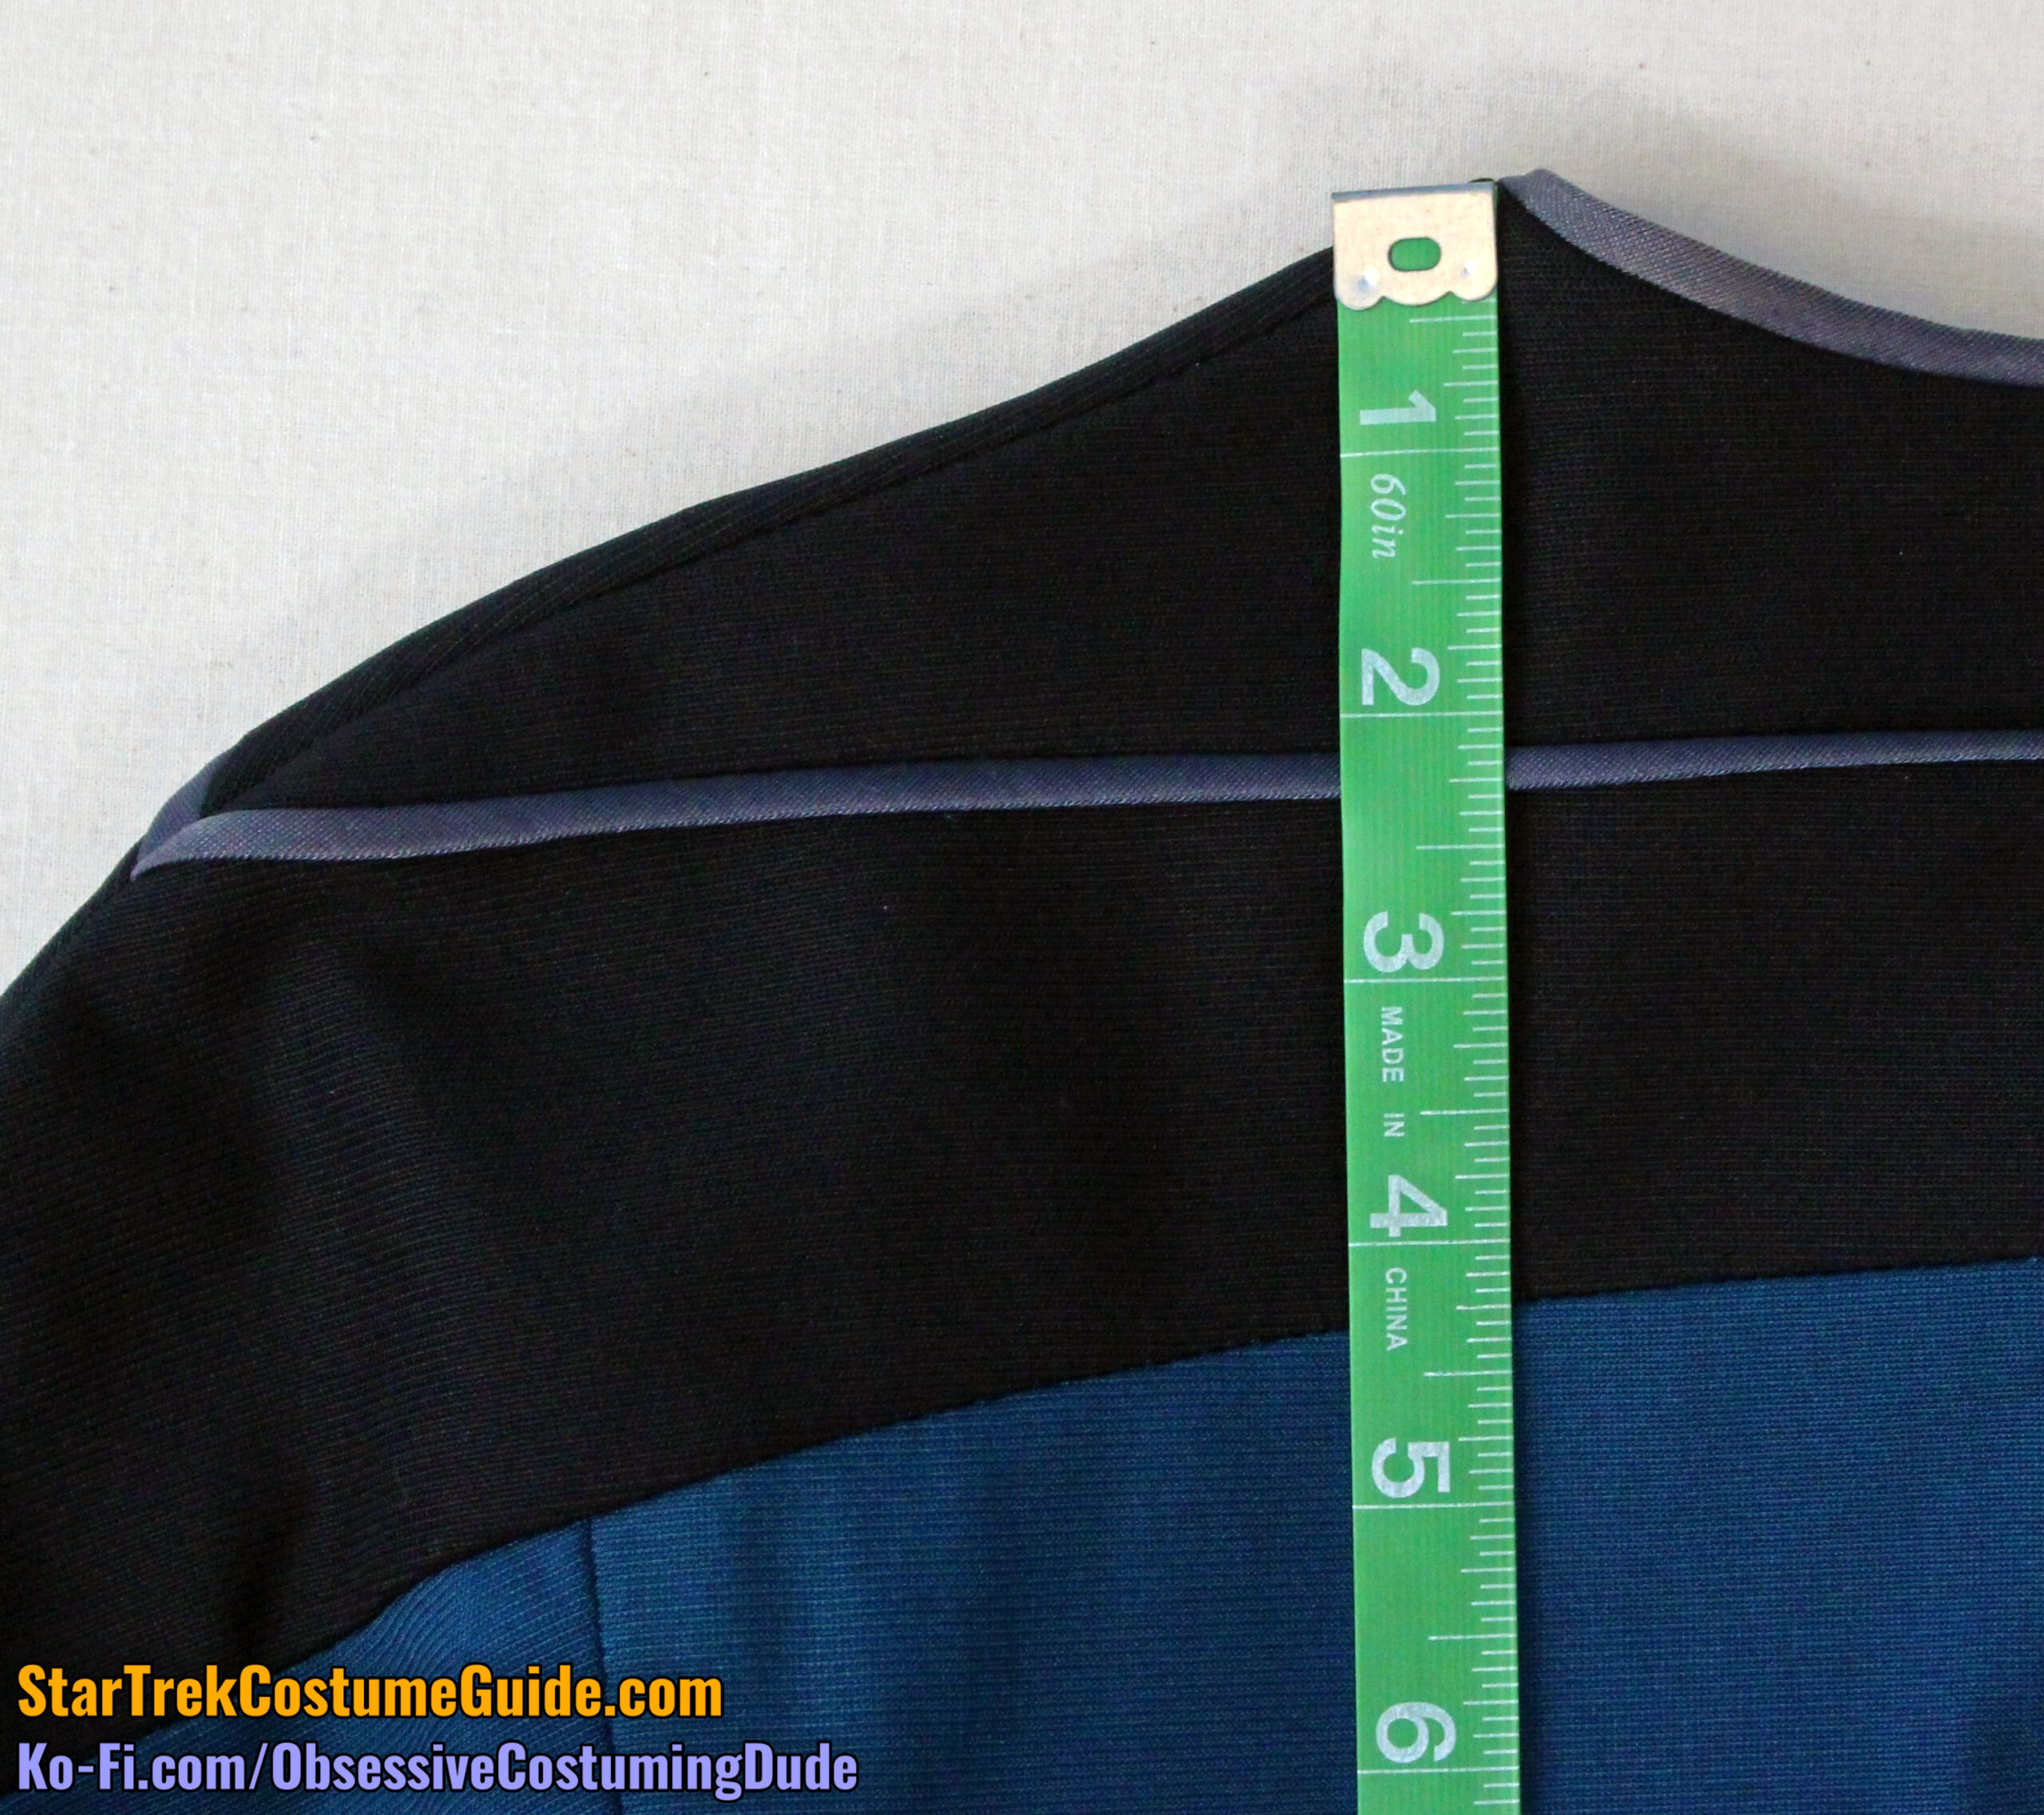
The back yoke was 4 ¼” deep at the shoulder seam.
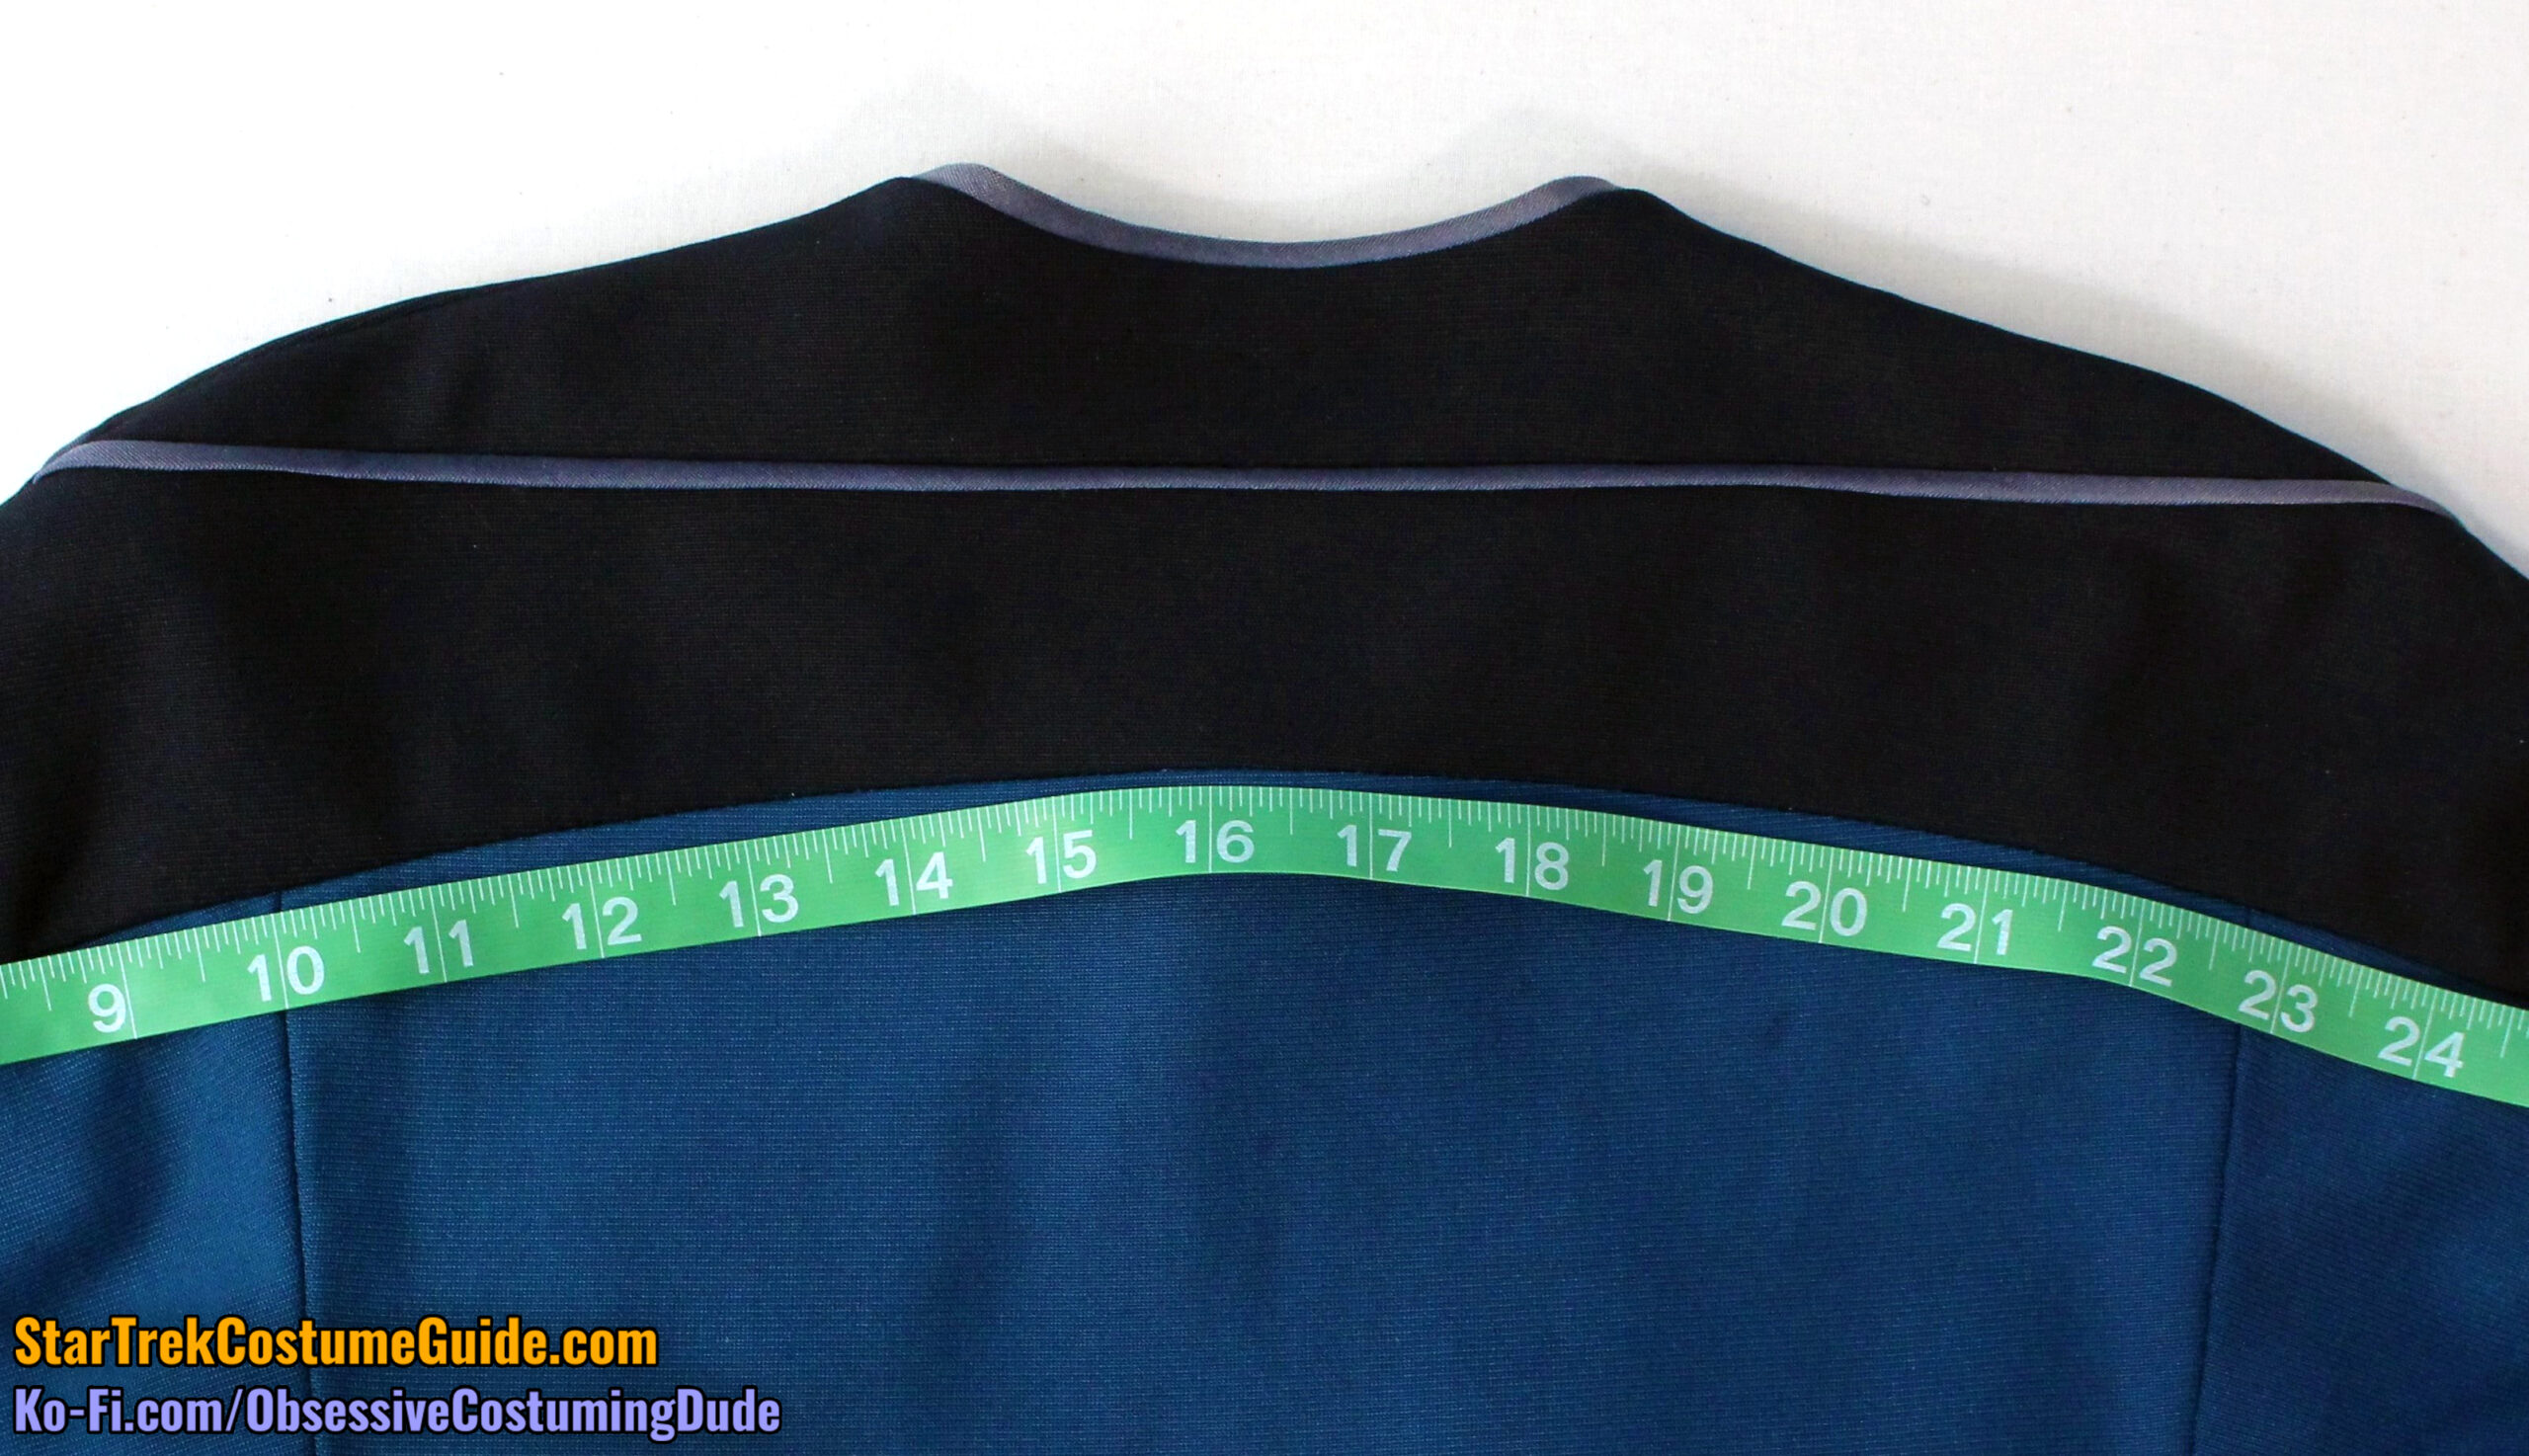
Curiously, the lower back yoke seam line was a bit asymmetrical.
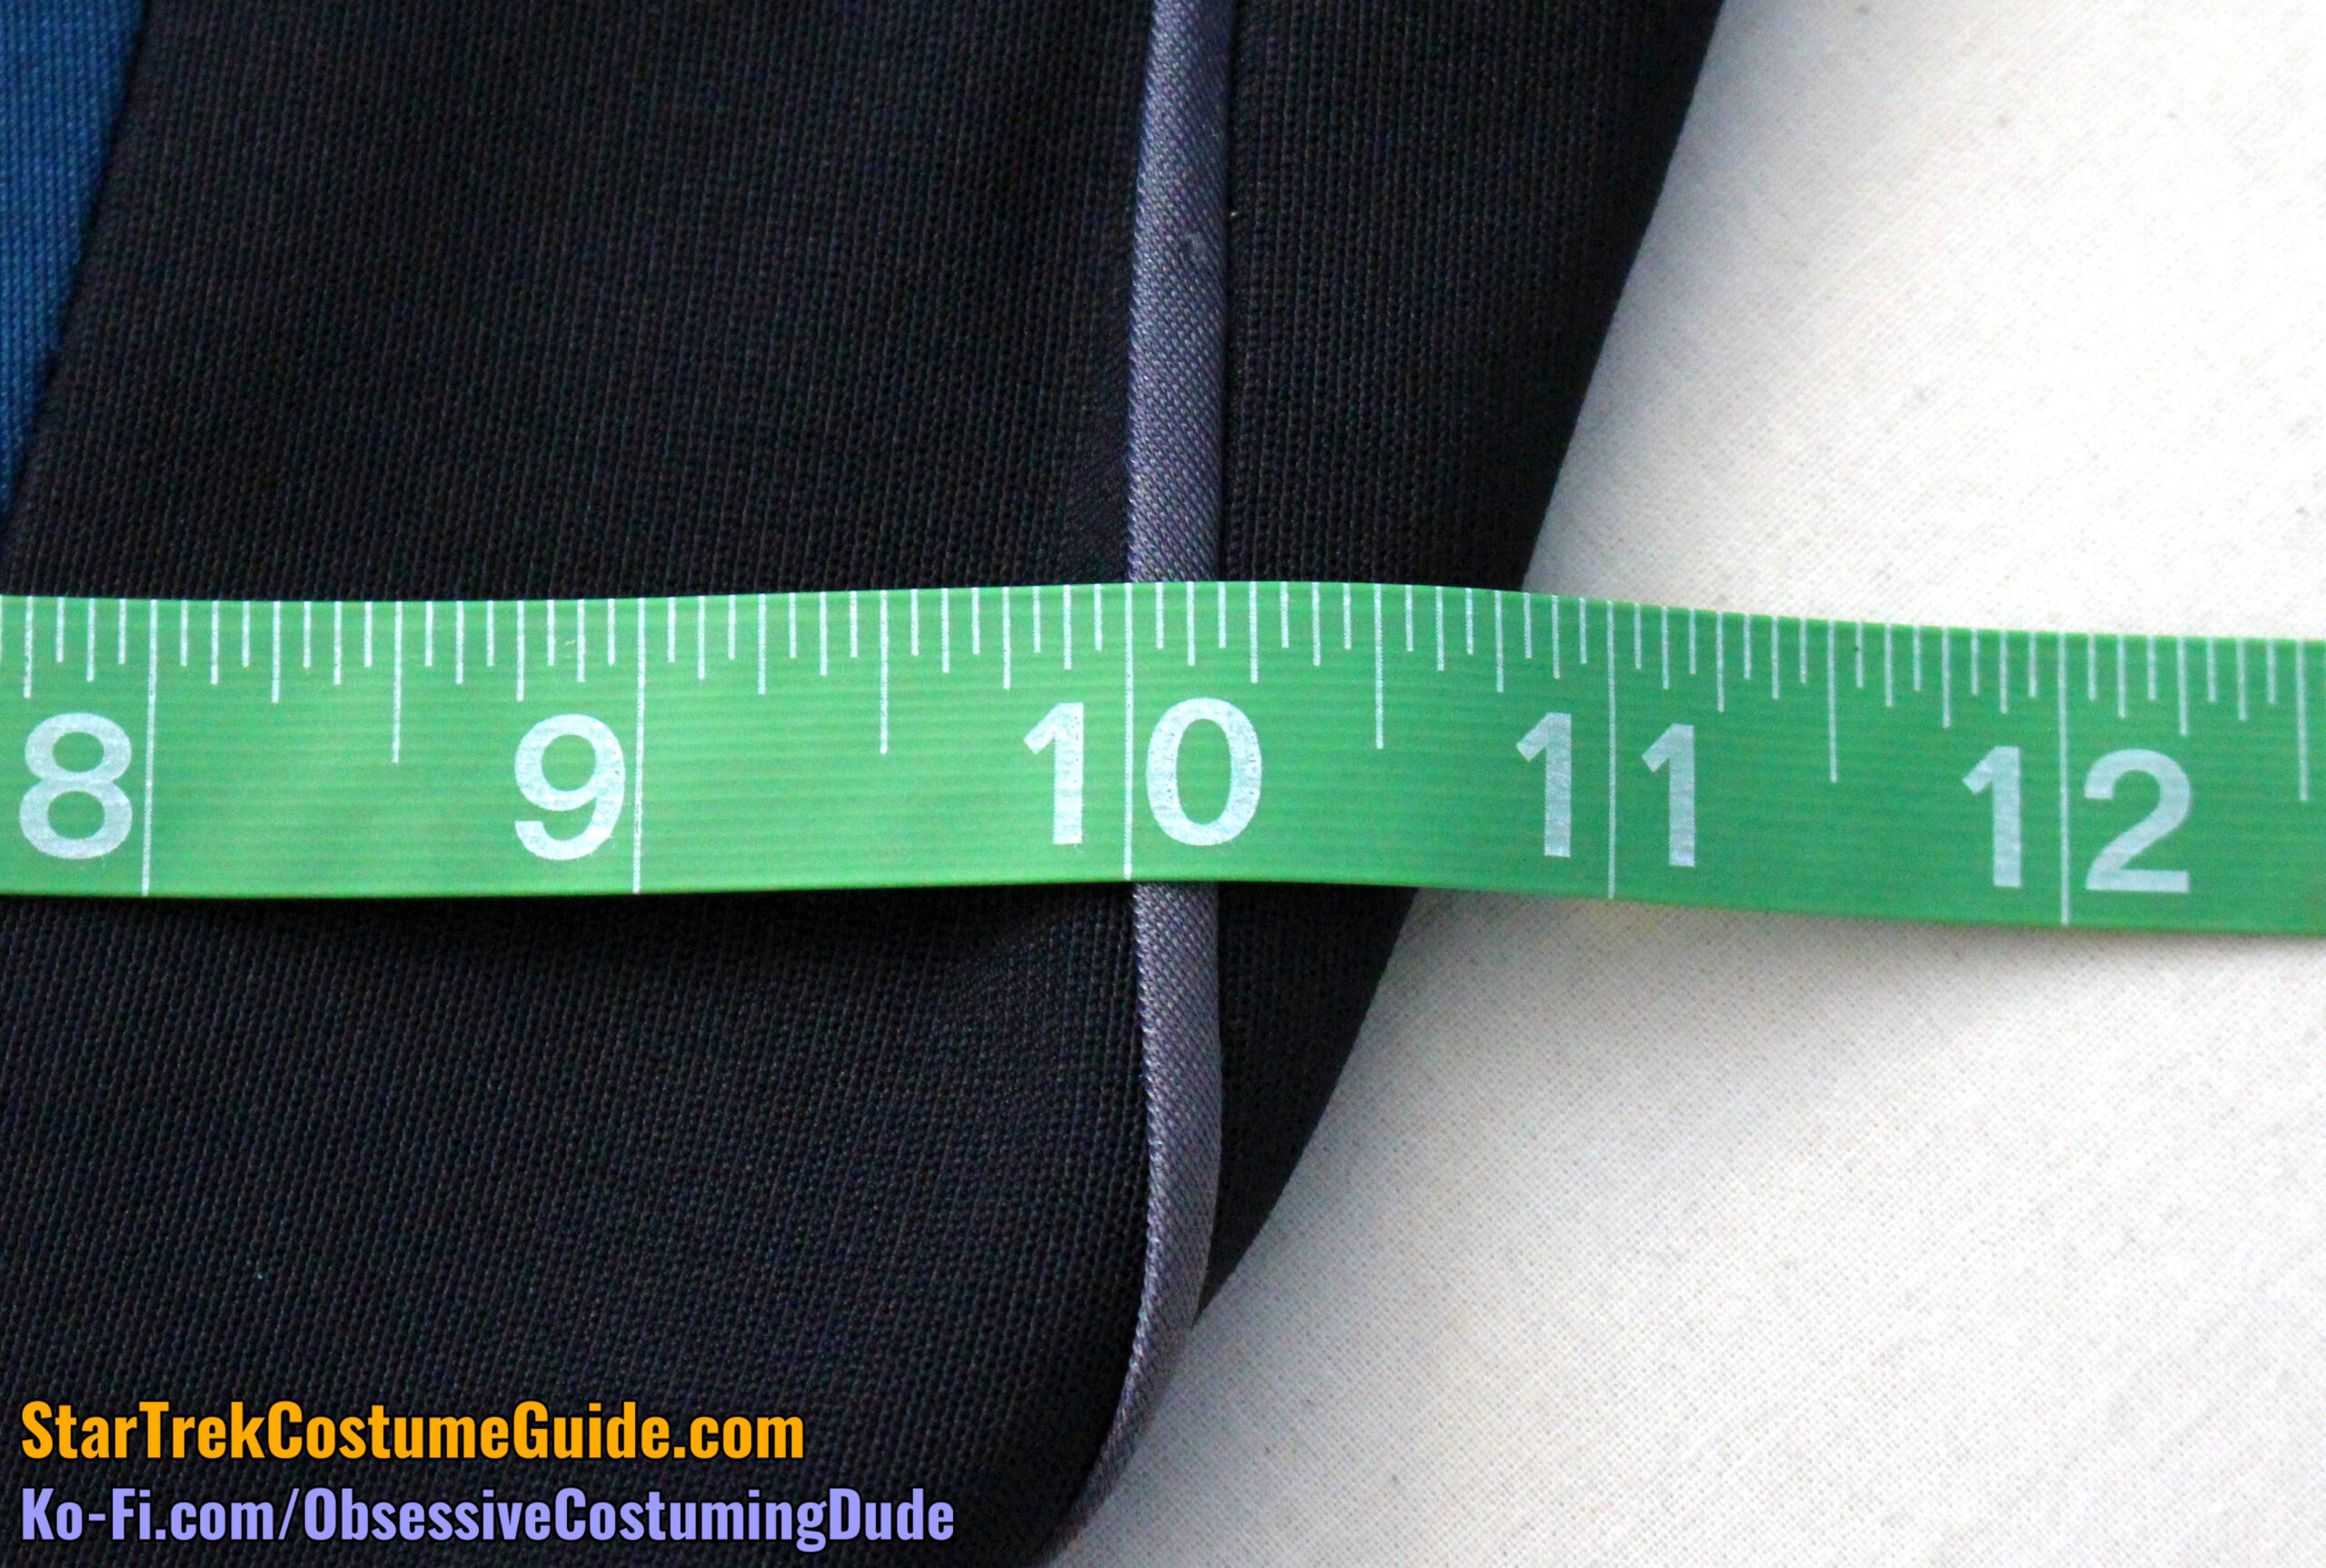
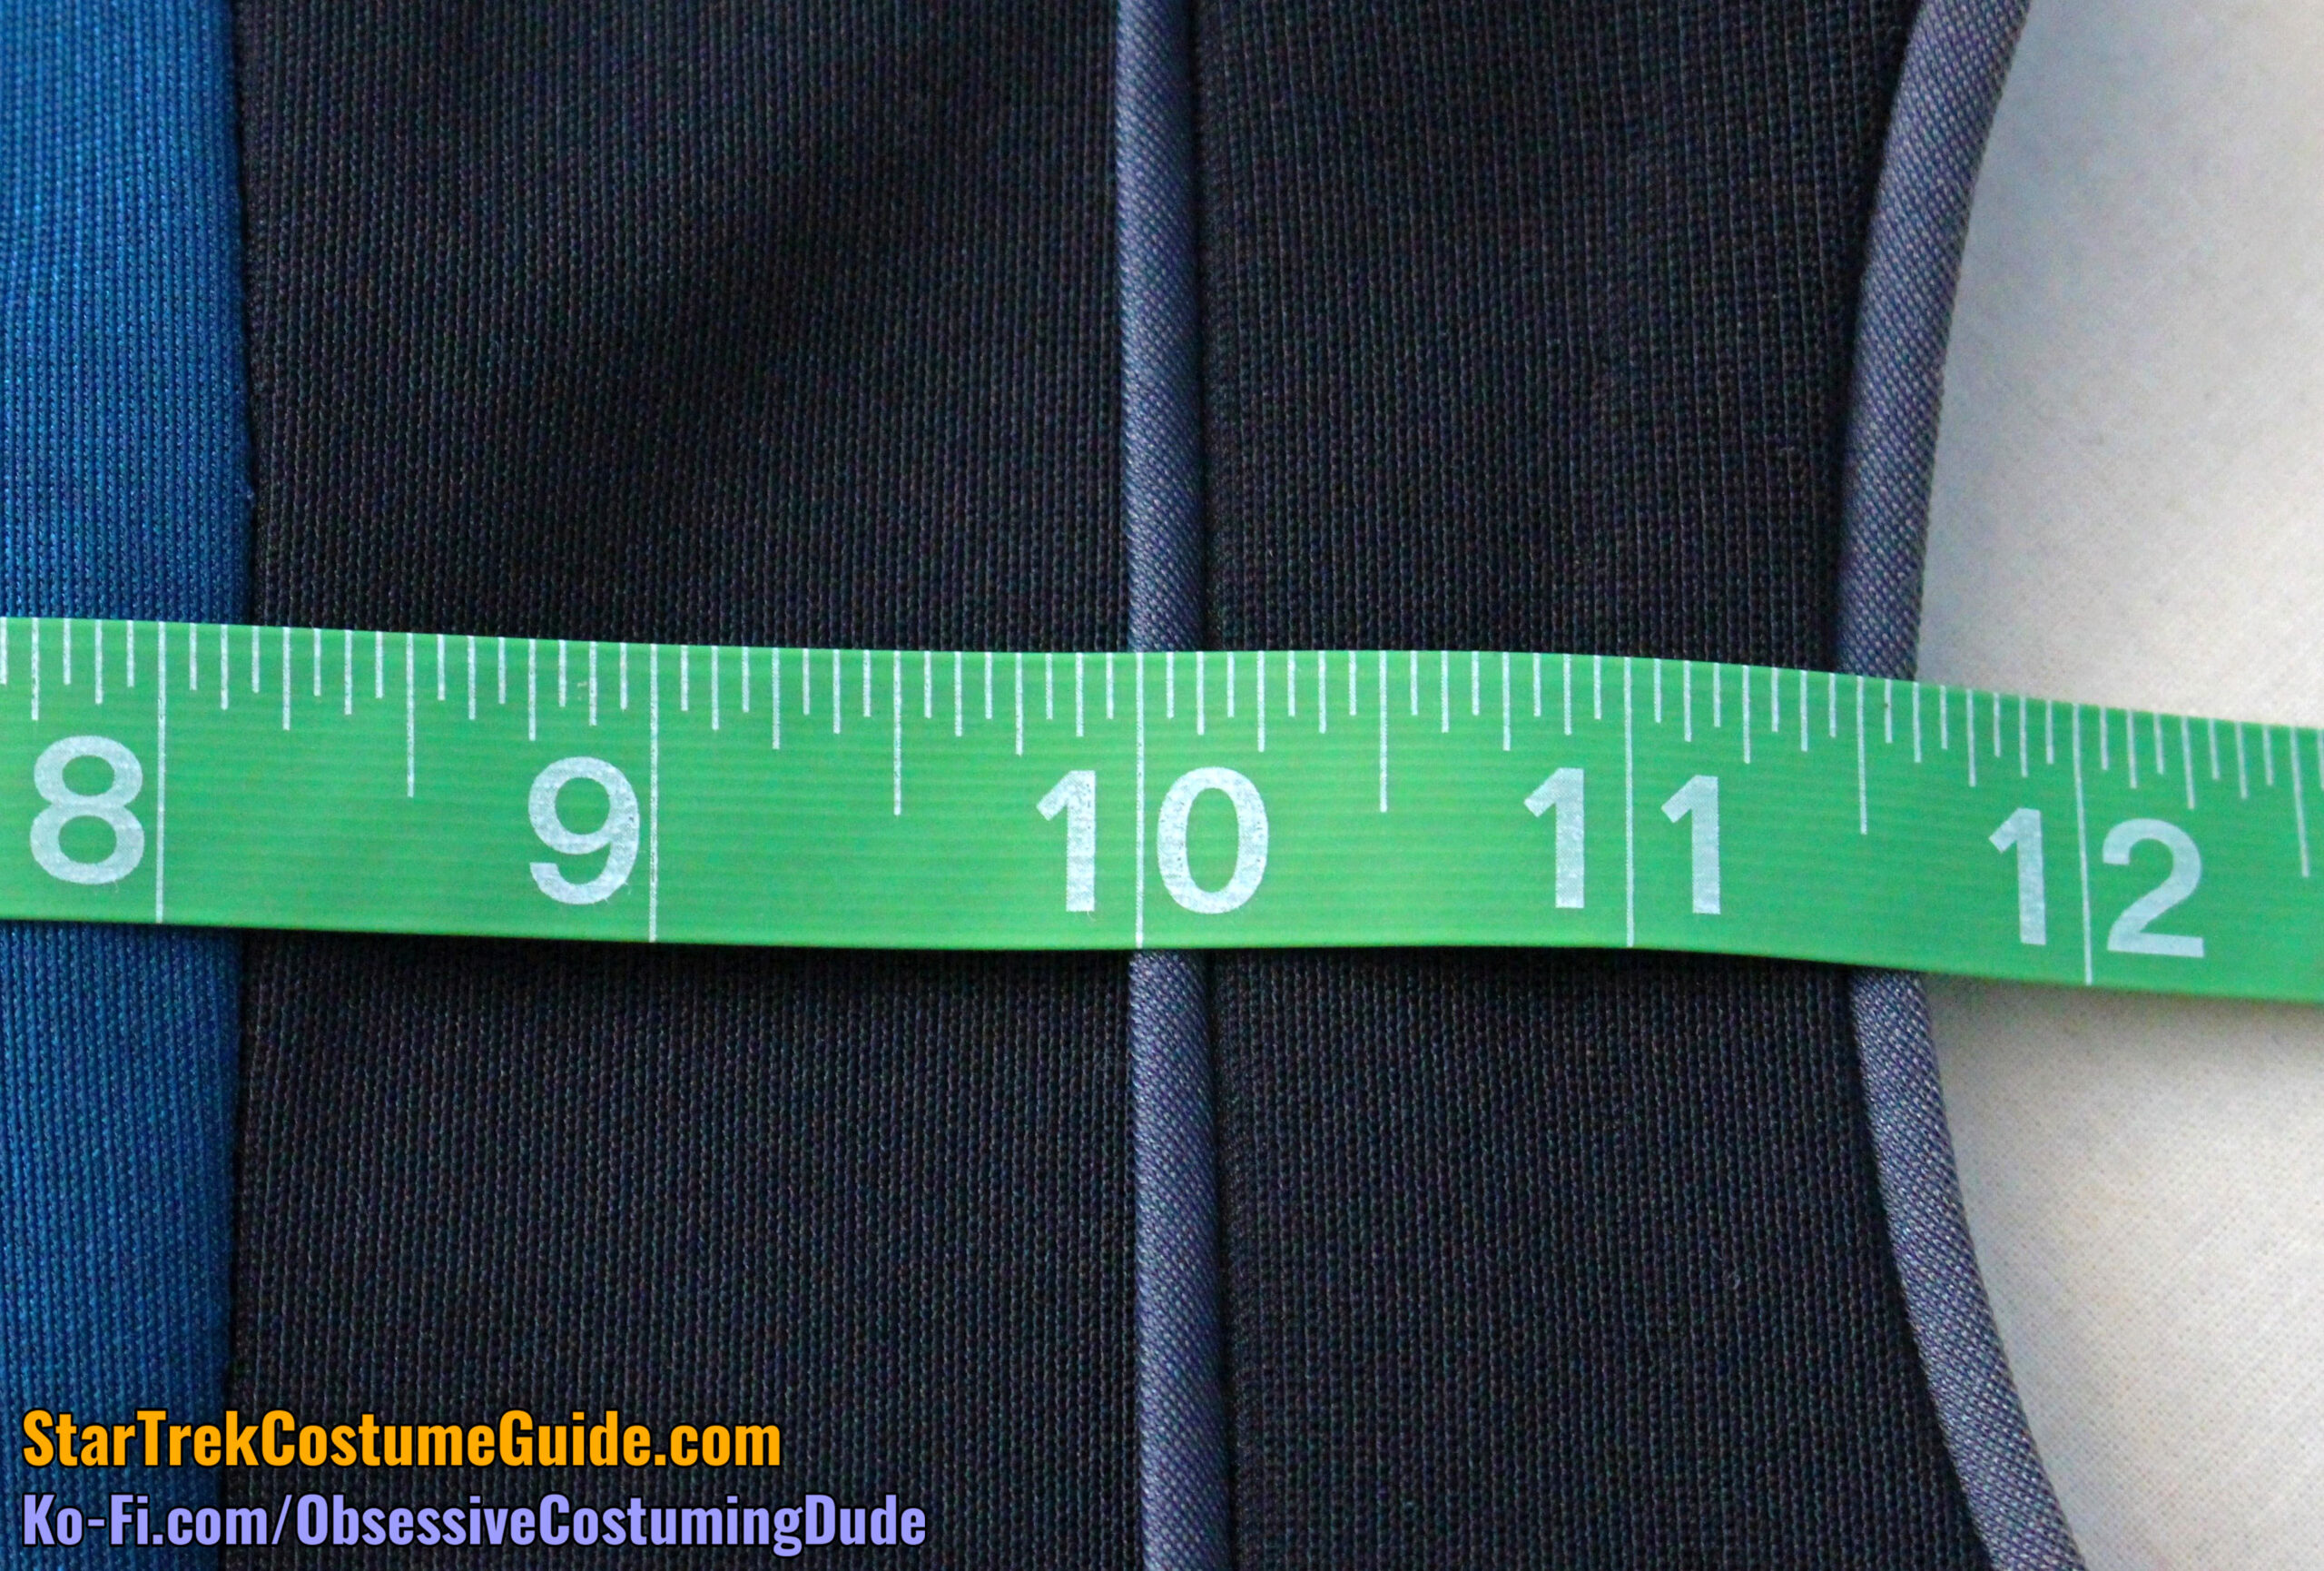
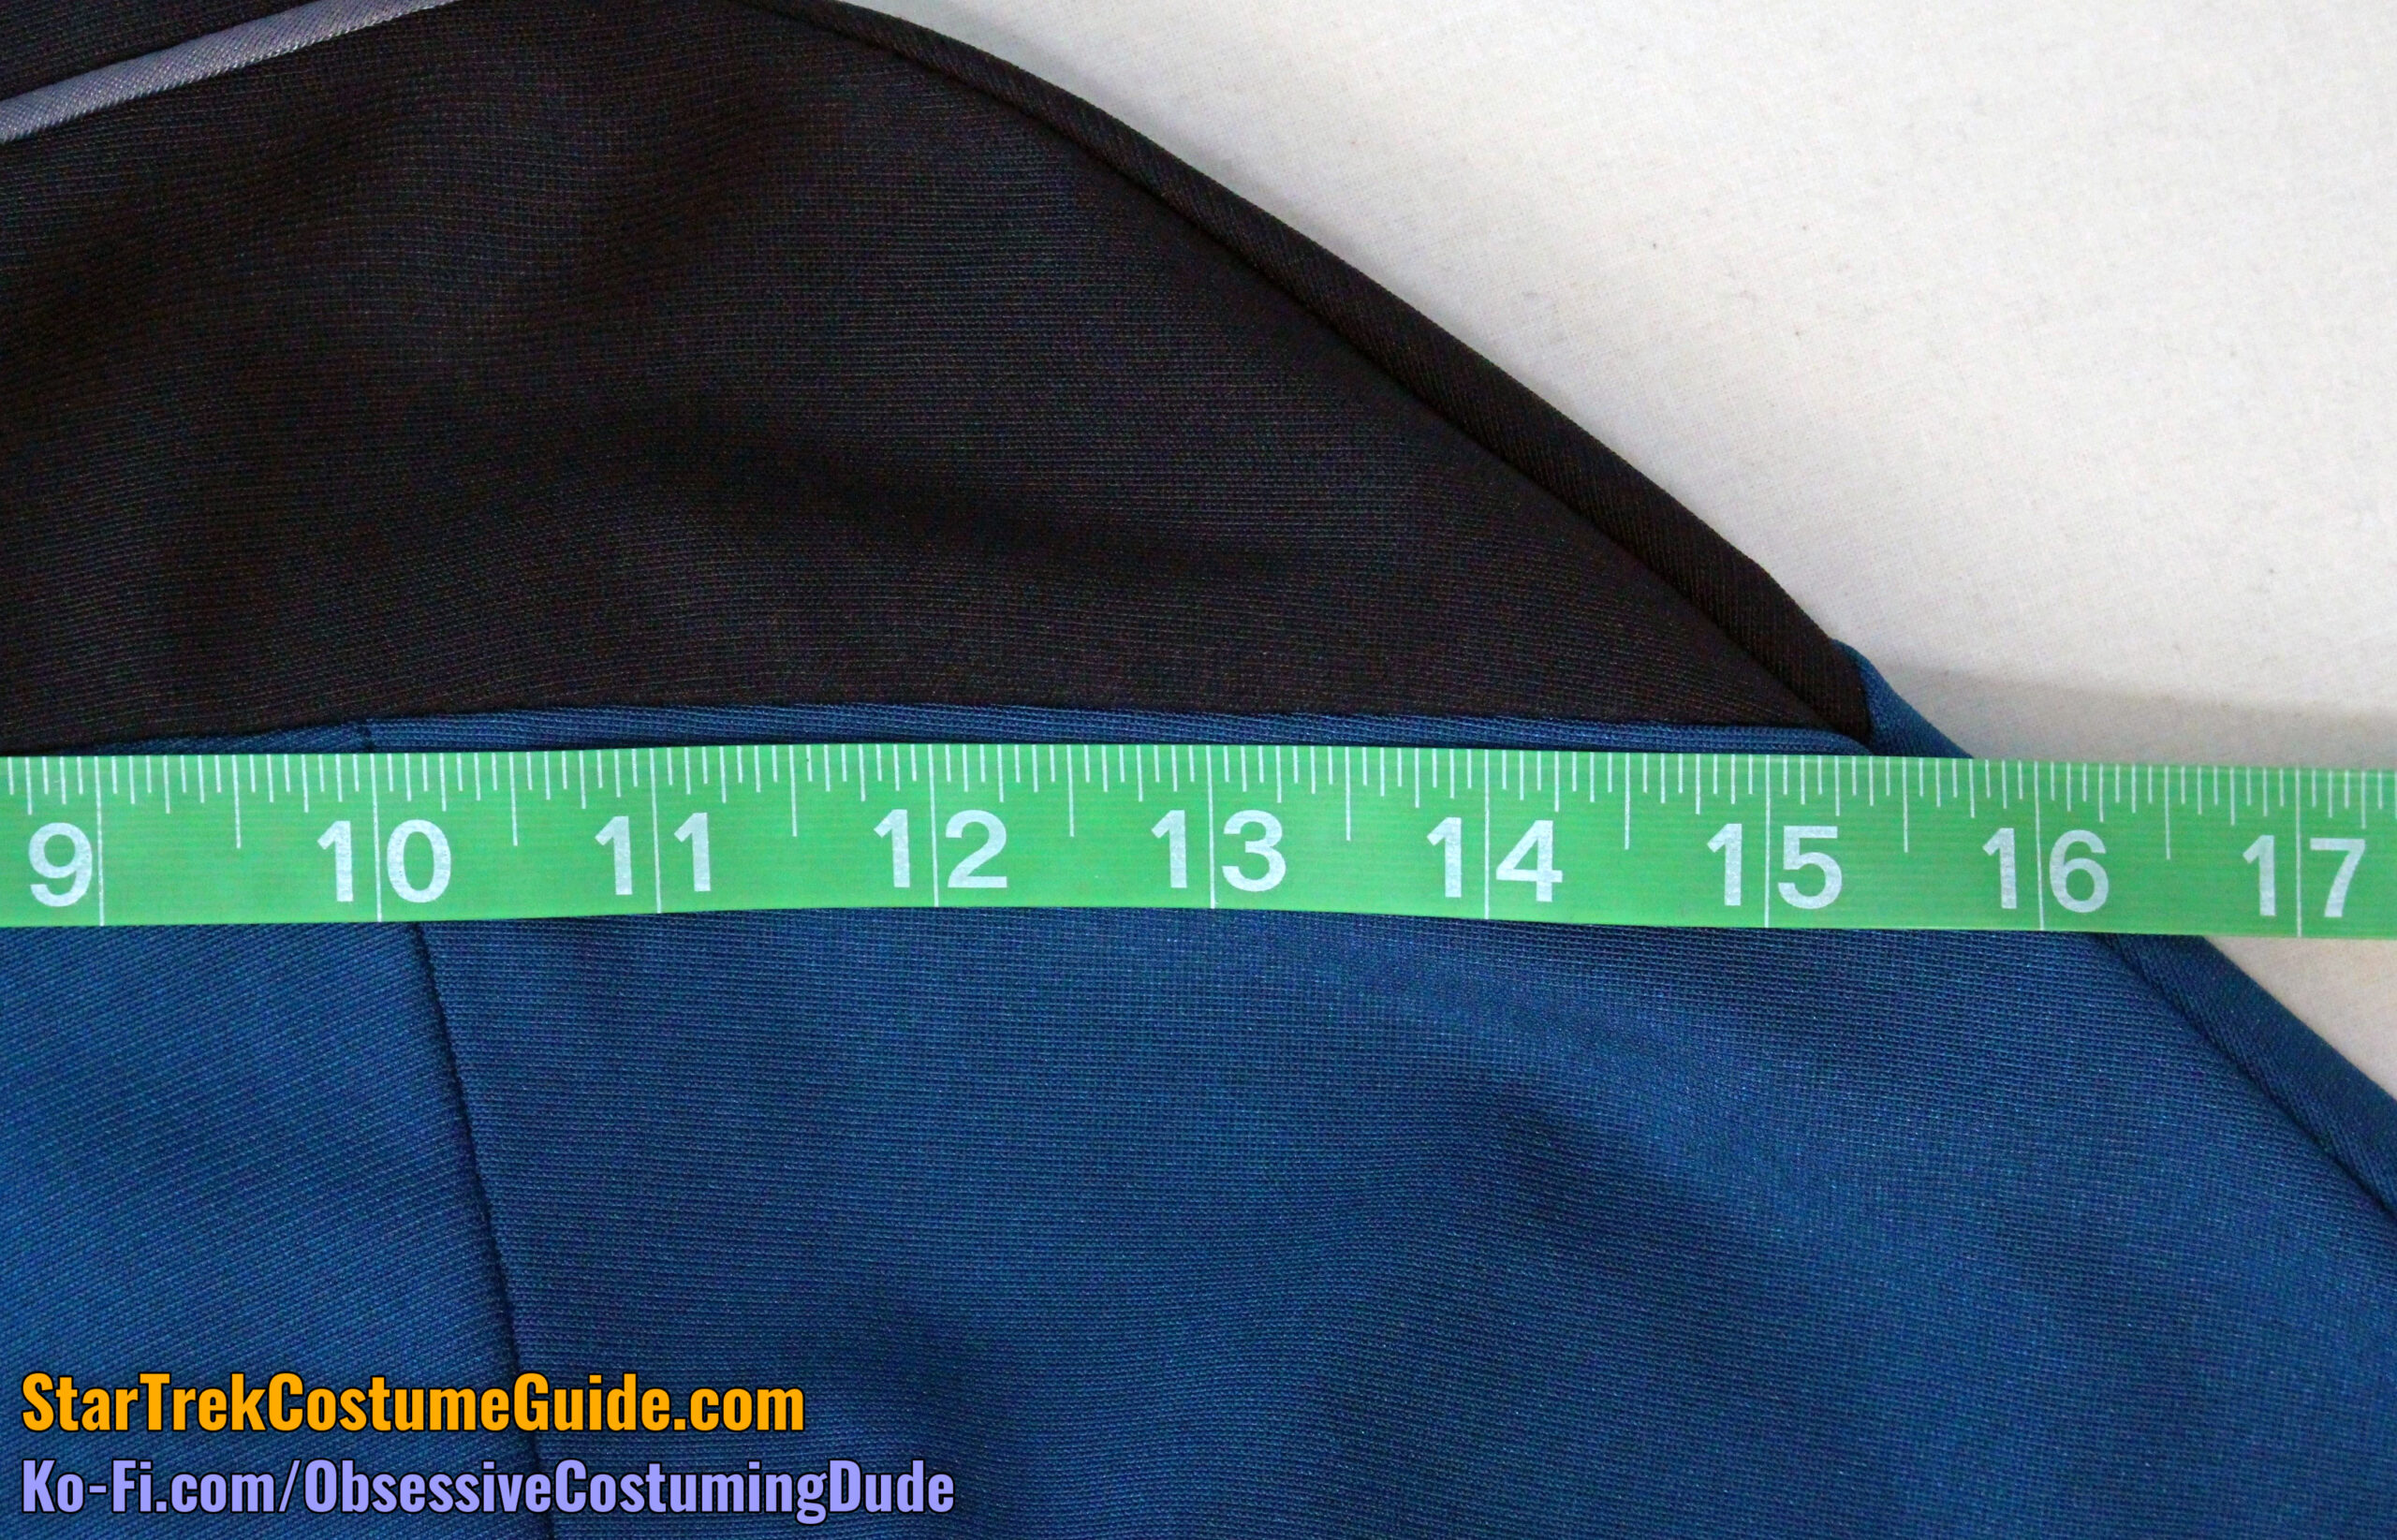
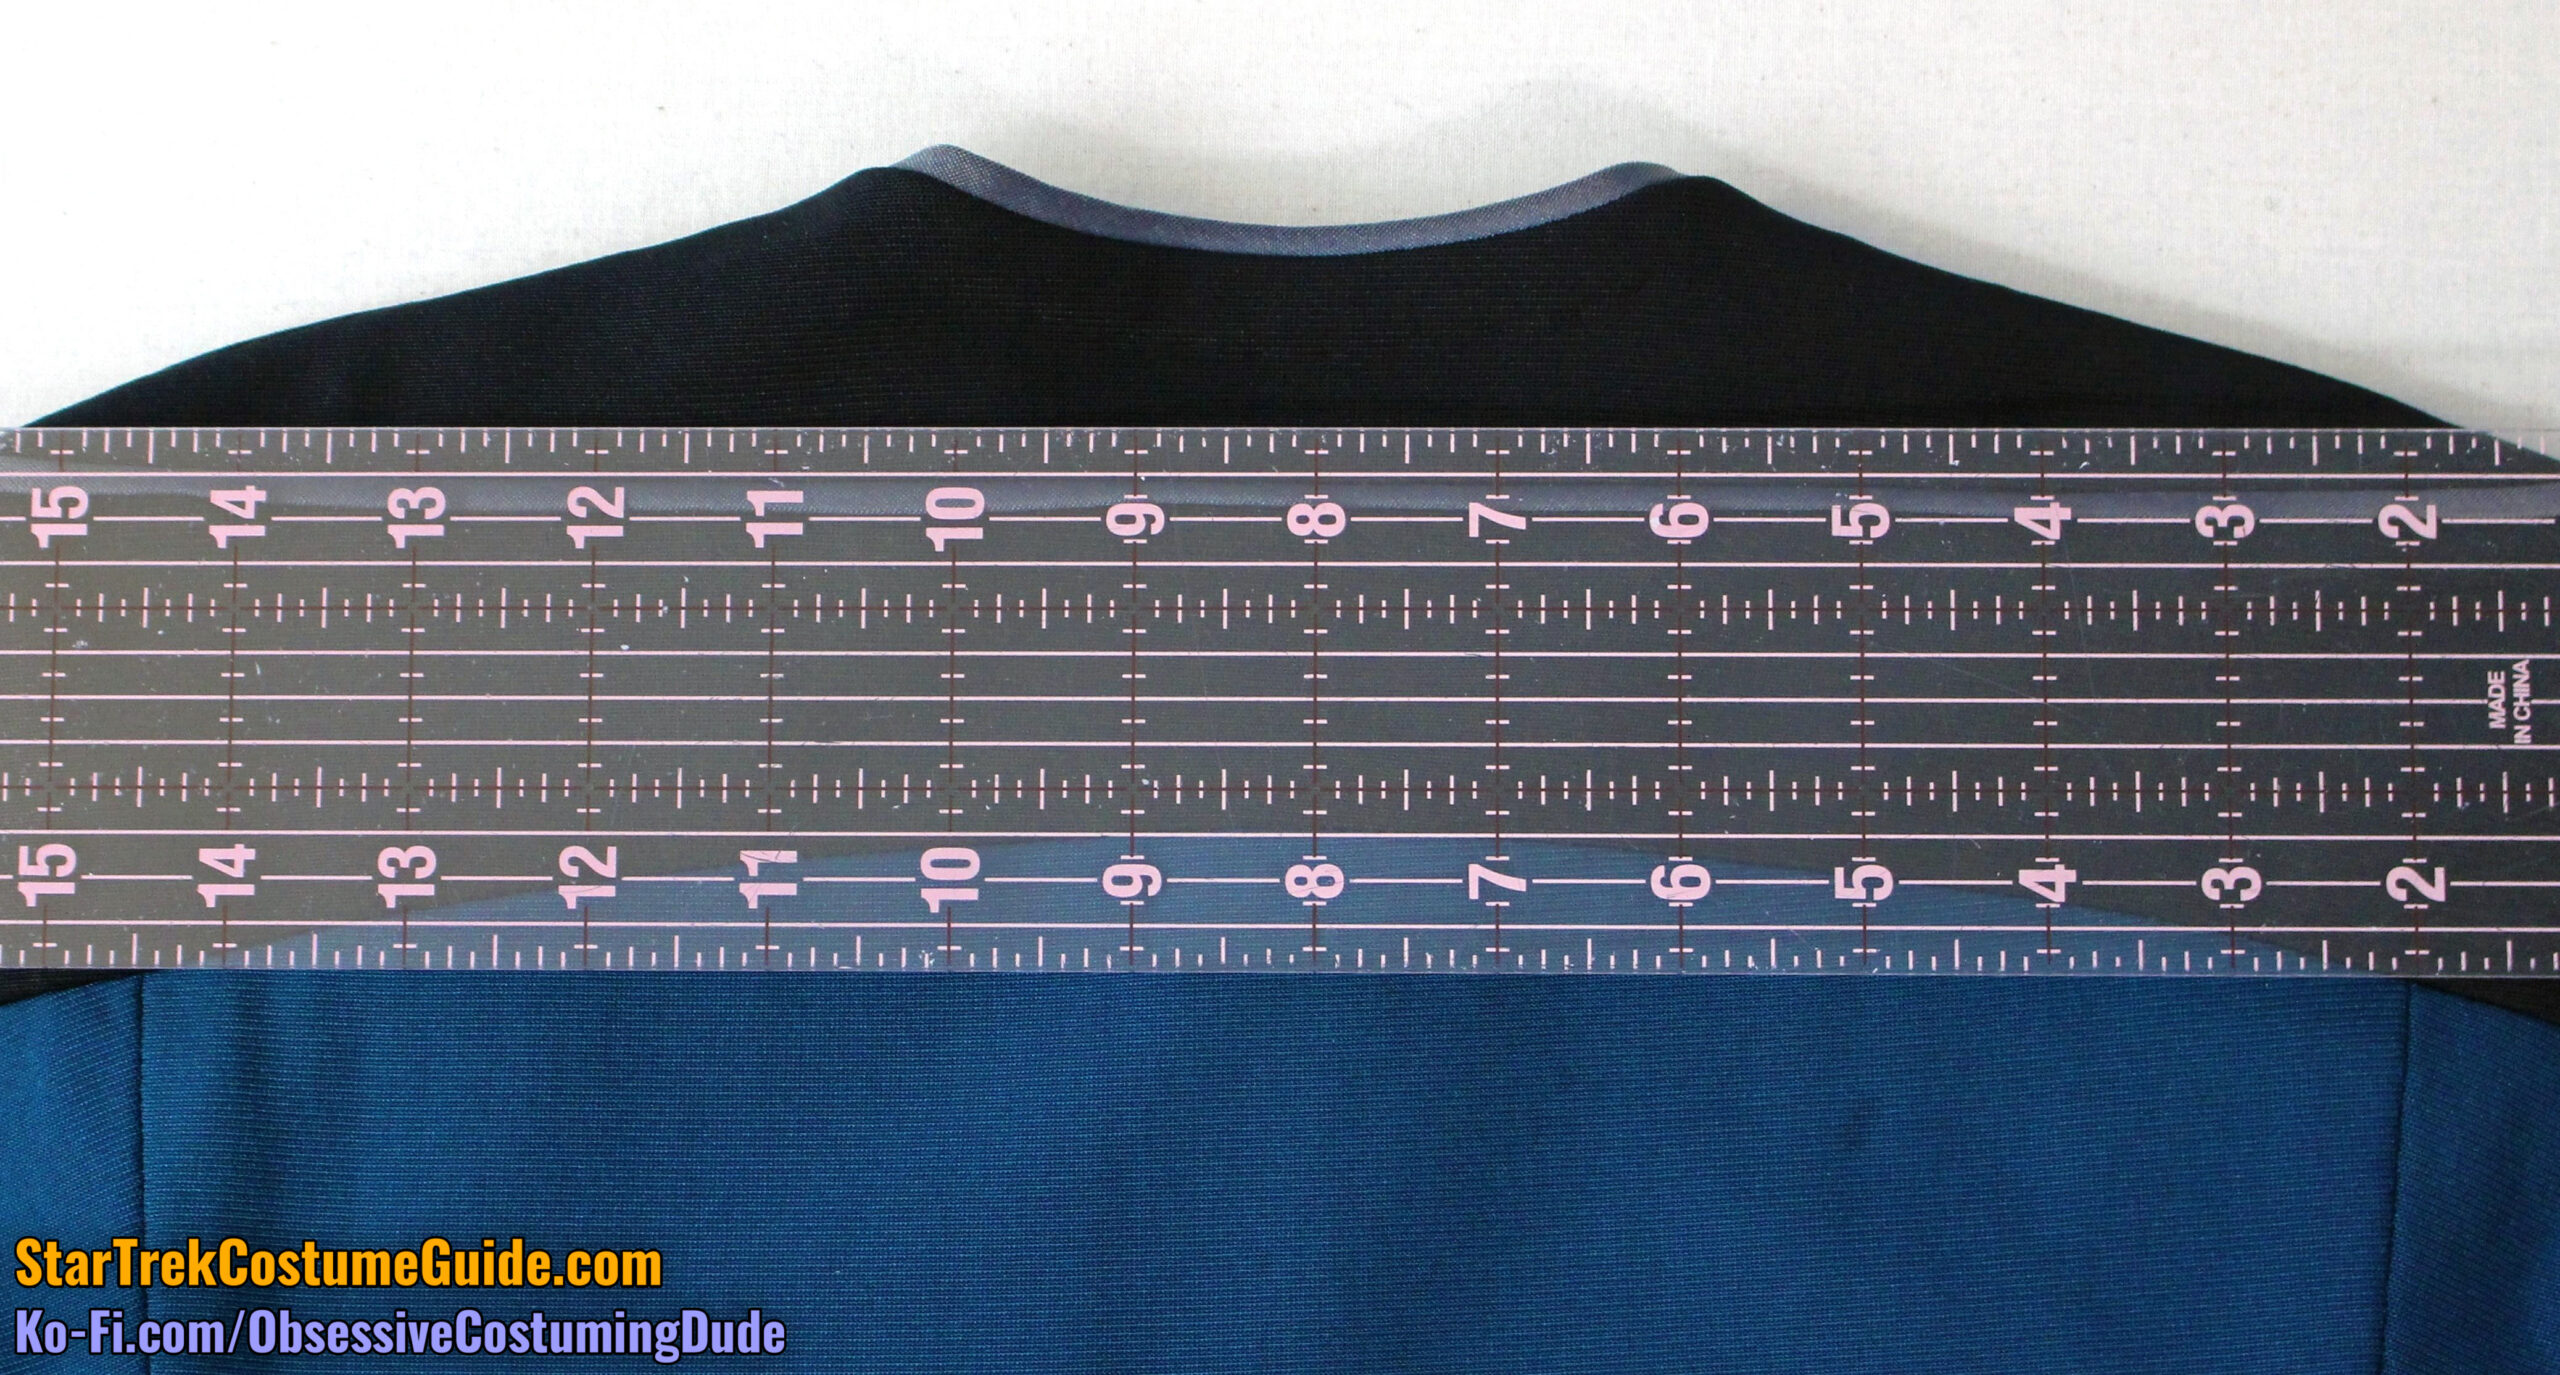
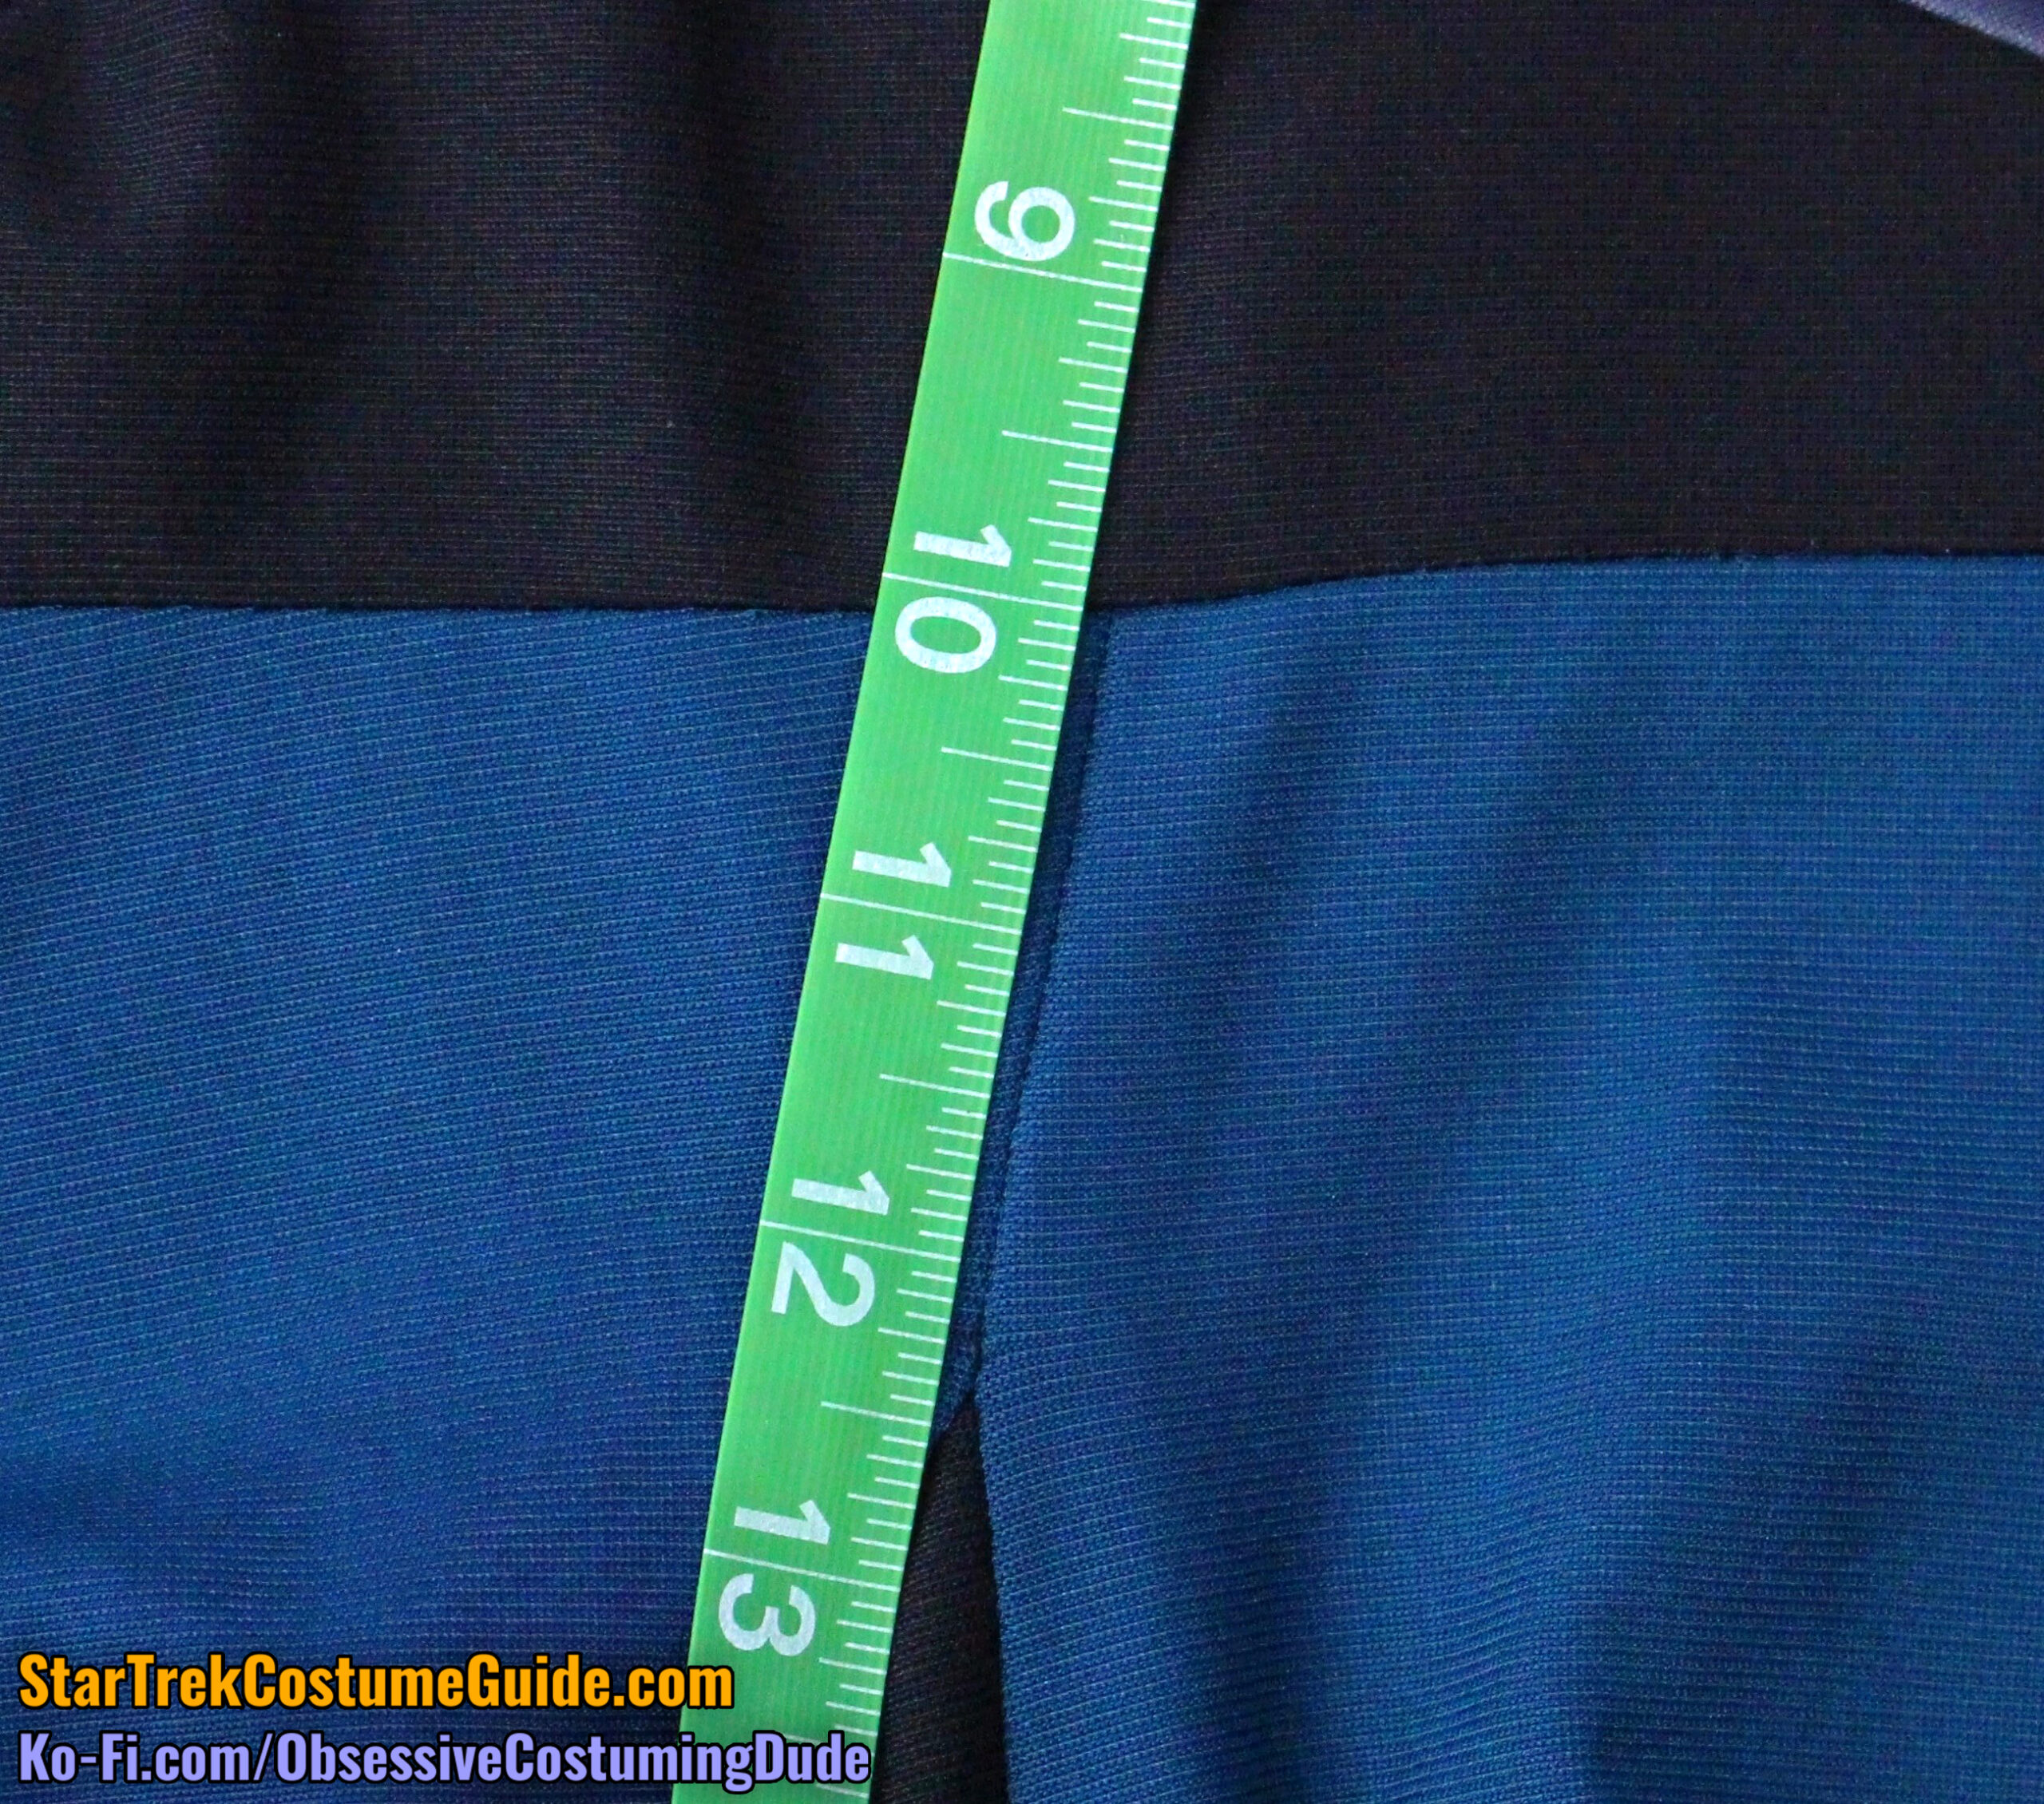
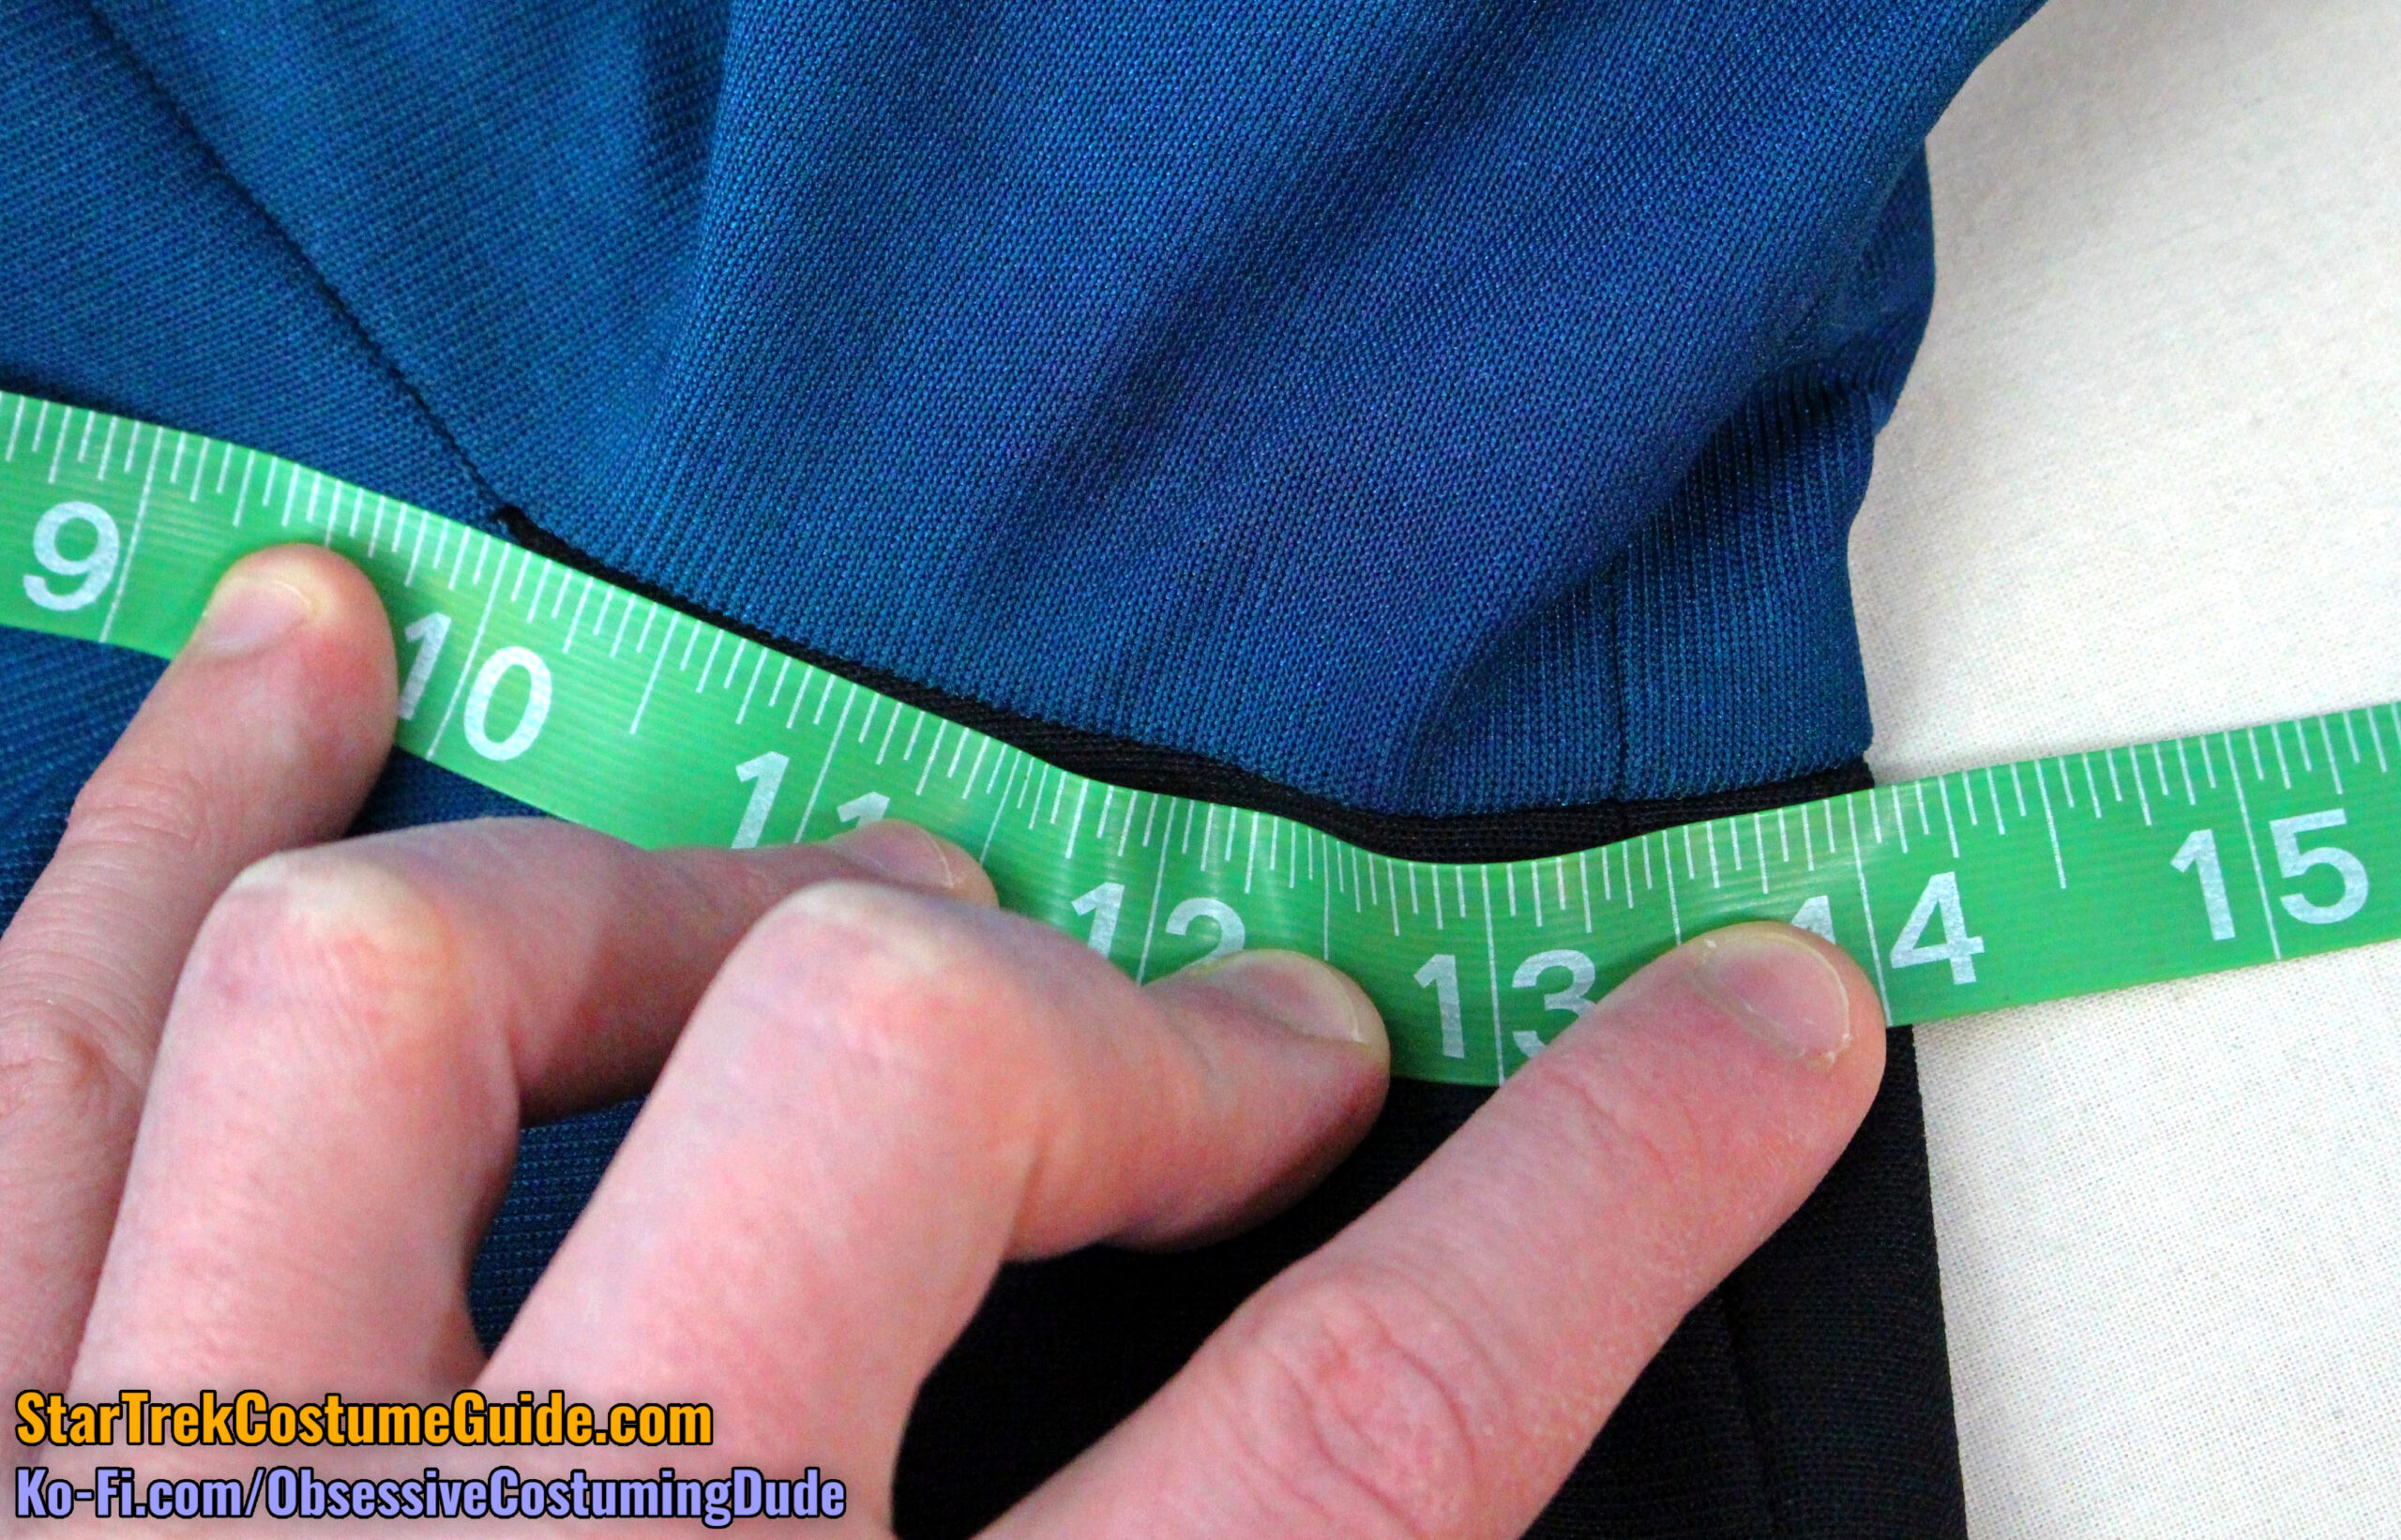
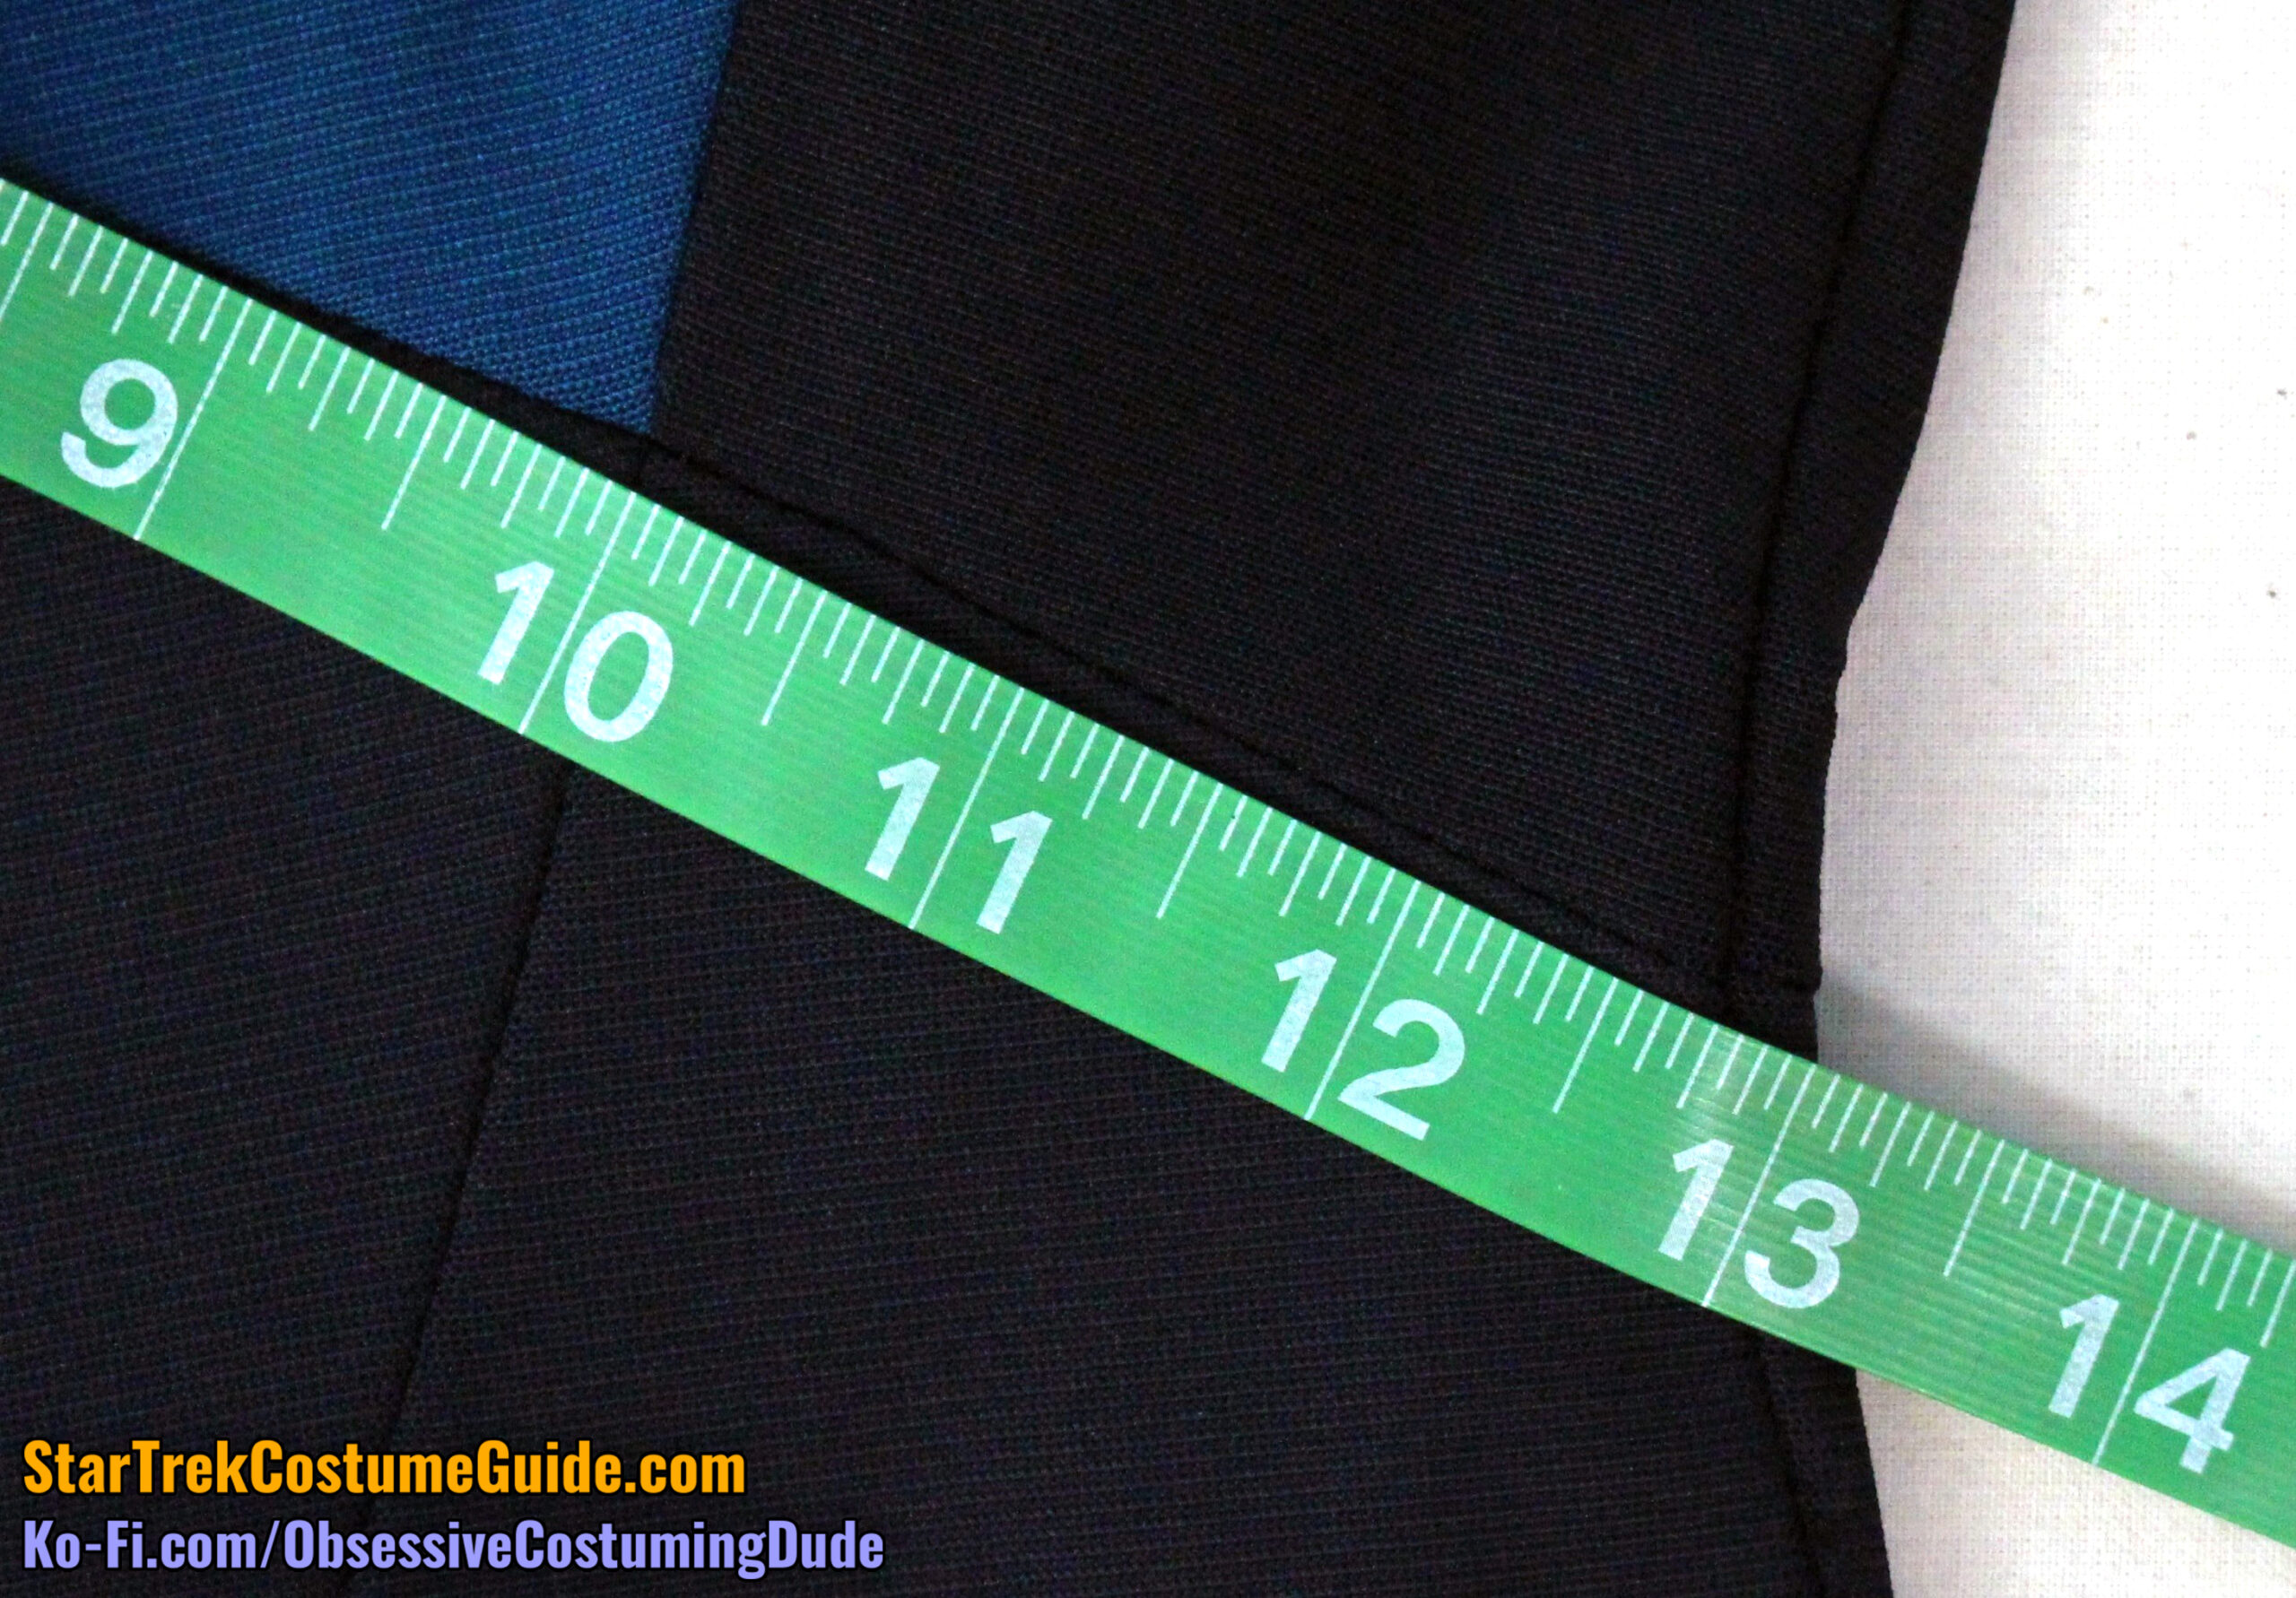
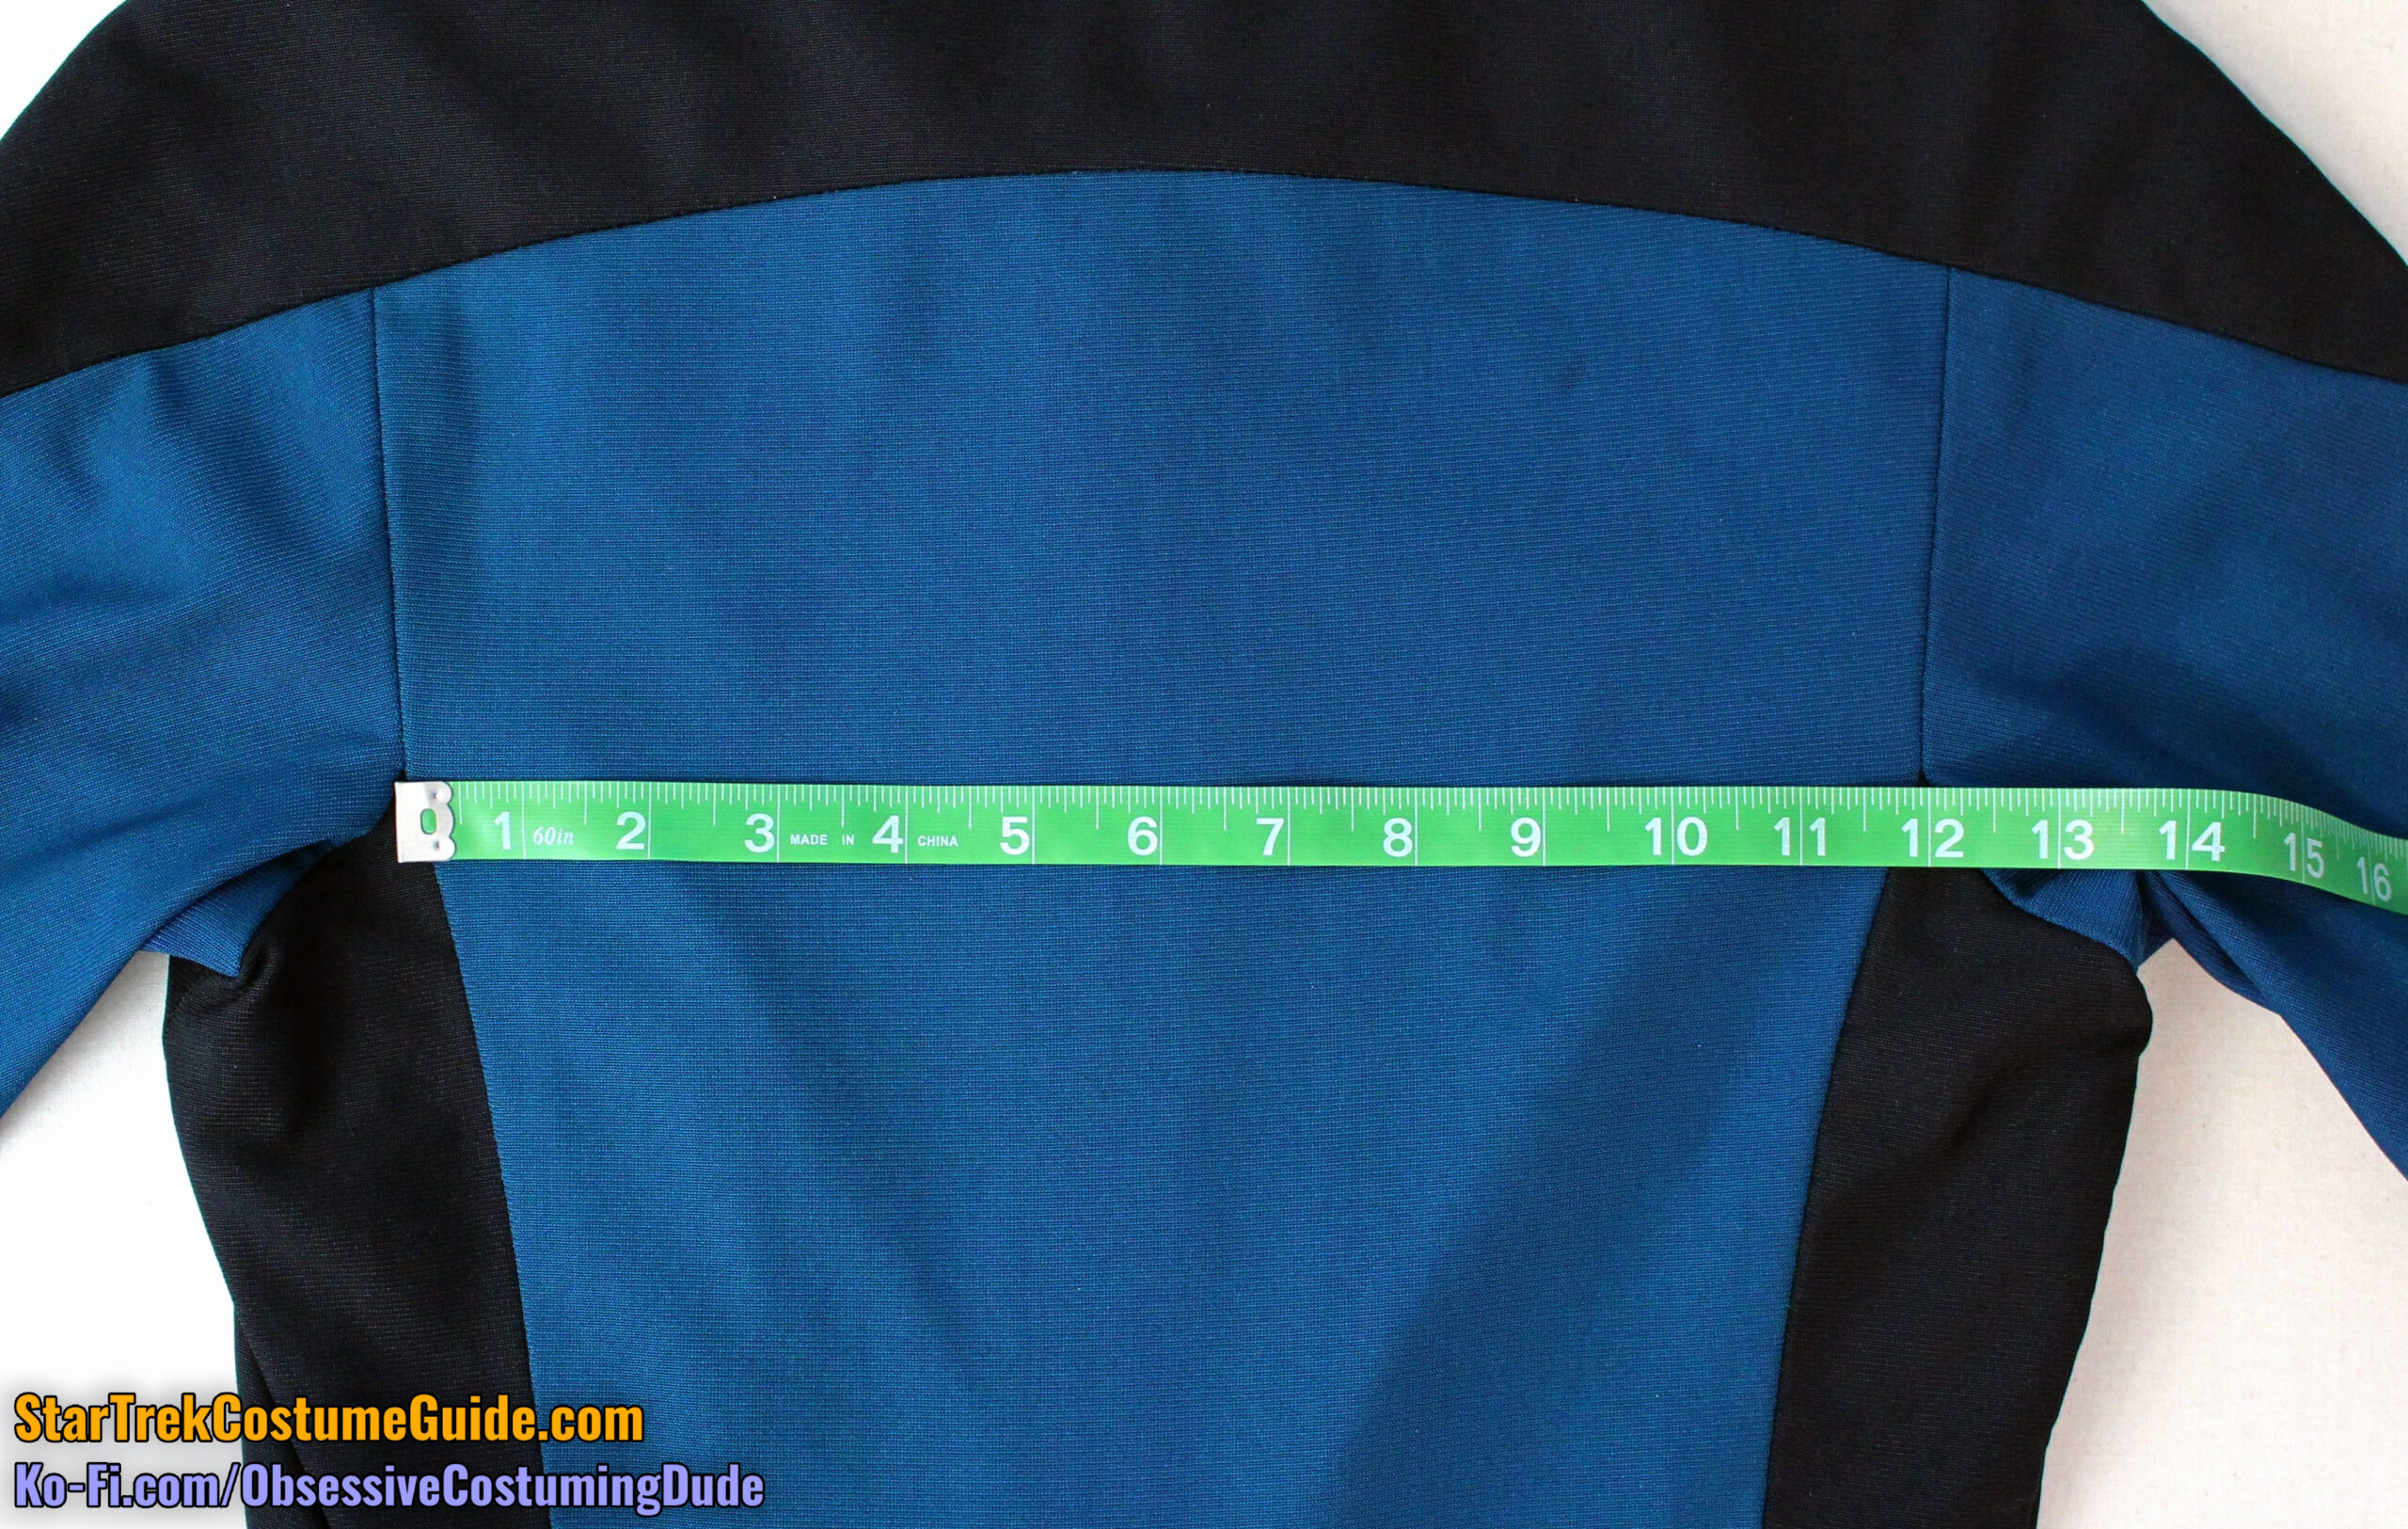
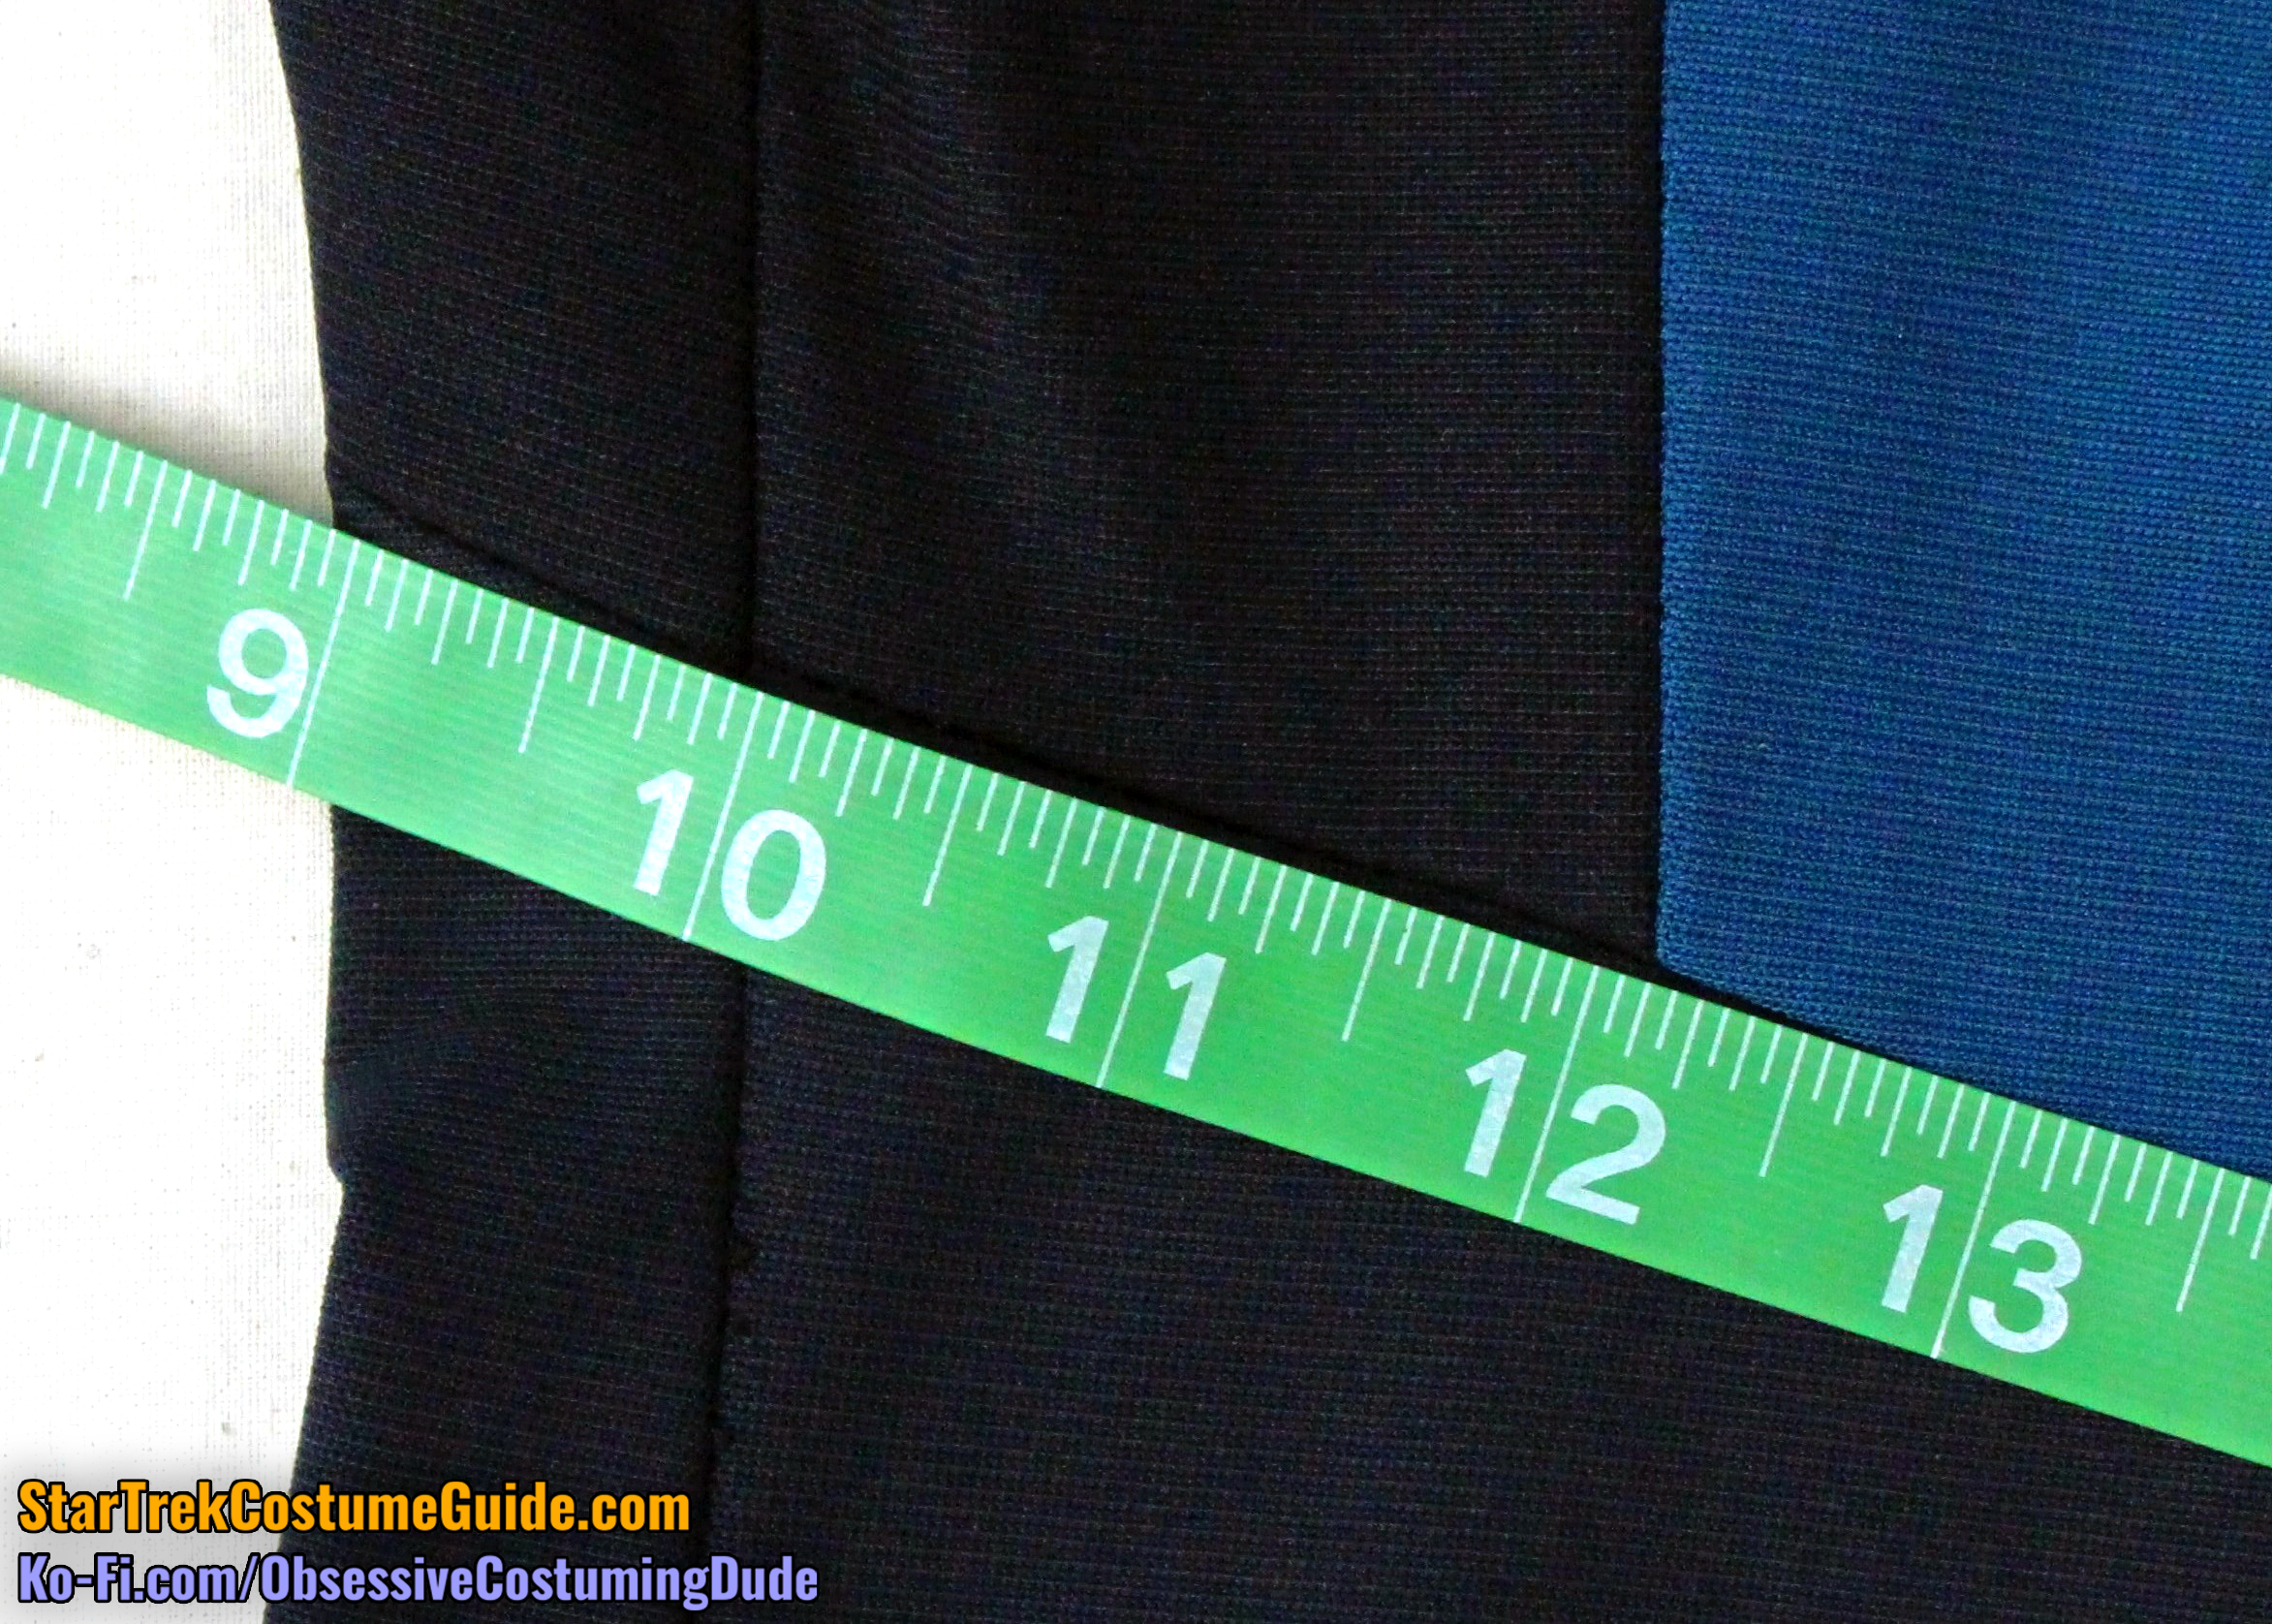
The upper back body portion of the seam was 12 ¾”.
However, the back yoke extended onto the left sleeve 5”, while it extended onto the back right sleeve 5 ½”.
Like the front, the lower edge of the back yoke seam also curved downward.
And again using the jumbo spandex “weave” as a reference, we can see that the back yoke curved downward ¾” from center back to the armscye seams.
From the center back, the lower edge of the back yoke curved downward a total of 1”.
The upper front body panels curved downward ½” as well, from center front to armscye.
Both side front seams were 2 ⅜” below the yoke at the armscye.
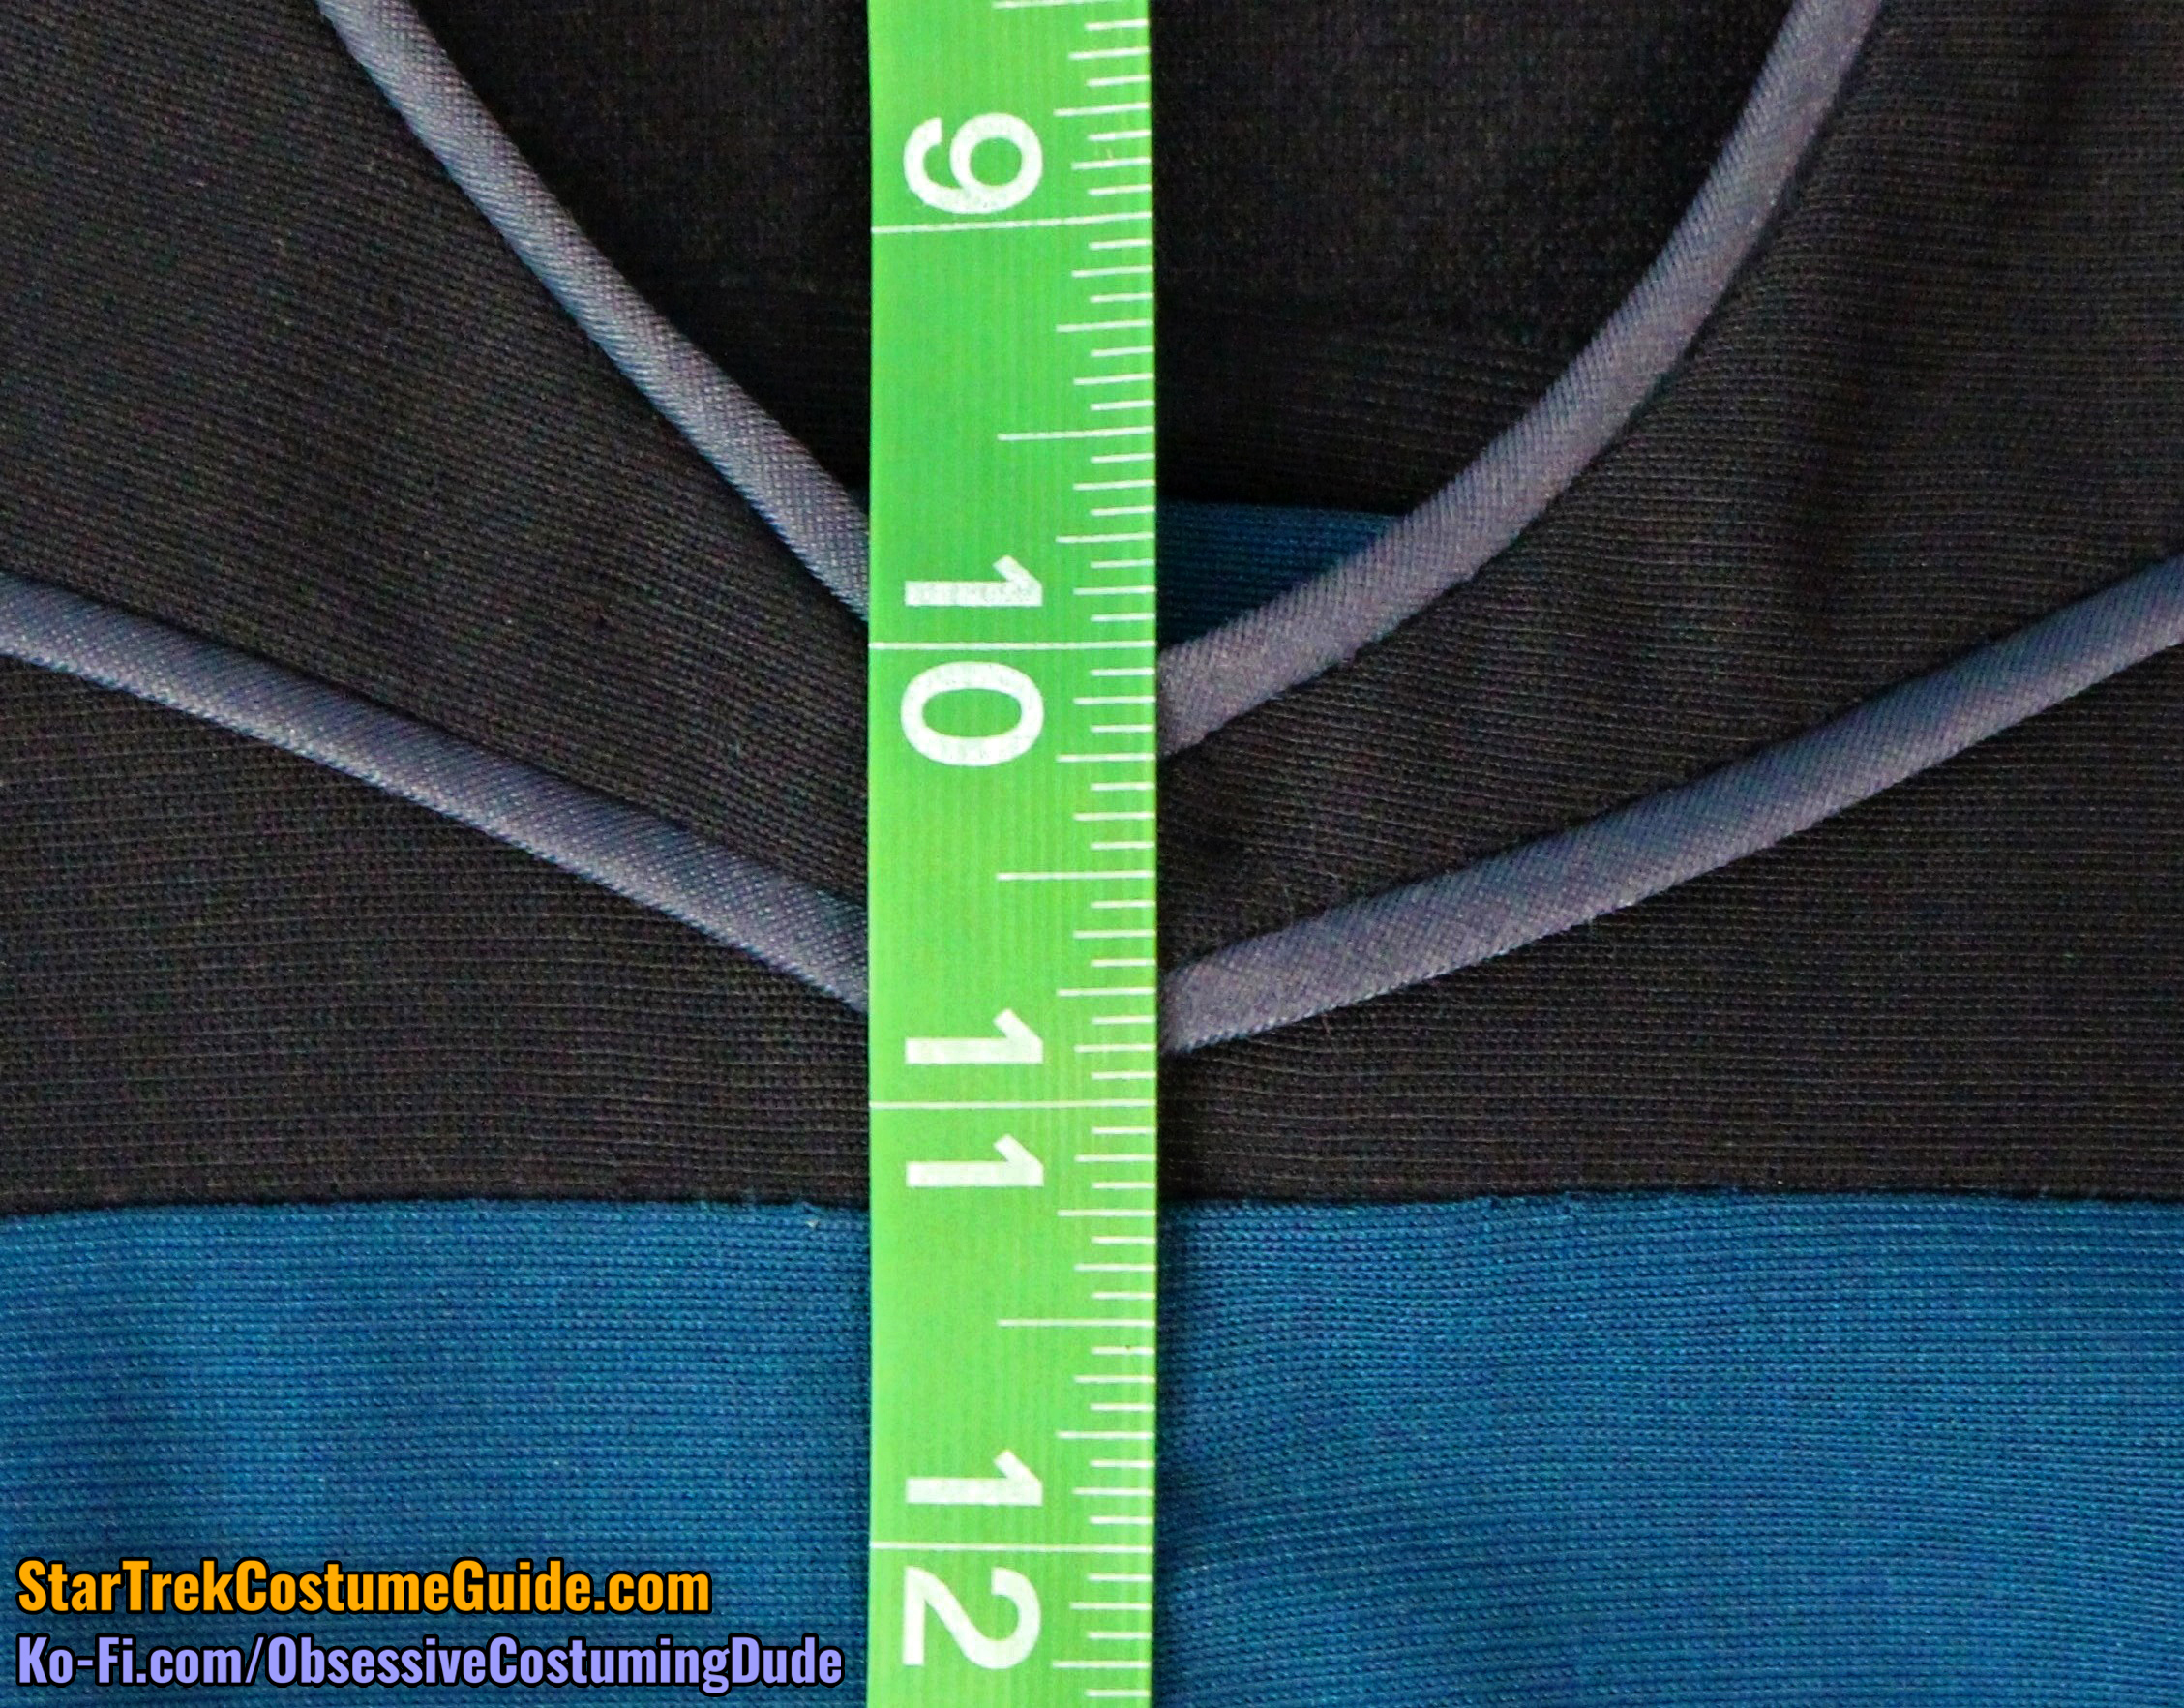
The center front/zipper seam was 10 ⅛” long, measured from the lower yoke seam to the asymmetrical “wedge” insert.
Unlike the screen-used Tasha Yar jumpsuit, which had straight edges along the upper front, the front edges of this Beverly Crusher jumpsuit were slightly curved – seeming to have been let out a bit to allow more room for the bust.
The right side front seam was 8 ¾” tall, with the bust dart positioned 4 ¼” below the armscye.
The left side front seam line was 6 ¾” tall, with the bust dart positioned a tiny bit lower, at 4 ⅜” beneath the armscye.
The right front lower seam line was 4 ⅝” long, with approximately 1 ¼” upward slant.
The lower left front seam lines were 3 ⅜” and 2 ¼”.
This wedge-shaped insert slanted upward 1 ½” away from center, then downward 1 ⅛” toward the side front seam.
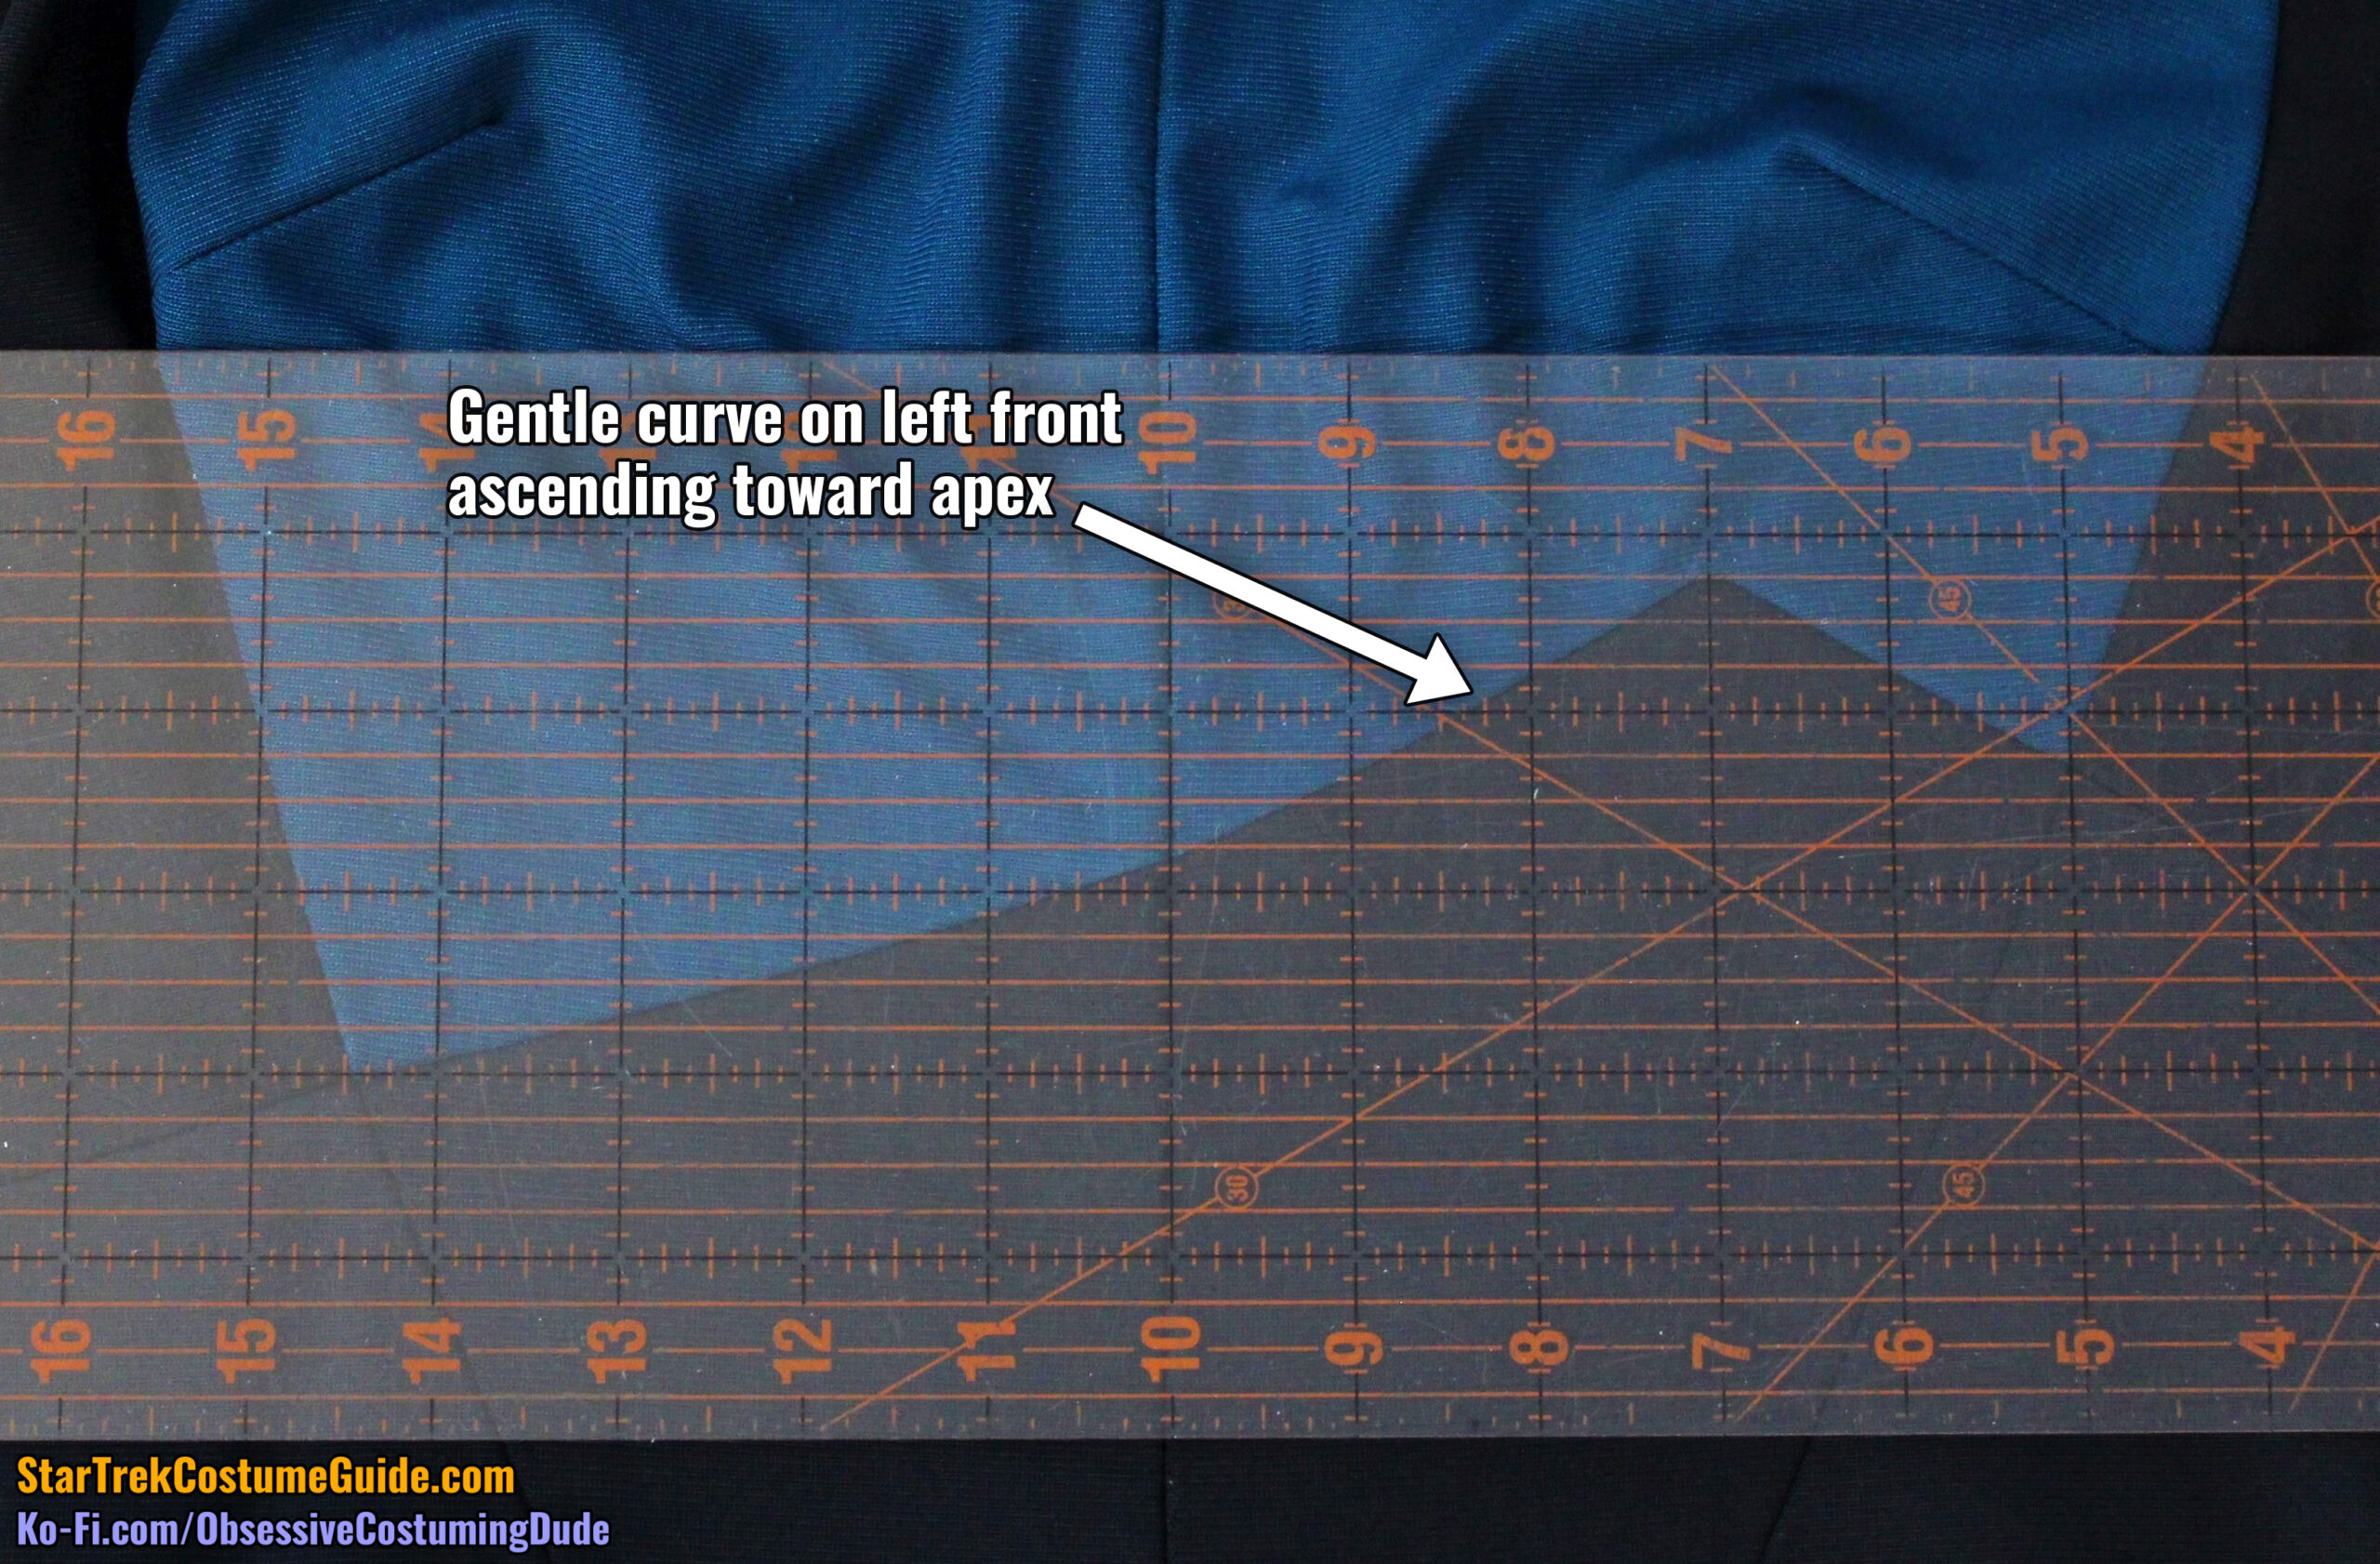
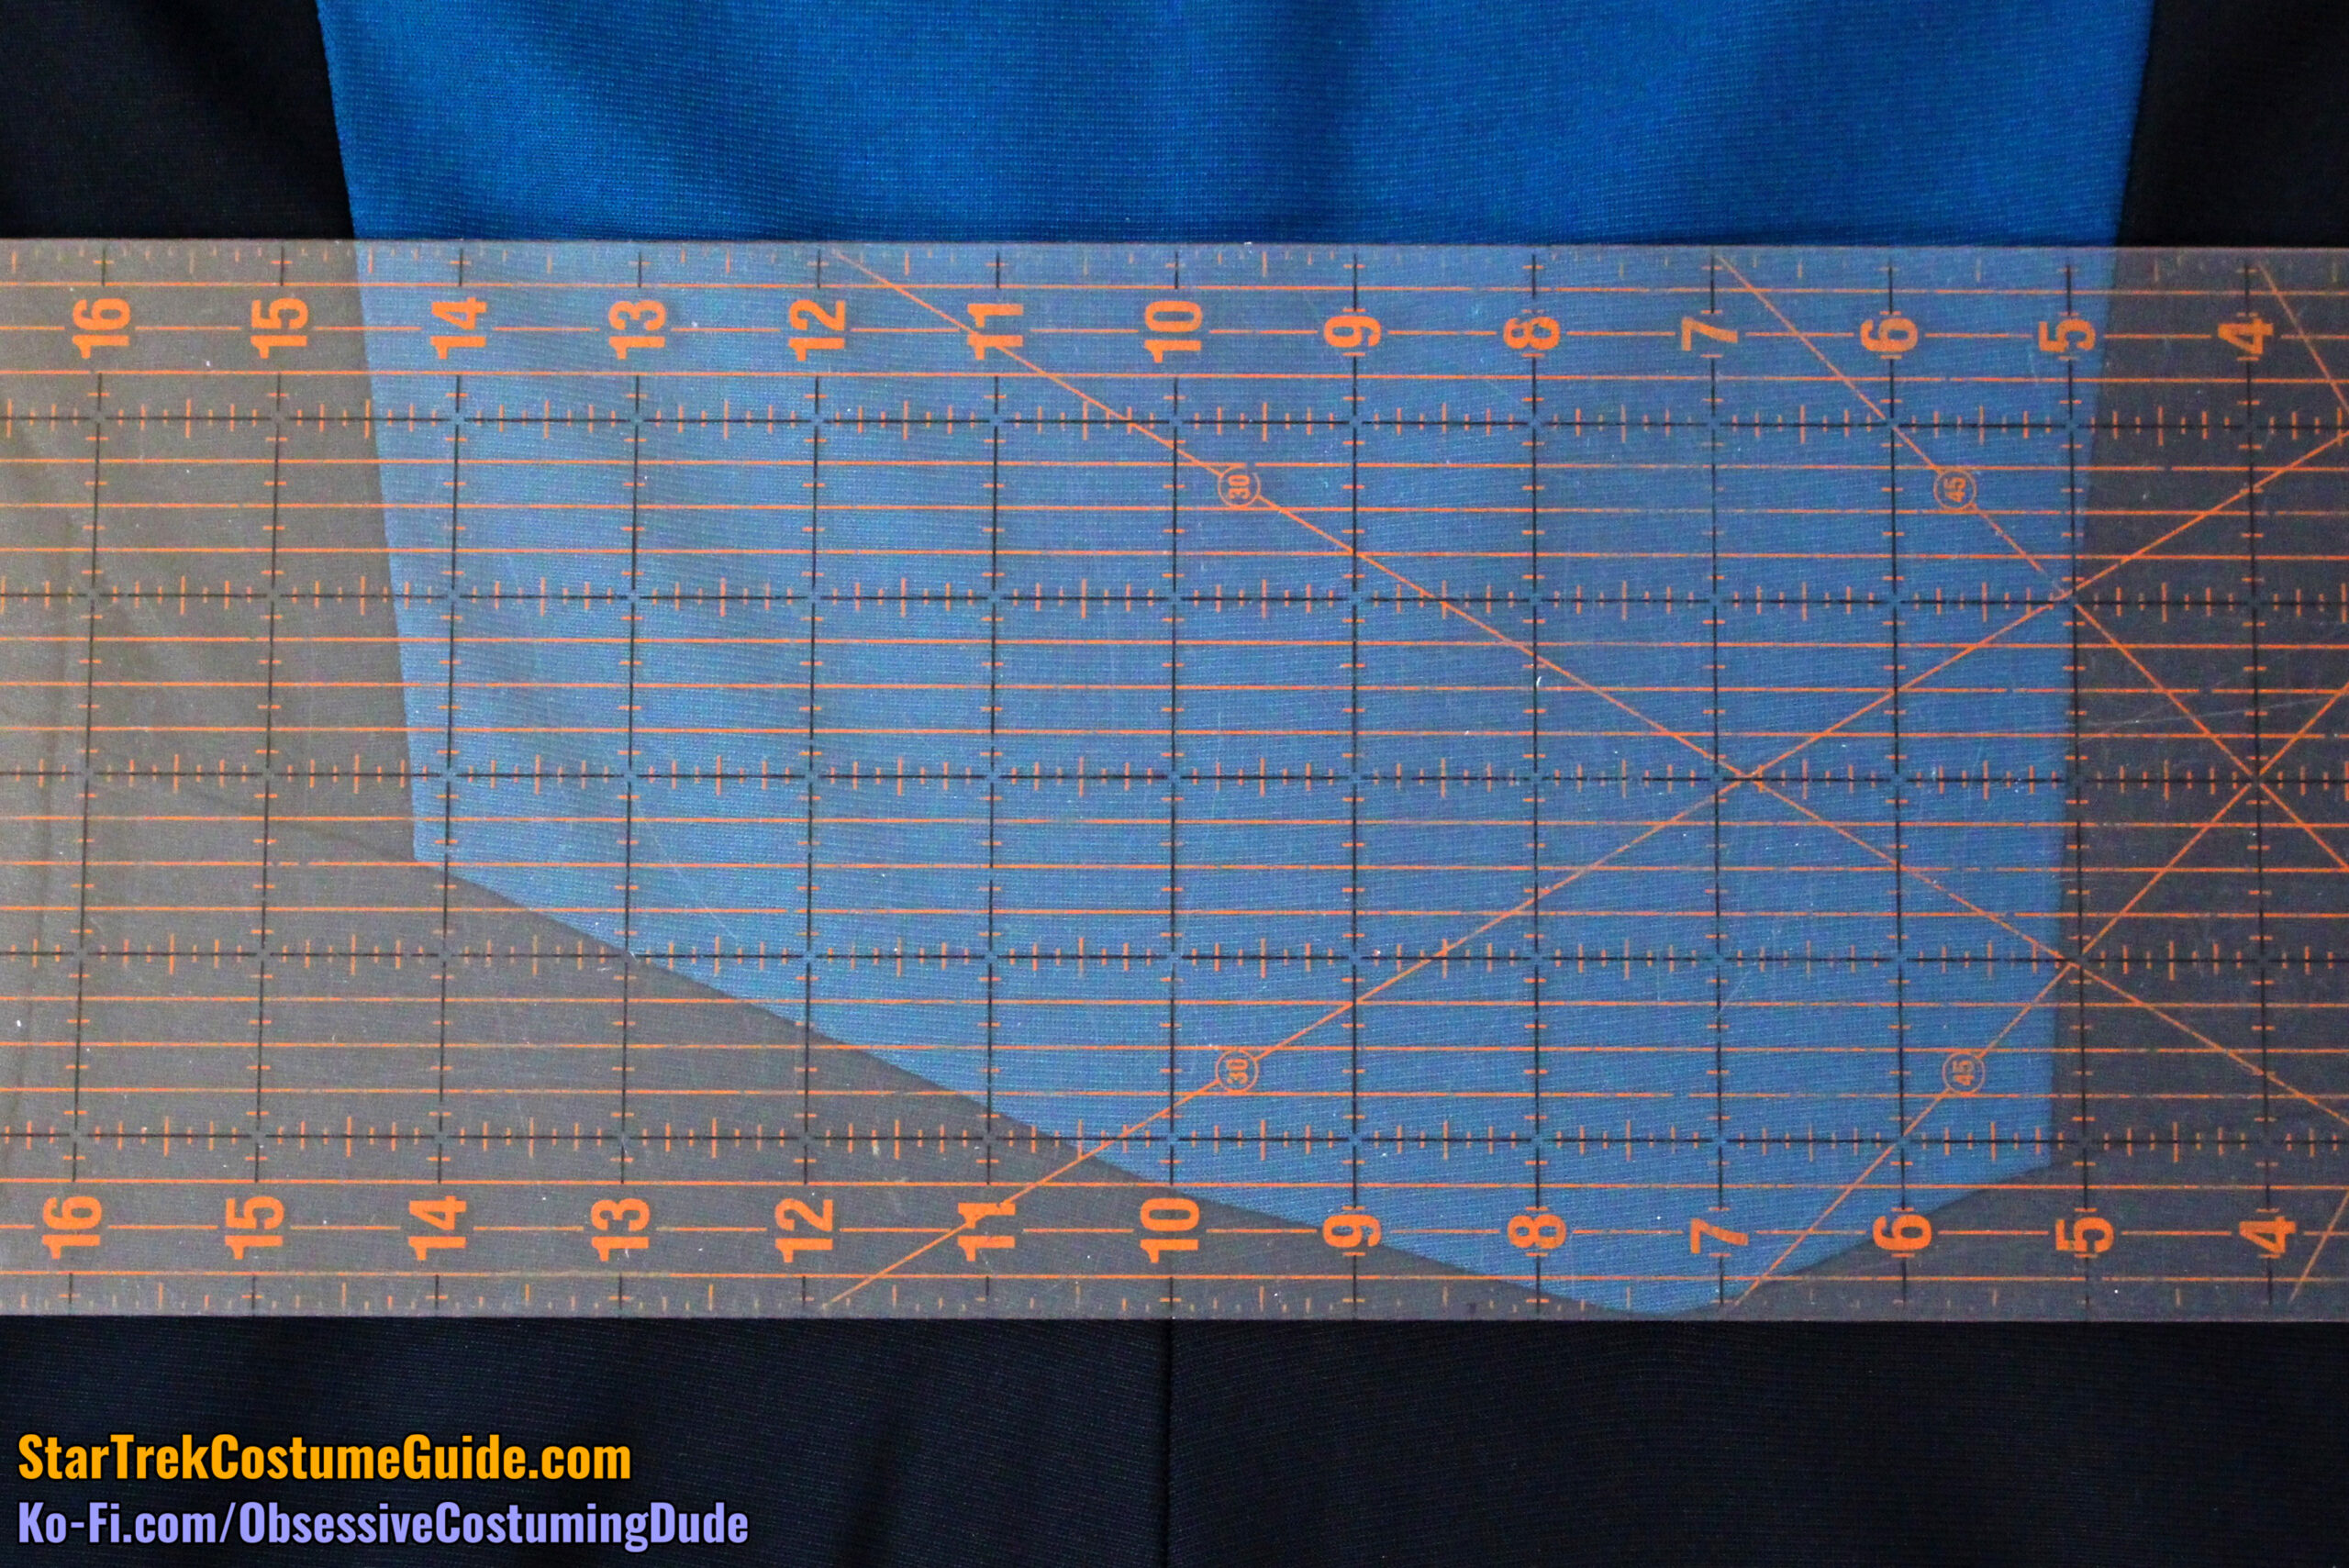
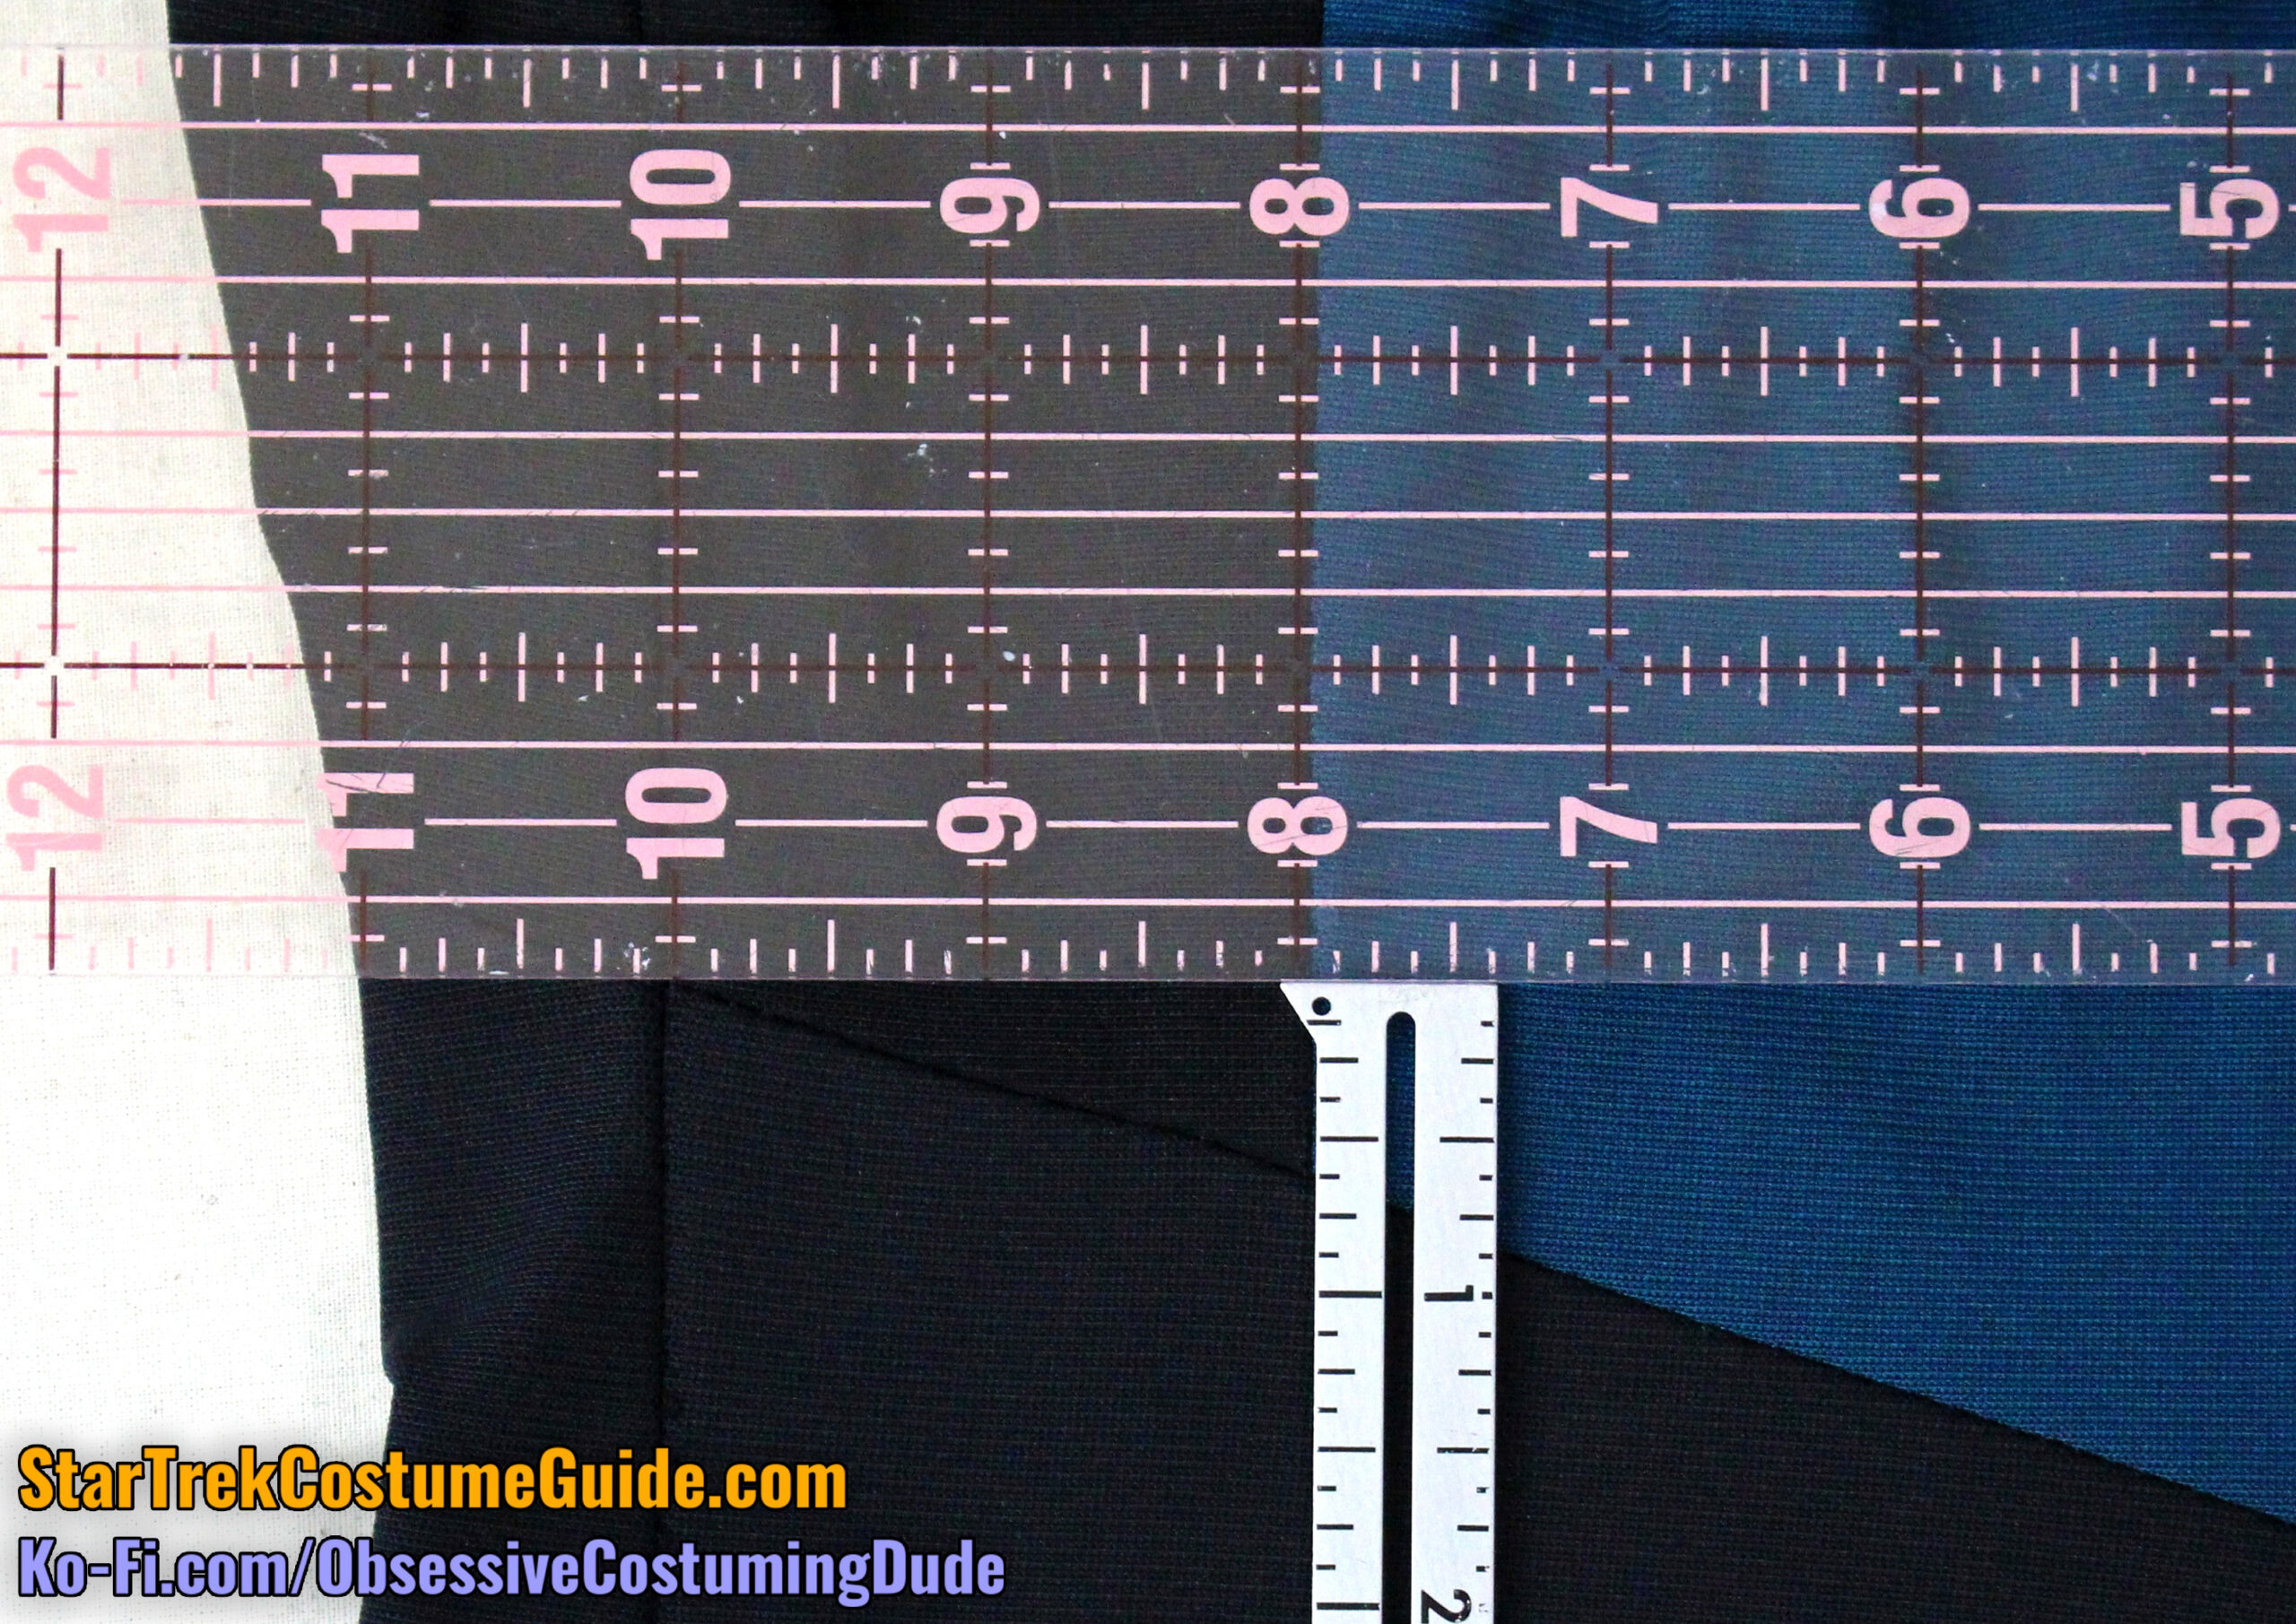
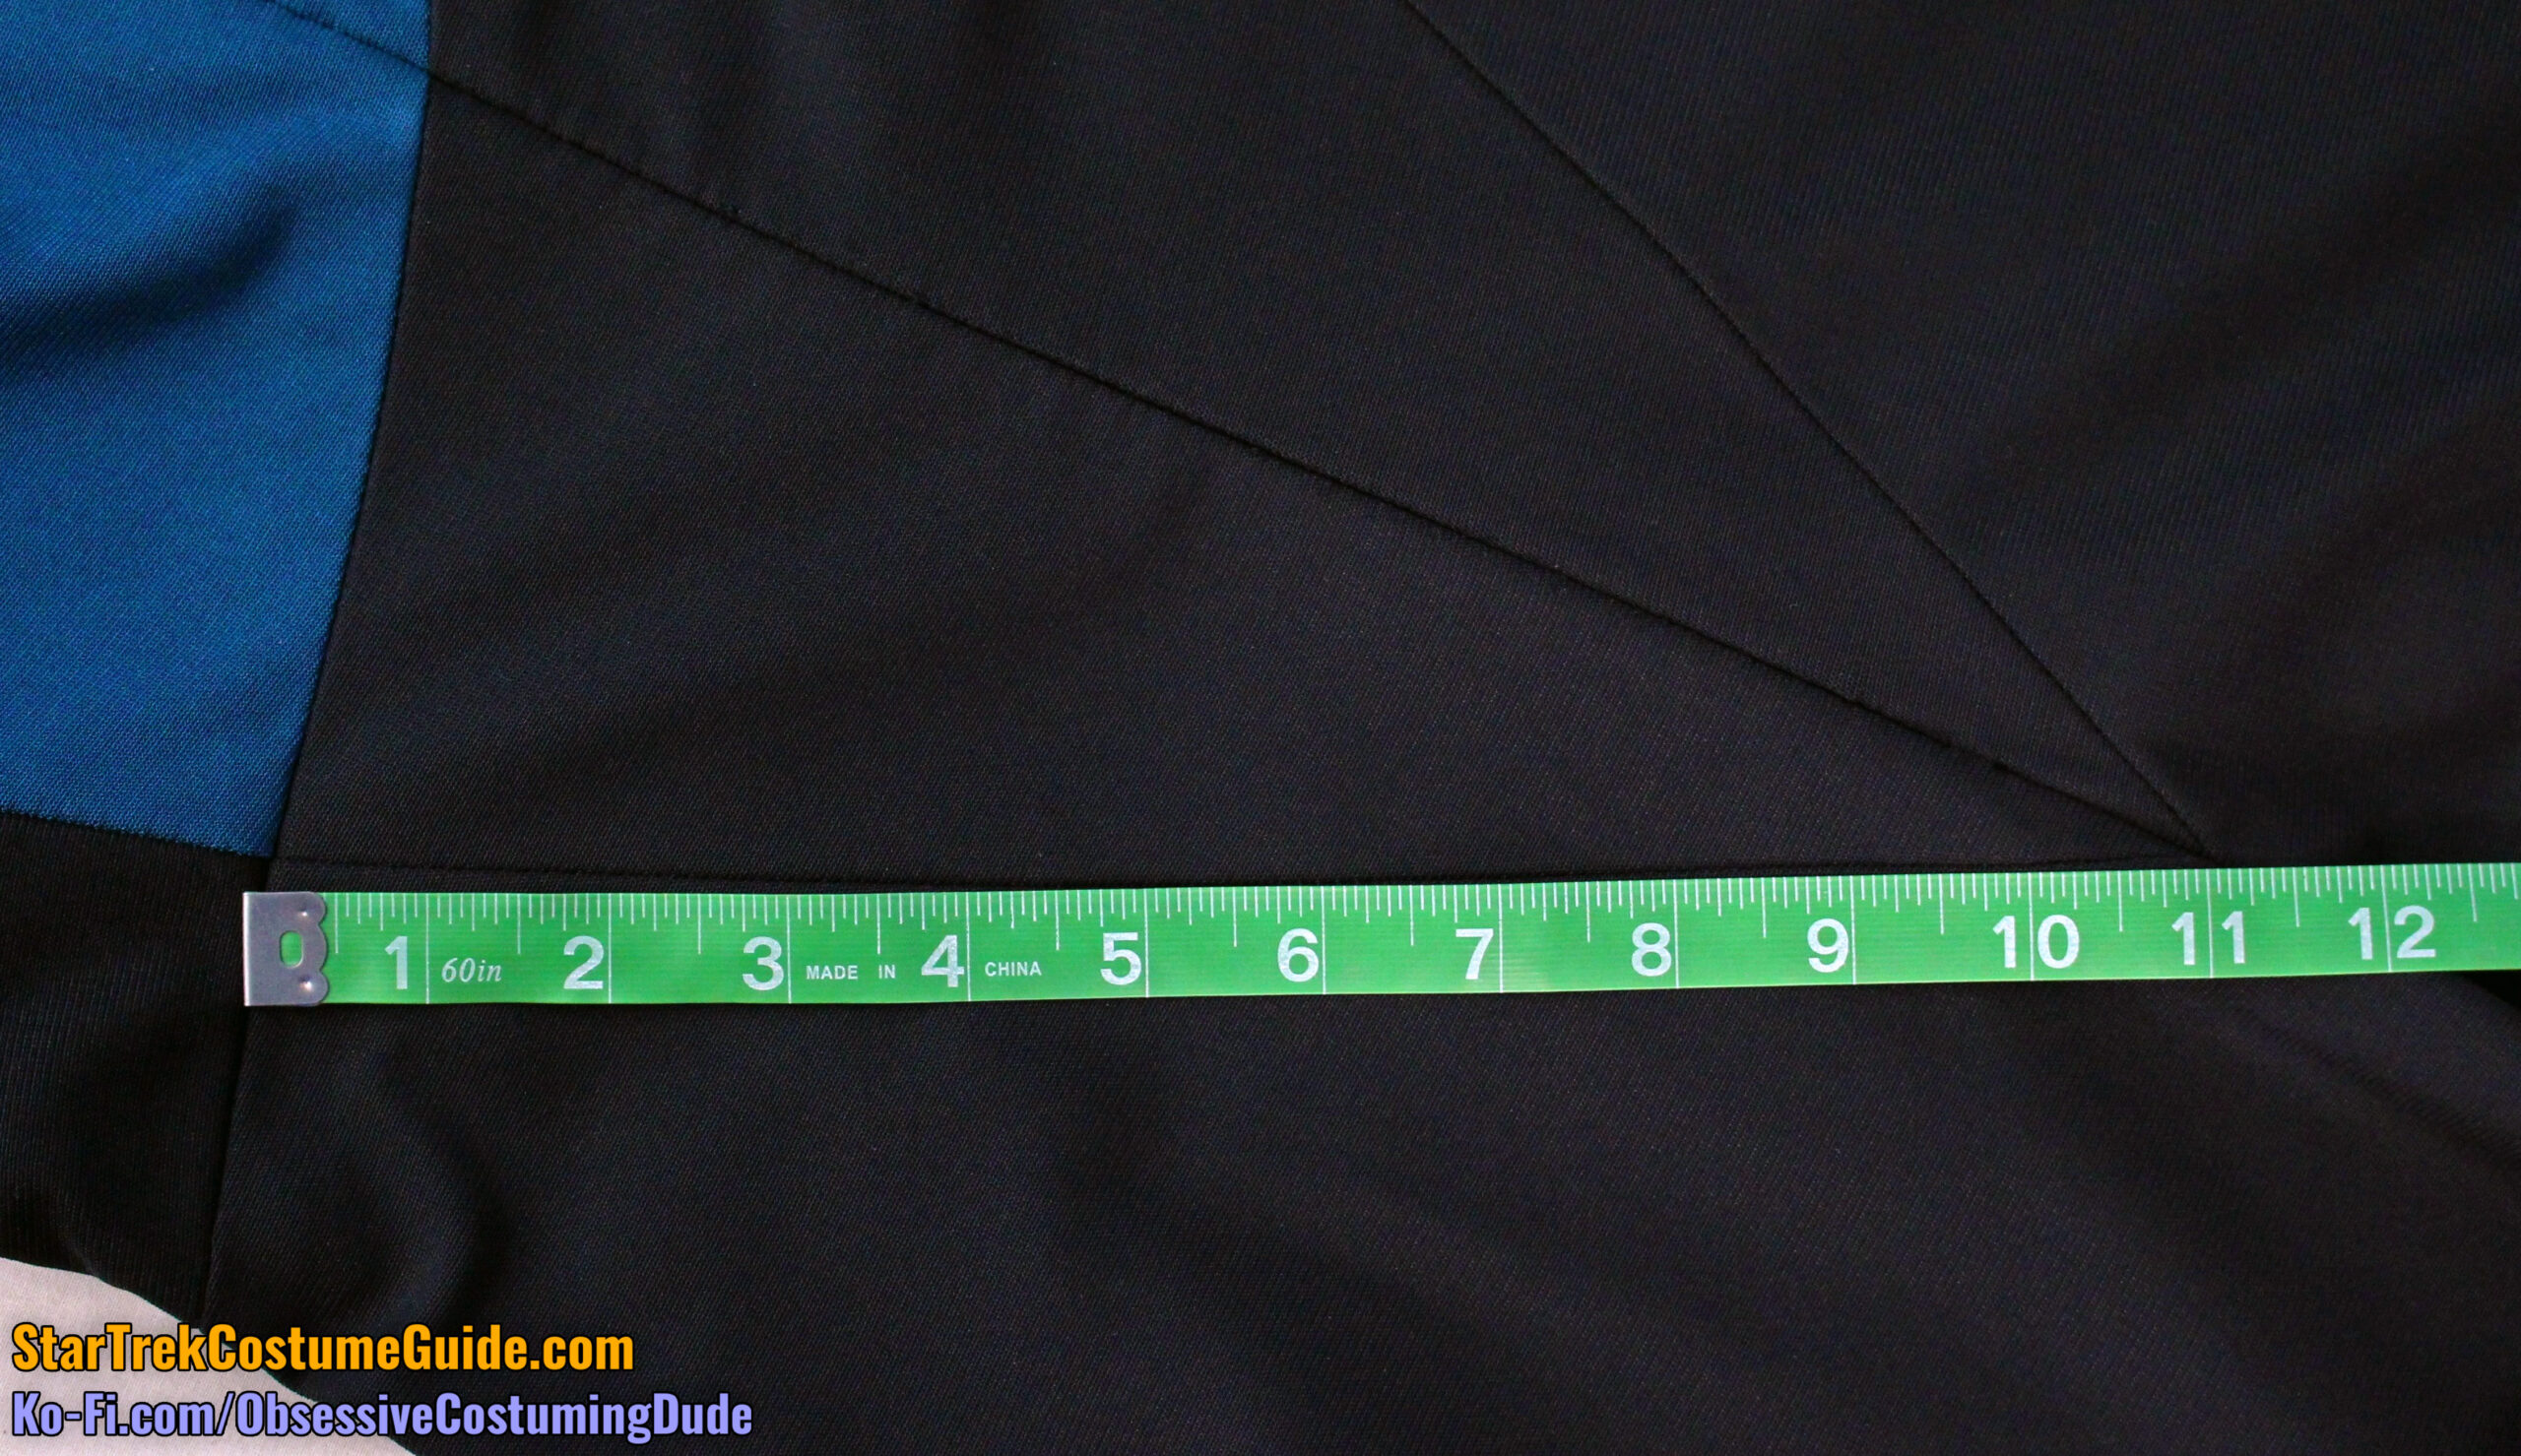
Keeping in mind that the upper front panels were let out a bit toward the bust and the lower front panels were cinched in a bit toward the waist (thus making the fitted jumpsuit not lie flat on the table), here are the overall dimensions/proportions of the front asymmetrical design.
As you can see, measured from the side front seams, the asymmetrical insert ascends approximately 2 ¾” from (picture) left to right, then descends approximately 1 ⅛”.
Also note the slight upward curve as the insert approaches the apex – a subtle, but lovely little detail!
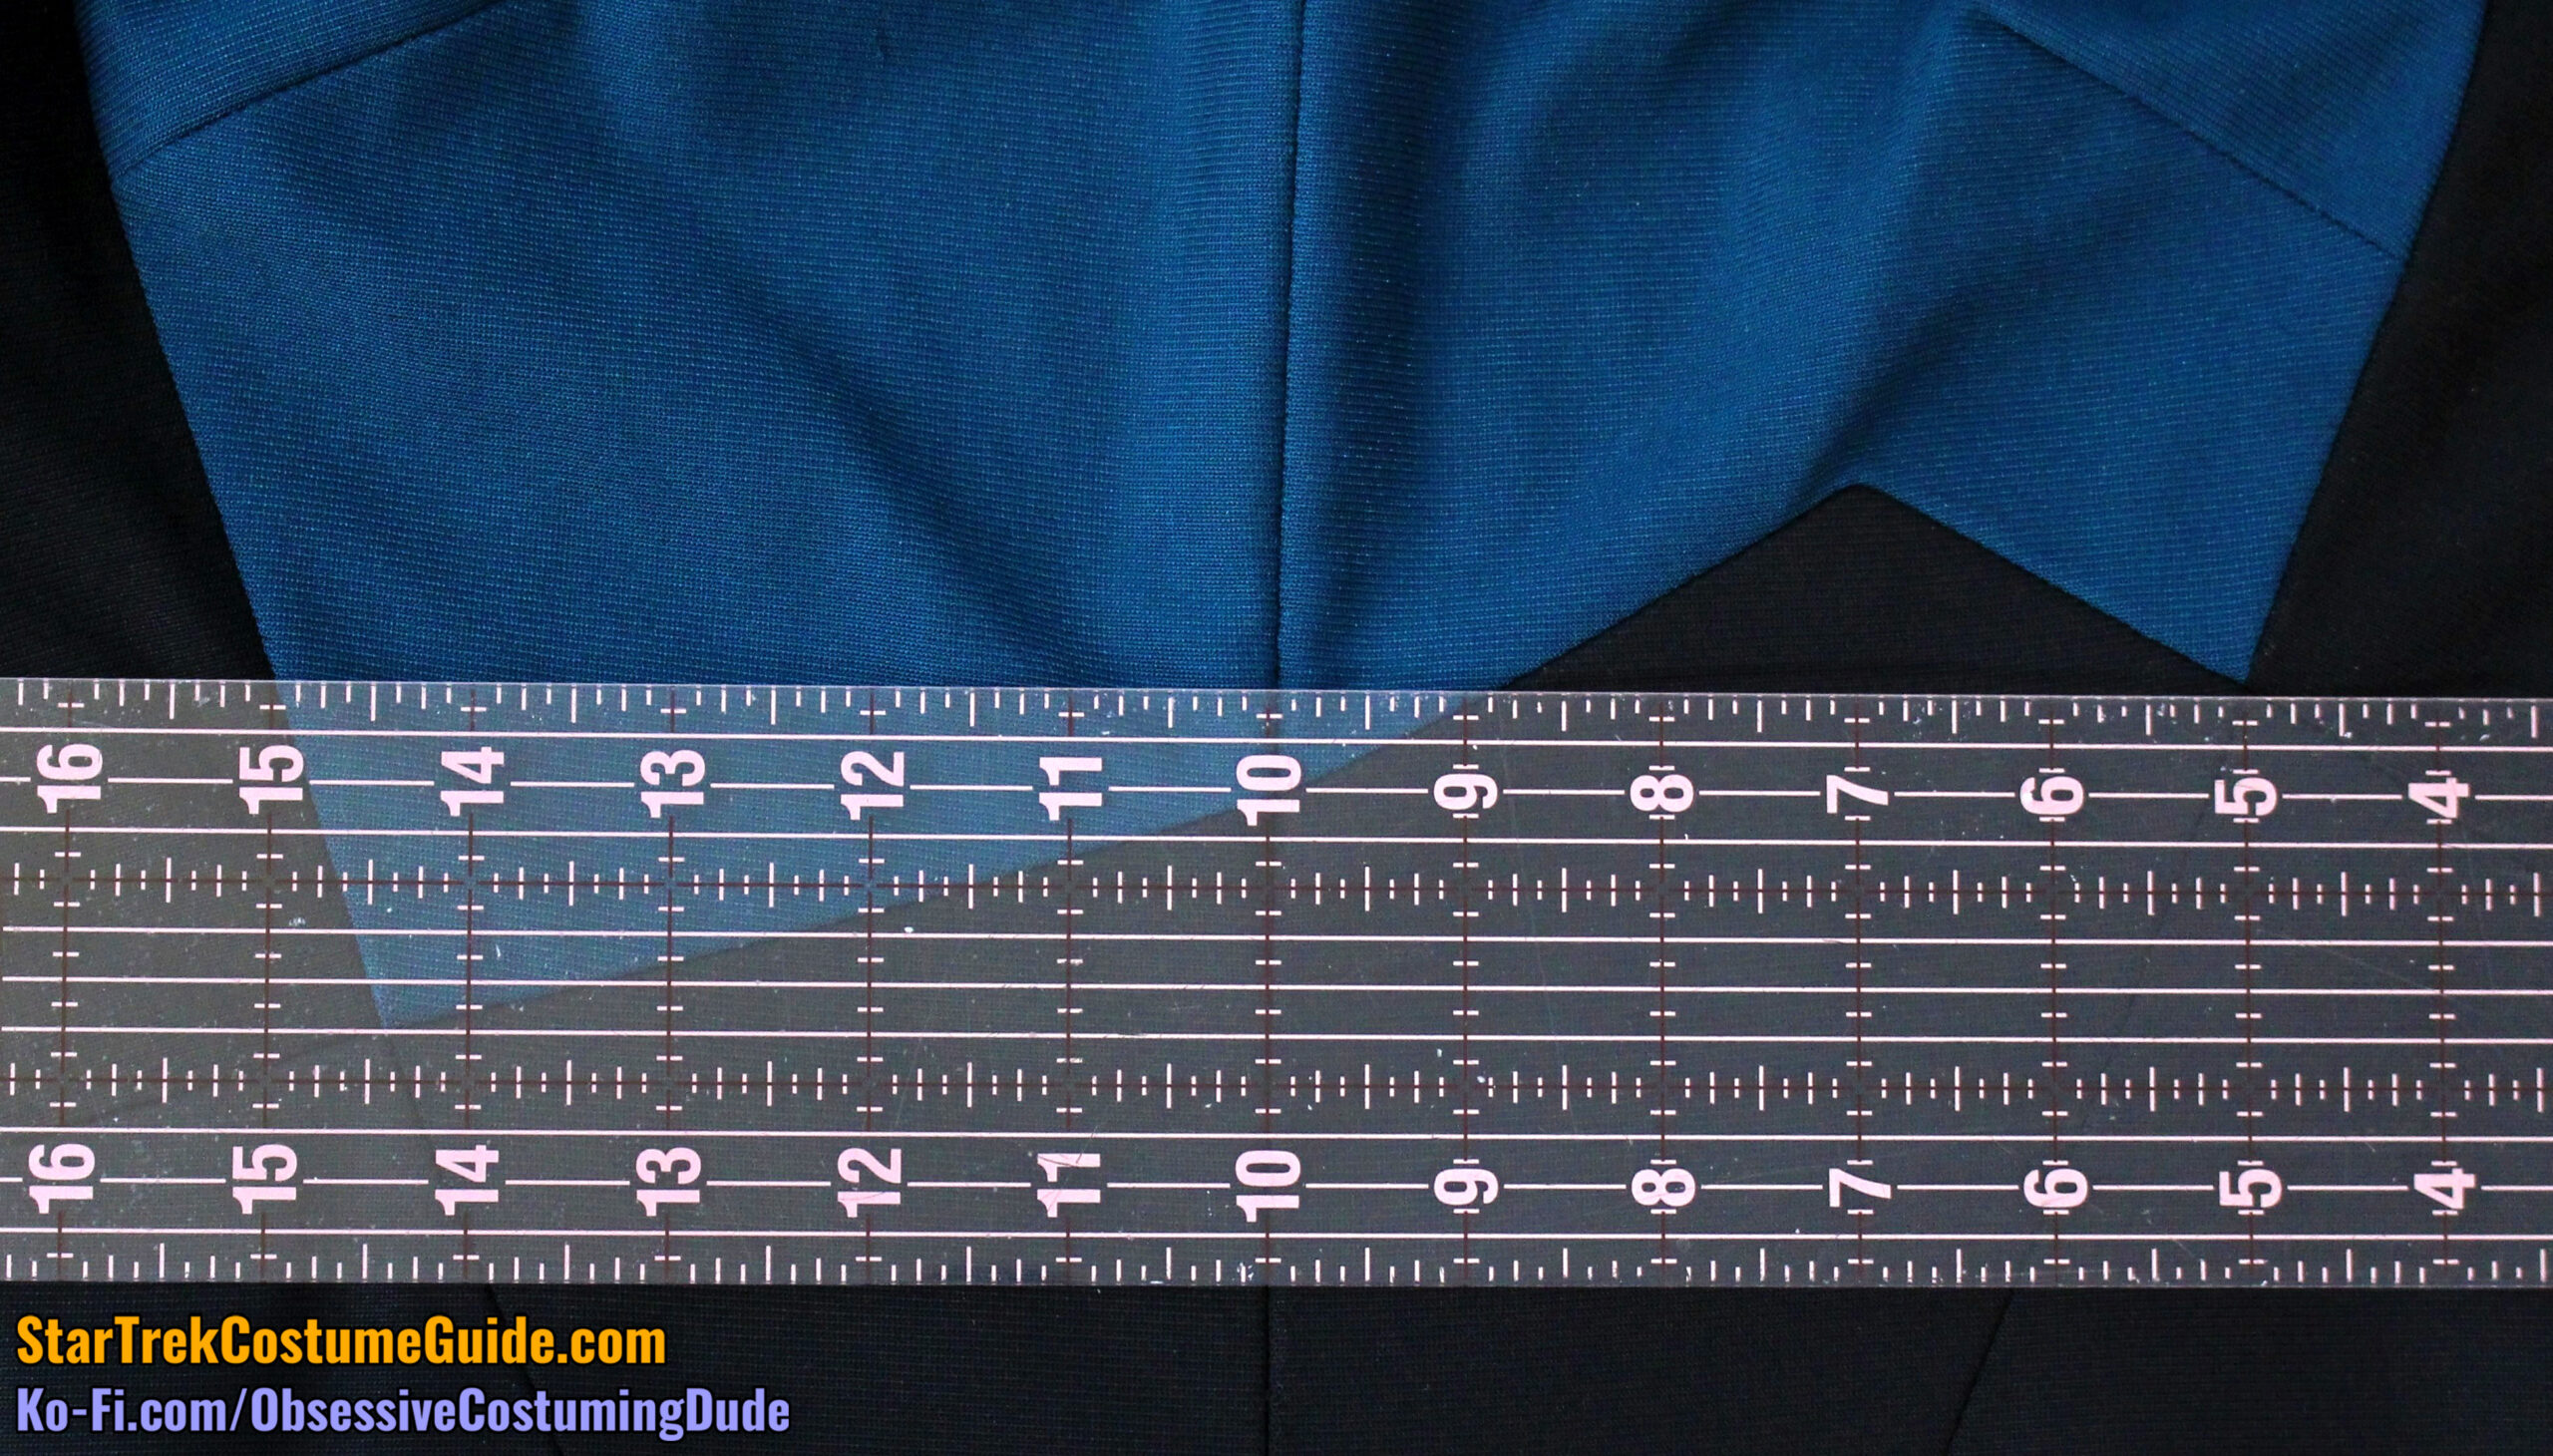
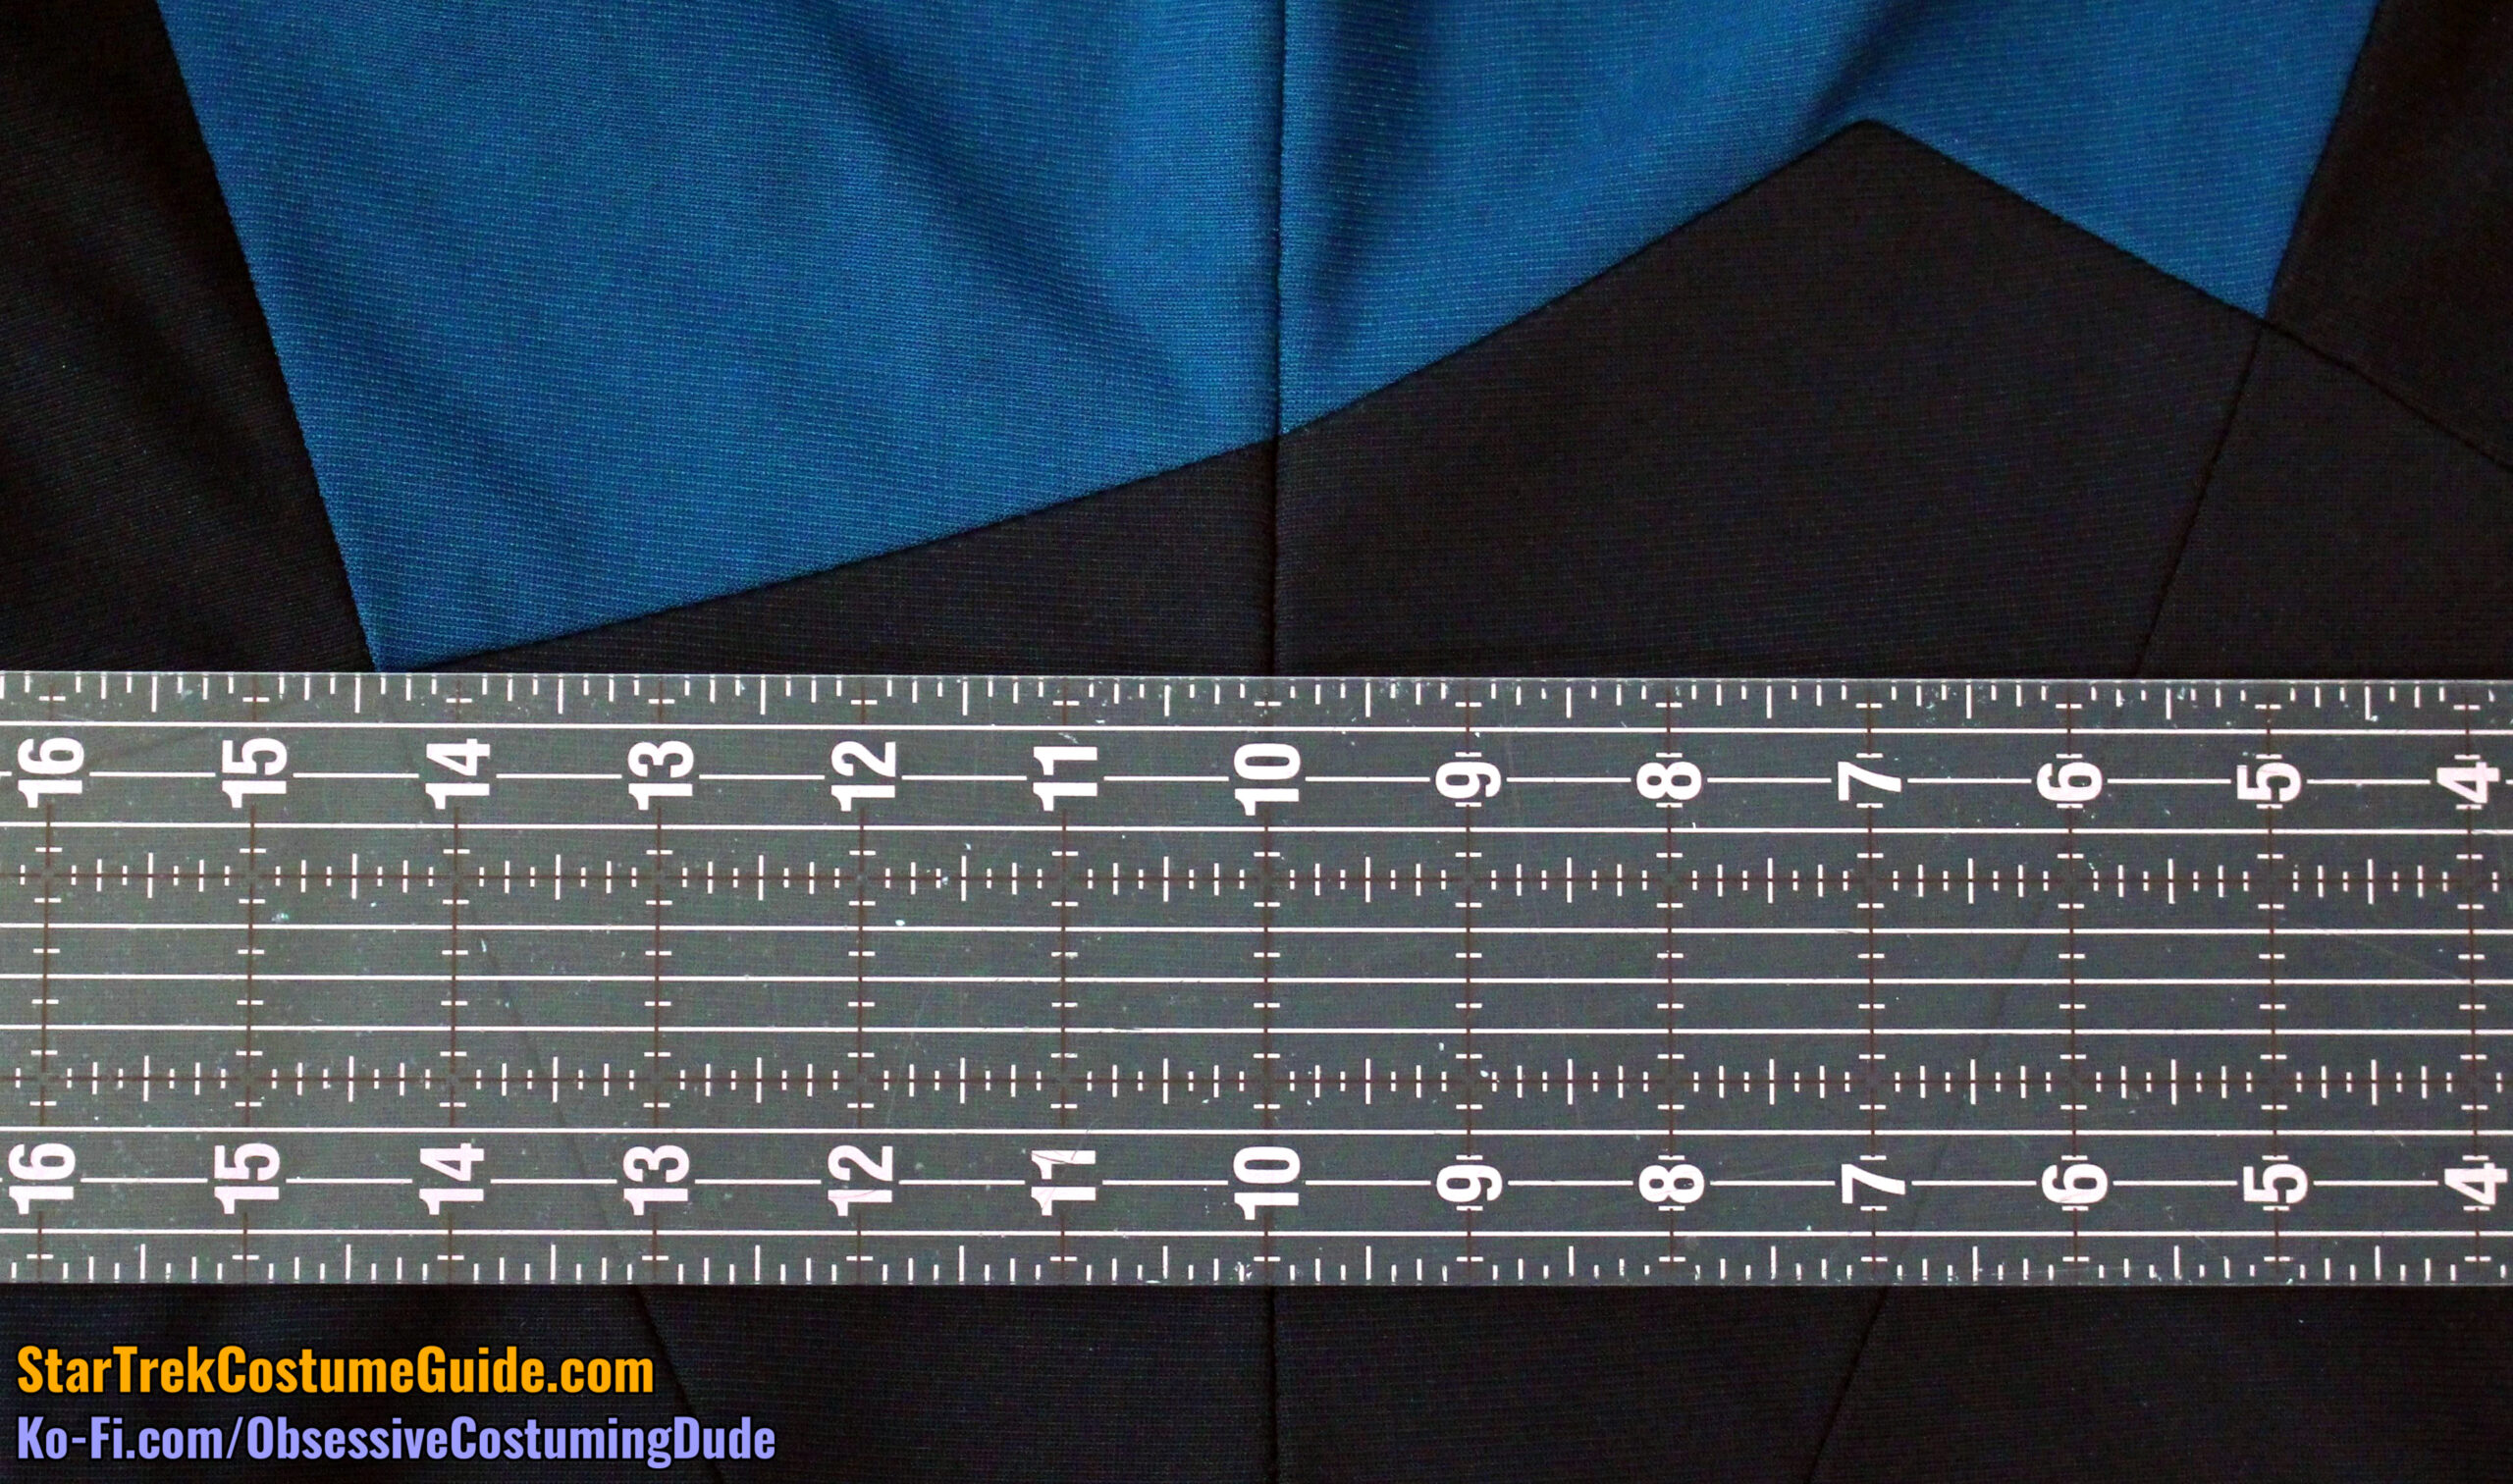
The upper front panels were both 5” wide at the lower descending (picture right) corner of the asymmetrical insert.
Both lower front panels were 4 ⅜” wide at the lower ascending (picture left) corner of the asymmetrical insert.
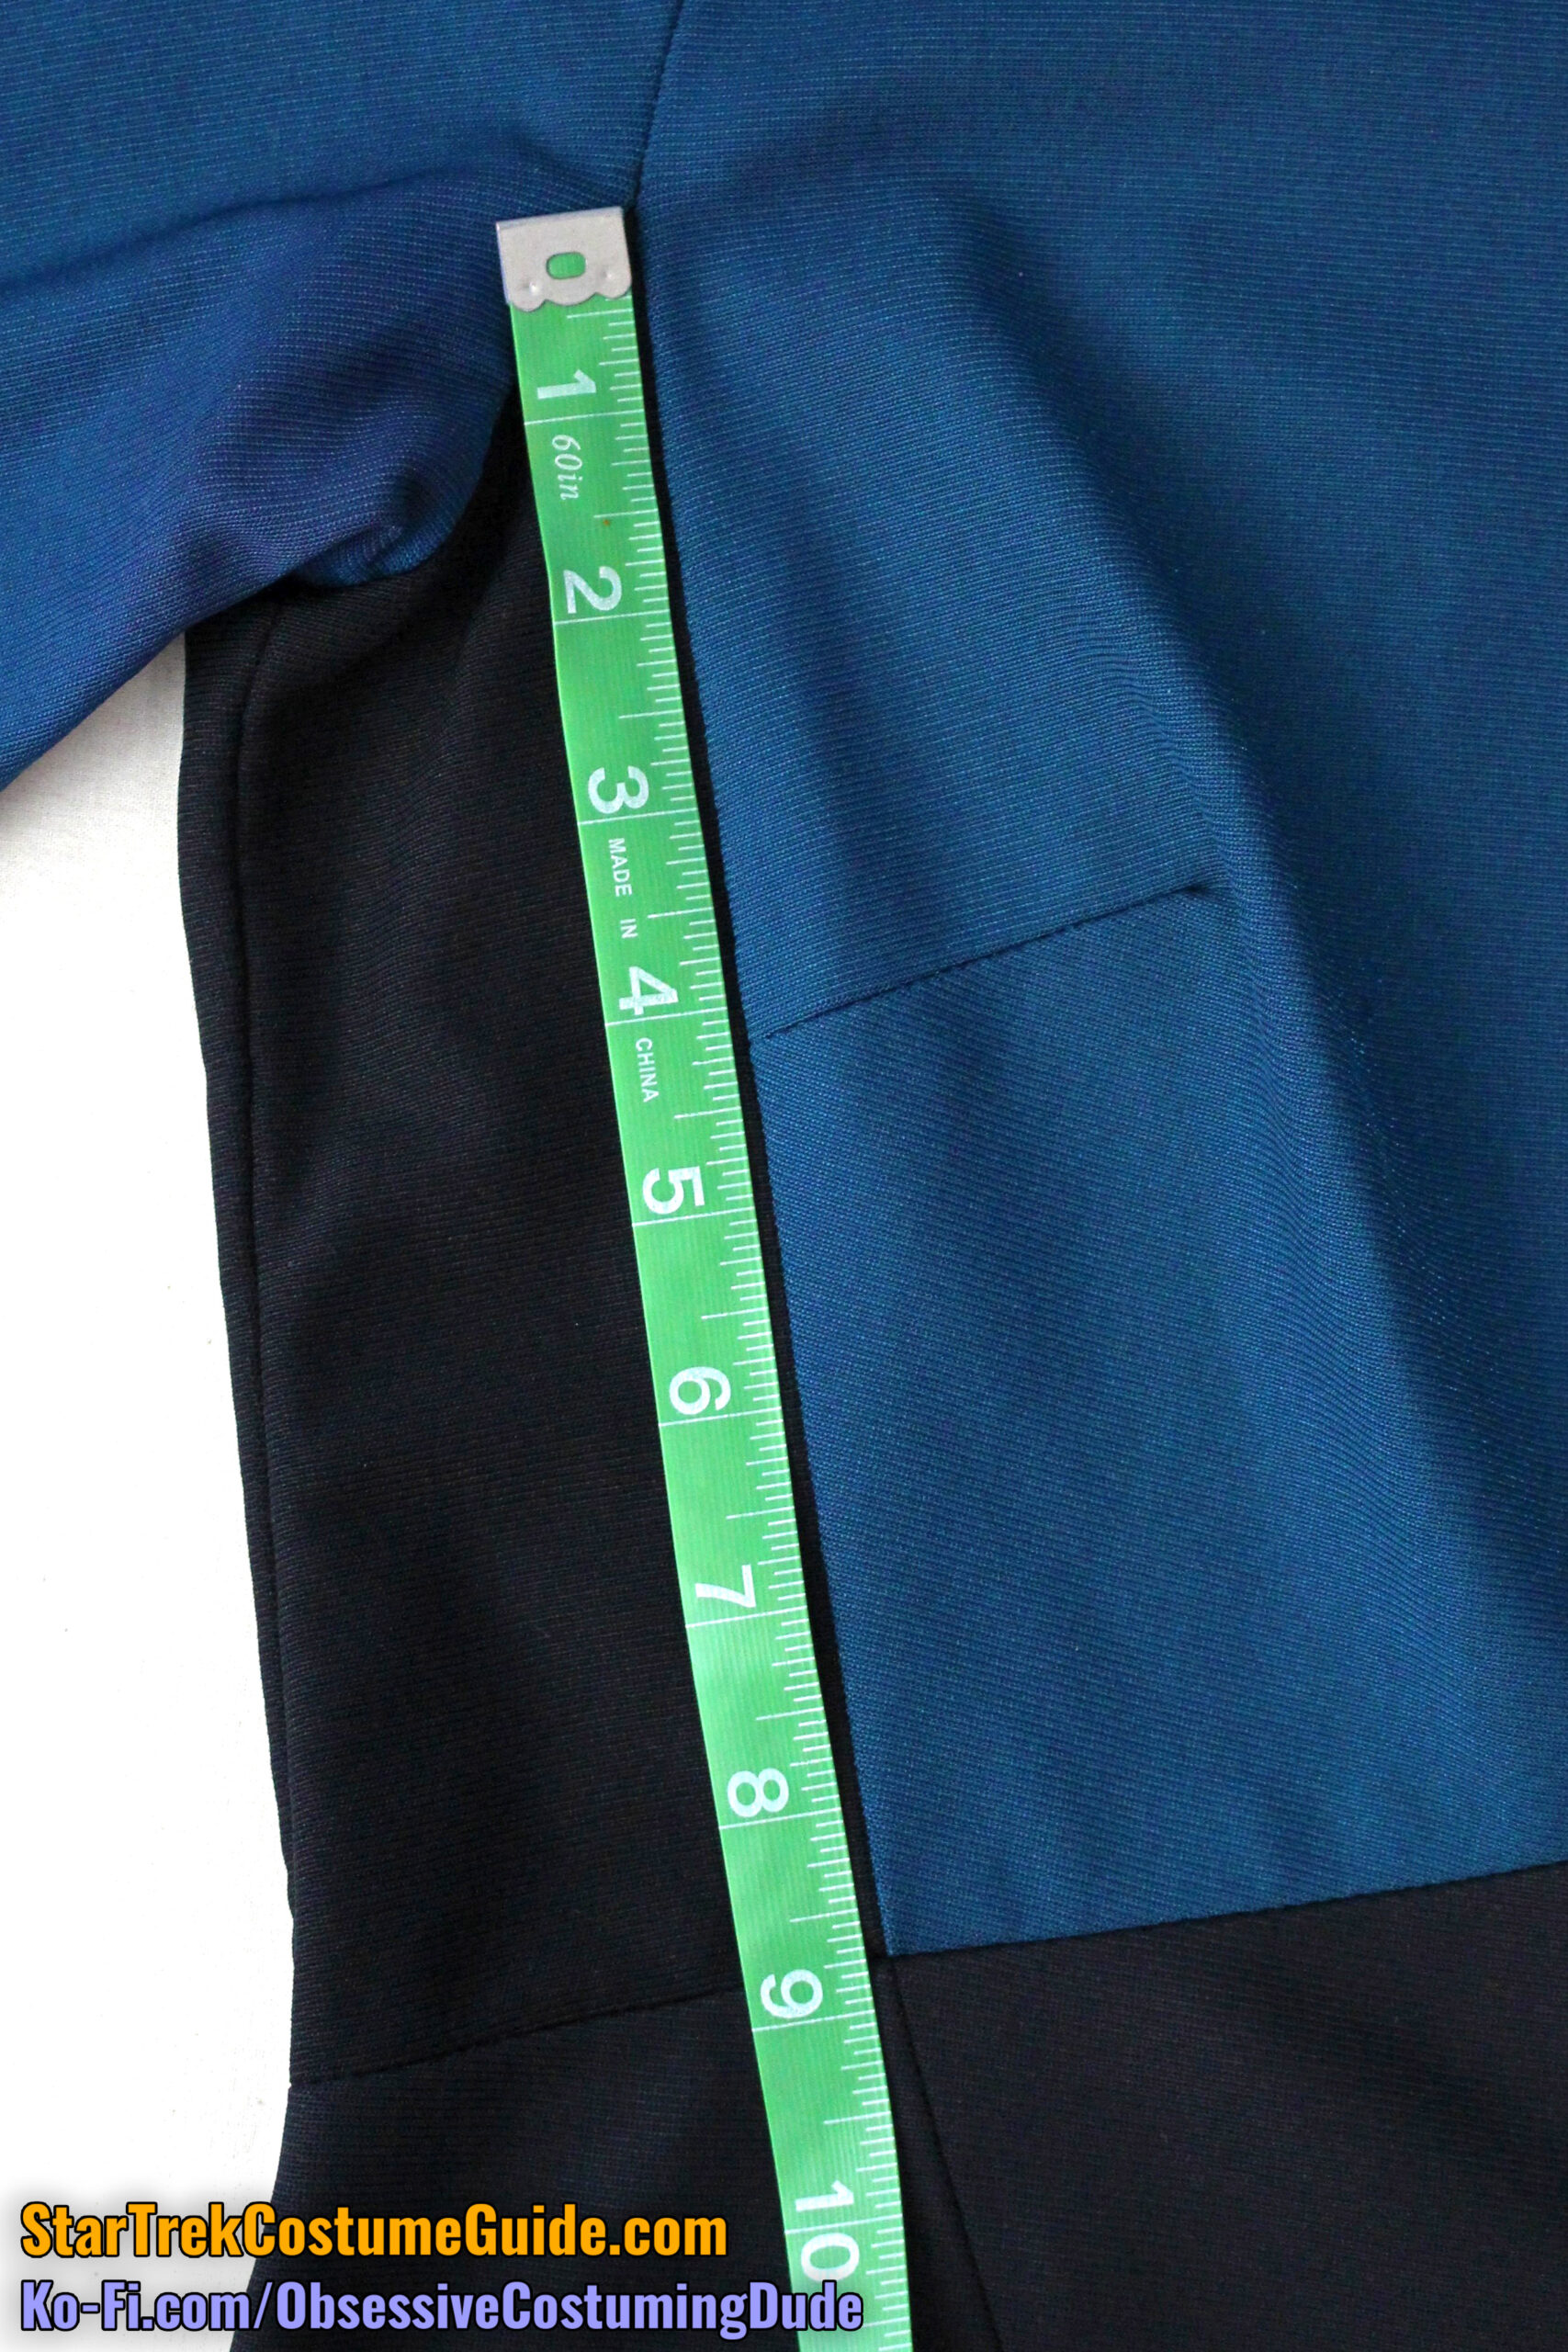
The right side front (lower) armscye was 3 ⅛”, measured from the side front to side seams.
The right side seam was 7 ⅞”, measured from the lower armscye to the diagonal waist seams.
The right side front lower seam line was 3 ¼”, although curiously, despite the diagonal contour of the seam line, it had a negligible upward slant (in relation to the weave of the jumbo spandex).
The left side front (lower) armscye was a bit longer than the right side, measuring 3 ⅜” from the side front to side seams.
The left side seam was 6 ⅜”, measured from the lower armscye to the diagonal waist seams.
The left side front lower seam line was 2 ¾”, although again curiously, with a mere ½” downward slant despite the sharp diagonal direction of the seam line.
(After having fiddled with various TNG jumpsuit patterns myself, I realized that the way this particular jumpsuit was patterned, the combination of various factors like the bust darts and side front seams pulled the side front panels toward the front, effectively rotating them to match the lower seam lines.)
As I mentioned previously, the upper back body seam line was 12 ¾”.
However, unlike the front, this seam line was cinched in a tiny bit and curved downward ⅞” from center back to each armscye.
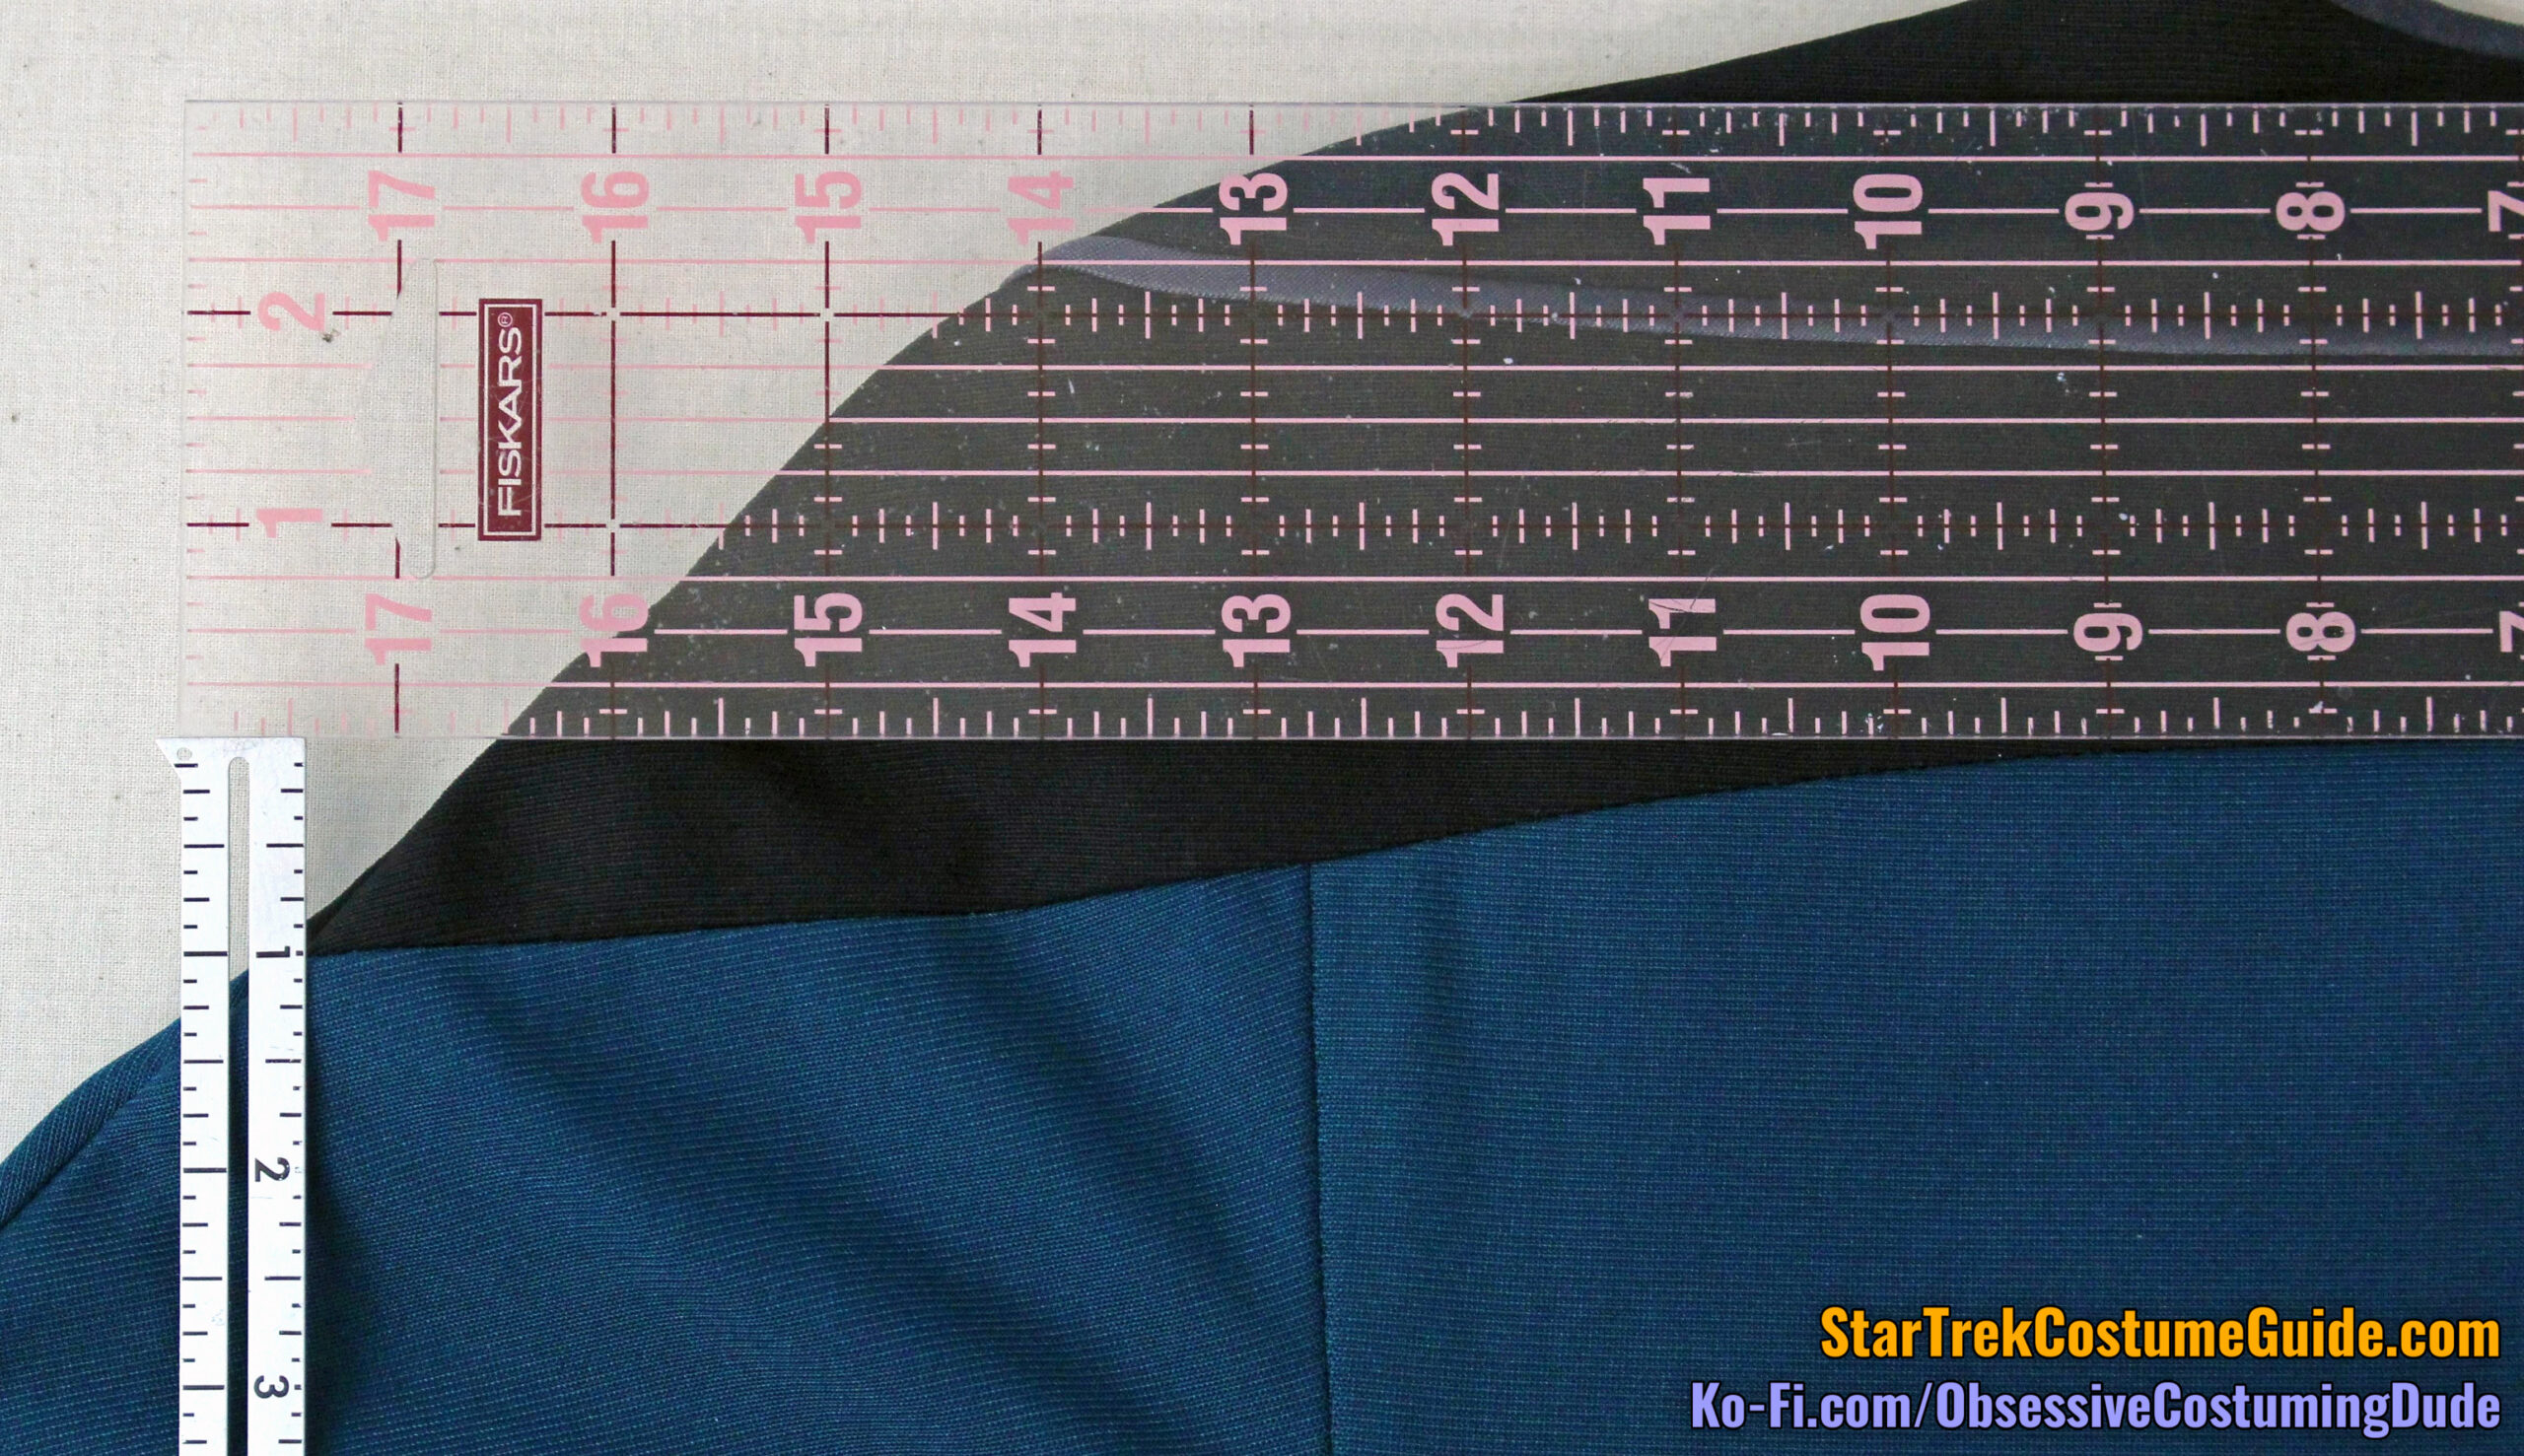
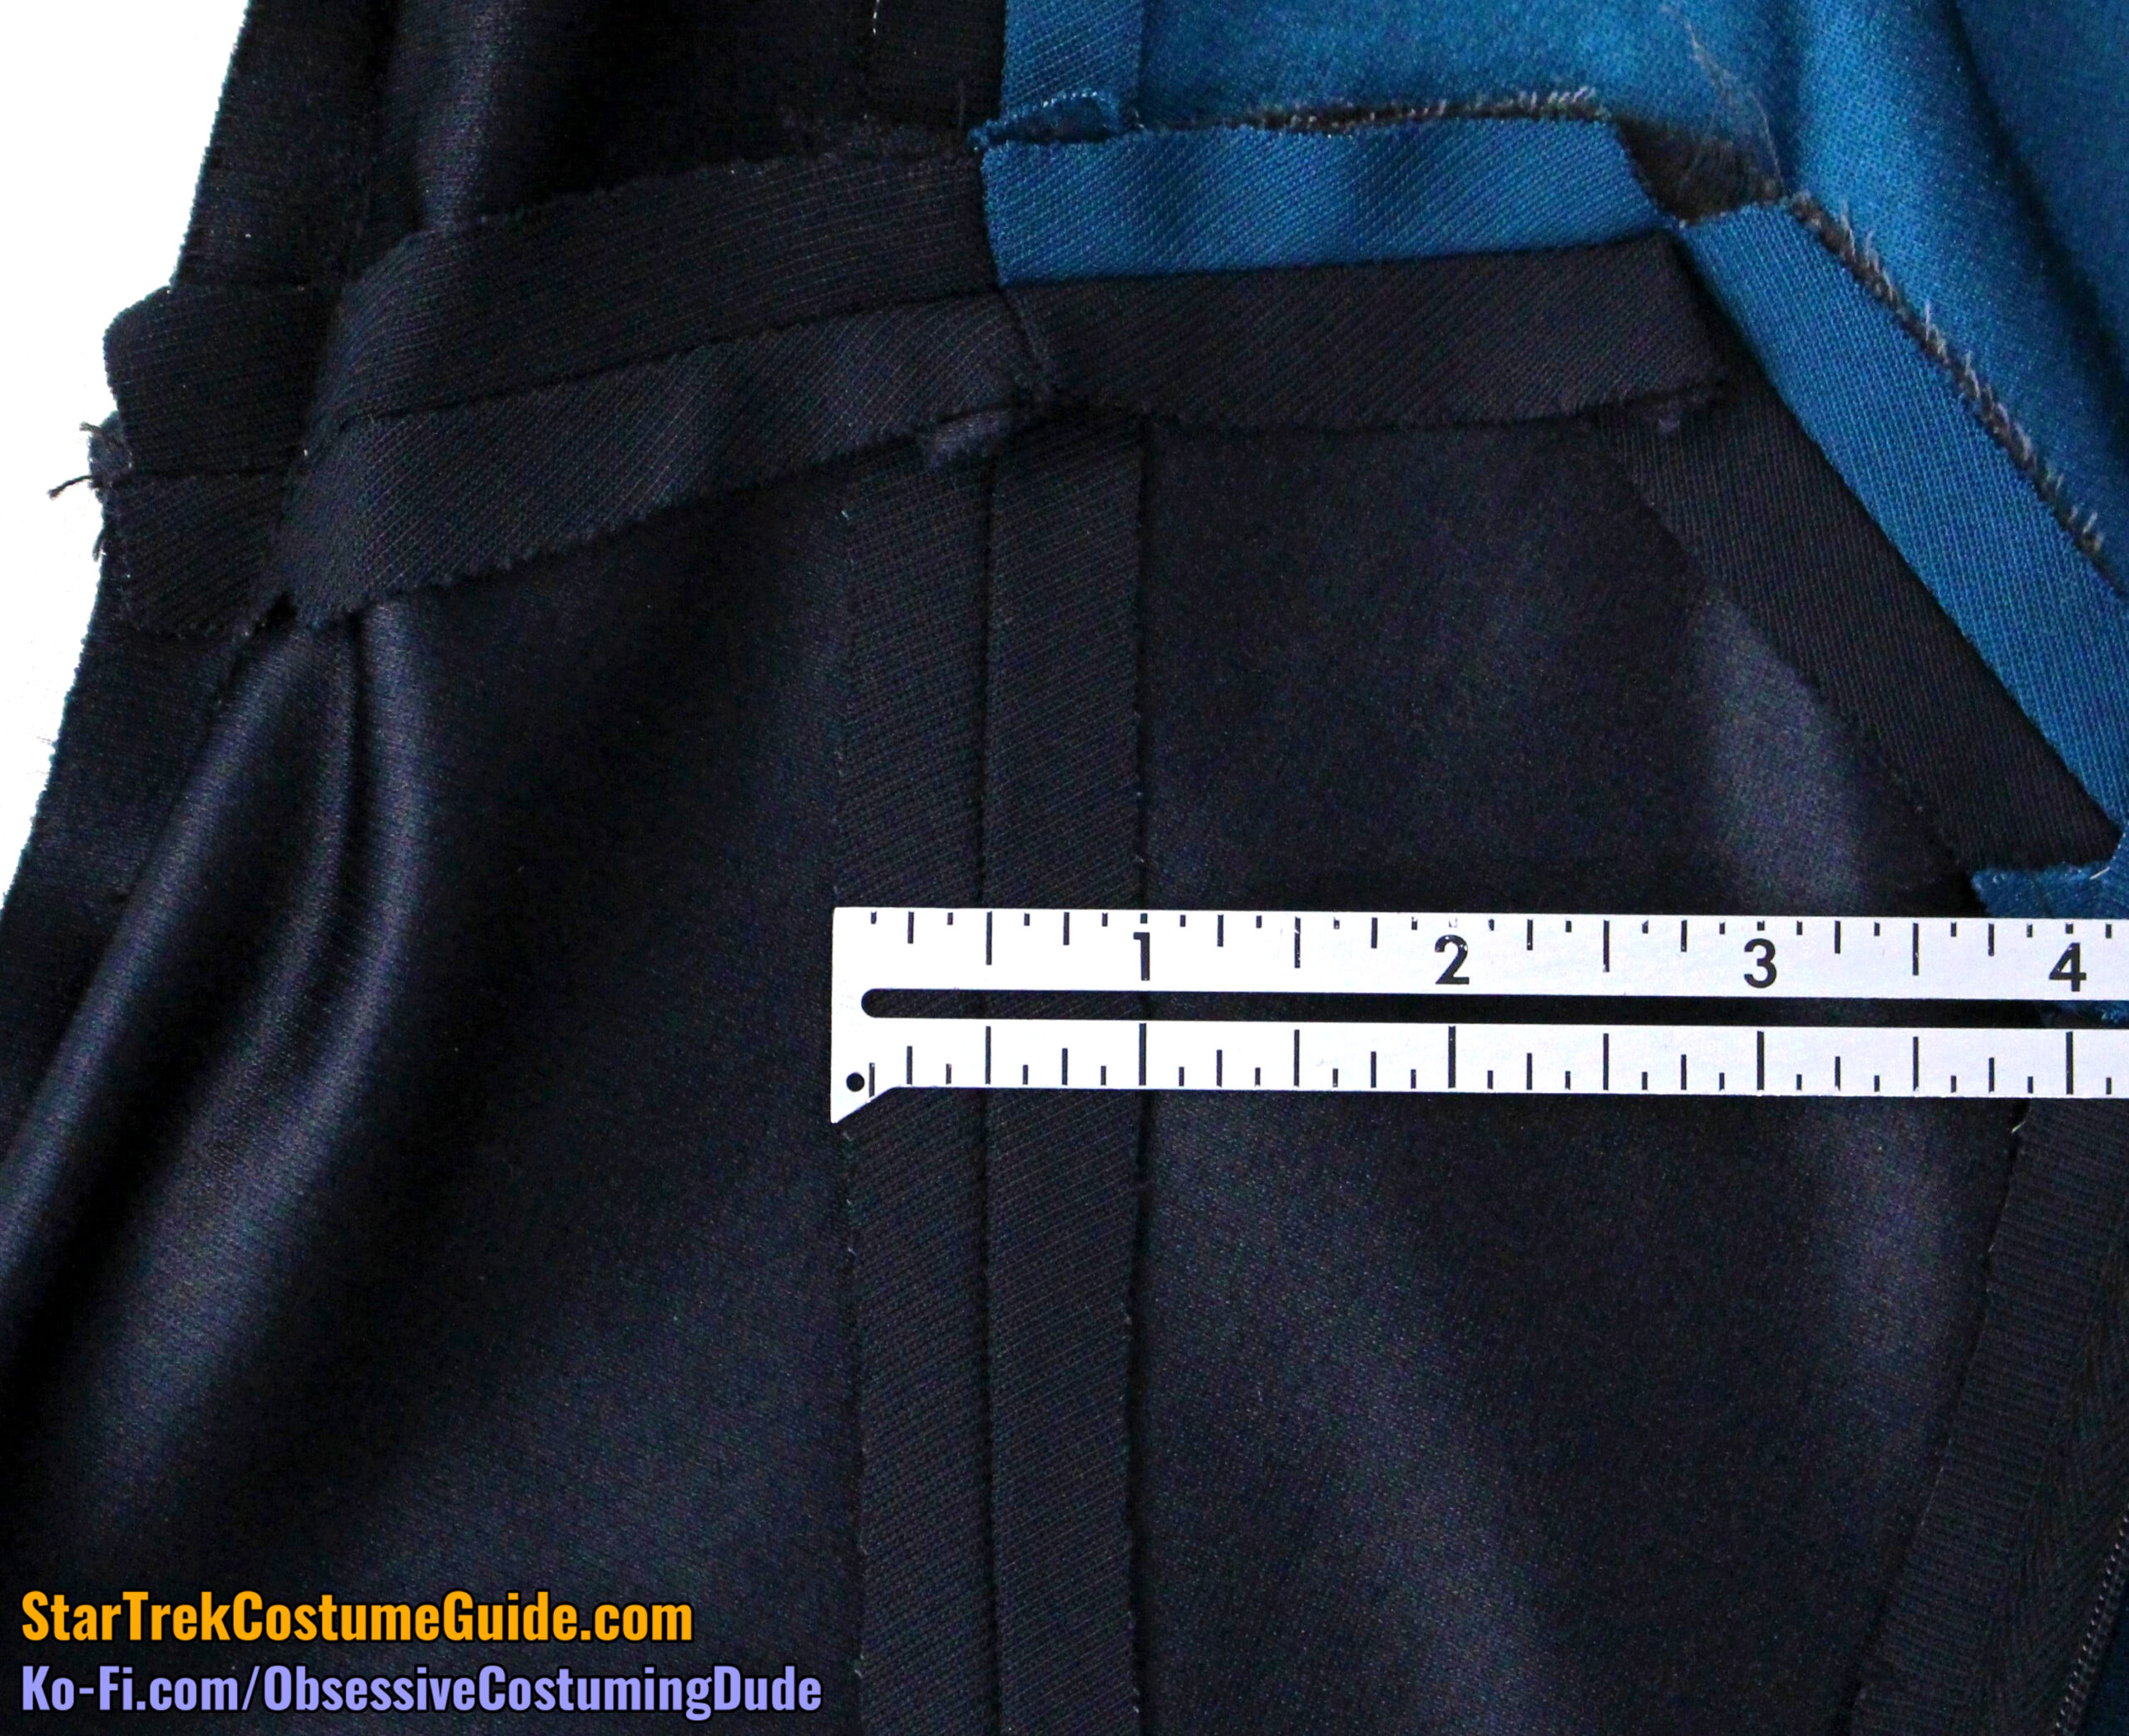
Both side back seam lines were 4” below the yoke at the armscye.
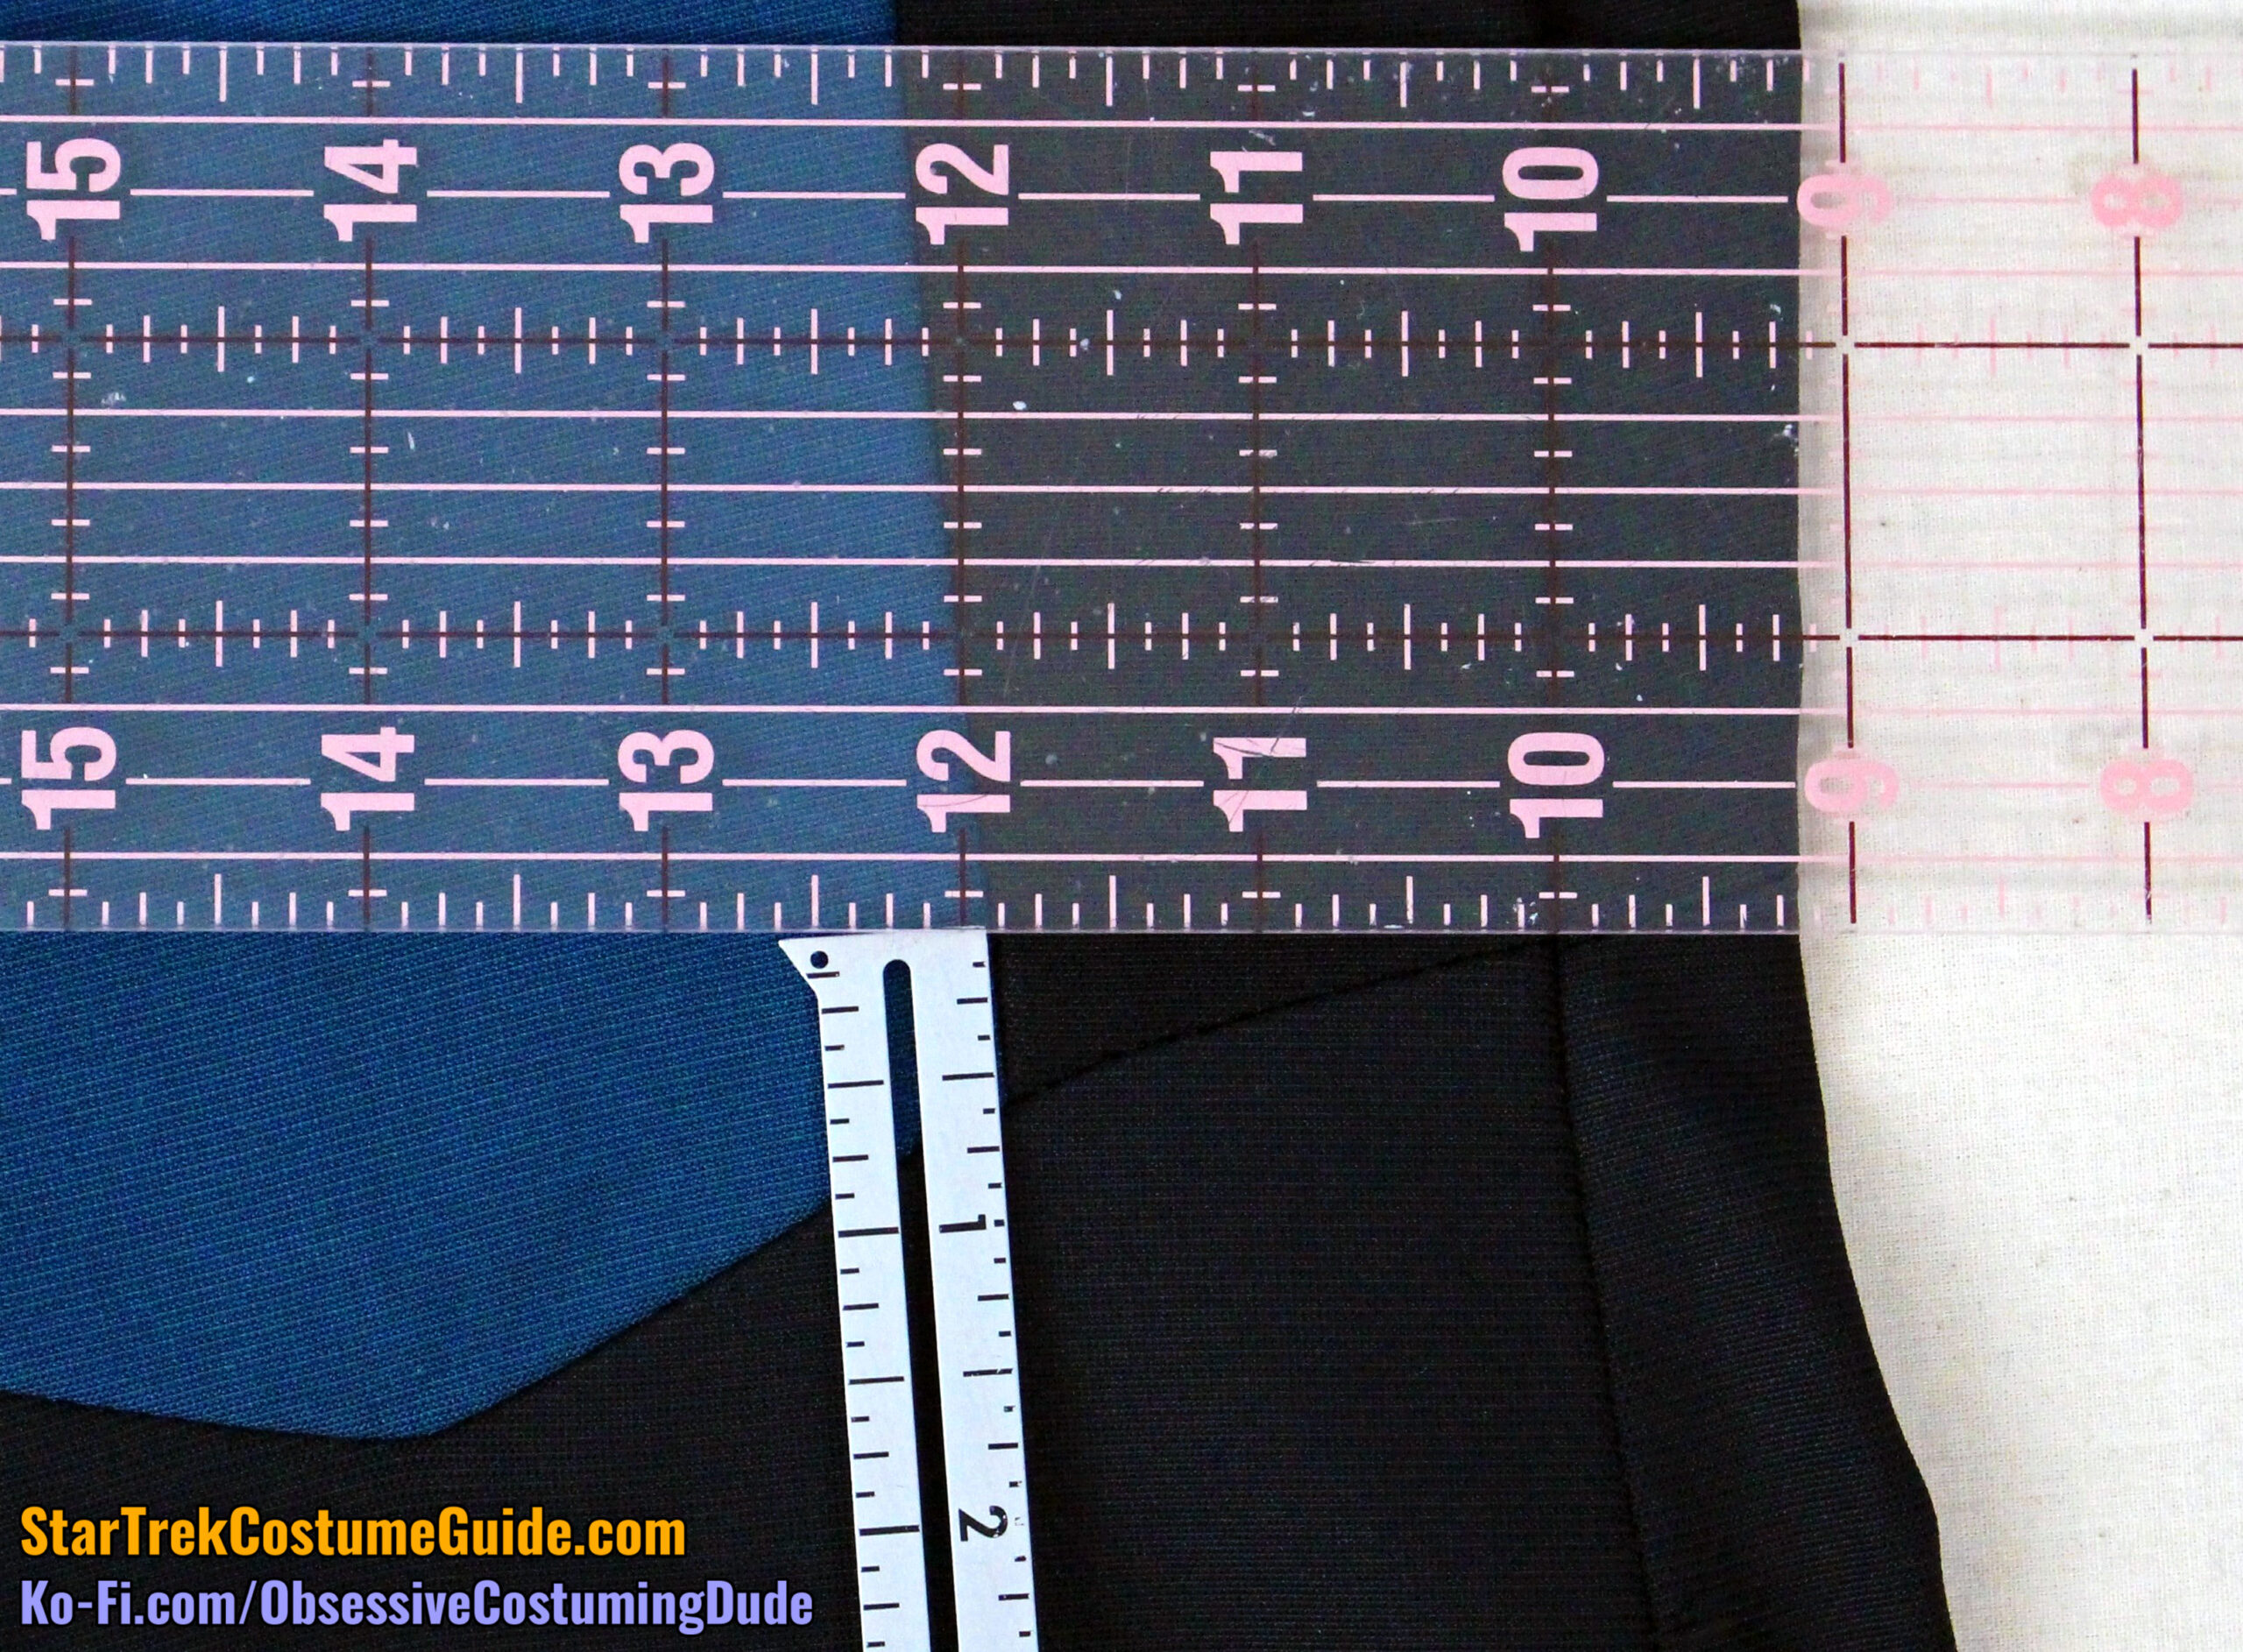
While the upper back was 12” across at the upper side back seams, it was only 9” across at the lower side back seams … (numerically) revealing the contours/proportions of the side back seams.
The left side back seam line was 8”, and the right side back seam line was 9 ¾”.
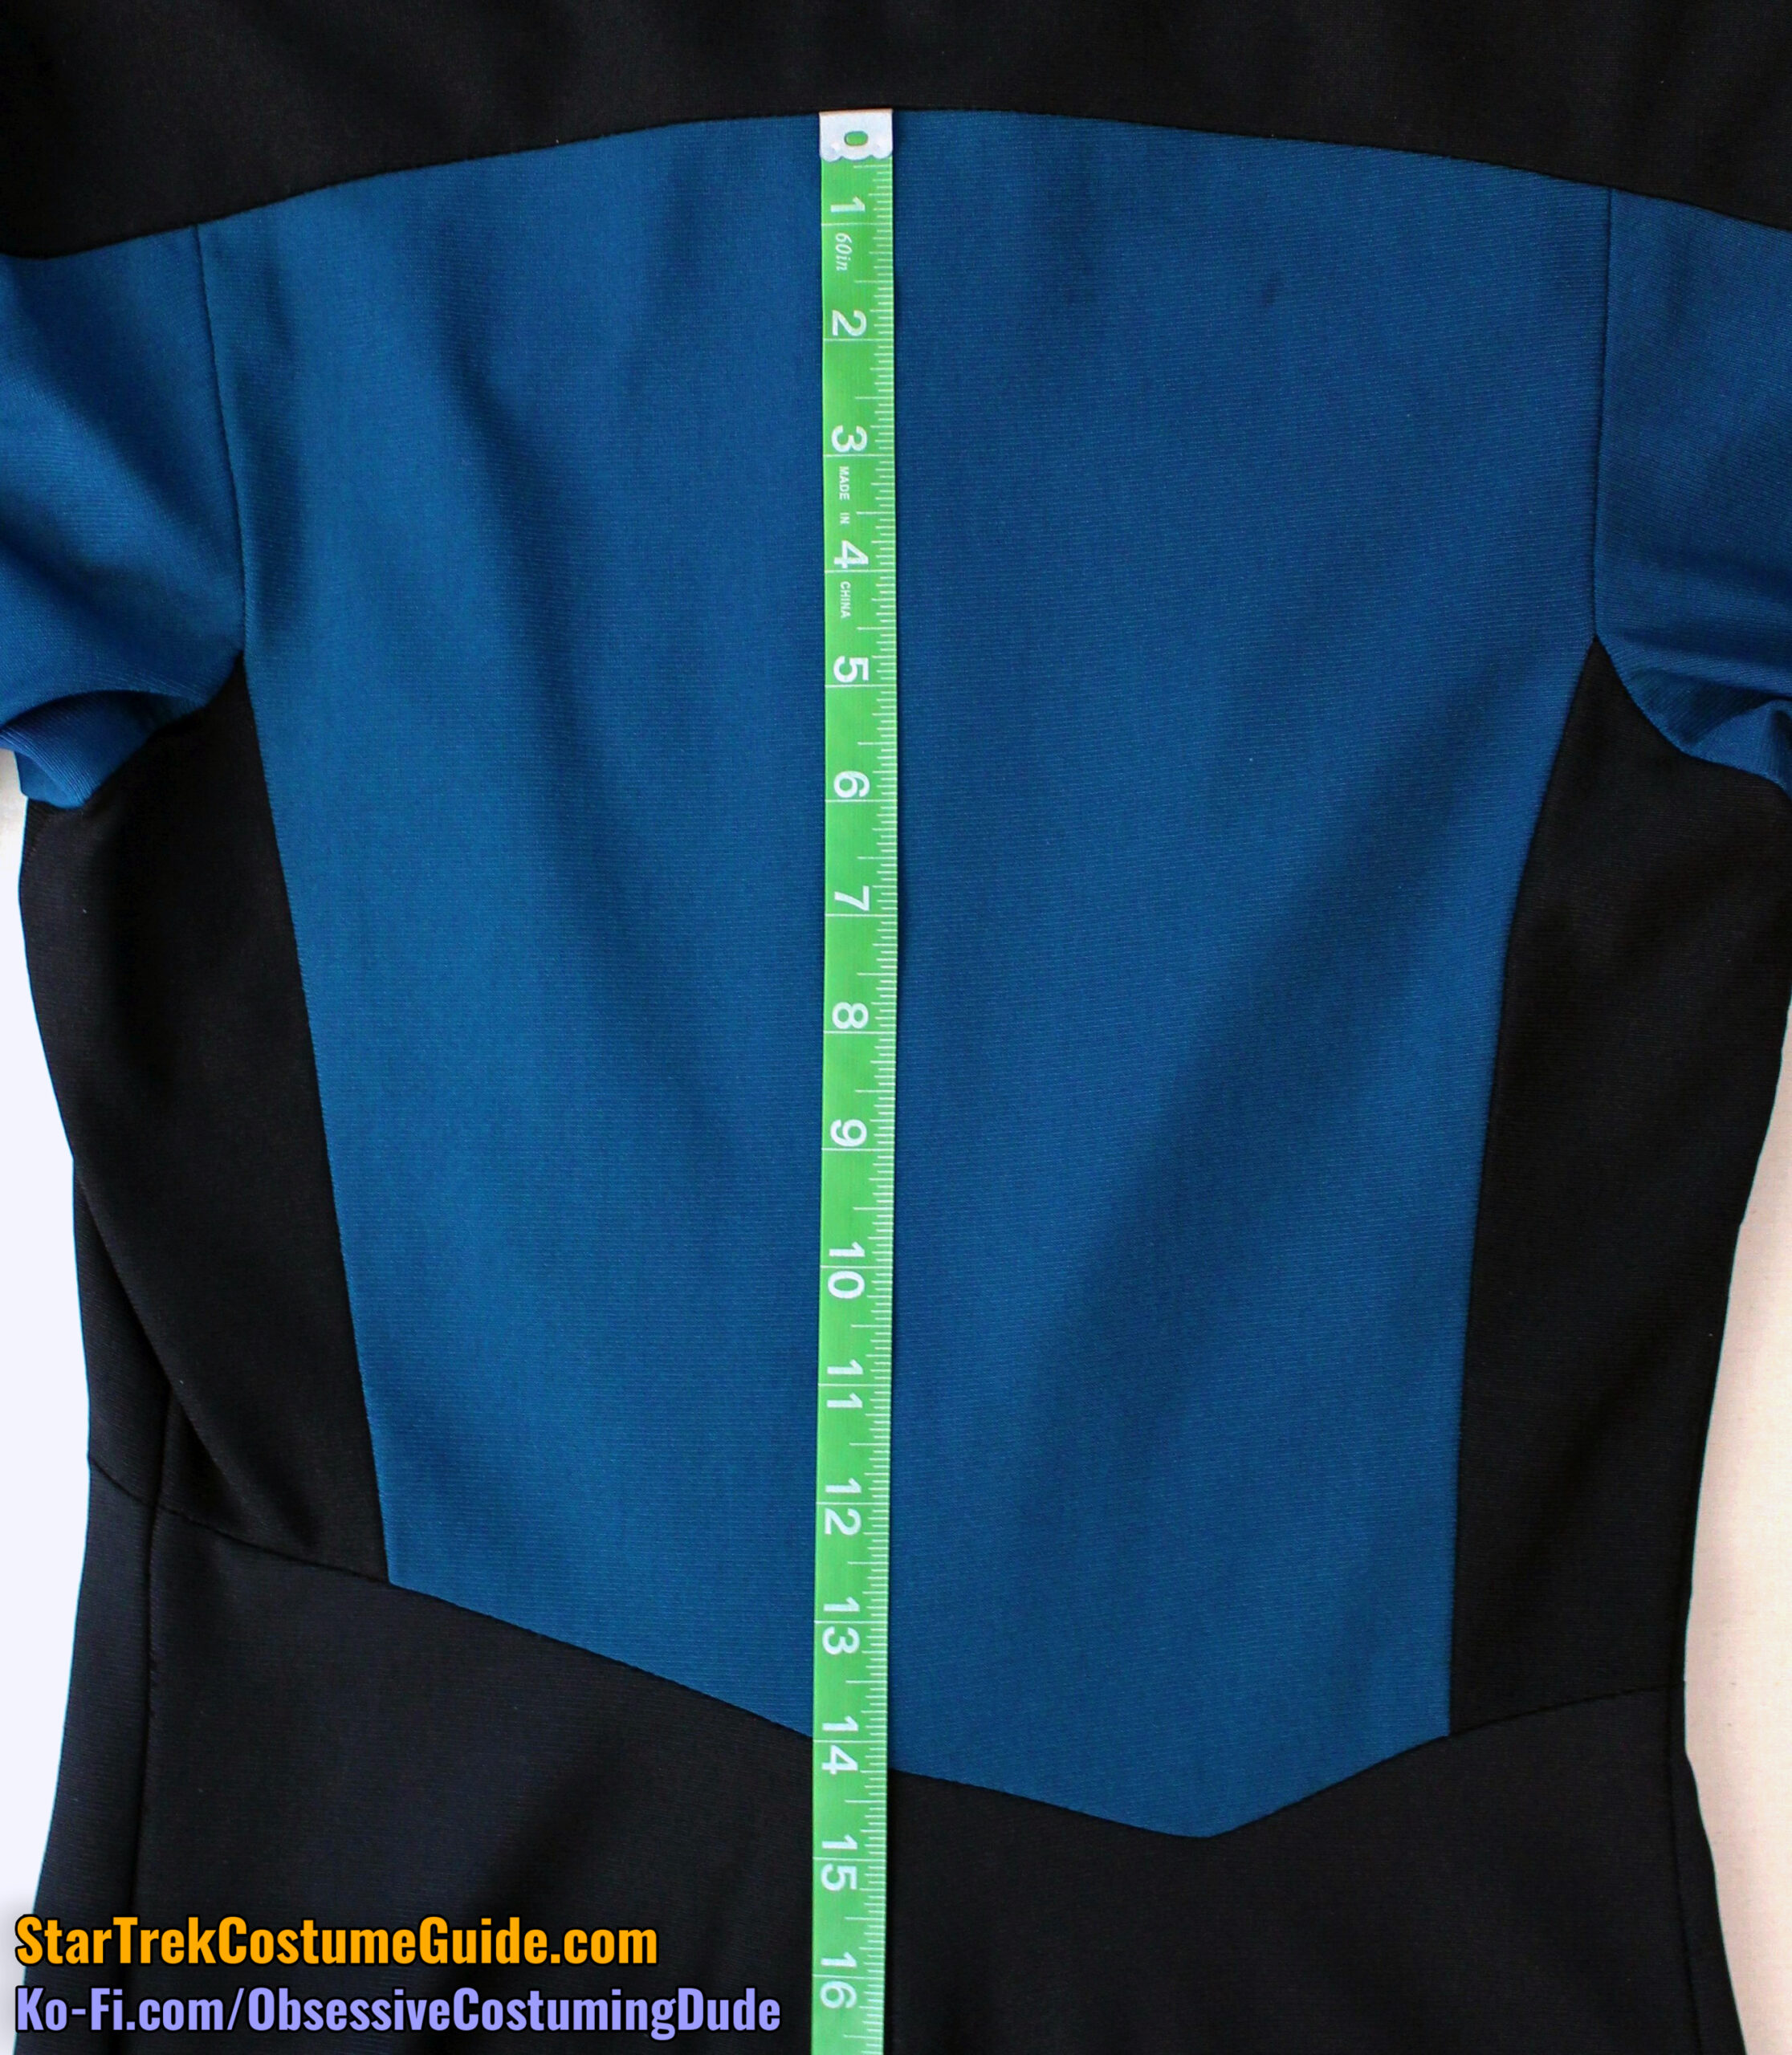
The upper back panel was 14 ¼” deep at the center back, measured from the yoke seam to the asymmetrical seam at the pant legs.
The lower back seam line was 4 ⅝” long, from the left side back seam to the center back.
Measured from the left side back seam all the way to the lower corner, the seam was 7 ⅜” long.
On the lower right back, the seam pivoted upward and extended upward 2 ¼” to the right side back seam.
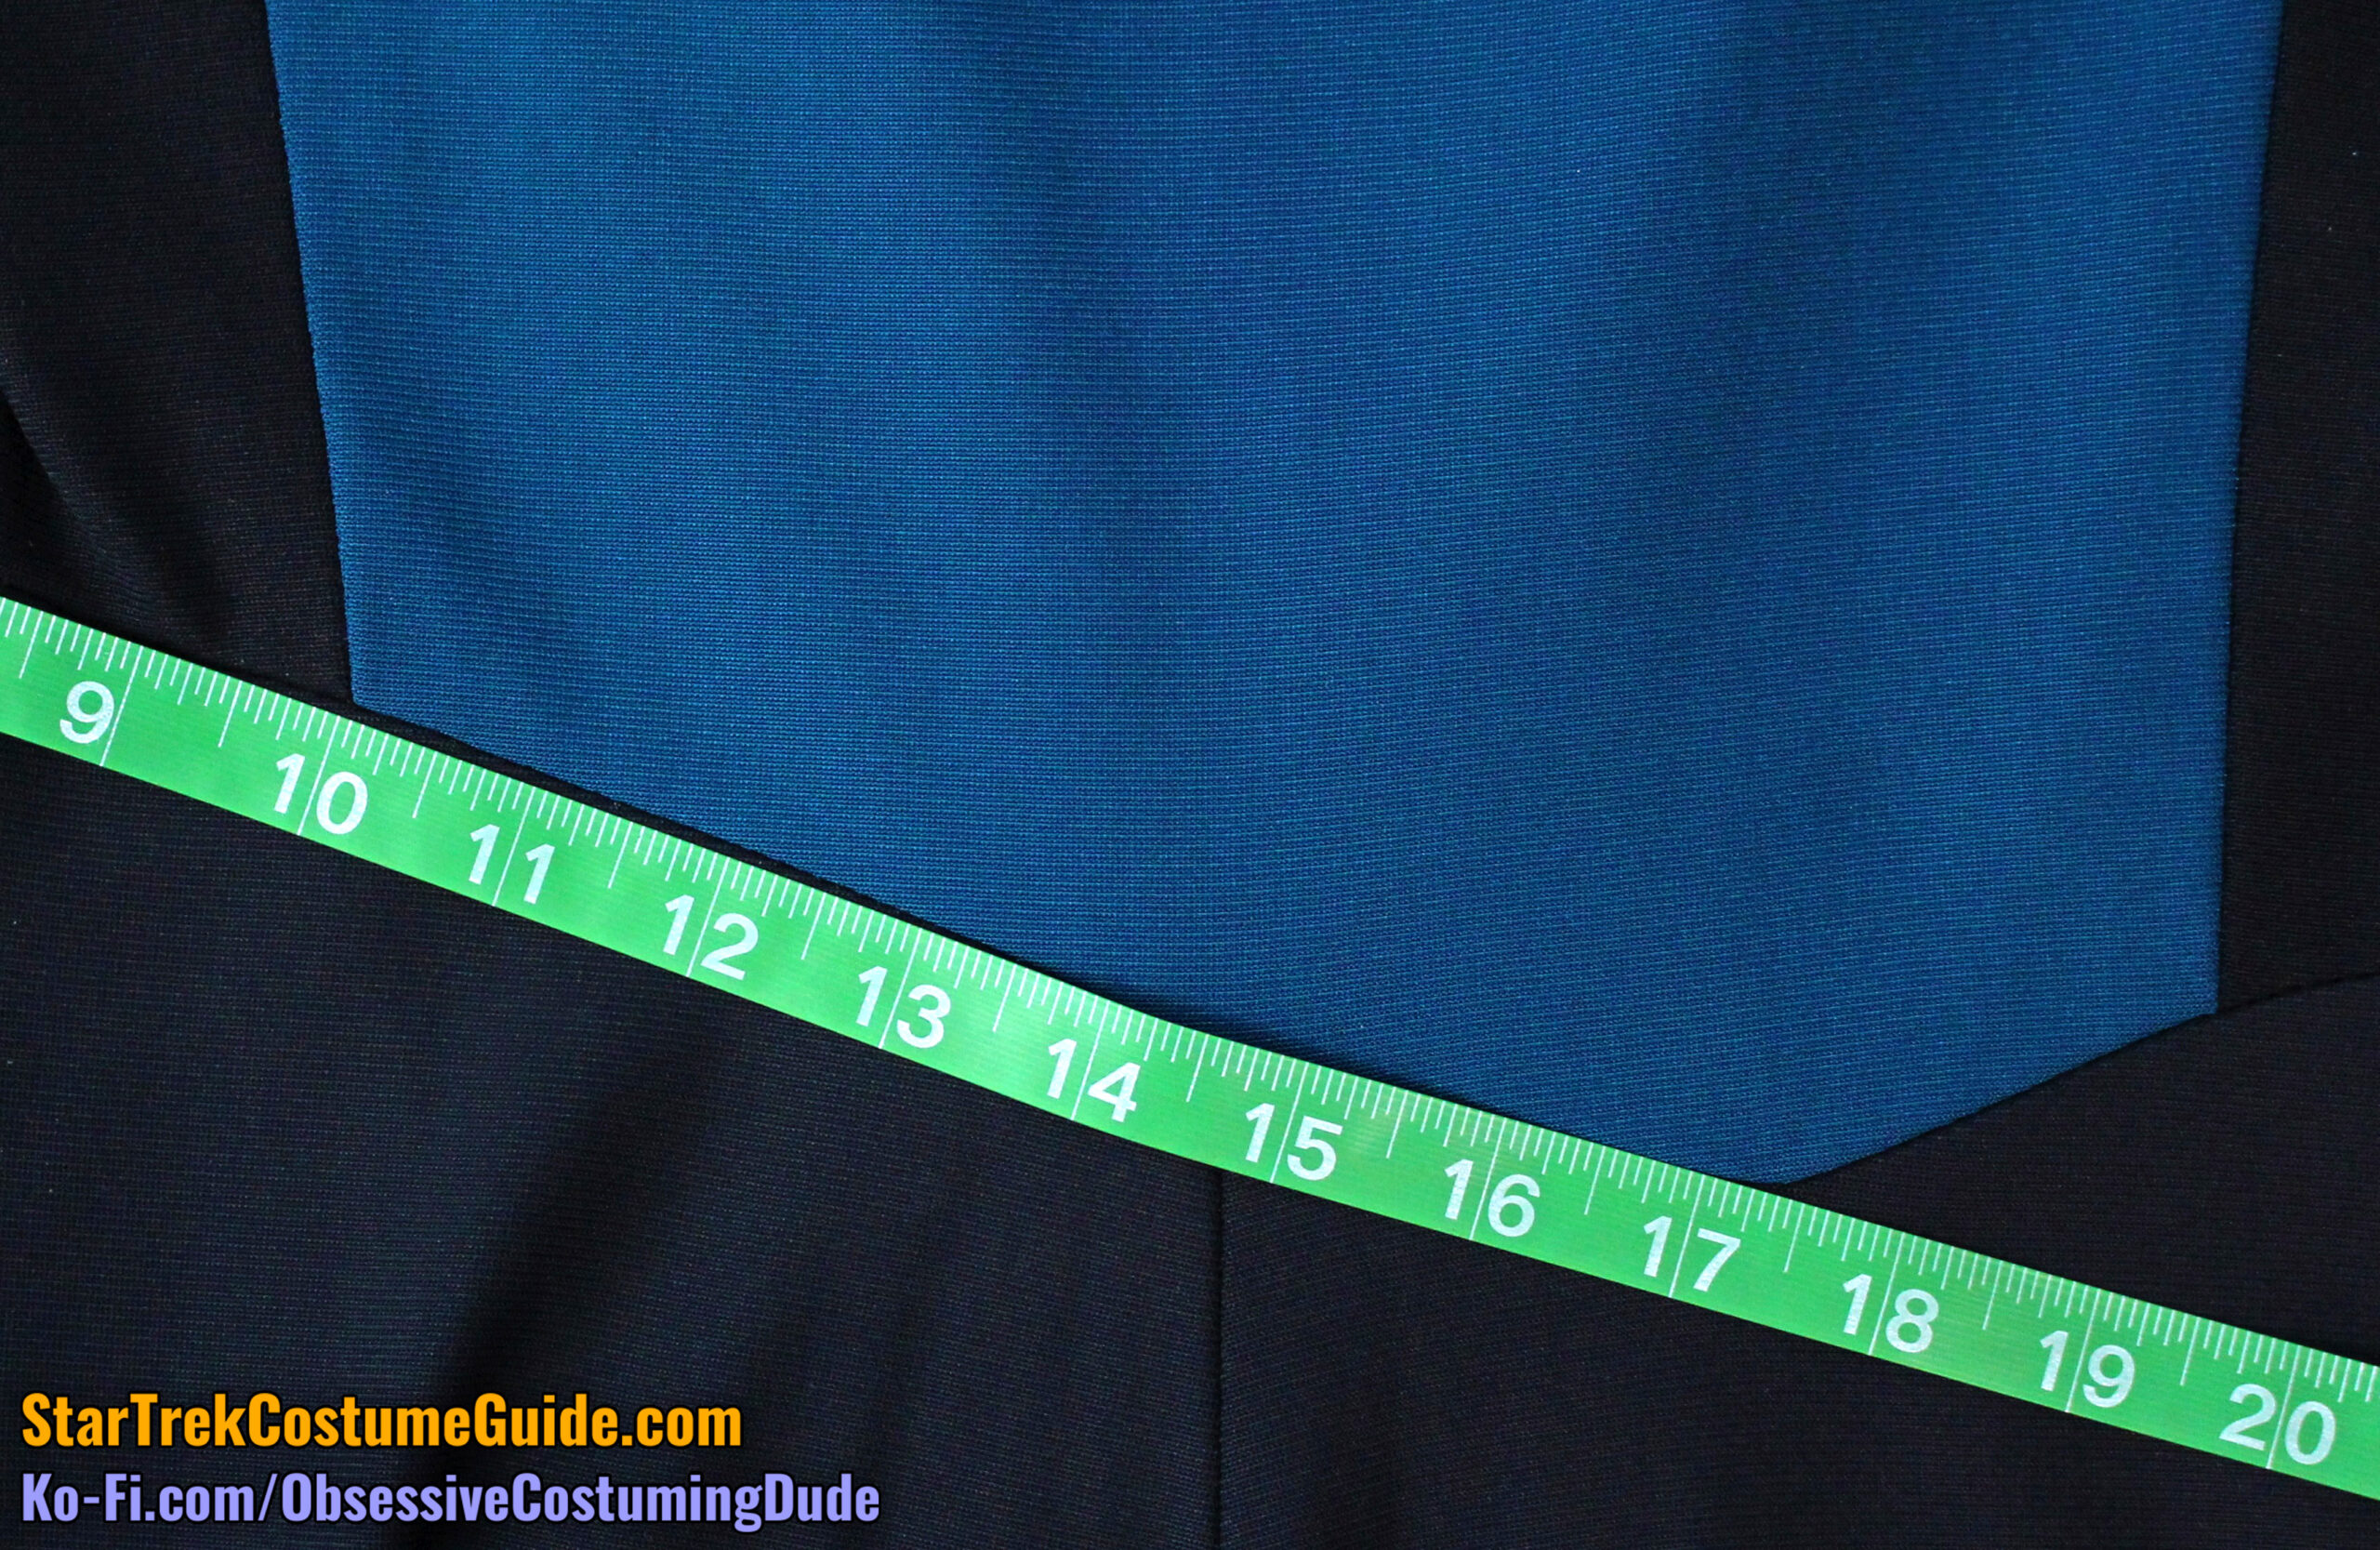
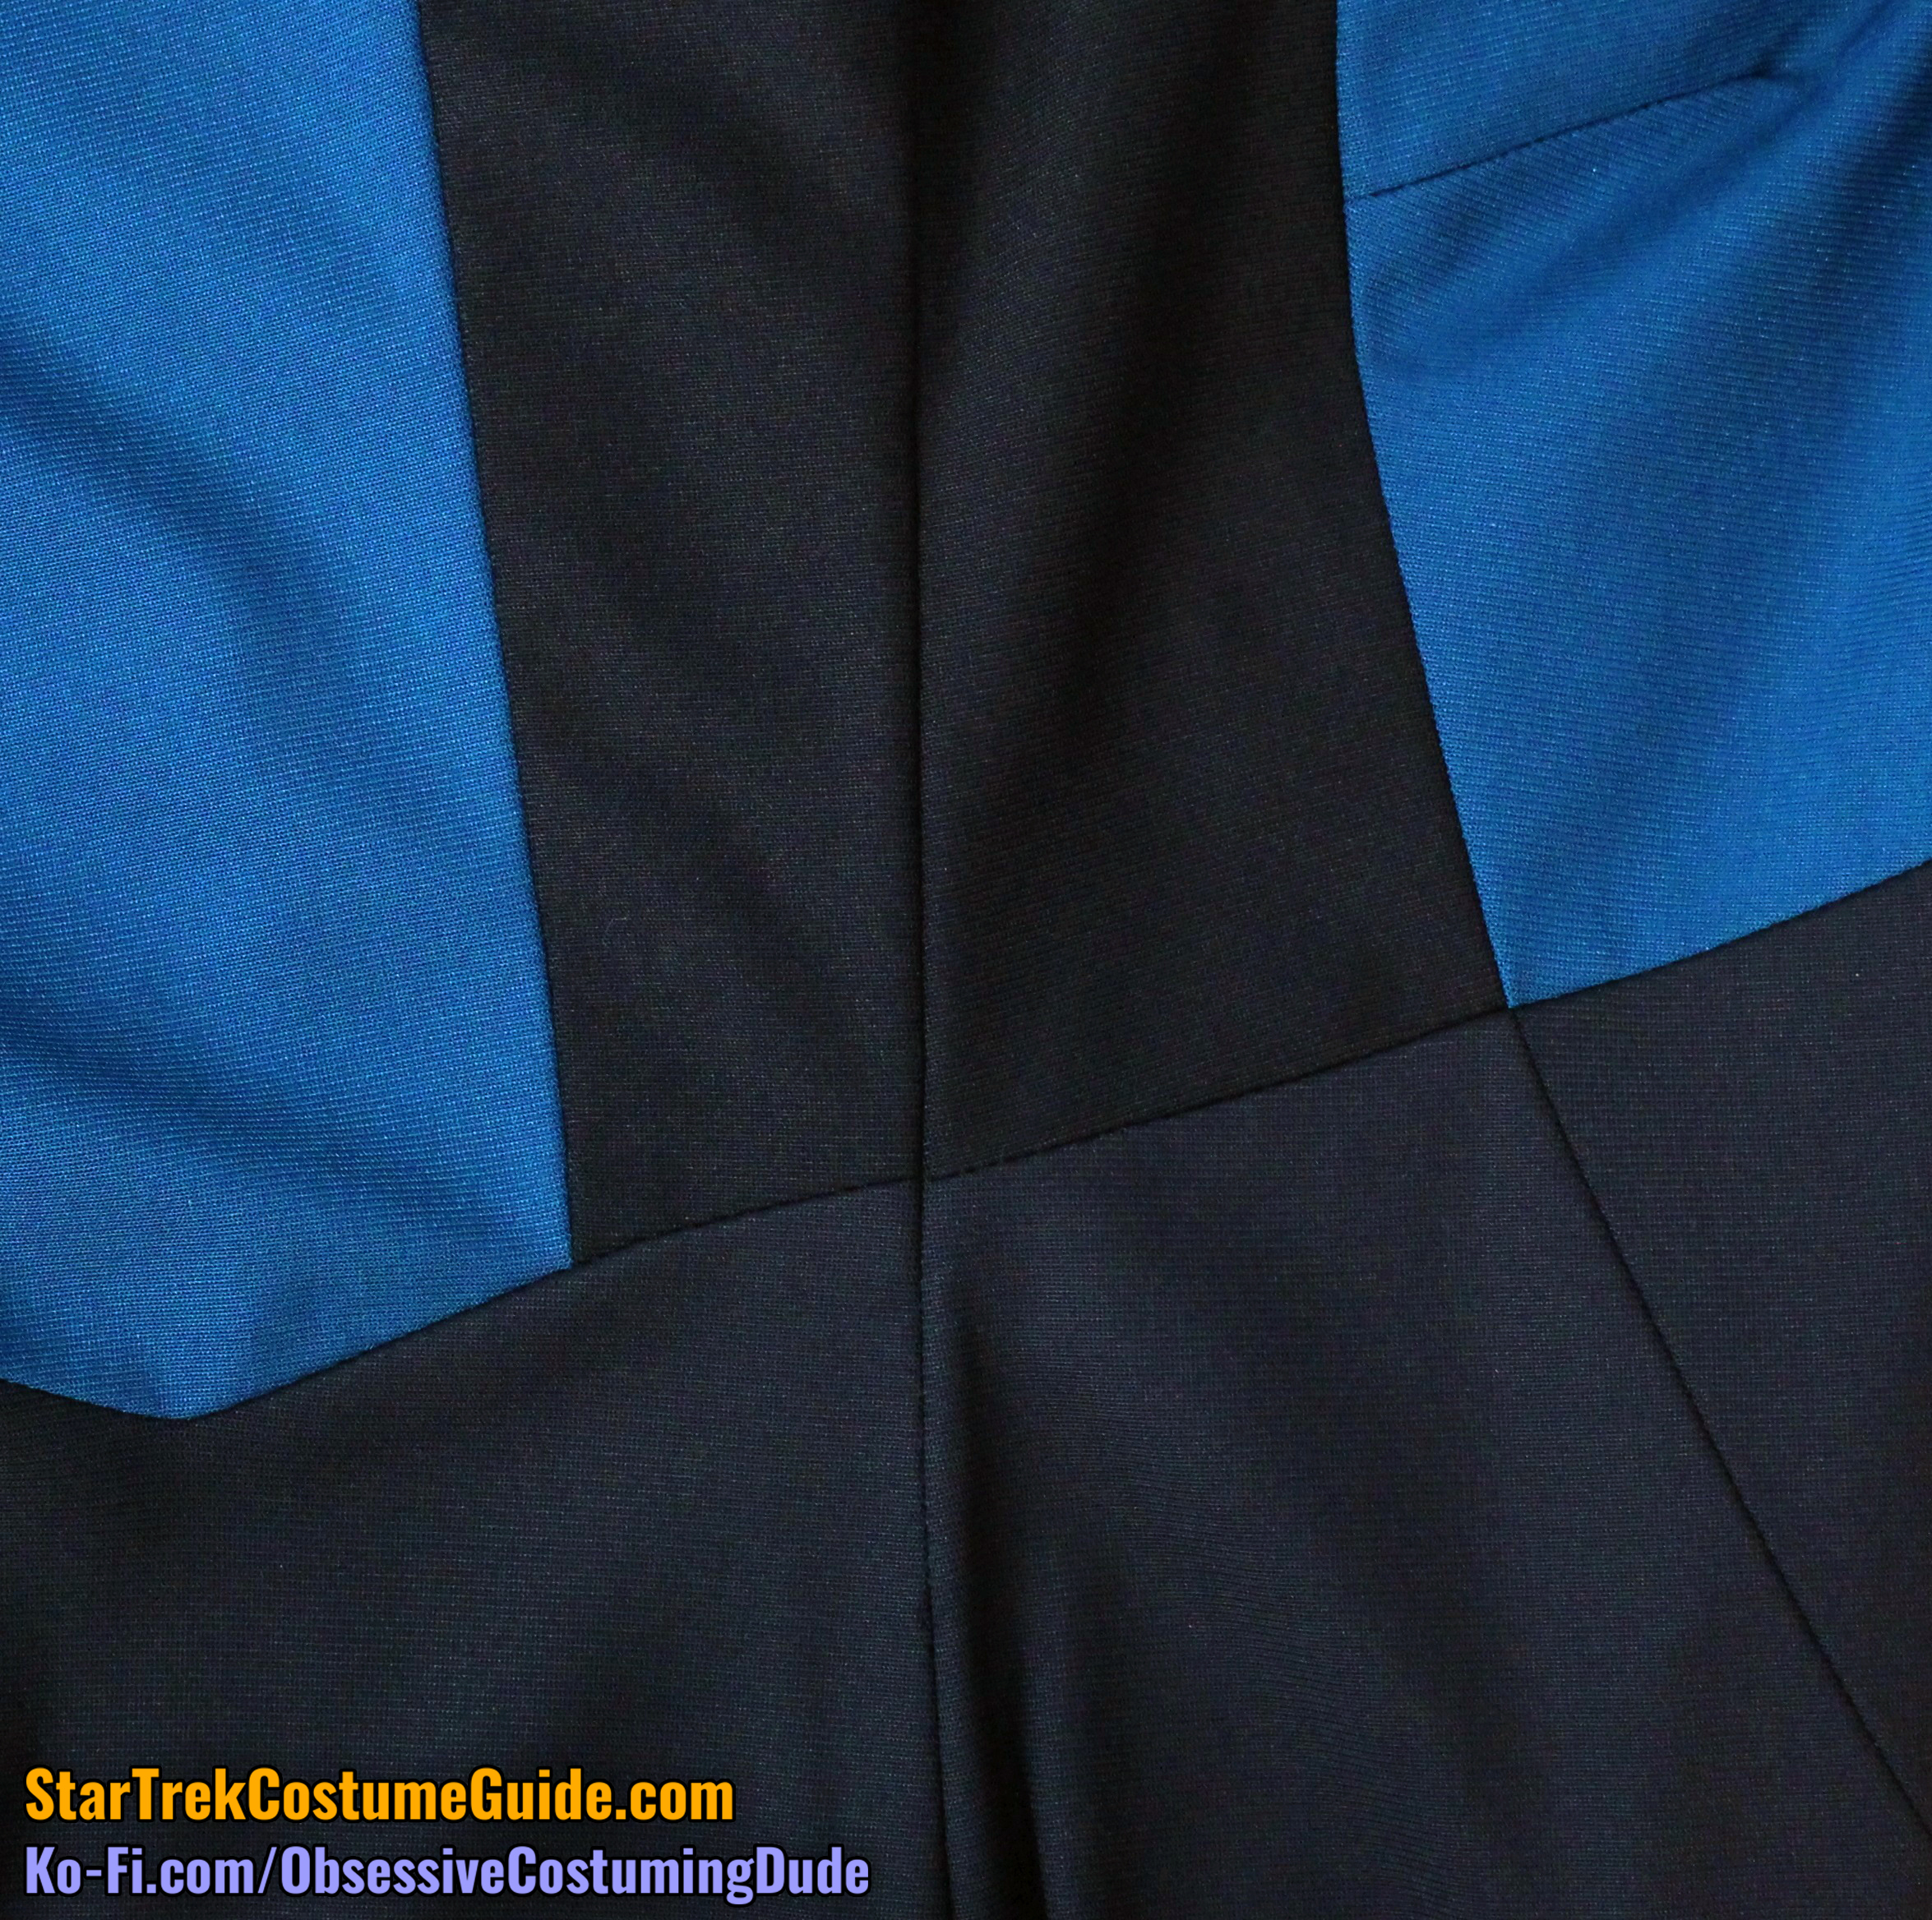
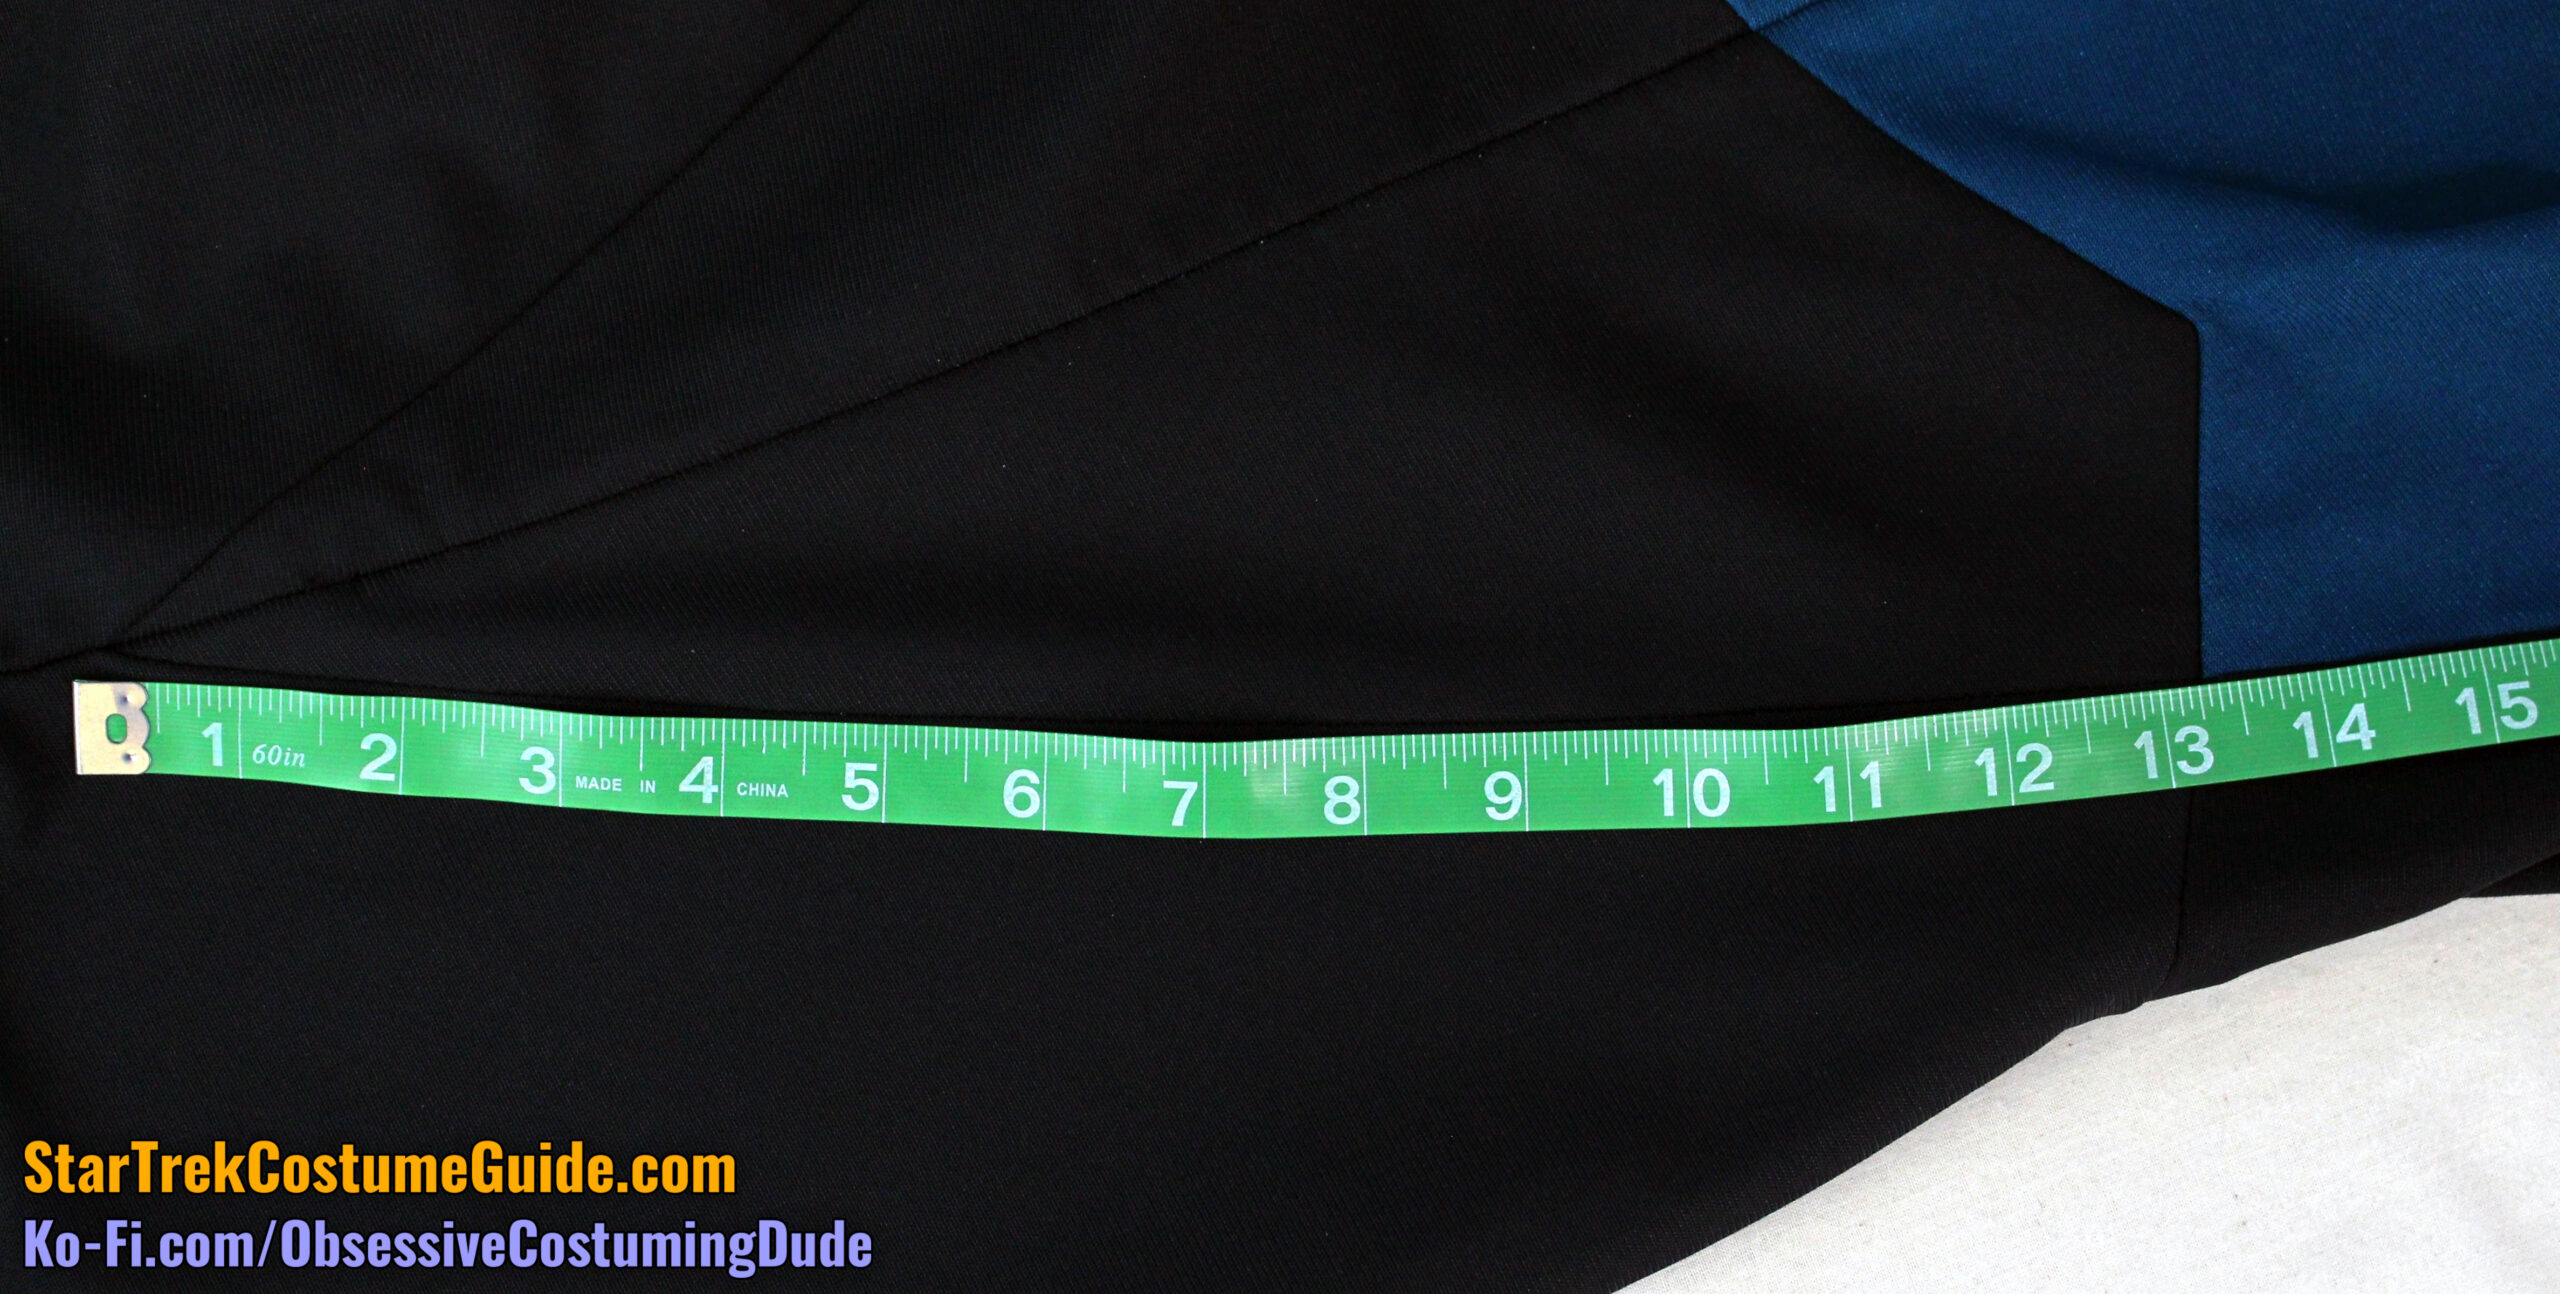
Keeping in mind that the pant legs are tapered and the fitted jumpsuit doesn’t want to lie flat on the table, here’s a look at the overall dimensions/proportions of the asymmetrical back design.
As you can see, it extends downward approximately 2 ½” from the left side back seam to the lower corner, then back up again approximately ⅞” from the corner to the right side back seam.
The right side back lower armscye was 3 ⅜”, measured from the side back to side seams.
The right side back lower seam was just shy of 2”, with a slant of ⅝”.
The left side back lower armscye was a tiny bit shorter than the right, measuring 3 ¼” from the side back to side seams.
The right side back lower seam was 2 ⅛”, also with a slant of ⅝”.
Like the screen-used Tasha Yar jumpsuit I examined, the side front and side back panels on this Beverly Crusher jumpsuit were not quite proportionate.
The side back panels were slightly narrower toward the waist, again suggesting that the jumpsuit may have been taken in across the back after its initial construction and a test fitting.
However, in this case, observe how the diagonal waist seam lines were adjusted so they properly aligned at the side seams!
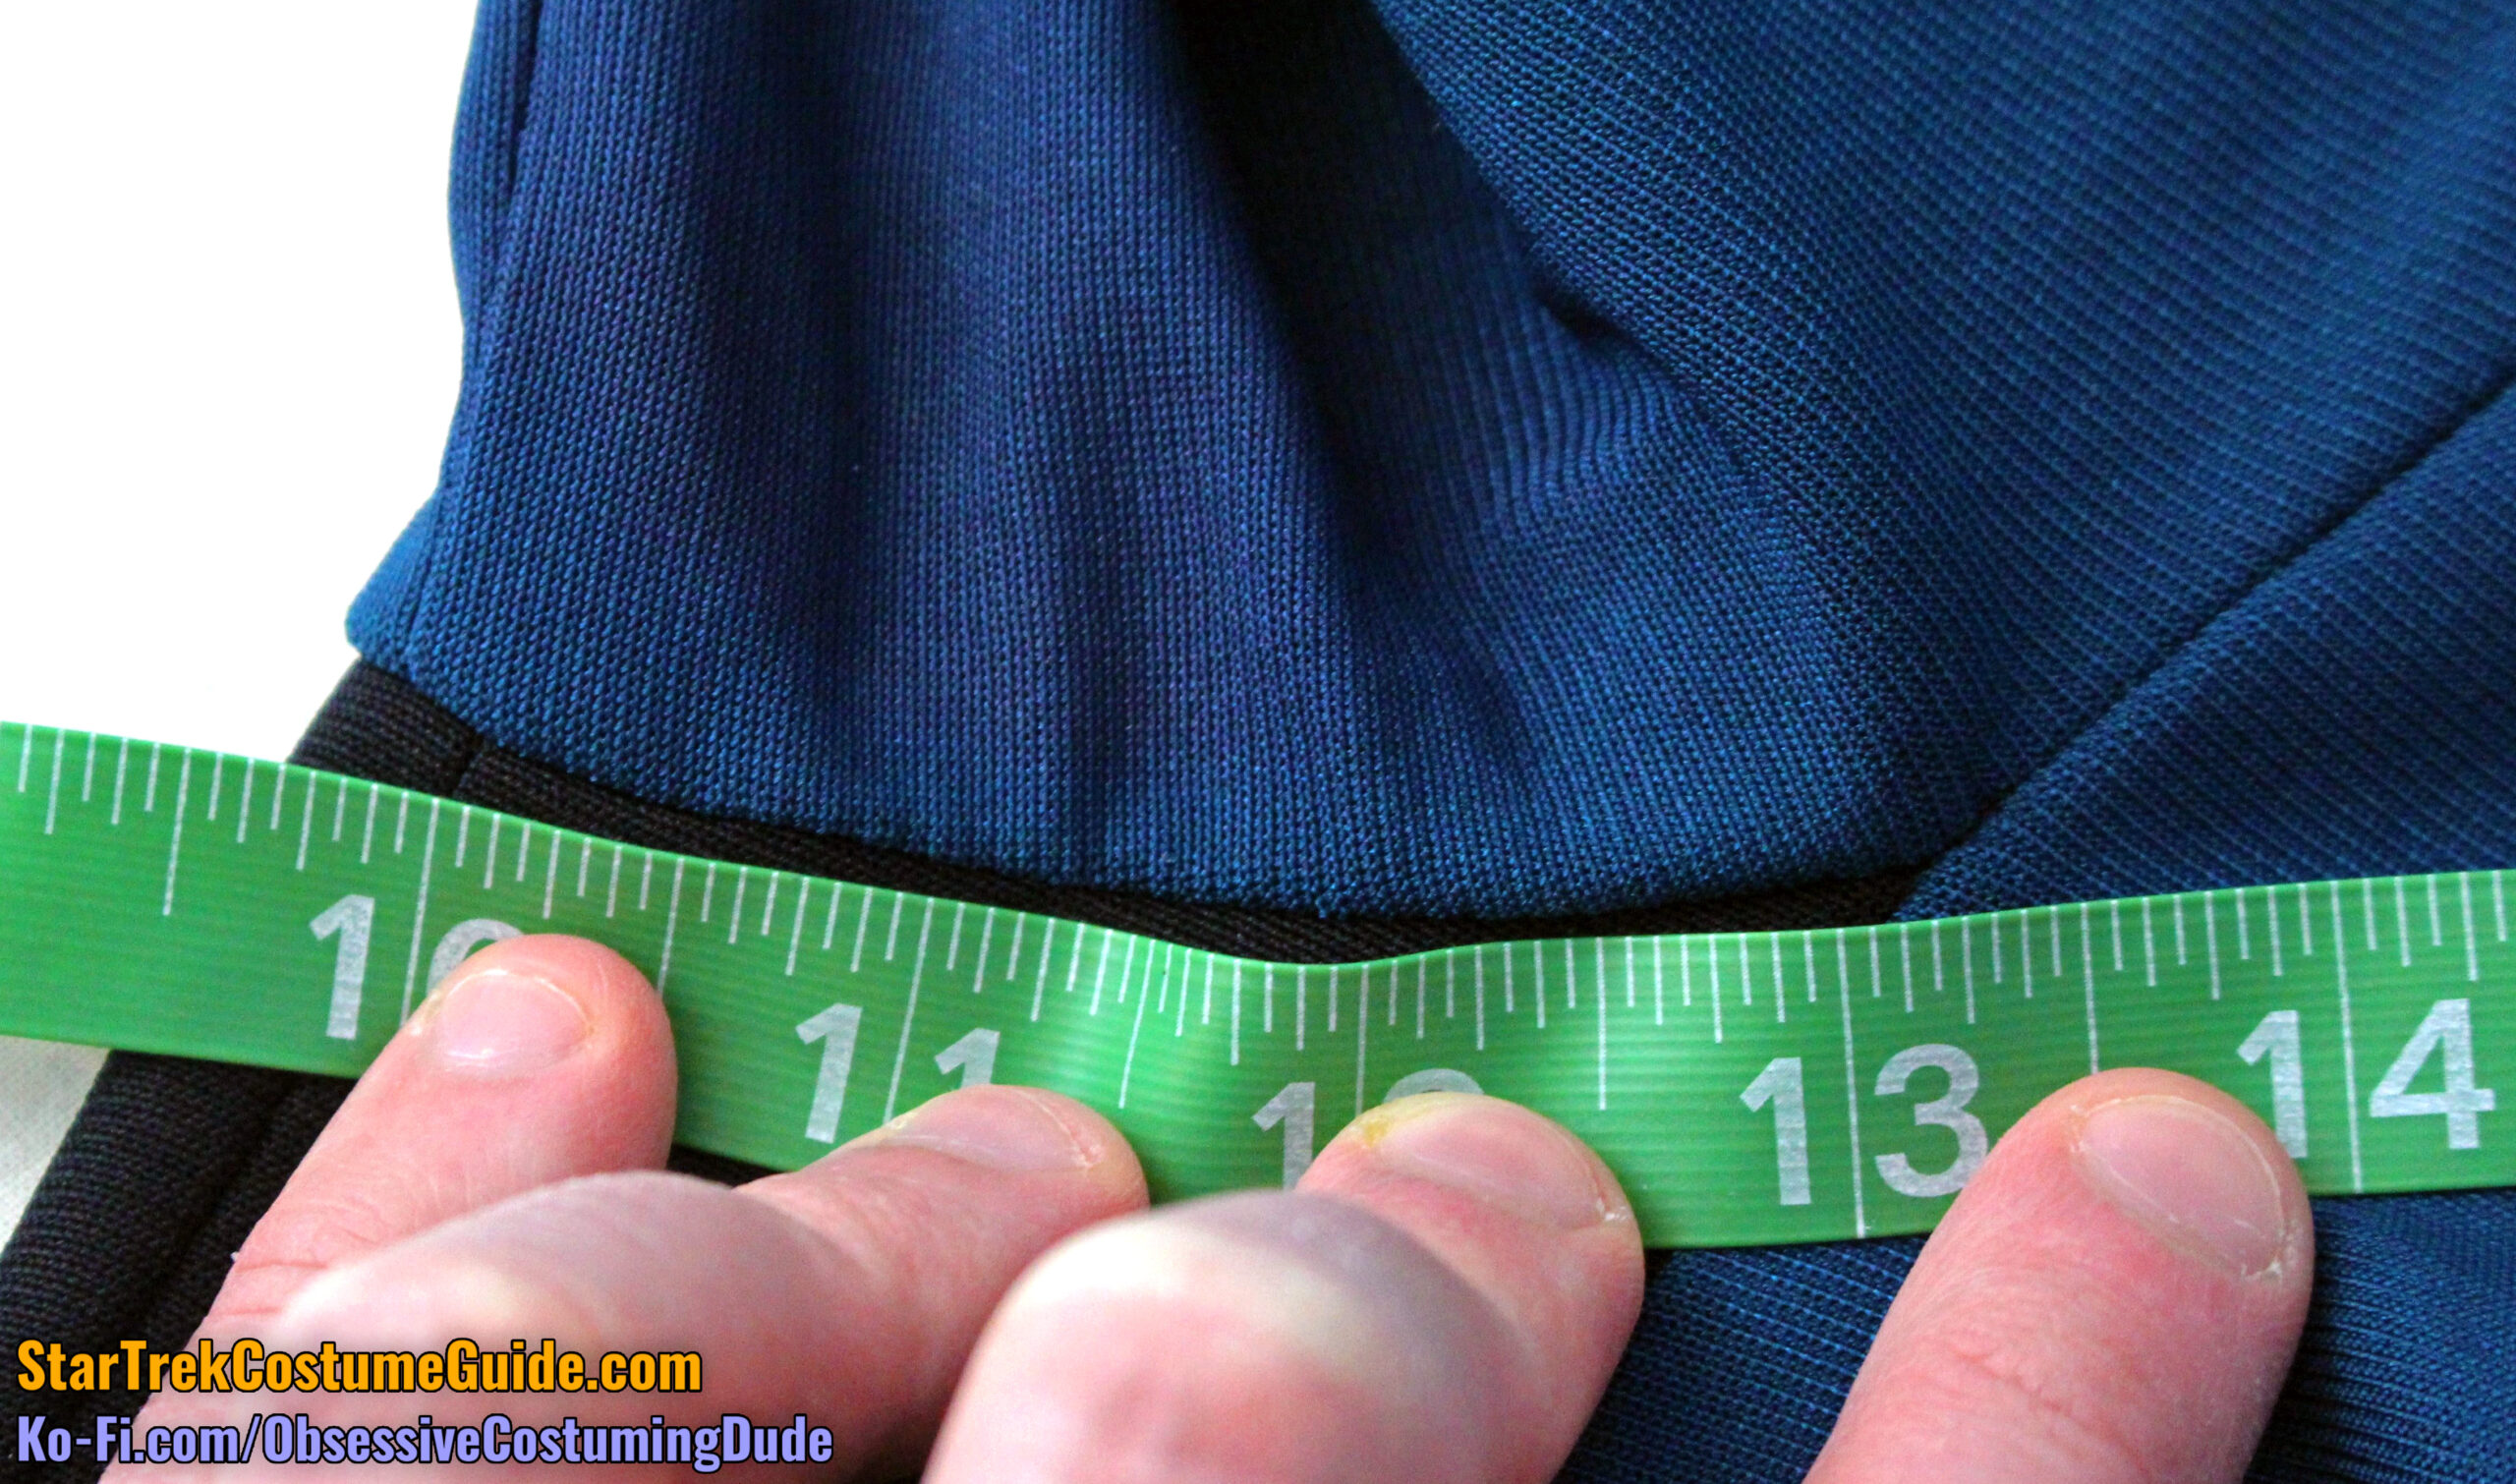
The lower center front seam line was 11”, measured from the asymmetrical front insert to the intersection of lower front panel seams.
The lower right front seam line was 11”, and the lower left front seam line was 13 ¼”.
The lower front crotch seam was 4”, measured from the intersection of lower front panel seams to the inseam.
Speaking of which, the inseam was 30 ½”, although I seem to have neglected to take a photo of that particular measurement …
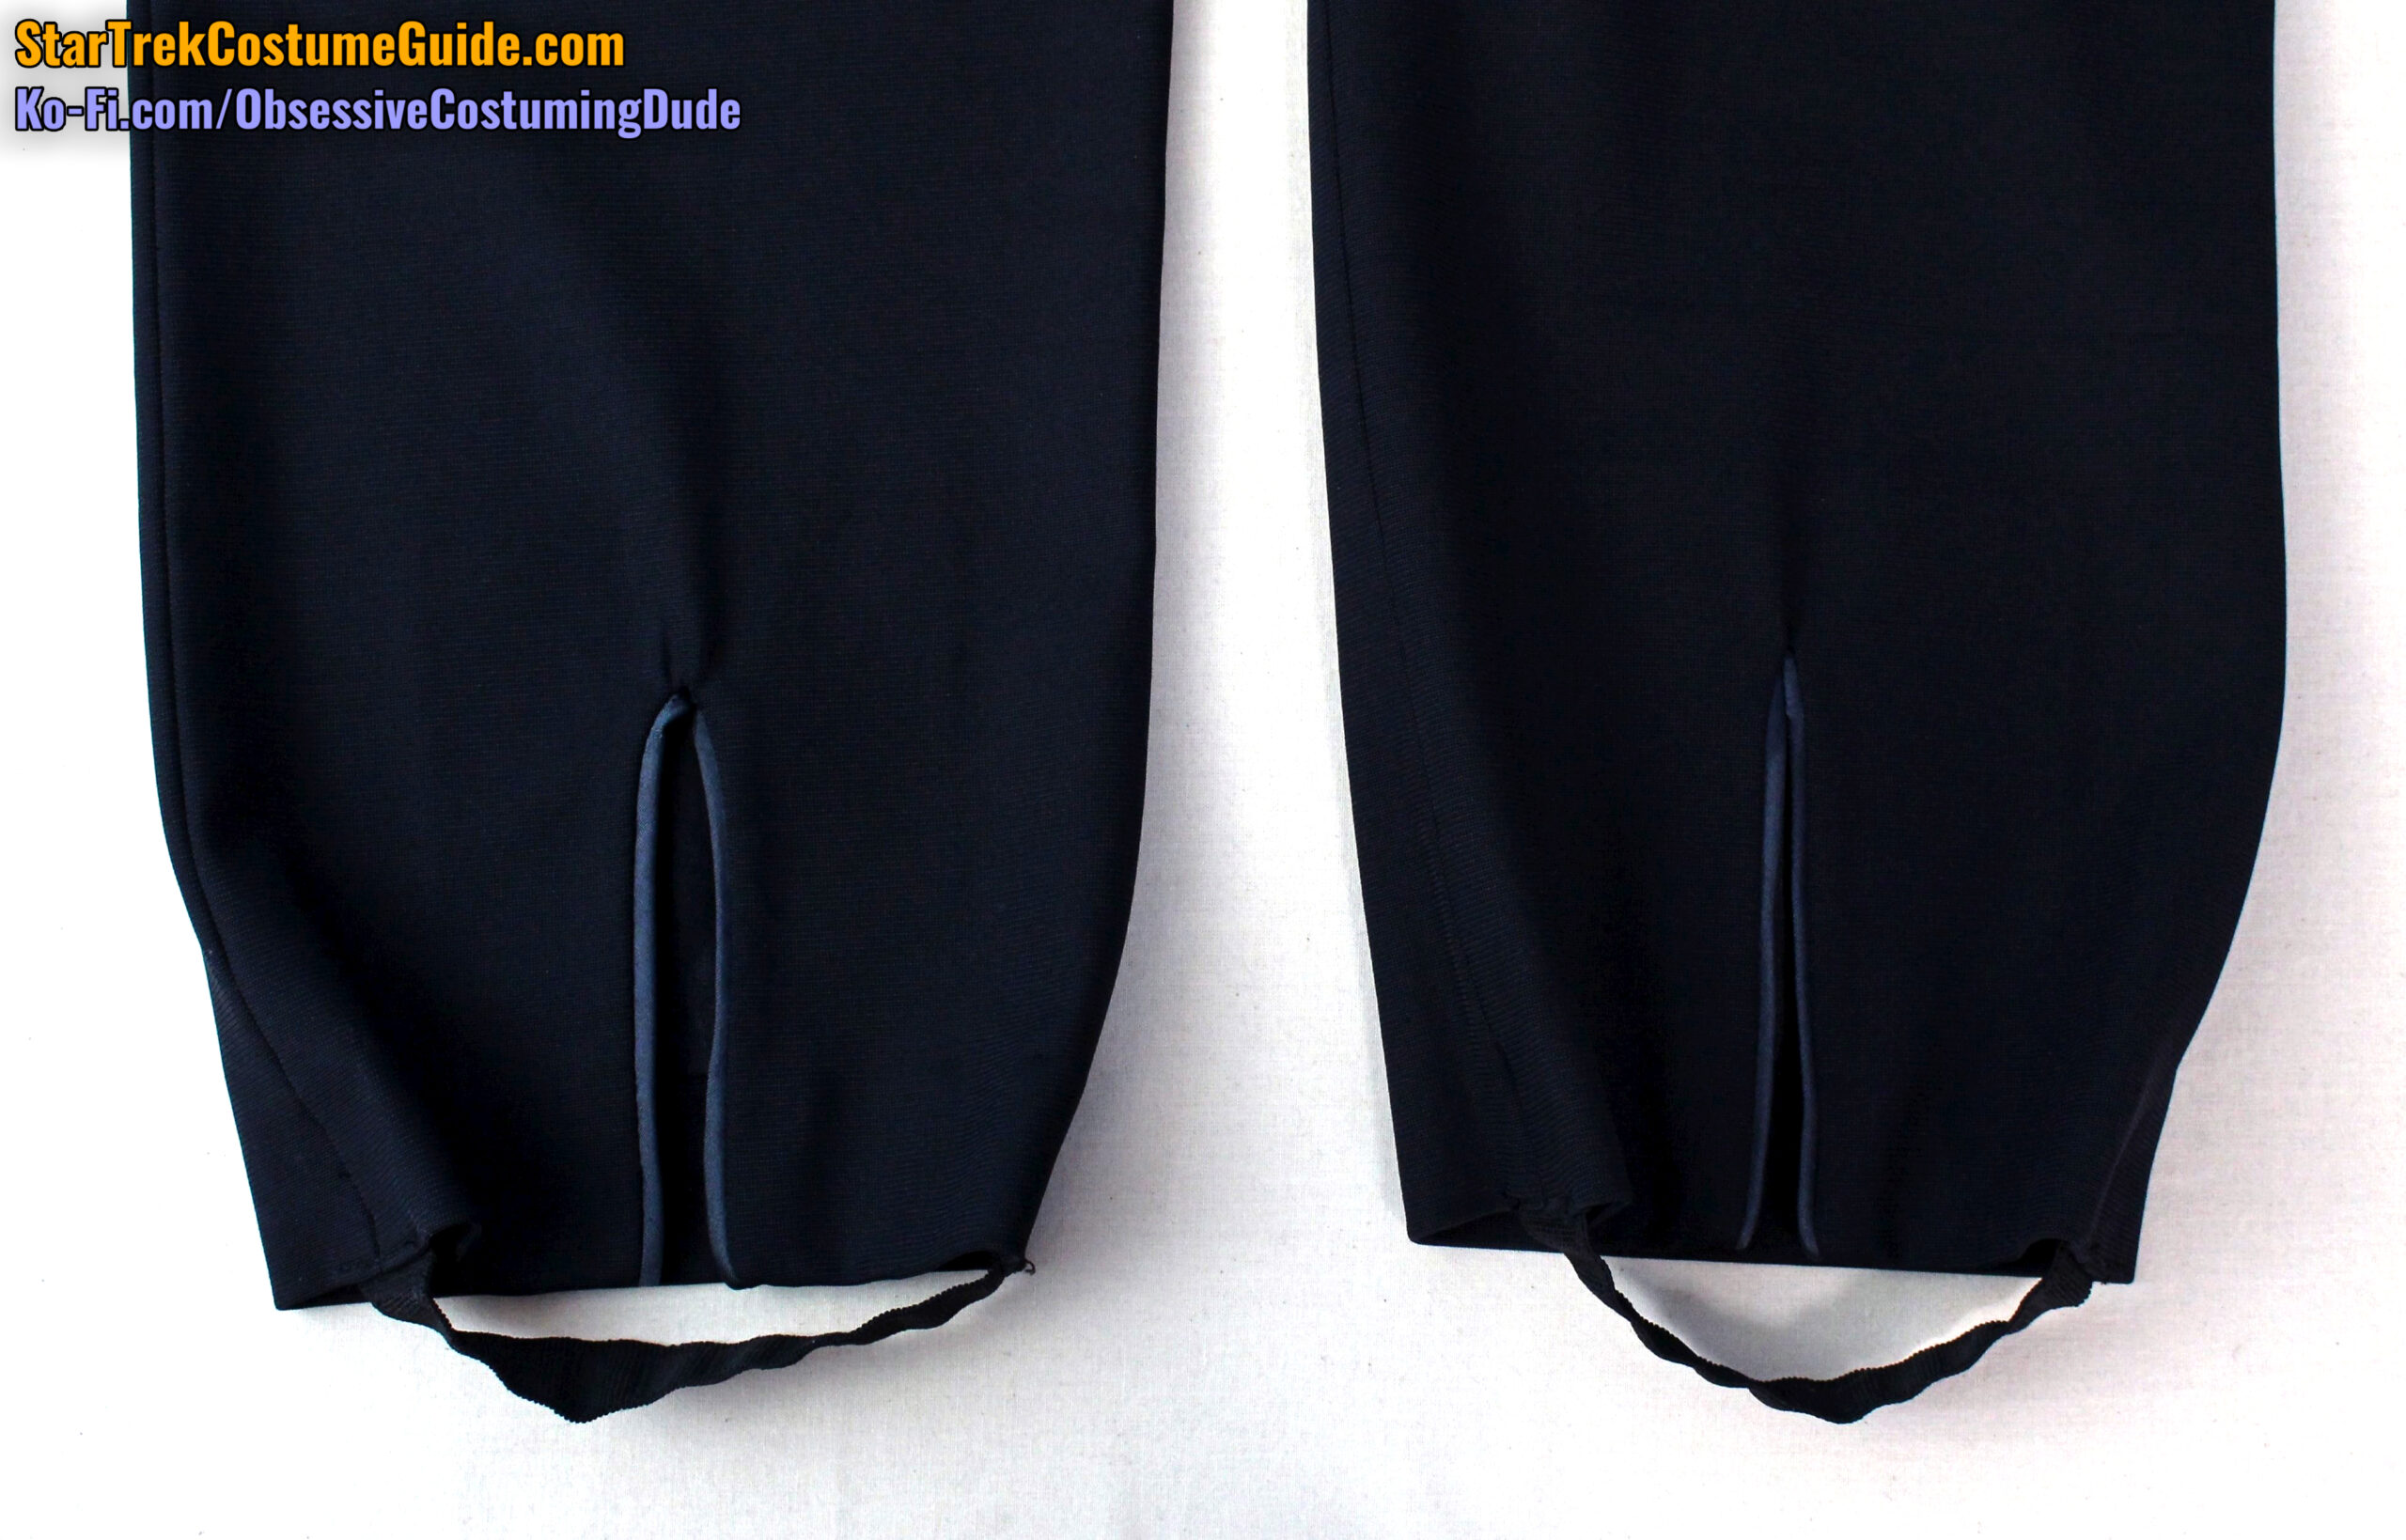
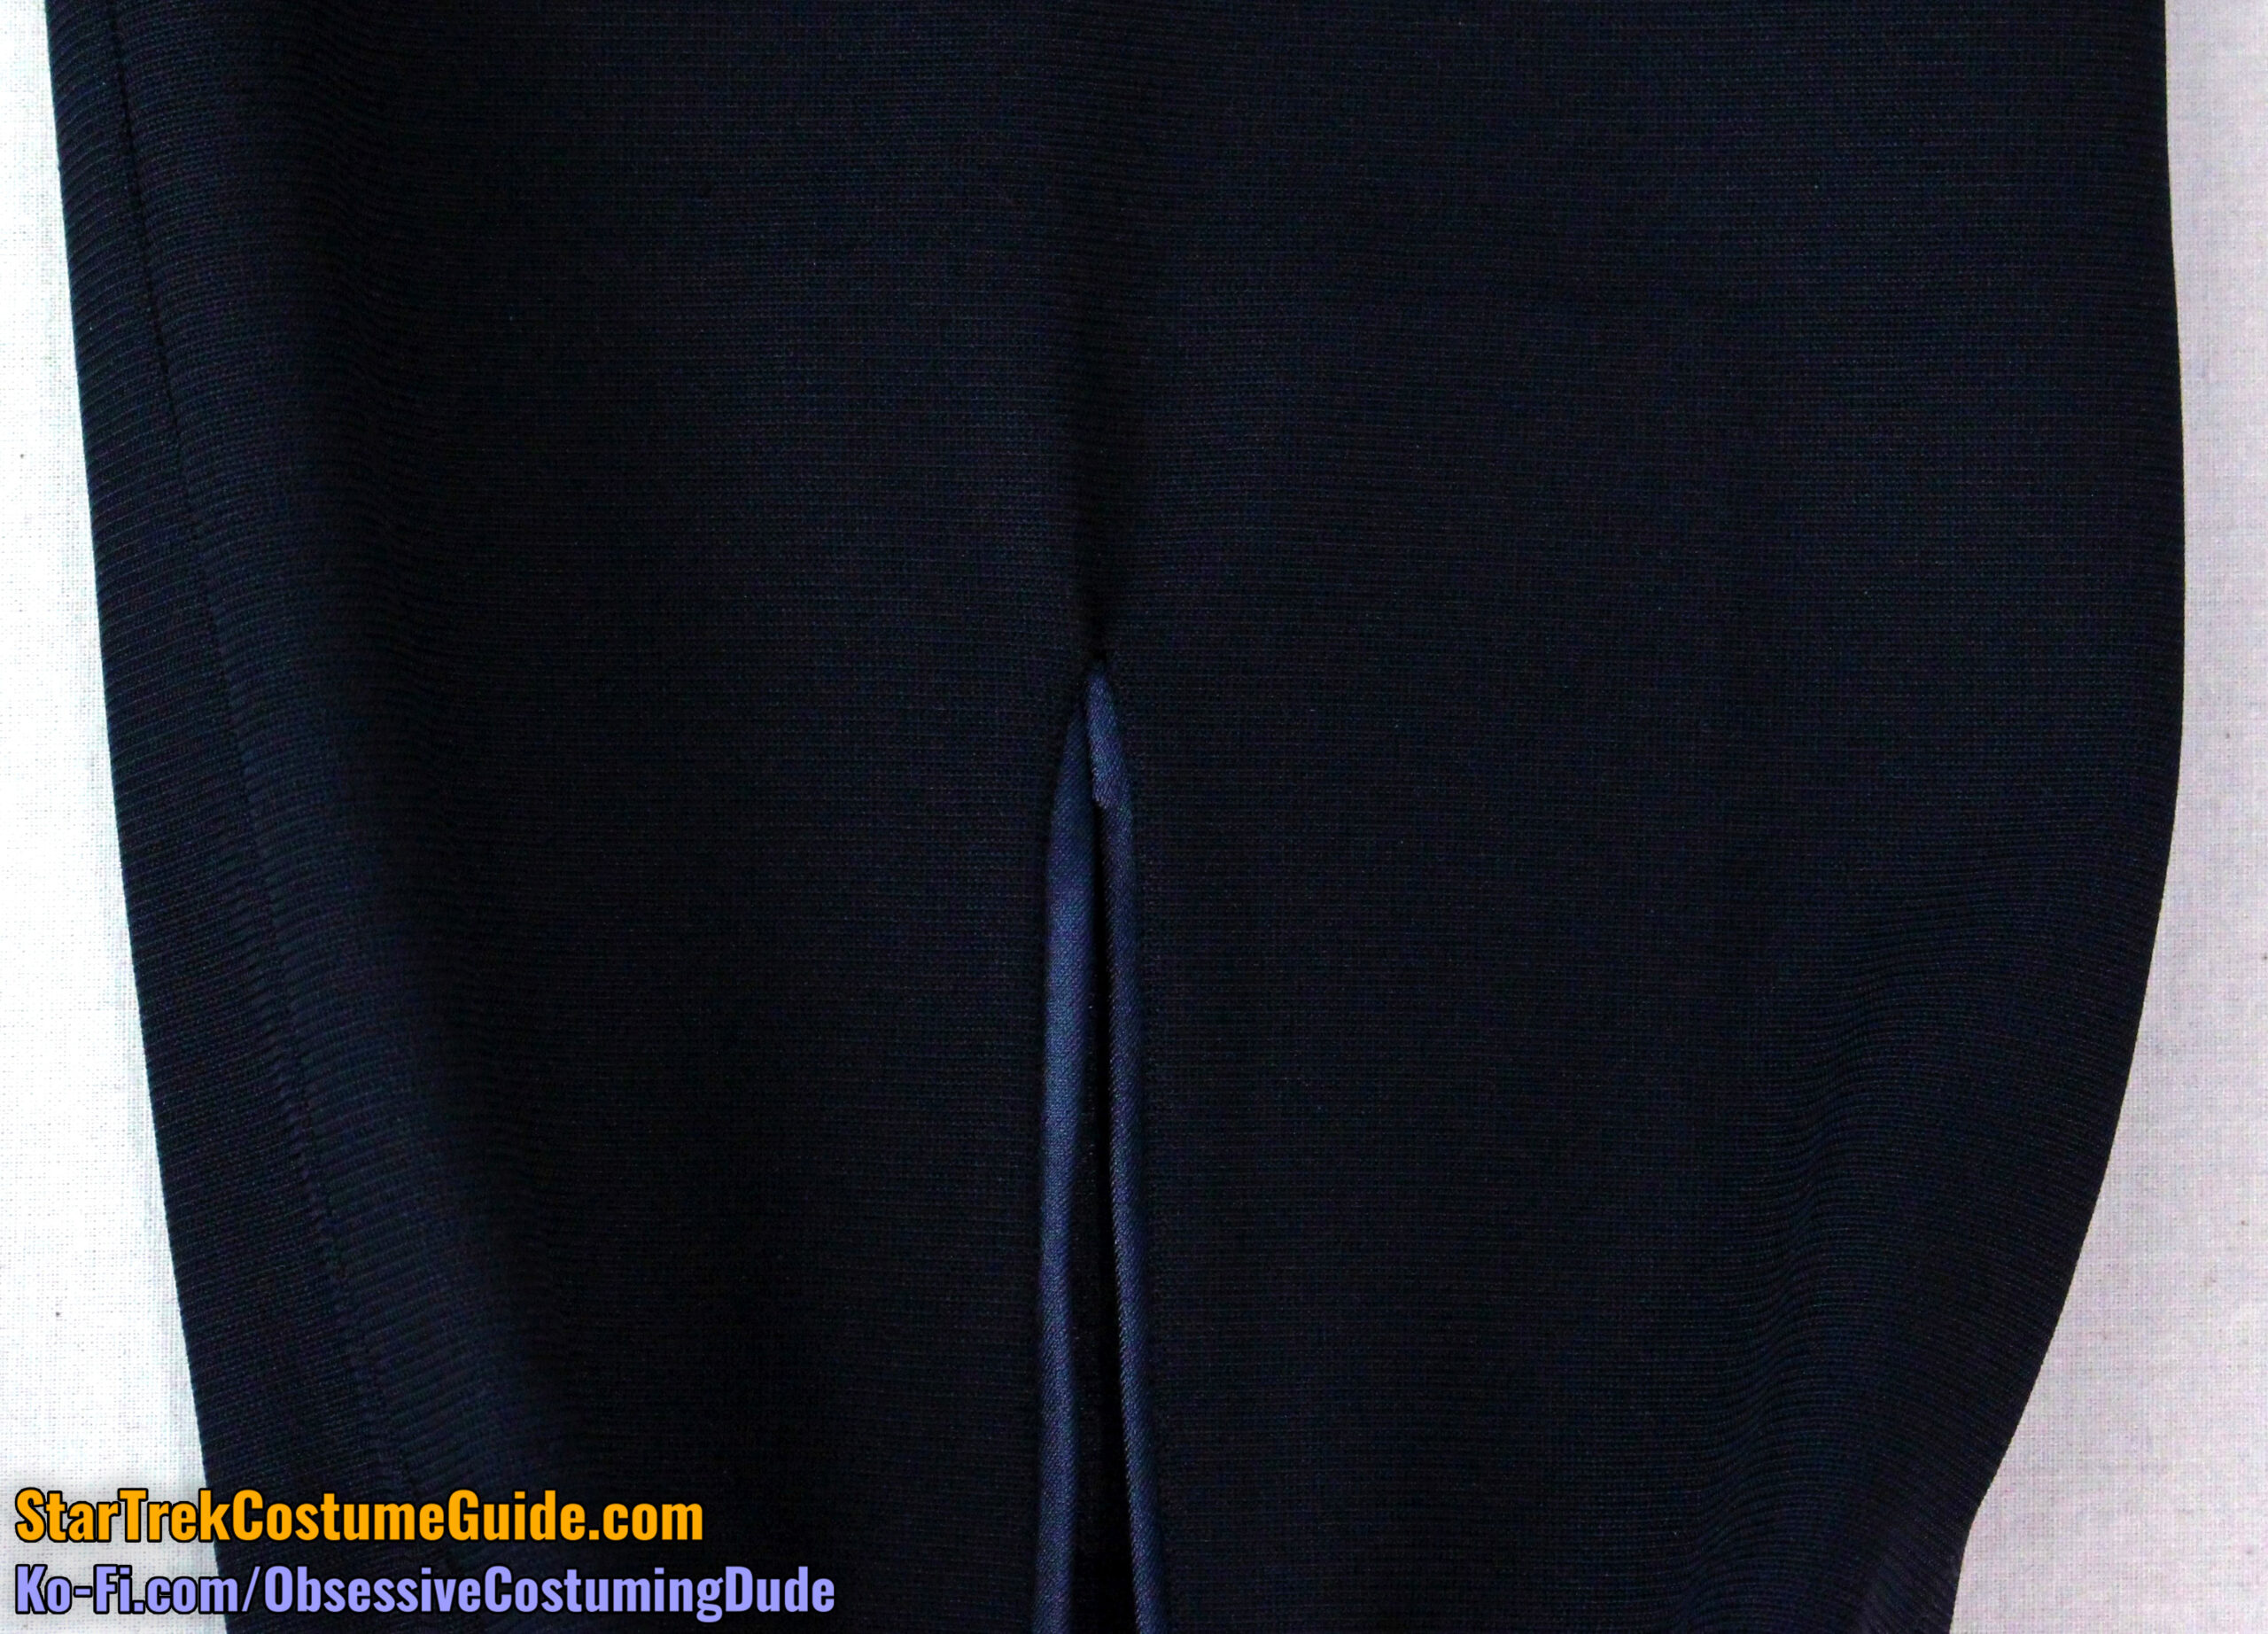
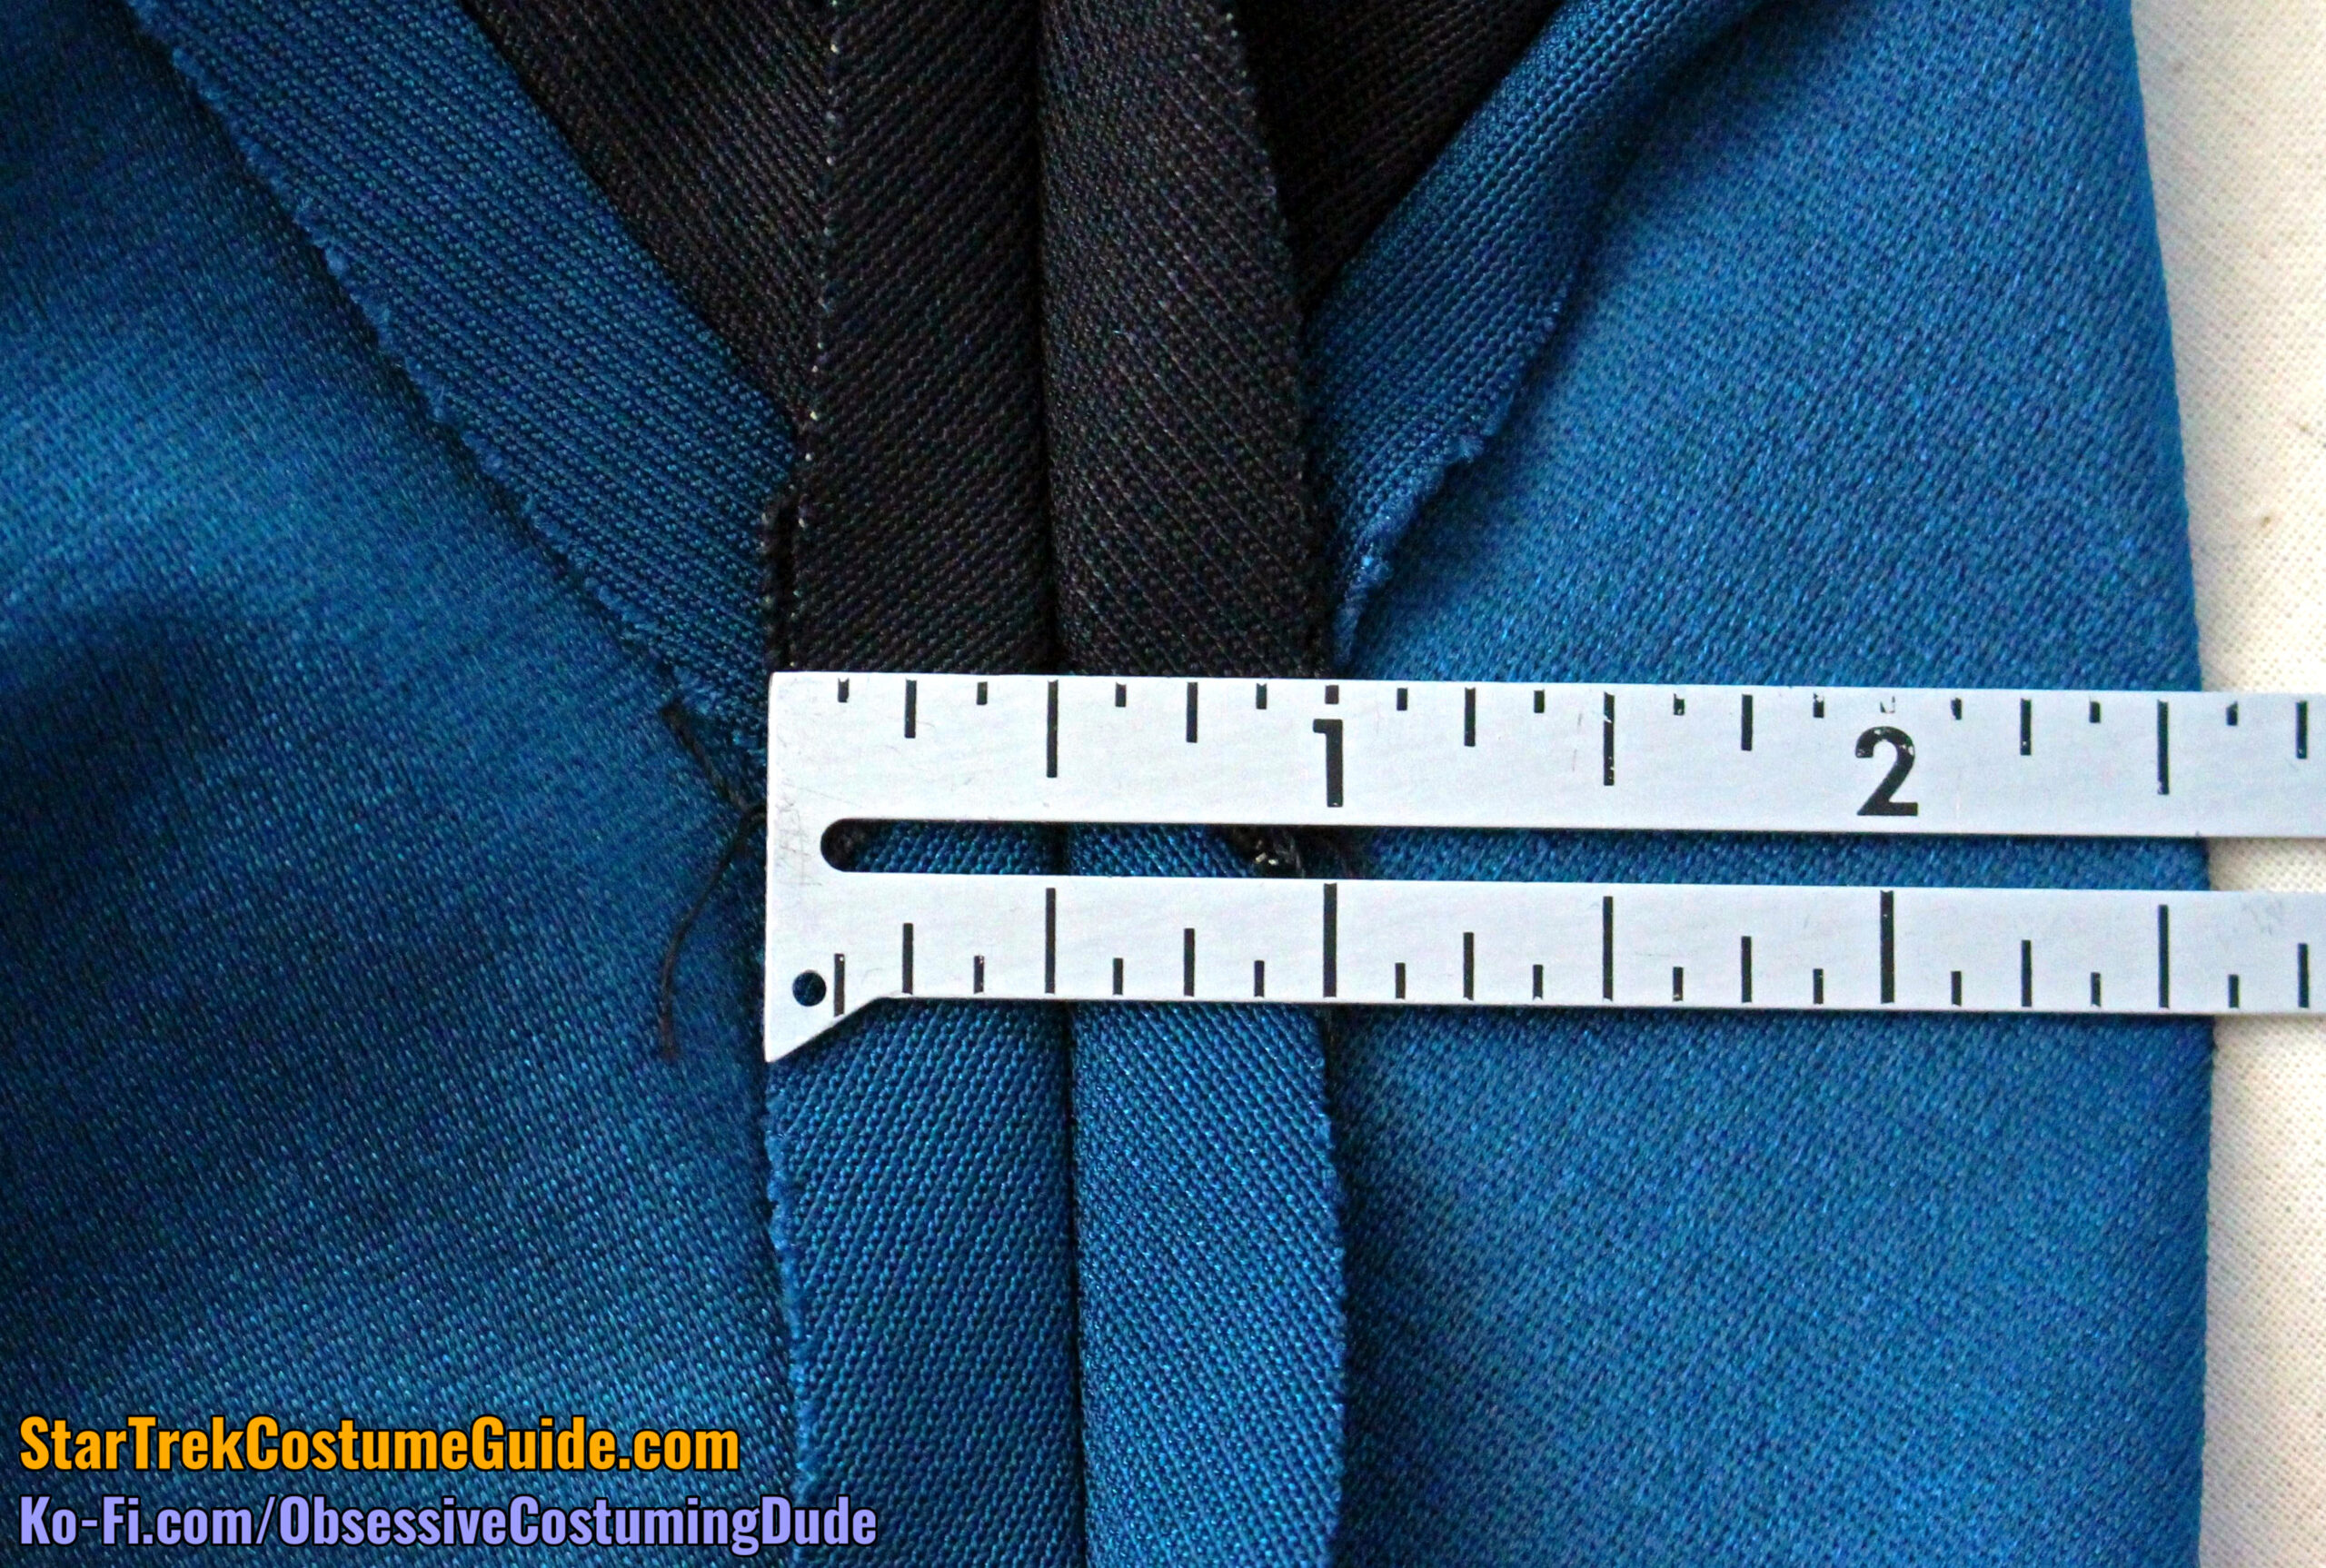
Being an early-style uniform, the slits on the lower front pant legs were accented with (theoretically division-colored) trim.
However, like the aforementioned neckline/yoke trim, this was gray rather than teal.
(Also note the ubiquitous elastic stirrups.)
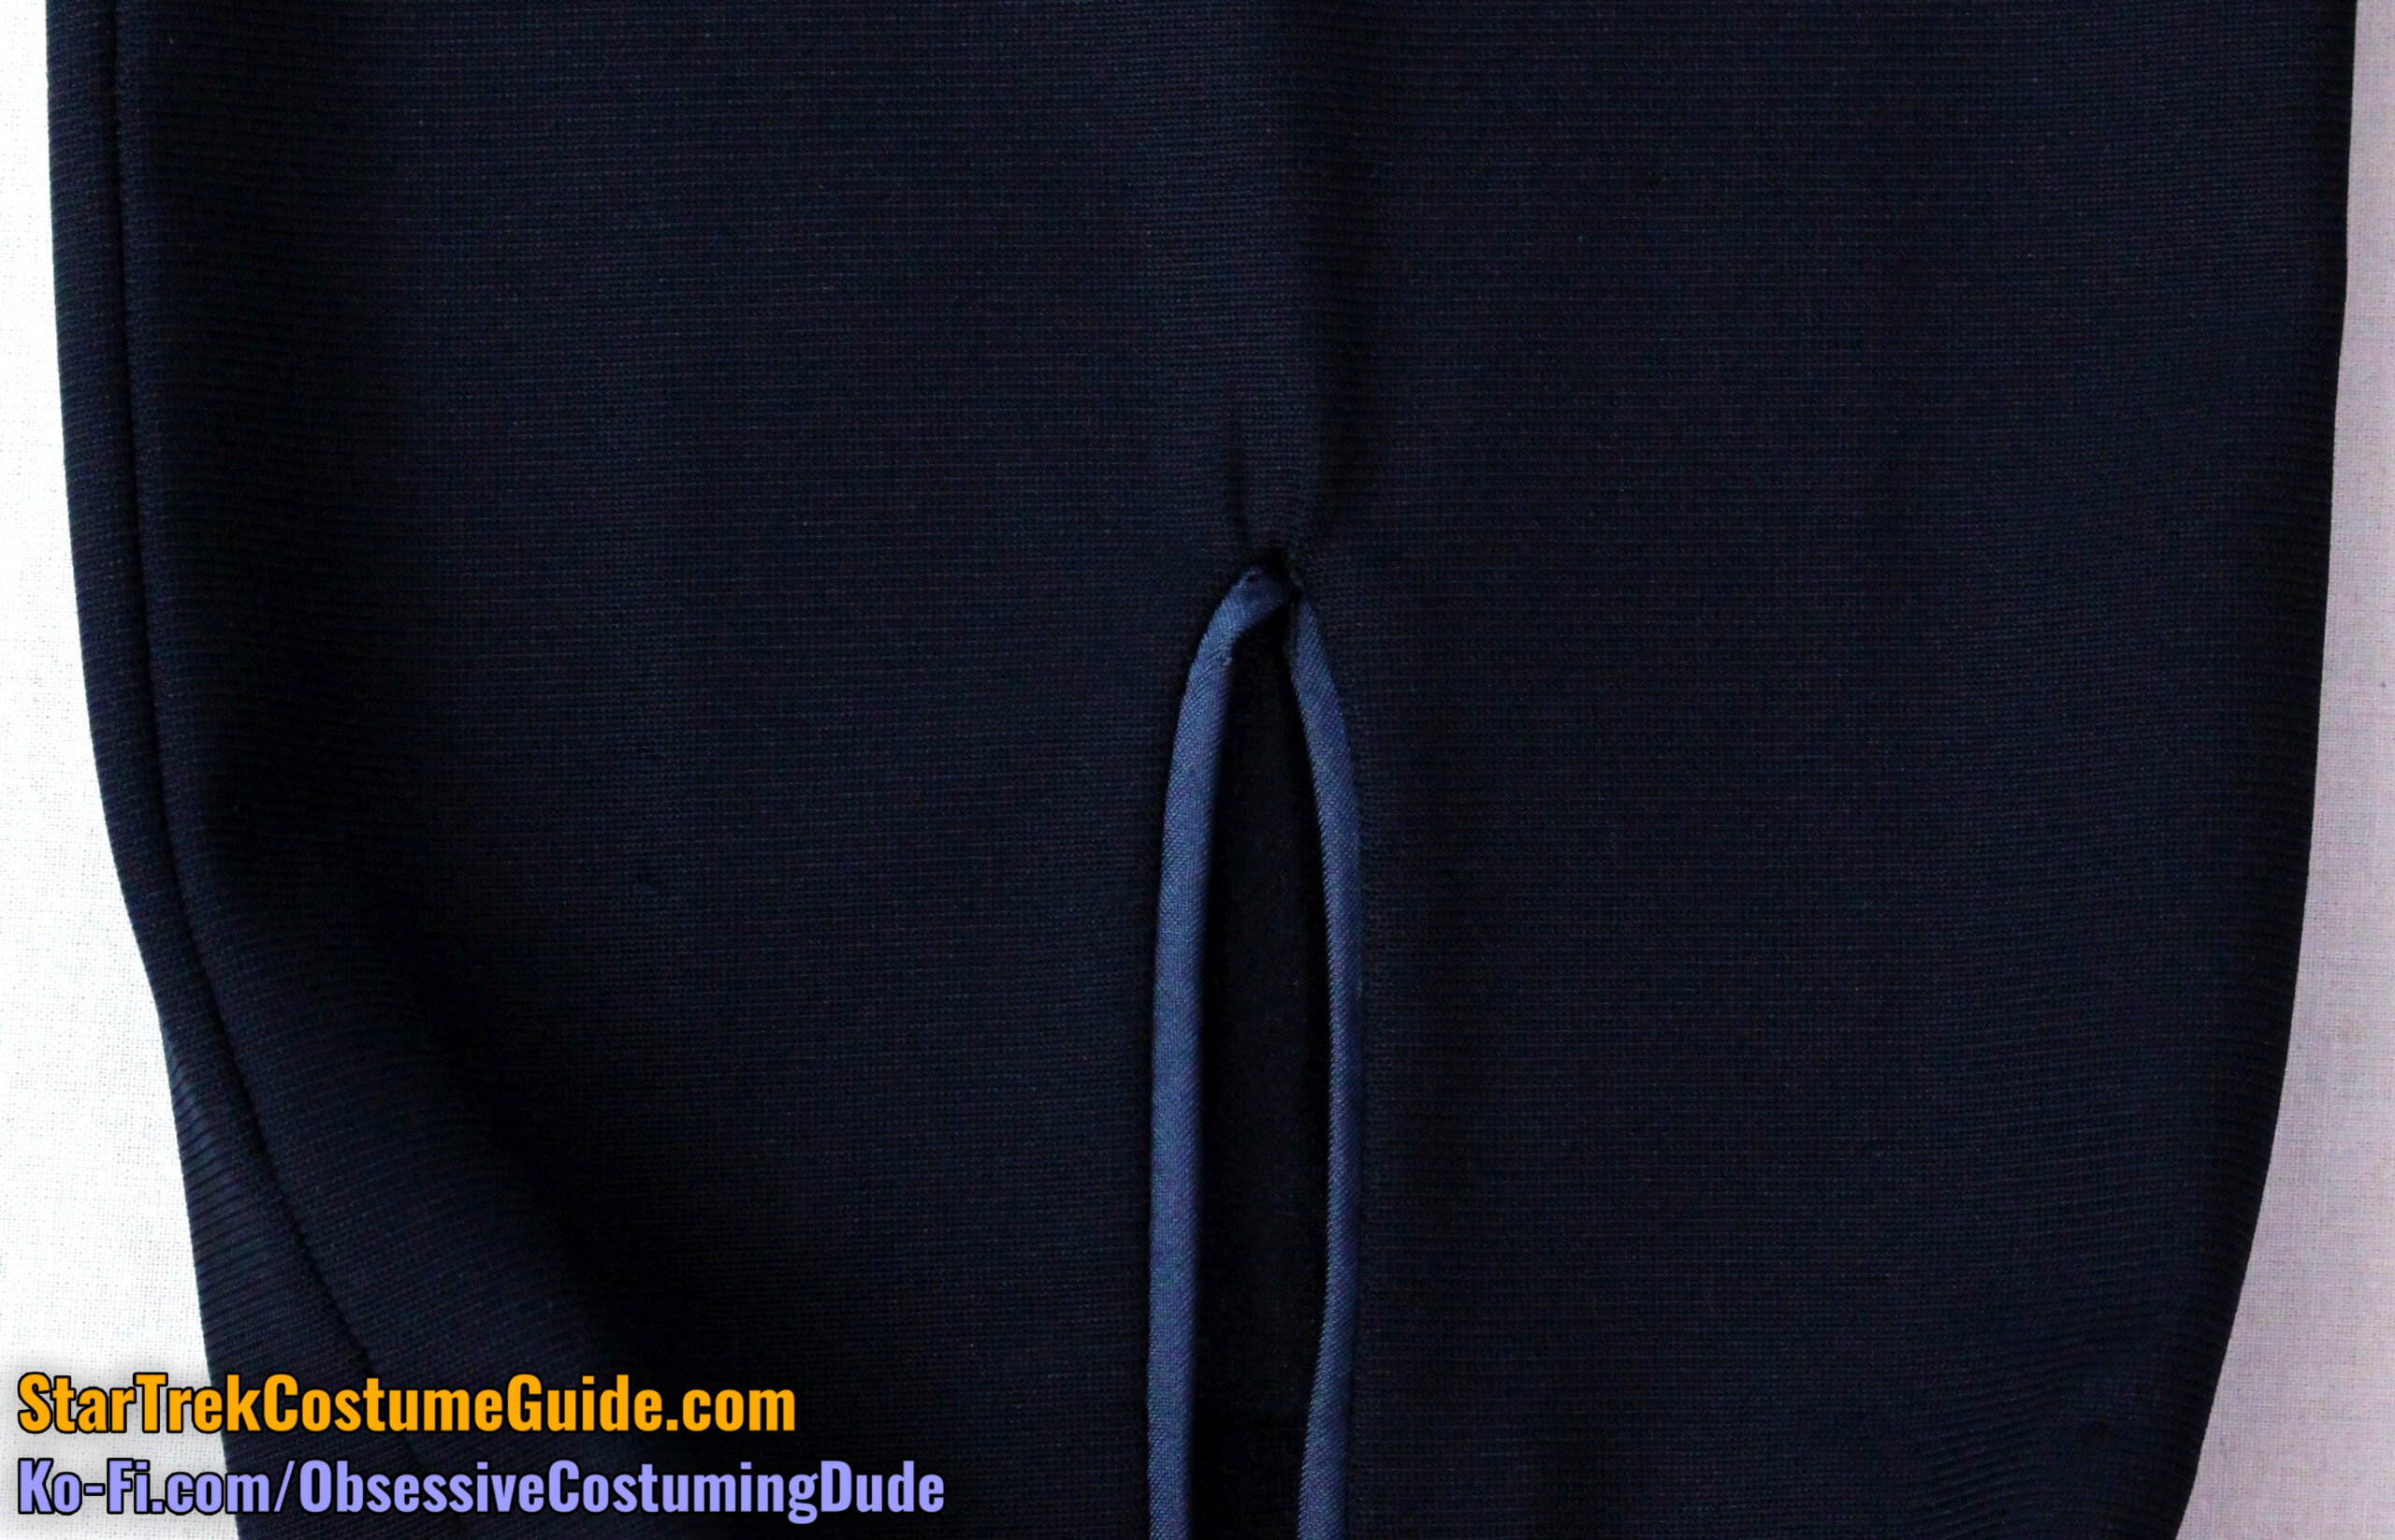
Although the construction technique for trim on the lower pant legs was the same as the screen-used Tasha Yar jumpsuit I examined, one pant leg definitely “a cut above” the other.
(I can personally attest to the difficulty of this particular method, and I prefer the season 2 method – both as a sewer, and as a fan.)
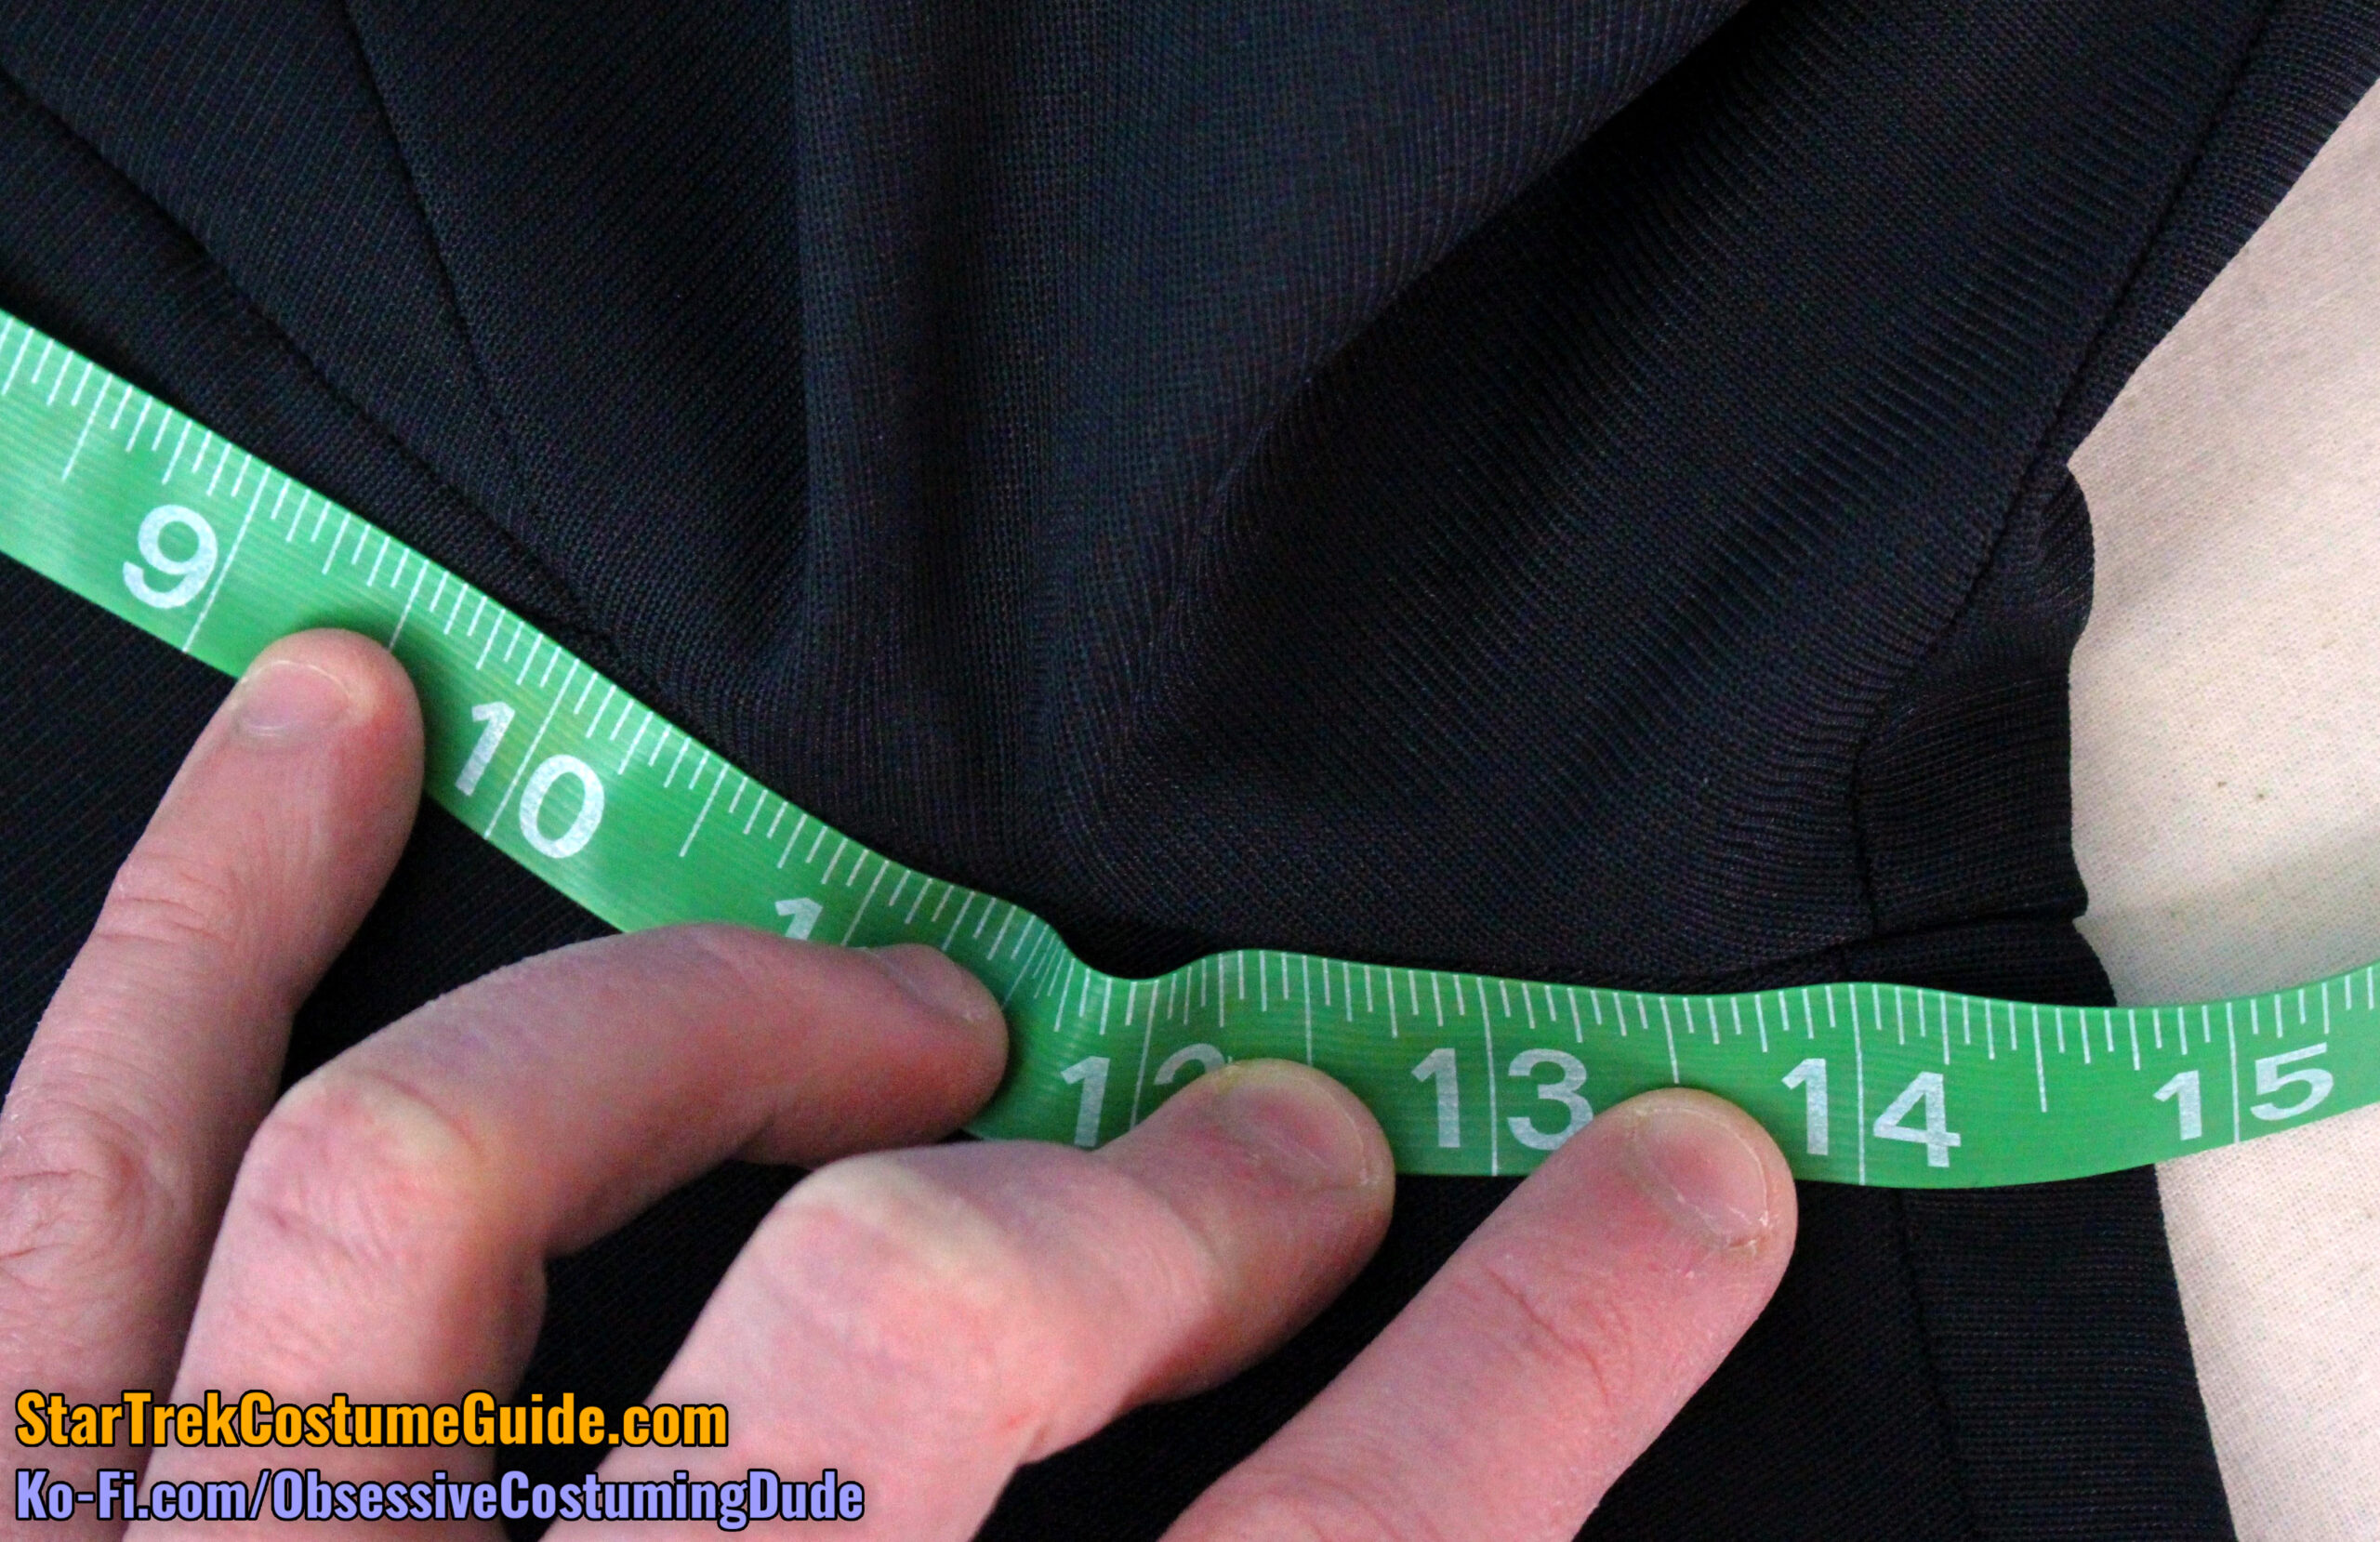
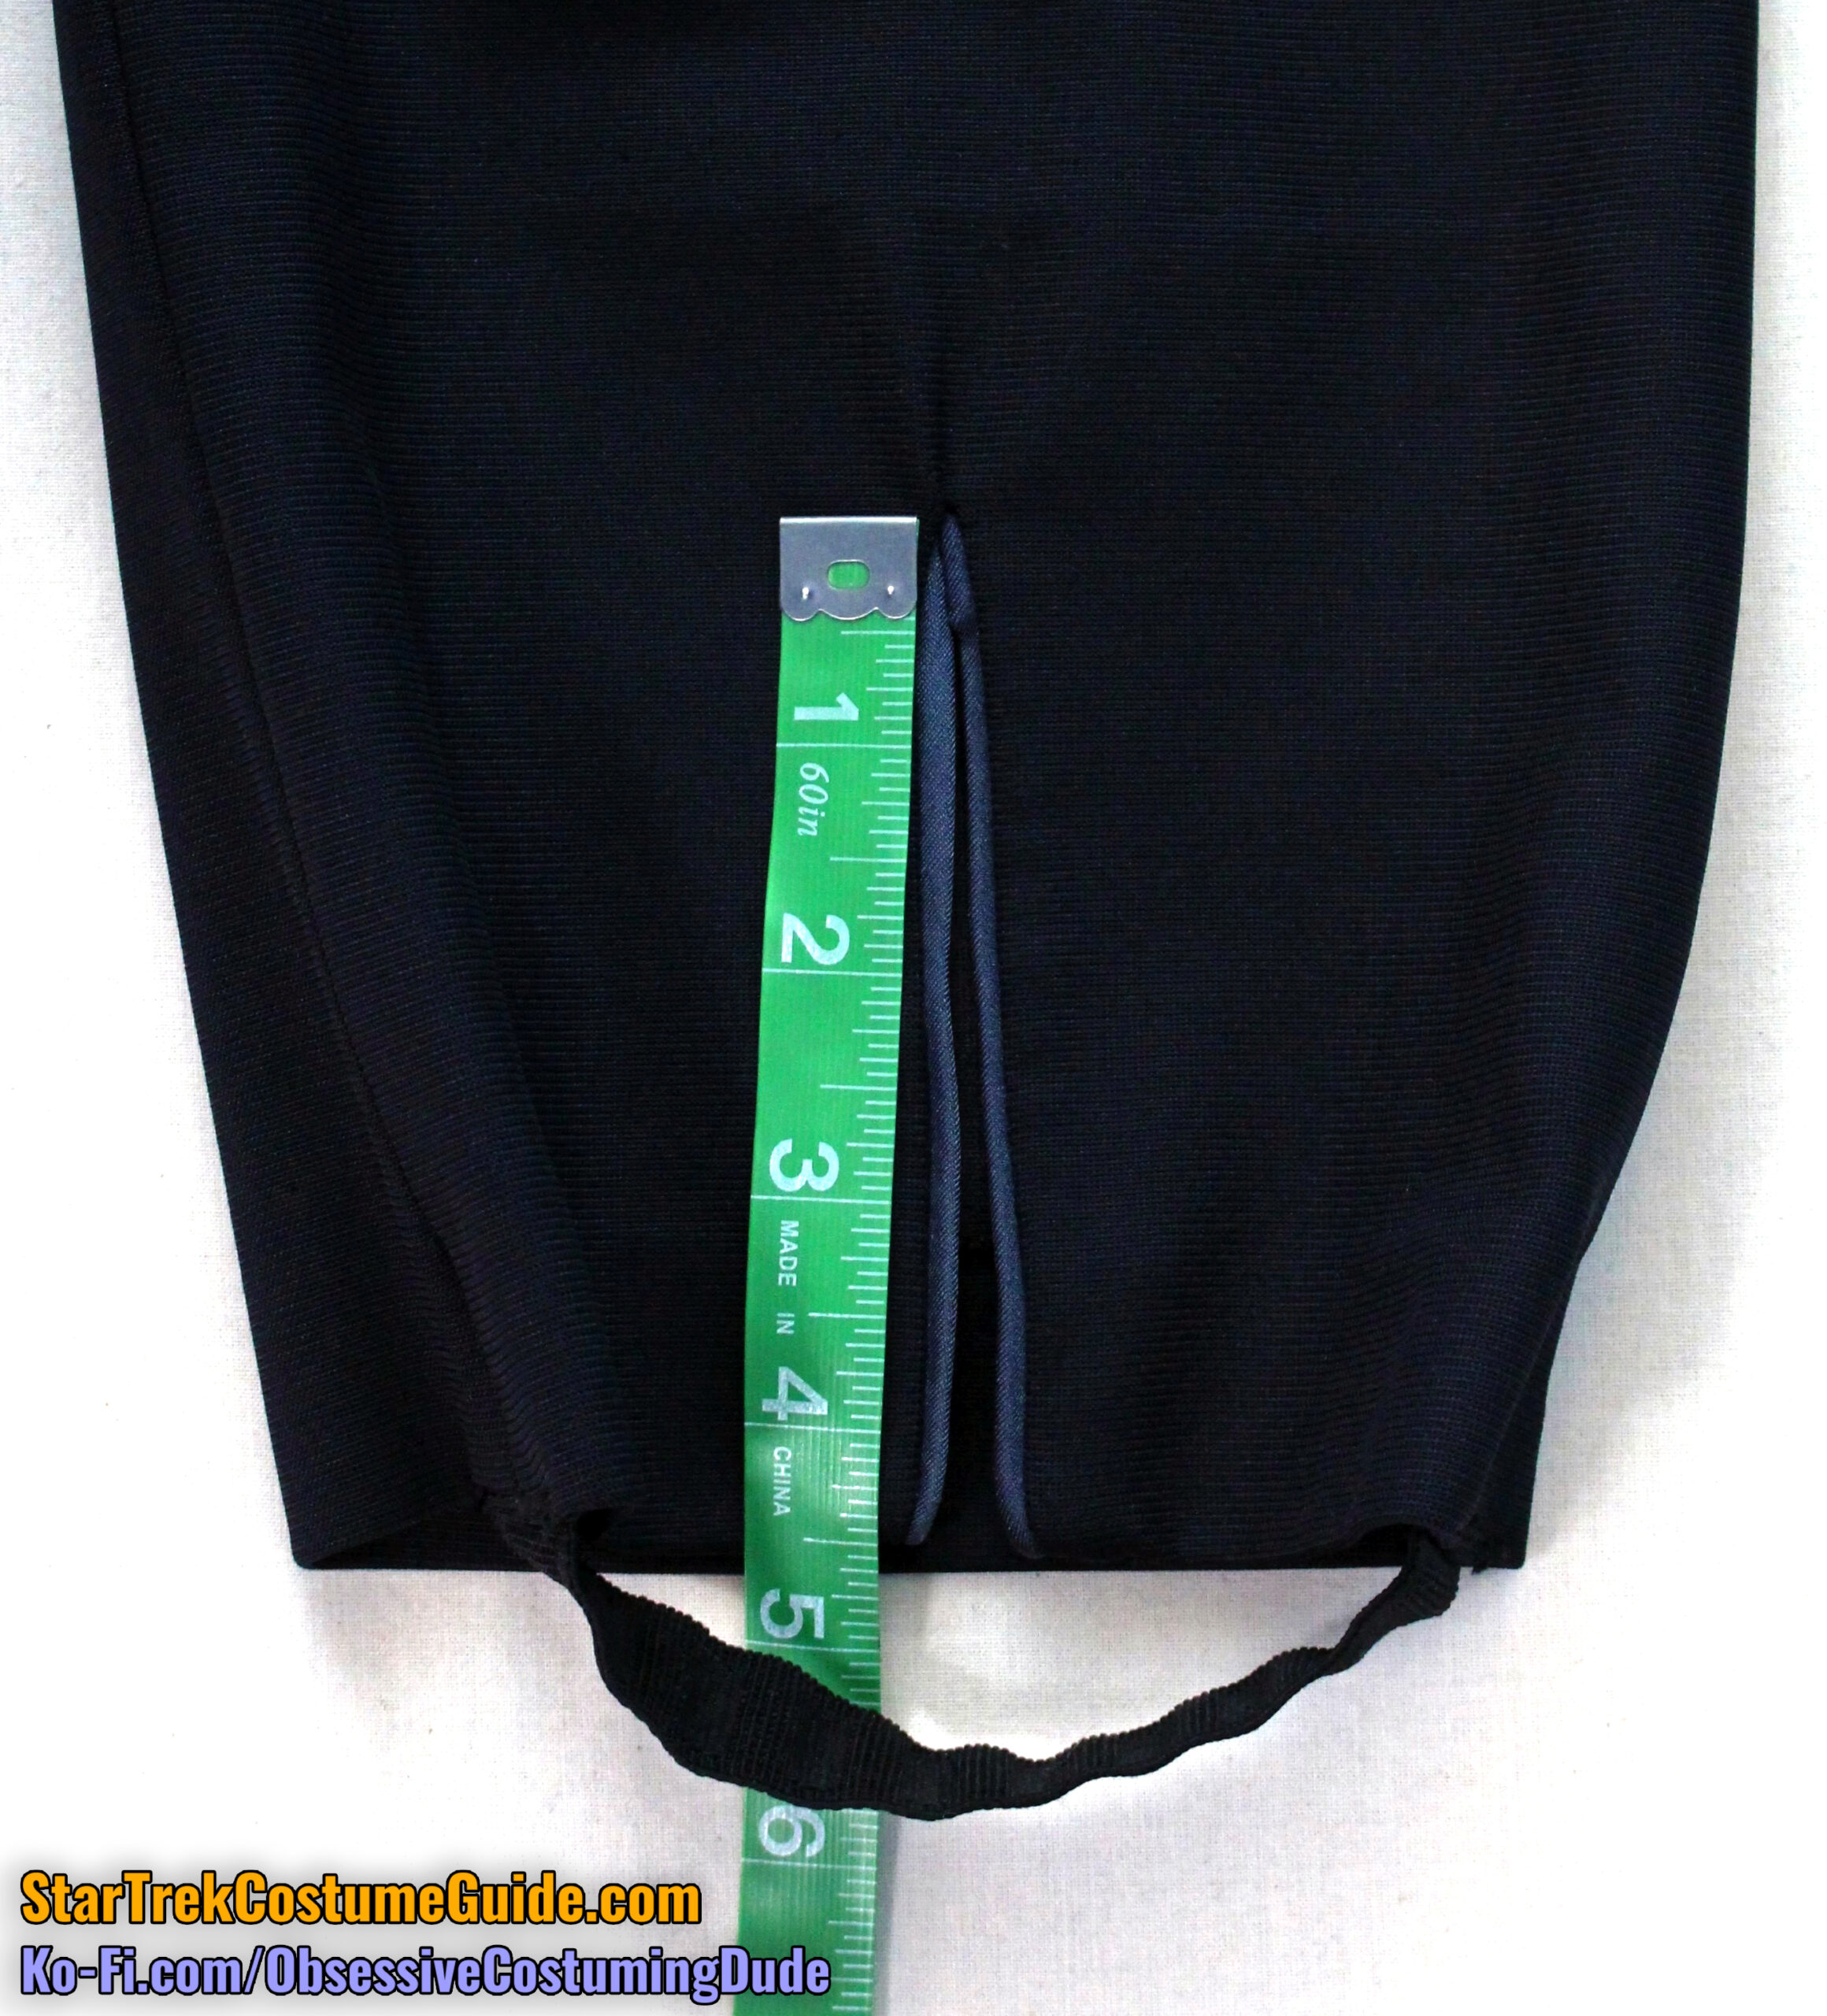
The lower pant leg openings on Beverly’s jumpsuit were 4 ½” tall.
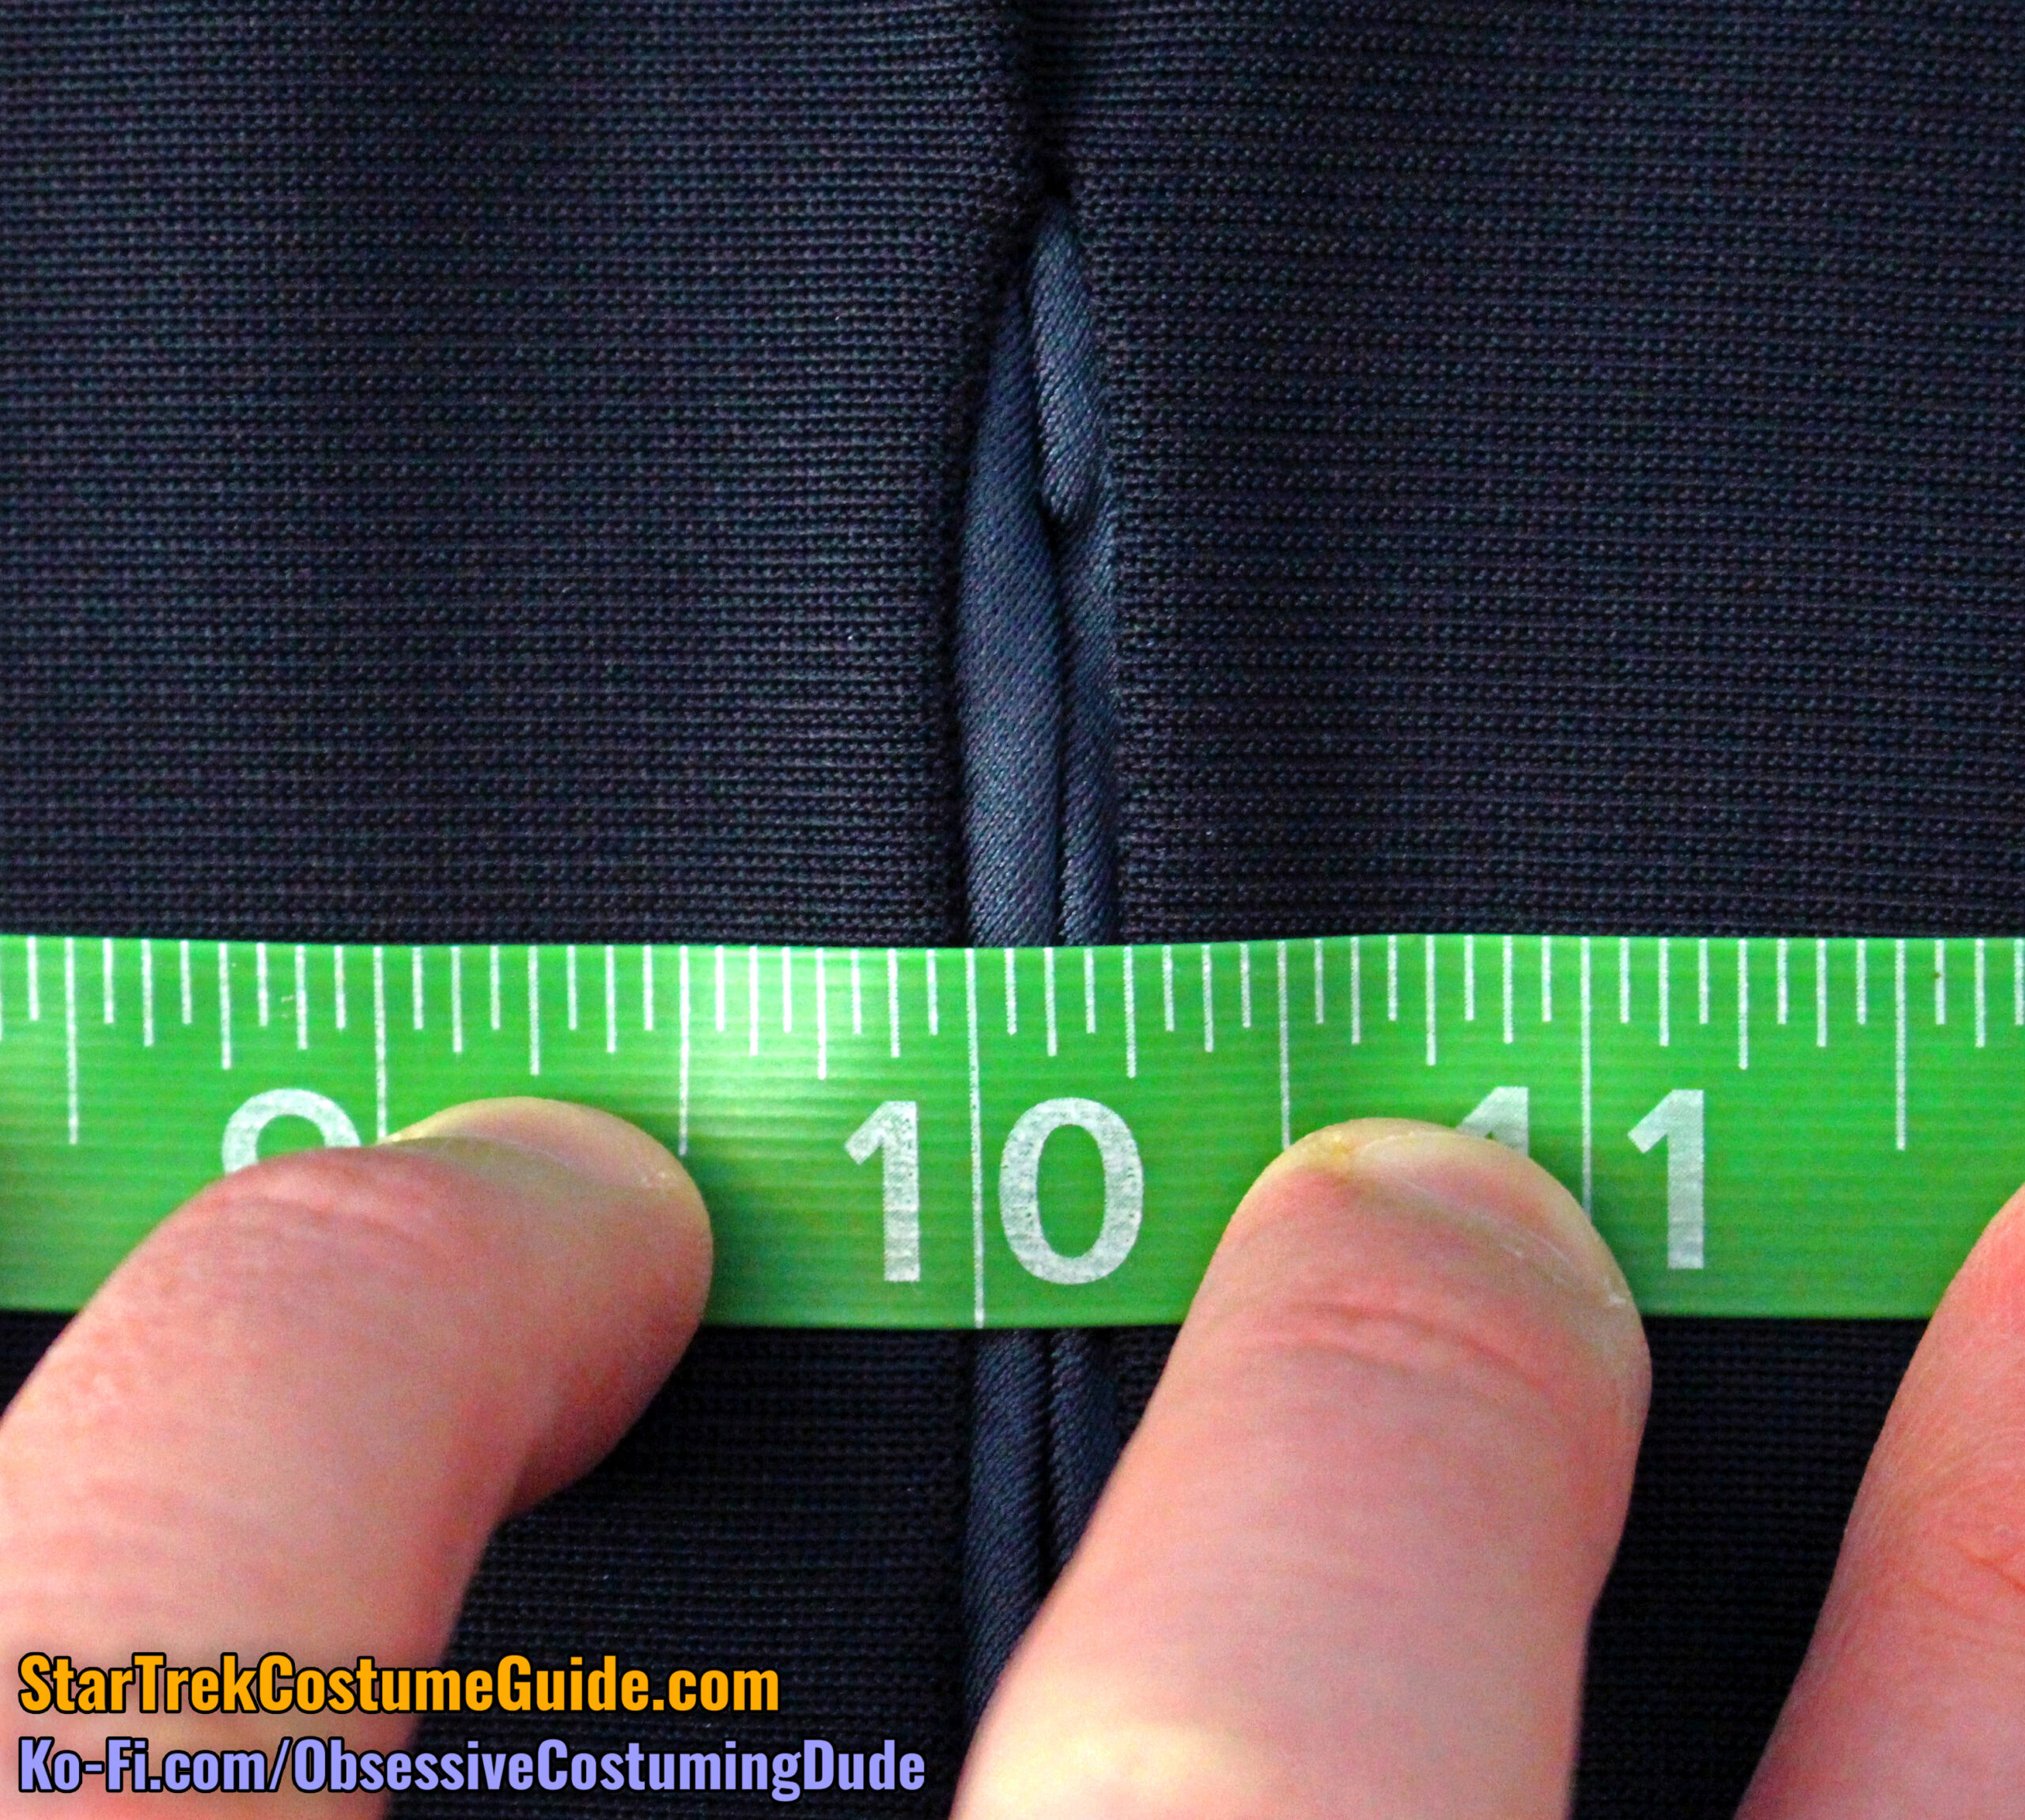
The width of the trim accents were also a bit uneven.
The elastic stirrups were approximately 5 ½” long, plus allowance.
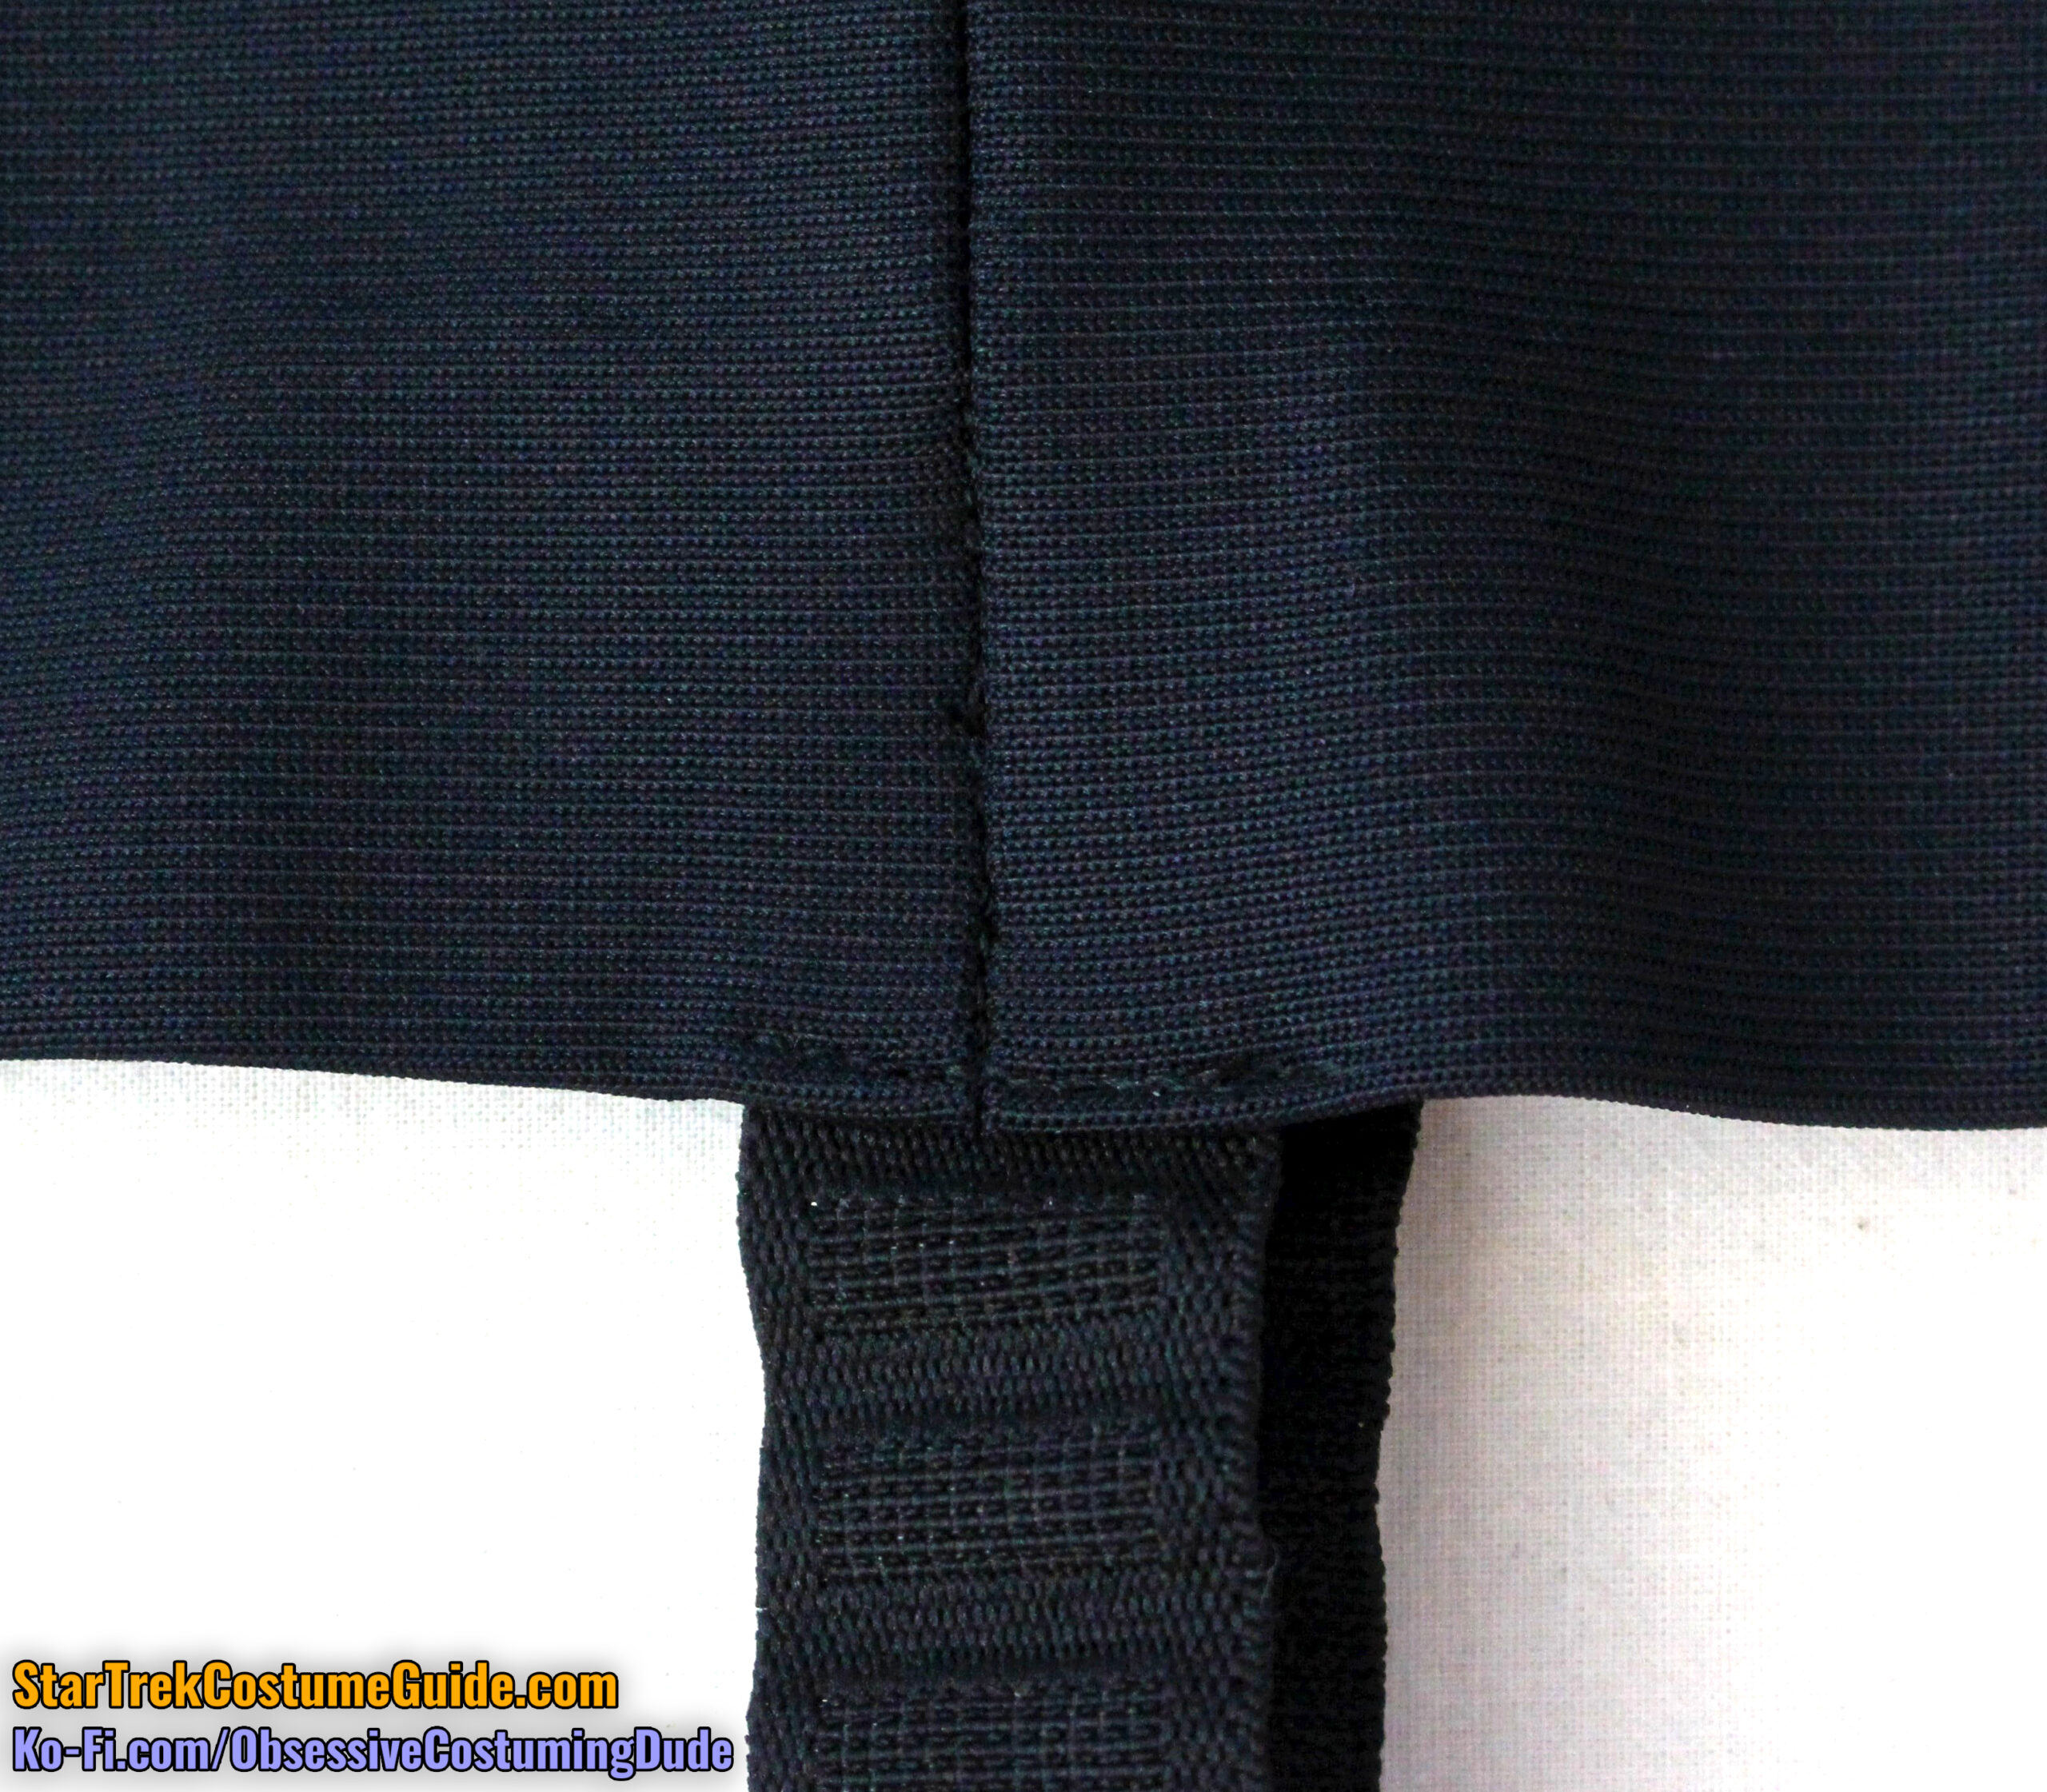
The elastic stirrups were attached differently than on the previous two (Tasha Yar and Ensign Sito) TNG jumpsuits I’ve posted about.
Like on both of those jumpsuits, the elastic stirrups were topstitched into place at the bottom of the pant leg.
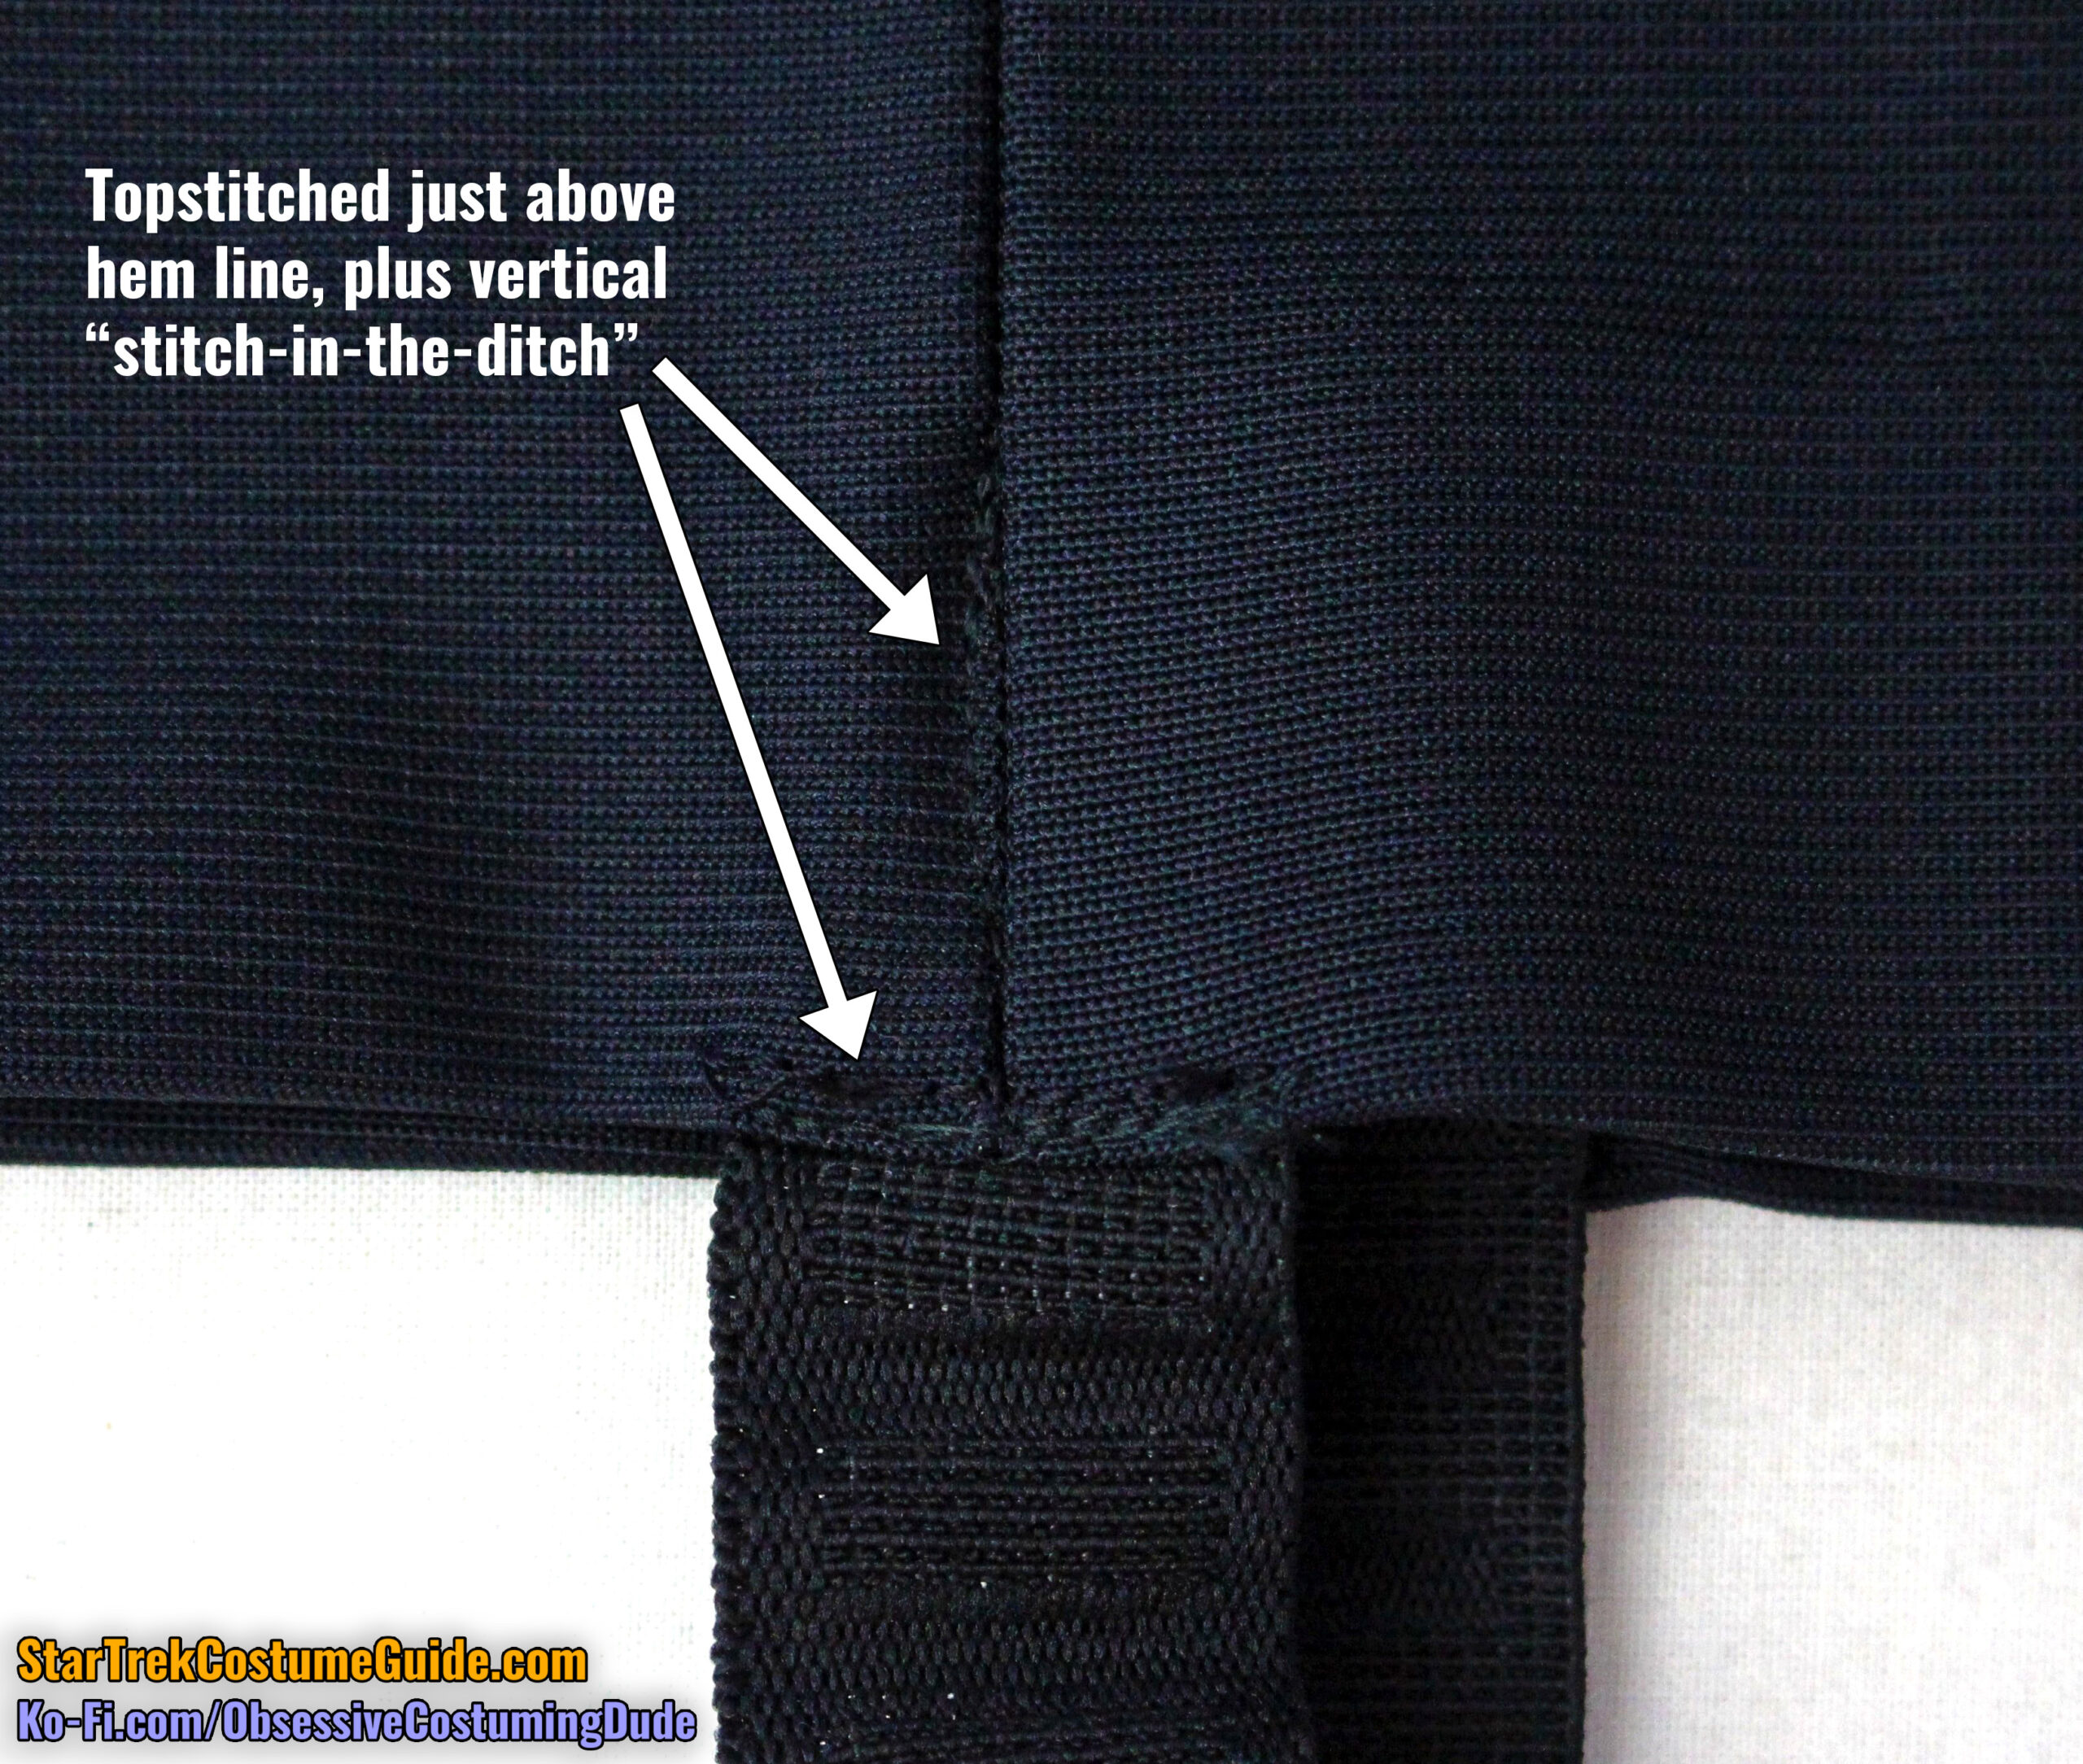
However, in this case, they were attached more subtly than on either of those uniforms: edge-stitched just above the hem line, then secured via a “stitch-in-the-ditch” along the pant leg seams.
When done perfectly, one can hardly see it at all!
However, the “stitch-in-the-ditch” is easier to see when it’s off a little bit.
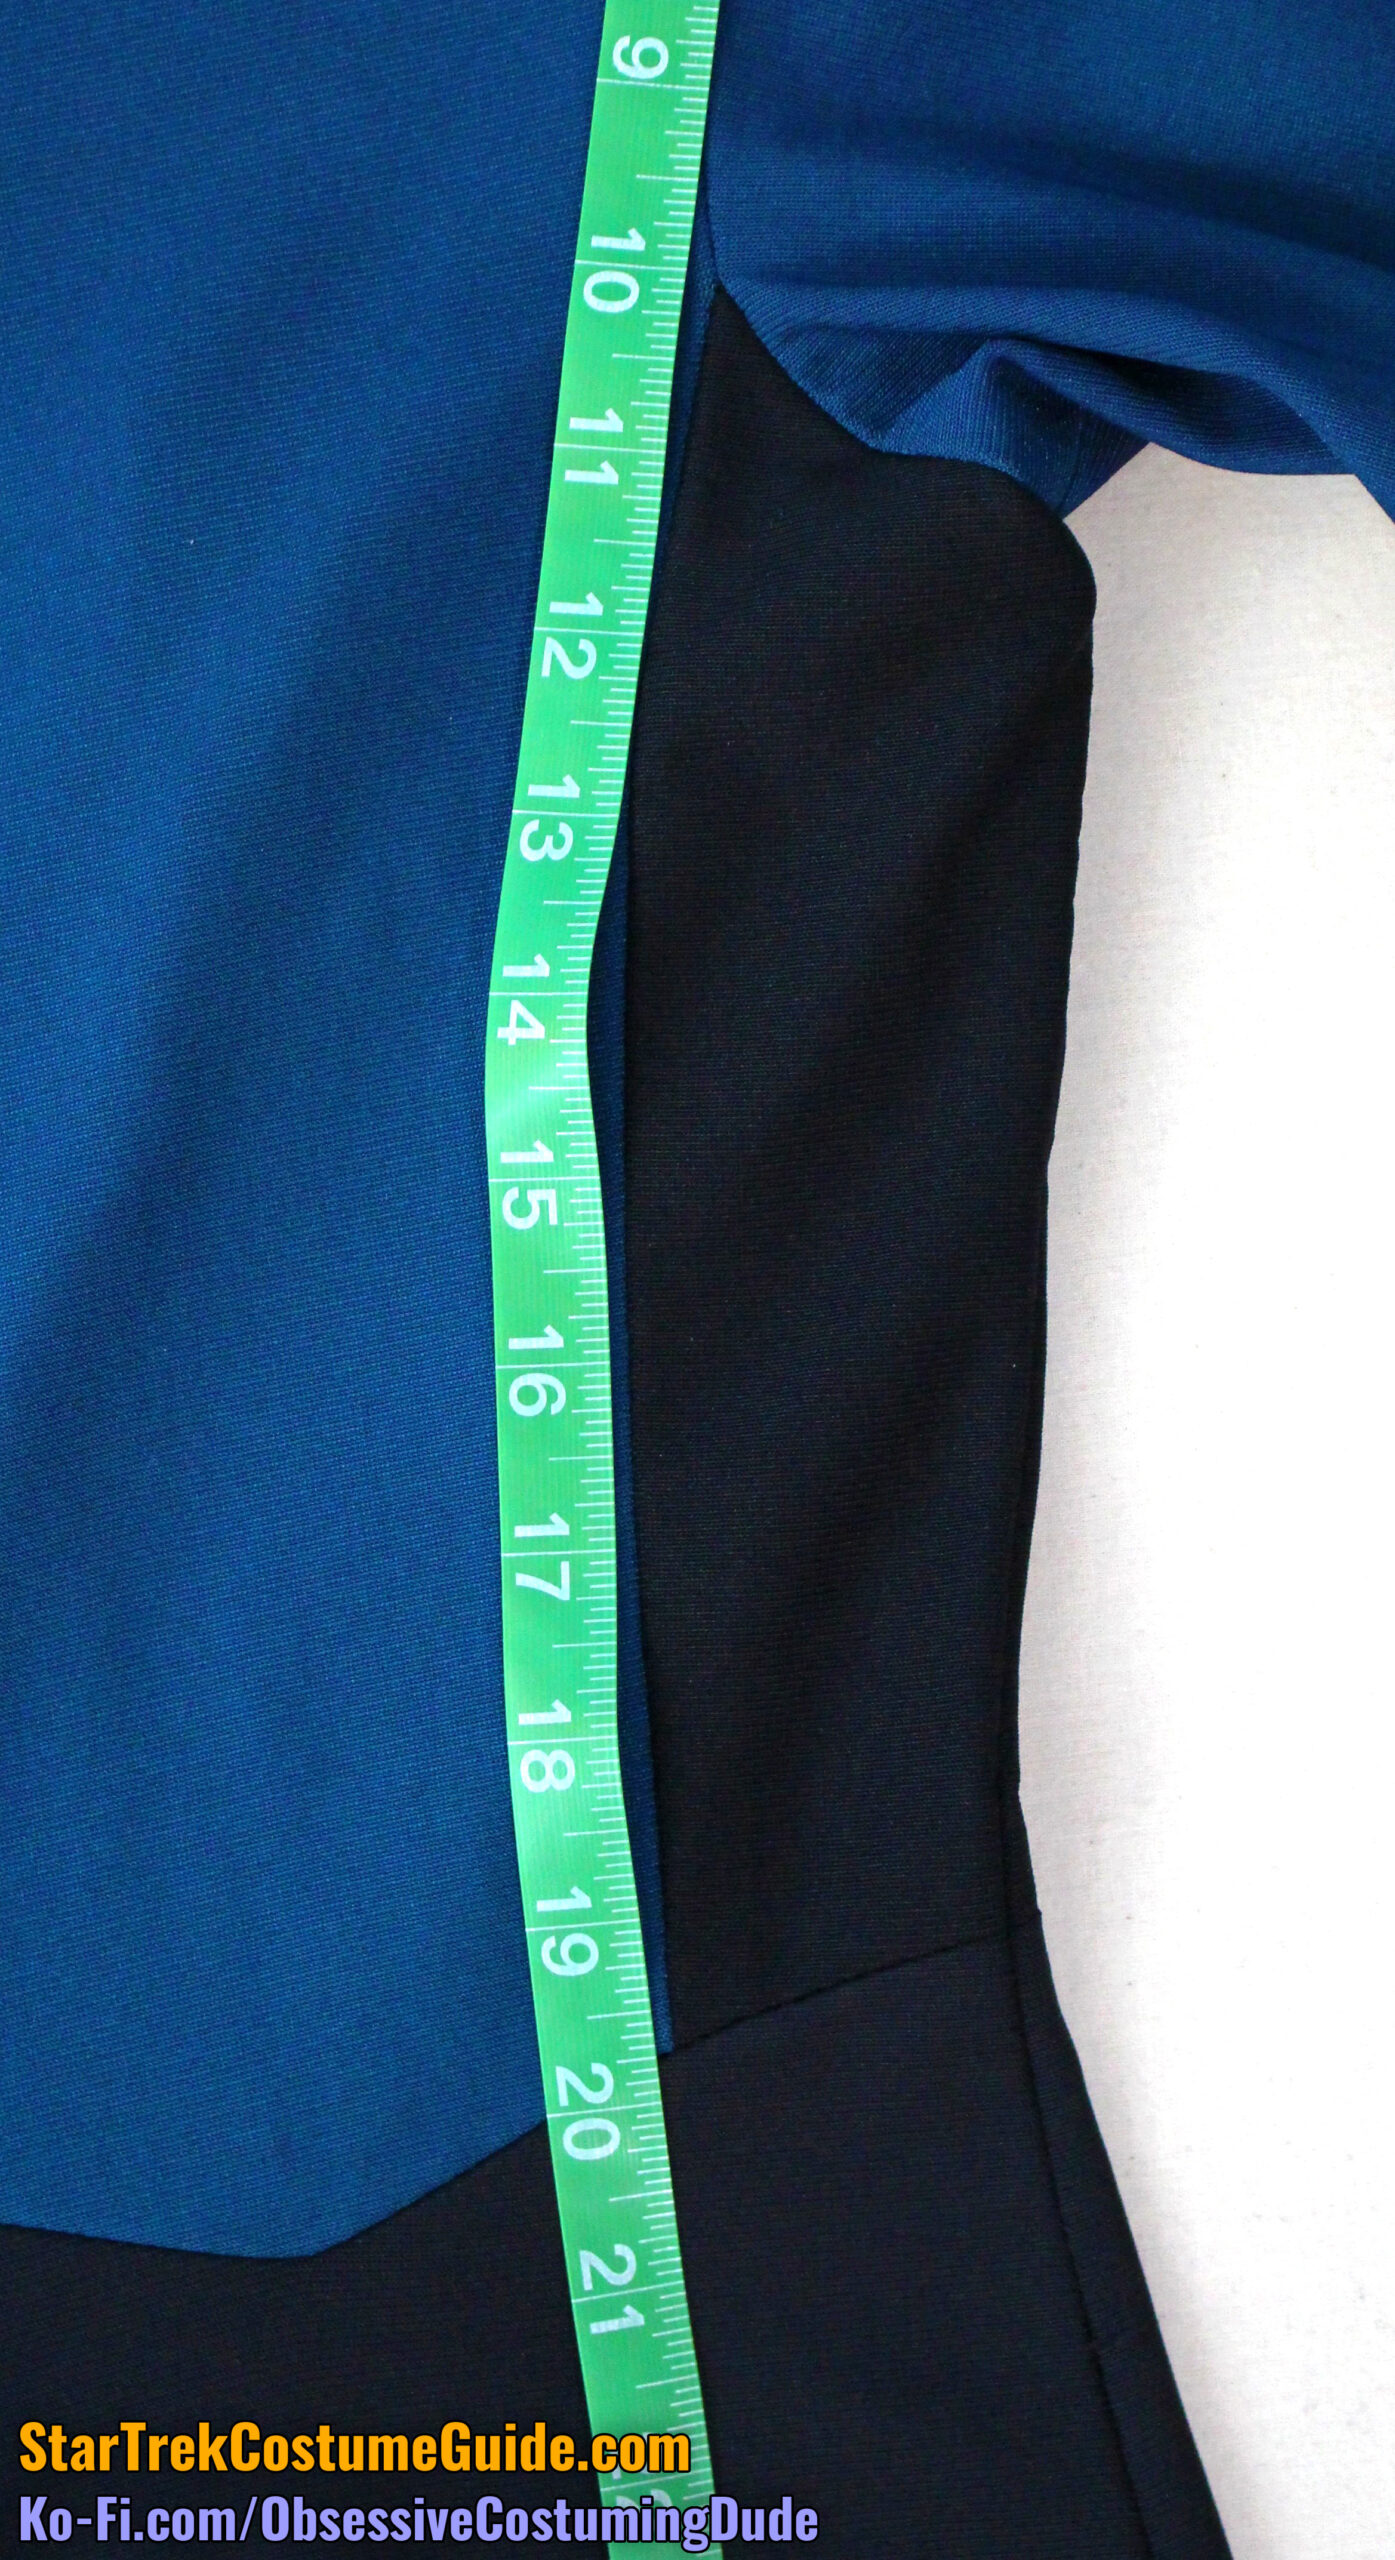
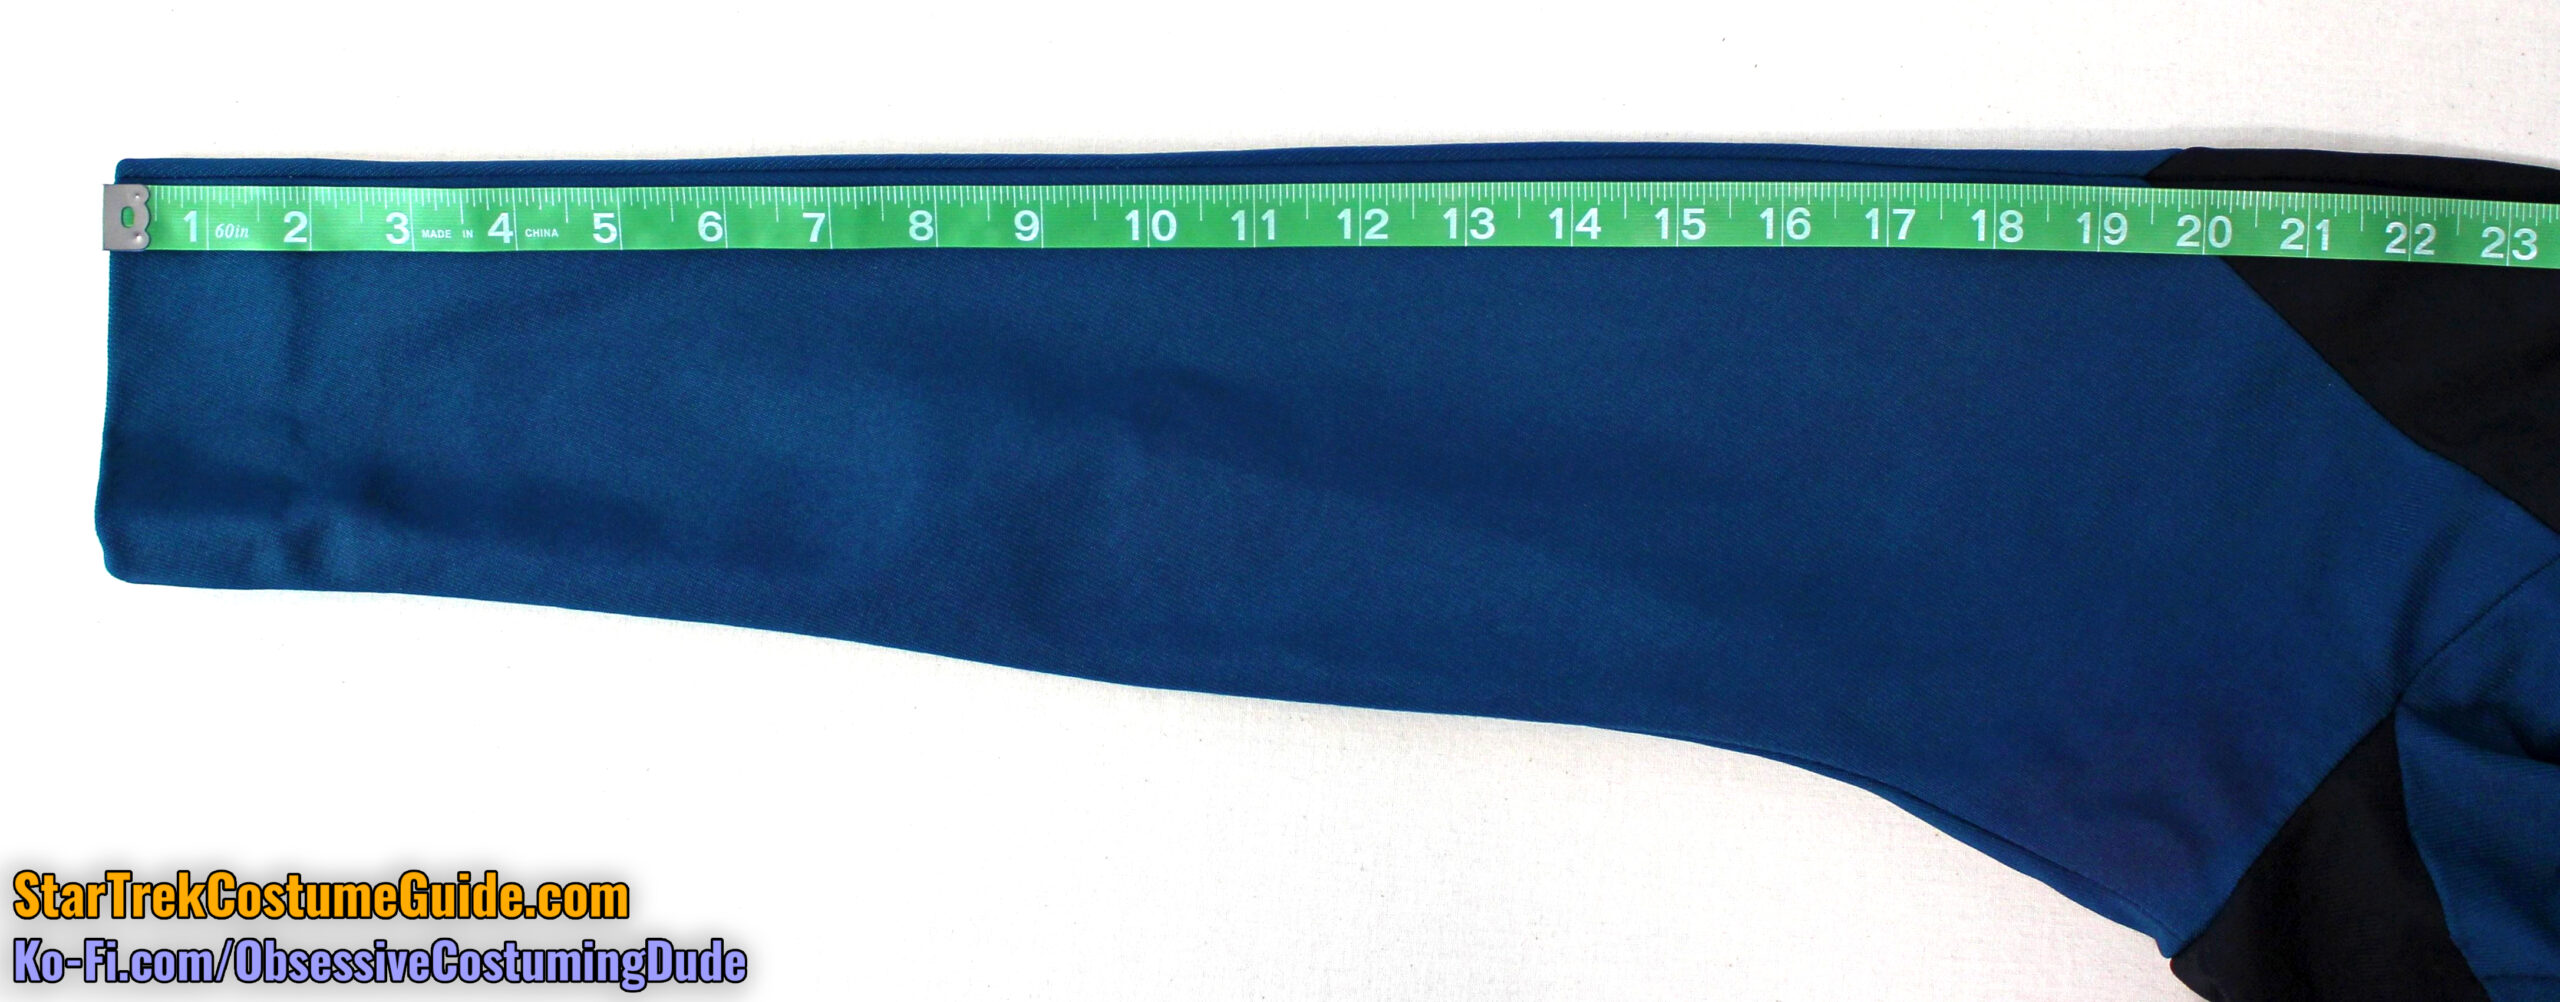
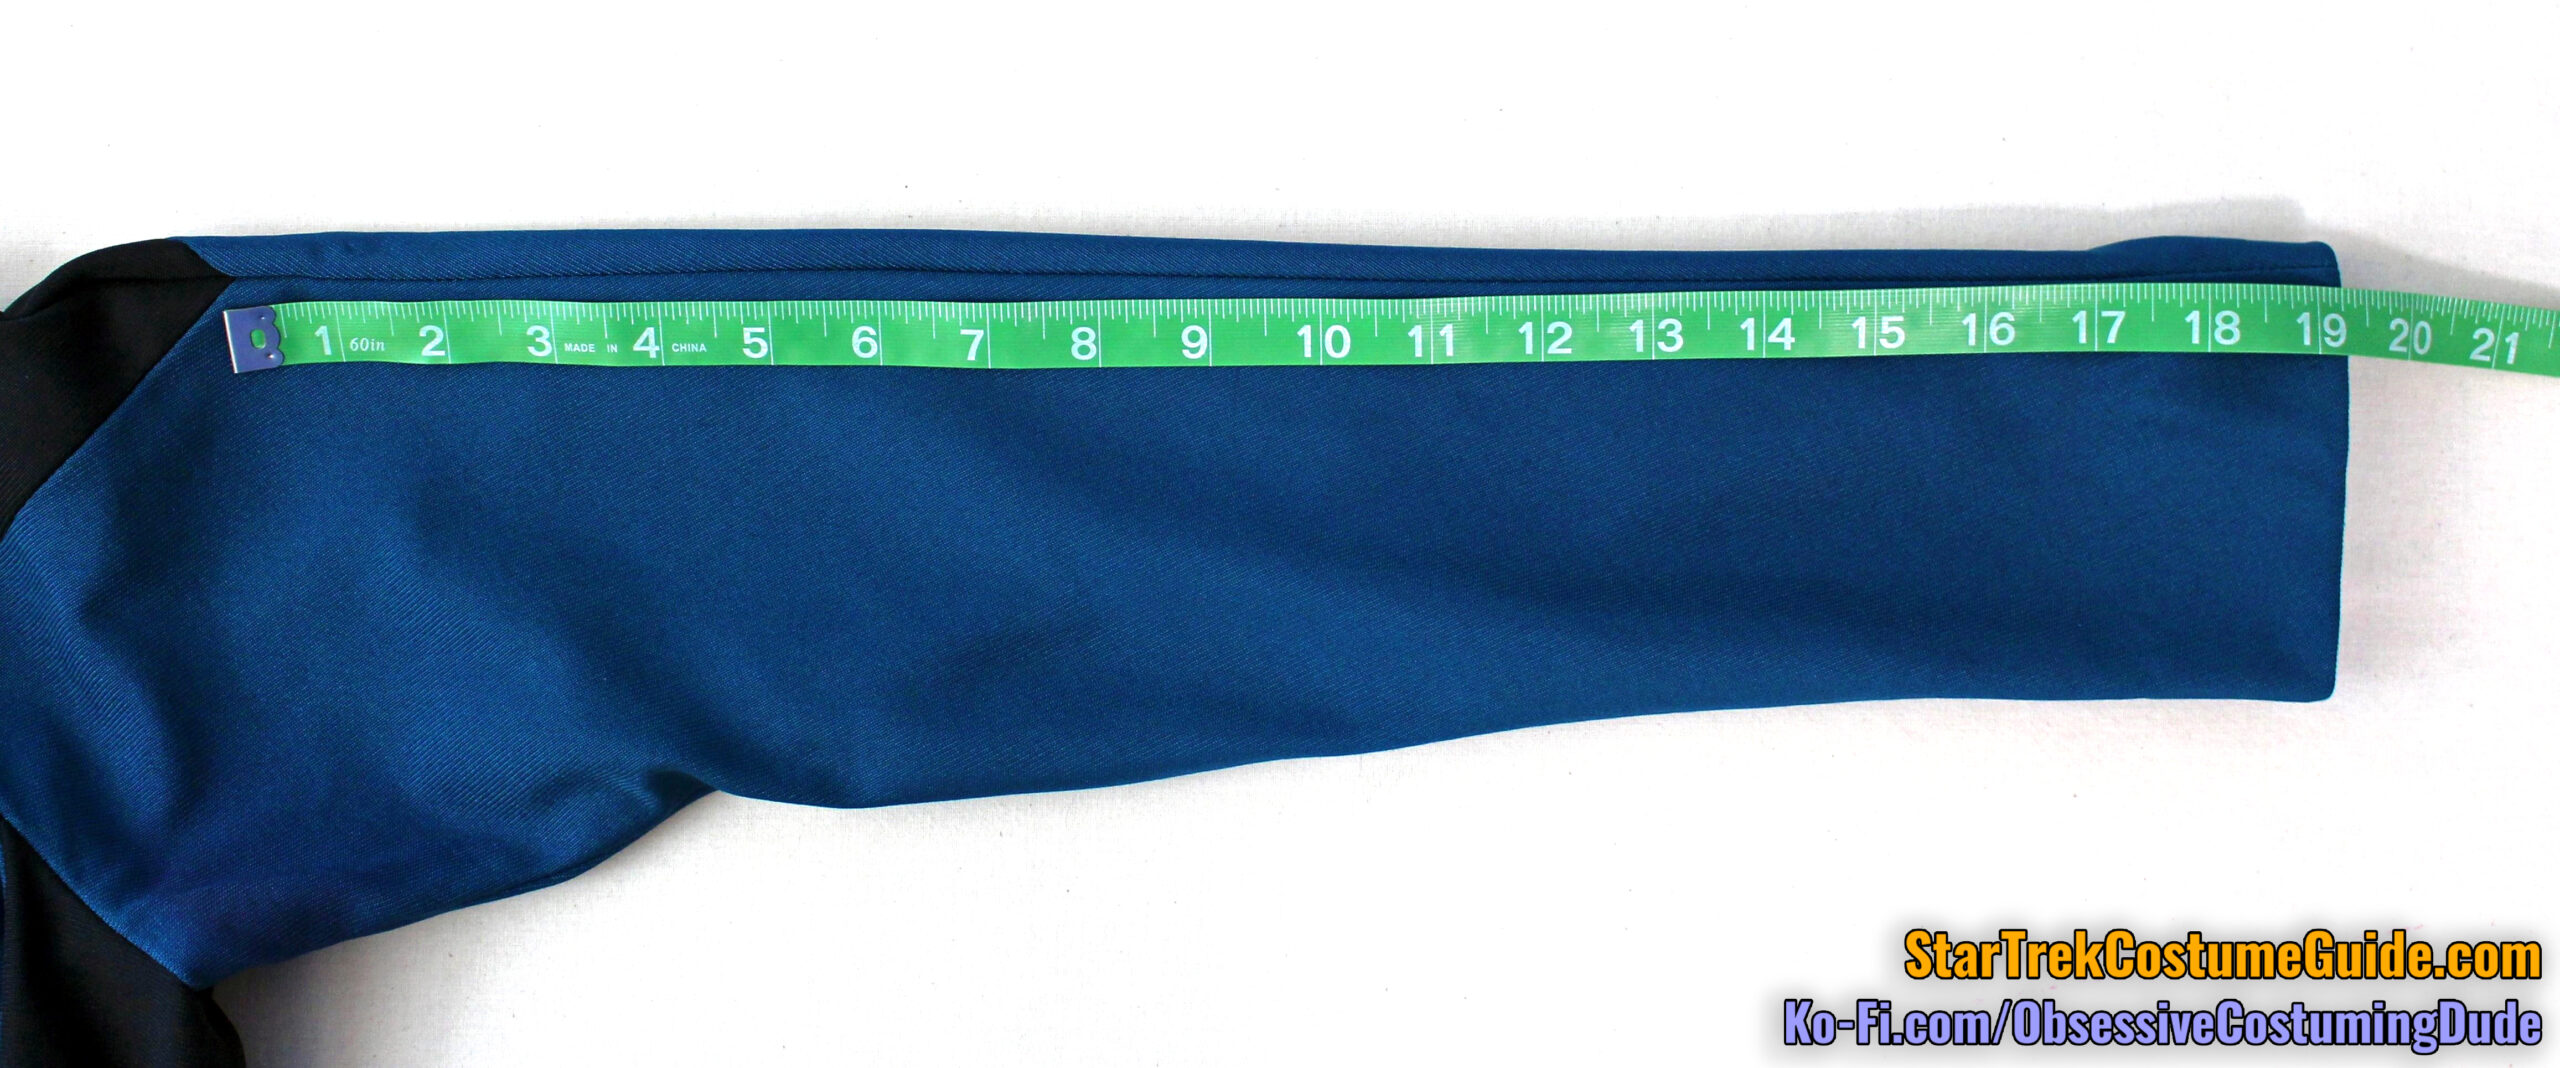
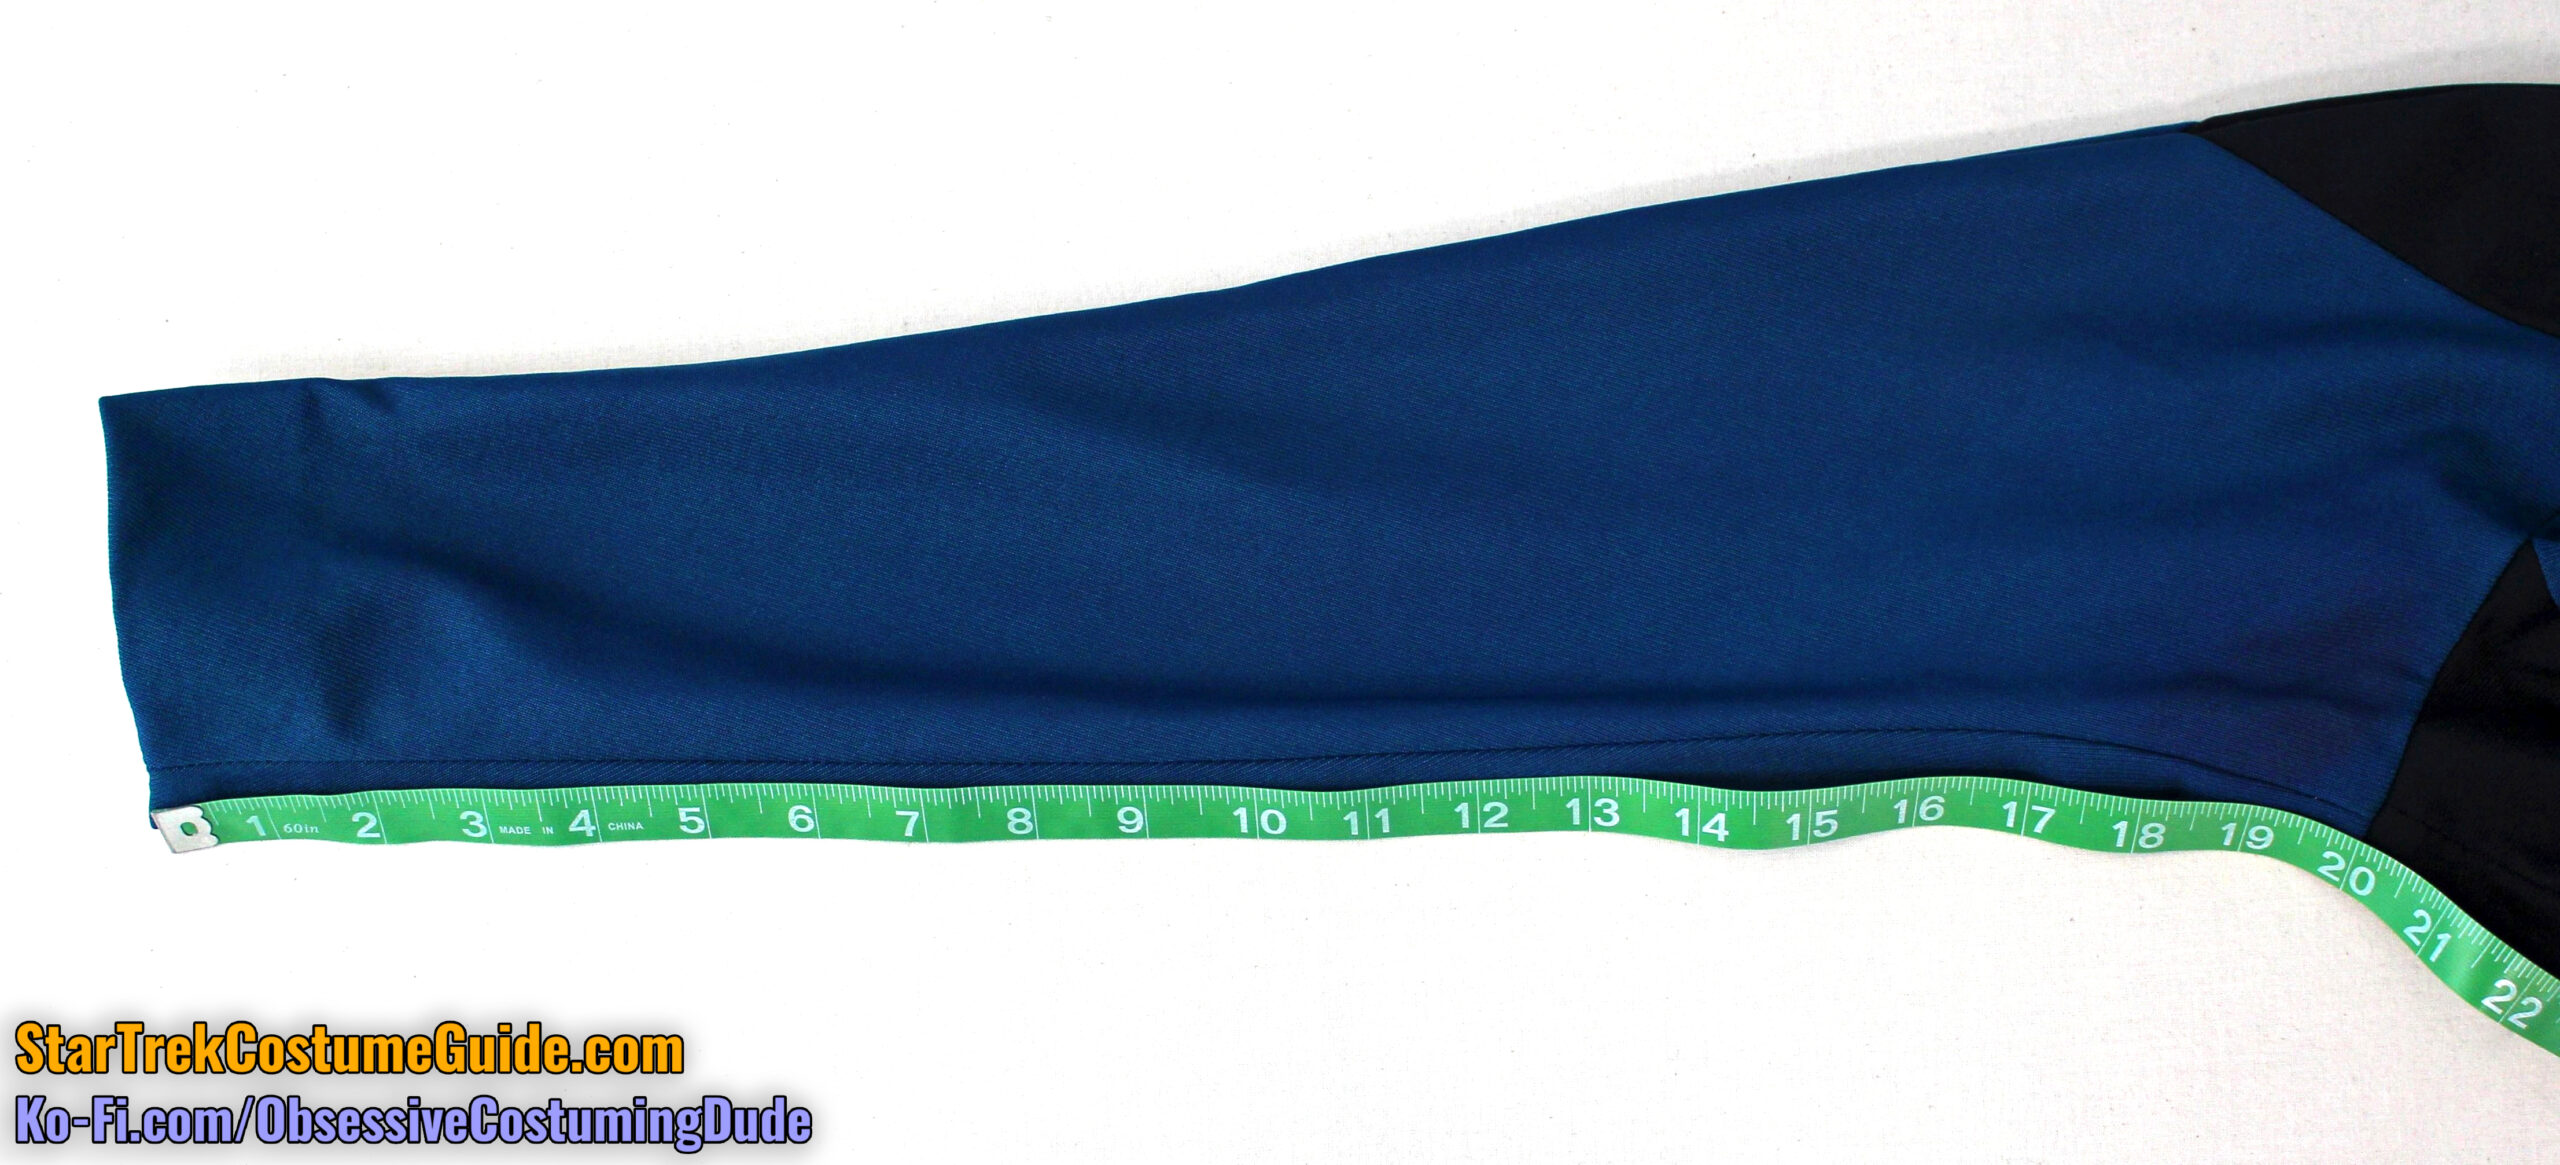
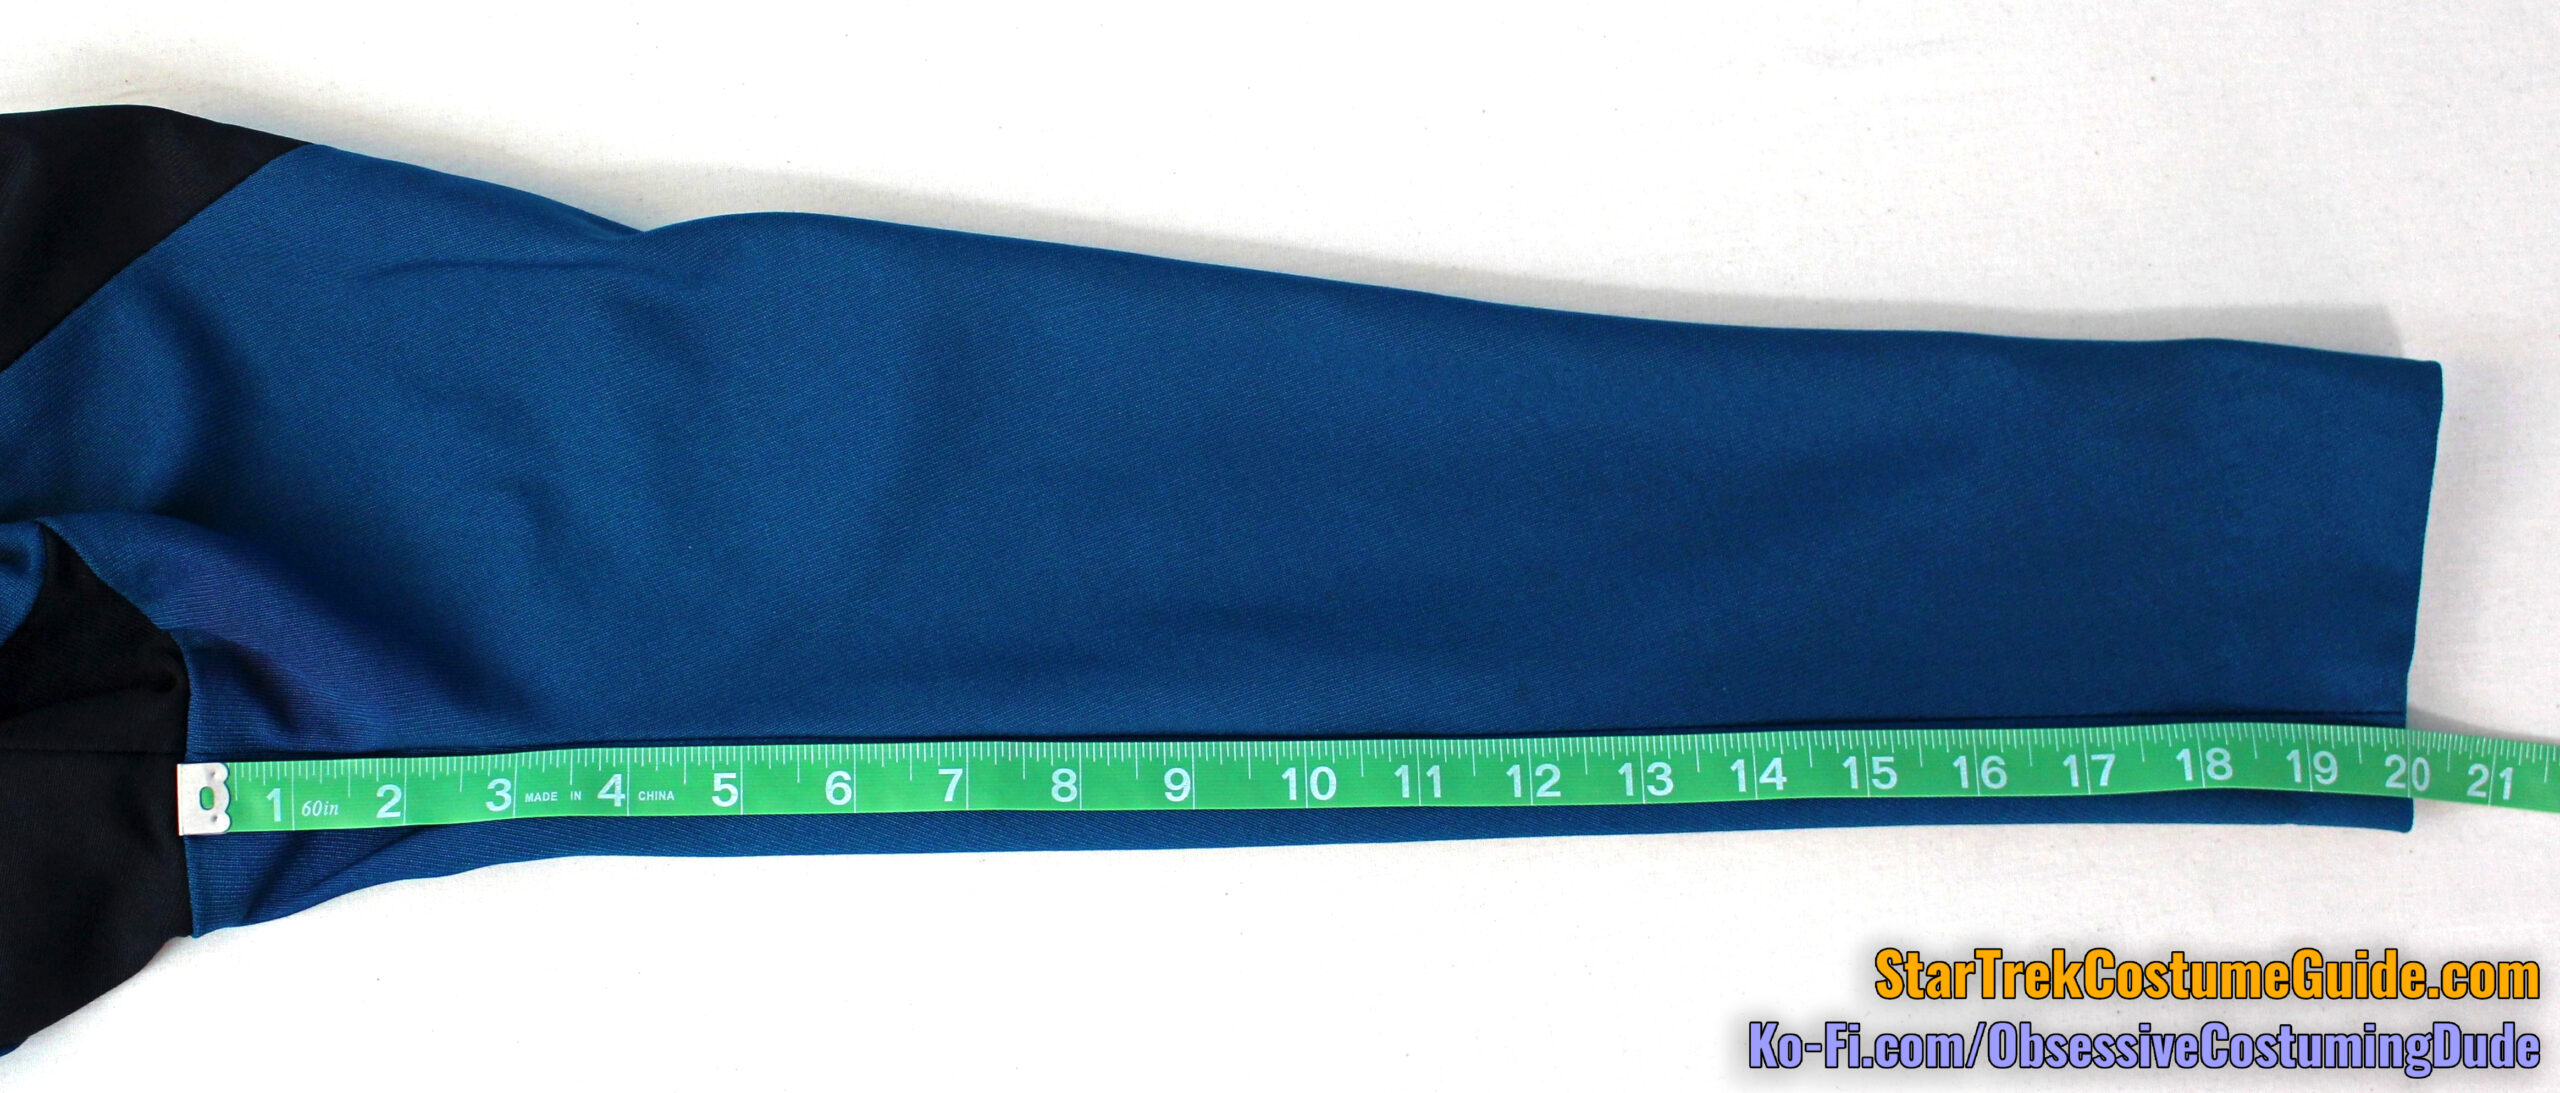
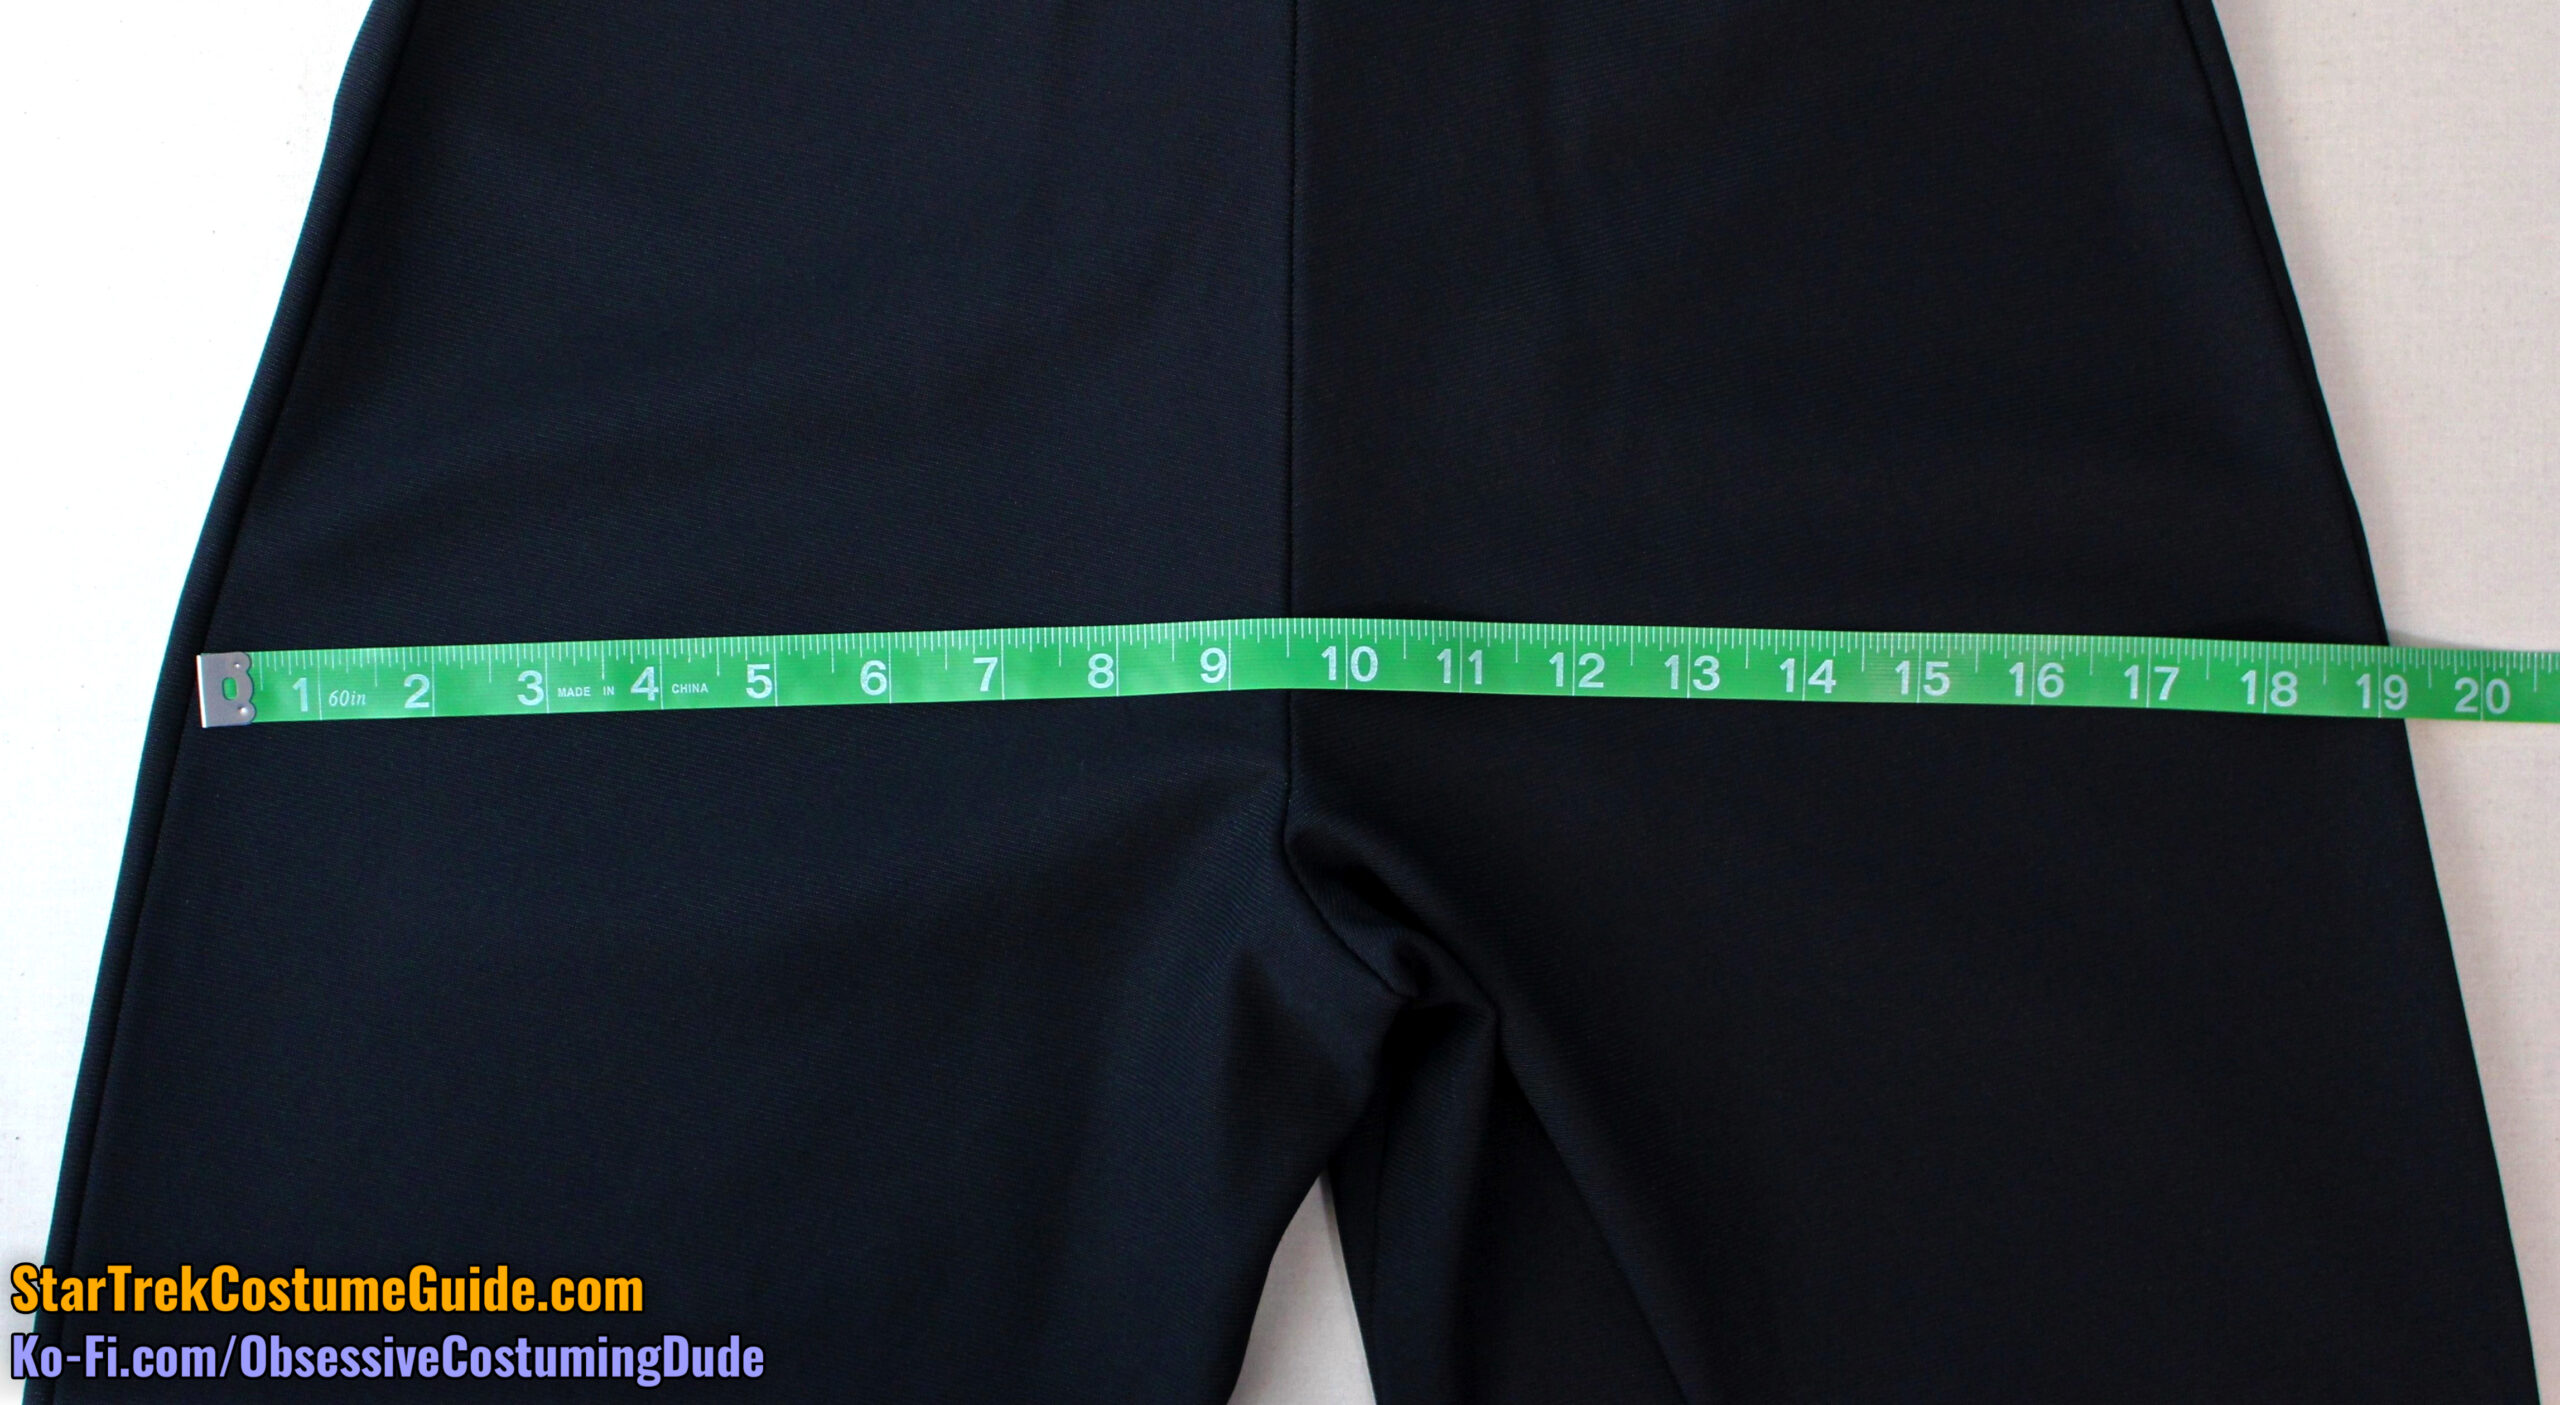
The right outer sleeve seam was 19 ½”, although the left outer sleeve seam was a little shorter, measuring 19 ¼”.
On both sleeves, the inner sleeve seams were 20”.
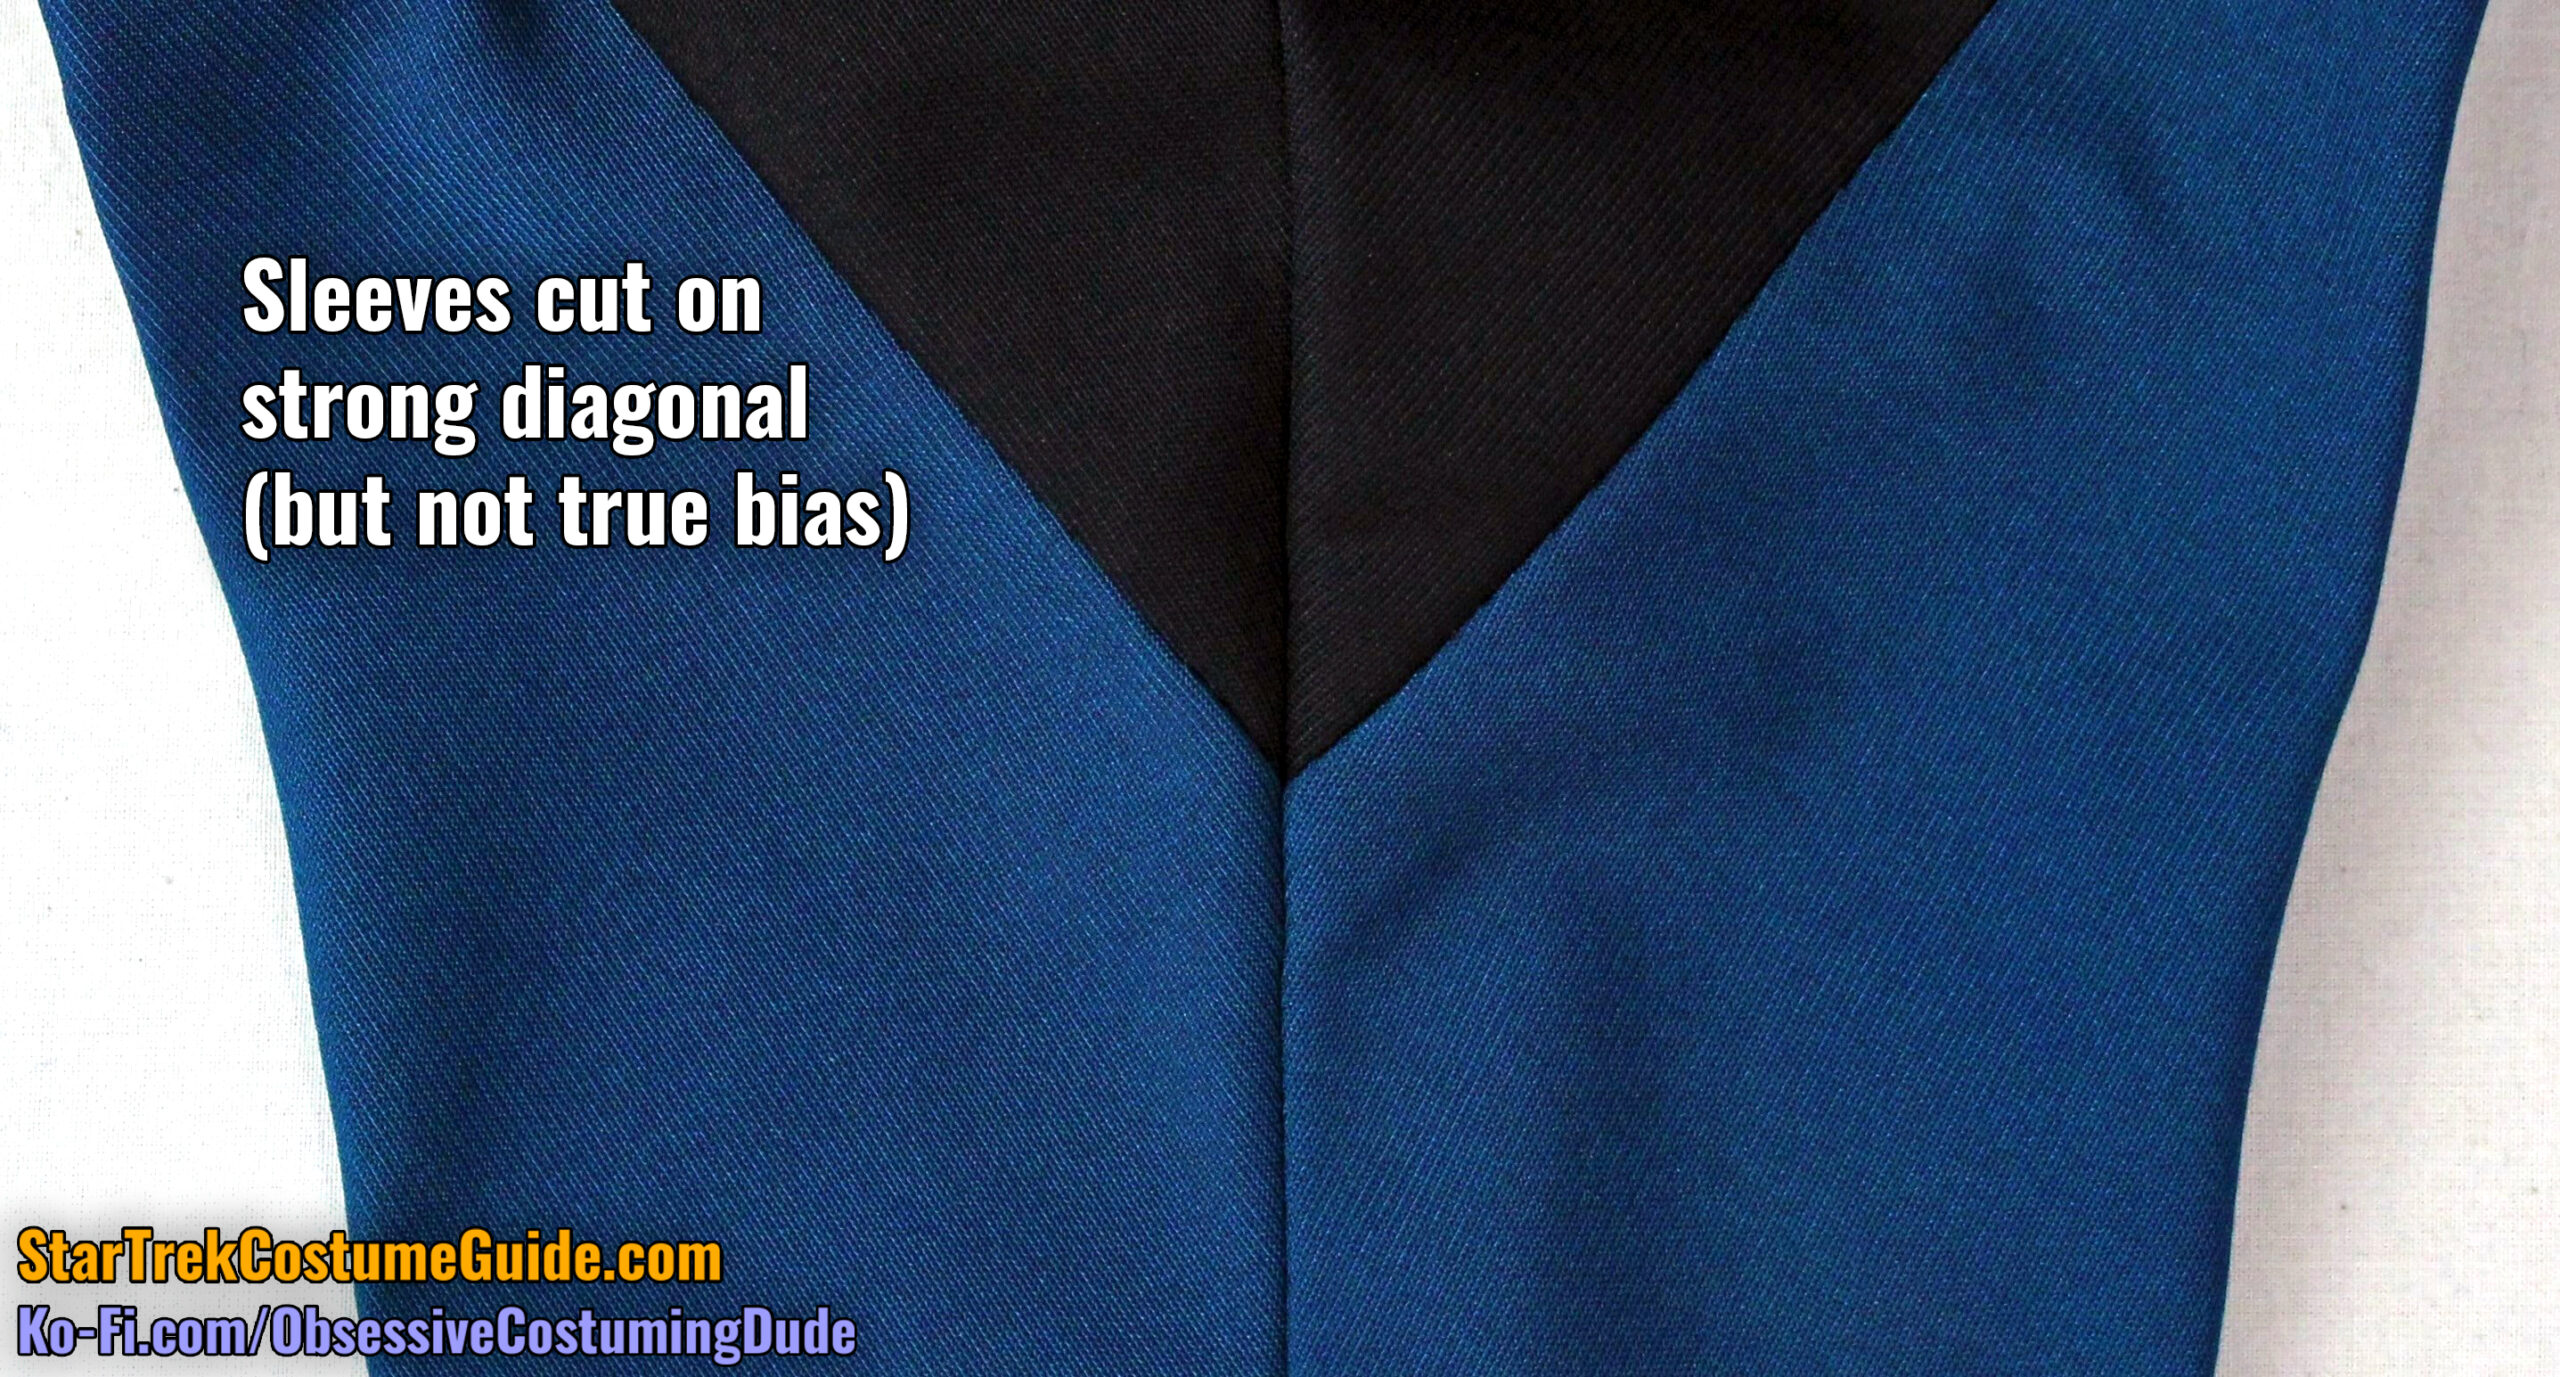
Curiously, the sleeves were not cut on the straight grain or the crossgrain; they were cut on a strong diagonal – but not the true bias.
Nor were they cut directly parallel to their respective outer/lower yoke seams.
Unfortunately, this grain orientation rendered the “weave” of the jumbo spandex useless as a visual reference to determine the angles of the sleeve inserts …
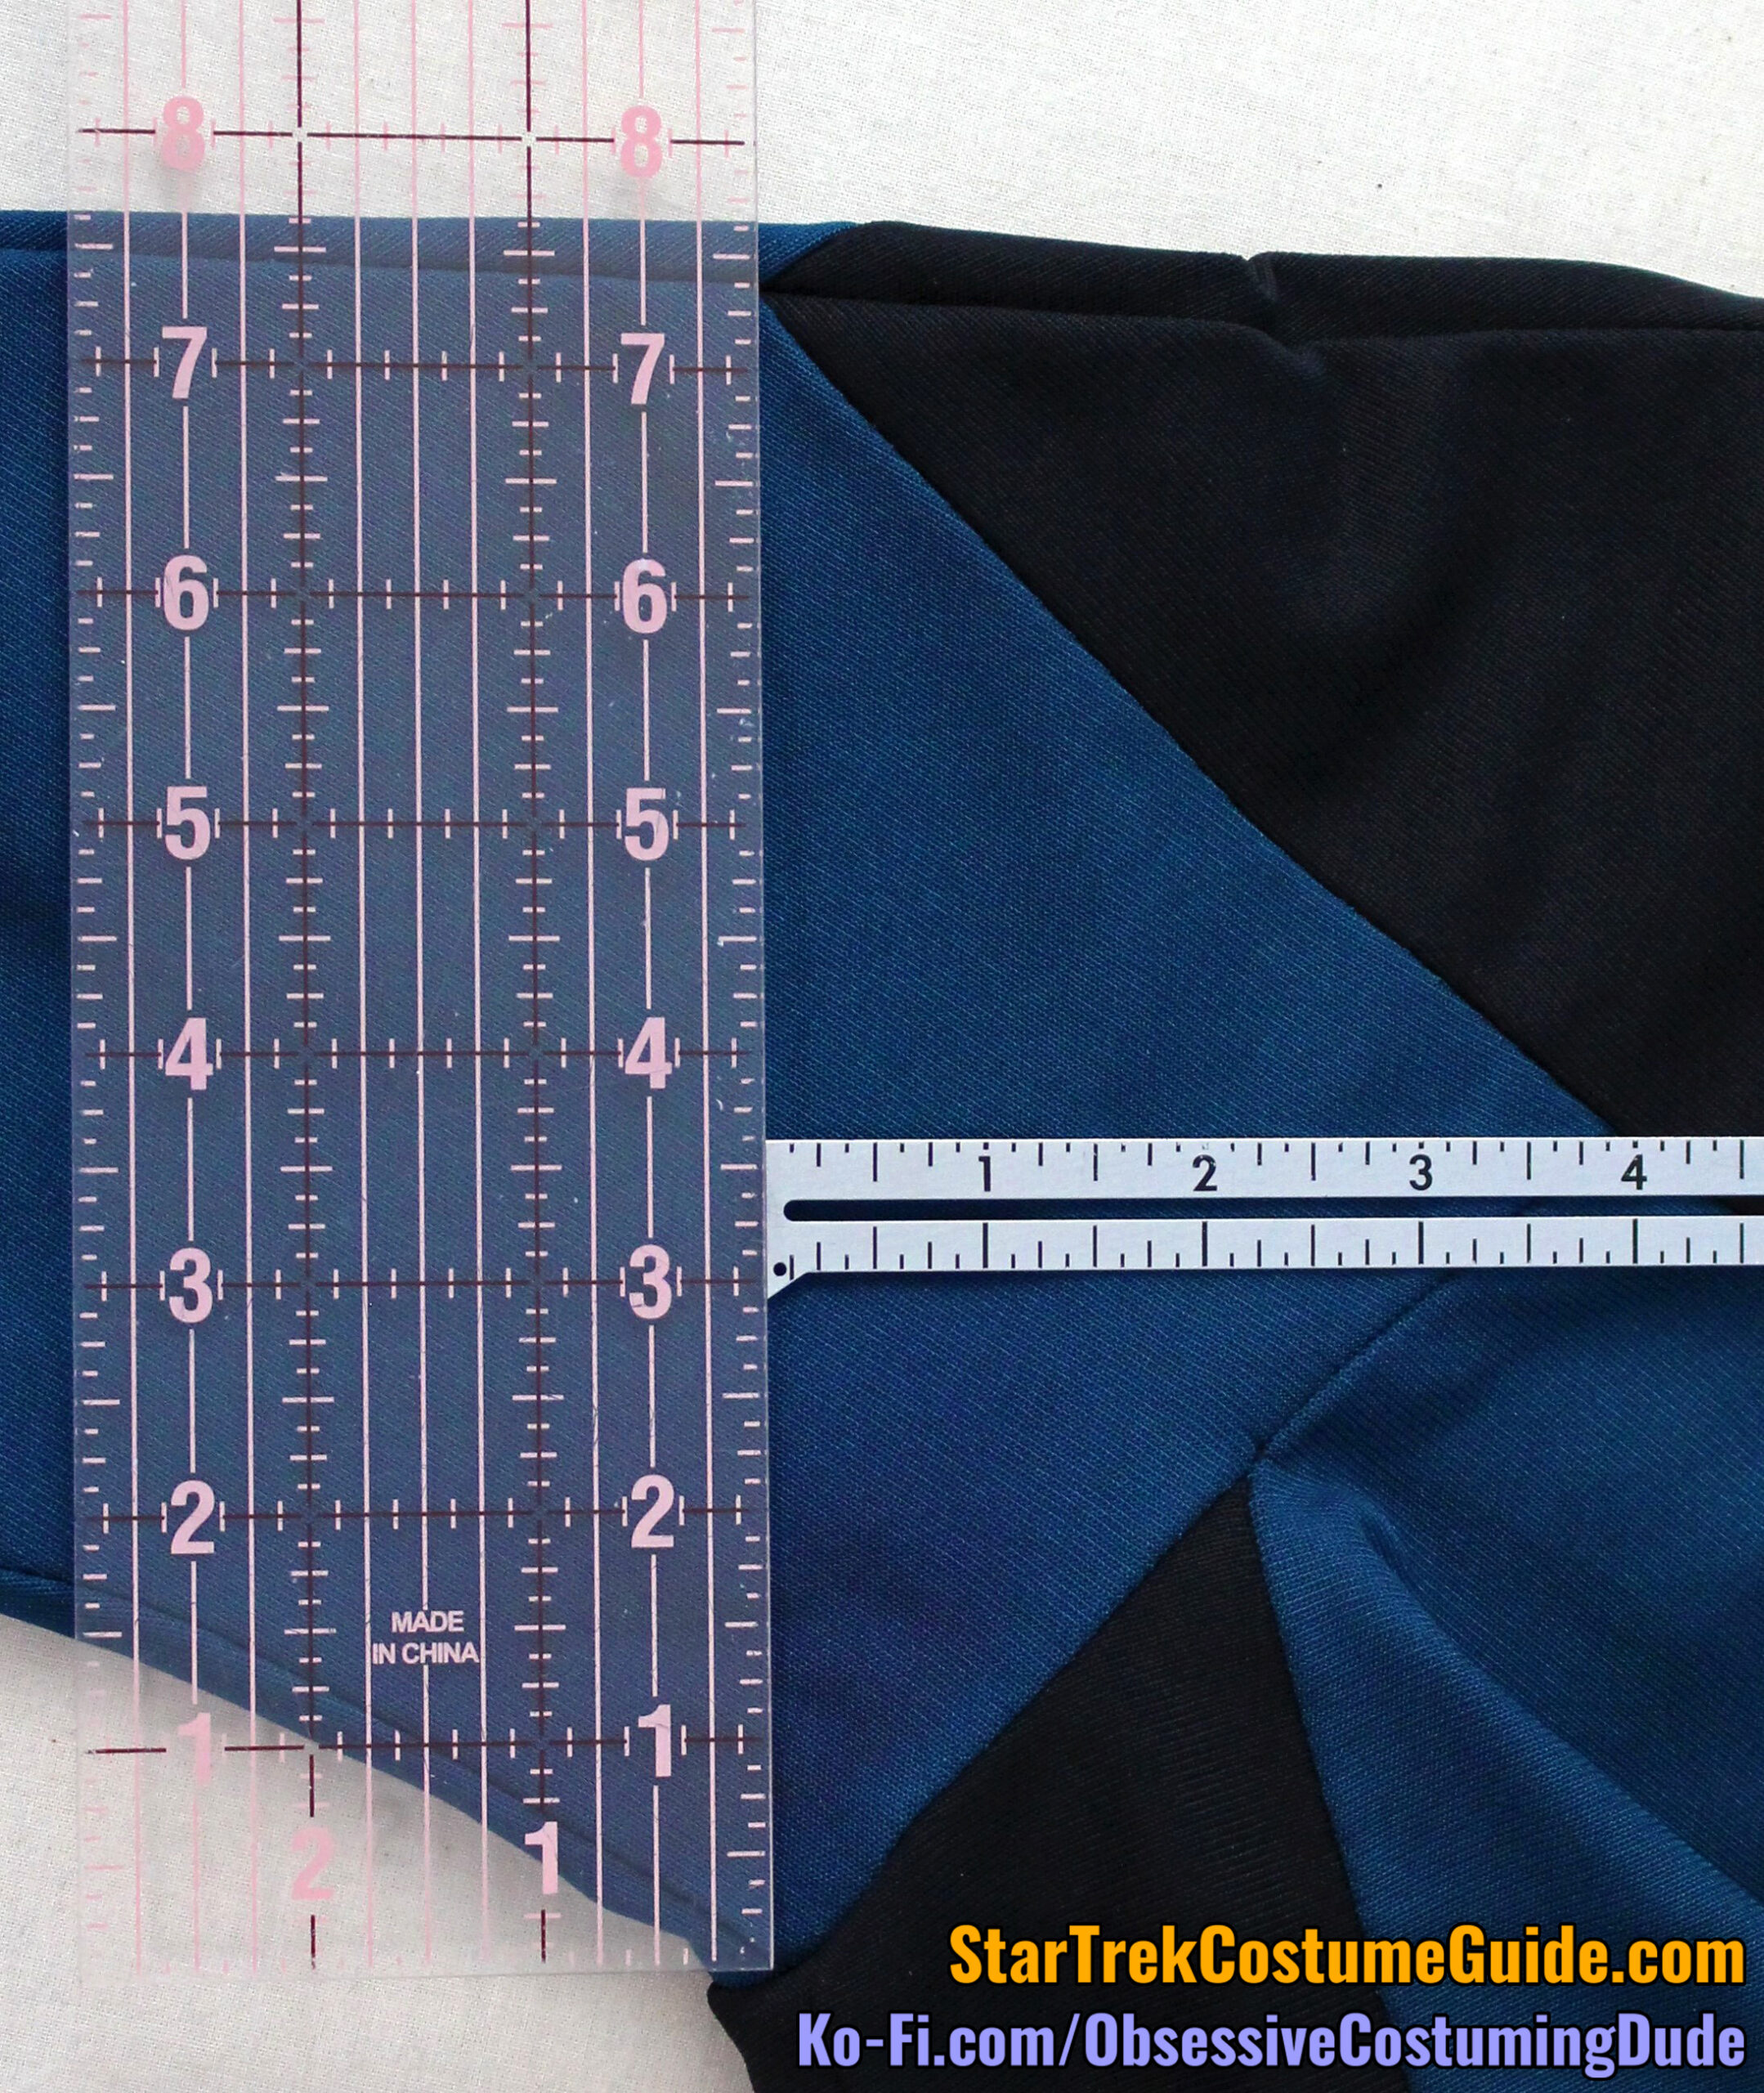
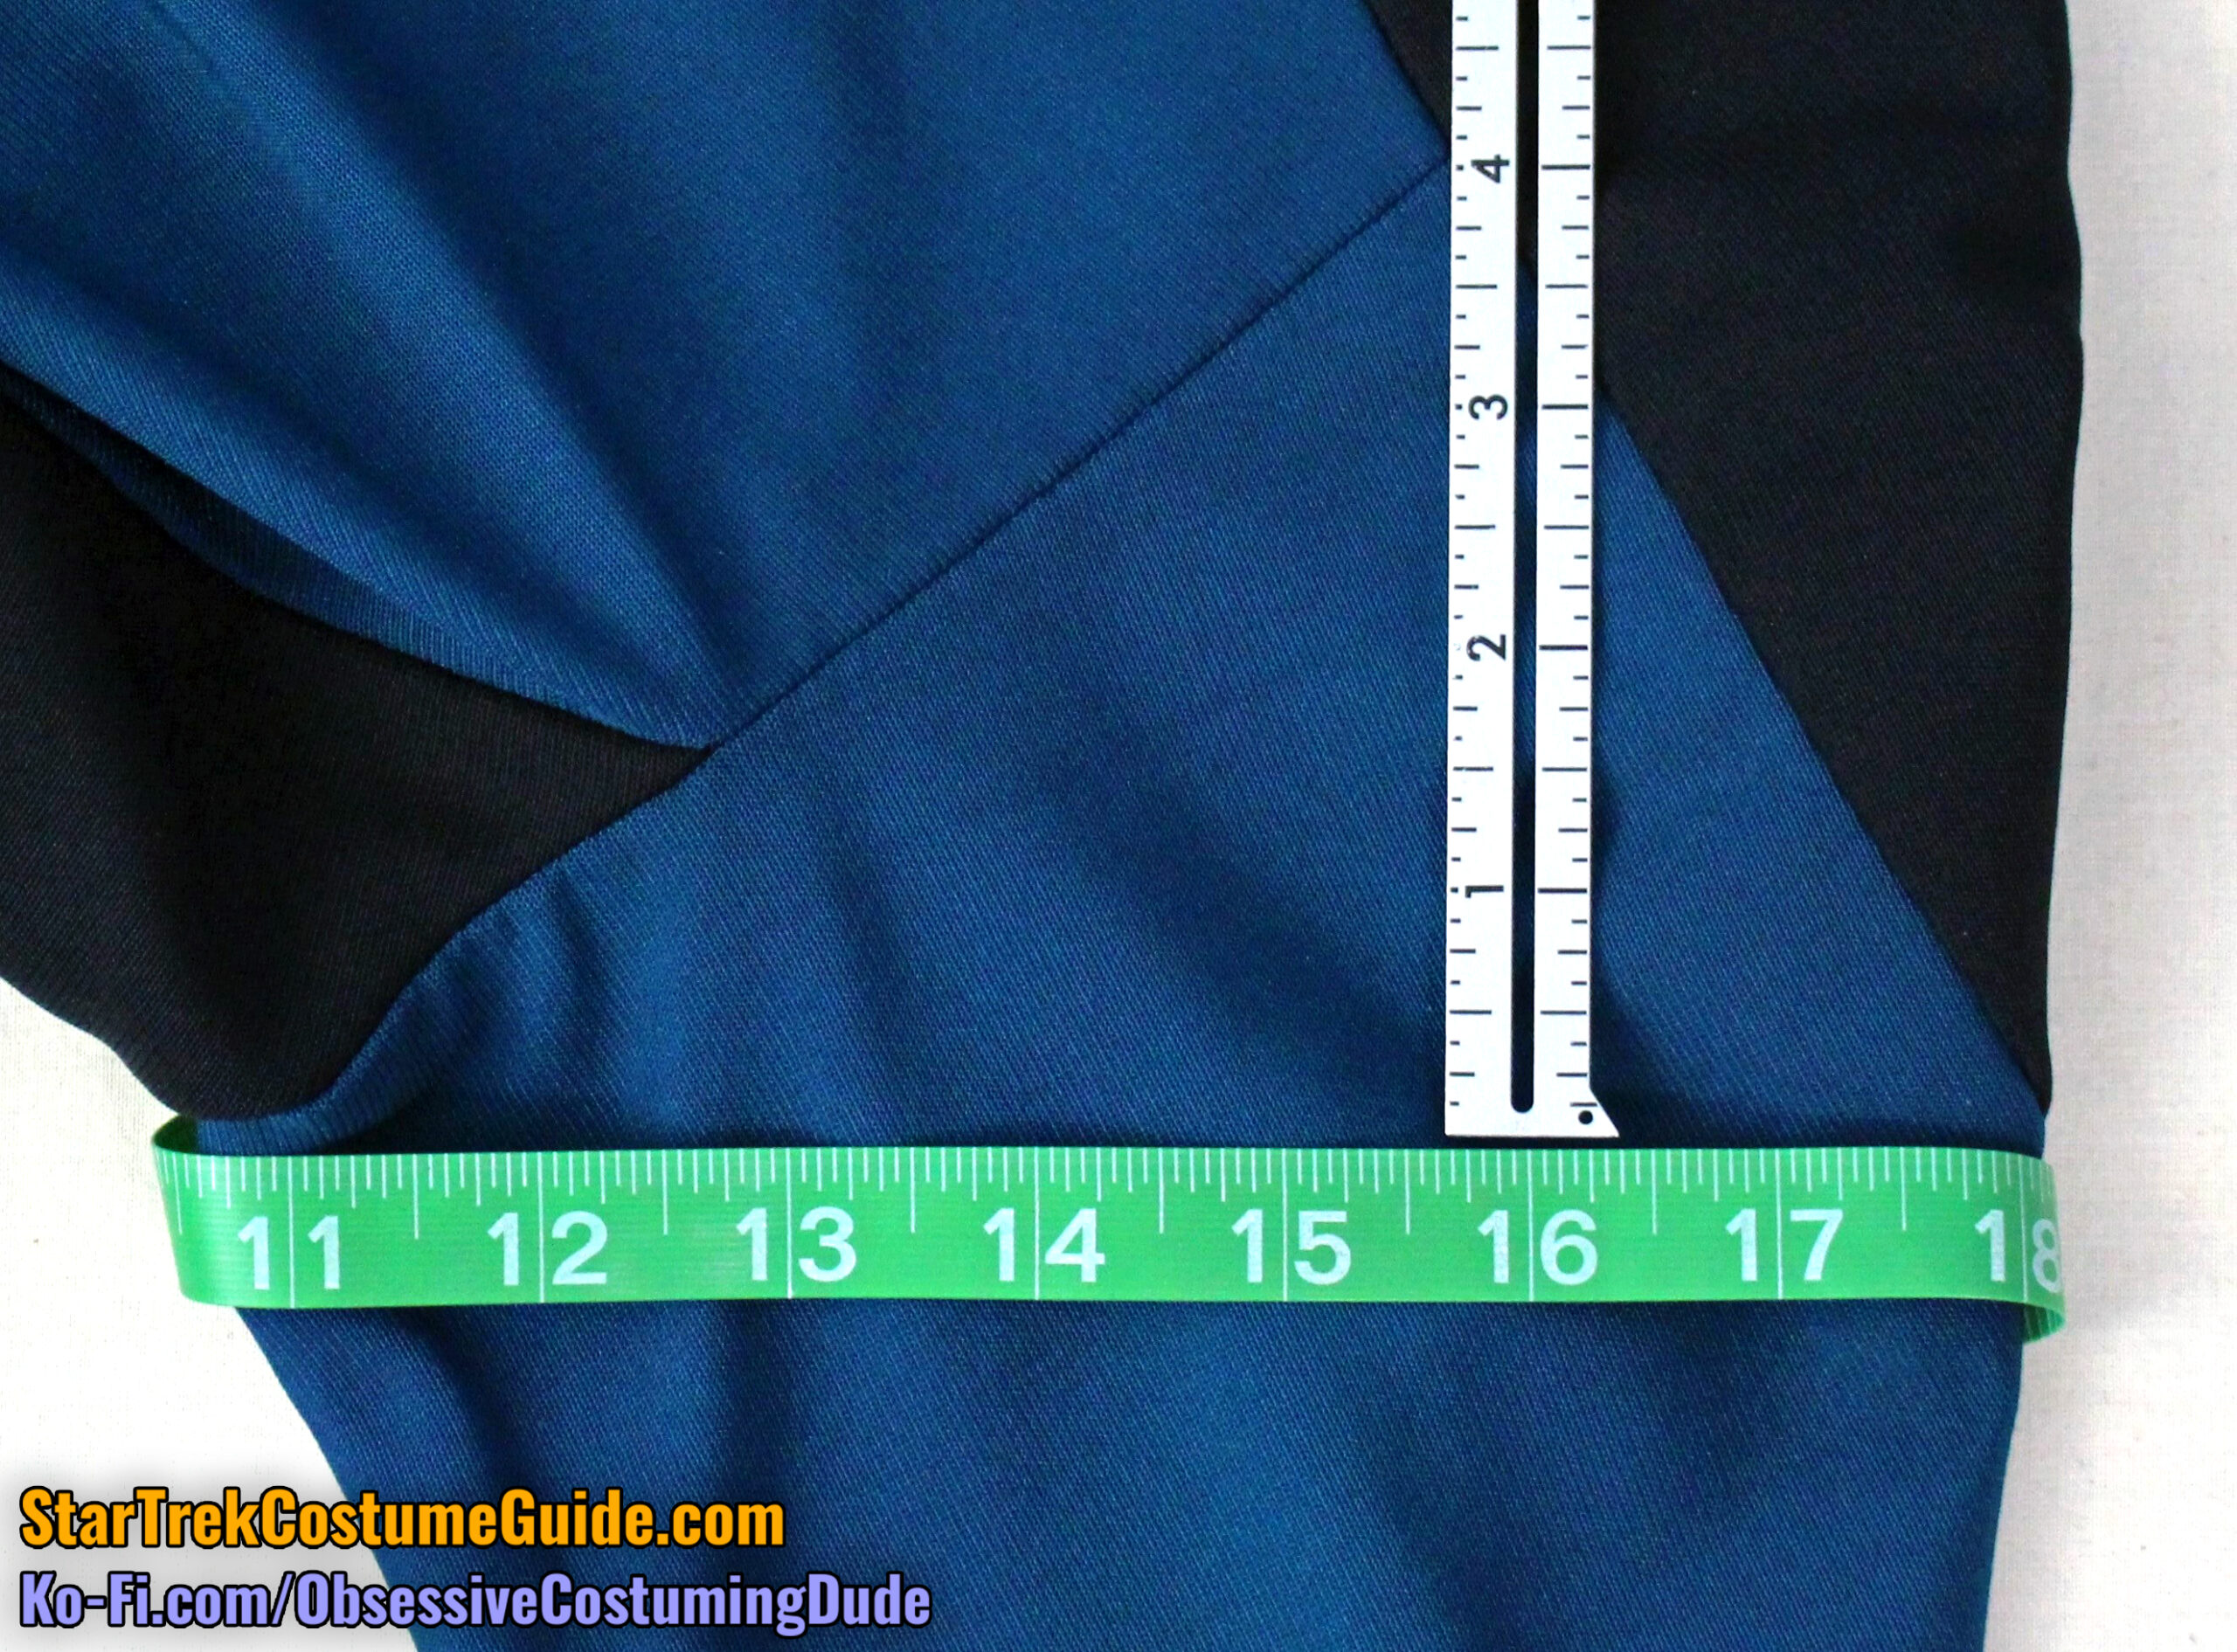
But, using the outer corners of the sleeves for reference, one can see that both sleeve inserts were 4” tall (measured from the aforementioned points, NOT the fabric weave).
Also, the front sleeves were 7 ⅜”, while the back sleeves were 8 ¾” wide.
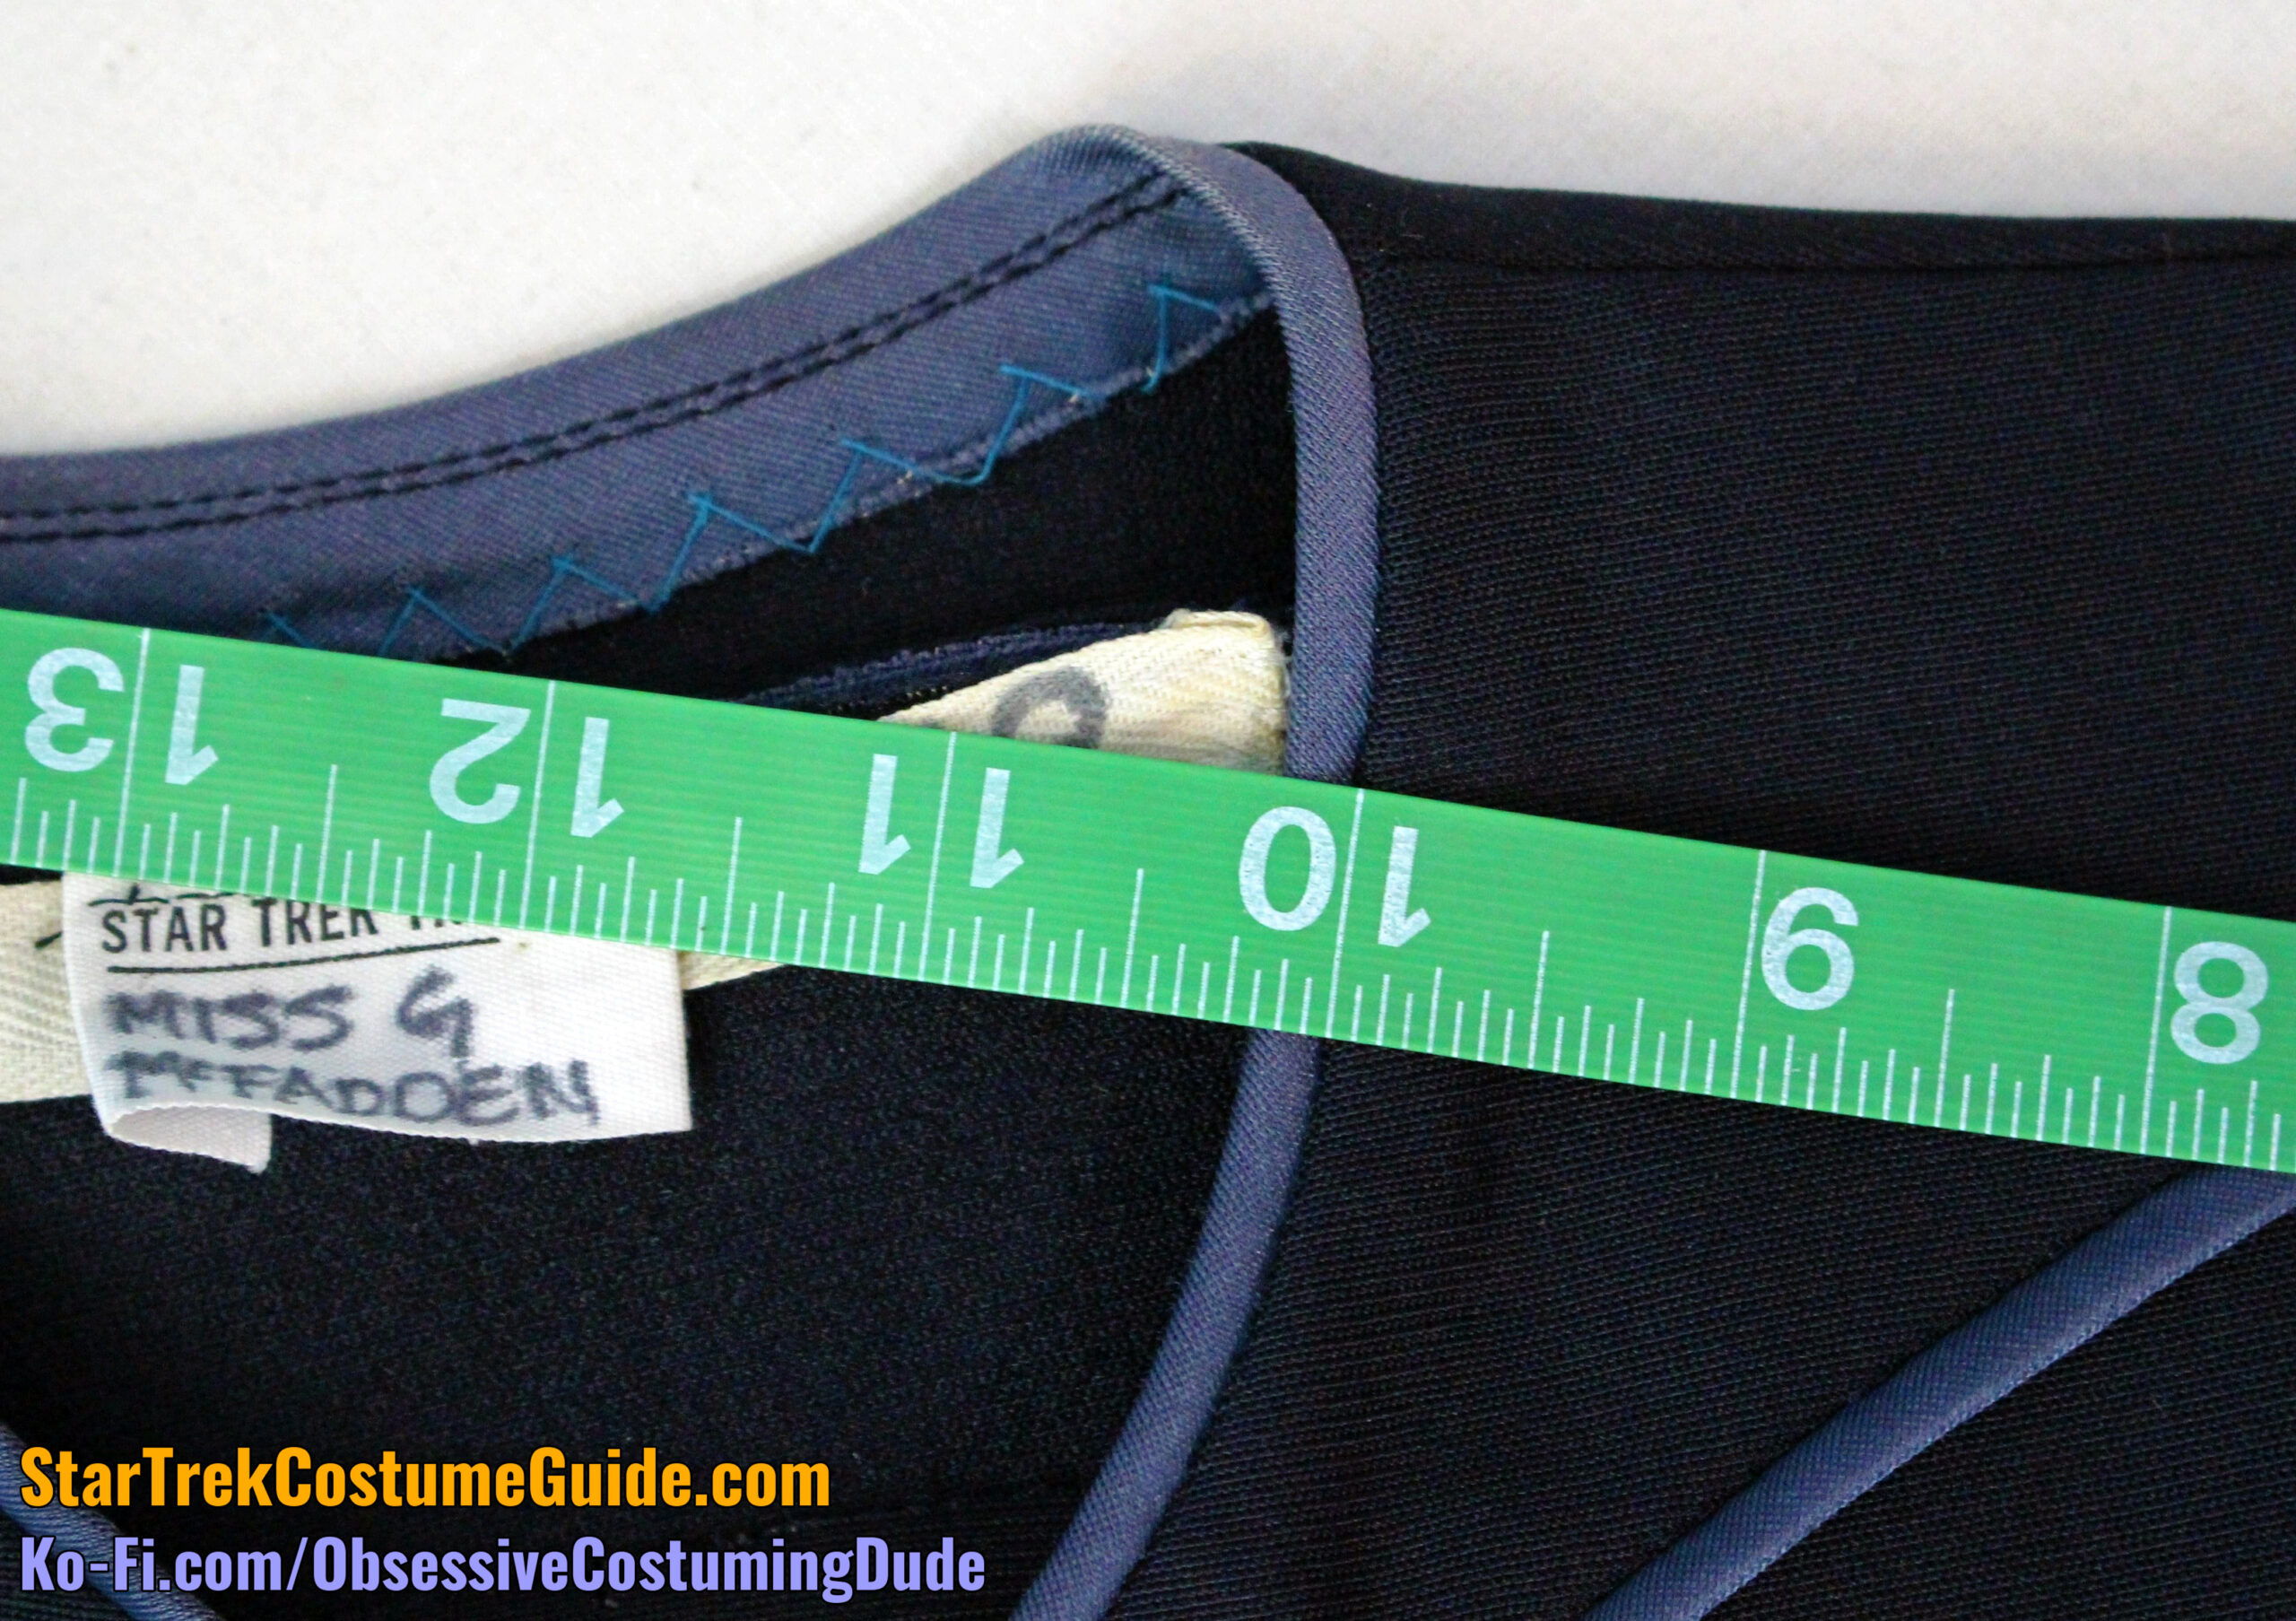
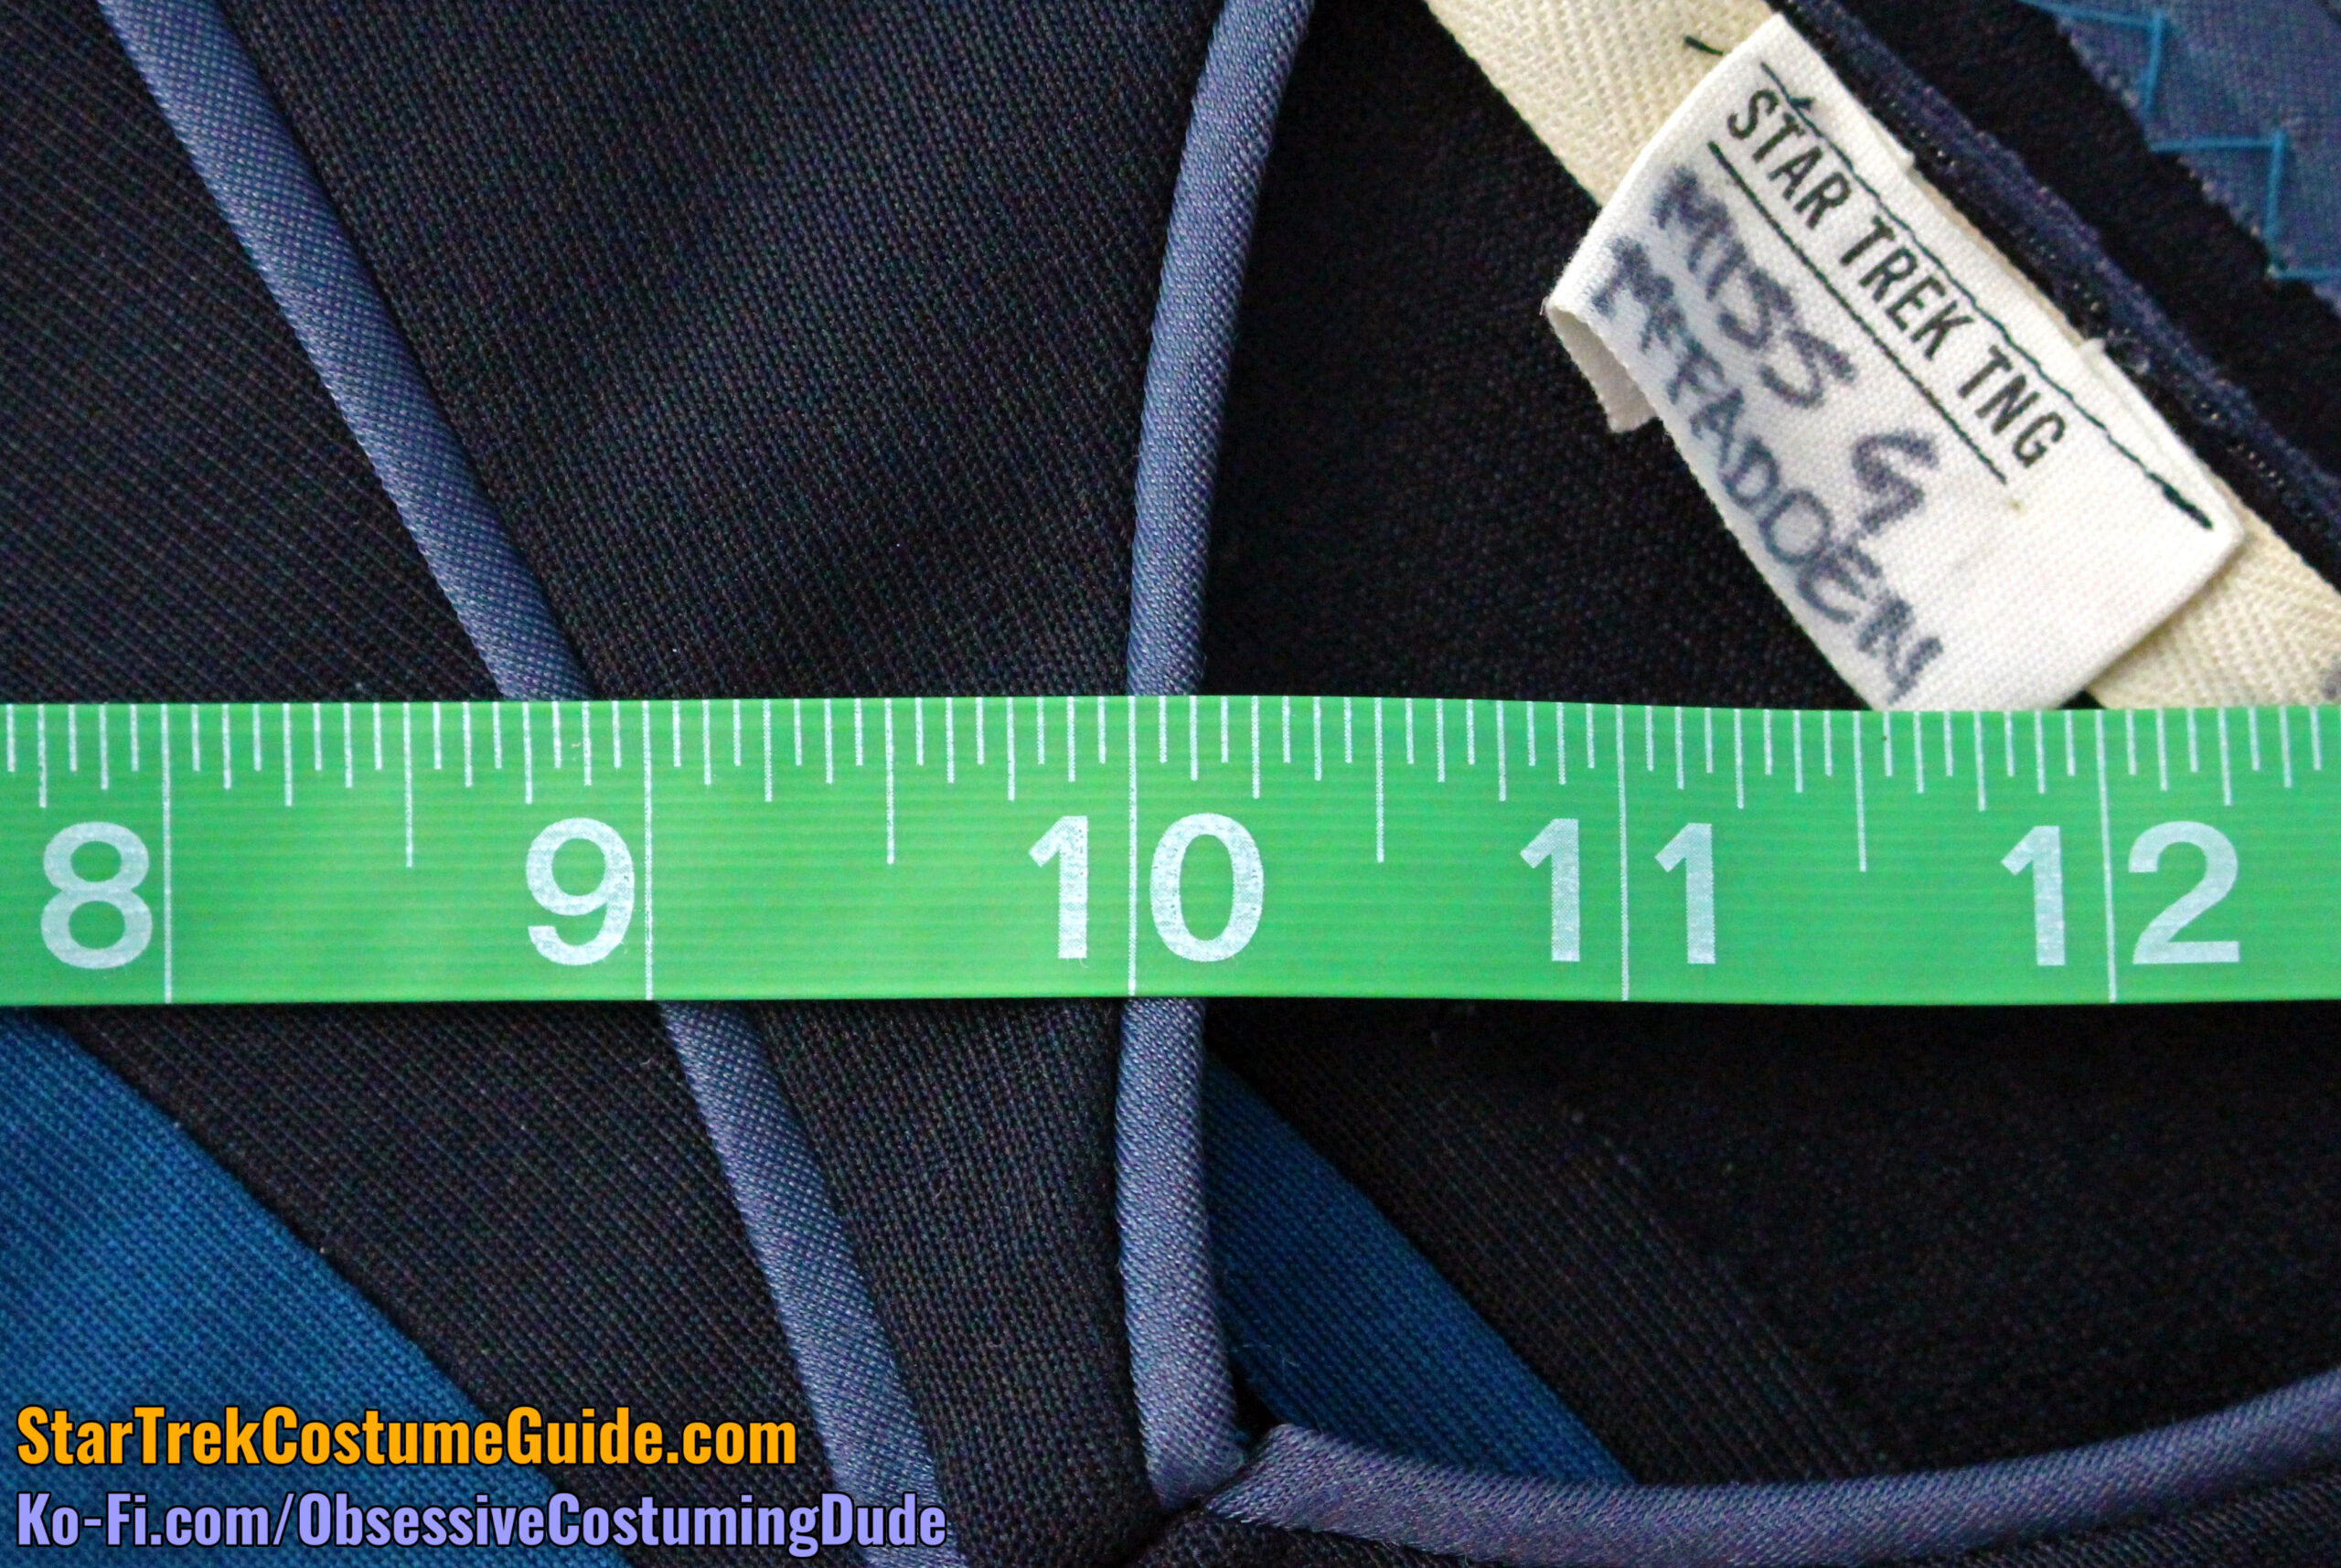
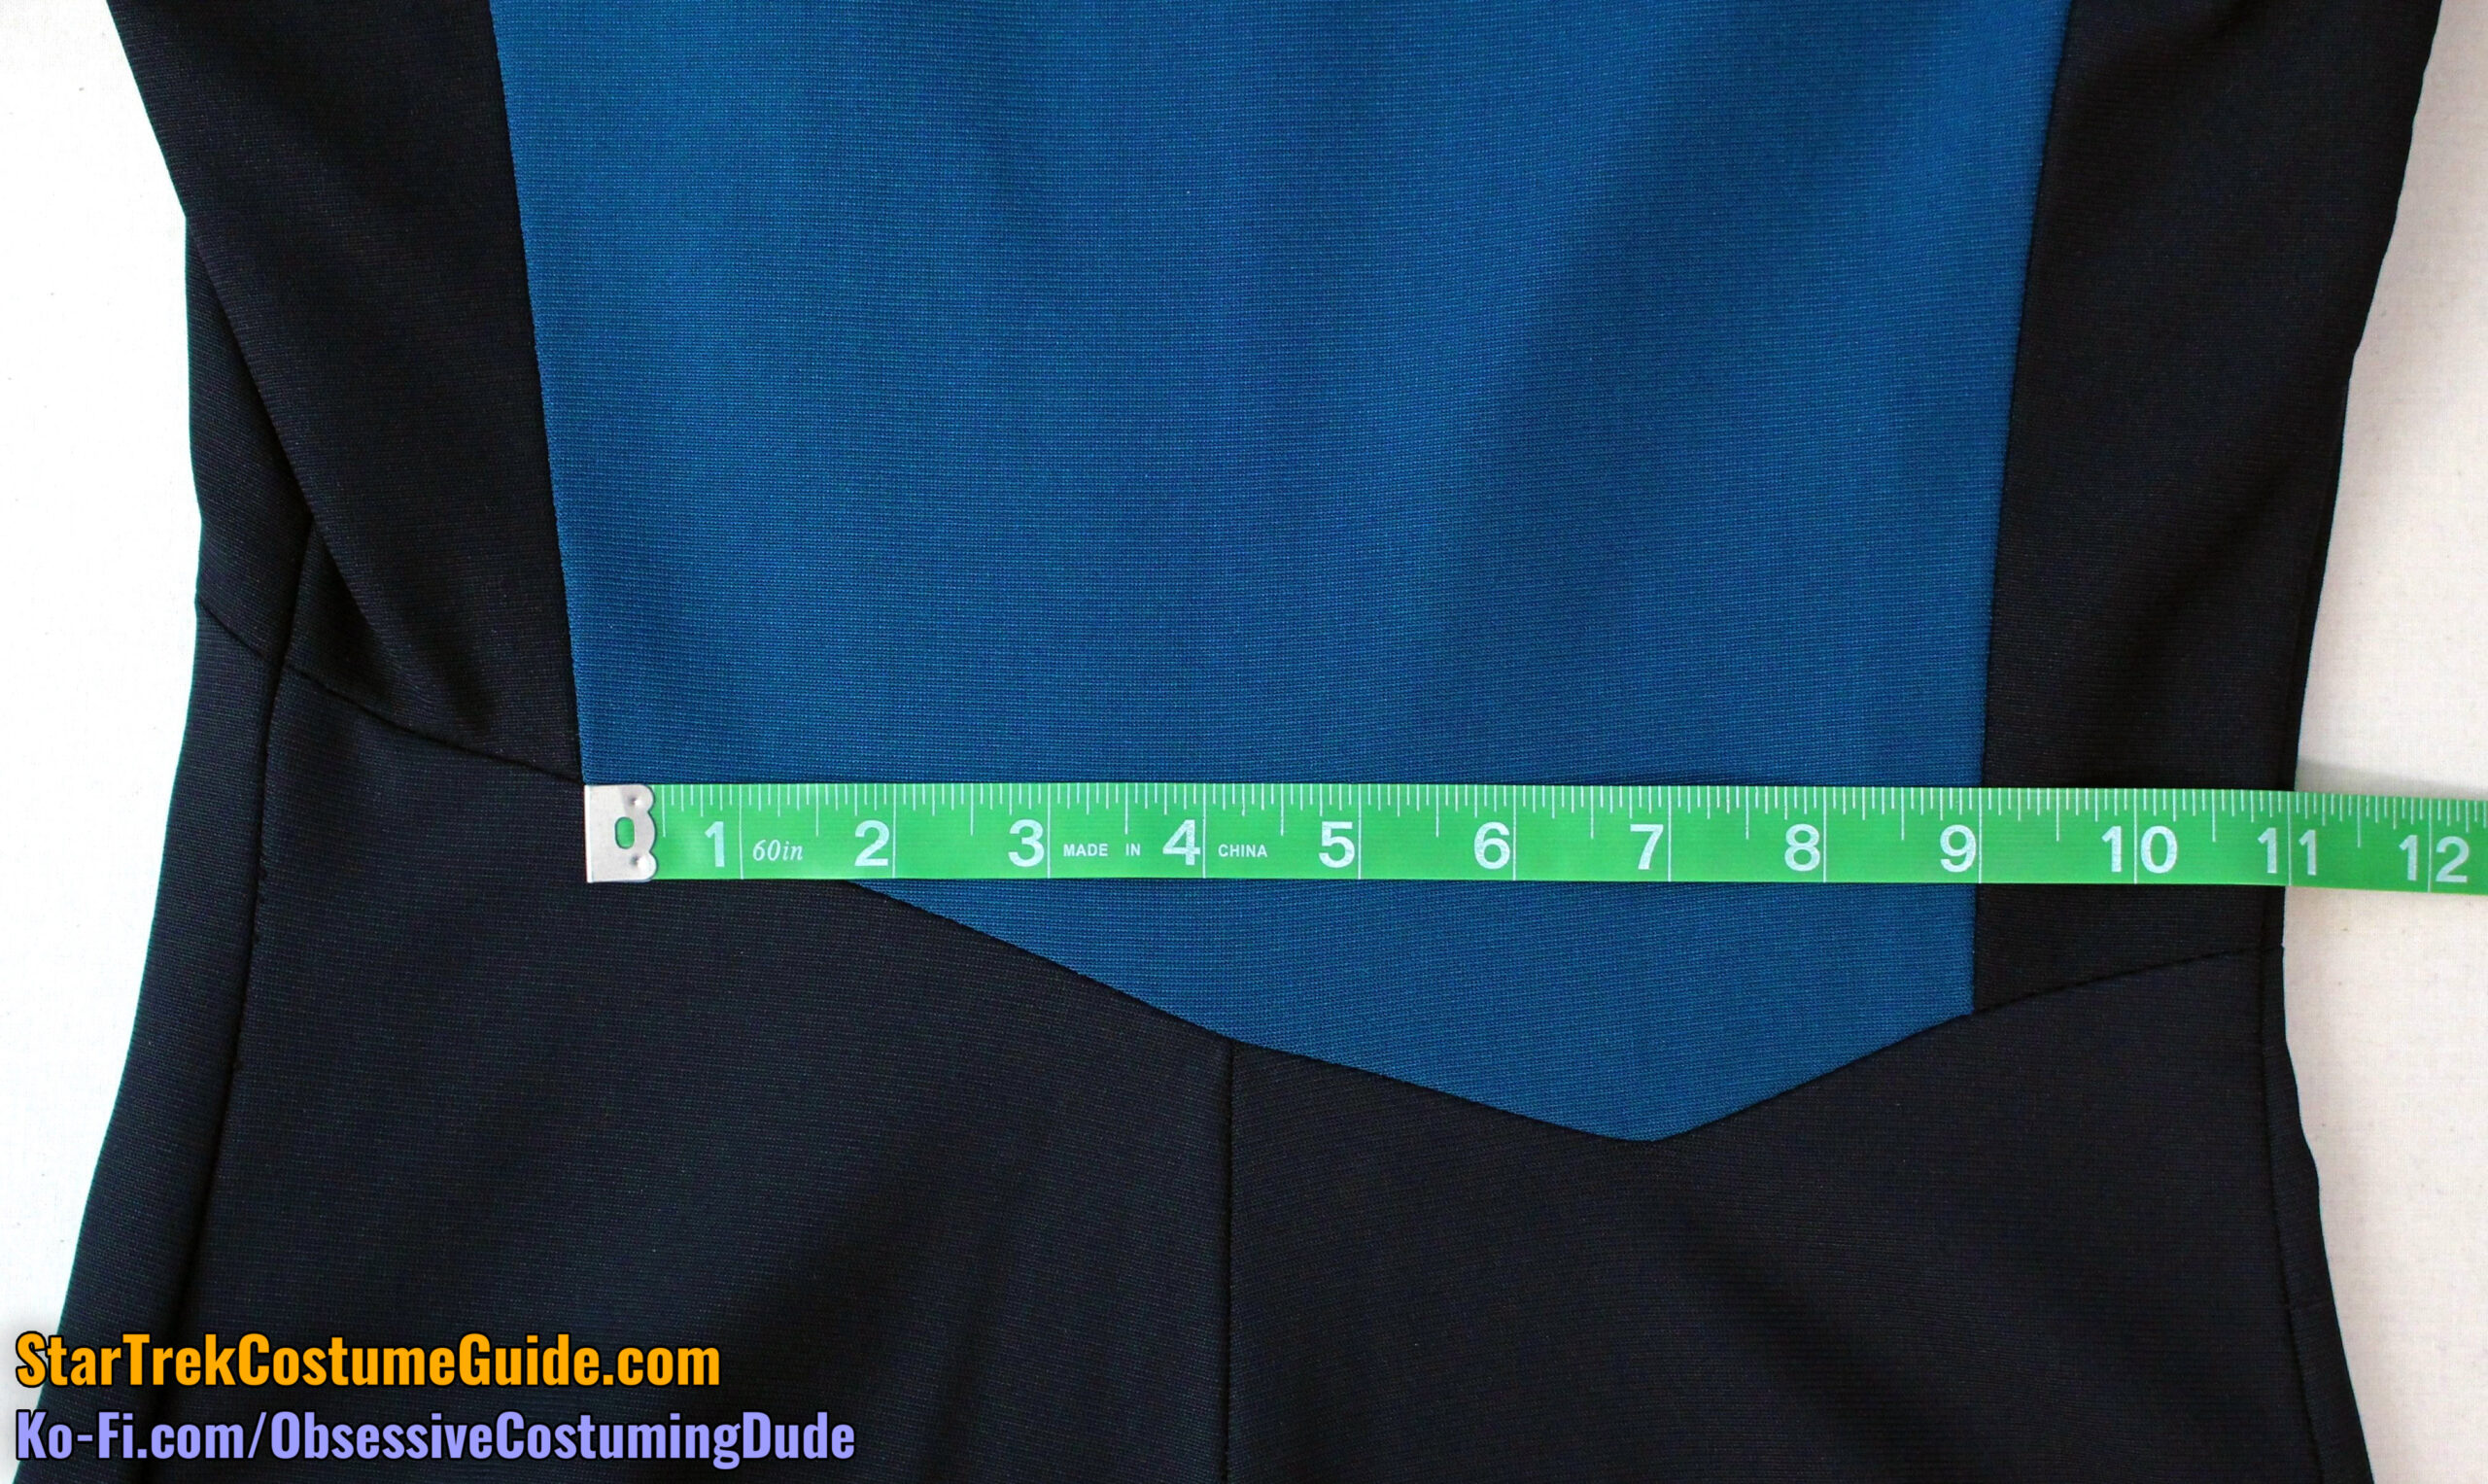
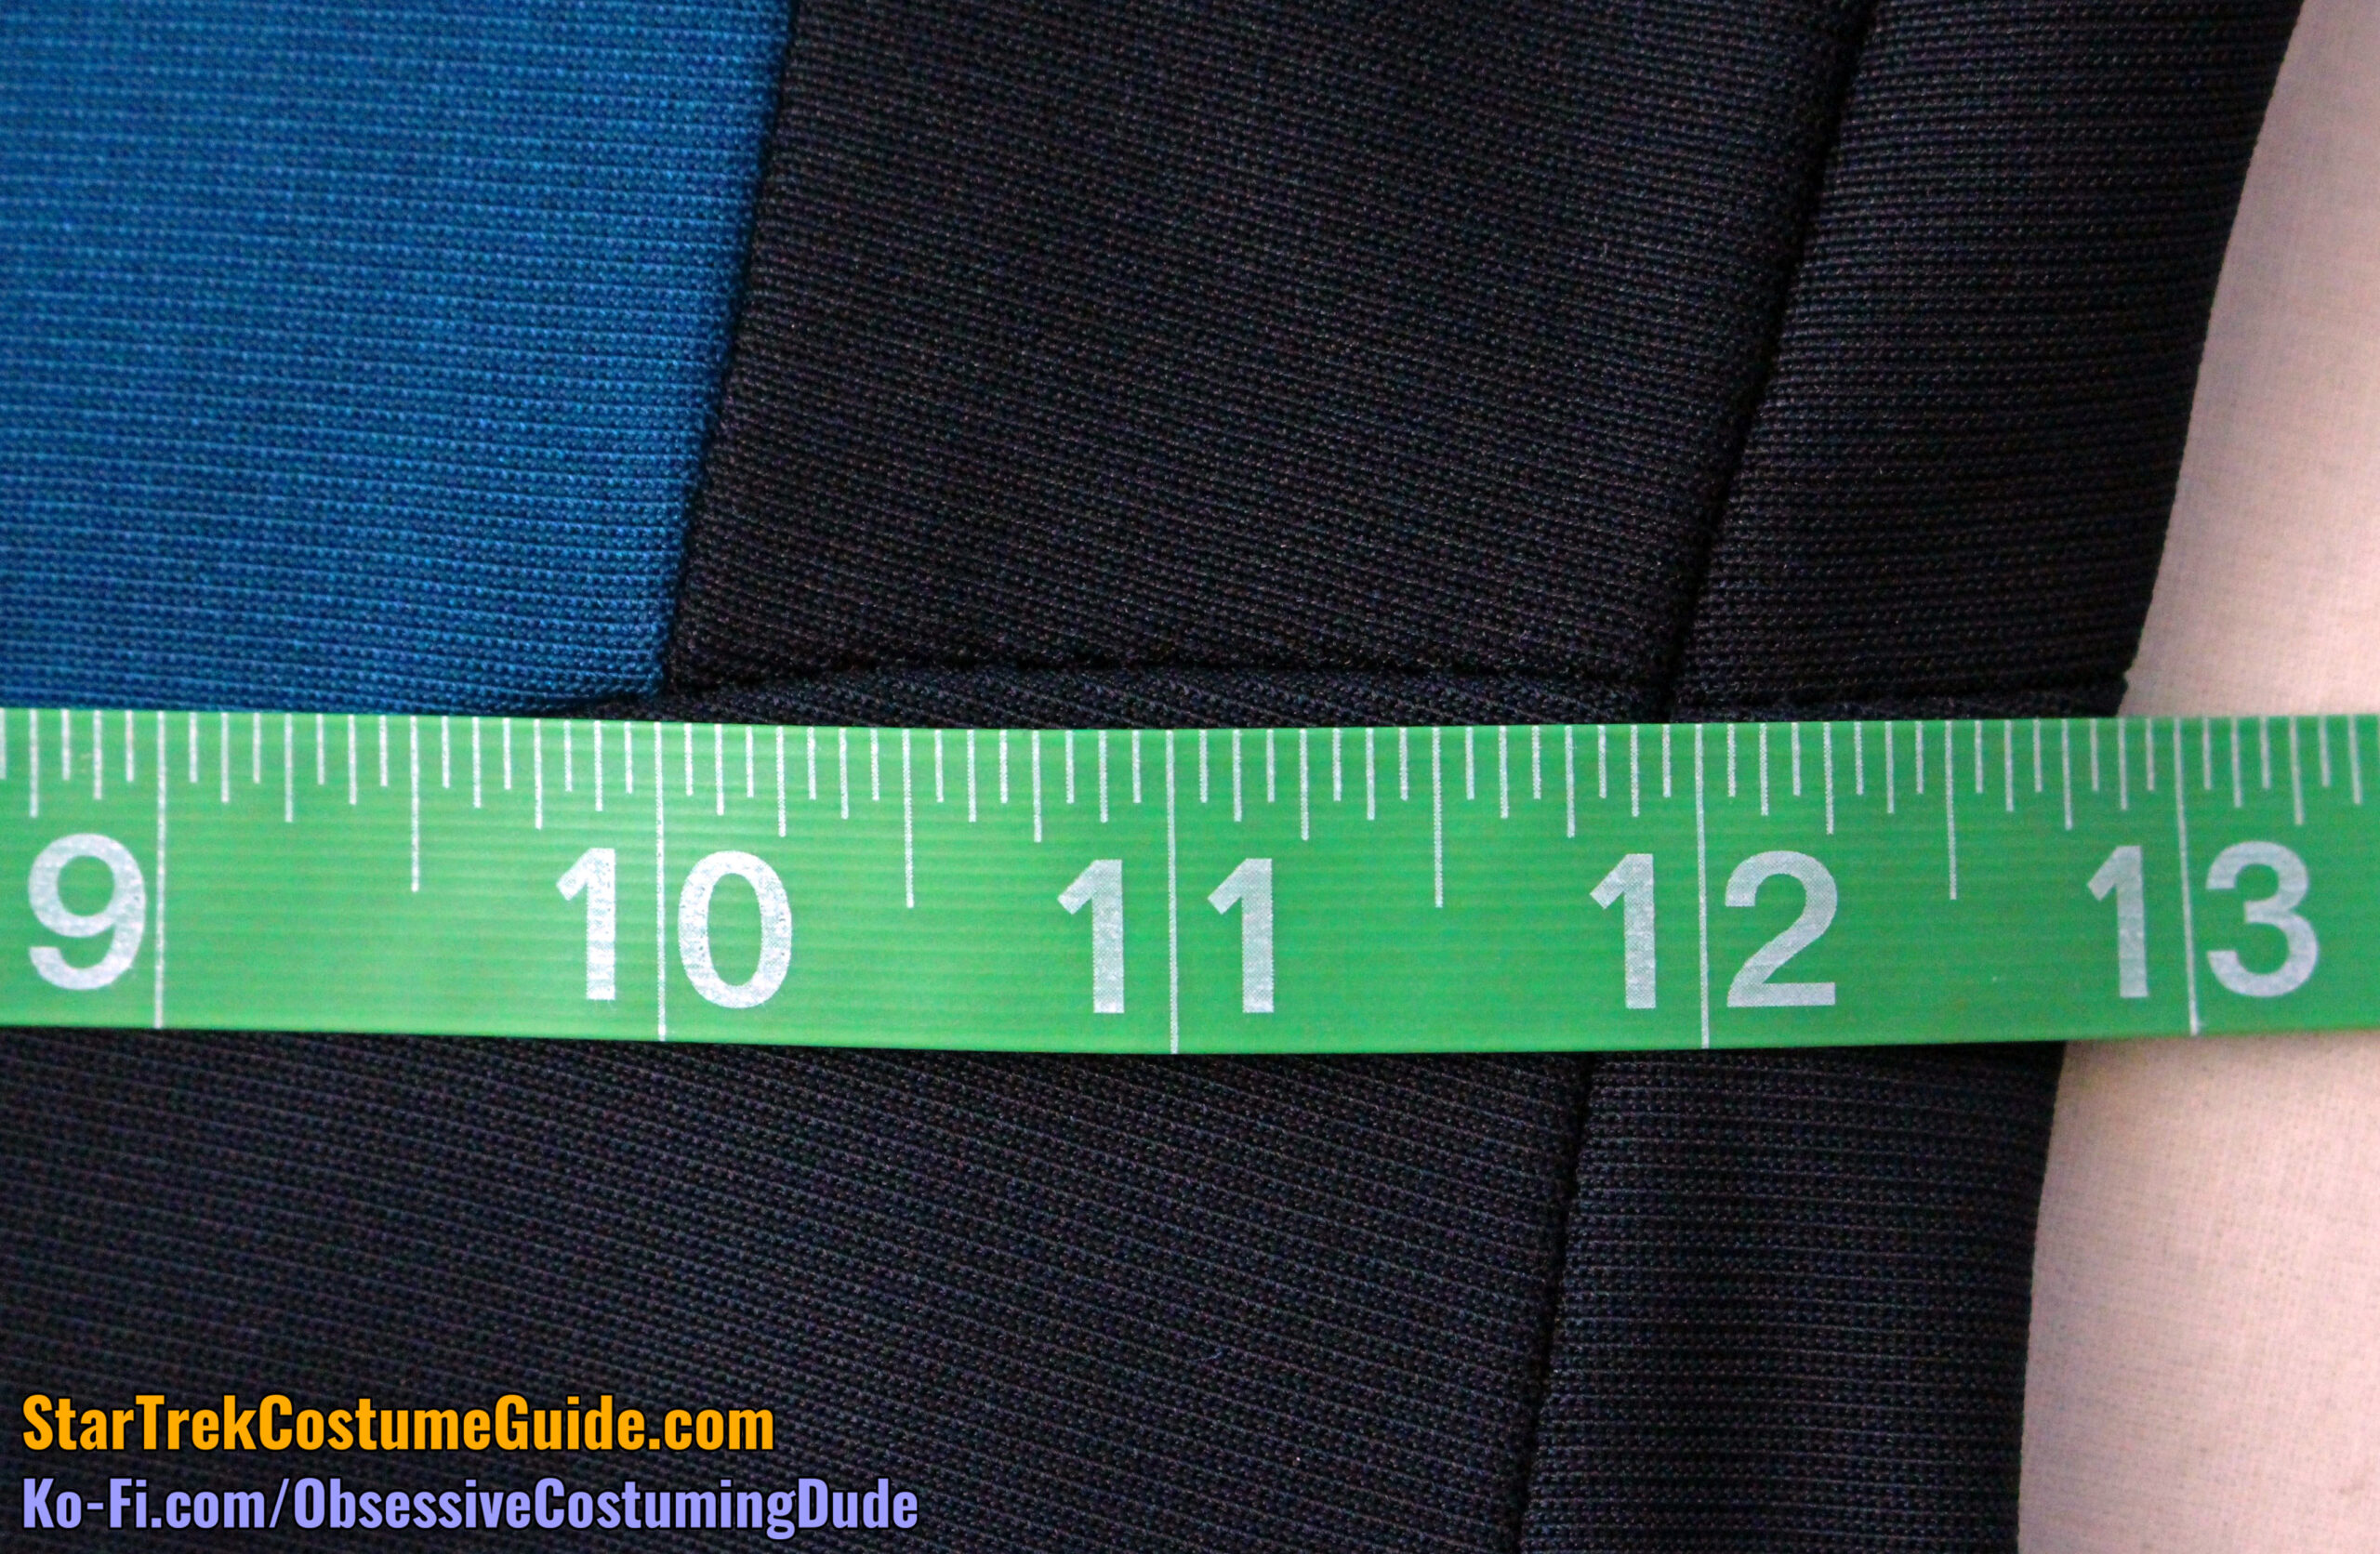
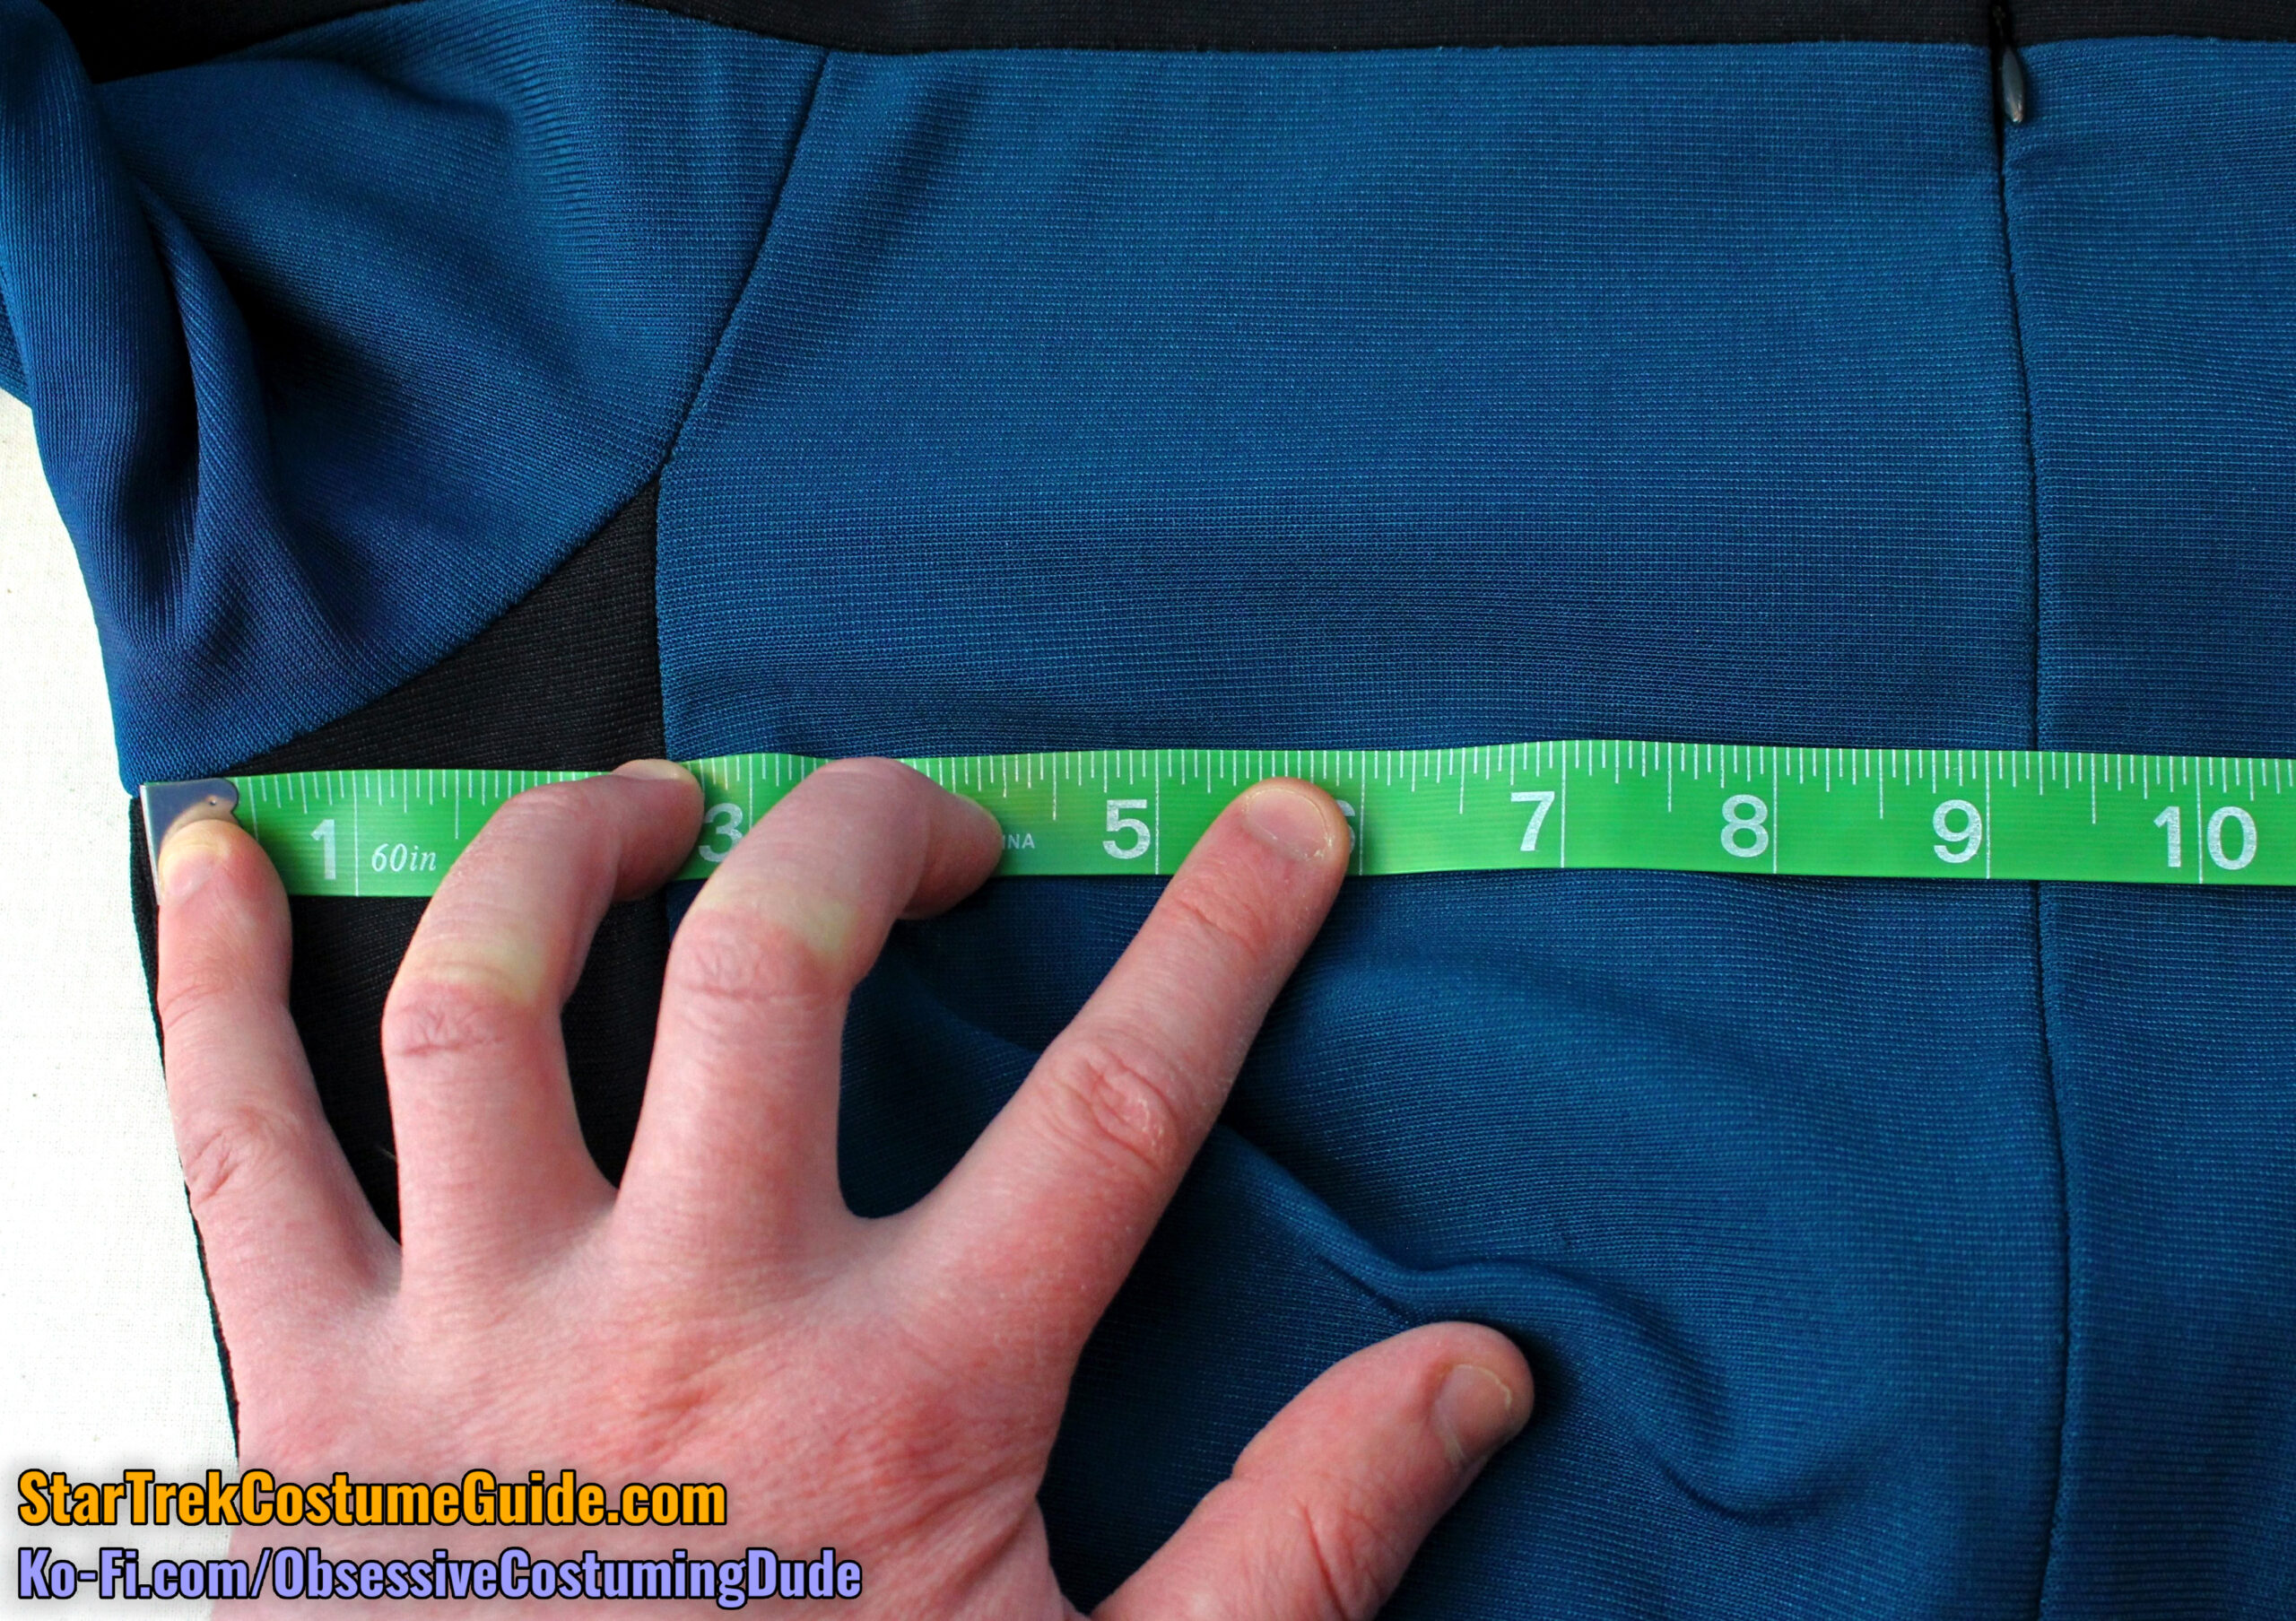
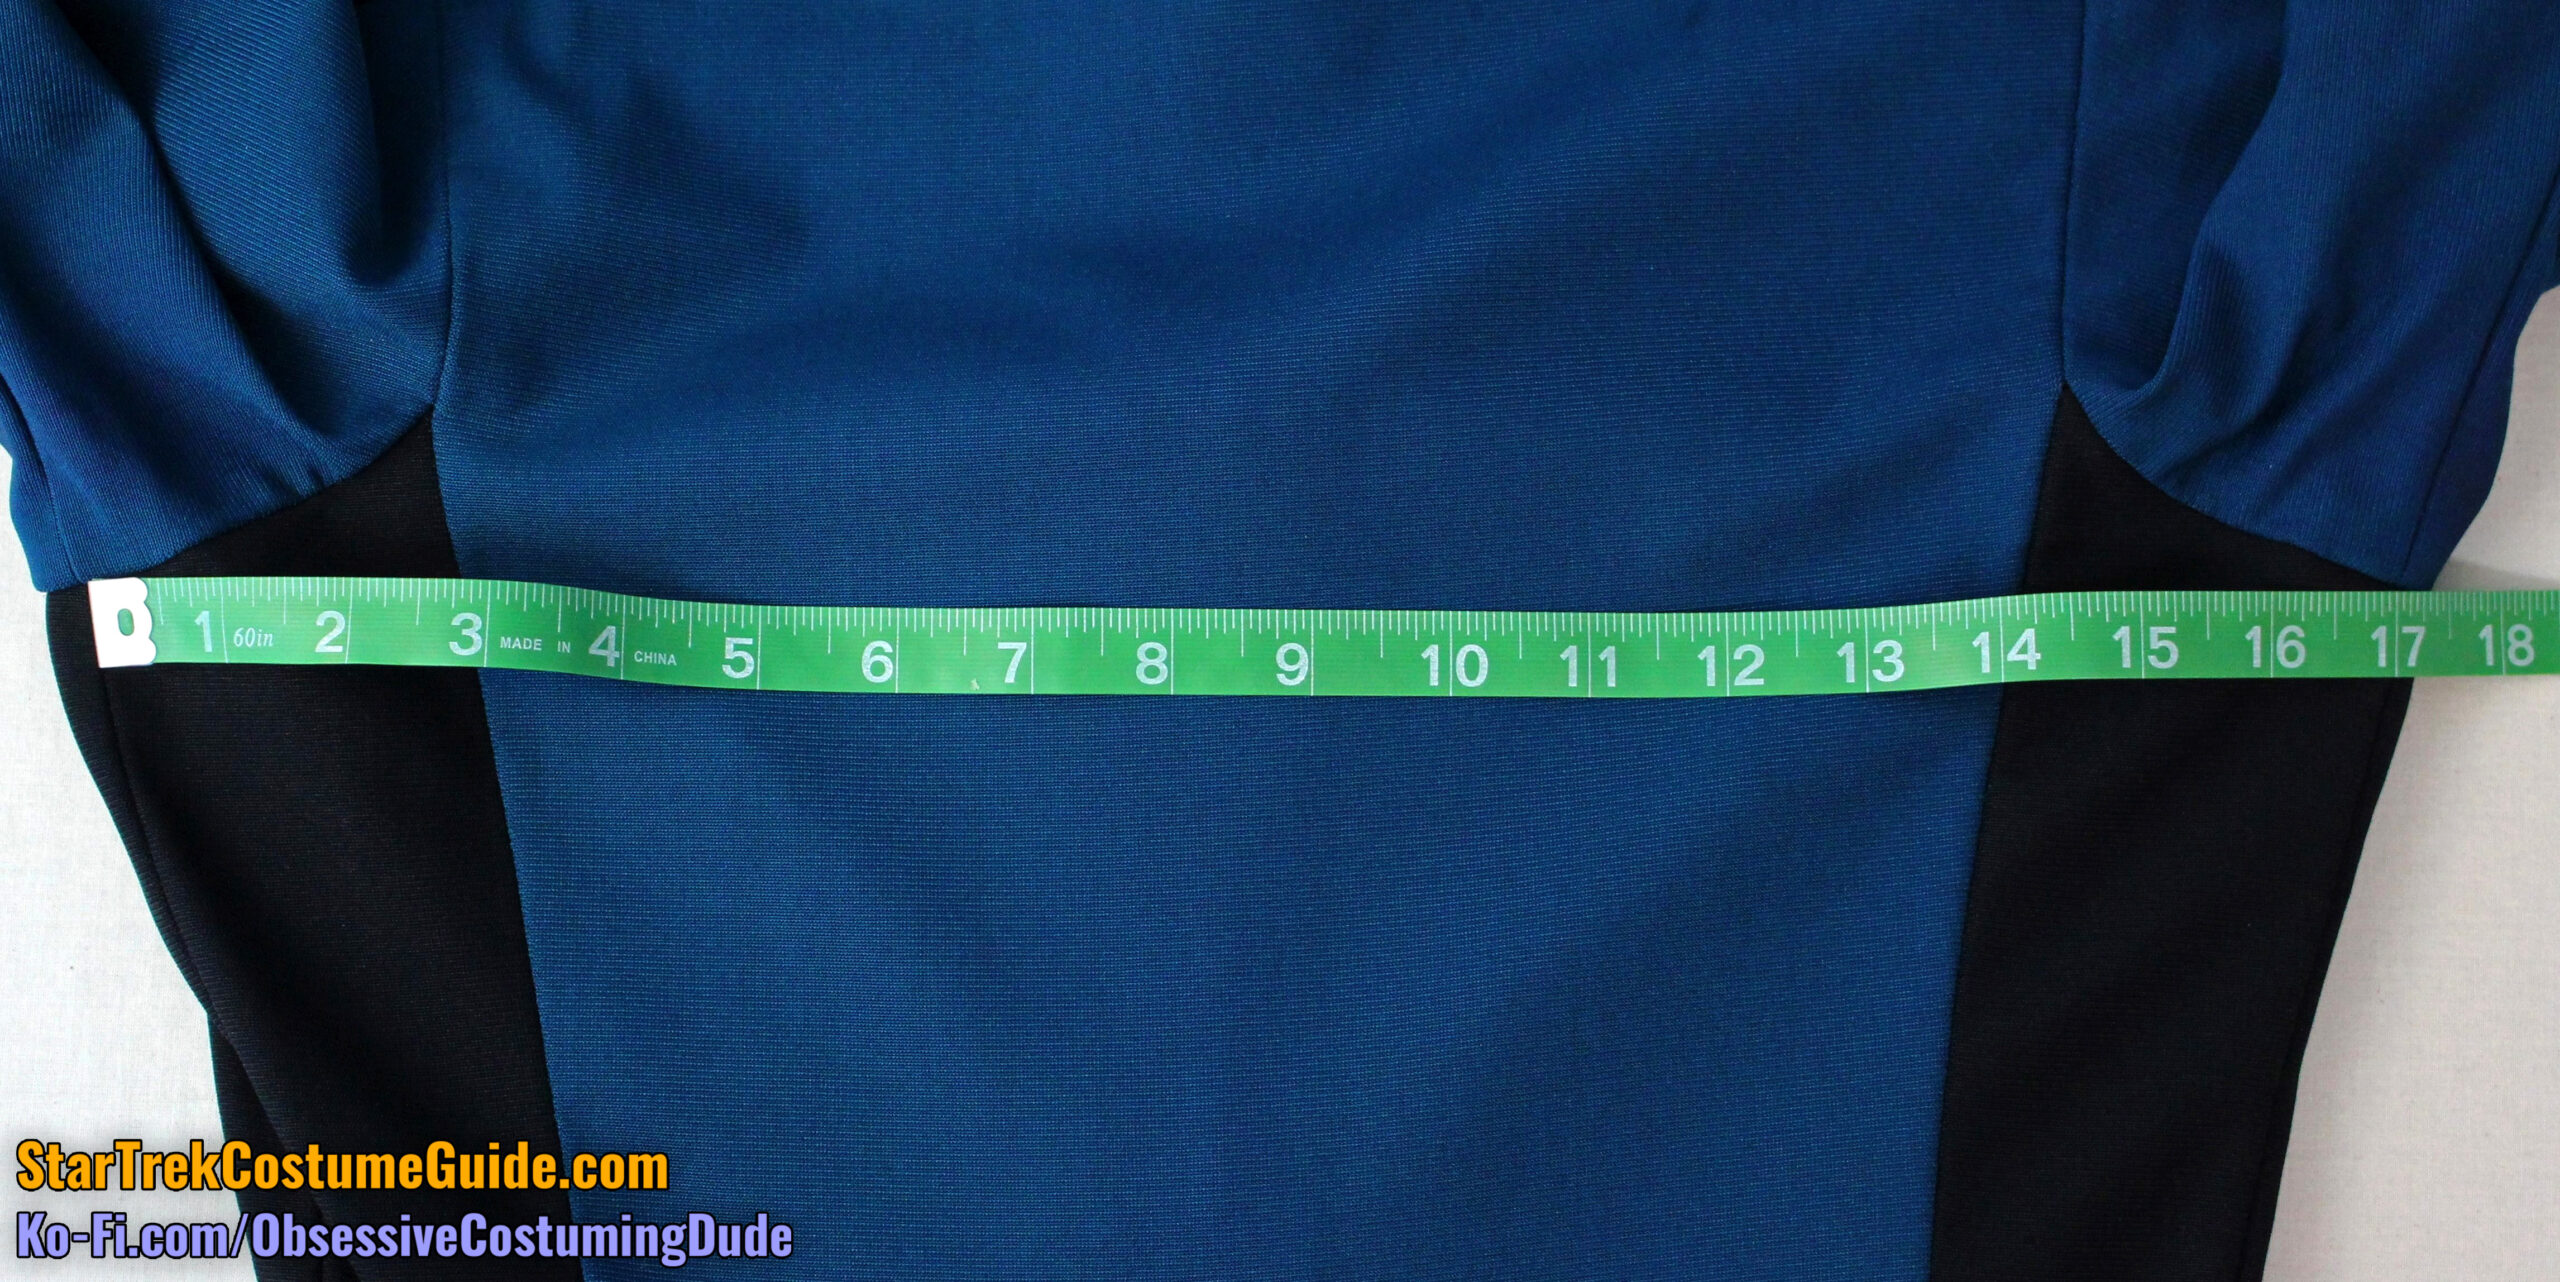
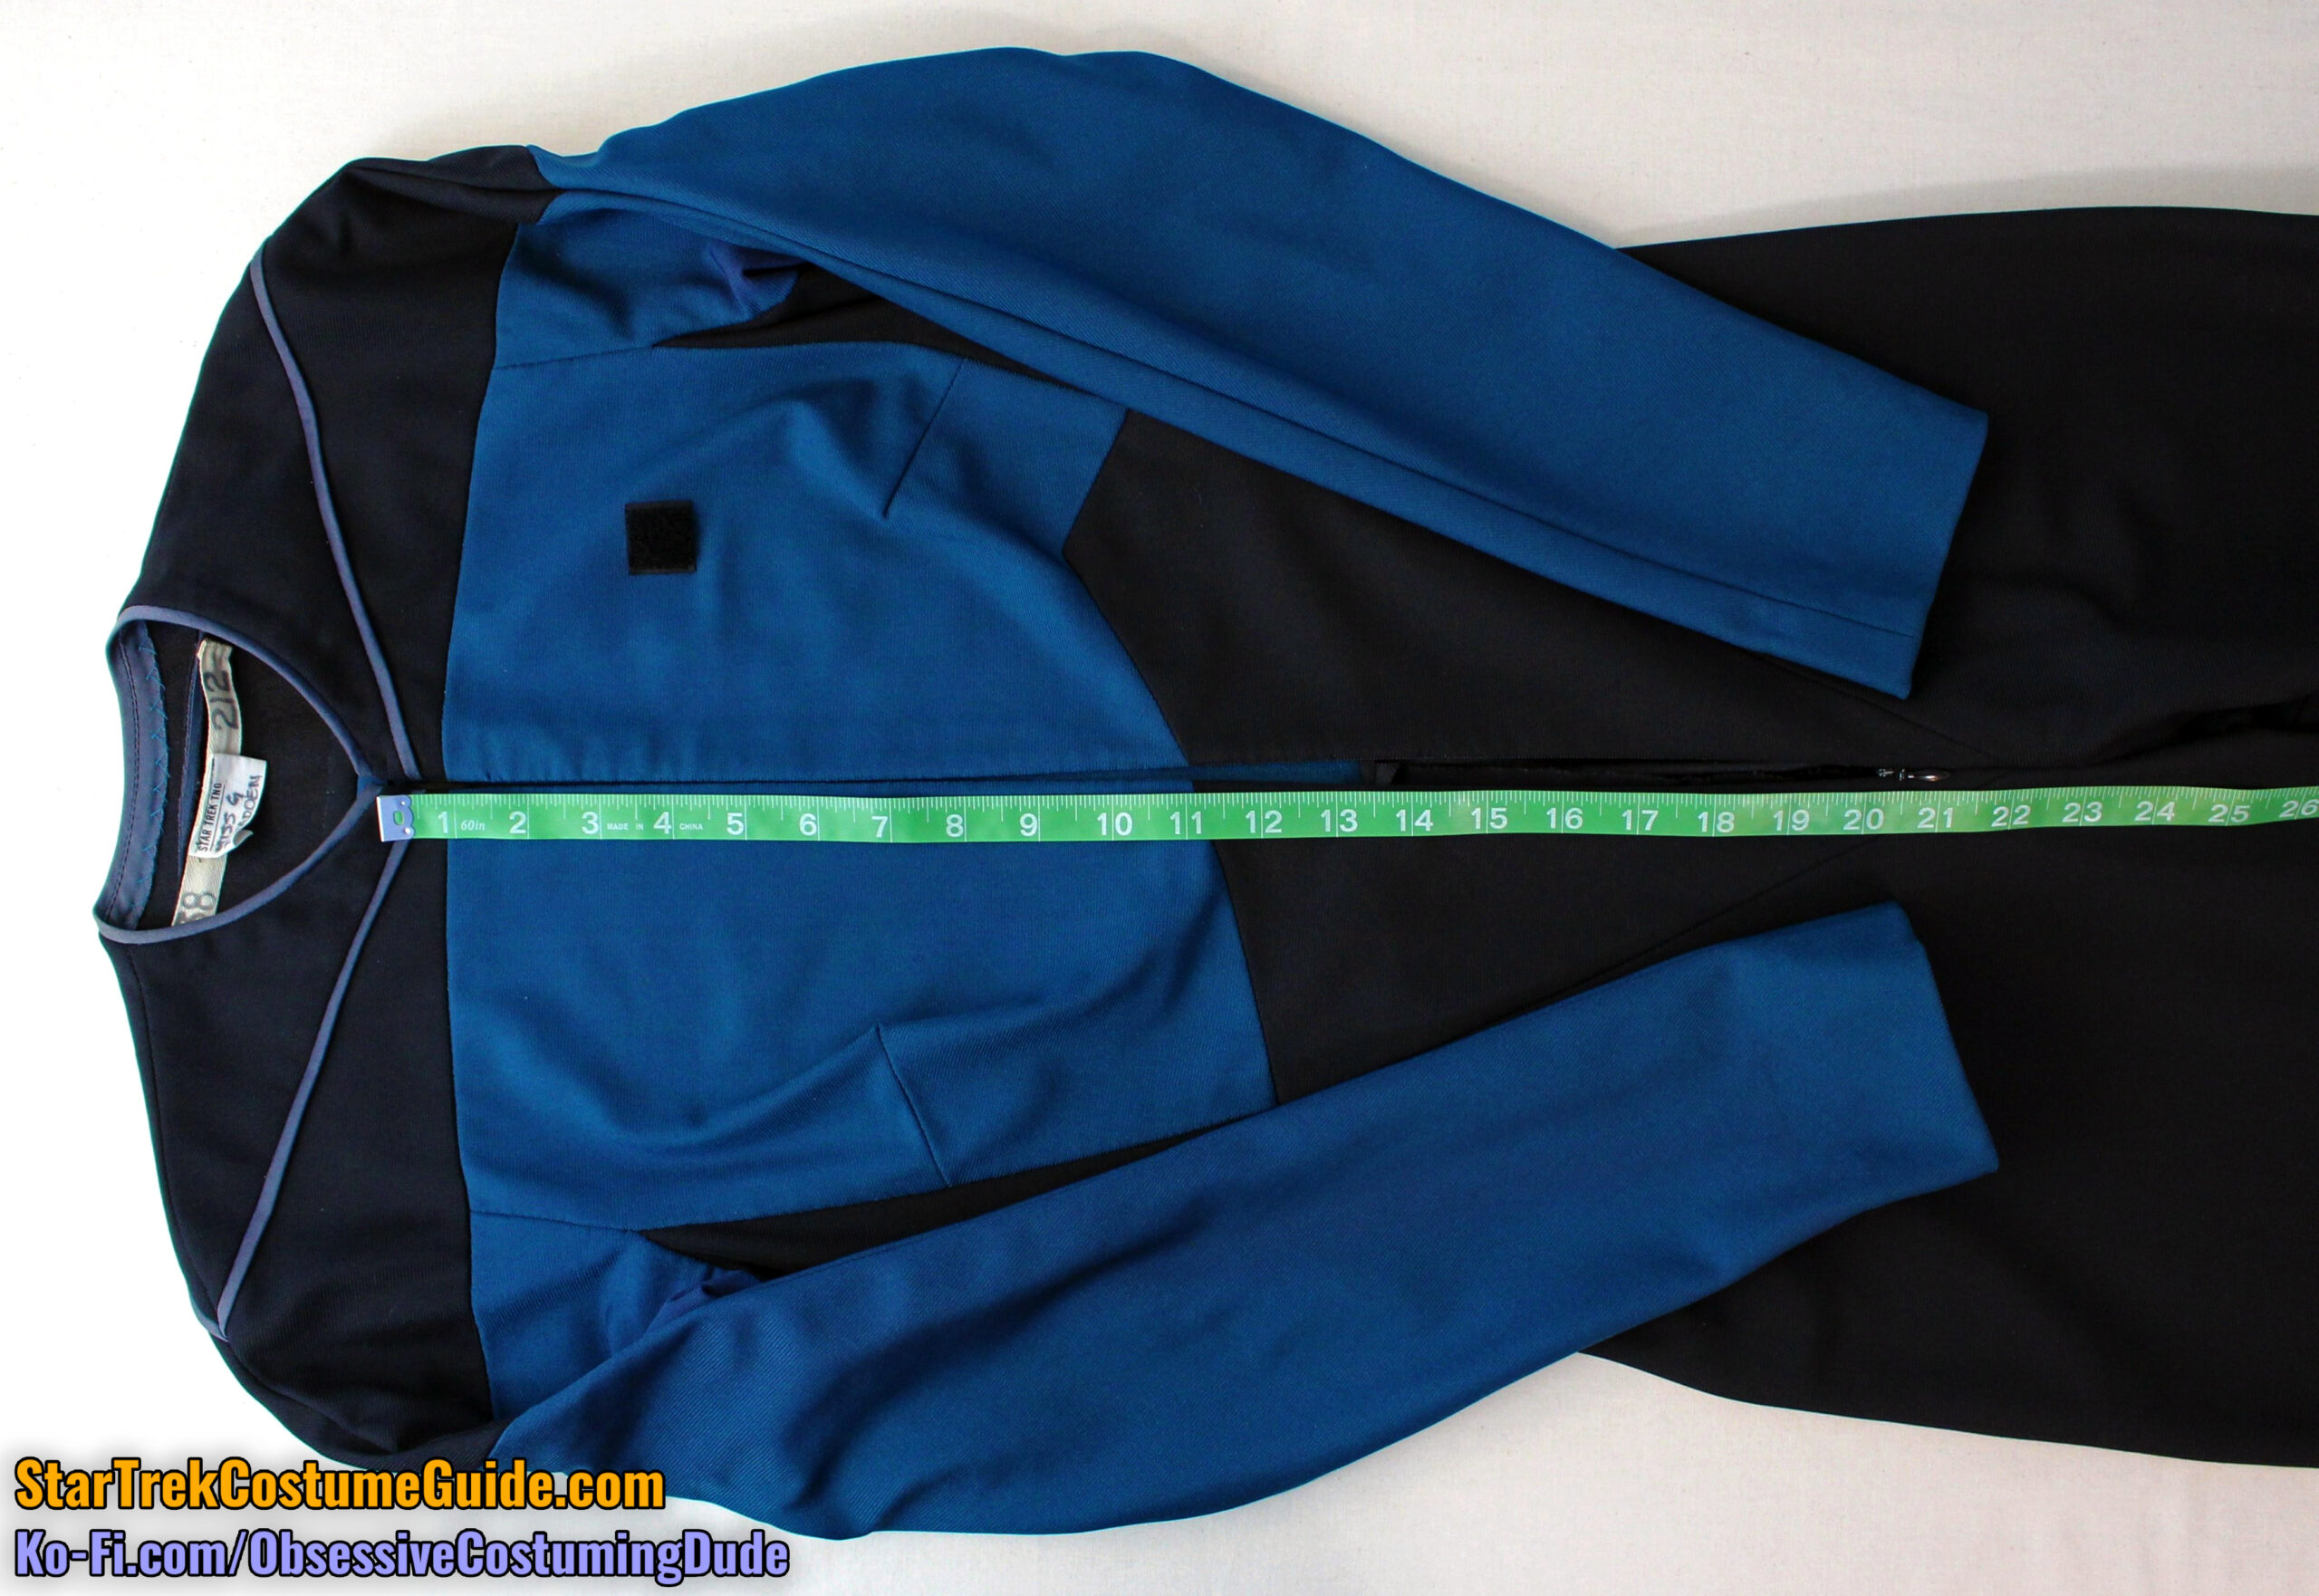
On both sides, the front chest measured 9 ¼” from the center front to side seams at the underarm (18 ½” across the front), and the back chest measured 17 ¼” at the underarm.
The total bust/chest measurement was approximately 35 ¾”.
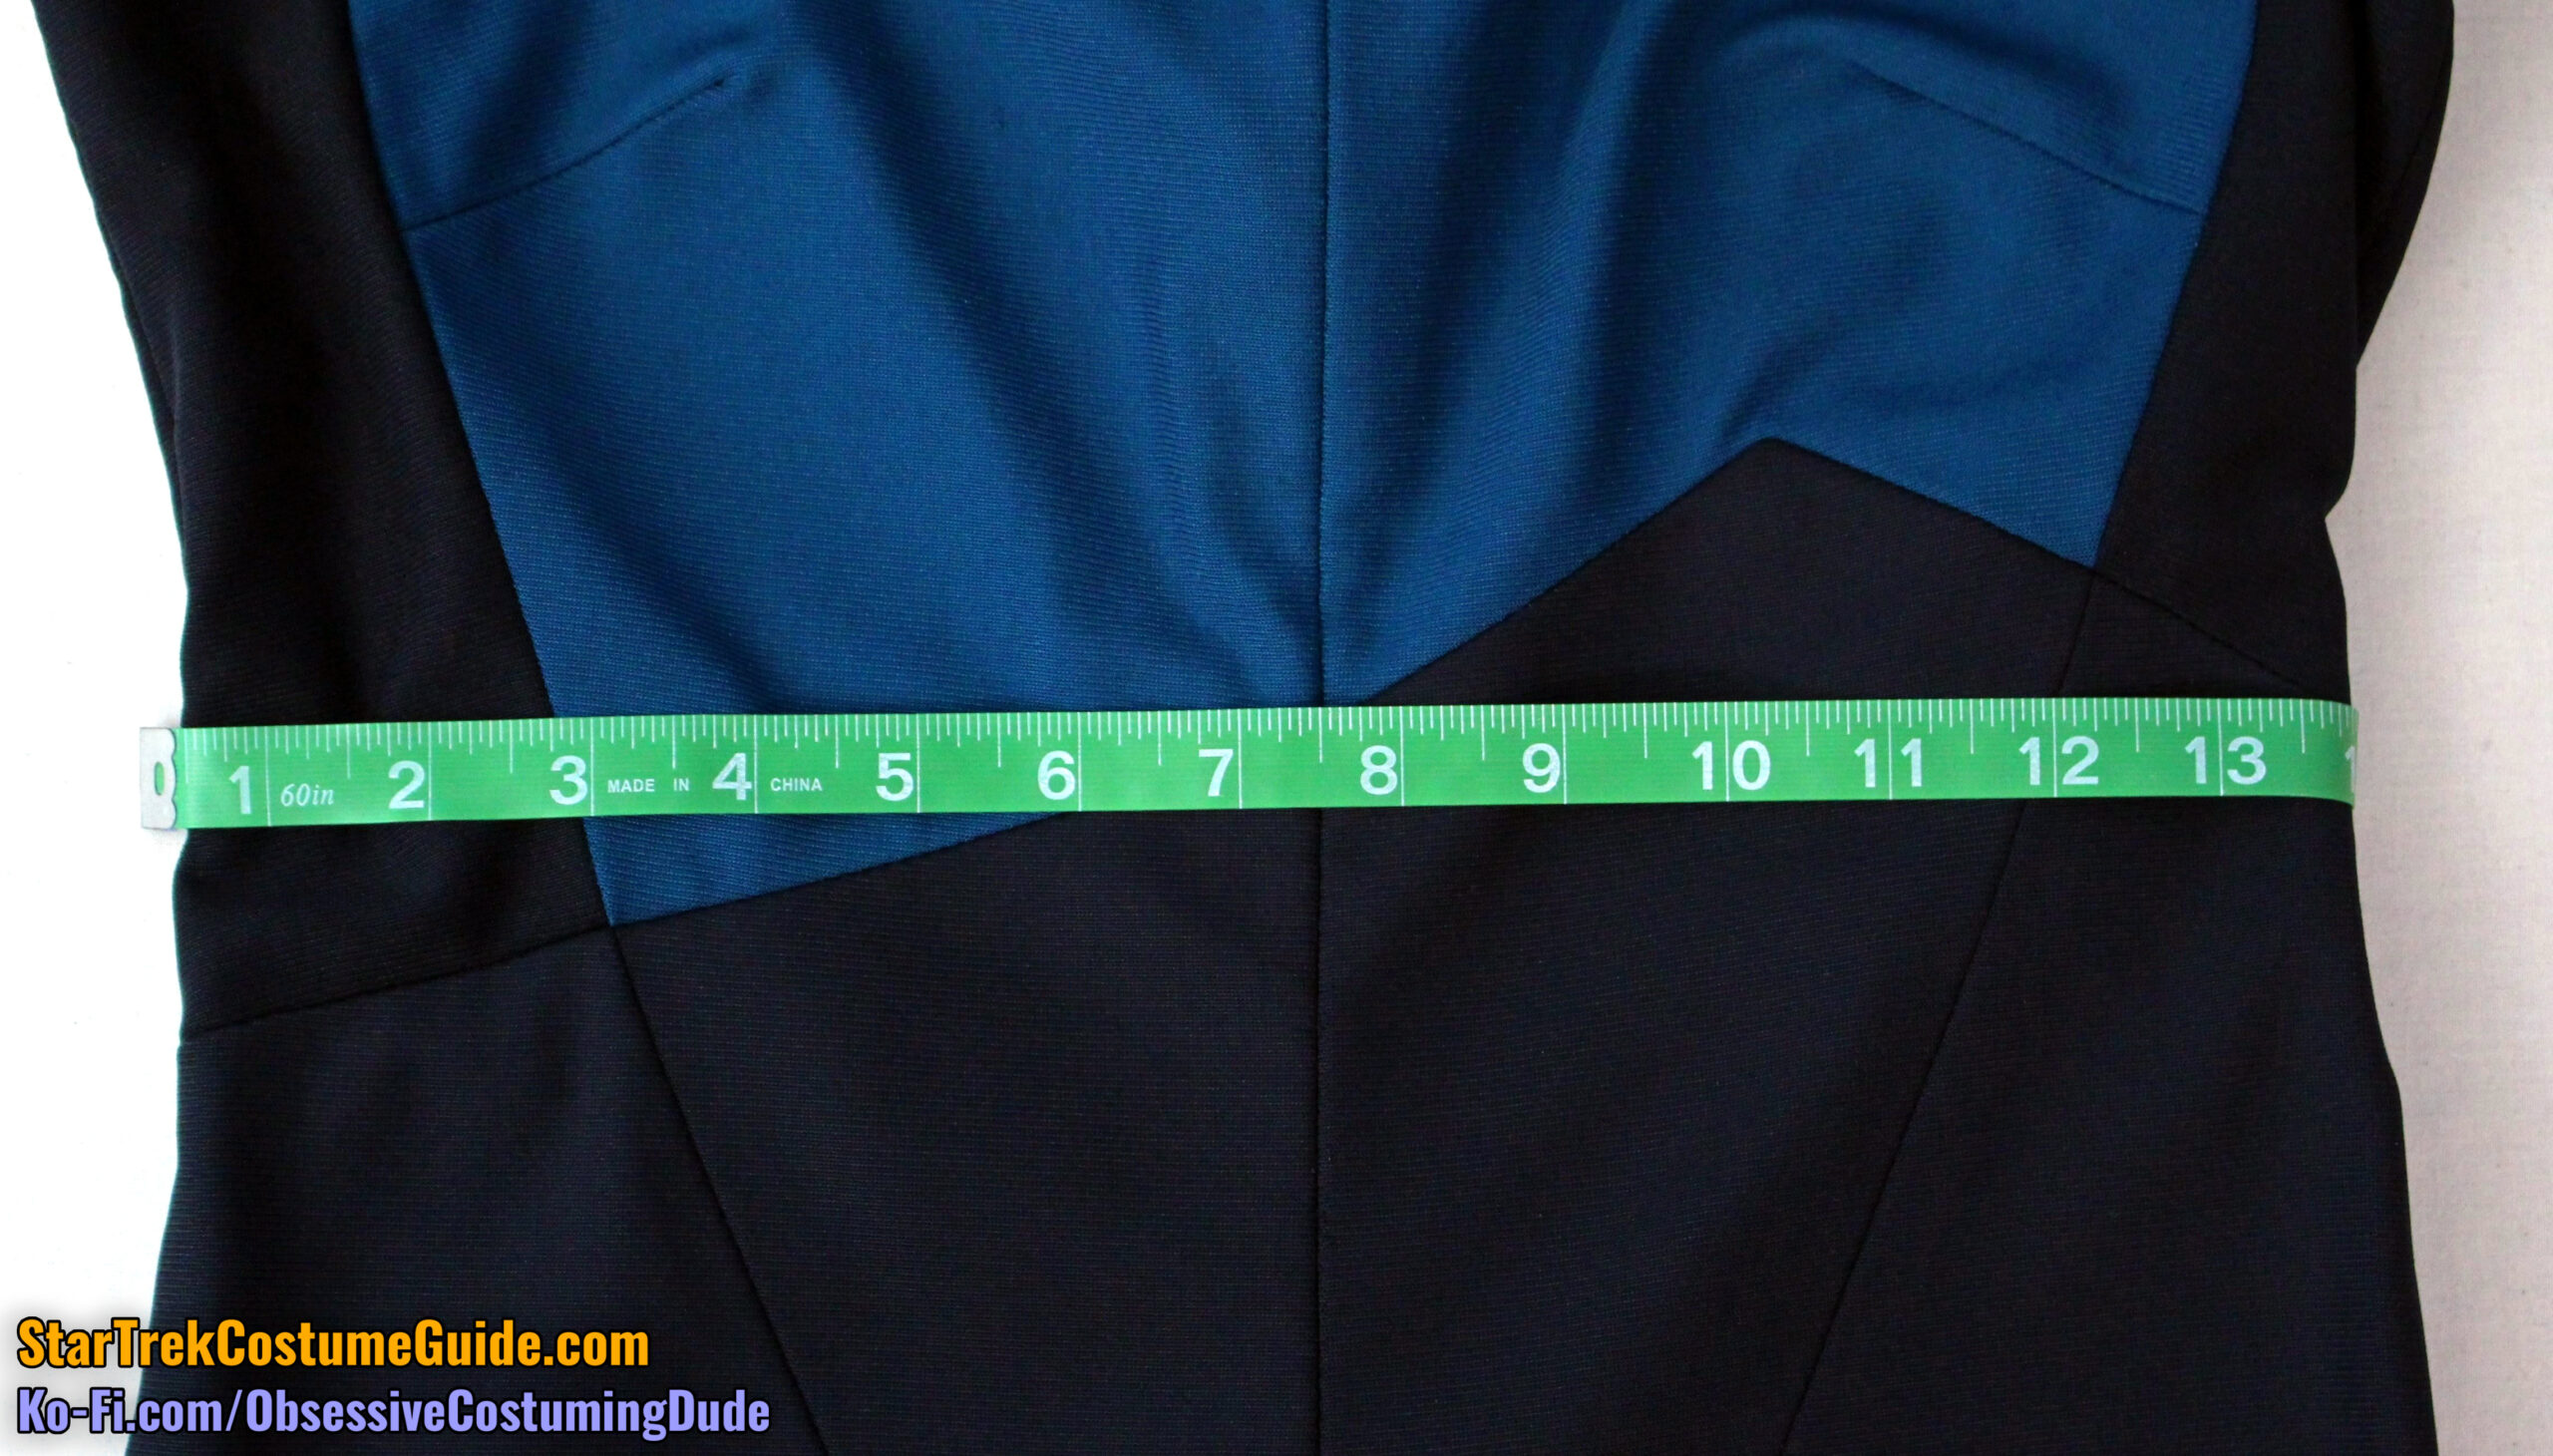
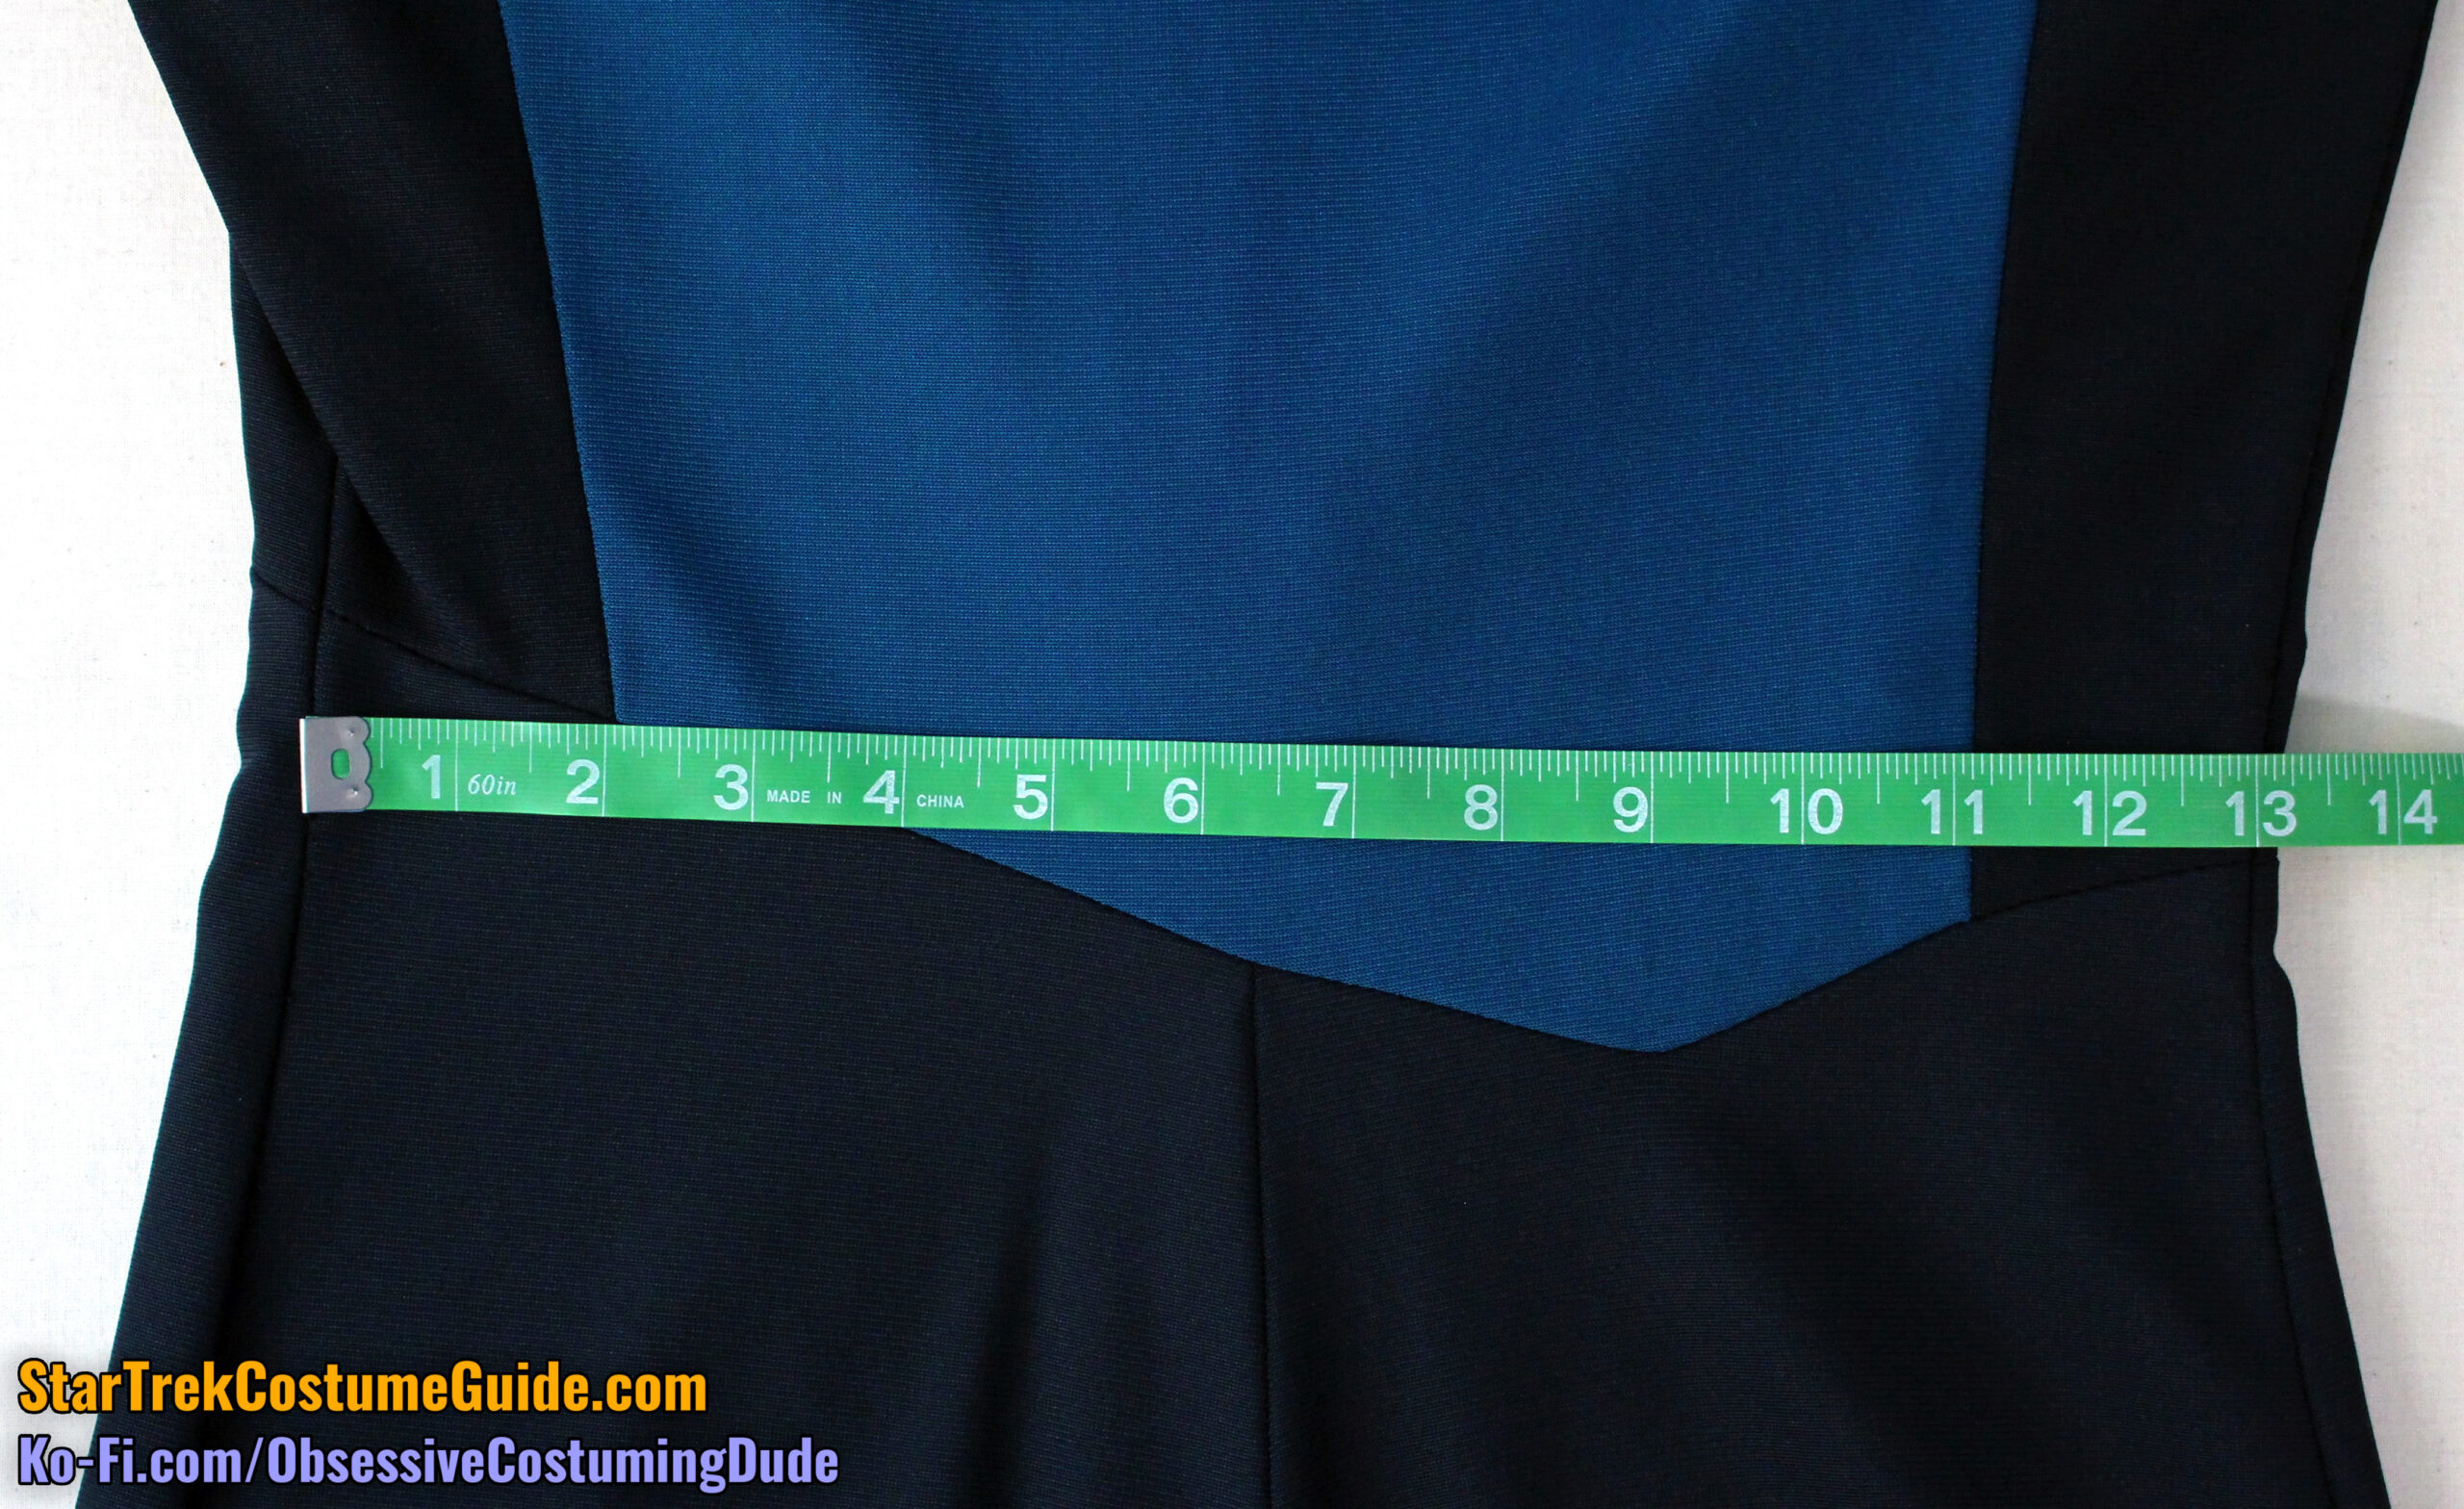
Although the side seams were slightly rolled to the underside at the waist (making it difficult to photograph properly), the front waist measured 15” and the back waist was 13”, for a total waist measurement of 28”.
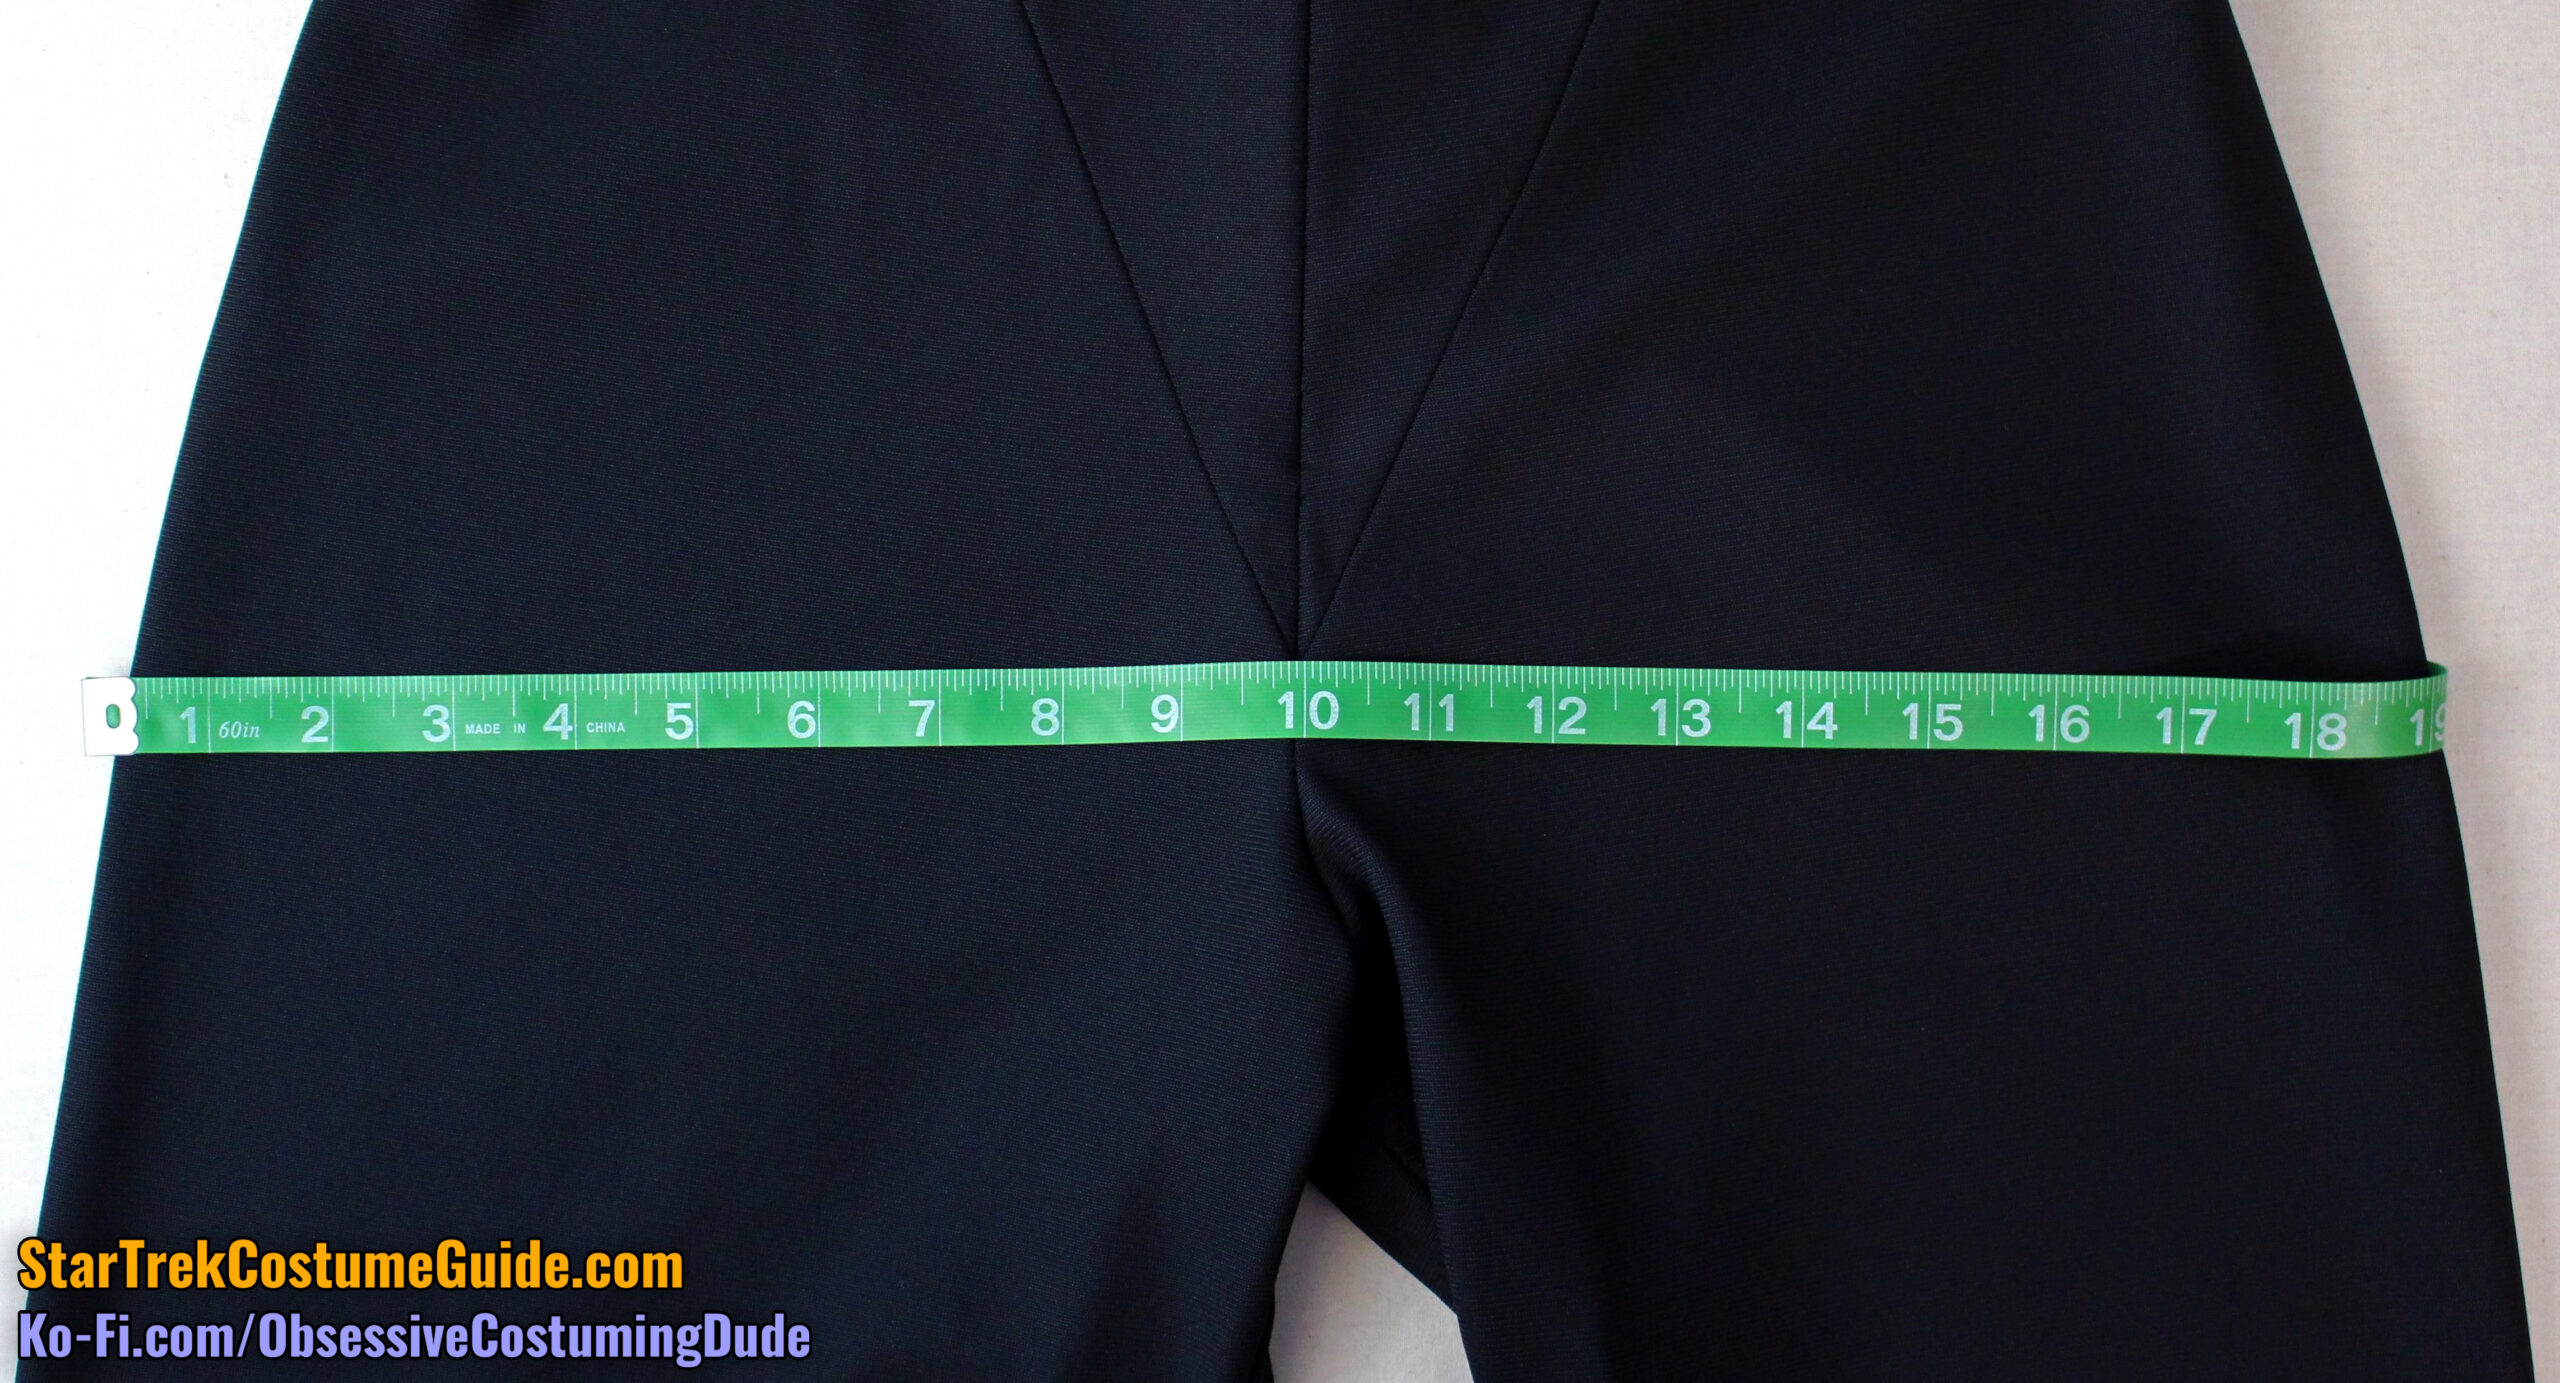
The side seams were again difficult to photograph properly, but the hips measured 20” across the front and 19” across the back, for a total hip measurement was approximately 39”.
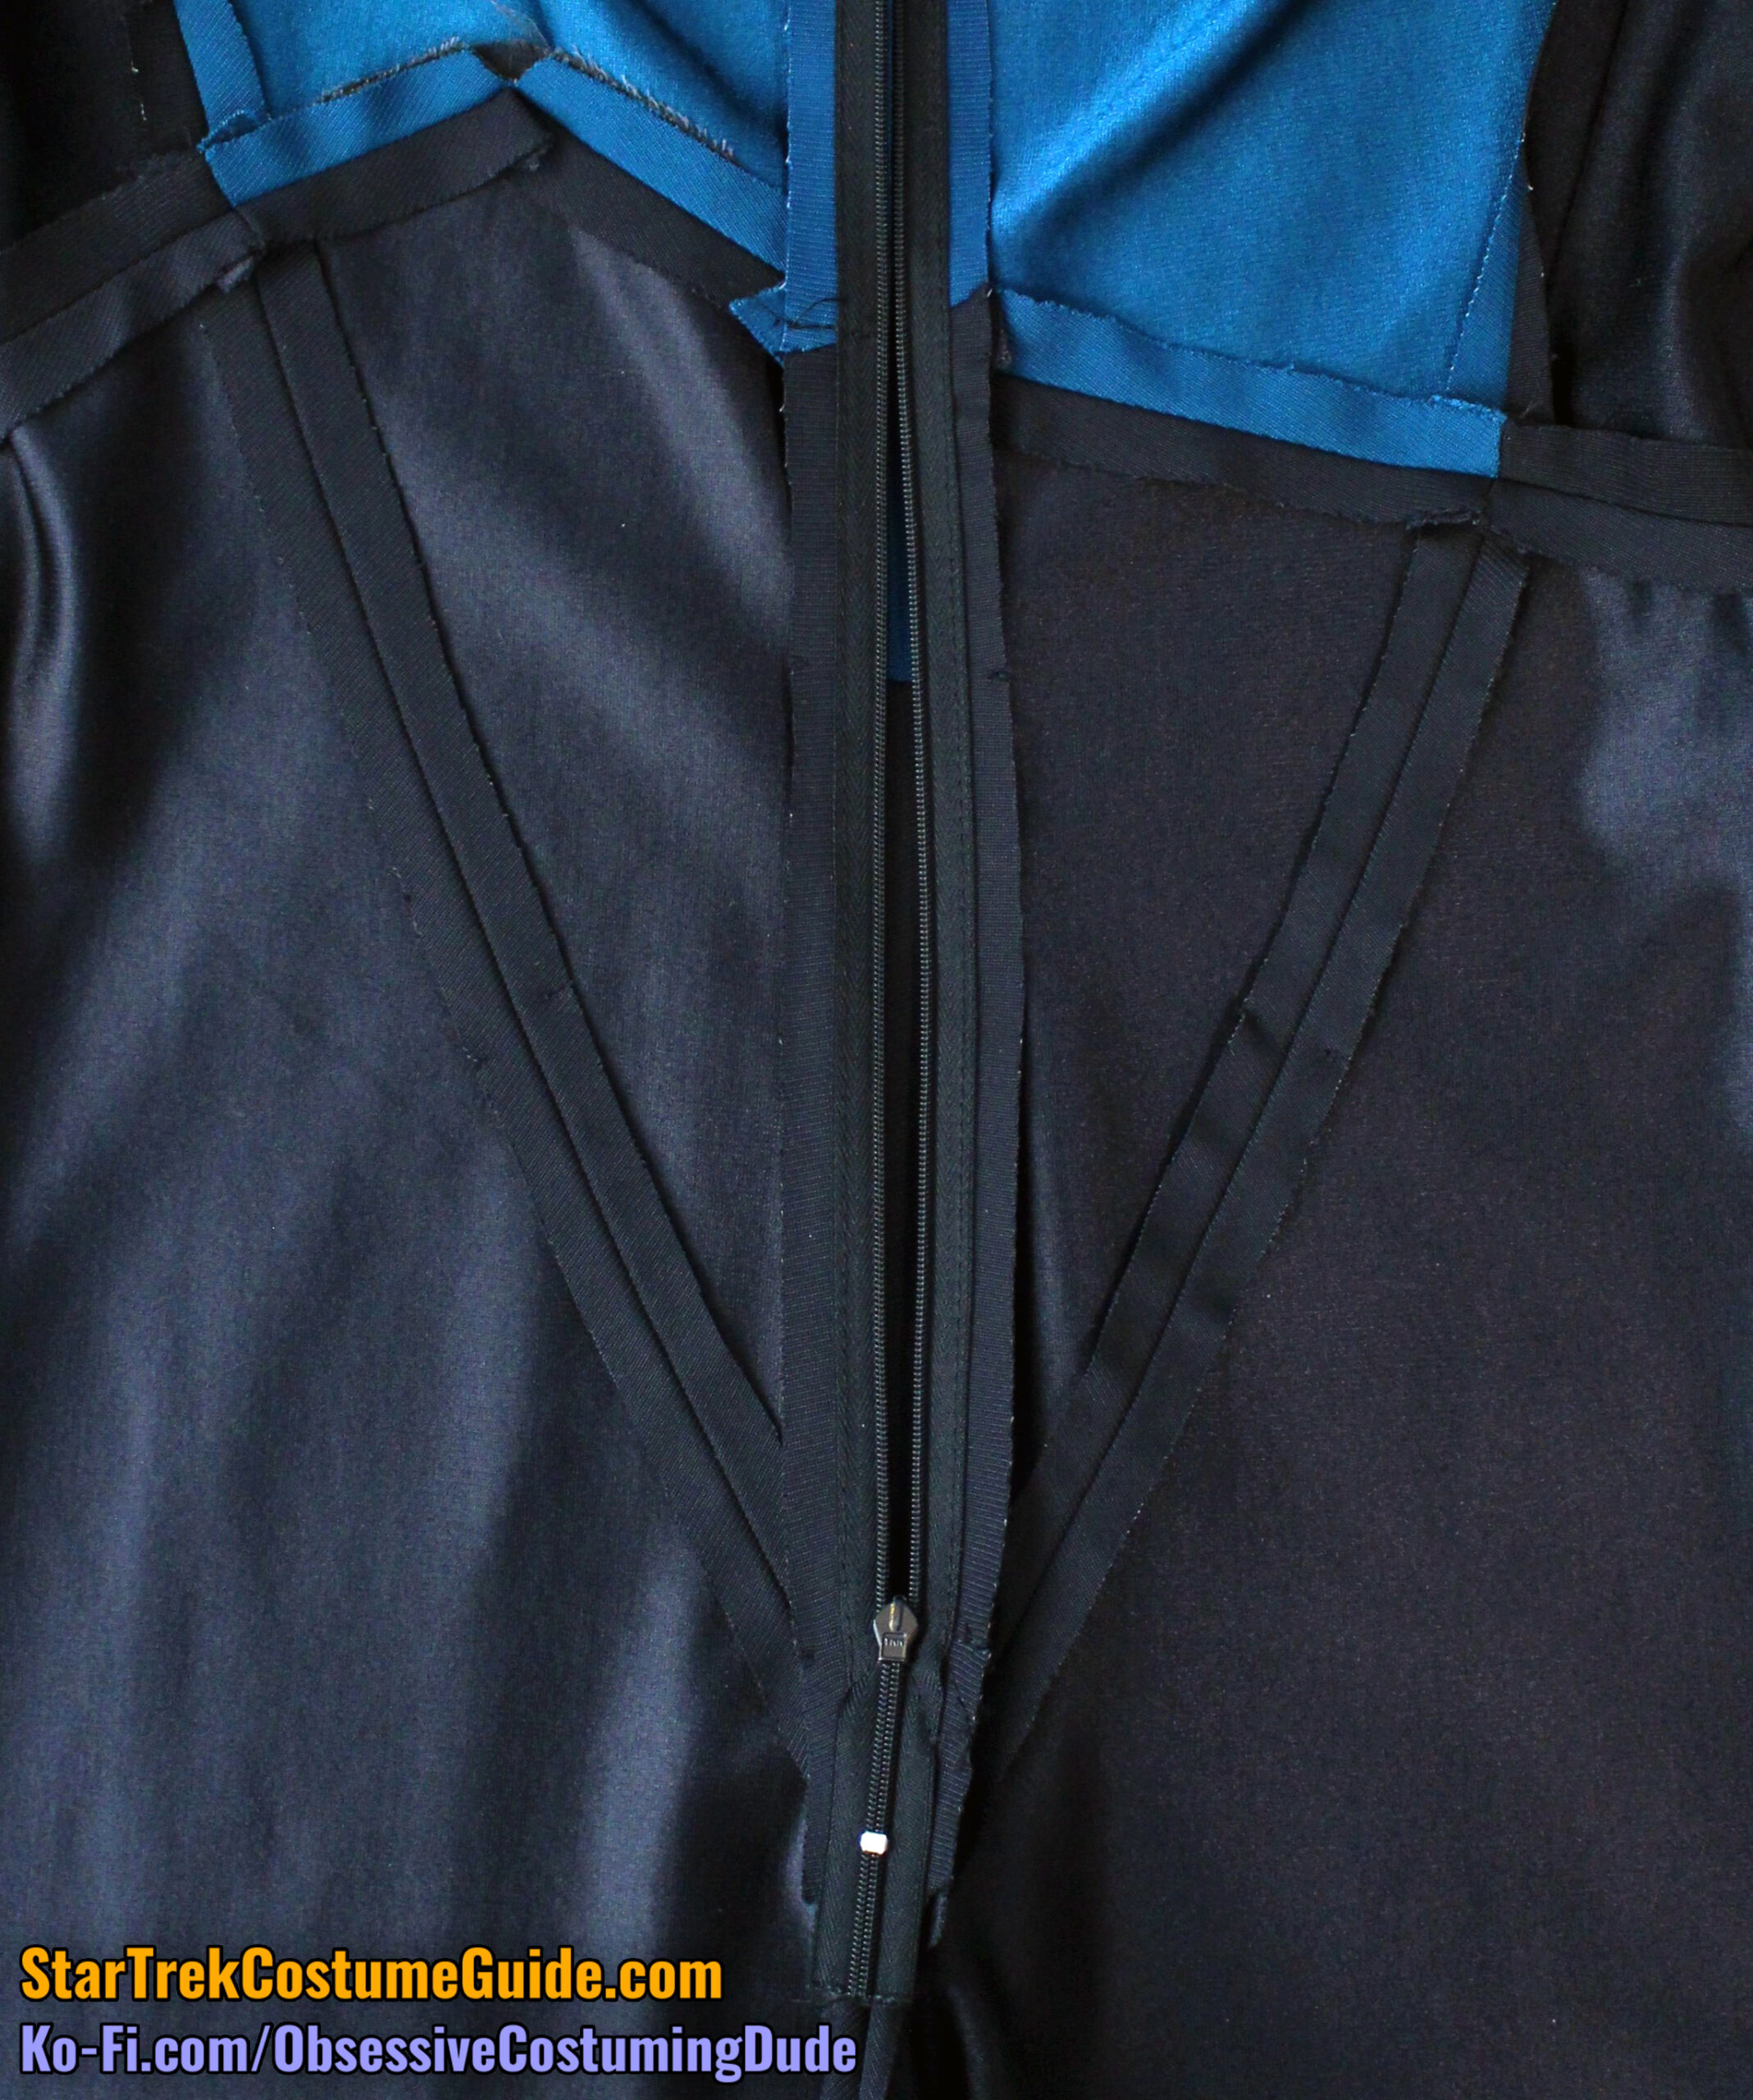
CLOSURE SYSTEM
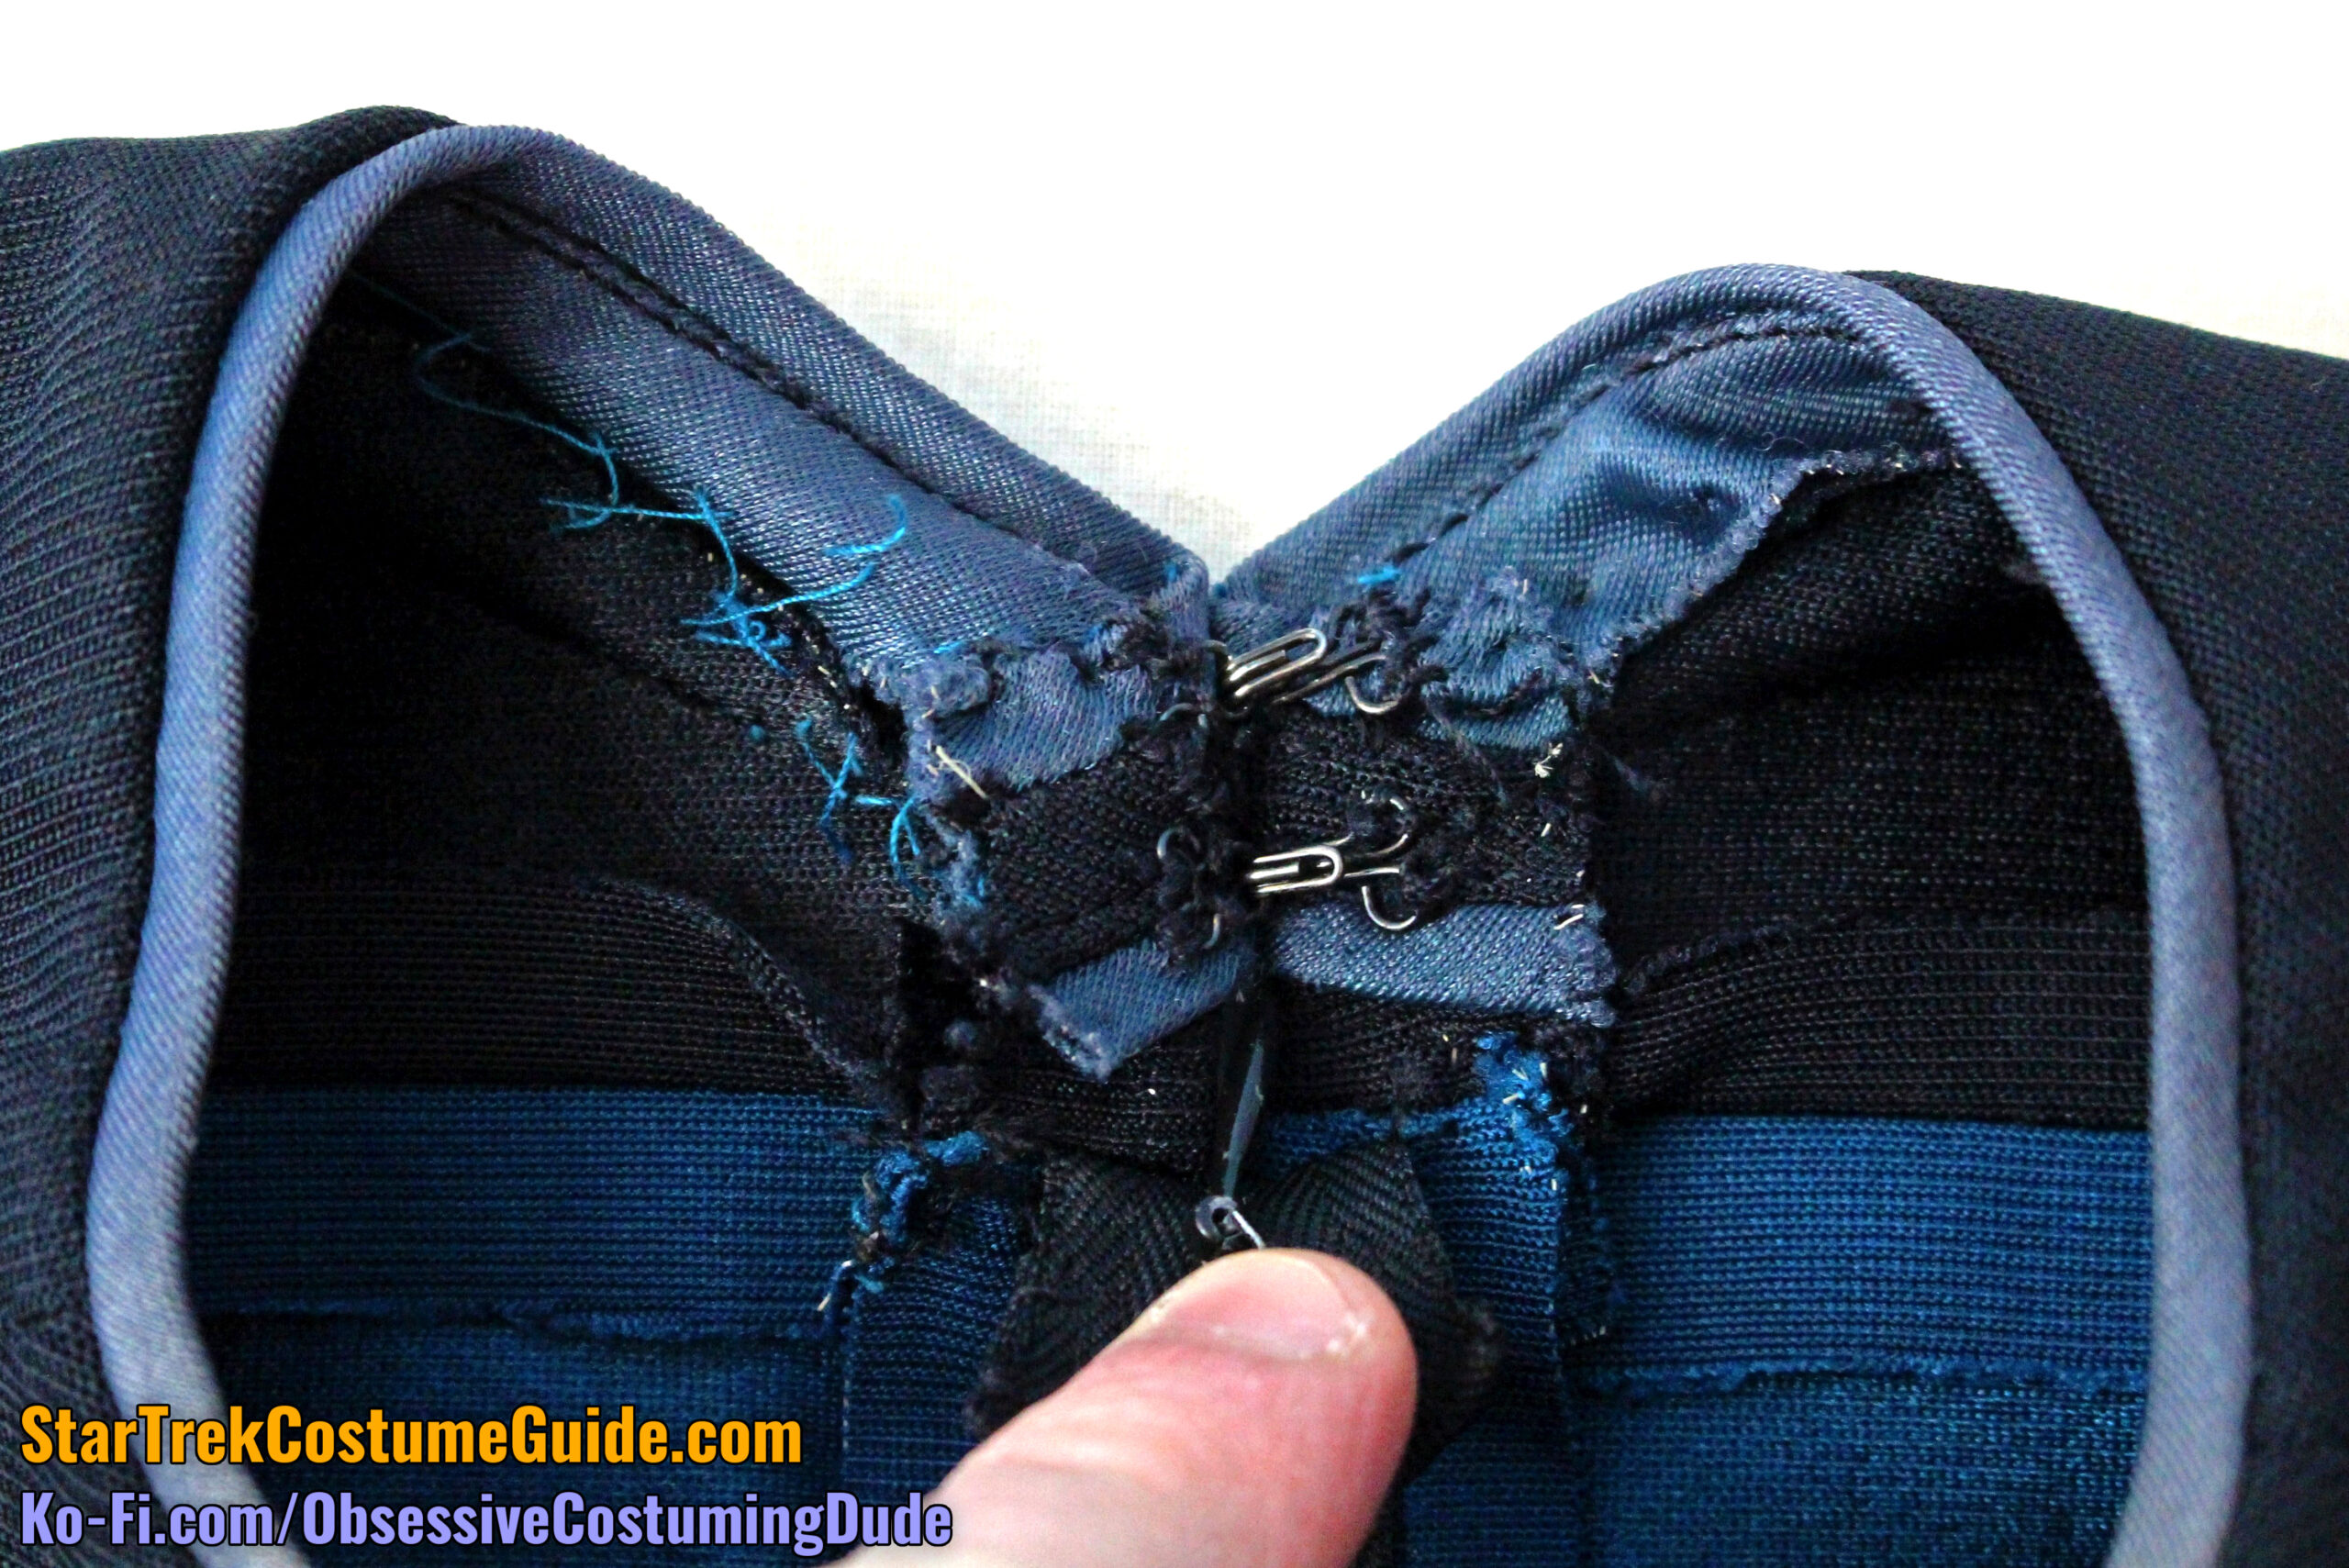
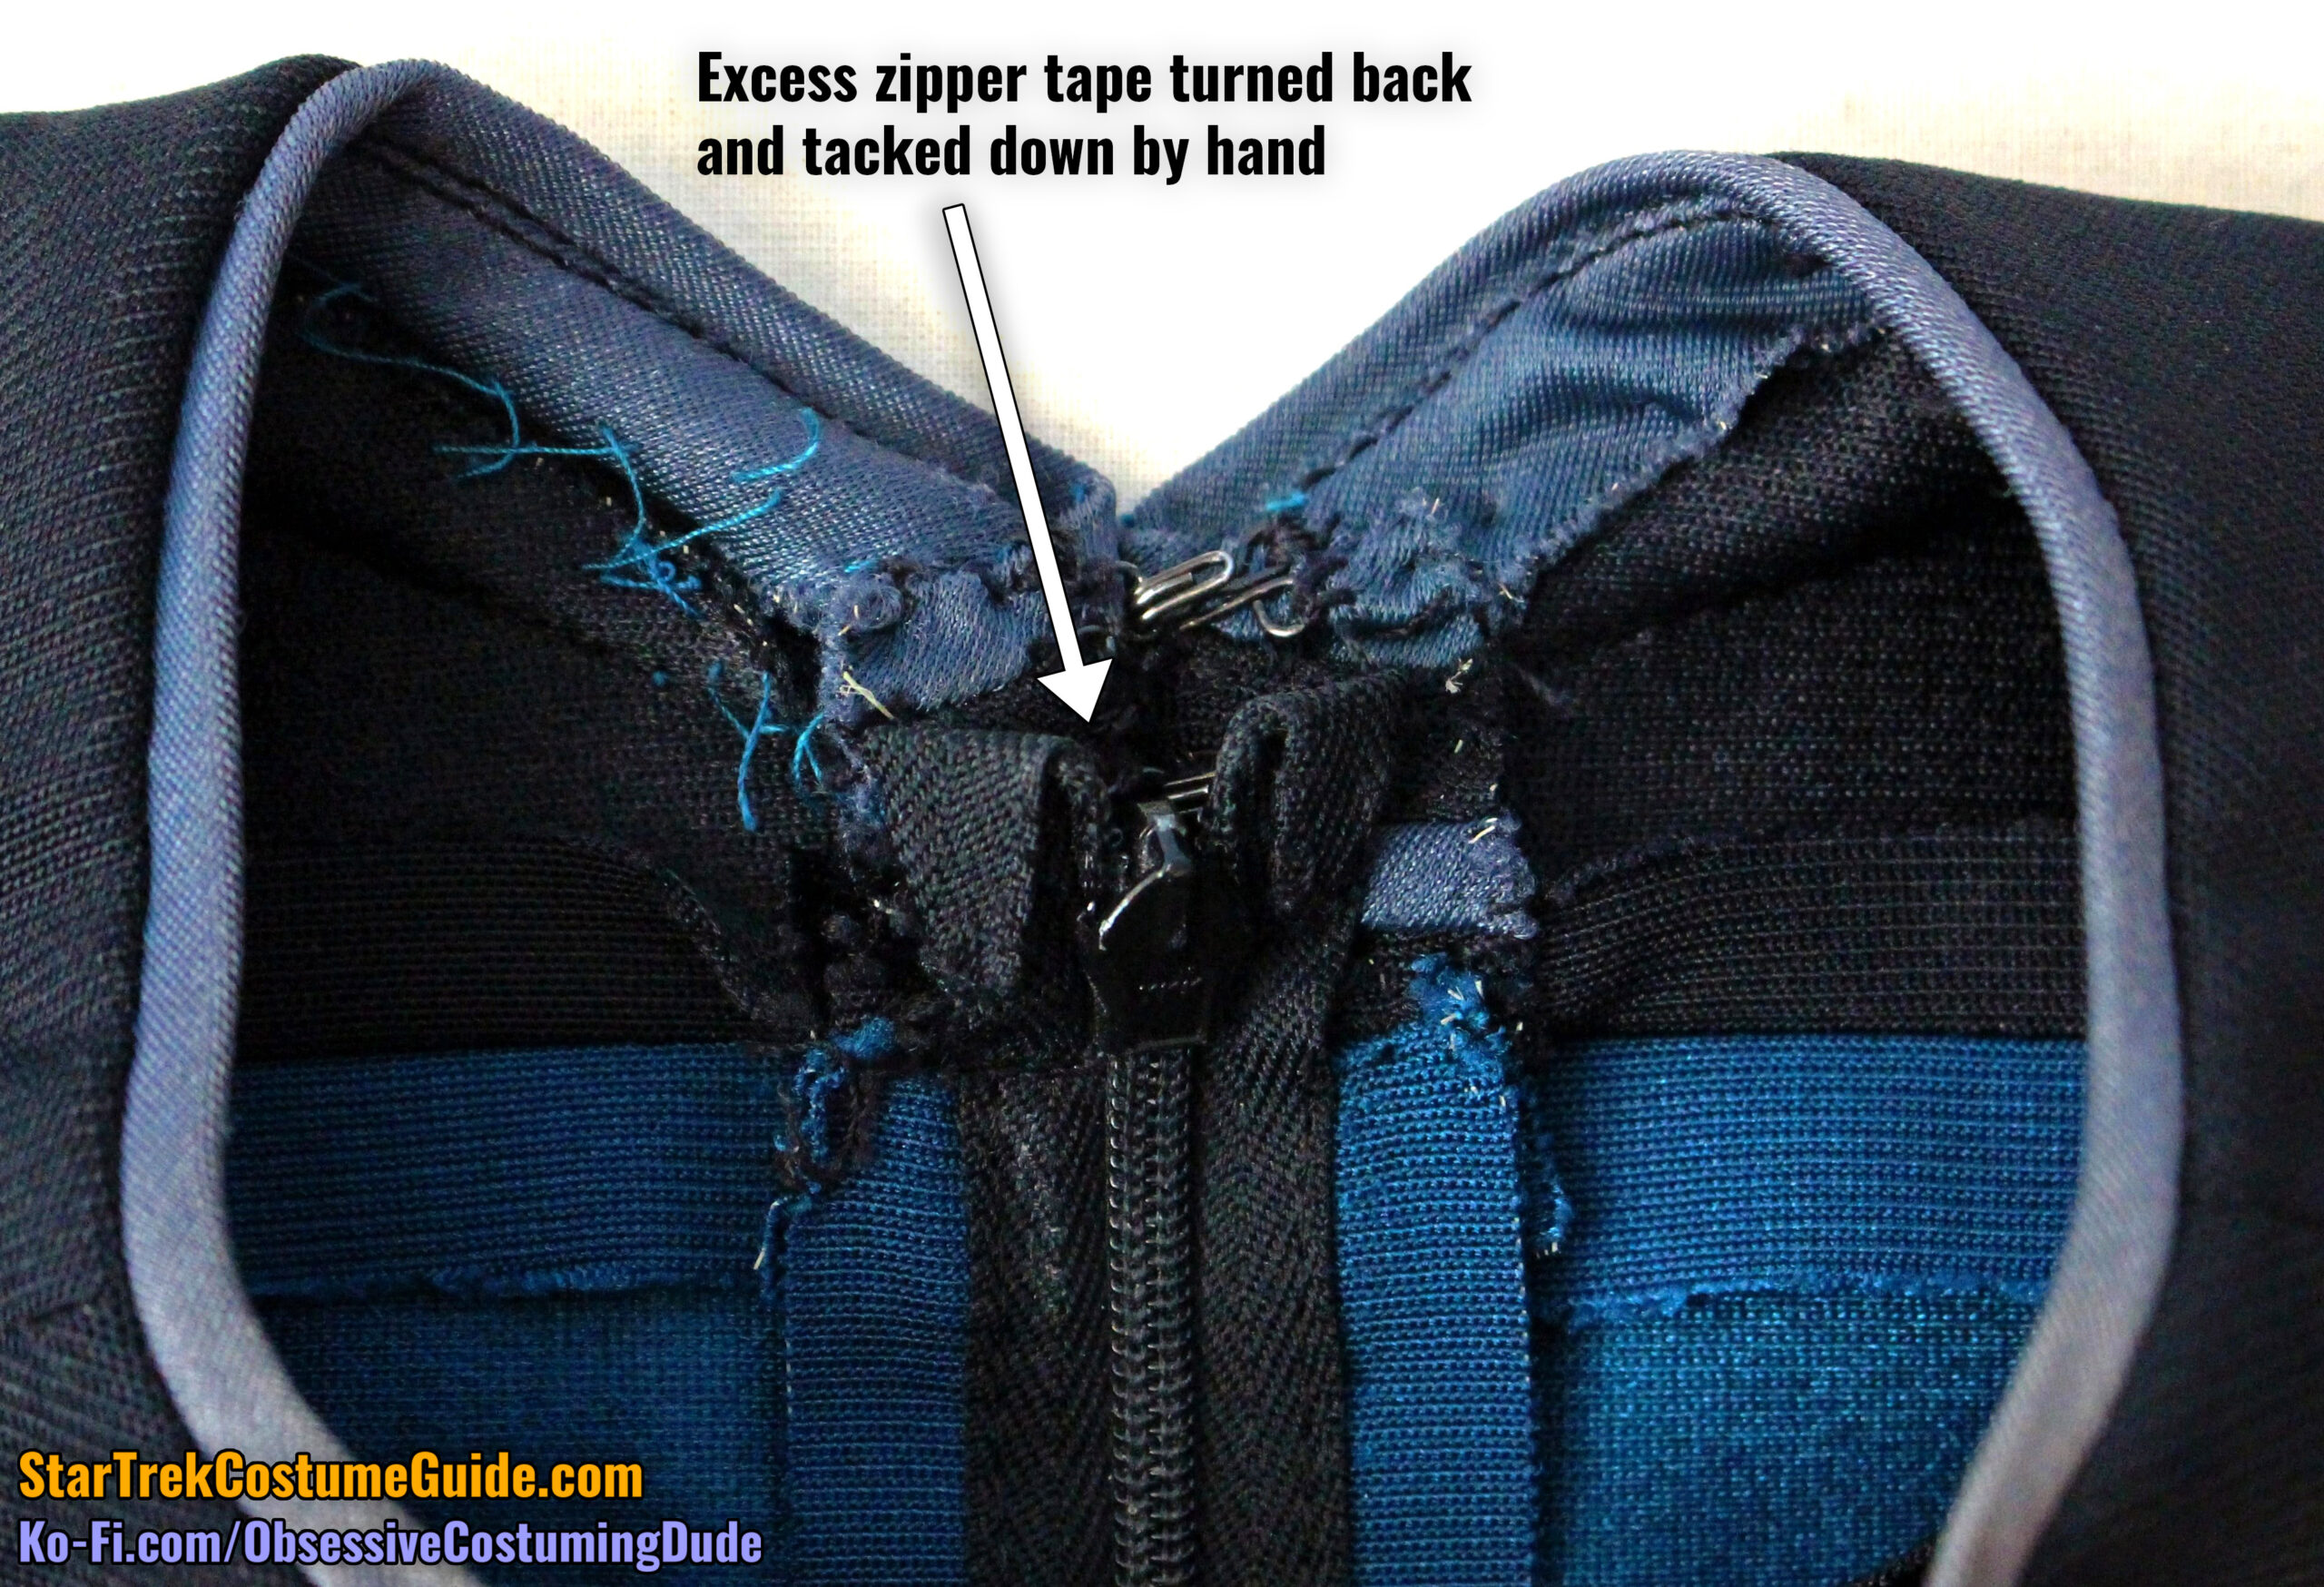
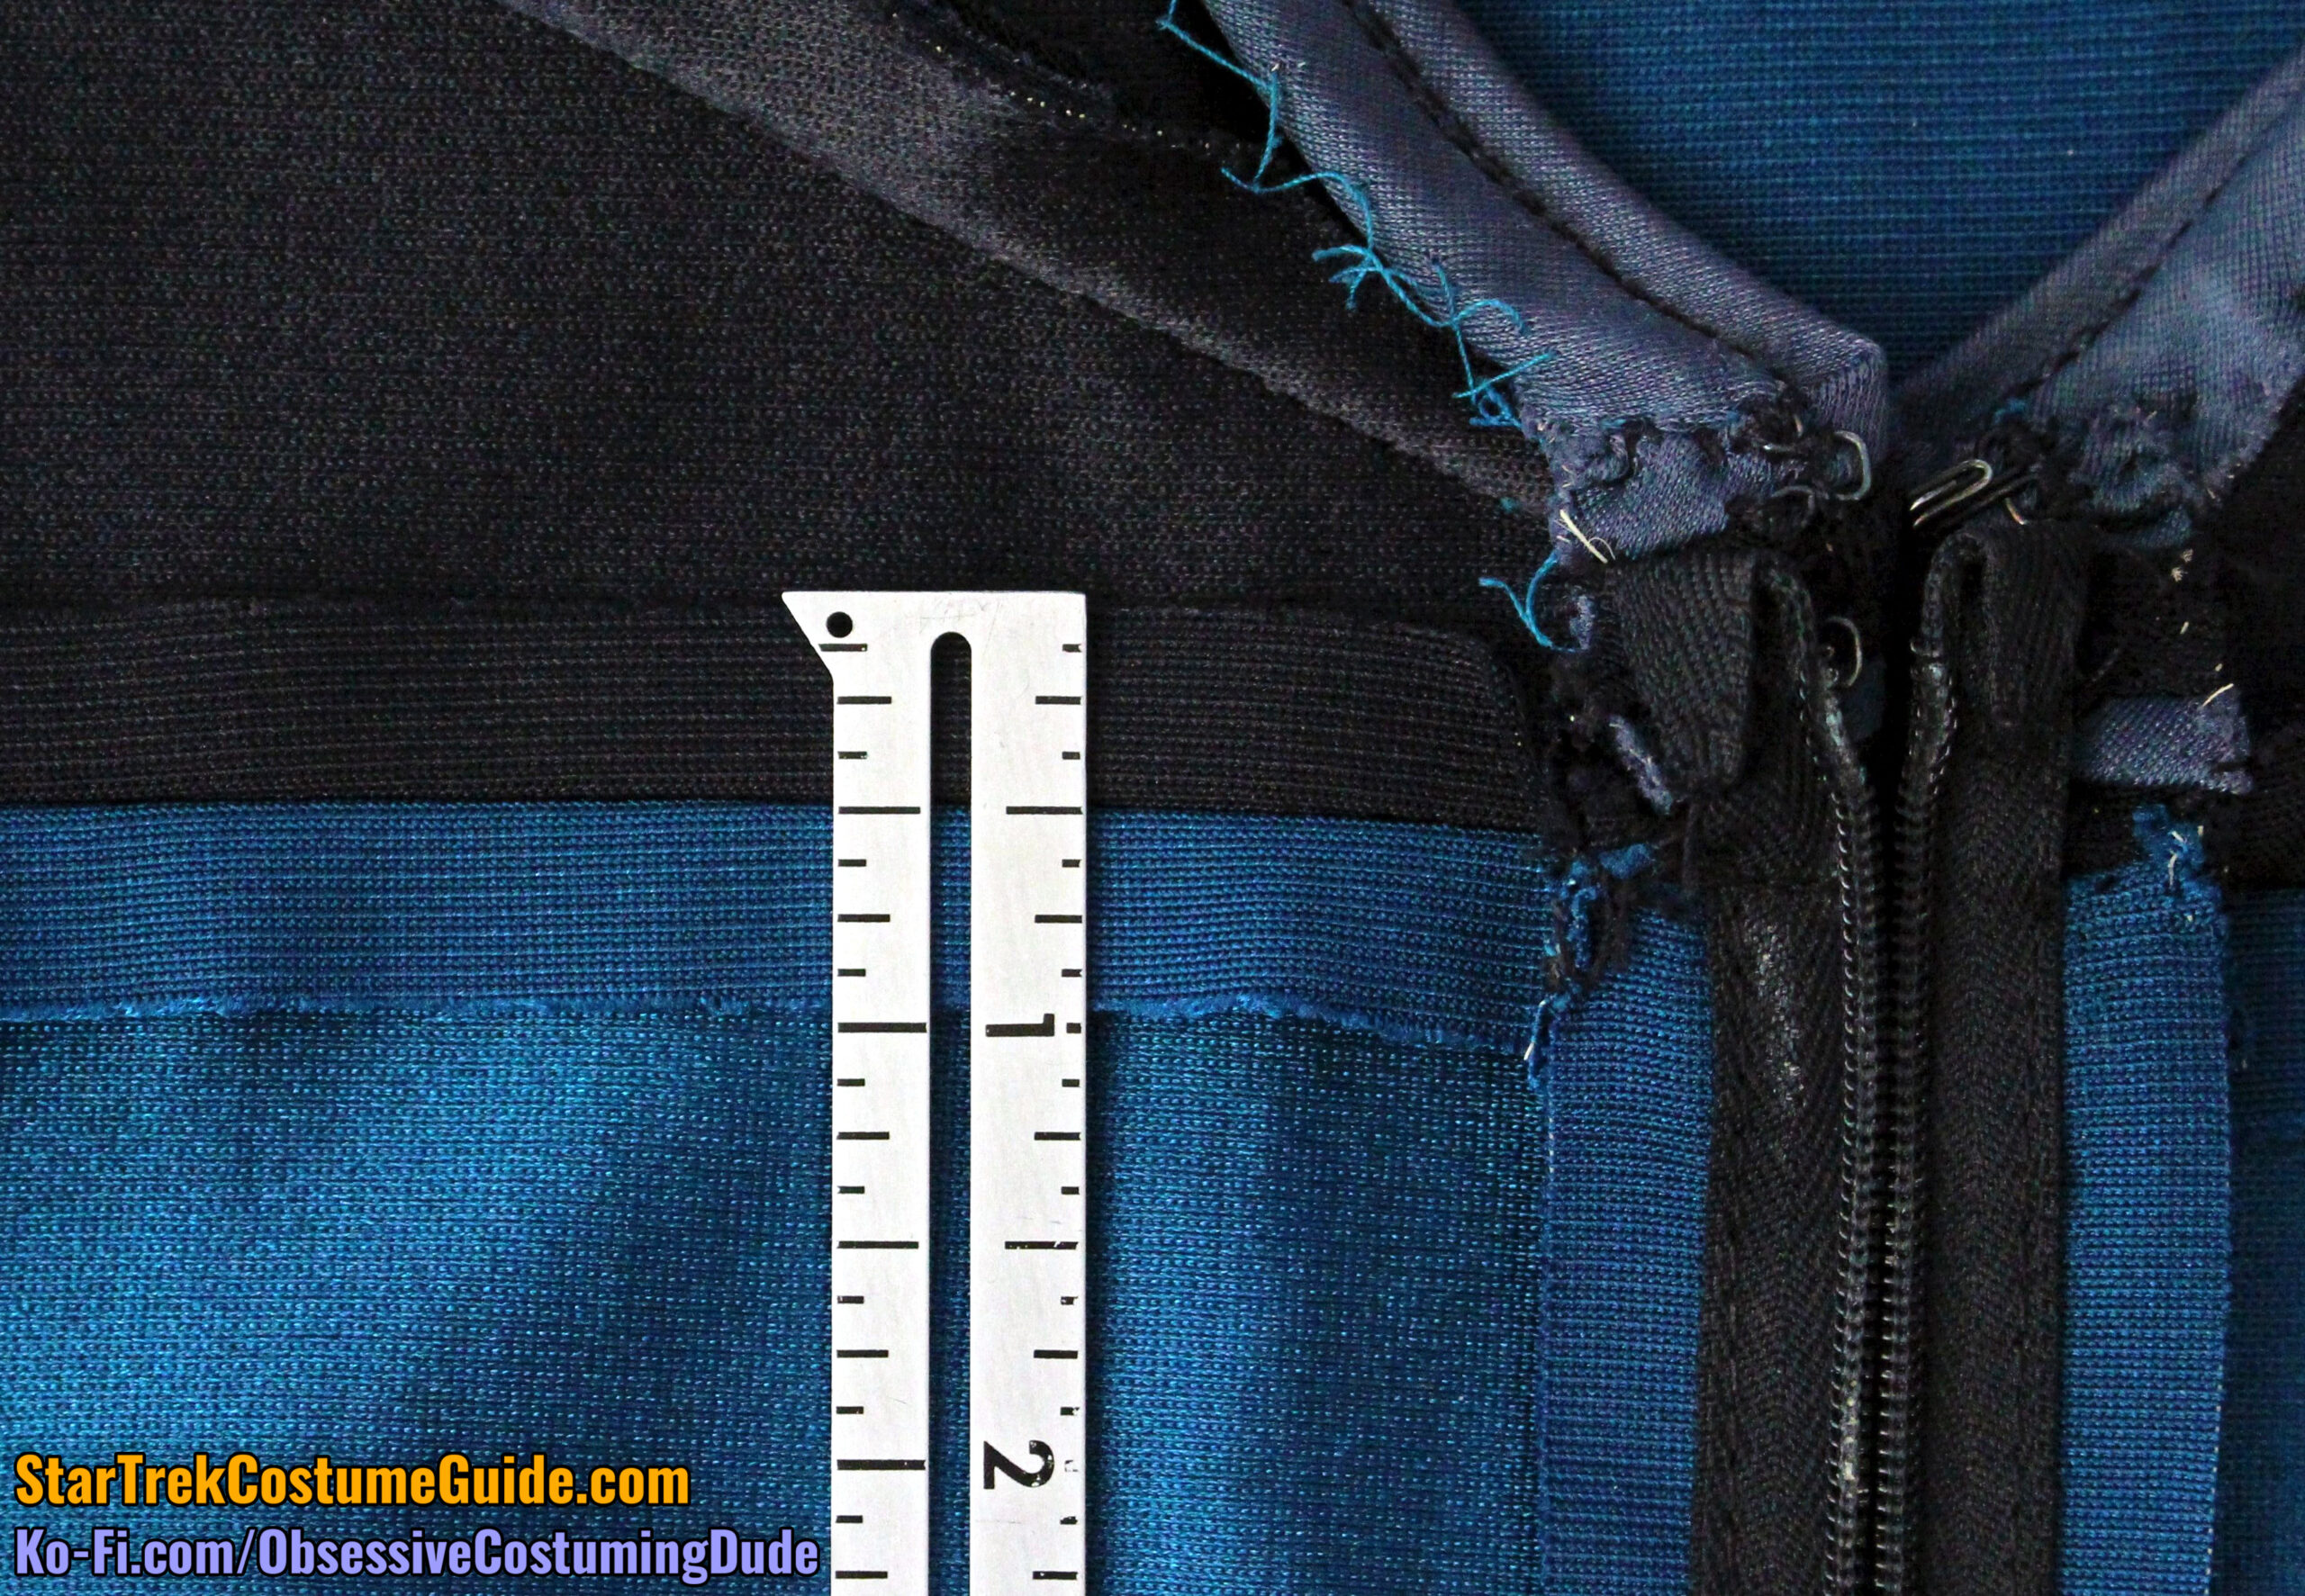
As you’re probably aware, these early-style jumpsuits closed up the front via an invisible zipper, with the top left hanging free and a couple hook-and-eye closures above to “seal the deal.”
The excess zipper tape at the top of standard retail zippers was handled different ways on different uniforms; the most common technique seems to have simply been turning it under and tacking it down by hand.
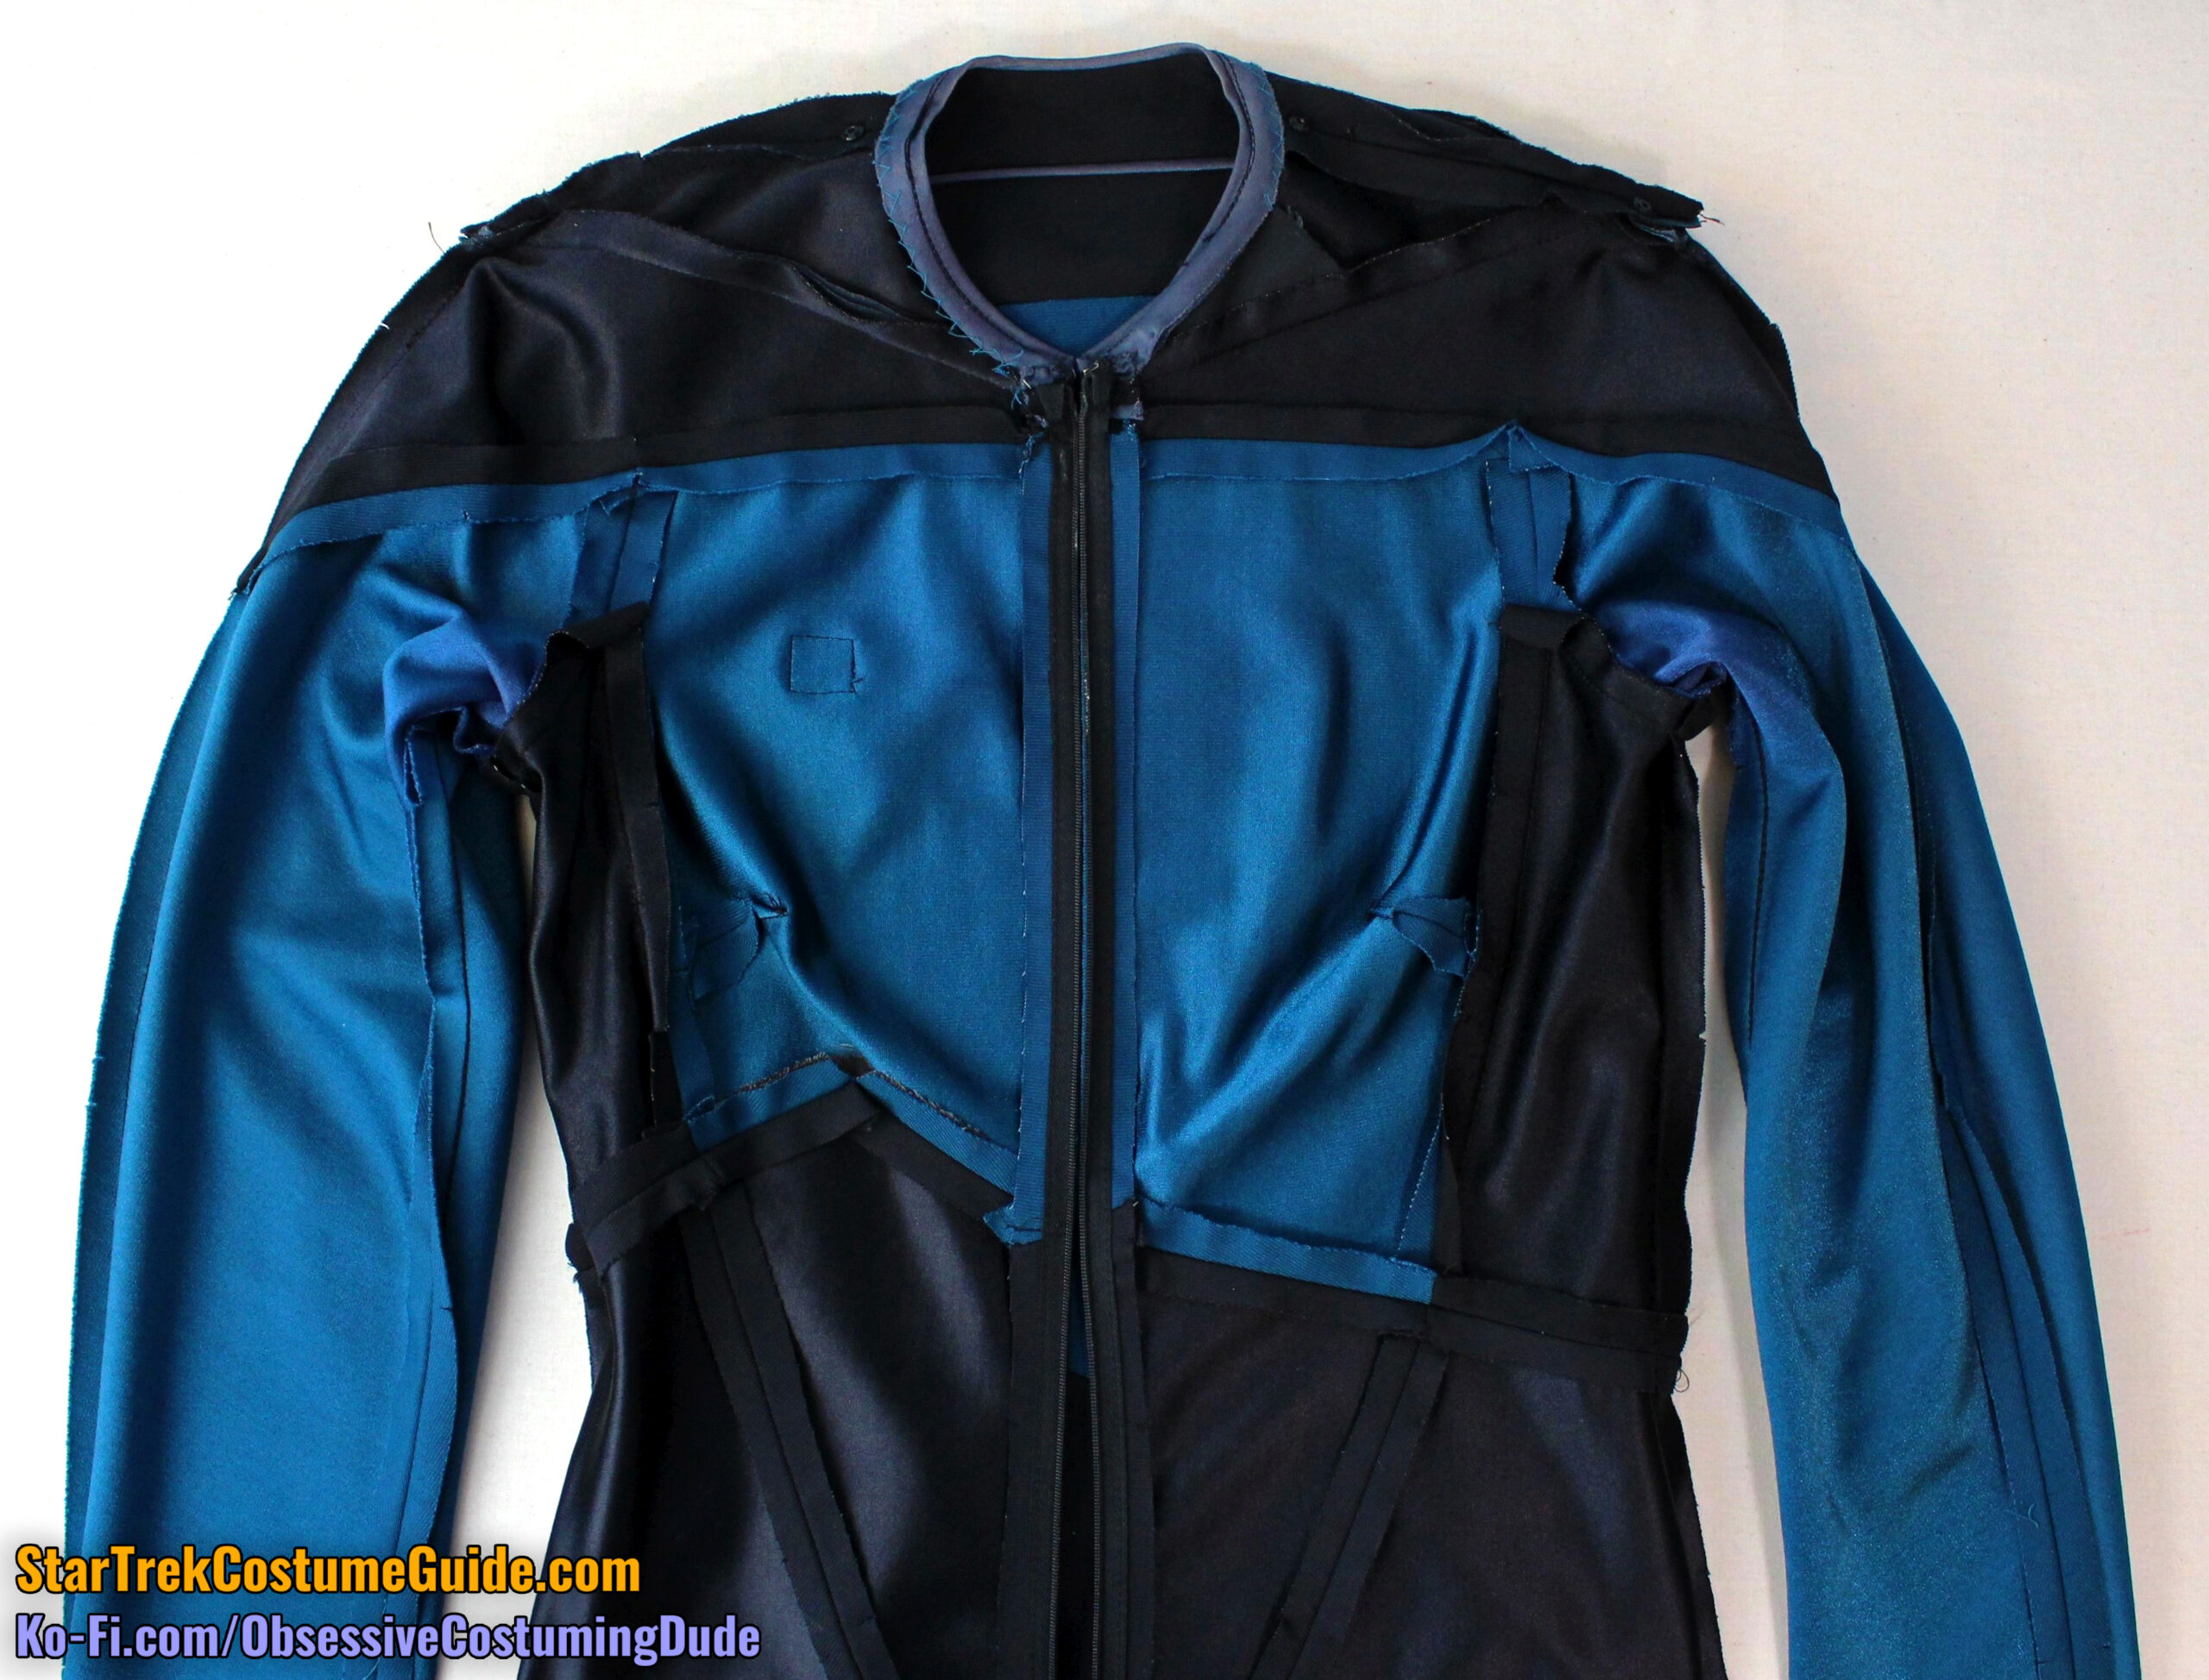
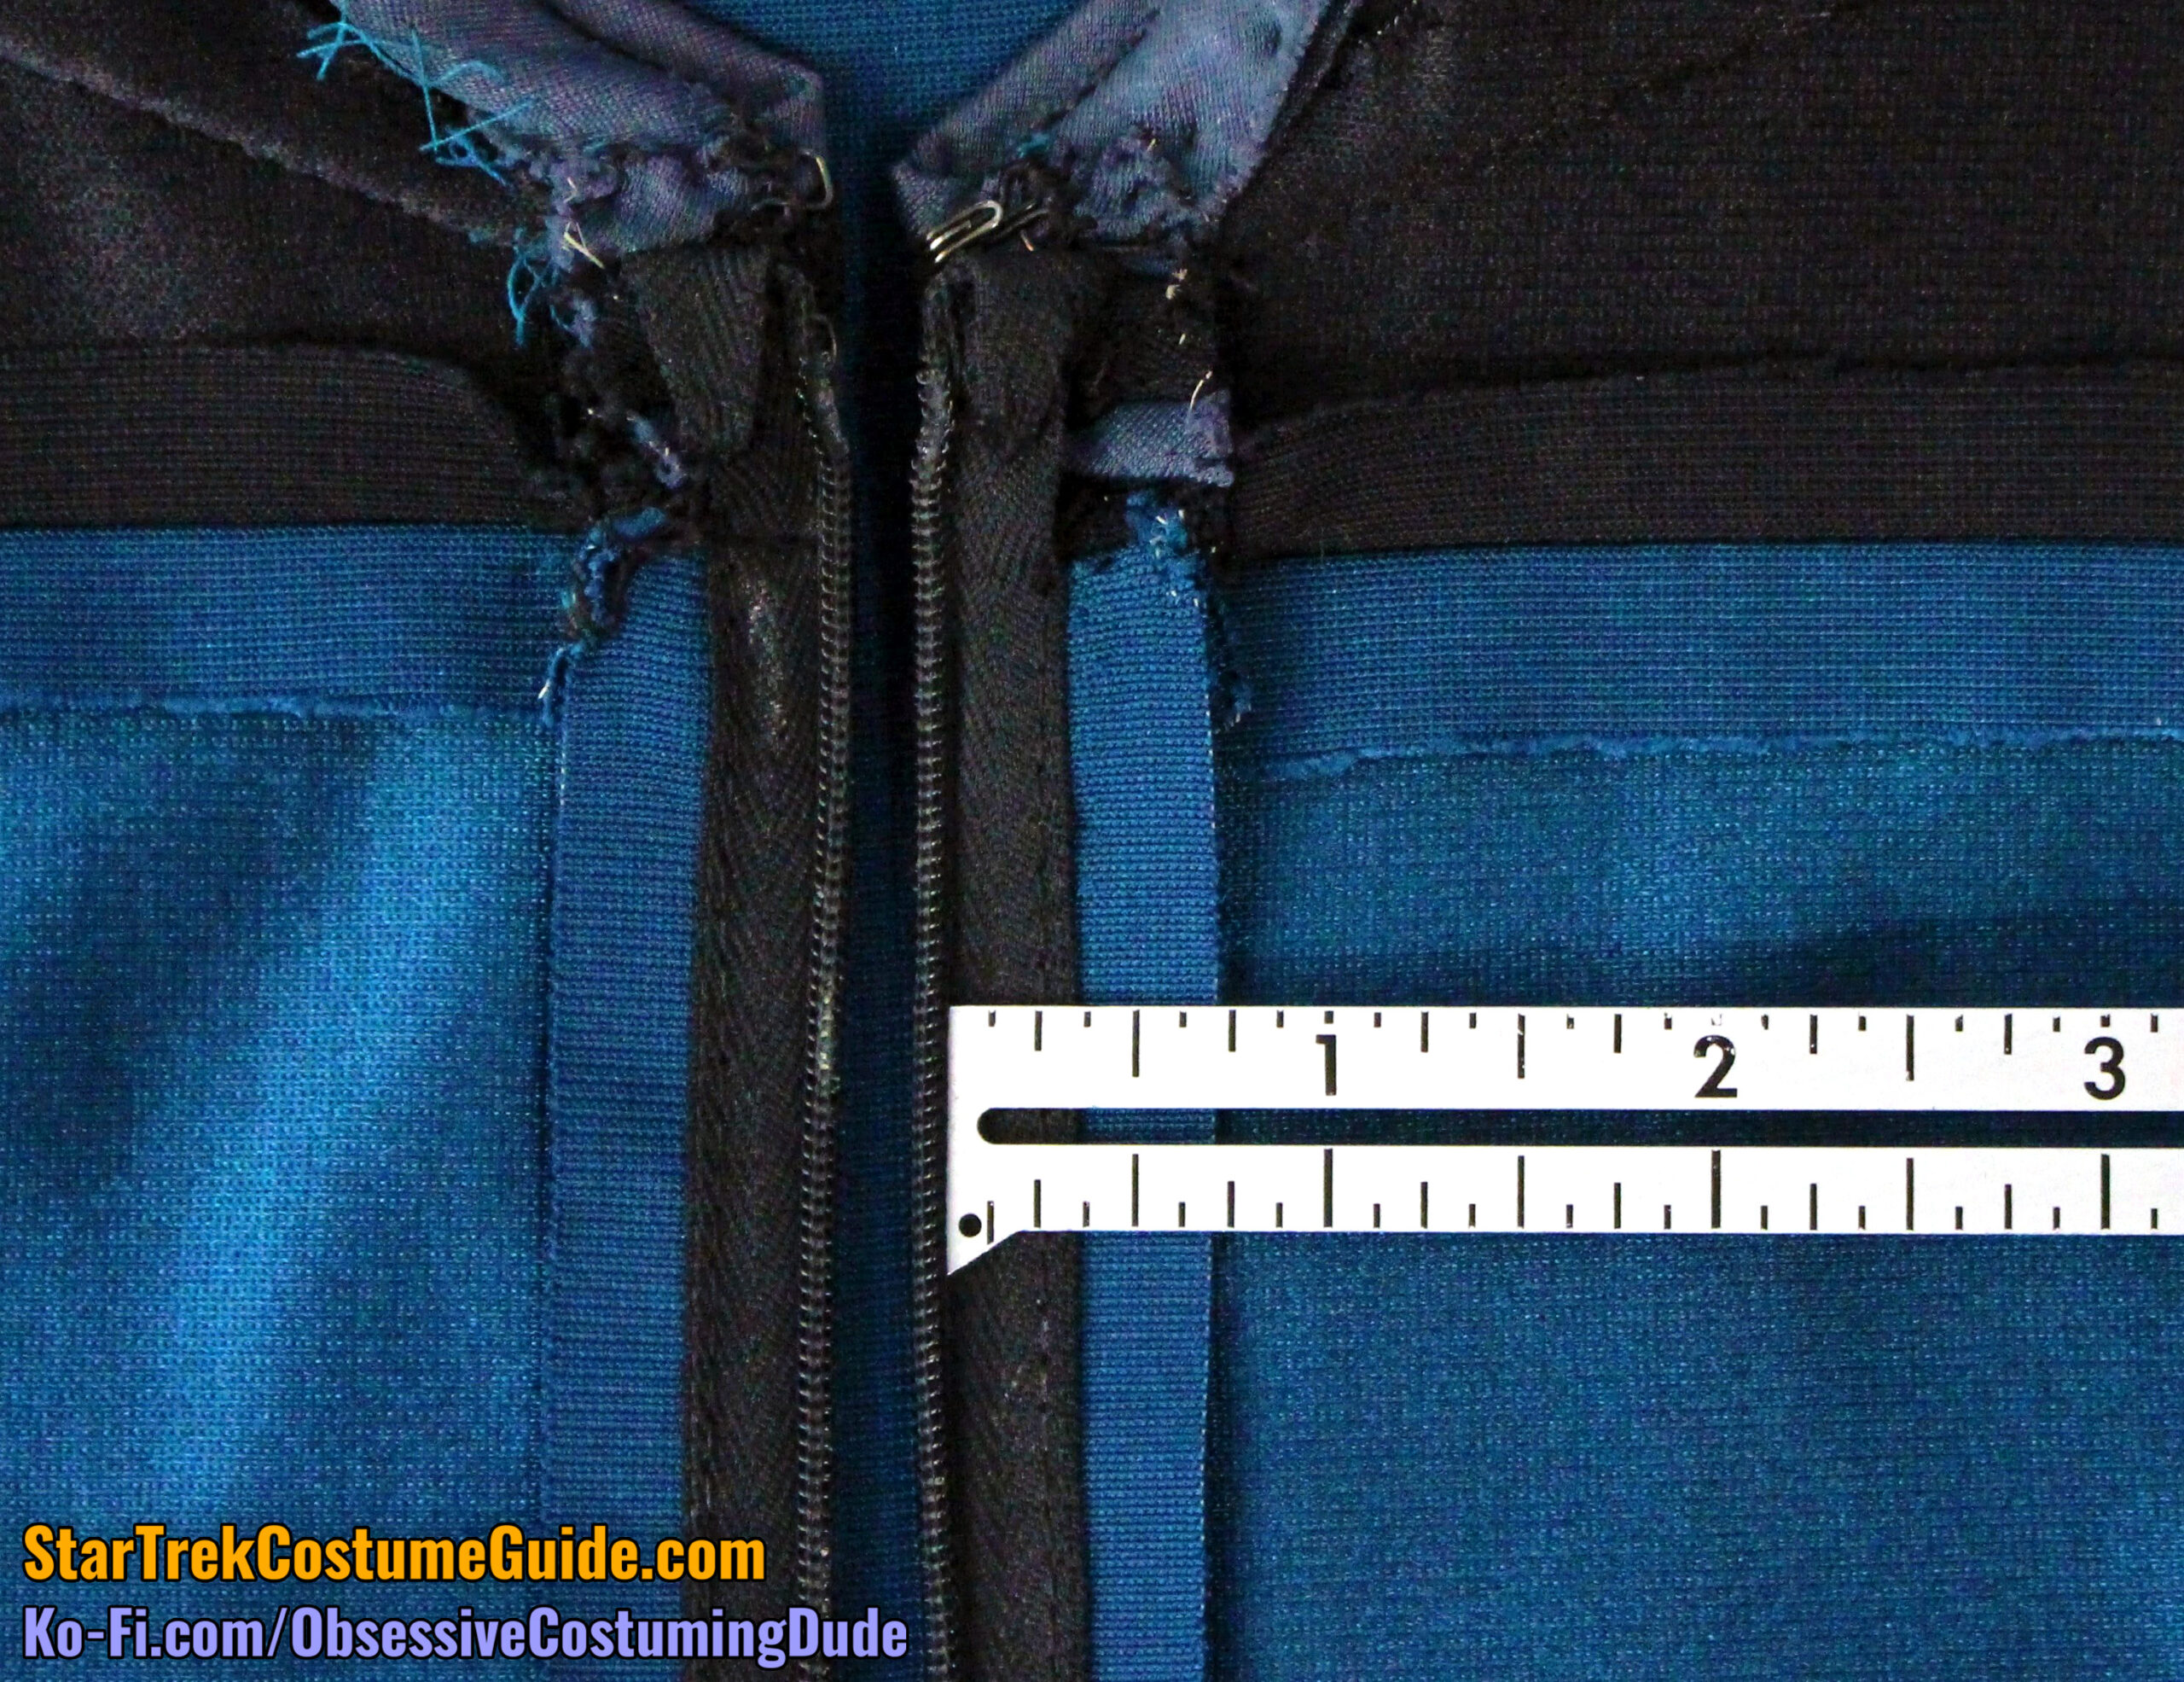
Here is the jumpsuit completely unzipped.
The invisible zipper was 20 ¼” long, plus seam allowance and upper excess – apparently a standard retail invisible zipper.
INTERIOR CONSTRUCTION
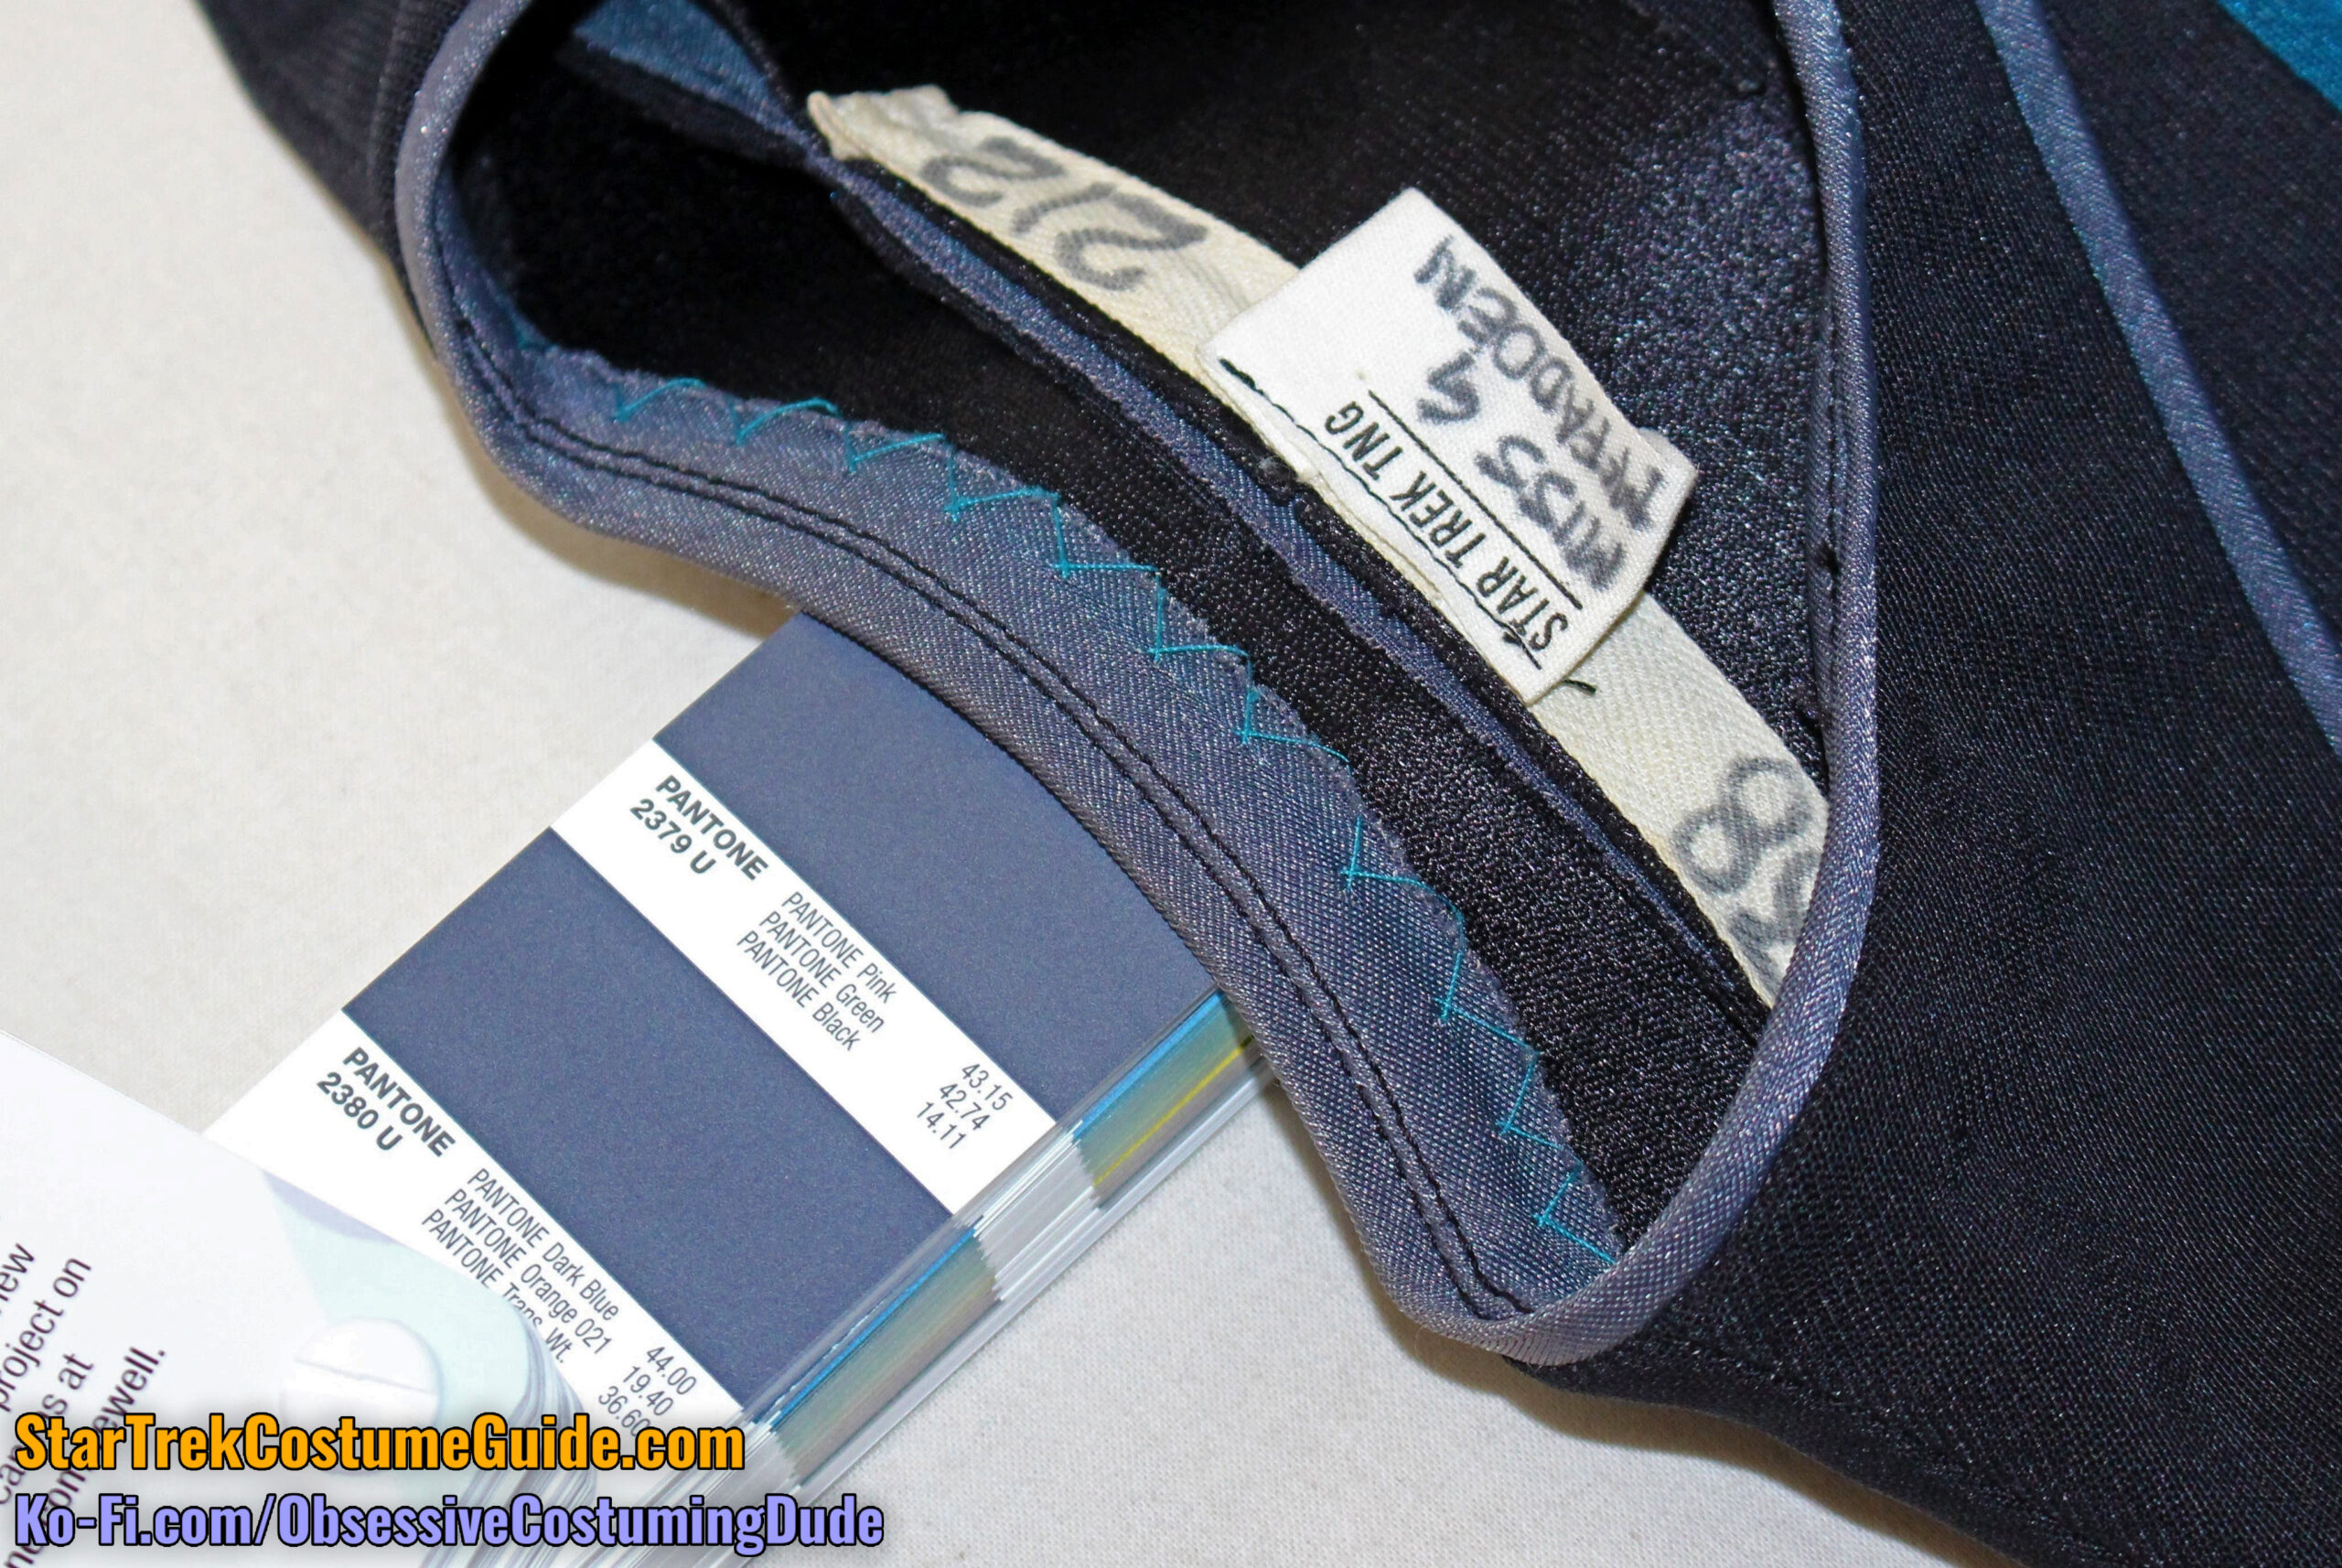
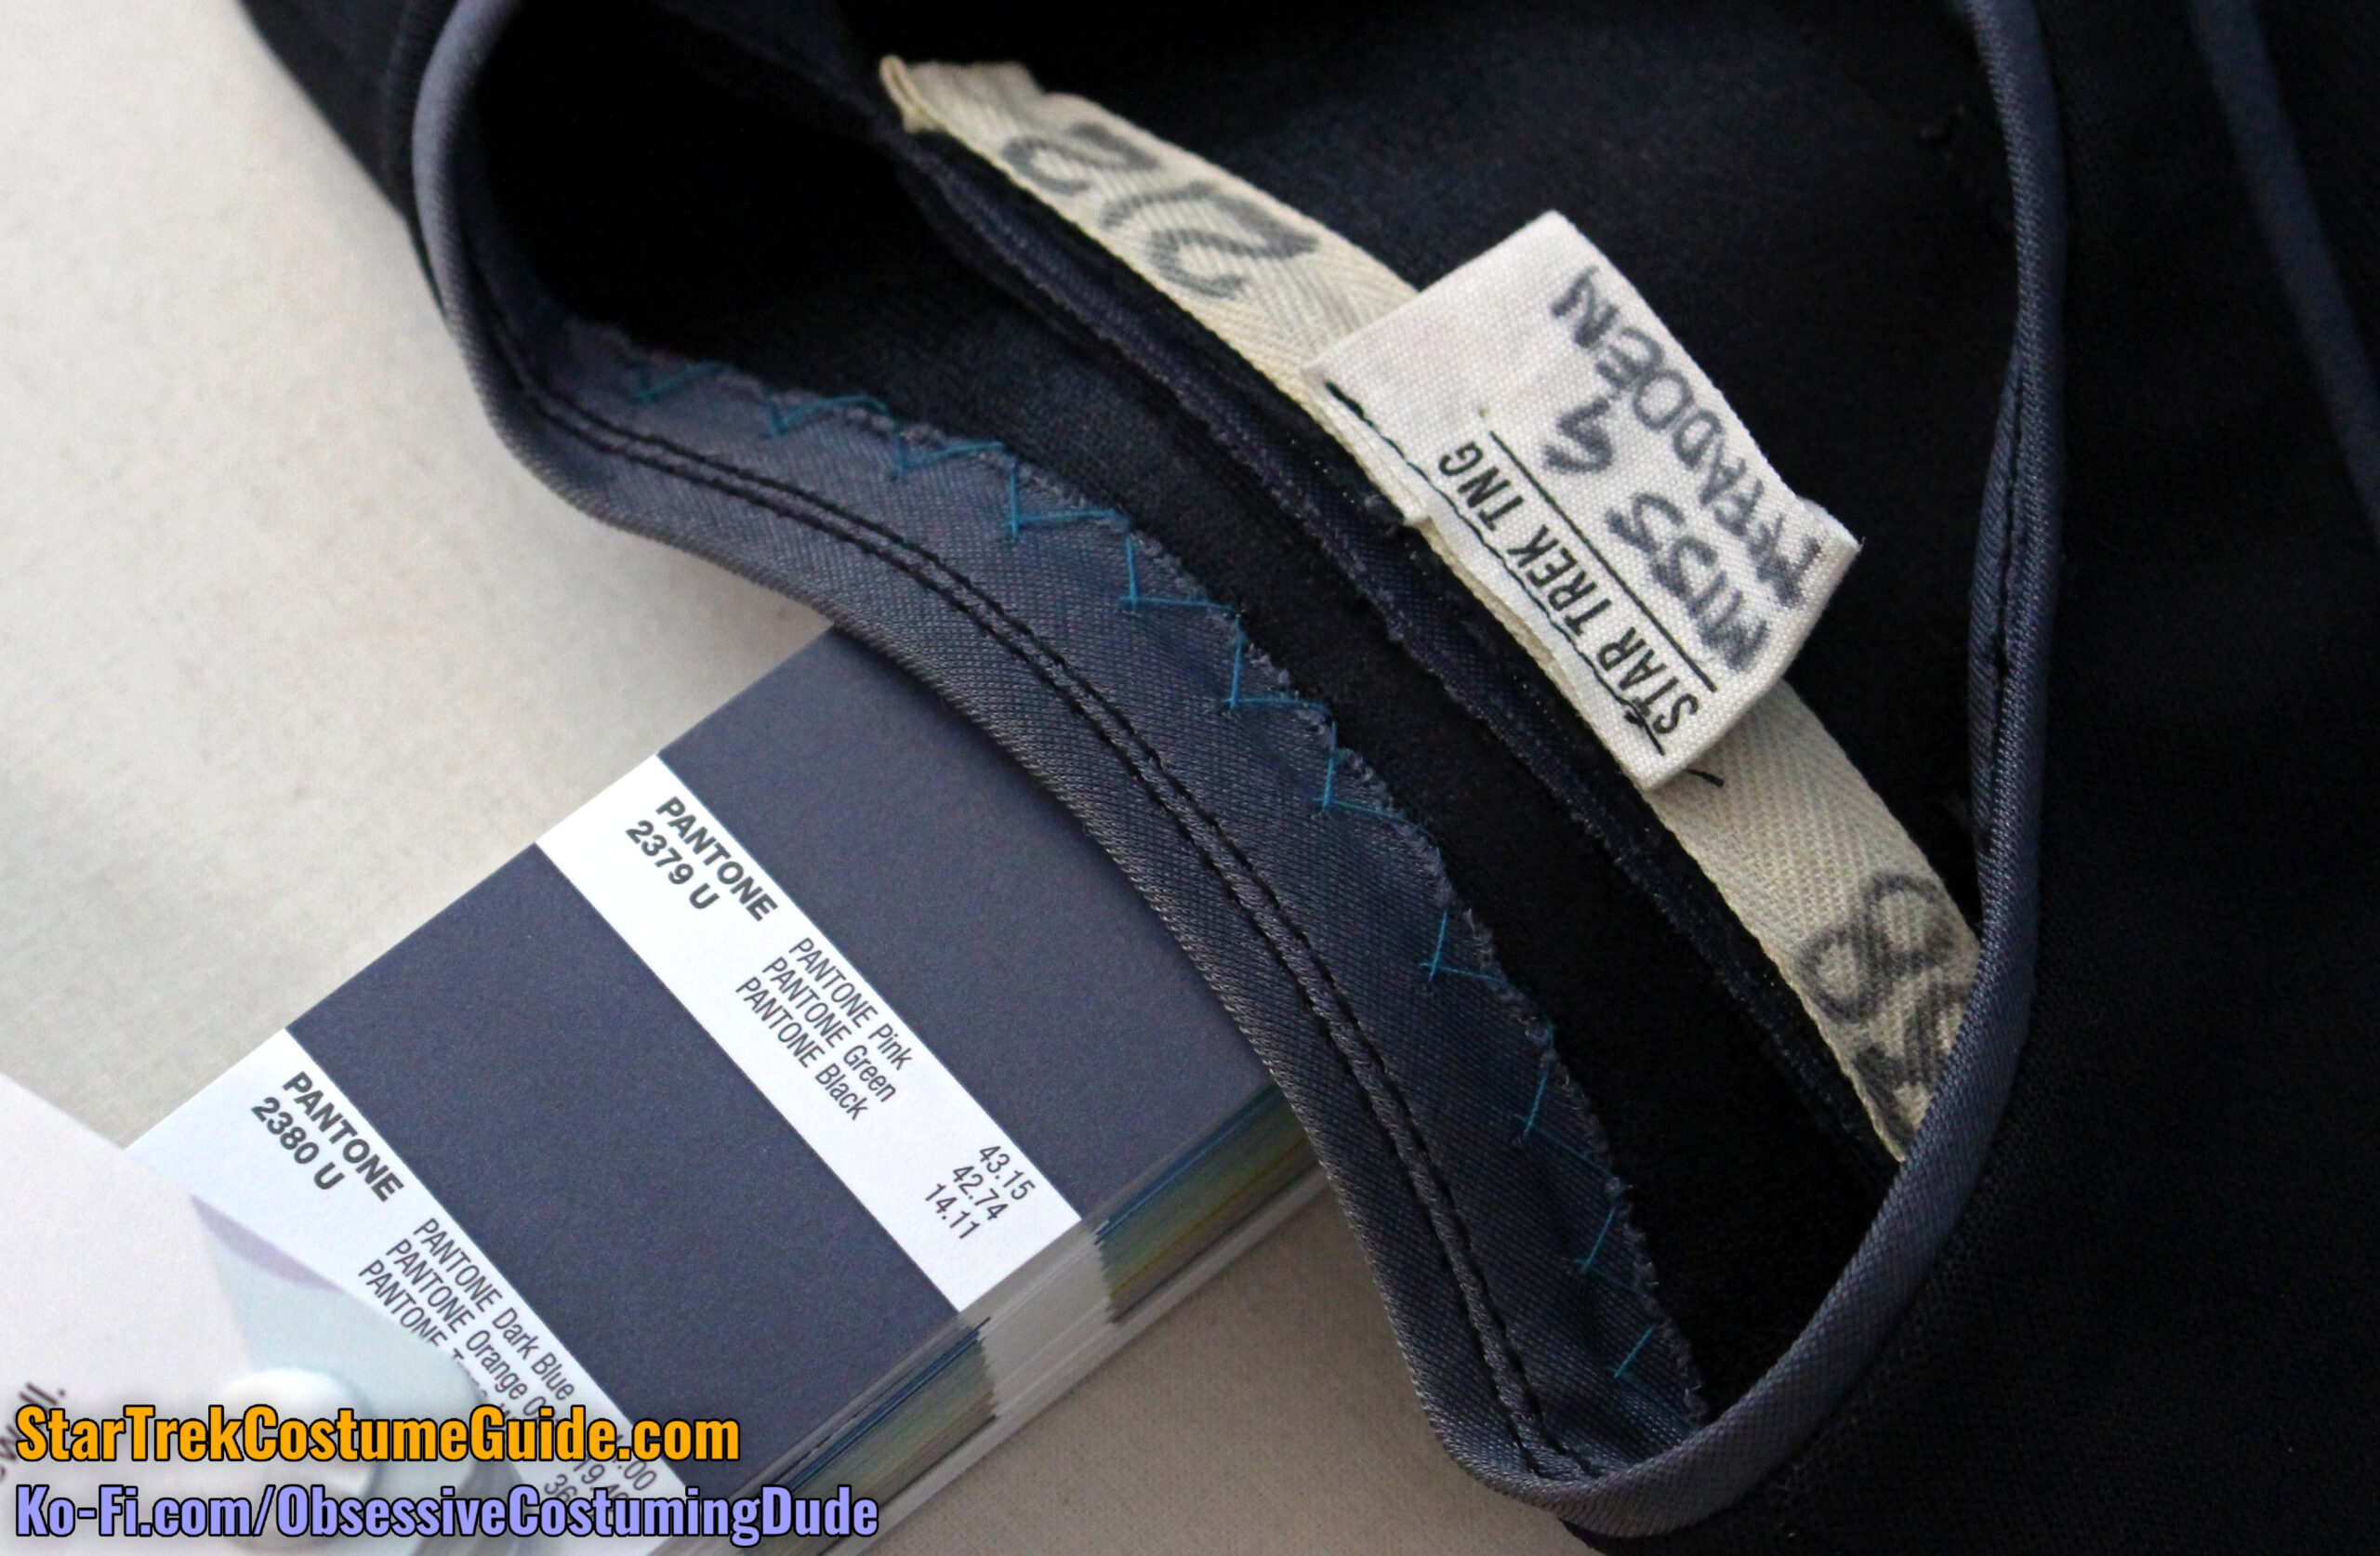
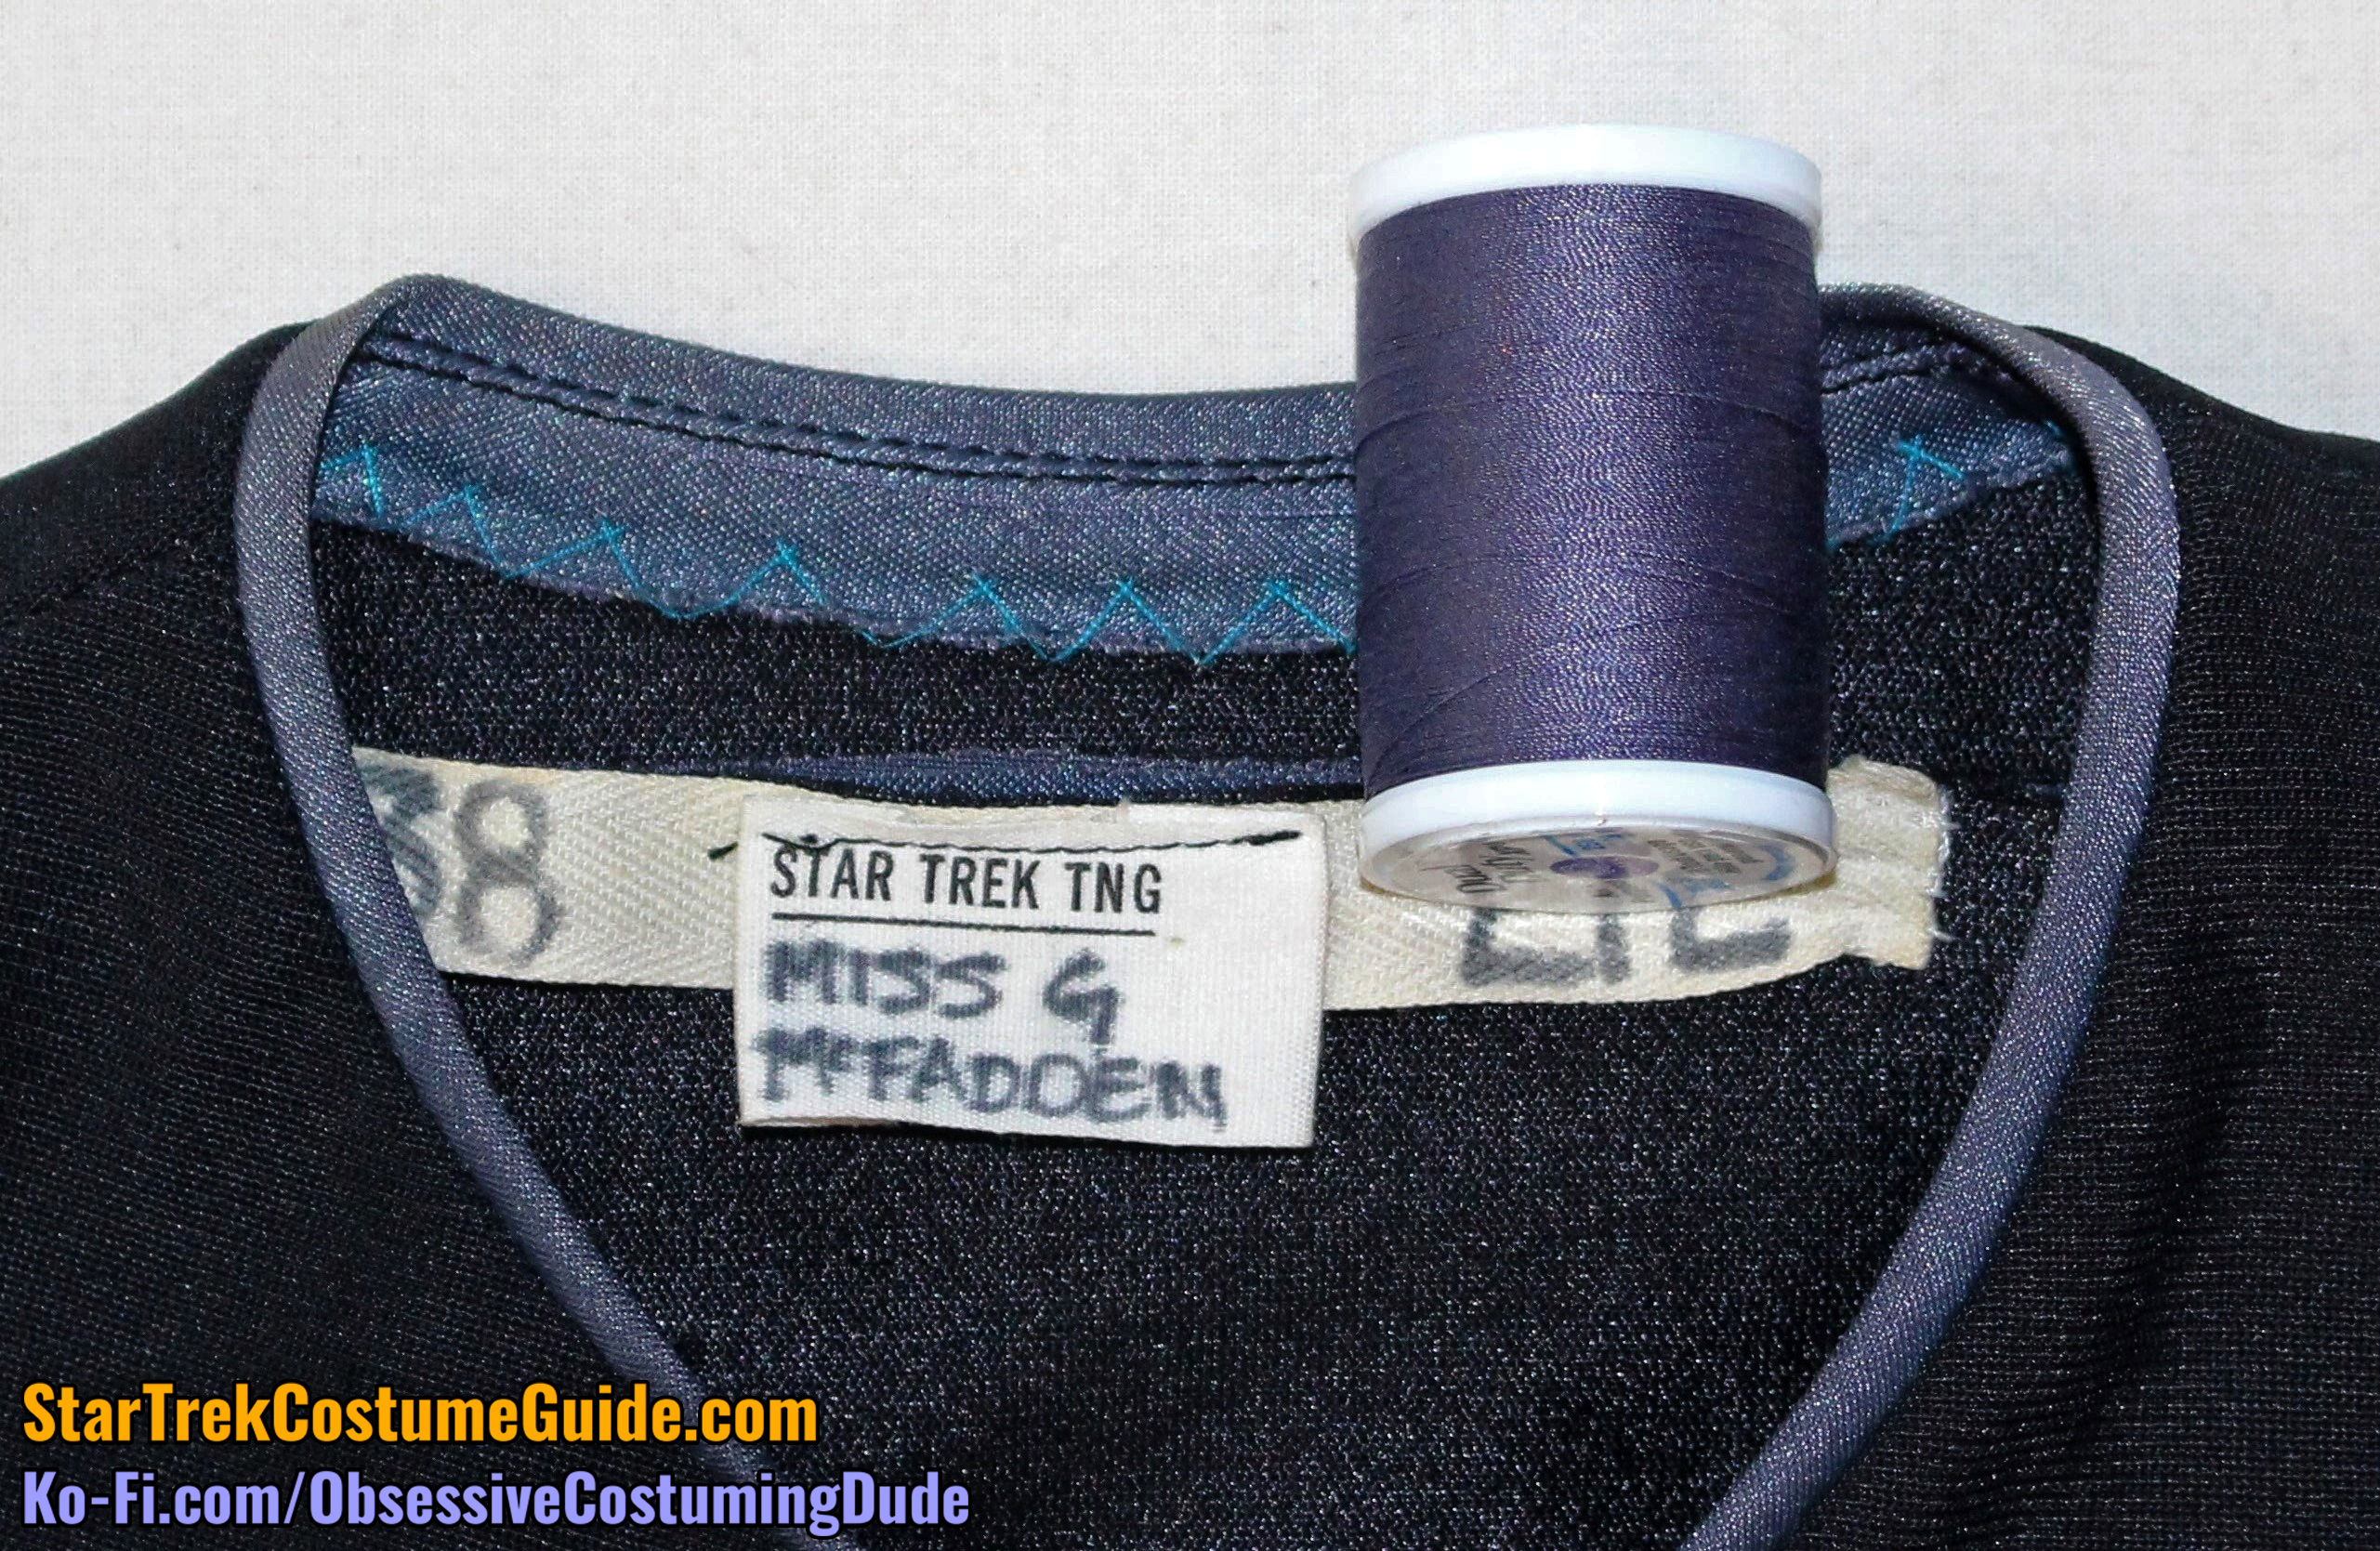
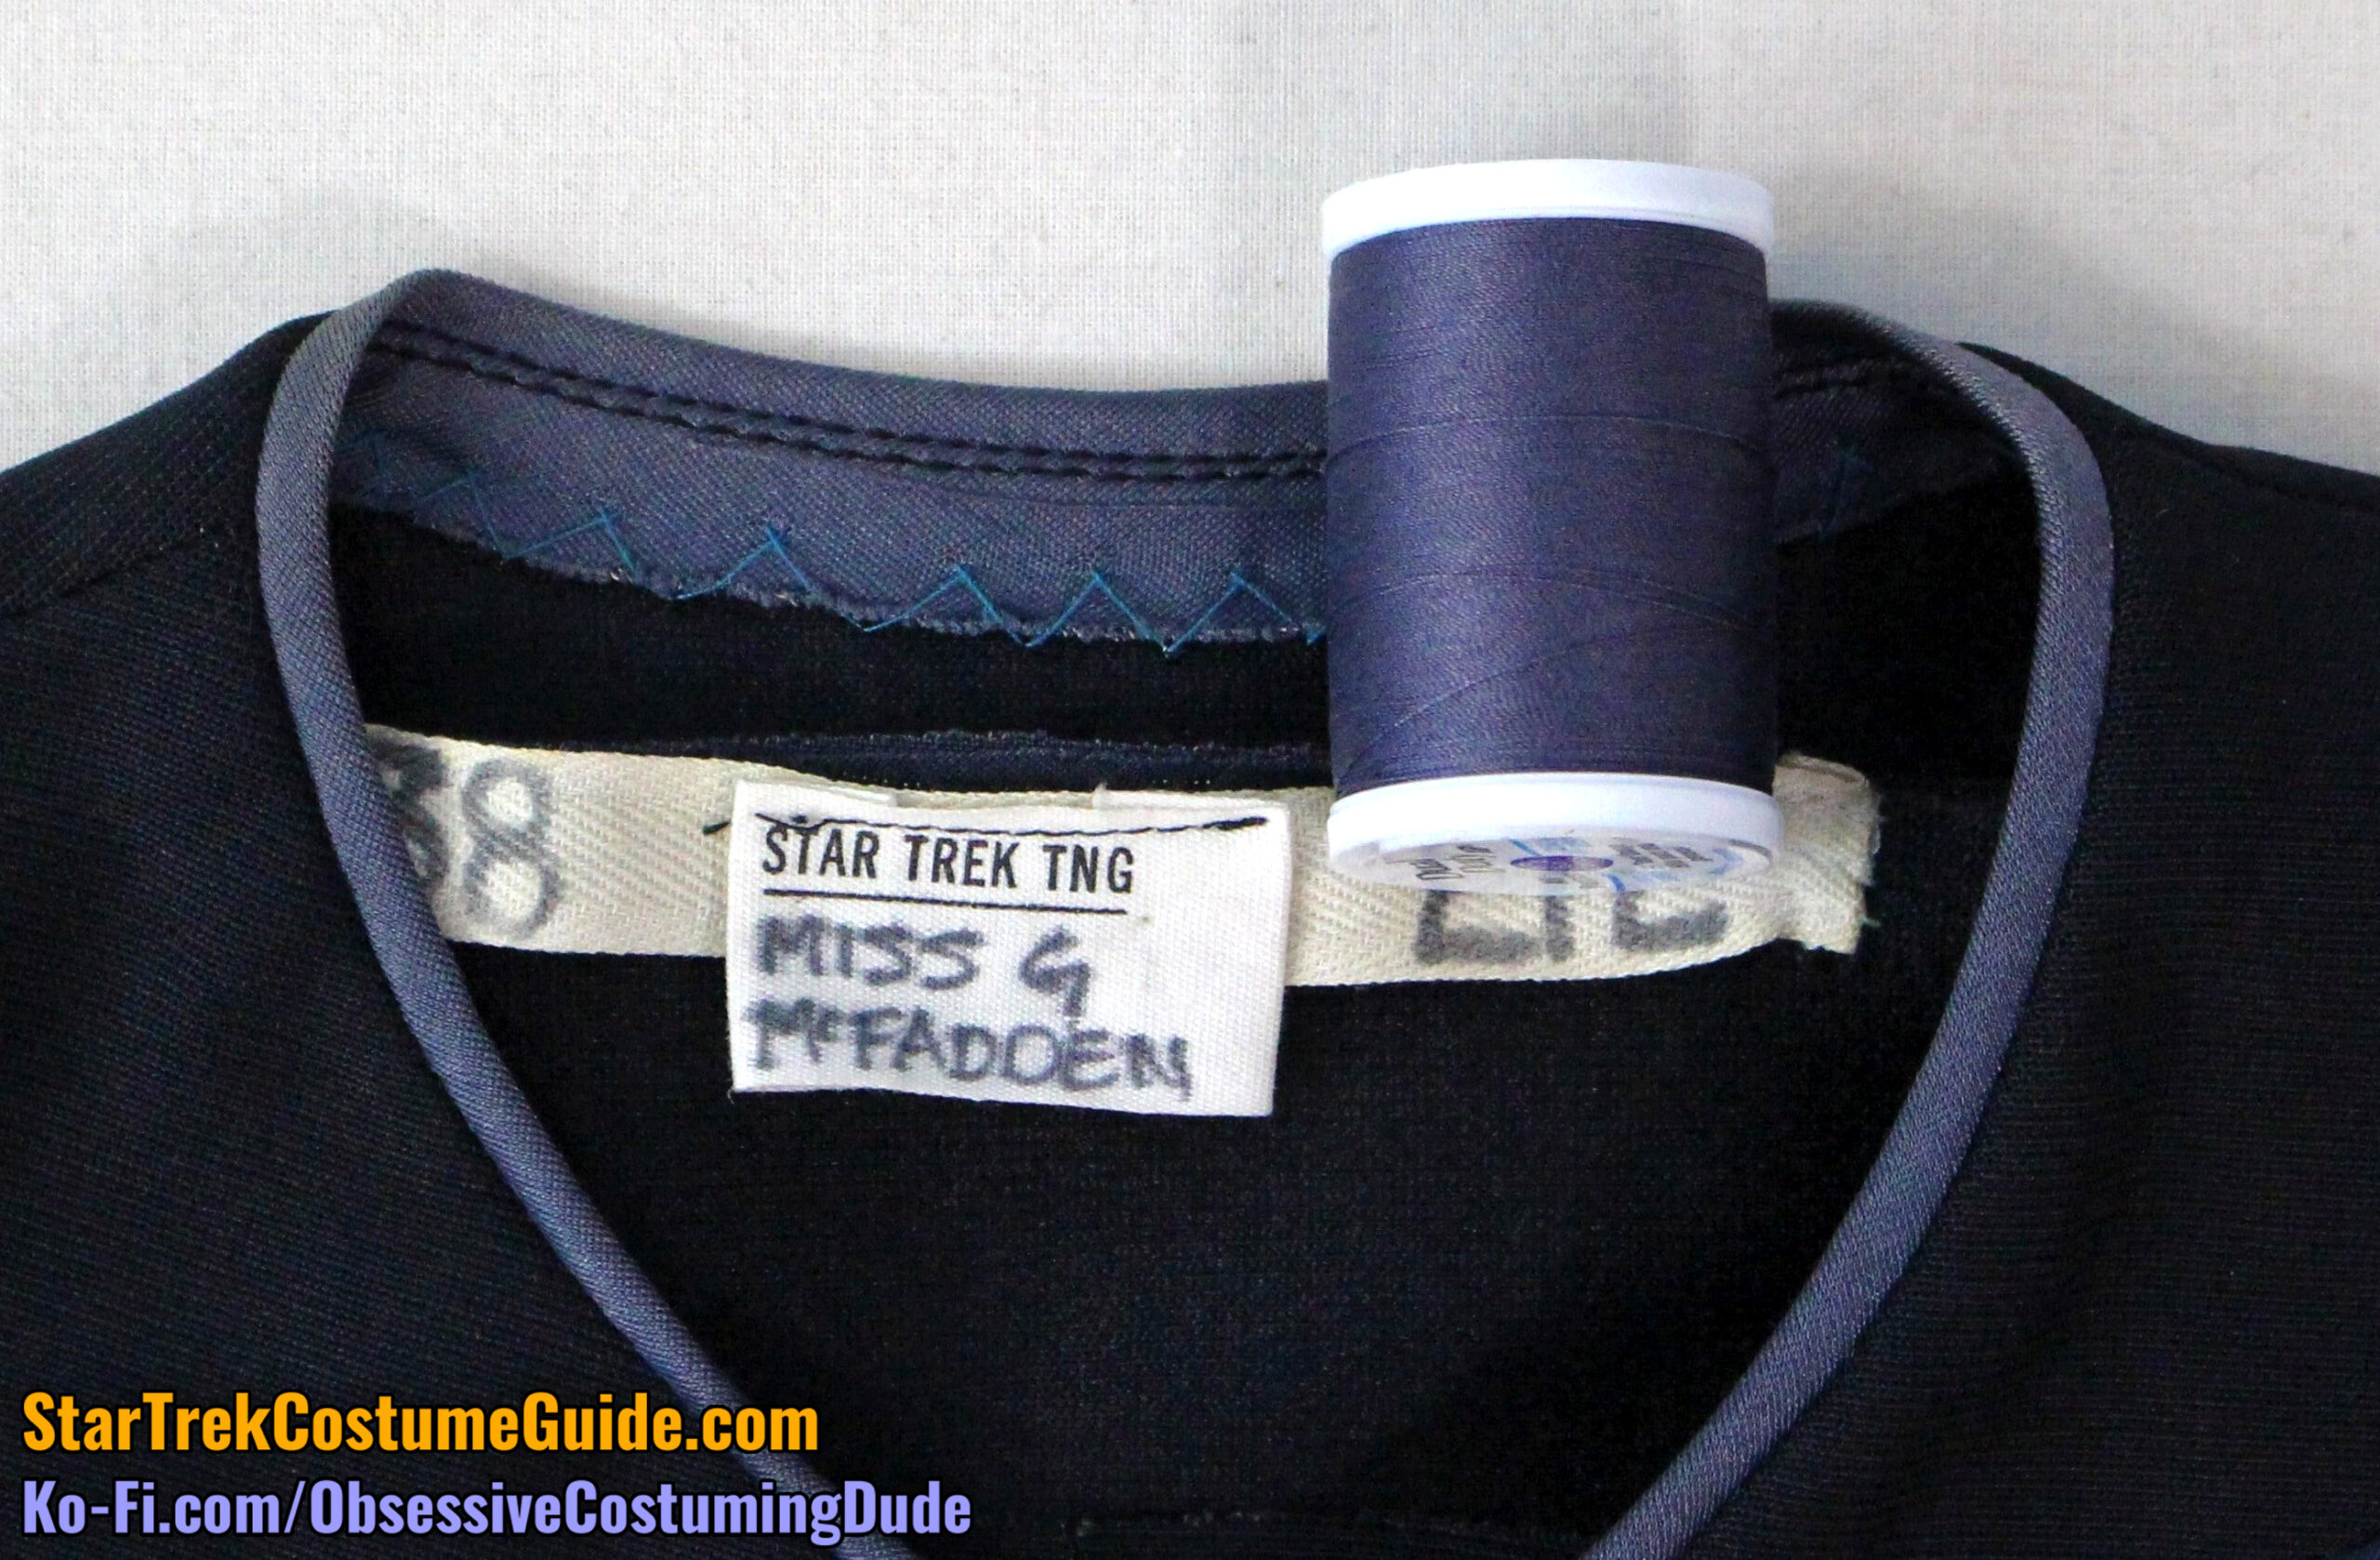
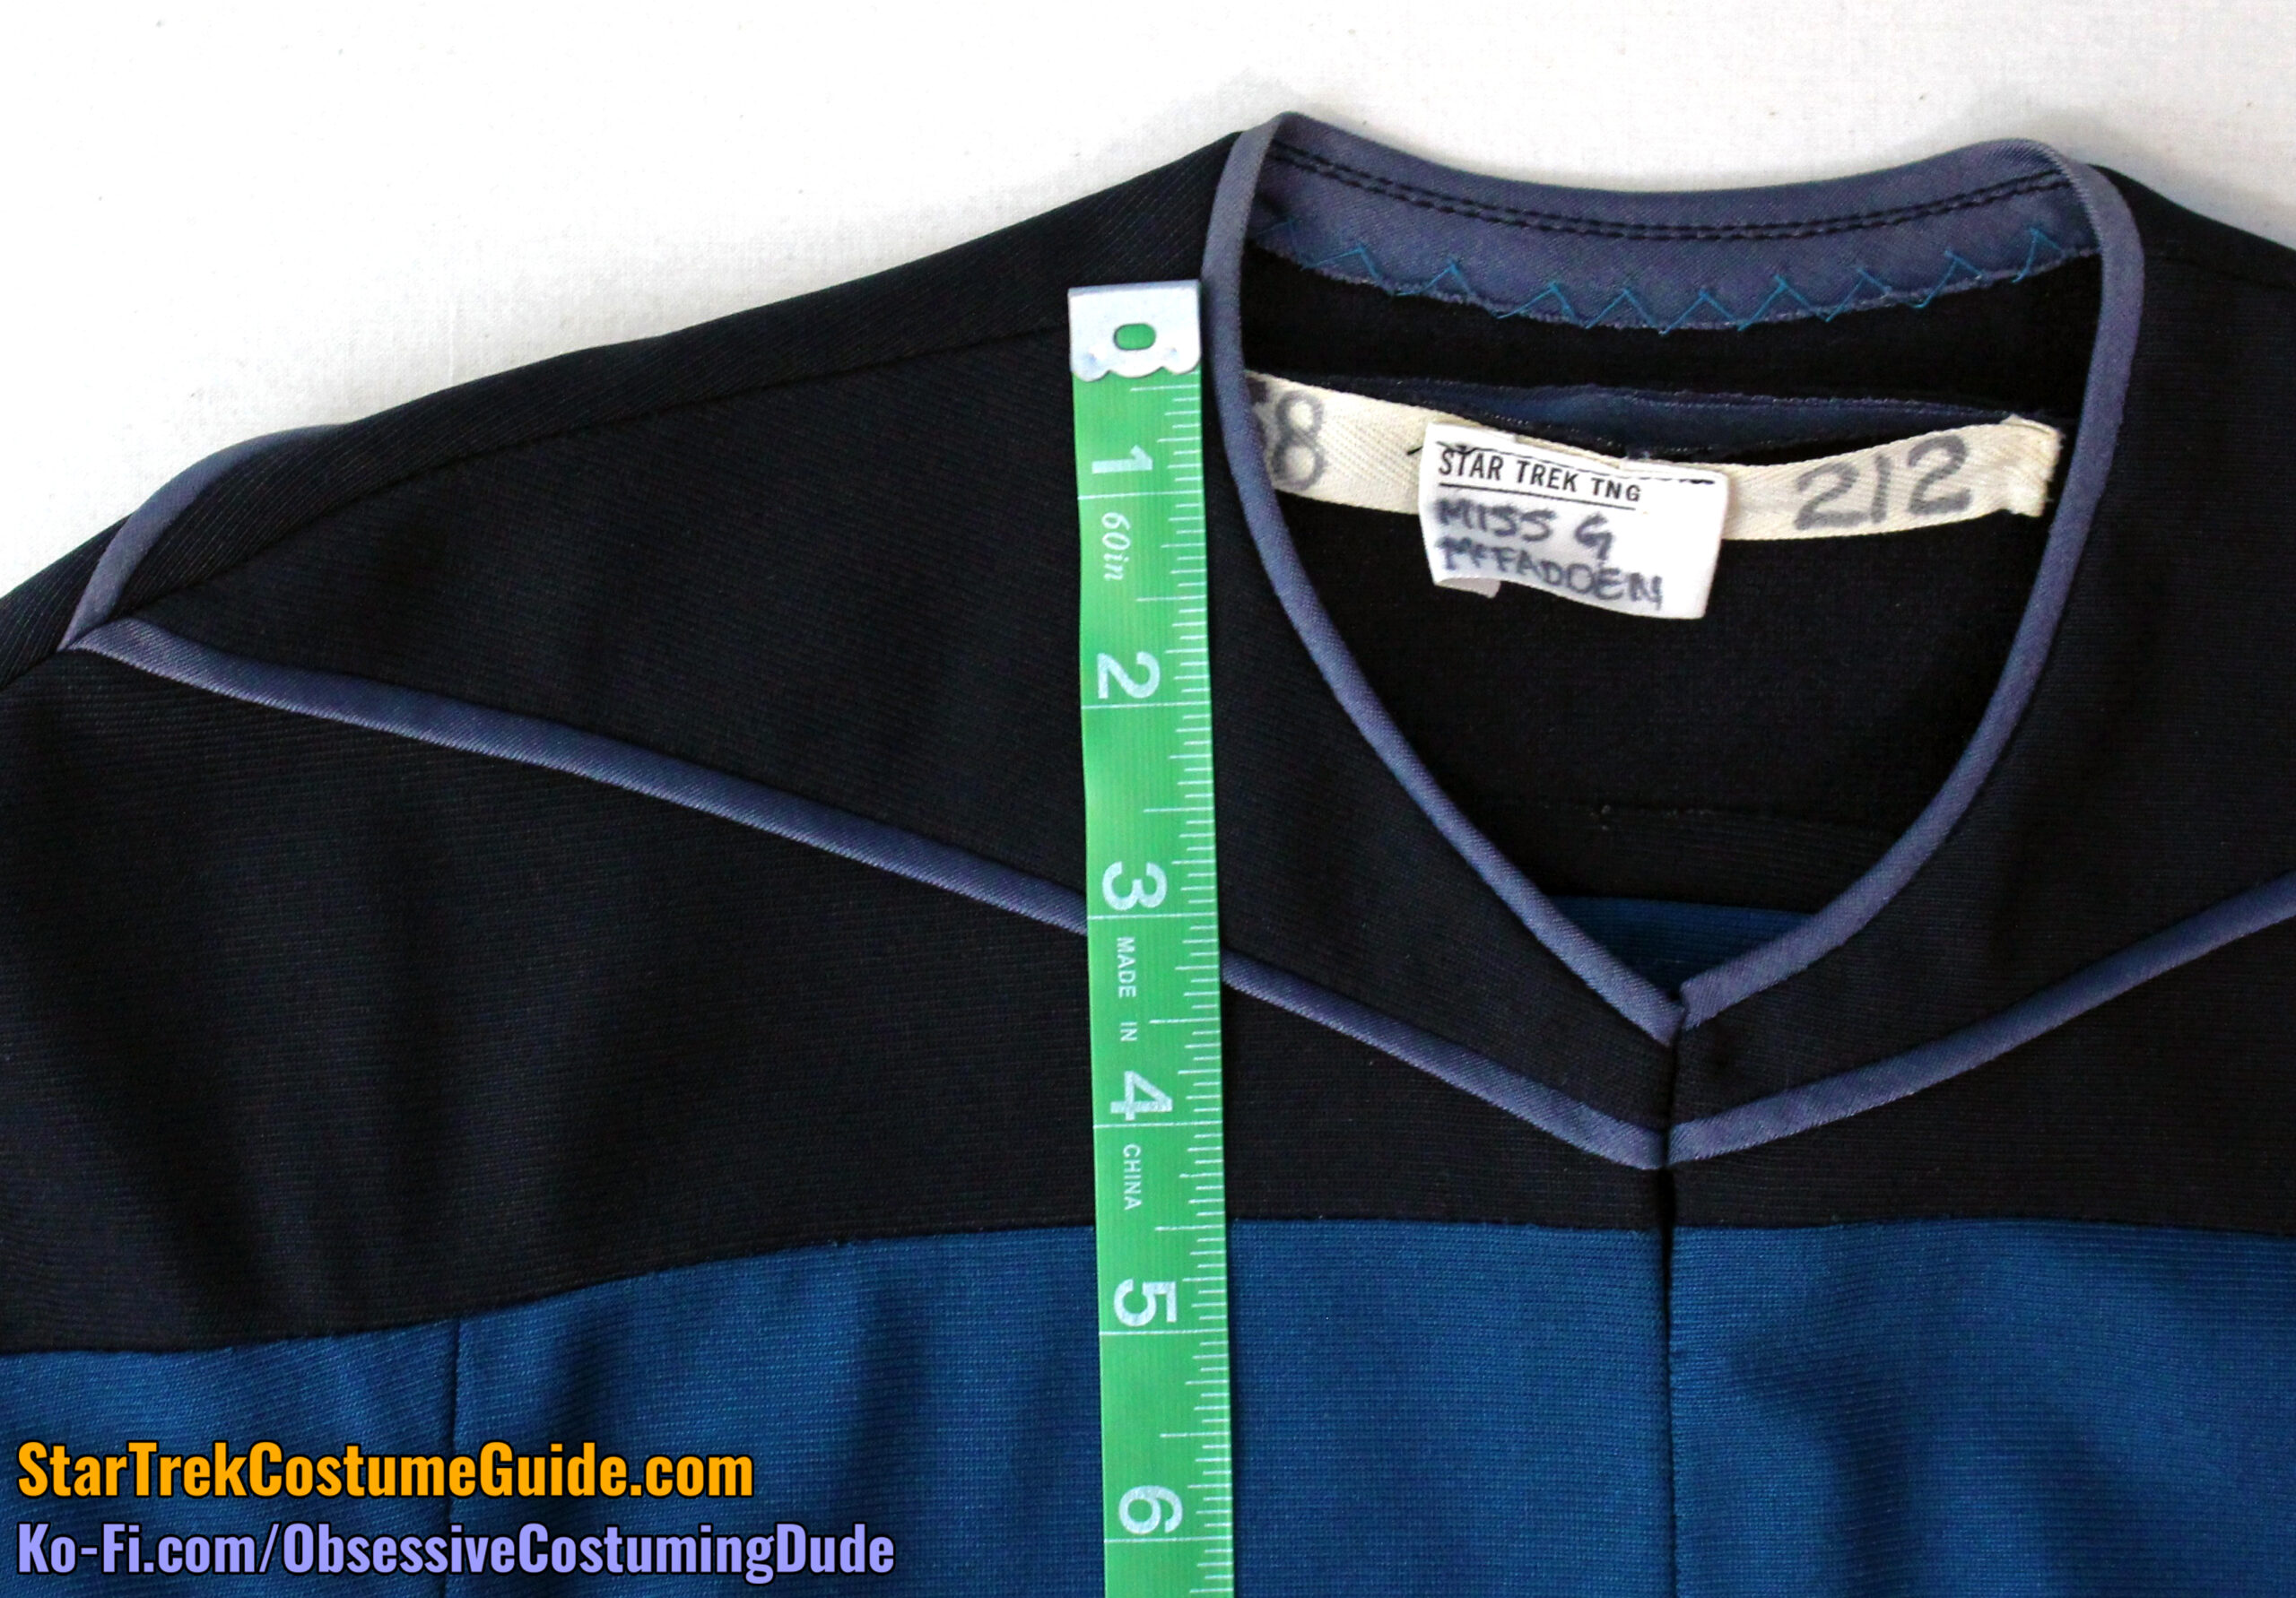
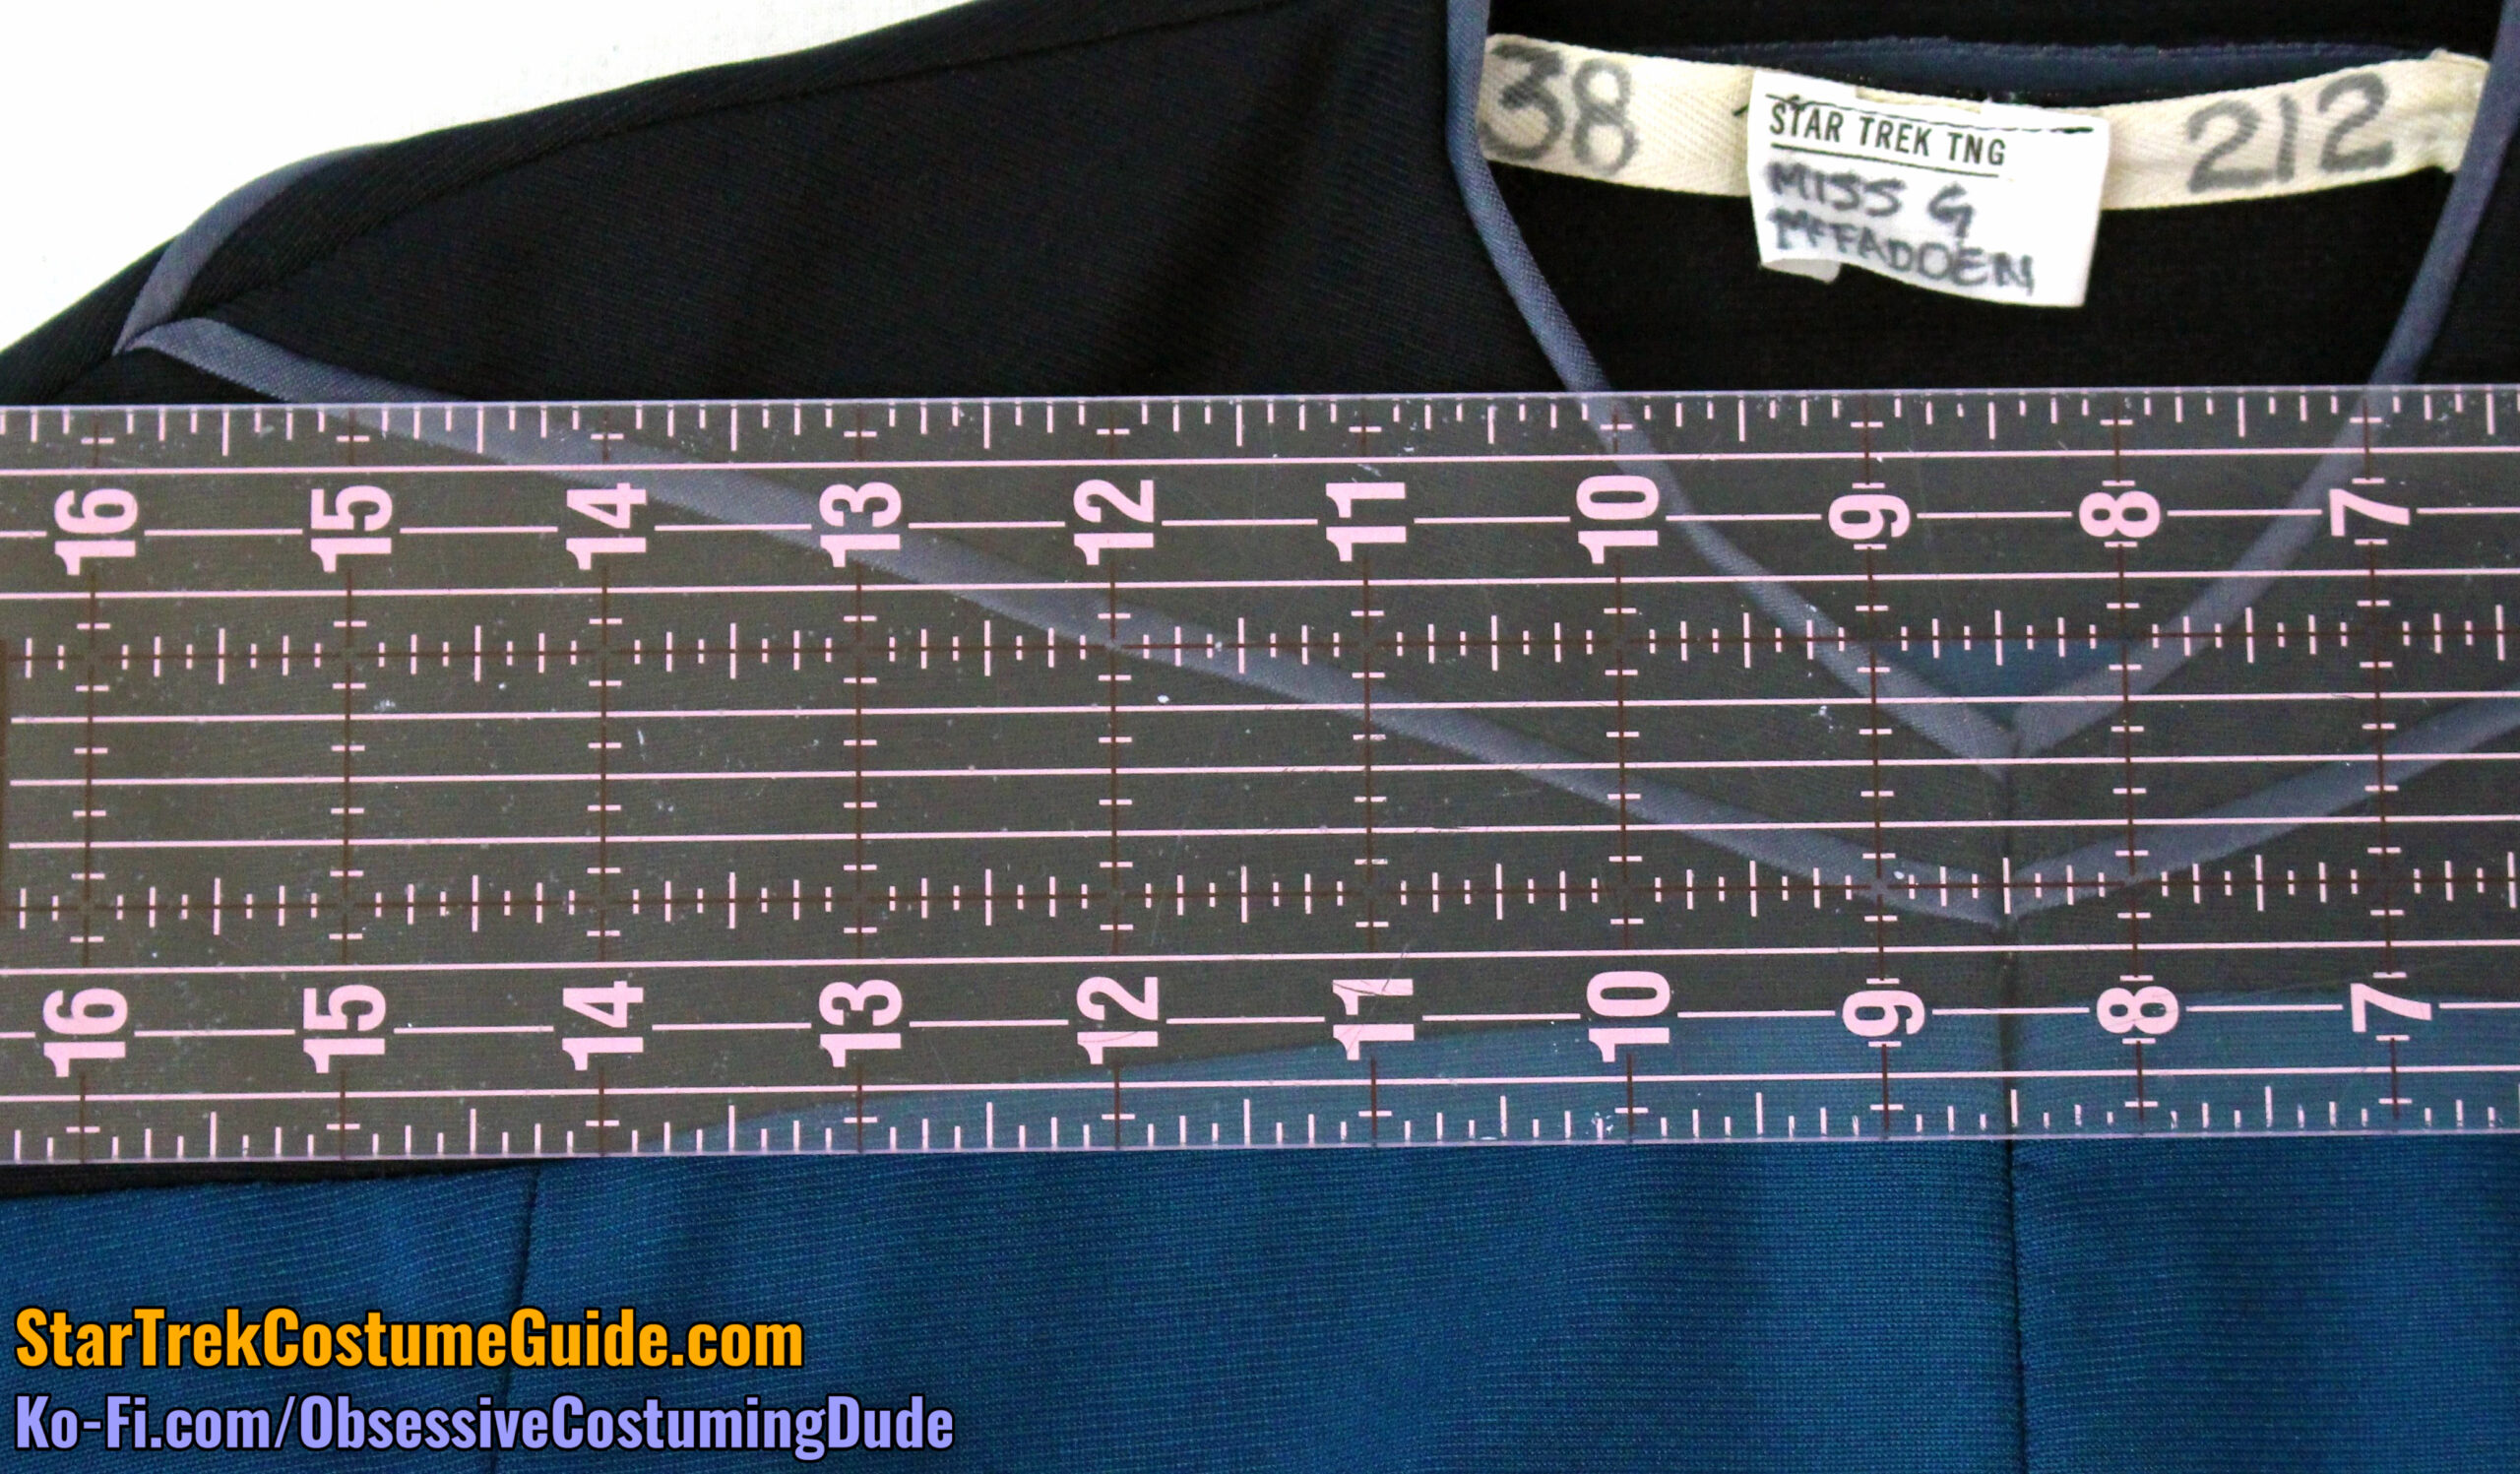
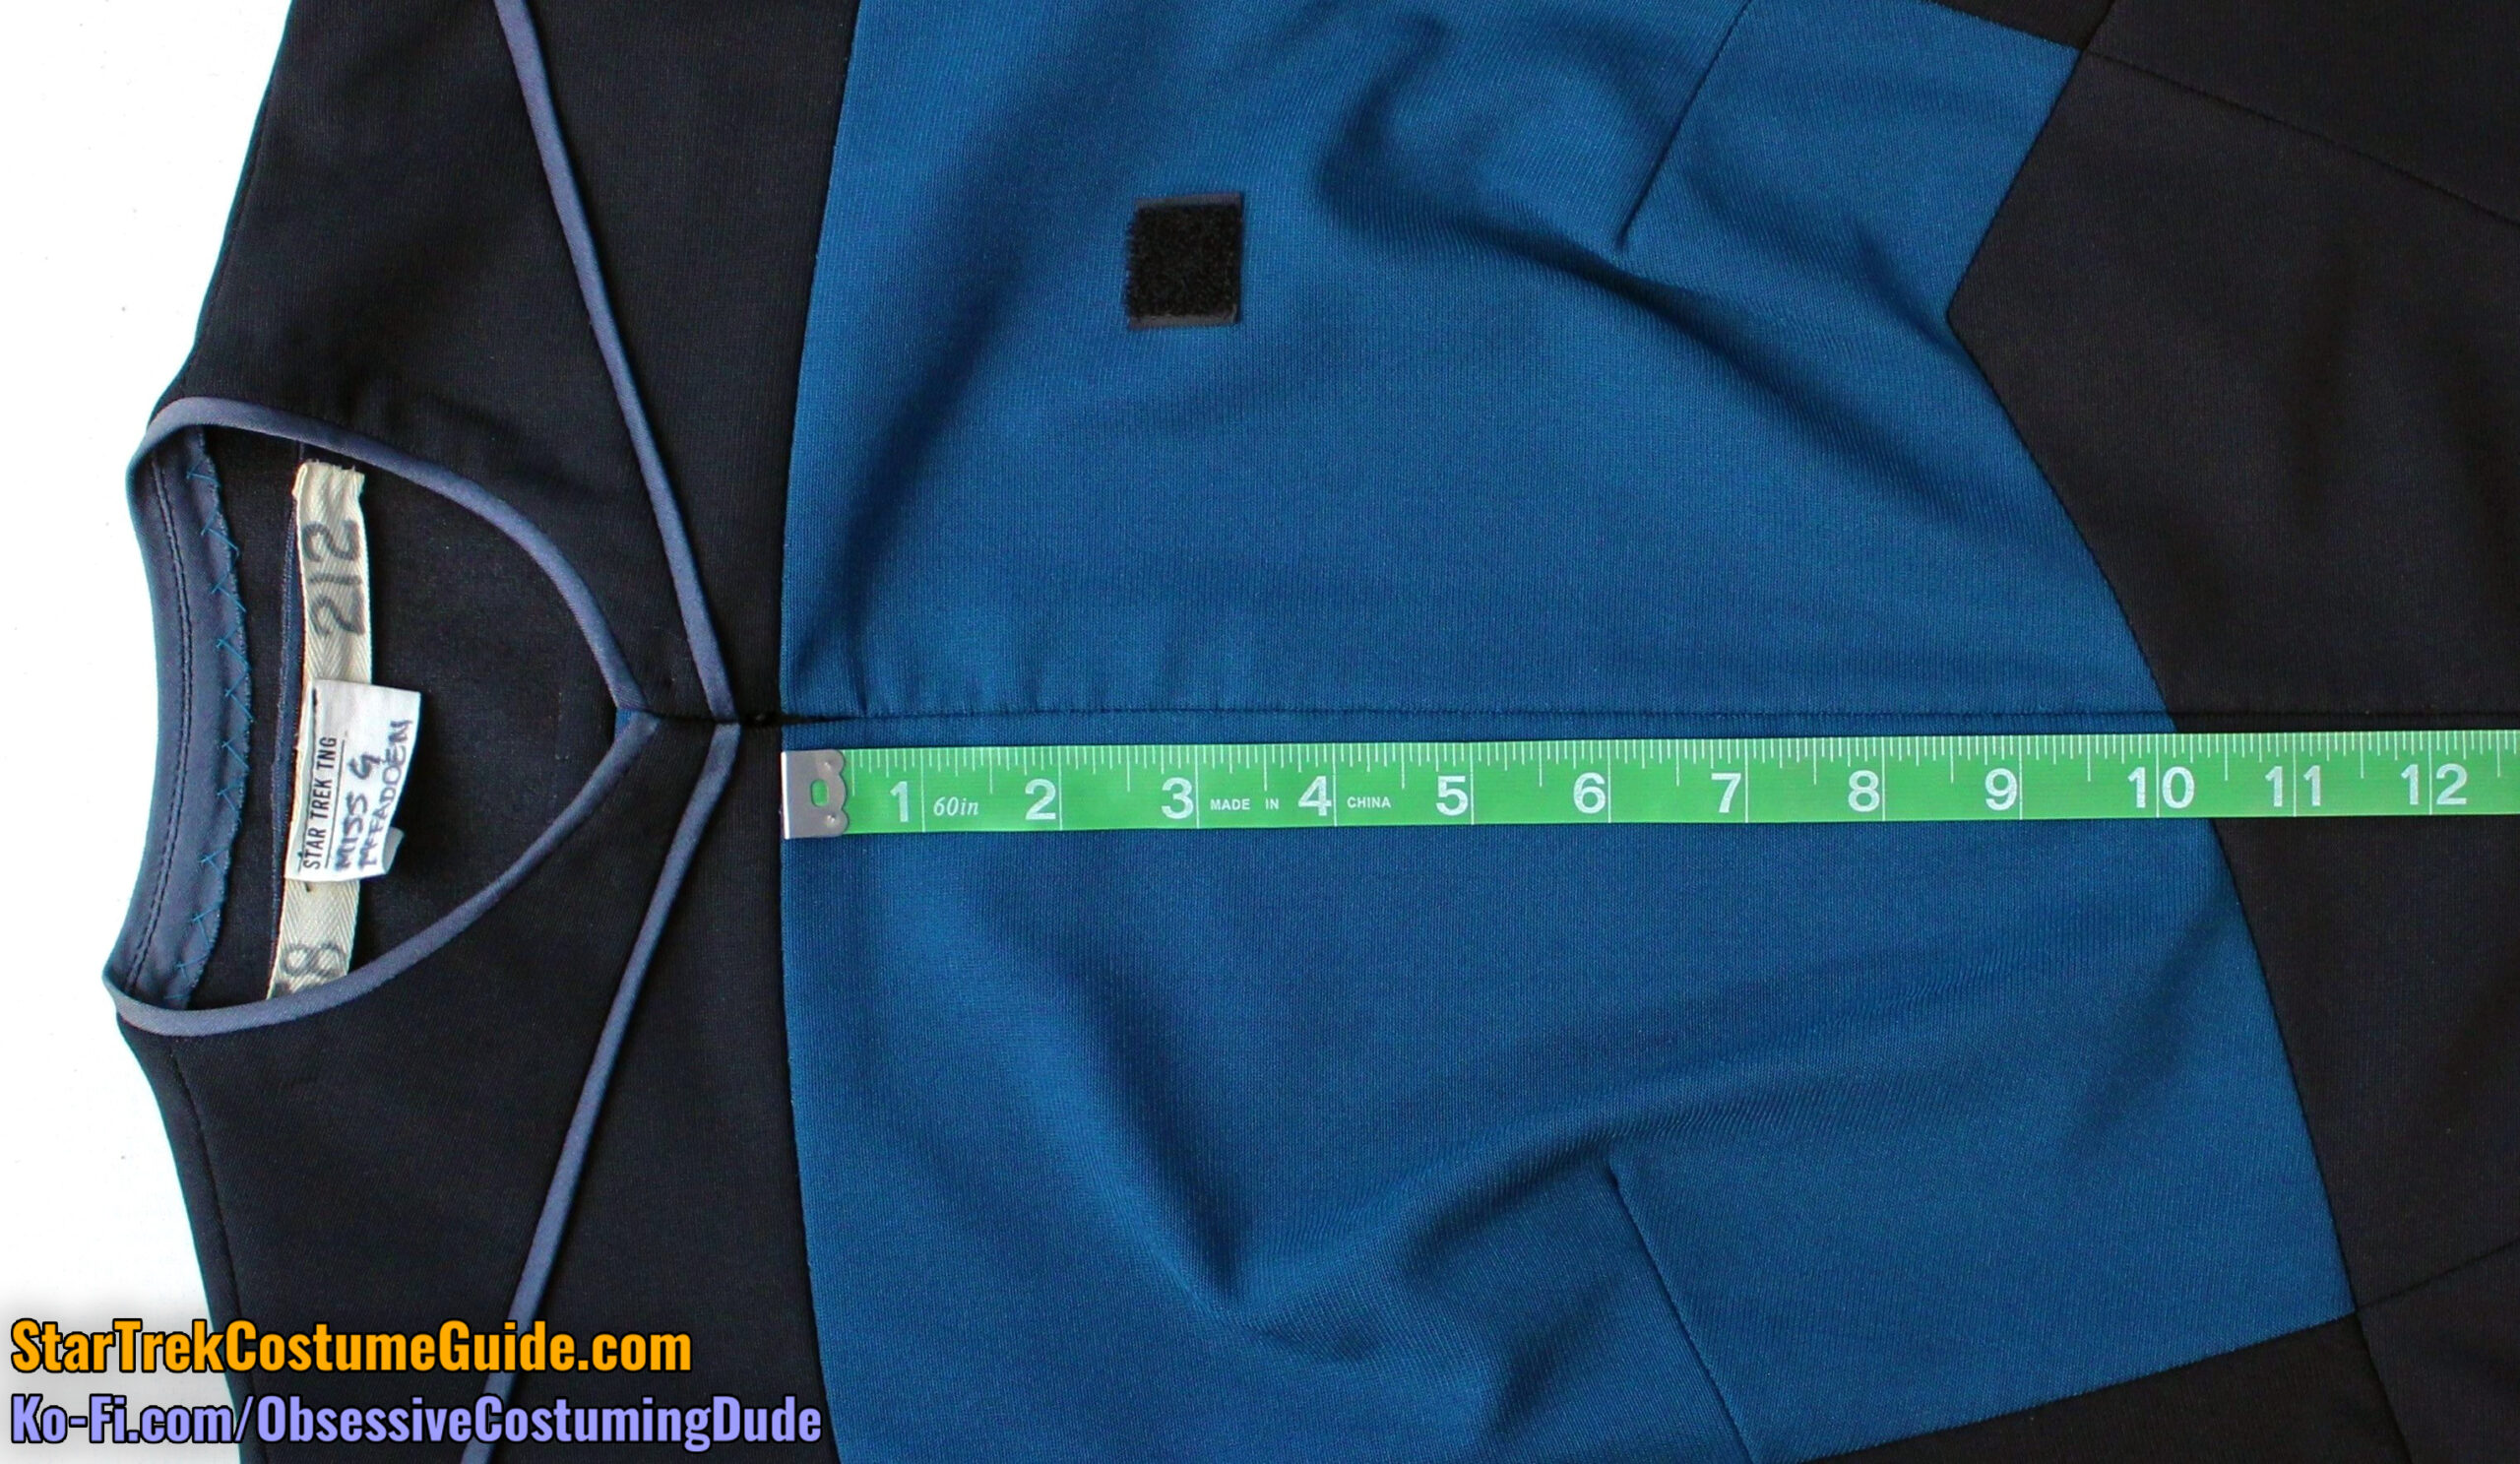
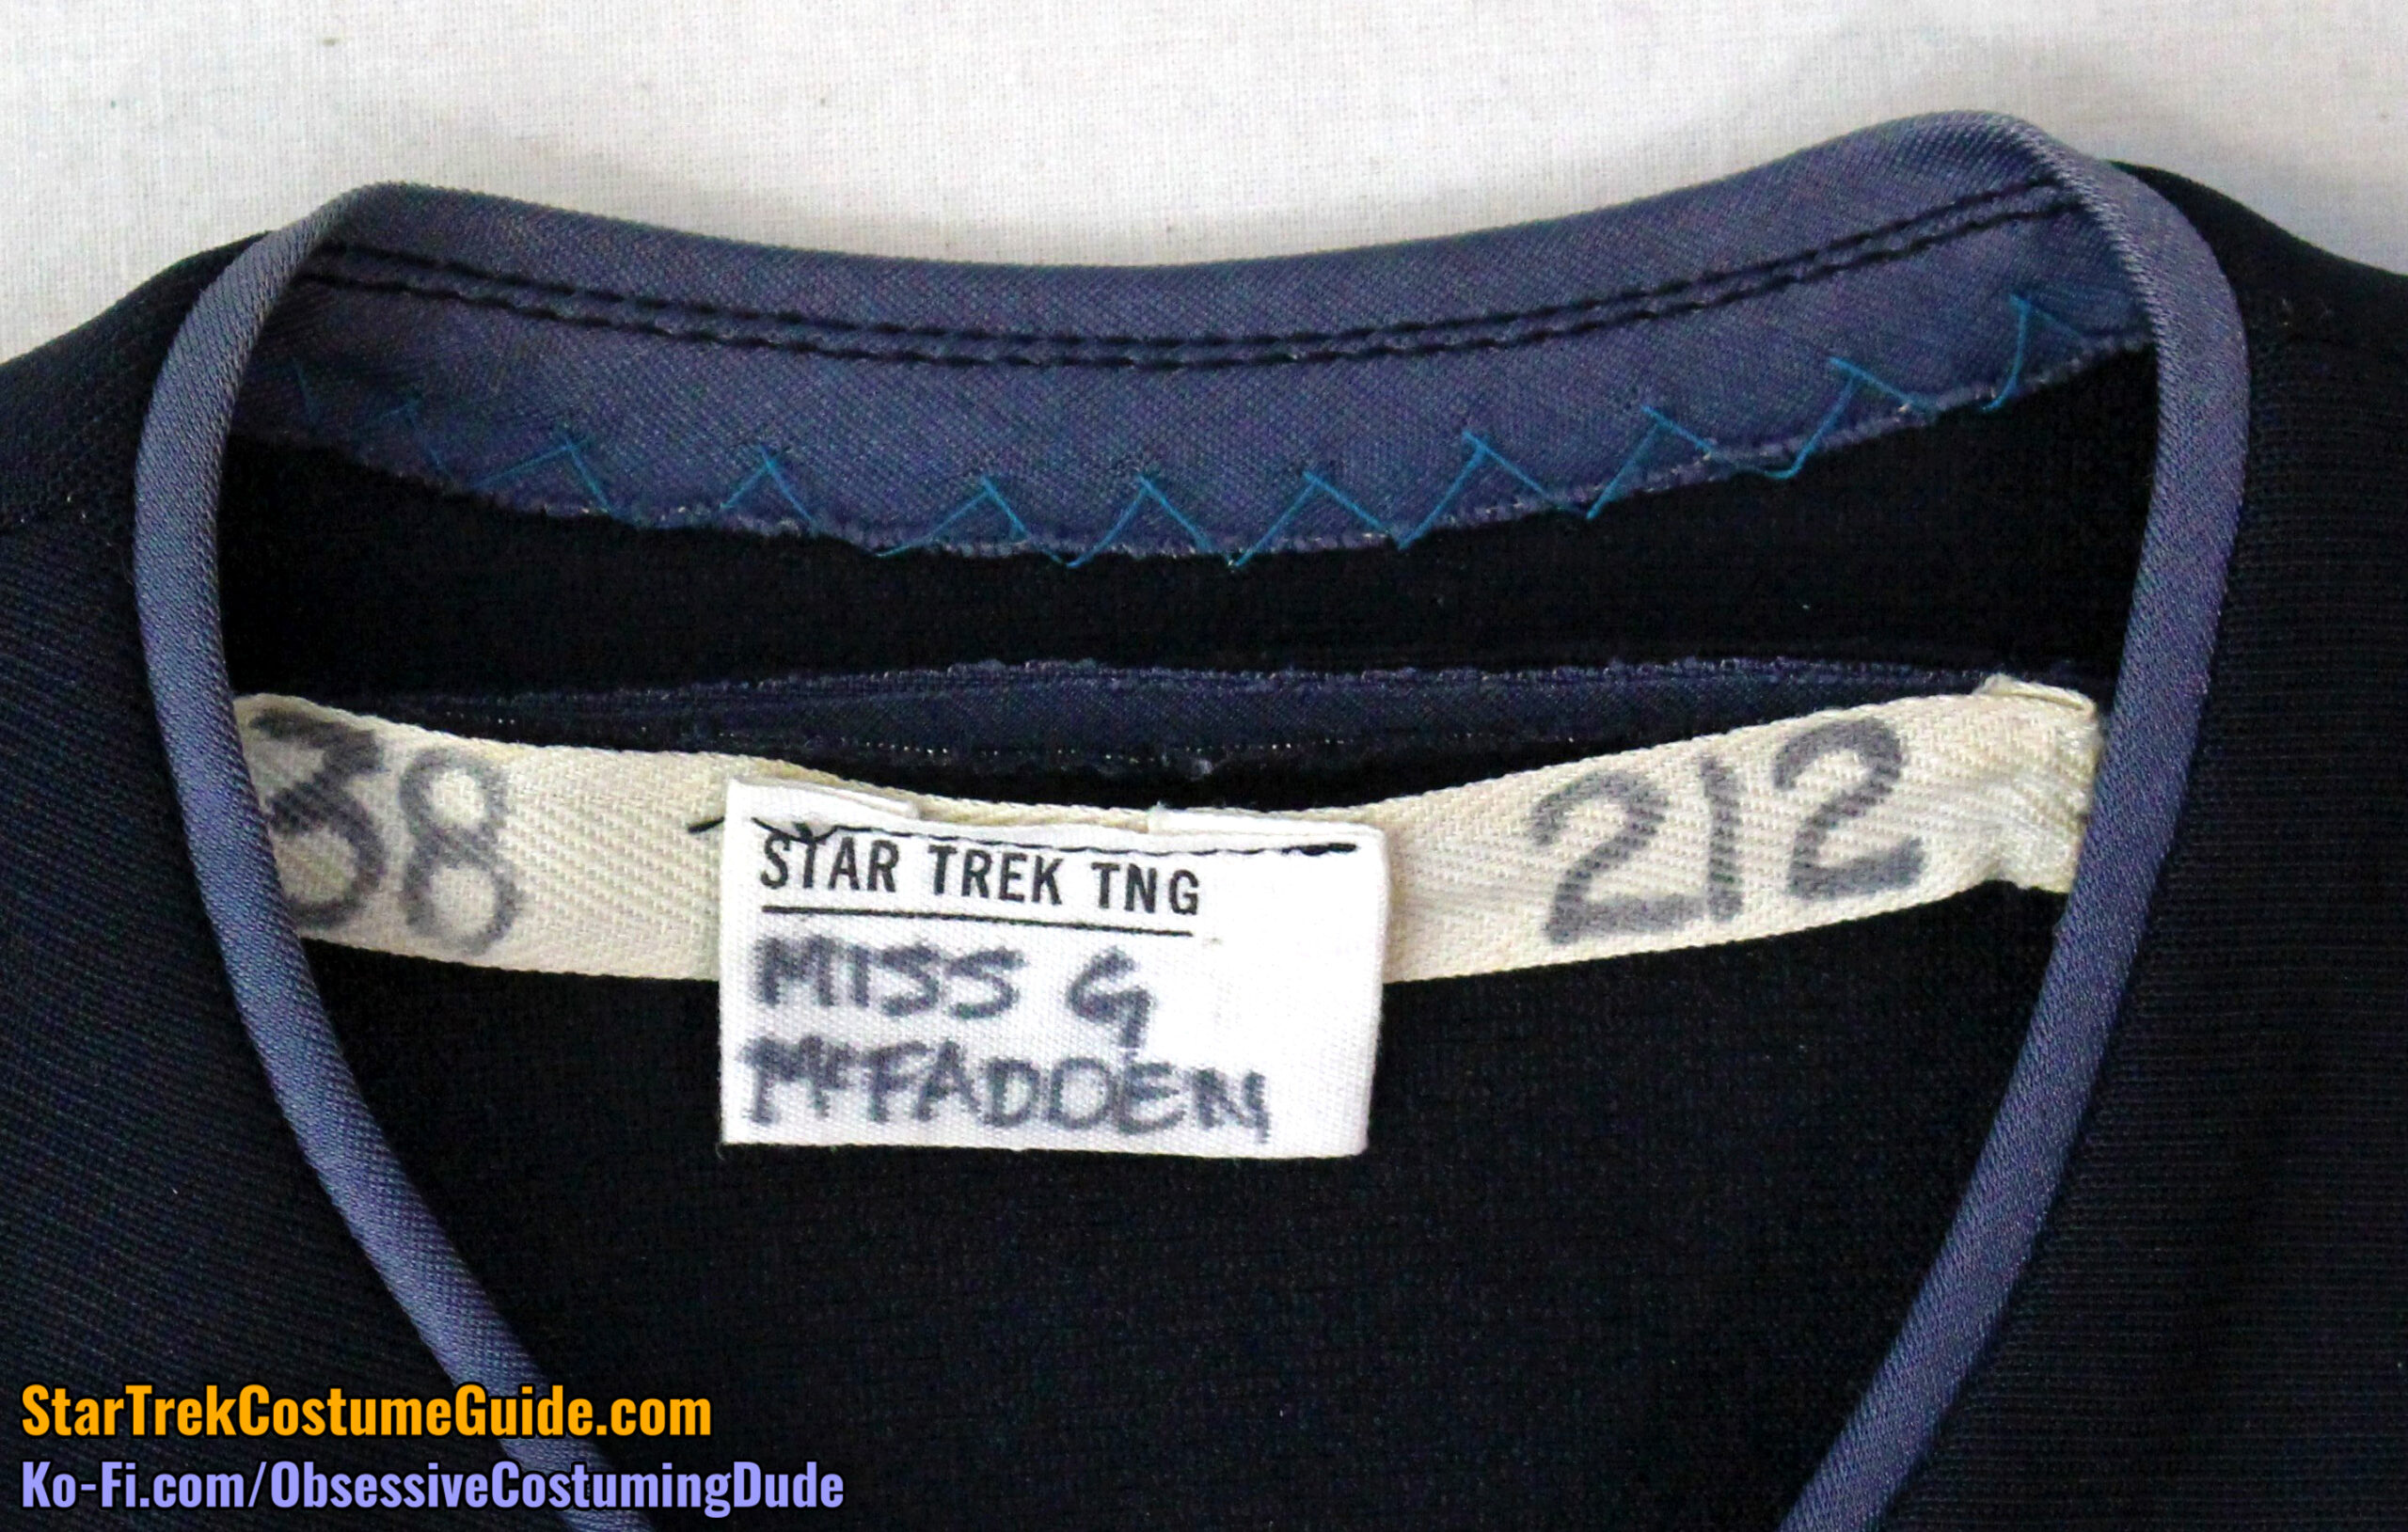
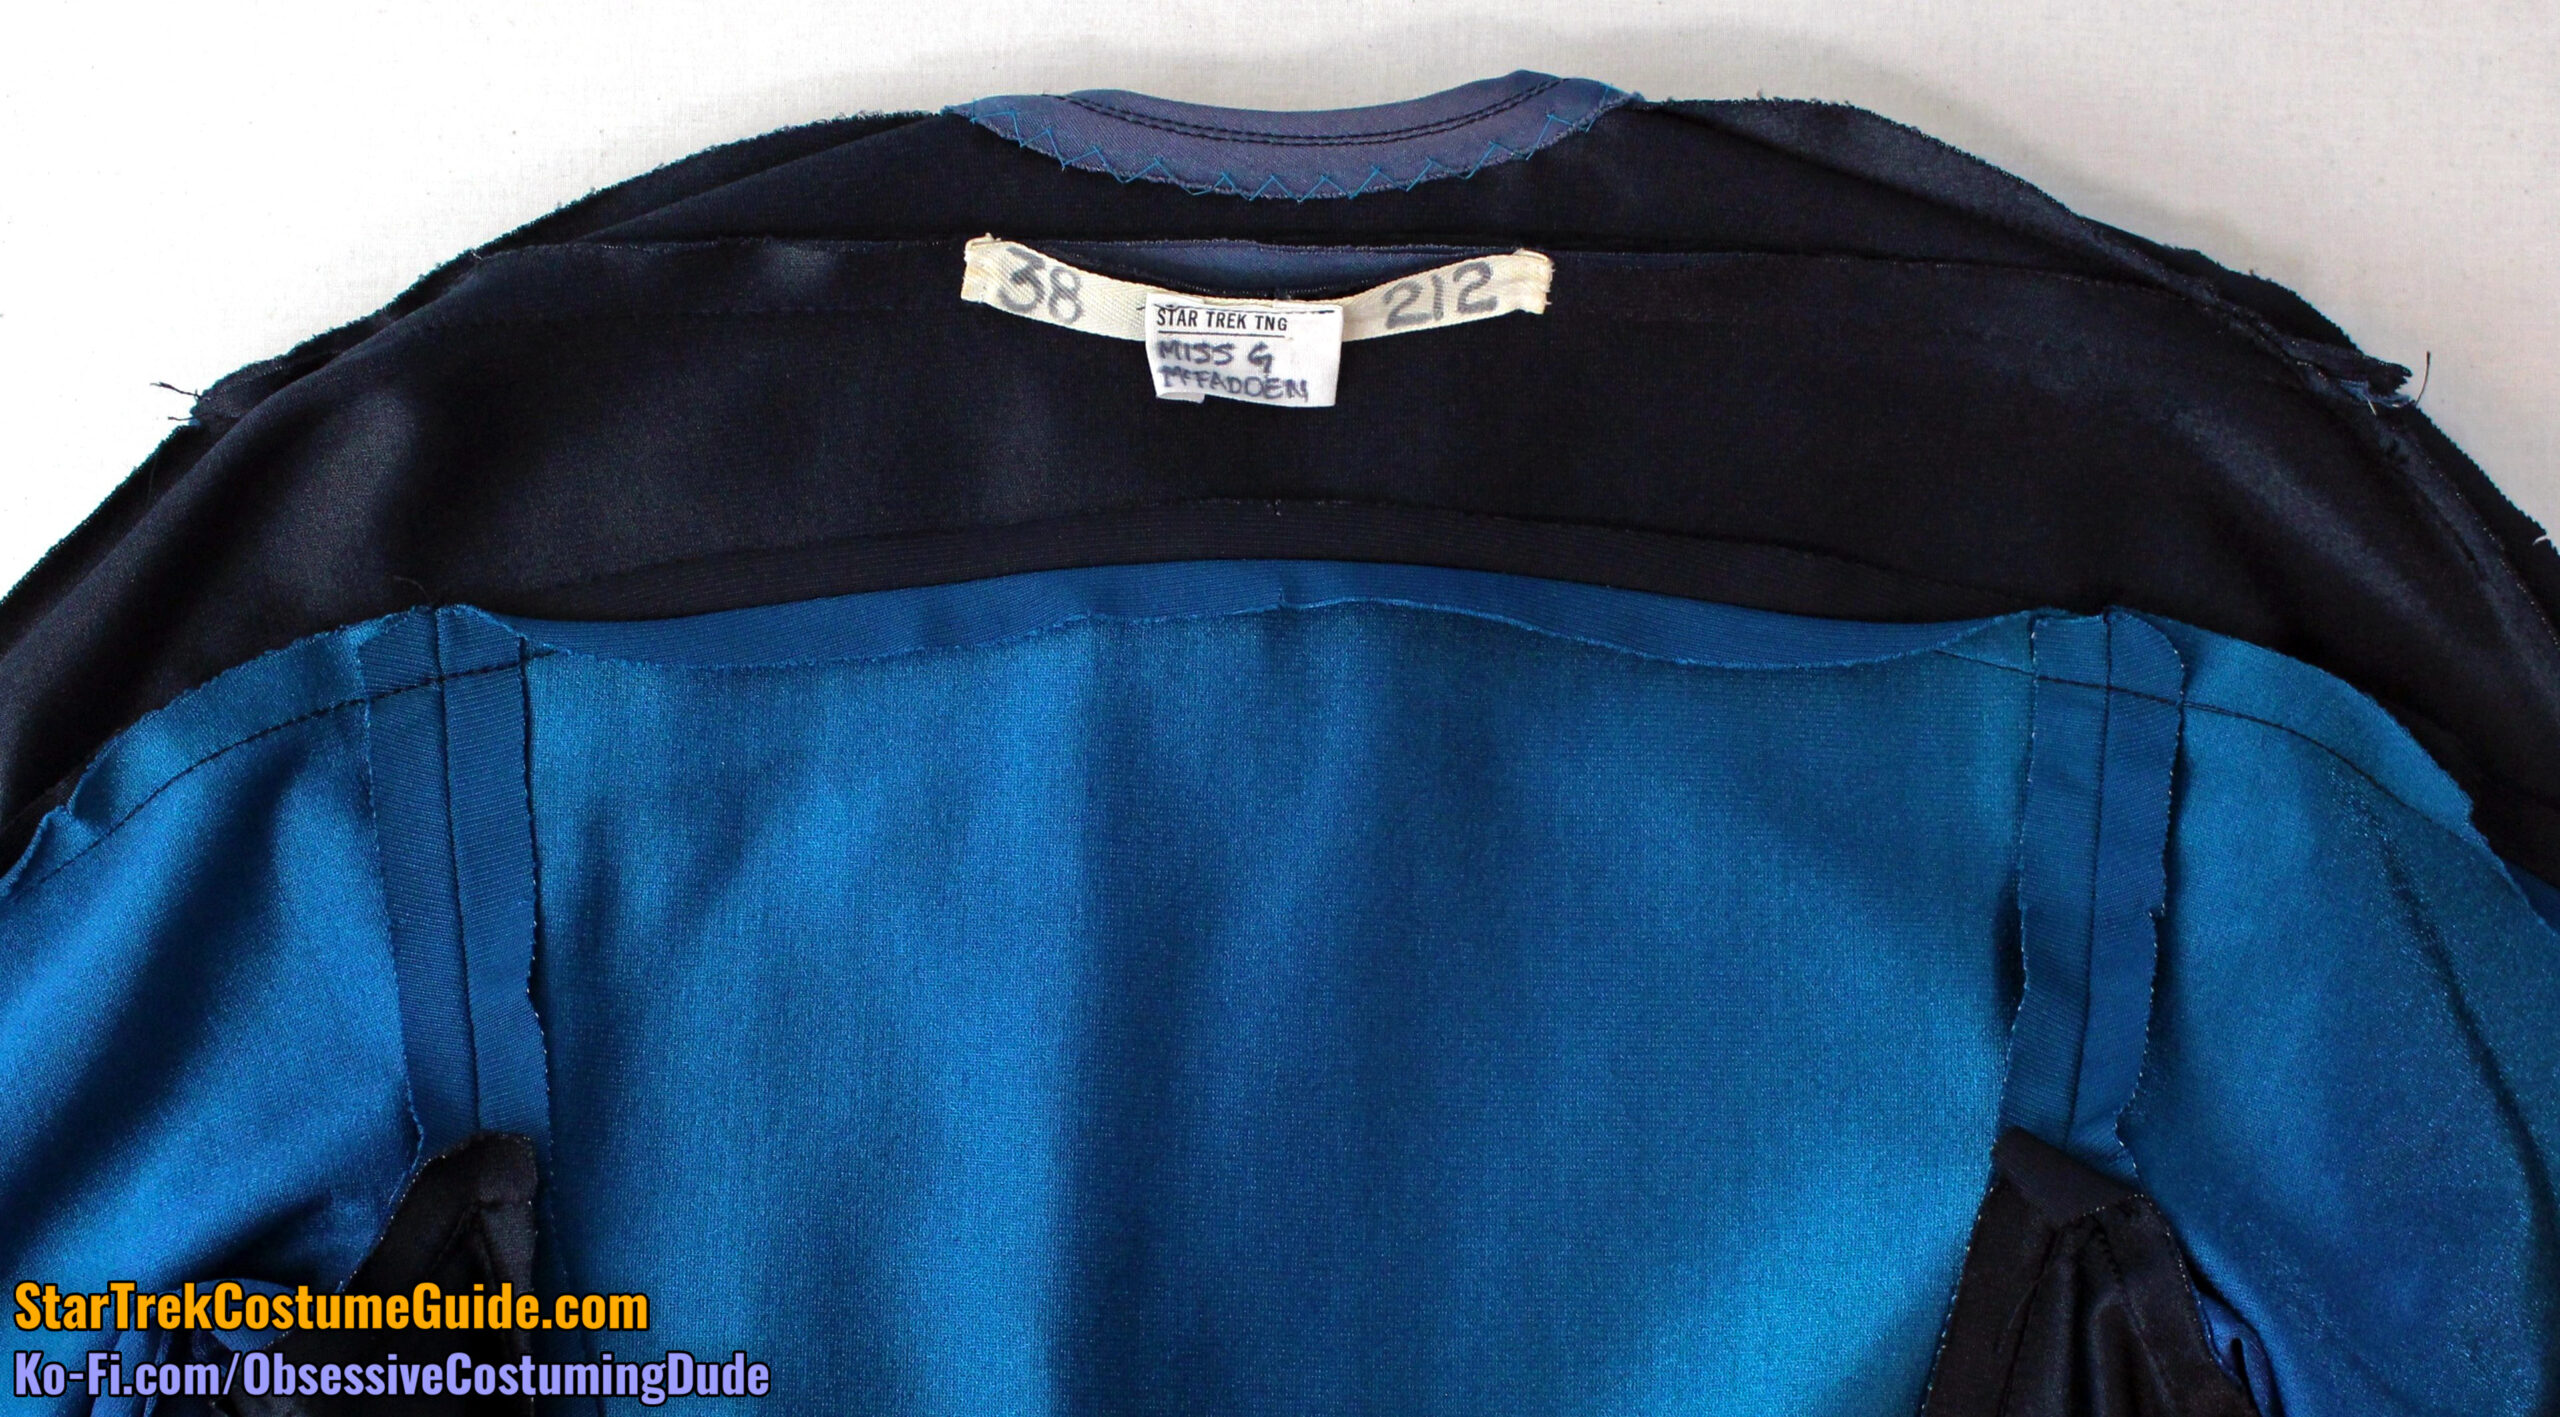
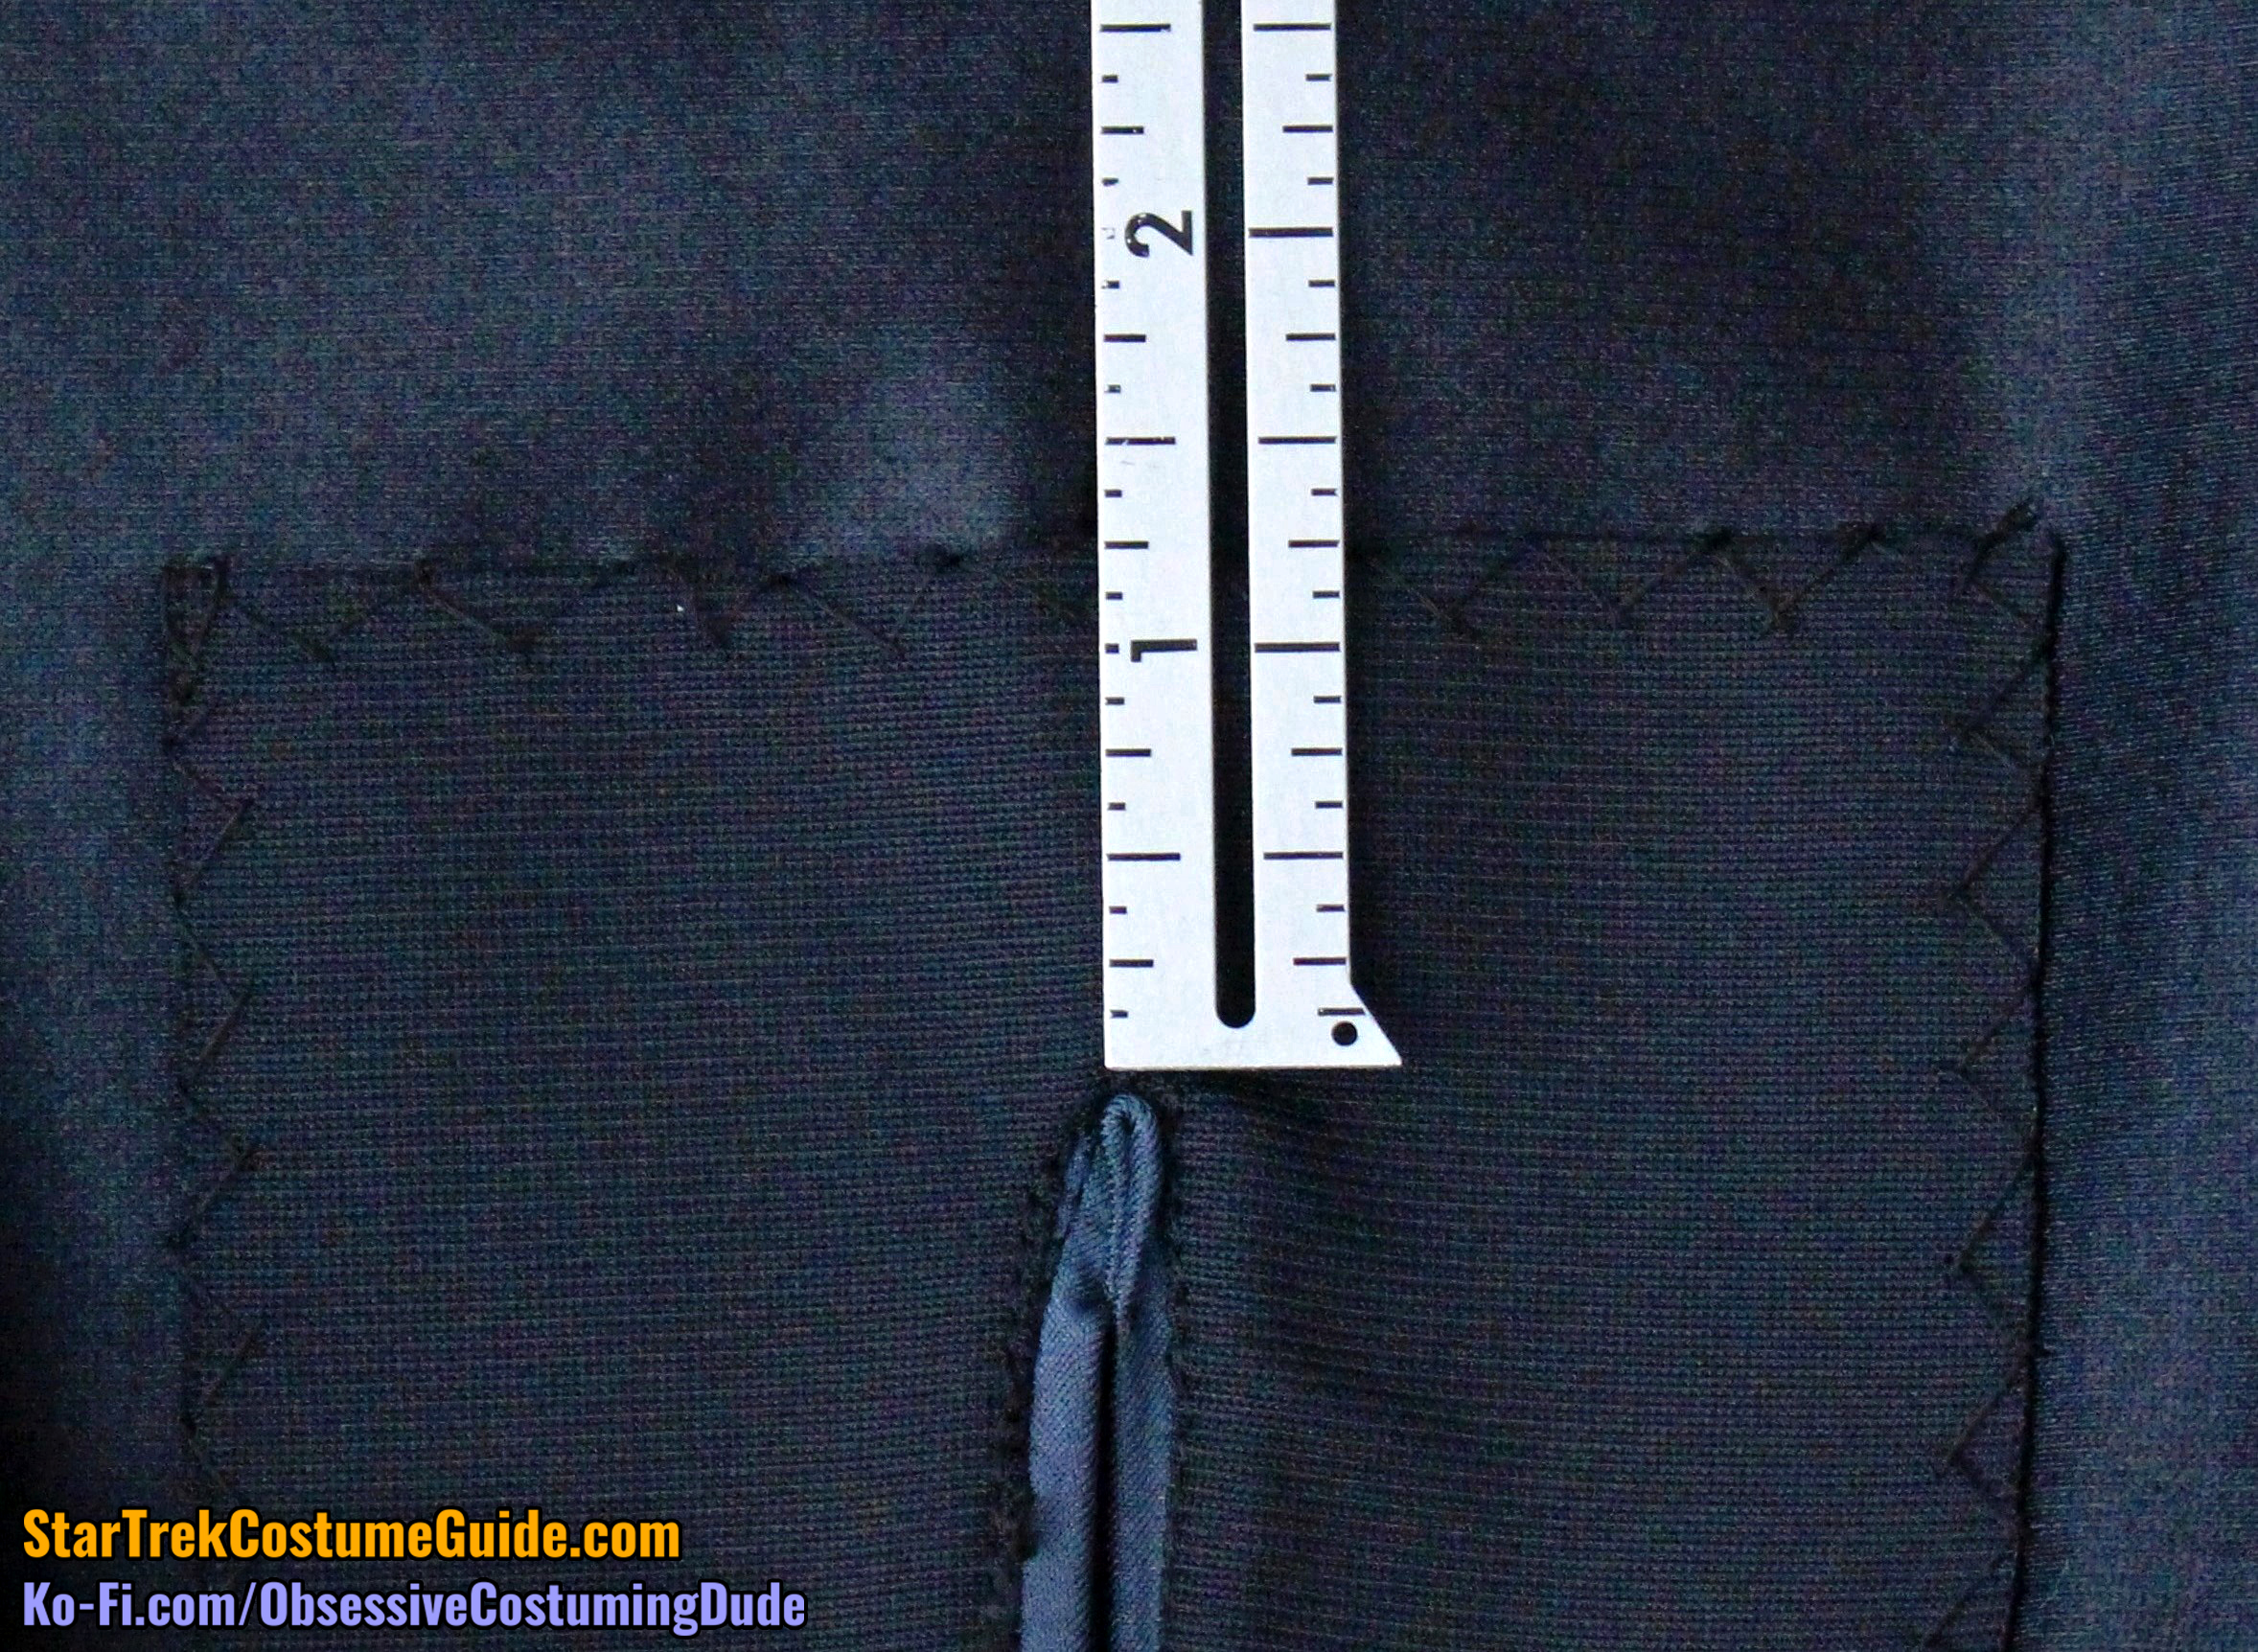
Here you can see the interior production tags.
The larger tag was white twill tape, with two numbers written in marker.
The “212” to the (photo) right is probably a production number, although indicative of what, I don’t know.
Like with the screen-used Tasha Yar jumpsuit I examined, I believe the “38” on the (photo) left was intended to denote the size of the costume … although with a 38” bust and a finished garment measurement just shy of 36”, that would mean the jumpsuit was not only skin-tight, but it actually had at least 2” of negative wearing ease!
That might not be so bad, if the spandex were cut with the stretch going horizontally, around the wearer’s body … but with the stretch going the opposite direction (vertically) and negligible stretch horizontally, it’s no wonder the cast notoriously hated wearing these uniforms!
Like so many other William Ware Theiss costume designs, the longer you stare at the interior of a TNG jumpsuit, the weirder it seems to get …
A quality unique to this Dr. Crusher jumpsuit is that the majority of the seam allowances were ½”; on most other uniforms I’ve seen they’re more varied.
(As best I can tell, Theiss and his team seemed to prefer ⅜” seam allowances along the neckline and upper/lower yoke, ⅝” allowances along the side seams and inseams, and ¾” to 1” allowances for zippers, although most of the other seams were usually ½”.)
However, in this case the neckline/trim seam allowances were ½”.
The shoulder seams were upwards of ⅝” toward the neckline, but they tapered down to ½” toward the shoulders and sleeves.
The upper/lower yoke seam allowances were also ½”.
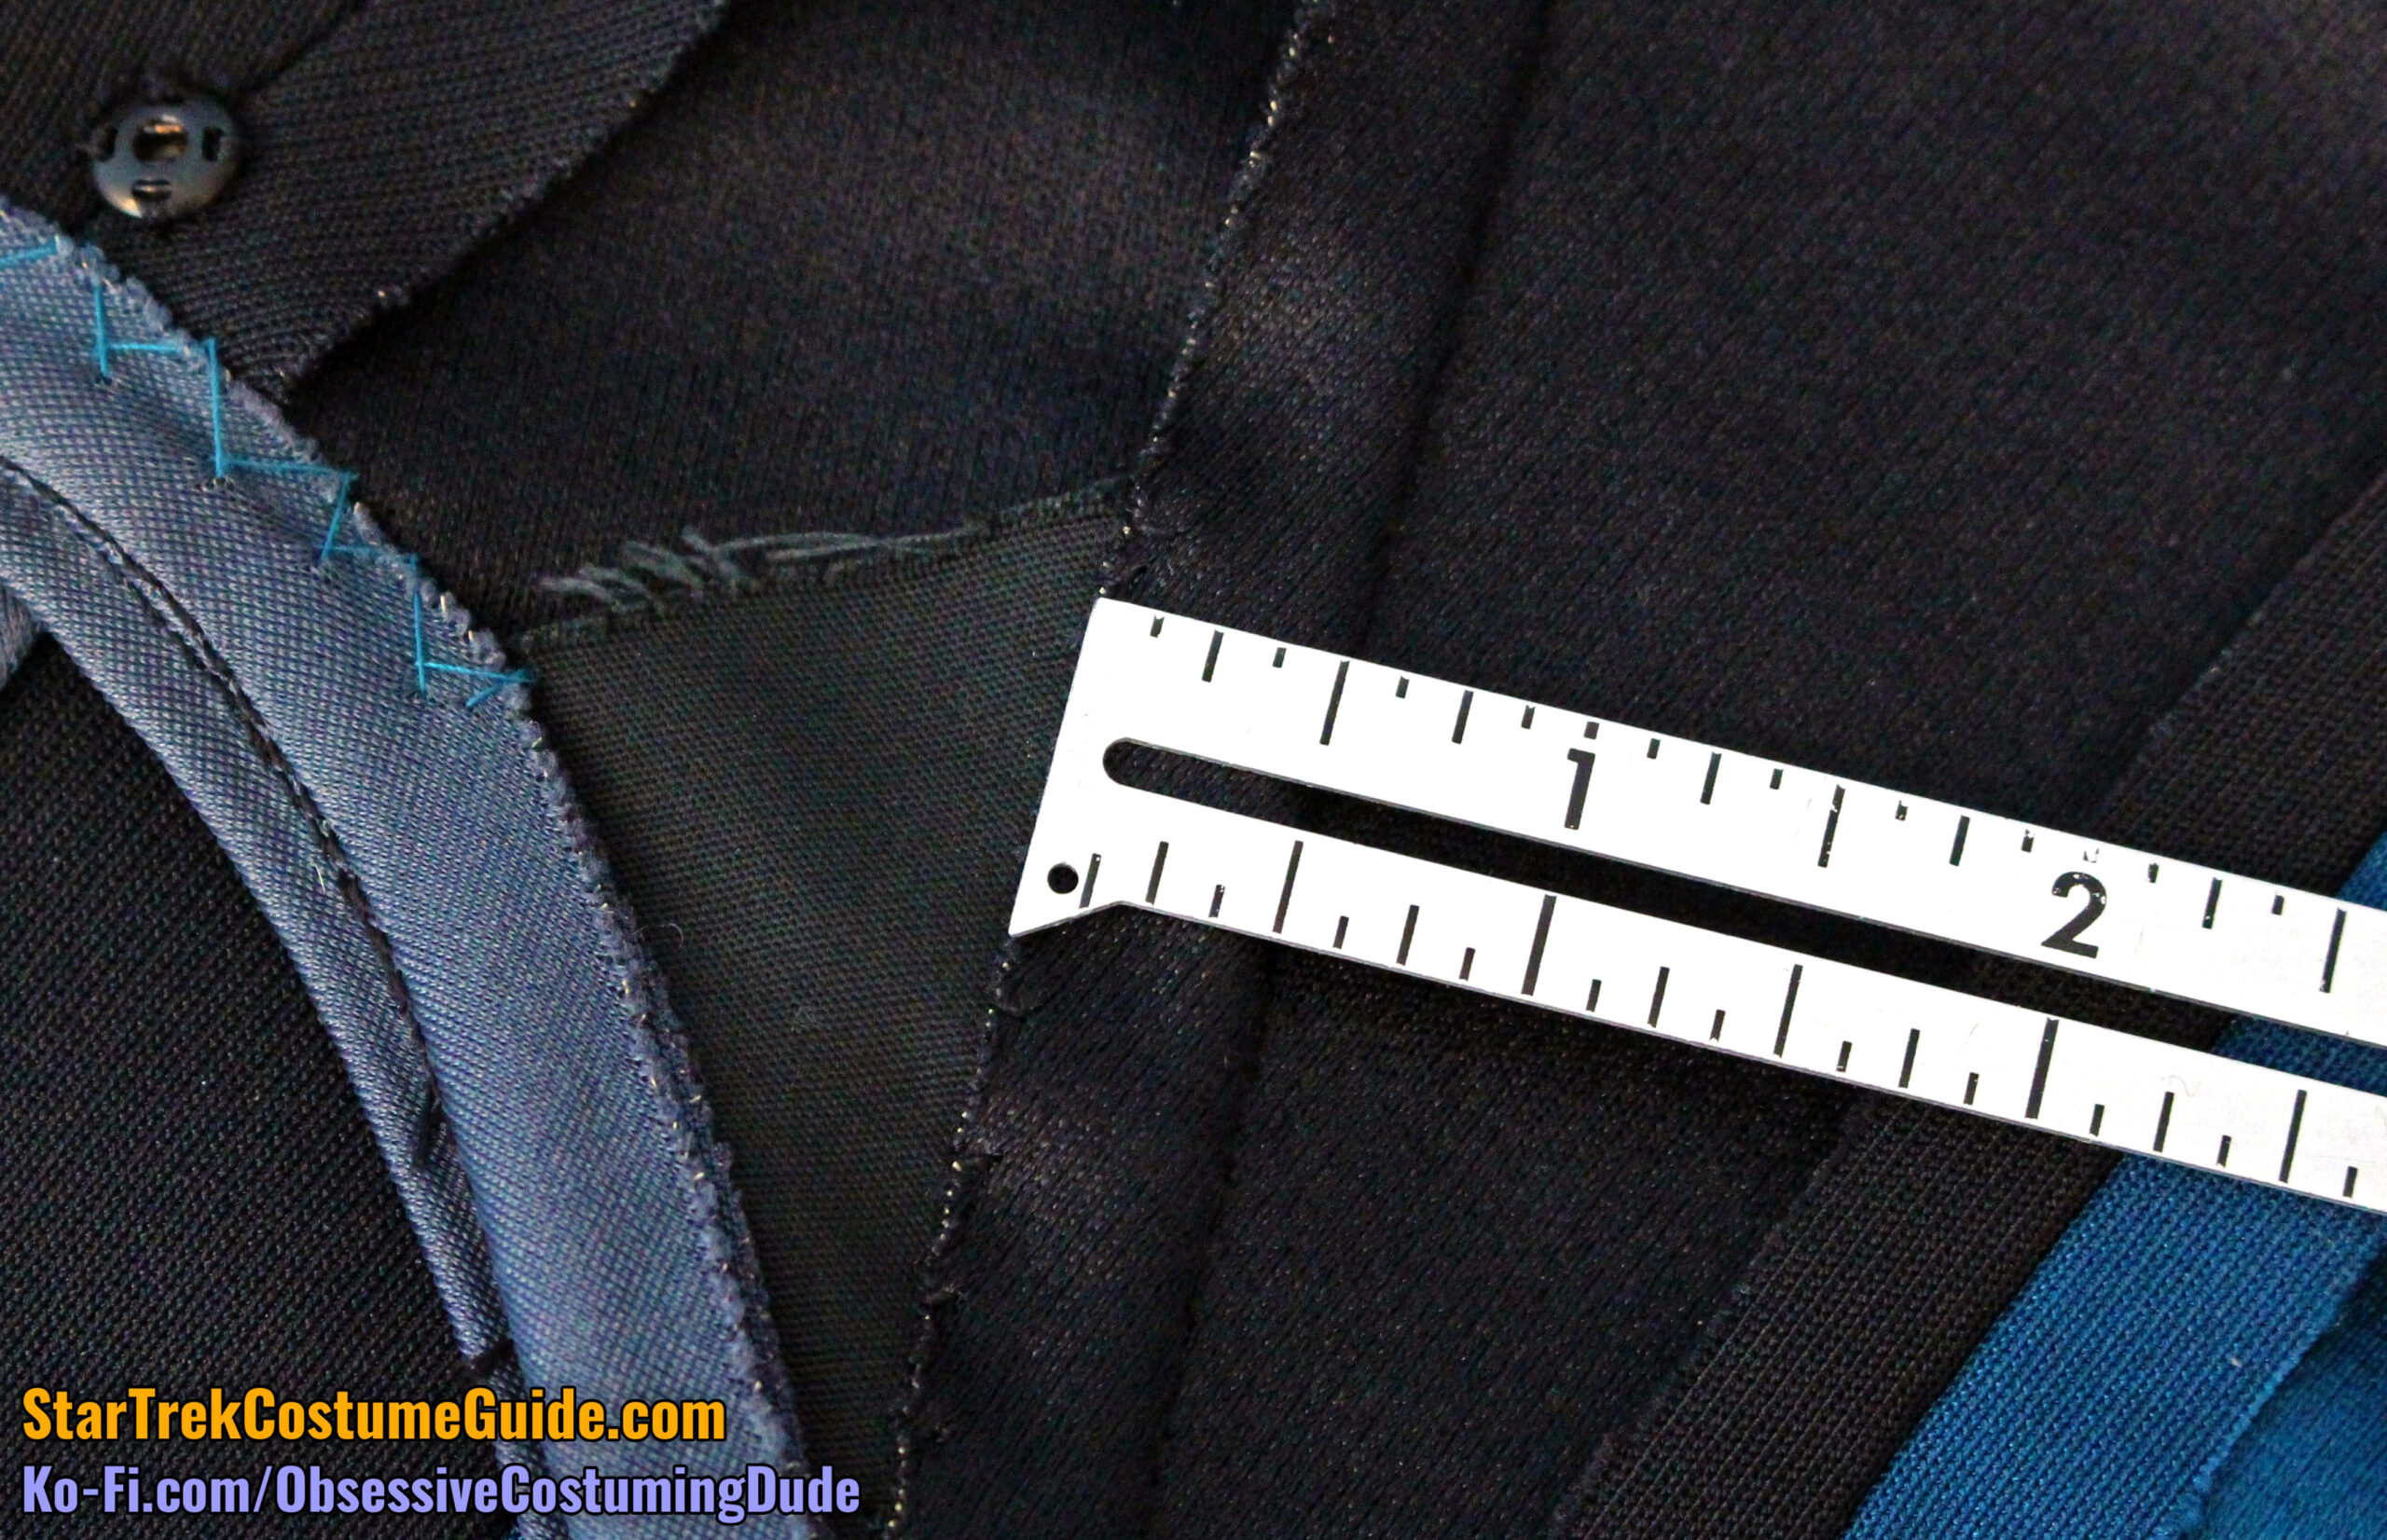
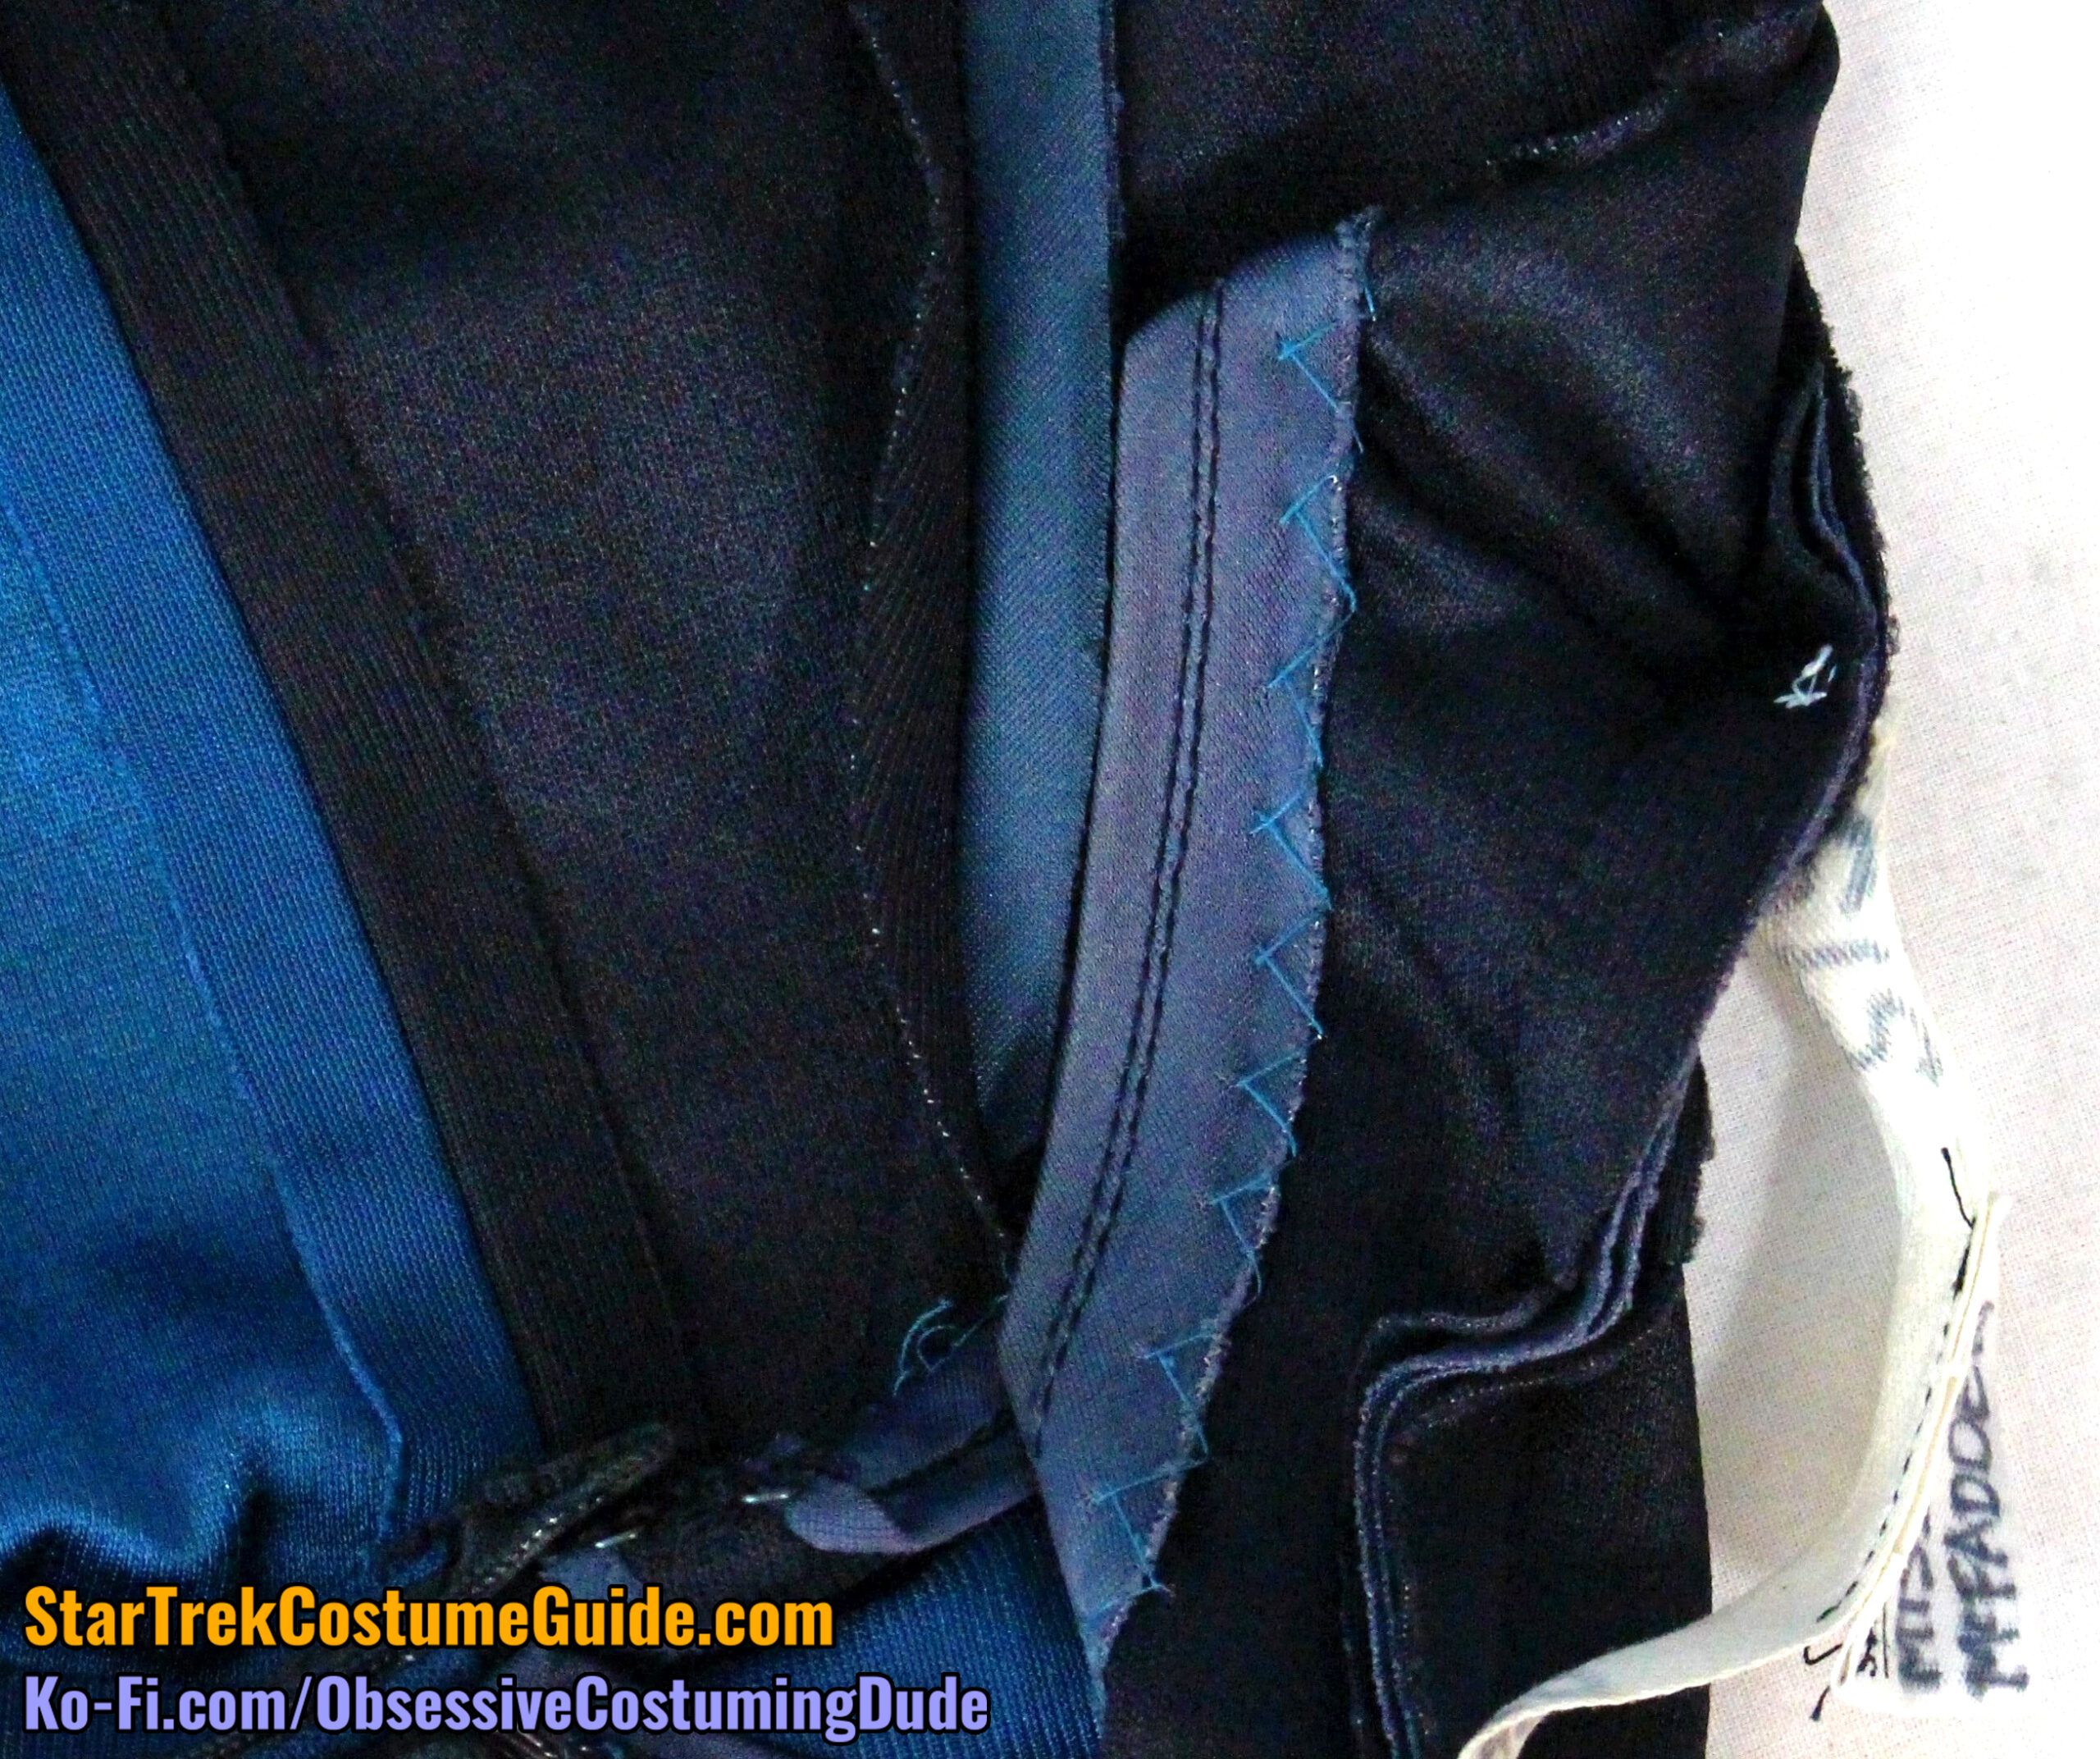
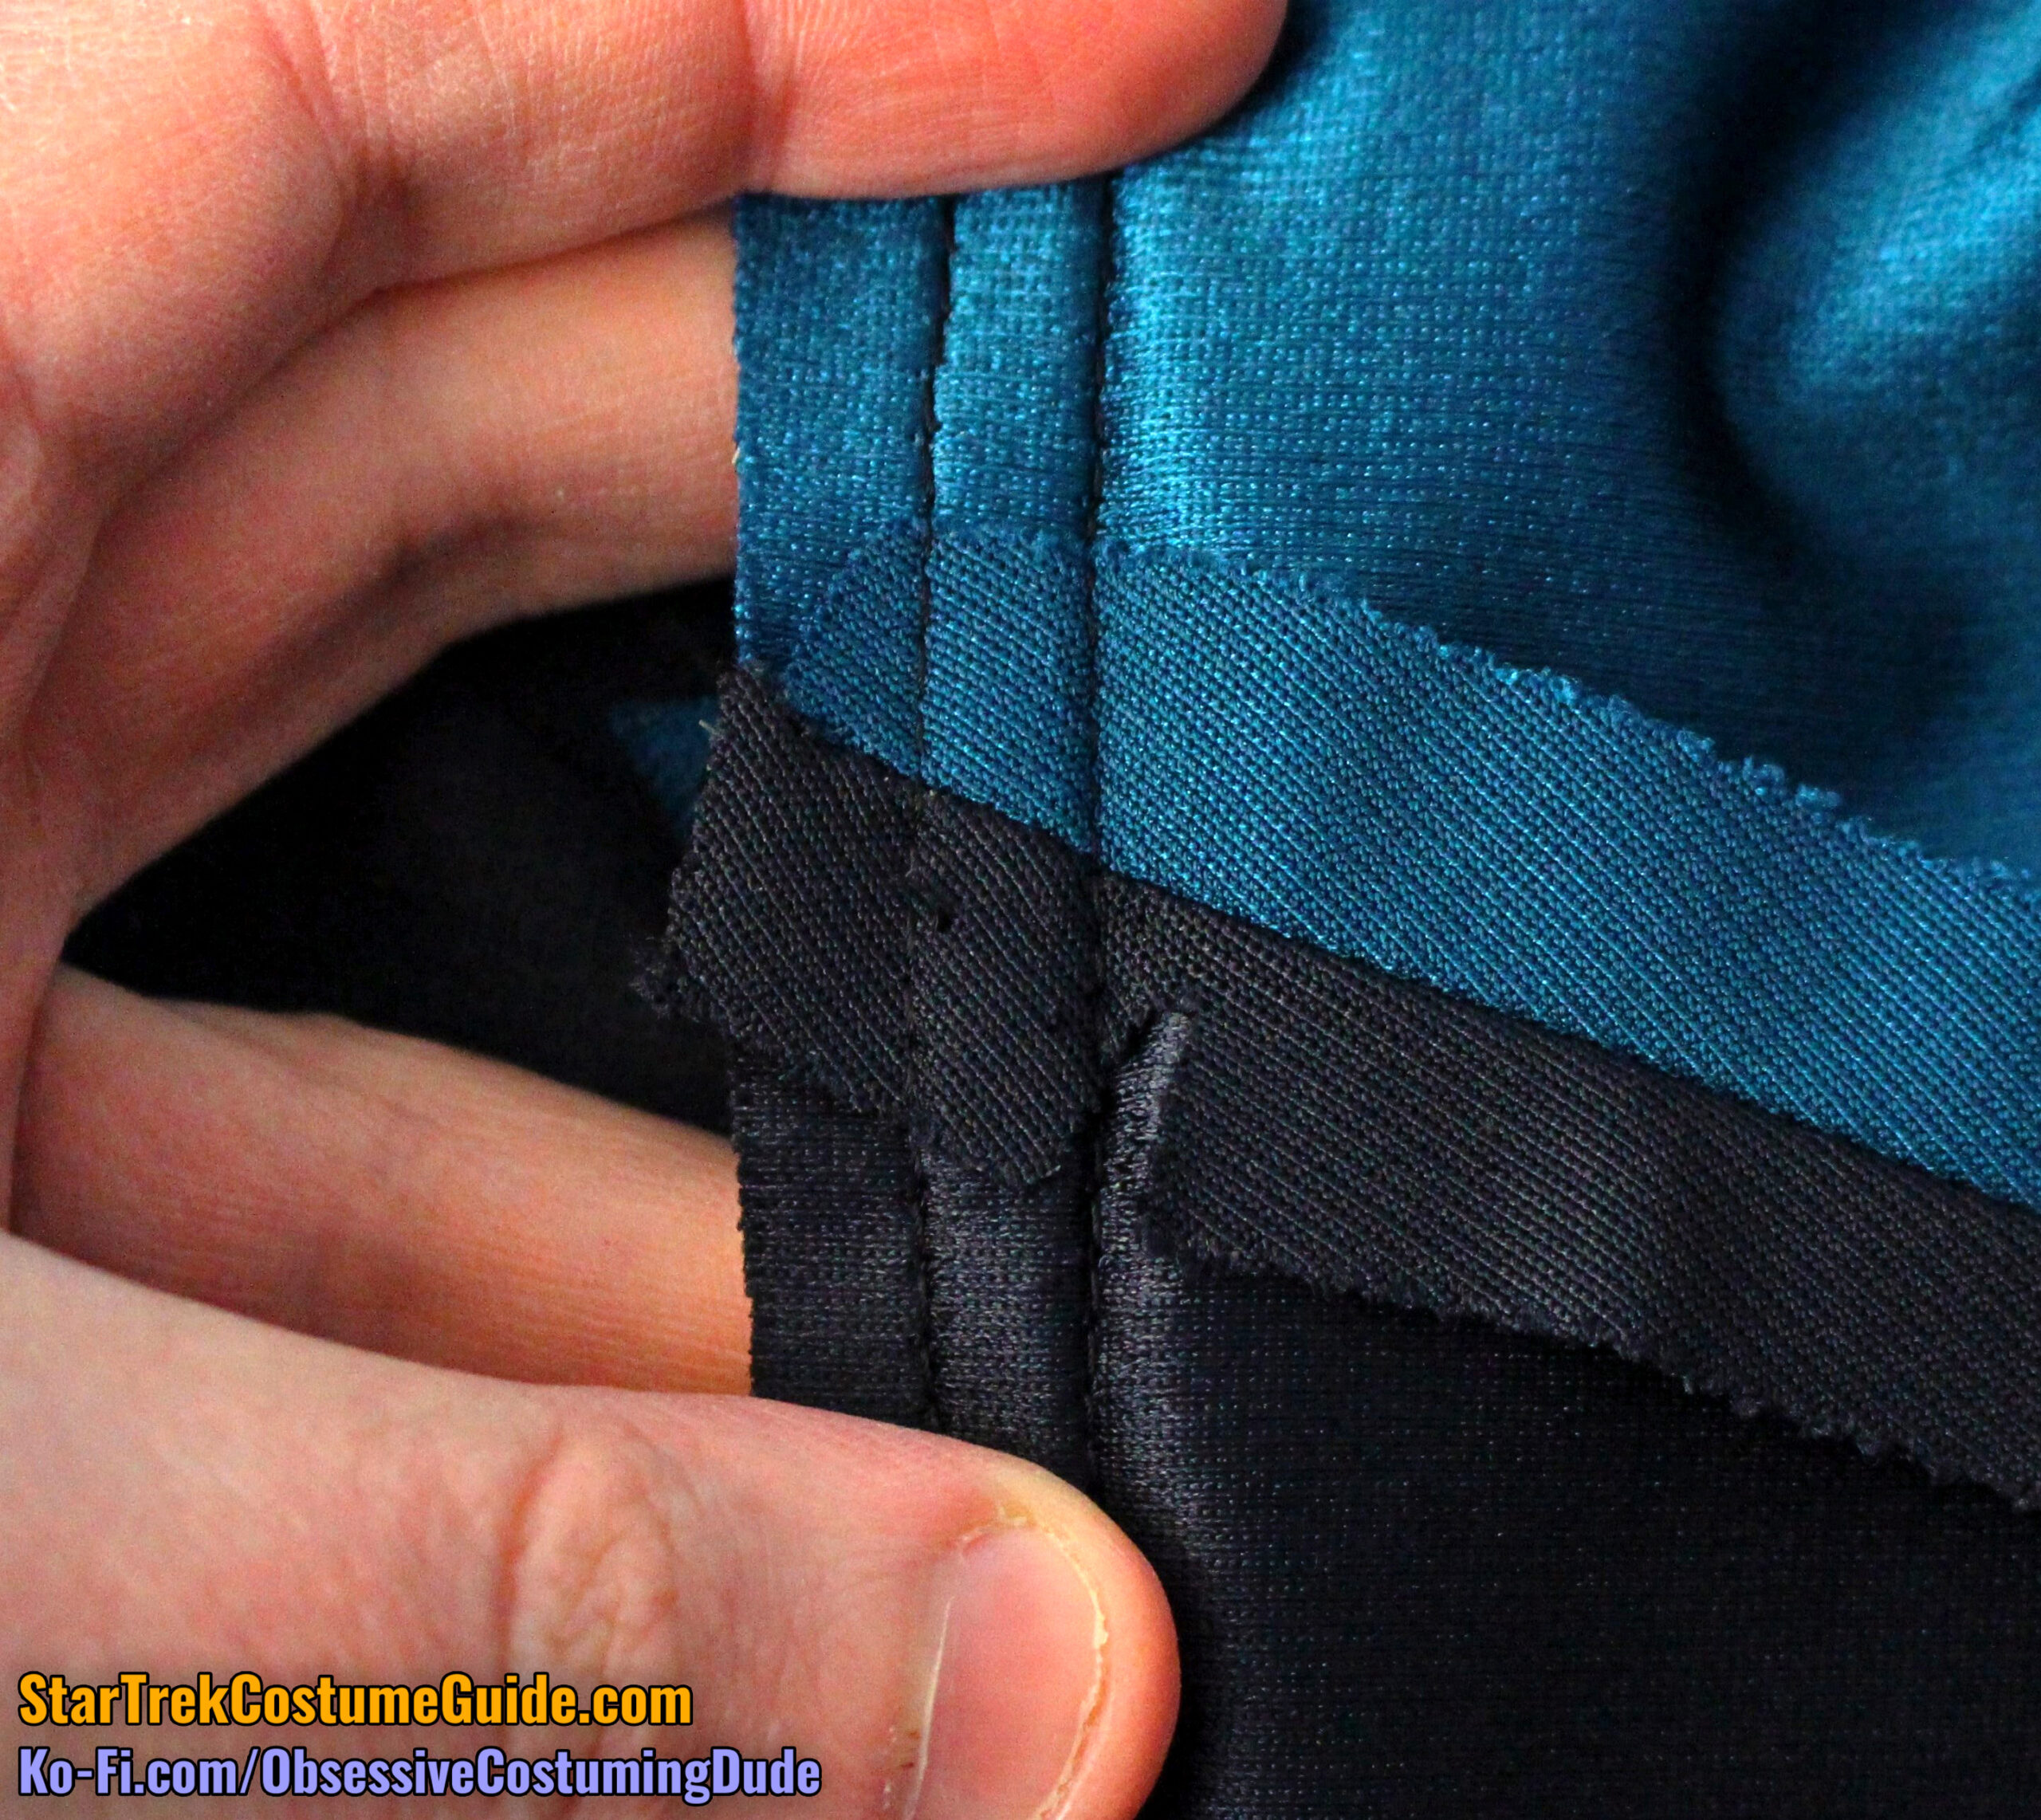
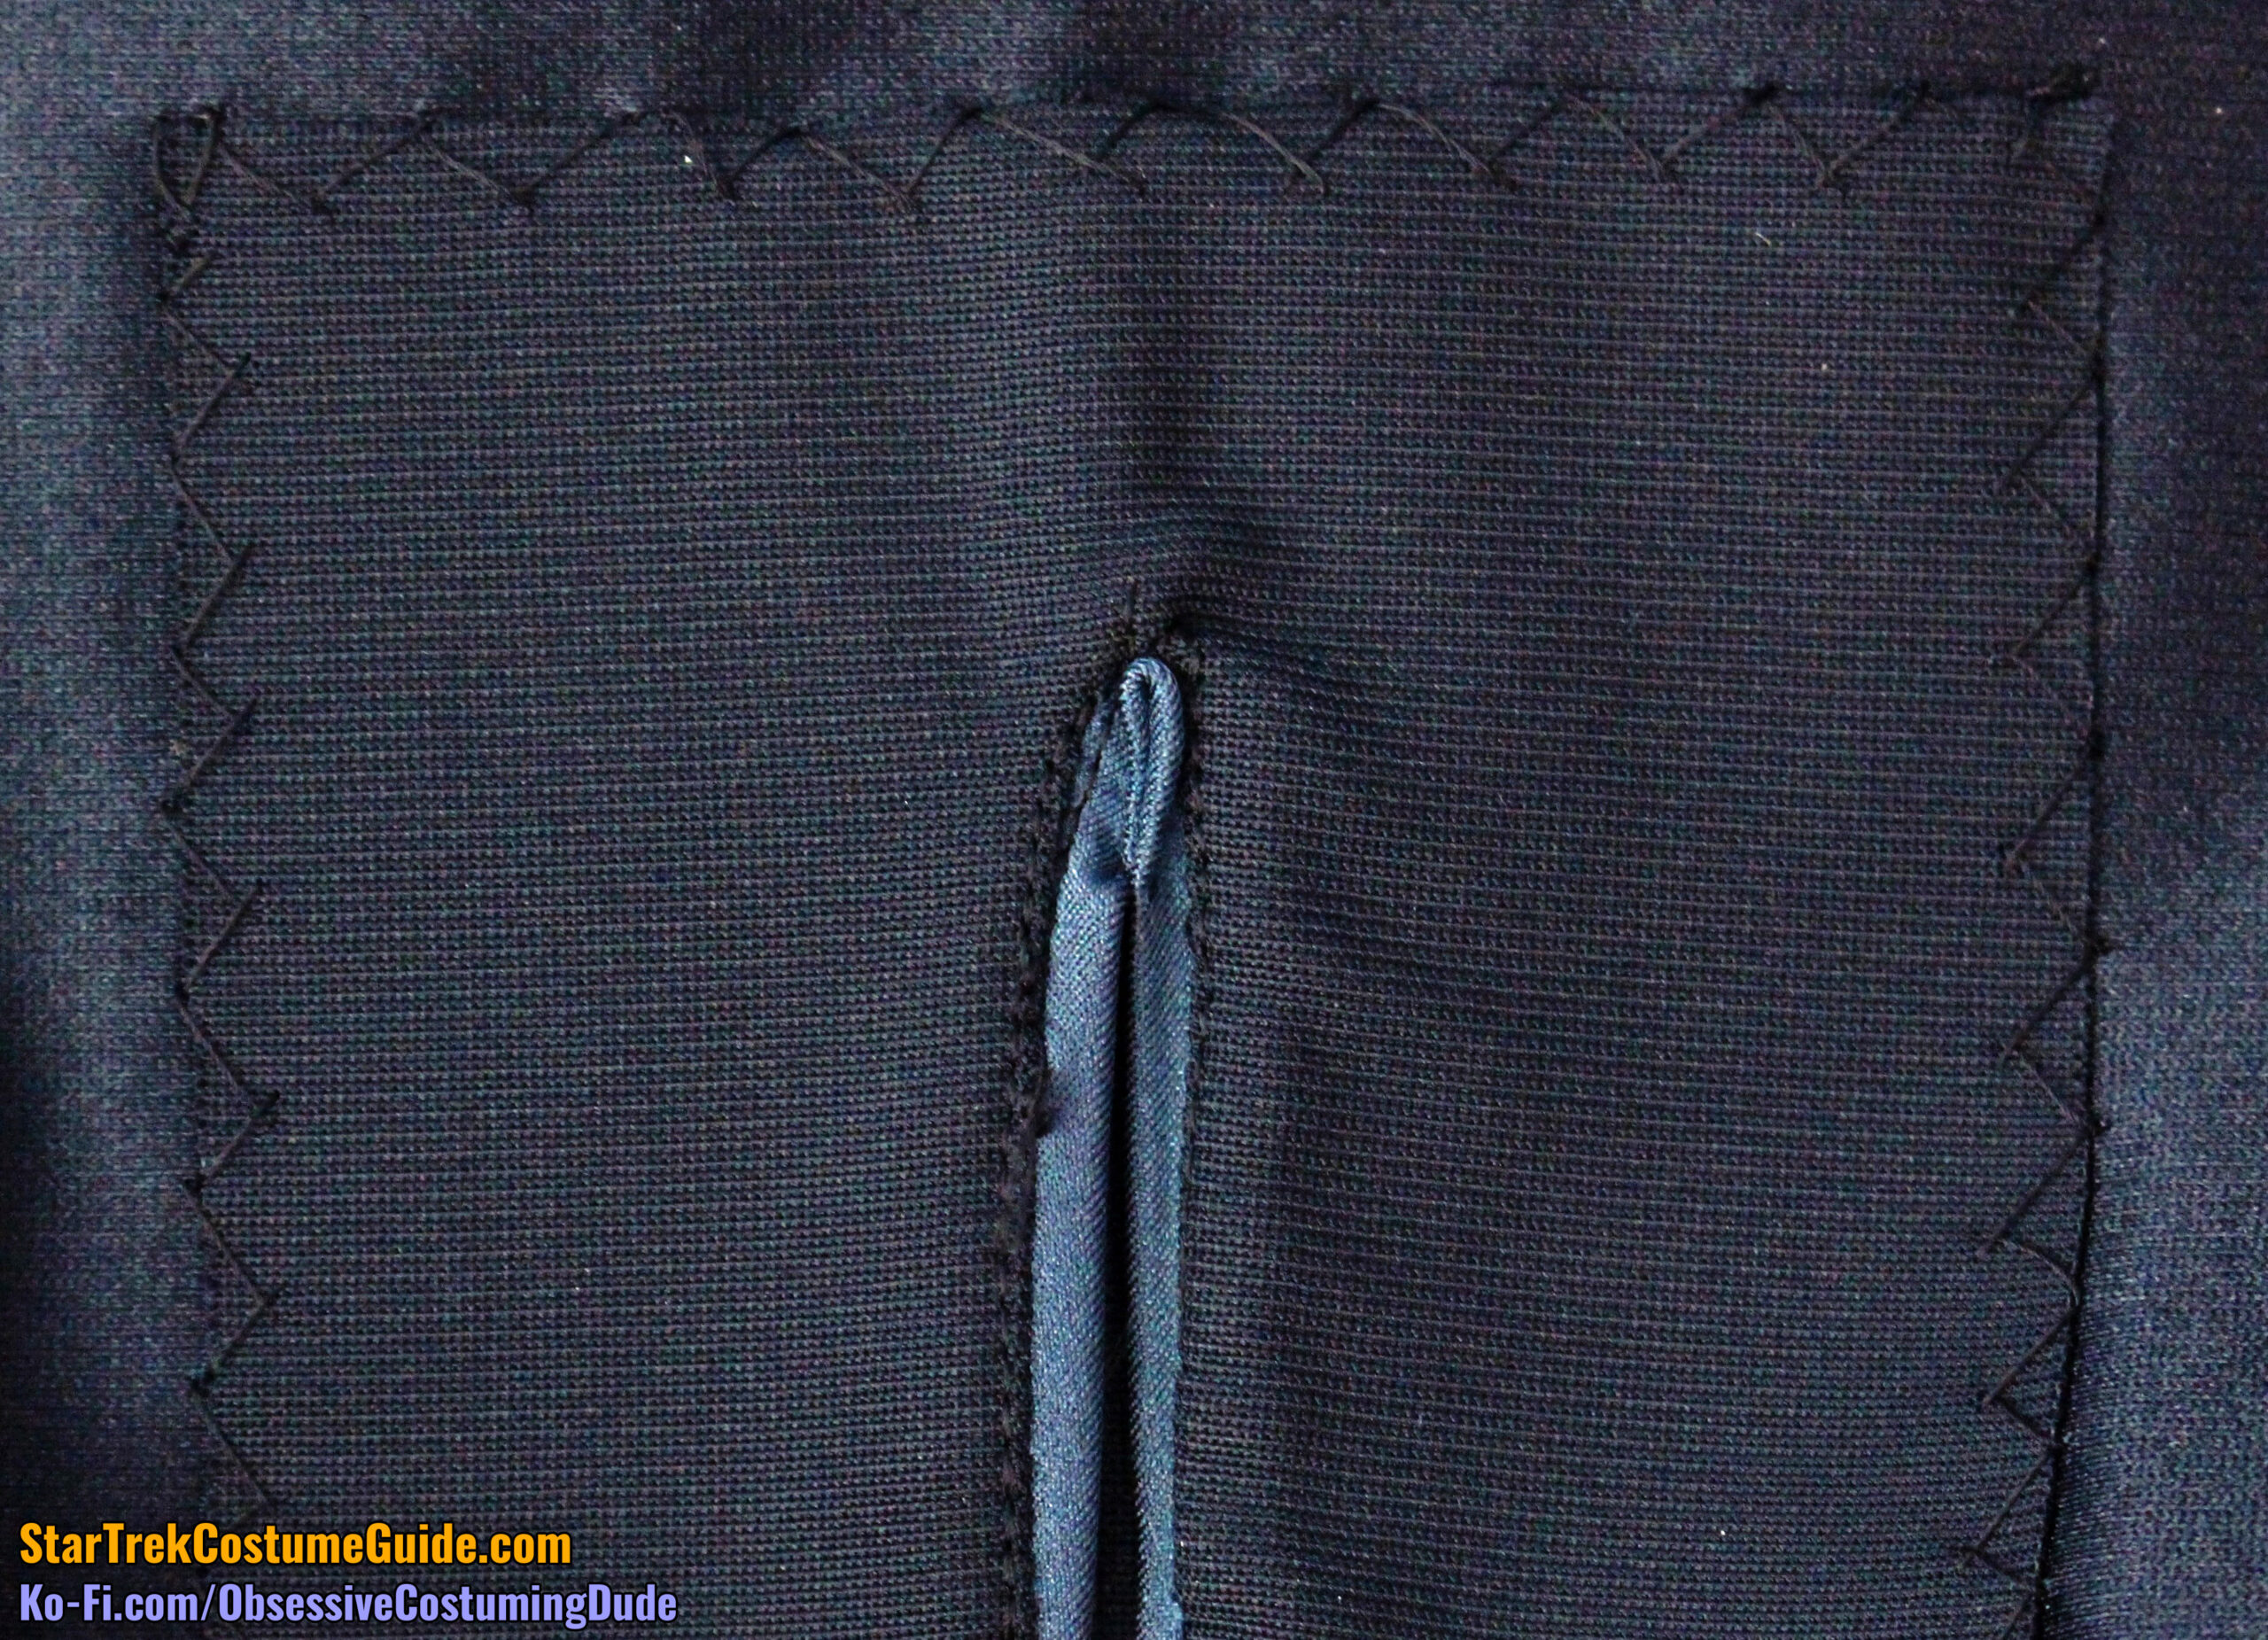
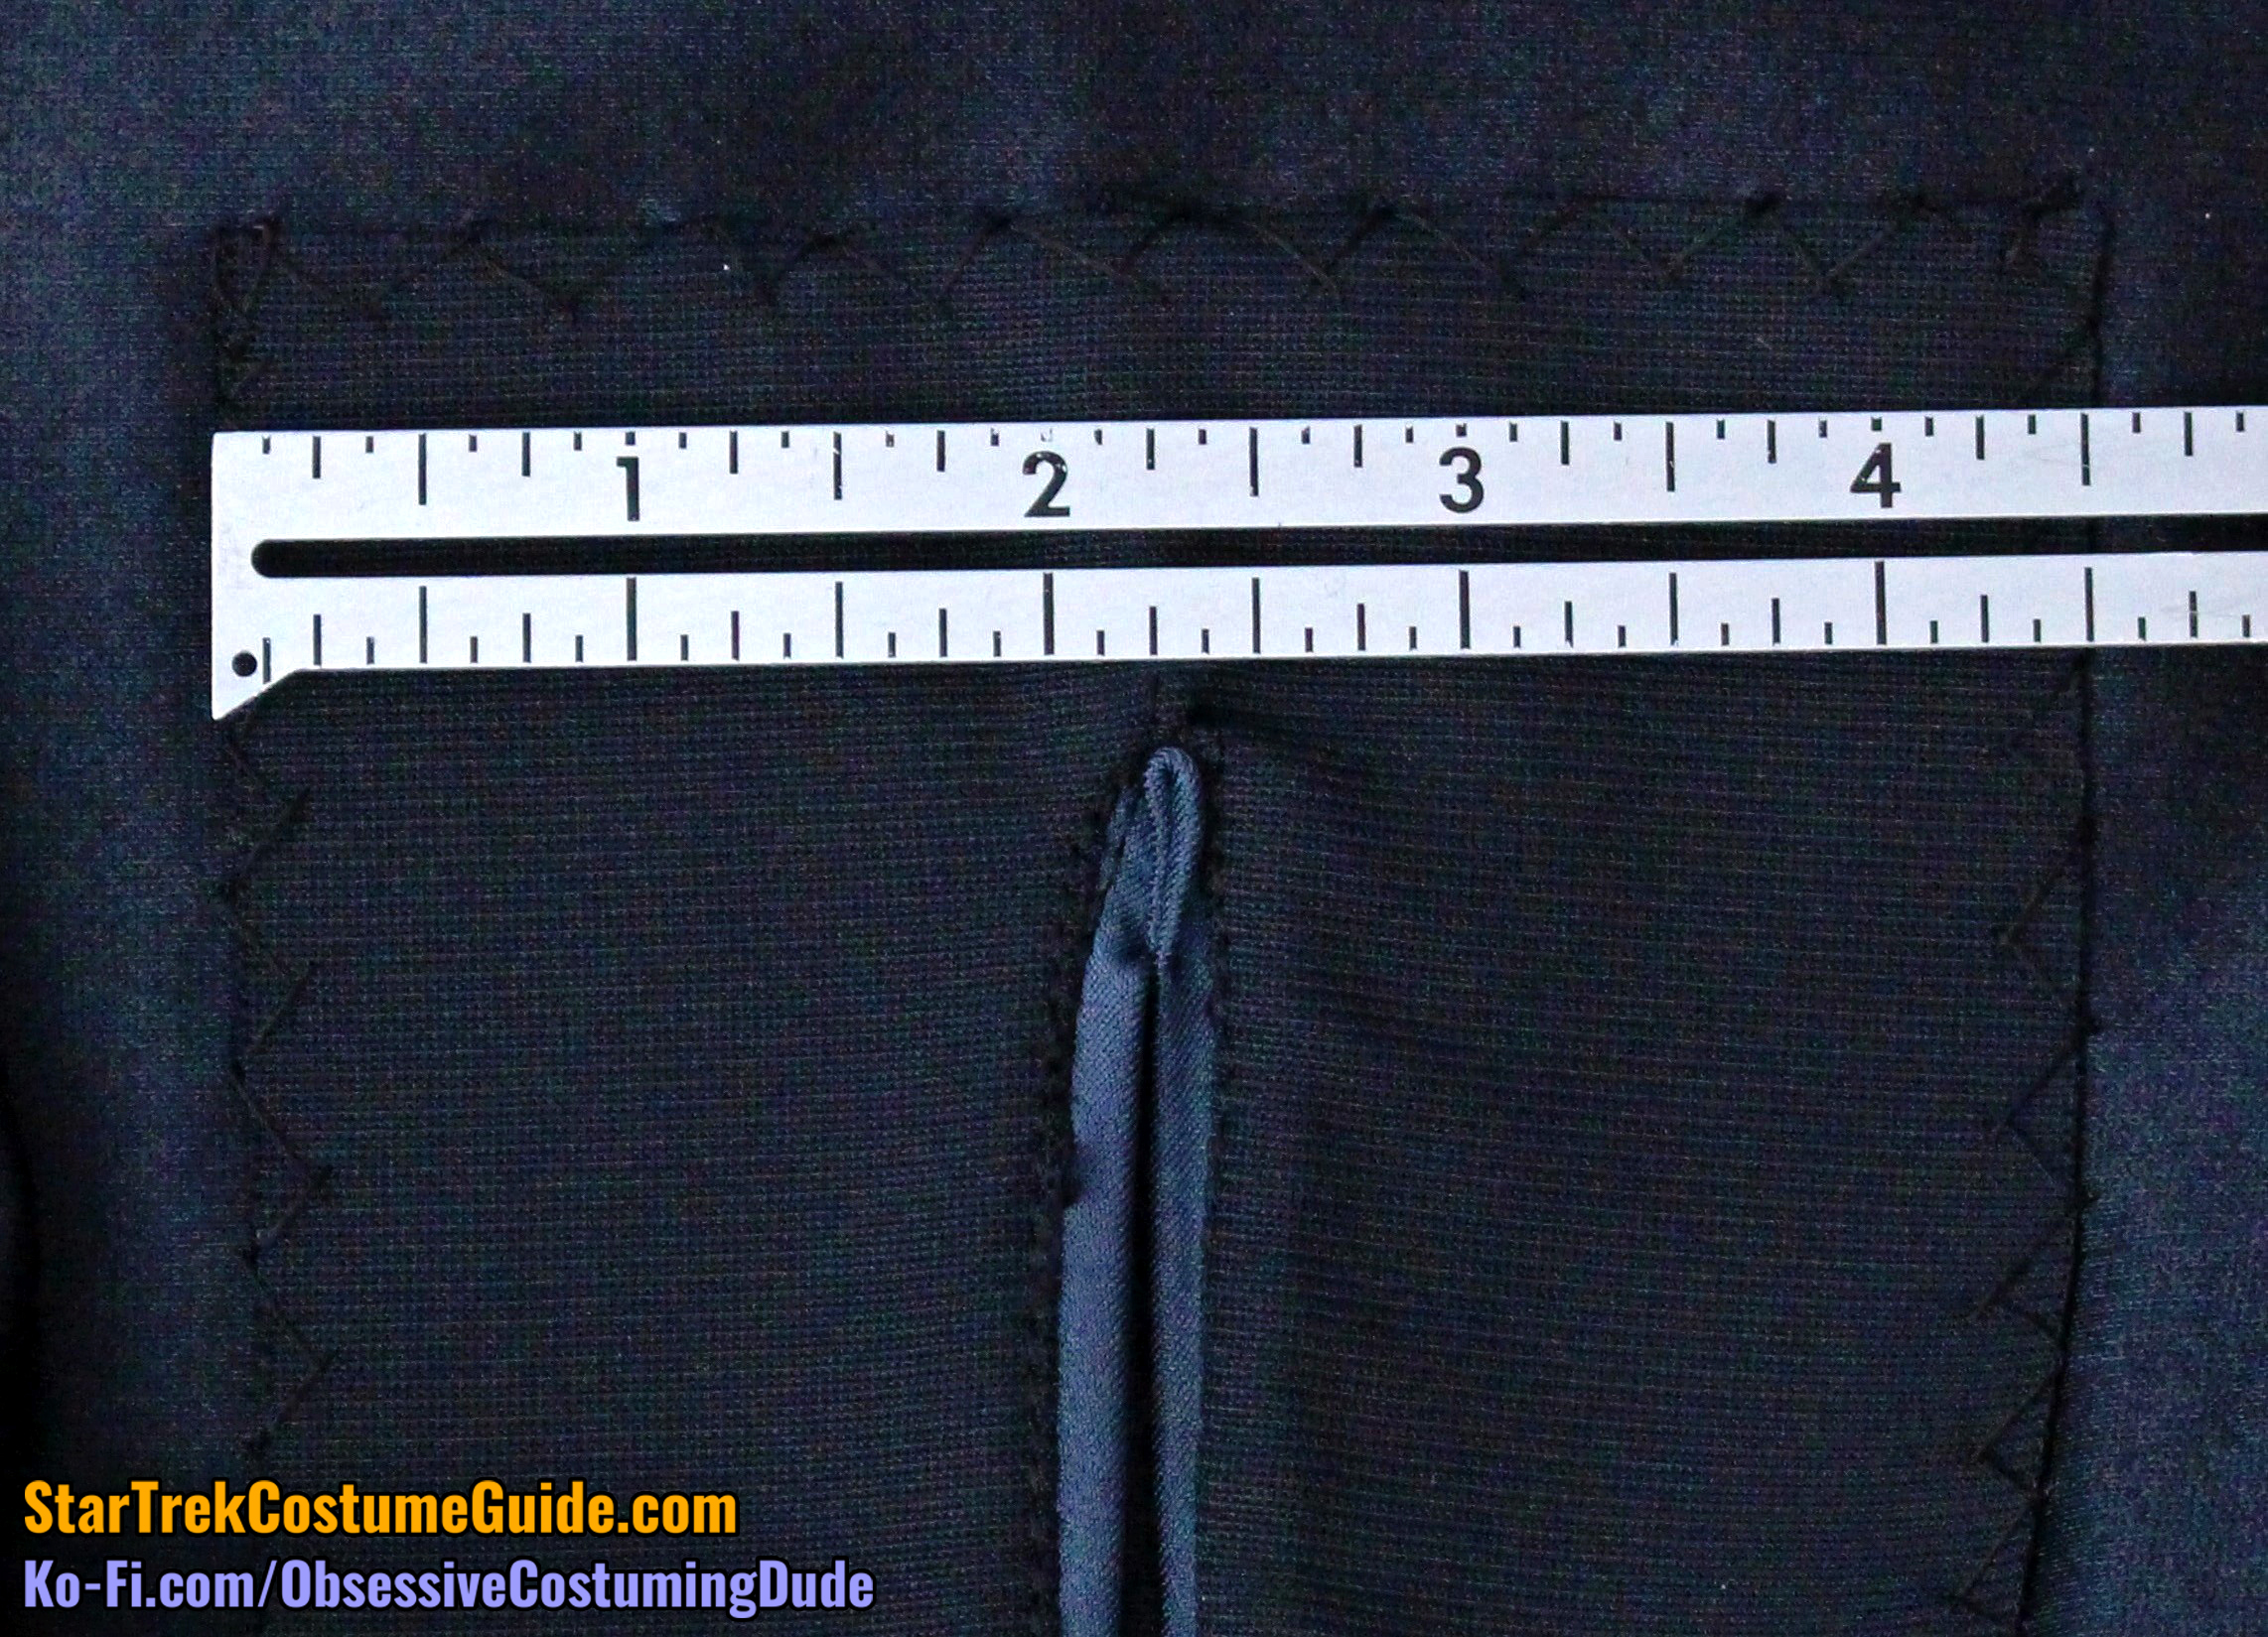
Which brings me to my observations regarding the gray neckline/yoke trim!
I did some detective work and peeked inside the upper/lower yoke seam allowances, where the trim was “sandwiched” inside.
On this particular uniform, the trim seam allowance wasn’t trimmed away – lucky for us!
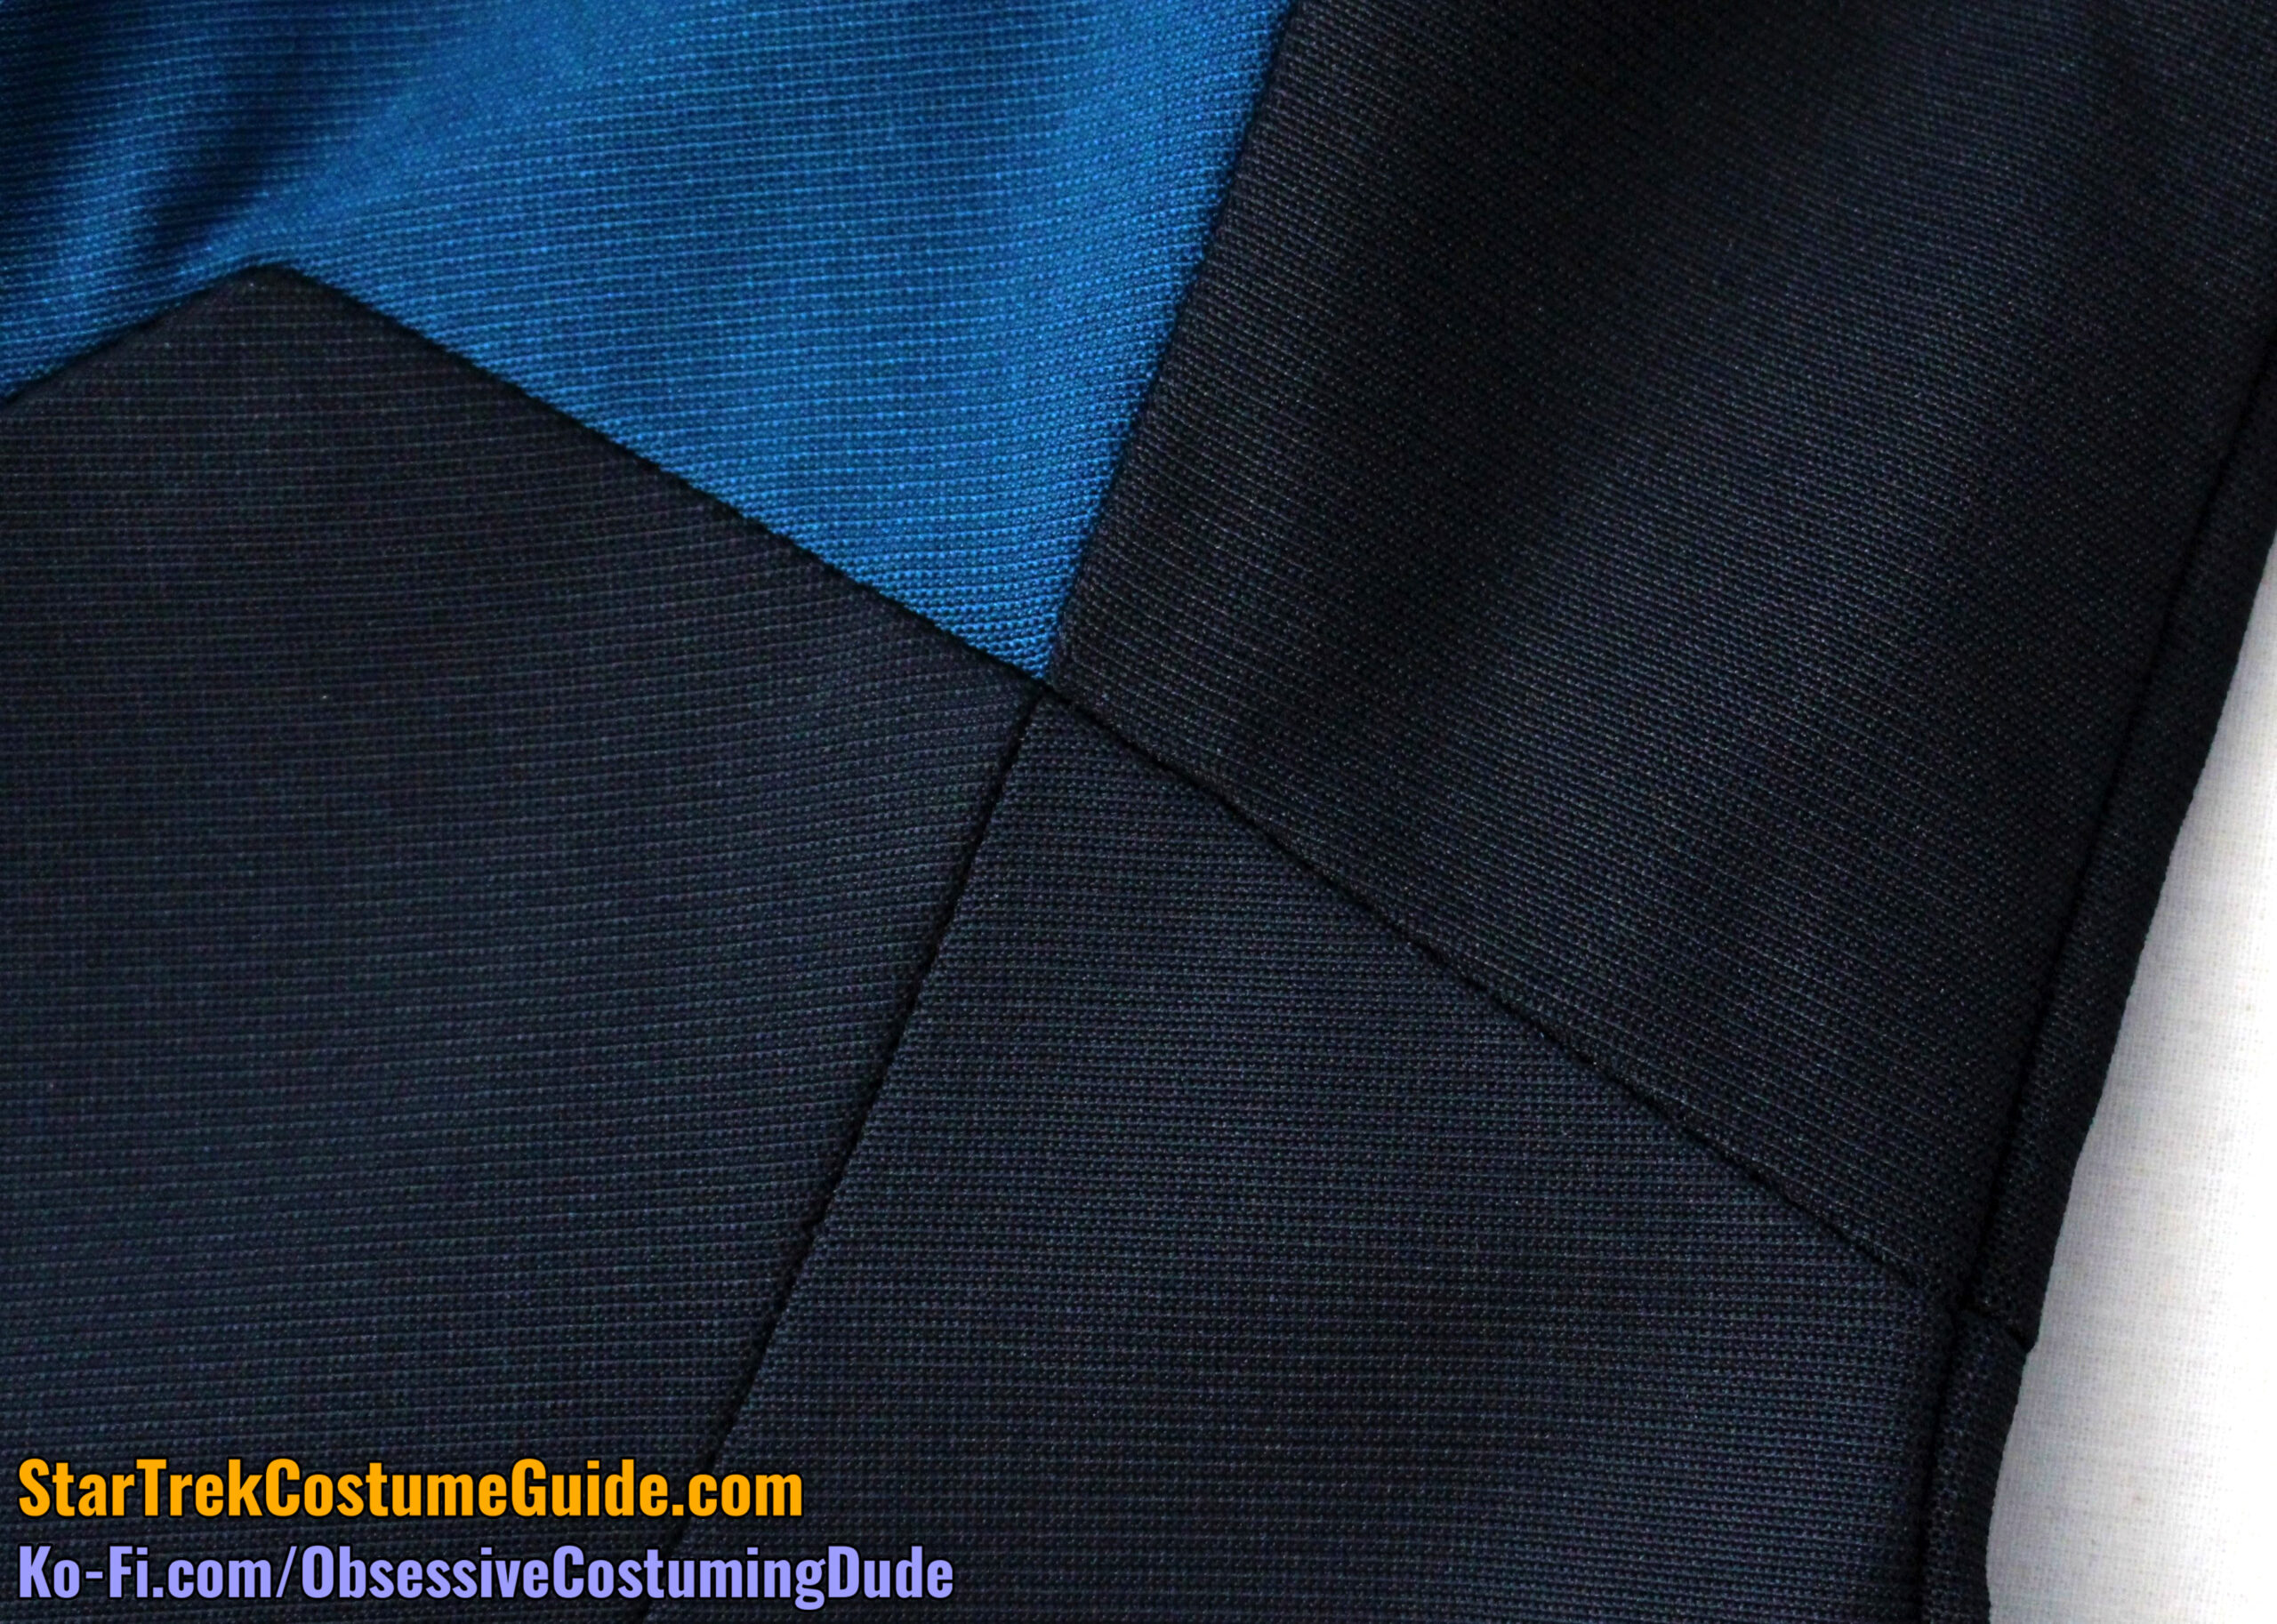
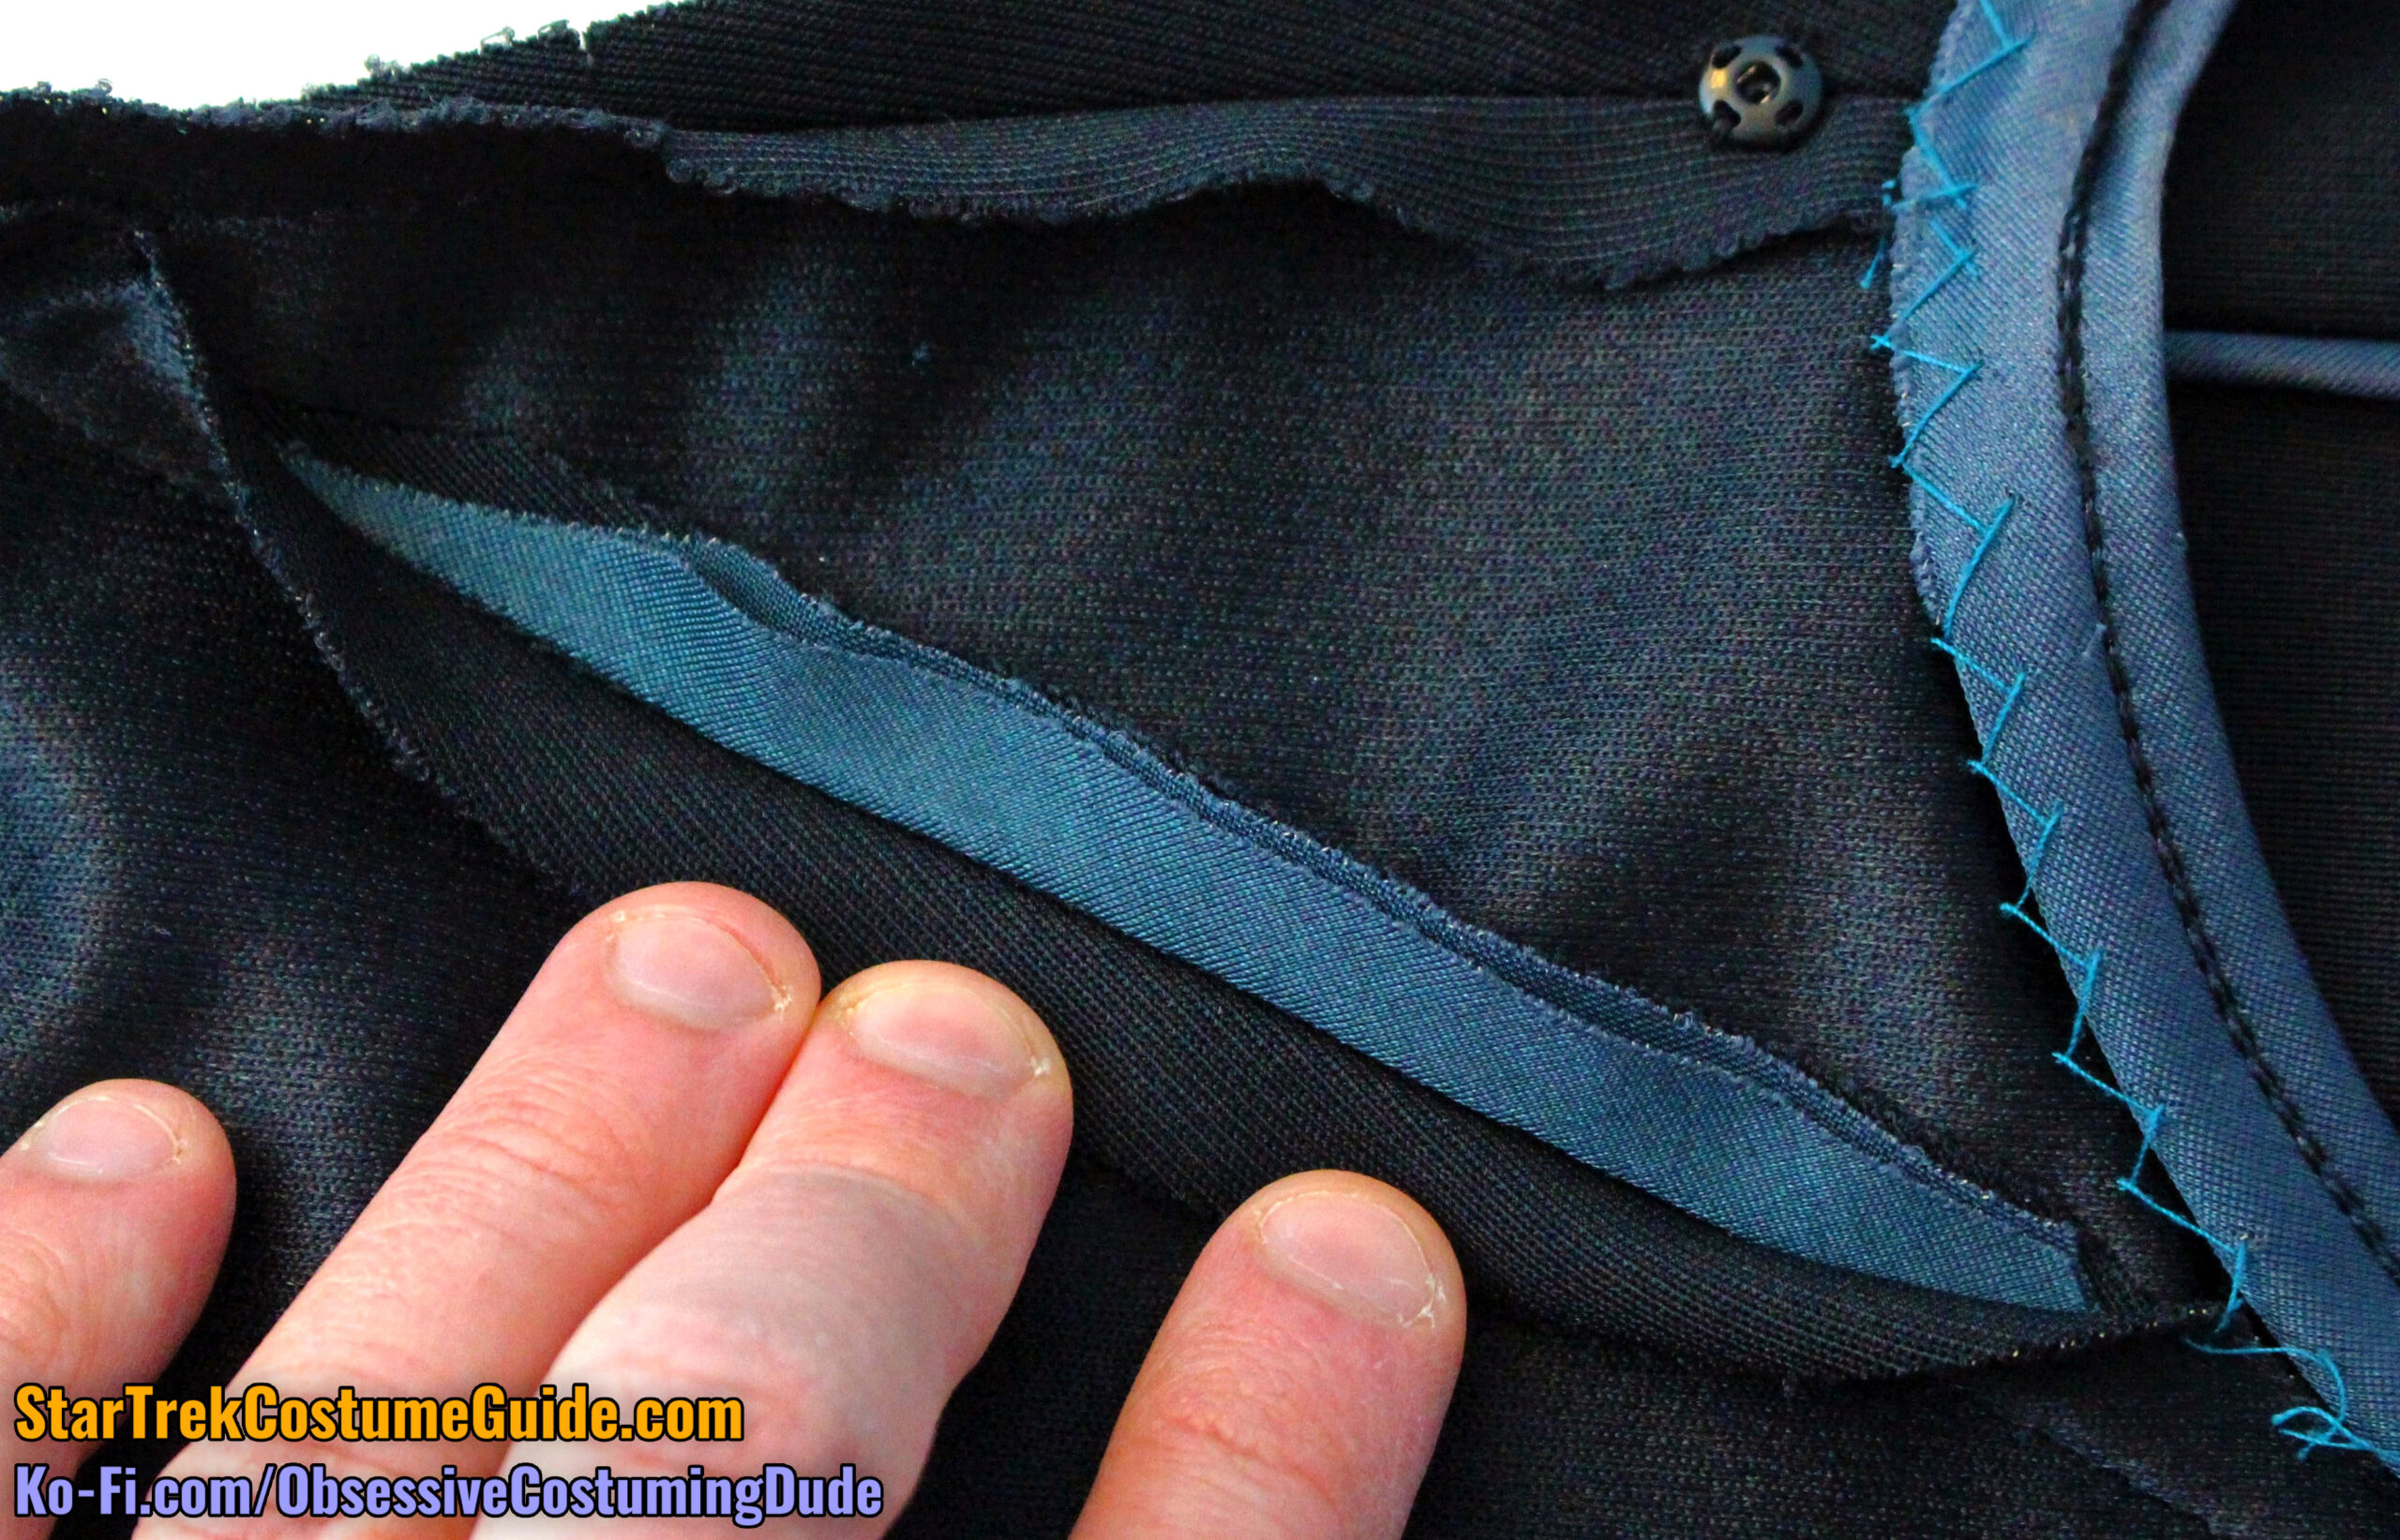
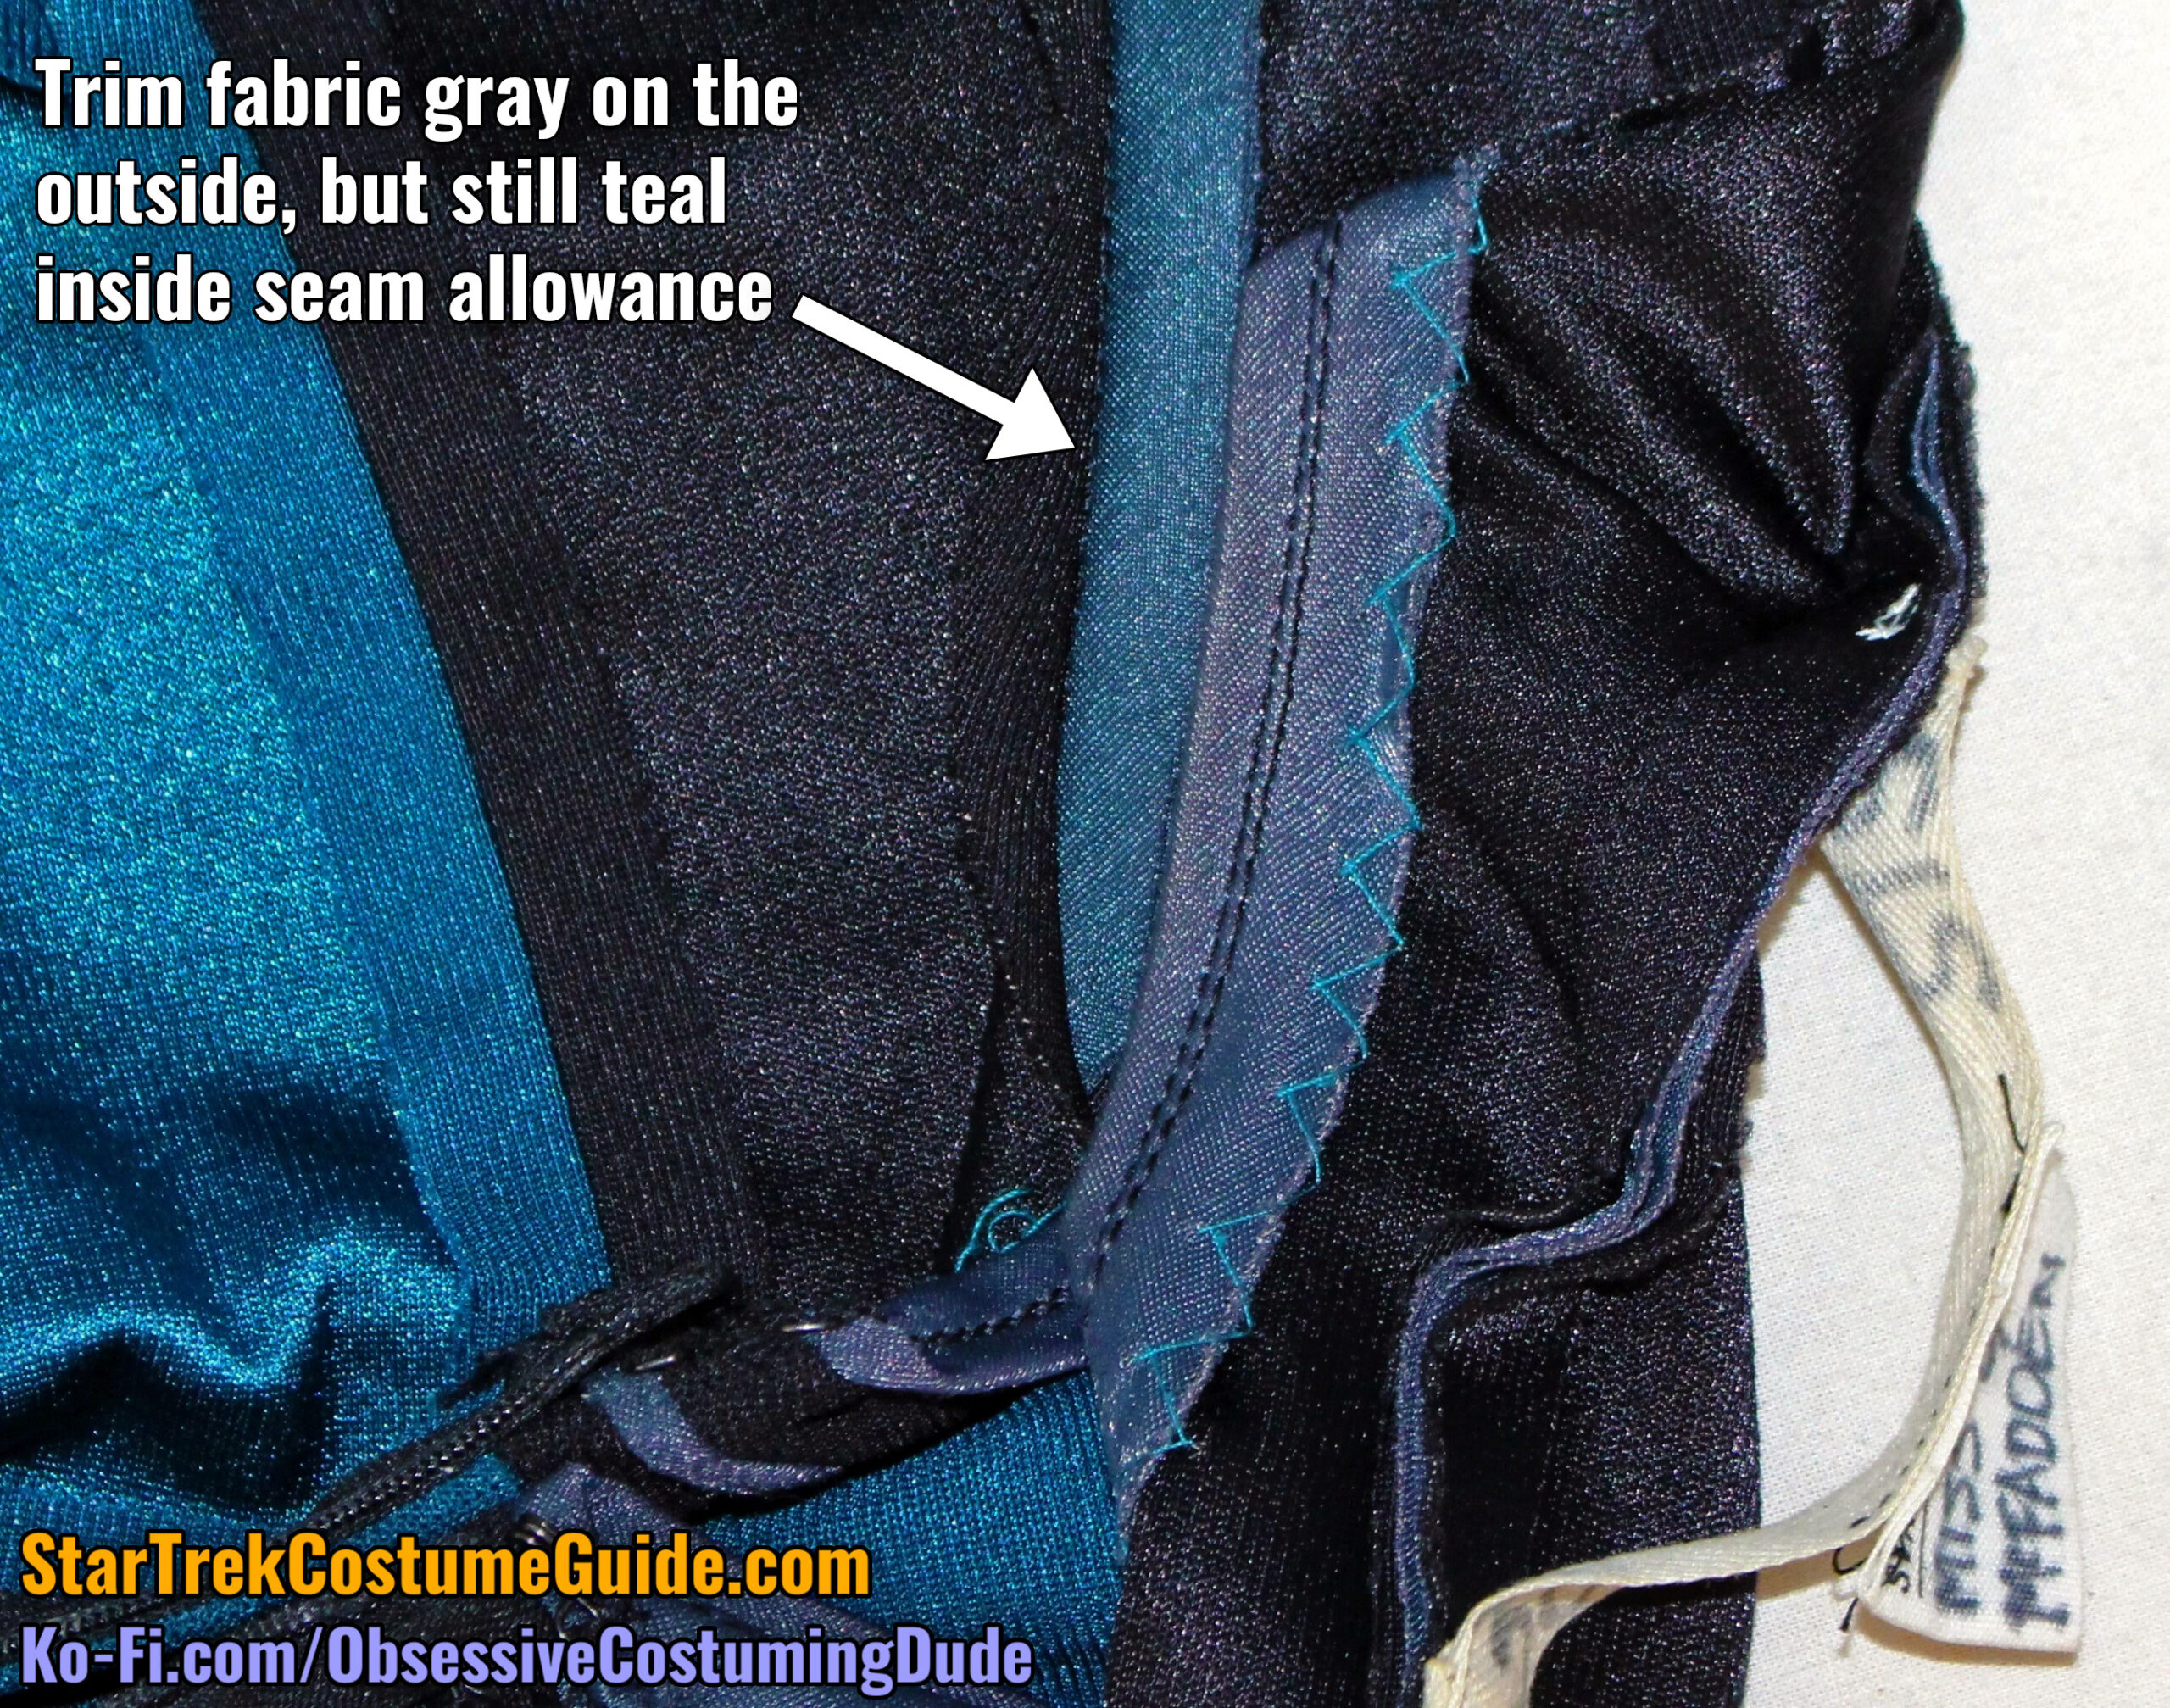
As you can see, inside the seam allowance, the trim was actually teal, not gray!
So although the trim was gray on the outside, it was actually teal on the inside.
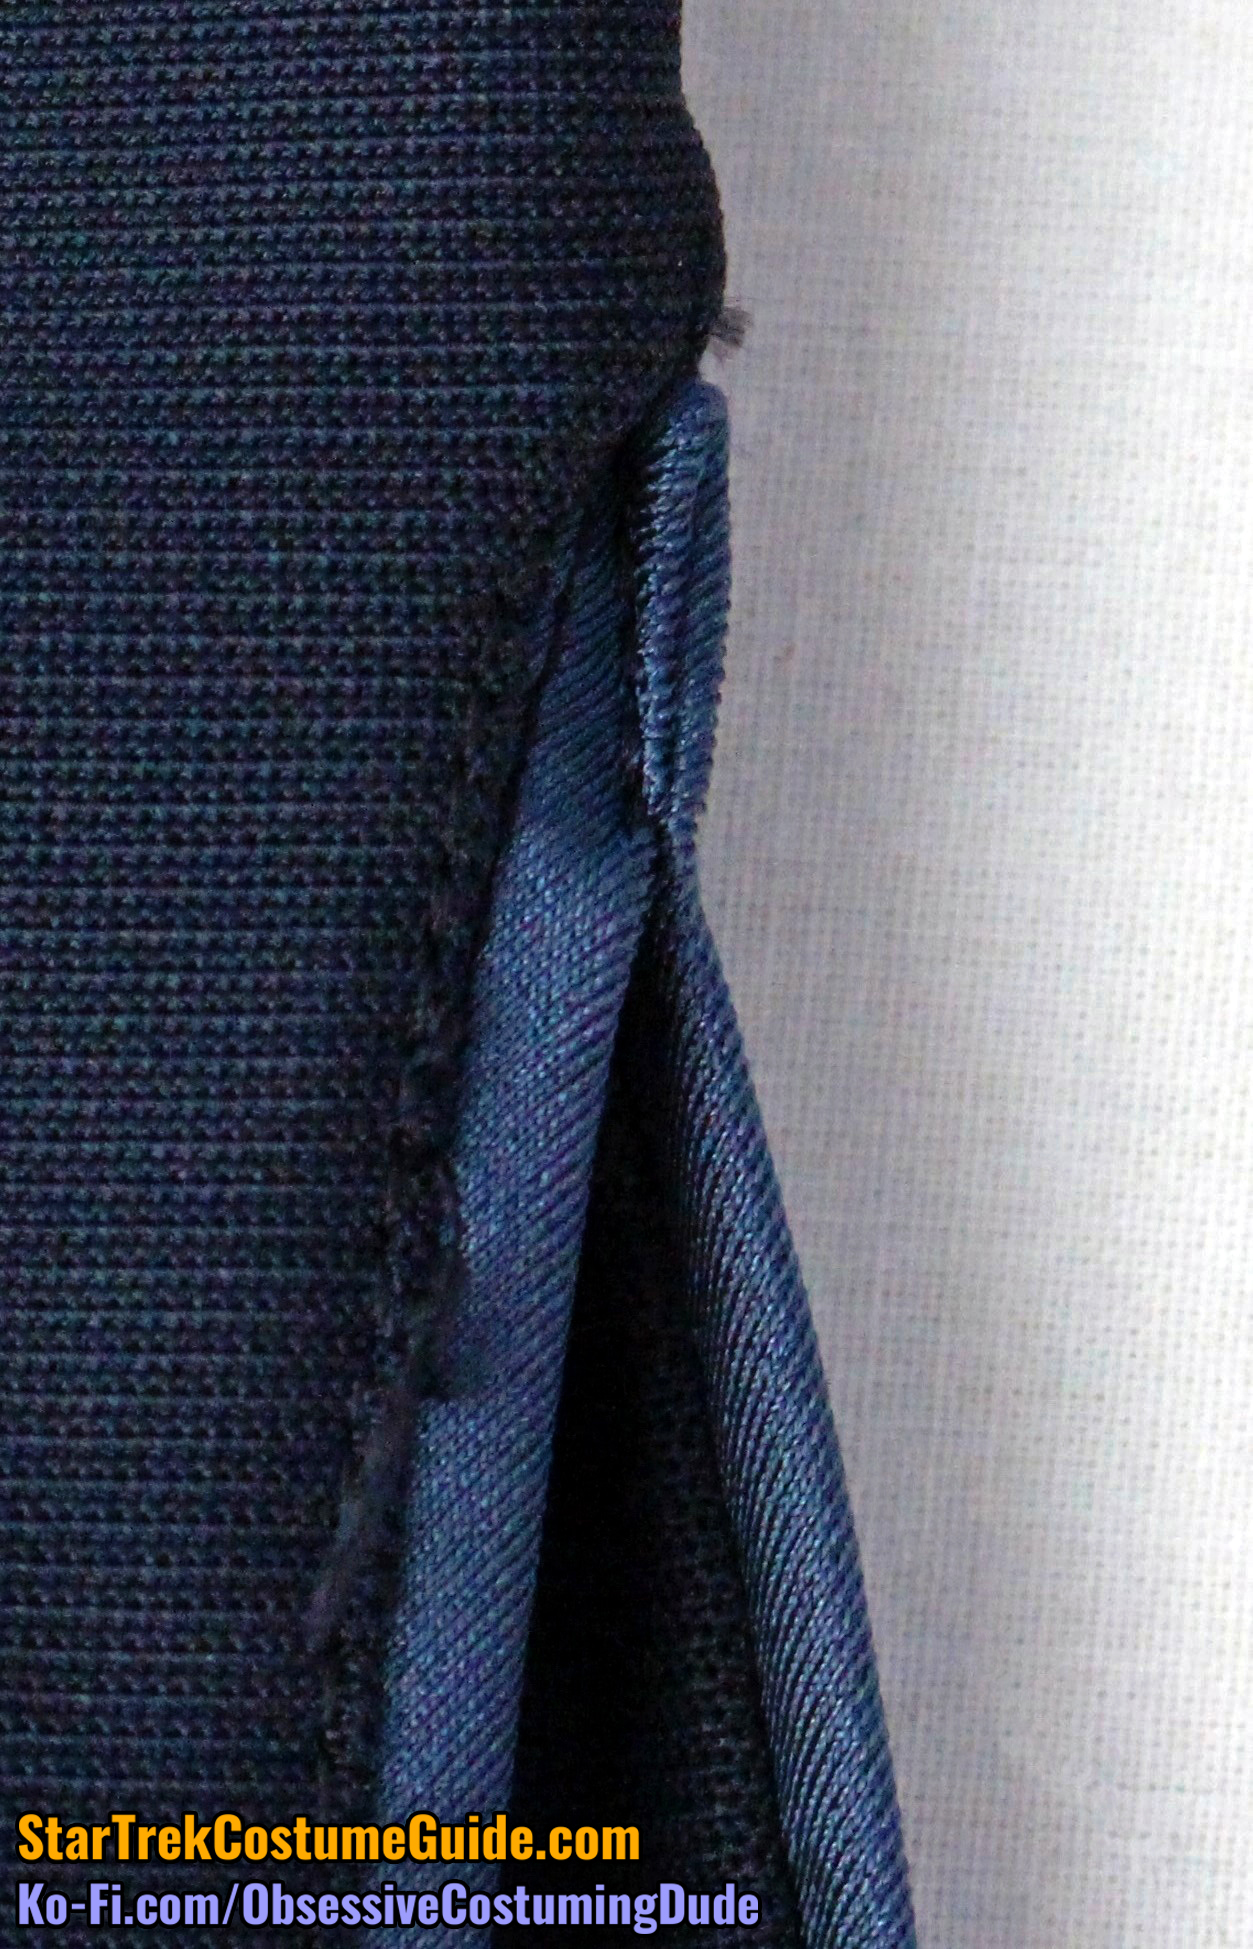
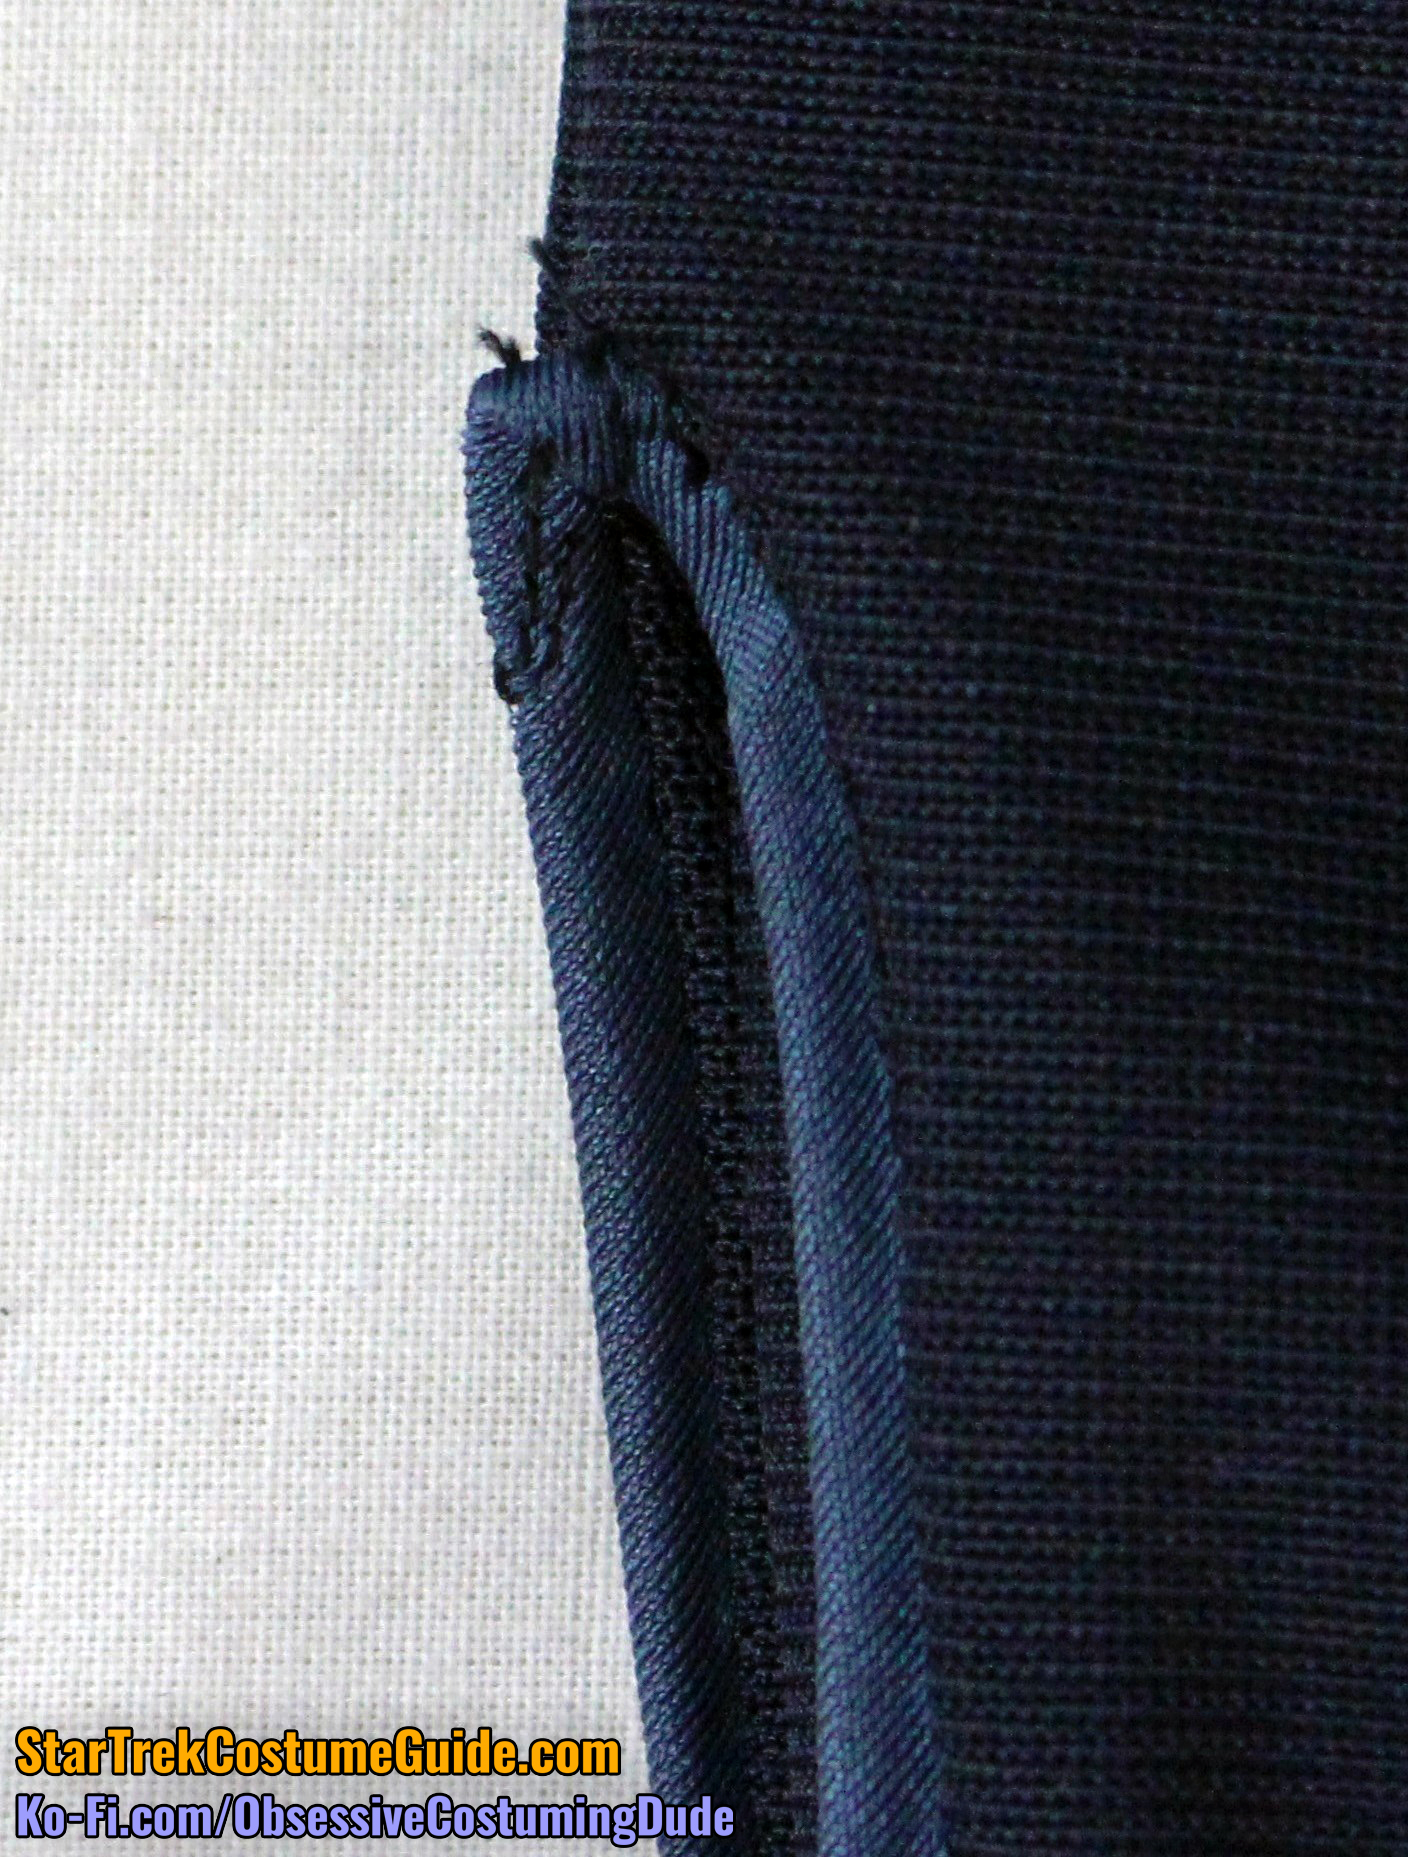
To me, this suggests that the trim fabric was originally teal, but it wasn’t as “lightfast” as the costuming department had believed it to be. (Unfortunately, the only way to know for sure may have been to see how it would hold up over a prolonged period of bright, hot lights.)
It seems that most of the yellow content of the teal trim fabric was “baked” out over the course of production use, with the remaining colors (mostly blue, with a bit of red and remaining yellow) forming the more neutral lavender/gray color seen on the outside of the jumpsuit.
It would also seem that the black yoke seam allowances “protected” the trim seam allowances from fading; in these photos you can see the “virgin” trim compared to the faded end result.
With flash
No flash
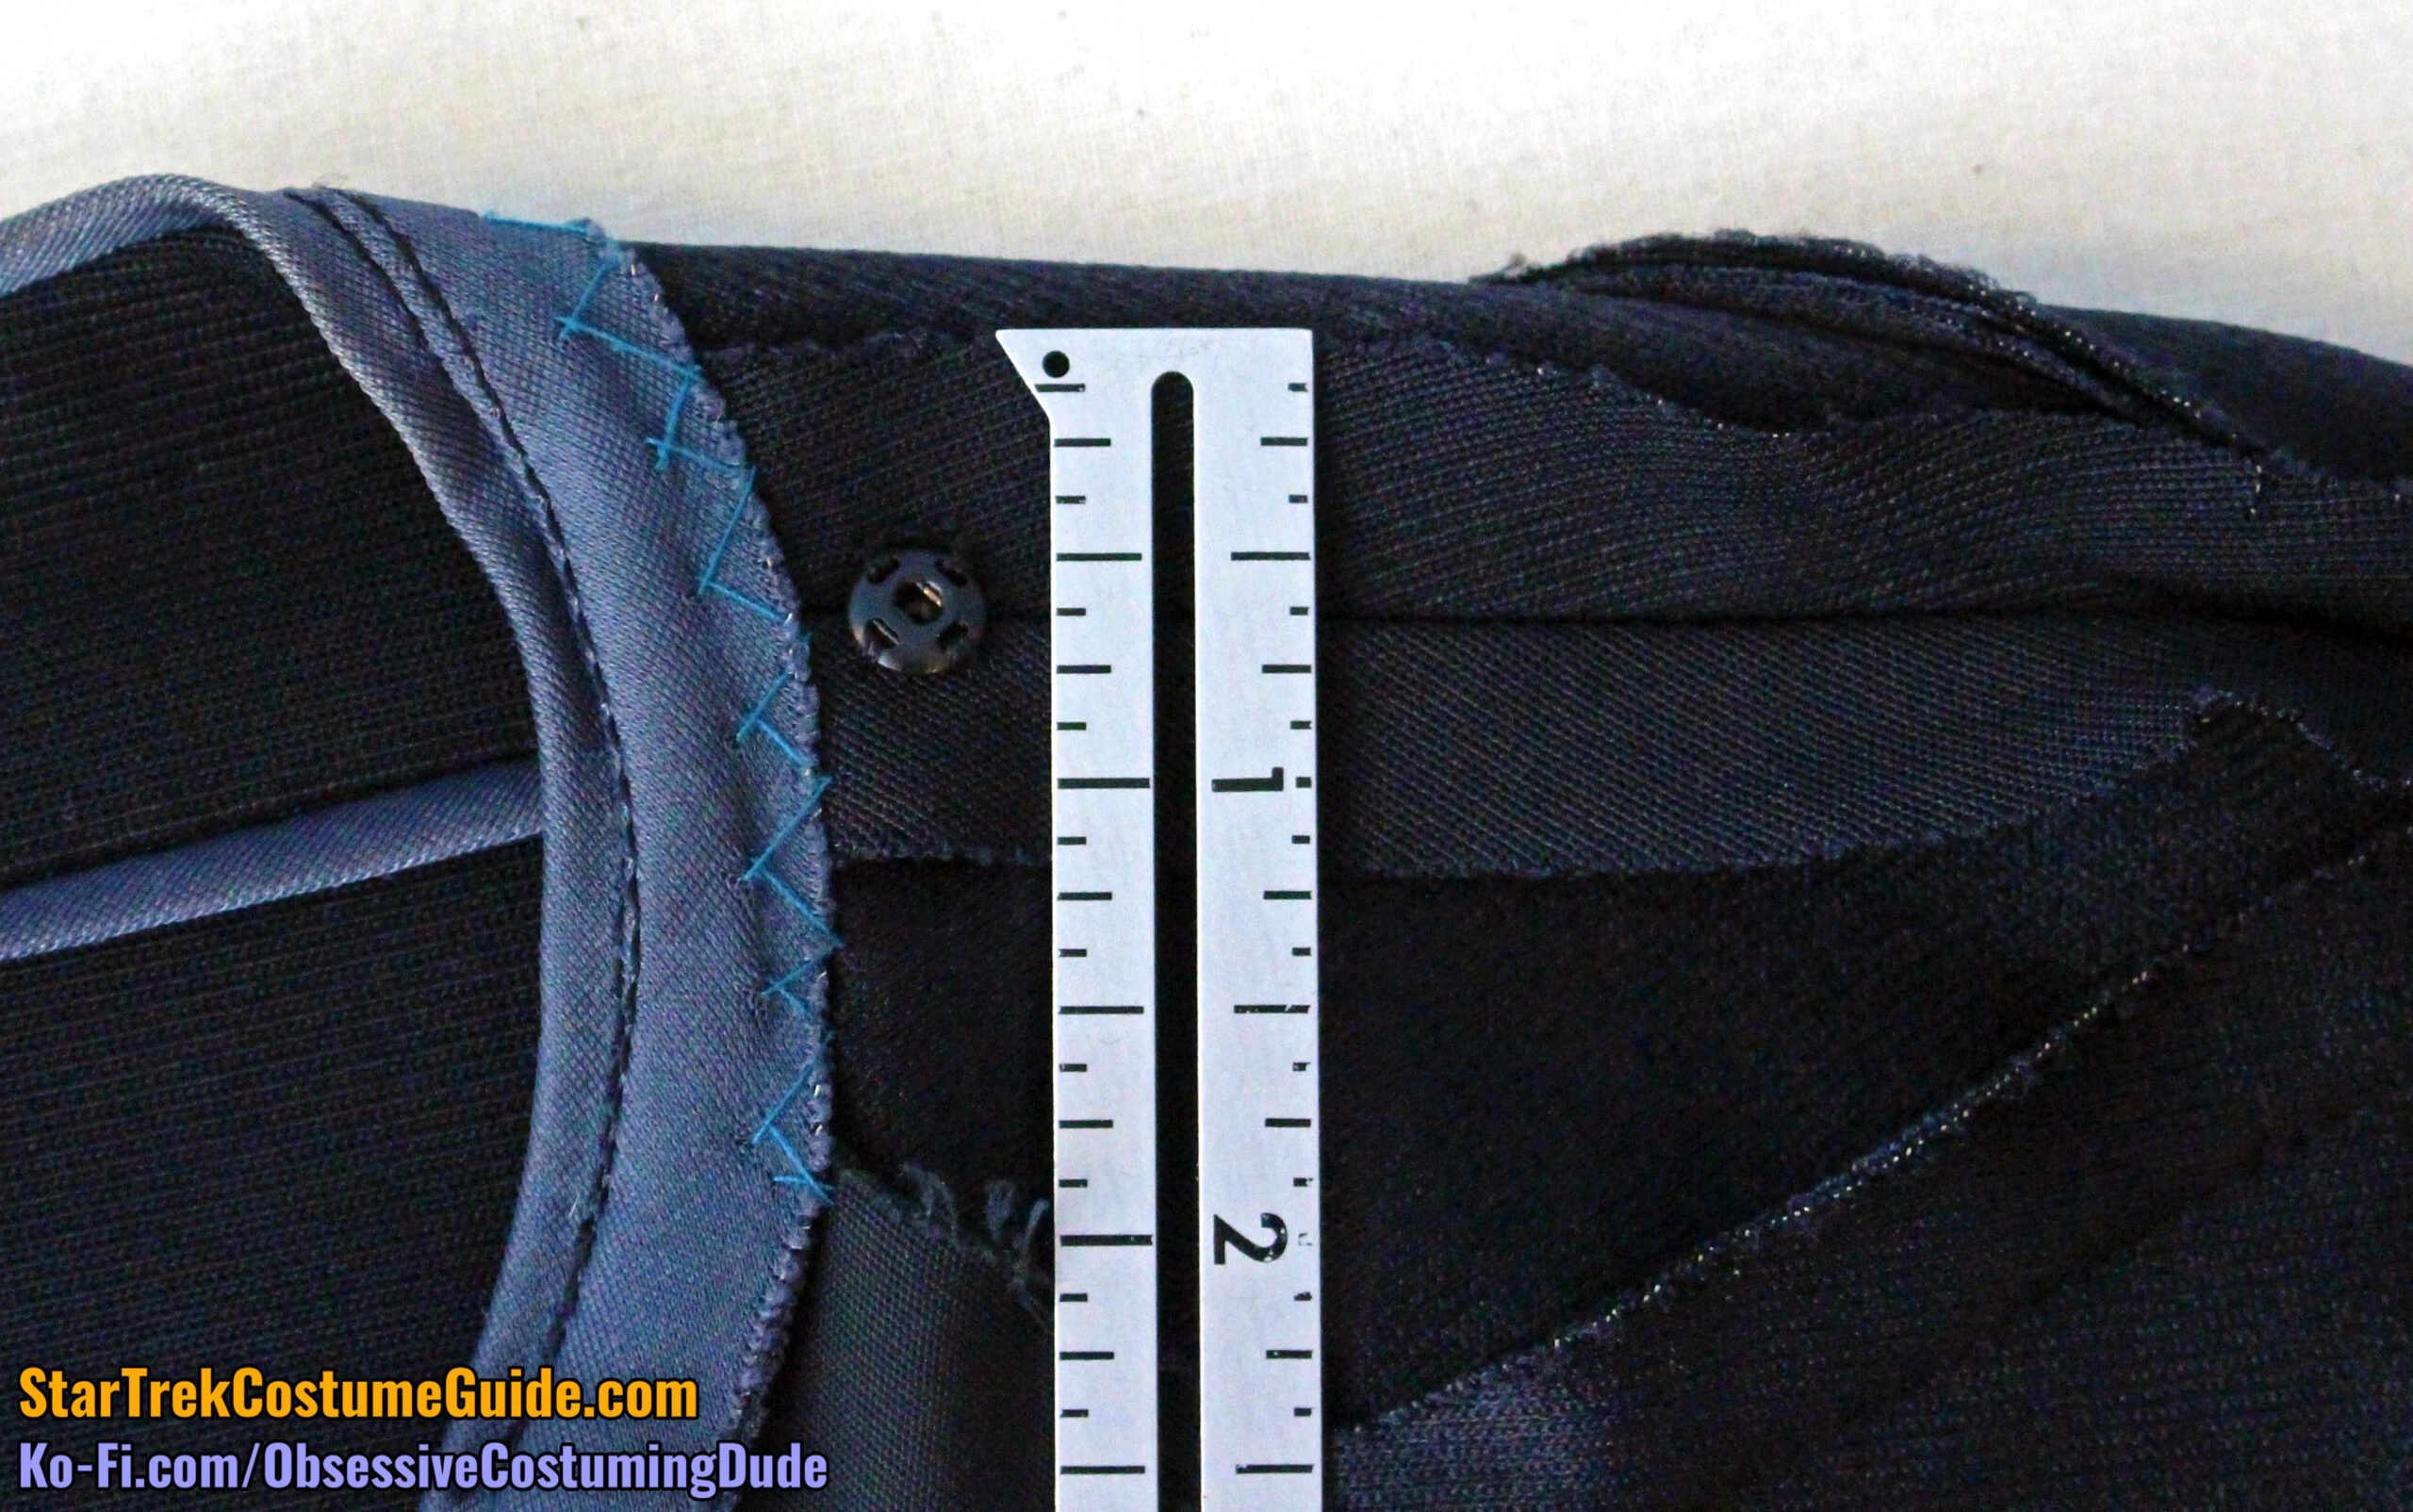
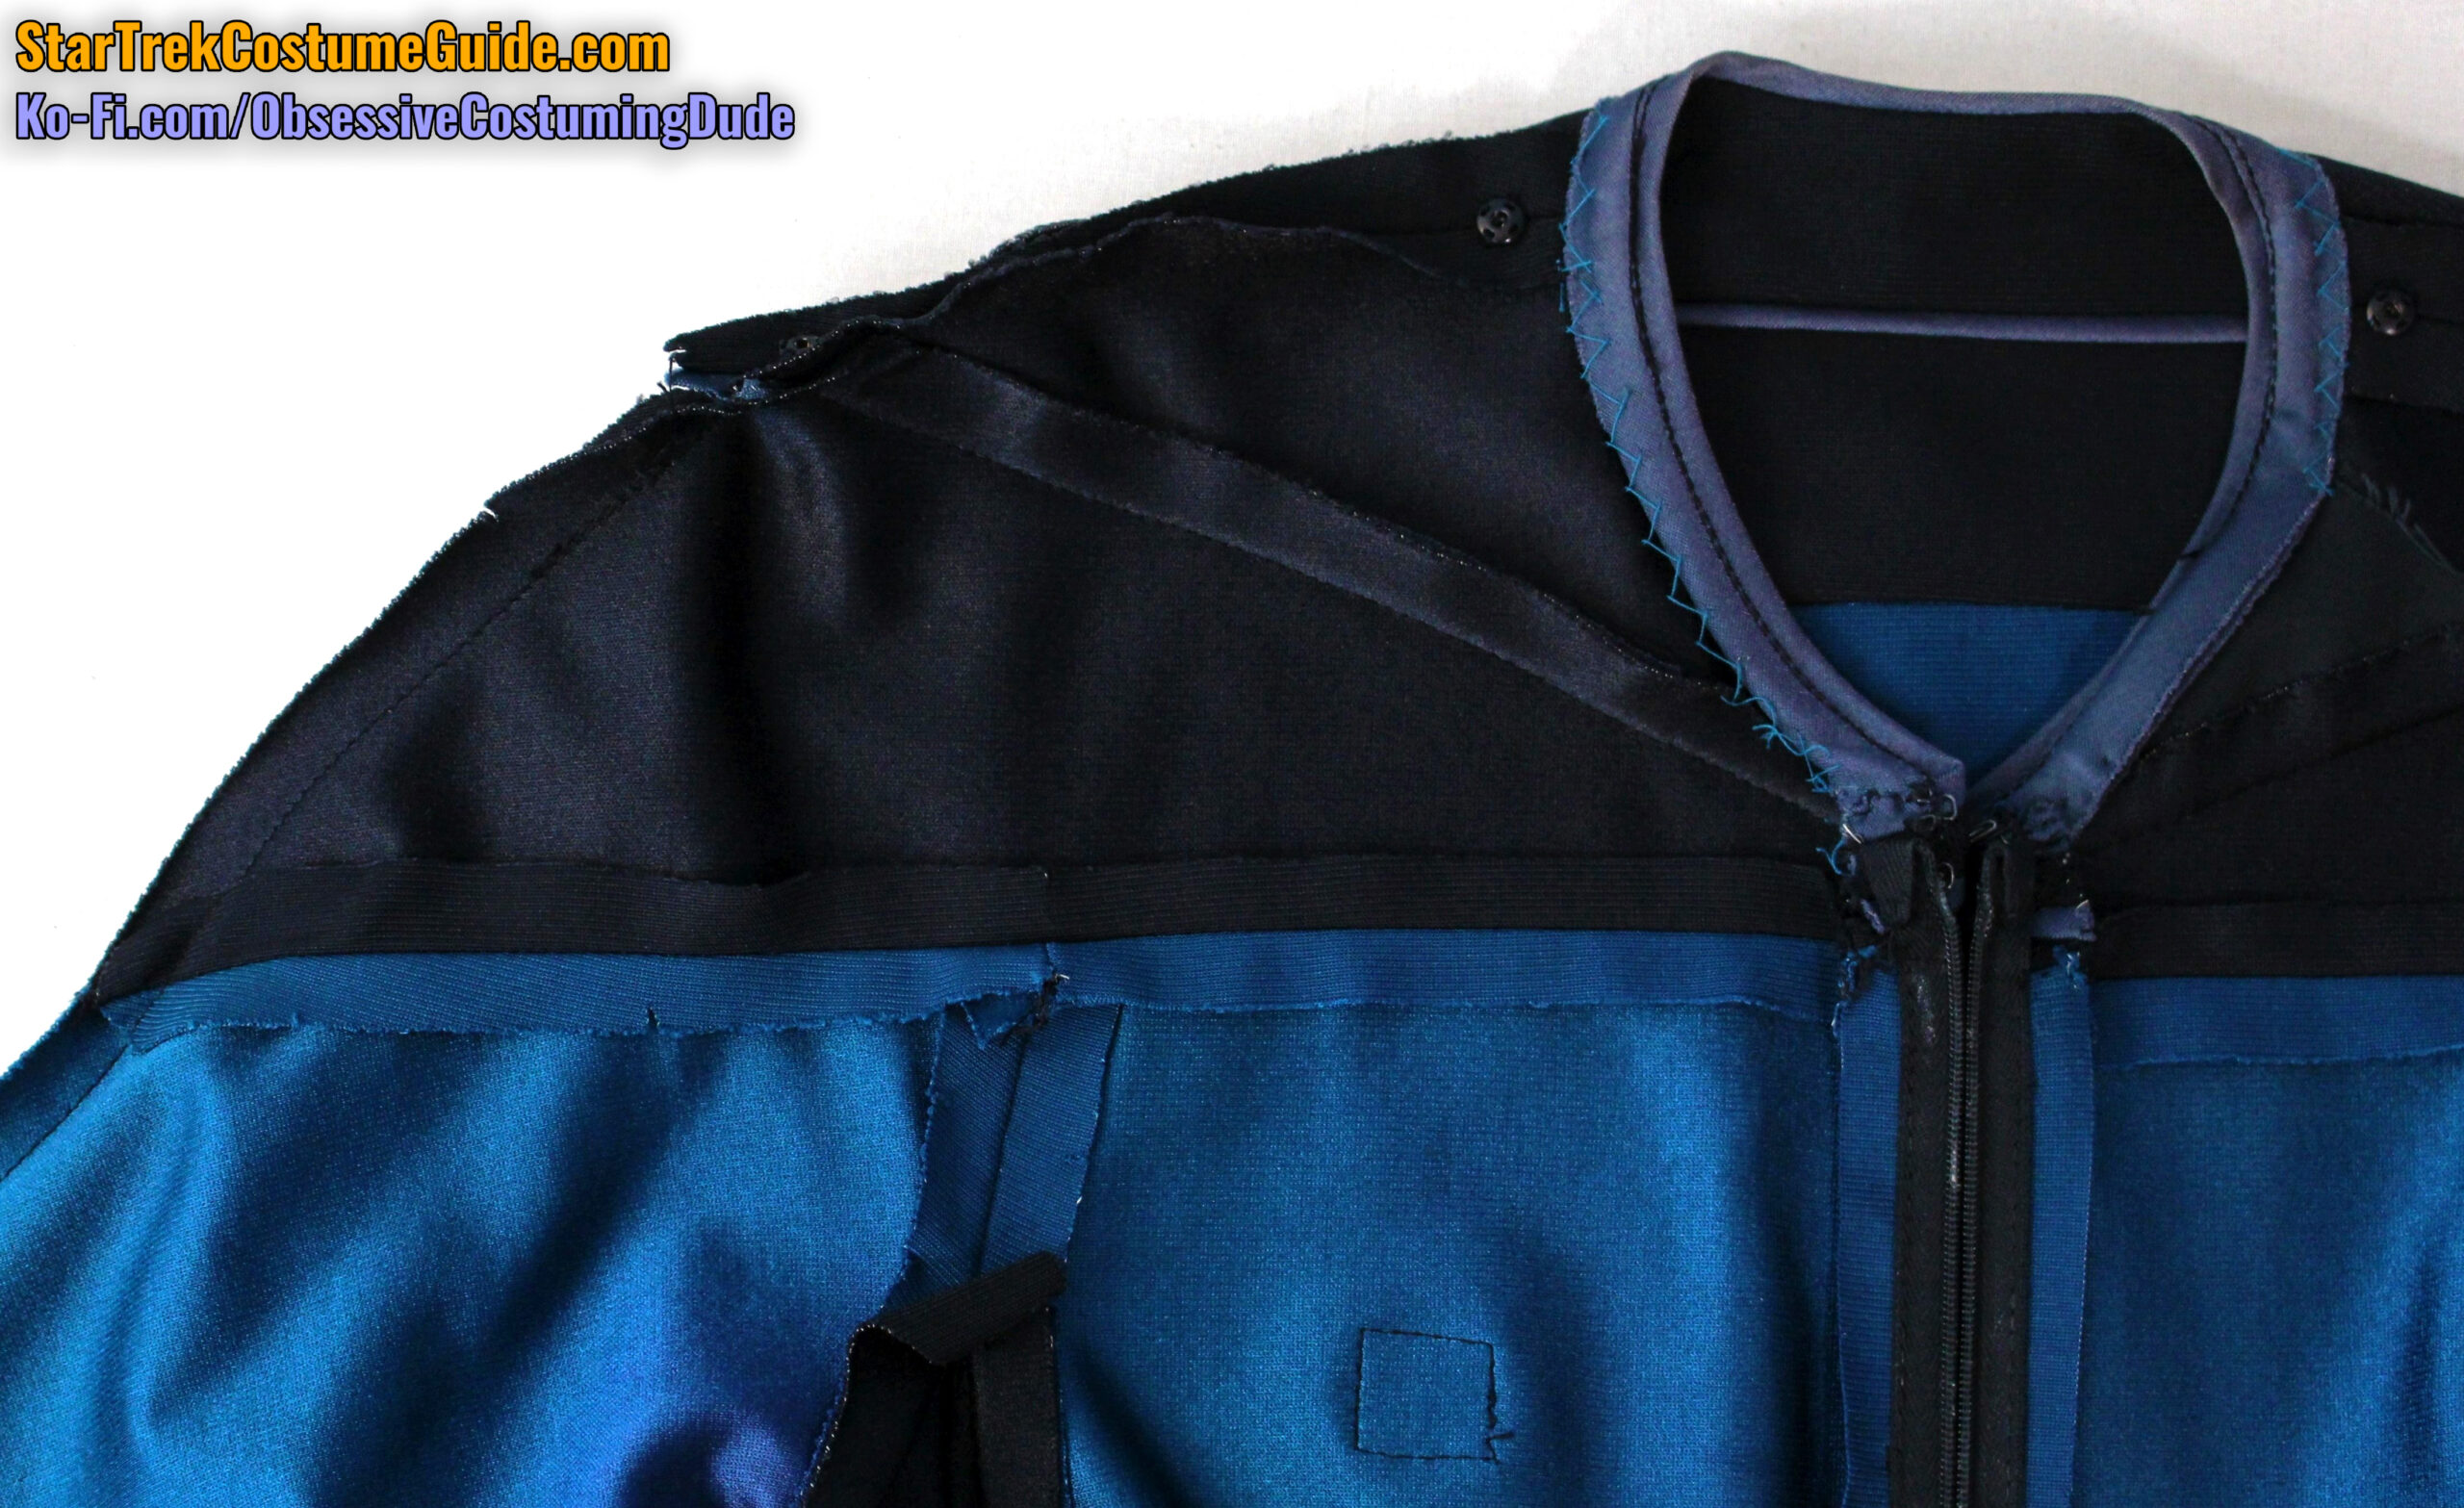
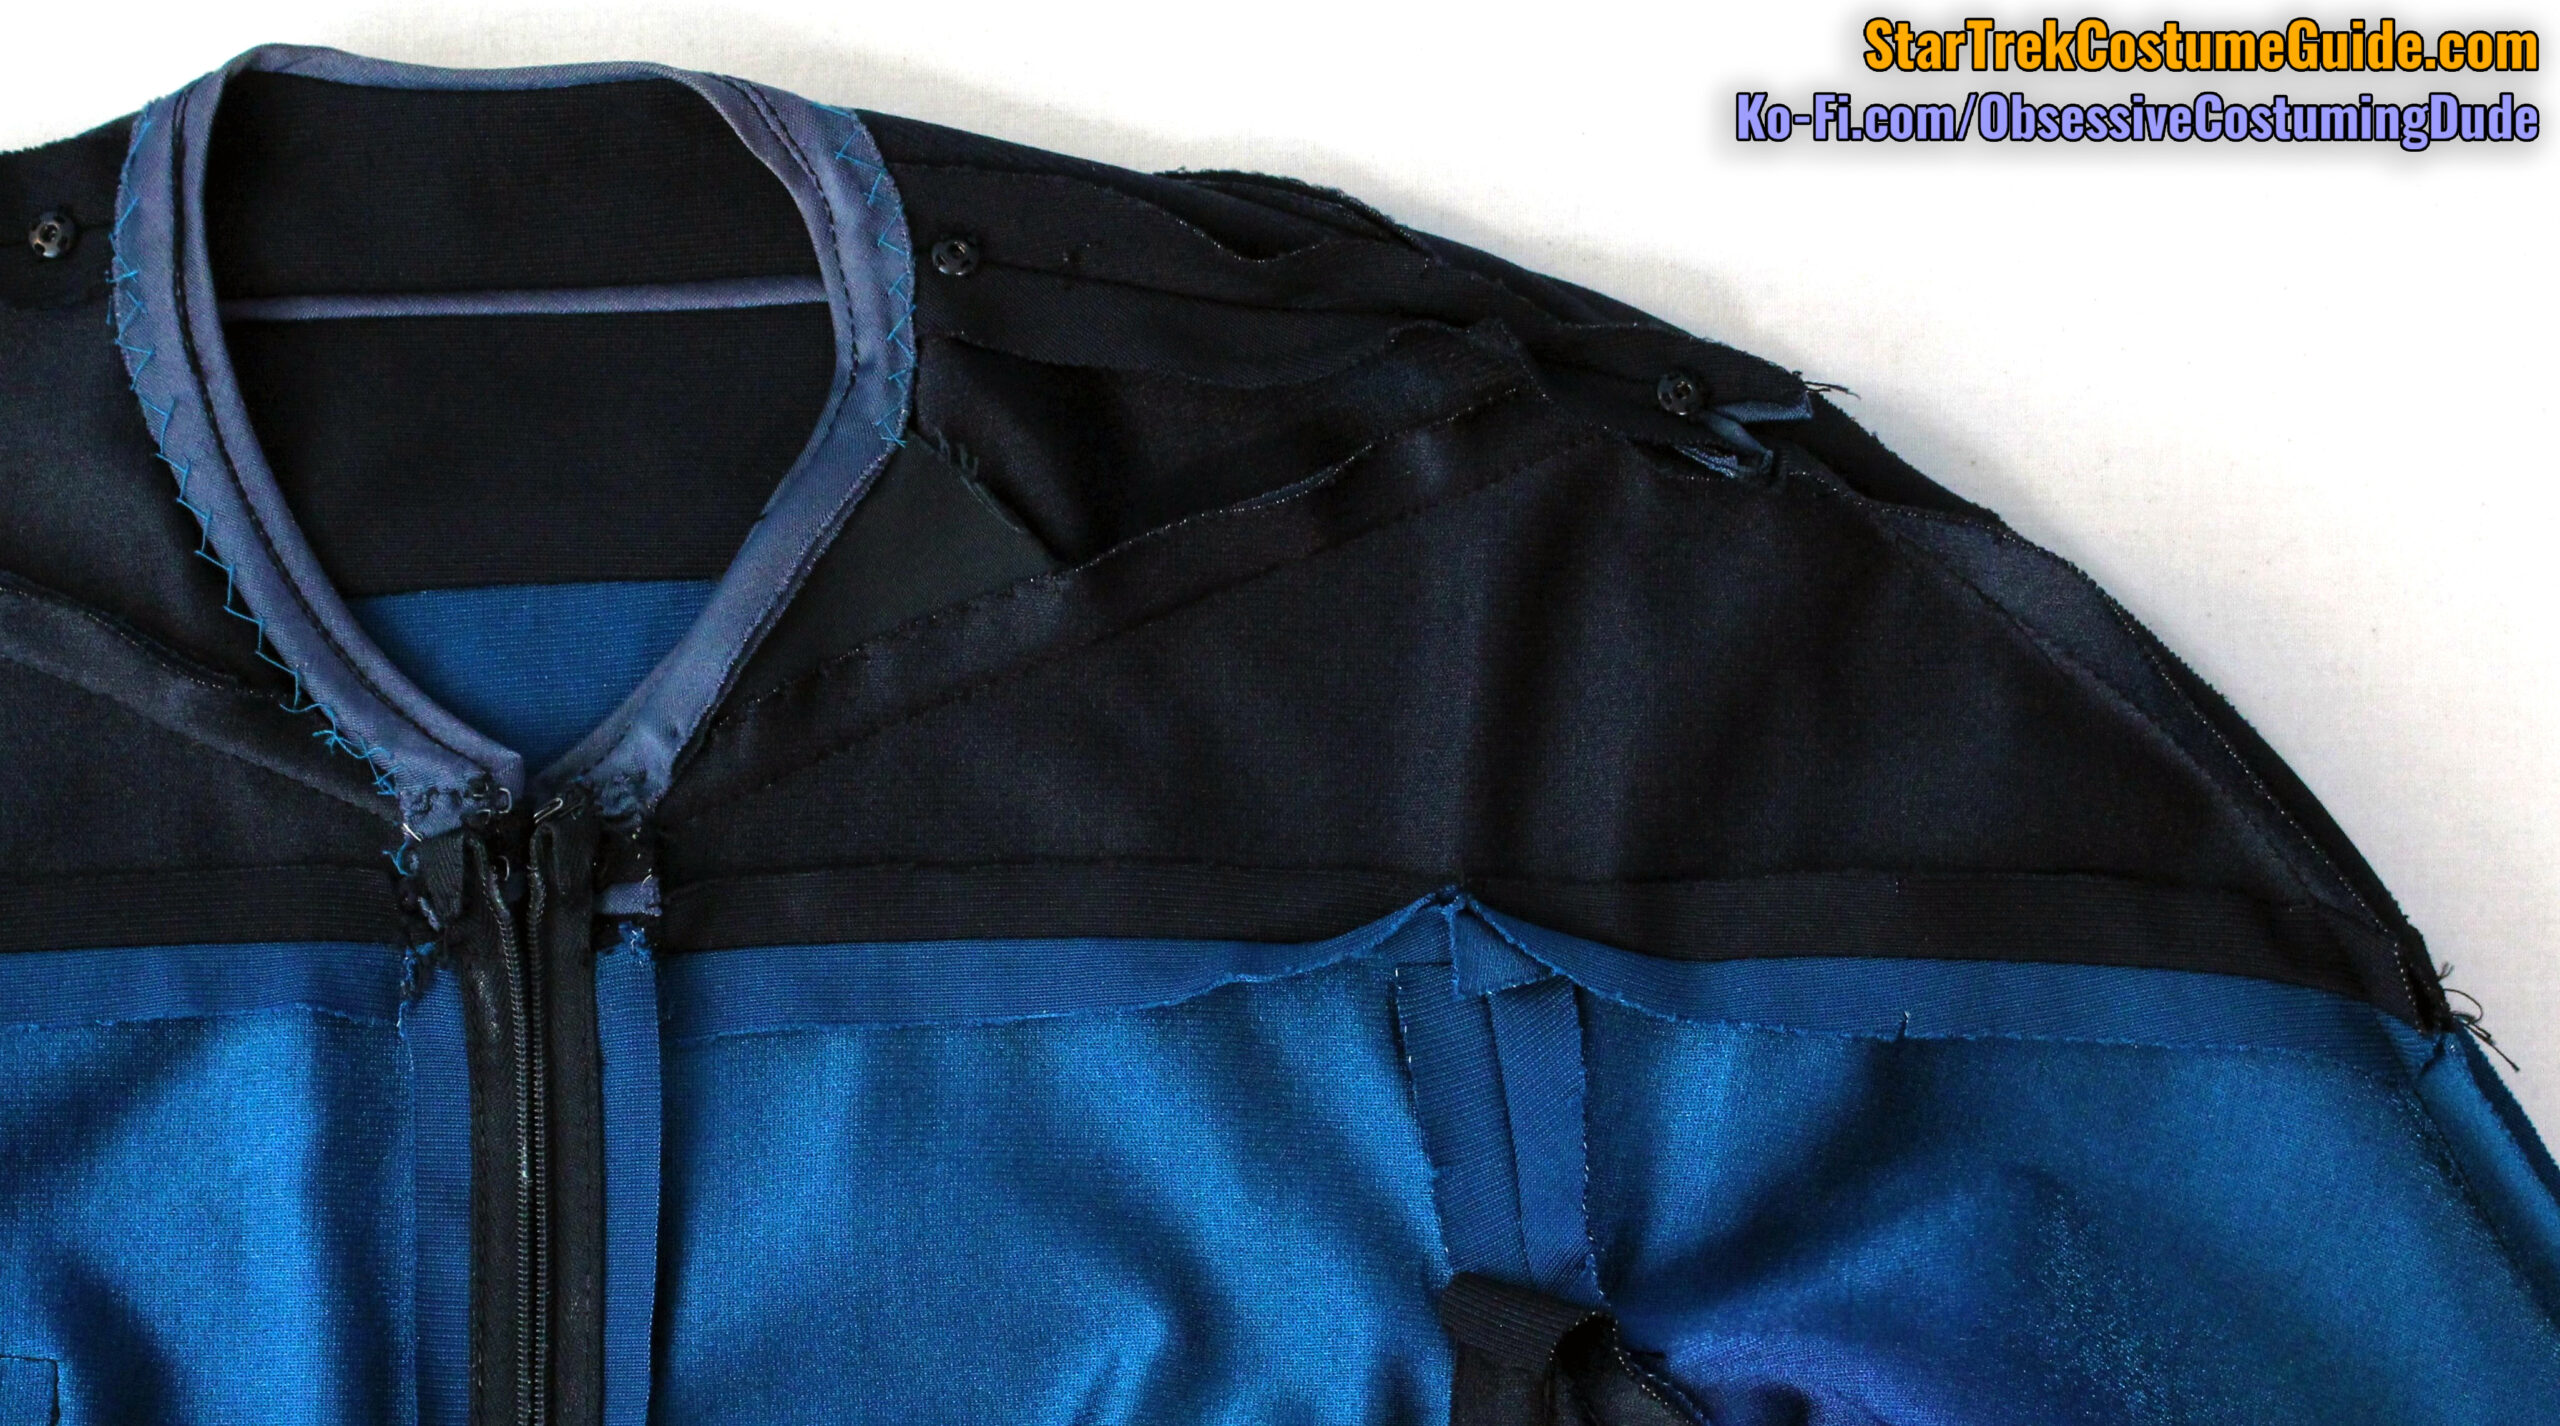
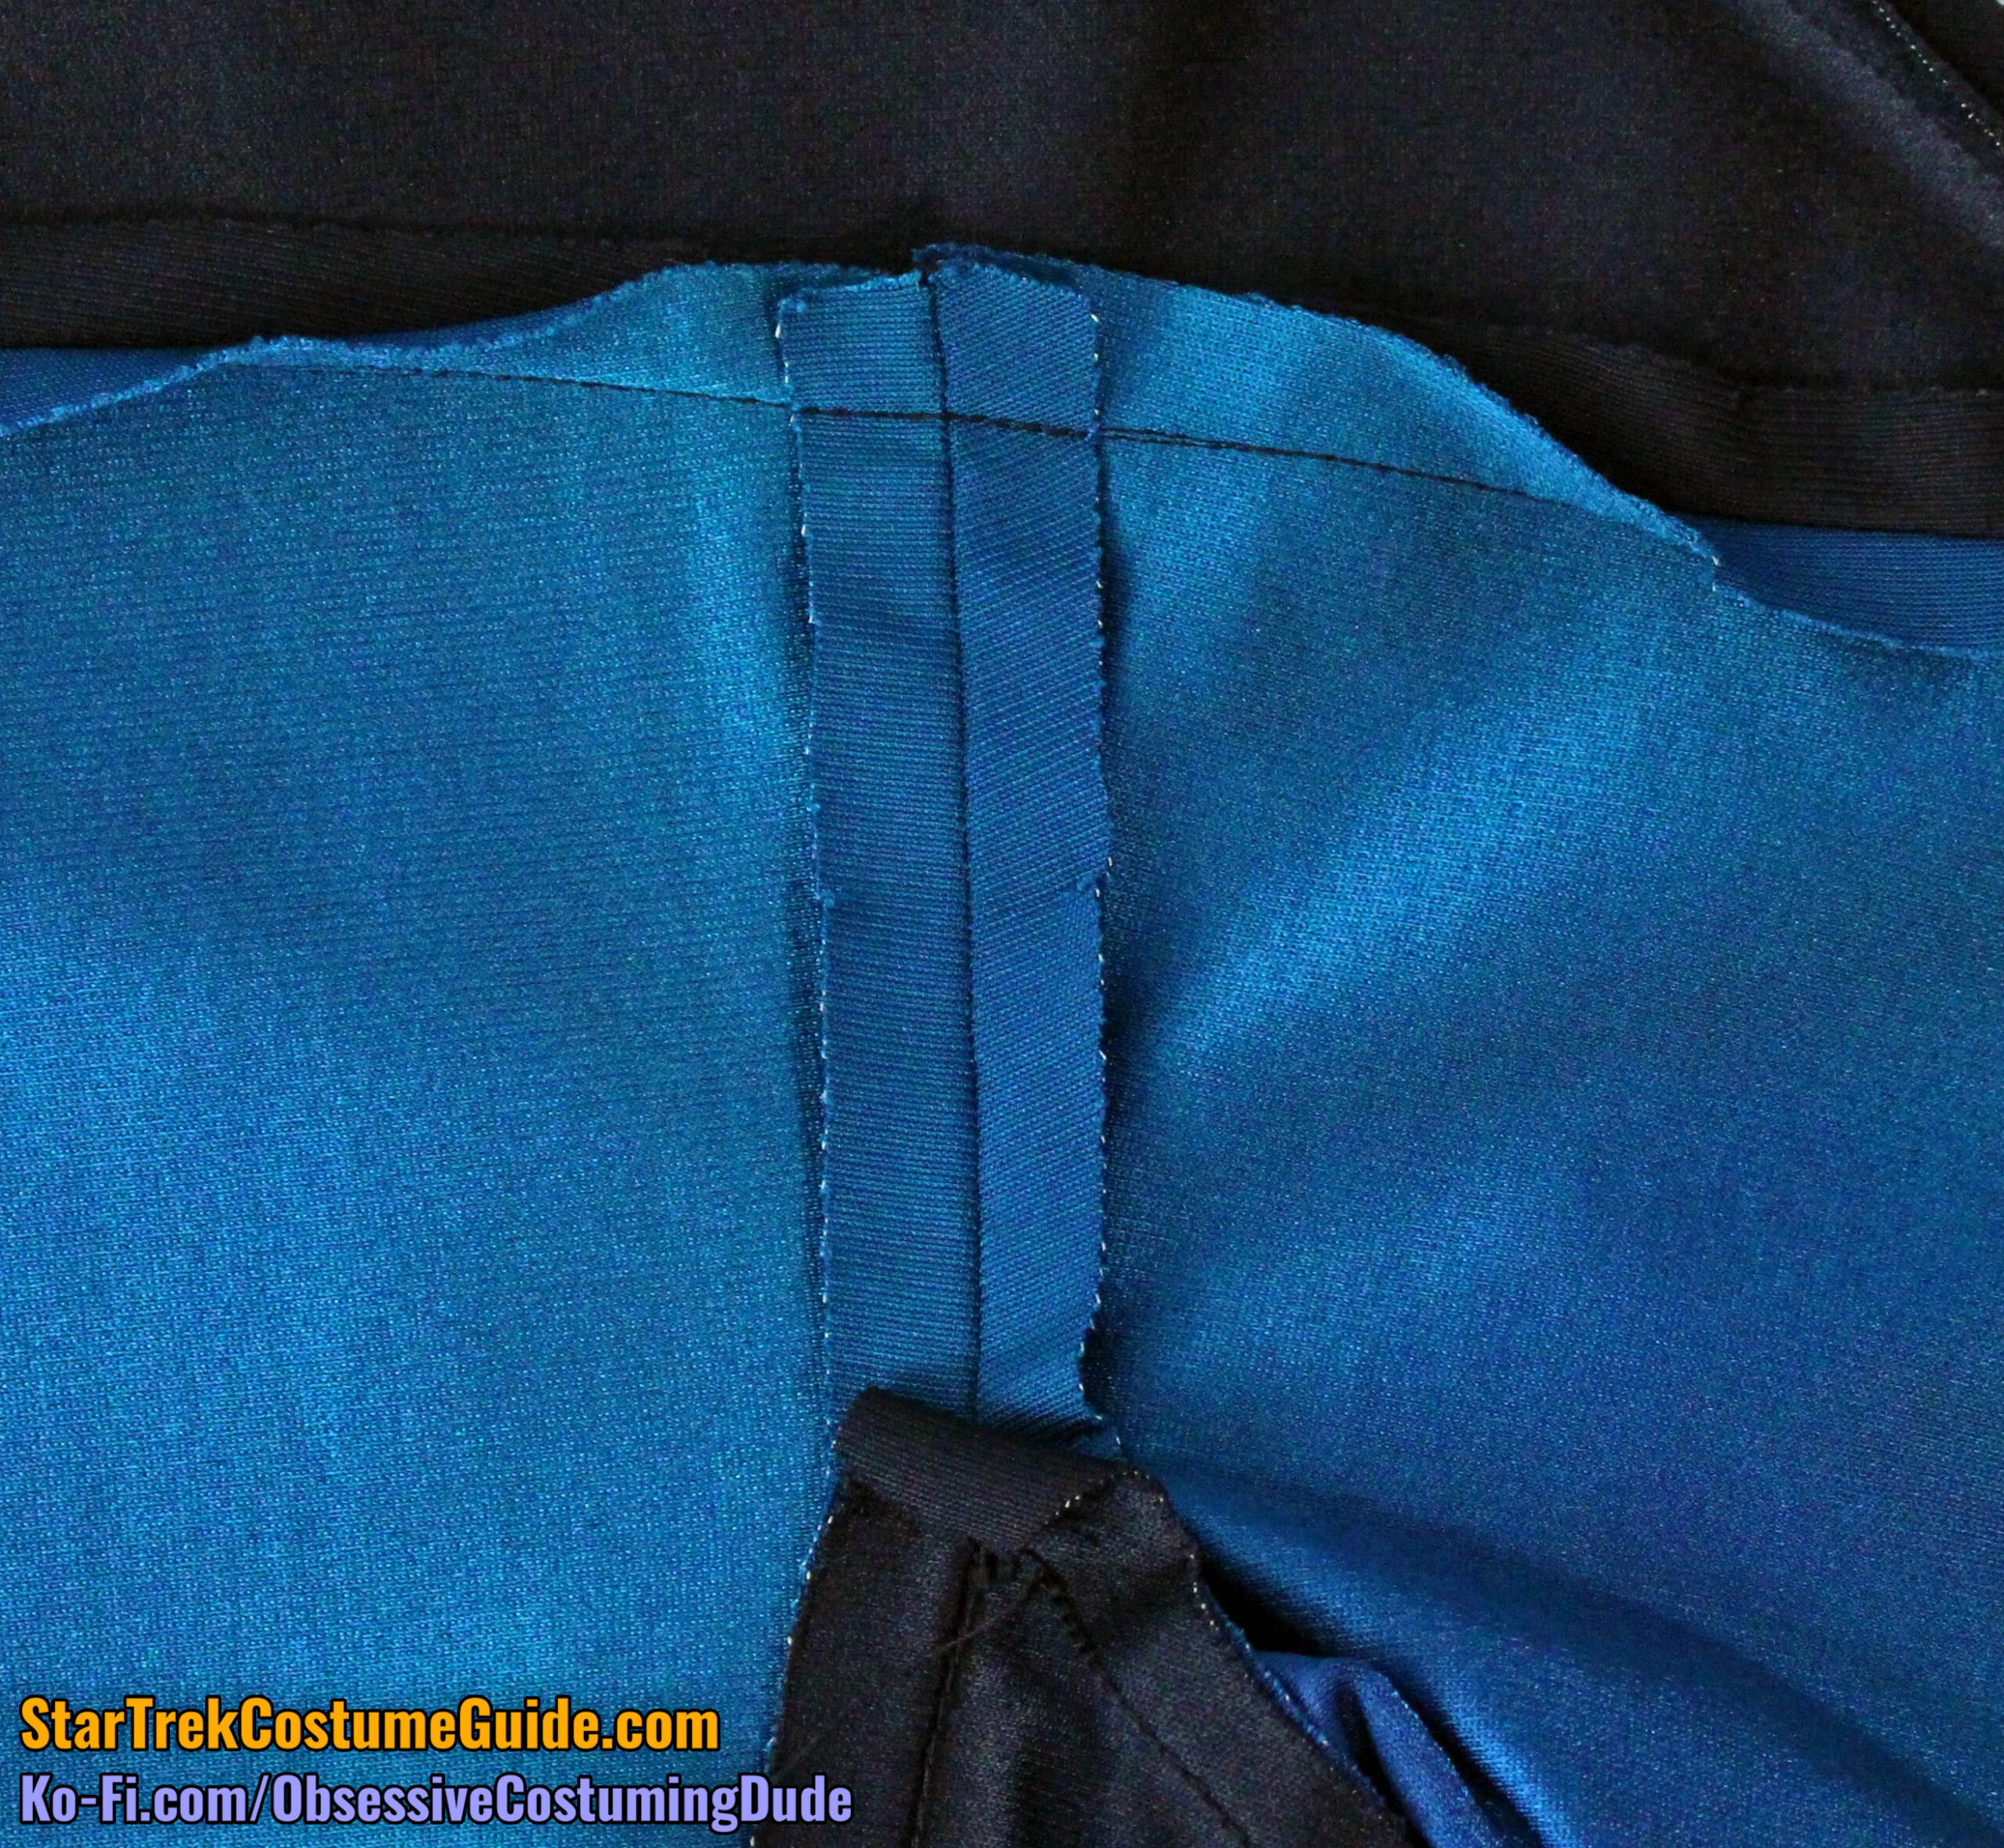
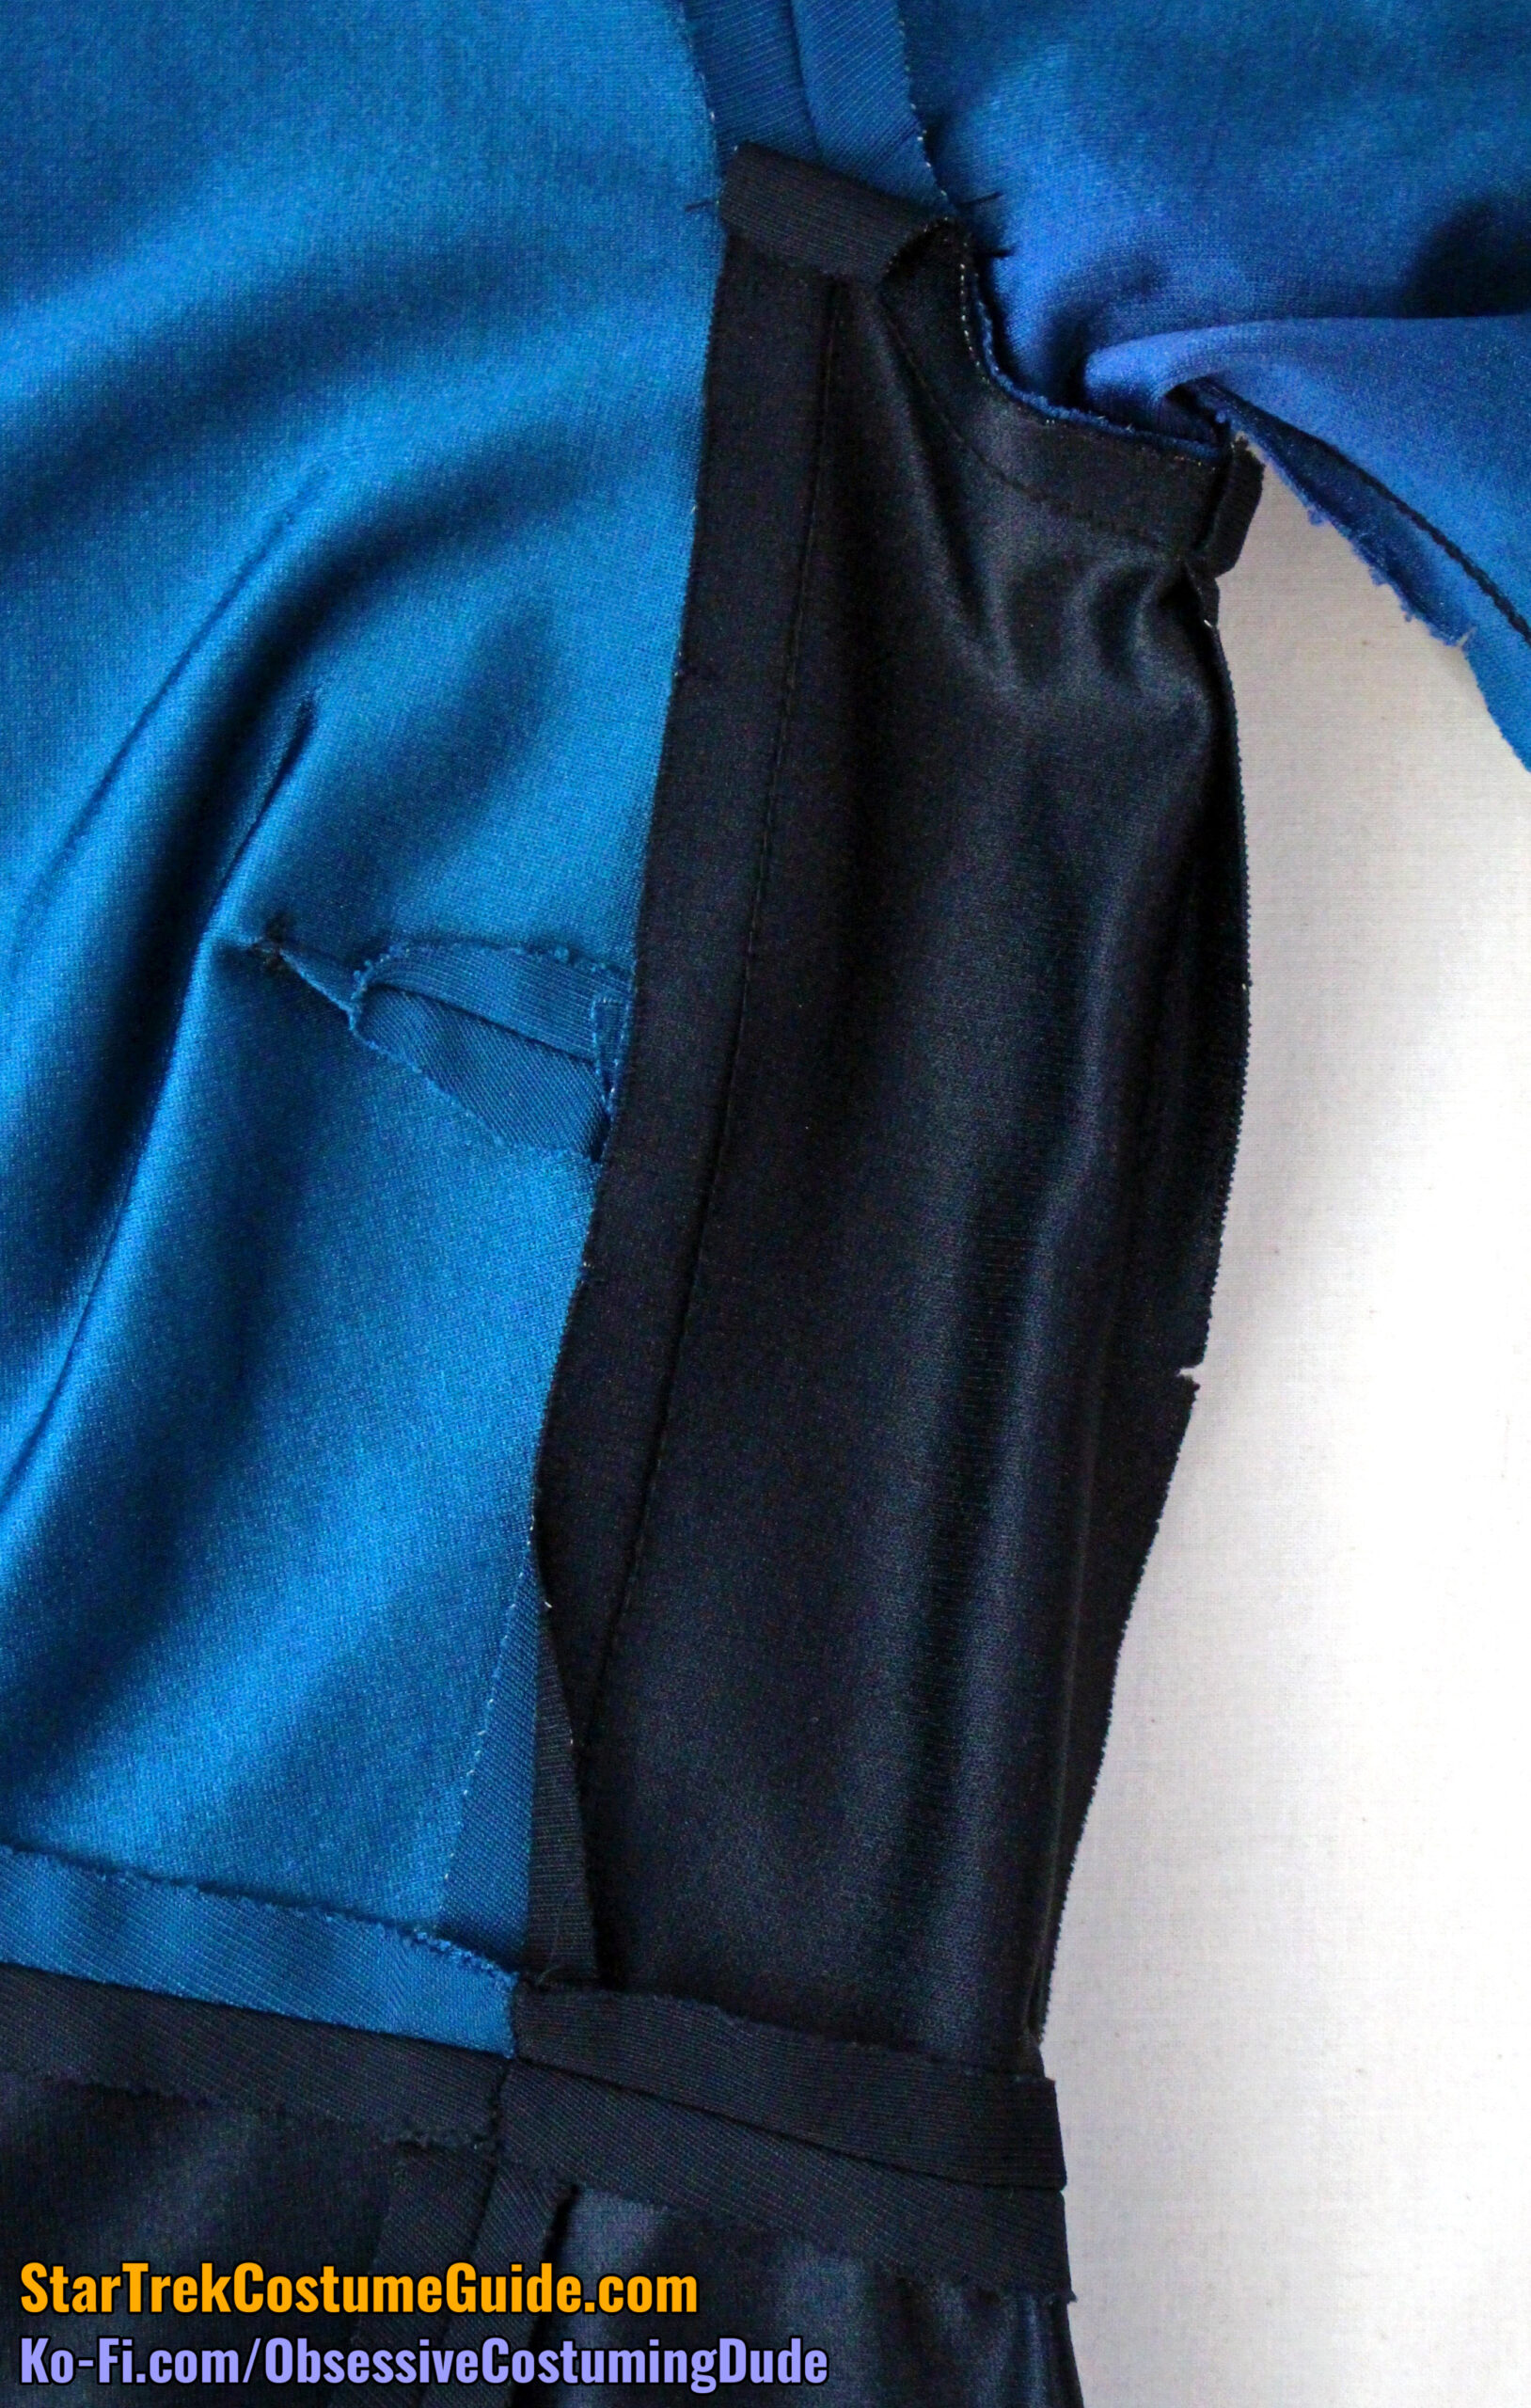
Like on the Tasha Yar uniform I examined, the upper right front yoke area of Dr. Crusher’s jumpsuit was reinforced, presumably to provide support for the rank bars.
However, rather than a fusible interfacing, on this jumpsuit a small piece of woven fabric was sewn into the nearby seams.
And curiously, the catch-stitching around the neckline trim did not extend onto this fabric interfacing.
As you can see, there was no corresponding interfacing (fabric or fusible) on the left side.
The upper left yoke/body seam allowances were fairly “well-behaved,” being pressed open and maintaining that orientation all the way across the seam (from the center front to the outer sleeves).
However, the upper right yoke/body allowances were a bit wonkier, with the lower one reversing toward the armscye seam (as they were strongly inclined to do).
The front yoke/body seam allowances were ½”.
The back yoke/body seam allowances also changed directions; they were pressed open along the upper back and toward the outer corners at the sleeves, but flipped upward along the armscye area.
The armscye seam allowances were ½”.
Both the front and back upper armscye seam allowances were pressed open.
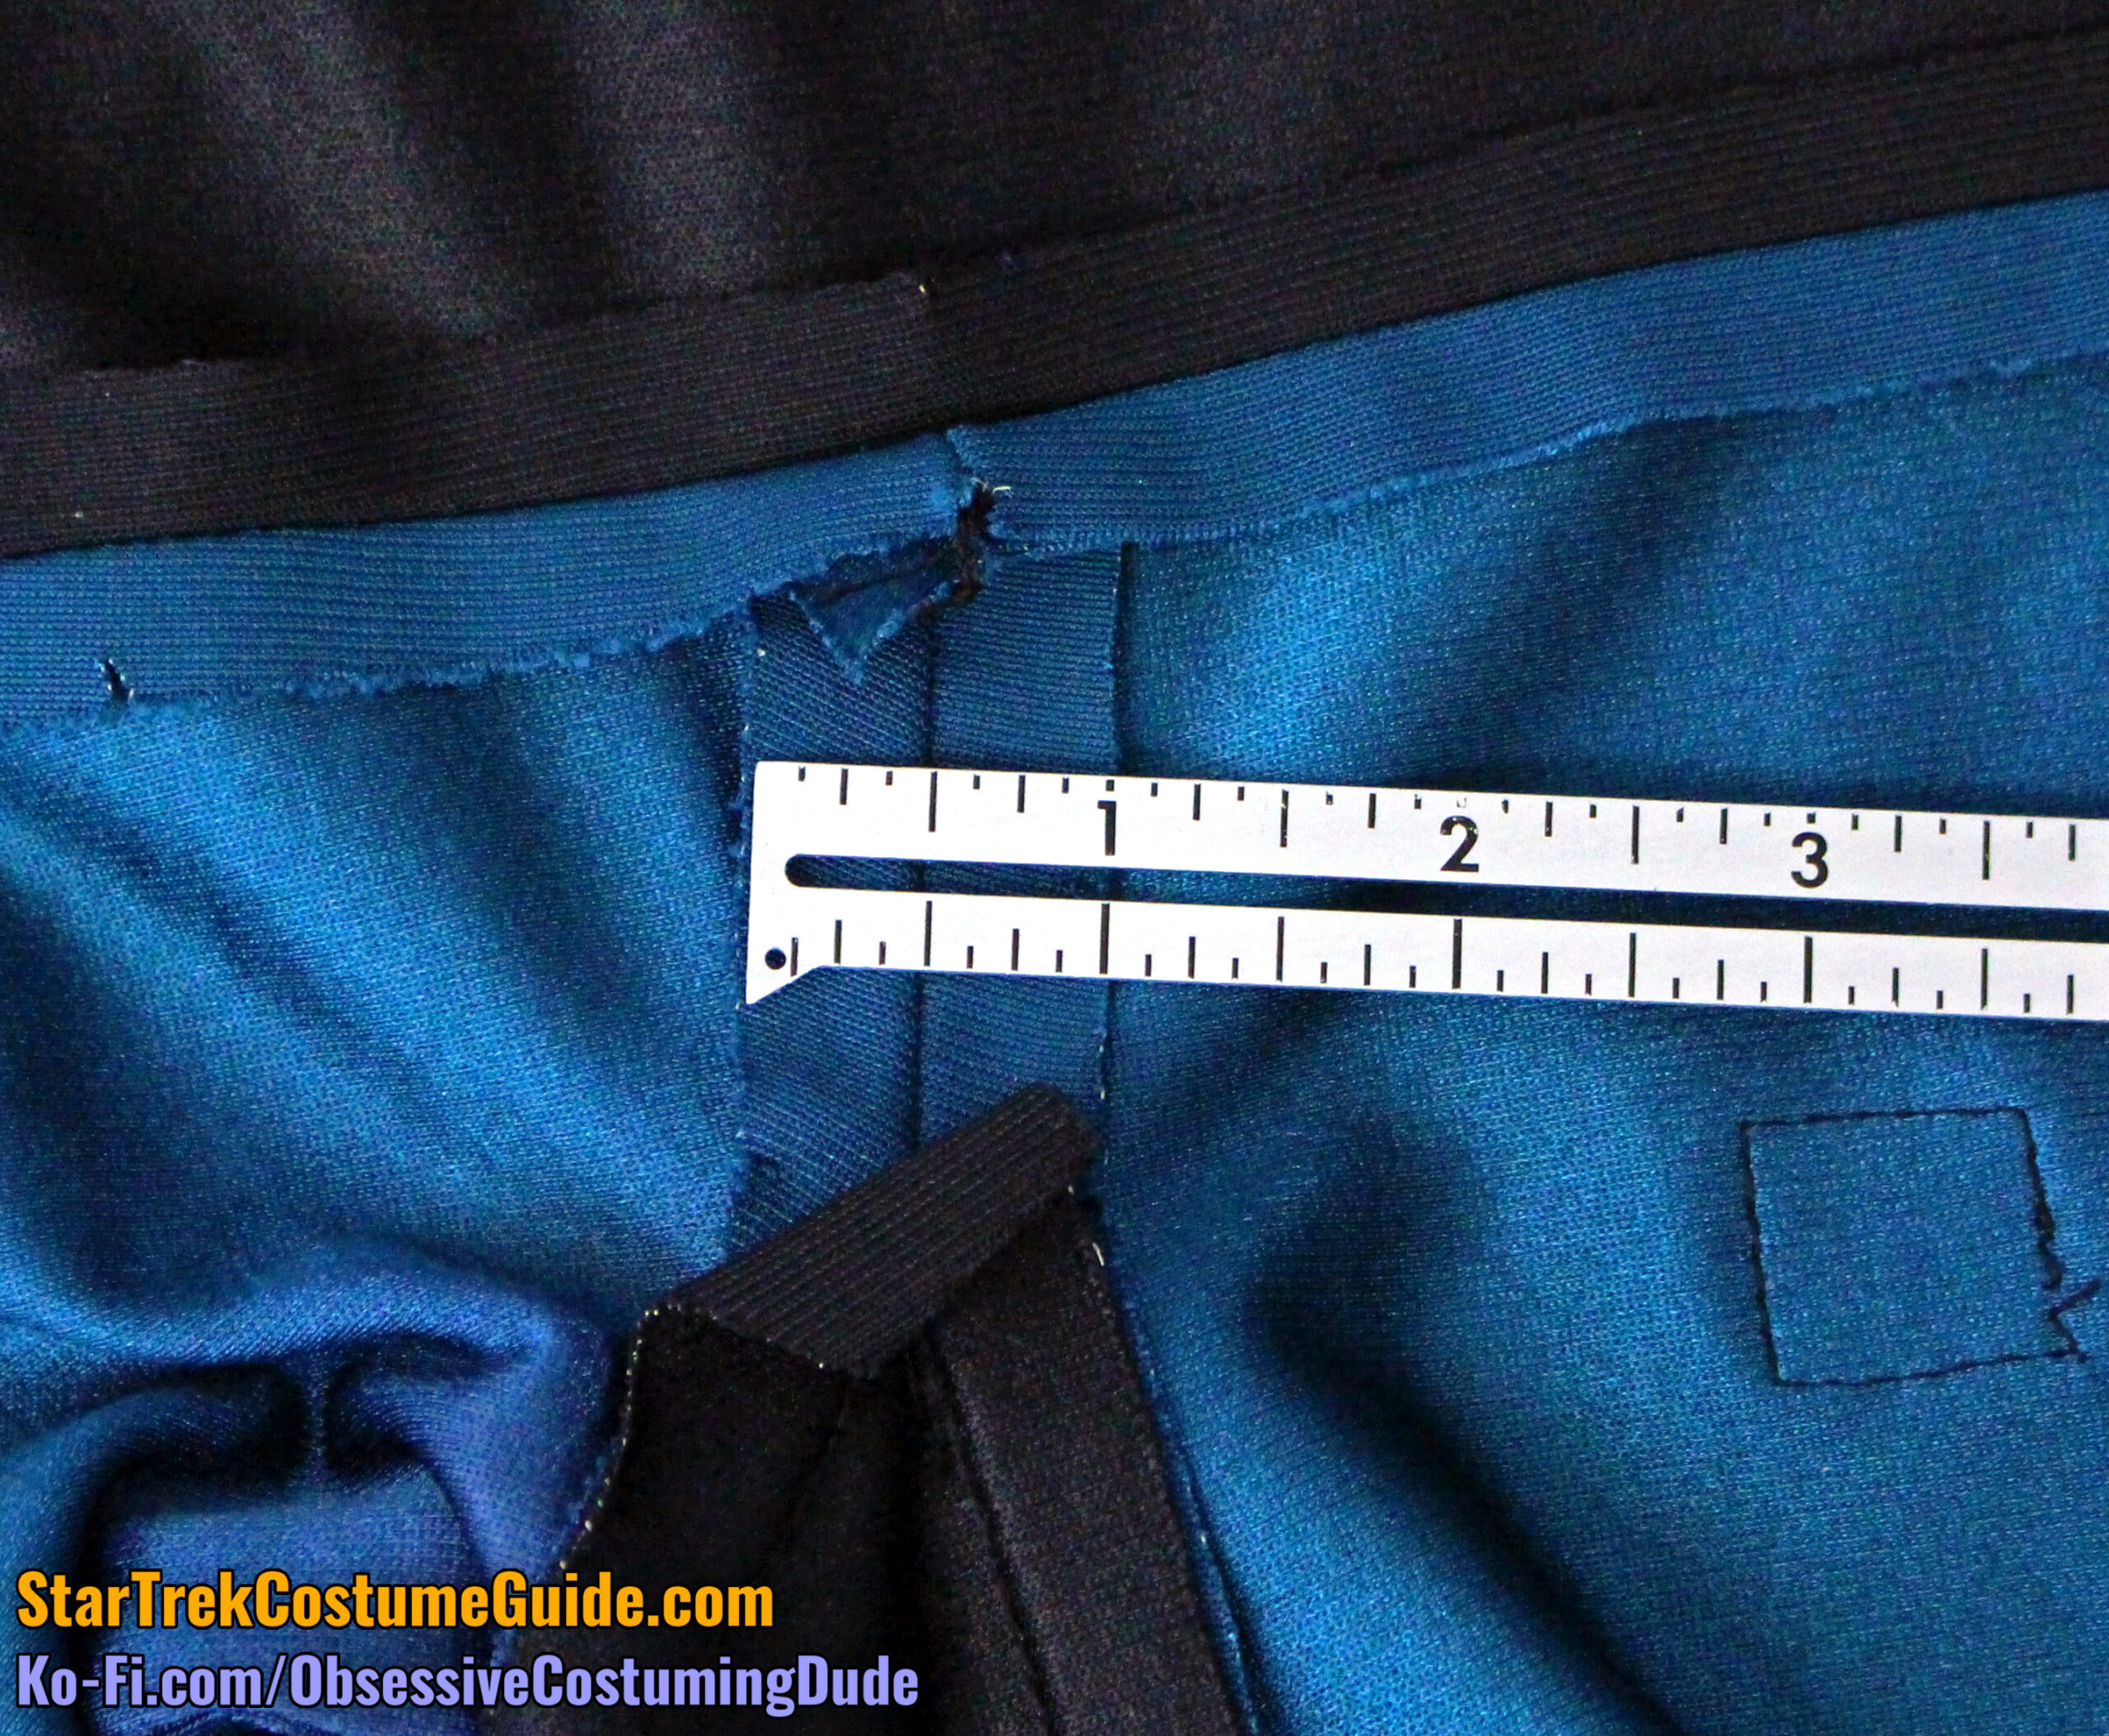
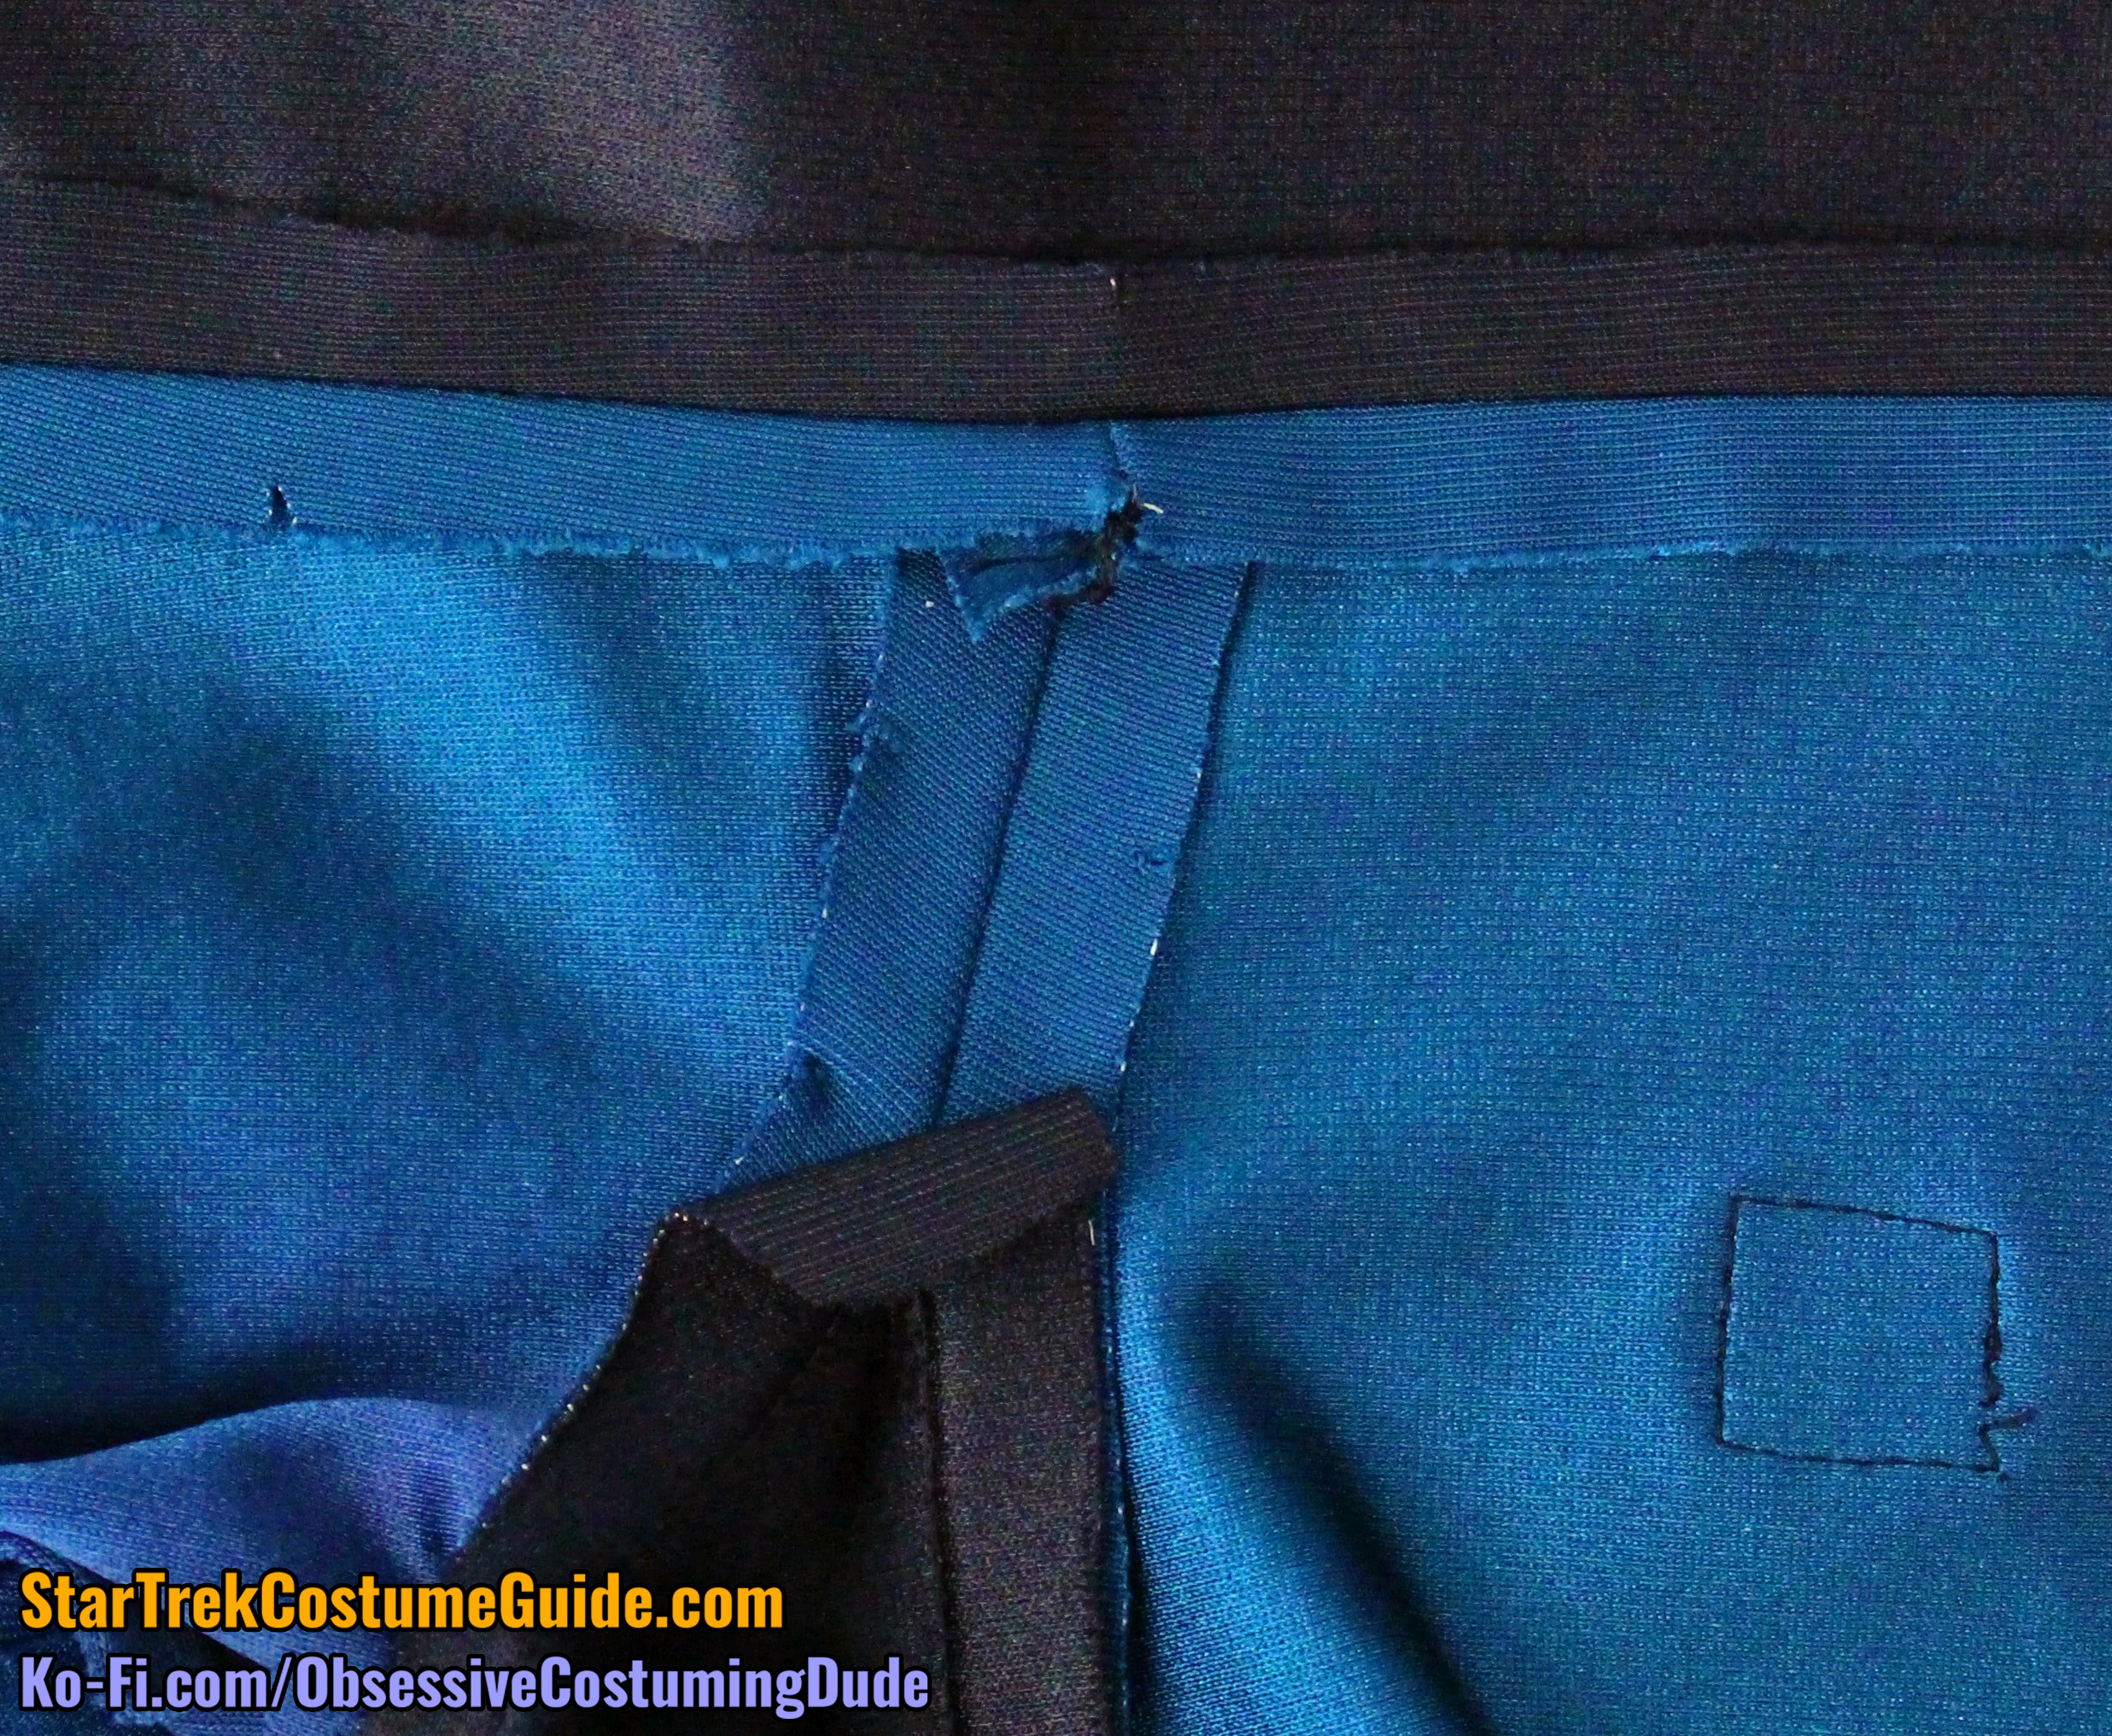
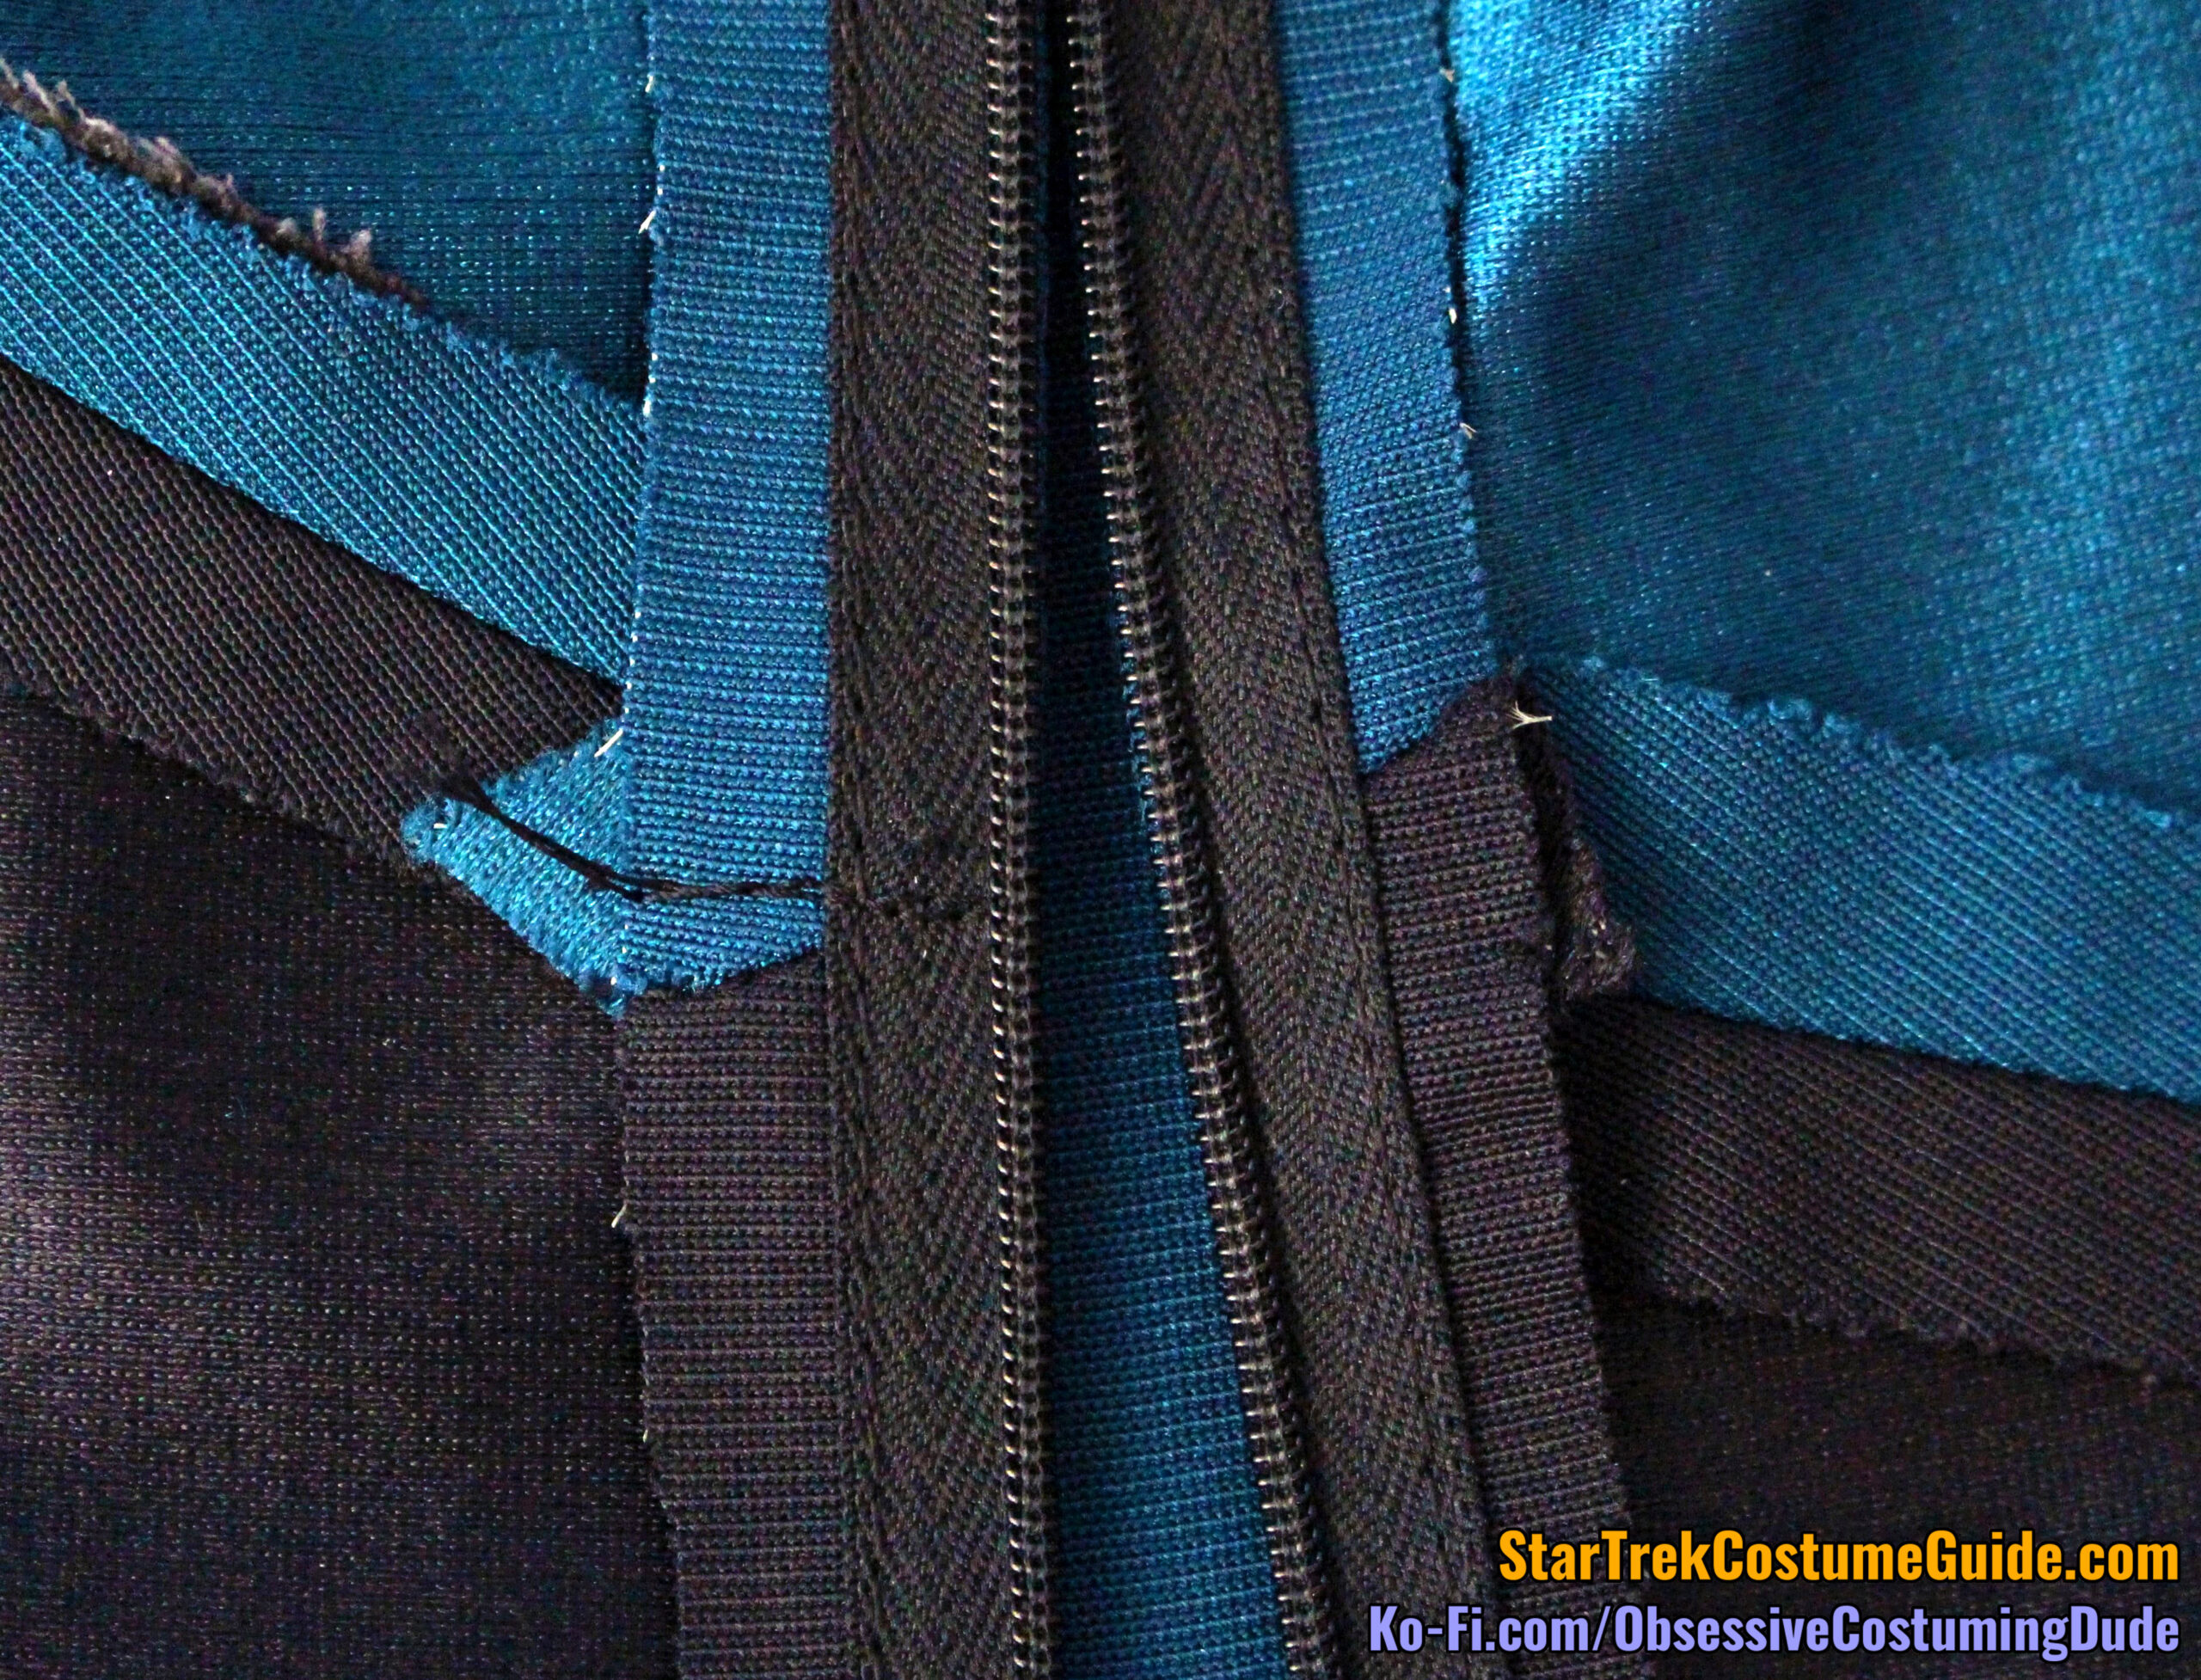
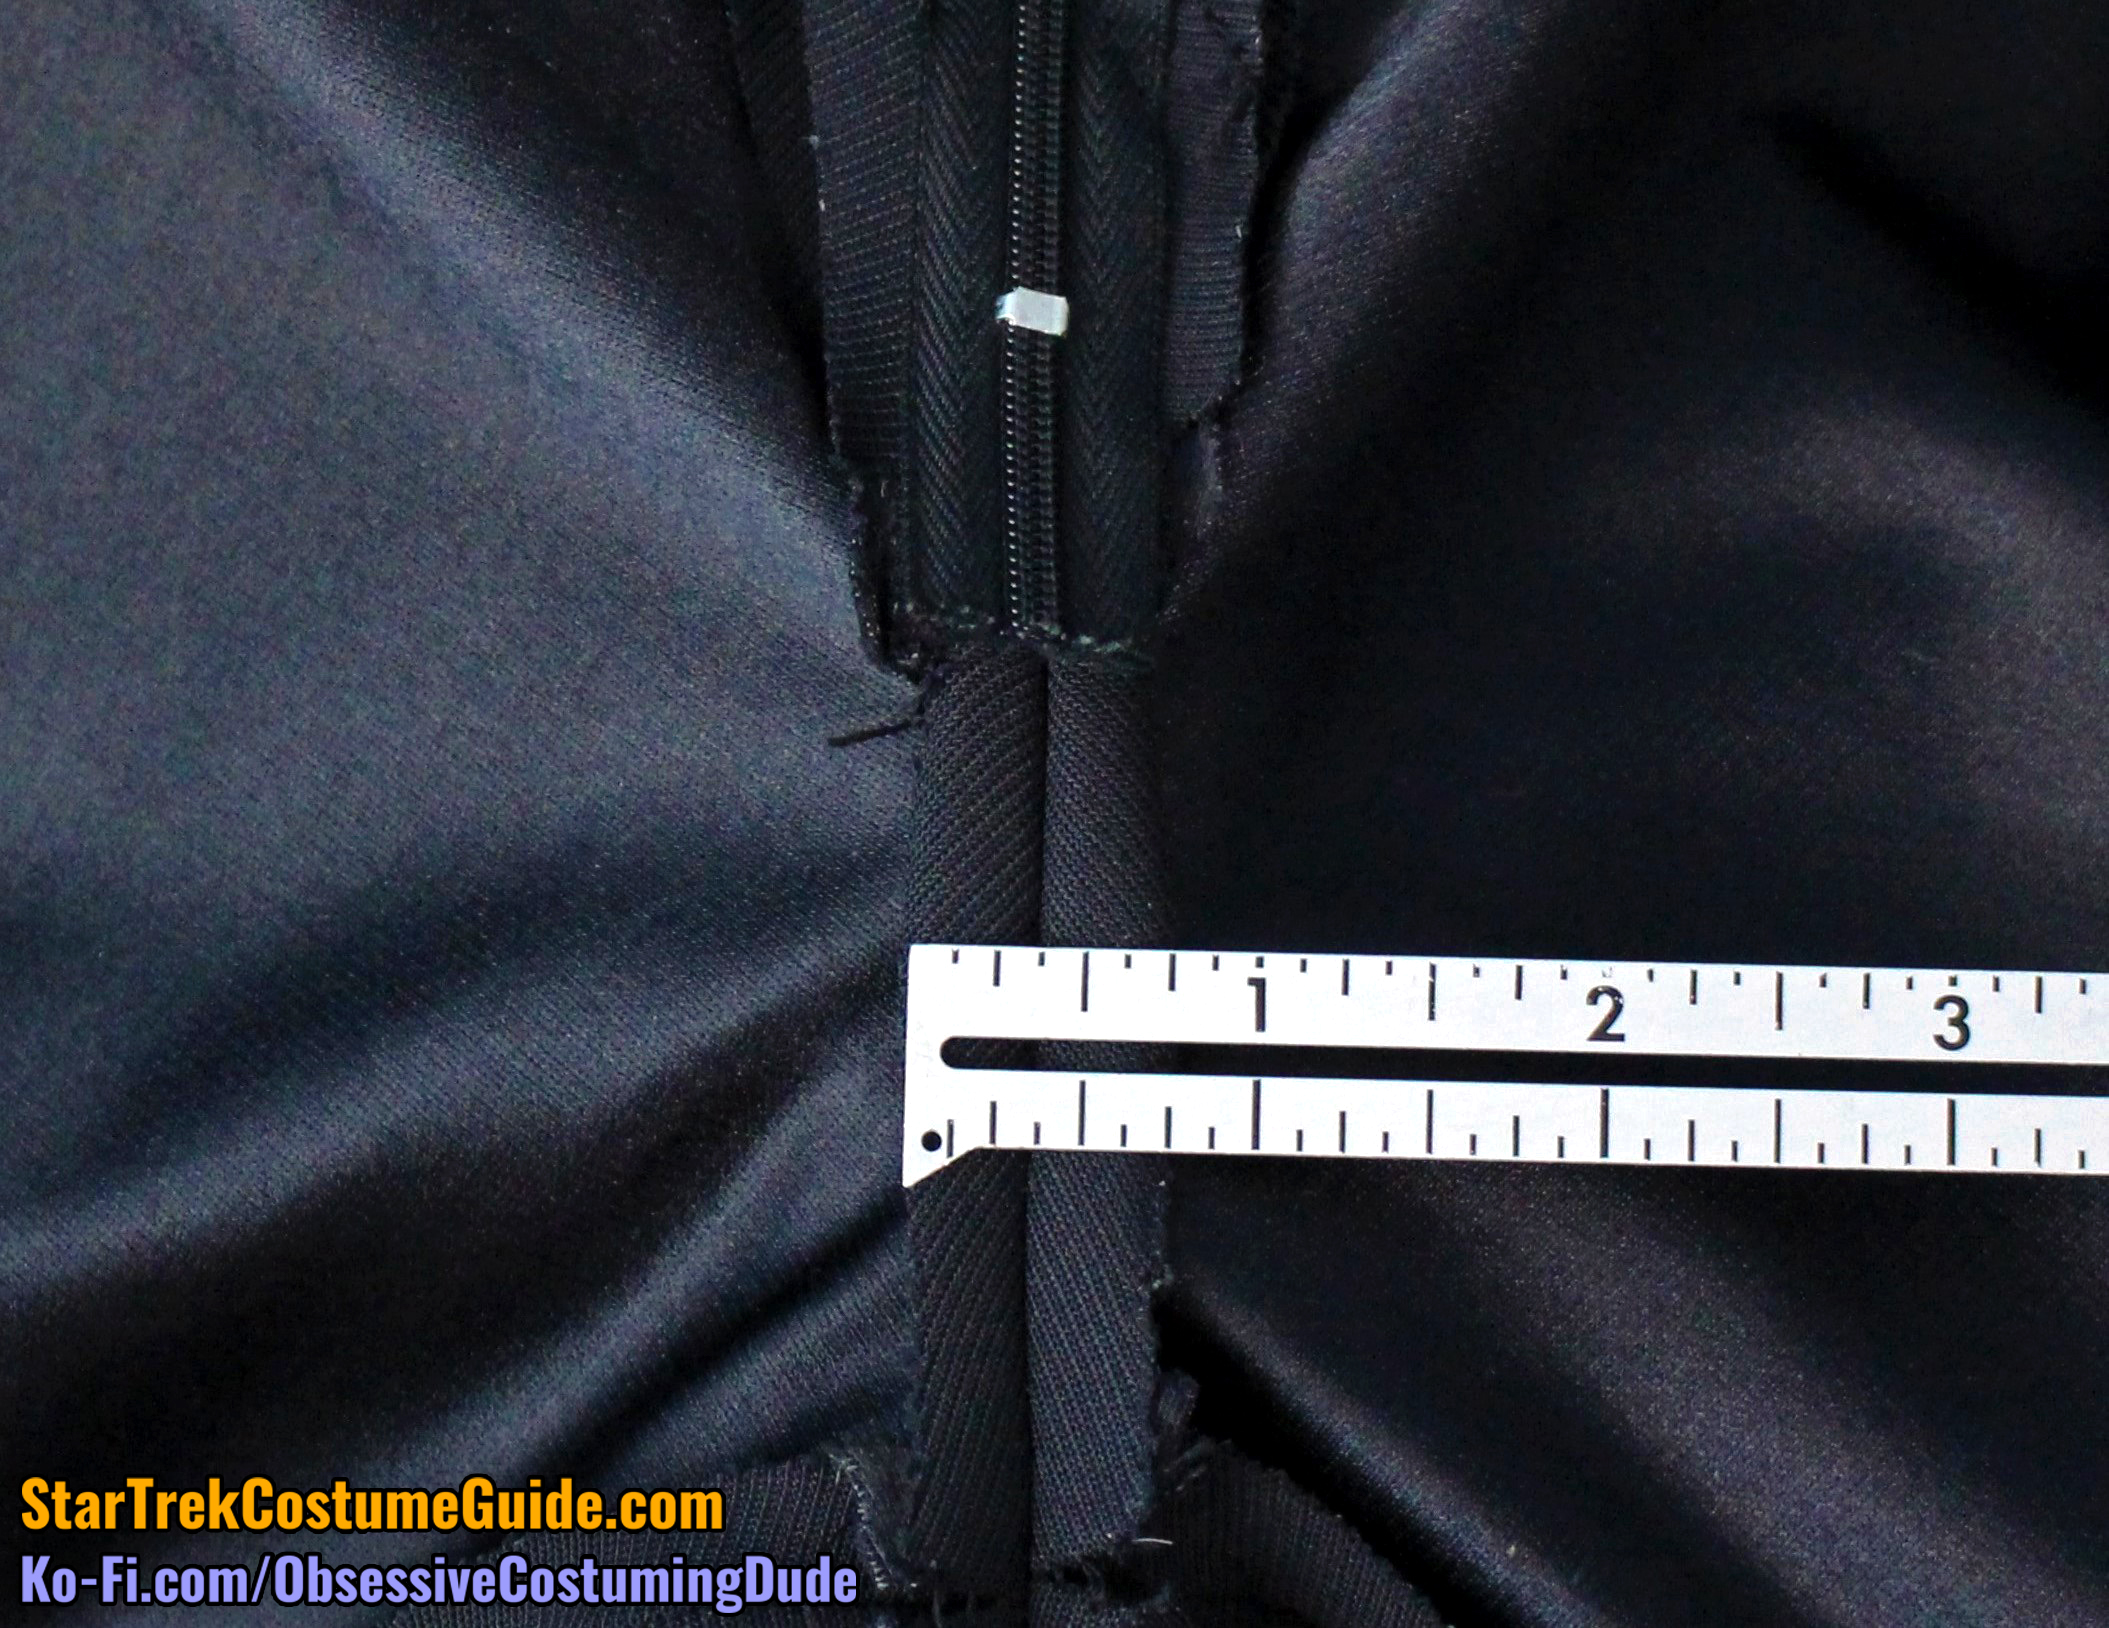
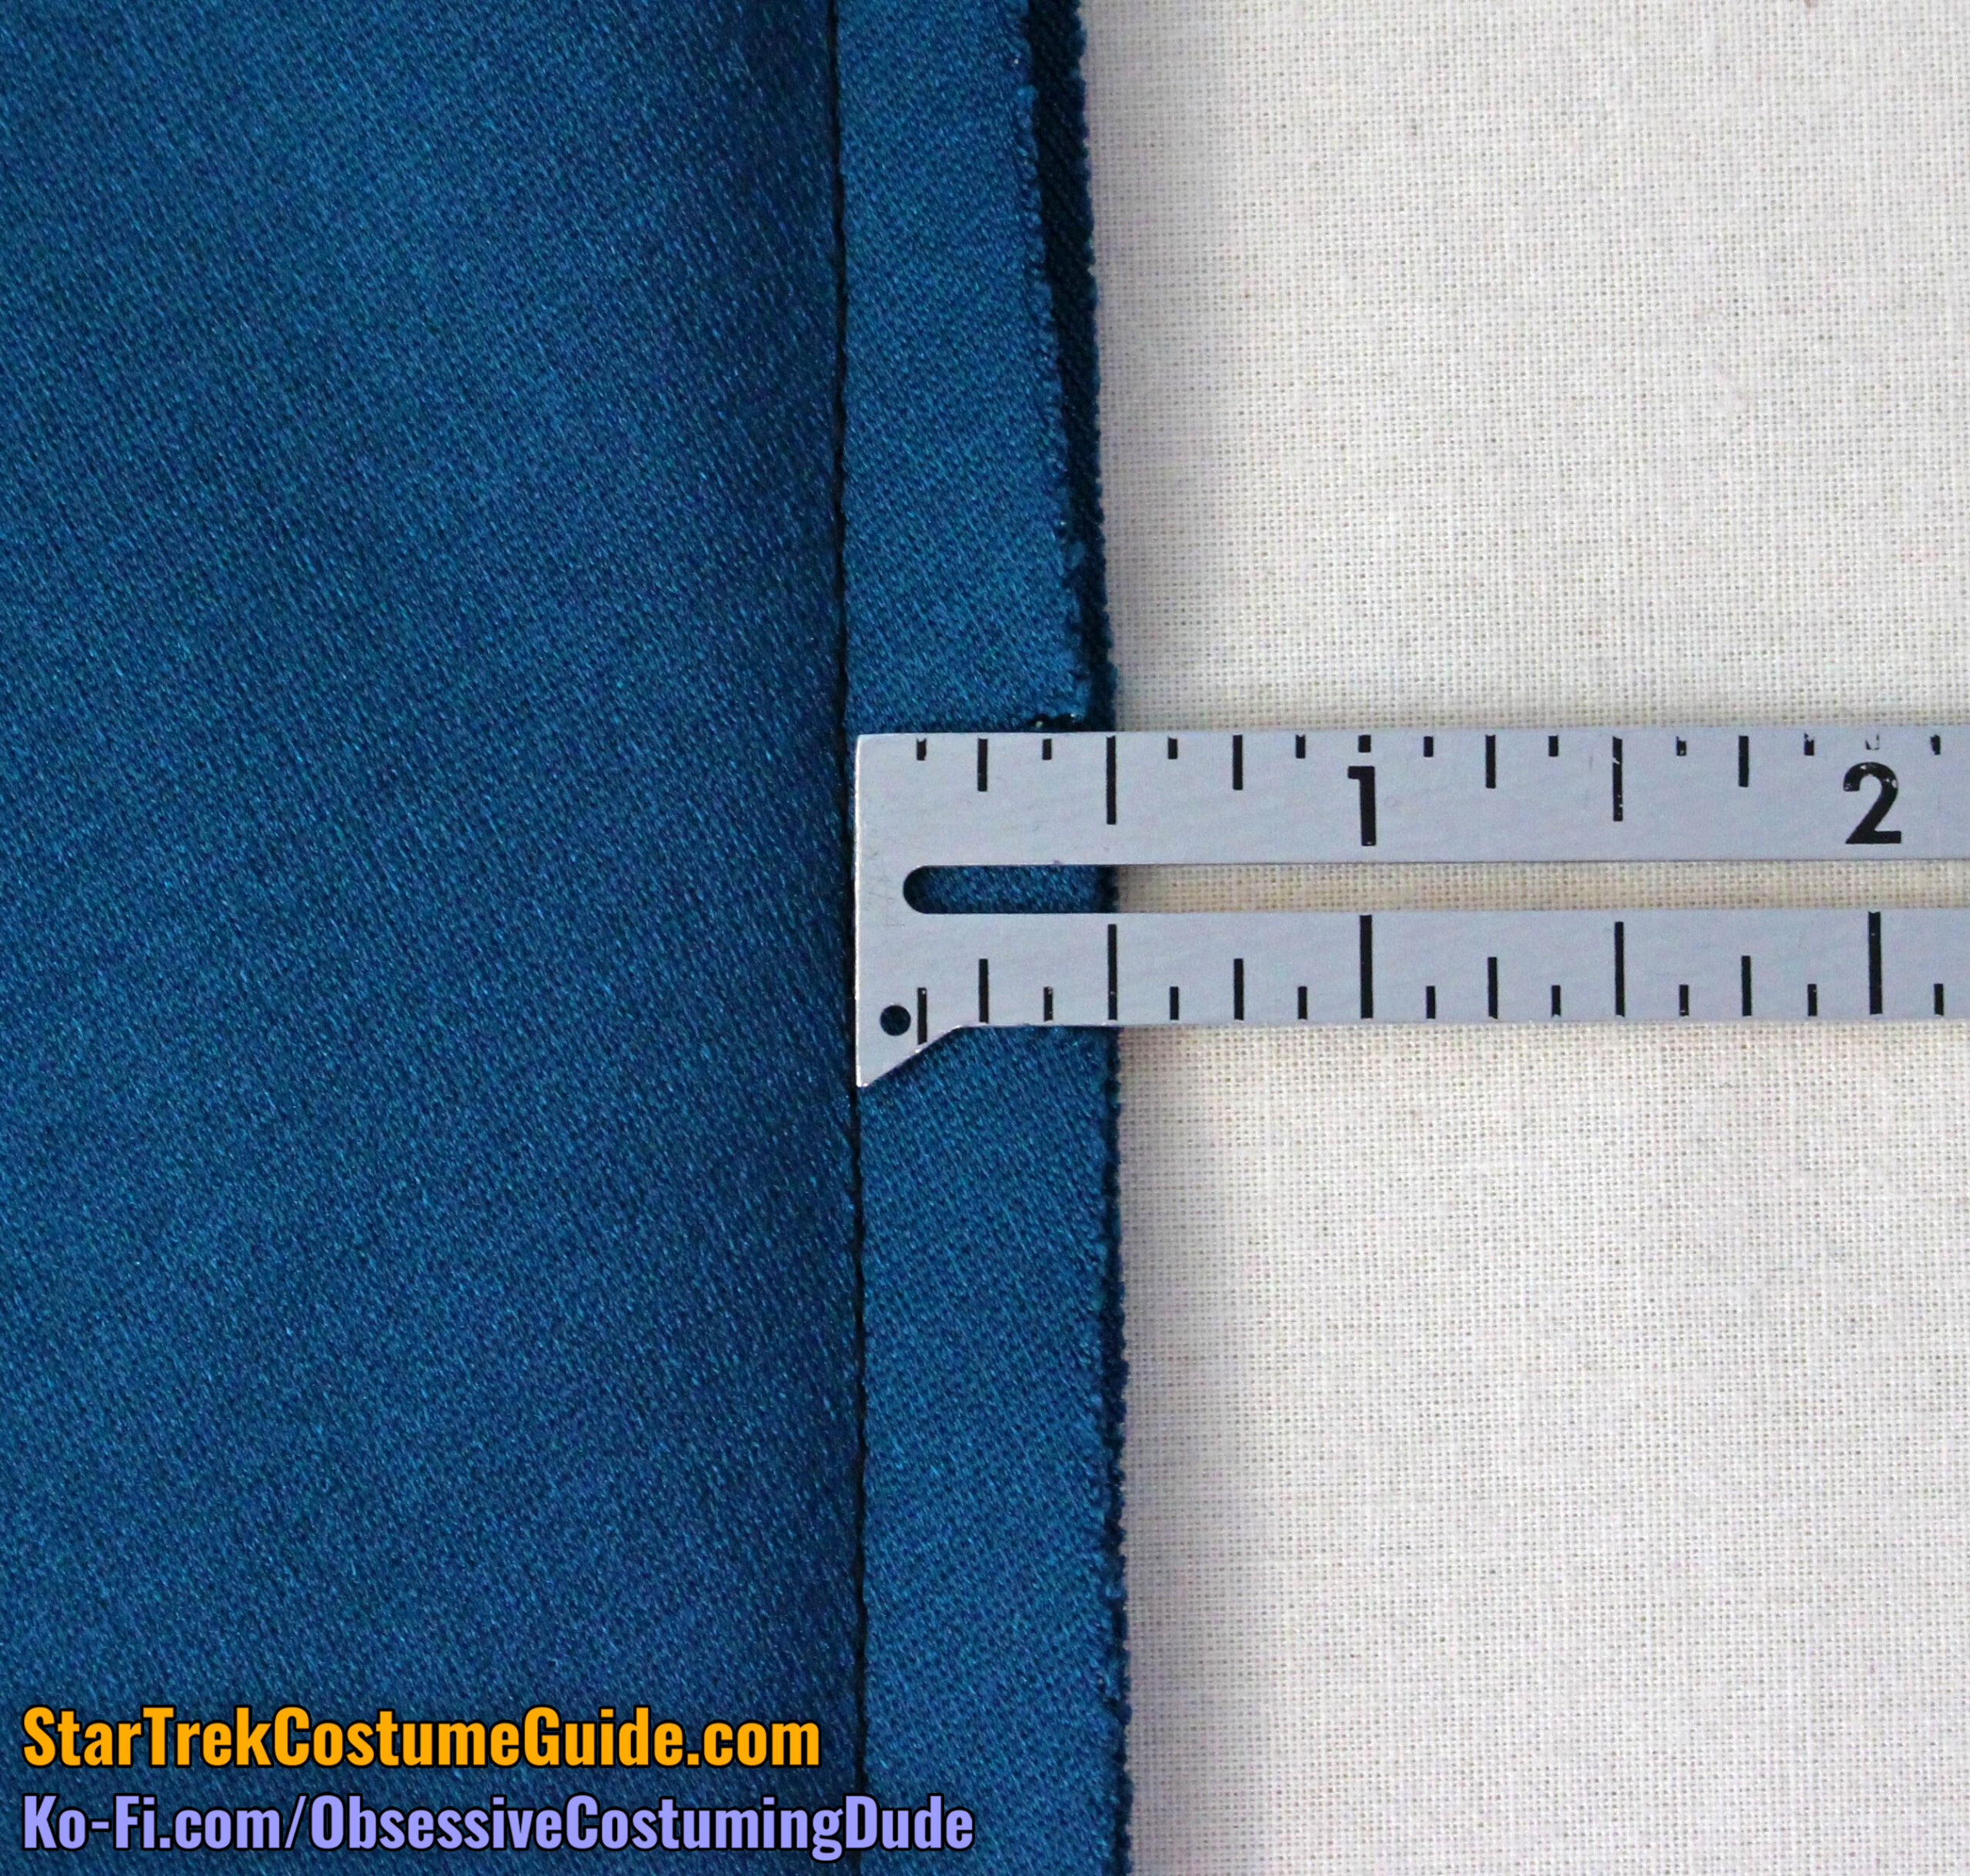
The center front/zipper seam allowance was consistently ¾”.
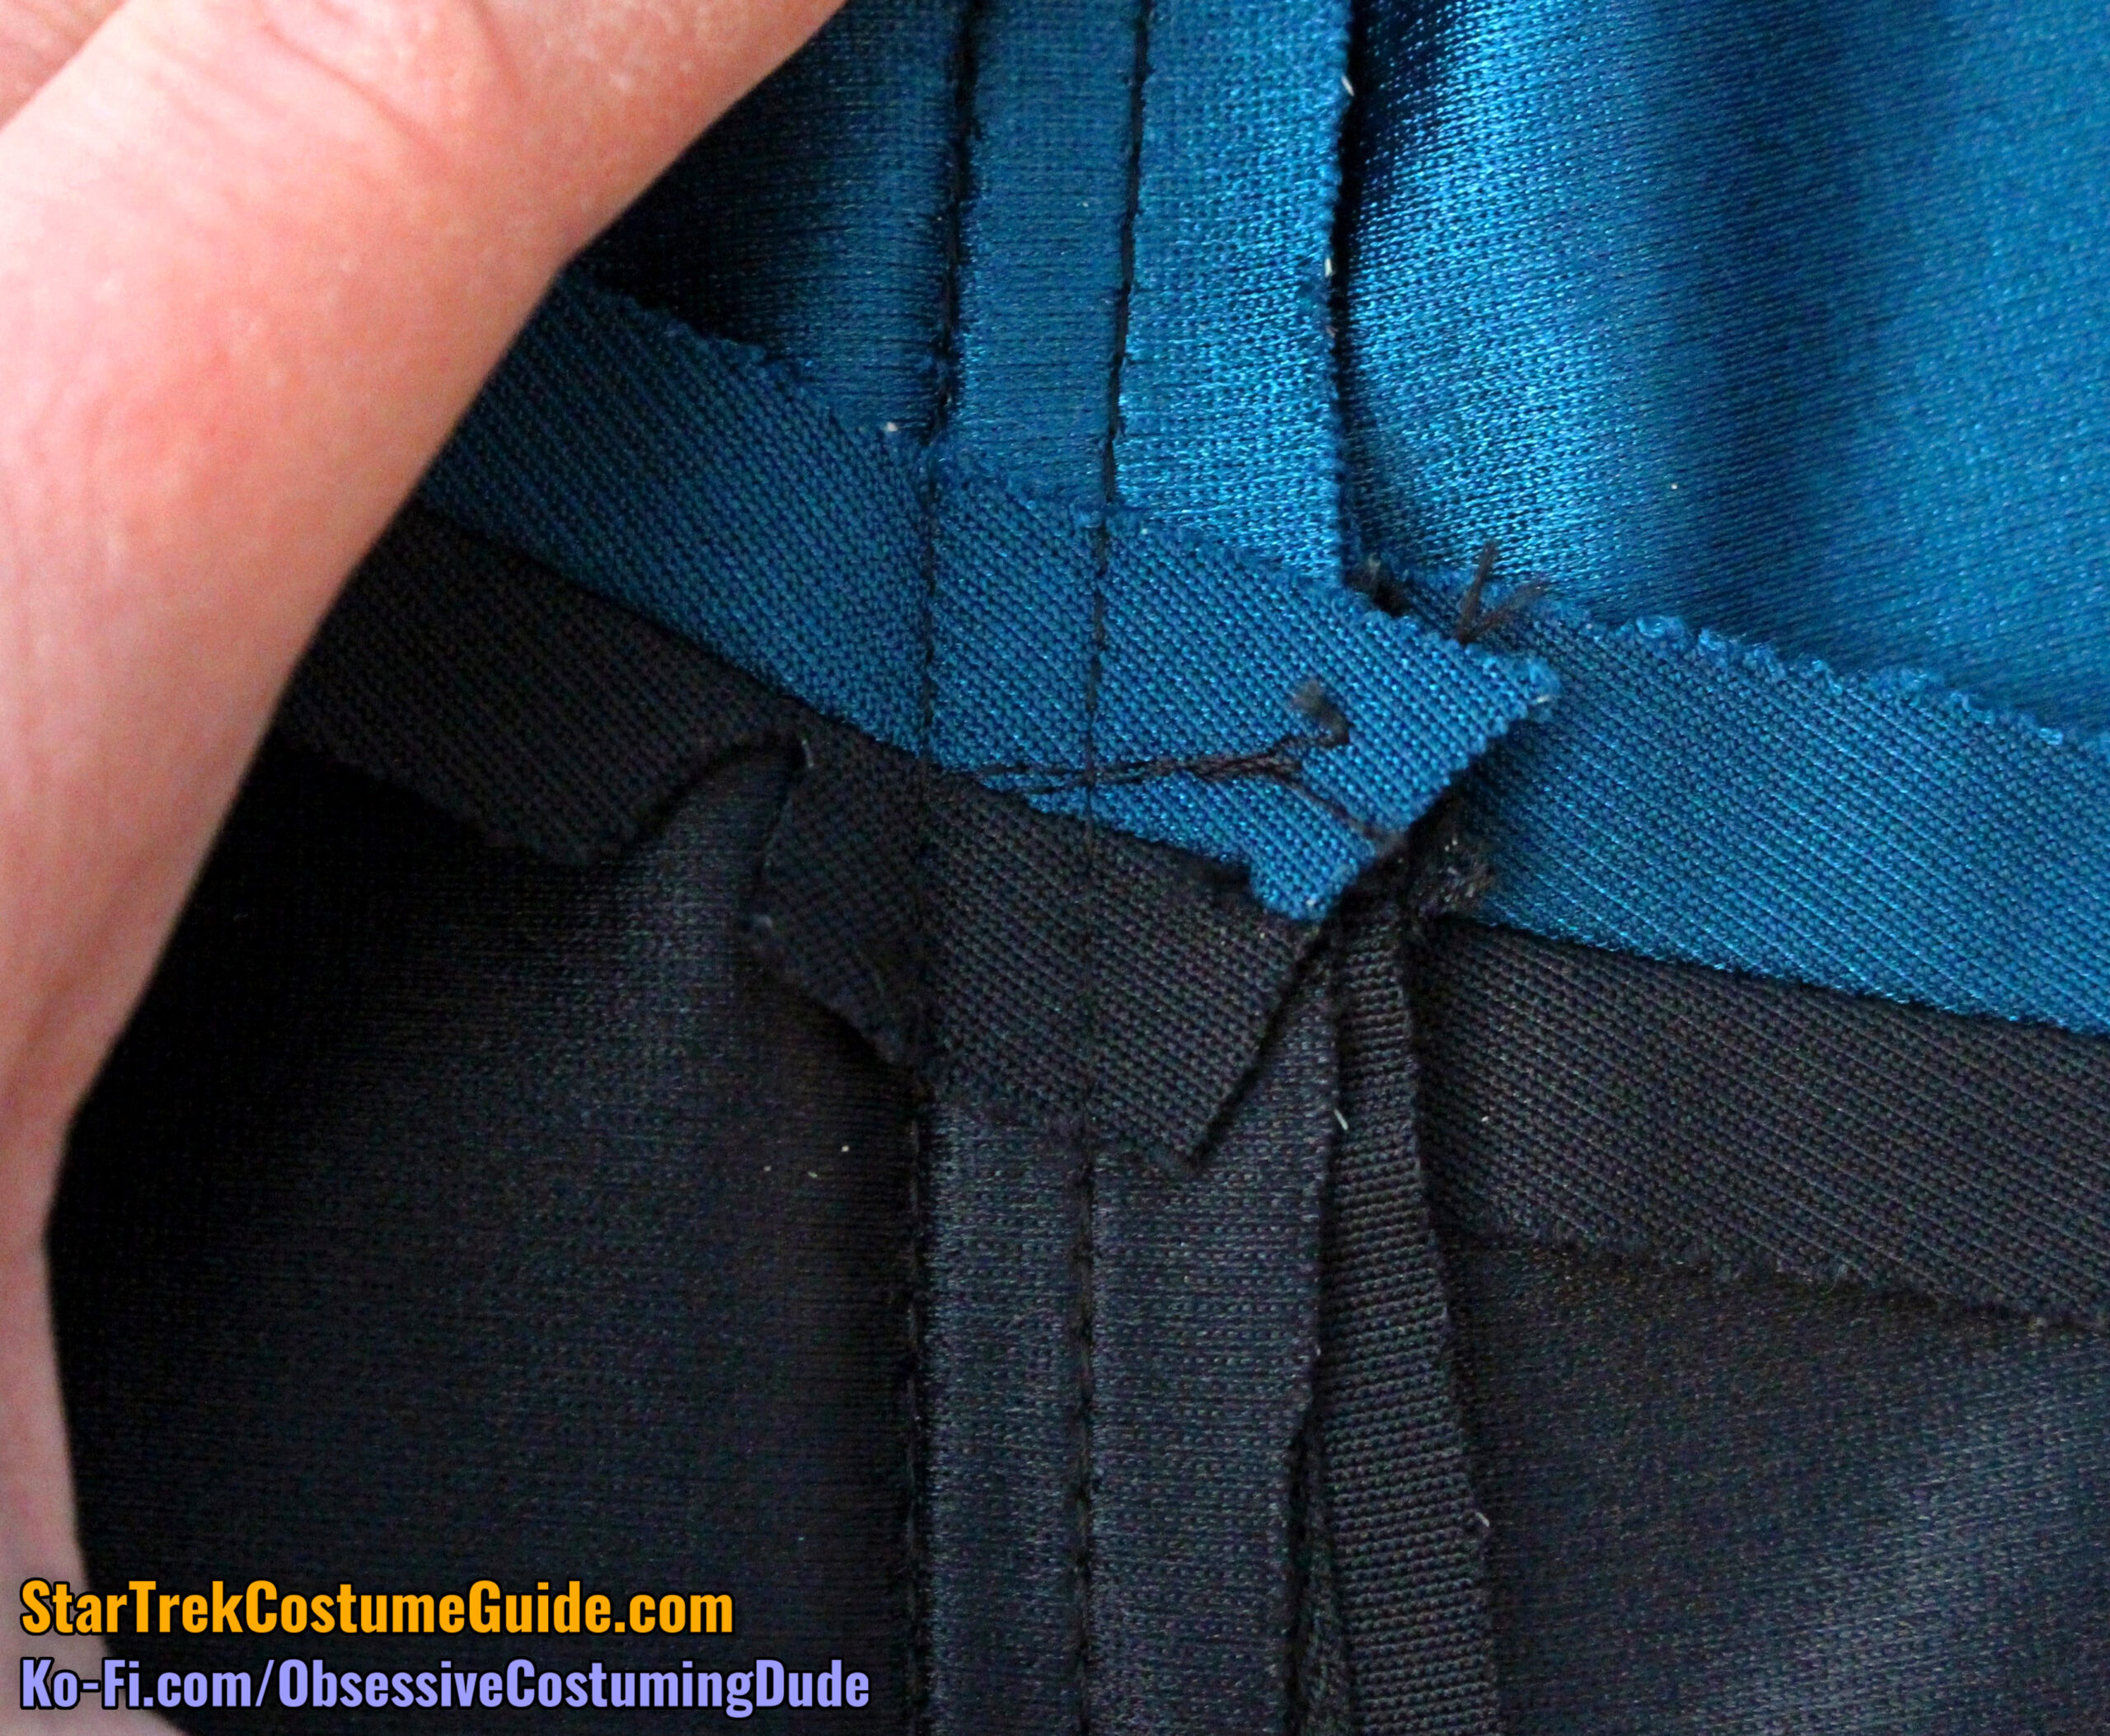
Curiously, there was a horizontal stitch across the zipper tape and seam allowances at the left waist, but not the right … I have no idea what purpose this stitch serves (if any), or why there wasn’t a corresponding stitch on the right side of the zipper.
The zipper tape was secured with an additional row of stitching, and the lower waist seam allowances were clipped just past the (proper) zipper stitching.
Beneath the zipper, the front crotch seam allowances were ⅜”.
As usual, both the side front and side back seam allowances changed directions; they were mostly pressed toward the front and back body panels, respectively, but toward the bottom they were pressed (and sewn into the waist seam) open.
The side back seam allowance was actually clipped, a bit above the waist seam.
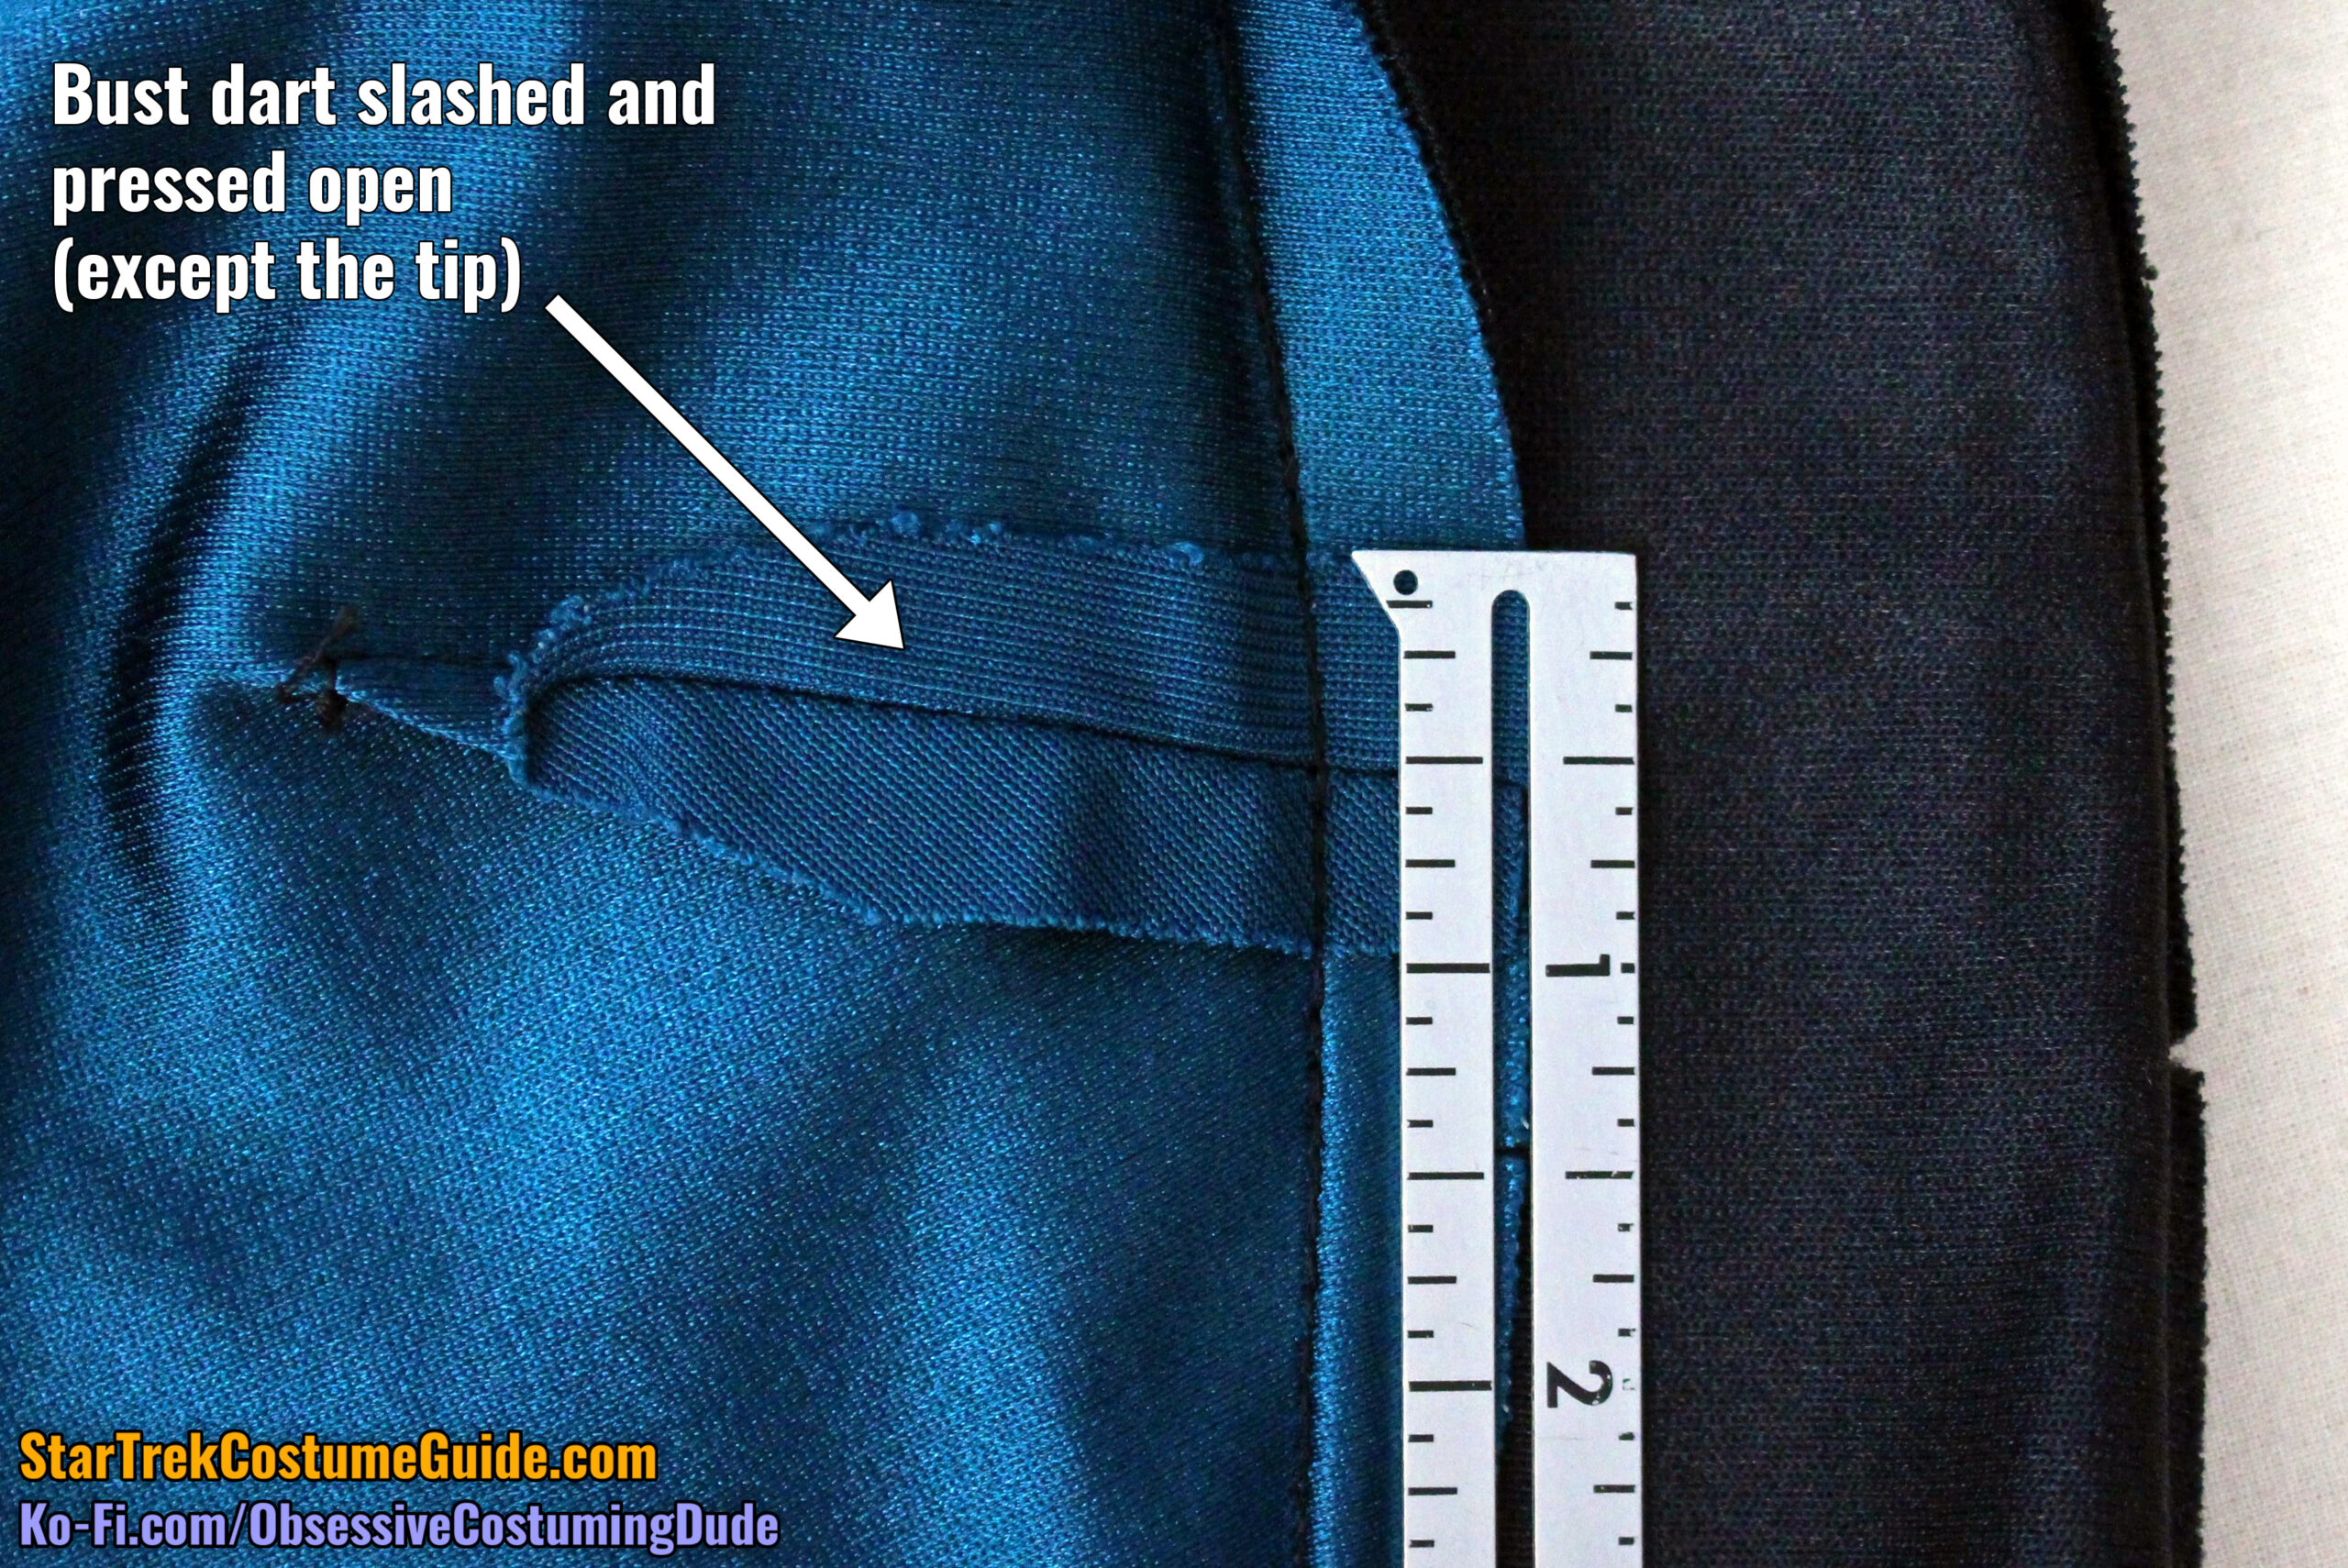
The bust darts were 1” tall and 2 ½” long.
Like on the Ensign Sito uniform I examined, the bust darts were slashed open (except for the tip).
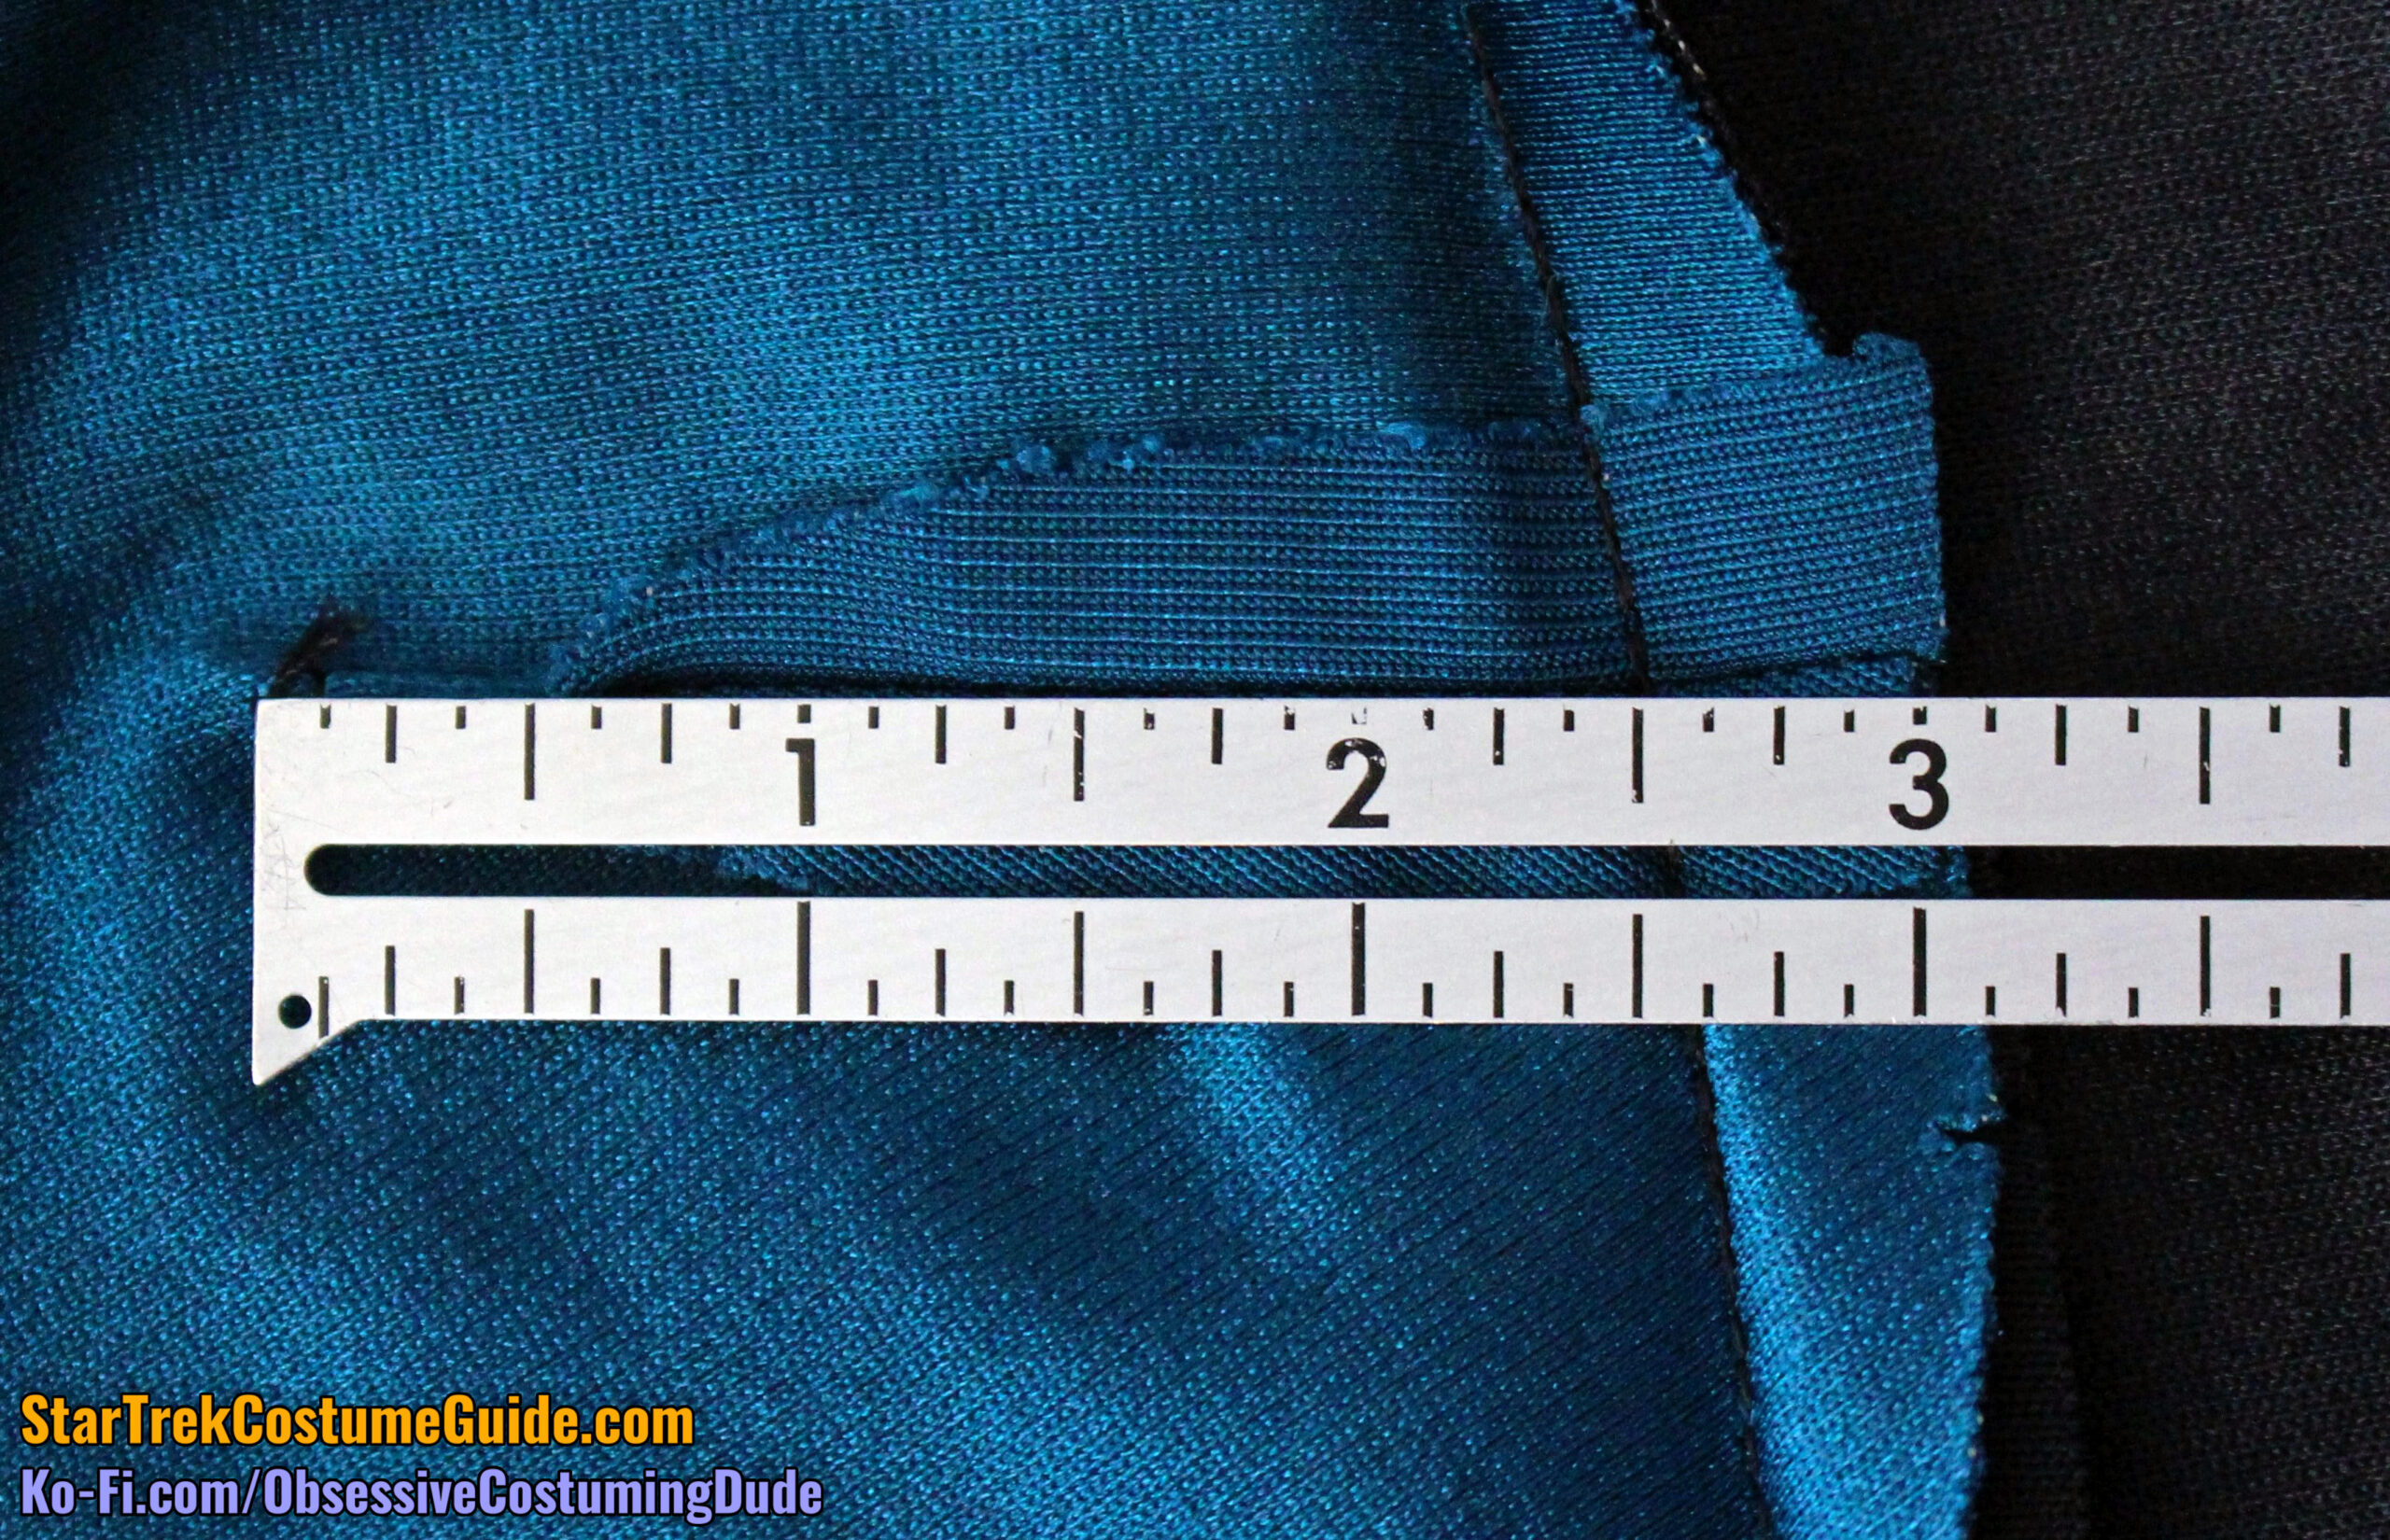
The waist seam allowances on this jumpsuit were also handled differently than on either of the two uniforms we’ve looked at previously.
(As I’ve mentioned previously, they were handled differently on nearly all of the screen-used TNG jumpsuits I examined.)
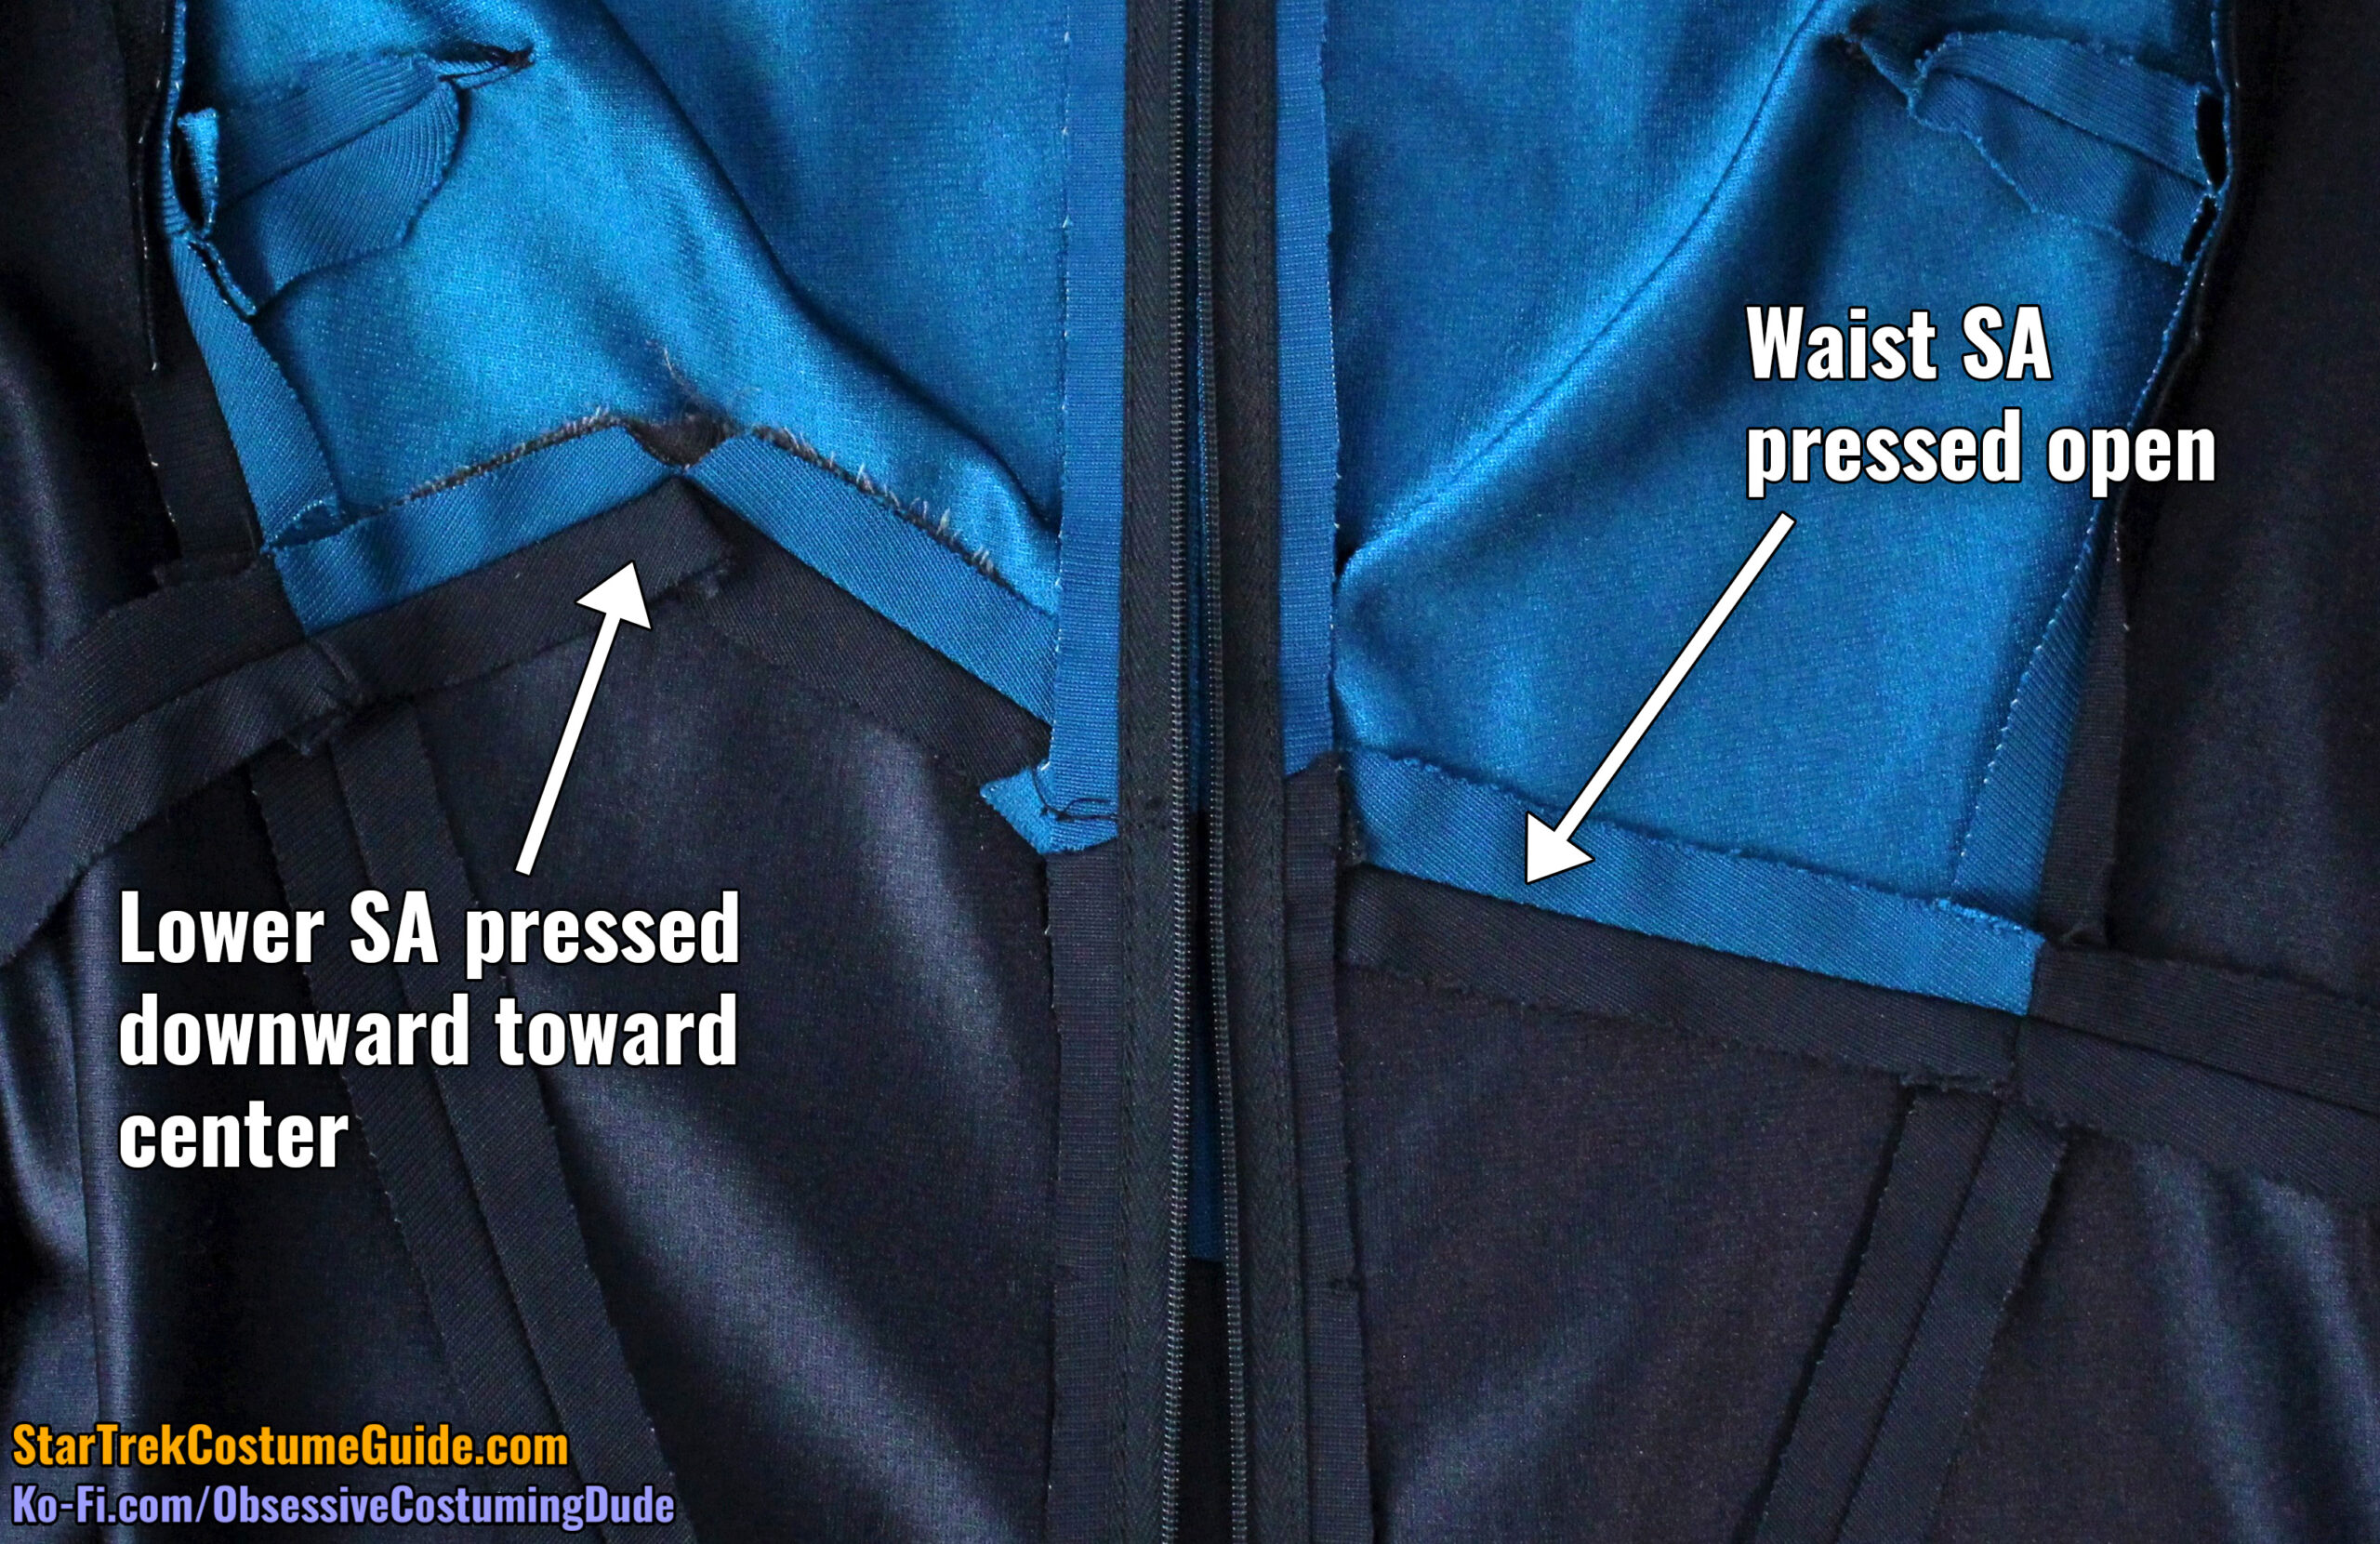
In the case of this Dr. Crusher jumpsuit, the front waist seam allowances were simply pressed open – by far the most conventional approach we’ve seen so far!
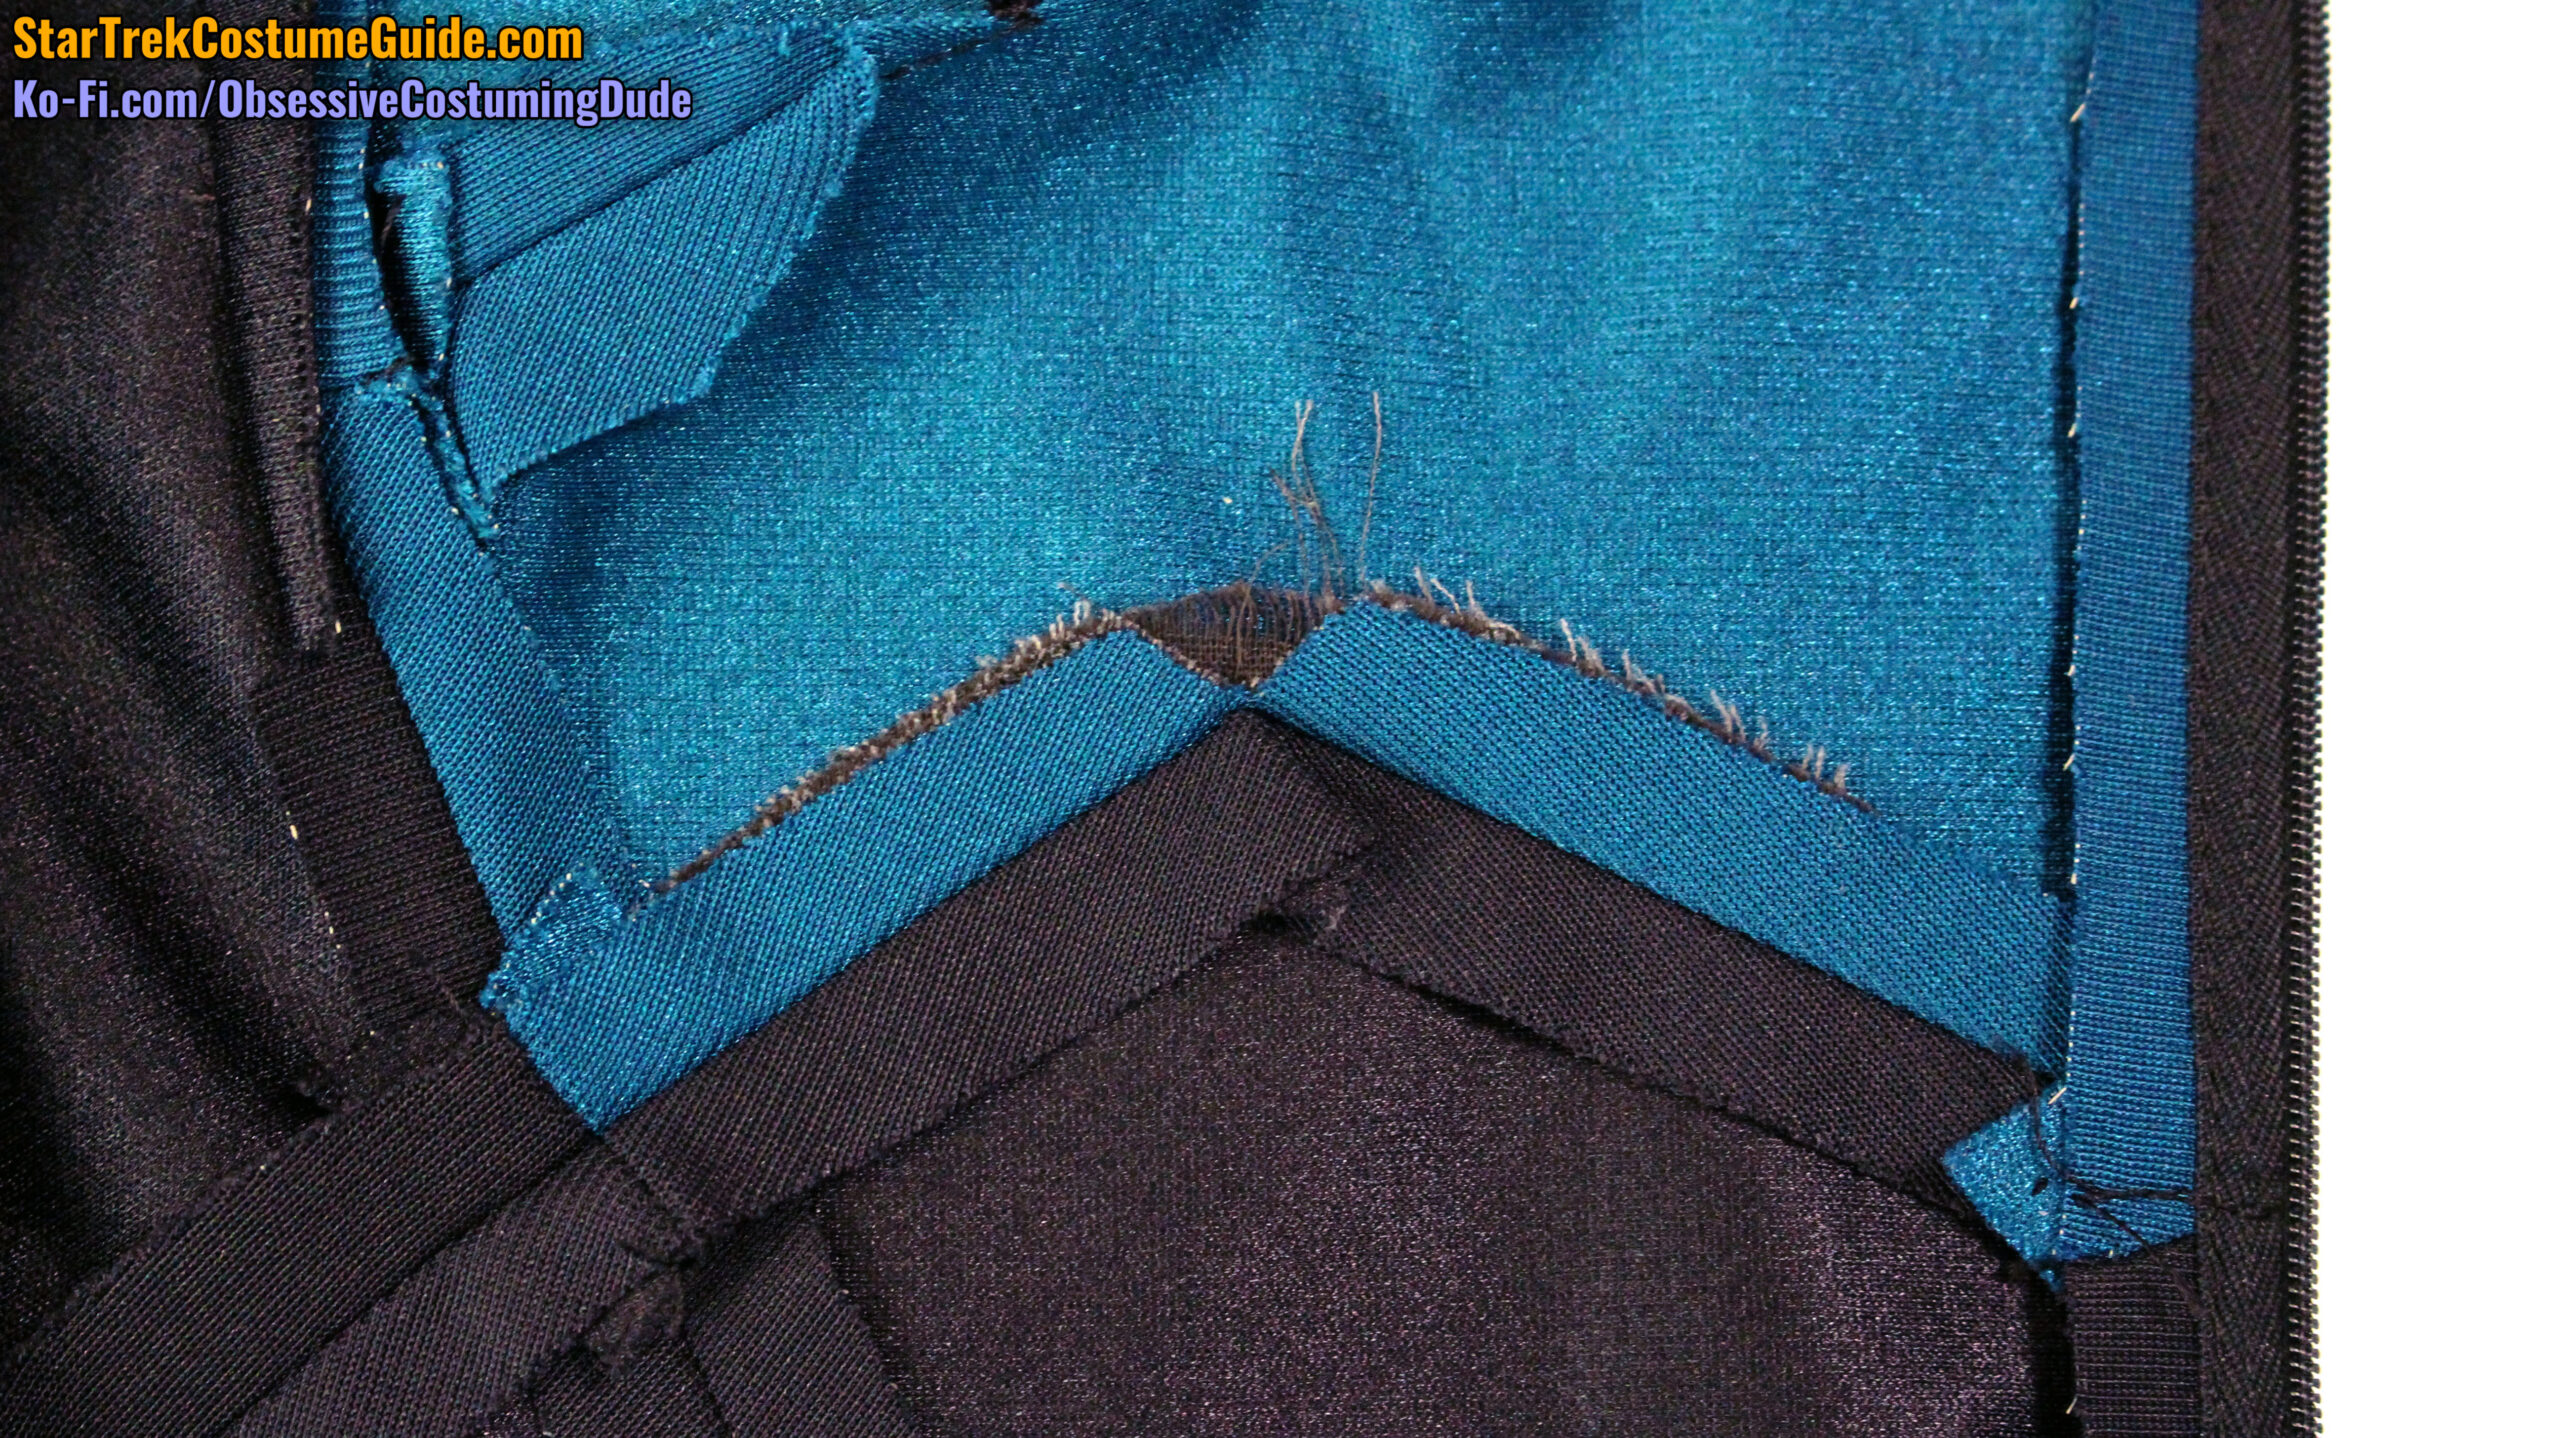
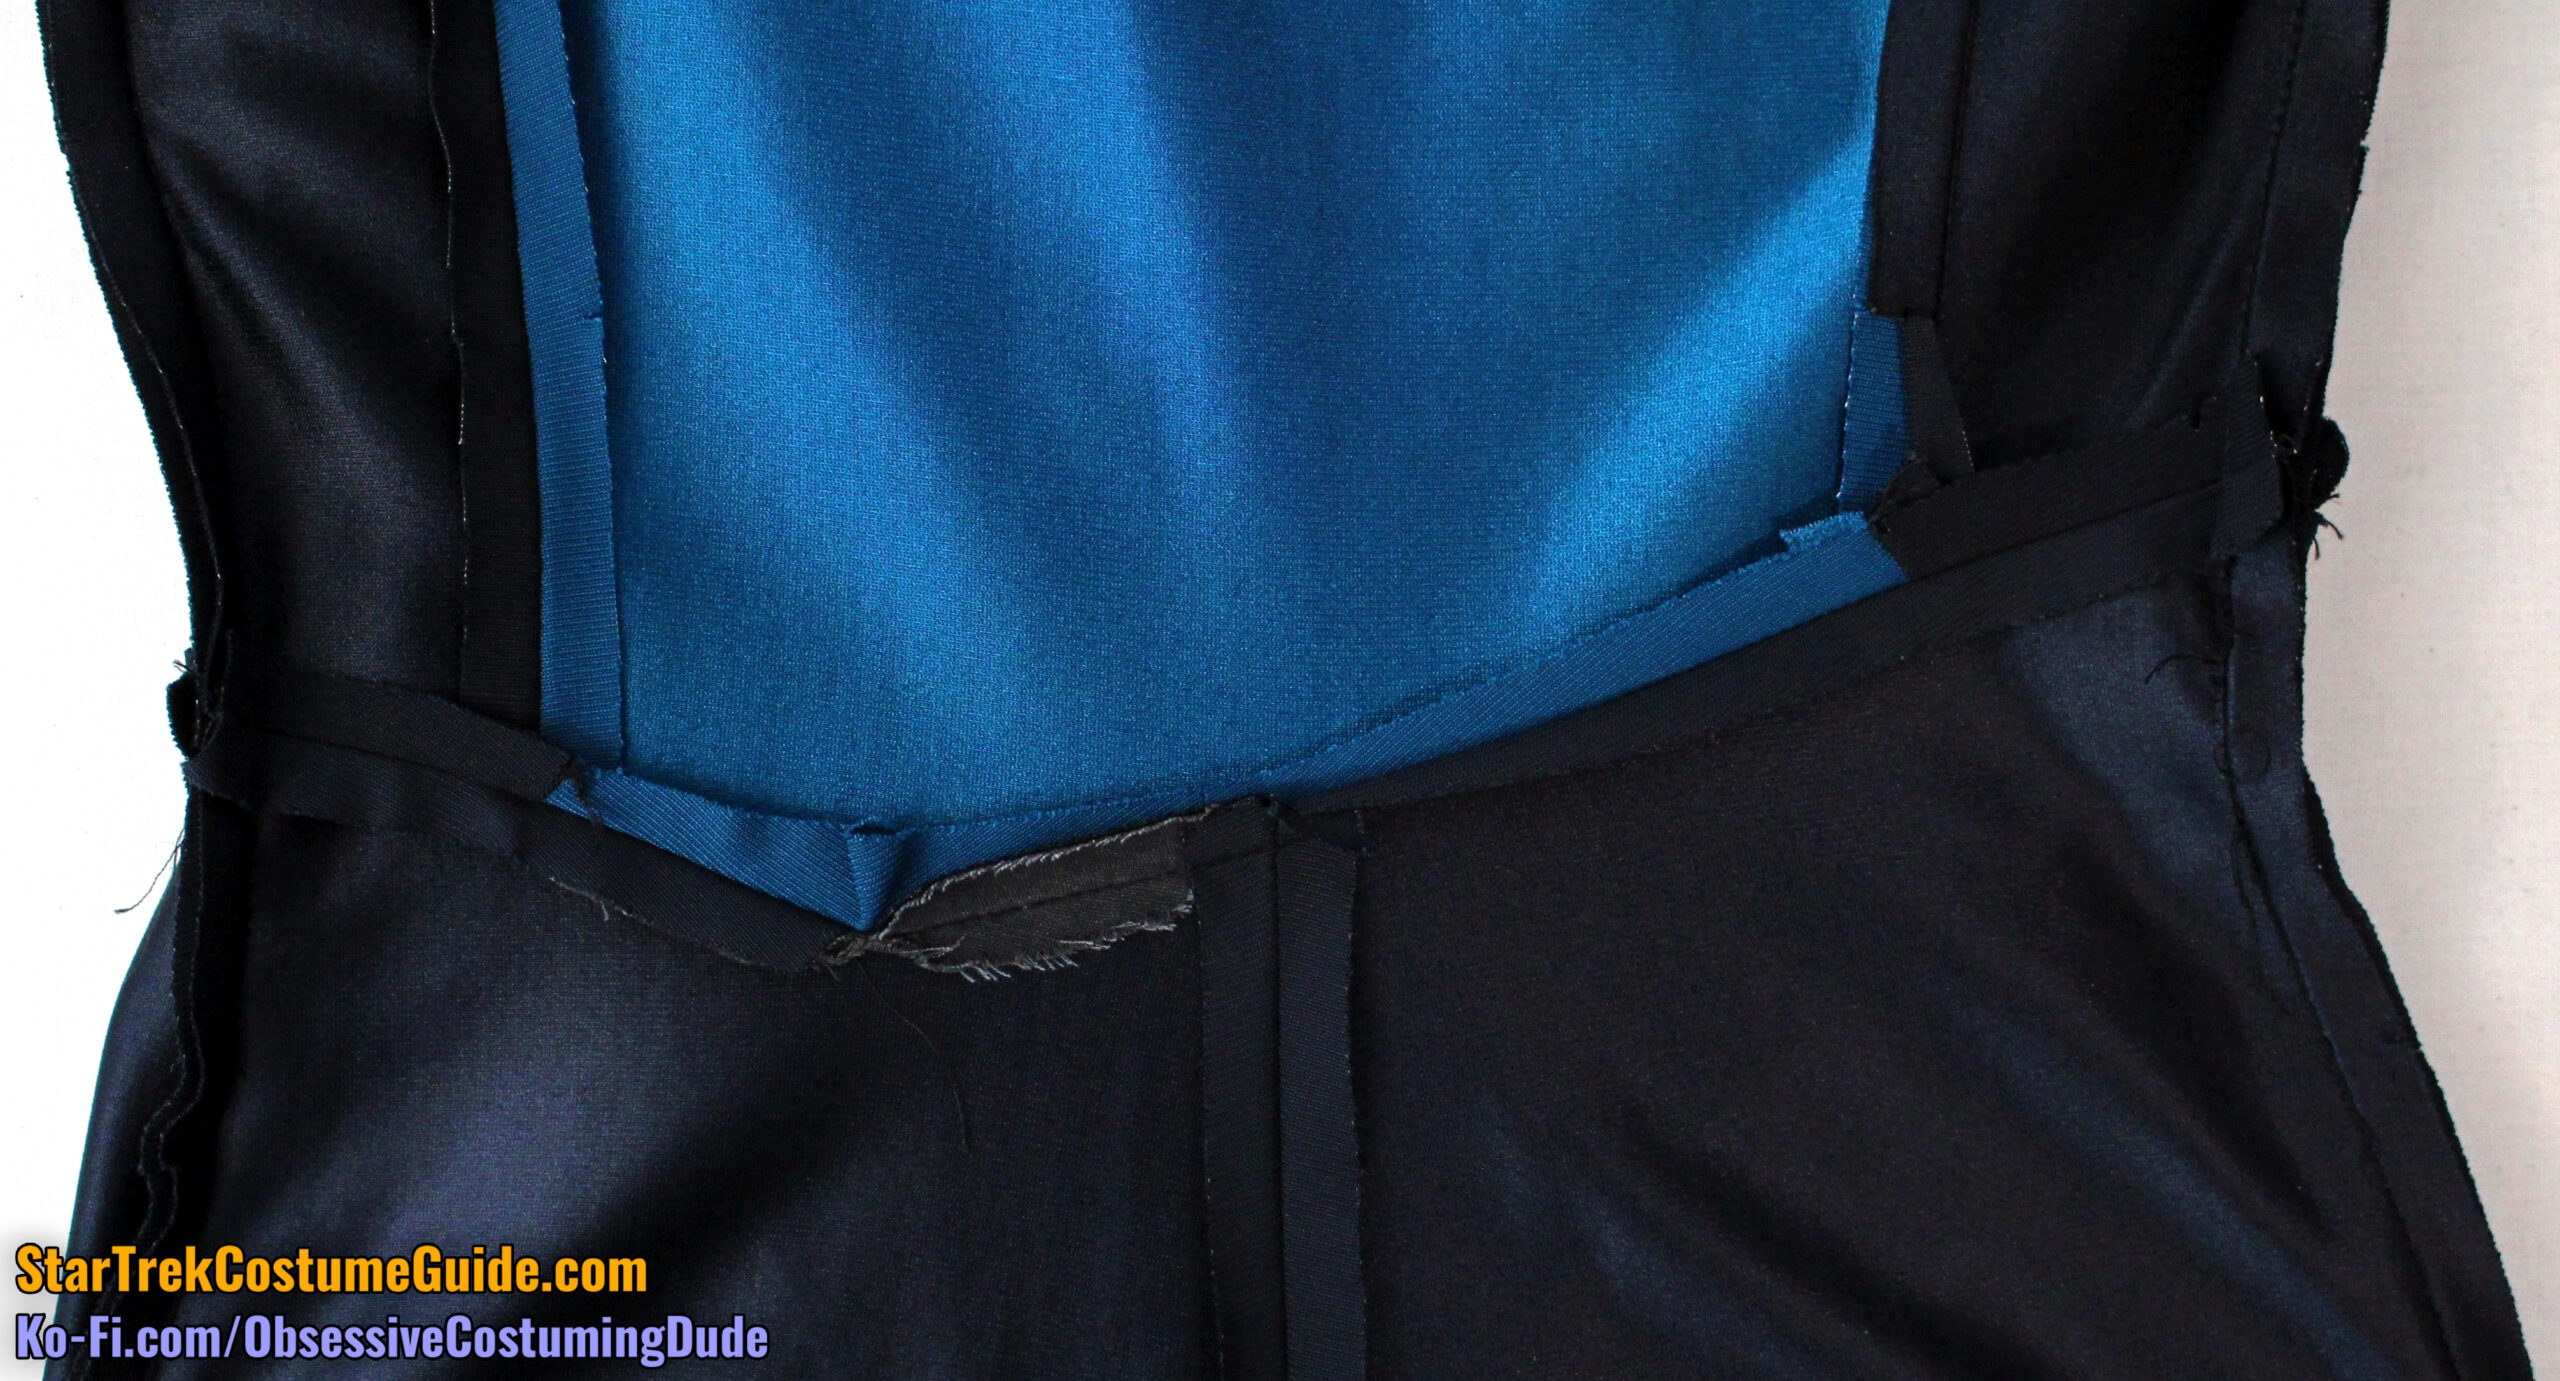
The back waist seam allowances, however, were a bit different …
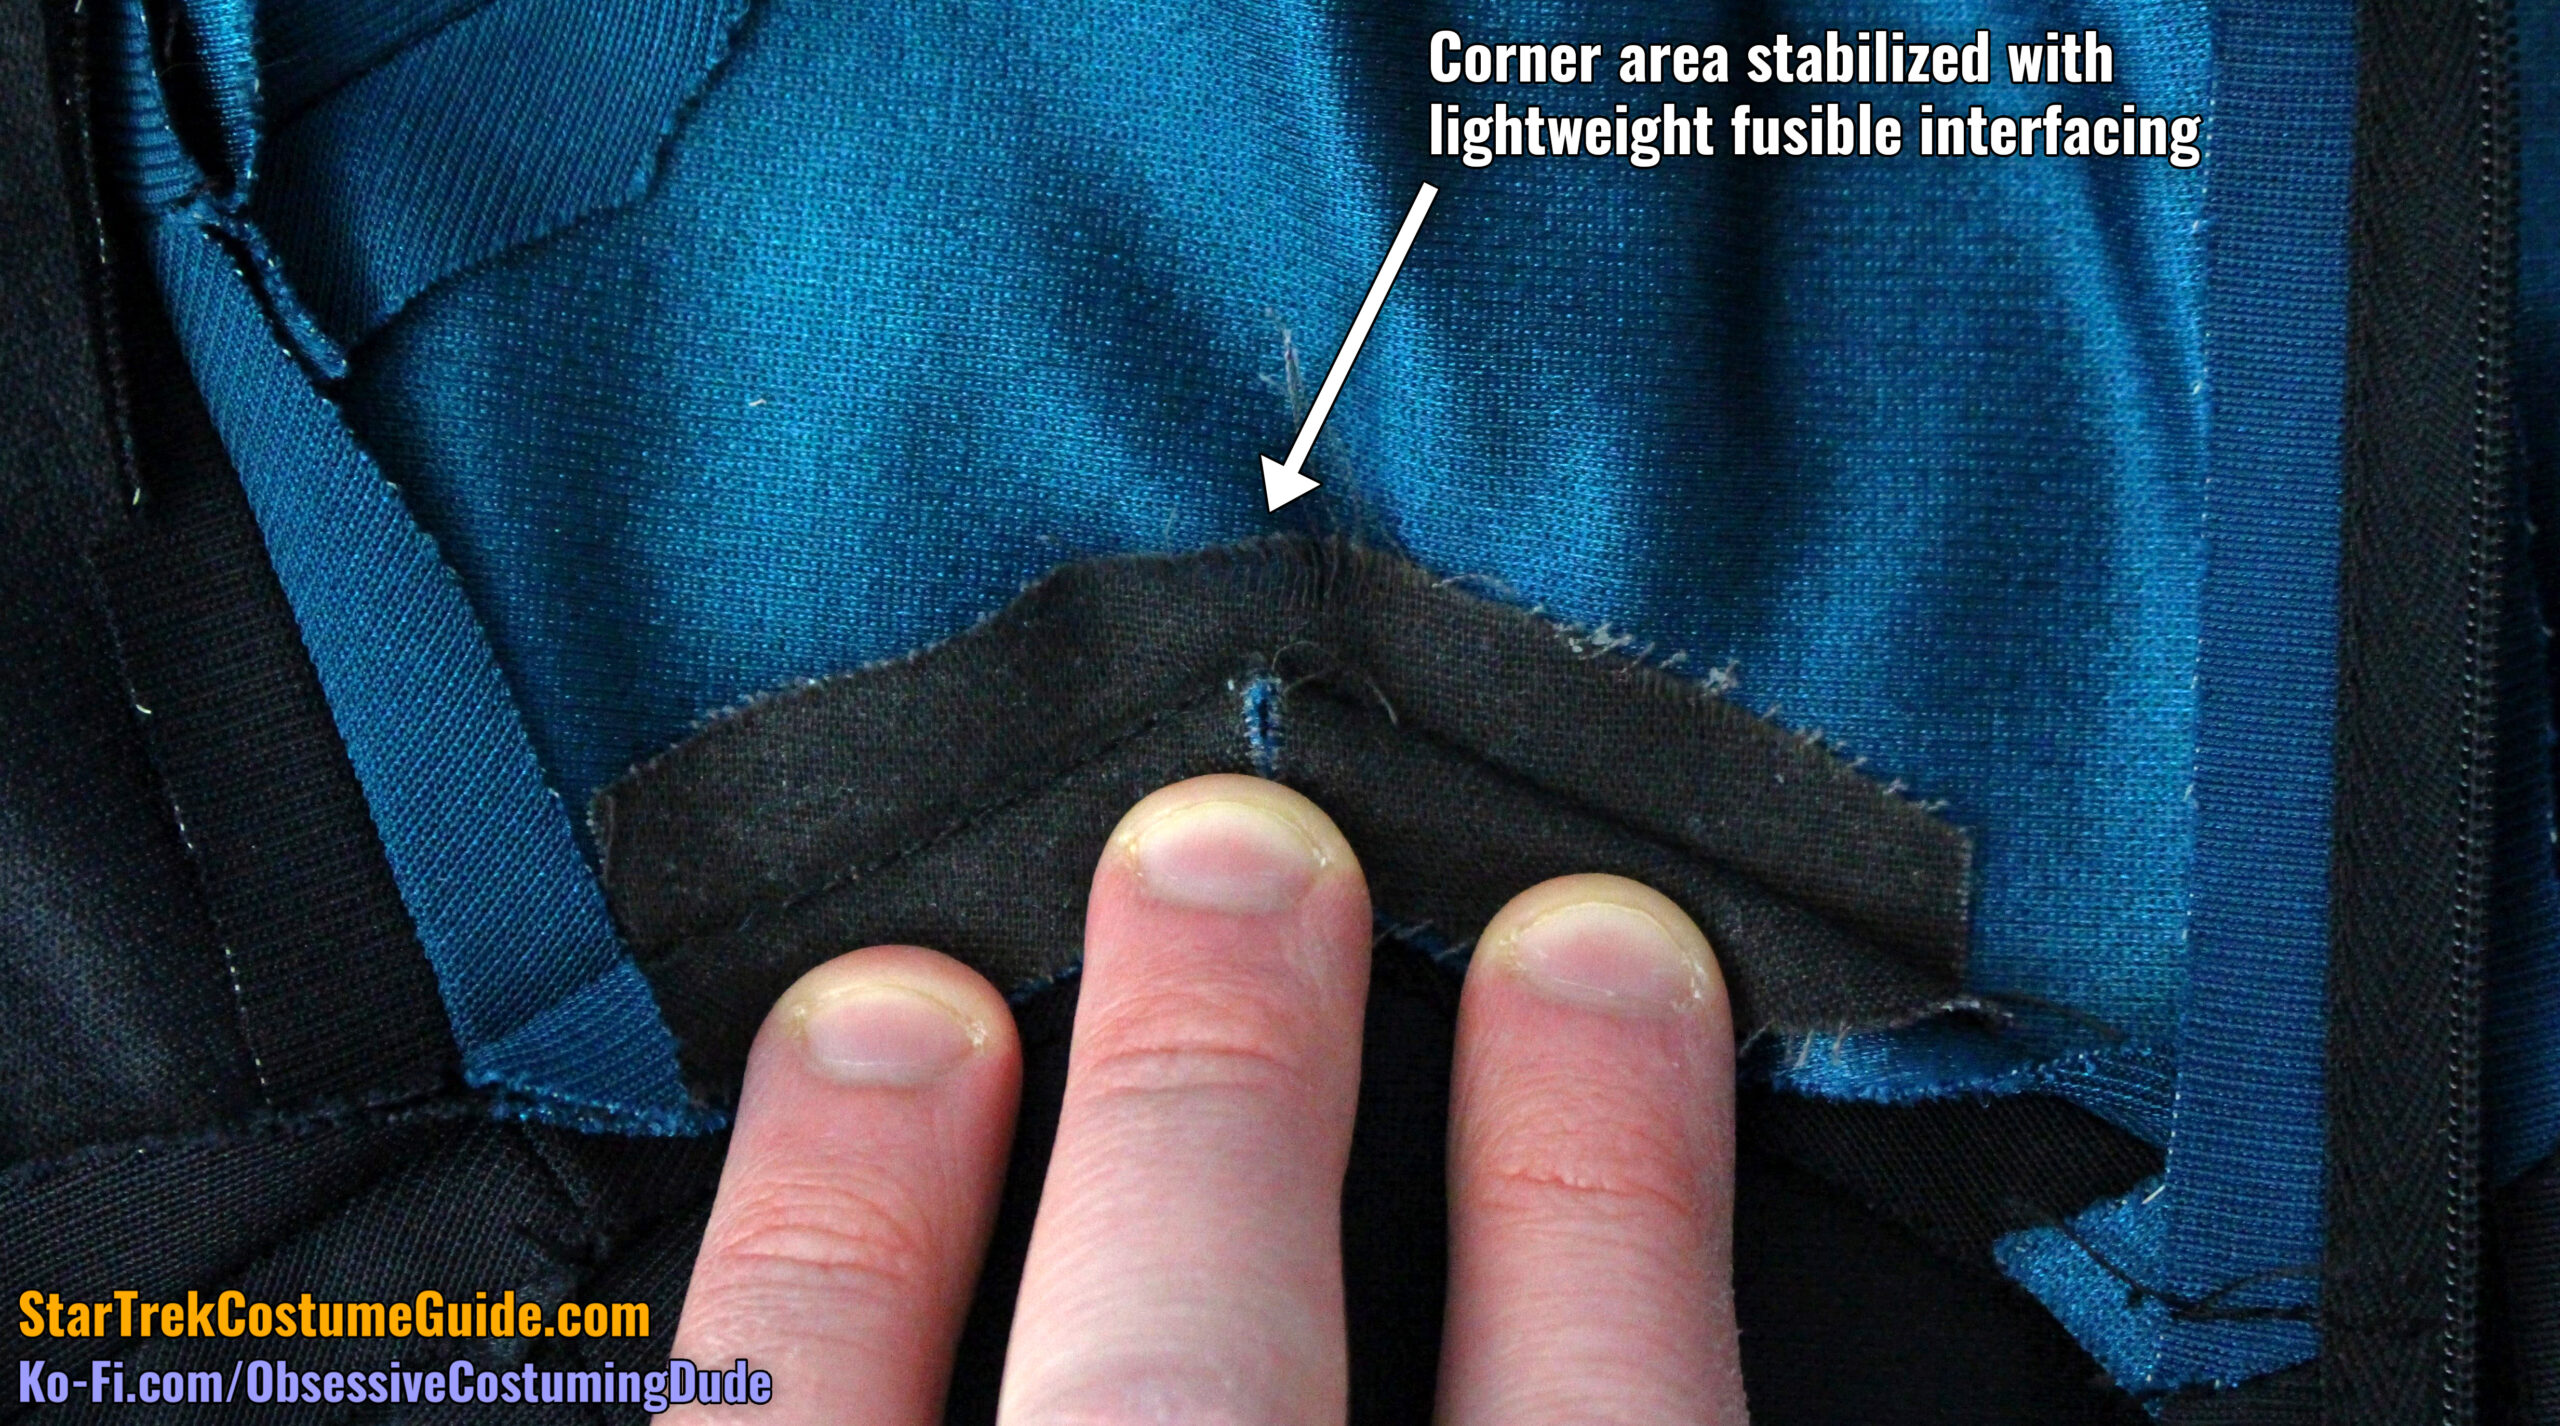
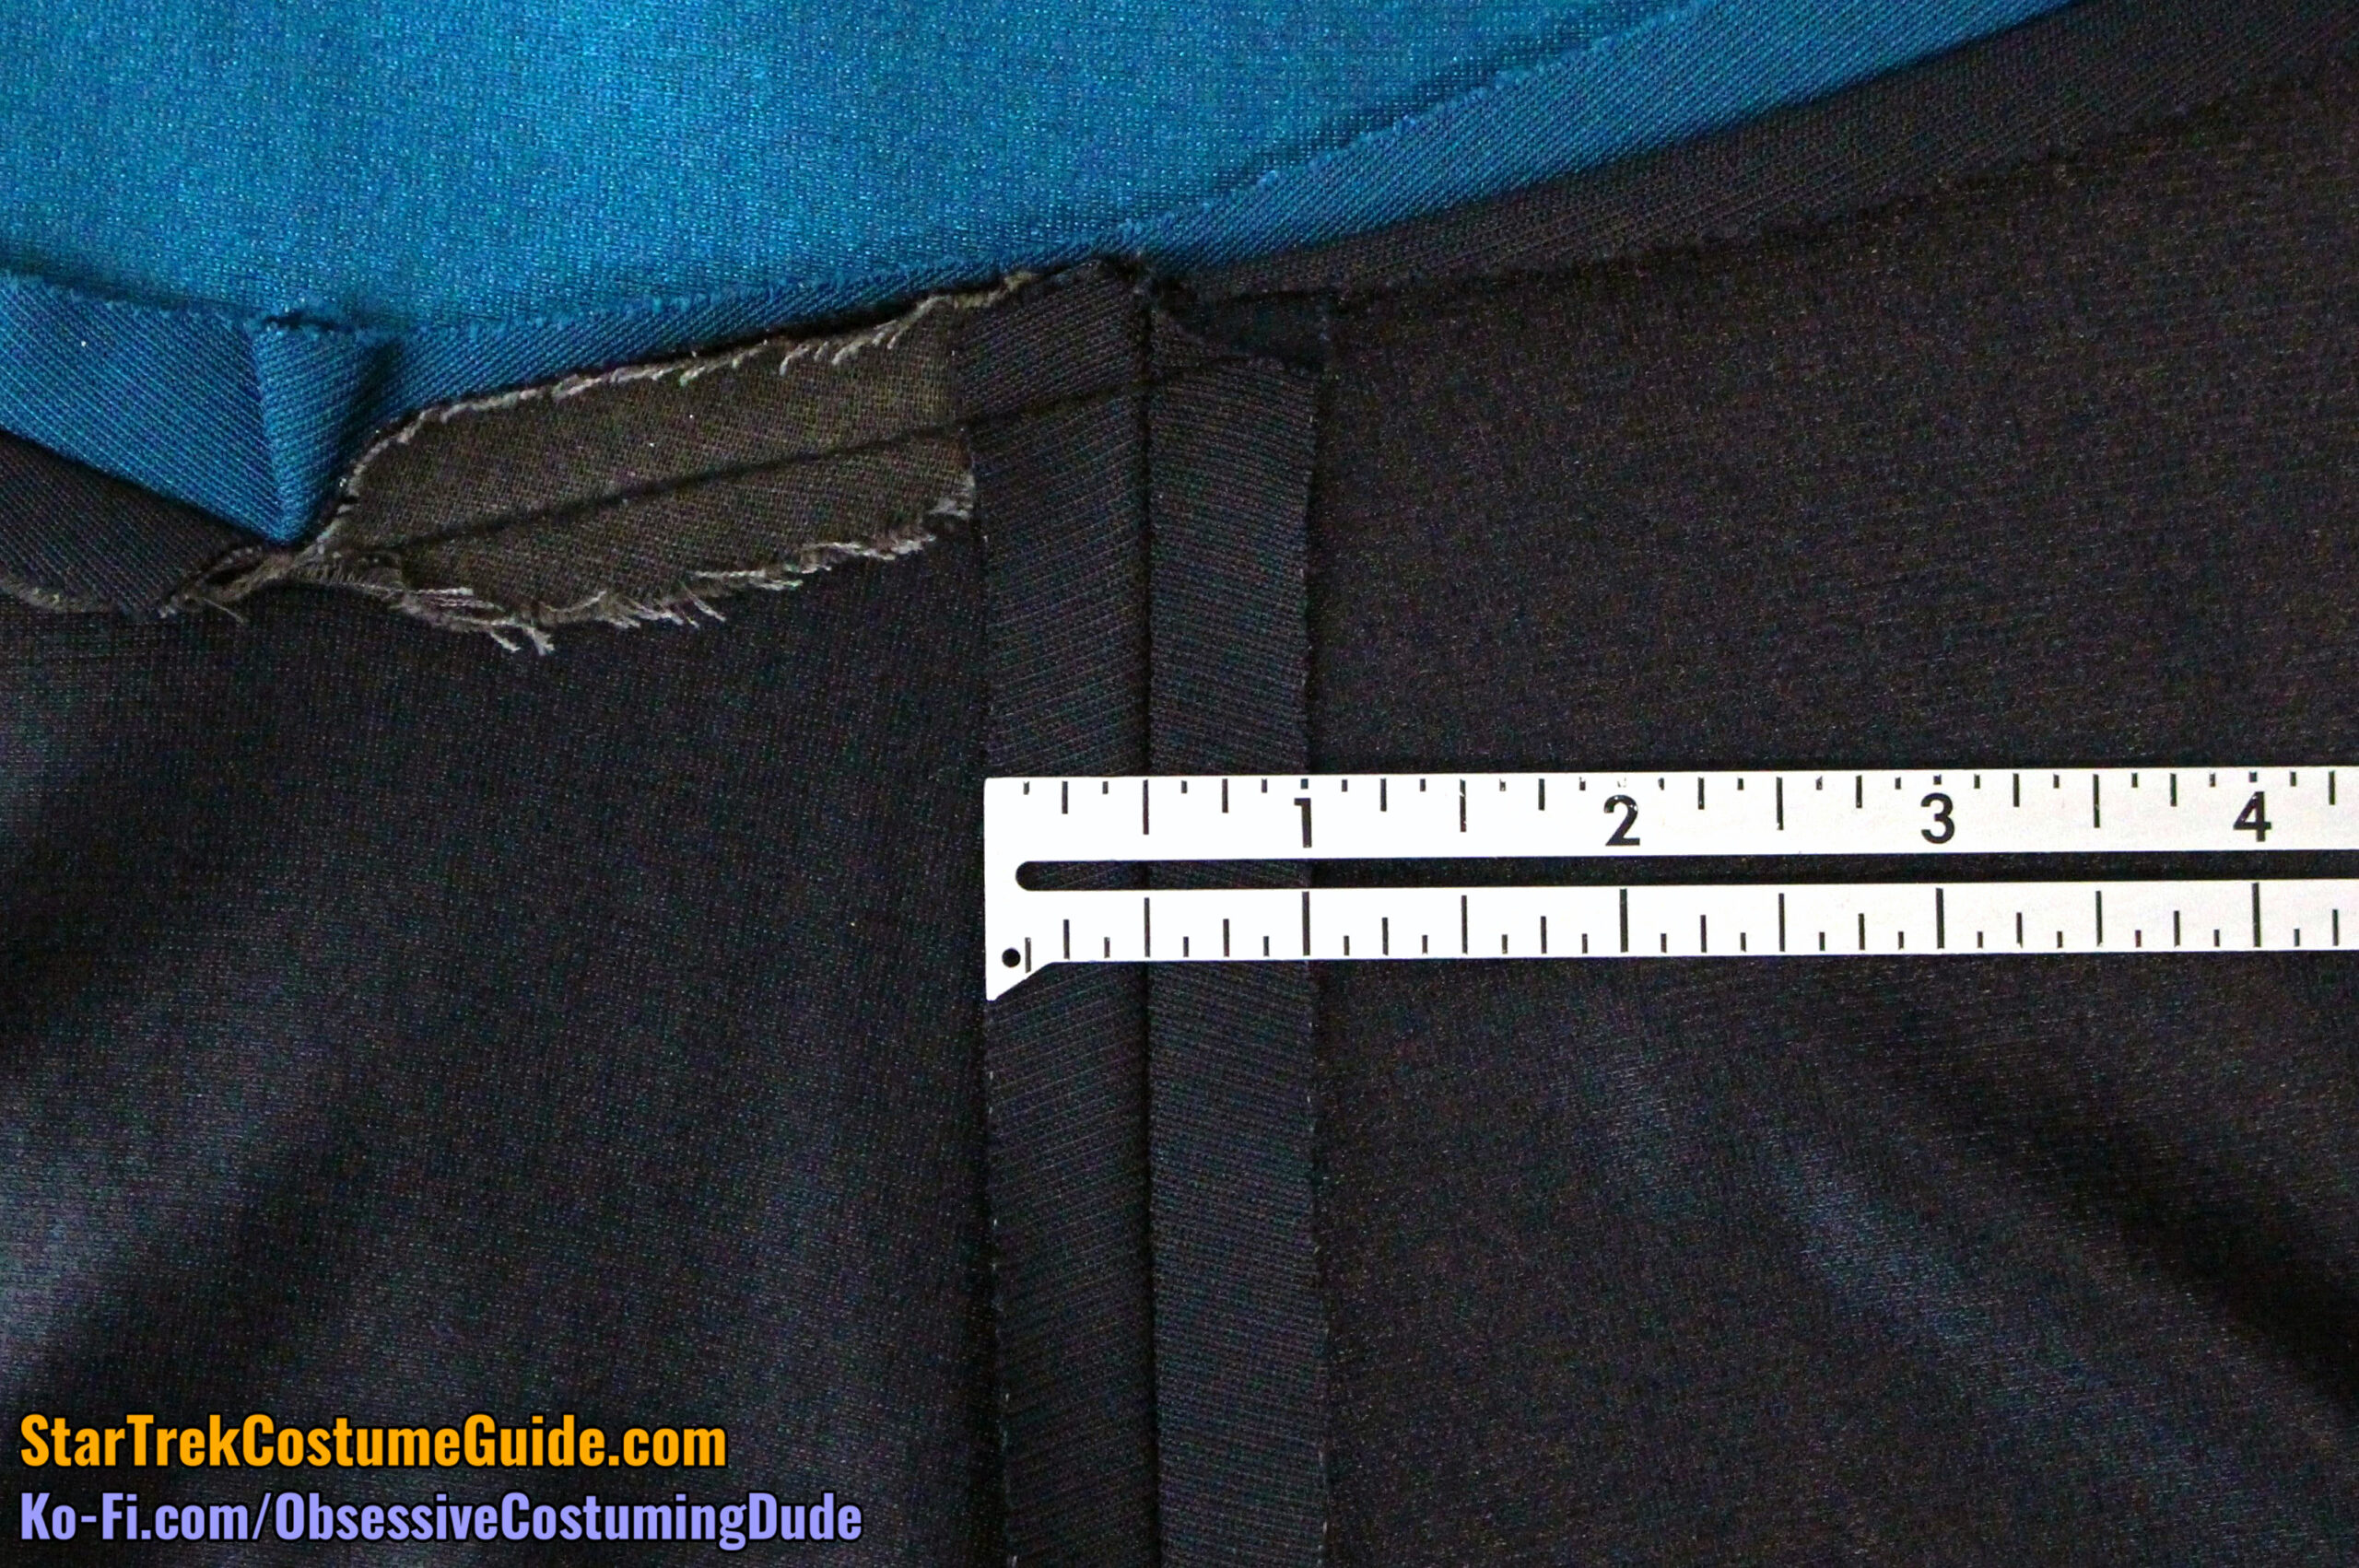
They were mostly pressed open, but they were both pressed upward near the center back at the lower corner.
Like on the Ensign Sito uniform I examined, the corner areas on the Dr. Crusher jumpsuit were stabilized with a lightweight fusible interfacing.
Like the front, the lower center back seam allowances were also ½”.
A refreshing change for the norm (and a sight for my sore eyes), the lower front seam allowances were all consistently pressed open along the entirety of both seams!
The lower left front seam allowances were the standard ½”, although the lower right front seam allowances were a tiny bit smaller.
The side seam allowances were also usually ½”, although they did occasionally widen to ⅝”.
The inseam allowance was also ½”.
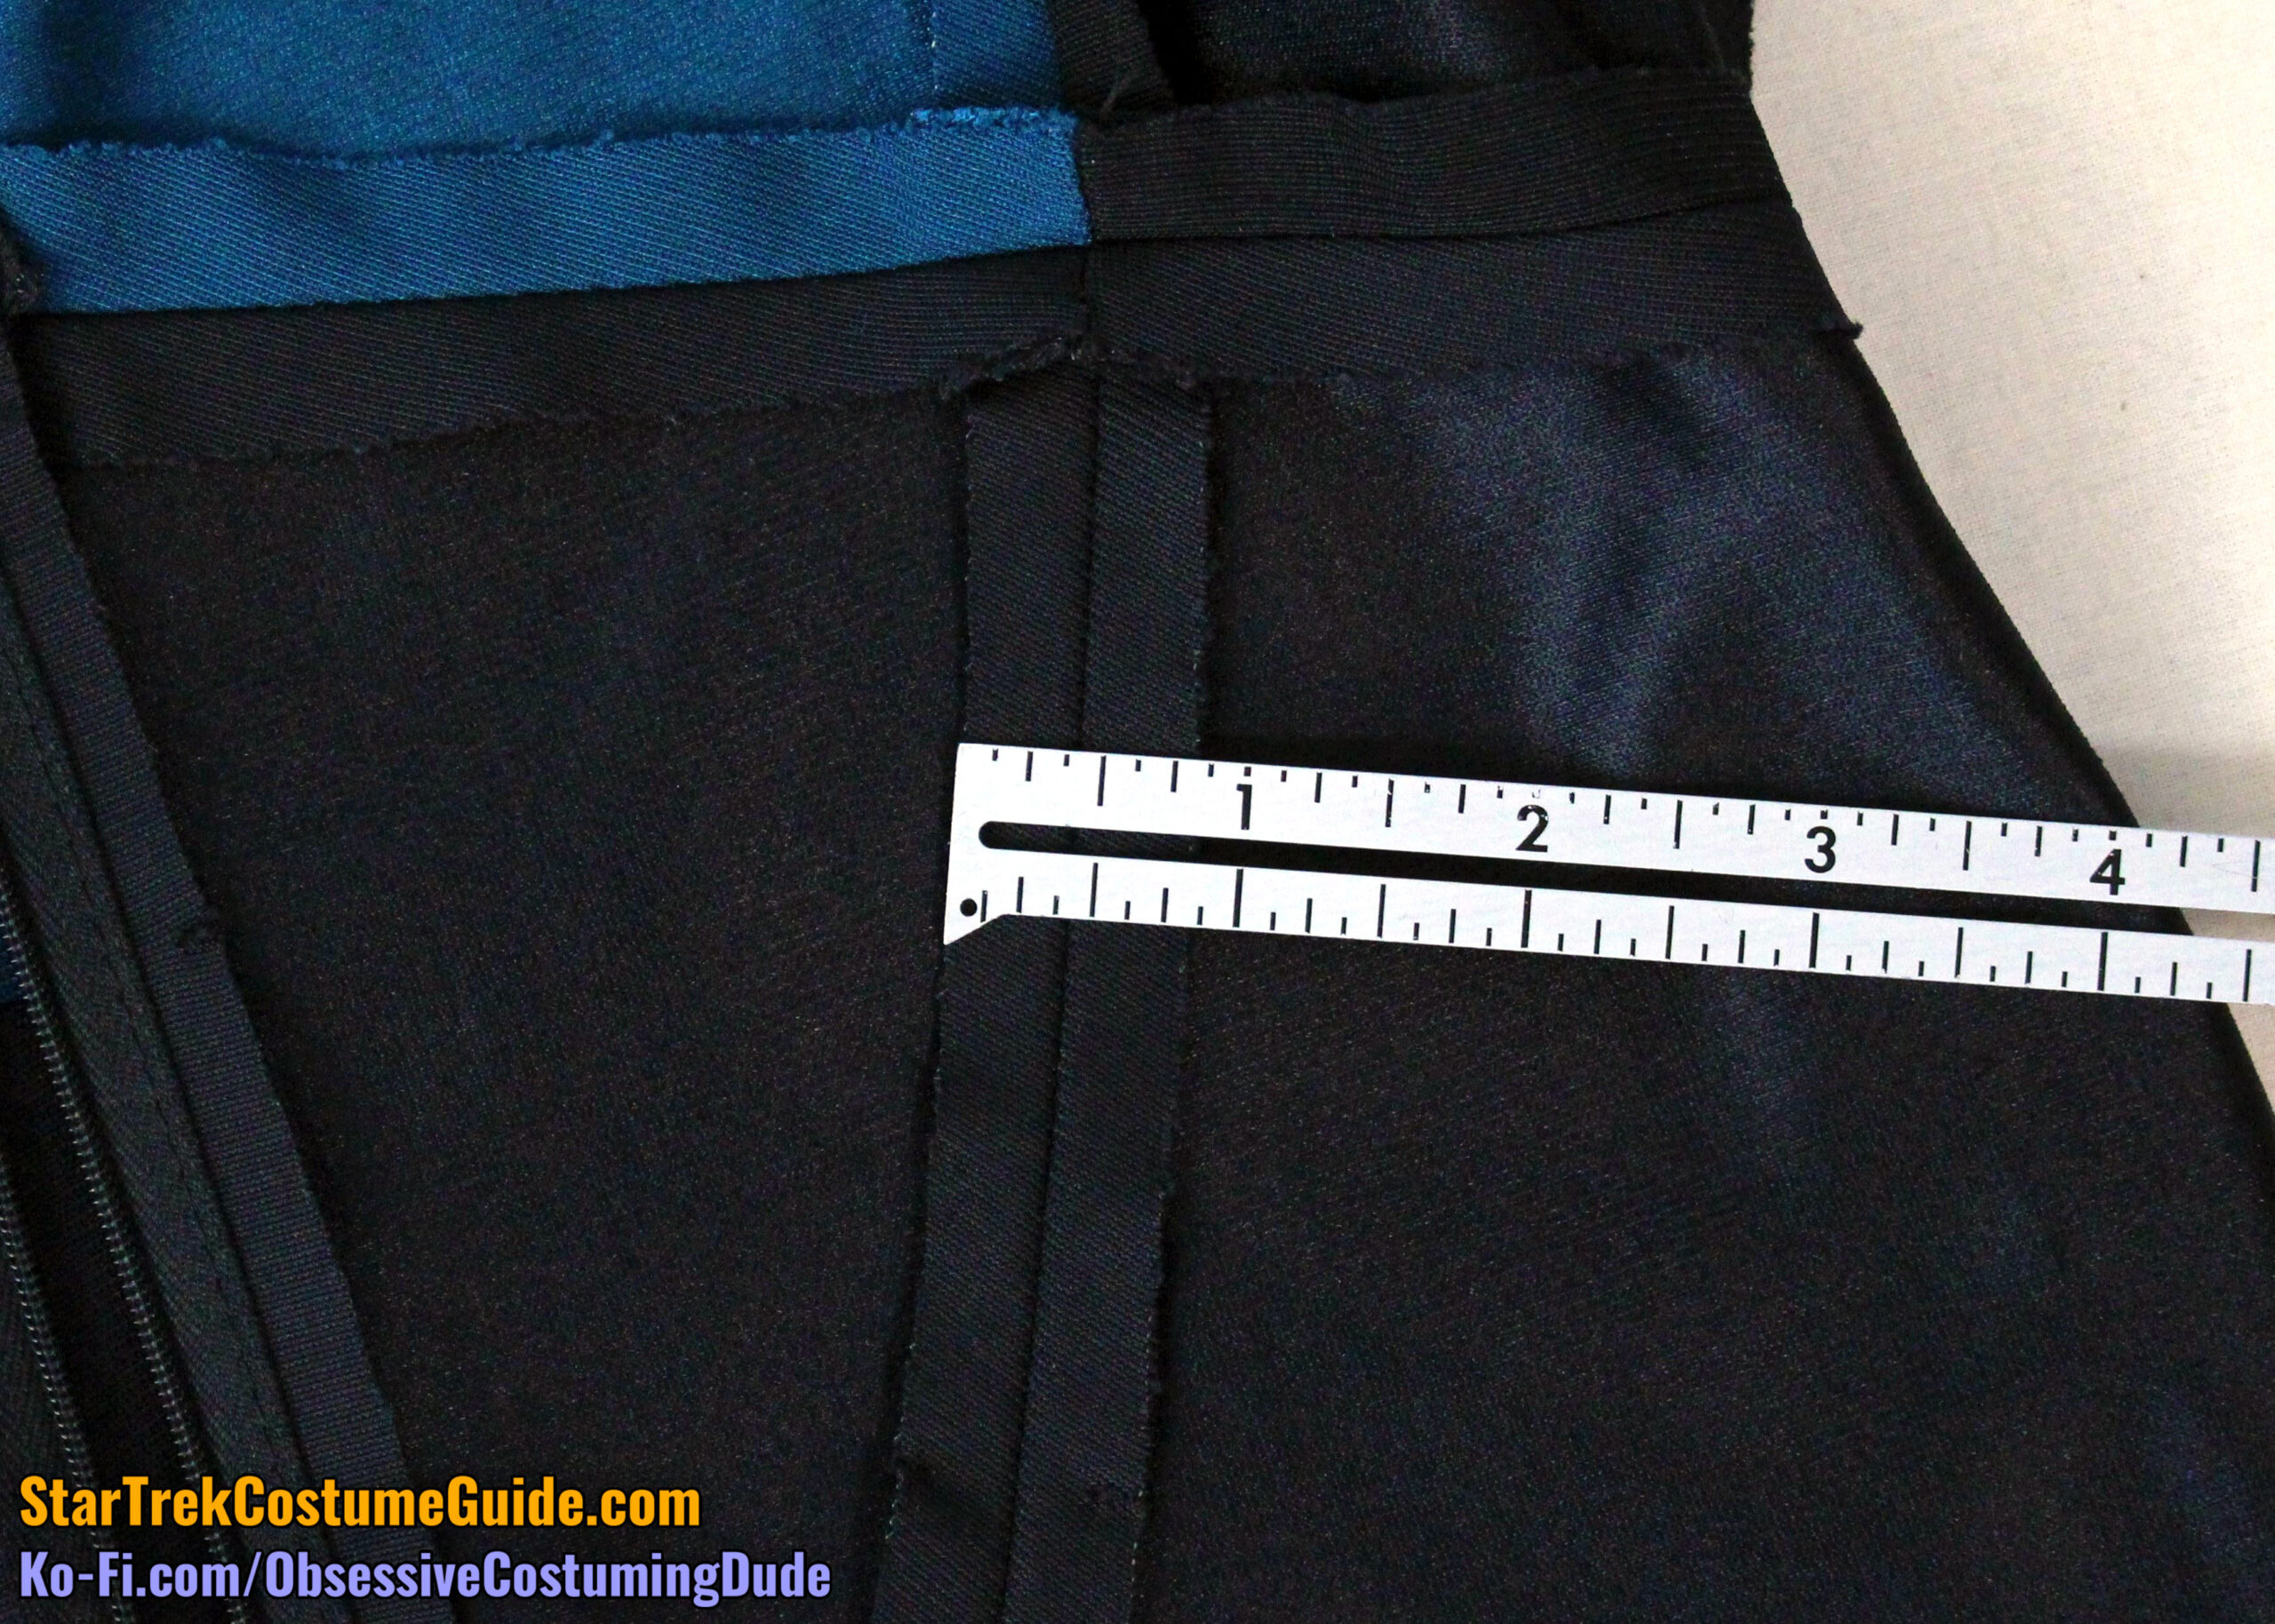
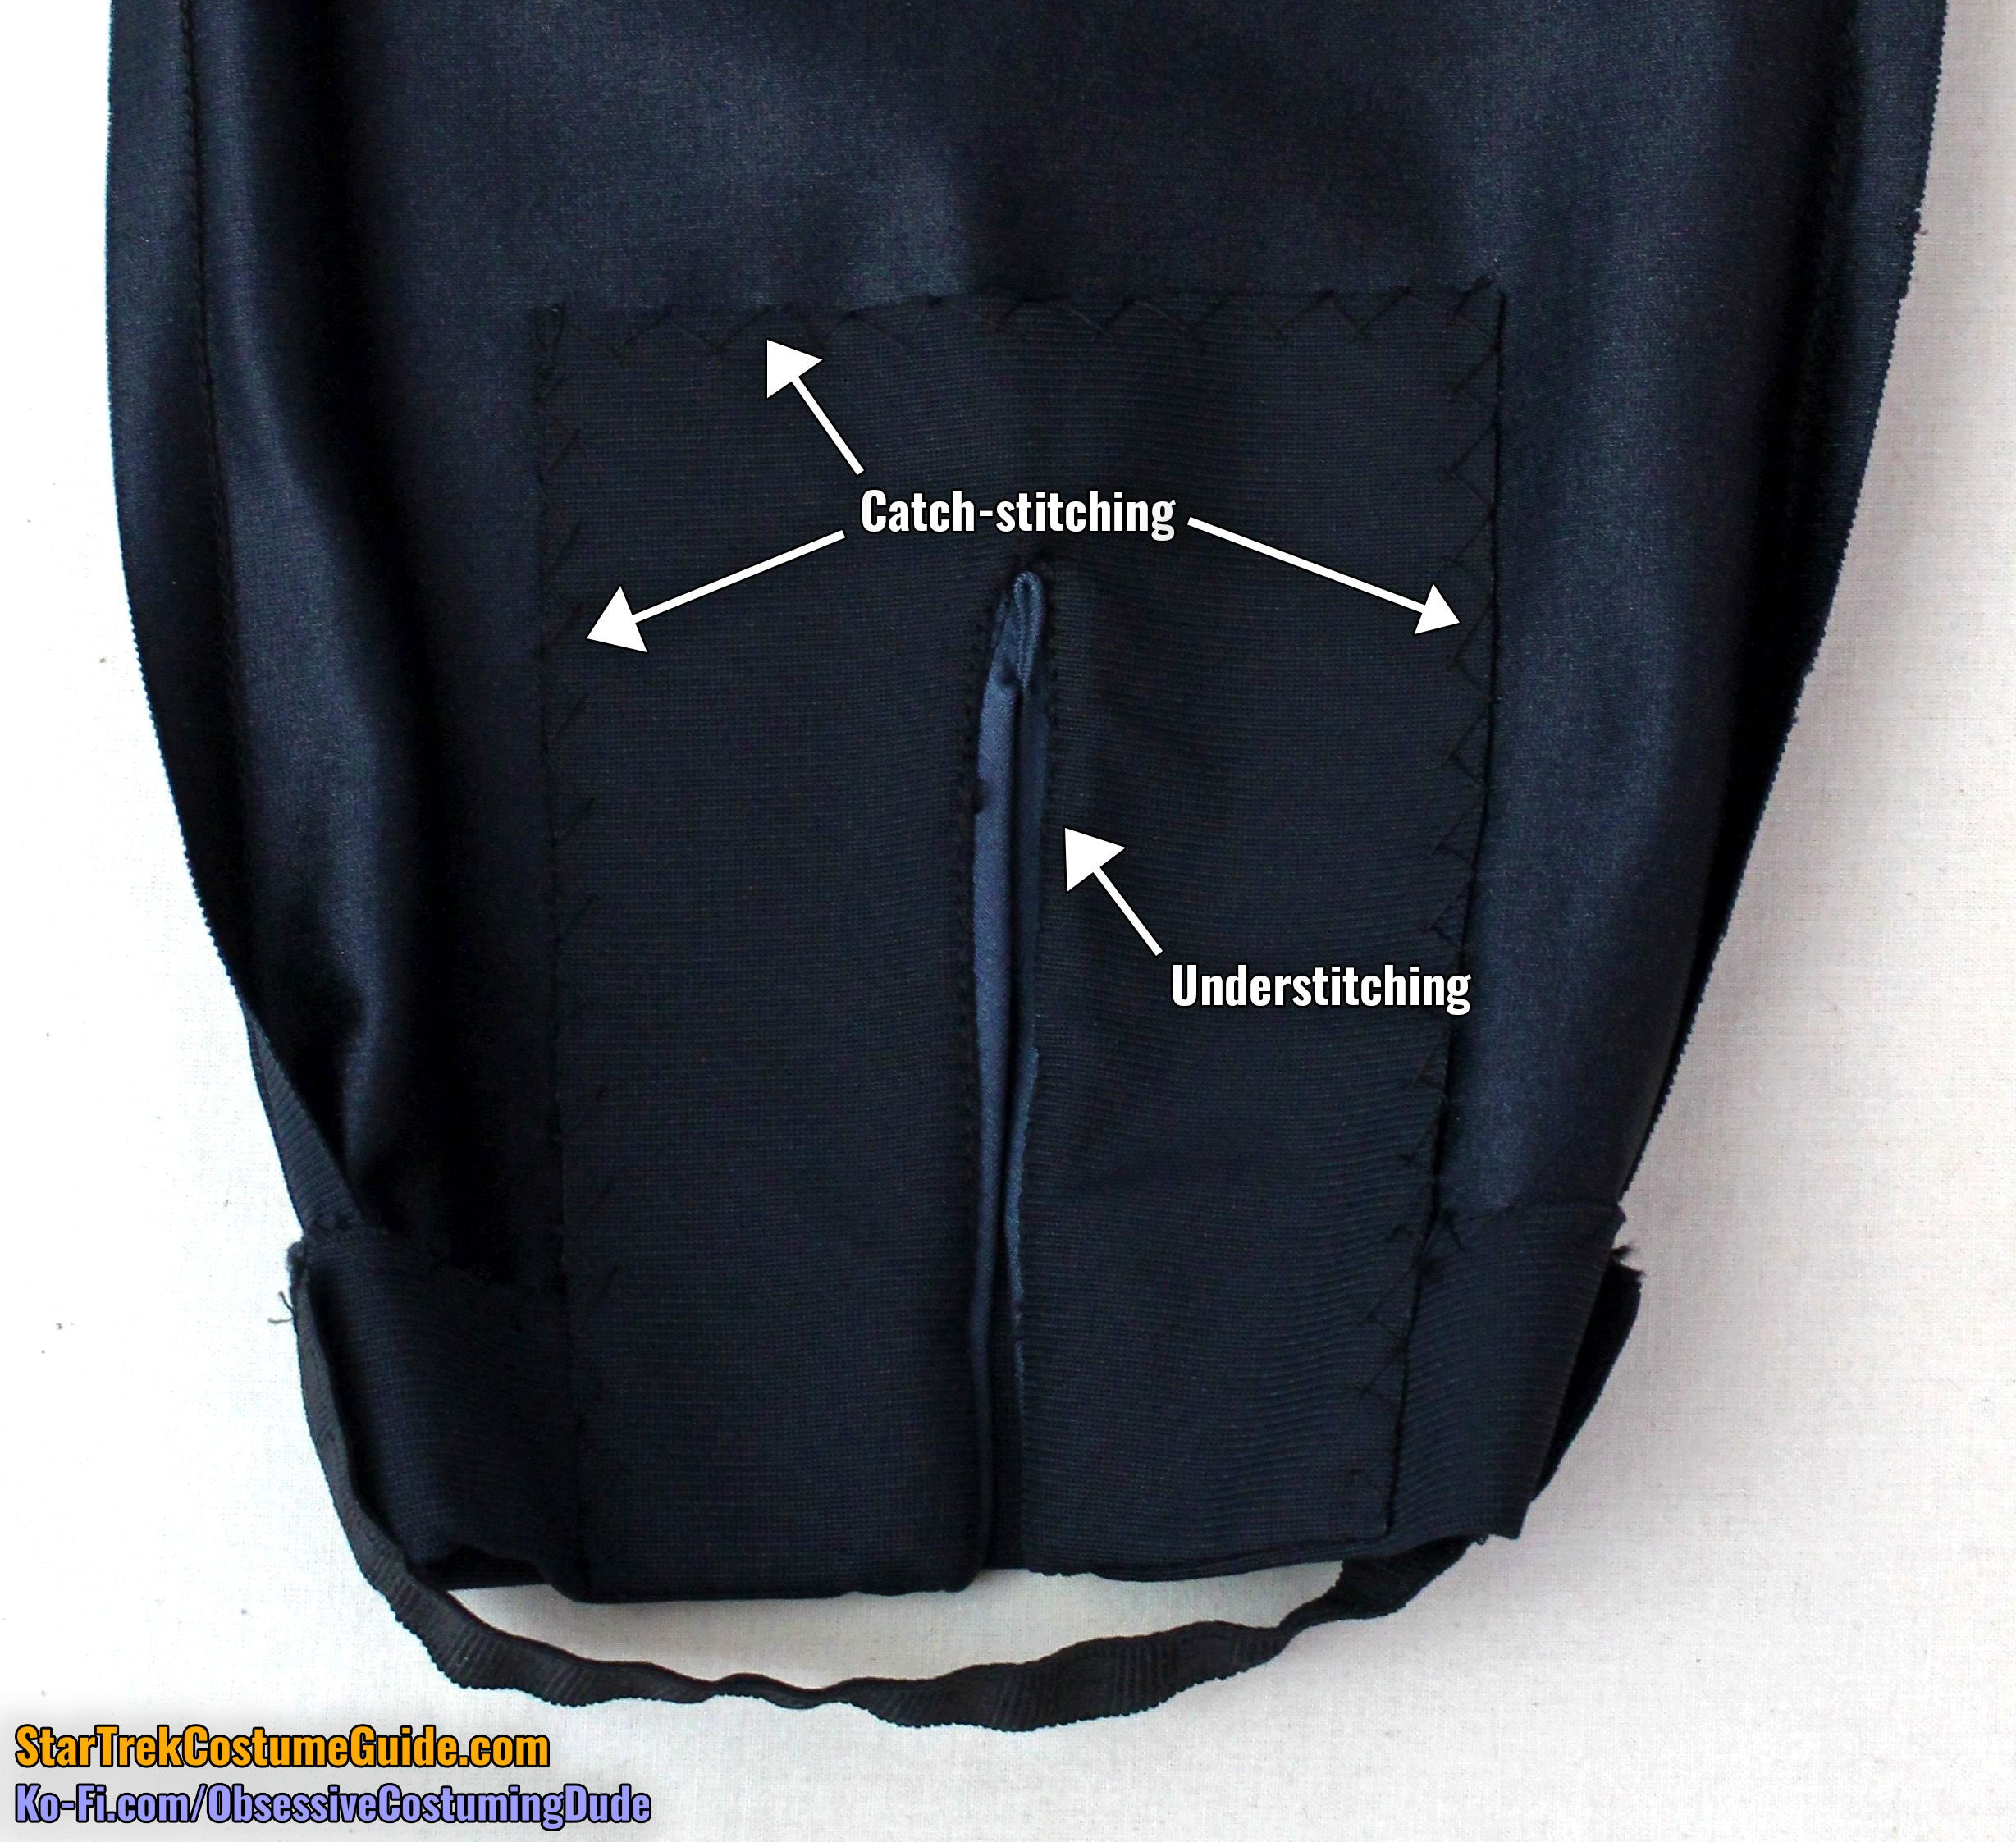
Here’s a look at the interior lower pant leg, the same basic construction as on the Tasha Yar jumpsuit I examined.
Observe the large facing on the underside, which was understitched along the upper half or so of the trim.
The outer edges were secured to the pant leg and hem via catch-stitching.
Like on the Tasha Yar jumpsuit, one long strip of trim was attached in one long go, the opening slashed, then the layers of trim simply “pinched” and sewn together with a diagonal stitch across the top of the opening.
However, in this case, one side obviously turned out better than the other!
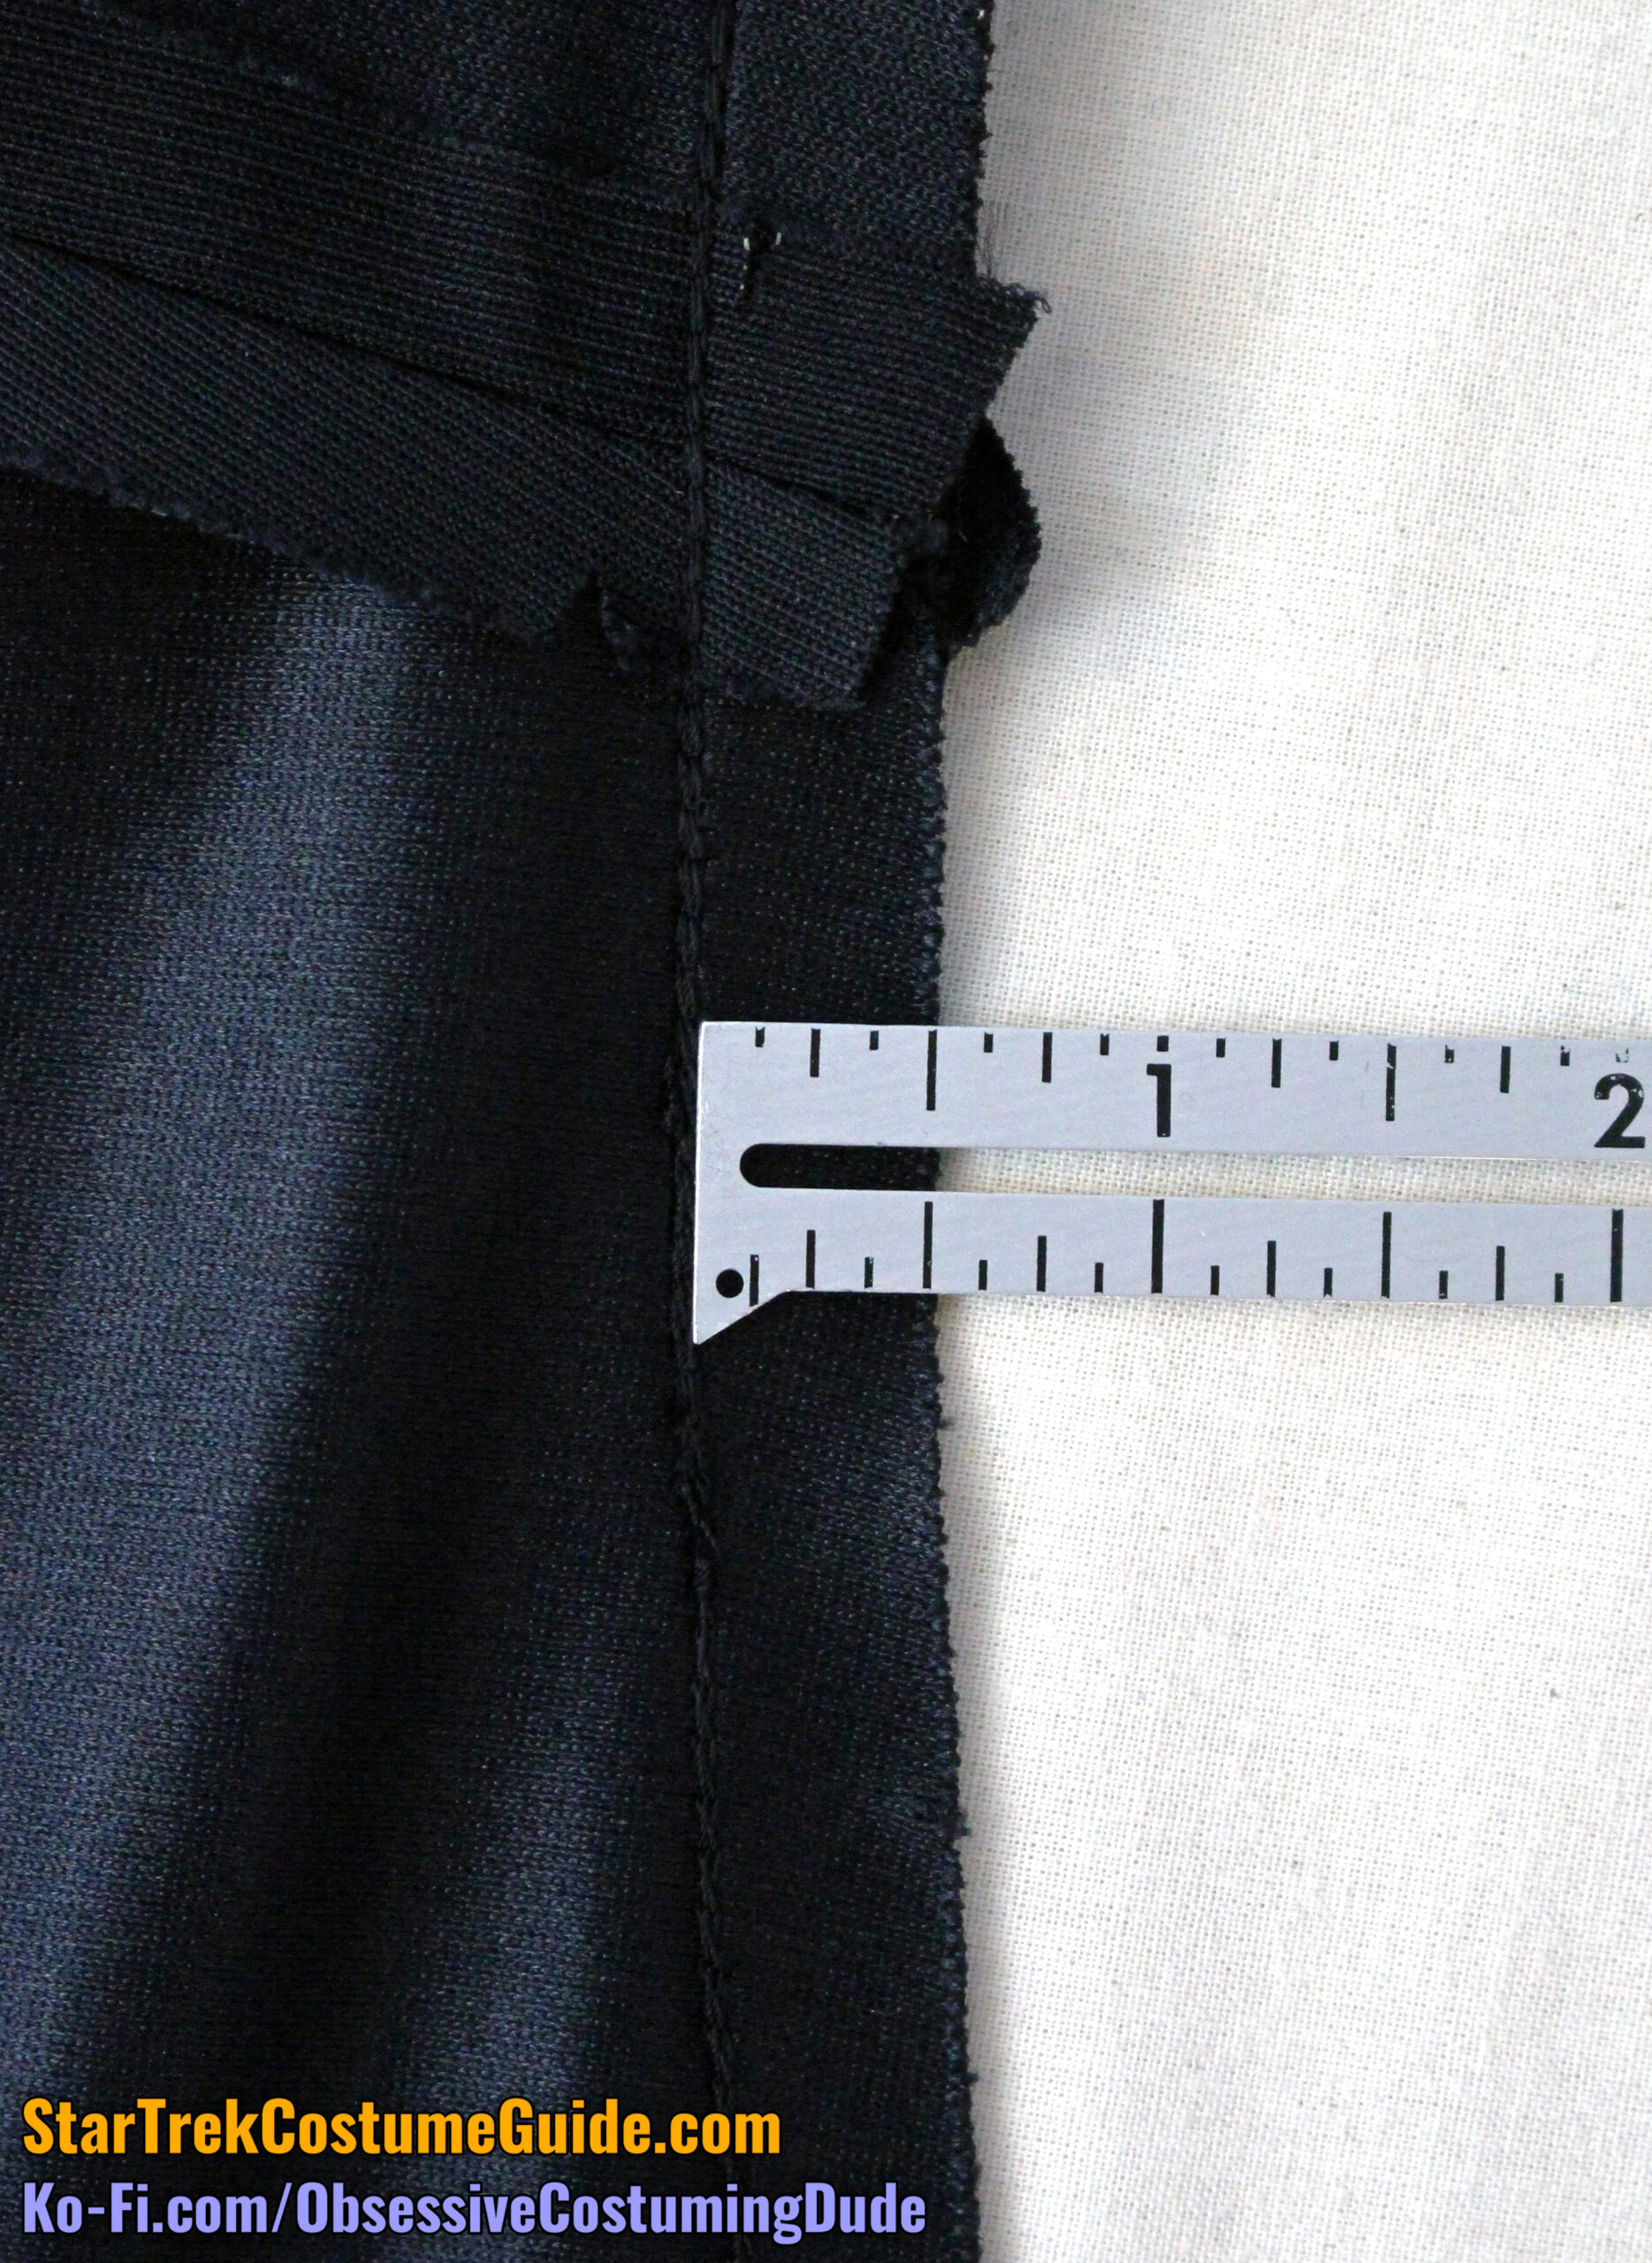
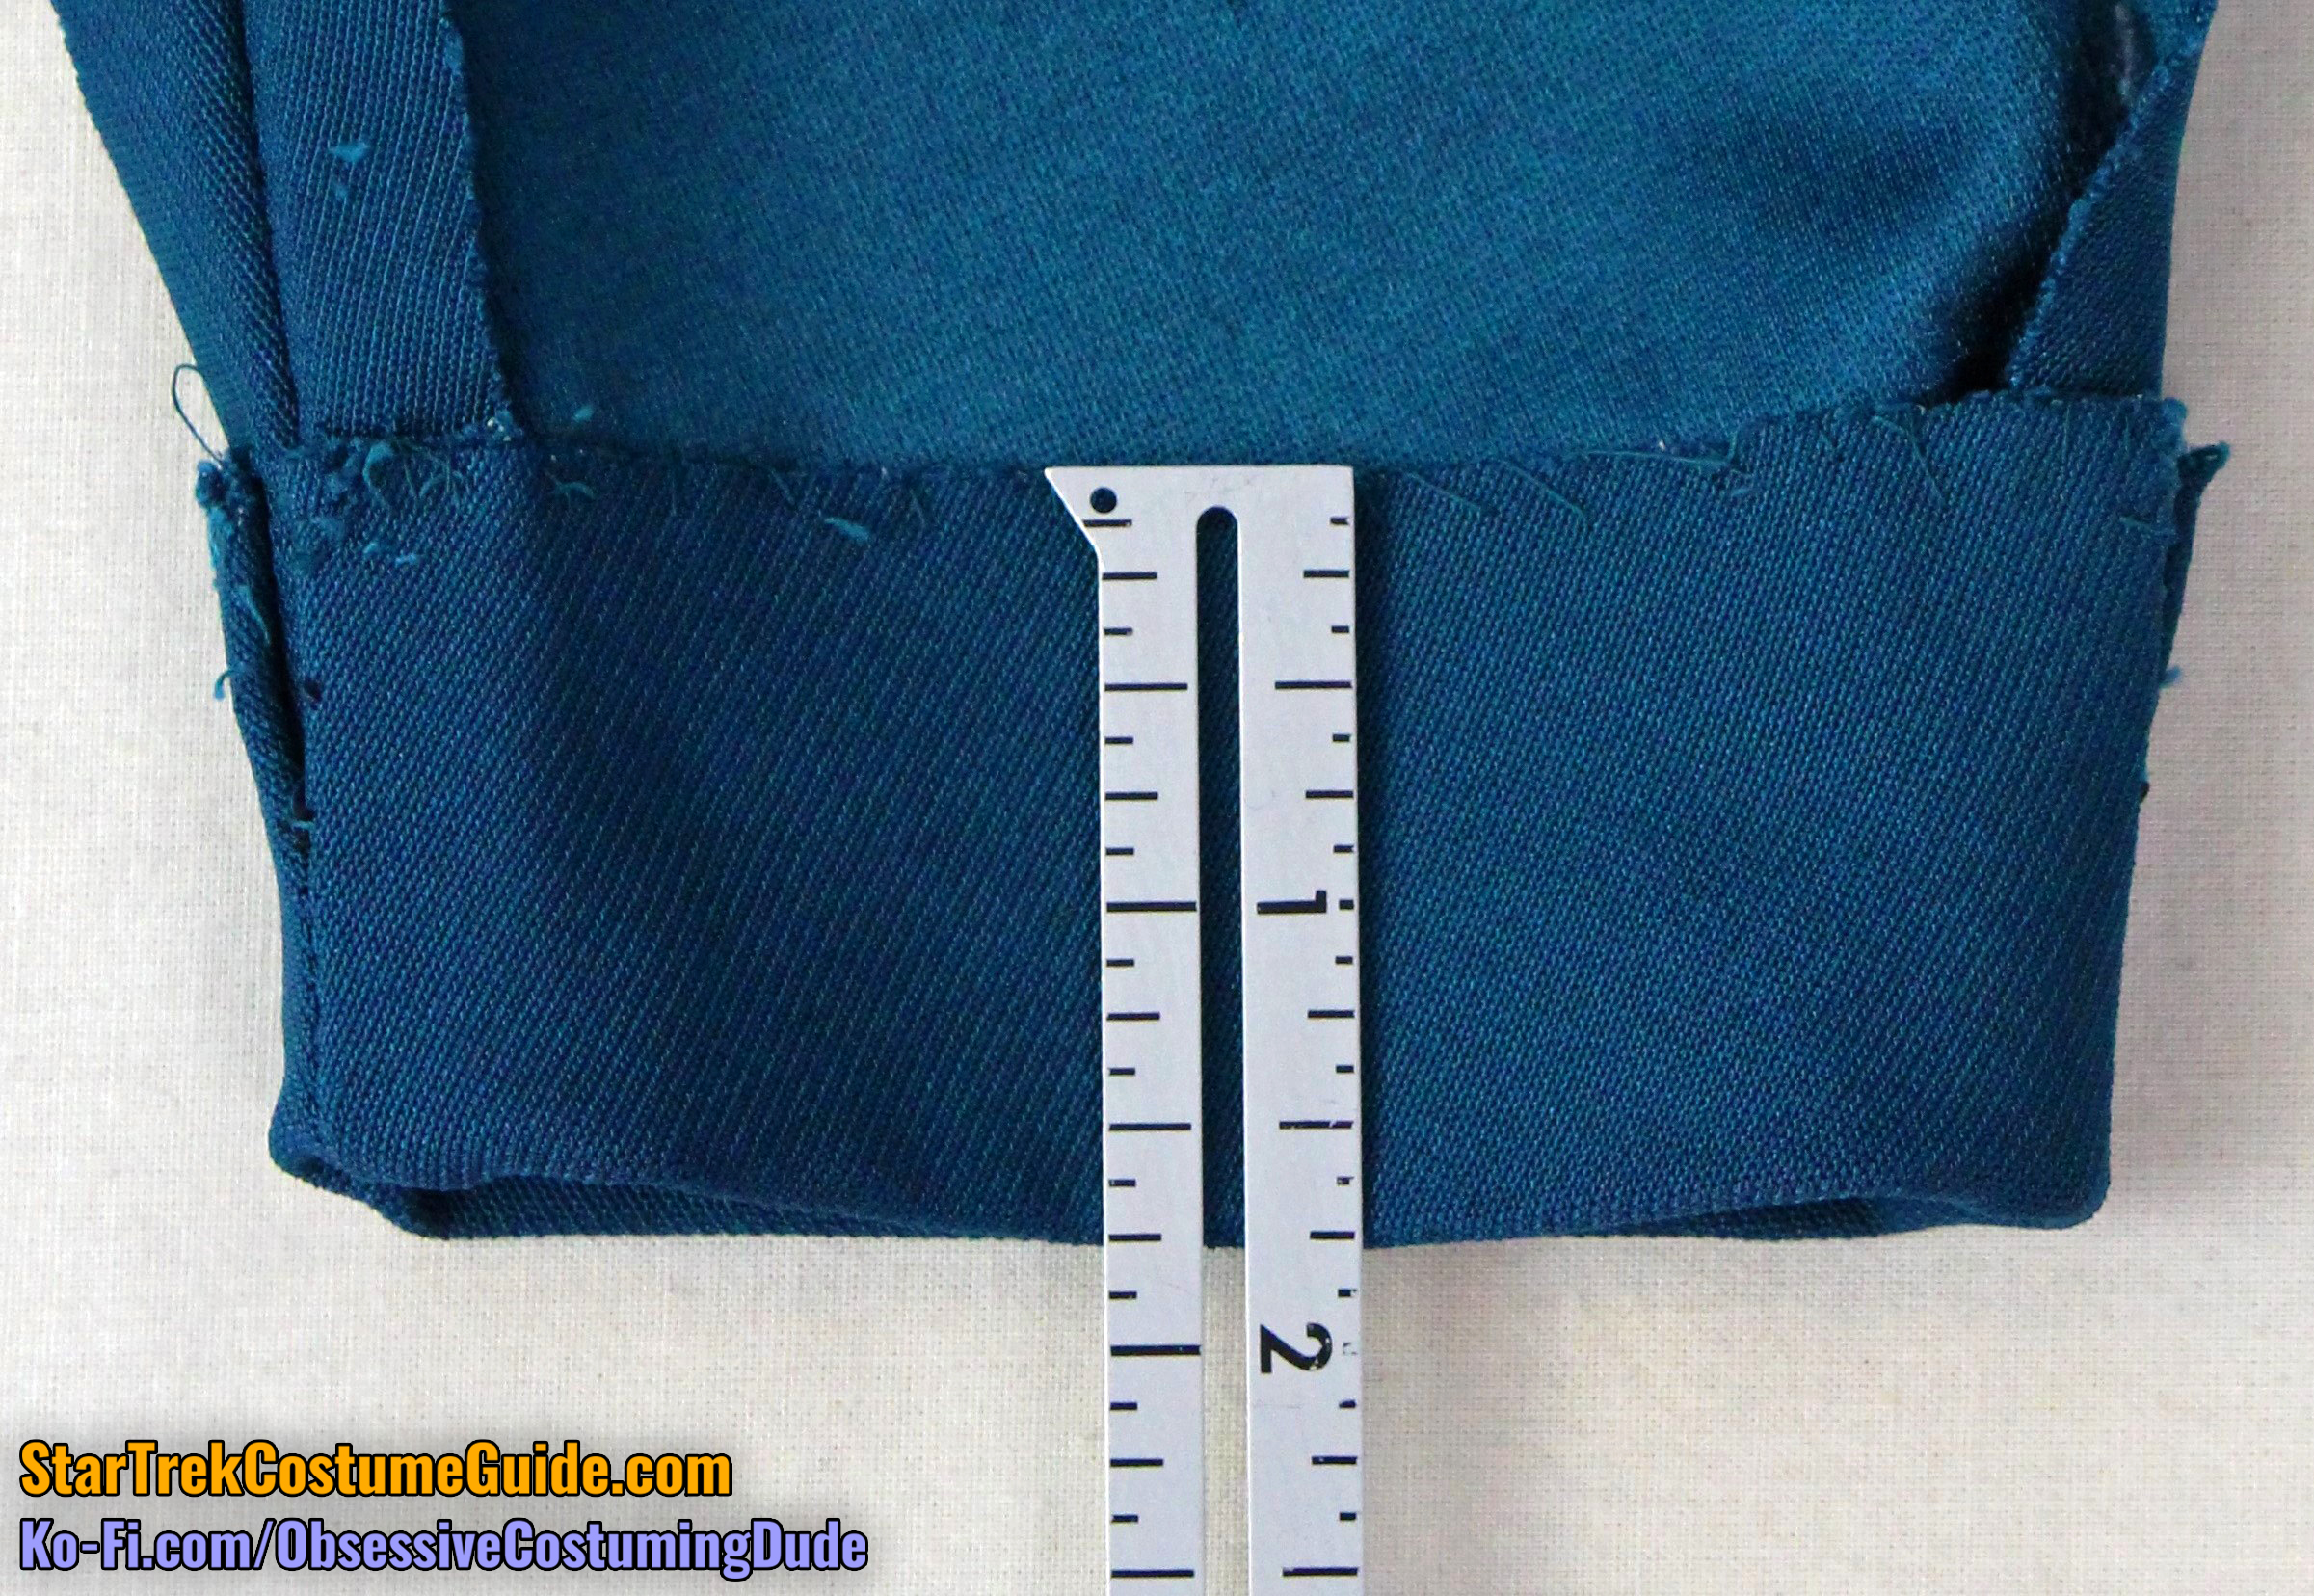
The lower front facing was 4 ½” wide (plus lower allowance) and extended 1 ¼” above the top of the opening.
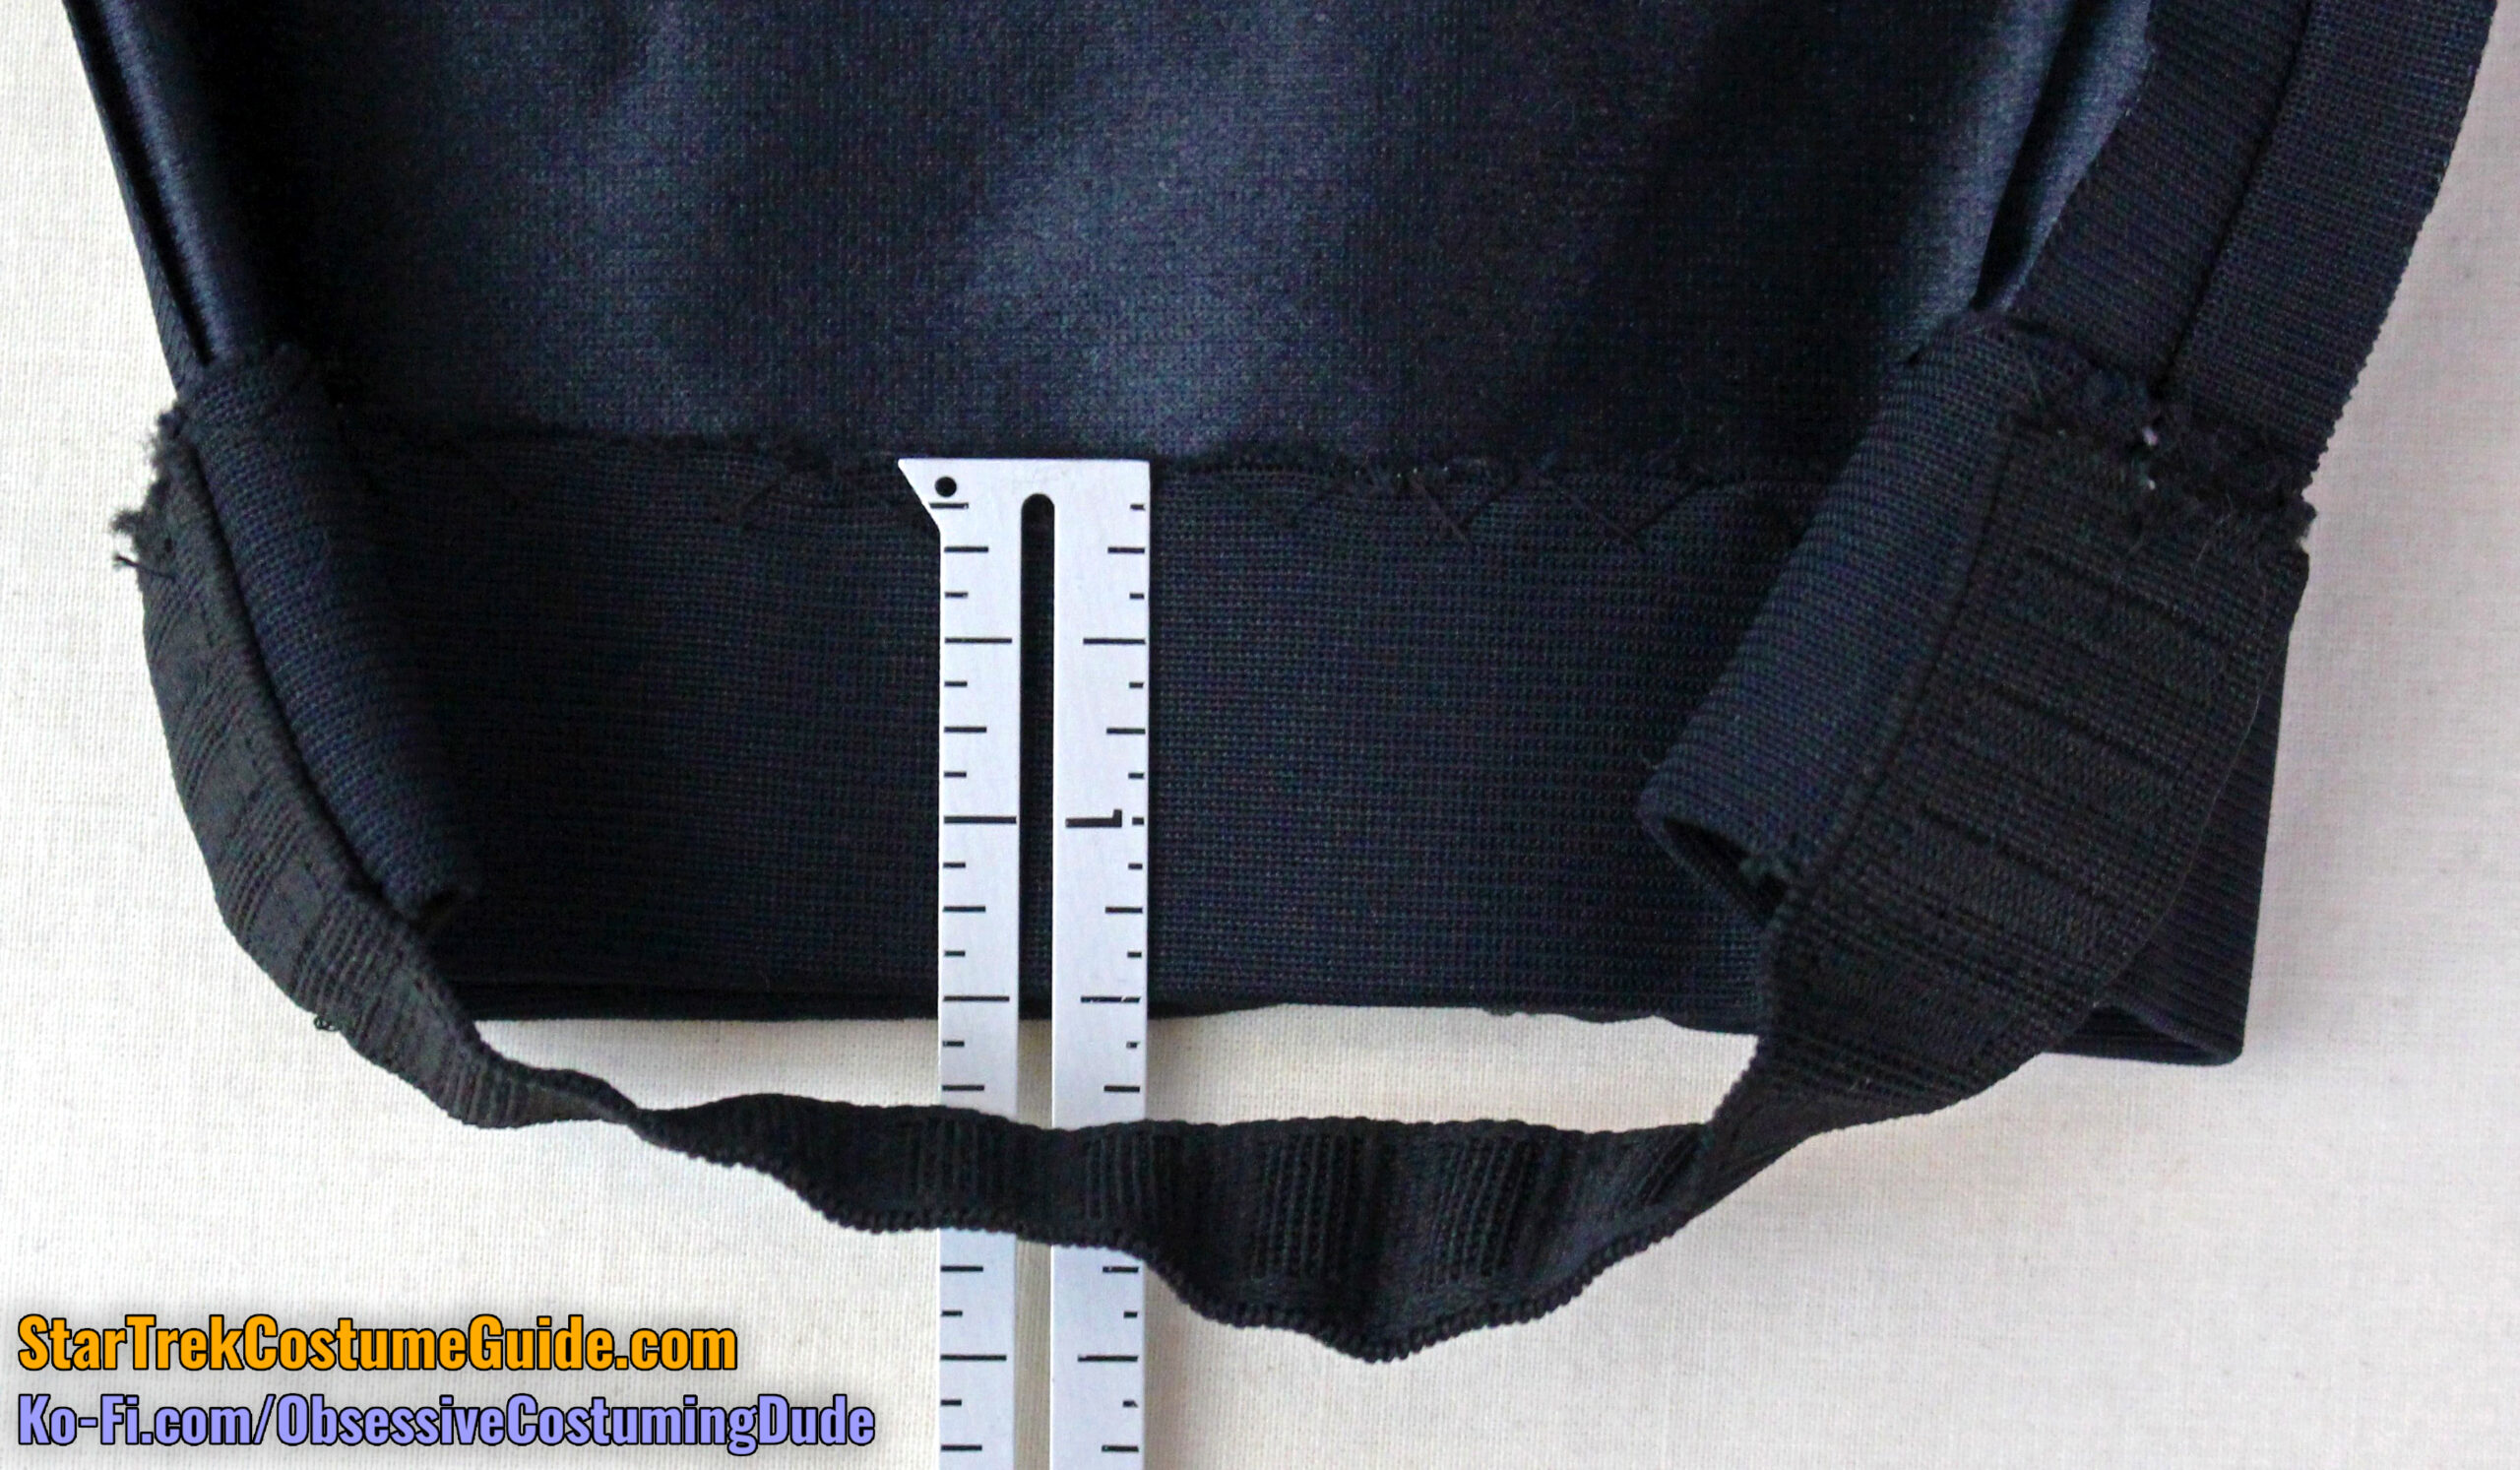
The hem allowance at the bottom of the pant legs was 1 ½”.
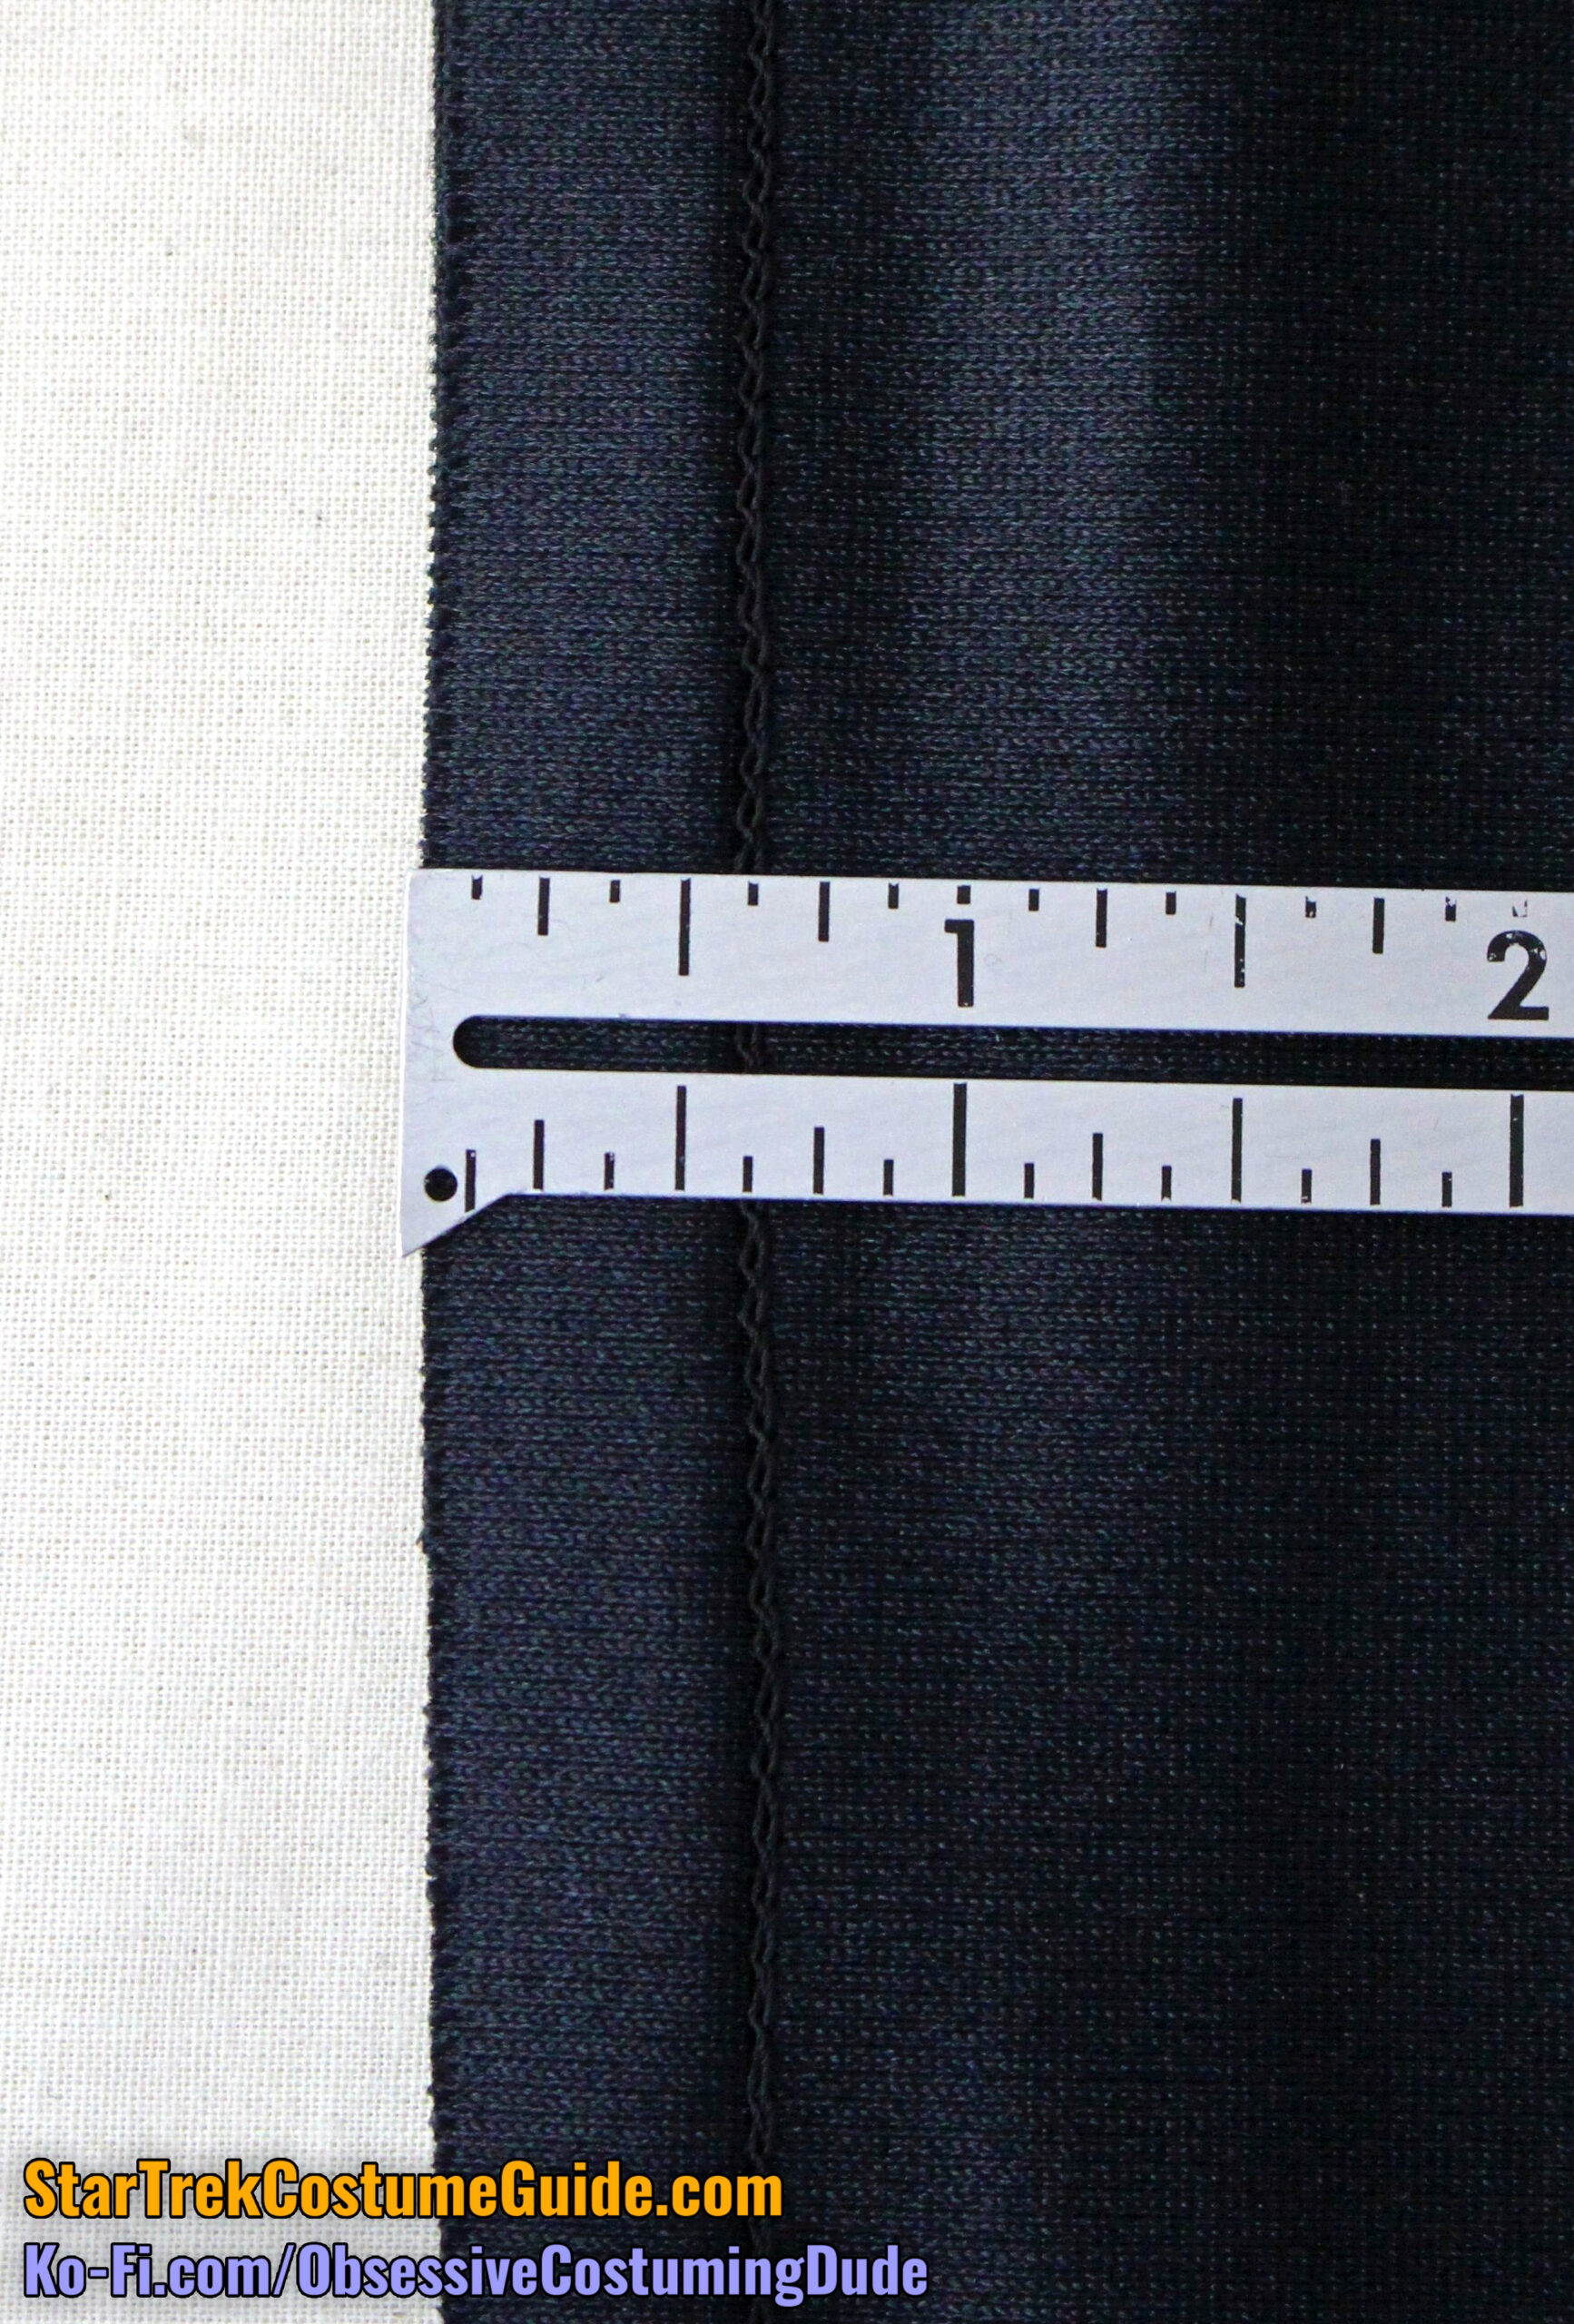
If you look carefully, you can see the horizontal edge-stitch just above the hem line and the vertical “stitch-in-the-ditch,” both securing the ends of the elastic to the lower pant leg.
The sleeve seam allowances were, of course, ½”.
The sleeve hem allowance was 1 ¾”.
IN CONCLUSION
I’d like to again thank Angelo Cifaldi for the opportunity to study this screen-used Beverly Crusher TNG jumpsuit and share my research with you.
I learned a great deal from the experience, and I hope you did as well!
Every bar of gold-pressed latinum goes toward producing more sewing and costuming resources like this, for everyone interested in Star Trek costumes. 🙂