As I mentioned in my TNG skant analysis, a while back I had the opportunity to examine a screen-used women’s TNG skant, courtesy of Steve Barnes.
As a supplement to the broader costume analysis, in this blog post we’ll be taking a closer, more detailed look at this specific TNG skant.
(This was my very first video of its kind – almost 4 years ago now – so please pardon its shortcomings. The information is still solid, though.)
Very special thanks to Steve Barnes for the privilege of examining this uniform and sharing my research with you, and to my Ko-Fi supporters for helping me be able to produce sewing/costuming resources like this. 🙂
This thing was just so freaking weird, it has to be seen to be believed.
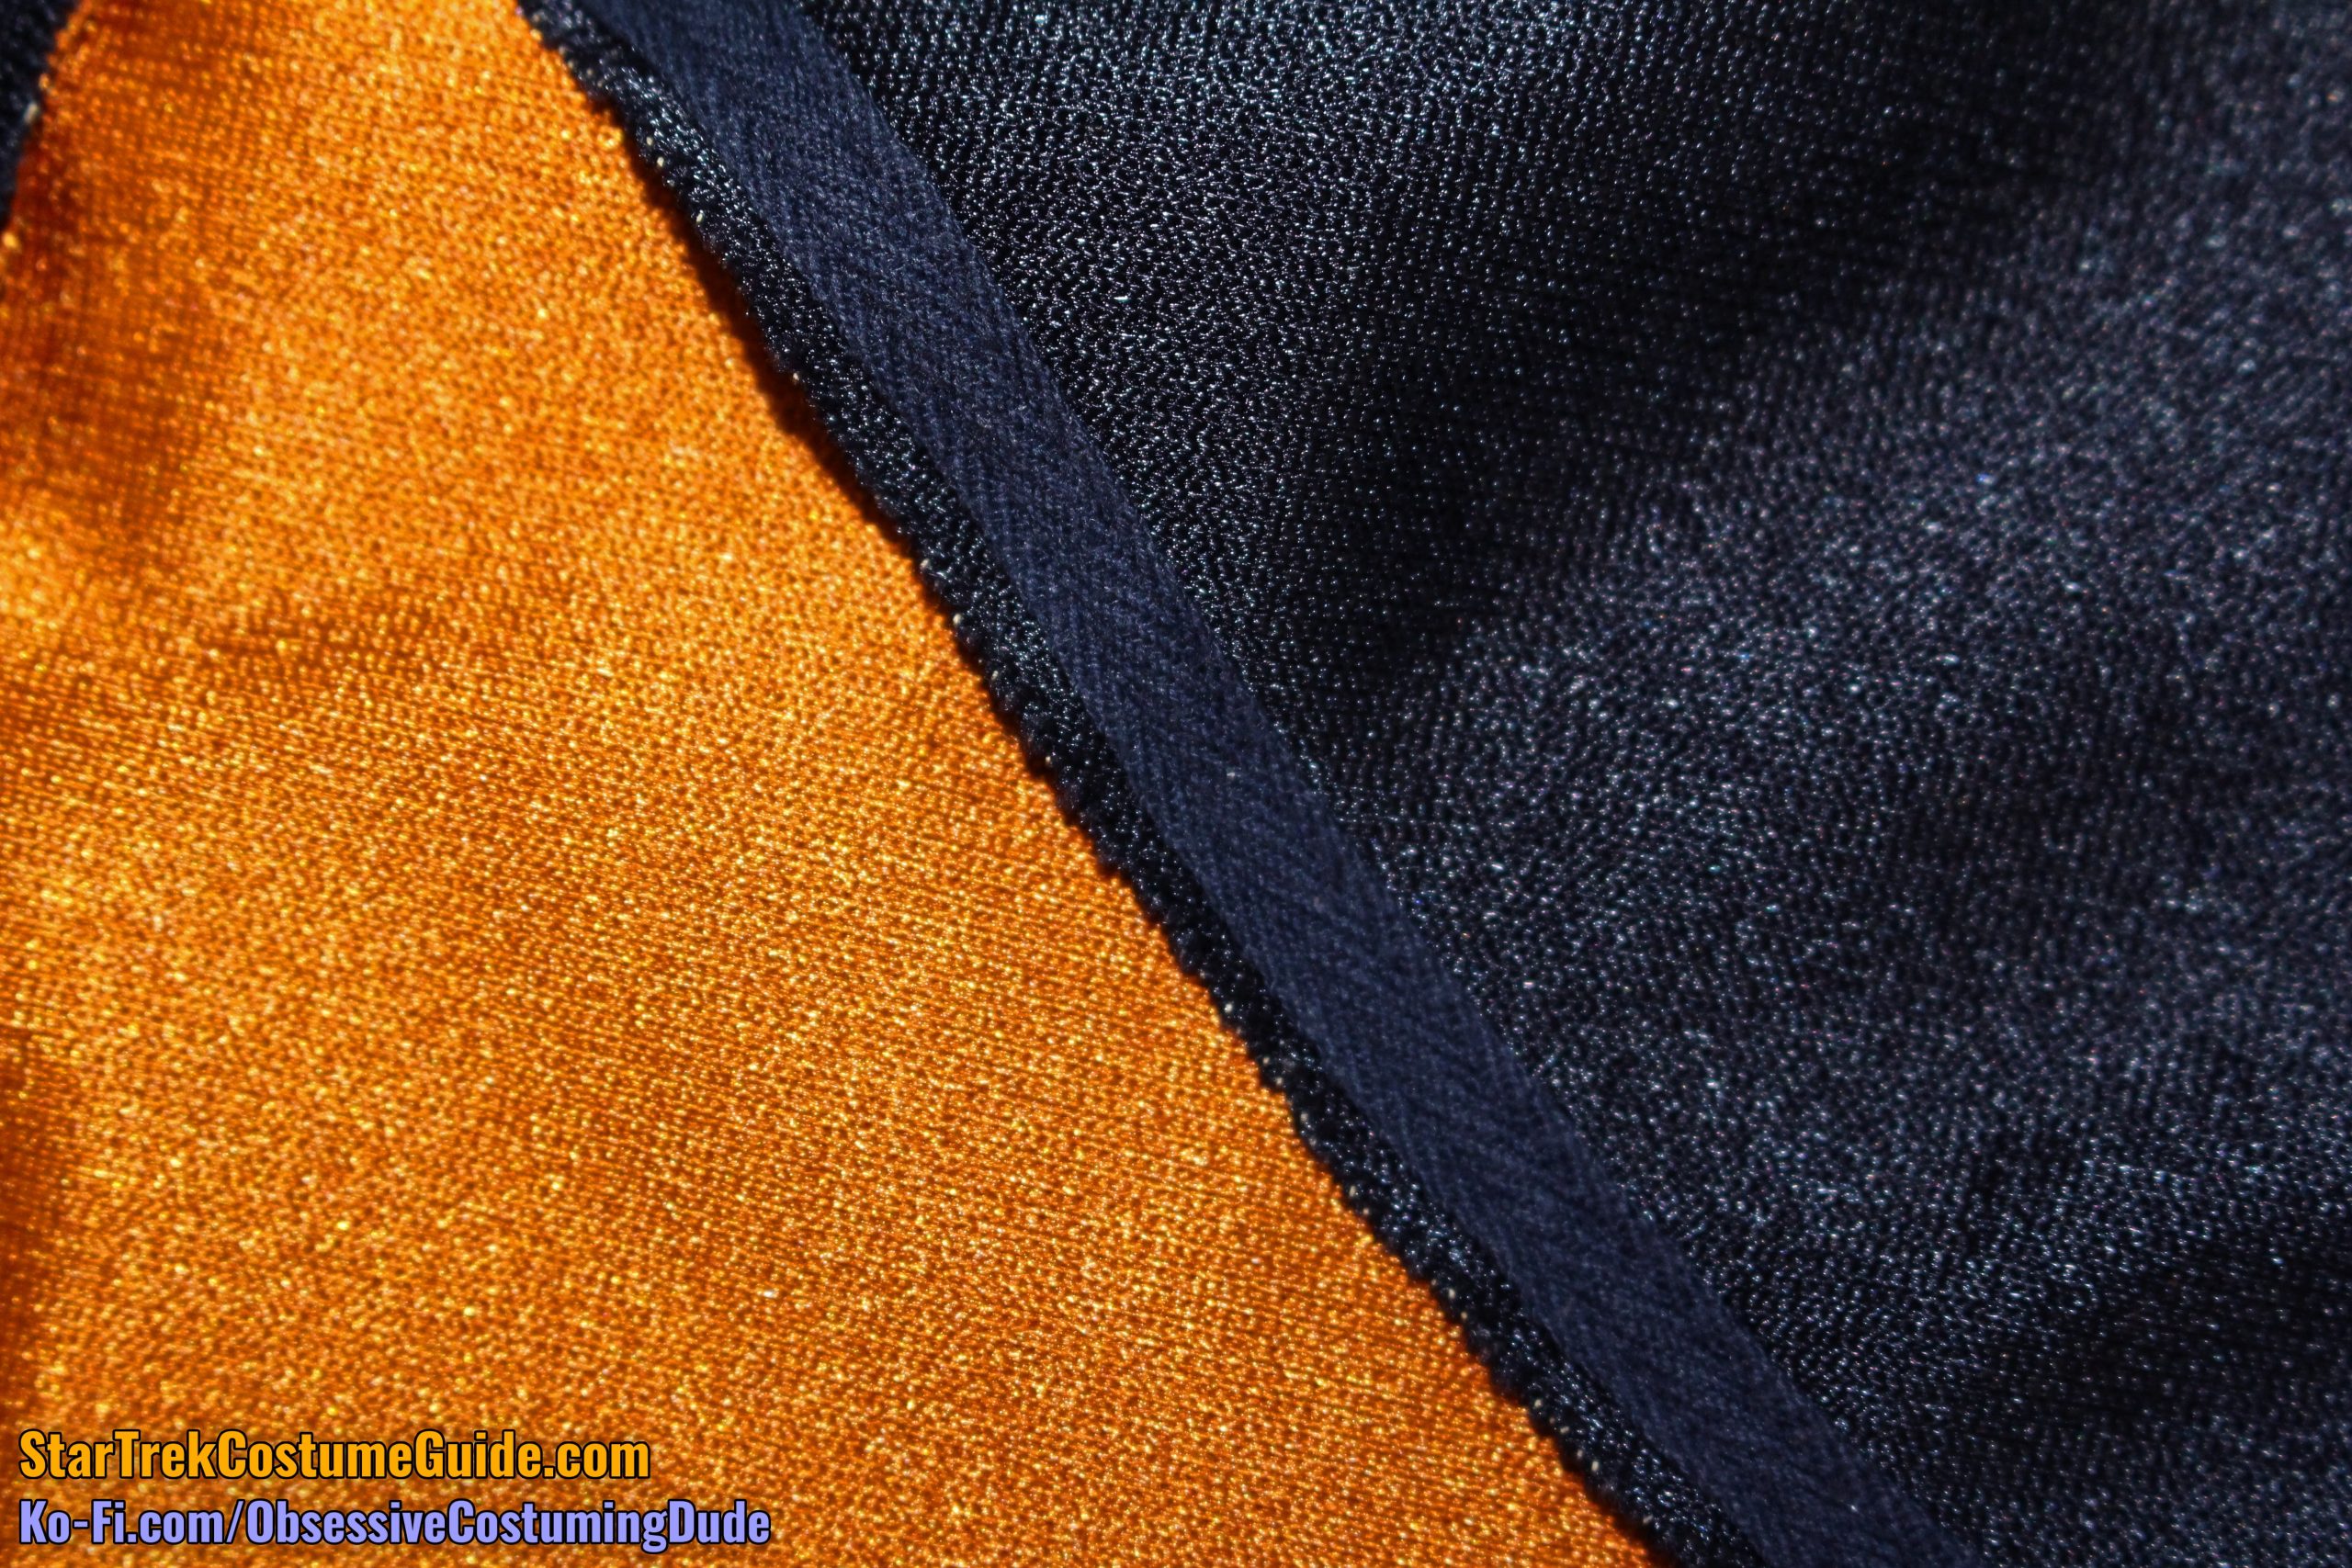
FABRIC and COLOR
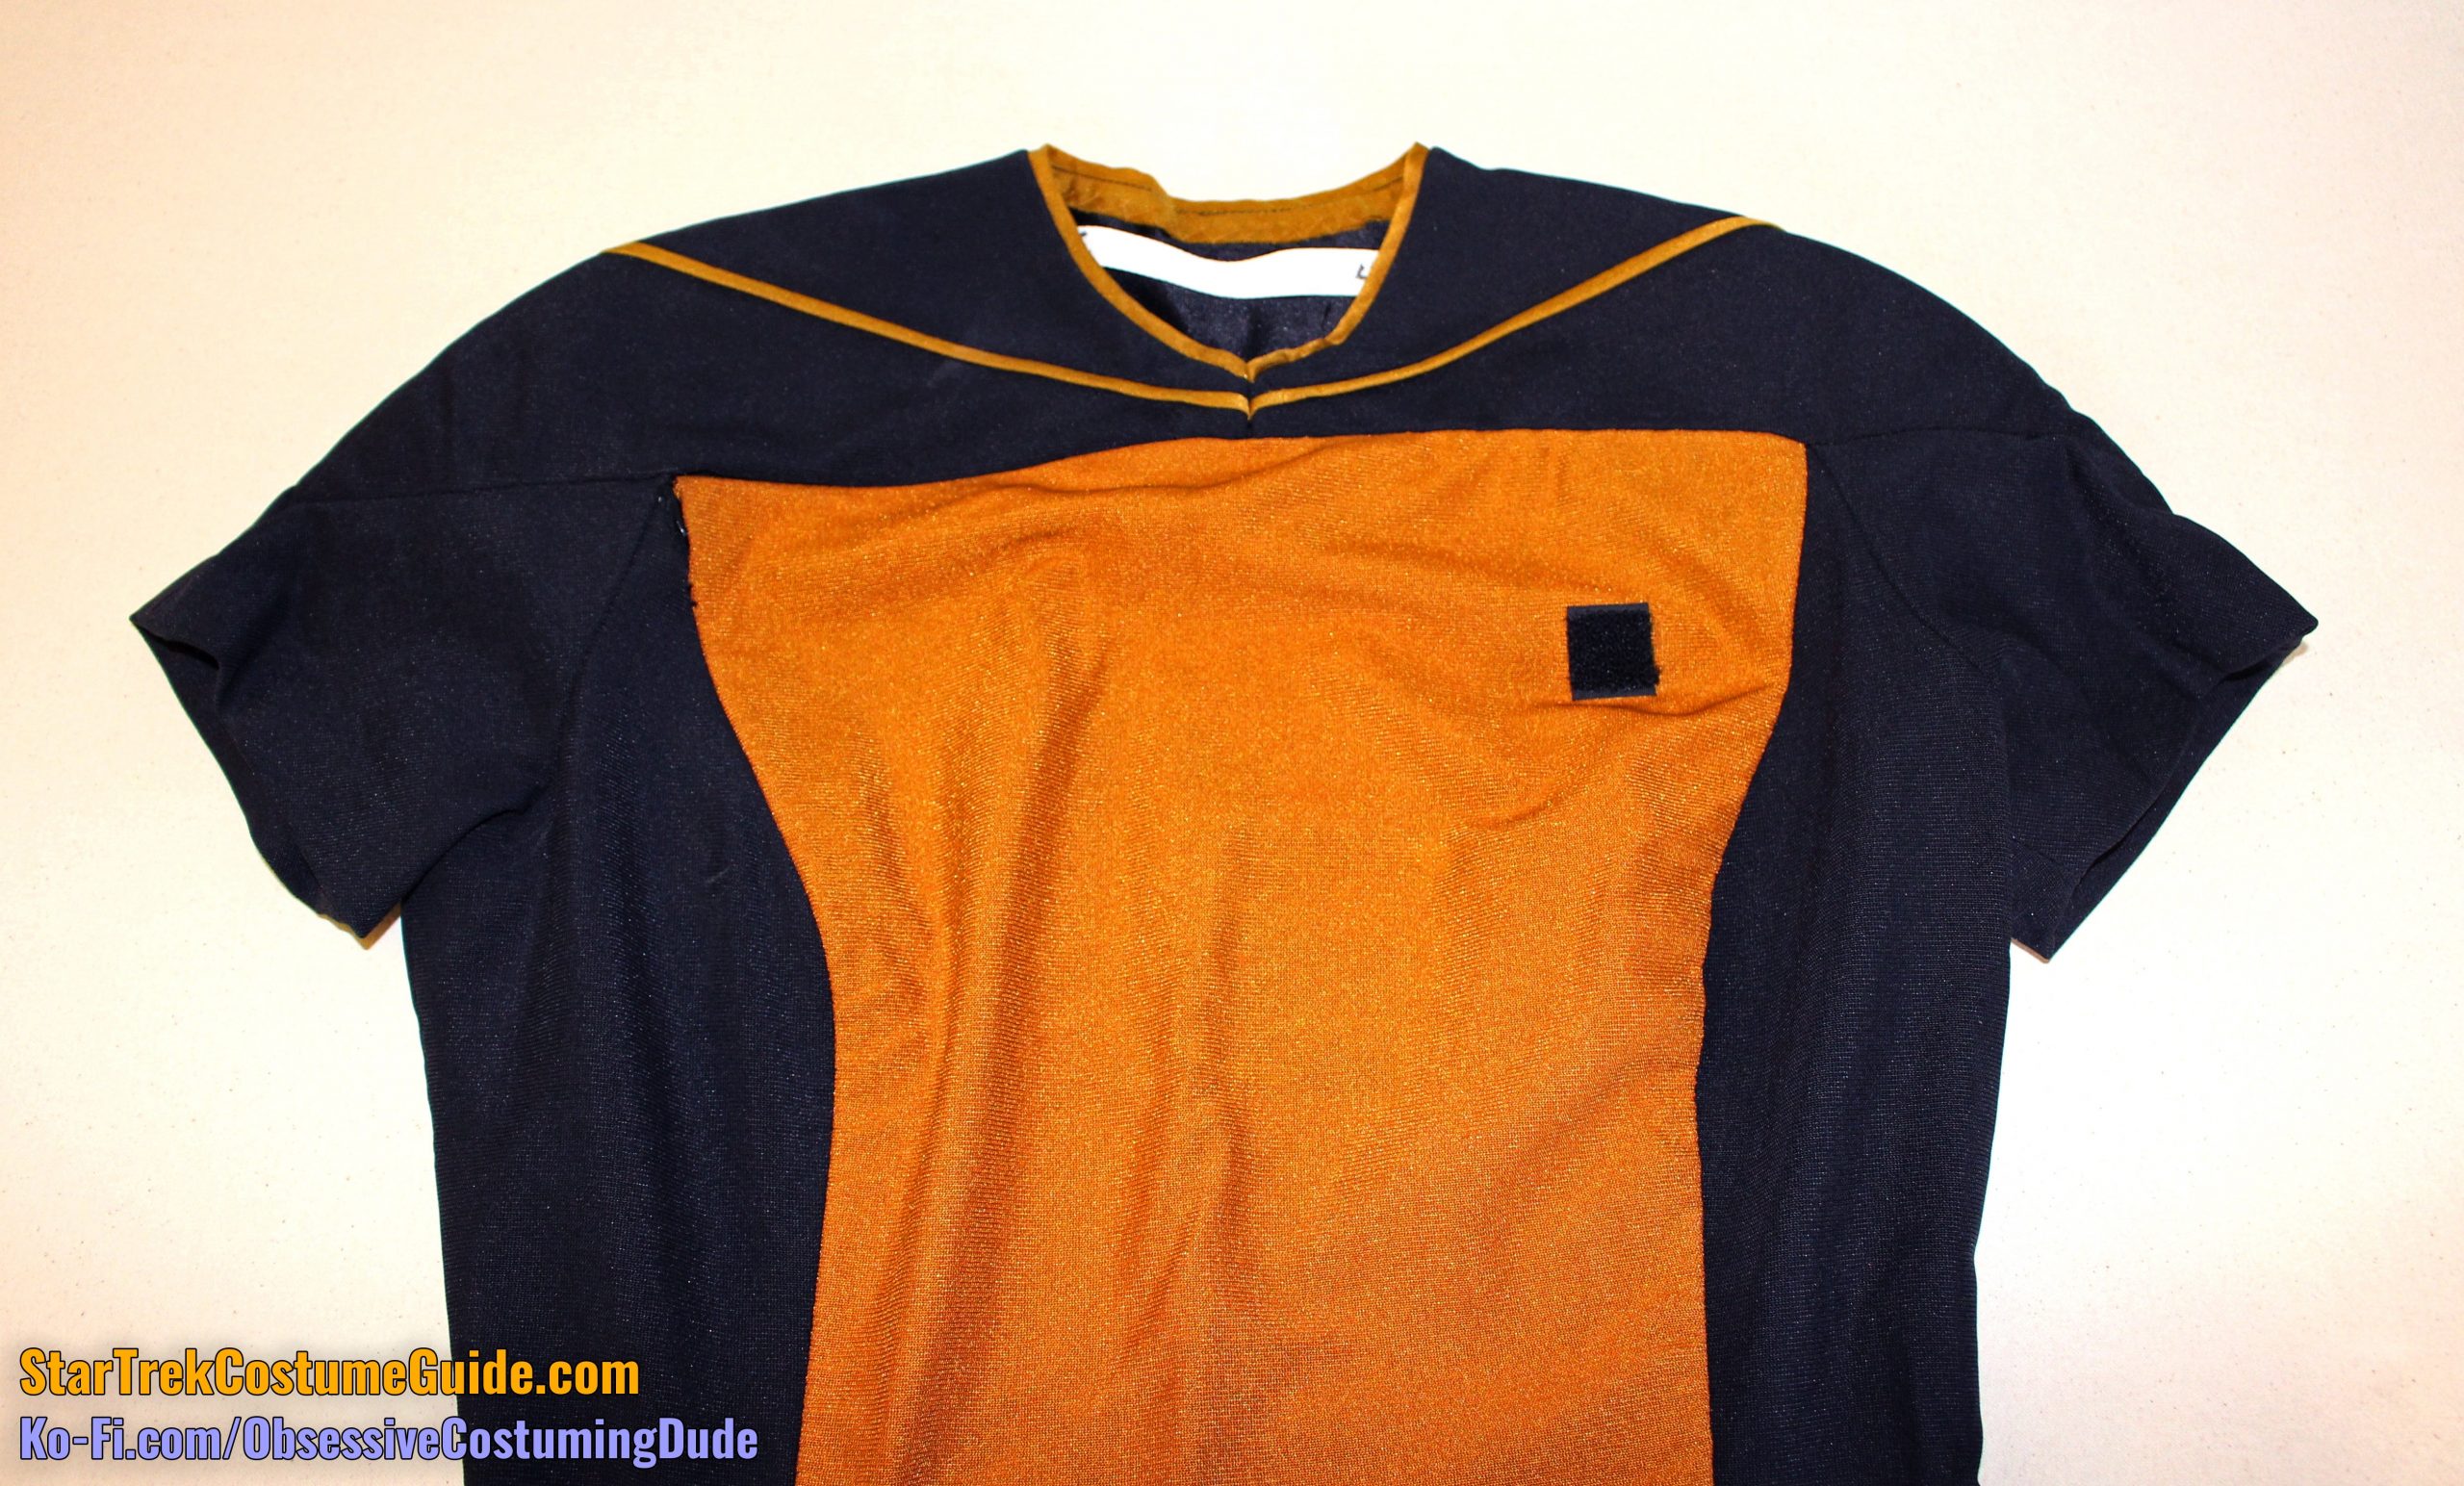
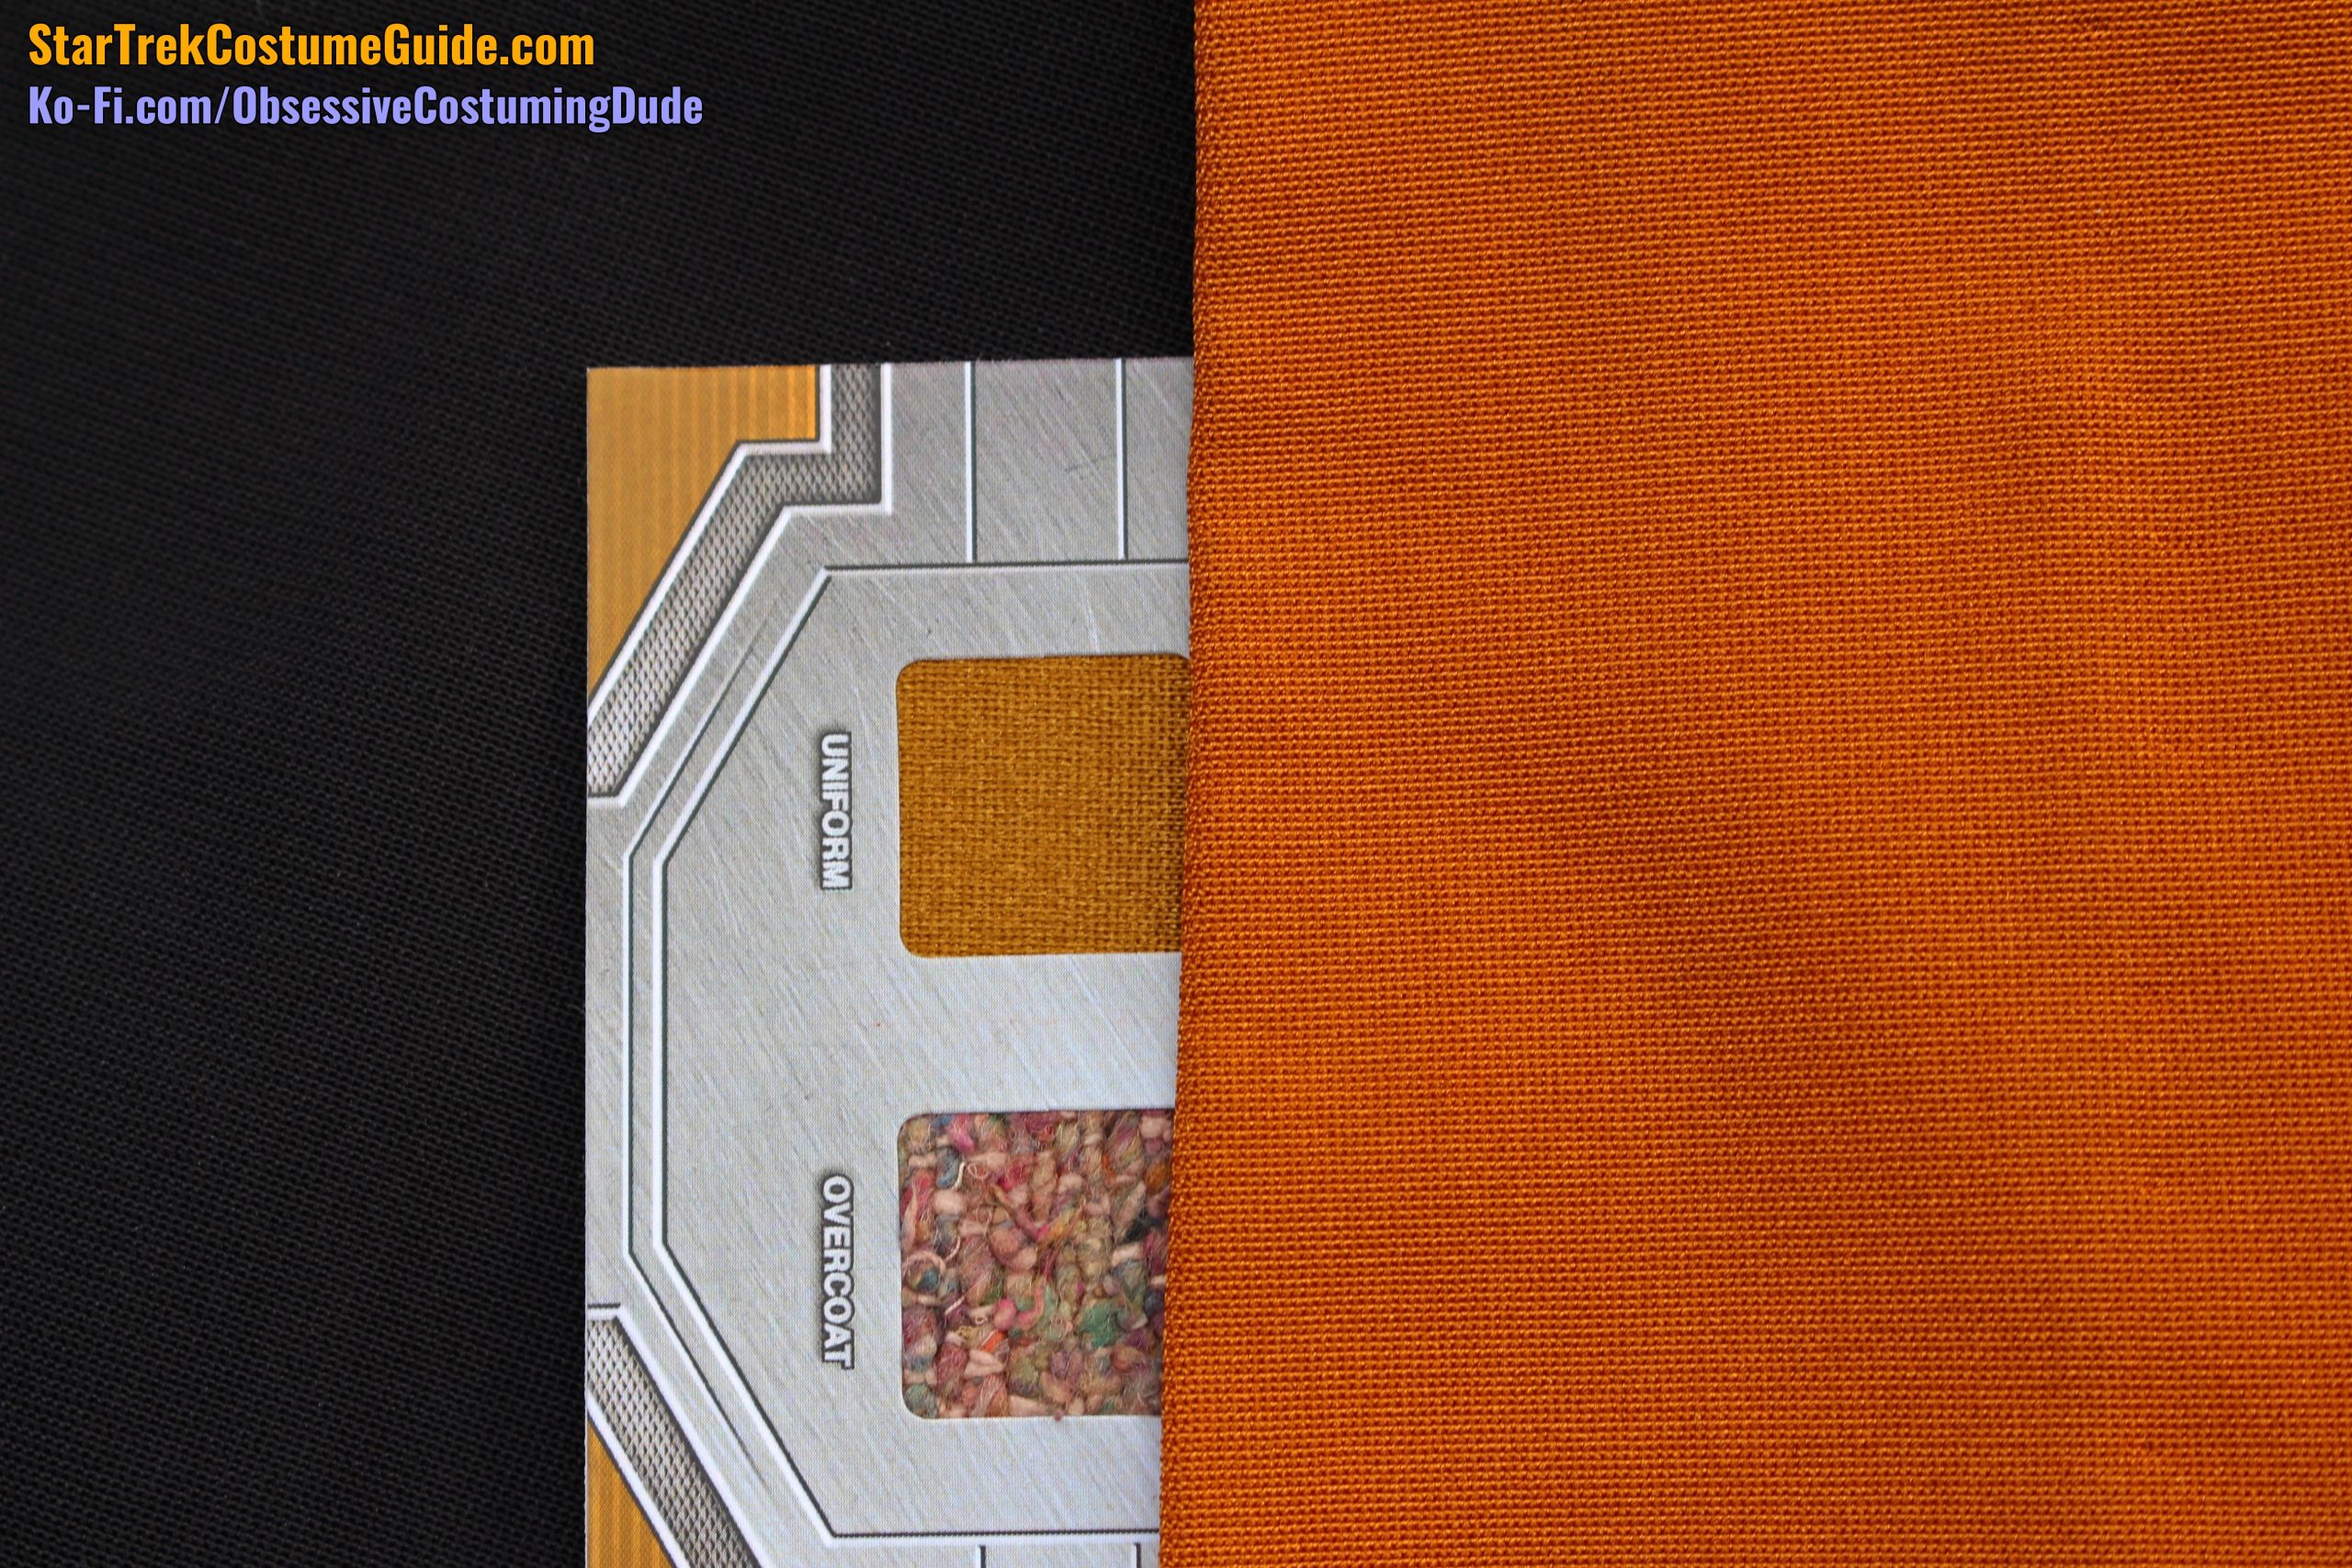
The first thing that struck me about the skant was how orange it was – especially considering how green-ish gold they looked during The Next Generation‘s first season, when they were primarily seen.
(And, as you’ll see, the flash on my camera really brought out the orange in the fabric! I’ve since done my best to avoid using flash.)
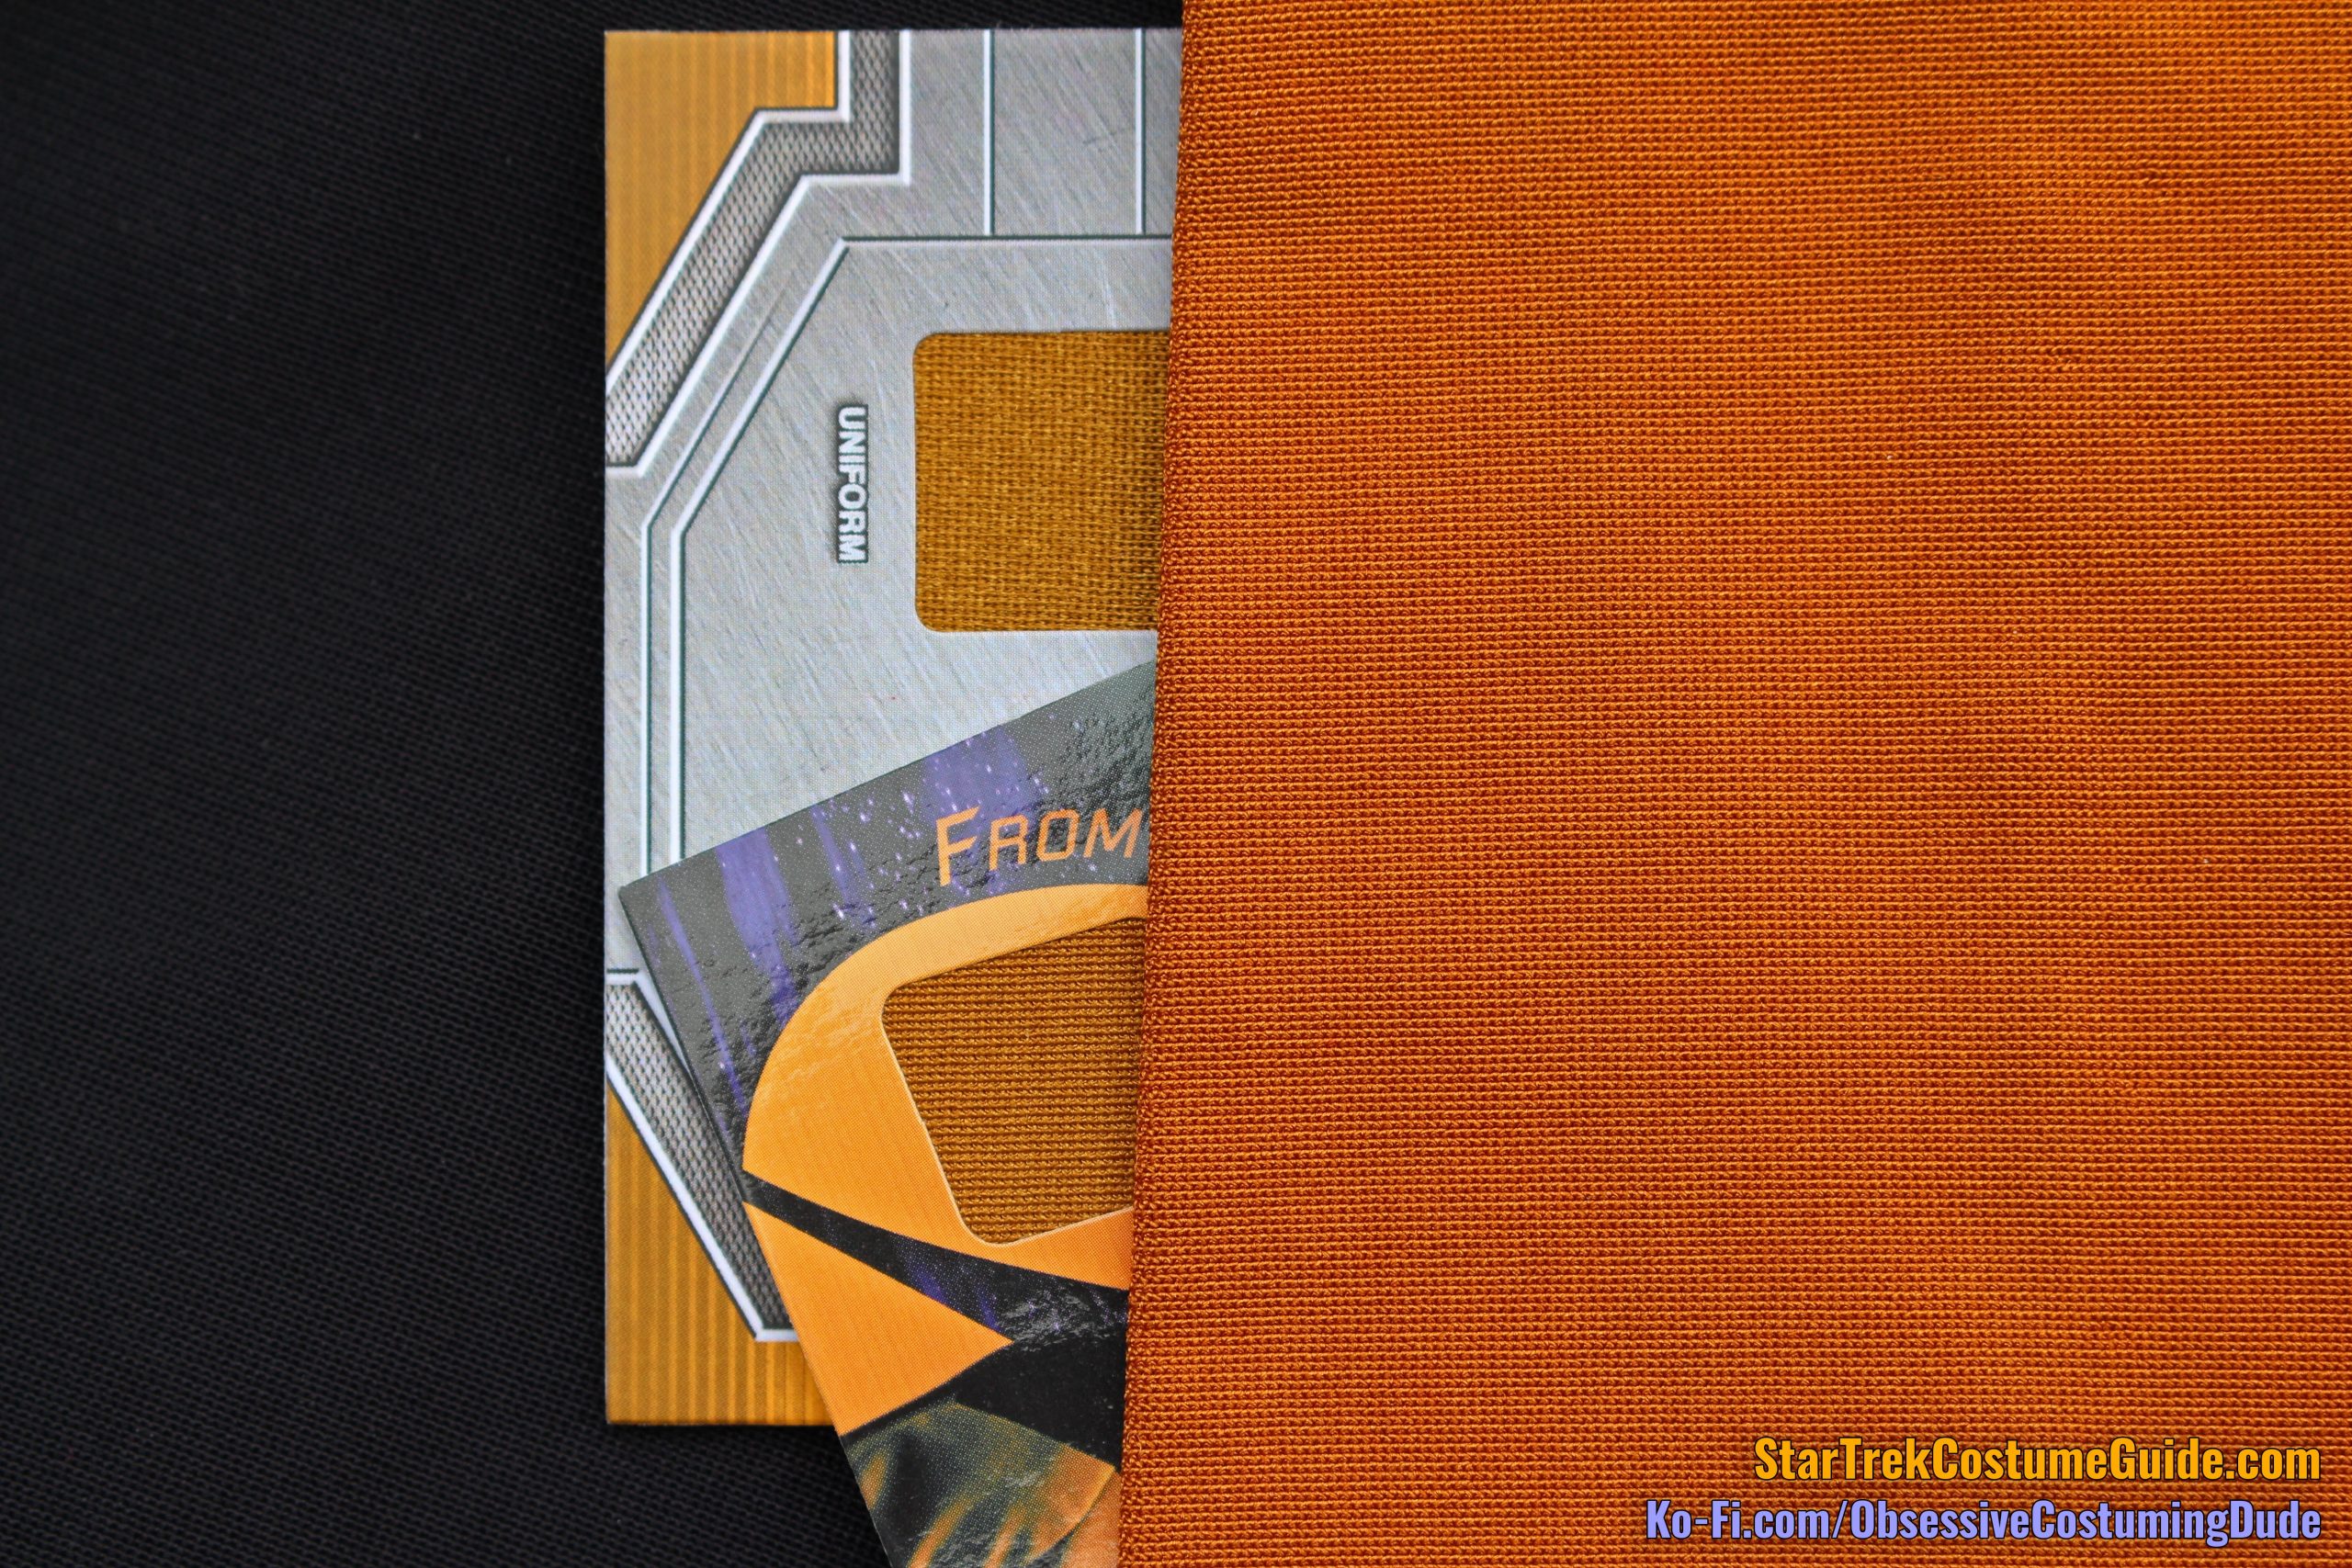
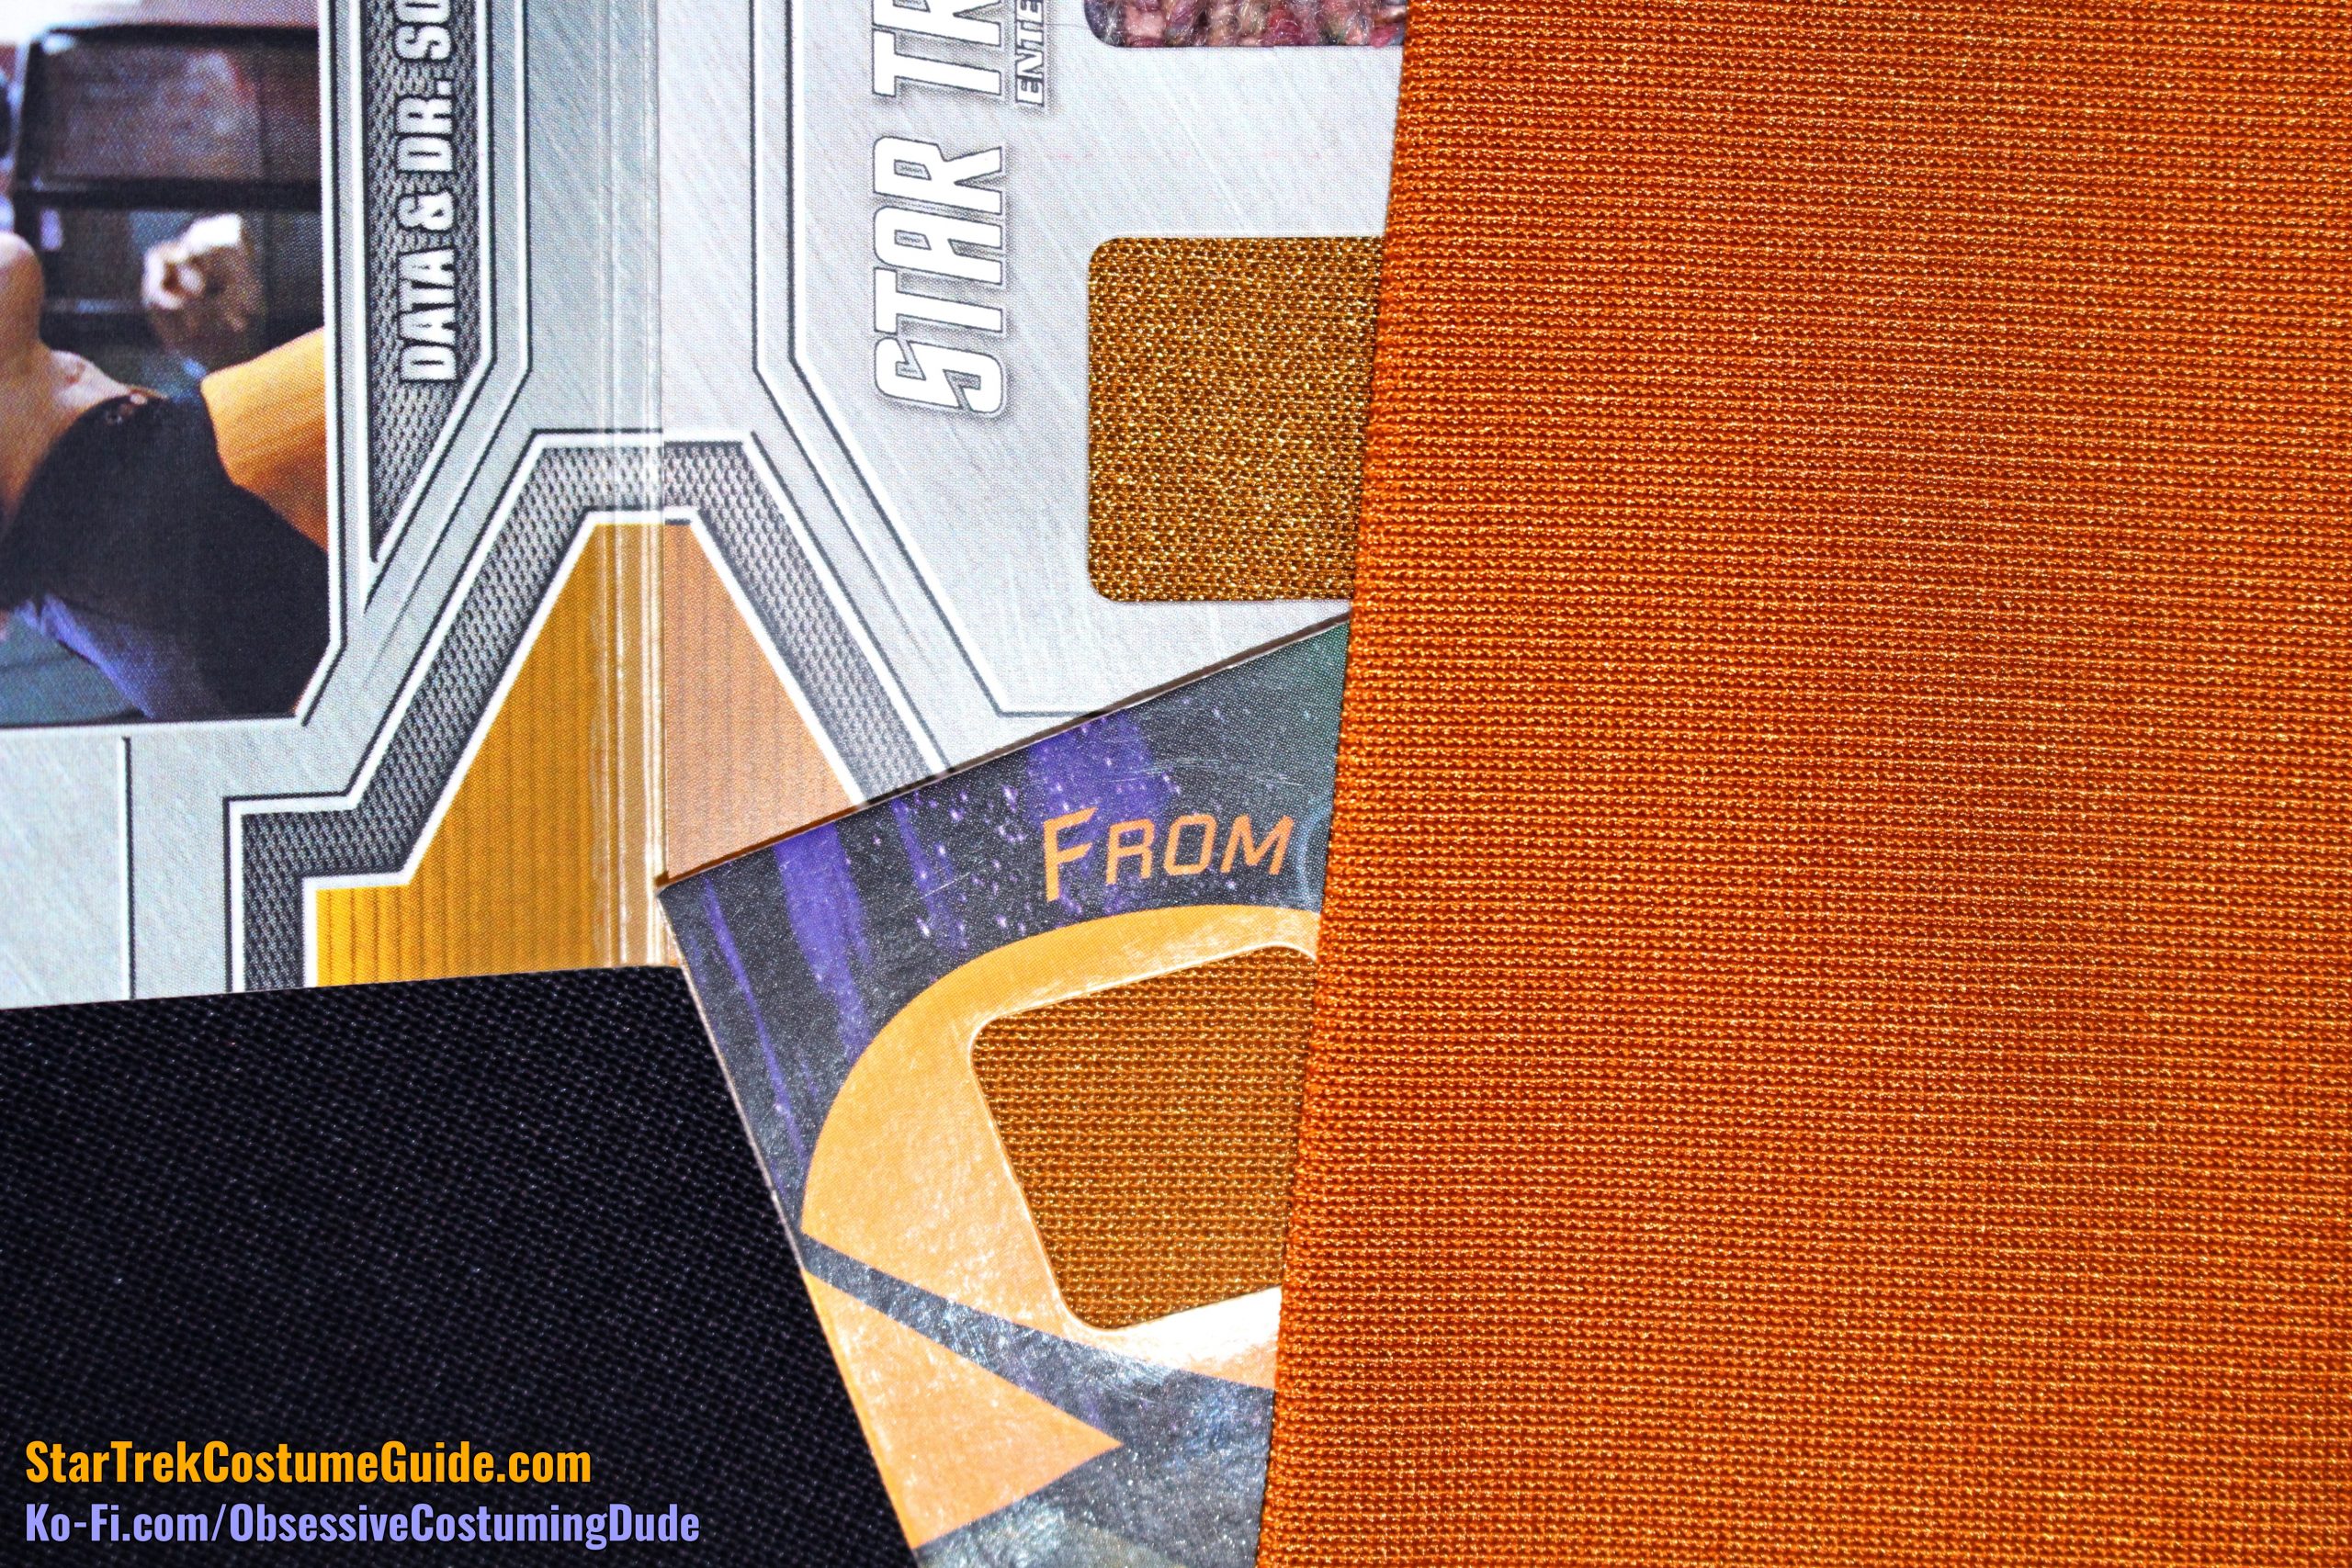
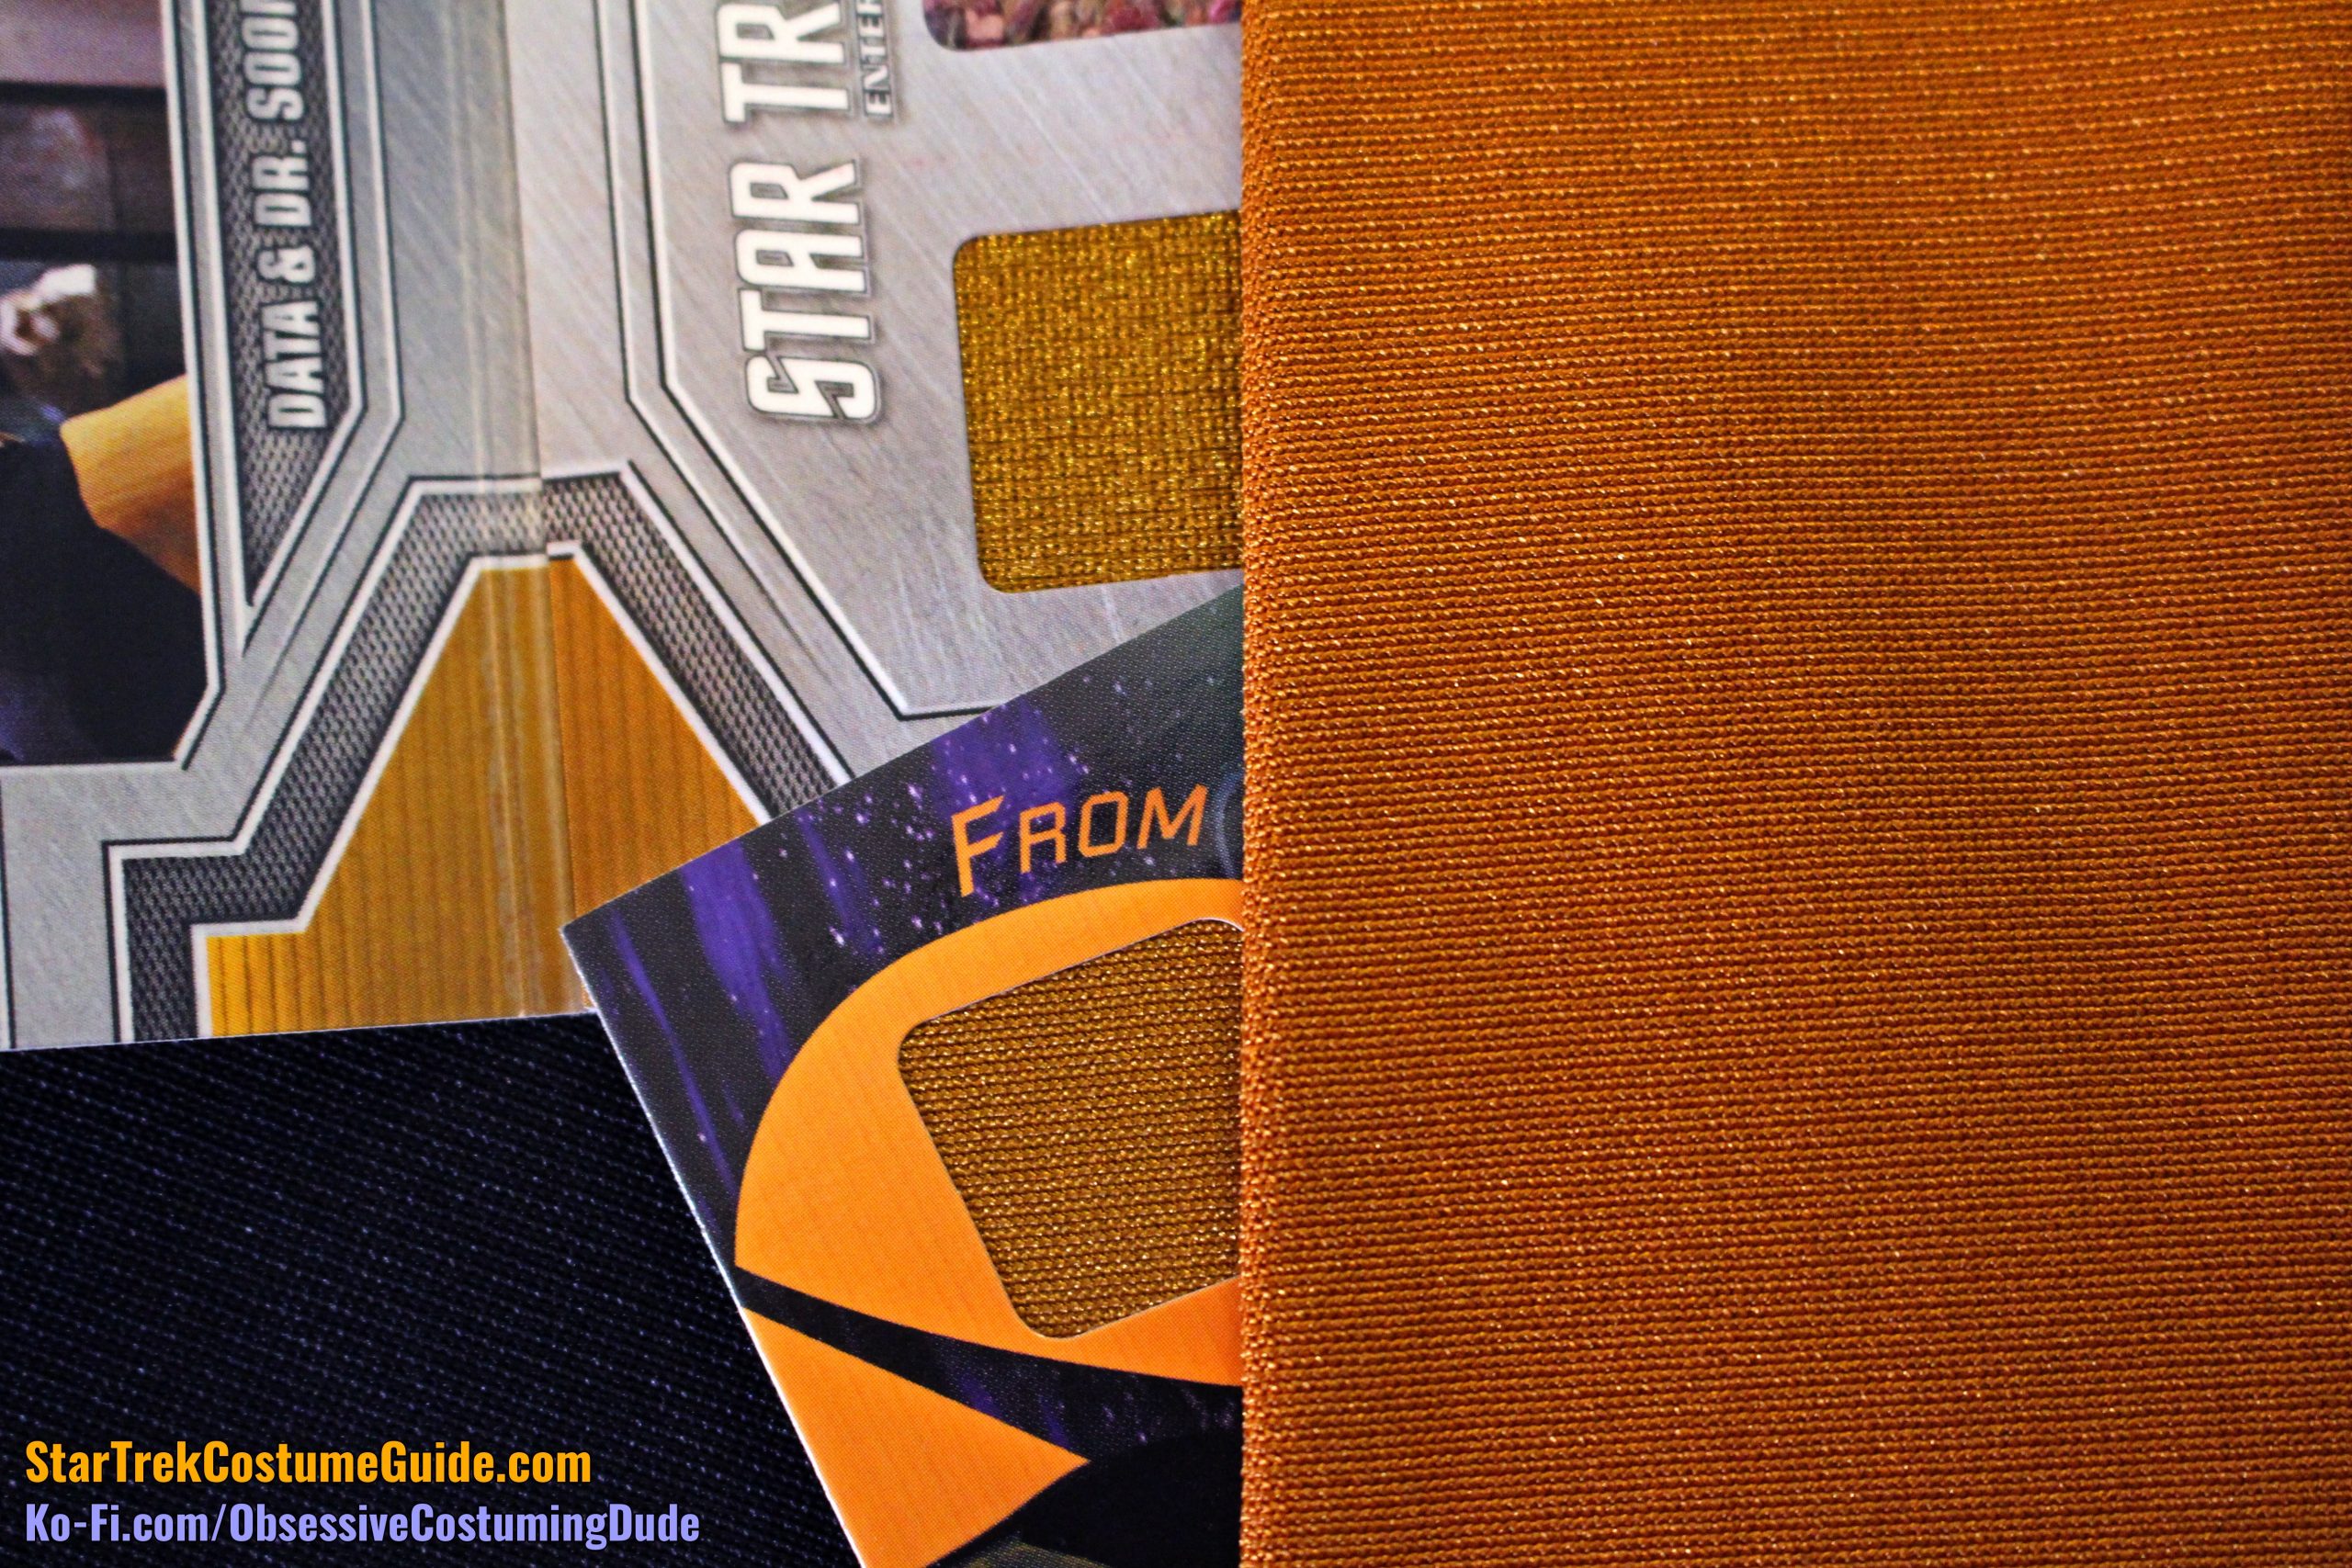
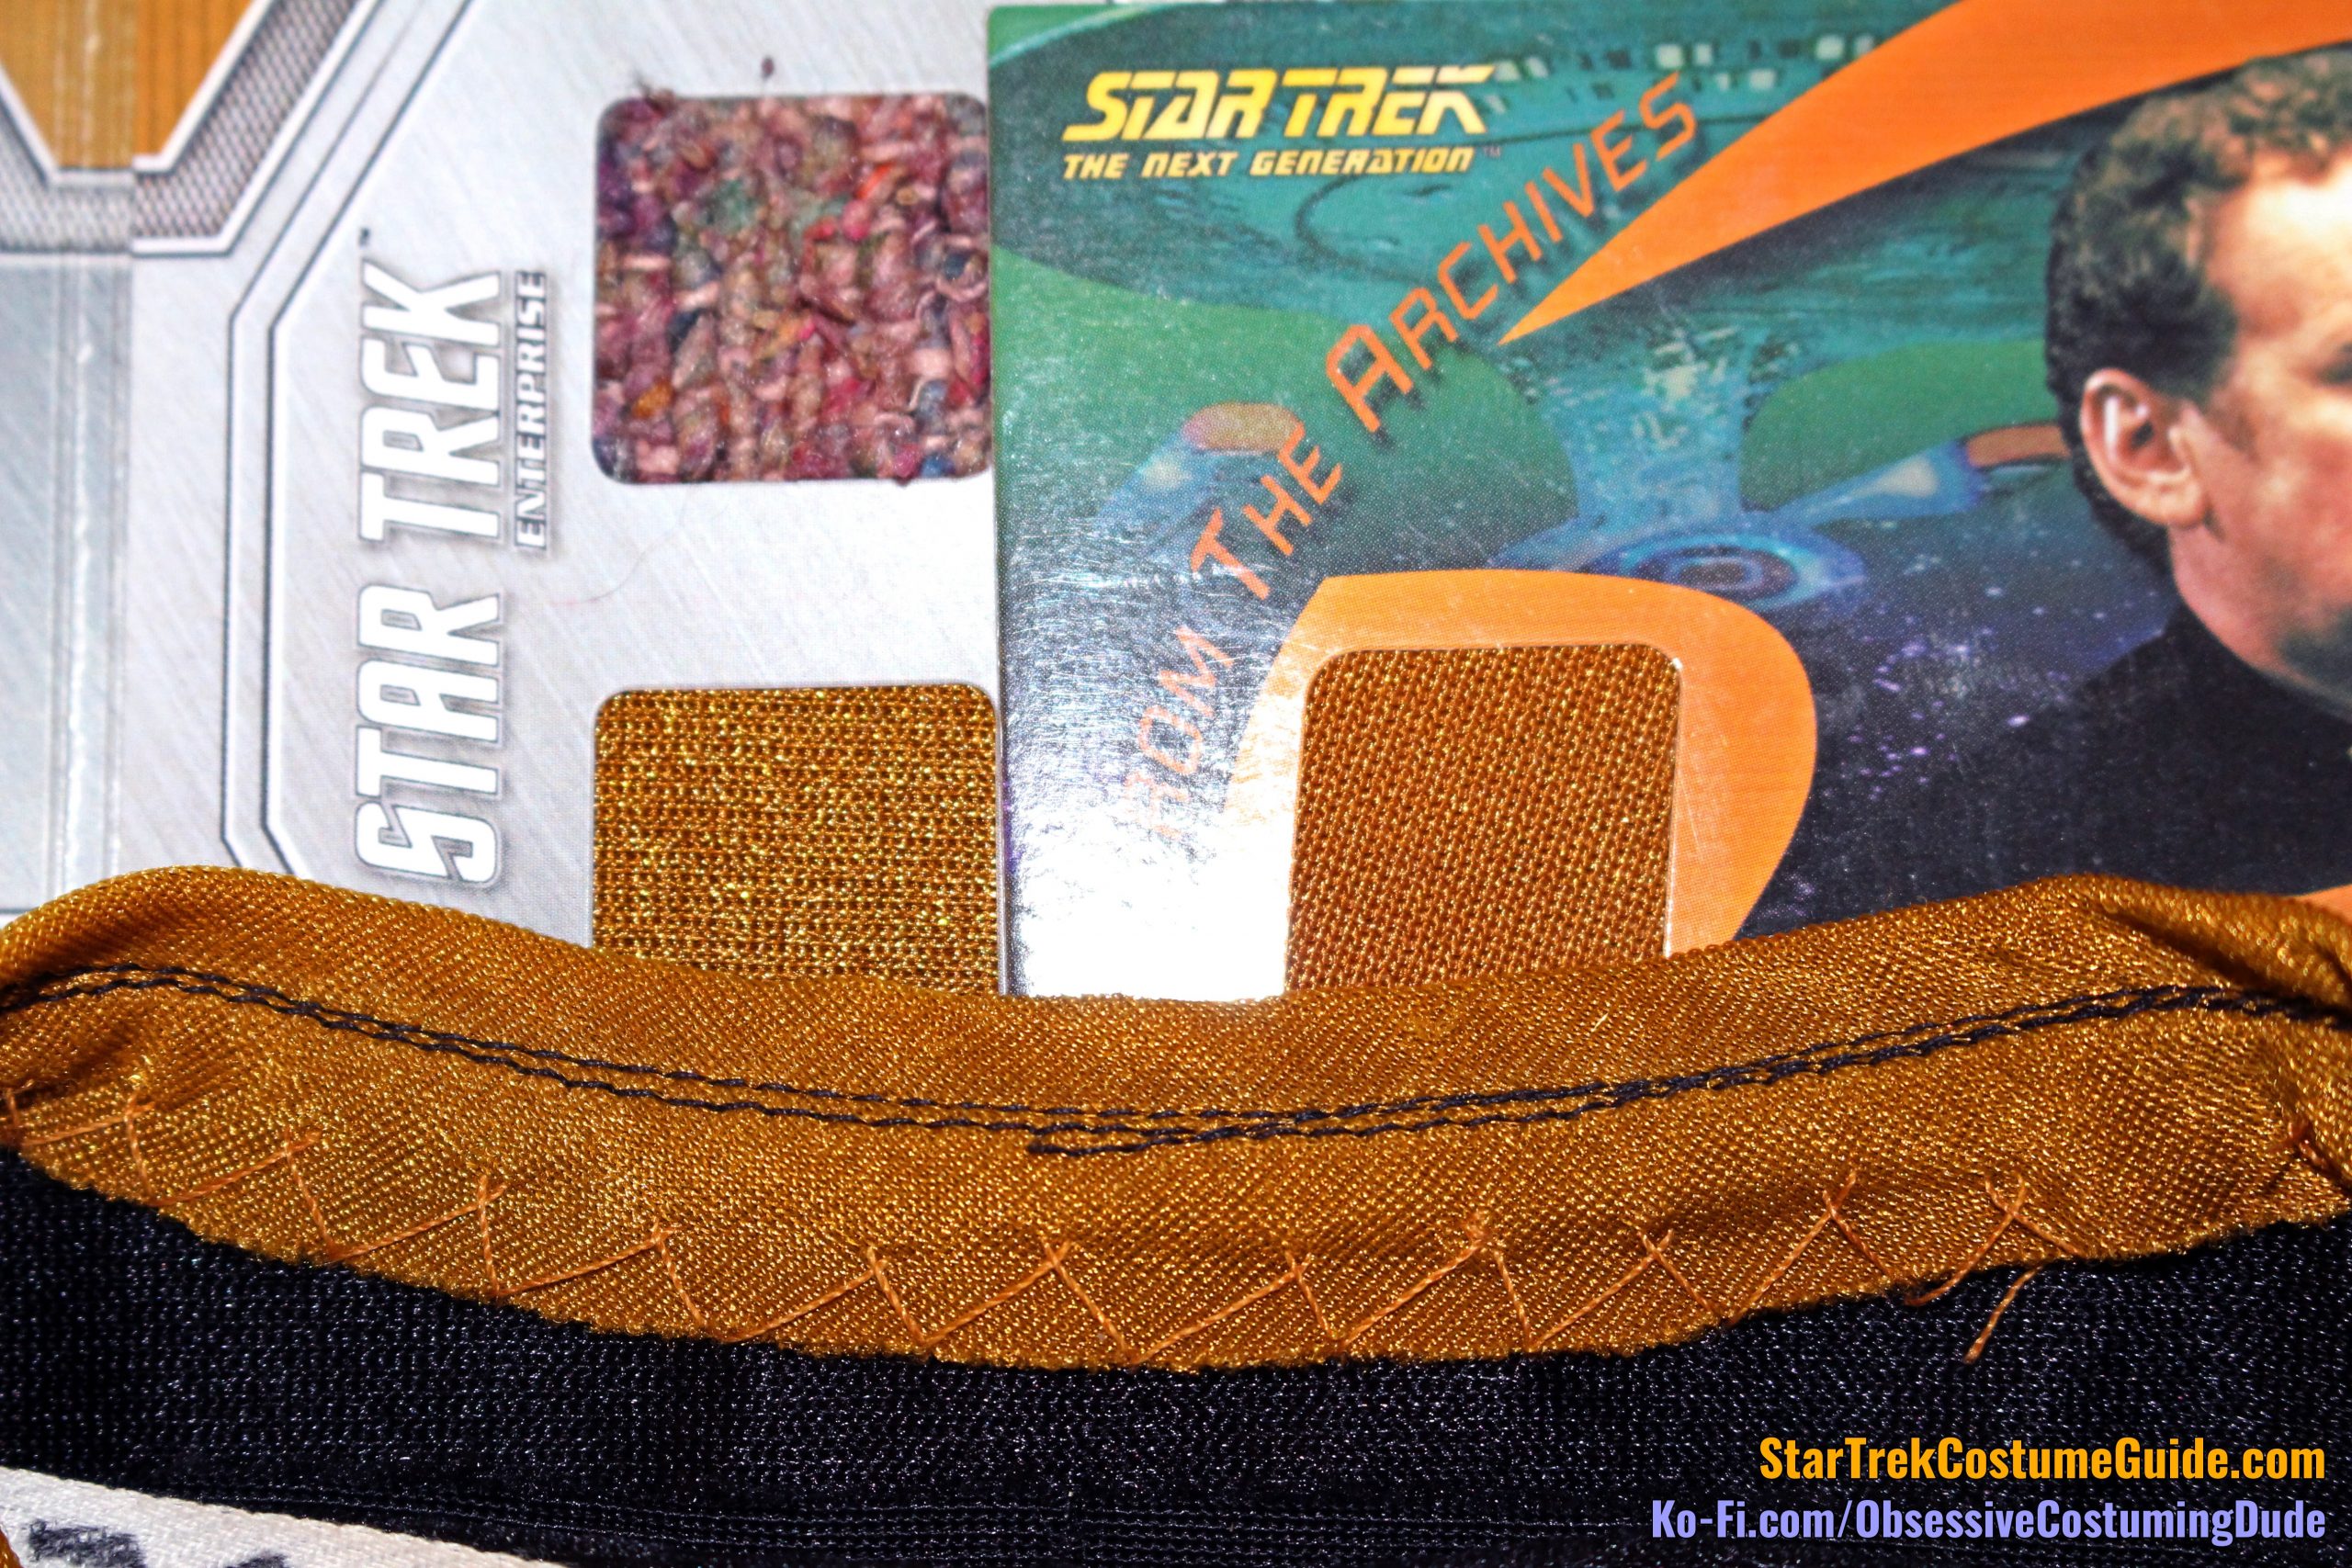
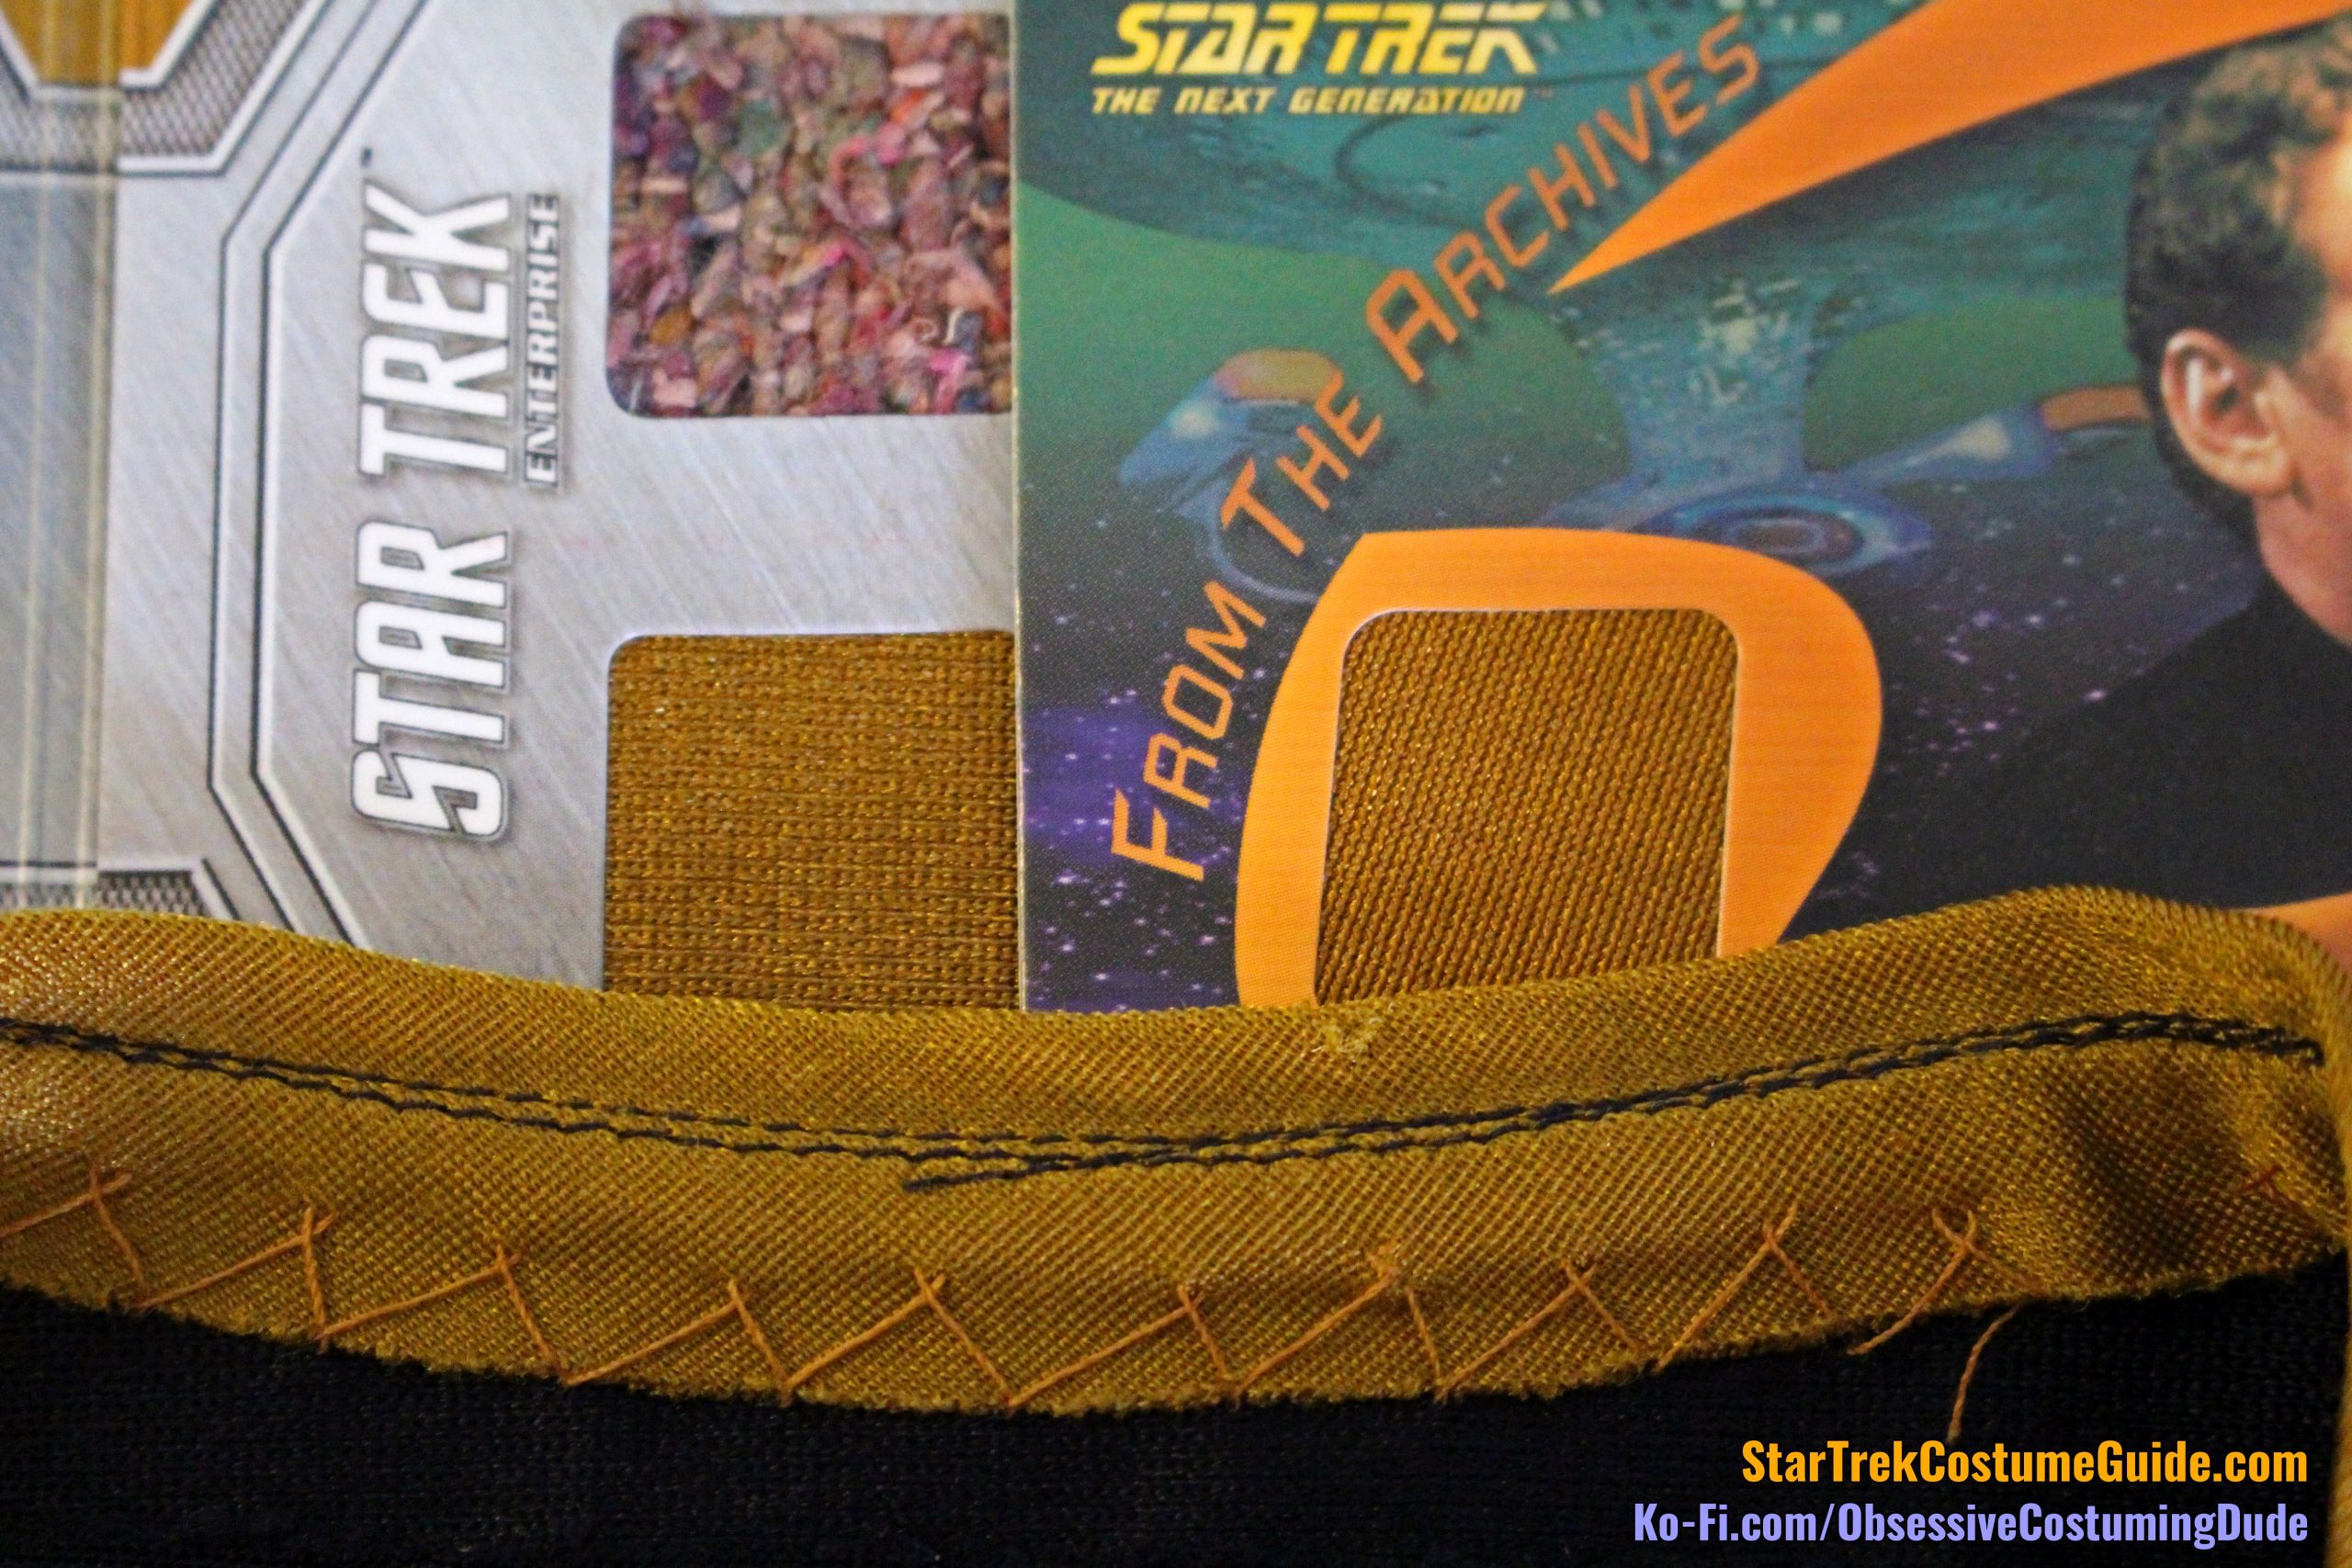
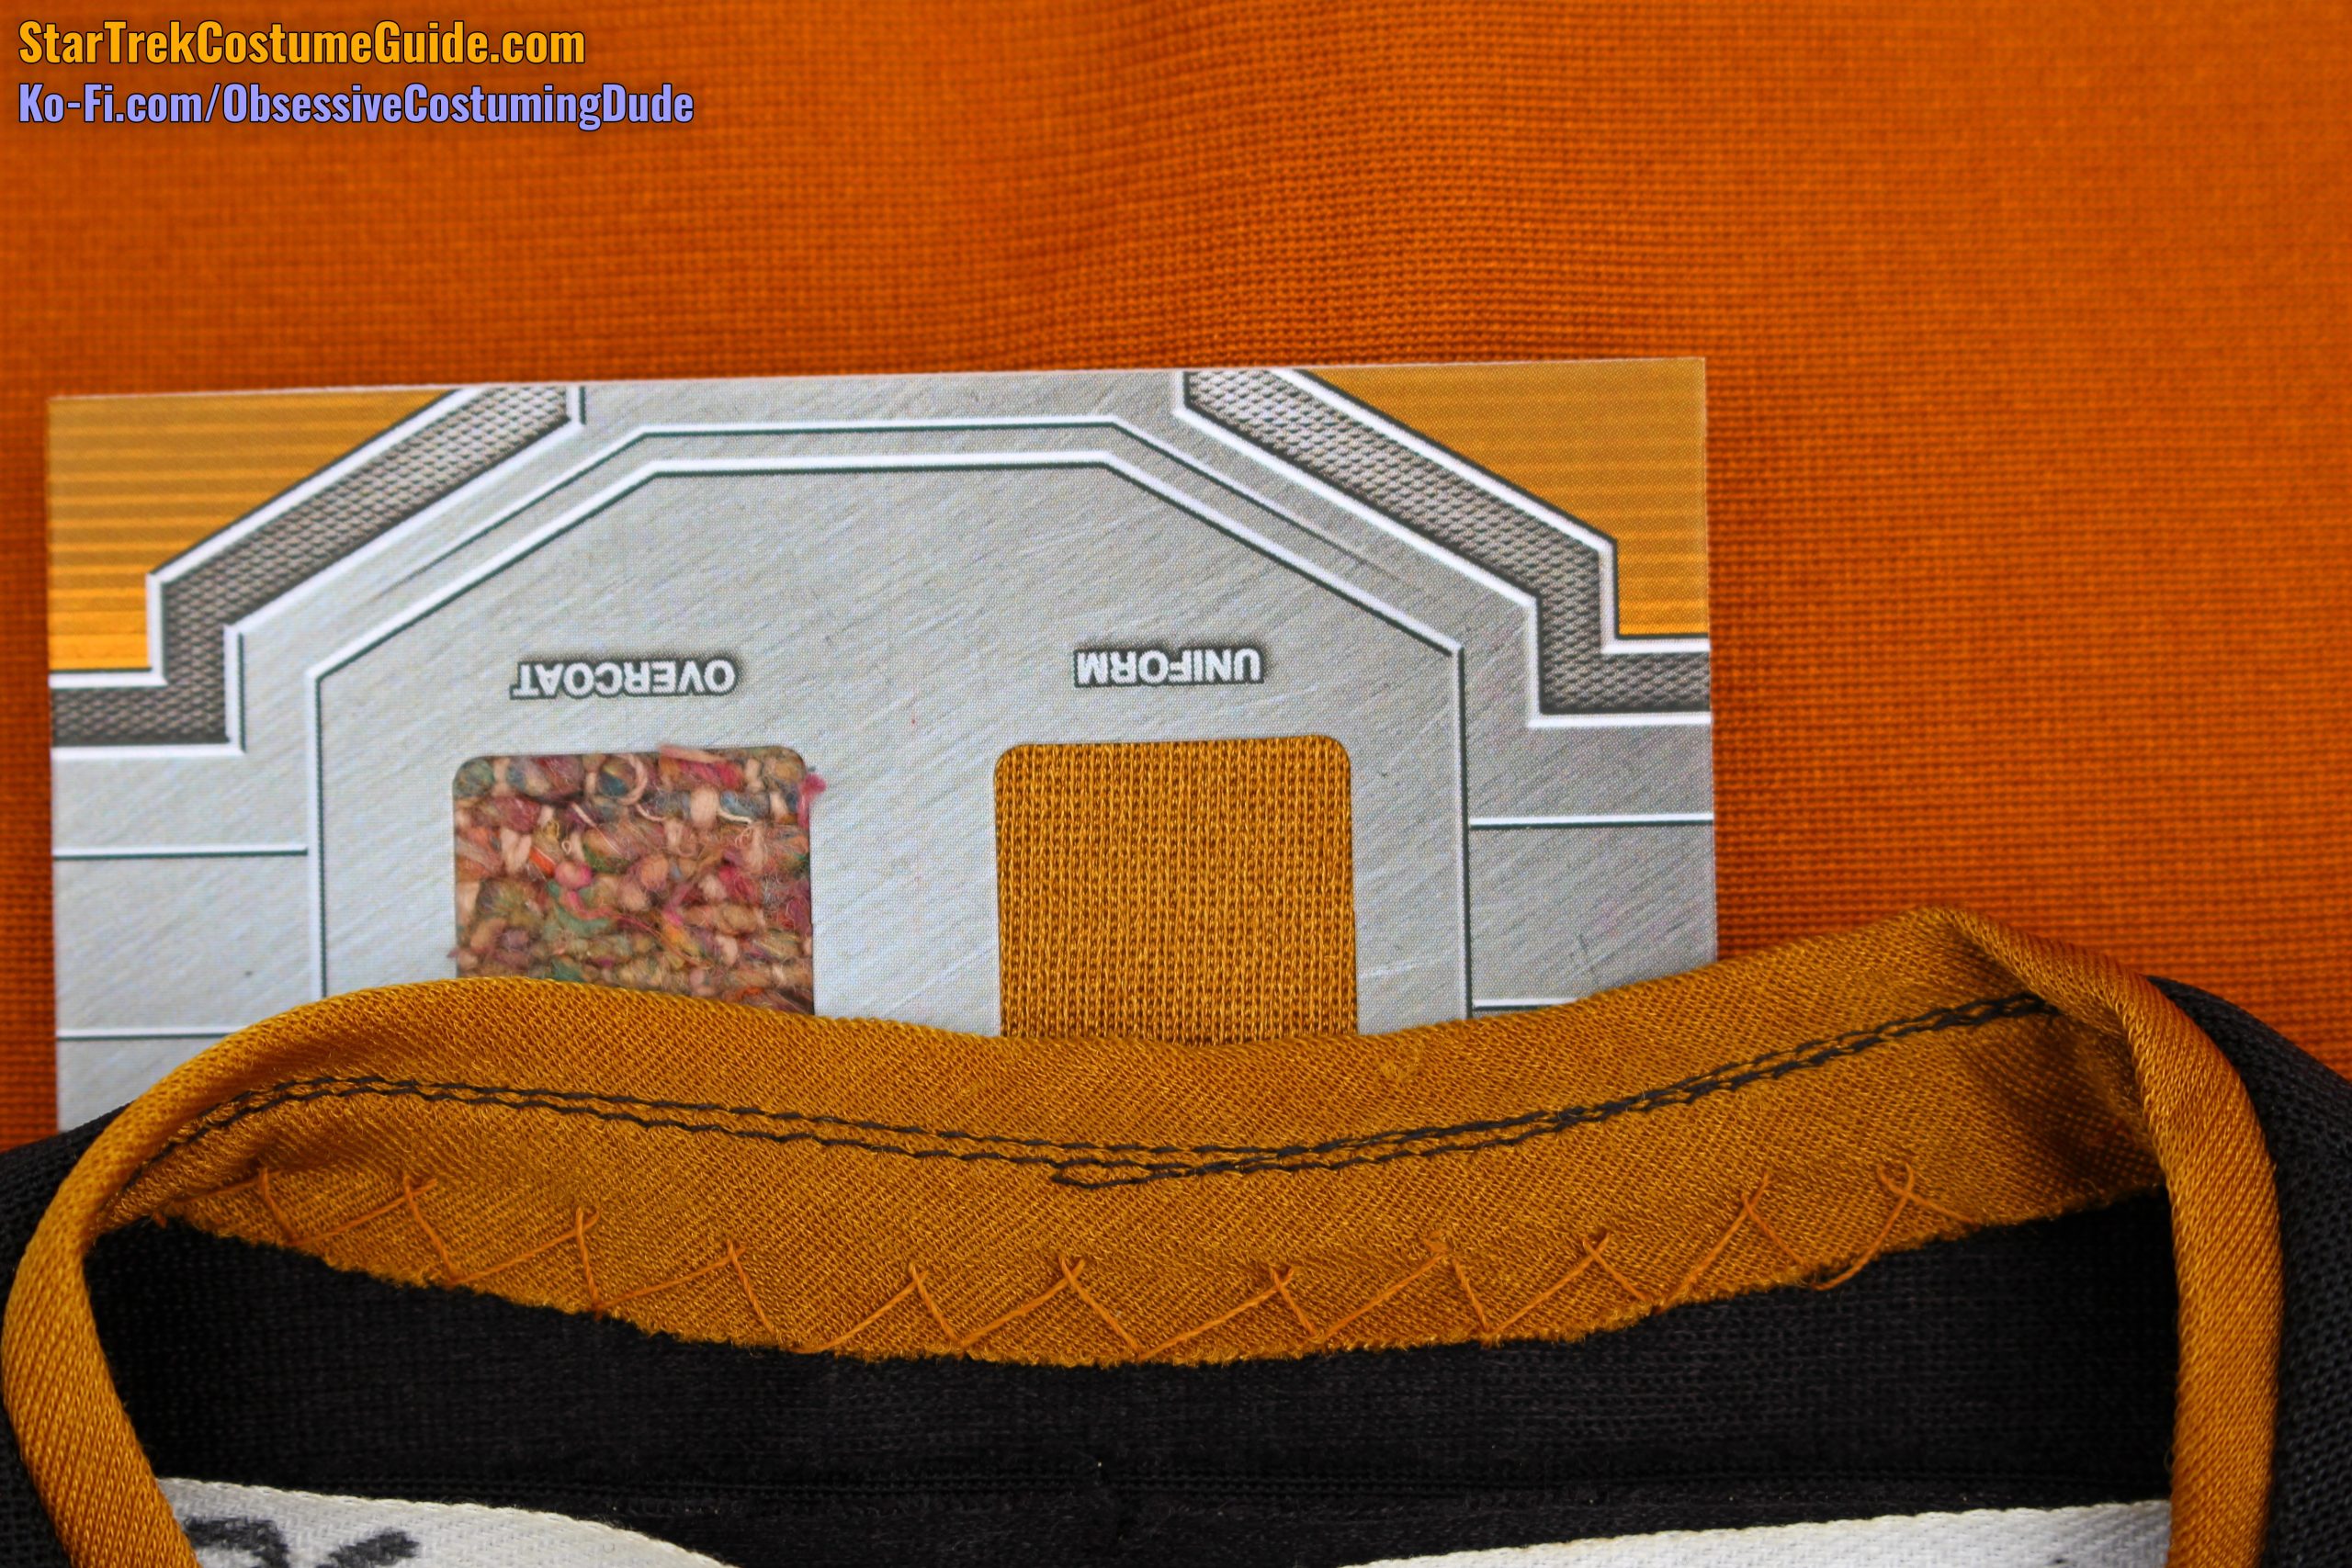
At the time I examined this skant (early 2017), I hadn’t yet begun collecting costume cards with swatches of screen-used uniform fabric, but my friend Michael Cowart had a couple and kindly loaned them to me for a color comparison.
Michael’s gold Data and O’Brien swatches were already different colors; the O’Brien swatch is more orange, and the Data swatch is more of a murky greenish brown.
But compared to the screen-used TNG skant … well, the color difference was quite pronounced.
Here’s a series of comparison photos I took, under different lighting situations:
Outside, no flash
Indoors, with flash
Indoors, no flash
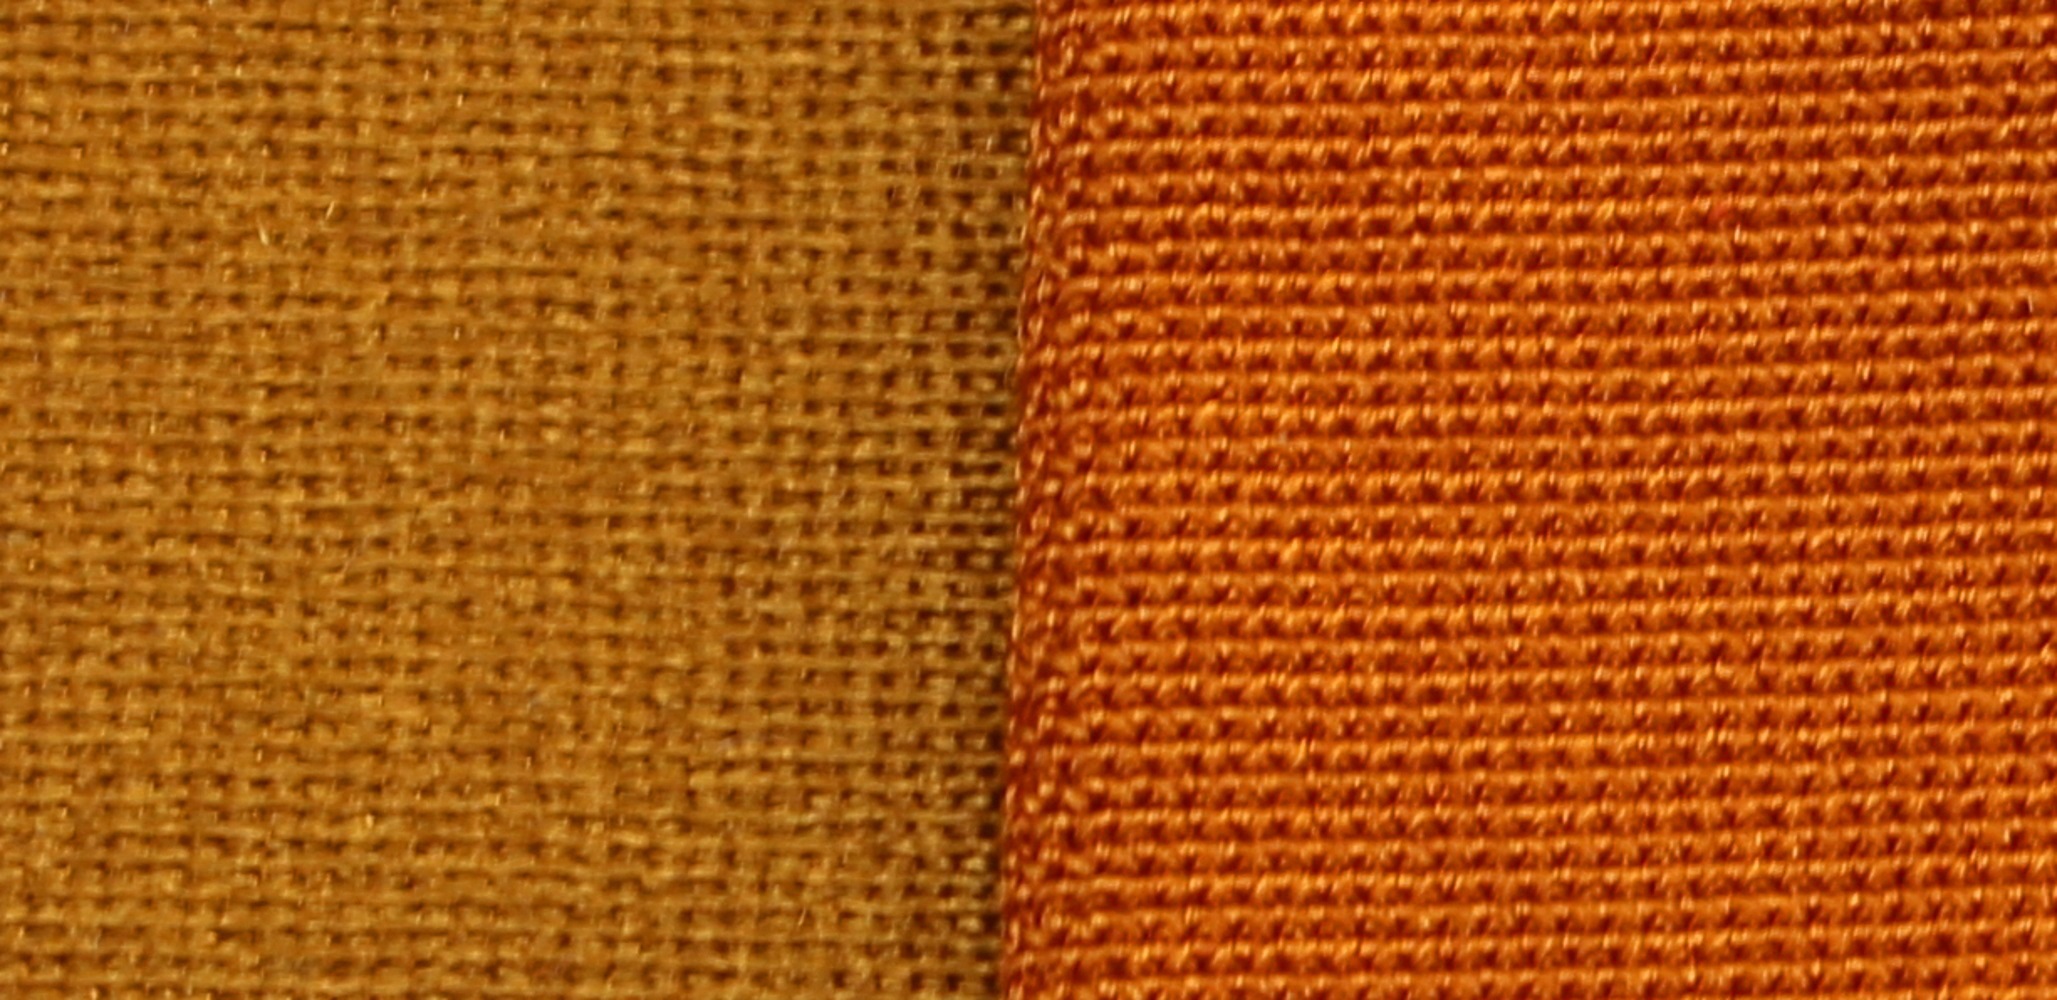
The color difference between the Data swatch and the TNG skant was considerable.
Outside, no flash
(Same photo, zoomed in and cropped)
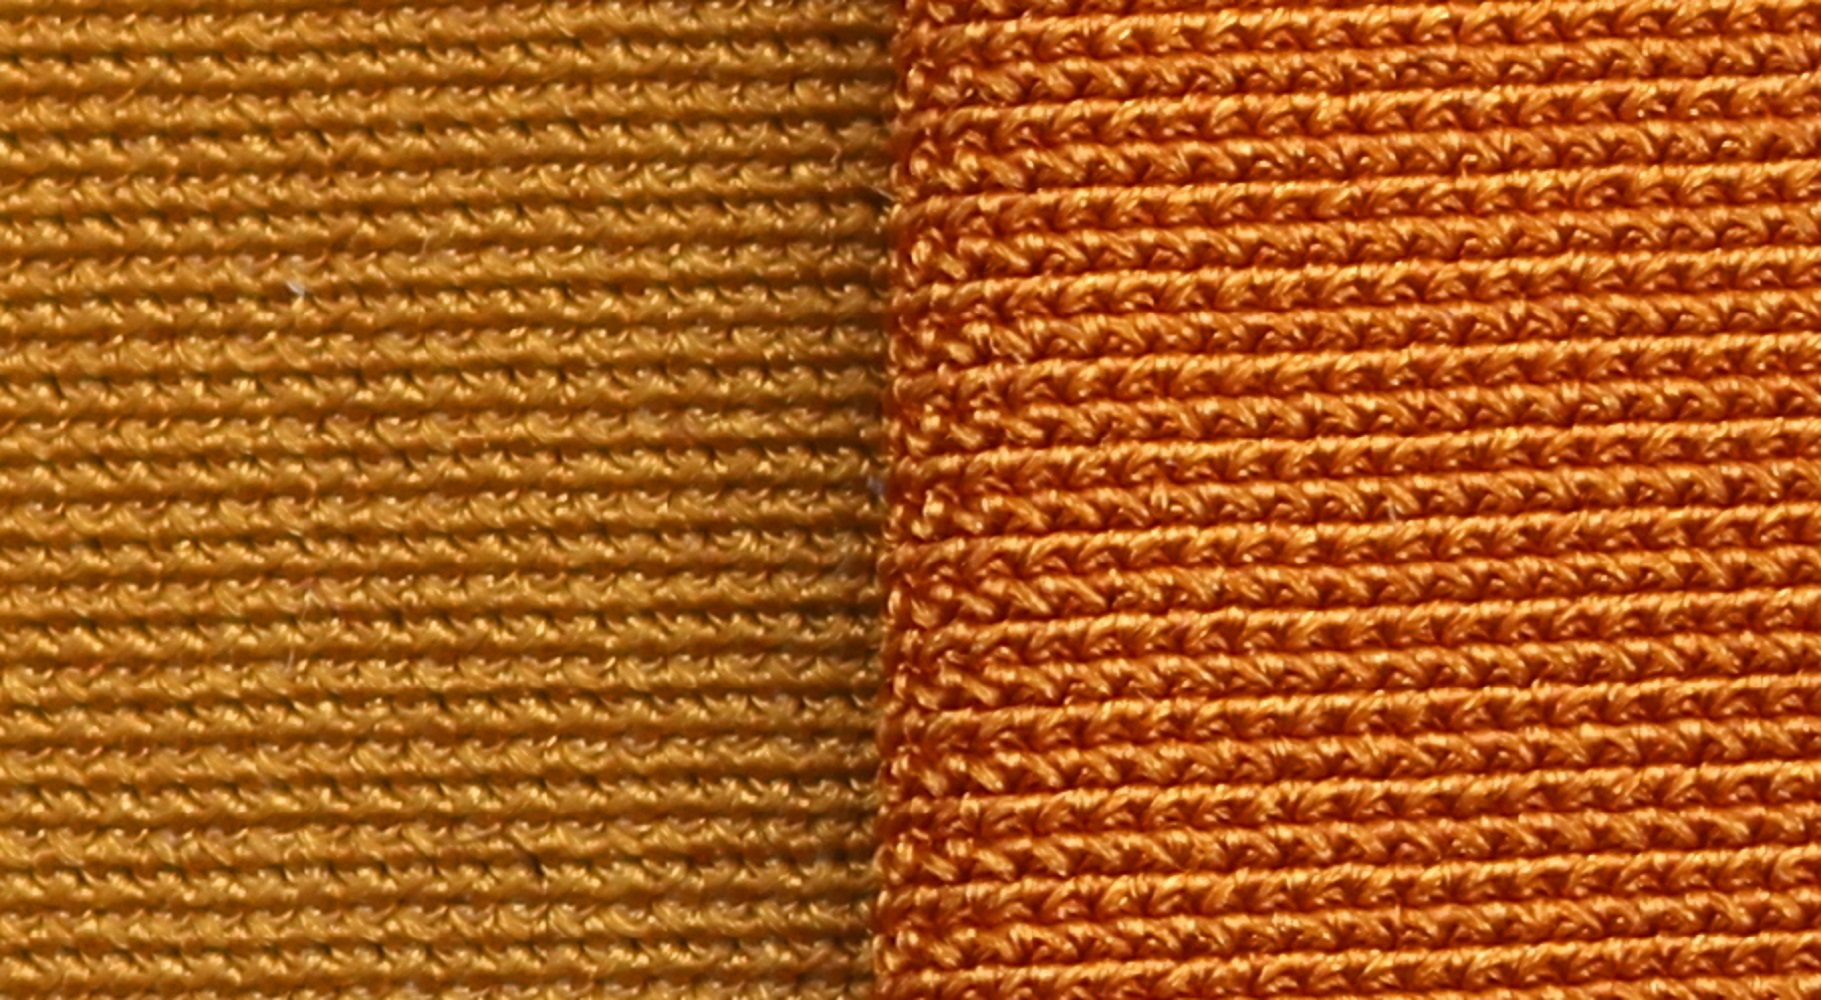
The O’Brien swatch was a bit closer, but still a far cry from the TNG skant.
Outside, no flash
(Same photo, zoomed in and cropped)
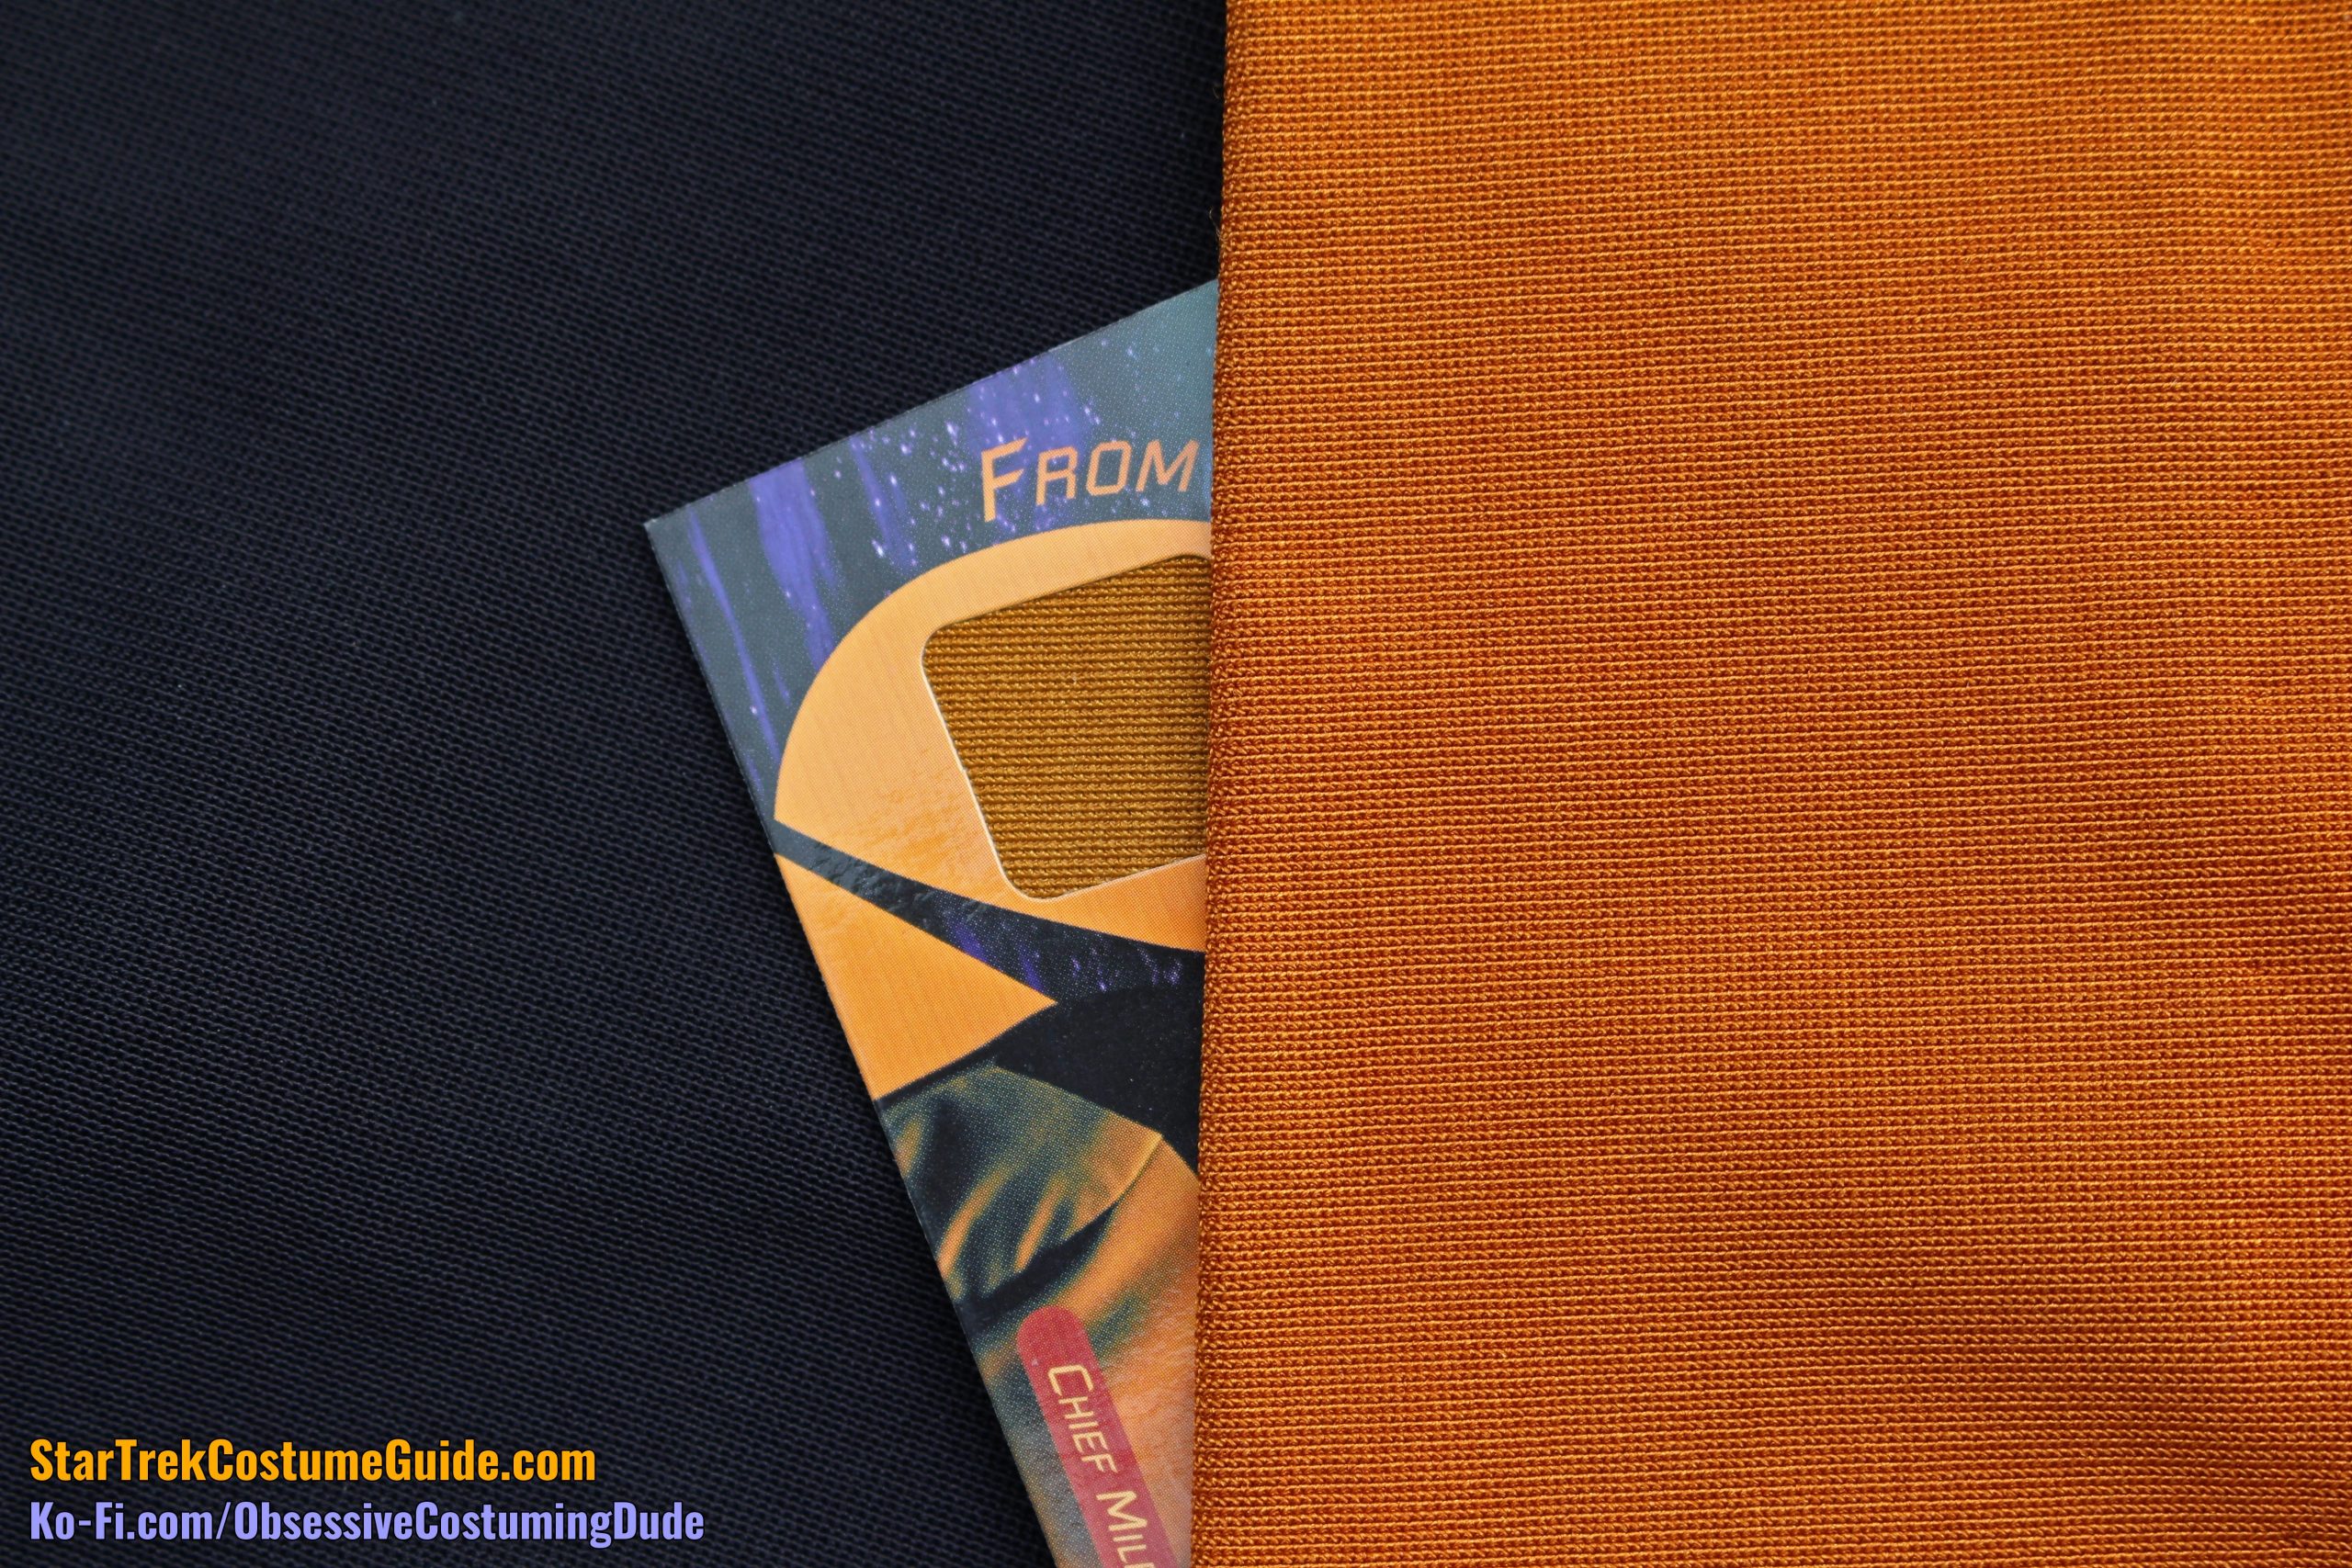
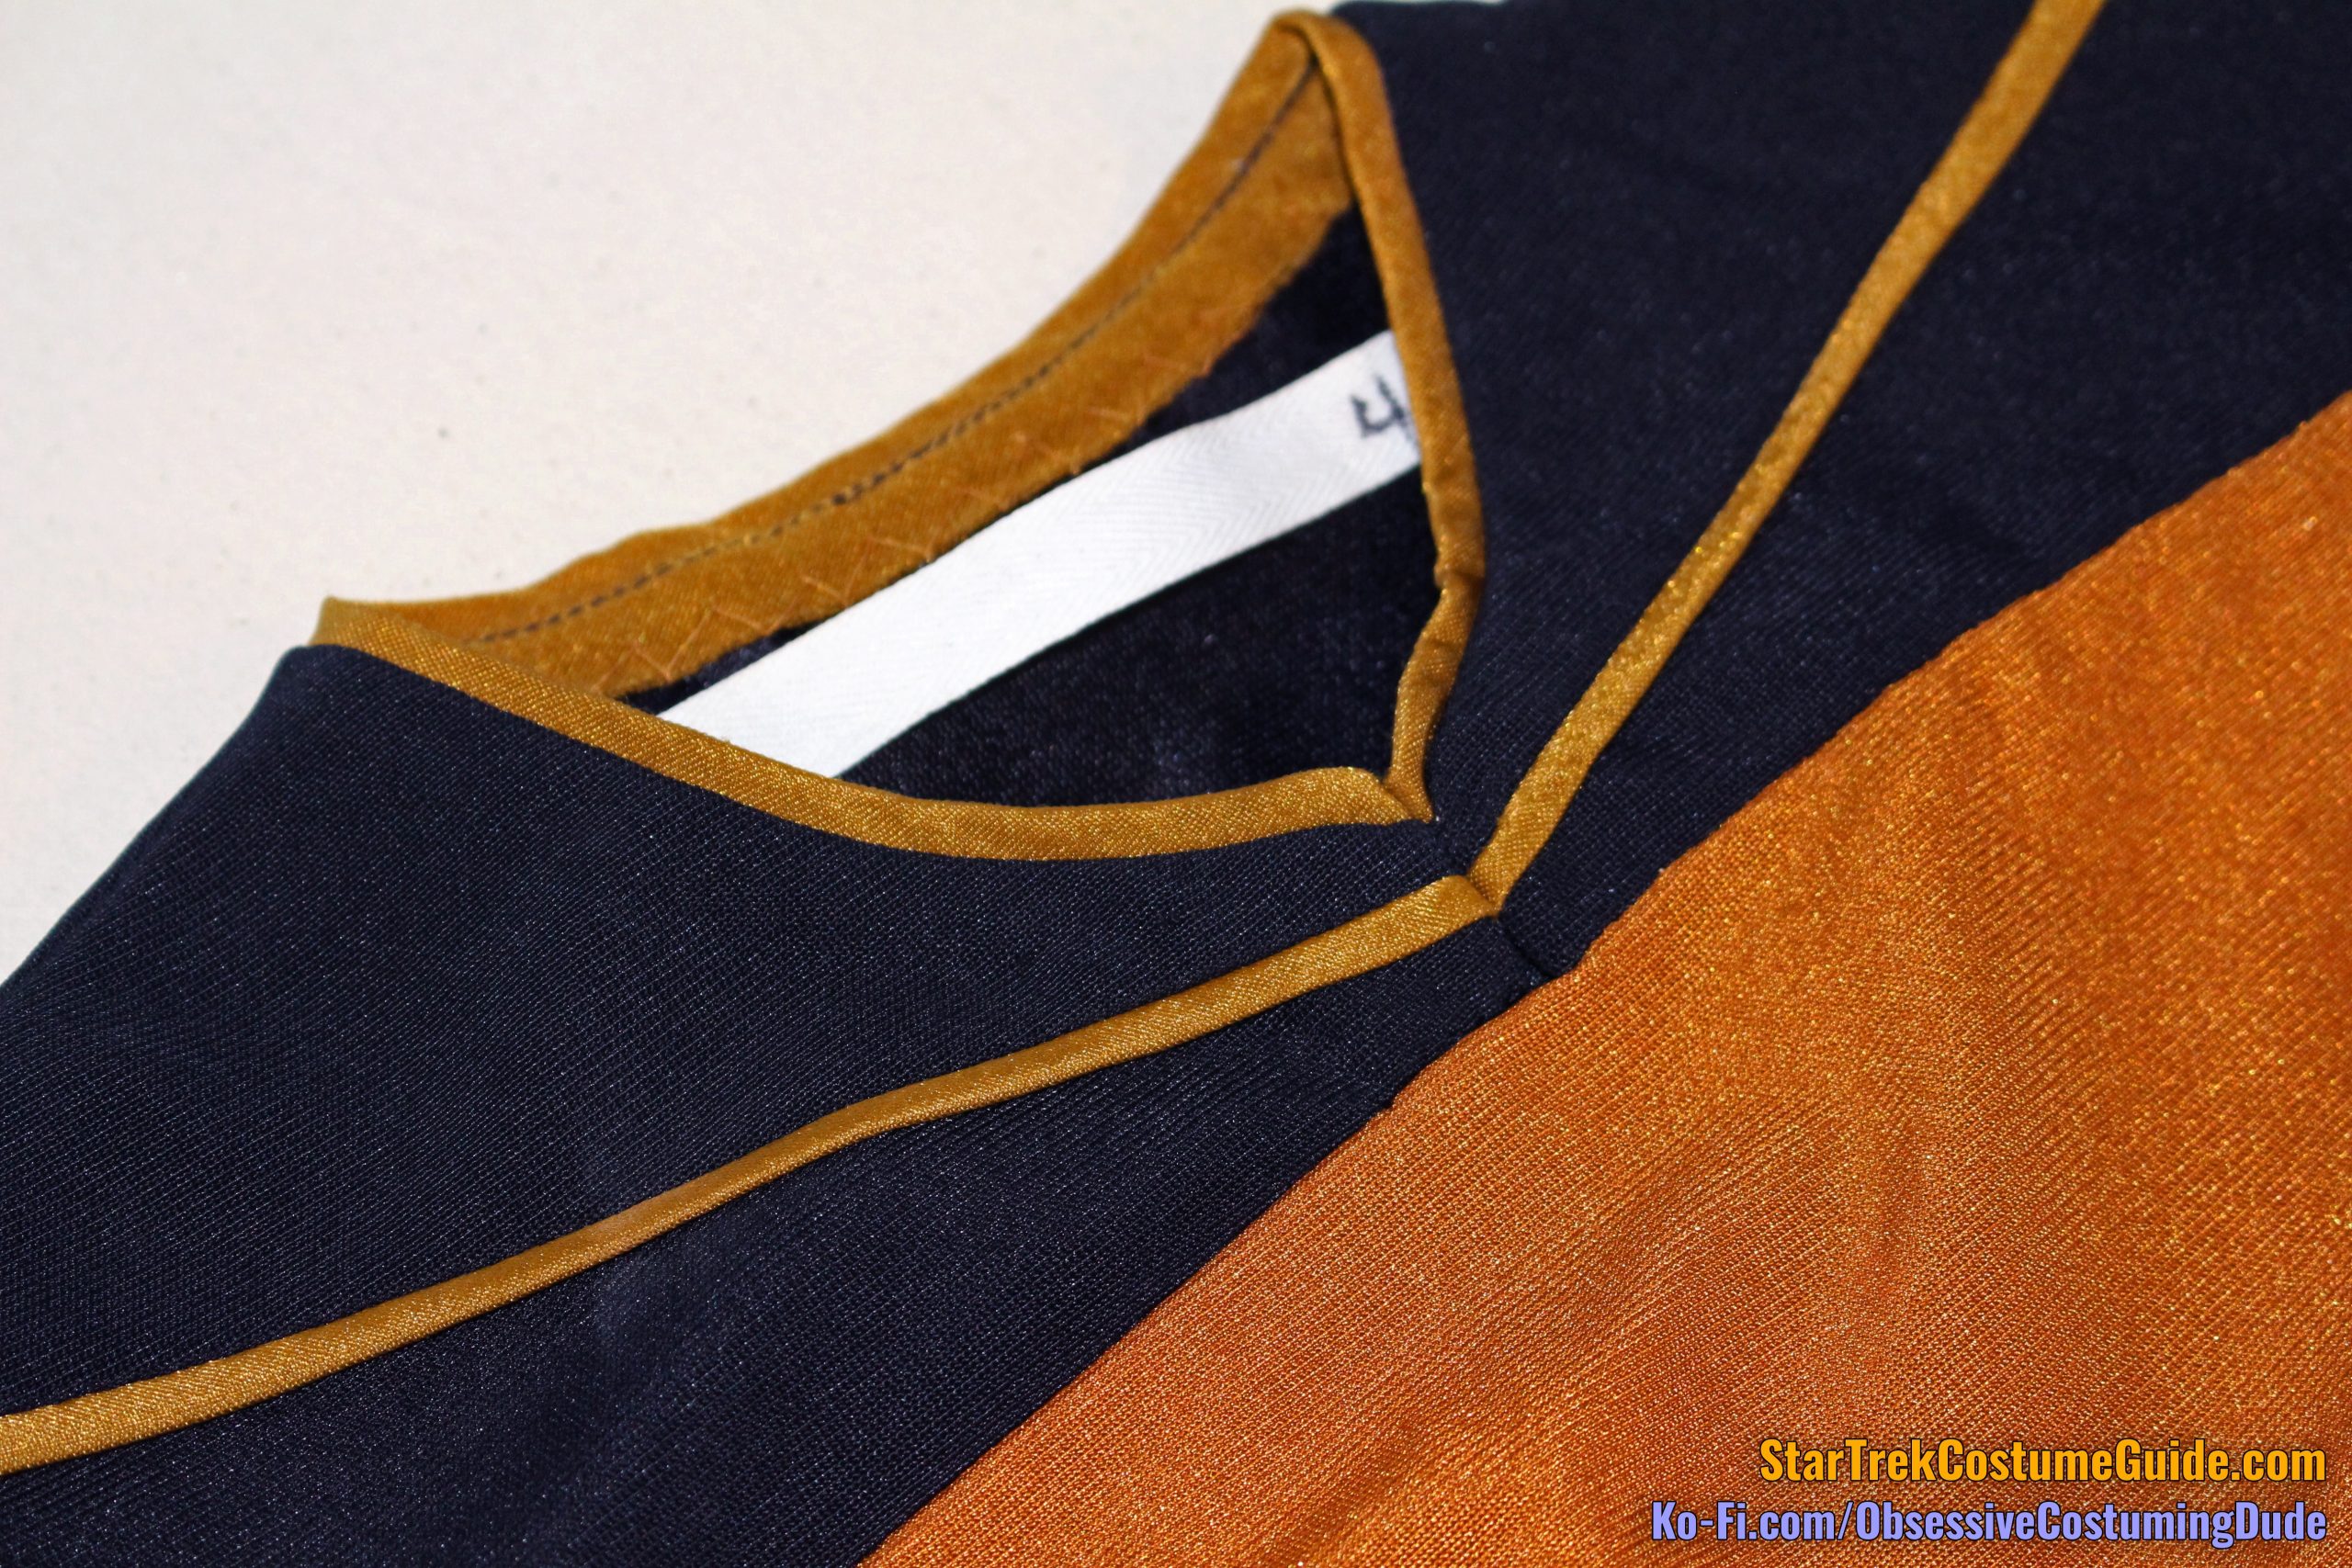
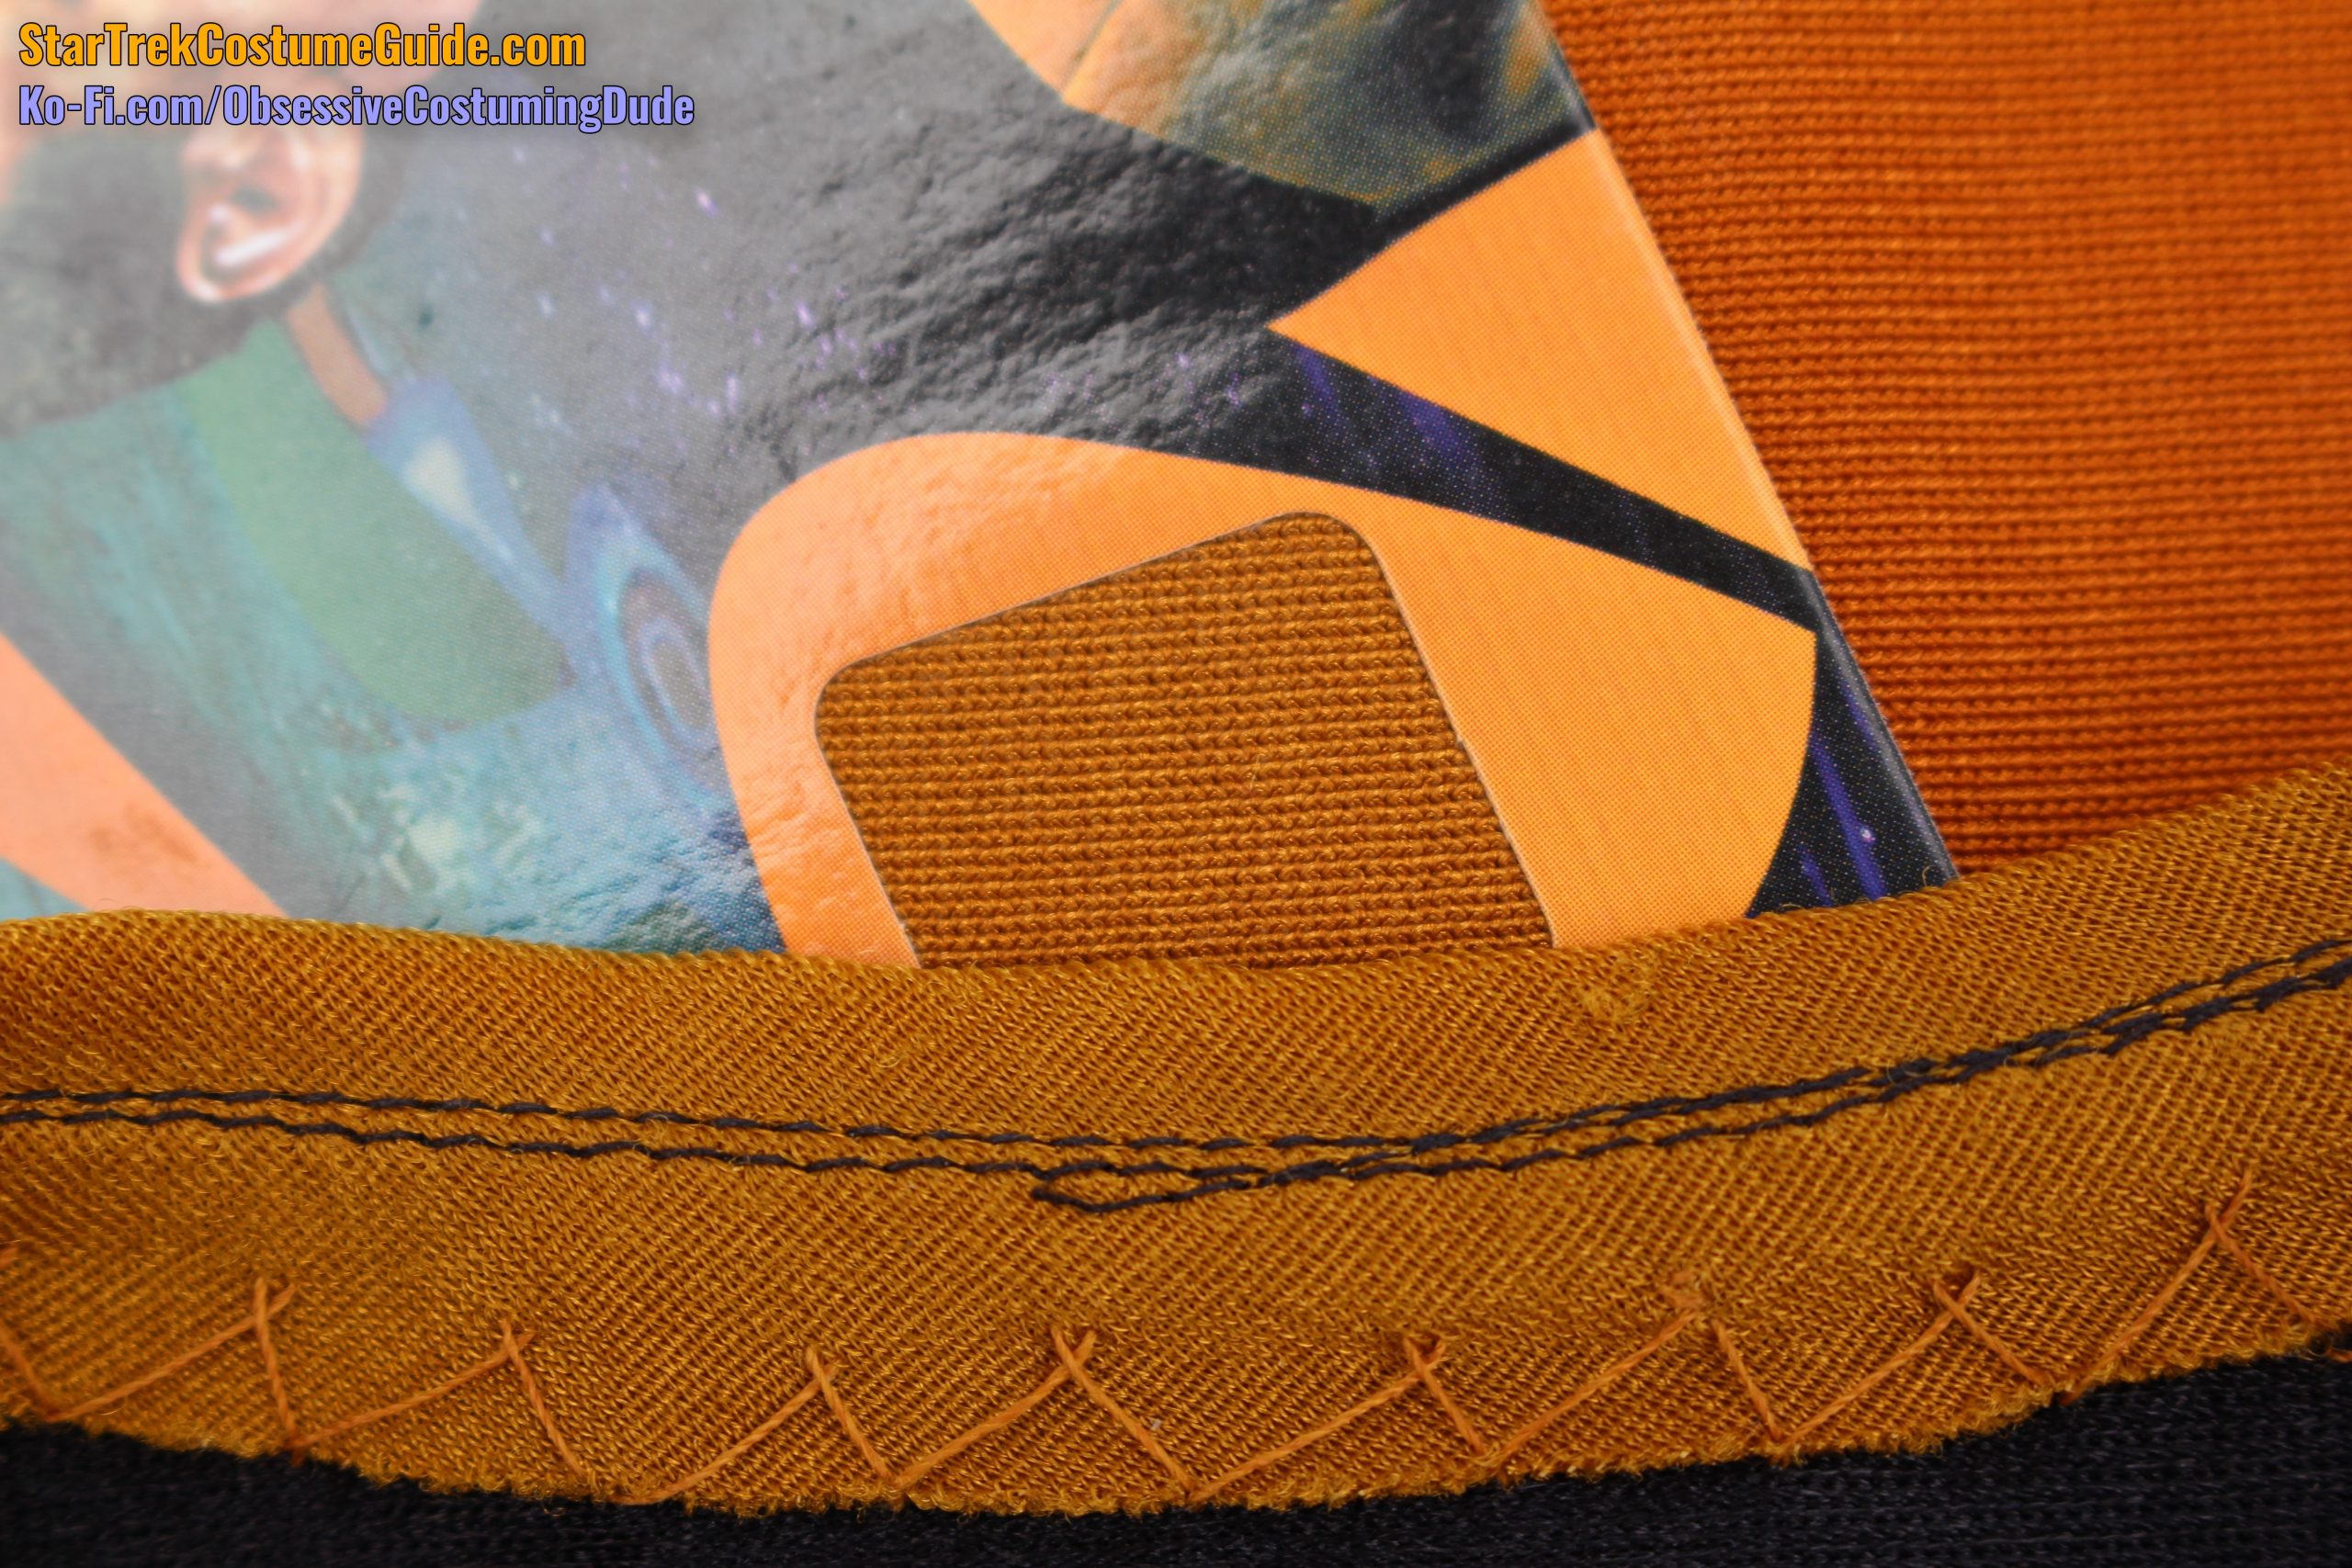
I’d previously hypothesized that the division-colored neckline/yoke piping fabric was jumbo spandex, shiny-side-out, but it’s actually a different fabric entirely.
Furthermore, it didn’t quite match the color of the gold jumbo spandex used for the skant body.
It appears to have been a different, lighter-weight spandex, cut on the bias/diagonal.
(This seems to have been common practice with the early TNG uniforms.)
Interestingly, while neither swatch was a close color match to the screen-used TNG skant, both swatches were much closer to the color of the neckline and yoke piping on the skant.
Indoors, with flash
Indoors, no flash
Here’s are two three-way color comparisons with each swatch, the neckline trim, and the skant body.
Outside, no flash
Outside, no flash
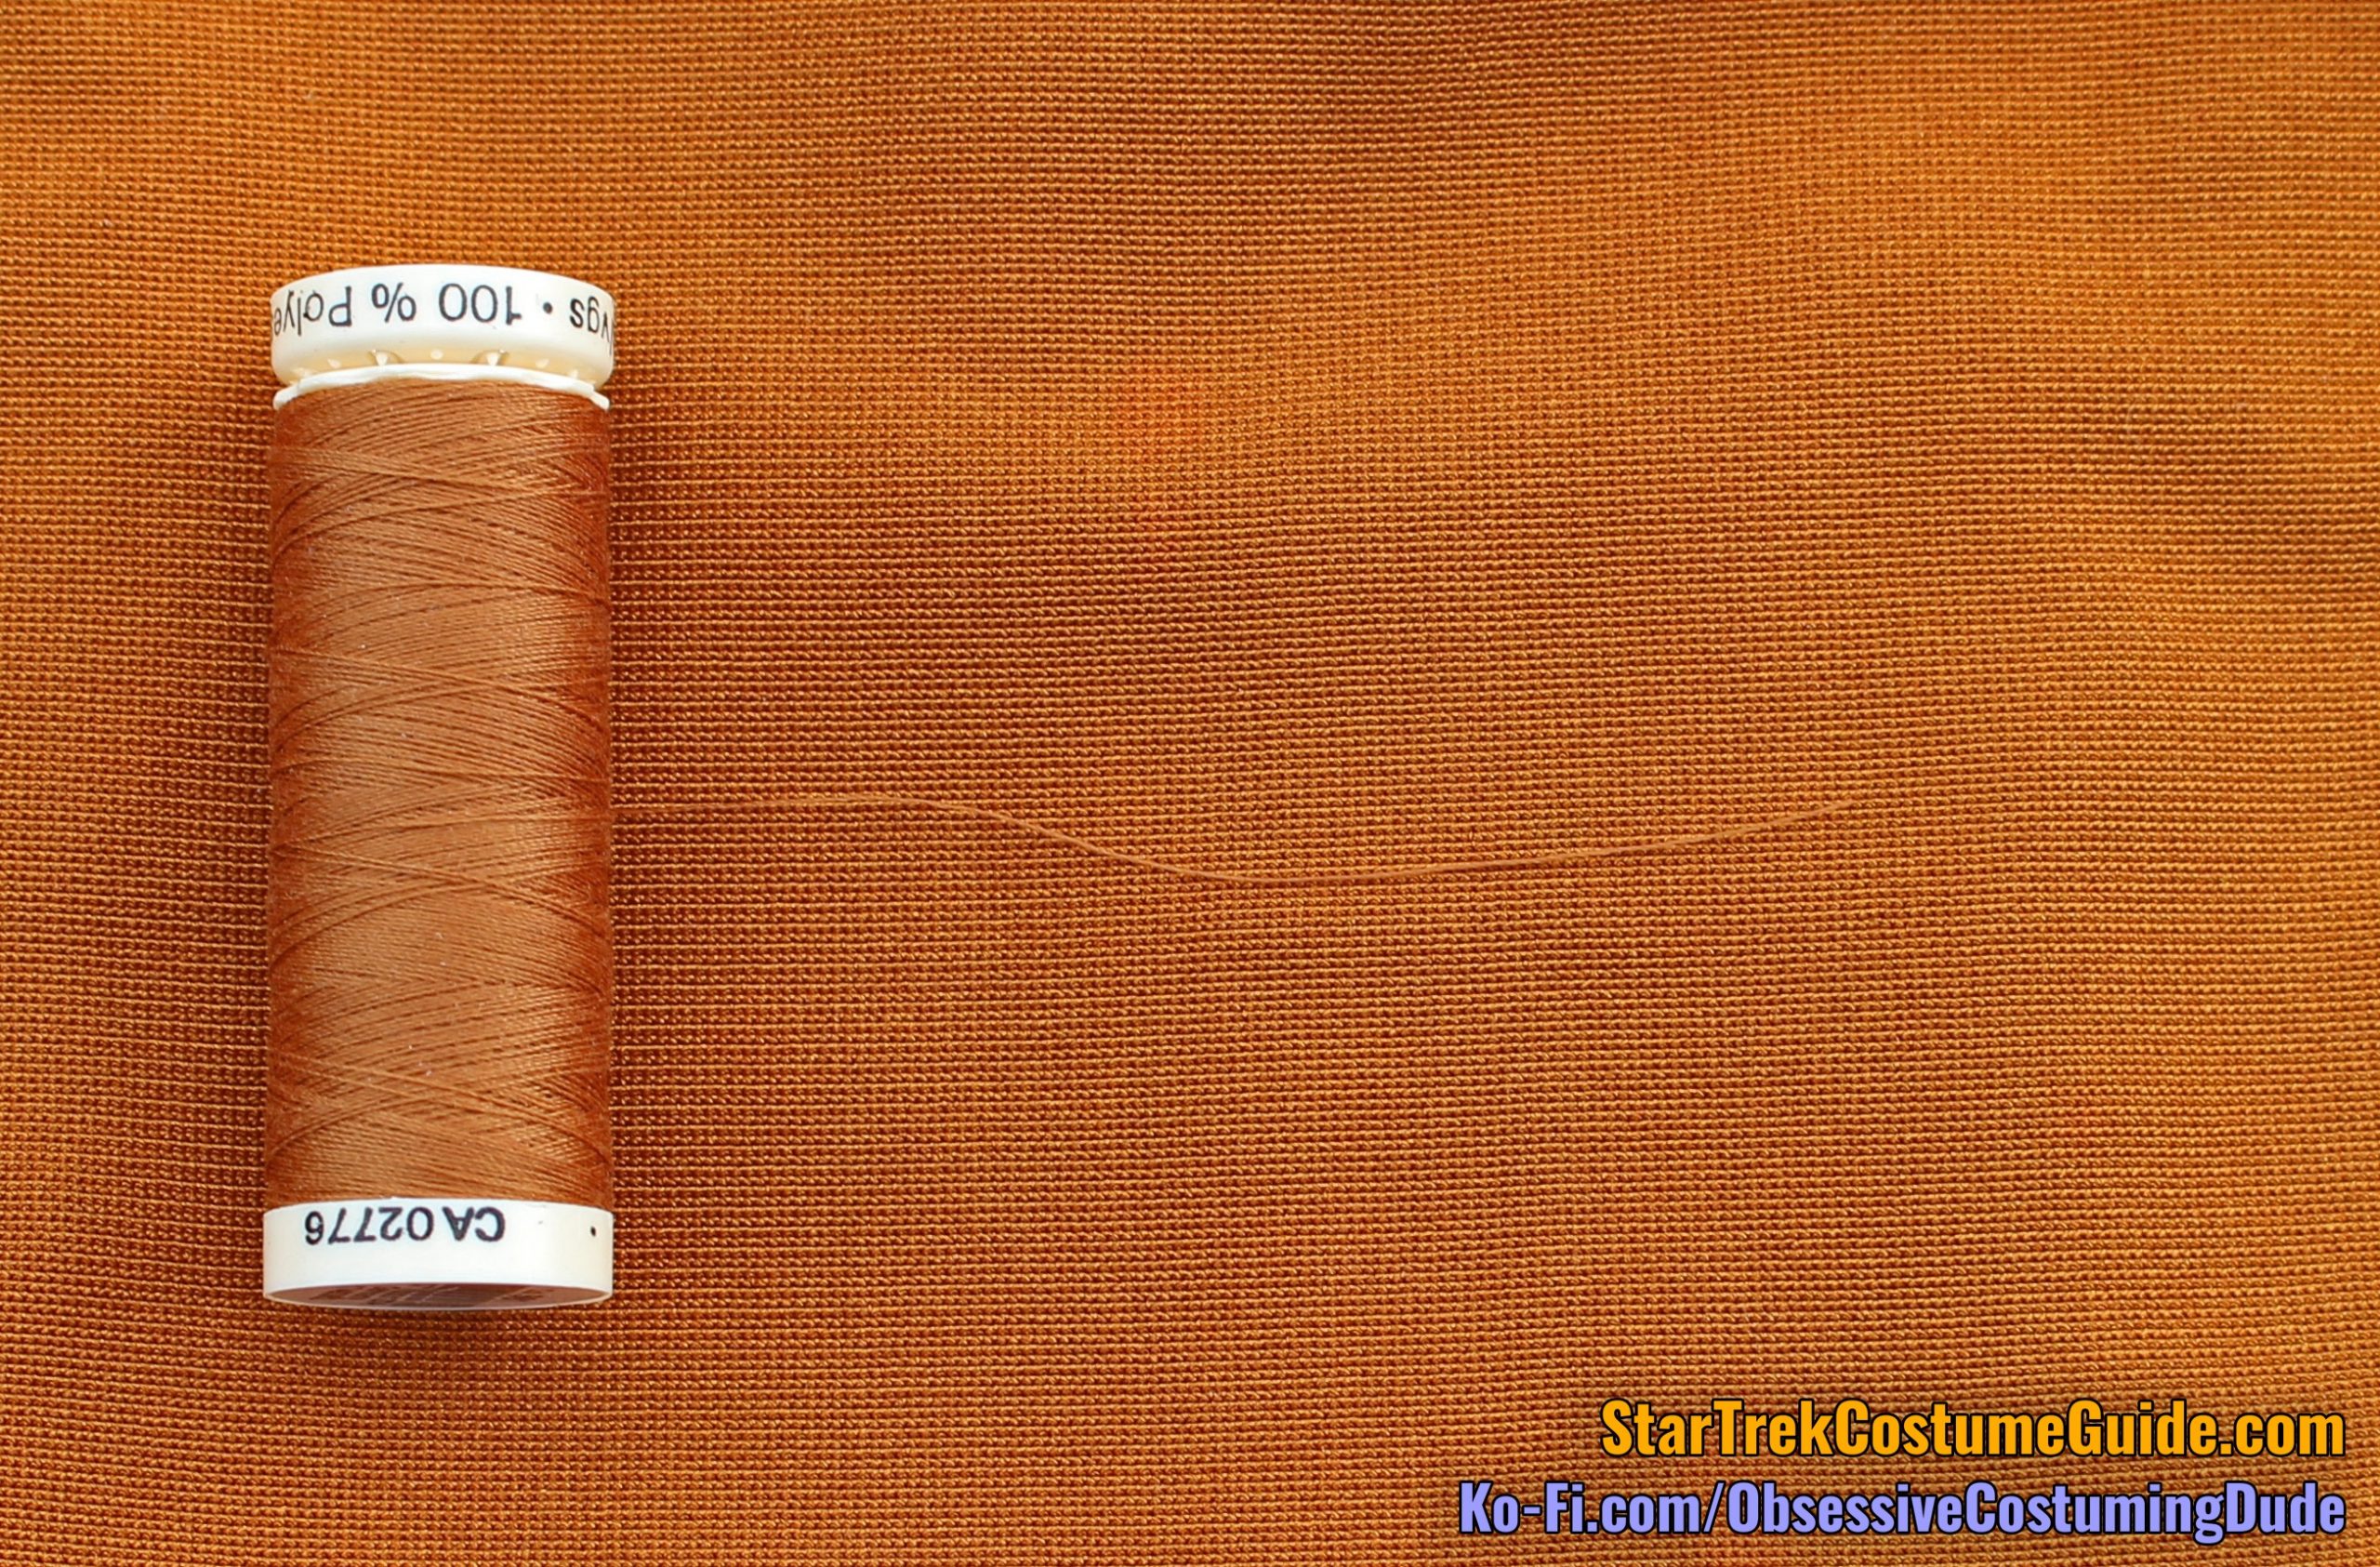
Unfortunately, at the time I examined this costume I didn’t have a Pantone book, and it hadn’t yet occurred to me to match with paint chips.
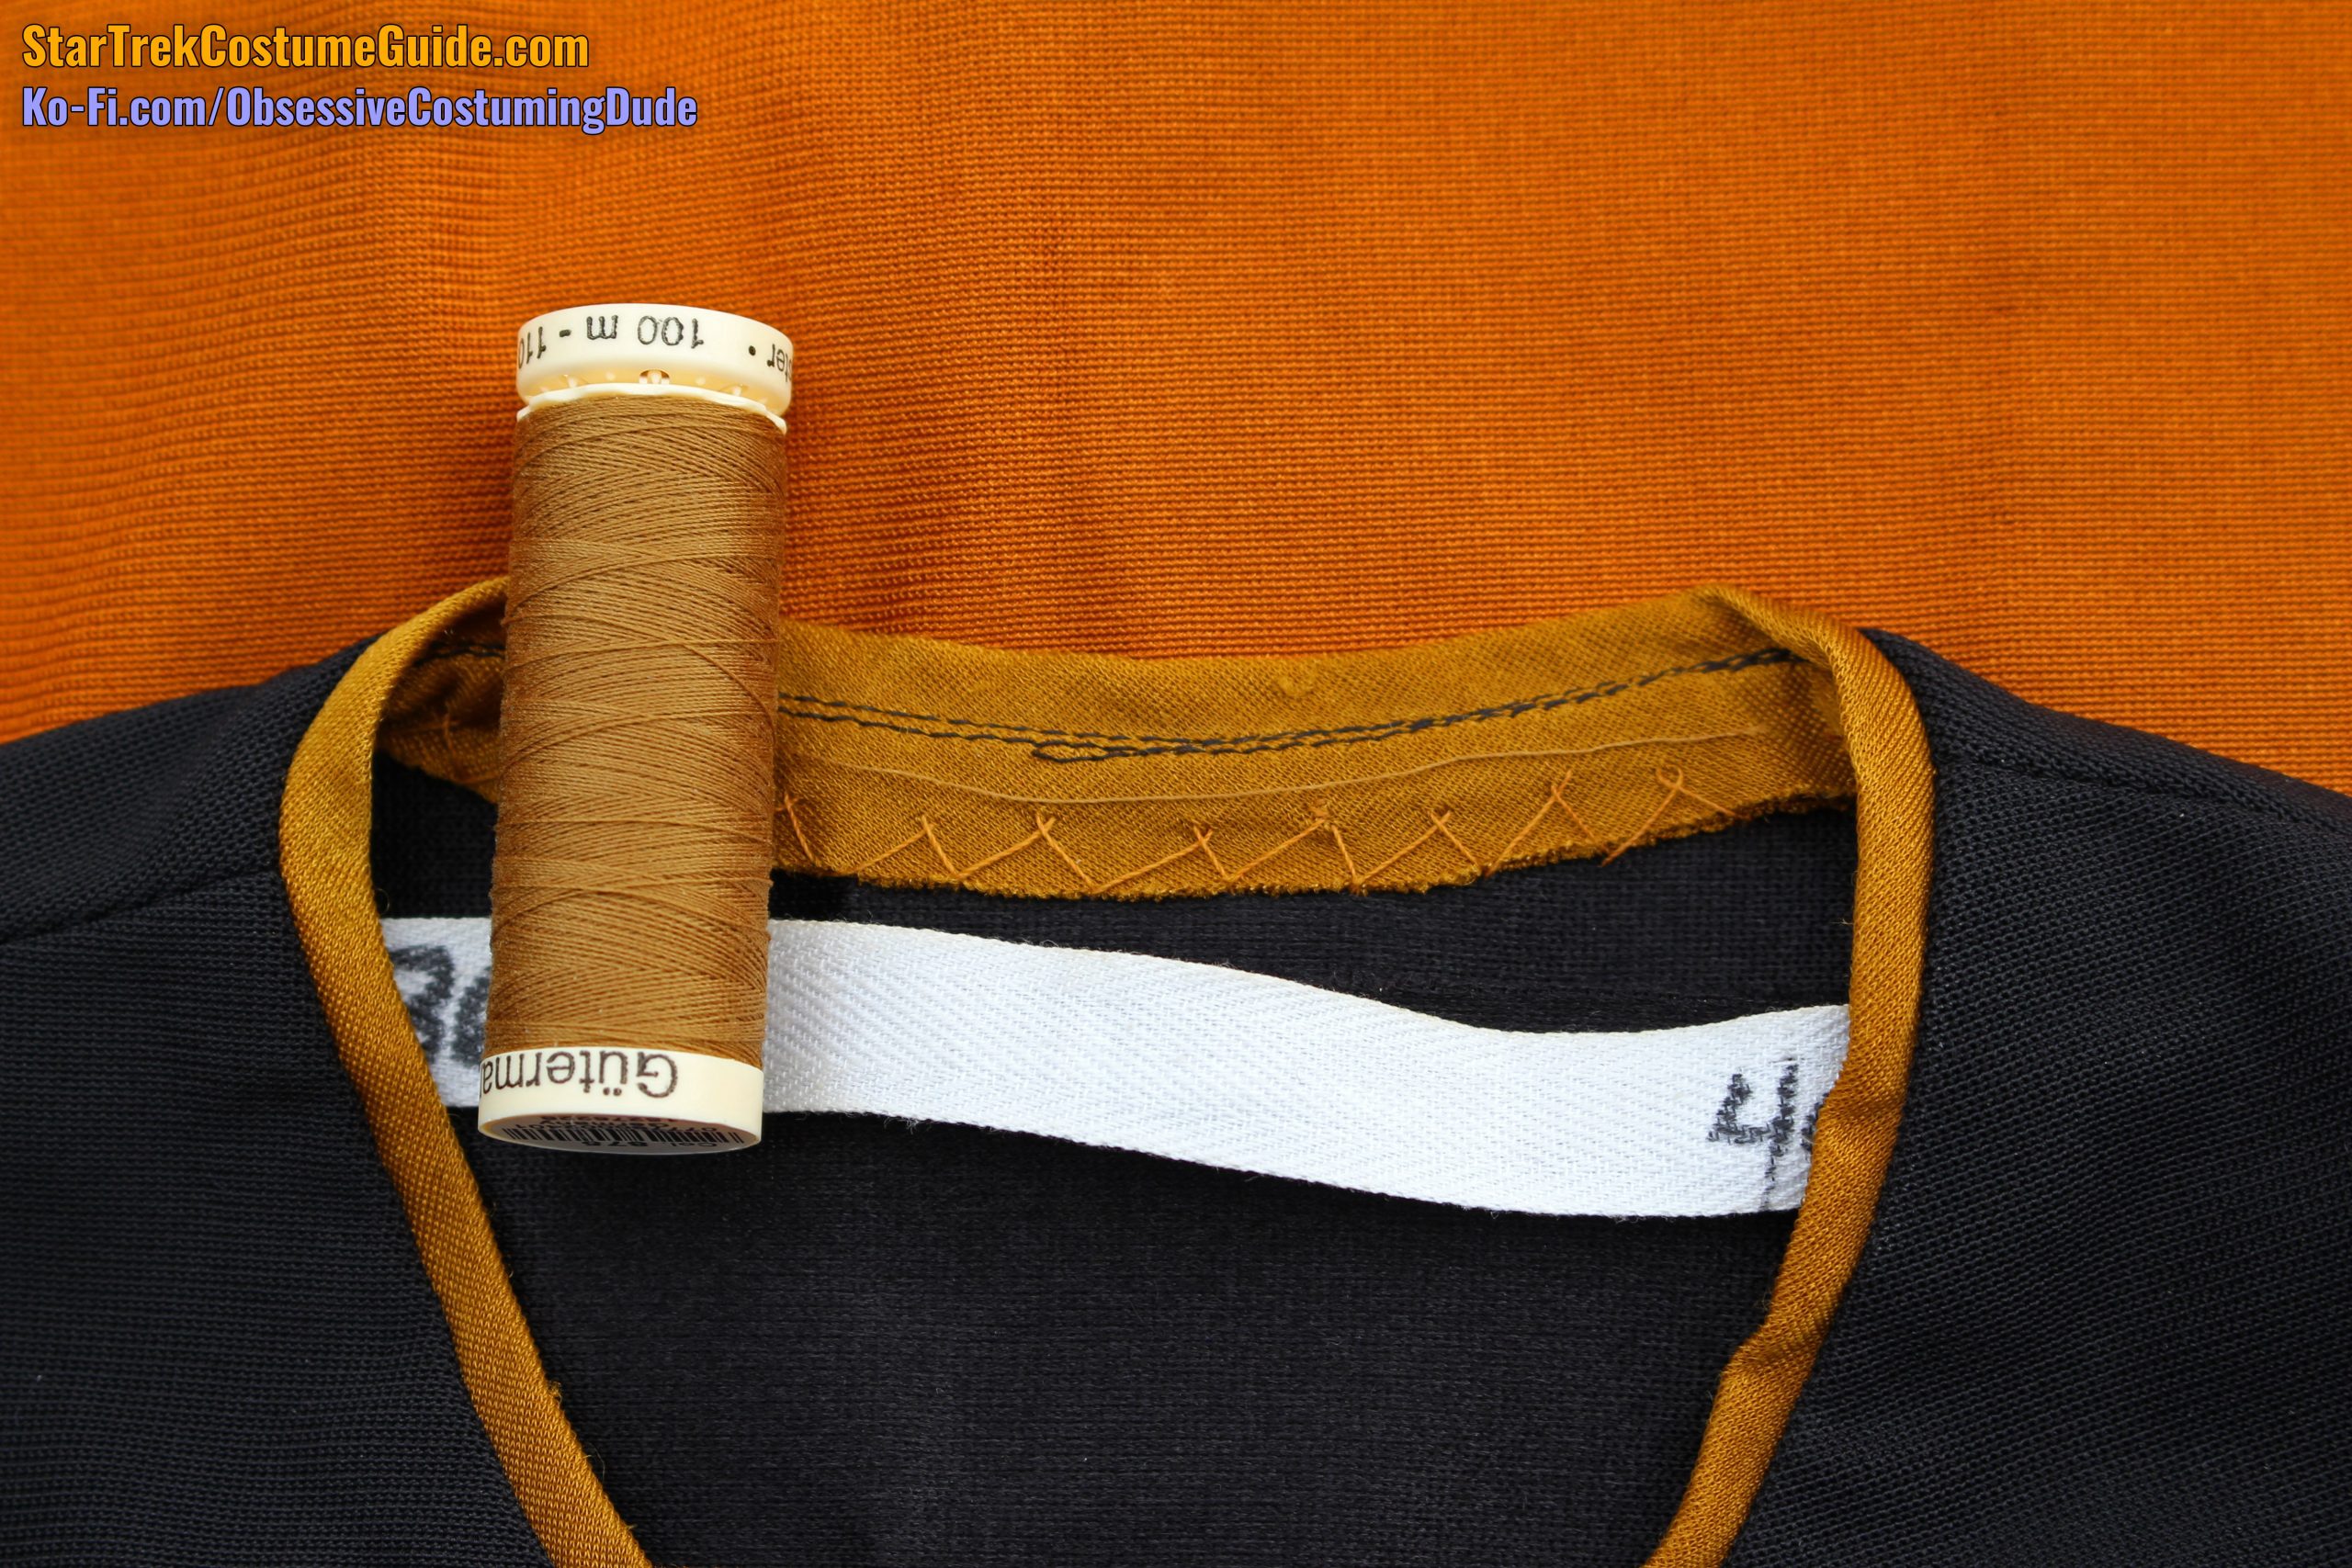
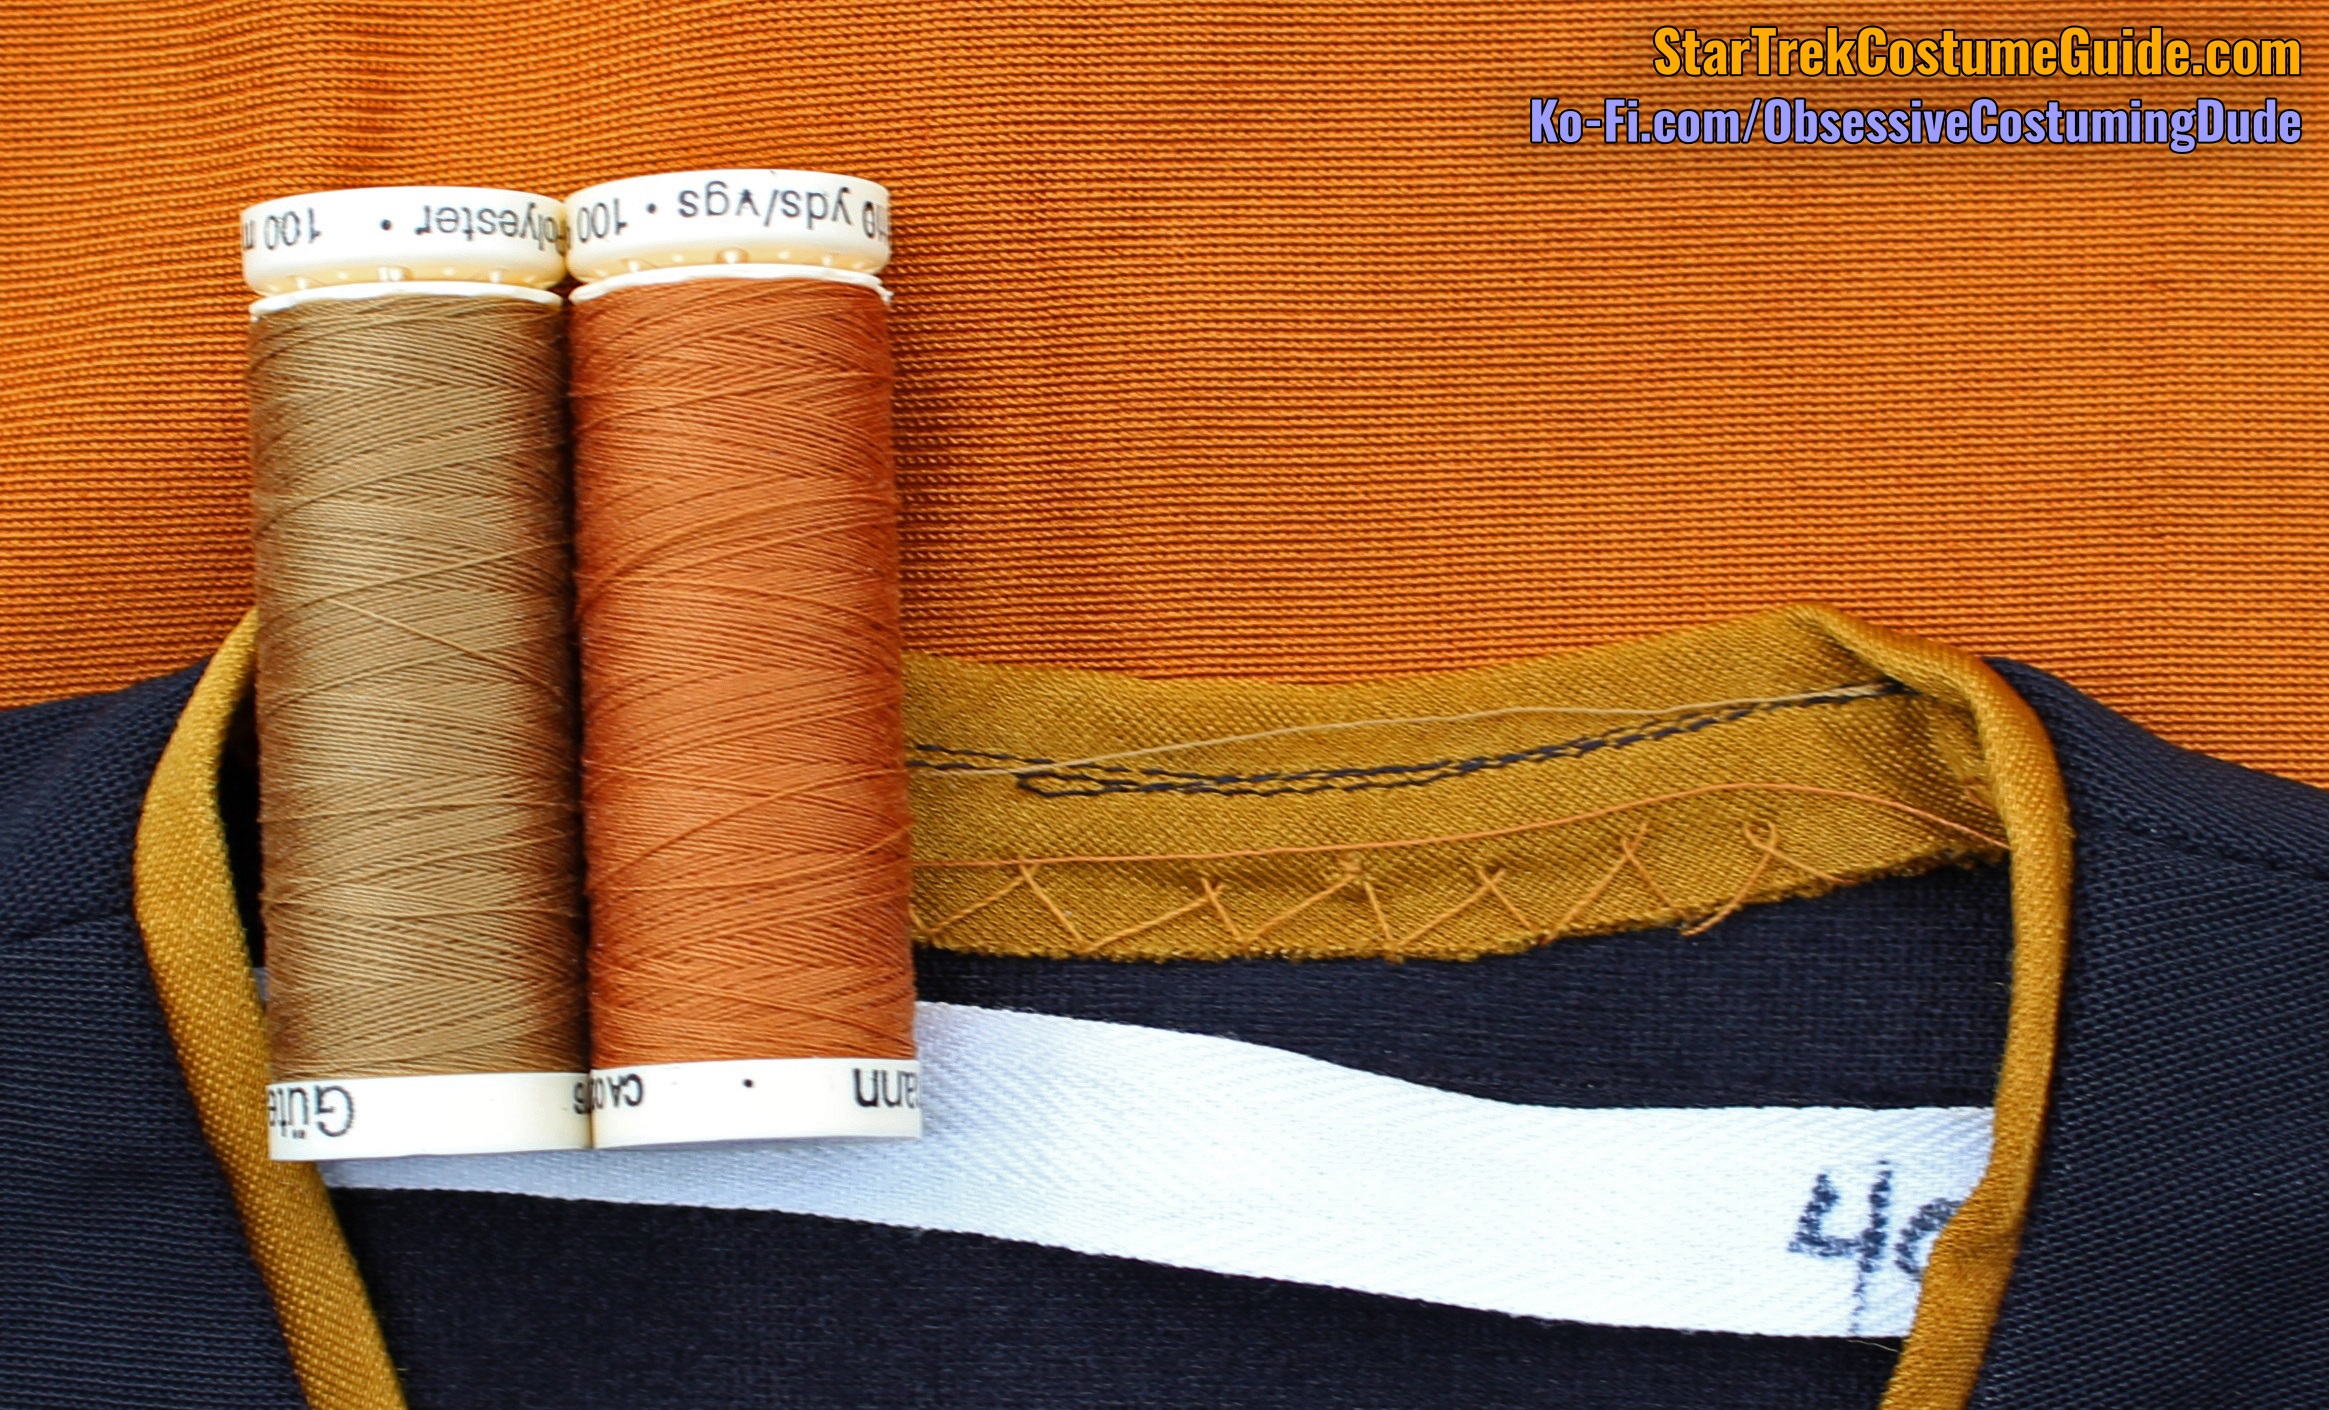
However, I did do my best to color-match some thread to both “gold” fabrics.
For the body of the skant, Gütermann #561 was a very close match.
Outside, no flash
Indoors, with flash
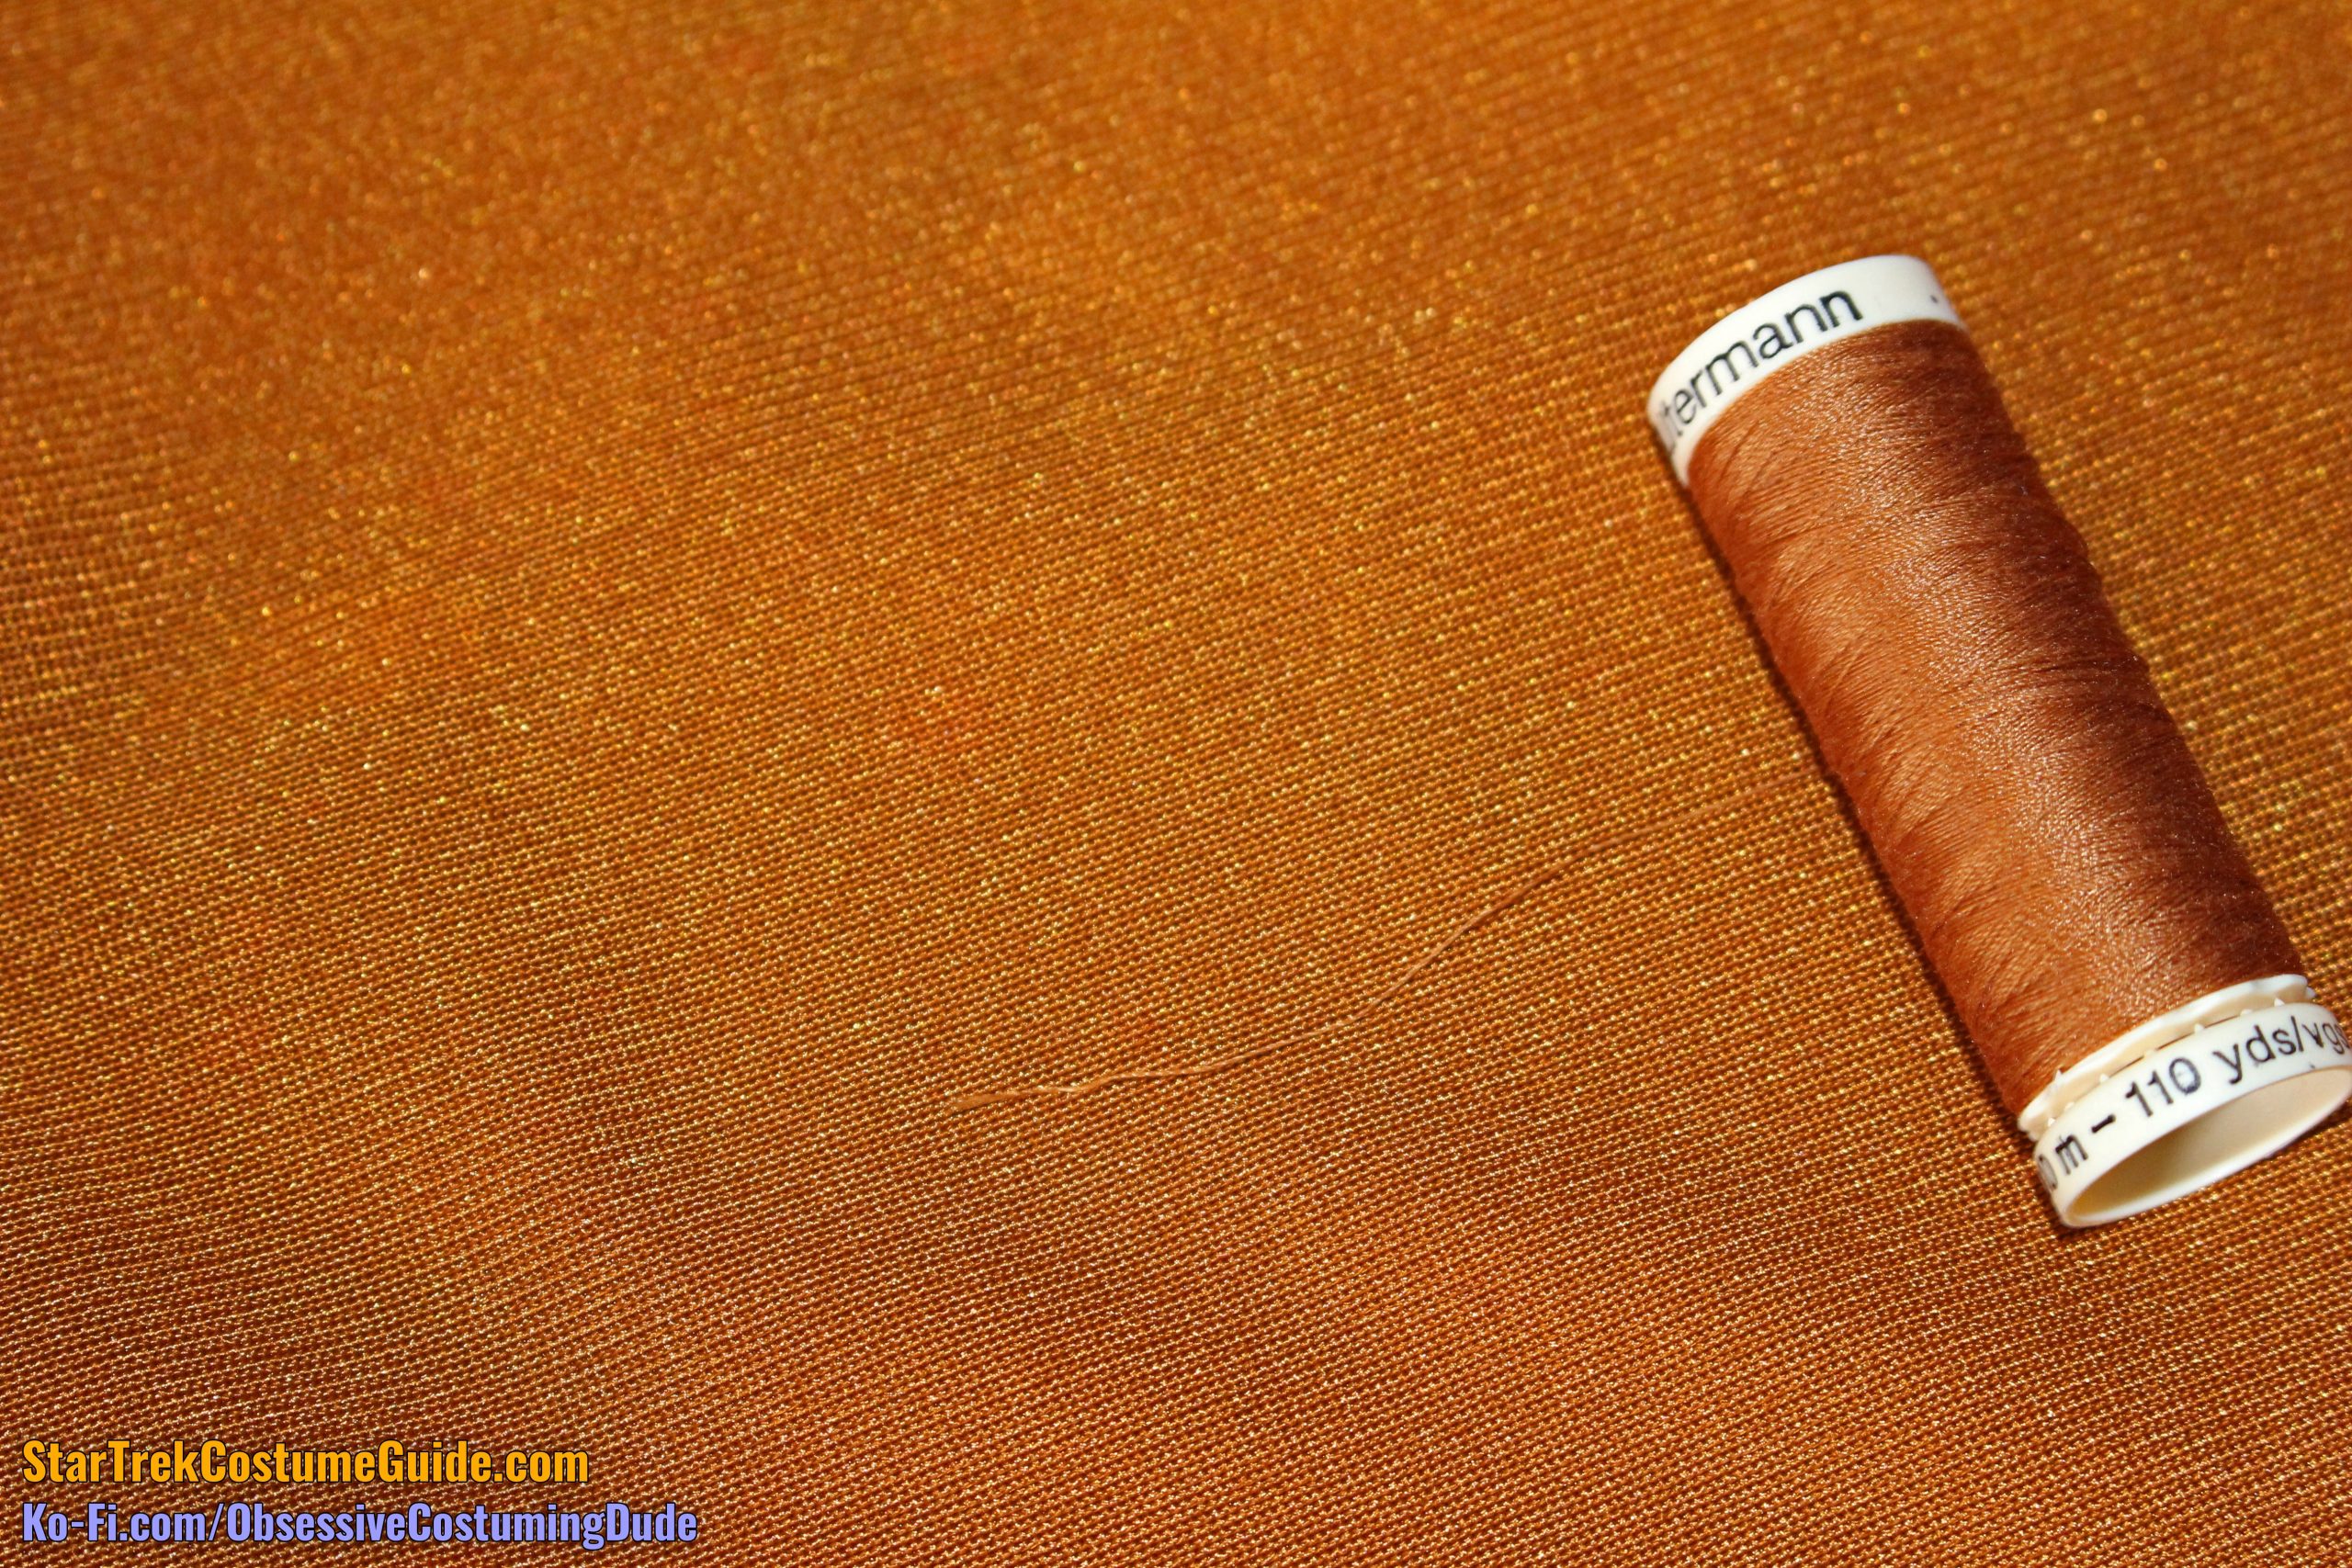
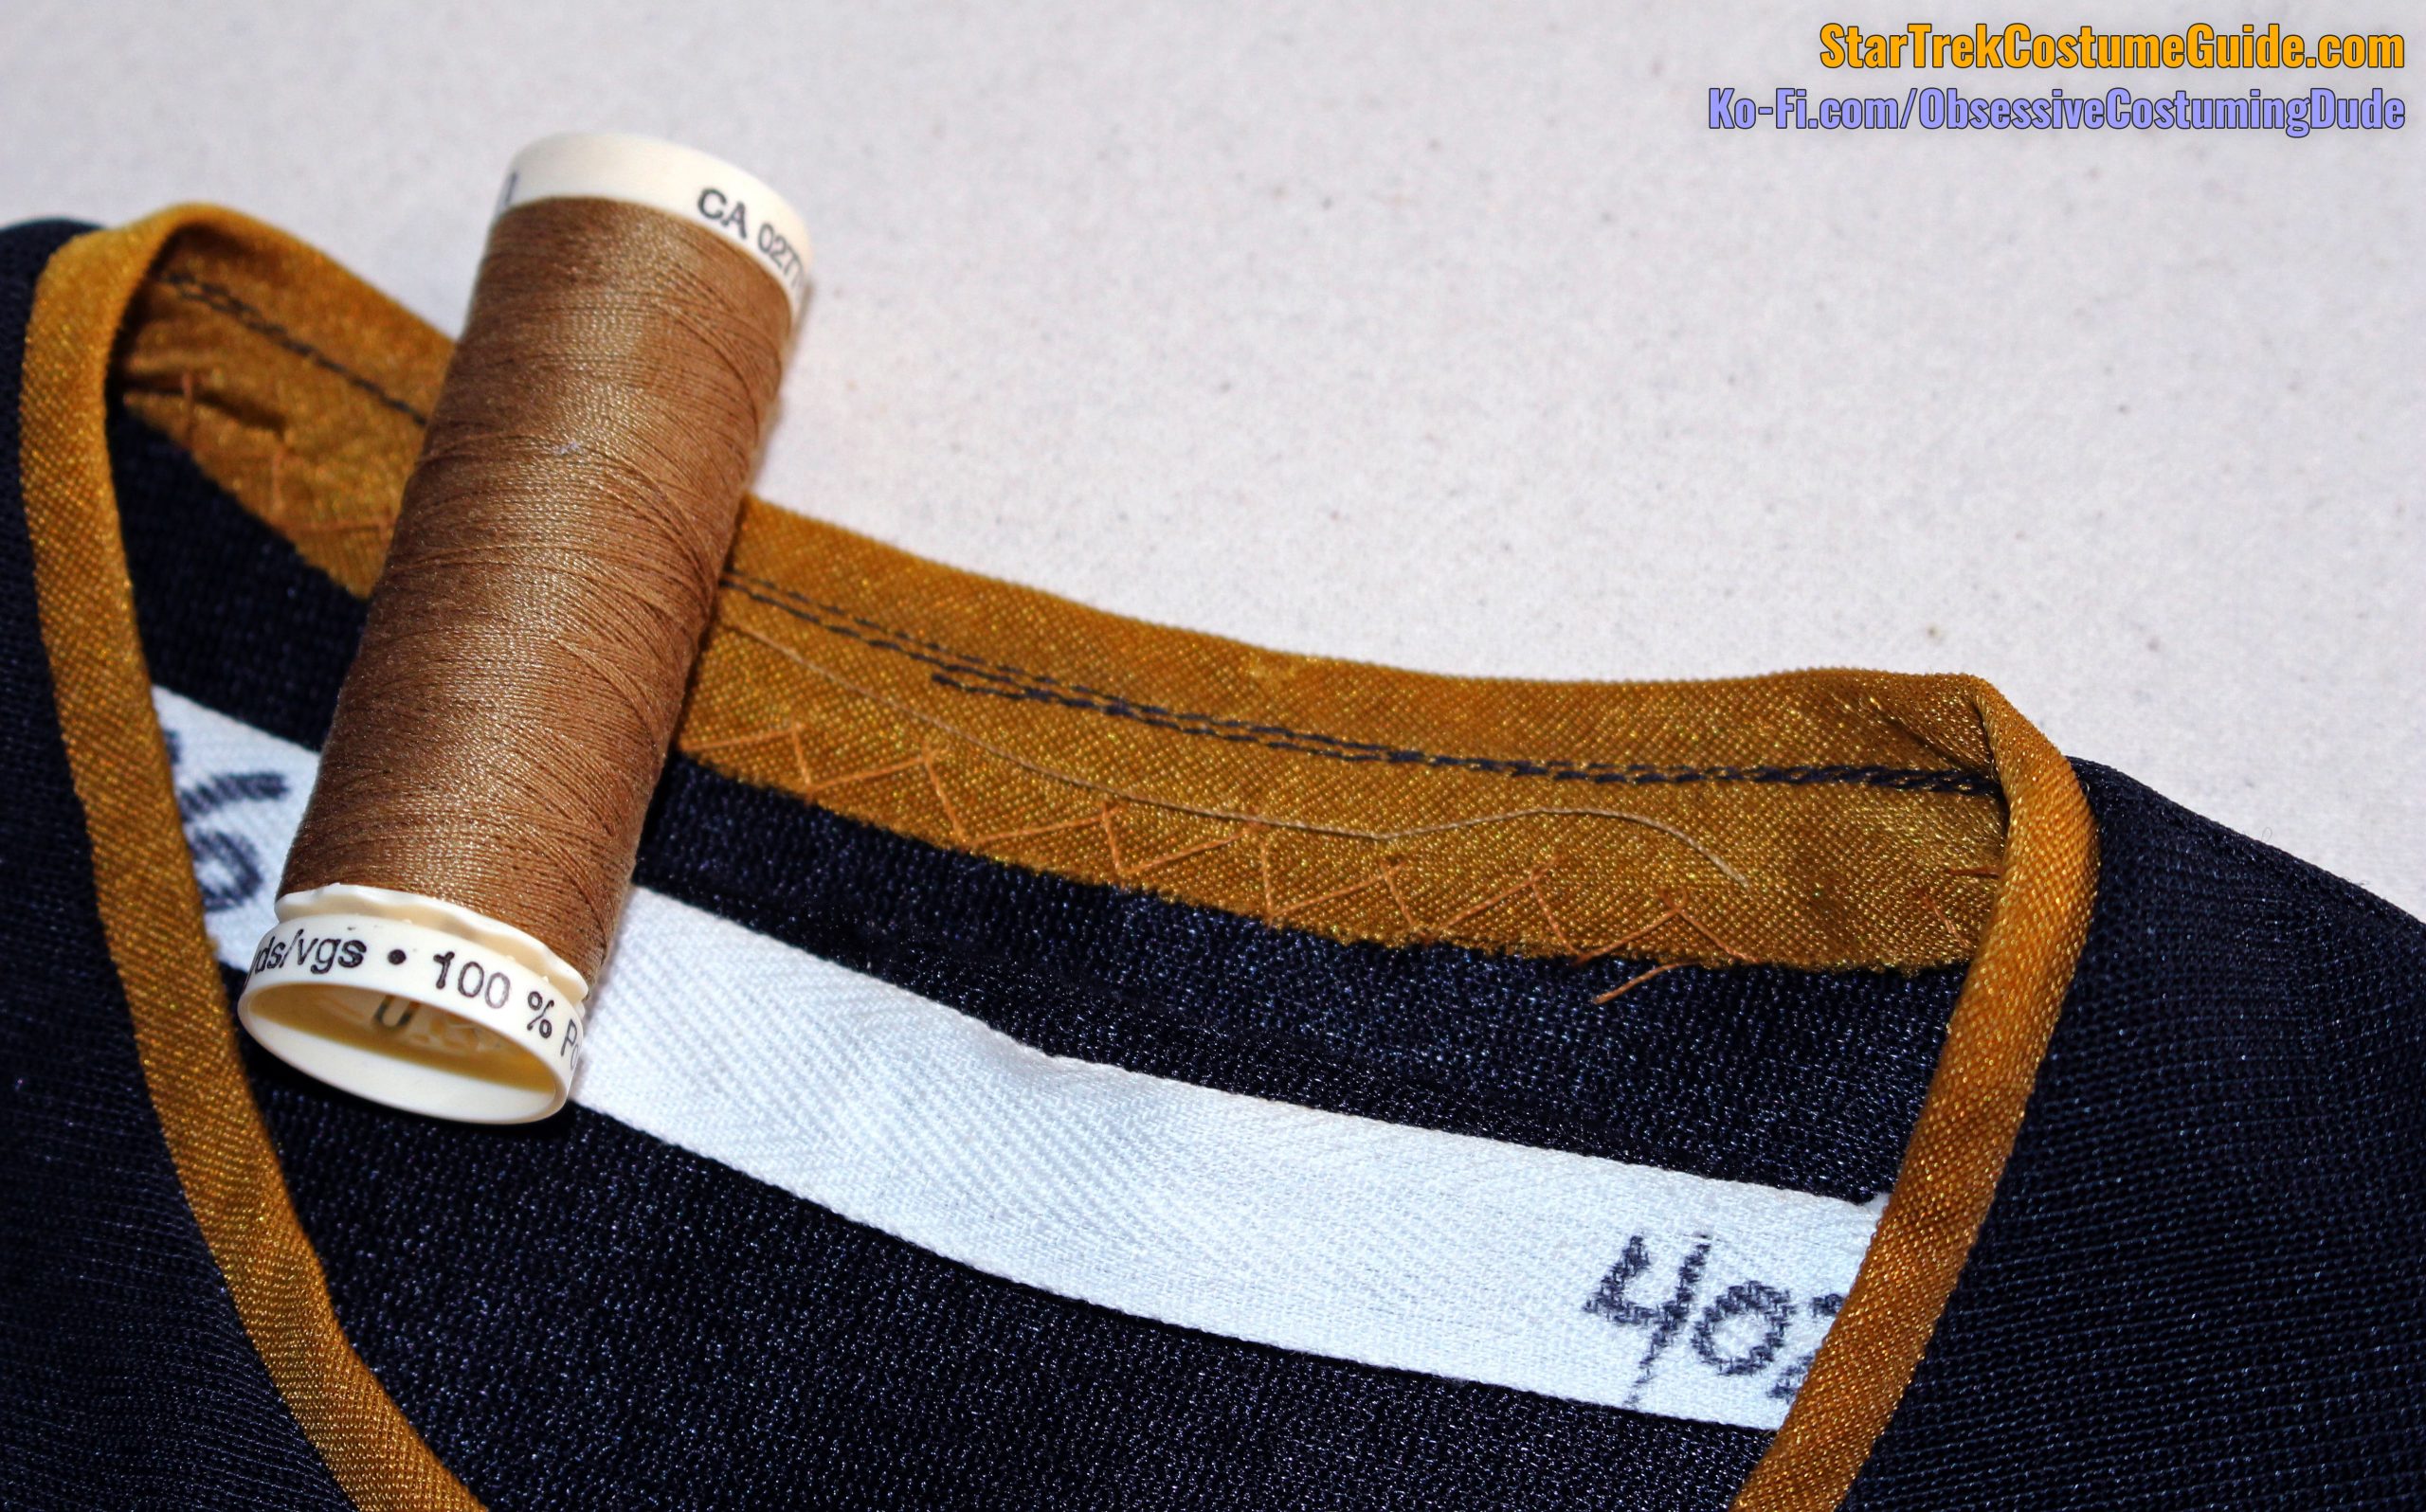
For the division-colored yoke/neckline piping, I wasn’t able to find a very close match, but Gütermann #875 was the closest that I found.
Outside, no flash
Indoors, with flash
Here’s what they look like, together.
Outside
EXTERIOR DIMENSIONS and CONSTRUCTION
After documenting the color as best I could, I grabbed my measuring tape and began the process of documenting the skant’s dimensions and construction, generally working from the top down; front, then back; outside, then inside.
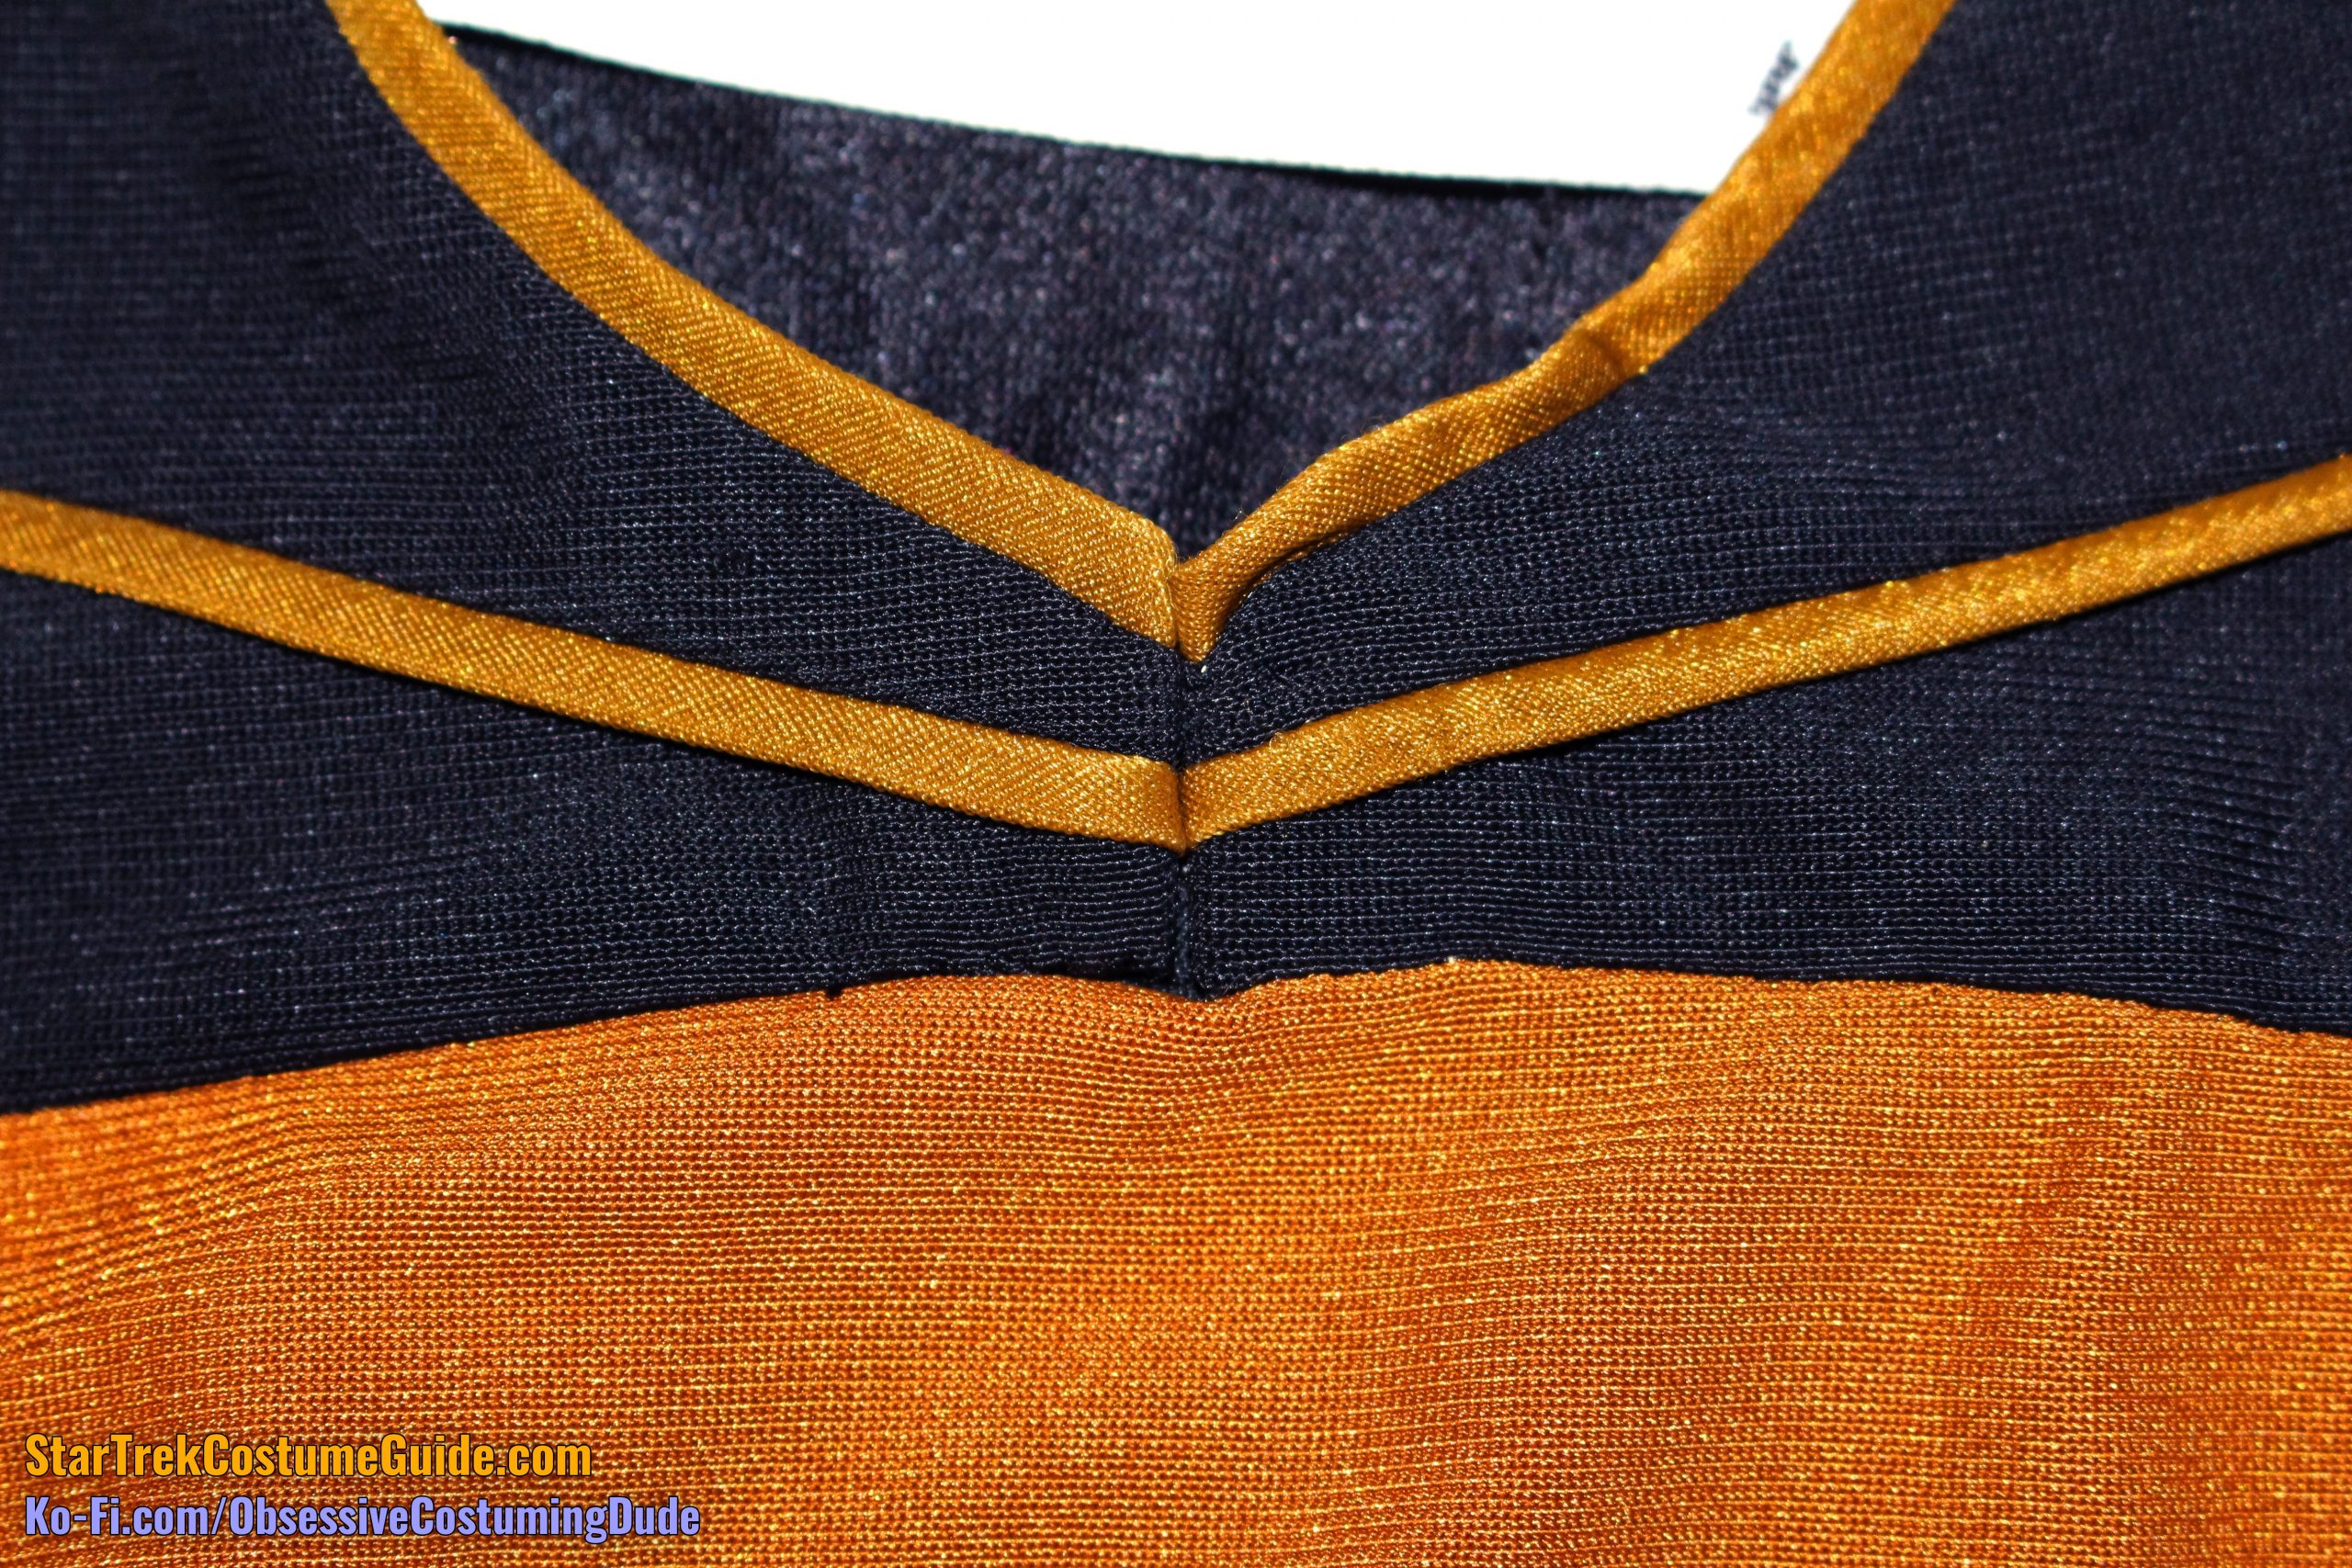
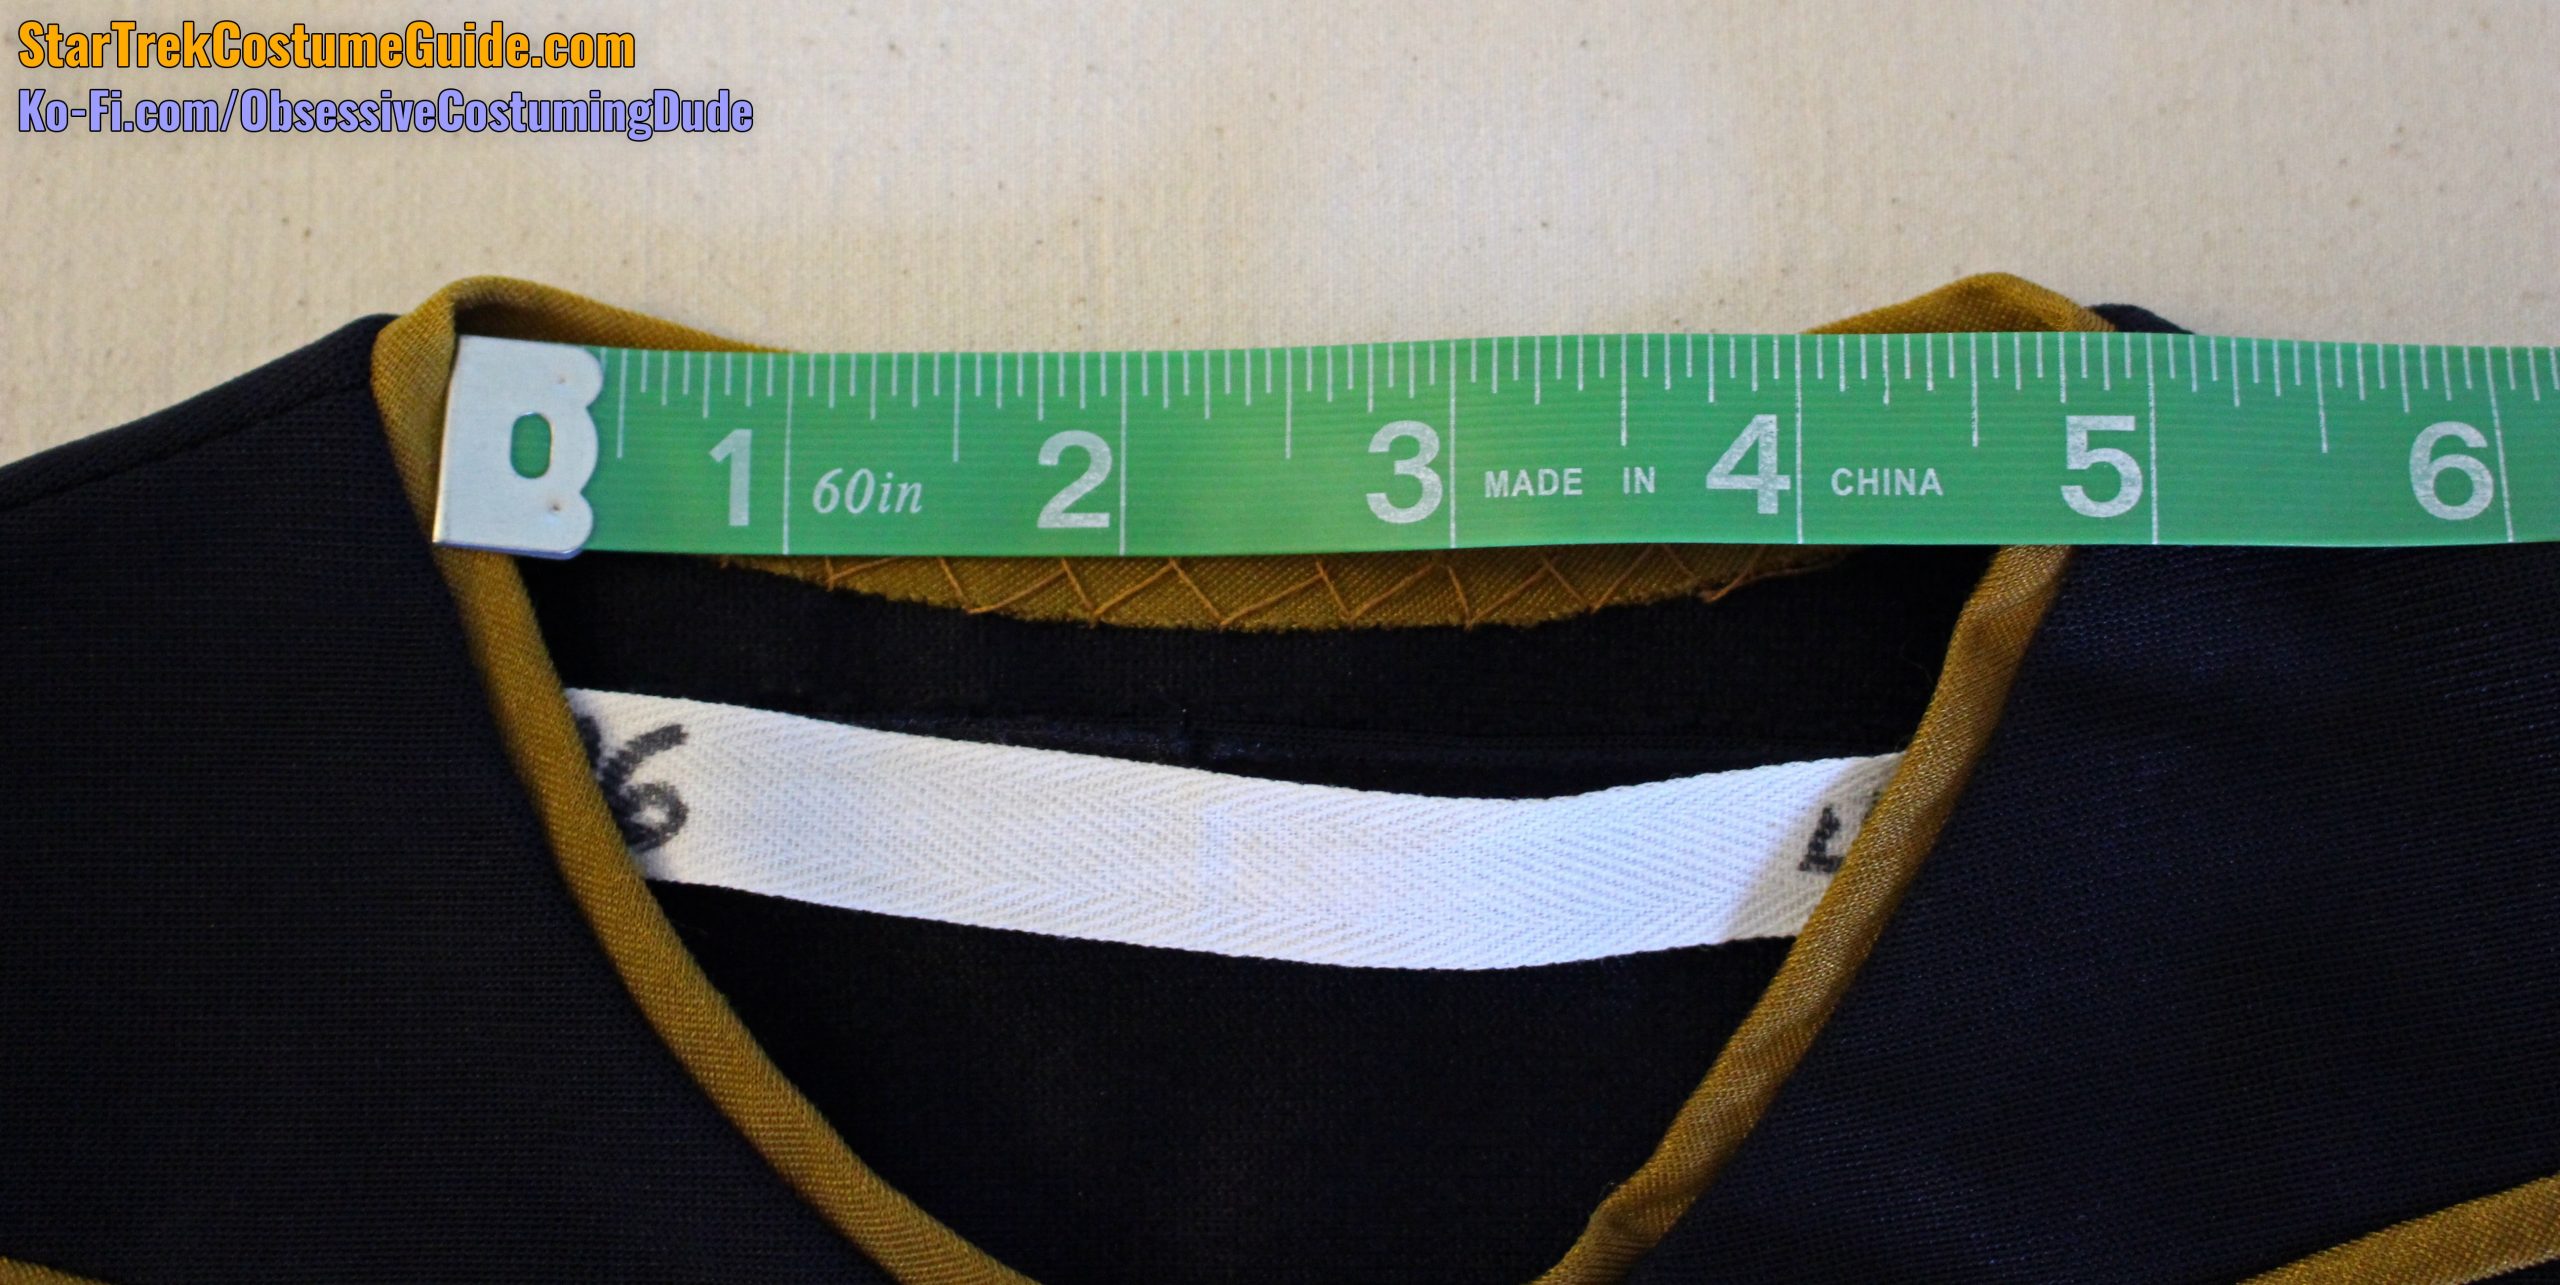
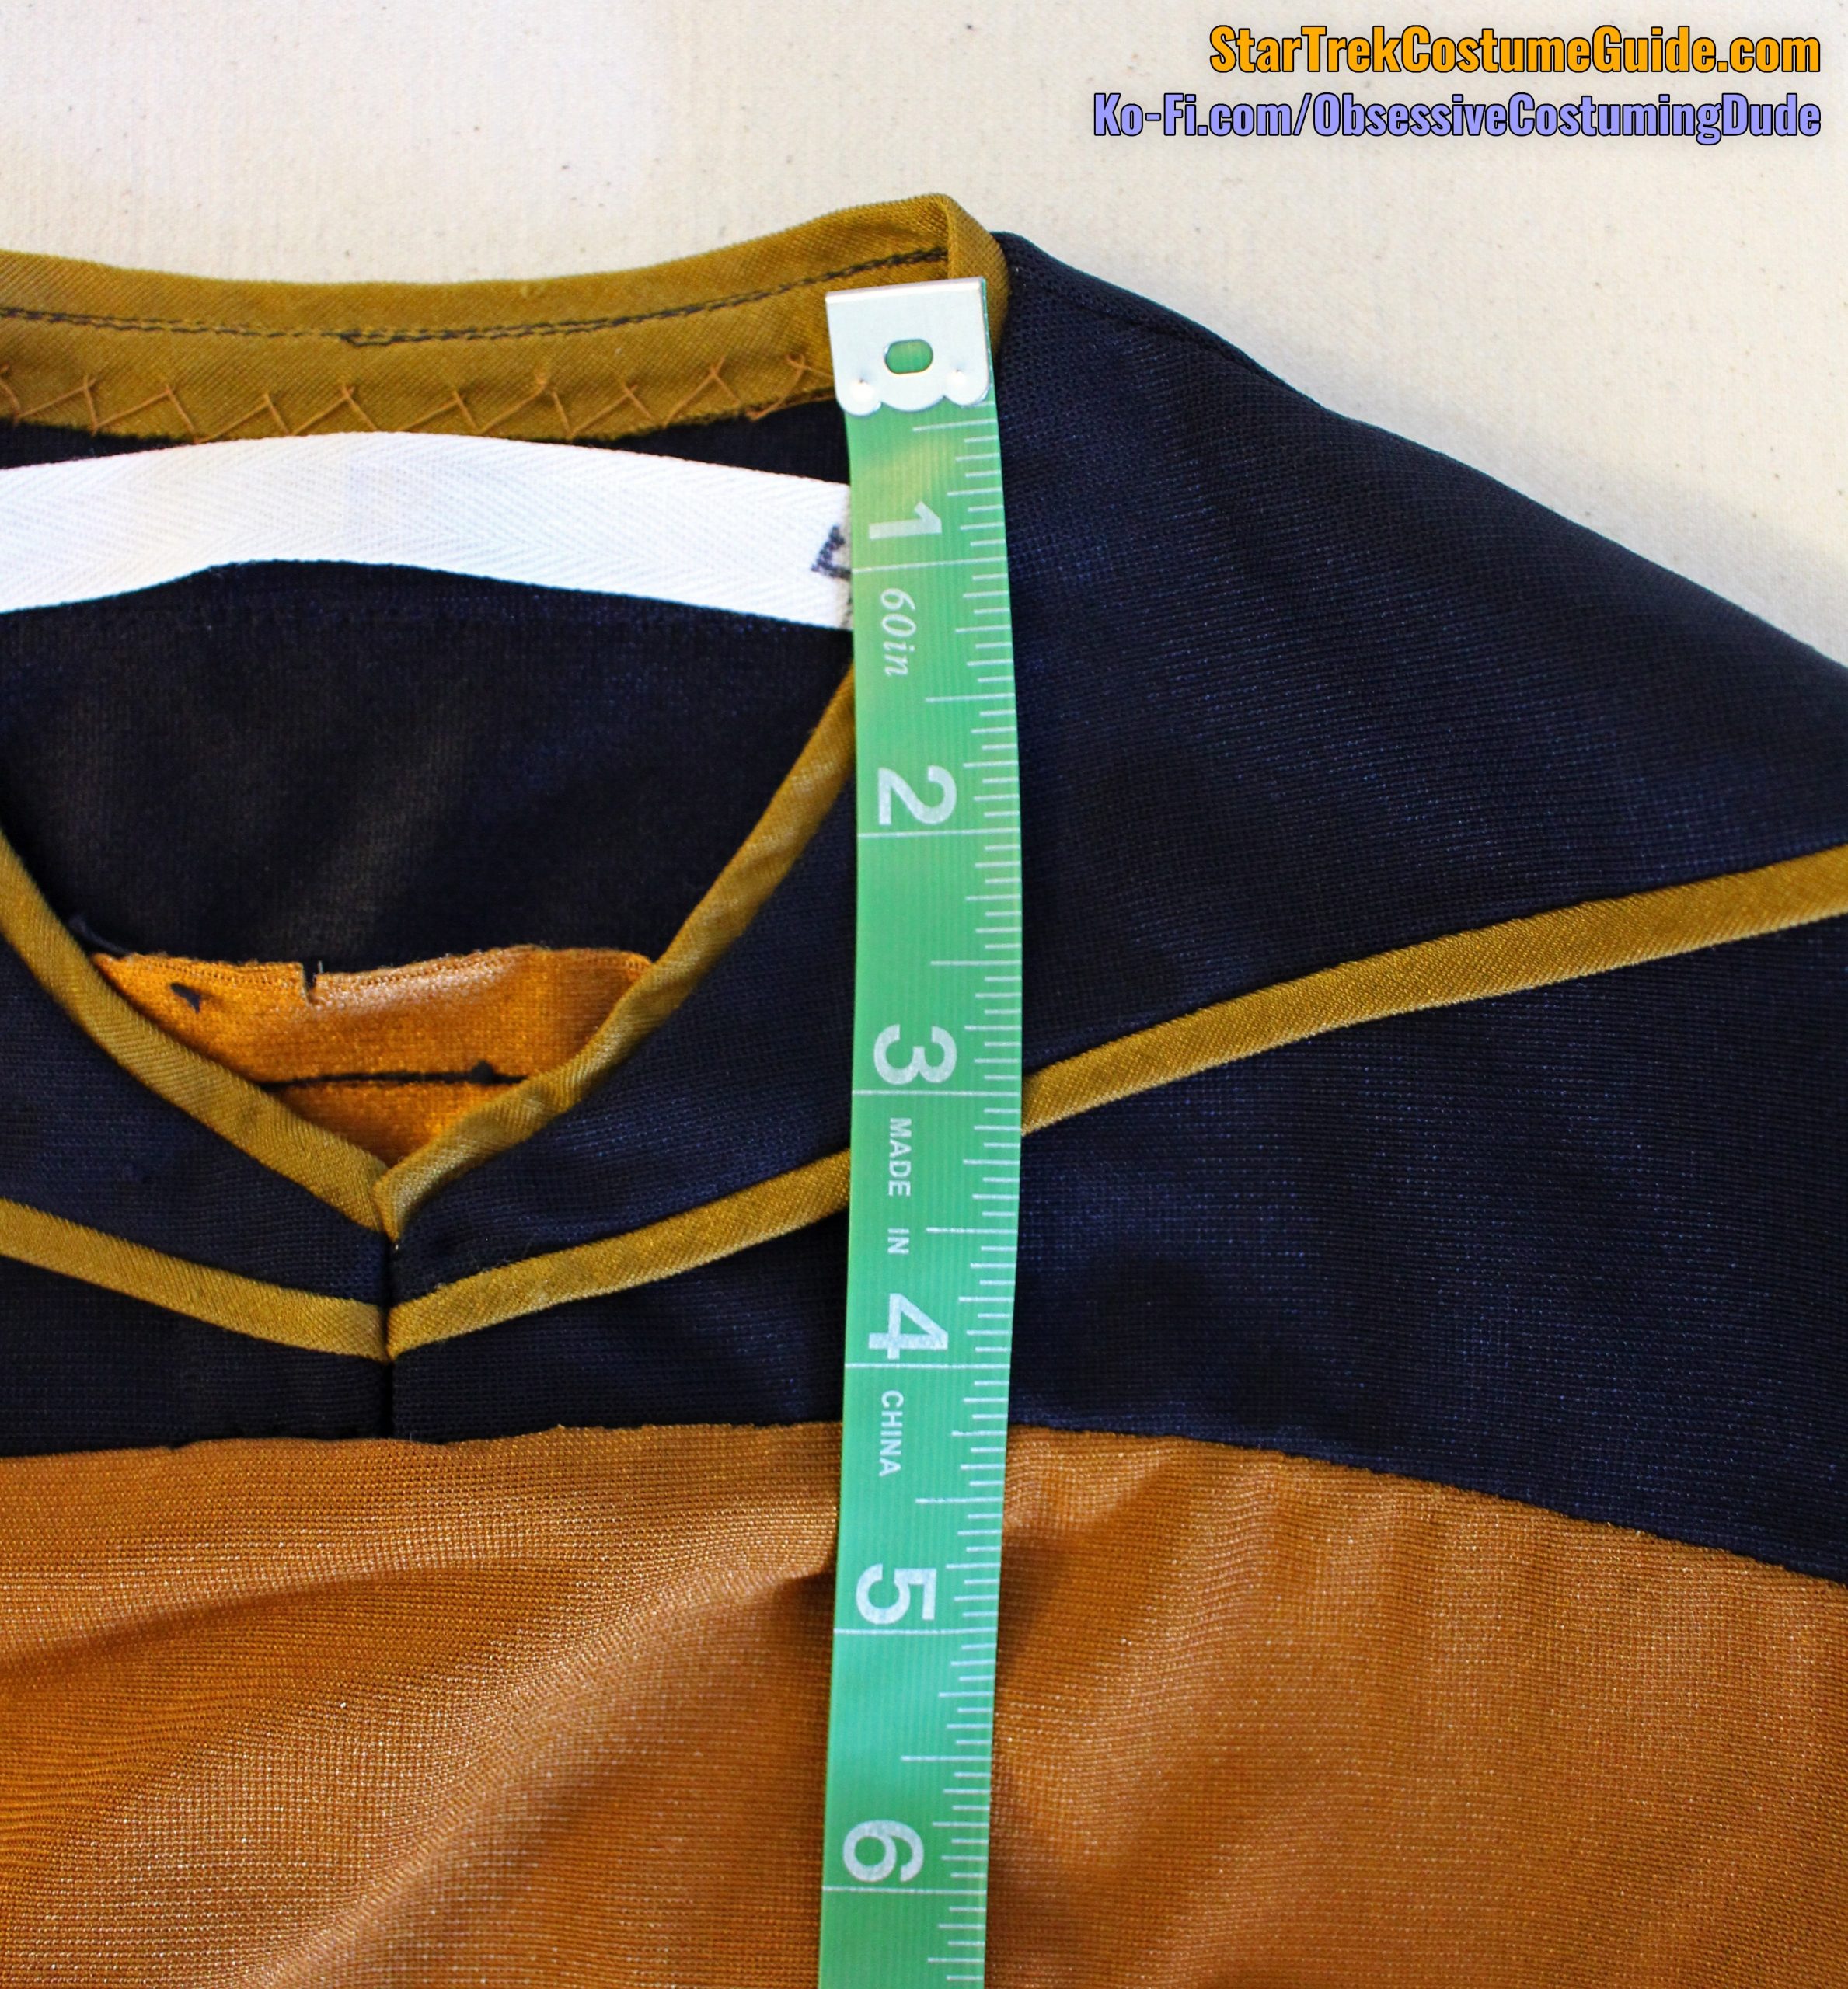
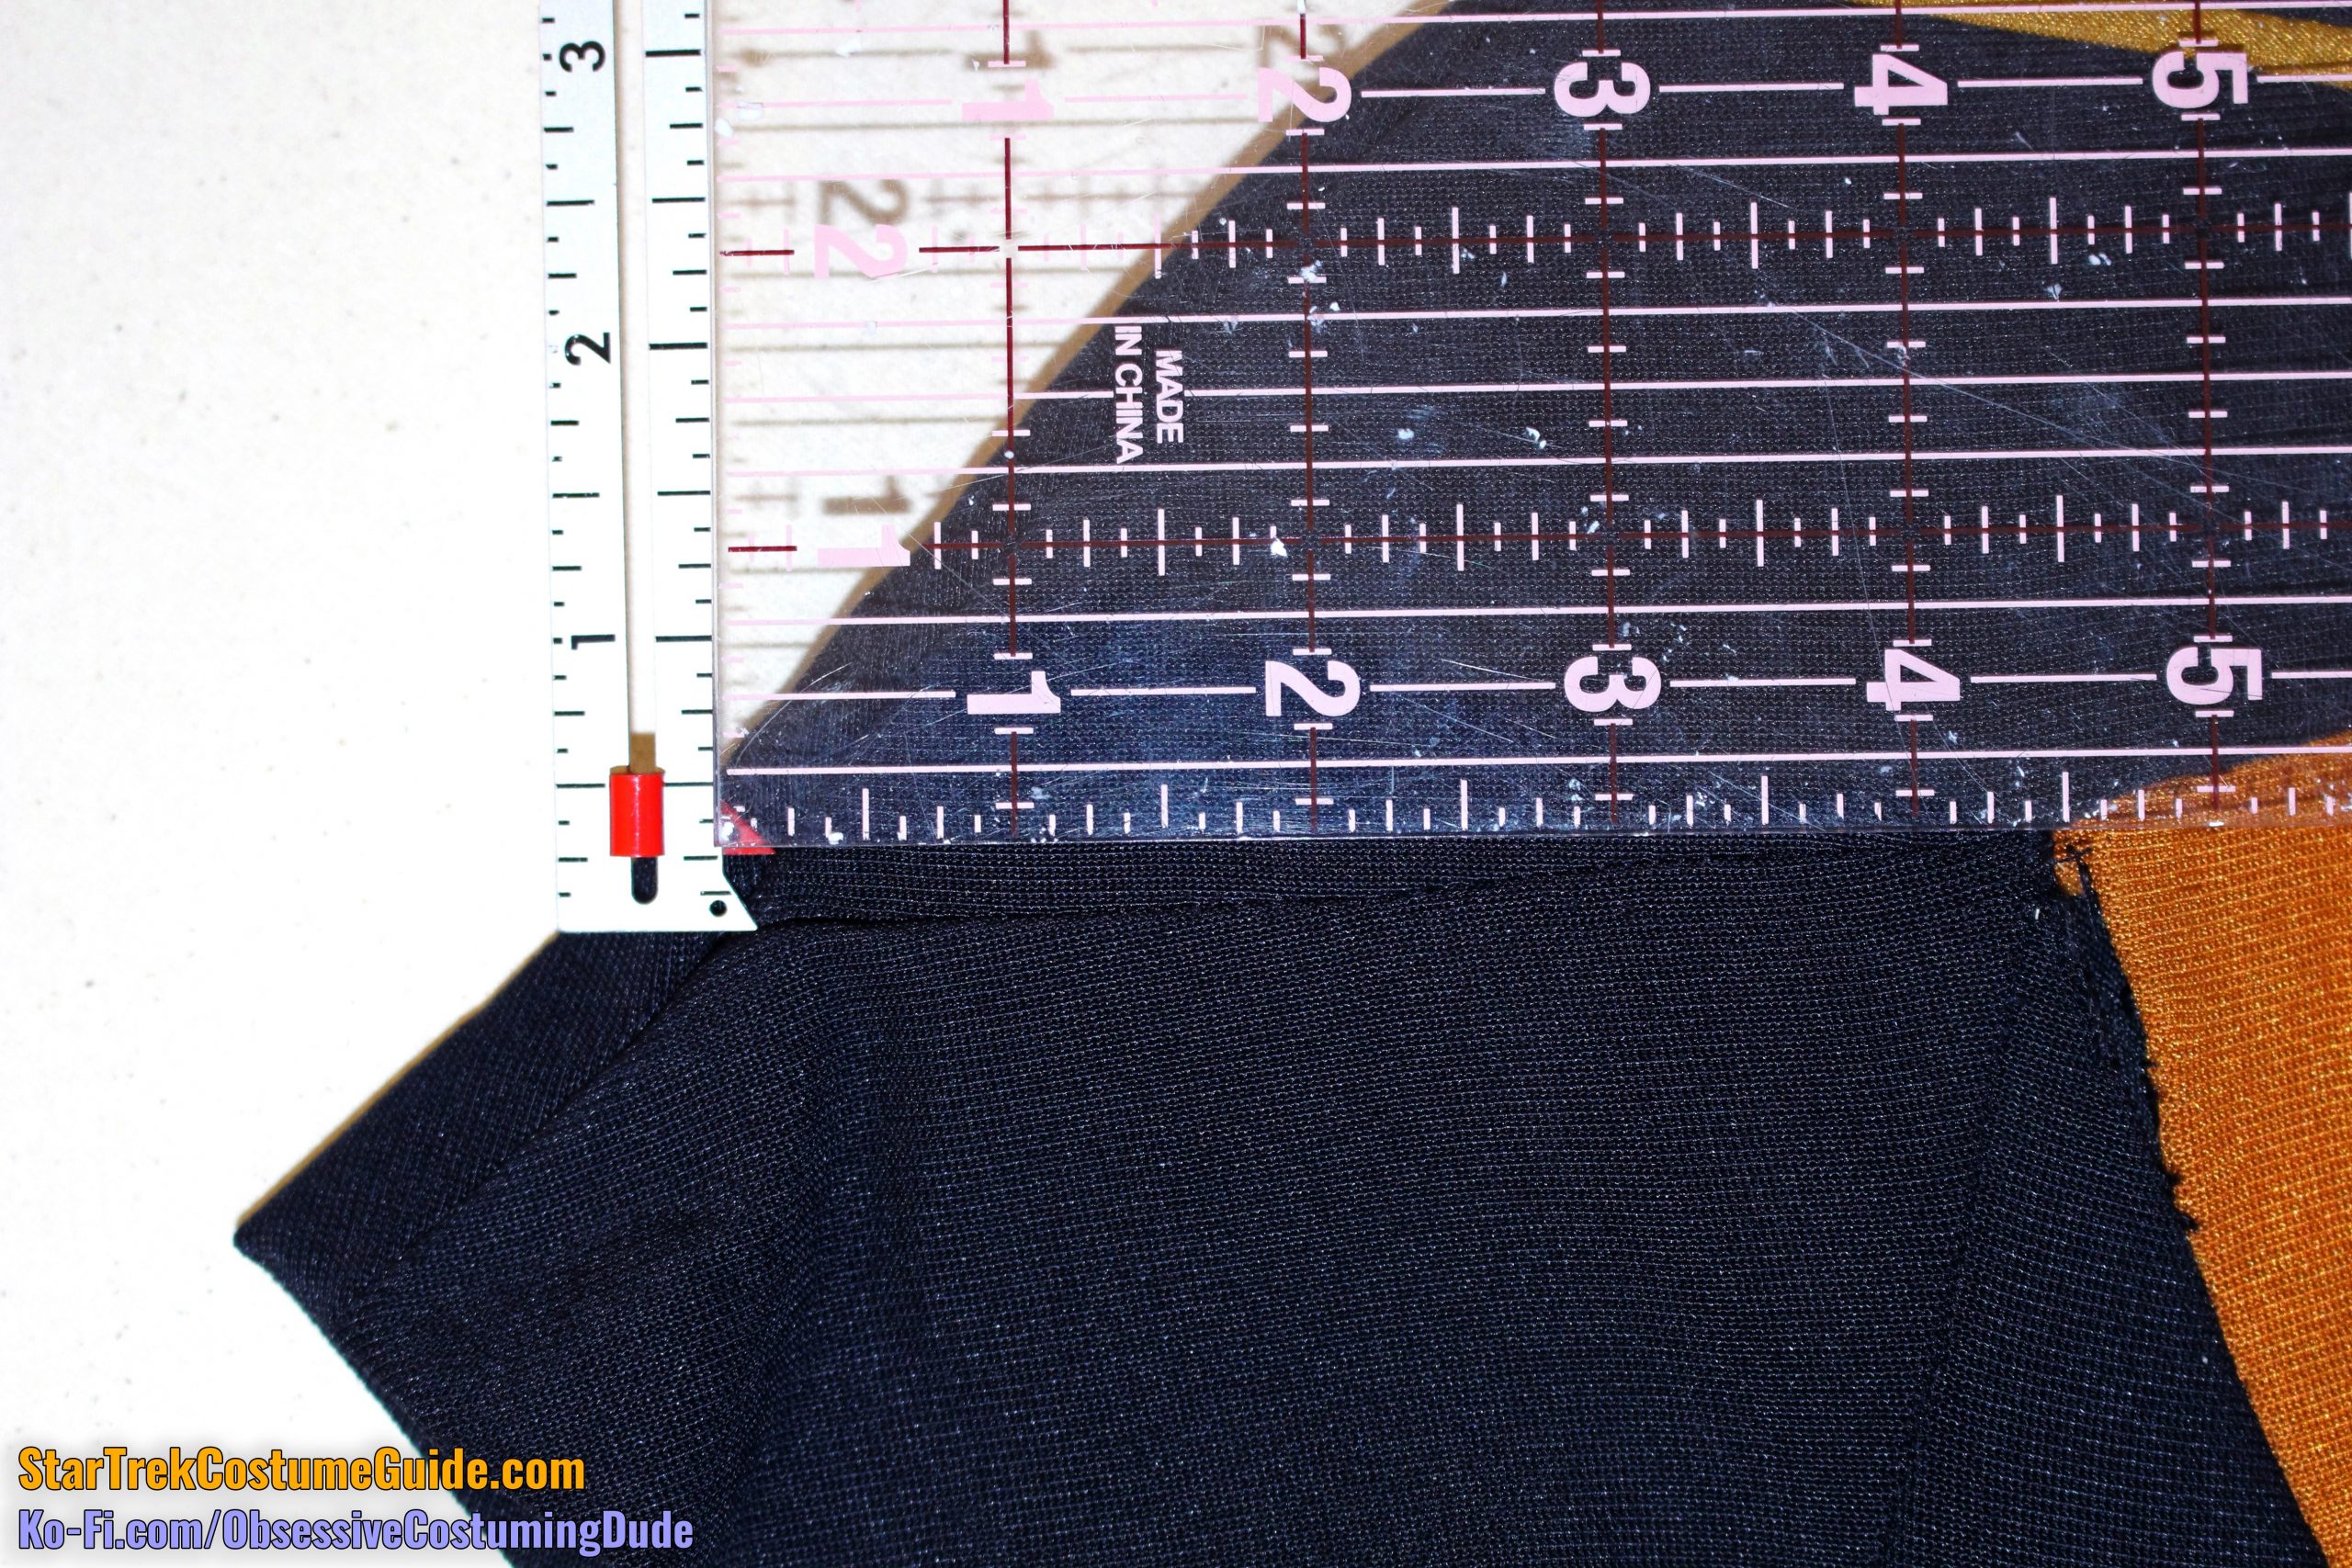
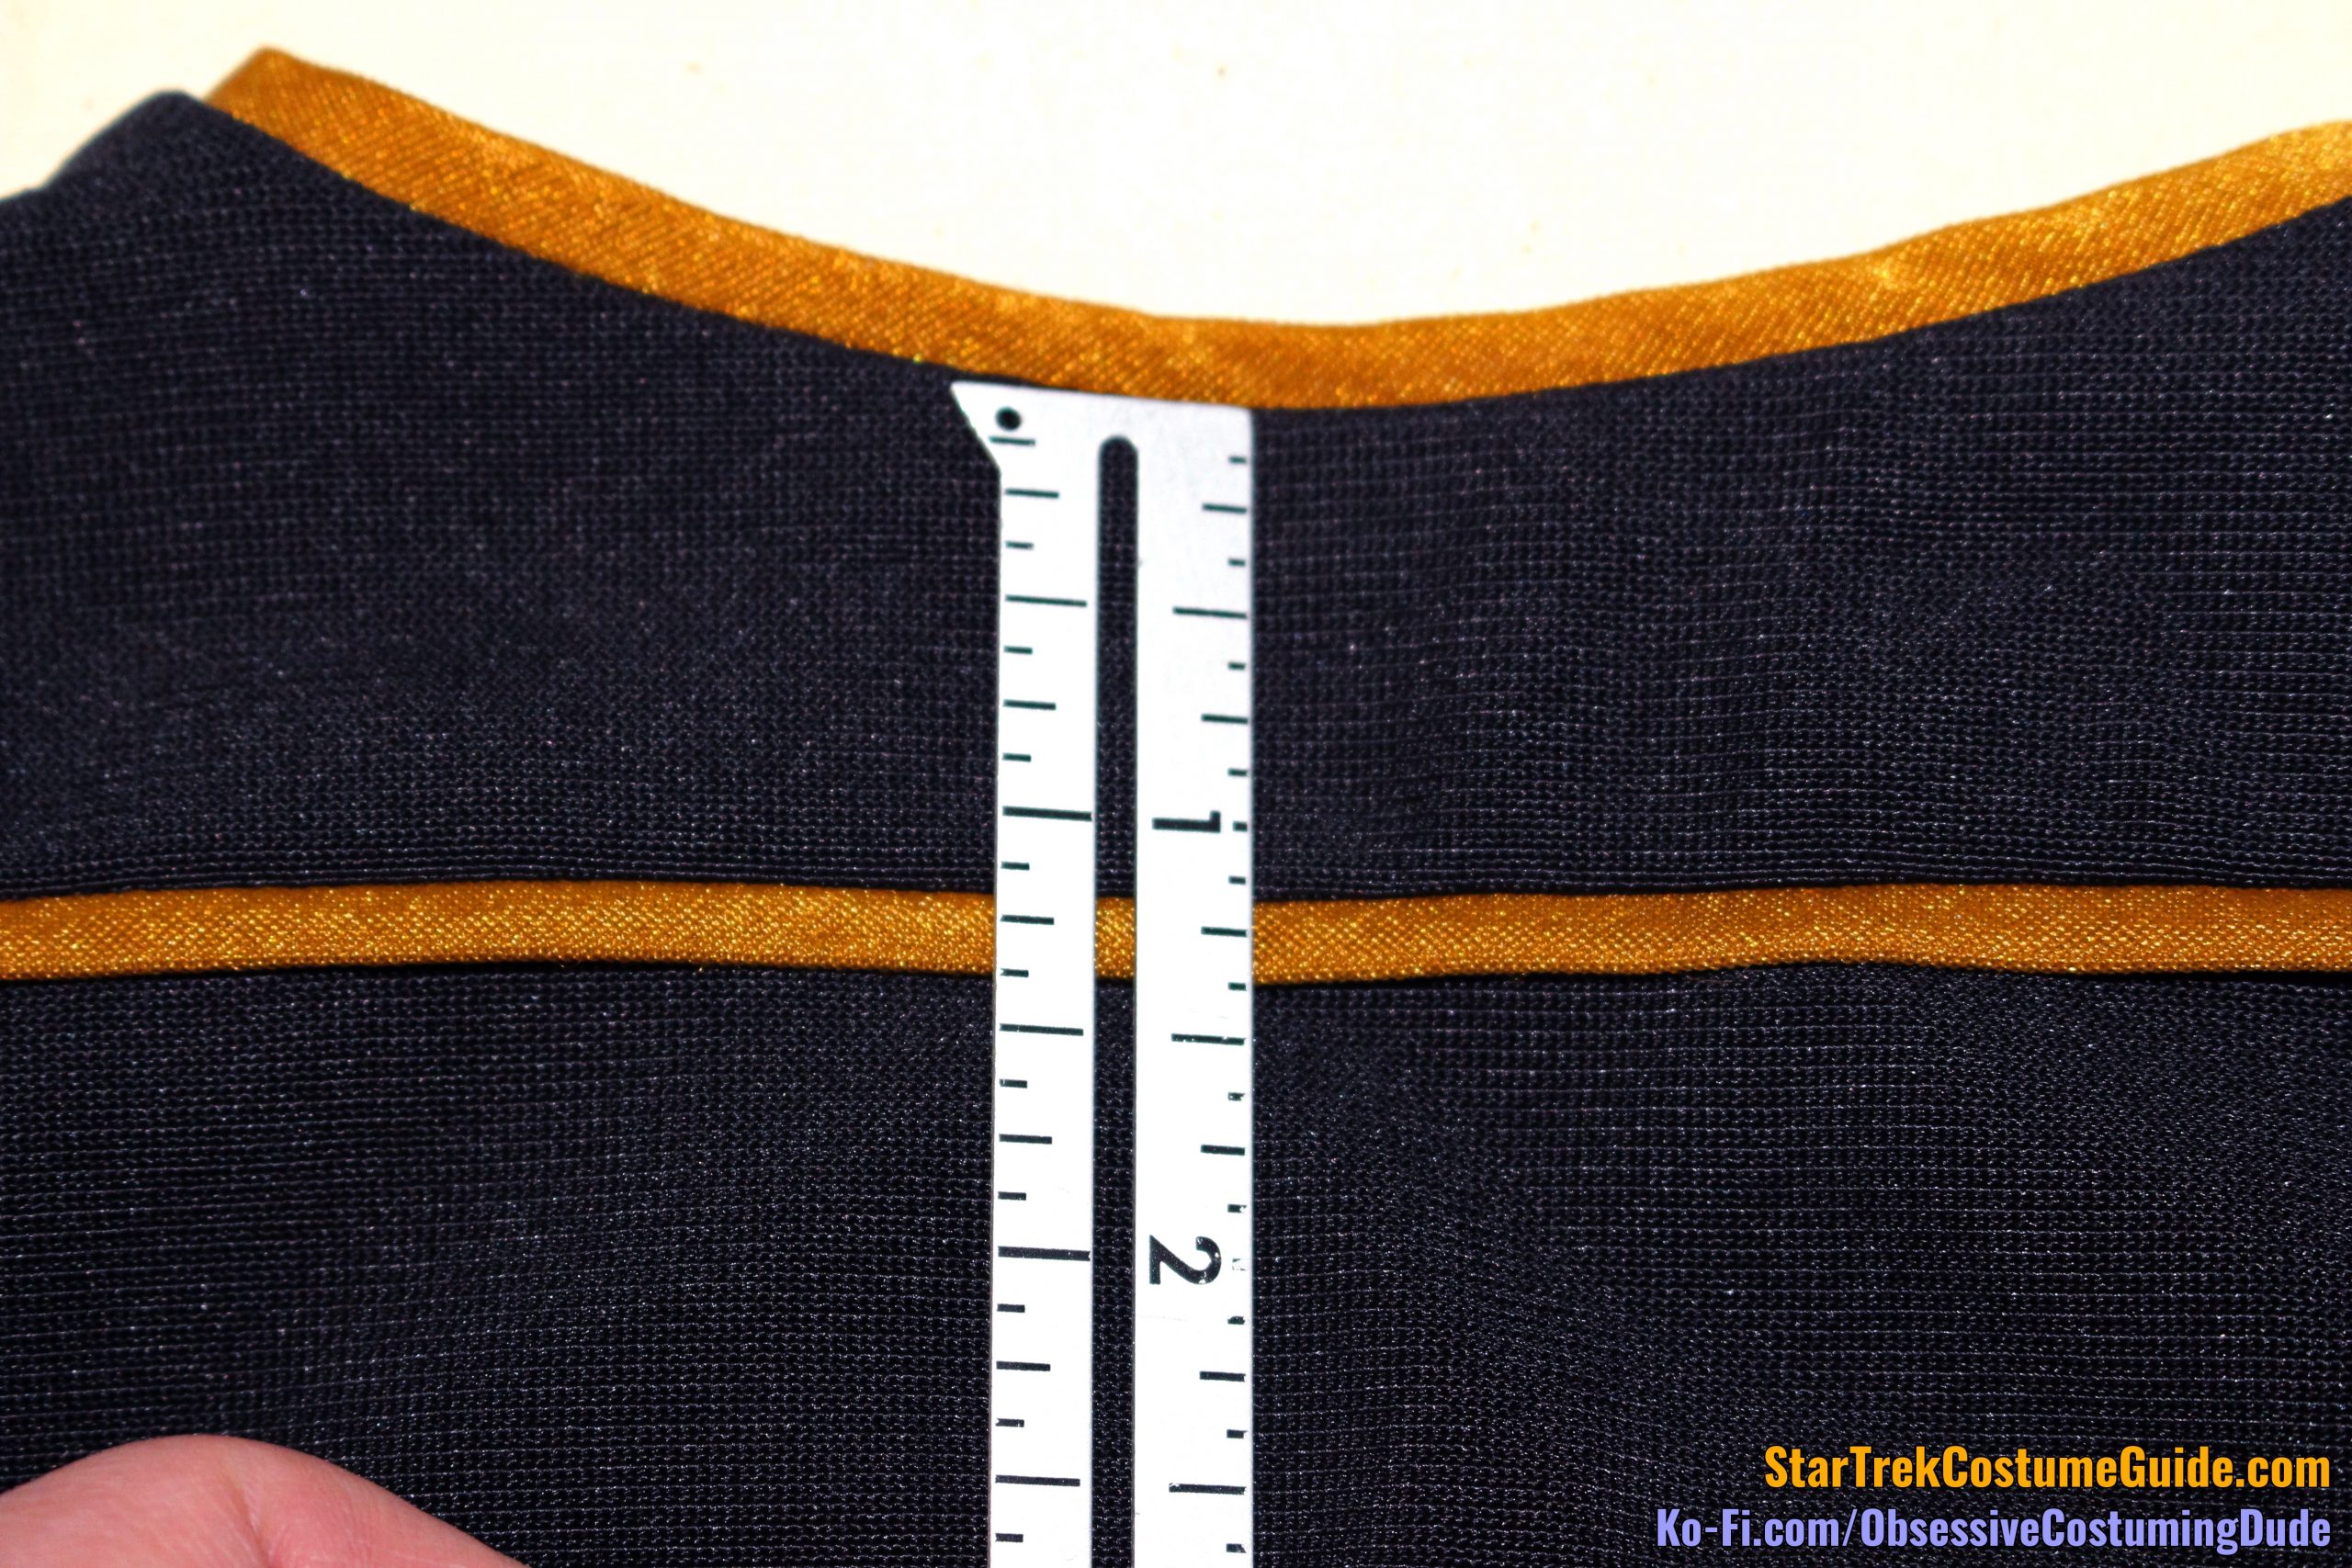
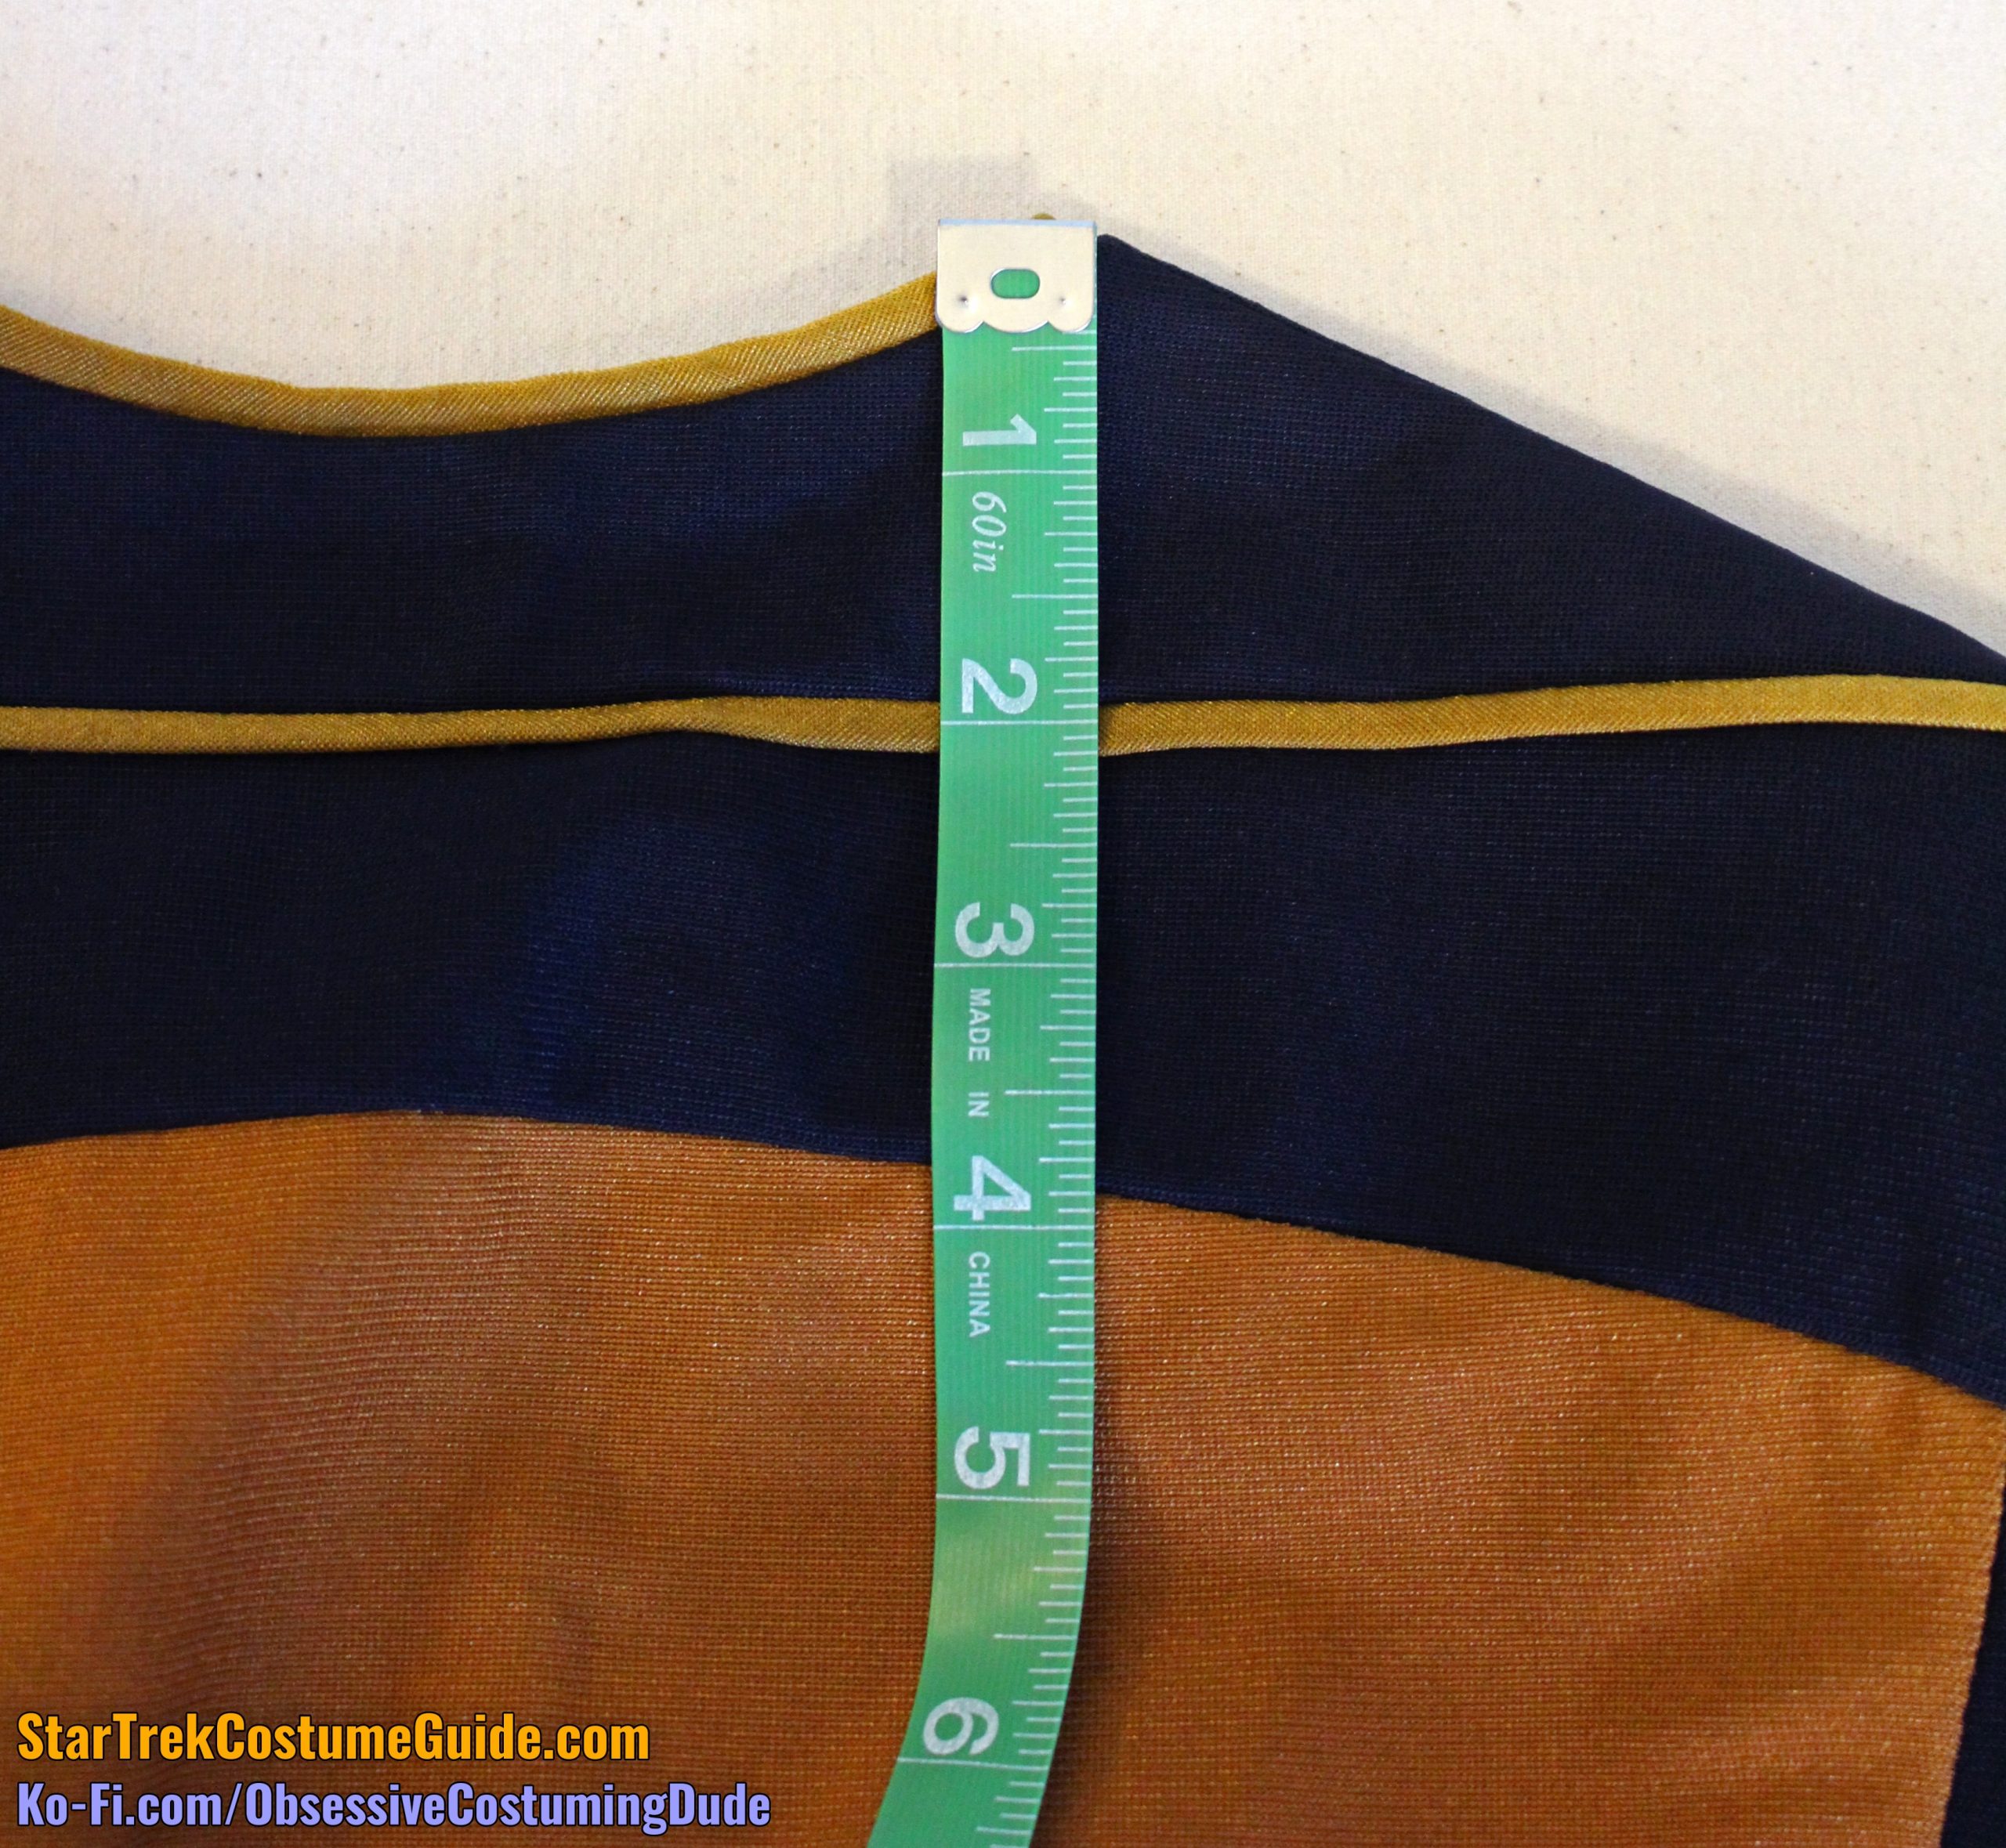
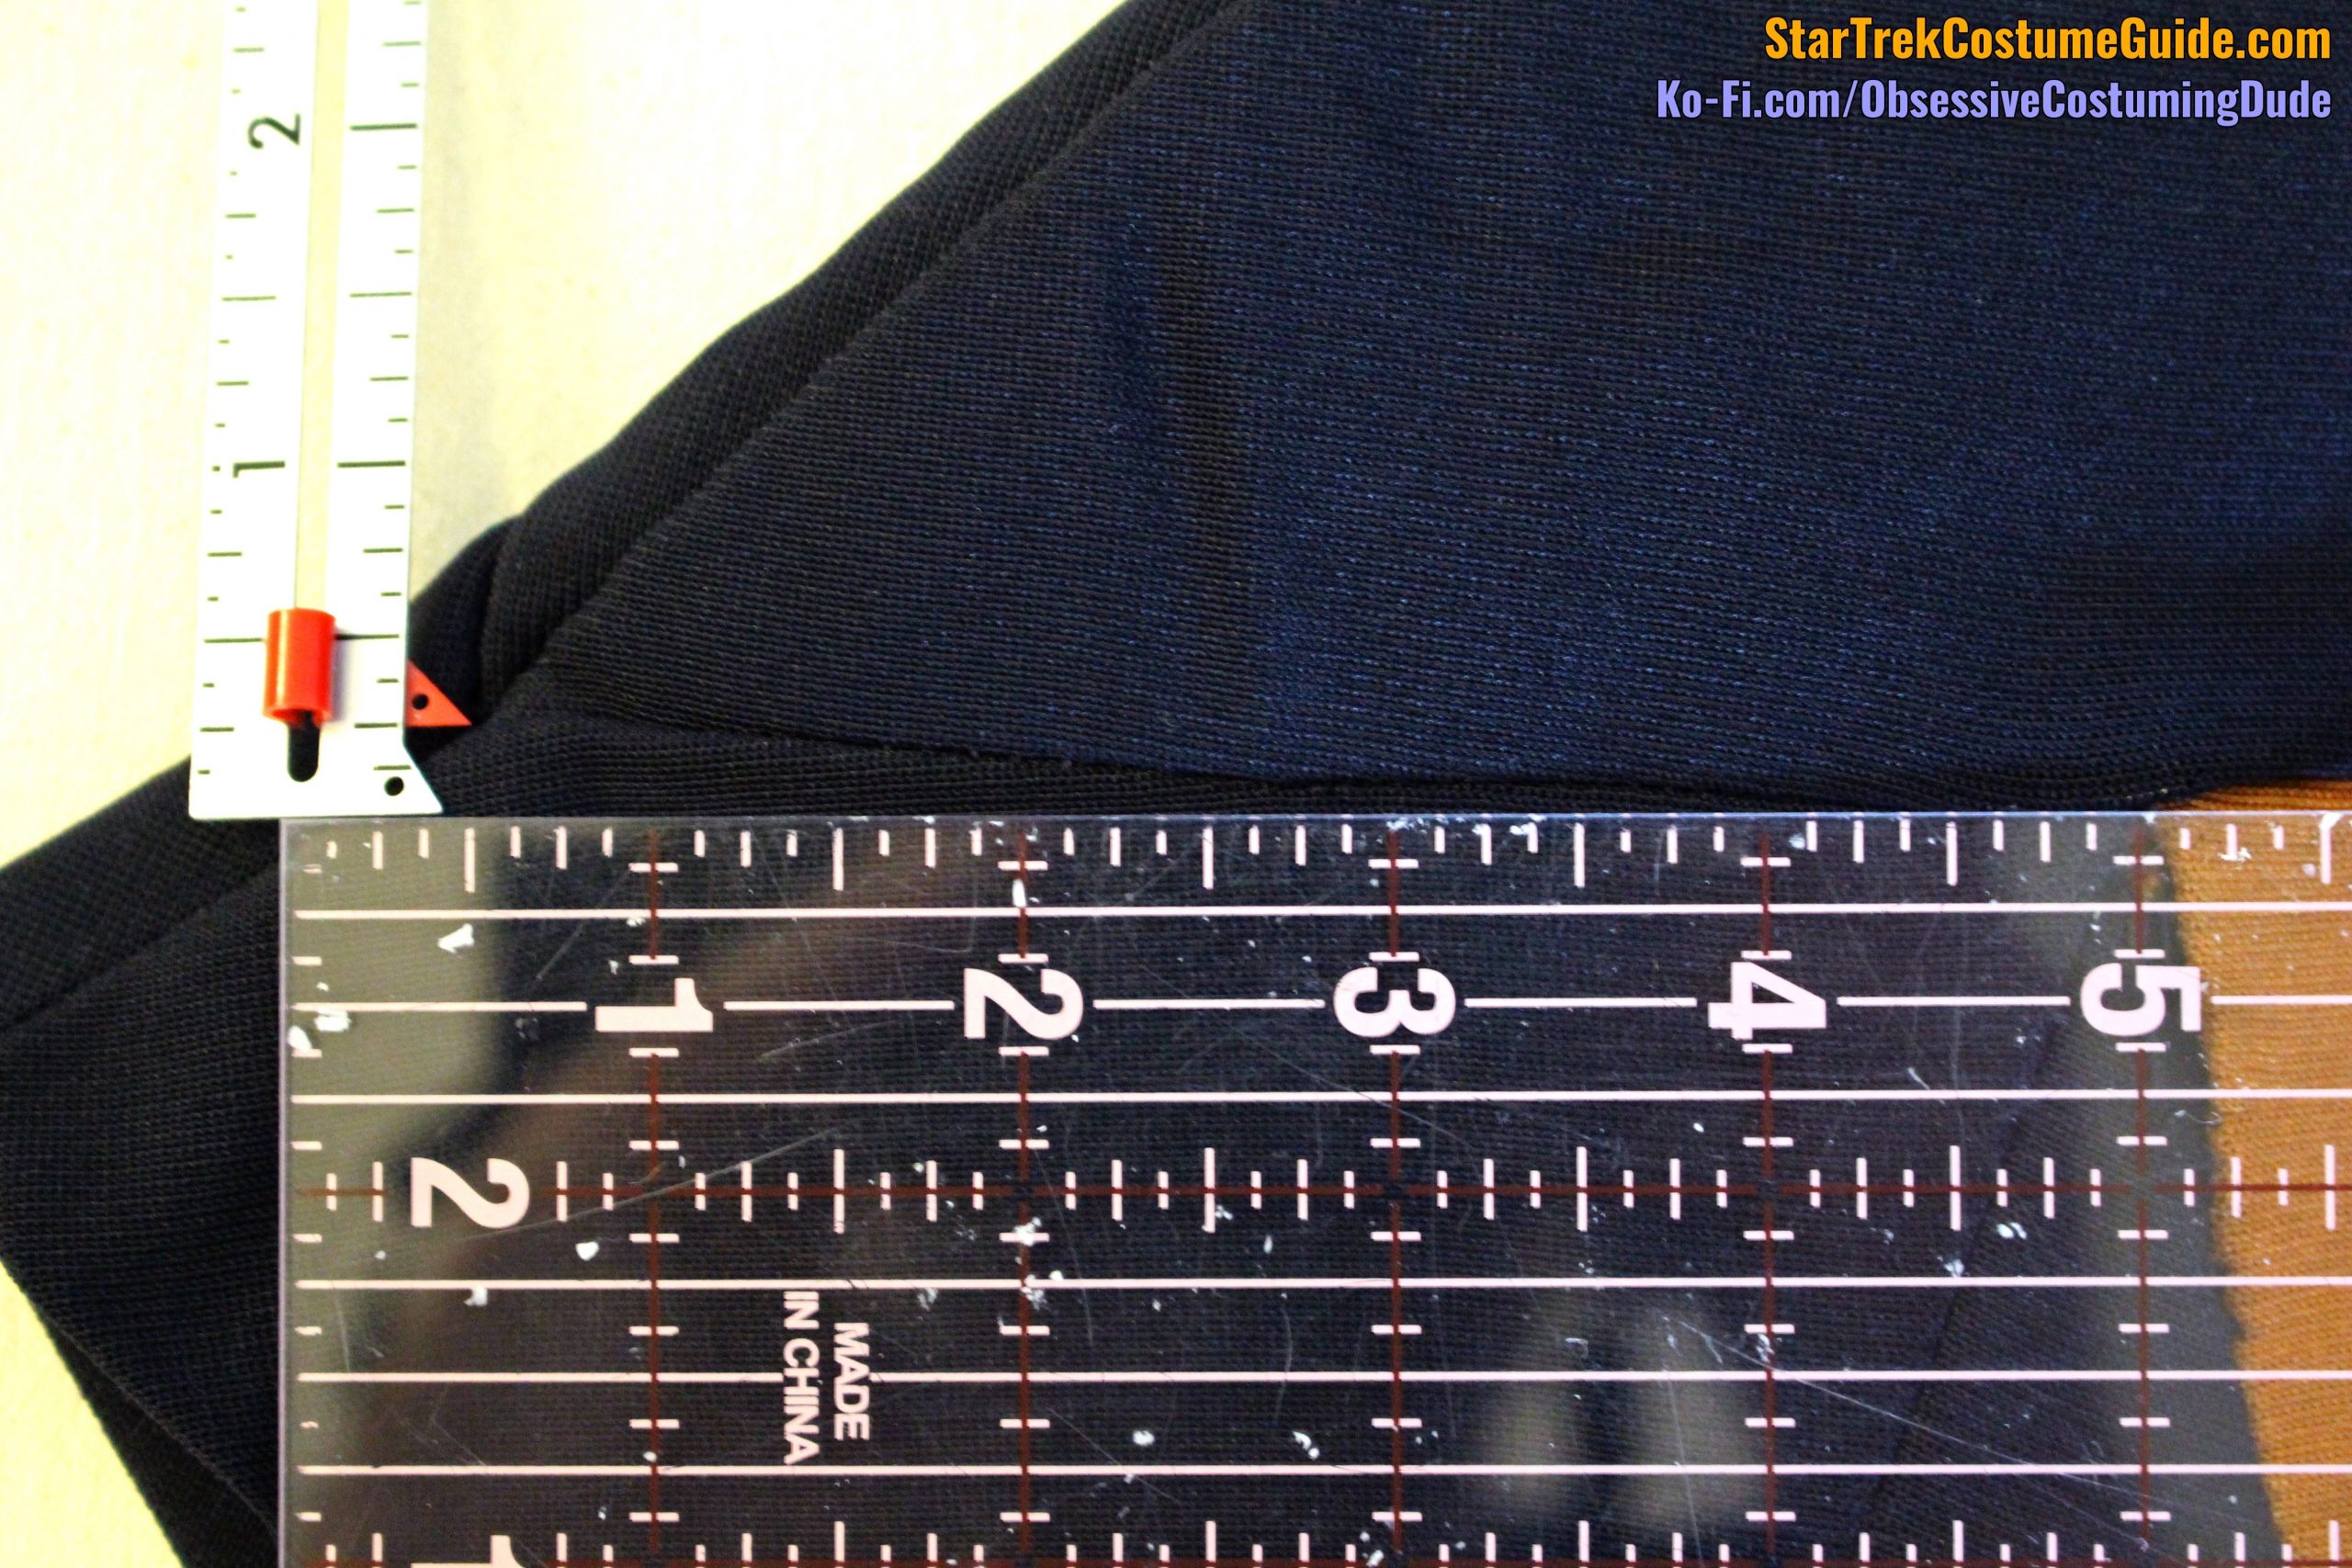
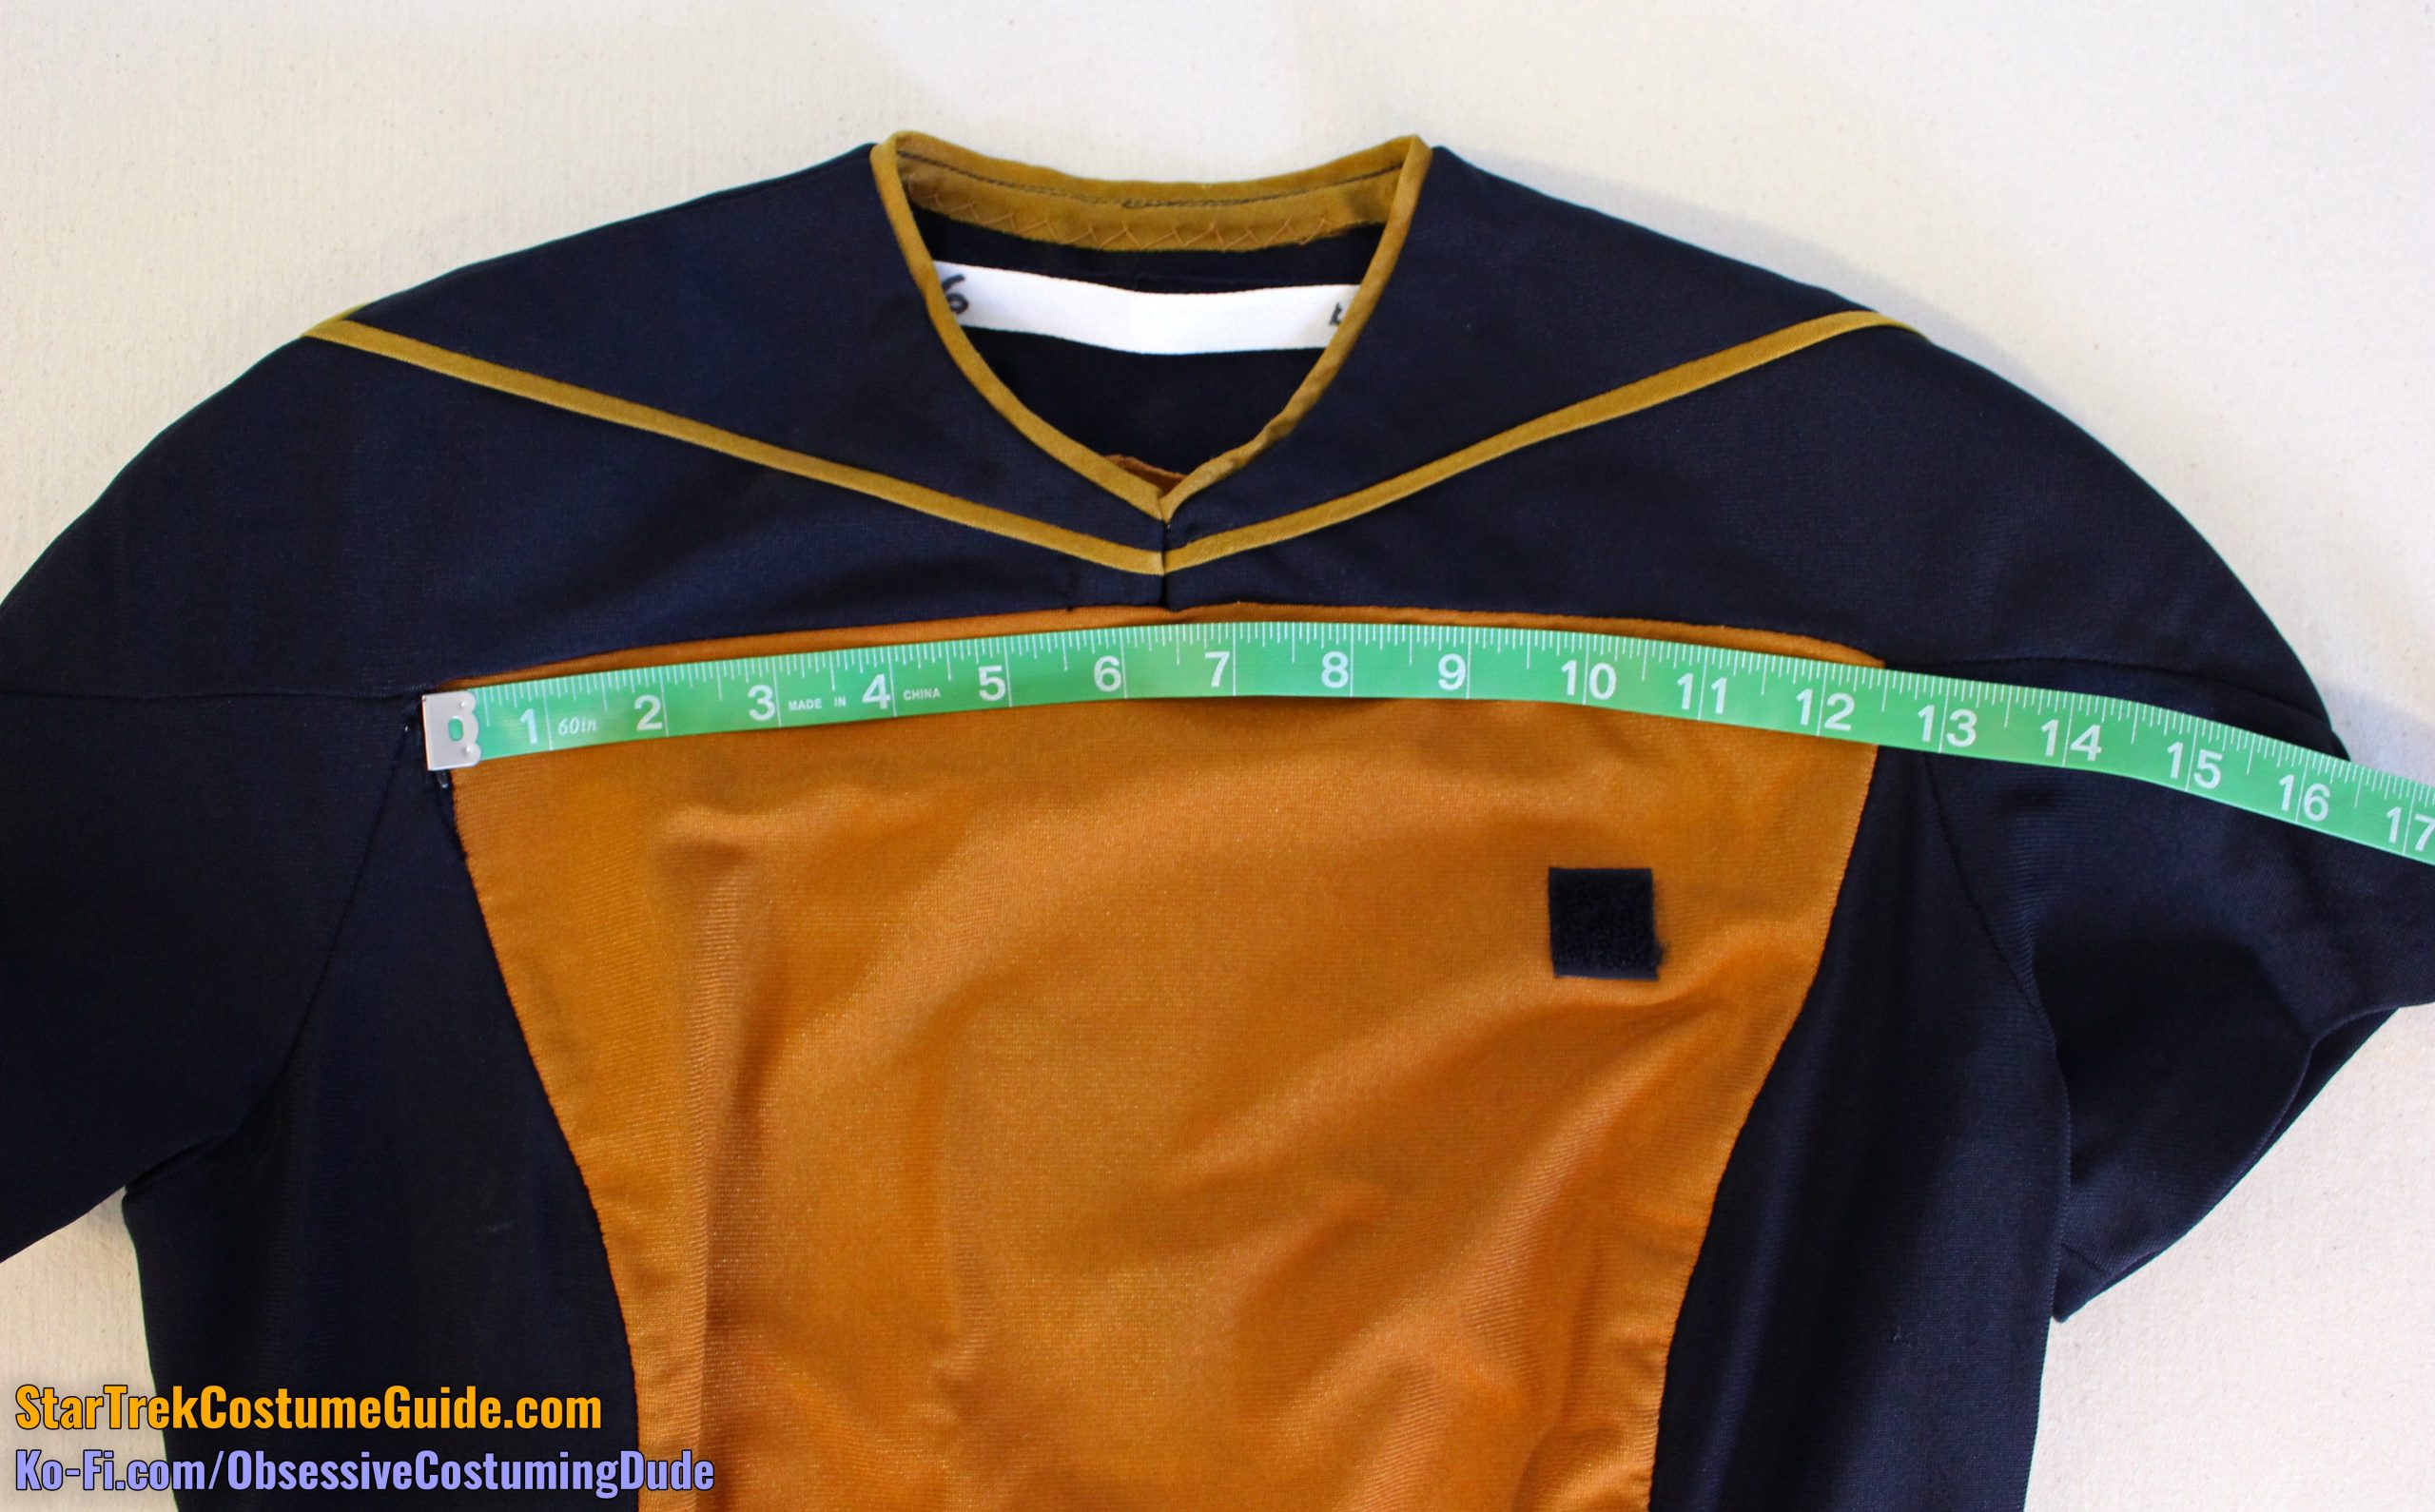
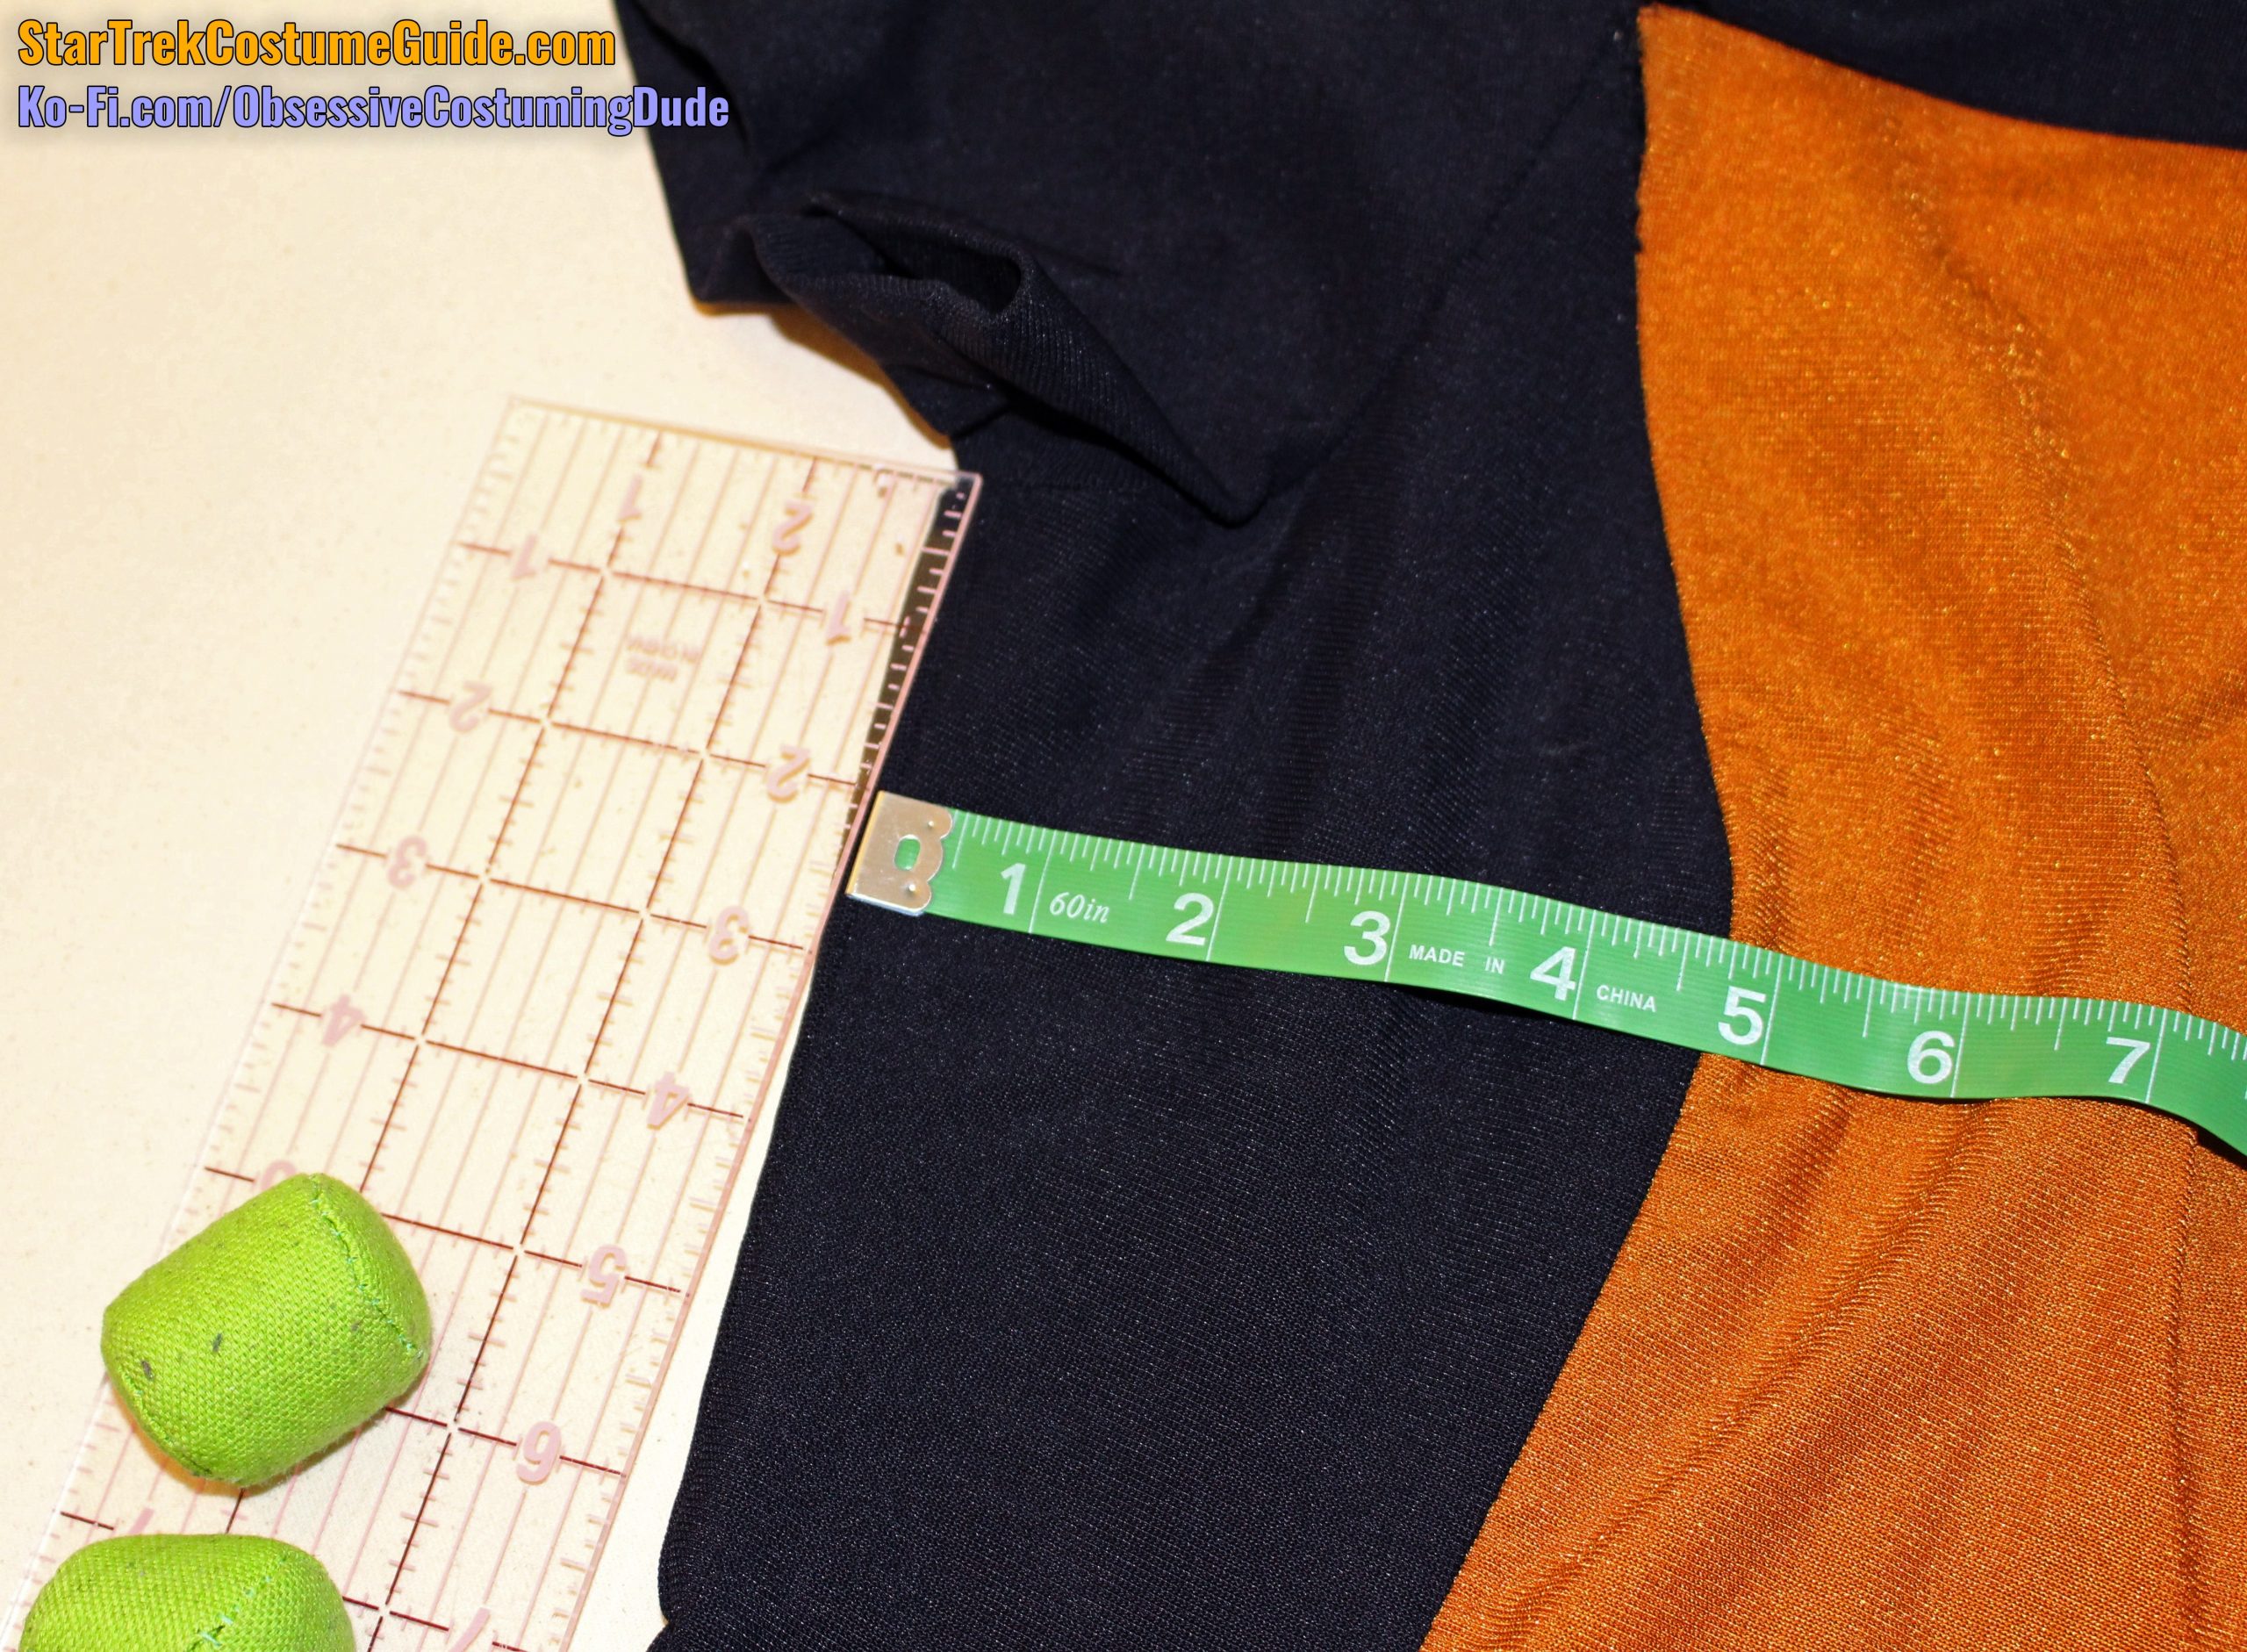
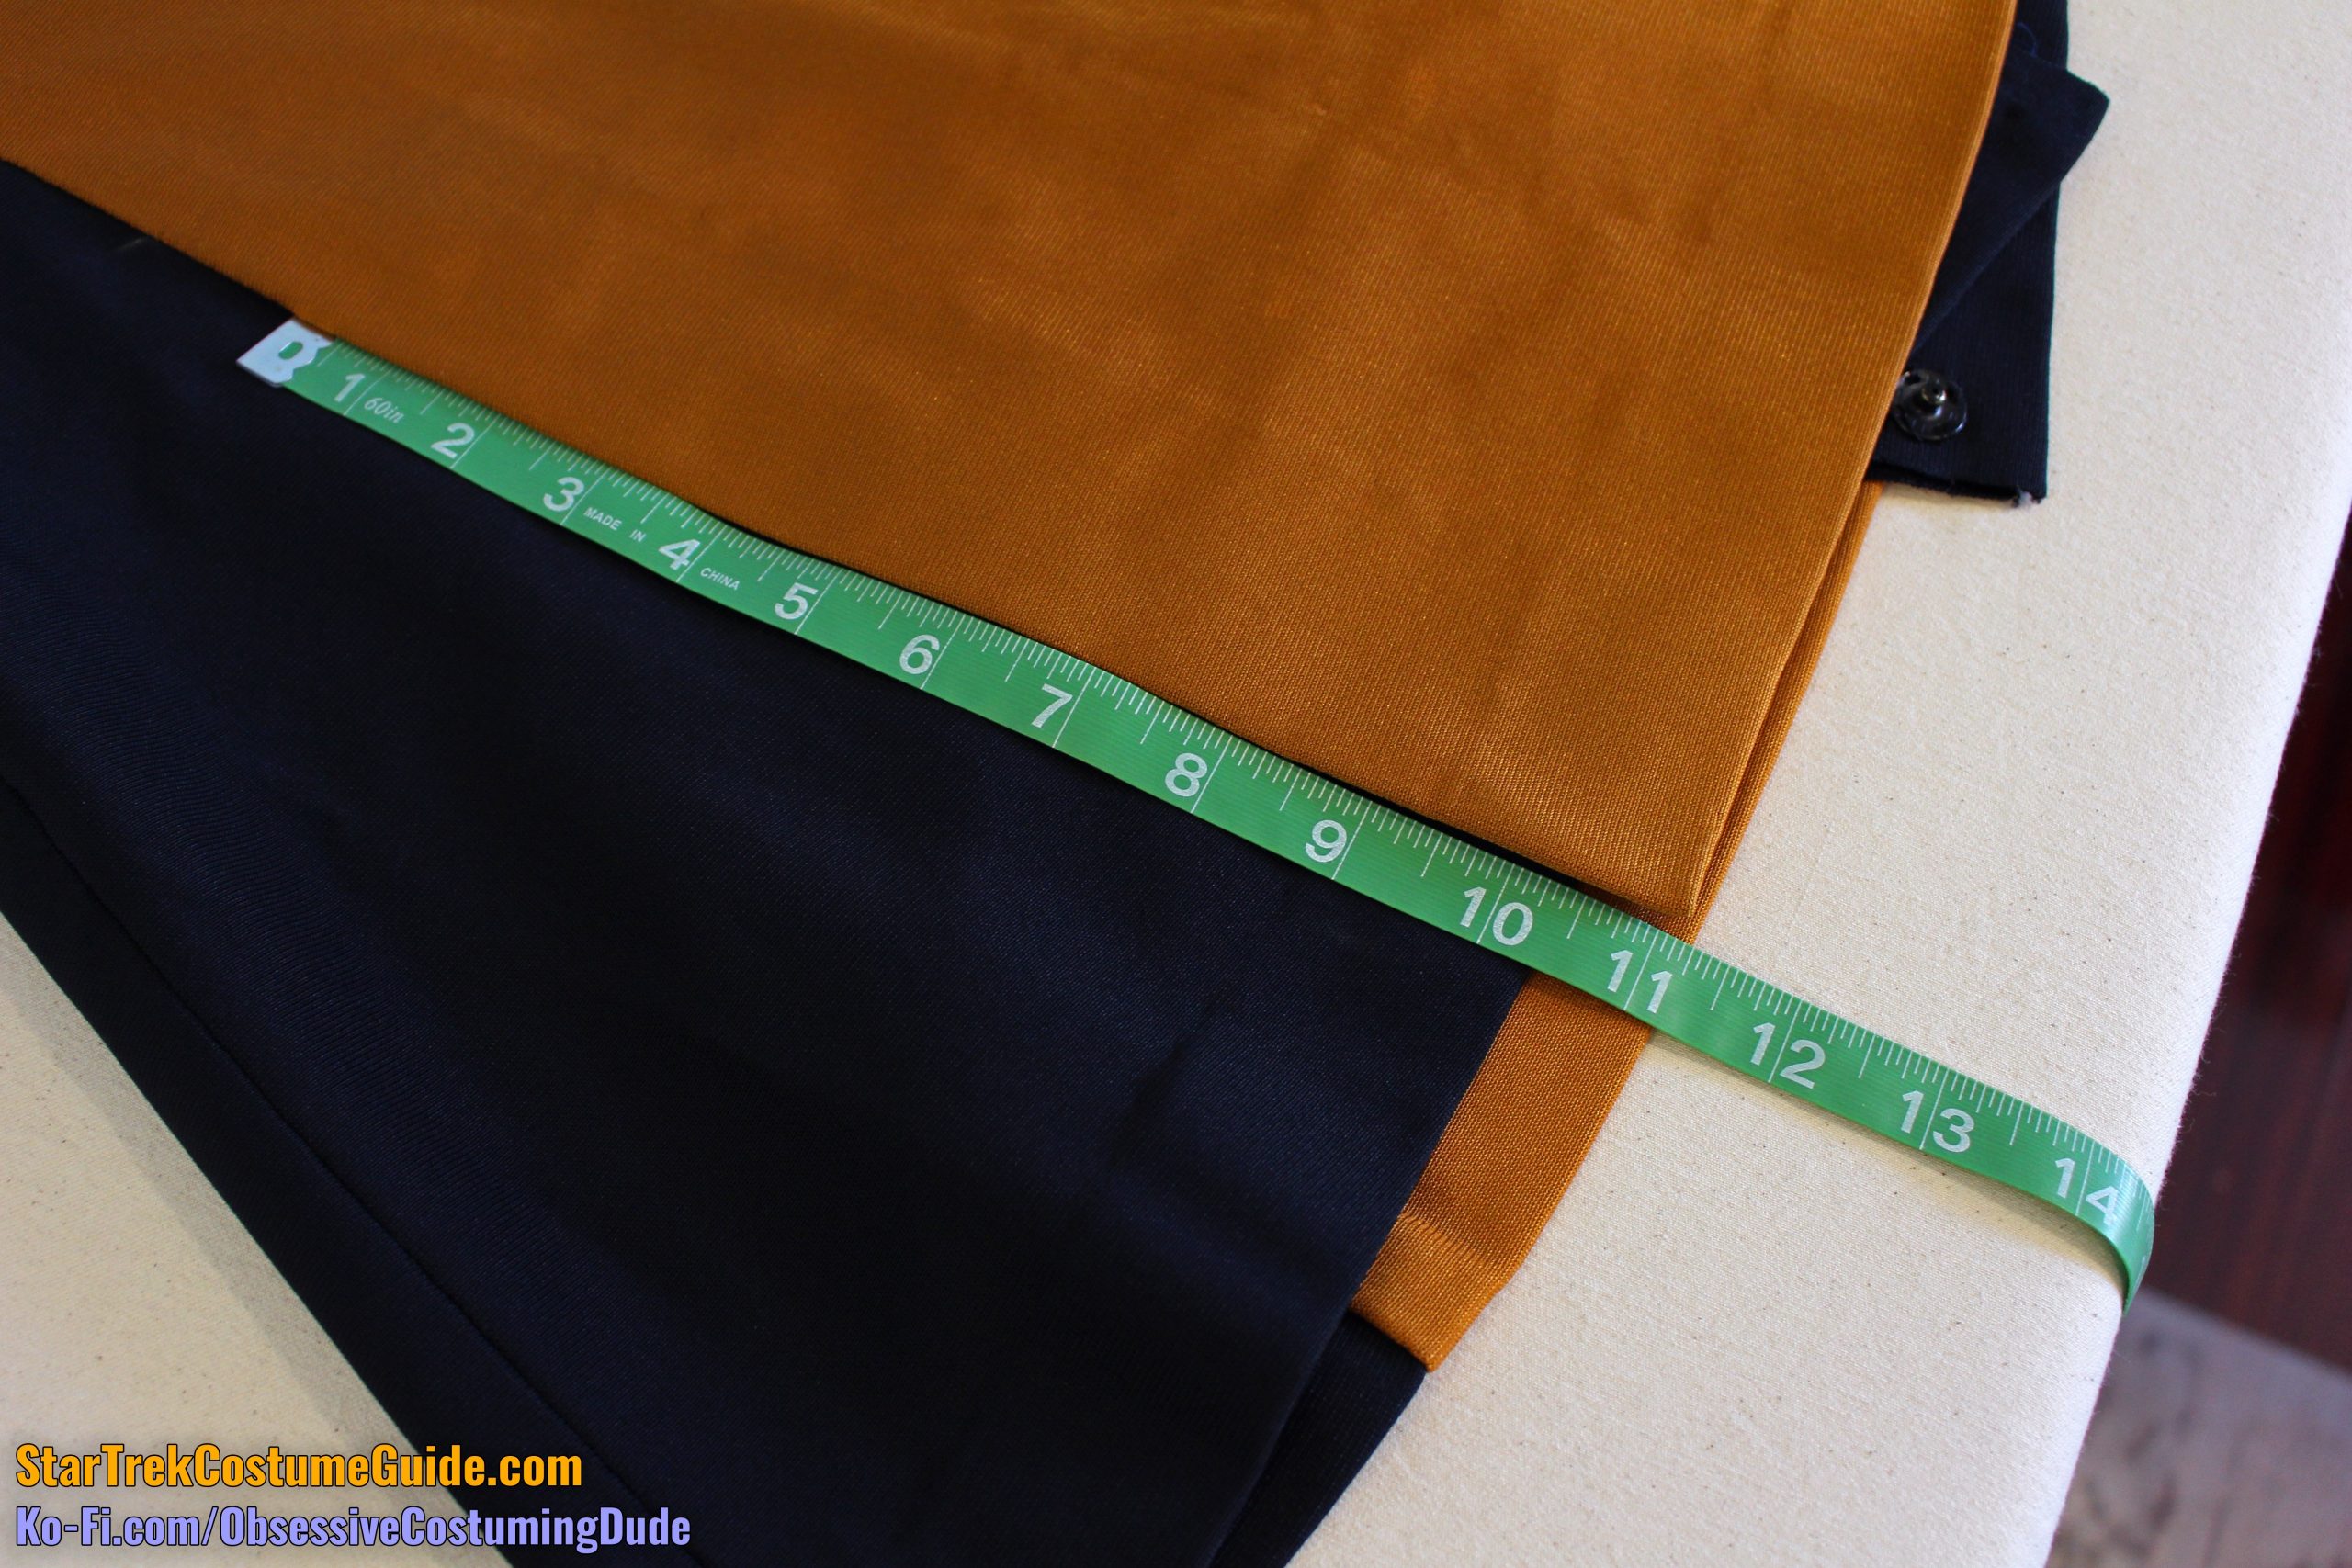
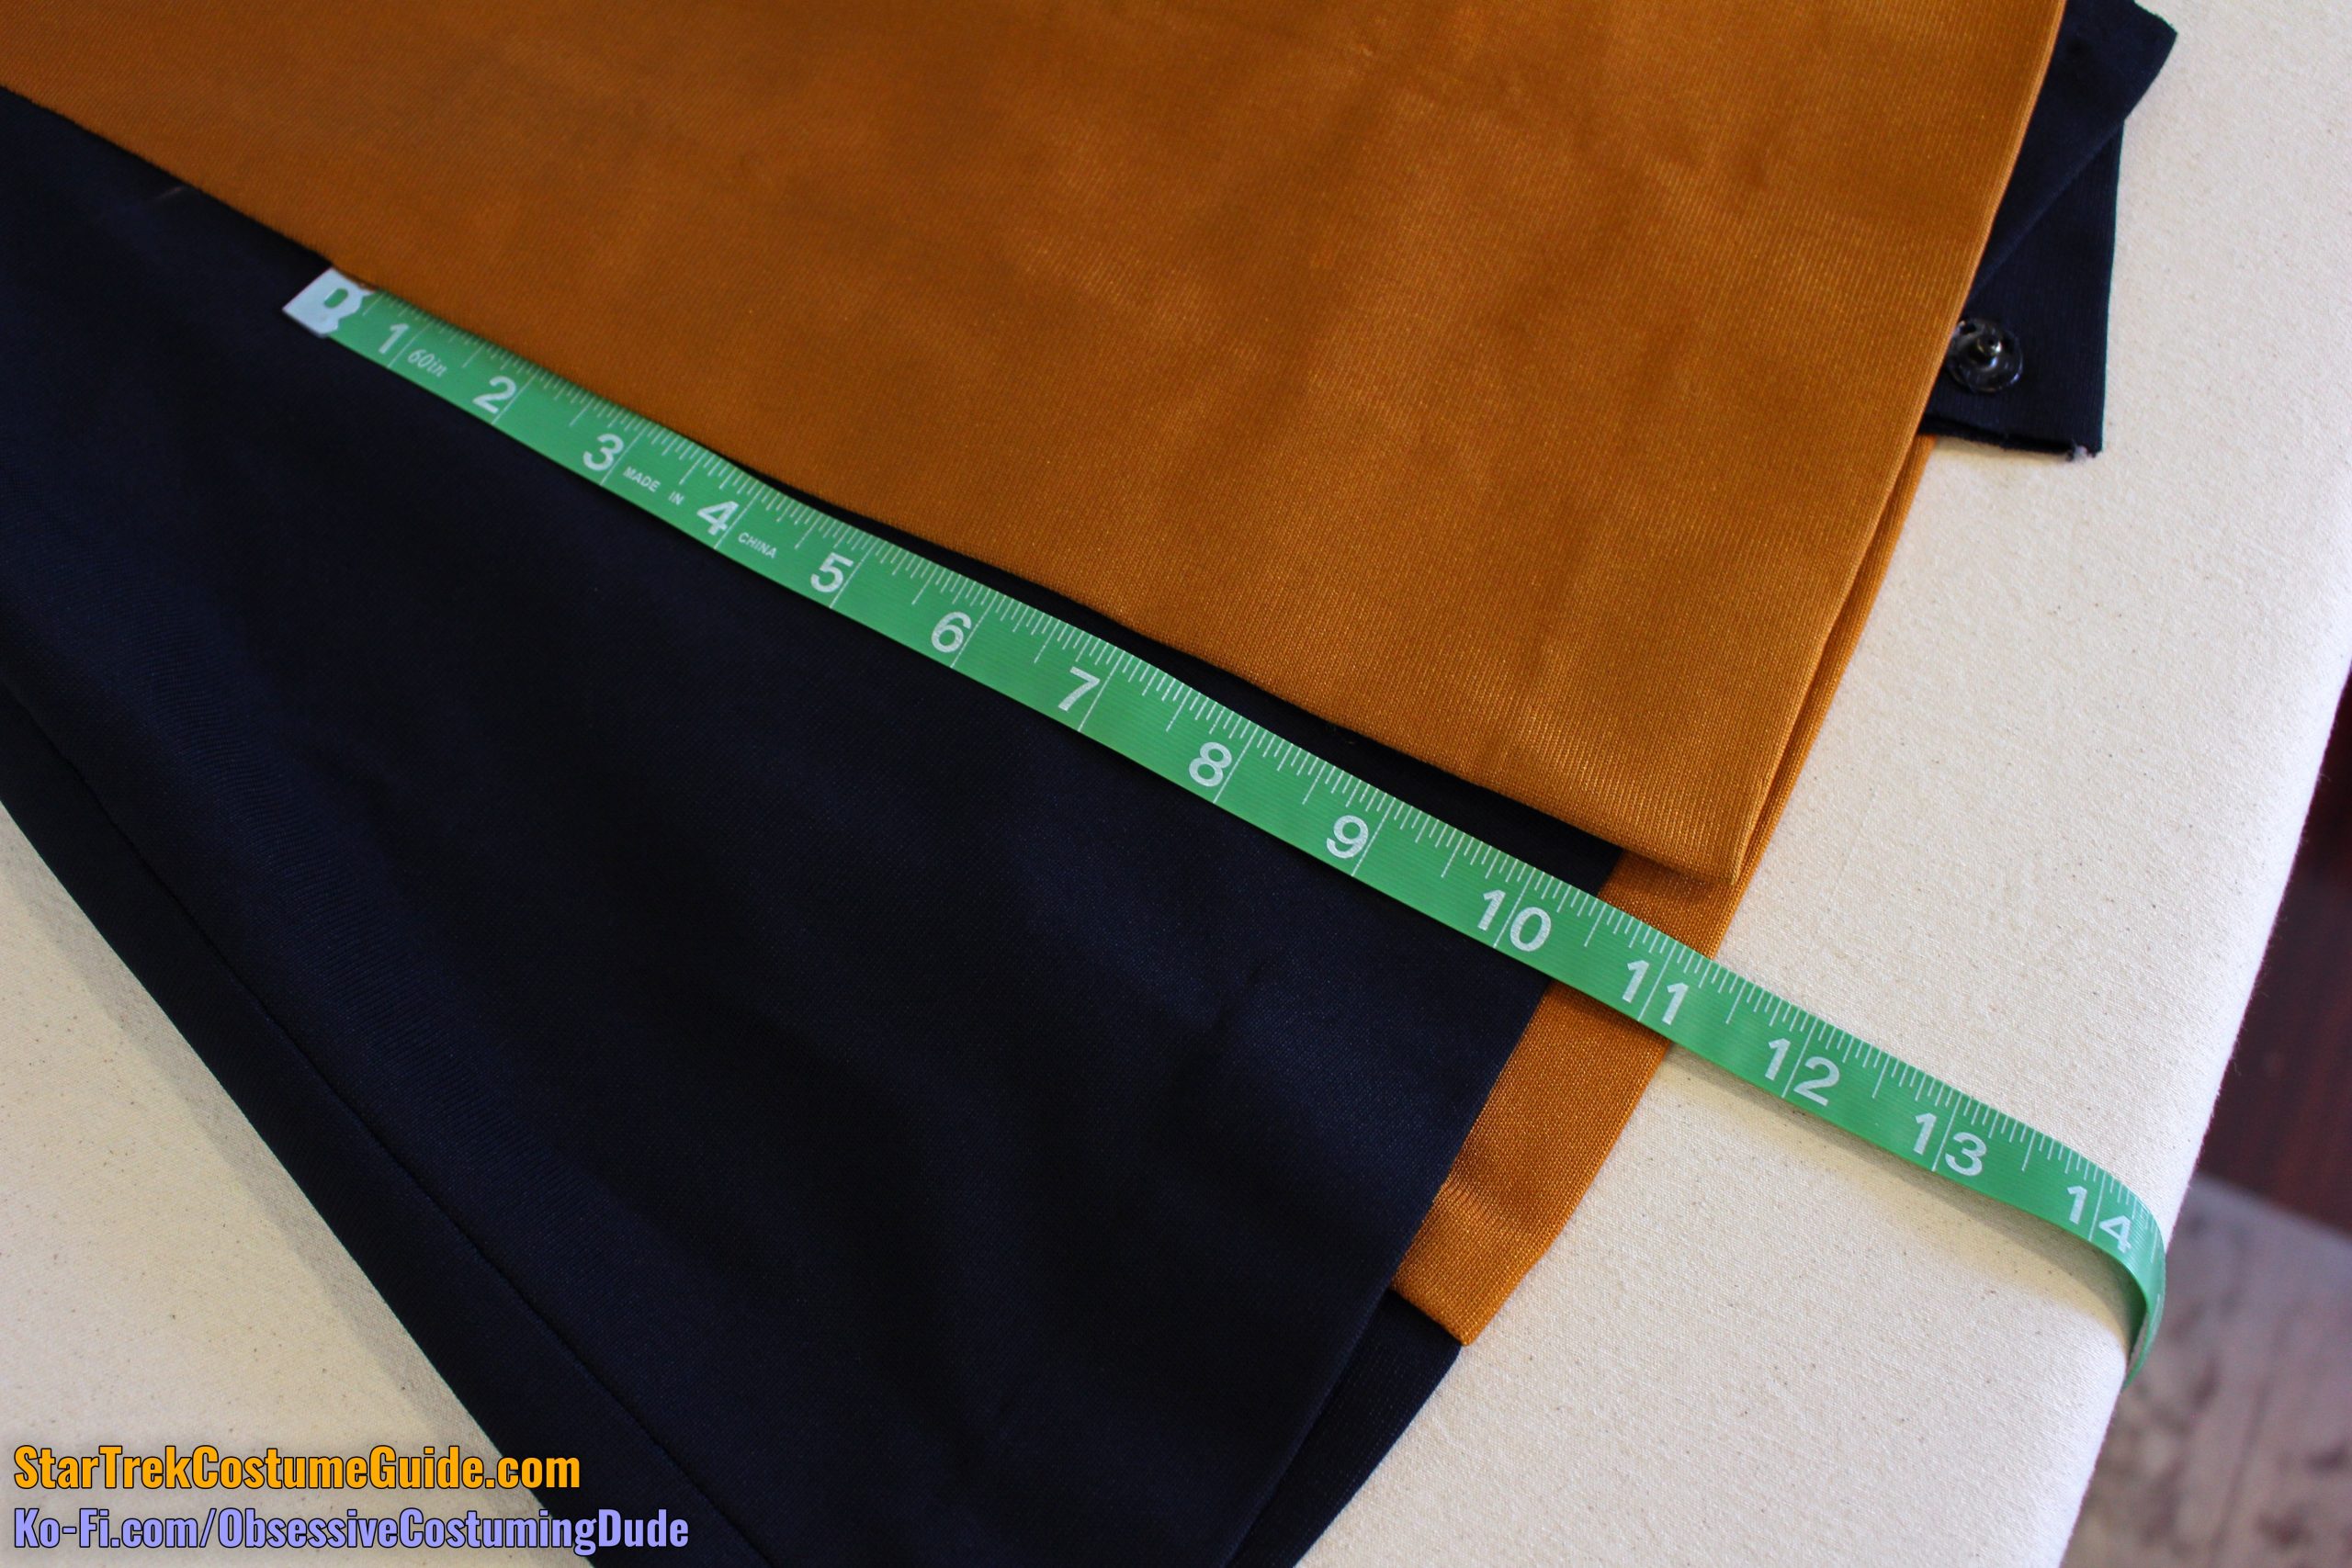
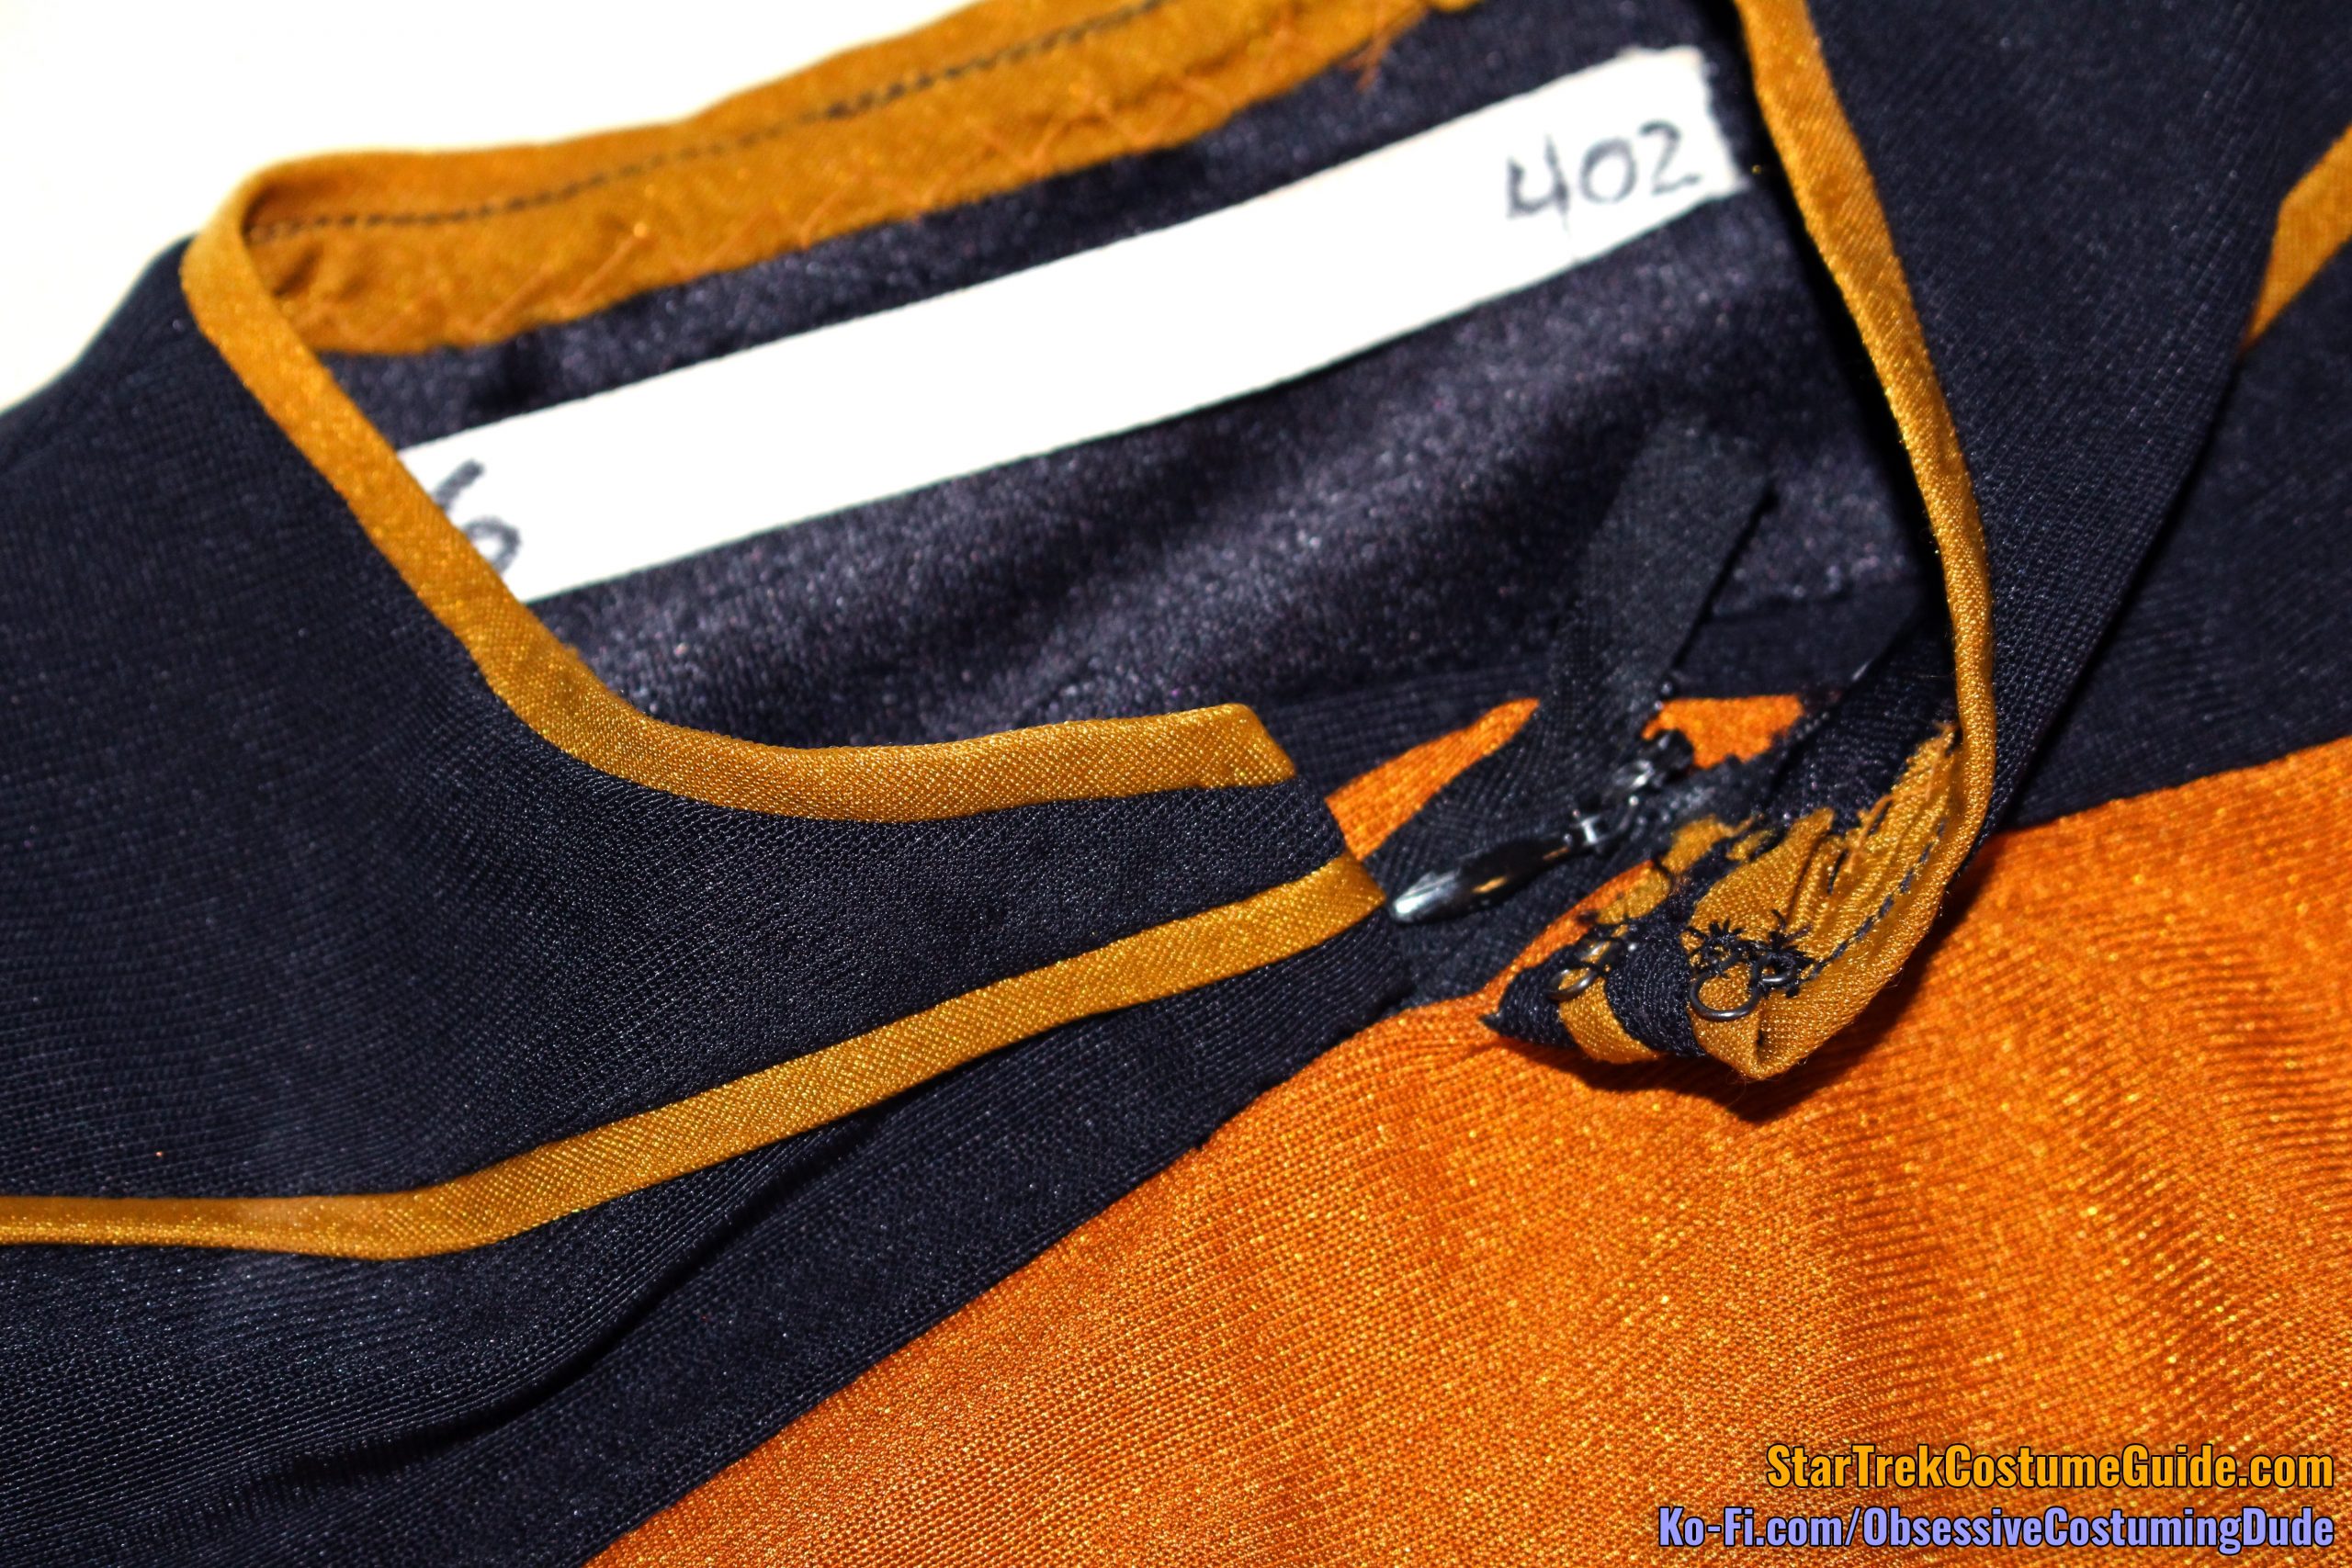
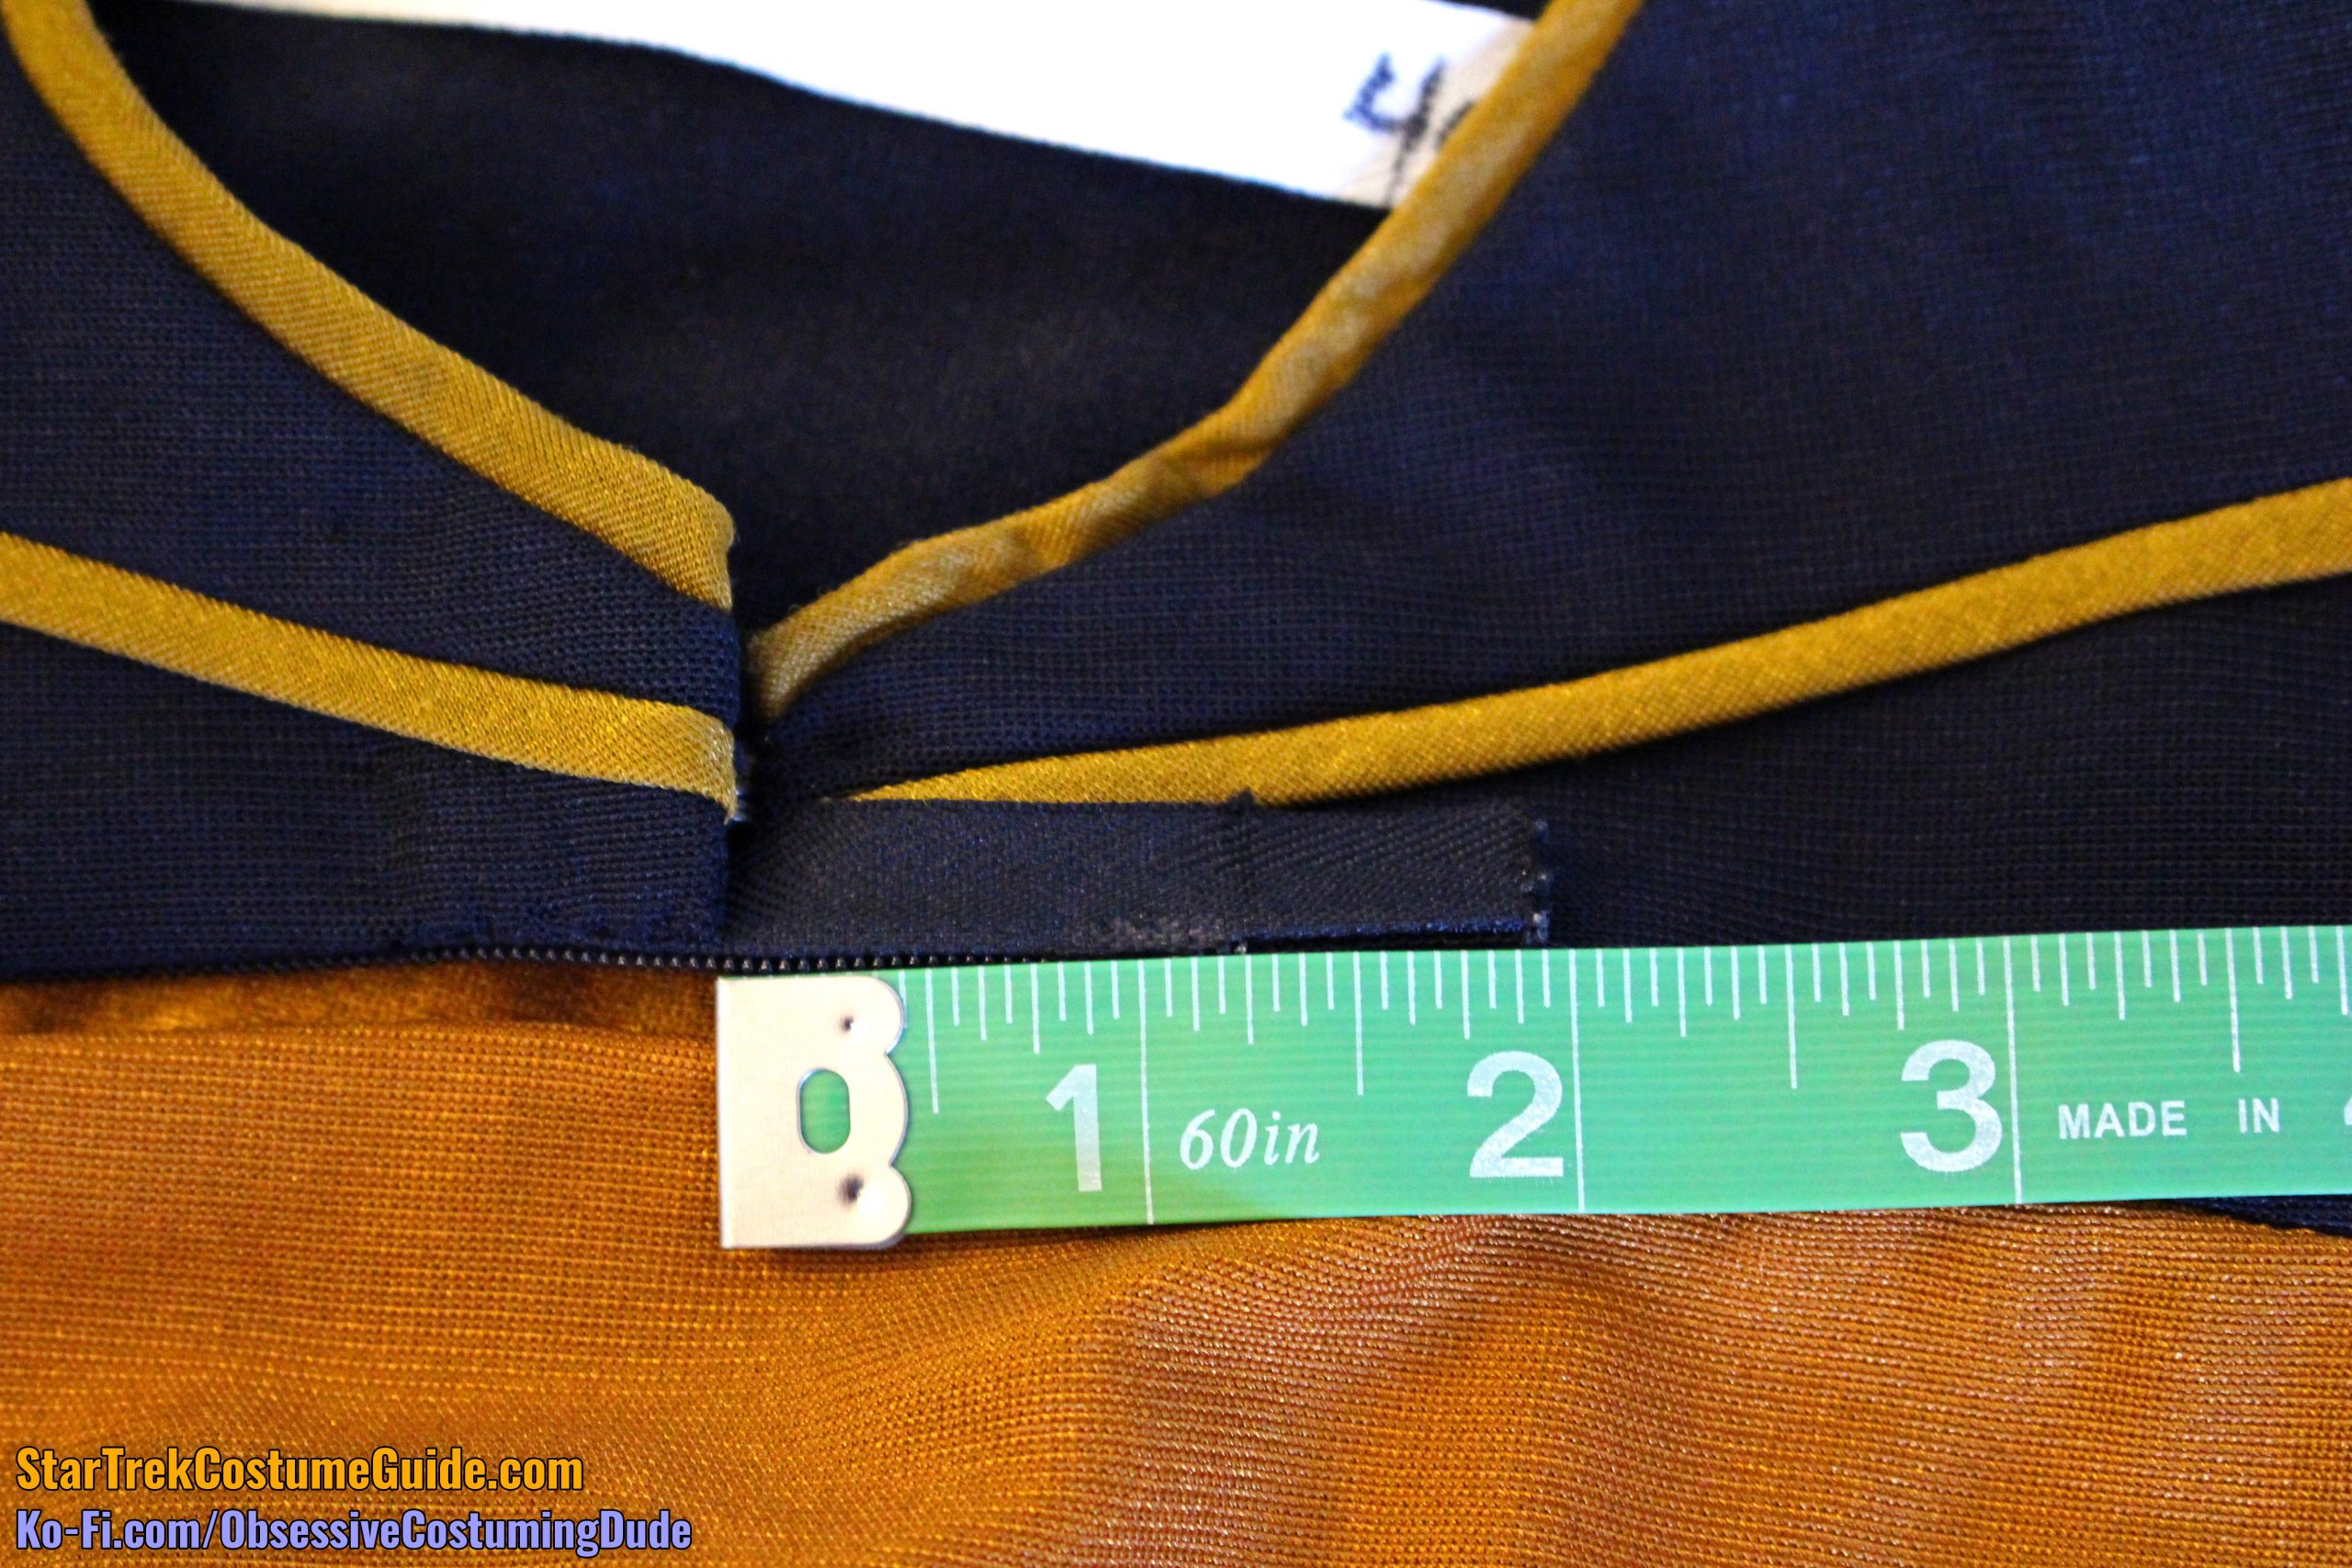
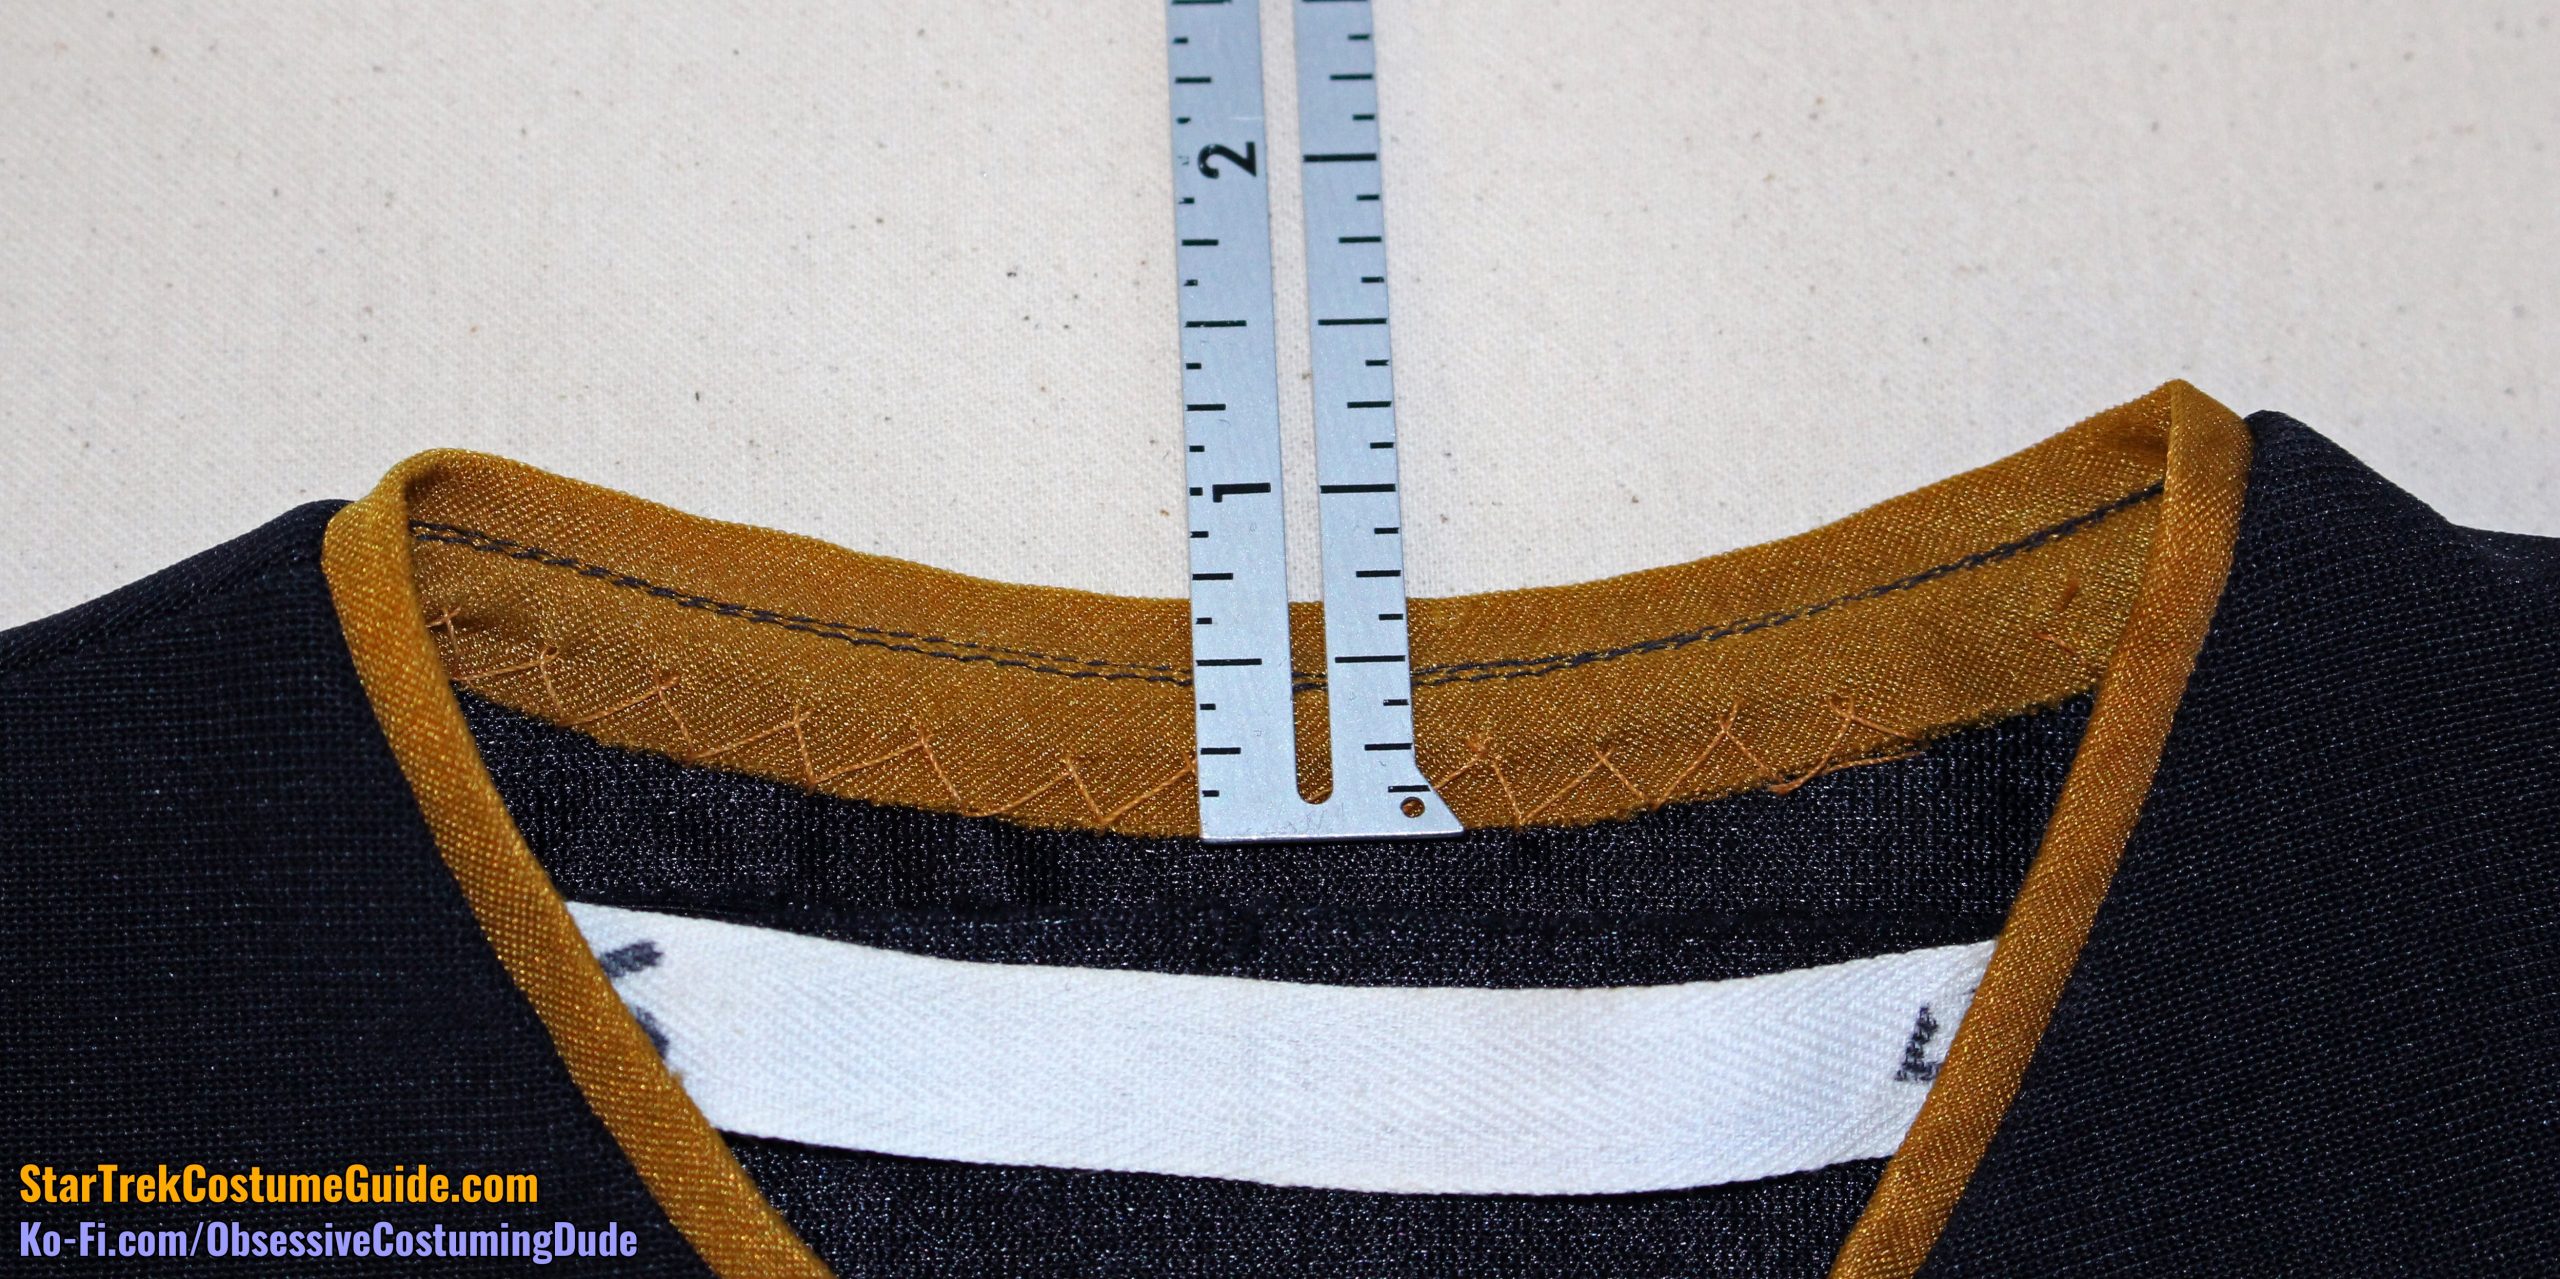
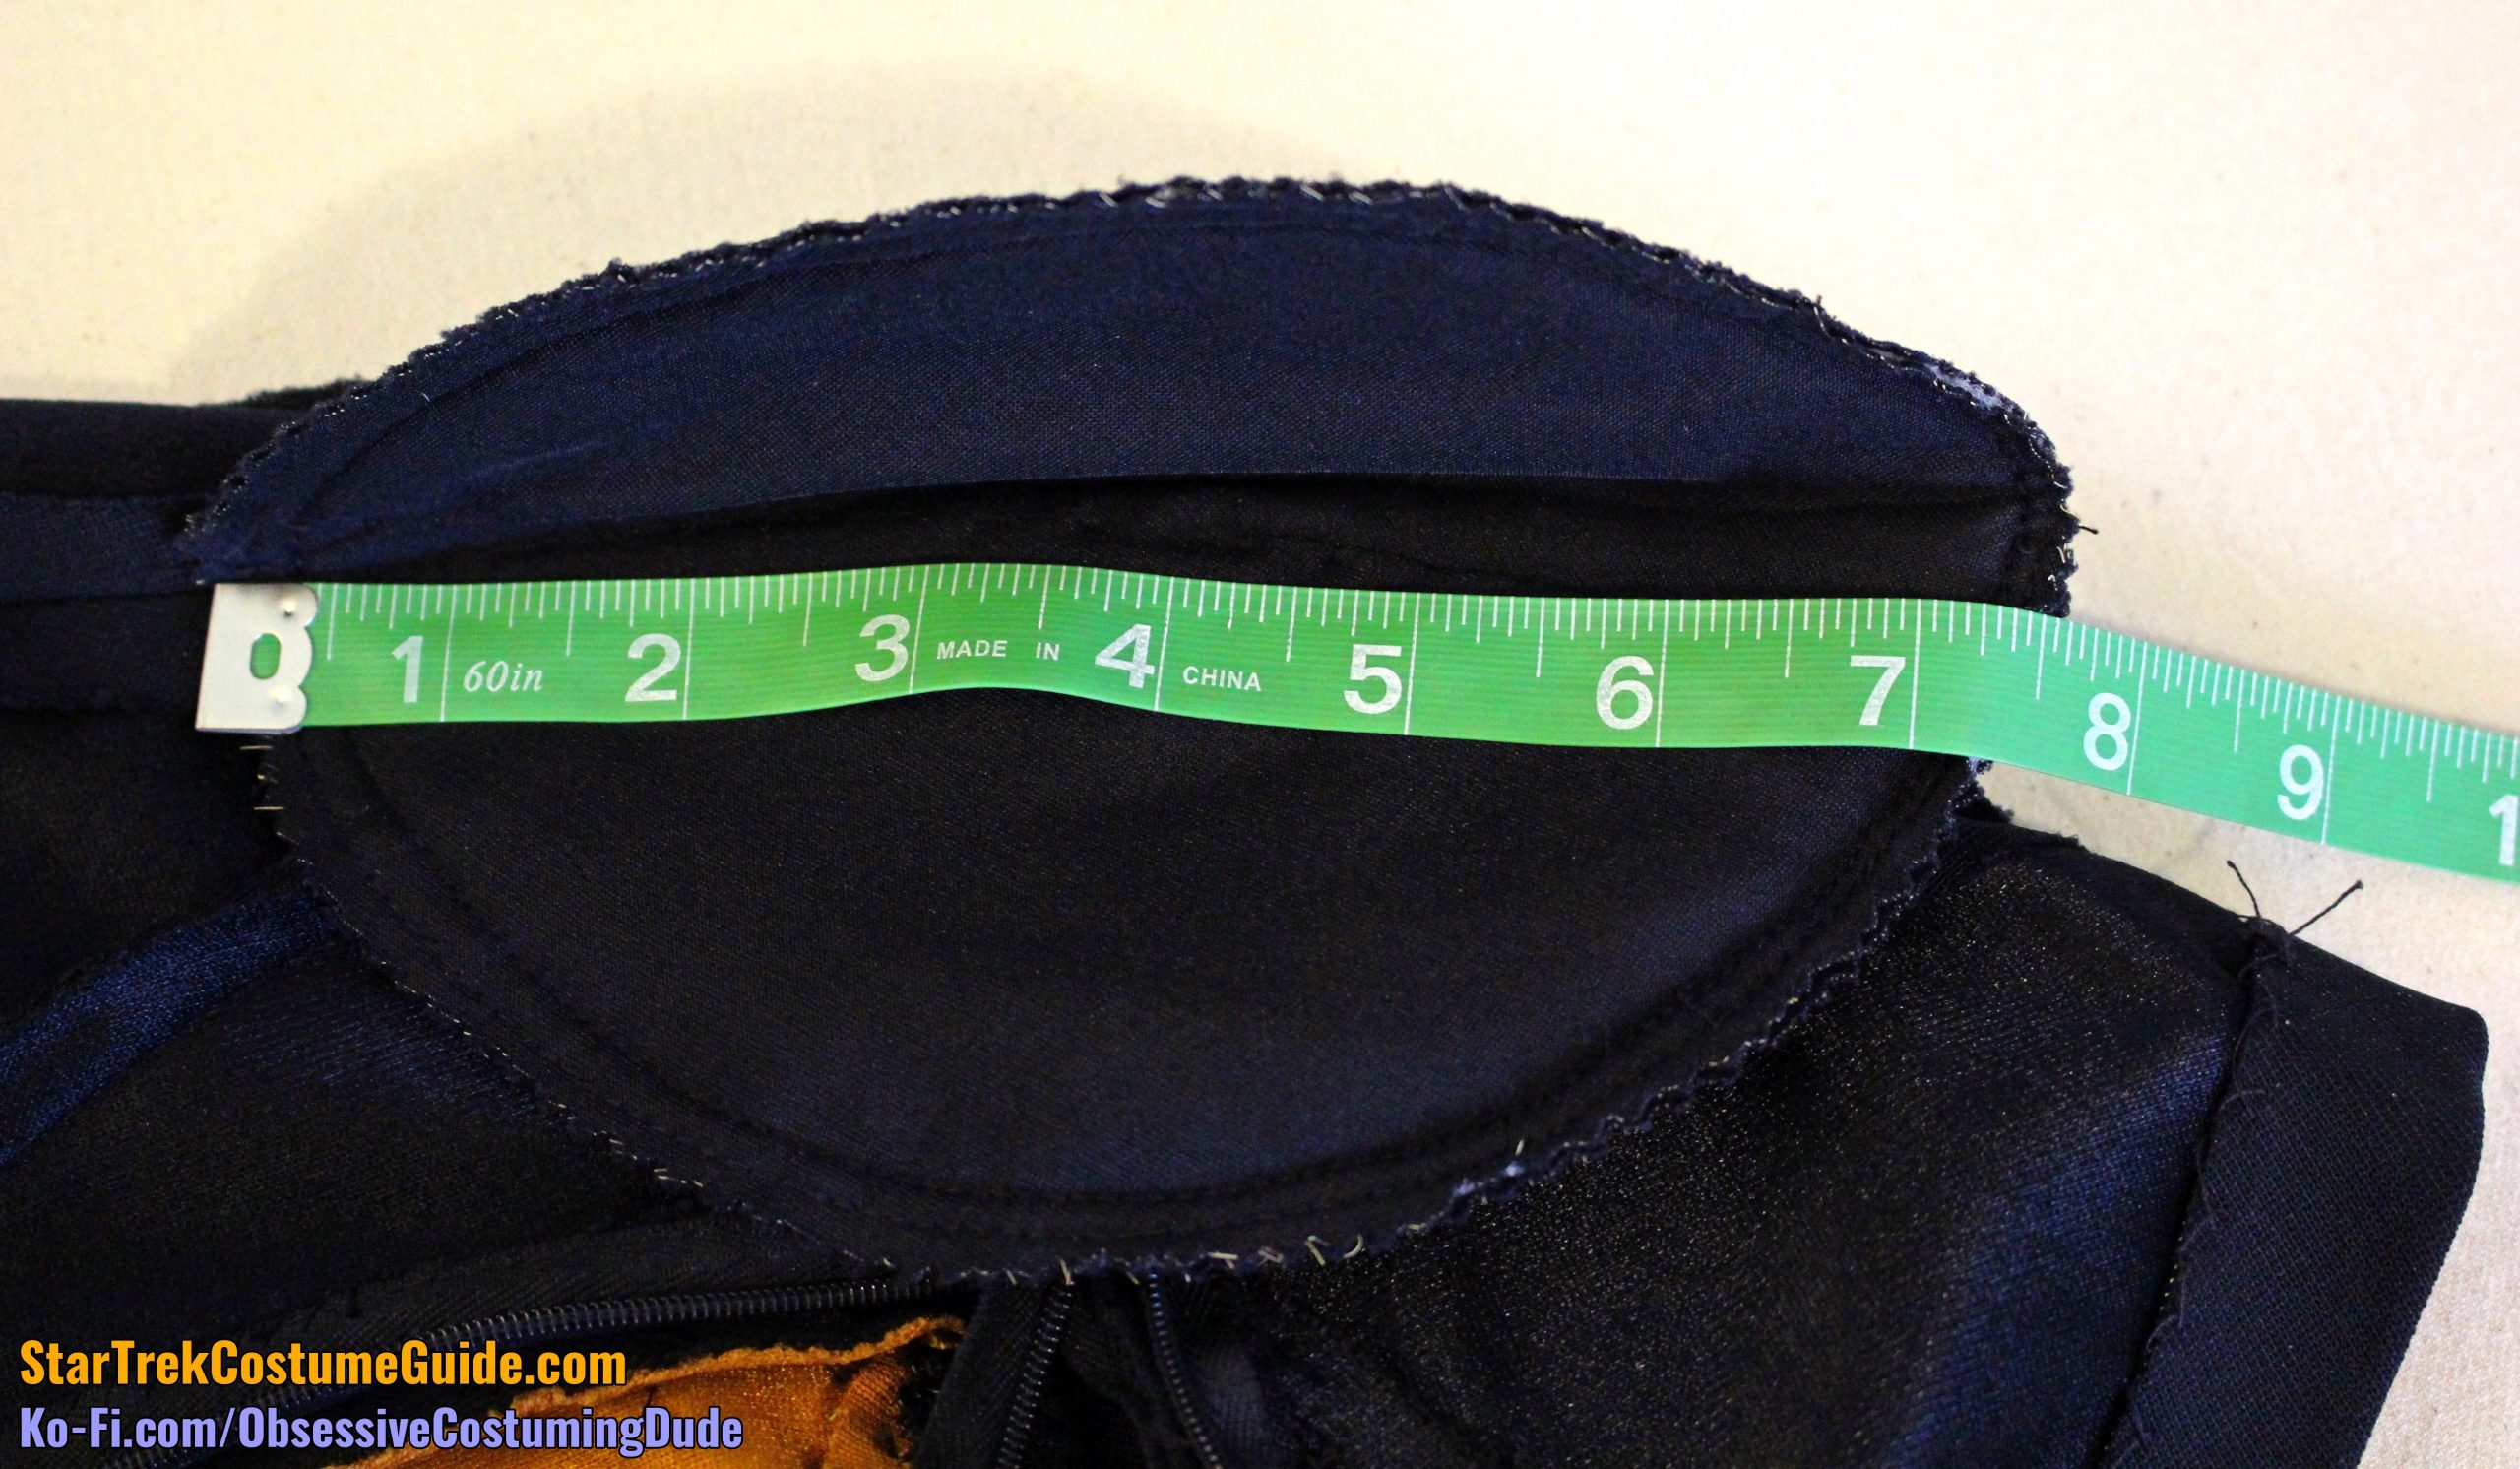
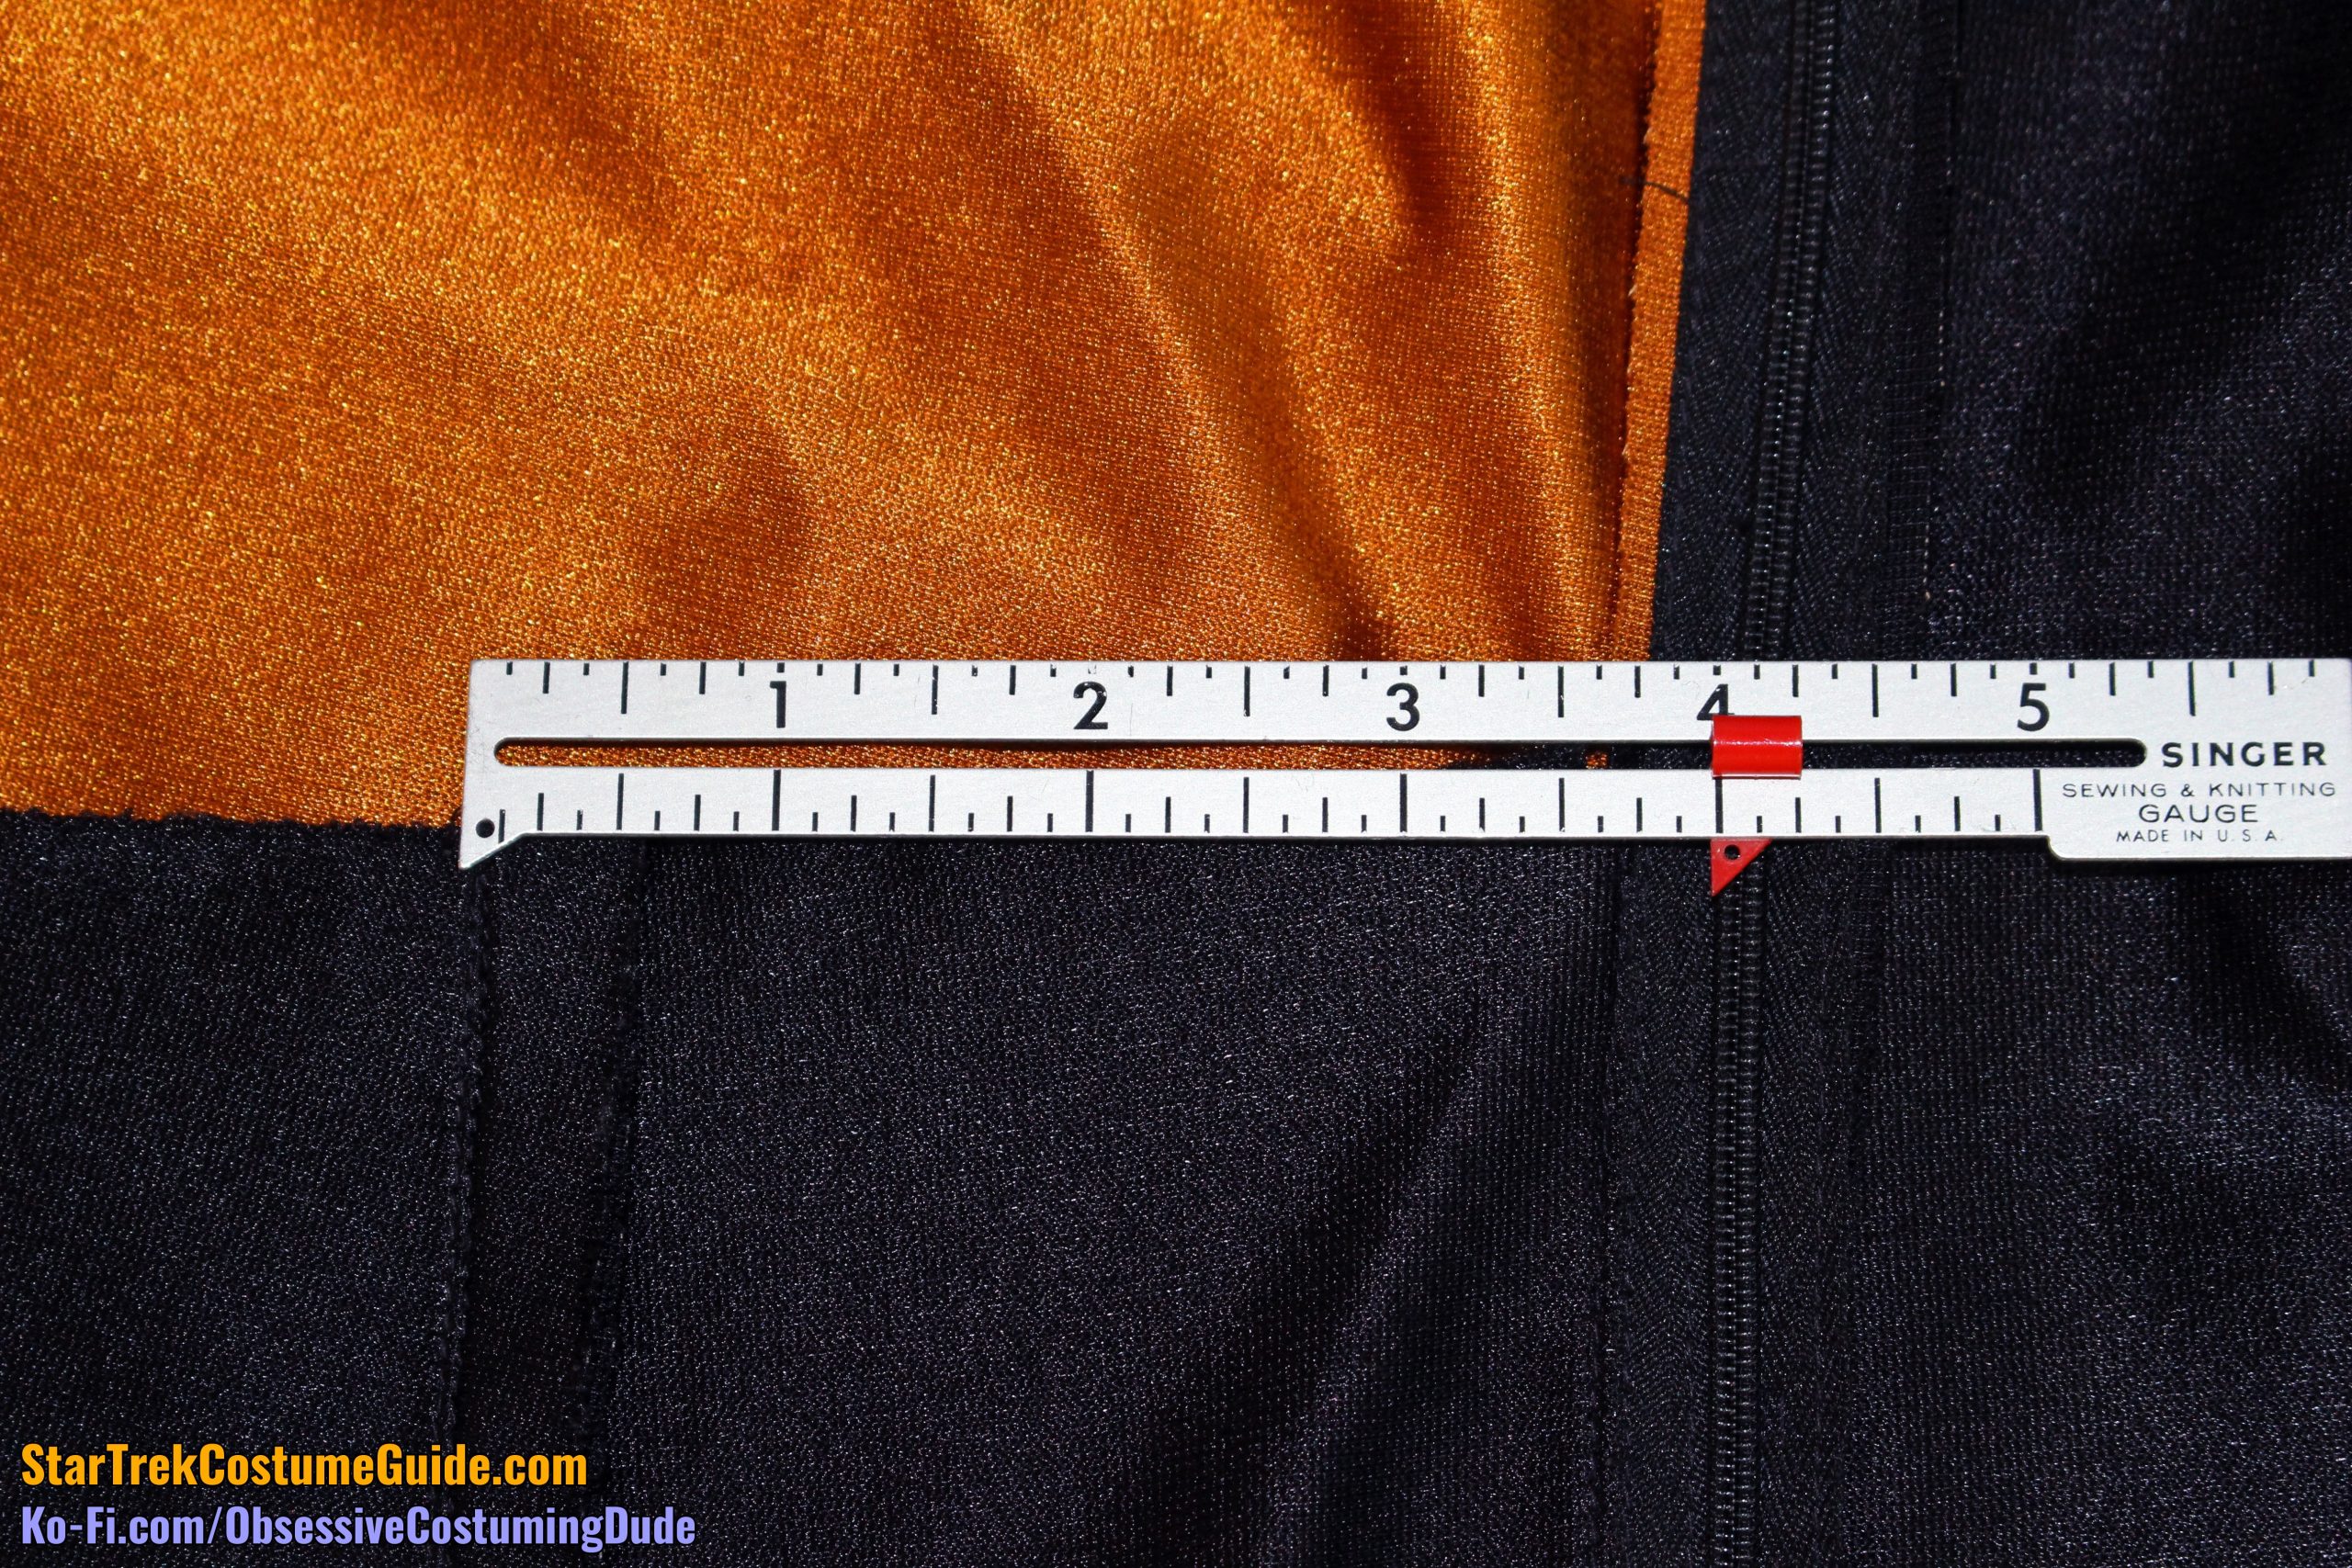
The neckline was only 4 ¾” from edge to edge, at its widest.
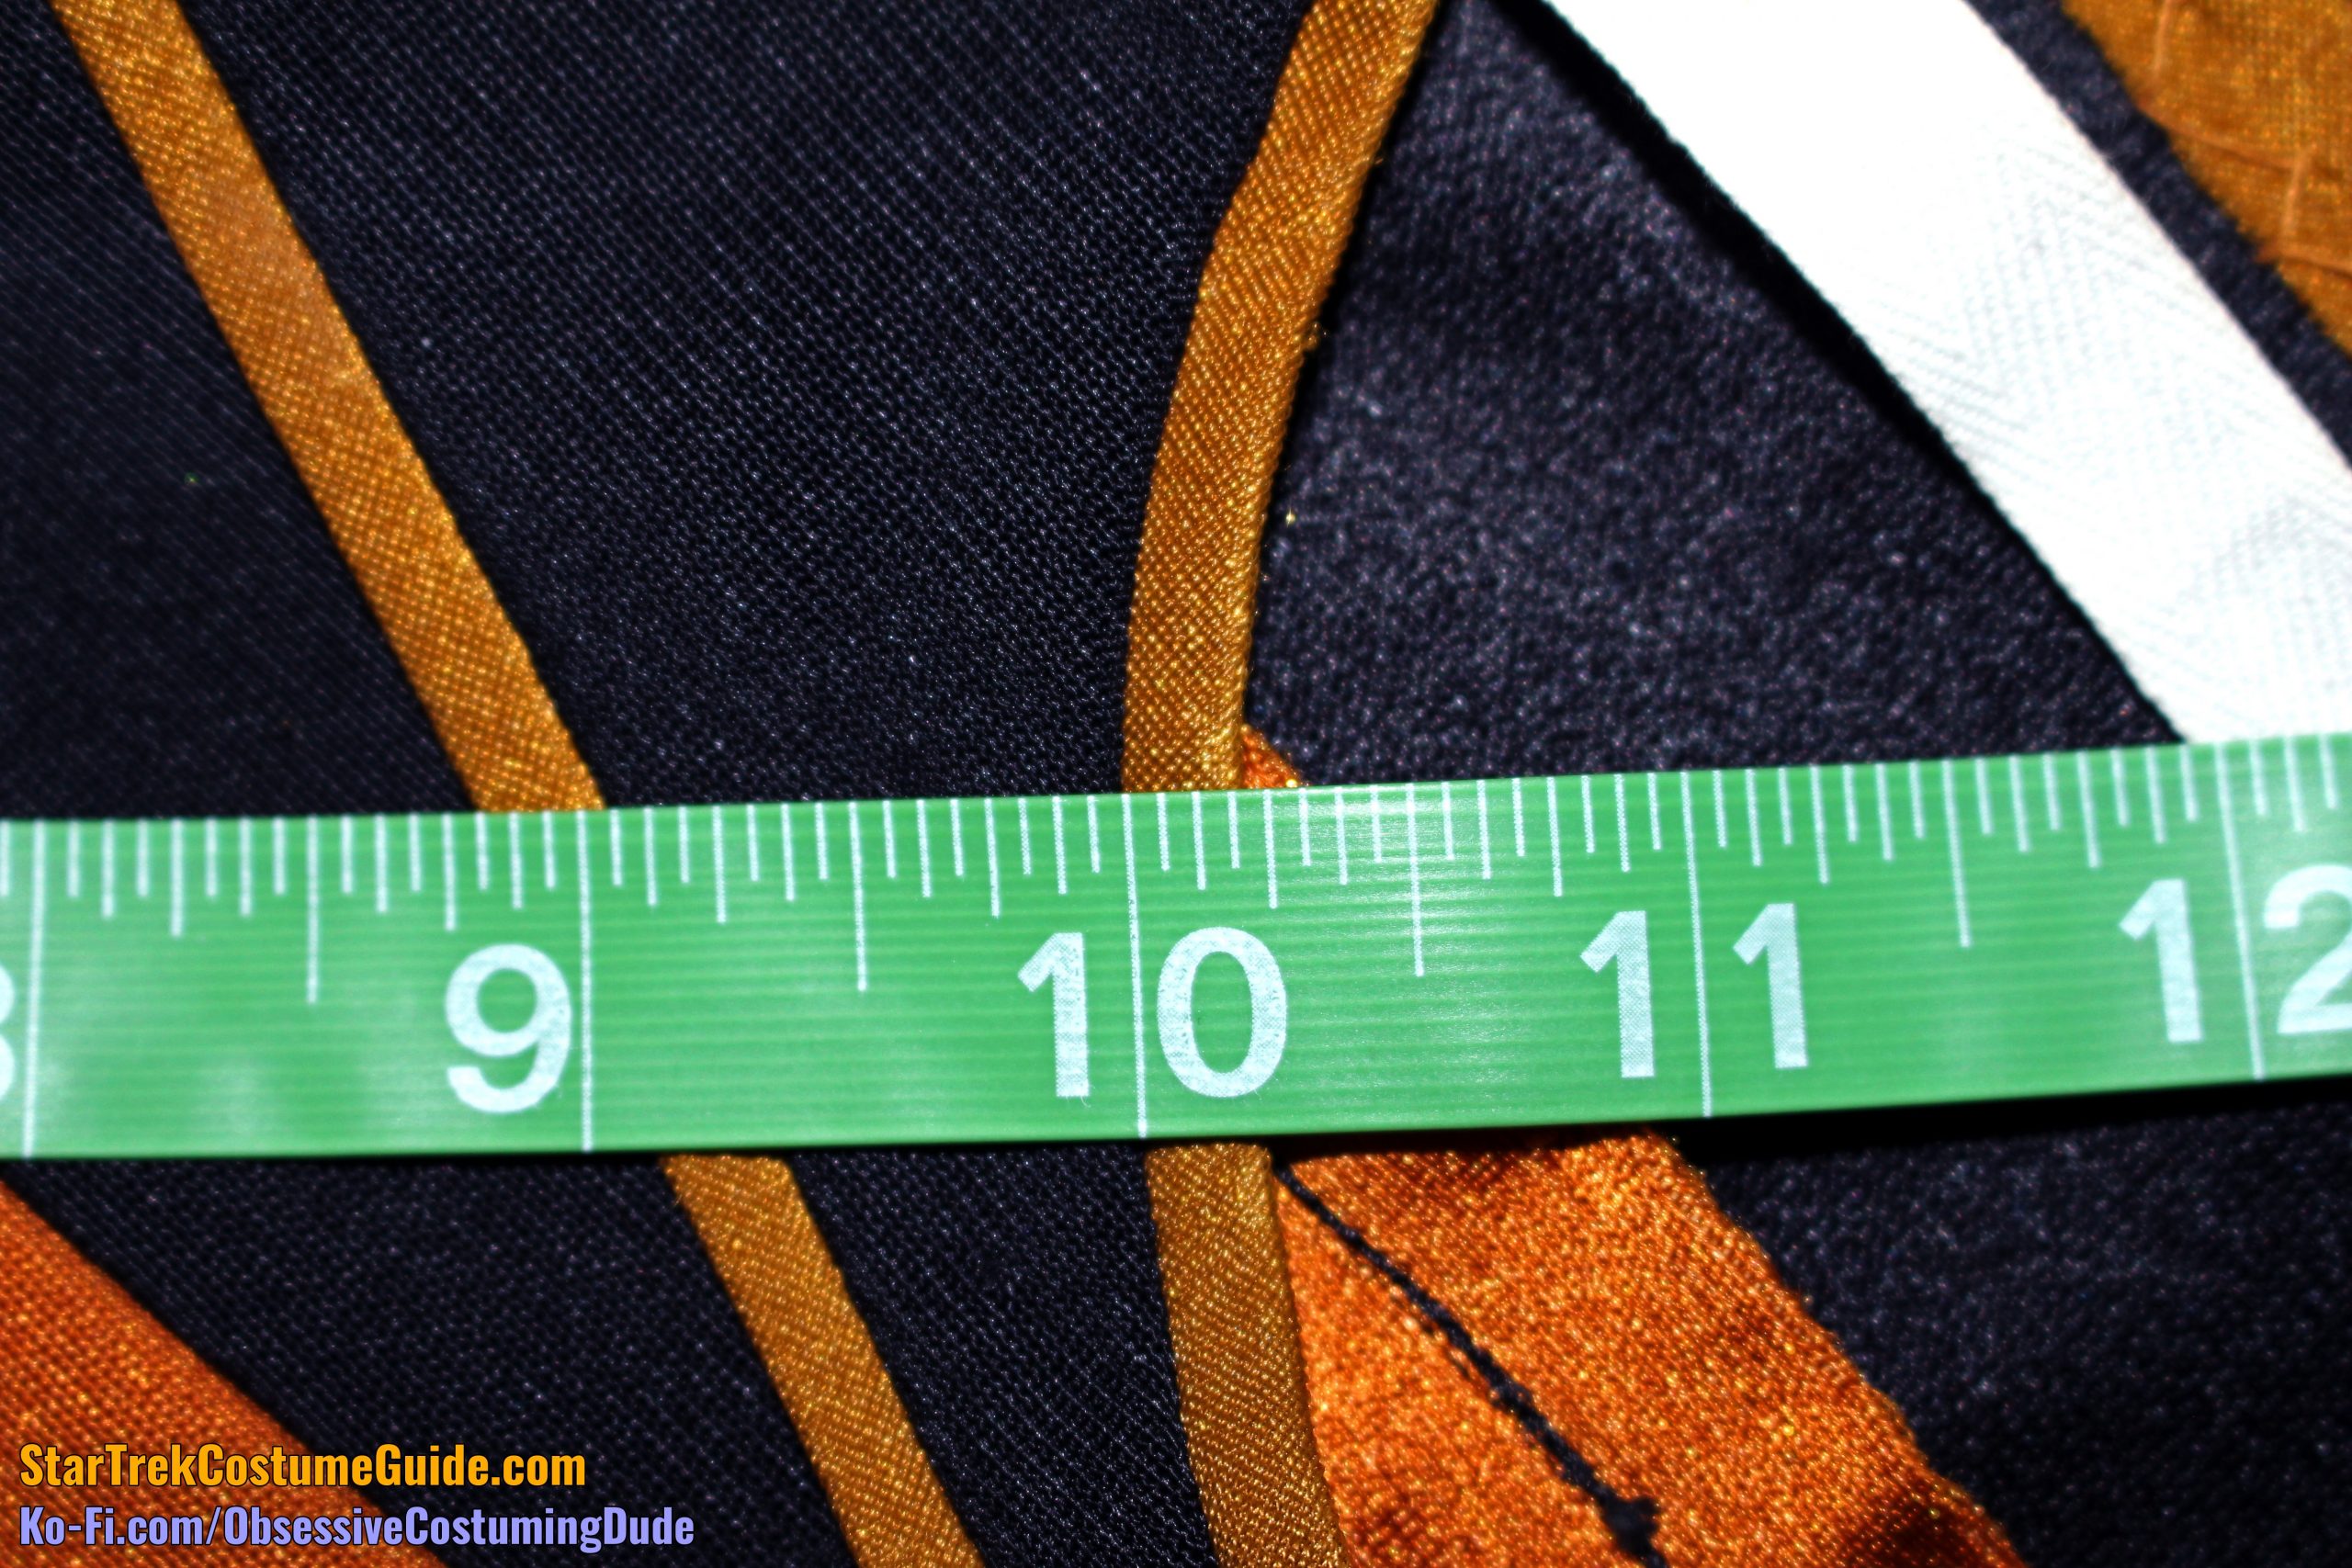
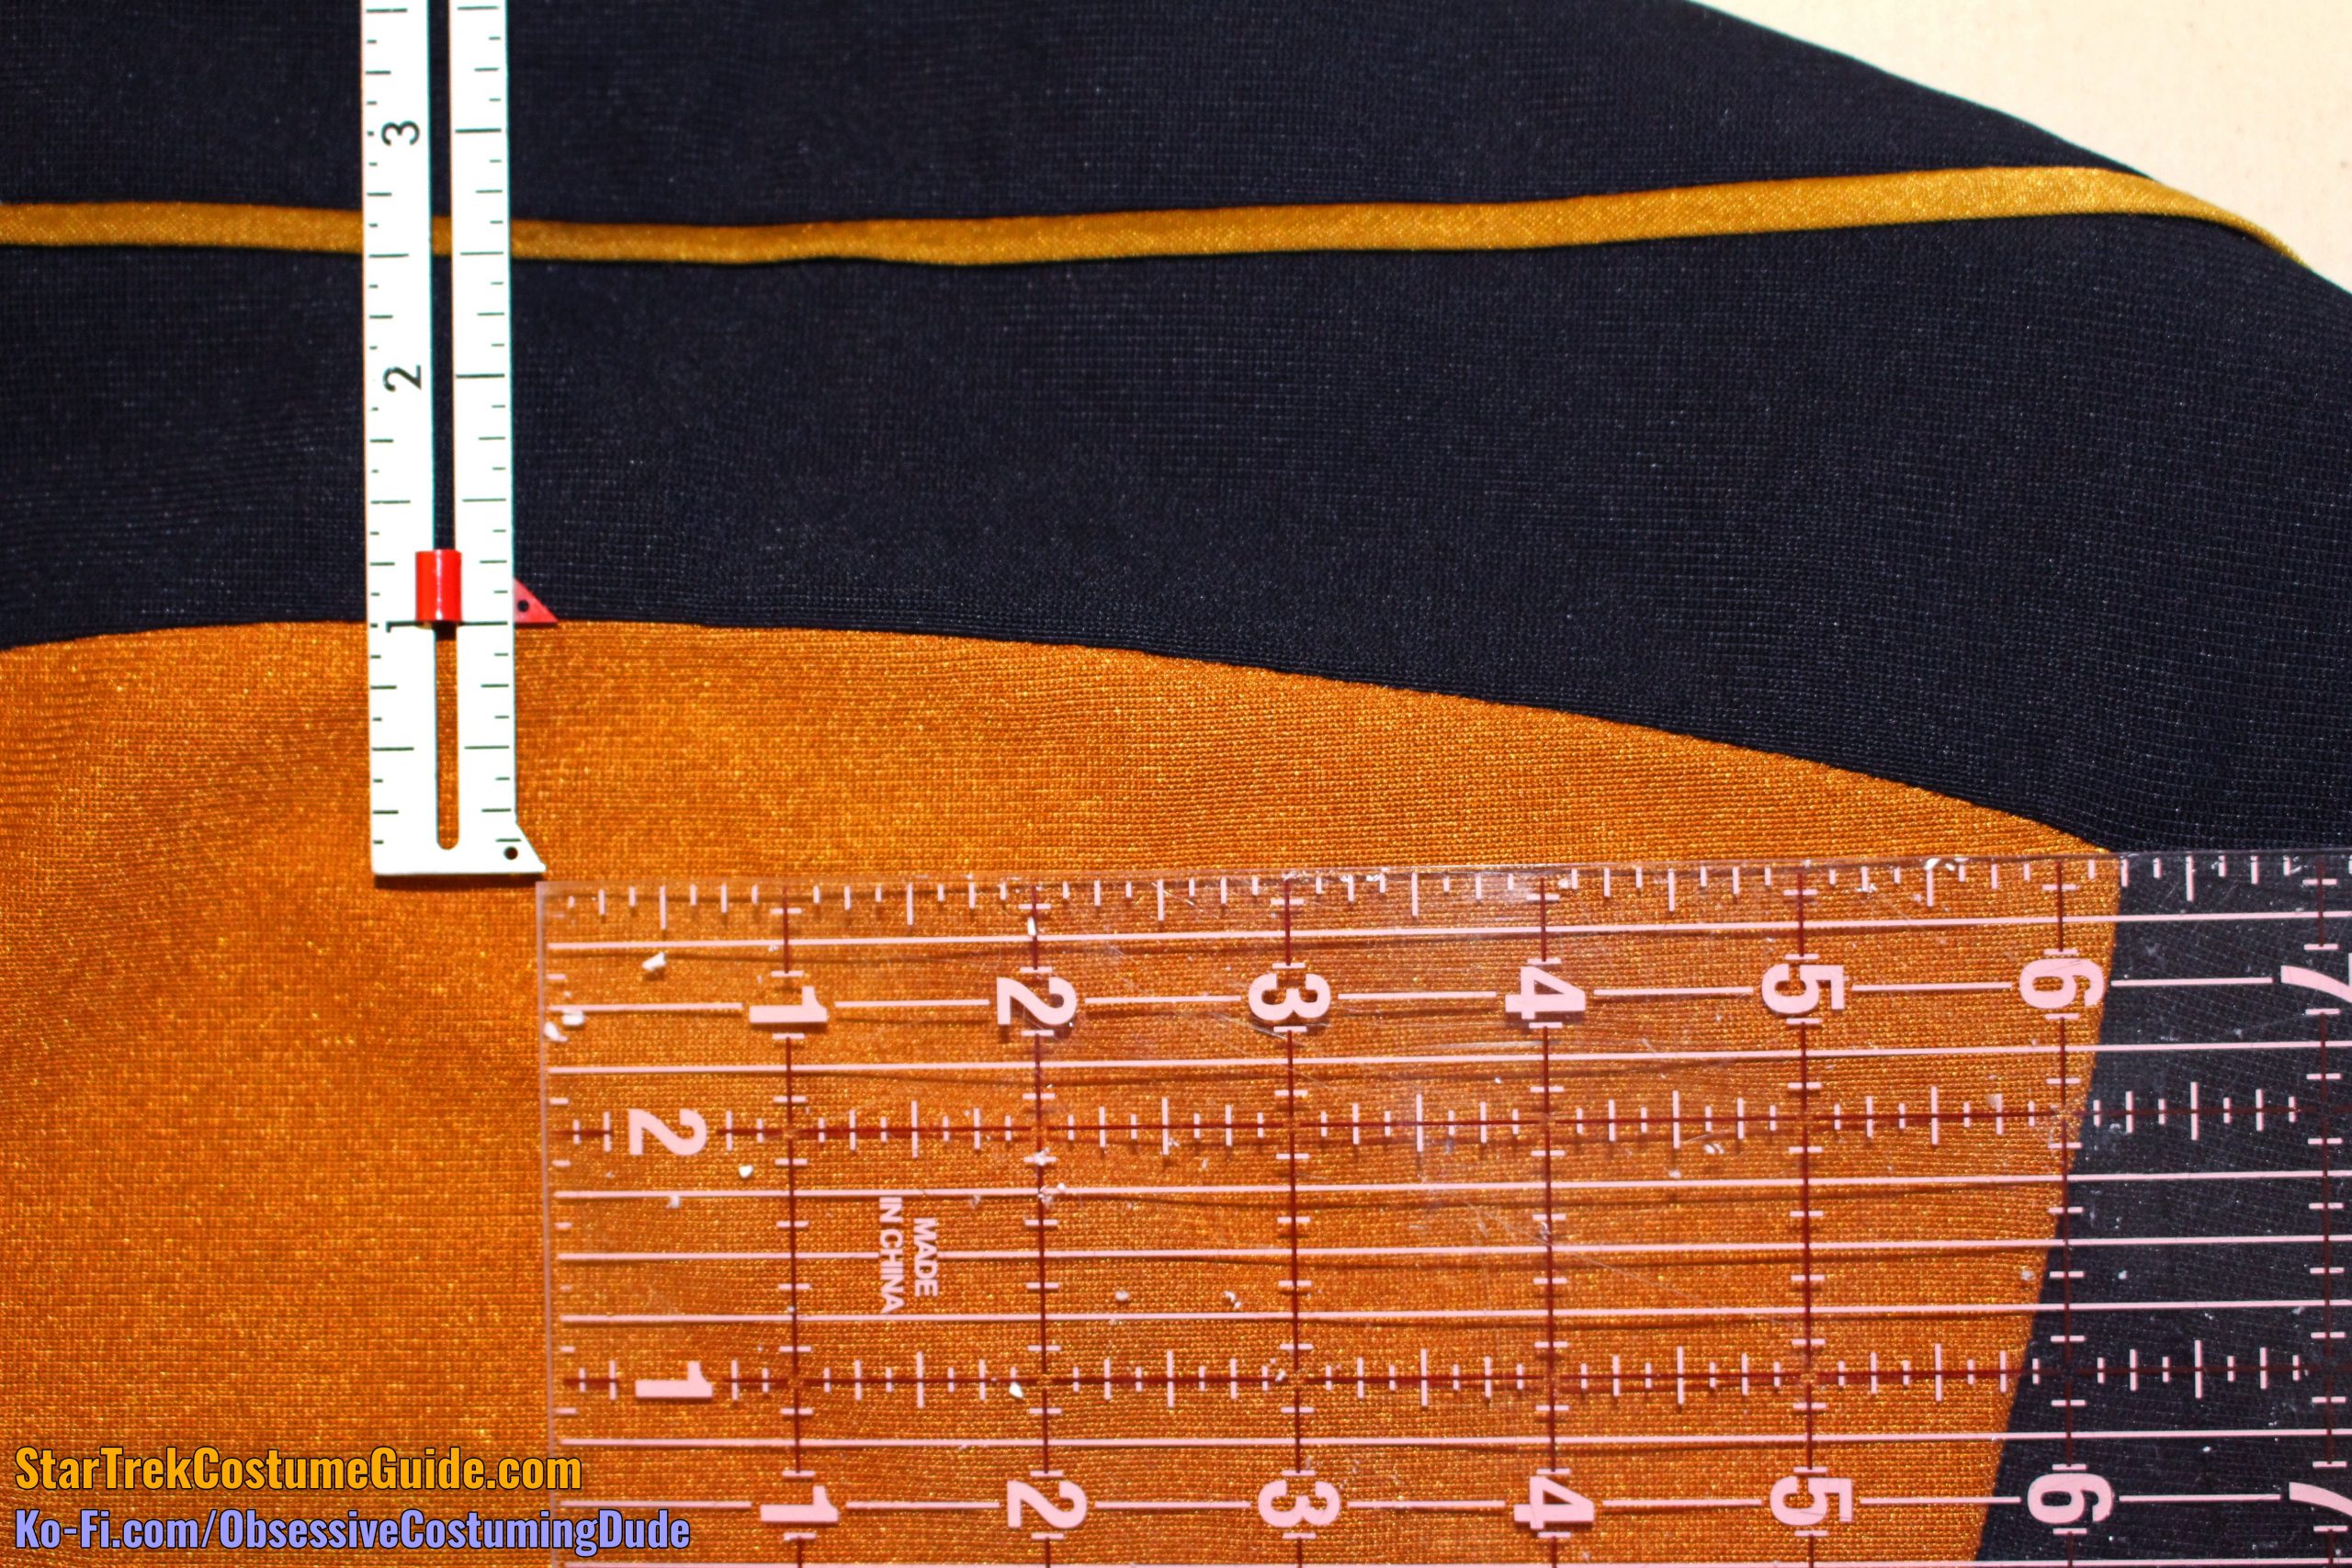
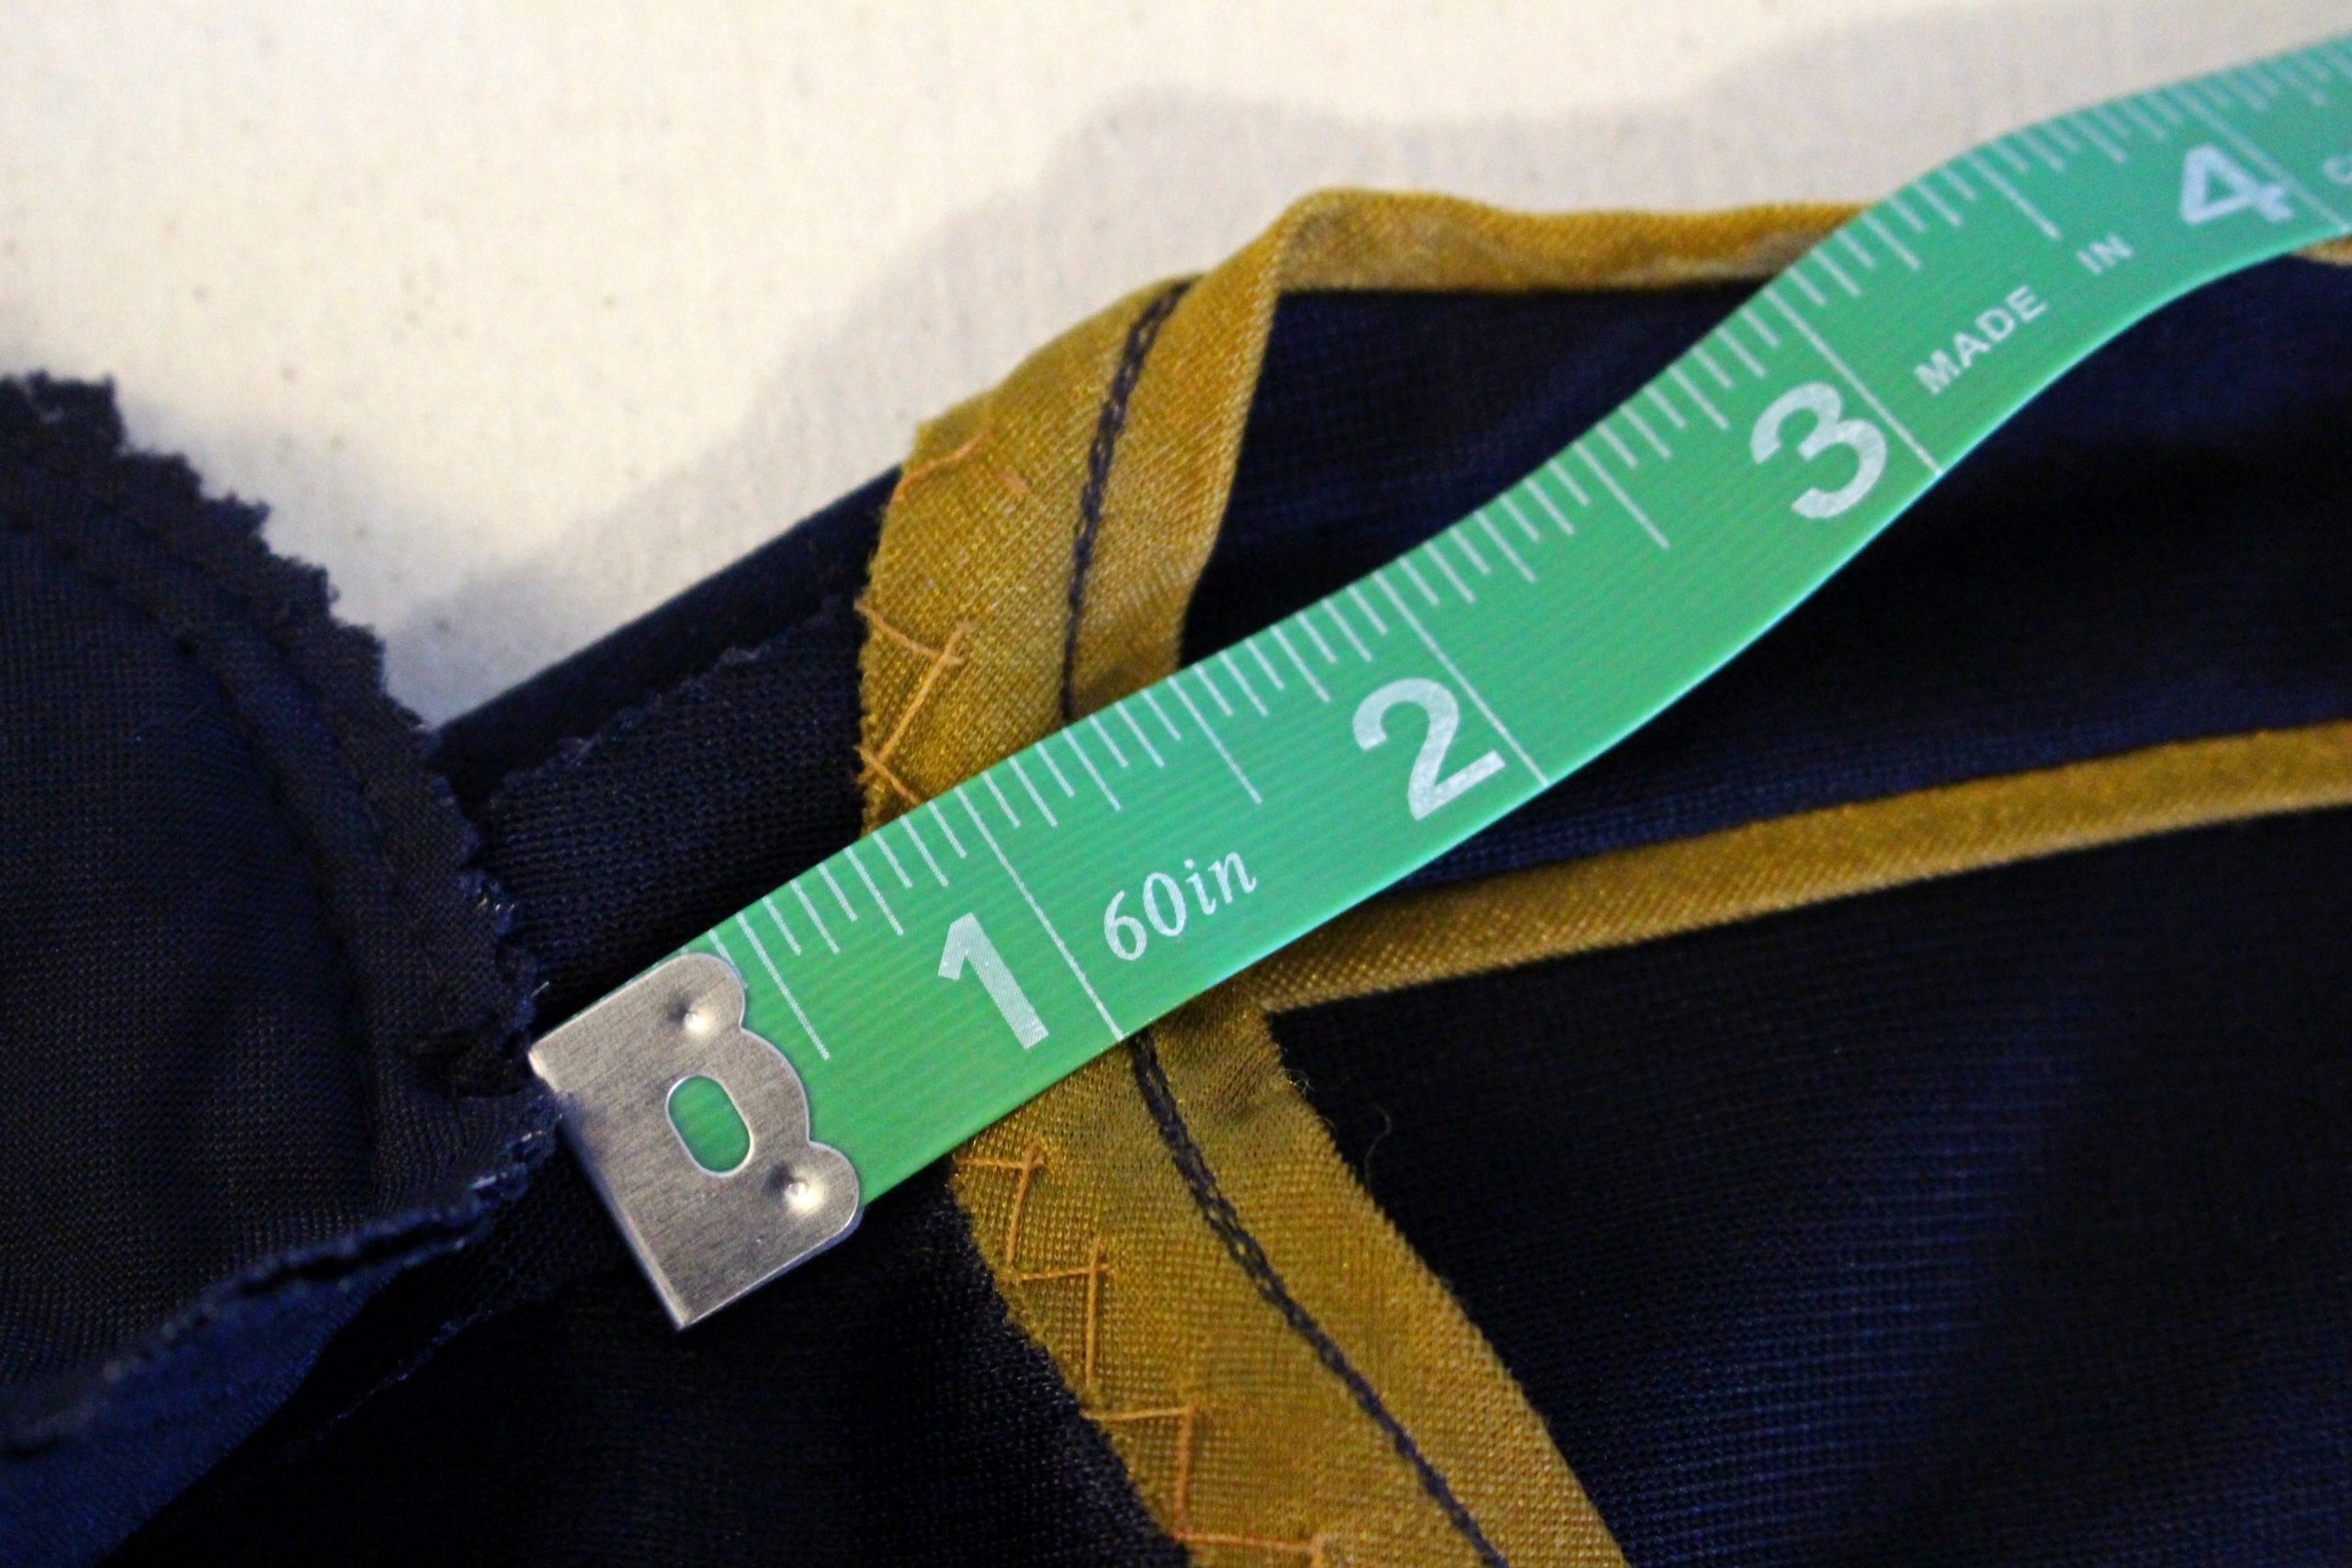
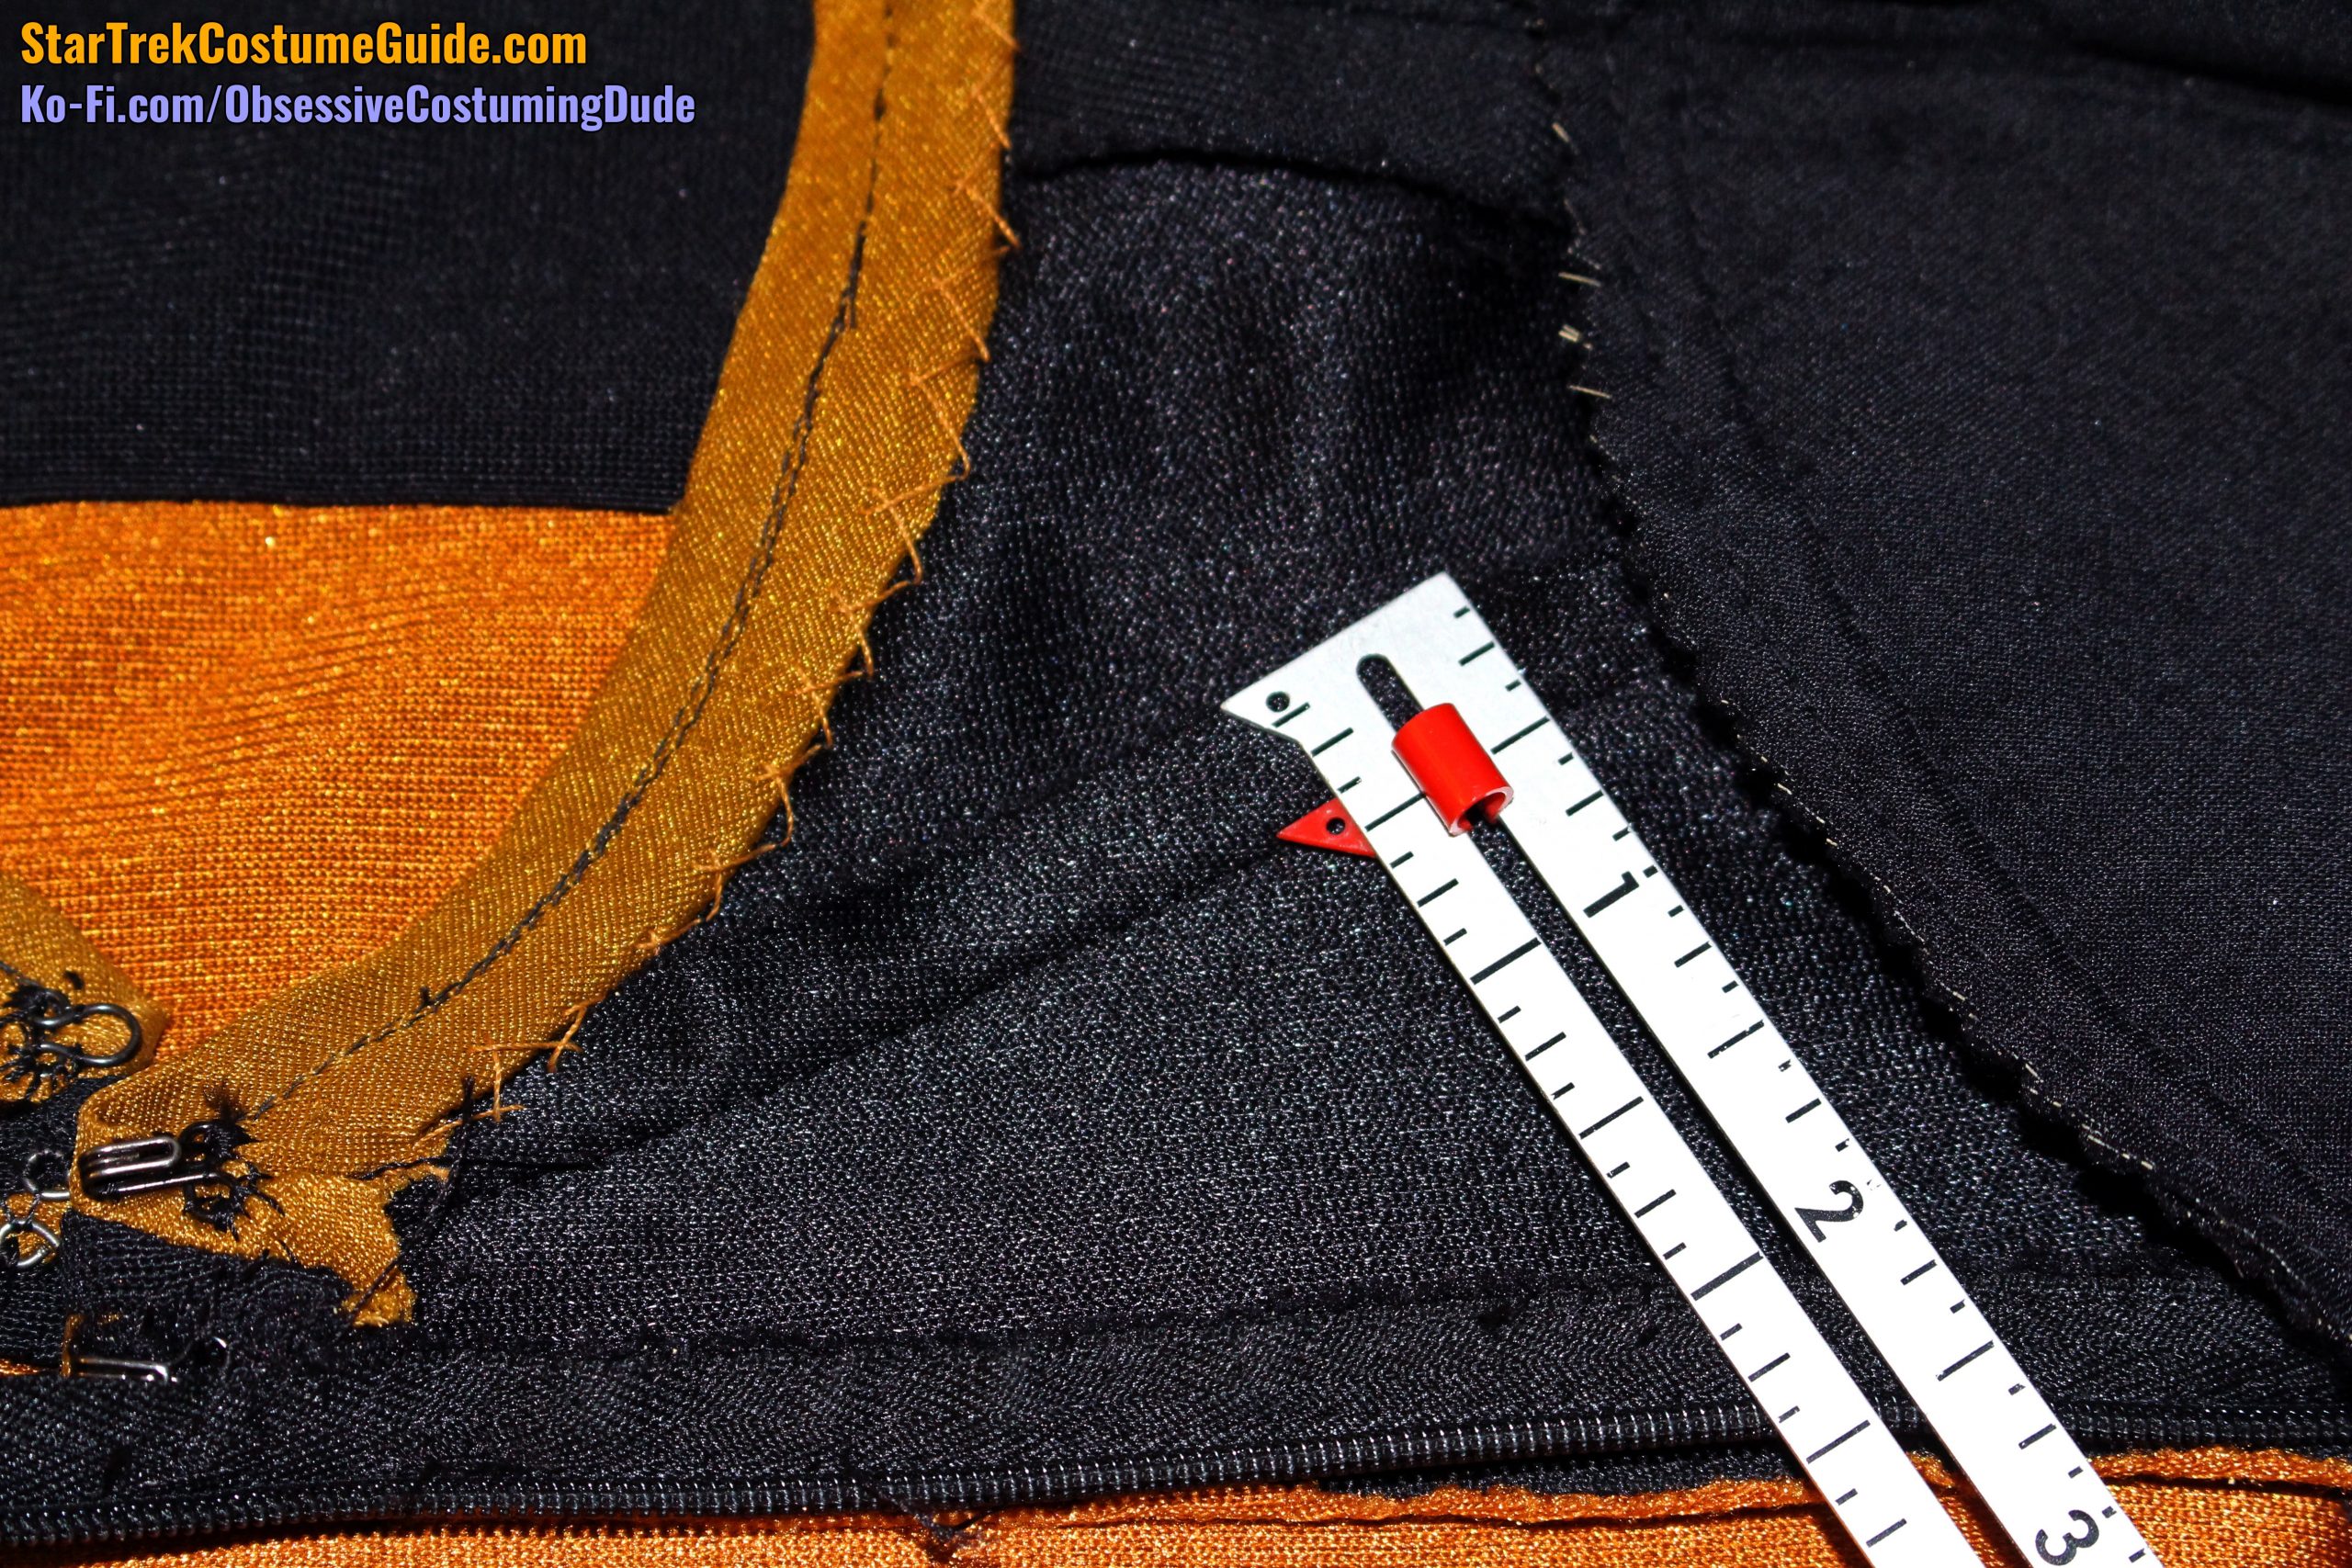
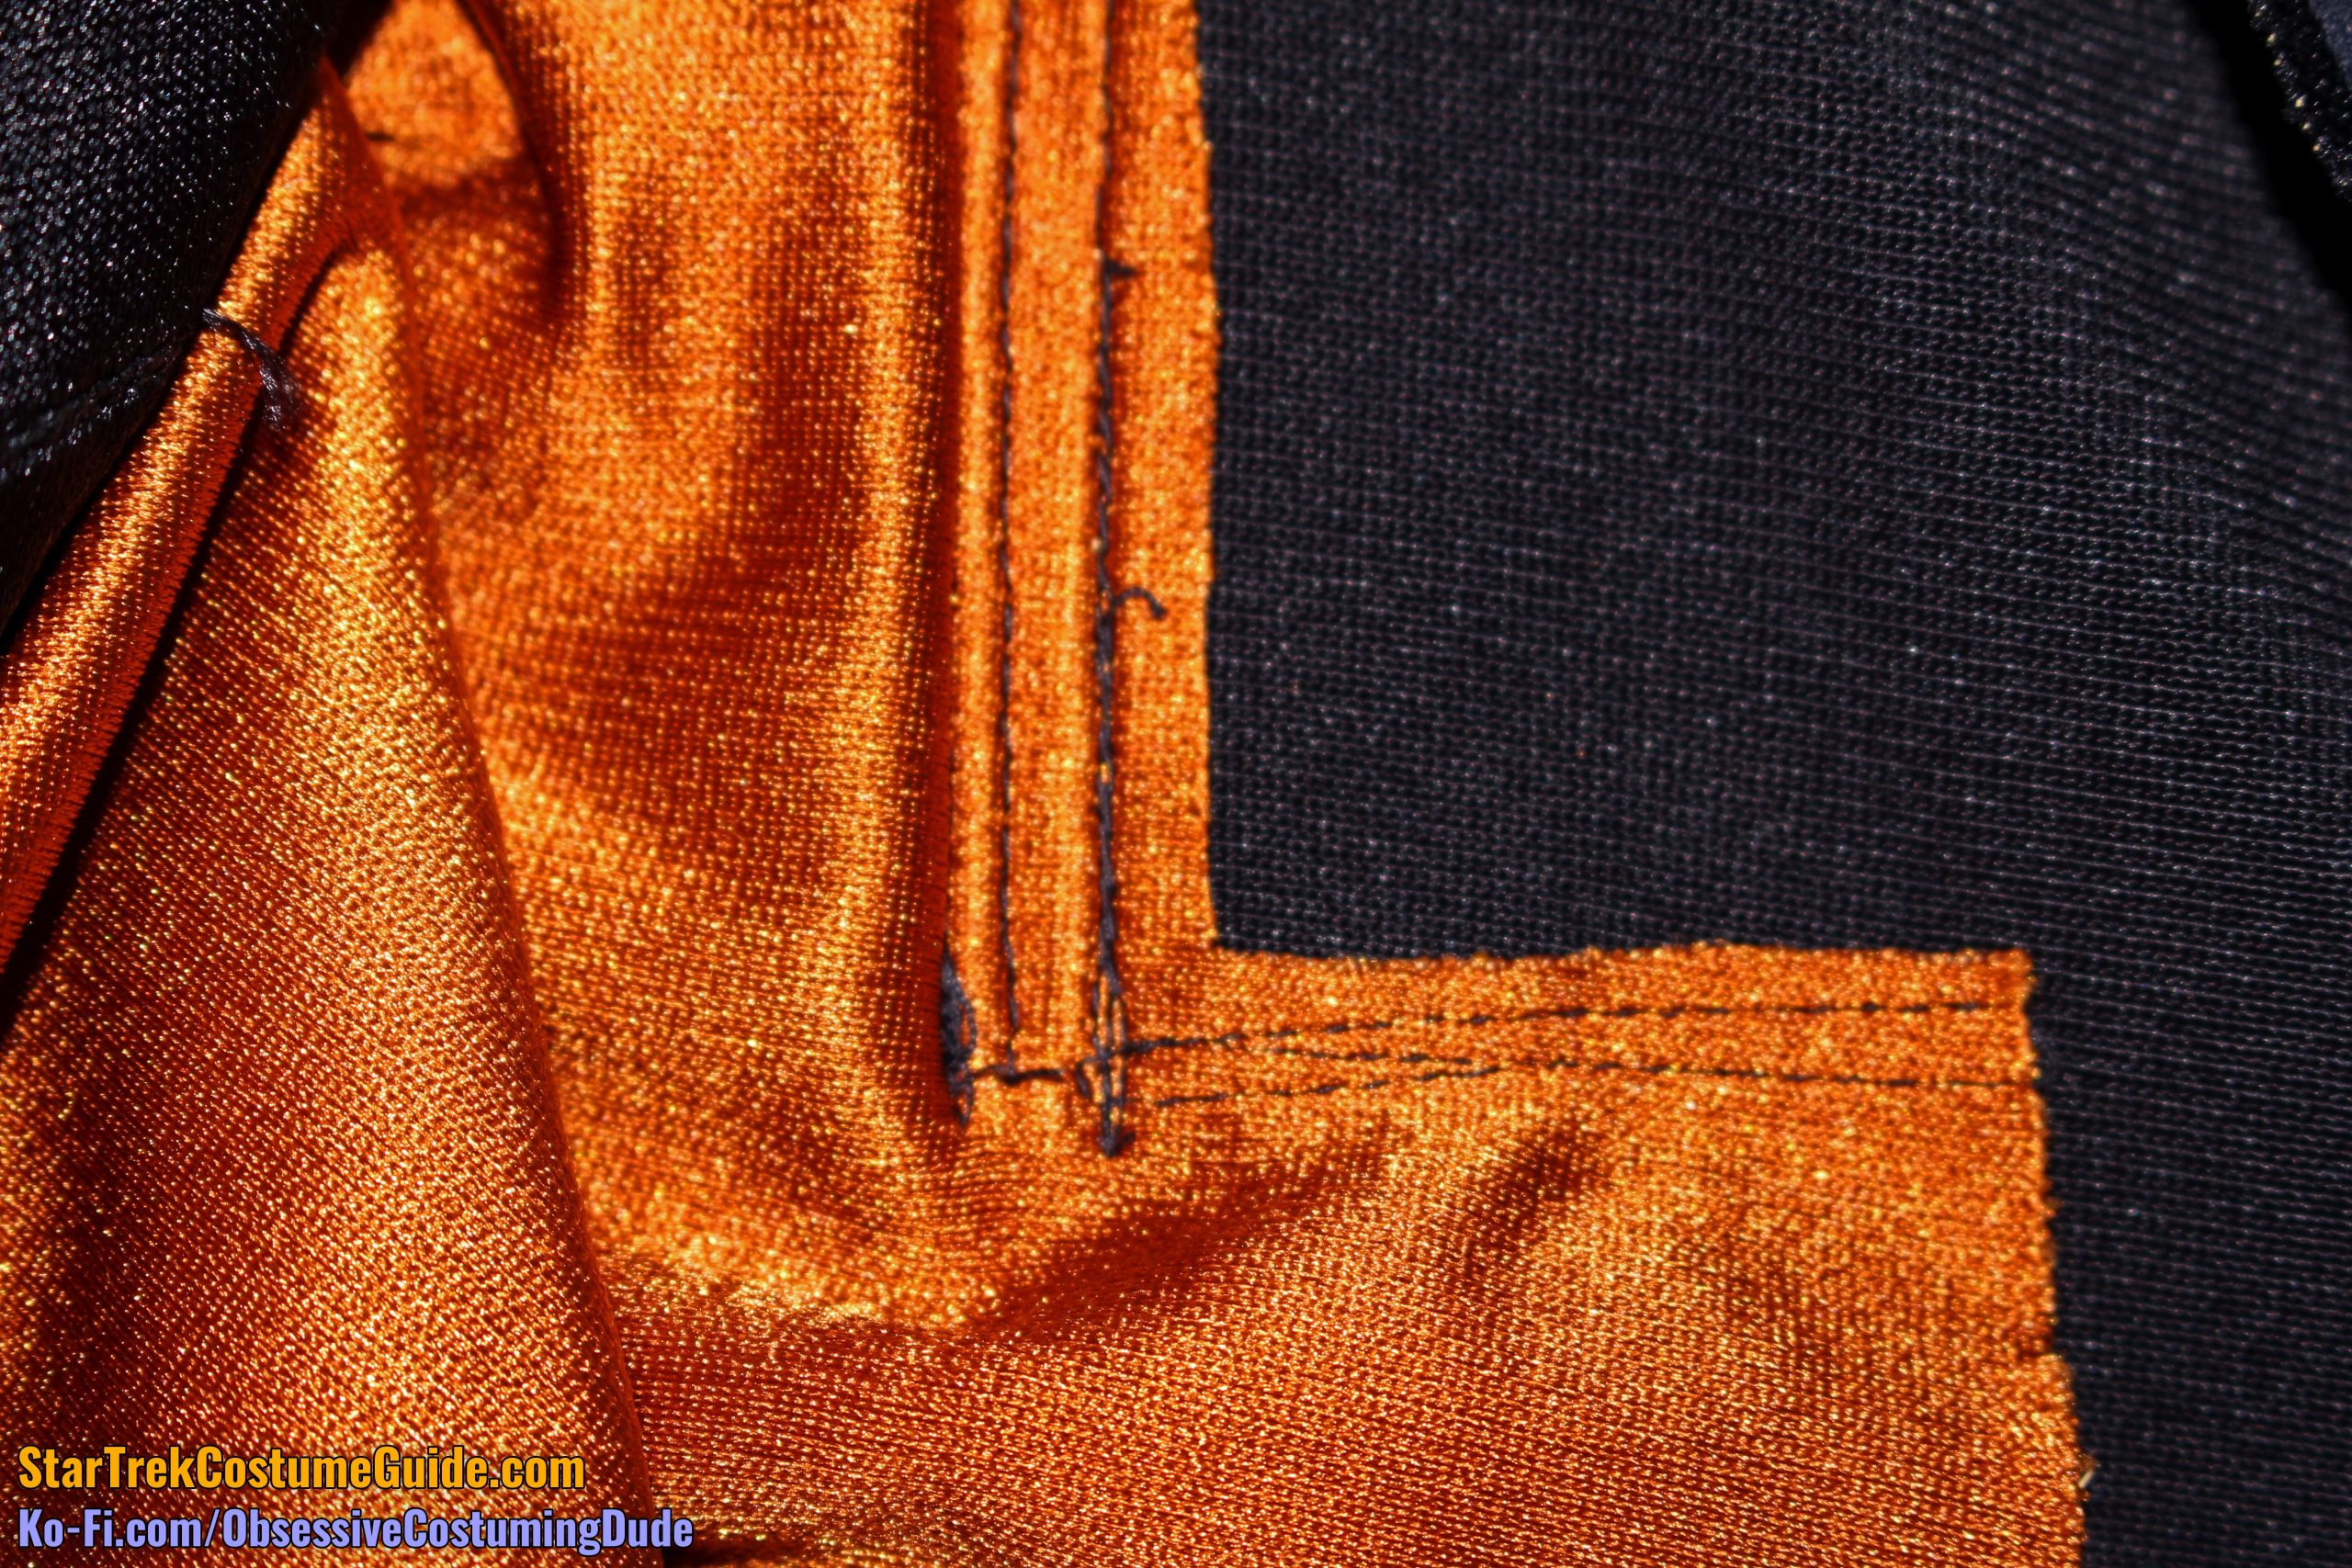
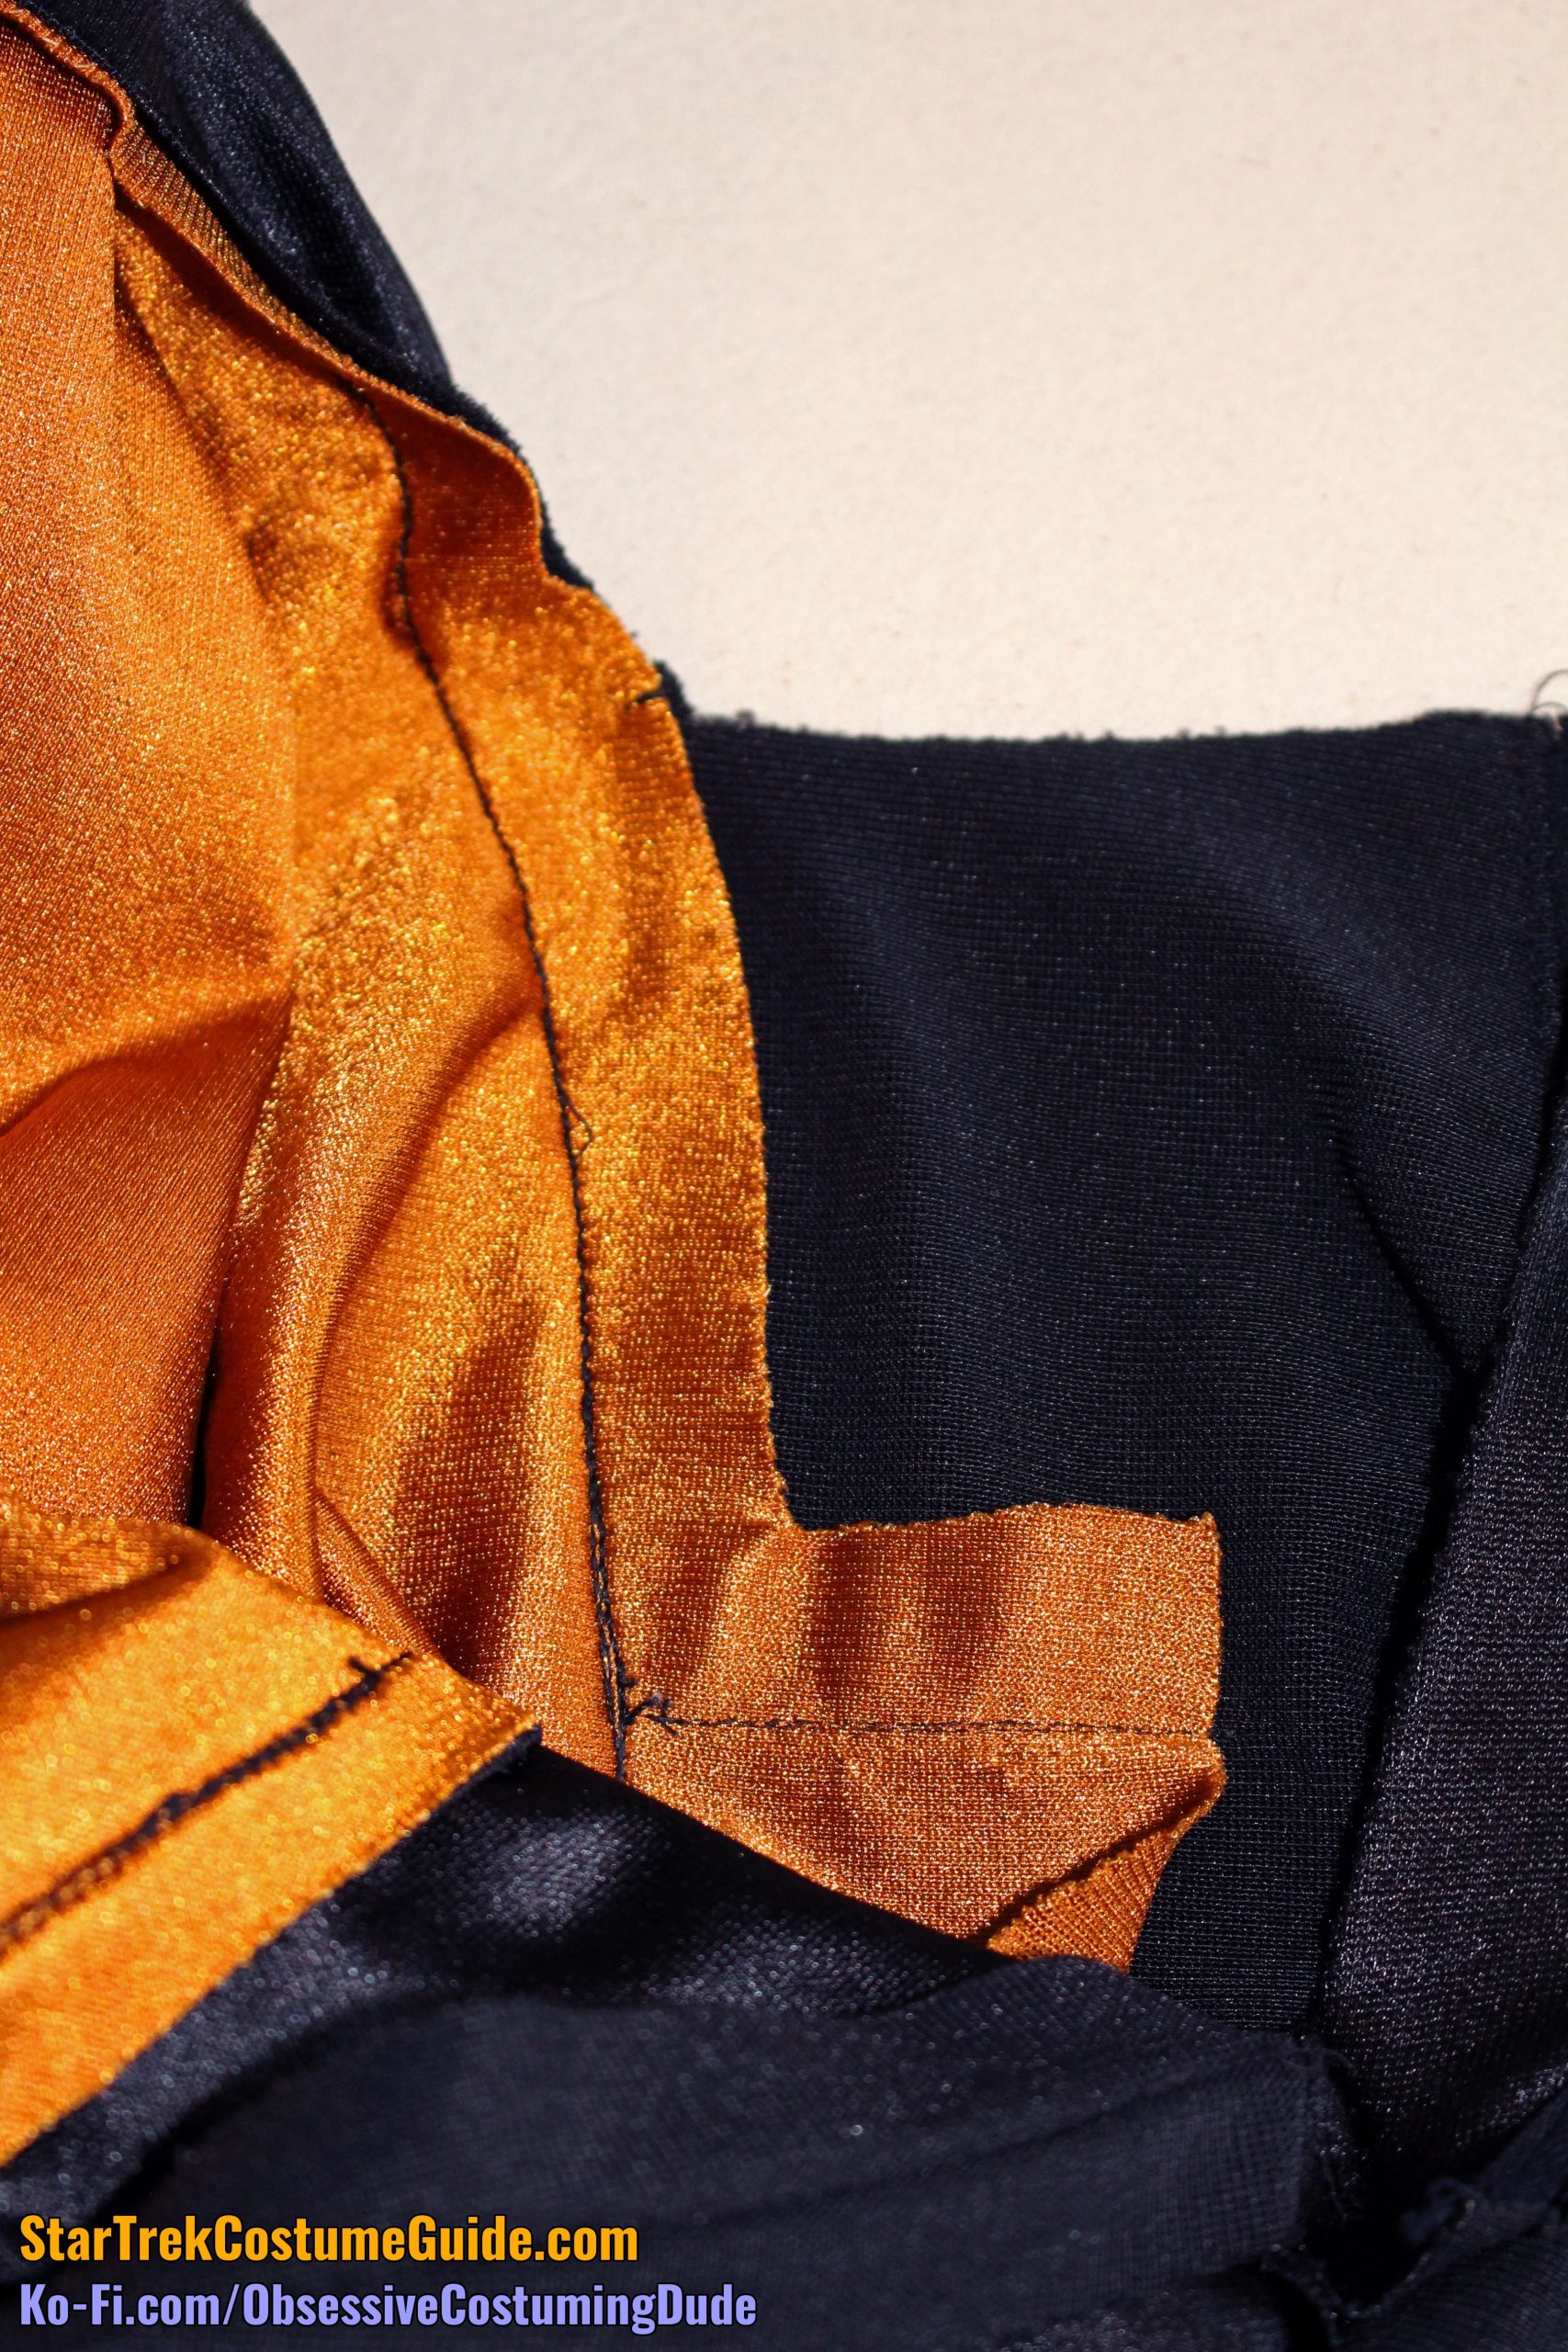
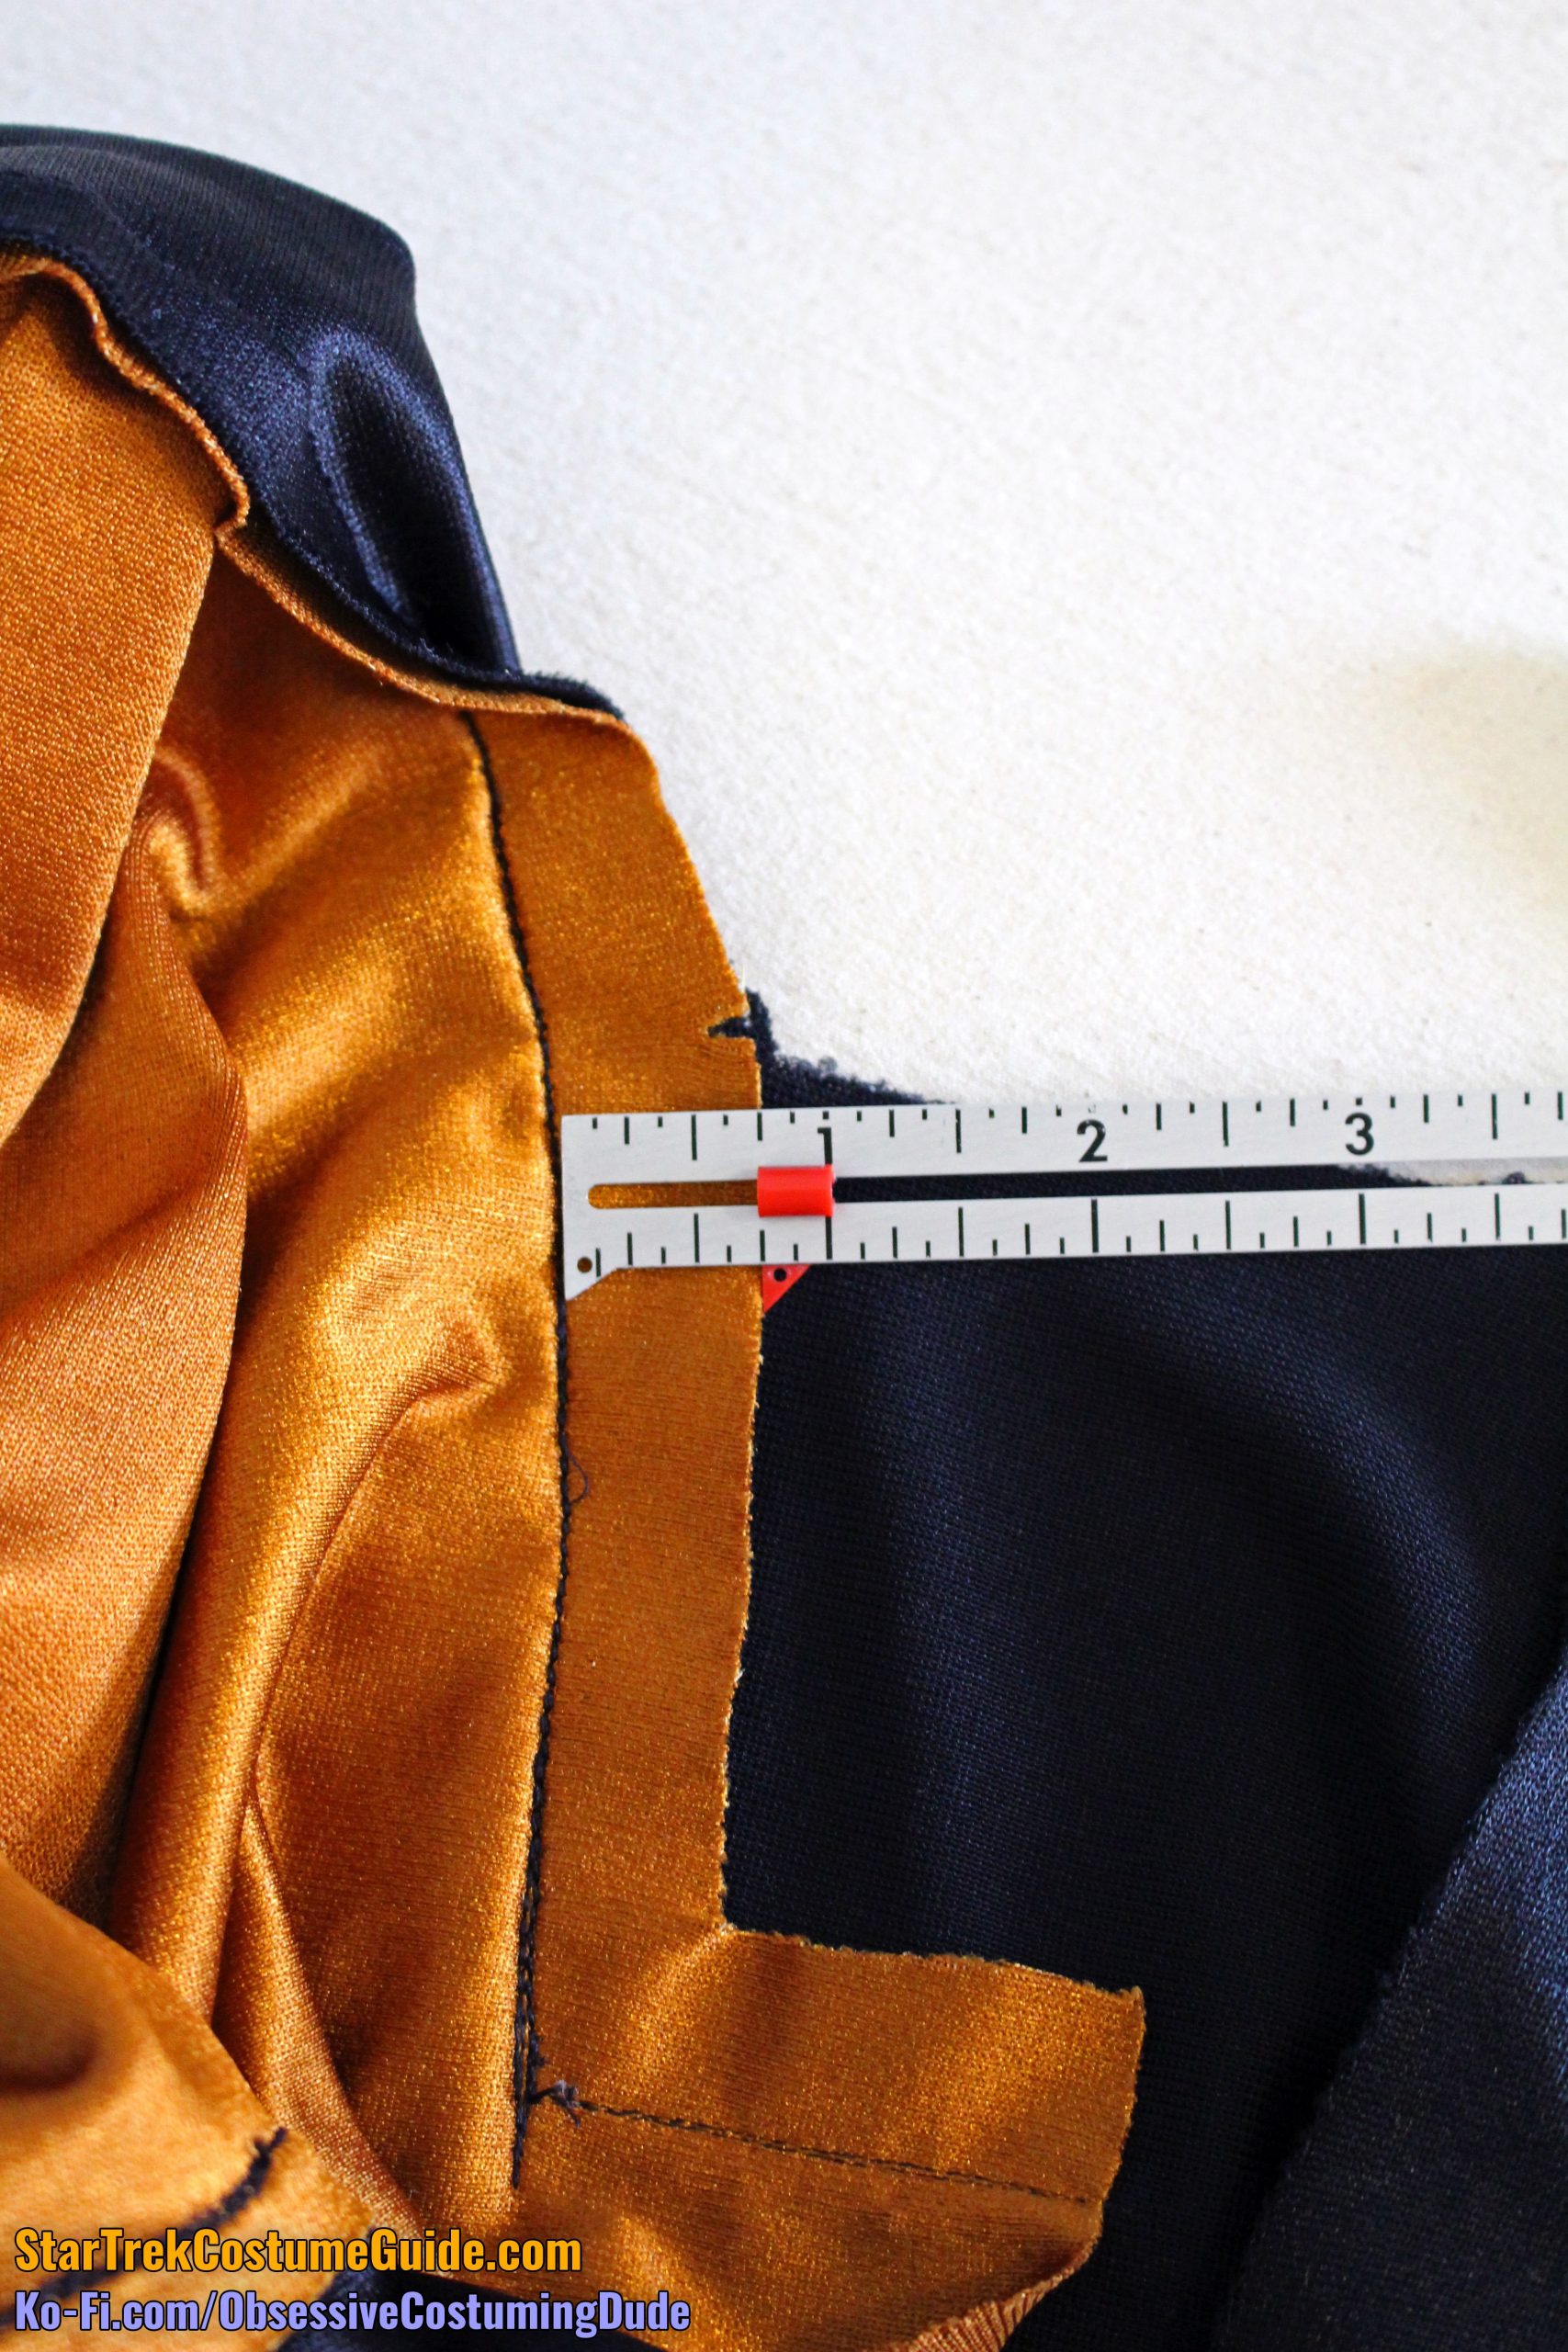
Both the neckline and yoke piping were precisely 3/16” wide.
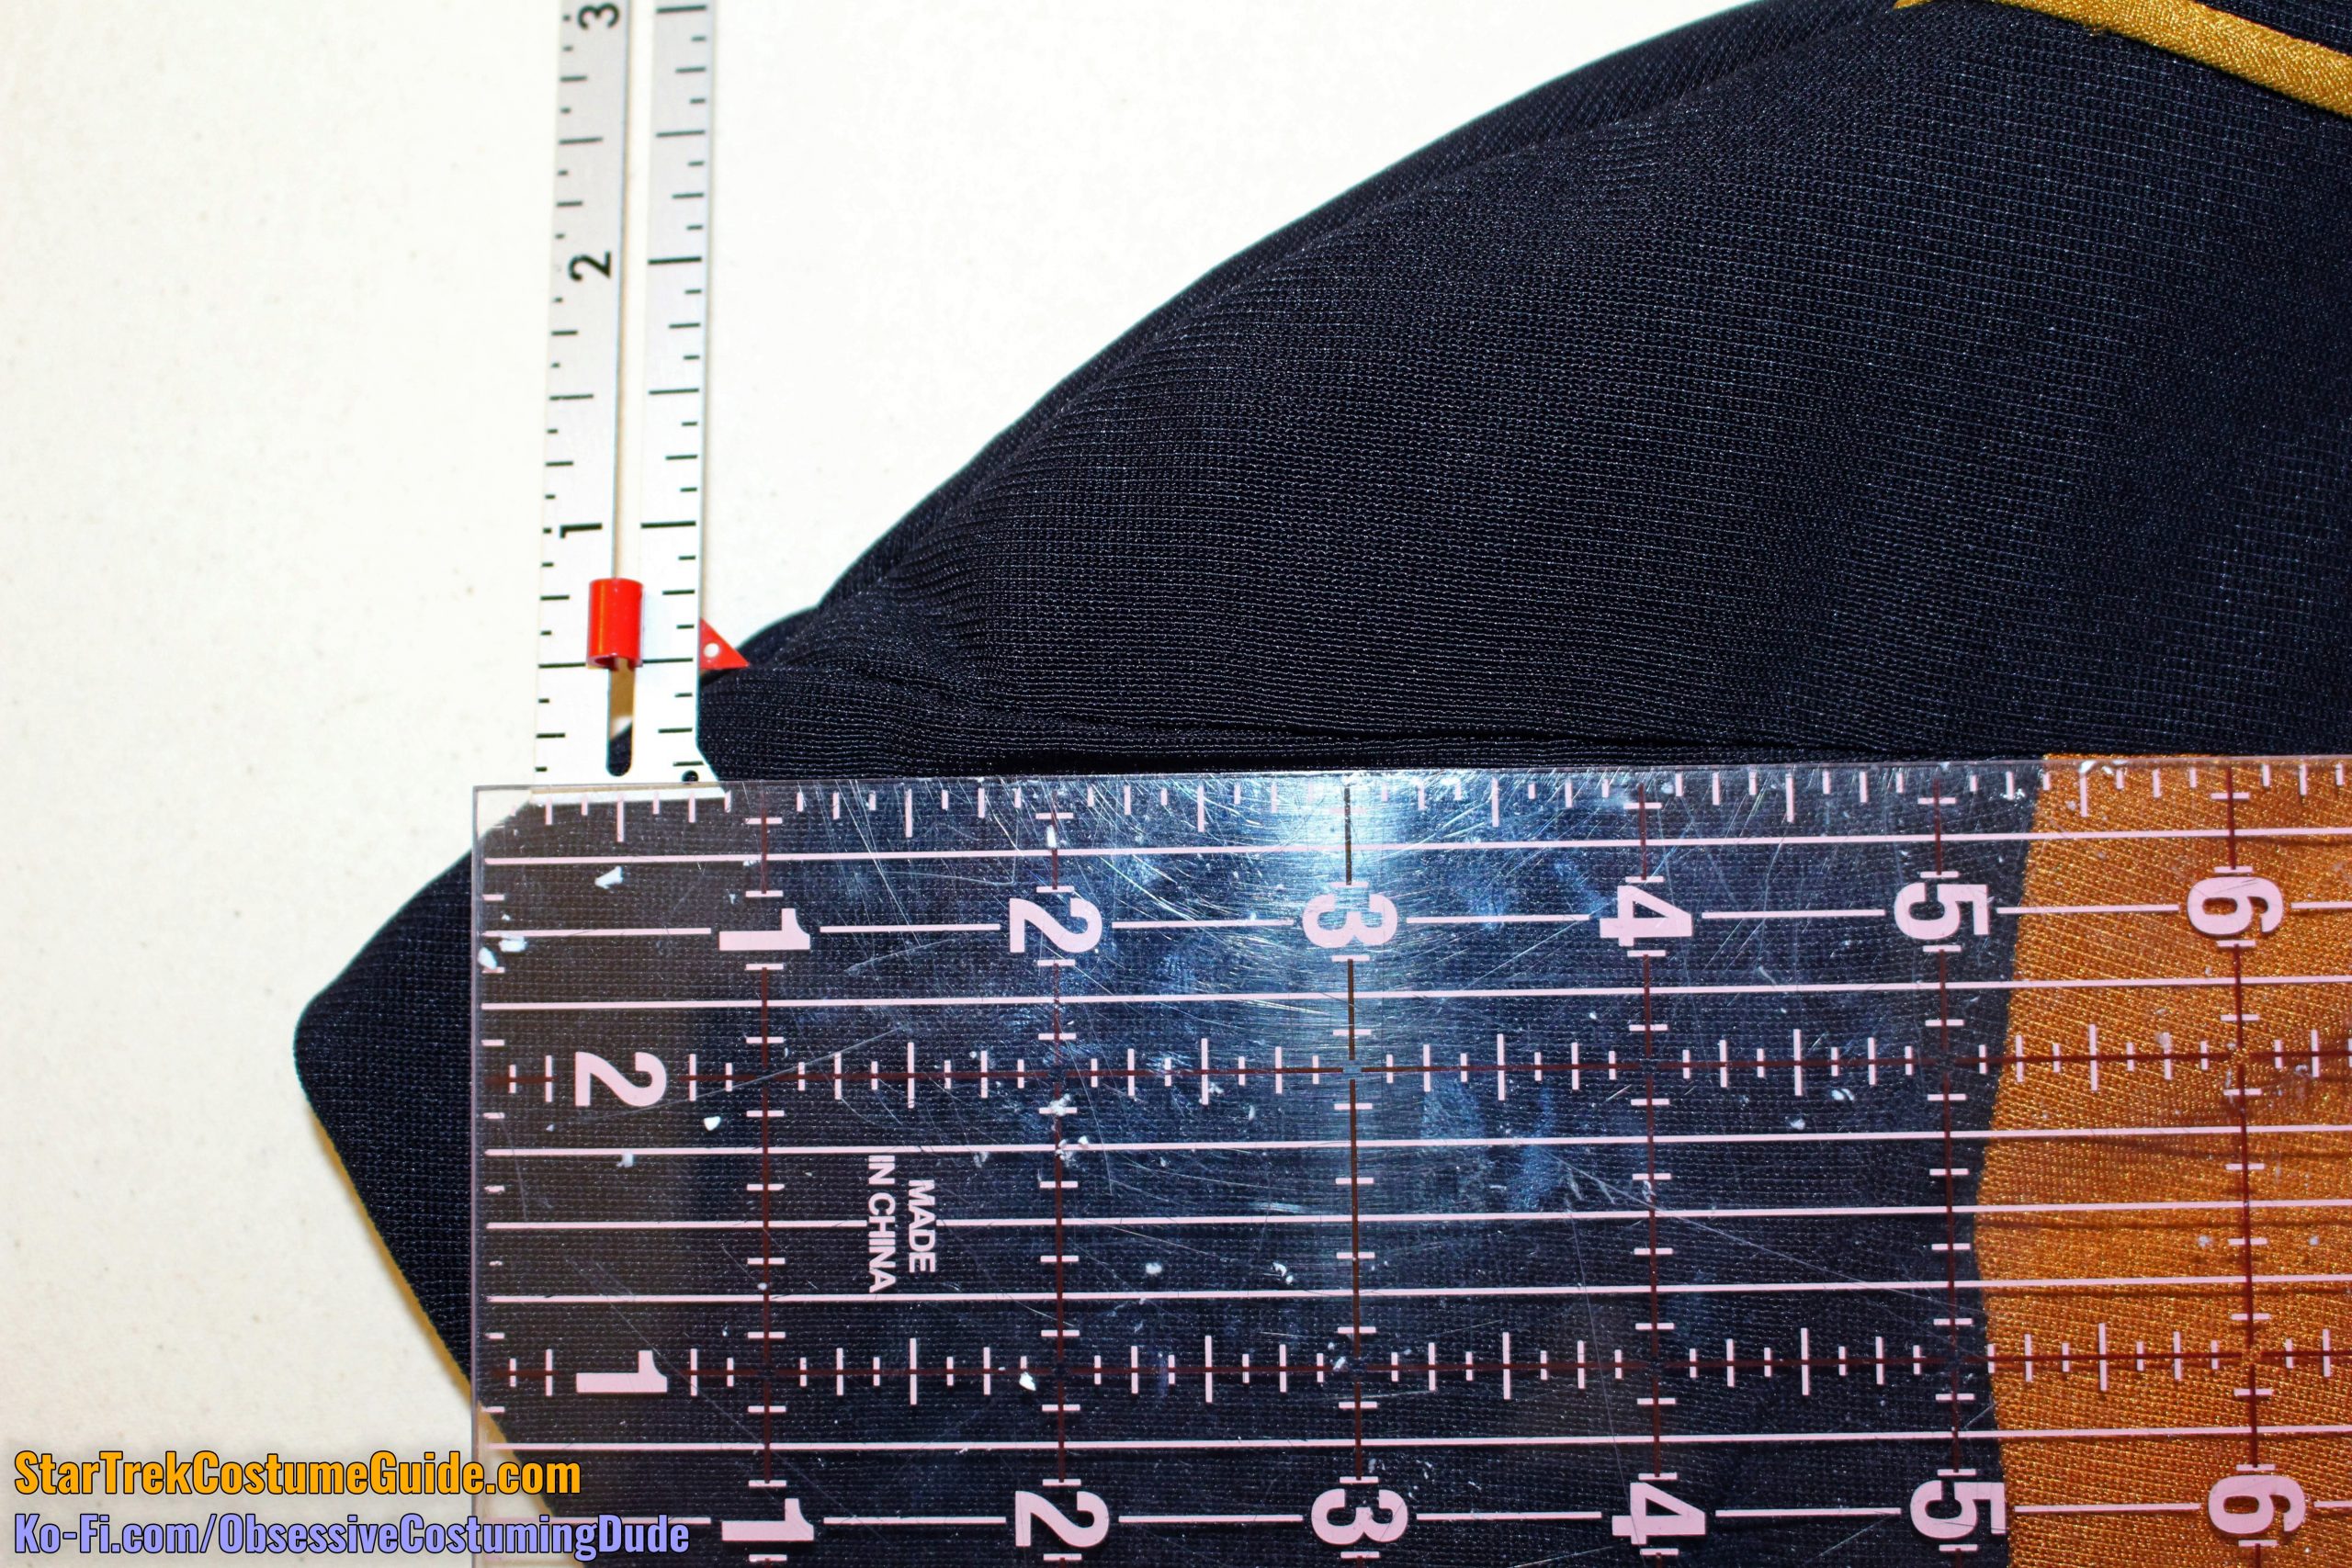
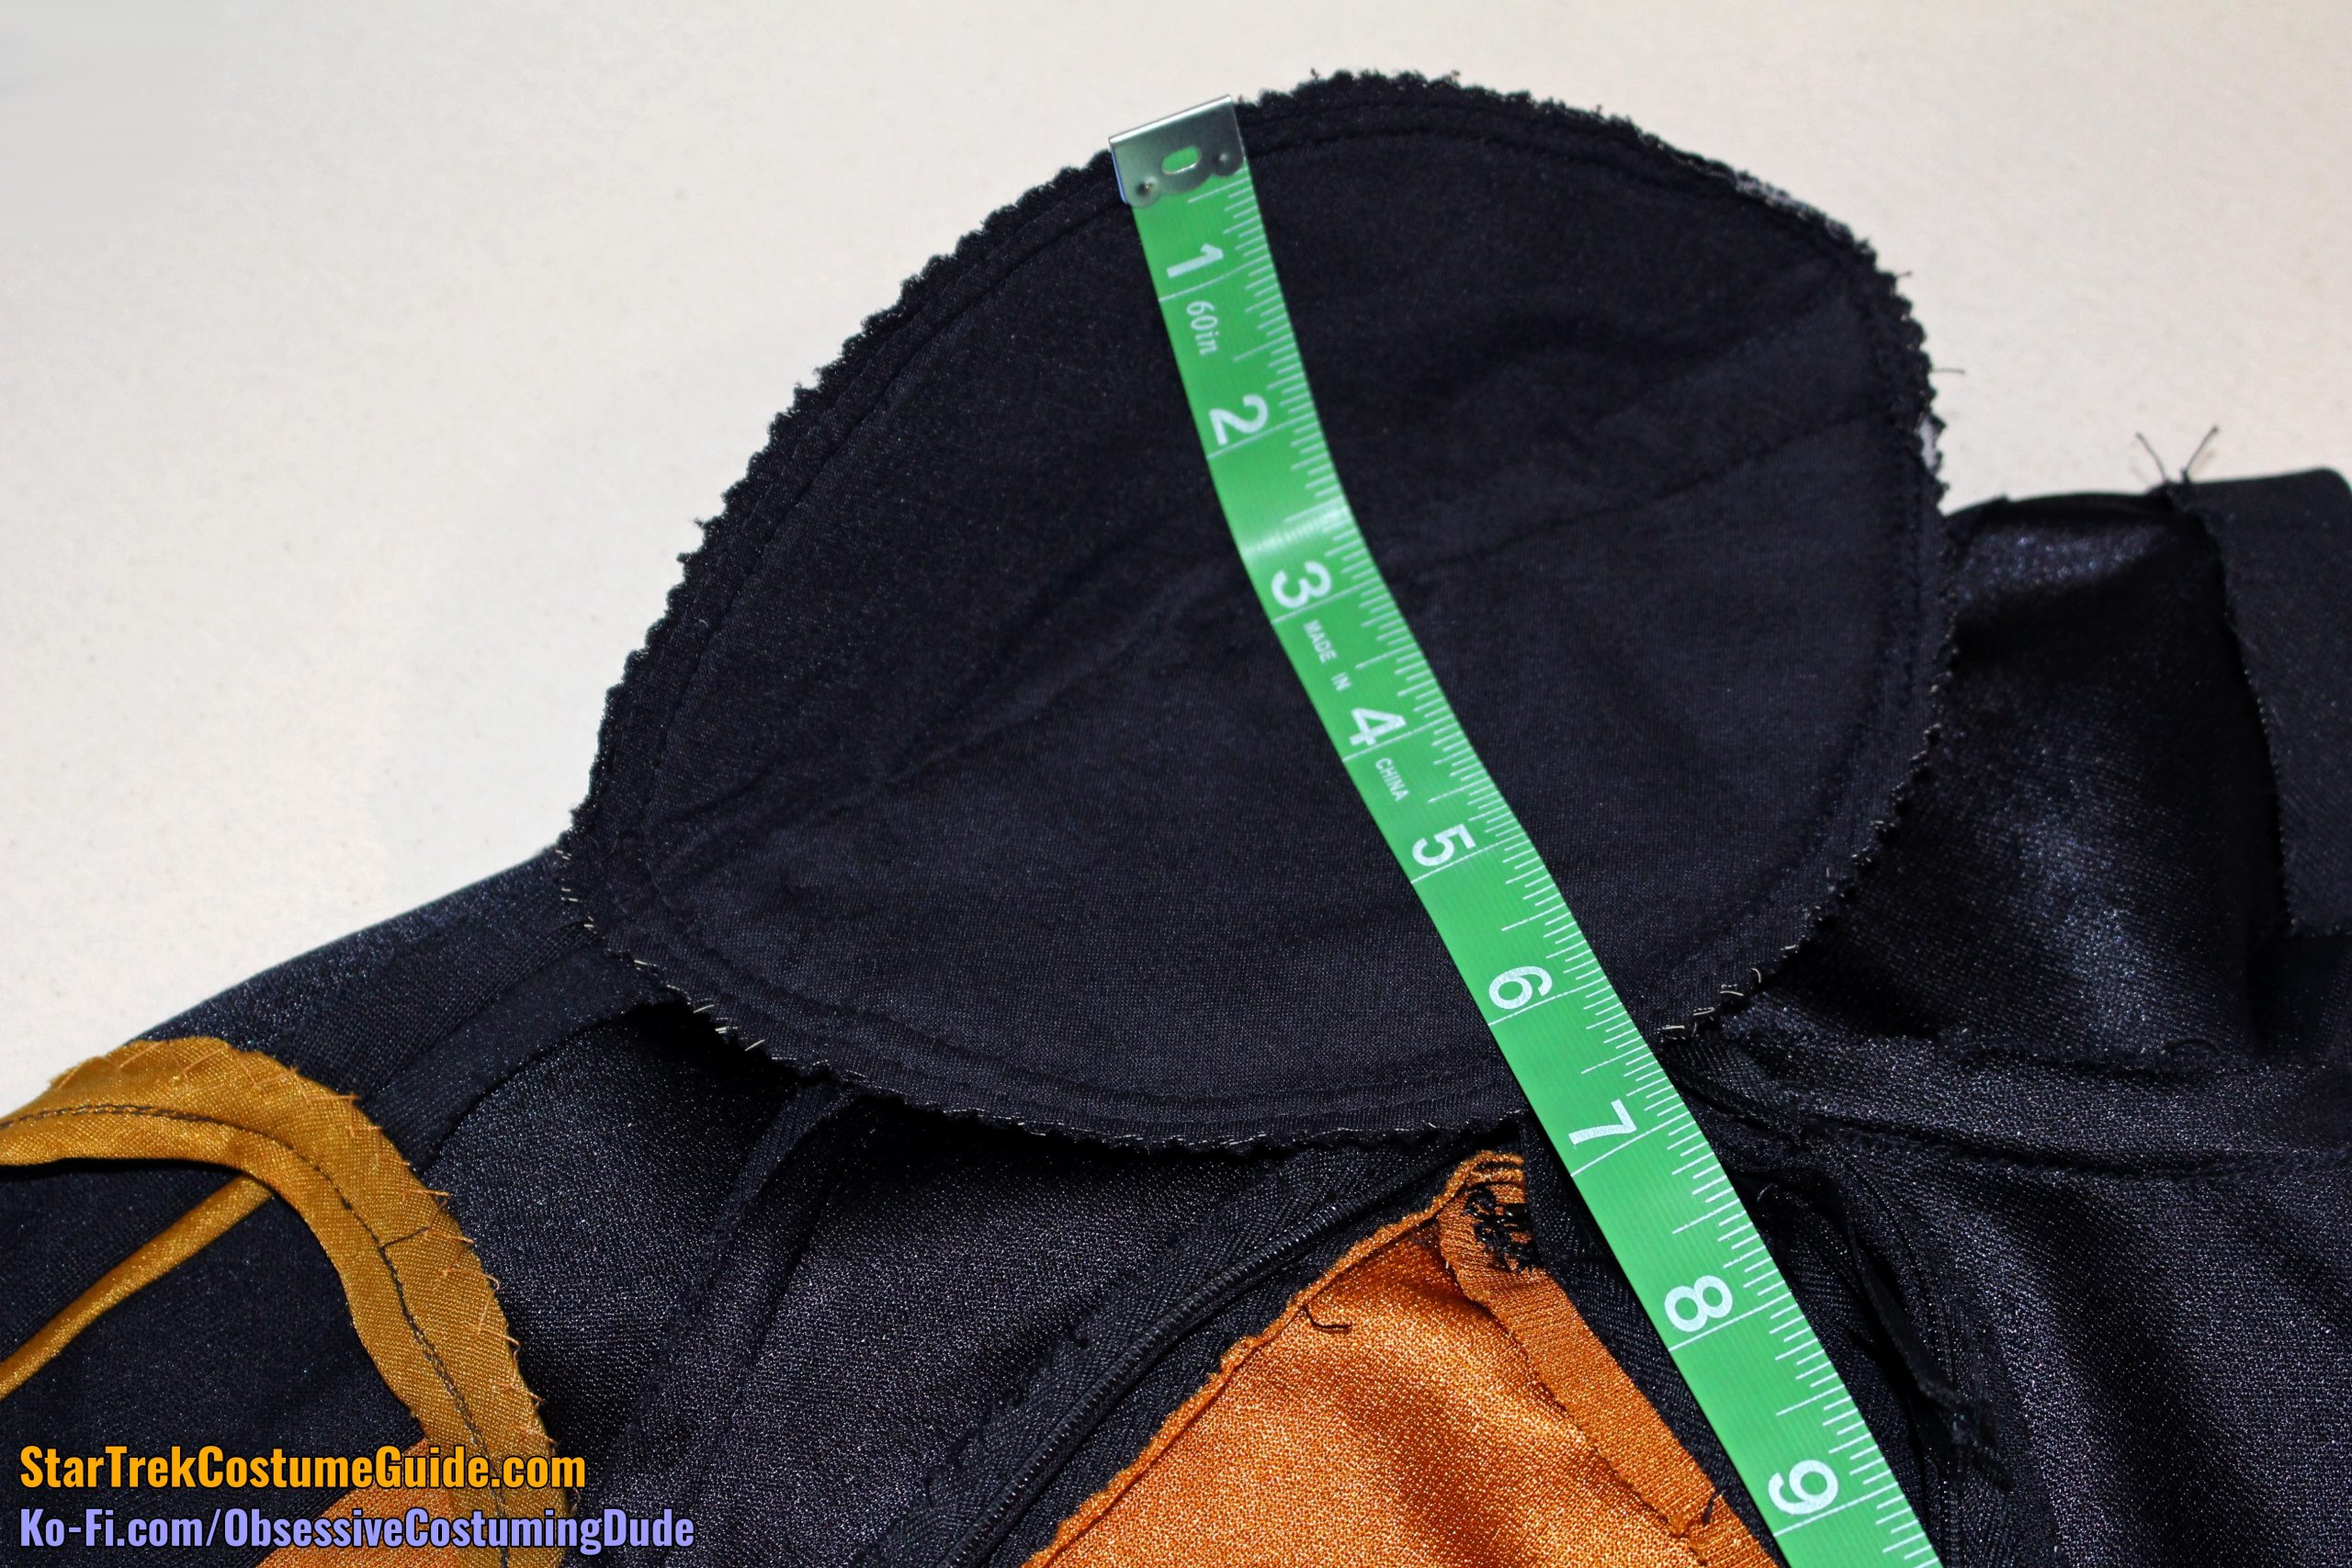
At the center front, the yoke was about 1 ⅛” deep (including the neckline trim).
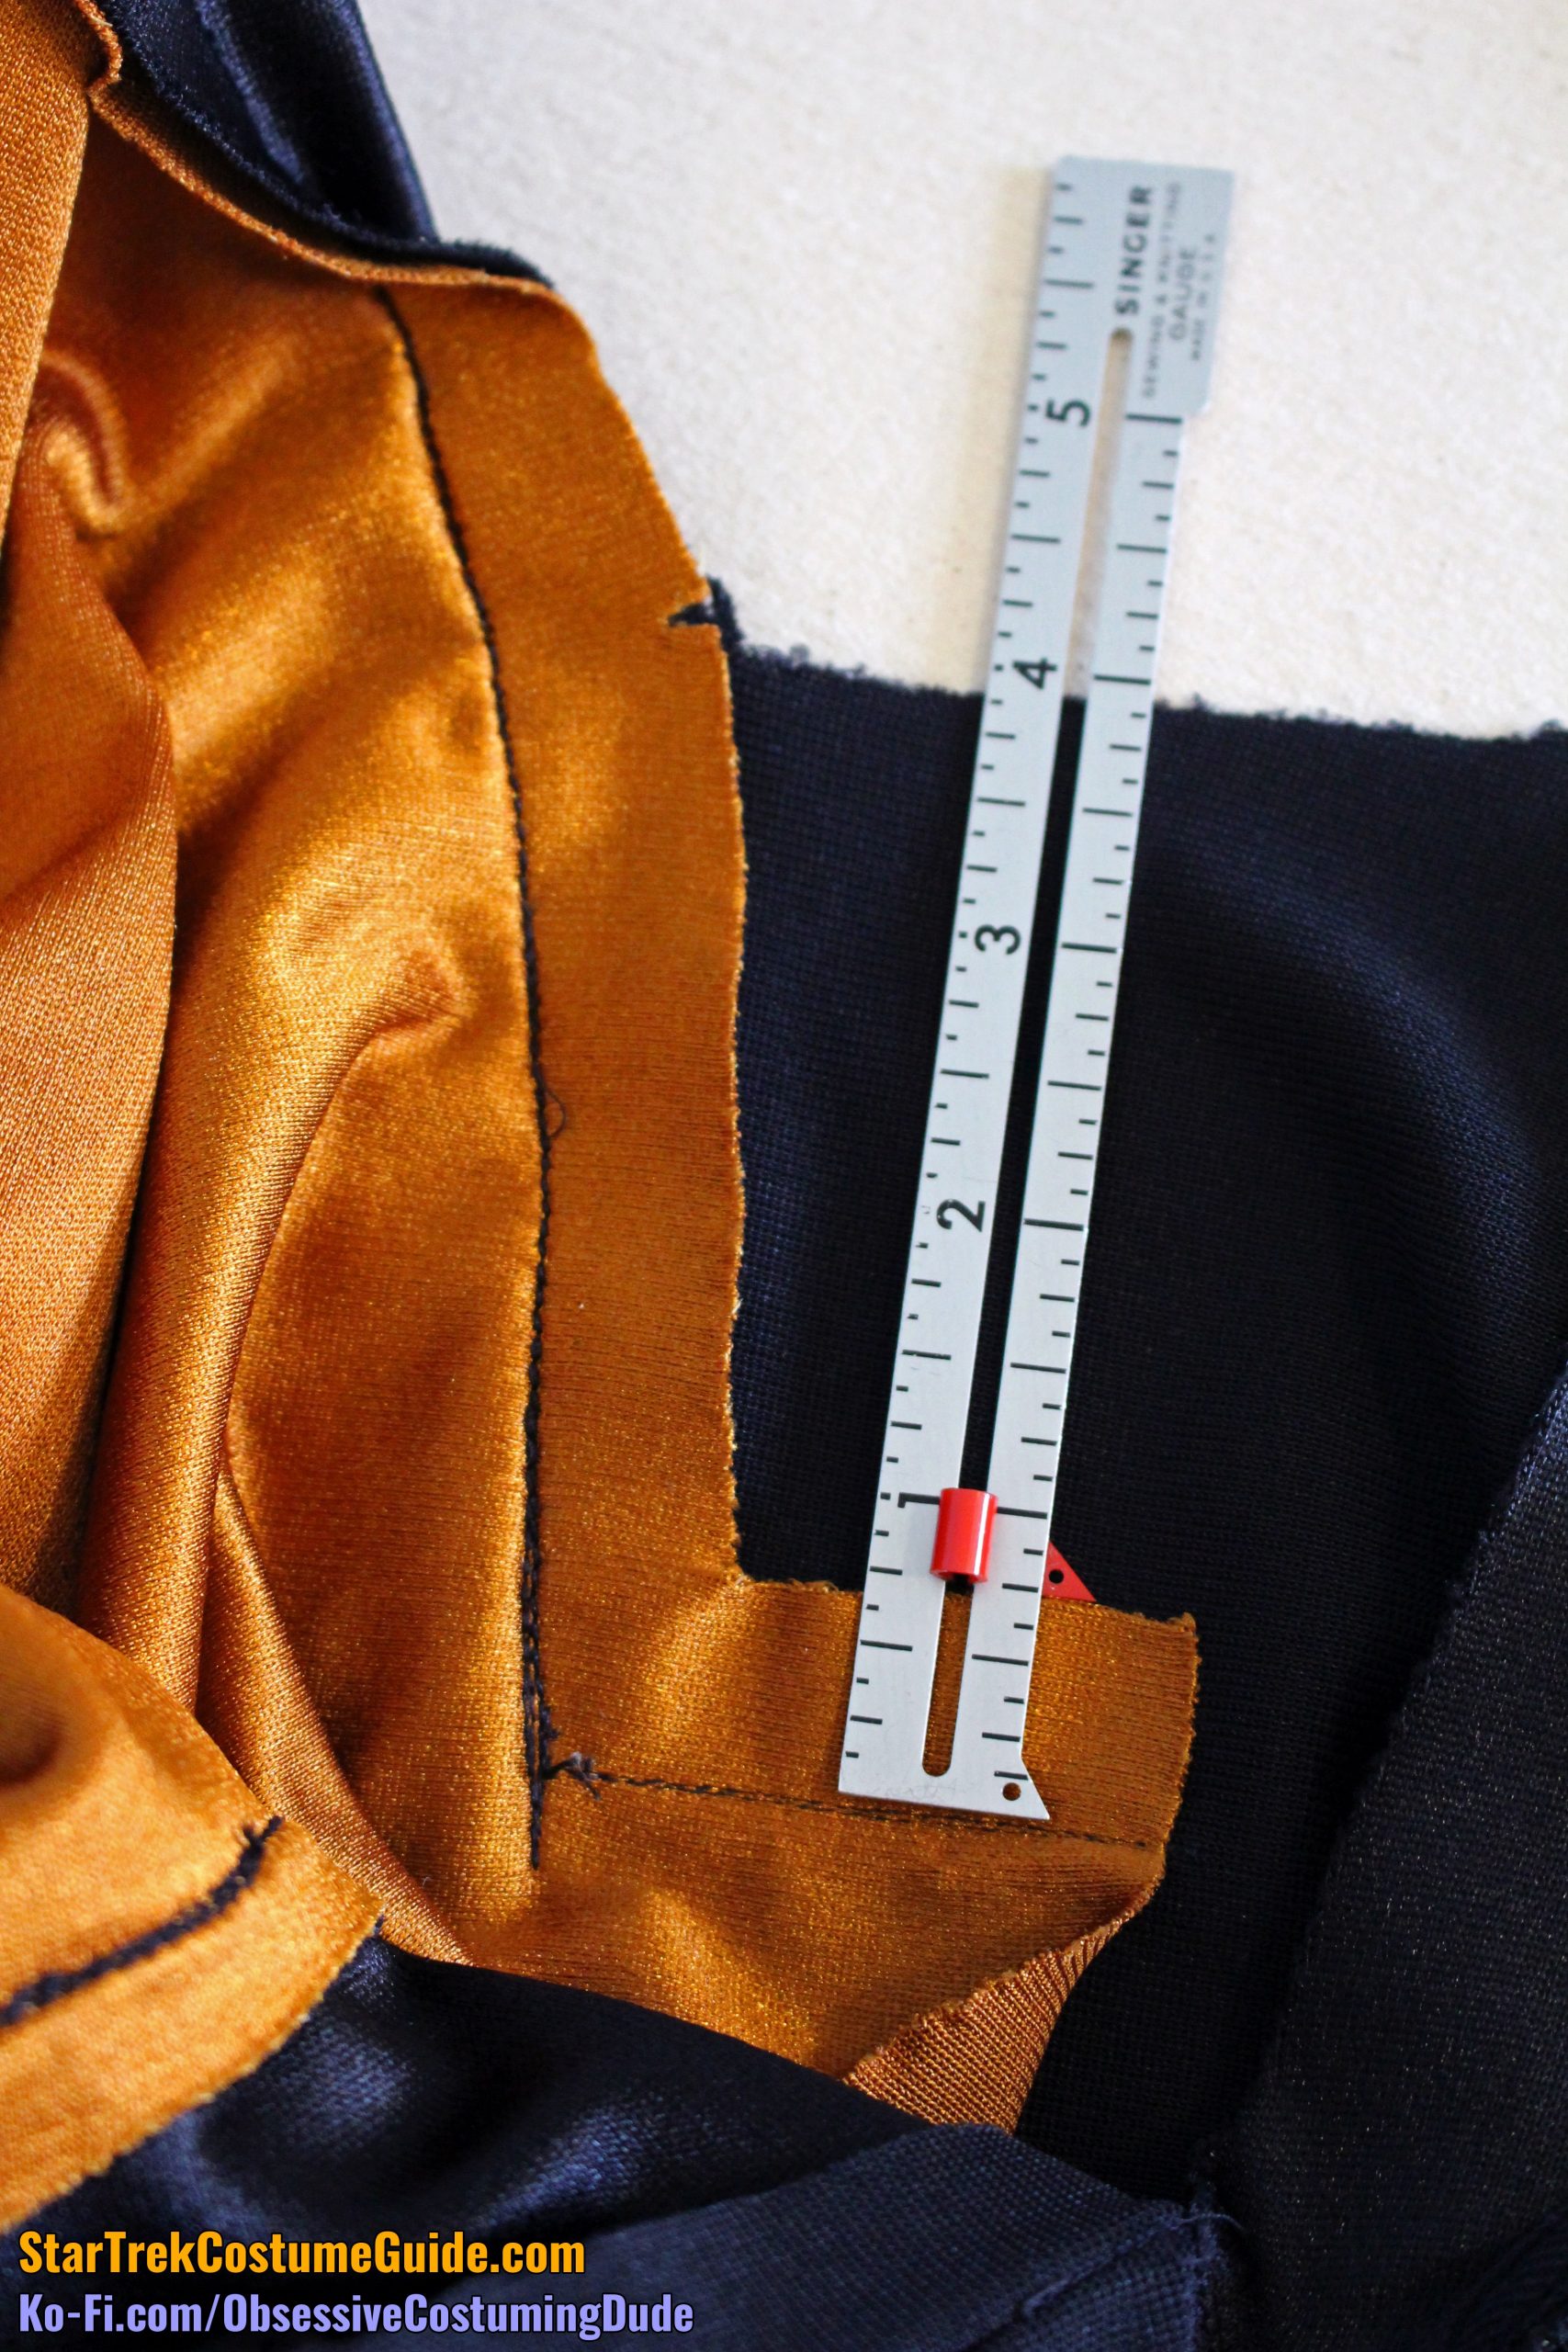
Measured from the neckline end of the shoulder seam, the front yoke was 4 ¼” deep.
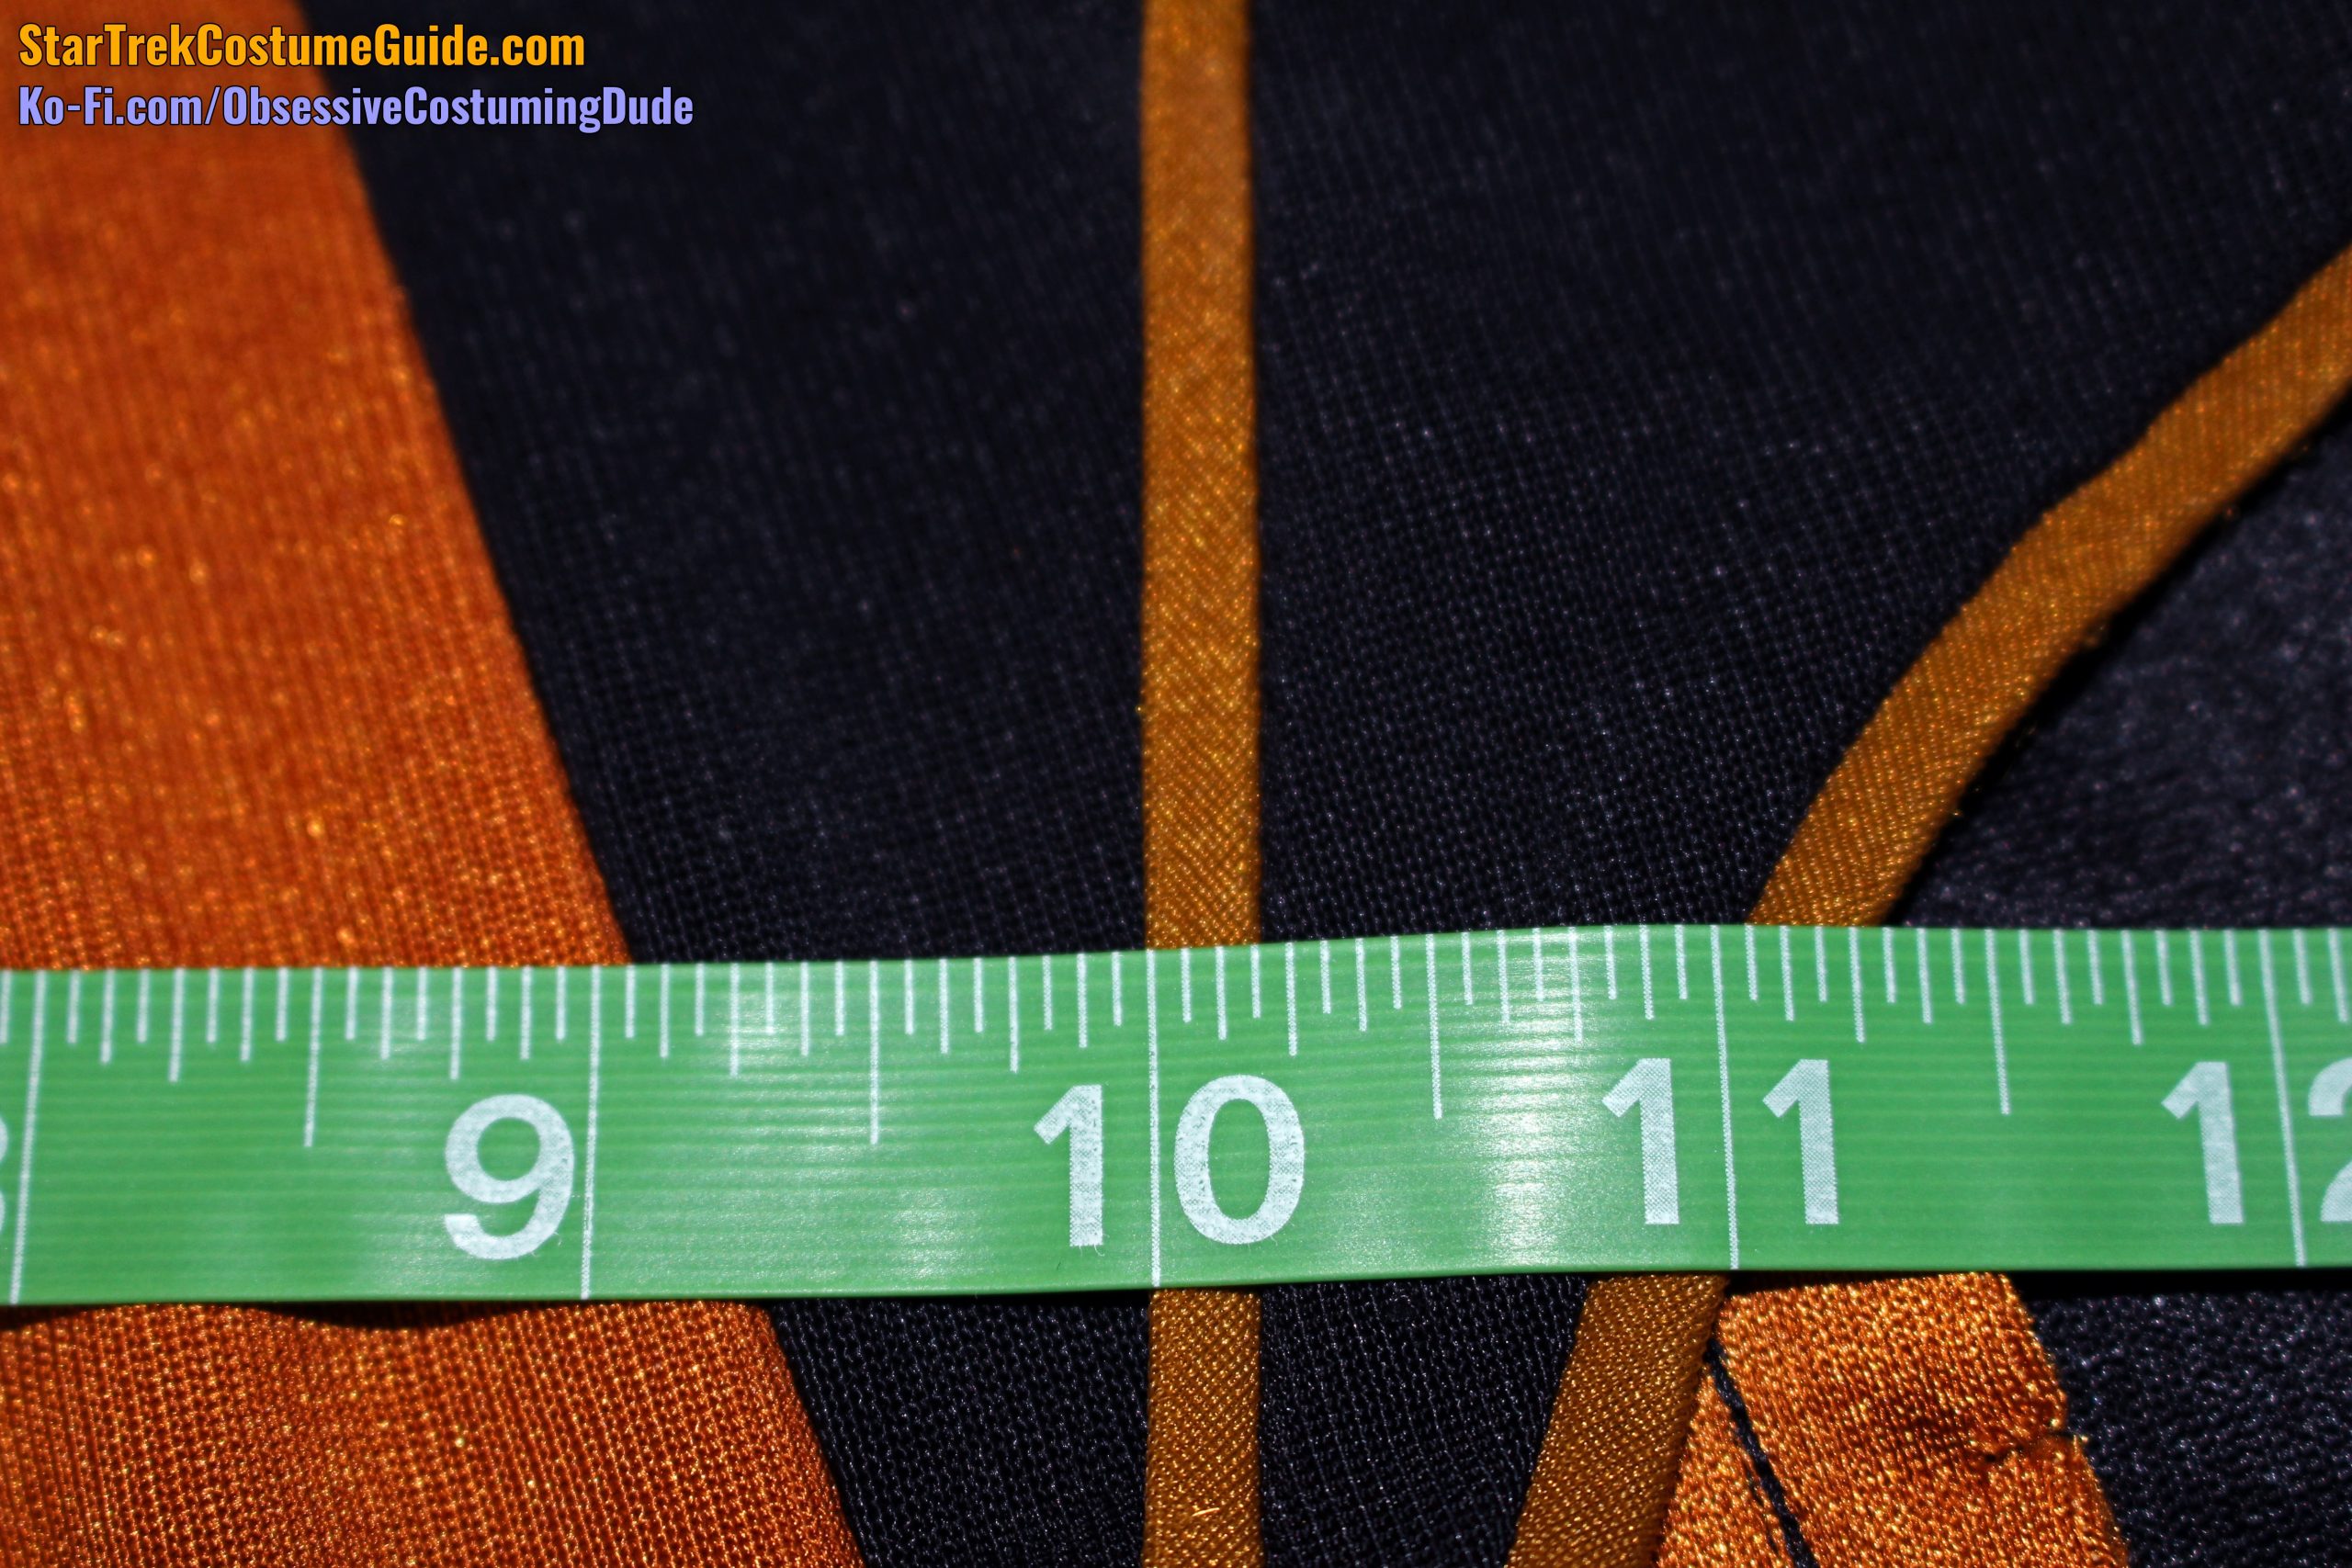
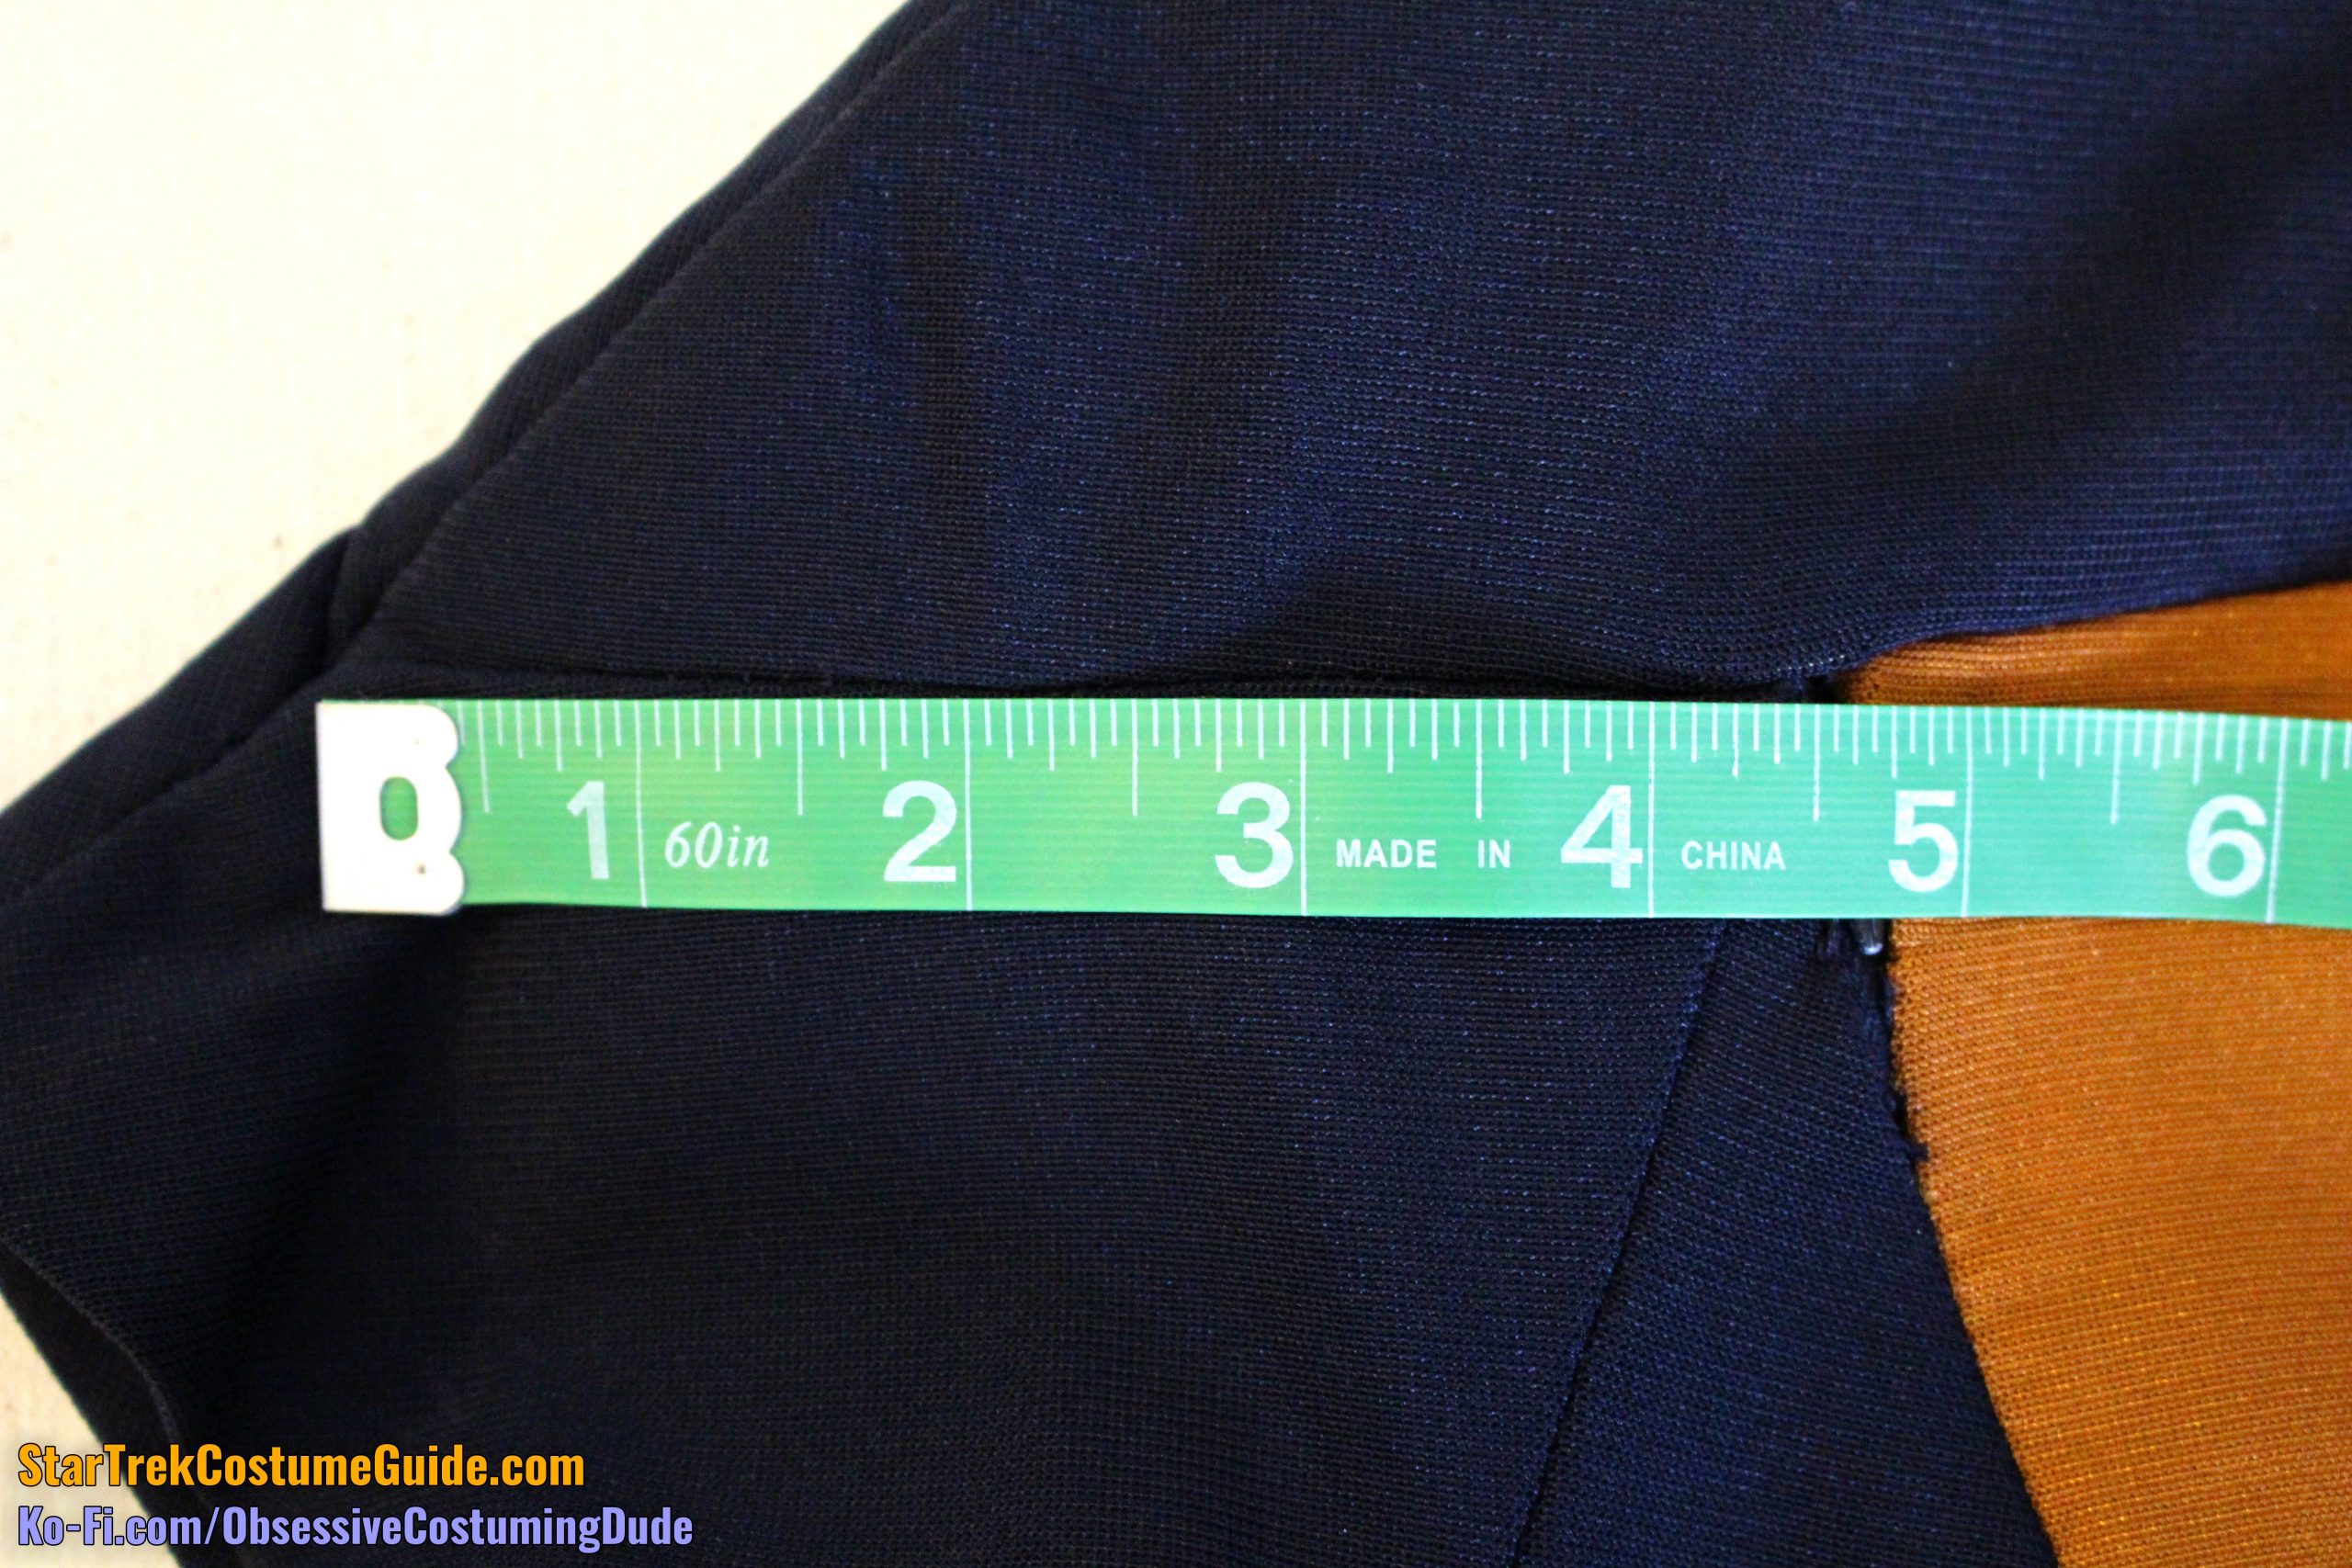
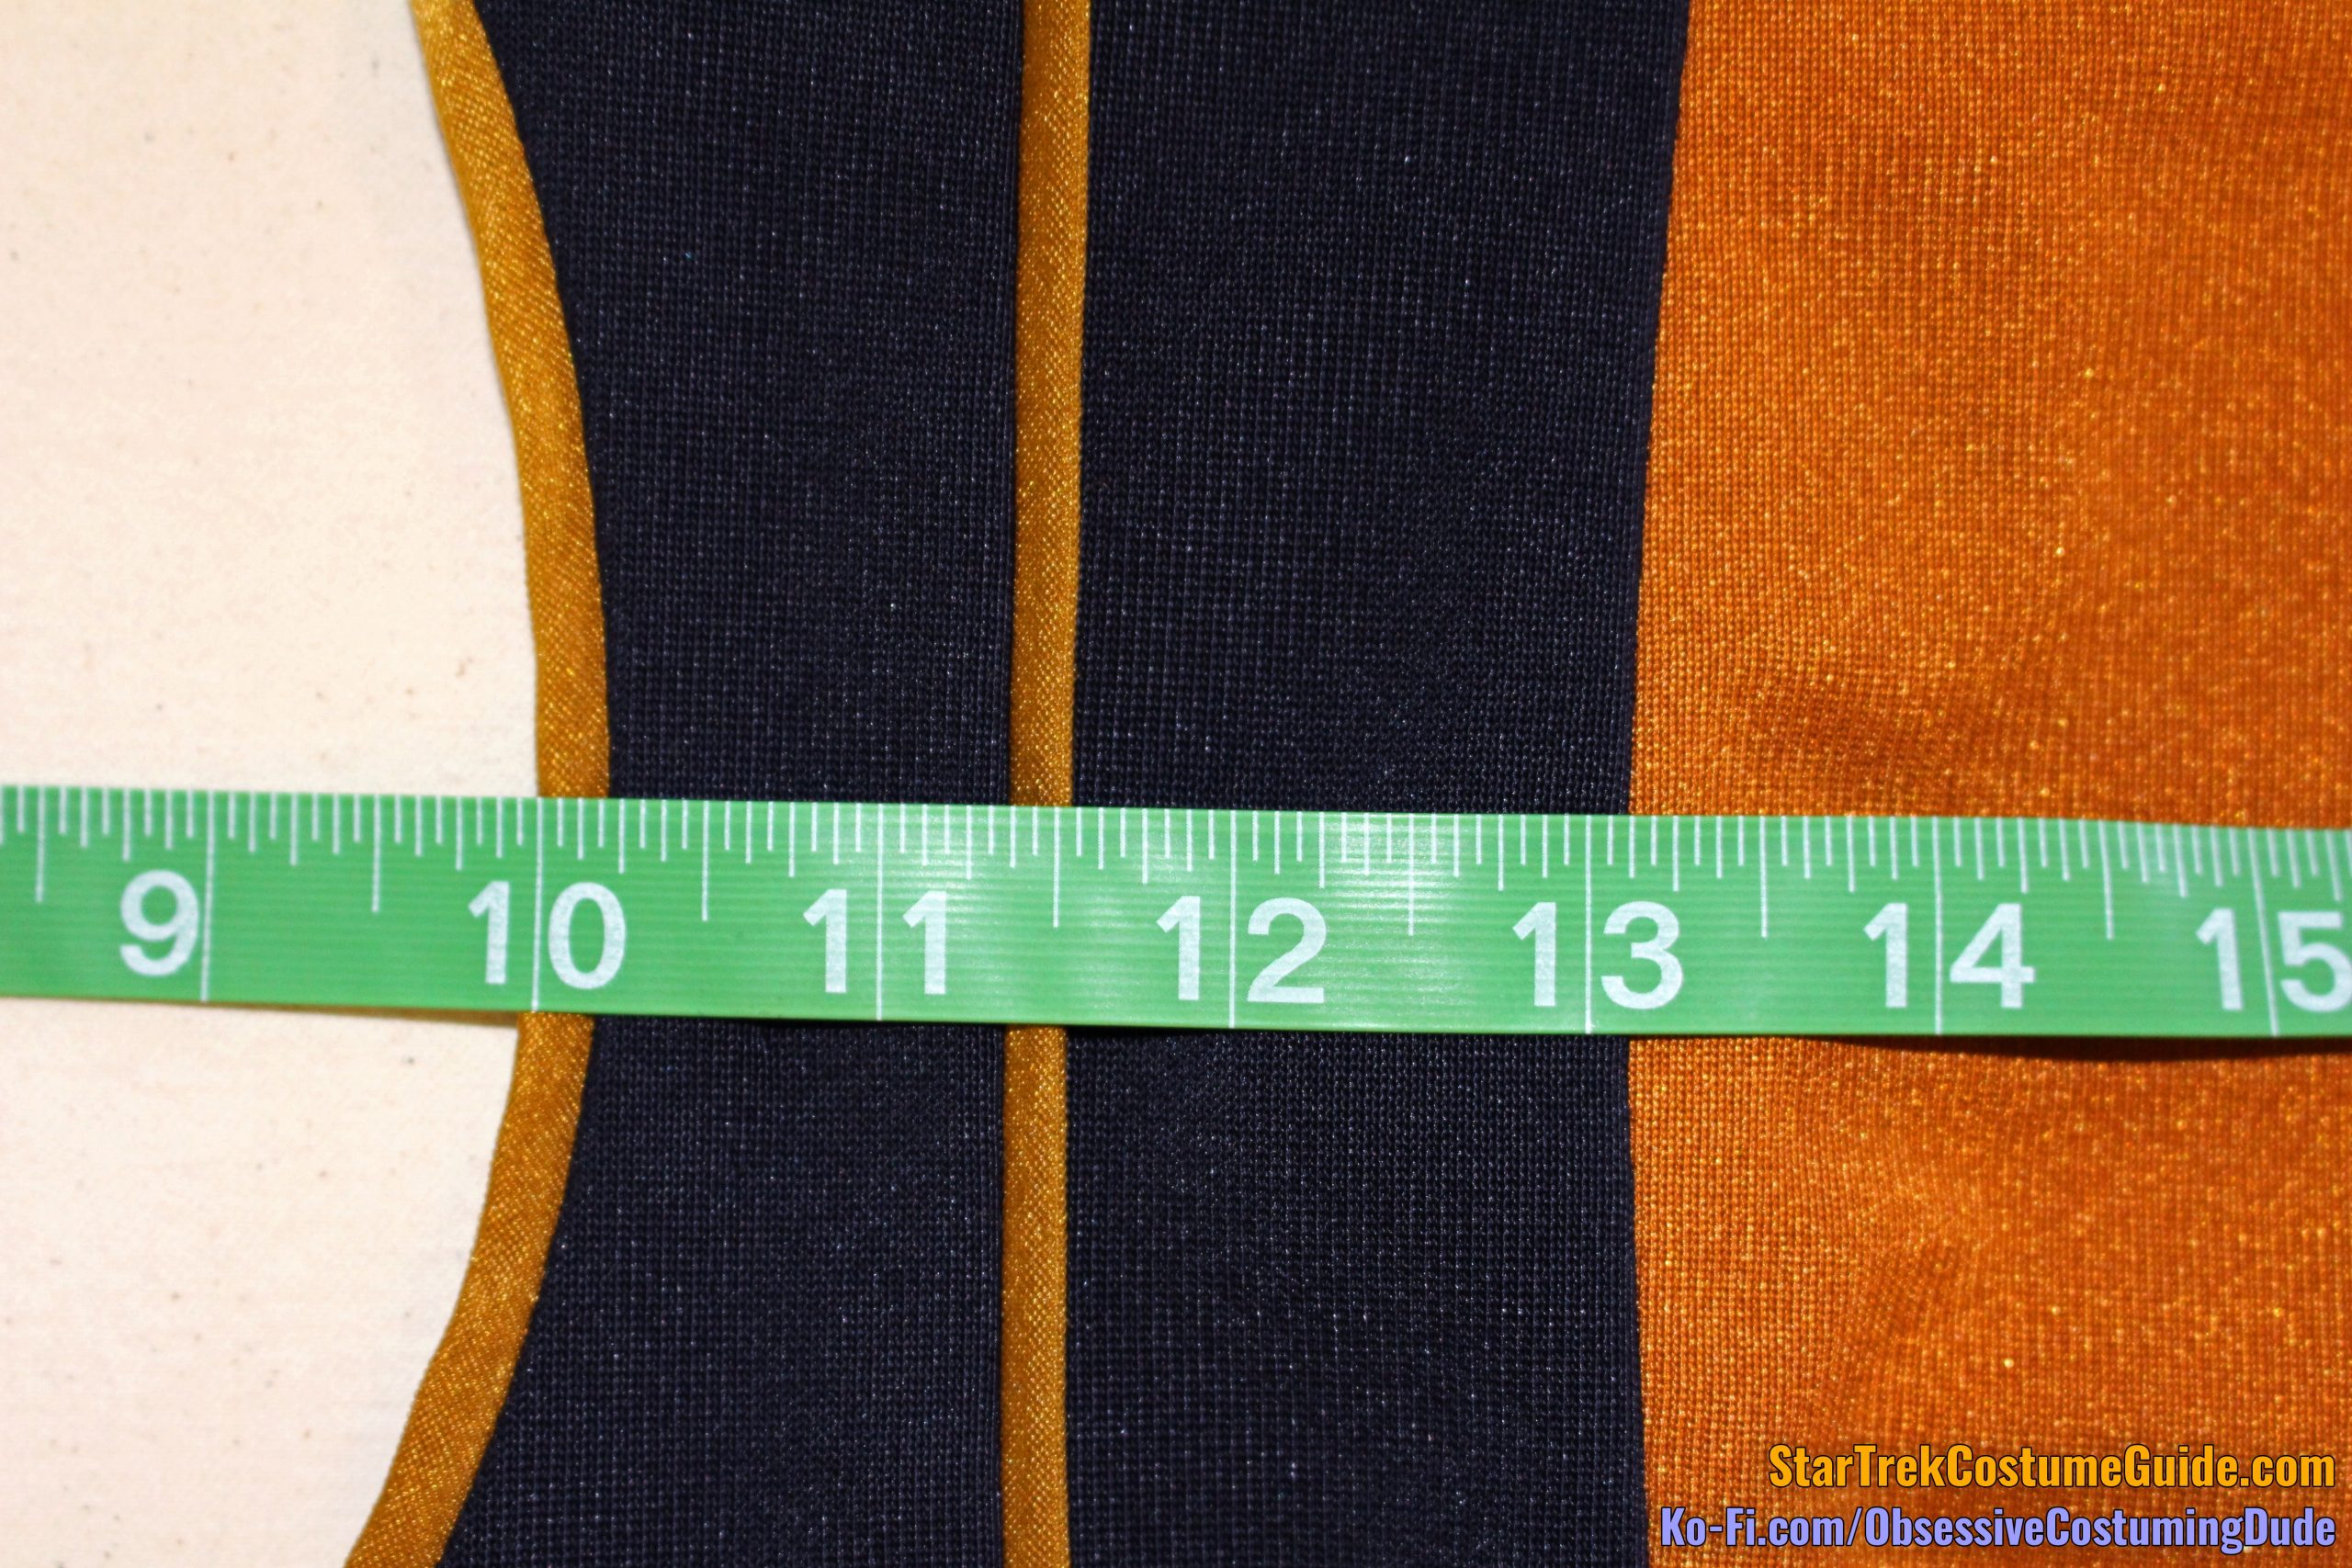
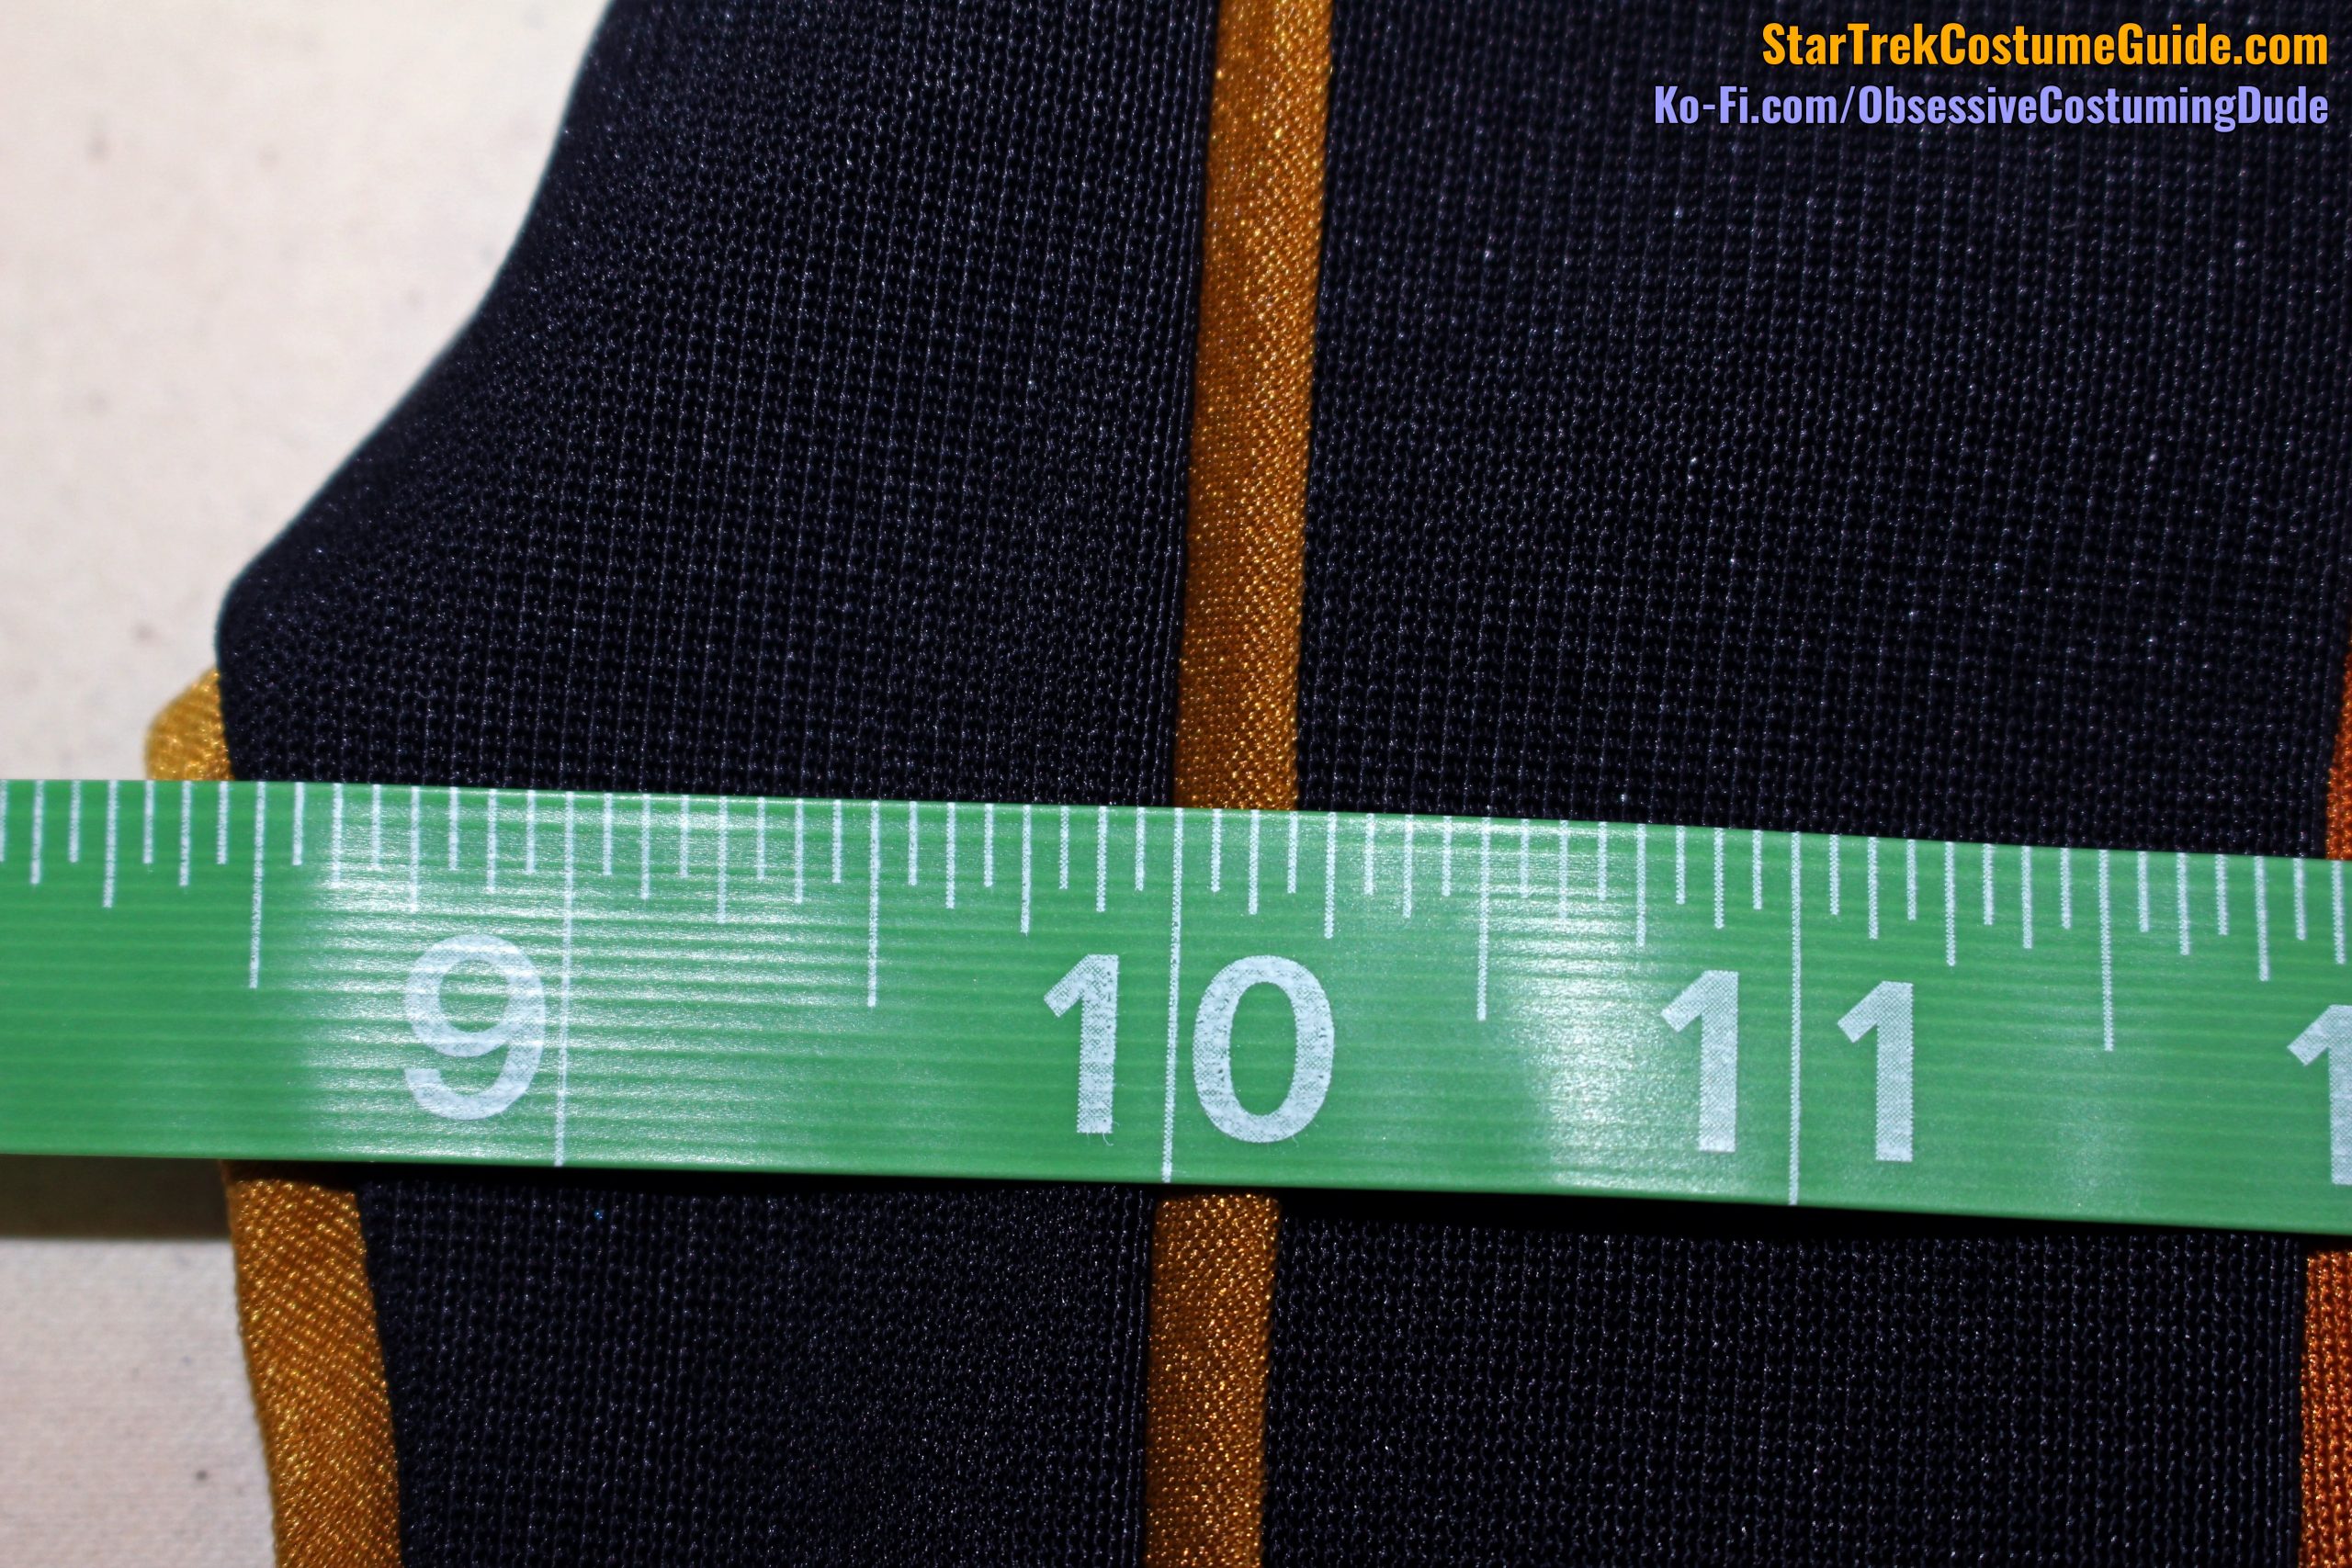
The front yoke extended onto the upper sleeve approximately 4 ½”.
sing the horizontal “weave” of the jumbo spandex as a guide, we can observe that the lower edge of the front yoke wasn’t cut straight, but it curved gently downward away from center.
The front yoke curved downward about ½” from center front to armscye.
It continued to slightly curve onto the sleeve, although the sleeve actually curved outward, which is part of what gives those sleeves their “bell” shape.
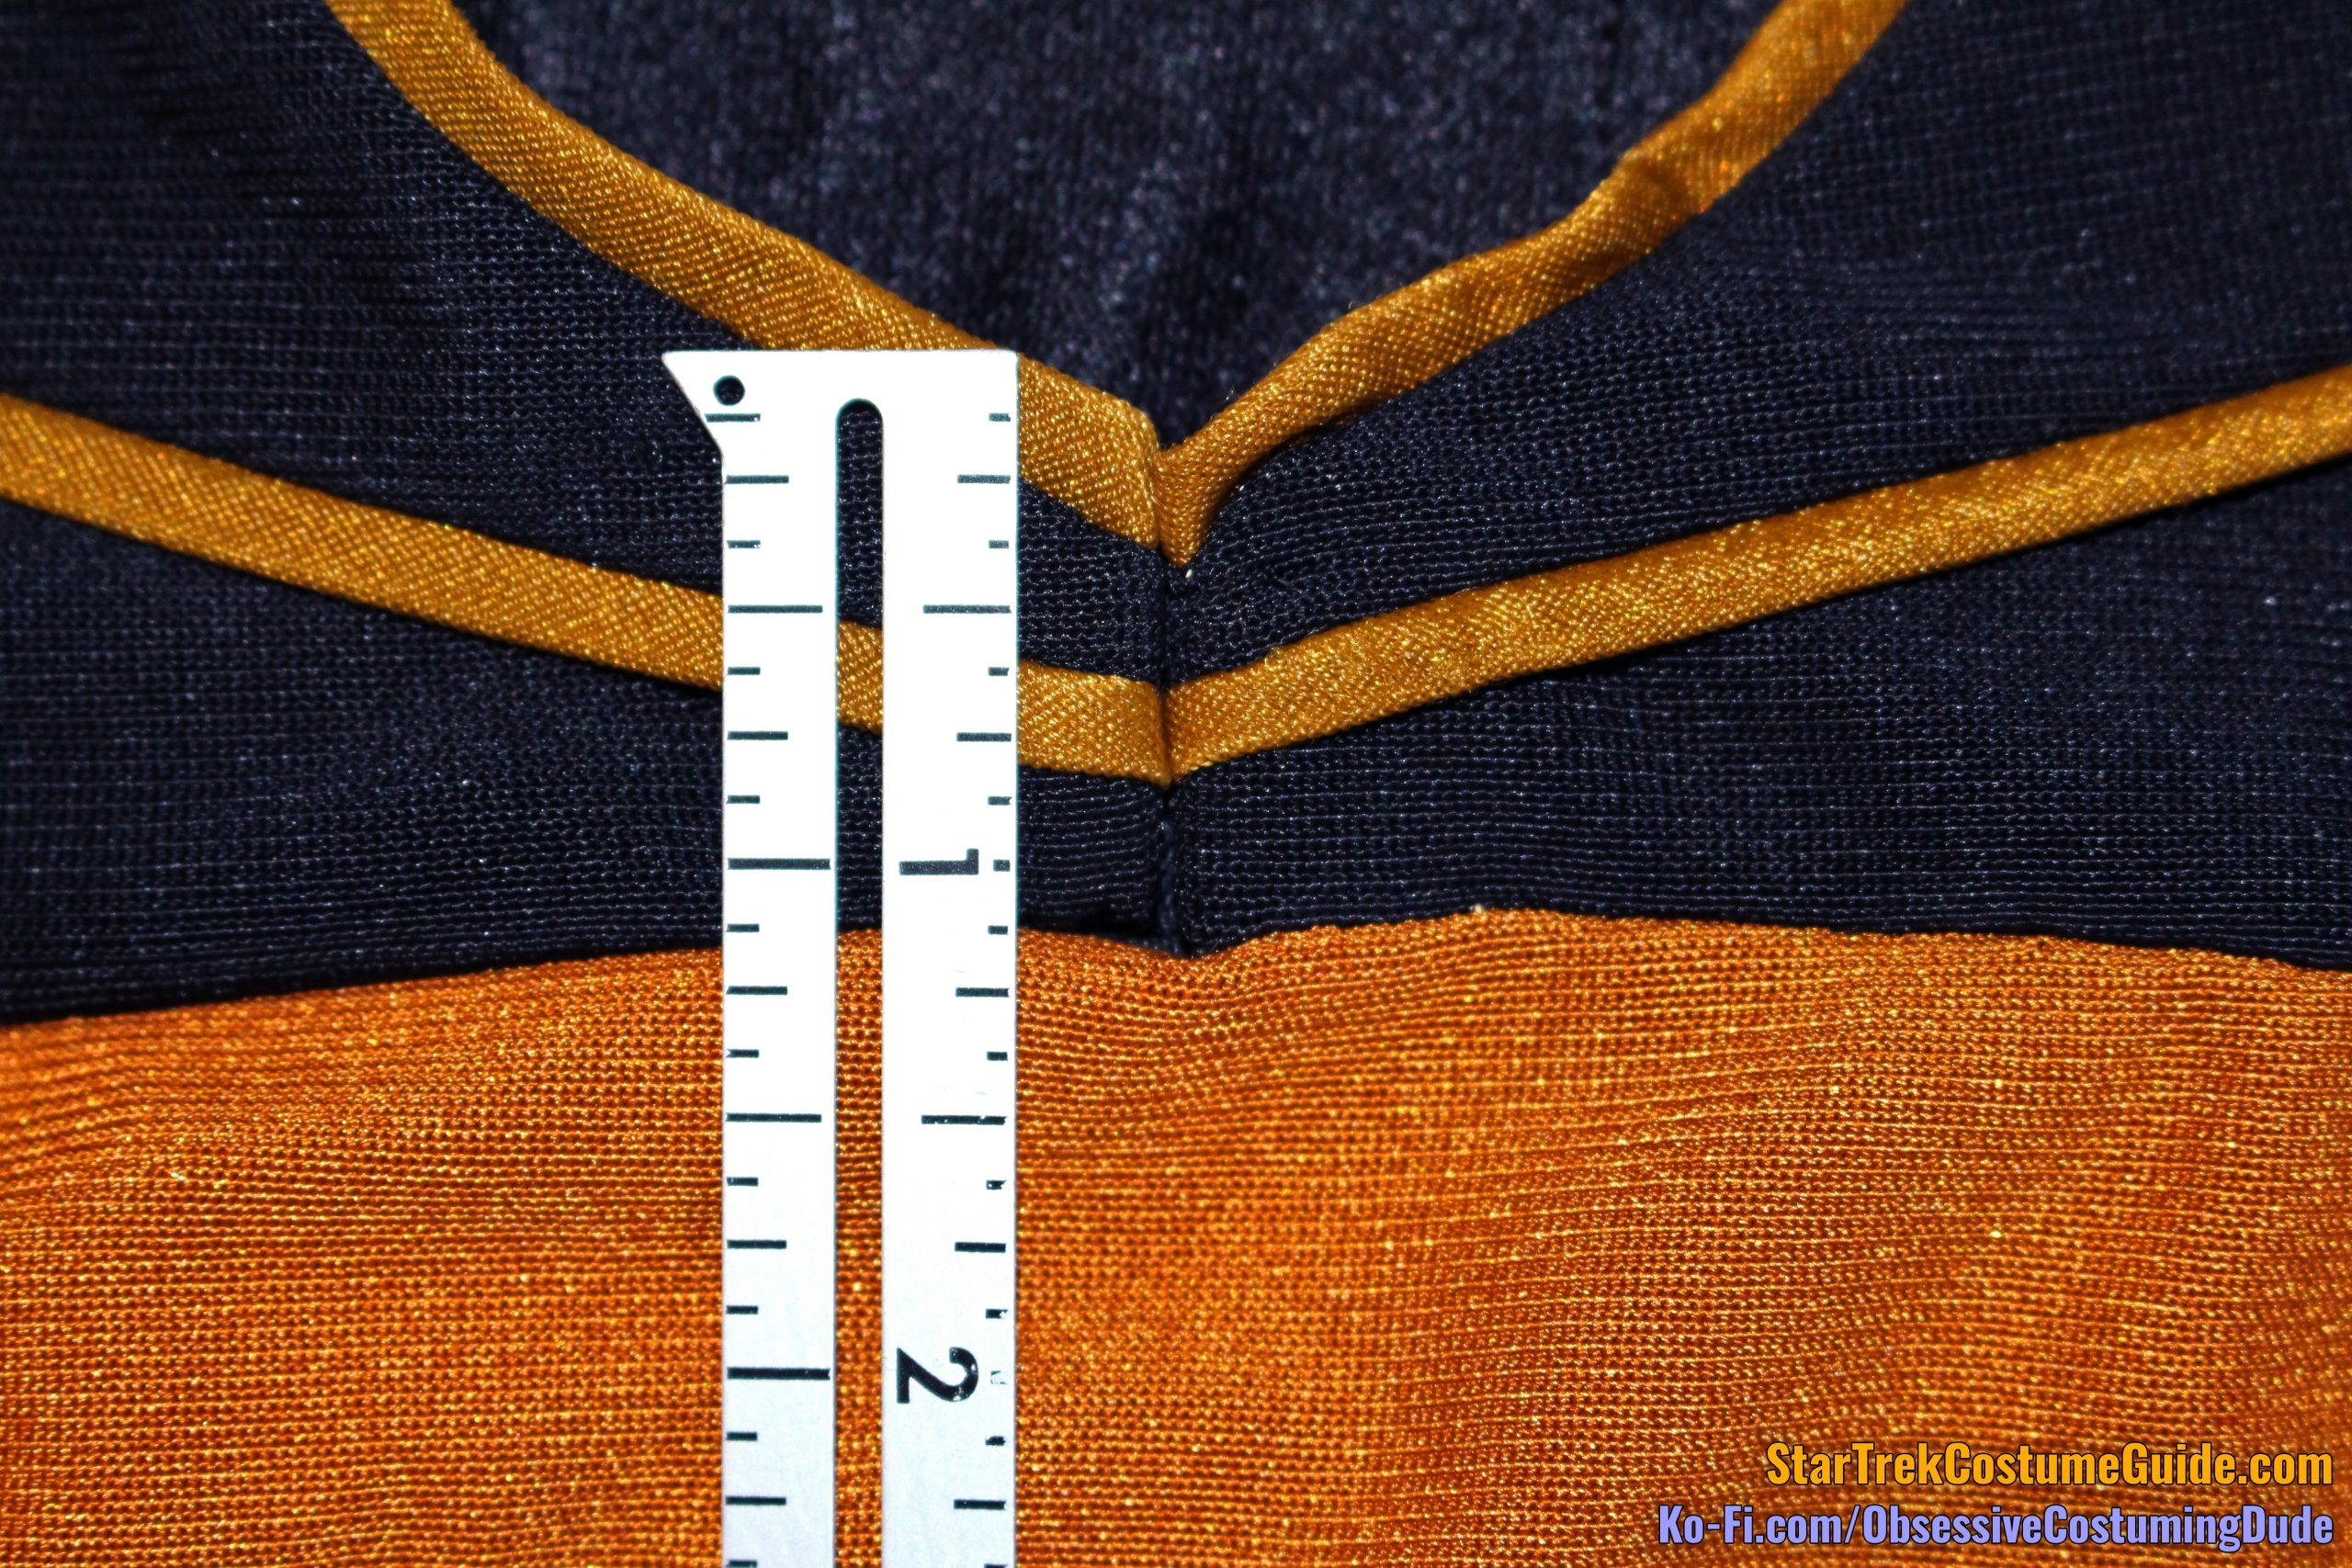
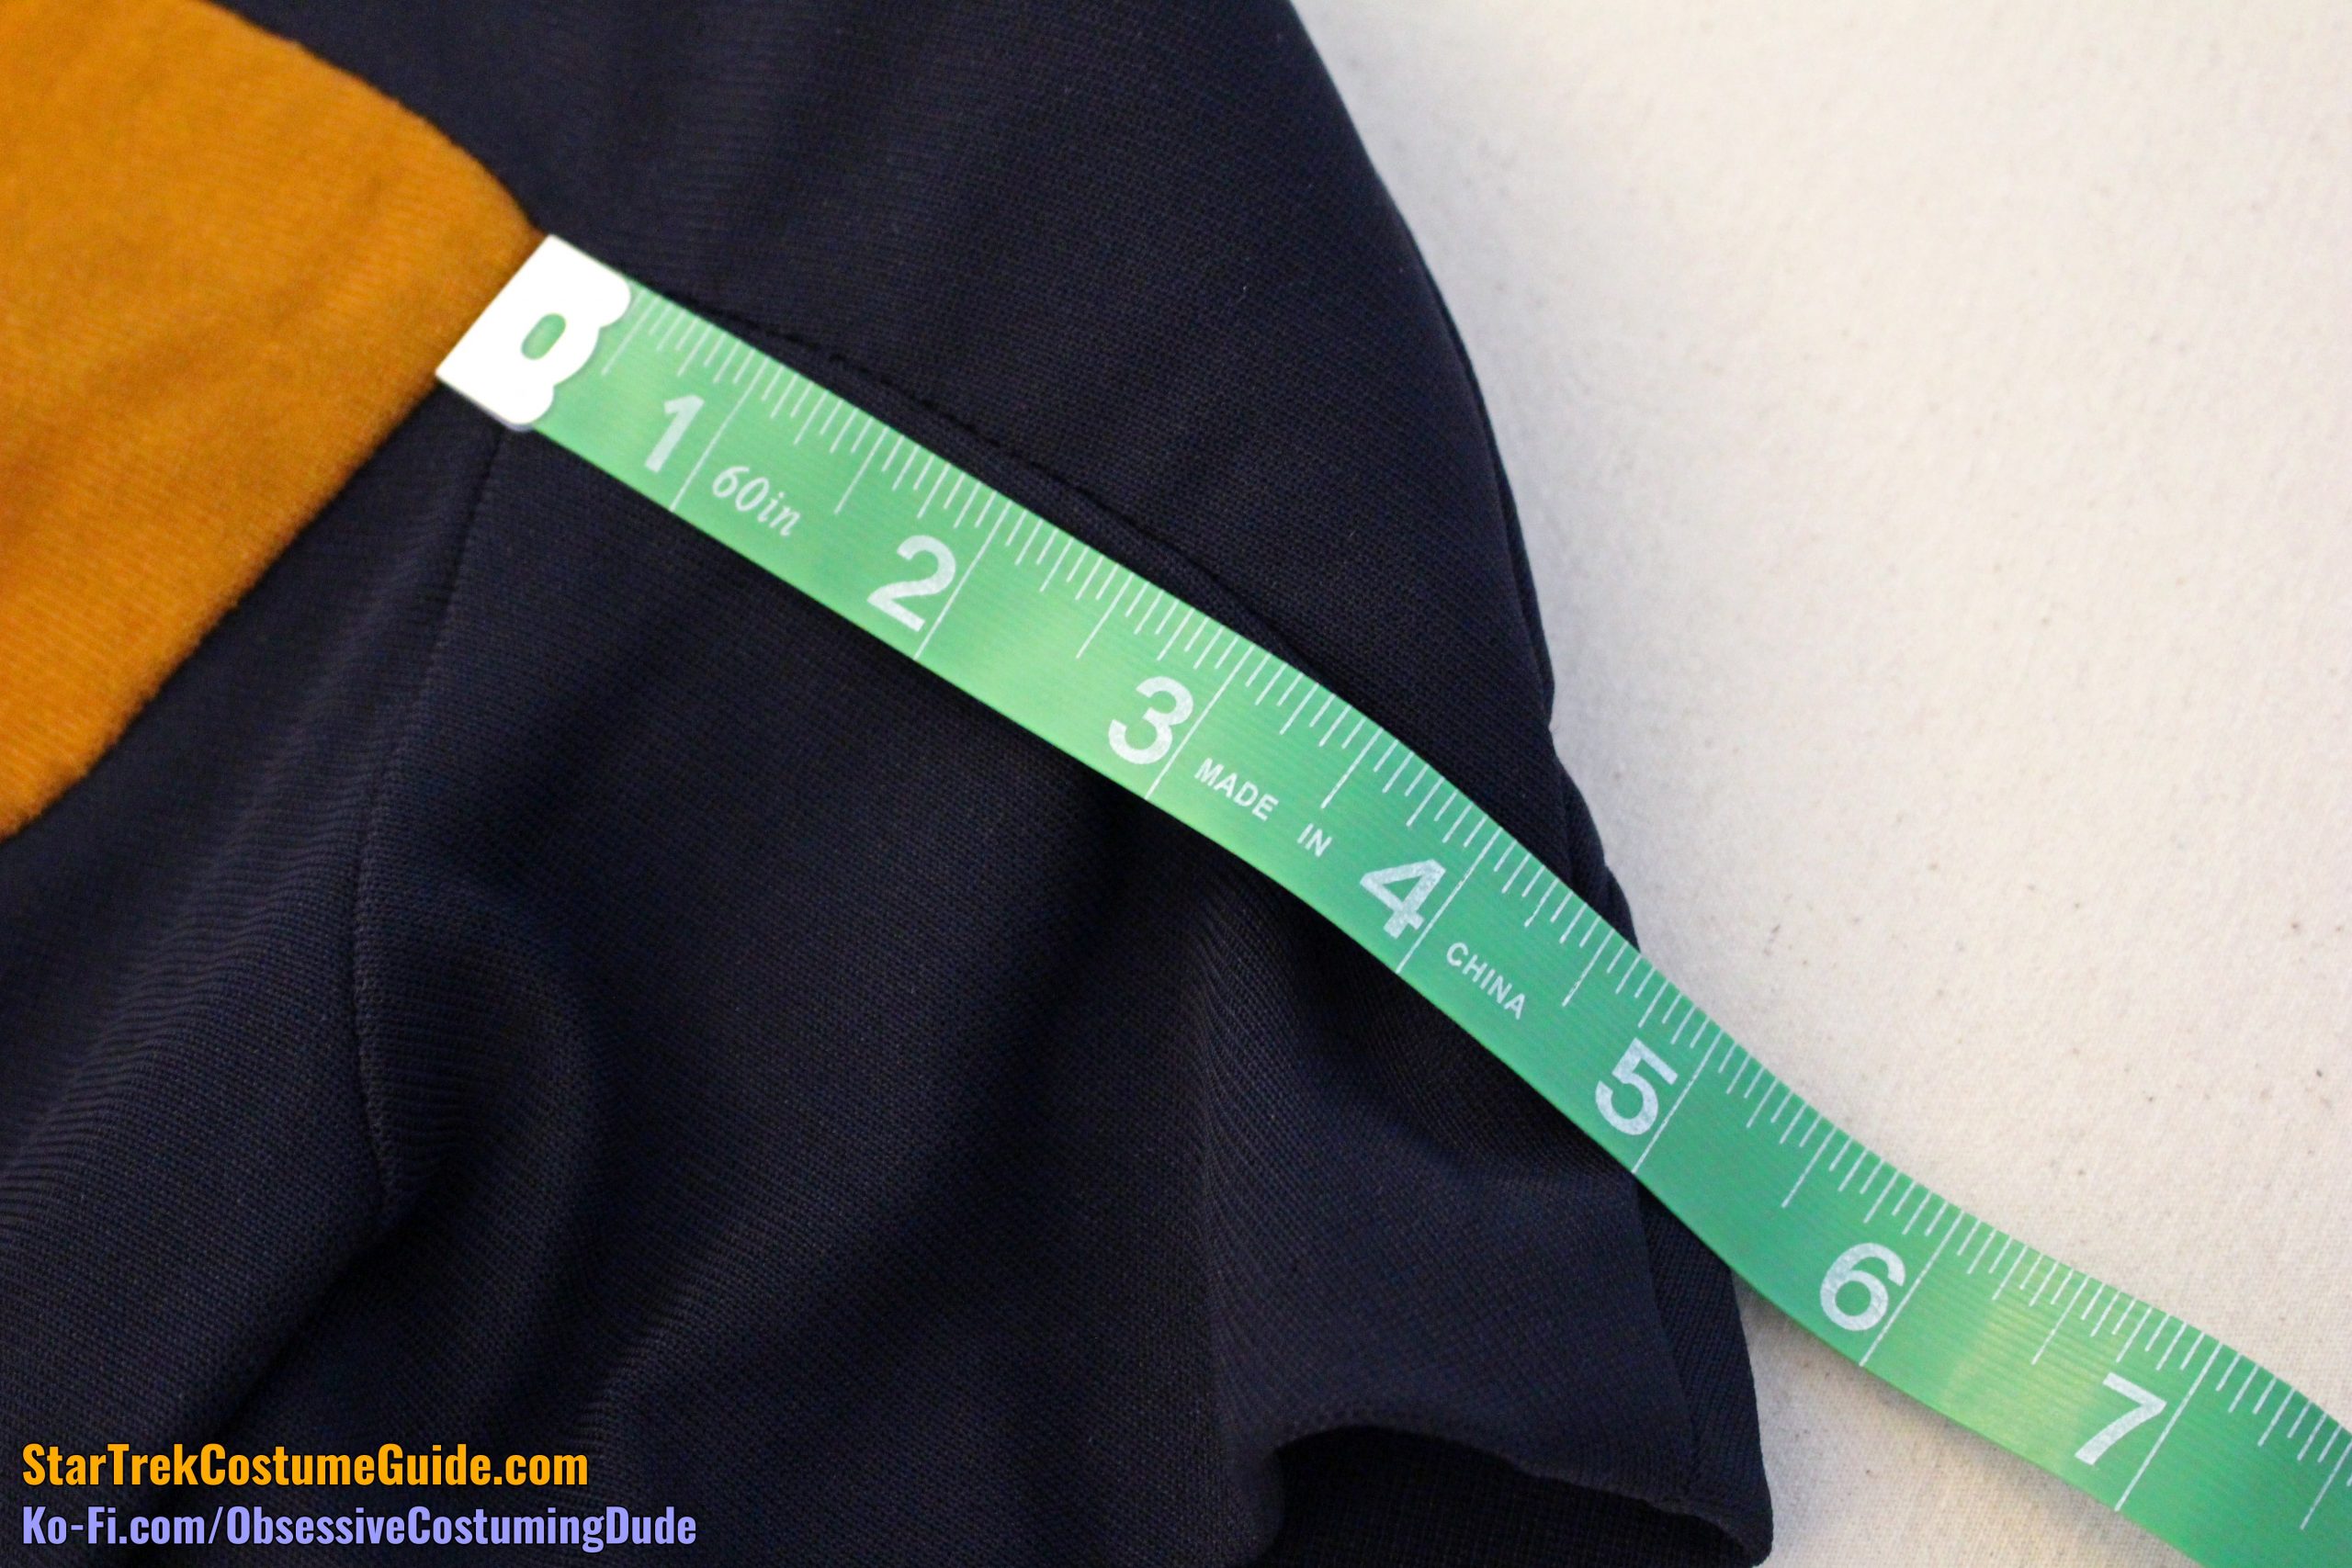
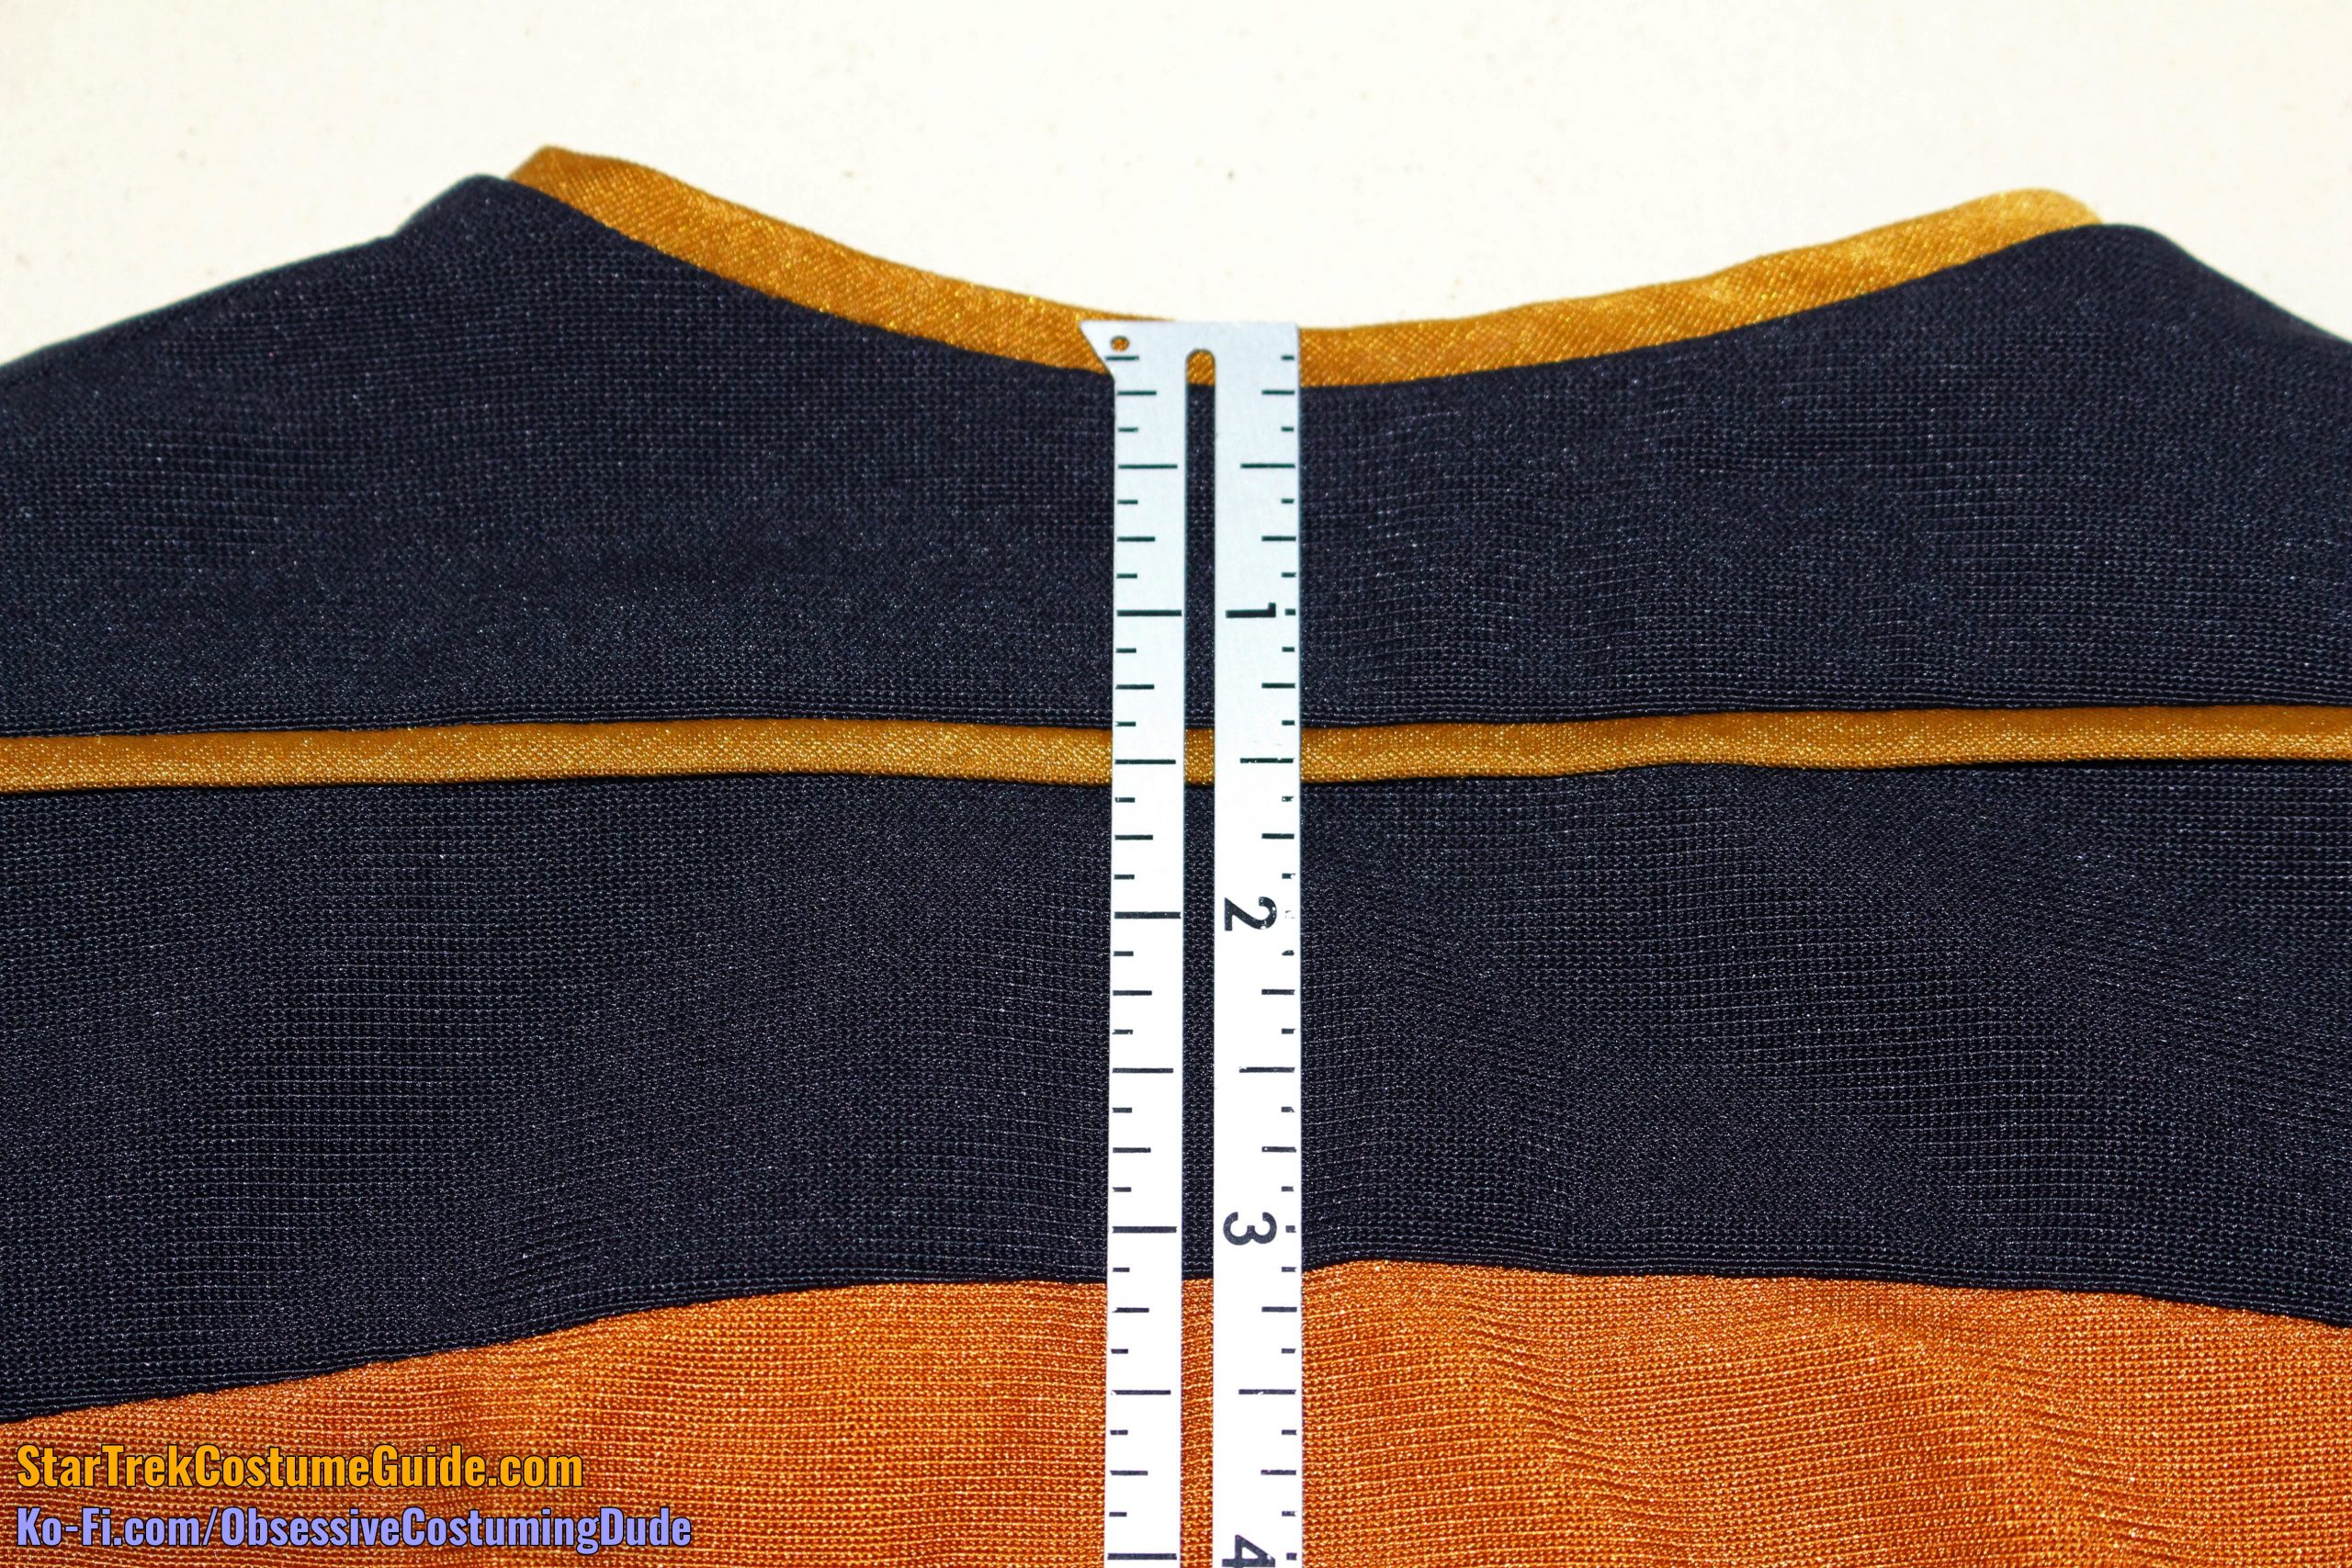
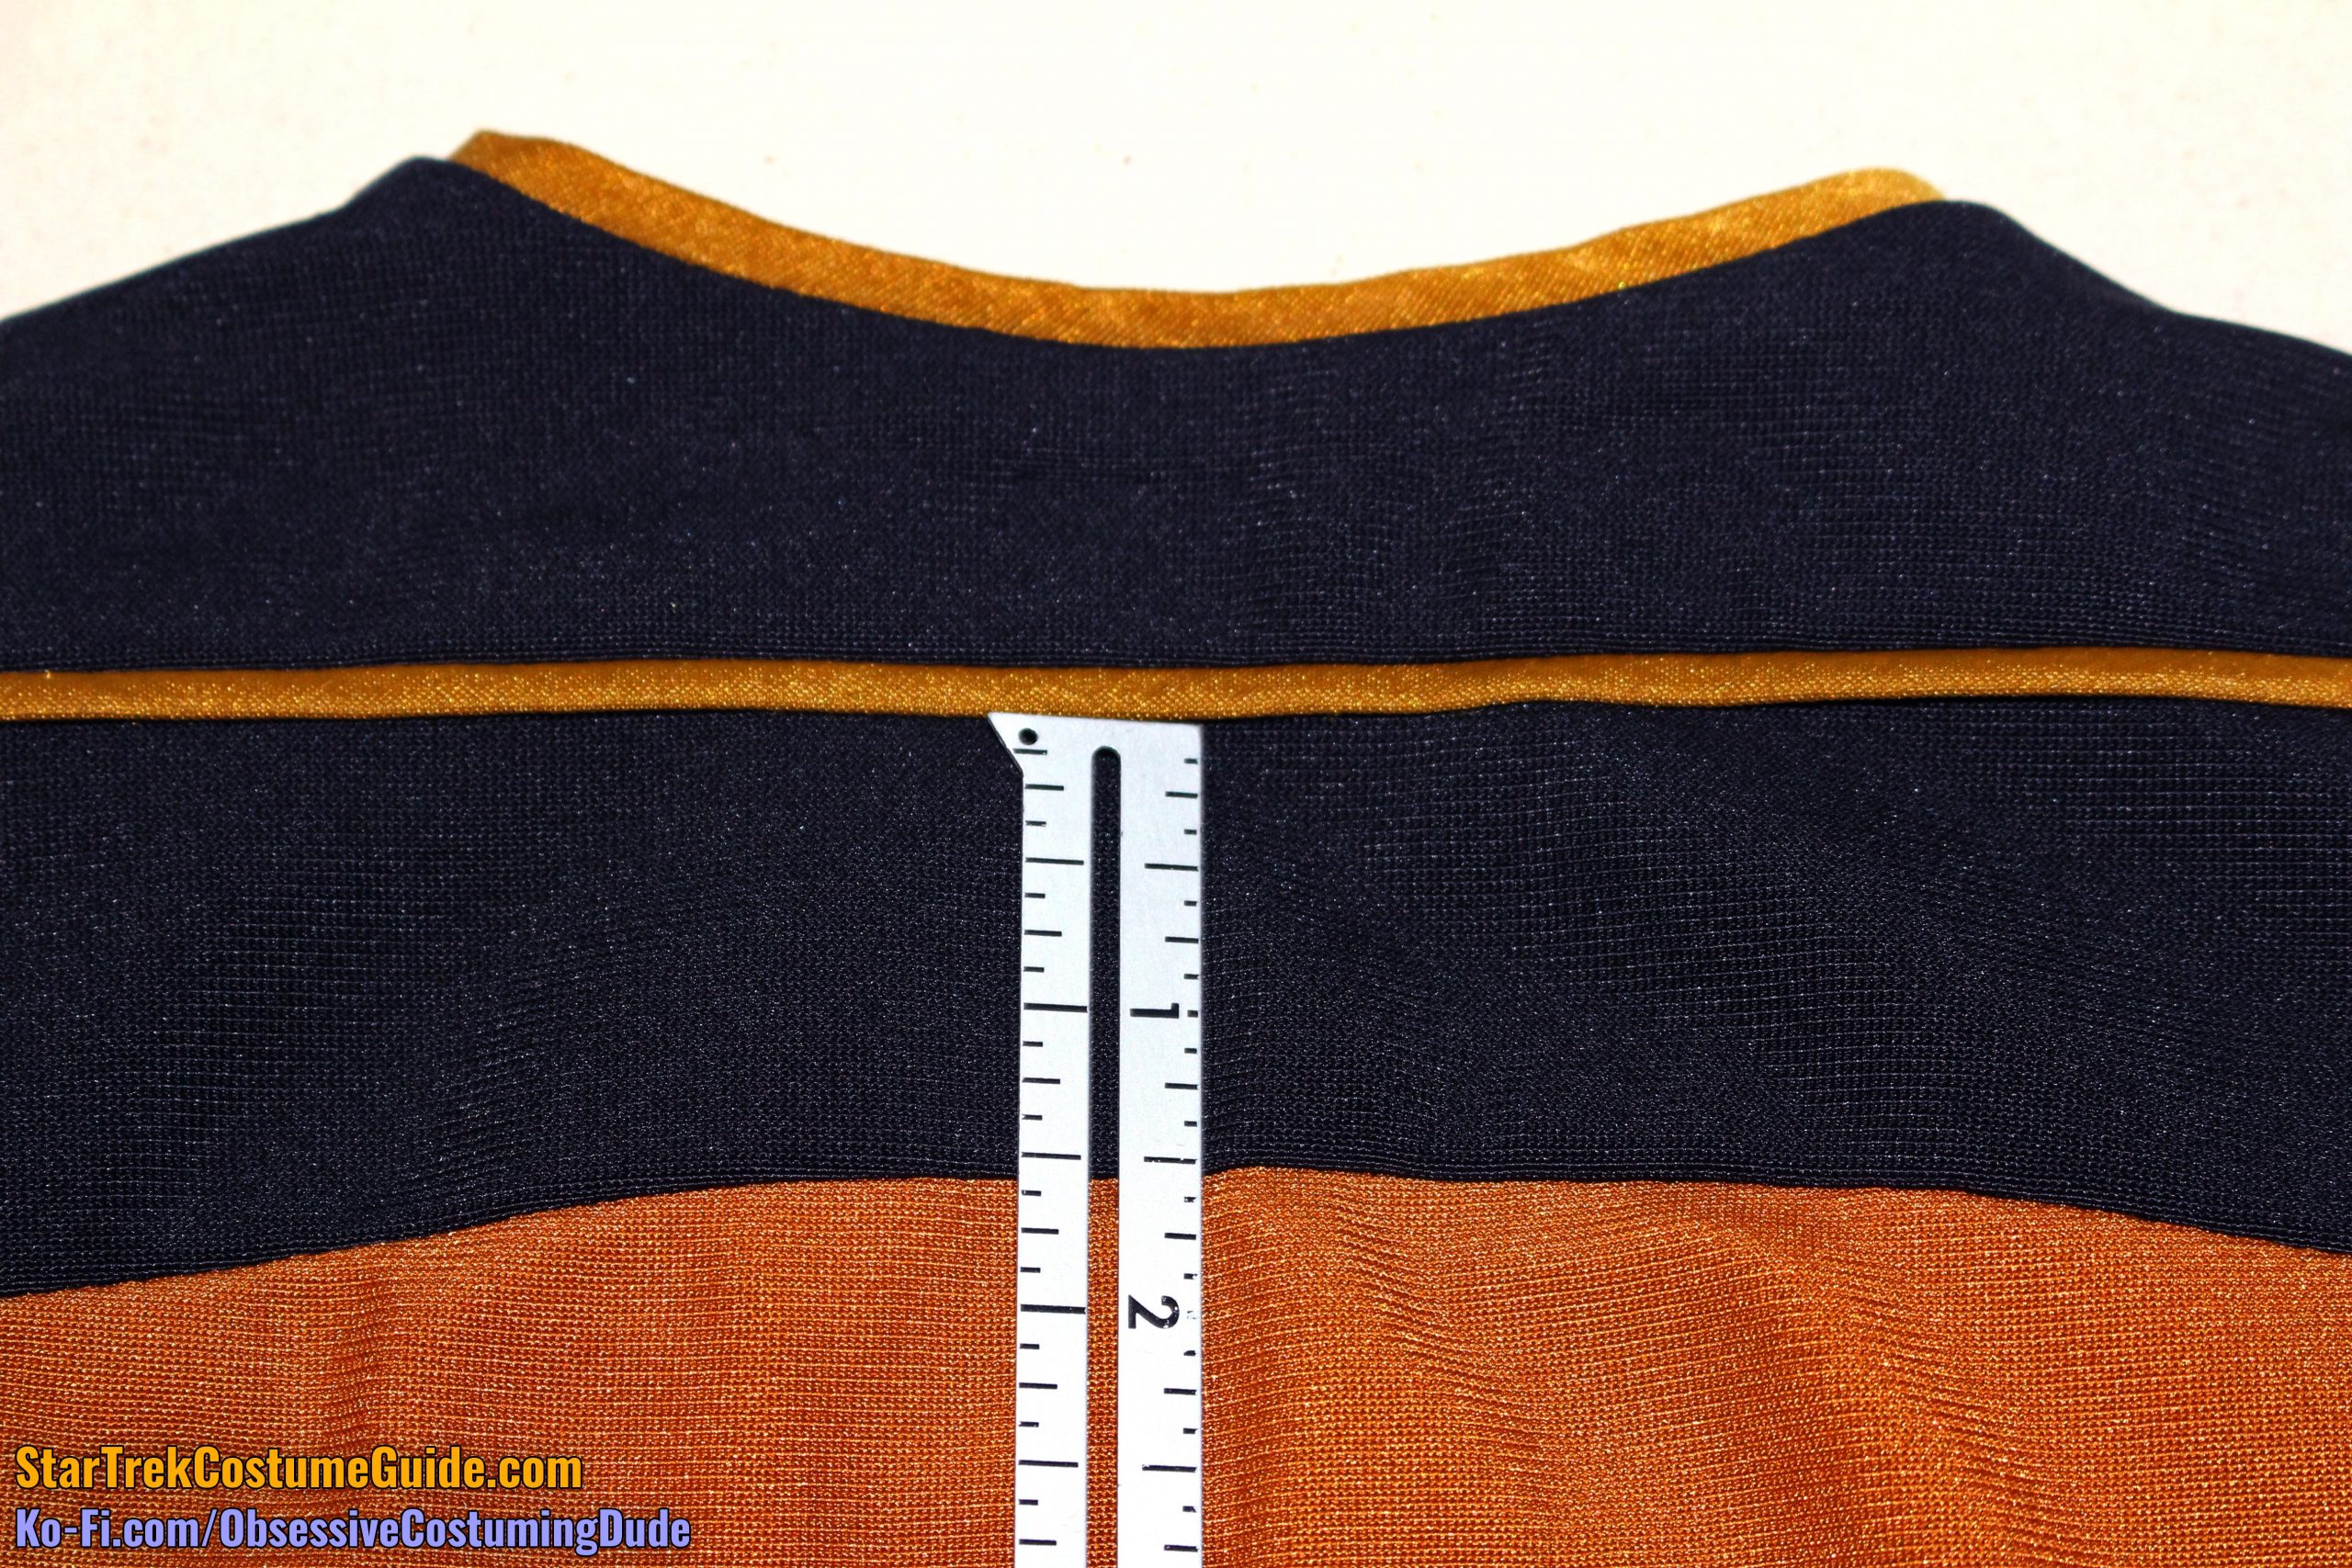
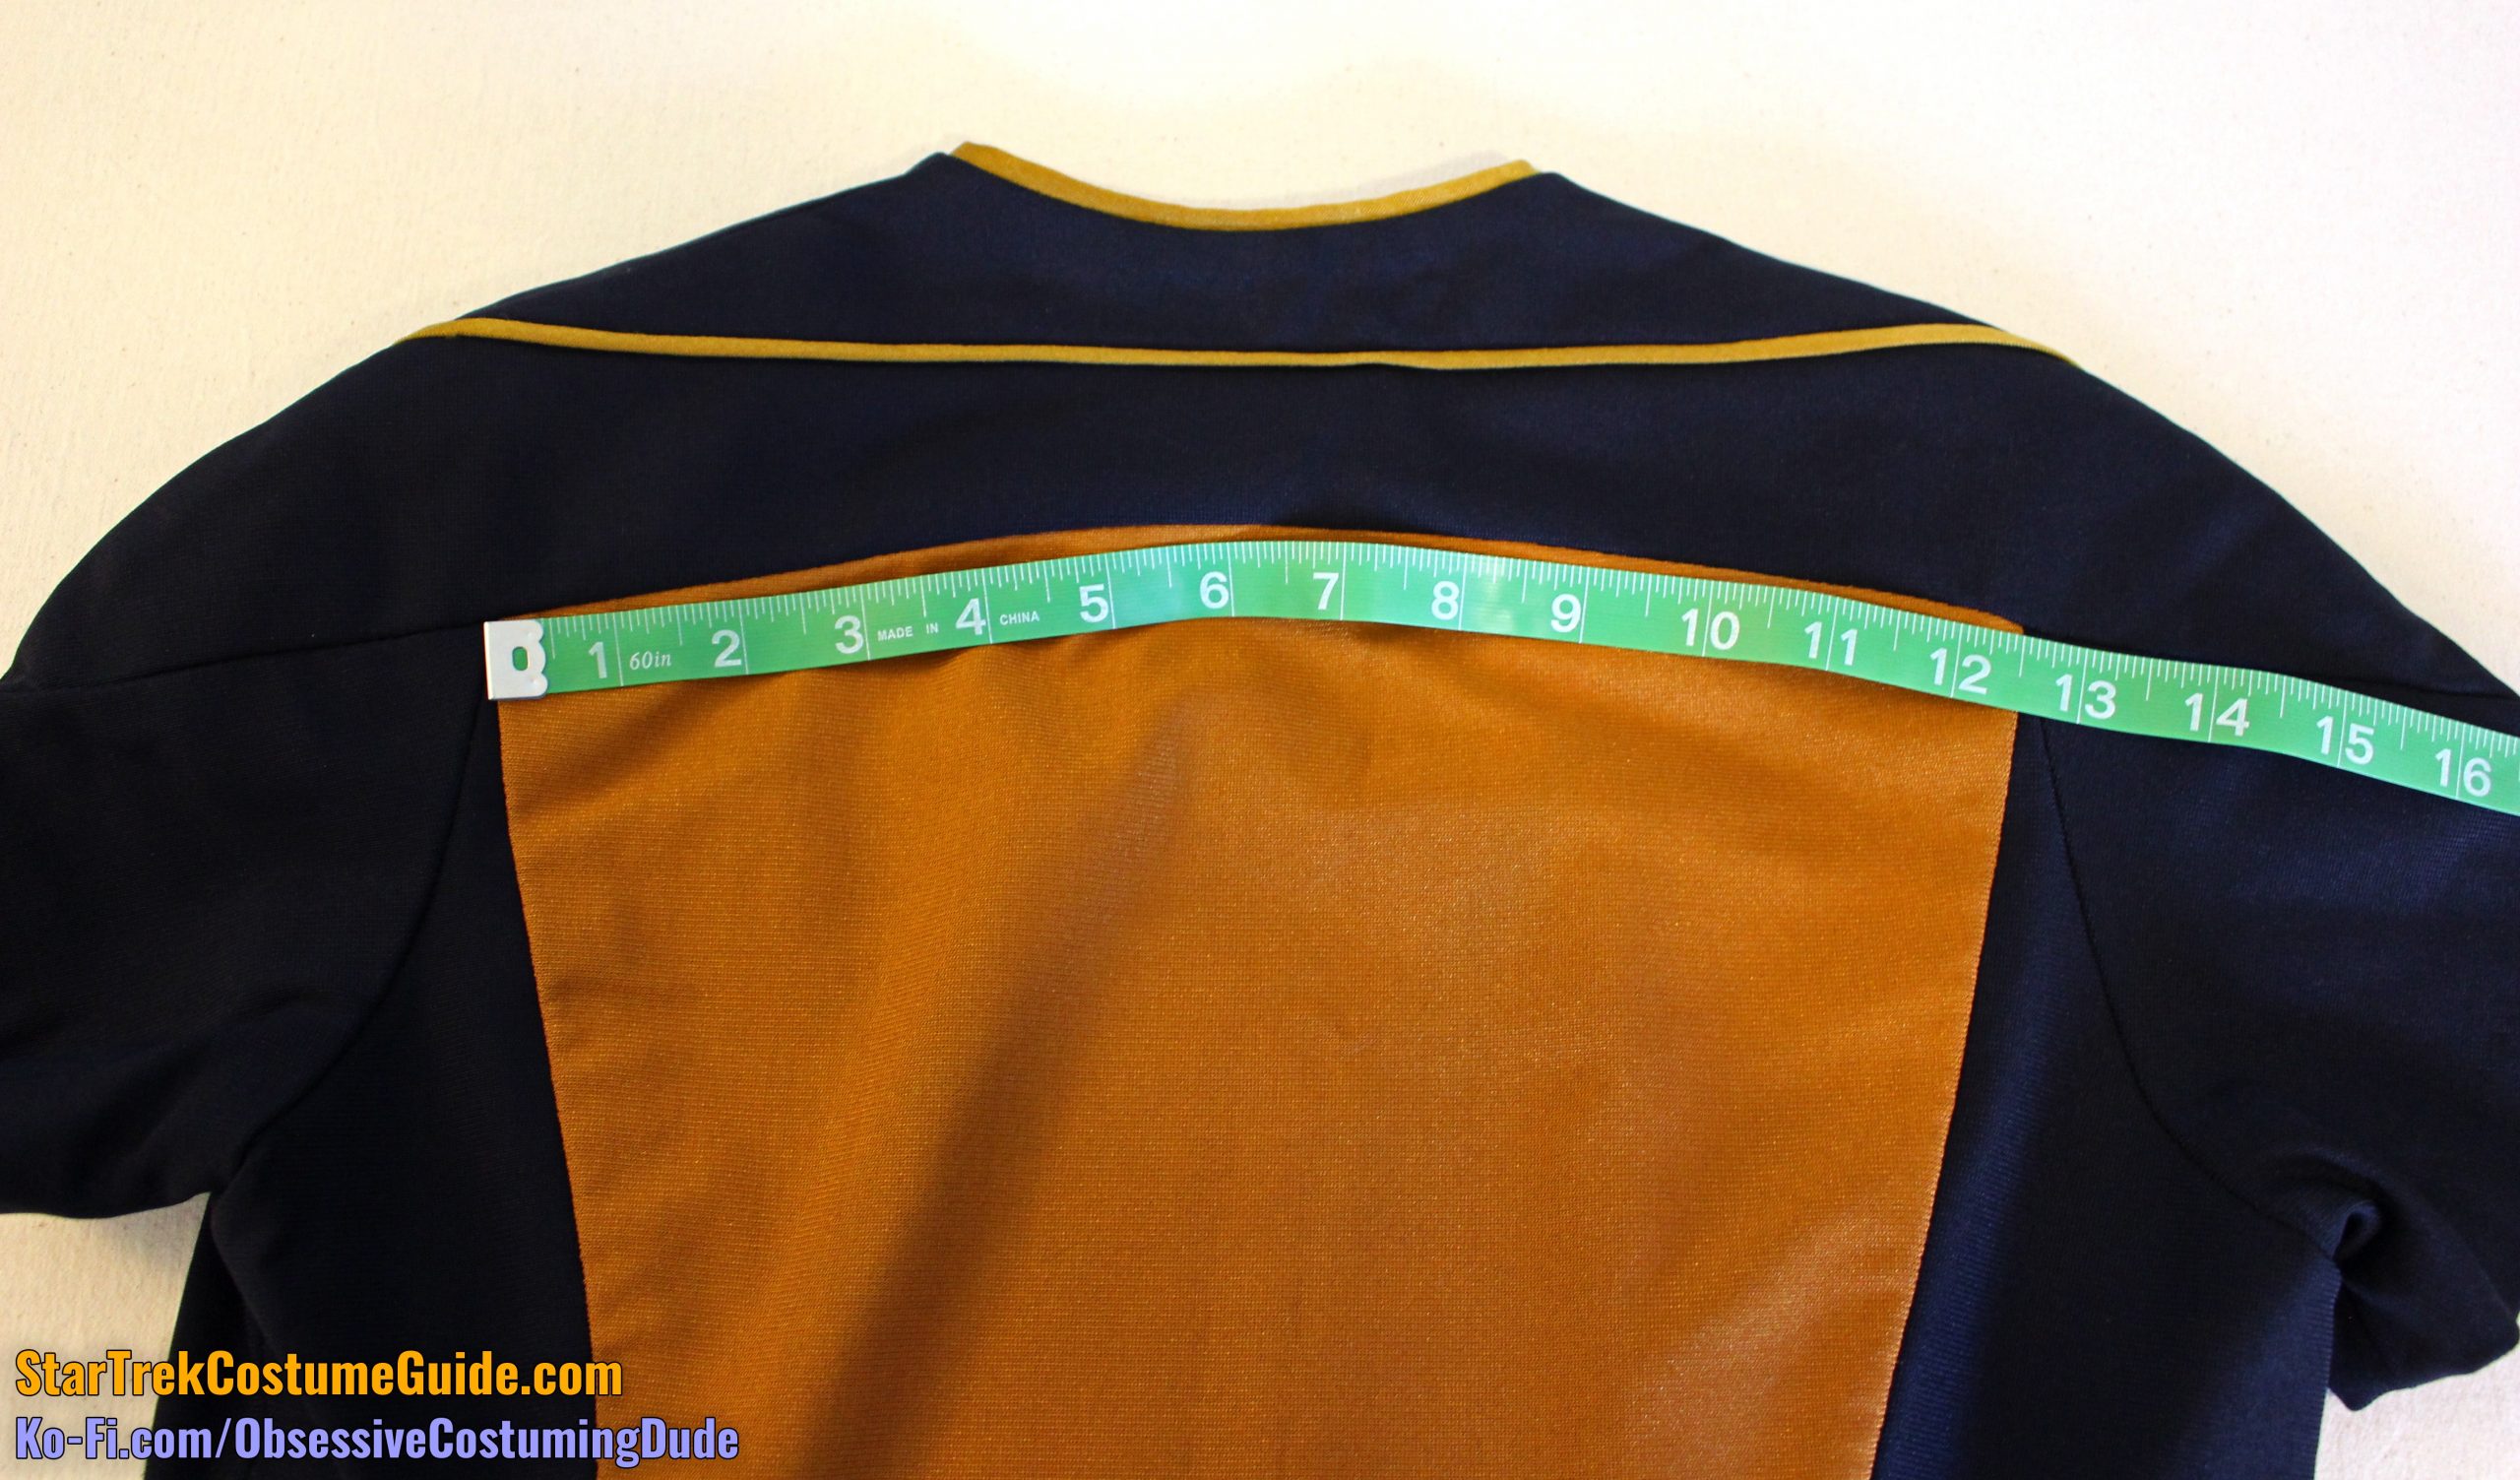
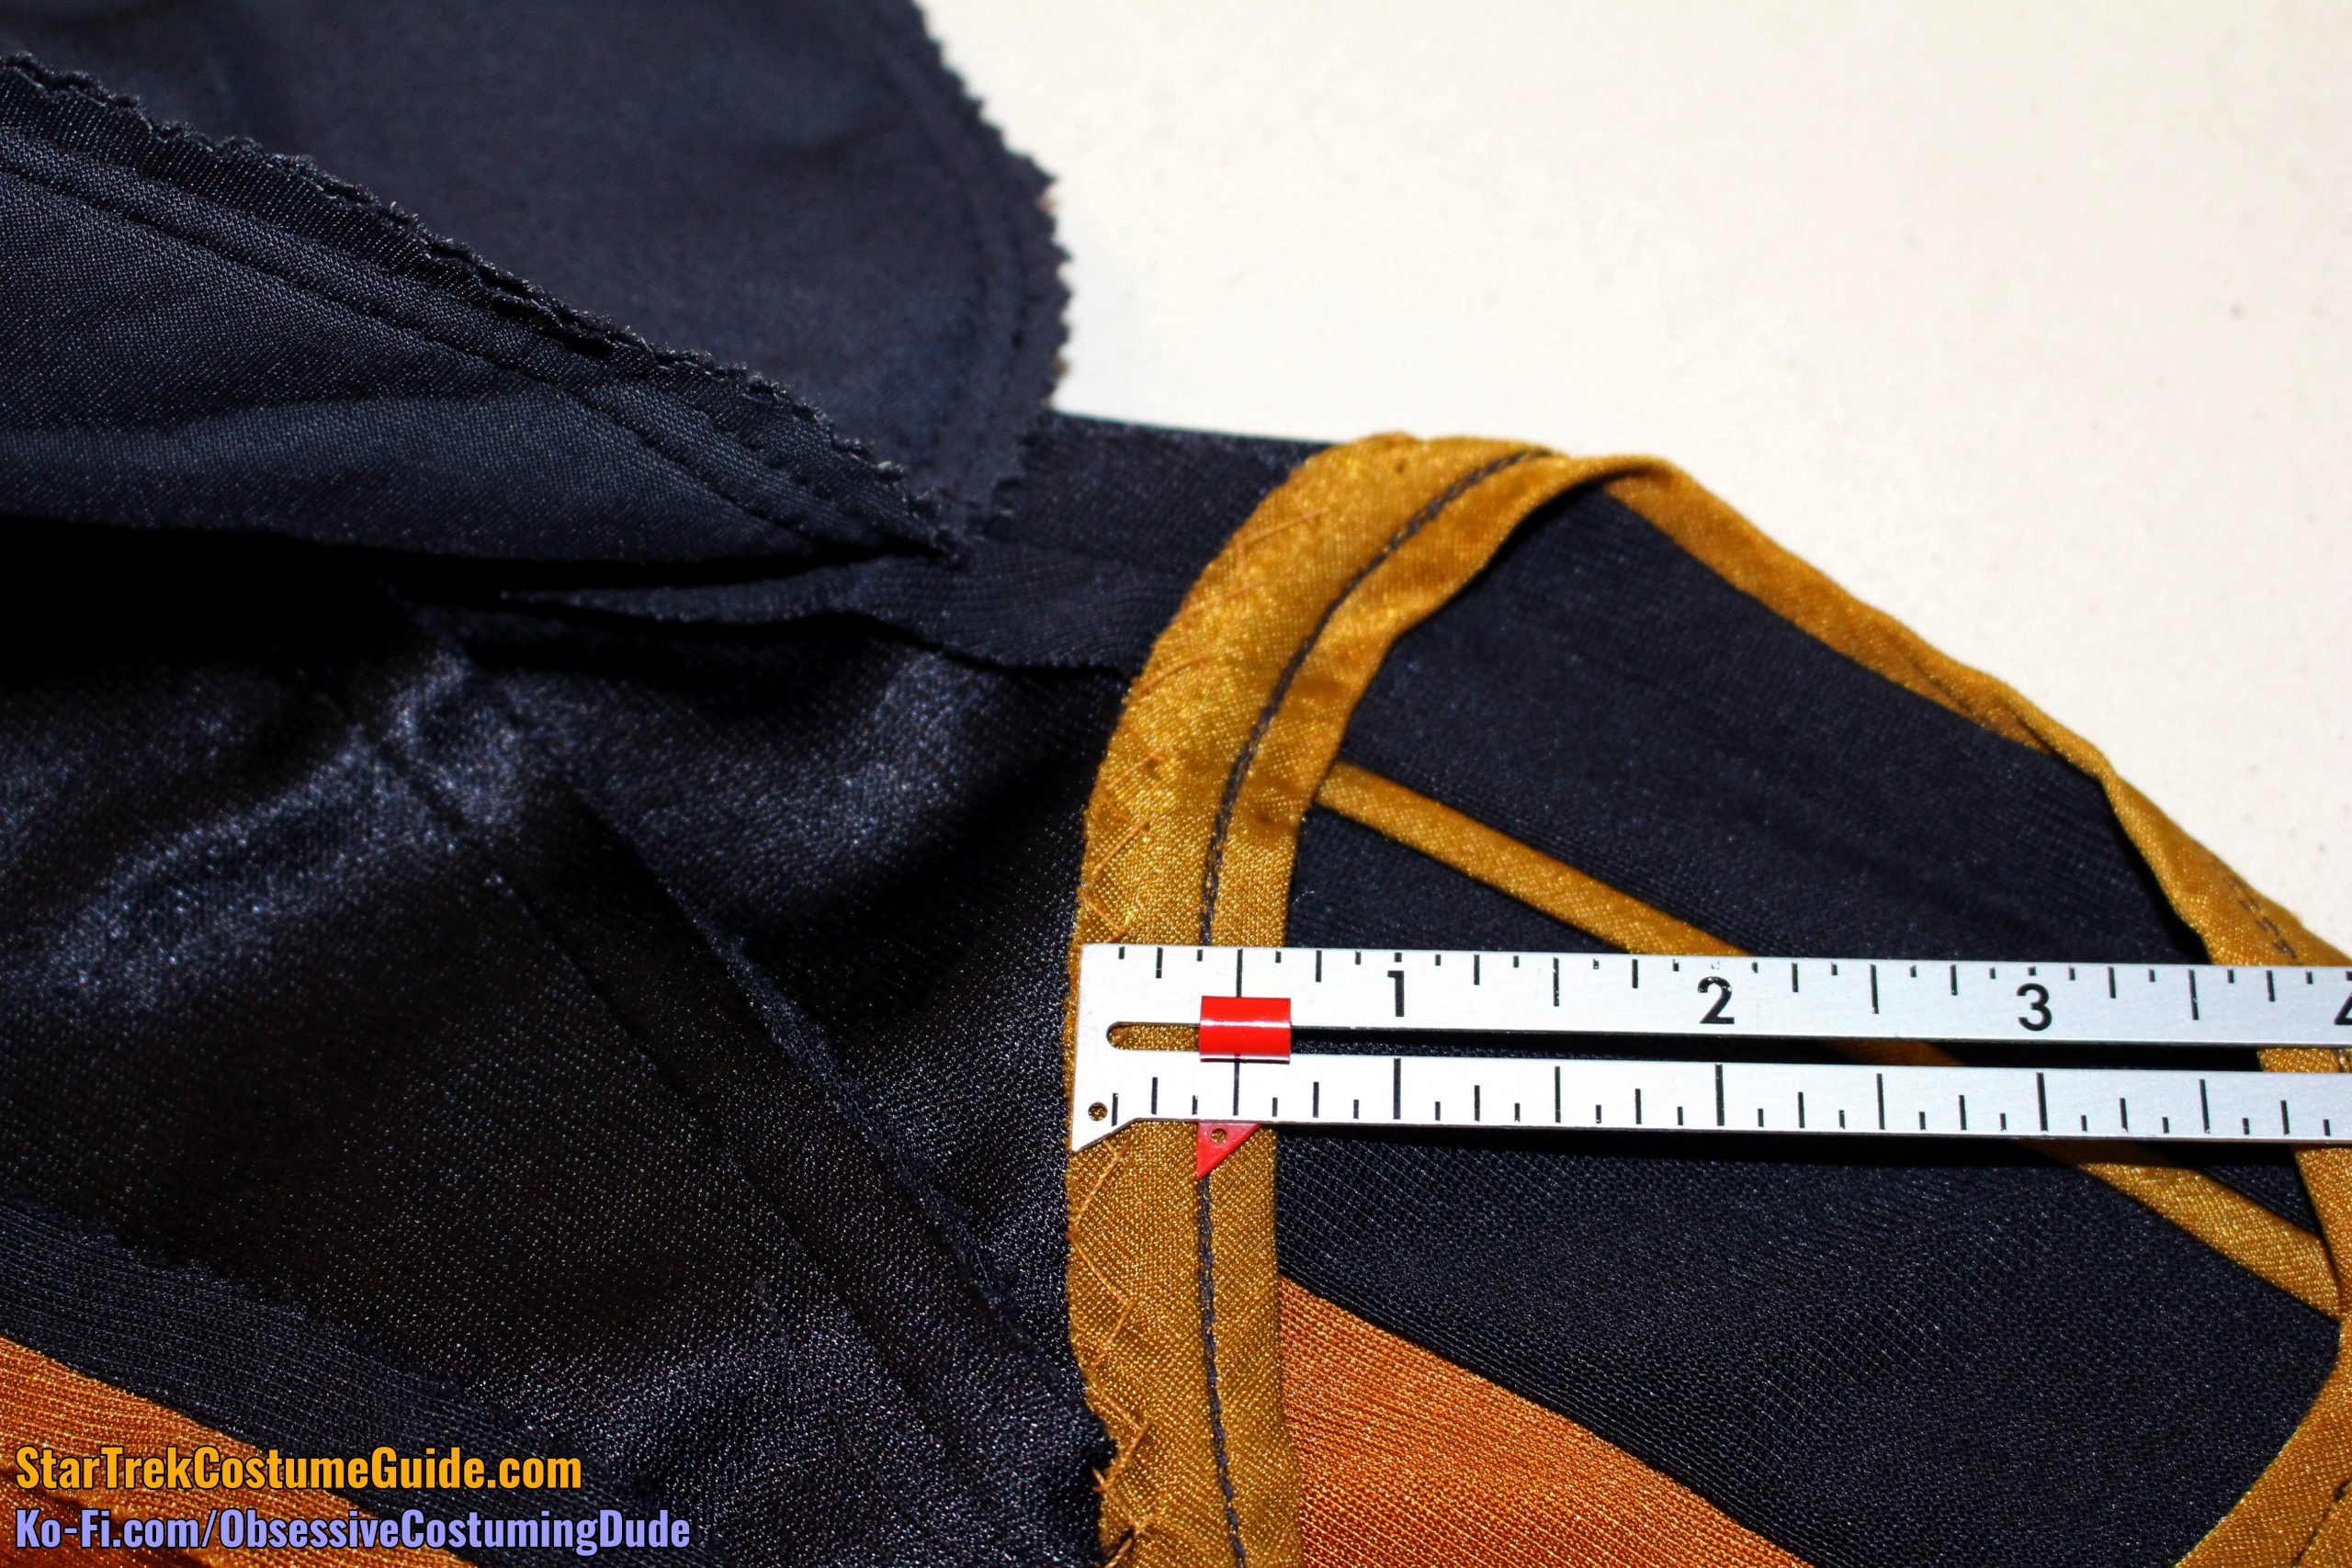
The back yoke was 3 ⅛” deep at the center back, including the neckline trim.
The dimensional allocation of the back yoke was: slightly over 1 ⅛” upper yoke, 3/16” yoke piping, and approximately 1 ½” lower yoke.
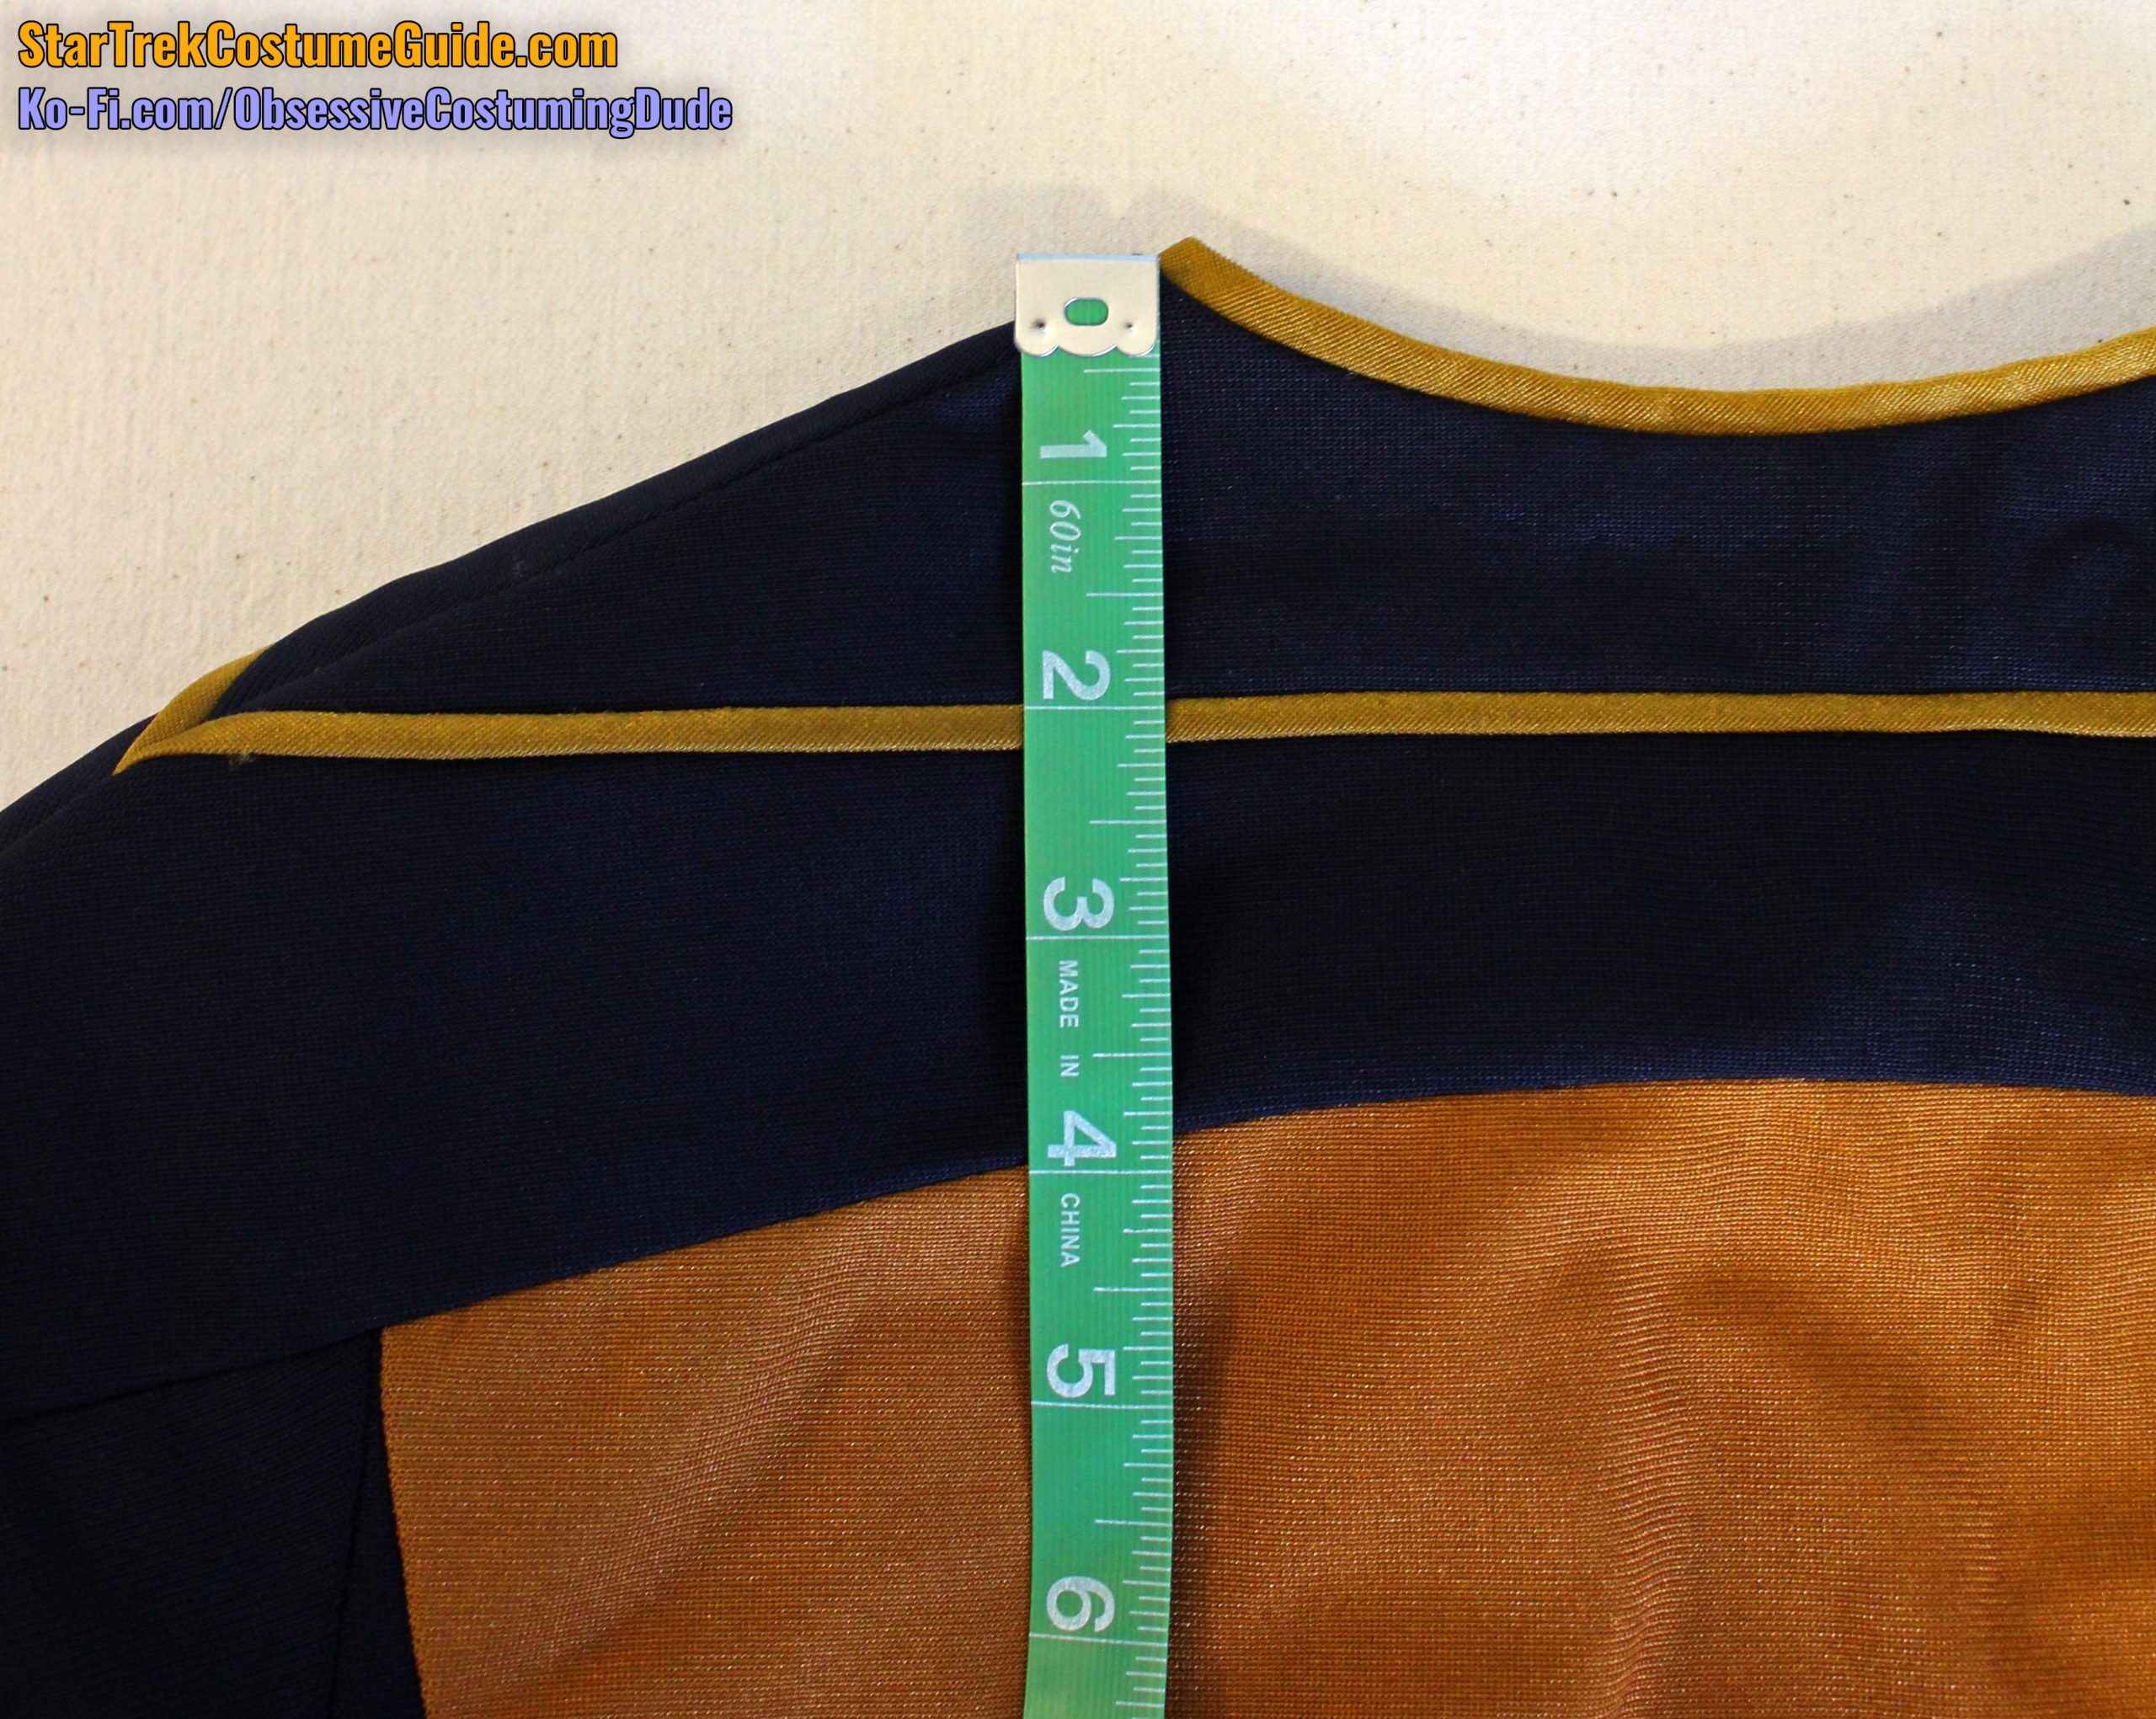
Measured from the neckline end of the shoulder seam, the back yoke was 3 ⅞” deep.
The back yoke also curved downward away from center; like the front, it curved downward ½” from center to armscye.
It also continued to slightly curve onto the sleeve, although the back sleeve’s upper edge also curved outward.
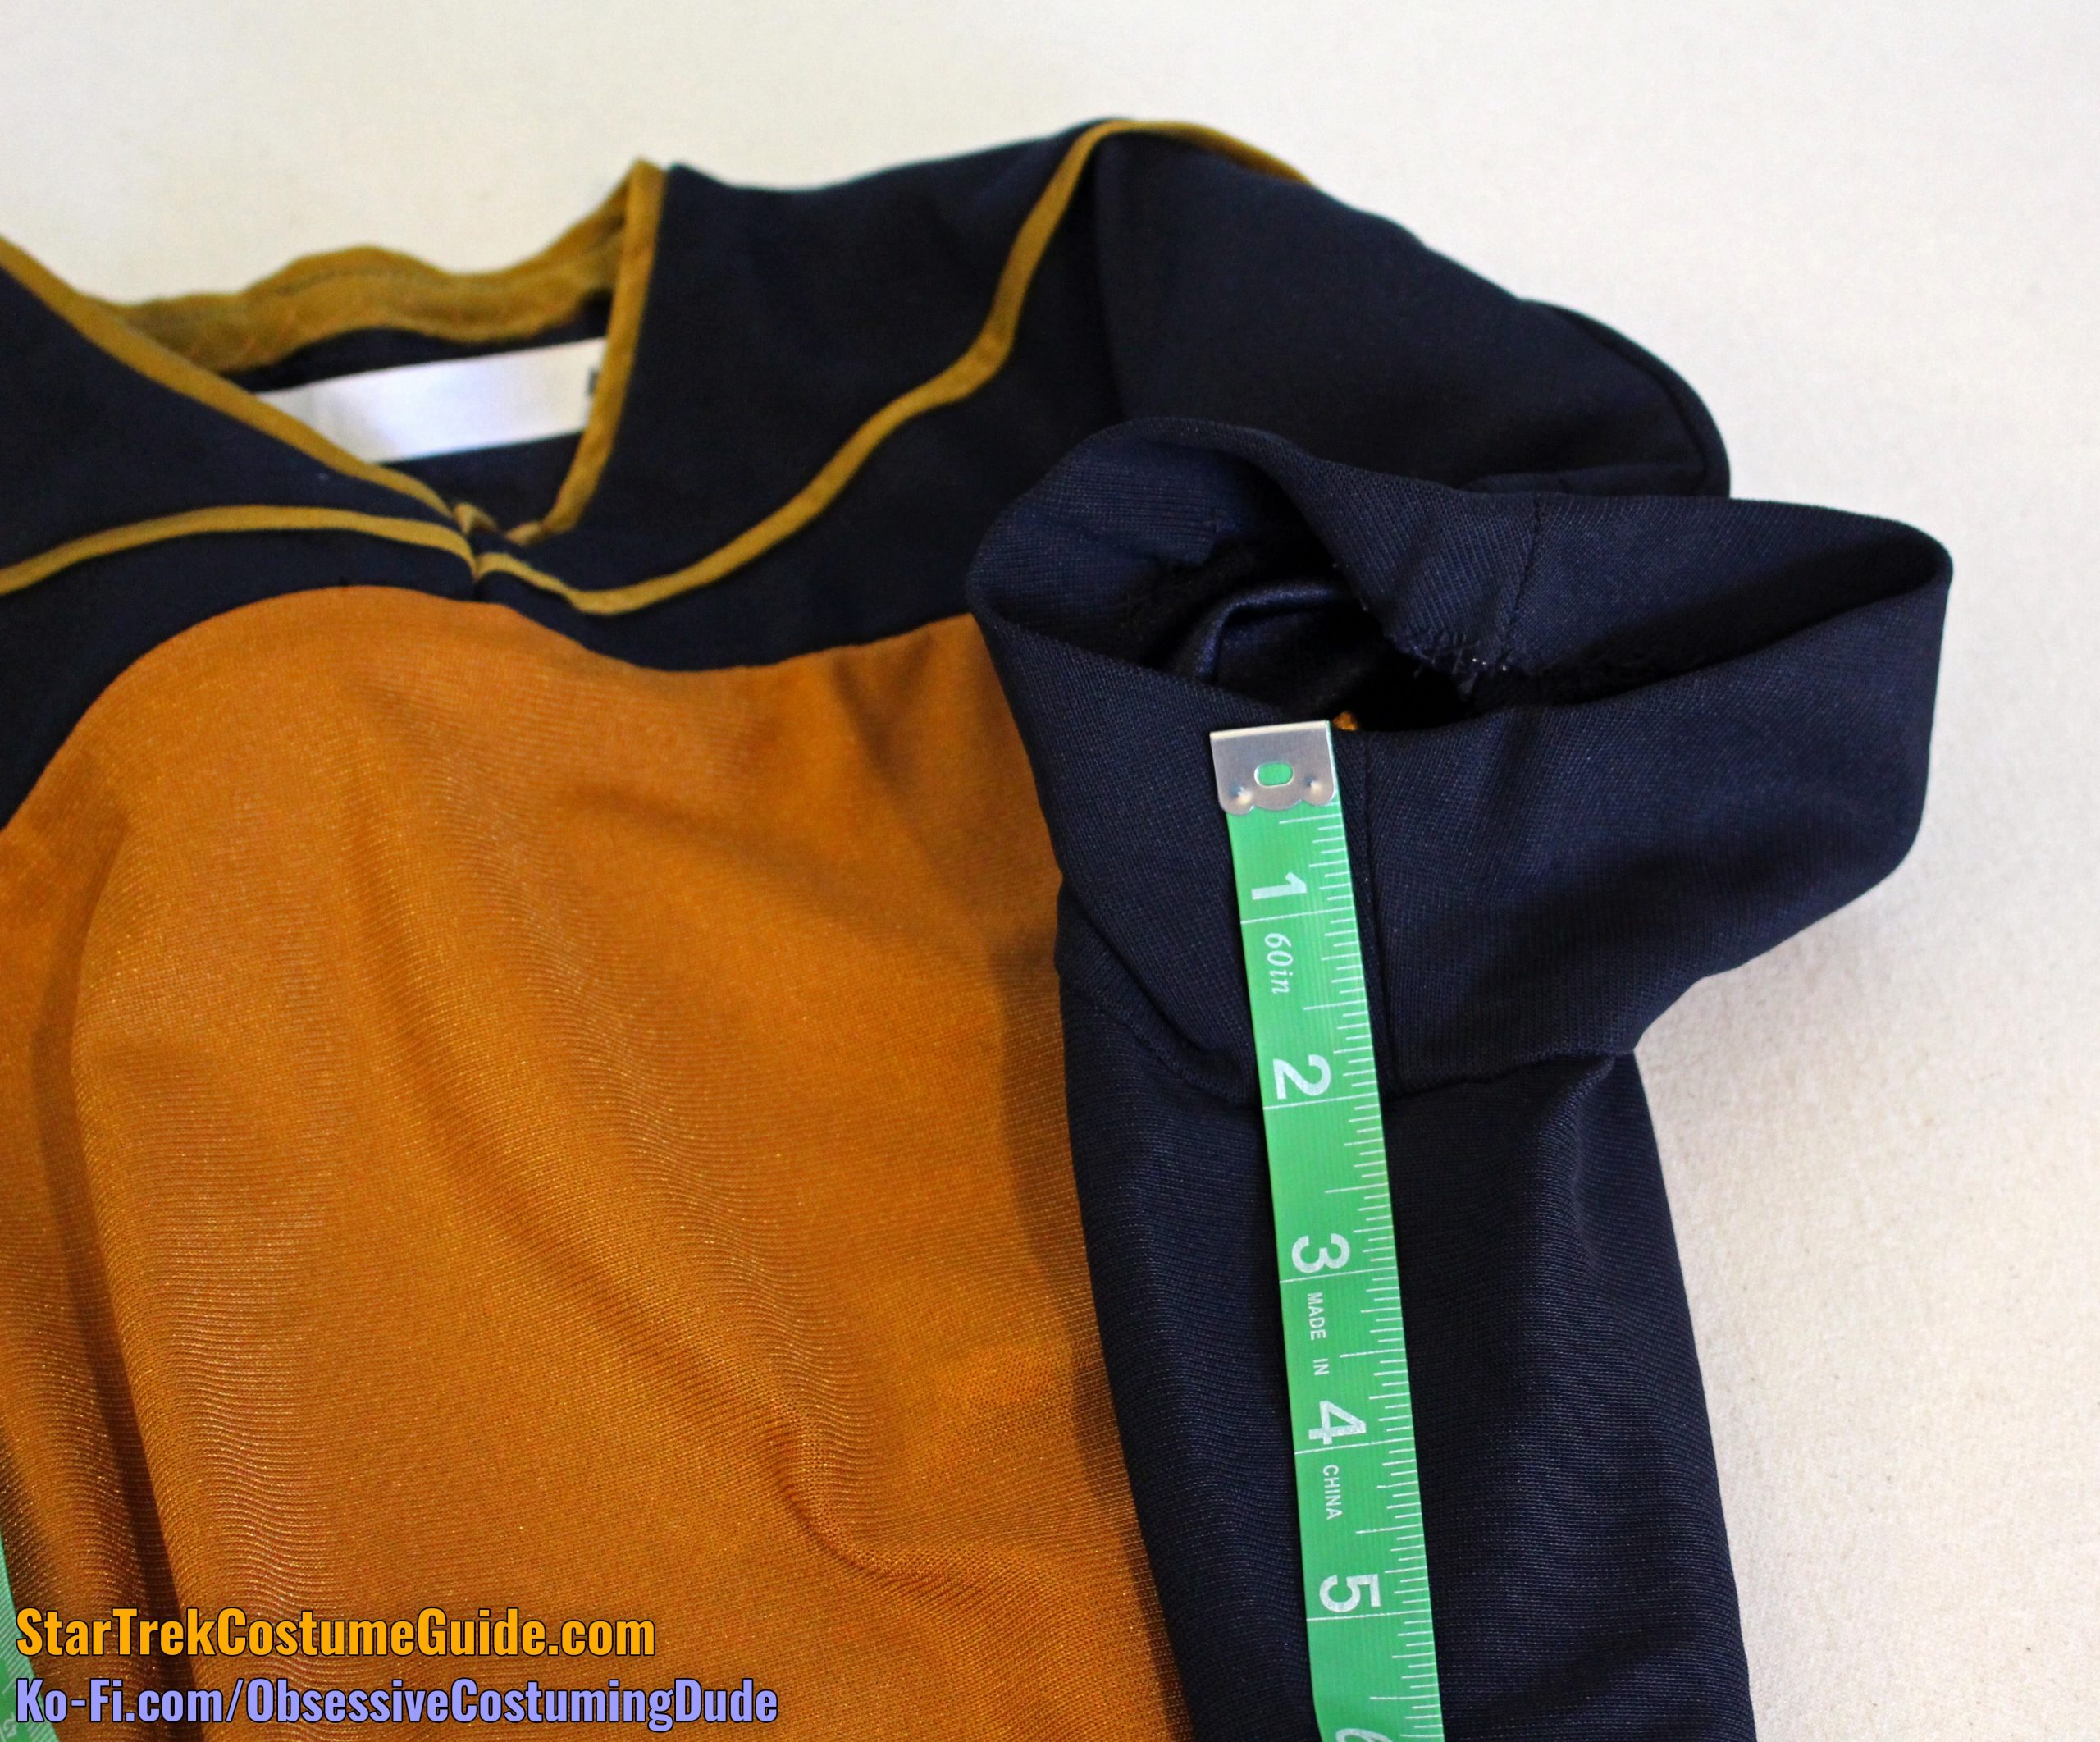
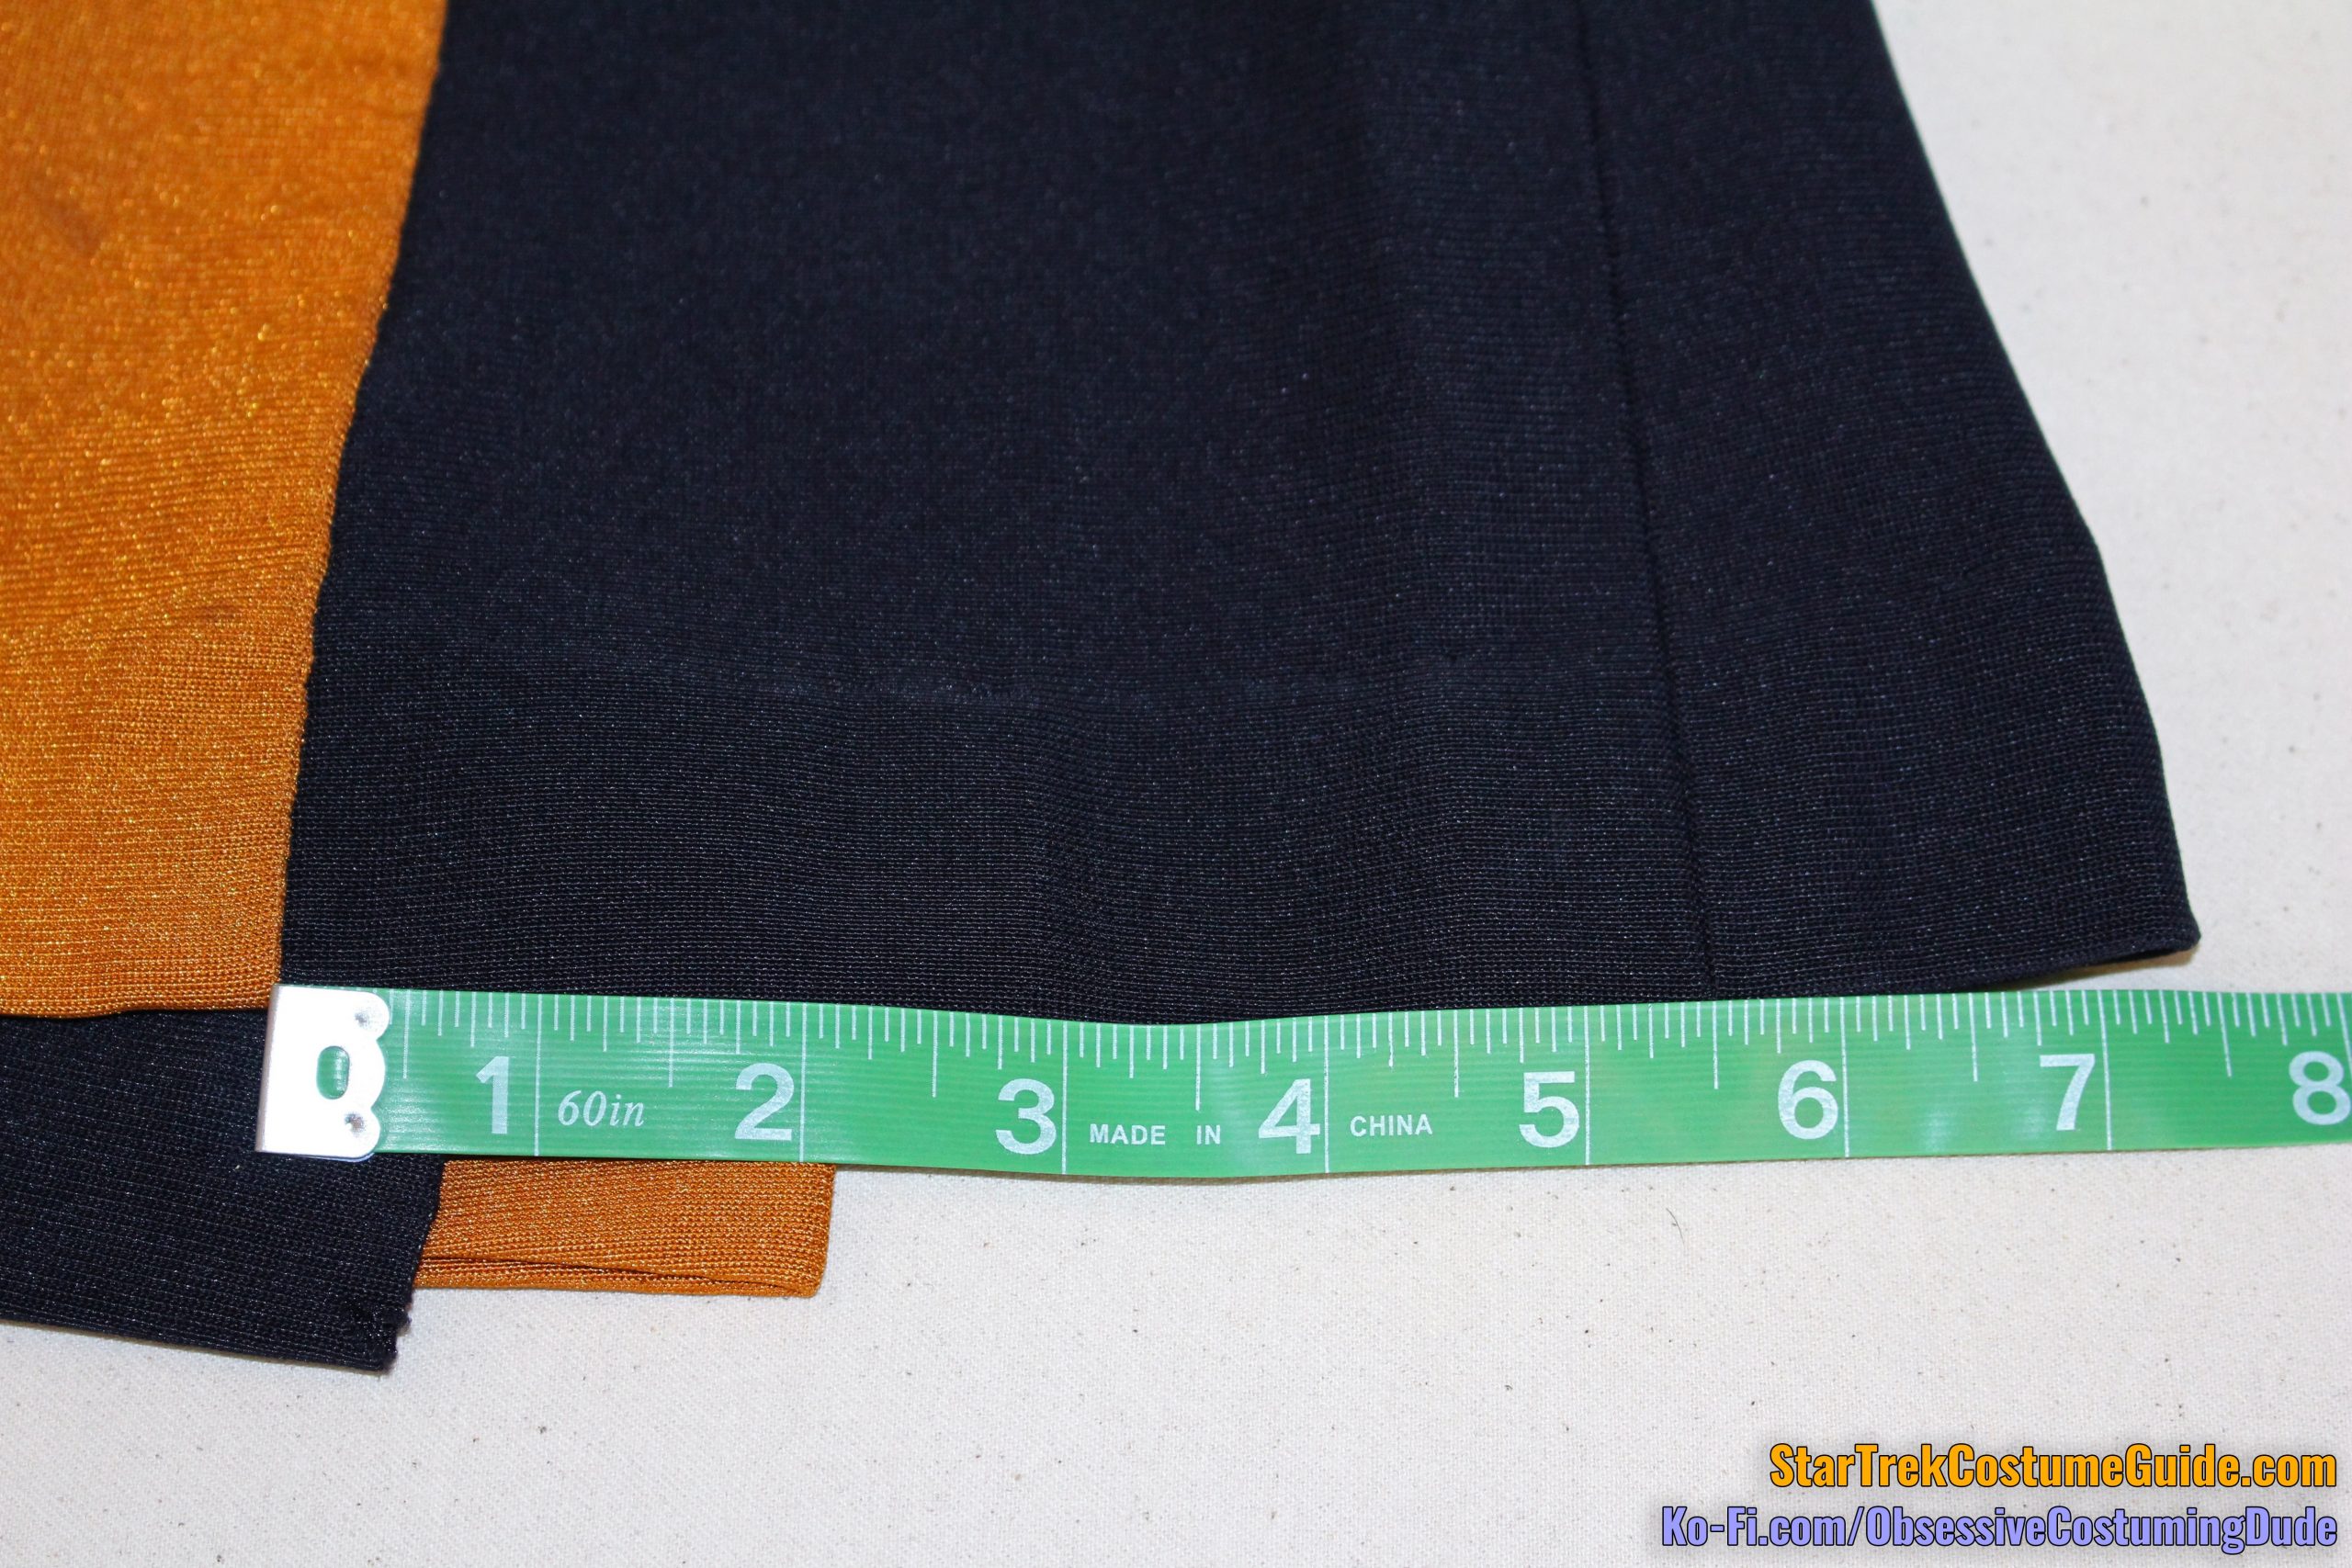
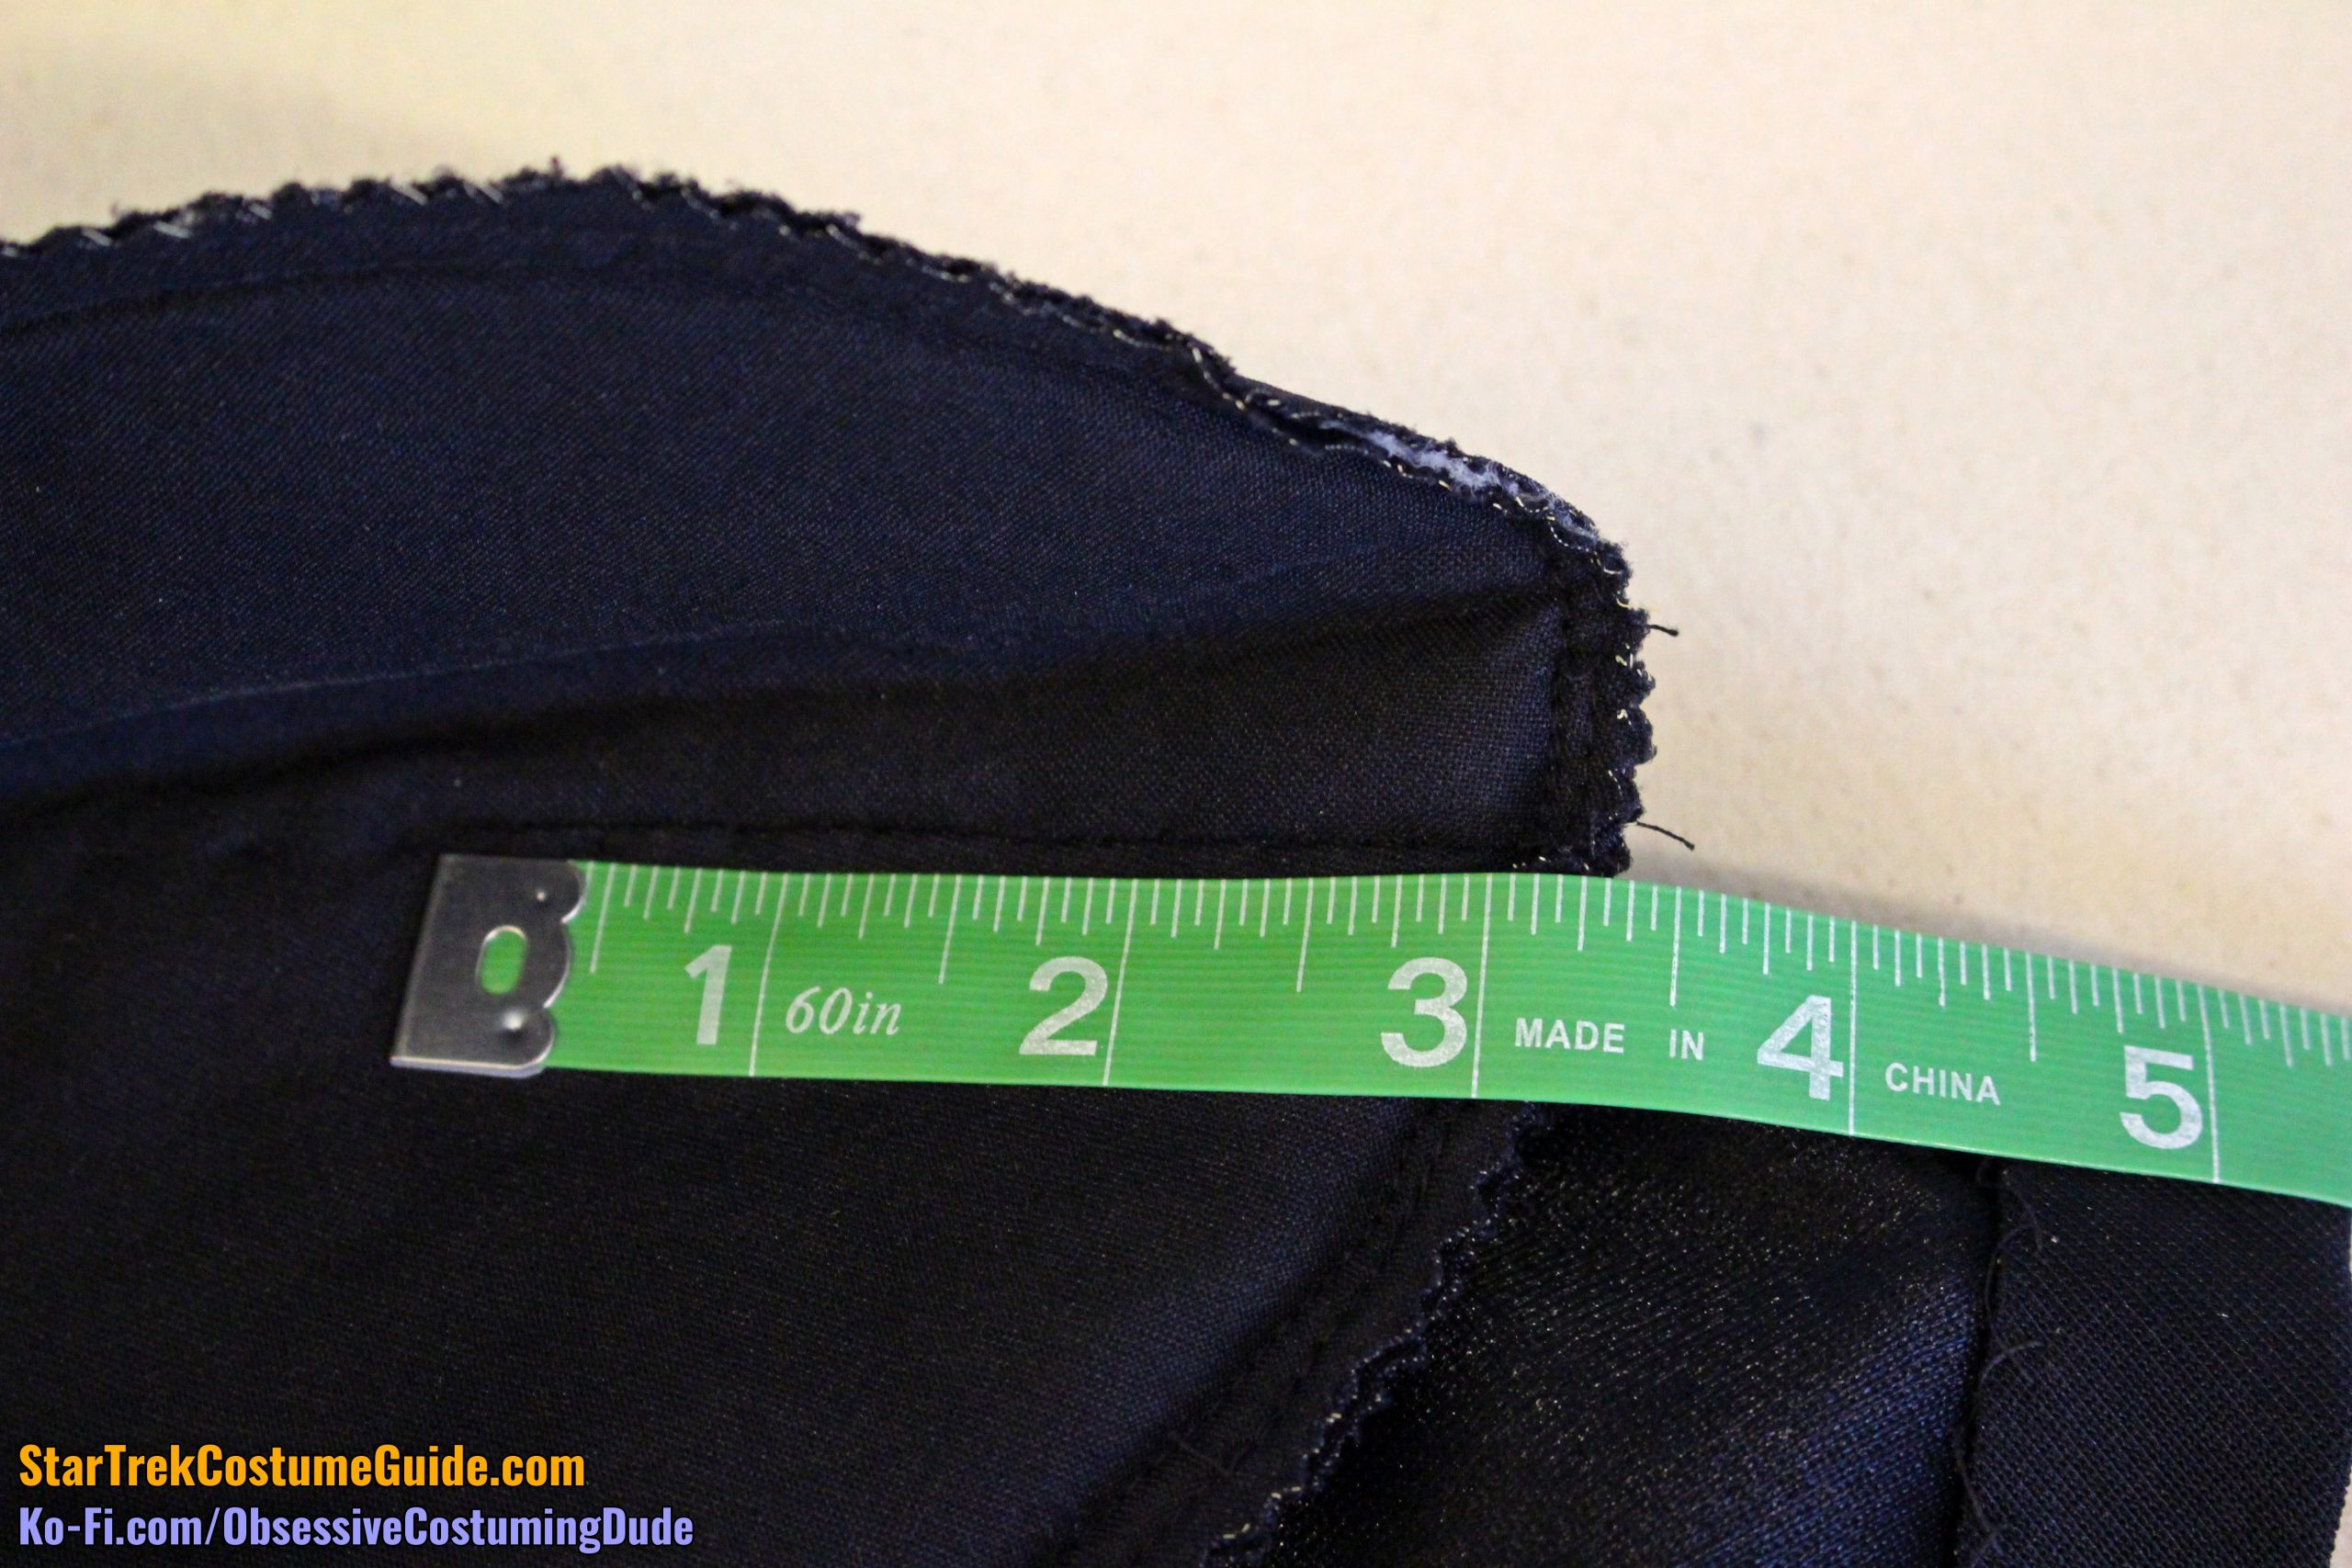
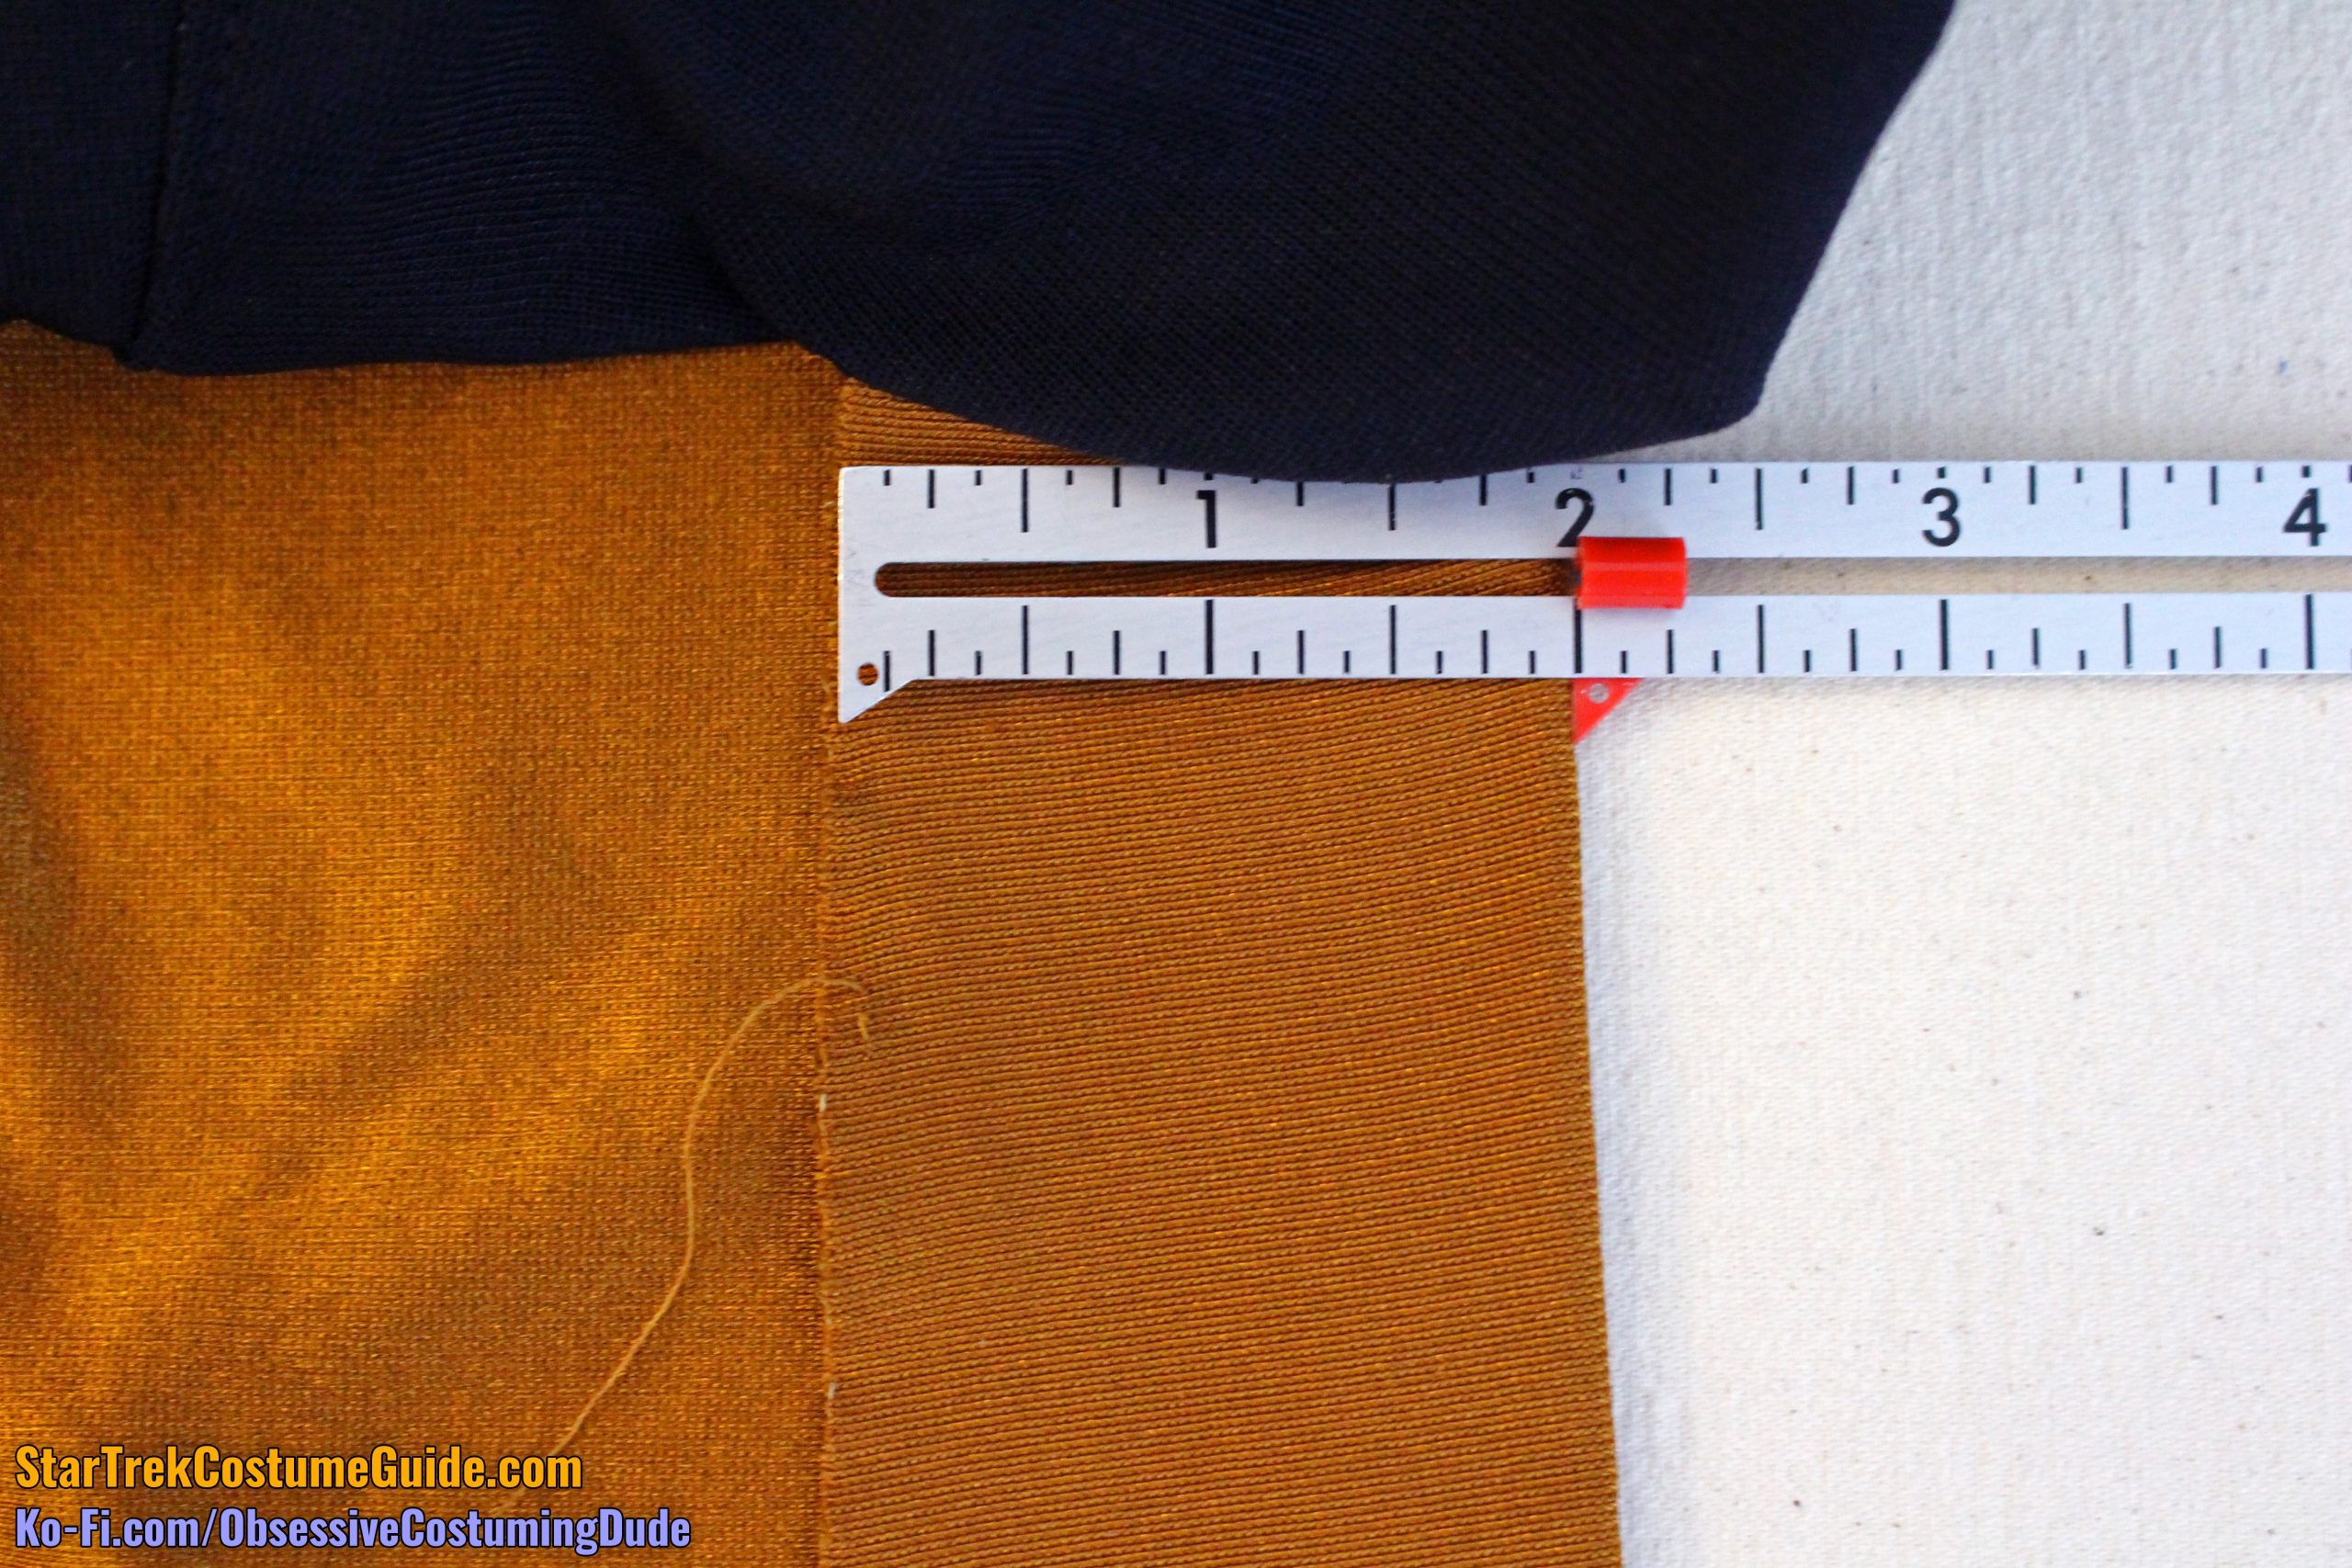
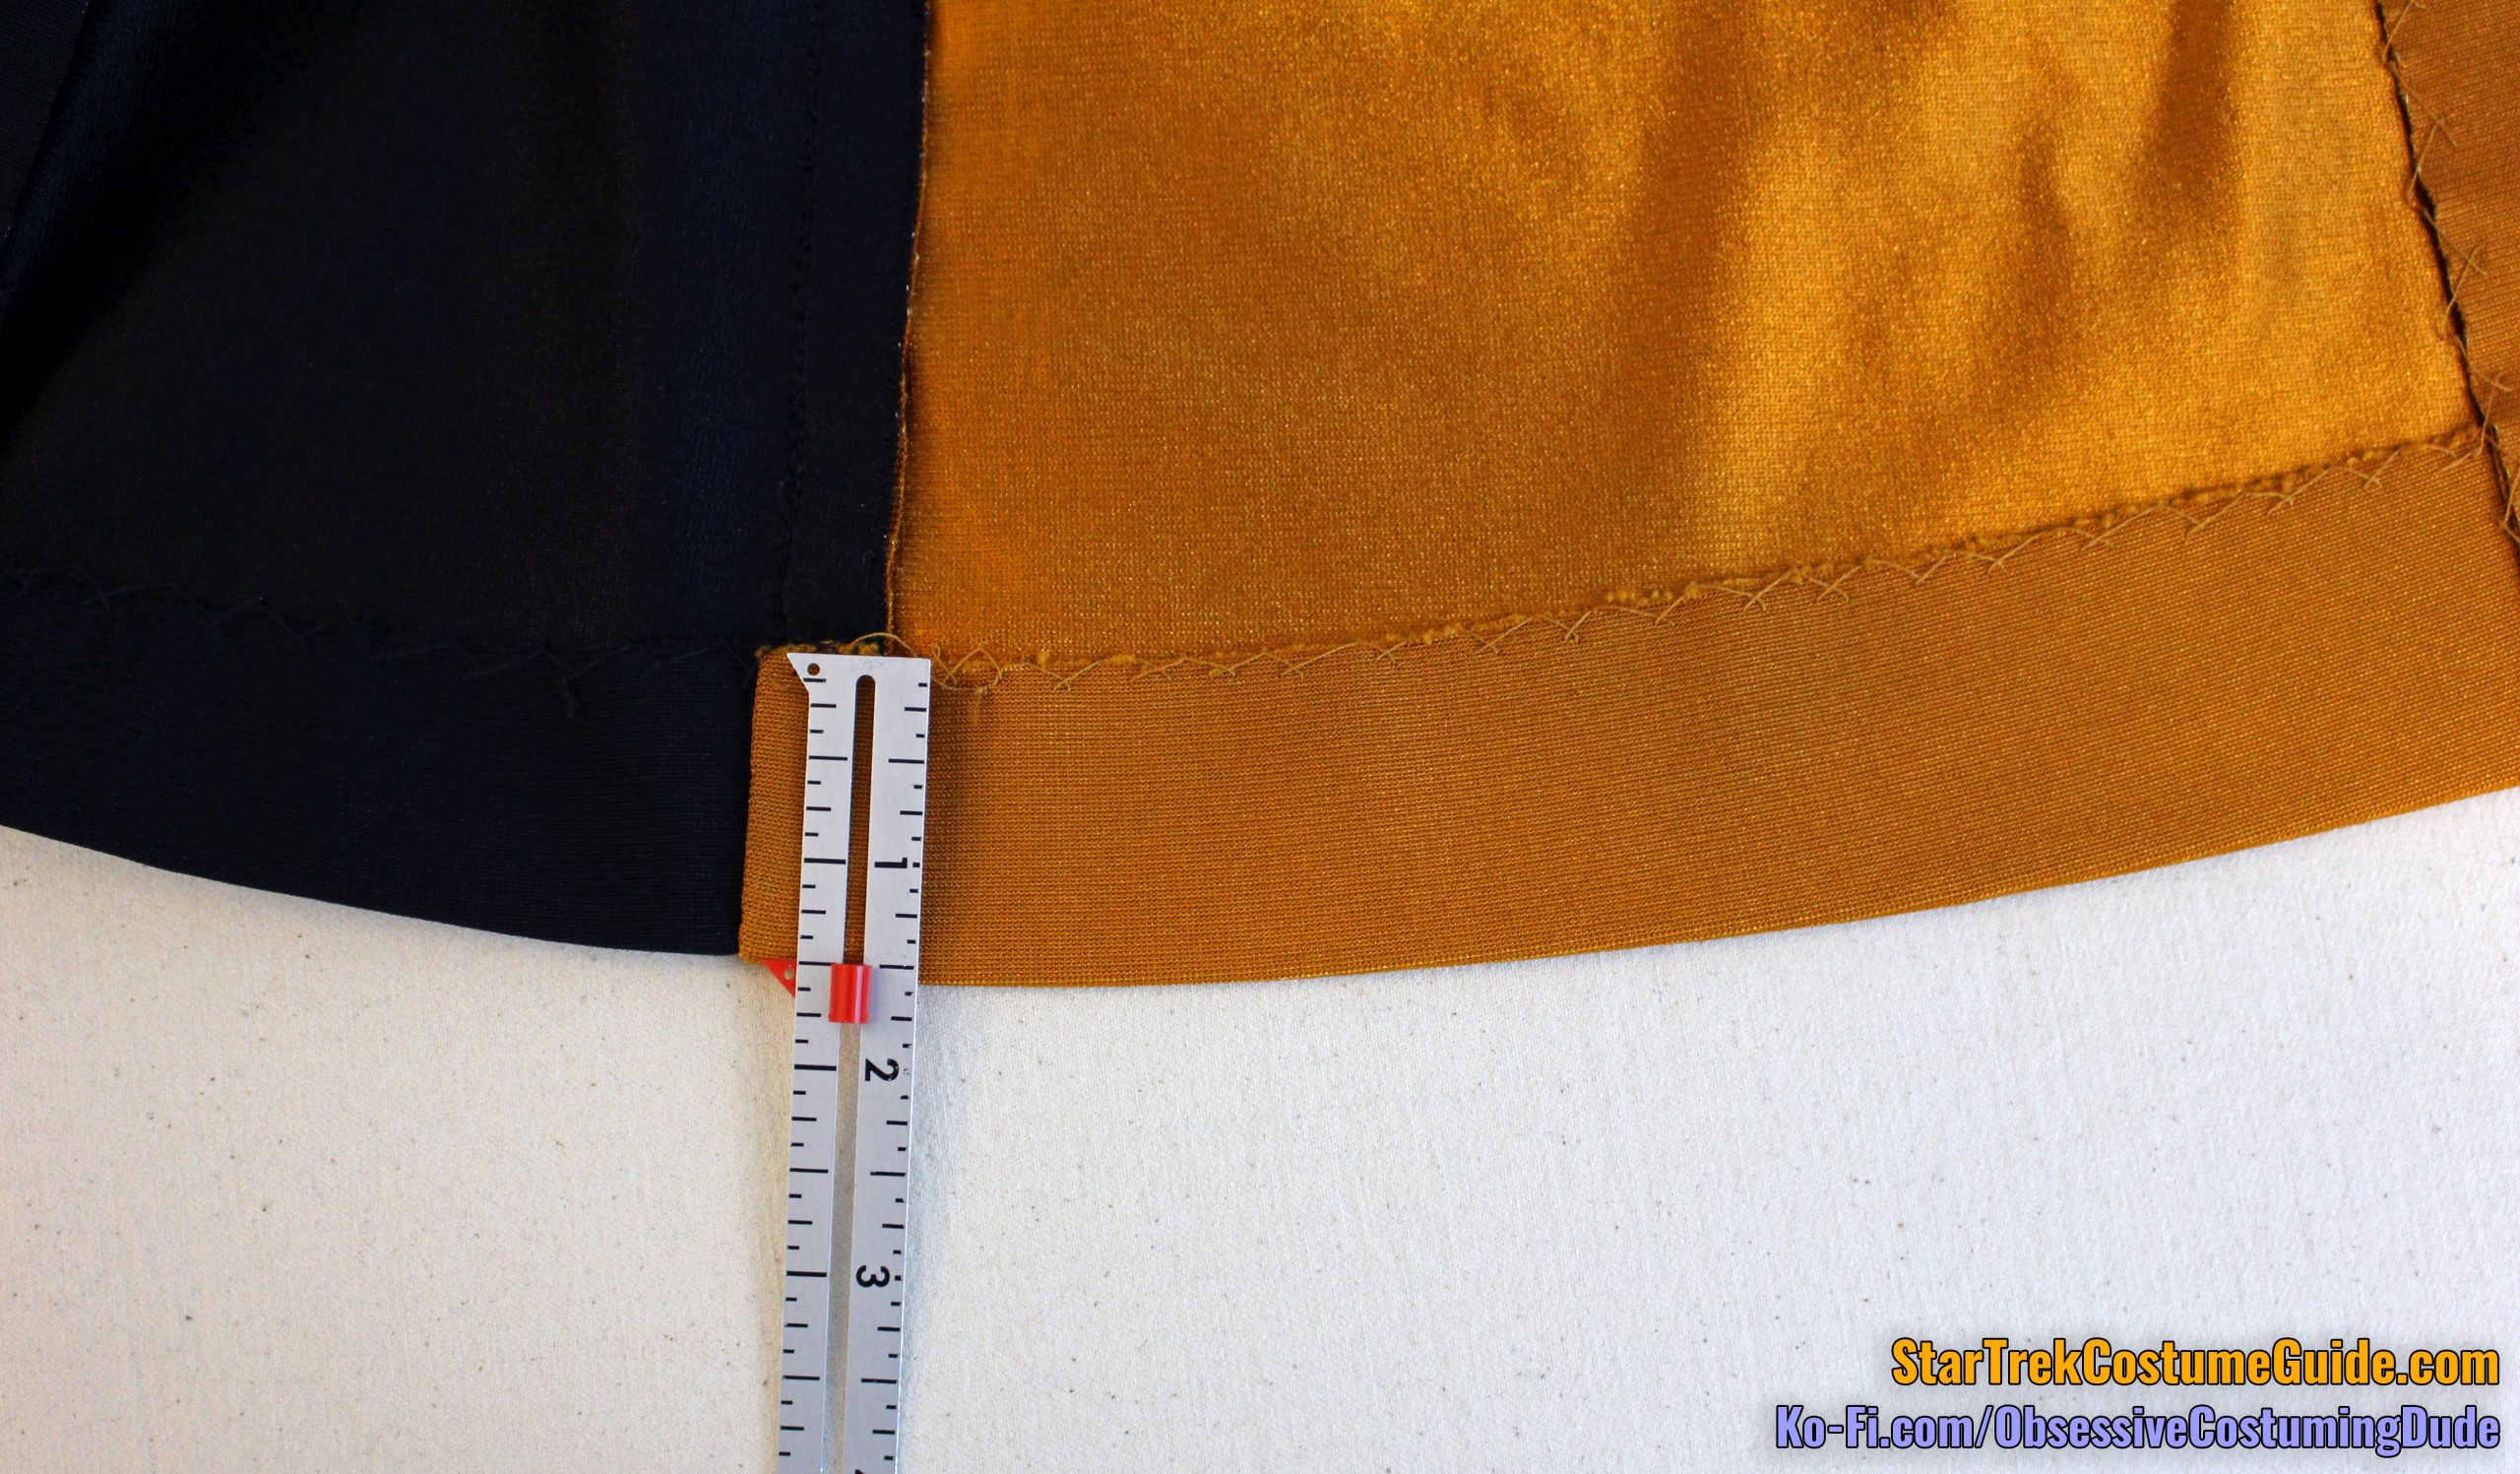
The outer sleeves were 2″ long, measured from the lower, outer corner of the yoke to the hem fold.
The under-sleeve seam was also 2″ long, measured from the upper armscye seam to the hem fold.
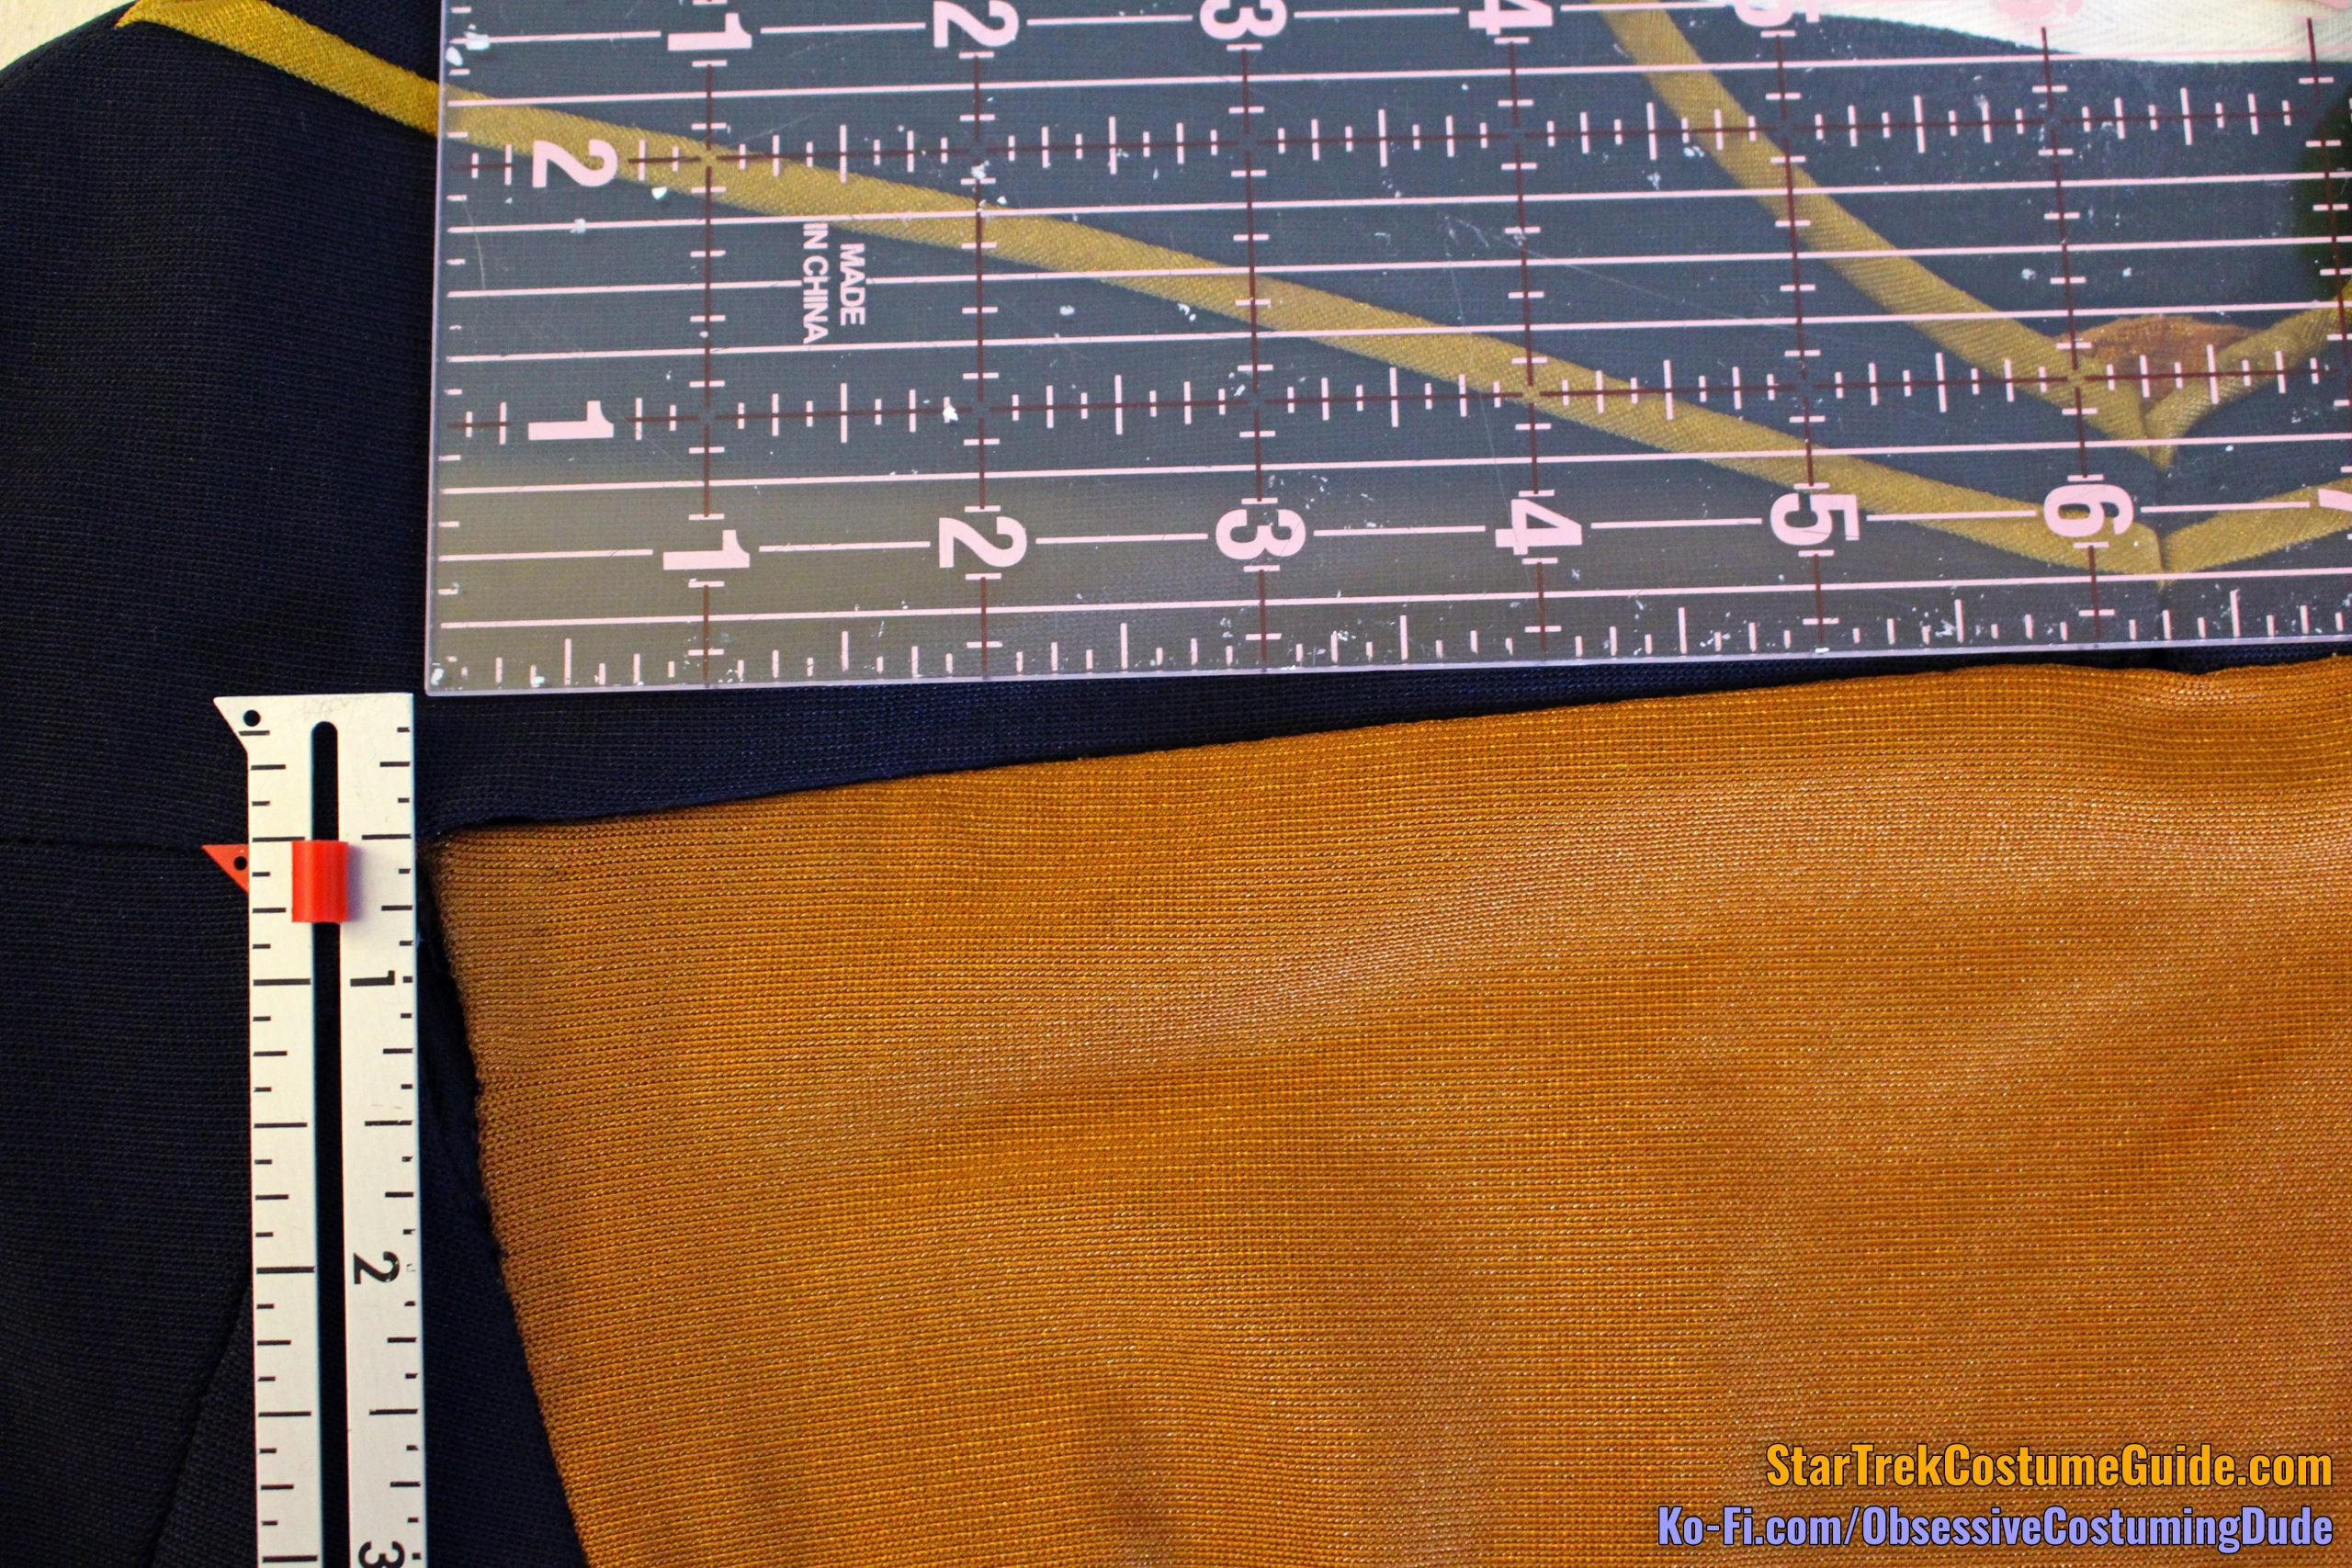
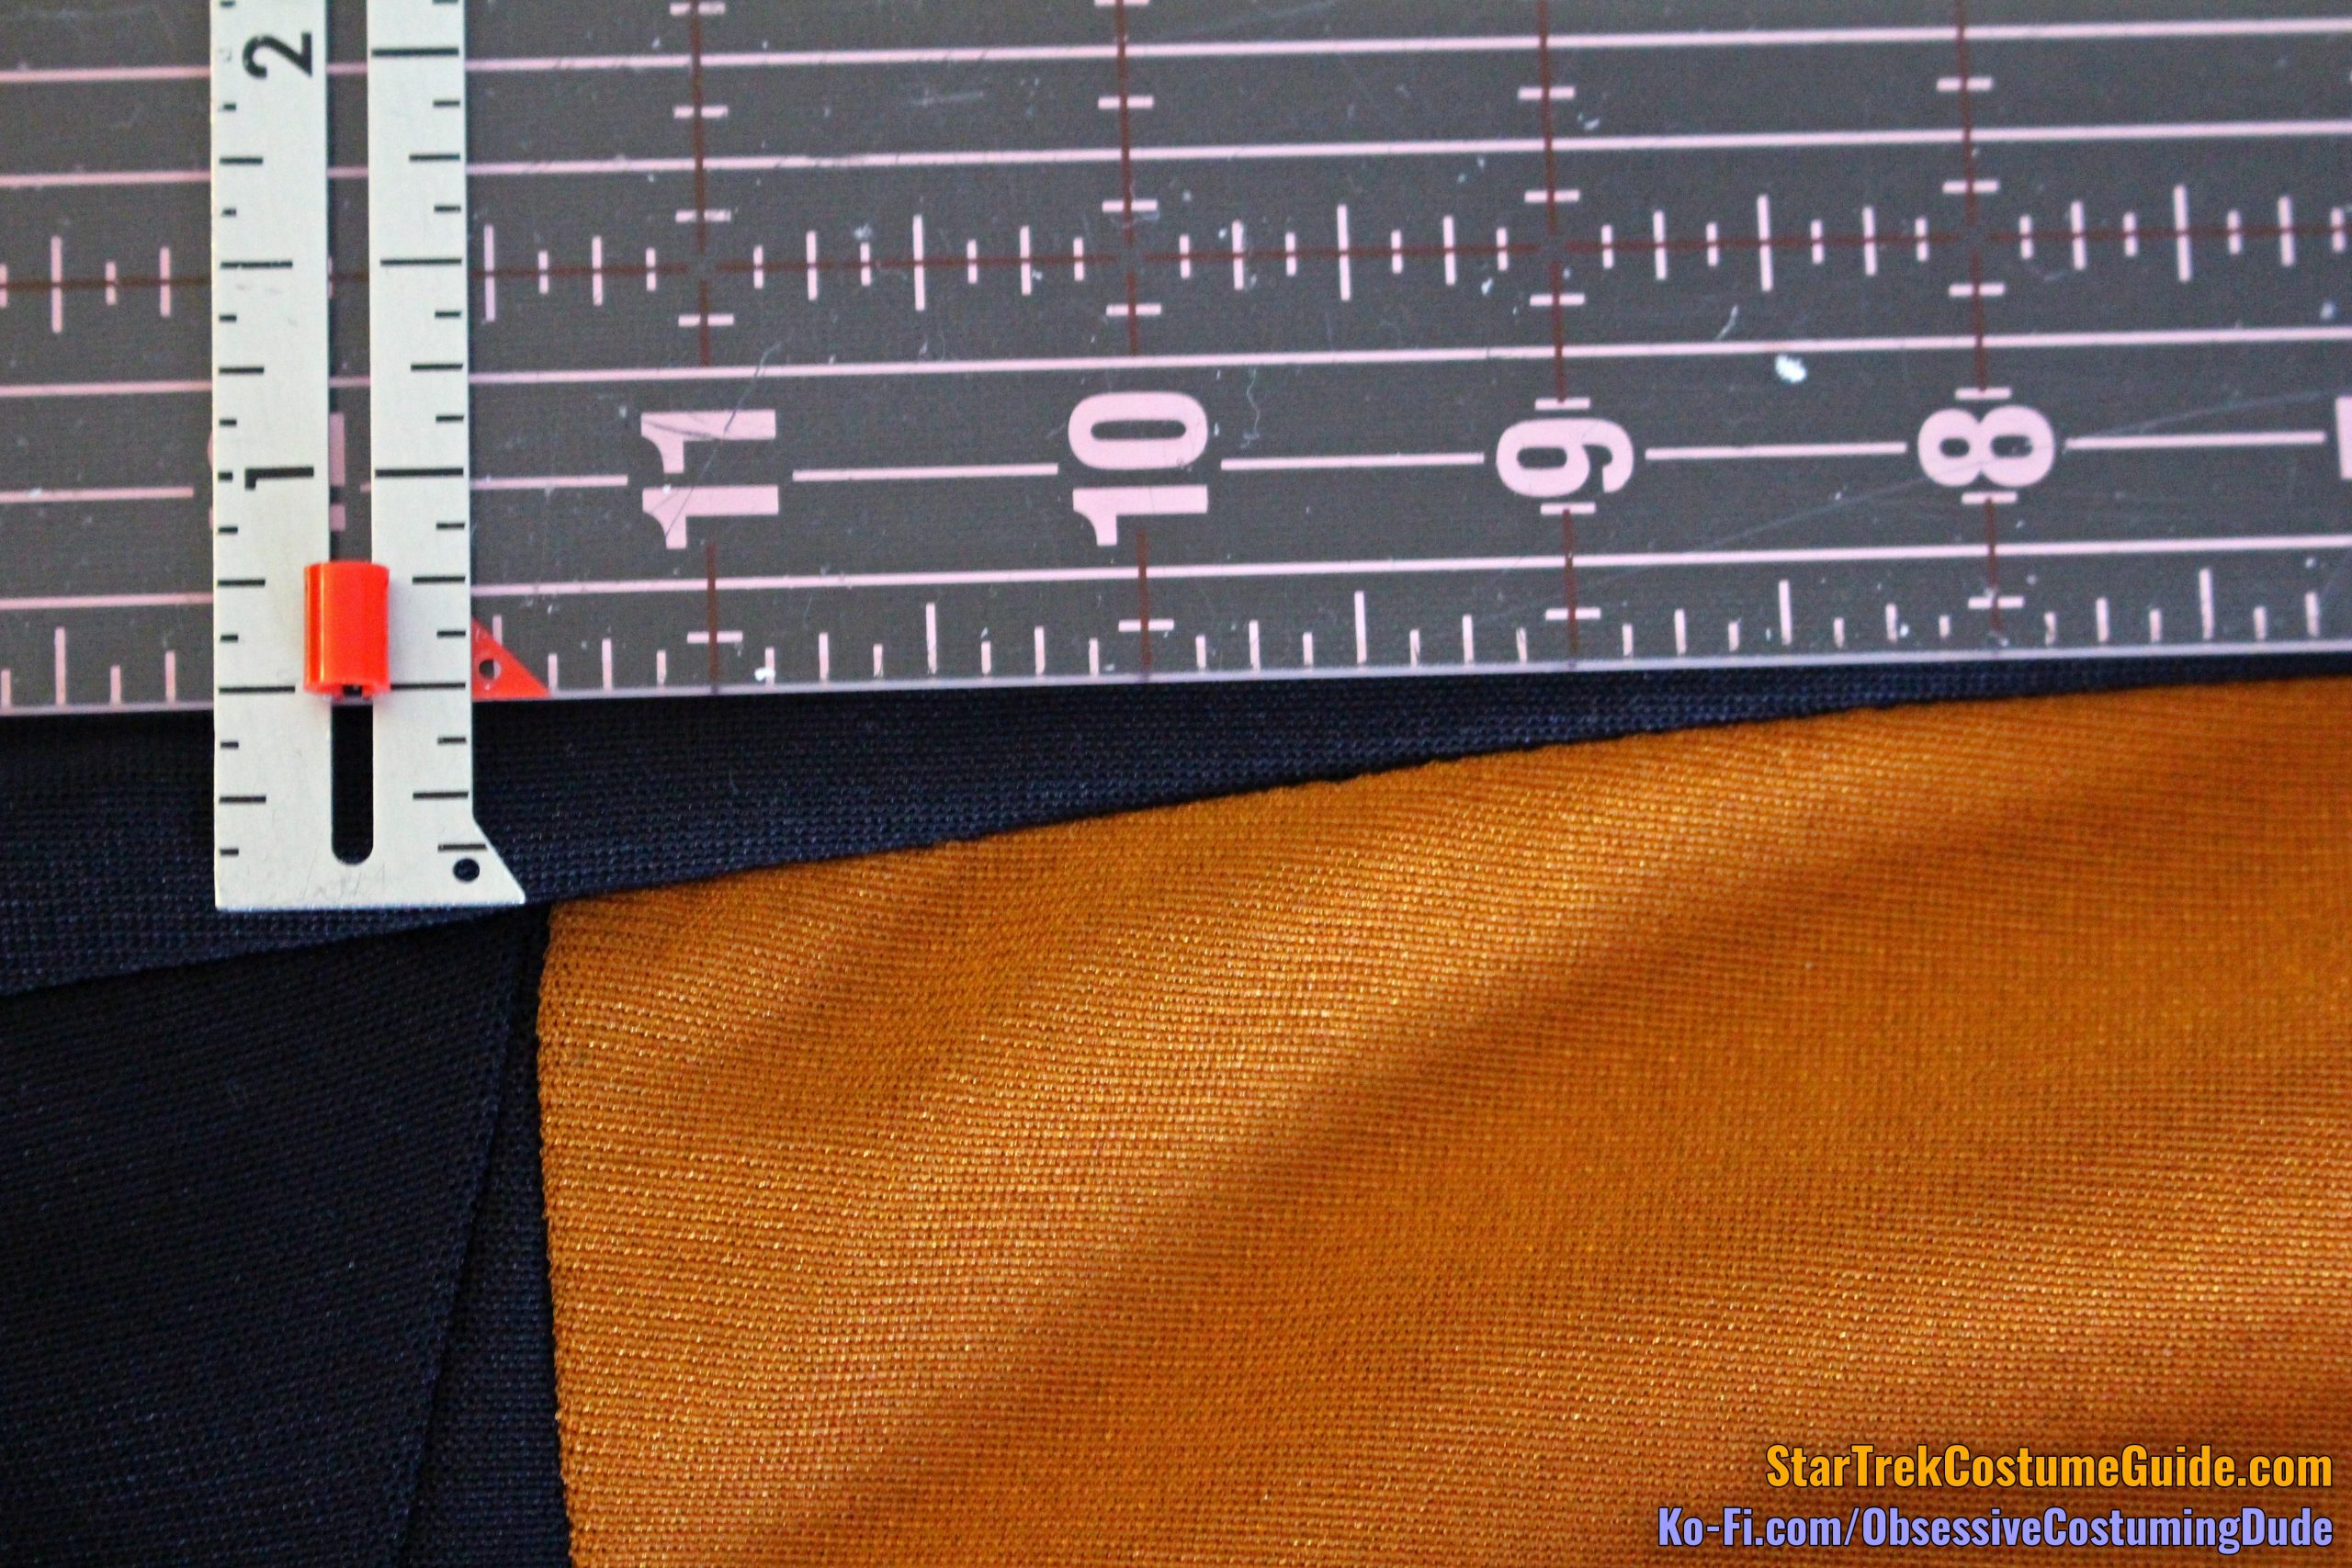
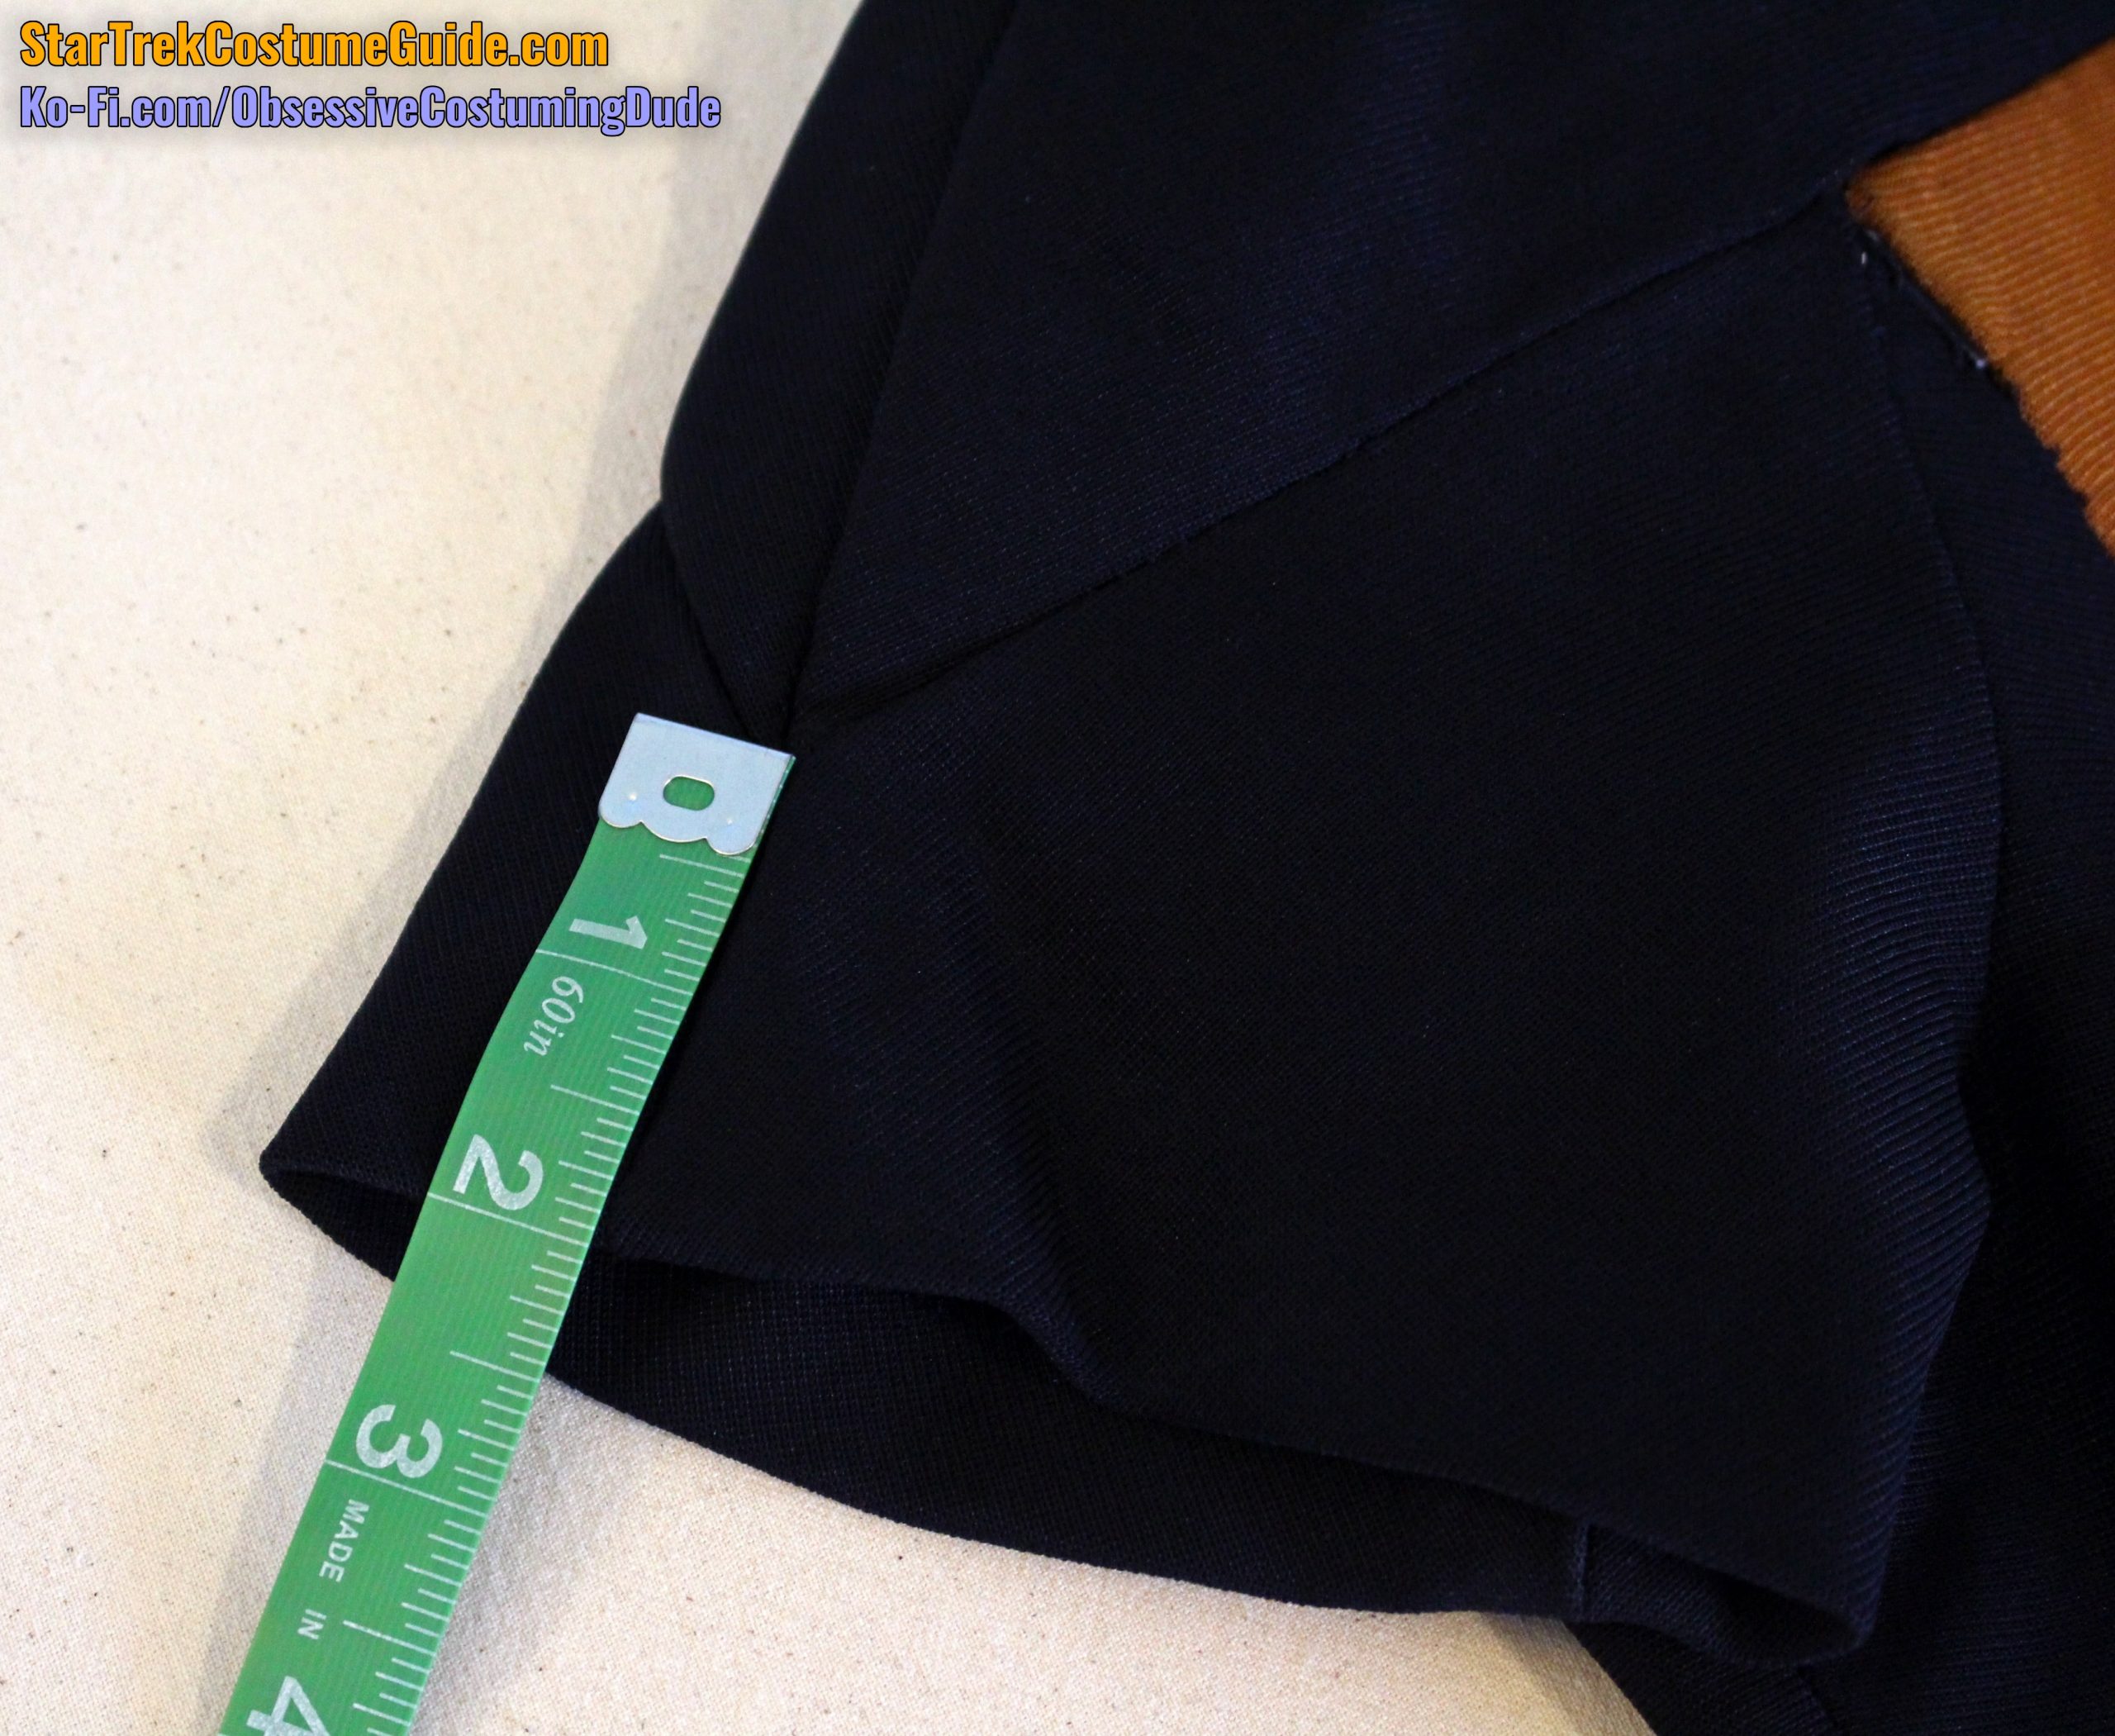
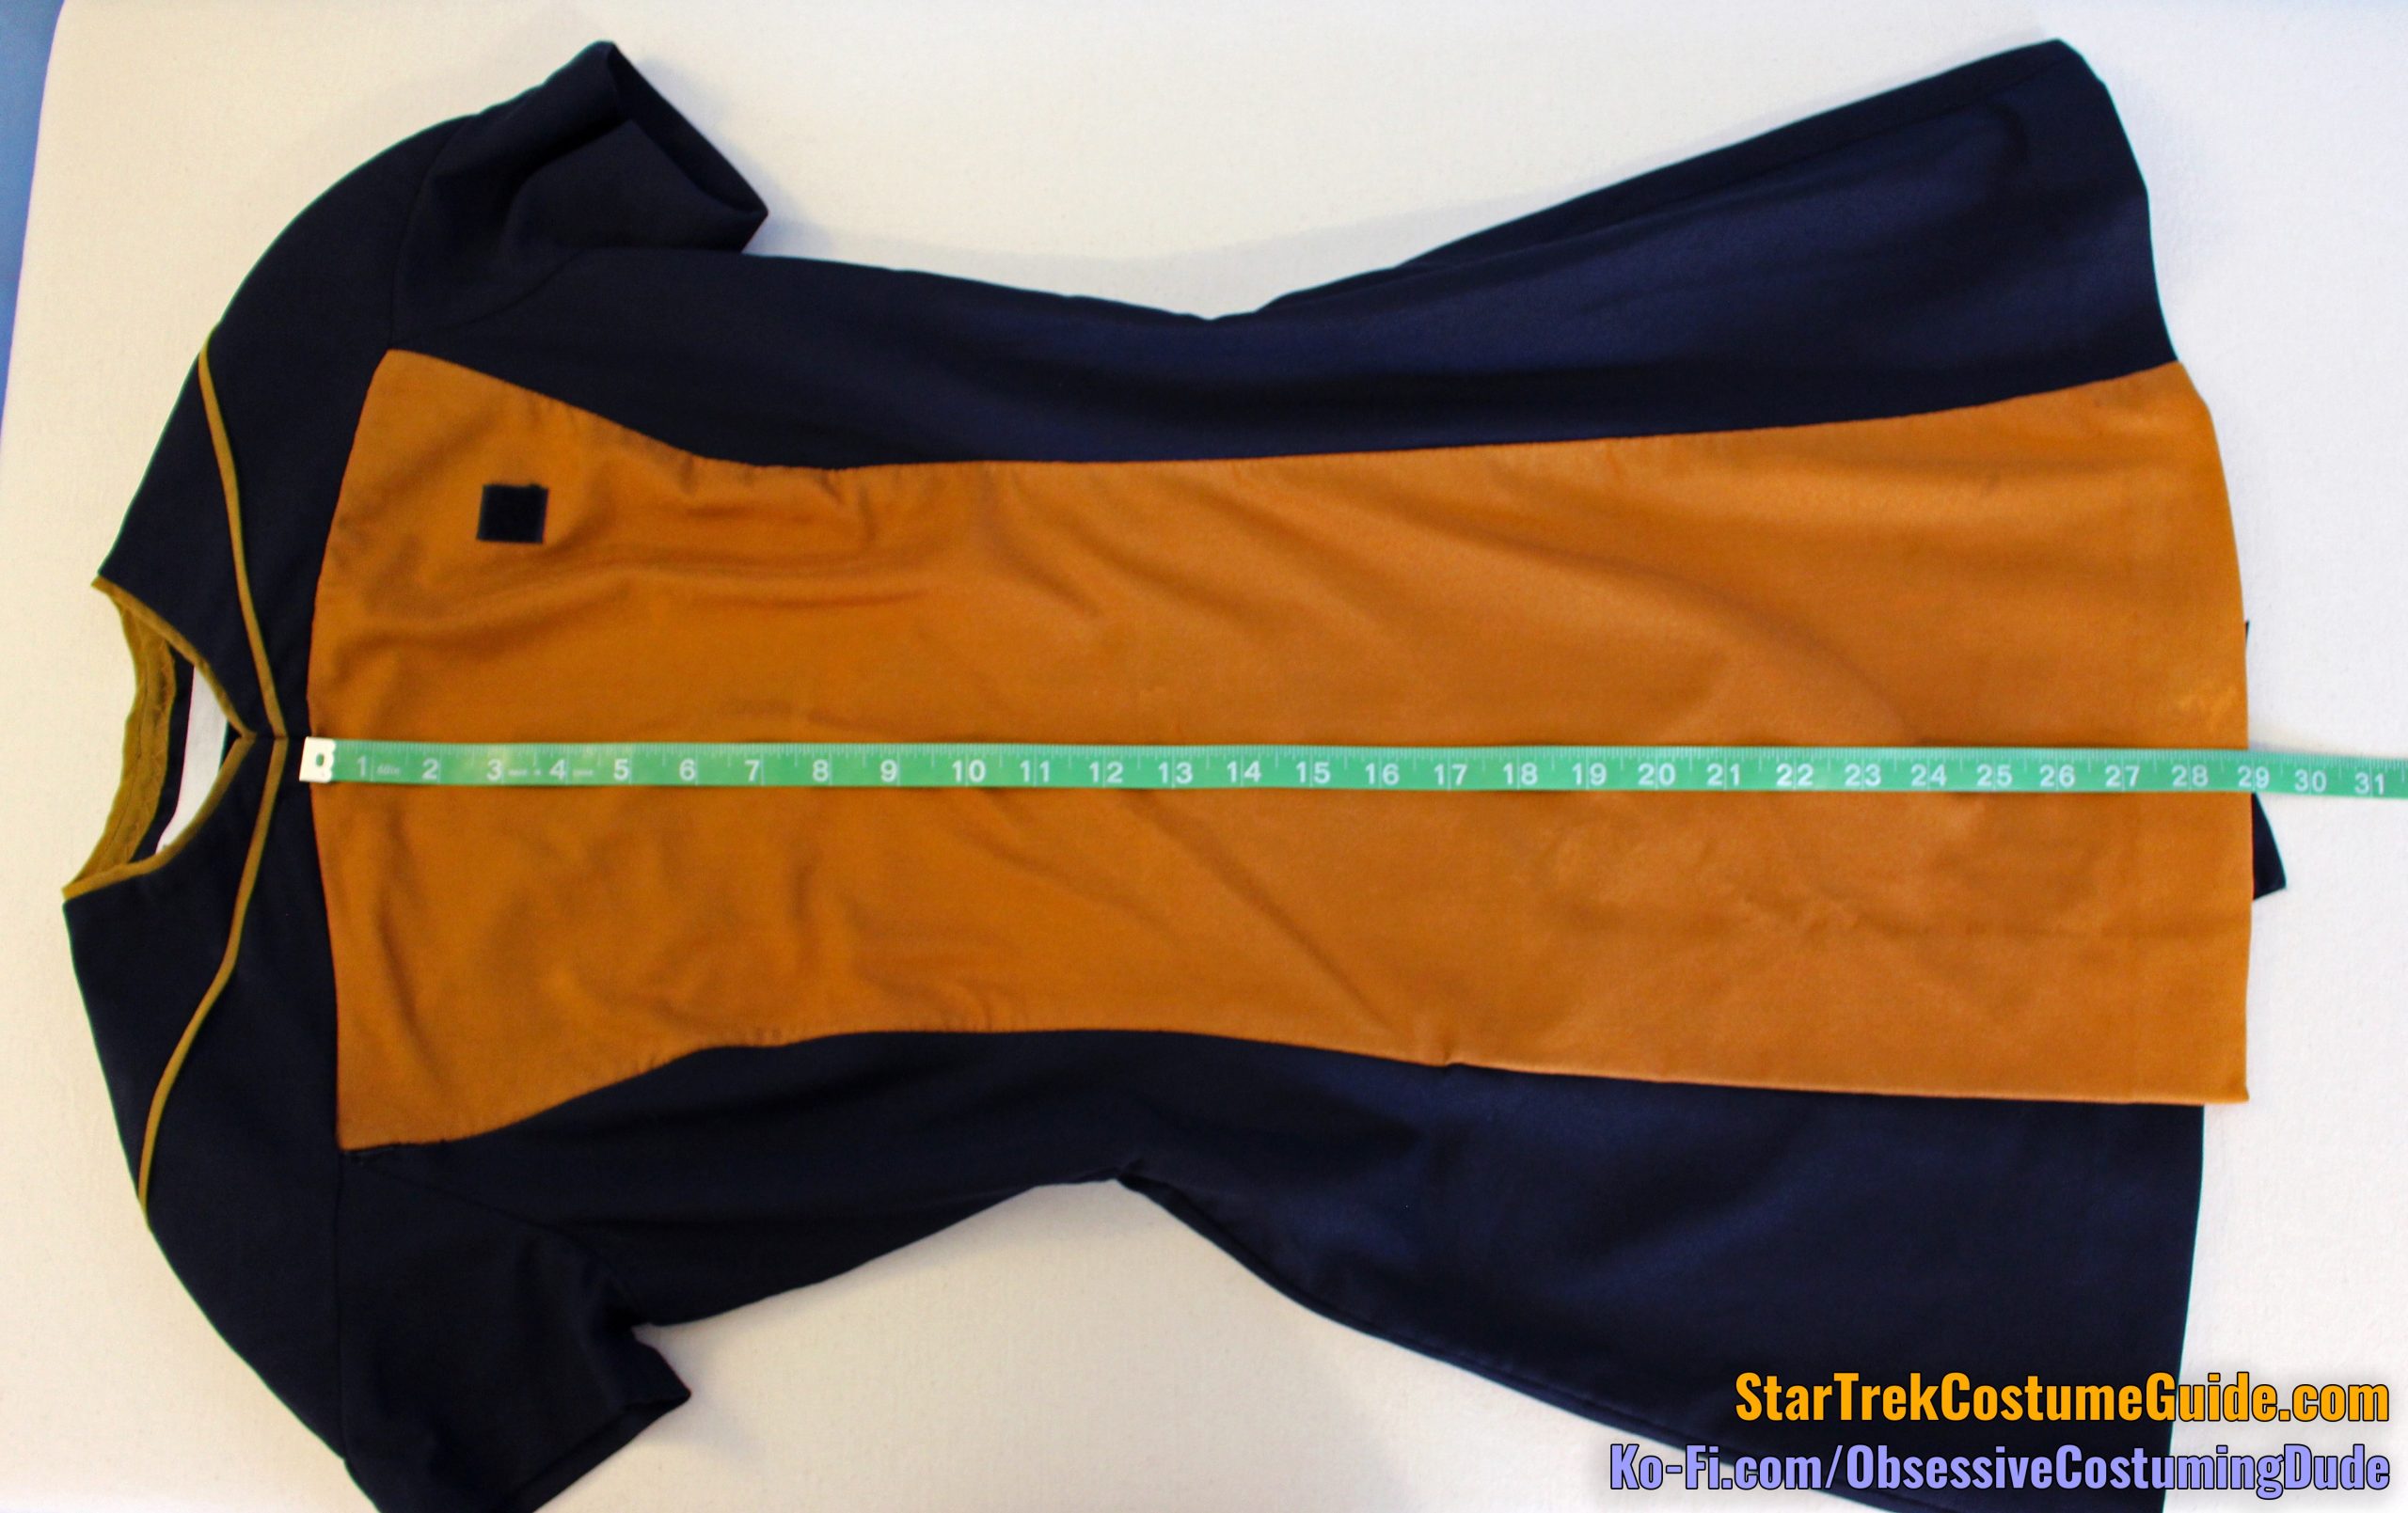
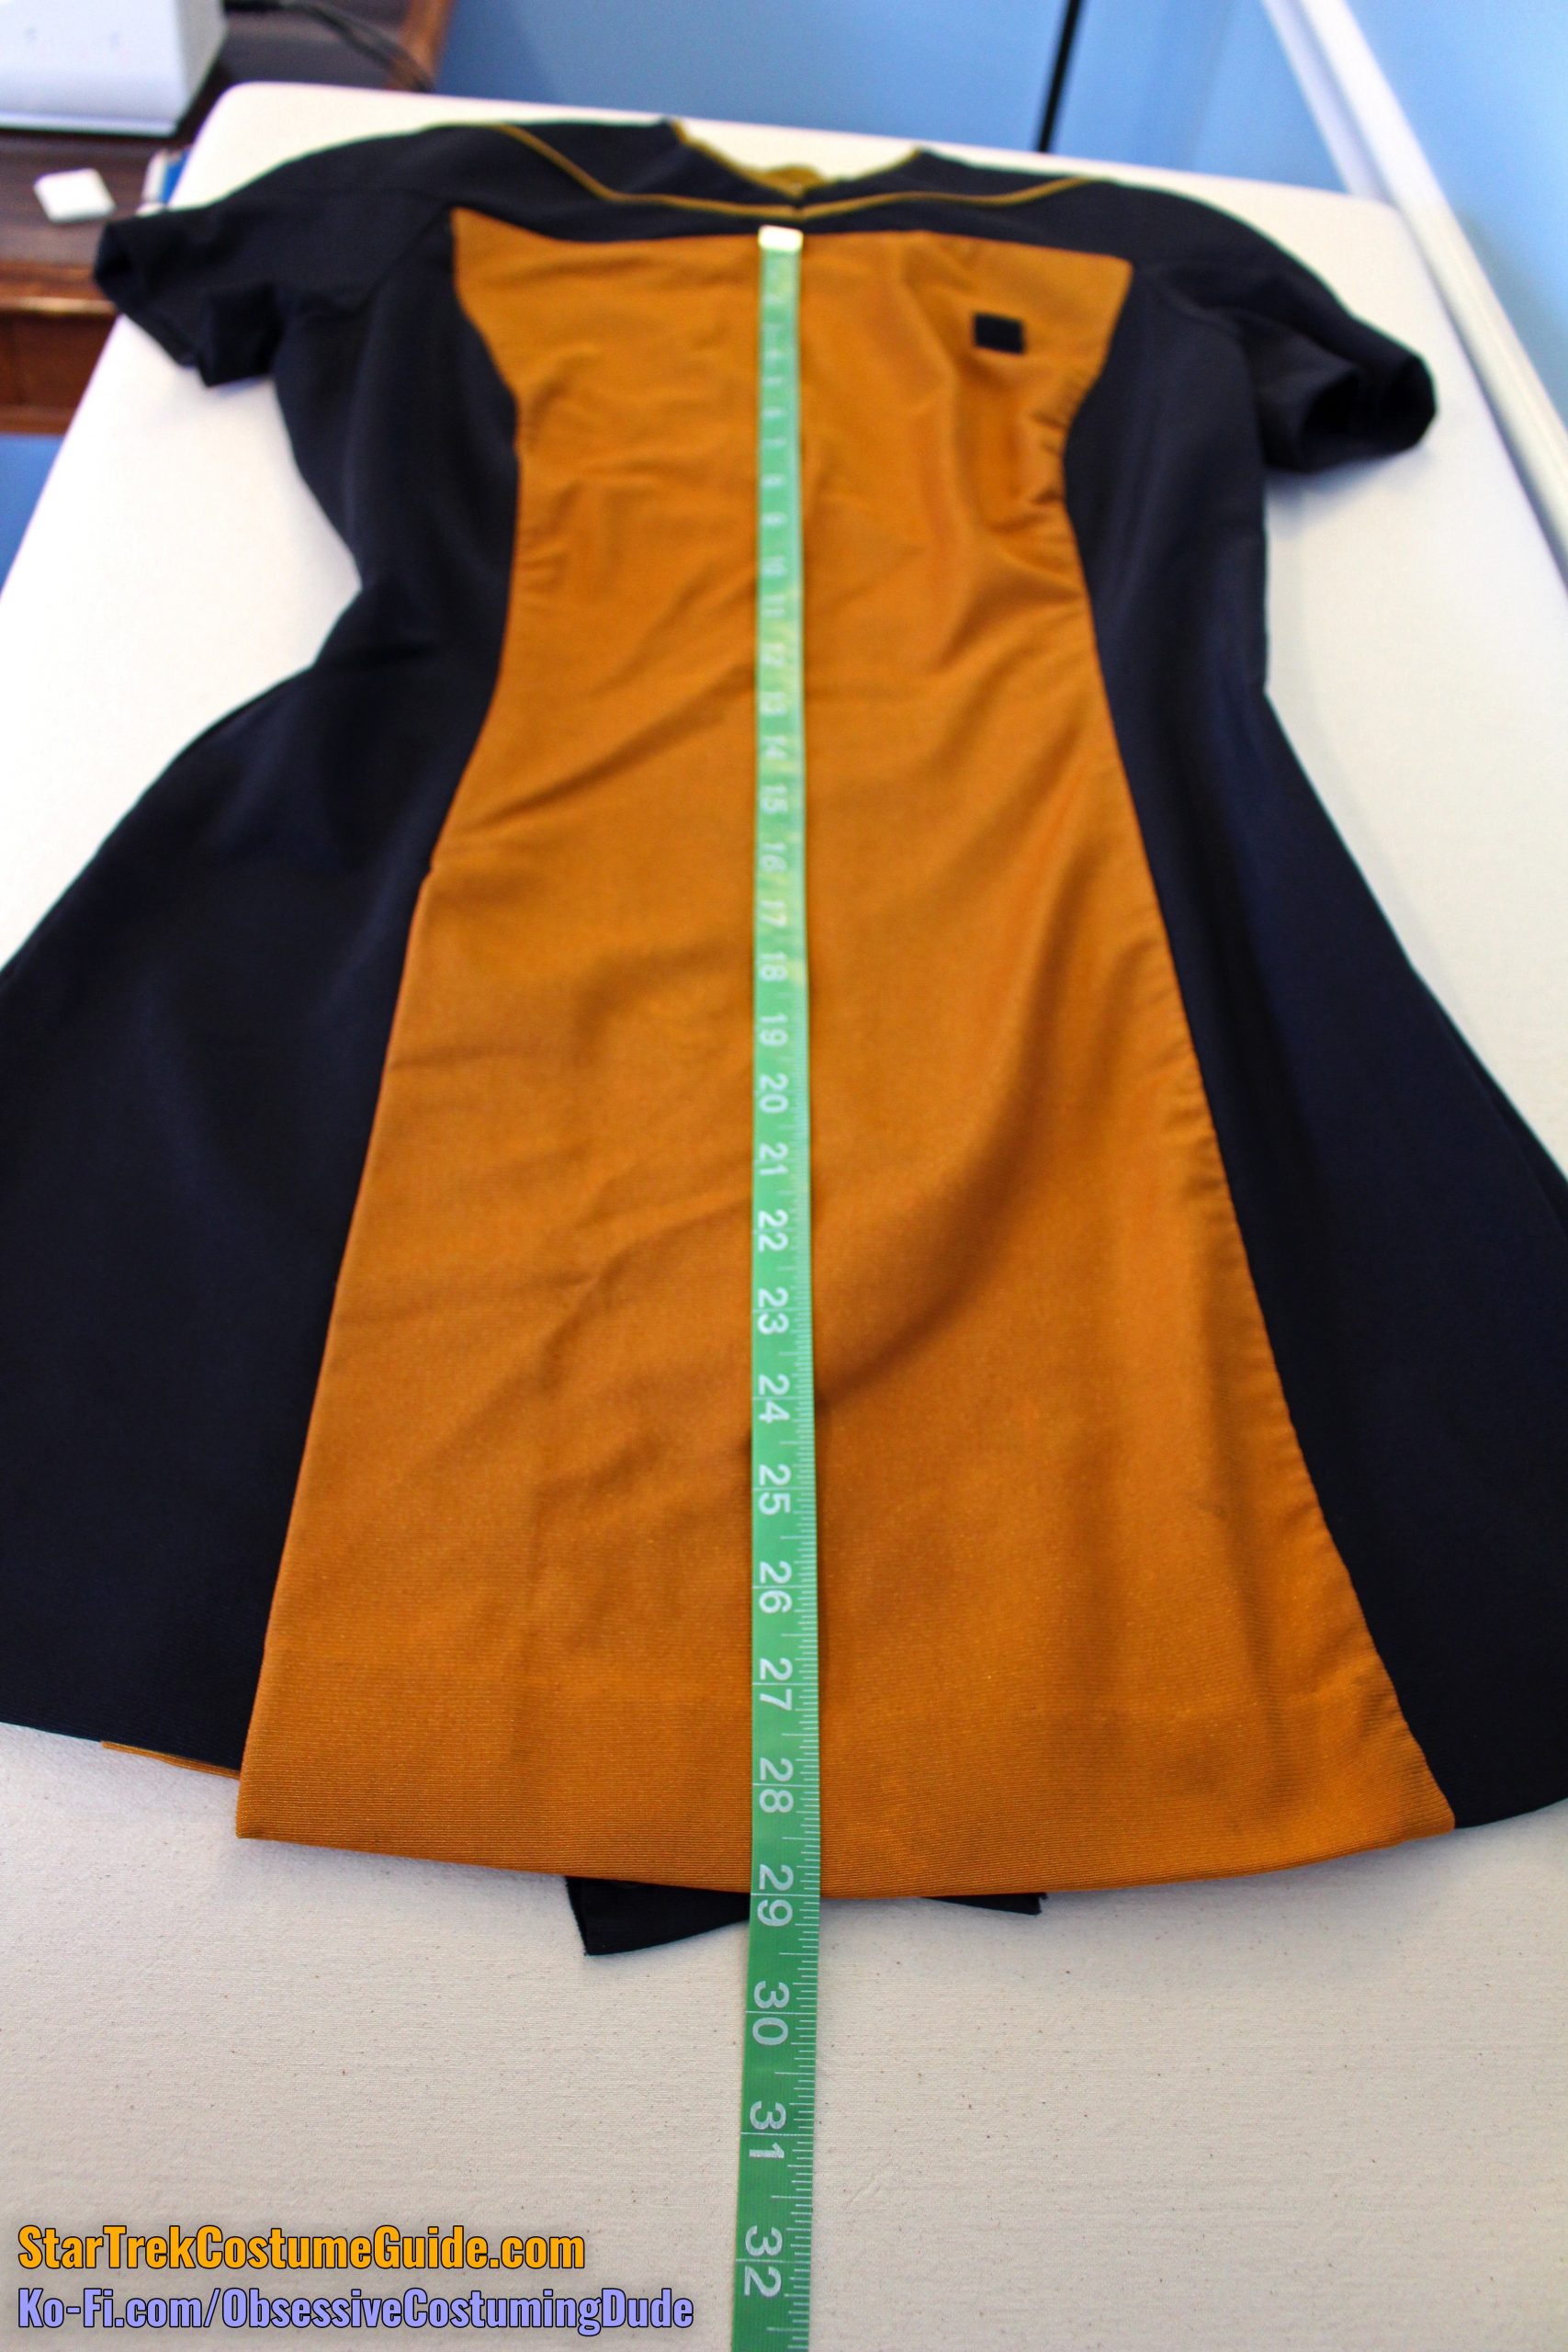
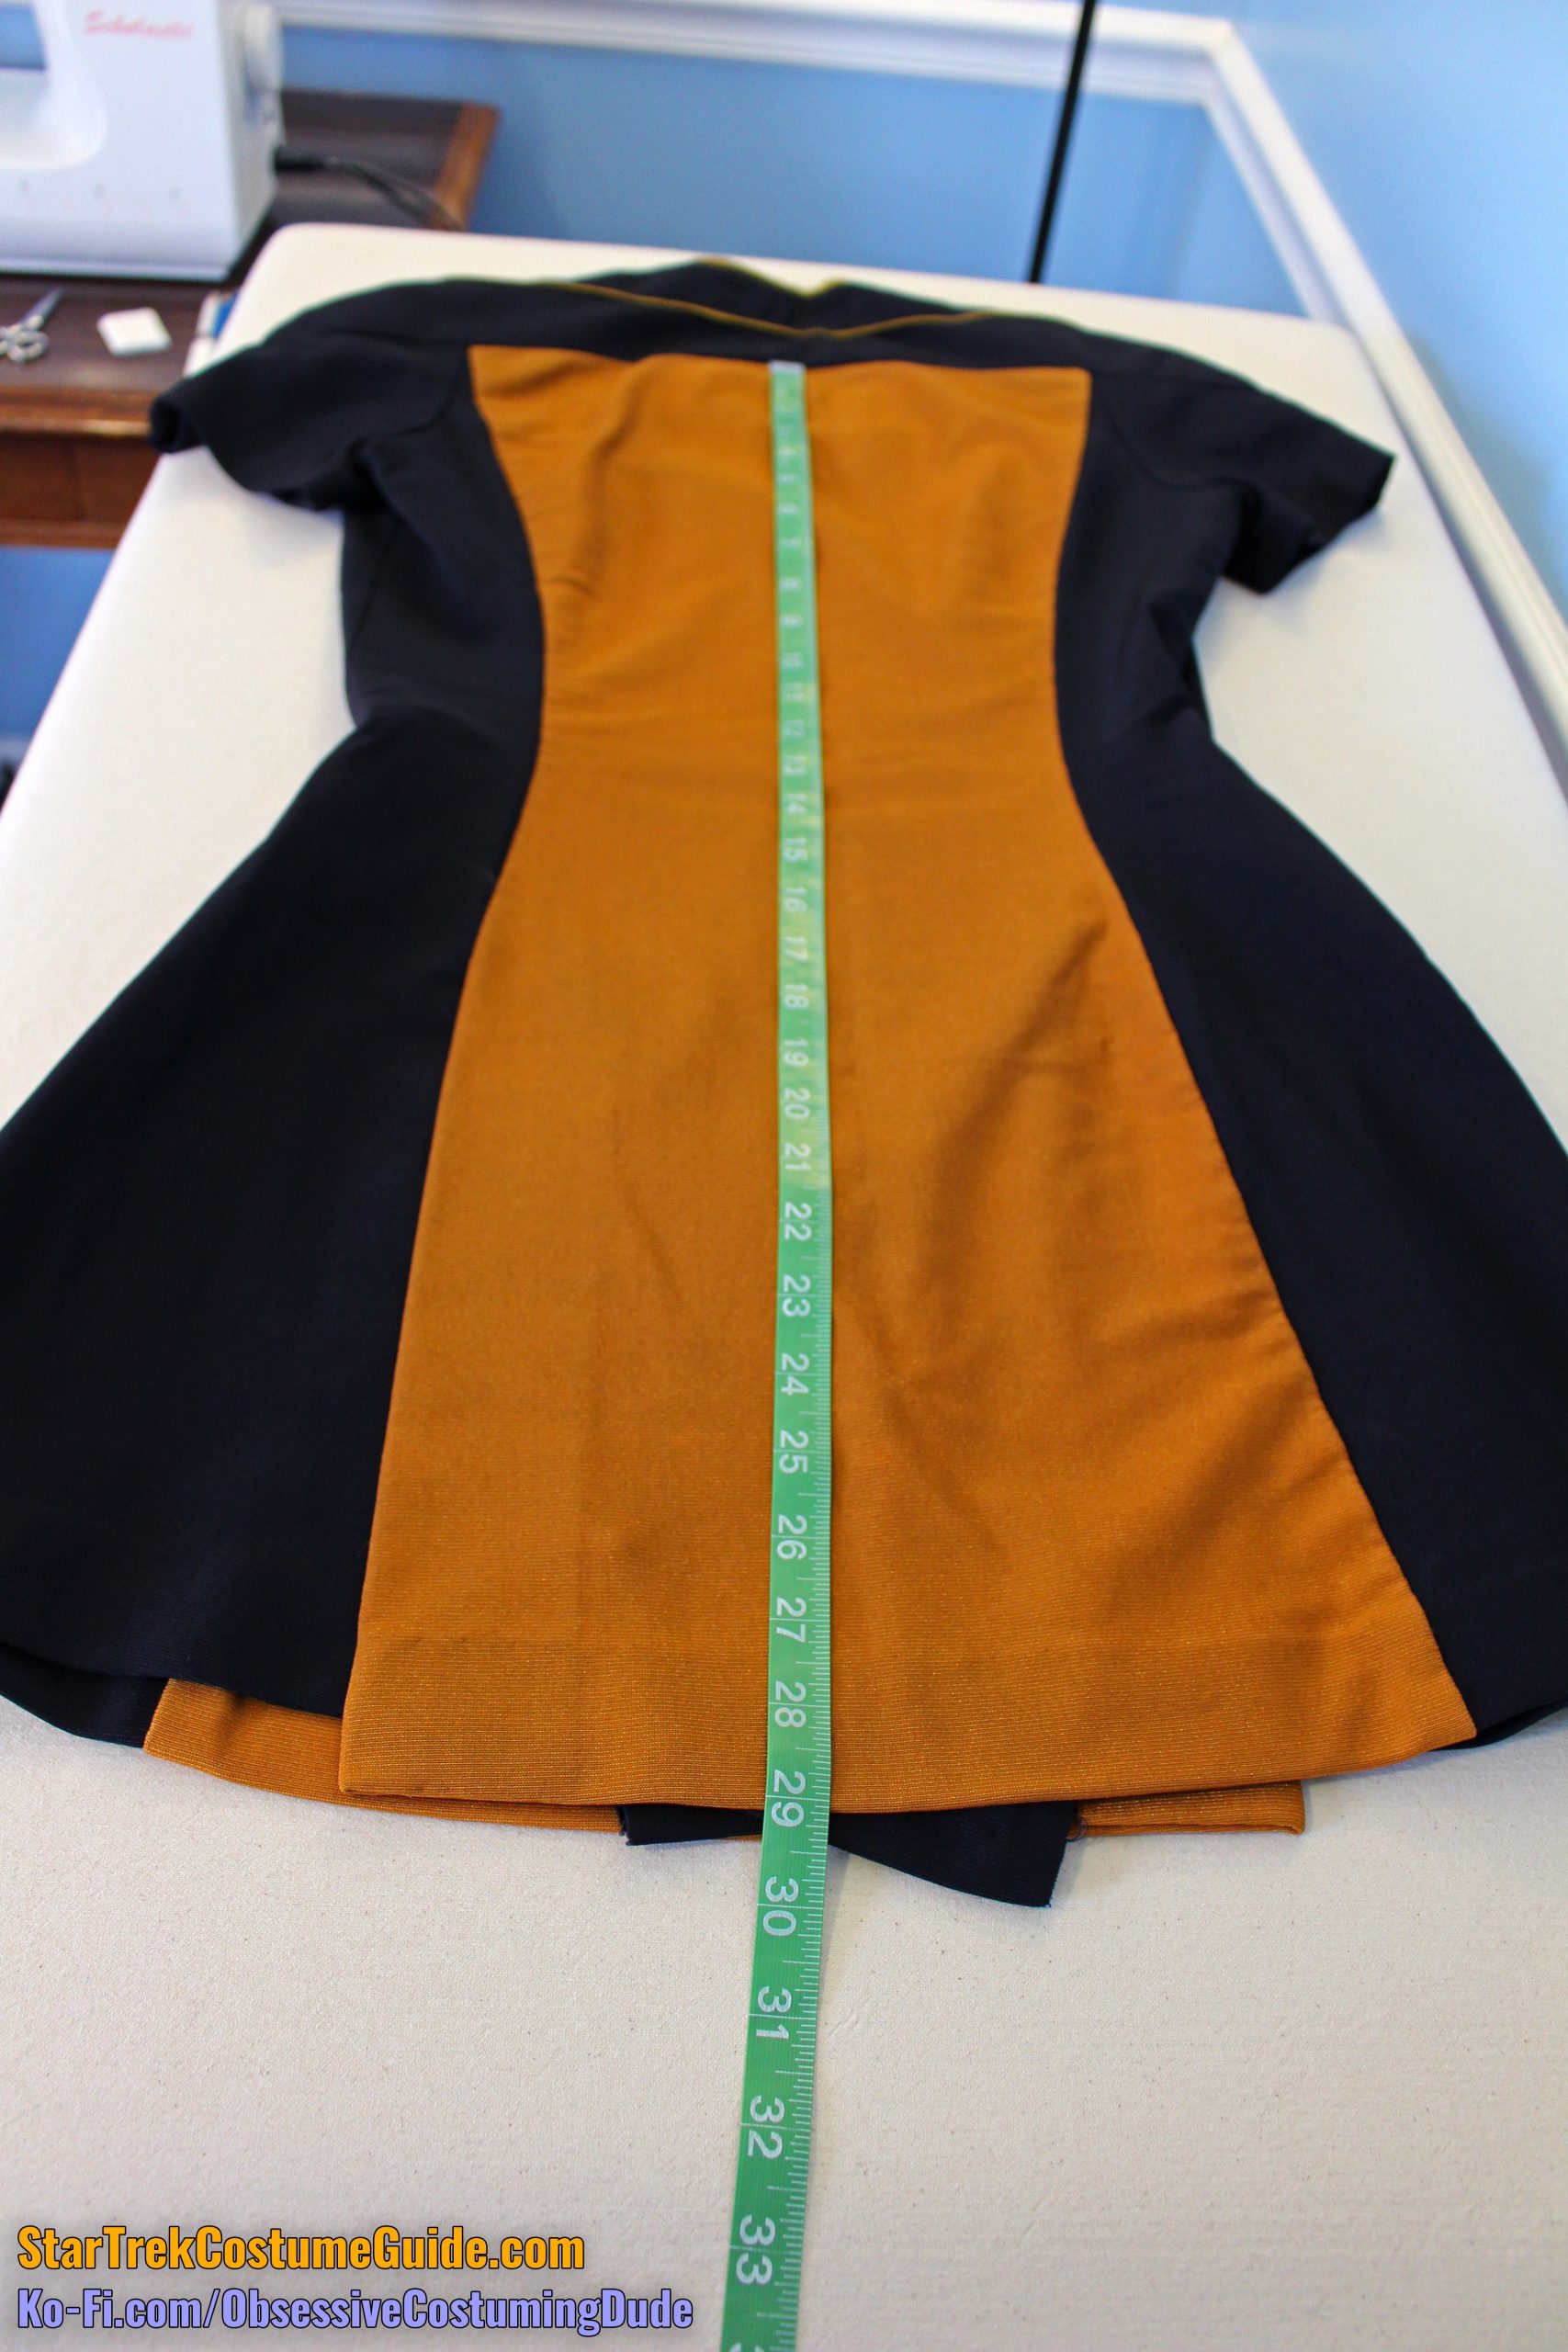
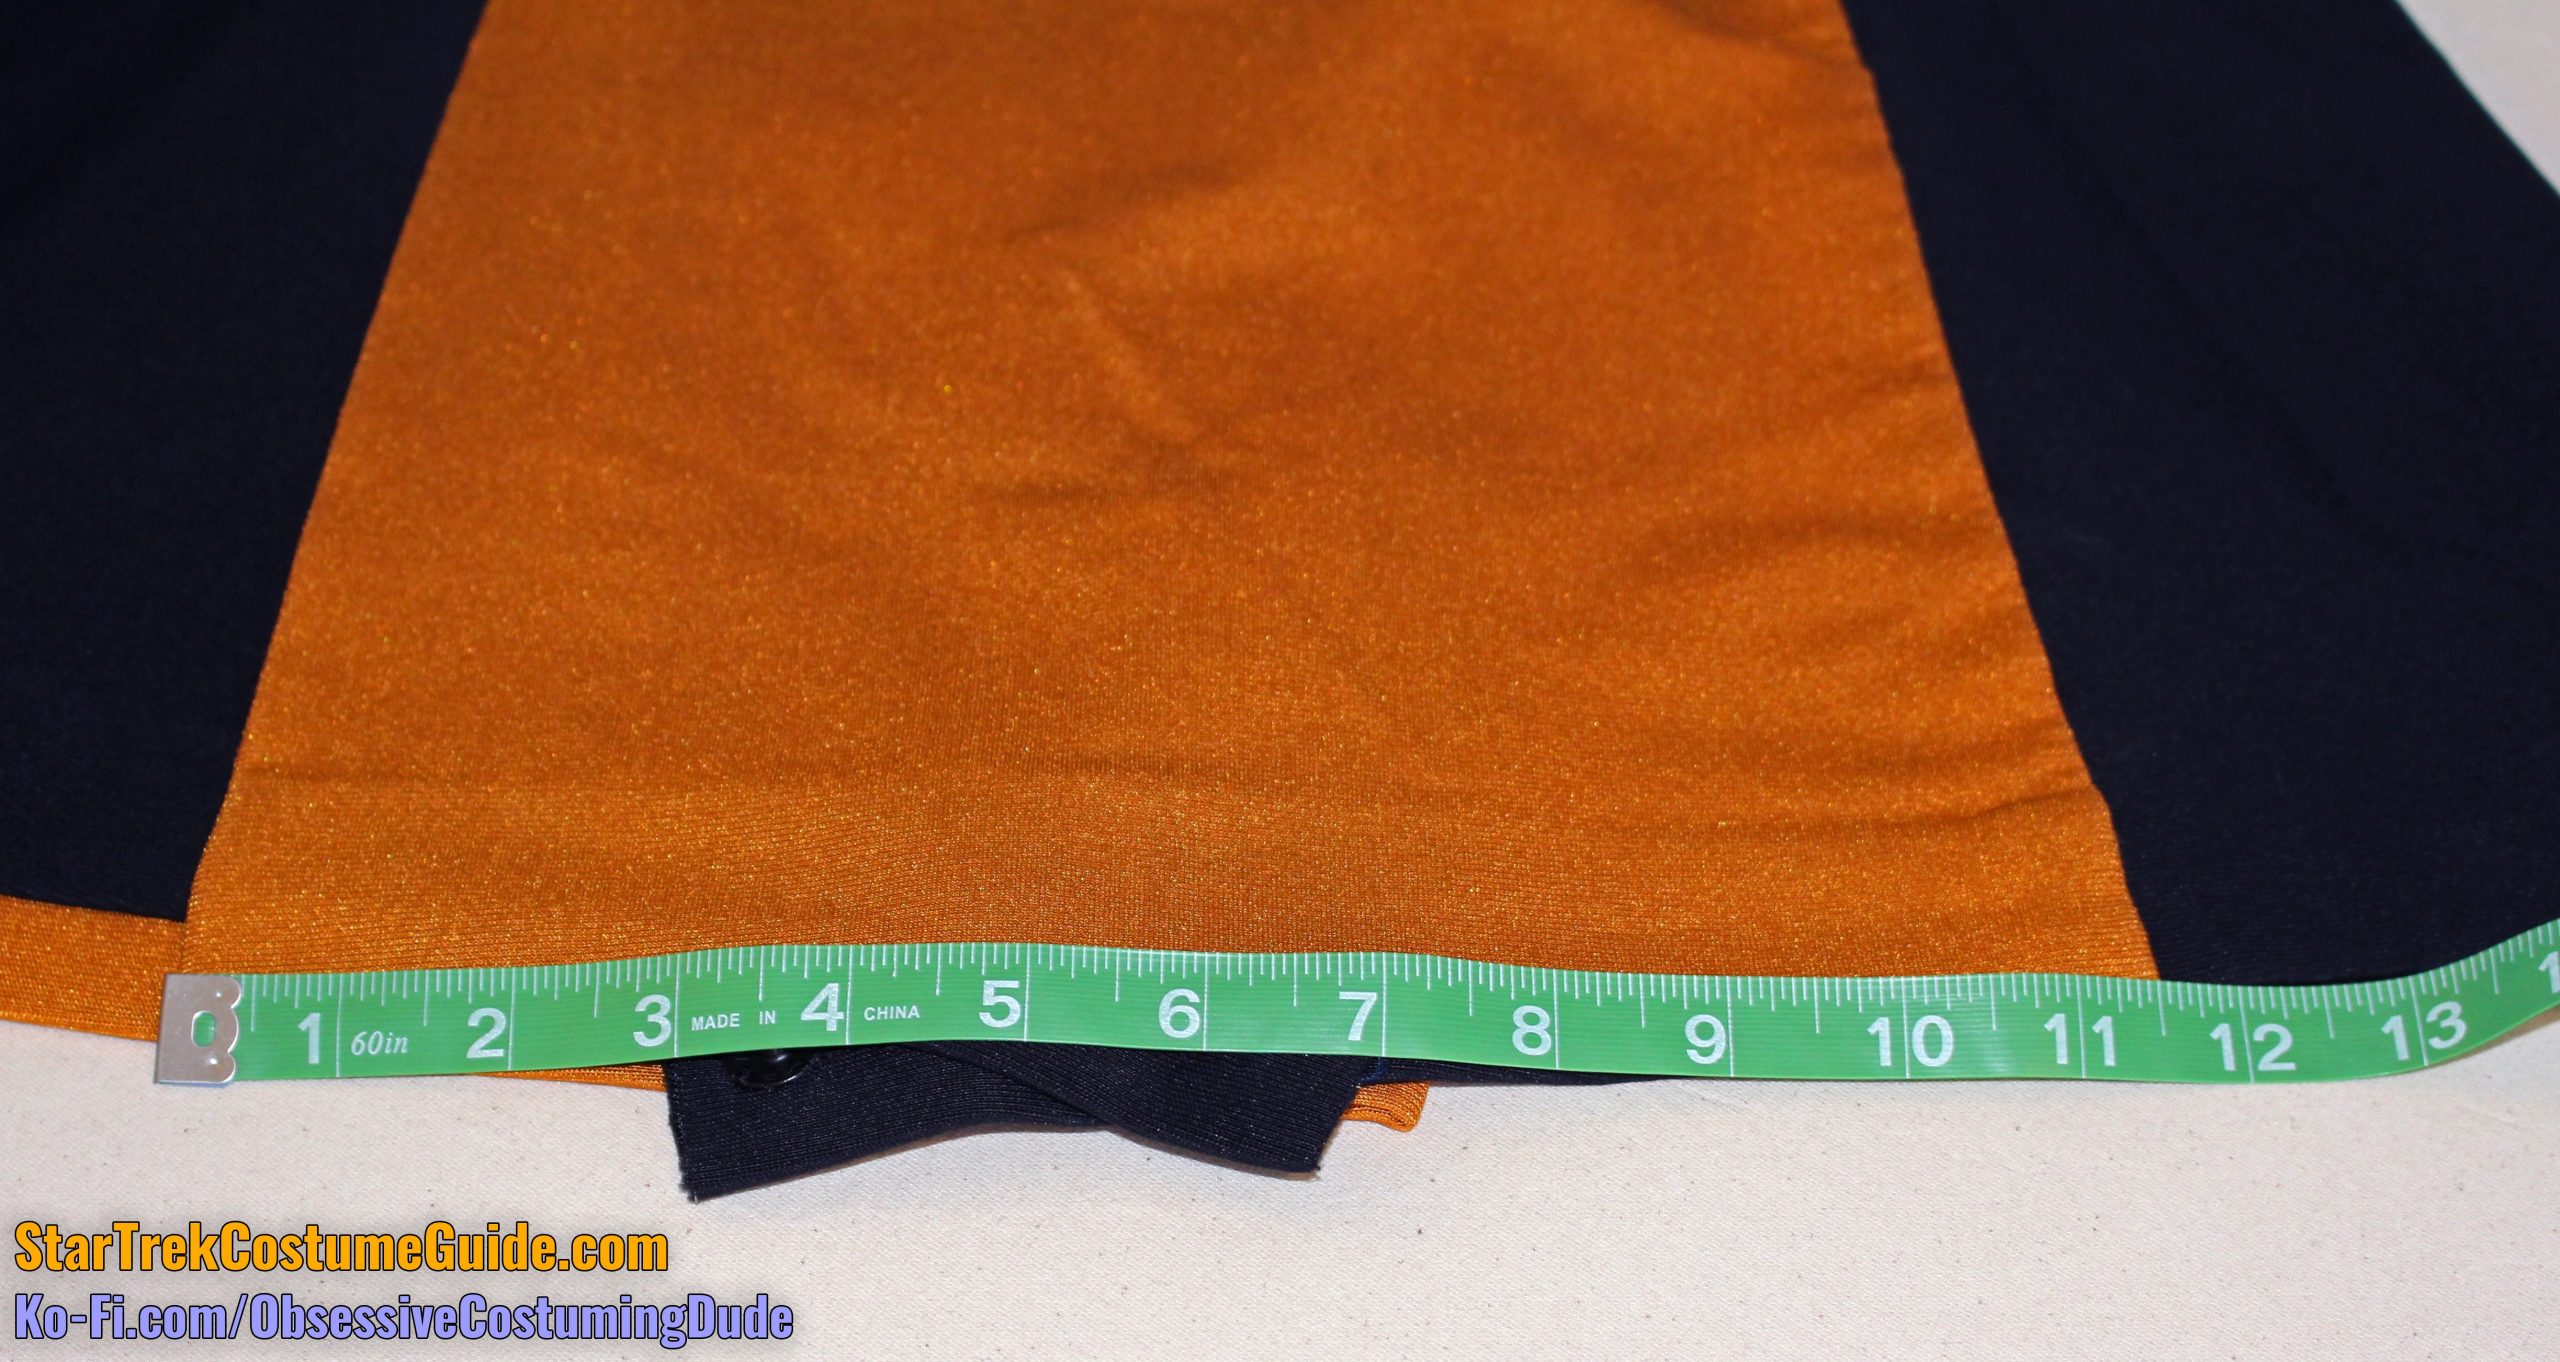
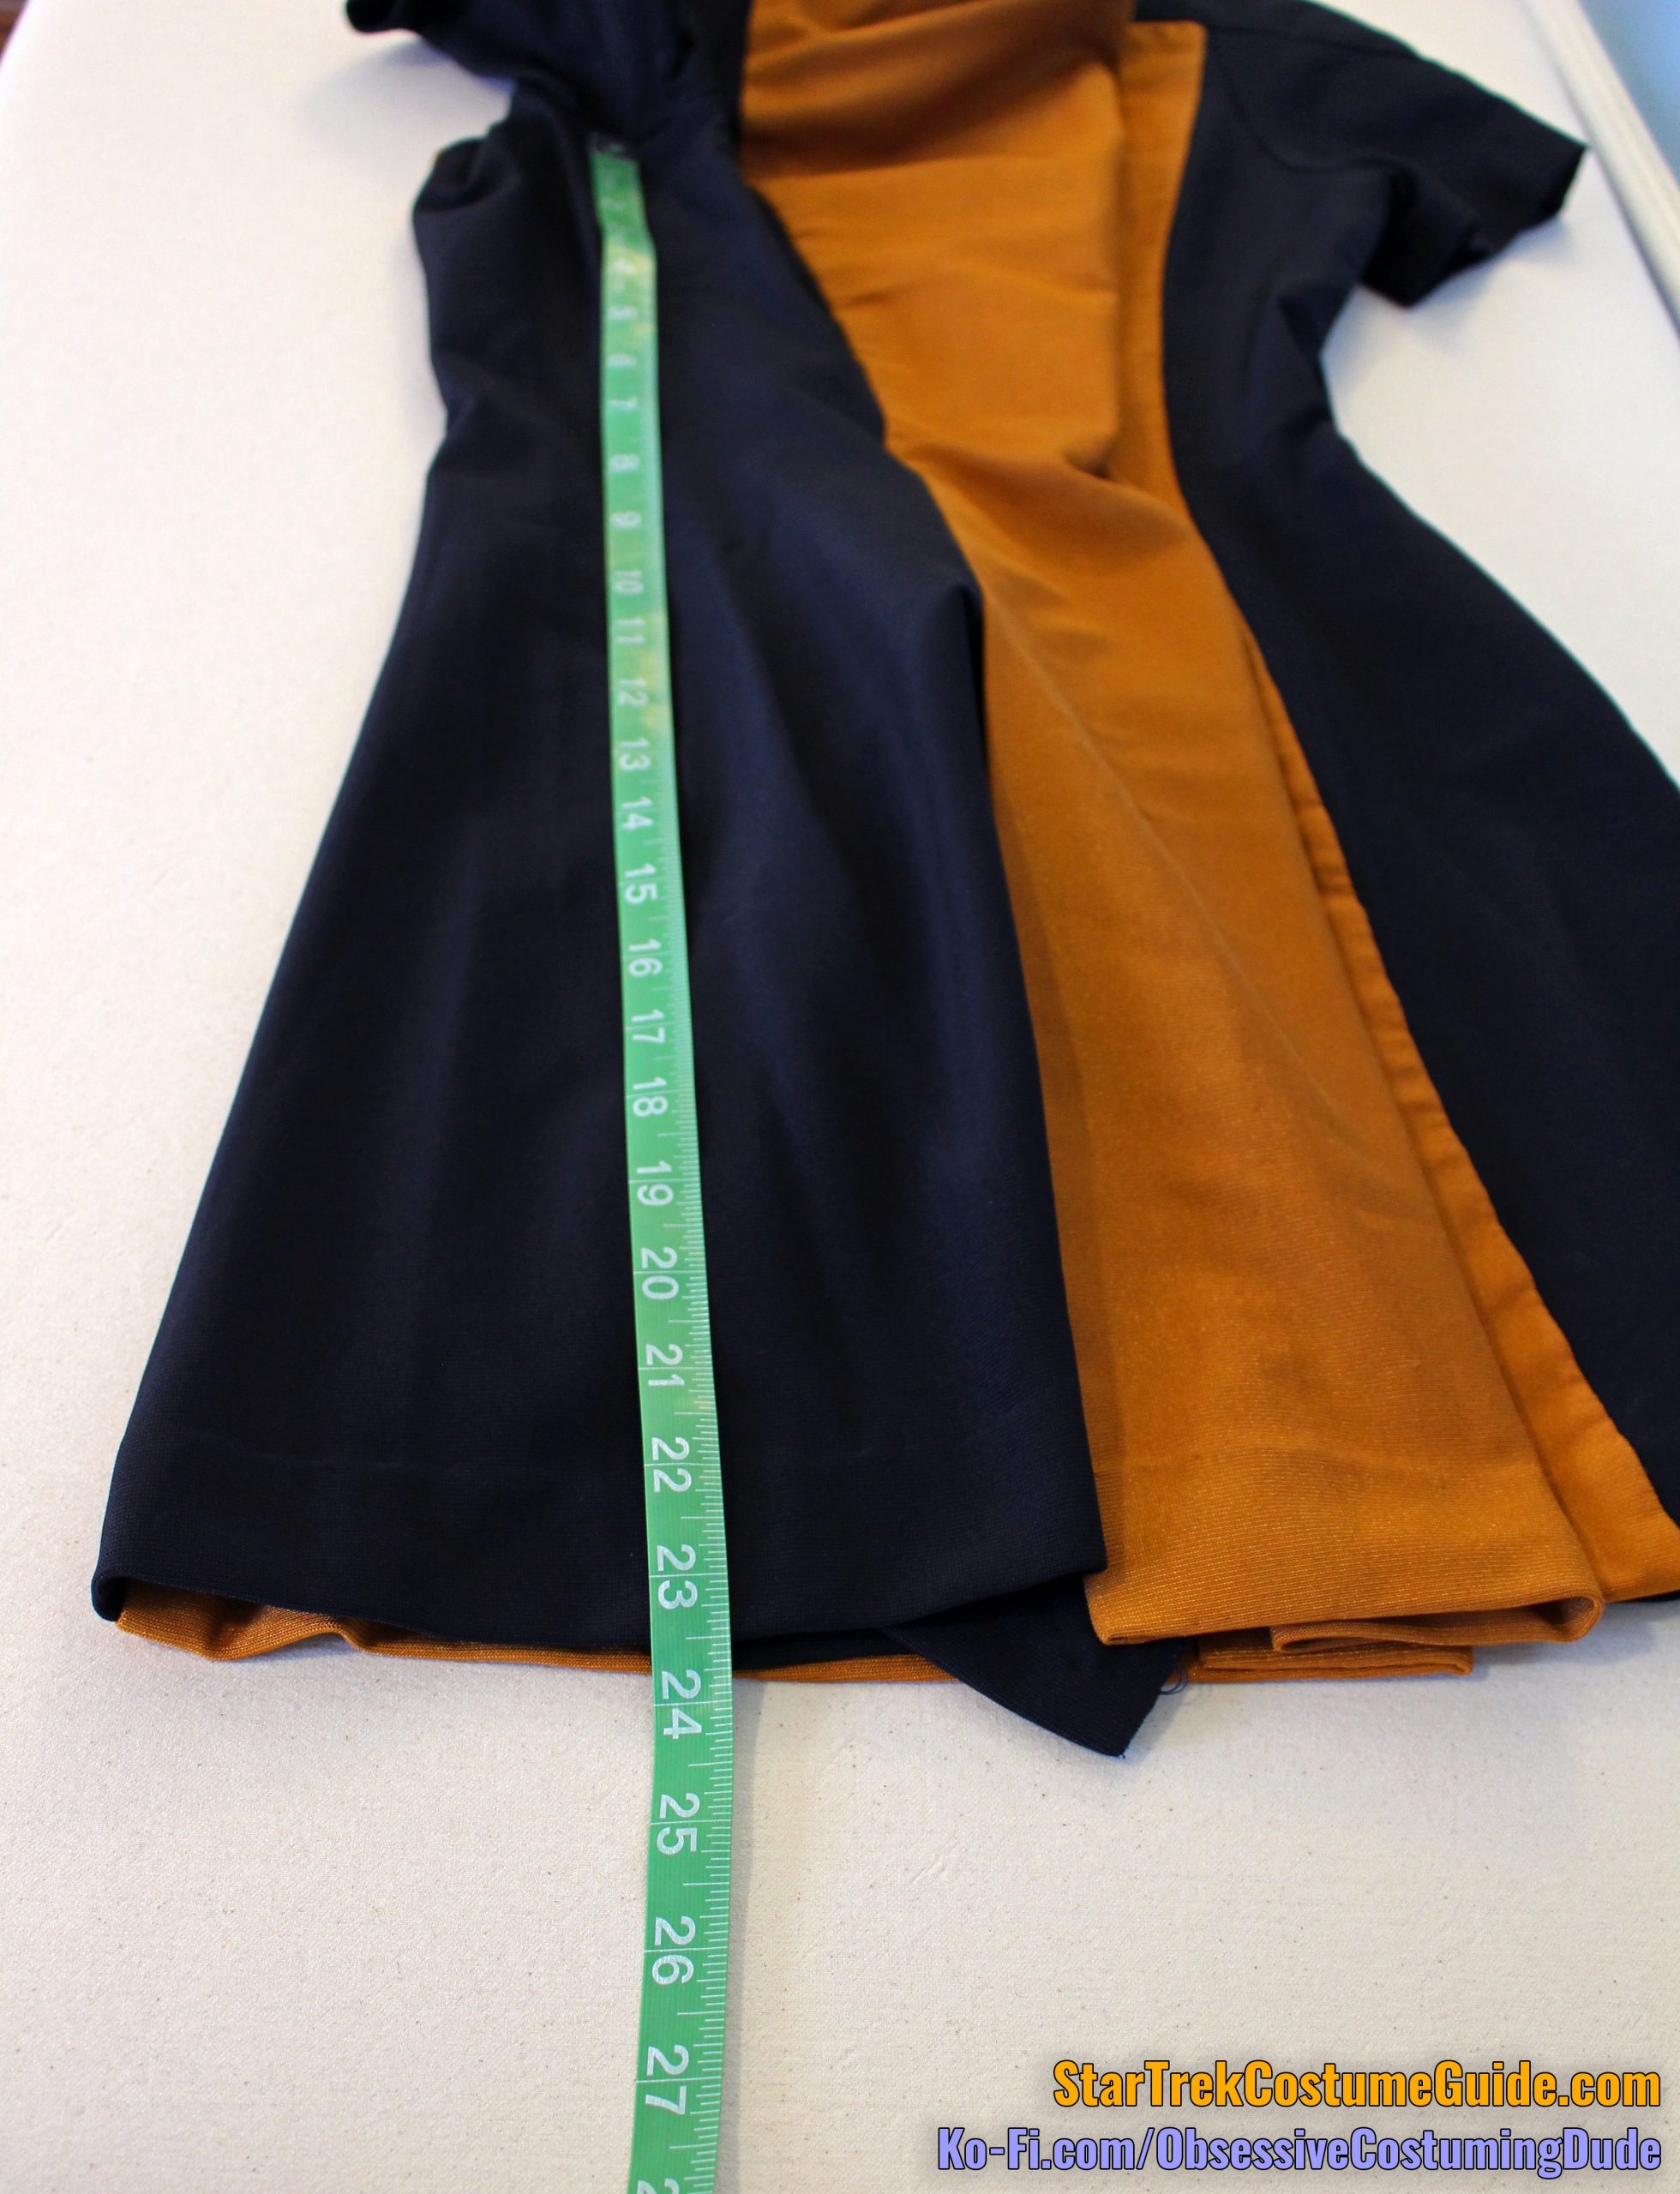
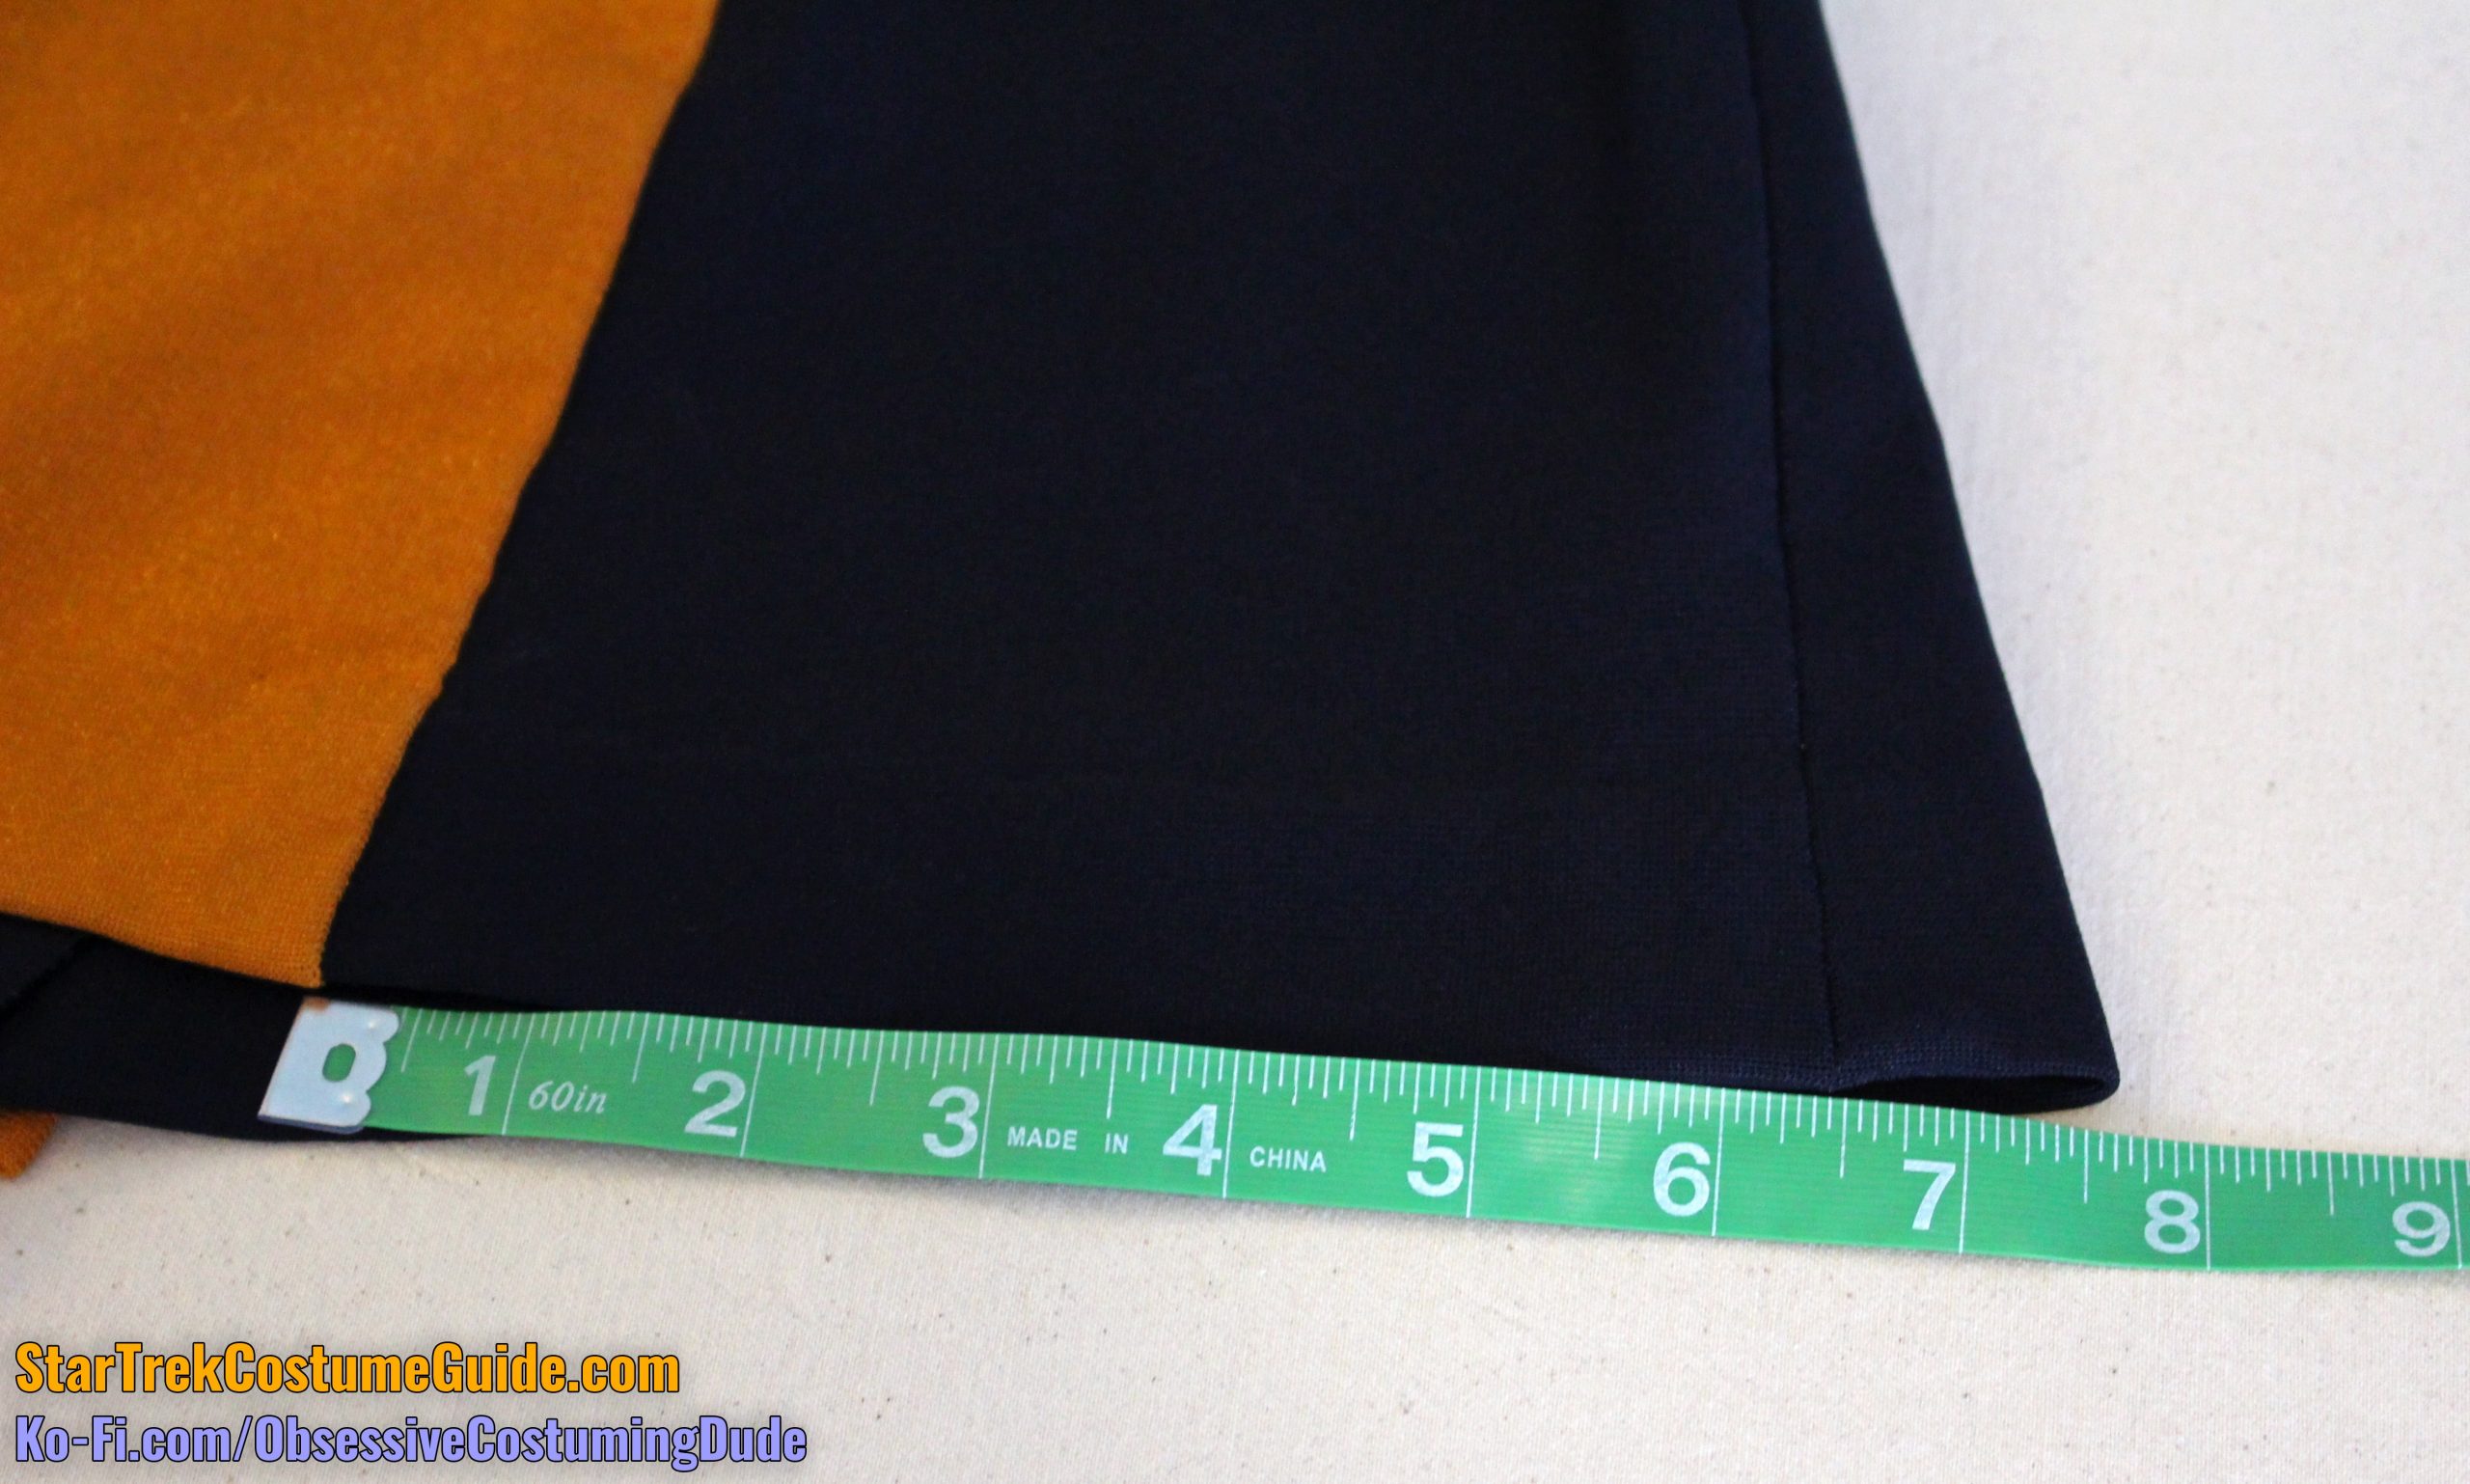
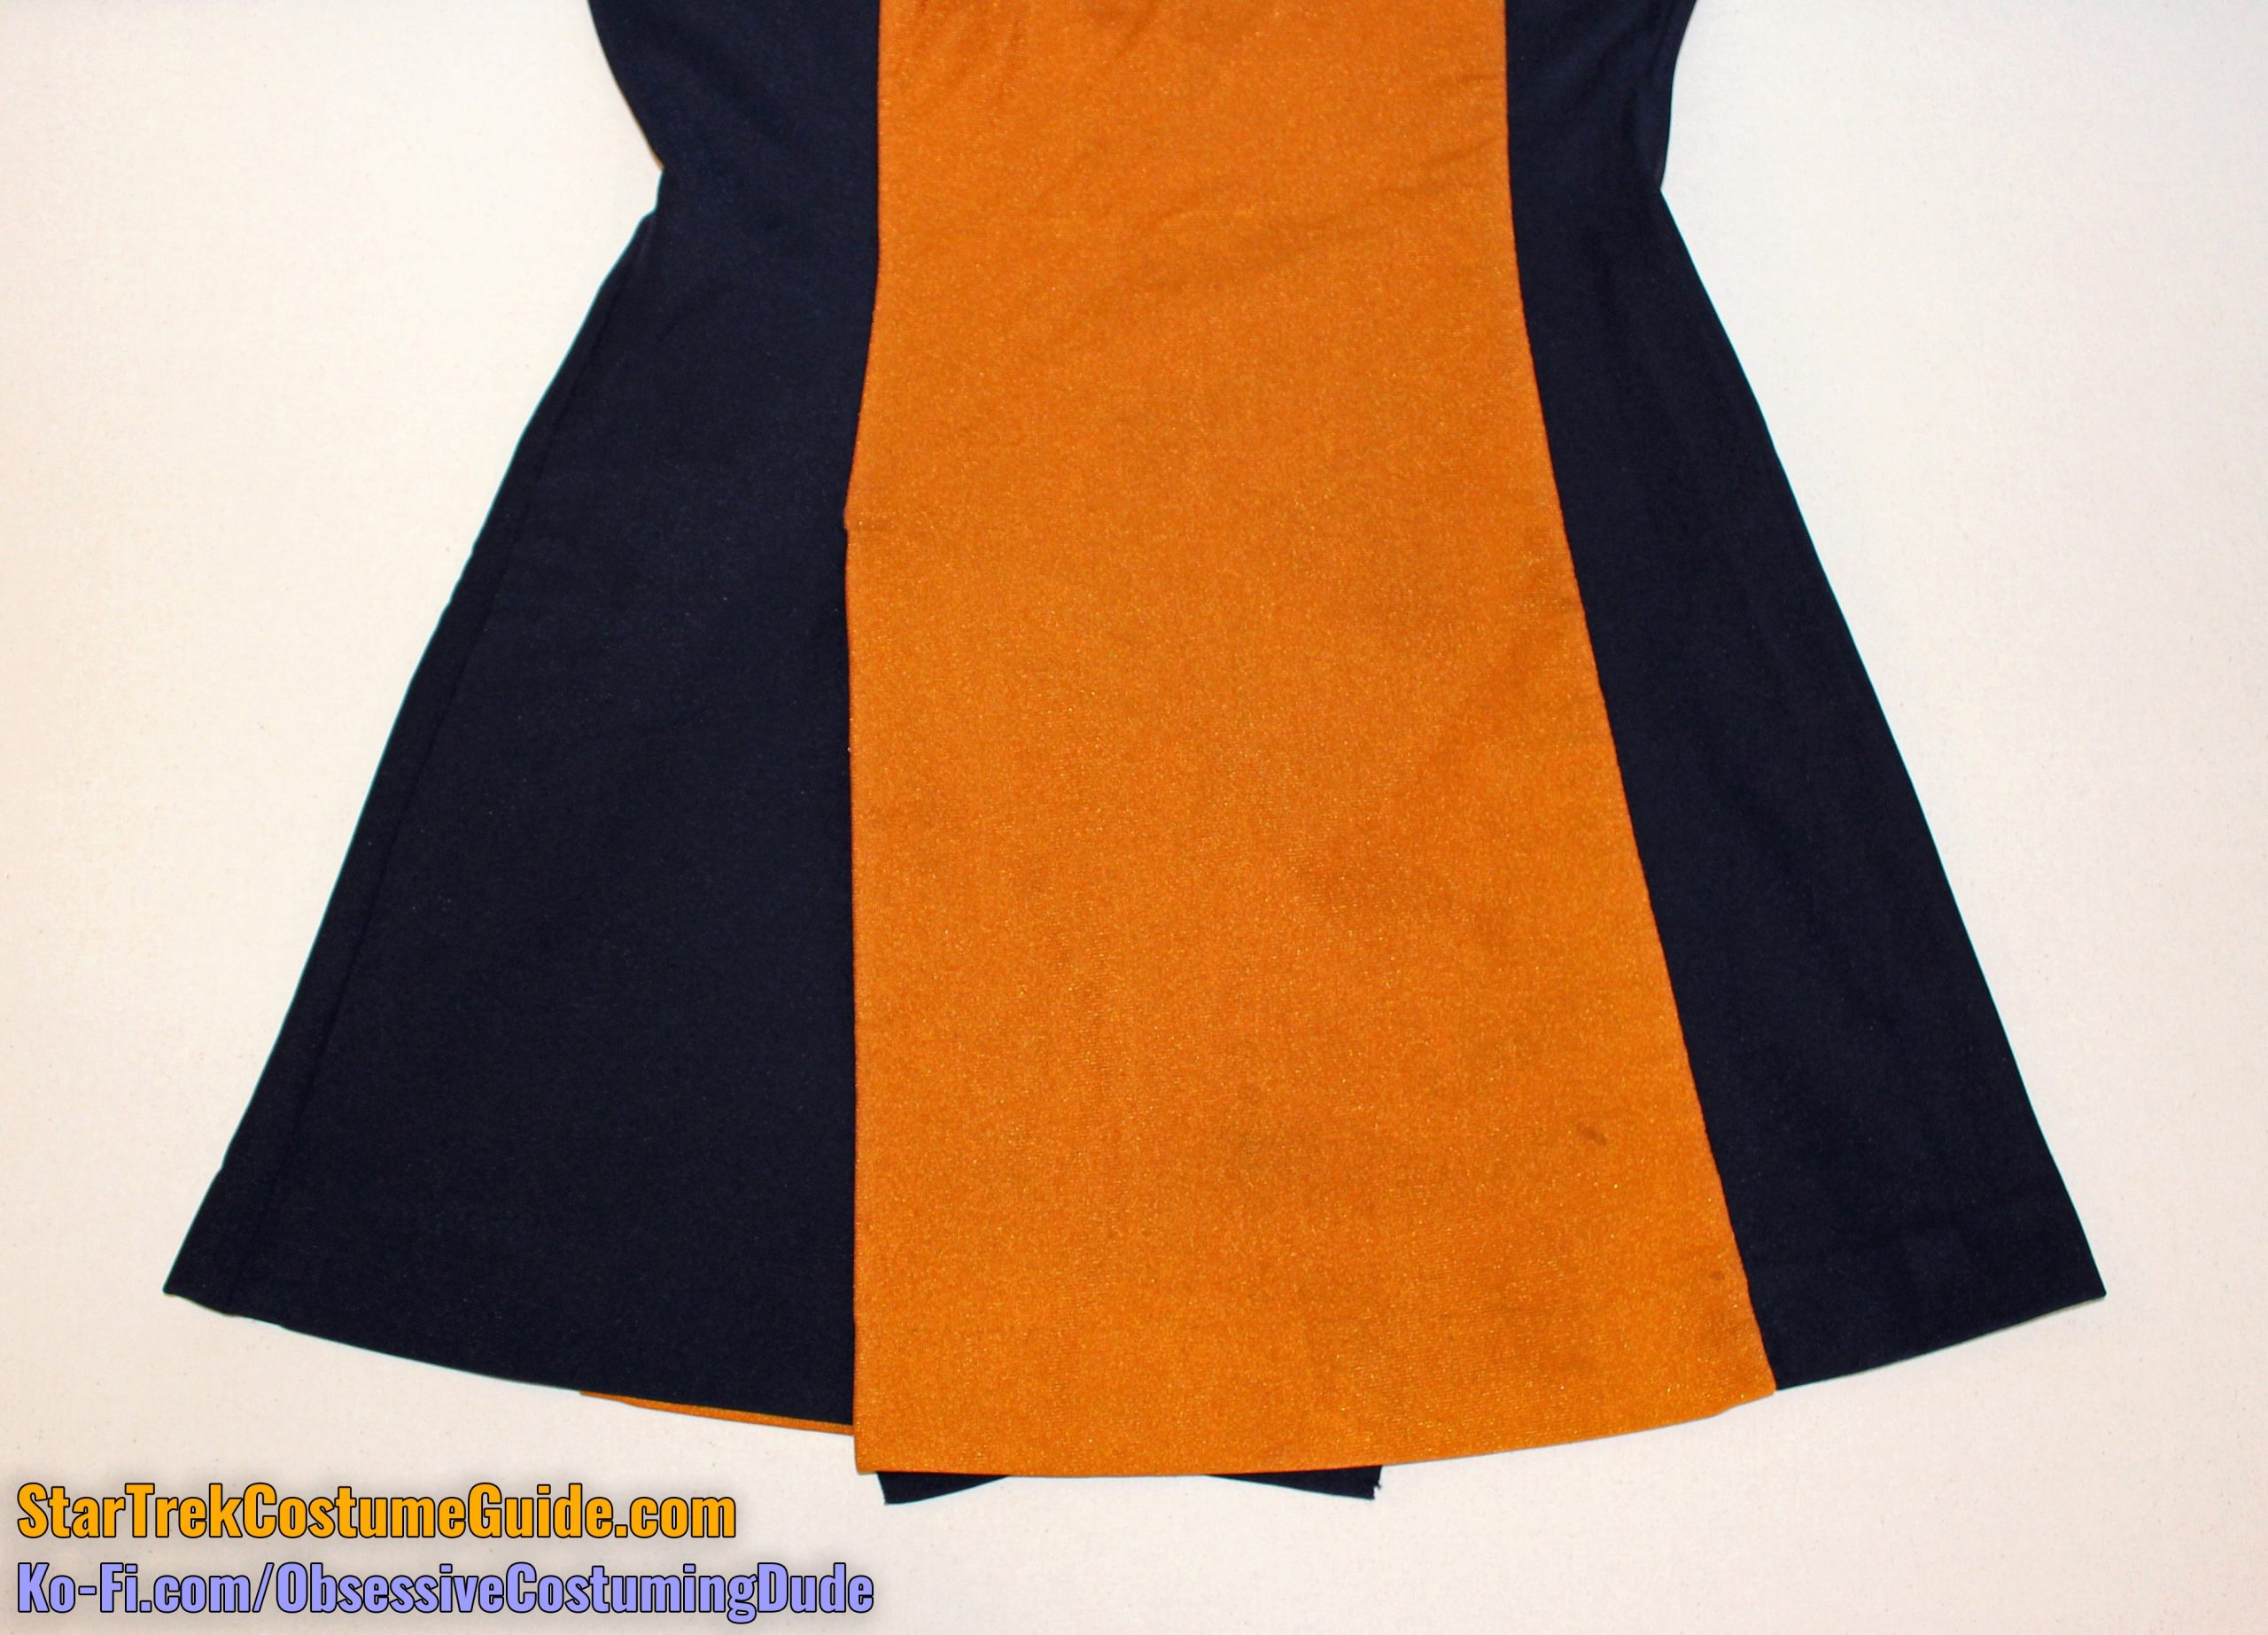
The skant’s front panel was 29″ long at the center front, measured from the bottom of the yoke to the hem.
The back panel was also 29″ long at the center back, measured from the bottom of the yoke to the hem.
The upper edge of the front panel was curved similarly to the lower edge of the yoke, although it was curved a bit more – ¾” from center front to armscye.
This additional curve allowed the seam line to also function as a dart, causing the skant to hug the body a bit tighter above the bust.
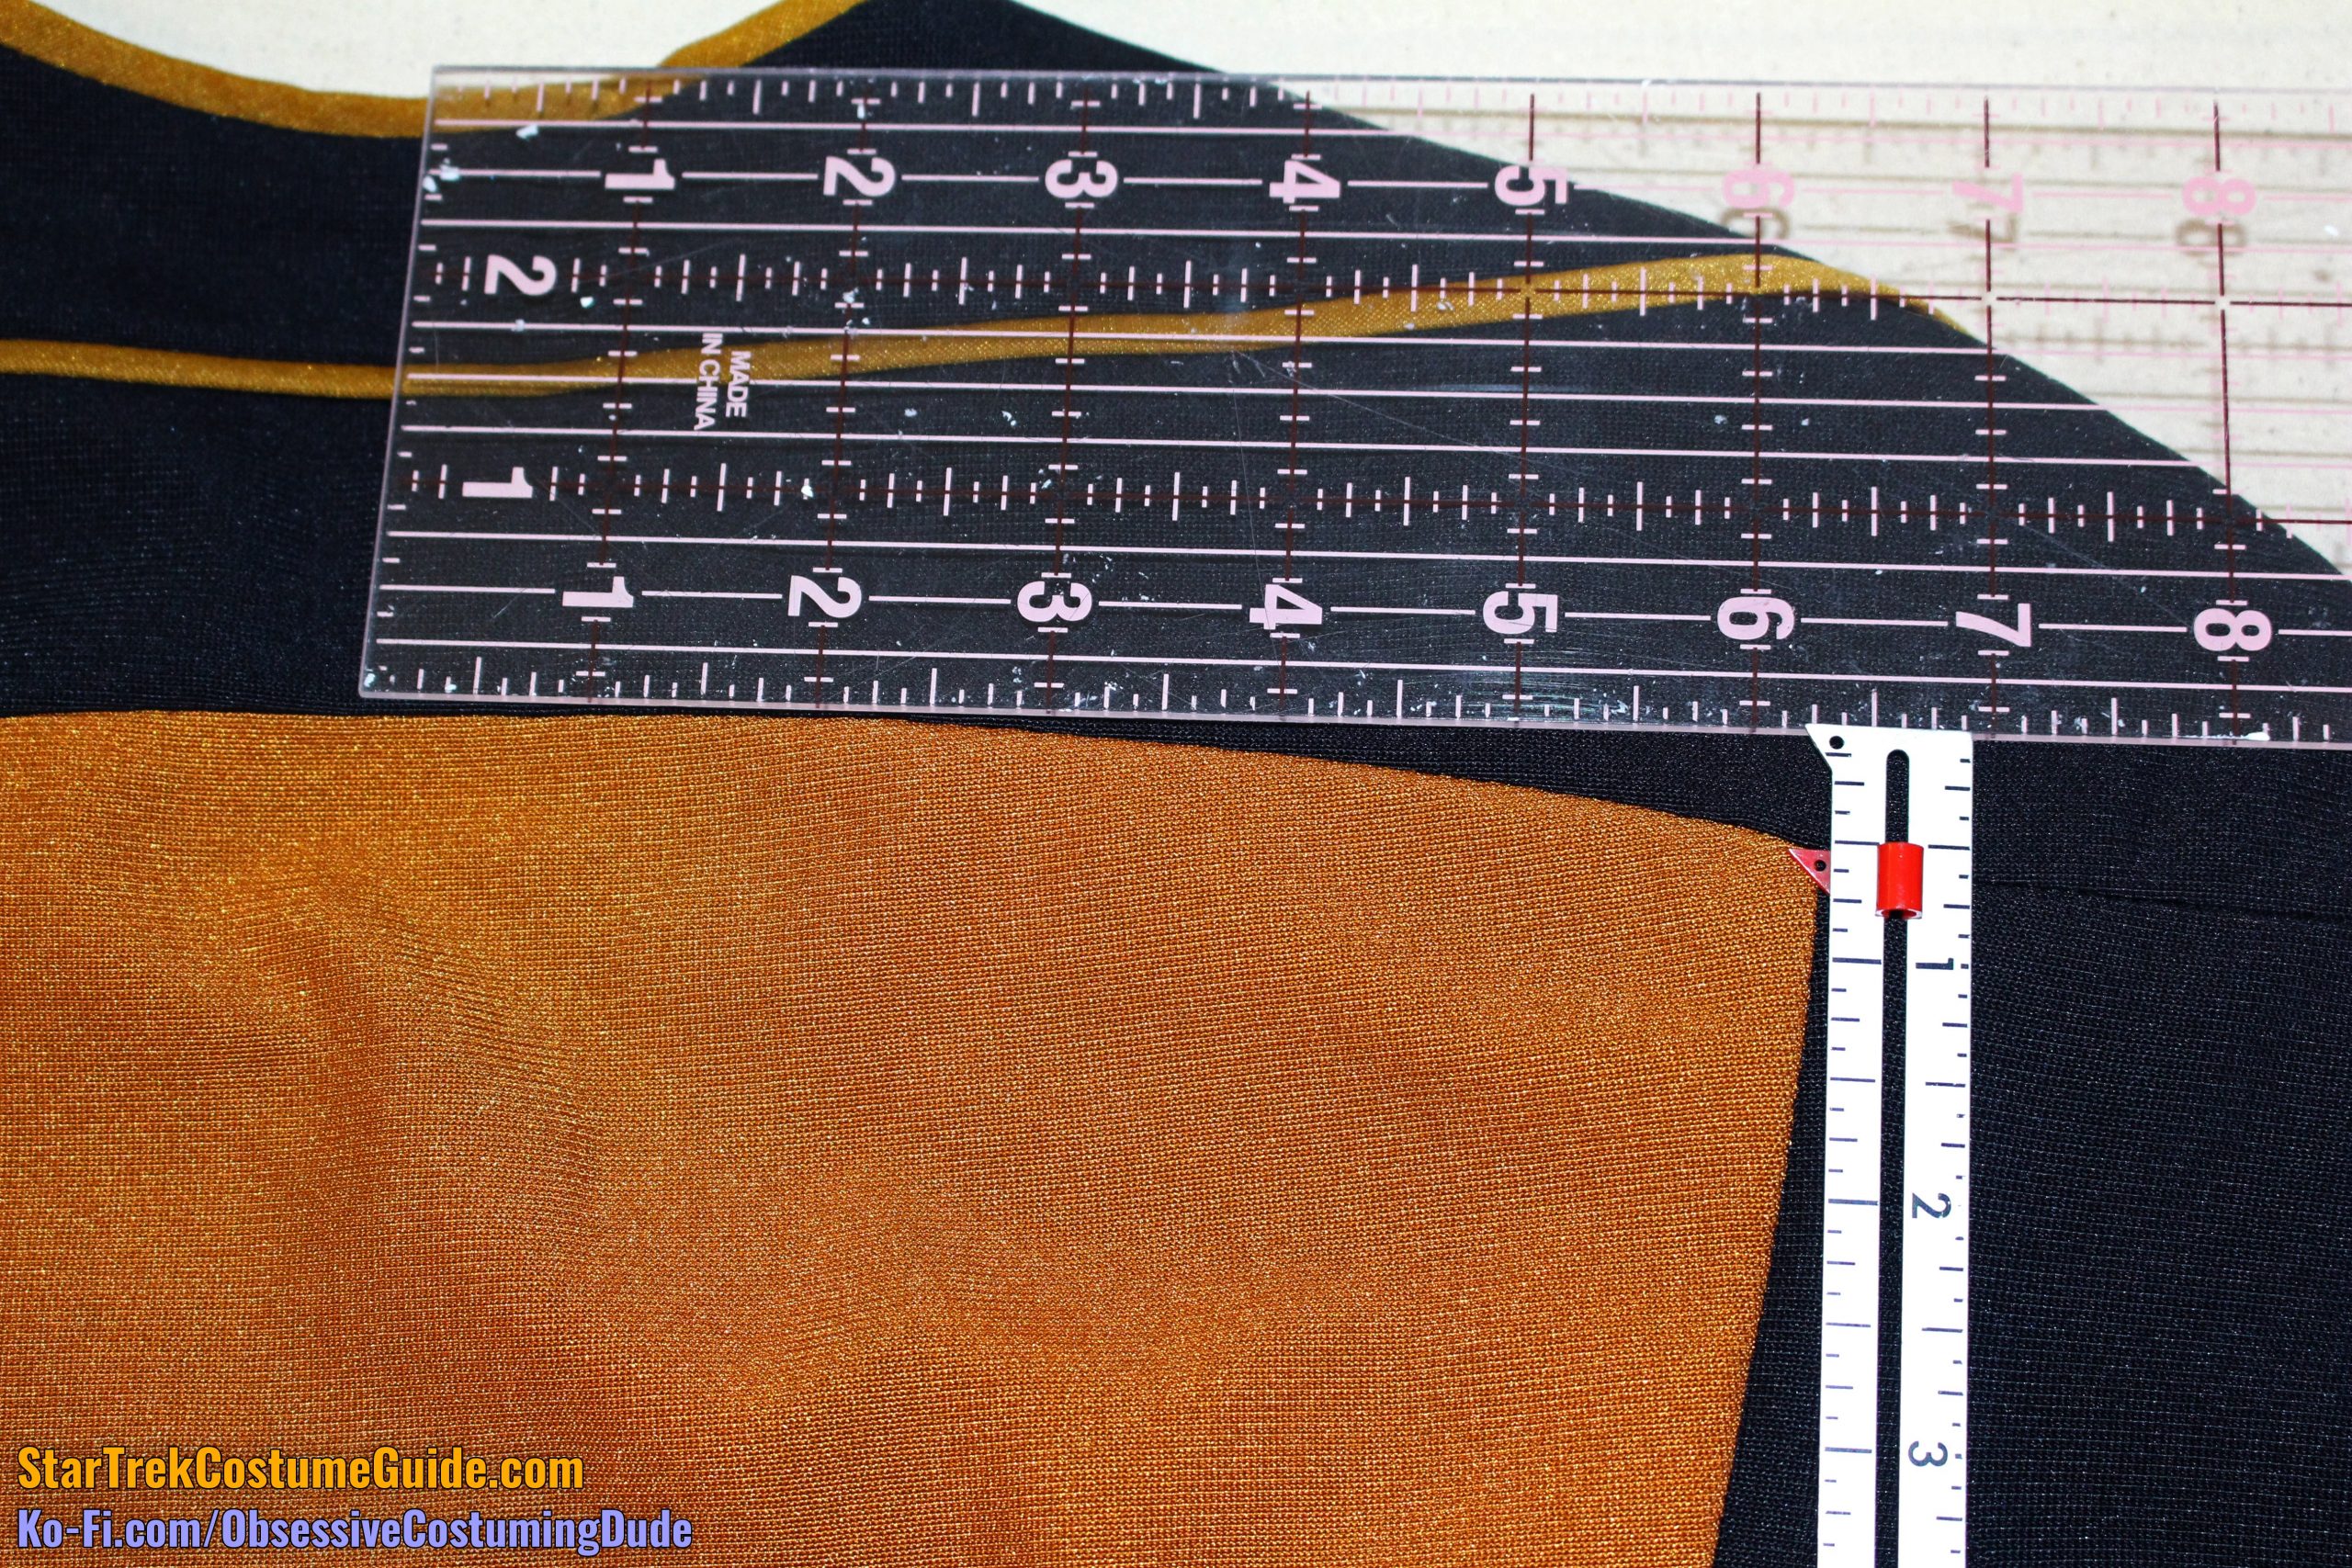
The upper edge of the back panel was even more curved – a full inch from center back to armscye.
This was probably to accommodate the shoulder blades. (On tailored garments like suits, the back armscye is usually “shrunk” a bit outside the shoulder blades.)
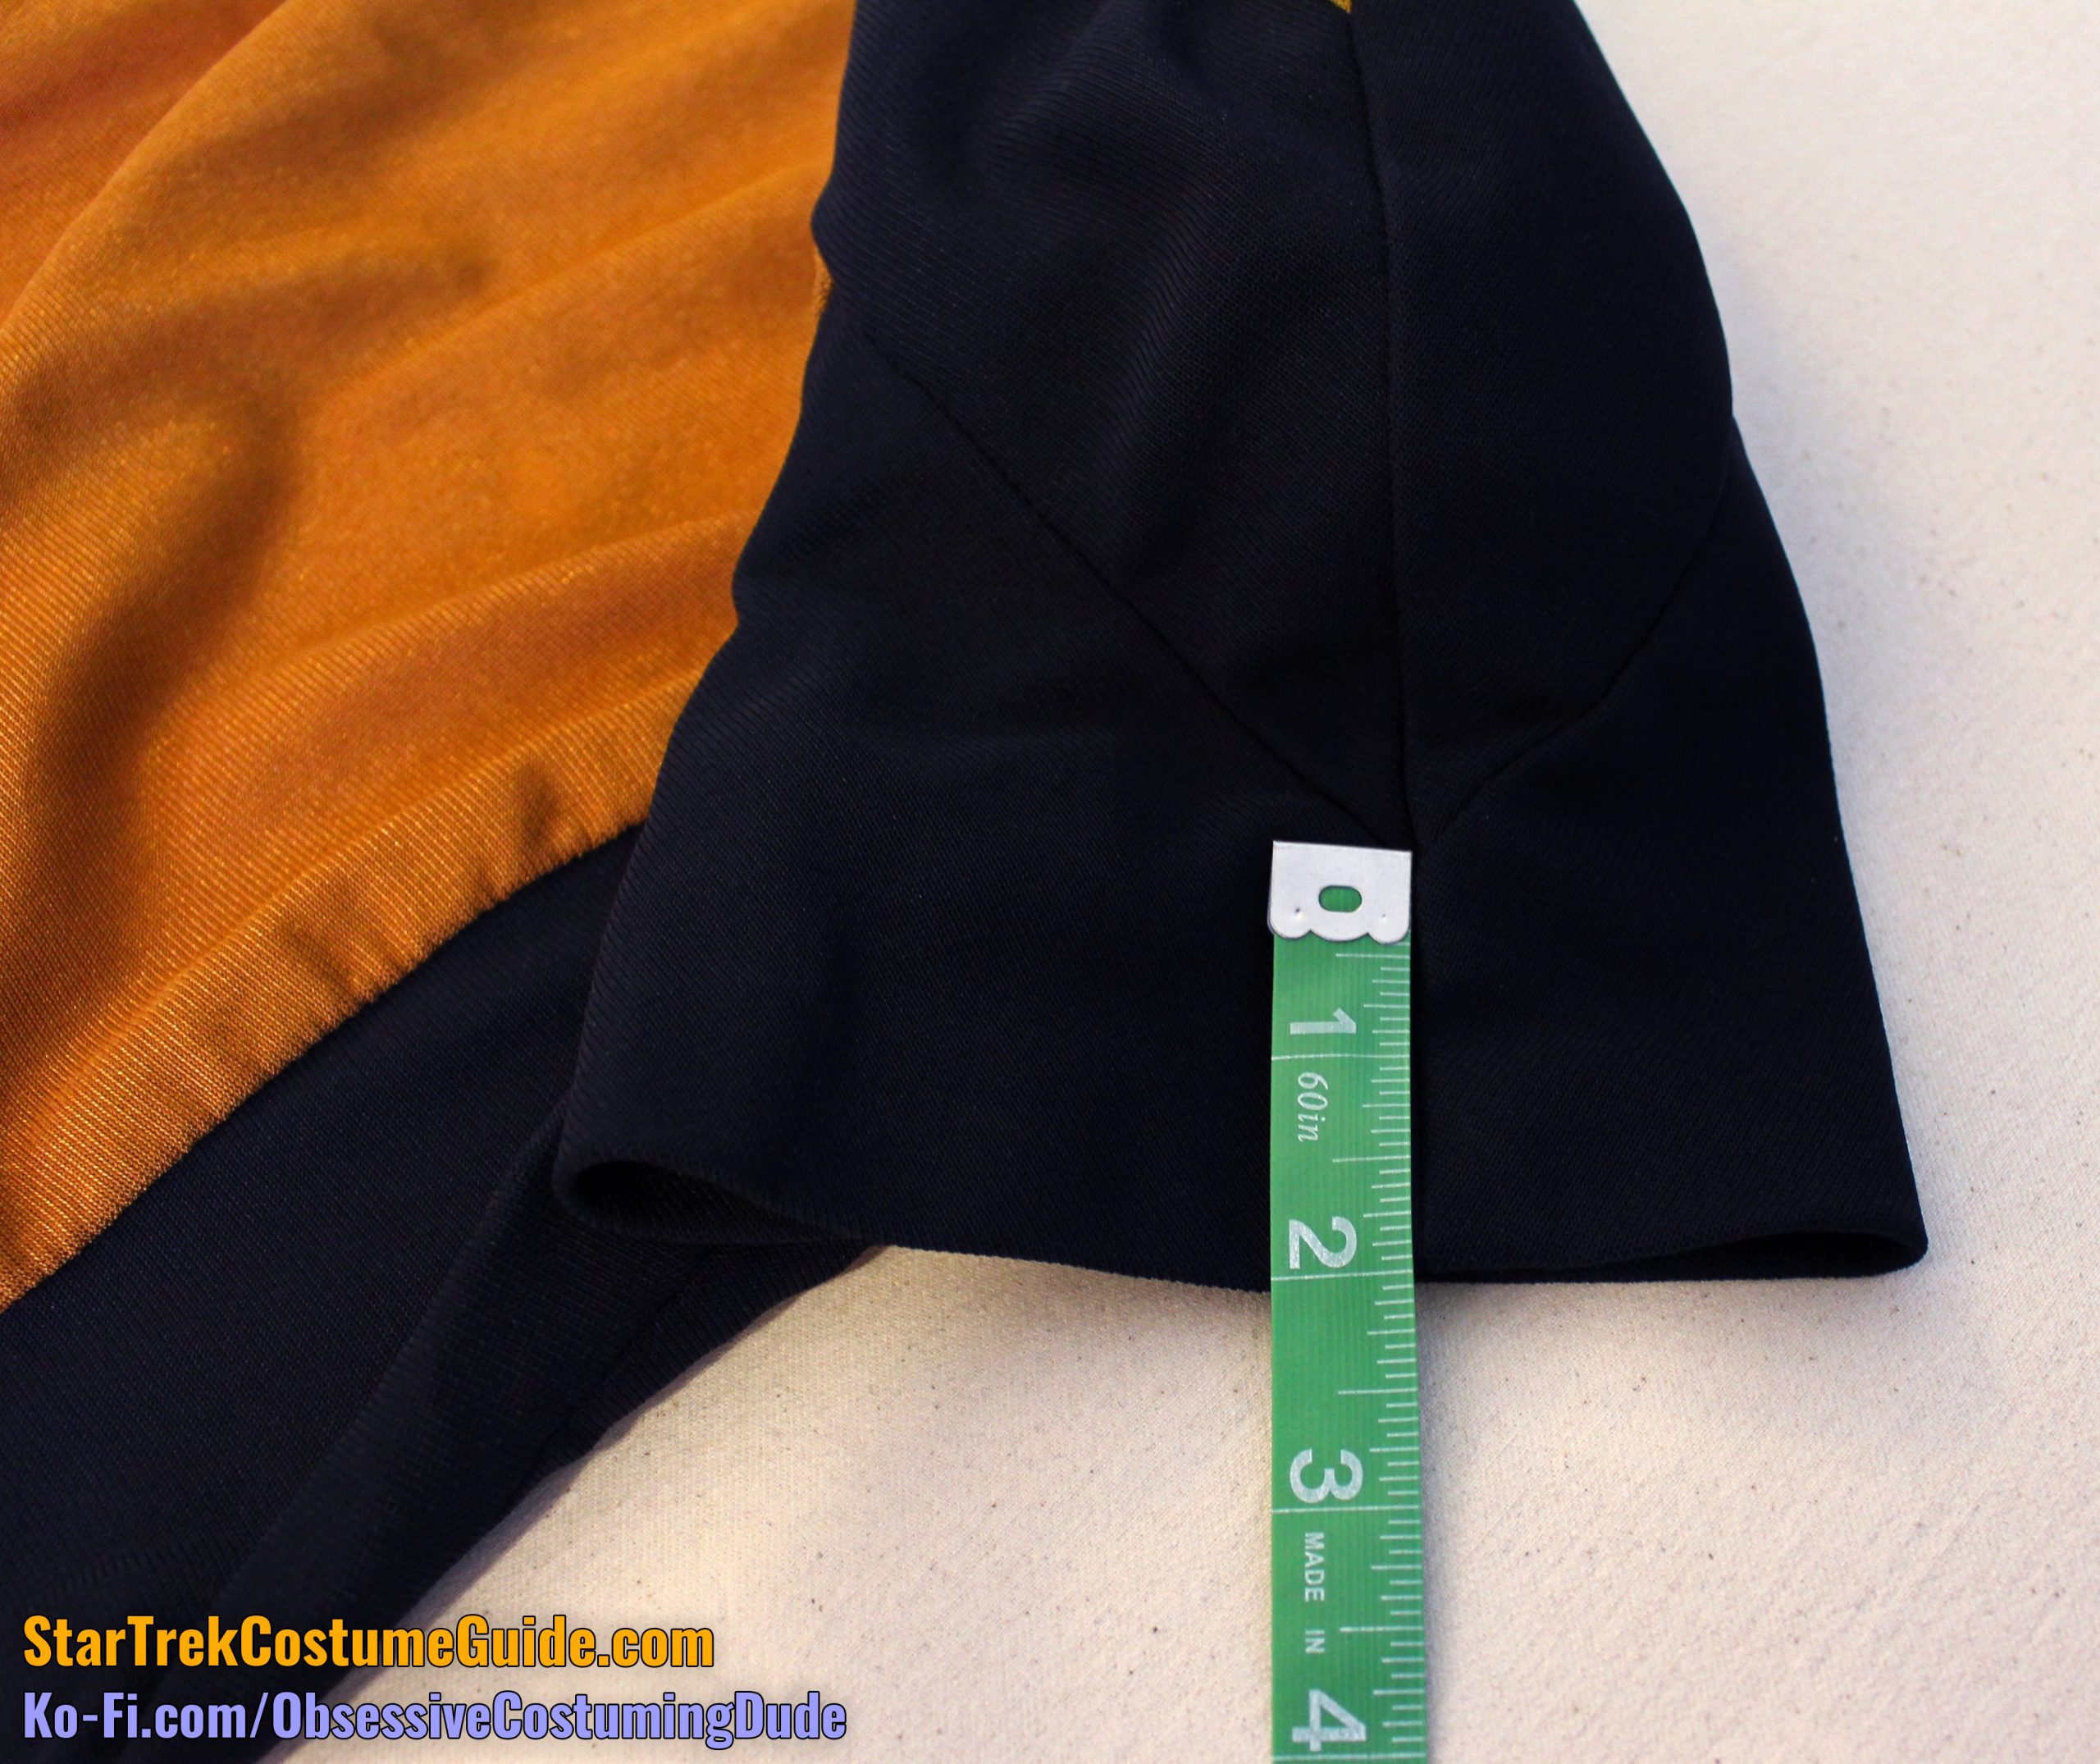
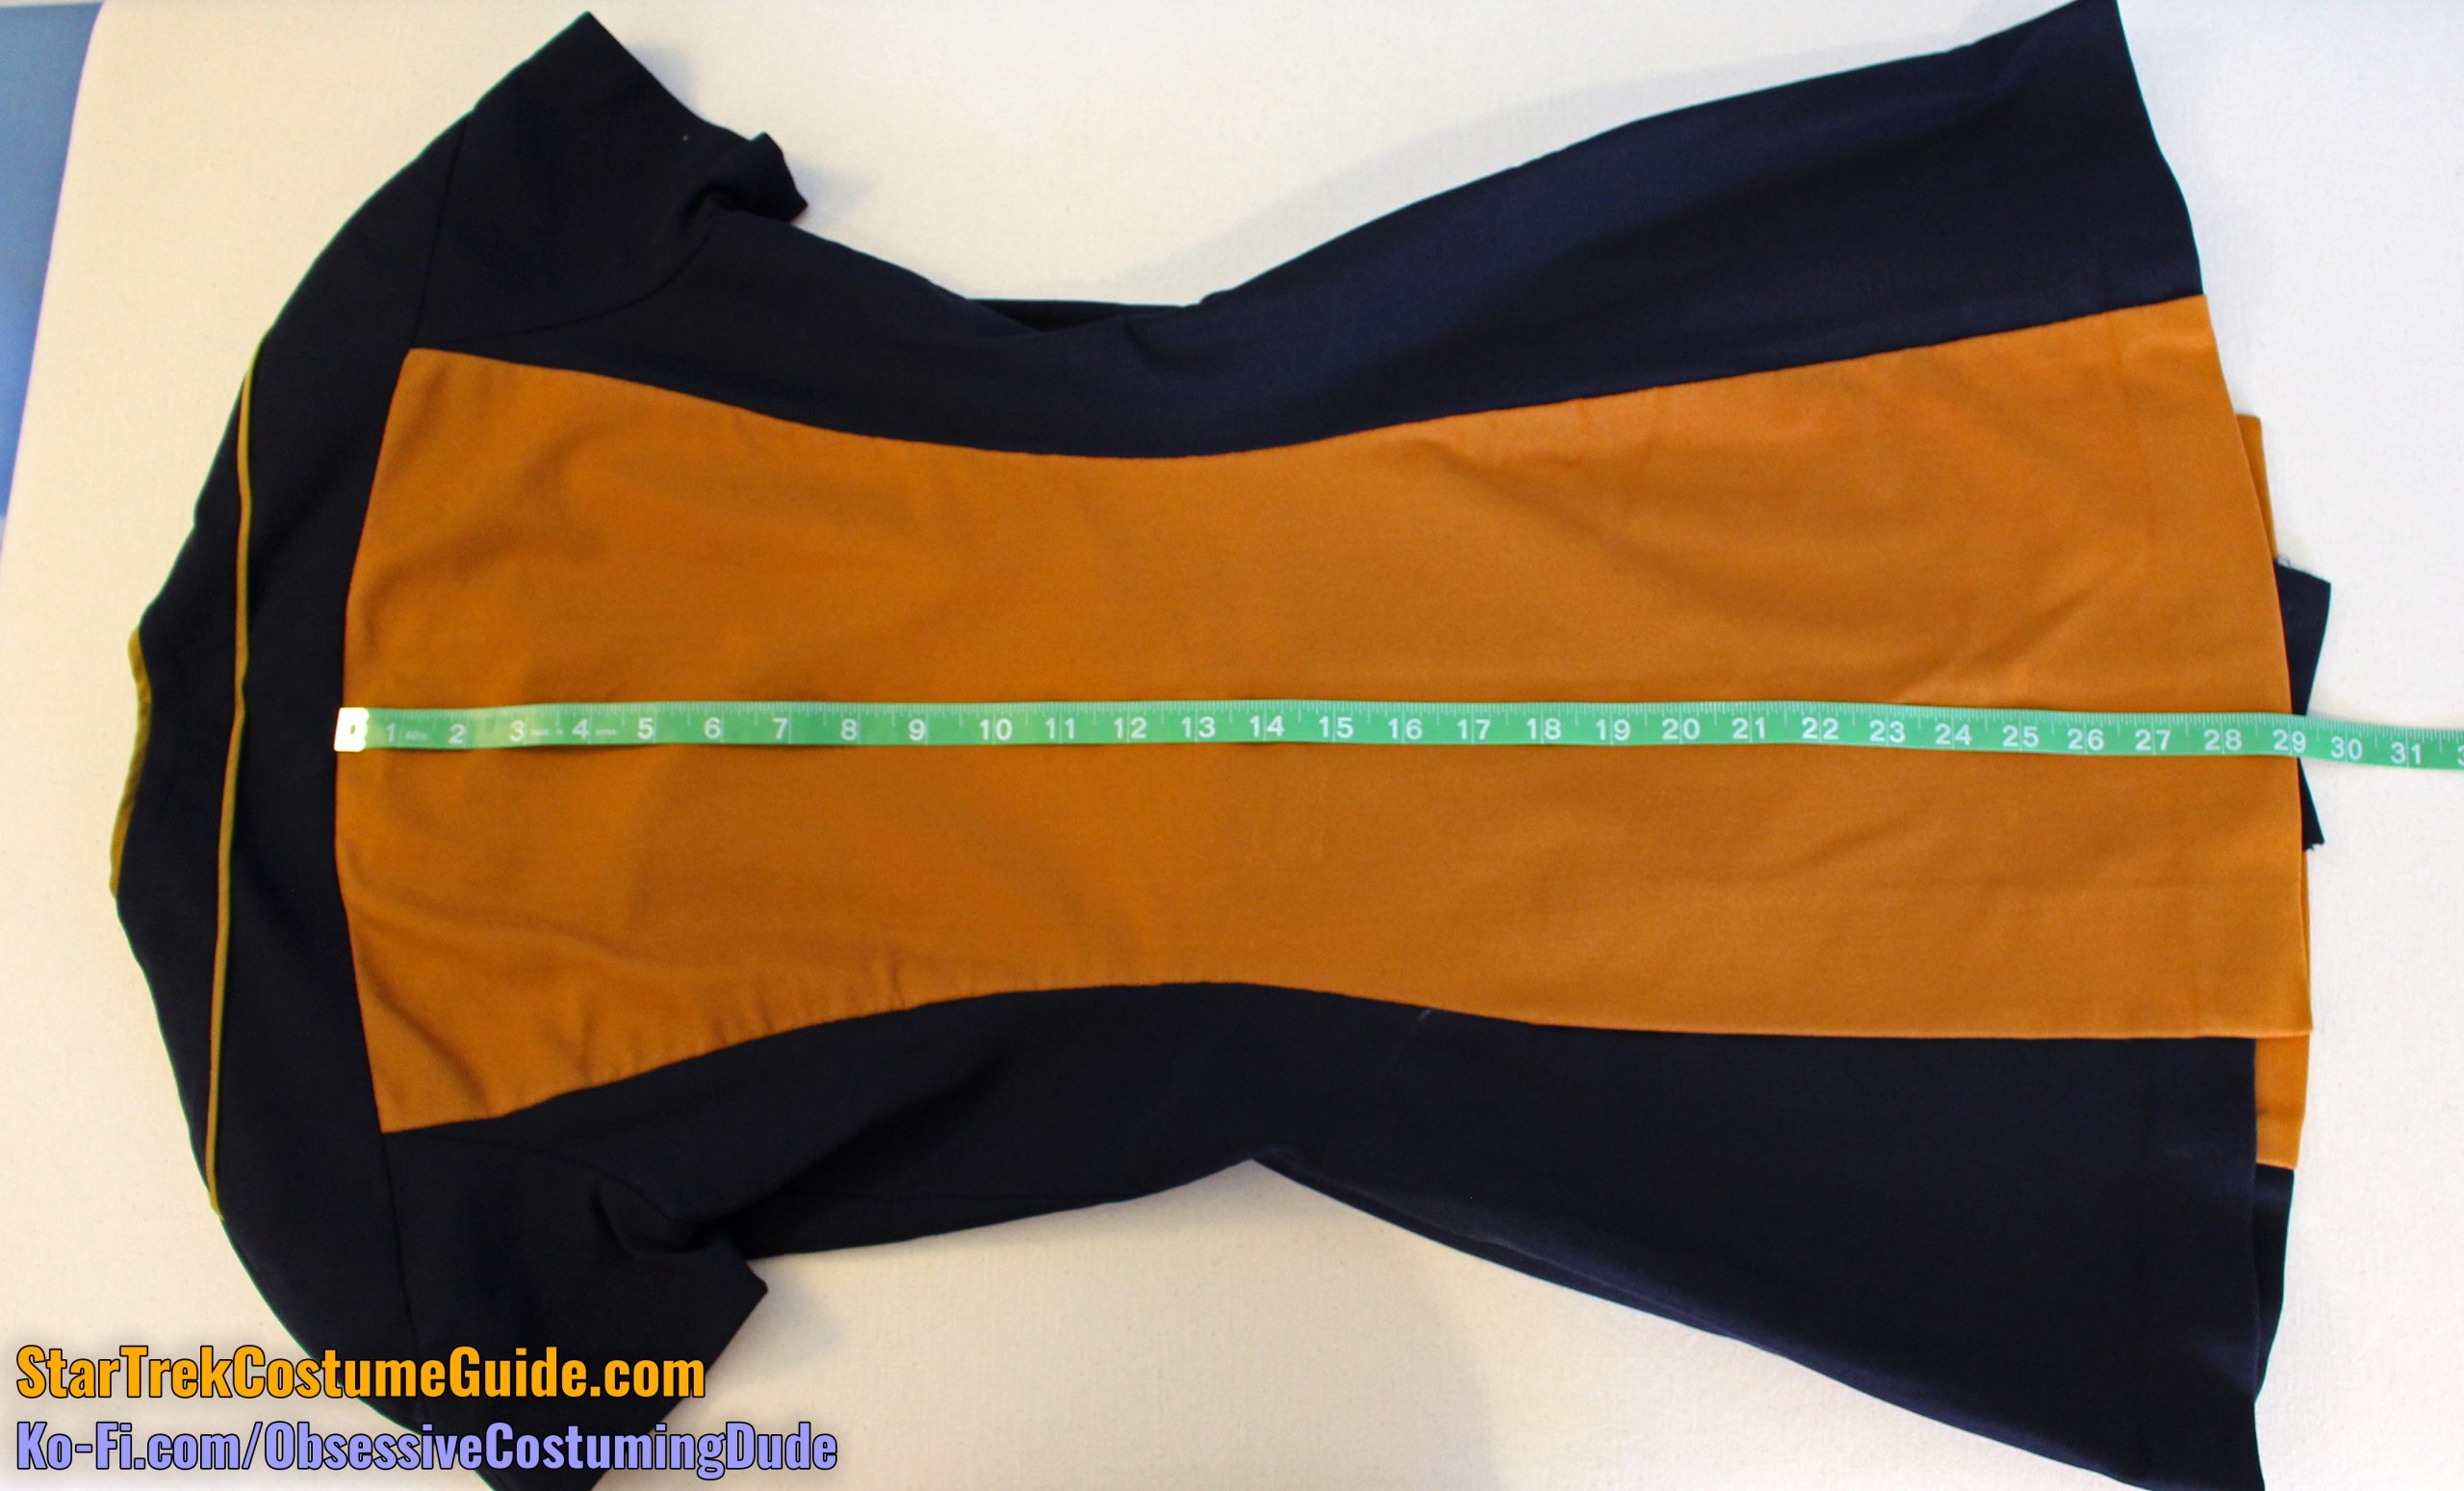
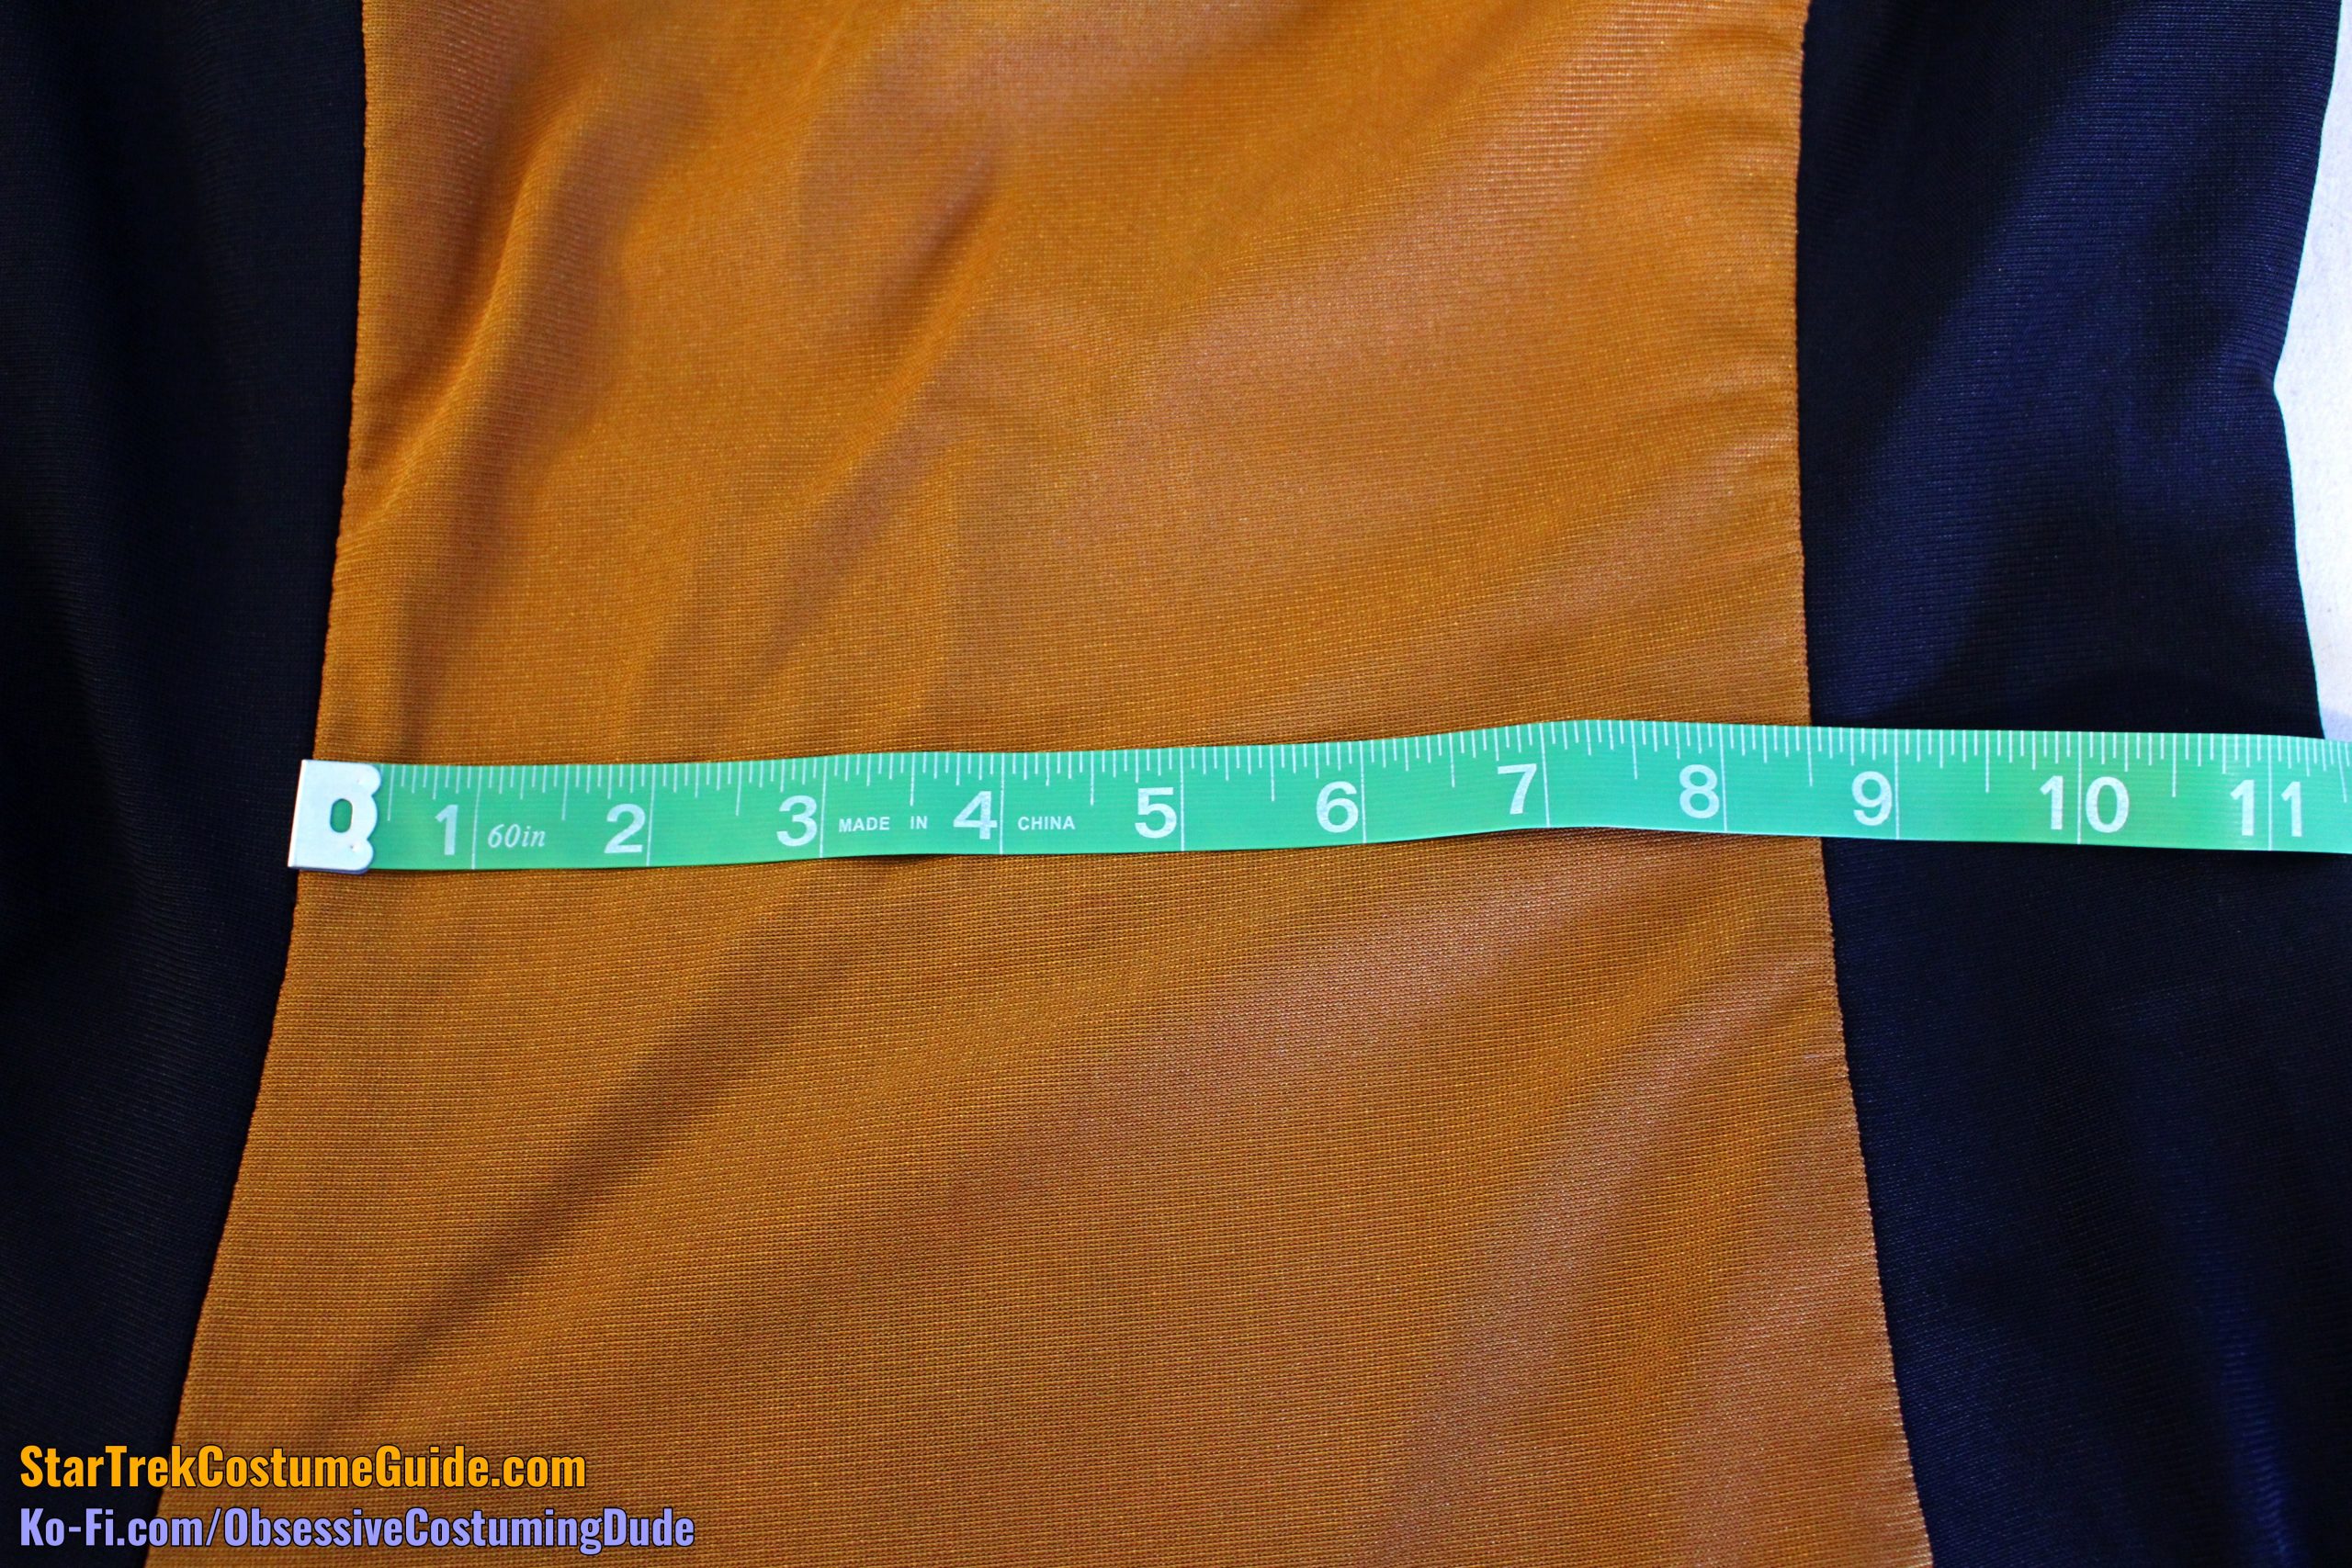
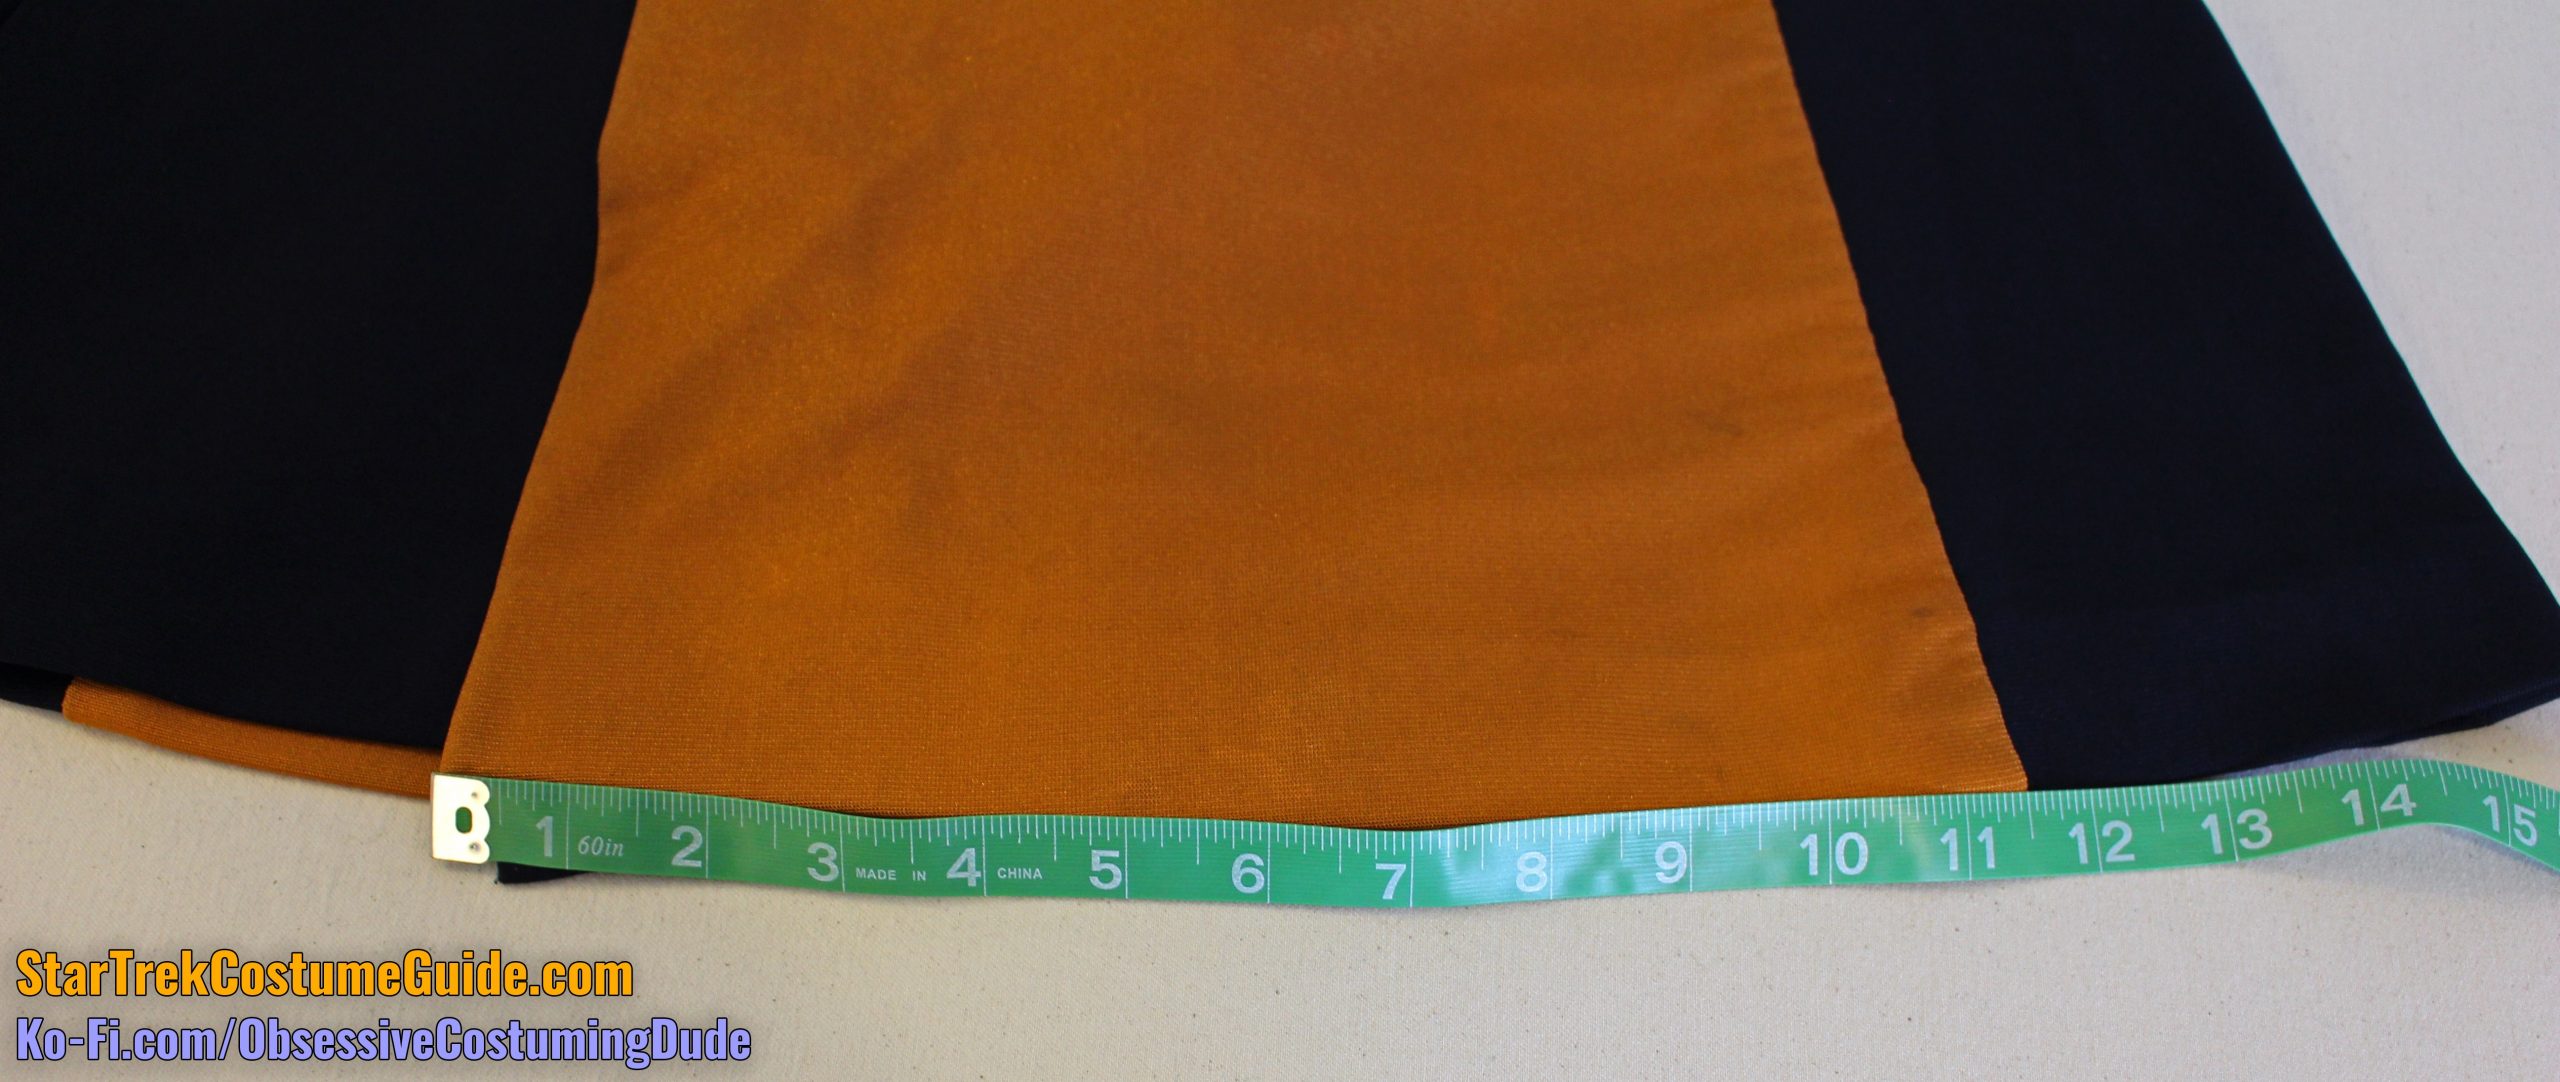
The front panel was hourglass-shaped.
Its upper edge was 12 ½” from corner to corner, tapering down to 8 ½” wide at the waist, and back out to 11 ½” at the bottom.
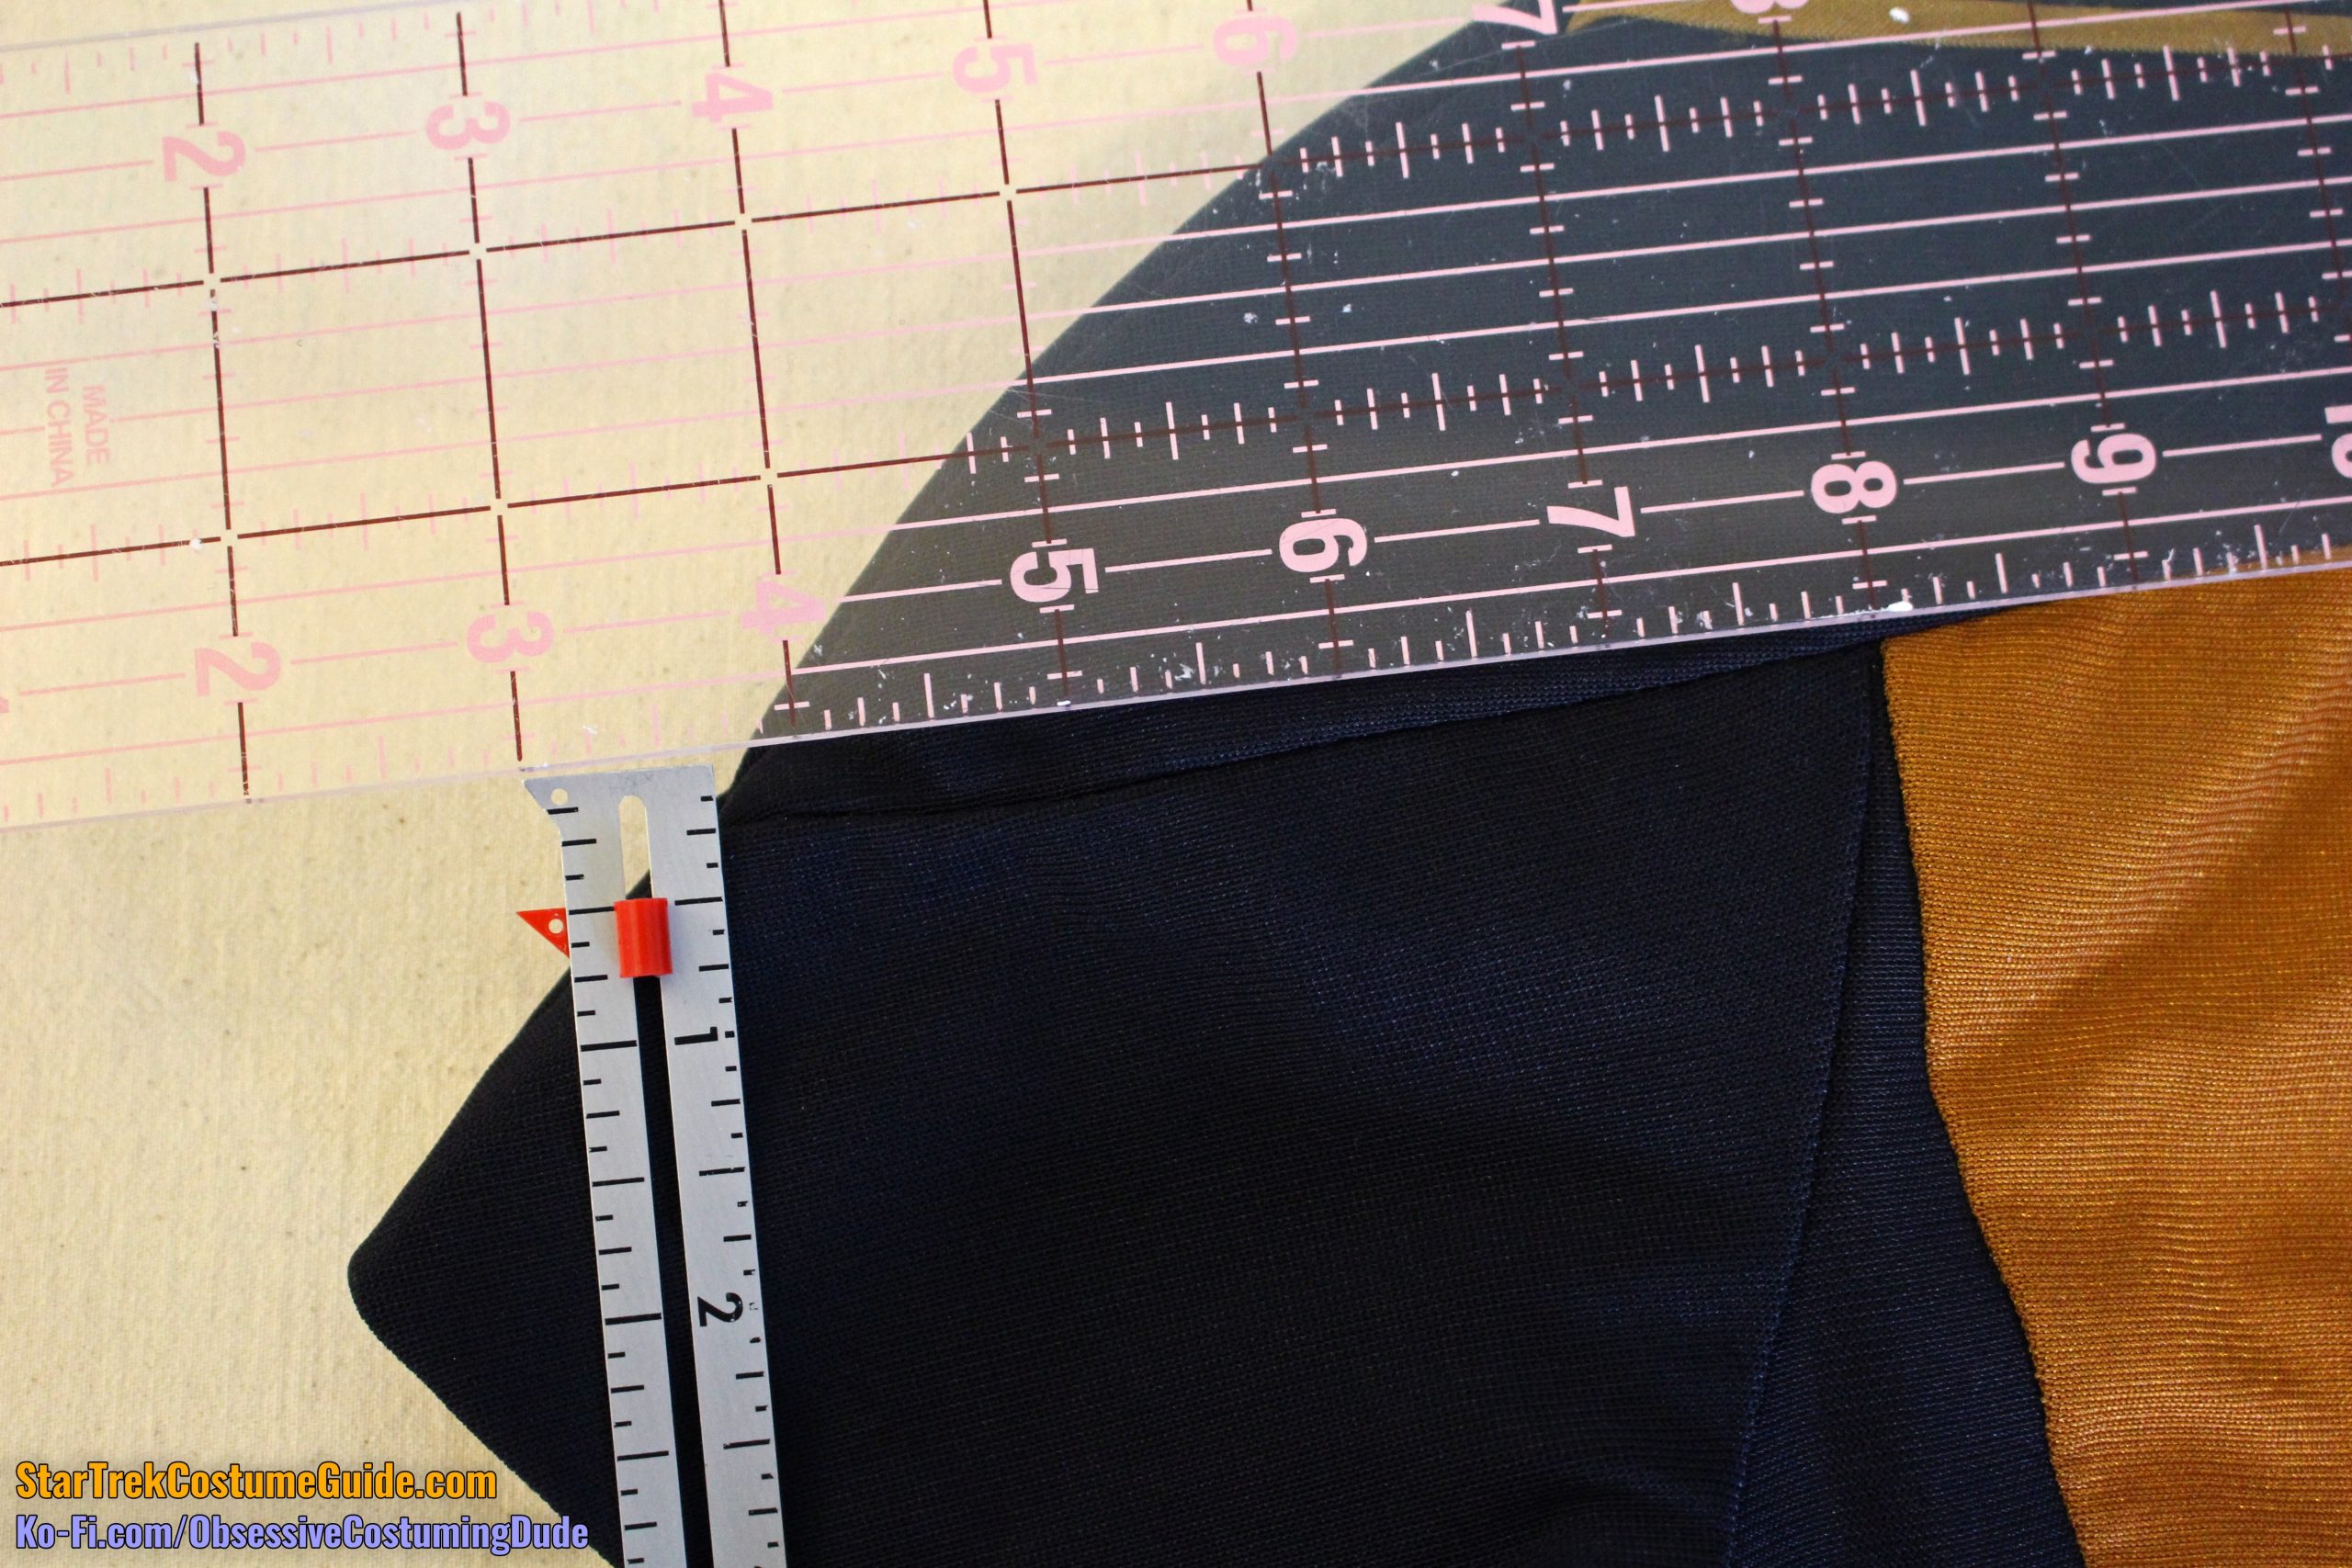
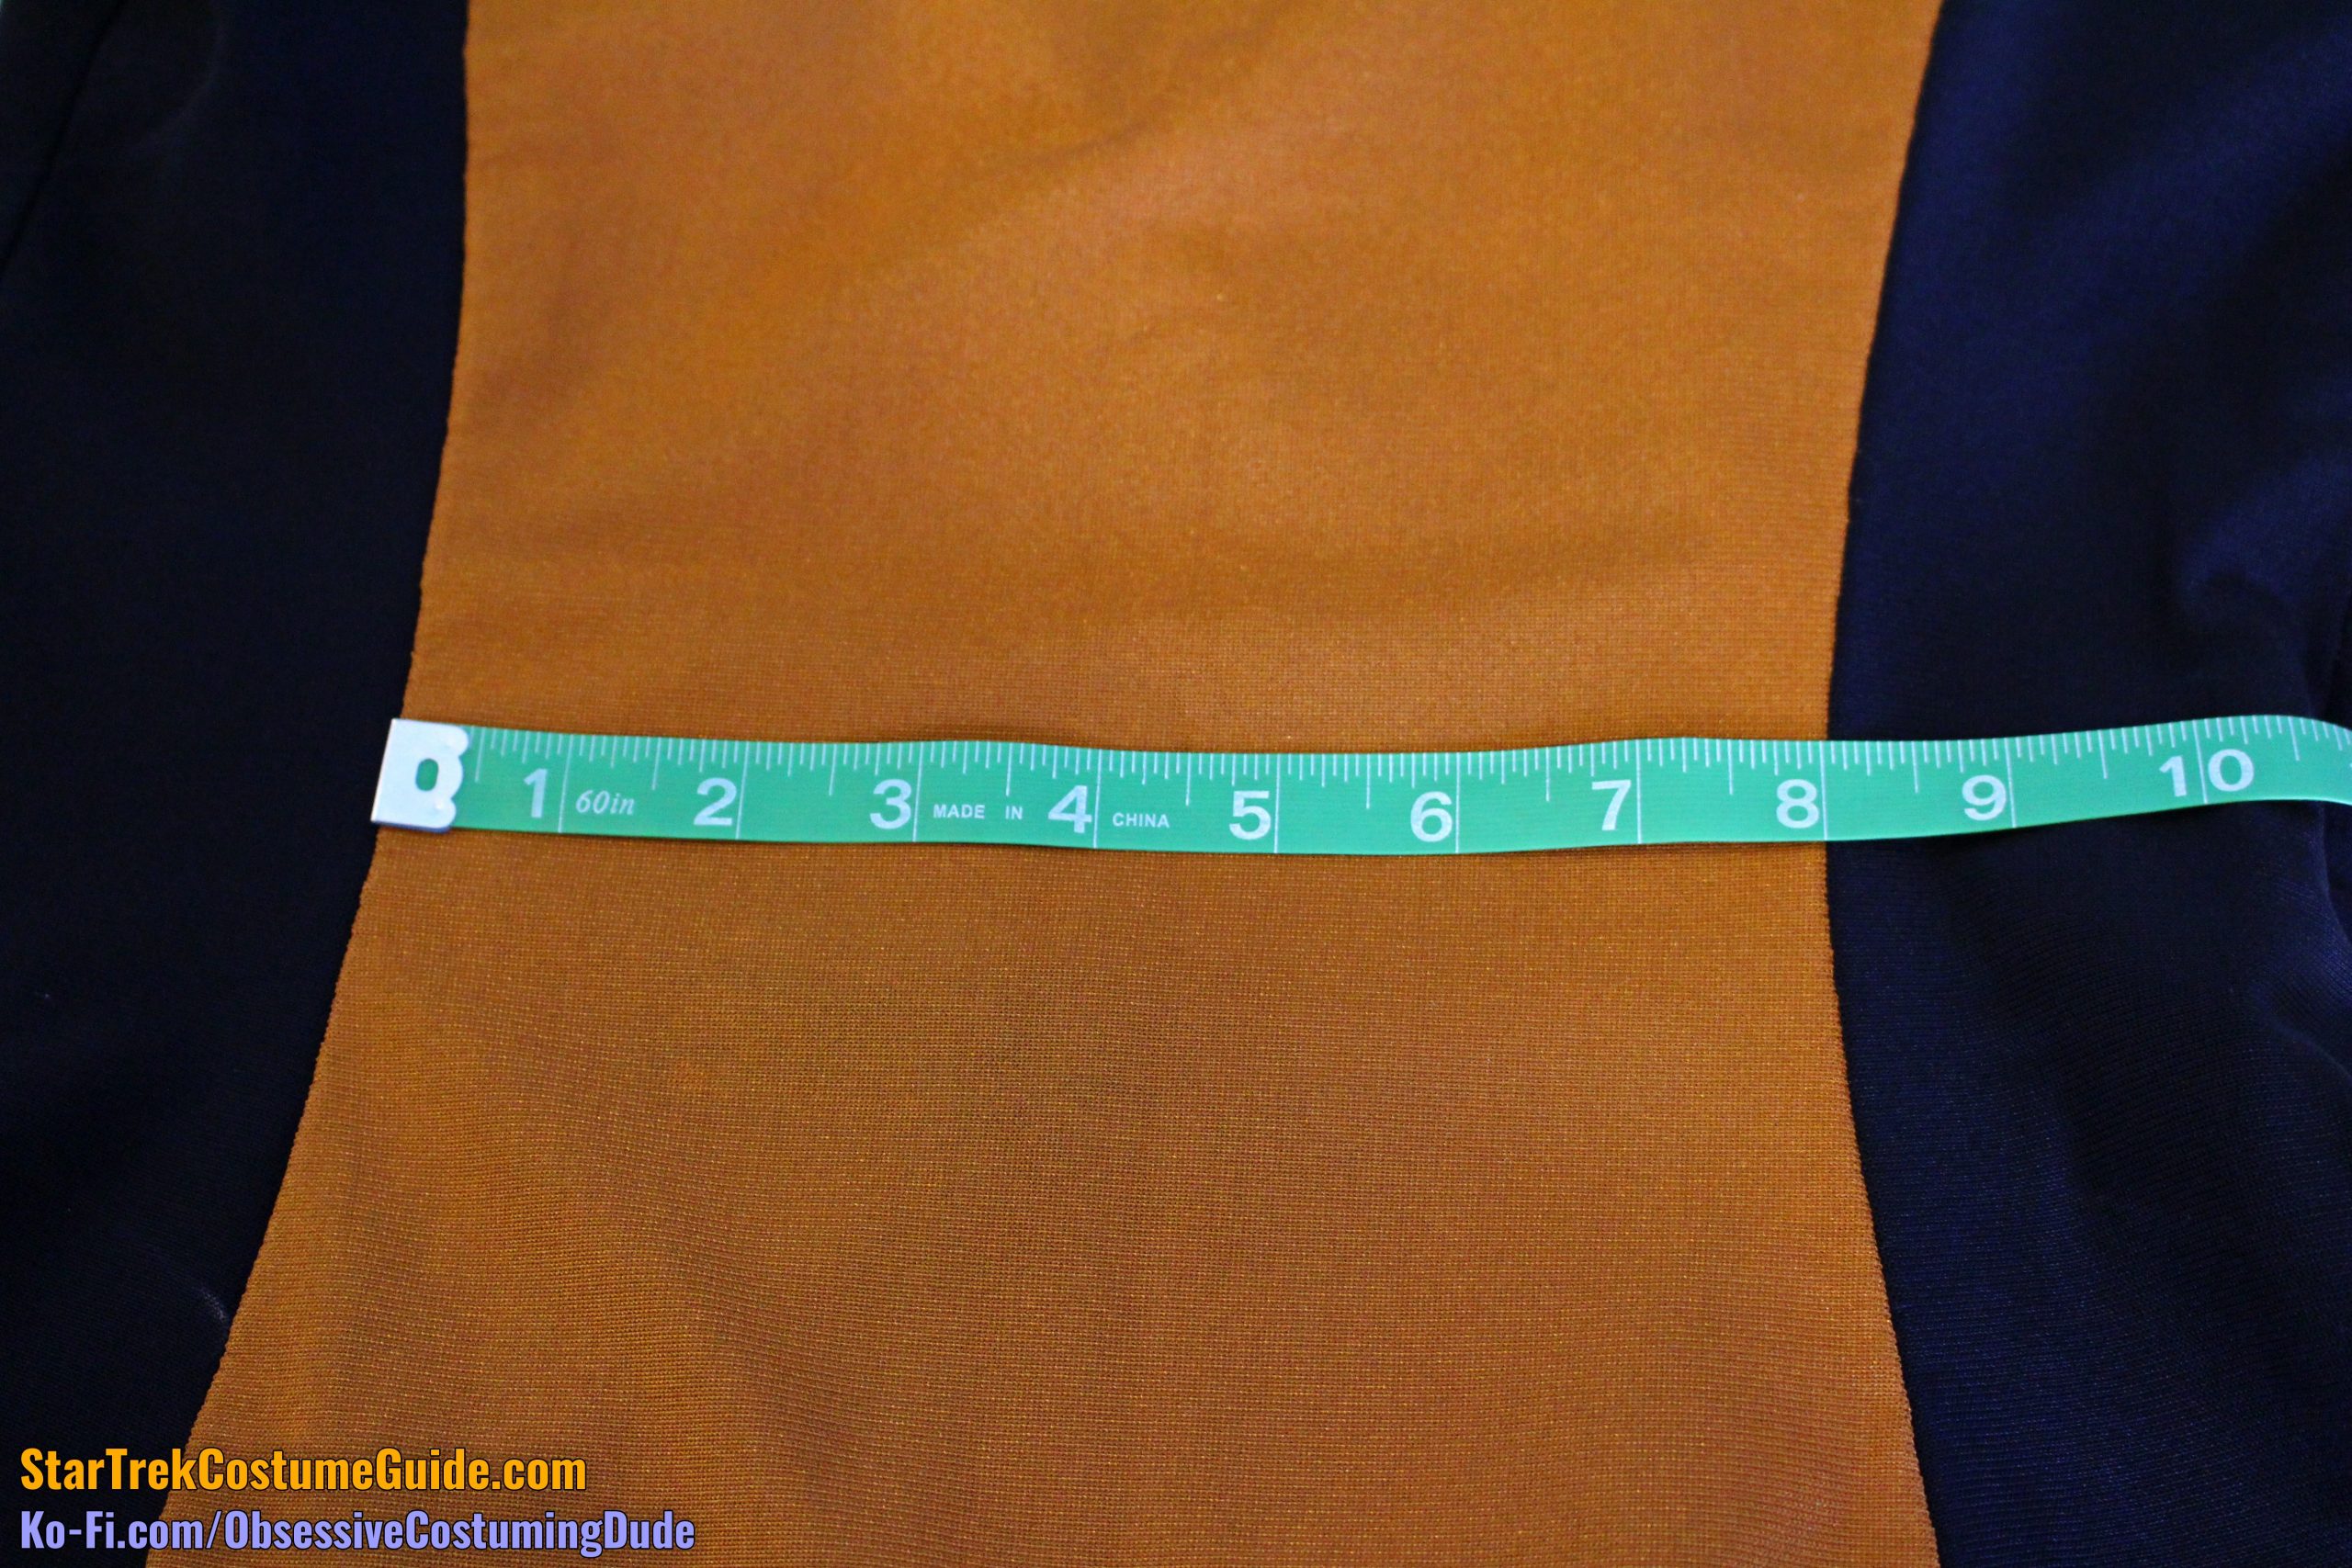
The back panel’s hourglass-shape was also a bit more pronounced.
The back dimensions were very close to those of the front, but it had a slightly more extreme taper, going from 12 ½” wide at the top to 8″ at the waist, then widening again to 11 ½” at the bottom.
I believe this additional tapering was to help fit the wearer’s back, since there was no center back seam – again, using the seams to also function as fitting darts.
Curiously, the skant was slightly longer on the left side than the right.
The left side seam was 23 ½” long, measured from the armscye seam to the hem fold.
However, the right side seam was only 23″ long.
I’m honestly not sure why that is, or to what degree it was intentional.
In any event, the side panels themselves had a slight hourglass-shape to them; there were no bust darts, so the additional fullness was incorporated into the side panels.
The side panels tapered inward toward the waist.
Side front waist
Side back waist
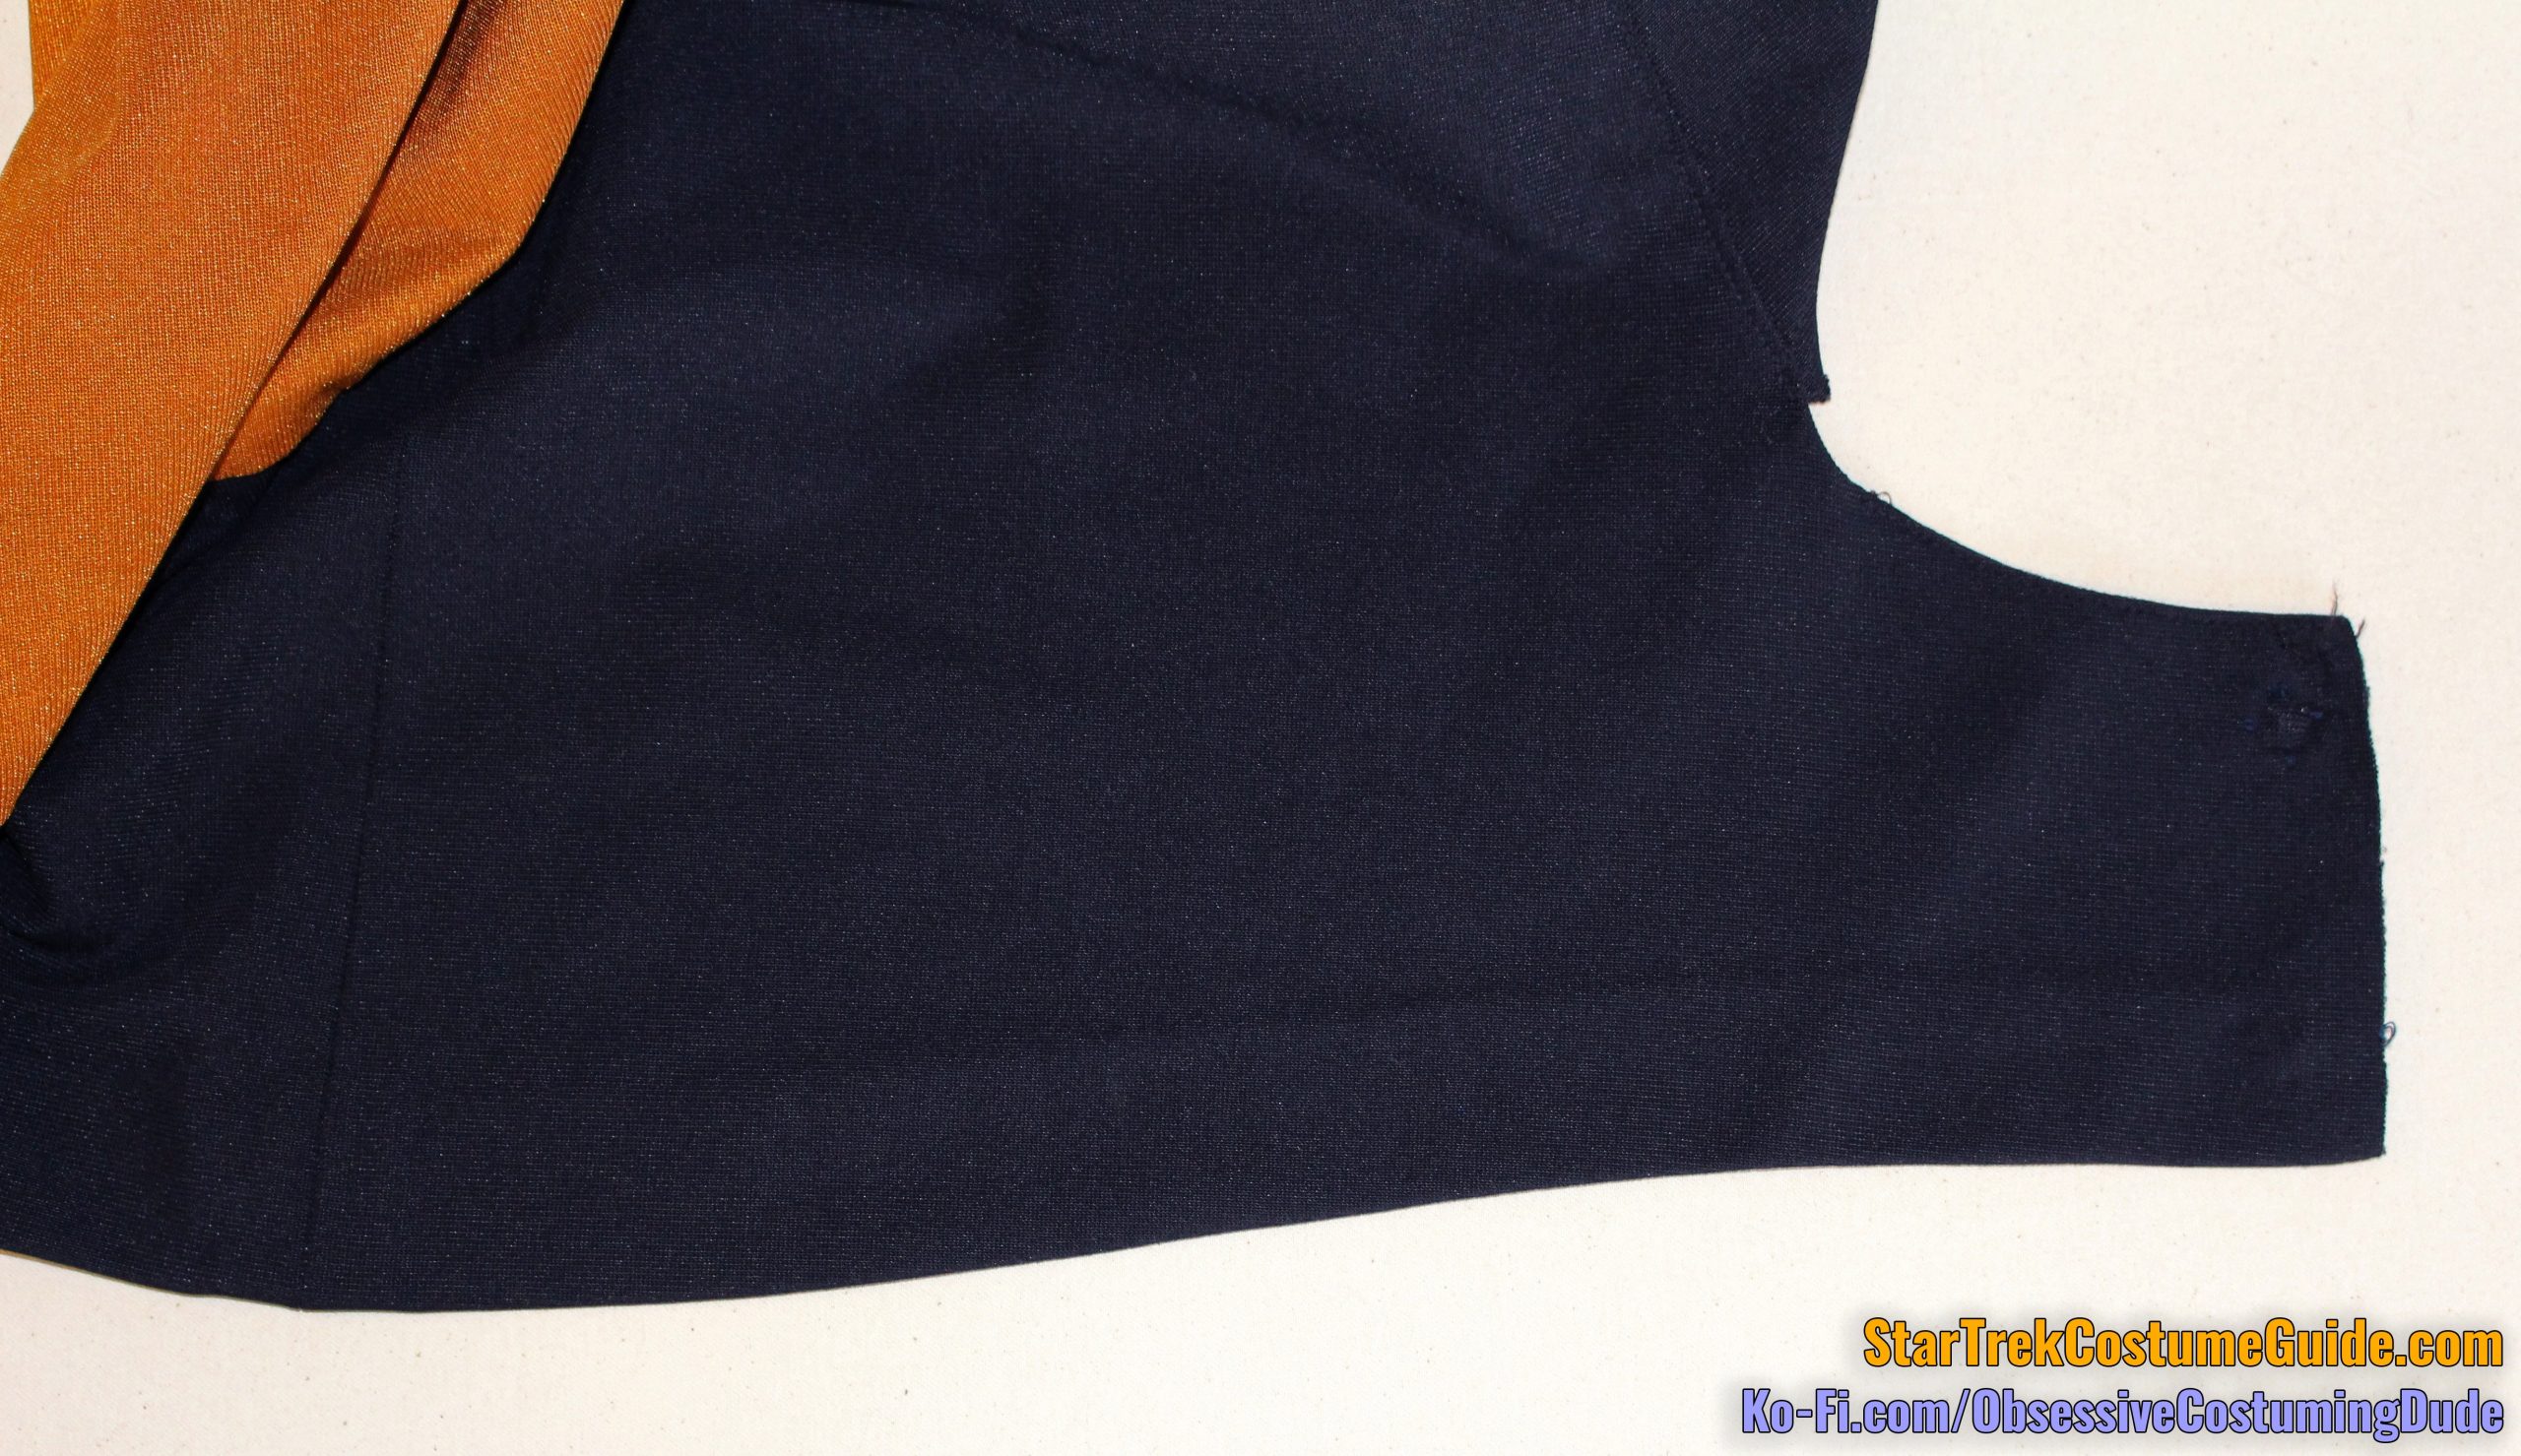
Beneath that, the side panels flared outward considerably, resulting in the full “skirt” that gave the lower portion of the skant its bell-shape.
Lower side front
Lower side back
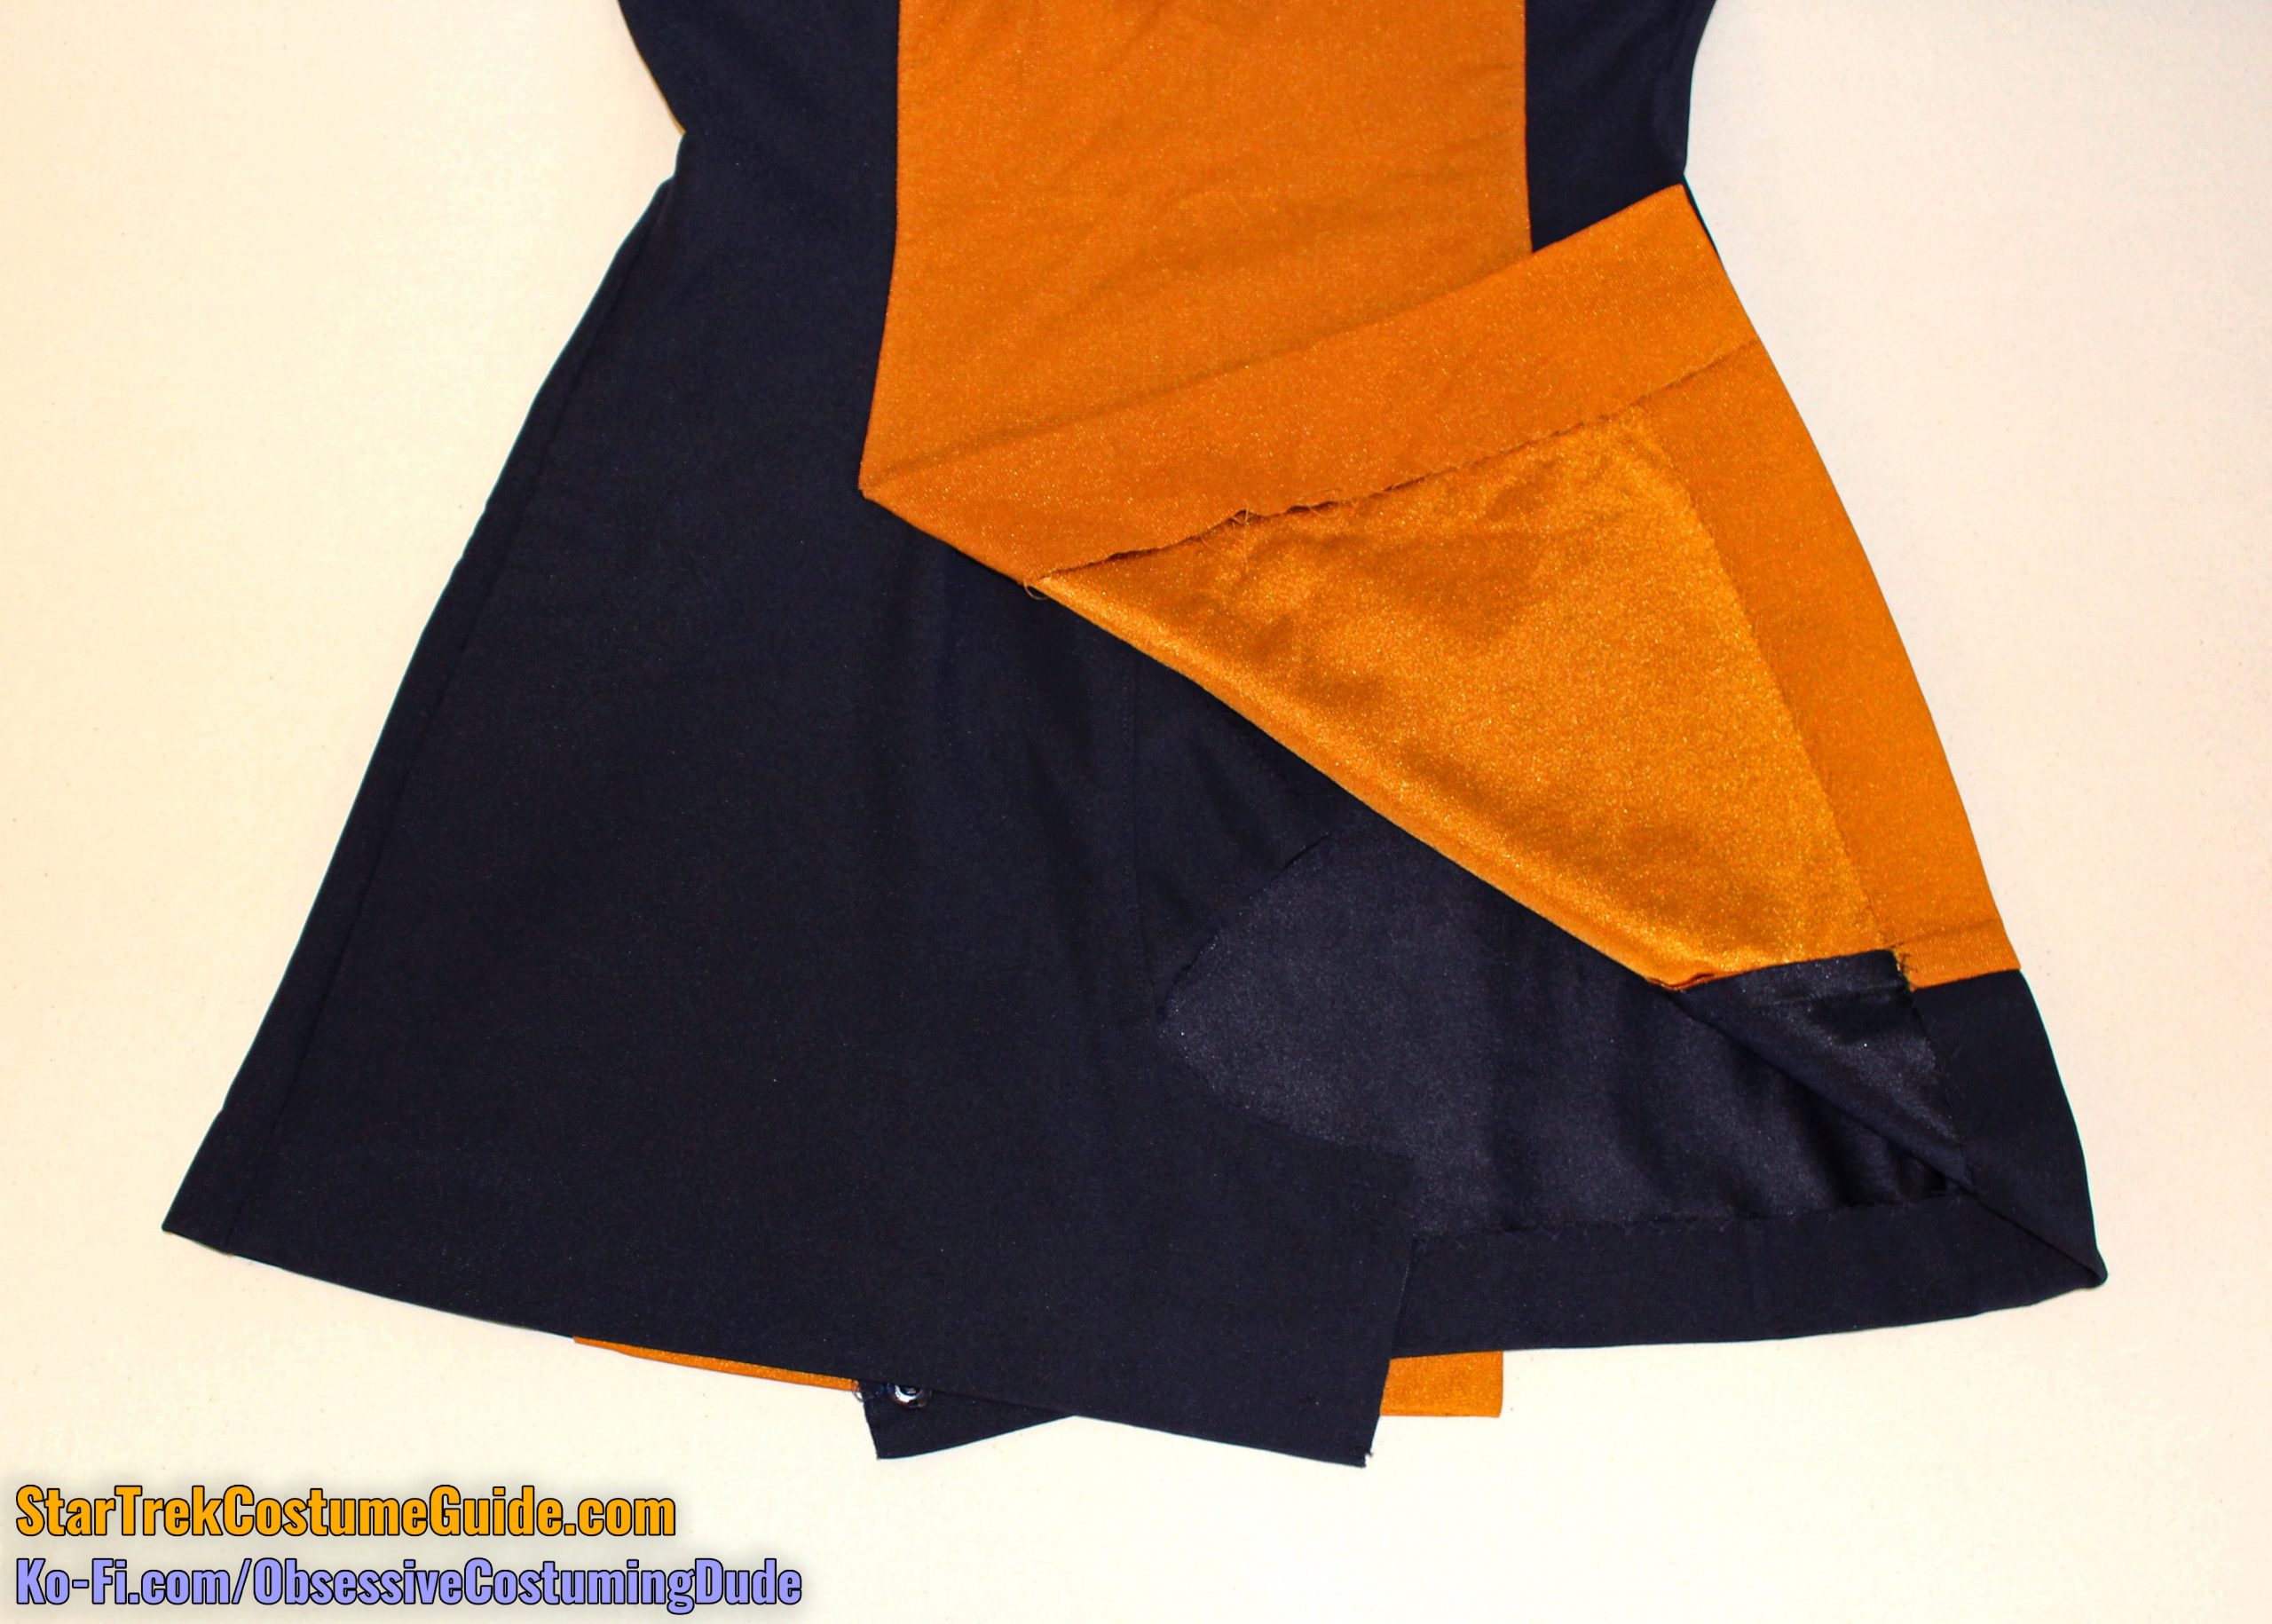
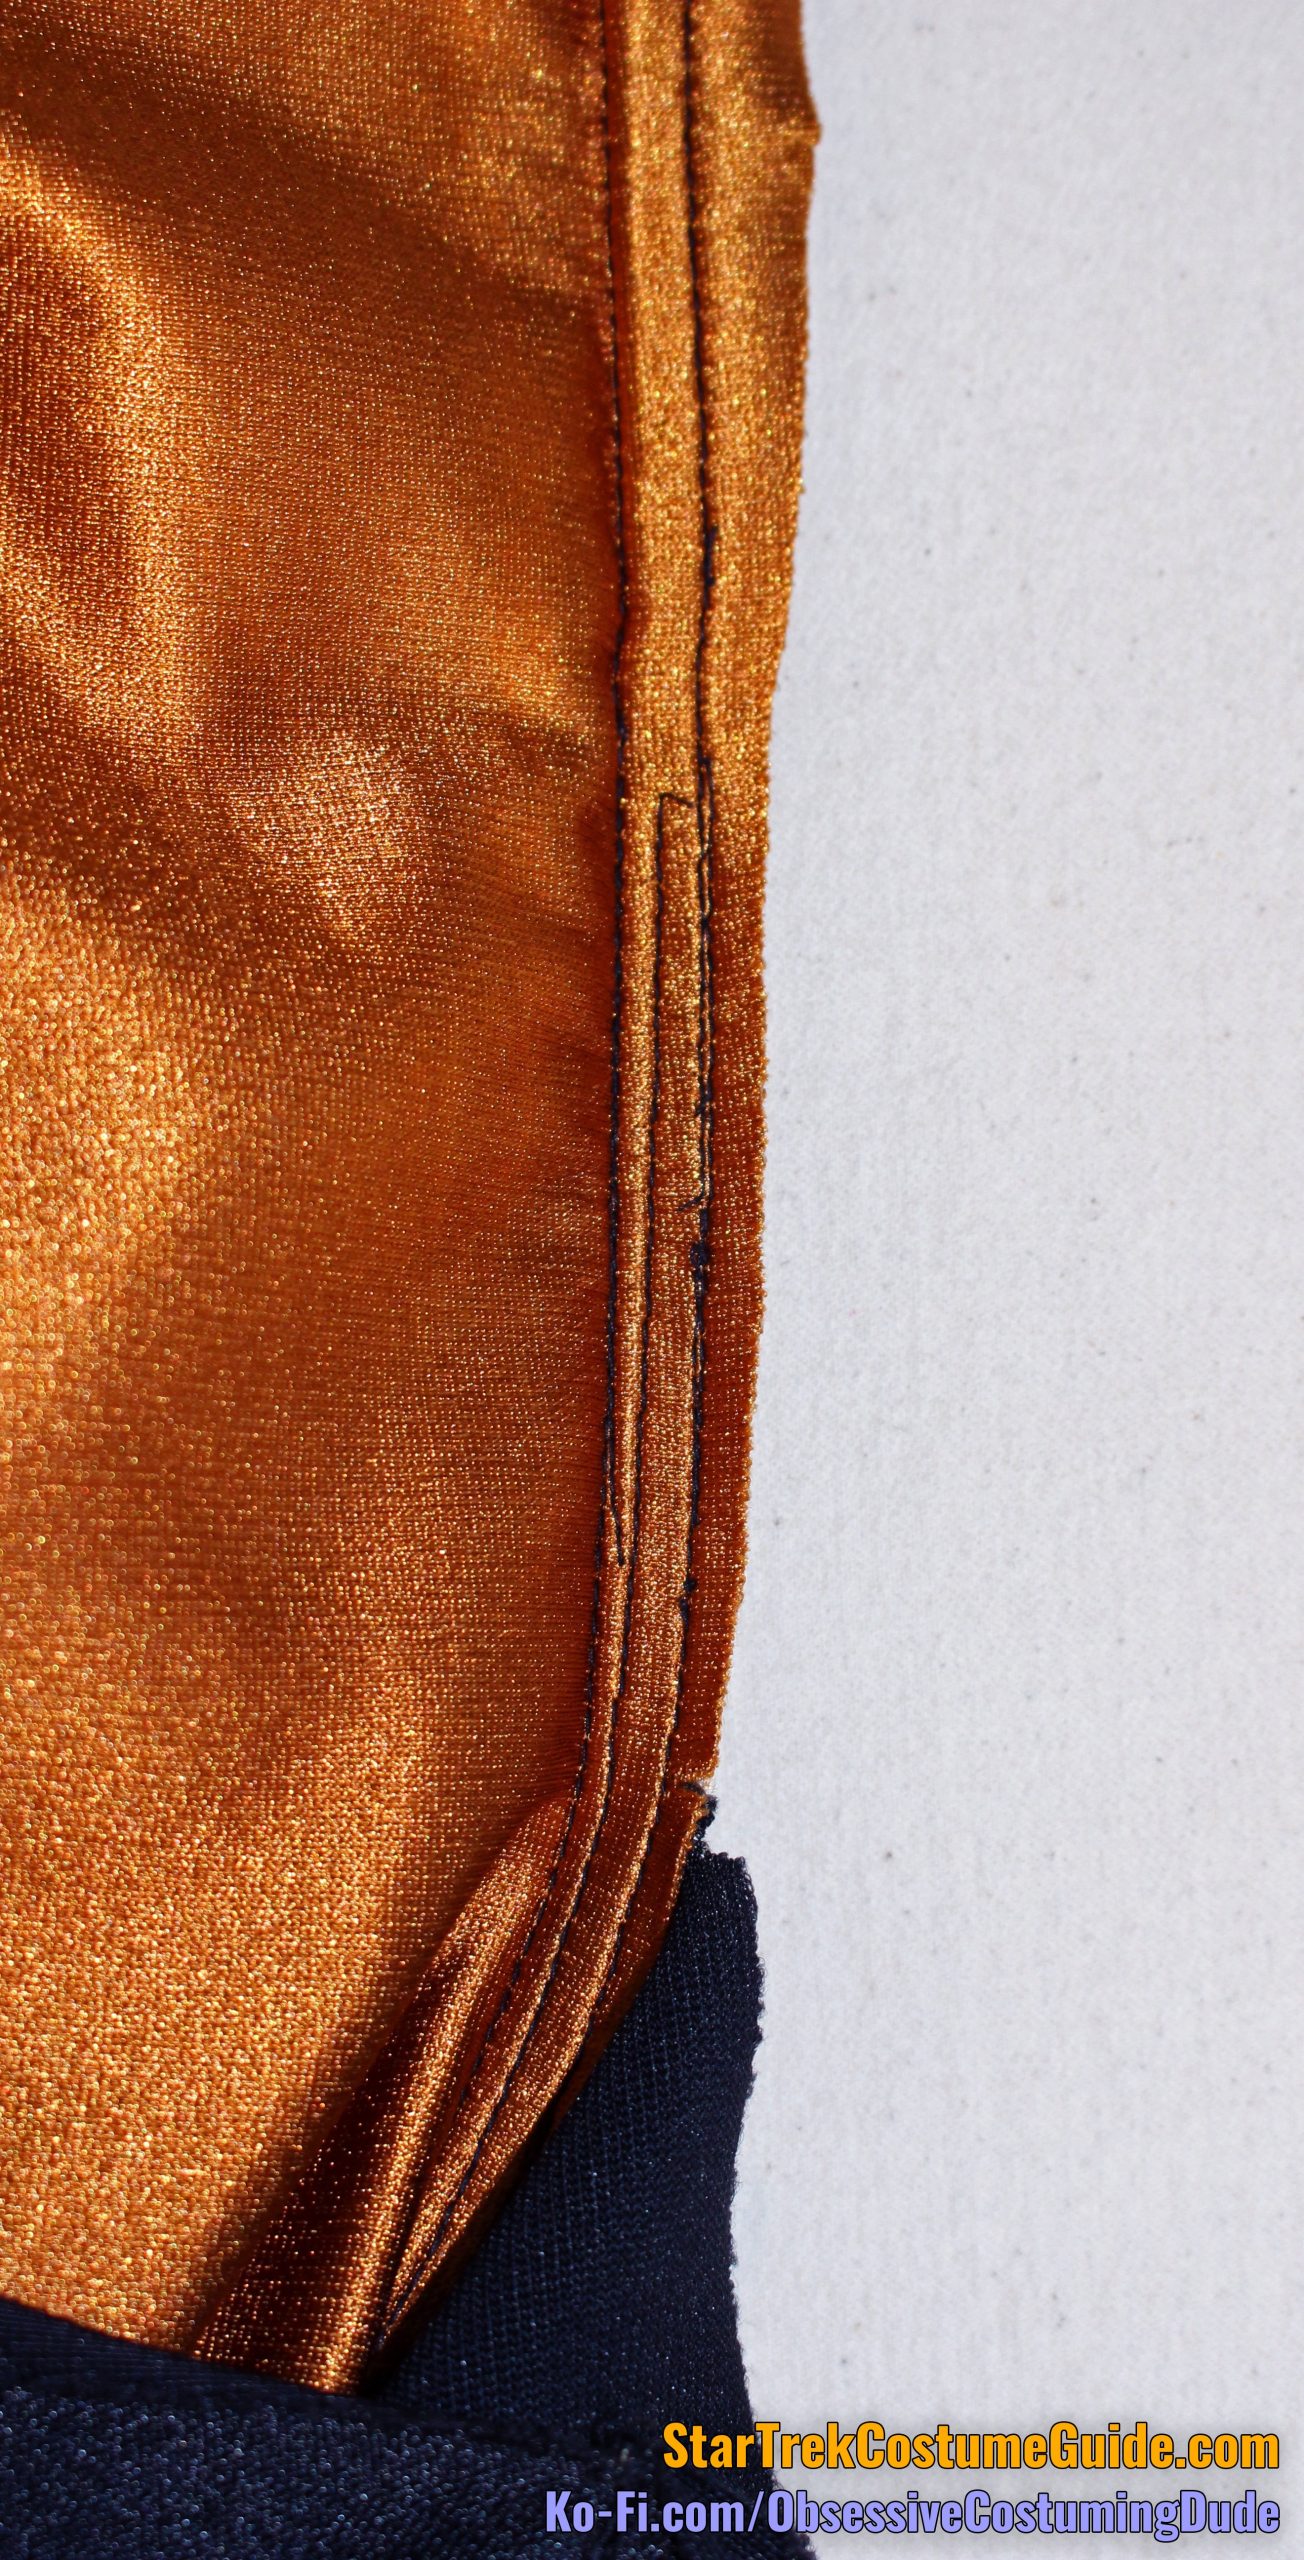
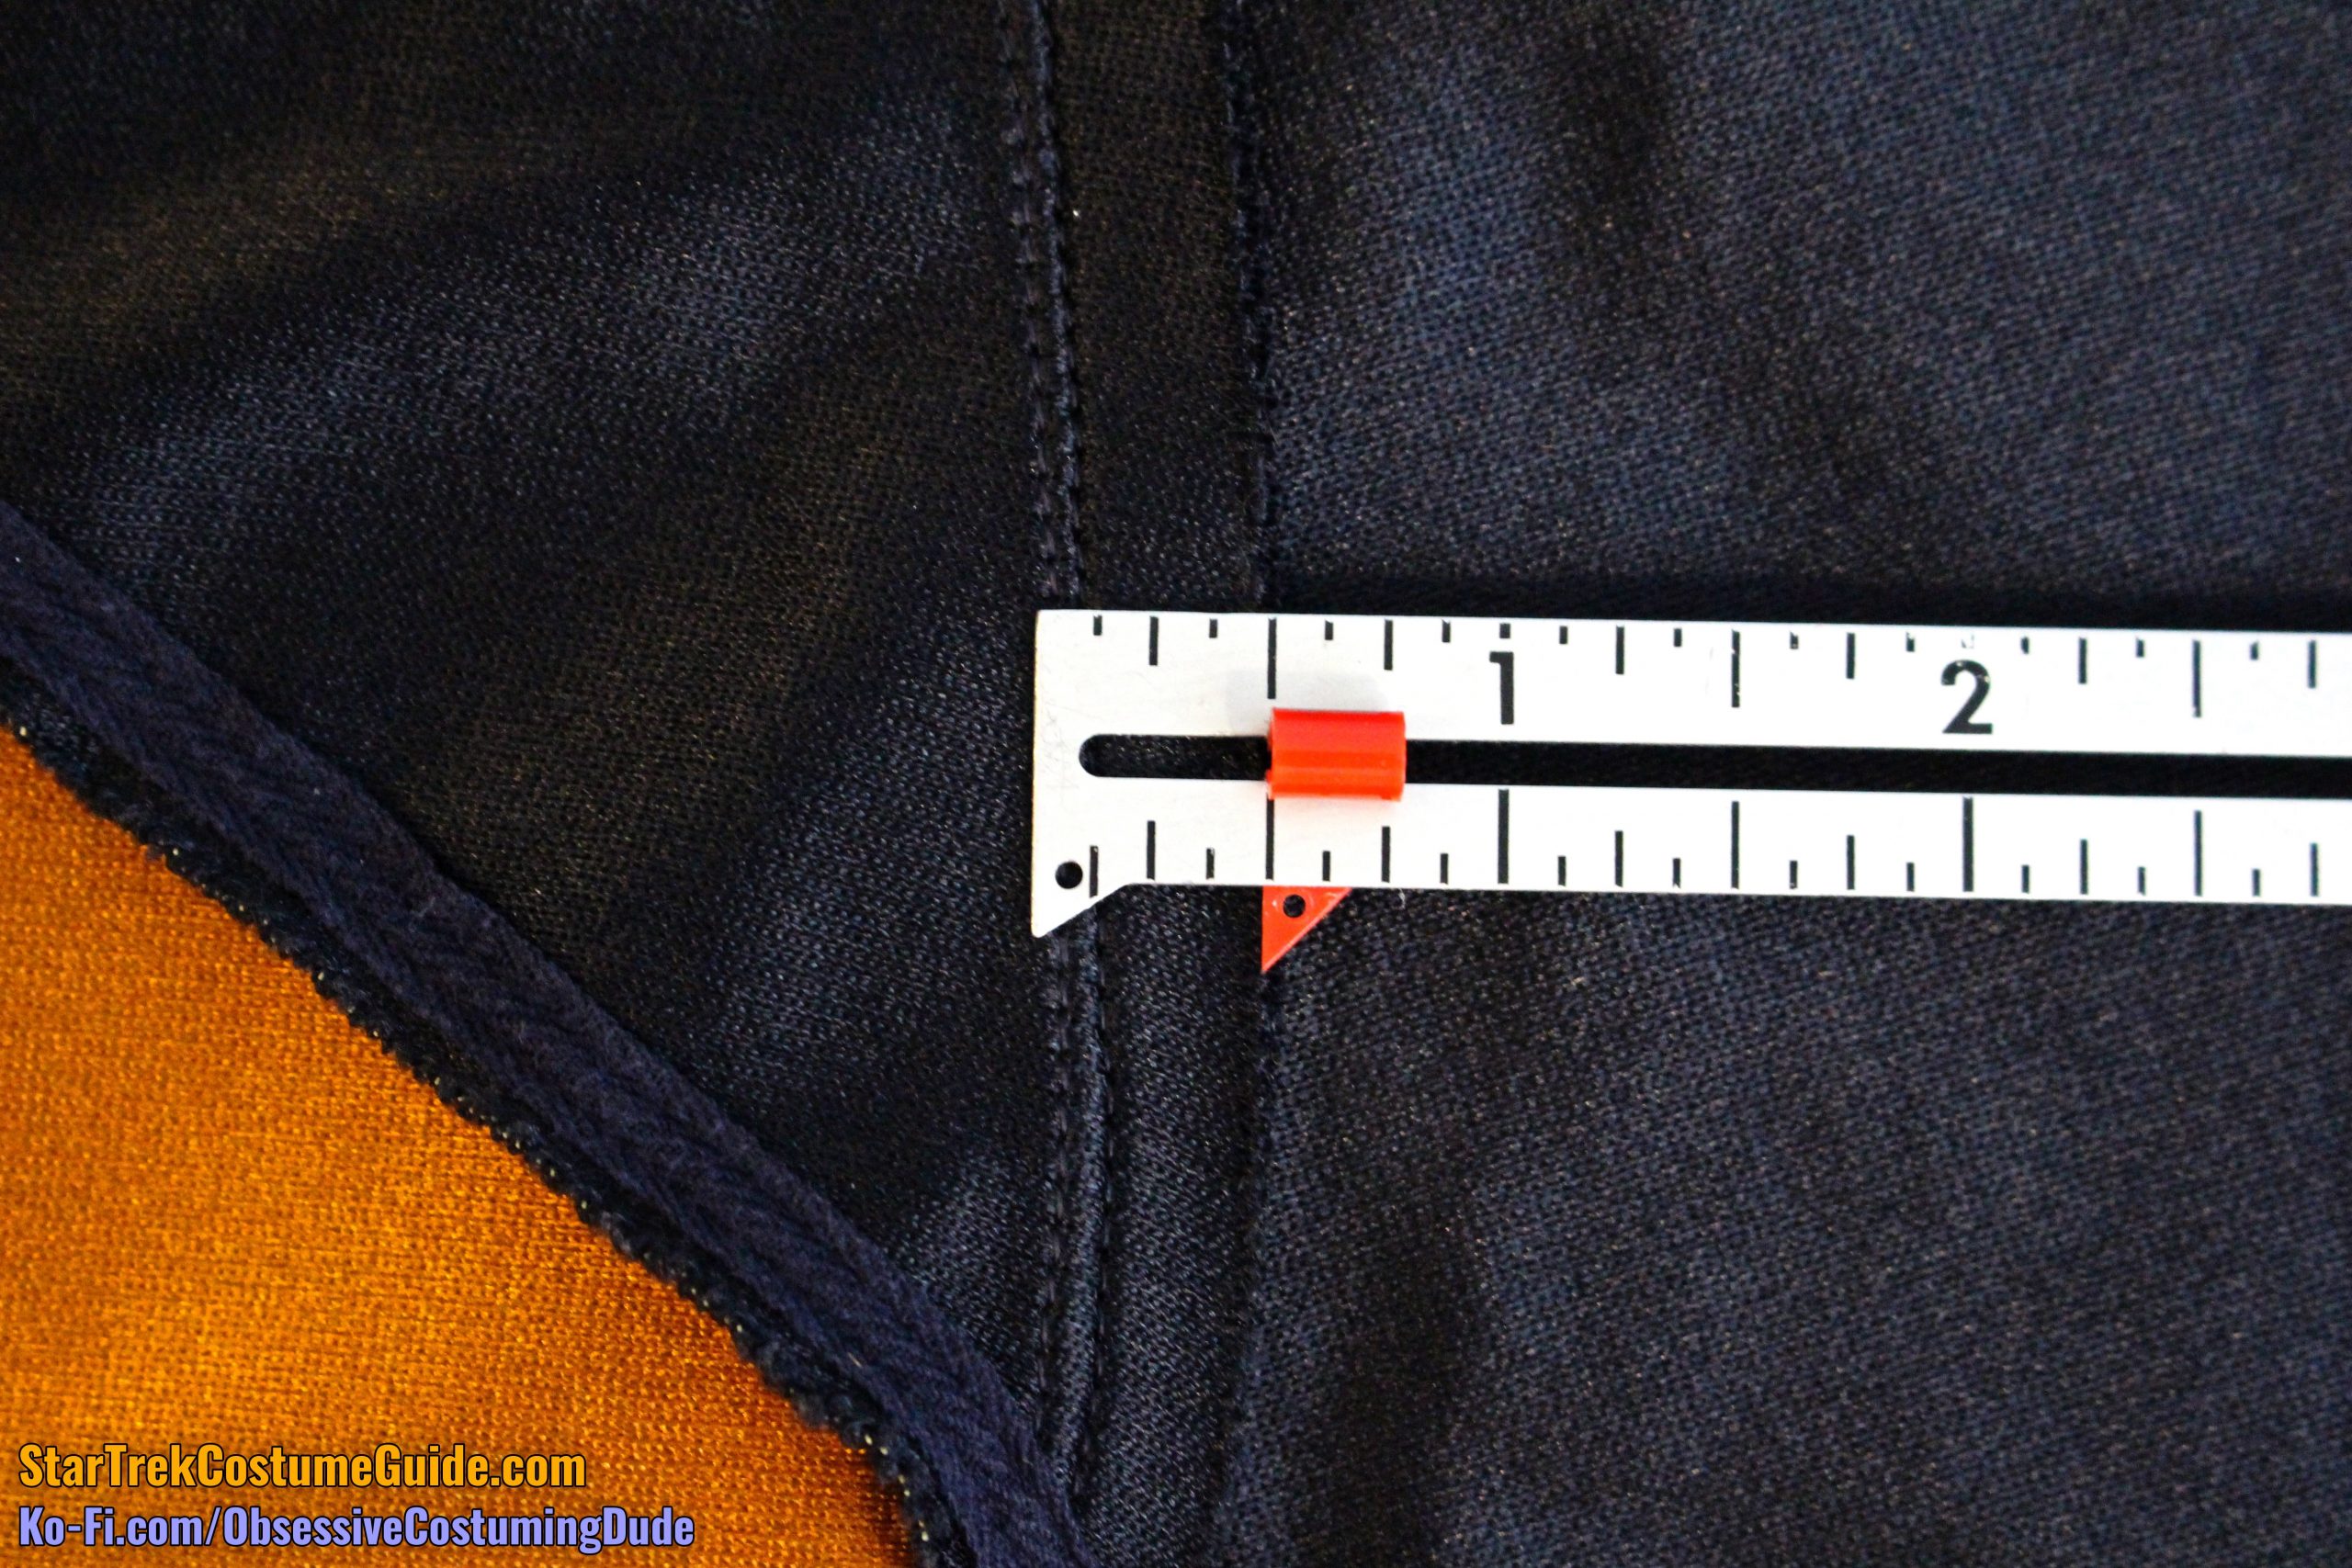
The lower front left was sewn closed, but at the lower front right was a vent.
On this particular skant, the vent was 12″ tall on the front panel, but the side panel was slightly shorter, with the vent only being about 11 ¼” tall.
Vent - center front panel
Vent - side front panel
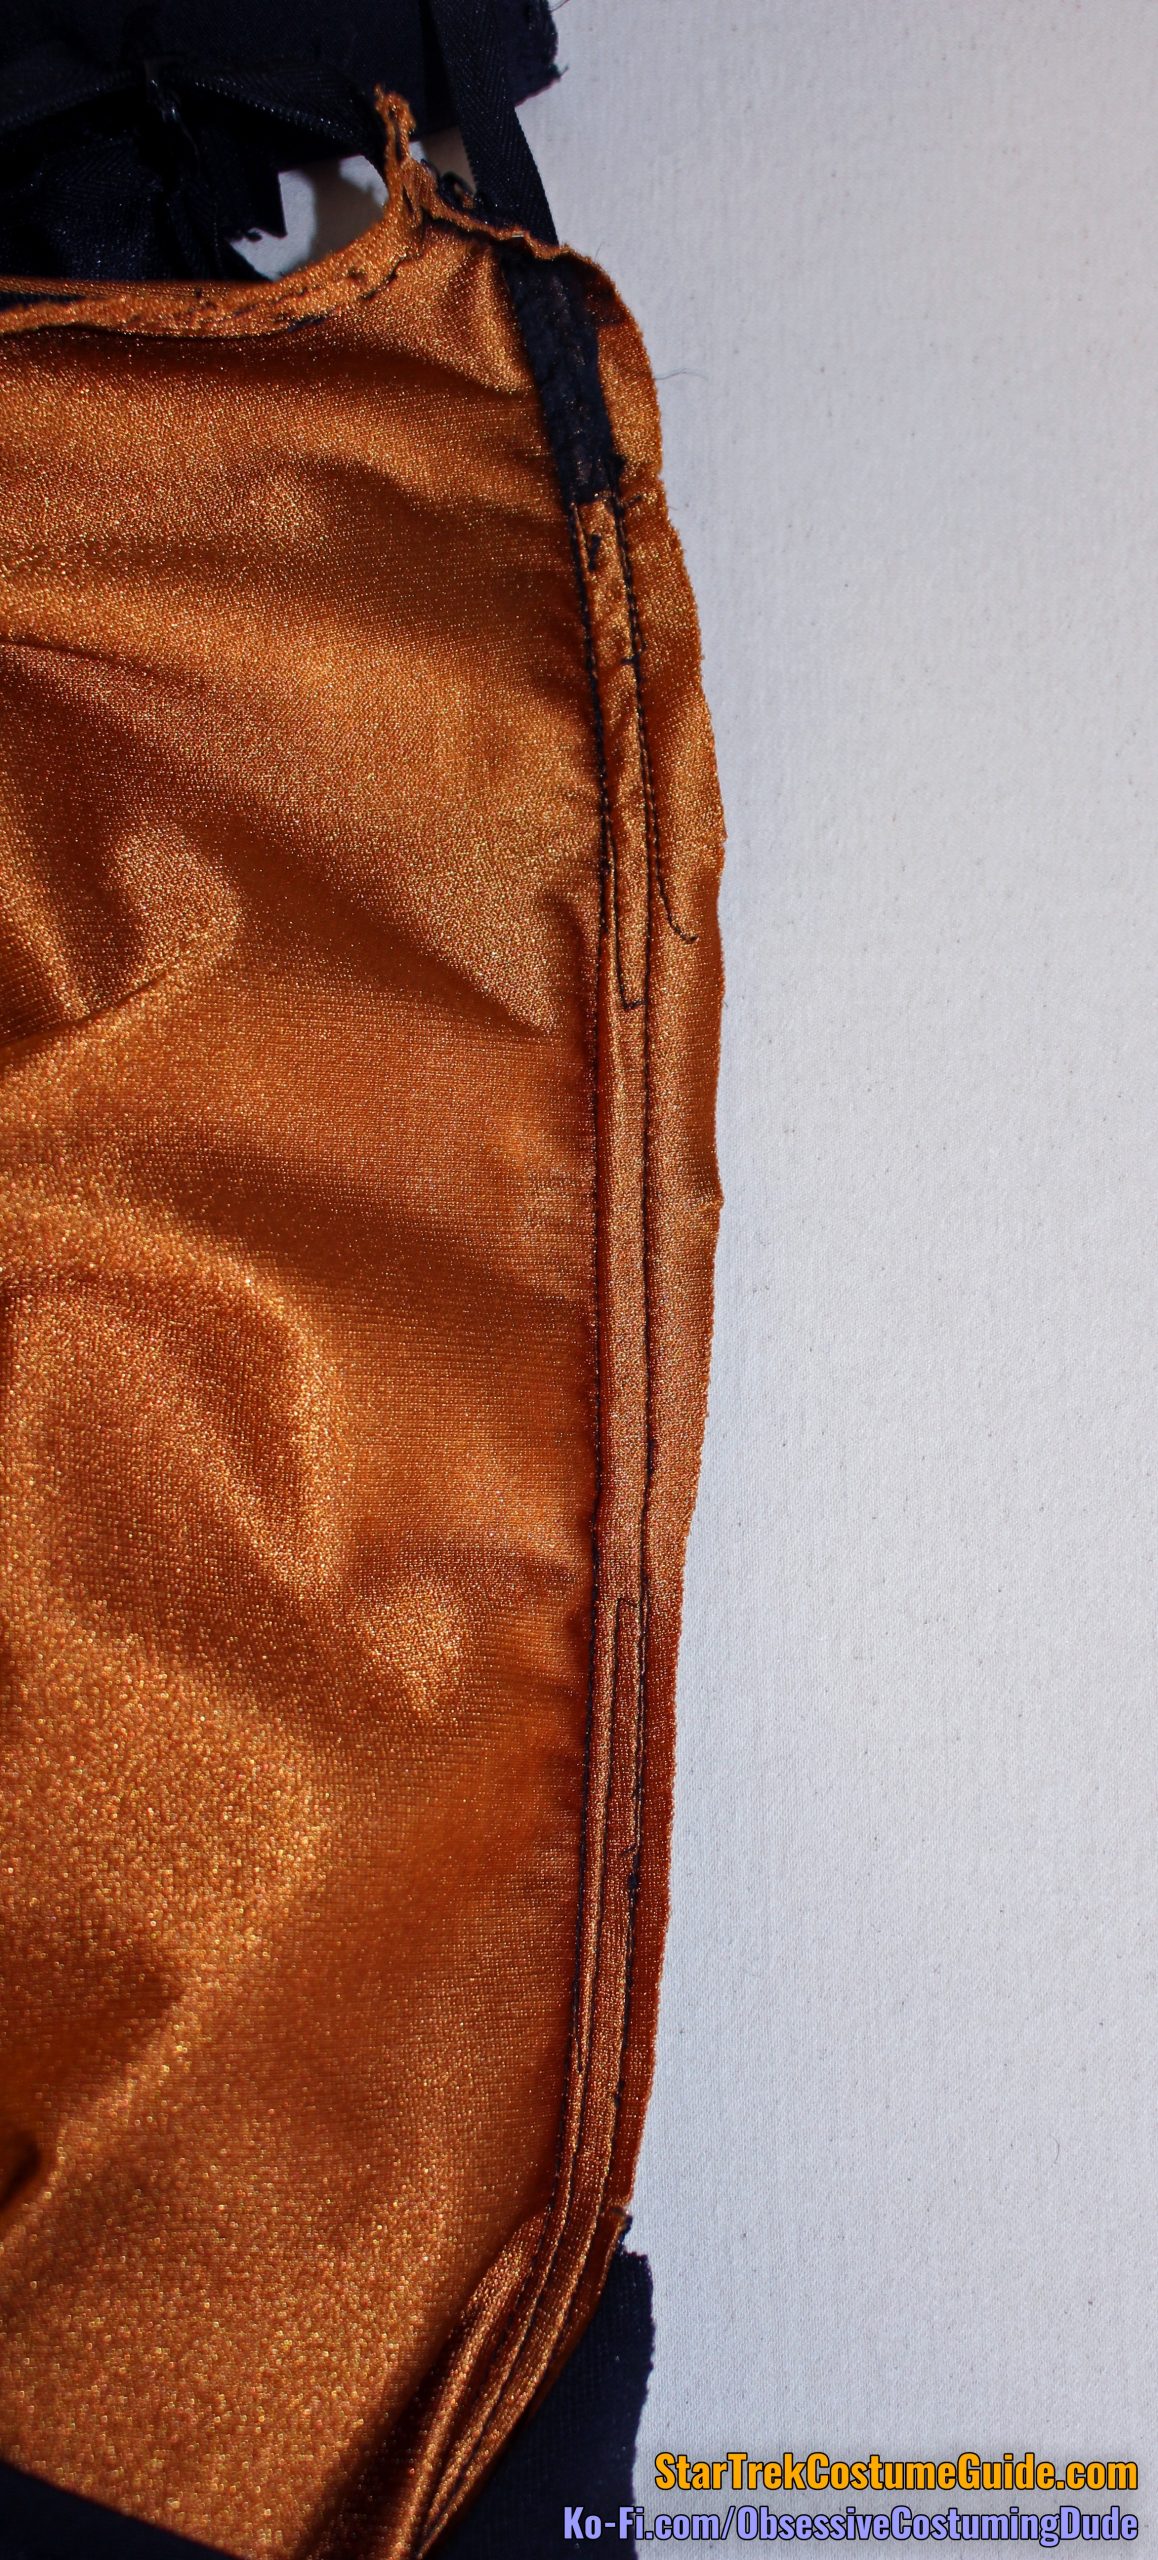
The back vent was a bit shorter than the front, although the center back panel was also a bit longer than the side panel (11″ and just shy of 10 ½”, respectively).
Vent - center back panel
Vent - side back panel
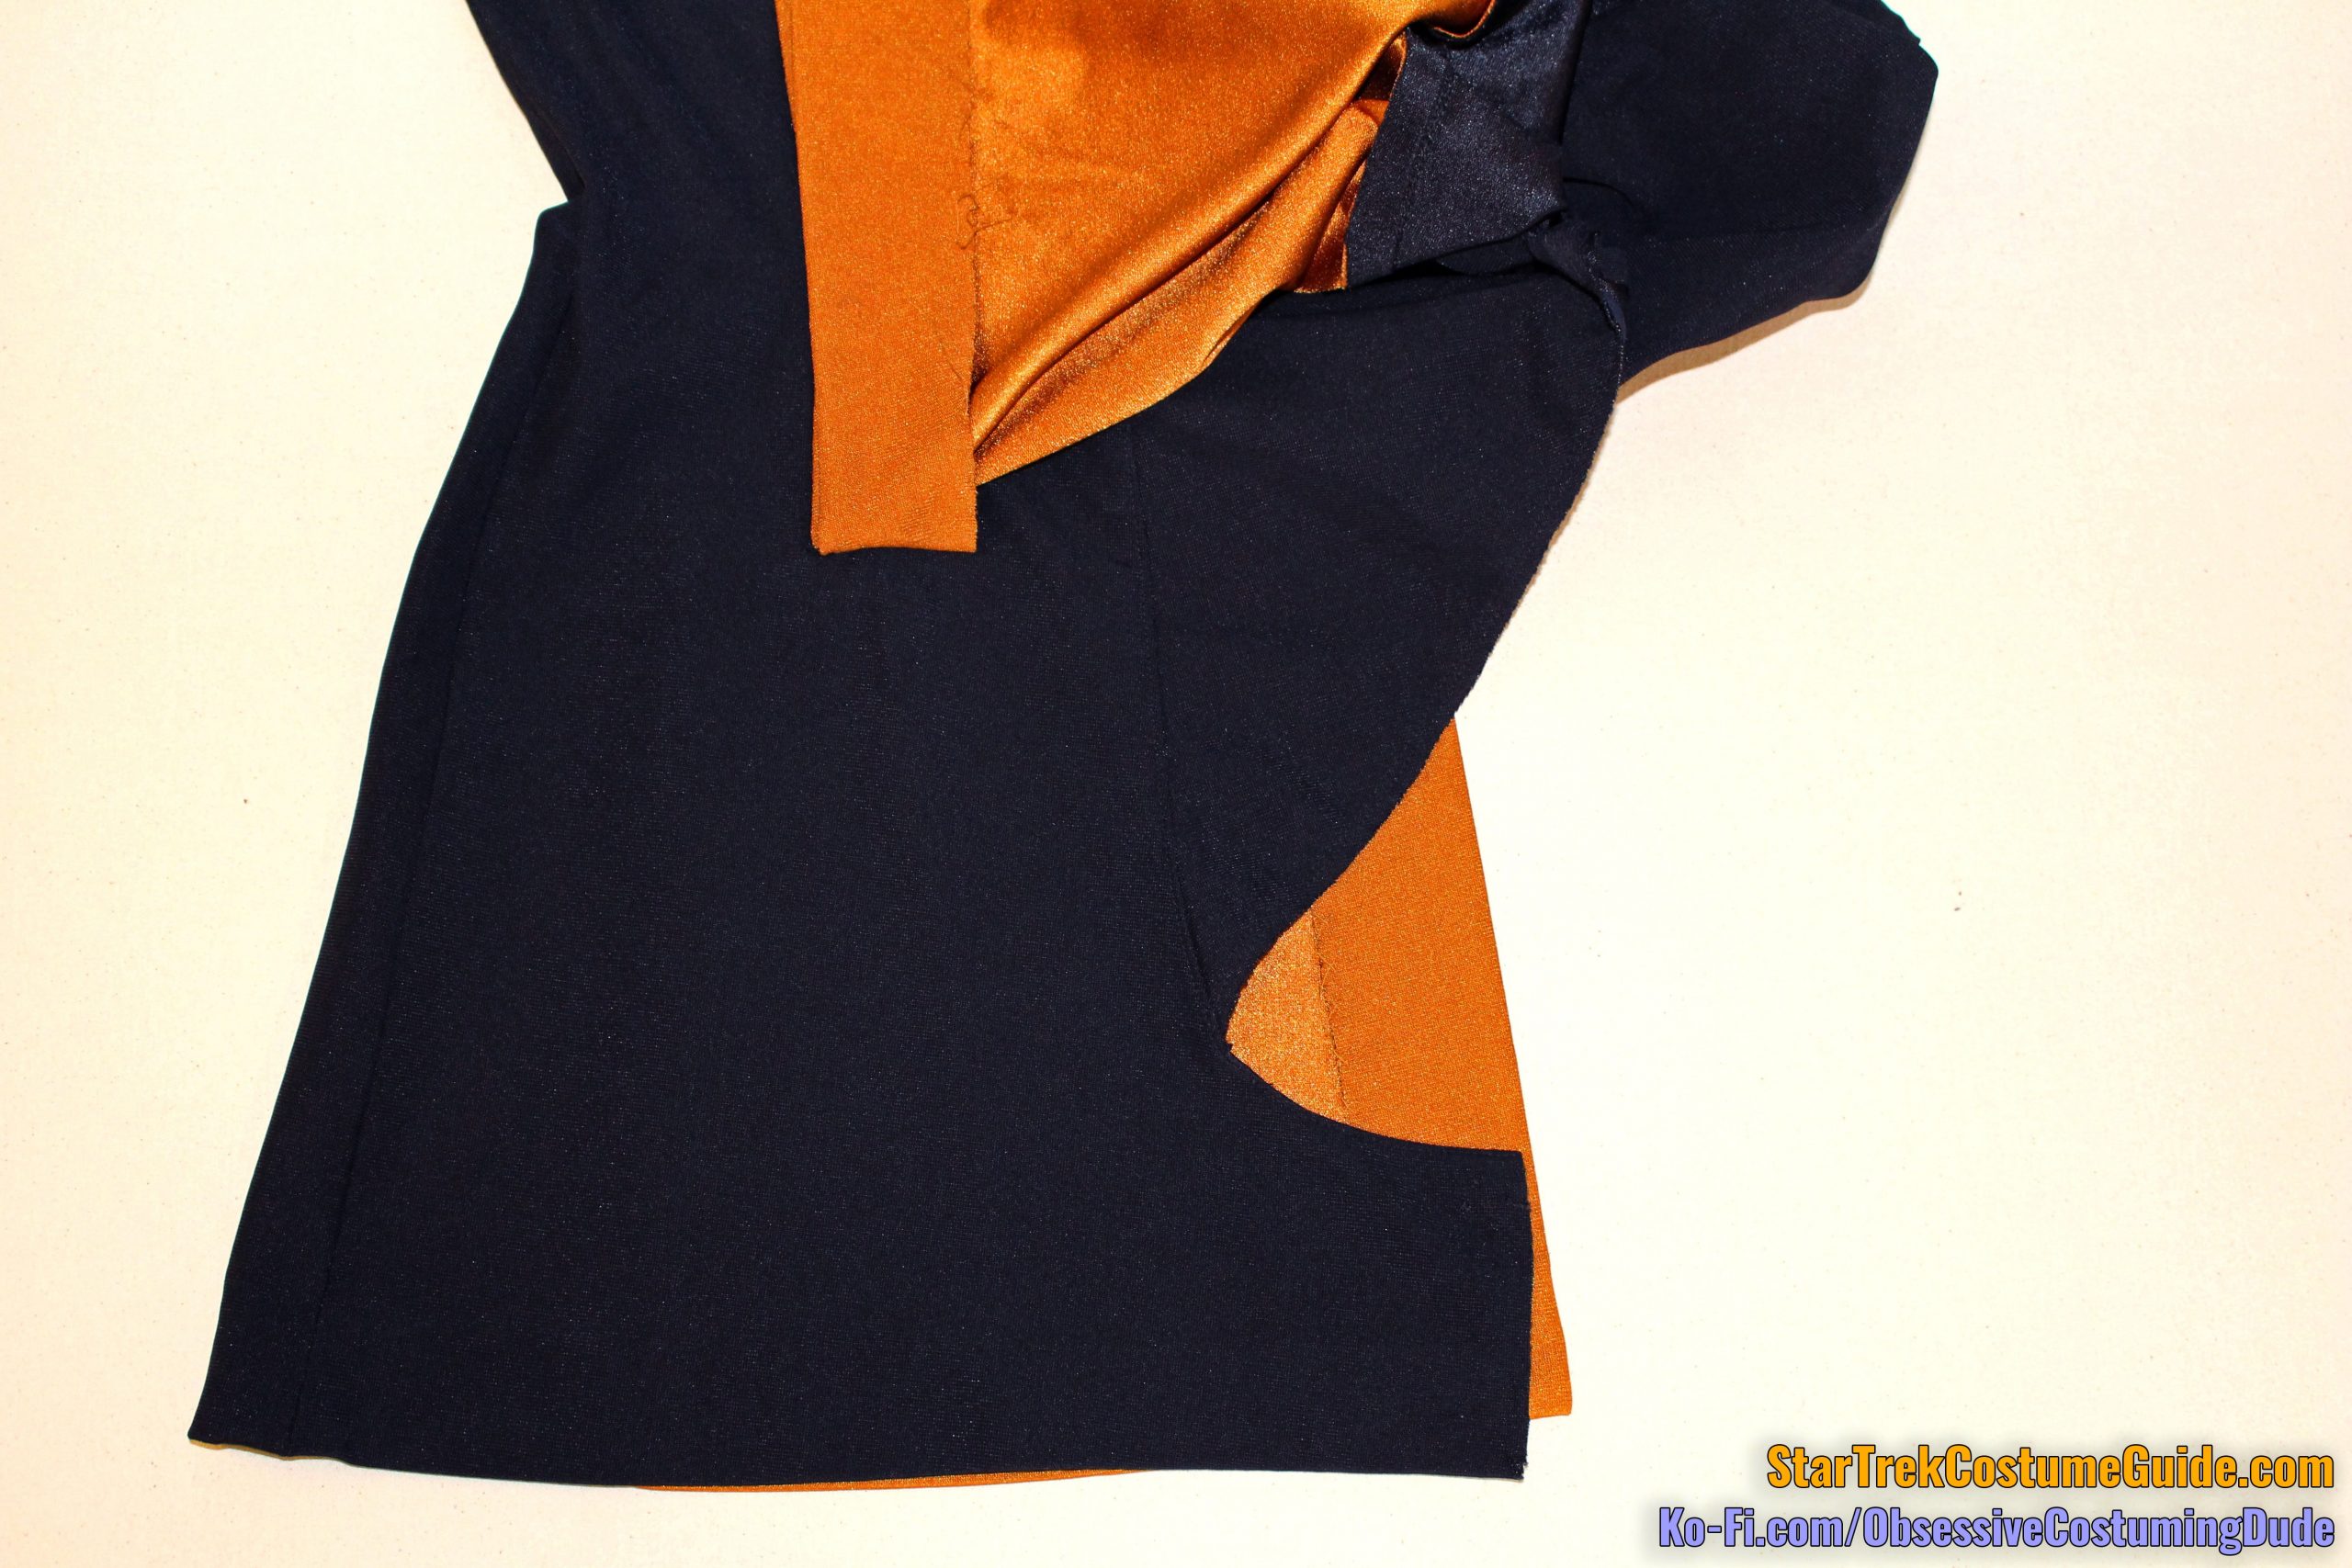
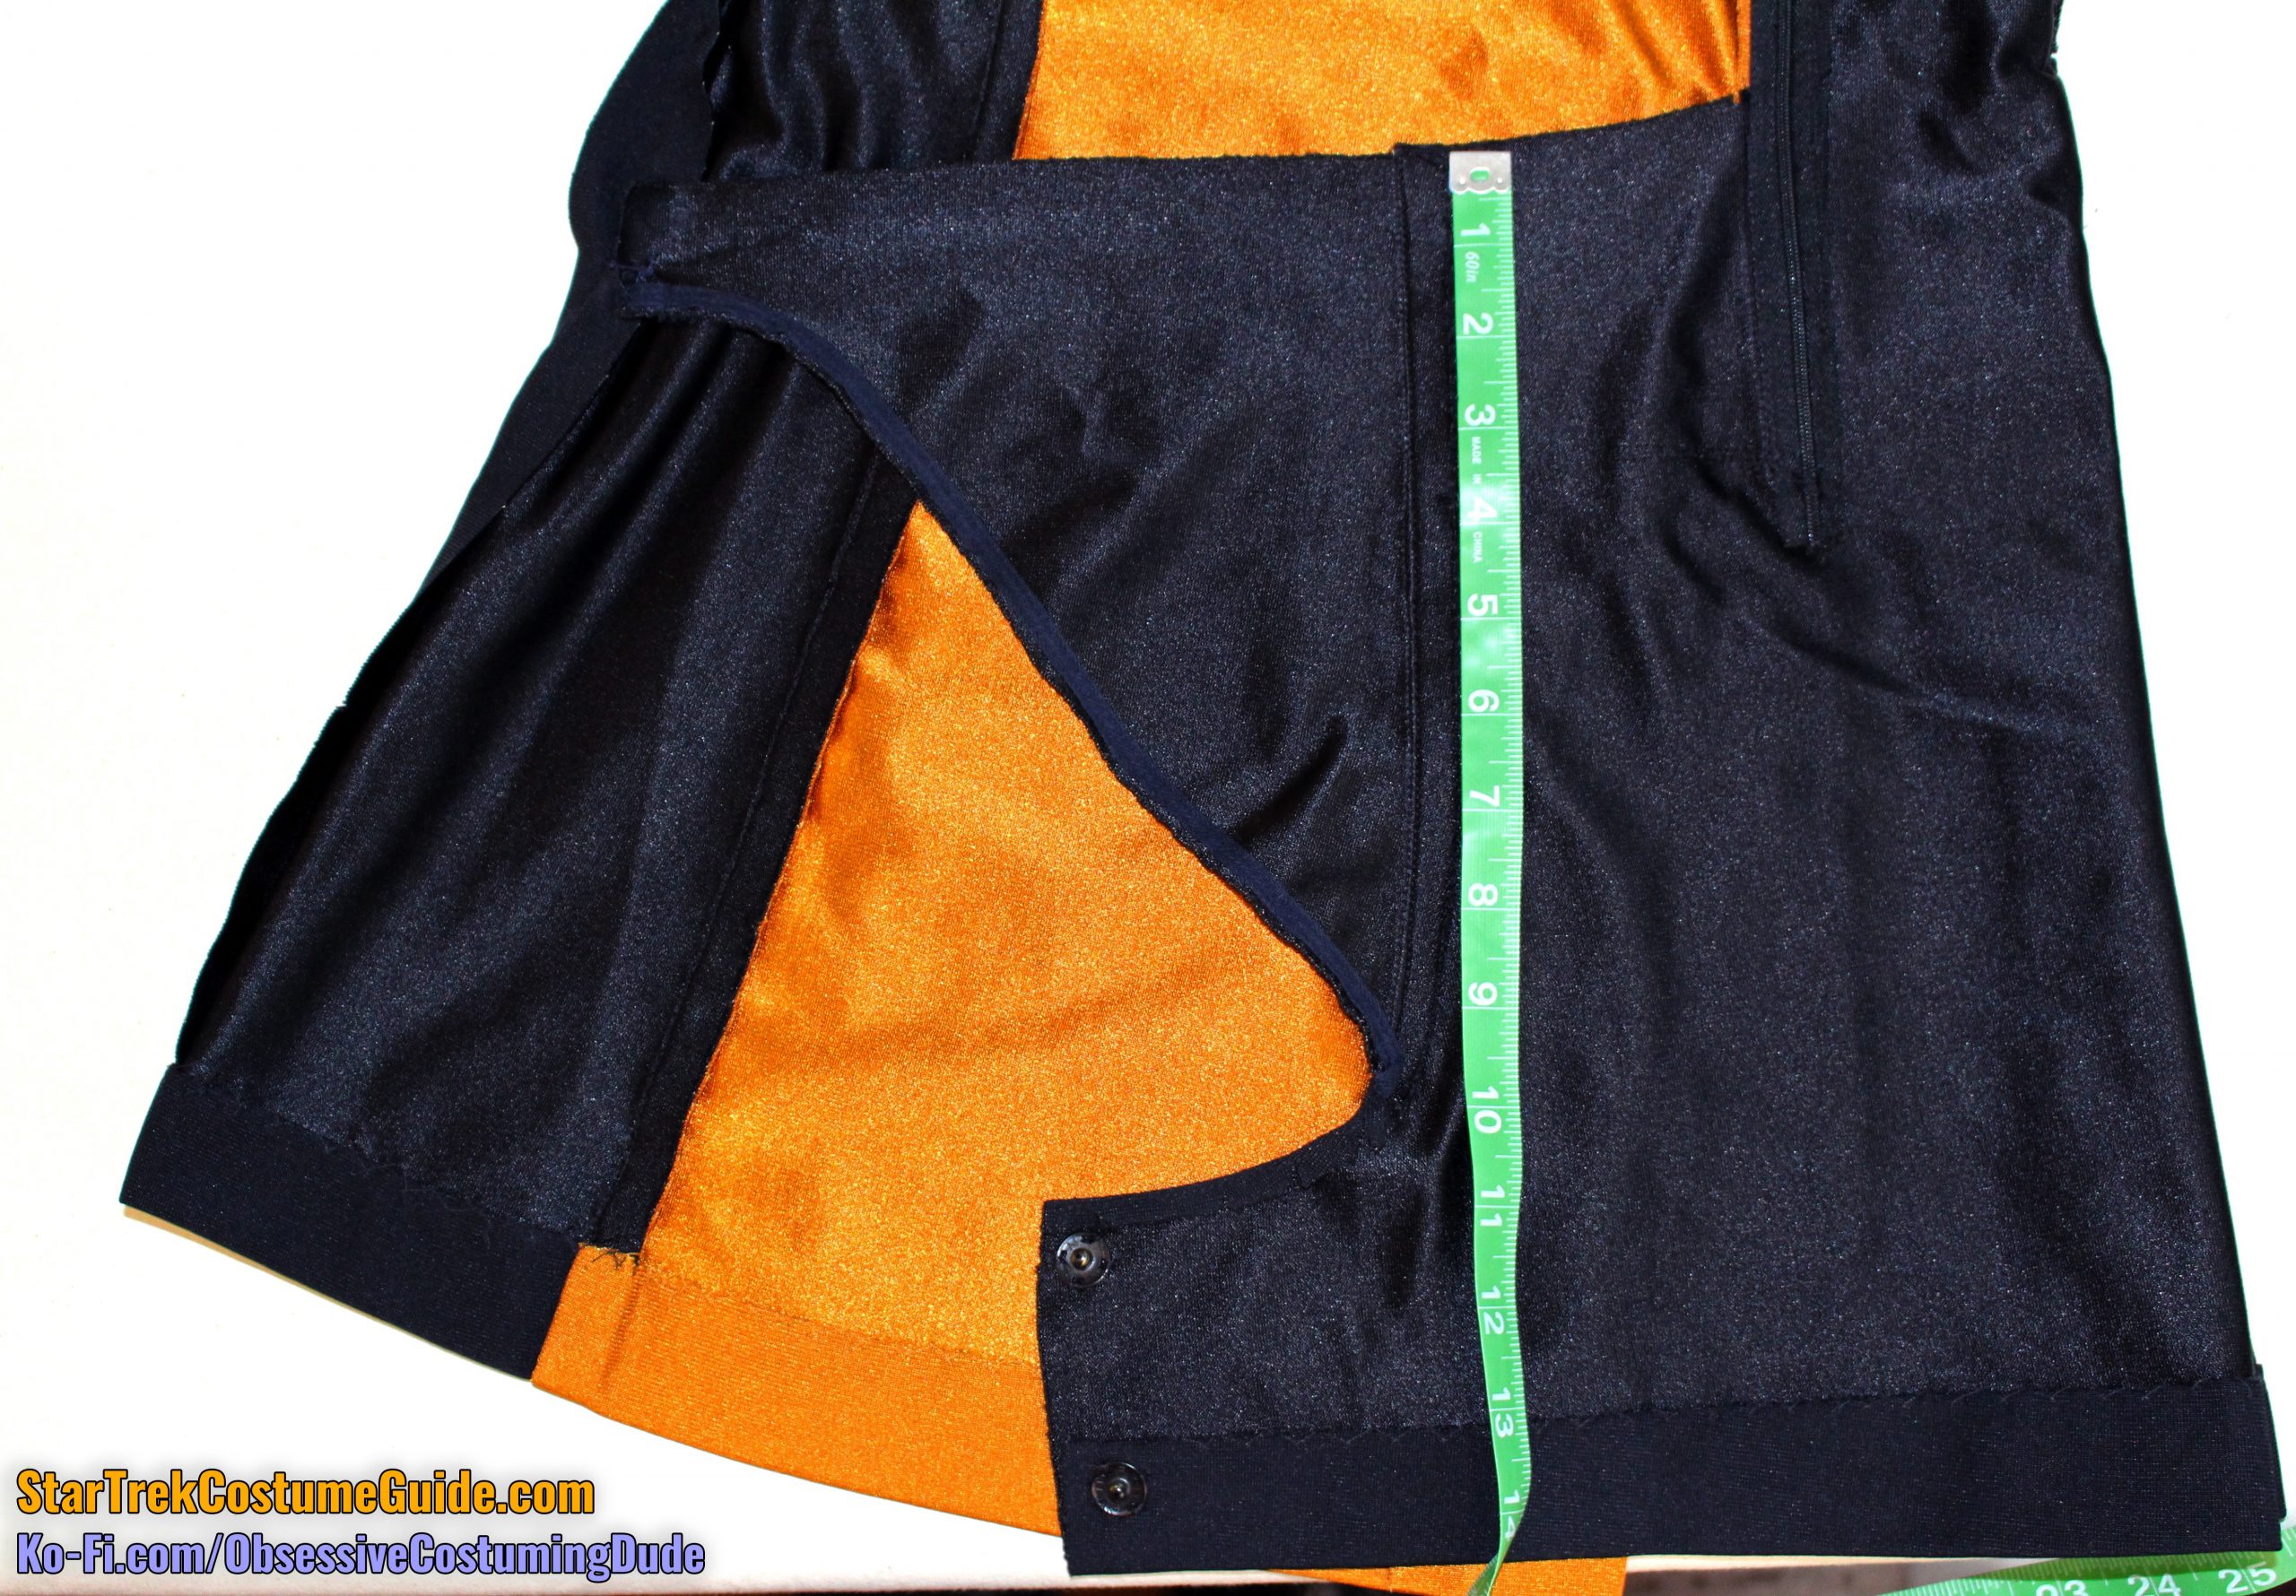
Now here’s where things start to get weird …
Looking at the lower front from the exterior, it looks pretty straightforward, right?
Lift the vent, though, and you get a peek at the skant’s interior construction …
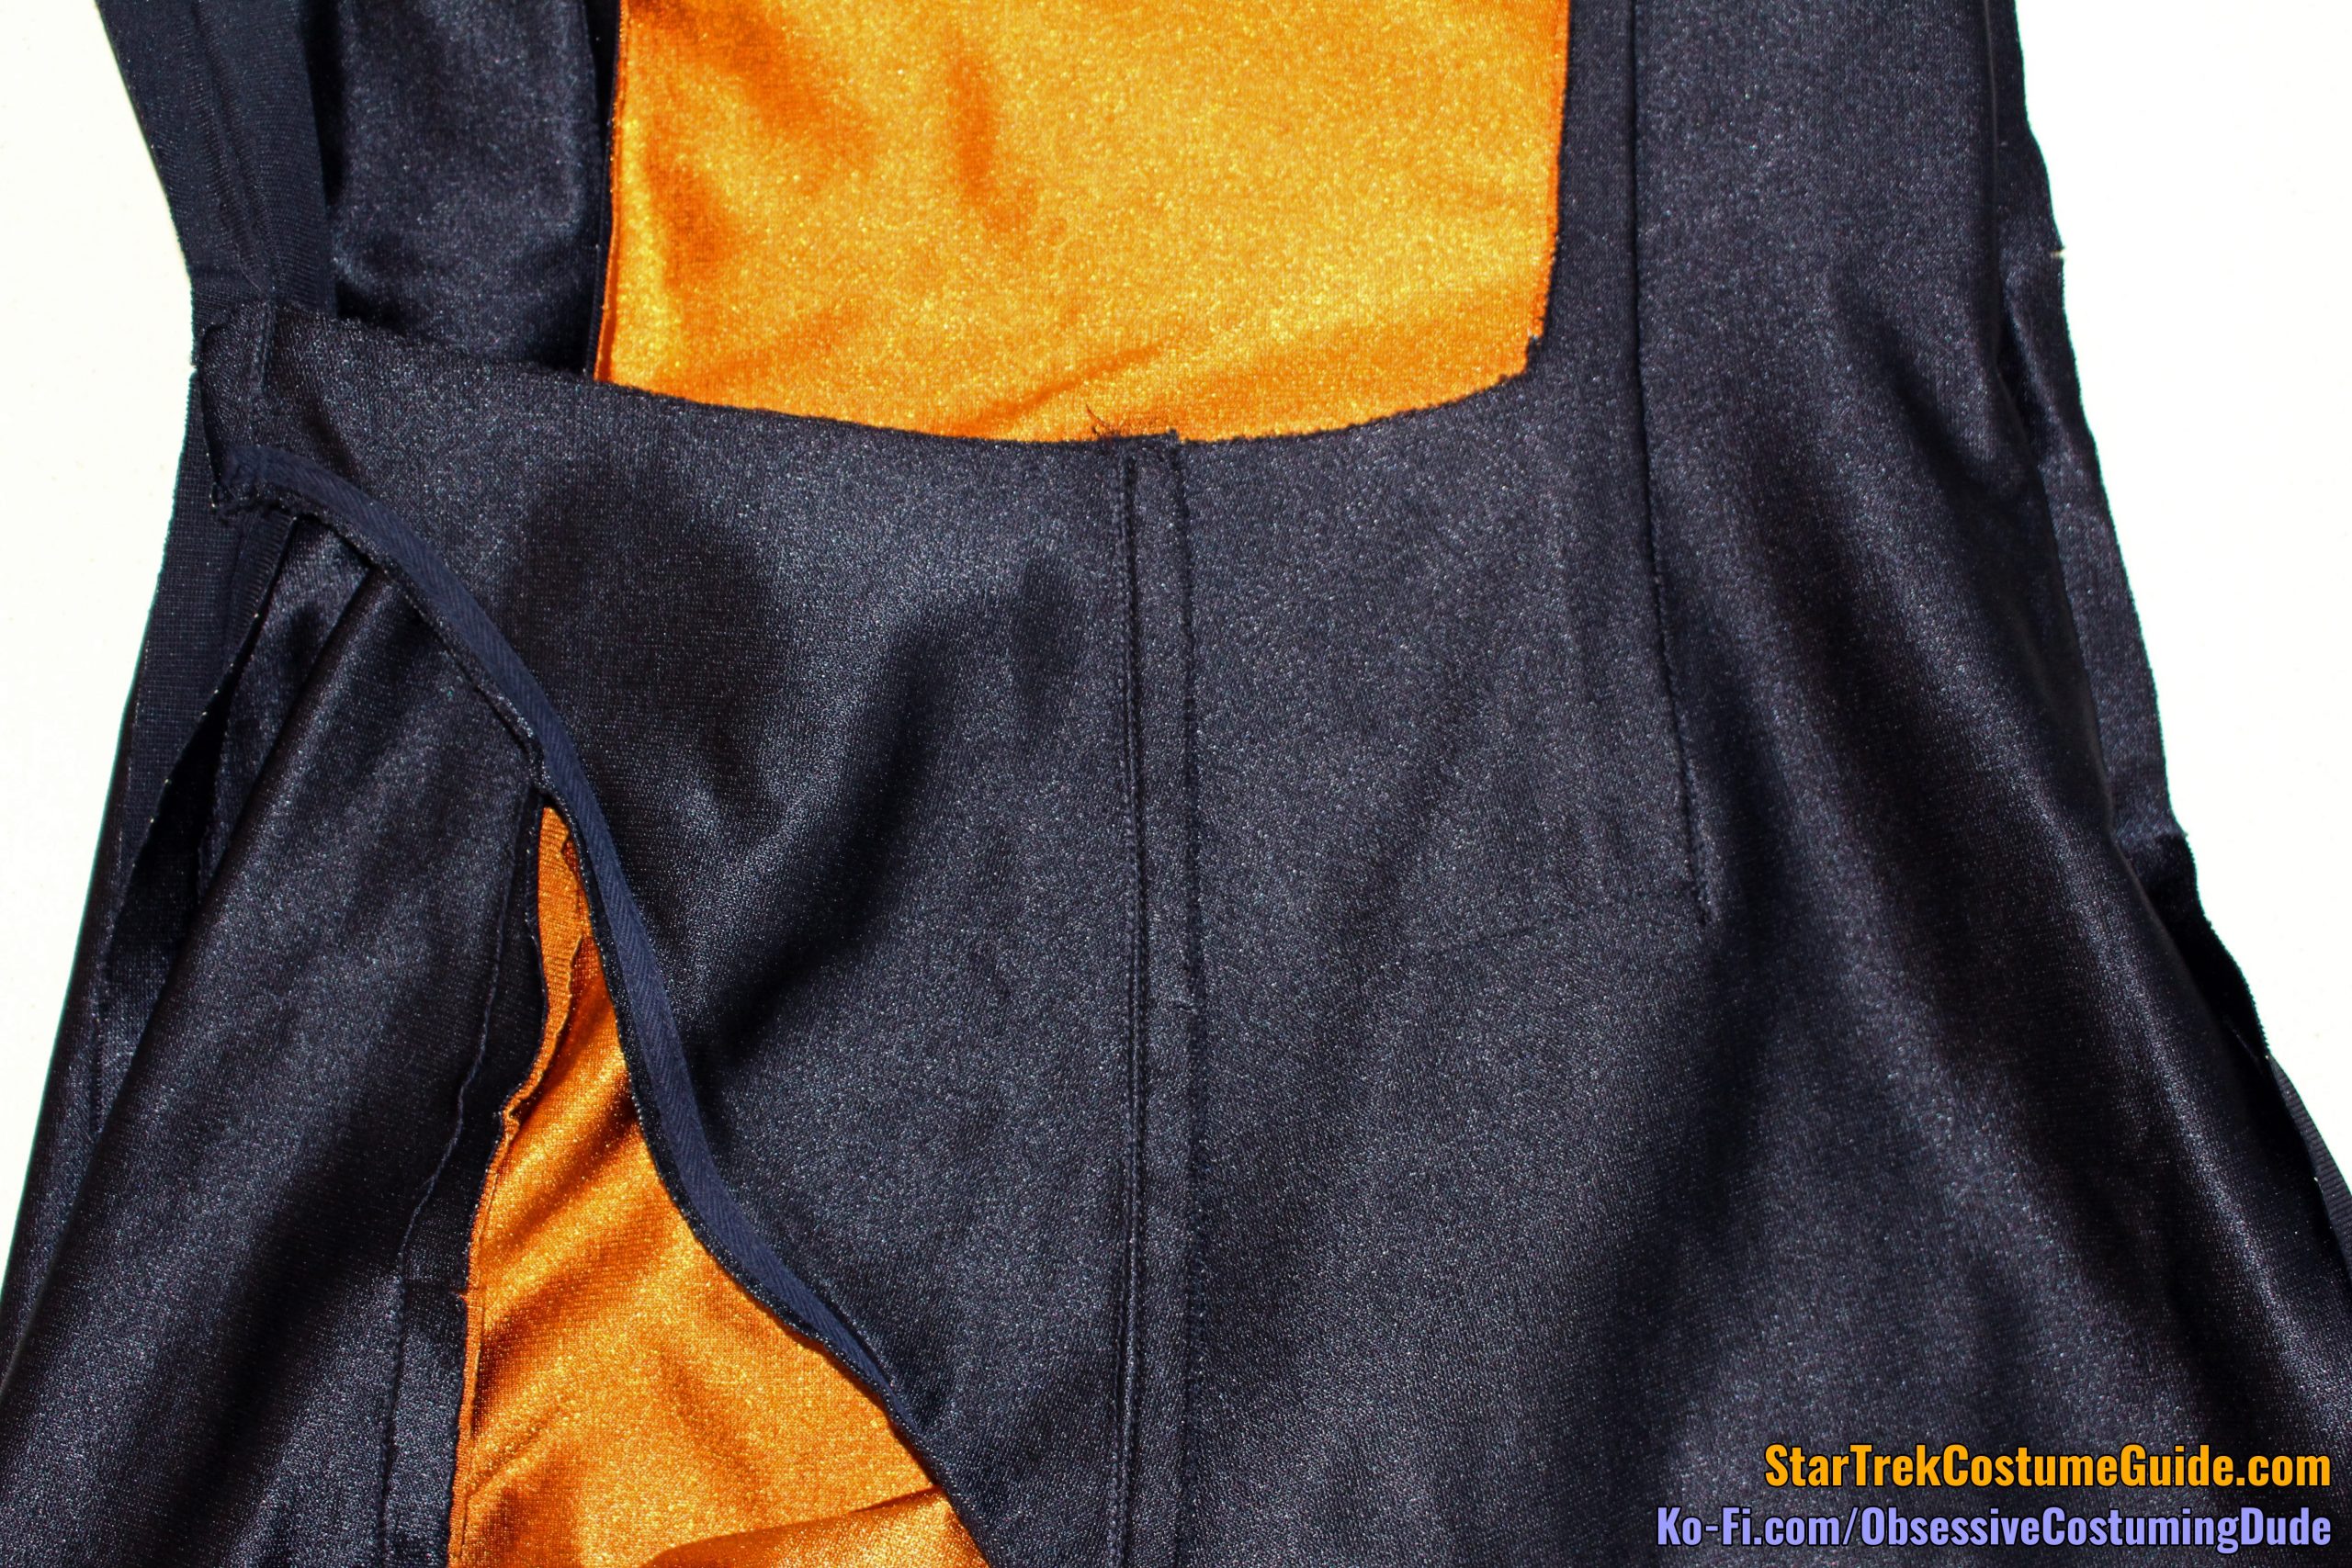
Pulling the side as far out of the way as I can, you can see what appears to be a vaguely K-shaped assembly, the upper corner of which was fastened to the side seam allowances.
The fabric directly underneath the vent was part of the side panel, cut-on as a single piece, but there’s a separate, sort of triangular piece attached to it, the outer corner of which was sewn to the opposite side seam at the waist.
I refer to this piece as the “interior waist anchor,” and we’ll take a look at the interior construction shortly.
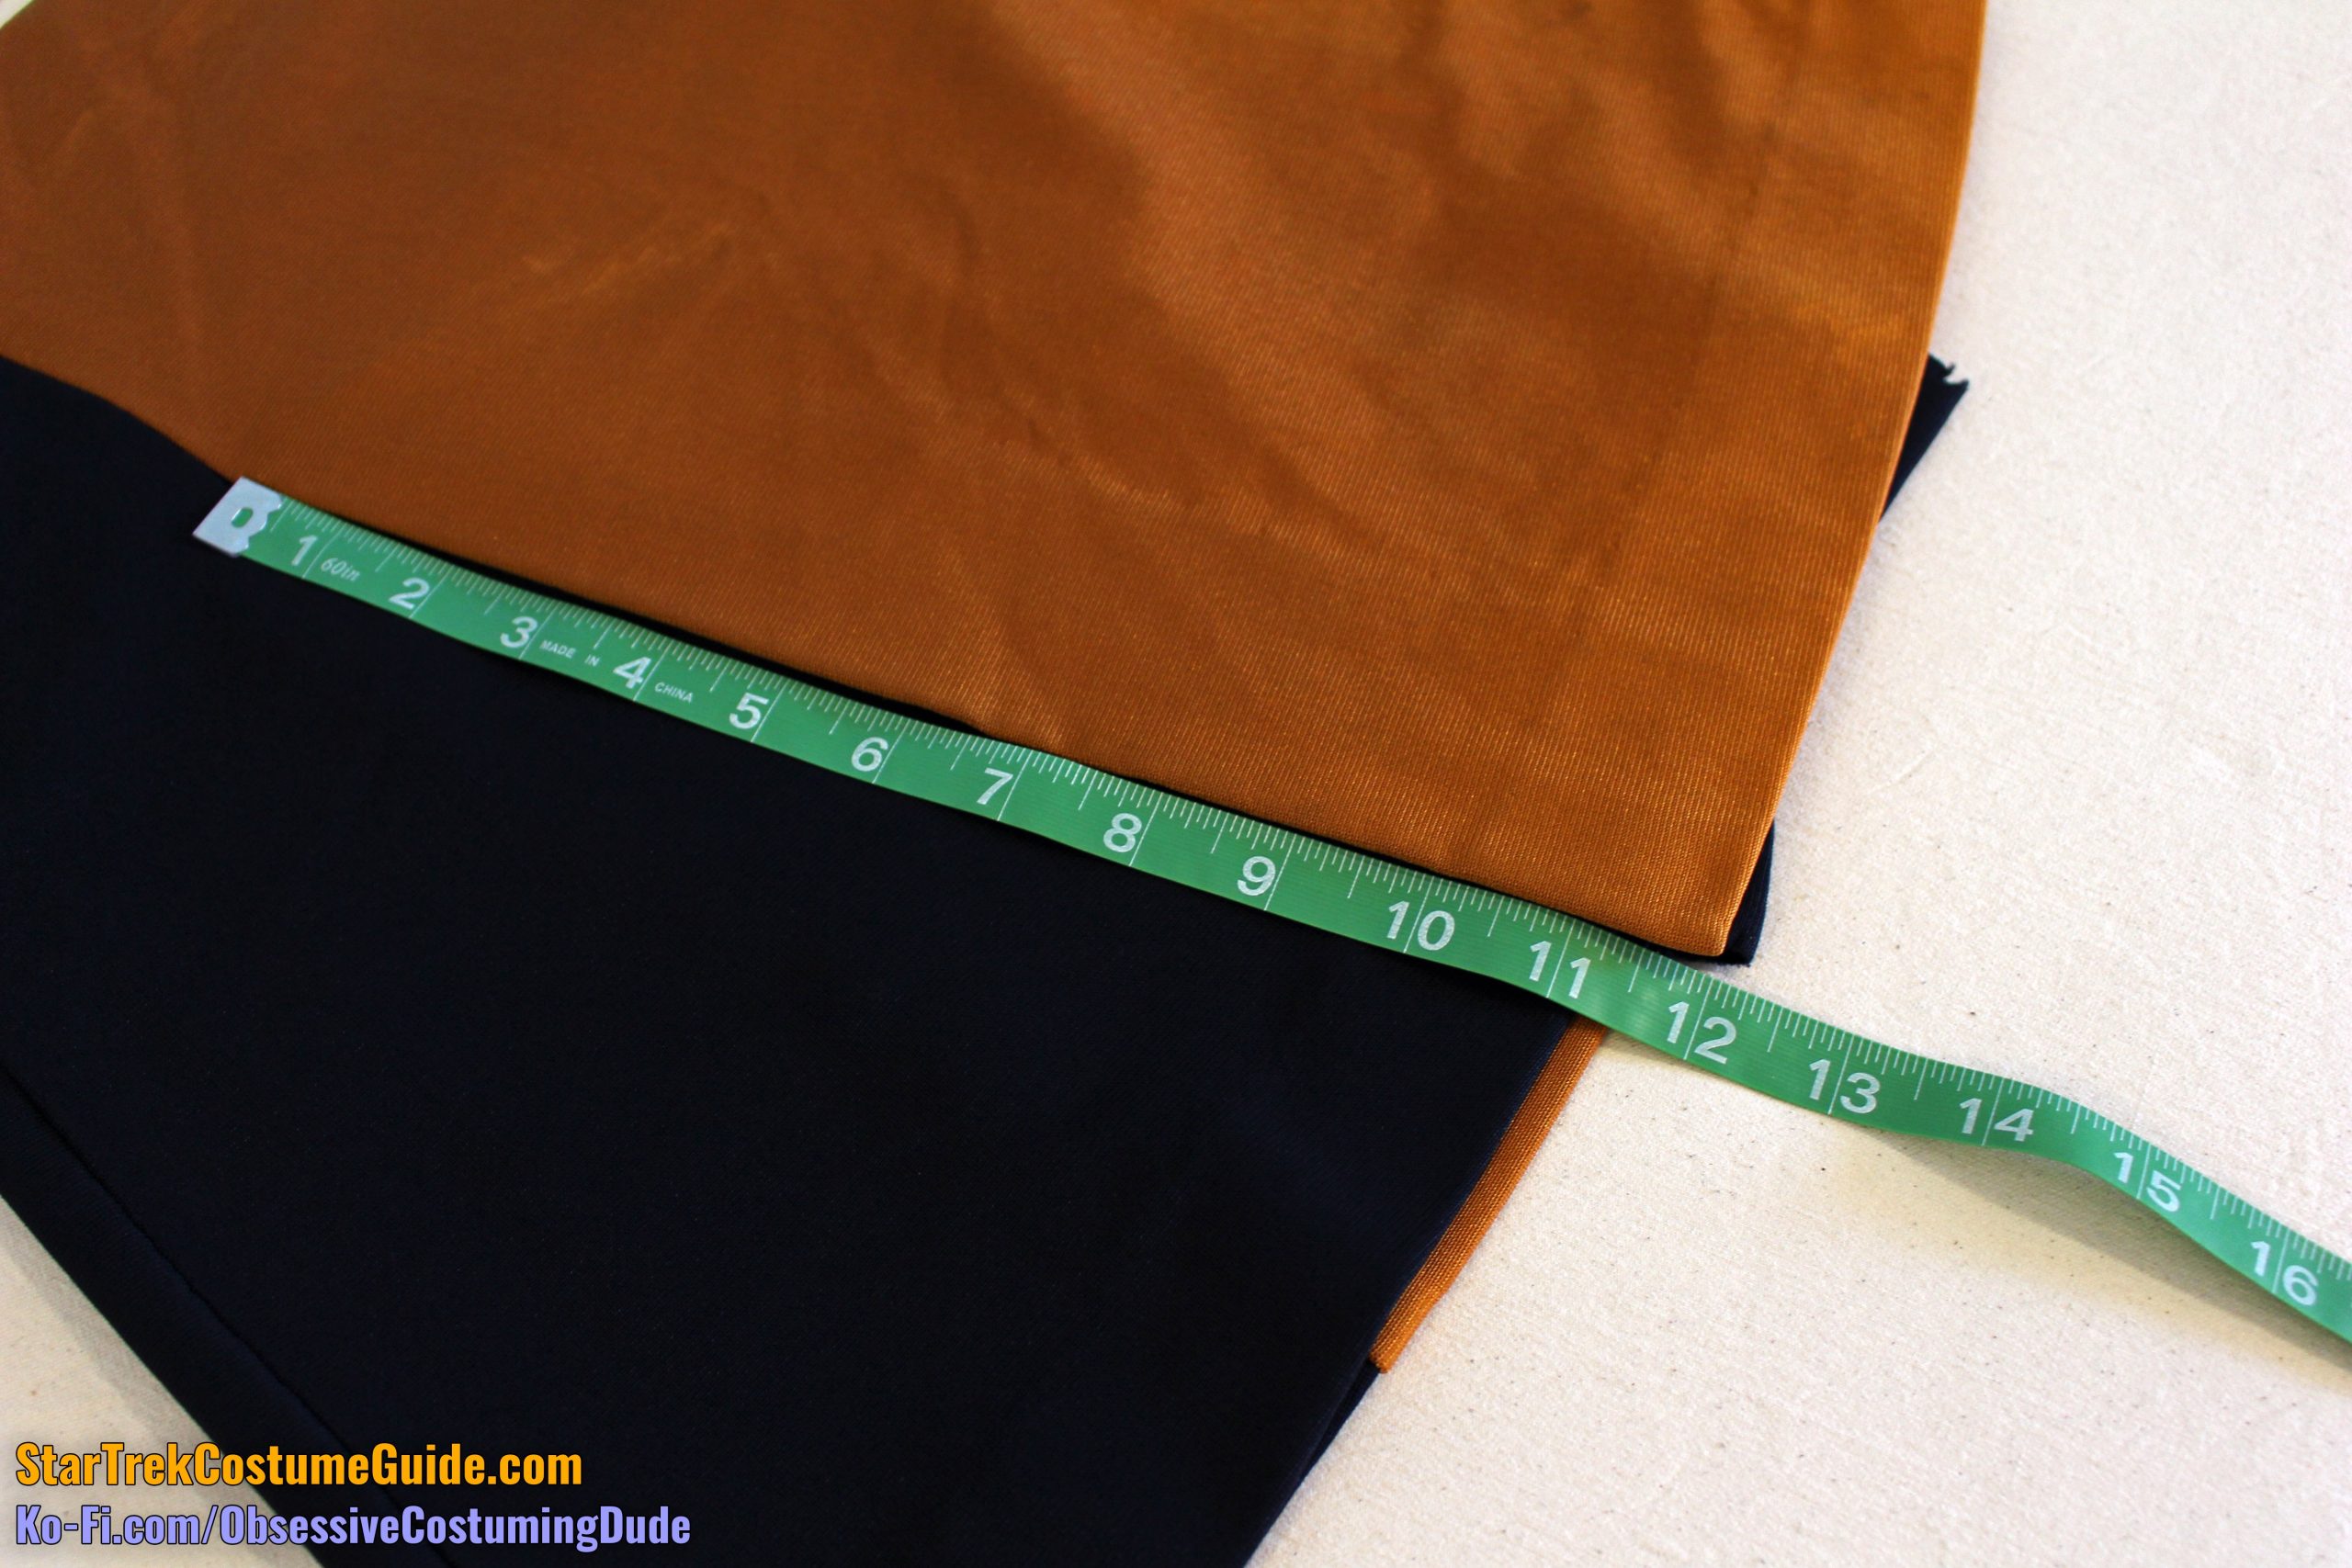
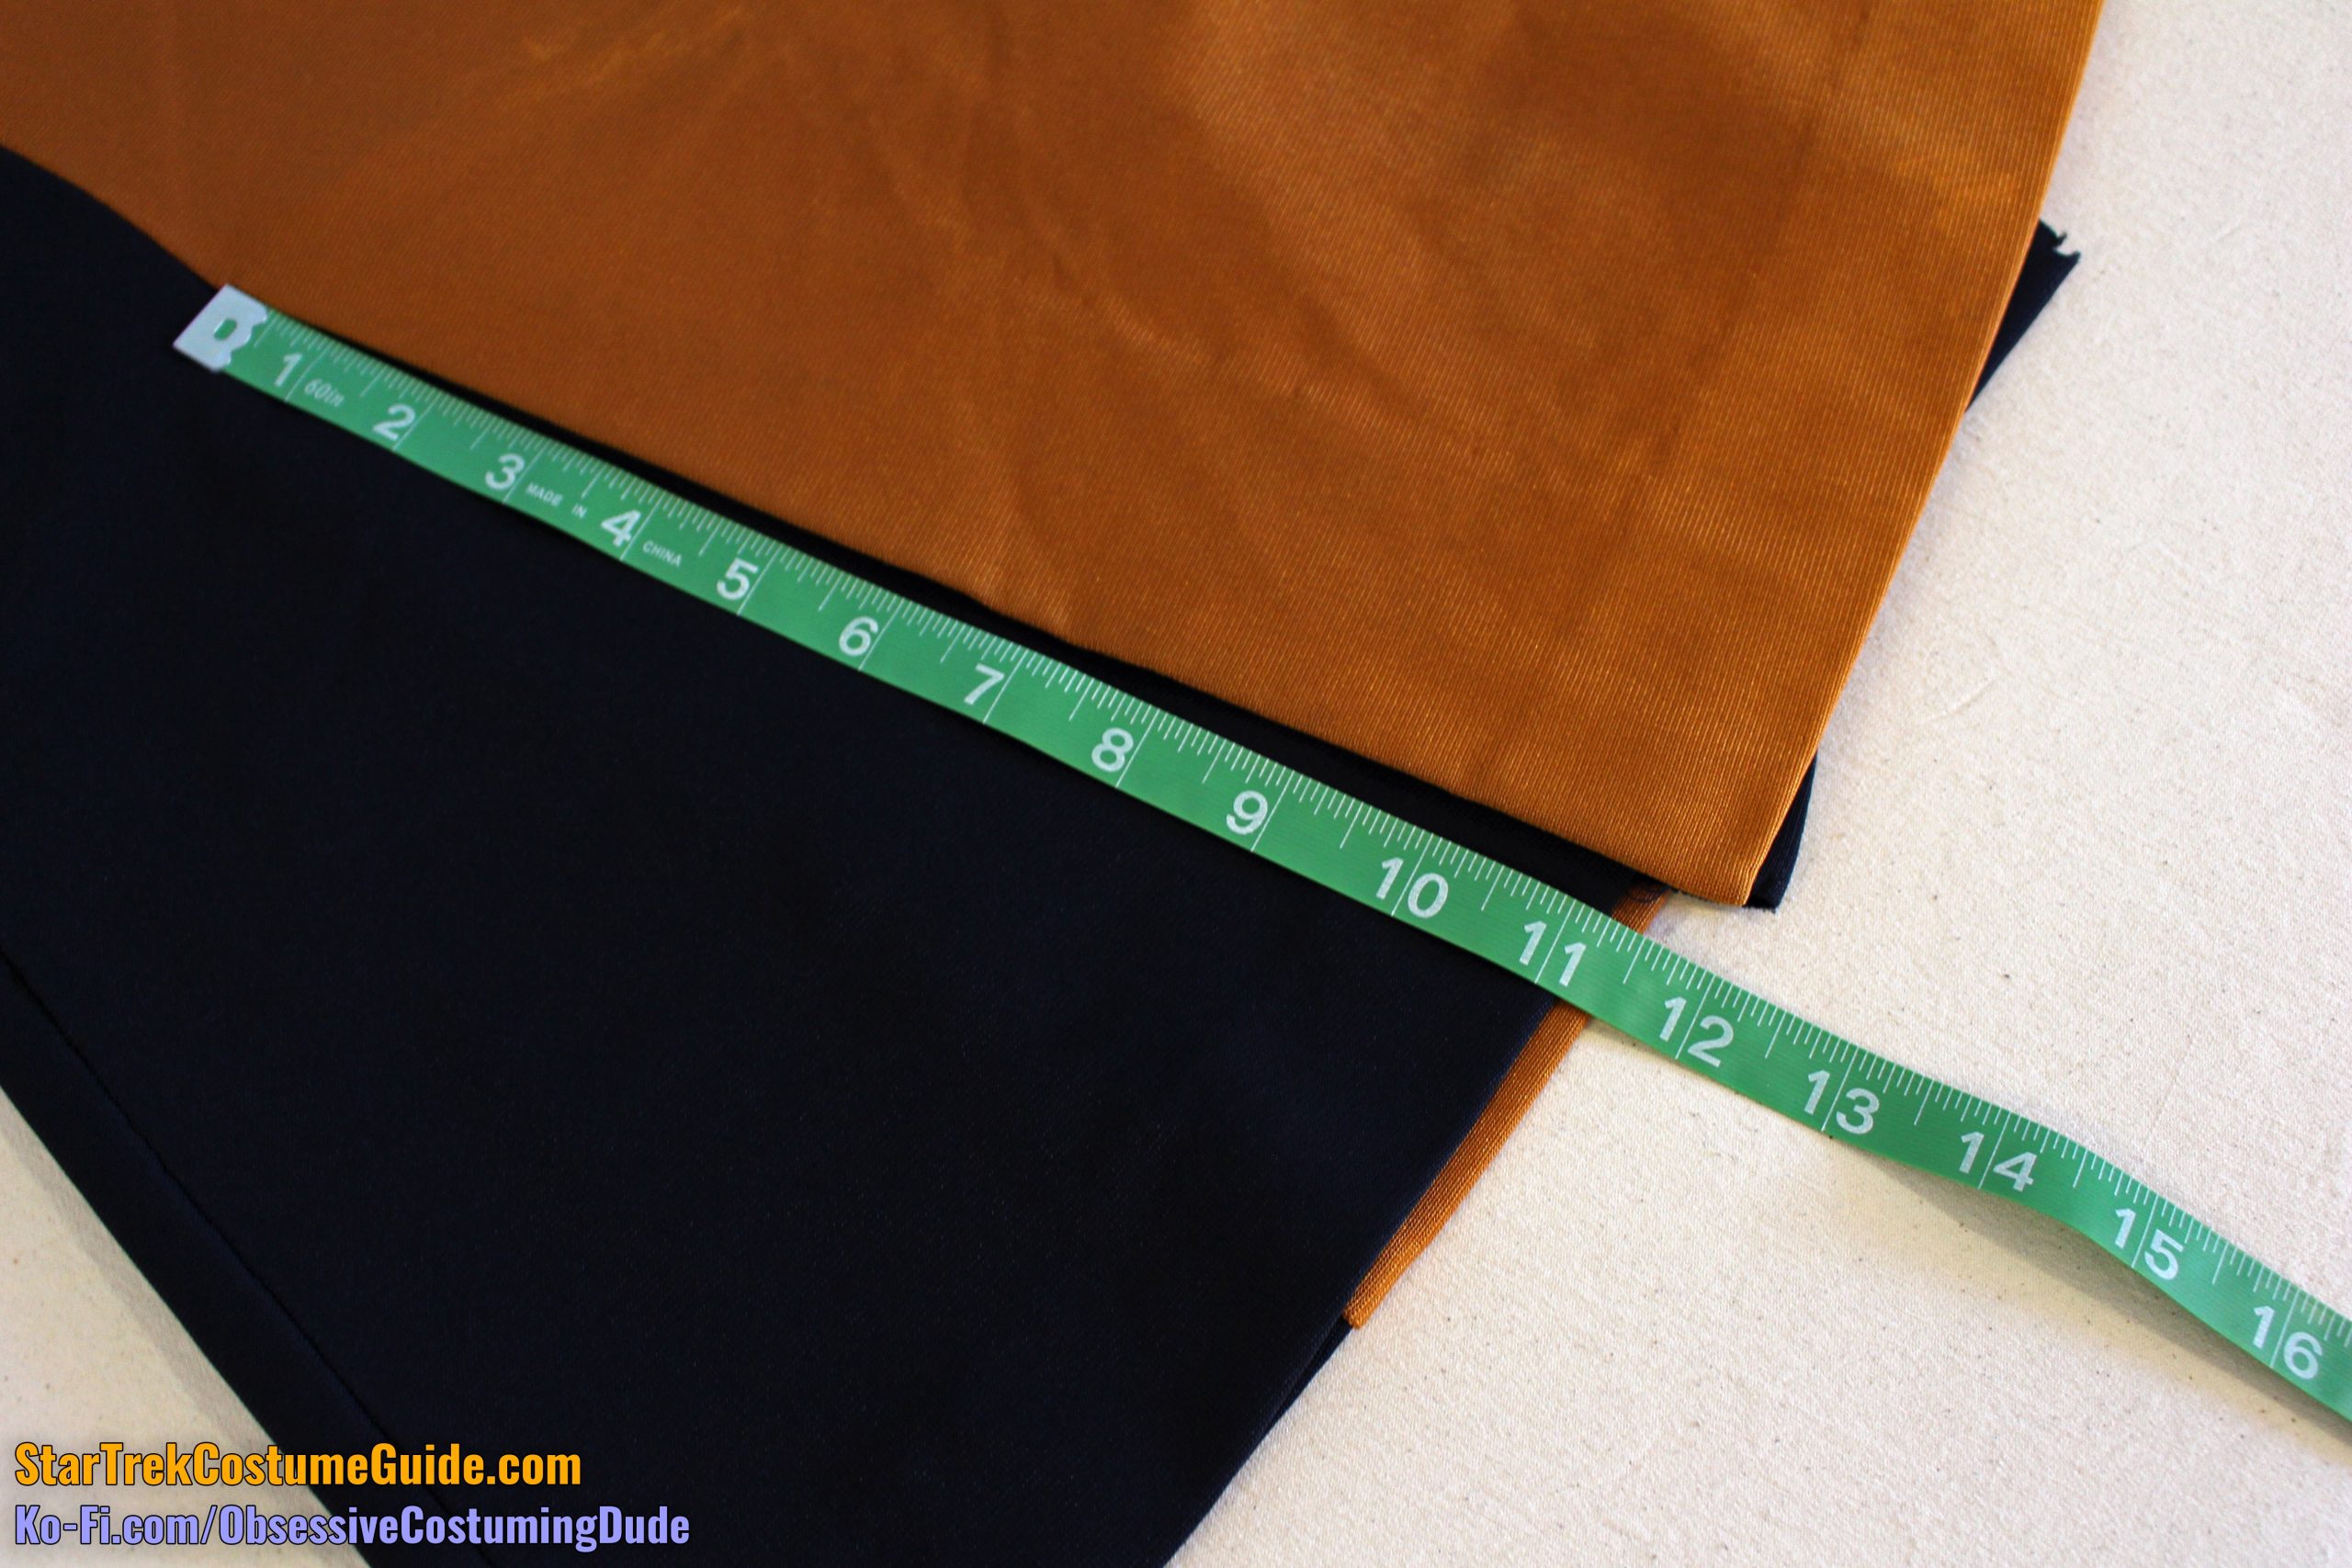
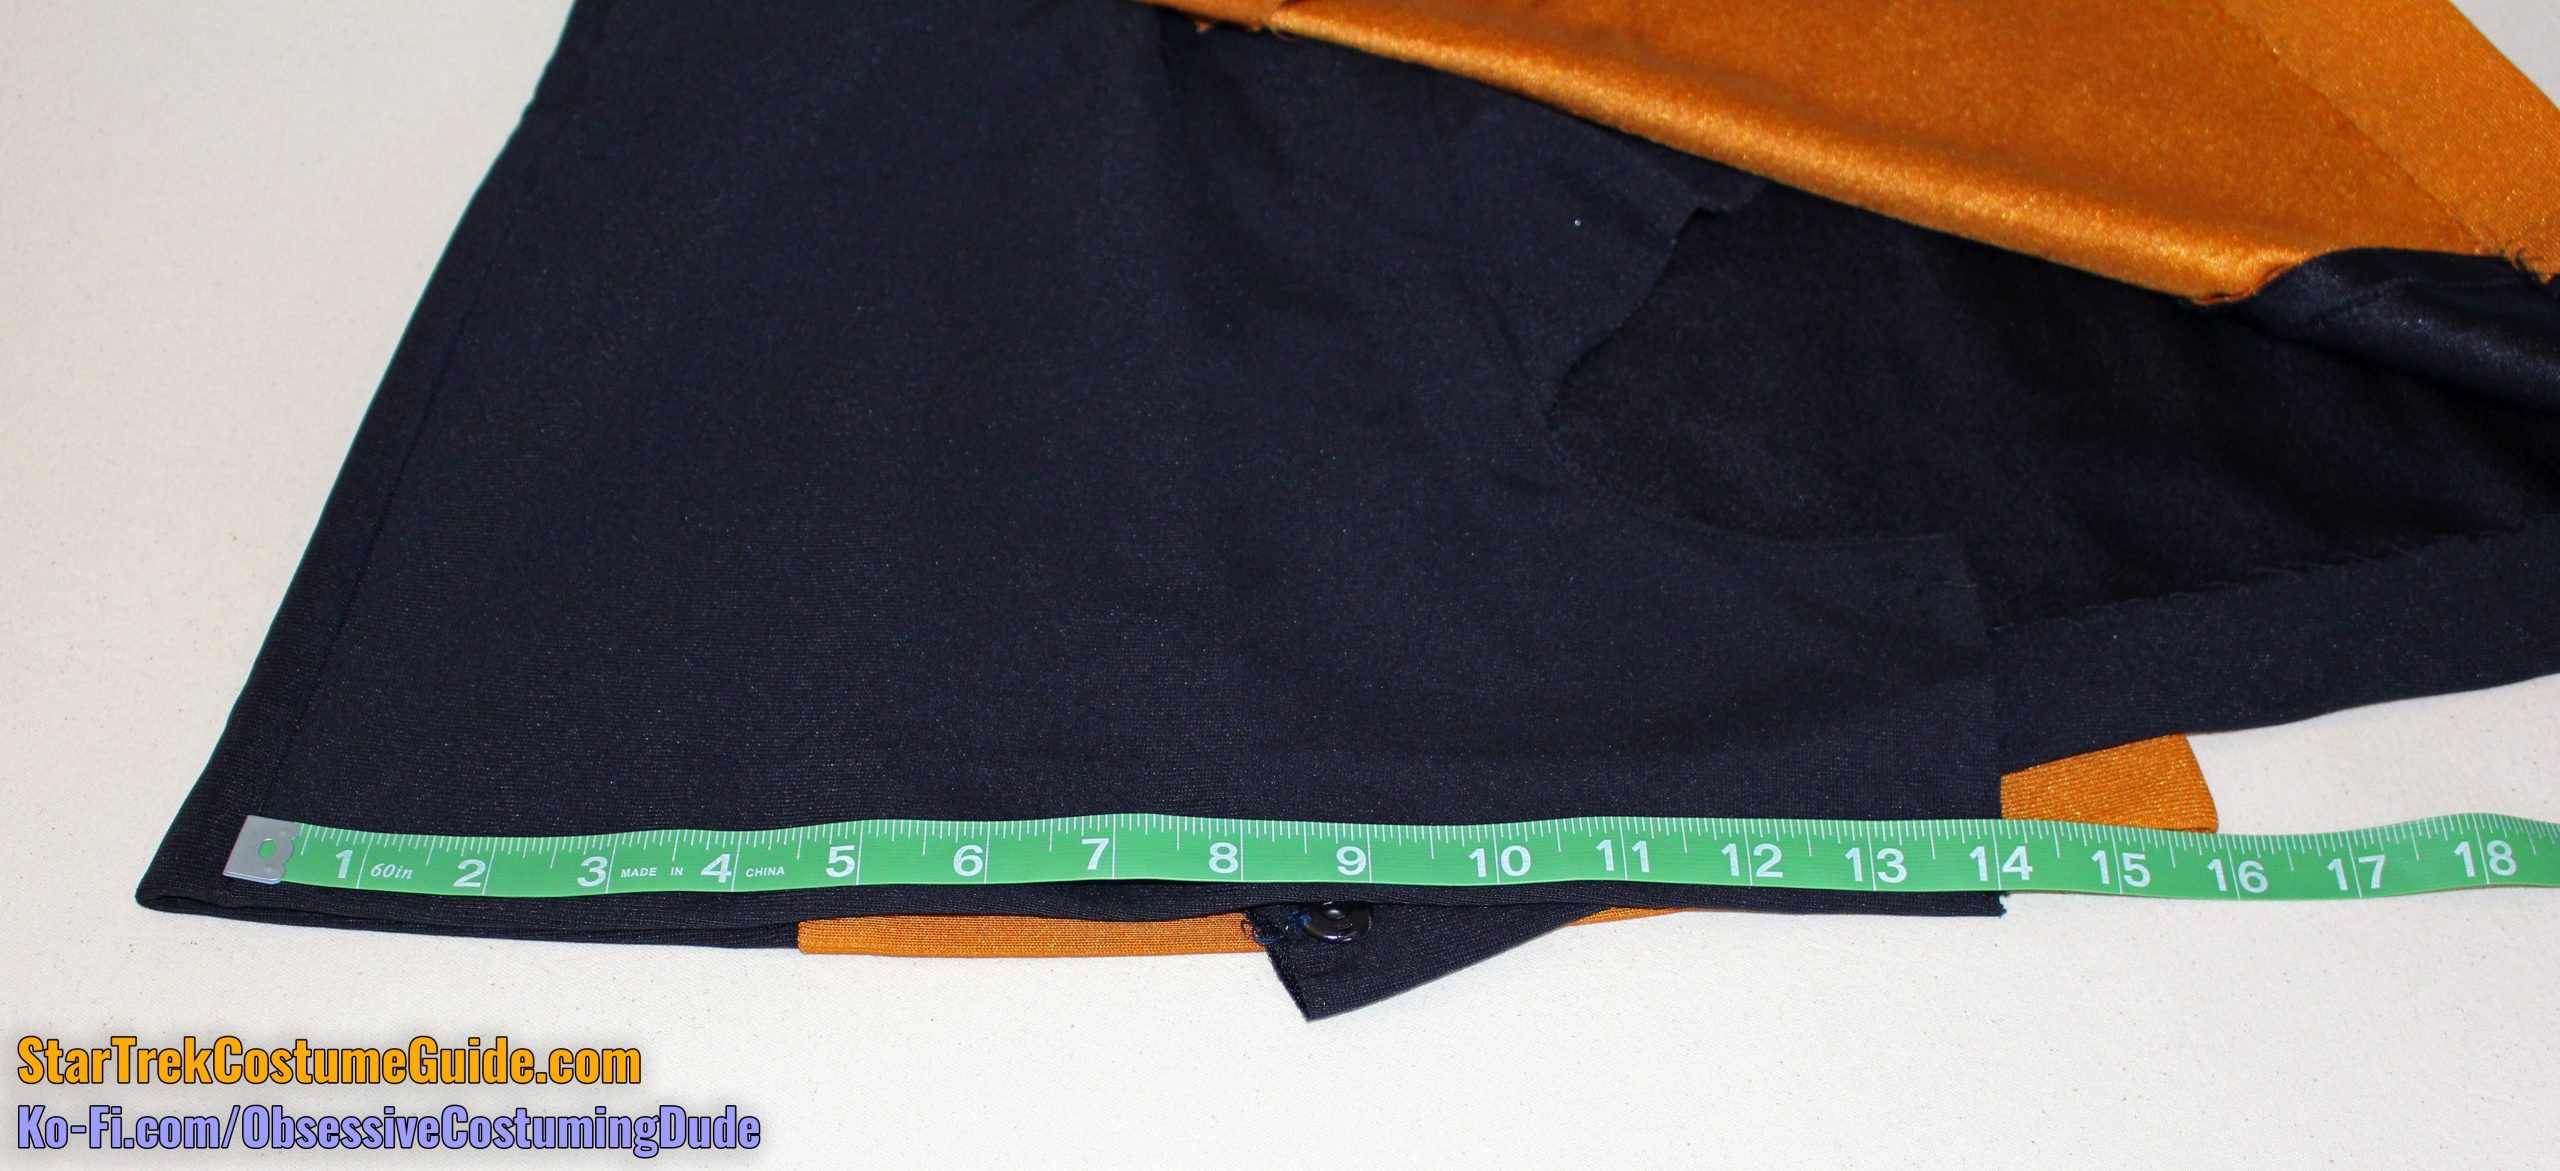
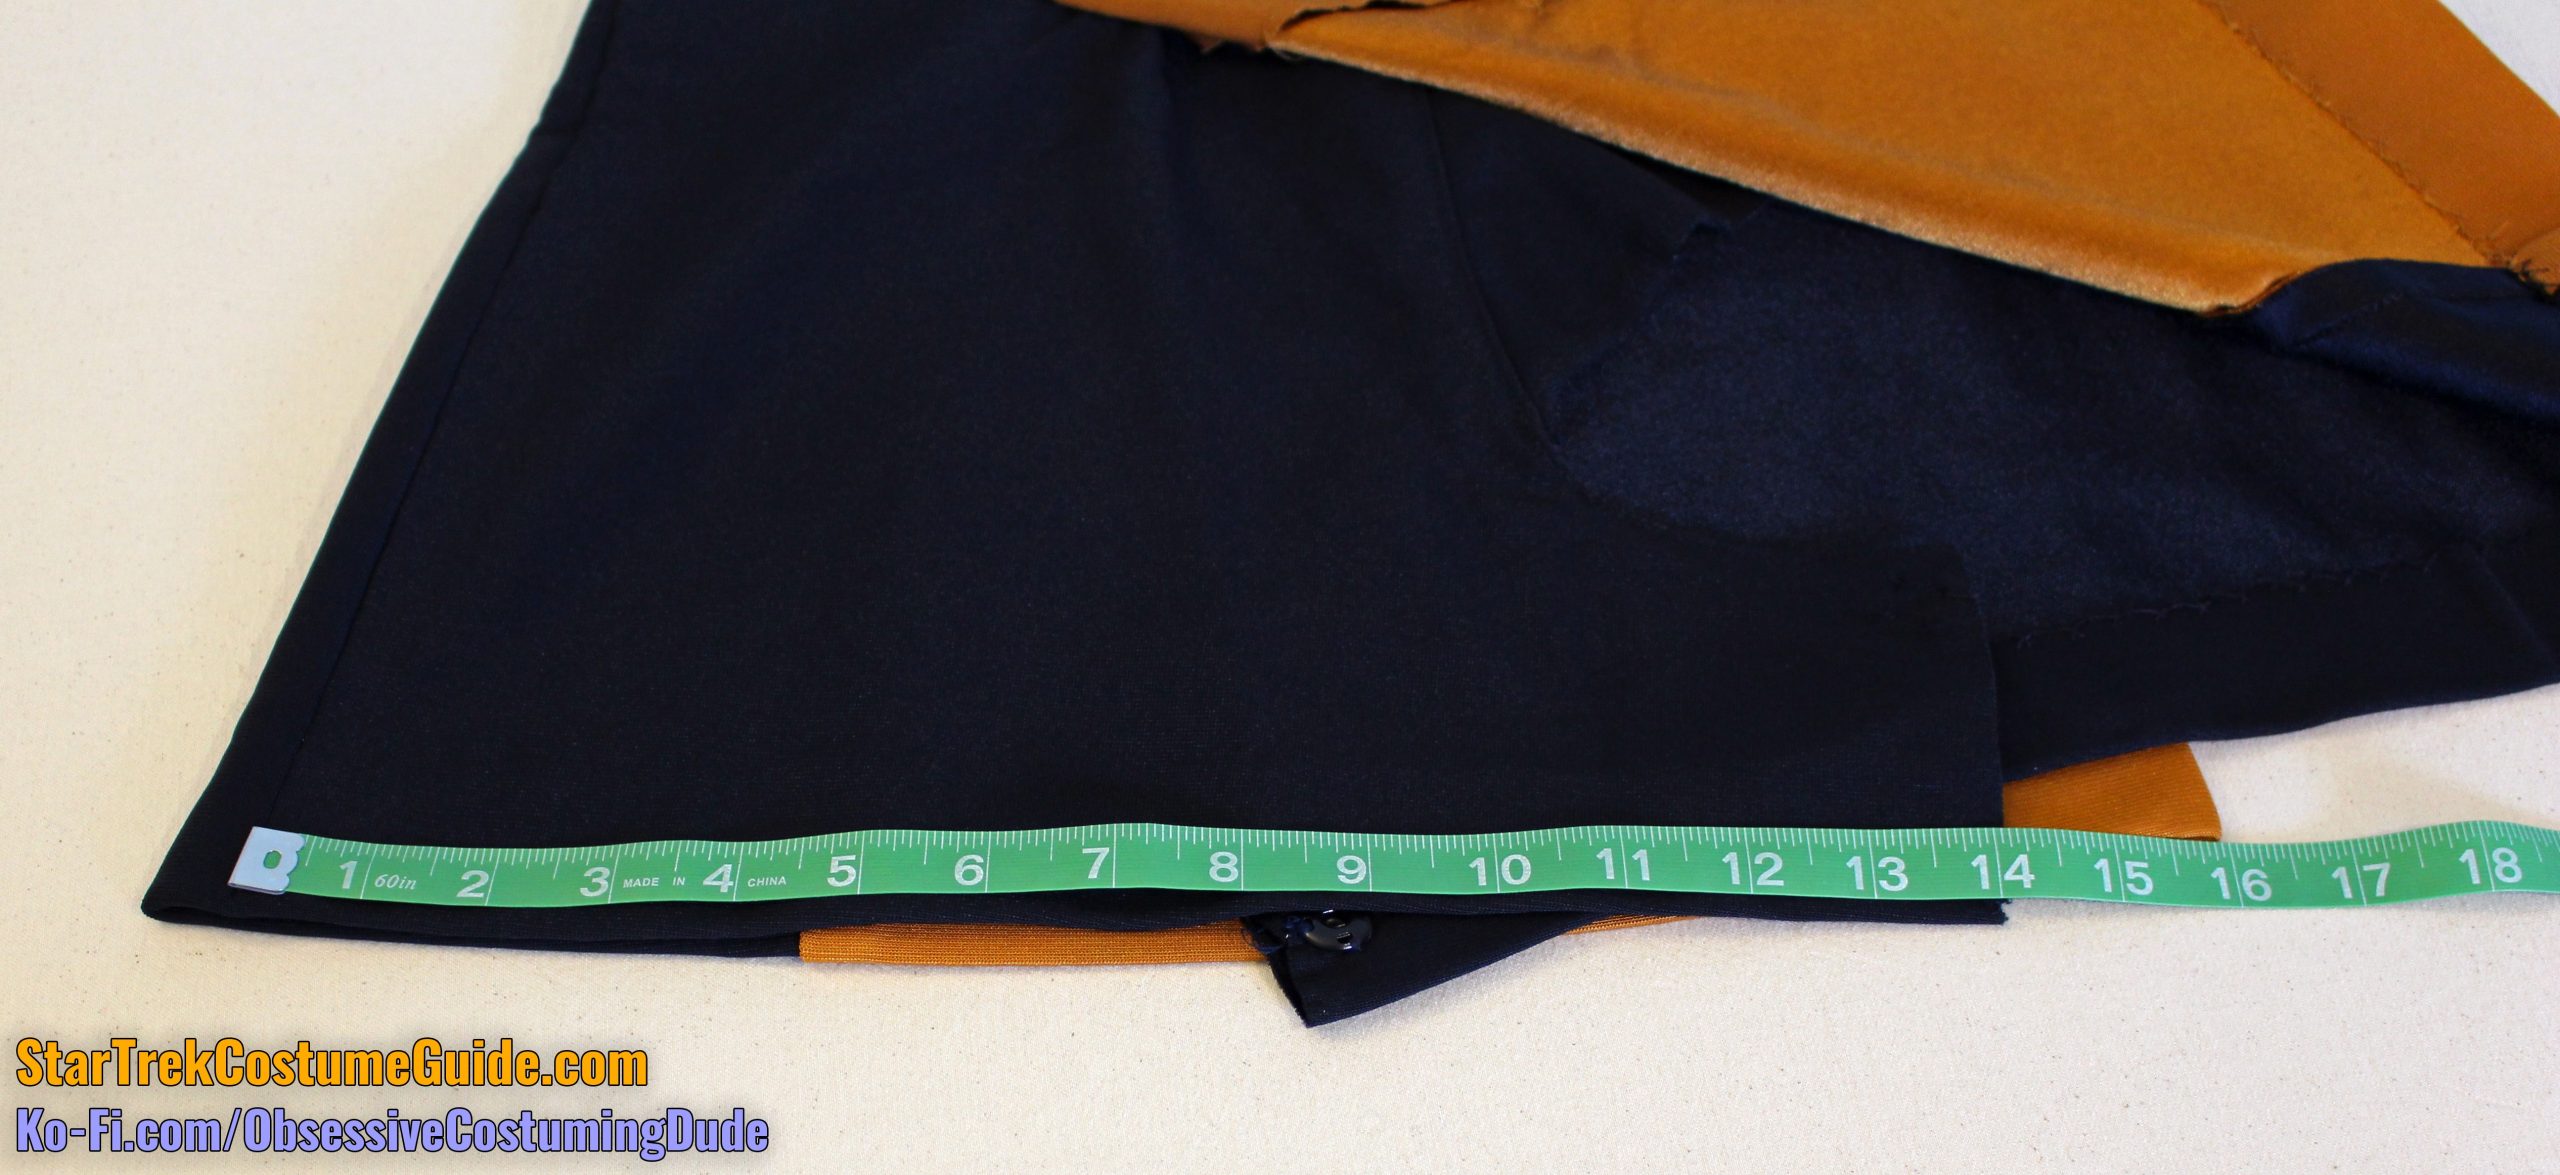
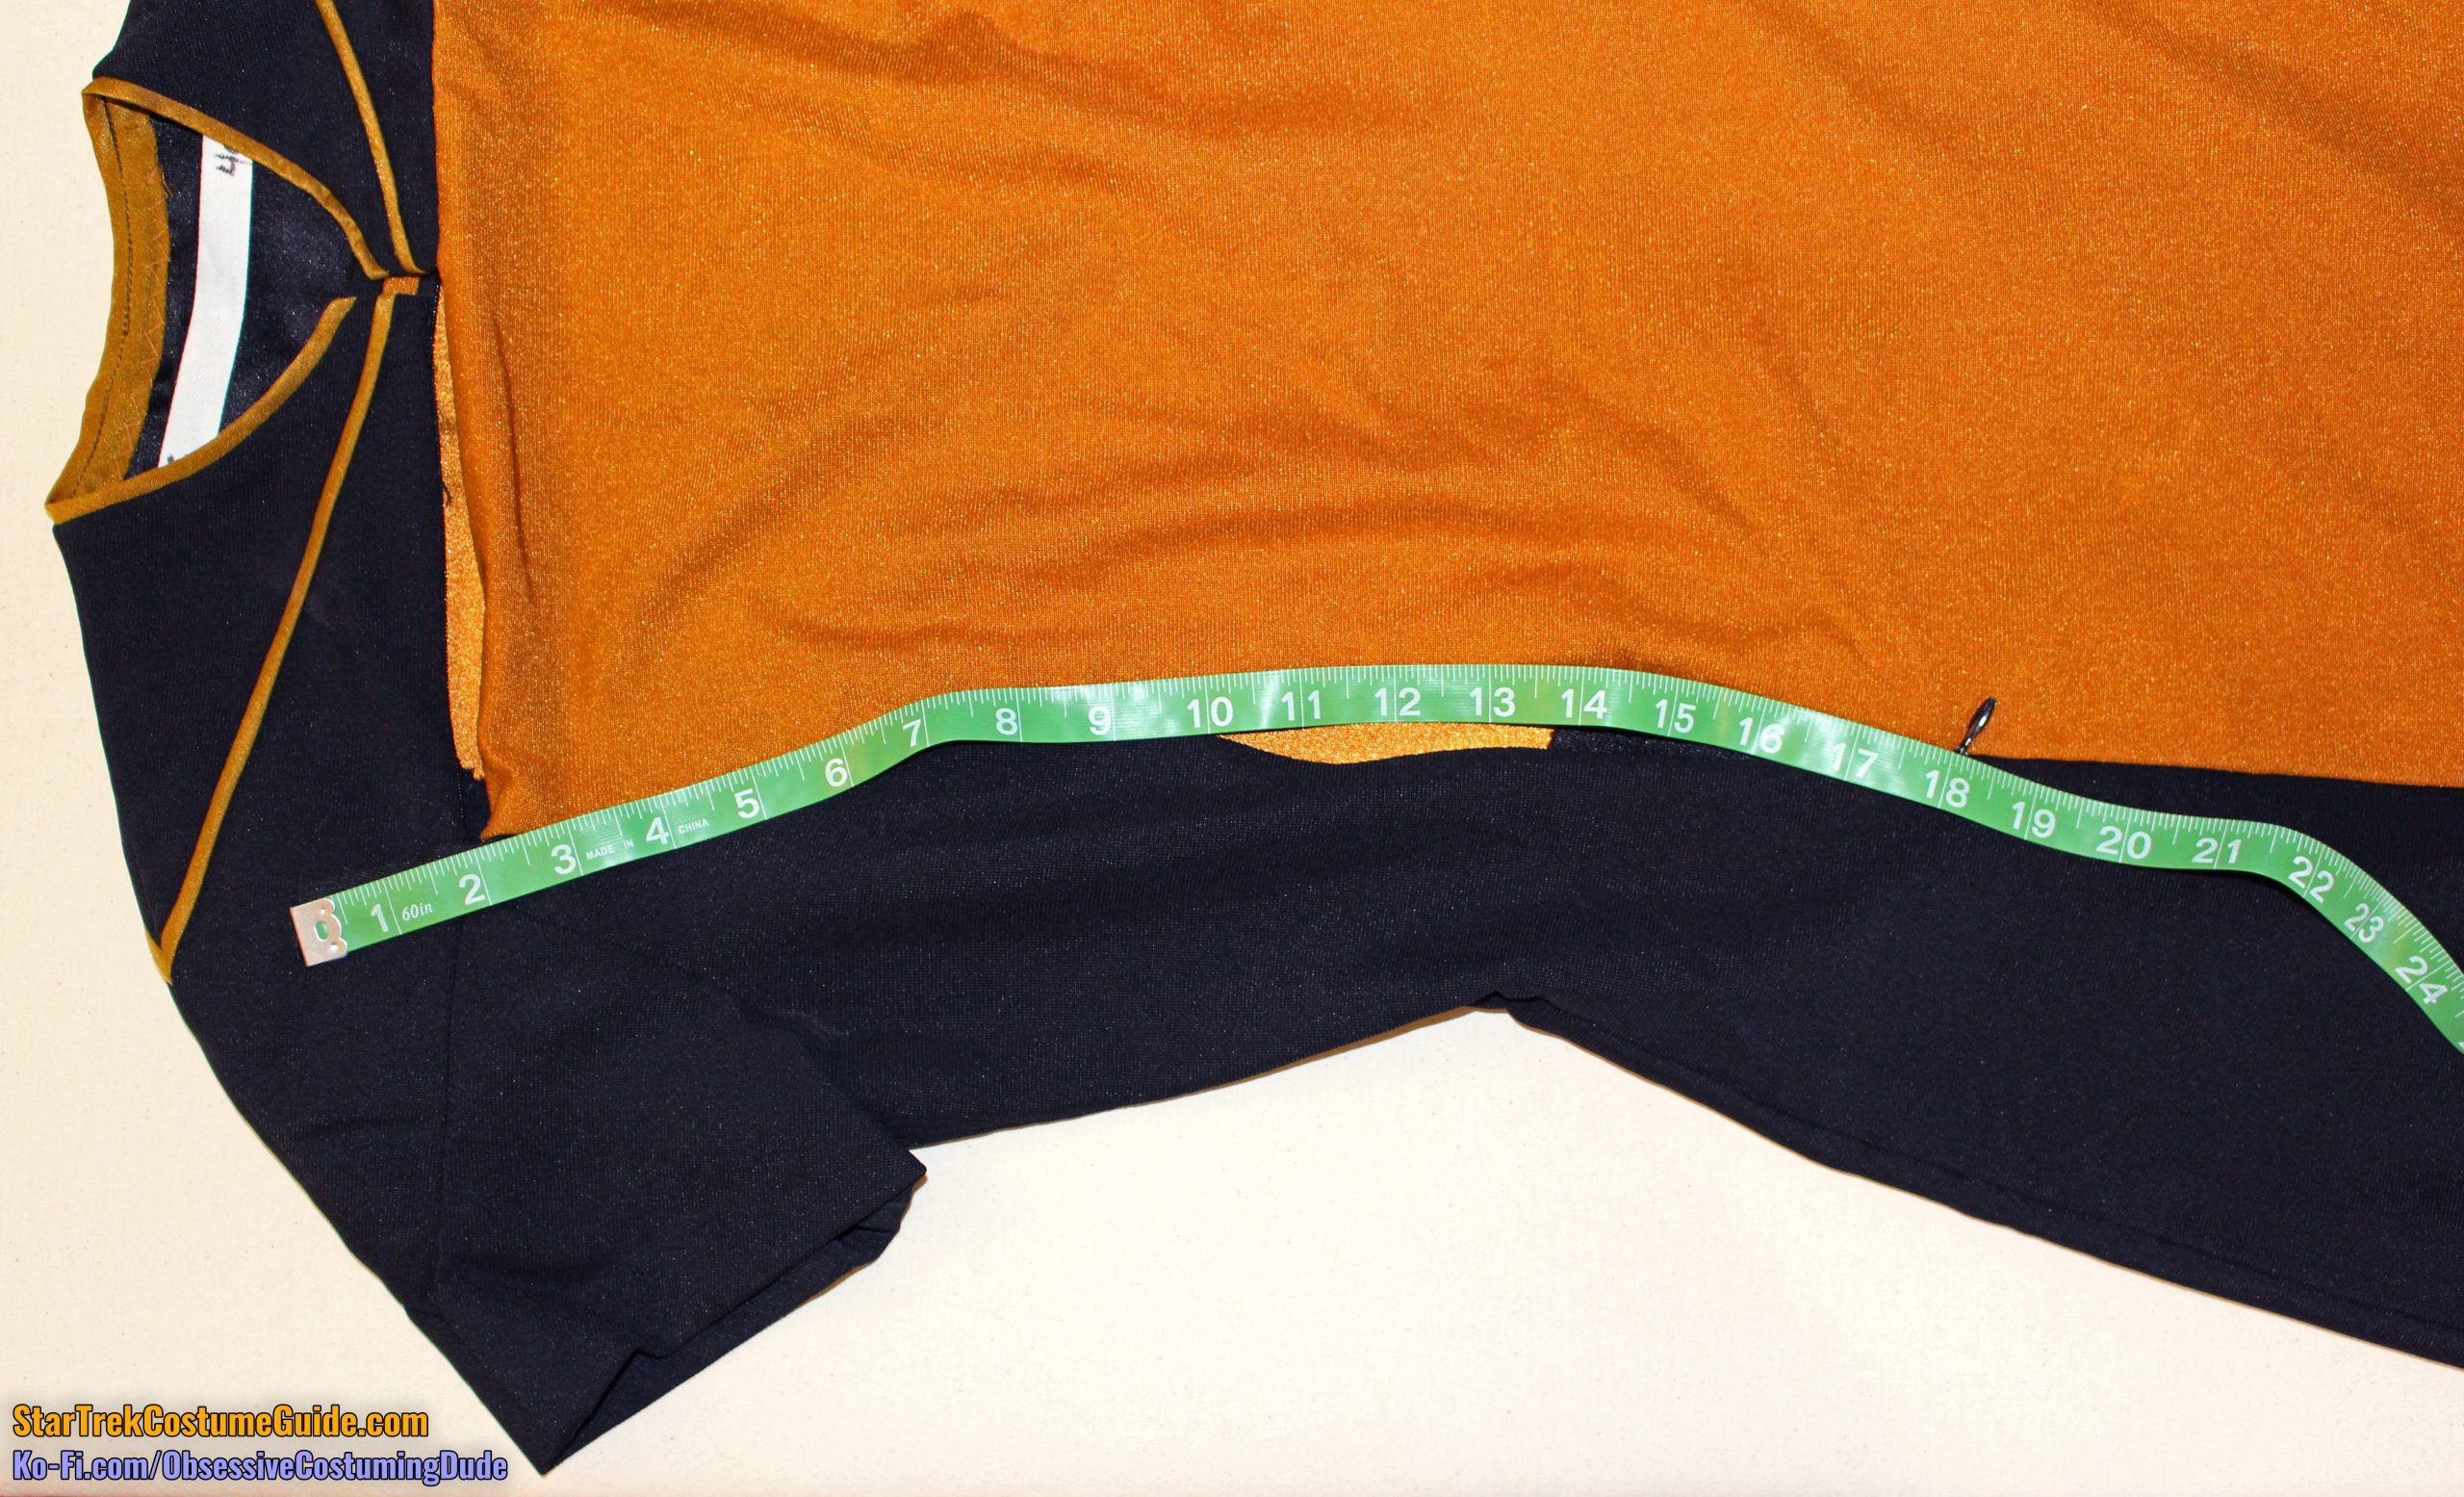
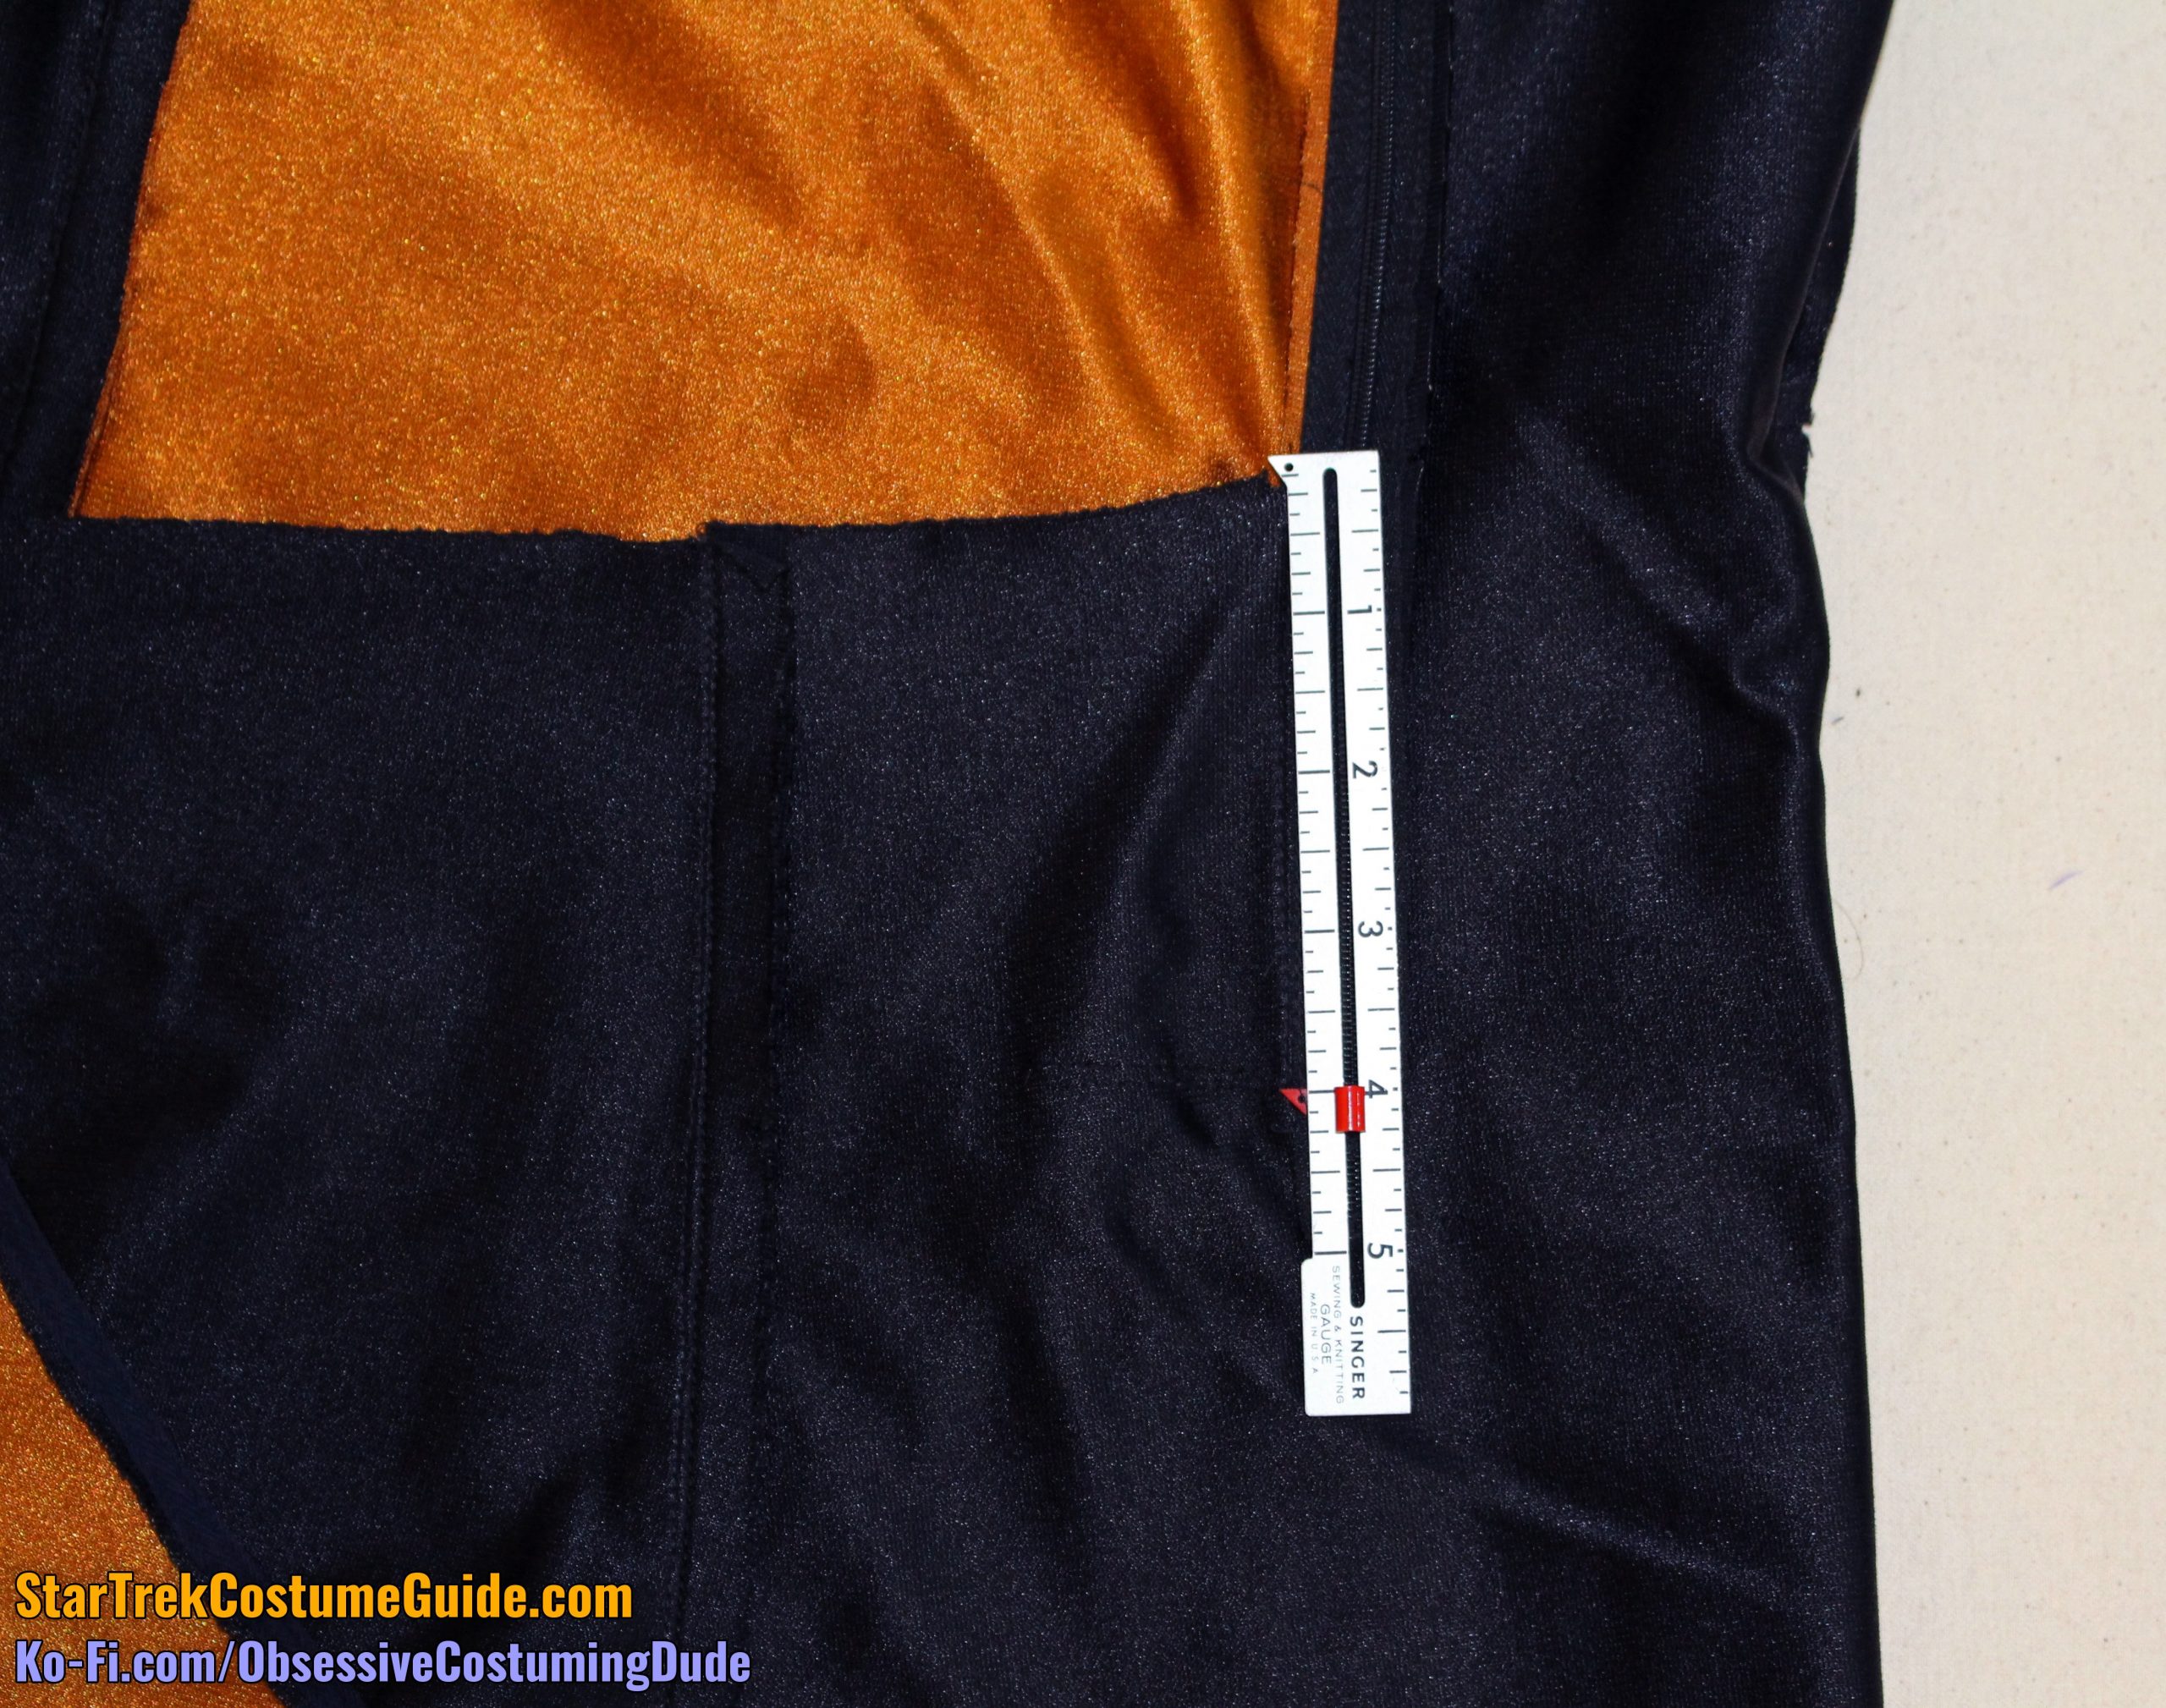
The bottom of the side front panel measured just over 14″, from the side seam to the edge of the front leg strap.
The bottom of the side back panel measured approximately 15″, from the side seam to the edge of the front leg strap.
Also observe that the lower edges of the skant’s side panels weren’t cut straight (horizontally or otherwise); just look at that graceful curve …
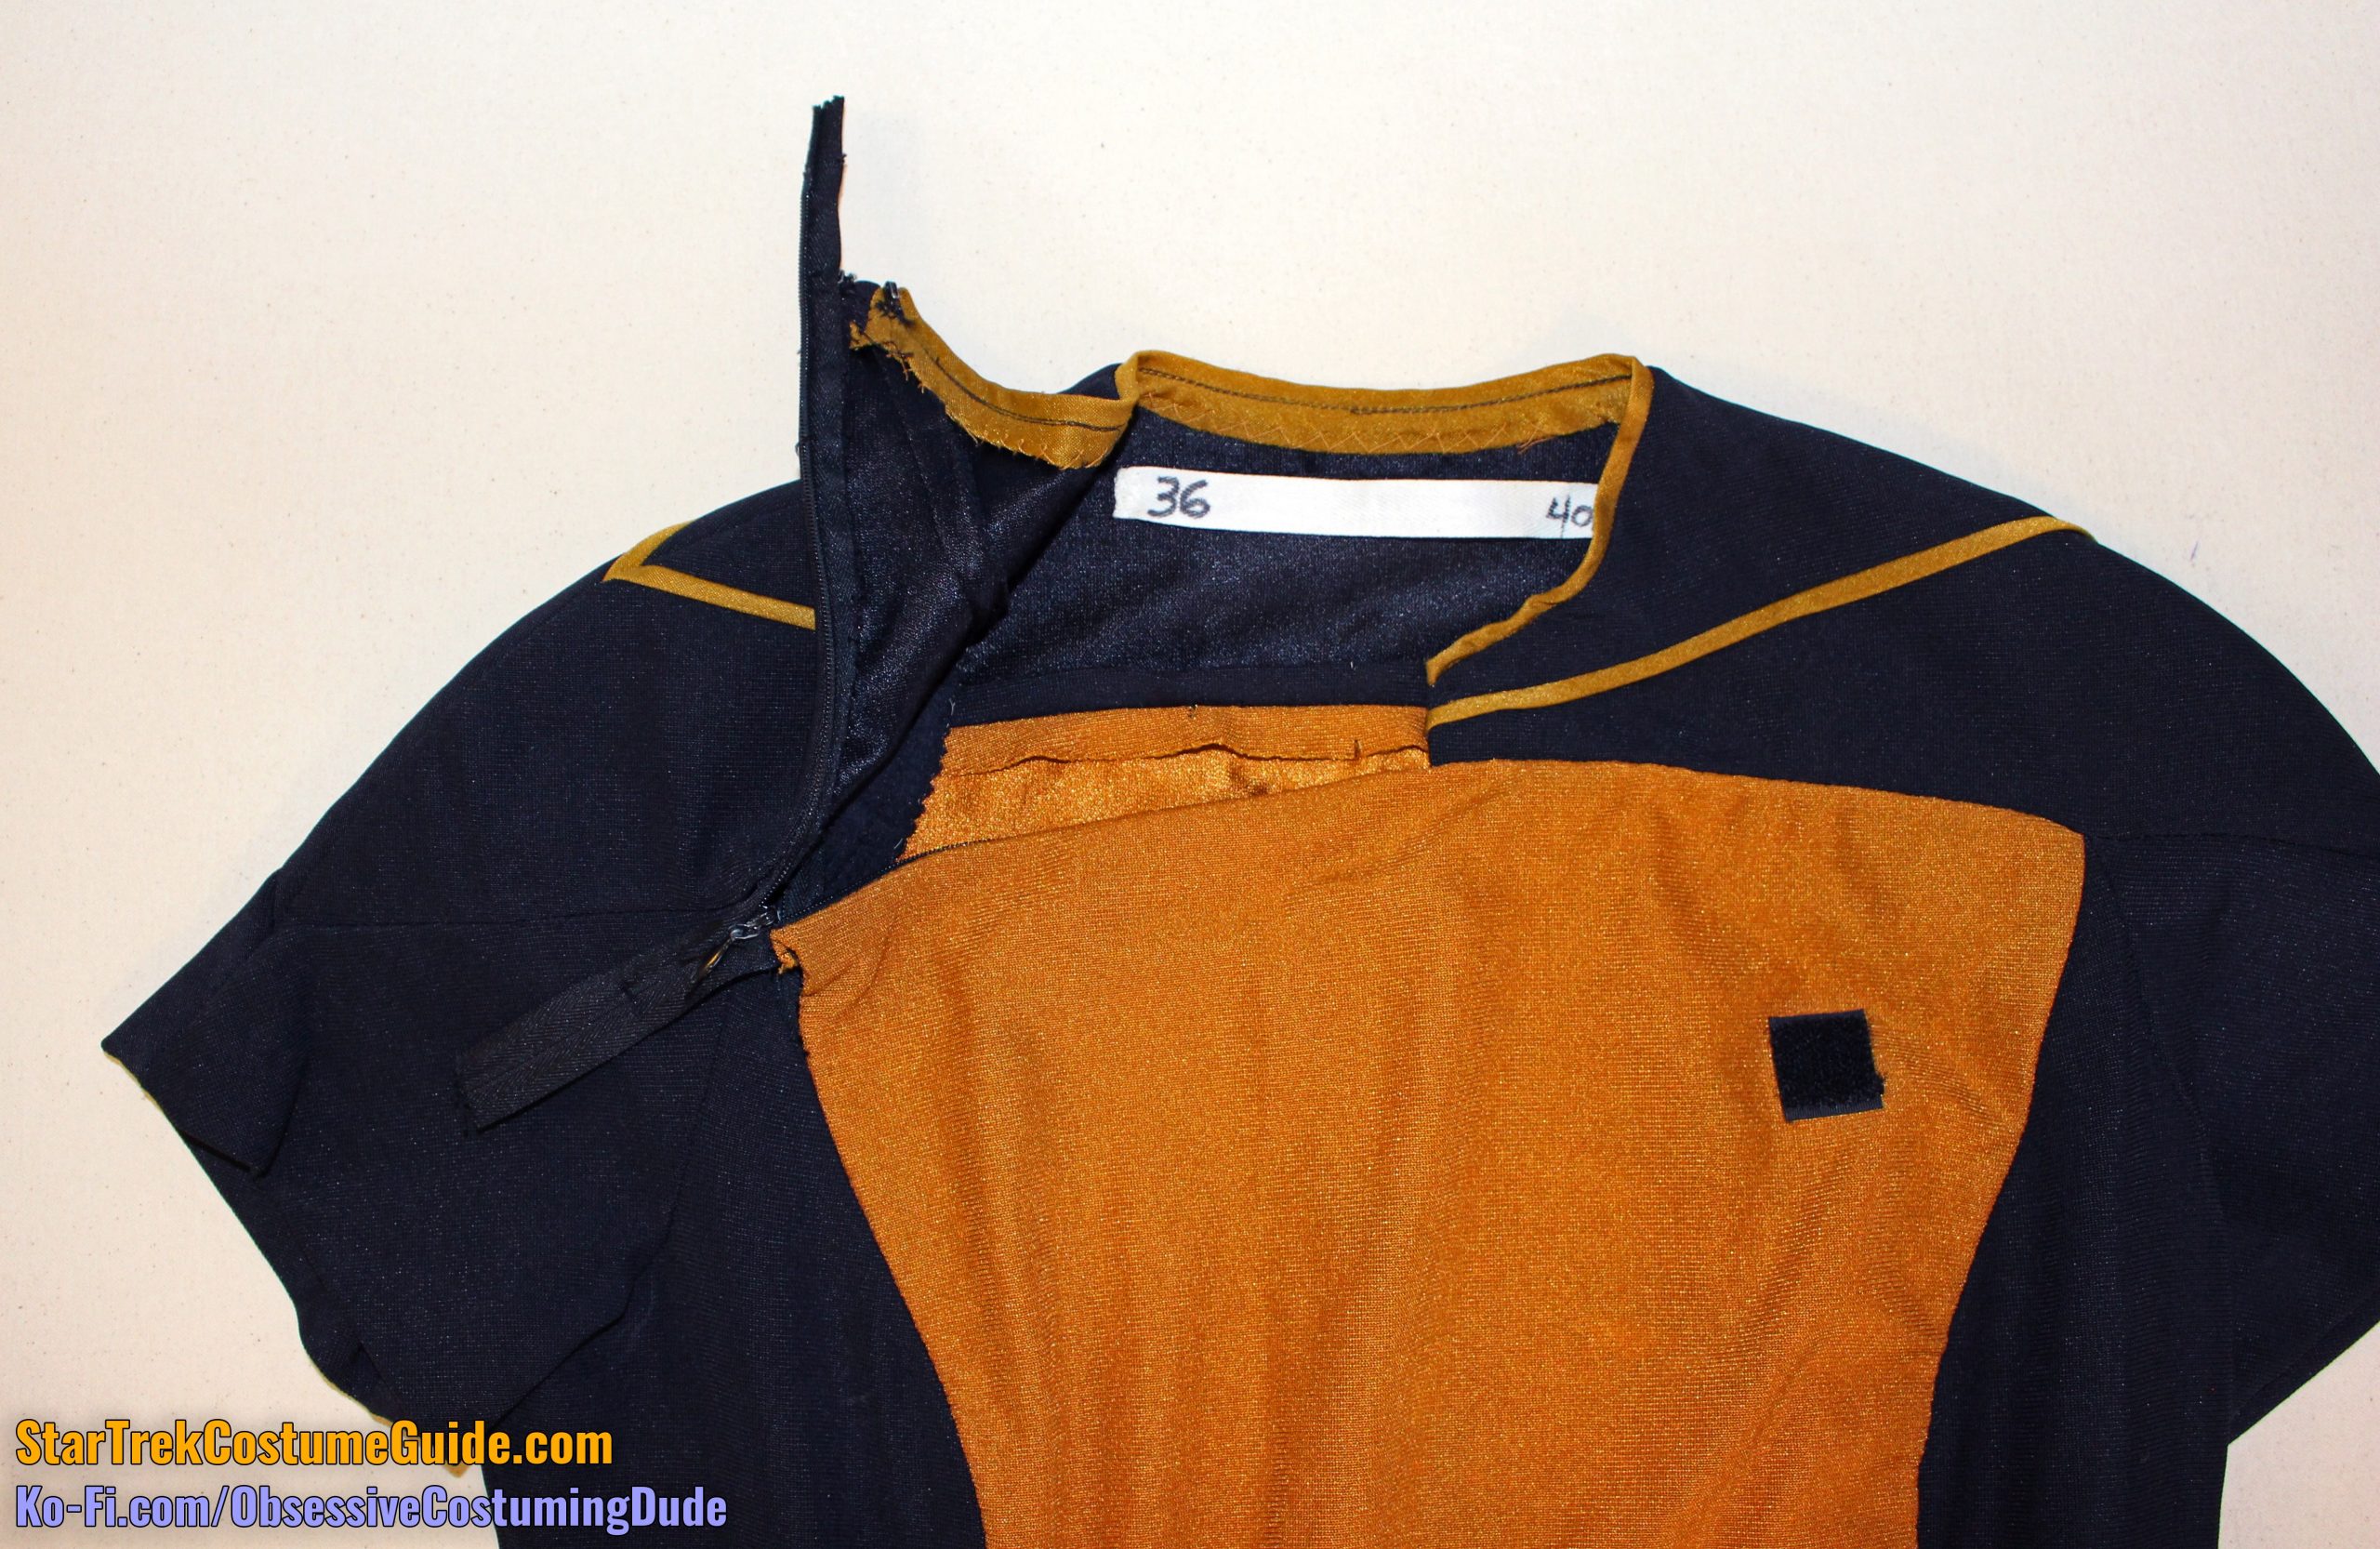
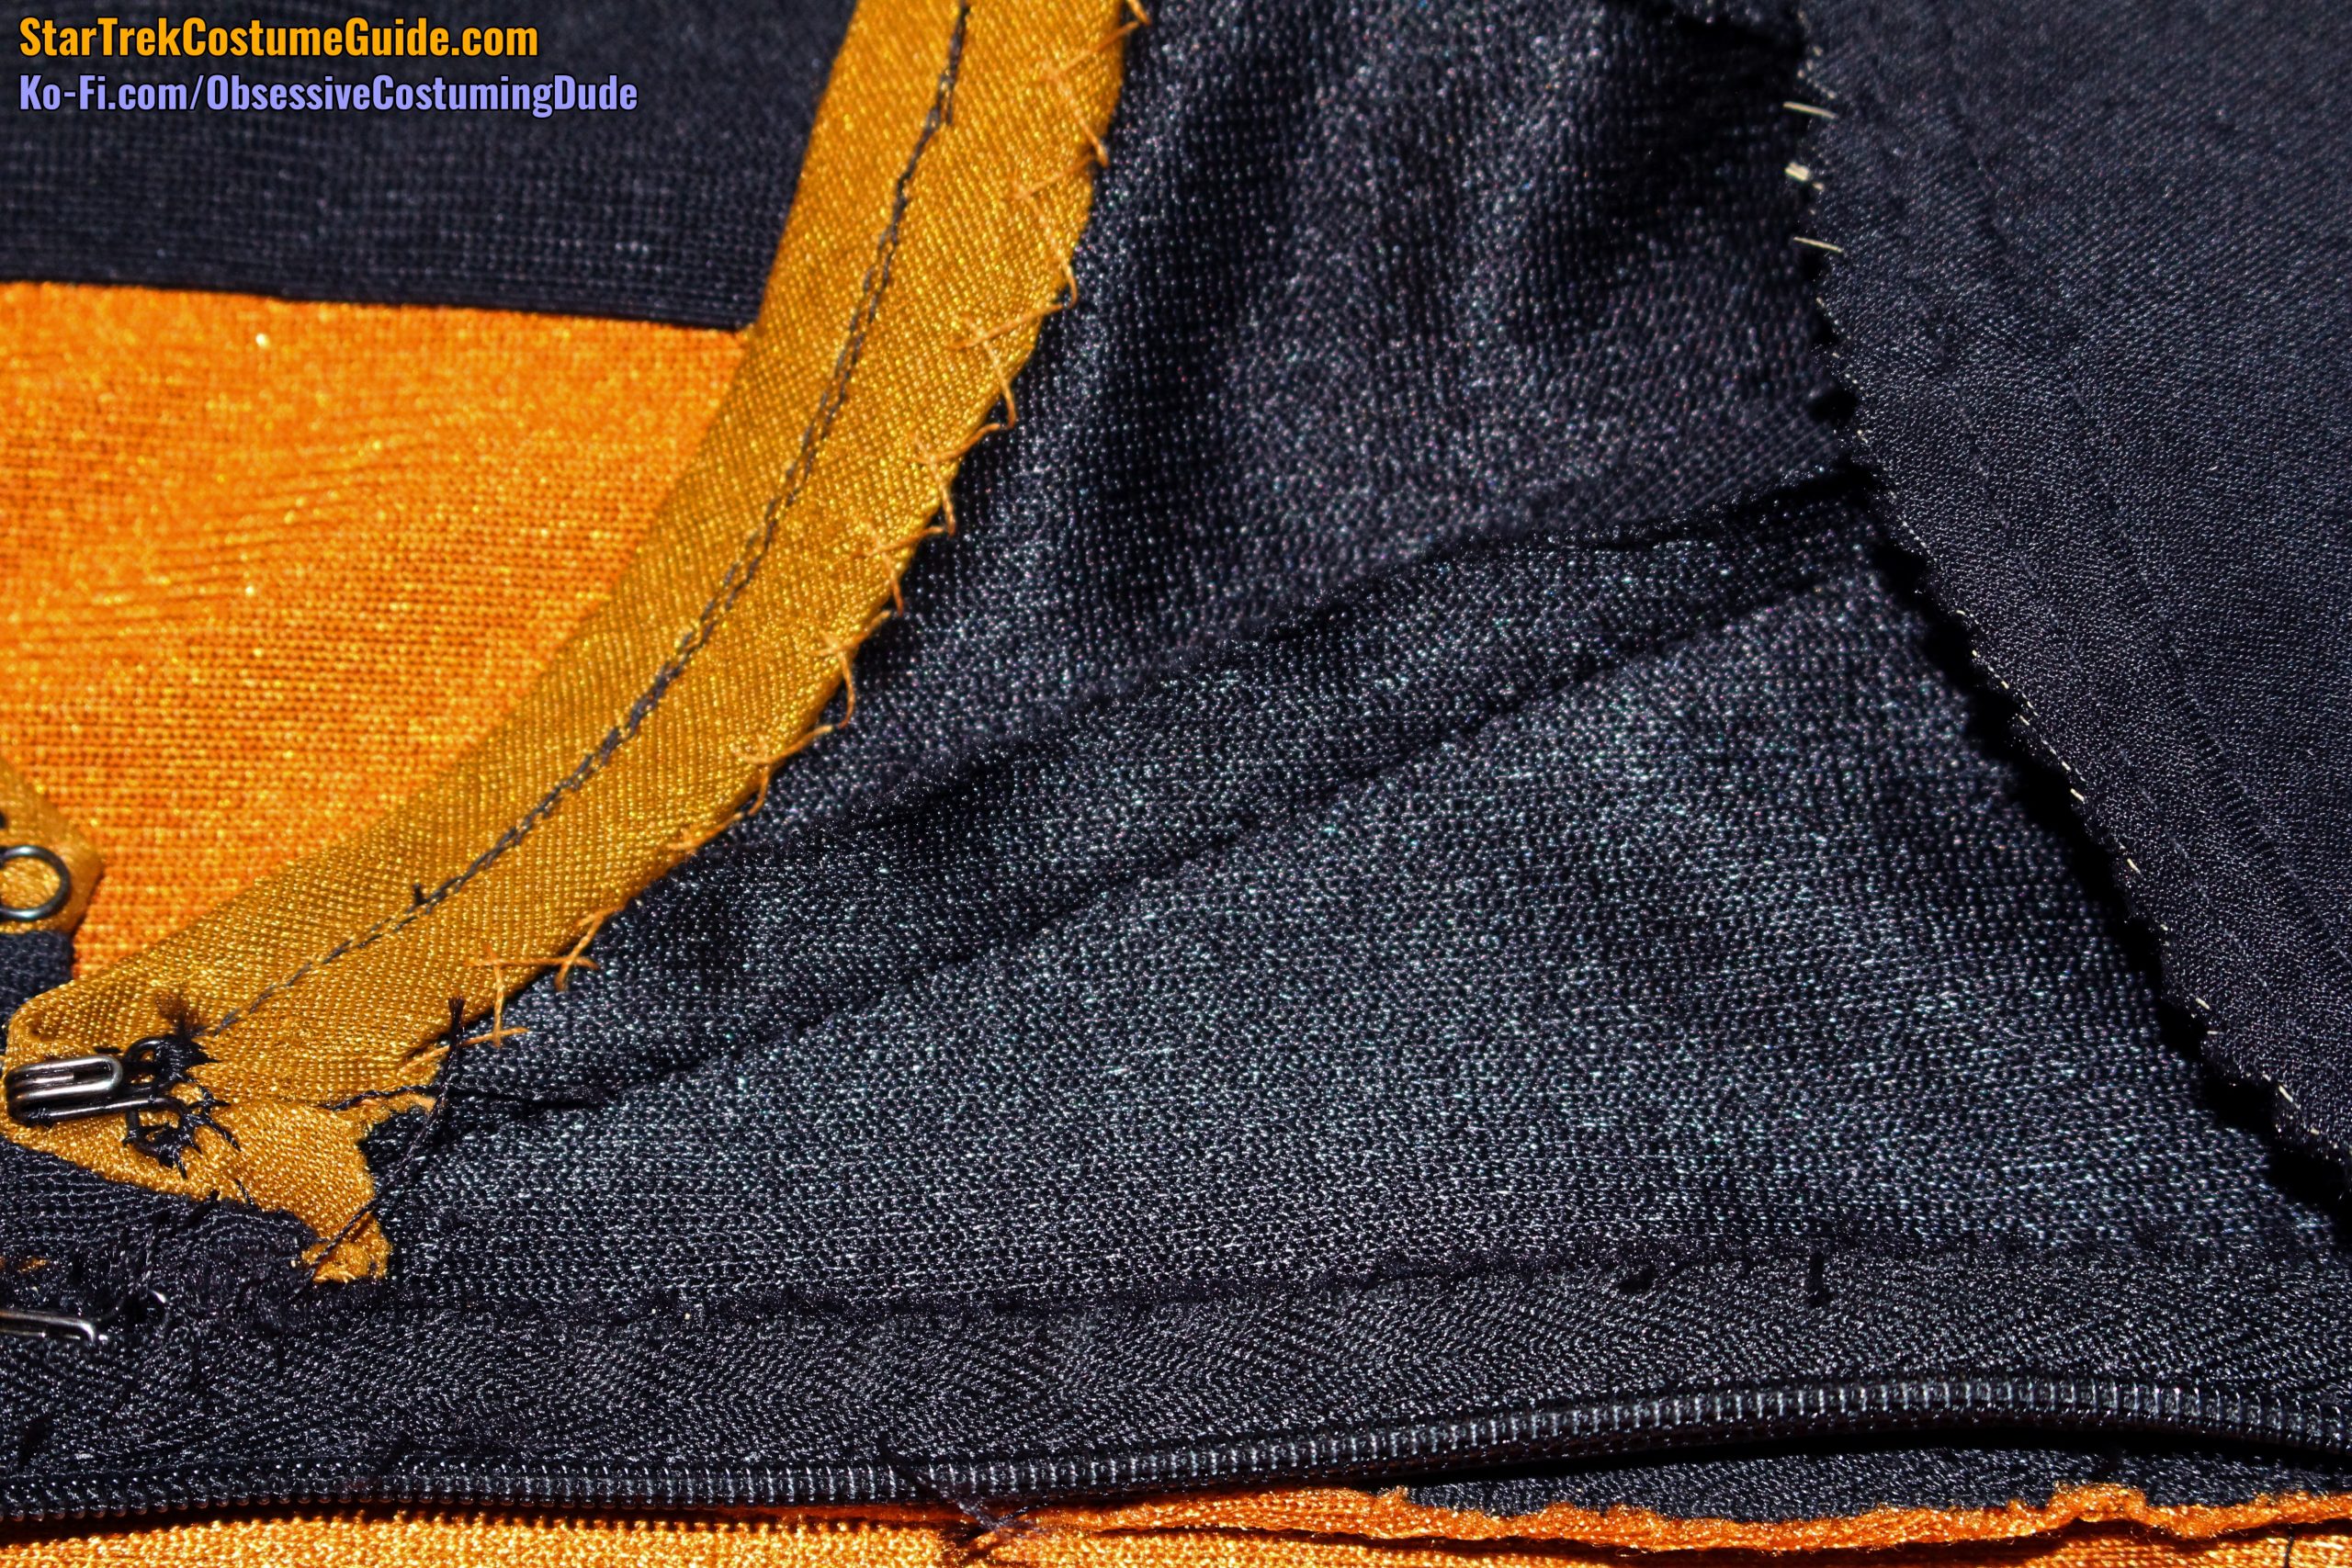
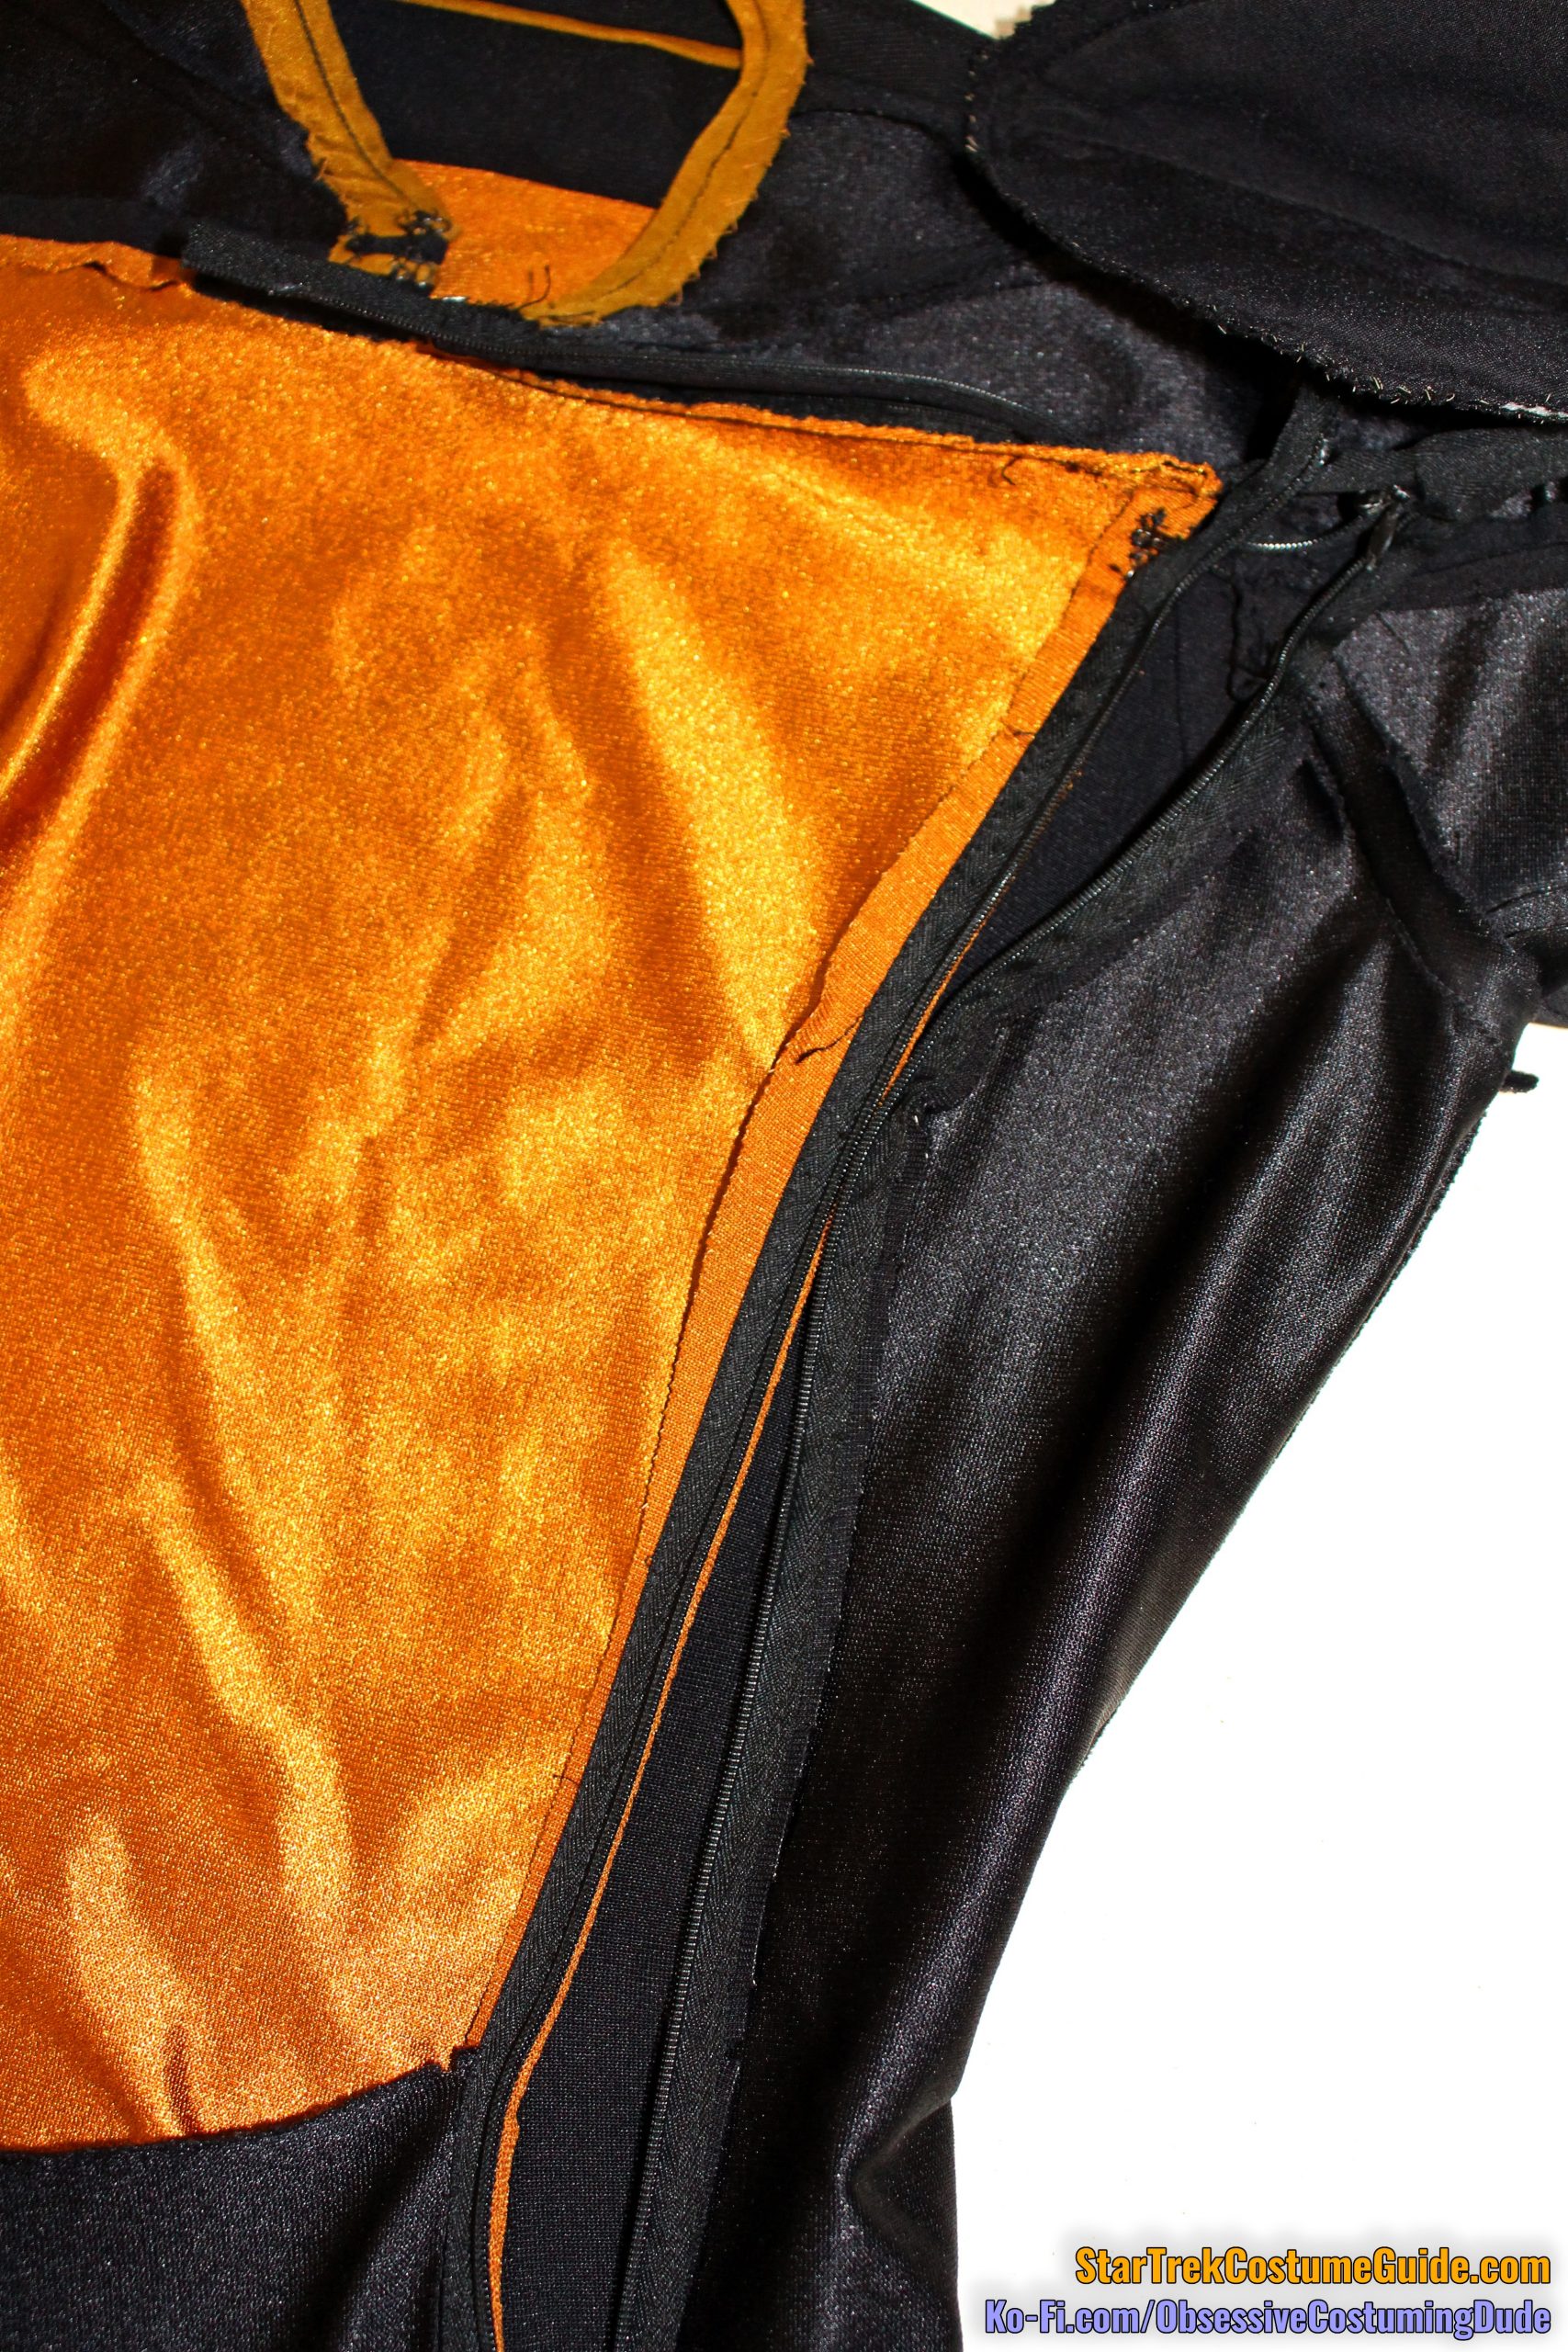
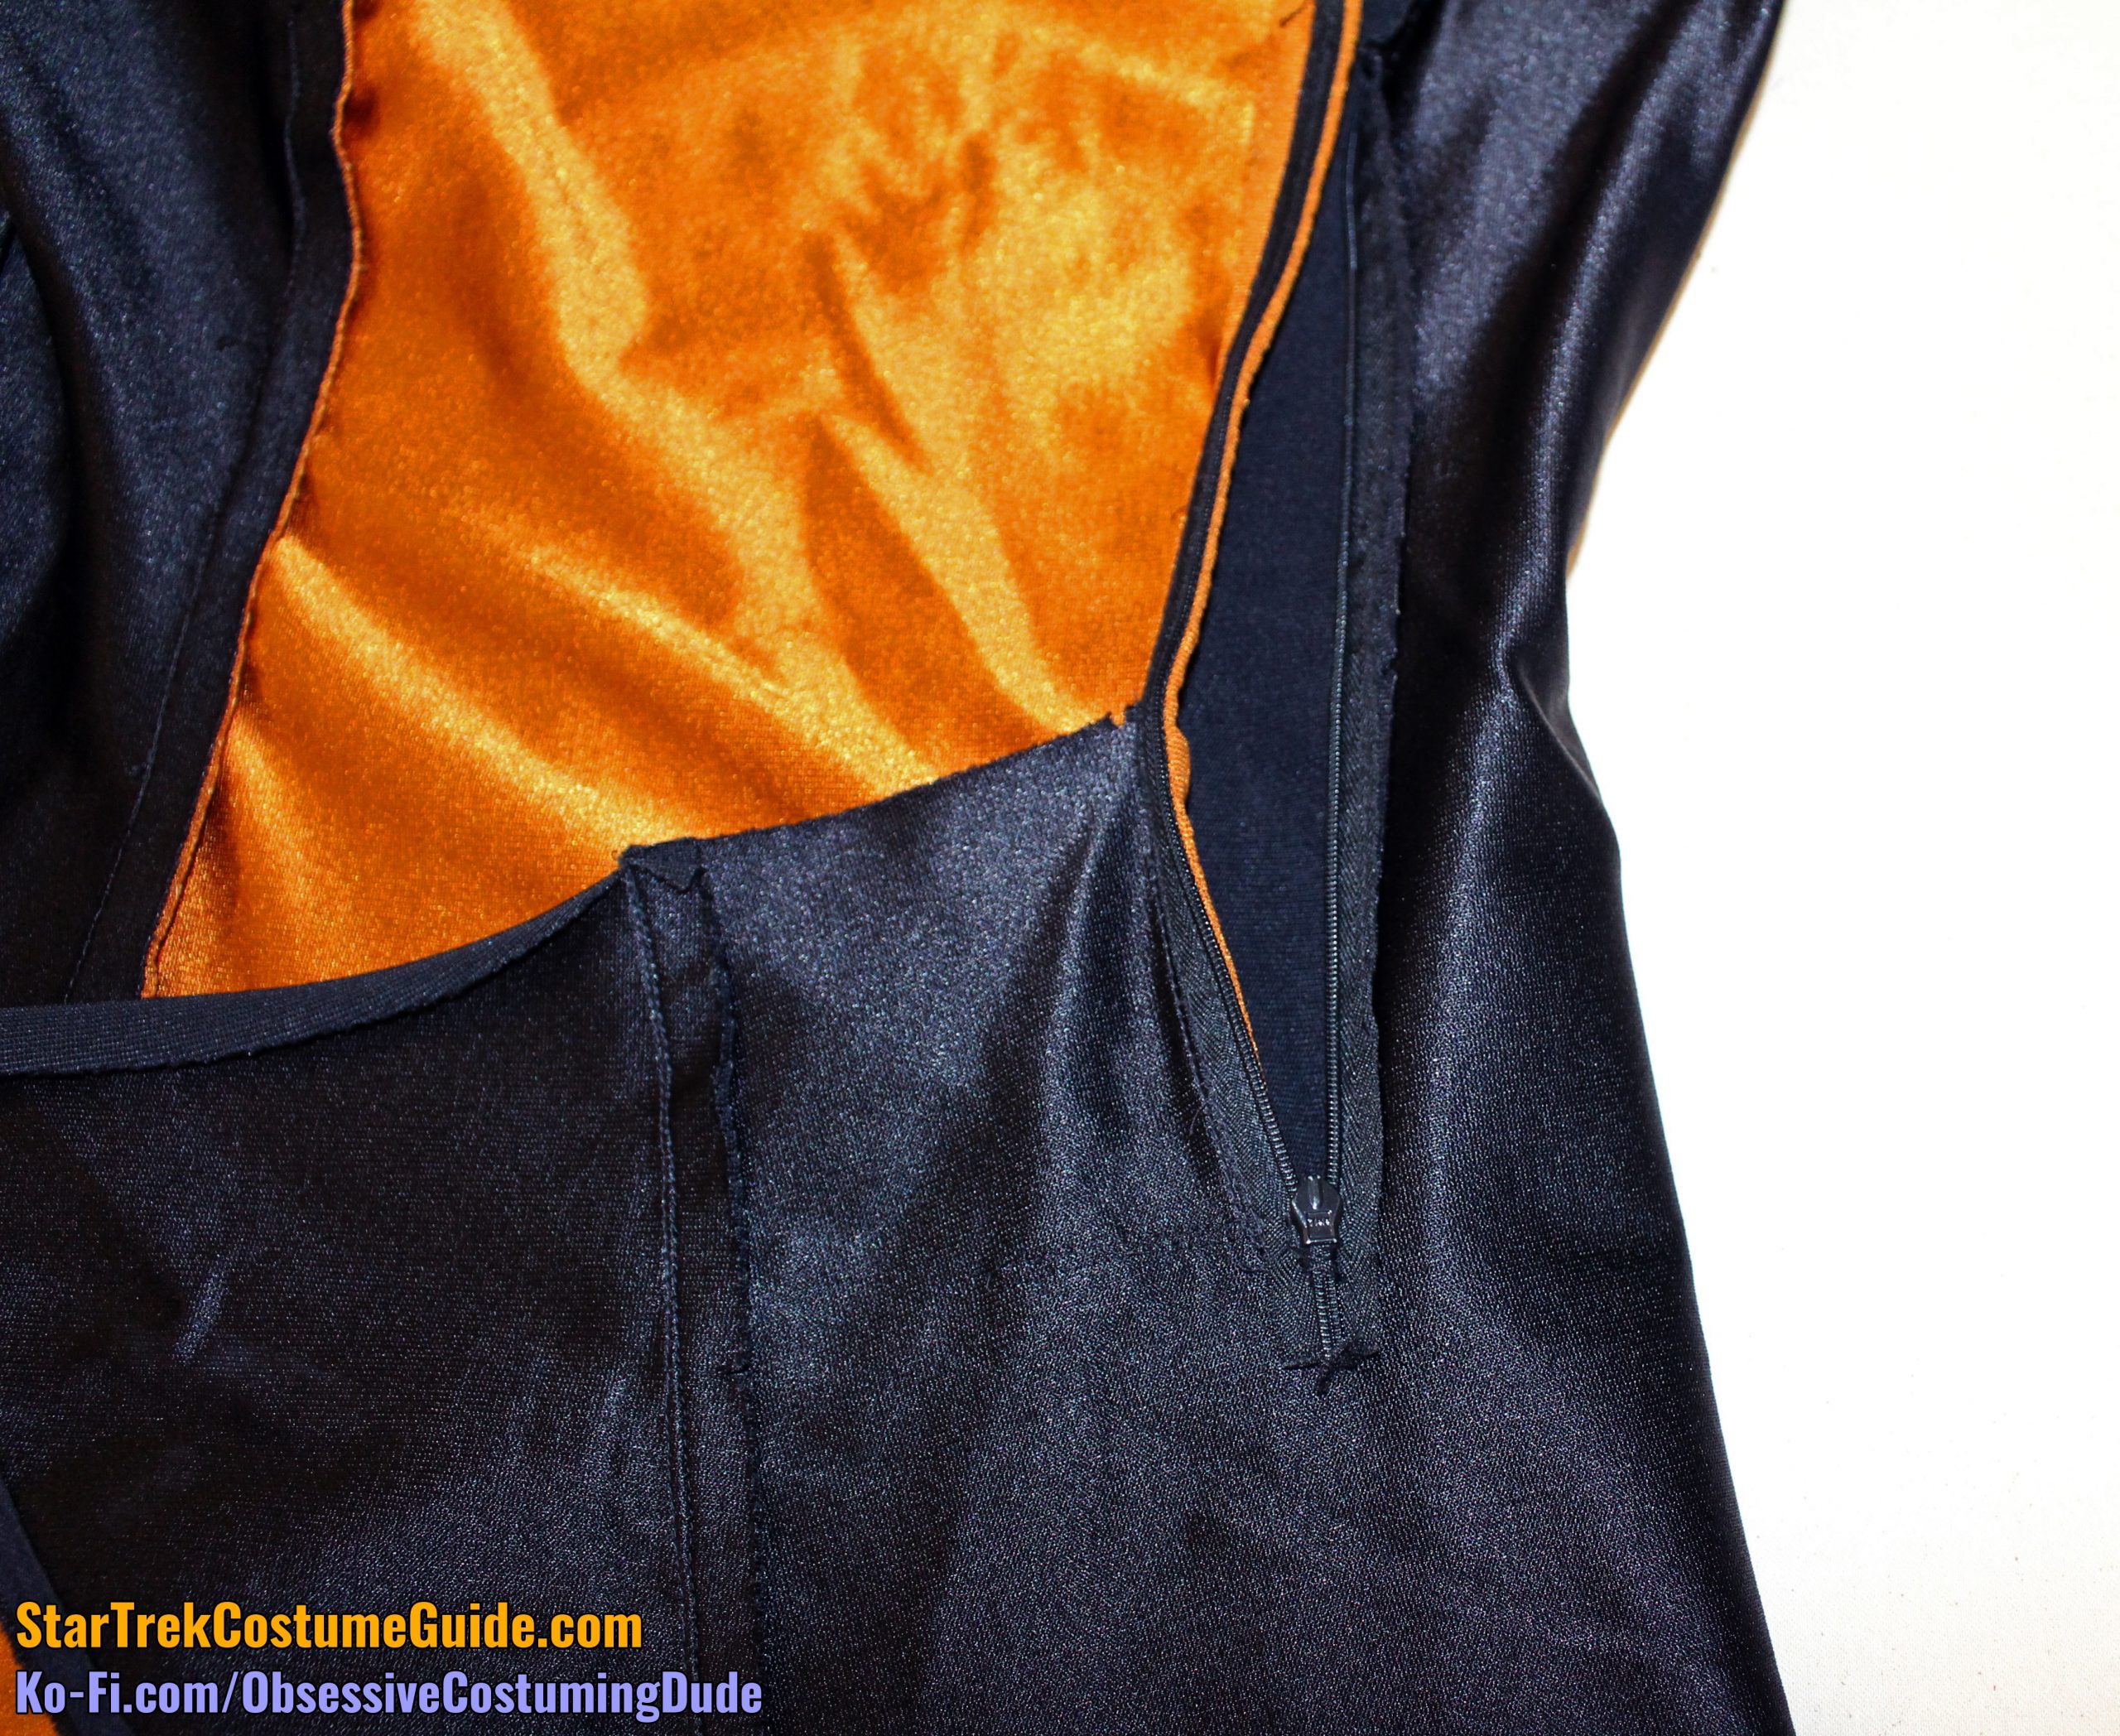
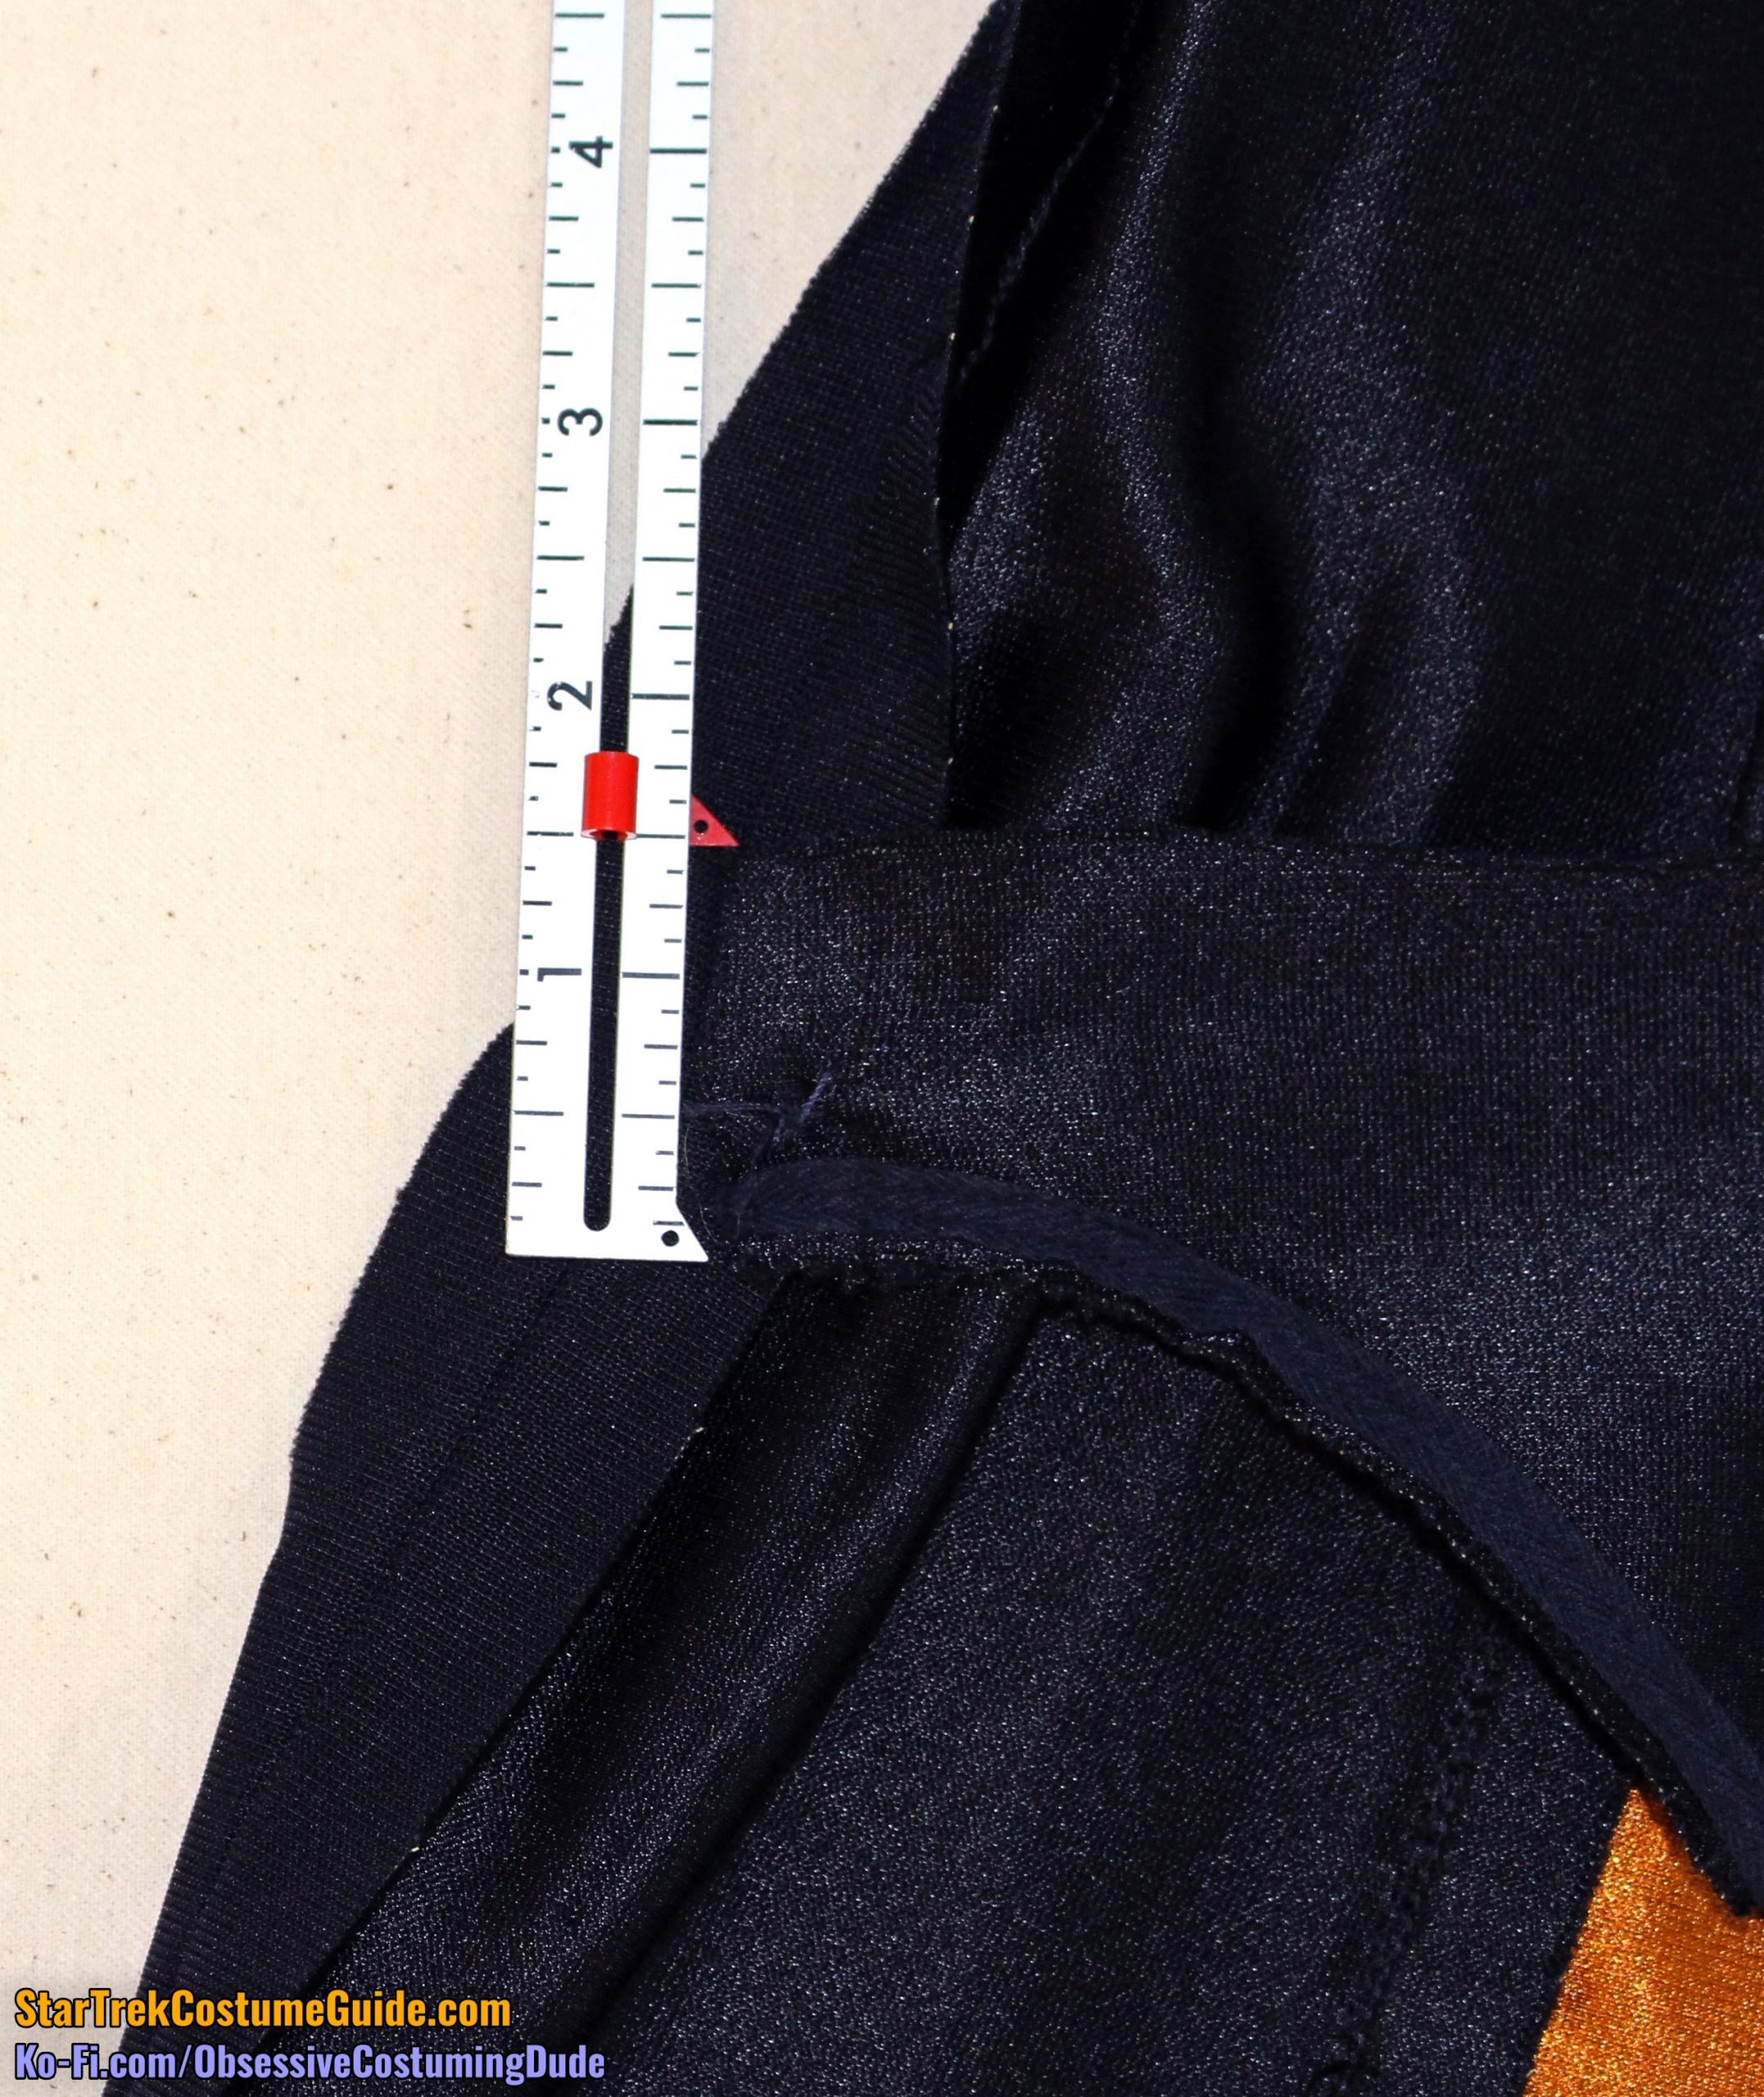
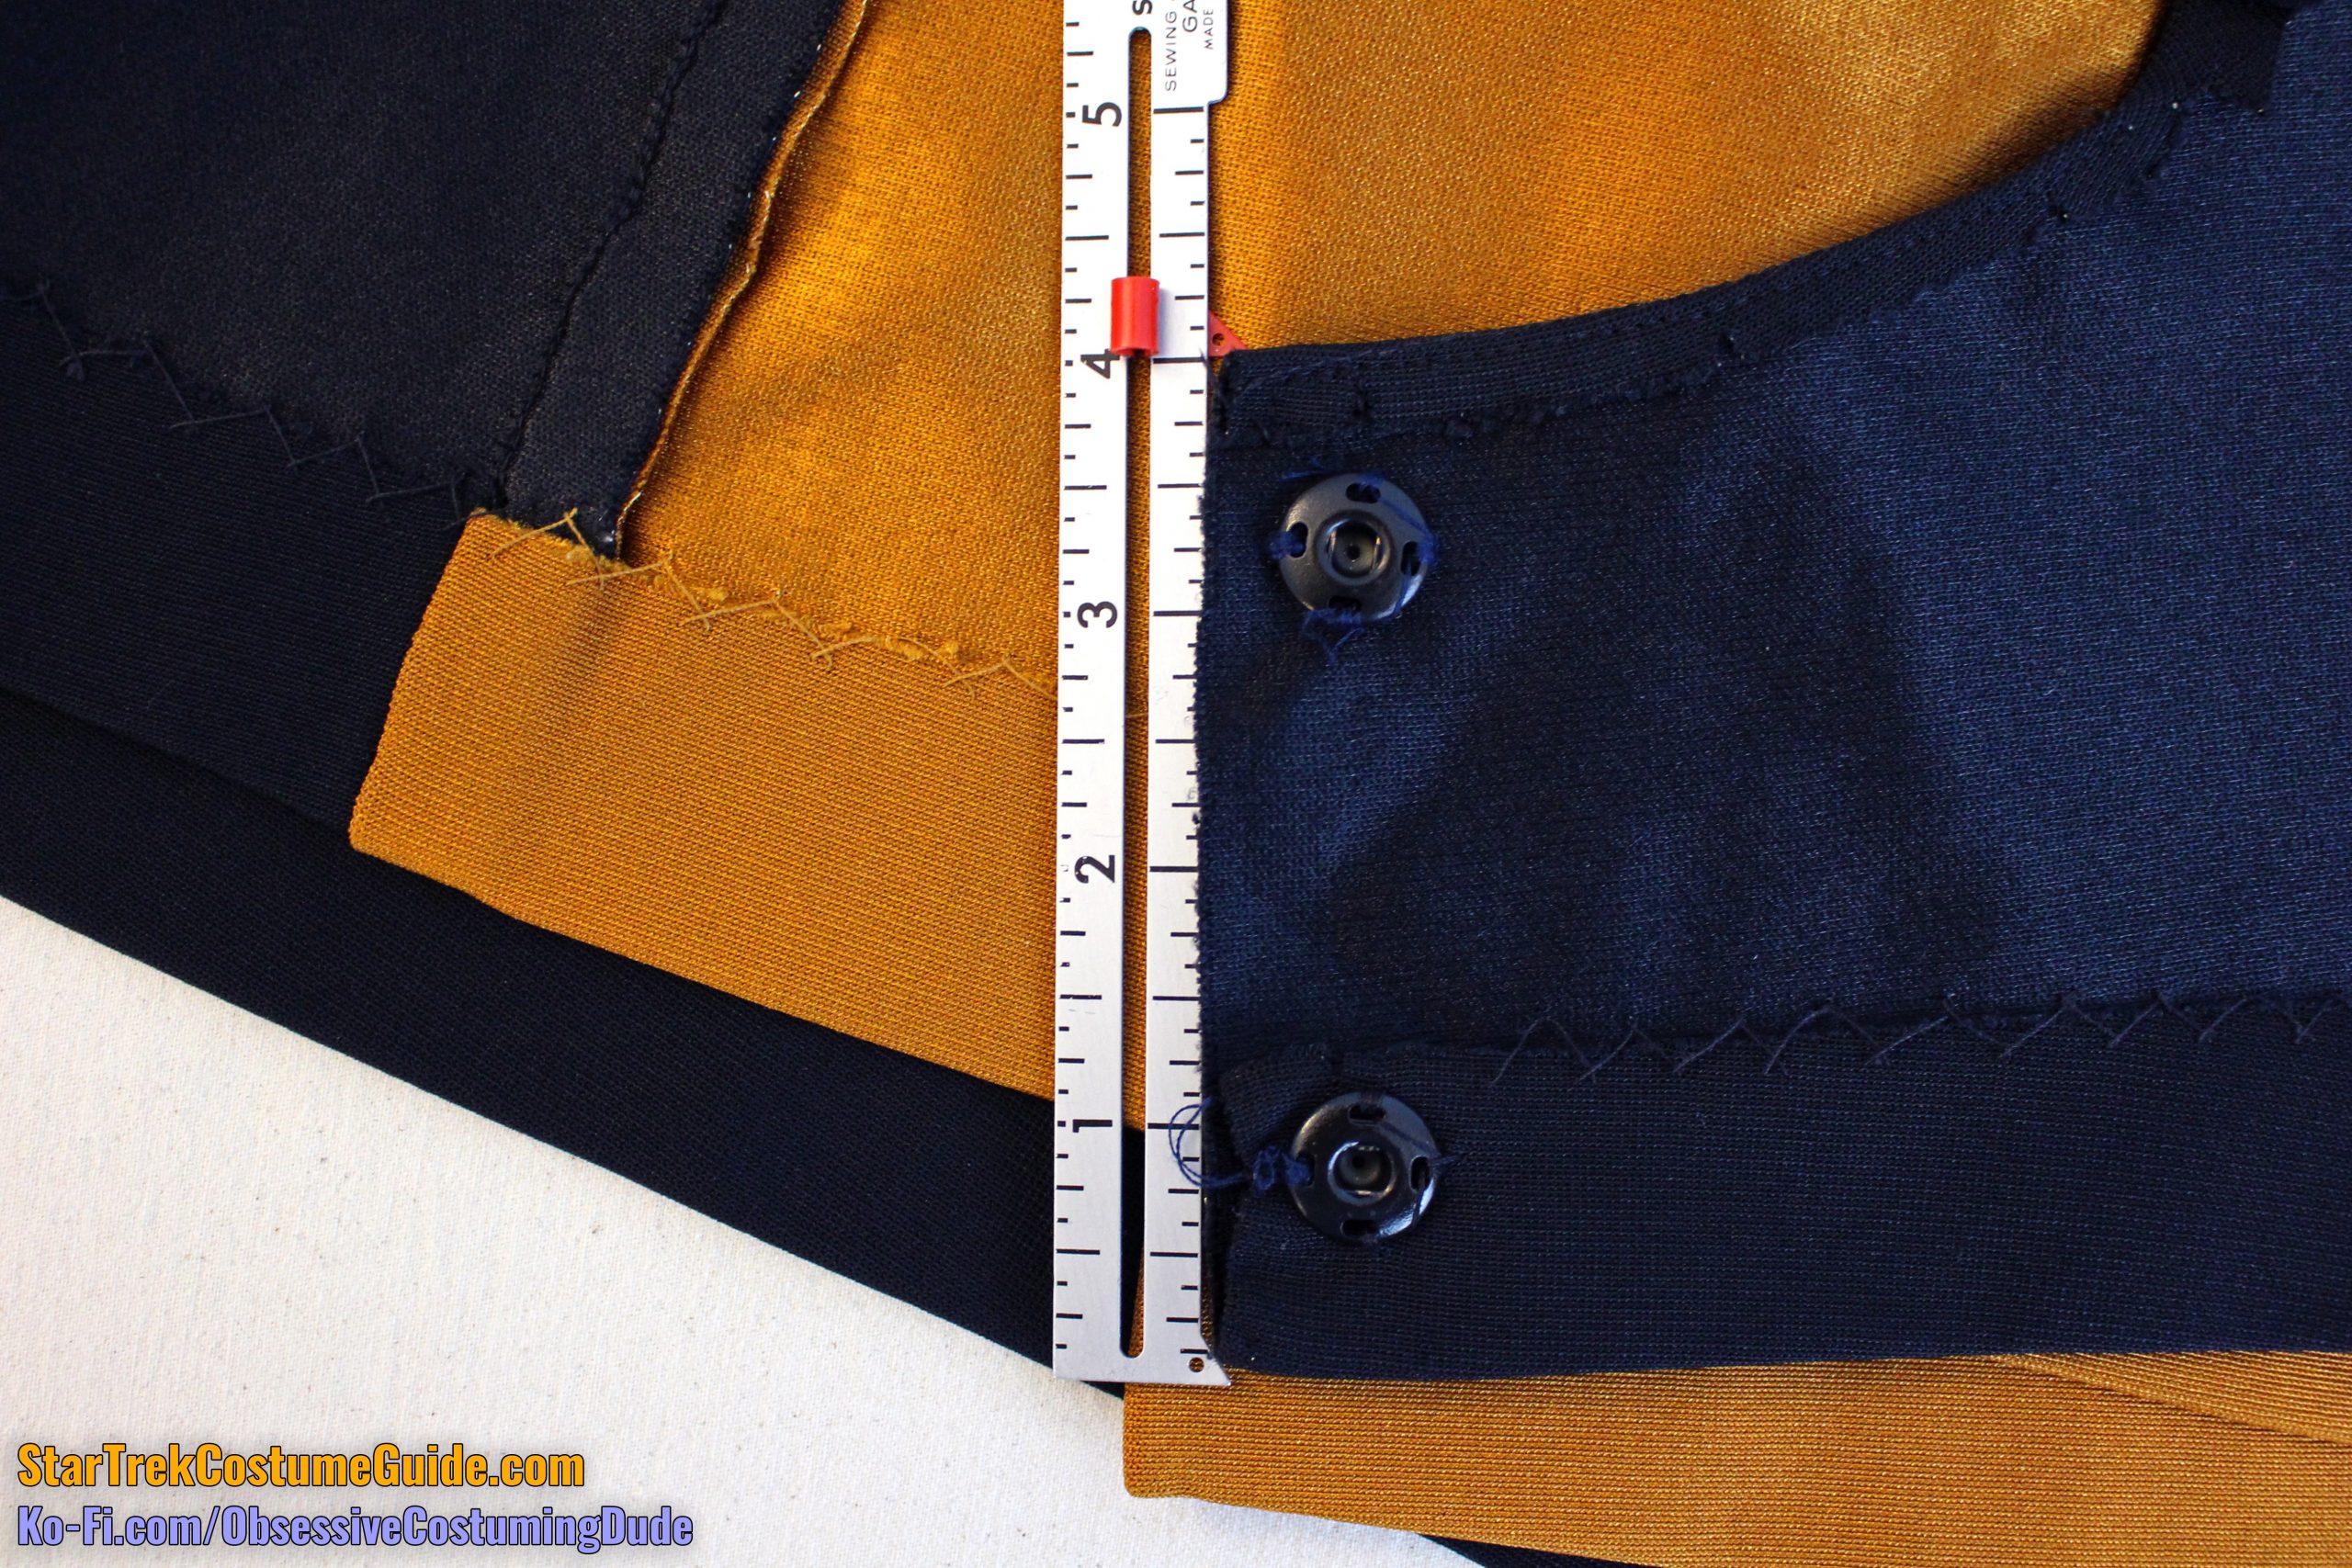
CLOSURE SYSTEM
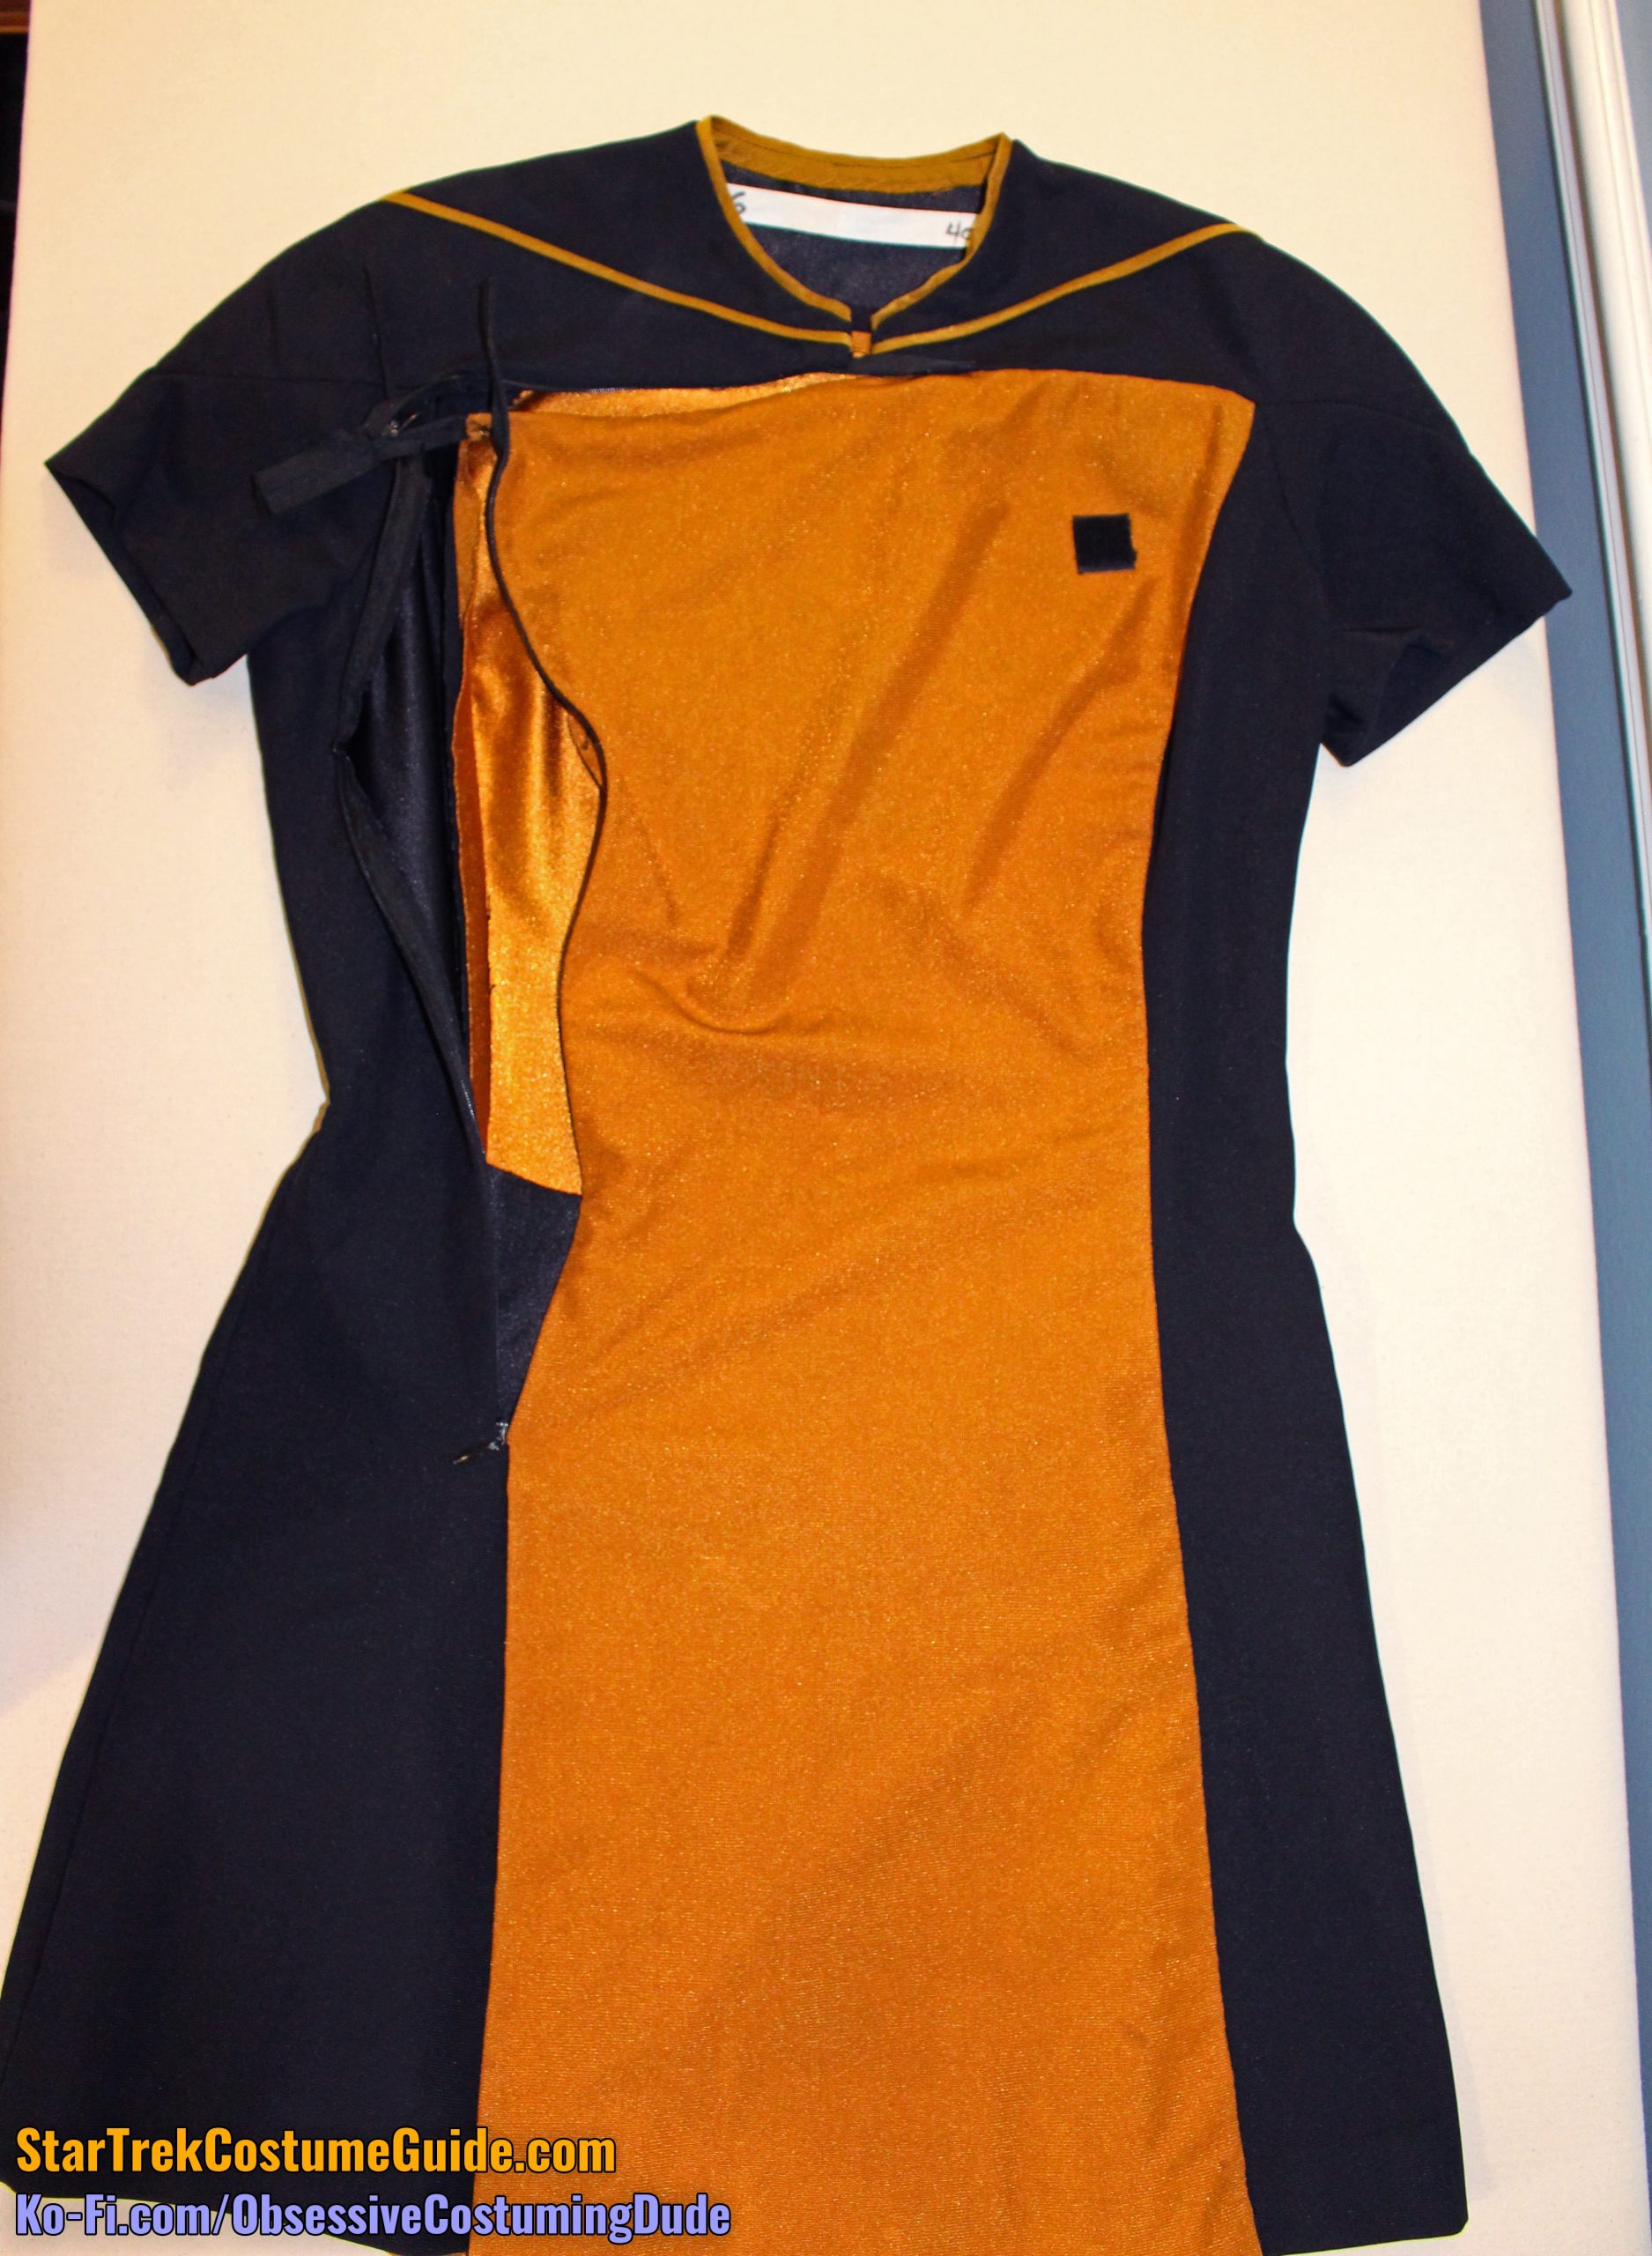
Before we move on to the TNG skant’s interior construction, I’ll walk you through the bizarre closure system.
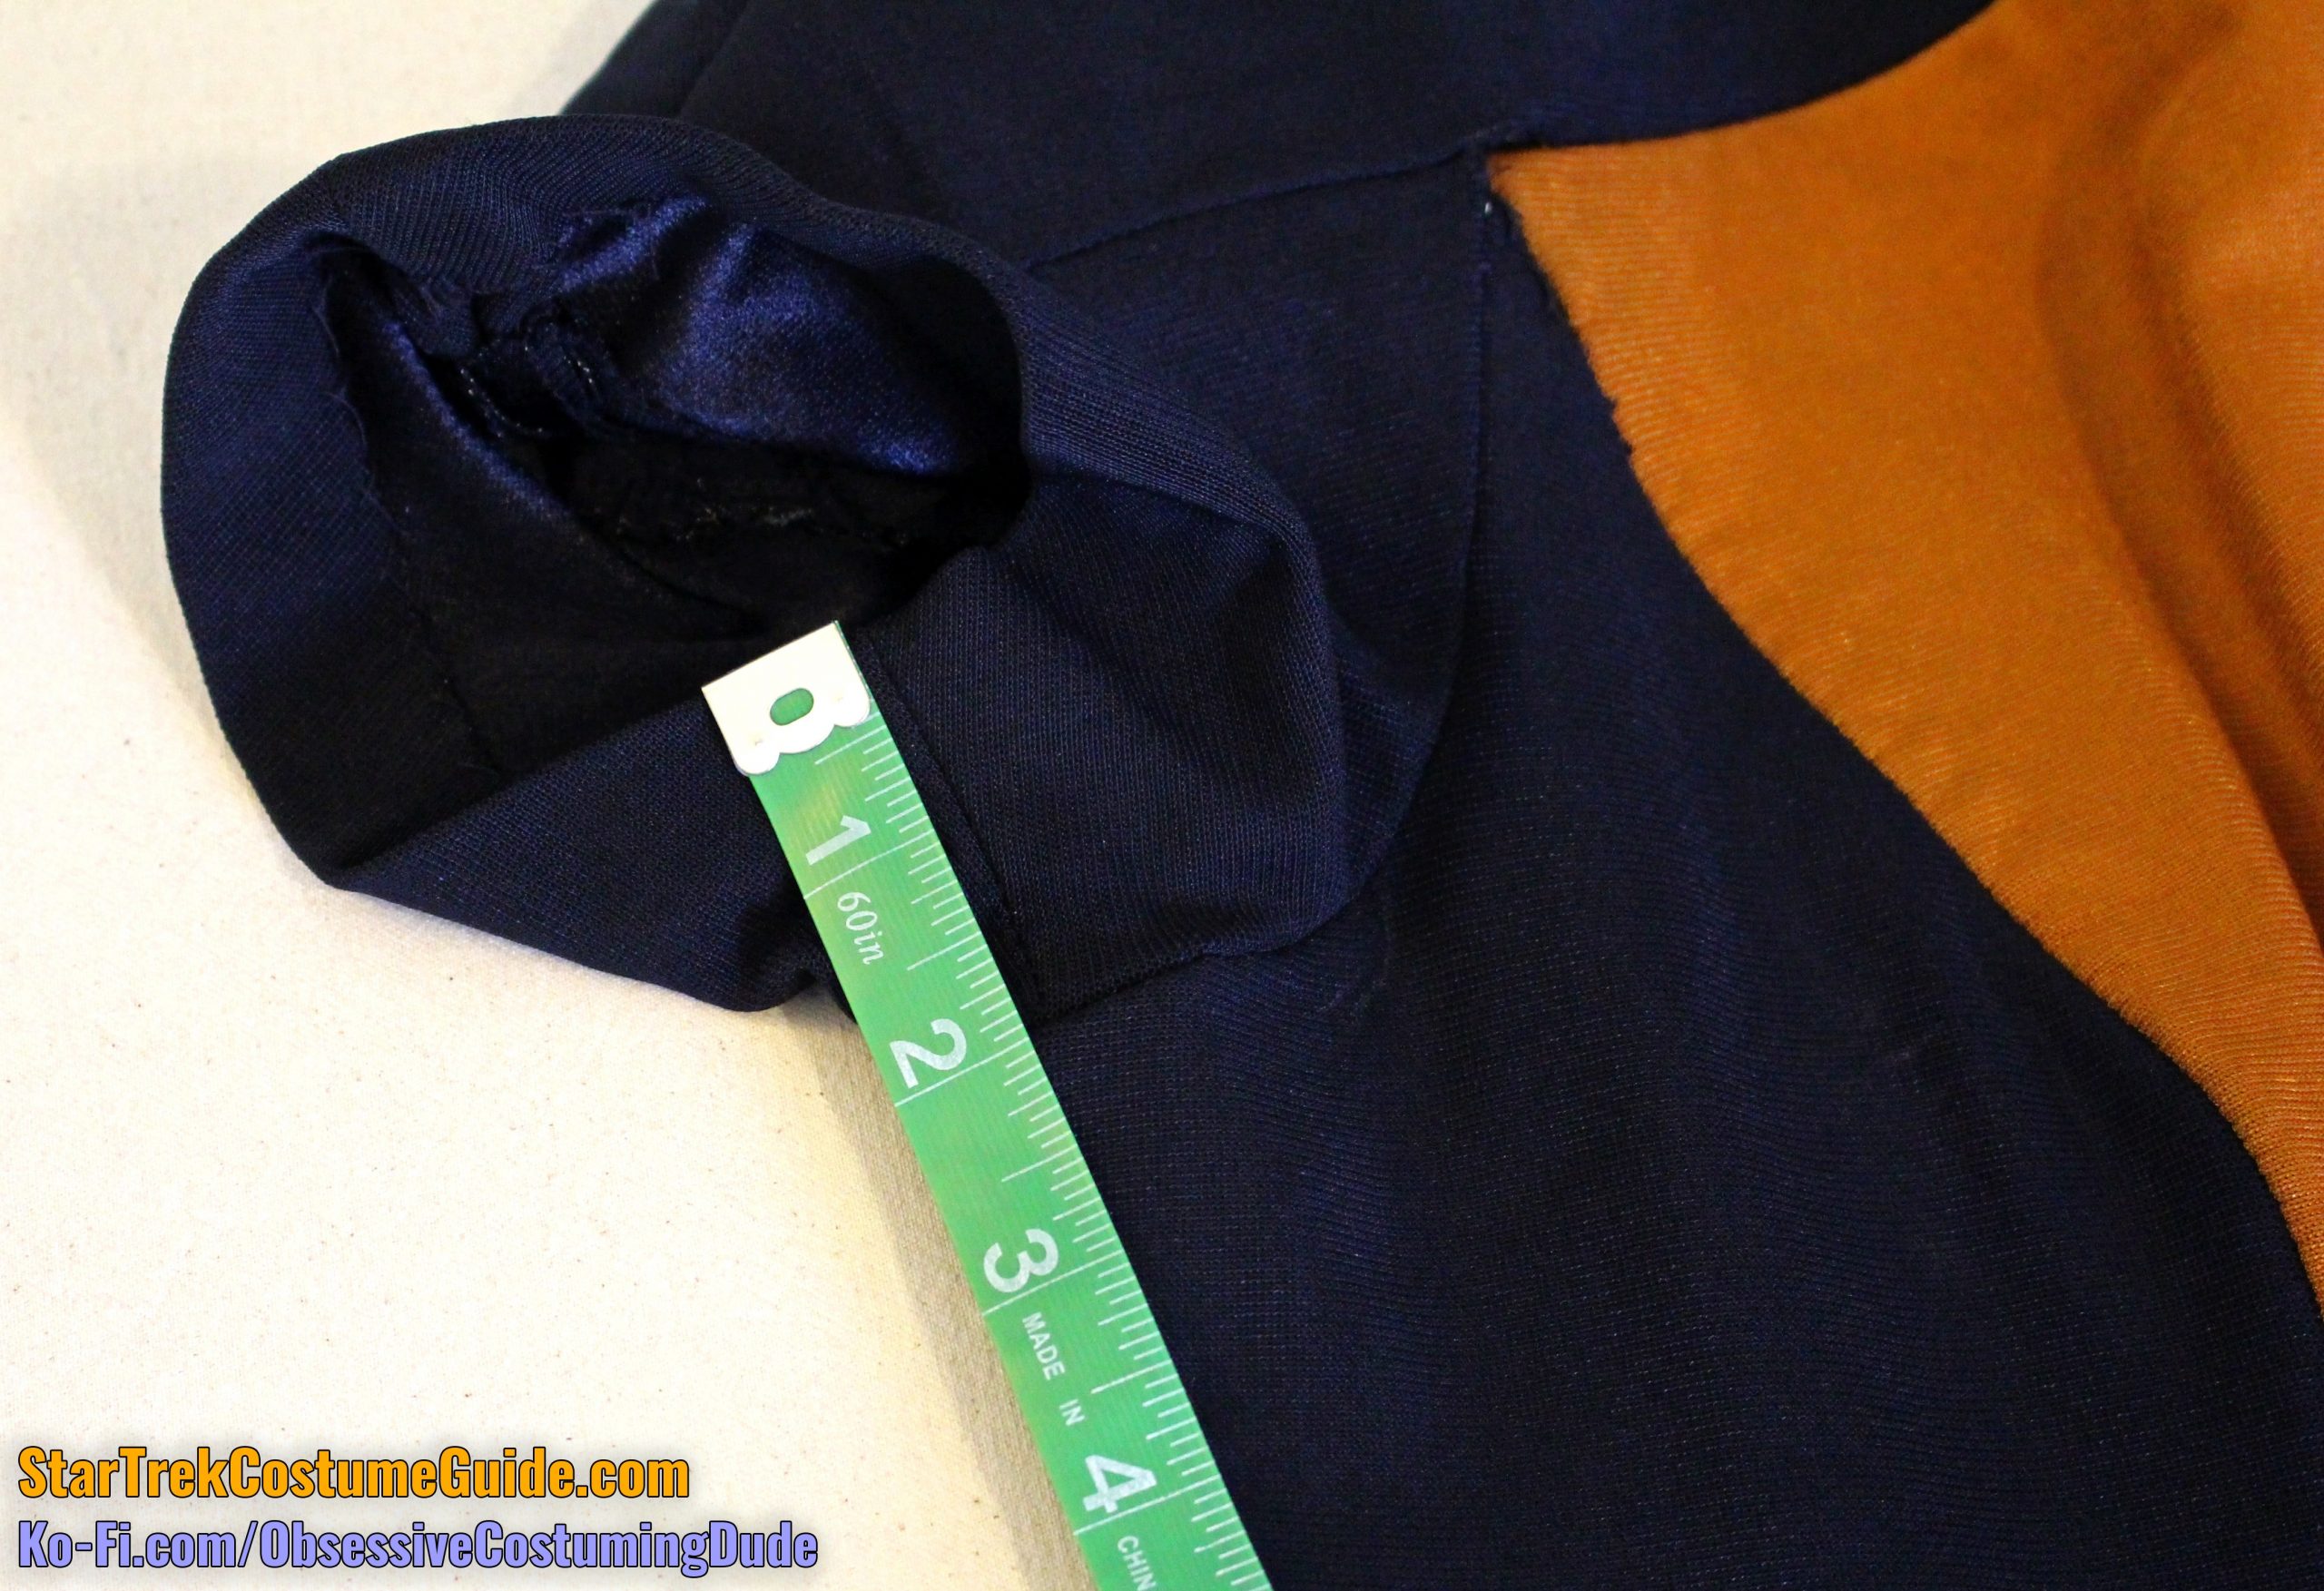
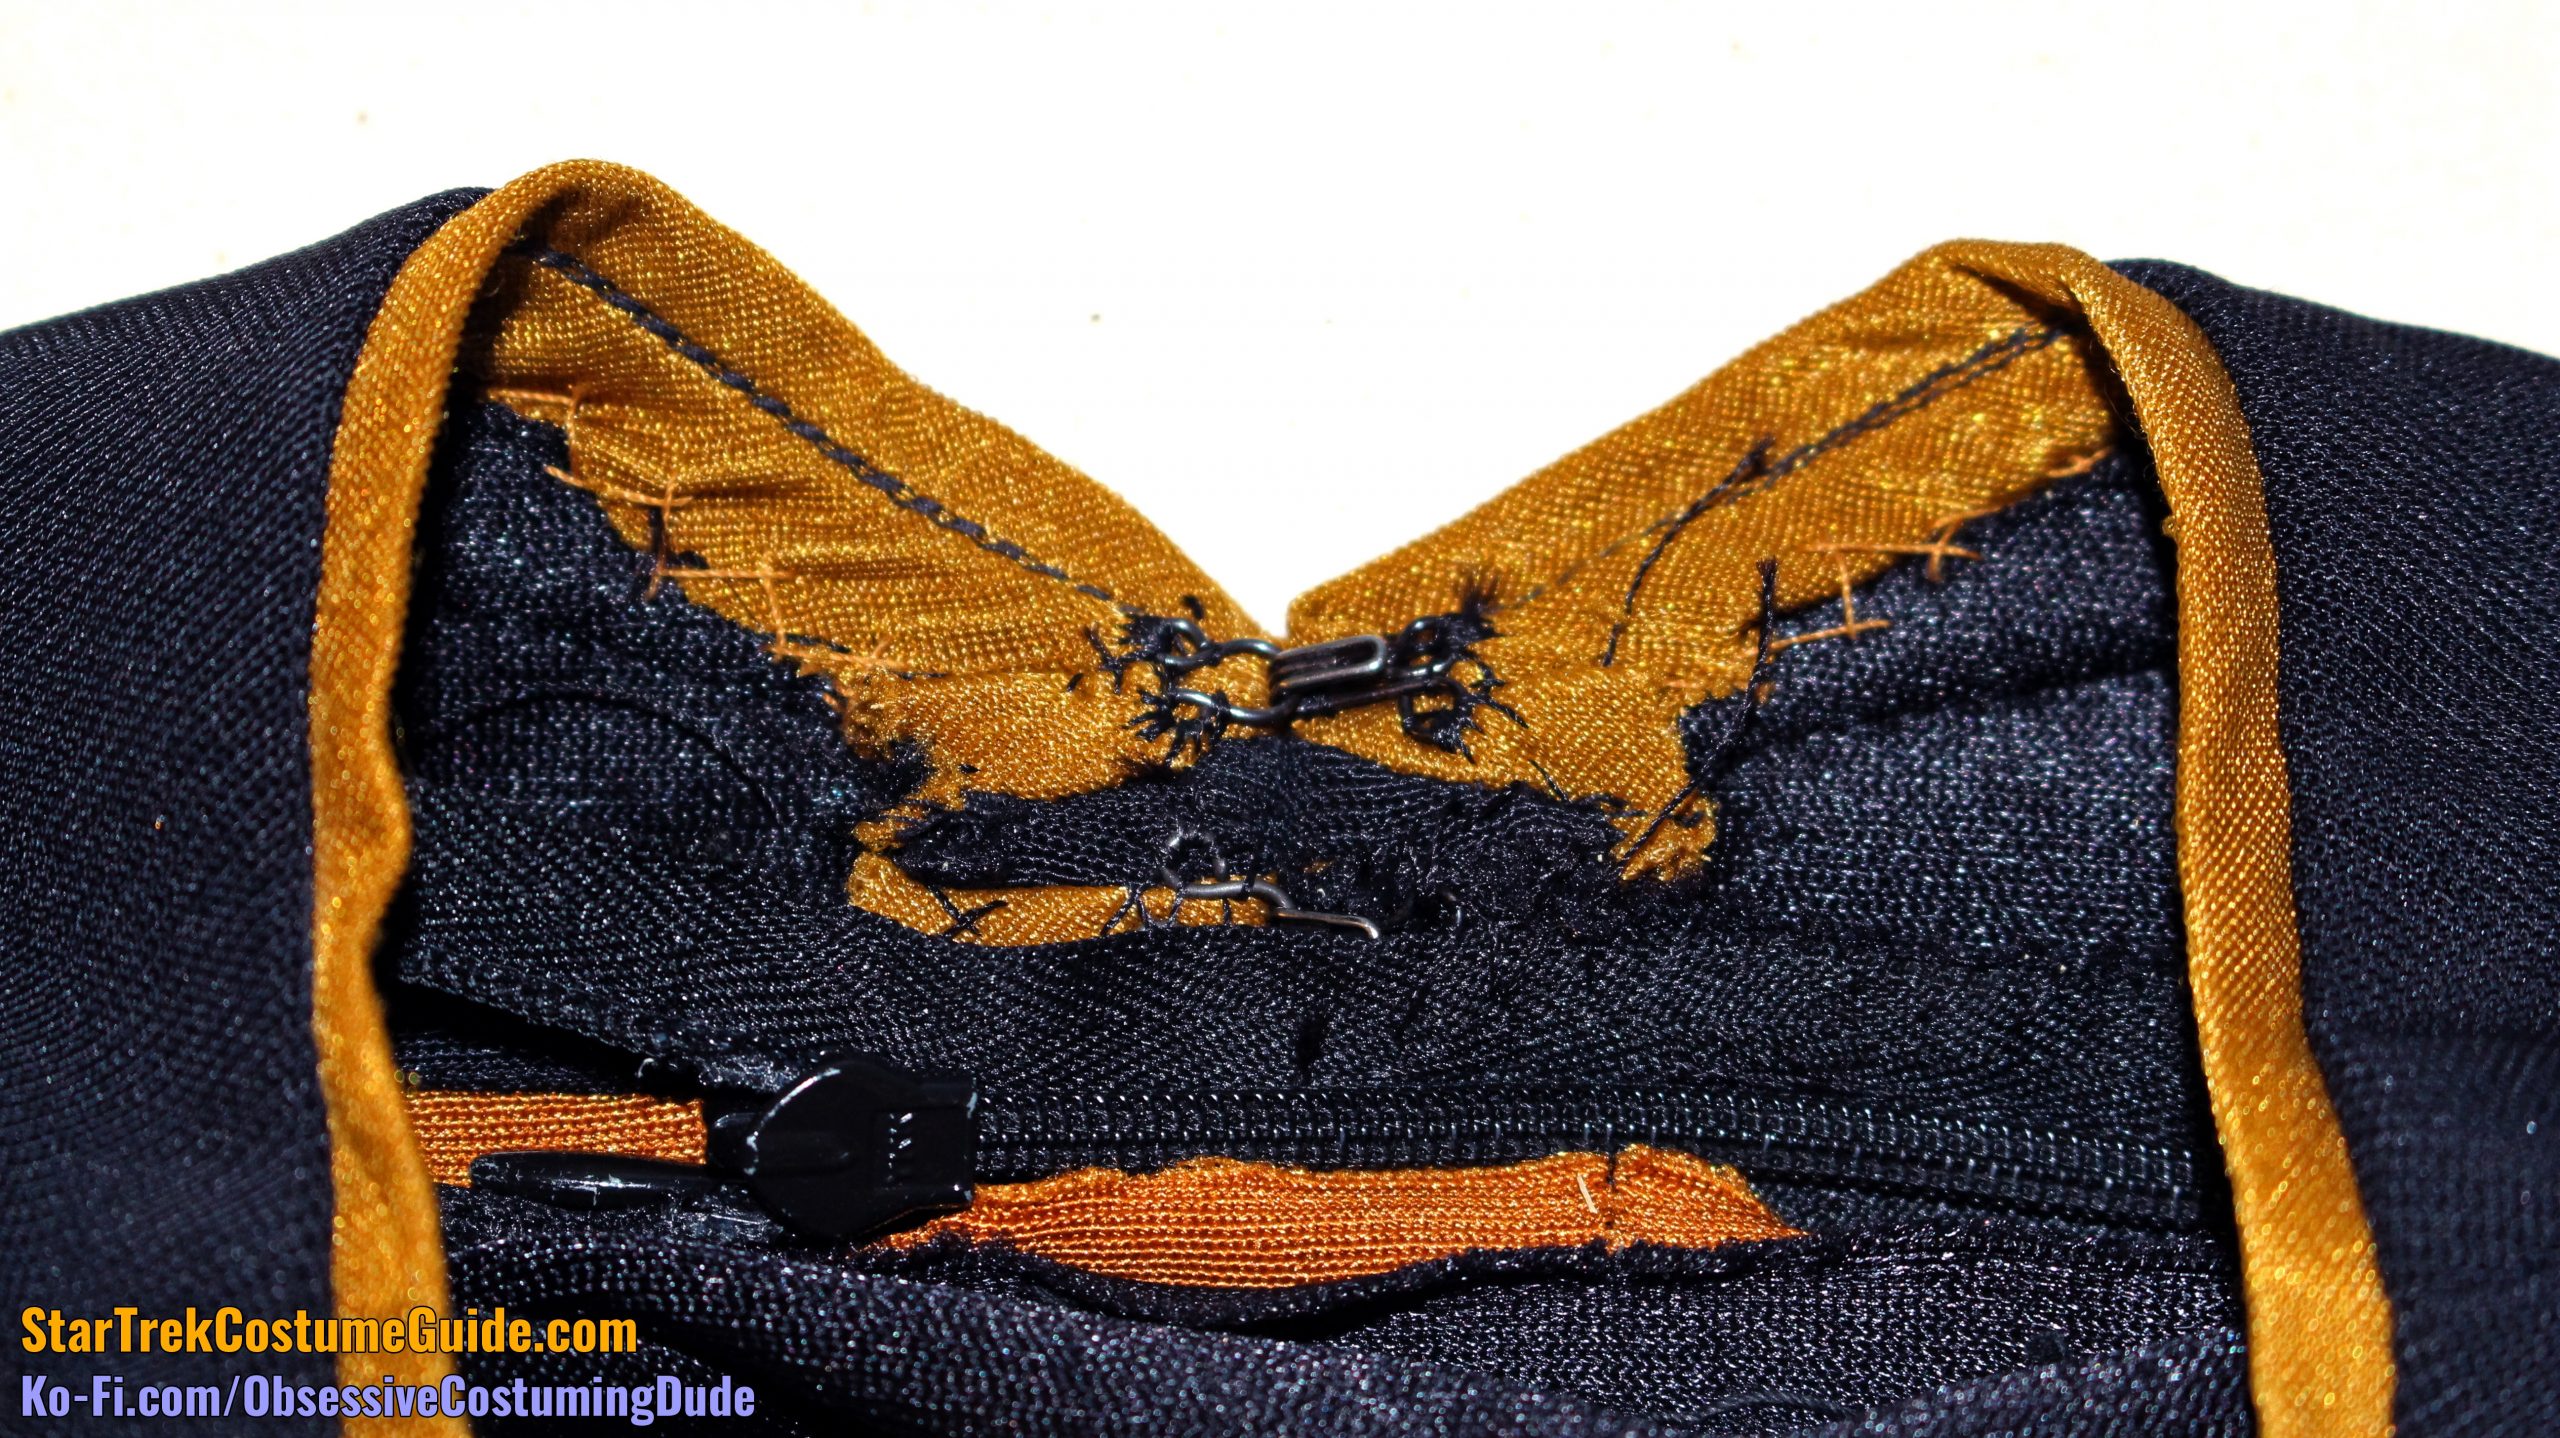
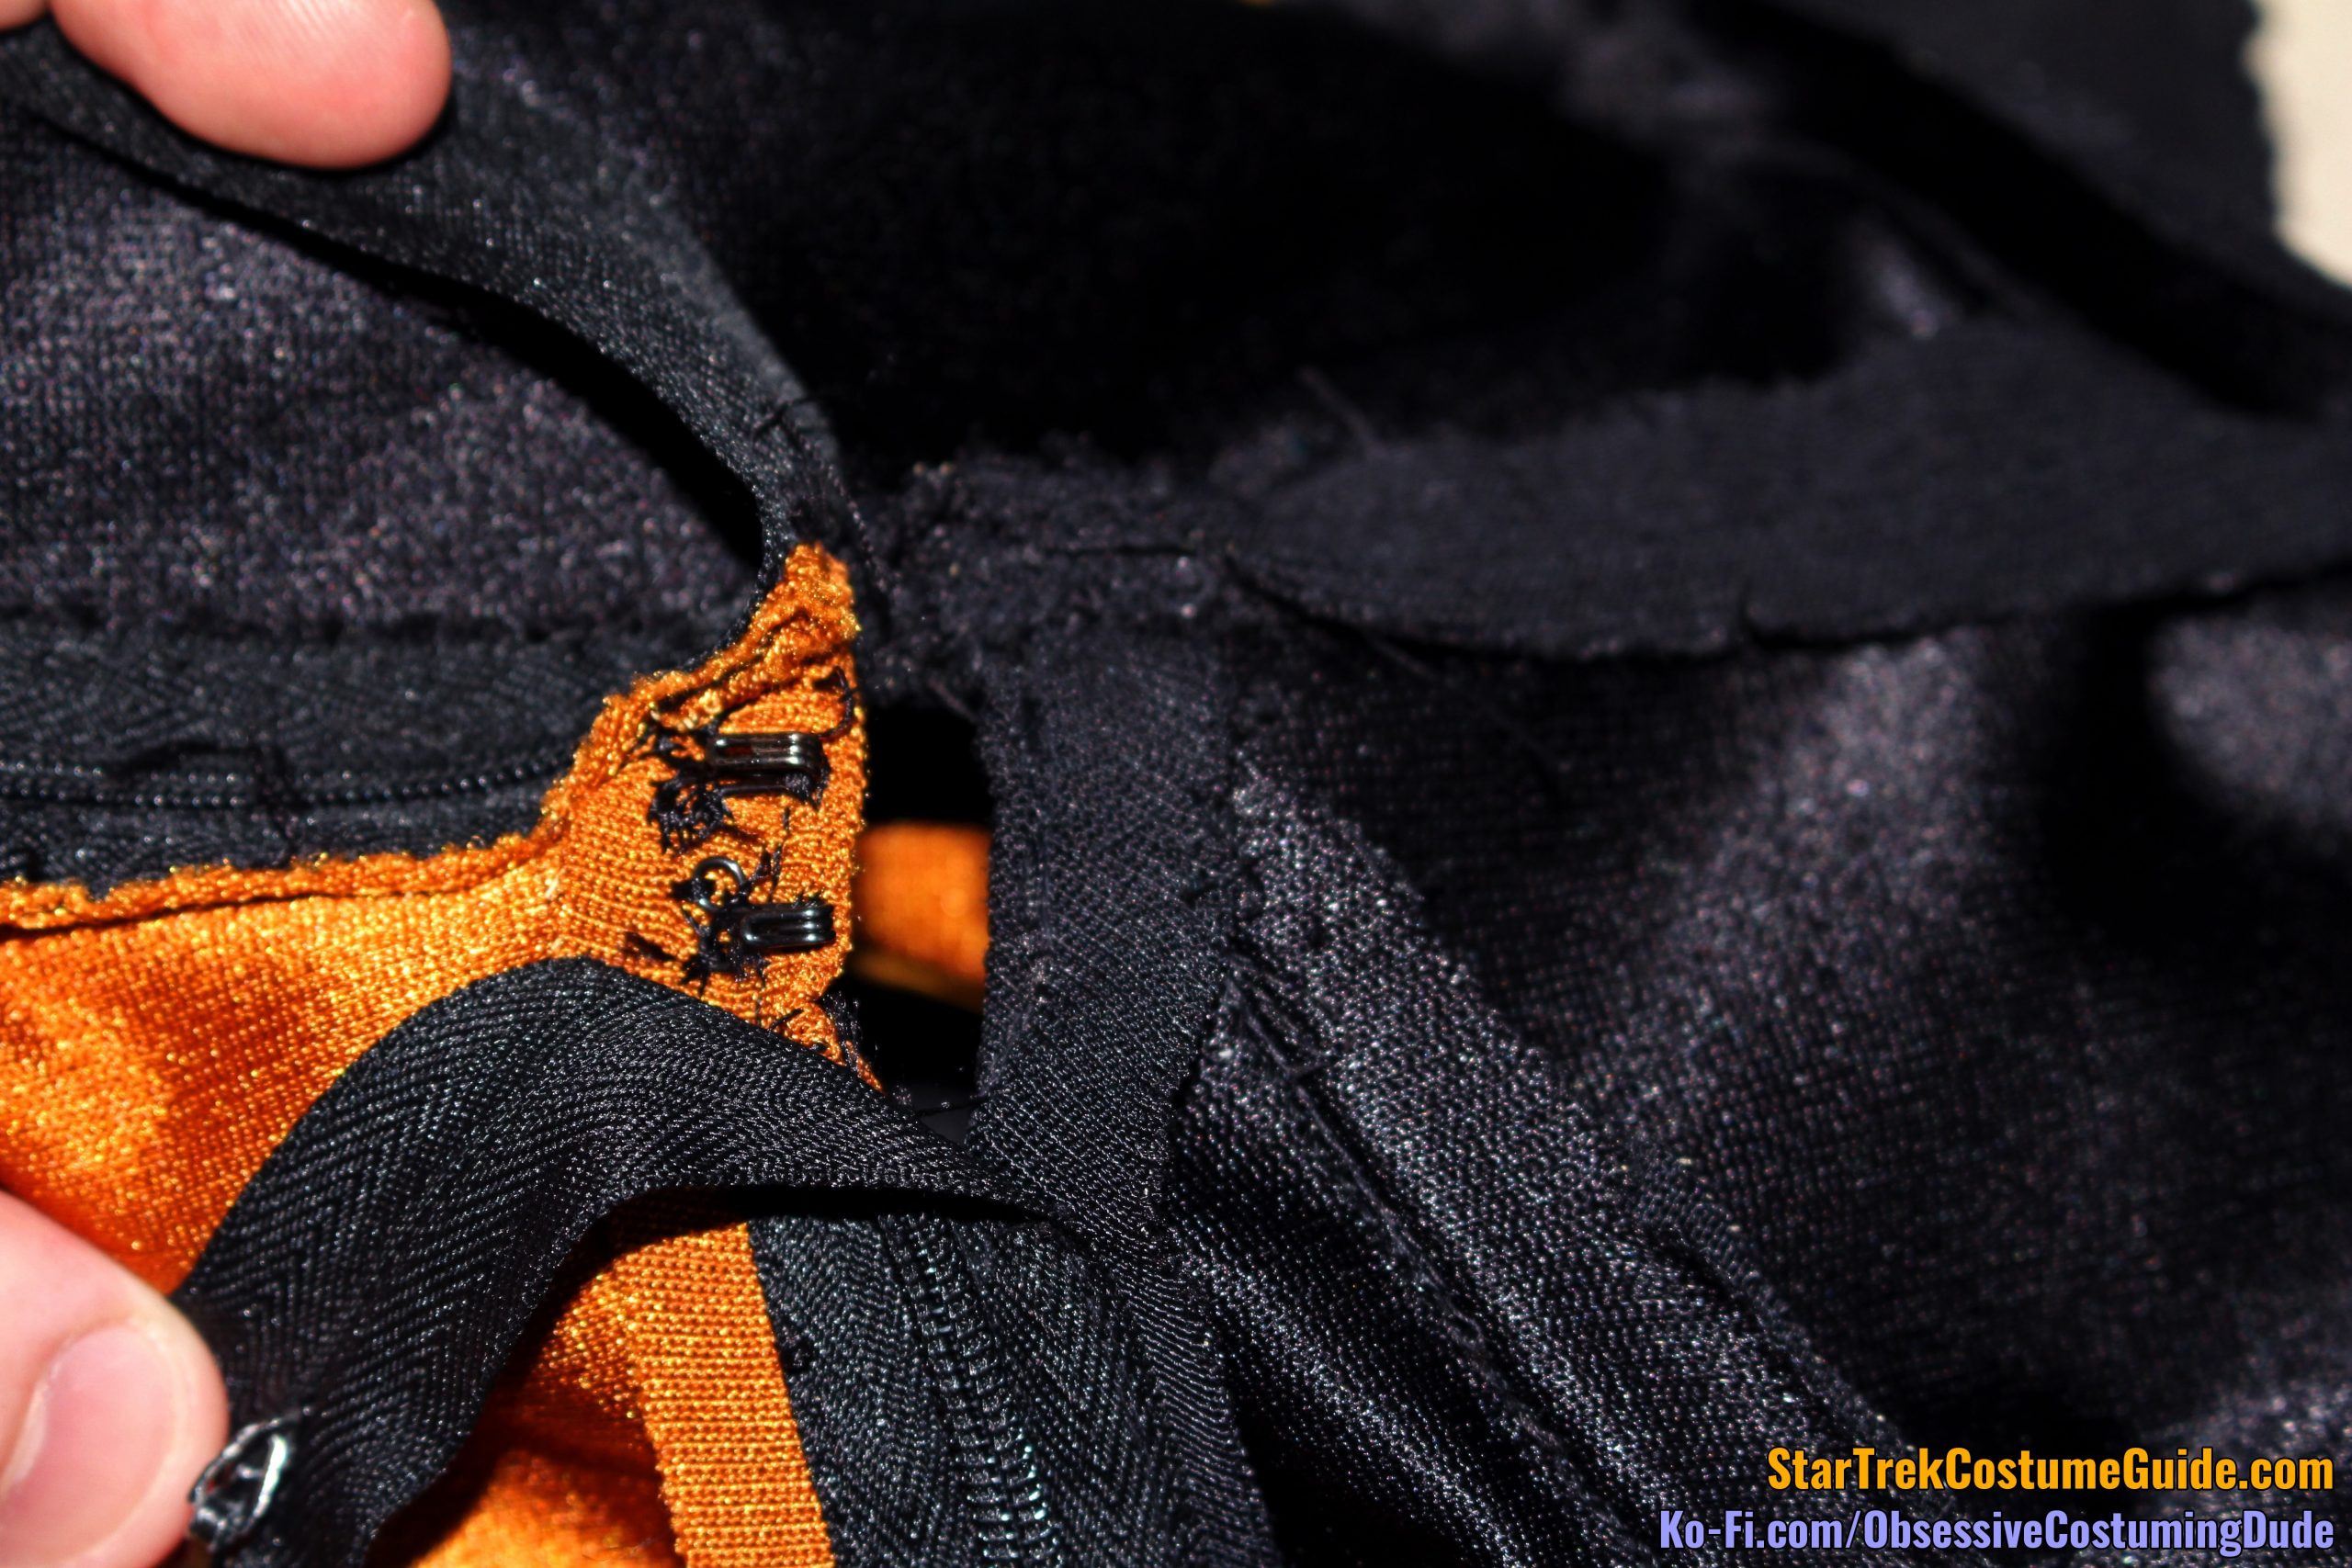
On the underside of the upper center front was a pair of hook-and-eye closures.
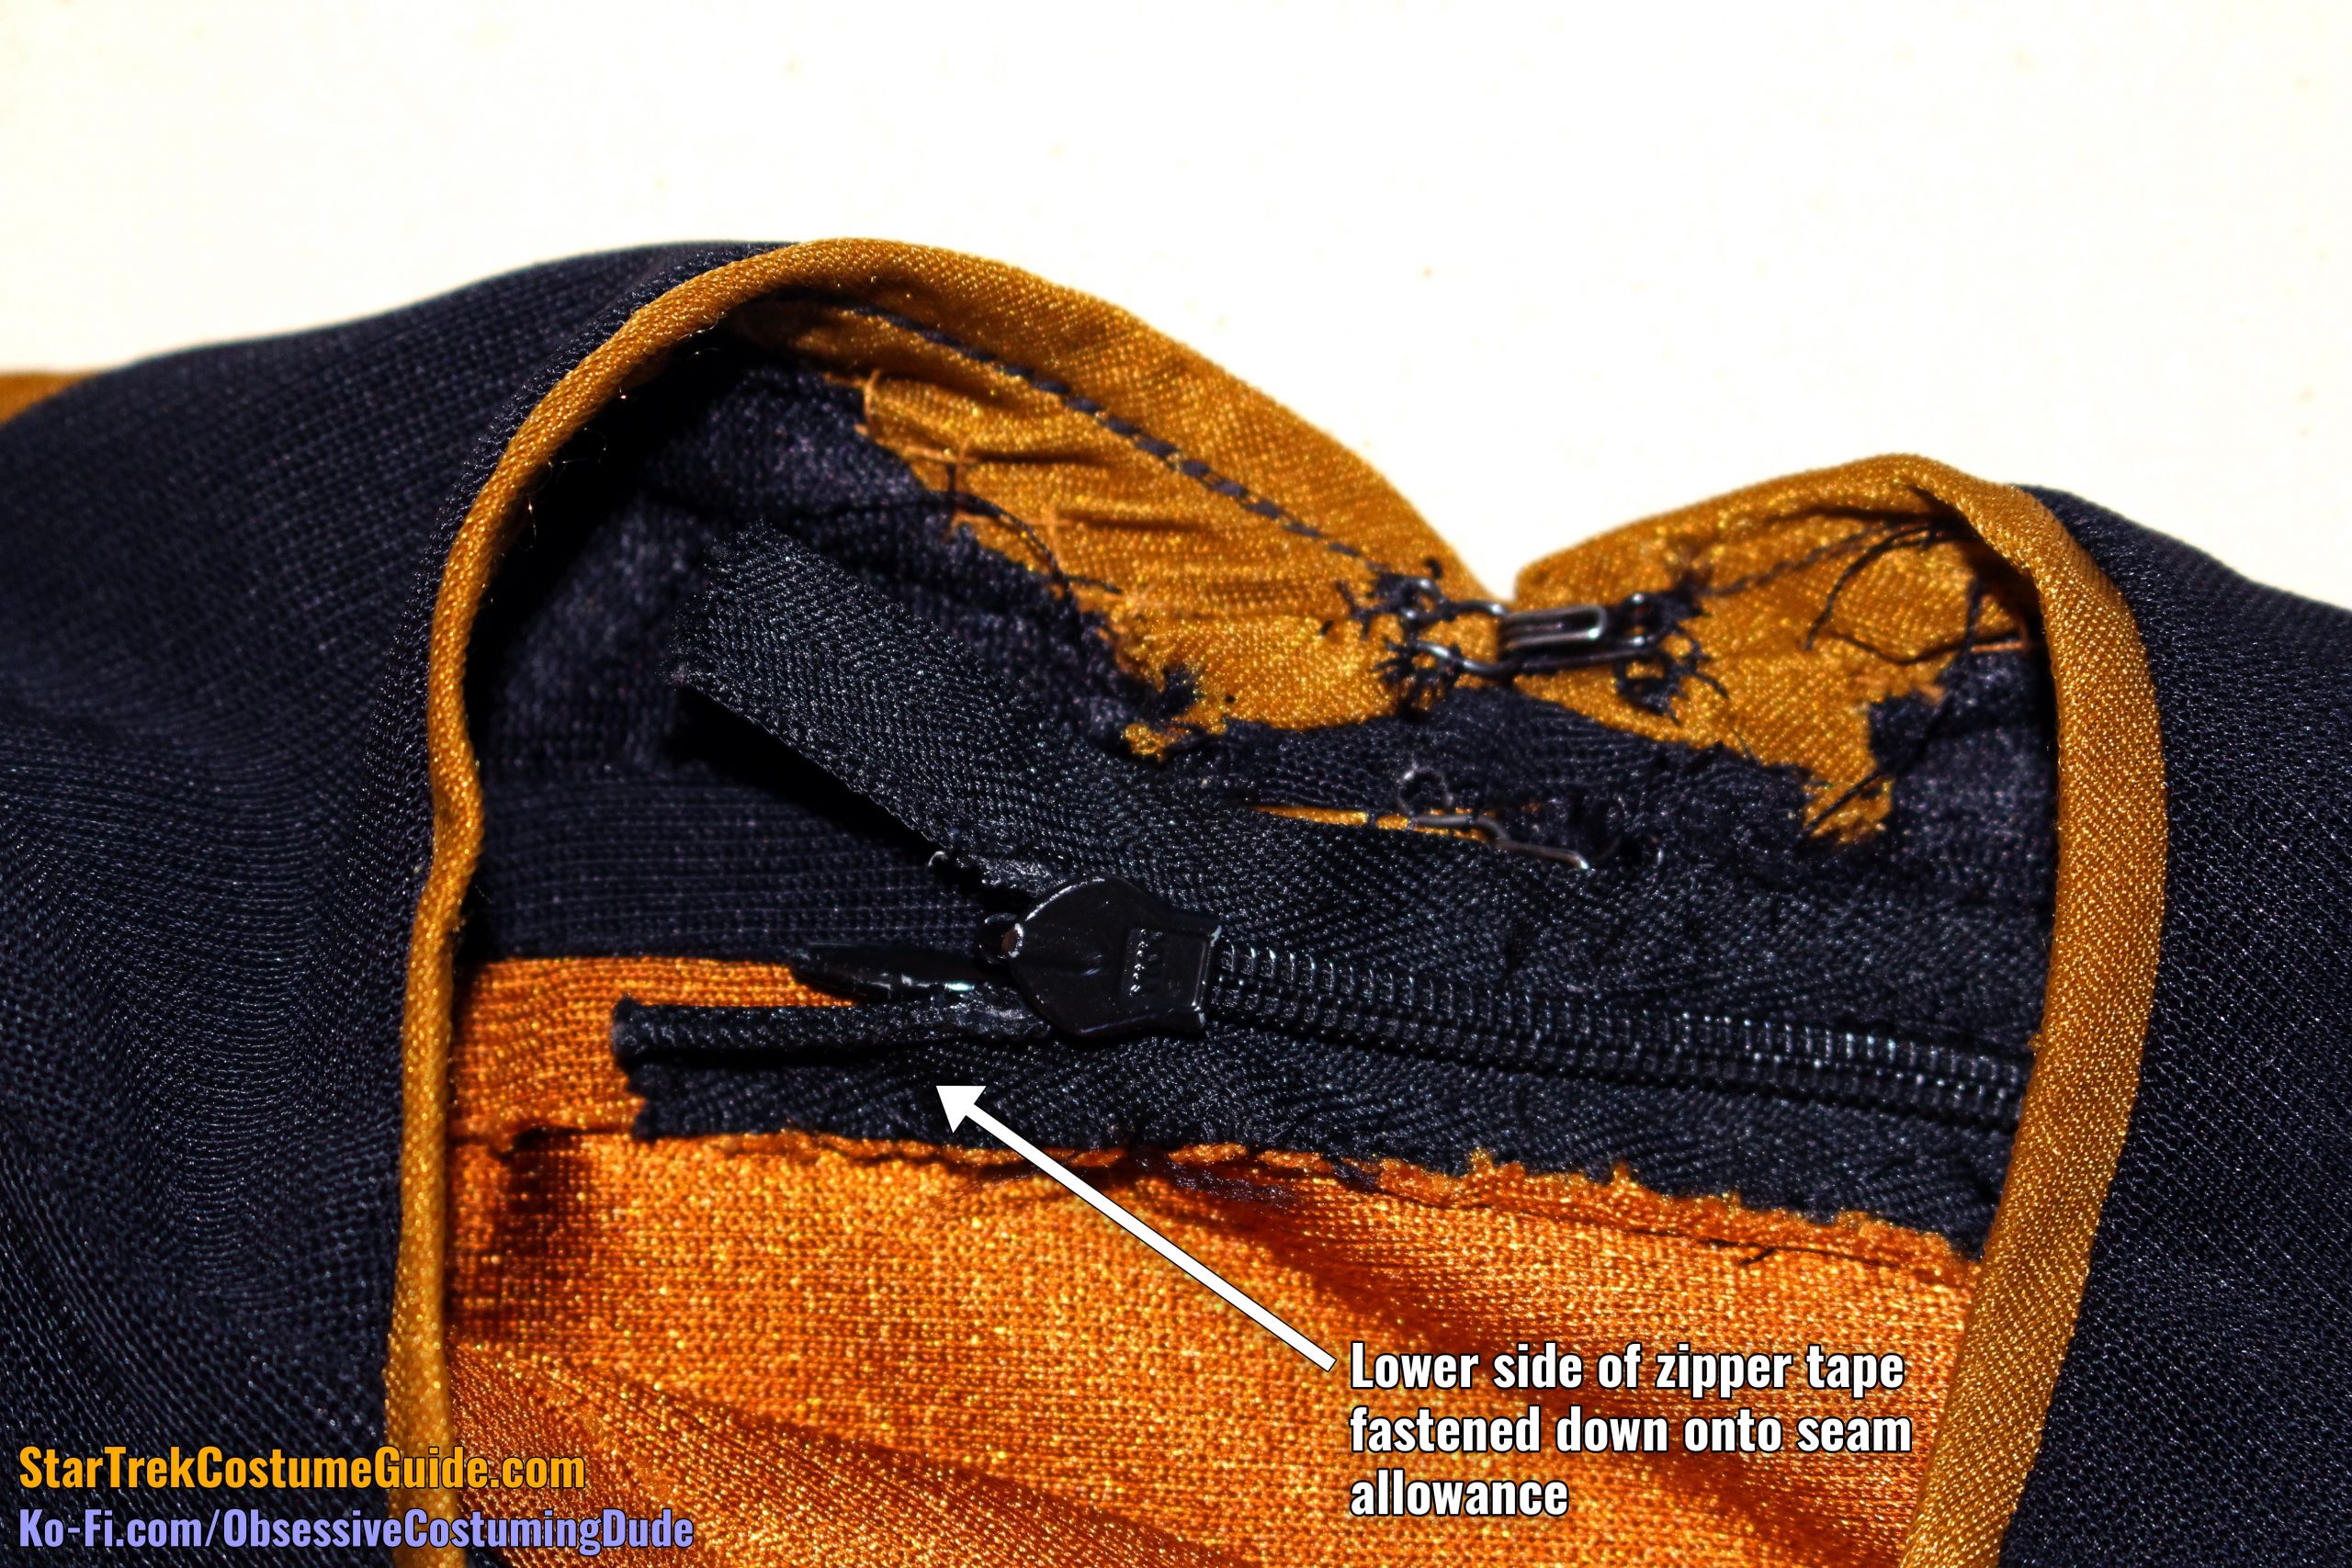
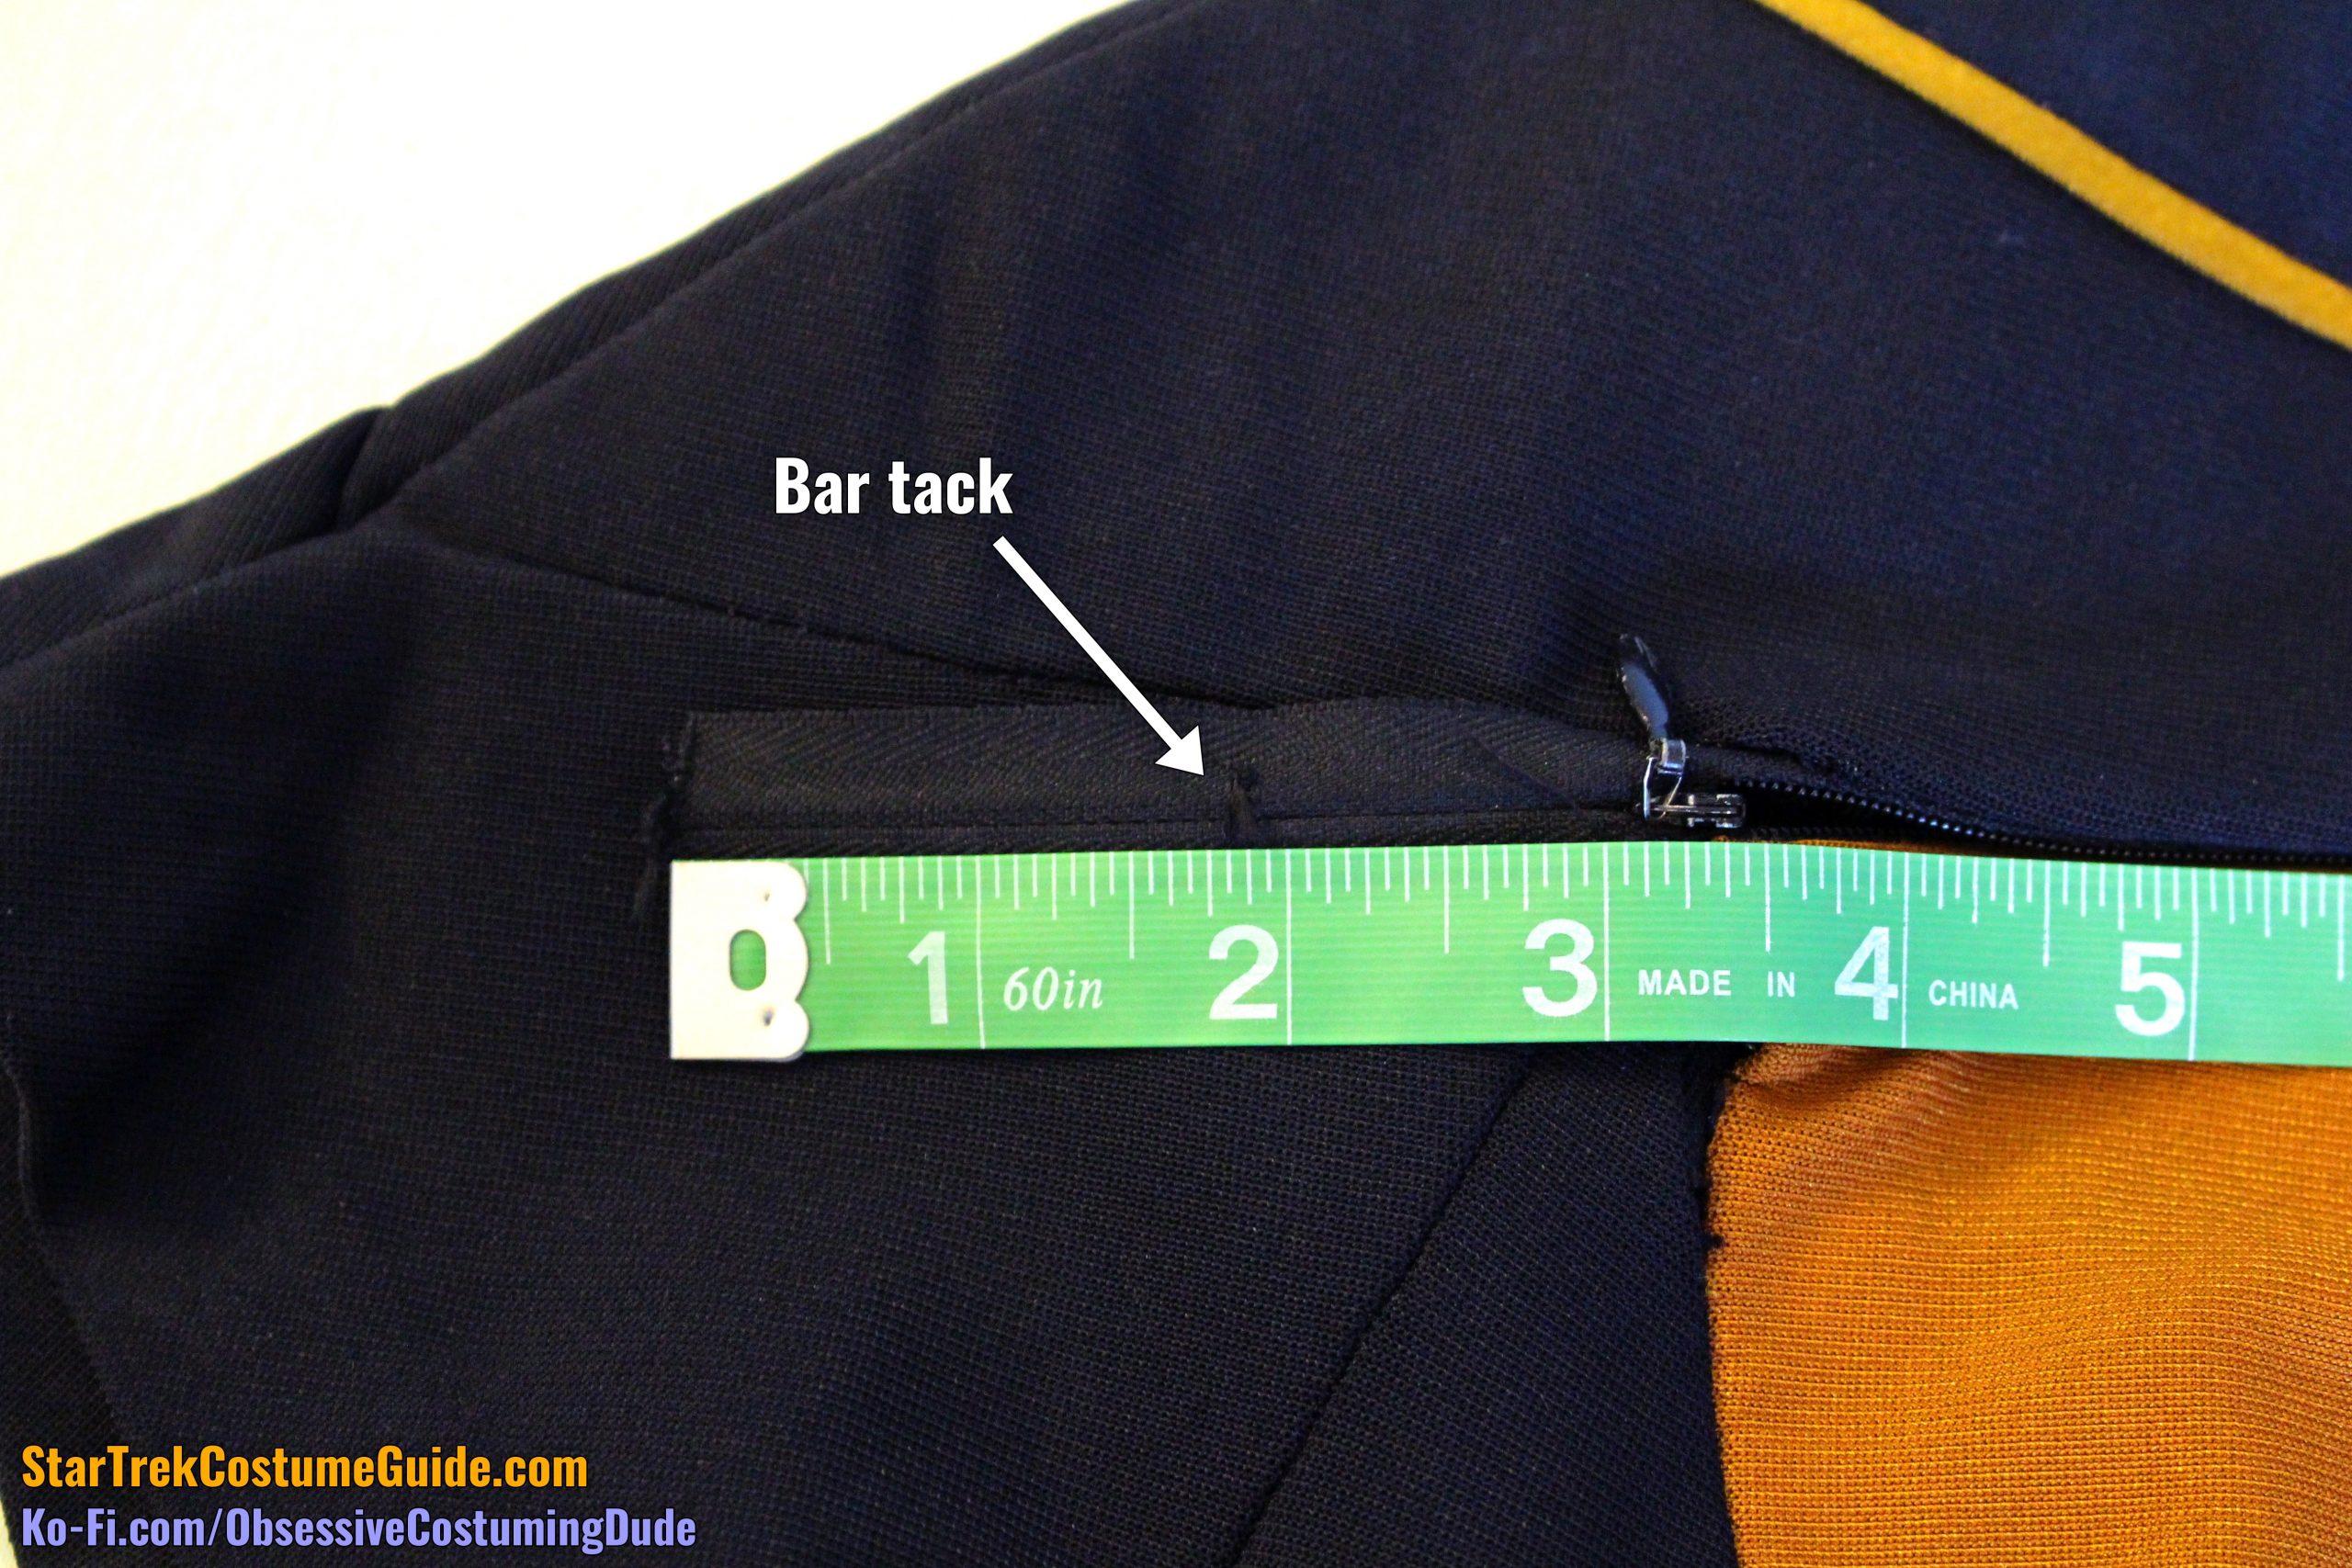
There was also an invisible zipper, horizontally positioned along the right yoke/body seam allowance and extending past the center front a couple inches, where the upper side of the zipper tape was left hanging free.
The zipper pull was hidden underneath the yoke and the lower zipper tape fastened down to the seam allowance.
To start, one must undo the front hook-and-eye closures.
Then the upper, horizontal zipper is unzipped away from center.
The zipper actually extended beyond both closed ends of the seam by a few inches.
The zipper extended 2″ past the center front, and about 3 ¼” past the outer corner of the front panel. On the outer end, about 1 ¼” from said corner, the end of the zipper was secured with a bar tack.
The zipper was about 11 ¾” long, total.
That’s not all, though – now there’s room for the head to go through the neck hole, but what about the torso?
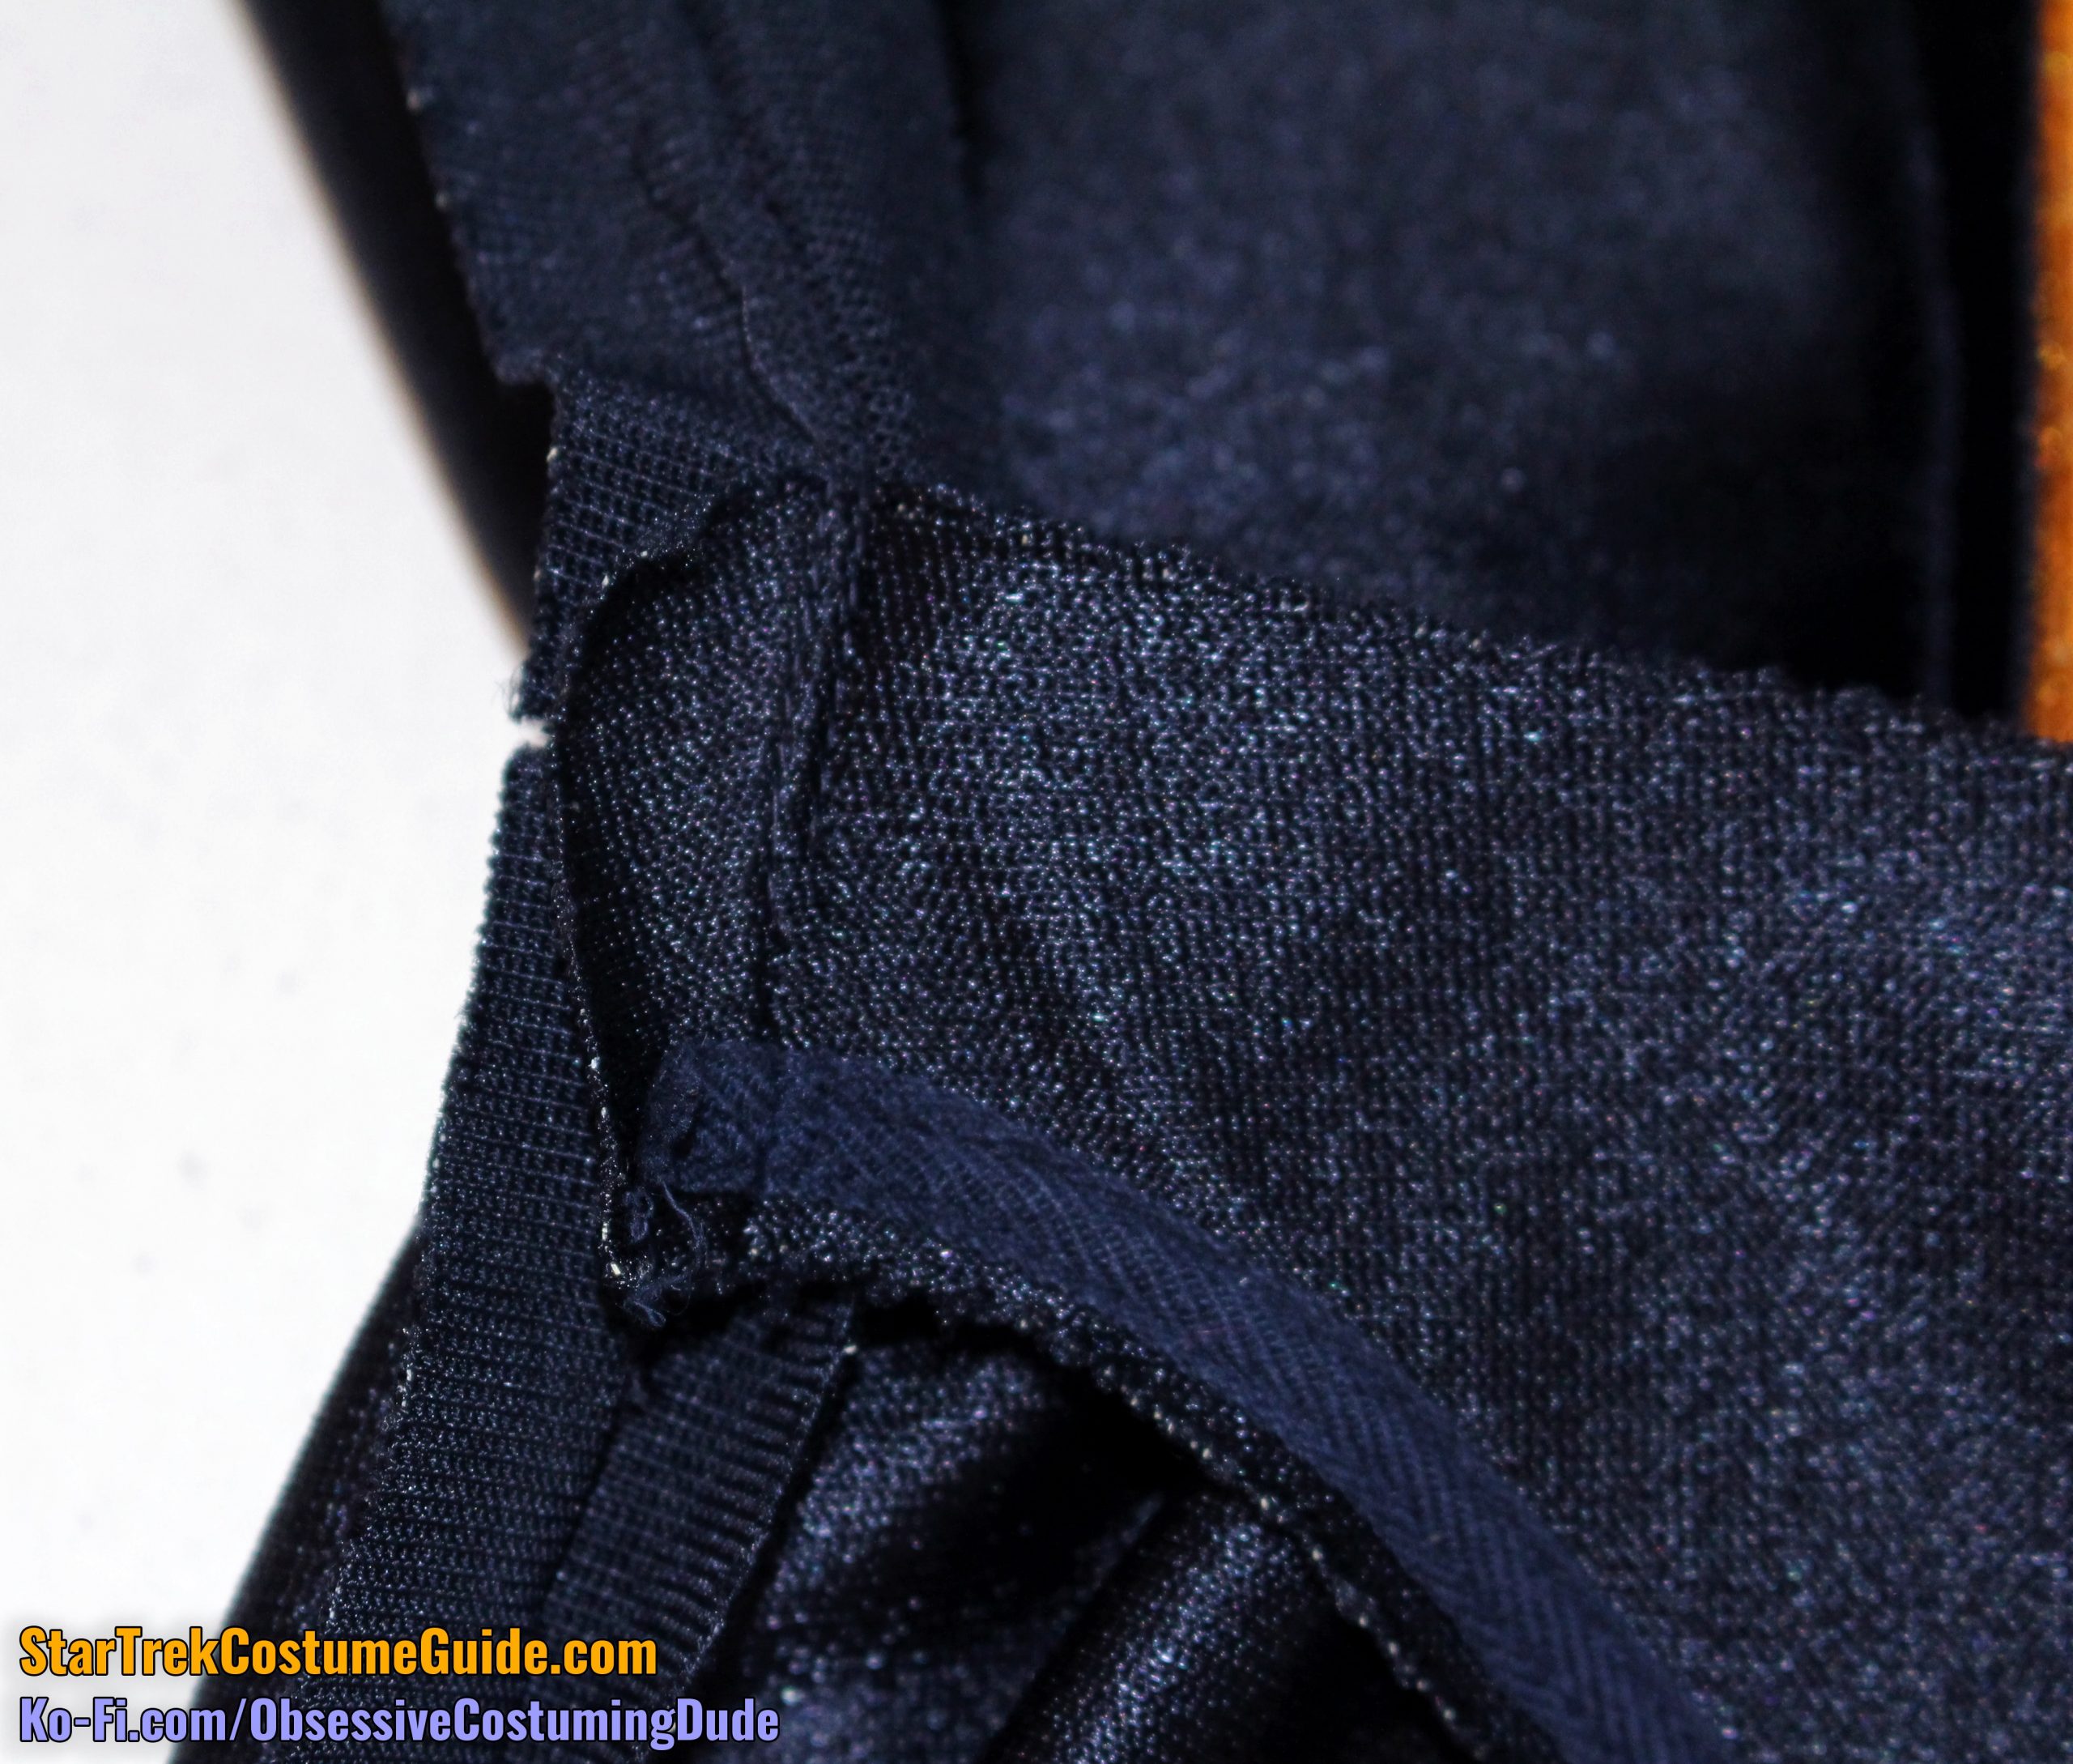
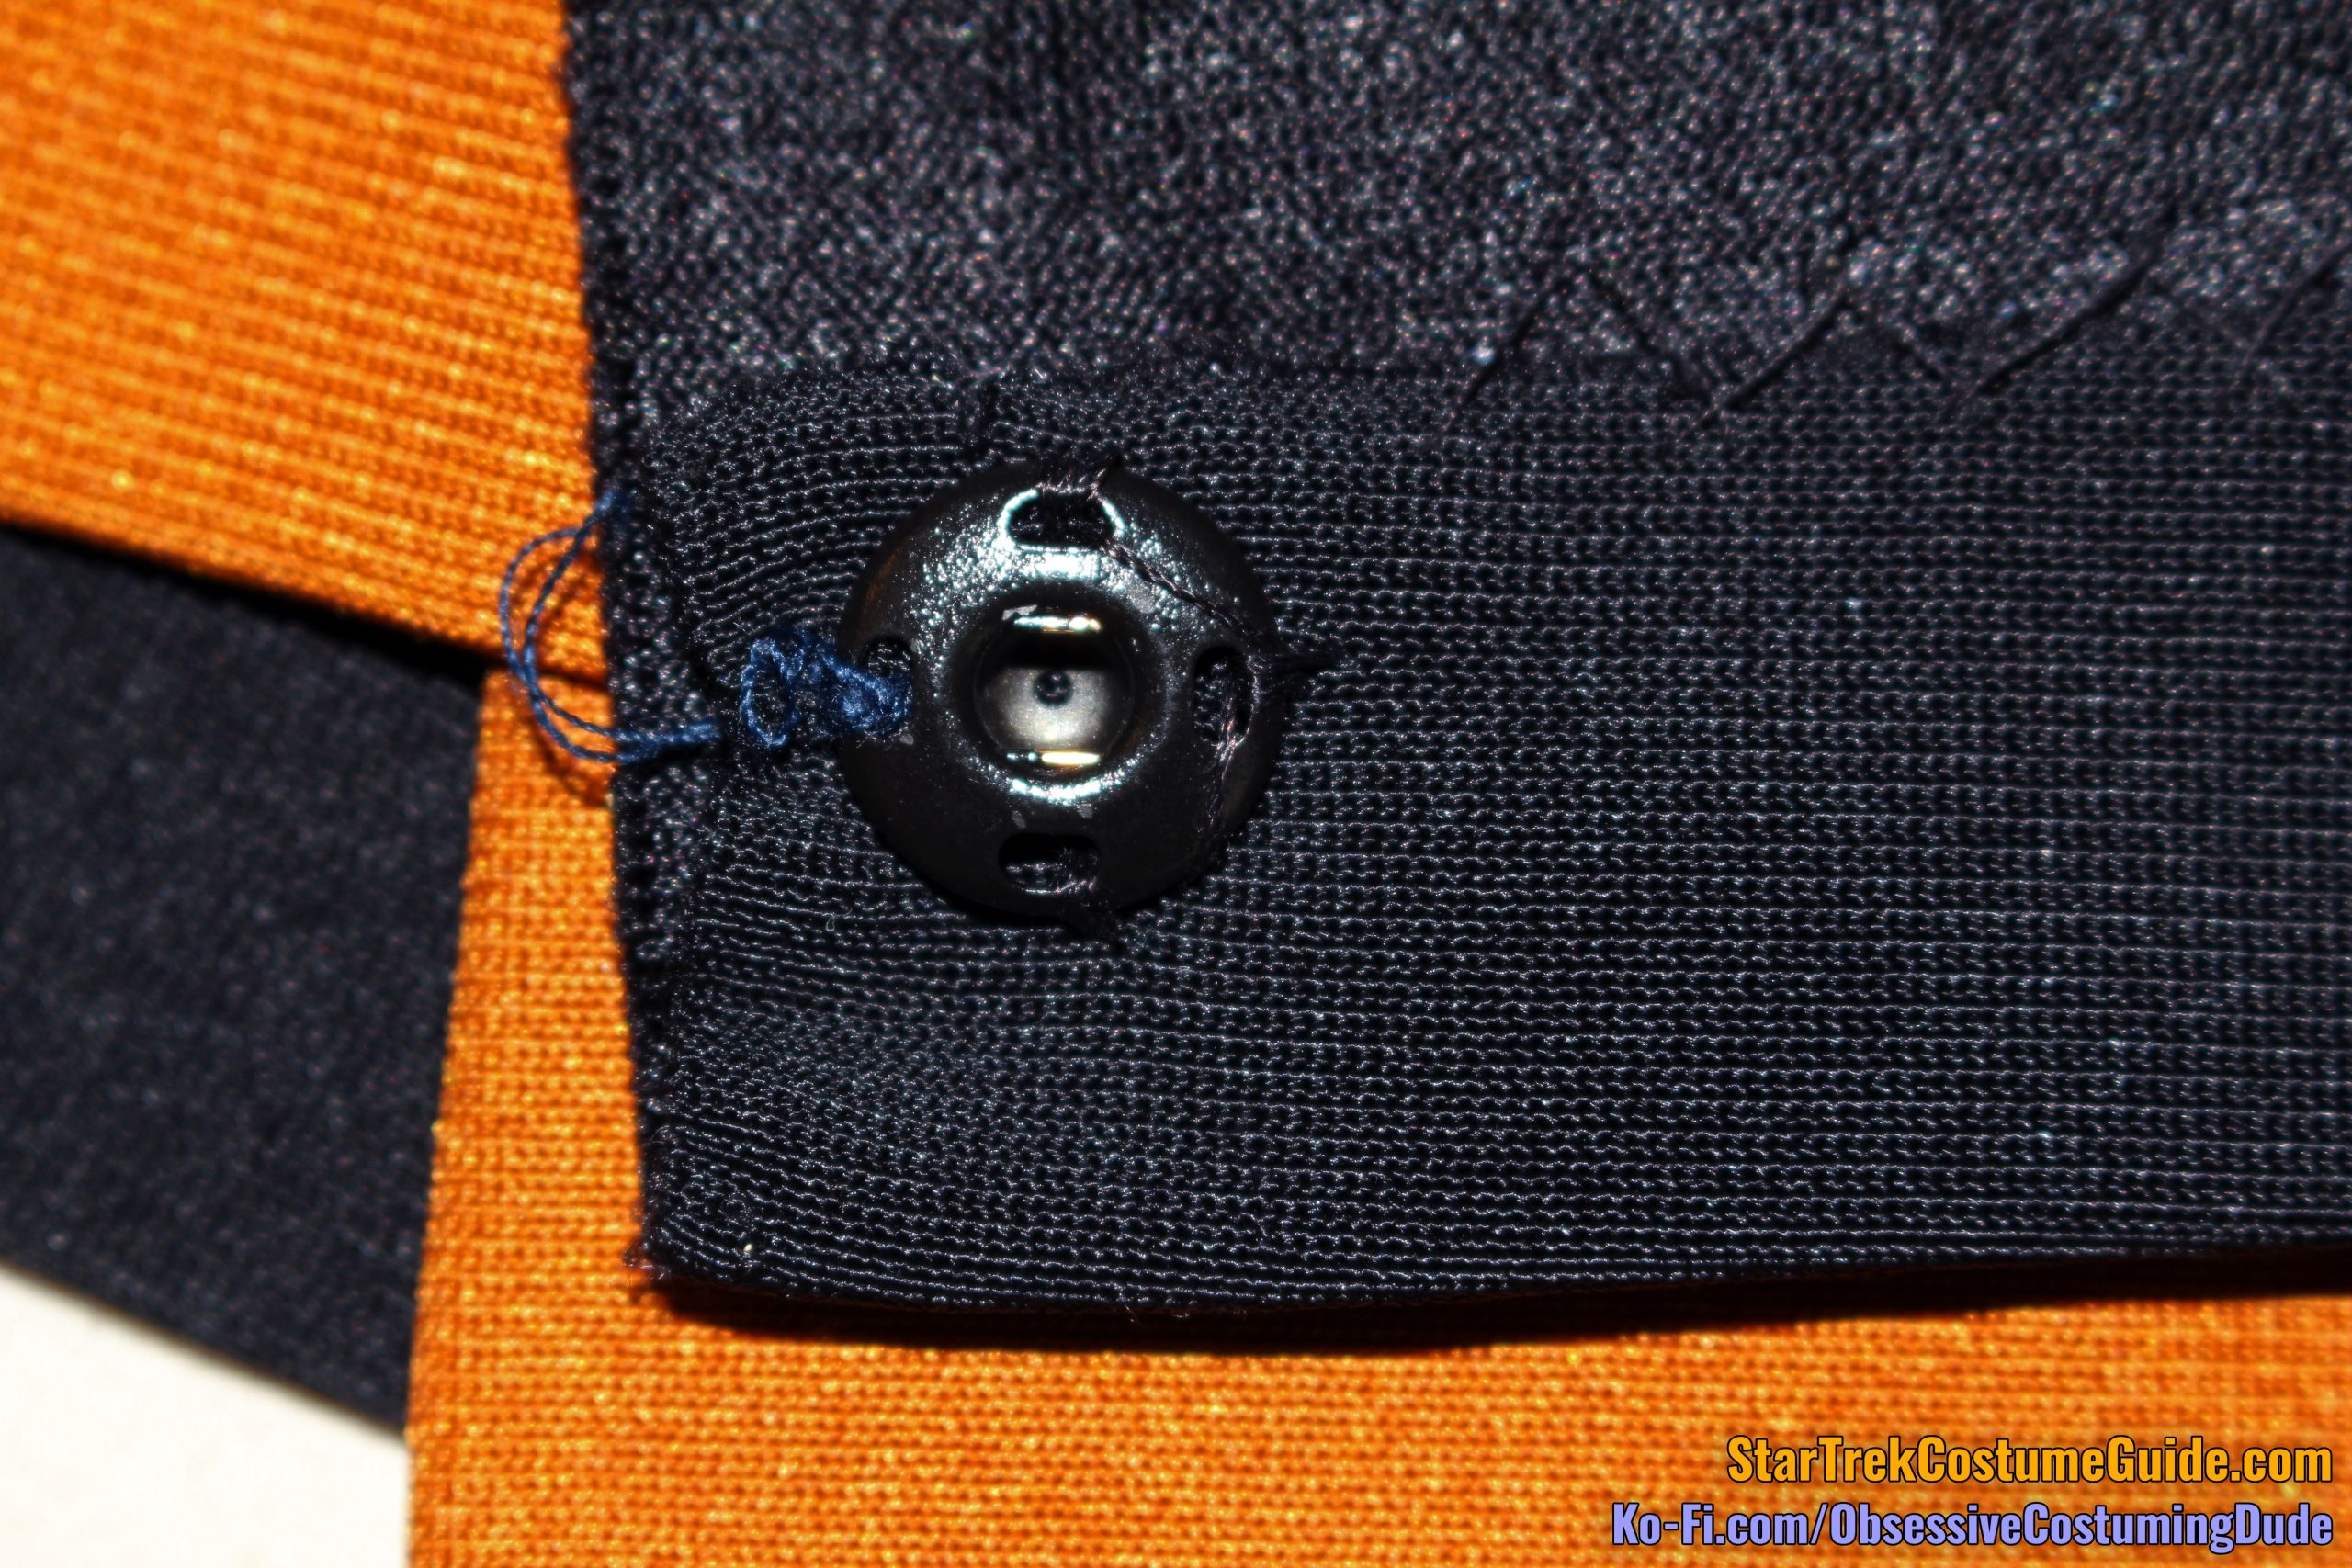
Well, in that upper right (photo left) intersection of seam lines was another pair of hook-and-eye closures which must be undone.
Interestingly, this particular TNG skant had thread “eyes,” rather than standard metal ones … I don’t know if this was common practice for the skants, or something unique to this specific one.
Underneath this second pair of hook-and-eye closures, the upper right side front allowance was reinforced – perhaps with organza, or a fusible interfacing long since detached?
Beneath that second pair of hook-and-eye closures was another invisible zipper, this one vertical, running down the front/side panel seam from the yoke to the lower vent.
That upper side seam allowance was also tacked onto the armscye seam allowance by hand, to stabilize the area and keep the hook-and-eye closures from pulling outward.
The top of this zipper was left hanging free, as well, and it extended a couple inches past the top of the seam.
Unzip that second zipper, and the skant is ready to be donned!
(Because, of course. How else would you get in and out of this thing?!?)
This second zipper was 18″ long, measured from the top of the vent to the top of the zipper.
However, this second, vertical zipper extended downward past bottom of the opening a bit more, as you’ll see shortly.
INTERIOR CONSTRUCTION
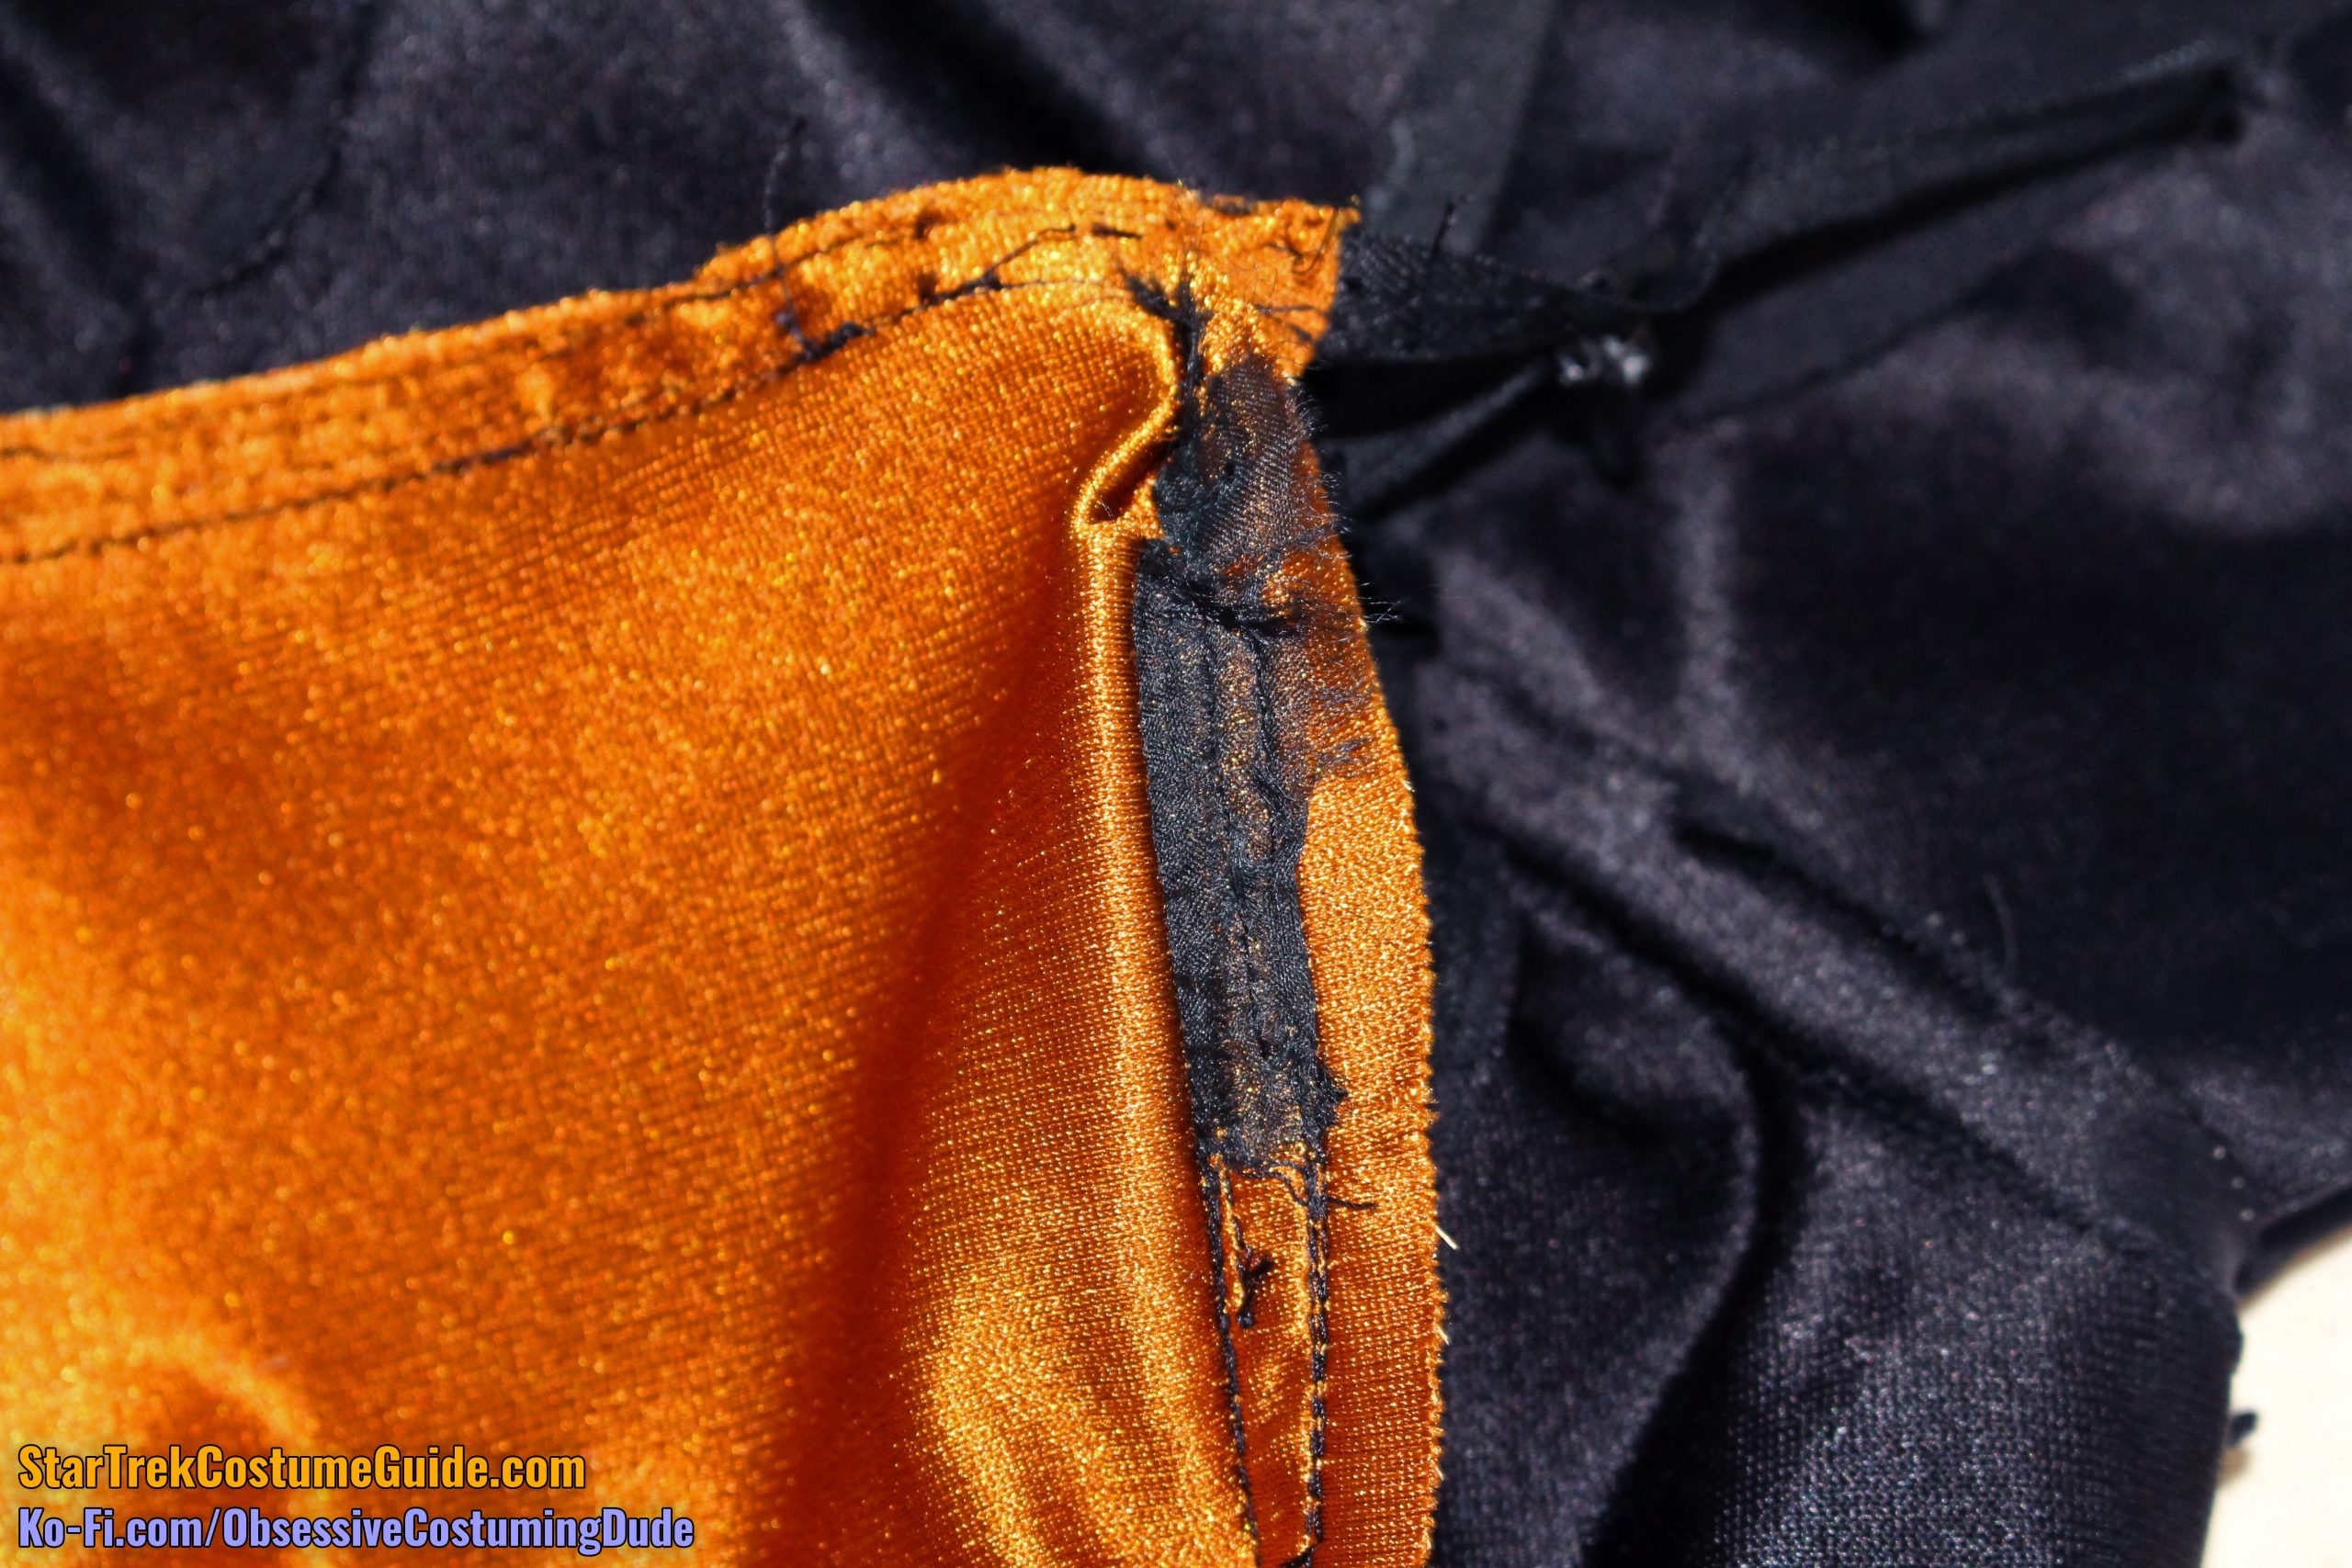
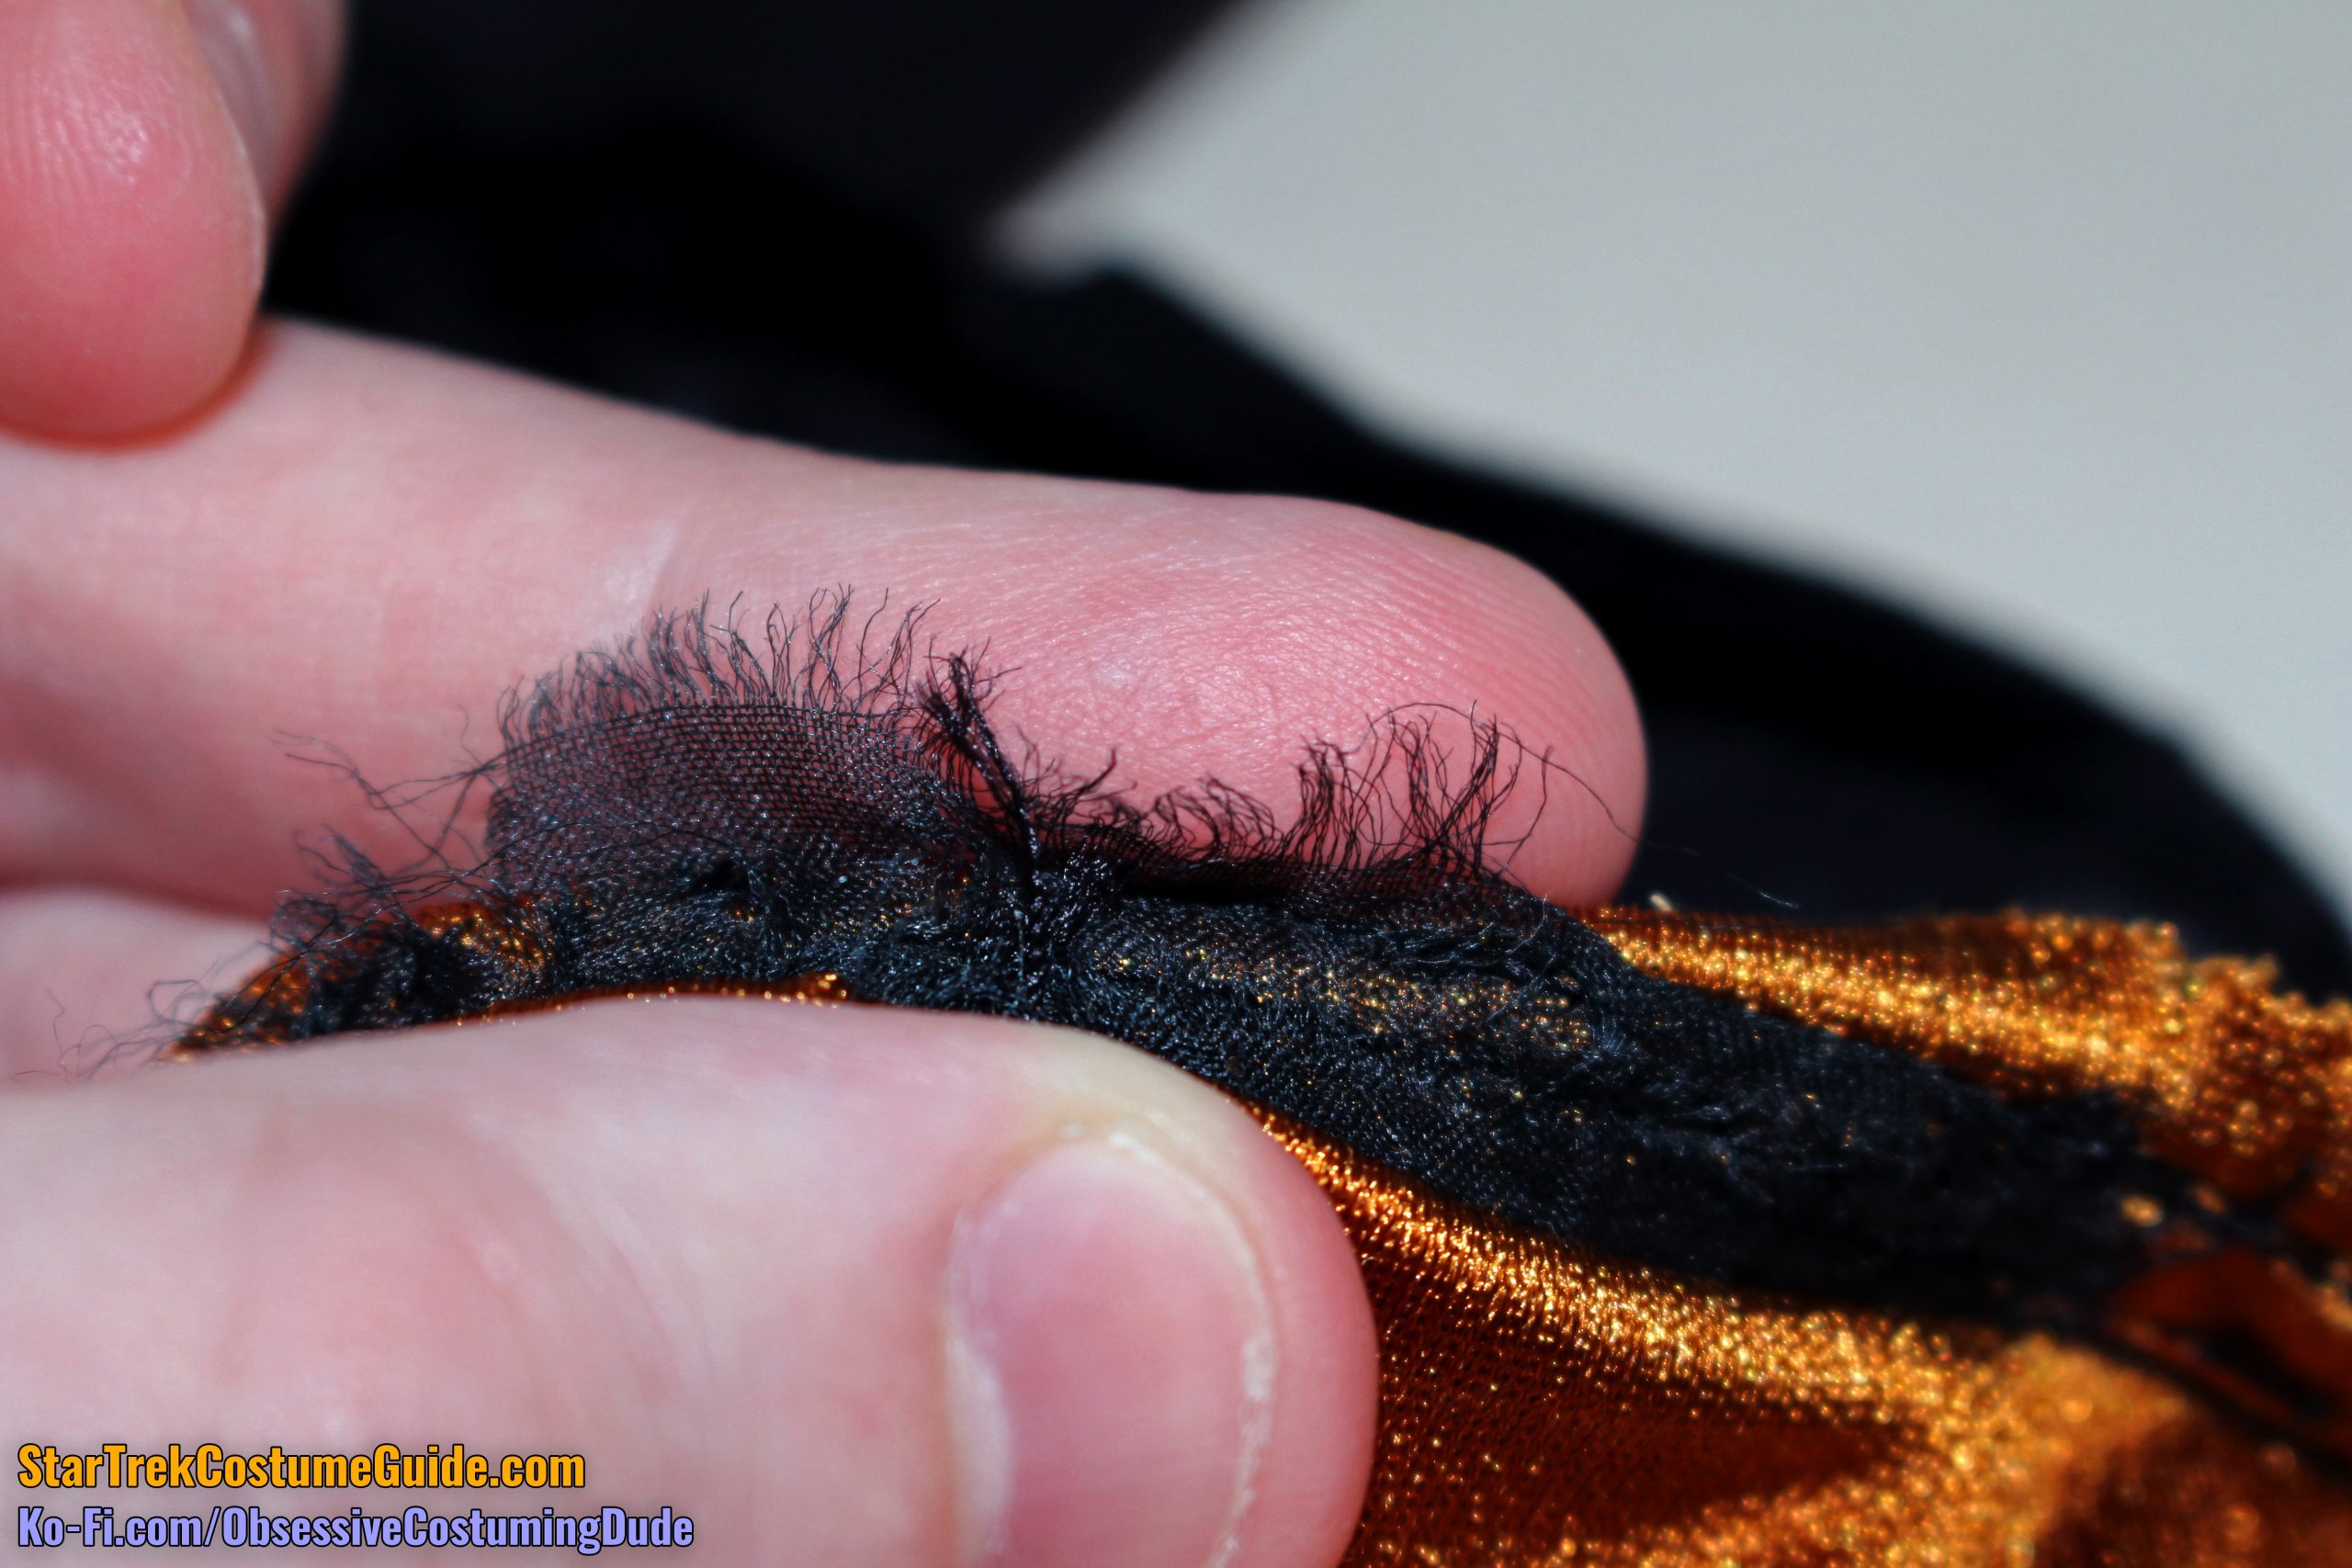
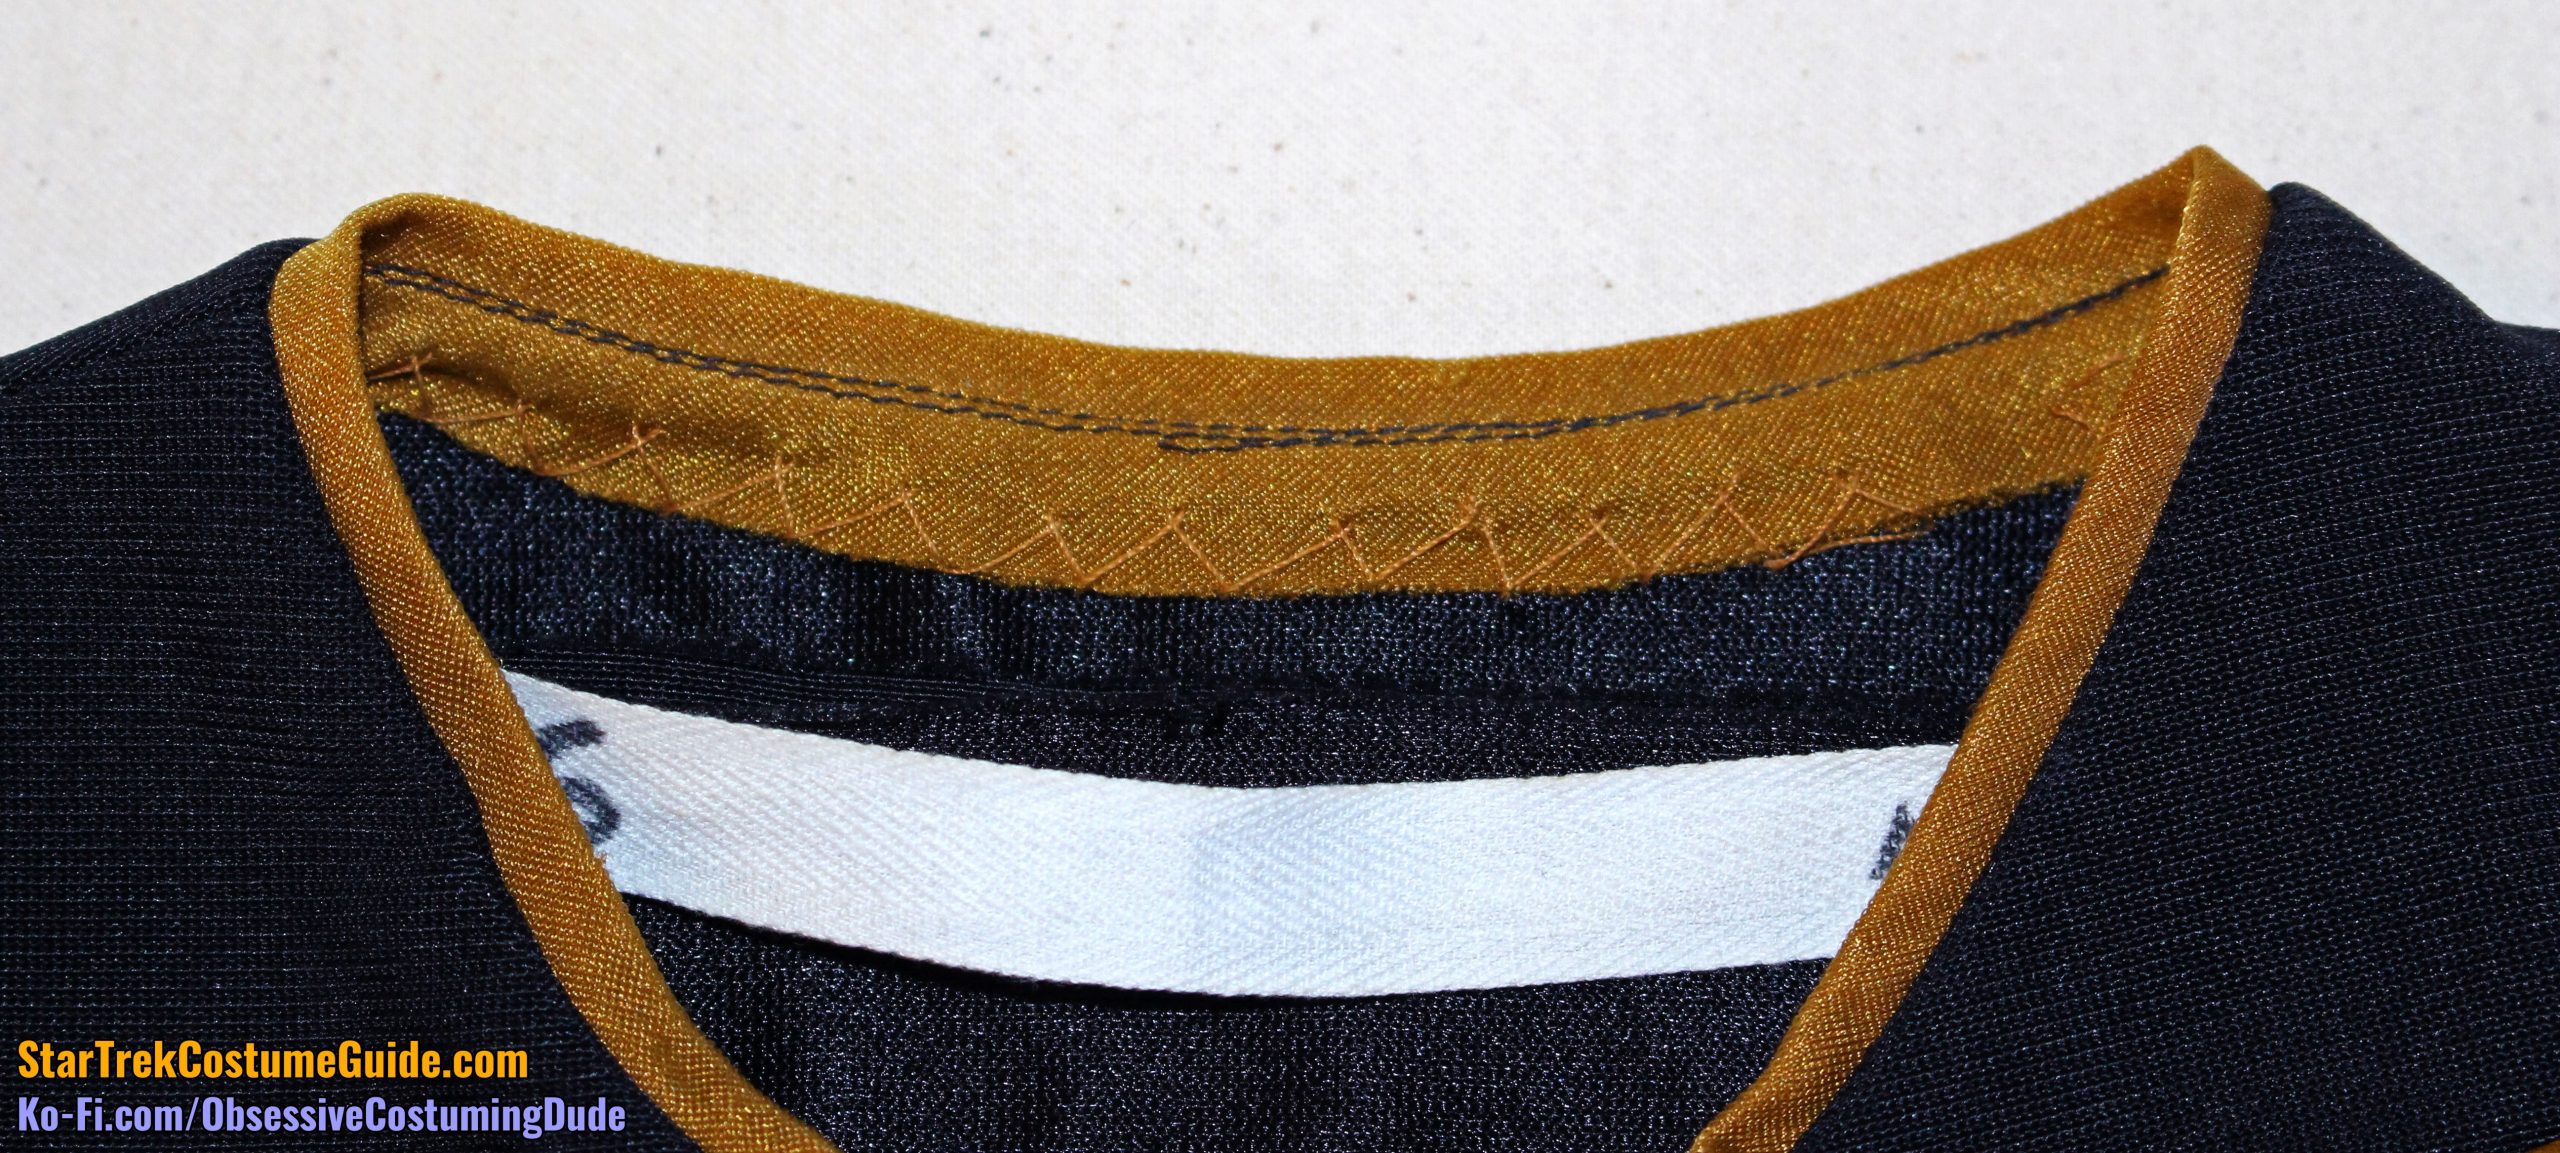
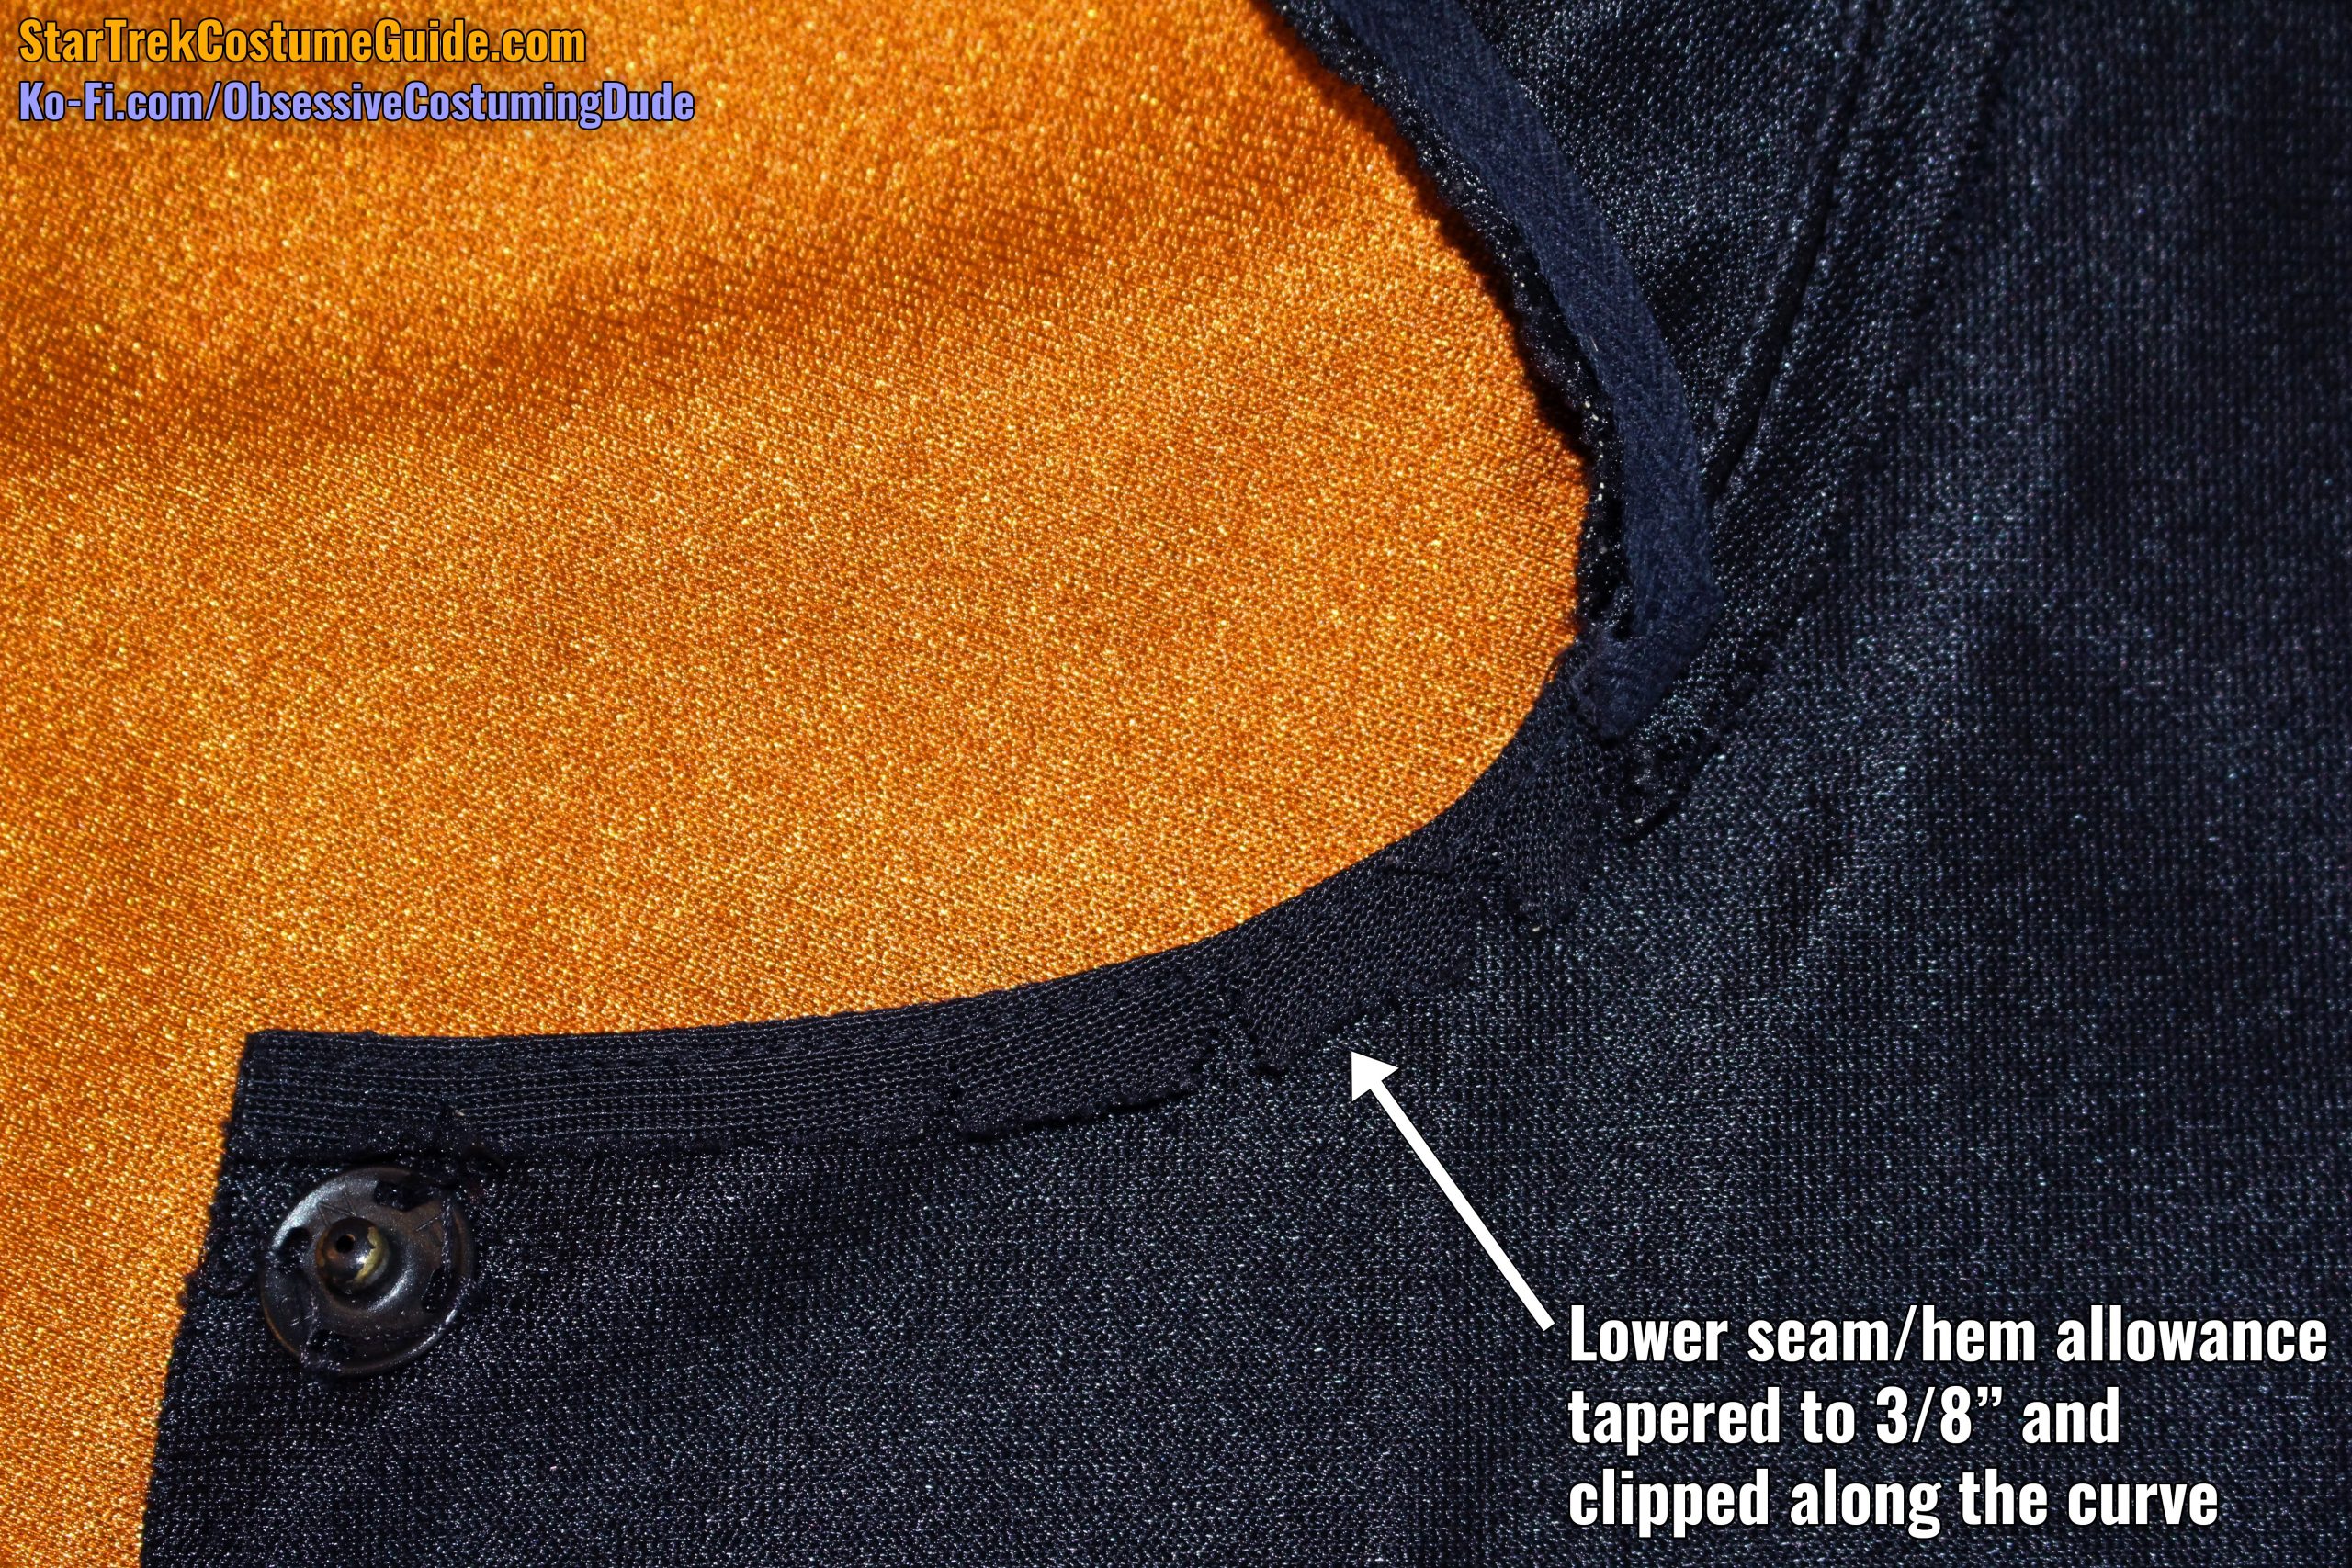
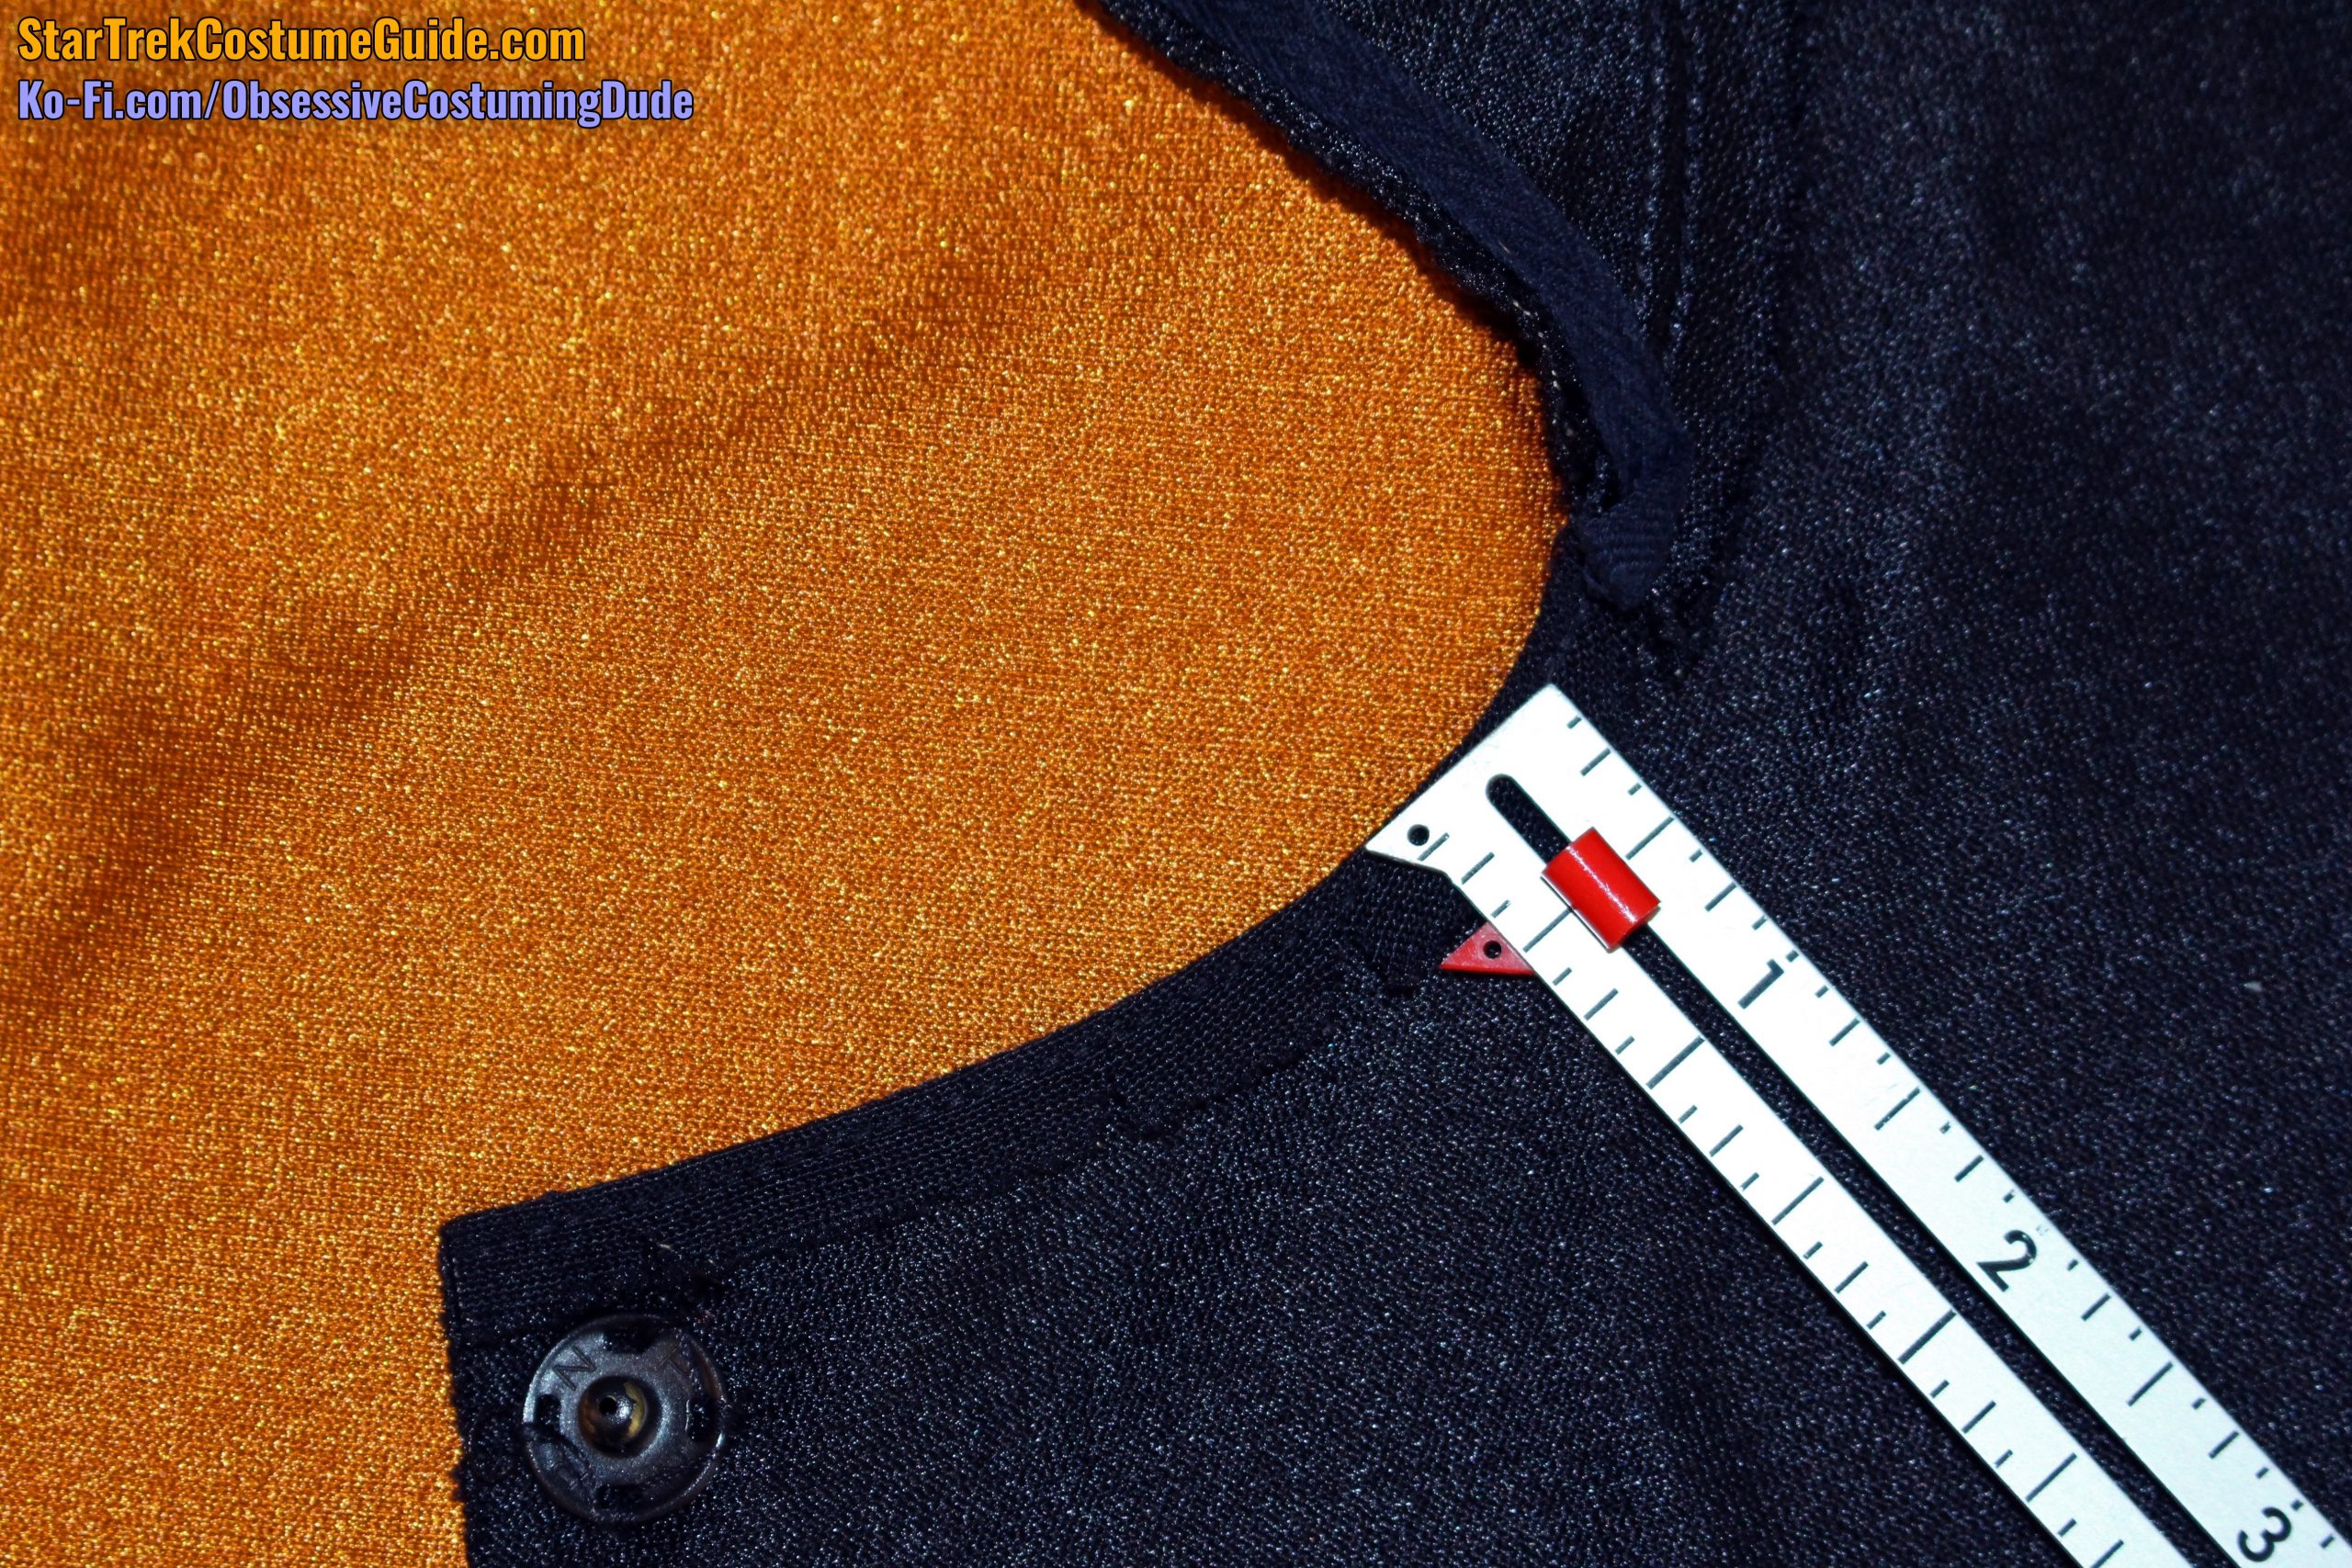
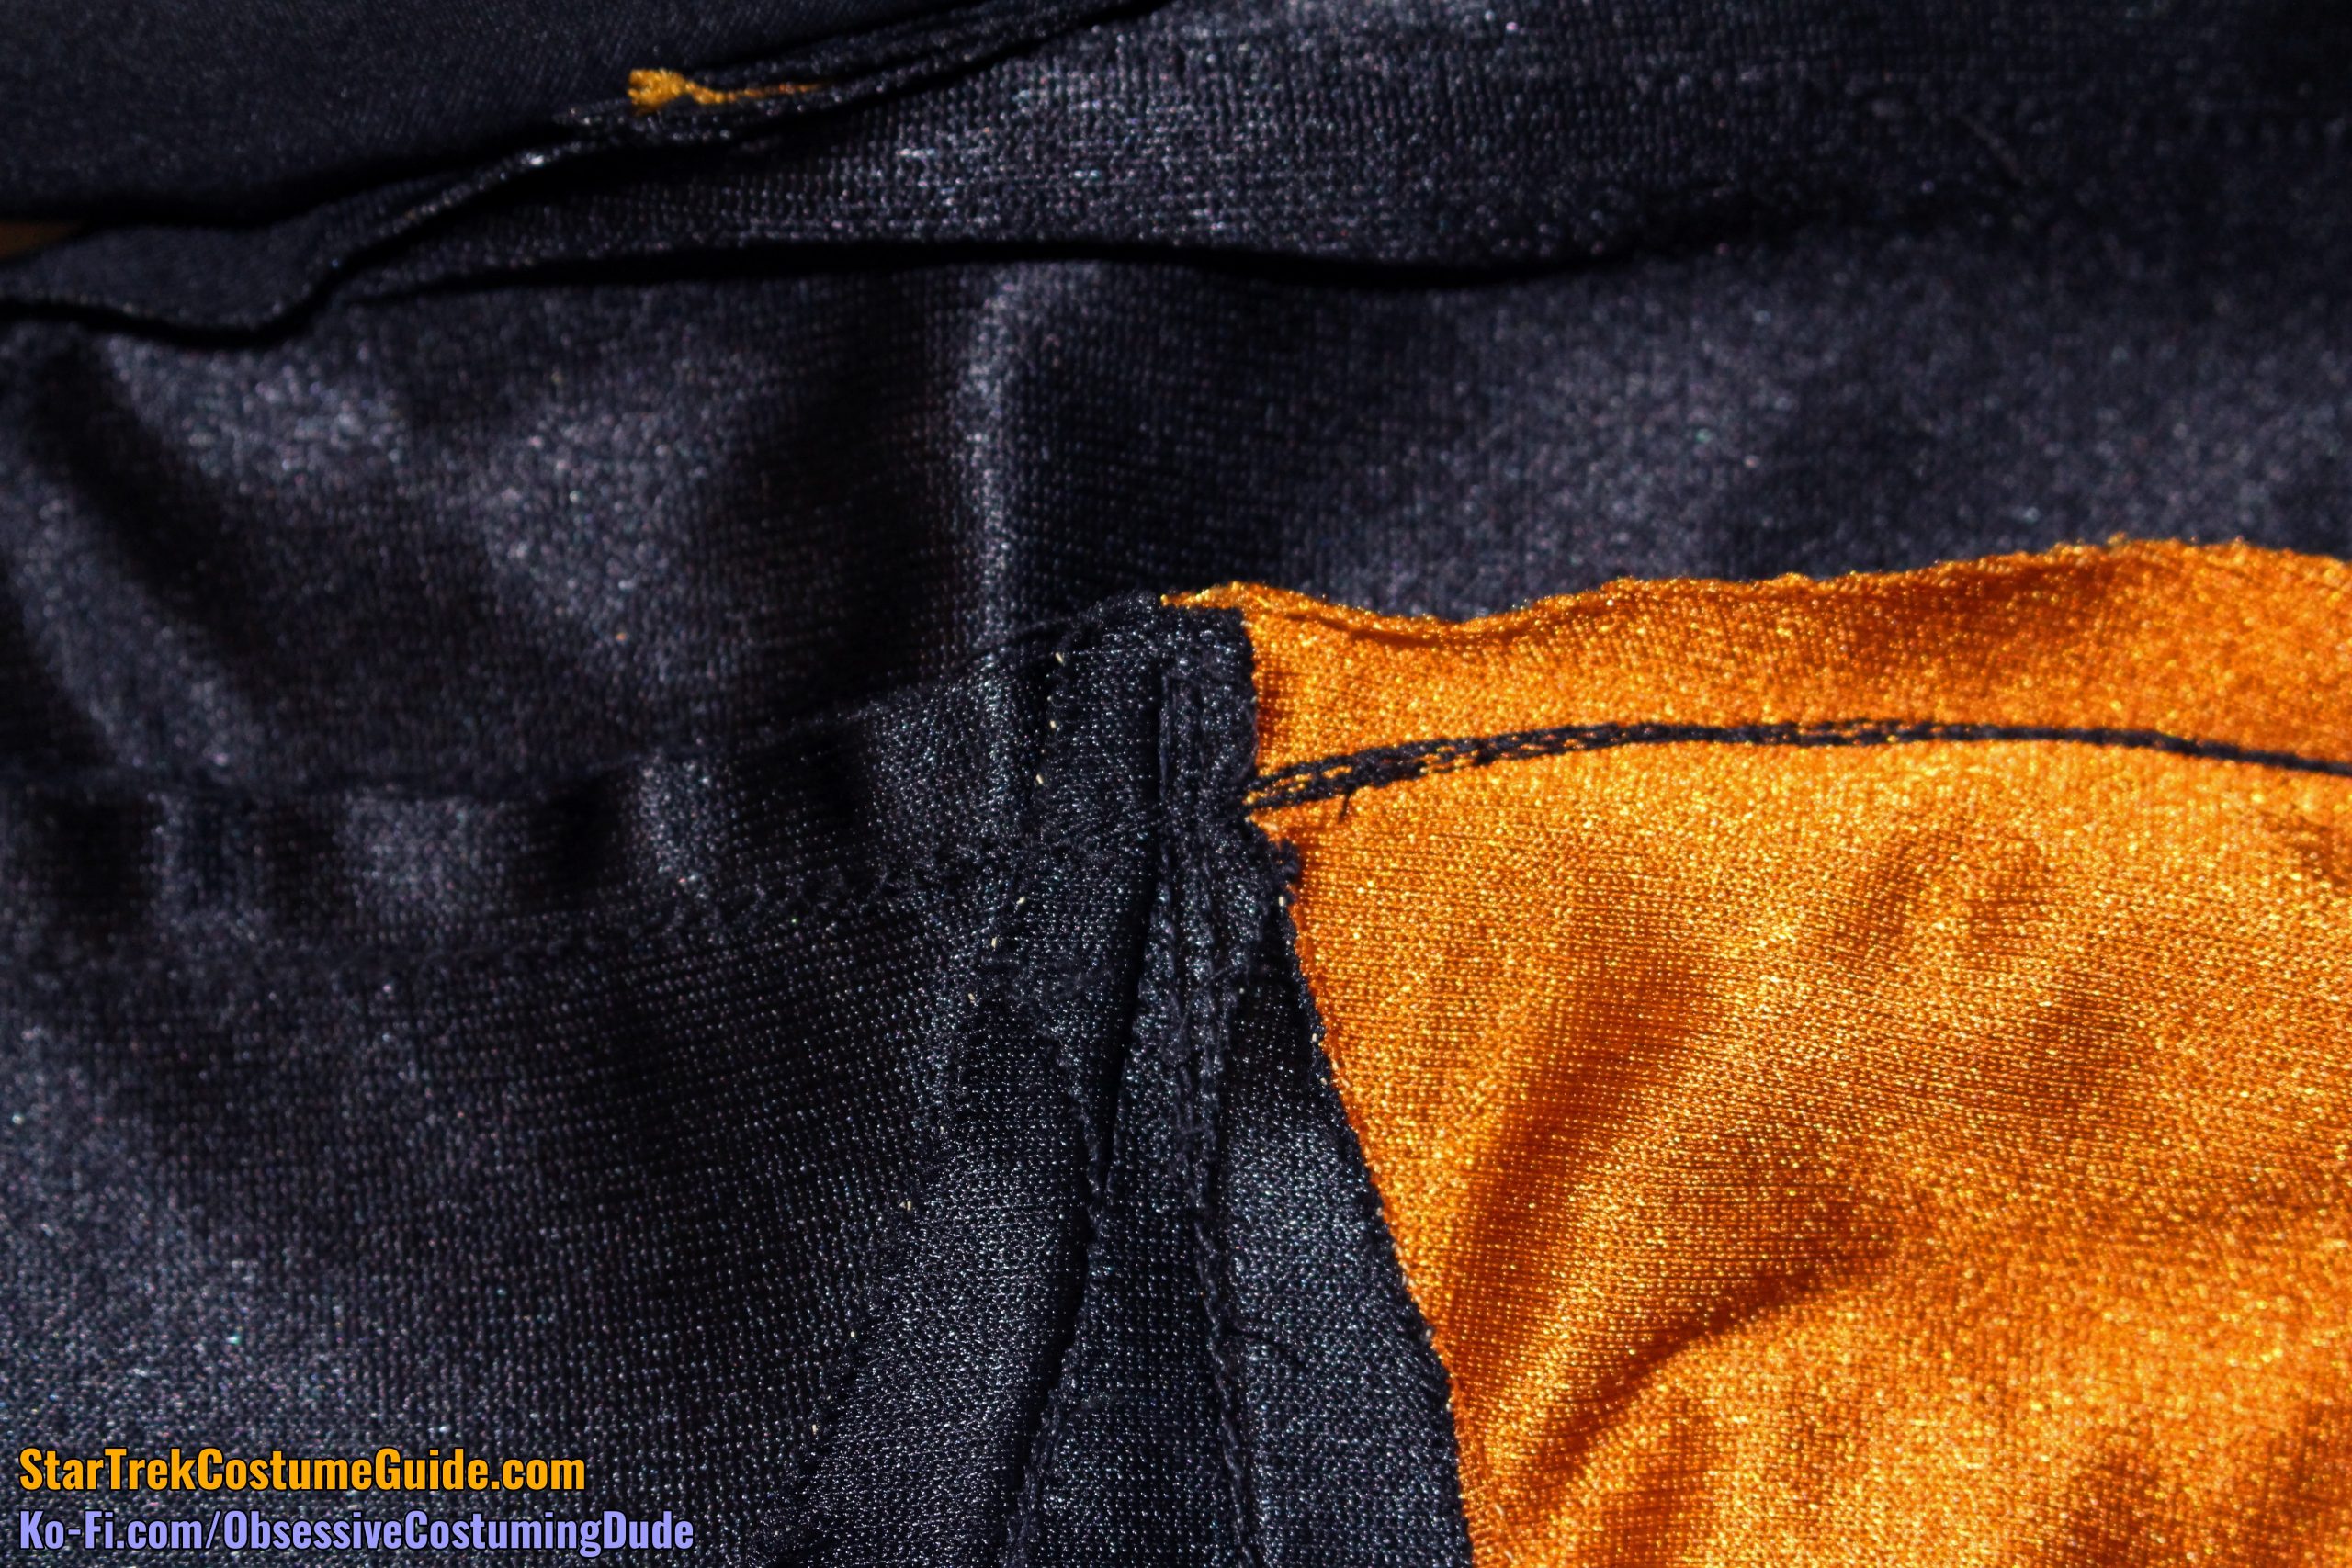
The neckline piping was simply a length of fabric, folded in half, sewn onto the skant’s neckline, and turned under; there wasn’t a “yoke facing” or anything comparable on the underside of the yoke.
Note the catch-stitching on the underside of the neckline trim, securing it to the underside of the yoke.
Curiously, this was done in division-colored thread, rather than black.
I mean, the color-match looks good on the interior neckline, sure … but while the stitching would ideally be invisible on the outside of the garment, why risk having little pinpricks of gold thread around the black yoke’s neckline?
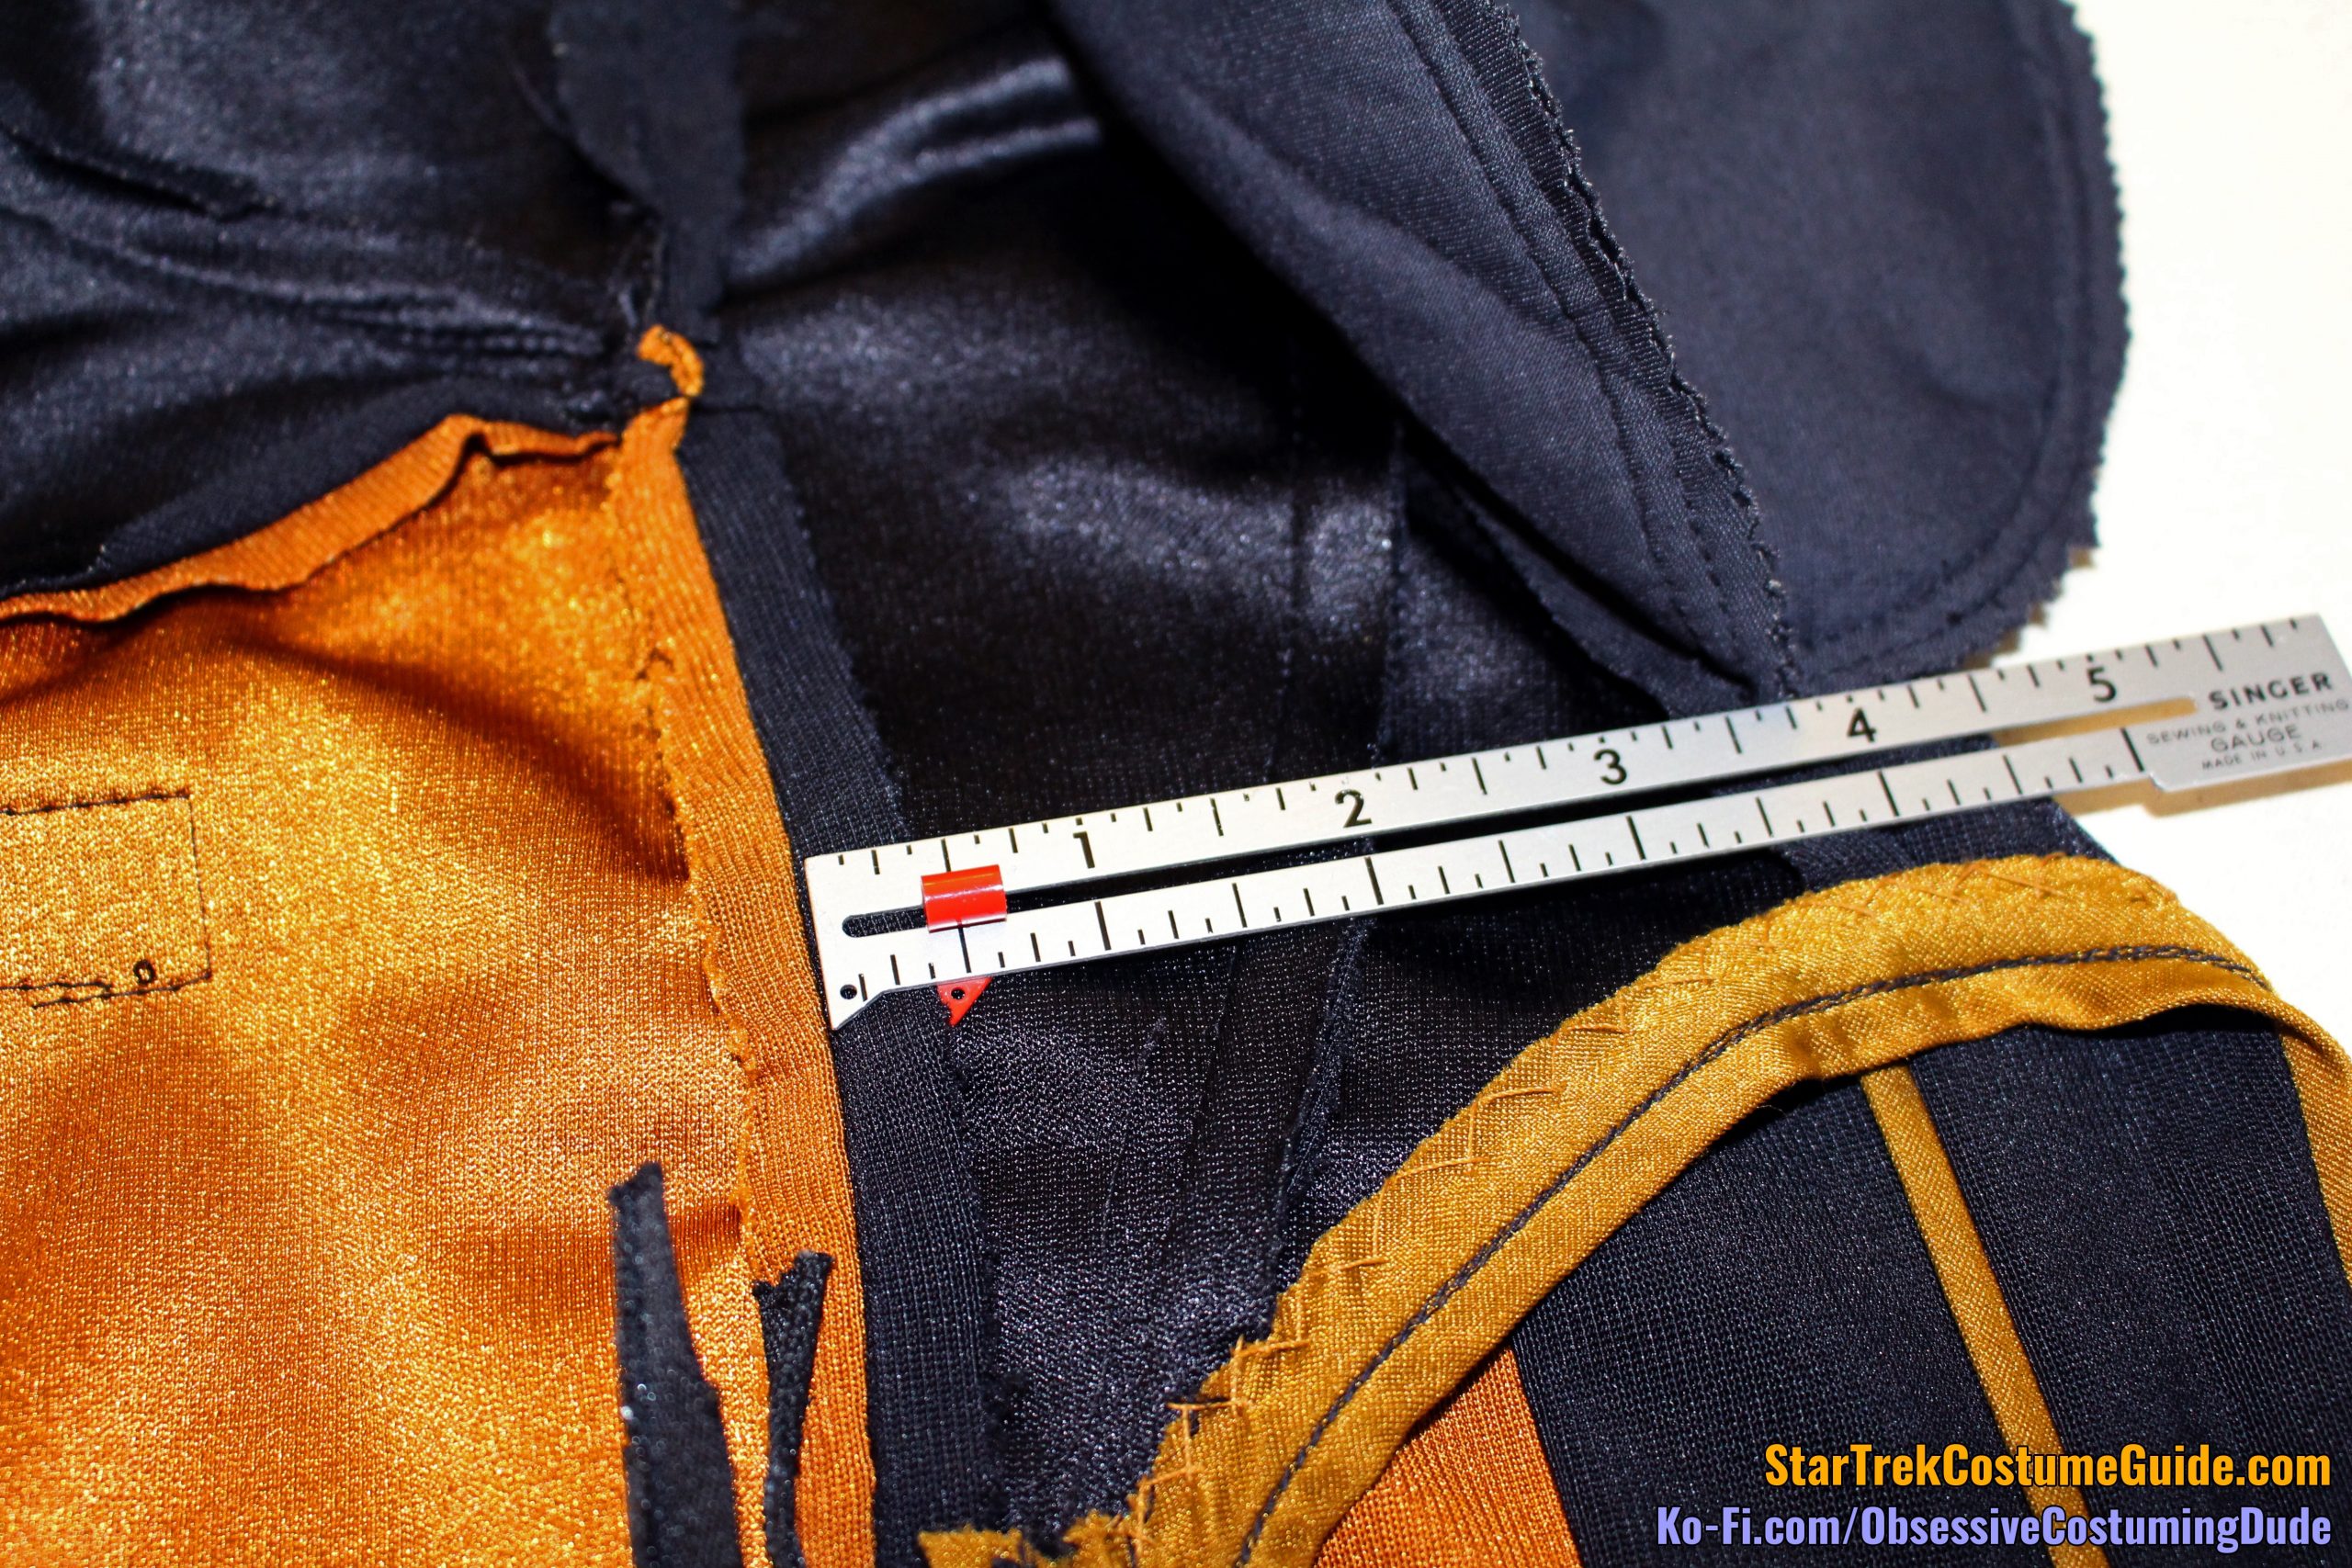
Also curious was that the neckline trim seam allowance appears to have been ½” along the back, but closer to ⅜” around the front.
I believe the allowance was originally intended to be ⅜”, but the layers may have simply shifted a little bit during construction.
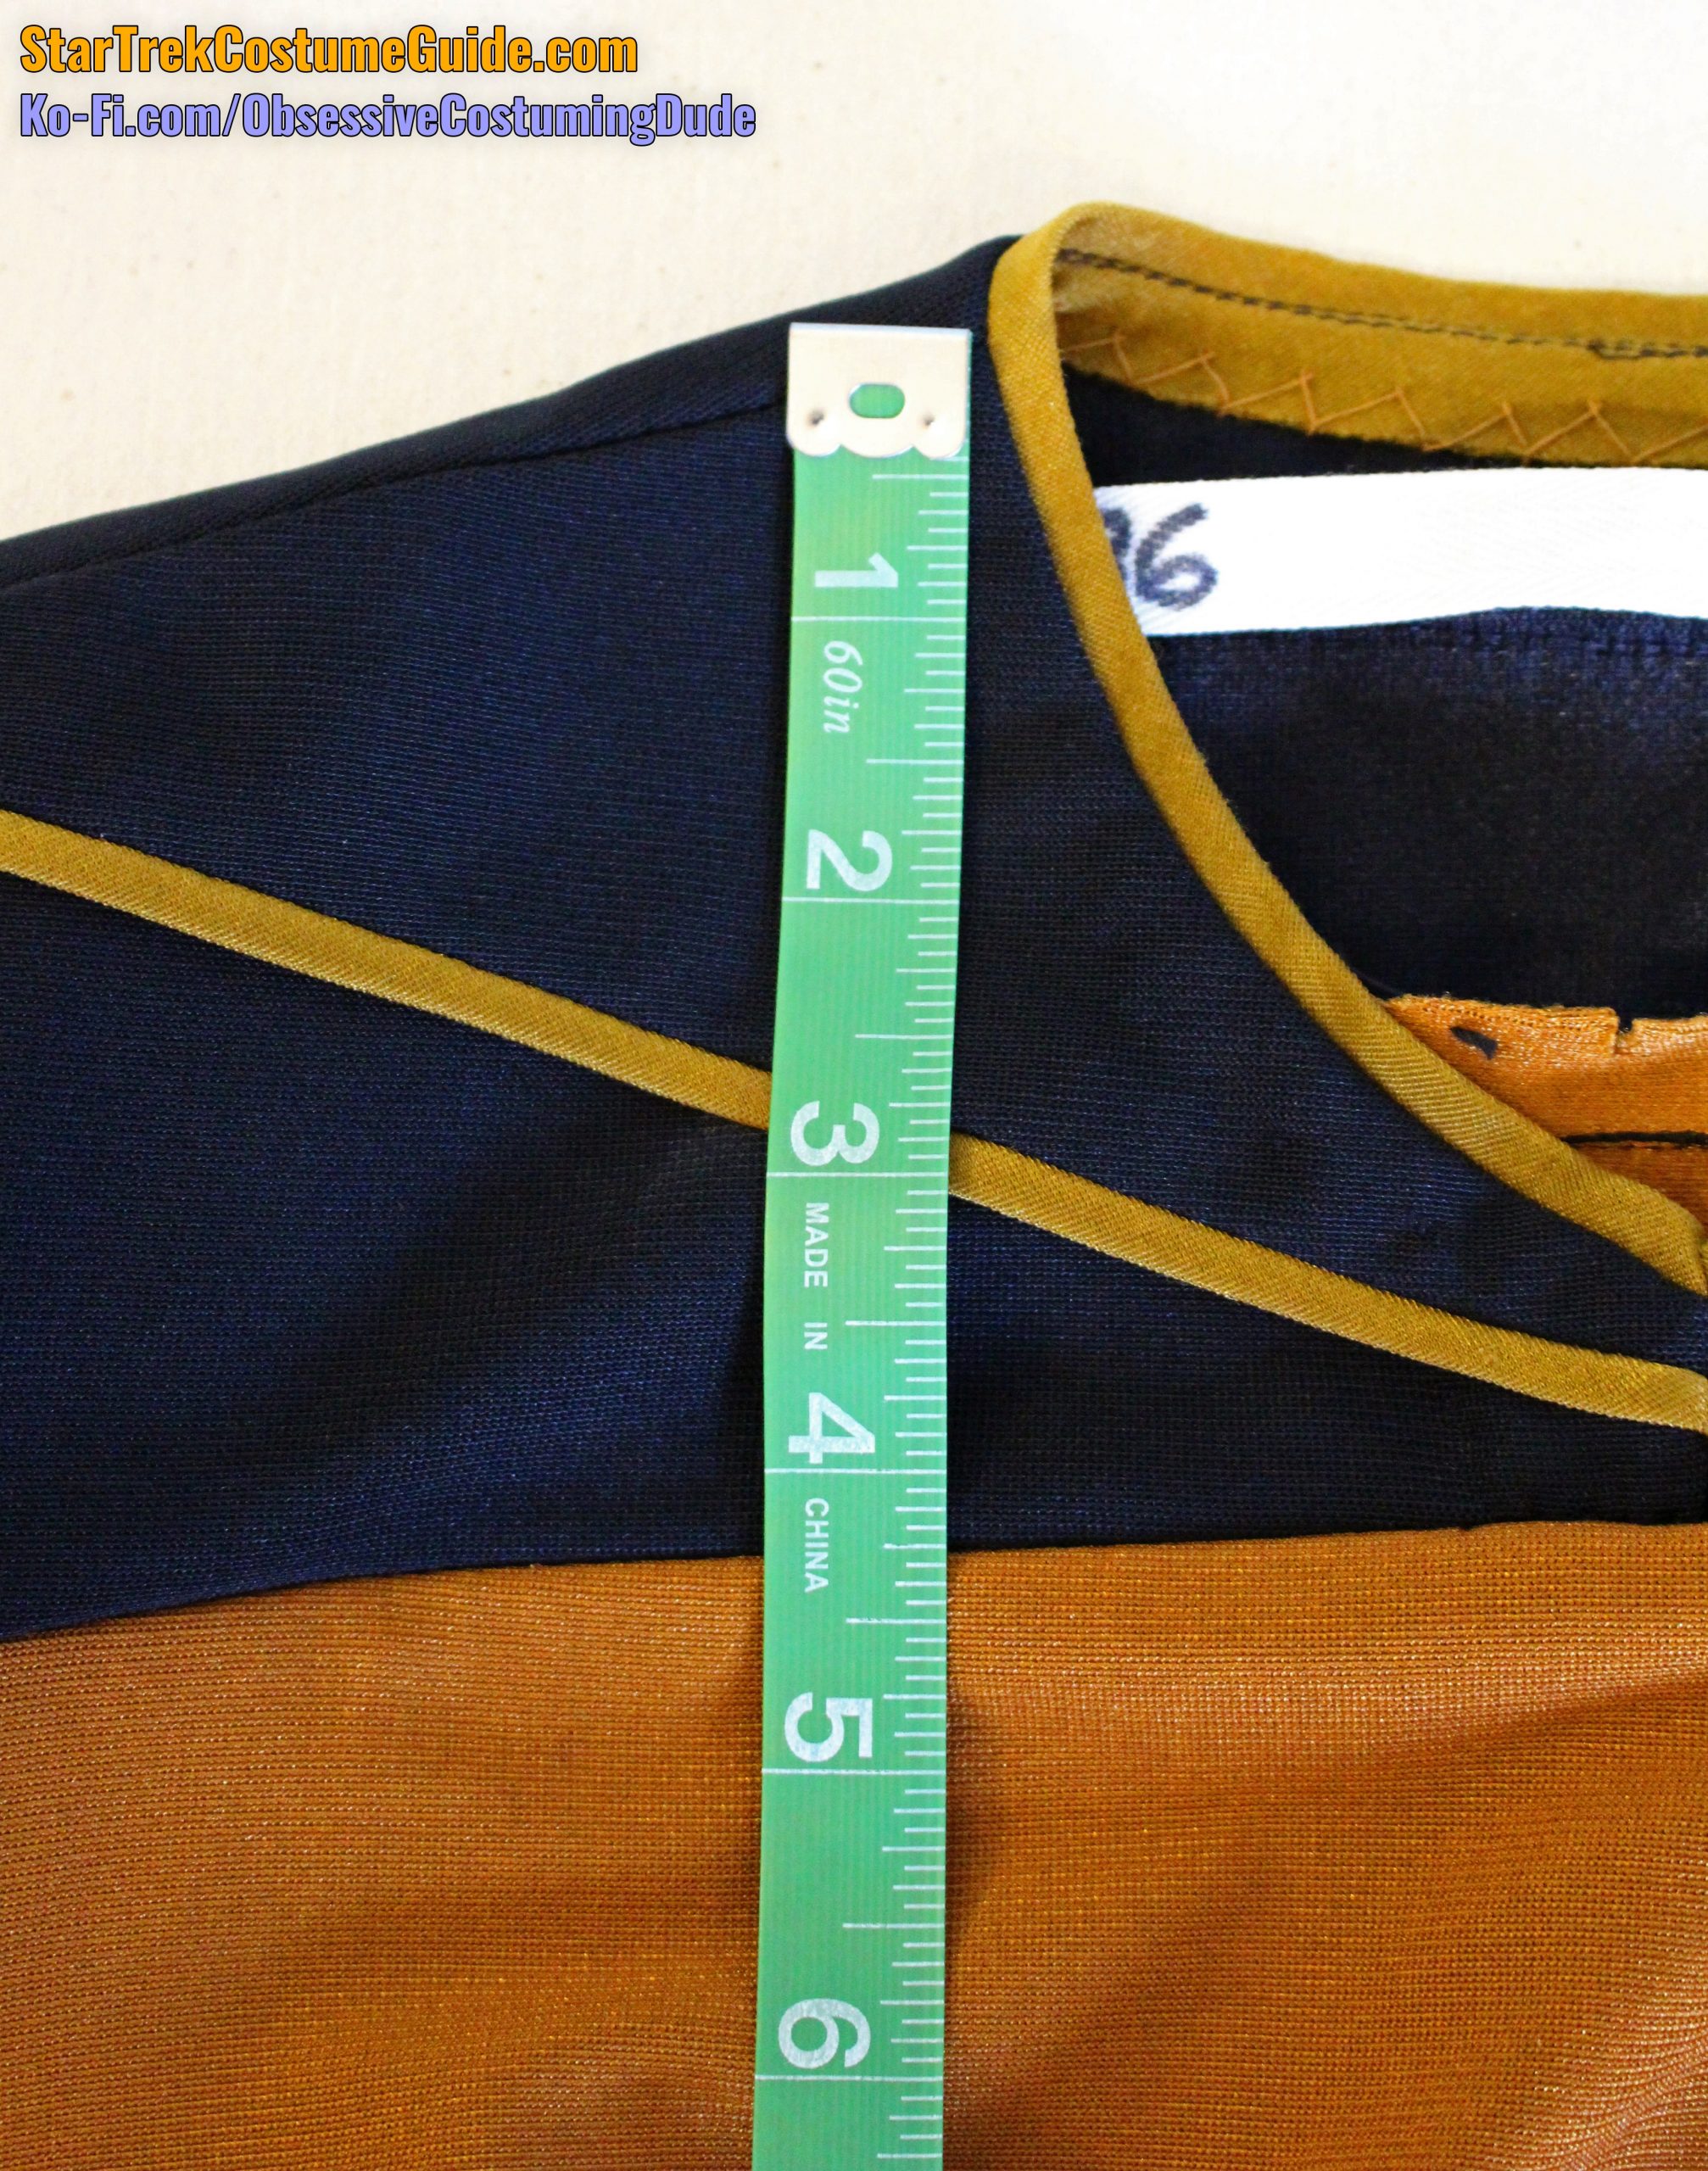
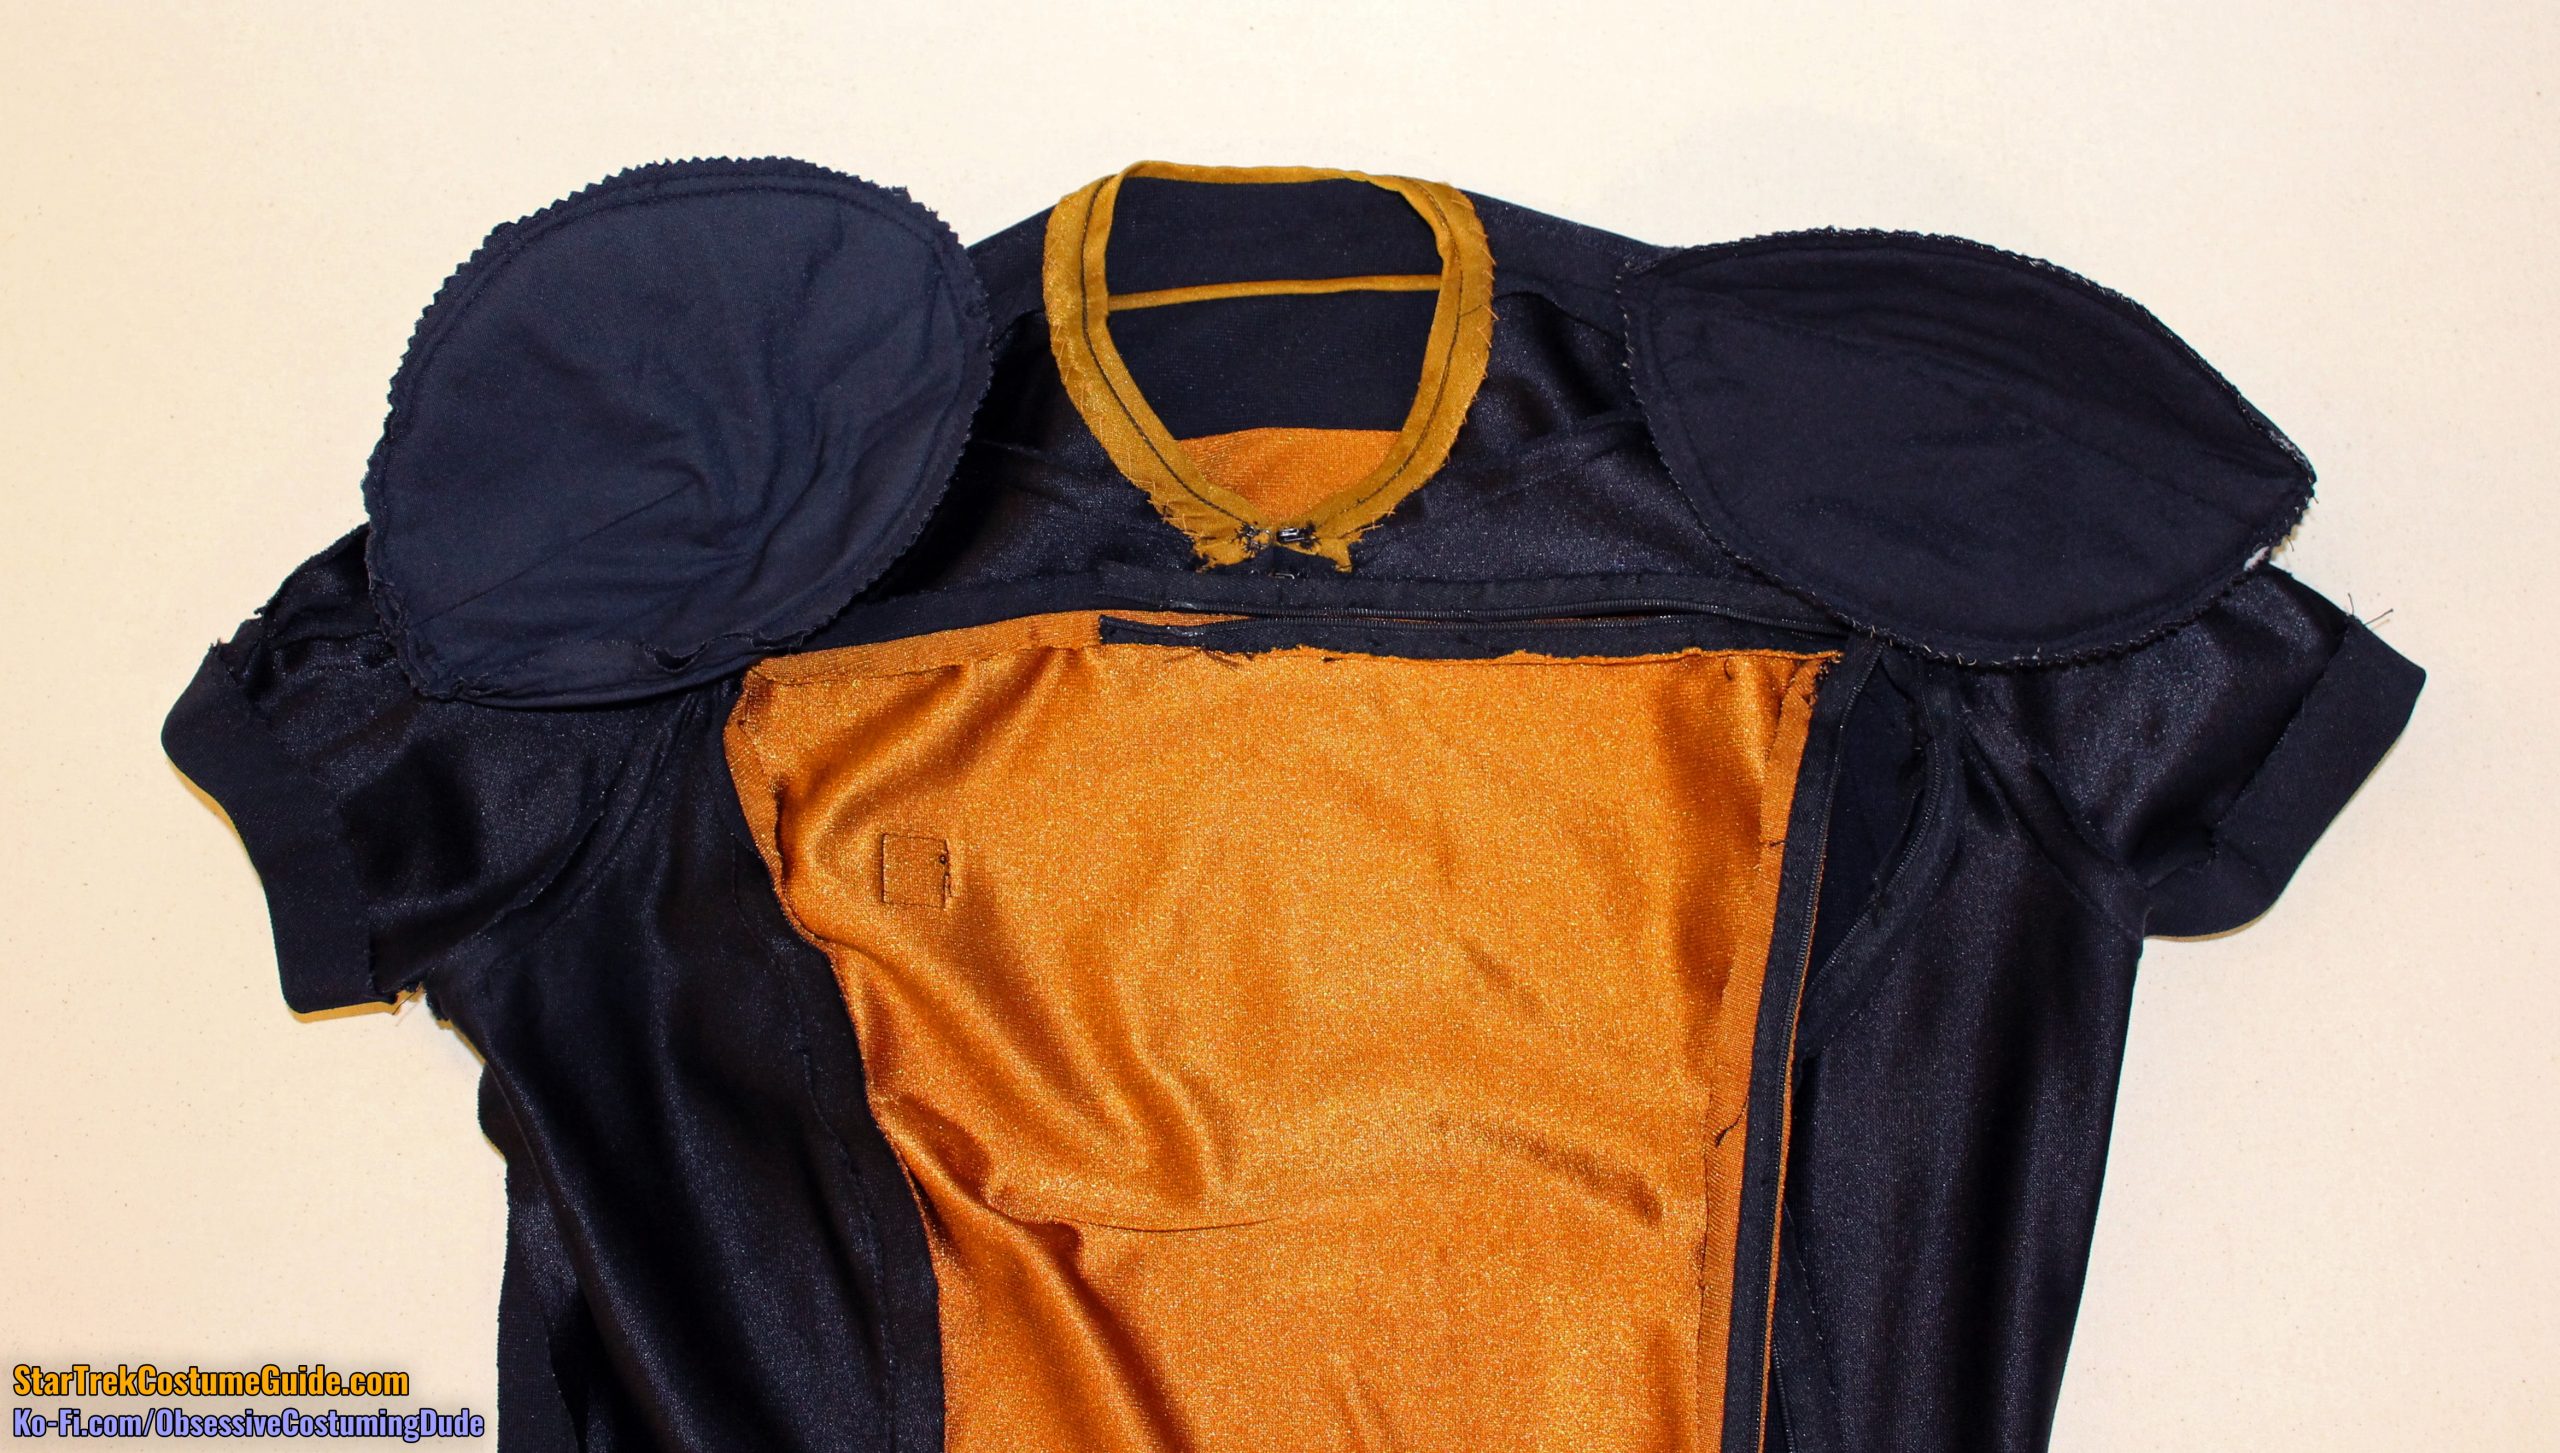
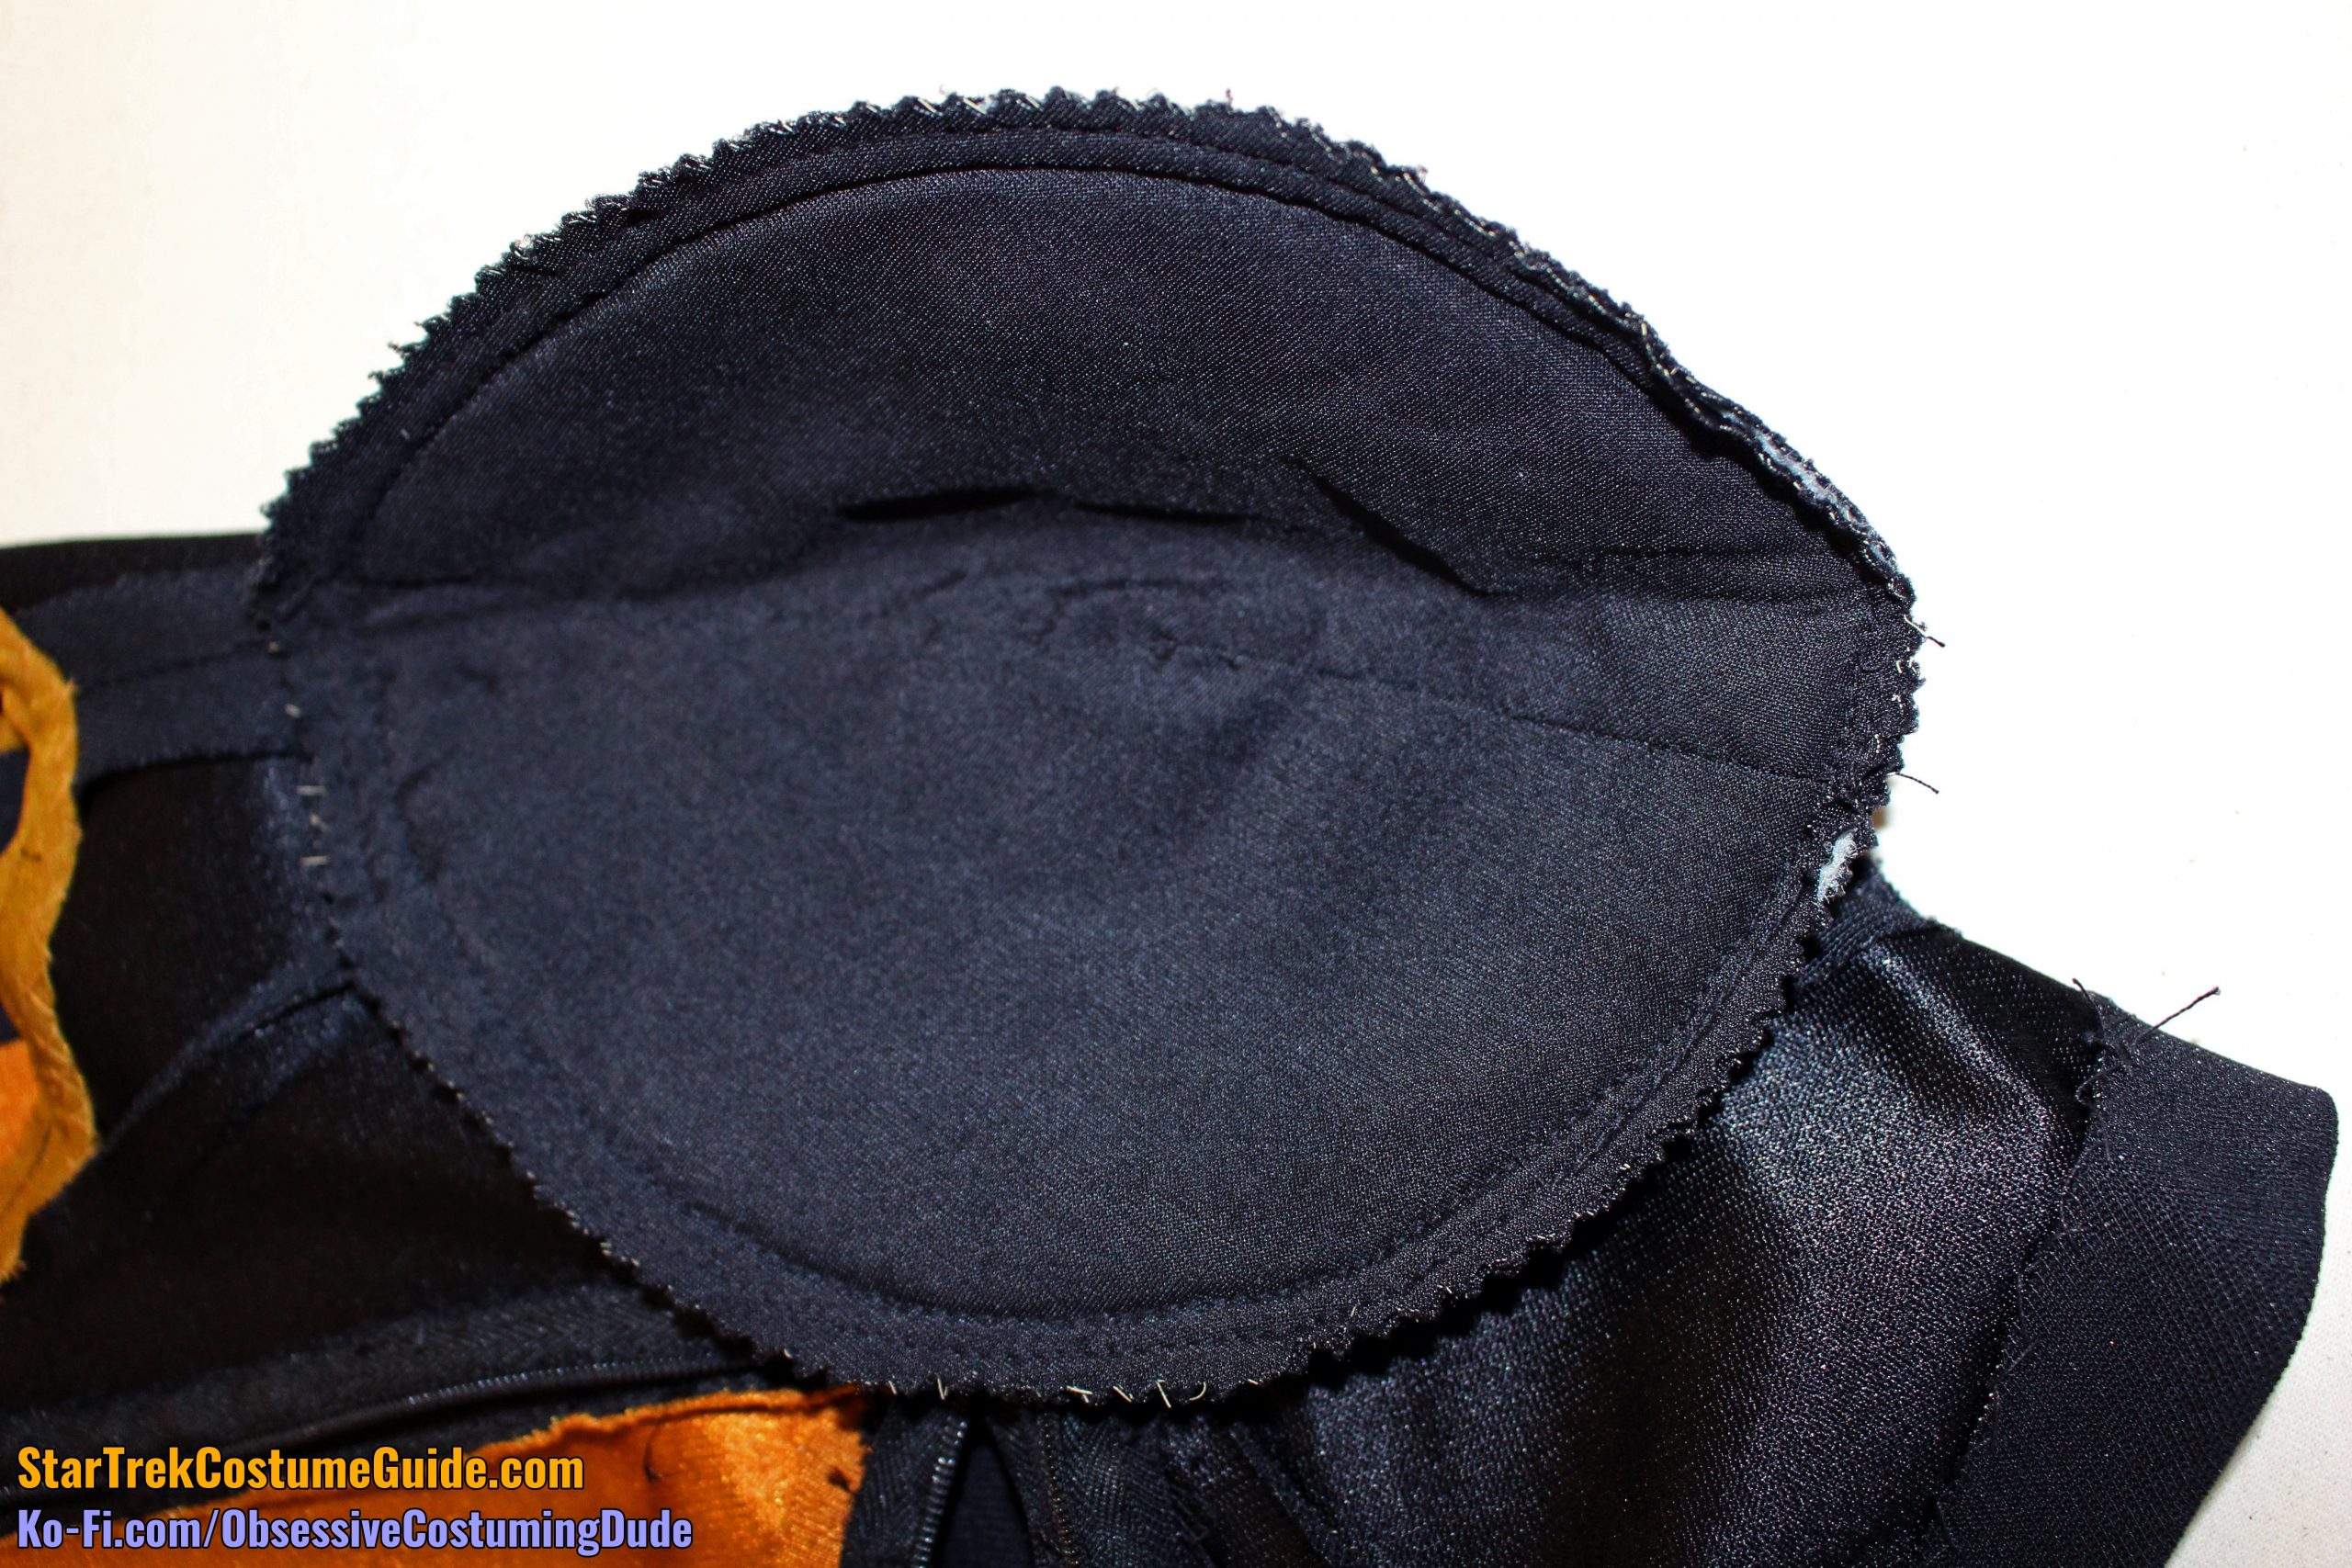
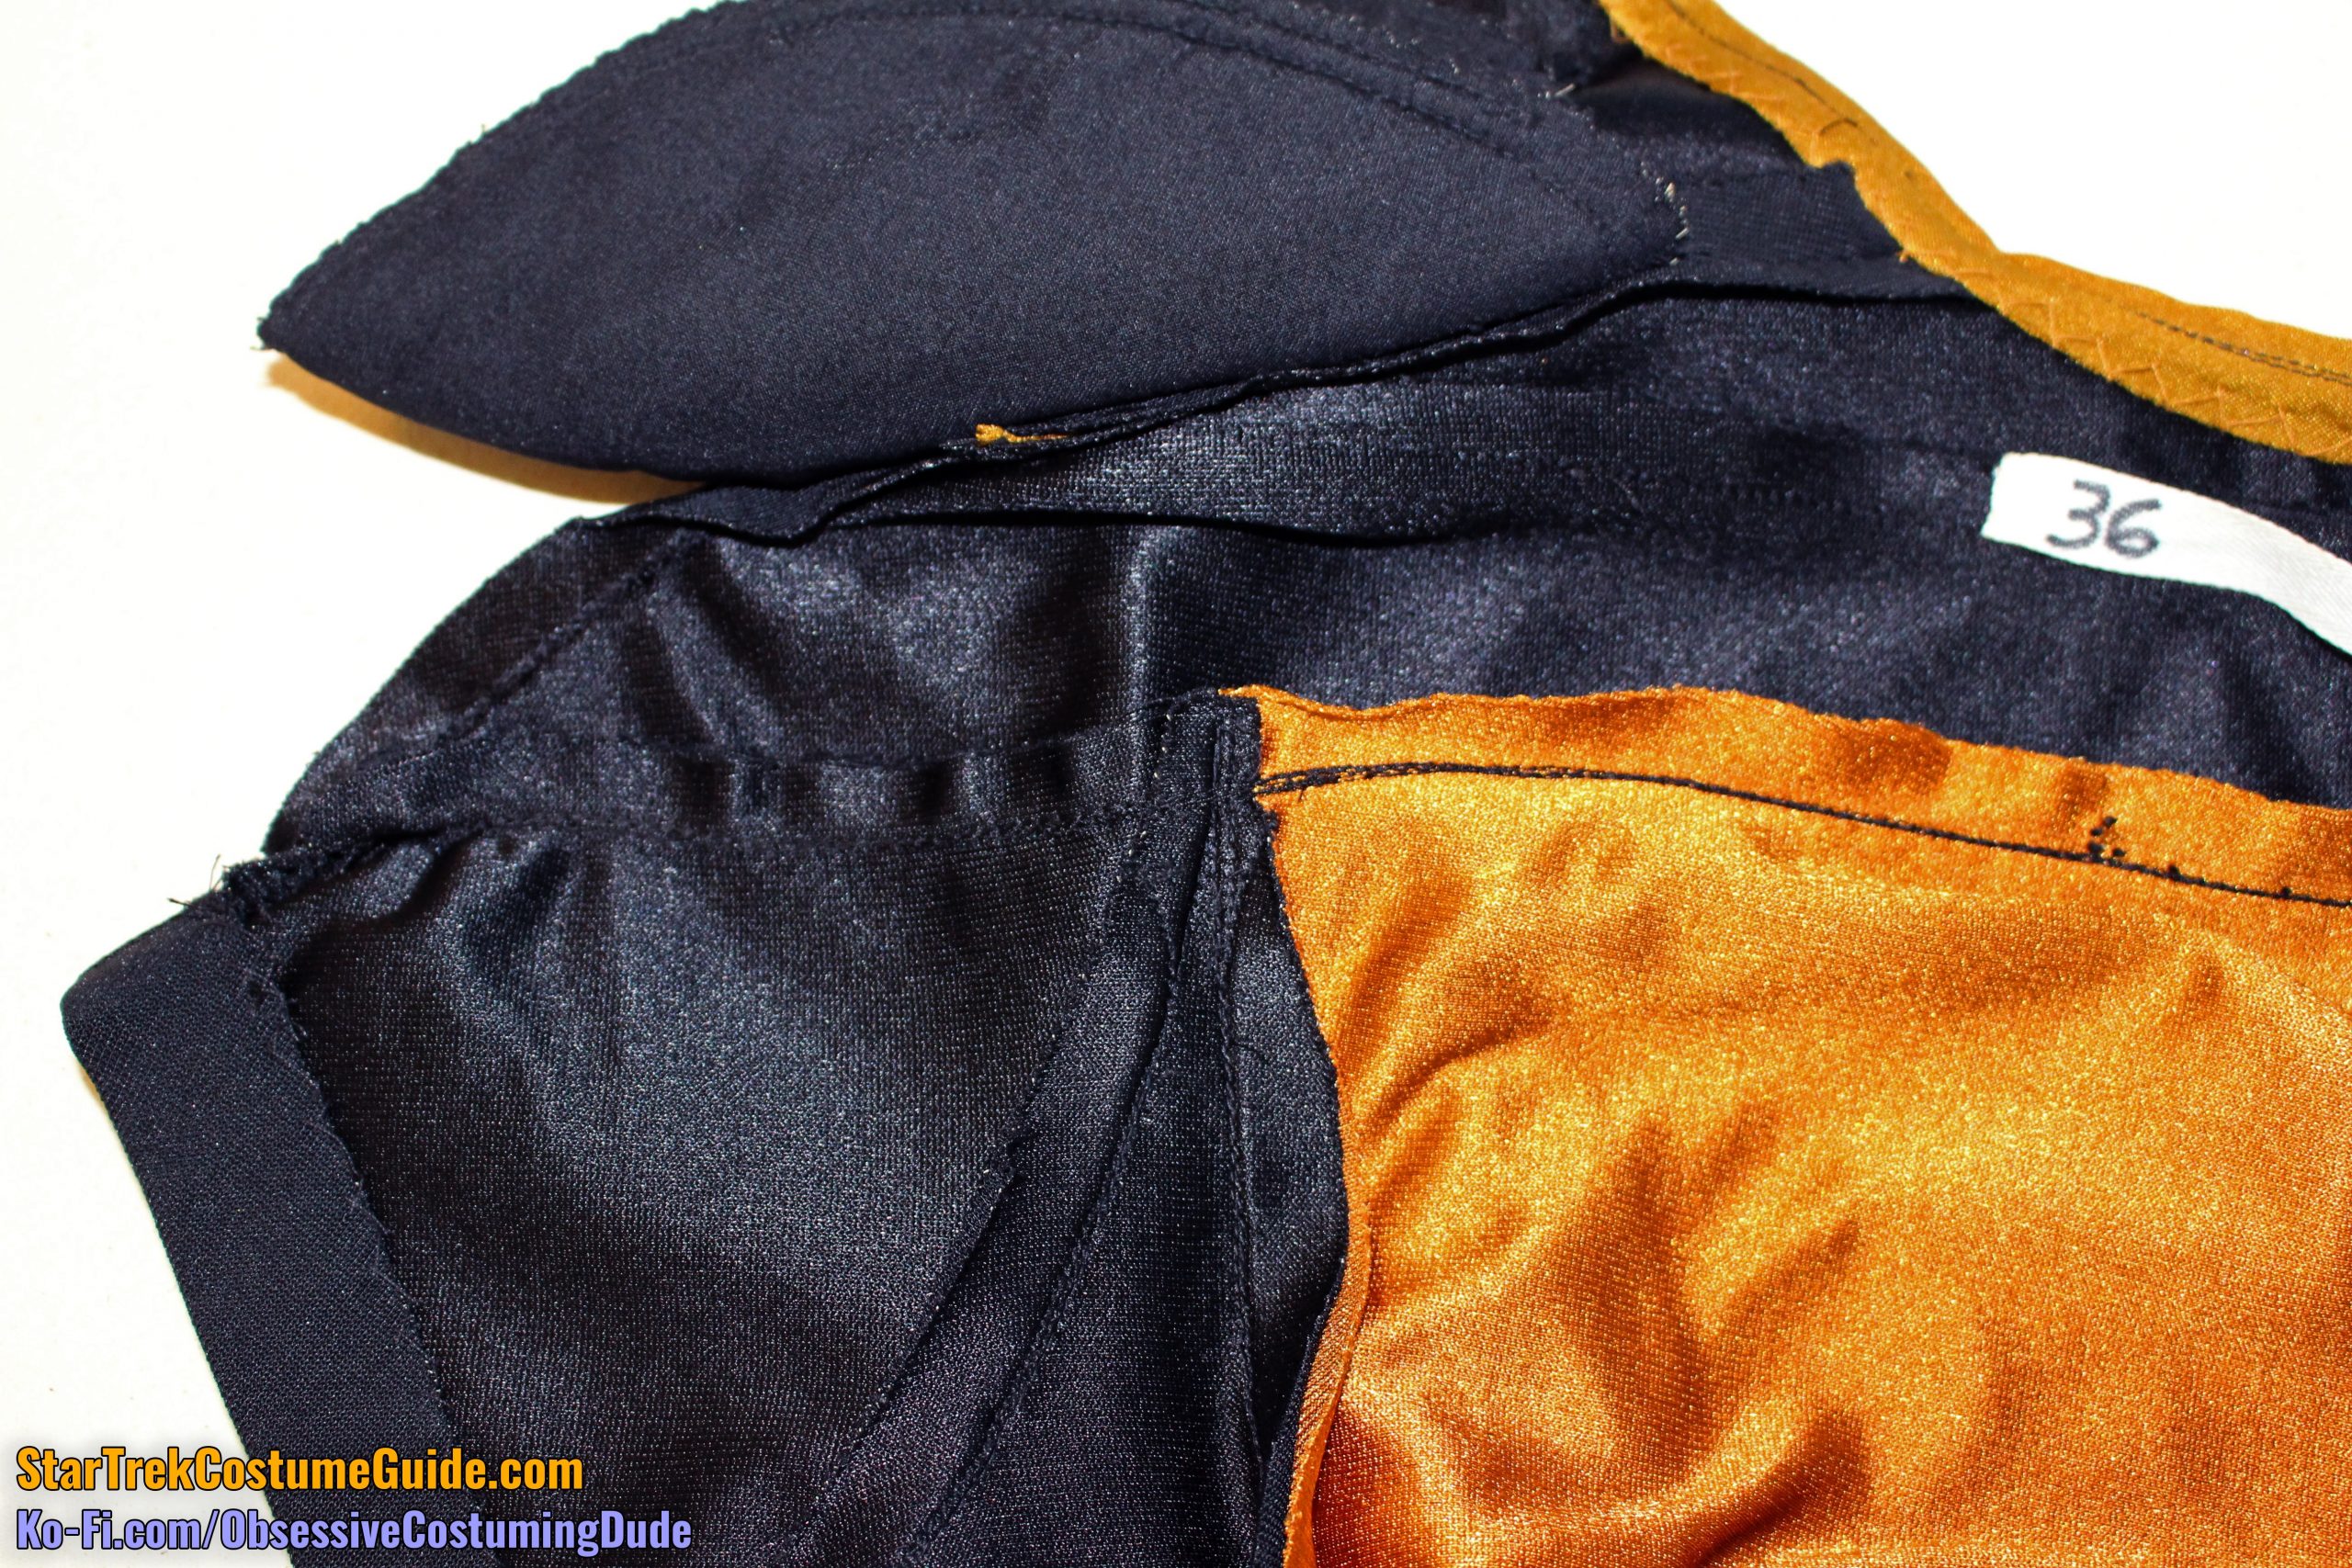
Upon turning the skant inside-out, one of the most immediately striking things (other than its bizarre lower construction, which we’ll get to shortly) was the shoulder pads.
These things were enormous.
Although they had a large surface area, there was only a moderate amount of loft to them.
These raglan-style shoulder pads appear to have been custom-made, with a dart sewn into them to give them that rounded shape.
They appear to have been cut out of black lining, with cotton batting as padding, stitched twice around the perimeter, and edges trimmed with pinking shears.
These pads were approximately 7 ½” by 6 ½” and ovular in shape.
The dart in the shoulder pad was approximately 3 ¼” long.
The finished pads were hand-sewn to the shoulder seam allowances.
Curiously, though, the right shoulder pad was positioned approximately 1 ⅞” from the inner edge of the neckline trim, while the left shoulder pad was positioned only 1 ½” inside of it.
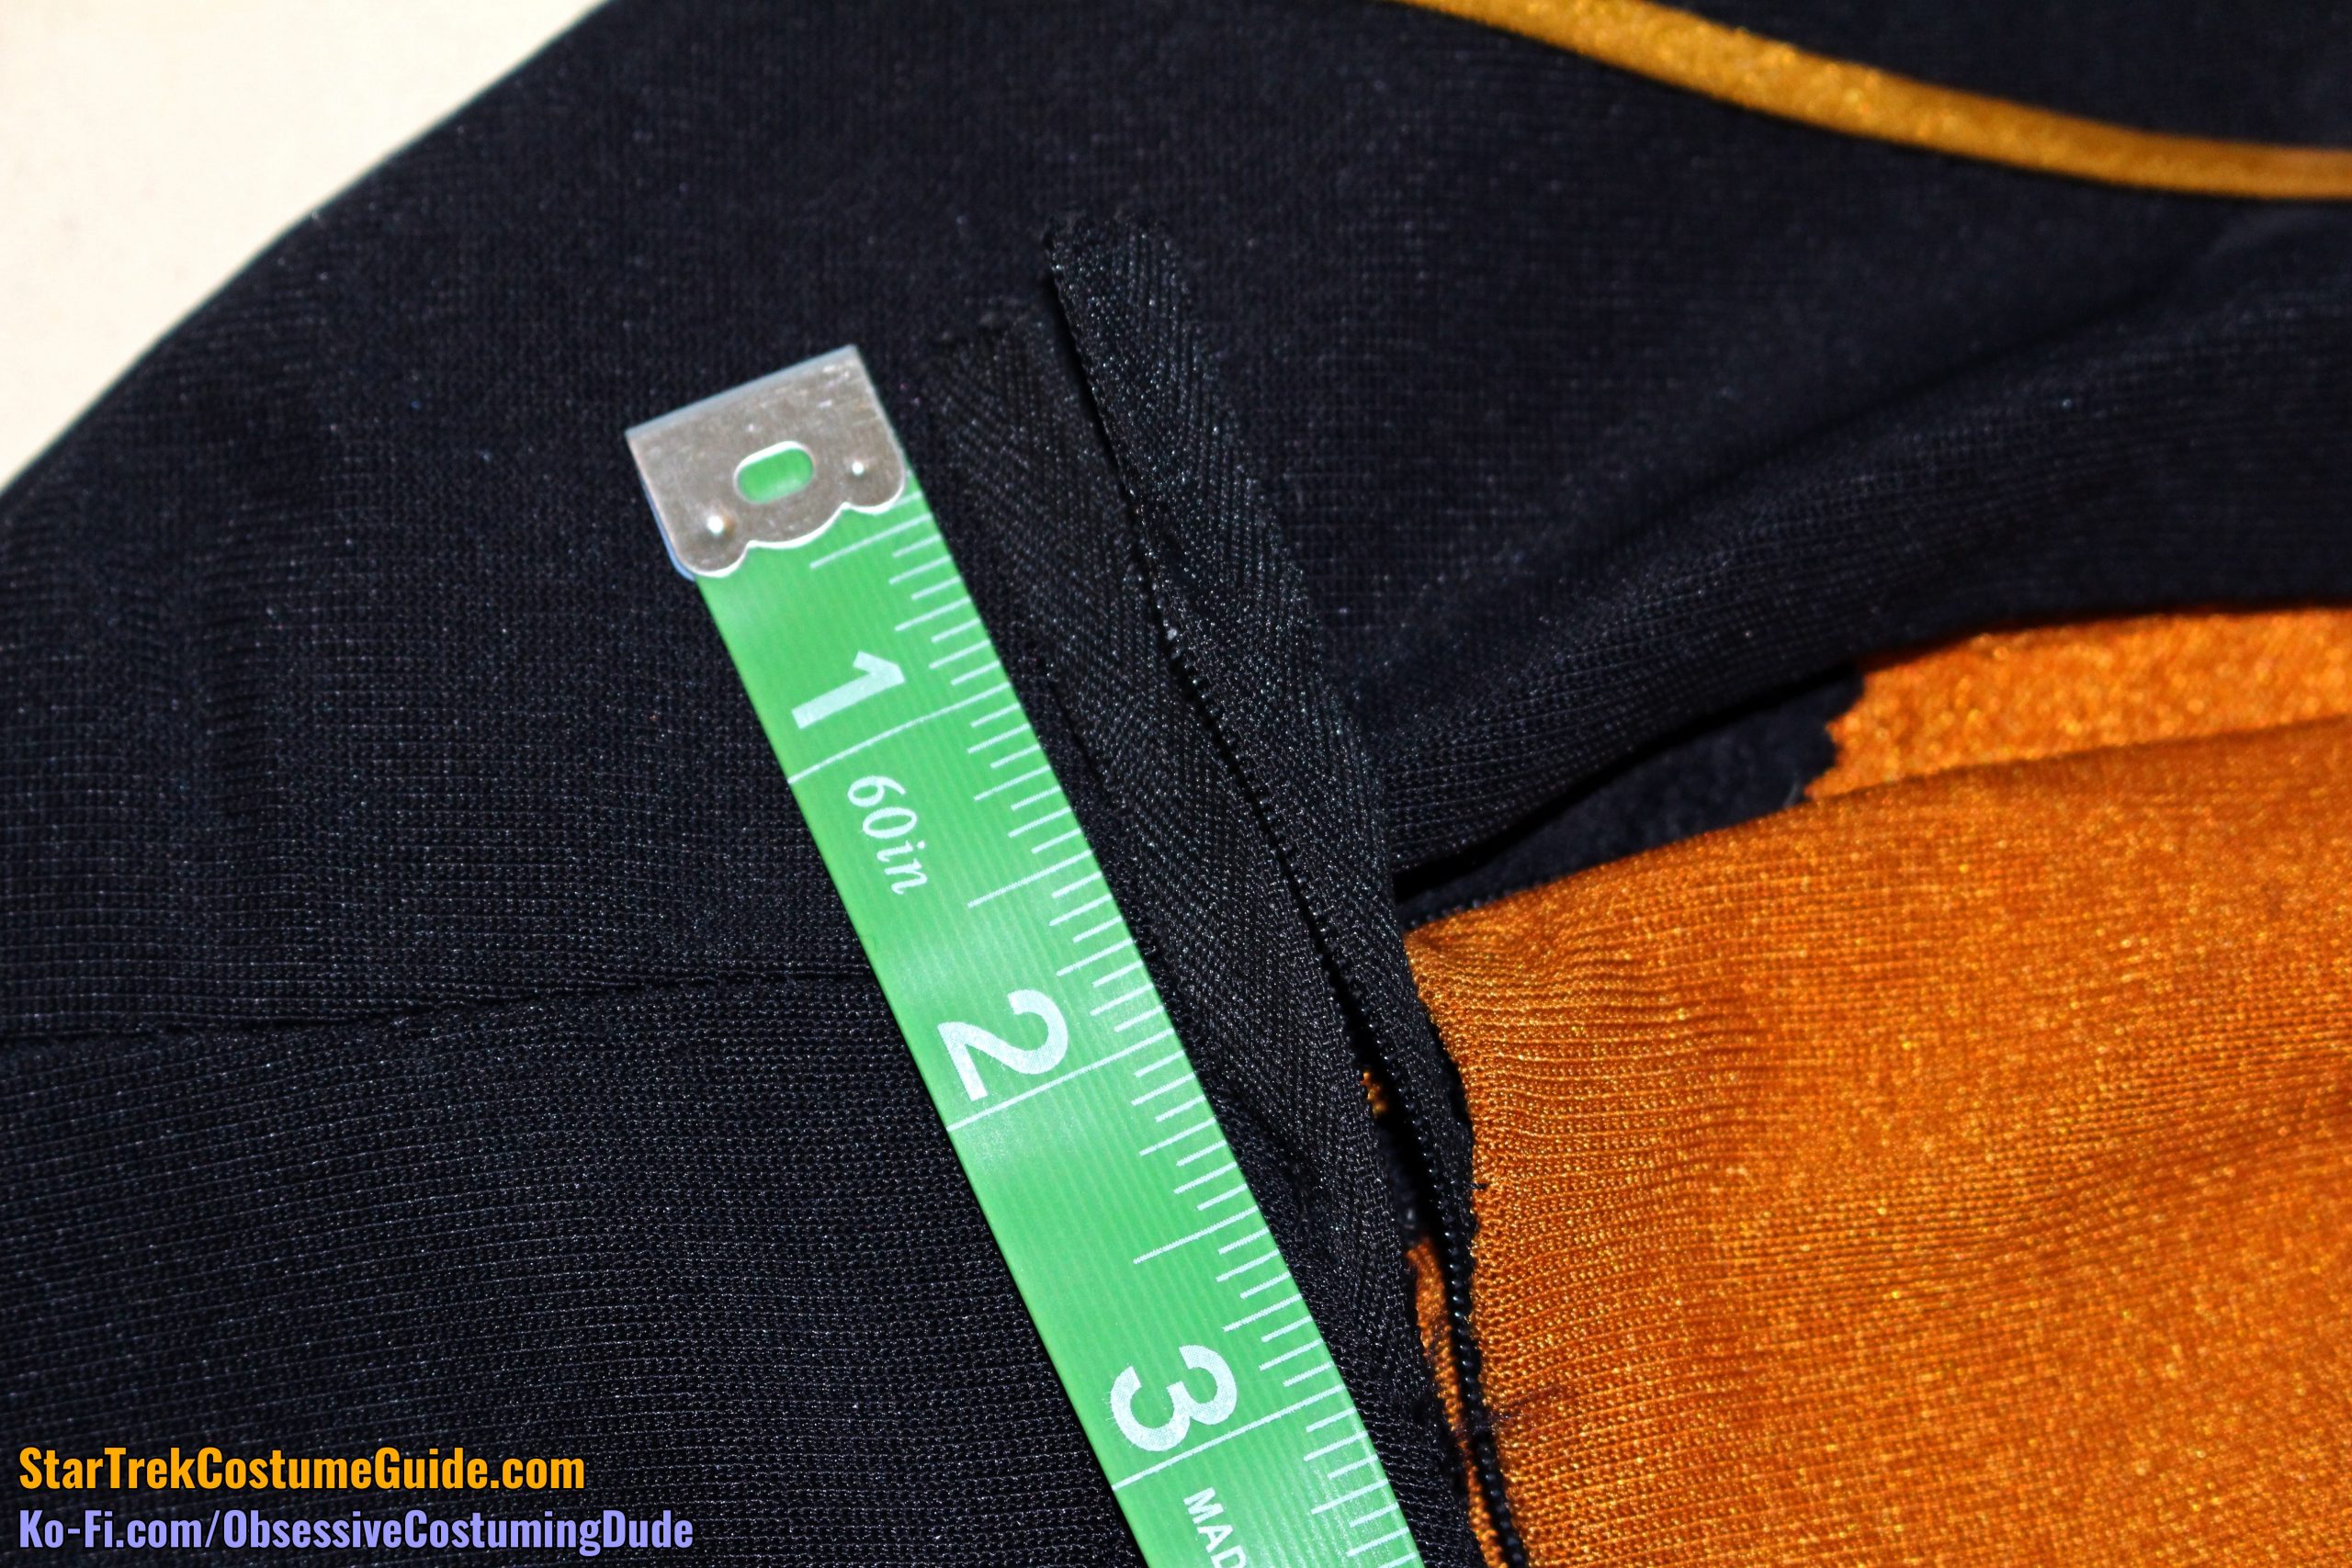
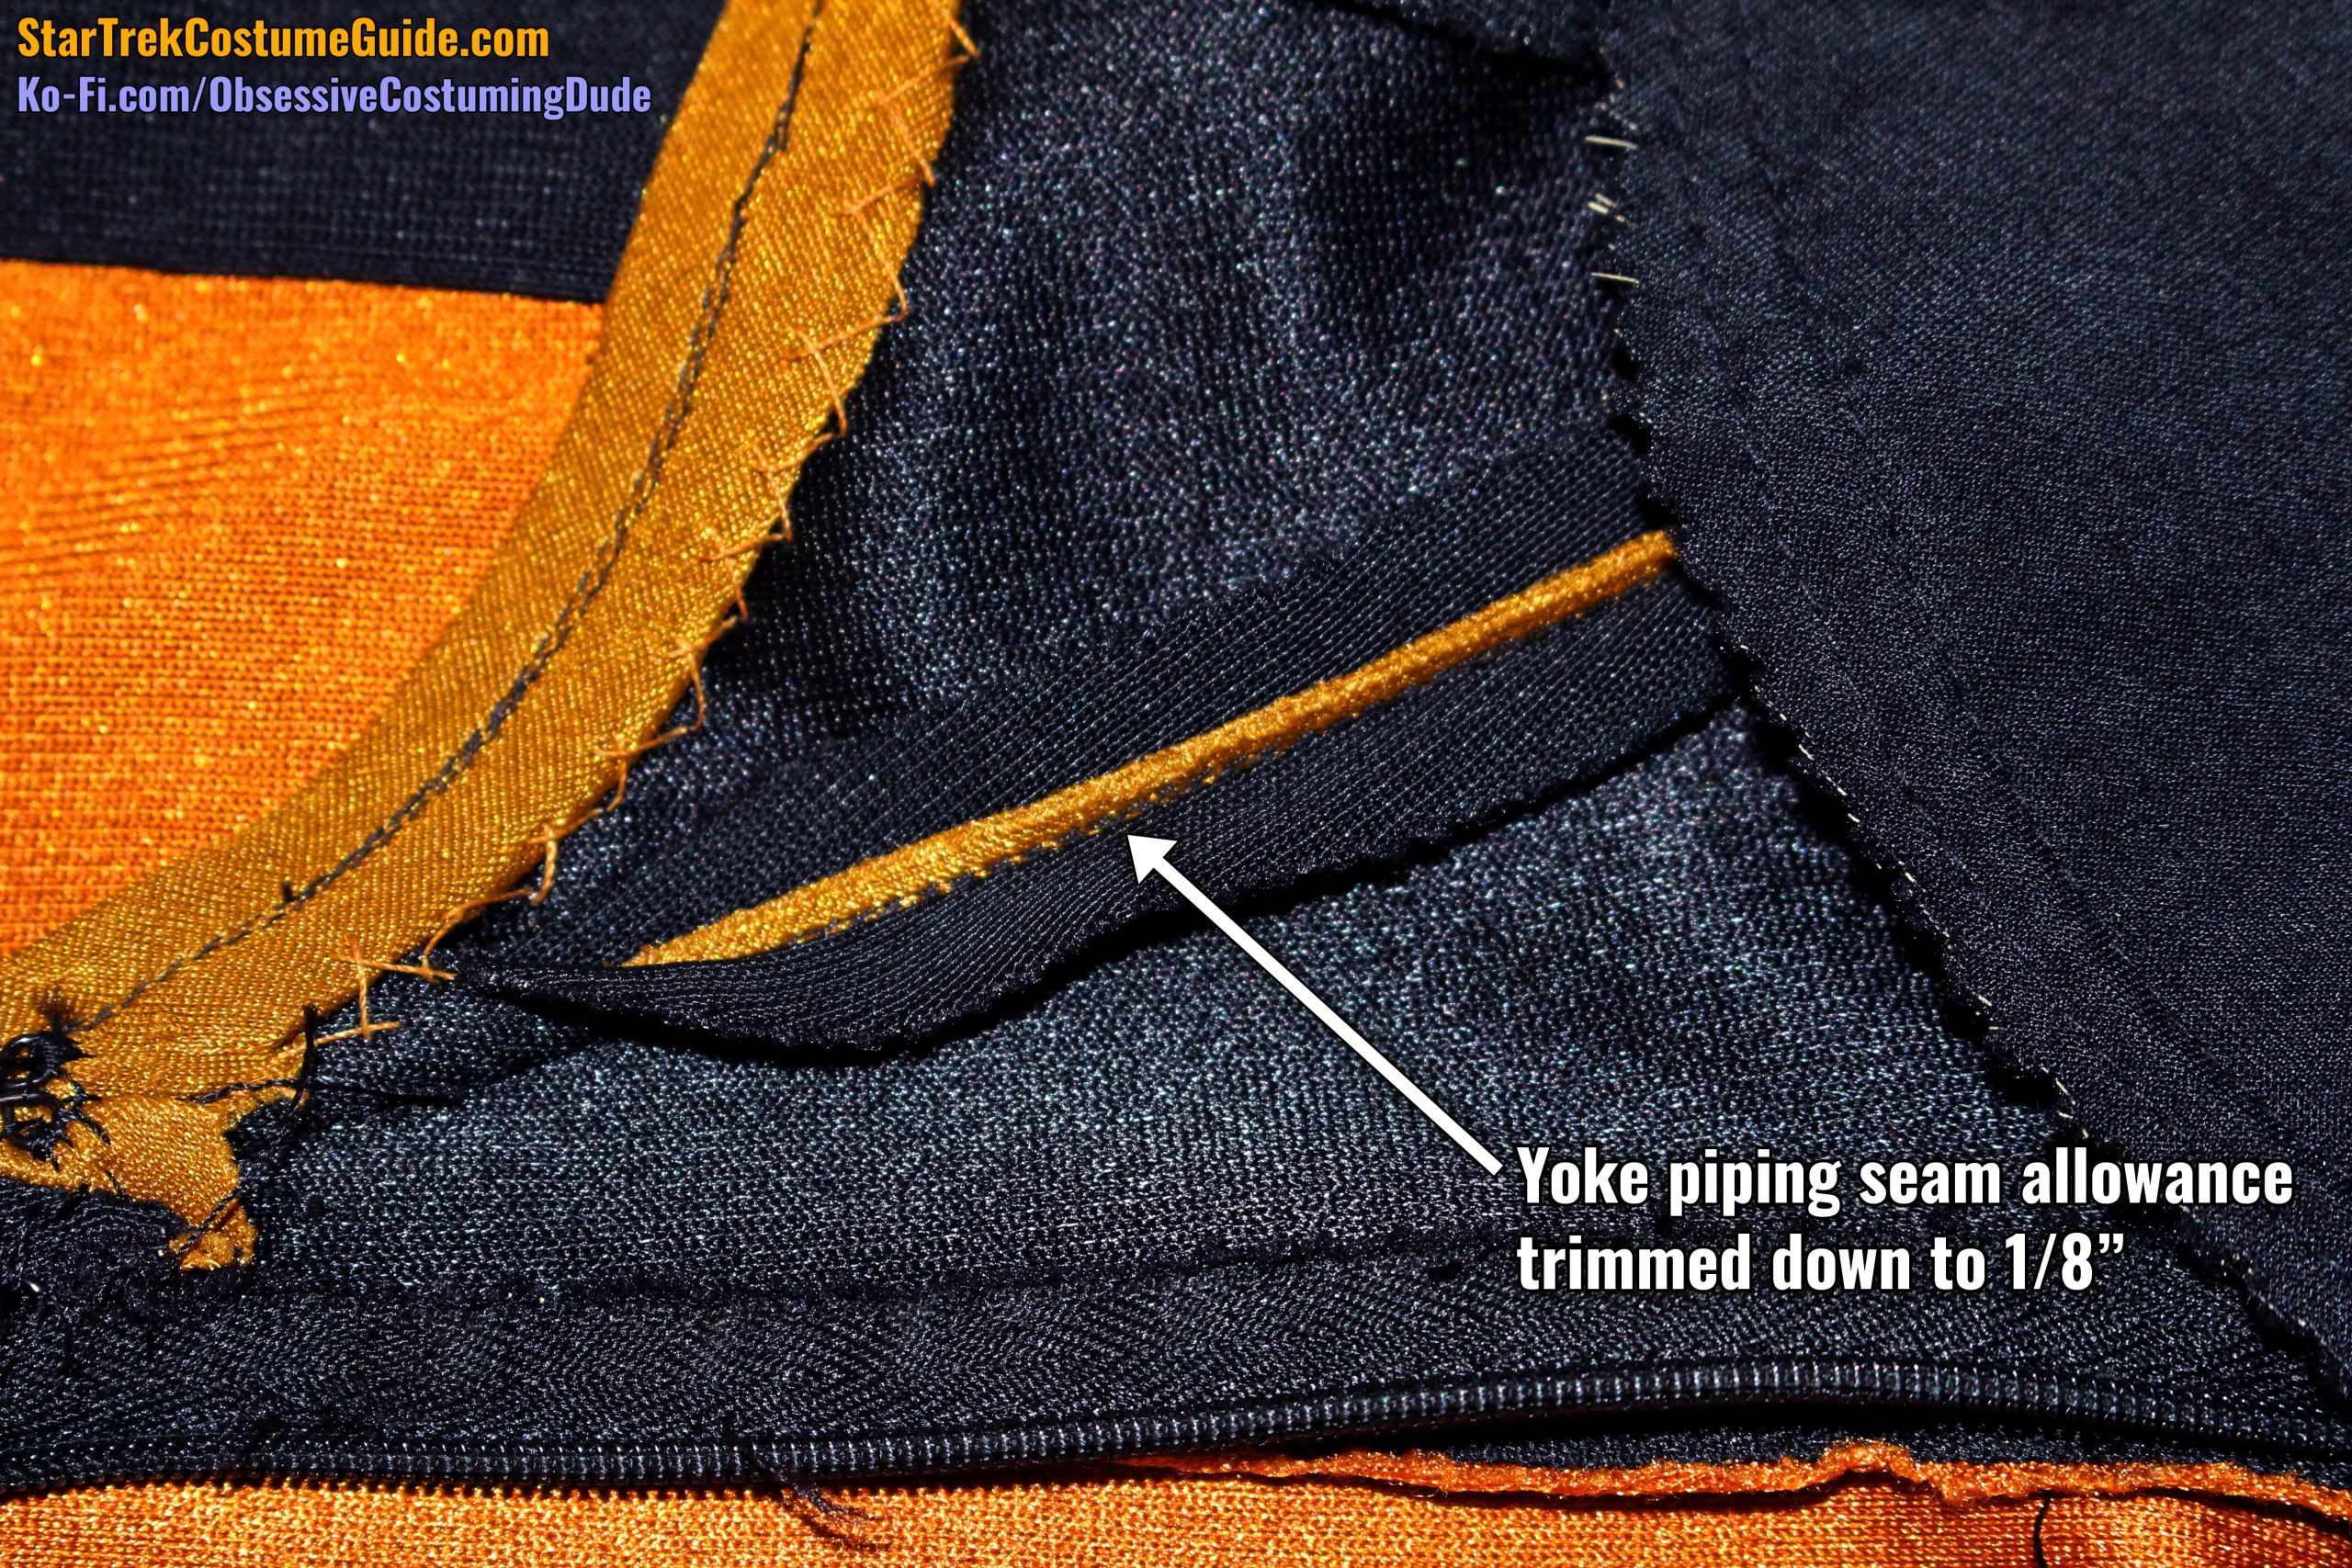
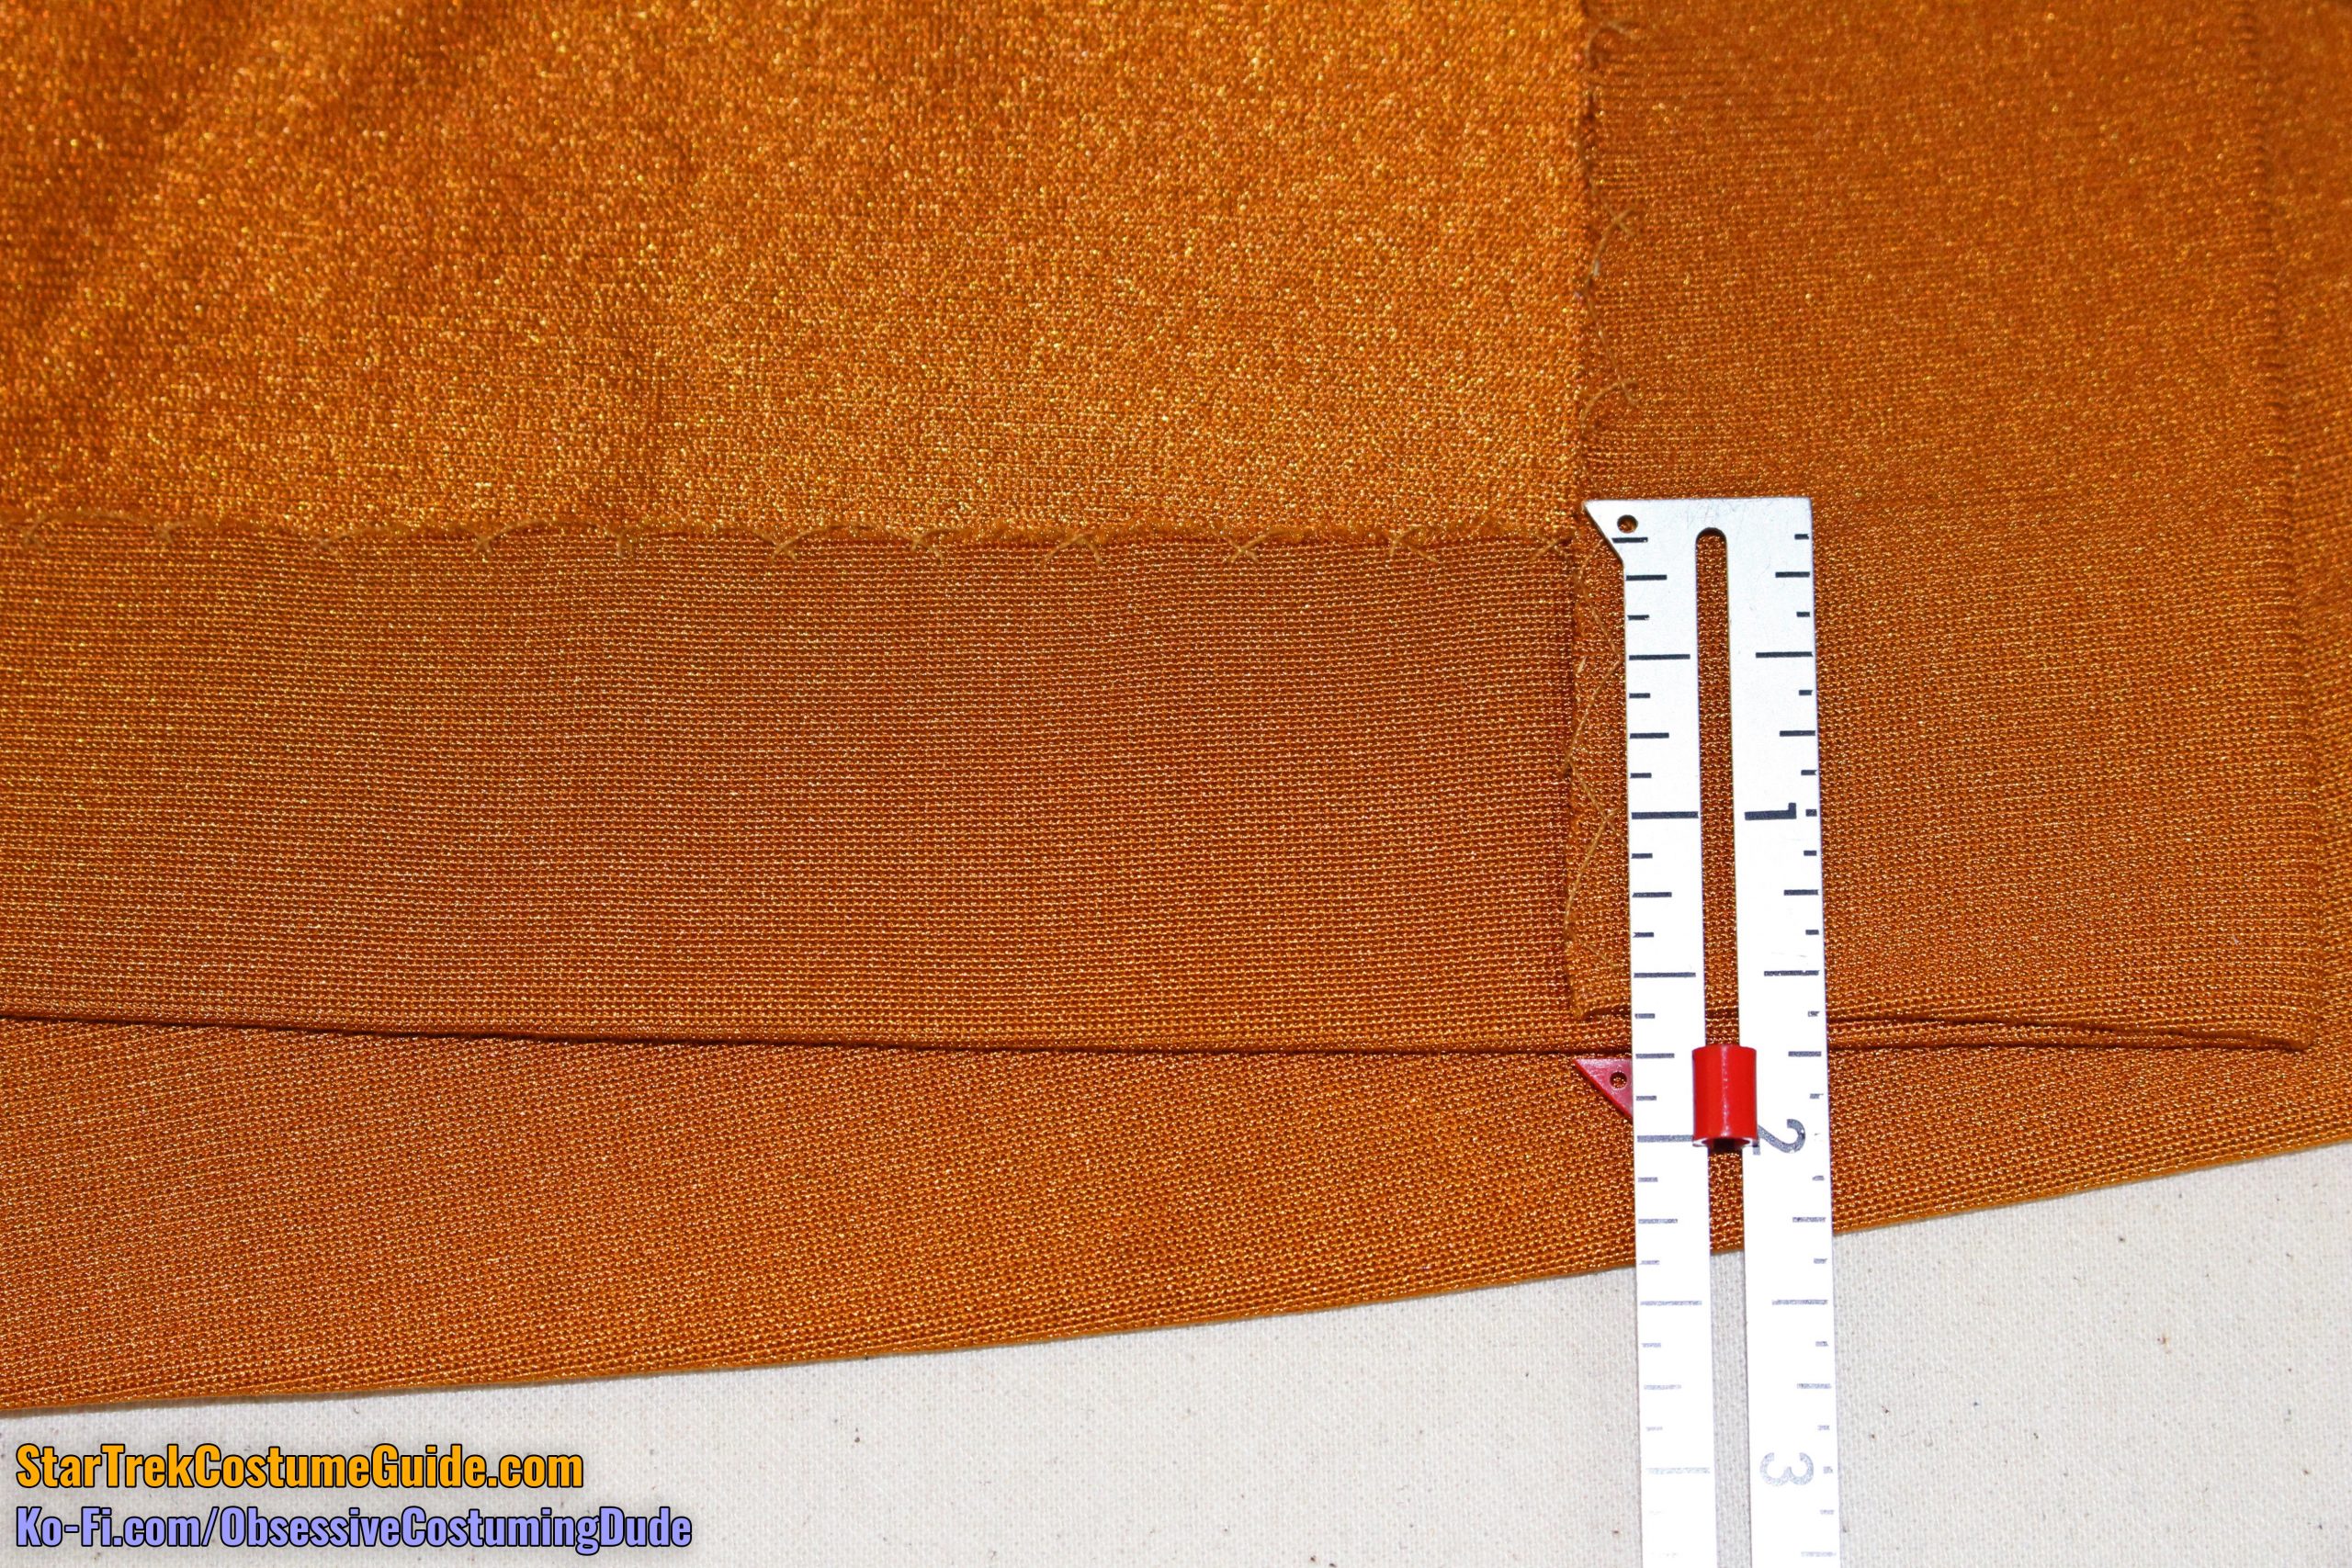
The upper/lower yoke seam allowances were ⅜” and pressed upward.
However, the yoke piping seam allowances were trimmed down to ⅛”.
The front yoke/body seam allowances were ⅜” and pressed open.
Also note the reinforcement stitching over the upper (horizontal) zipper.
The back yoke/body seam allowances, however, were pressed upward.
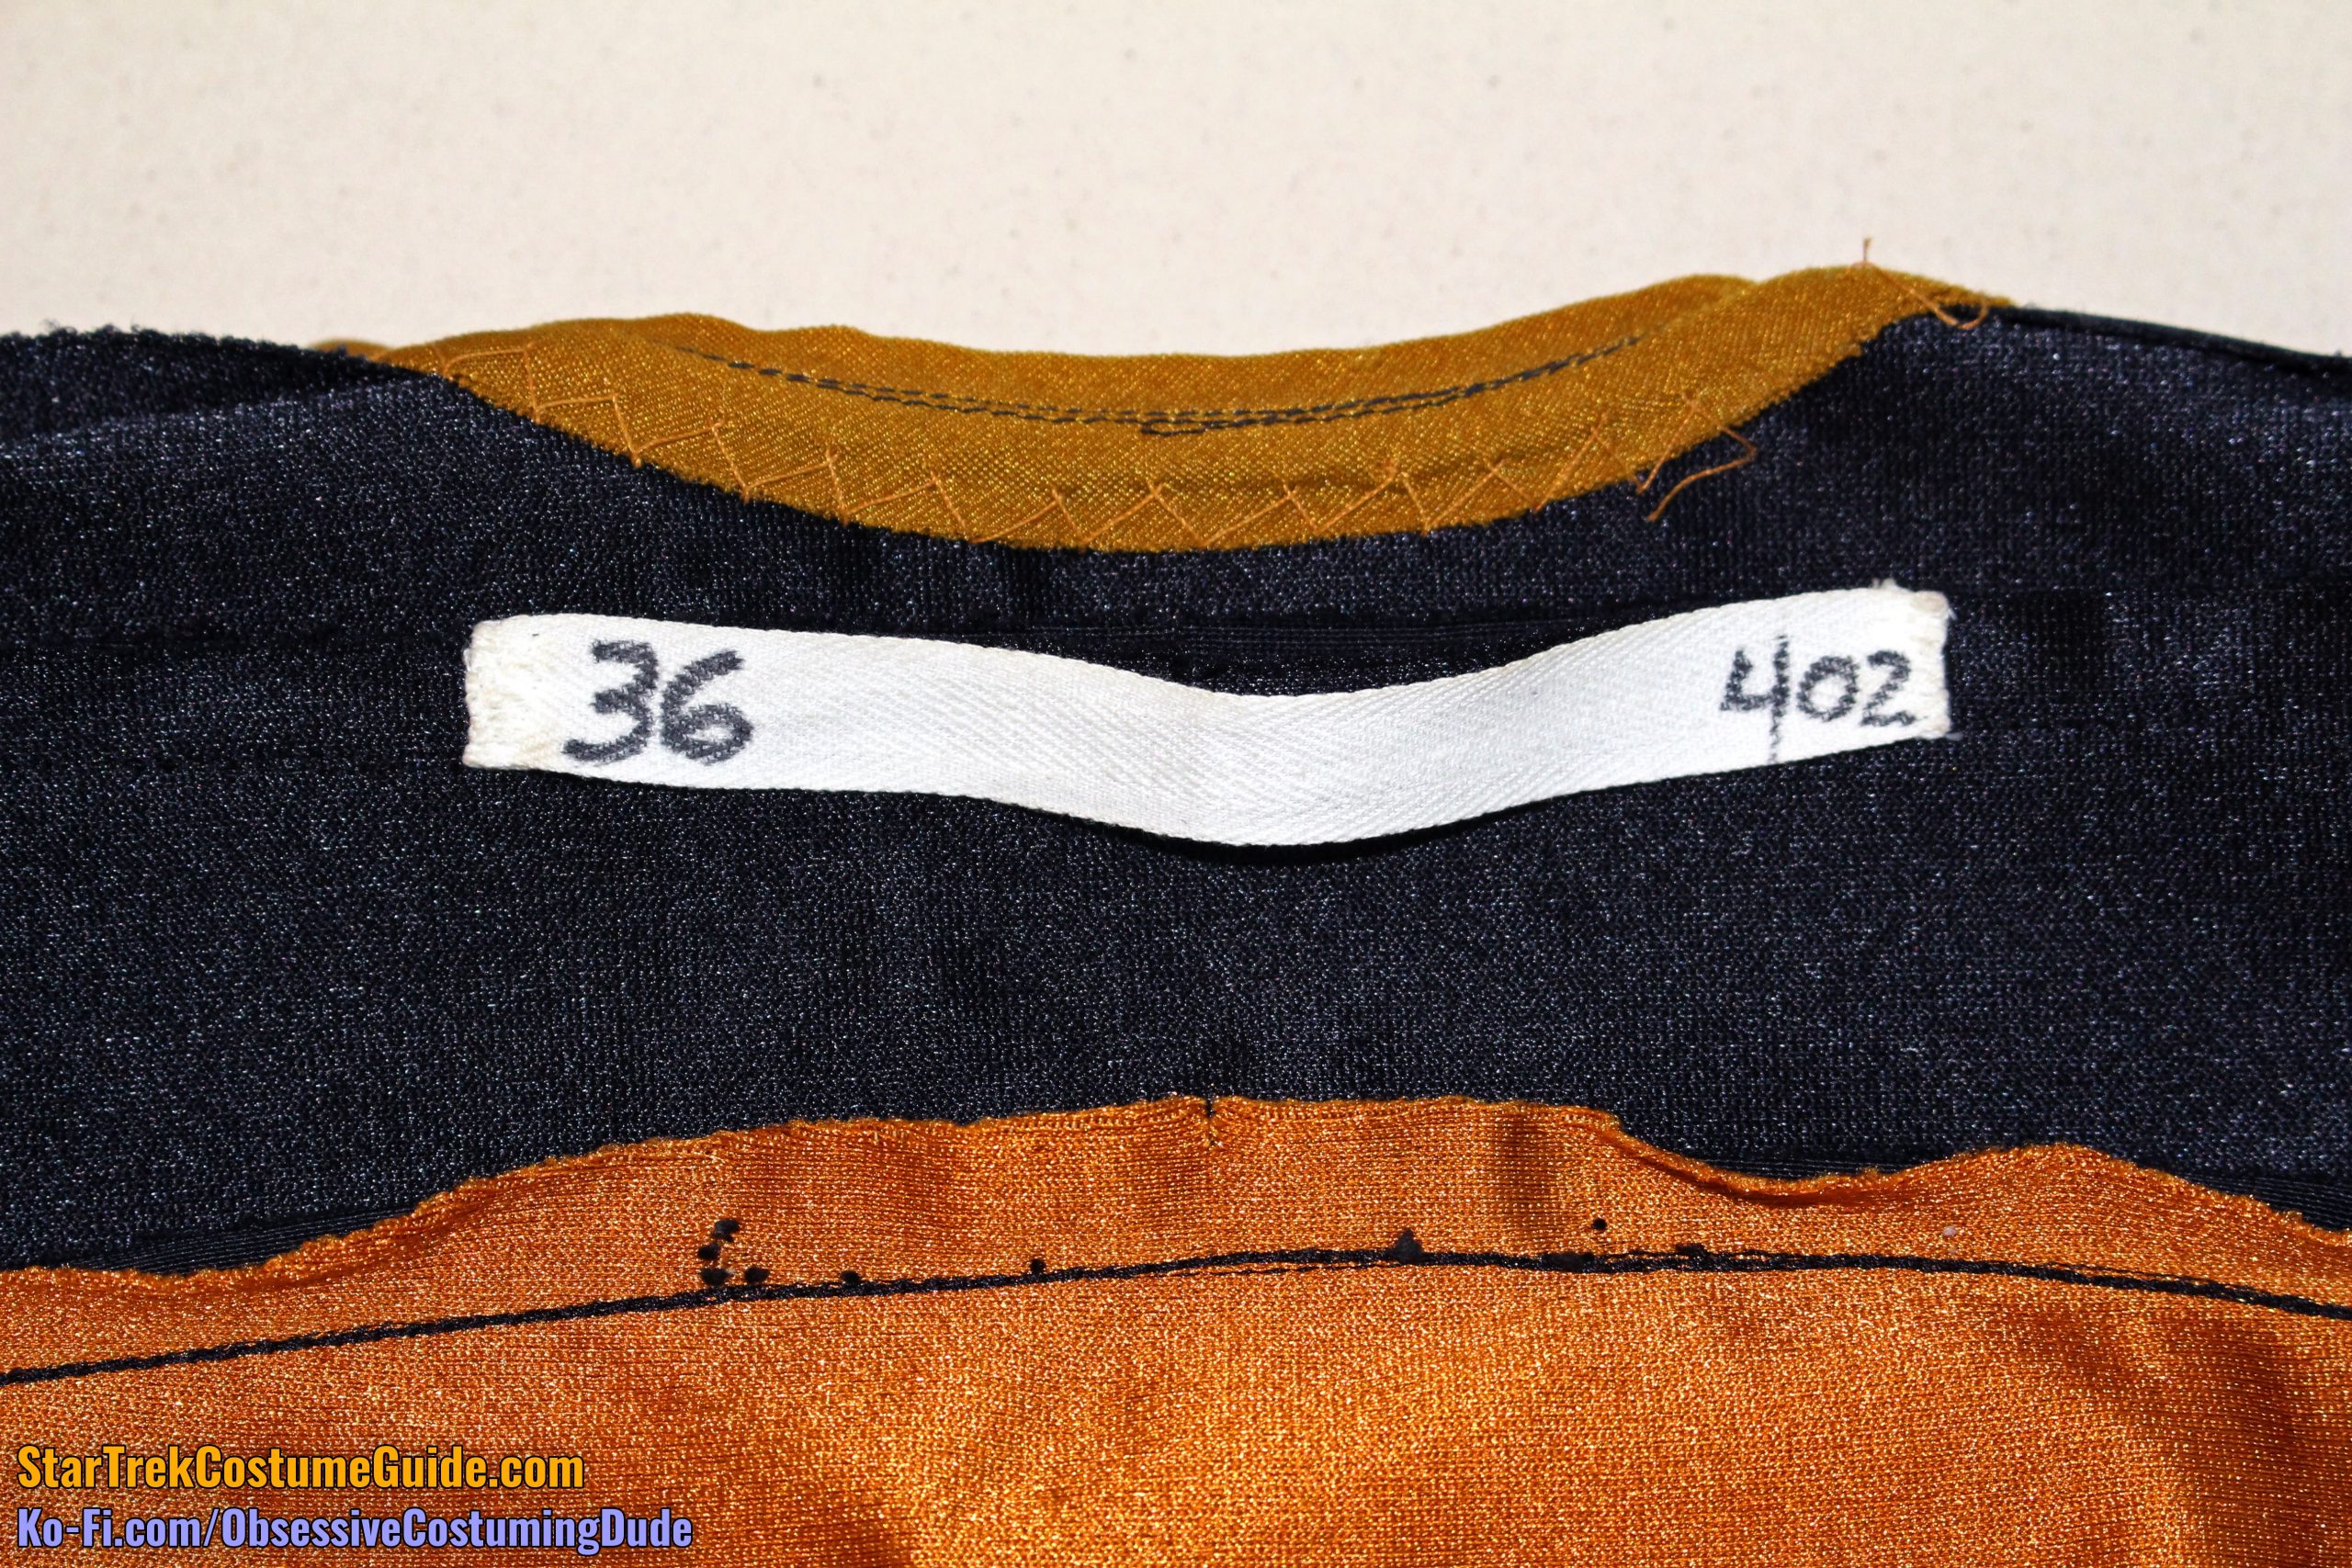
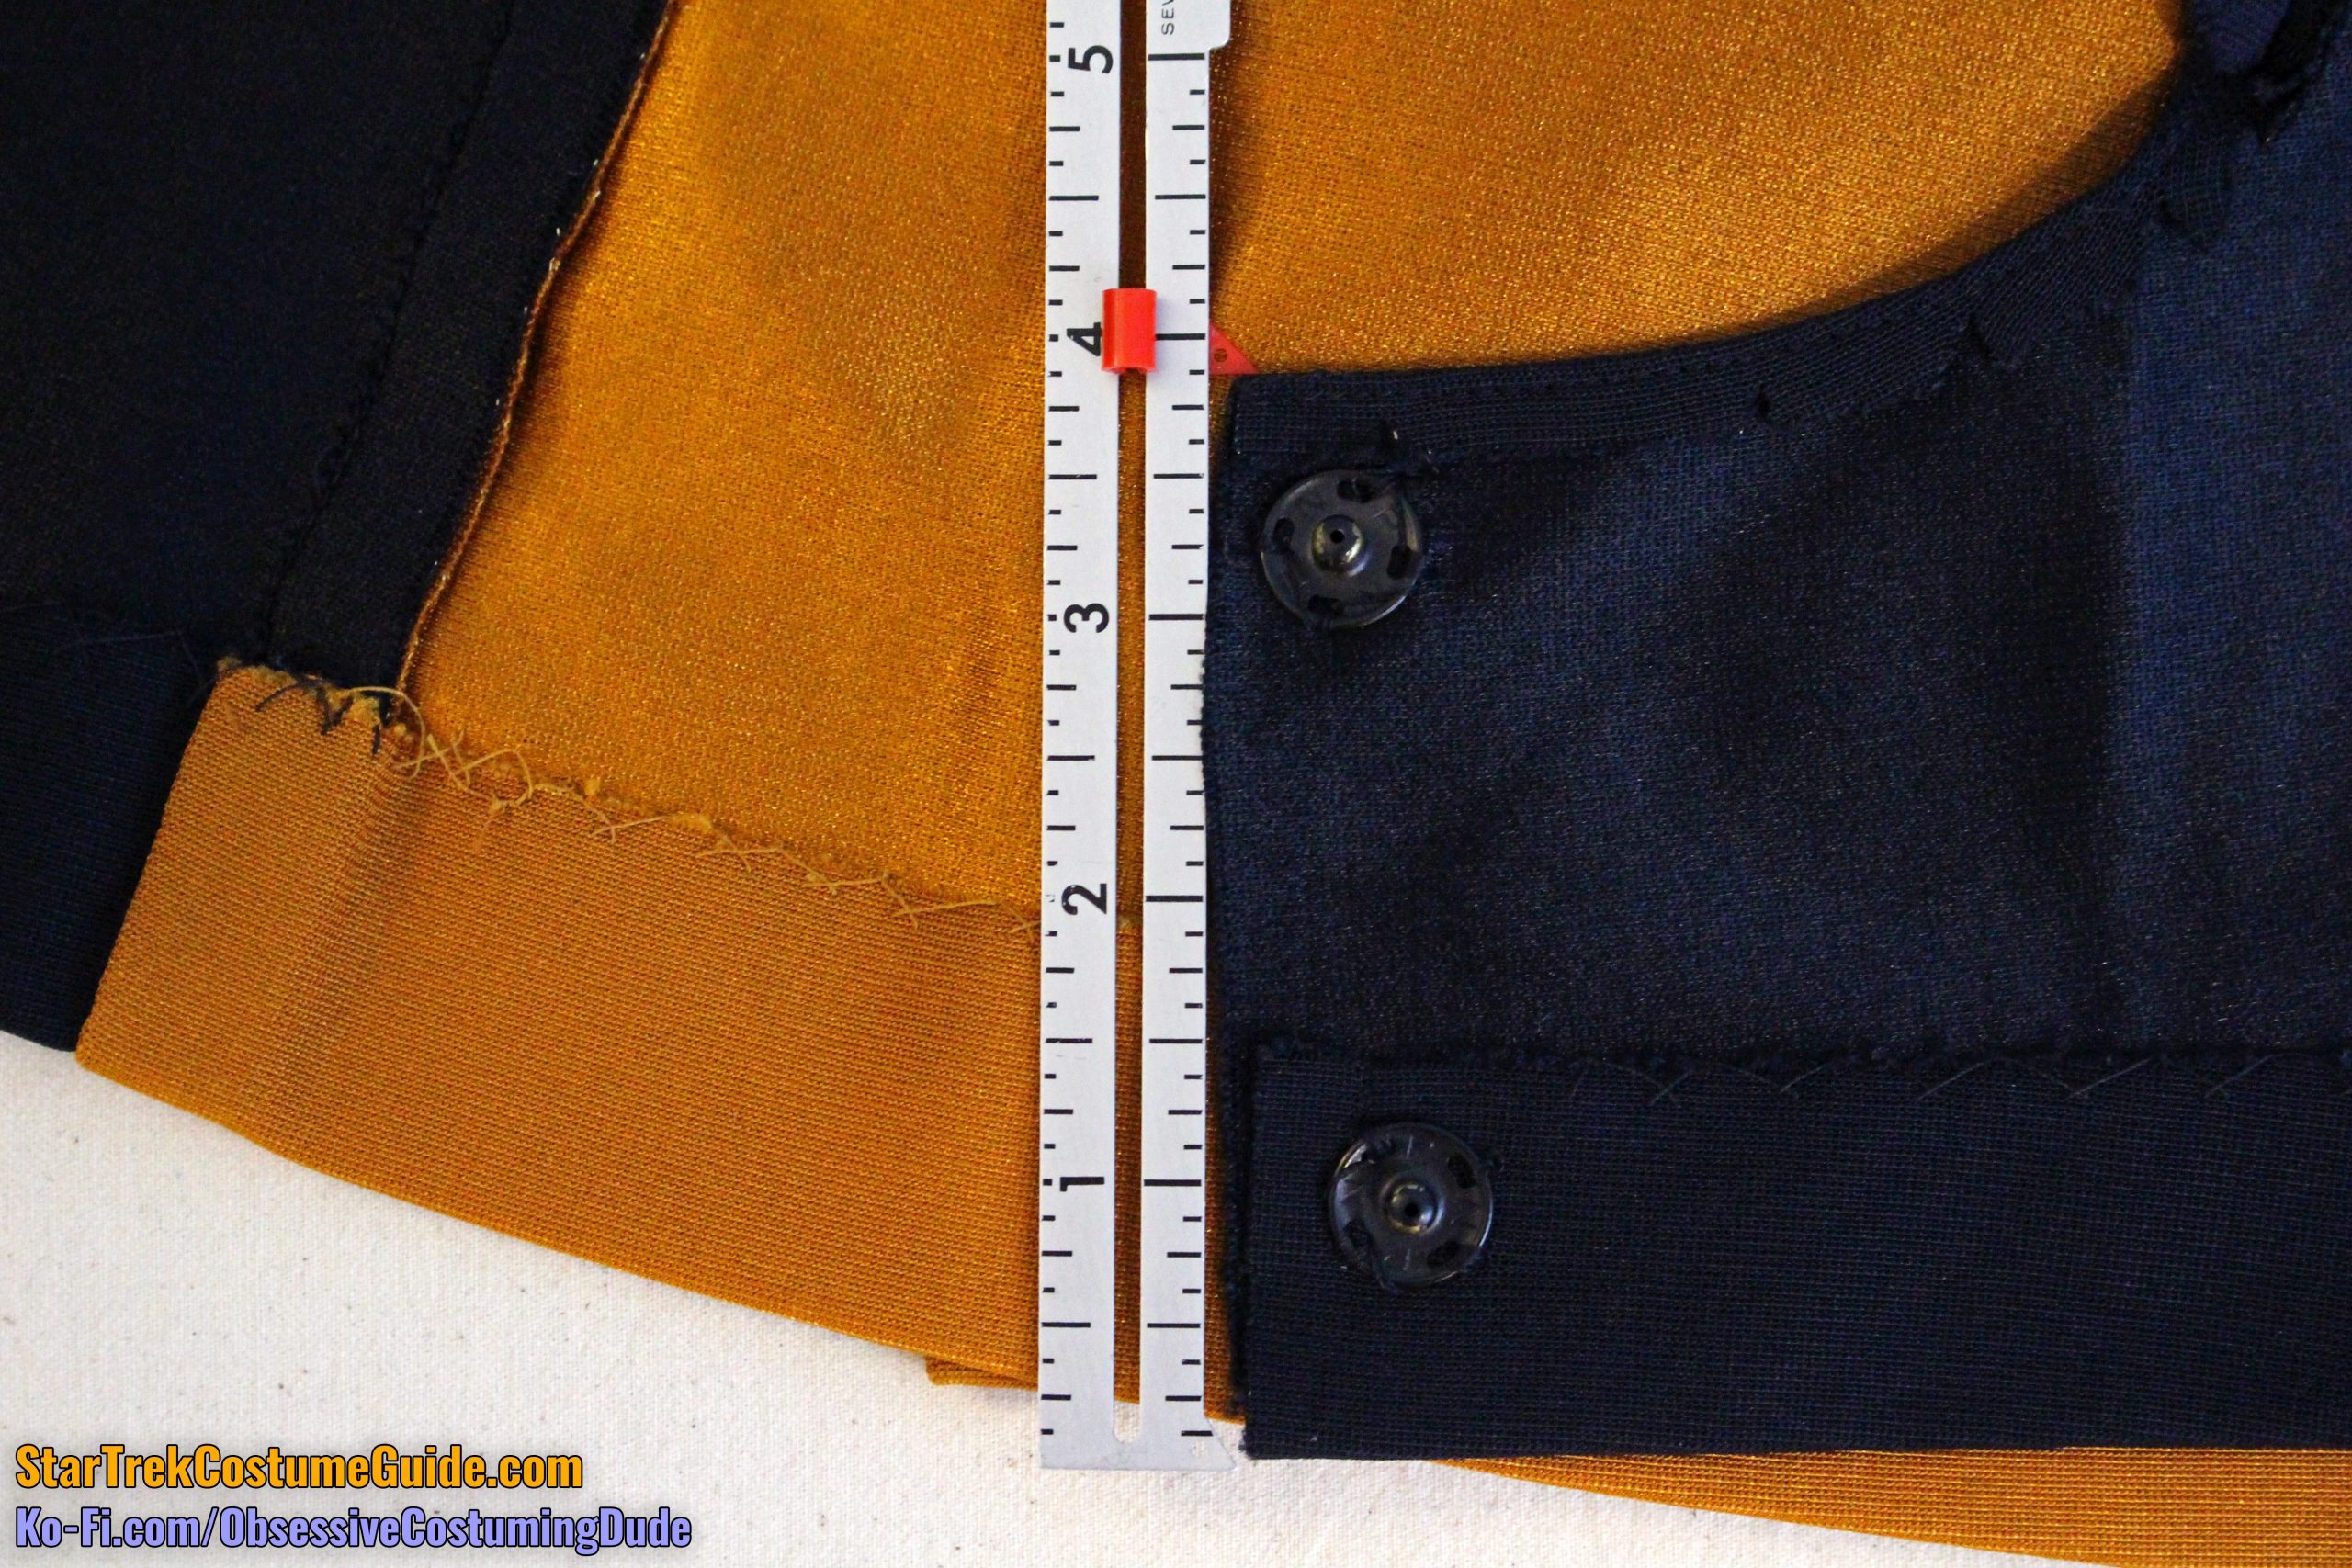
The production tag was white cotton twill tape and hand-sewn to the yoke/piping seam allowances.
I don’t know what “402” means; it’s probably something production-related.
“36,” though, appears to have indicated the size, since this particular skant has a 36″ bust.
However, this is a women‘s skant, and as you may be aware, women’s sizes are typically numbered with a weird “0-24+” system that seems to have no direct relevance to the actual size of the garment or the wearer.
On the other hand, men’s sizes are usually “34-52+” and are based on the chest measurement.
(In other words, a men’s size 42 indicates a 42″ chest, while a women’s size 14 represents … well, something different to everybody.)
This implies that a ladies’ numerical sizing system with direct relevance to the size of the garment and/or wearer may have been common practice for TNG, at least at the beginning.
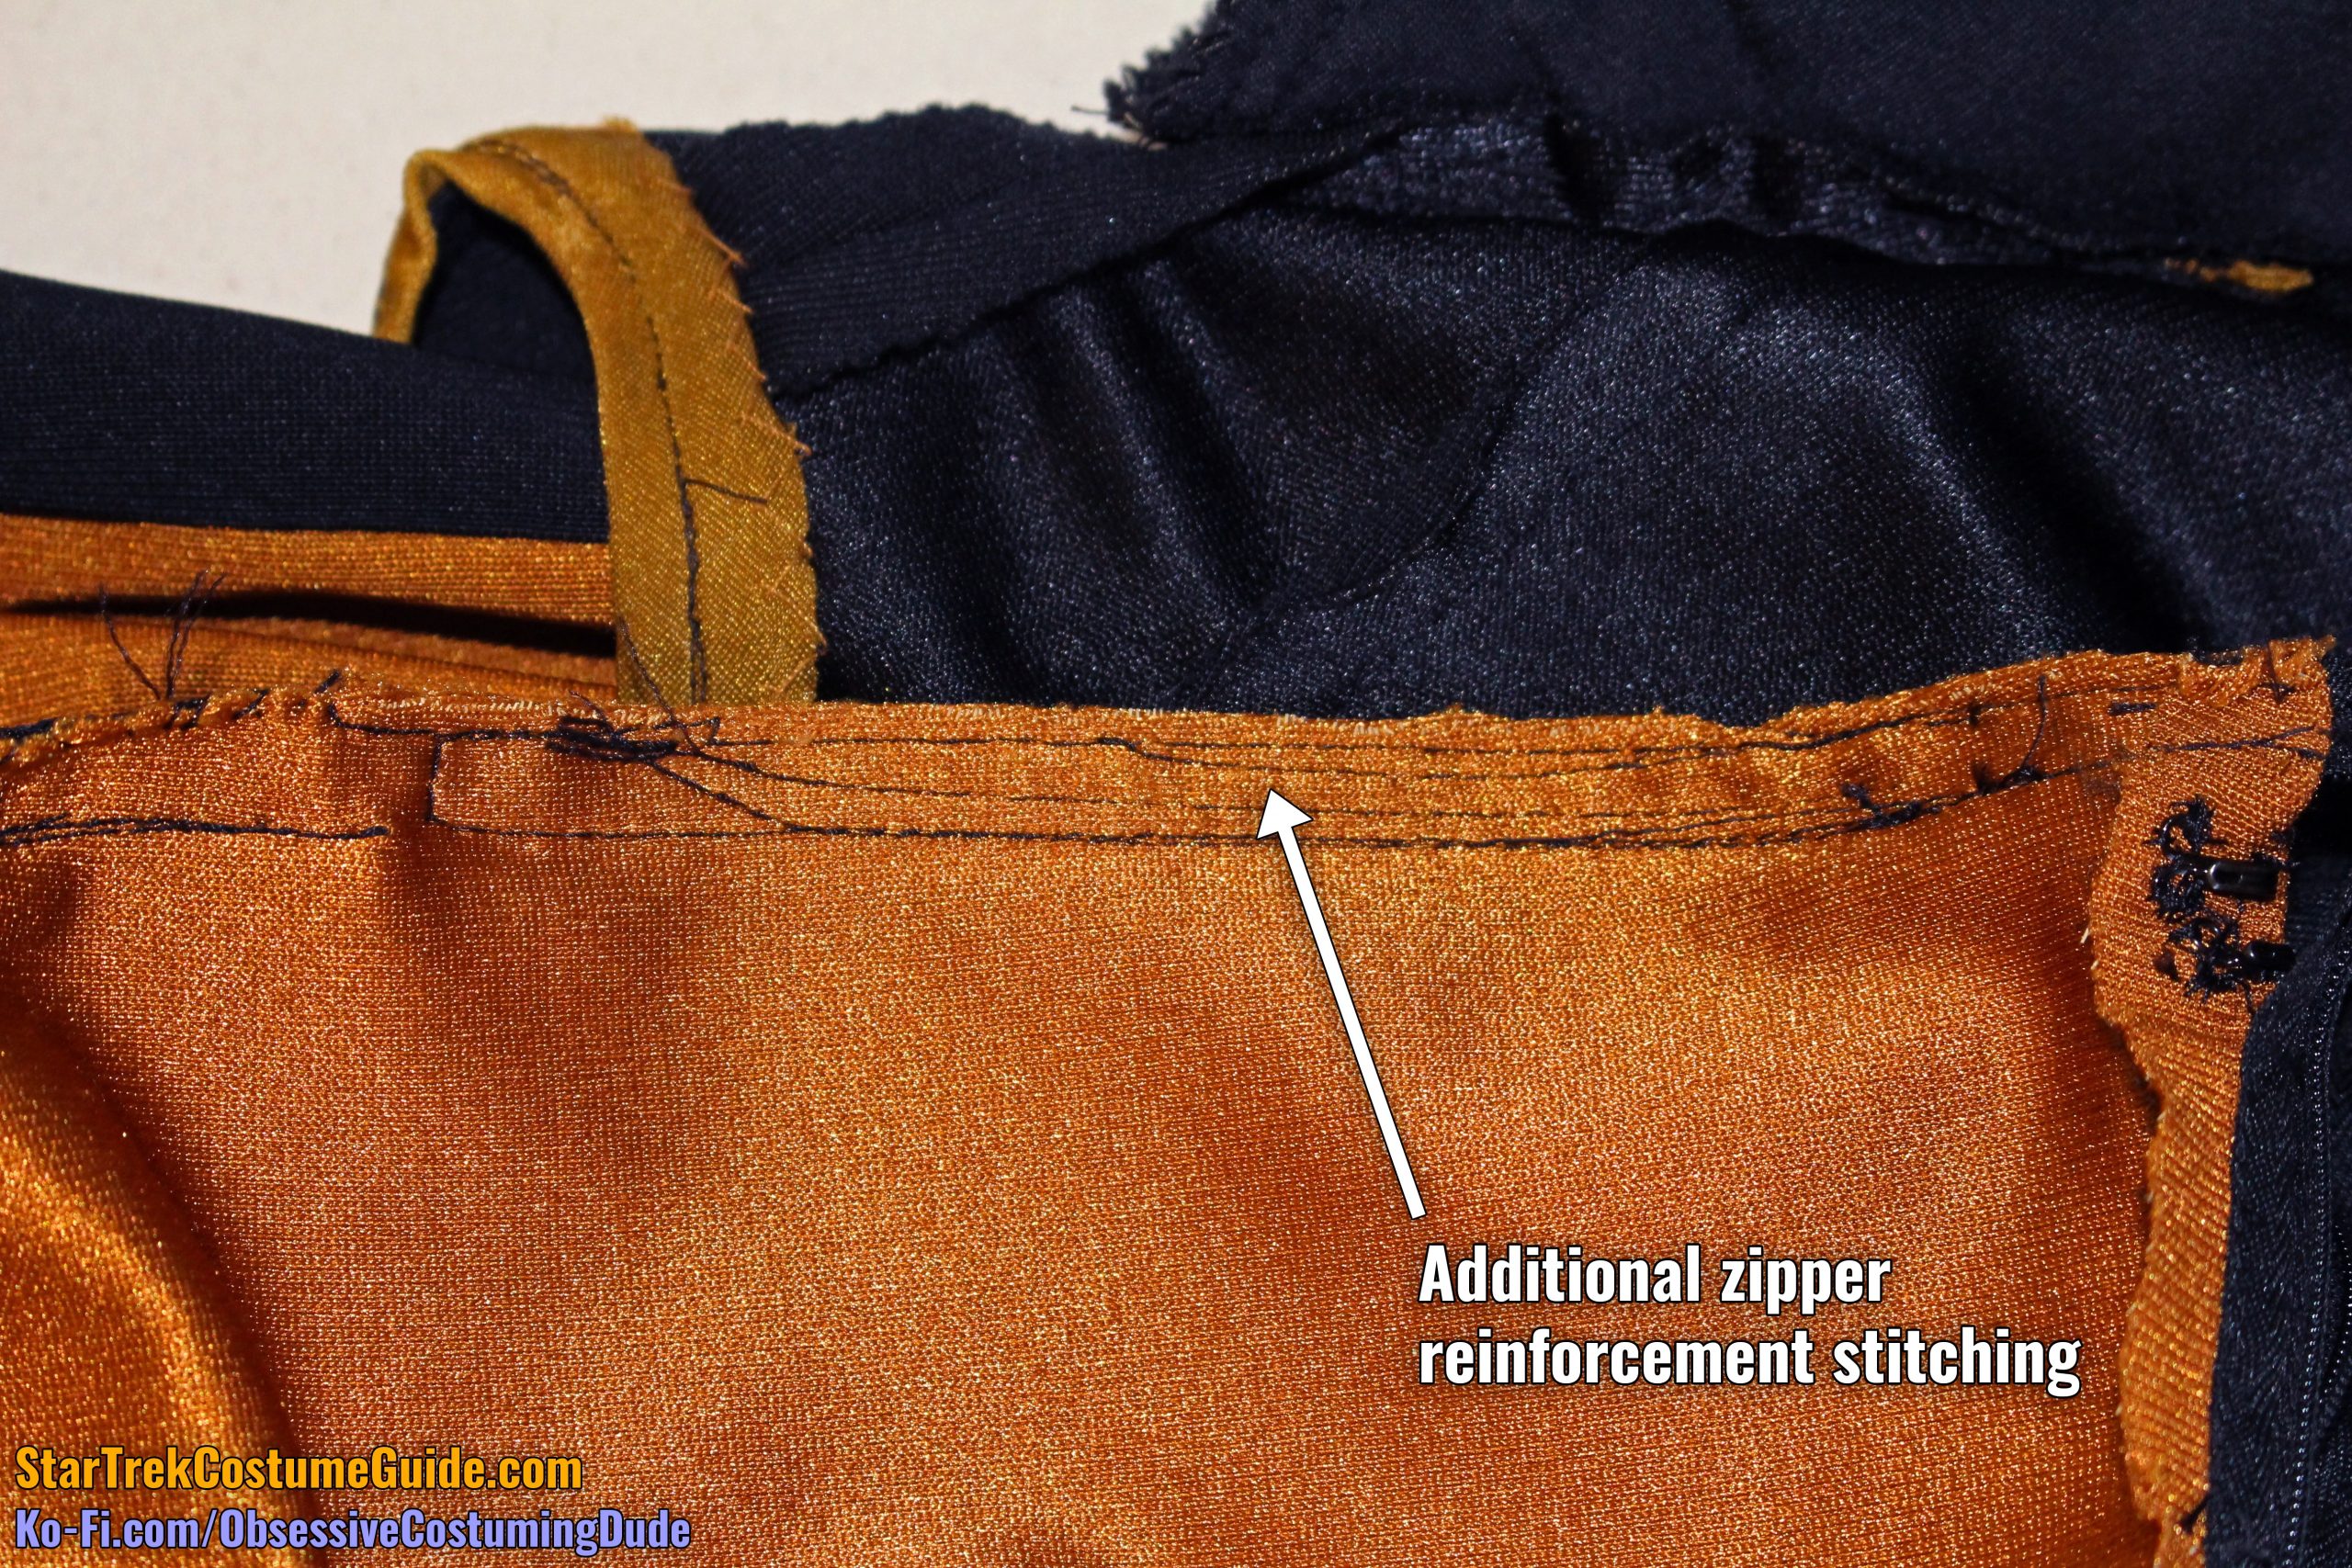
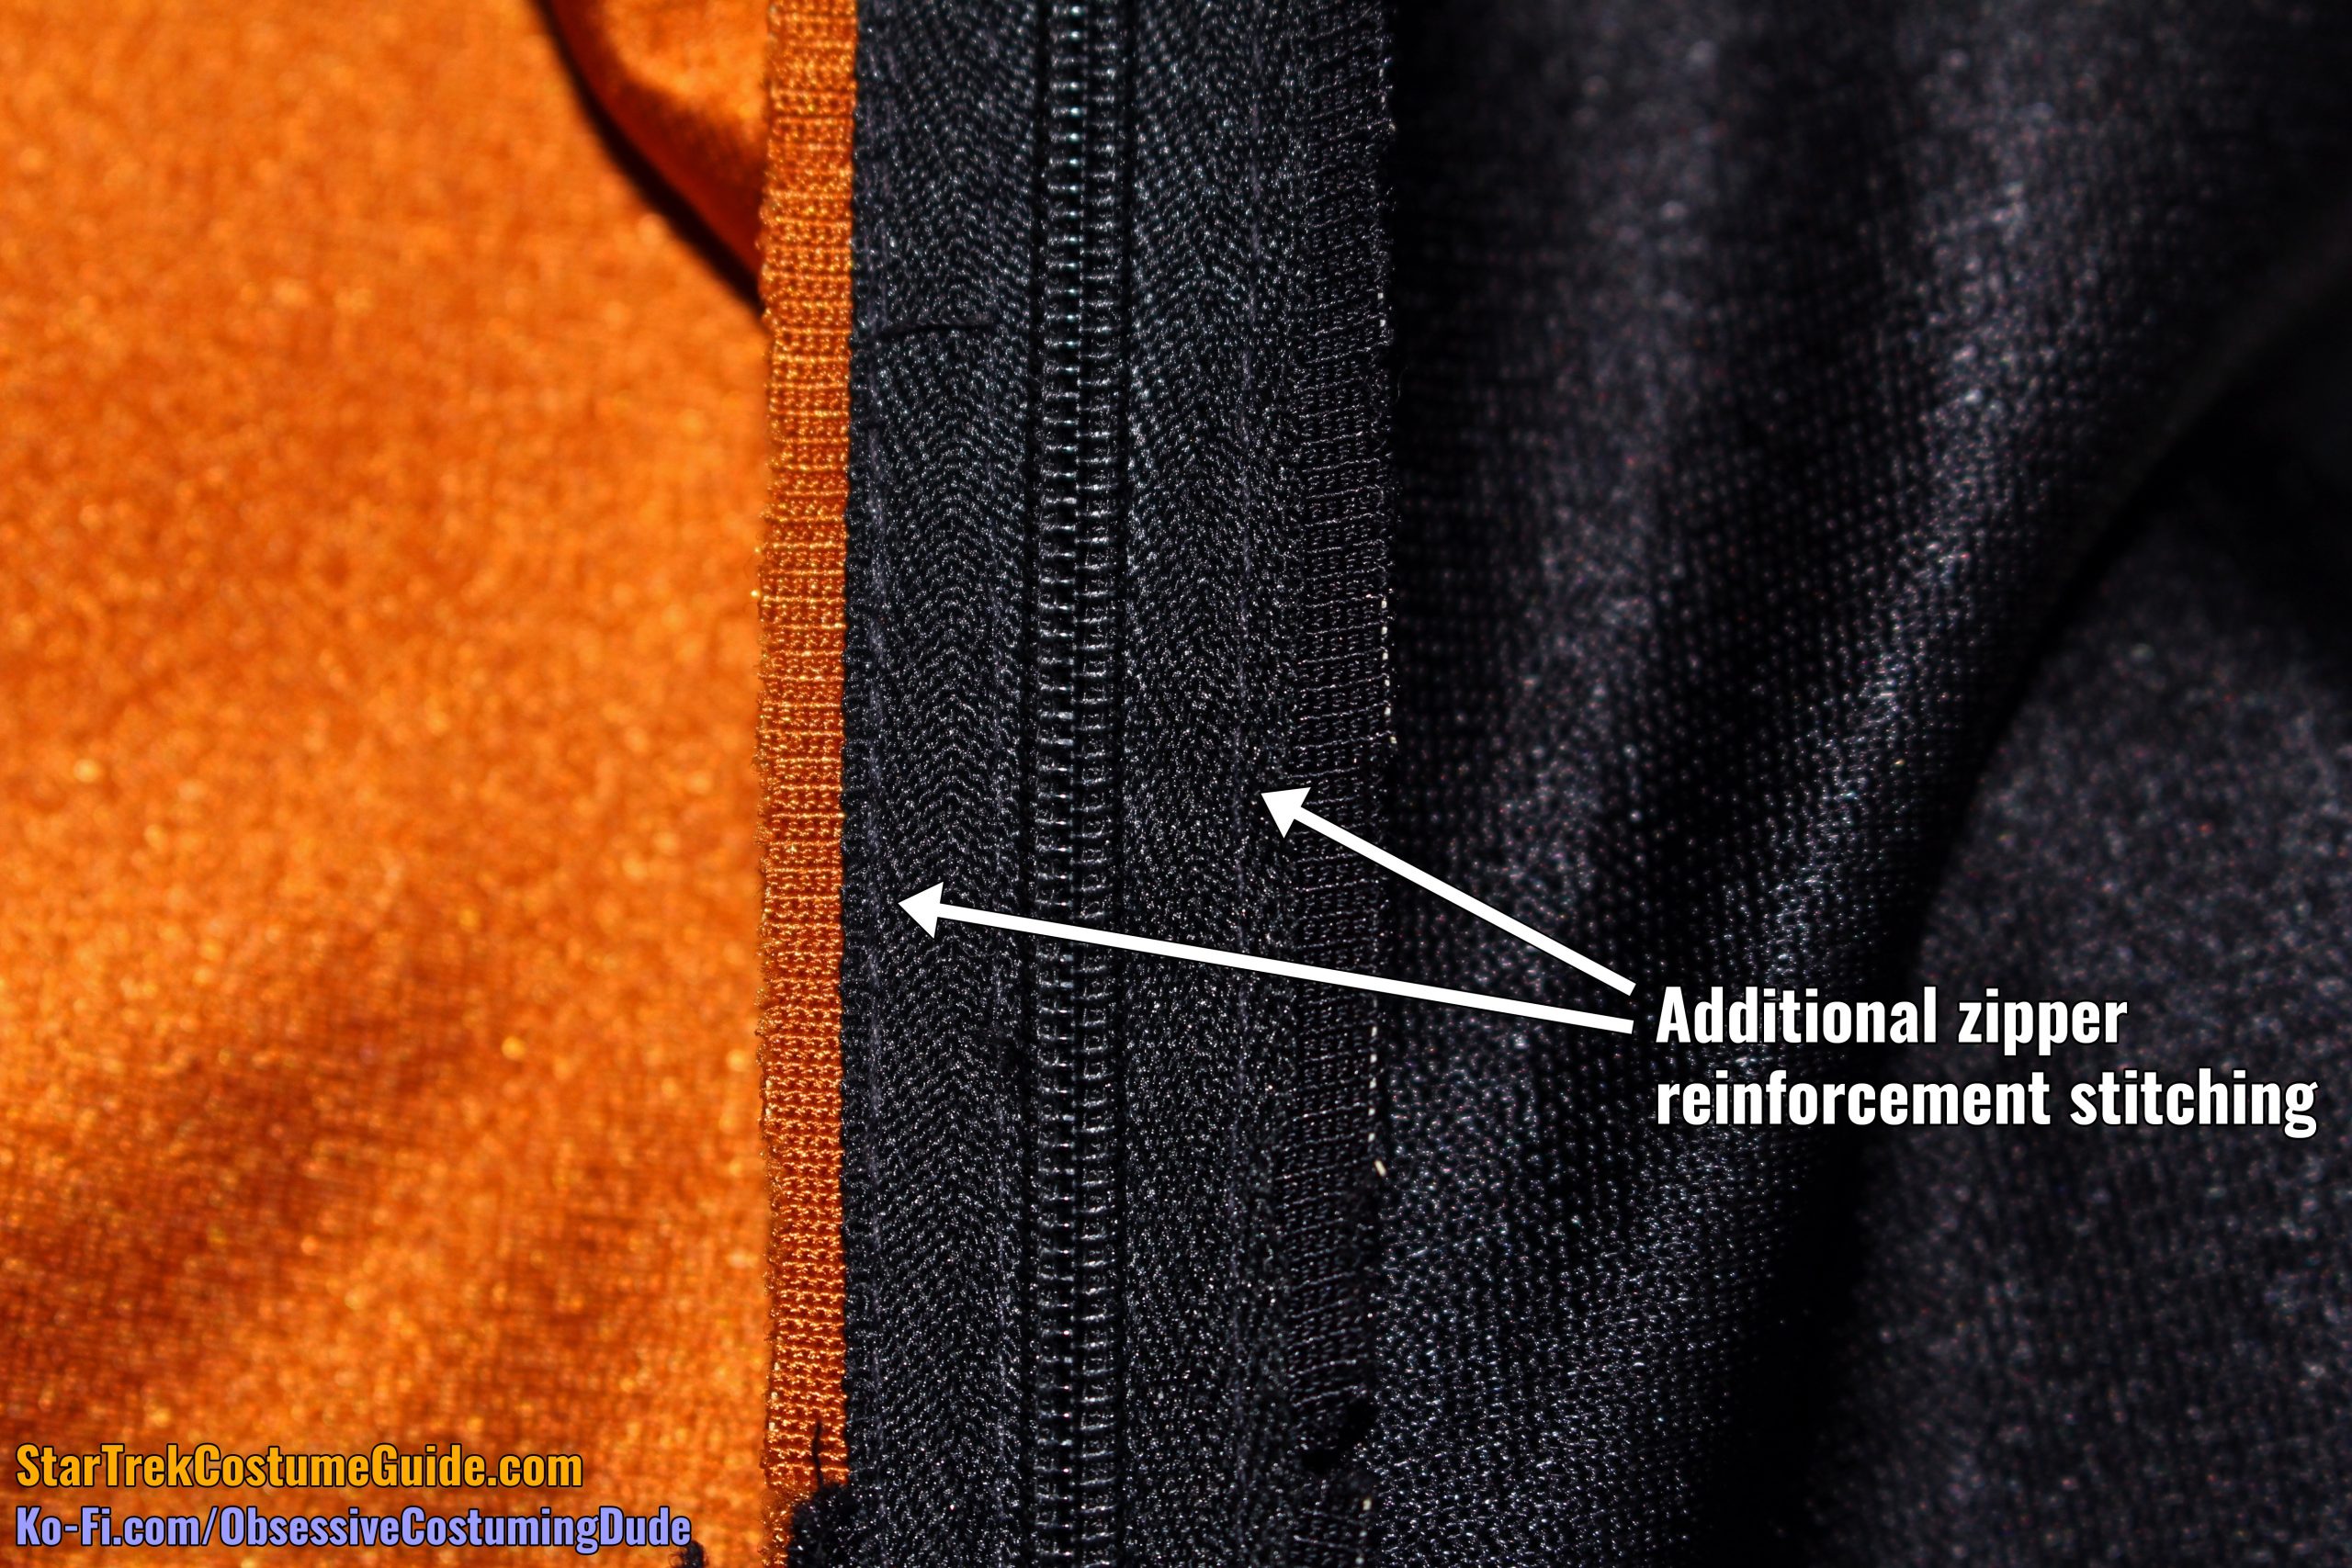
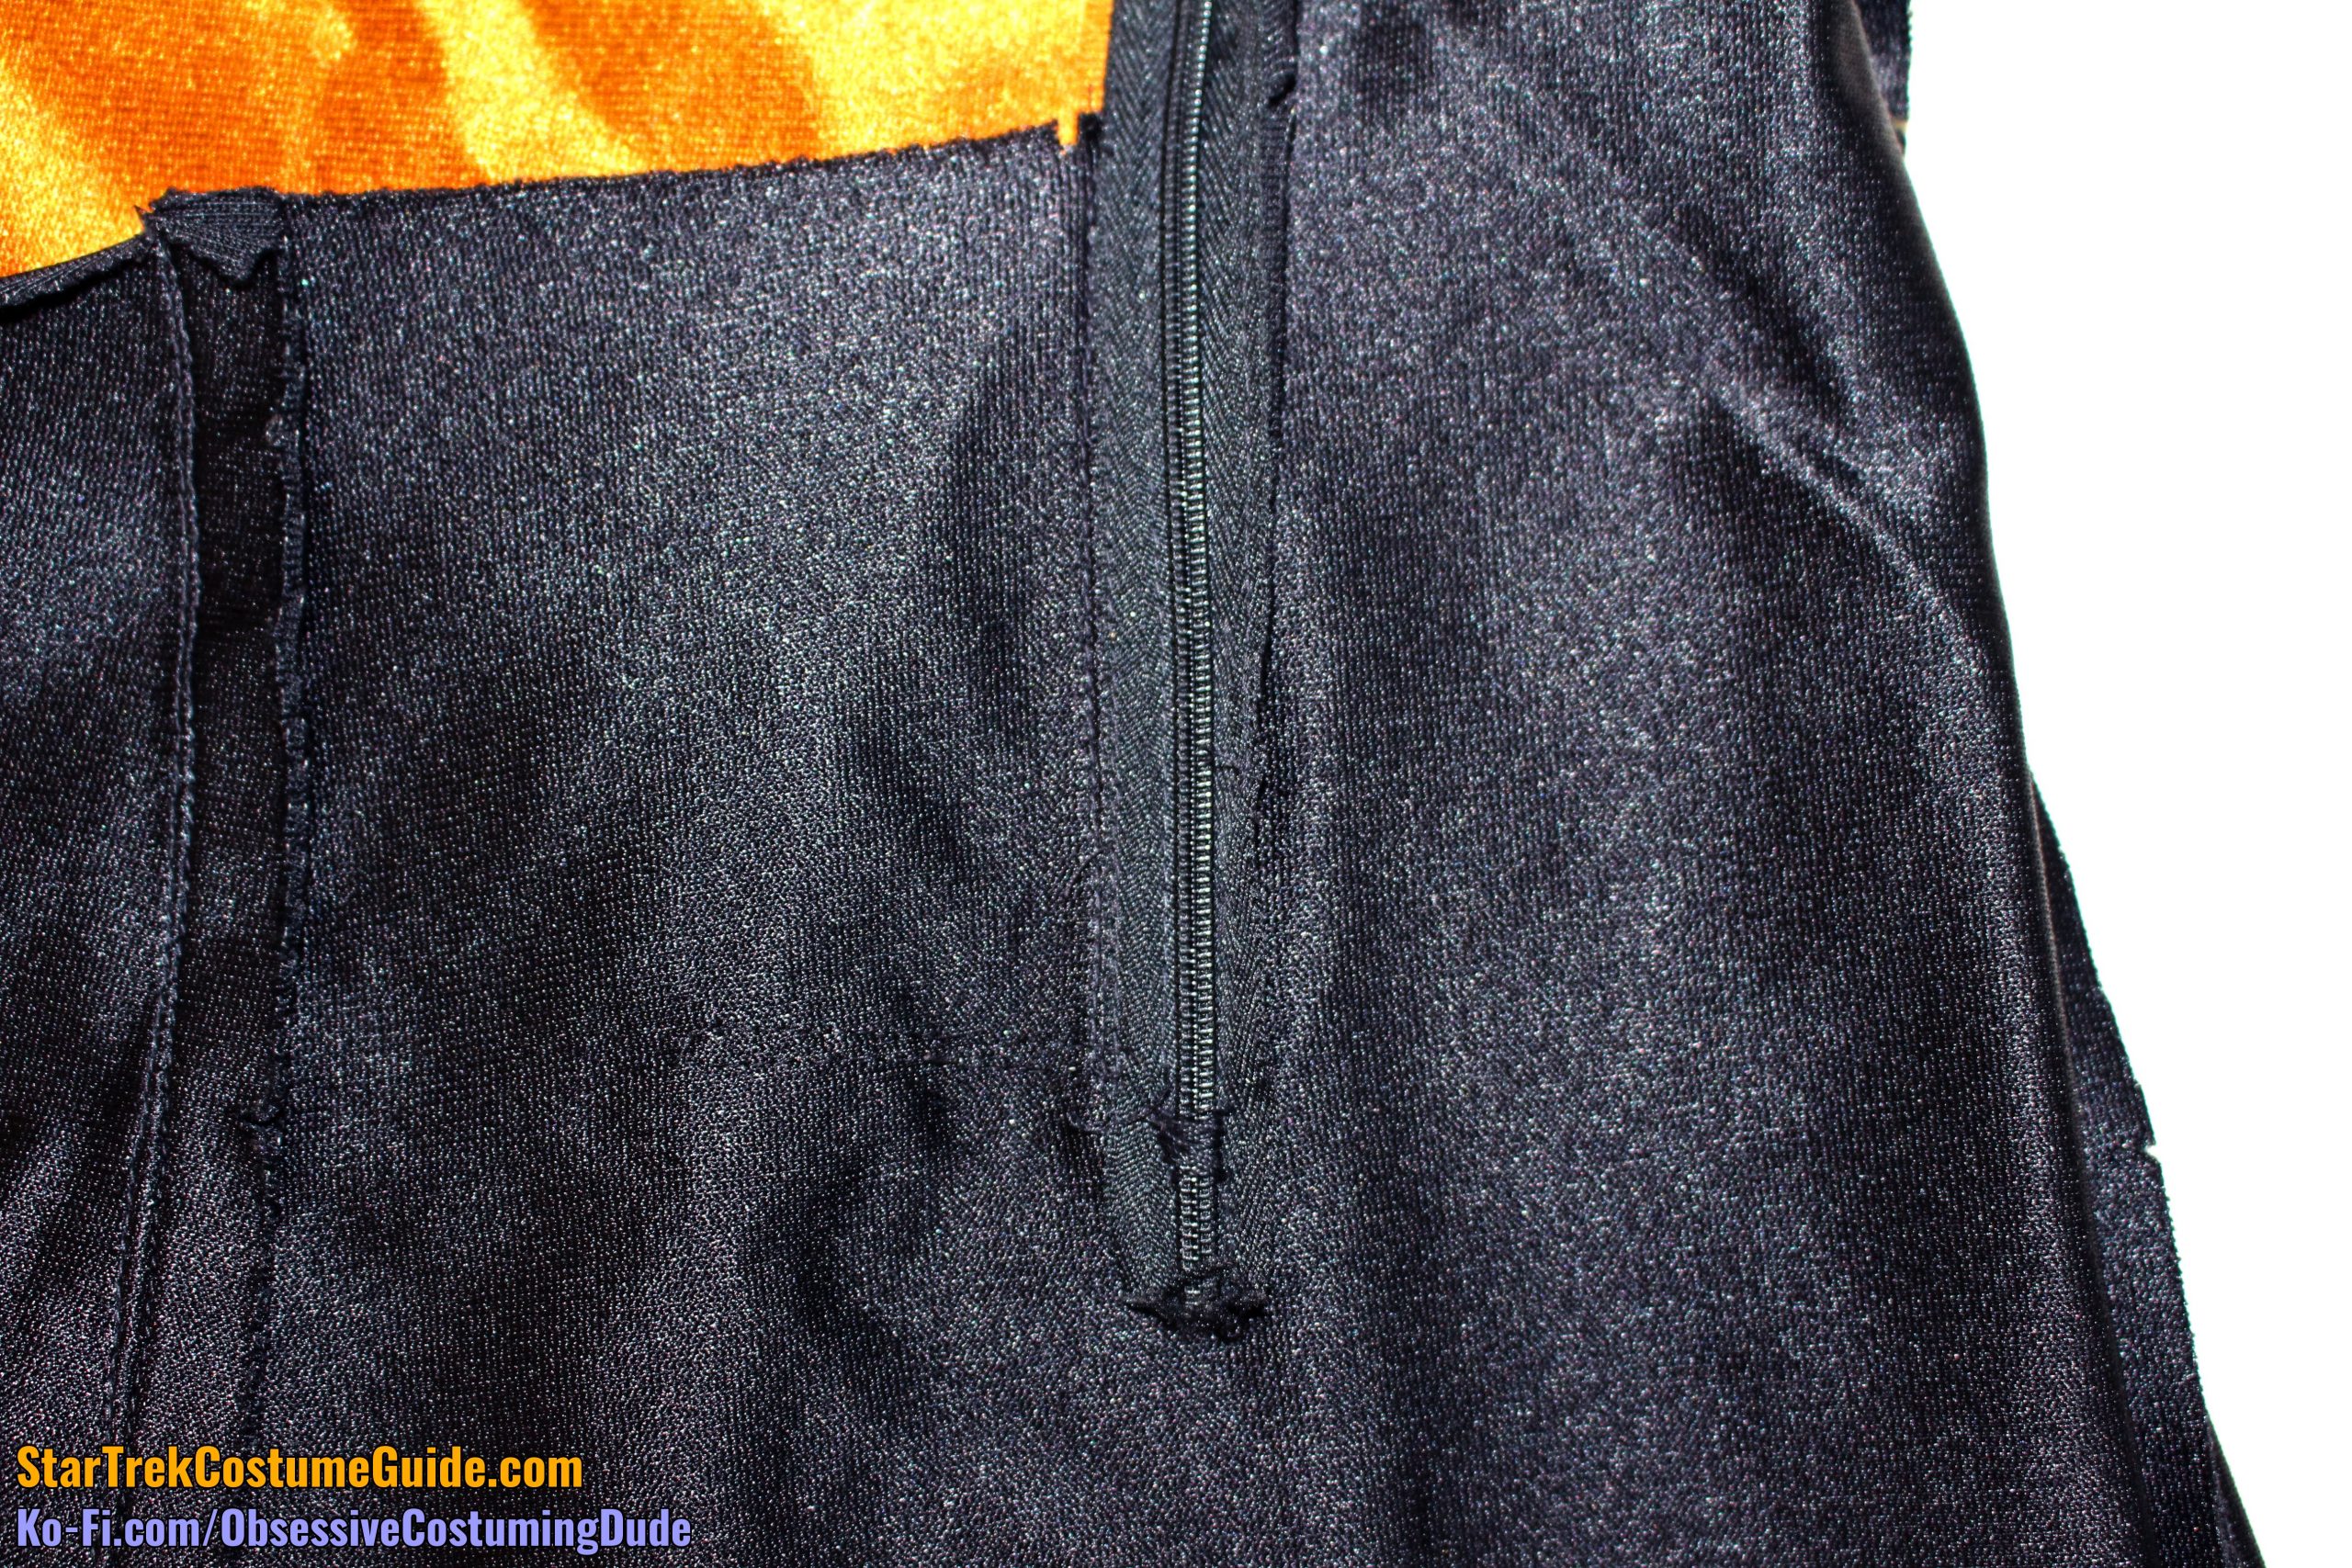
The side zipper was also supported with additional rows of reinforcement stitching.
Oddly, though, two of the rows of reinforcement stitching were made along the uppermost and lowermost few inches, but not the middle … one wonders why the original costumer/sewer didn’t simply start at one end of the zipper and go all the way to the other end with the stitching.
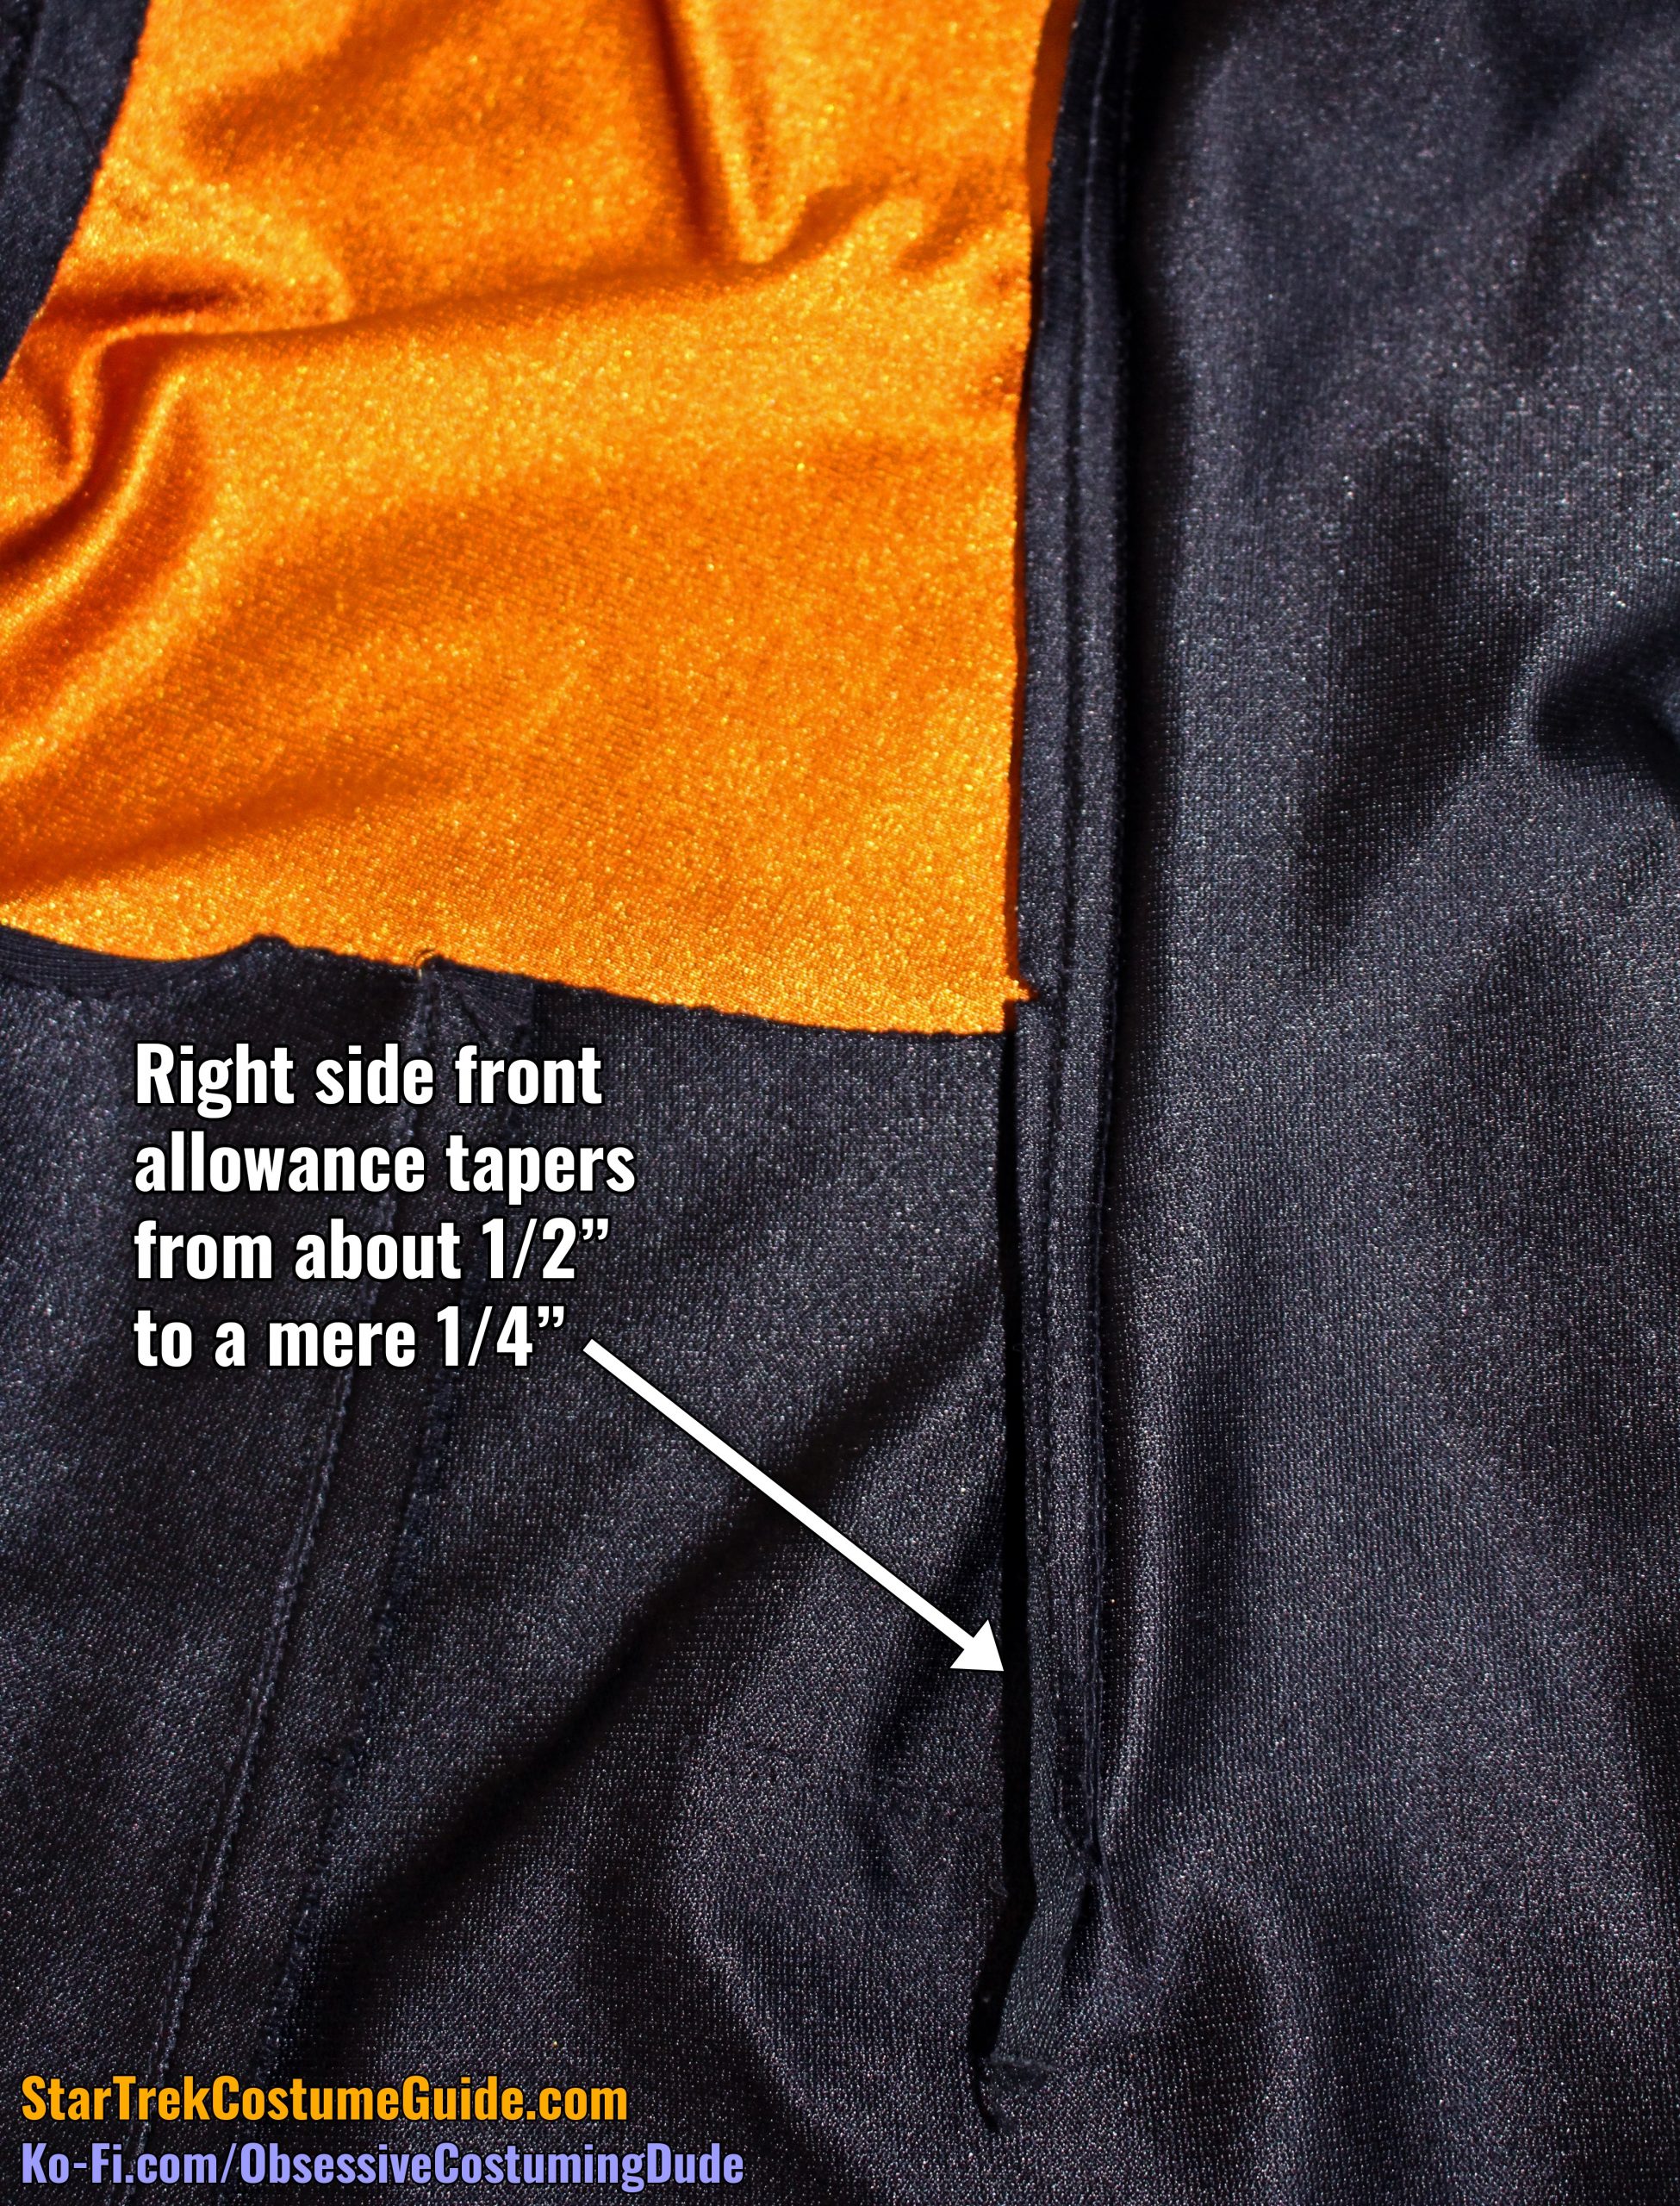
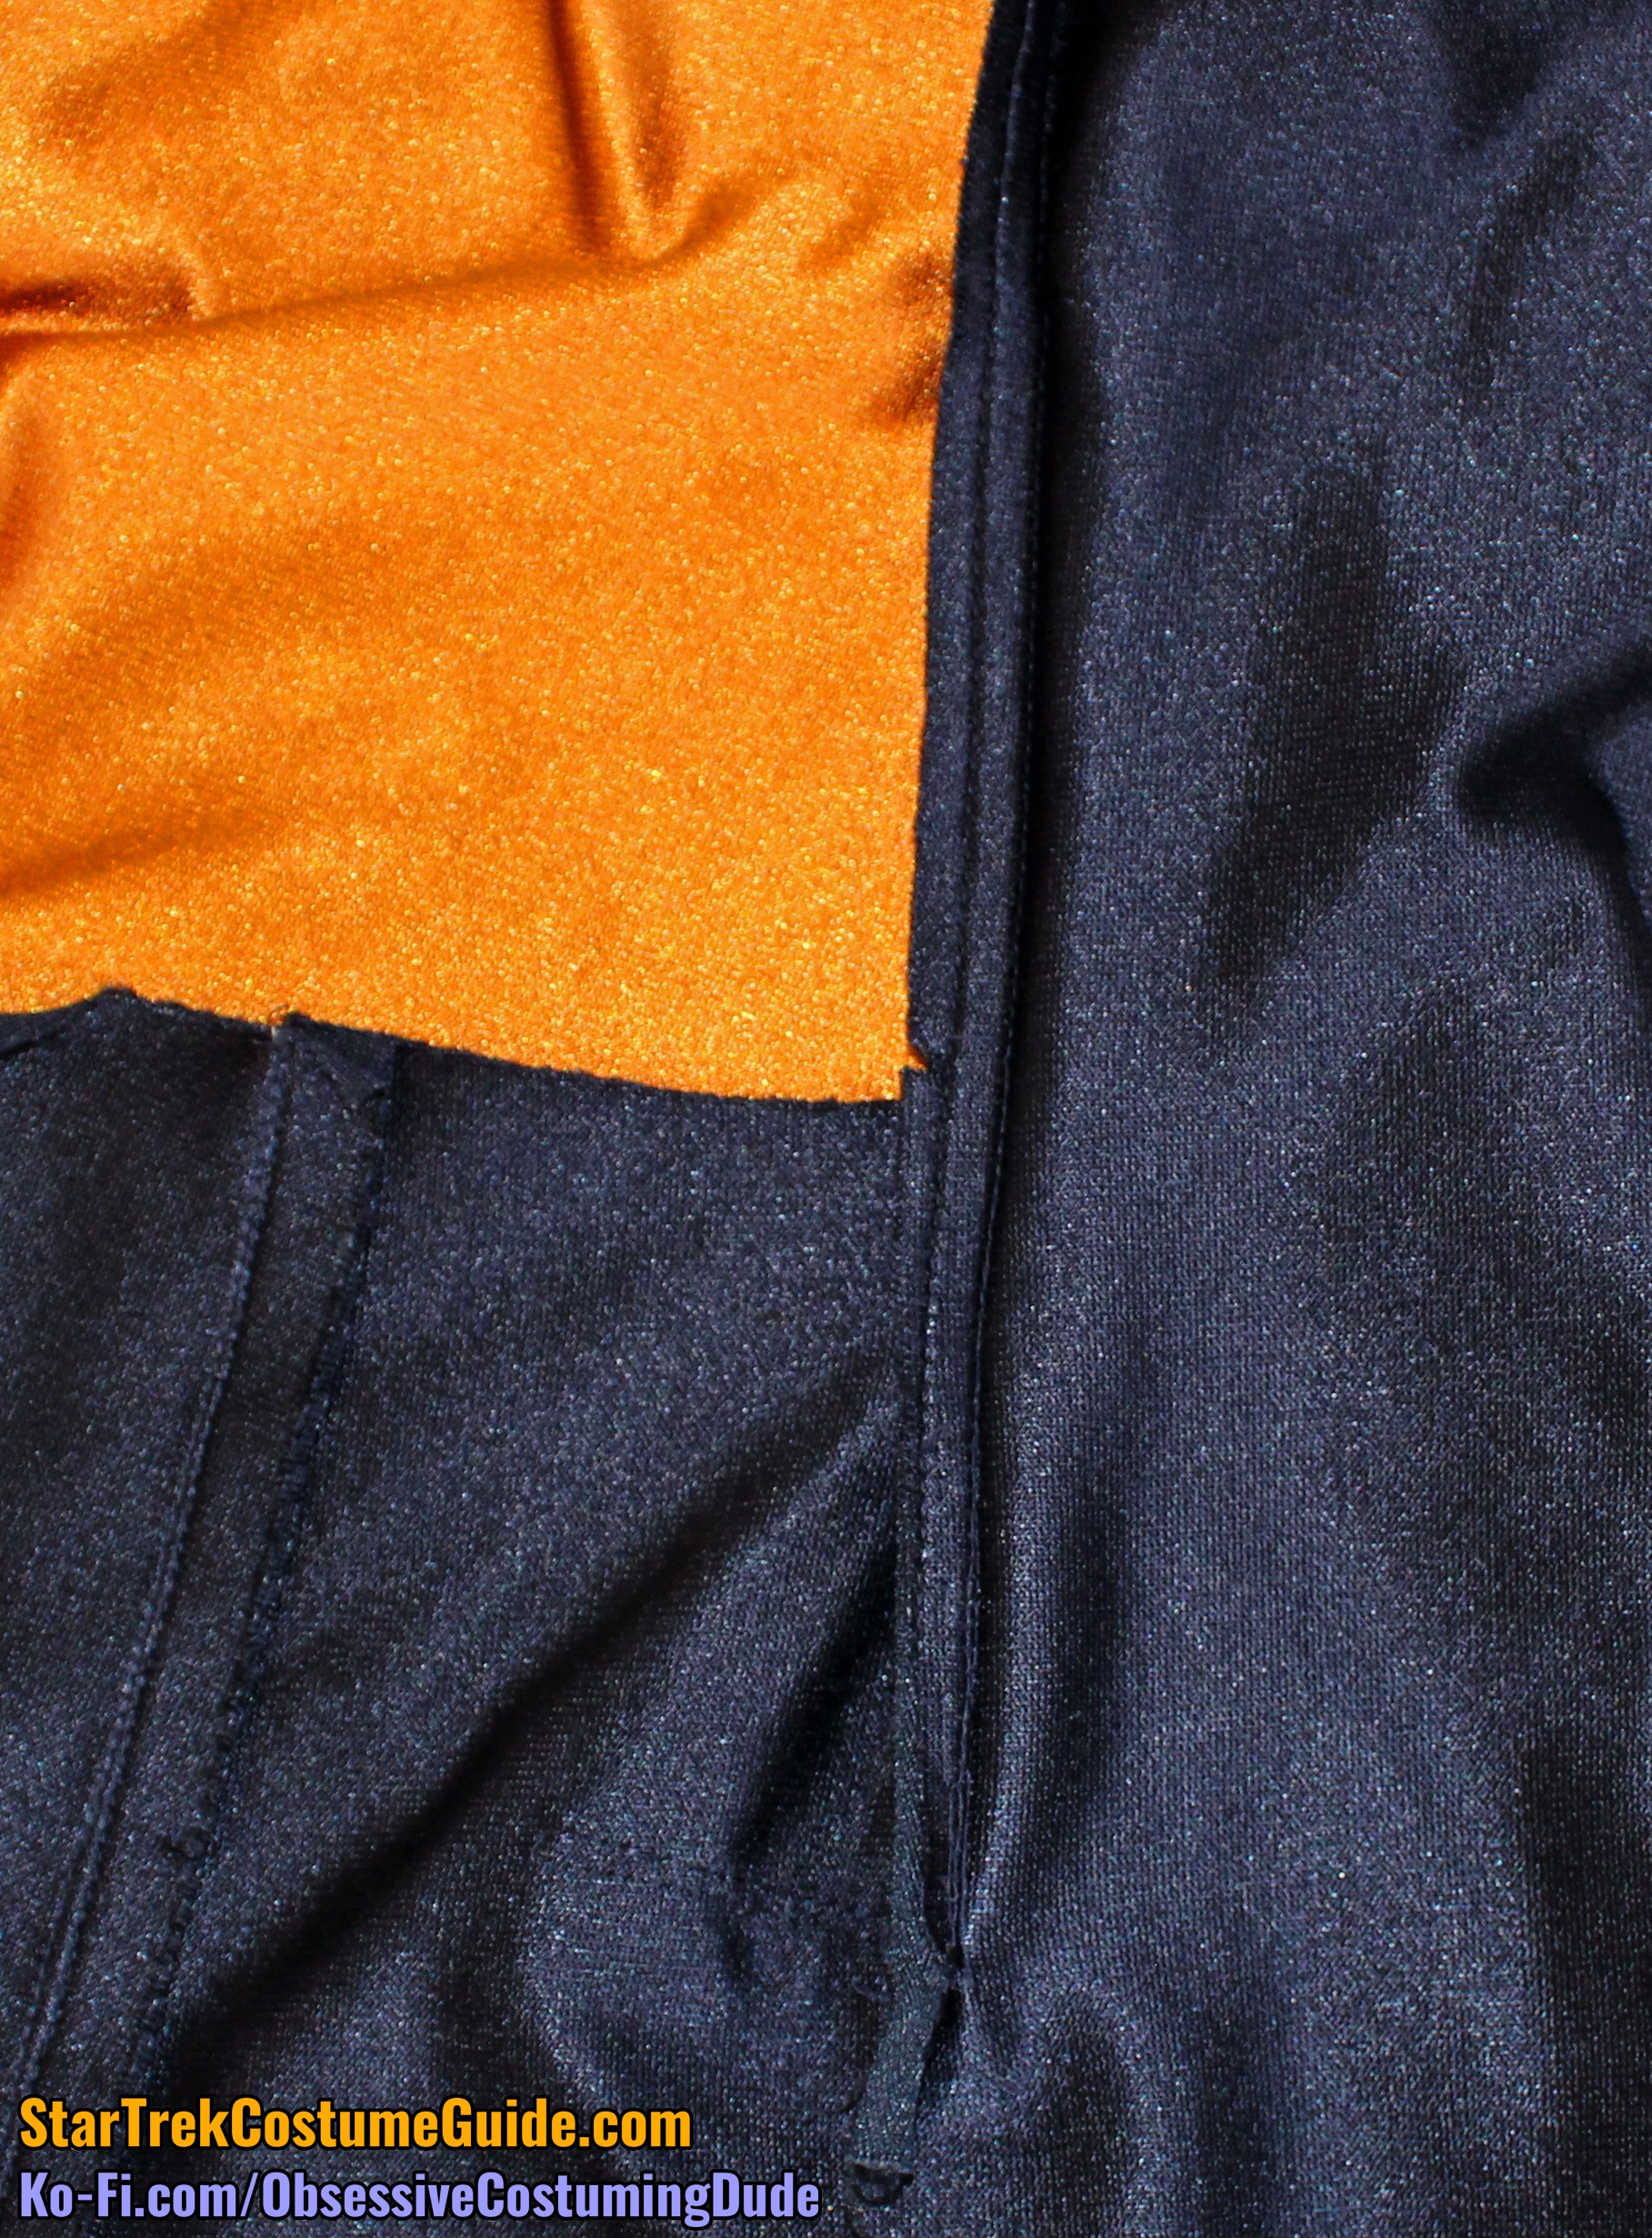
The right front zipper/seam allowance was a bit wonky; sewing a curved seam to a straight(-ish) seam like that can be tricky – even more so on spandex.
Installing a zipper over a seam of this shape on spandex can be quite frustrating … believe me, haha.
Apparently the original costumer/sewer had a hard time with it, too, and straightened out the seam a bit to make it easier.
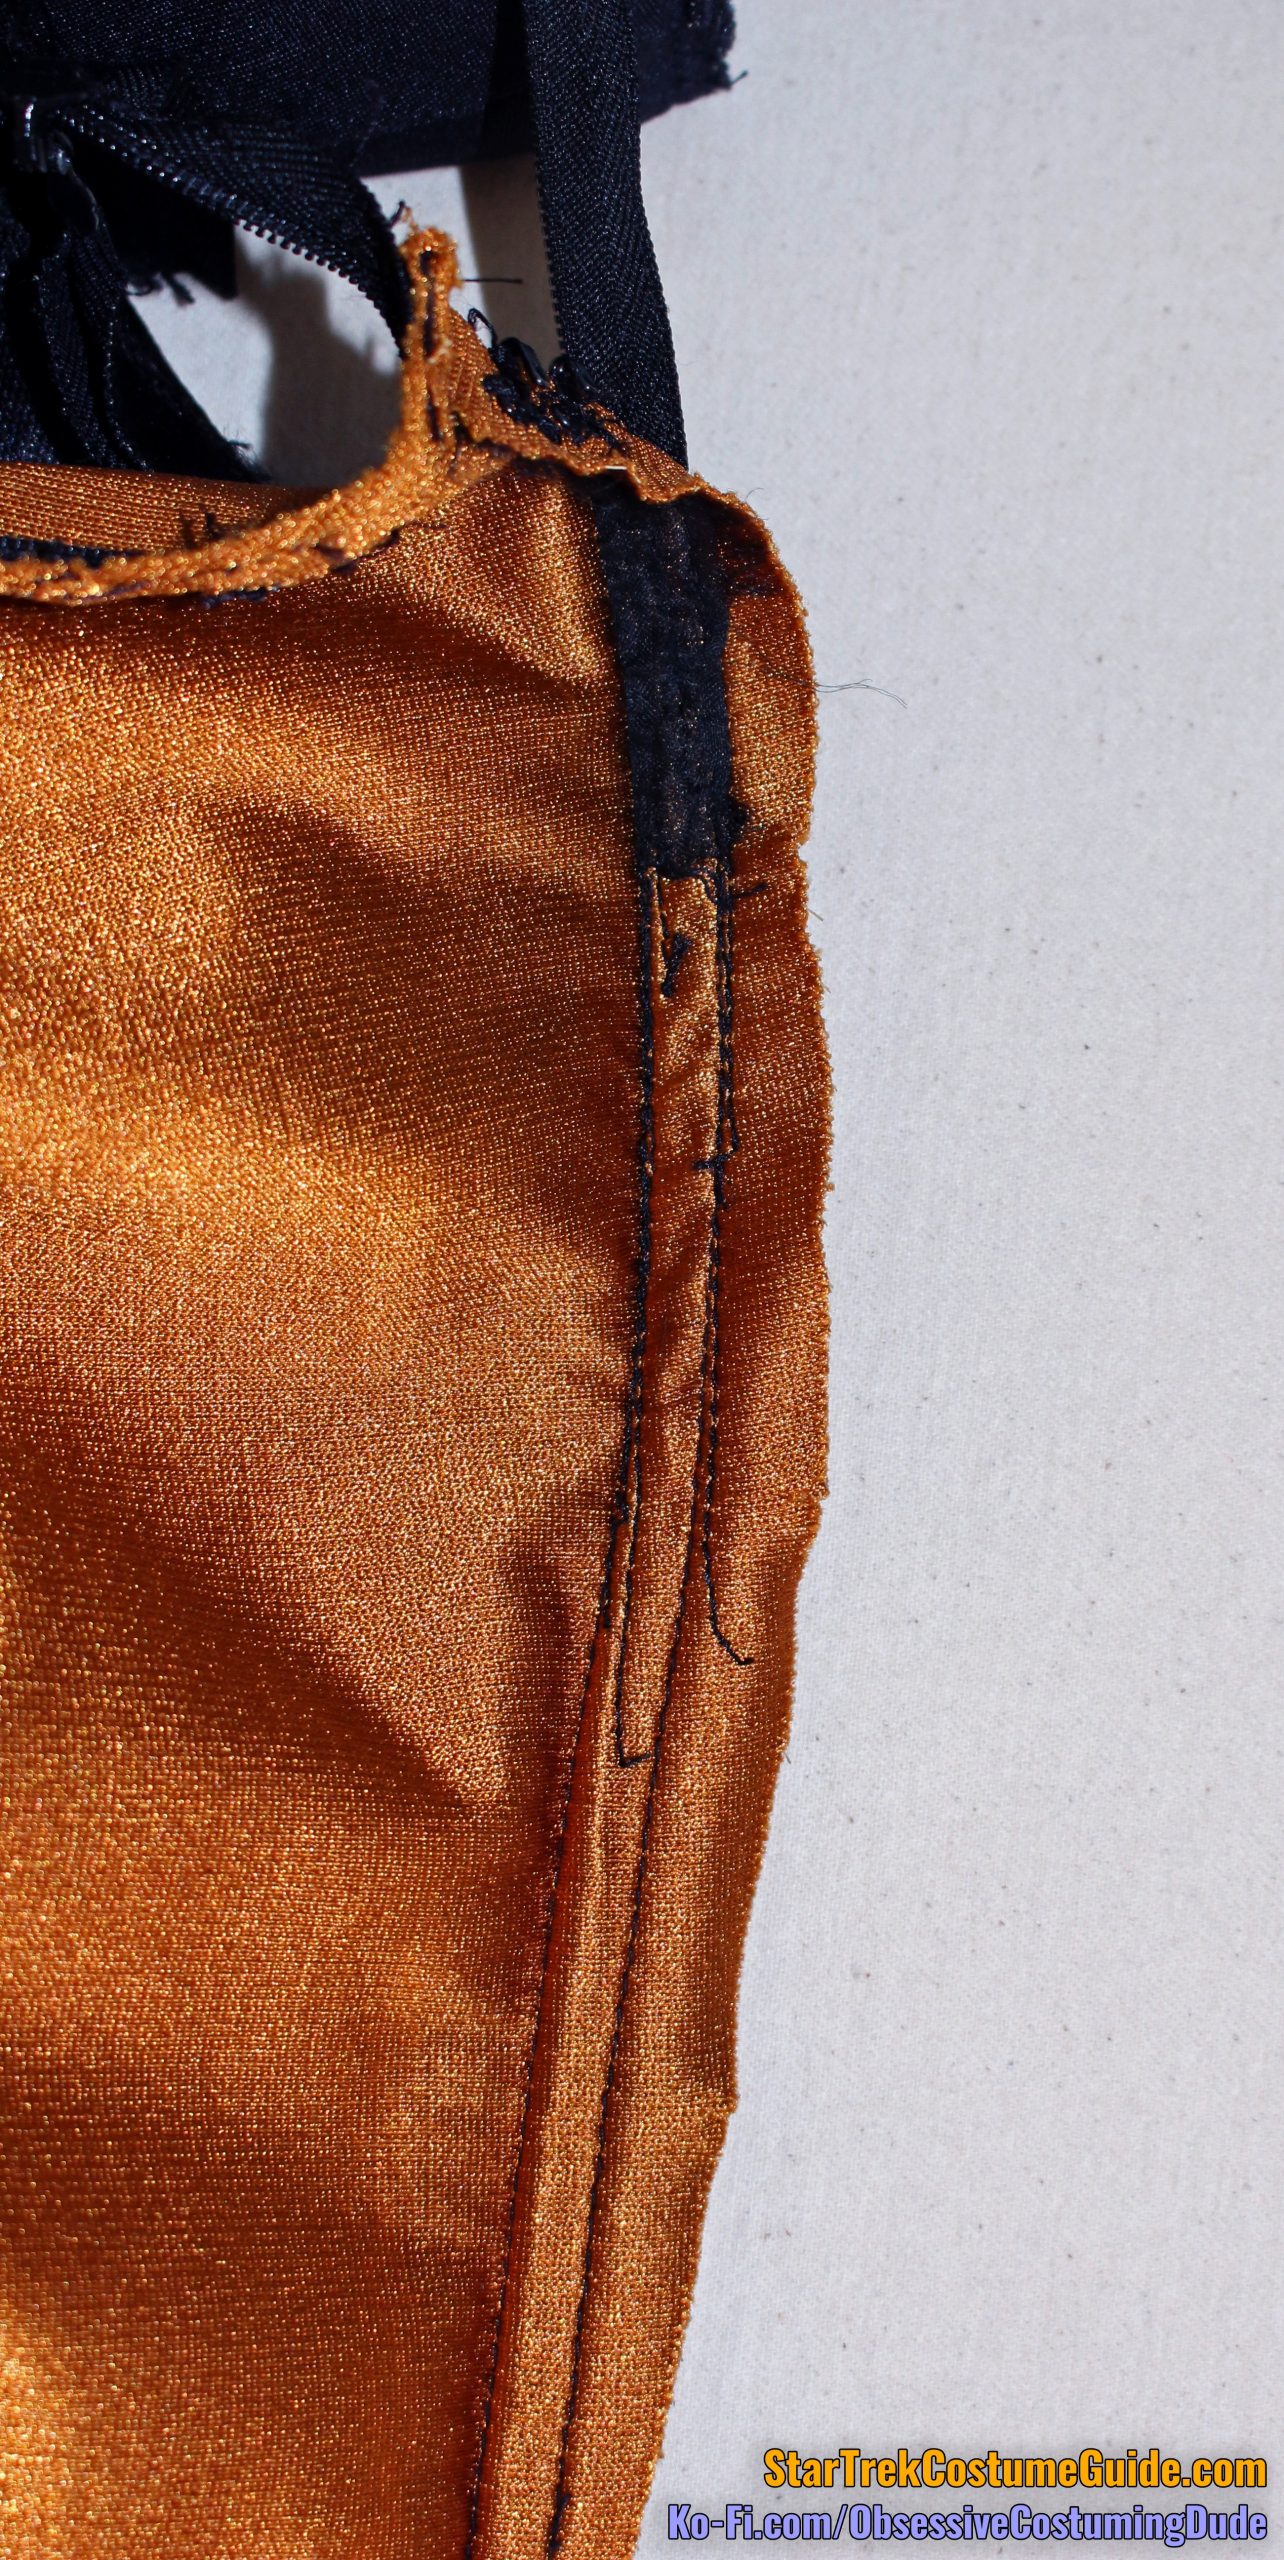
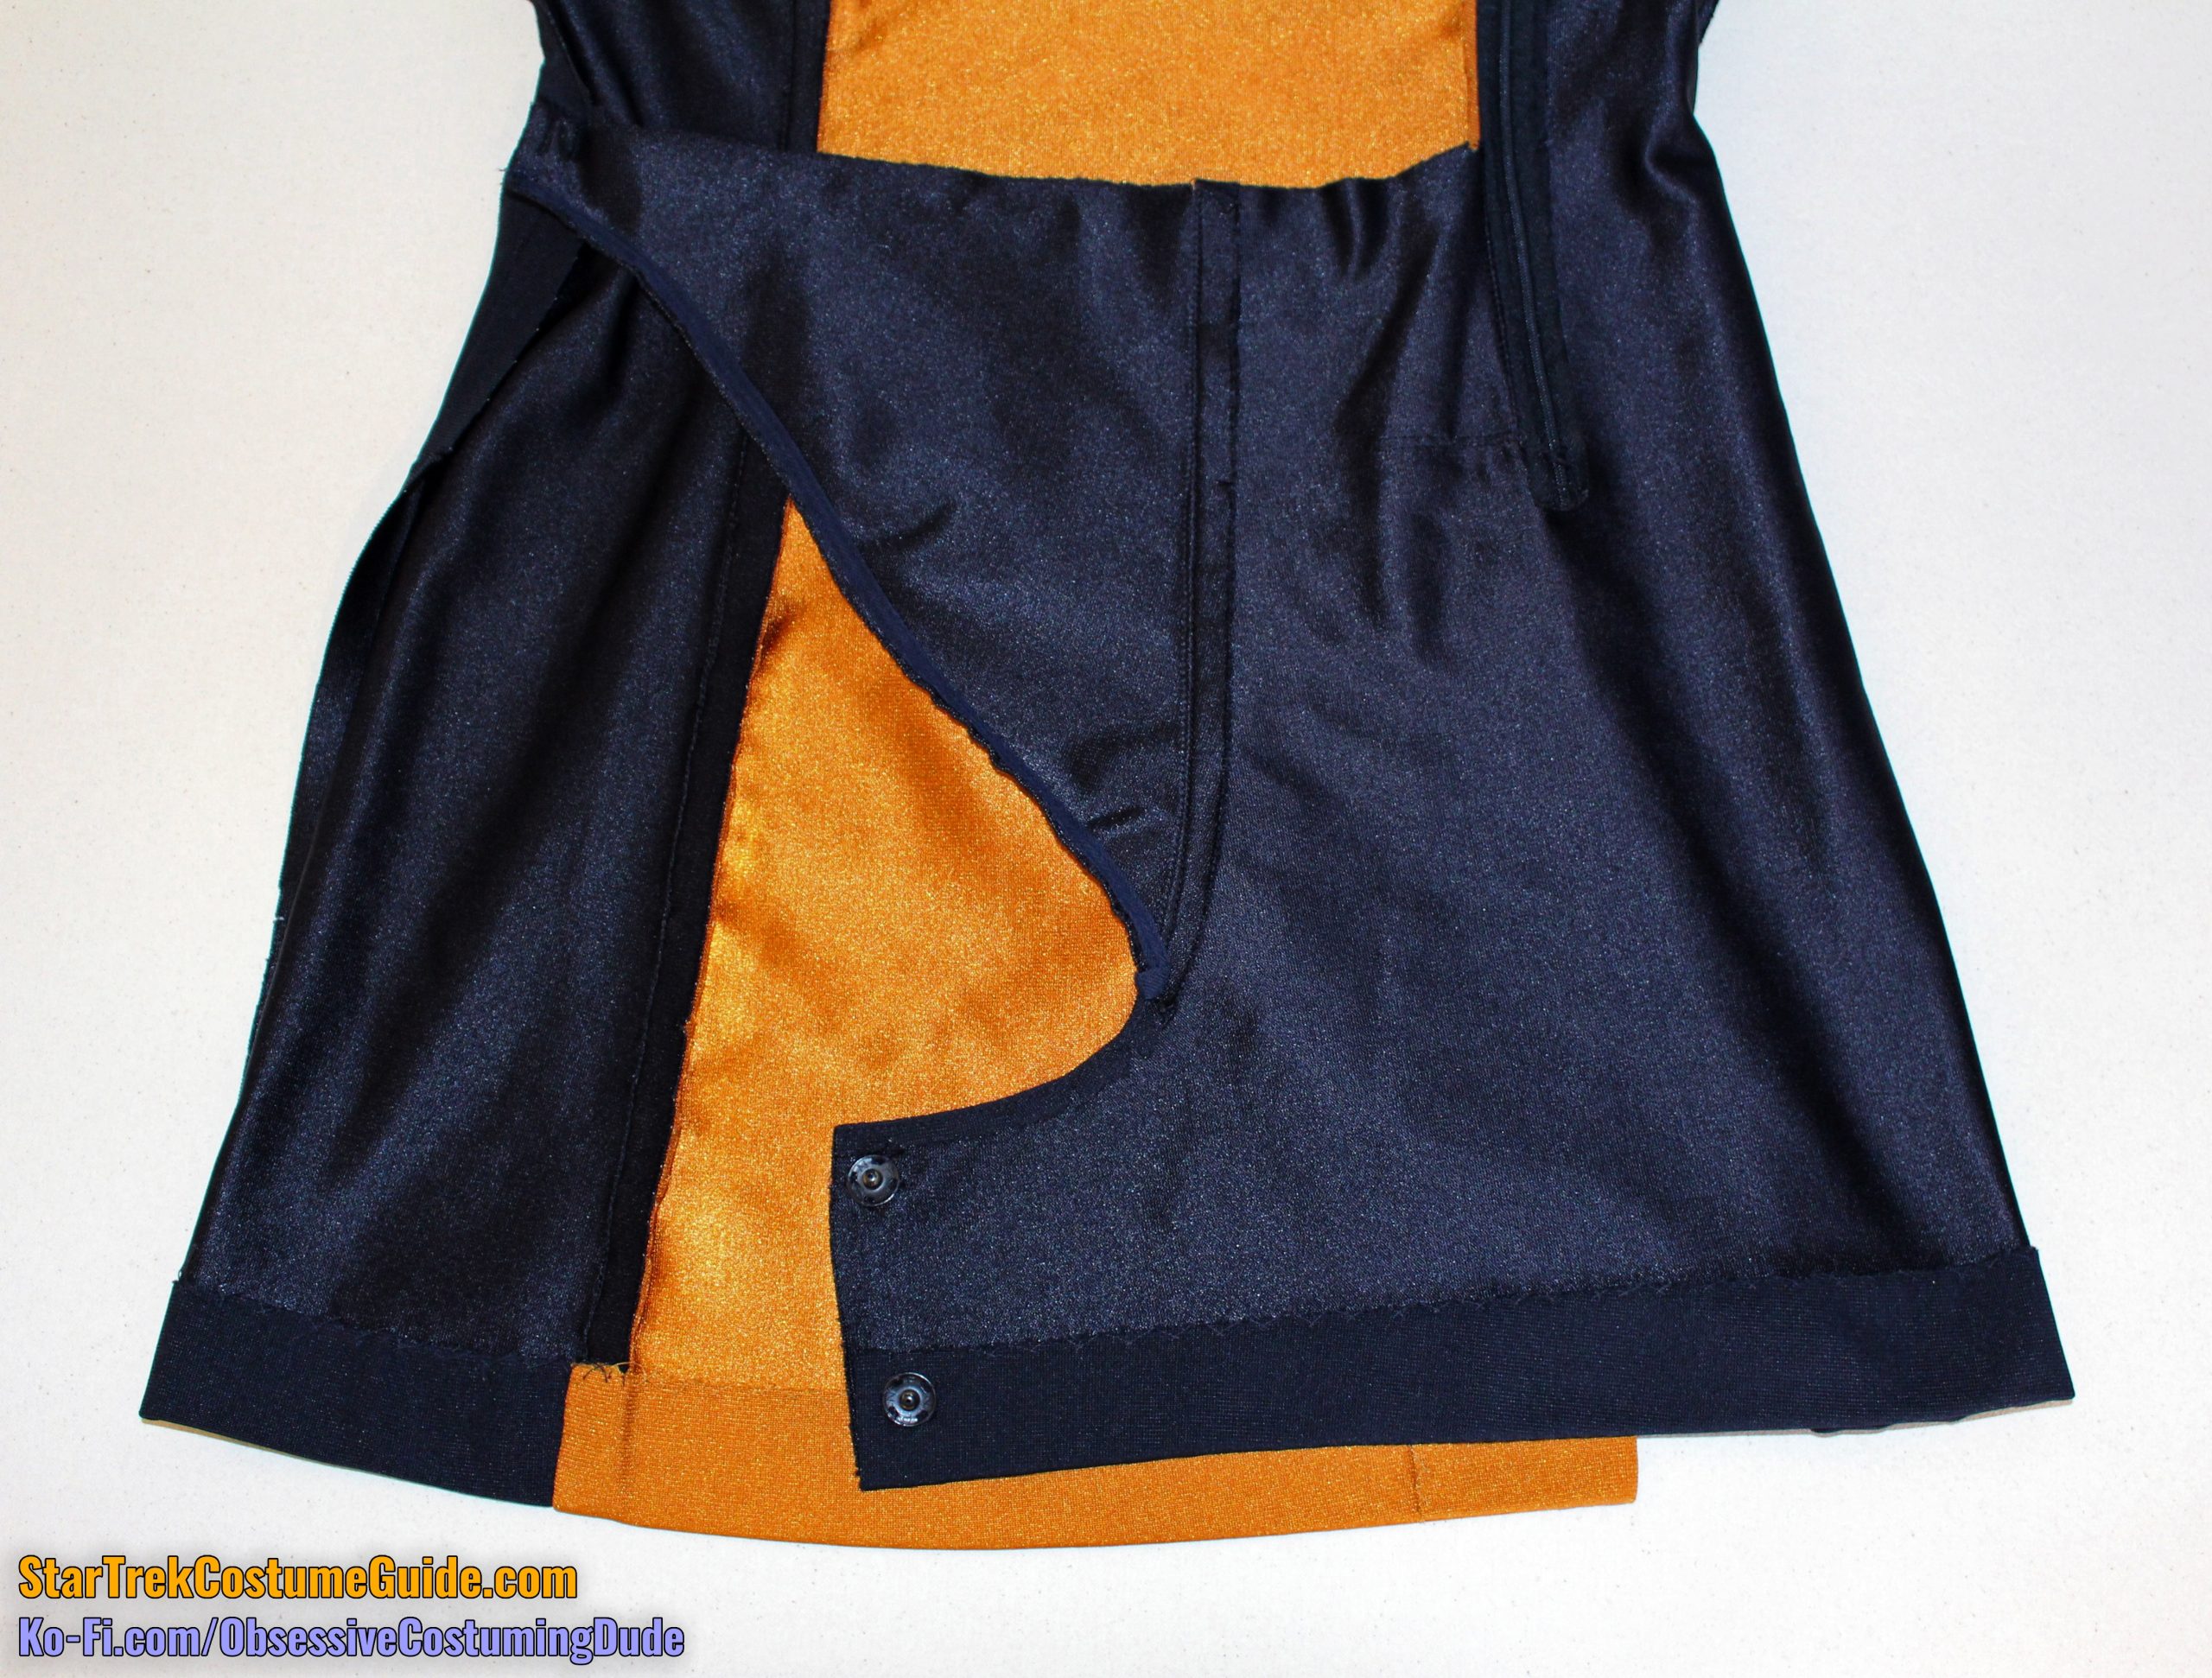
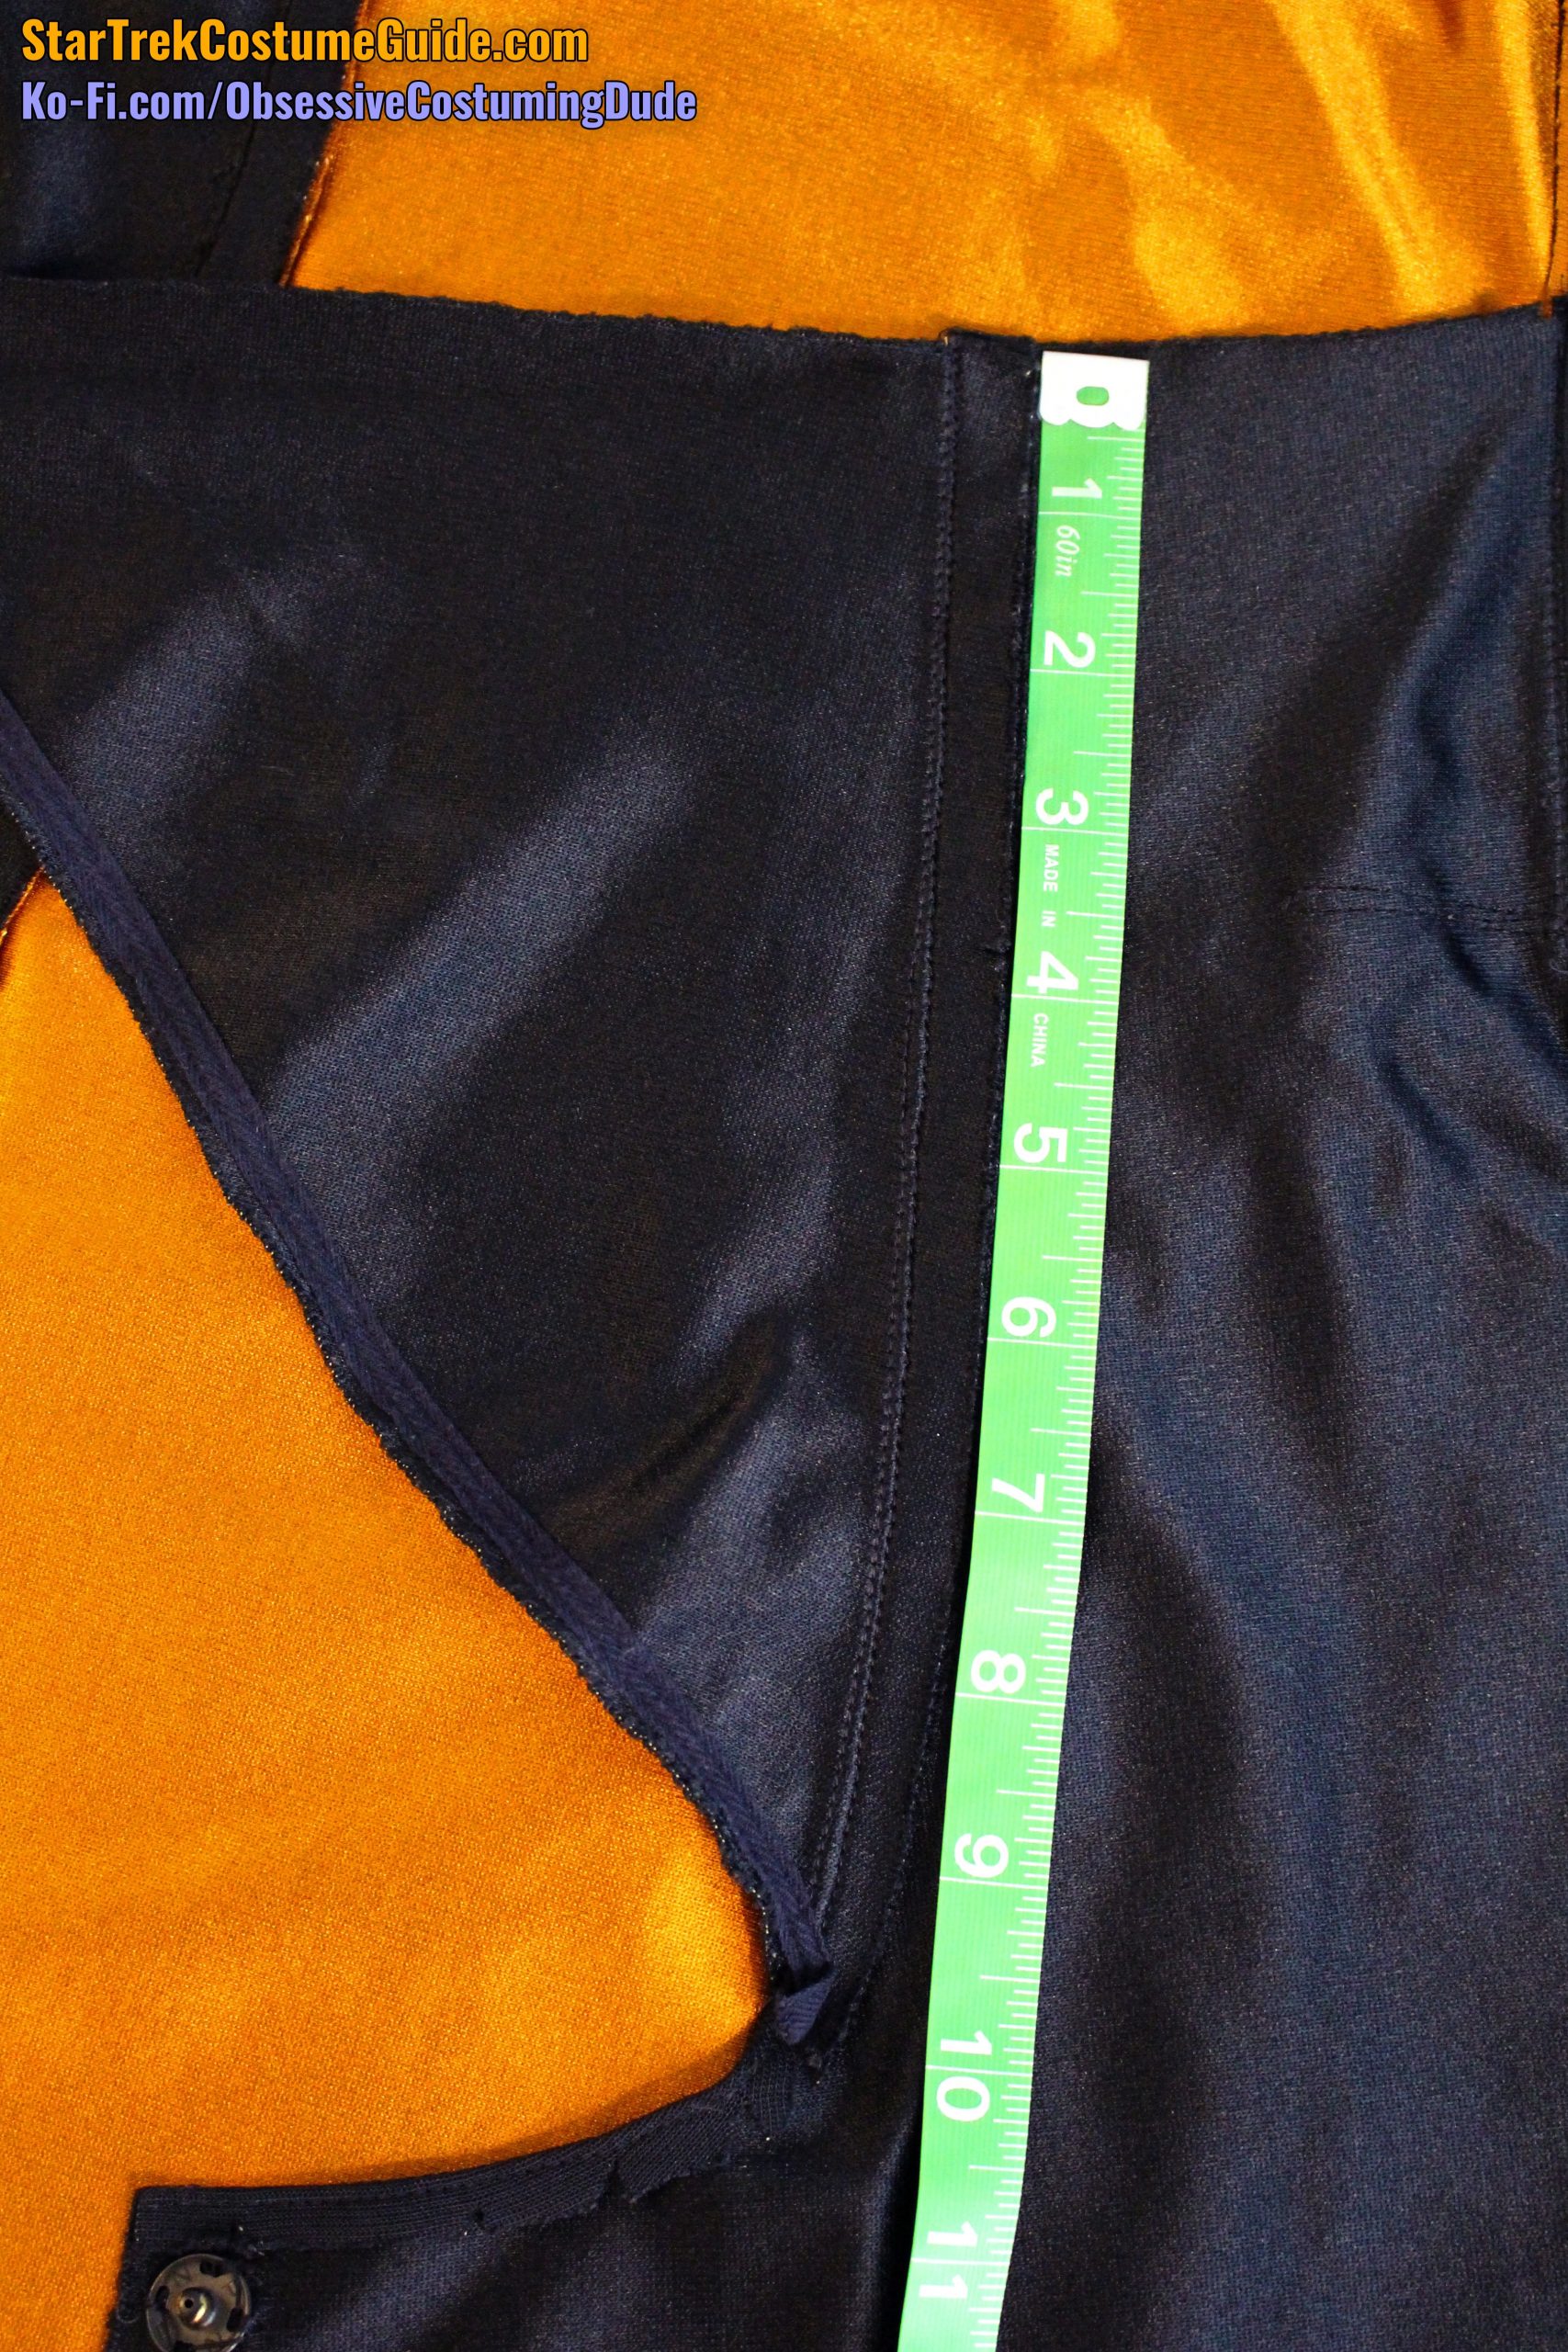
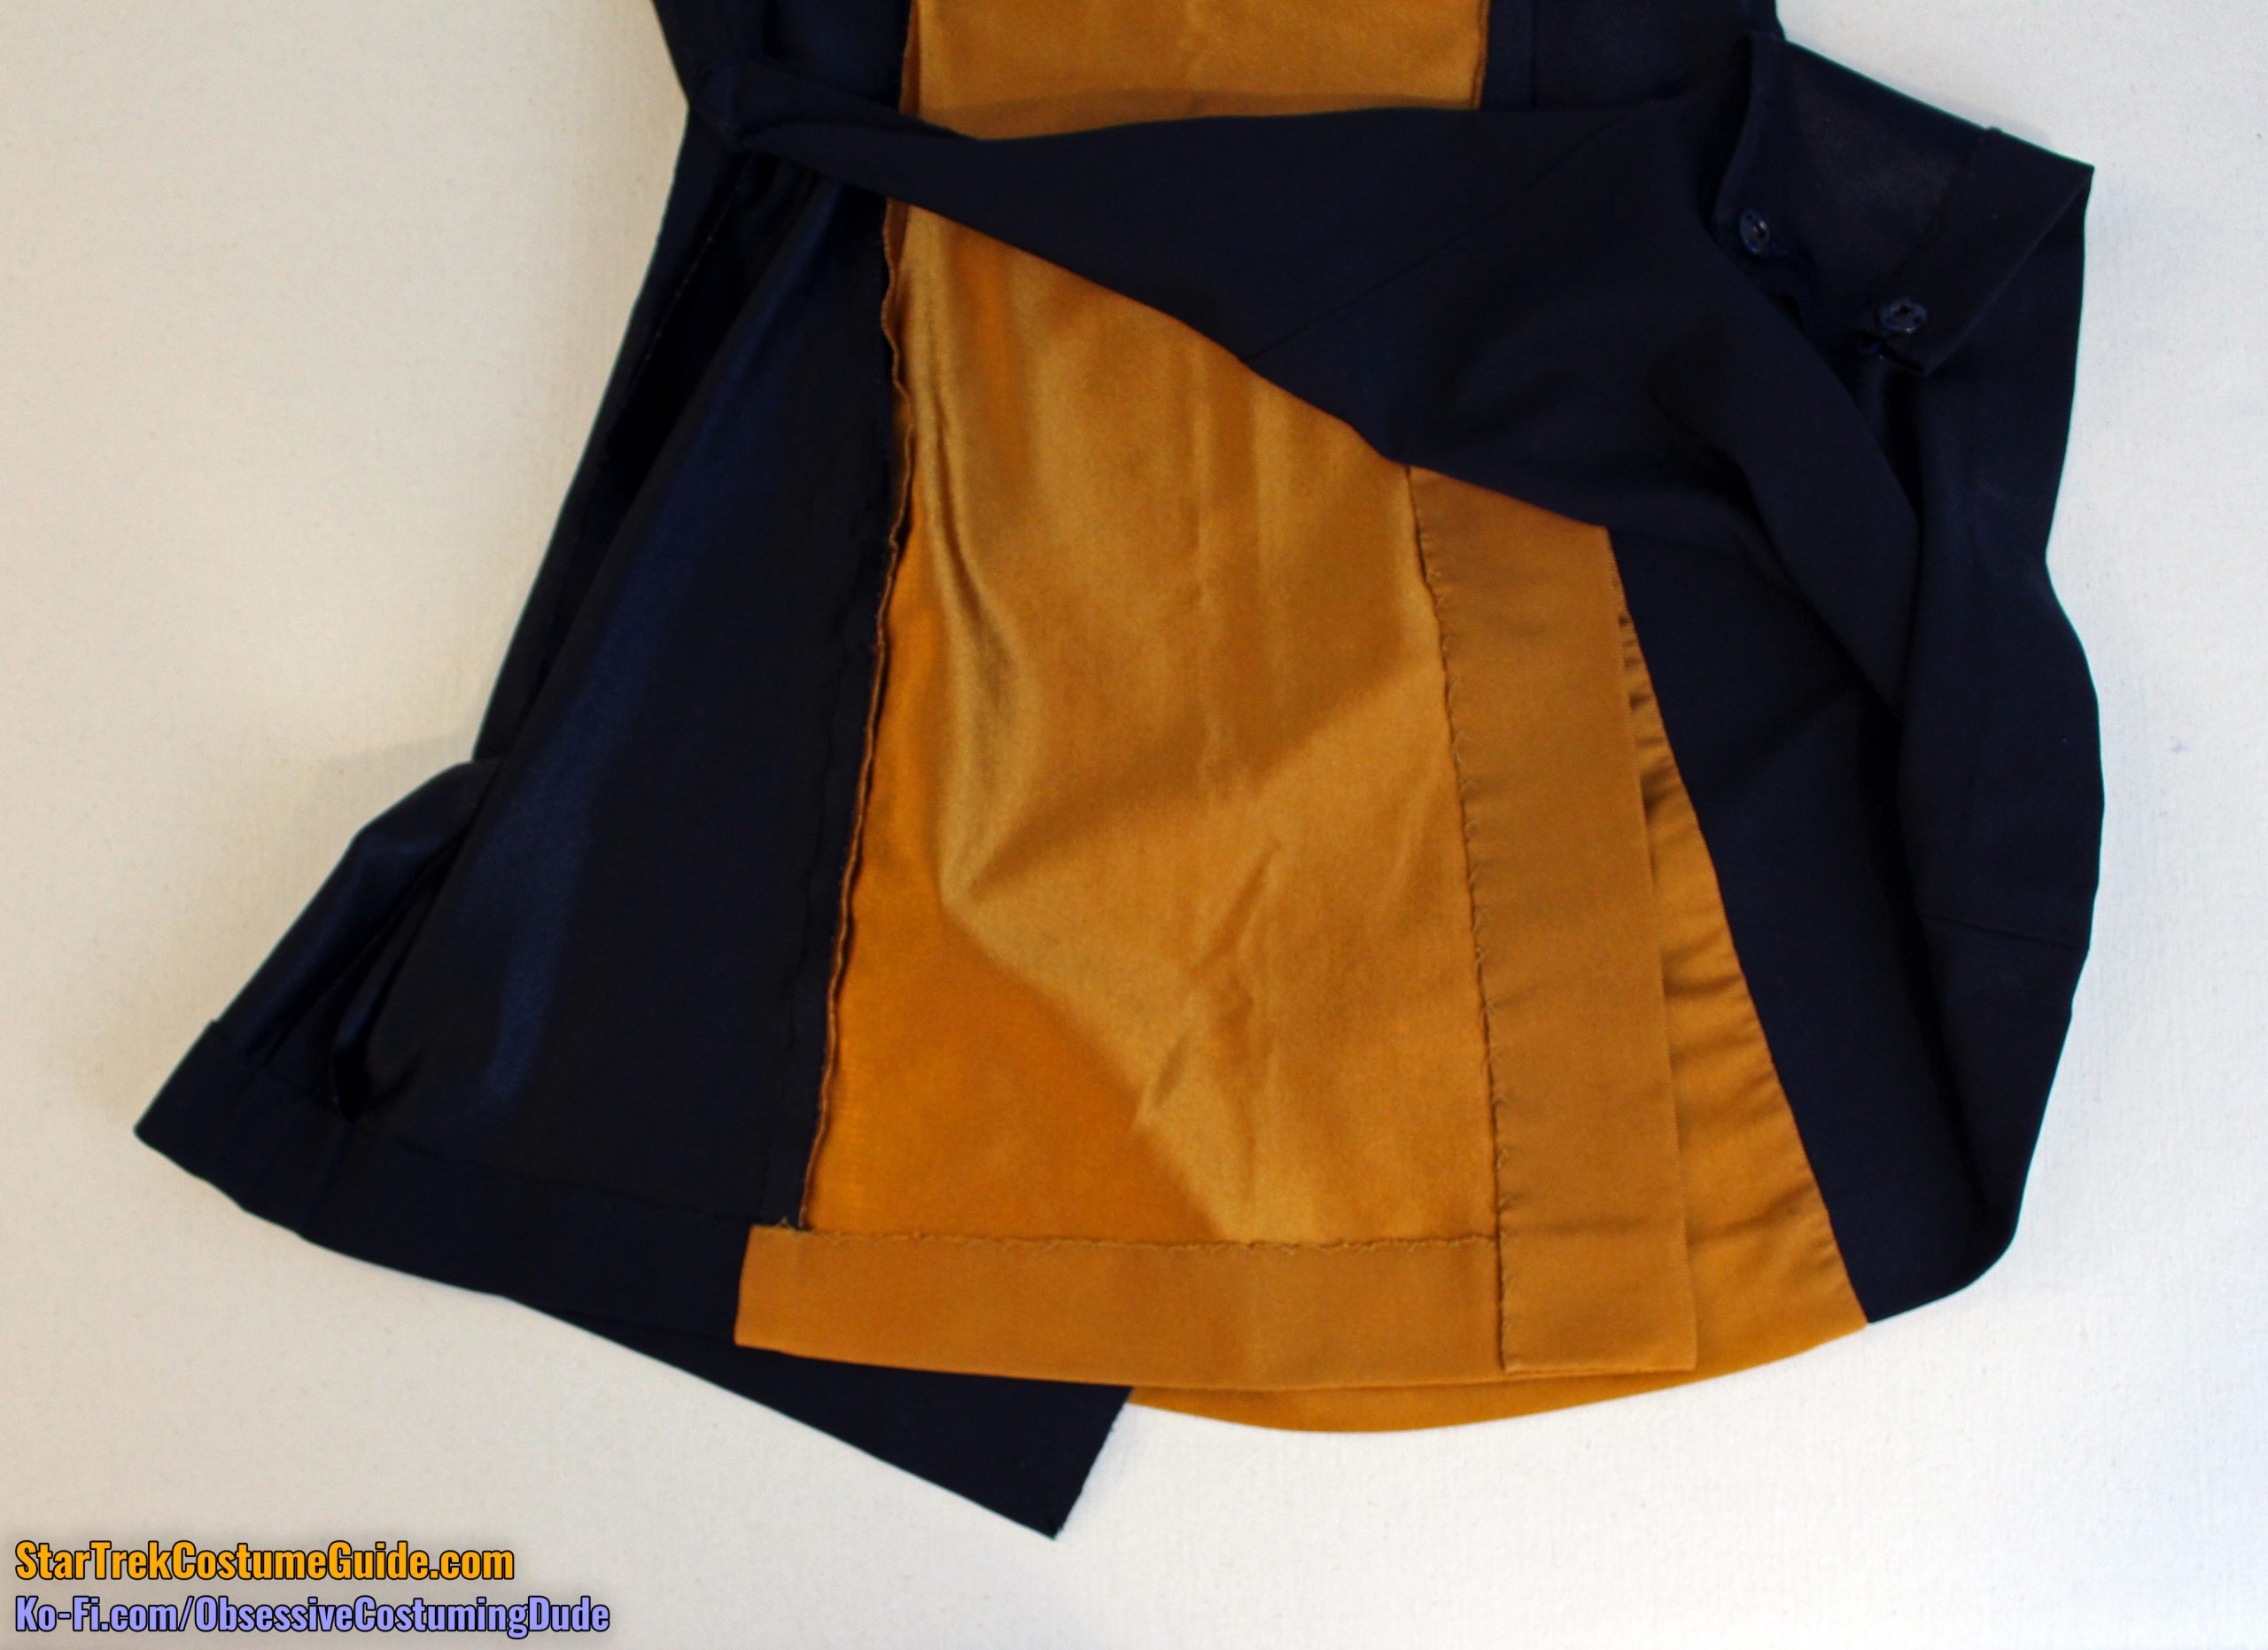
With the skant inside-out, the lower interior construction is more easily observable.
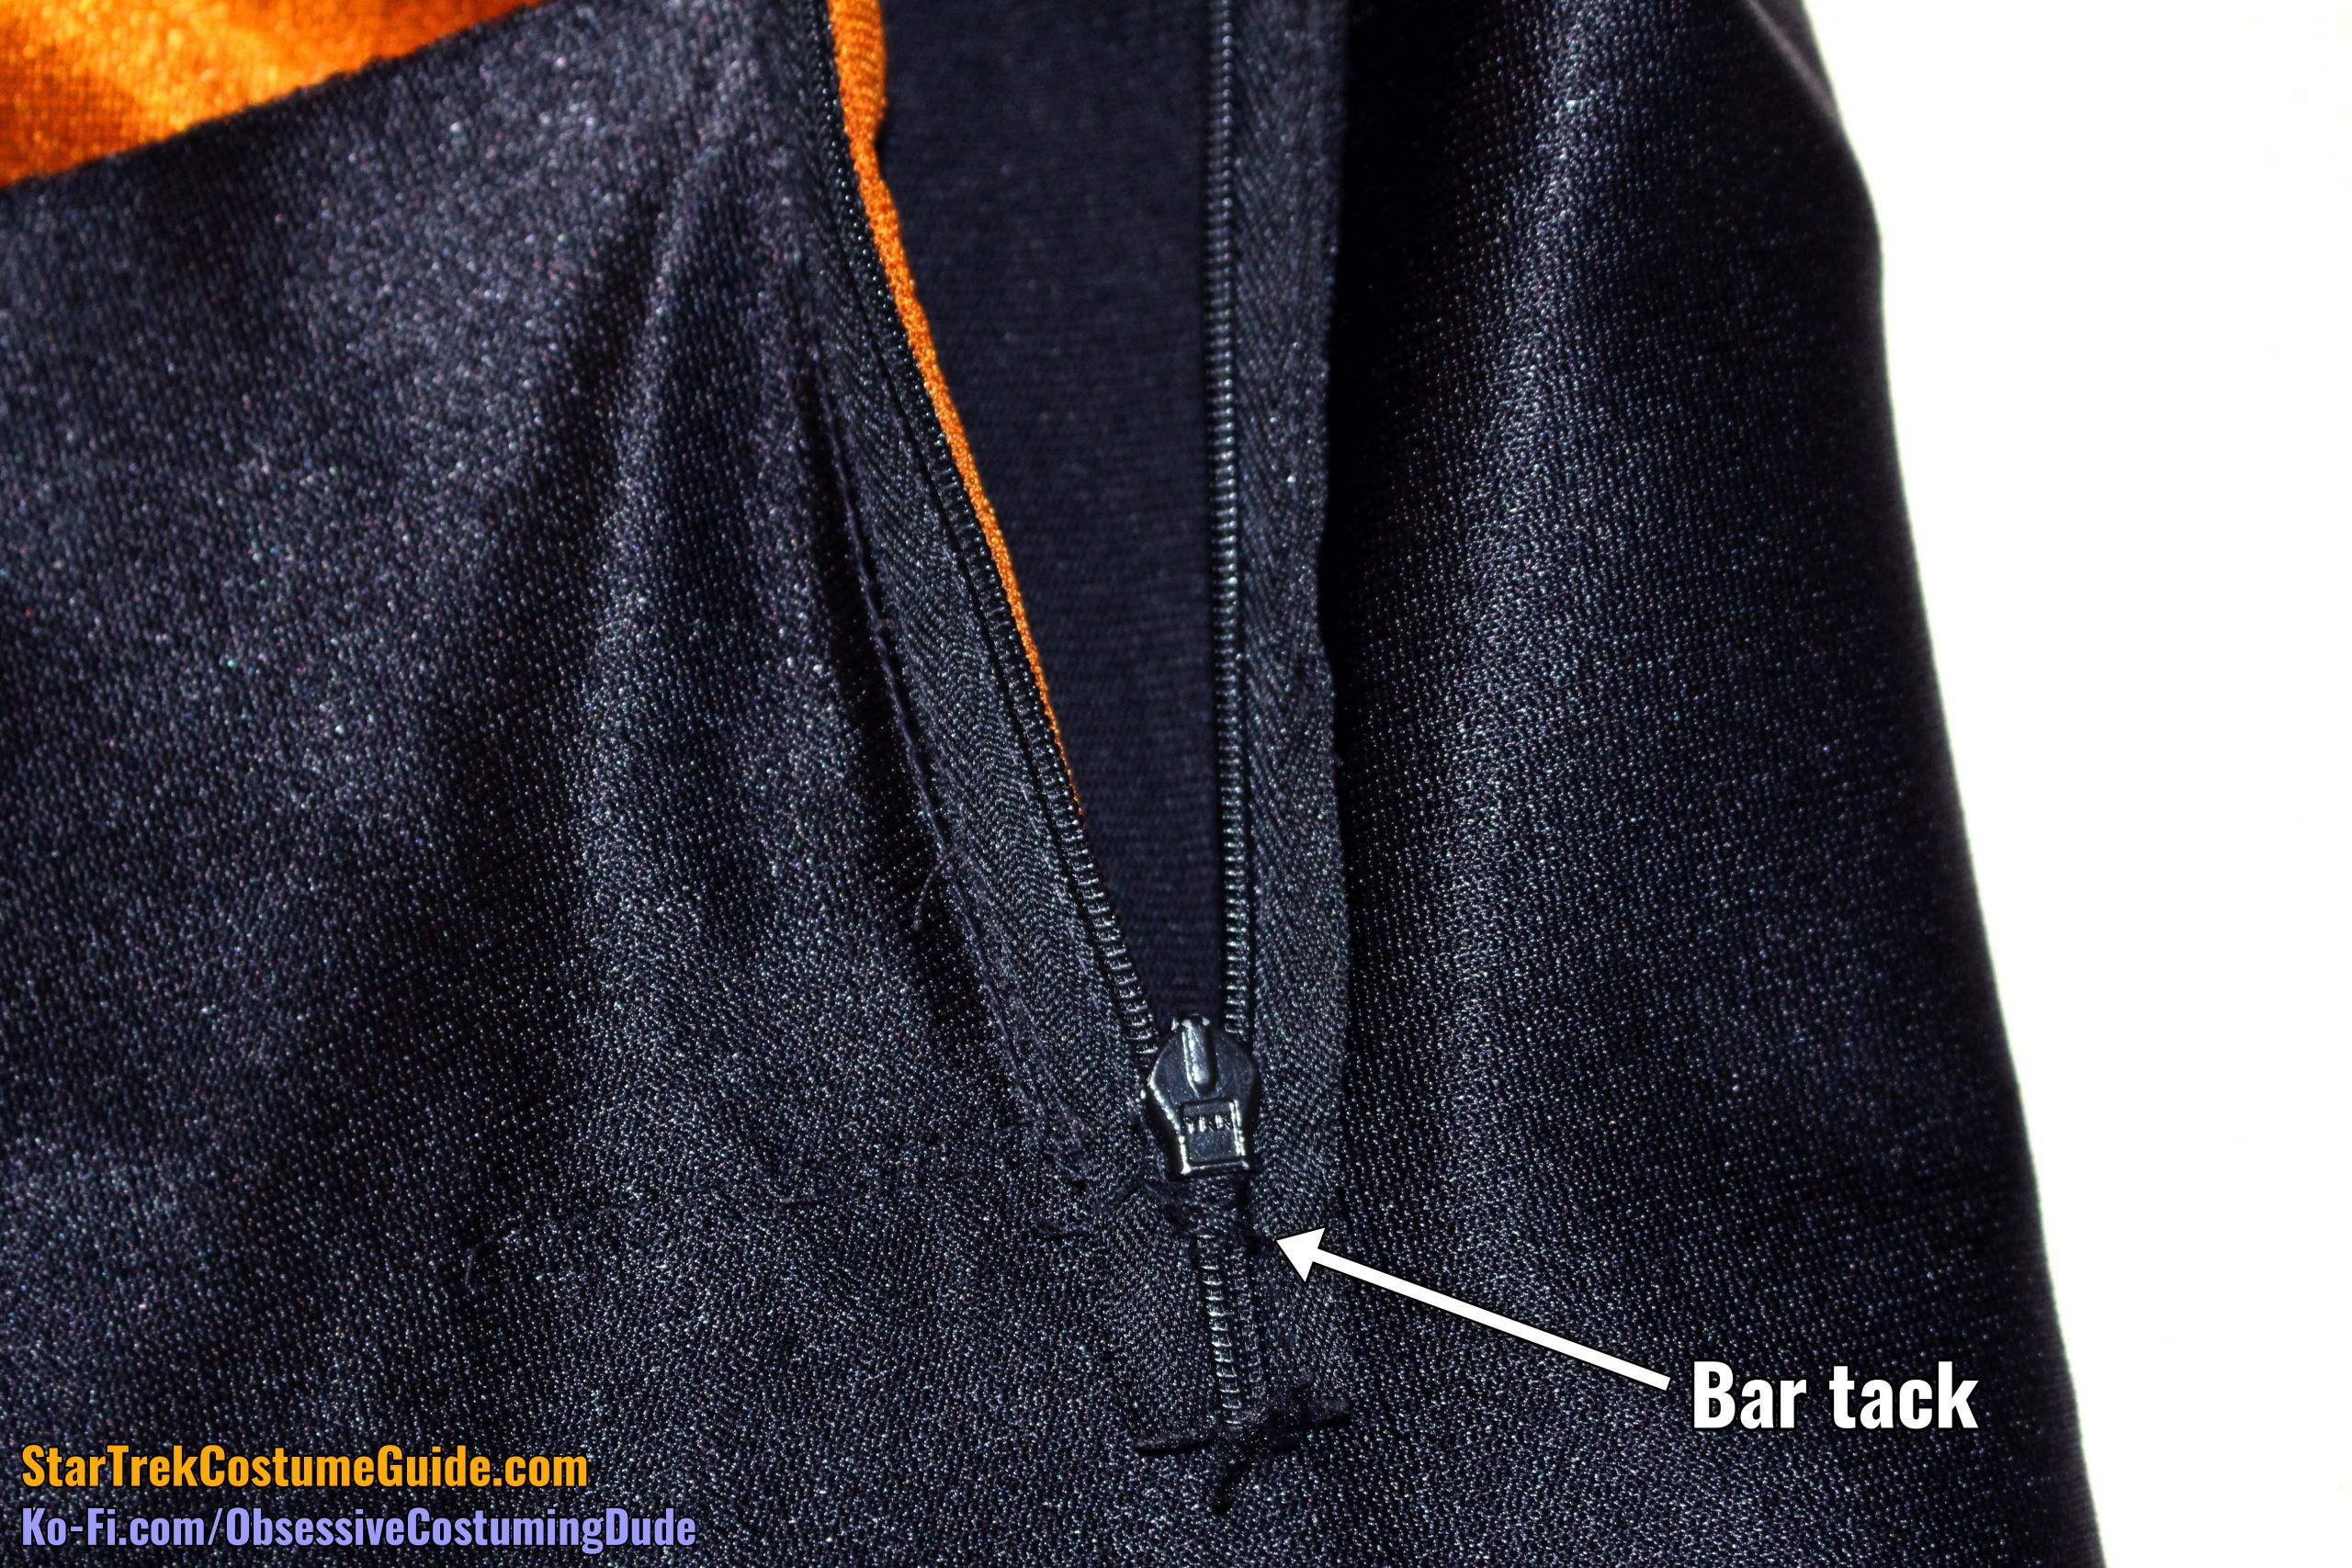
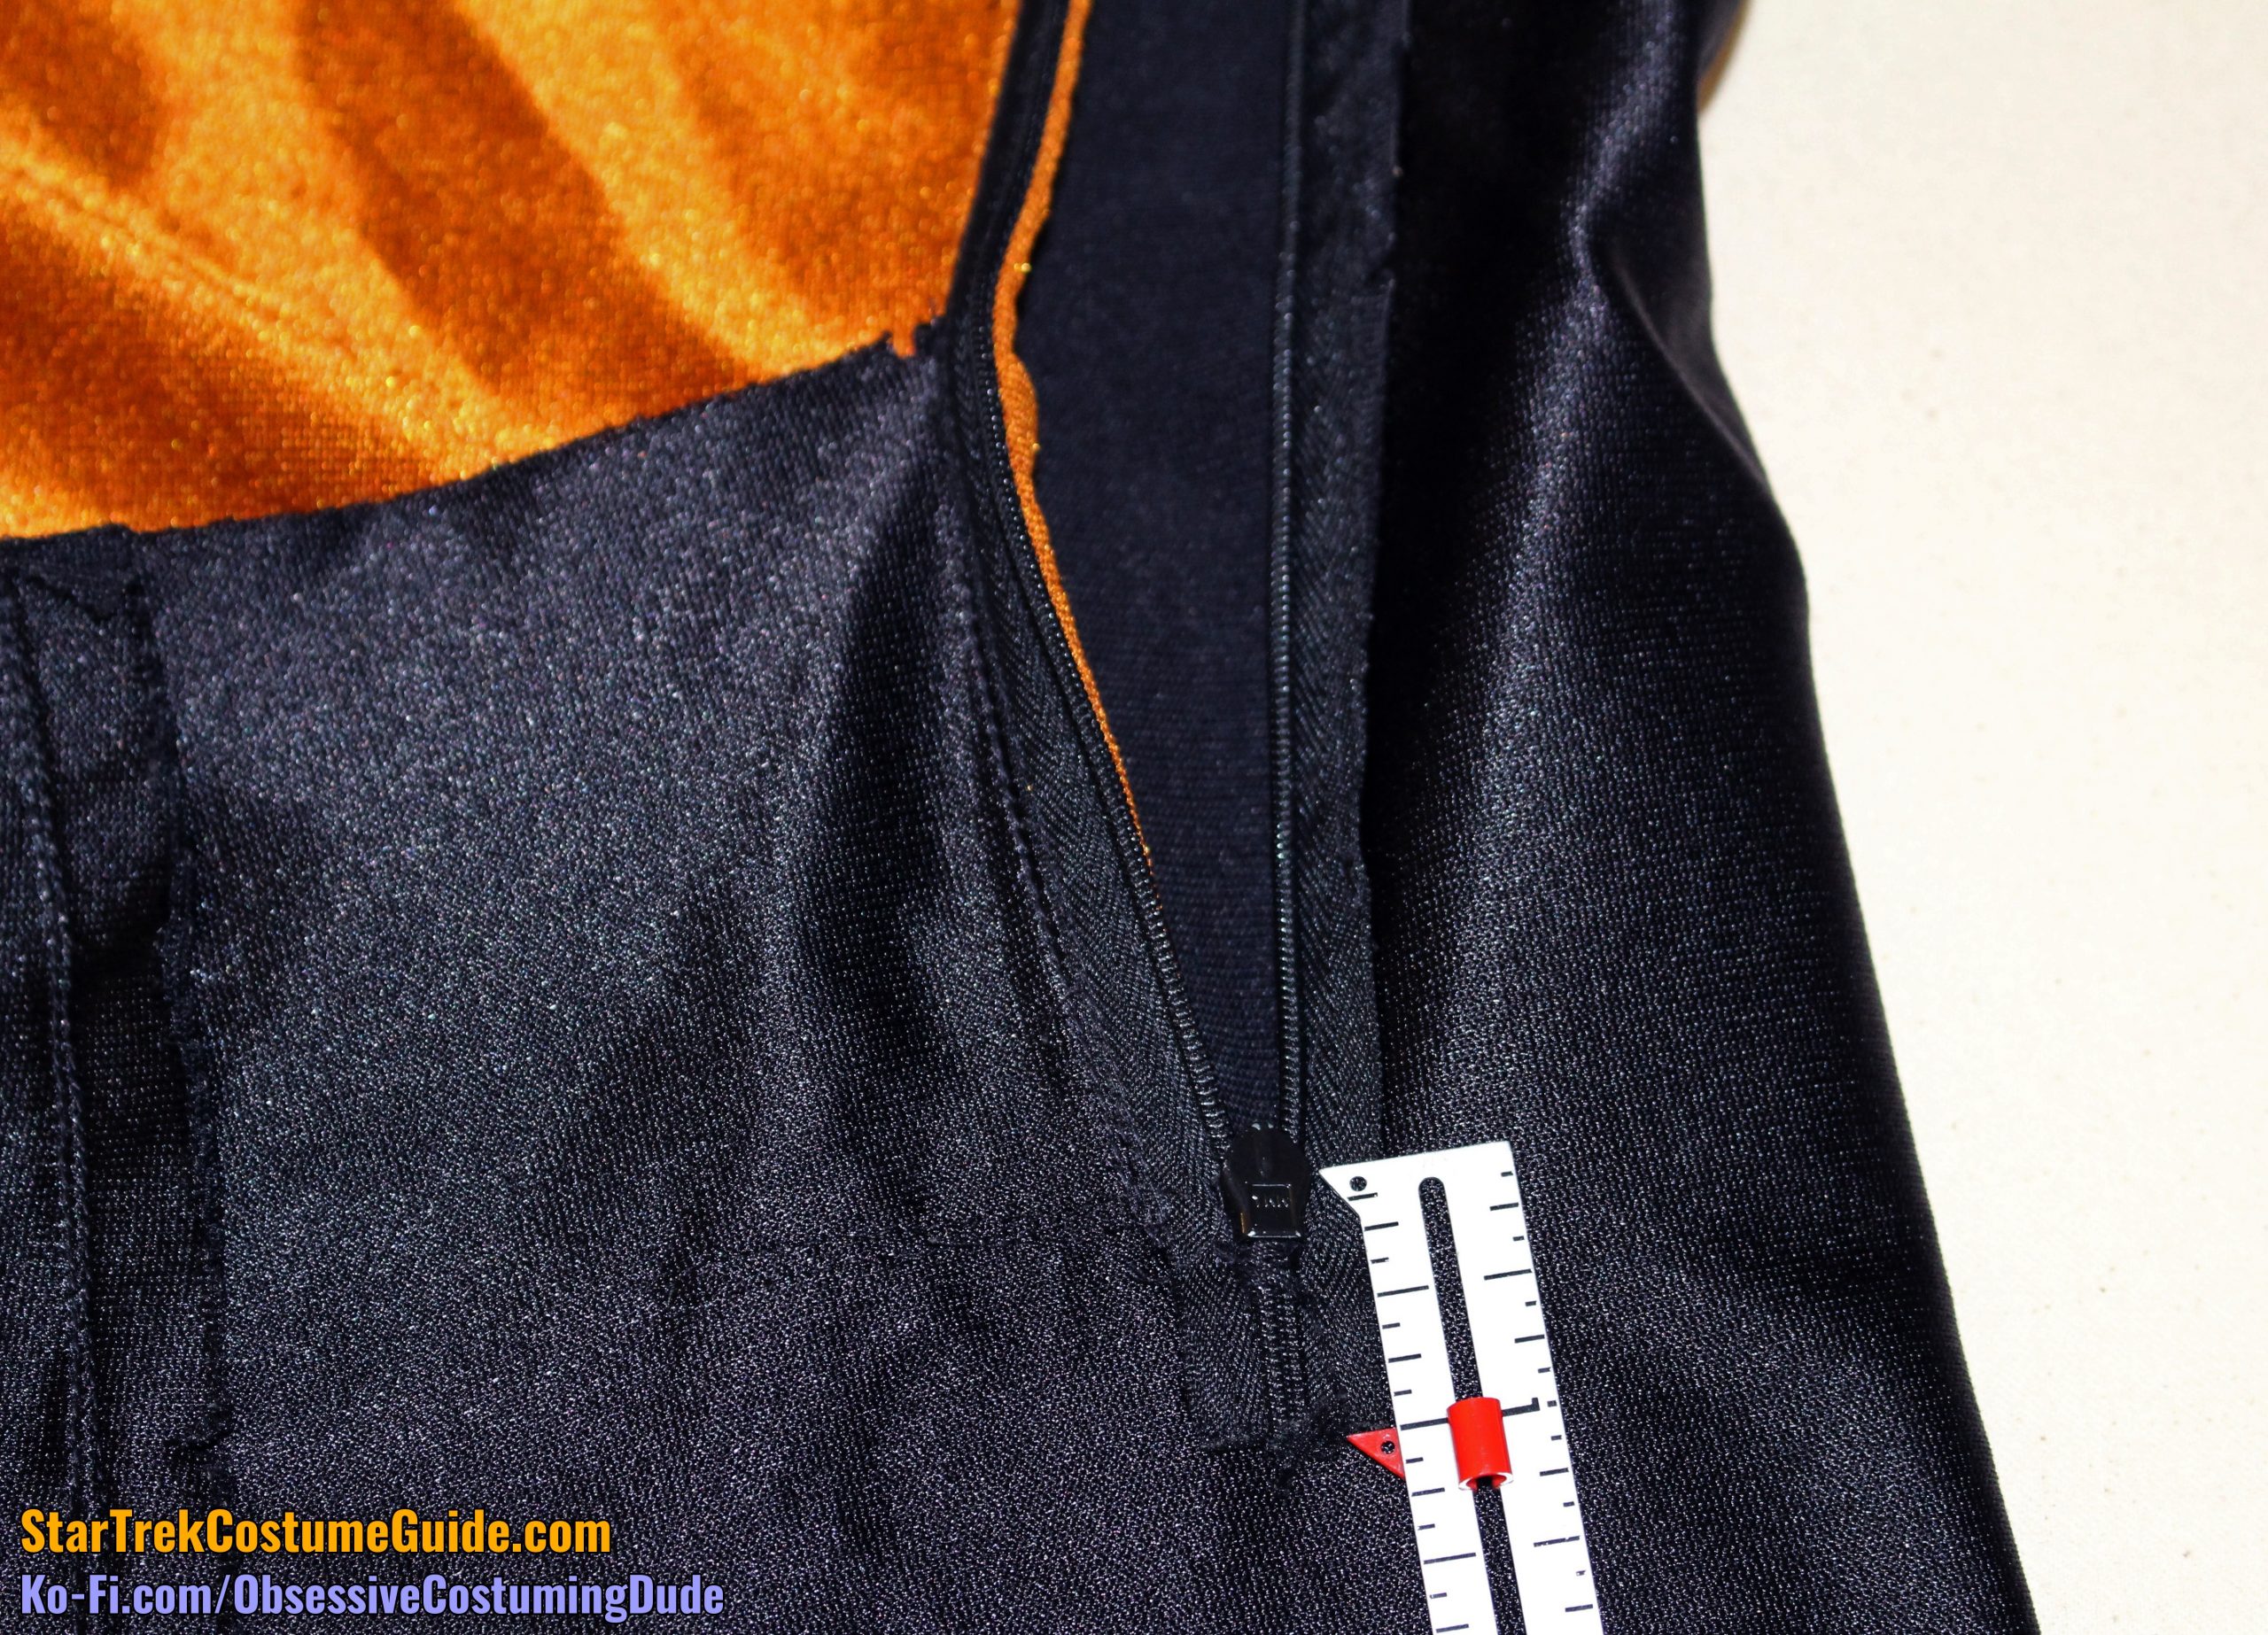
The lower front panel and “interior waist anchor” extended upward past the top of the vent by about 4″.
The vertical zipper extended downward about 1″ past the top of the vent, and the zipper tape was secured with a bar tack (presumably for extra security, since the zipper shouldn’t be able to open below the vent, anyway).
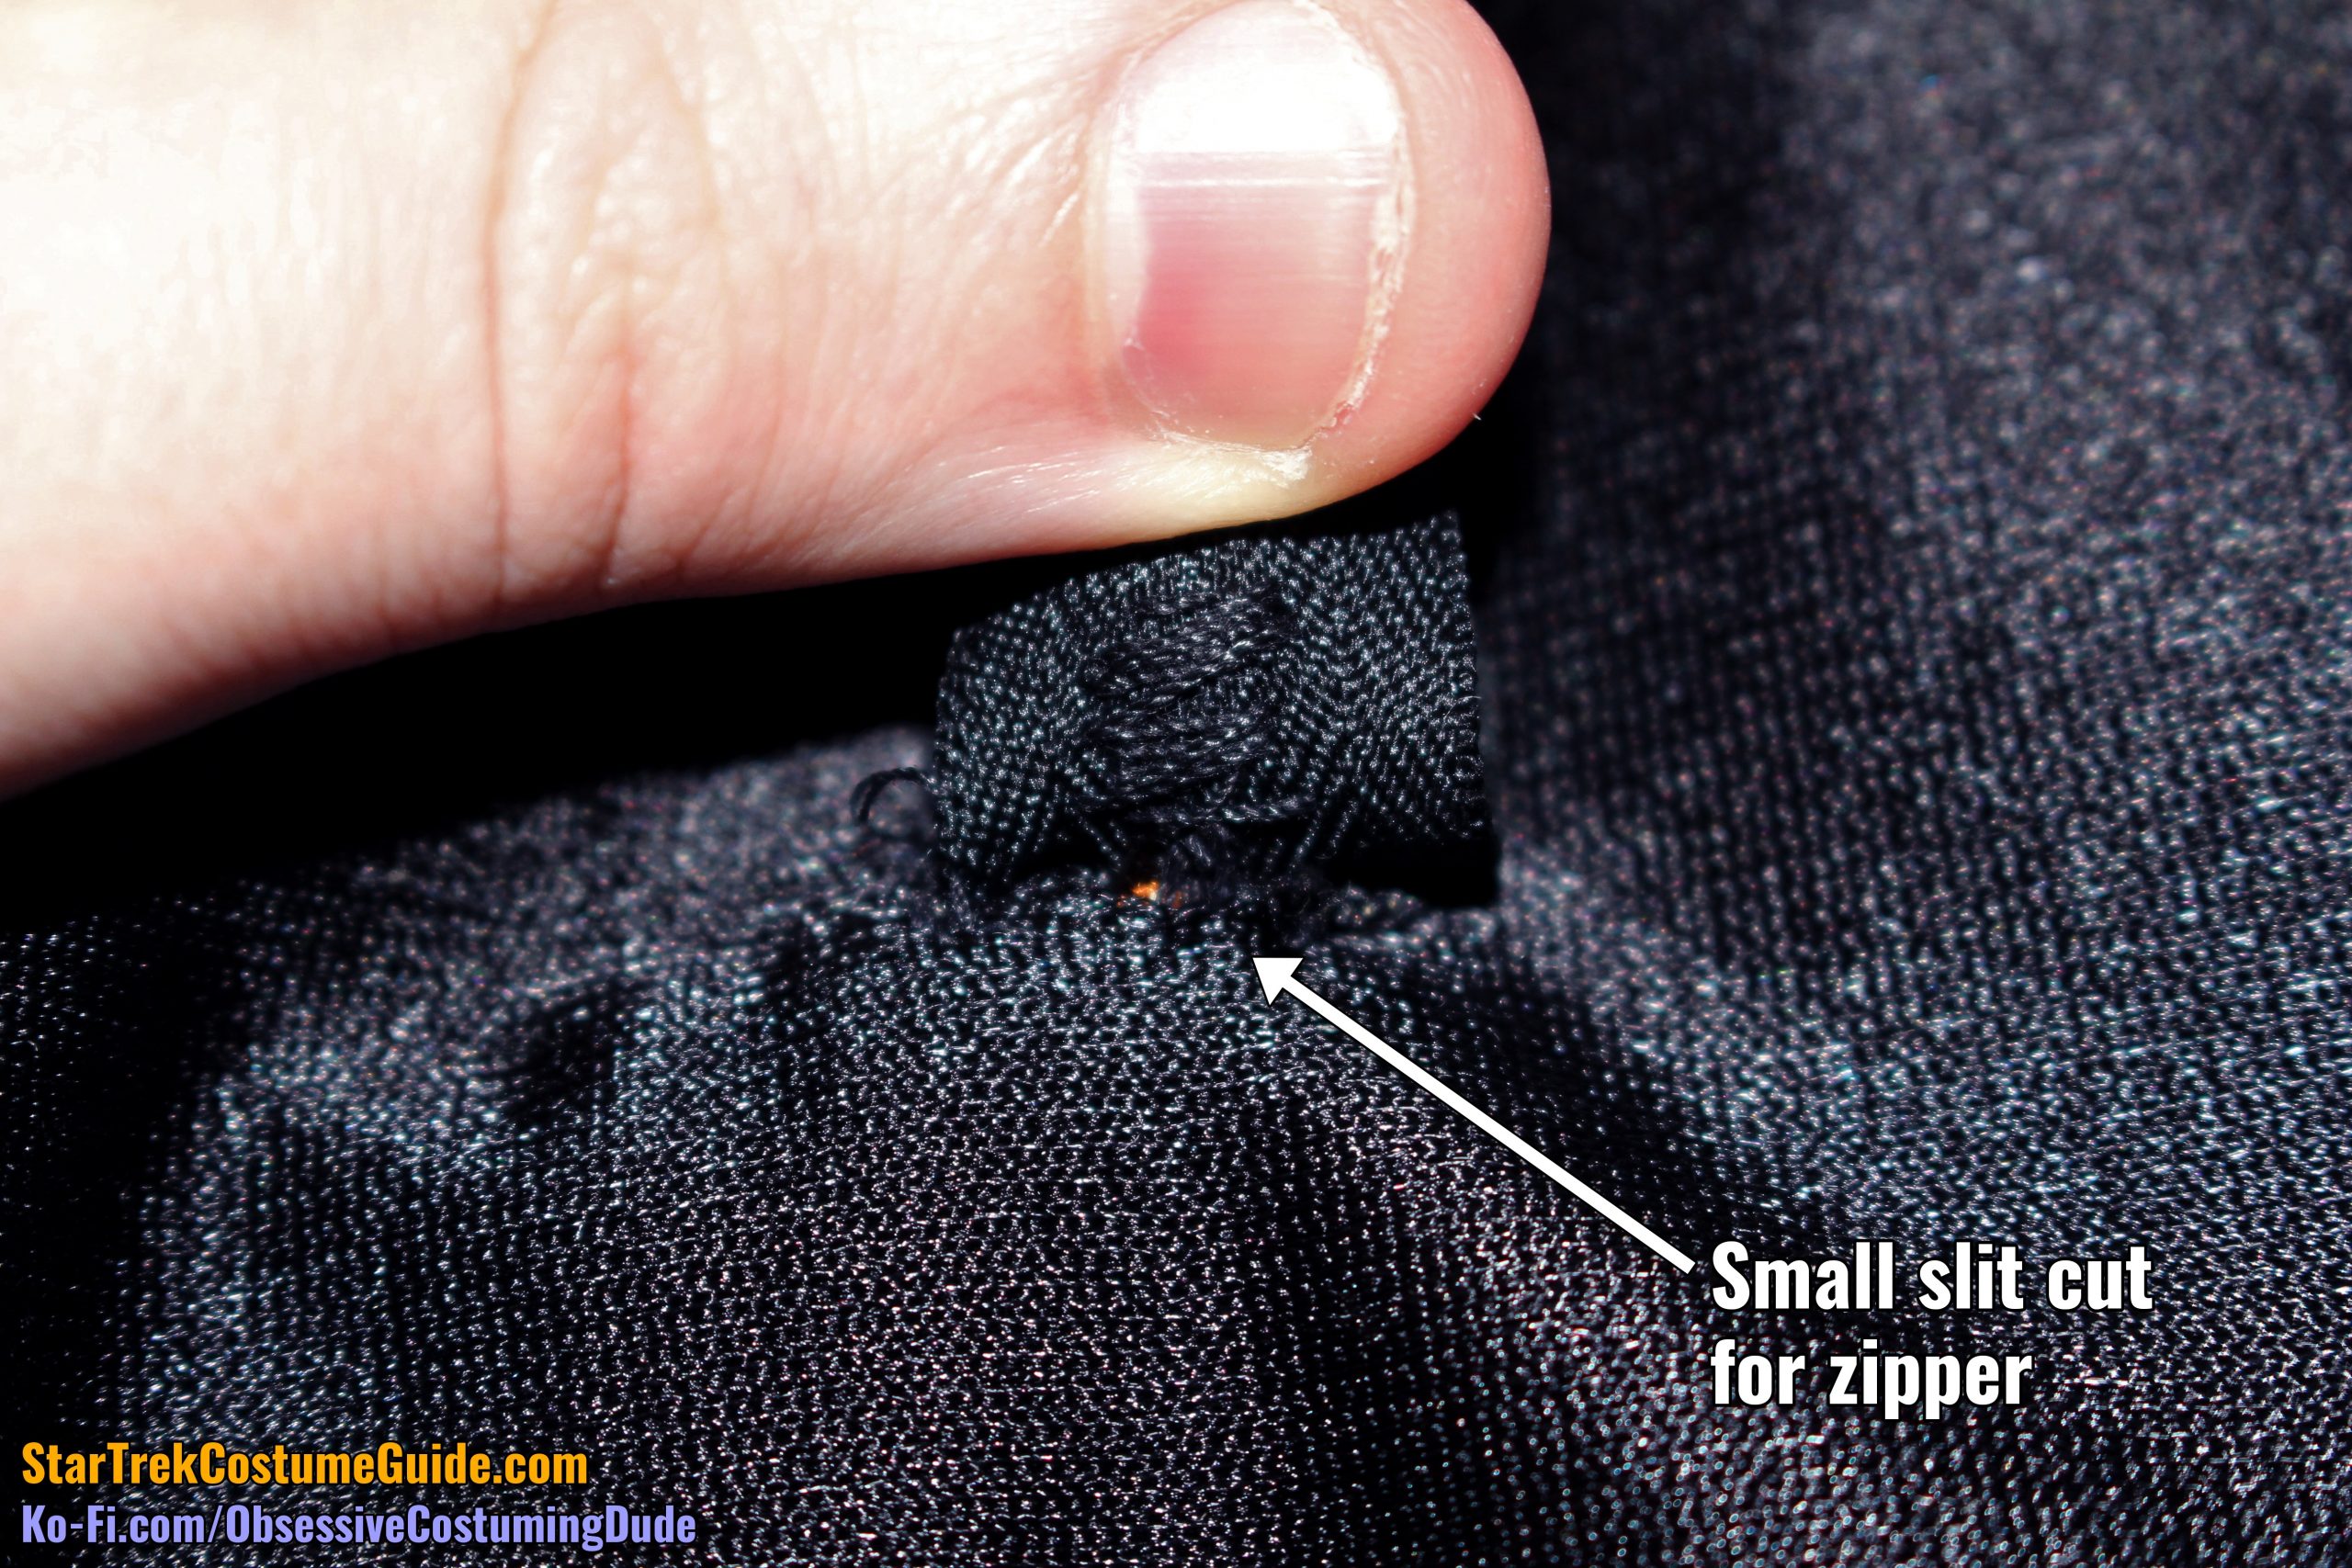
Since the vertical zipper extended downward into the lower side panel, and this panel was cut as a single piece, a slit had to be cut into it to accommodate the zipper.
This meant that there was very limited seam allowance available toward the bottom, though.
Observe how the right side front seam allowance tapered down from about ½” to a mere ¼” along the lowermost few inches of the zipper.
You may have also noticed the twin rows of black stitching, barely visible on the underside of the skant.
This is where the center front was fastened down above the vent.
In addition to the stitching that attached the invisible zipper to the front panel, the front was sewn down to the side panel above the vent with two more subsequent rows of stitching.
The side panel extended toward the center 4″ from the zipper.
The centermost edge of the side panel was fairly straight, vertically, before it began to curve downward toward the leg strap.
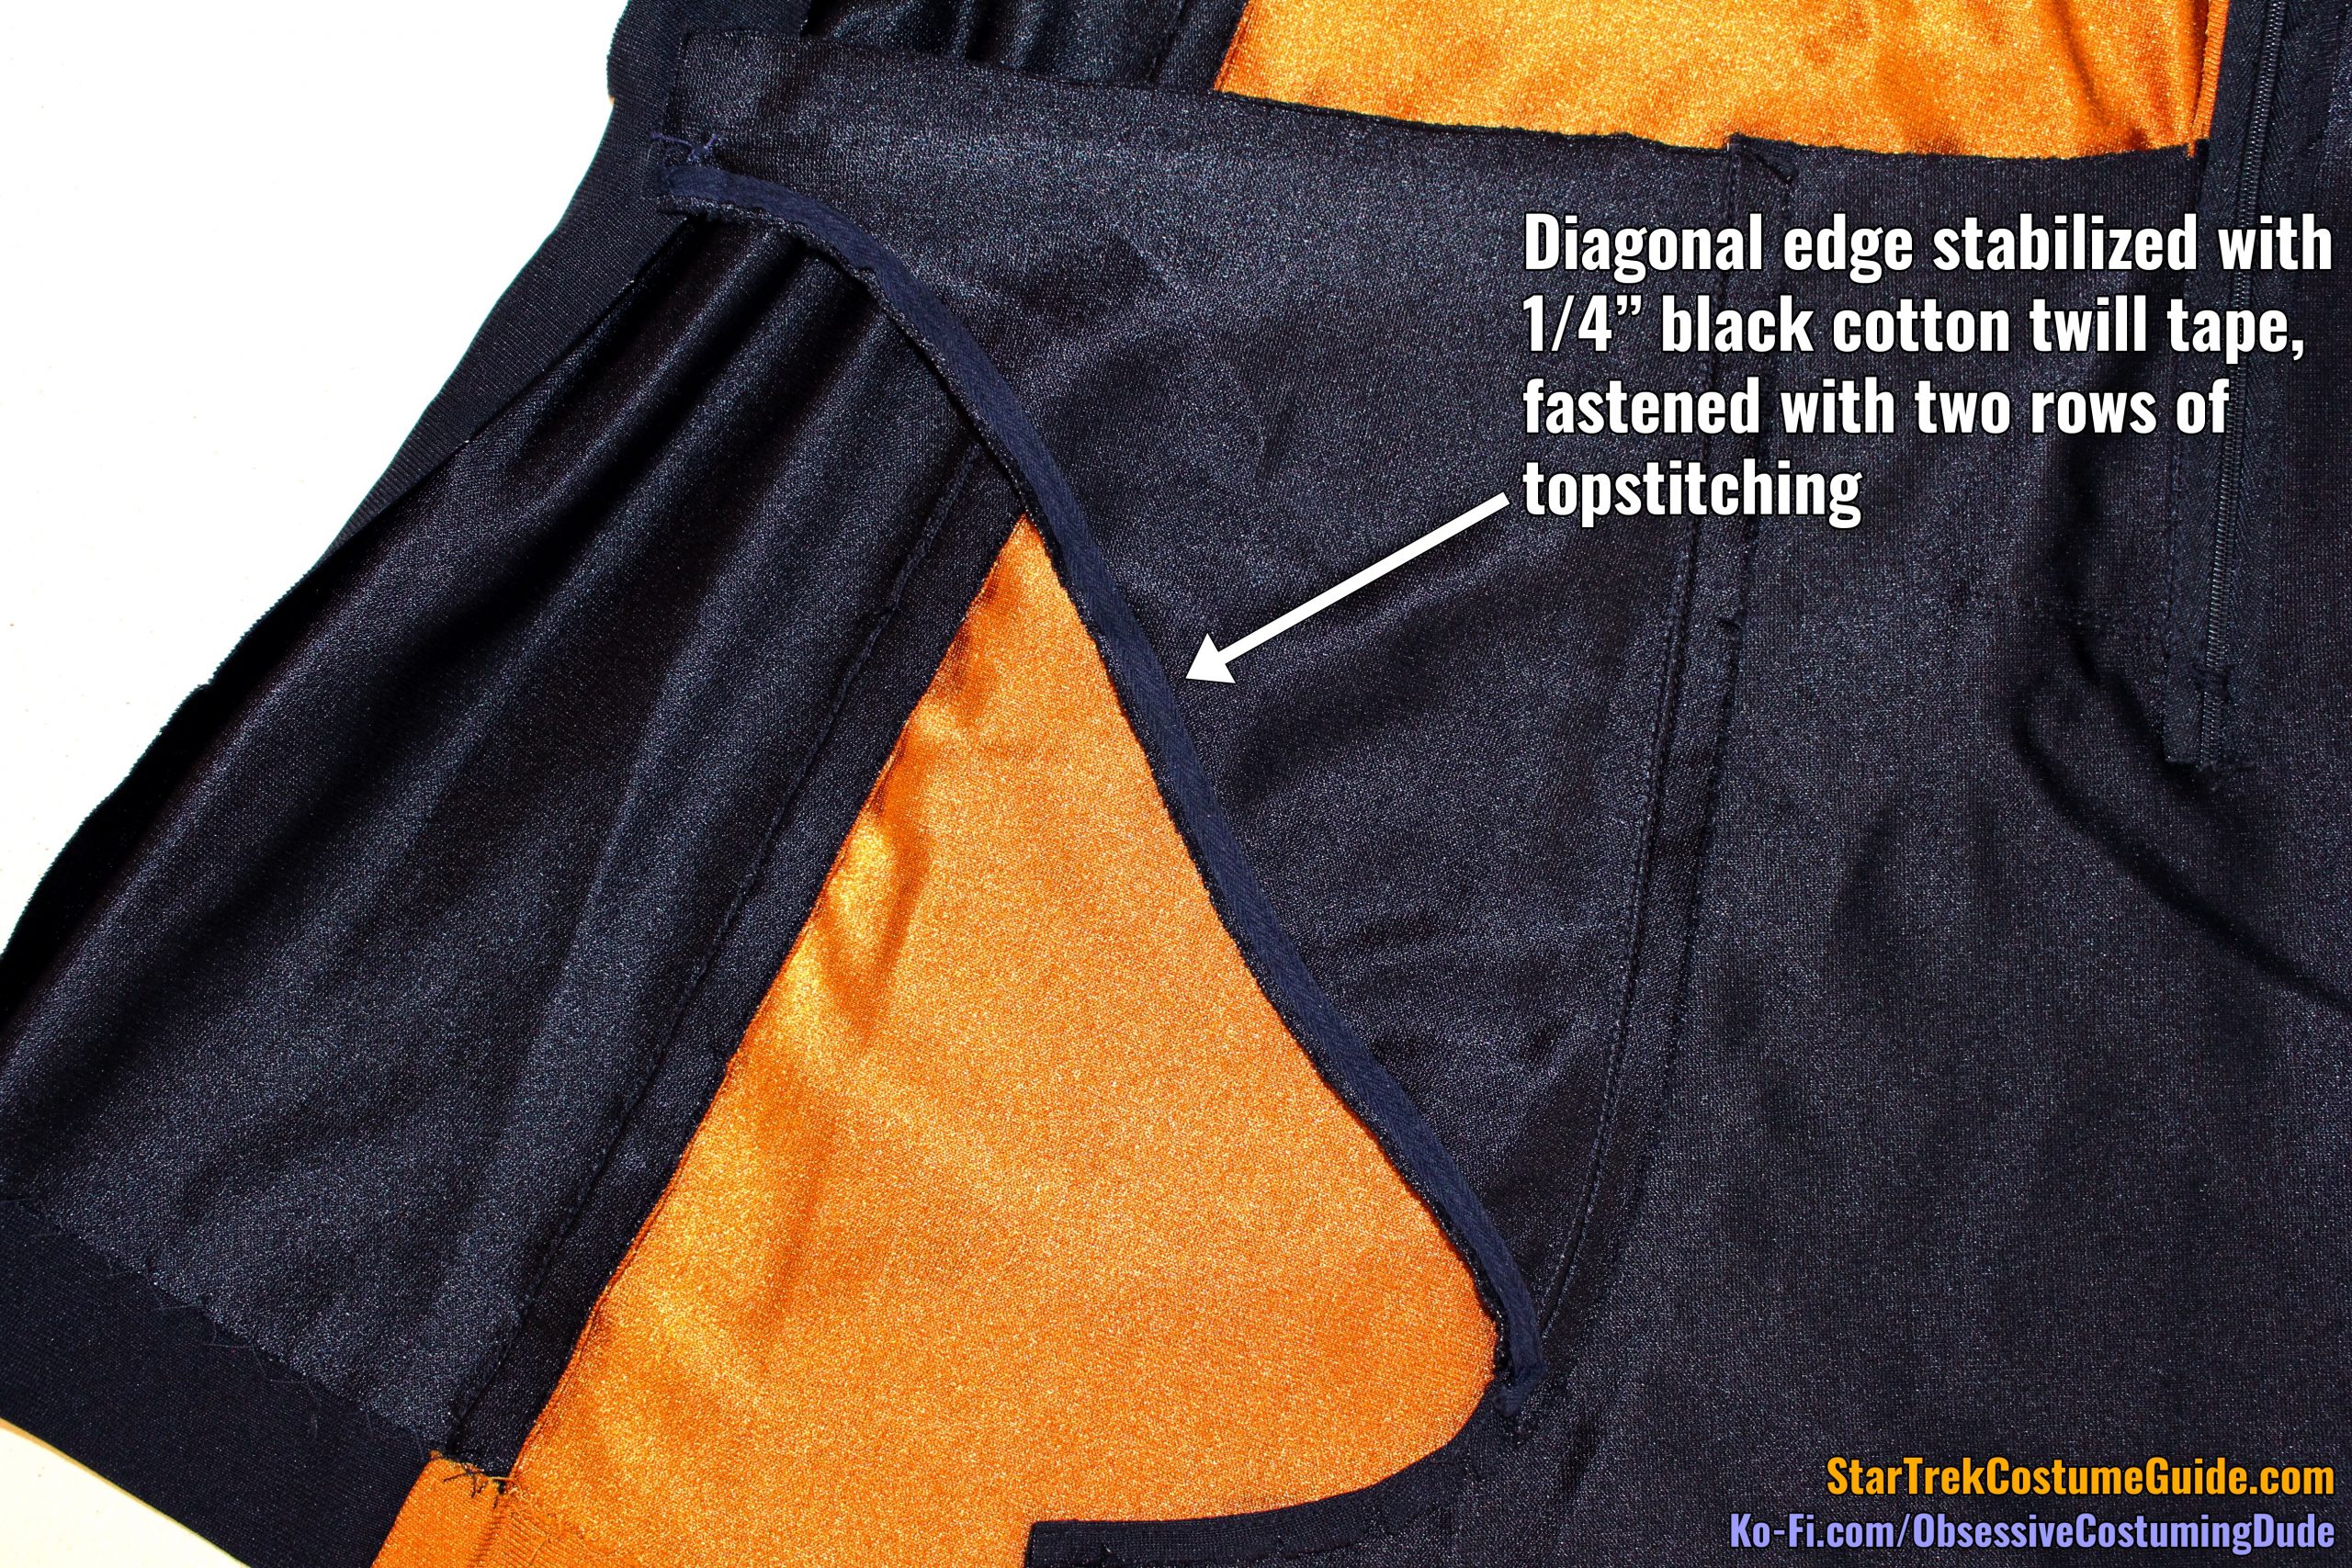
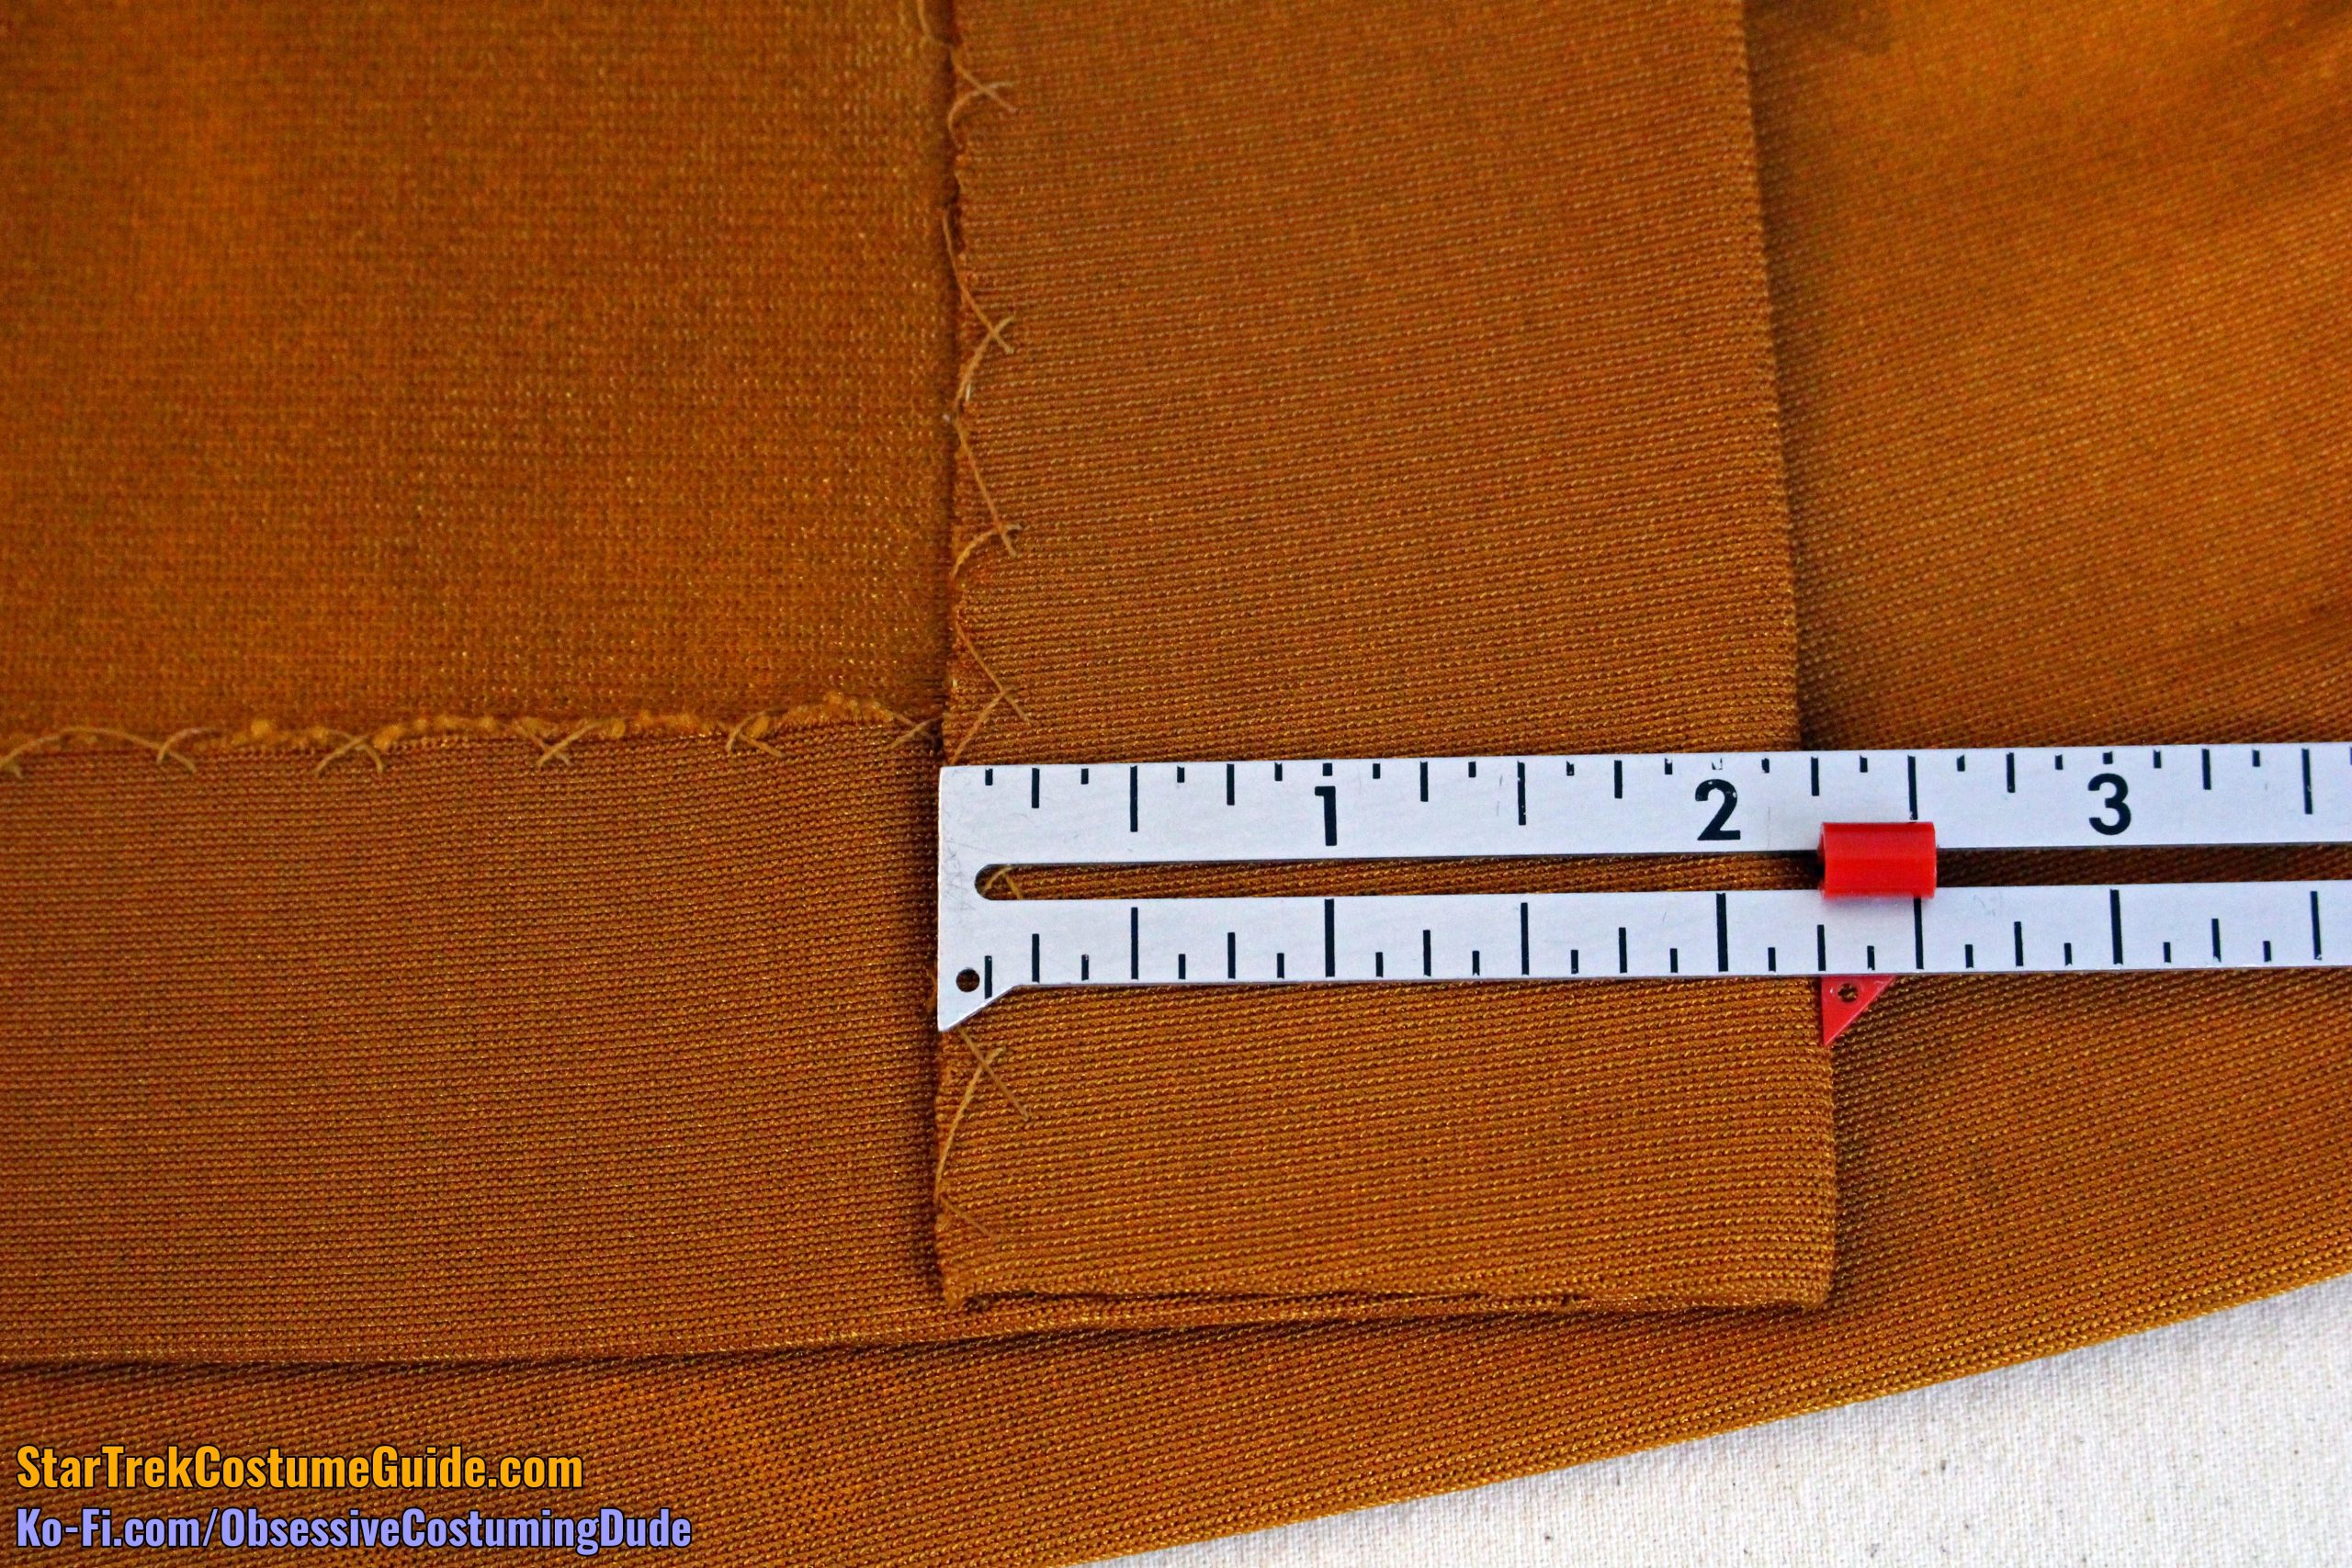
The centermost edge of the “interior waist extension” was approximately 10″ long.
For some reason, the “interior waist anchor” was cut separately and sewn onto the centermost edge of the side panel.
The ½” seam allowances were pressed toward the side panel and edge-stitched.
Beneath that, the upper edge of the leg strap was pressed under and edge-stitched, although the allowance was reduced to ⅜” and clipped to accommodate the curve.
The long, diagonal end of the “interior waist anchor” extension was stabilized with ¼” black cotton twill tape, which was simply fastened to the fabric with two rows of topstitching.
The outermost edge of the “interior waist anchor” was 1 ½” tall, where it was machine-sewn to the opposite side seam allowances.
The result of this “anchoring” was the wearer feeling like they’re wearing shorts or underwear of some kind.
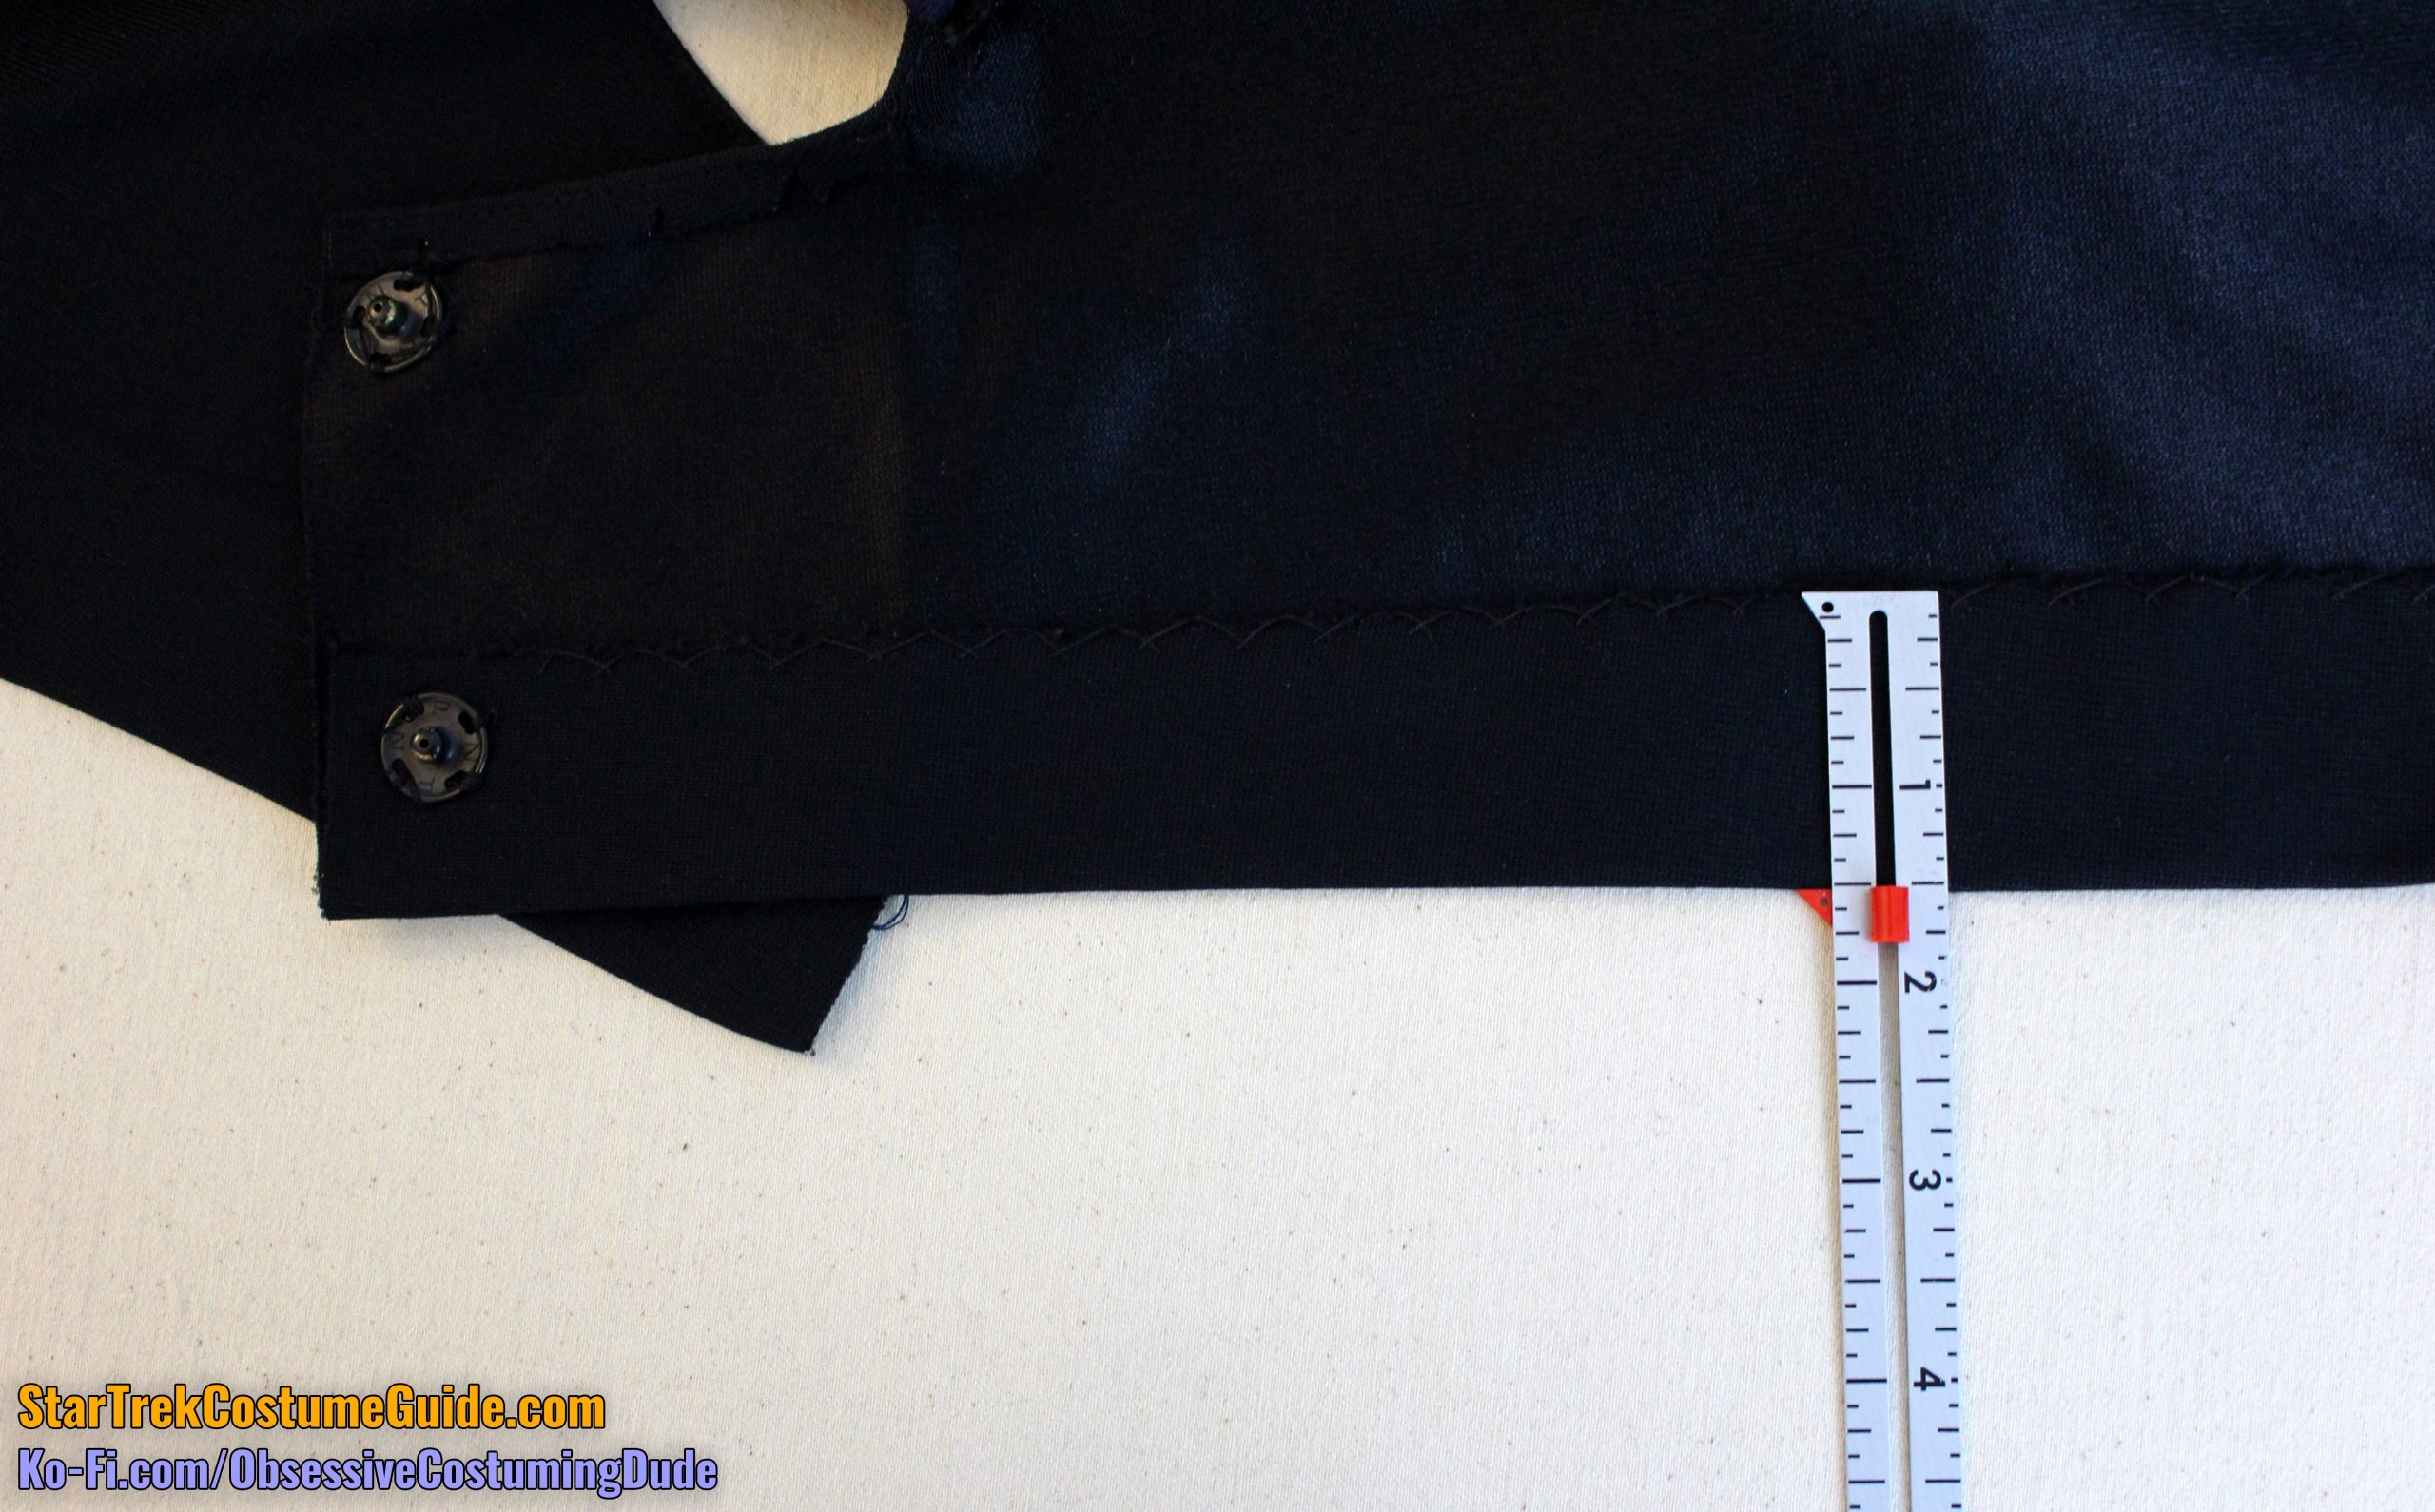
At the bottom of this whole assembly was what I refer to as the “leg strap,” which snapped closed across the wearer’s opposite thighs (right front to left back) to form a sort of “half-boxer-brief.”
The front strap was 3 ⅞” tall, but the receiving back end was actually 4″. (I get the feeling that this may not have been an exact science …)
Front "leg strap"
Back "leg strap"
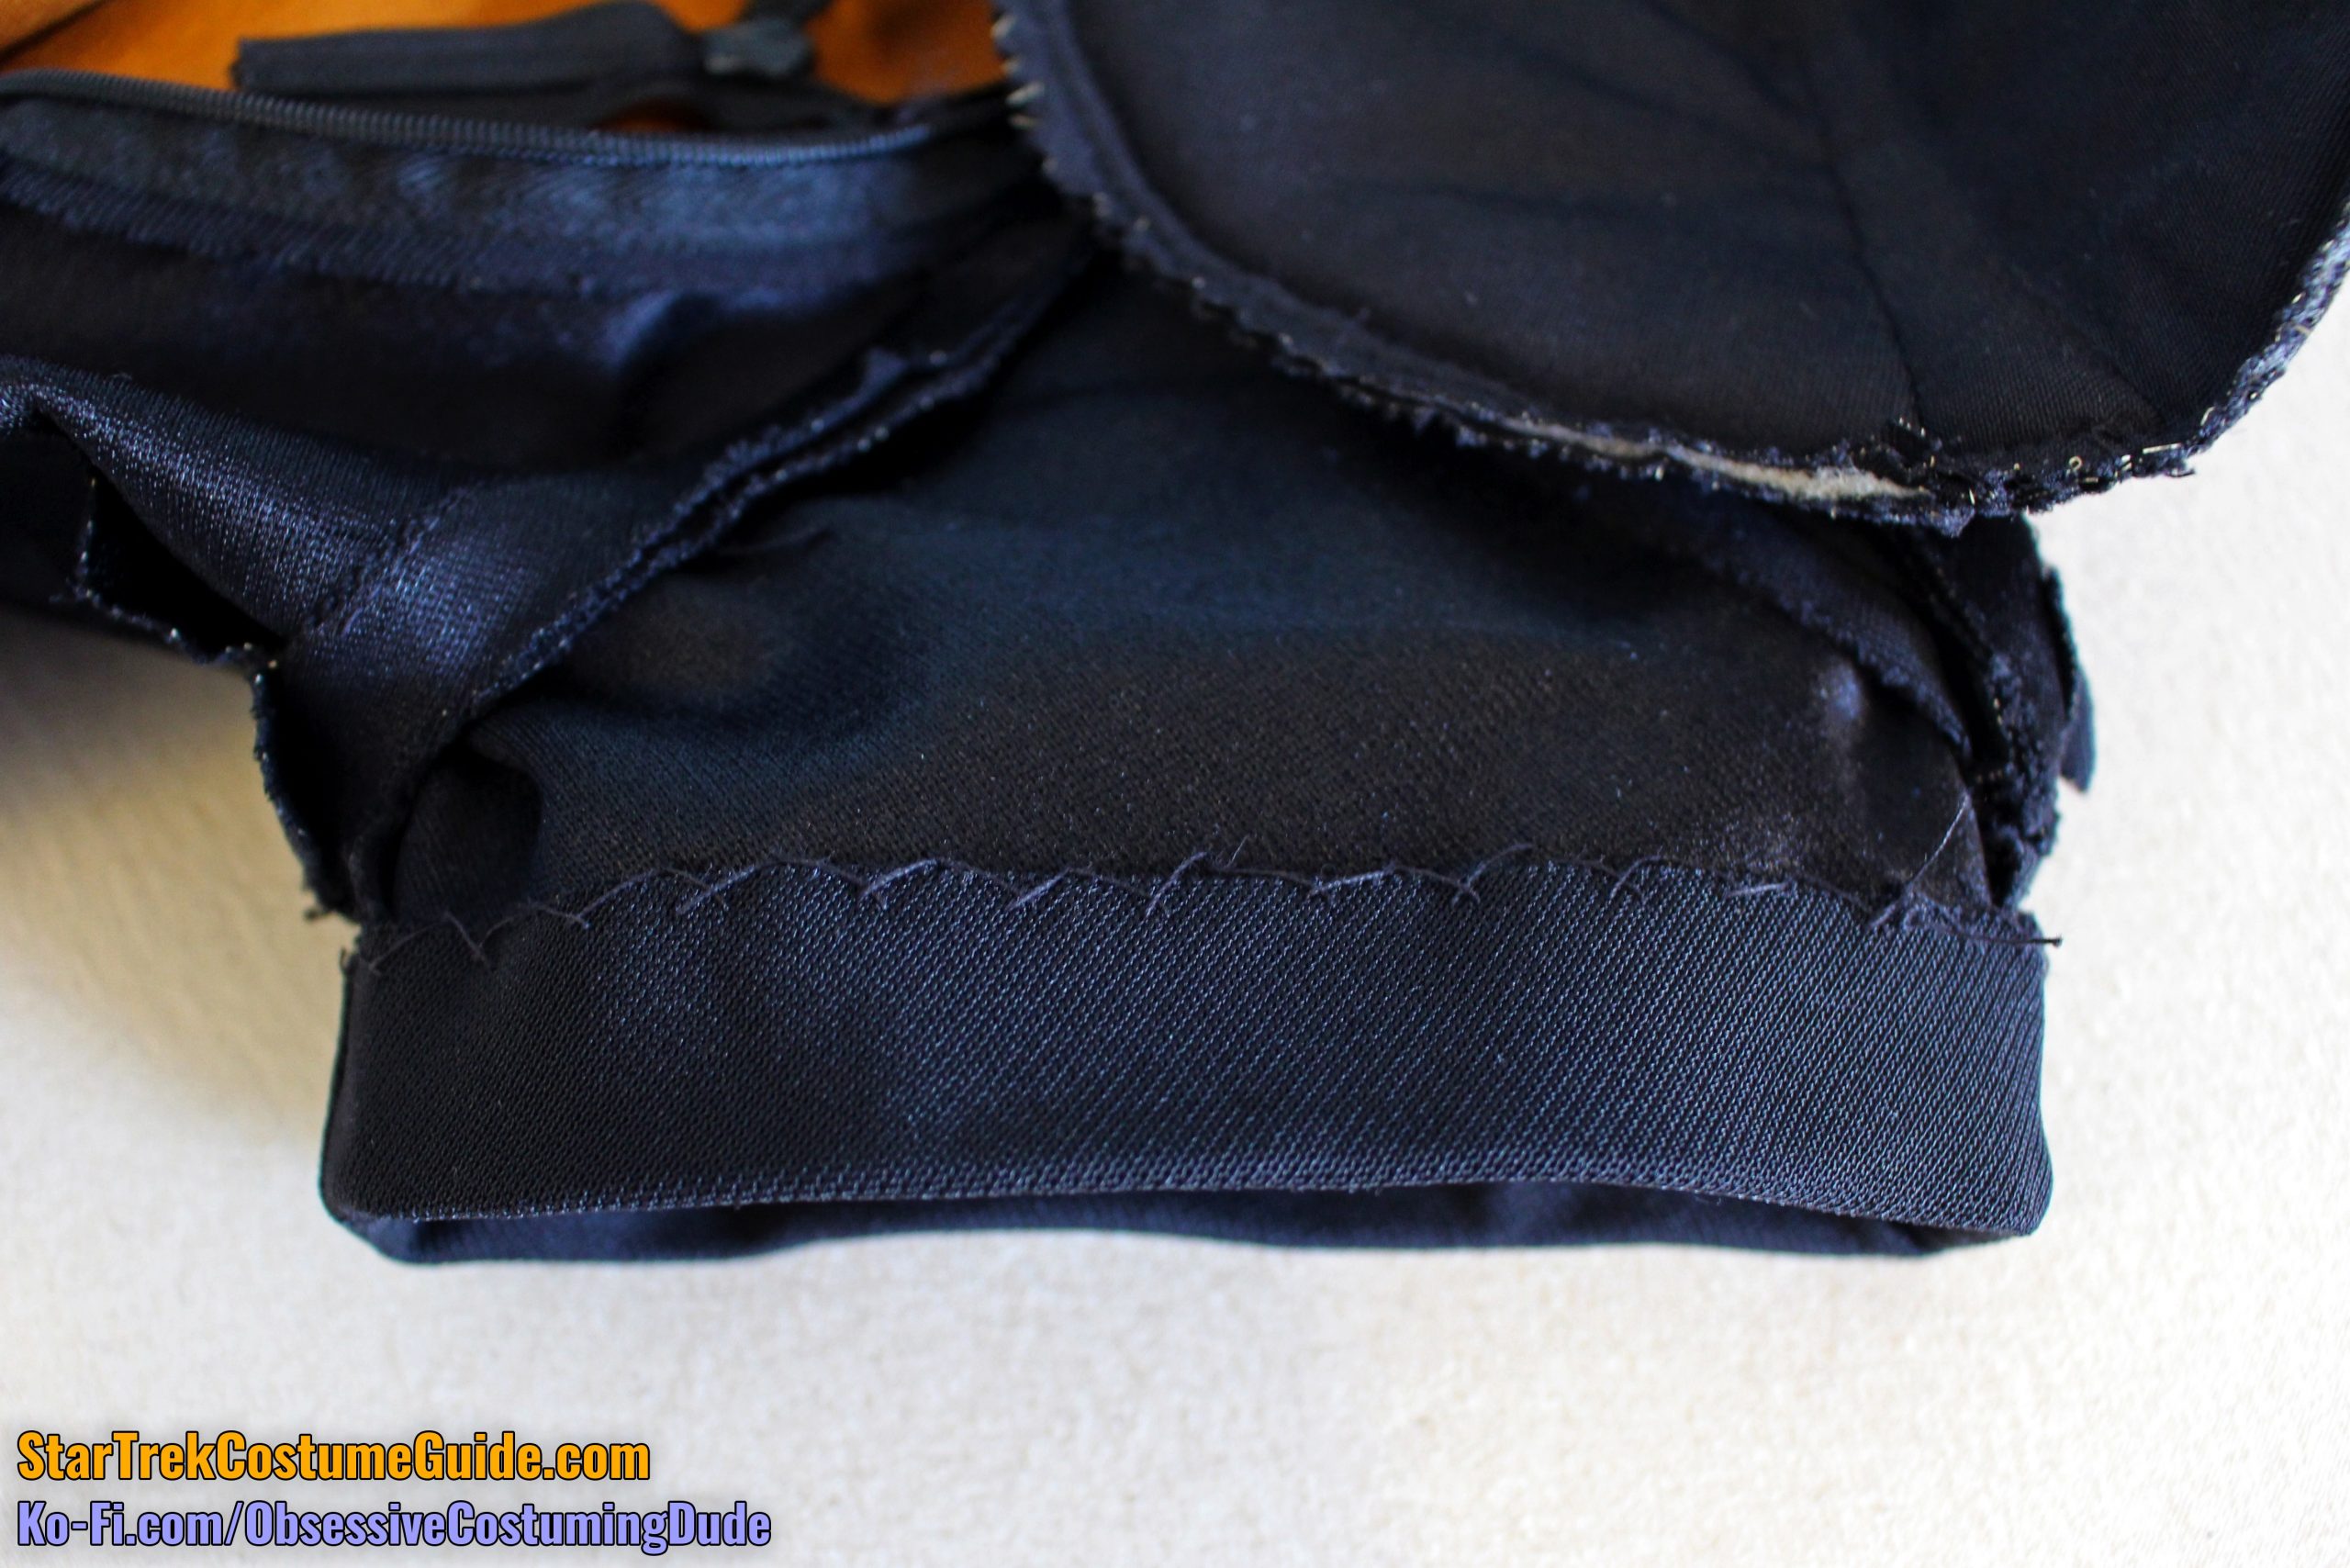
On the vent, the allowances were simply turned under and hand-sewn into place – first the lower hem allowance, then the vent’s.
Curiously, the front vent’s hem allowance was 2″ at the top of the vent, but this widened to 2 ⅜” at the bottom of the vent.
The back interior was basically the same construction as the front, except for the lack of any zippers.
The centermost back edge of the “interior waist anchor” was slightly shorter than the front – approximately 9 ½”.
The back panel’s allowance above the vent was larger, too, and had only one row of stitching fastening the layers together.
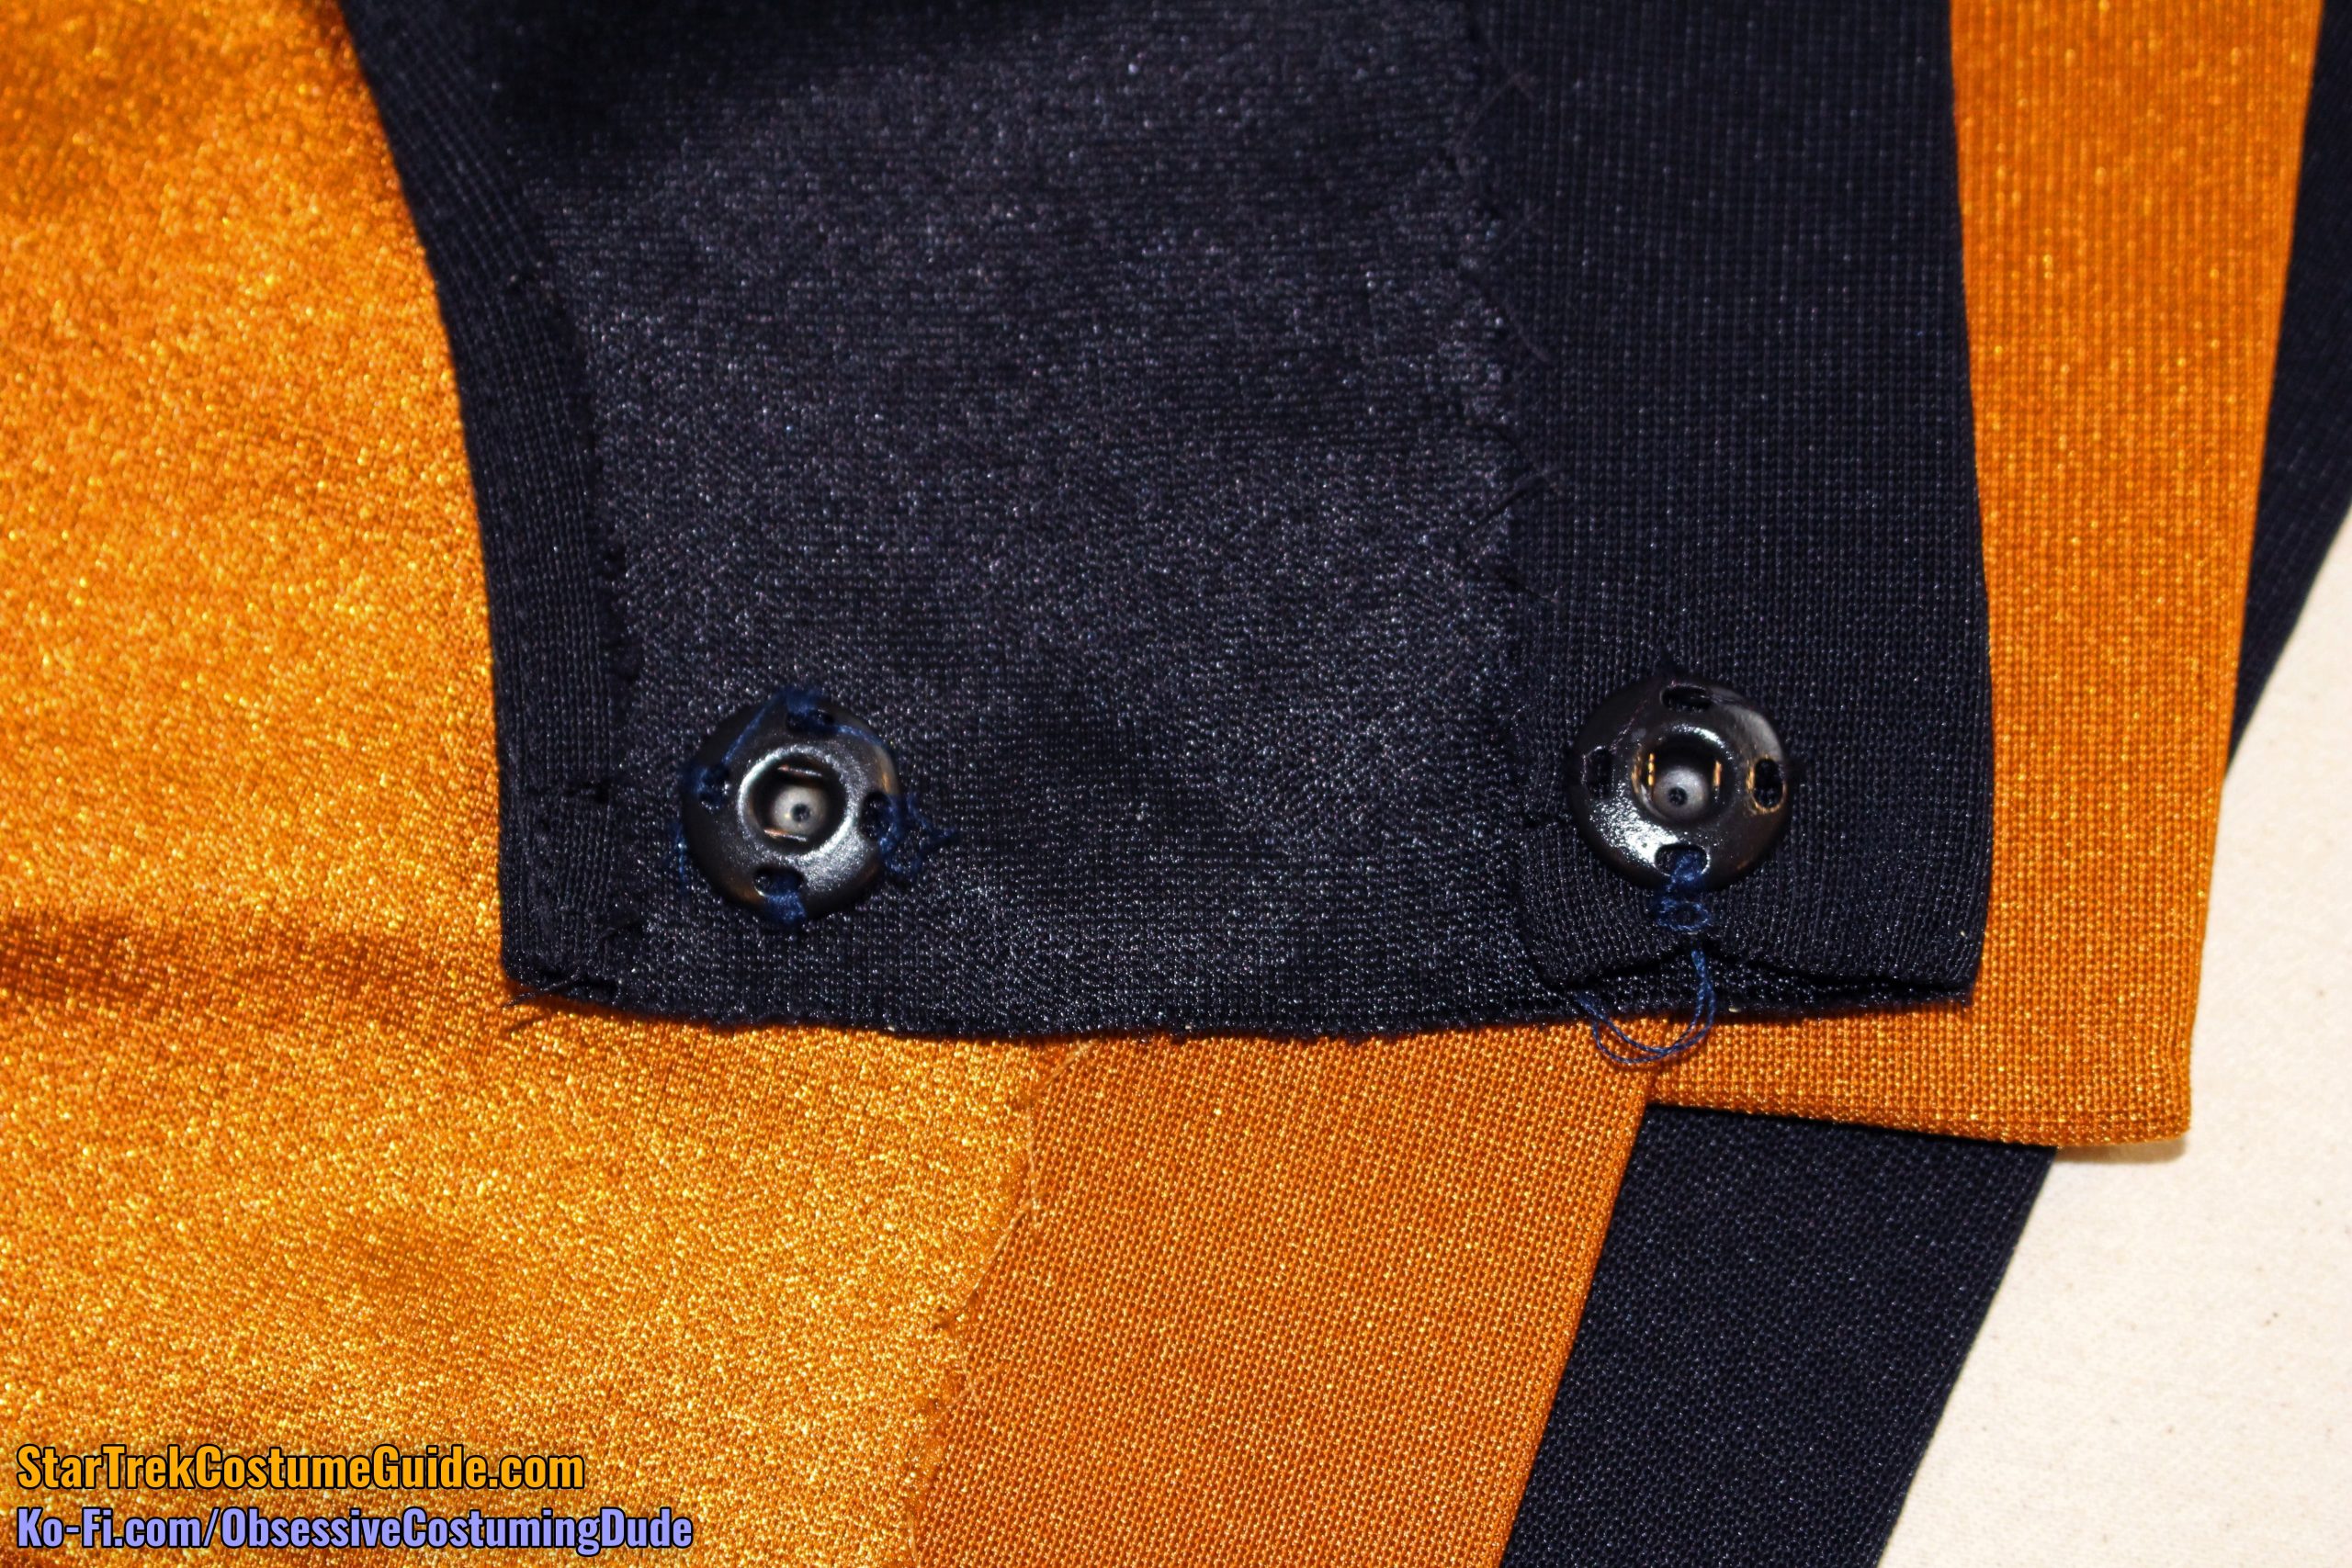
If you look very carefully, you may notice a peculiarity about the back snaps …
The upper snap was attached with blue thread, not black!
So was one side of the lower snap.
My guess is that this was either hastily done during the original construction in the race to complete the uniform before filming, or it was an emergency repair job – either way, a hurried effort while under the TV grind.
The back vent’s structure was basically the same as the front’s.
However, unlike the front, the back vent’s hem allowance was consistently 2 ¼” from top to bottom.
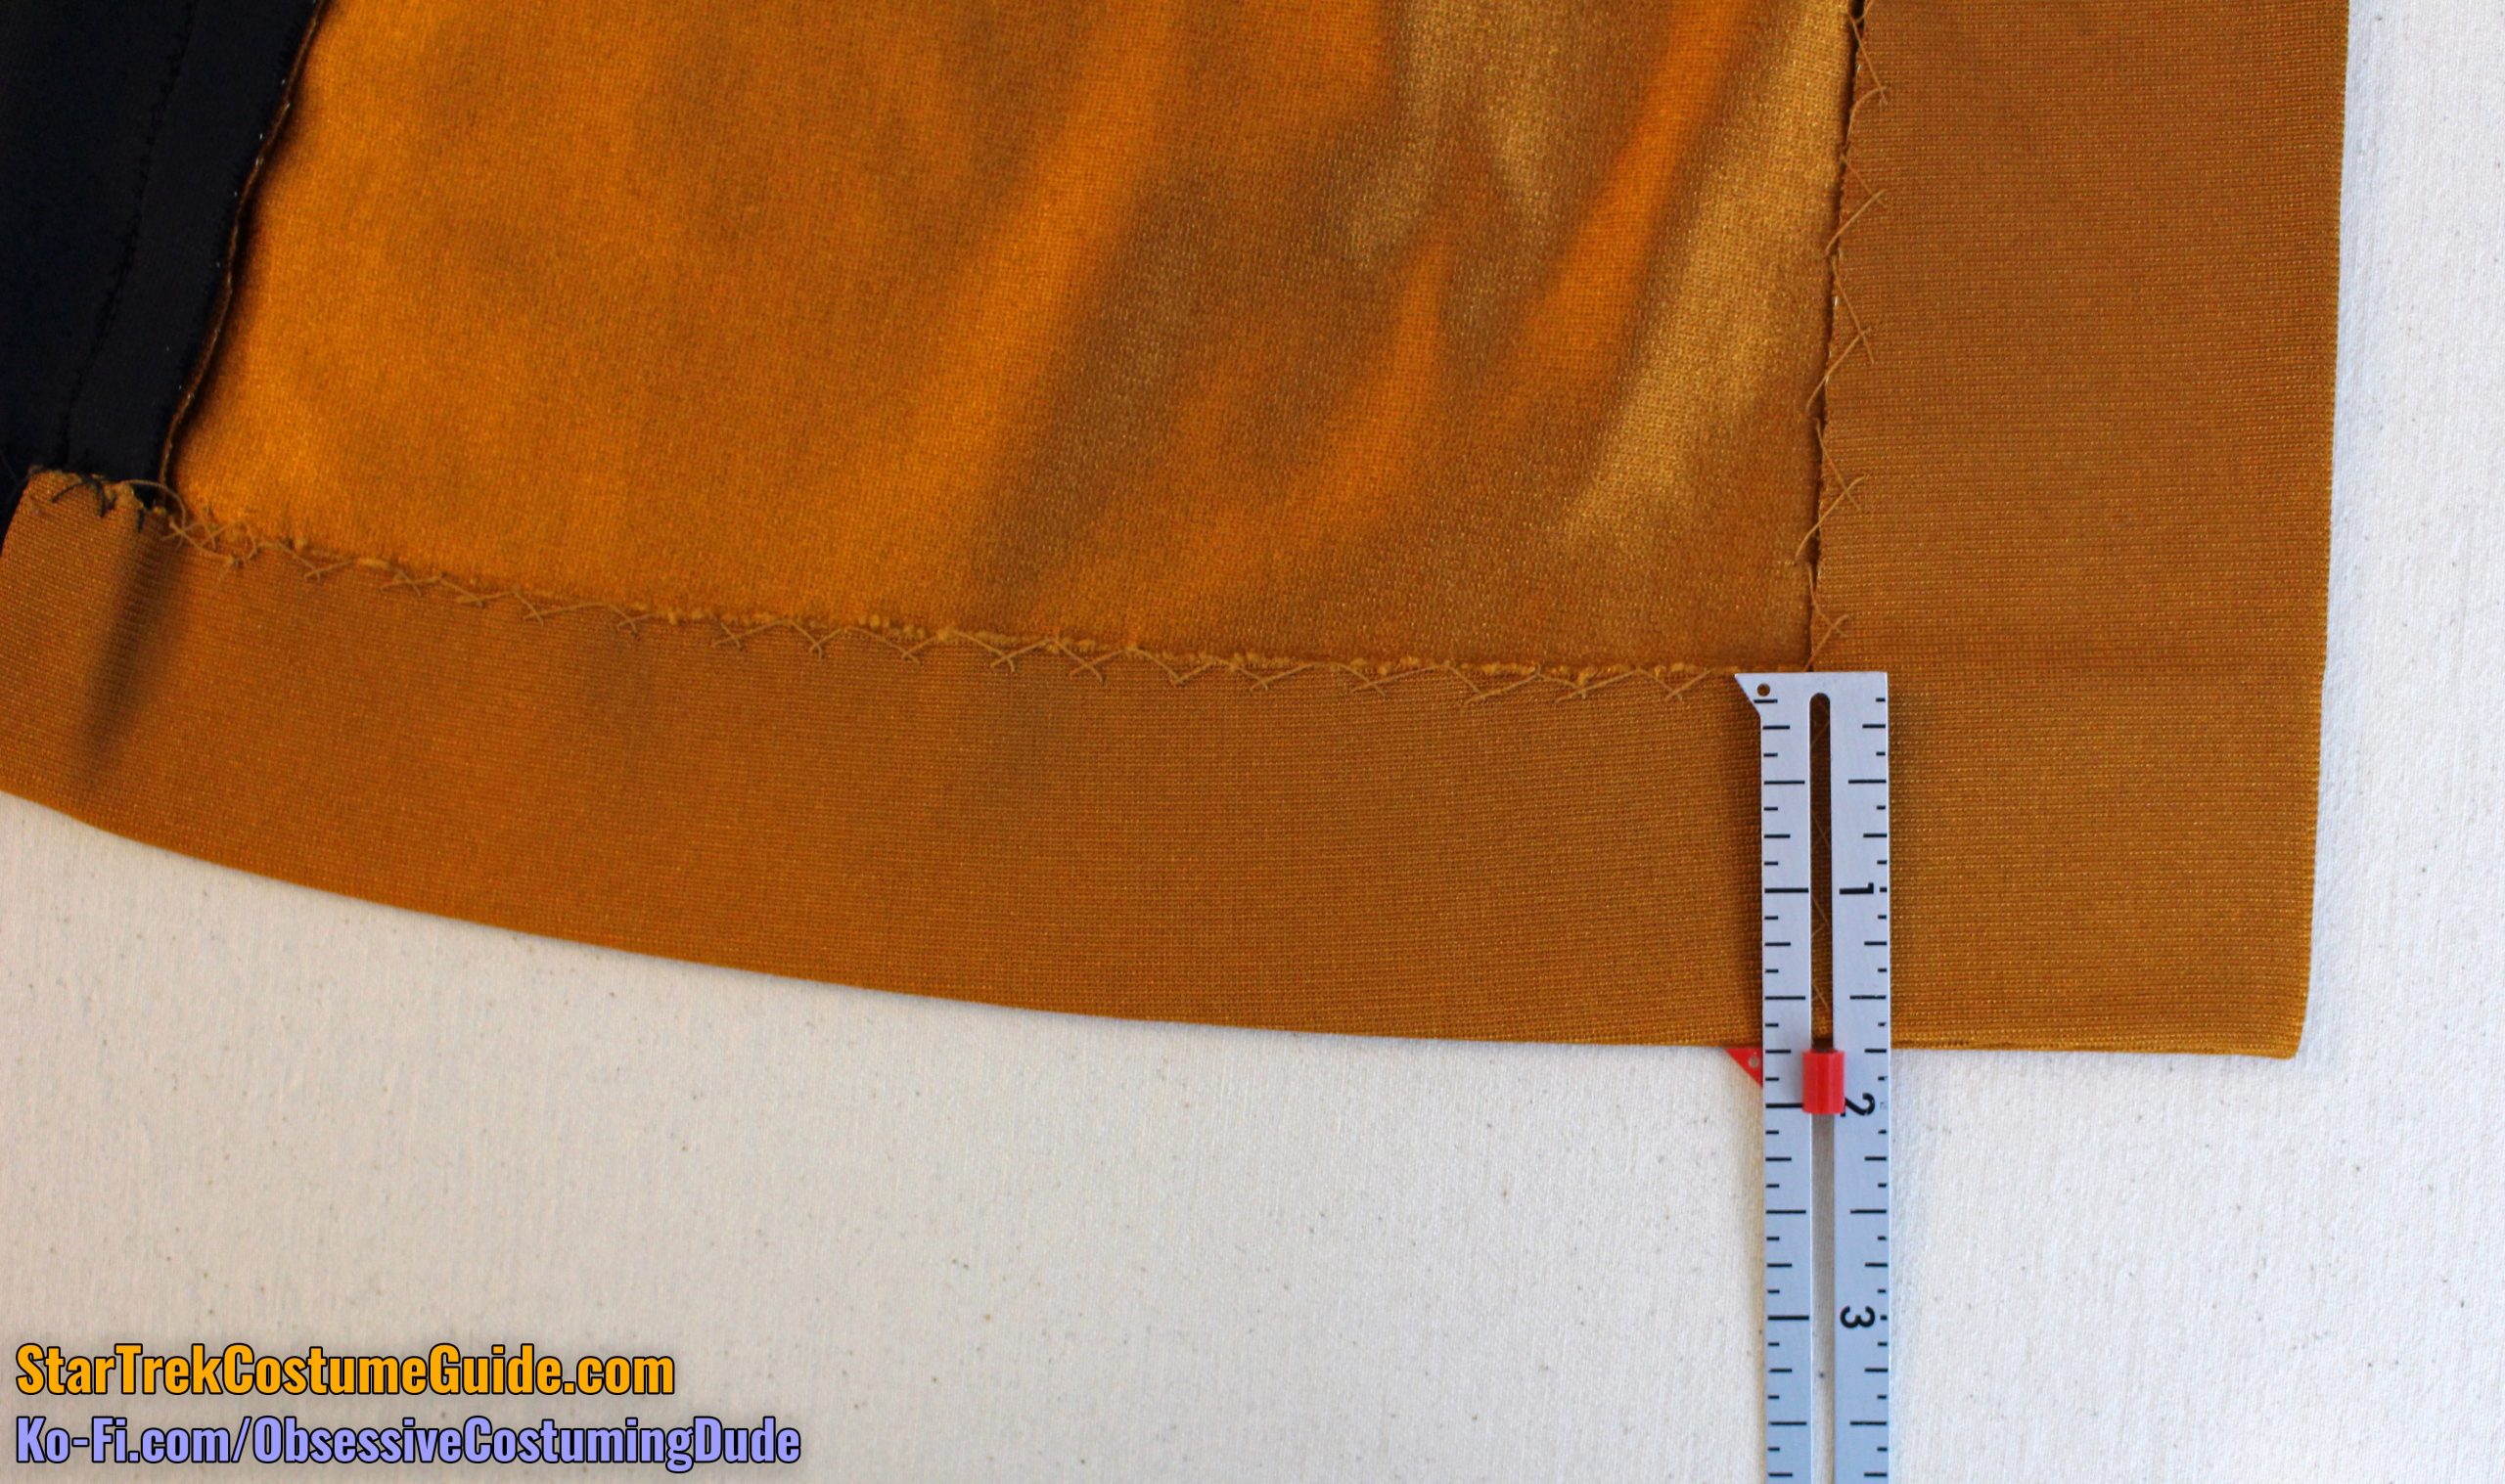
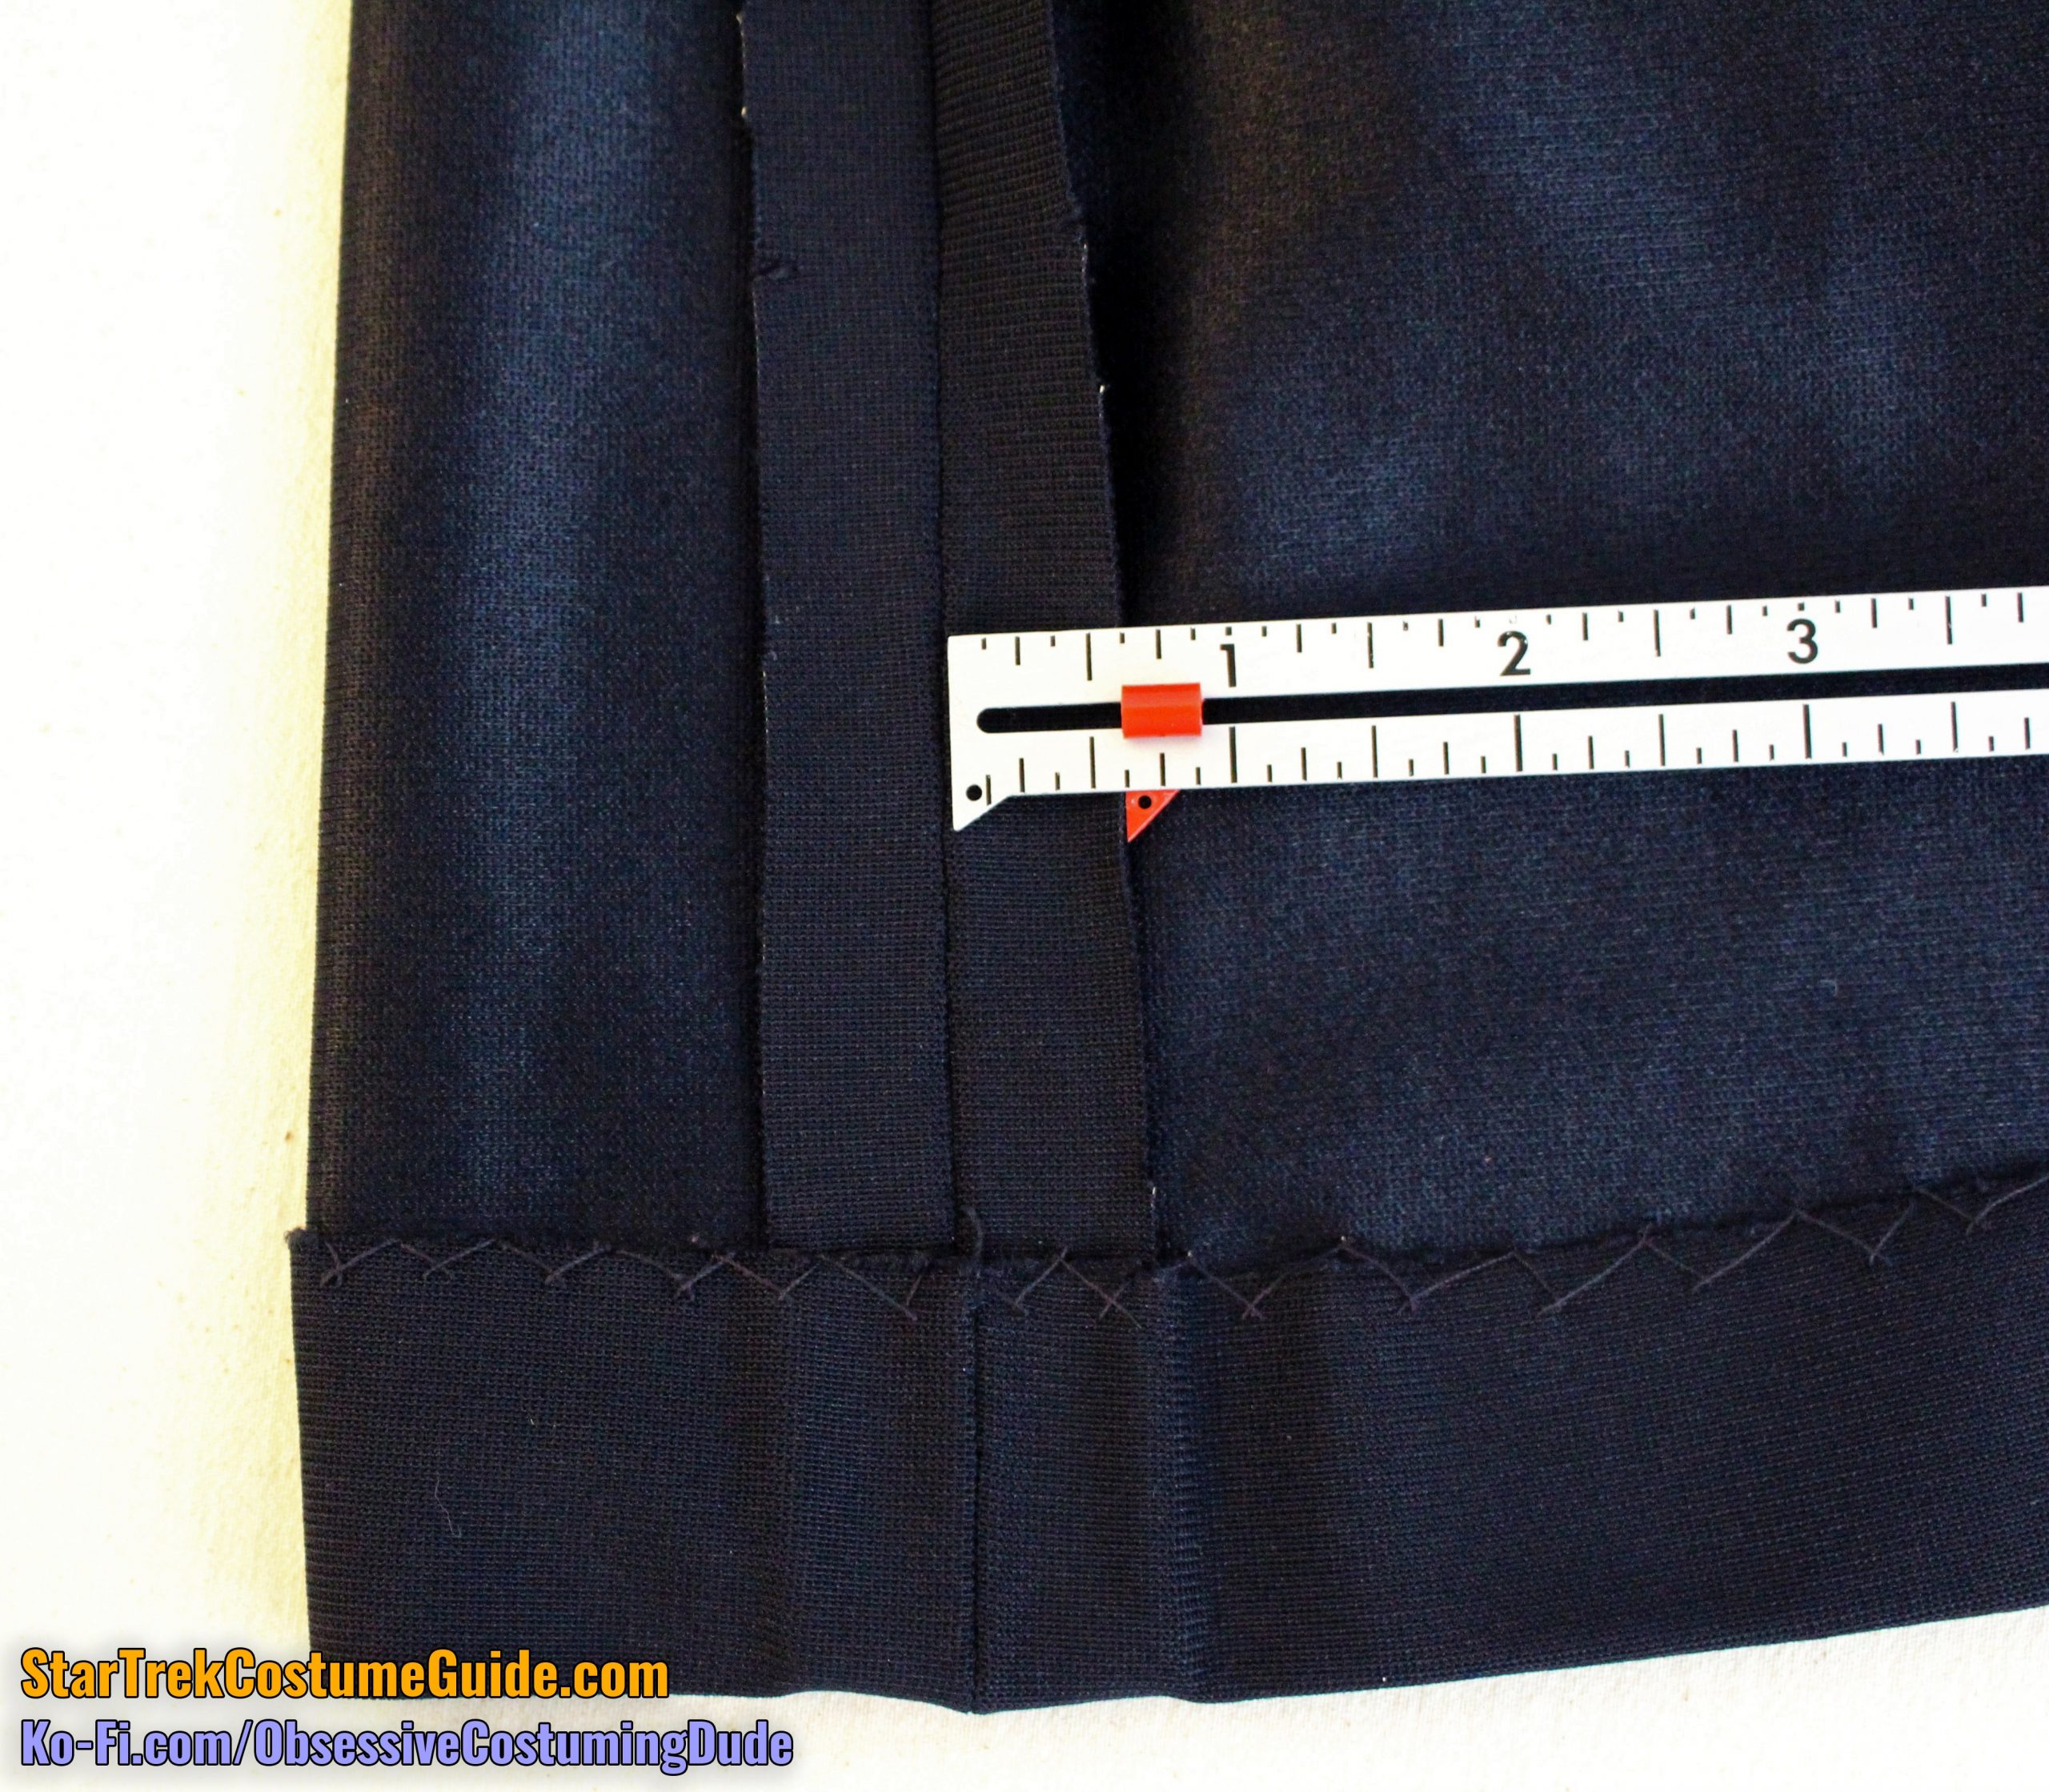
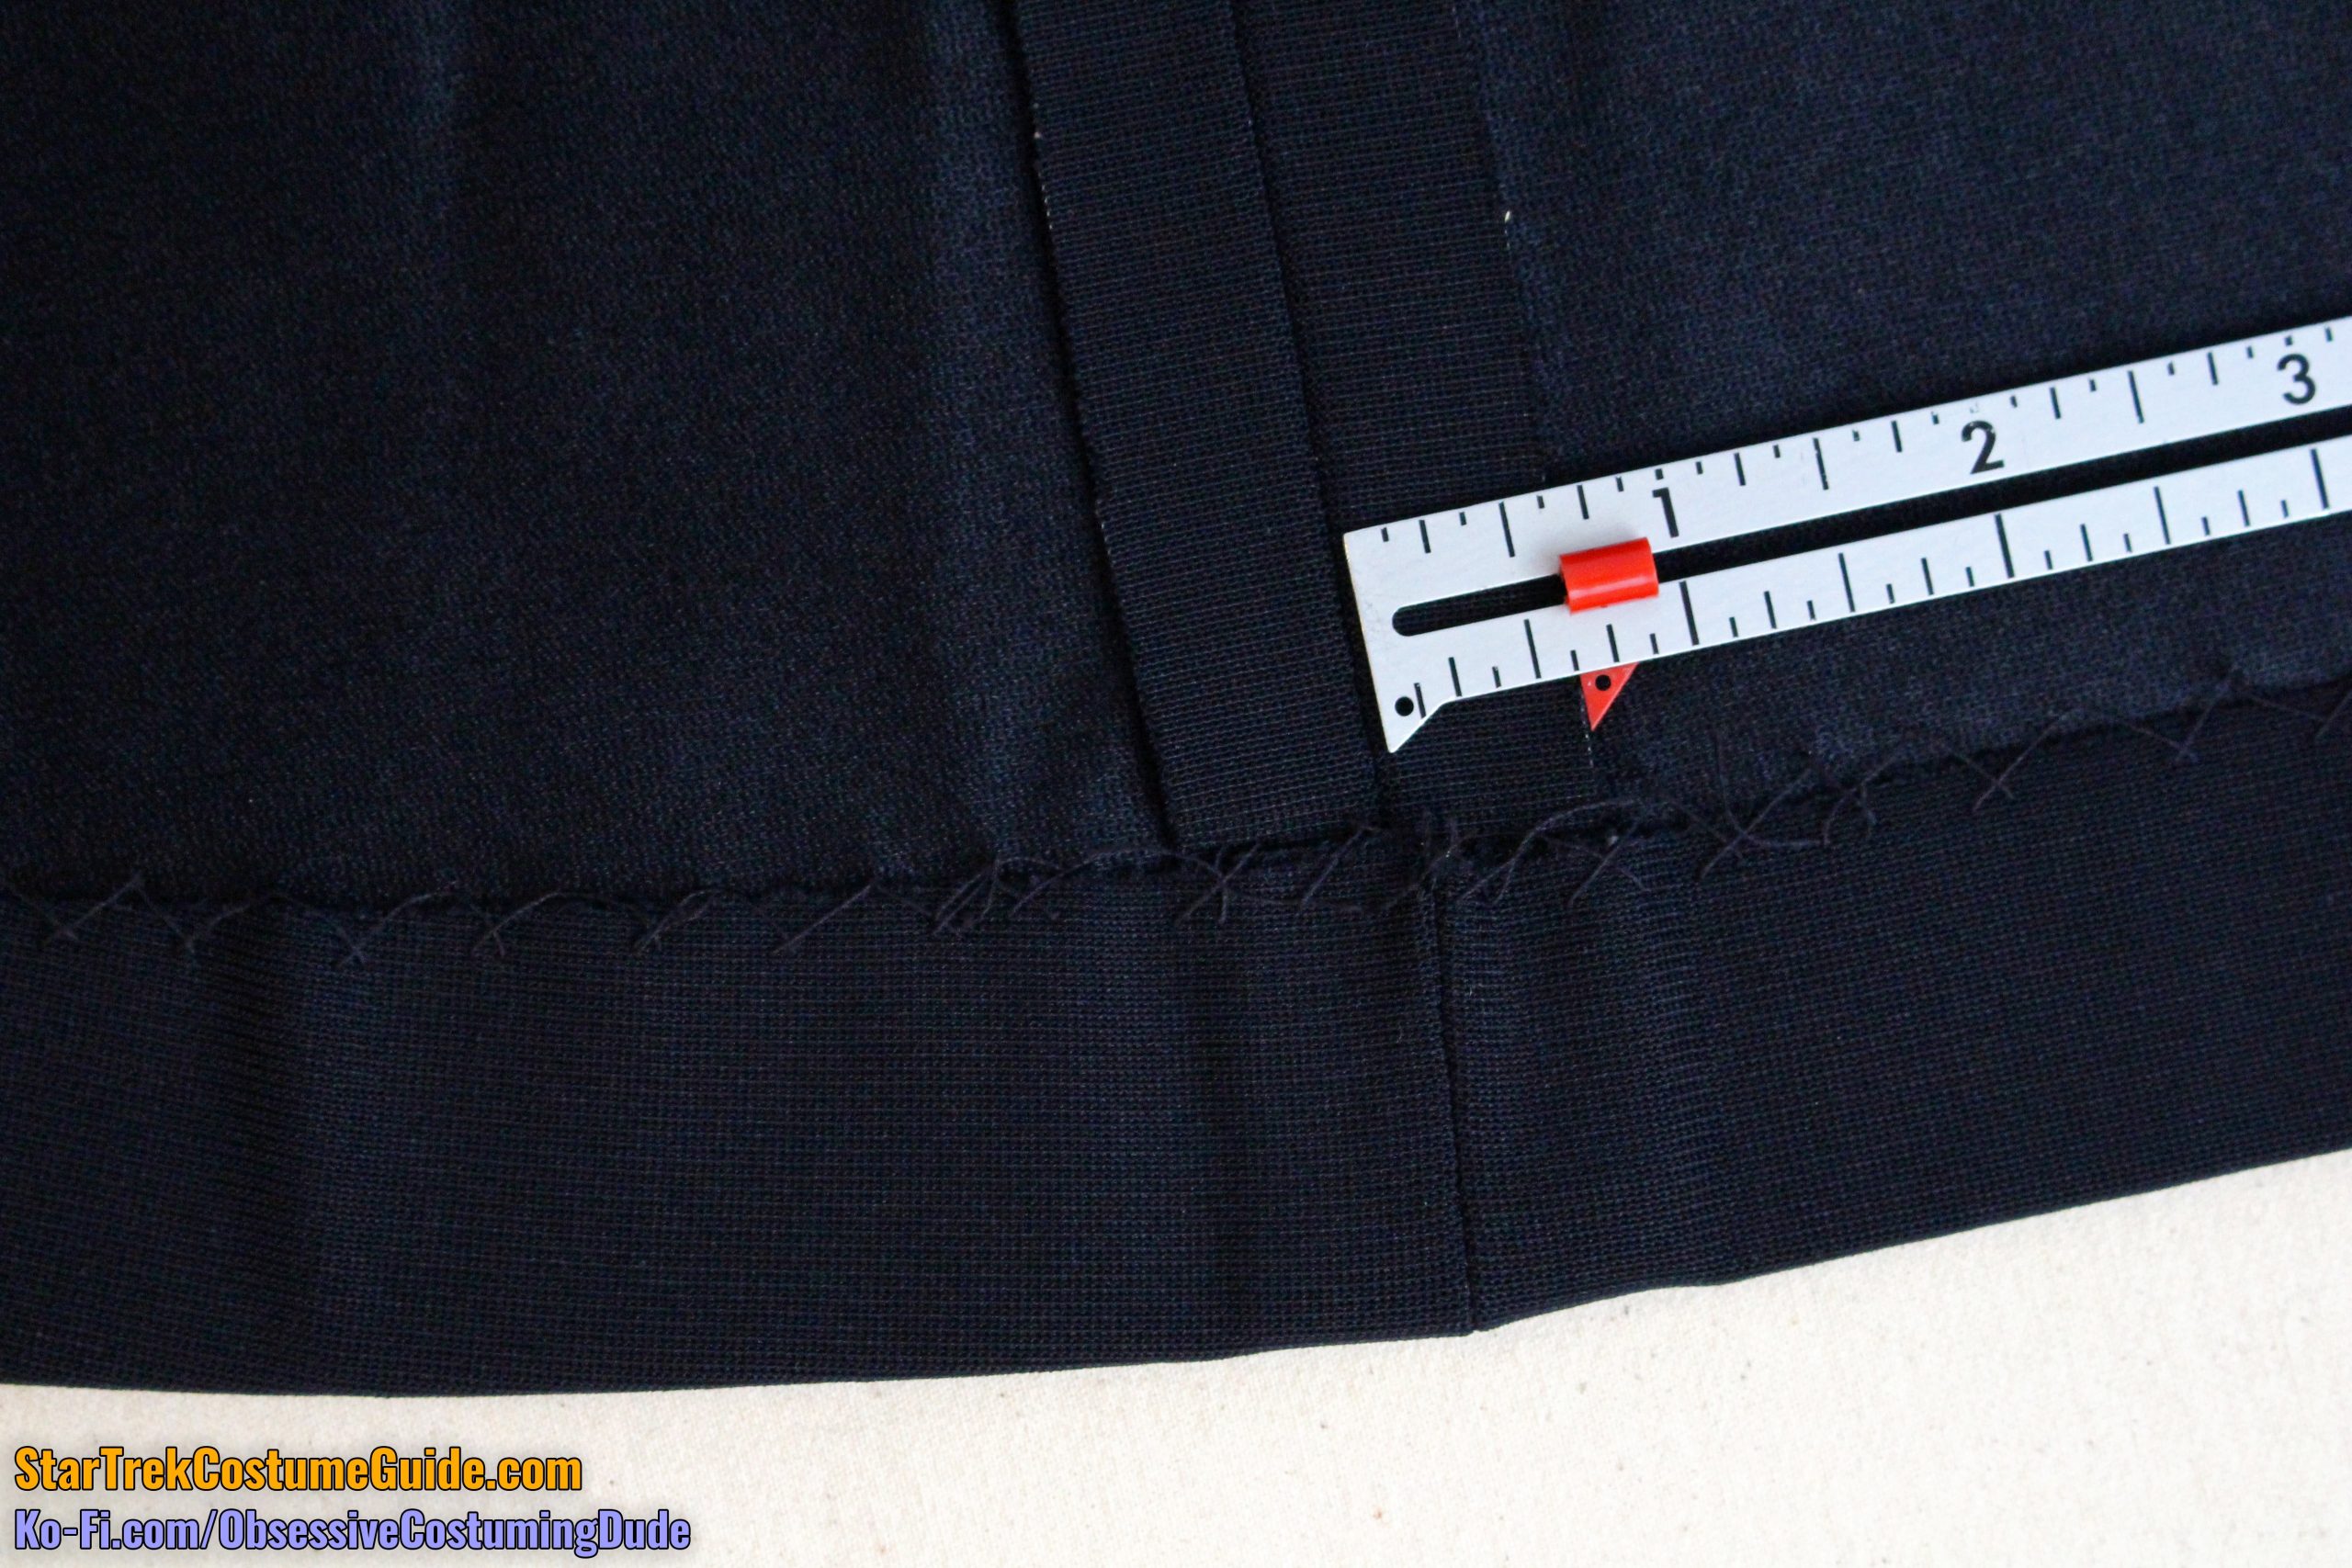
The skant’s front hem allowance was 1 ¾” at the lower front corner, but this gradually tapered down to 1 ½” at the side seams.
The back lower hem allowance was similarly tapered.
Across the sides and leg strap, though, the hem allowance was consistently 1 ½”.
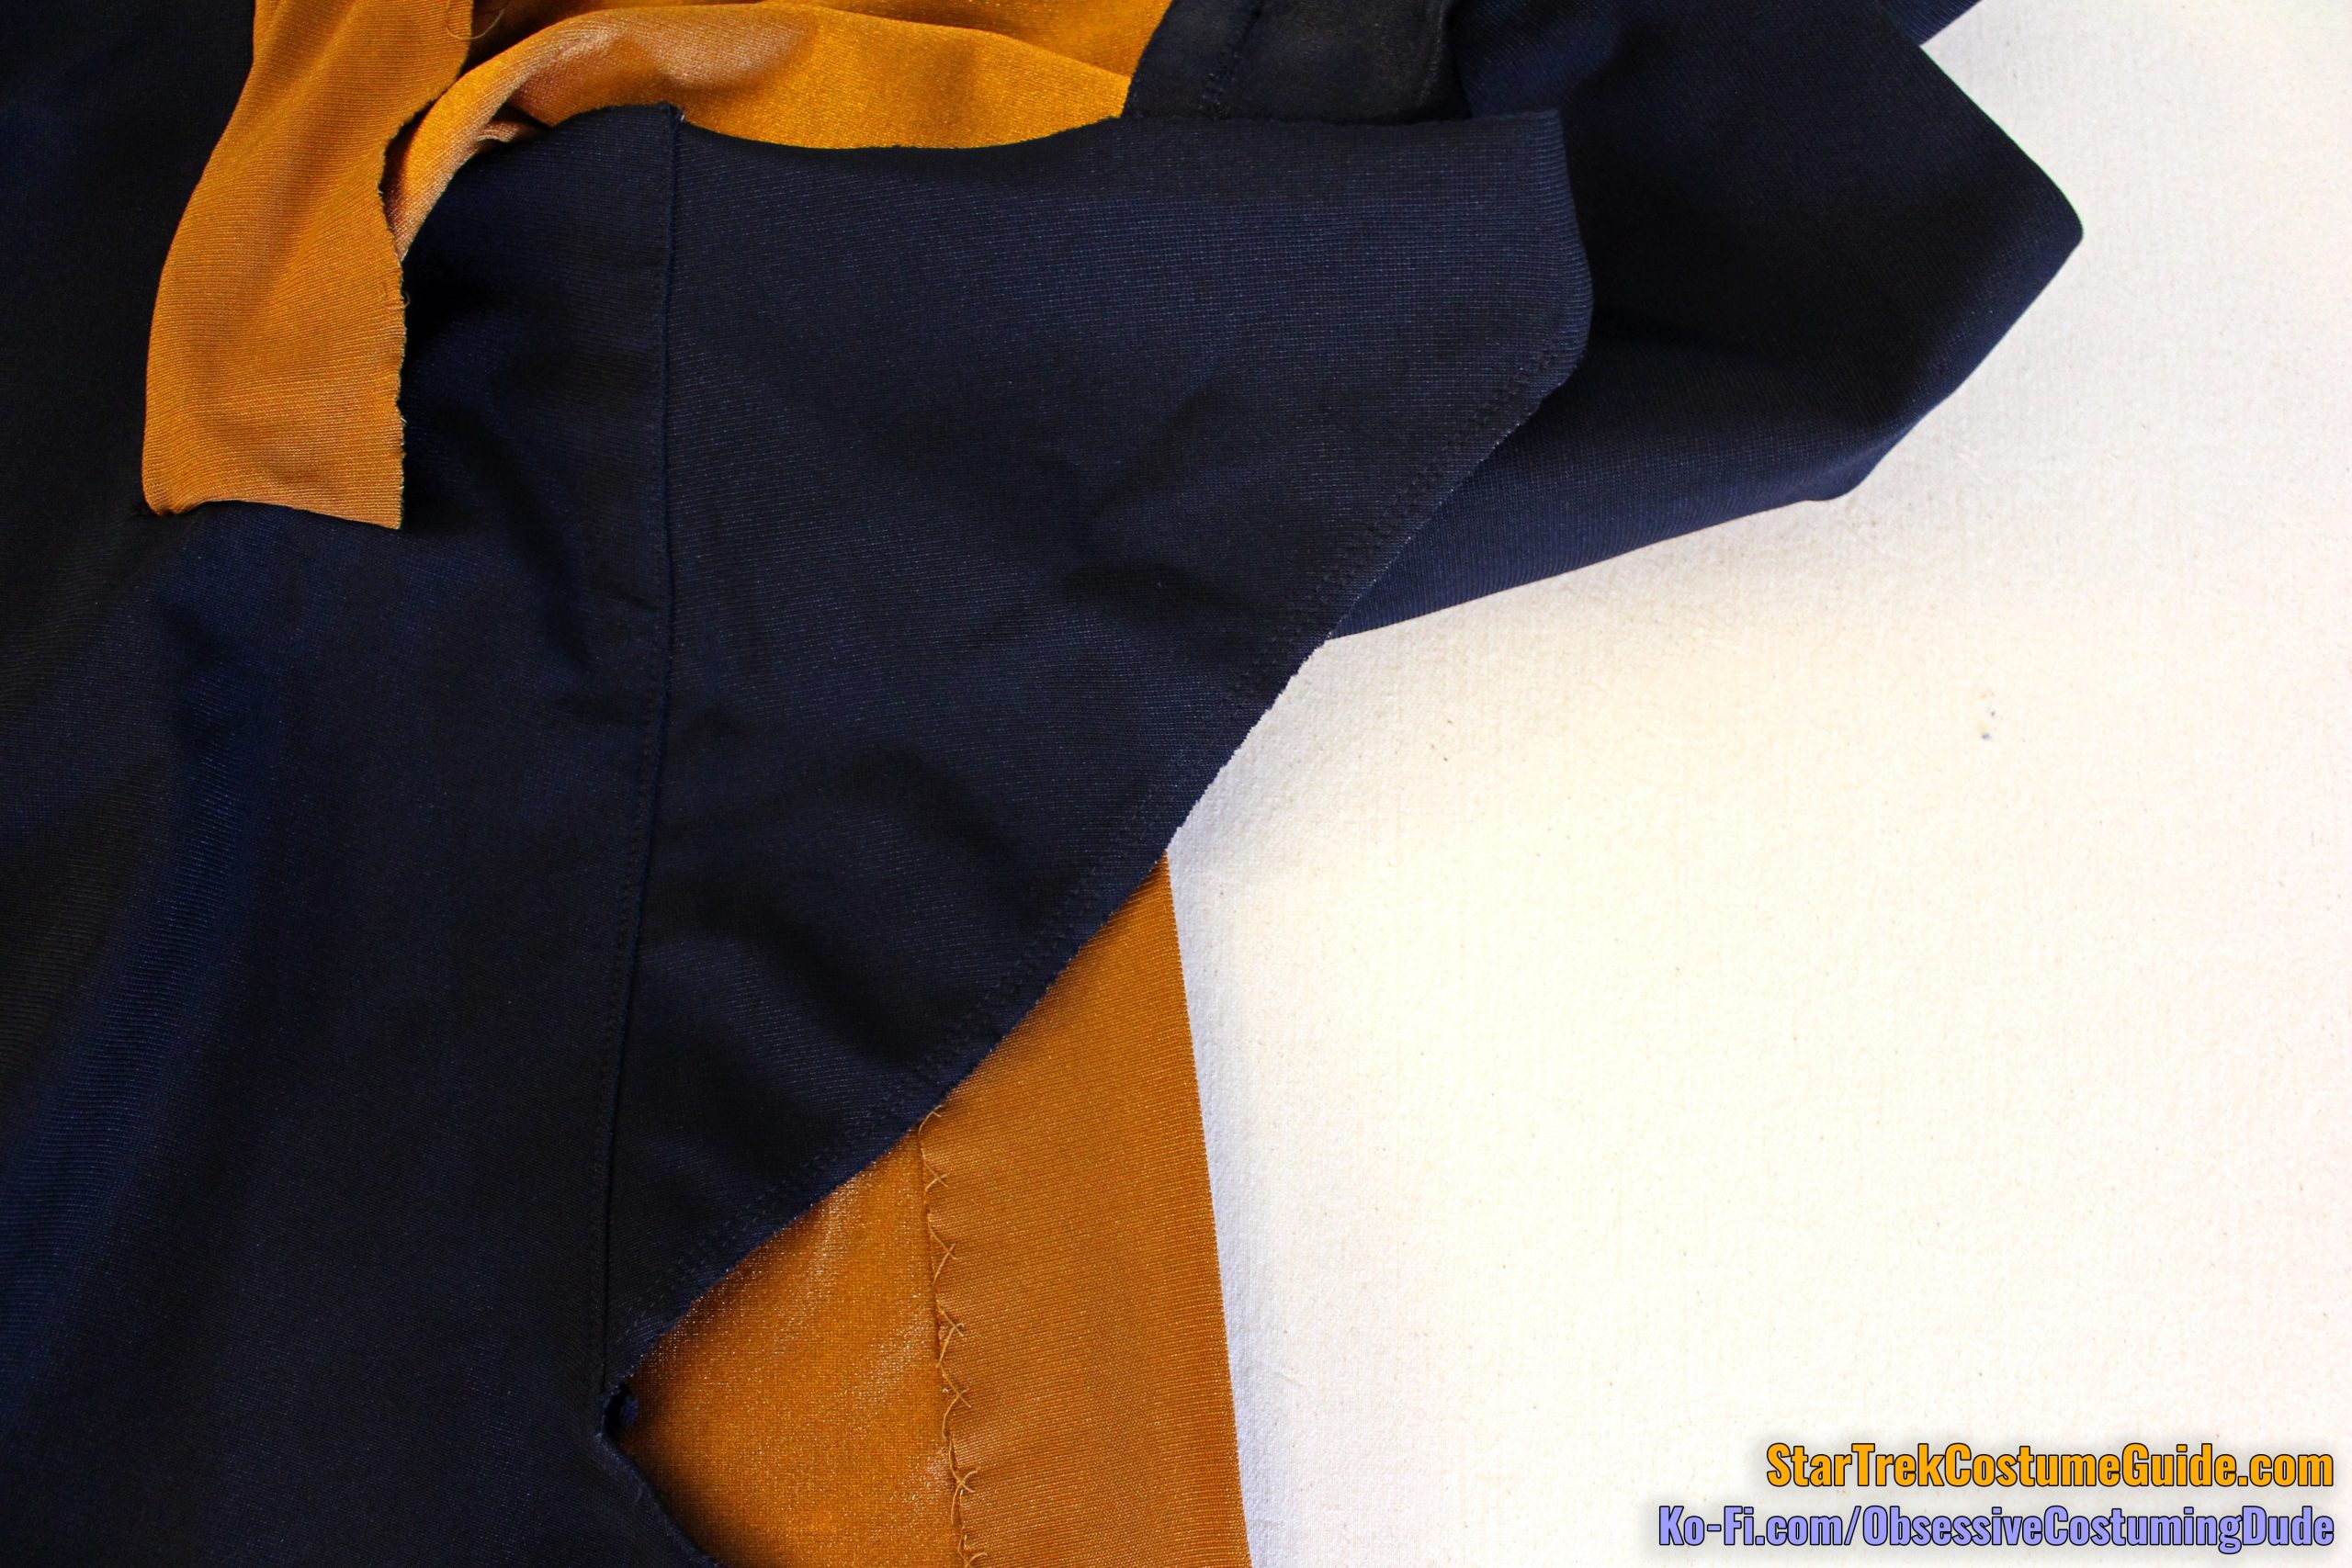
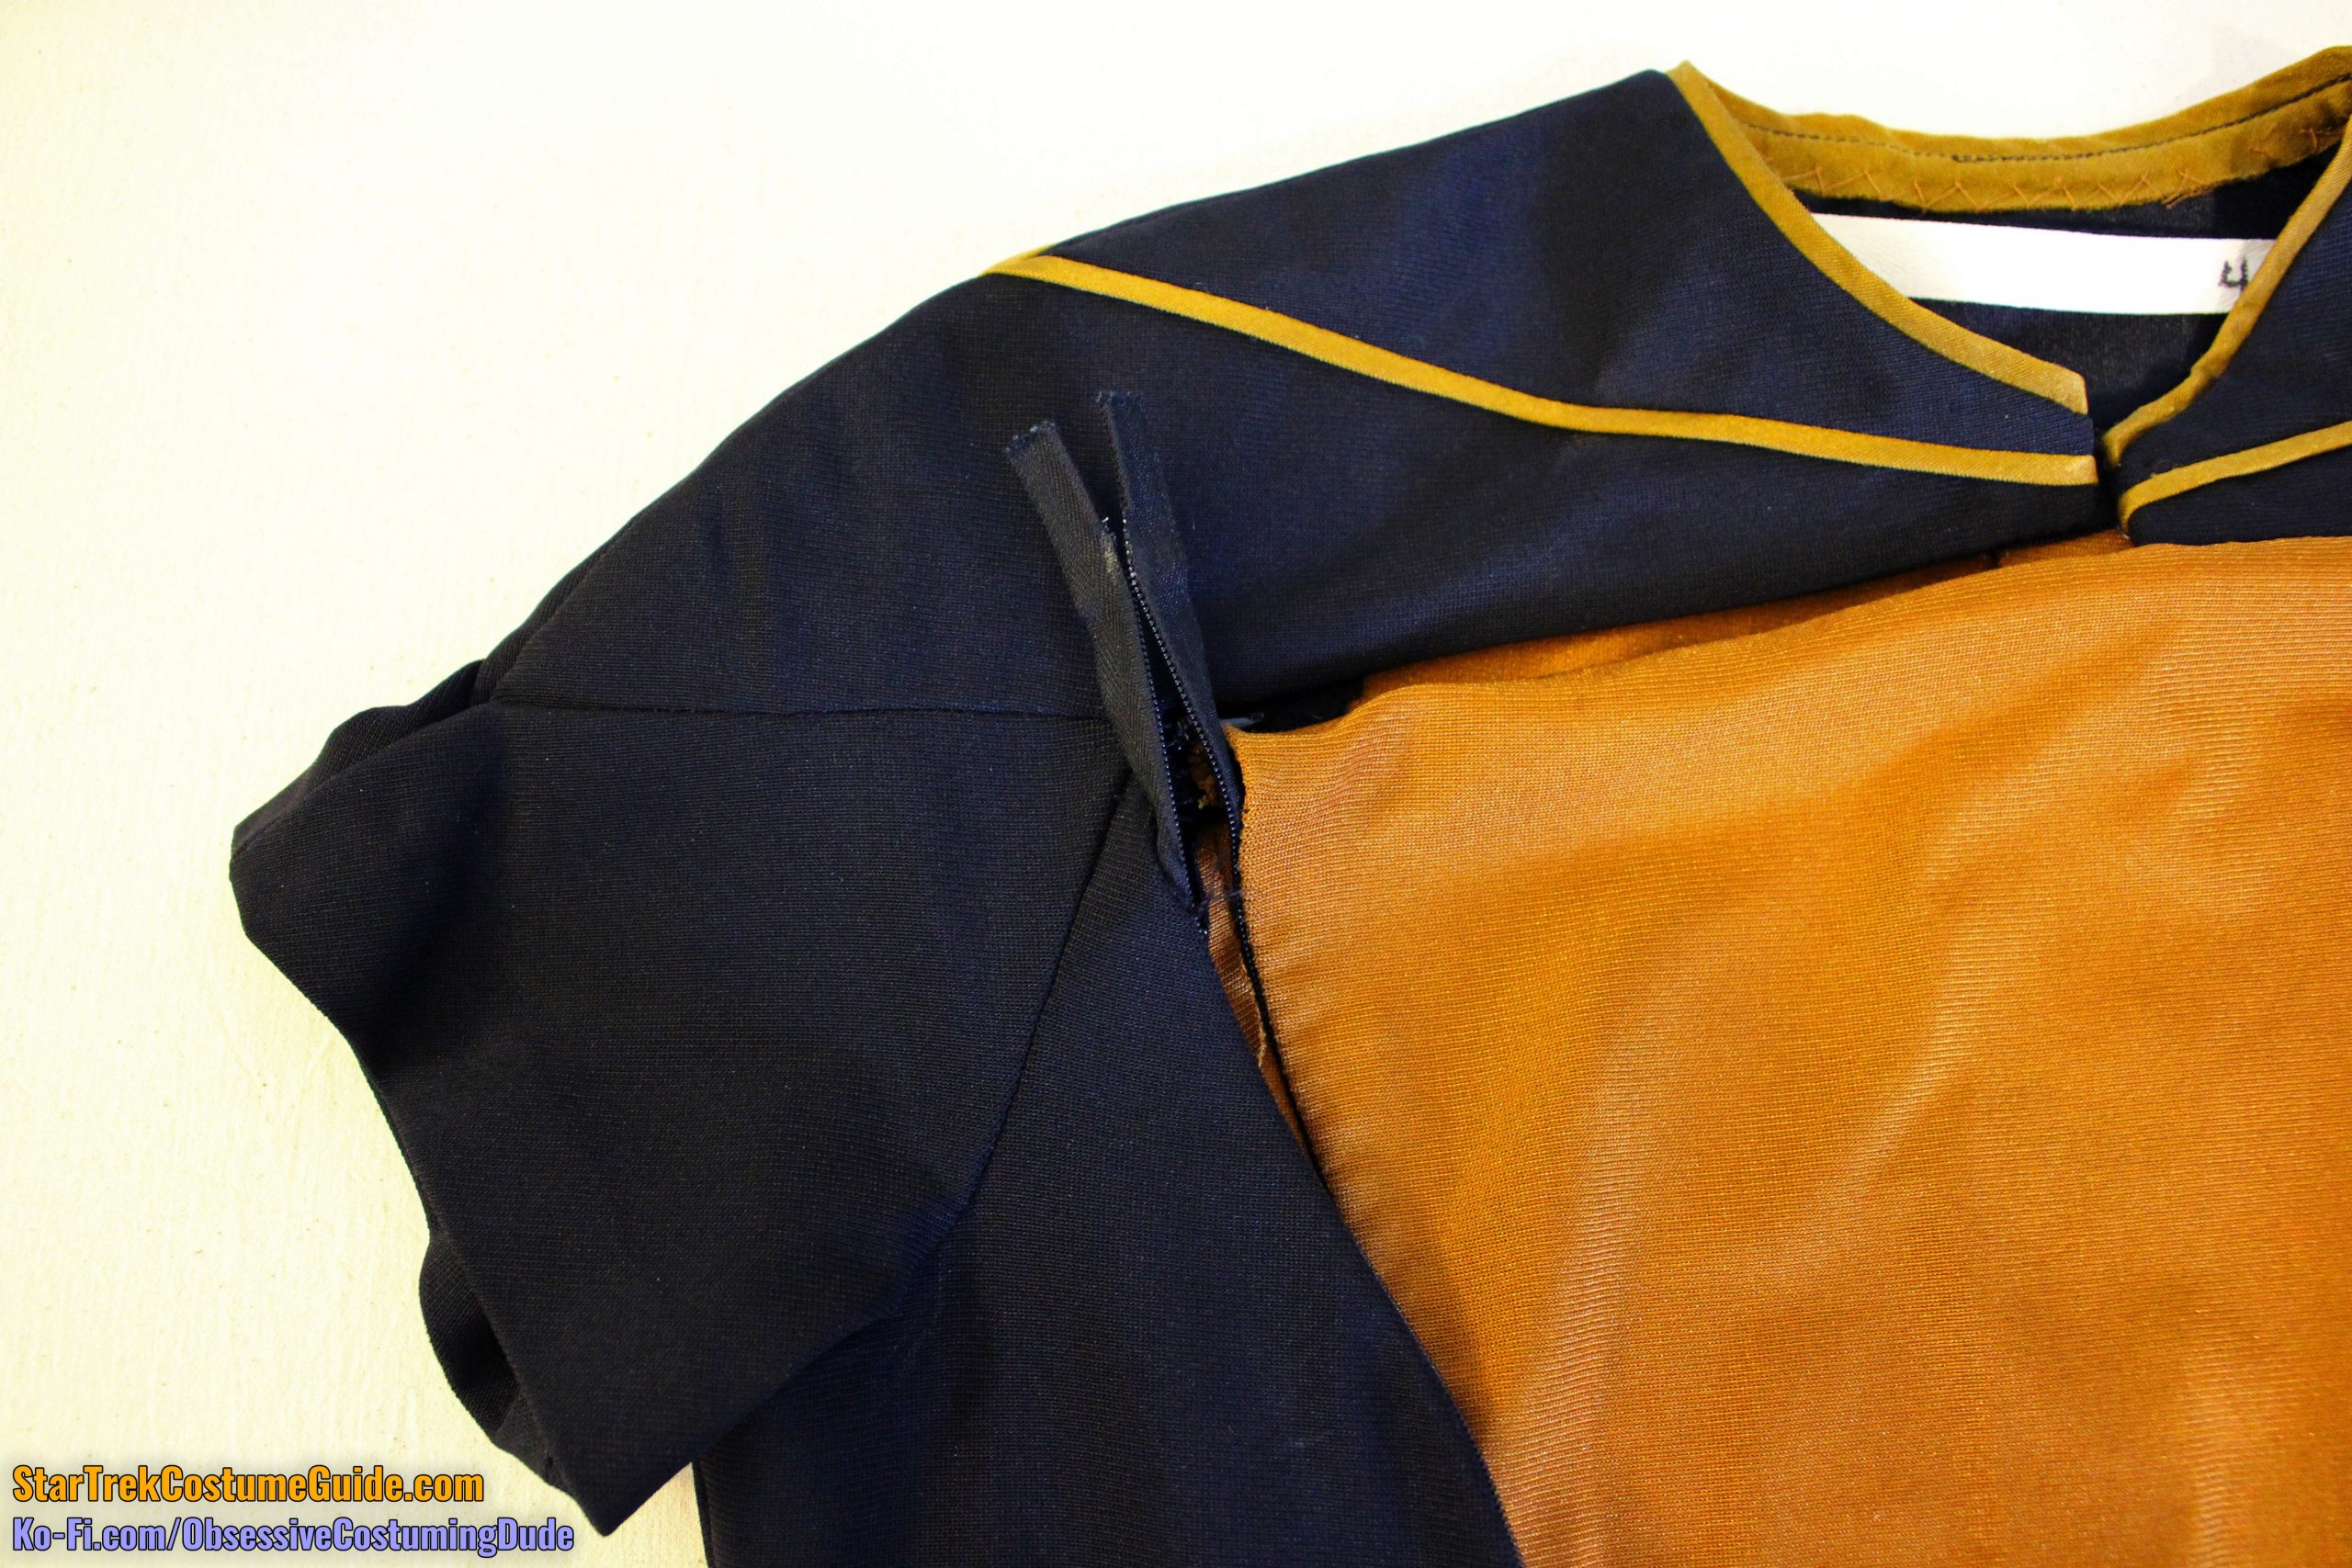
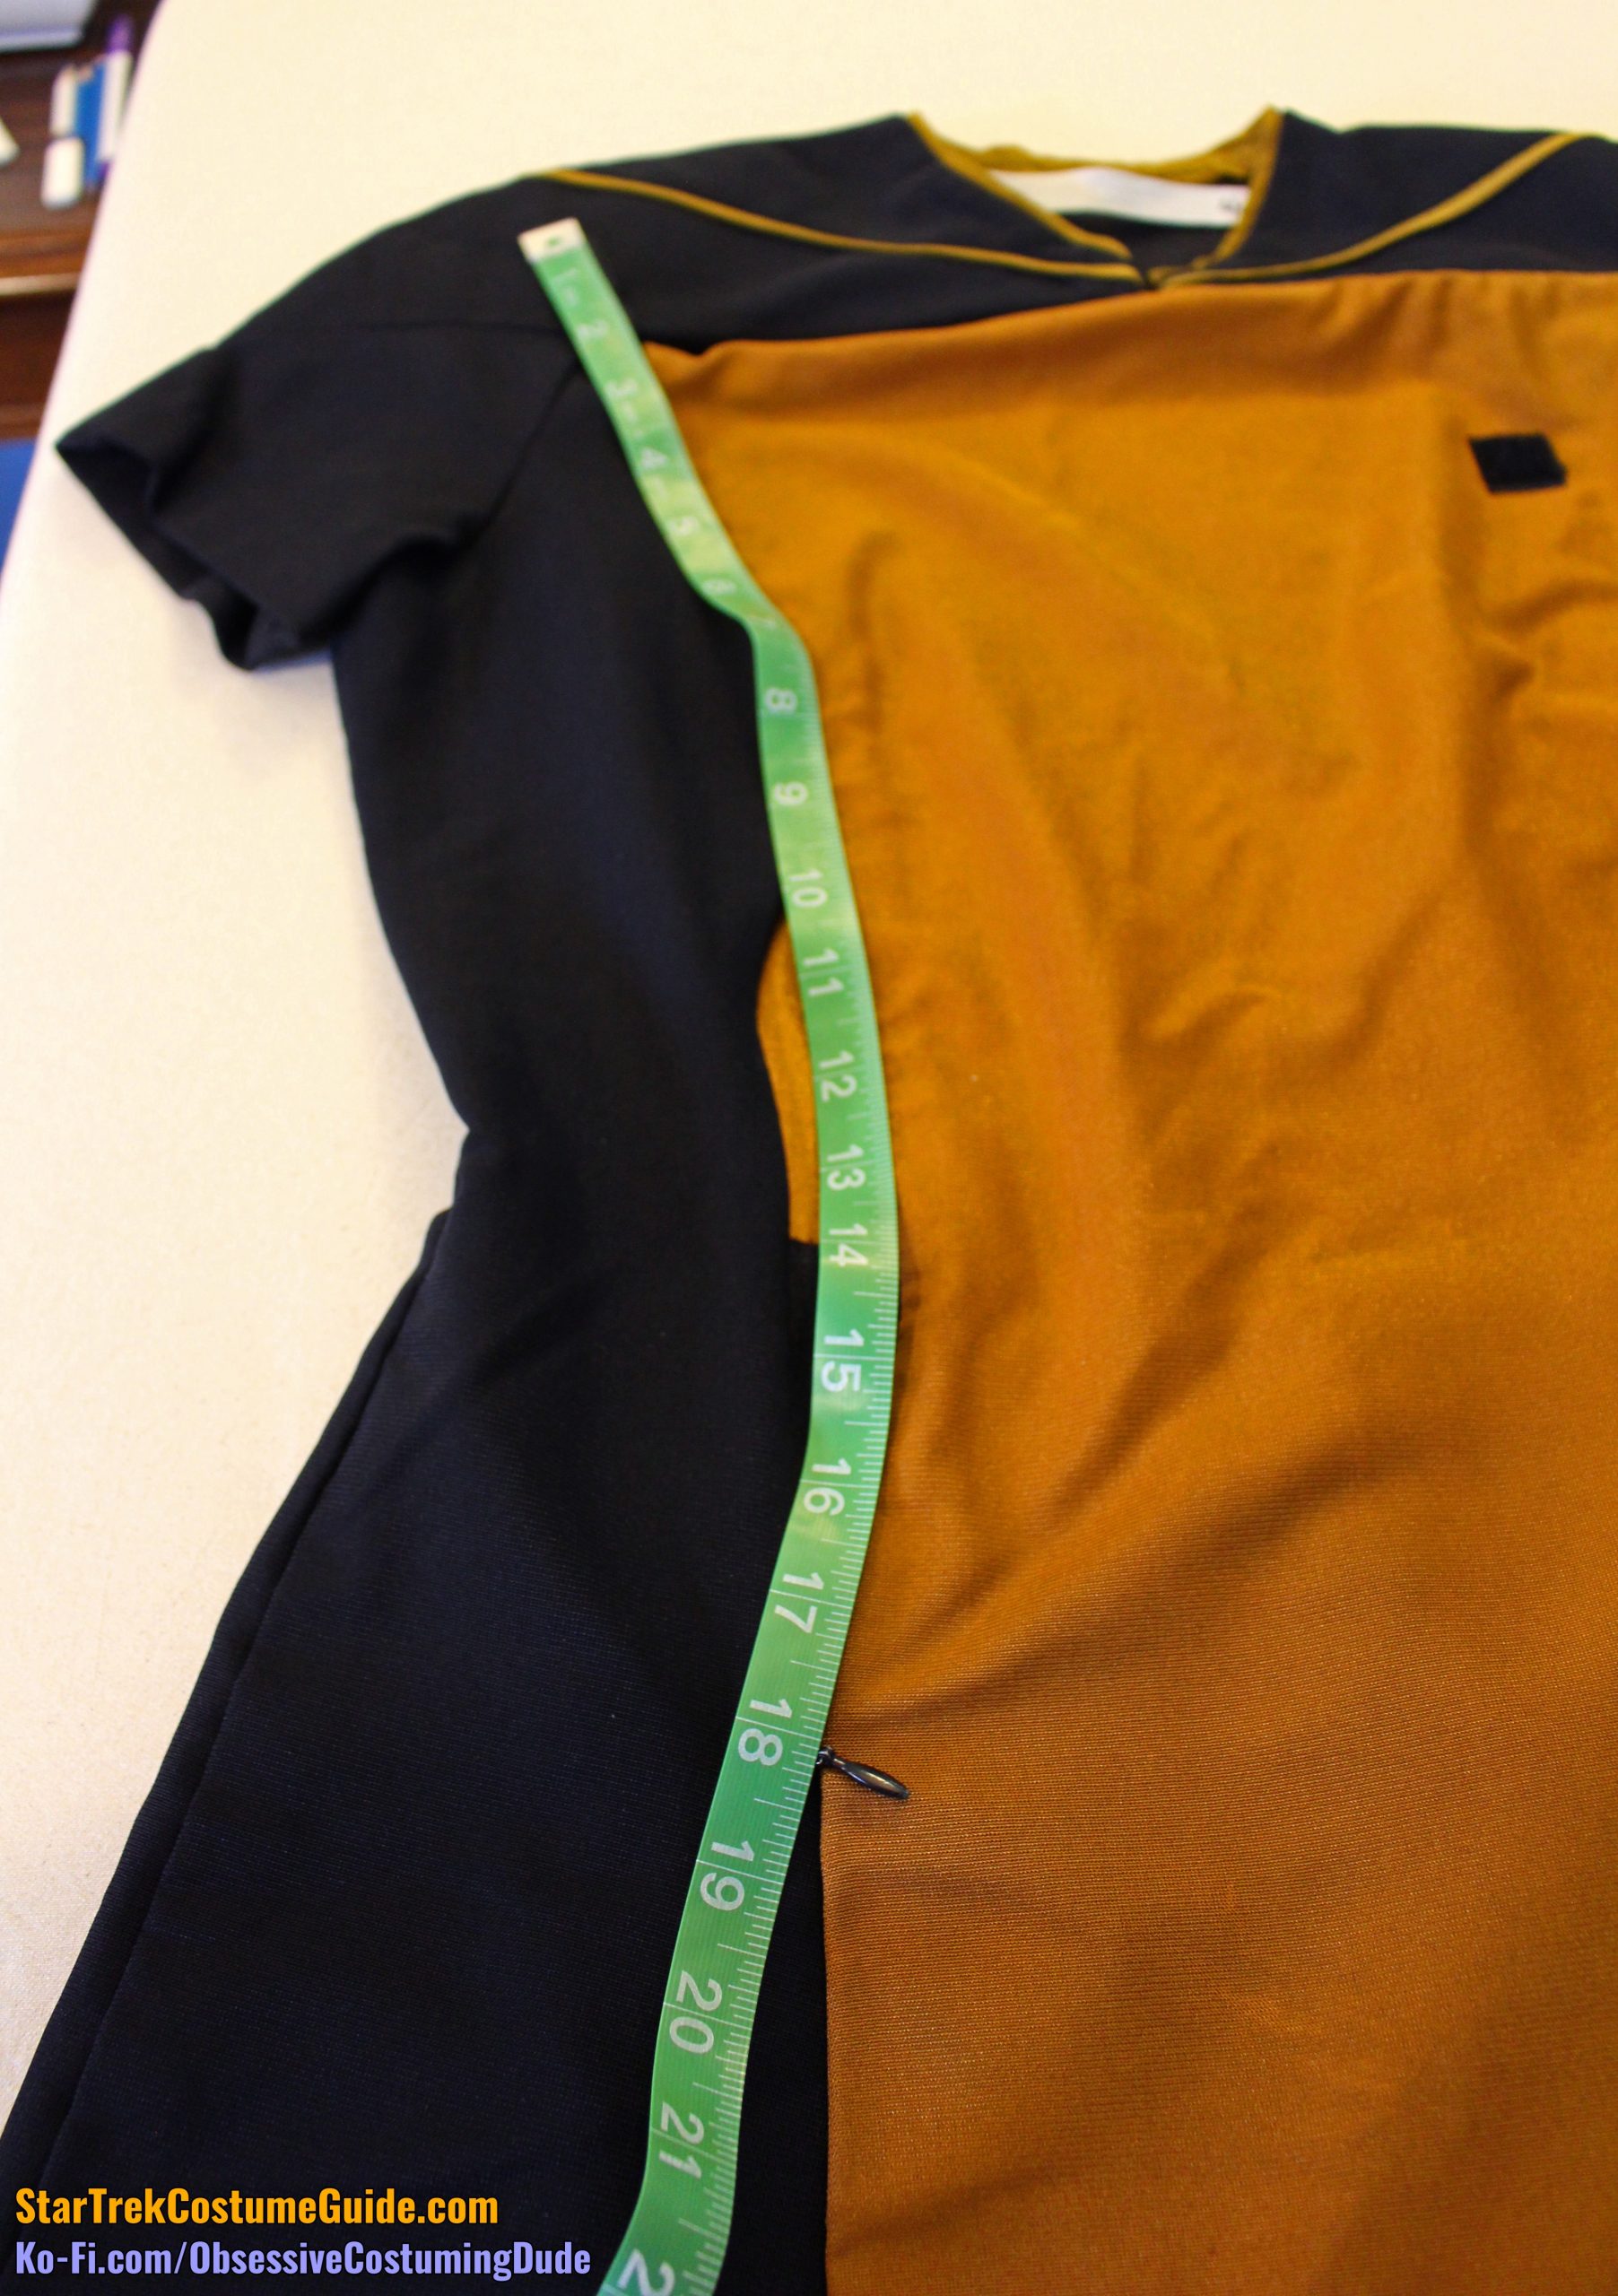
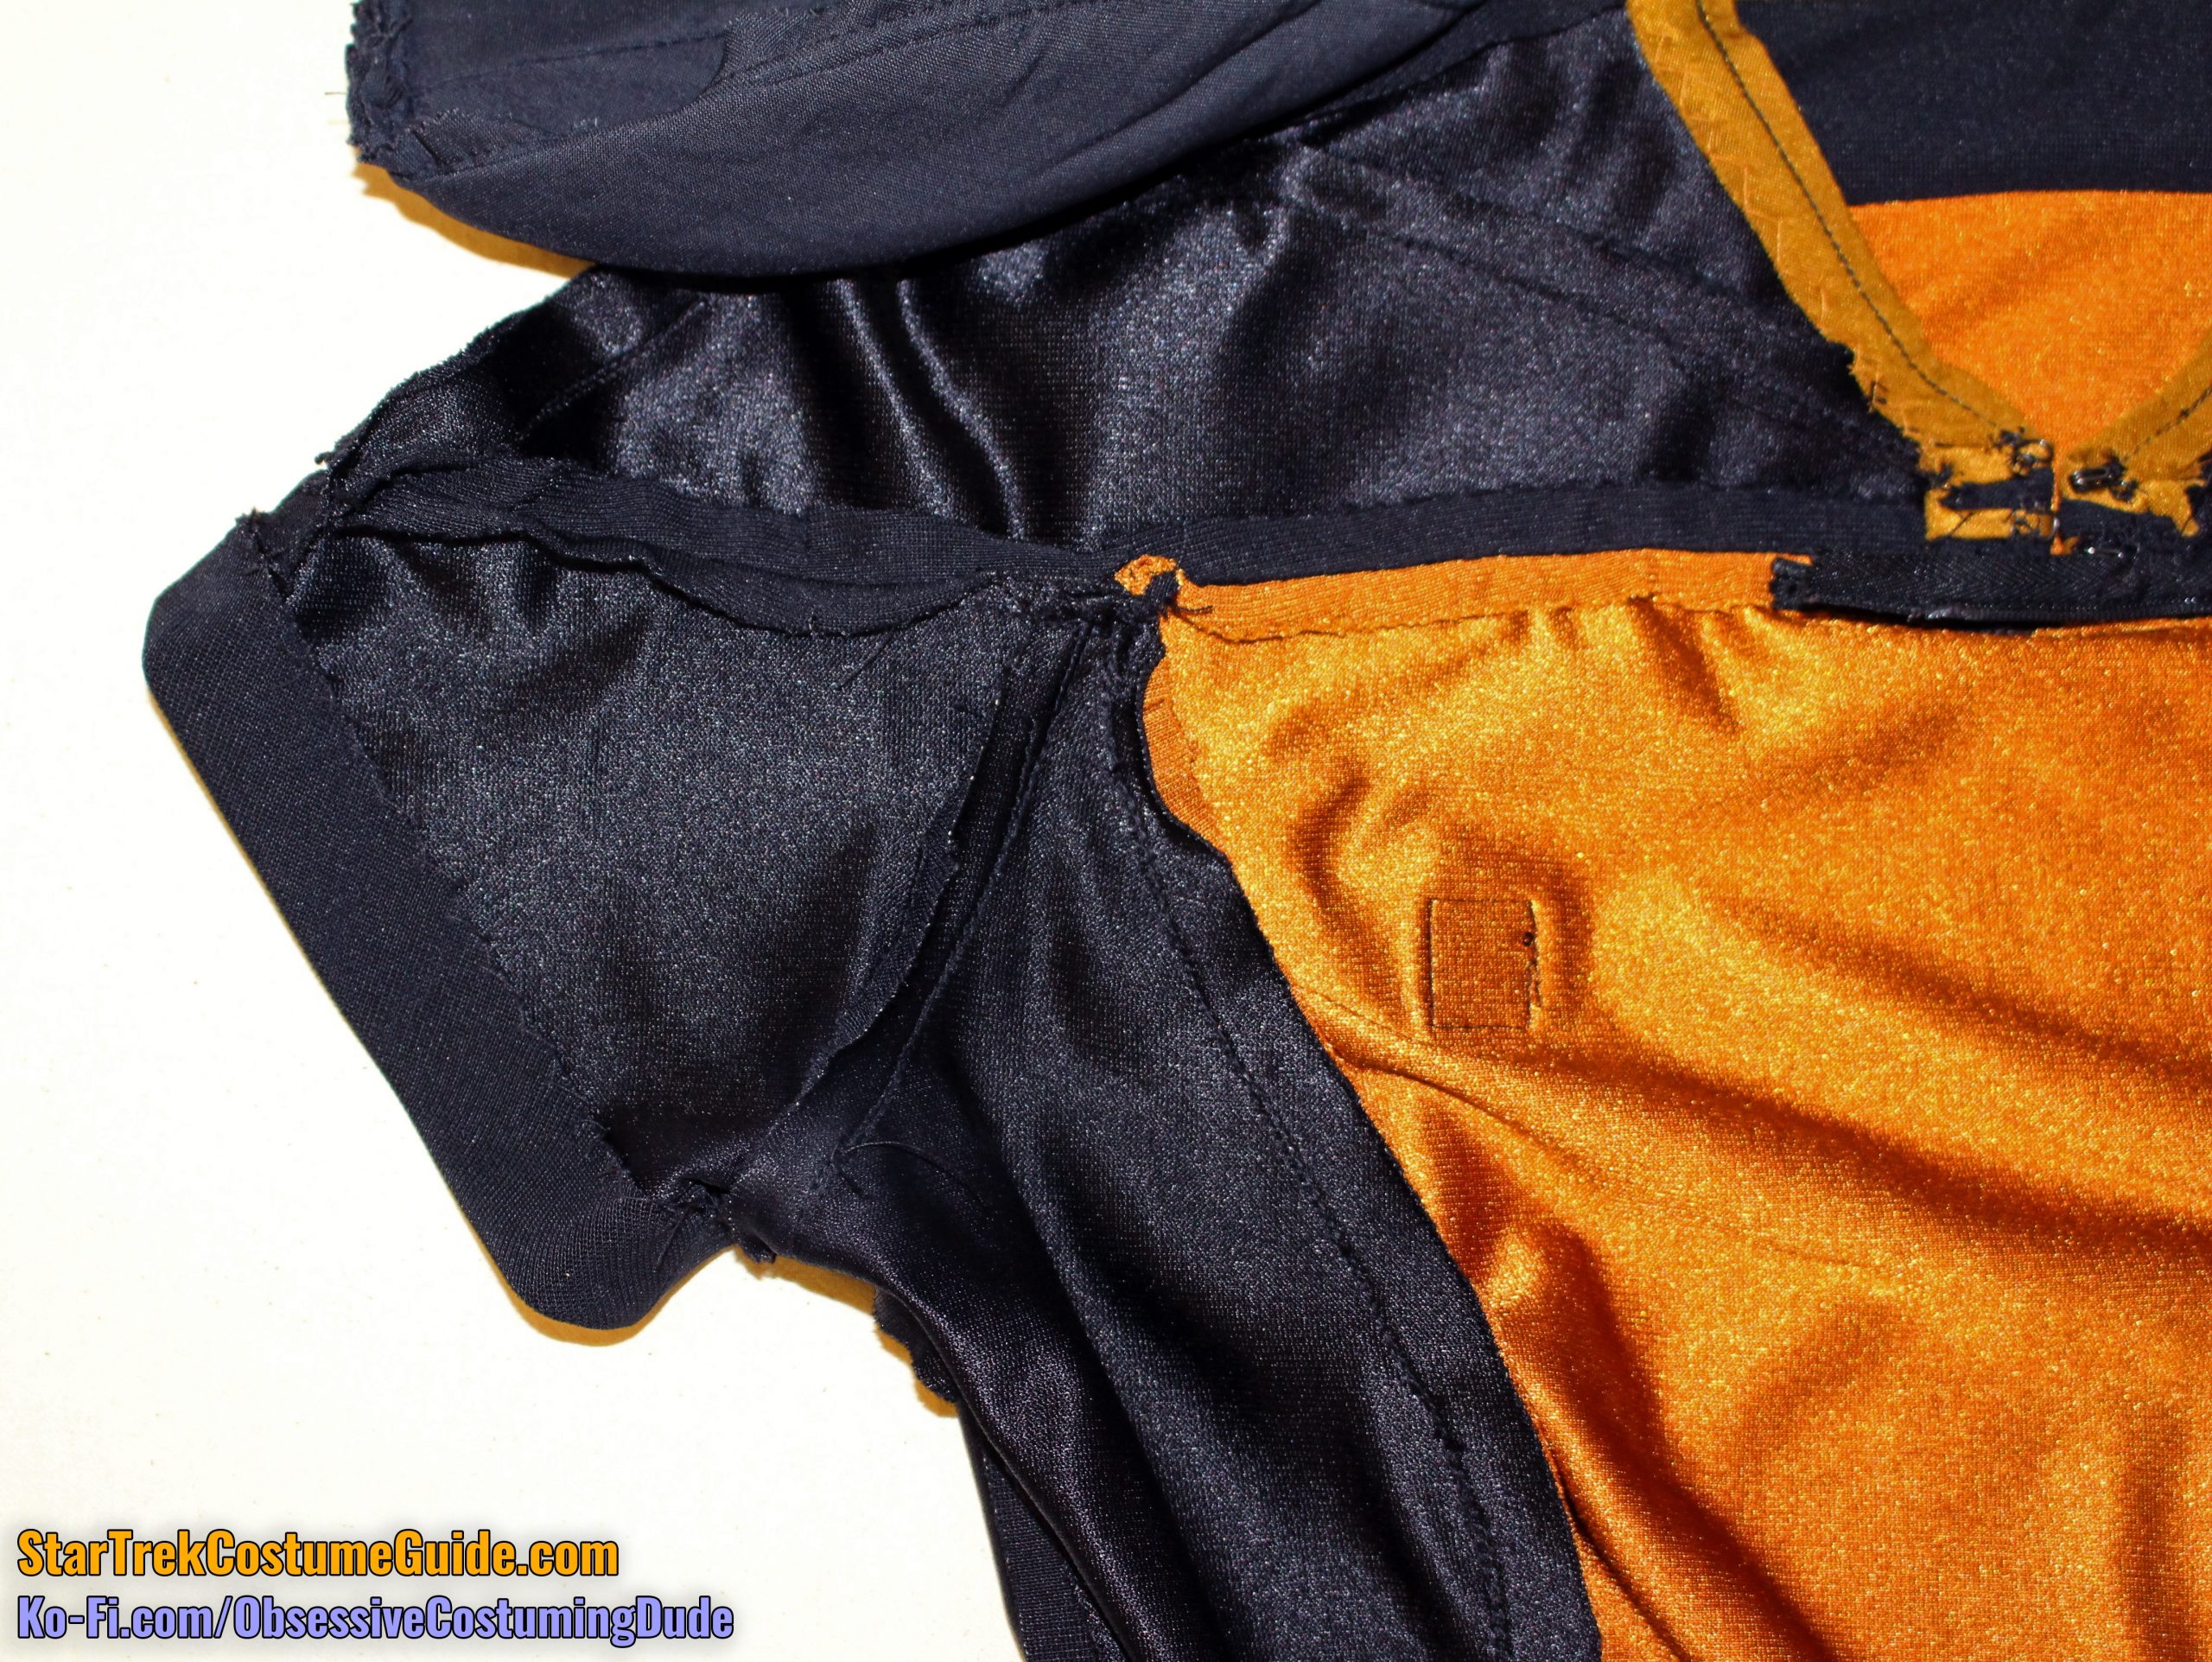
A particularly nice touch is that the division-colored front panel and black side panel met at the yoke/body/armscye seam line, forming a three-way intersection of seam lines.
These body panels were obviously designed and carefully drafted so the seam lines would intersect at exactly the same point!
Front
Back
Note the multiple rows of stitching to reinforce the entire area, and that the center/side and side/armscye seam allowances were stitched yet again before tapering off to the edges.
Also note that with the exception of the front zipper, the vertical front and back body seam allowances were all ½” and pressed toward center.
However, the side seam allowances were ⅝” and pressed open.
The armscye seam allowances were pressed outward, toward the sleeves.
The sleeve hem allowance was 1″.
As you may have noticed, all hem allowances were catch-stitched to the underside of the garment by hand.
A particularly nice touch was that the gold areas were hemmed with gold thread, and the black areas were hemmed with black thread. (Except for that neckline trim – not sure what was up with that.)
IN CONCLUSION
I’d again like to thank Steve Barnes for allowing me to study this screen-used TNG skant, and to share my research with you.
I learned a great deal from this costume examination, and I hope you did as well!
[…] shoulder pads were quite large – which would have been surprising if I hadn’t examined a screen-used TNG skant beforehand, as well as a season 1 admiral jacket (which I’ll be posting about […]
[…] this thing is short – over 5” shorter than the women’s TNG skant I examined. I’d been working under the assumption that the two garments were approximately the same length, […]
[…] you’ve probably seen from my TNG skant analysis and TNG skant examination, I was really able to get a lot of mileage out of the screen-used TNG skant I examined a few years […]