There are a few important factors to keep in mind when cutting your fabric.
First, remember to cut your fabric using the matte/”dull” (non-shiny) side of the fabric as the “right” side.
With the Tailors Gone Wild TNG skant patterns, this means cutting your pattern pieces with the fabric “right” (matte/dull) side up and the printed pattern pieces facing upward, as well.
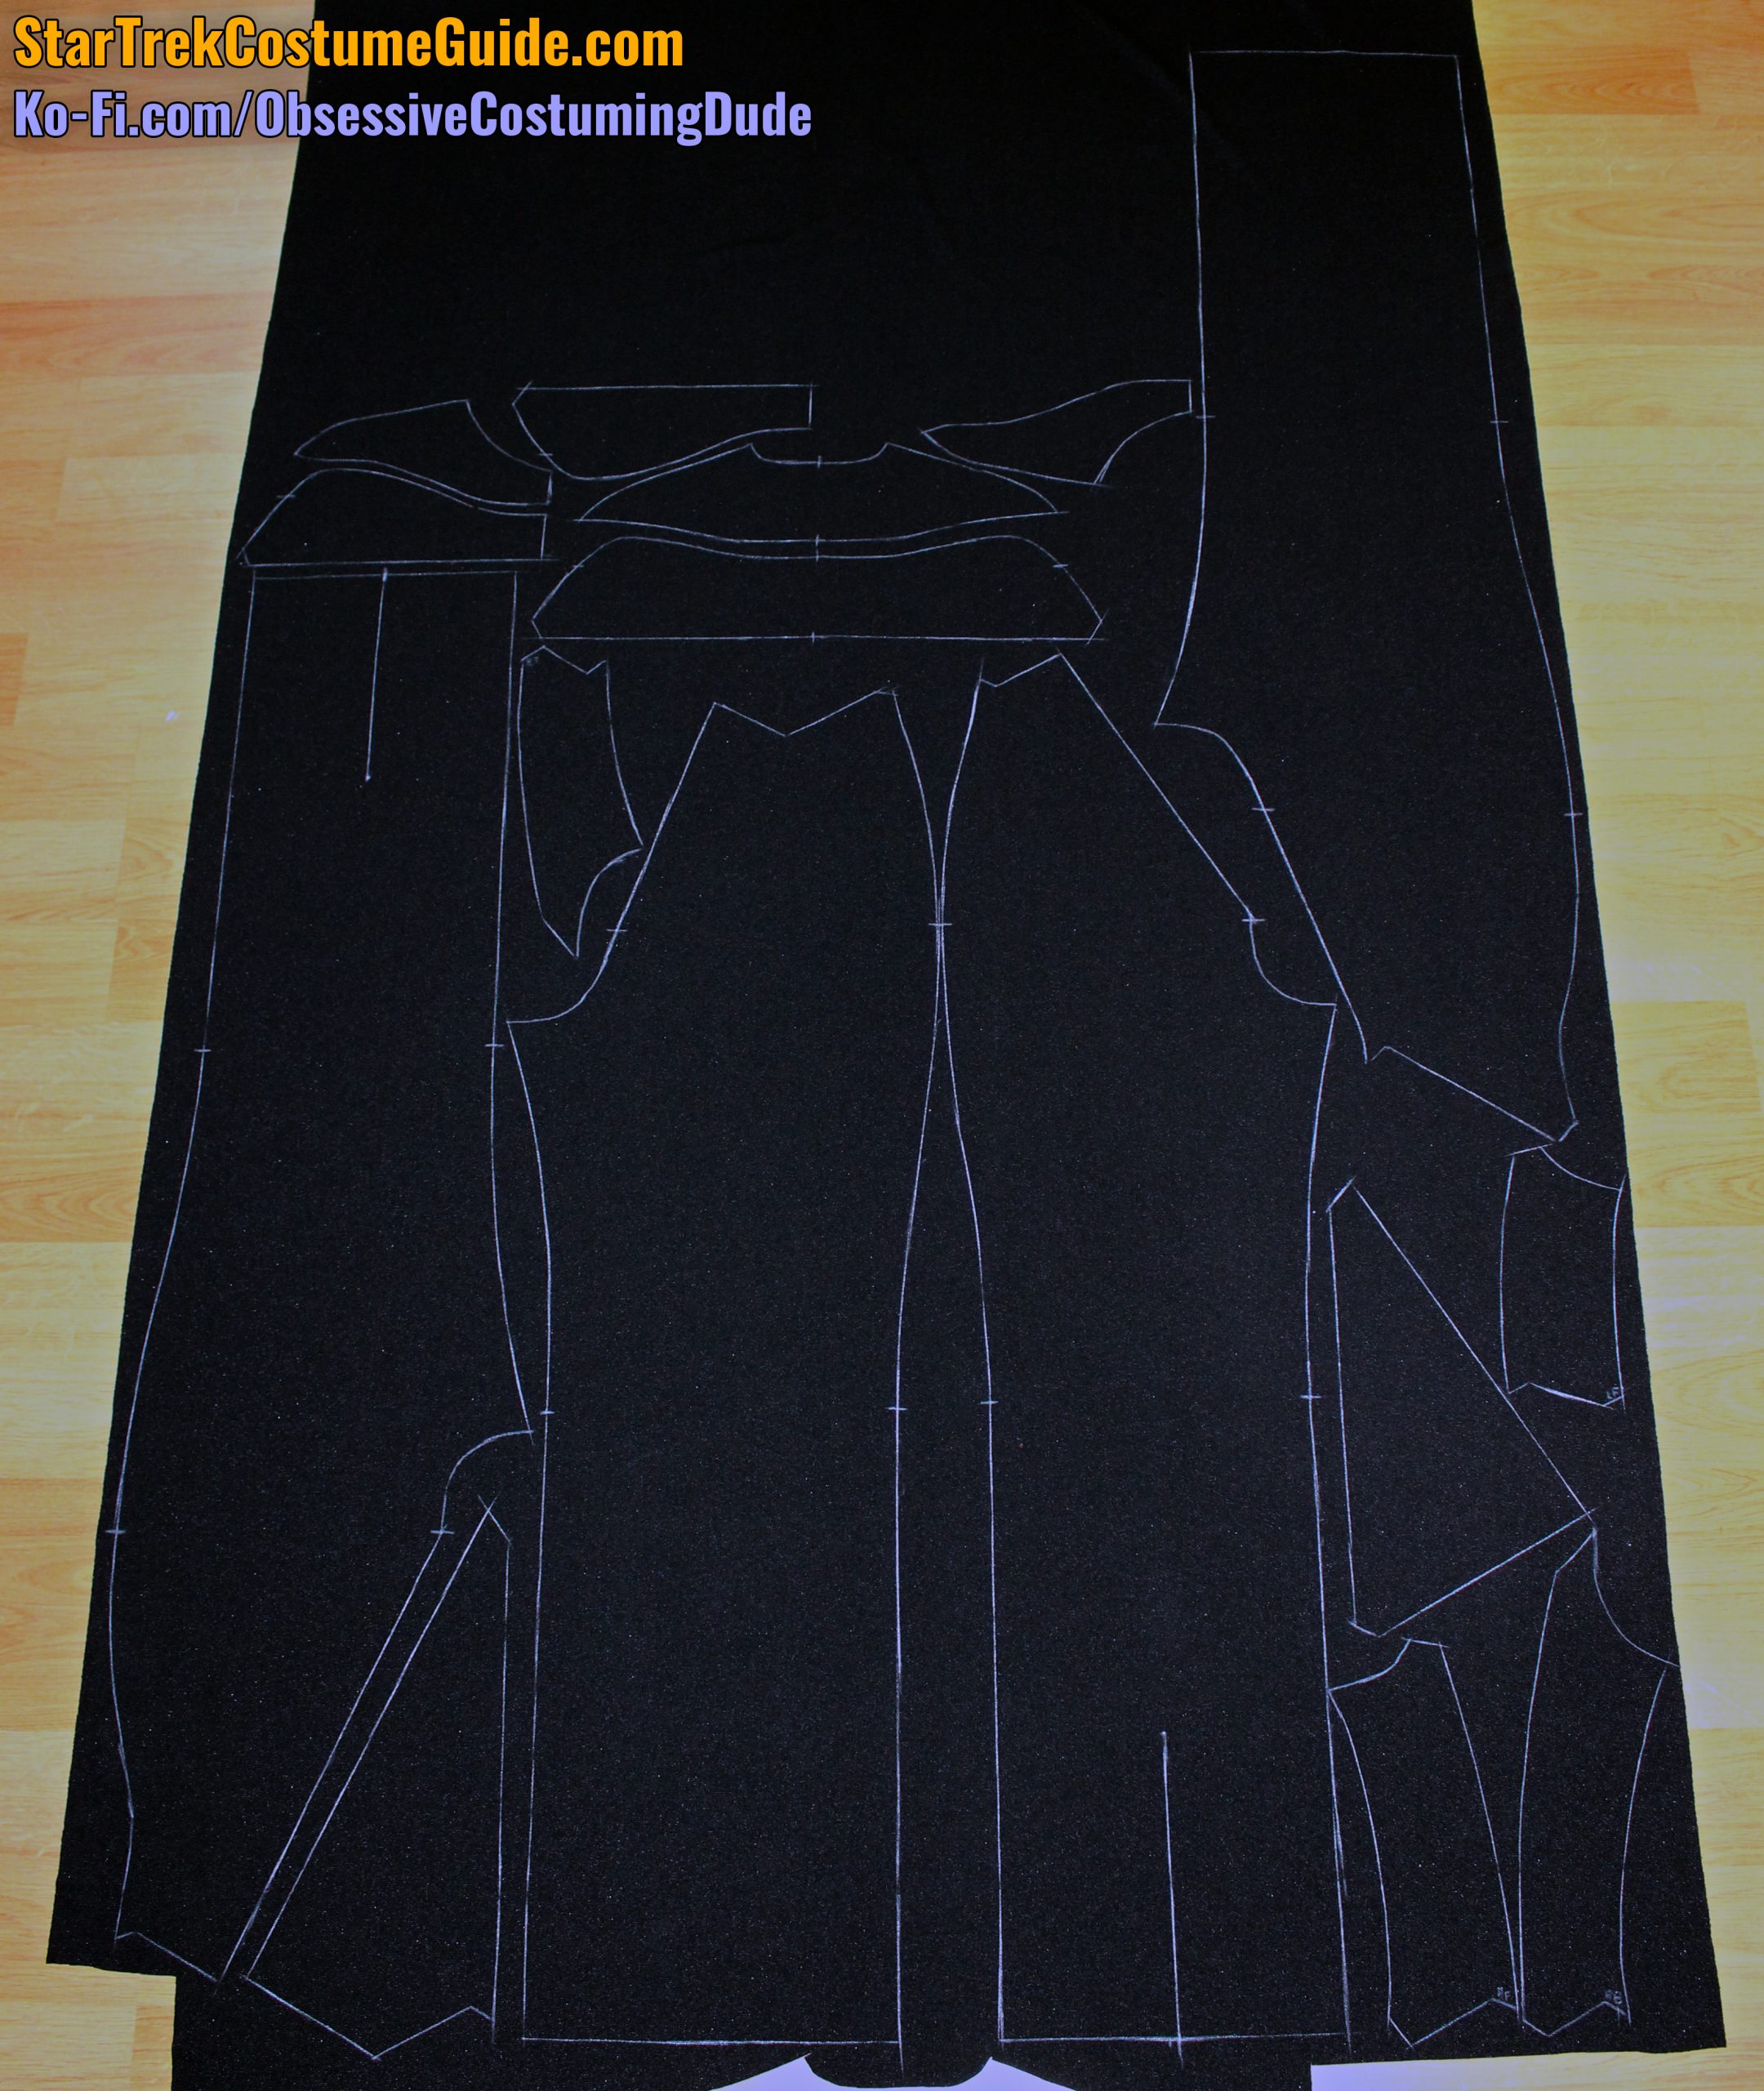
TIP: I like to cut my paper pattern pieces using paper scissors, then trace my pattern pieces onto the fabric using tailor’s chalk. (See TNG jumpsuit example to the right.)
Second, on my aforementioned TGW sewing patterns, the “grain line” references actually indicate the crossgrain, not the straight grain!
Personally, I find it easier to align these with the horizontal weave of the jumbo spandex.
Third, the seam and hem allowances vary (just like the originals), so reference both the printed pattern and the following sewing tutorial while assembling your uniform.
(I did consider “standardizing” all the seam allowances for my patterns, but I ultimately decided to preserve the original allowances, for the sake of authenticity.)
And finally, if you’re doing the convenient “cheat” I mentioned and using the same division-colored jumbo spandex for both the body and neckline/yoke trim, remember to cut your piping strips on the bias (i.e. at a 45° angle to the cut edge and/or selvage).
Now that you’ve gathered your materials, determined your sizing, and cut your pattern pieces, it’s time to actually start making your TNG skant!
STEP 1 - Front Assembly
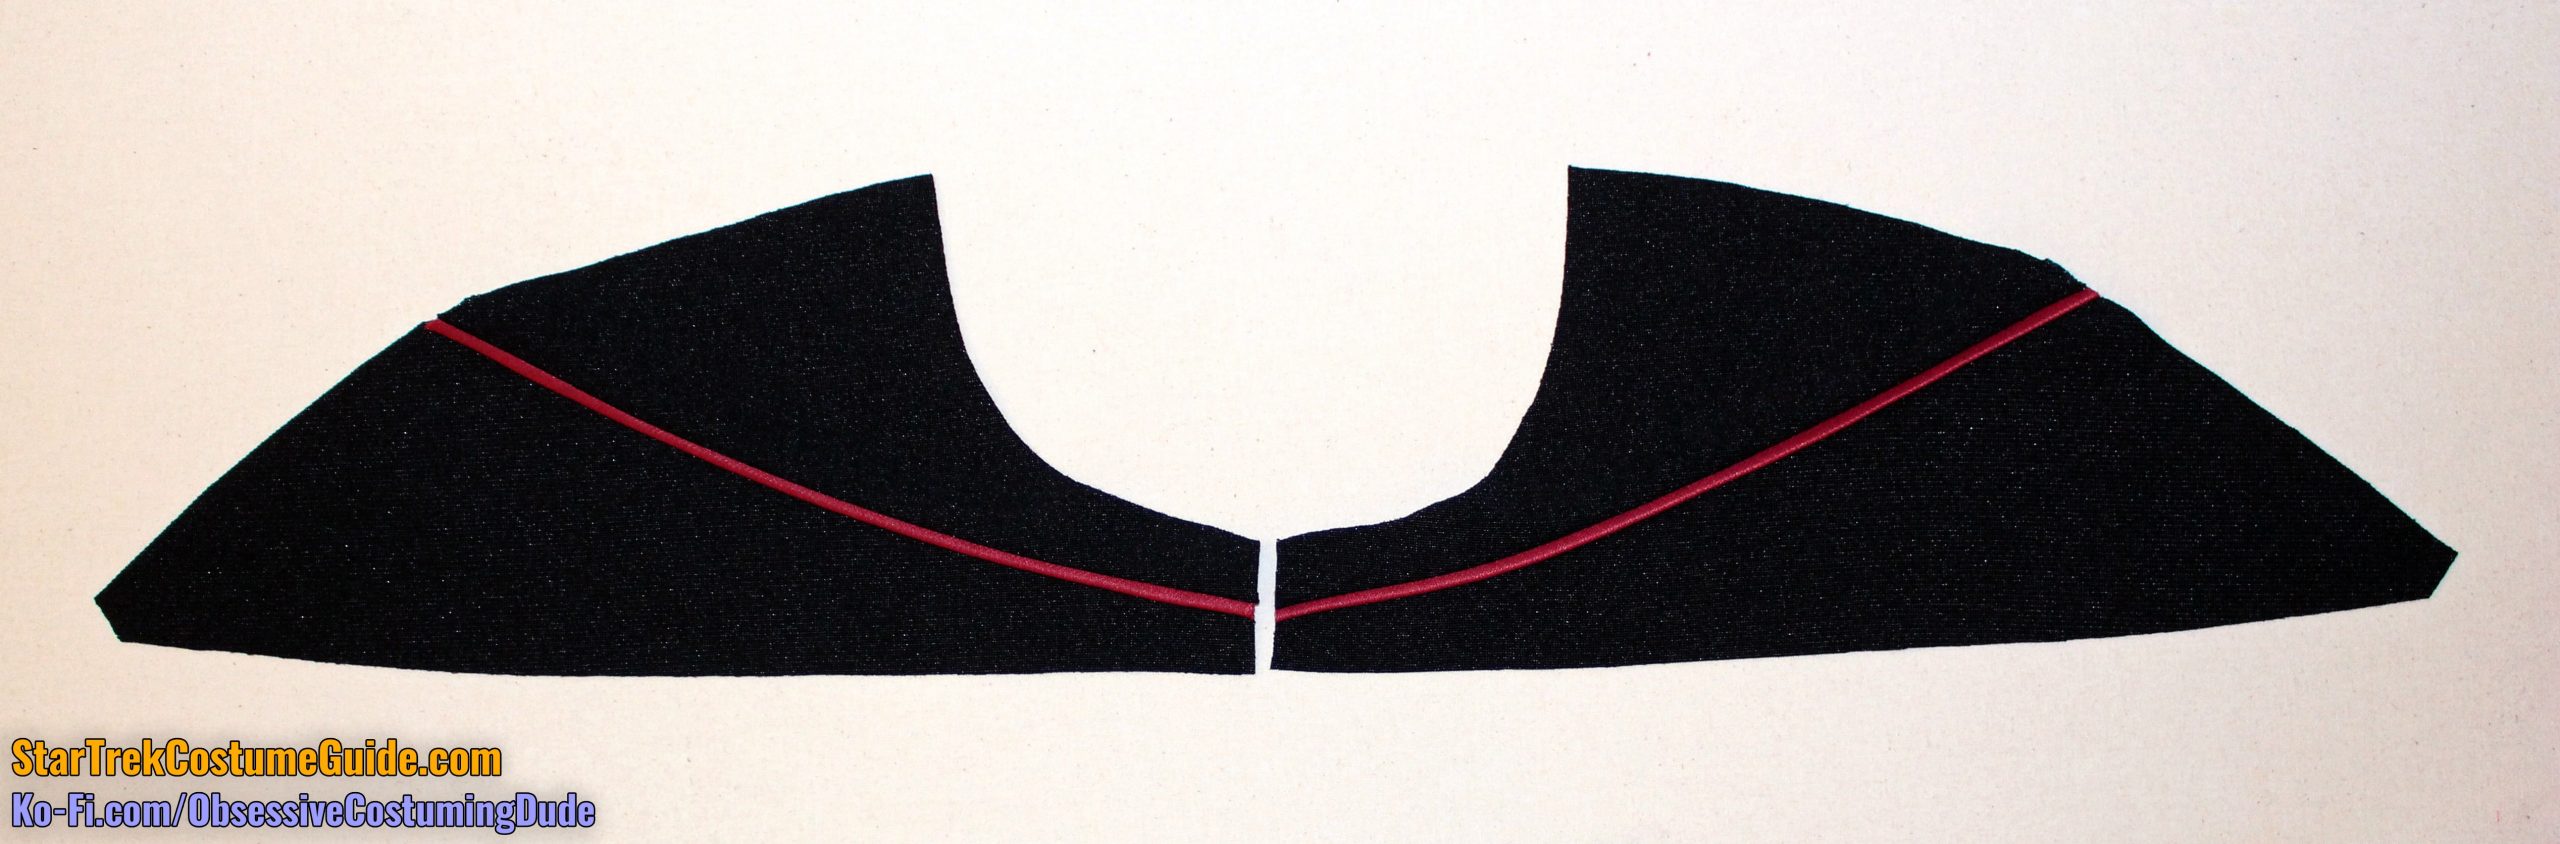
For the conceptual (seasons 3+) version of the skant, use the front yoke (piece B3) as-is and skip ahead to the body panels.
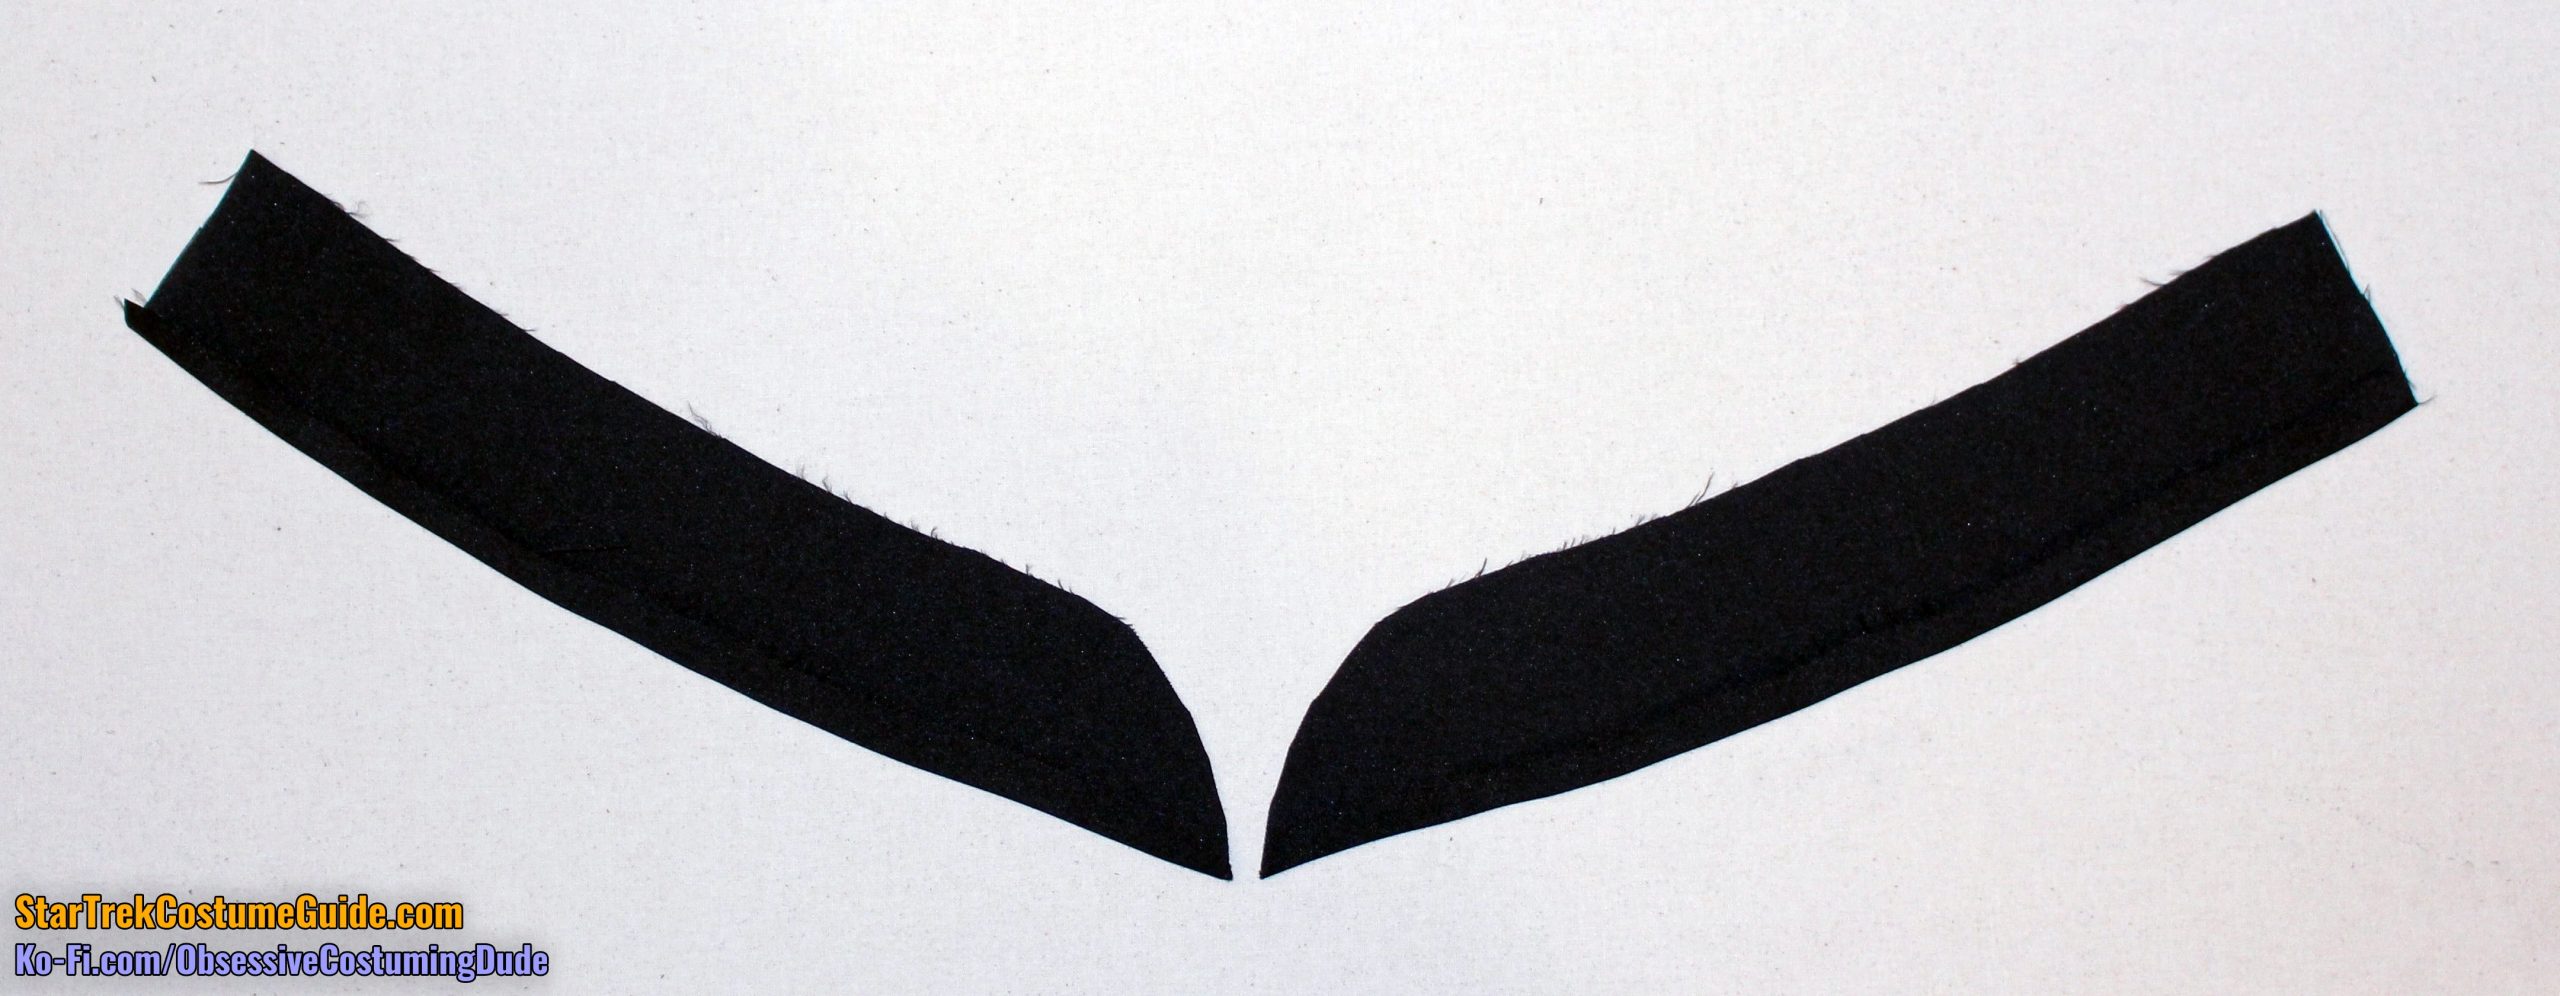
For the early versions of the skant, you’ll need the upper front yoke (piece B1), lower front yoke (piece B2), and front yoke piping (piece P).
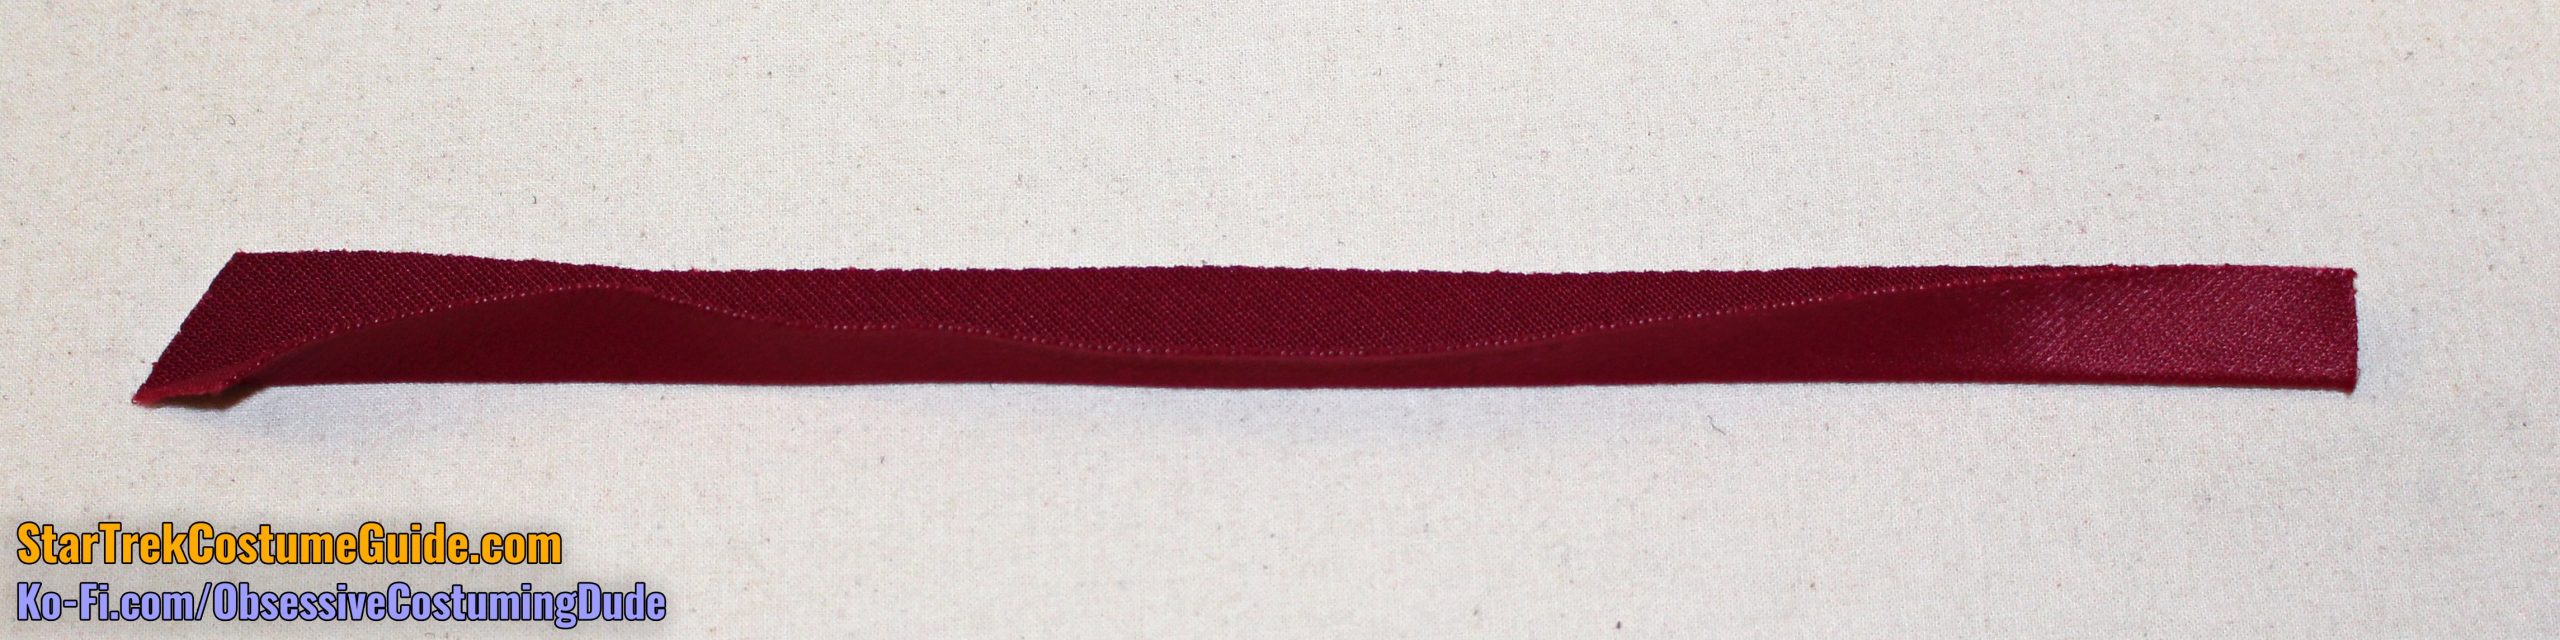
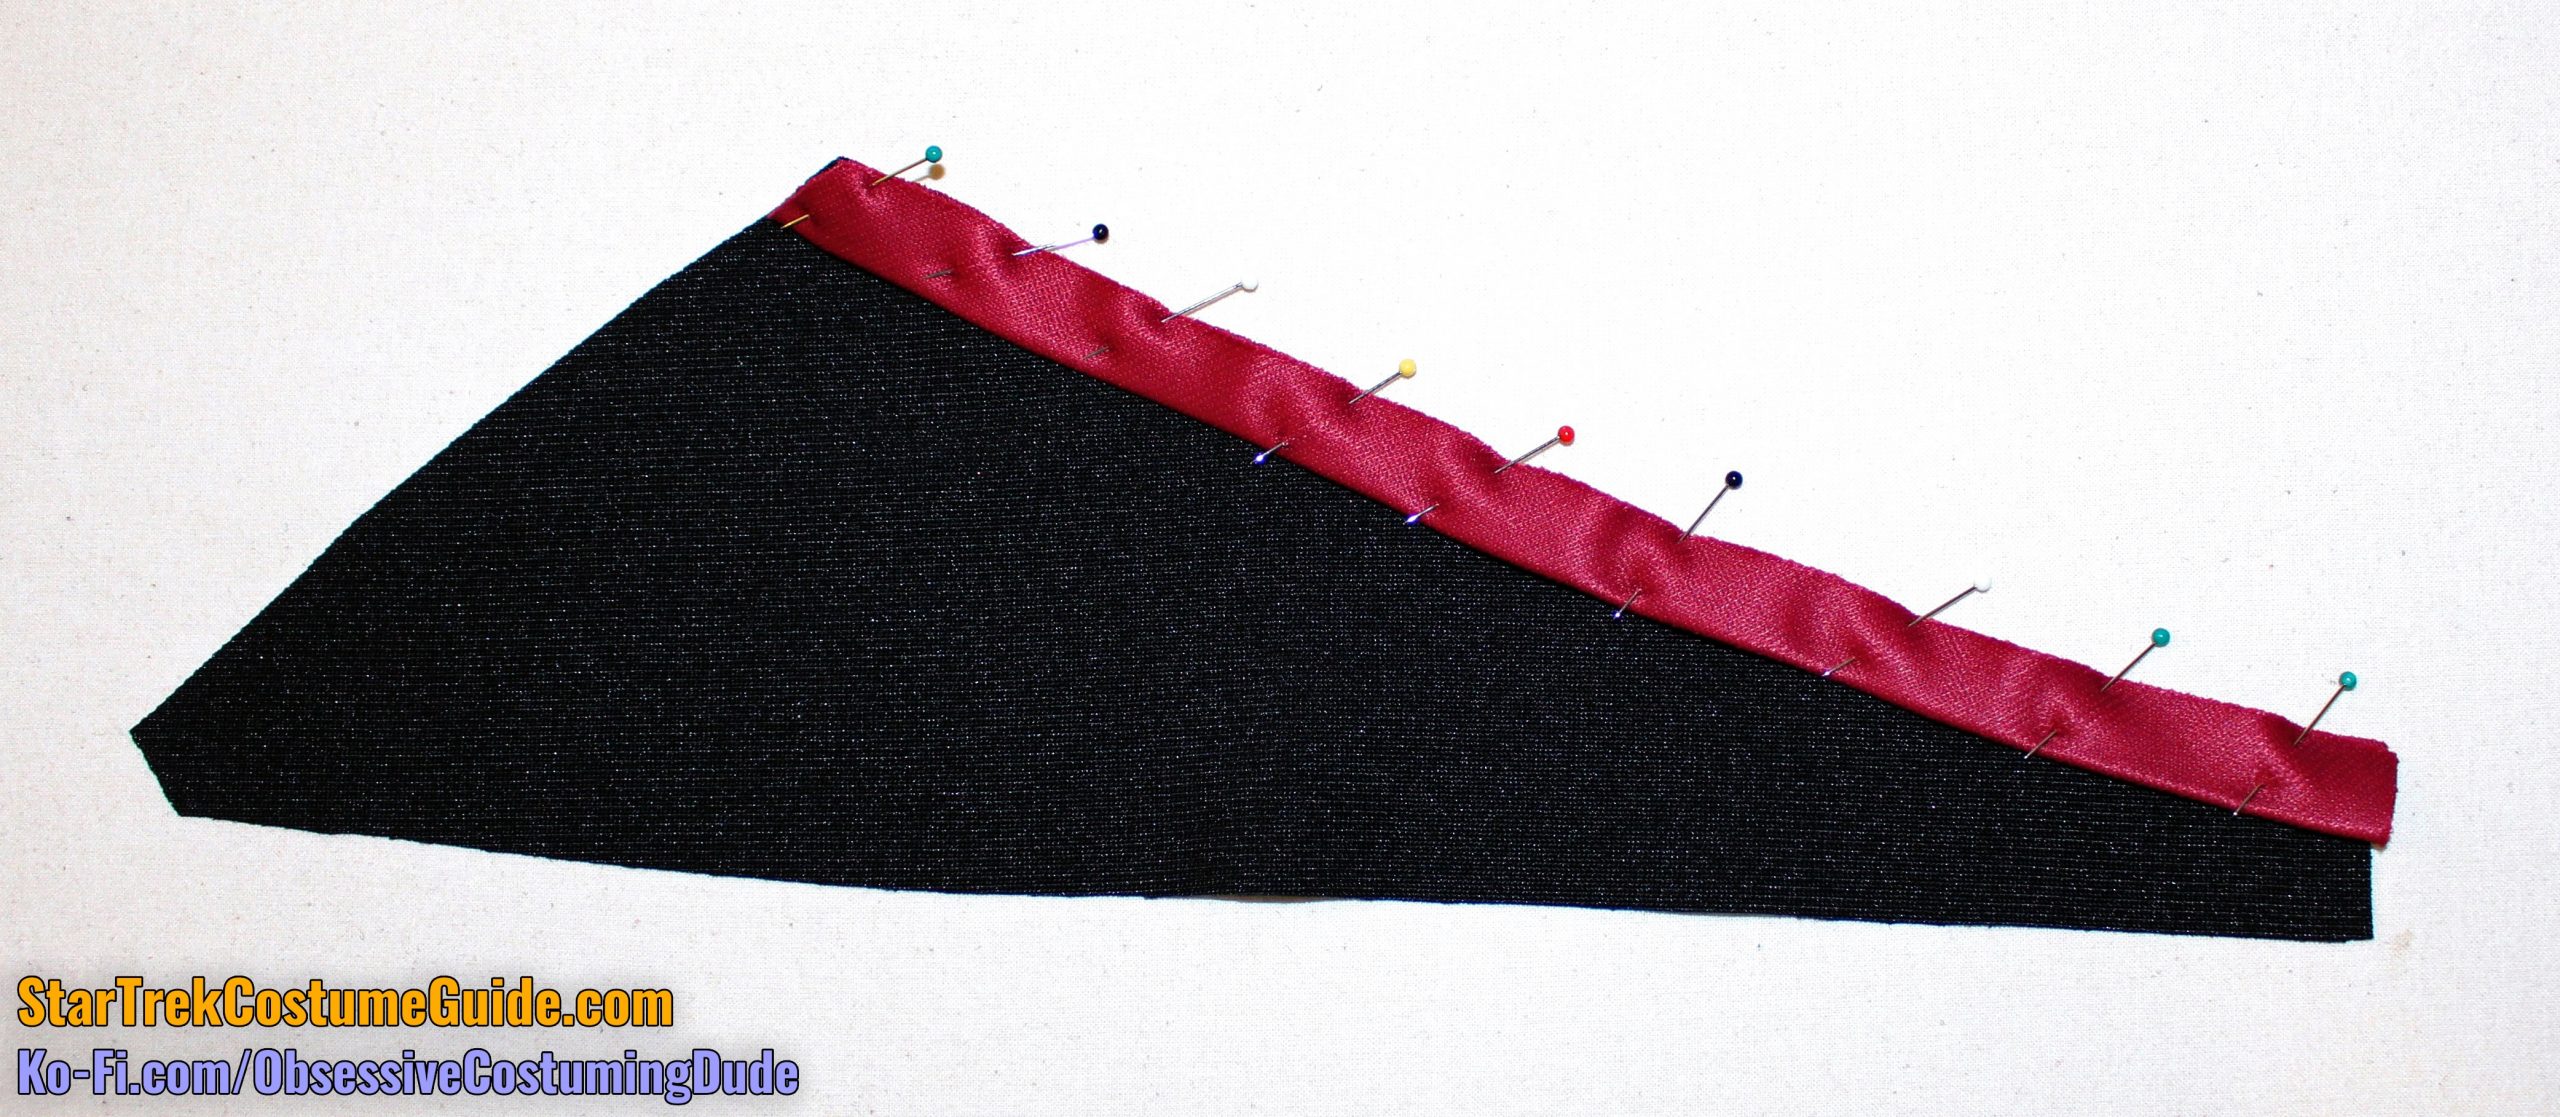
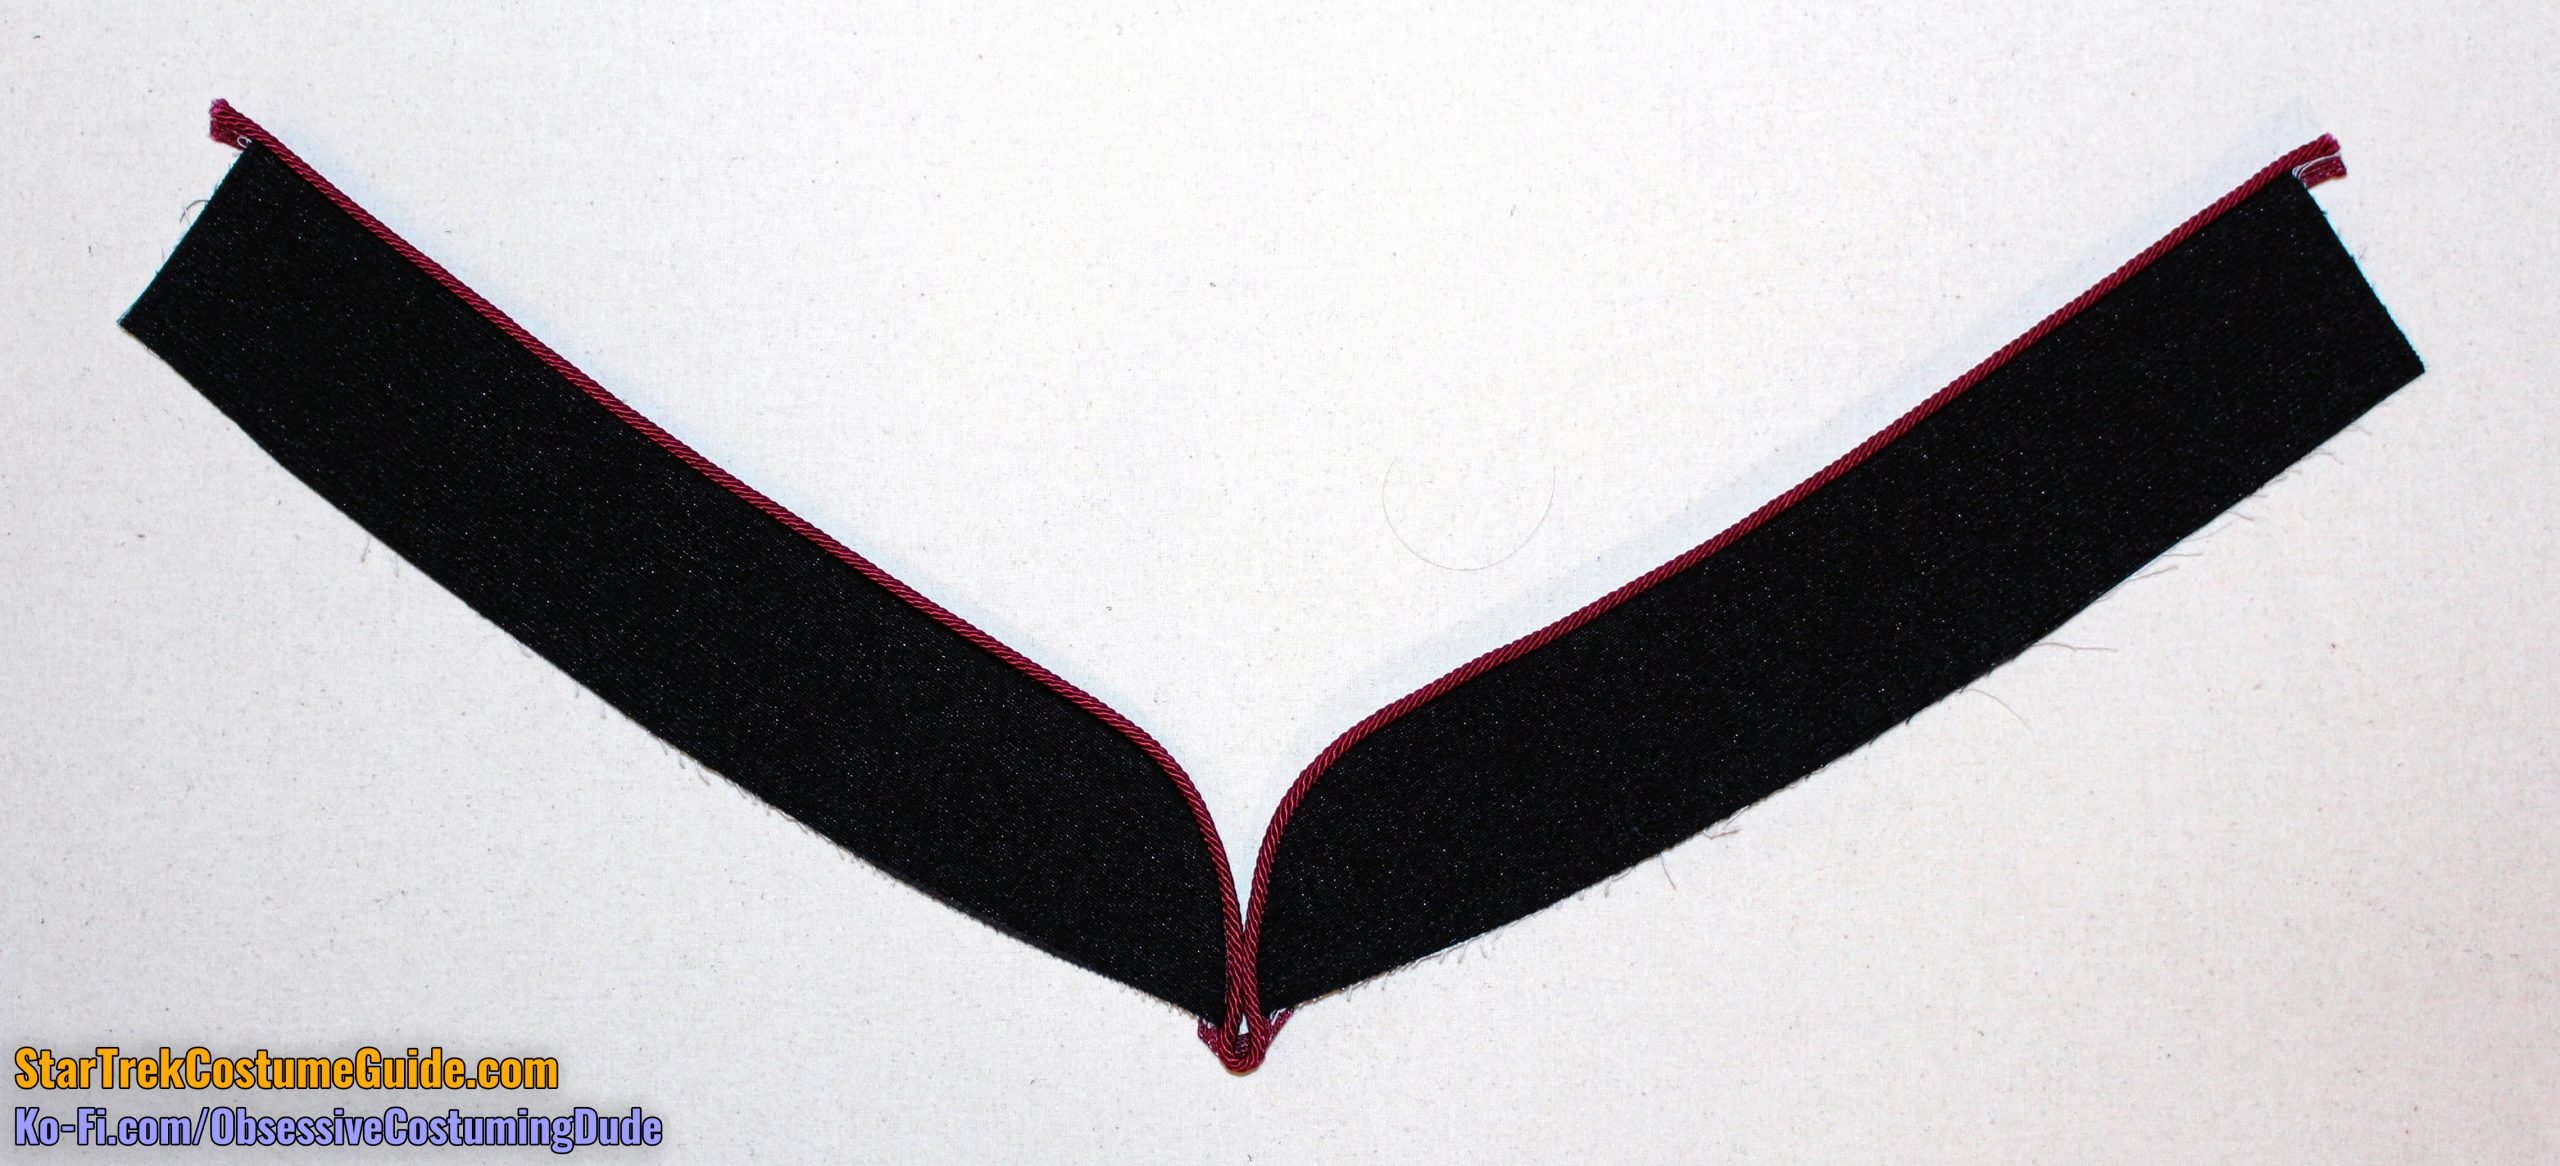
Begin by pressing your front yoke piping in half, lengthwise.
(And if you’re “cheating” and using the same jumbo spandex as the body panels, remember to fold the matte/”dull” sides together so the trim is shiny-sides-out.)
Pin the front yoke piping to the lower front yoke, folded side down, with the upper and centermost edges flush.
Sew the front yoke piping to the lower front yoke ⅜” from the upper edge.
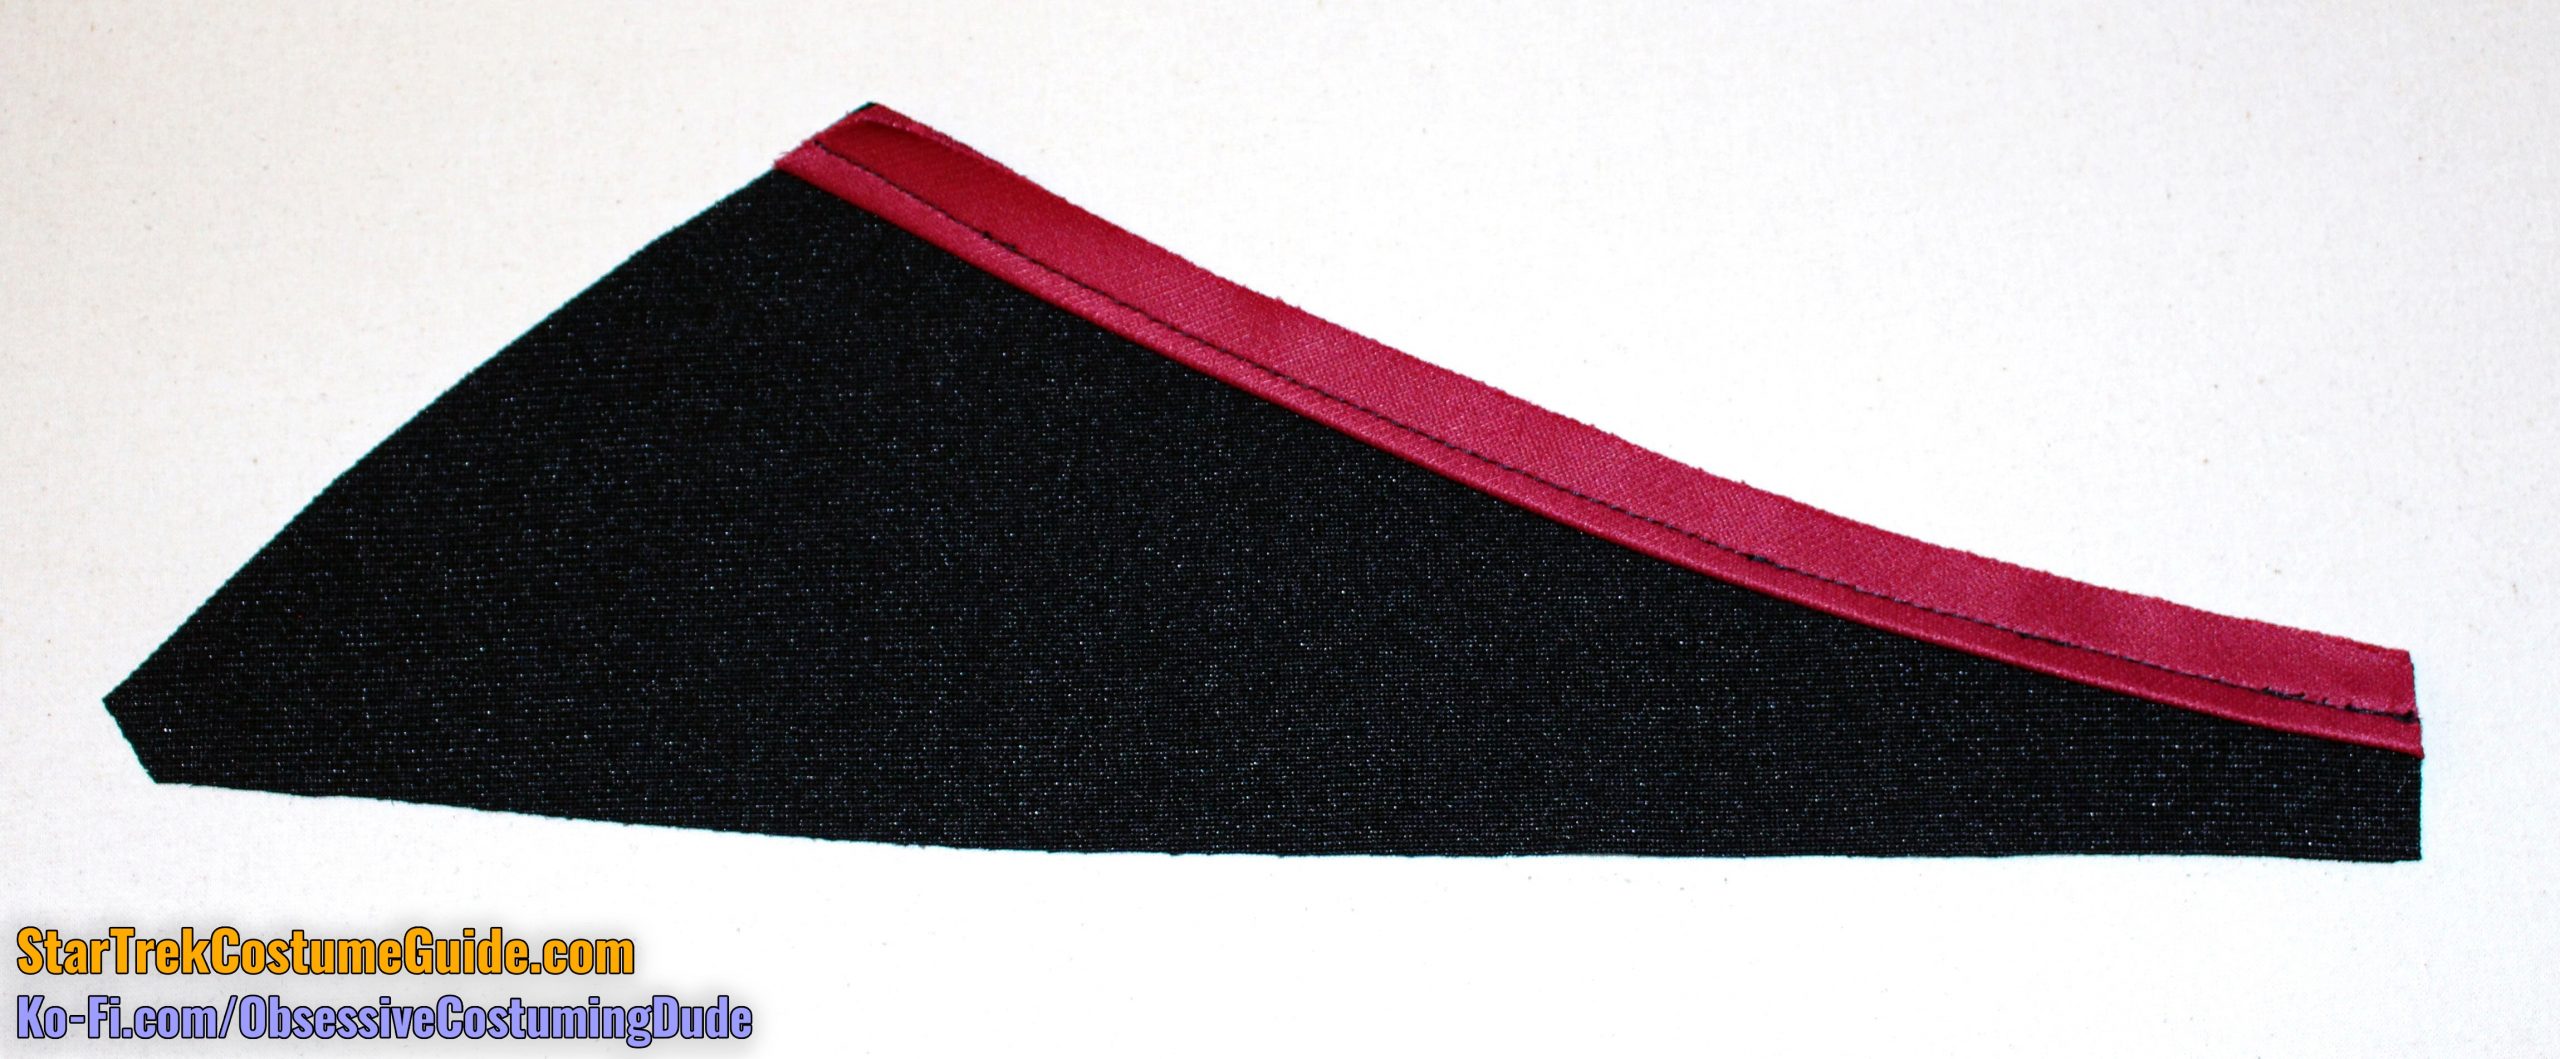
Sew the upper yoke to the lower yoke with ⅜” seam allowance, exactly over the previous stitch line.
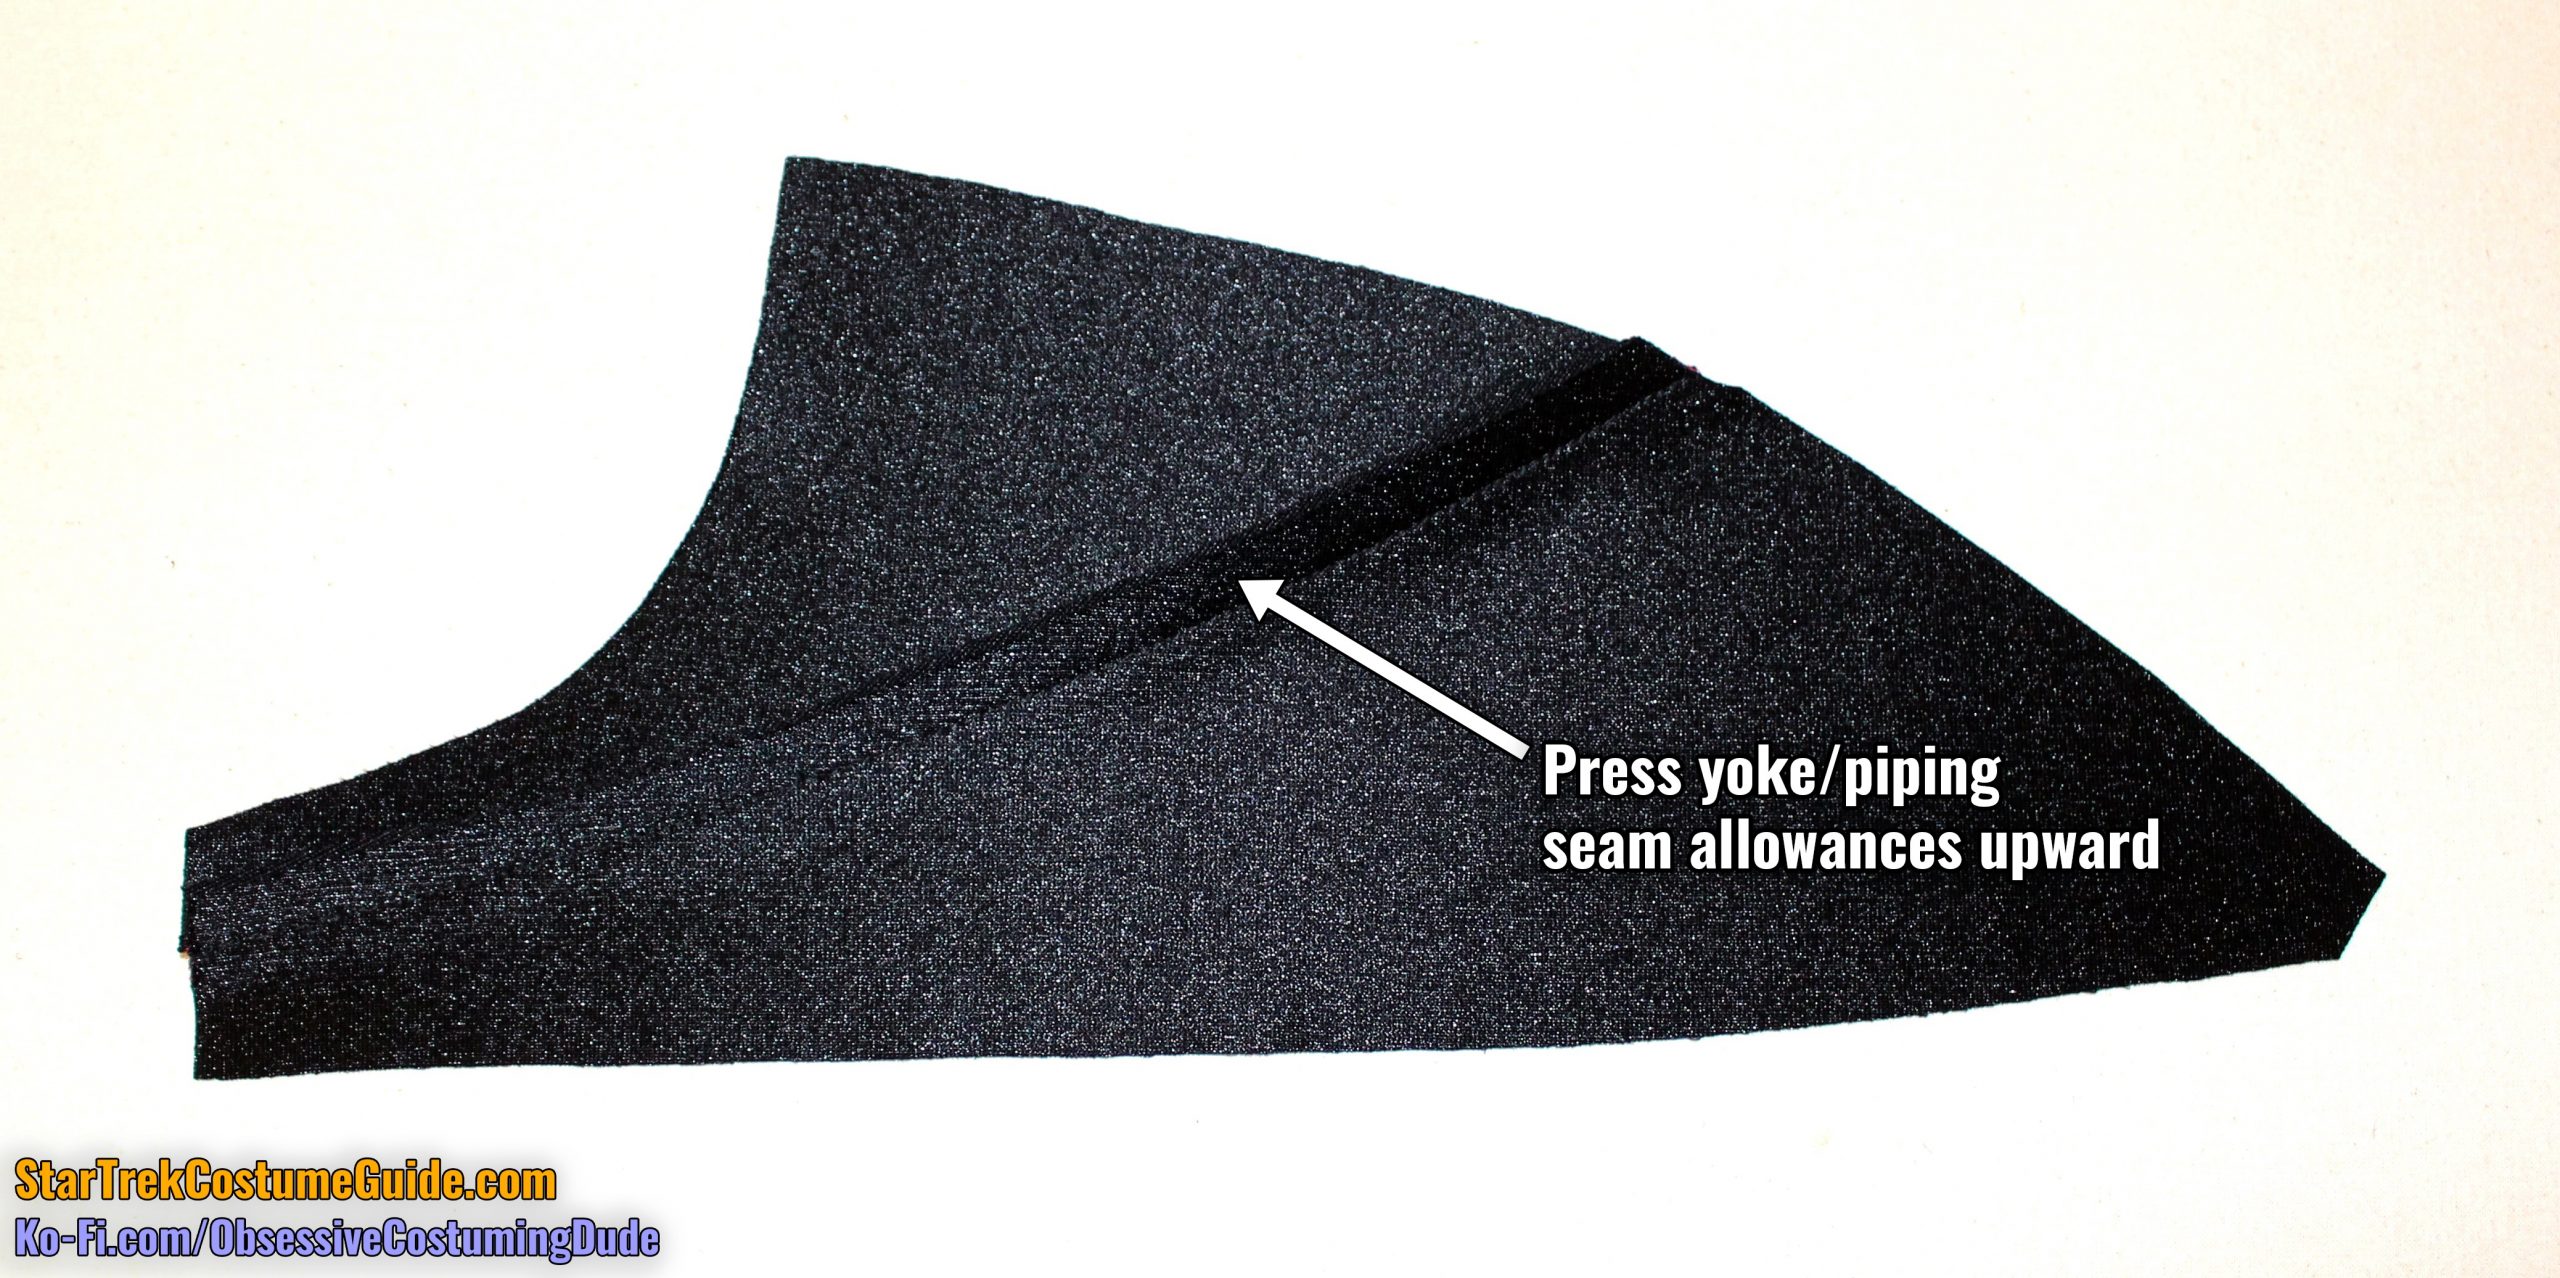
Press the upper yoke and seam allowances upward.
(If you have a little “triangle” of seam allowance poking out of the center front, just trim it away.)
TIP: Use a quilting/walking foot to sew through all those layers, to help prevent undesired stretching and/or sliding.
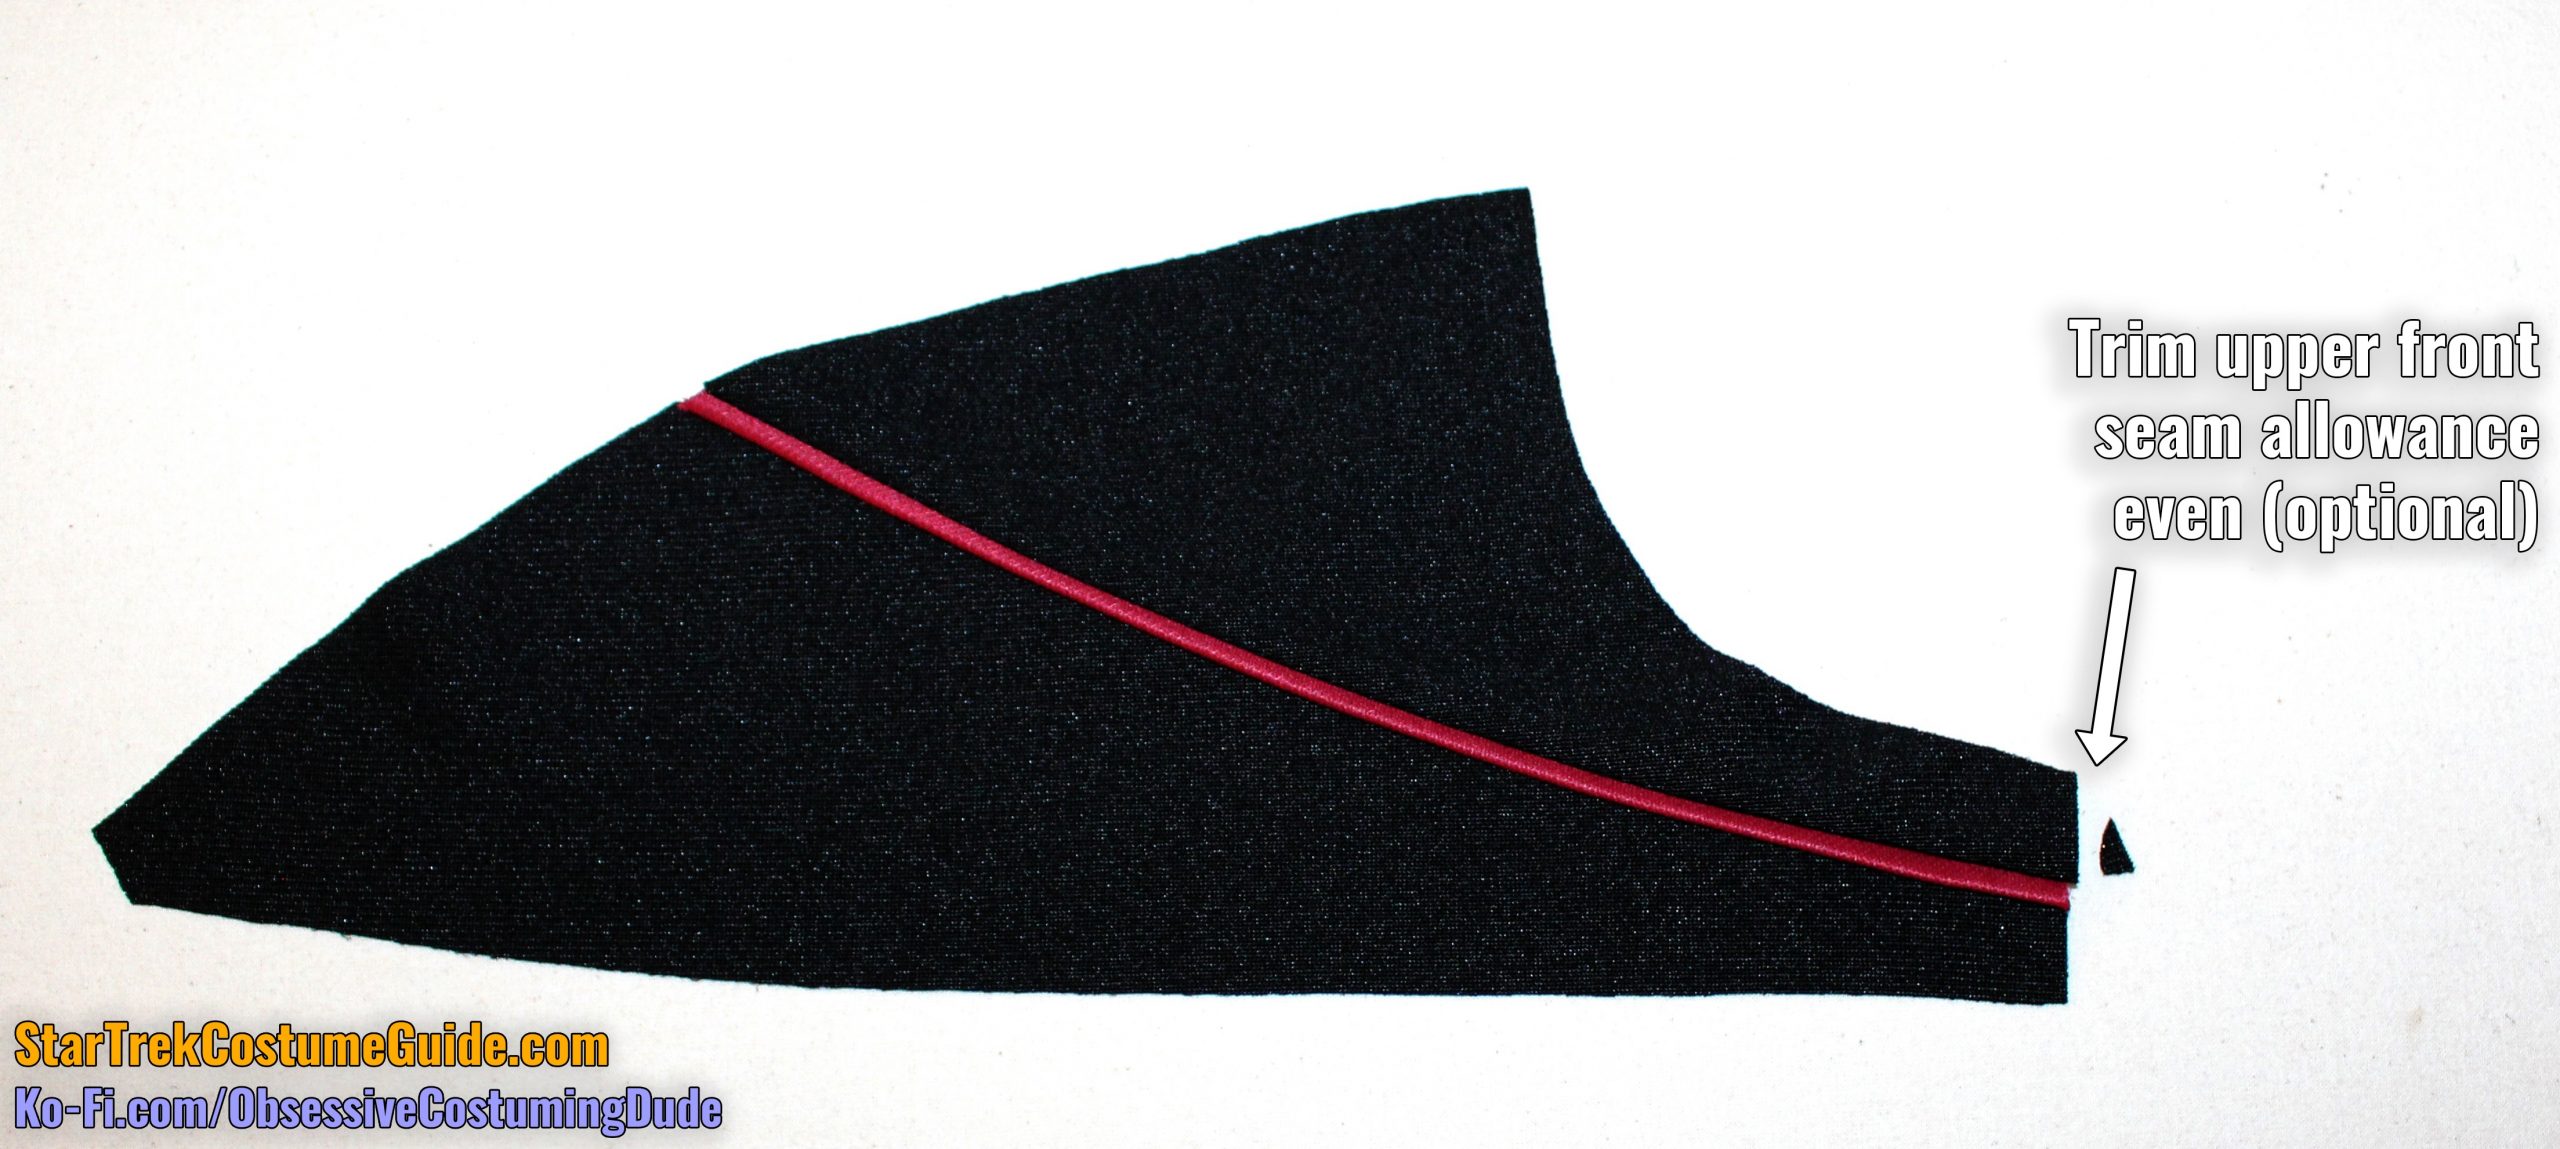
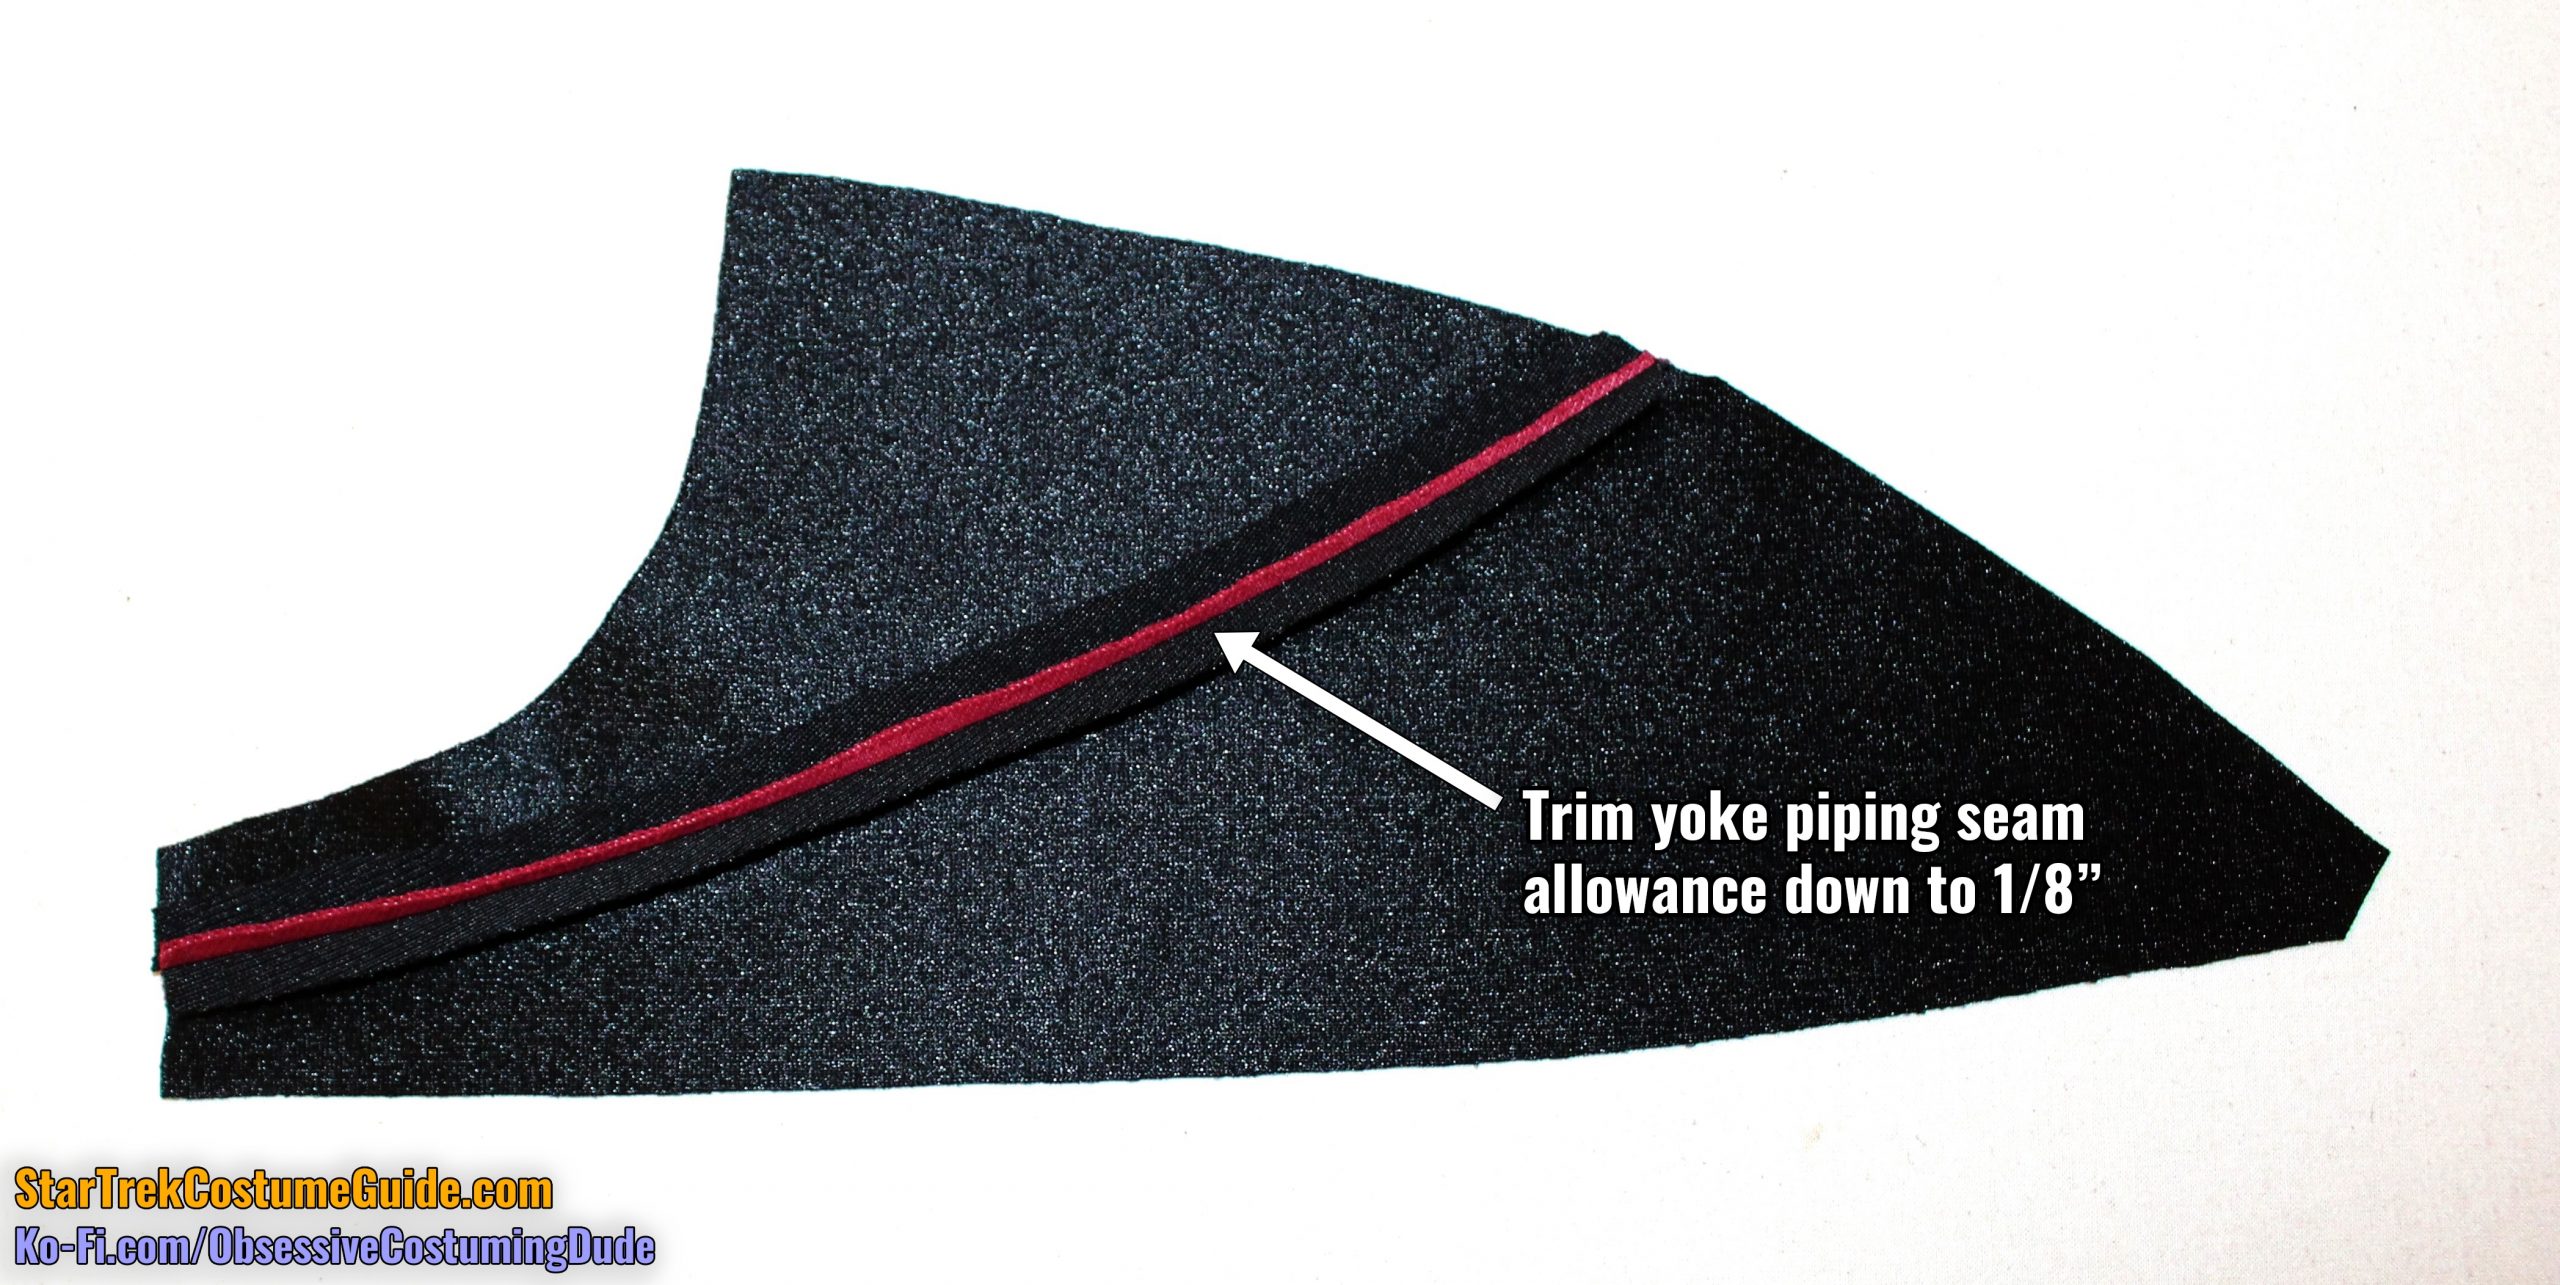
Pull the yoke seam allowances out of the way, and carefully trim the piping seam allowances down to ⅛”.
Press the seam allowances upward again.
Repeat for the other front yoke assembly.
TIP: Check to make sure both front yokes are dimensionally identical at the center front.
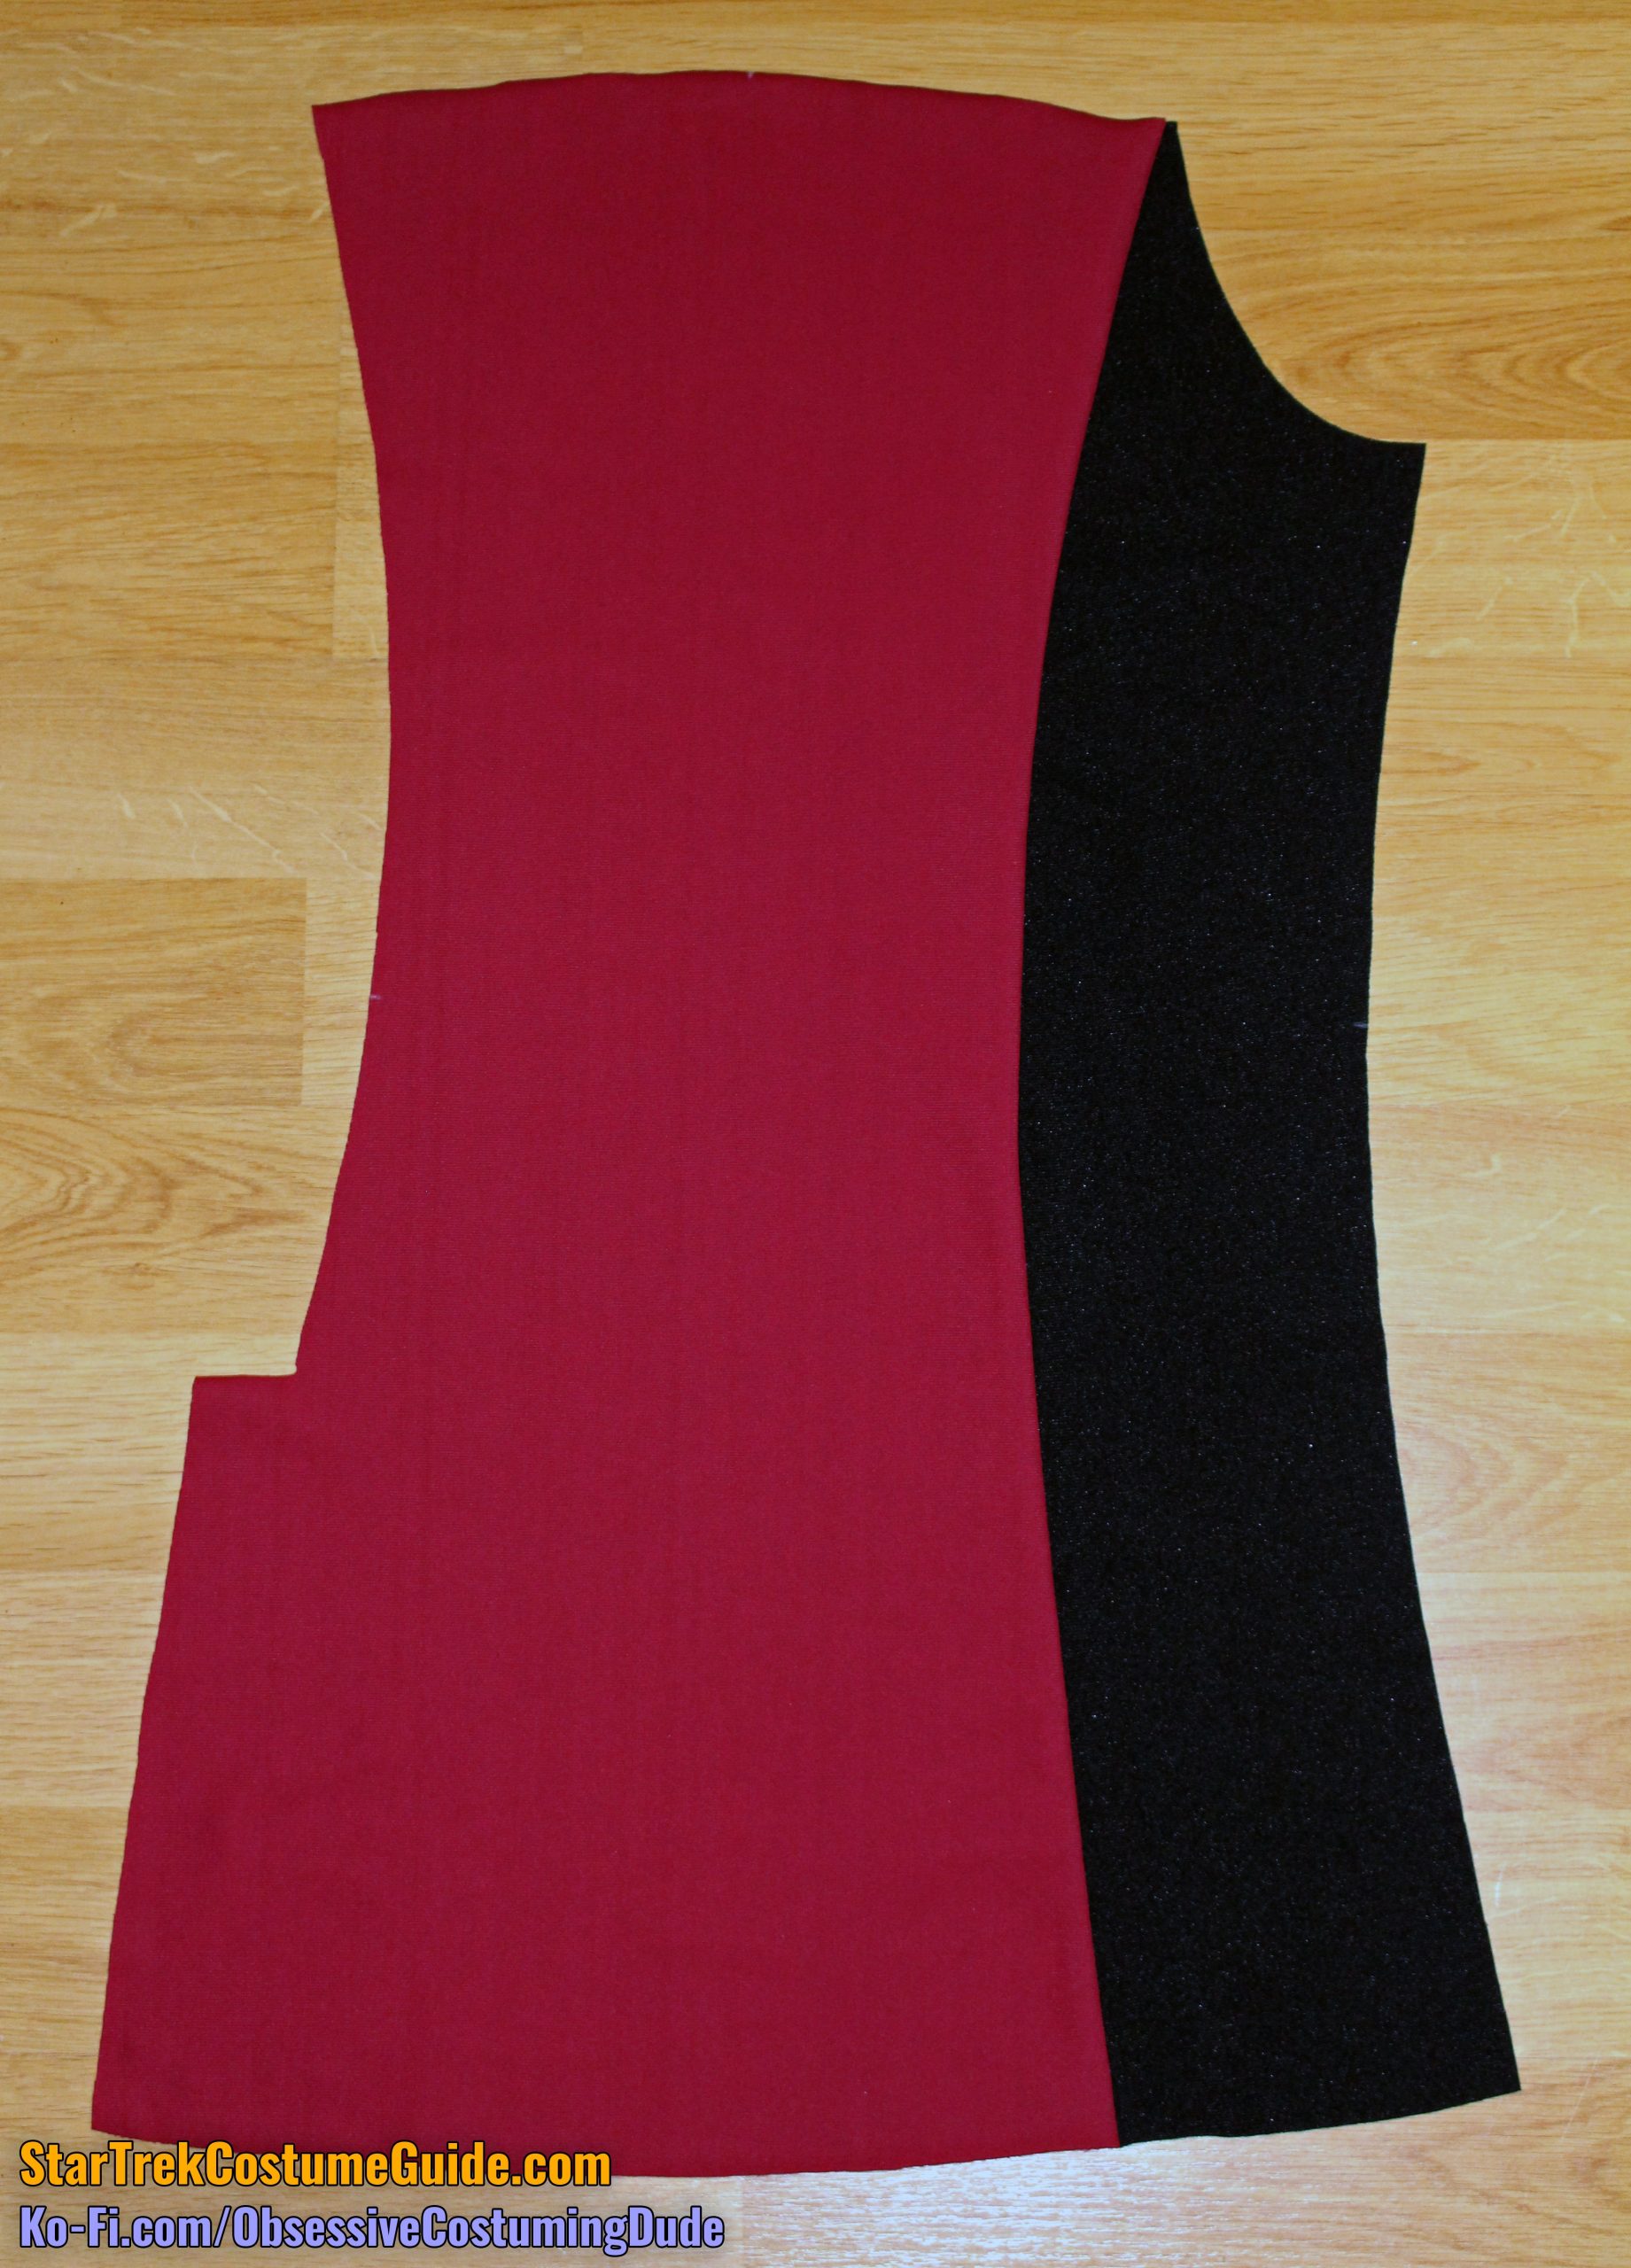
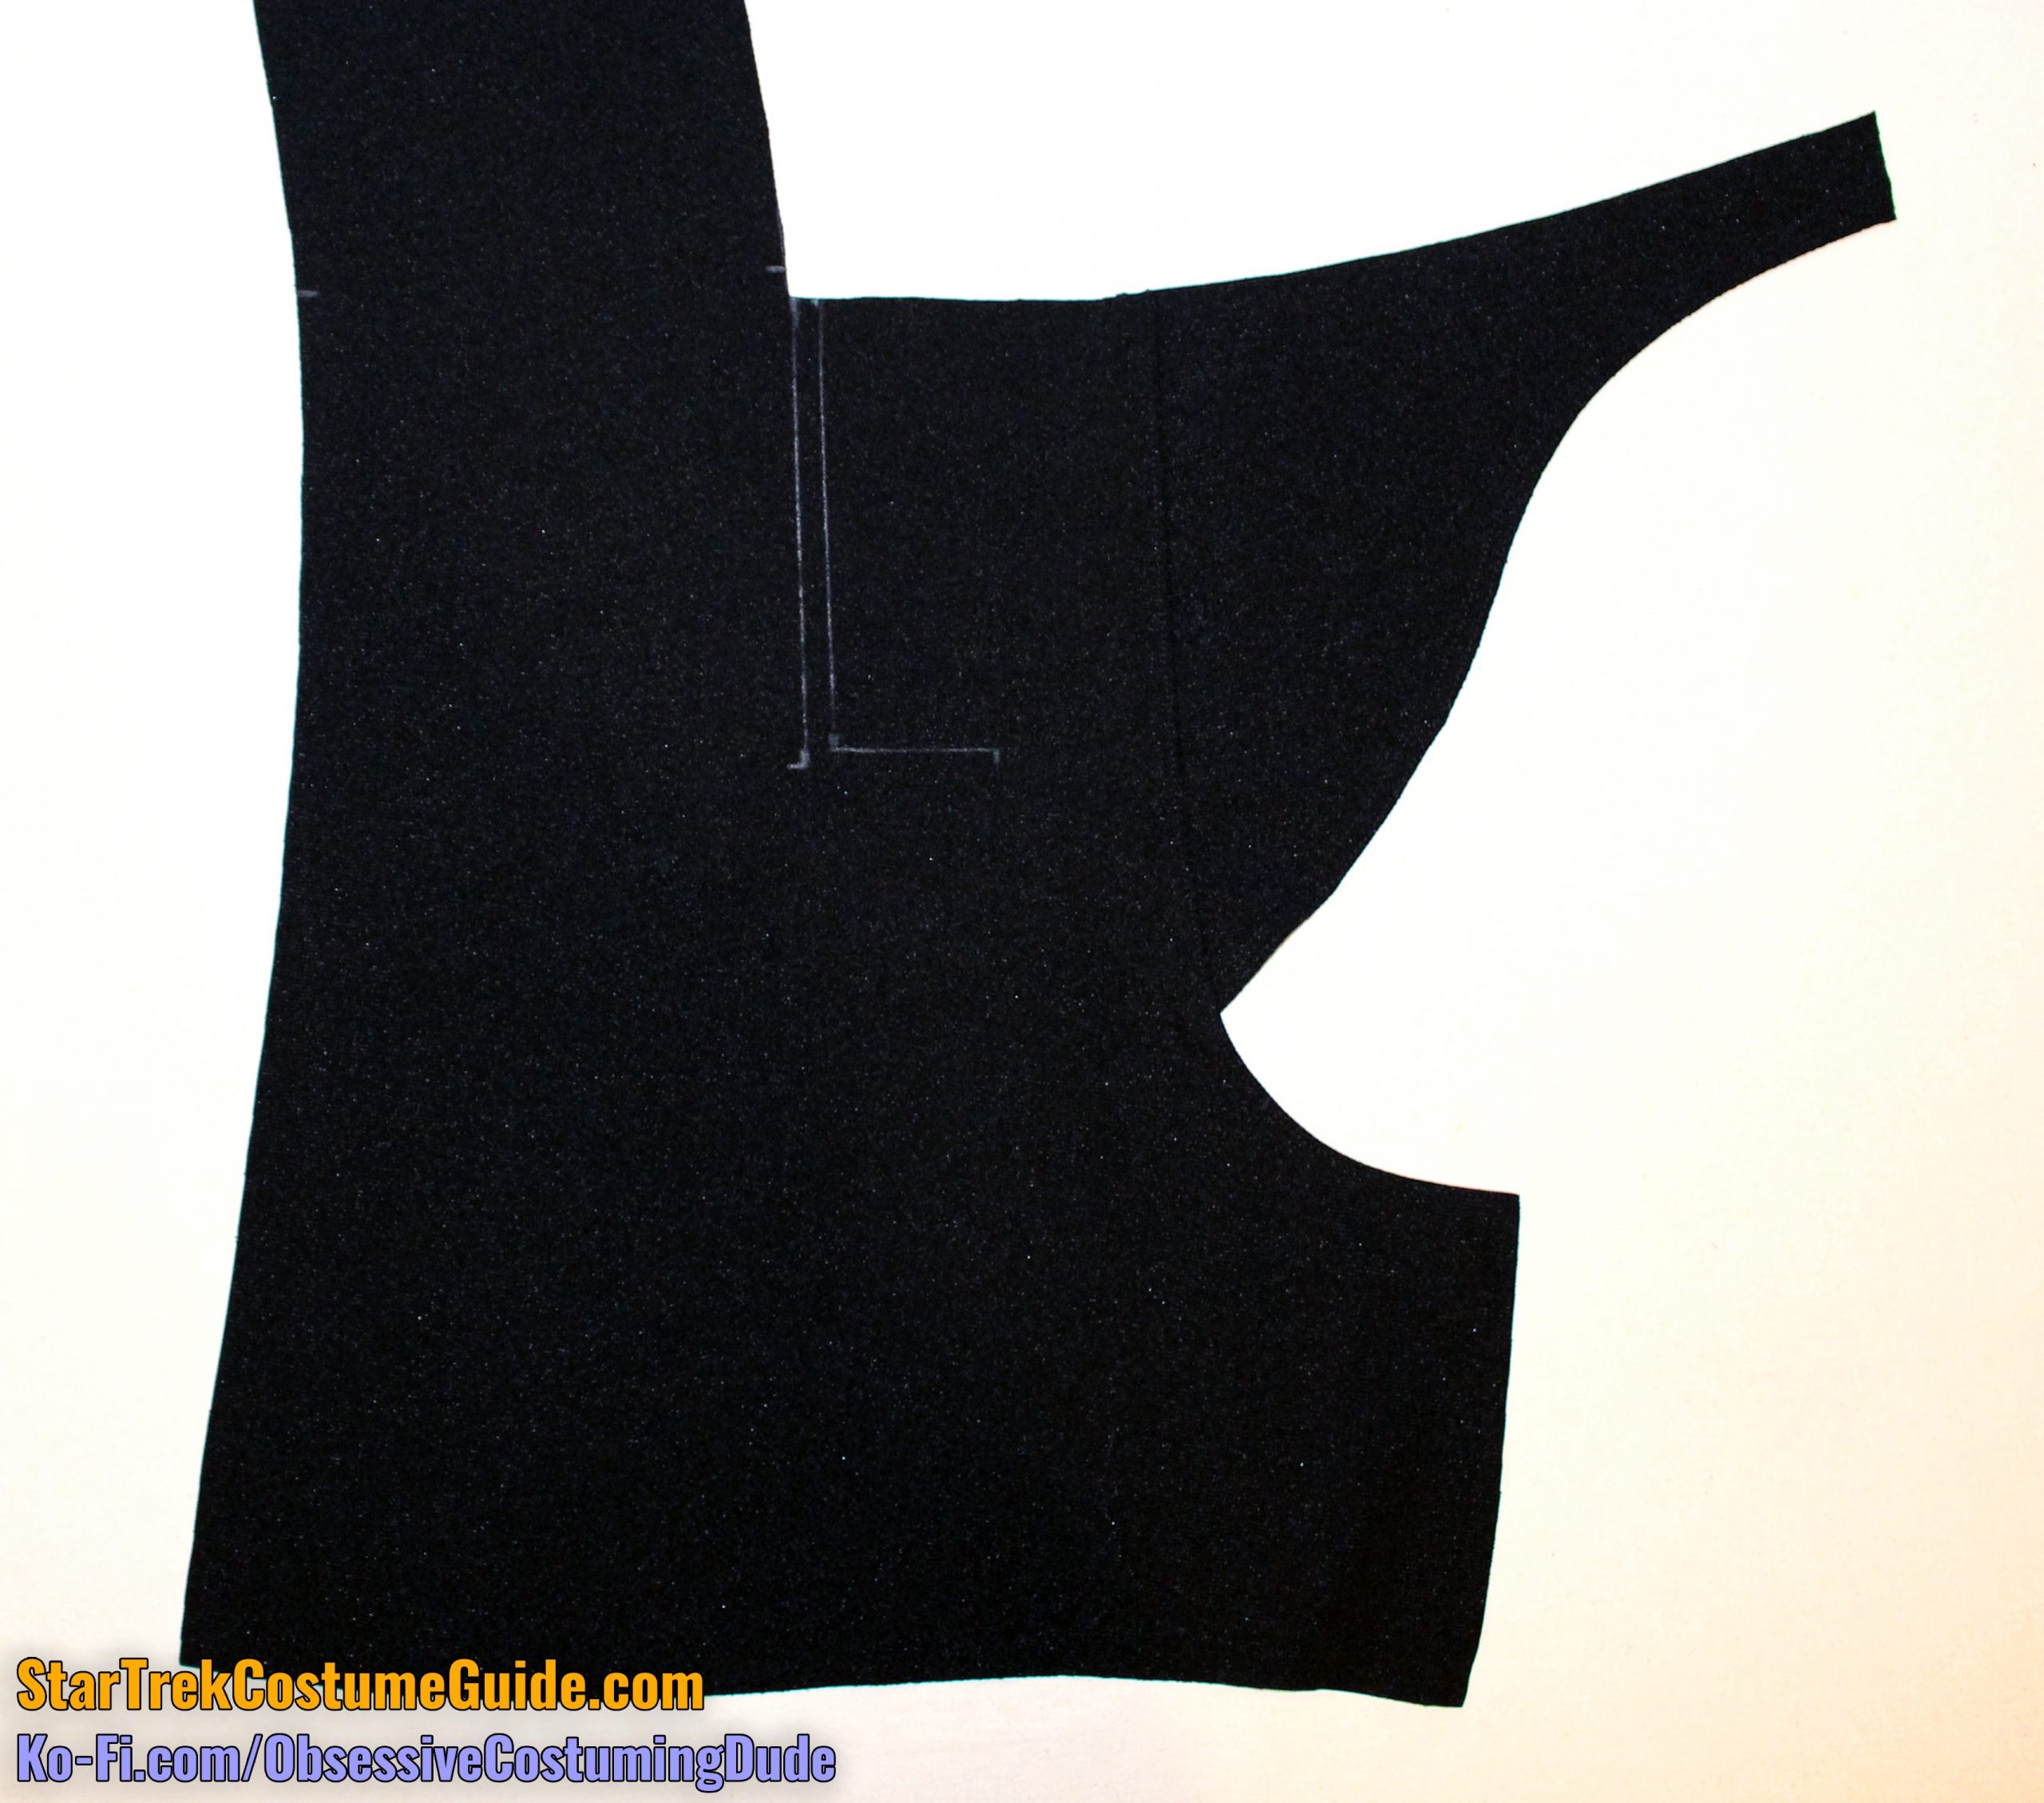
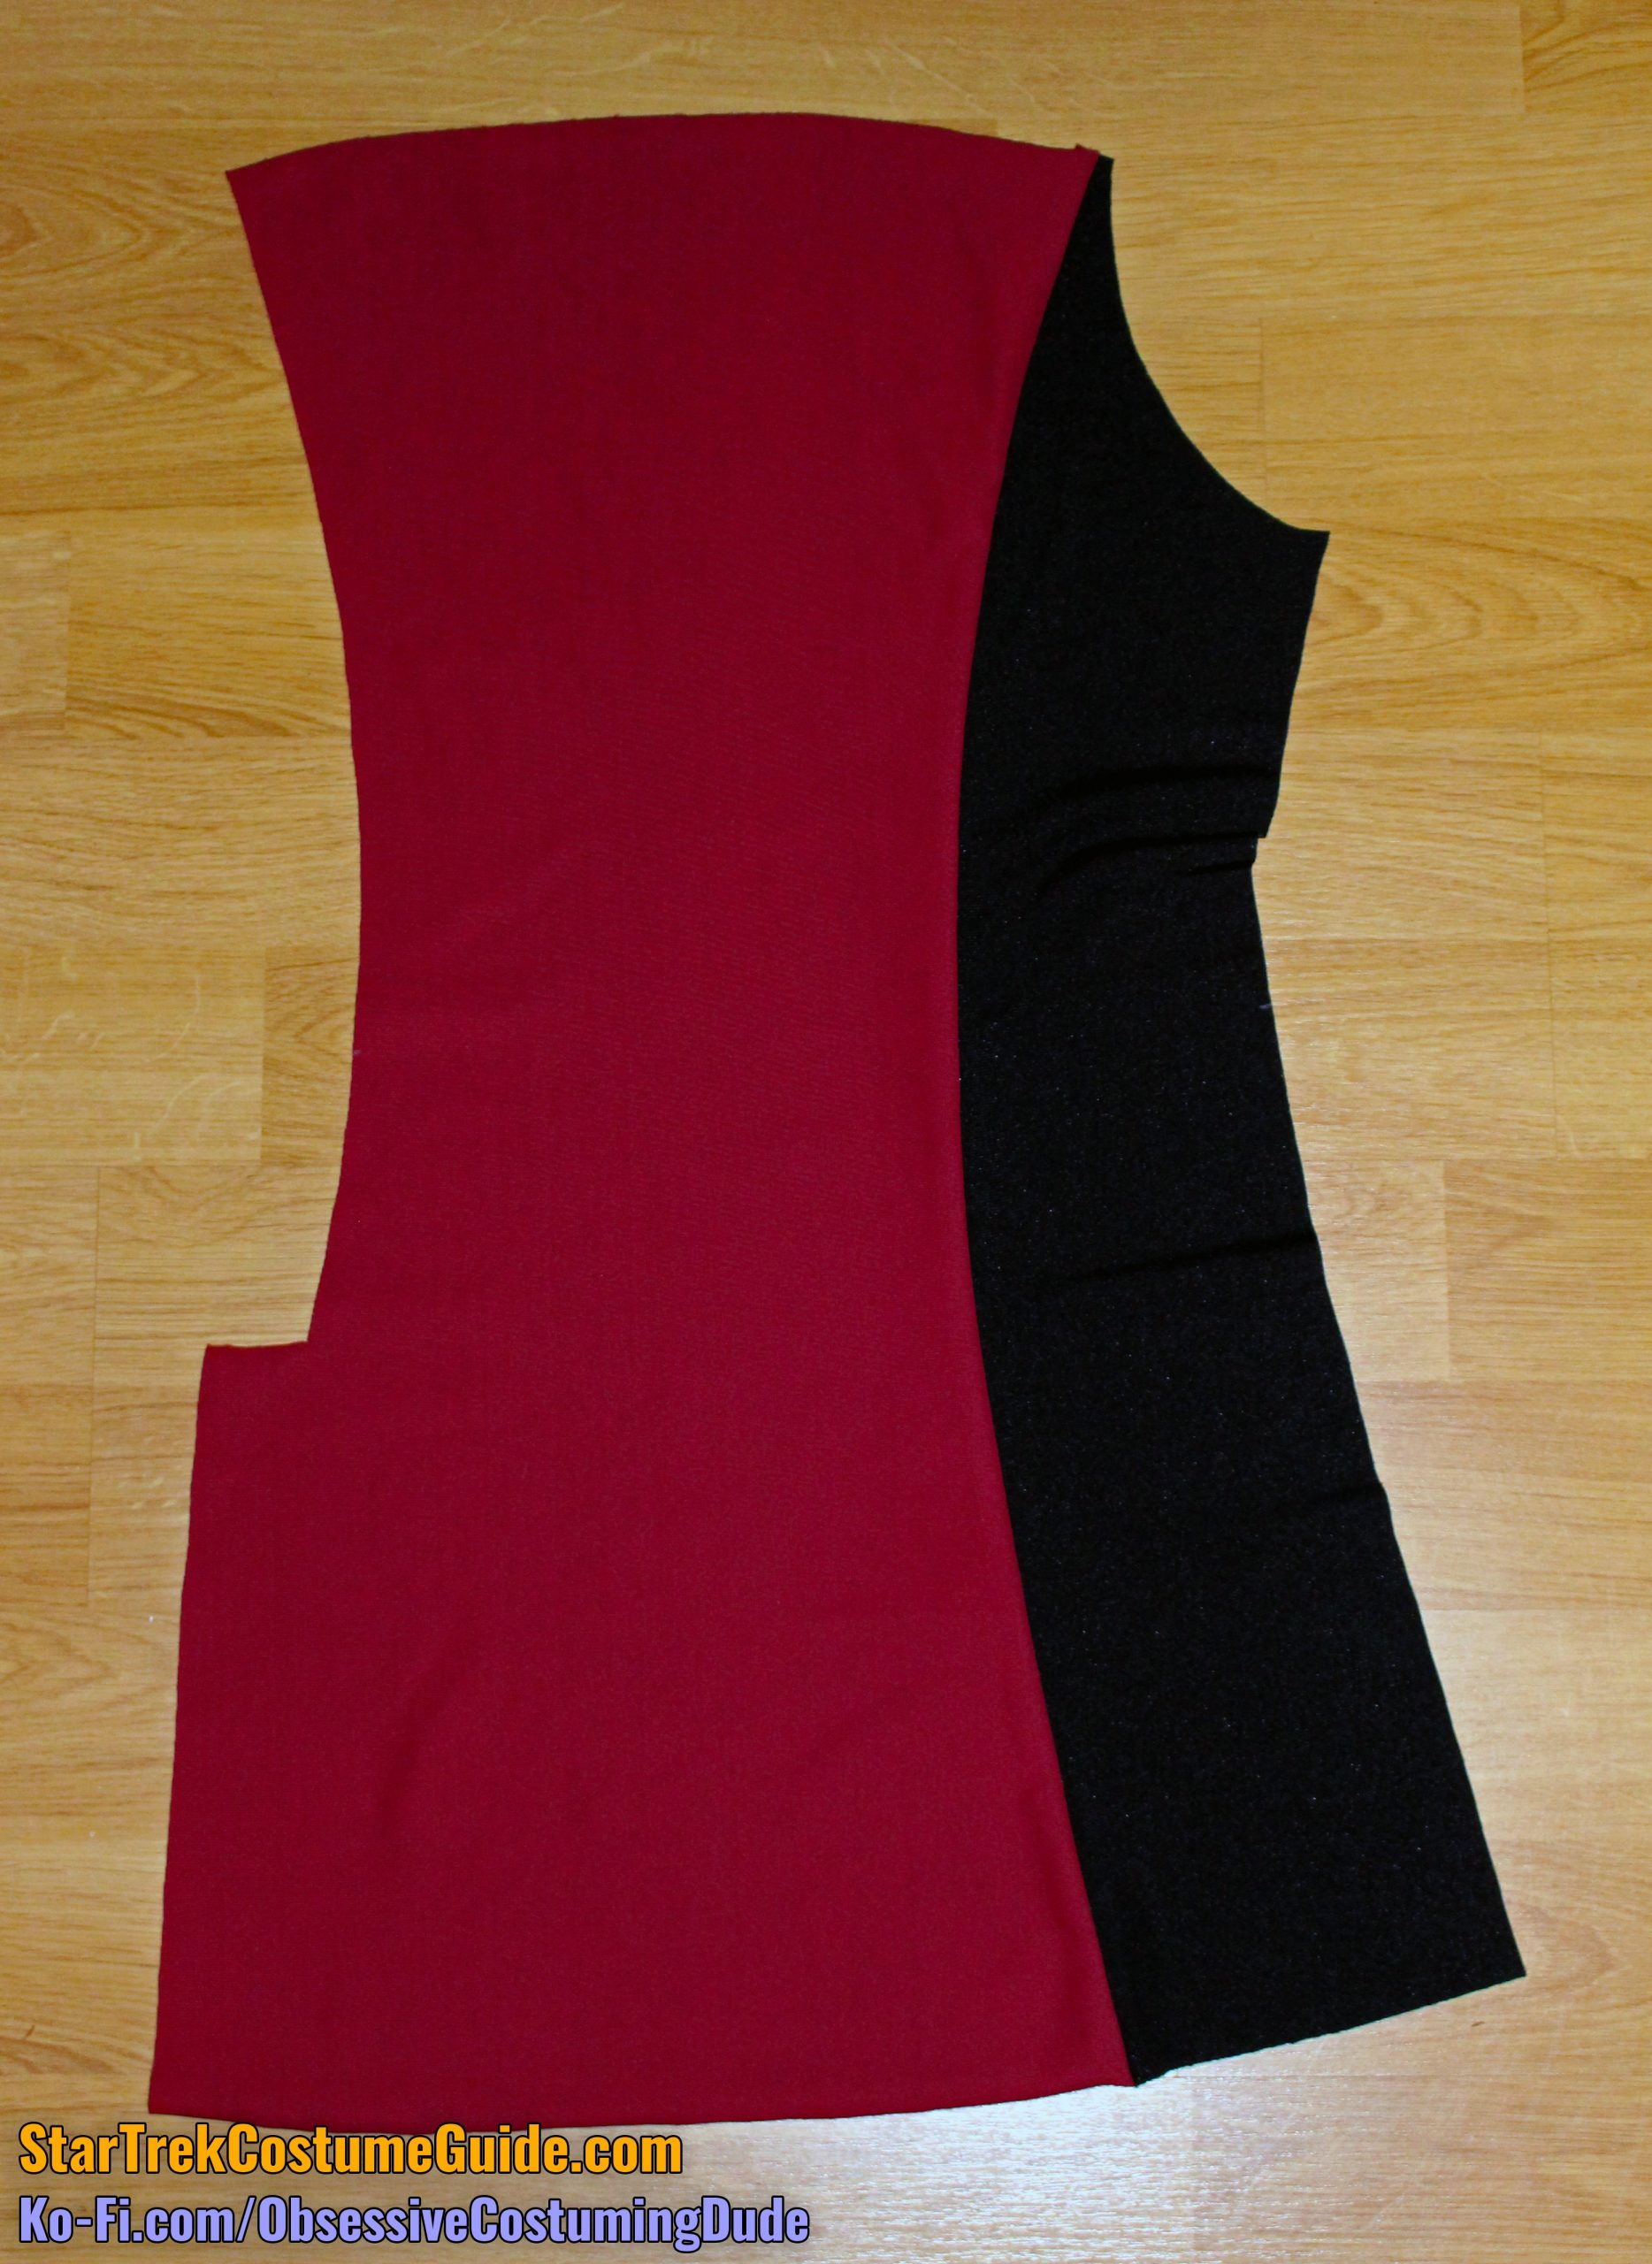
Sew the left front (piece G) to the center front (piece D) with ½” seam allowance.
Press the seam allowances toward the front.
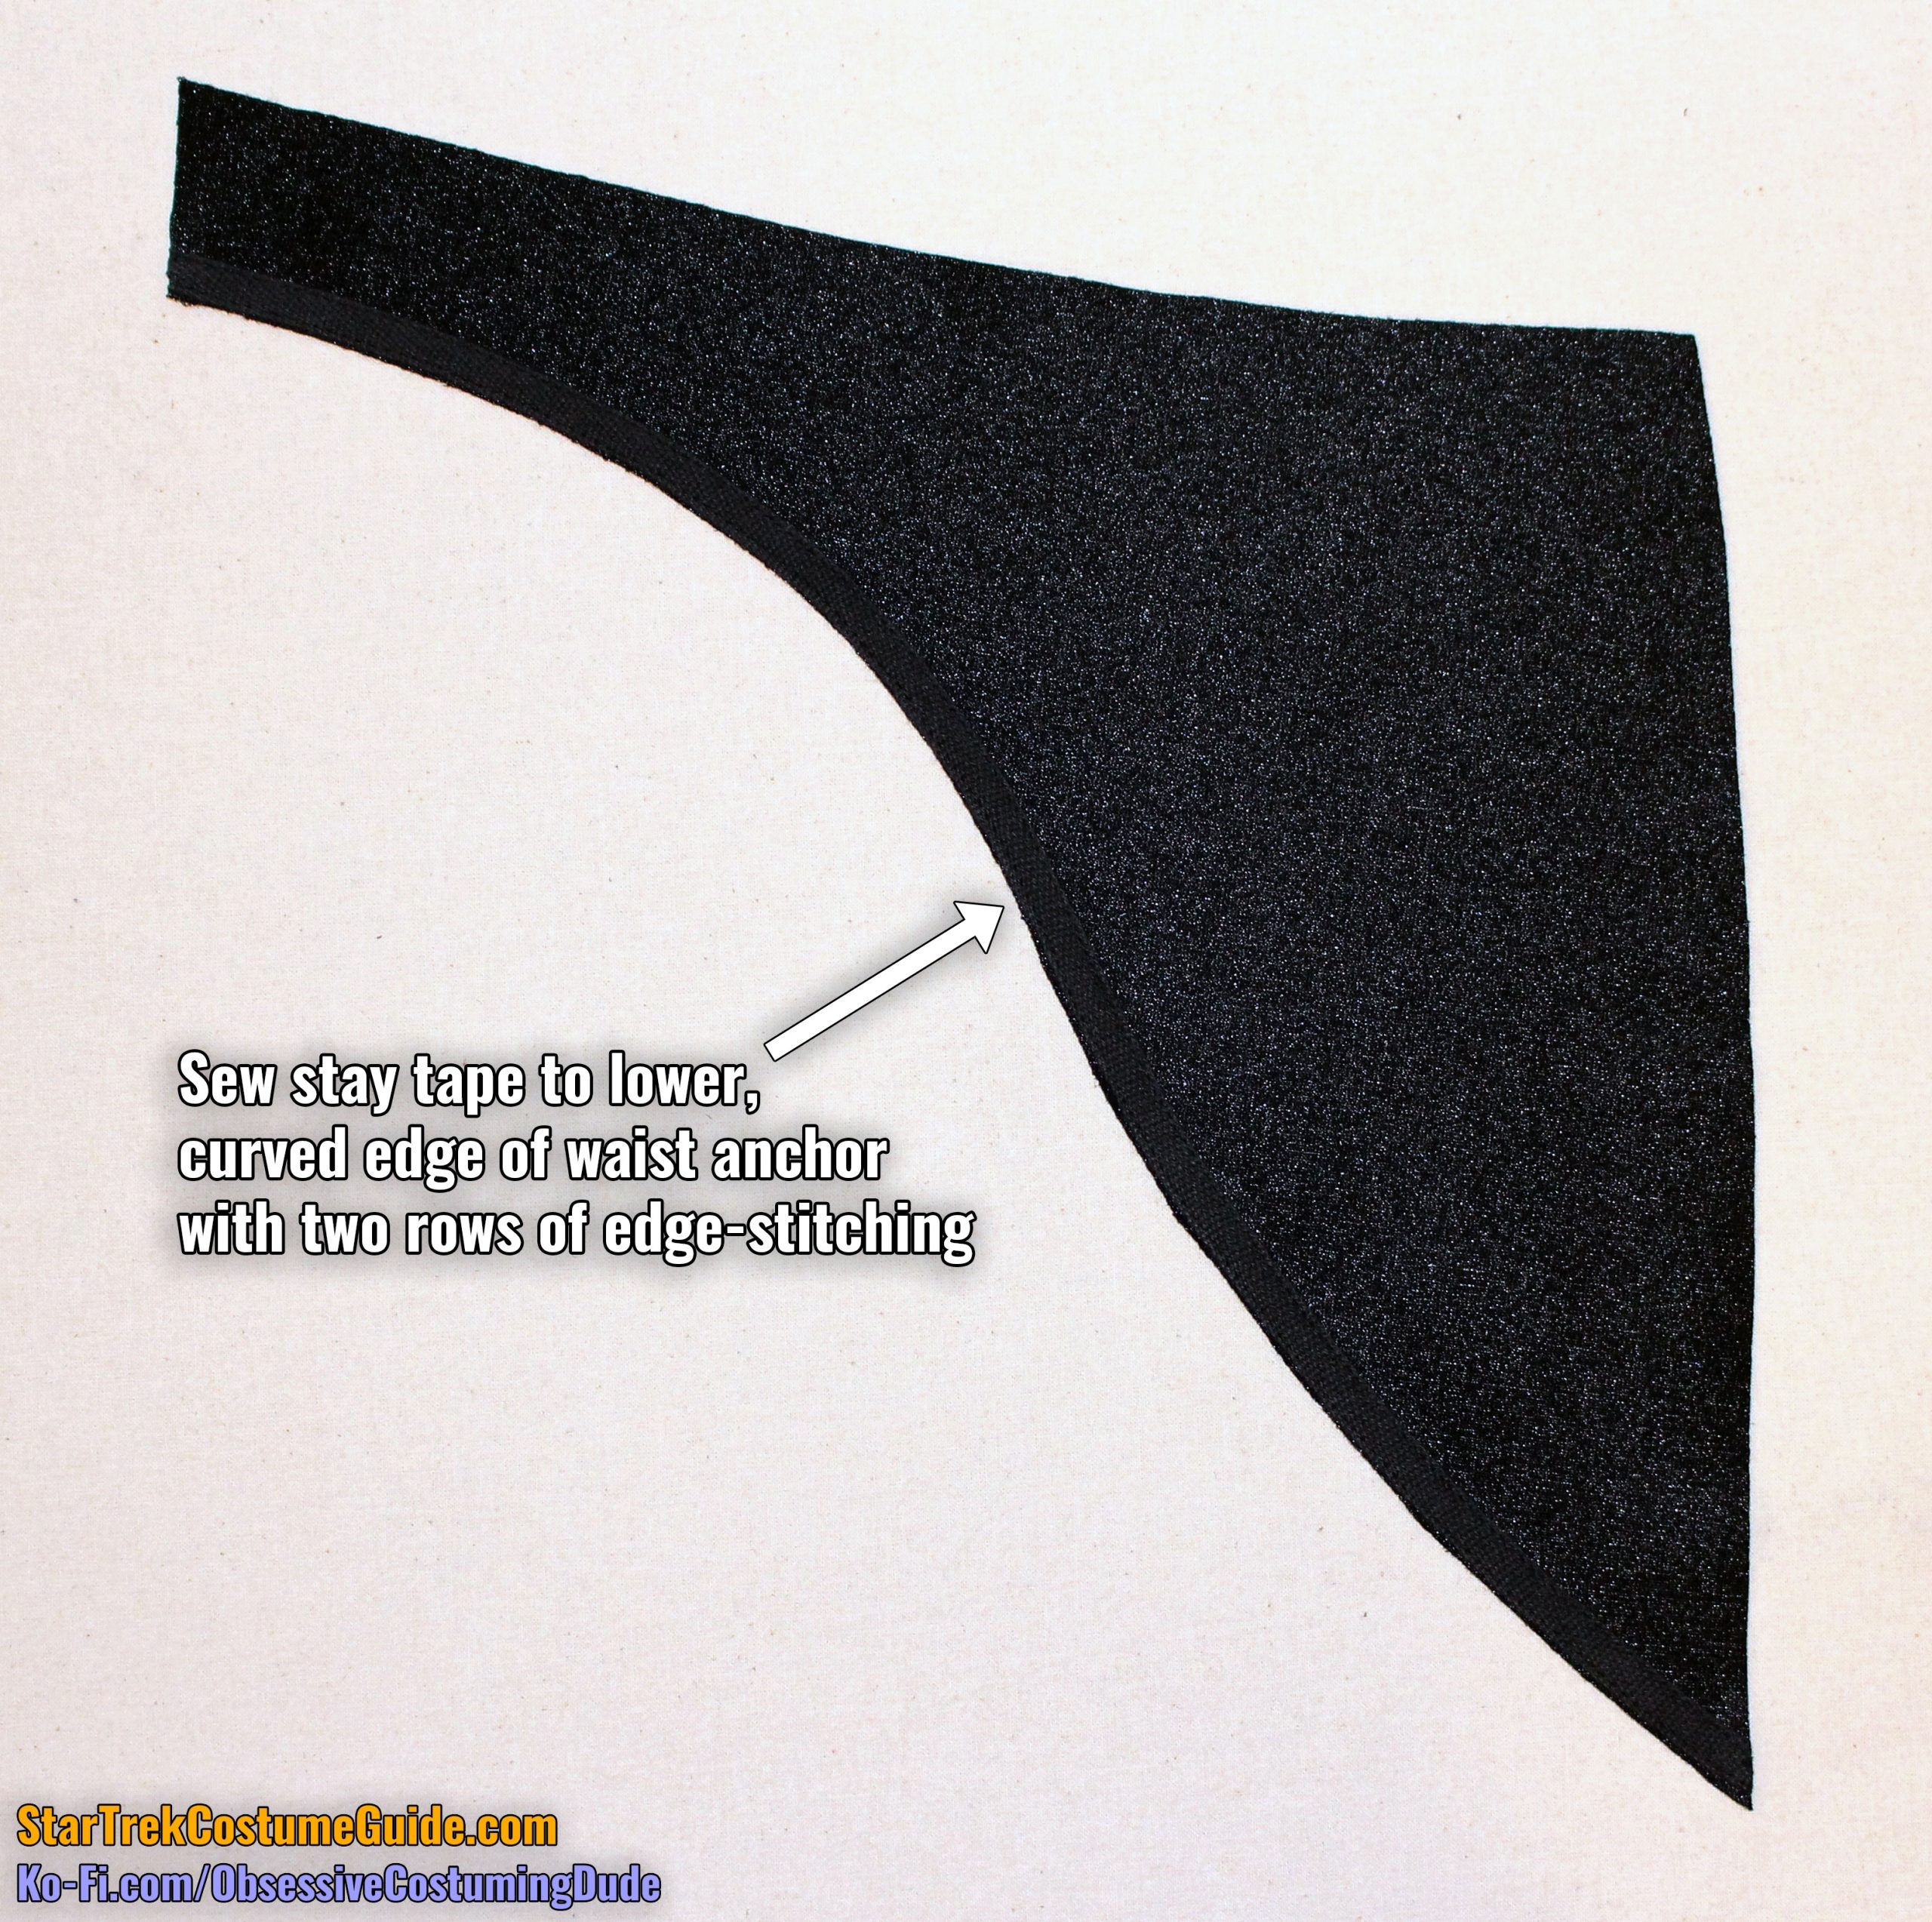
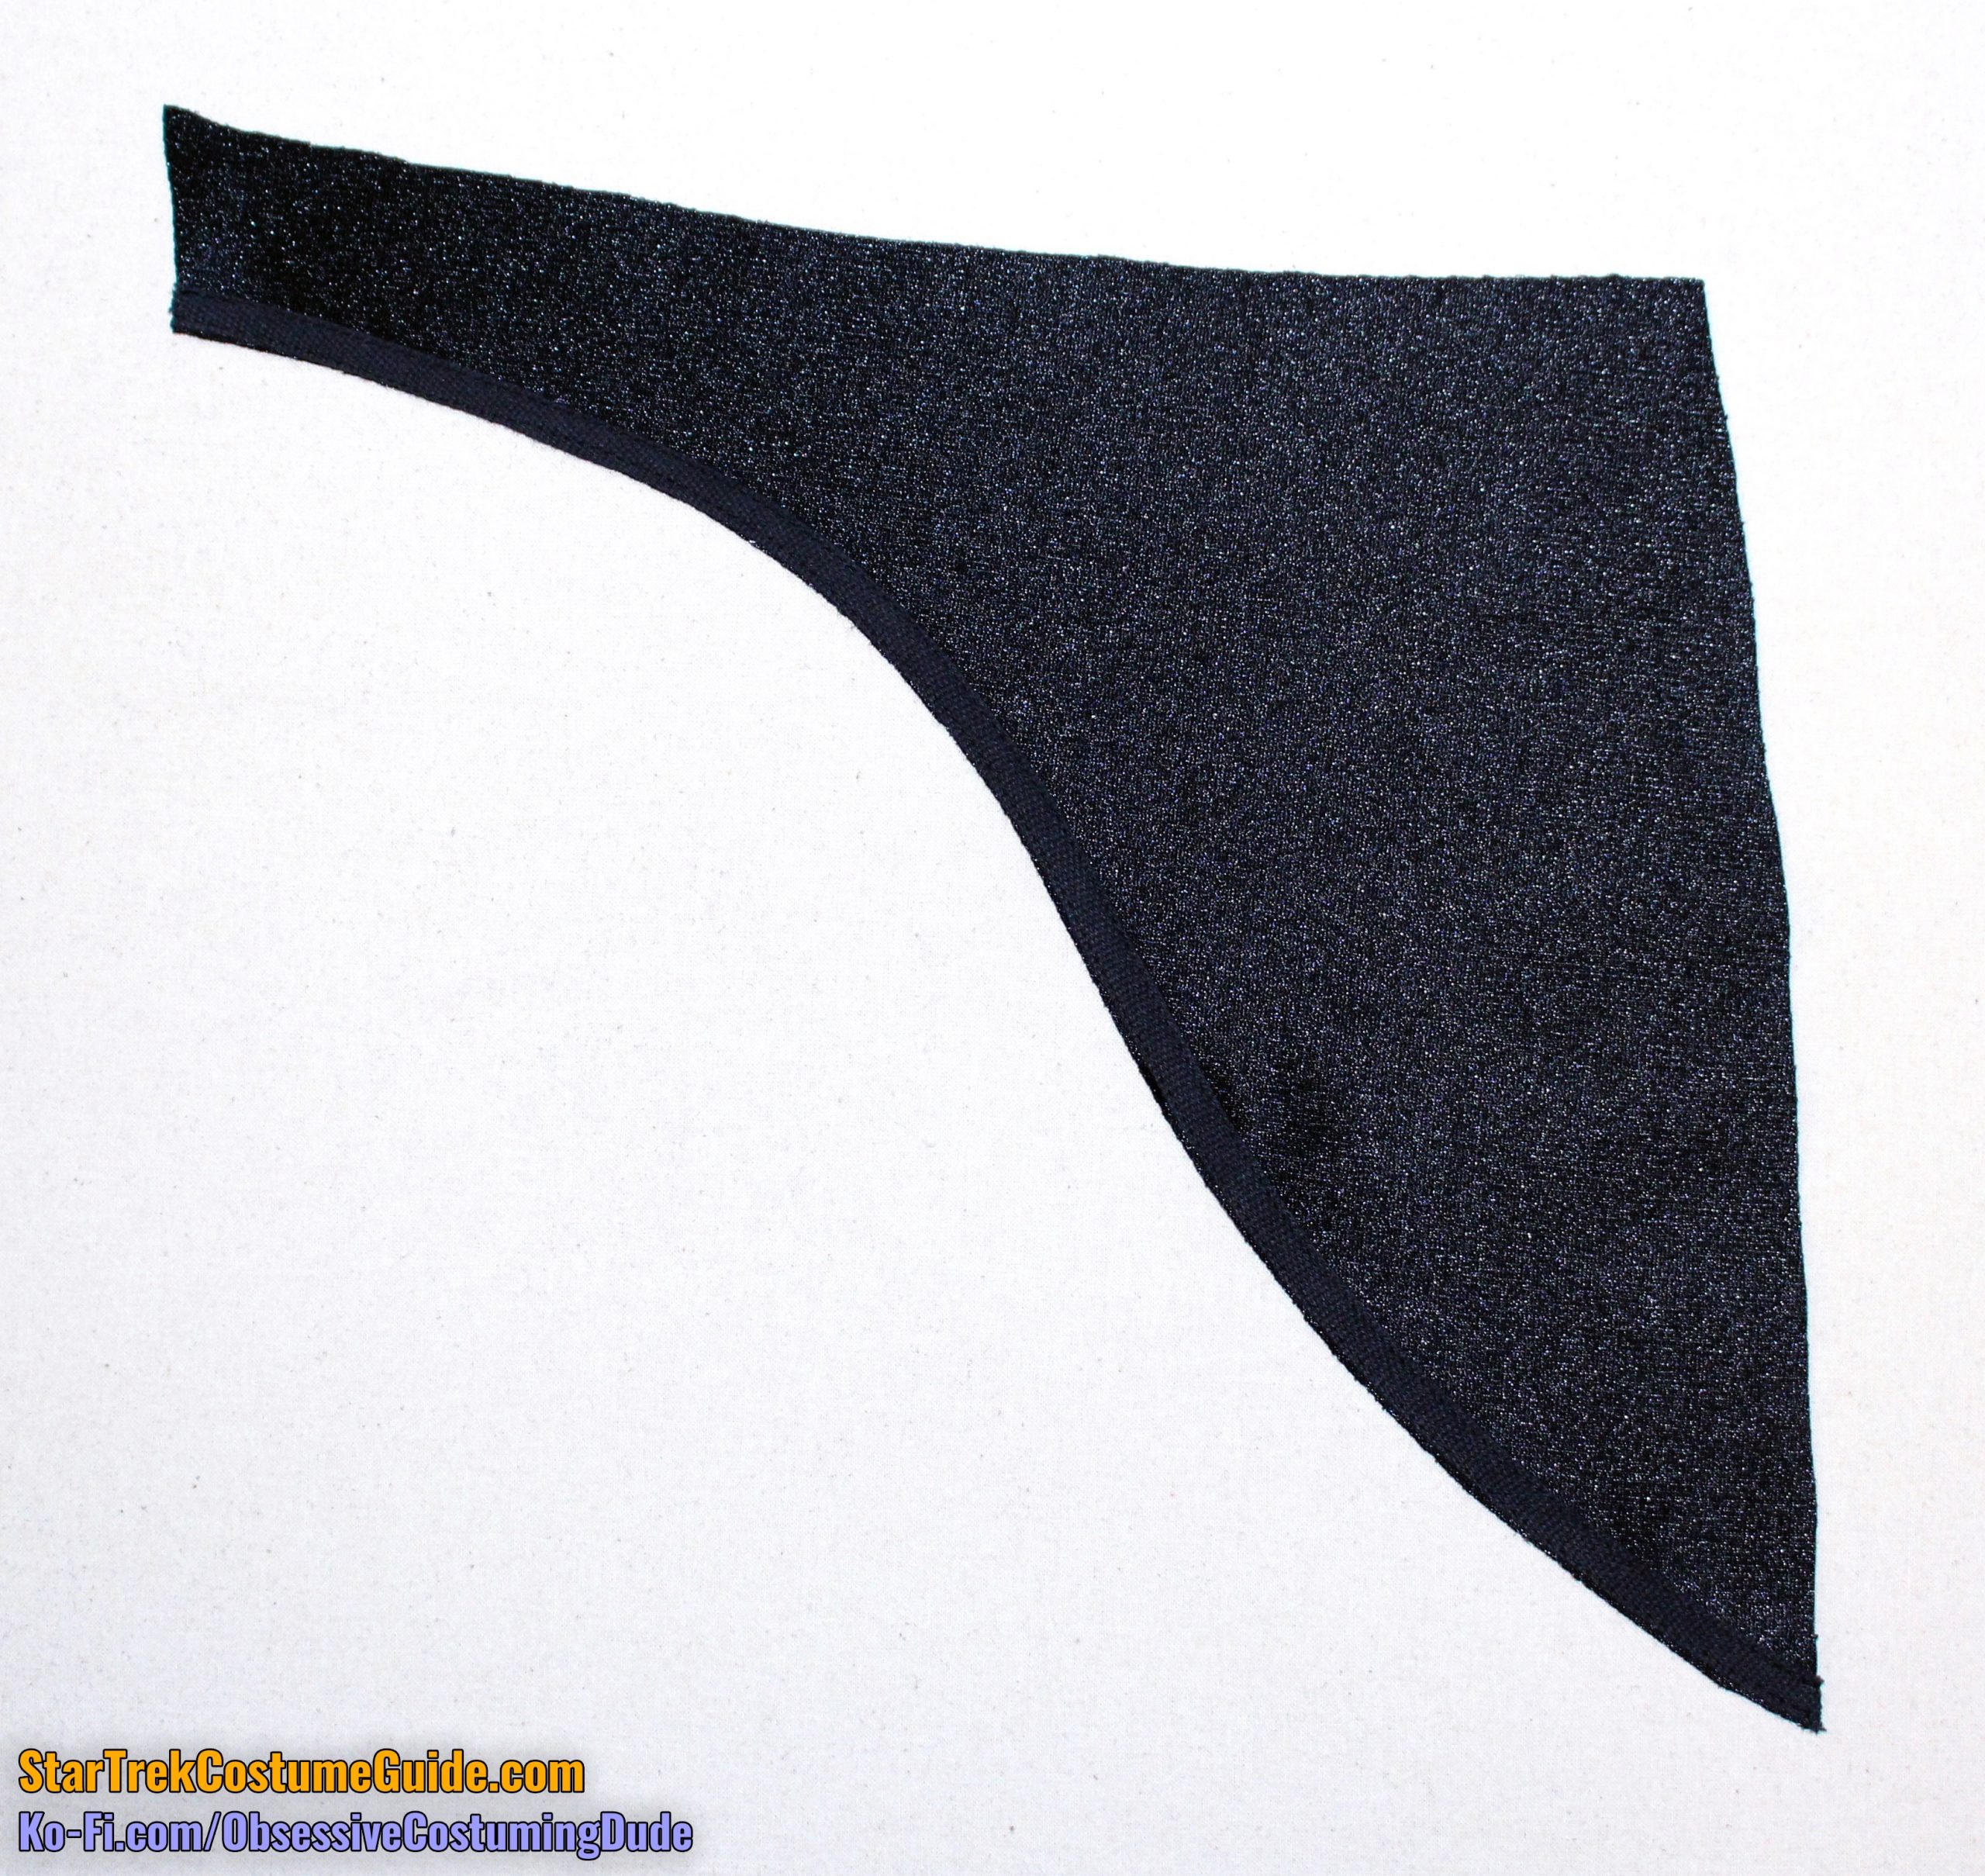
Flip the front waist anchor (piece F) over so it’s right-side-down, and shiny-side-up.
Cut a length of ¼” black stay tape (again, ideally cotton twill tape) slightly longer than the lower, curved edge.
Pin the tape into place close to the edge.
Sew the tape onto the waist anchor with two rows of stitching, one close to each edge of the tape.
Cut off any excess tape and press the edge flat.
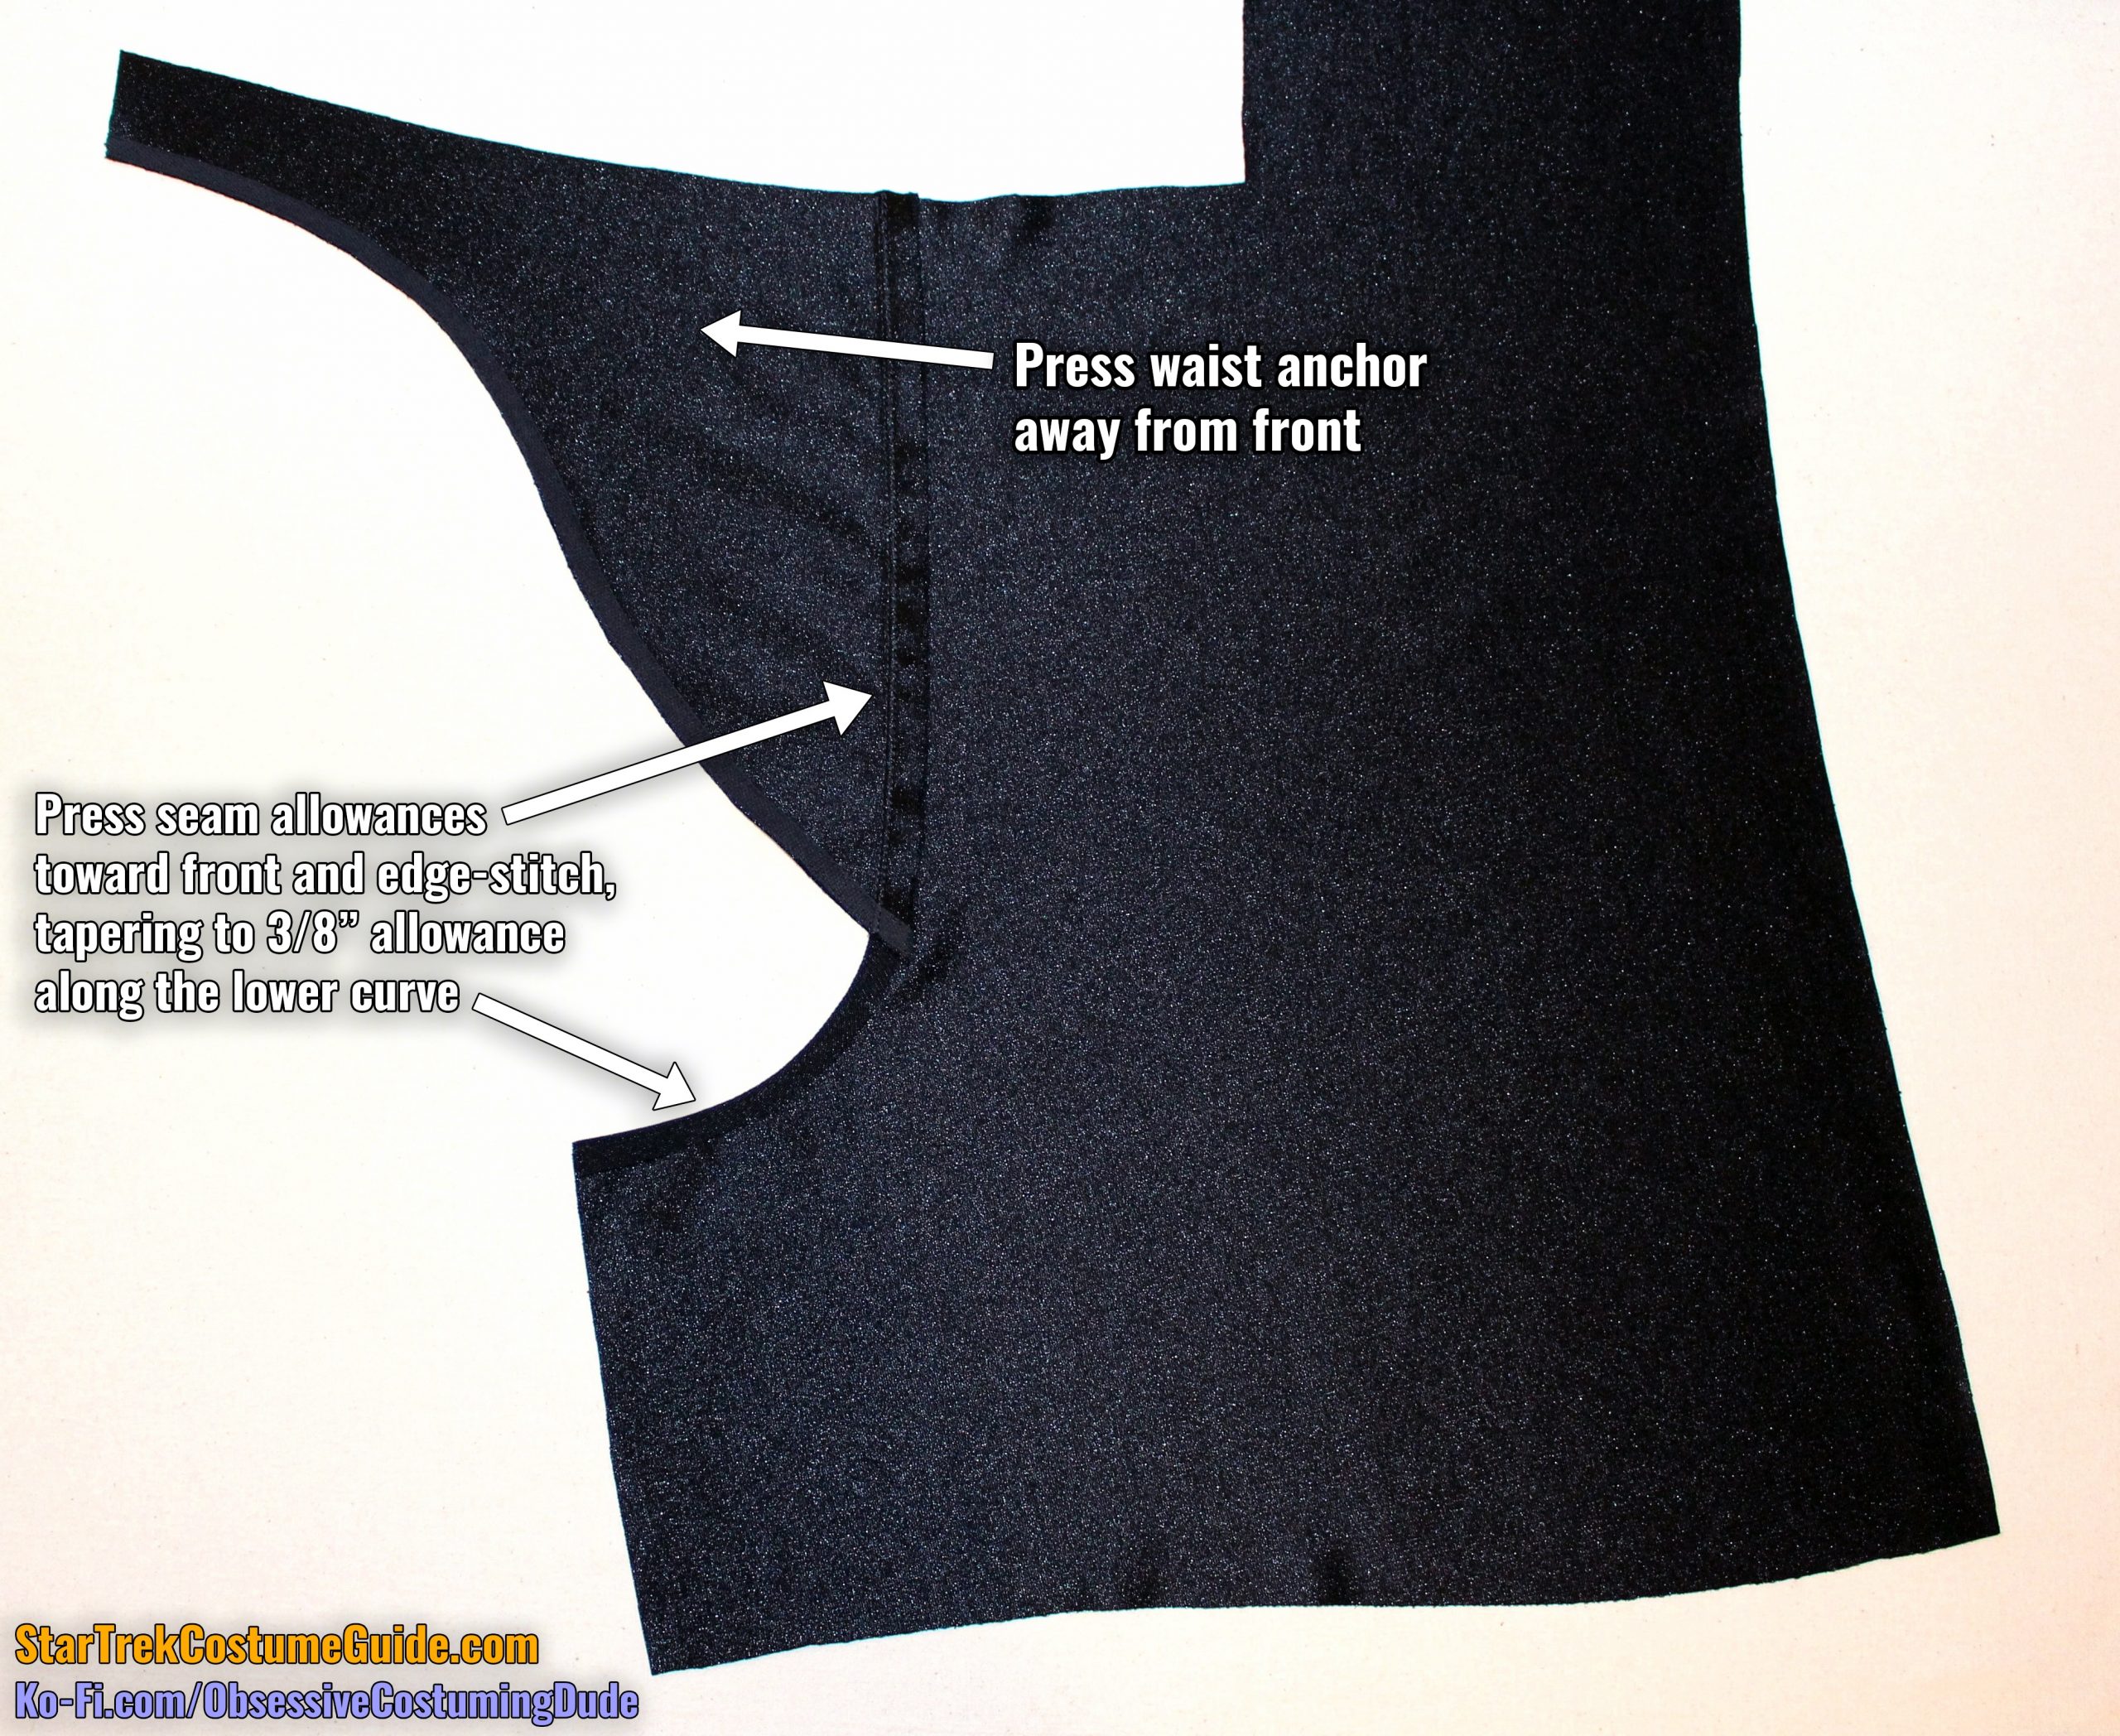
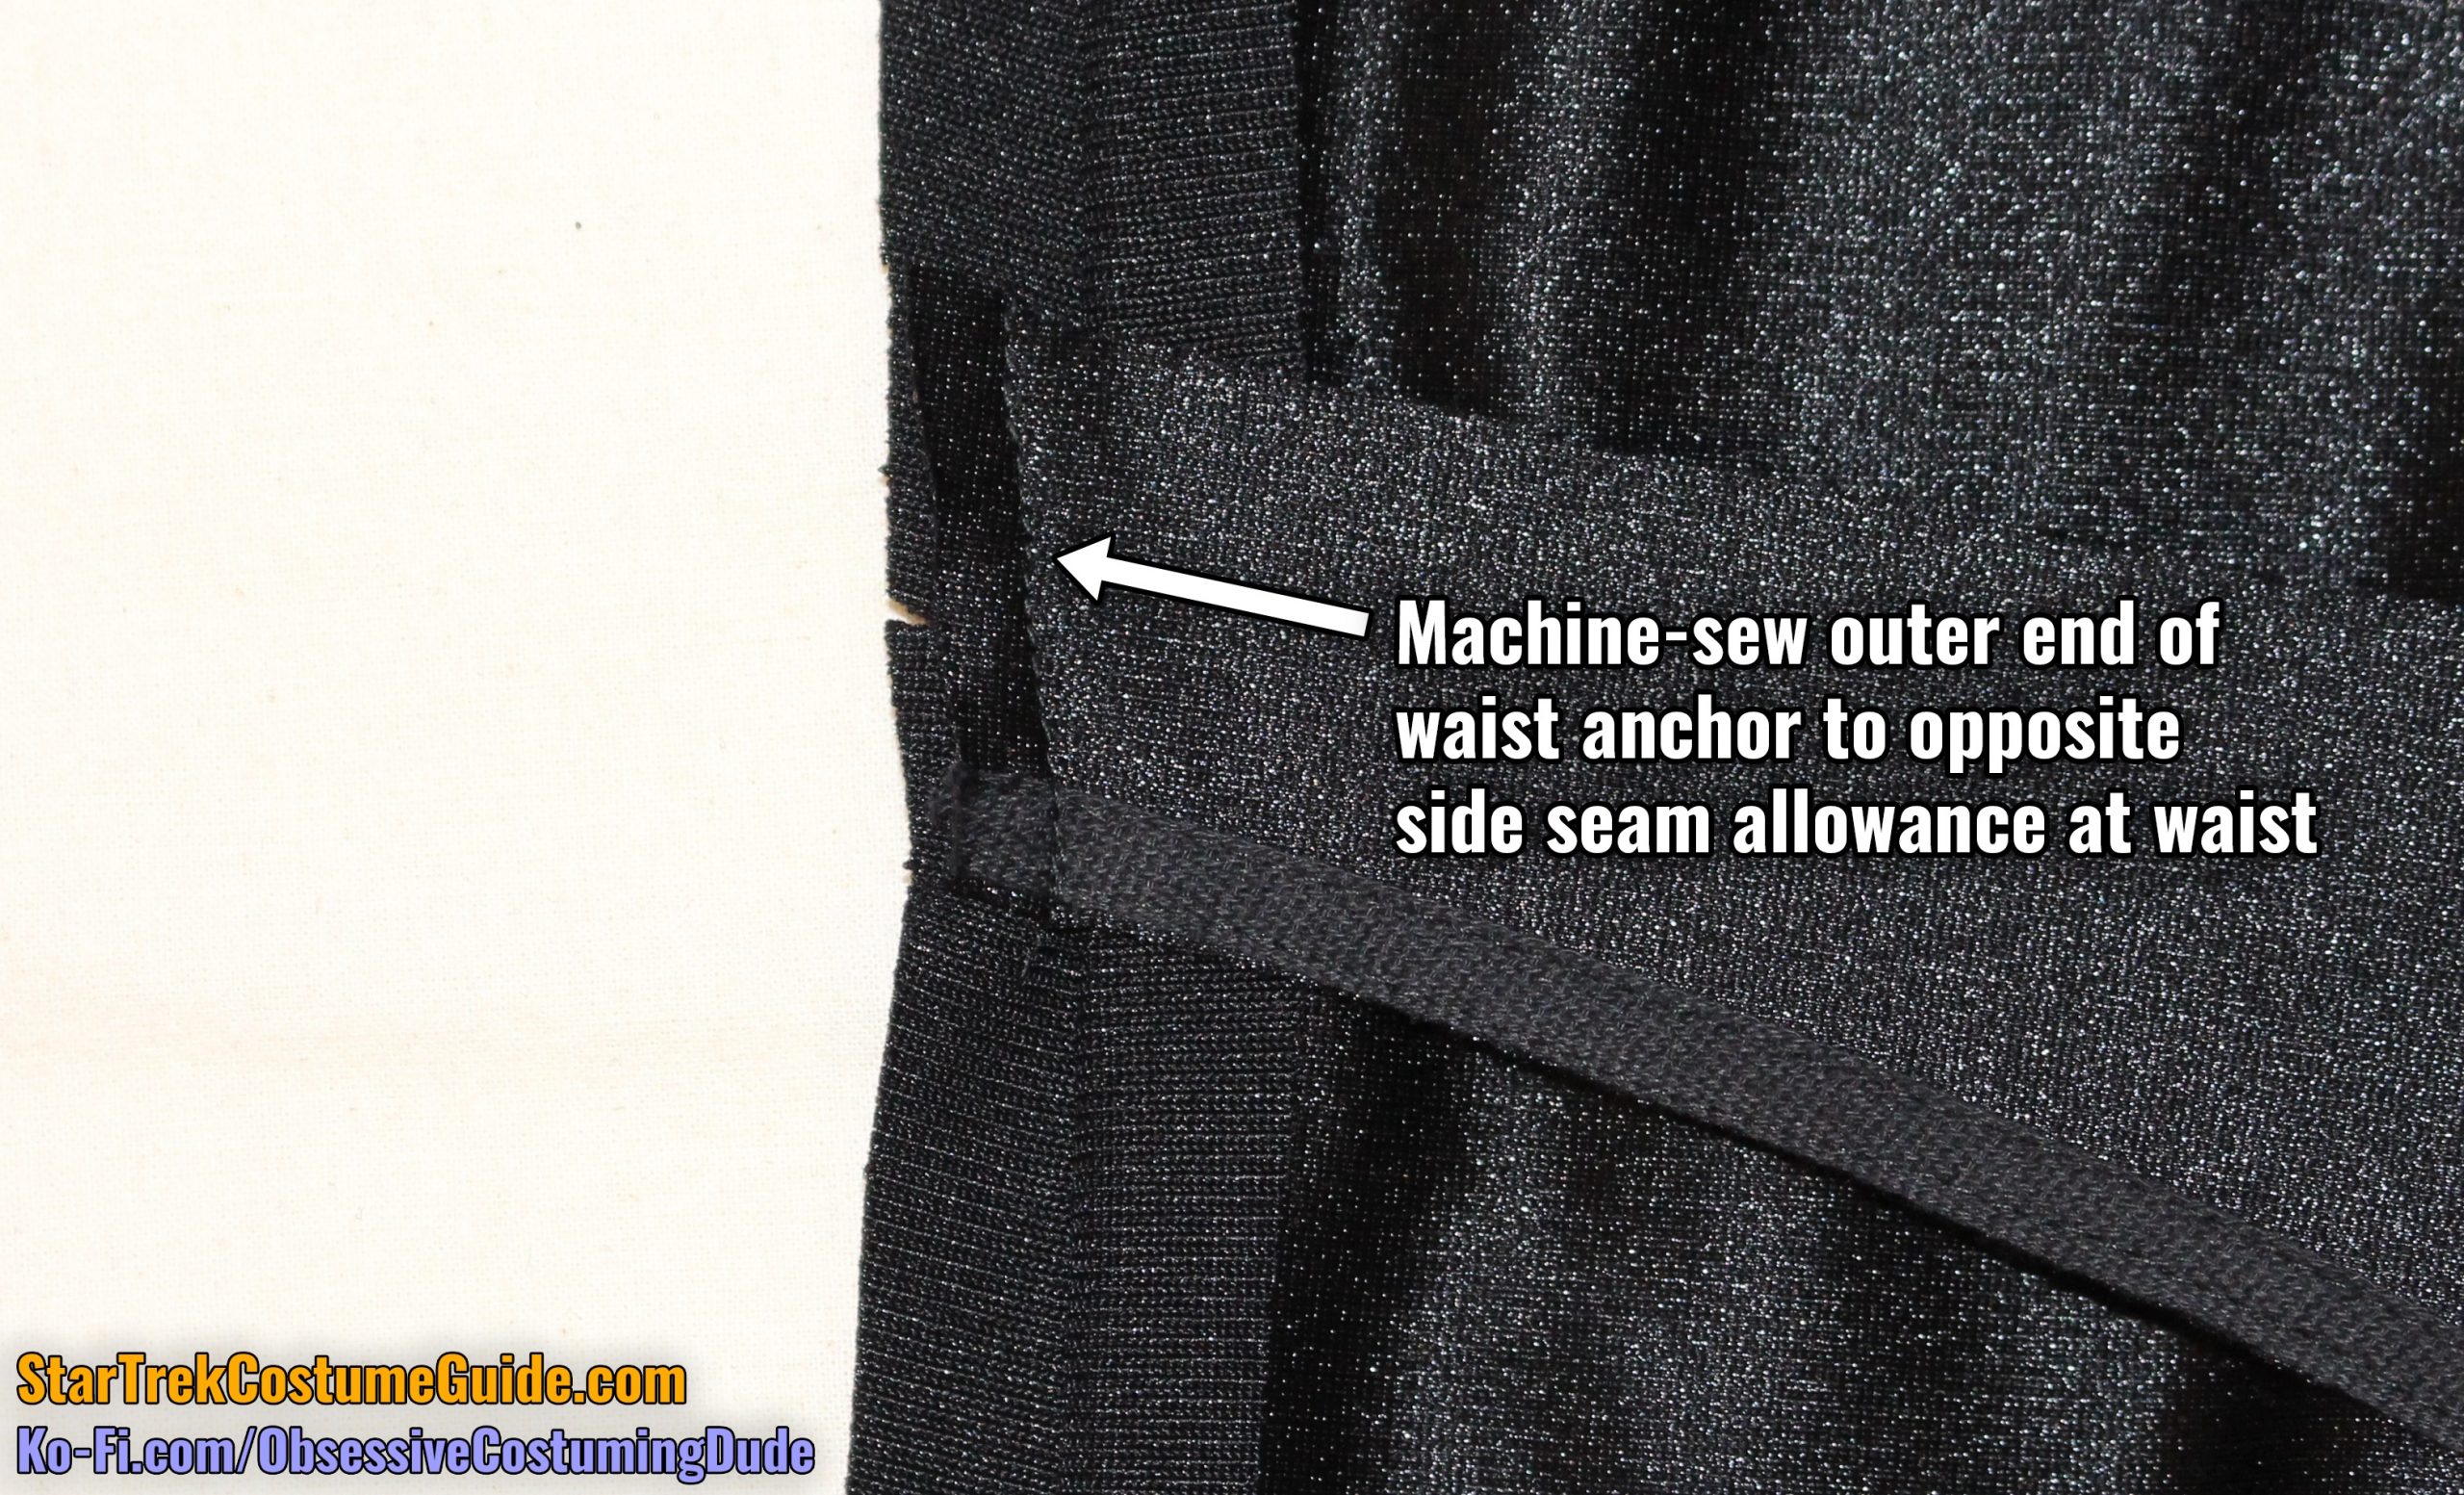
Sew the front waist anchor to the right side front (piece E) with ½” seam allowance.
Press the waist anchor away from the right front, and press the seam allowances toward the right front.
Press under the ⅜” hem allowance at the top of the leg strap, segueing into the ½” seam allowances above.
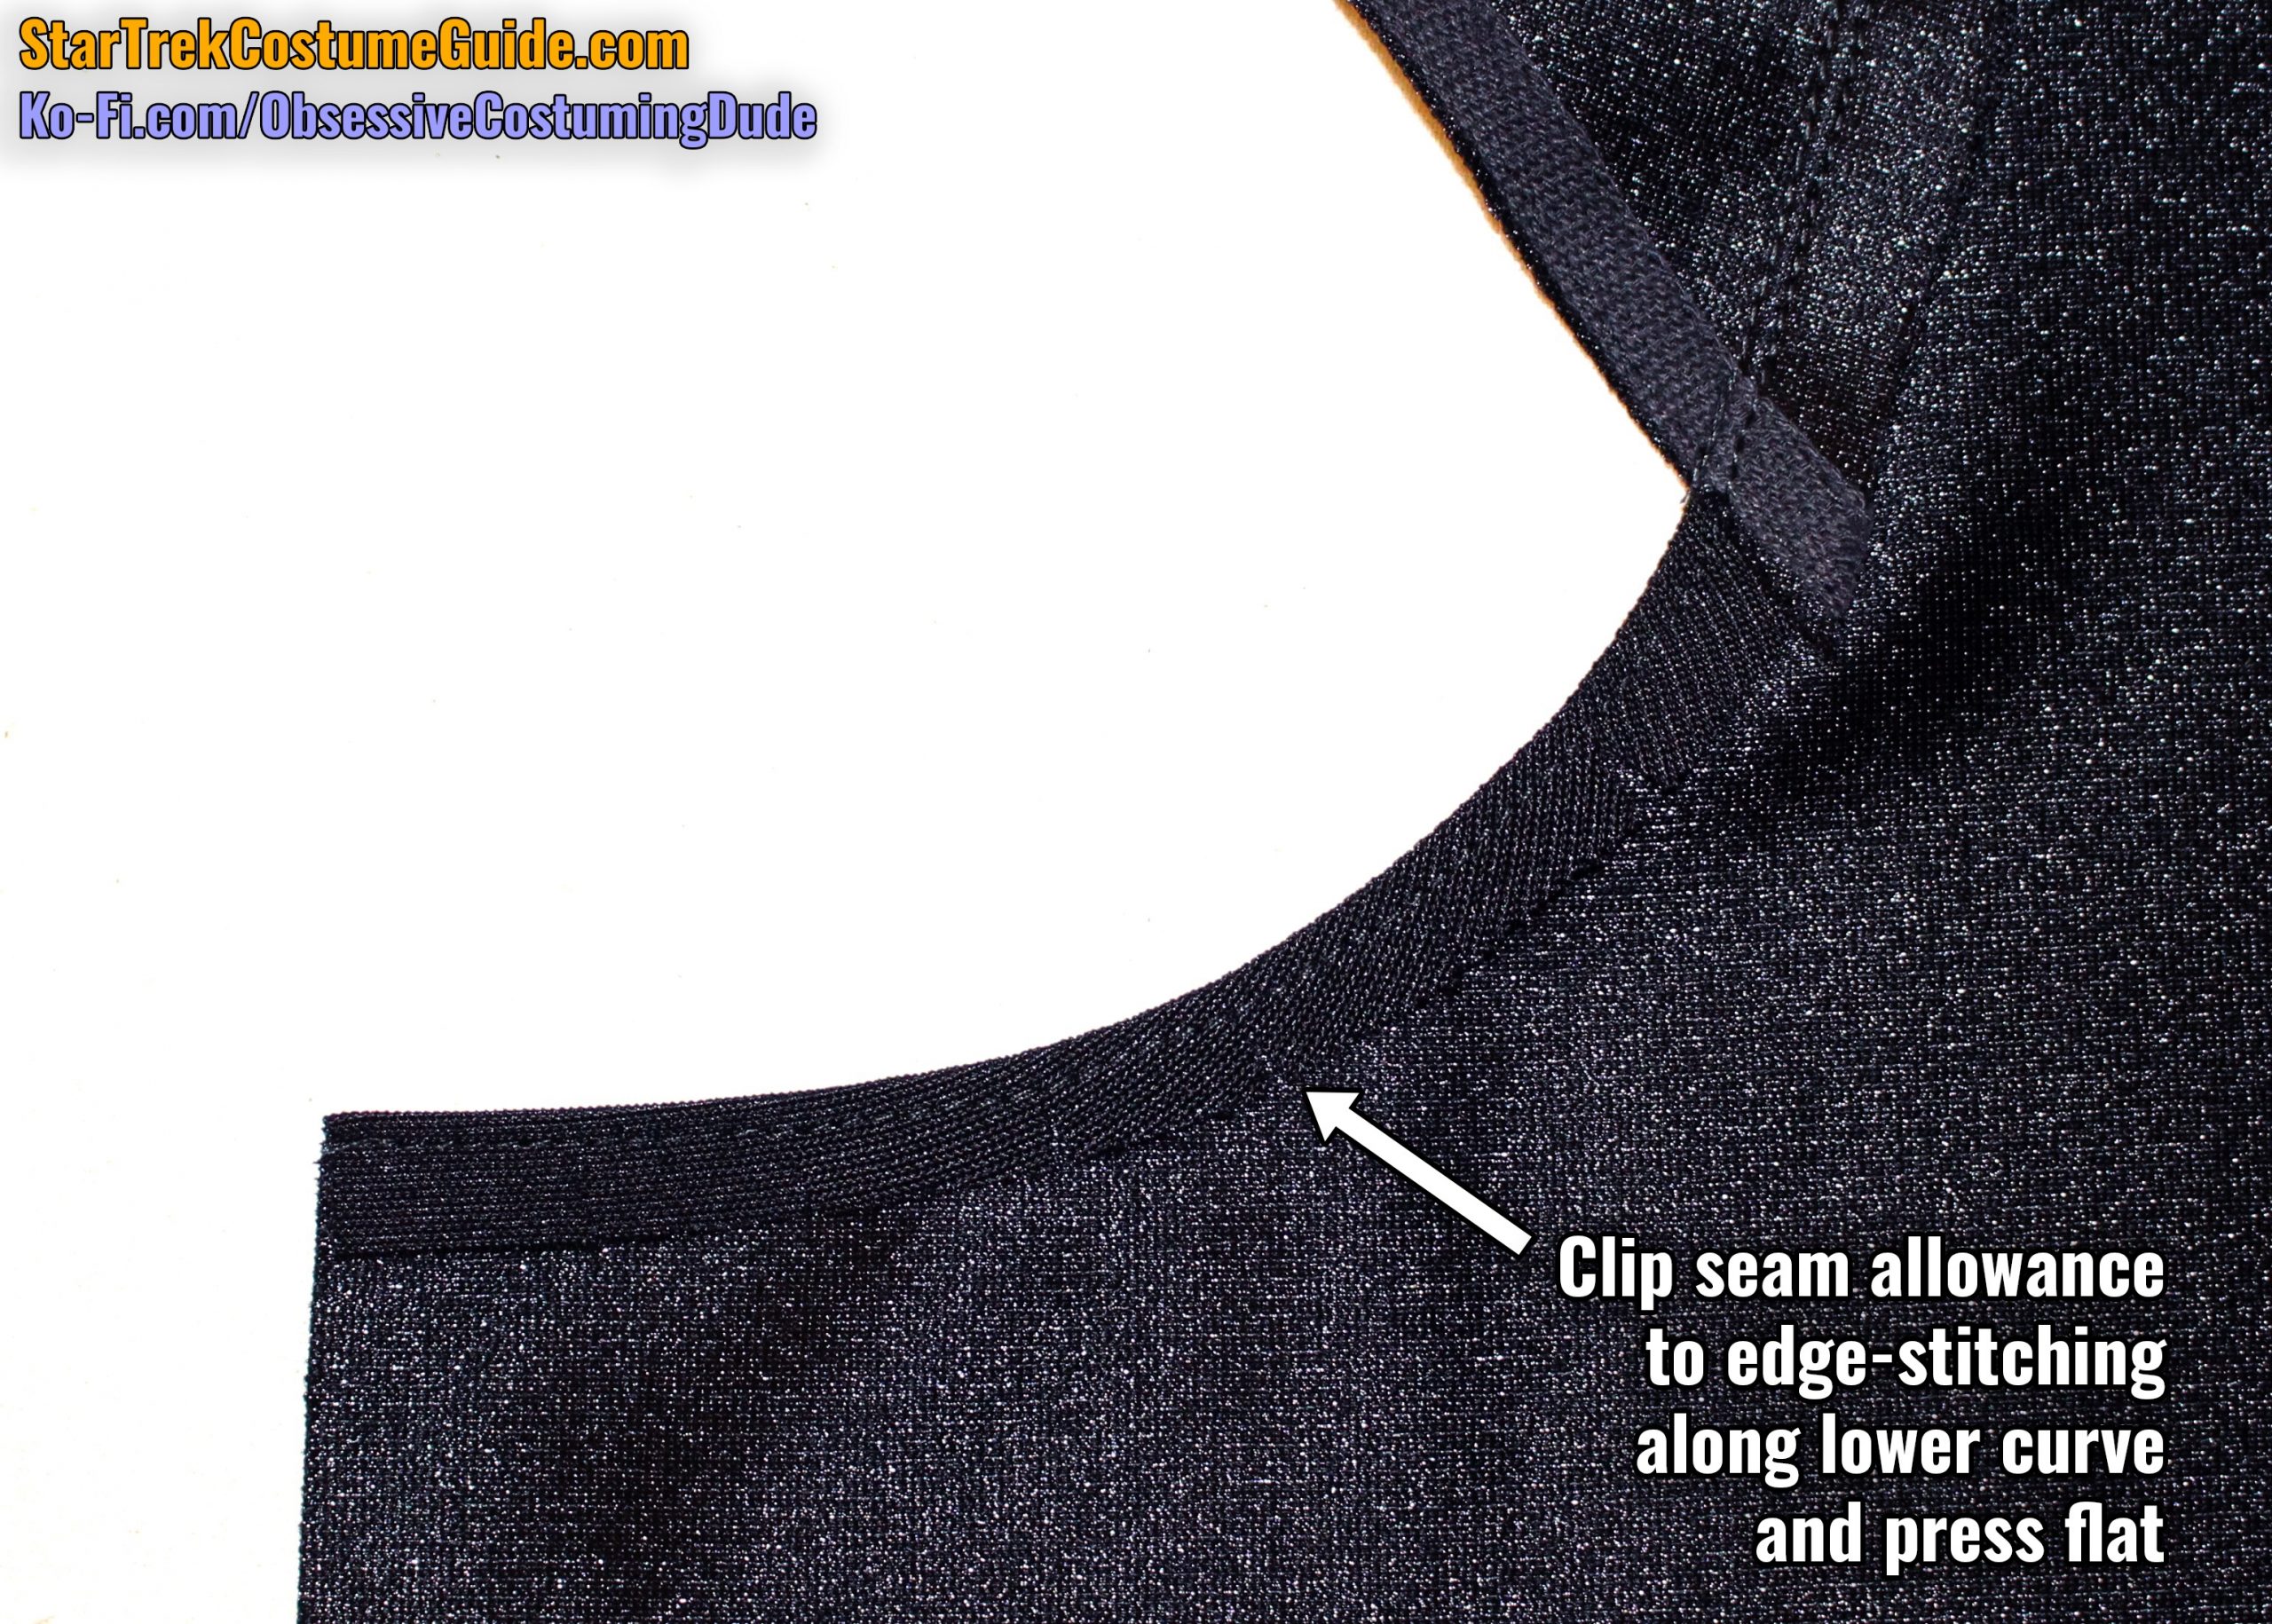
Edge-stitch the seam and hem allowances into place.
Clip the leg strap’s upper hem allowance to the stitching and press it flat.
NOTE: For either of the back-zipping versions, just sew the right front seam closed and skip ahead to the sleeves.
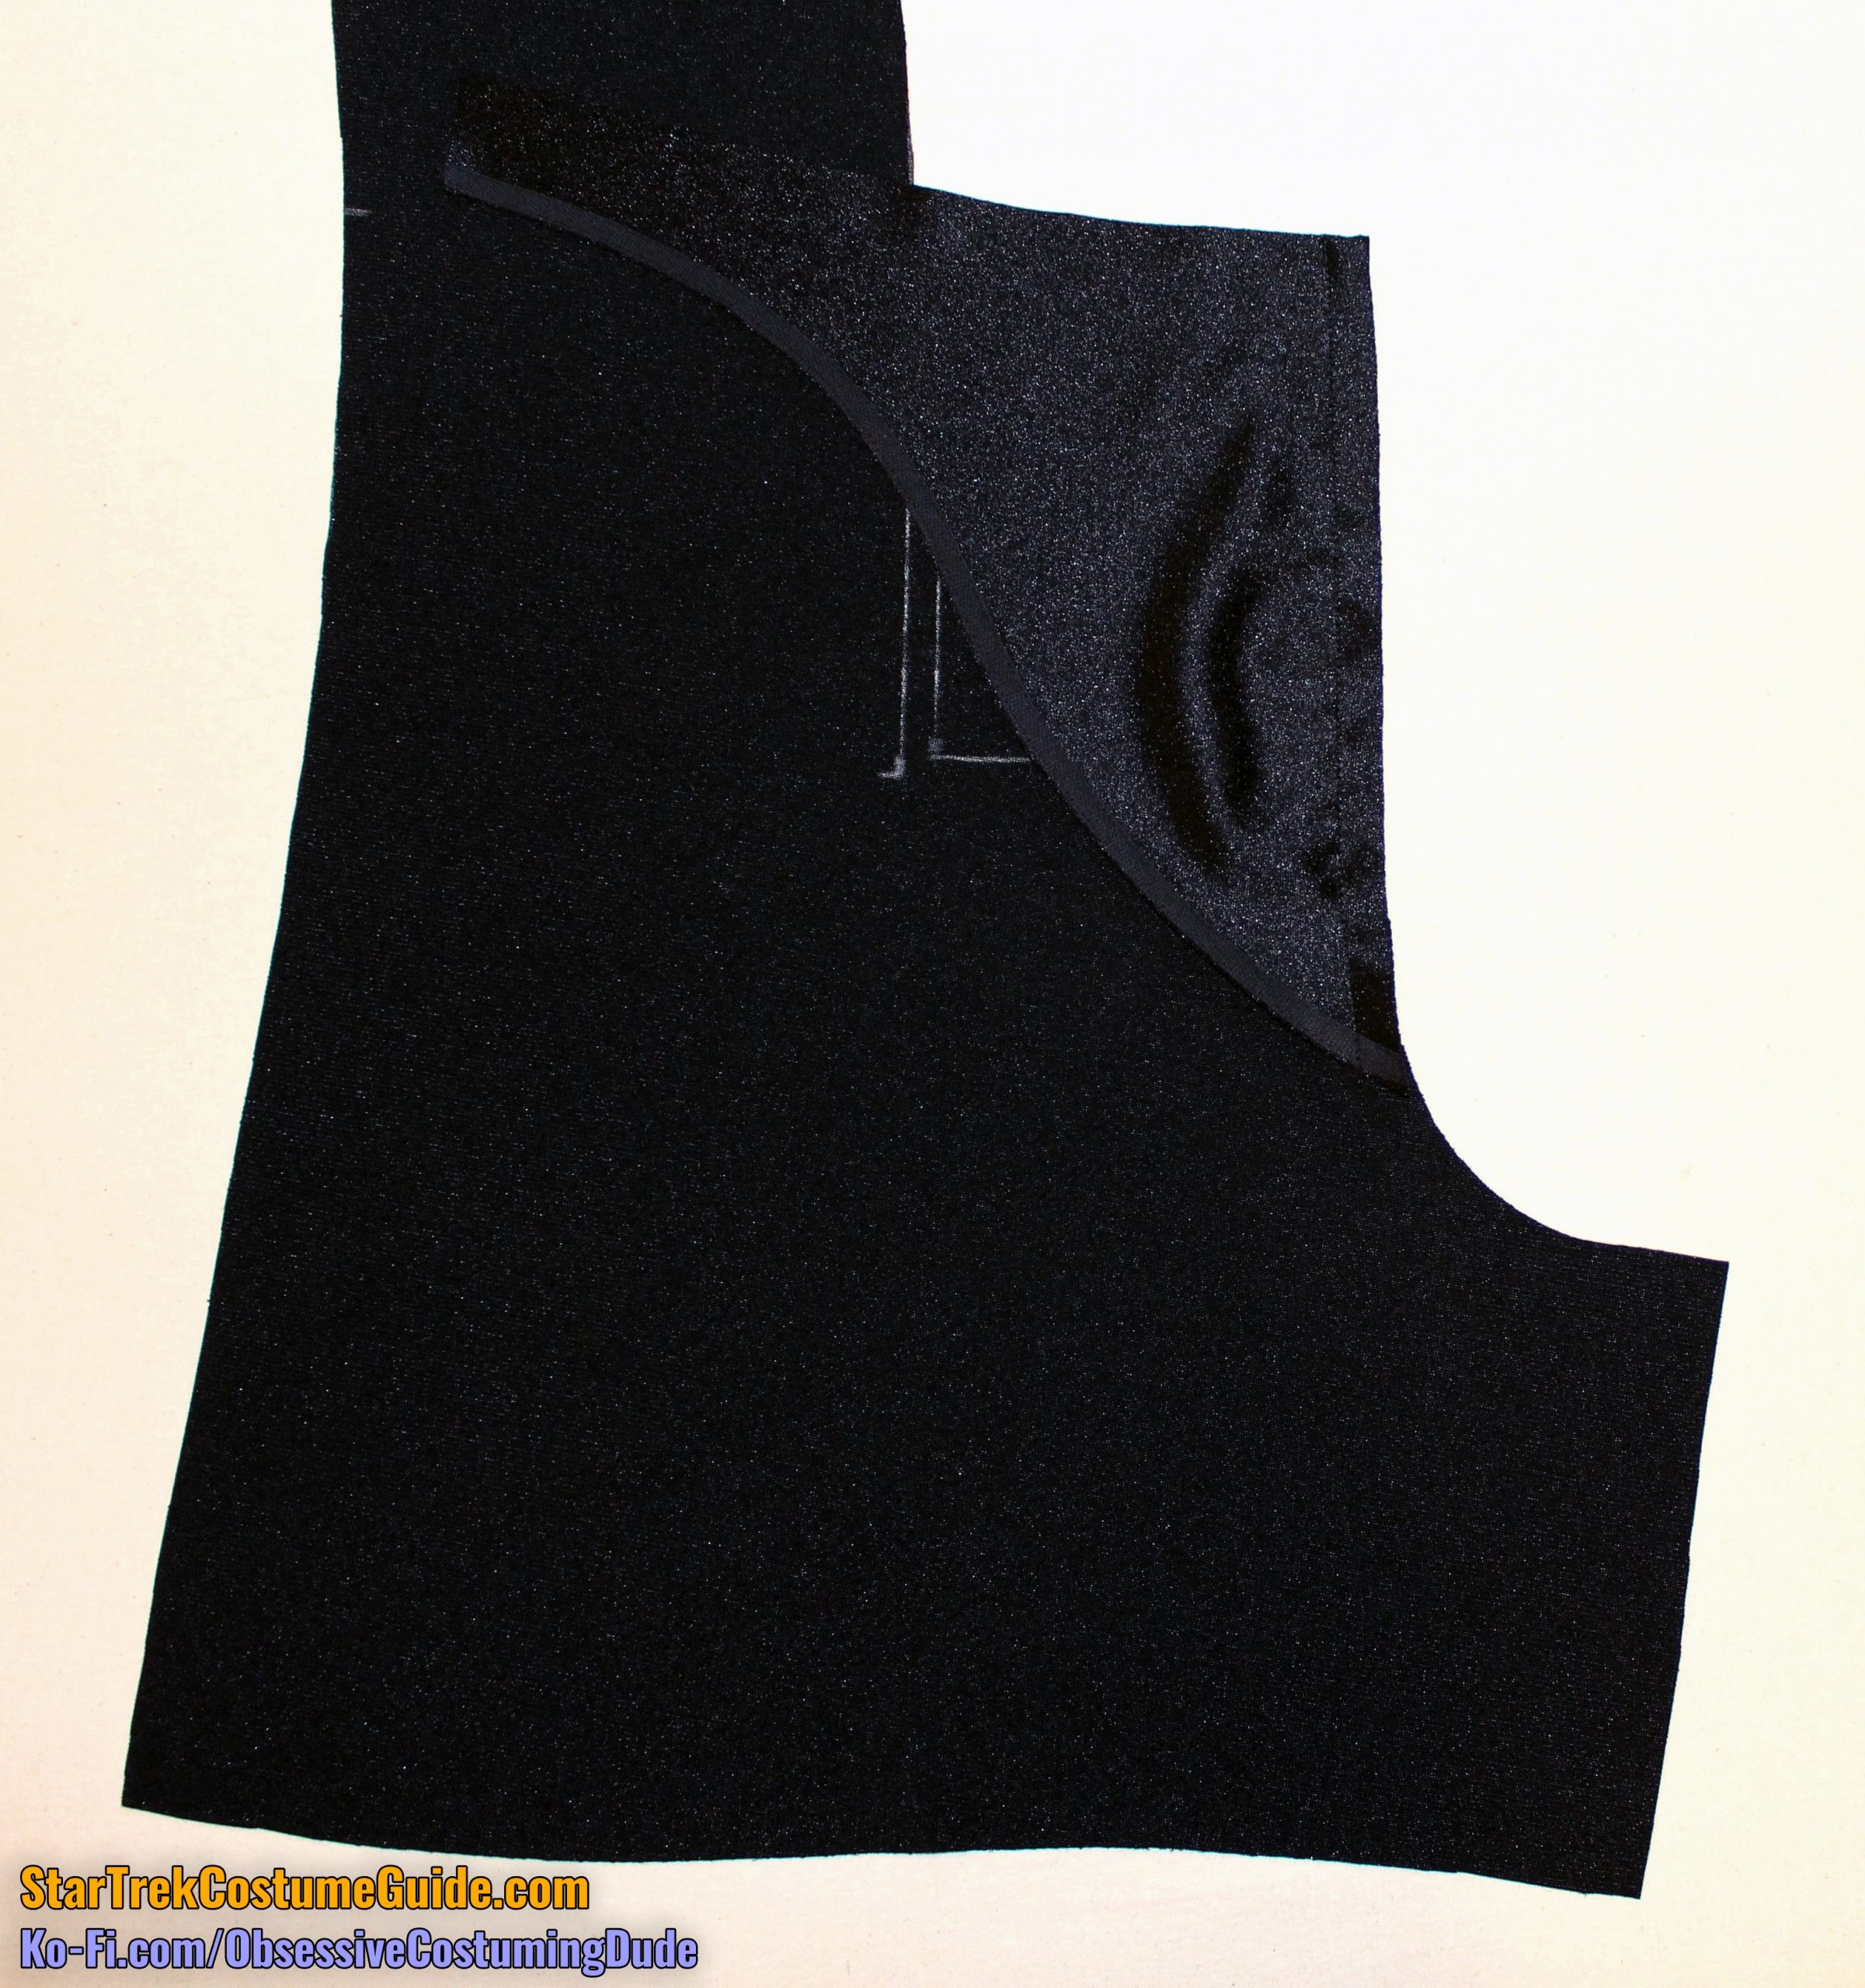
TIP: On the printed pattern, there are several alignment guides. I like to lightly mark these on the fabric using disappearing tailor’s chalk.
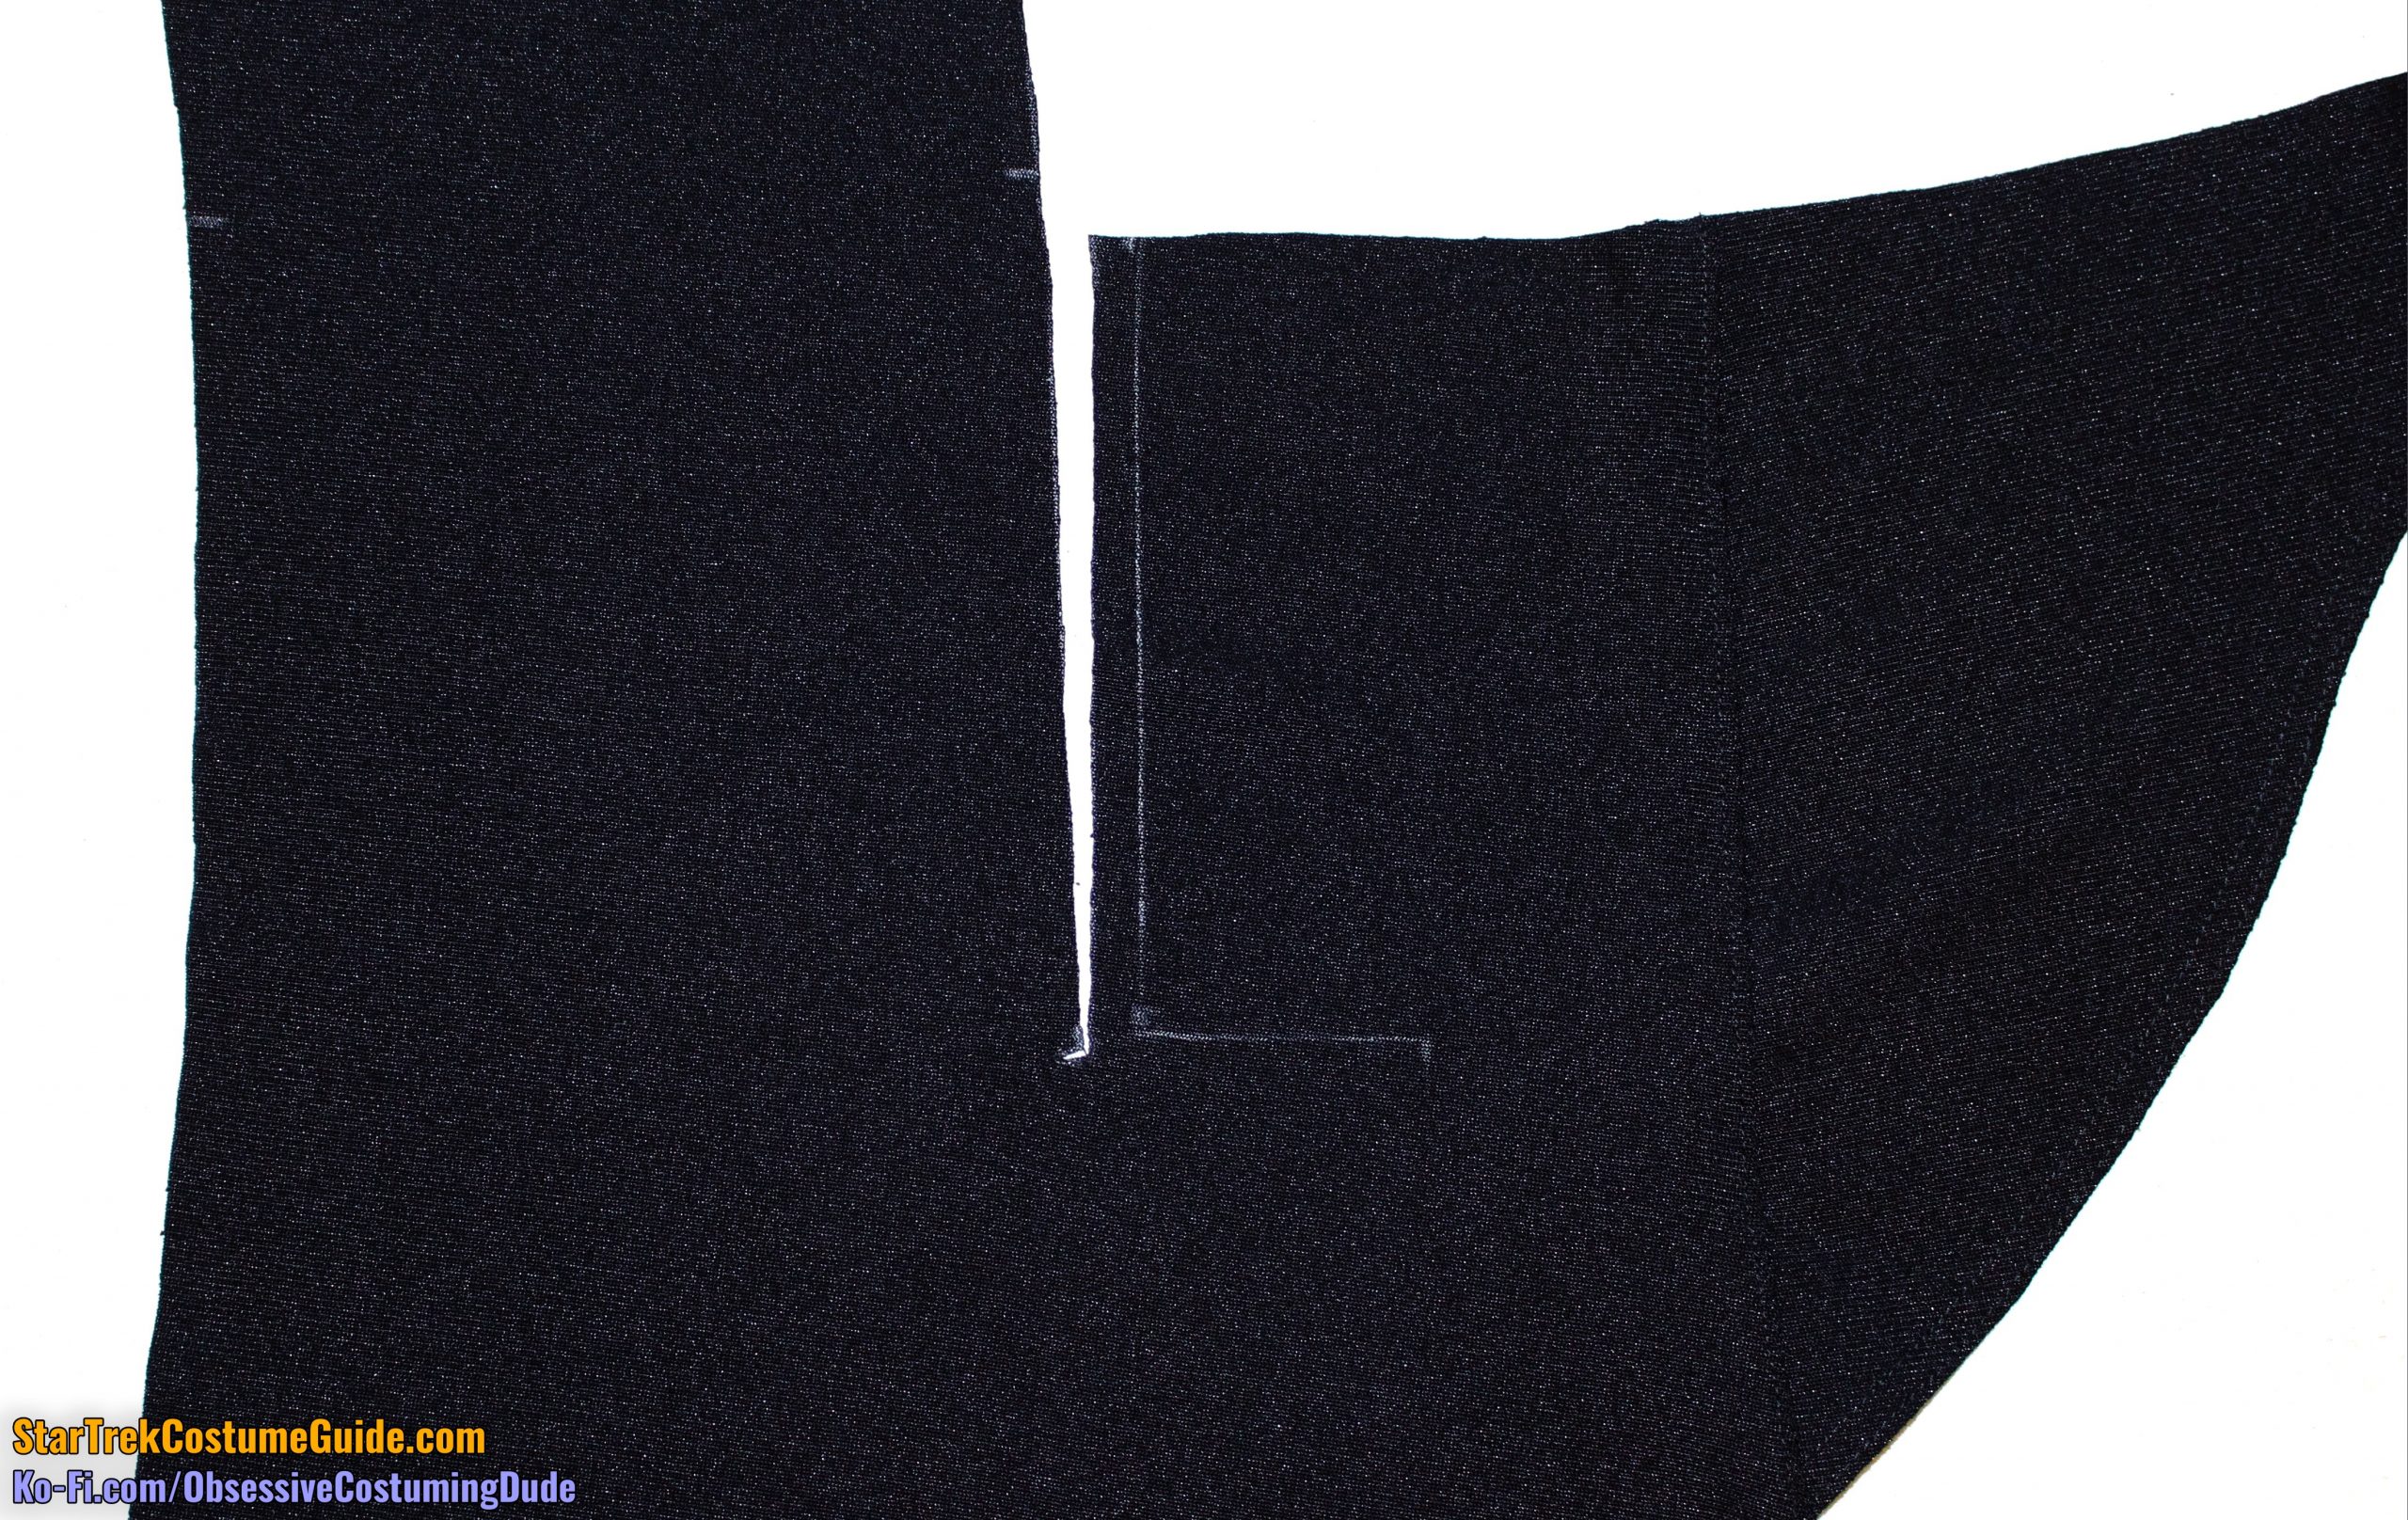
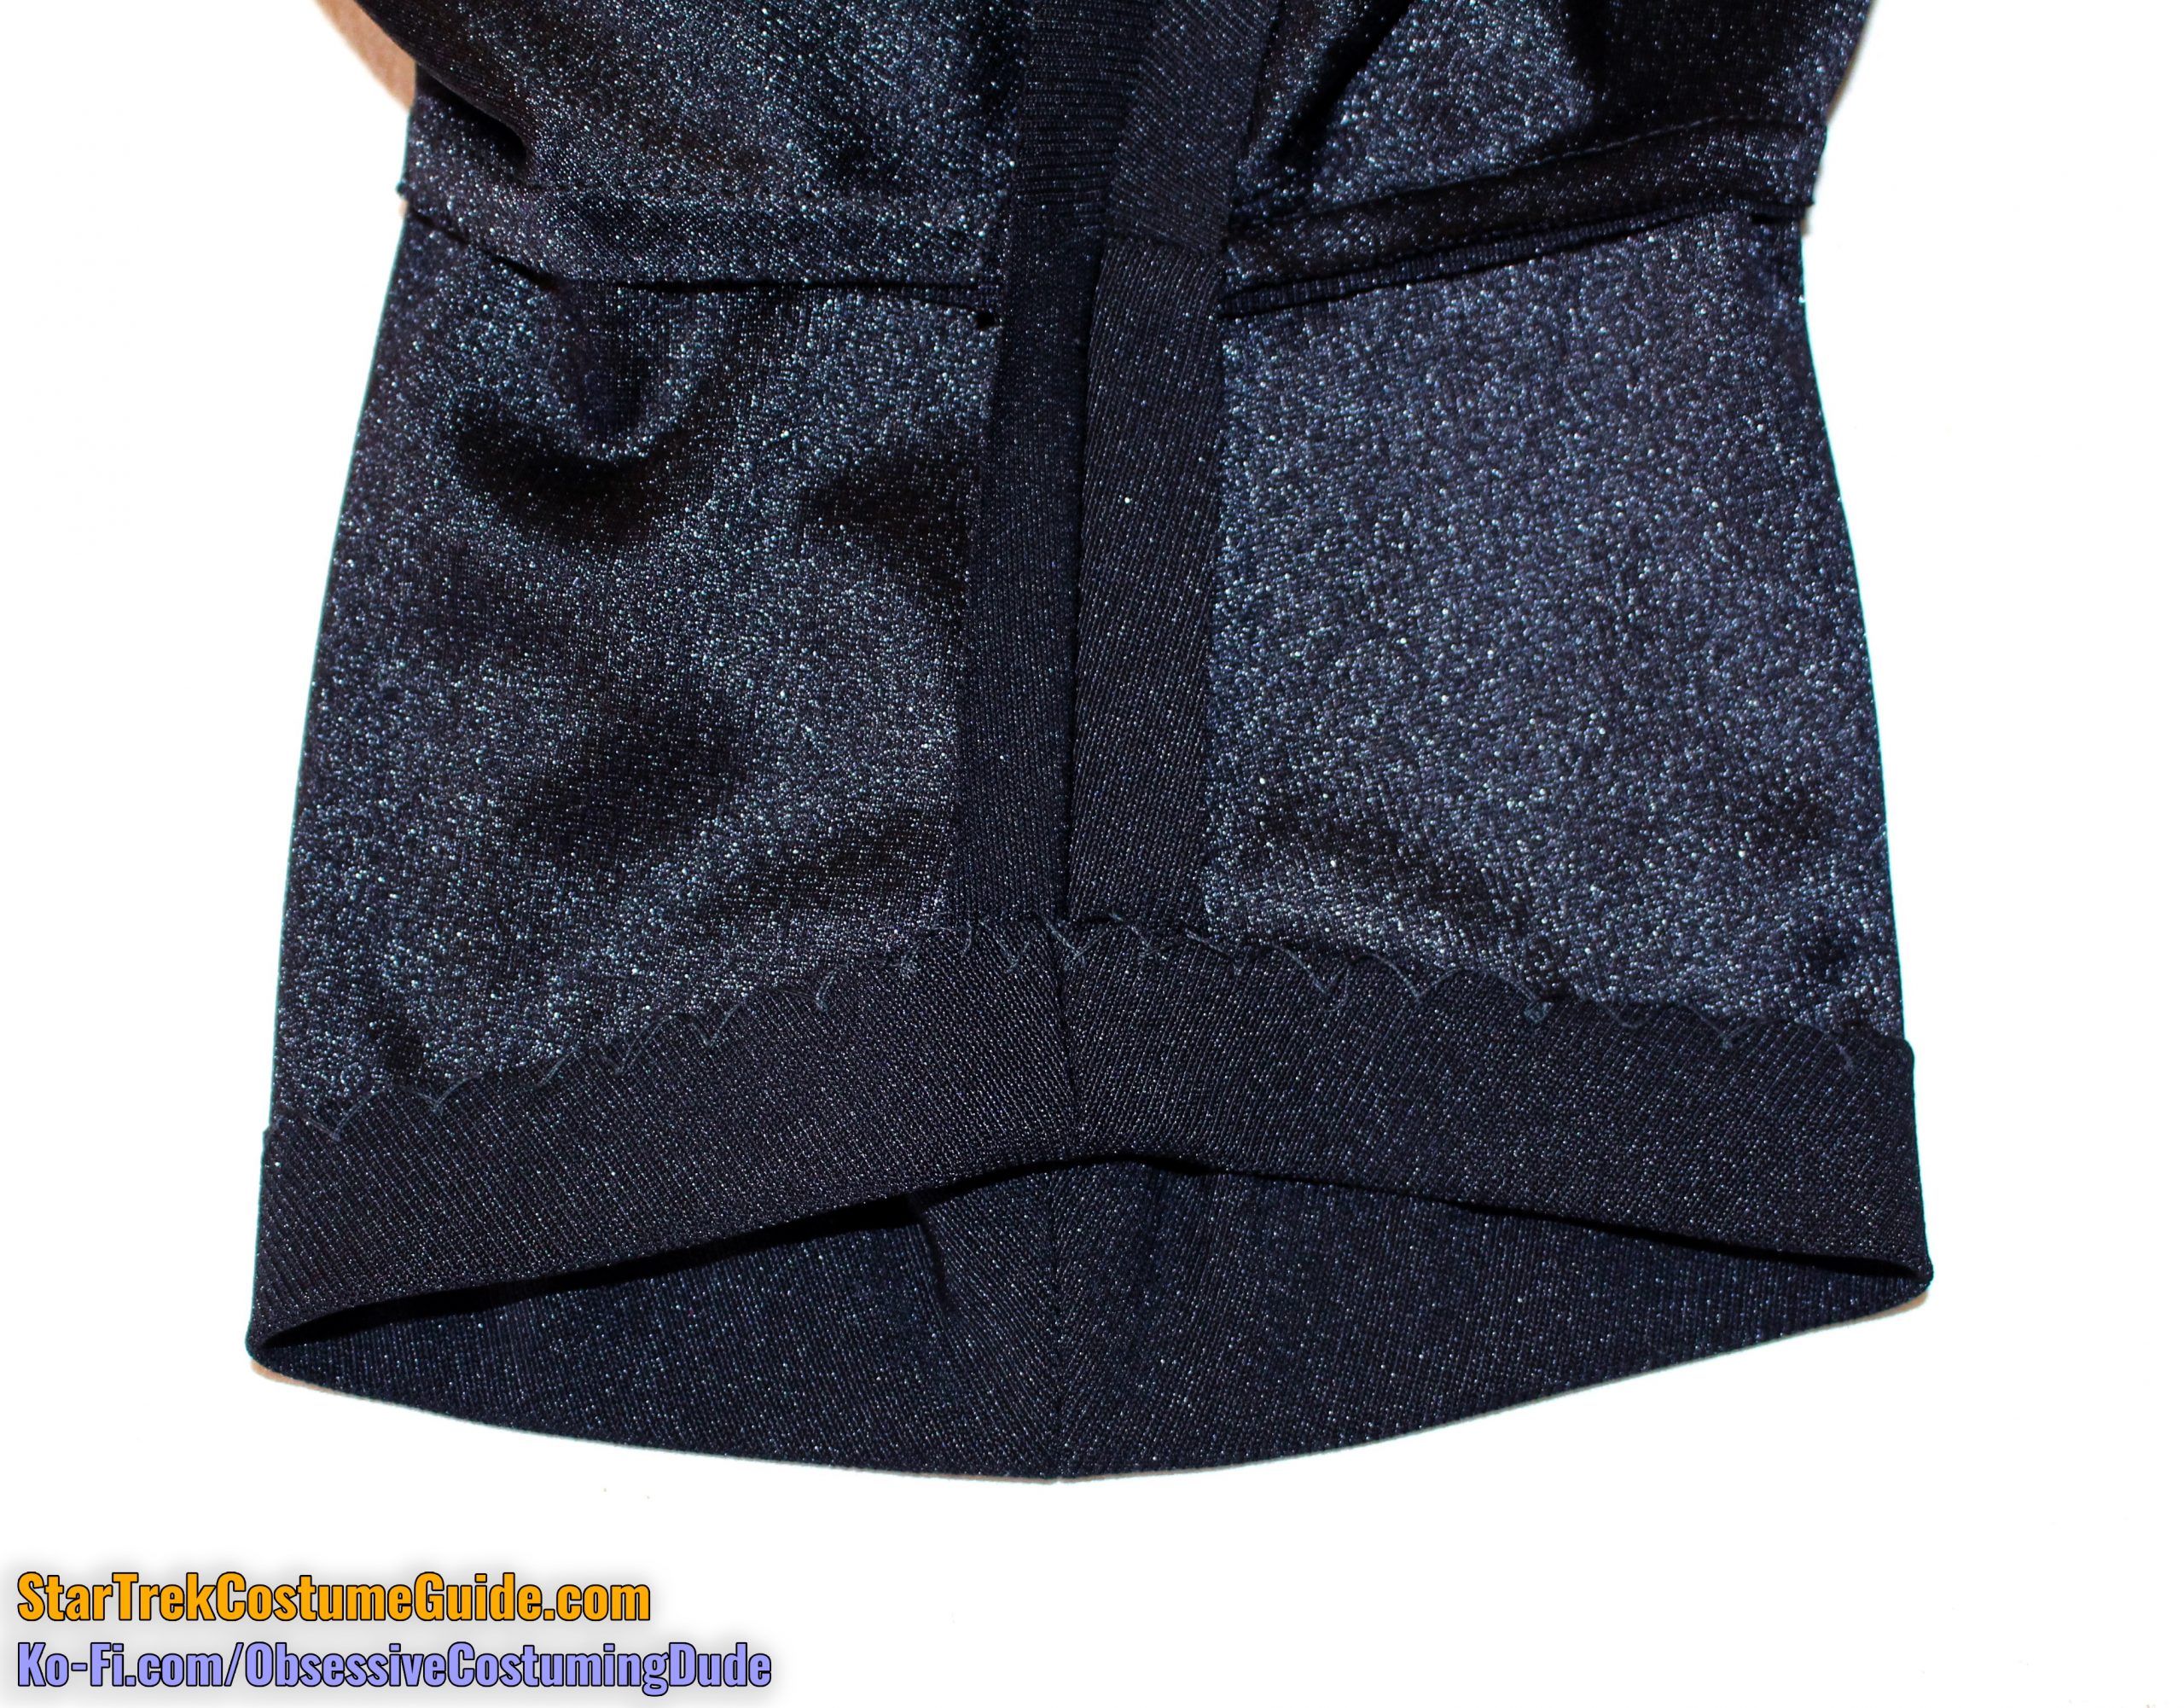
OPTIONAL: Stitch around the lower corner of the slit with a short stitch length to reinforce it before cutting.
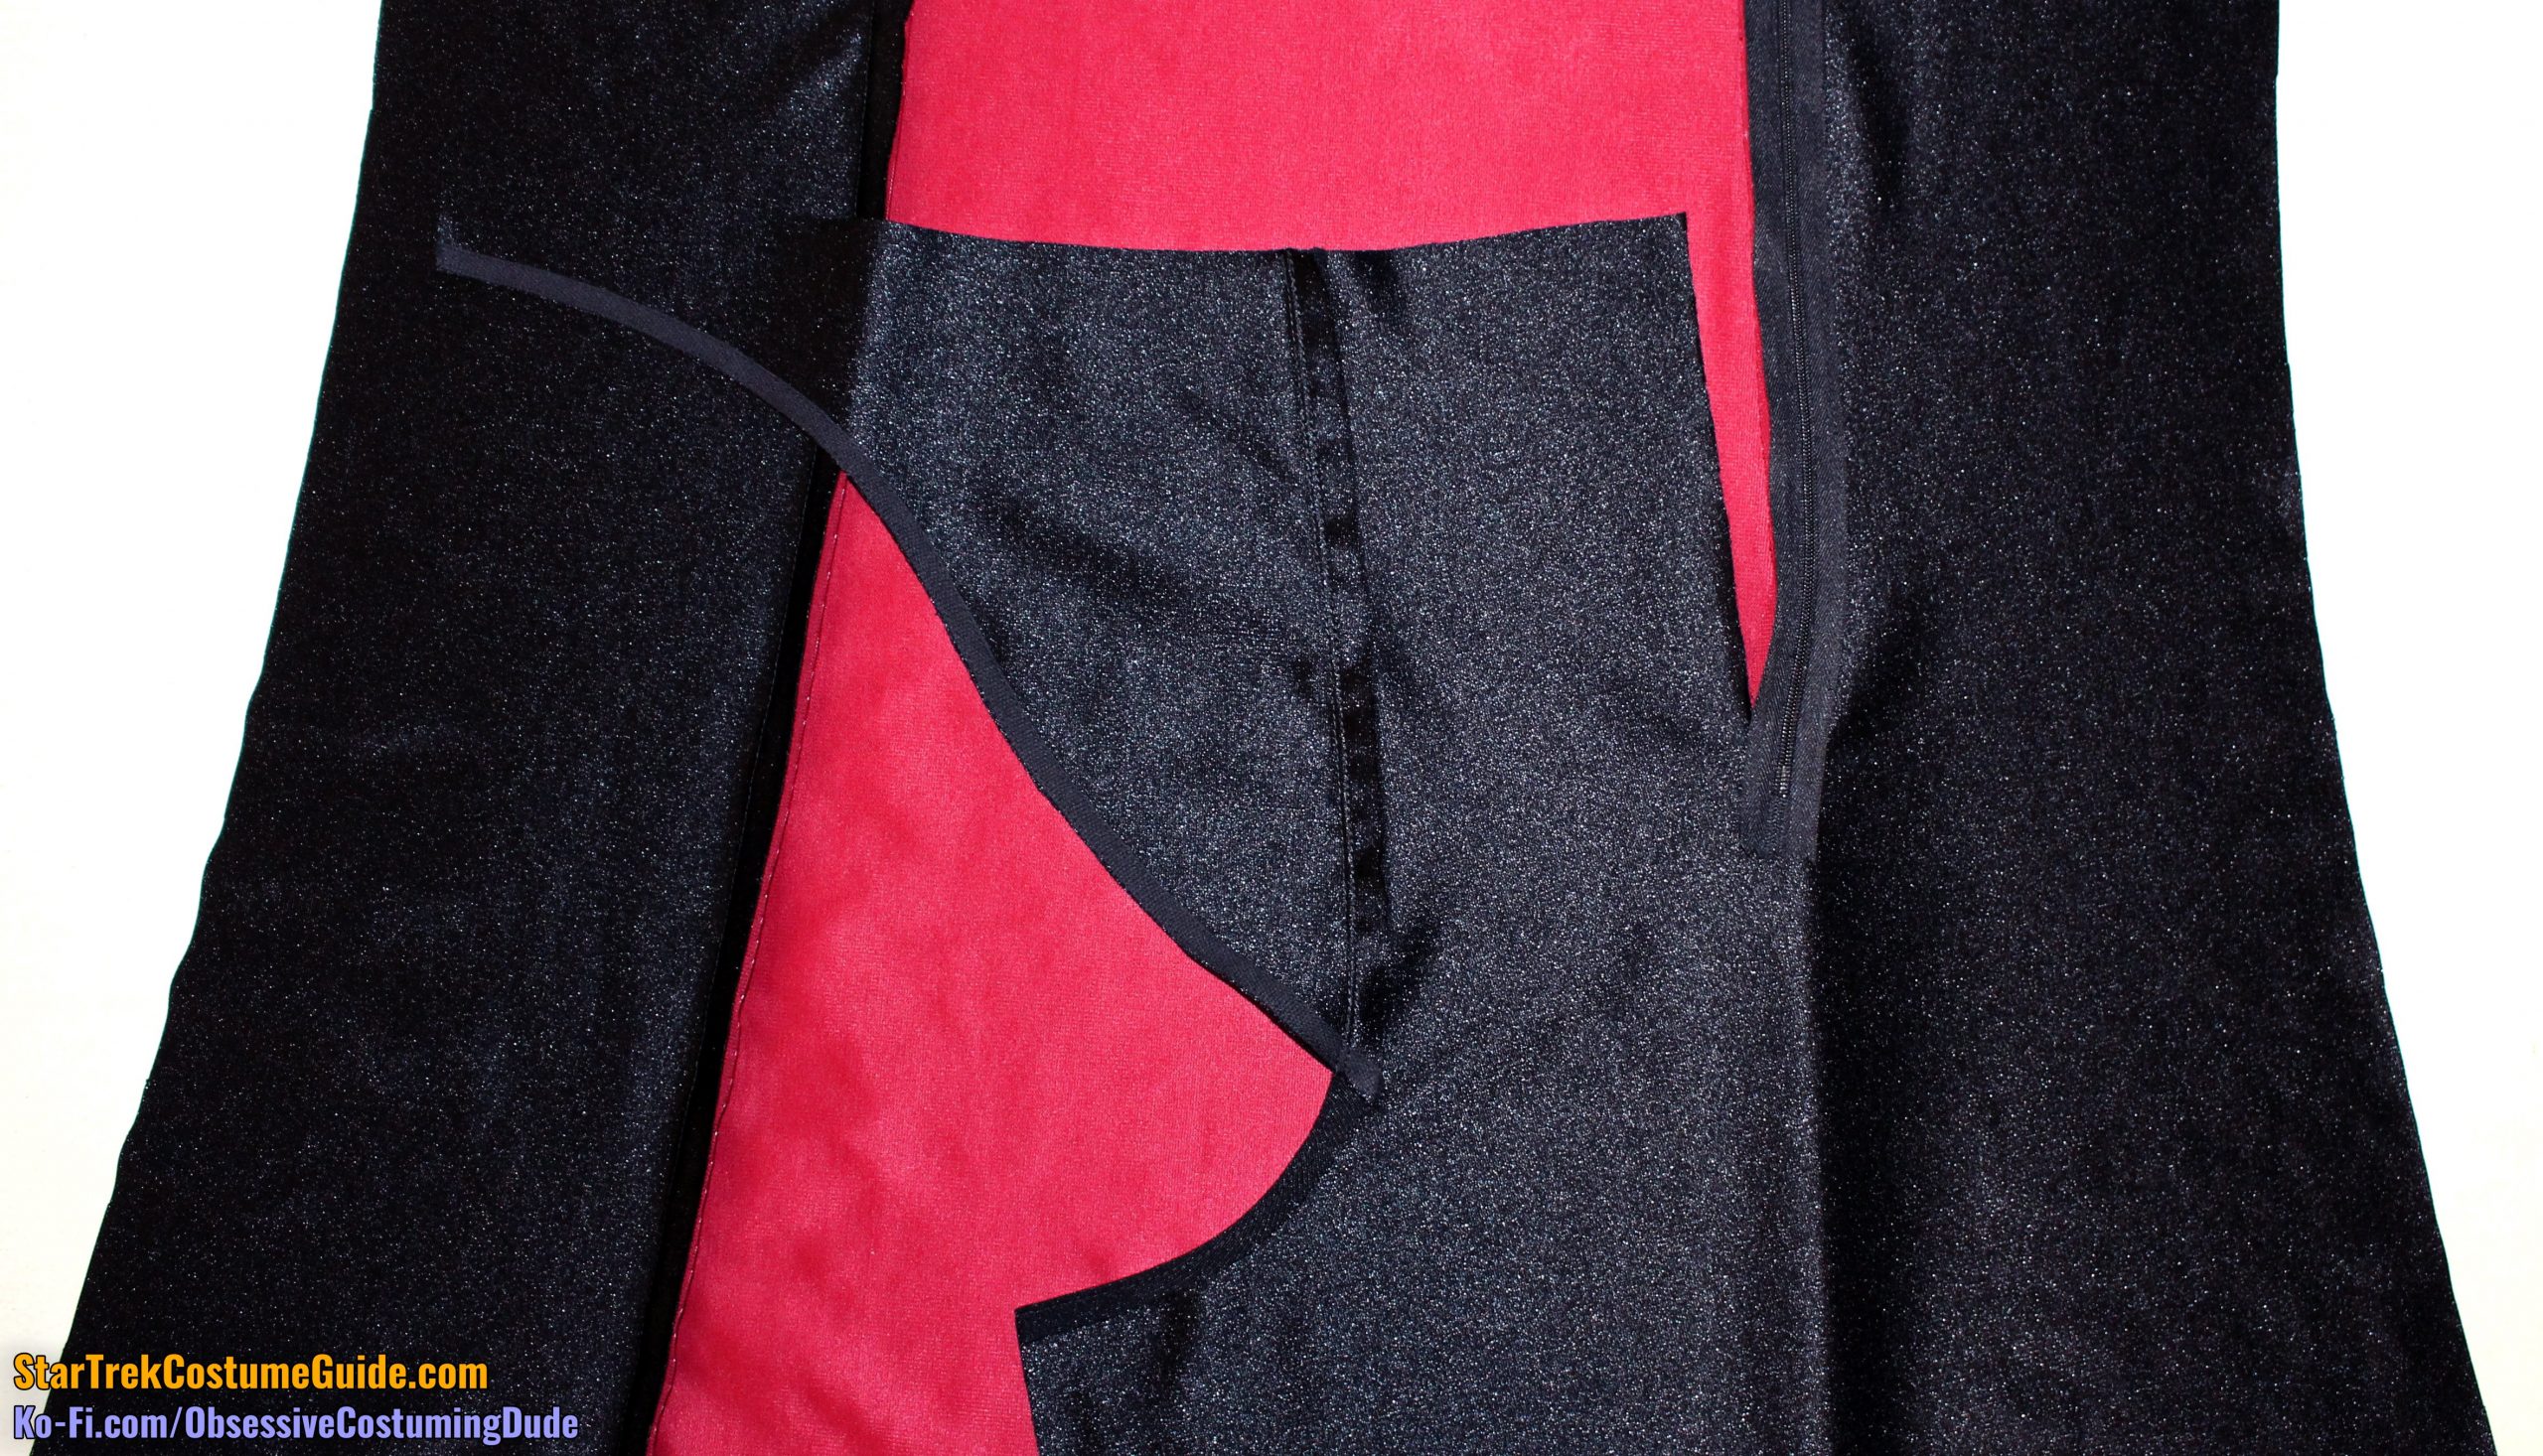
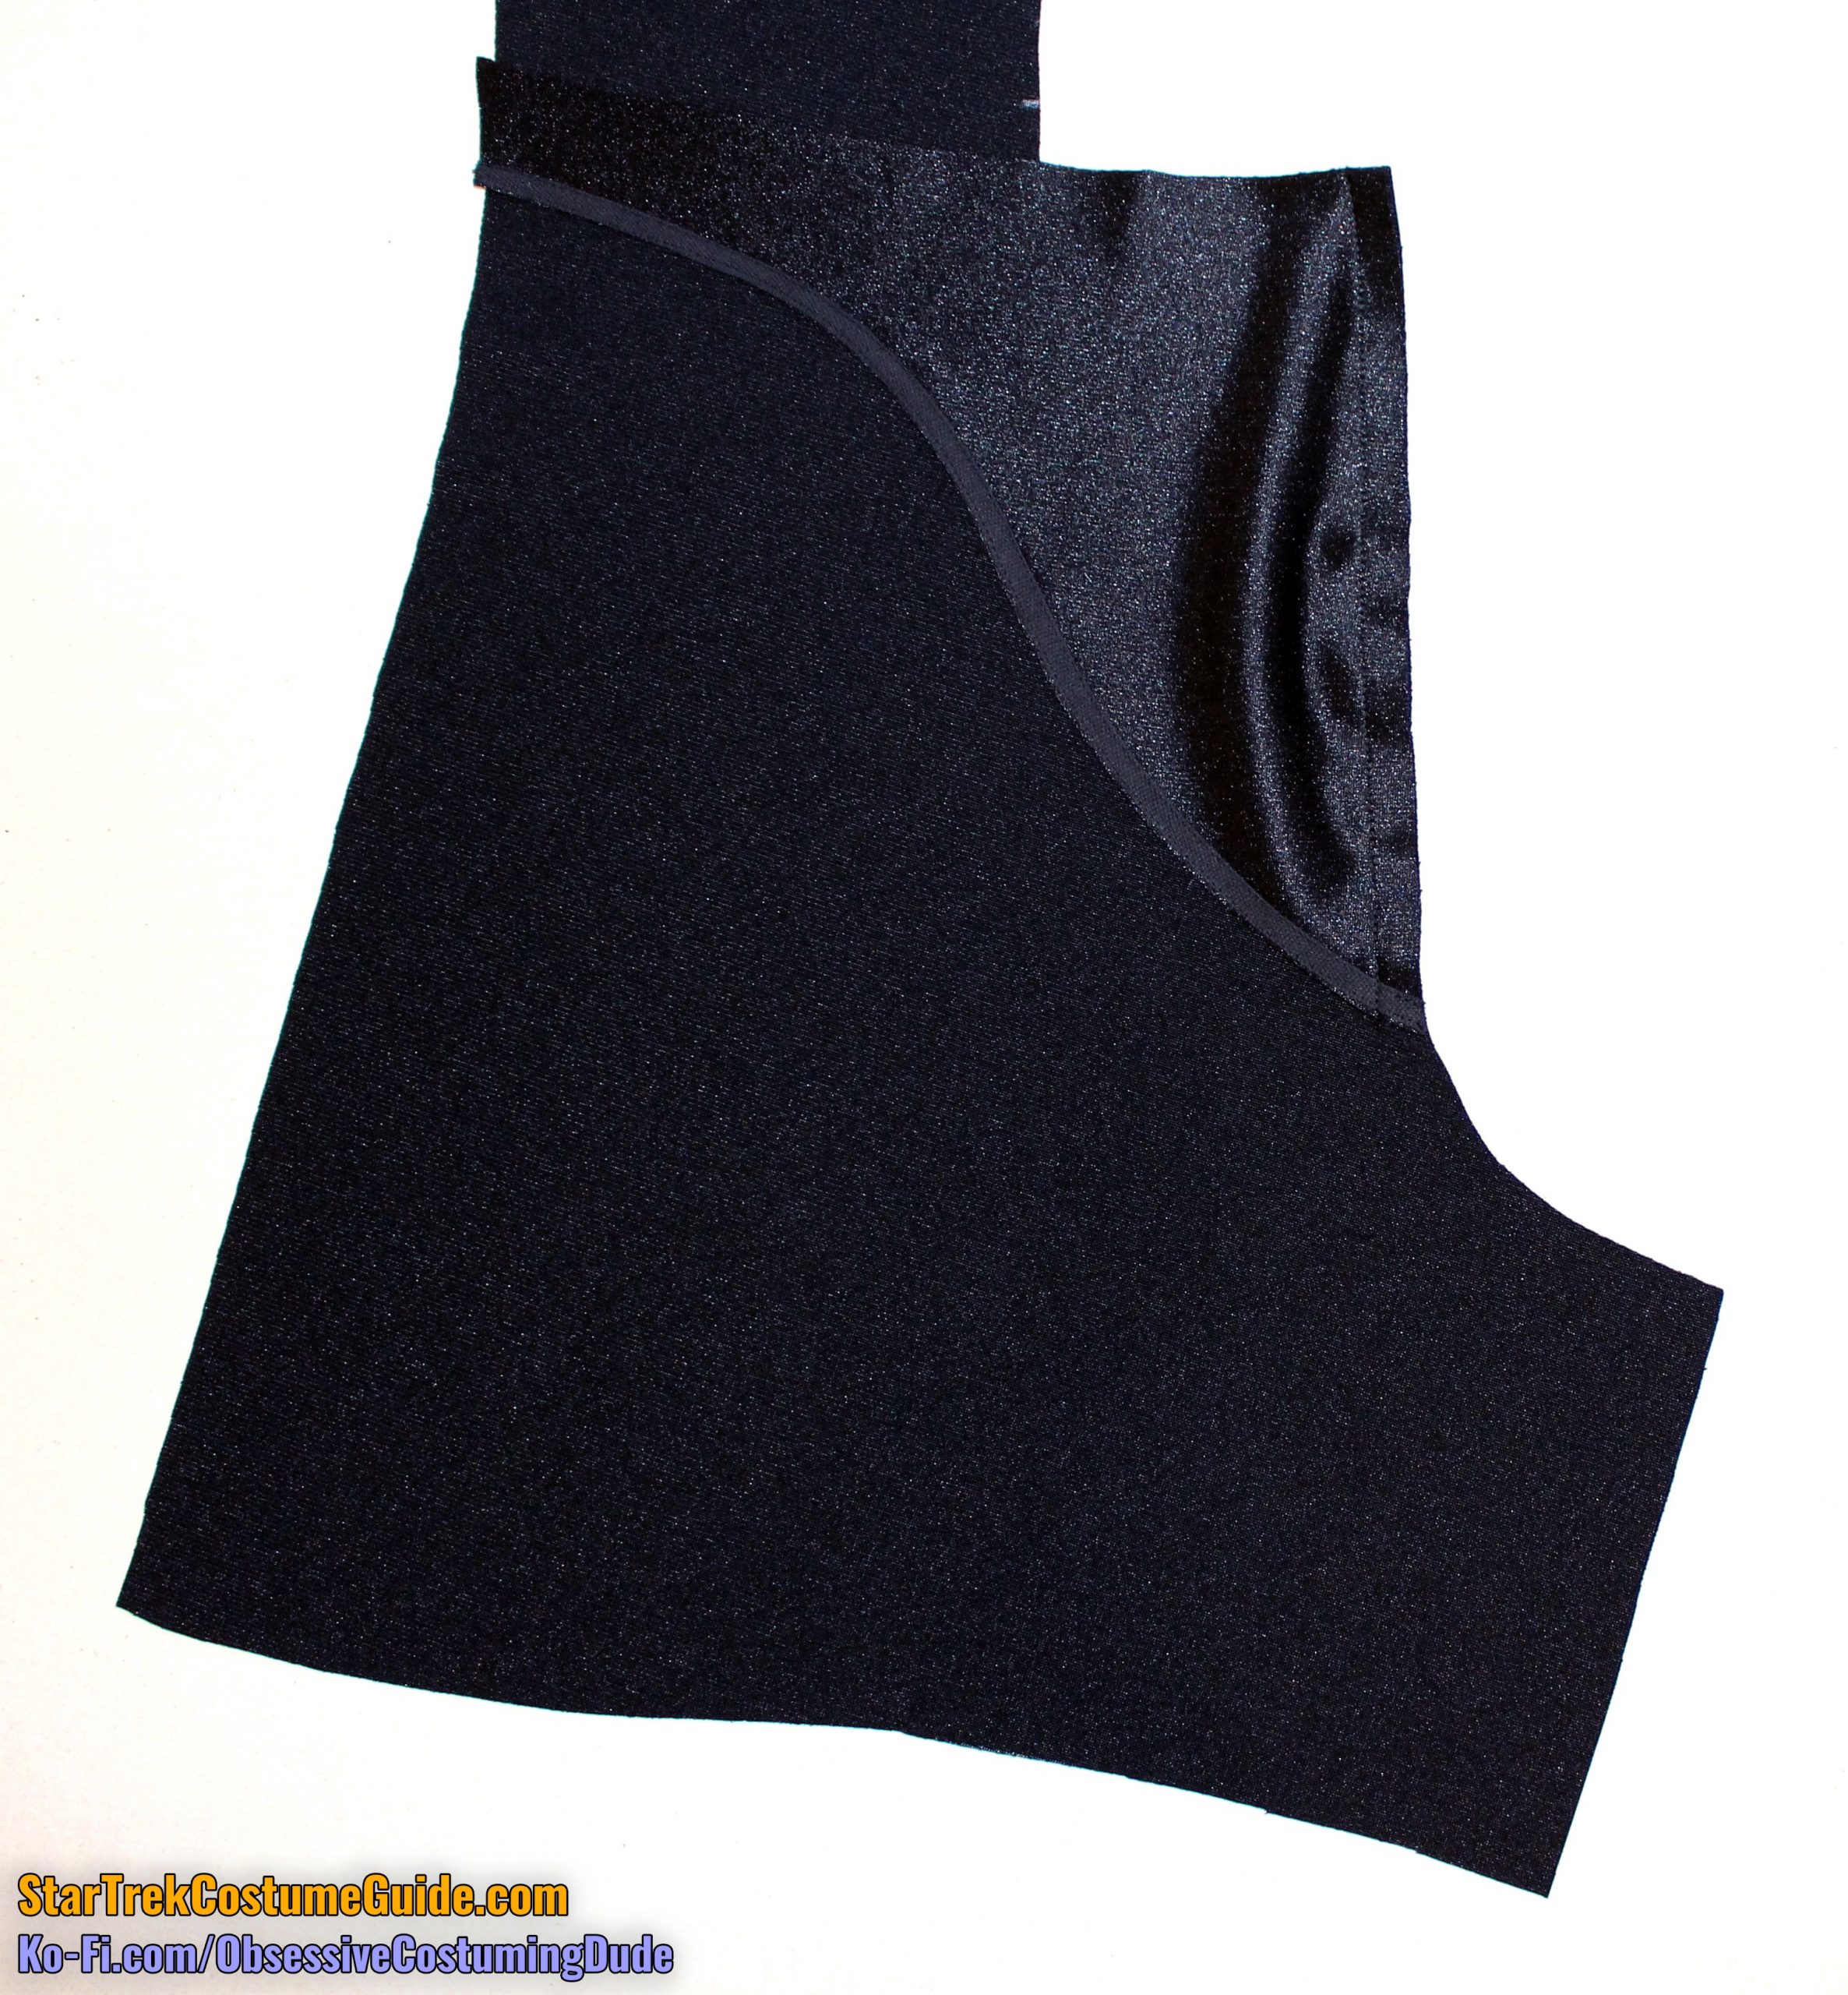
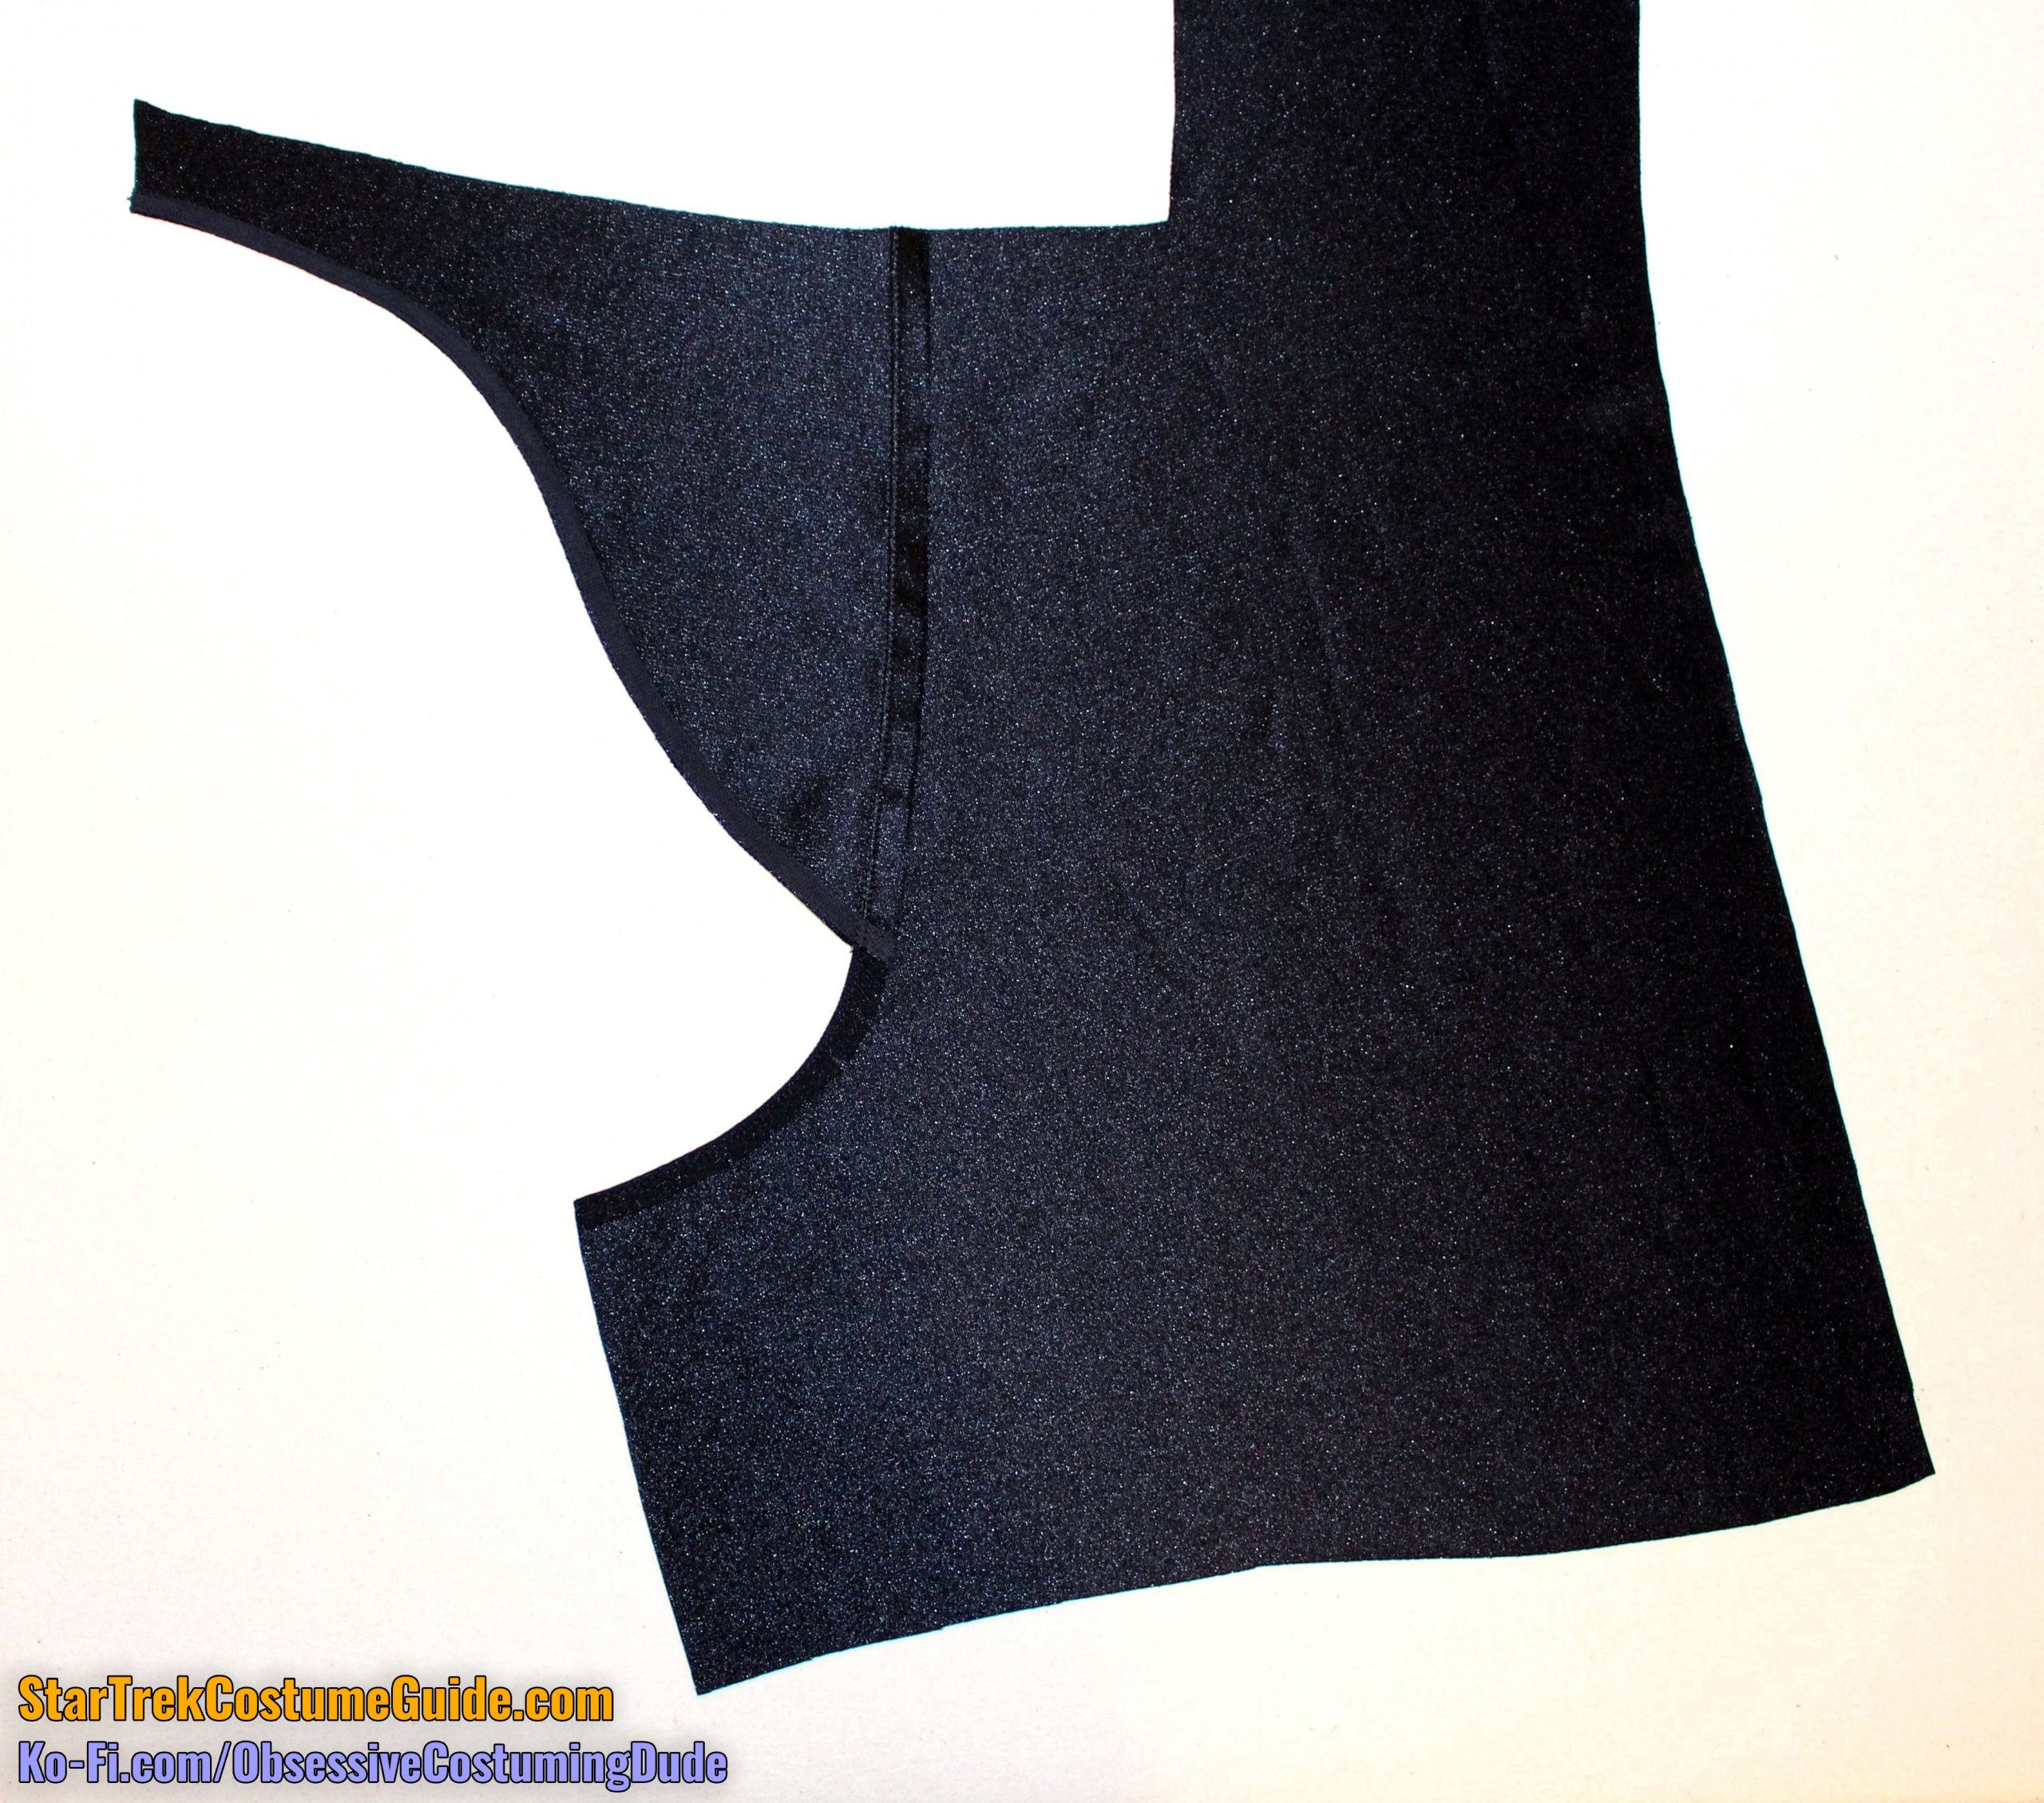
Carefully cut a backwards-L-shaped slit into the panel, as indicated on the printed pattern.
Position the first invisible zipper along the front/right front seam line so the top of the zipper overhangs the top of the fabric by about 1 ⅝”, and the bottom of the zipper is even with the bottom of the slit.
NOTE: For larger men’s sizes and lengthened skants, even a 22” invisible zipper may not be long enough. You can either use a longer invisible zipper or position the bottom accordingly and just extend it upward as far as it will go.
Install the invisible zipper with ⅜” seam allowance on the front panel, and with ⅜” tapering down to ¼” seam allowance on the right front panel.
Leave the top 1” of the zipper hanging free.
If the zipper extends downward more than about 1” past the slit, make a bar tack beneath the slit (as close as you can manage) and trim away the excess zipper tape.
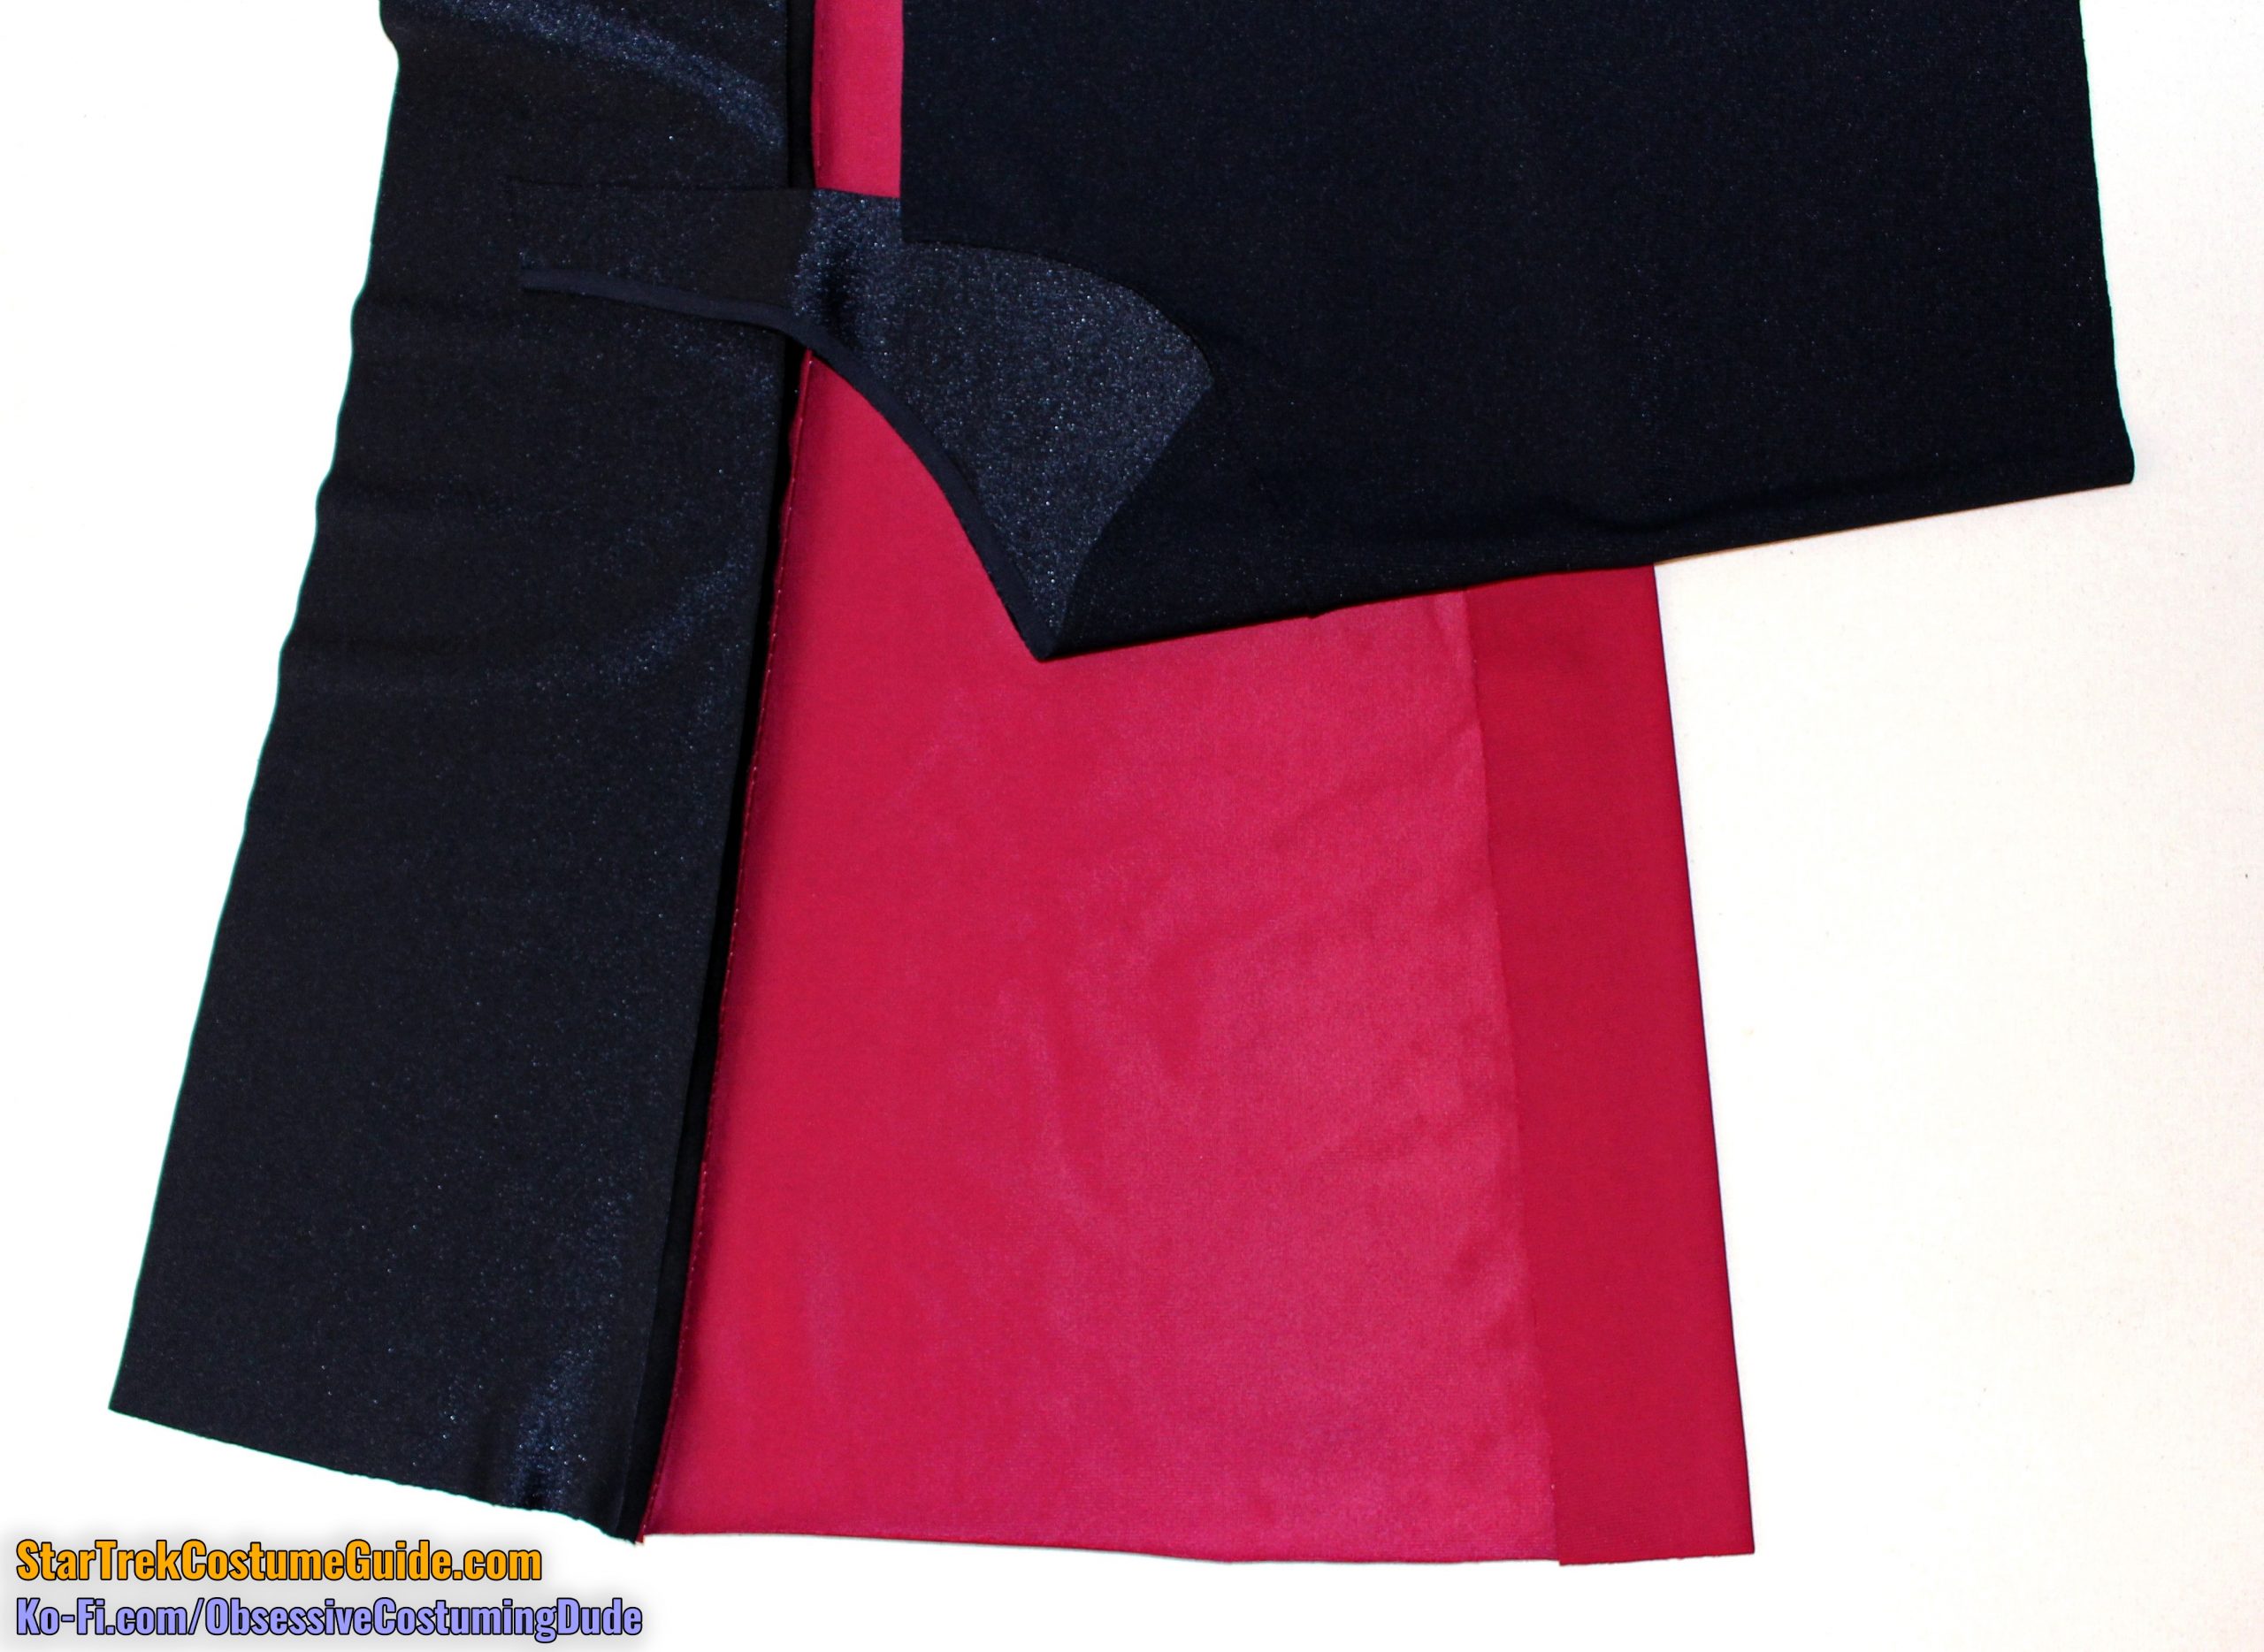
Tuck the free upper edge of the right front panel between the zipper tape and front seam allowance, then stitch through all three layers either ⅛” or ¼” from the edge.
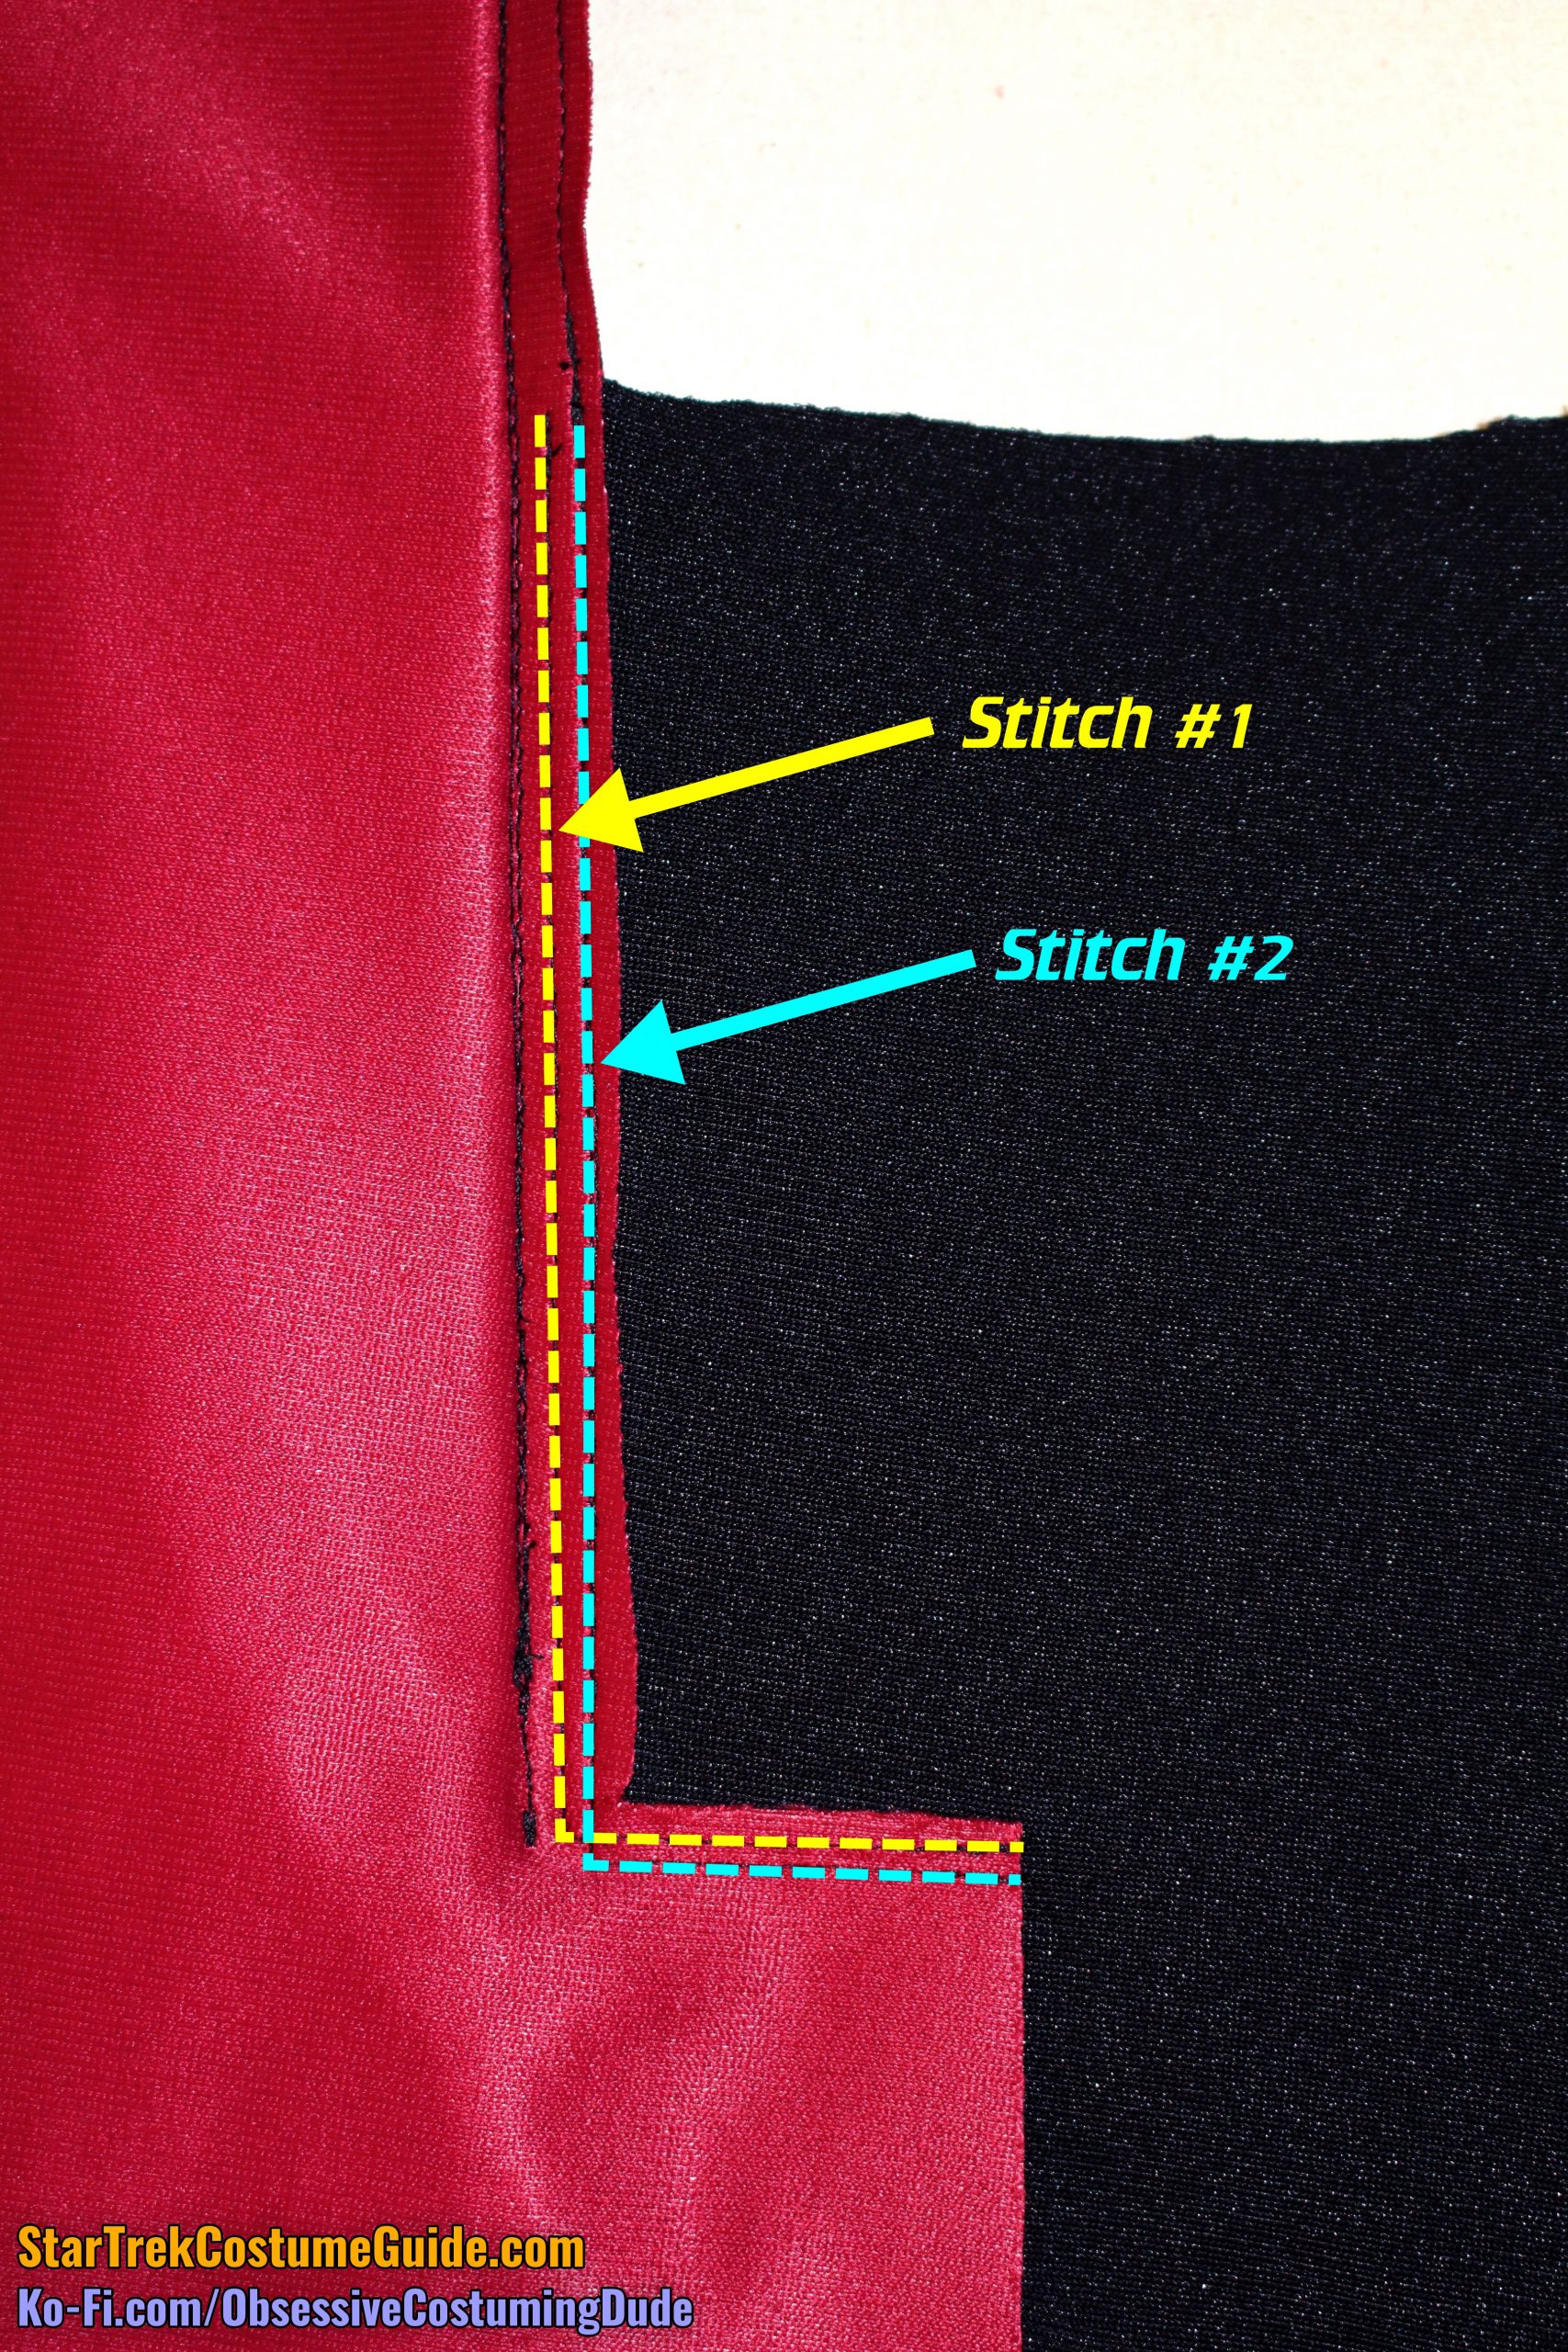
Position the edges of the front vent onto the right front panel using the alignment guide on the printed pattern, and pin it into place.
Fasten the vent down with two stitches: the first ¼” from the vertical edge and pivoting straight across ⅛” from the top edge, and the second ⅛” from the vertical edge and pivoting straight across ¼” from the top edge.
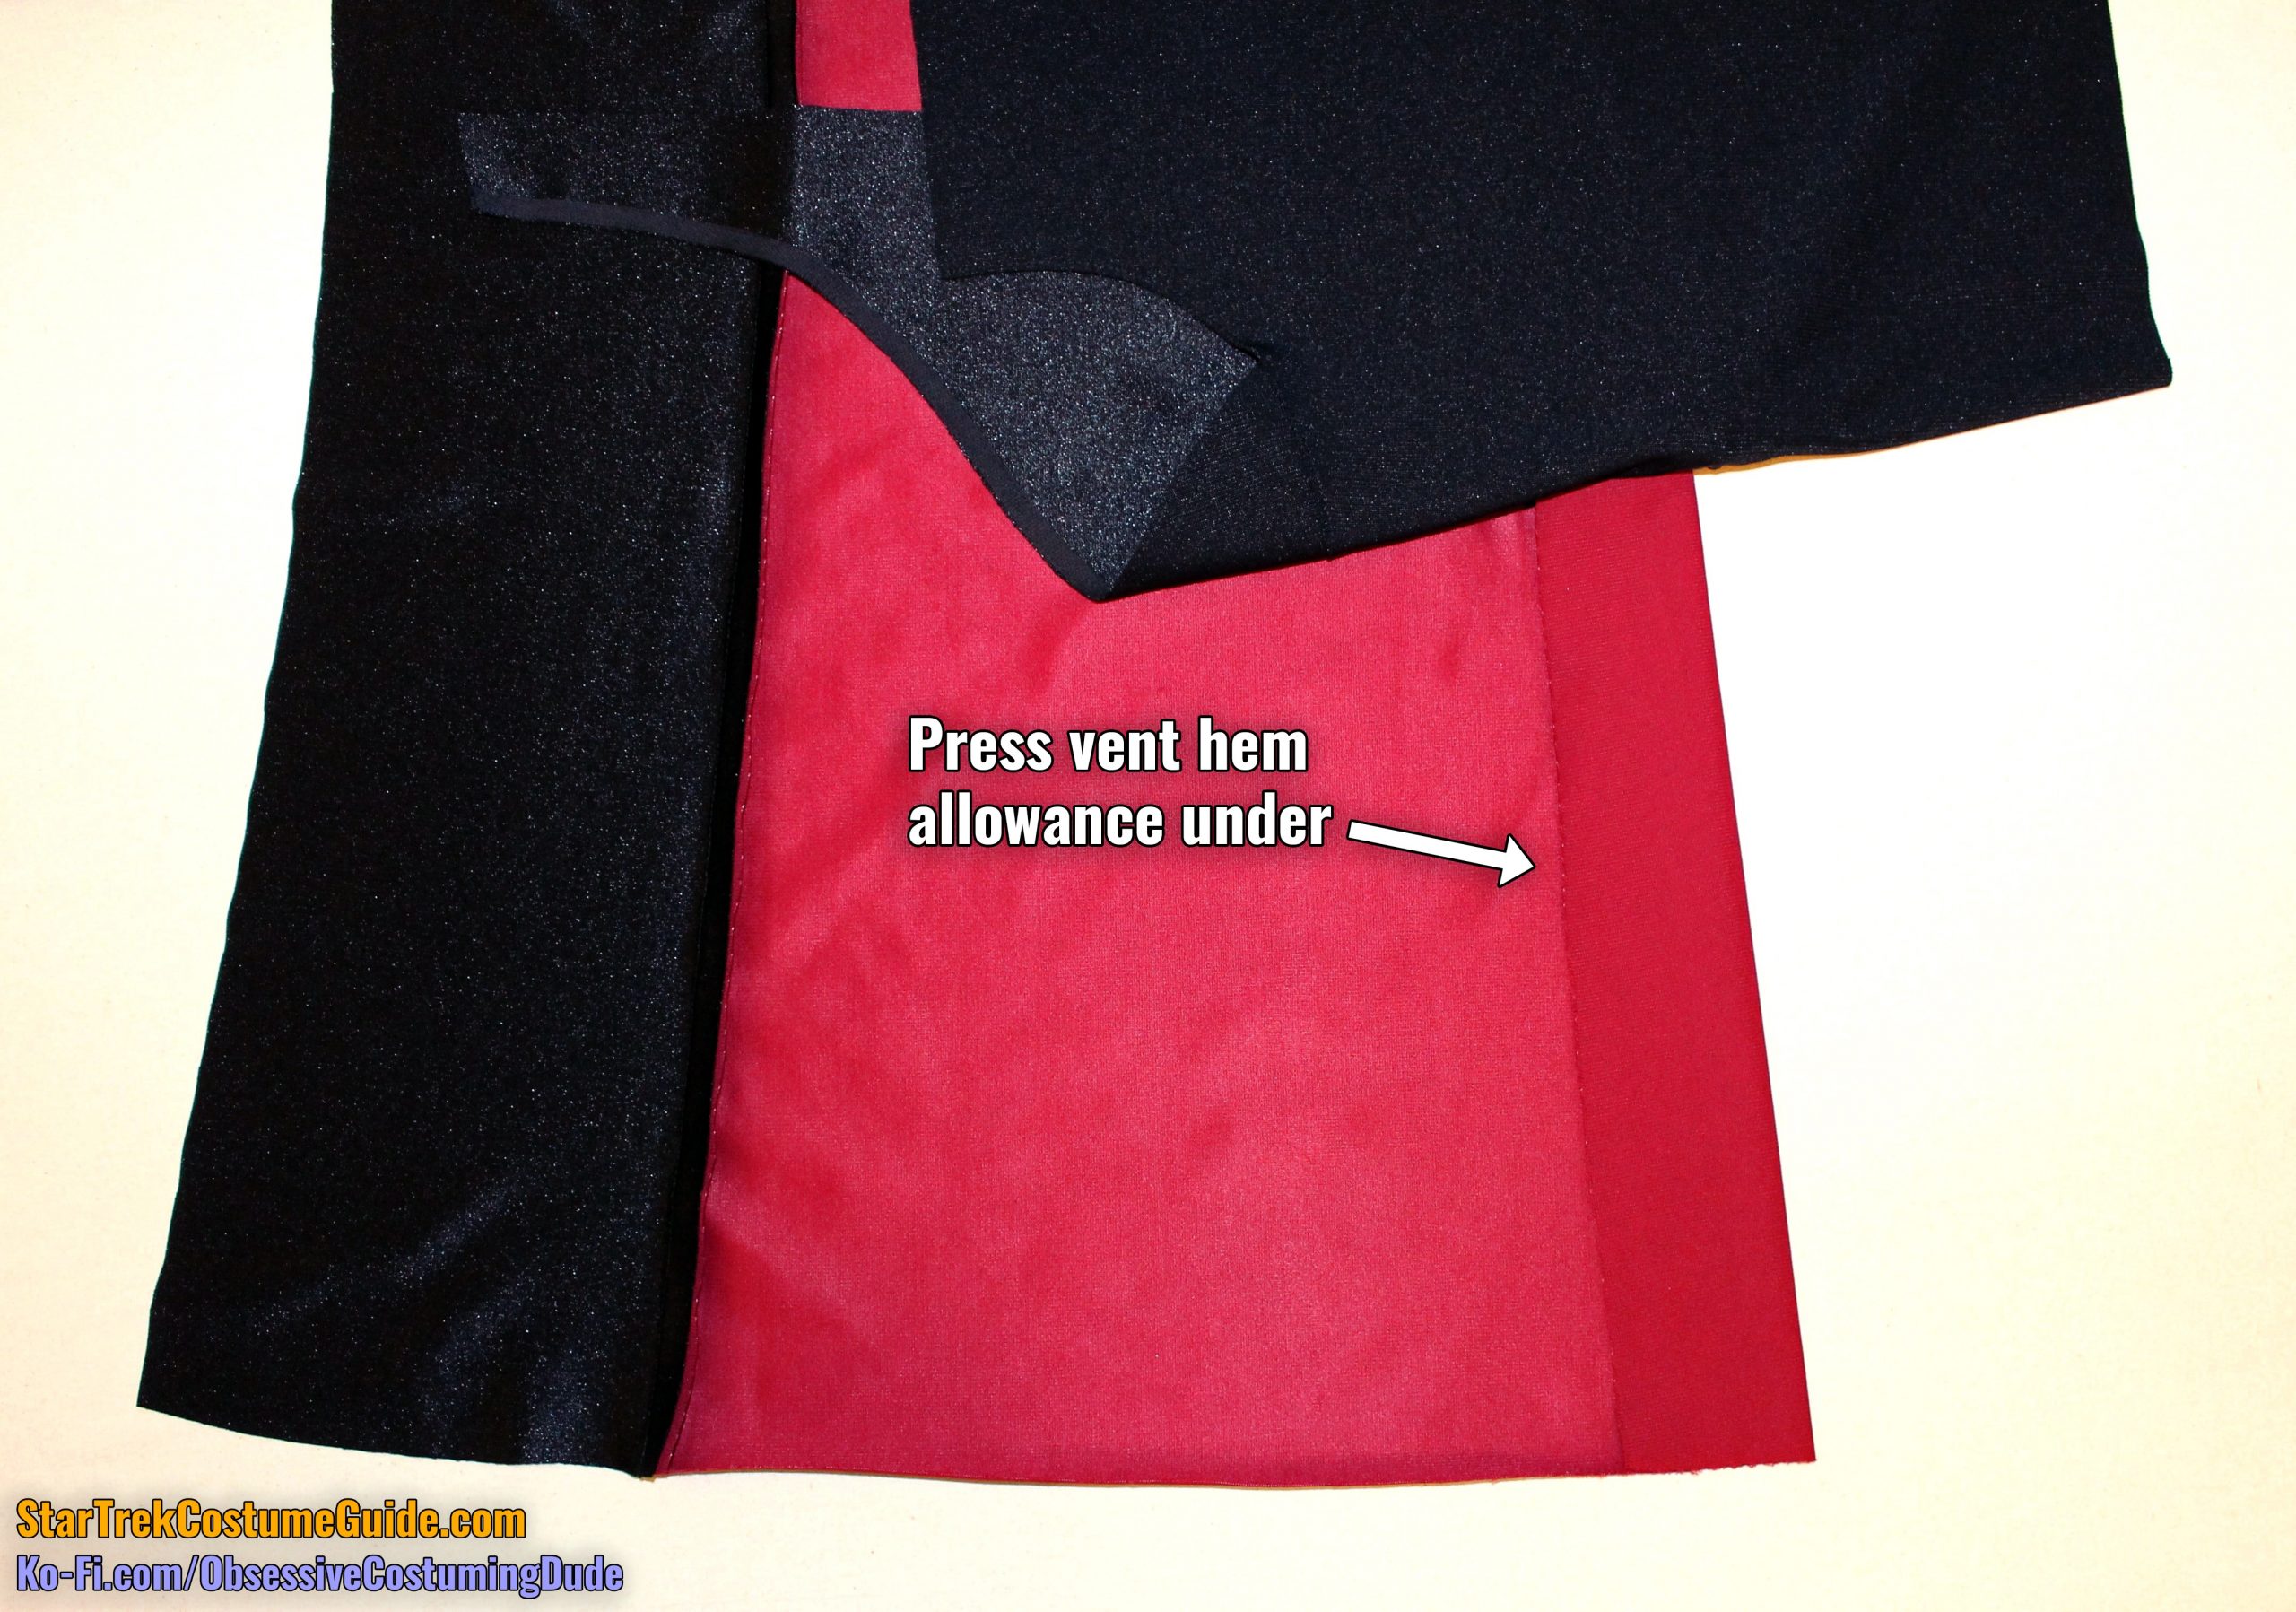
Press the vent’s hem allowance under.
Note that the hem allowance is 2” at the top of the vent and 2 ¼” at the bottom, so taper the fold line accordingly.
Sew the front sleeves (piece L) to the front body with ⅜” seam allowance.
Press the sleeves and armscye seam allowances away from the body.
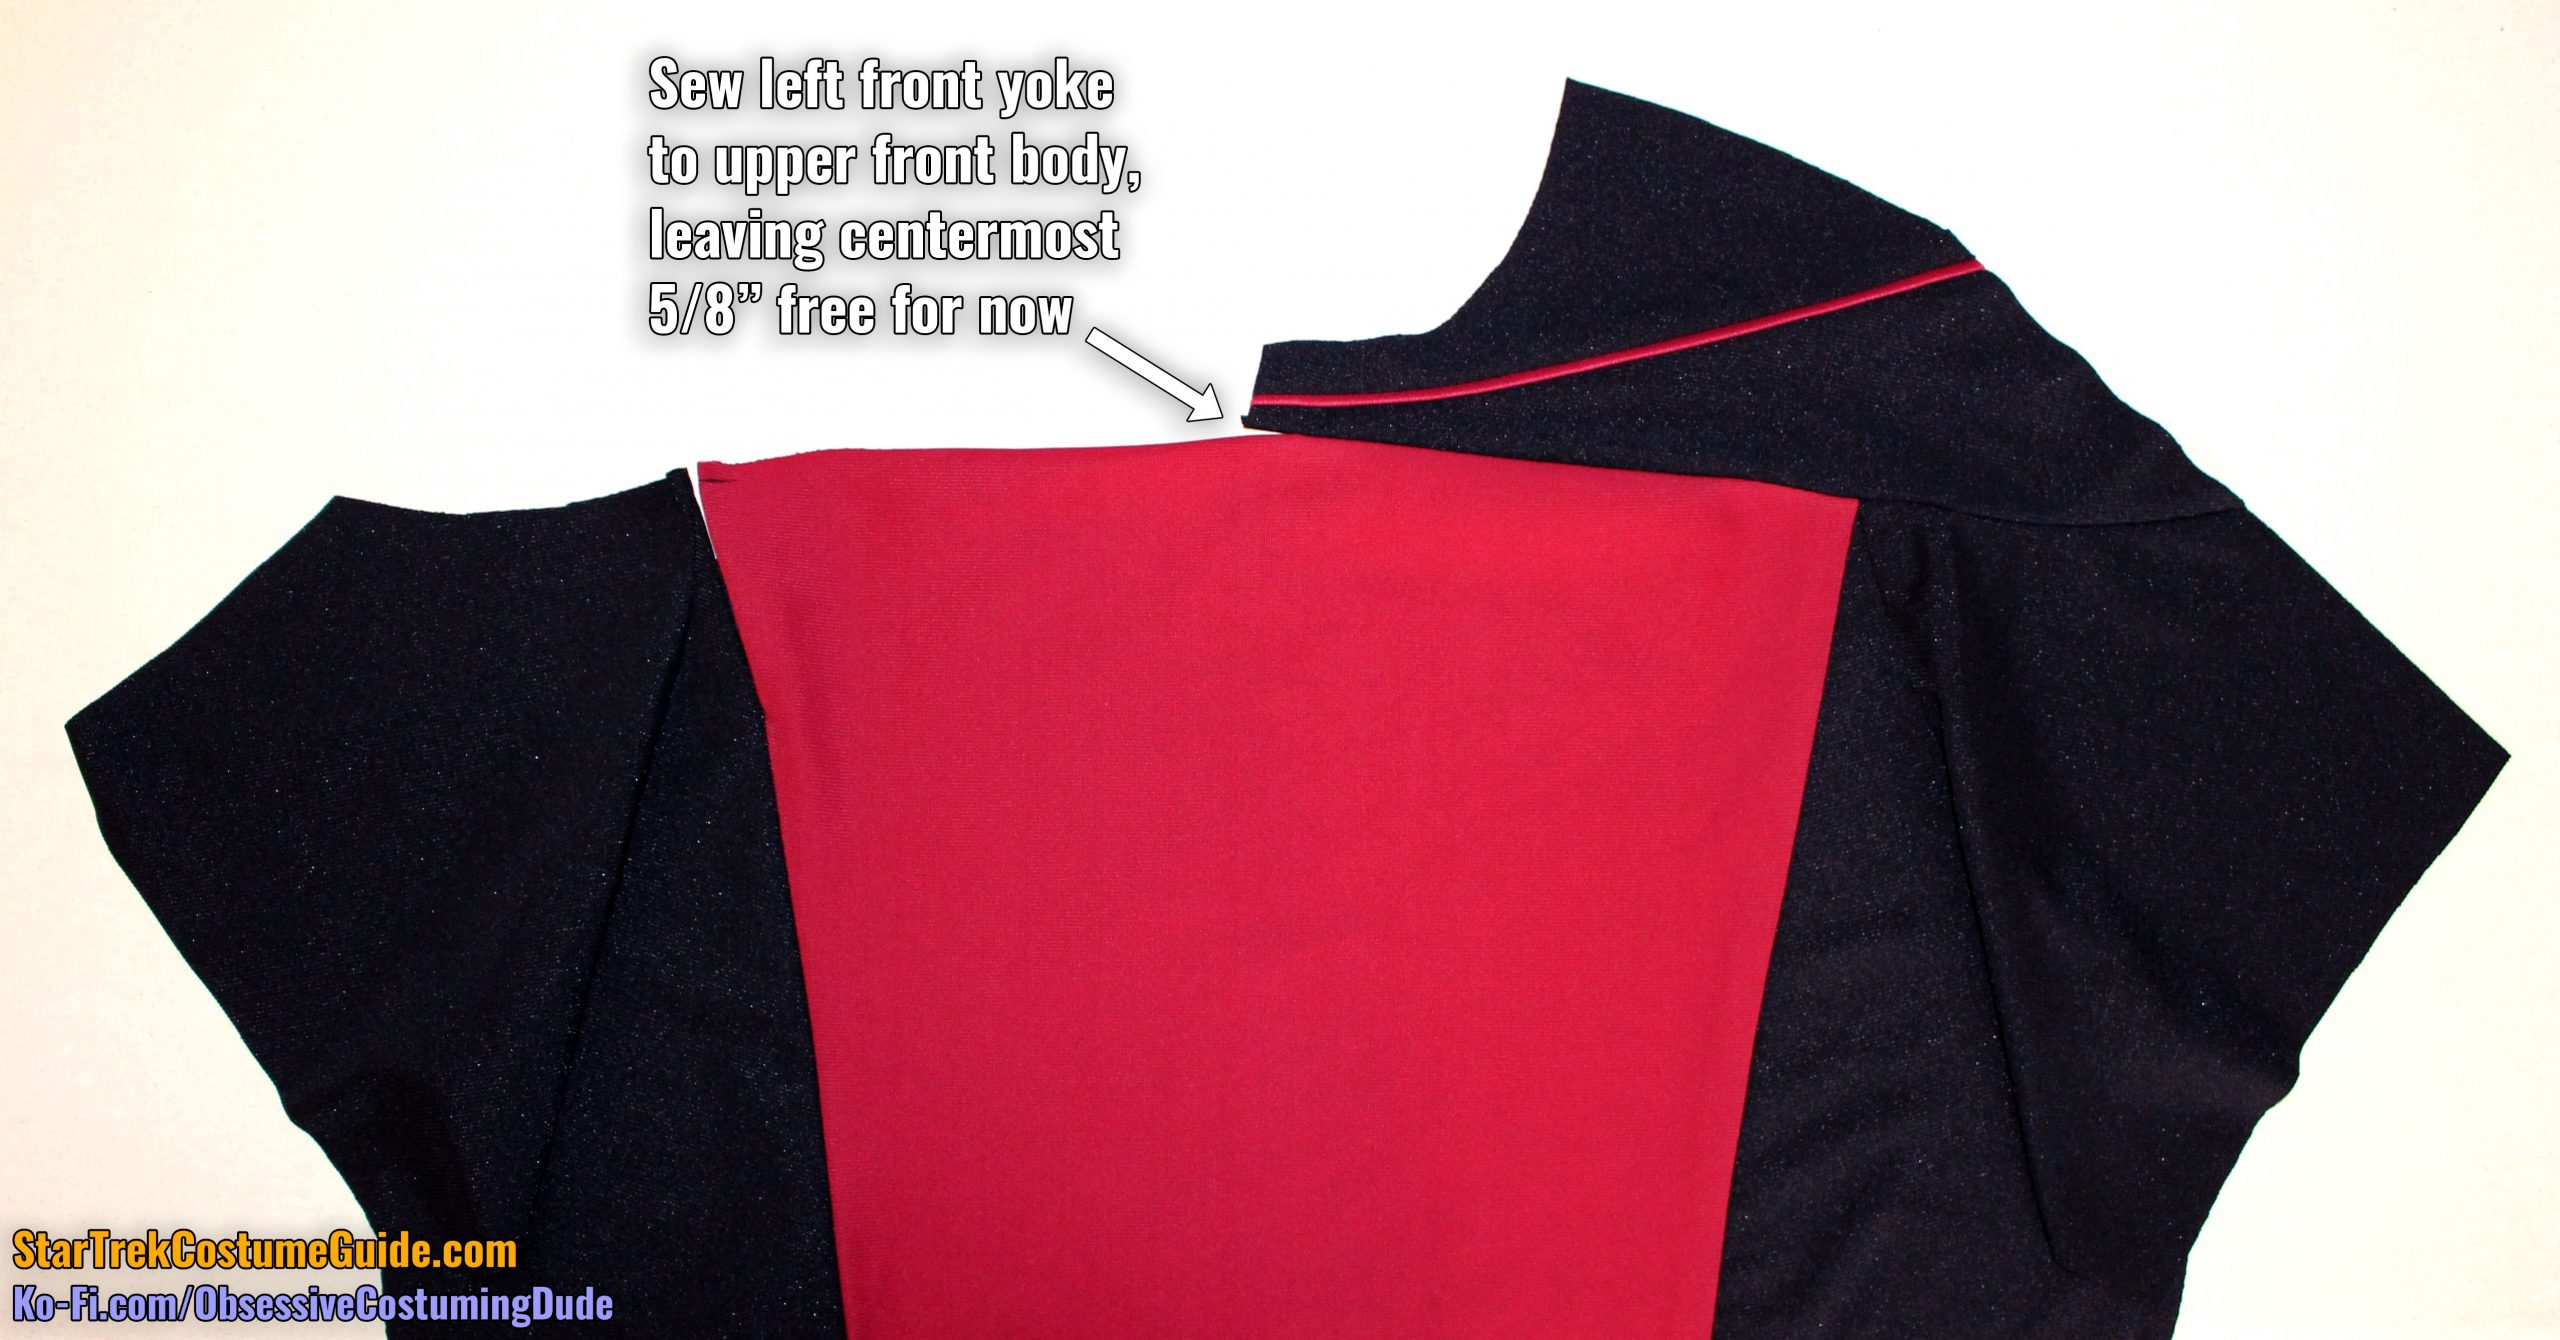
NOTE: For the back-zipping “All Good Things …” variant, don’t attach the front yokes to the body yet. Skip ahead to the back assembly.
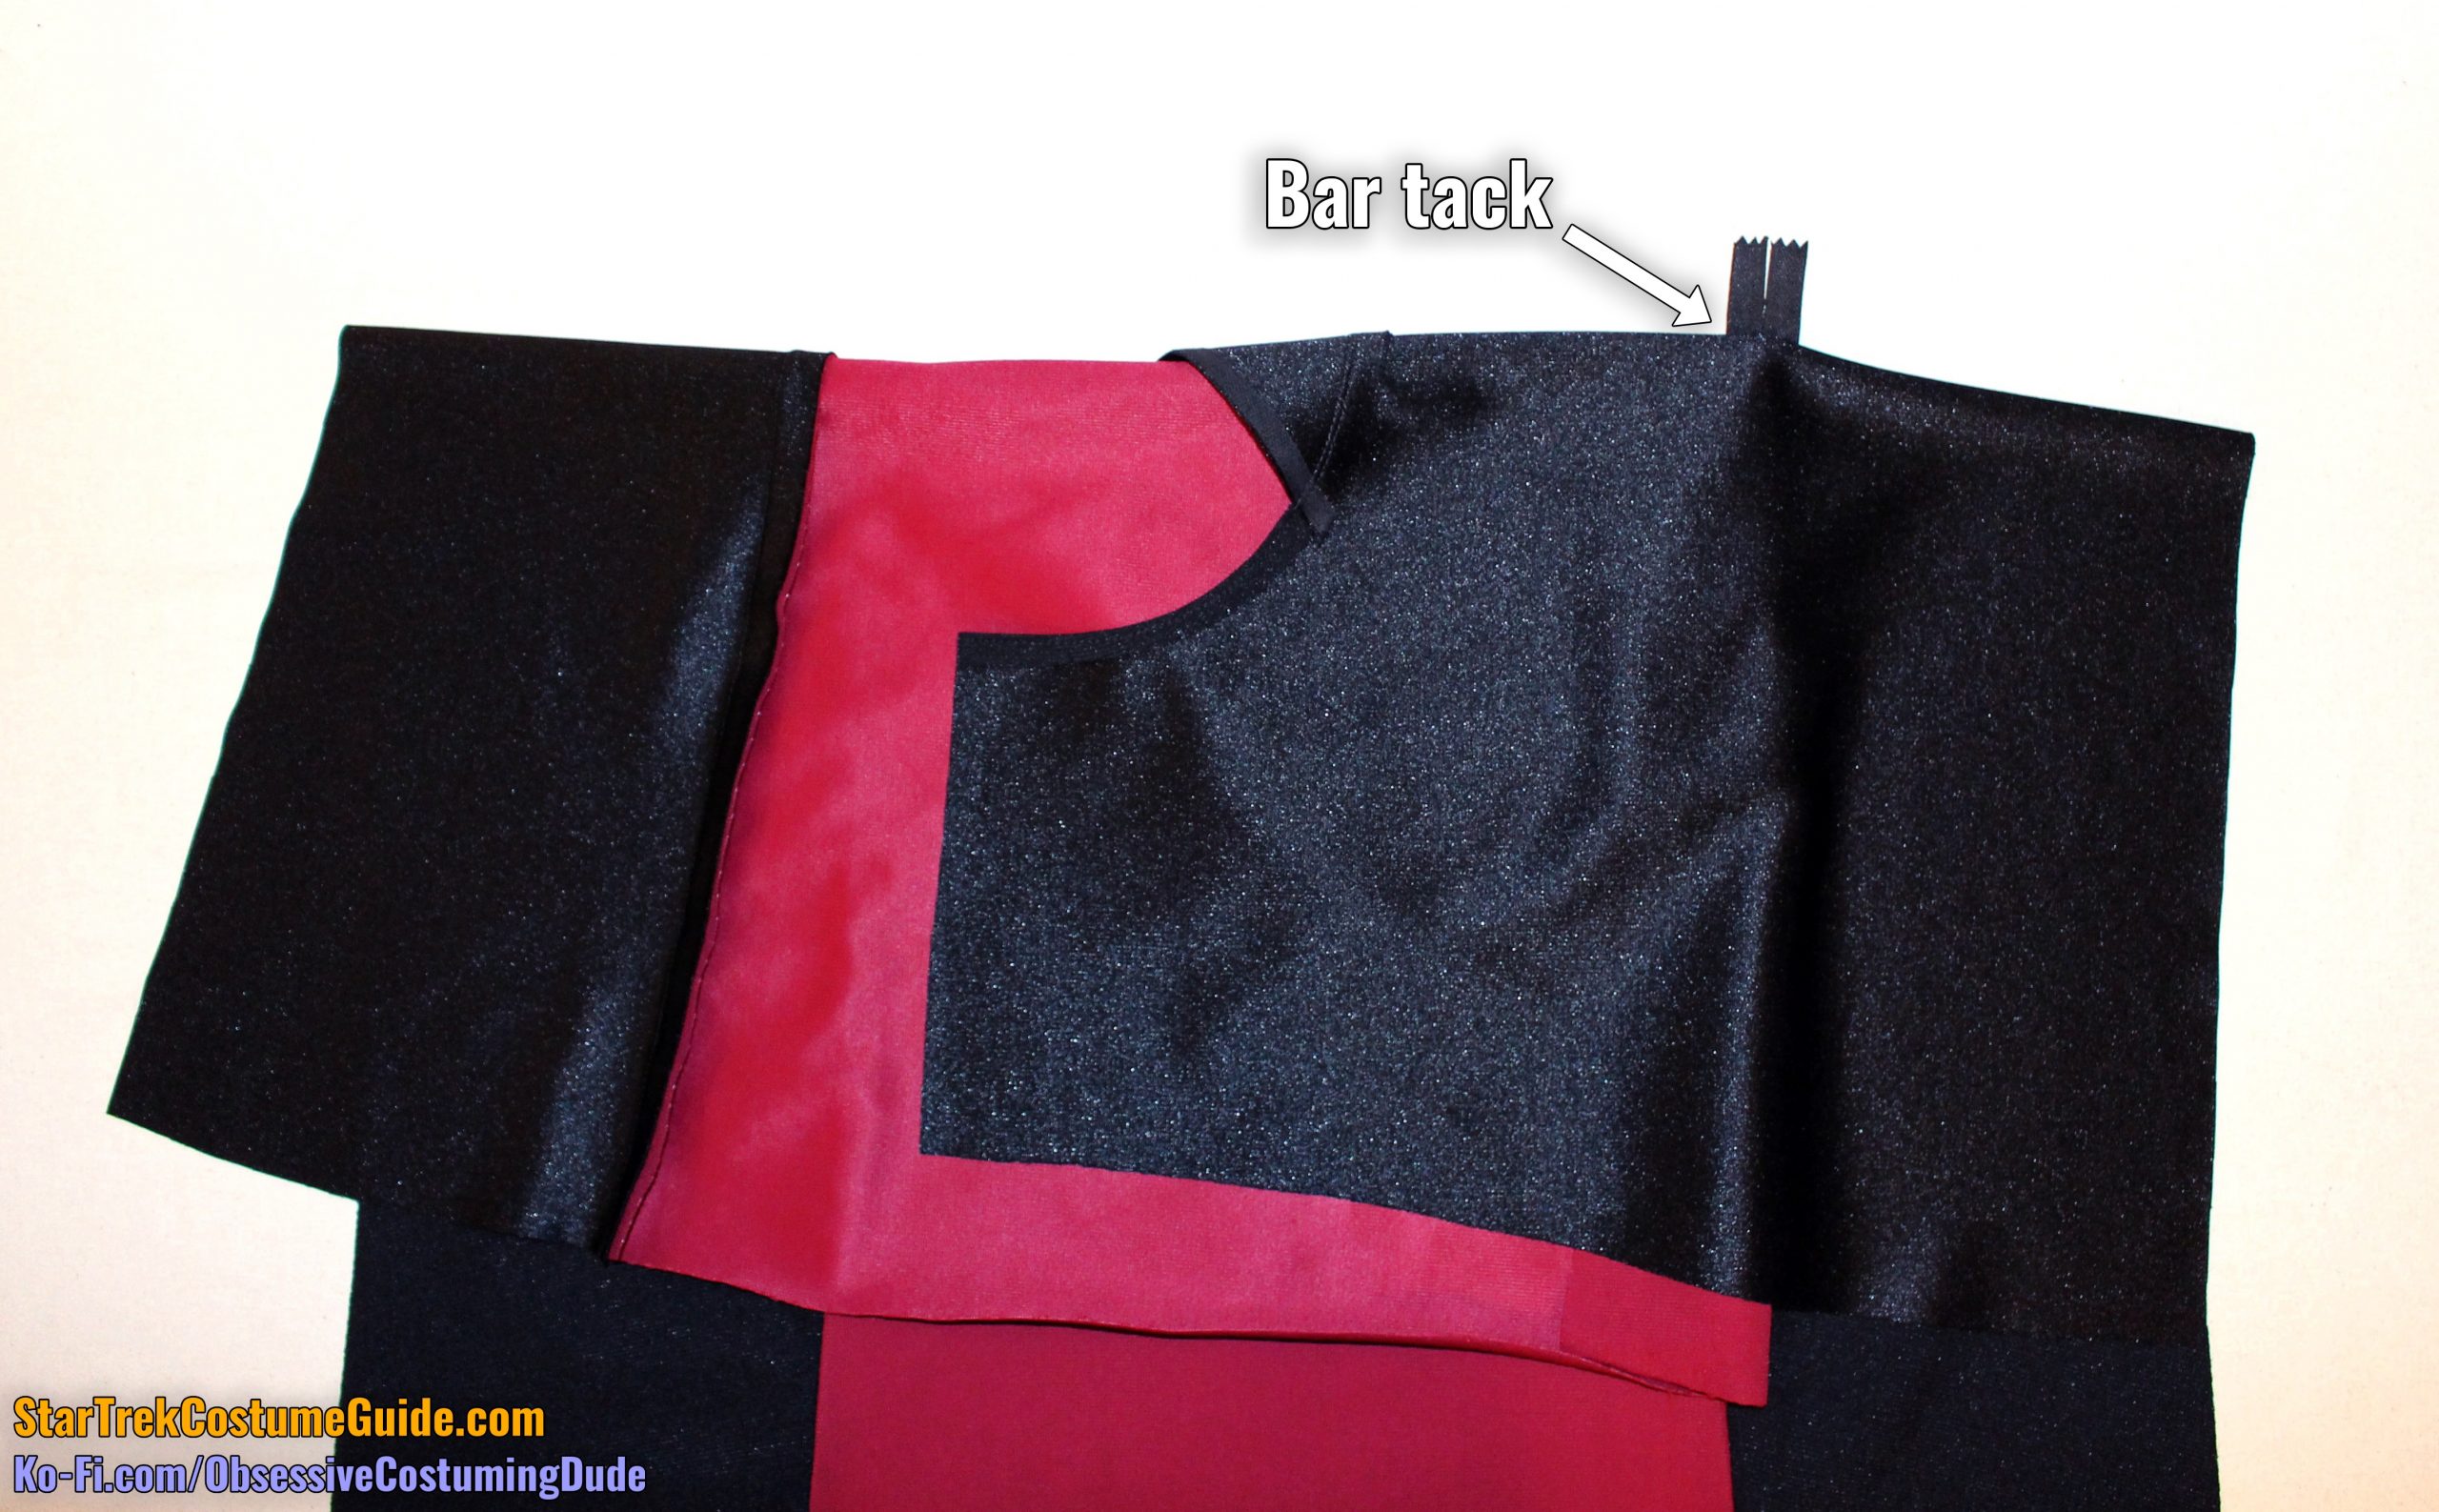
Sew the left front yoke to the top of the skant body with ⅜” seam allowance, leaving the centermost ⅝” free for now.
Press the seam allowances open.
Position the second invisible zipper so the “upper” end extends about 2” past the center front, and the other about 3” past the sleeve seam.
(If your zipper is longer, you can either allocate the excess on the outer/sleeve end, or trim it down to size and close the new “lower” end with a bar tack.)
Install the zipper onto the lower edge of the right yoke and upper right front of the skant body with ⅜” seam allowance, from the armscye/sleeve seam to the center front.
Sew the remainder of the right sleeve/yoke seam closed and press the seam allowances open.
On the underside, stitch the zipper tape to the seam allowances where the zipper is attached.
(Leave the outer/sleeve end of the zipper hanging free.)
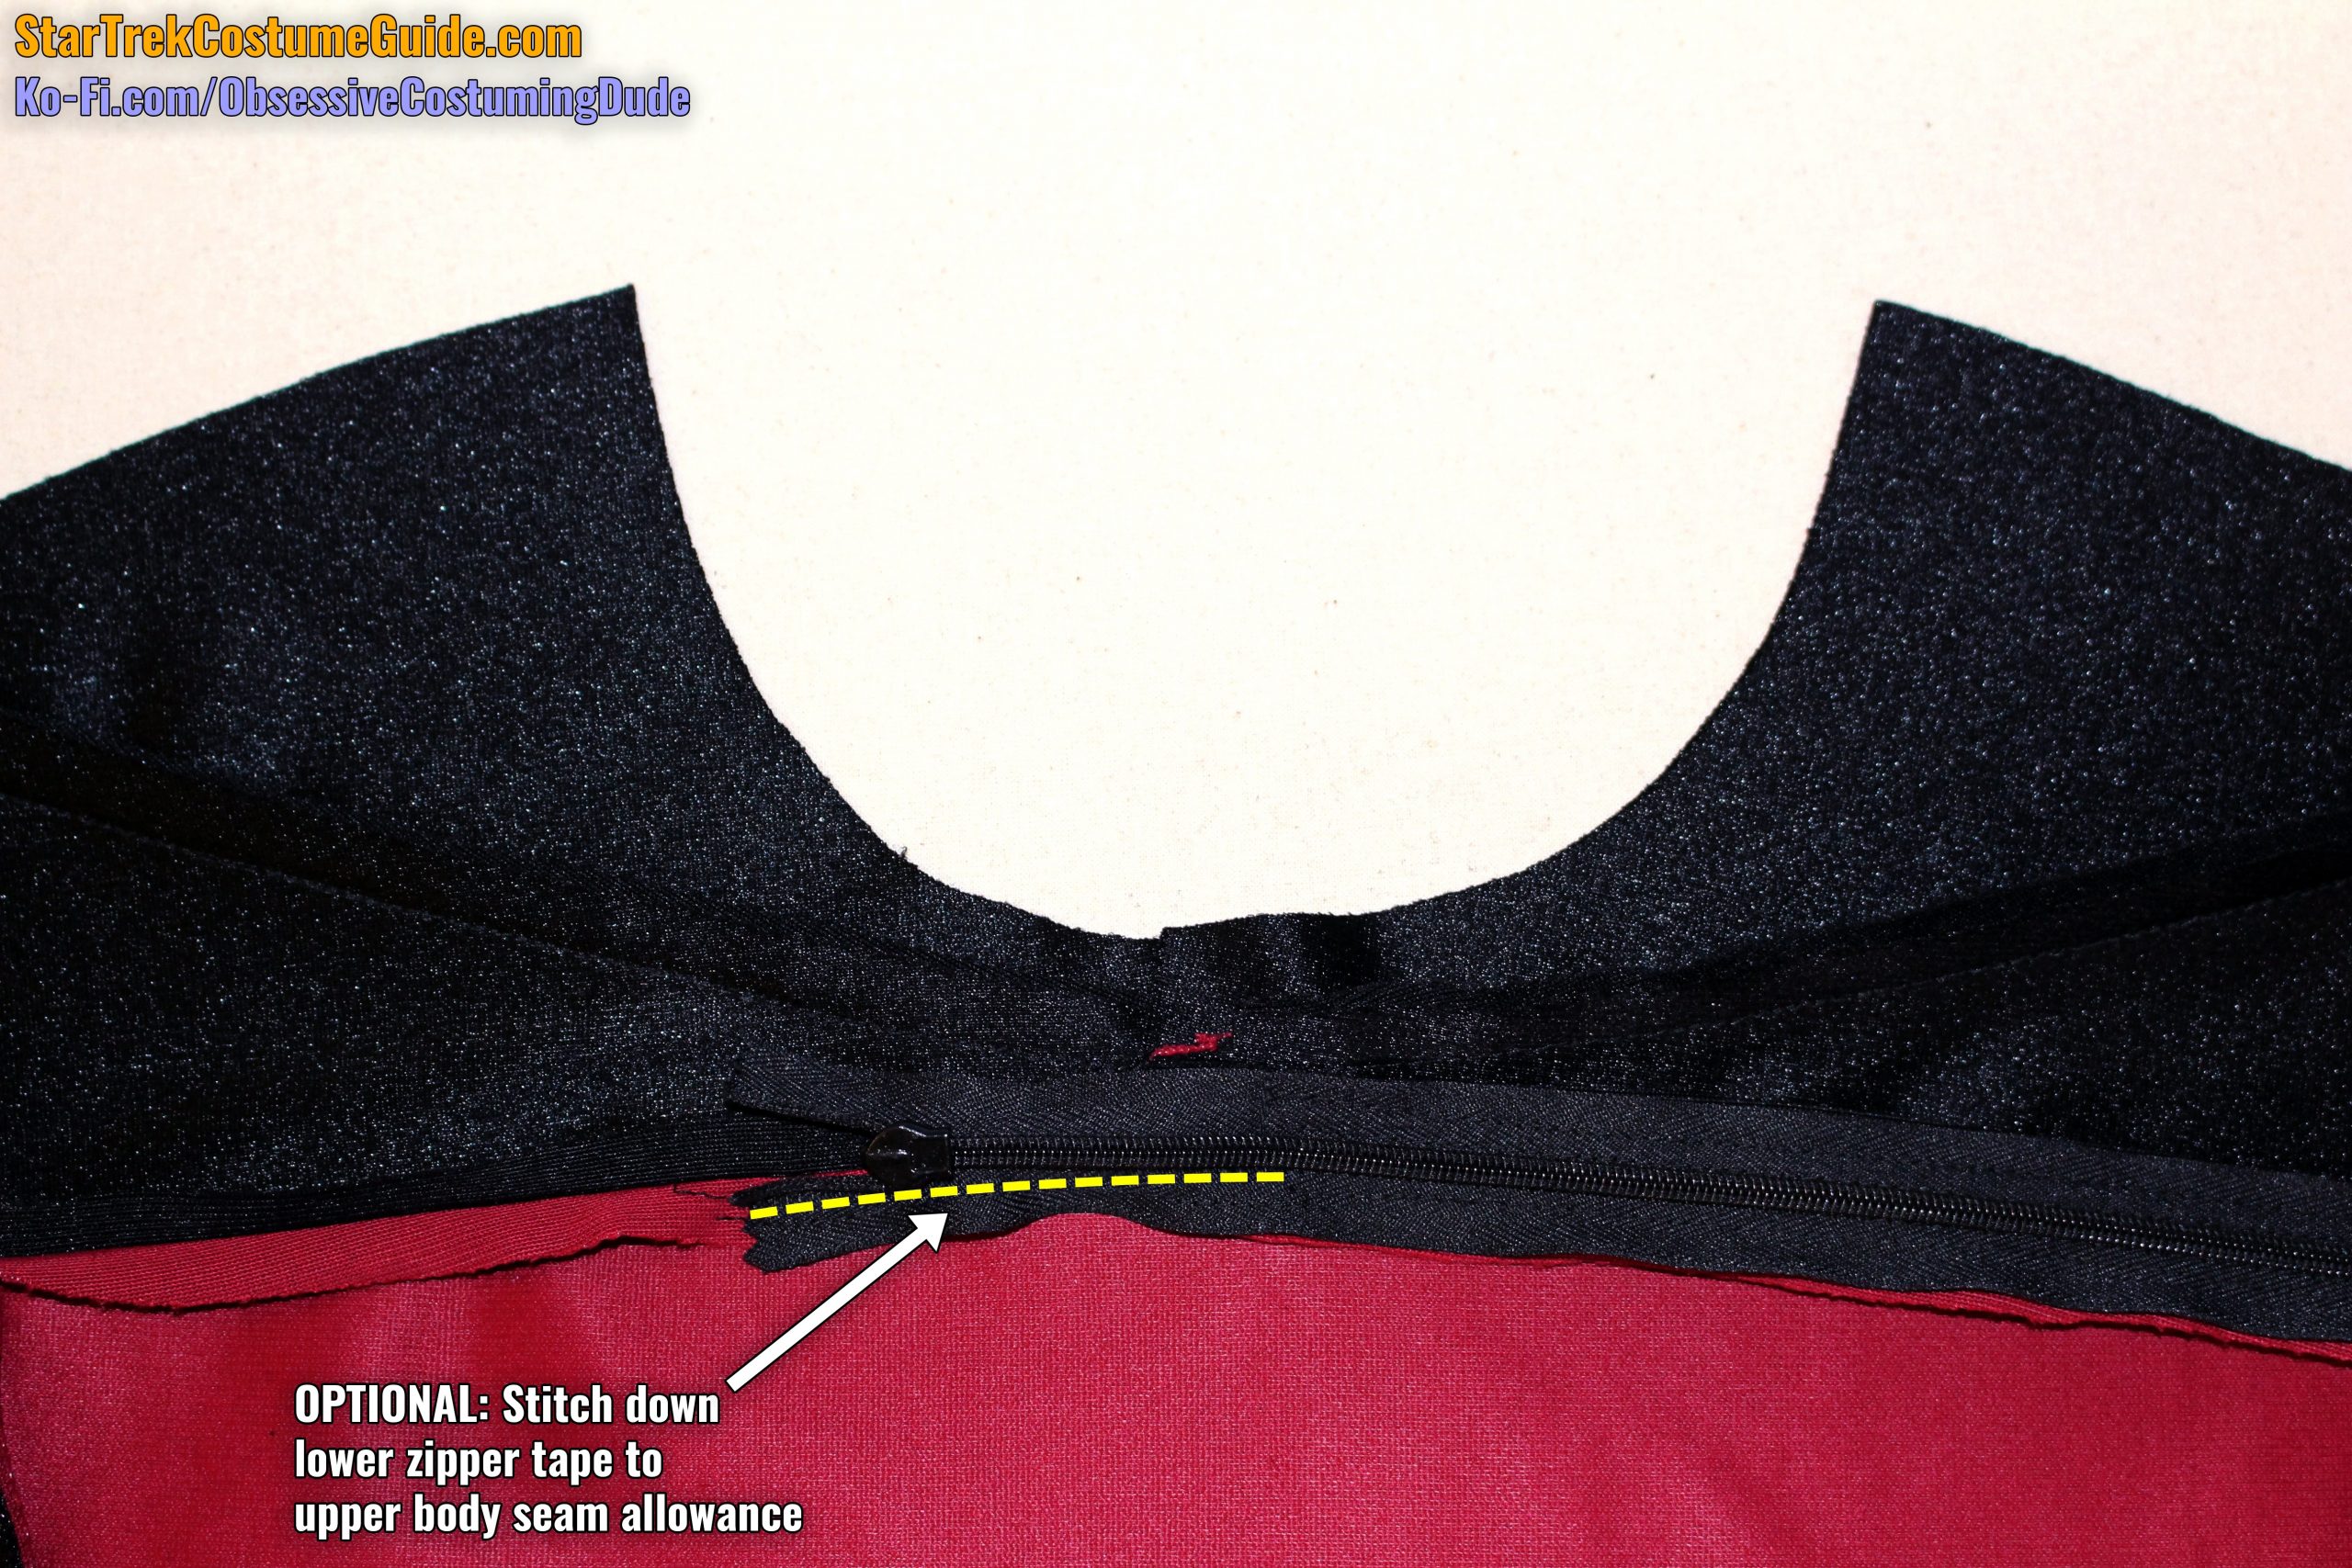
OPTIONAL: Also stitch down the lower side of the invisible zipper where it extends past the center front.
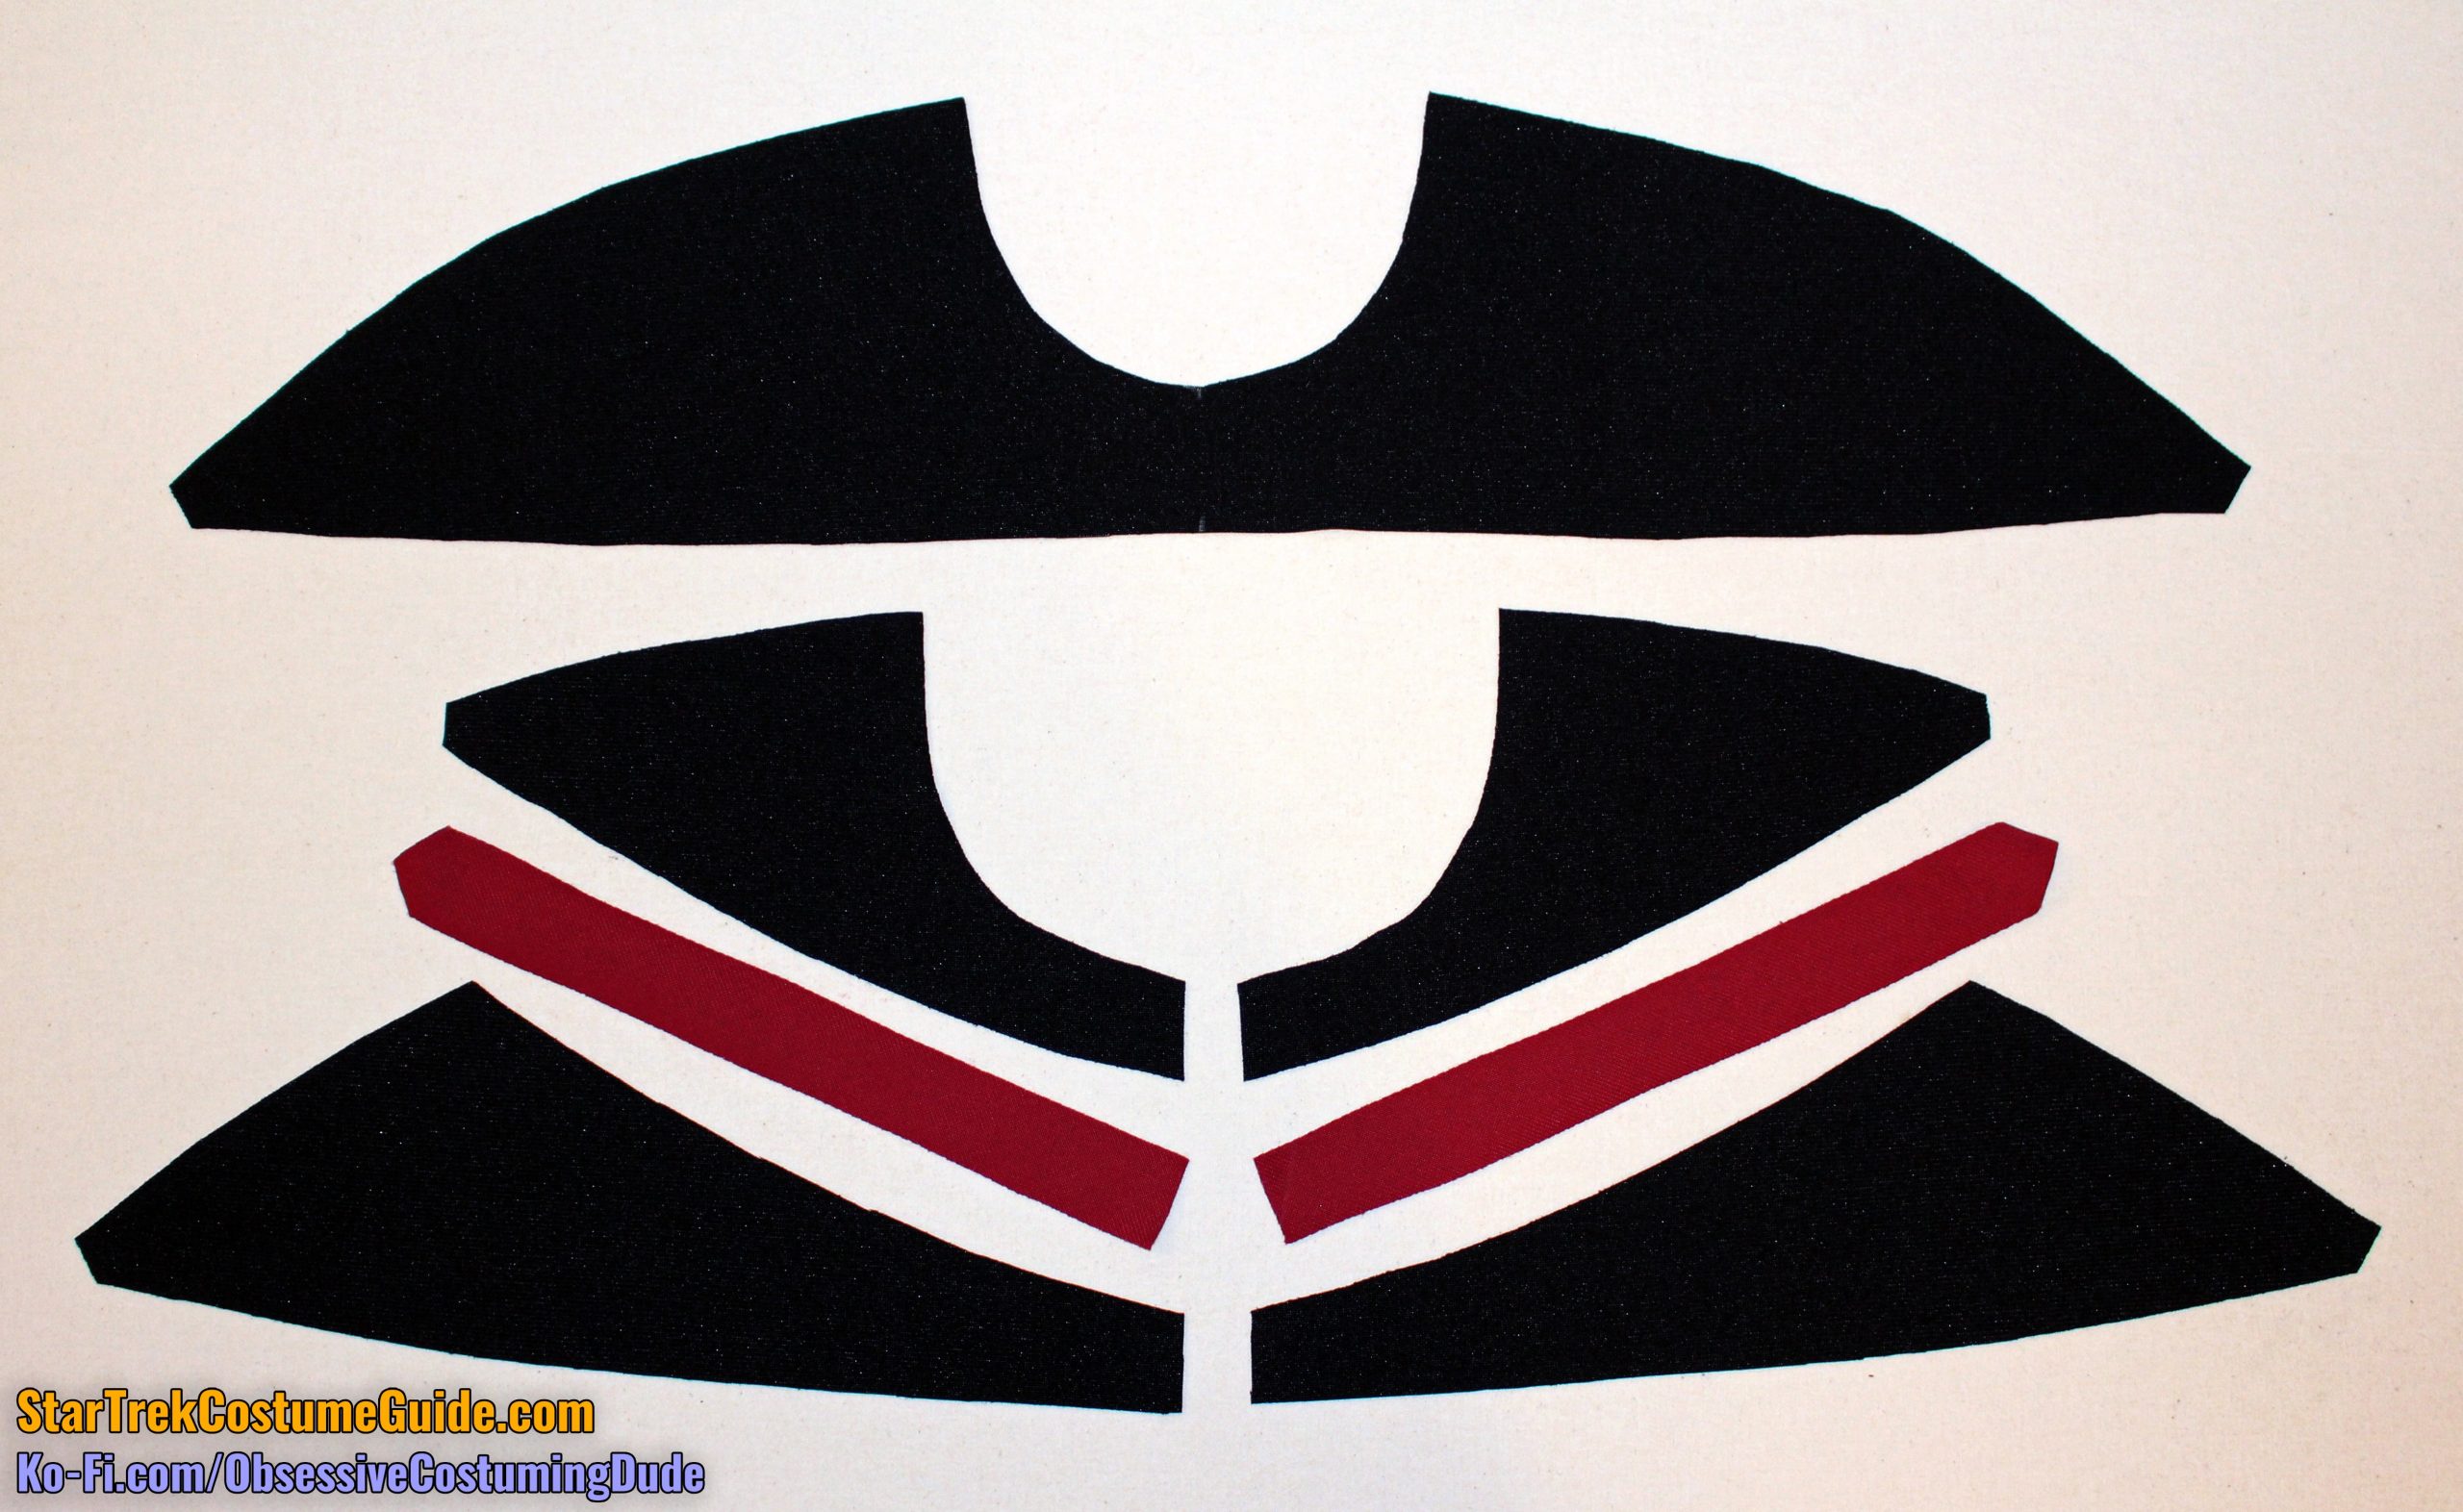
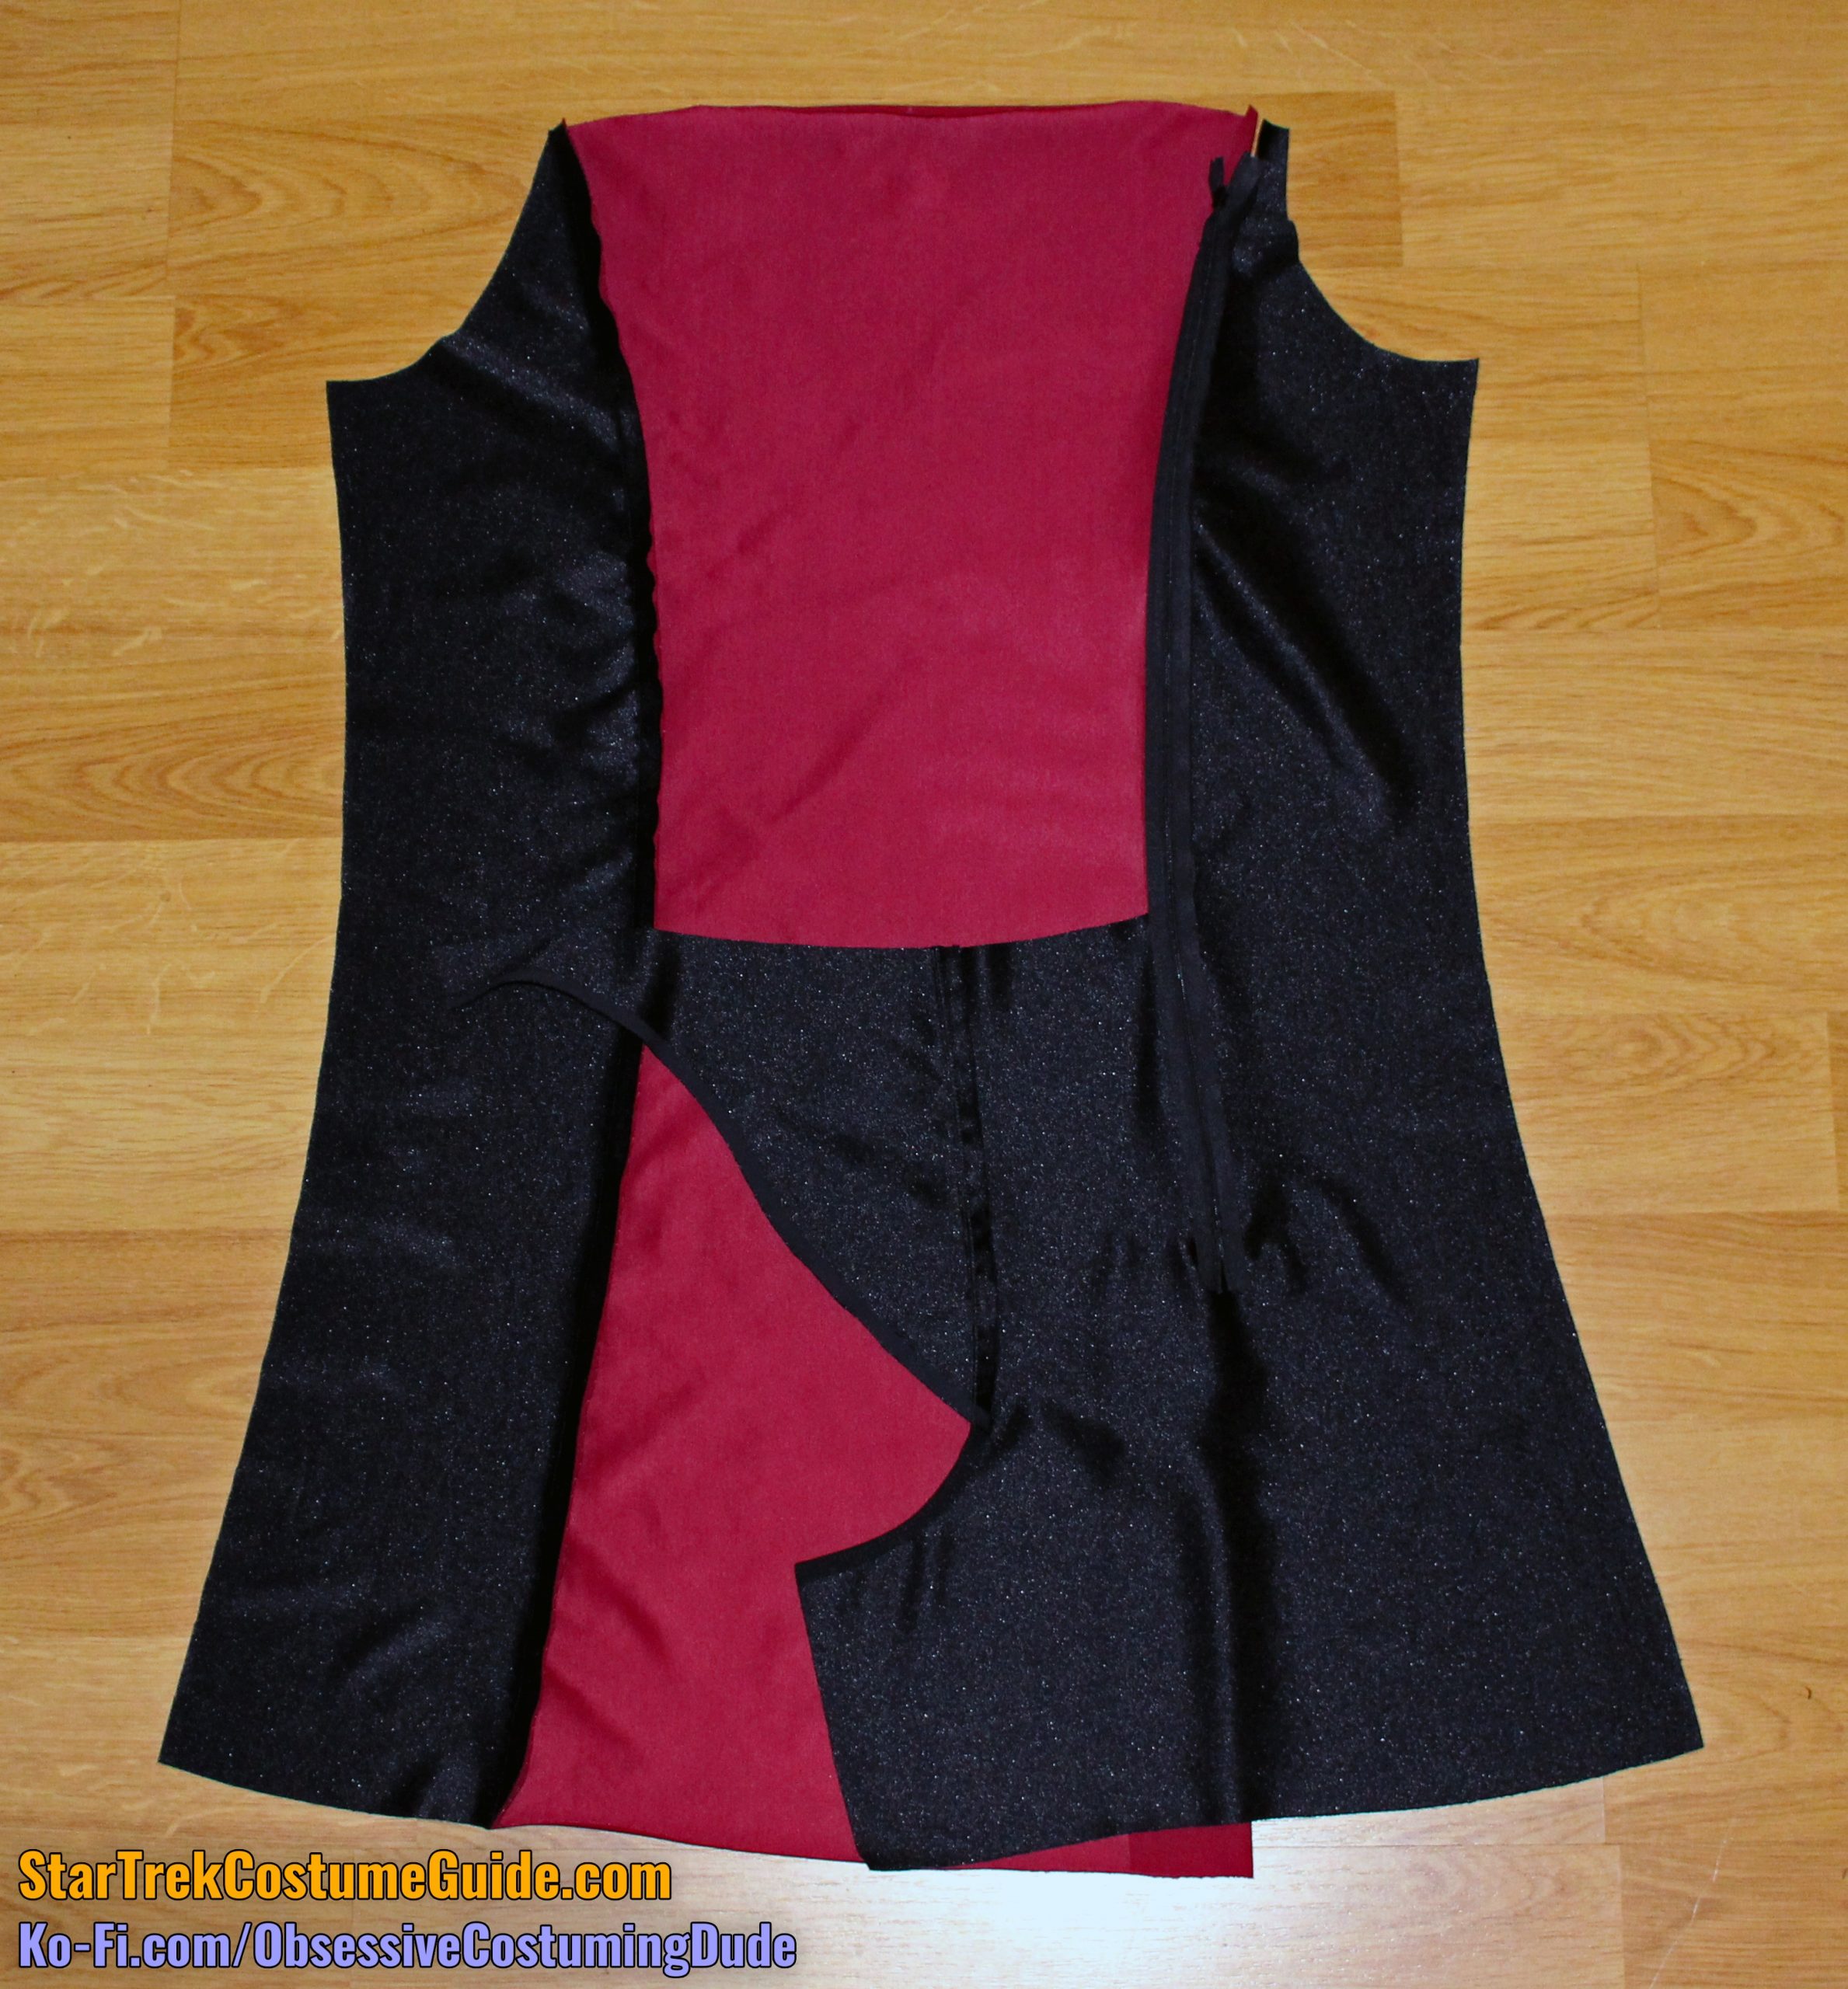
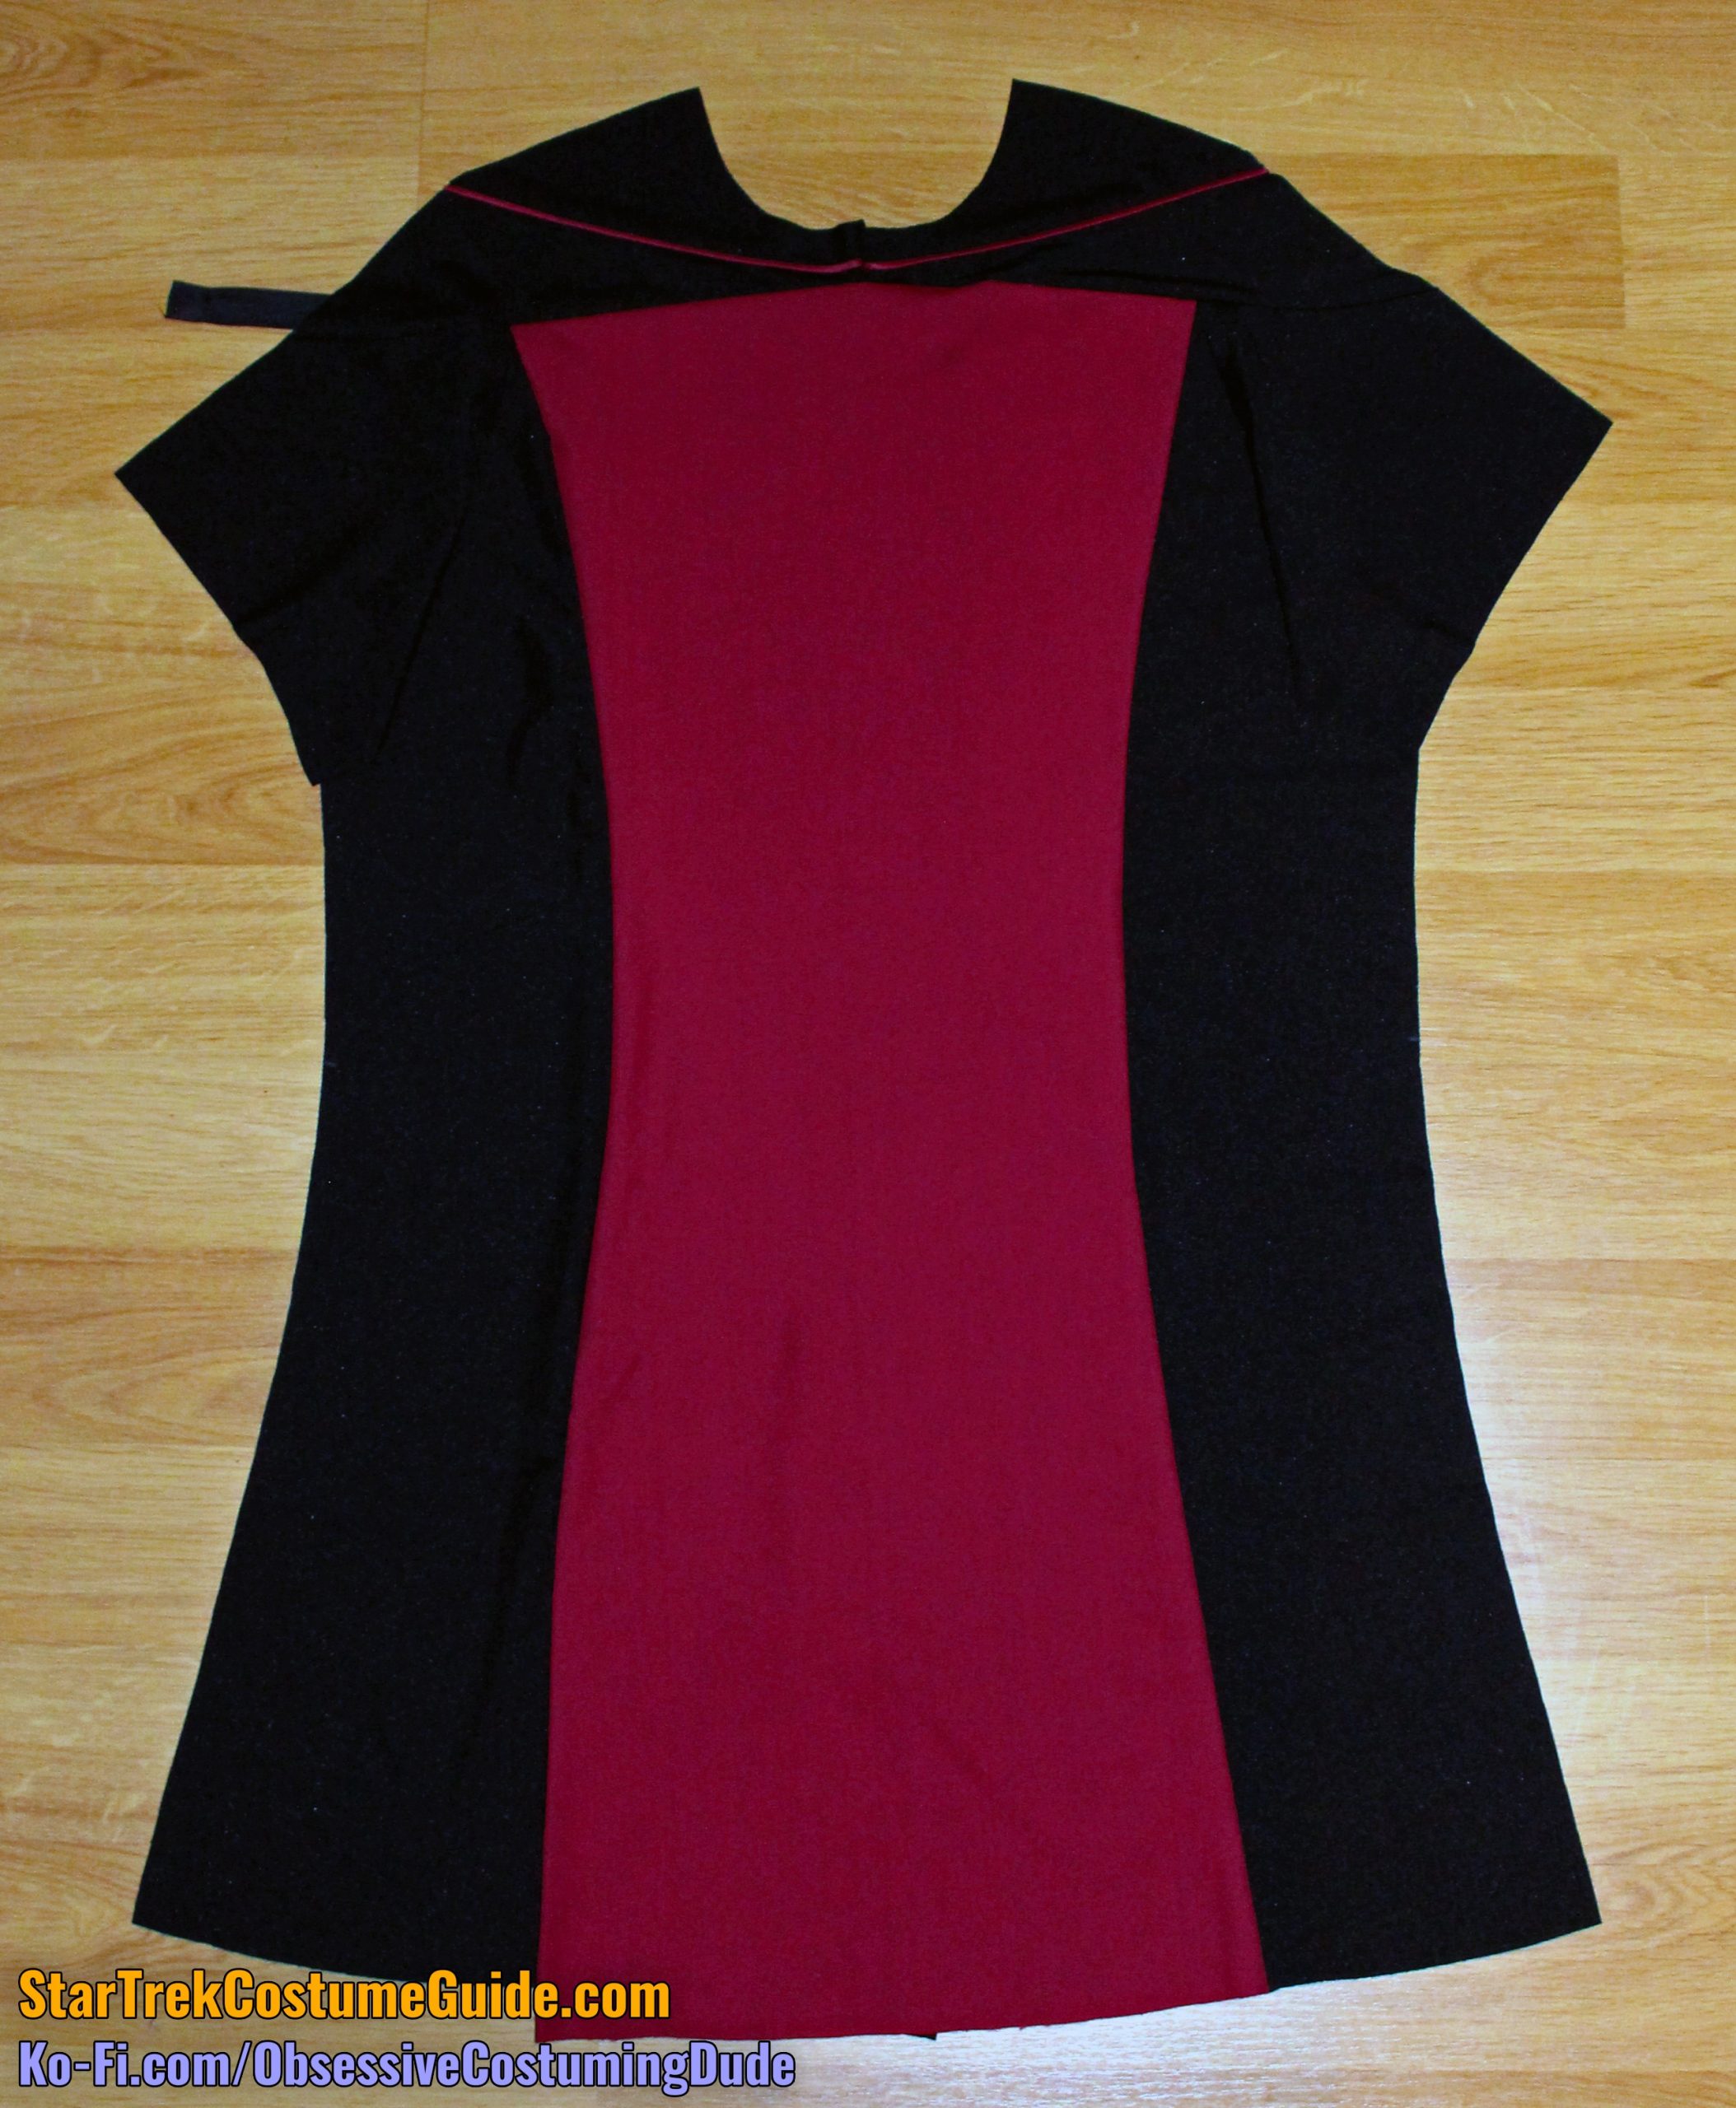
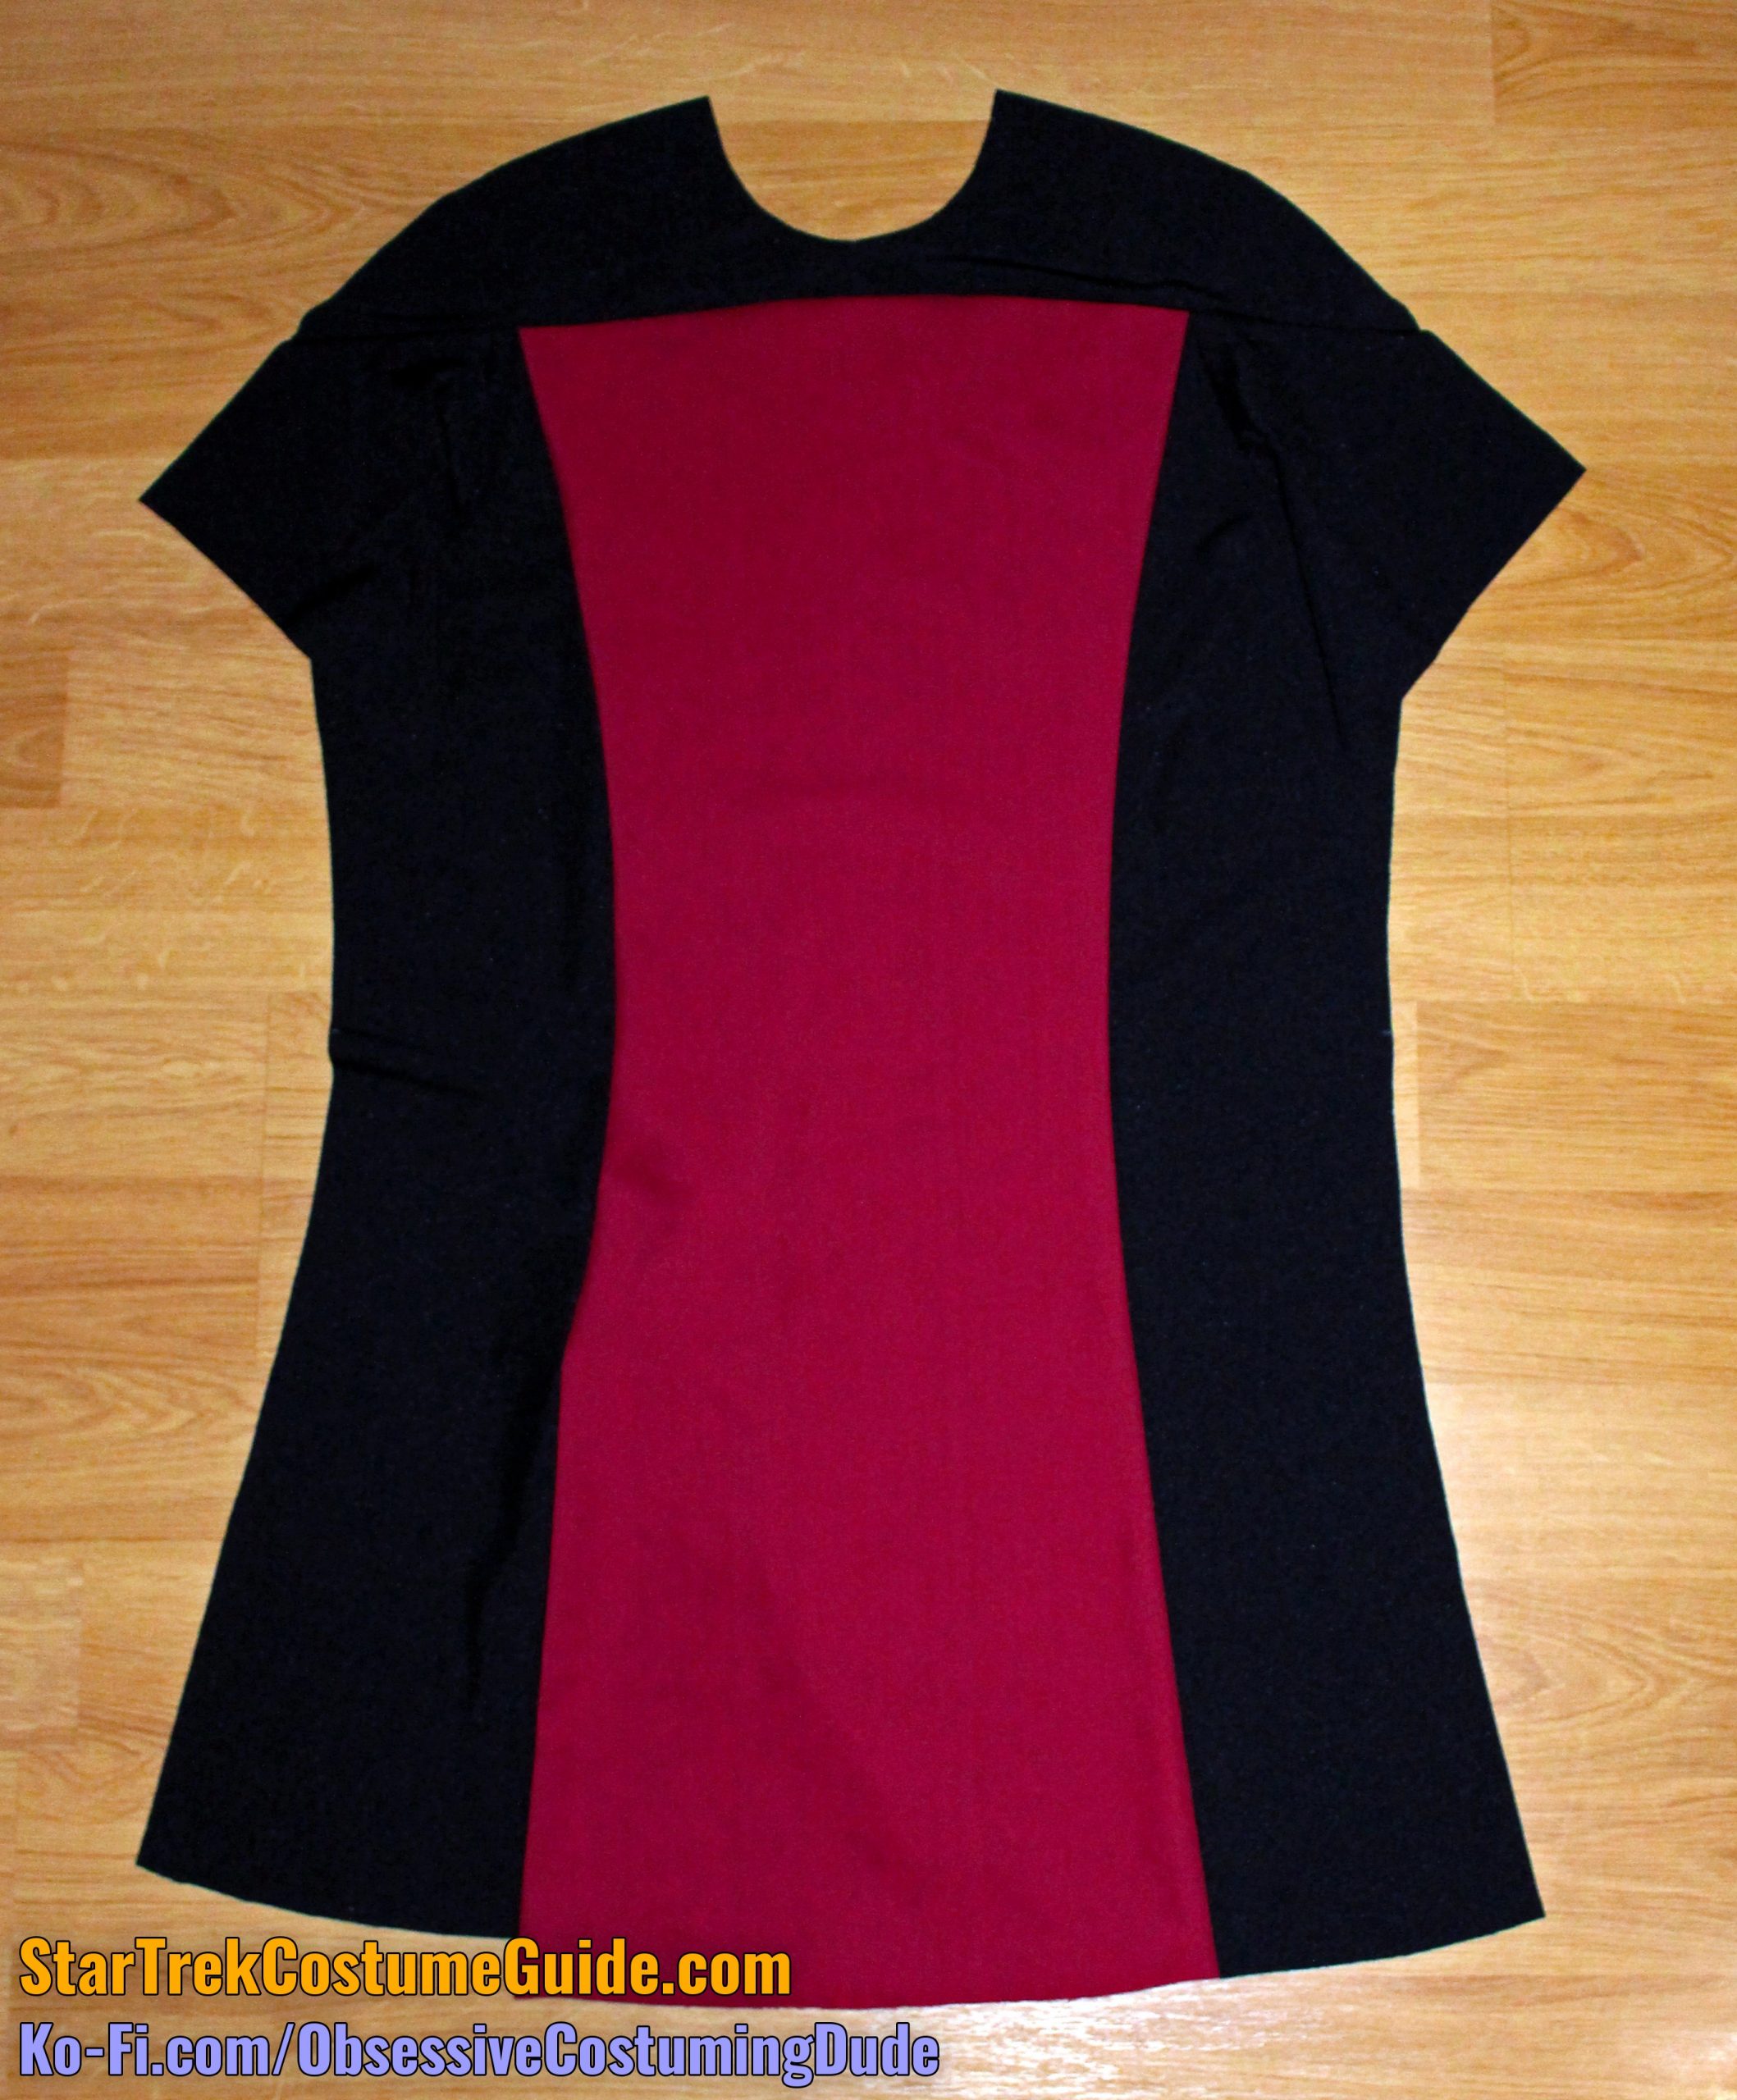
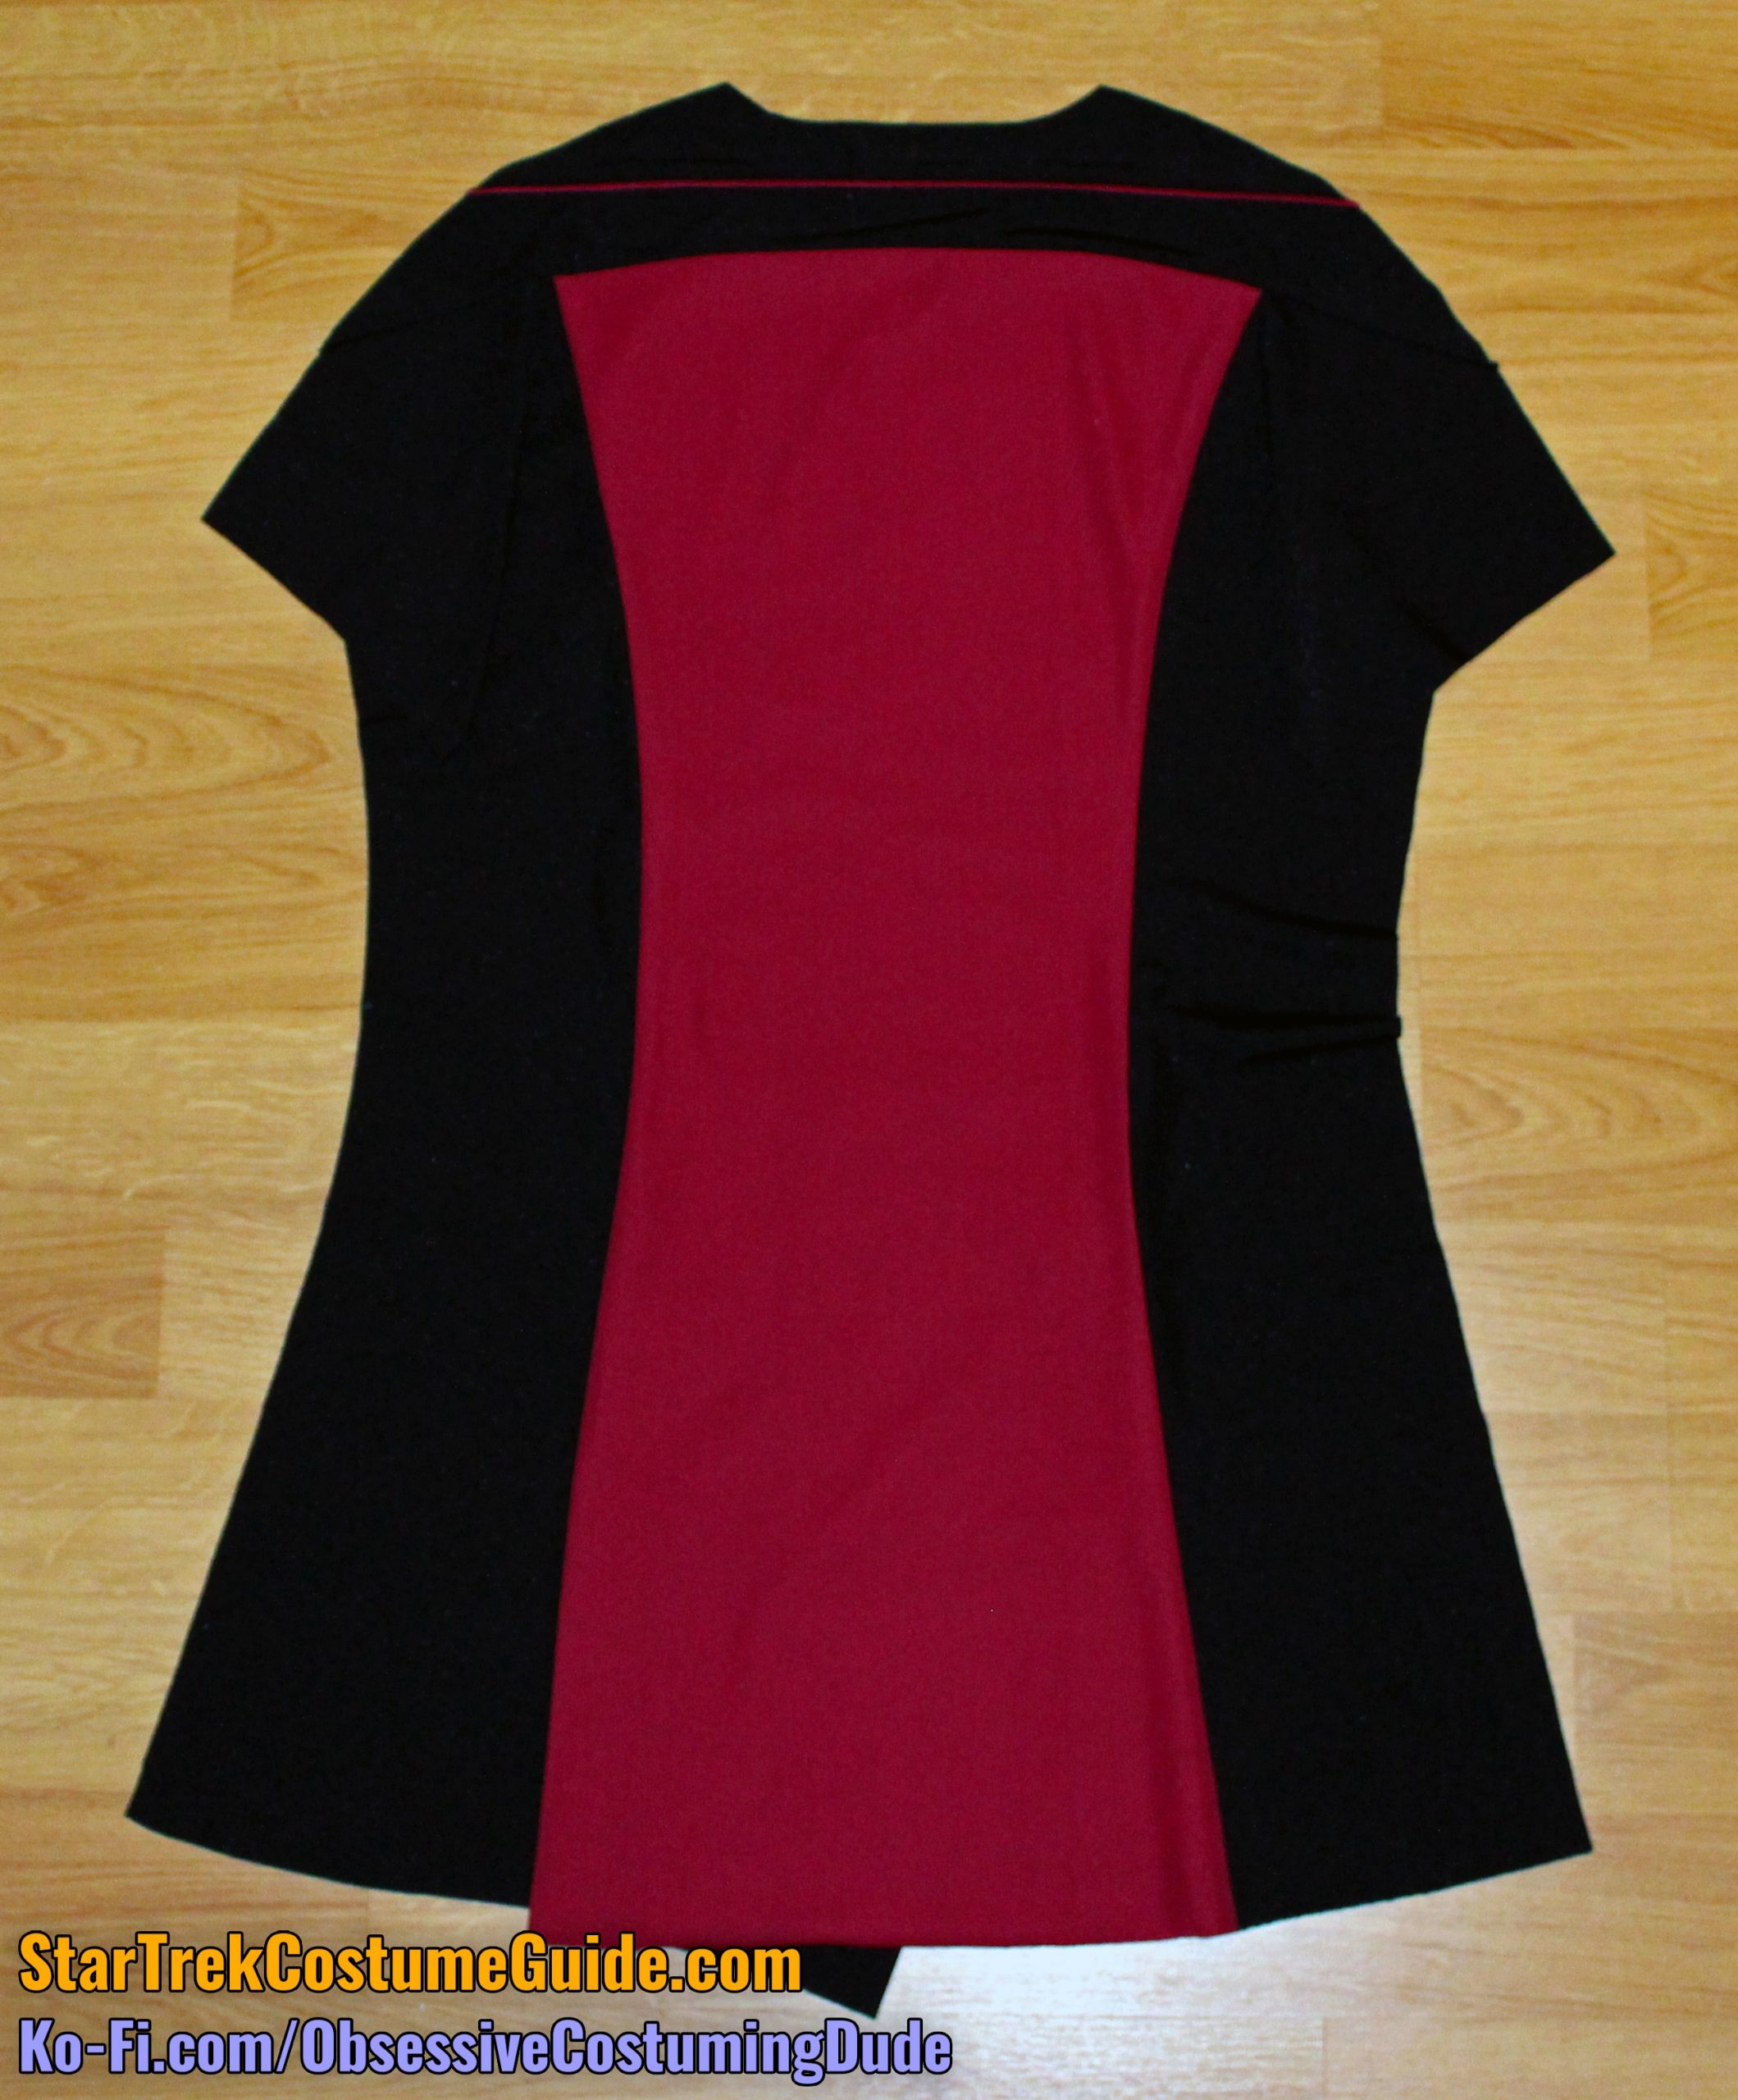
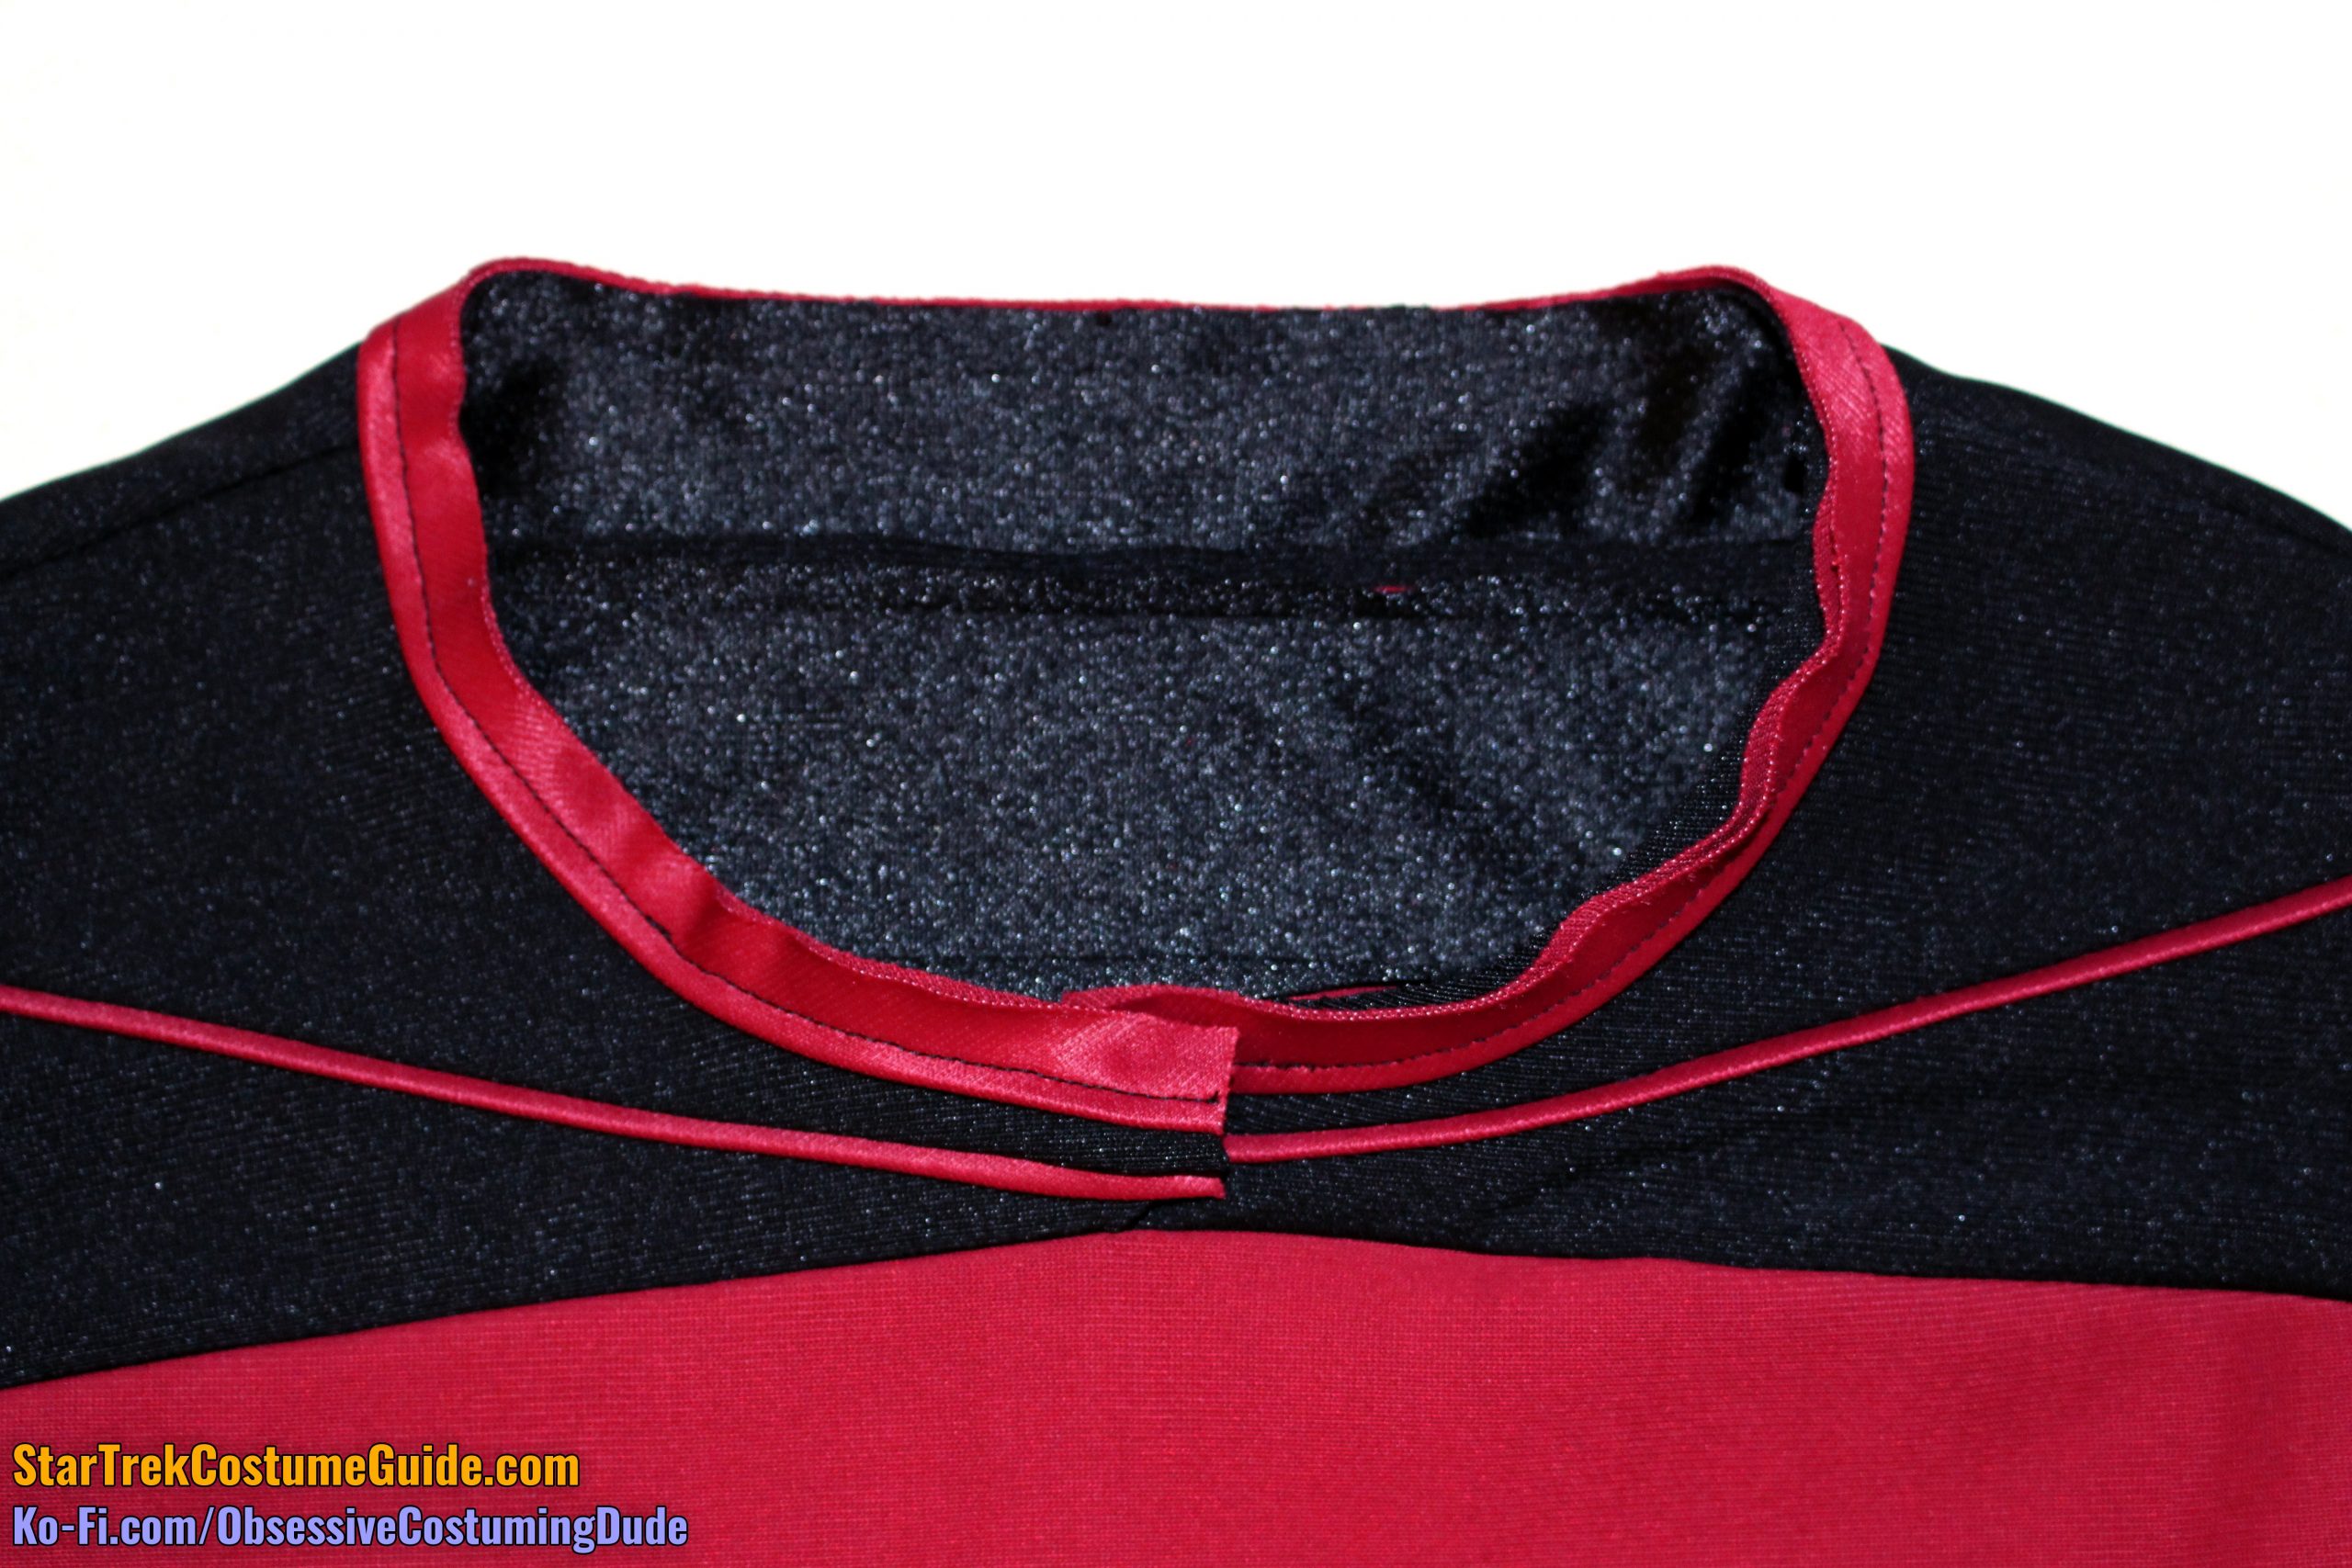
Your finished front assembly should look something like this:
NOTE: For the conceptual seasons 3+ variant, simply attach the front yoke to the front body with ⅜” seam allowance, and press the seam allowances open.
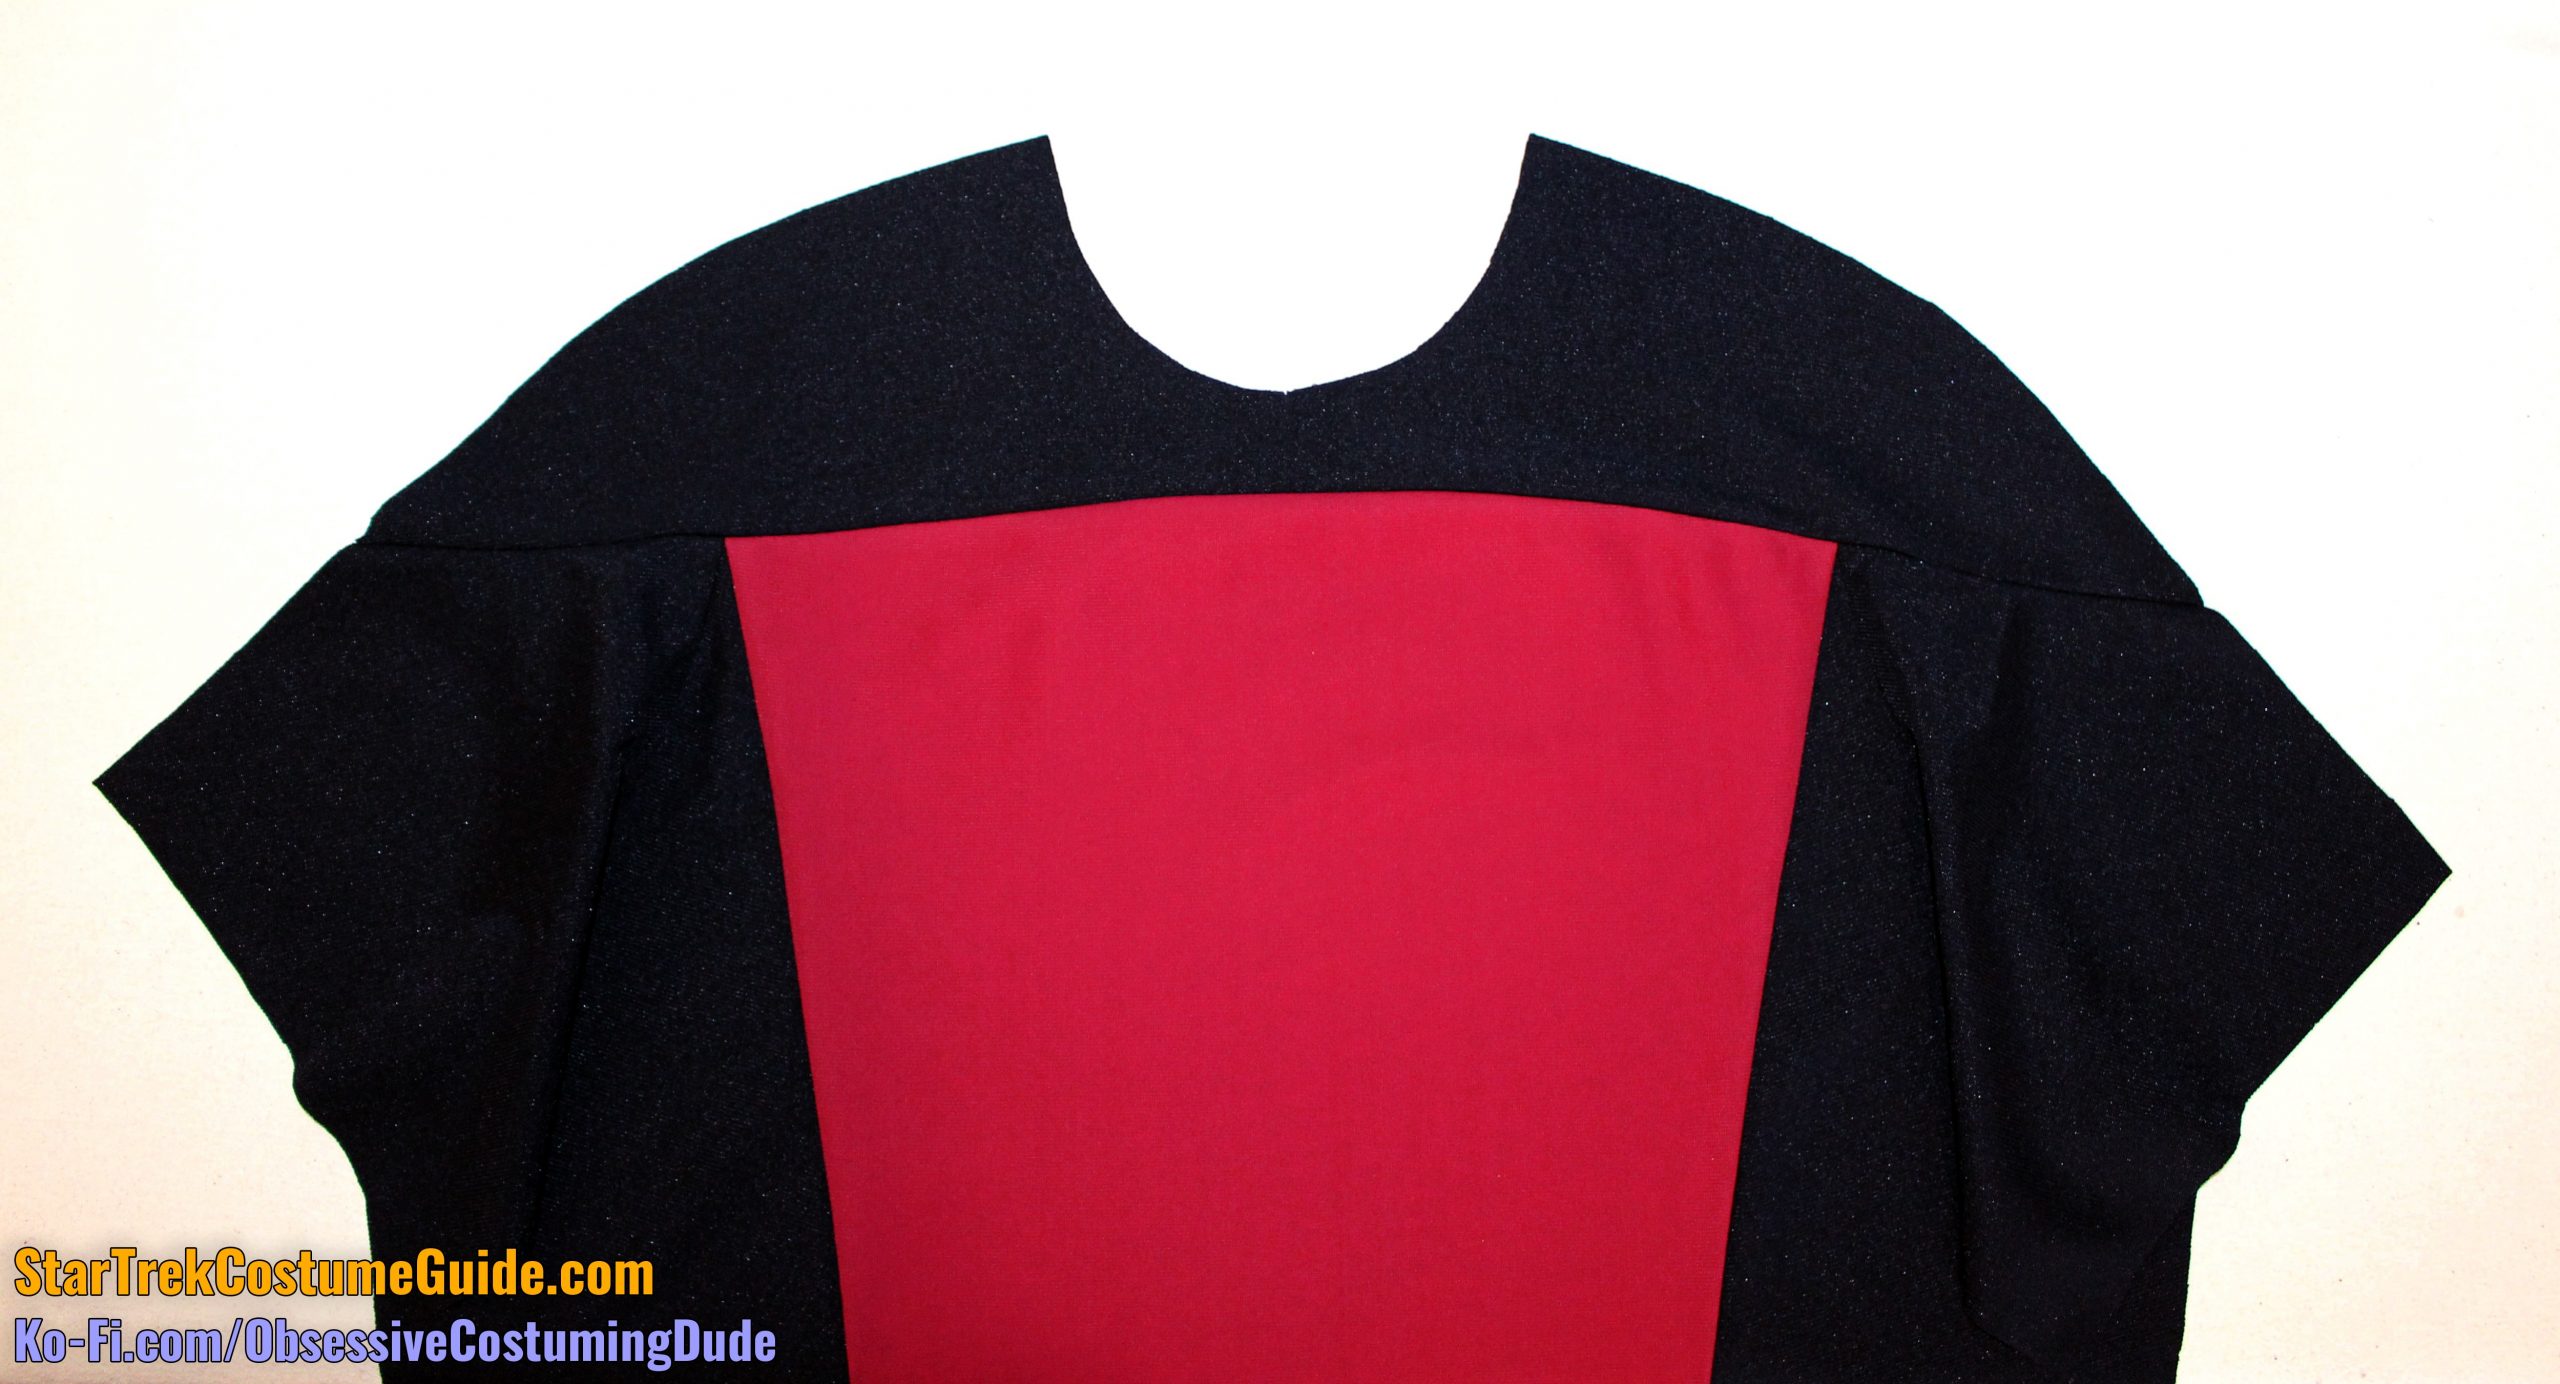
For the conceptual seasons 3+ version, your finished front assembly should look like this:
STEP 2 - Back Assembly
Constructing the back assembly is basically the same process as the front, but a few of the minor details are different. I’ll point them out as we go.
NOTE: For the back-zipping versions, separate the center back pattern piece (piece H) into two pieces along the center back before cutting your fabric, then add your preferred seam allowance when cutting your fabric. (I recommend adding at least ⅜” seam allowance.)
For the conceptual (seasons 3+) version of the skant, simply use the back yokes (piece B3) as they are.
For the early version of the skant, construct the back yoke in the same manner as the front.
For the back-zipping “All Good Things …” variant, cut the back yokes with the extra center back seam allowance provided and assemble the two back yokes separately. (Just cut the strips of yoke trim as long as you need them.)
Sew the right back (piece K) to the center back (piece H) with ½” seam allowance.
Press the seam allowances toward the back.
Stabilize the lower edge of the back waist anchor (piece J) with ¼” black twill tape, as done previously with the front.
Sew the back waist anchor to the left side back (piece I) with ½” seam allowance.
Press the back waist anchor away from the left back, and press the seam allowances toward the left back.
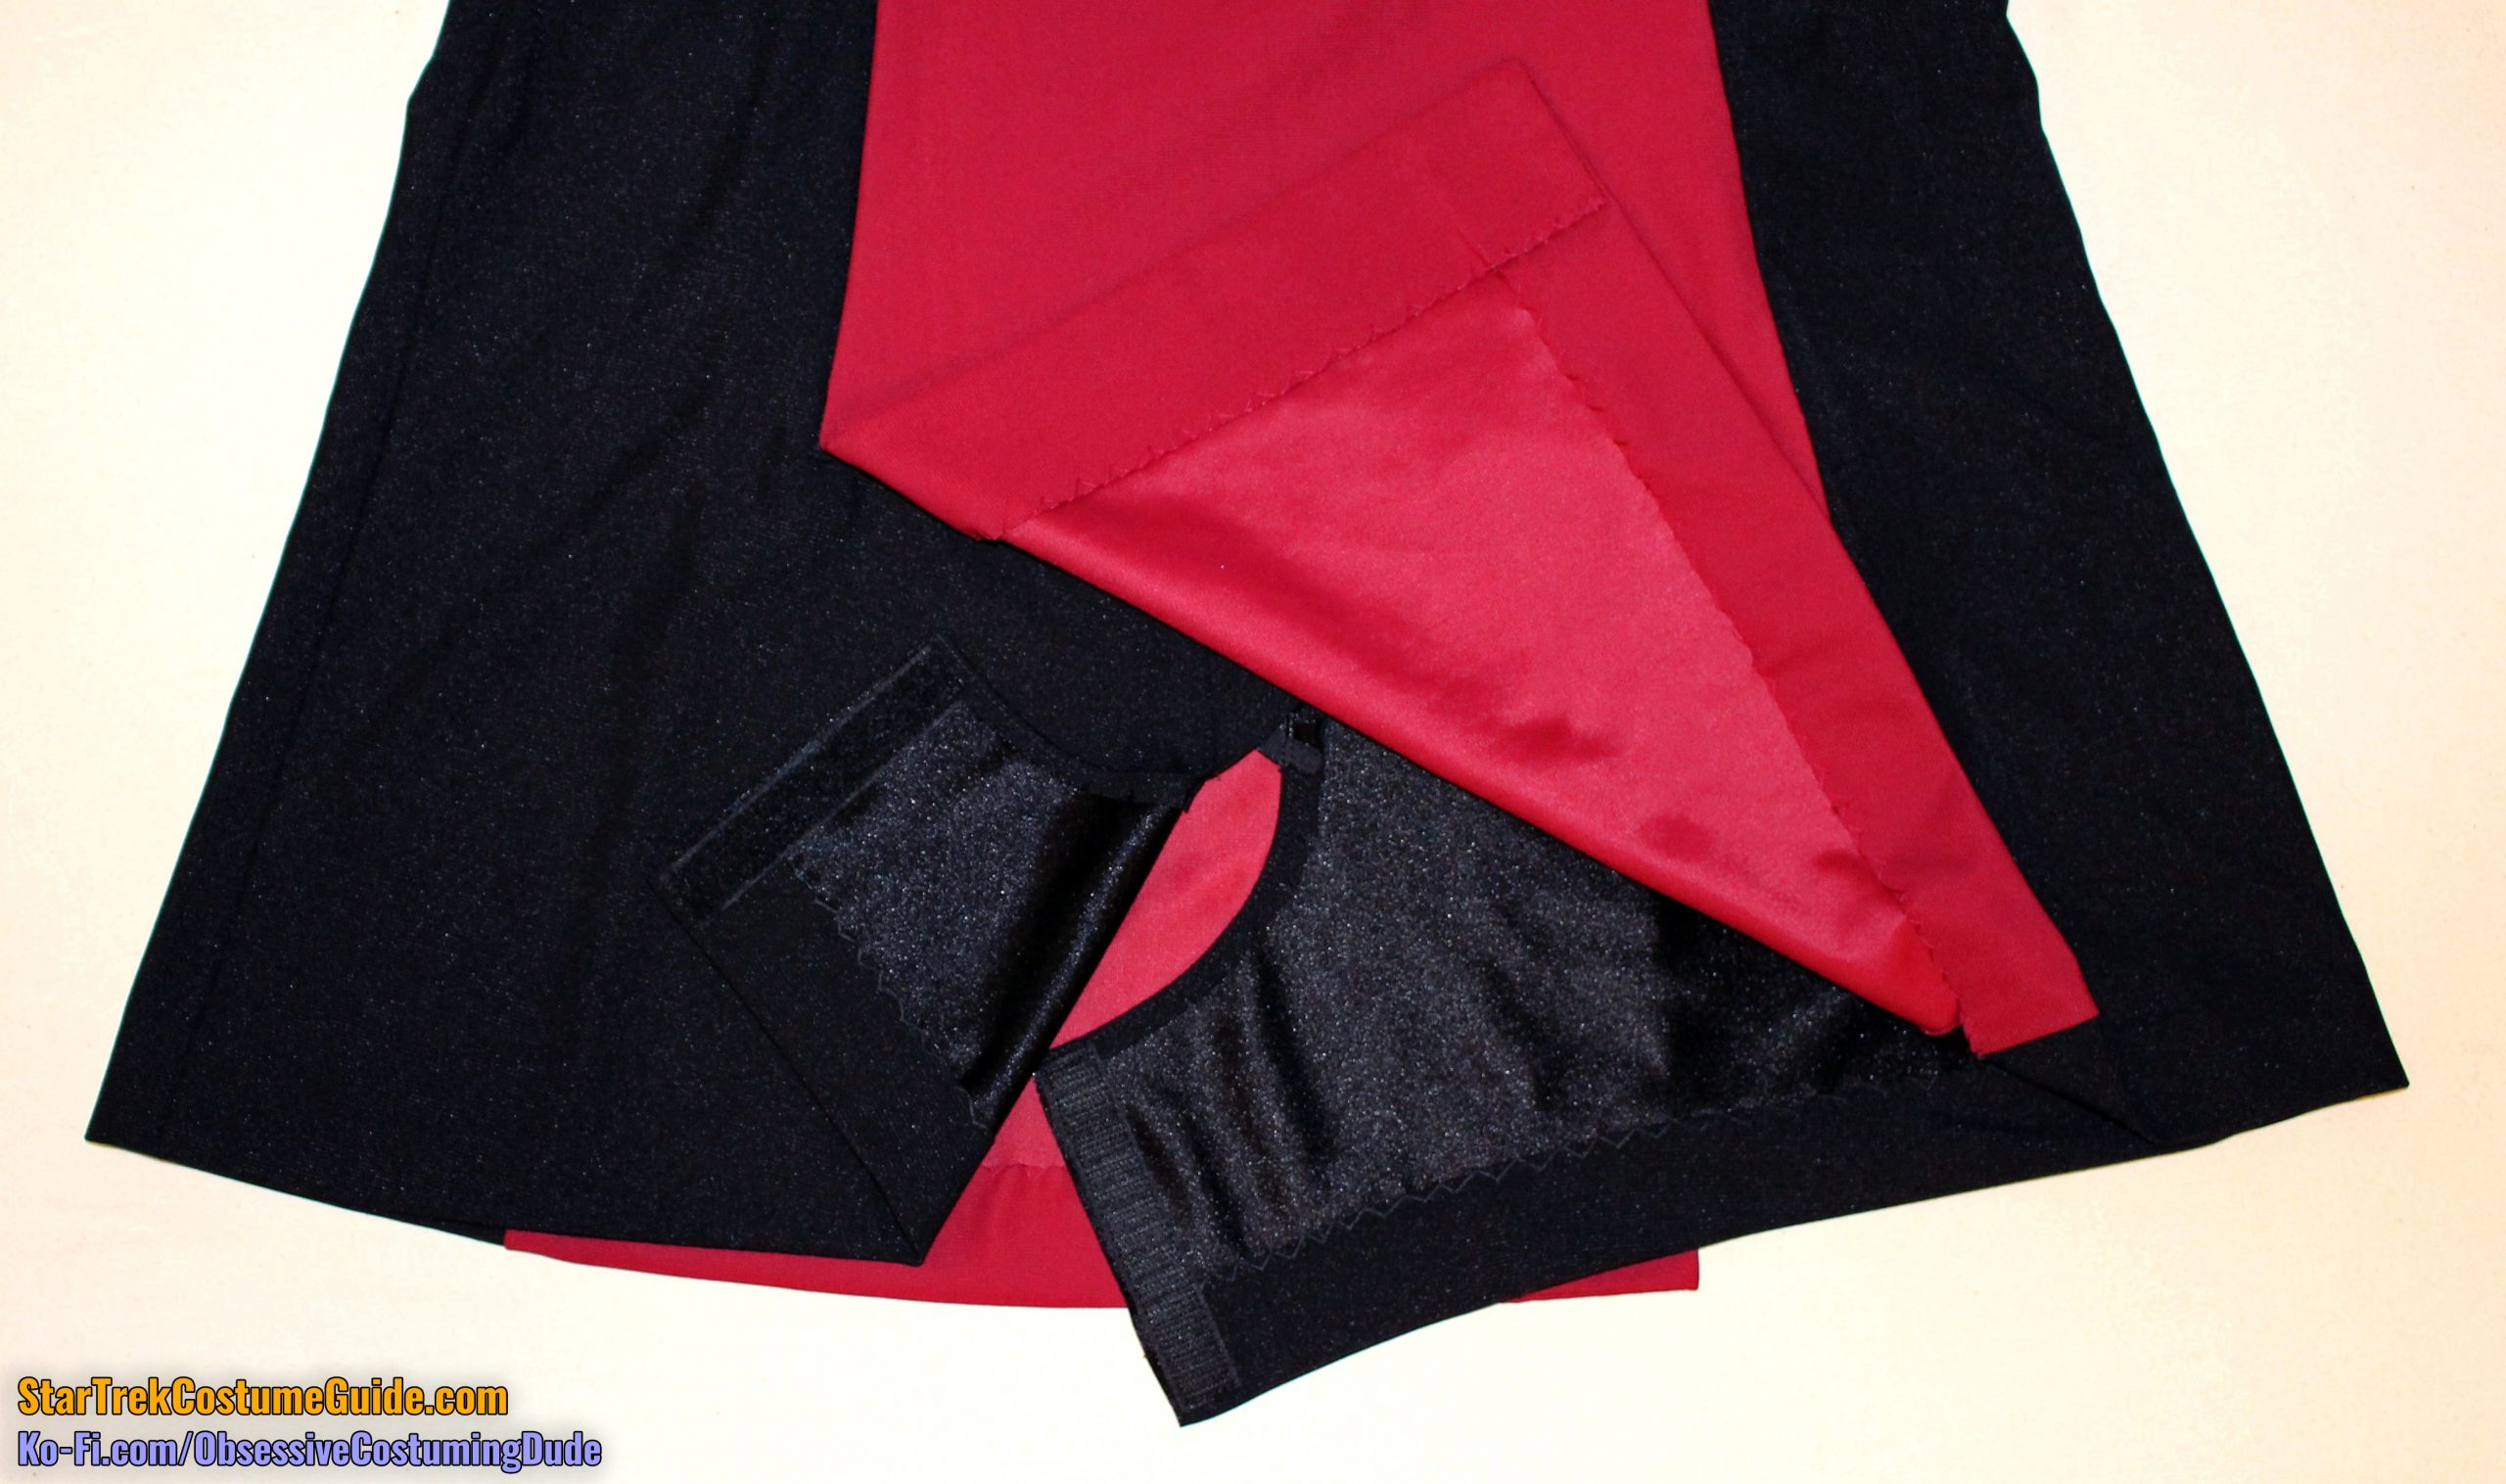
Press the leg strap’s ⅜” hem allowance under, segueing into the ½” allowances above.
Edge-stitch the allowances into place.
Clip the leg strap’s upper hem allowance to the edge-stitching and press the area flat.
Fastening down the top of the back vent, however, is slightly different (and easier).
Using the alignment guide on the printed pattern, pin the left side back to the center back.
Sew the left side back to the center back with ½” seam allowance, stop stitching ¾” beneath the top edge of the back vent, pivot, and continue sewing across the top of the vent.
Press the back vent’s hem allowance under.
(Note that unlike the front, the back vent’s hem allowance is 2 ¼” all the way down.)
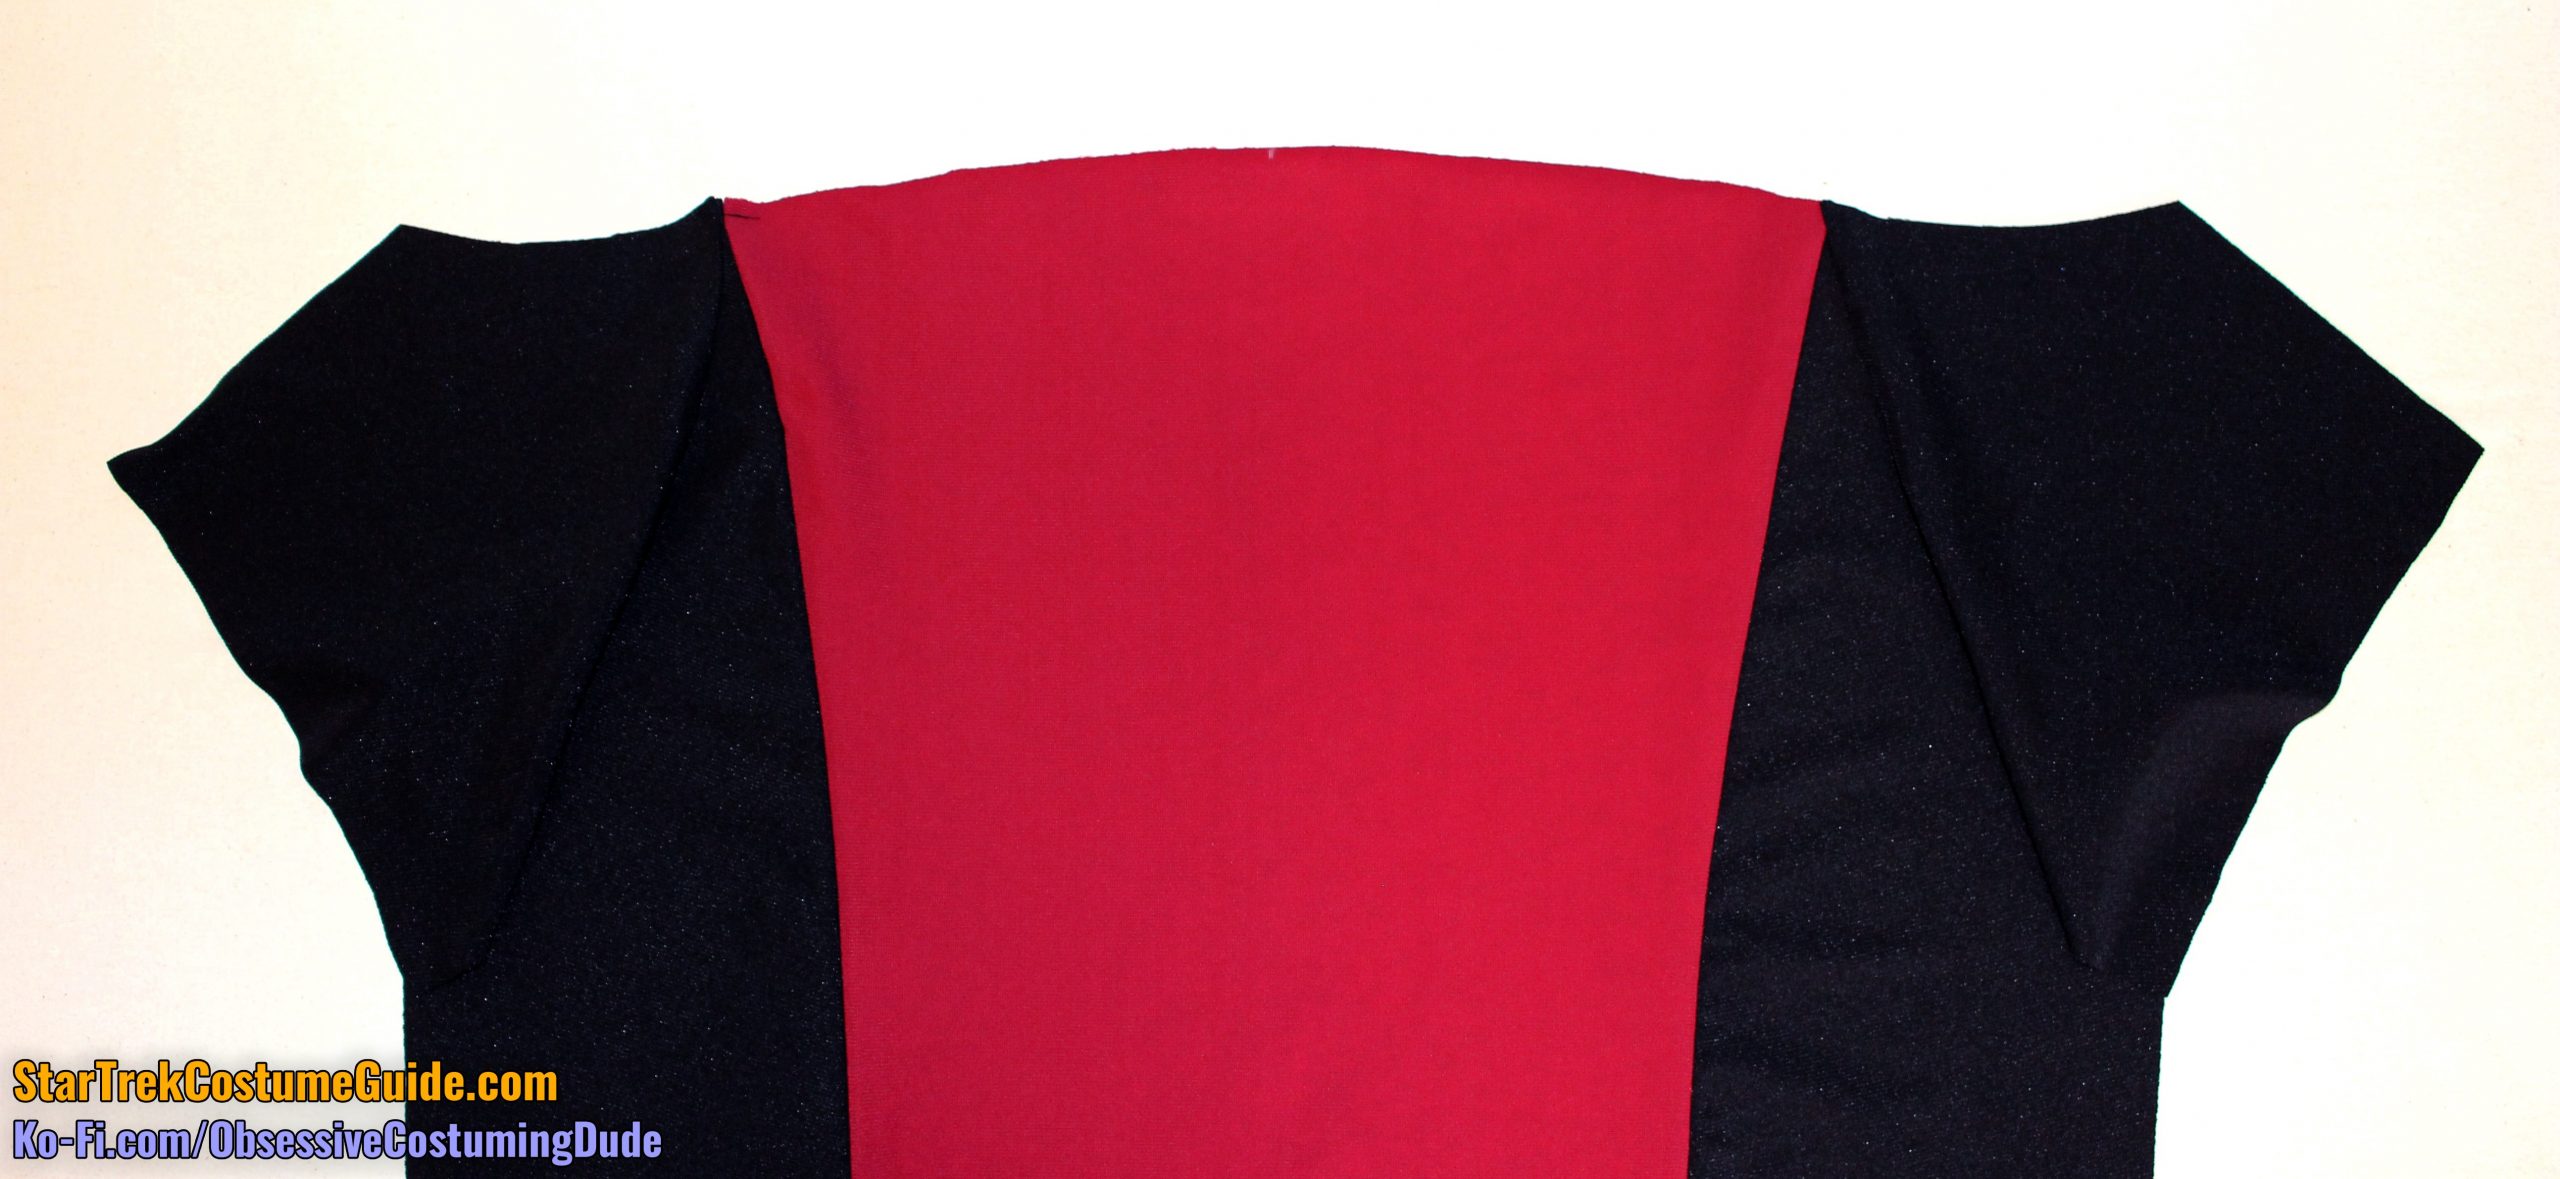
Sew the back sleeves (piece M) to the front body with ⅜” seam allowance.
Press the sleeves and armscye seam allowances away from the body.
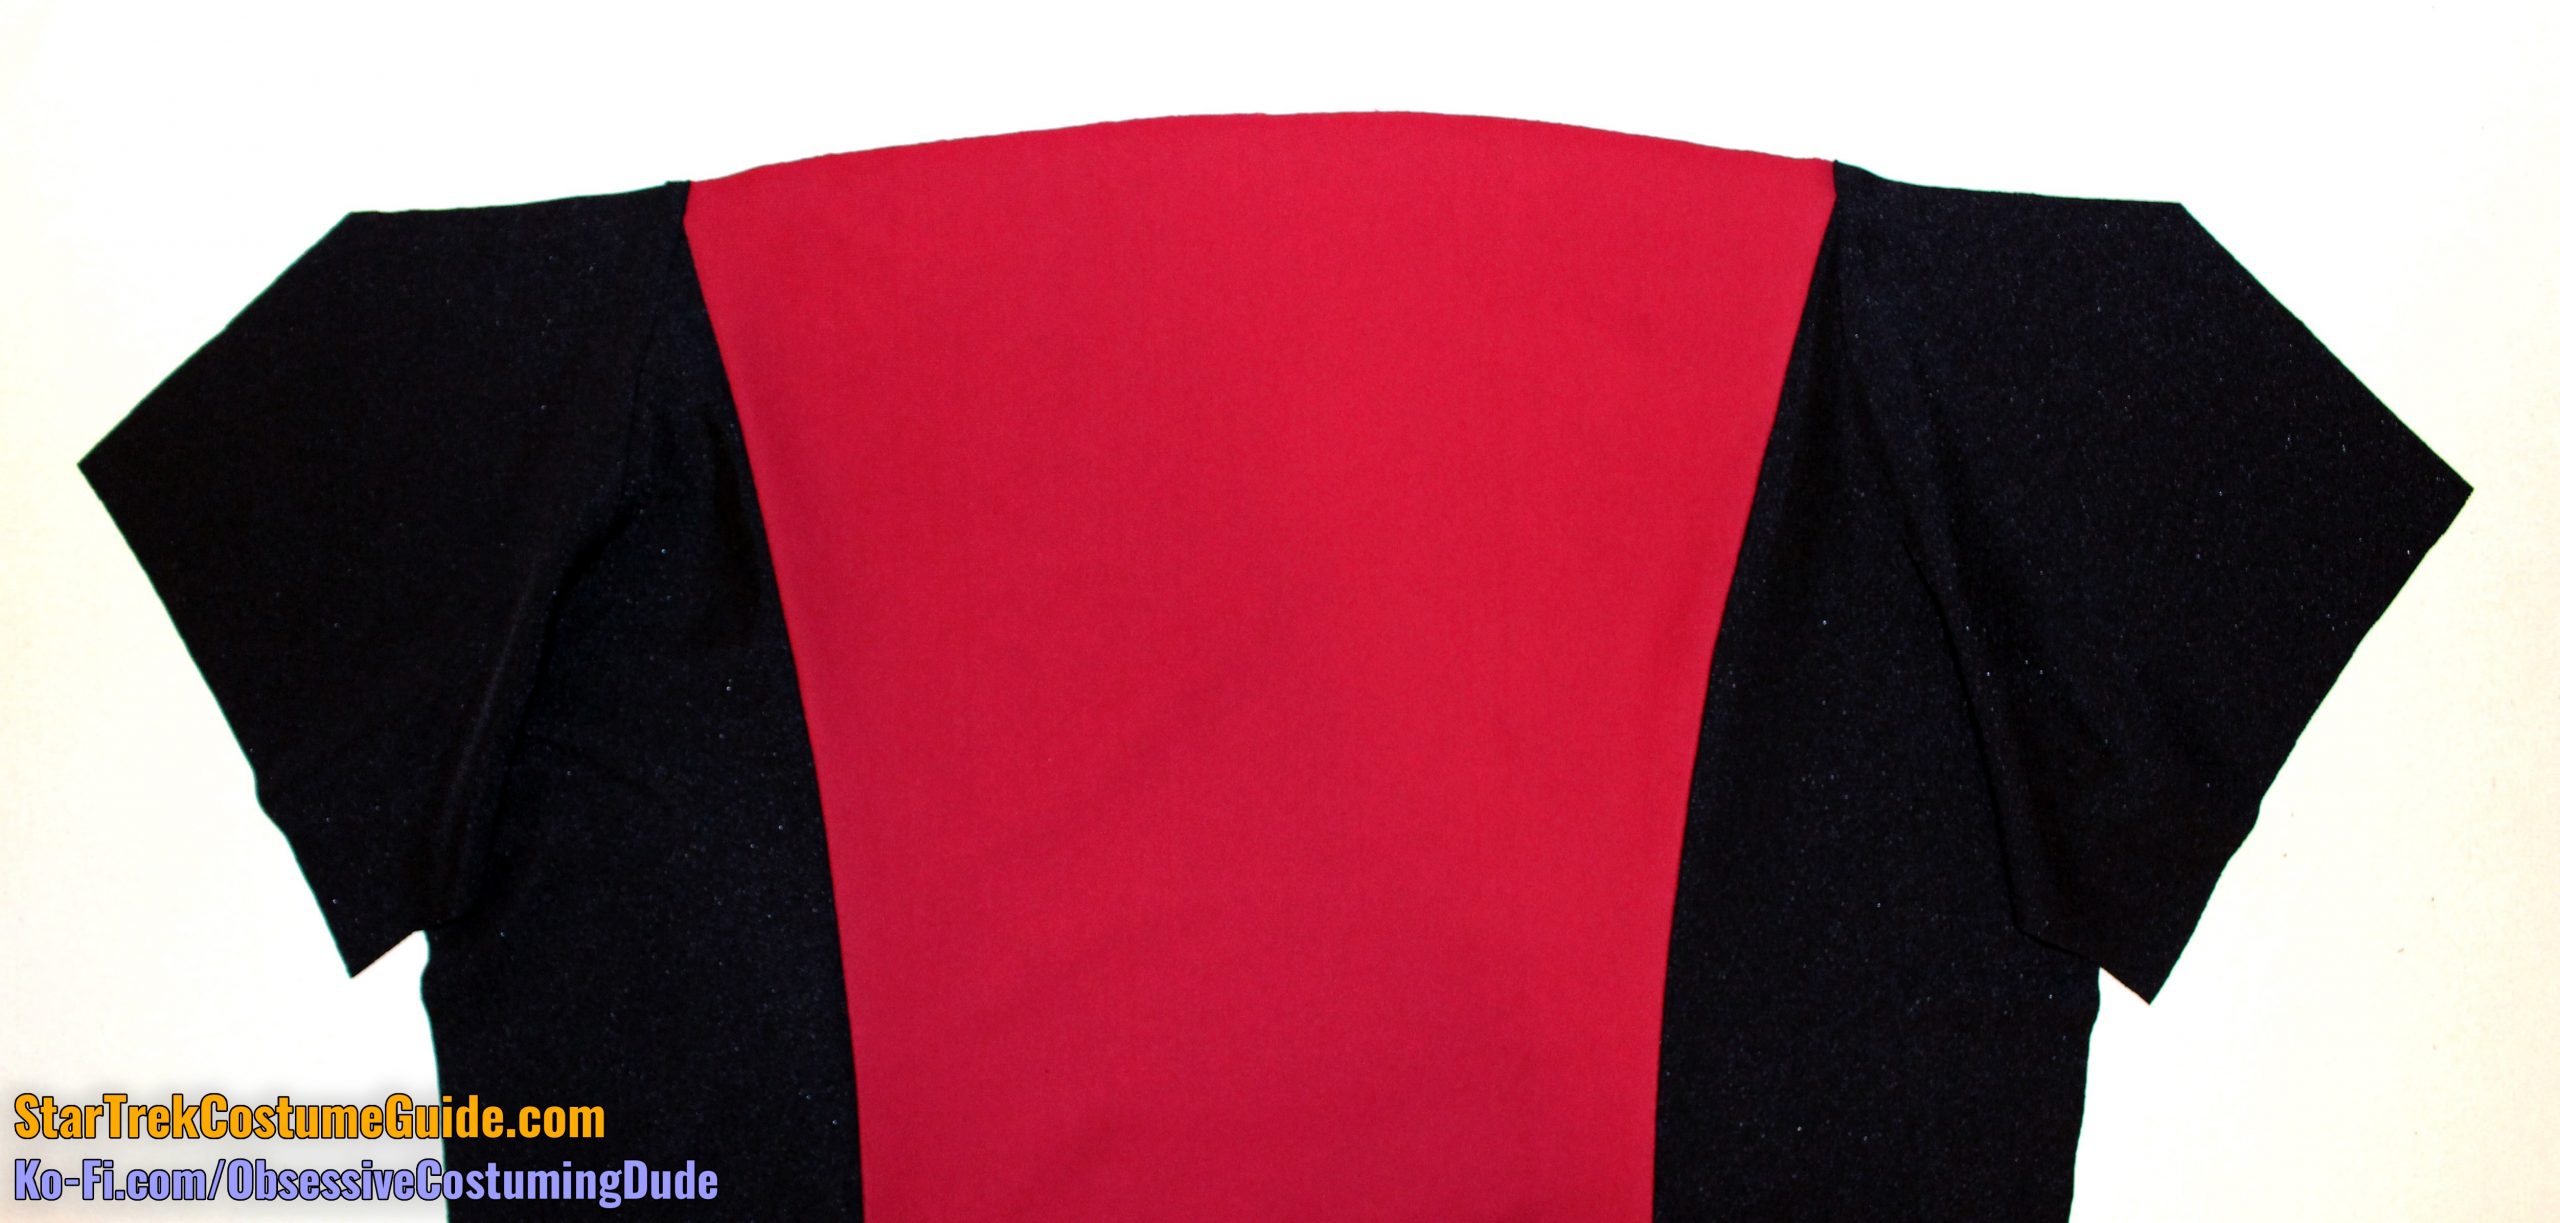
Sew the back yoke assembly to the upper back with ½” seam allowance.
Press the seam allowances upward.
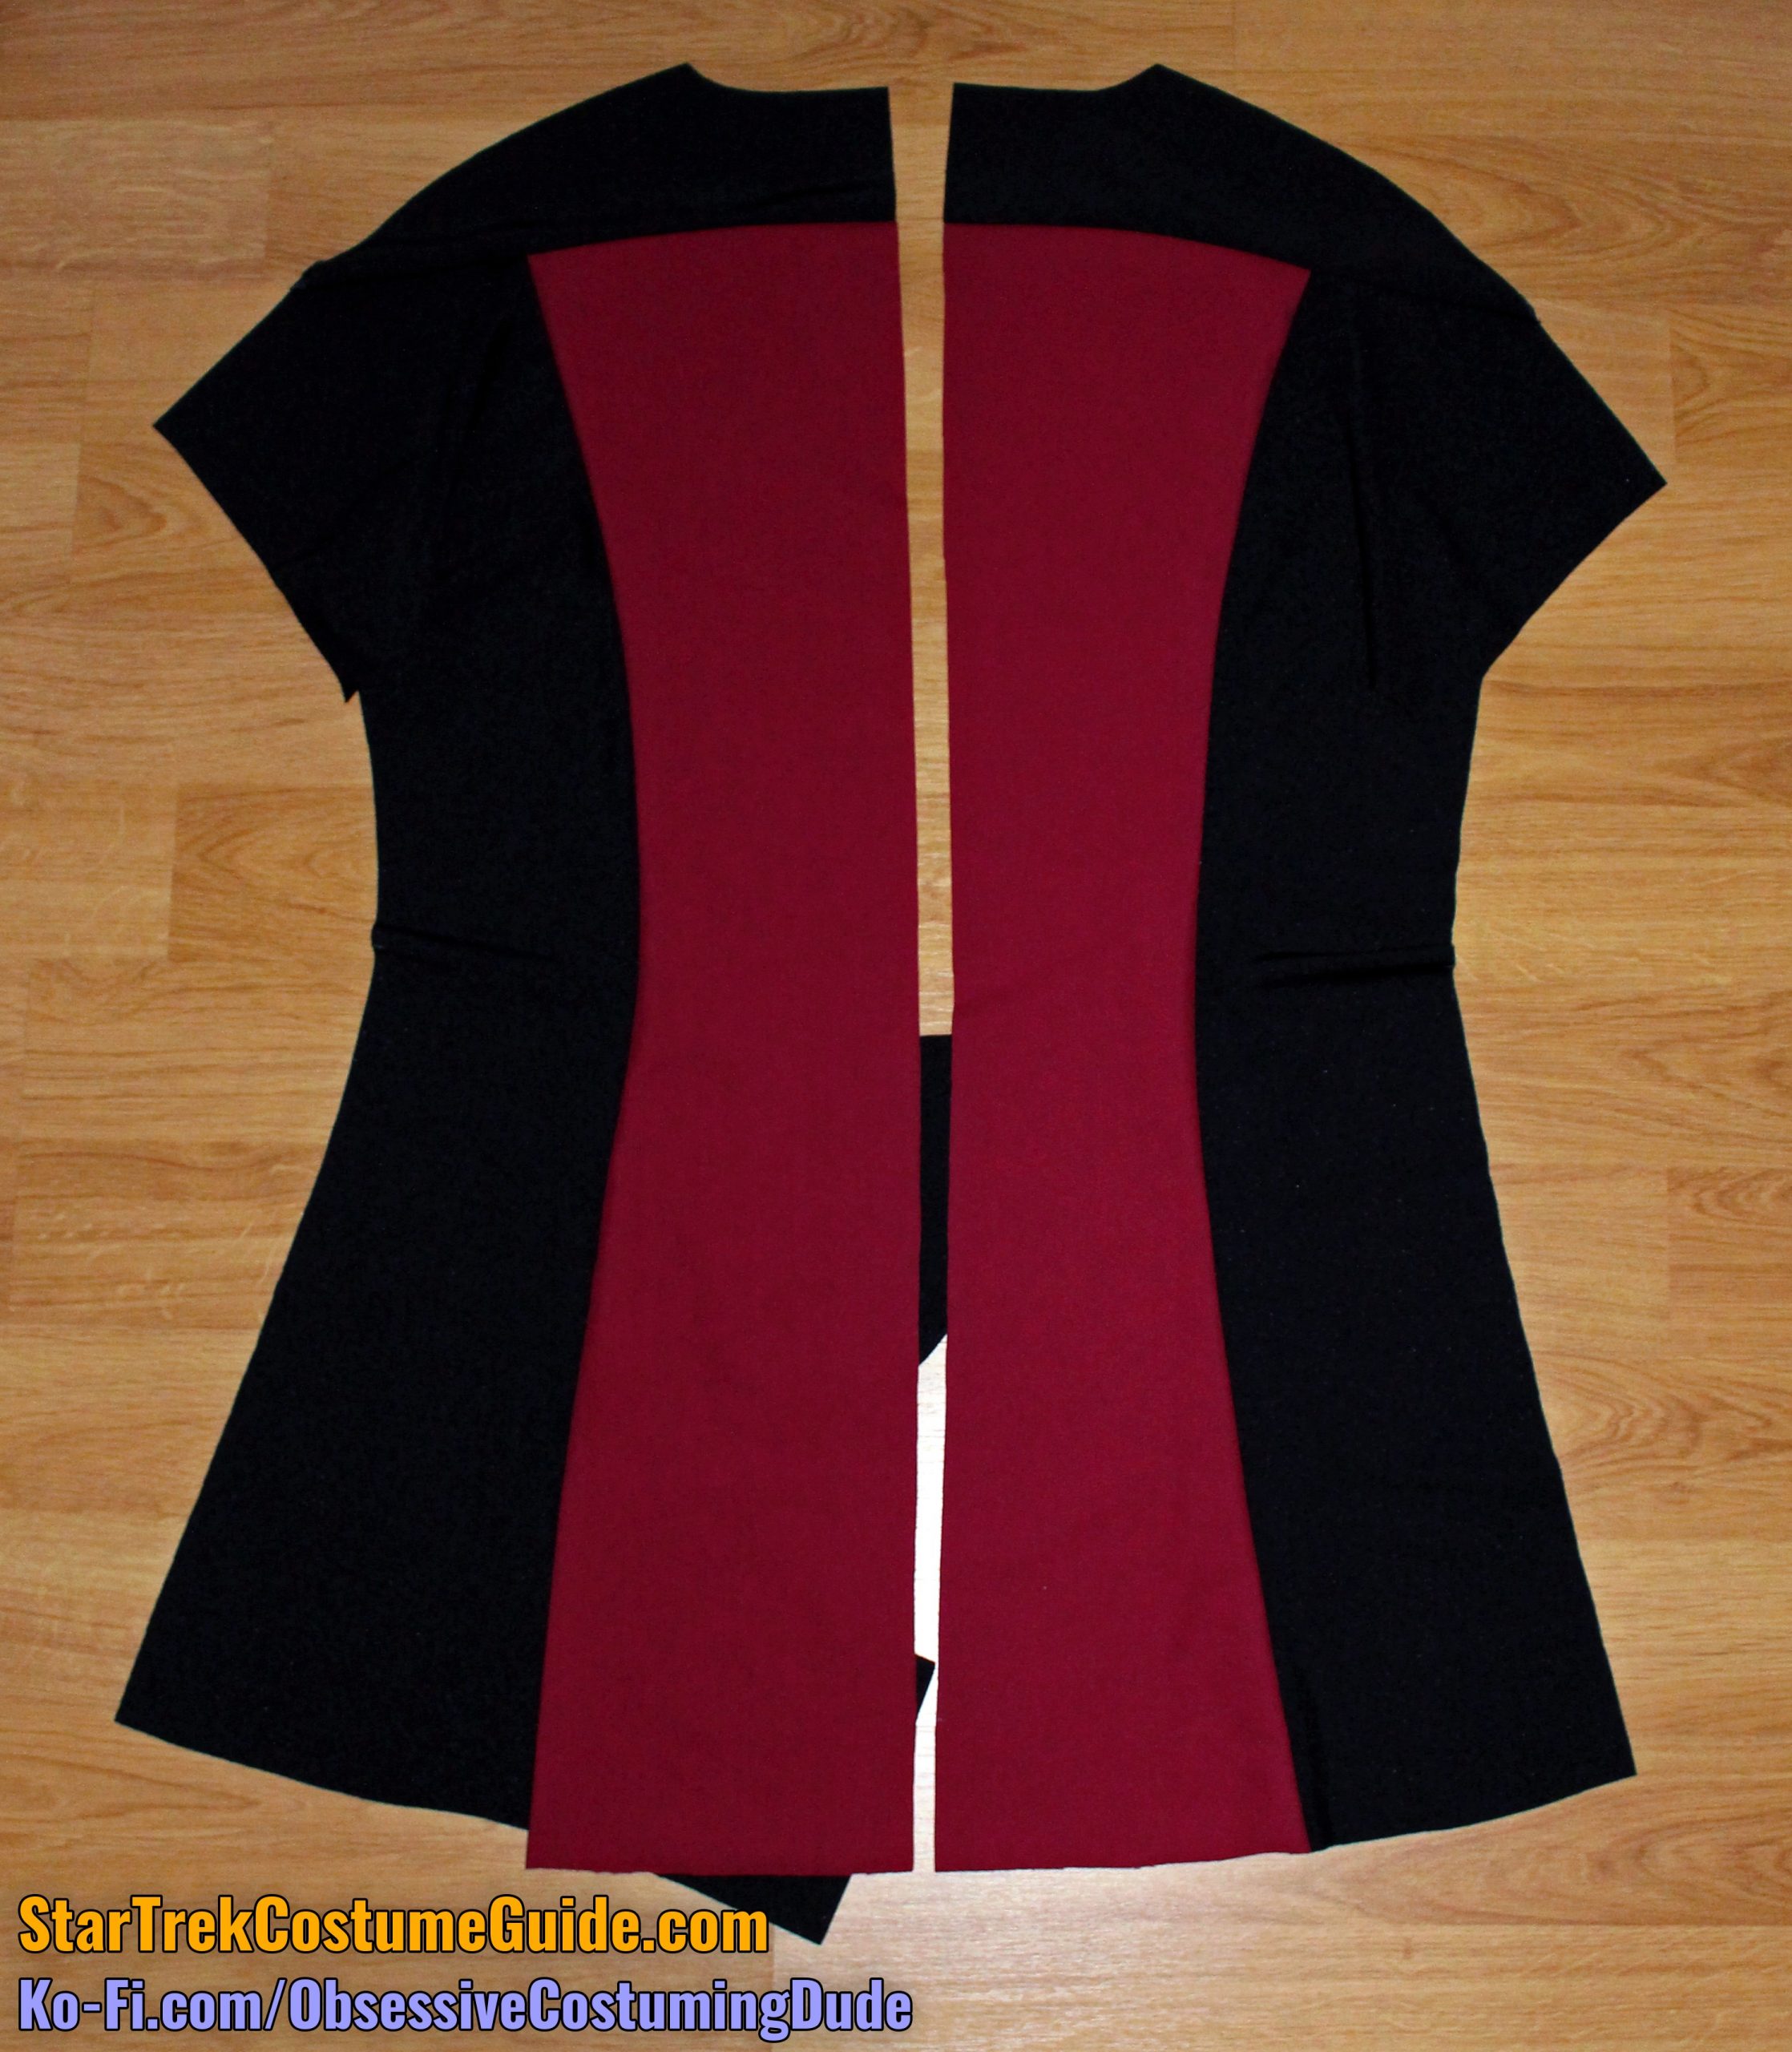
Your finished back assembly should look something like this:
Remember that if you’re making a back-zipping version, you’ll have two back assemblies; just assemble them separately for now.
STEP 3 - Front to Back
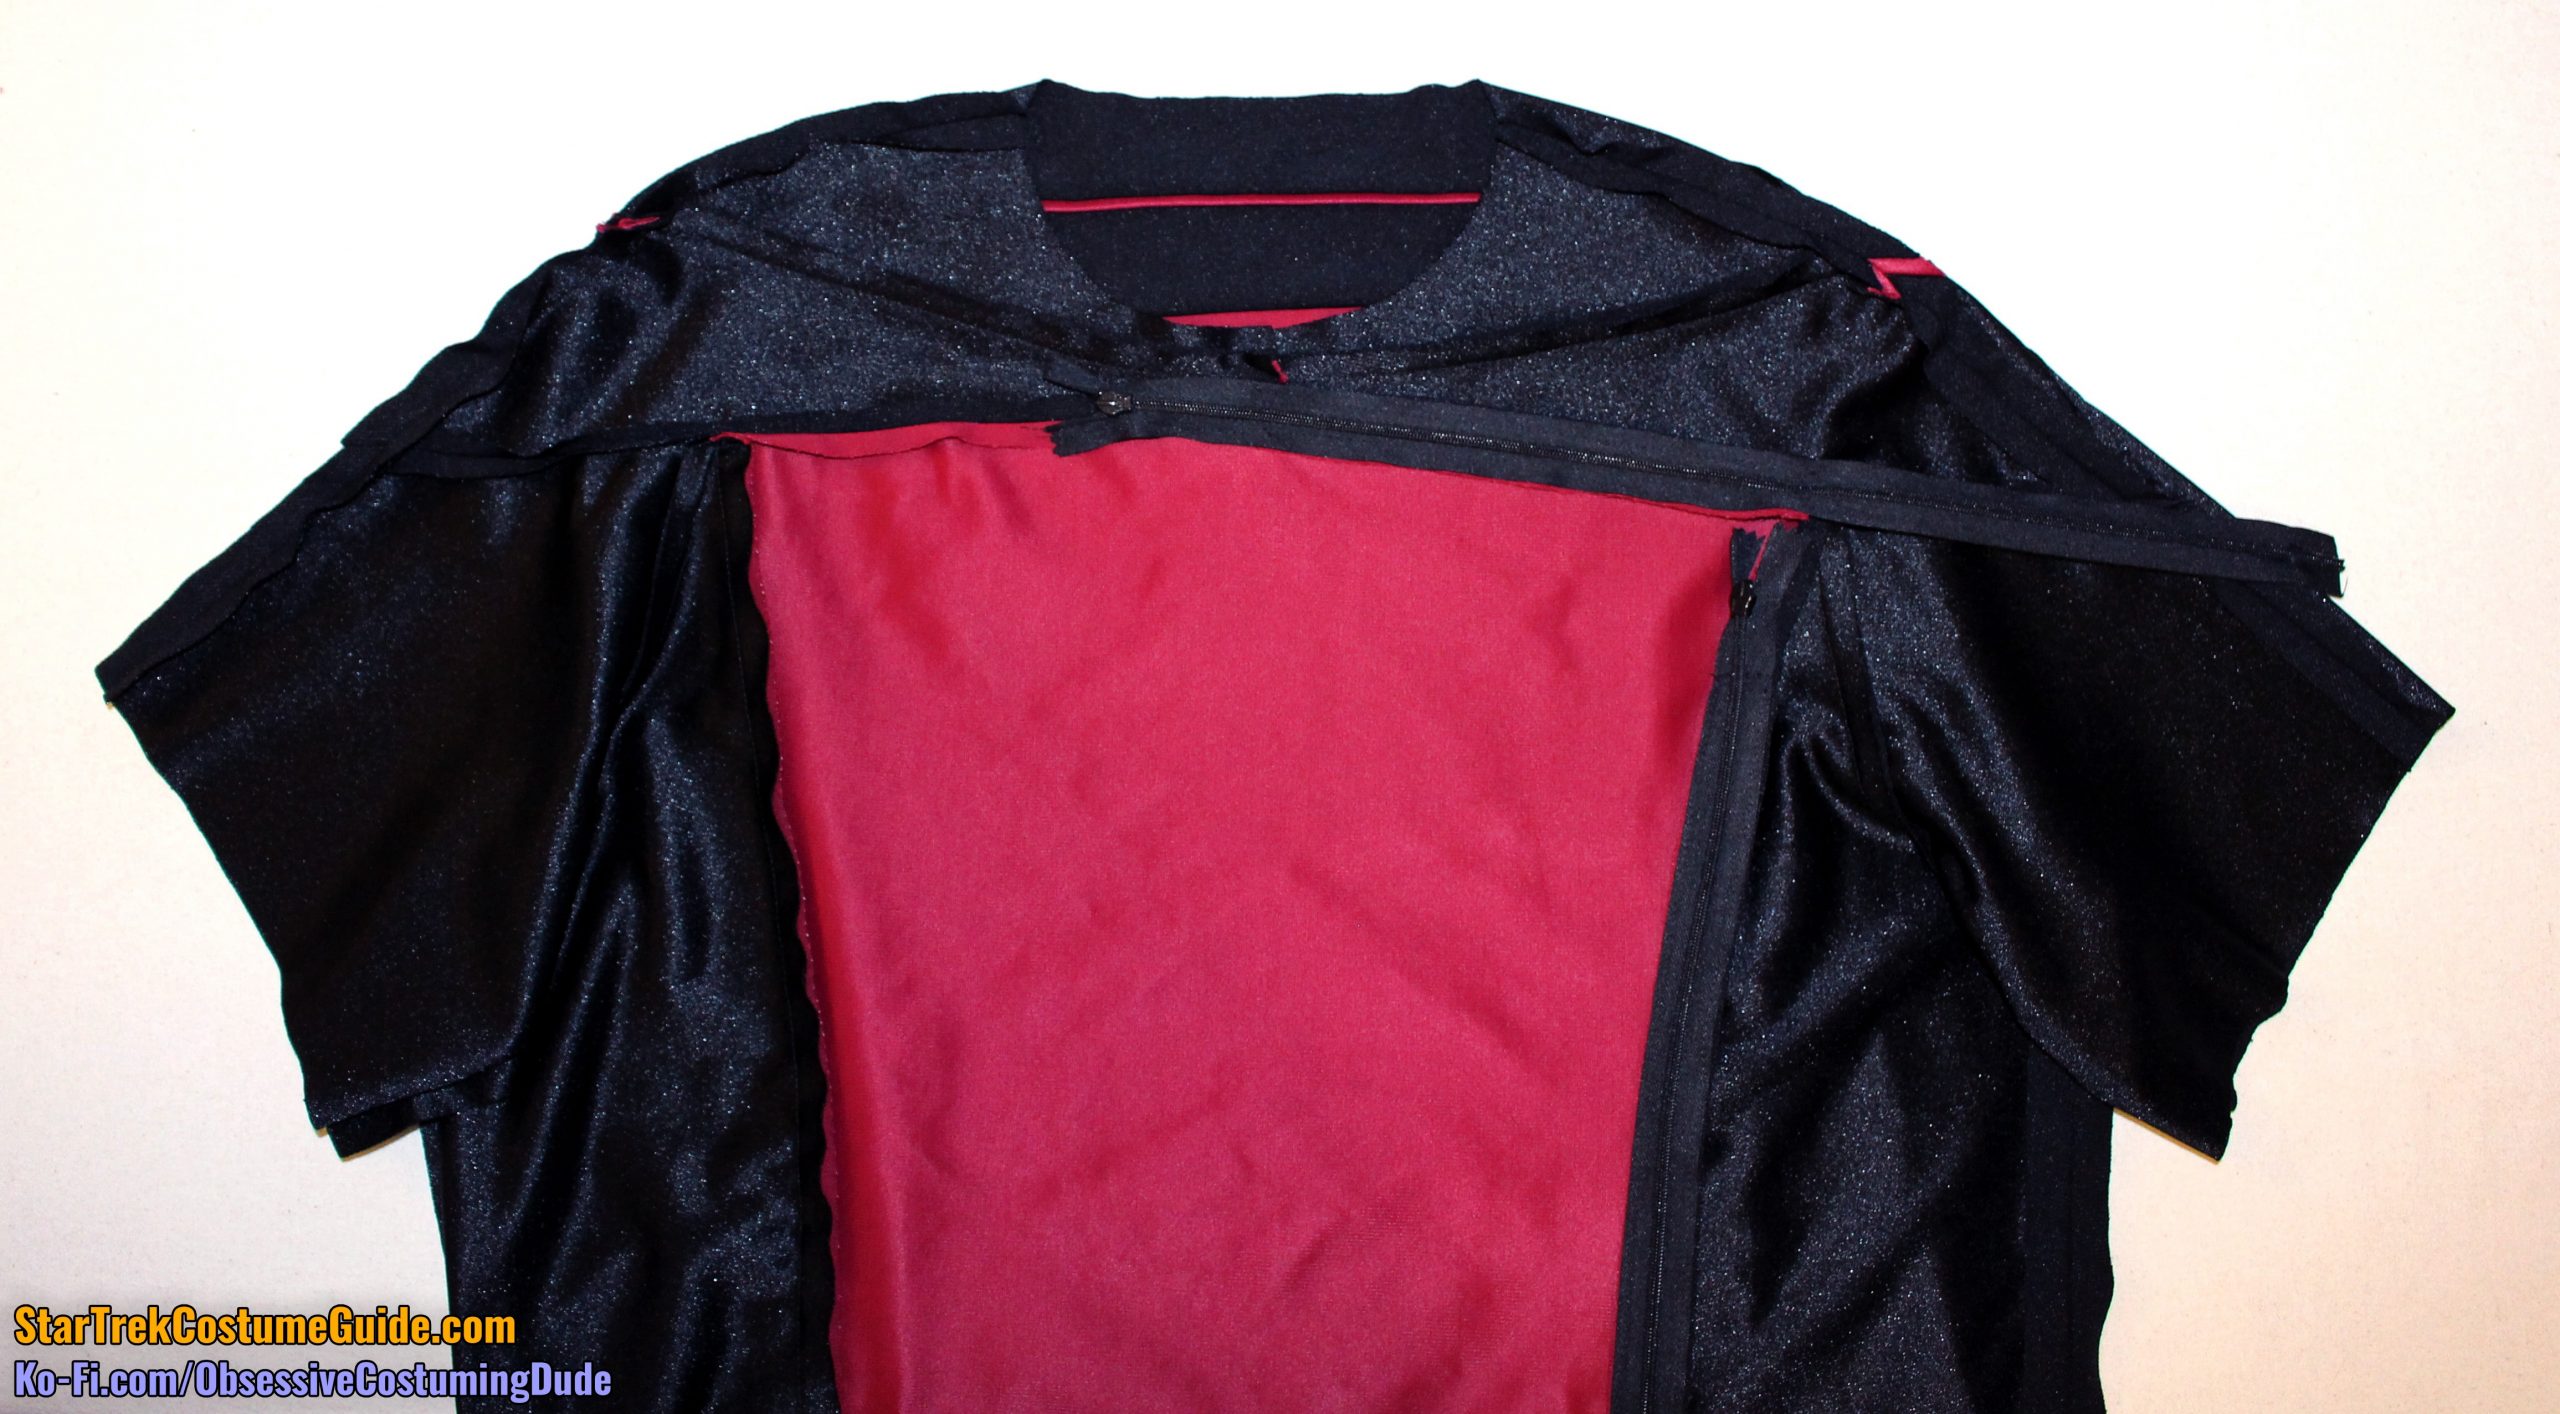
Sew the front and back assemblies together along the shoulder/outer sleeve seam with ½” seam allowance, matching yoke piping and seam lines.
Press the seam allowances open.
(For the back-zipping “All Good Things …” variant, sew the shoulder seams closed as described above, even though the front yokes aren’t actually attached to the front yet.)
TIP: Pin the assemblies together, then baste across the yoke piping and yoke/sleeve seam lines before sewing. Turn the garment right side out, check to make the sure the seams are properly aligned, adjust your basting if necessary, and once satisfied of proper alignment, THEN sew the assemblies together!
TIP: Use a quilting/walking foot to sew across the yoke piping, or even the entire shoulder/outer sleeve seam.
Sew the front and back assemblies together along the sides with ⅝” seam allowance.
Press the seam allowances open.
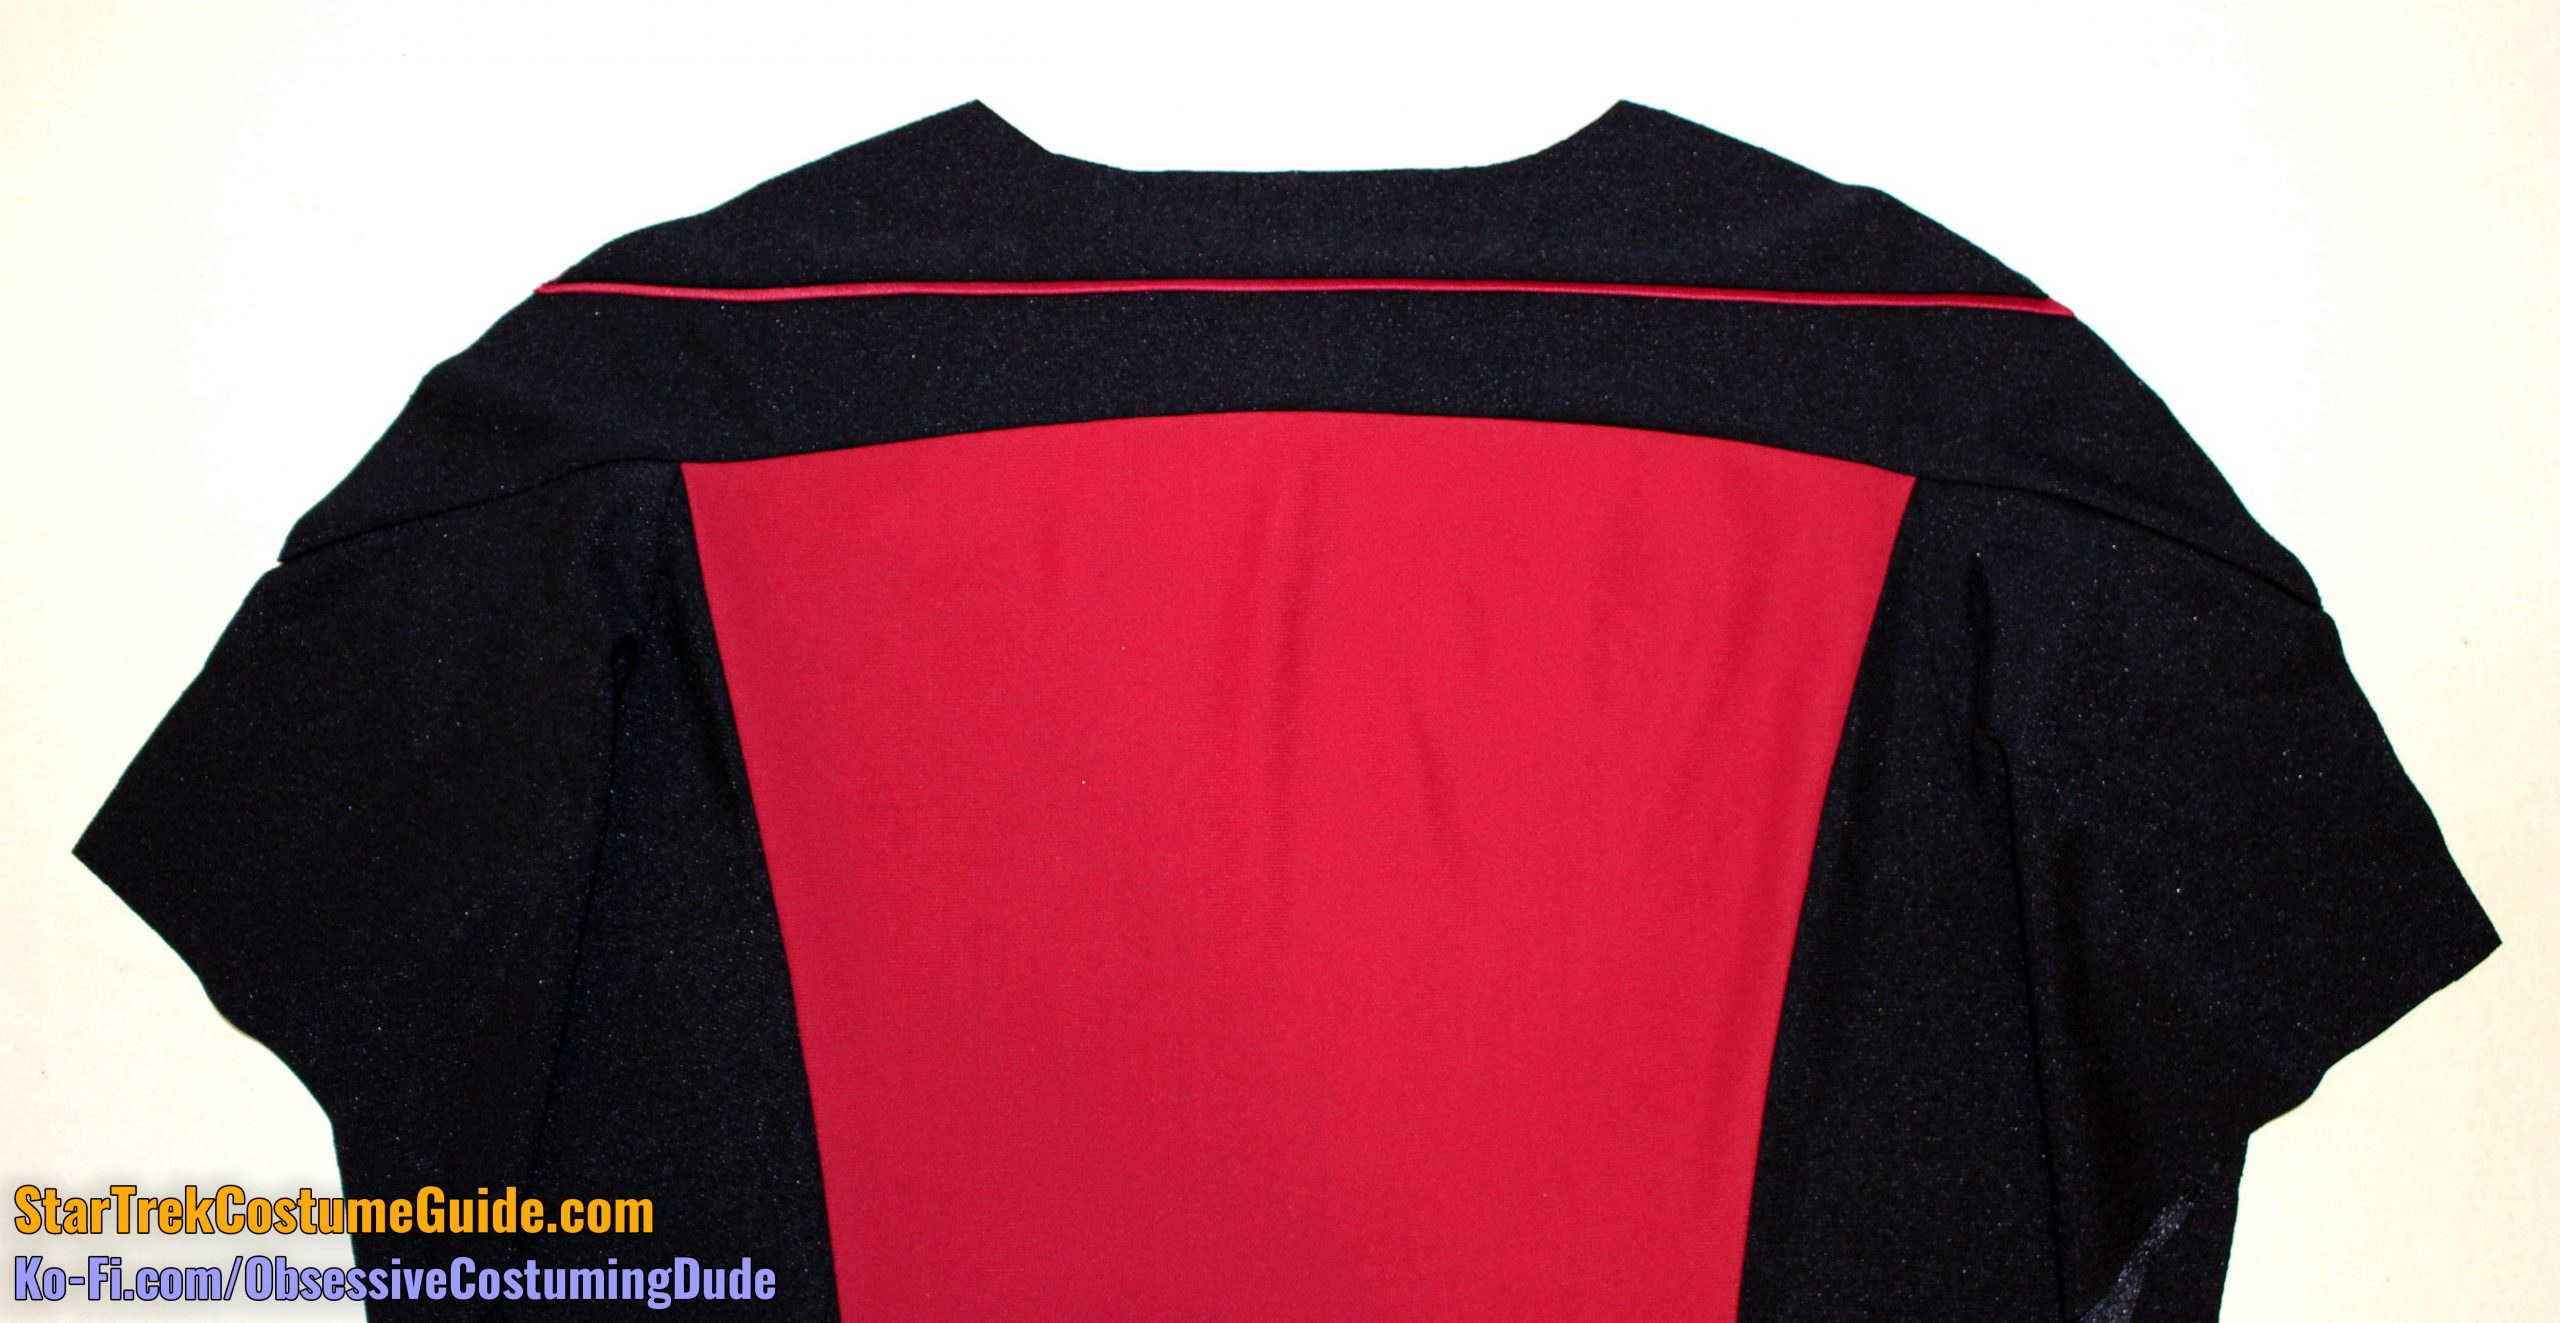
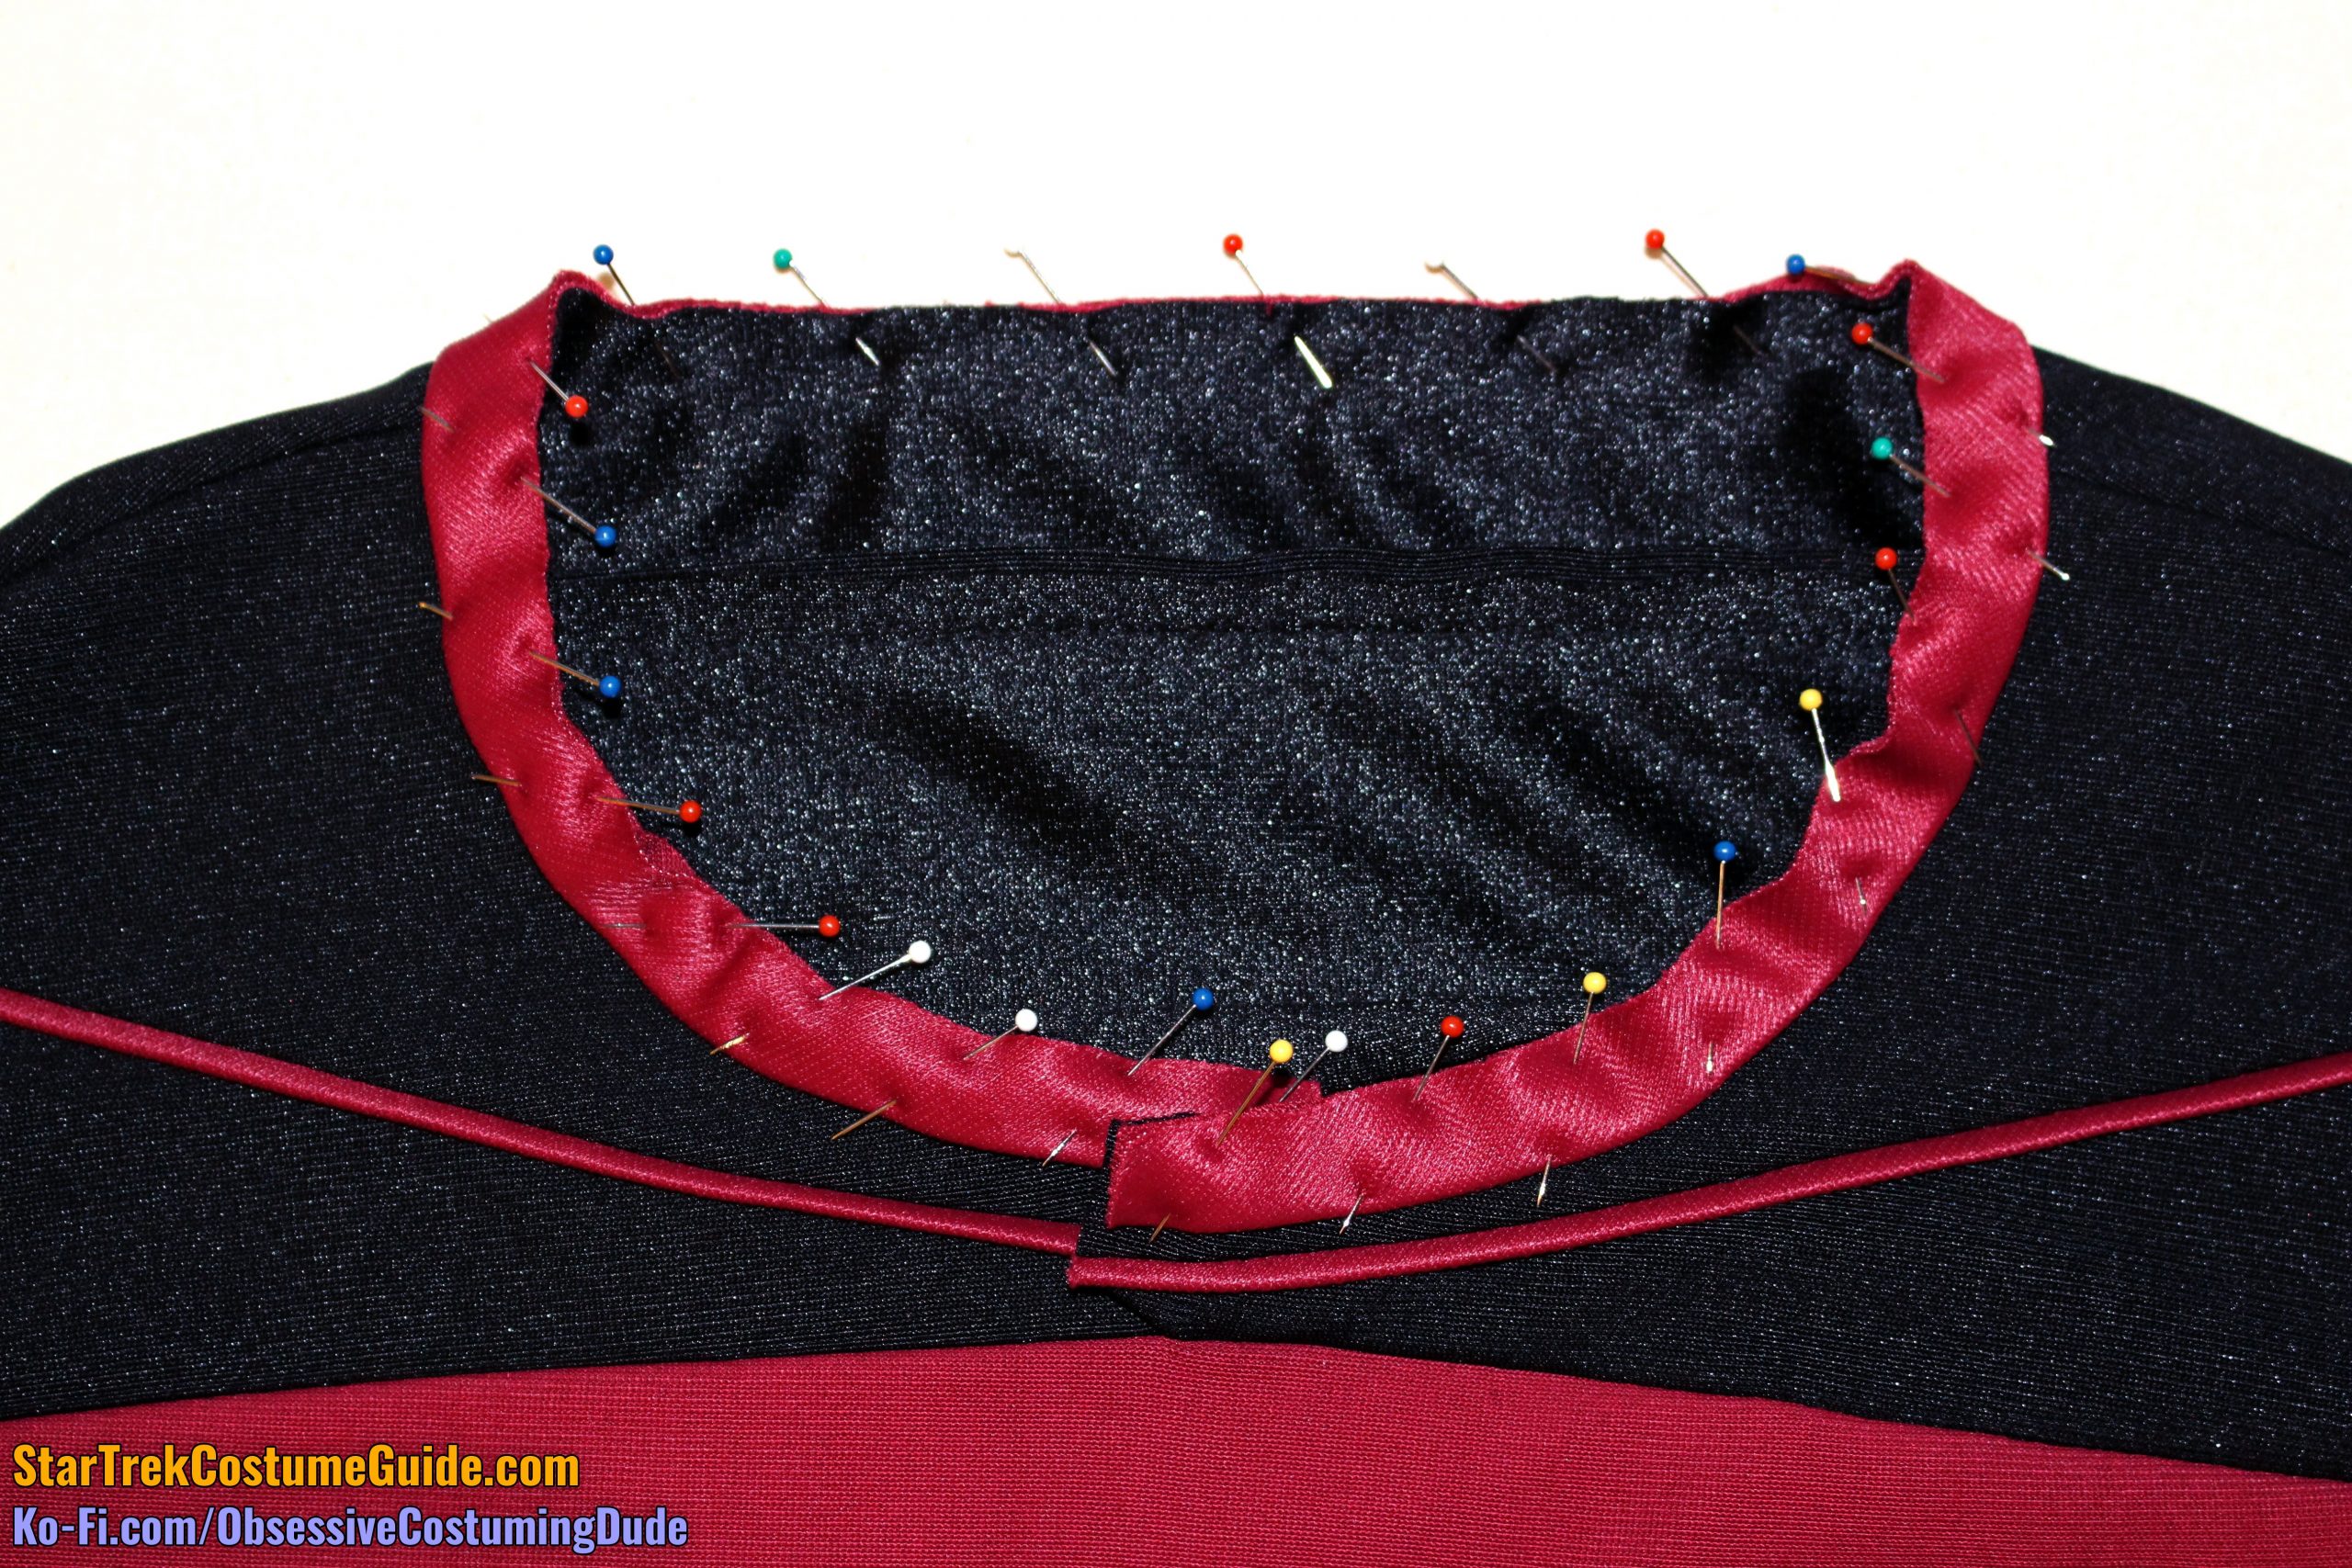
Stay-stitch the neckline ¼” from the edge.
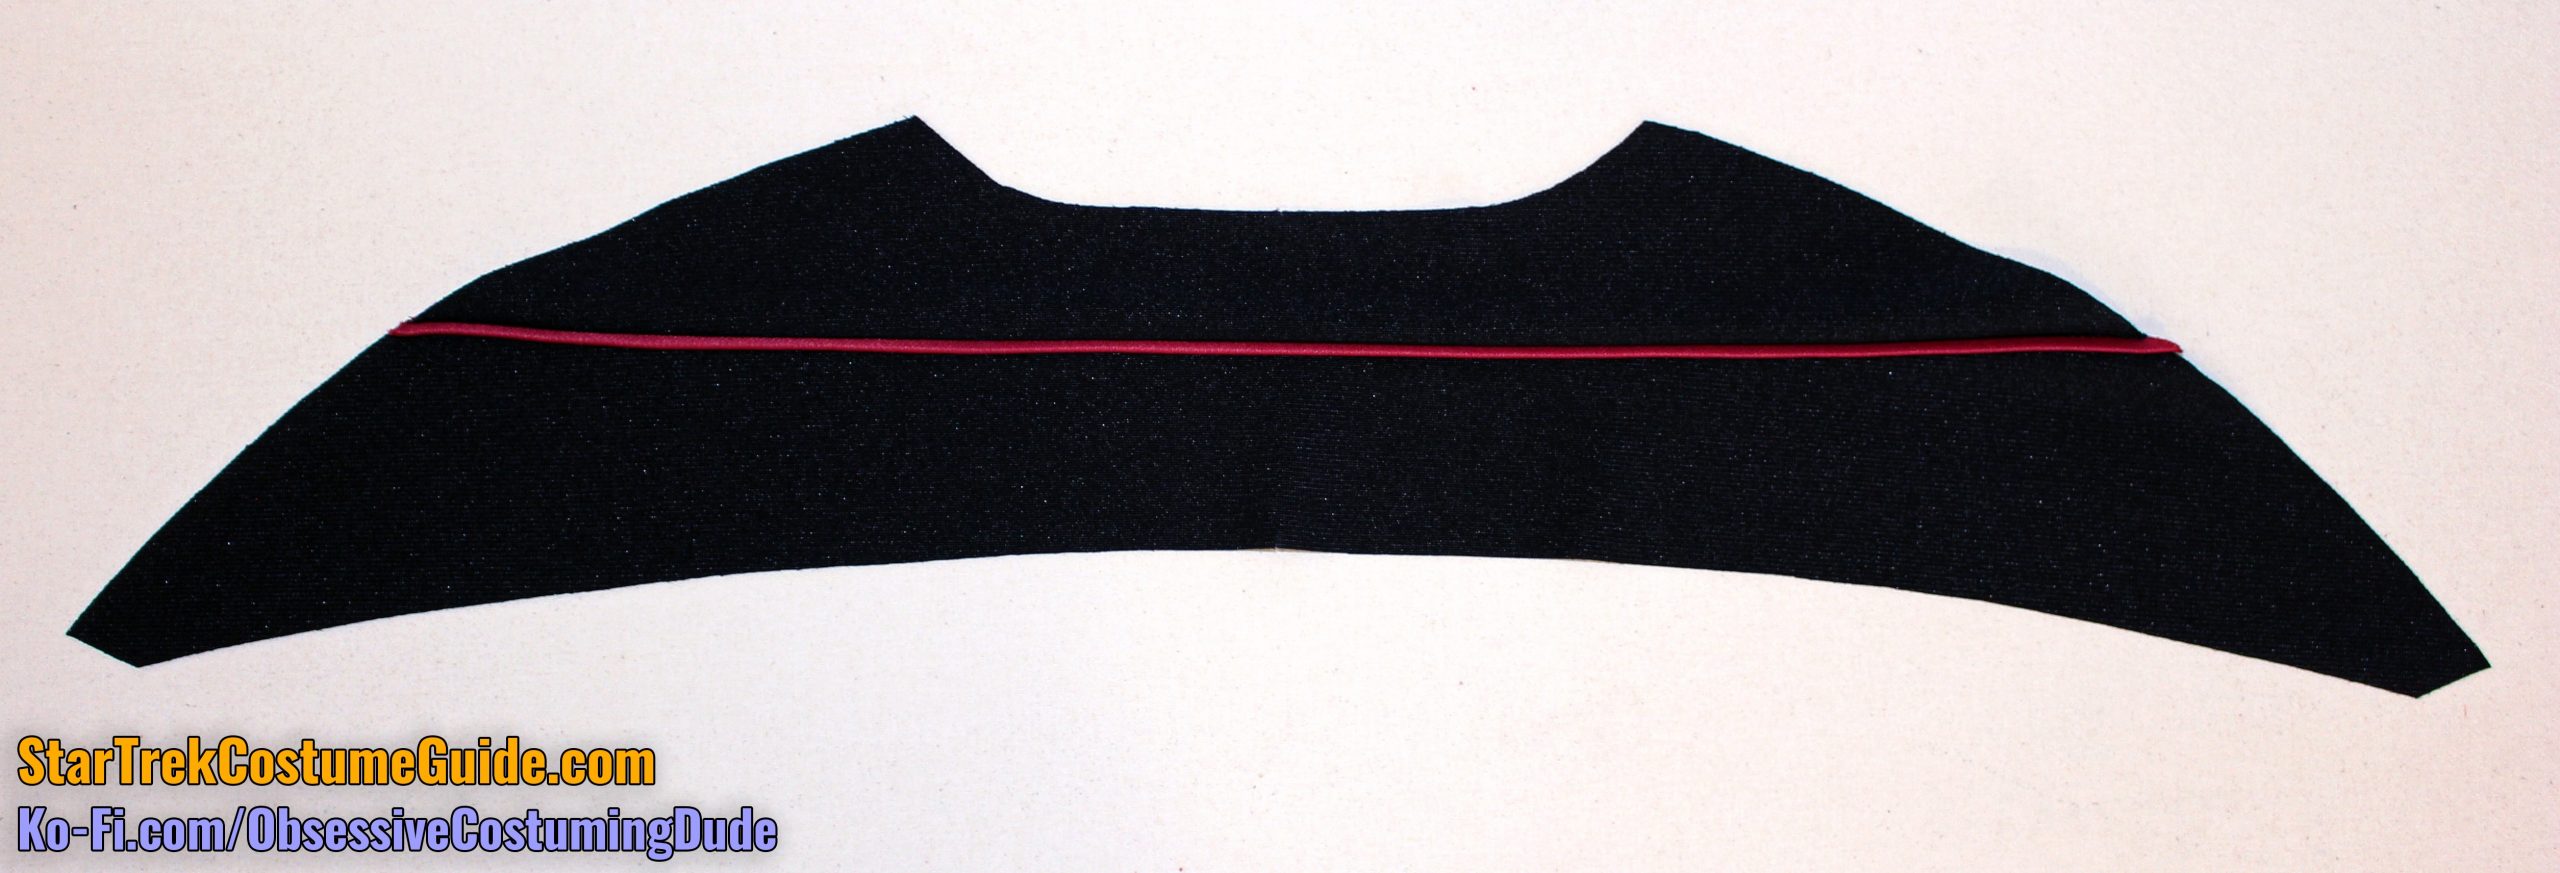
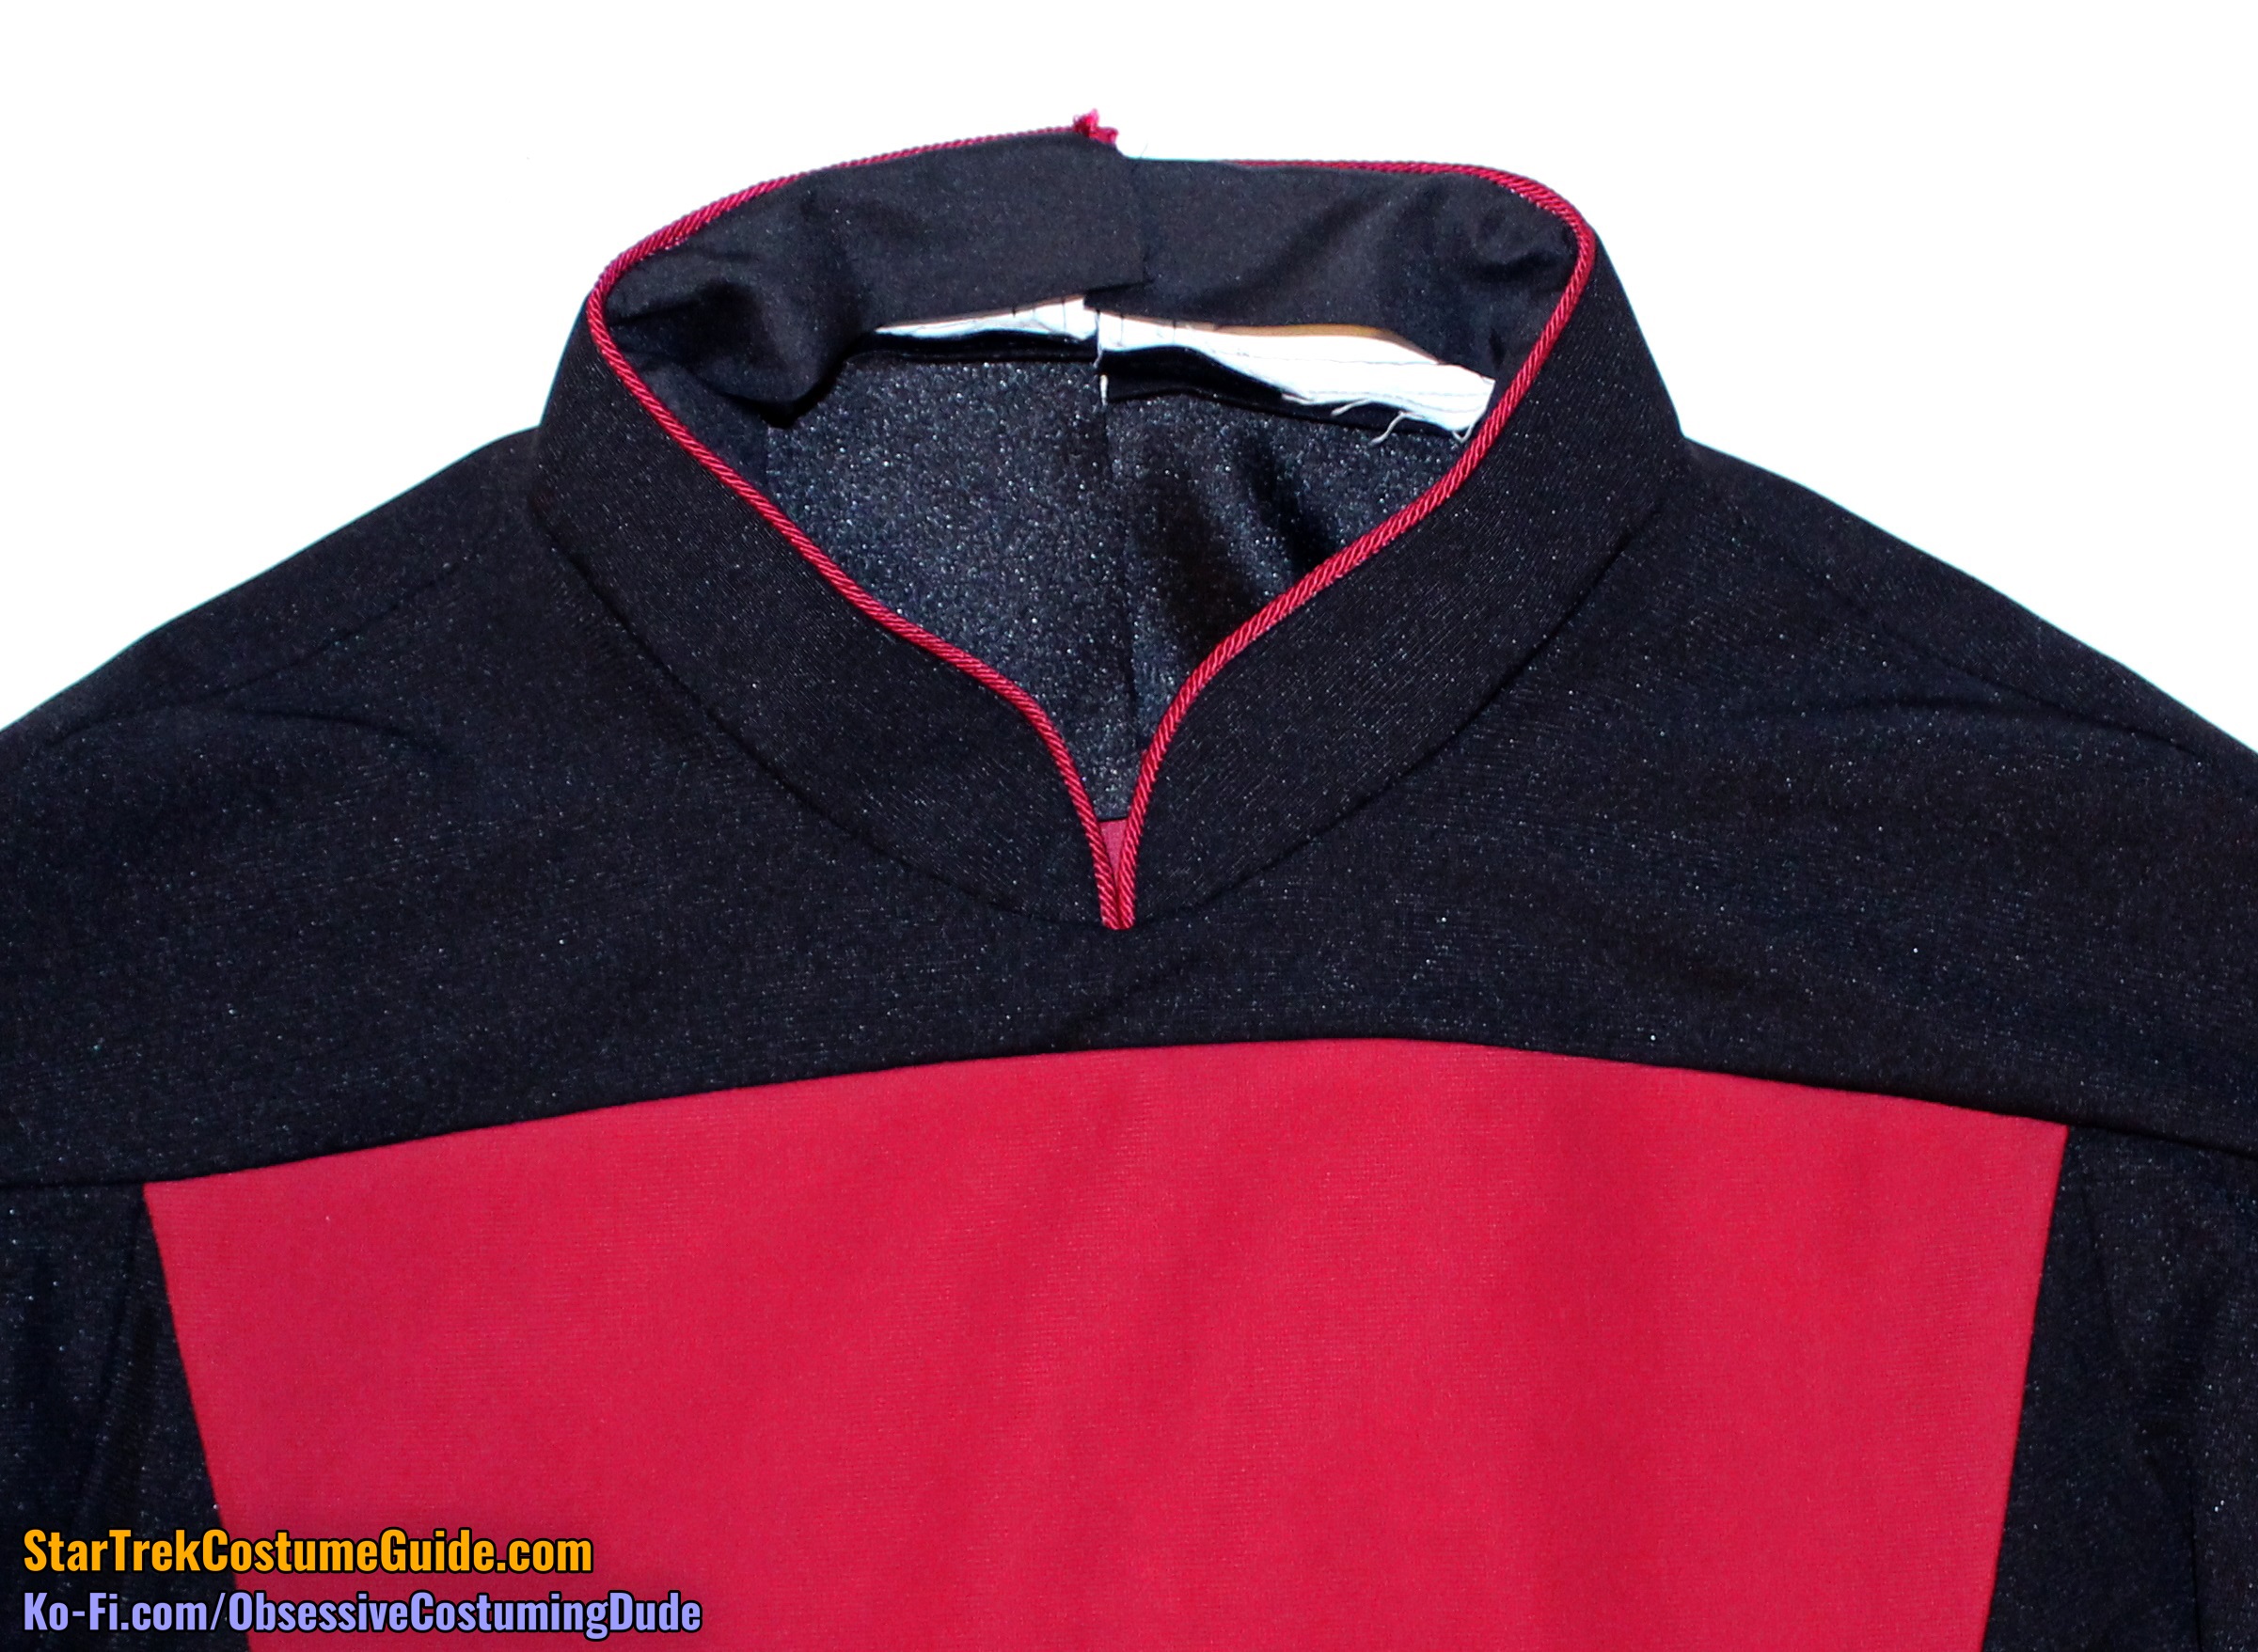
For the early version of the TNG skant, it’s time to attach the neckline piping.
For the conceptual seasons 3+ version of the TNG skant, it’s time to make and attach the collar.
I’ll cover the early TNG skant and its neckline piping first. If you’re making the conceptual later version of the TNG skant, feel free to skip ahead to the collar.
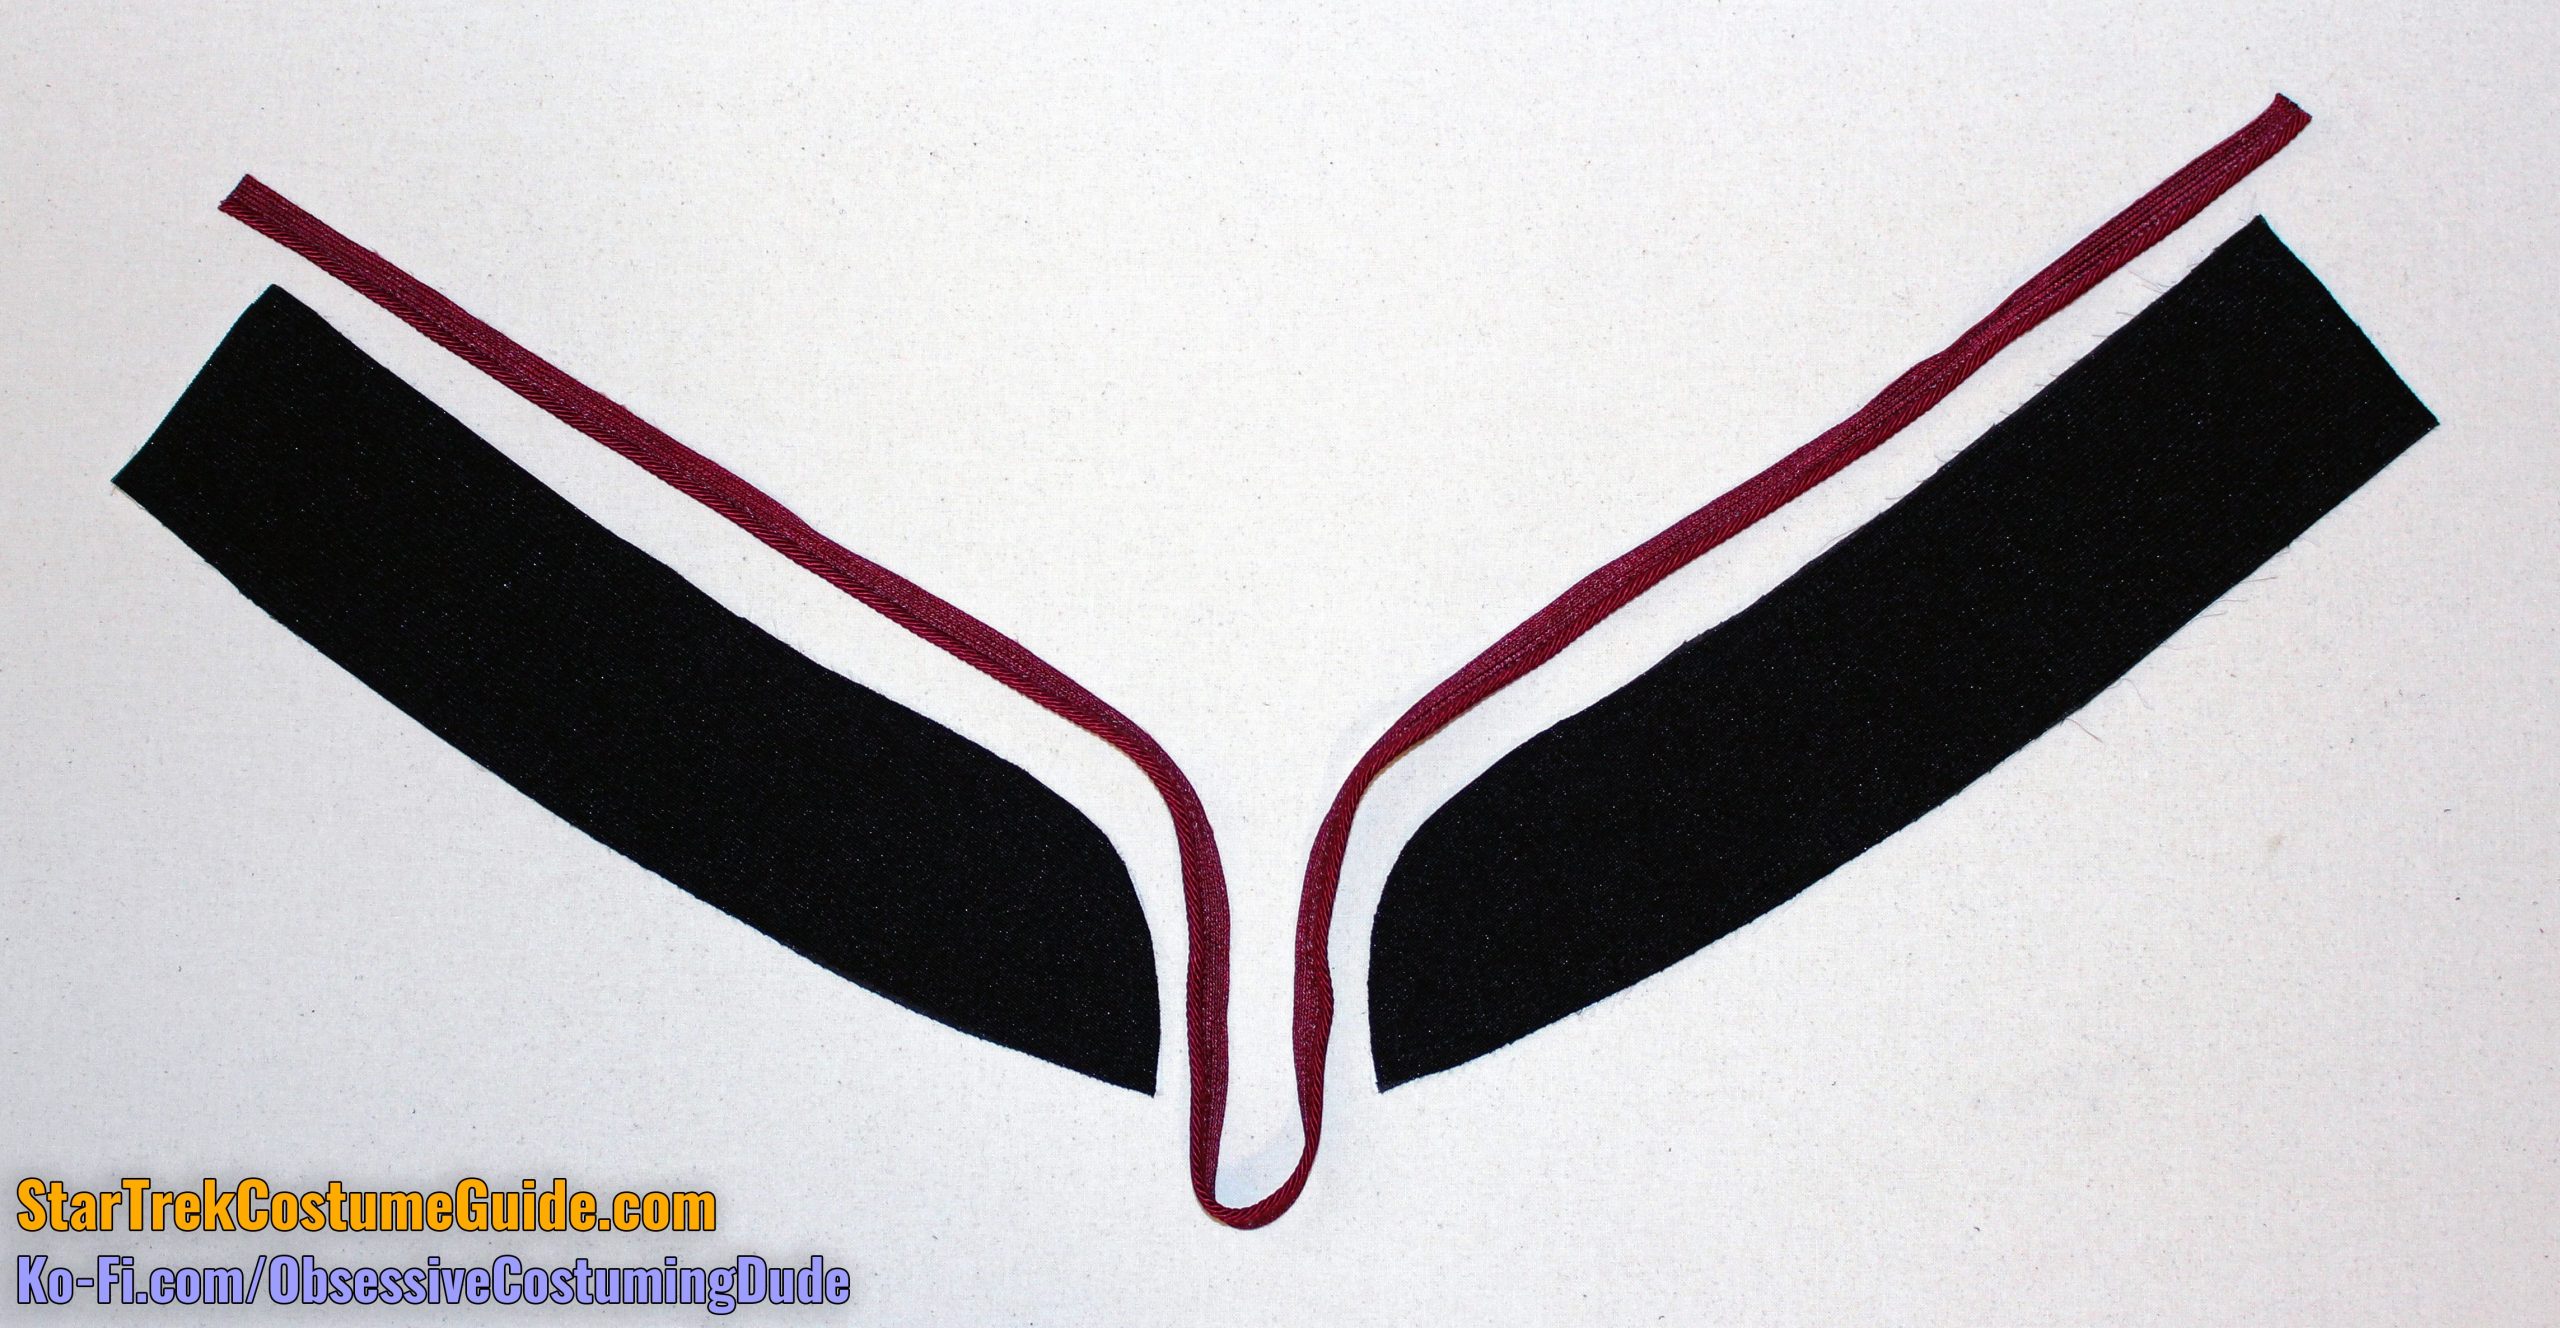
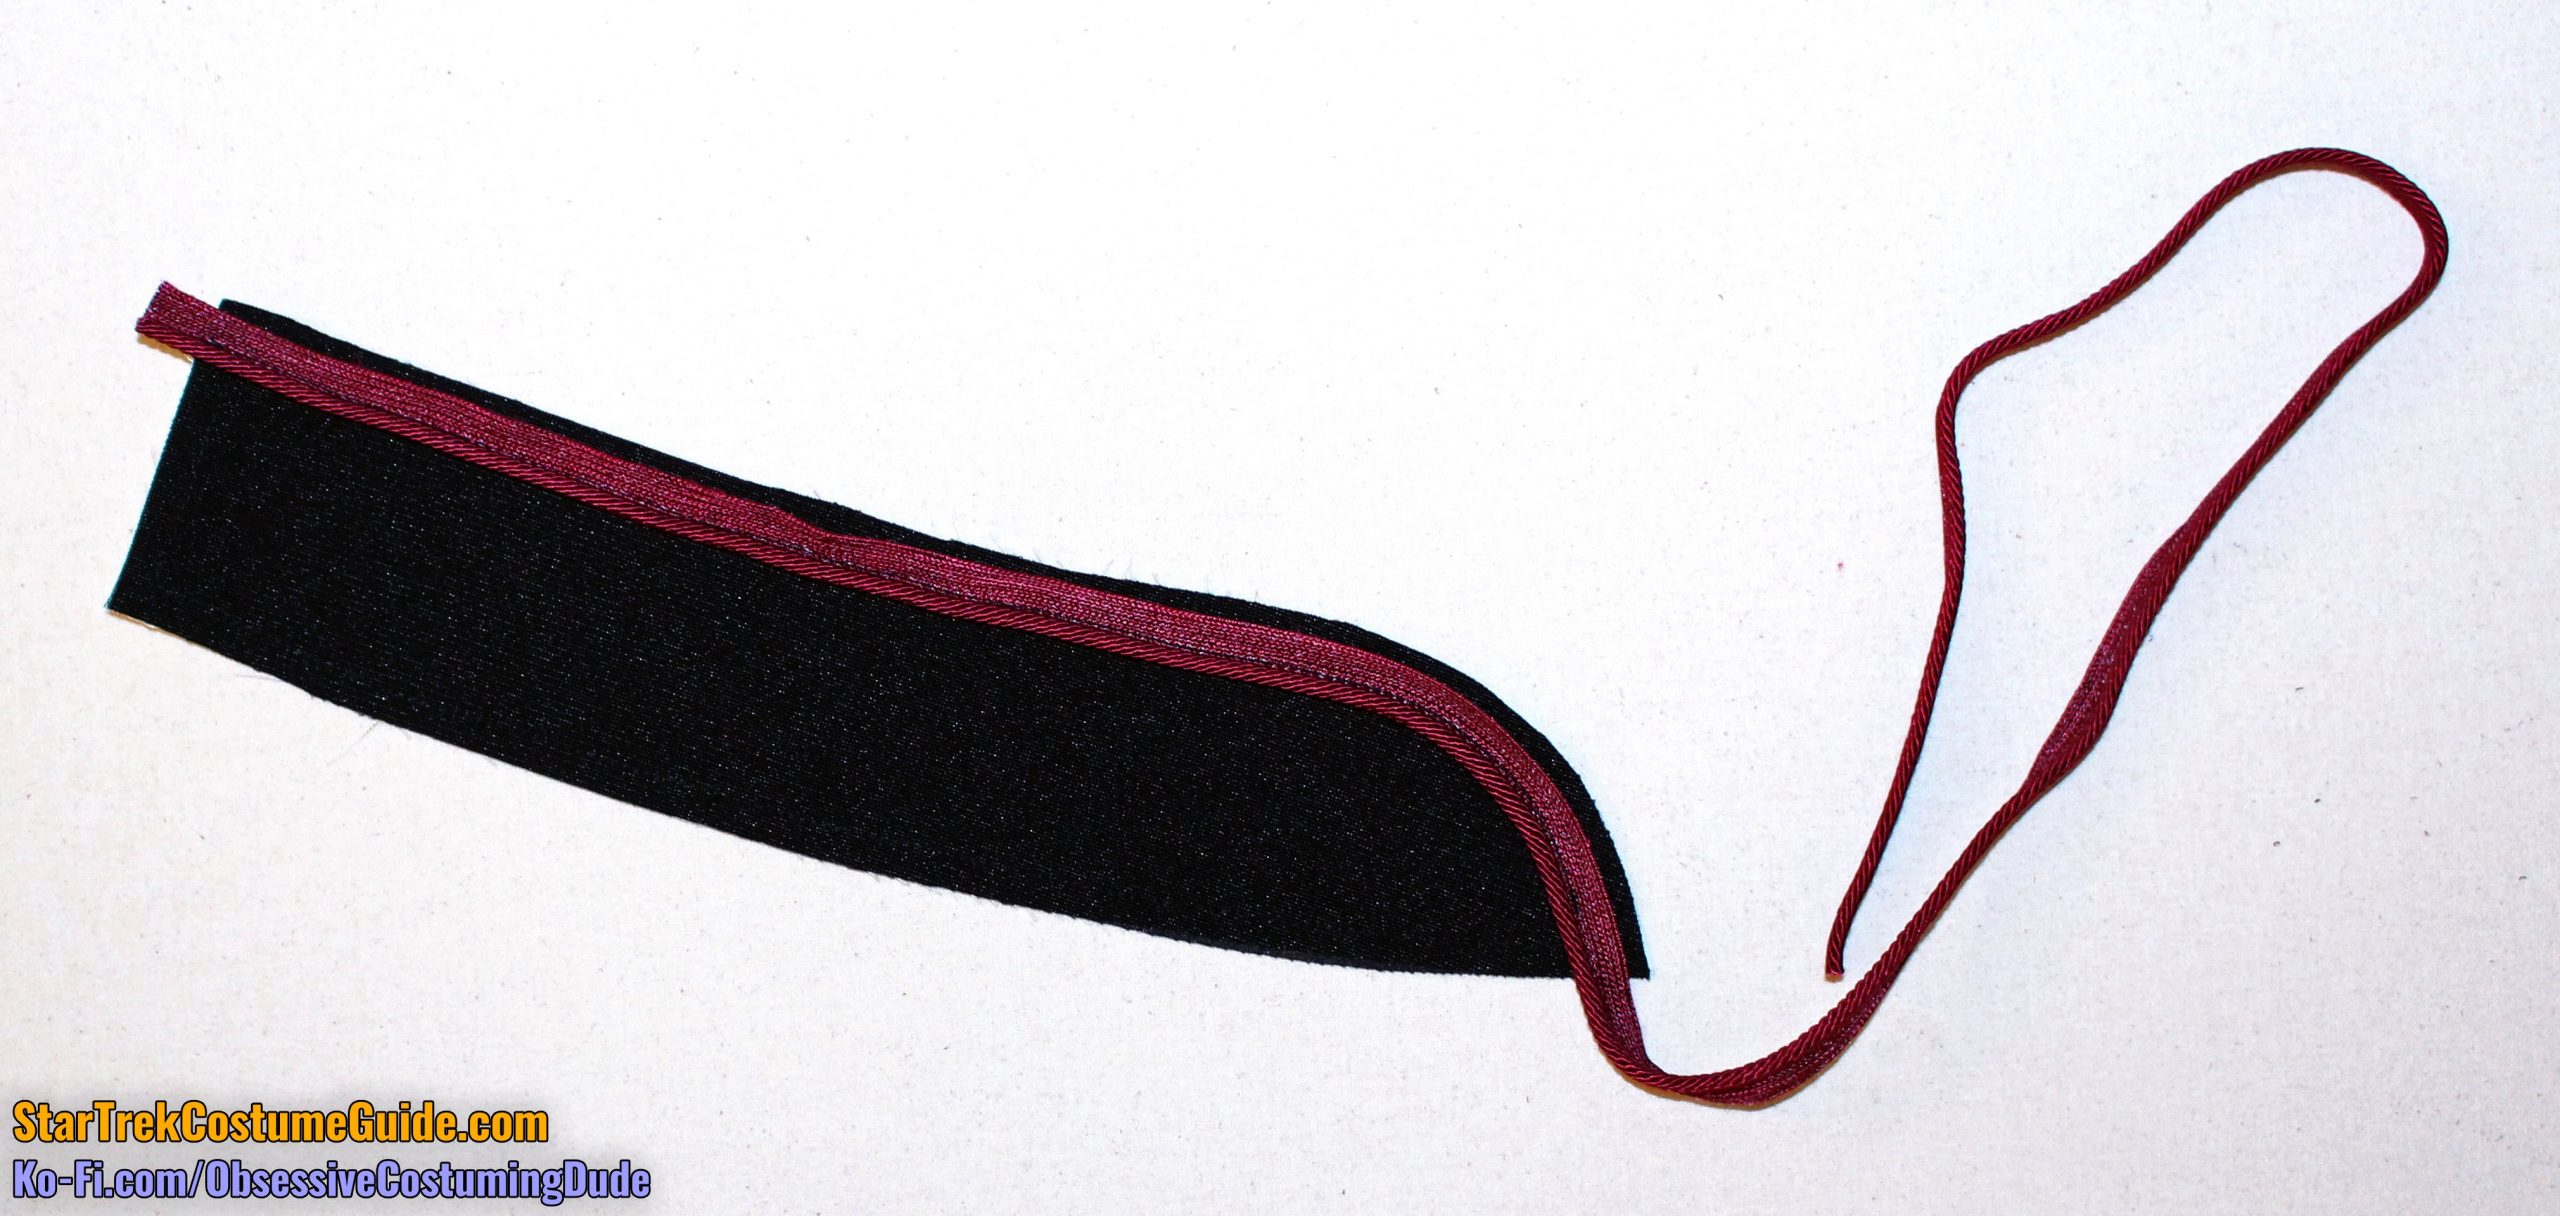
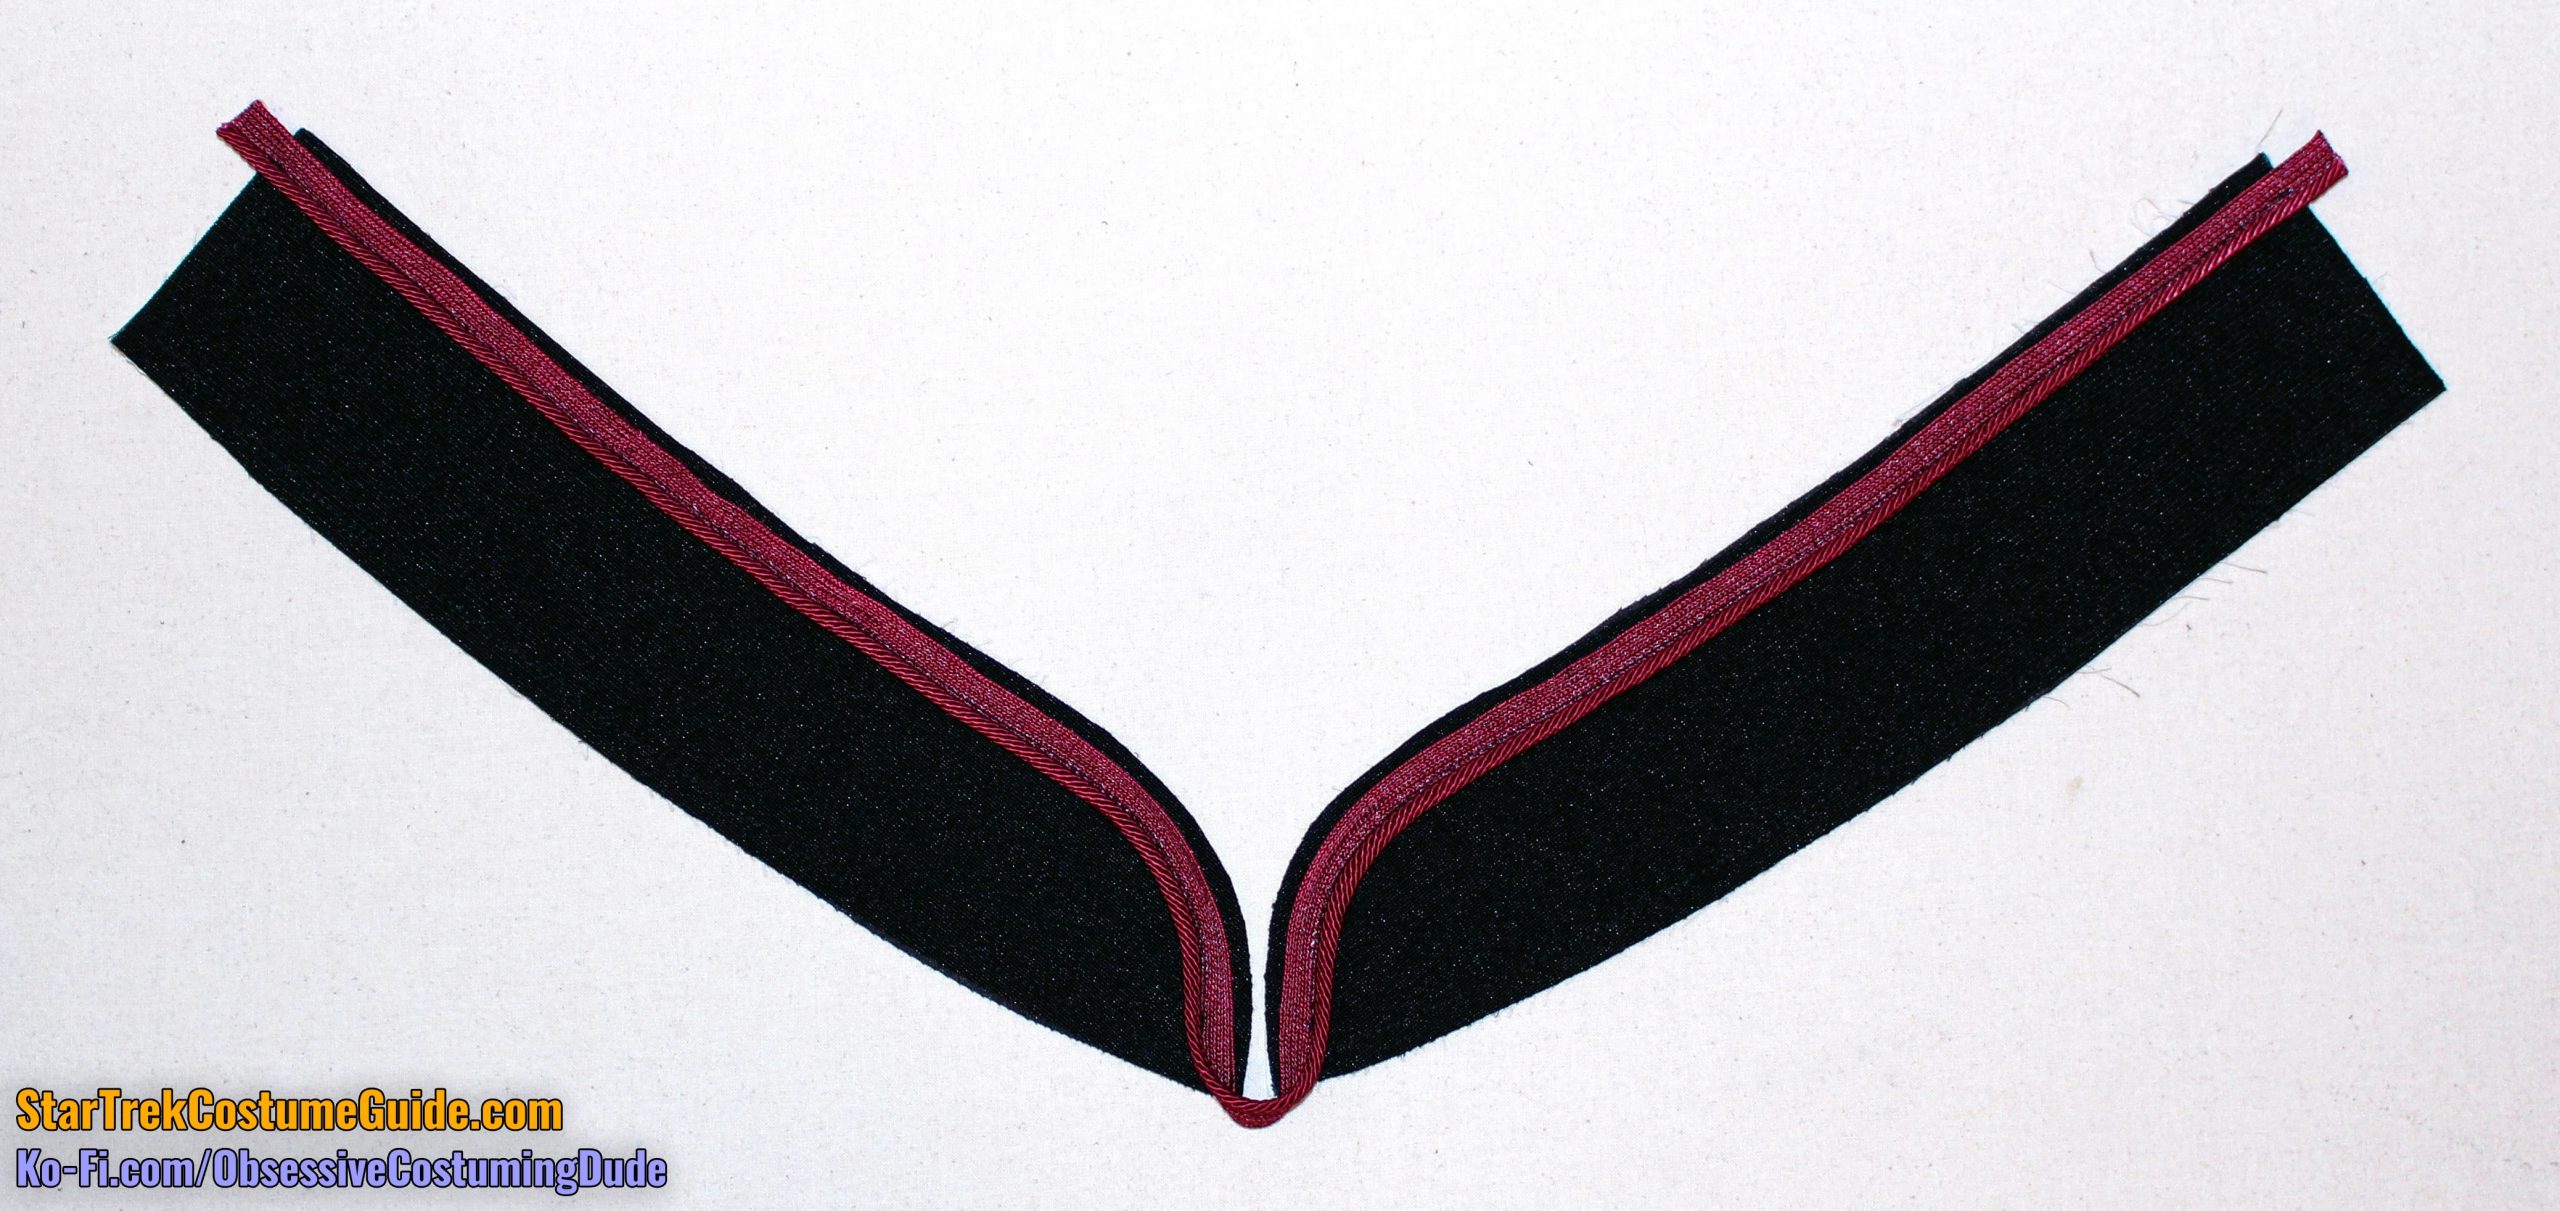
Press the neckline trim (piece O) in half, lengthwise.
Pin the neckline trim to the skant’s neckline, folded edges down and open edges flush.
Sew the neckline trim to the neckline with ⅜” seam allowance.
Press the neckline/trim seam allowances under.
Catch-stitch the seam allowances to the underside of the yoke, catching only a thread of the garment fabric so your stitches won’t show on the right side.
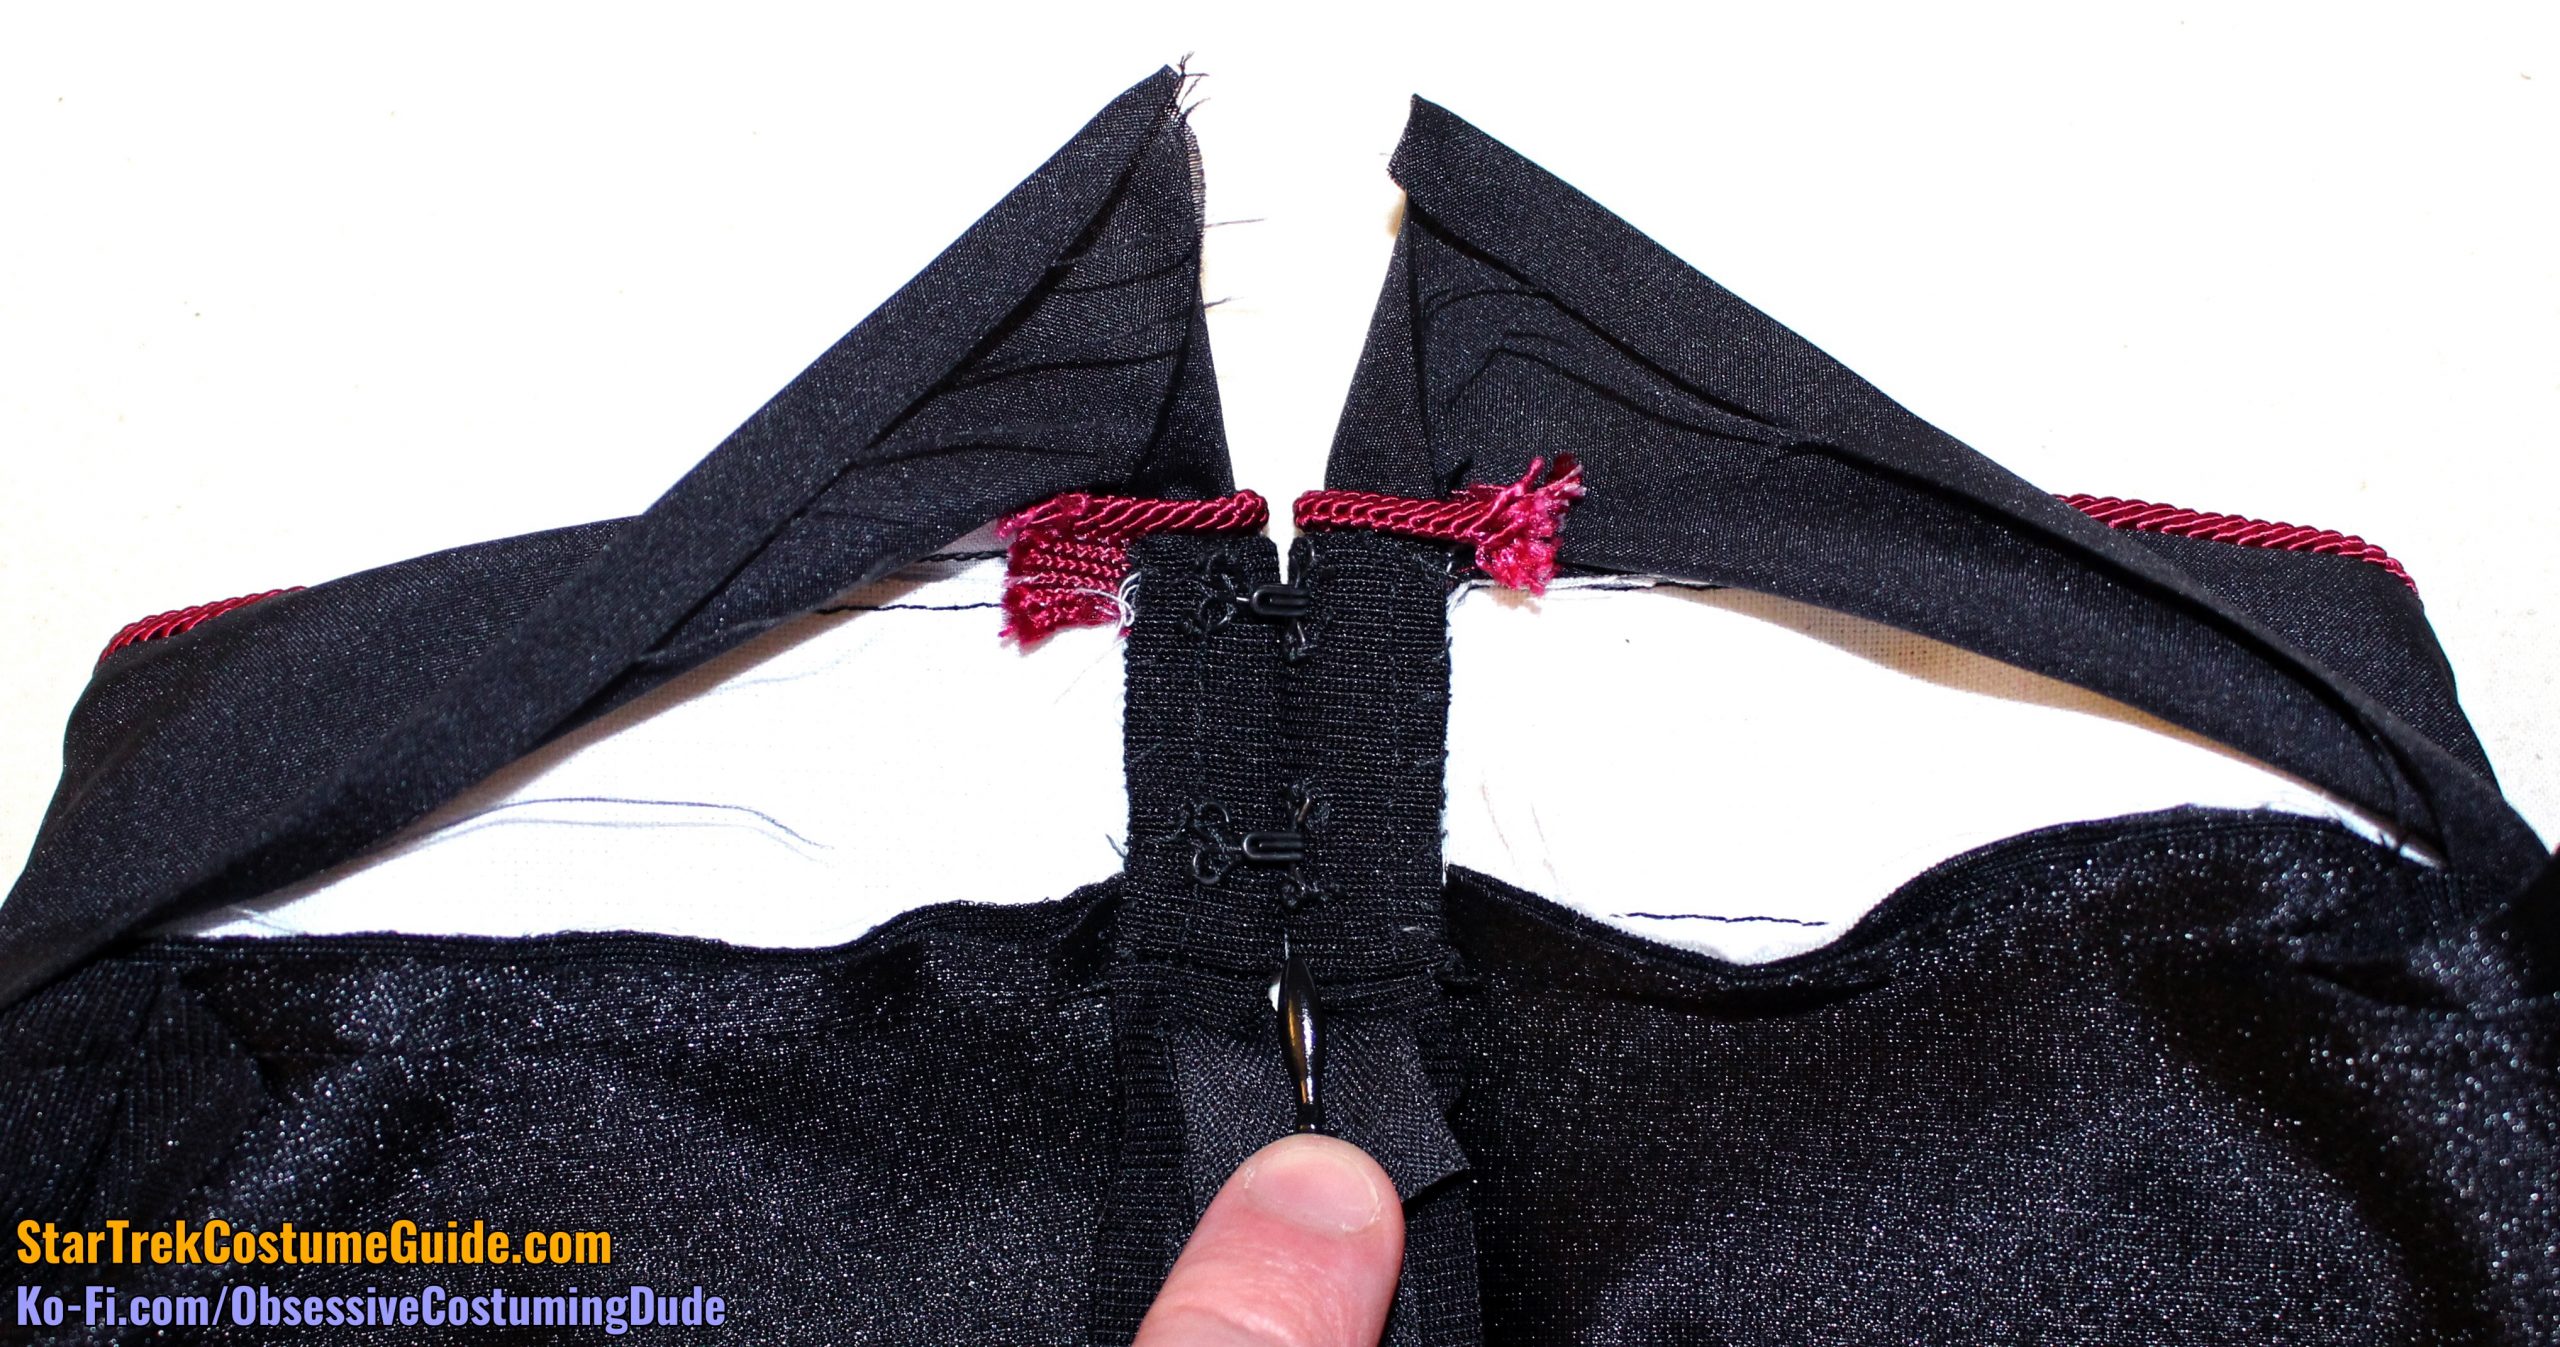
NOTE: For the back-zipping “All Good Things …” variant, you’ll need to do the two sides individually. Then sew the two front yokes together at the center front with ⅝” seam allowance, press the seam allowances open, and tack them down by hand. Then sew the front yoke assembly to the upper front body with ⅜” seam allowance, and press those seam allowances open.
Turn the upper front seam allowances under and tack them into place by hand, taking care that your stitches don’t show through to the right side of the skant.
Hand sew two hook-and-eye closures to the seam allowance, again making sure your stitches don’t show on the right side.
For the conceptual seasons 3+ version of the TNG skant, you’re obviously free to interface your collar however you’d like, but here are my thoughts:
On the screen-used Ensign Sito and male extra TNG jumpsuits I examined, the collars were only lightly interfaced – definitely stabilized and bolstered a bit, but they were still quite “squishy.”
Should you wish to replicate this effect, I suggest simply applying a lightweight fusible interfacing to the underside of your collar piece (piece A).
You might also apply a second layer of fusible to the underside of the collar; if so, I suggest trimming away the seam allowances on the second layer, as to avoid bulking up the seams.
On the other hand, on the screen-used Commander Riker and Lieutenant Barclay TNG jackets I examined, the collars were more sturdily interfaced.
The Barclay uniform collar was not only interface with a layer of fusible interfacing; it also was also underlined (“flat-lined”) with a second layer of wool gabardine that served as a “carrier layer” for a layer of hair canvas interfacing (with the seam allowances trimmed away).
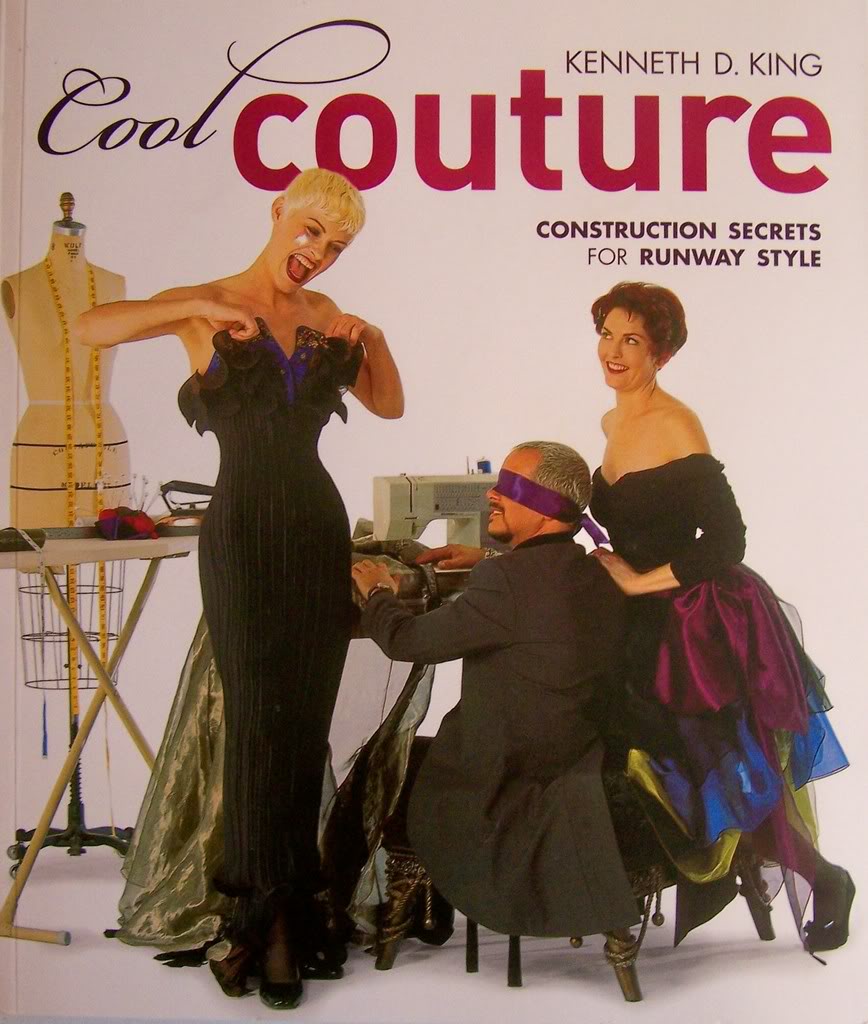
This is similar to the process Kenneth King described in his excellent book, Cool Couture (see right).
Since this uniform variation is purely conceptual, I believe either approach is fine and a matter of personal preference.
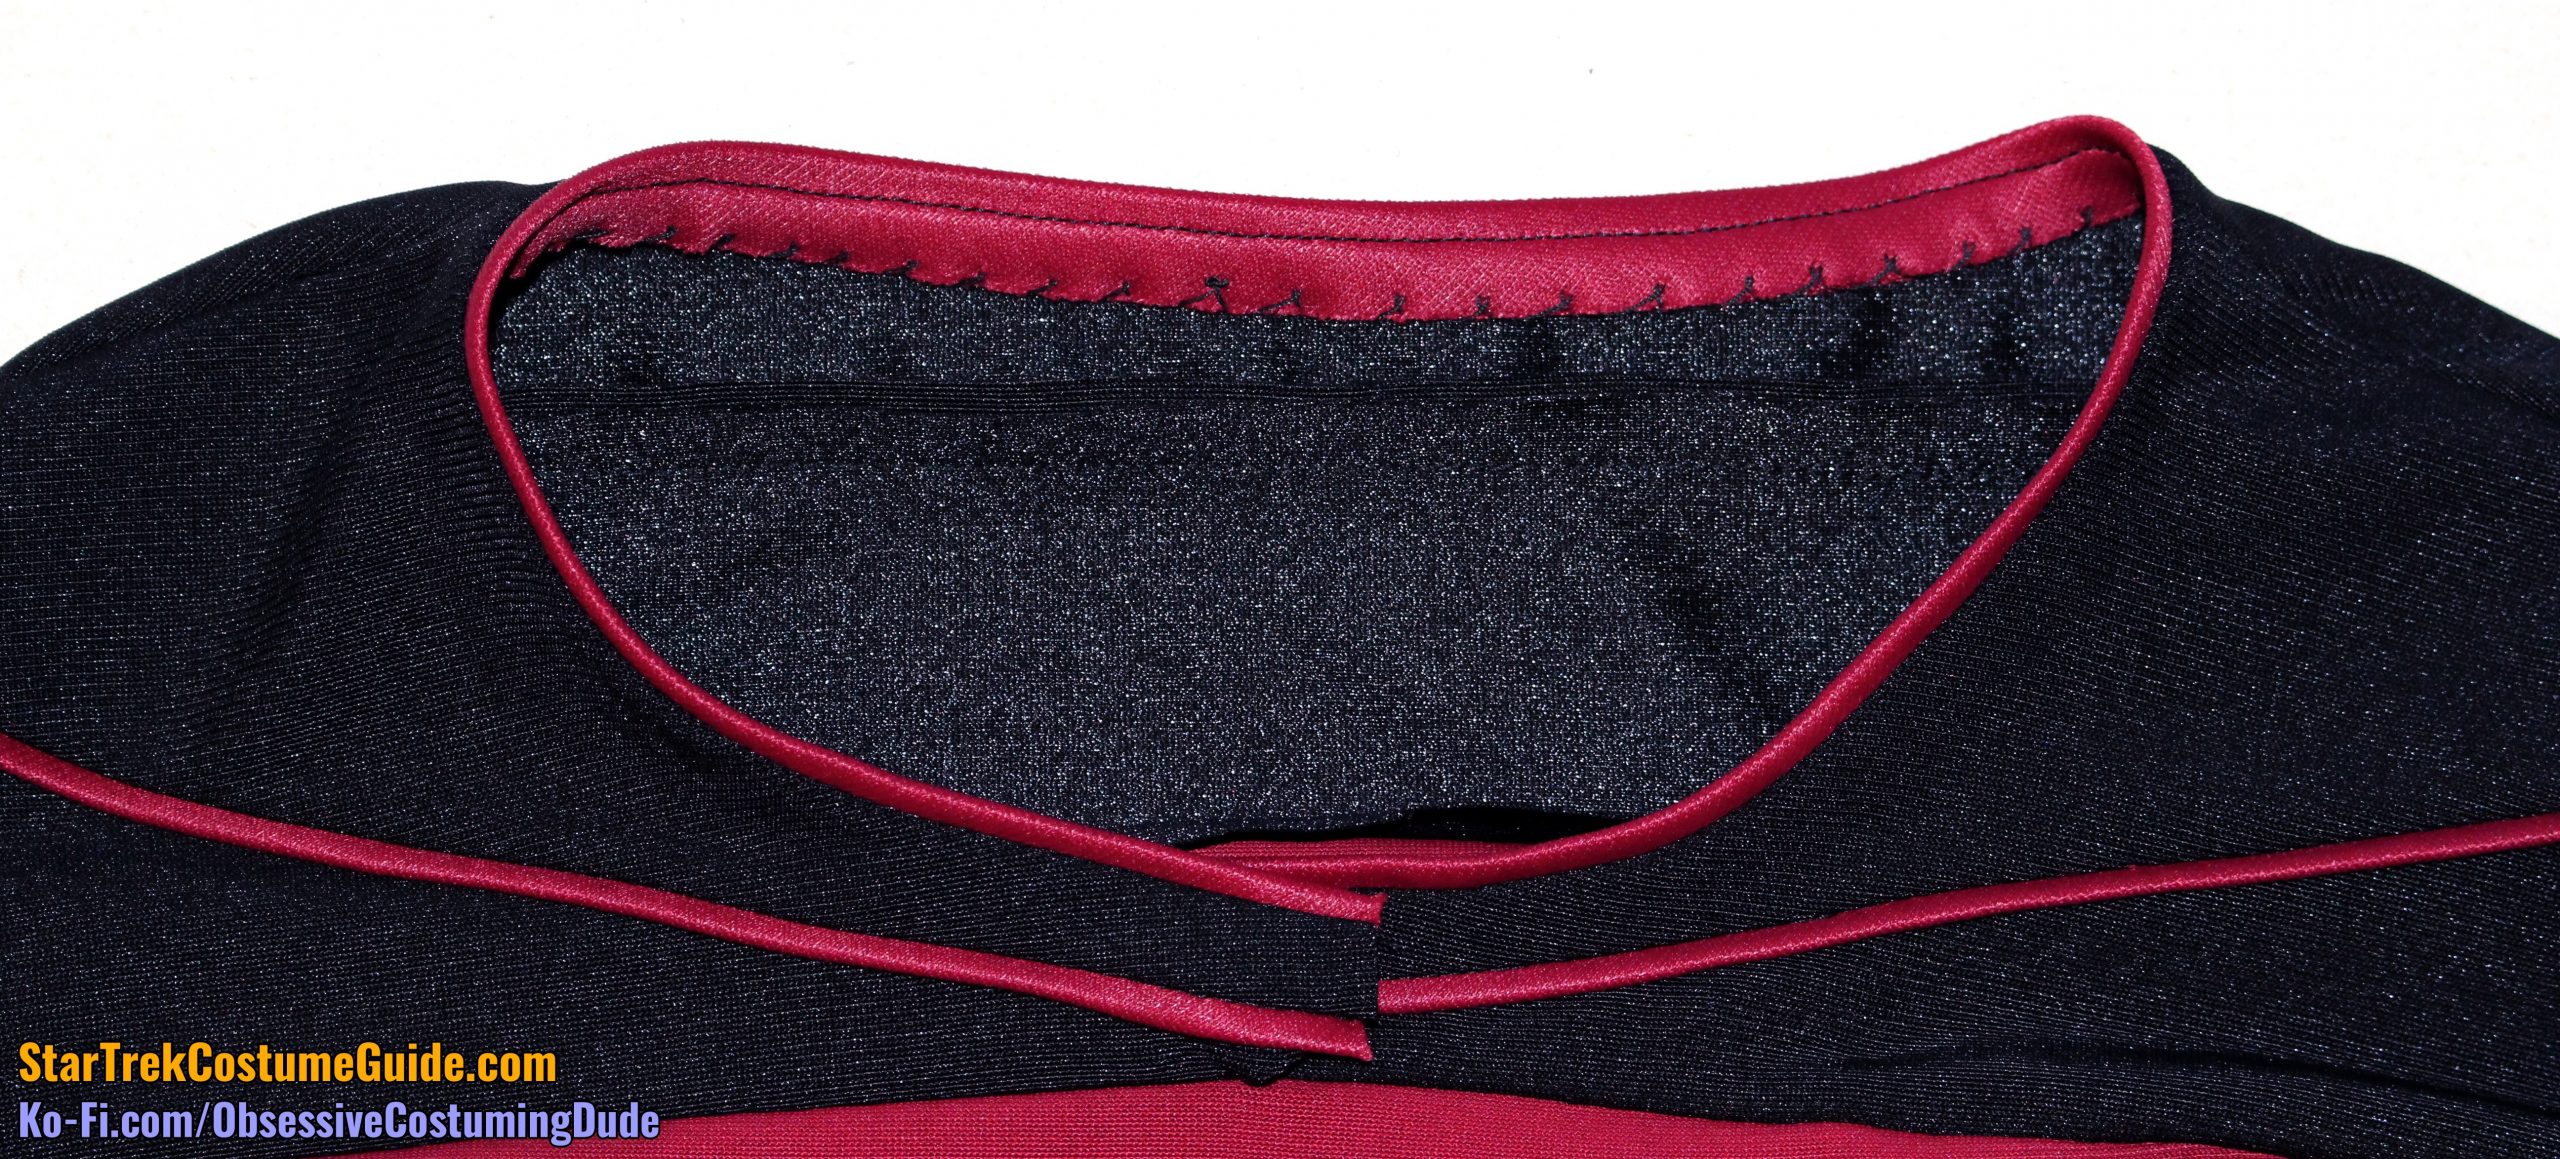
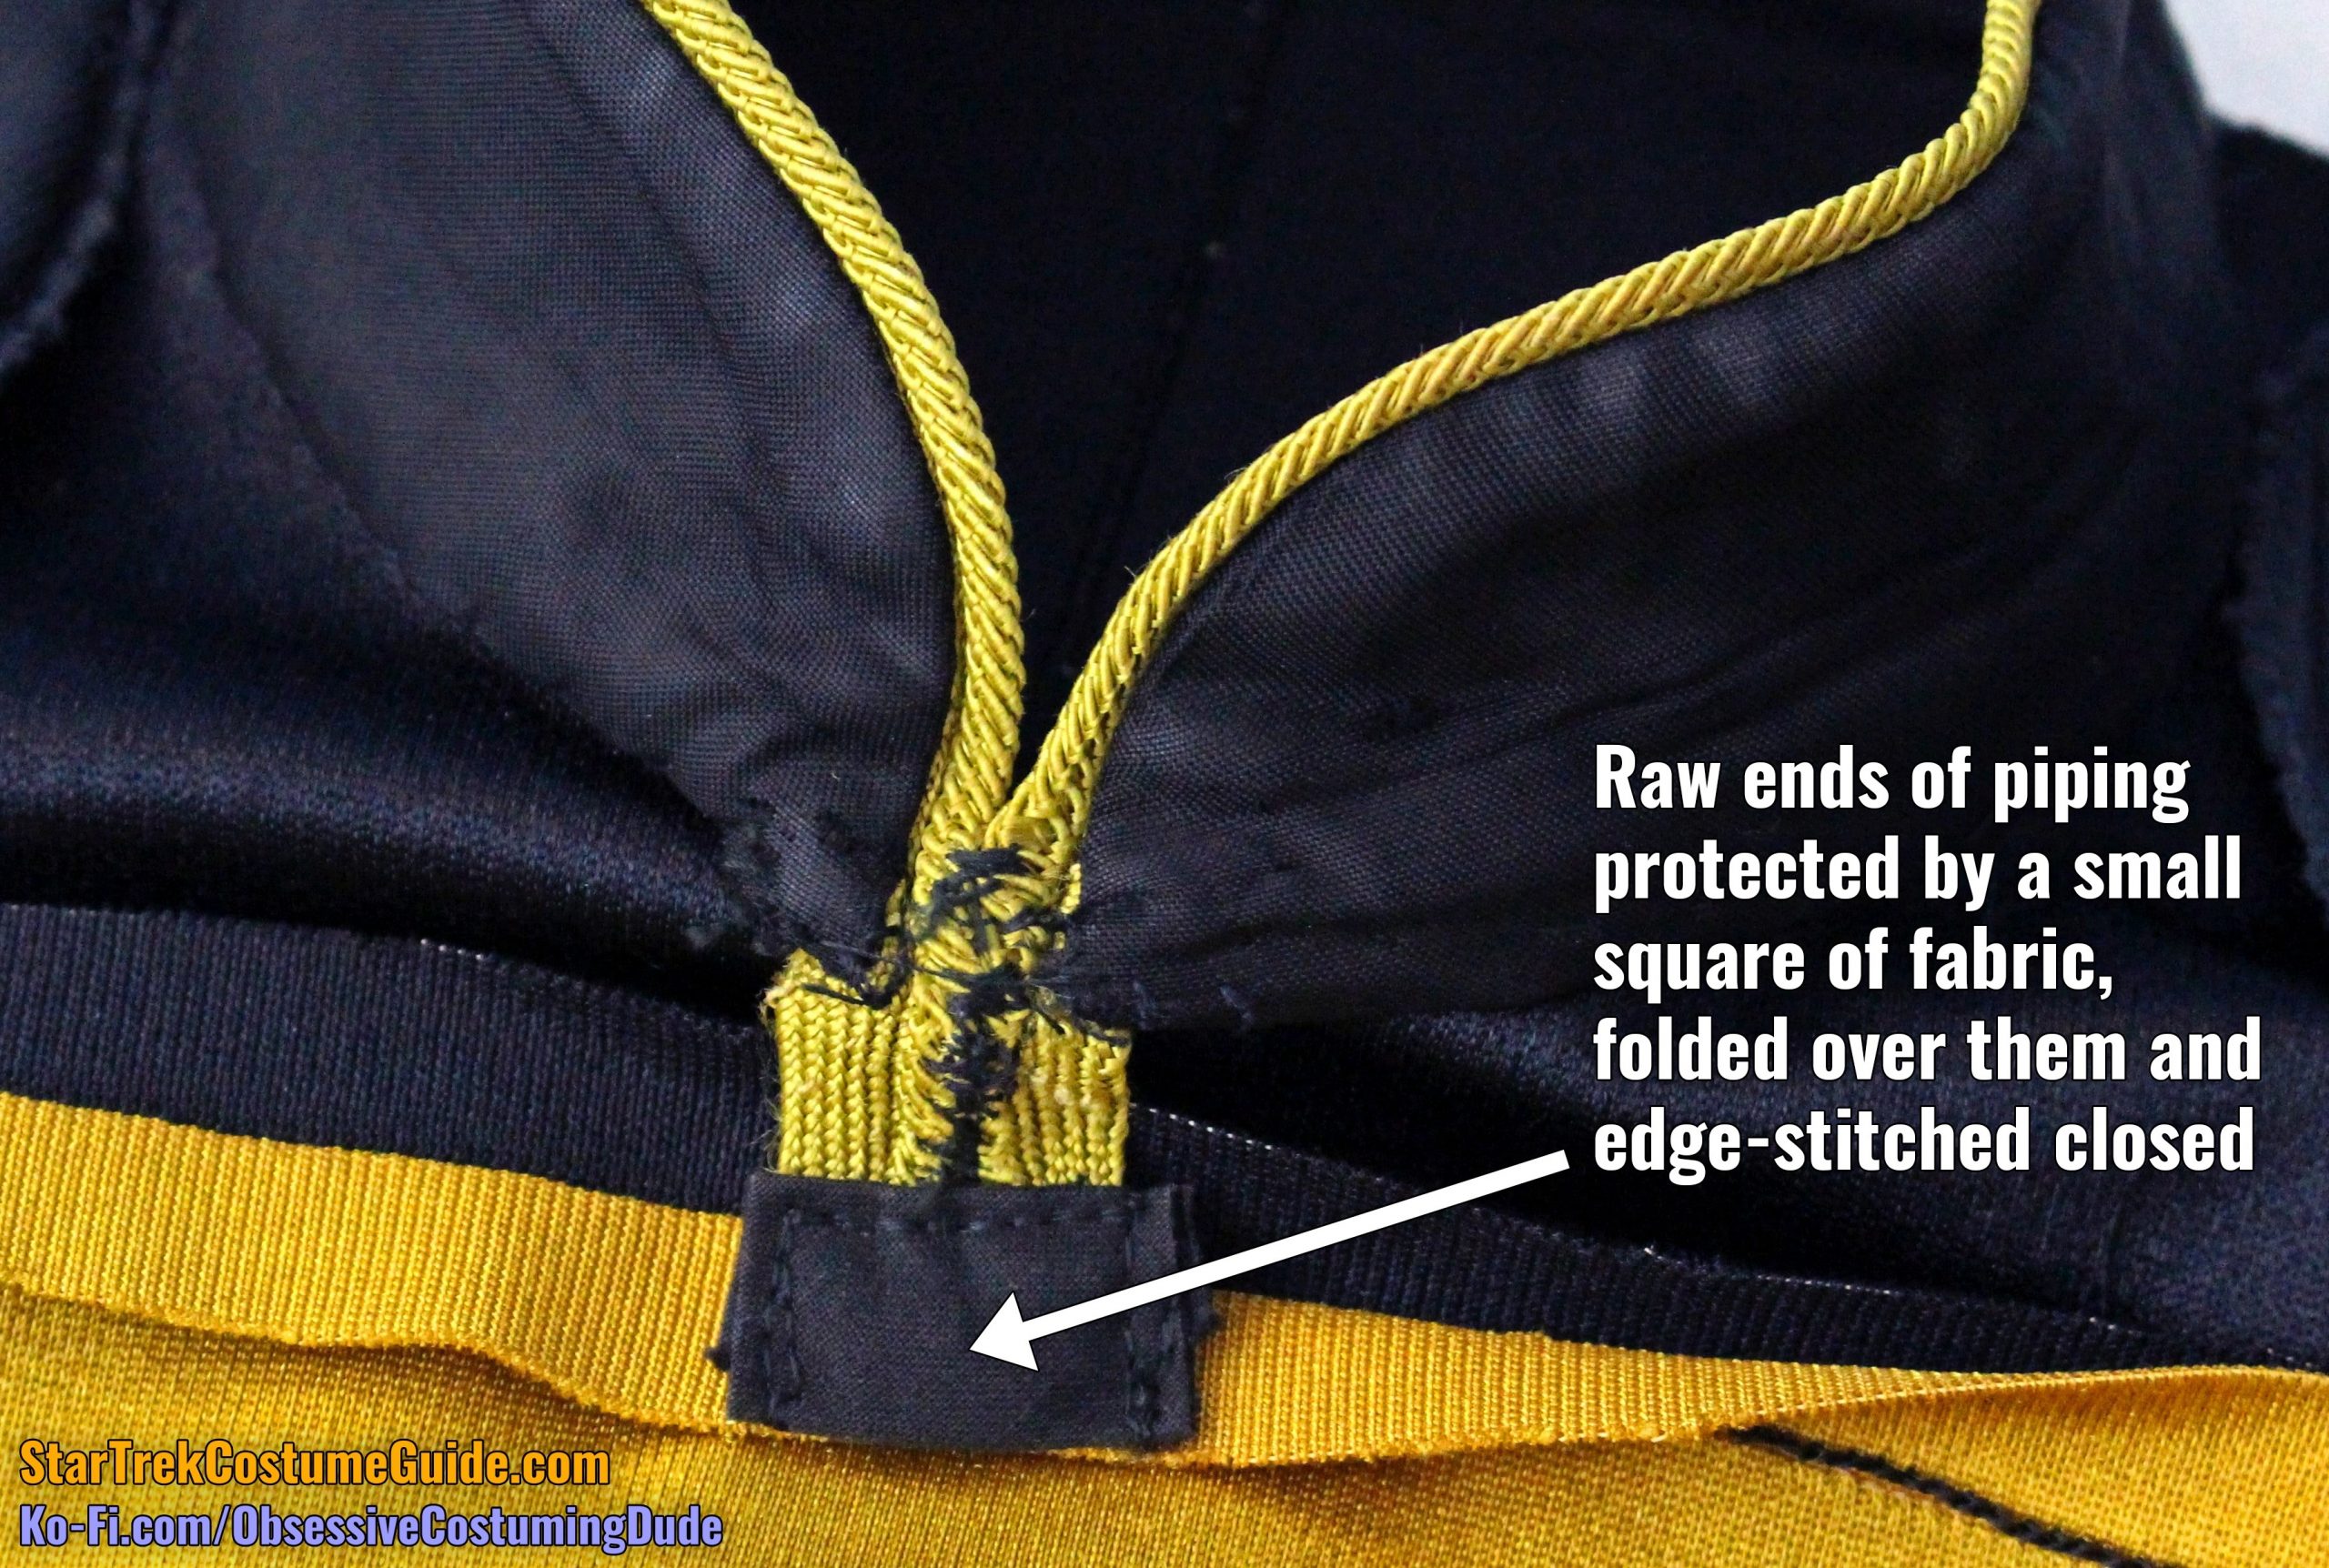
On the screen-used Ensign Sito TNG jumpsuit I examined, the collar piping was applied in to each side separately, and the raw ends were protected via a small square of fabric, folded over them and edge-stitched closed.
Alternatively, you can cut a single length of ⅛” division-colored piping sufficient to extend all the way around the upper edge of one side of the collar, down the front, then back up and around the other side of the collar.
TIP: Cut your collar piping a longer than you’ll actually need, with at least 1″ overhanging each end of the collar. Better to have more than you’ll actually need instead of coming up short because you underestimated! Also, the piping can tend to fray when handled, so after you’ve sewn the piping onto the collar, you can trim the excess from the ends and apply liquid fray preventer.
Using your zipper/piping foot, sew the piping to the right side of the right collar along the upper/front edge with the ⅜” seam allowance, regardless of the size of your piping’s lip. Stop stitching ⅜” from the lower front edge and reinforce (leaving the bottommost ⅜” of the piping handing free).
Position the two halves of the collar so the front edges are flush and they’re mirrored at the front. Pull the free end of the piping across the front and into place on the other (left) half of the collar.
Beginning ⅜” from the lower front edge, sew the piping to the left collar.
At this point, the piping should be sewn to both sides of the collar, except for a ¾” to 1”” length of piping left hanging free in the middle which connects the two collar halves.
Press the lower seam allowance upward on the two halves of the collar lining.
Sew the collar lining to the collar along the upper edge over the previous stitch line, again leaving the bottommost ⅜” free.
Repeat for the other side.
Trim the collar’s upper/front seam allowances to ¼” and notch the seam allowances along the front curve.
Turn the collar lining to the underside of the collar and press.
Fold the centermost length of (free-hanging) division piping into a flat, triangular shape and press.
Sew the collar assembly to the skant neckline, matching center backs and center fronts.
TIP: When attaching the collar, first position the center front edges flush over the center front of the neckline and securely fasten the centermost ½” or so of the collar to the skant by stitching ⅜” from the edge, backstitching, and repeating several times.
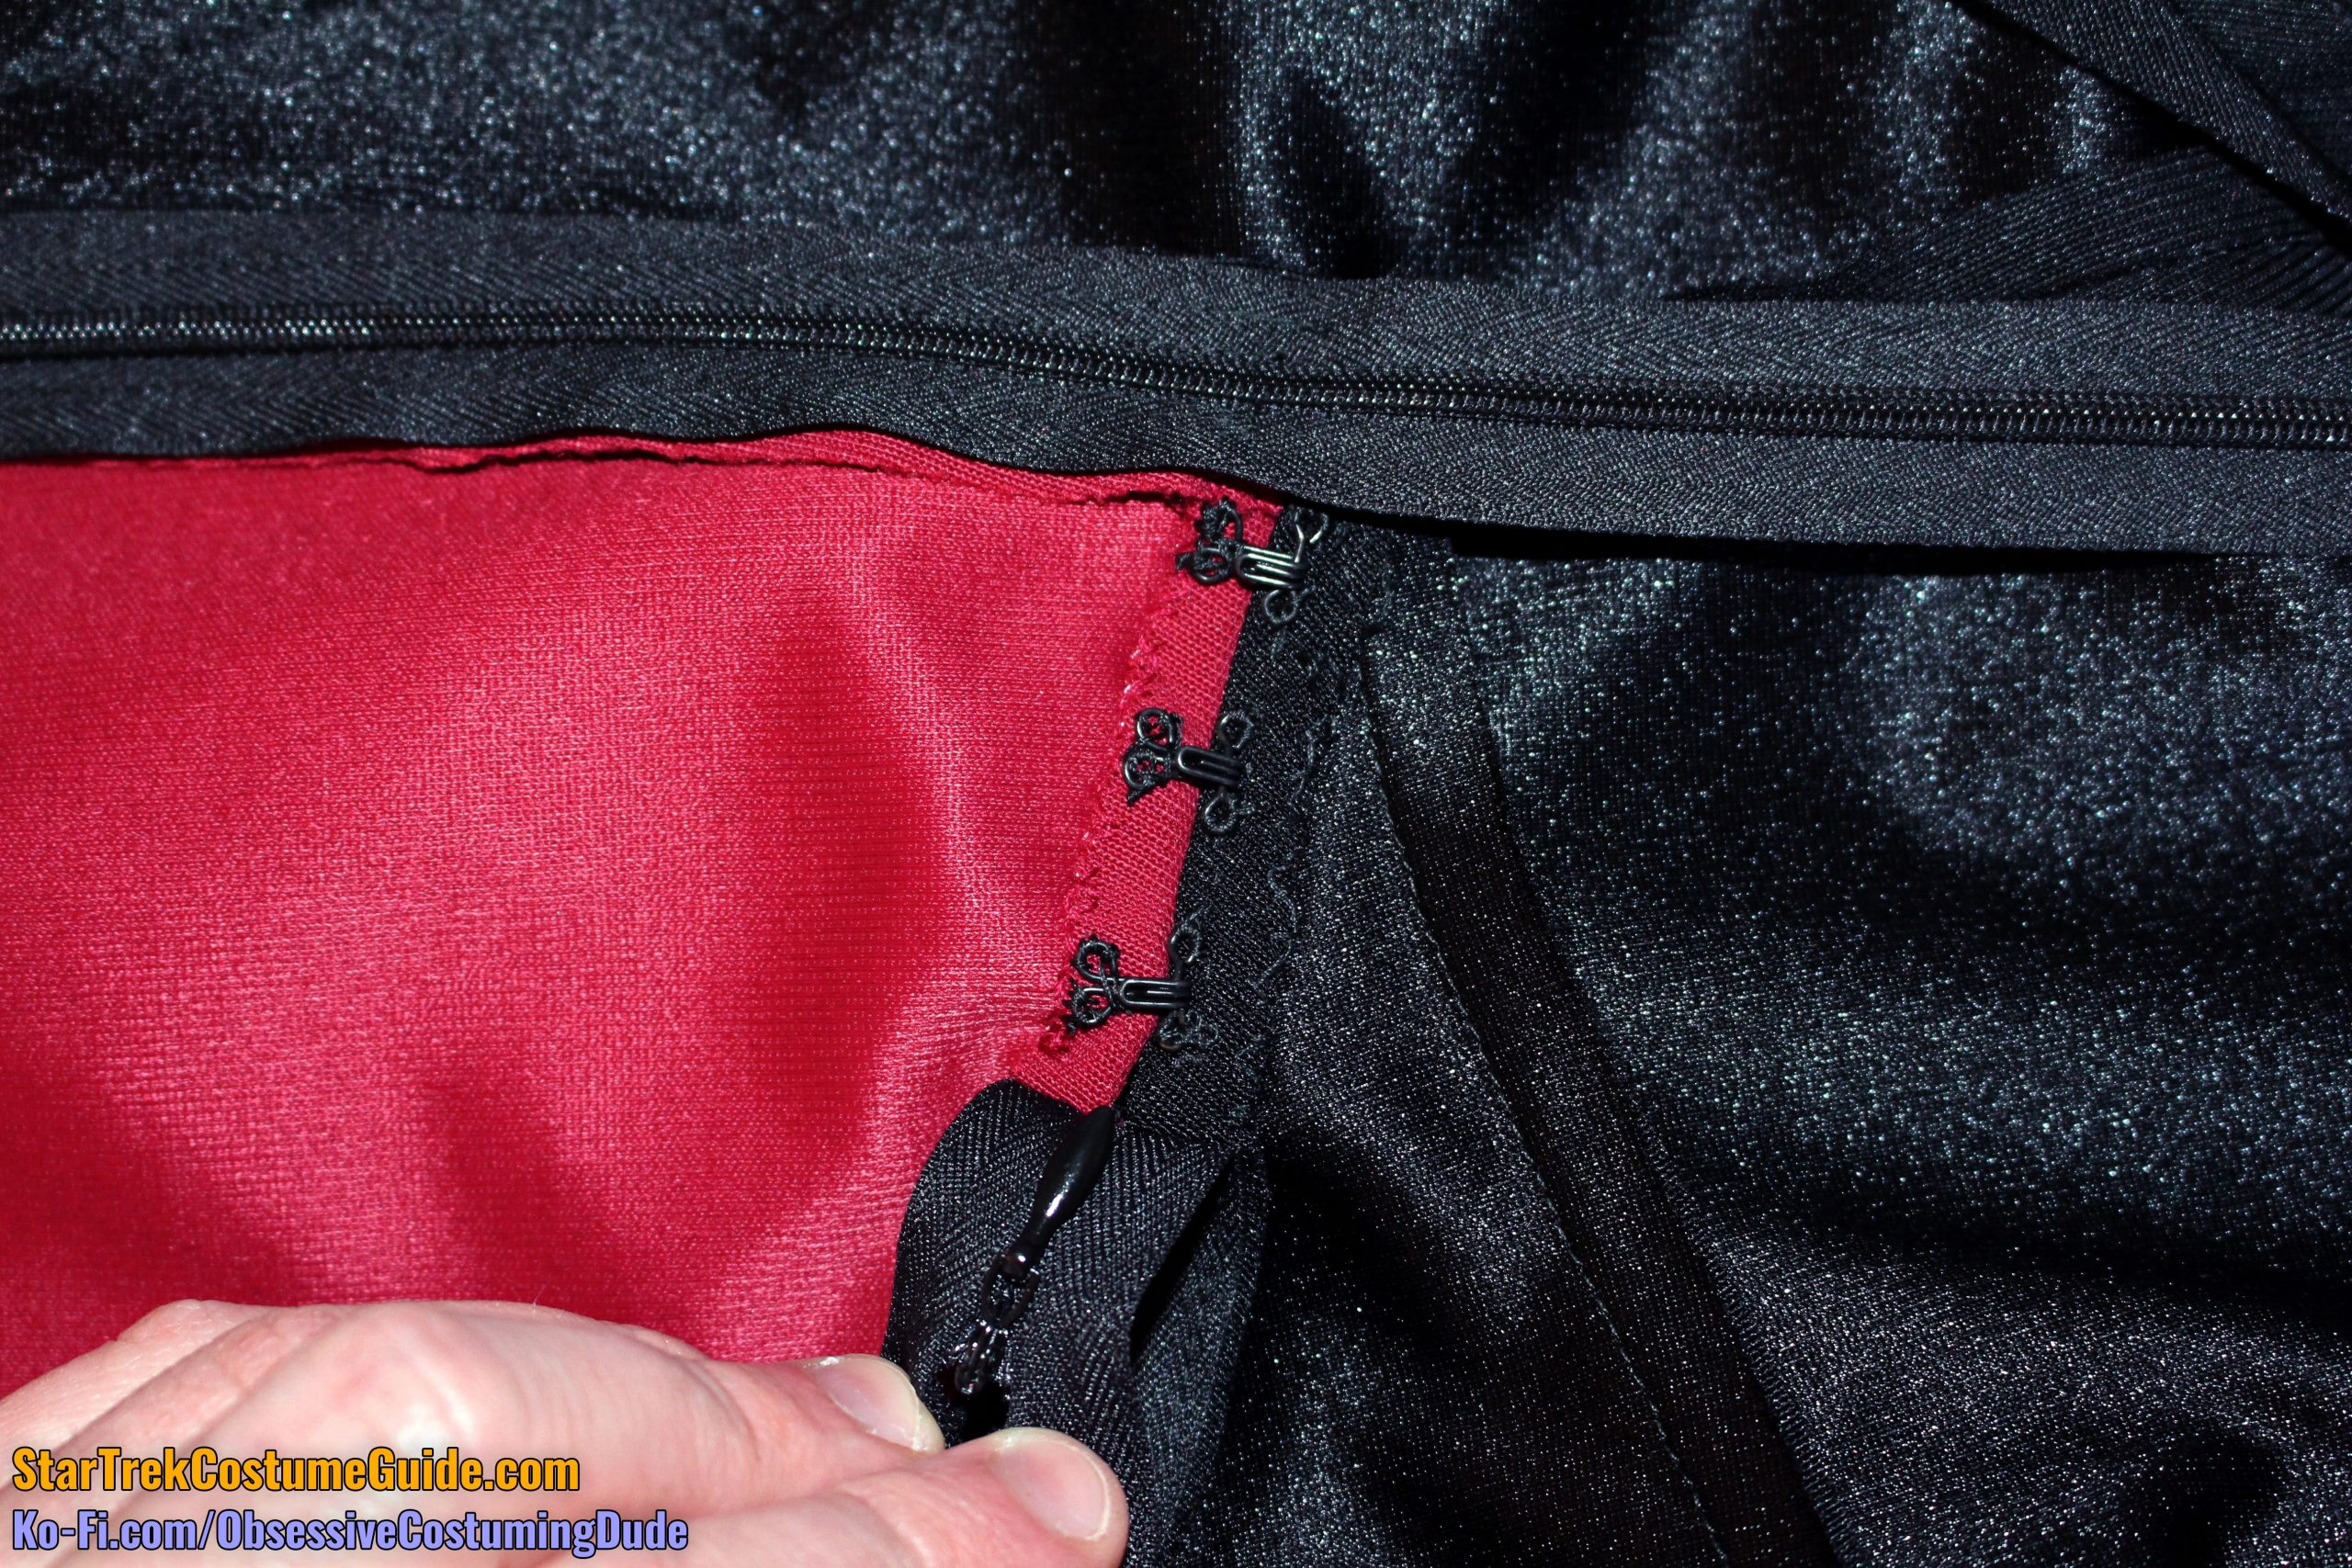
For the back-zipping versions, install the back invisible zipper, matching seam lines and leaving the top 1″ hanging free.
(I like to position the back zipper so it extends upward past the collar/neckline seam by ¾”.)
Stitch across the zipper tape horizontally several times 1″ from the top (where the actual zipper stitch ended, also ¼” beneath the bottom of collar) to reinforce it where it was left hanging free.
Sew the lower back closed from the lower edge to the bottom of the zipper. Press the seam allowances open.
Trim away the yoke/body and collar/neckline seam allowances to reduce bulk.
Notch the center front collar/neckline seam allowances, taking care not to accidentally cut into the piping.
Press the collar/neckline seam allowances upward into the collar.
Tack the collar’s back seam allowances into place by hand, taking care that your stitches don’t show through to the right side of the garment.
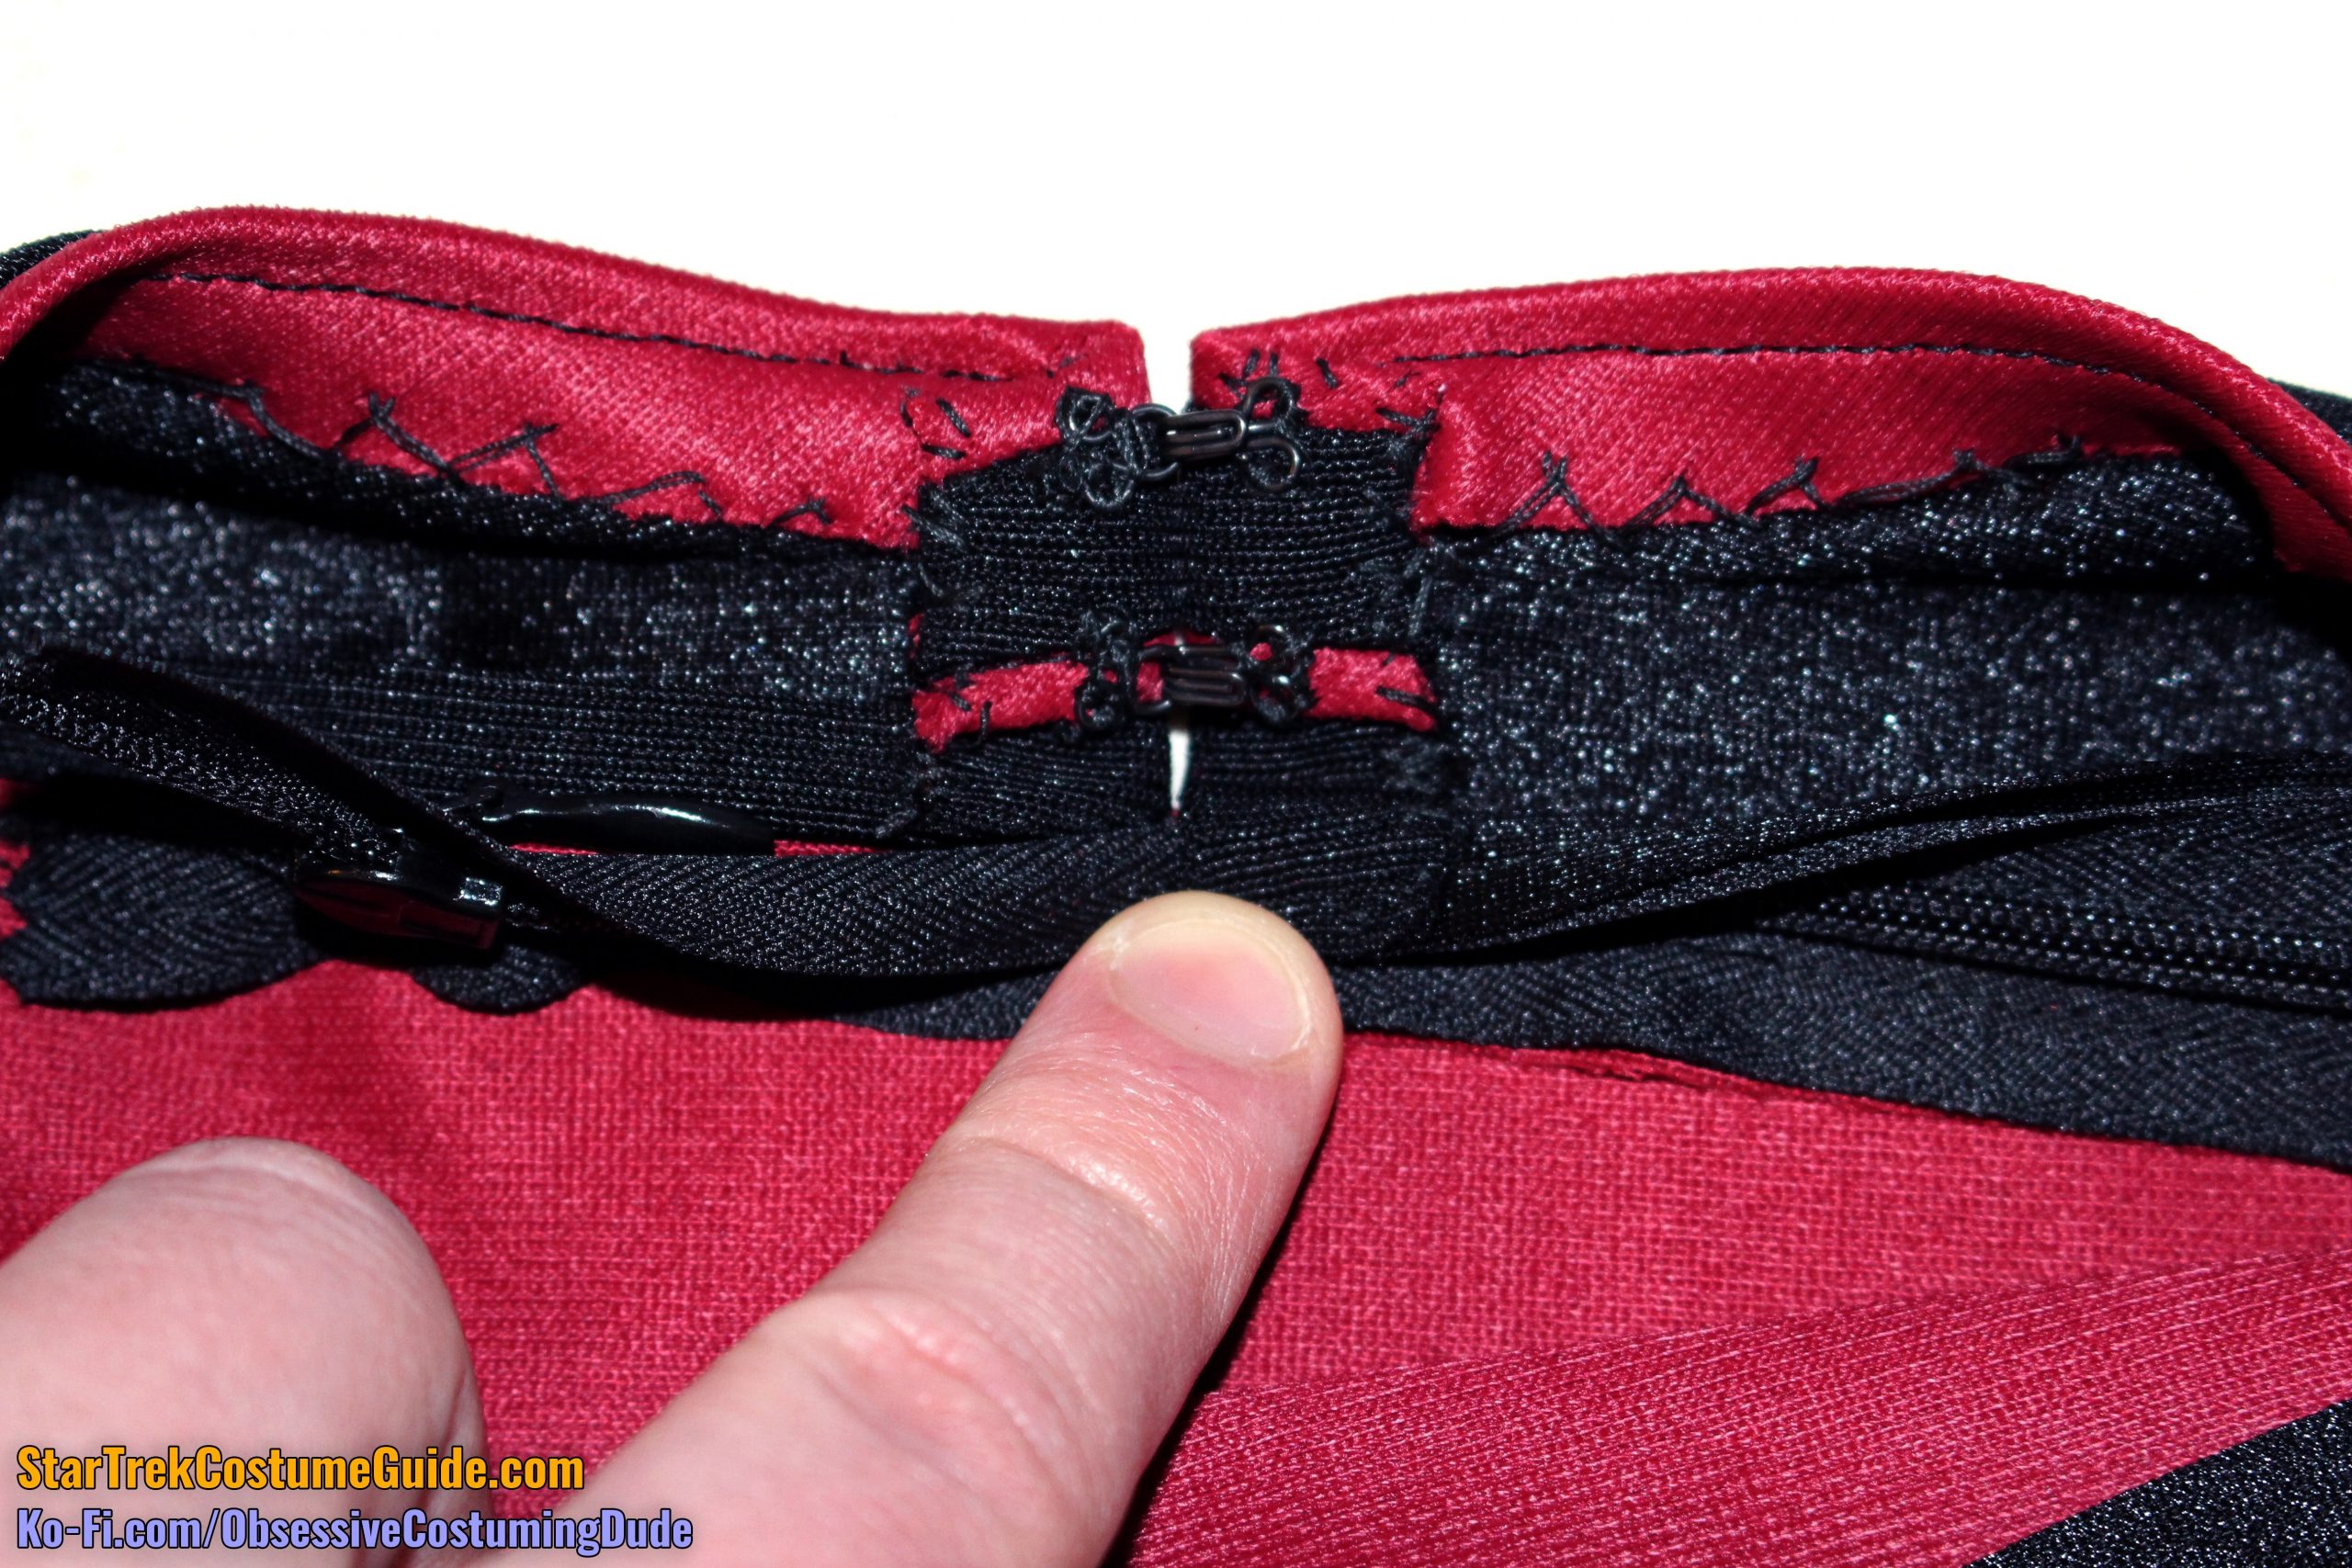
Hand sew two hook-and-eye closures to the seam allowance, again making sure your stitches don’t show on the right side.
Tack the collar’s back seam allowances into place by hand, taking care that your stitches don’t show through to the right side of the garment.
Hand sew two hook-and-eye closures to the seam allowance, again making sure your stitches don’t show on the right side.
For the back-zipping “All Good Things …” variant, tack the upper back seam allowances under by hand and attach two hook-and-eye closures at the top where the zipper was left hanging free.
STEP 4 - Finishing
If you’ve read my TNG skant analysis or my screen-used TNG skant examination, you may recall that the raglan-style shoulder pads appear to have been custom-made. They seem to have been primarily intended to simply smooth over the outer shoulder area to create a more “idealized” silhouette.
You can use regular, store-bought raglan shoulder pads if you want, but I’m not aware of any as large as the originals and I don’t think the end result looks as good.
Should you wish to make a pair of replica shoulder pads (more akin to those on the screen-used TNG skants and TNG jumpsuits), here’s how. 🙂
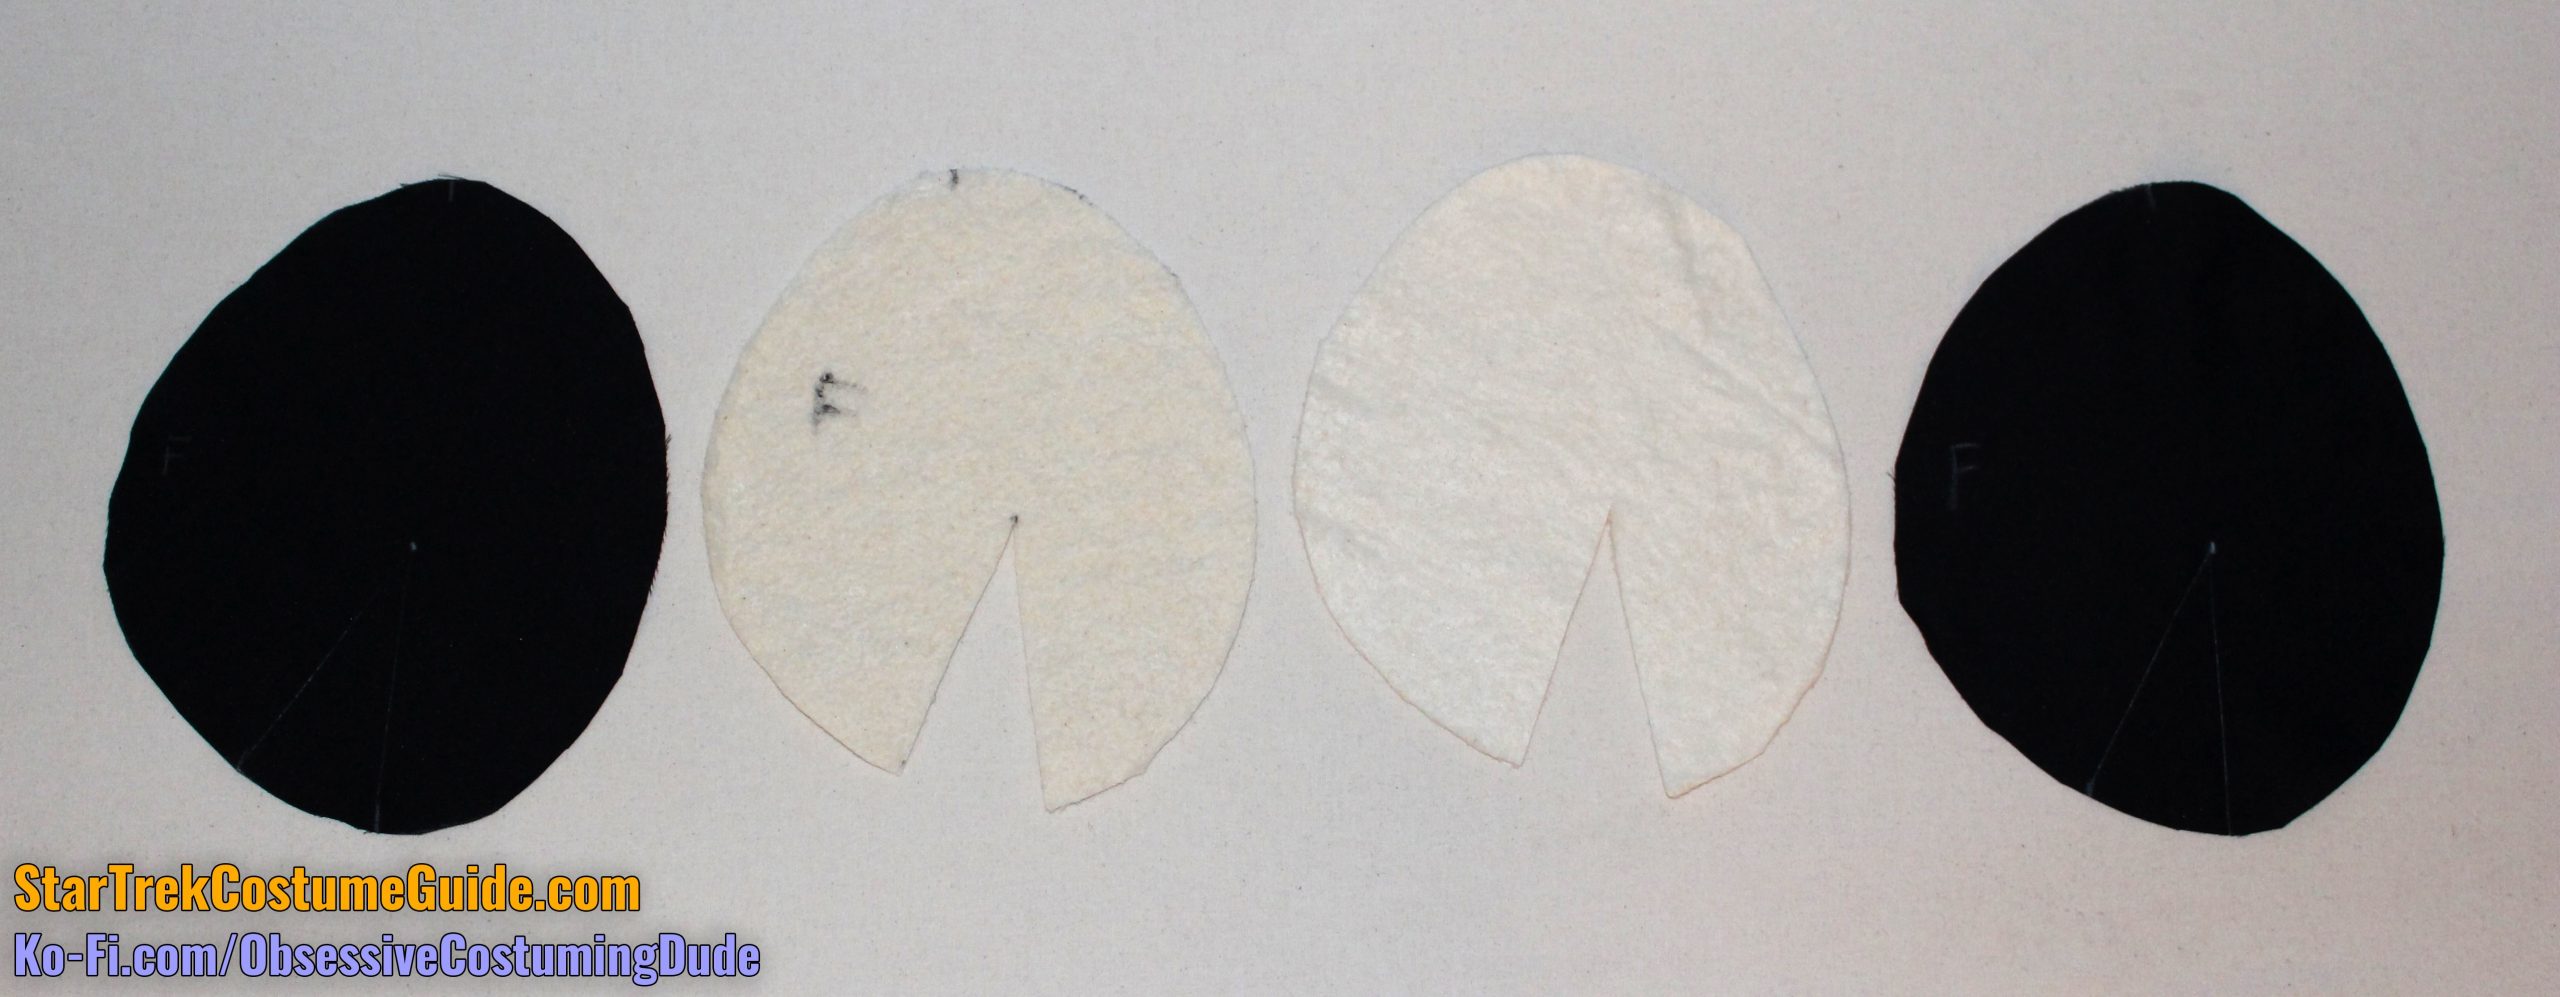
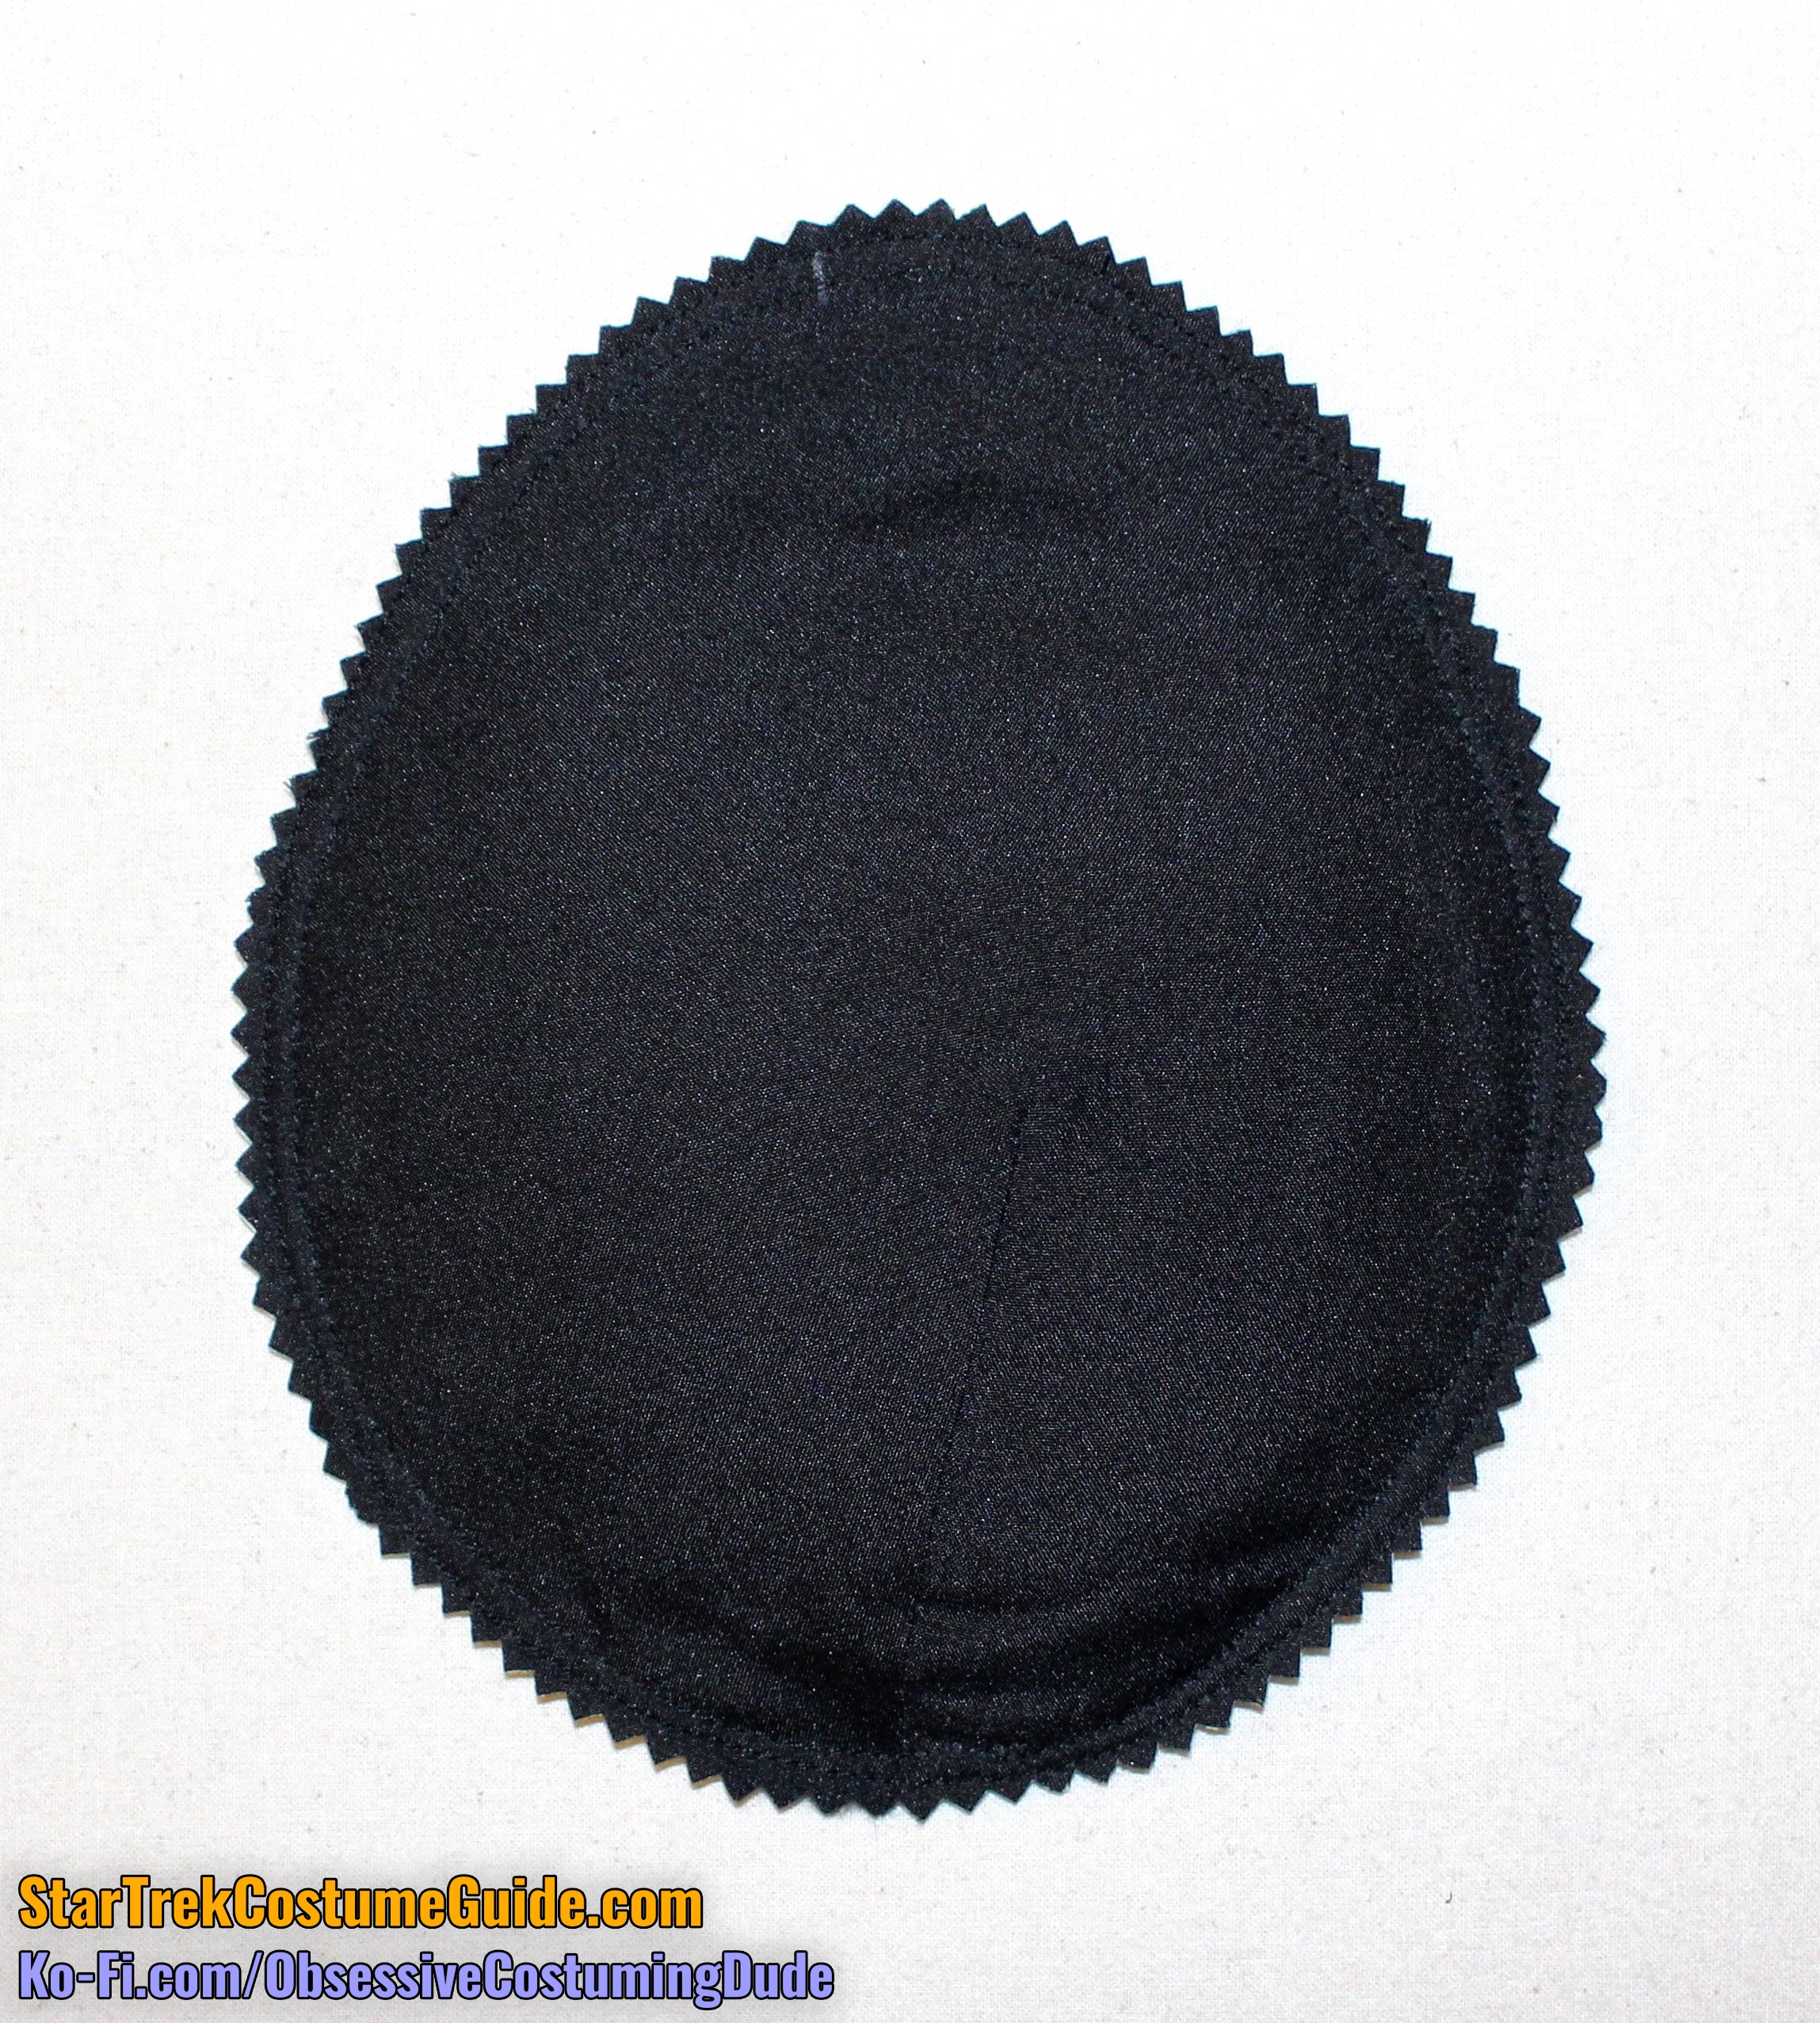
First, cut two pieces of lining and however much padding you want, using the shoulder pad pattern (piece N).
(I like to use lightweight cotton batting for the padding.)
For “normal” shoulder slopes, a mere two layers of padding both looks good and is fairly analogous to the loft of the original pads.
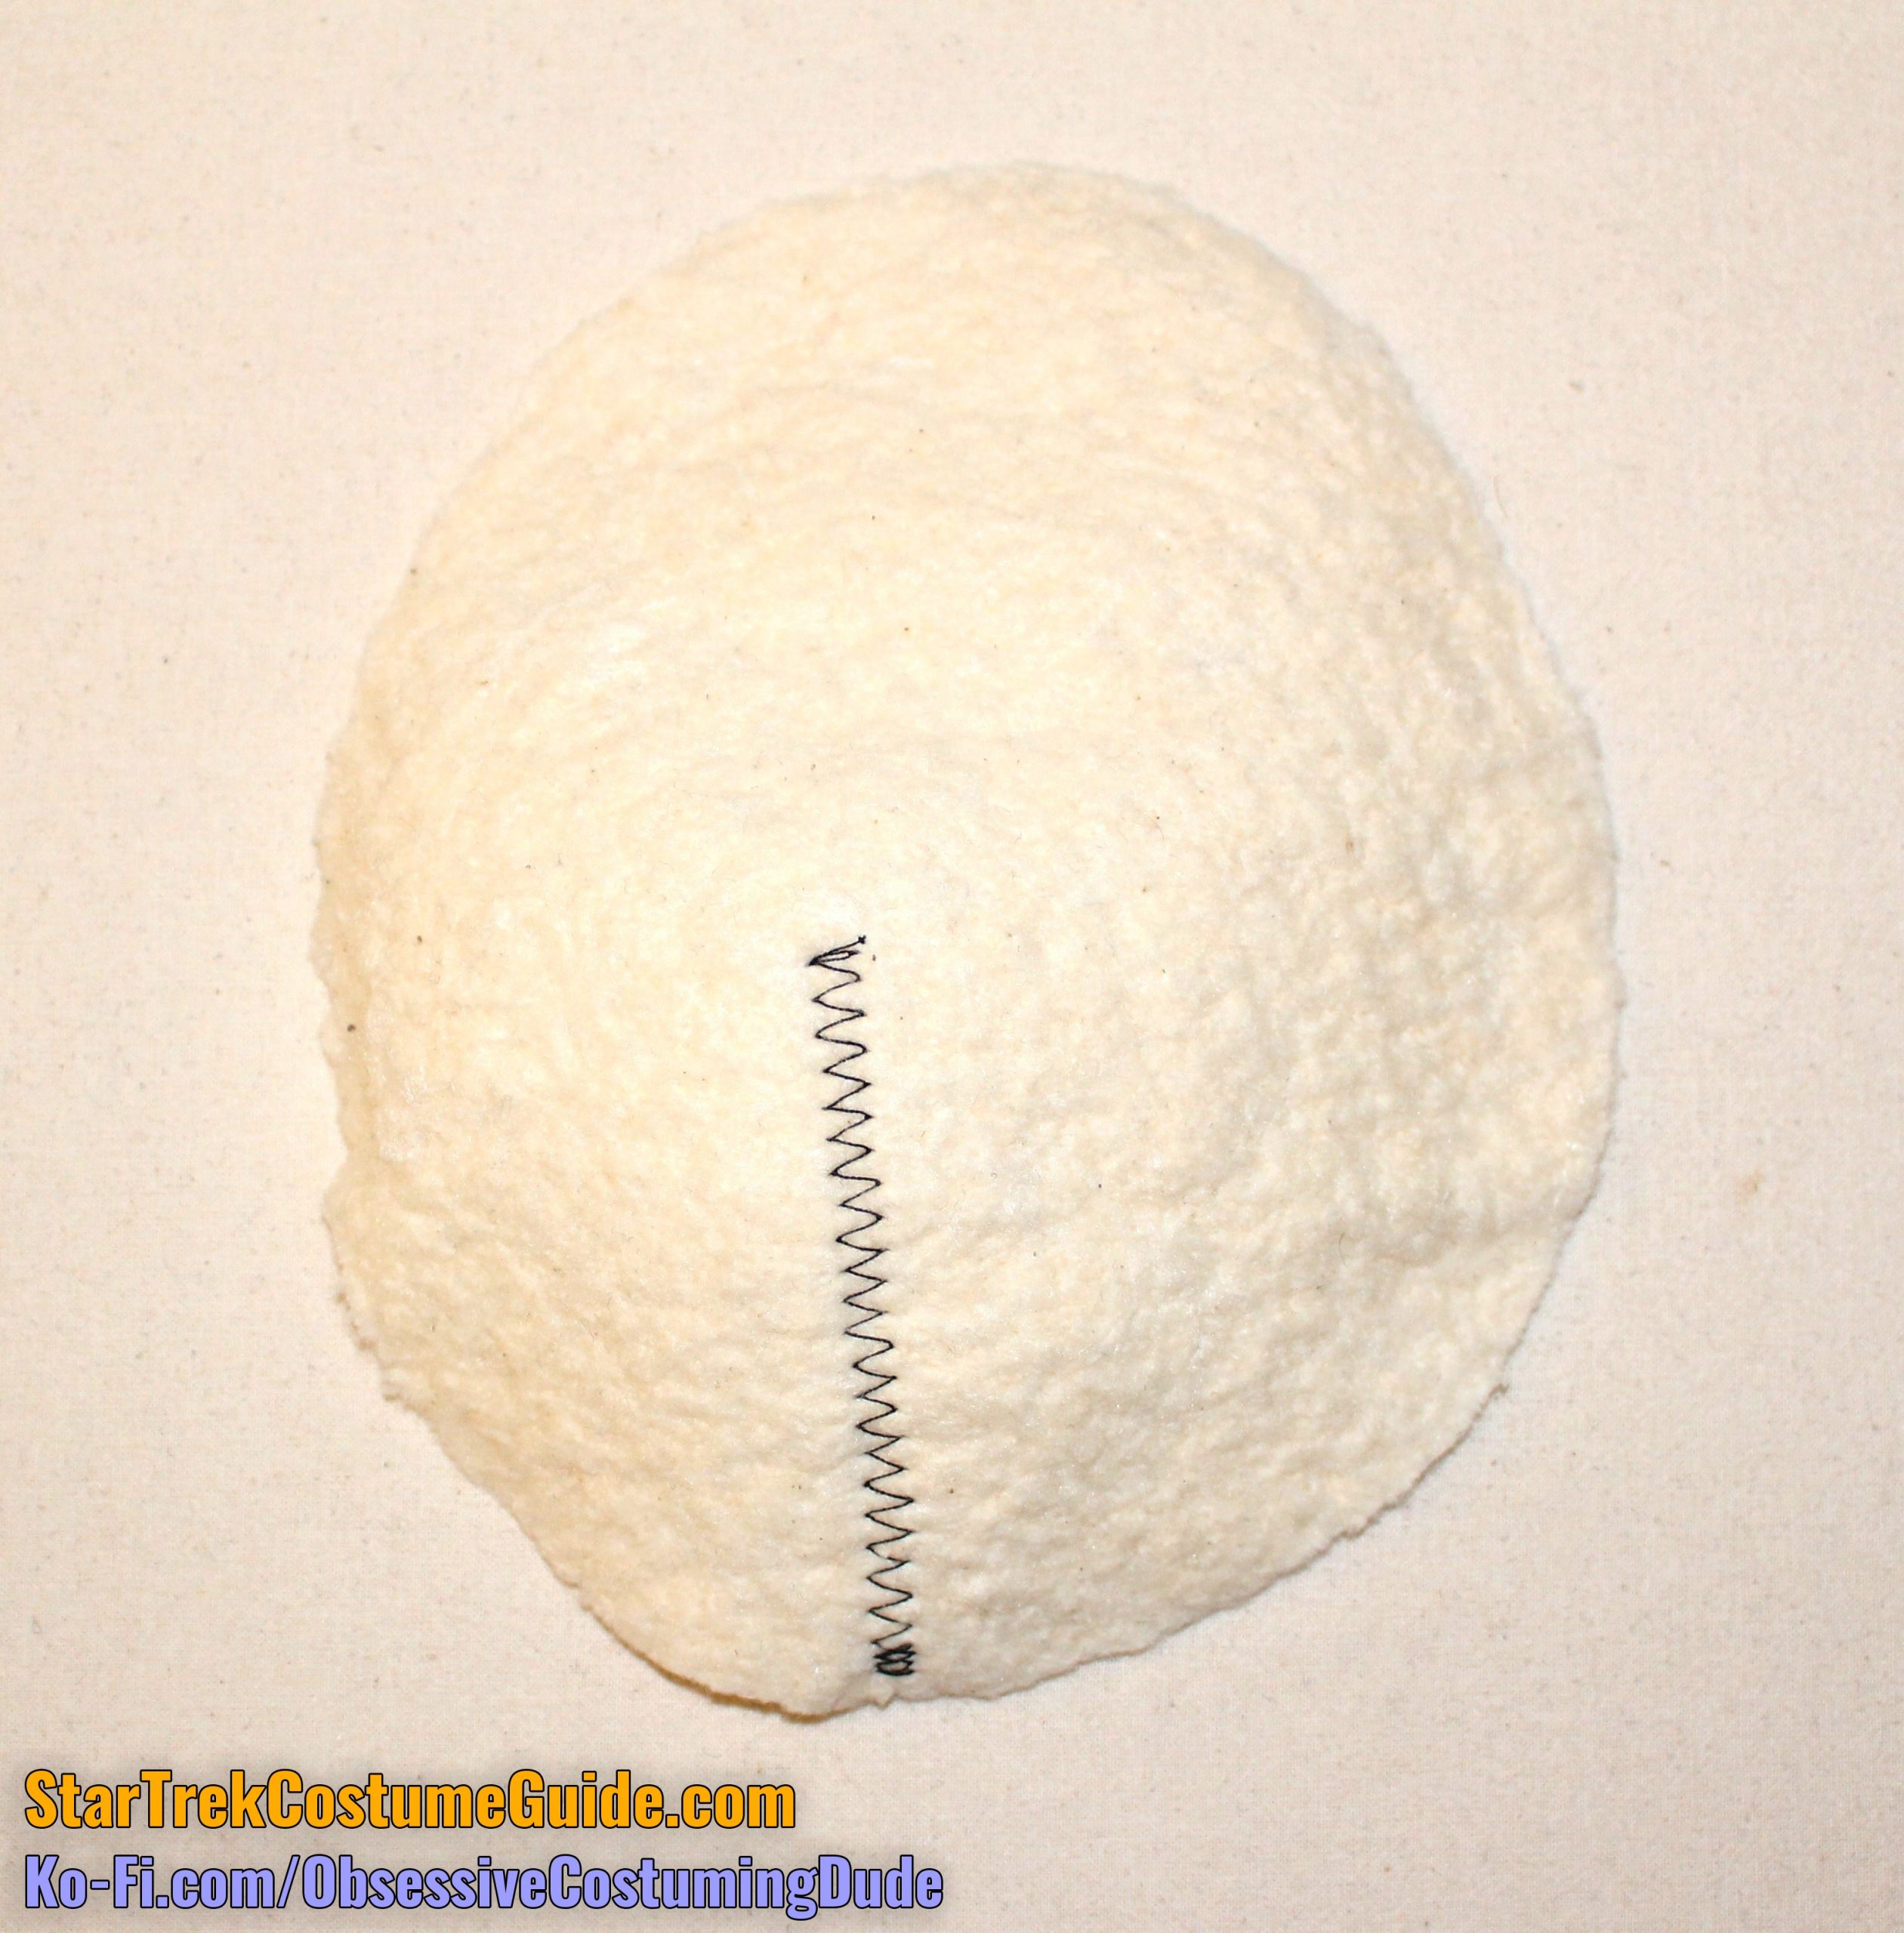
Cut out the darts in the padding, pull the cut edges together flush, and join them with a zig-zag stitch.
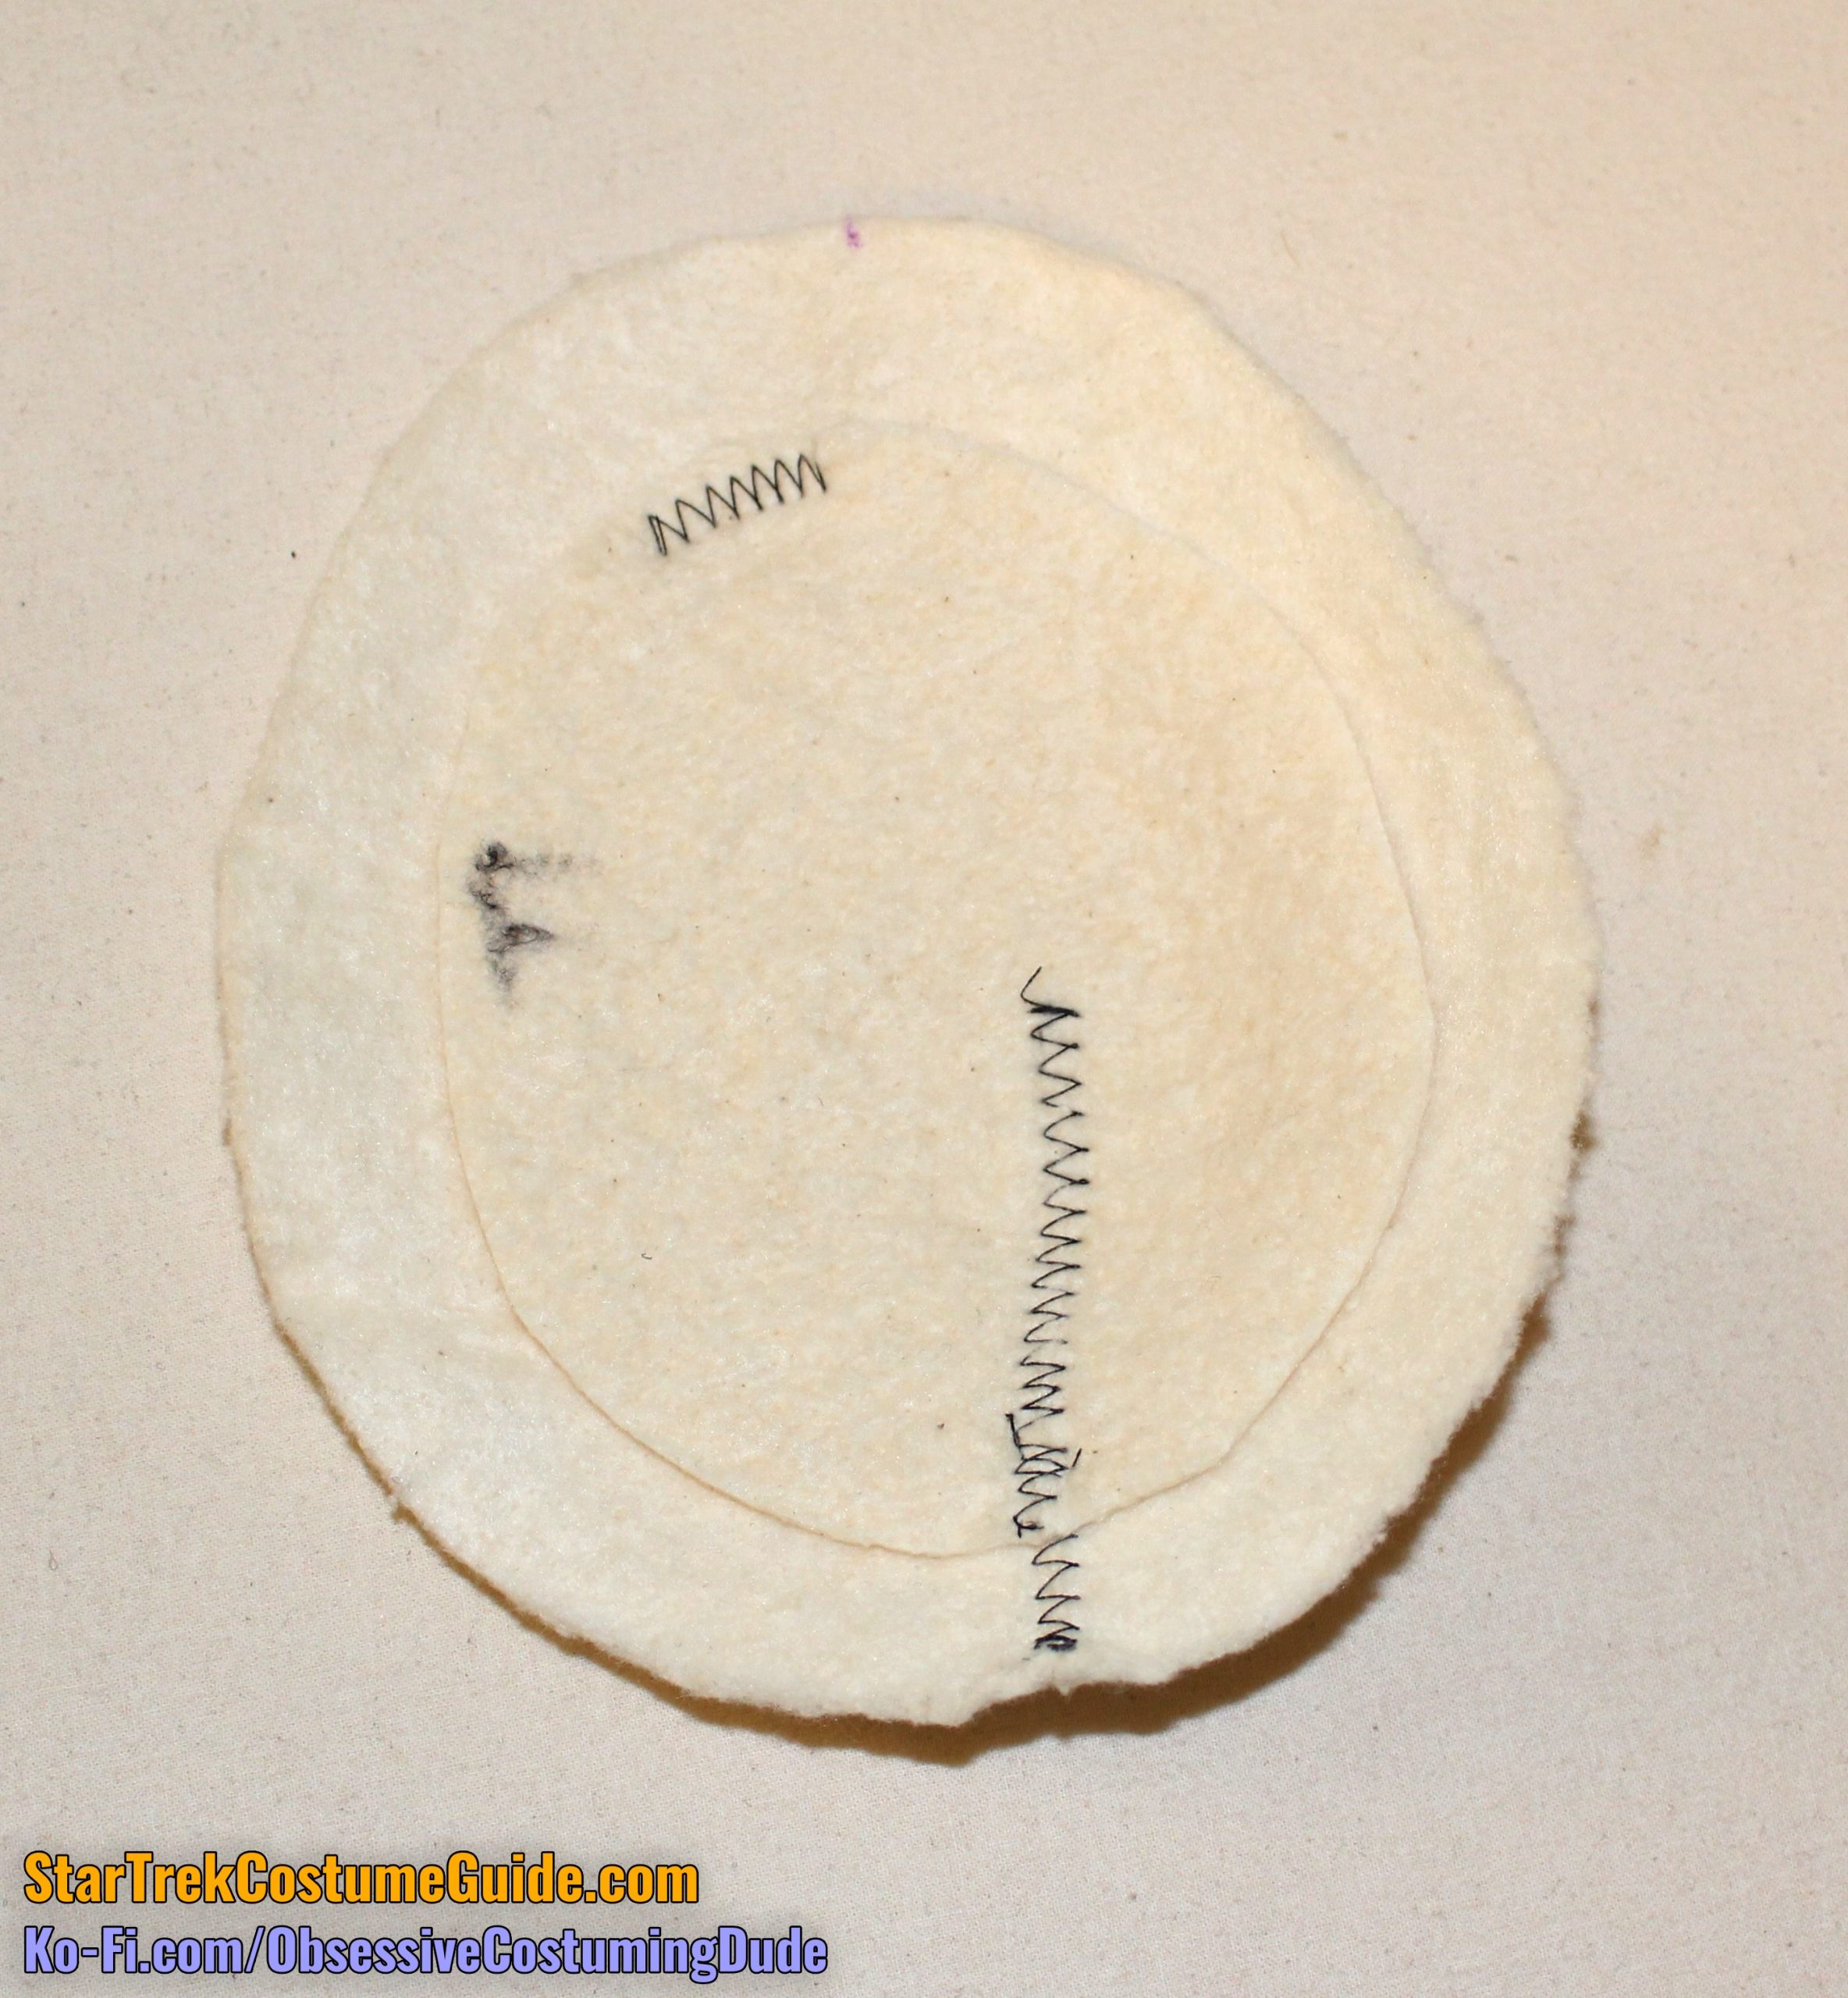
Trim the additional layer(s) of padding smaller about ¾” around the edges.
Place the smaller layer(s) of padding underneath the full-size one and anchor them together. (I usually just do a quick stitch at the “top” and “bottom” of the smaller pad.)
Sew the darts in the lining pieces, and press the darts toward the front.
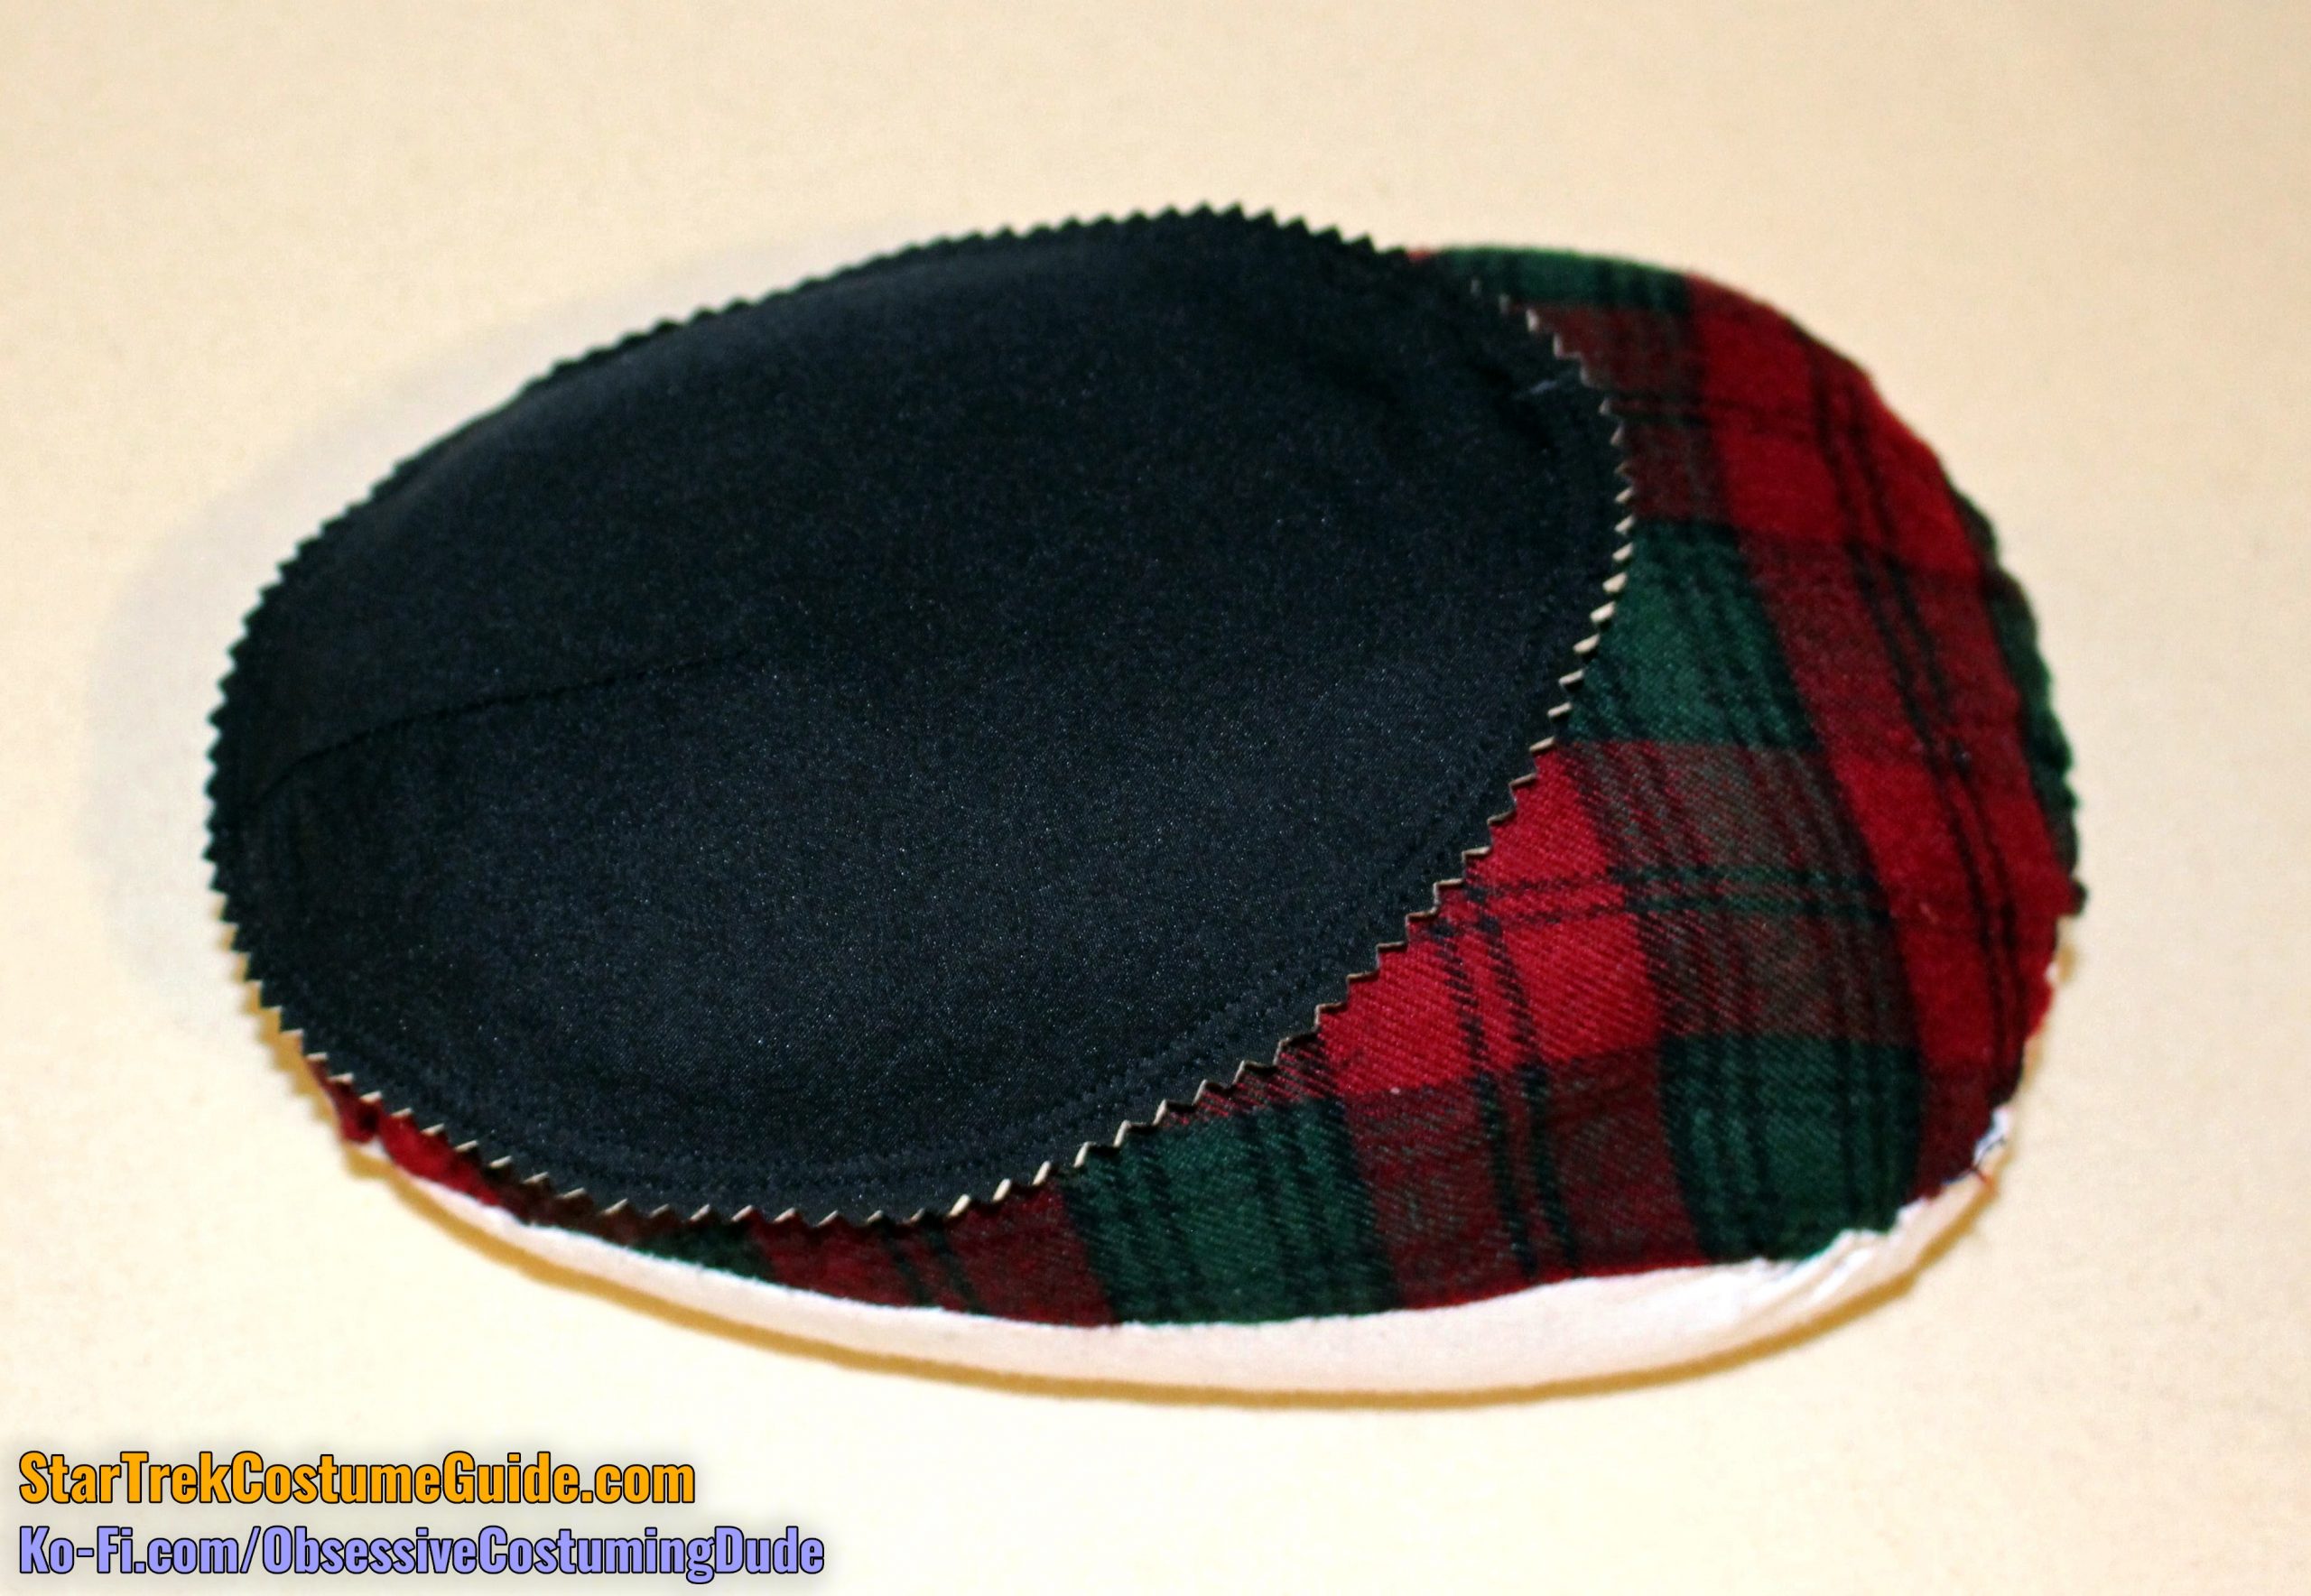
Position the padding between the two layers of lining, edges flush, and pin the layers together.
Sew the layers together around the perimeter of the pad ⅜” from the edge, then again ¼” from the edge.
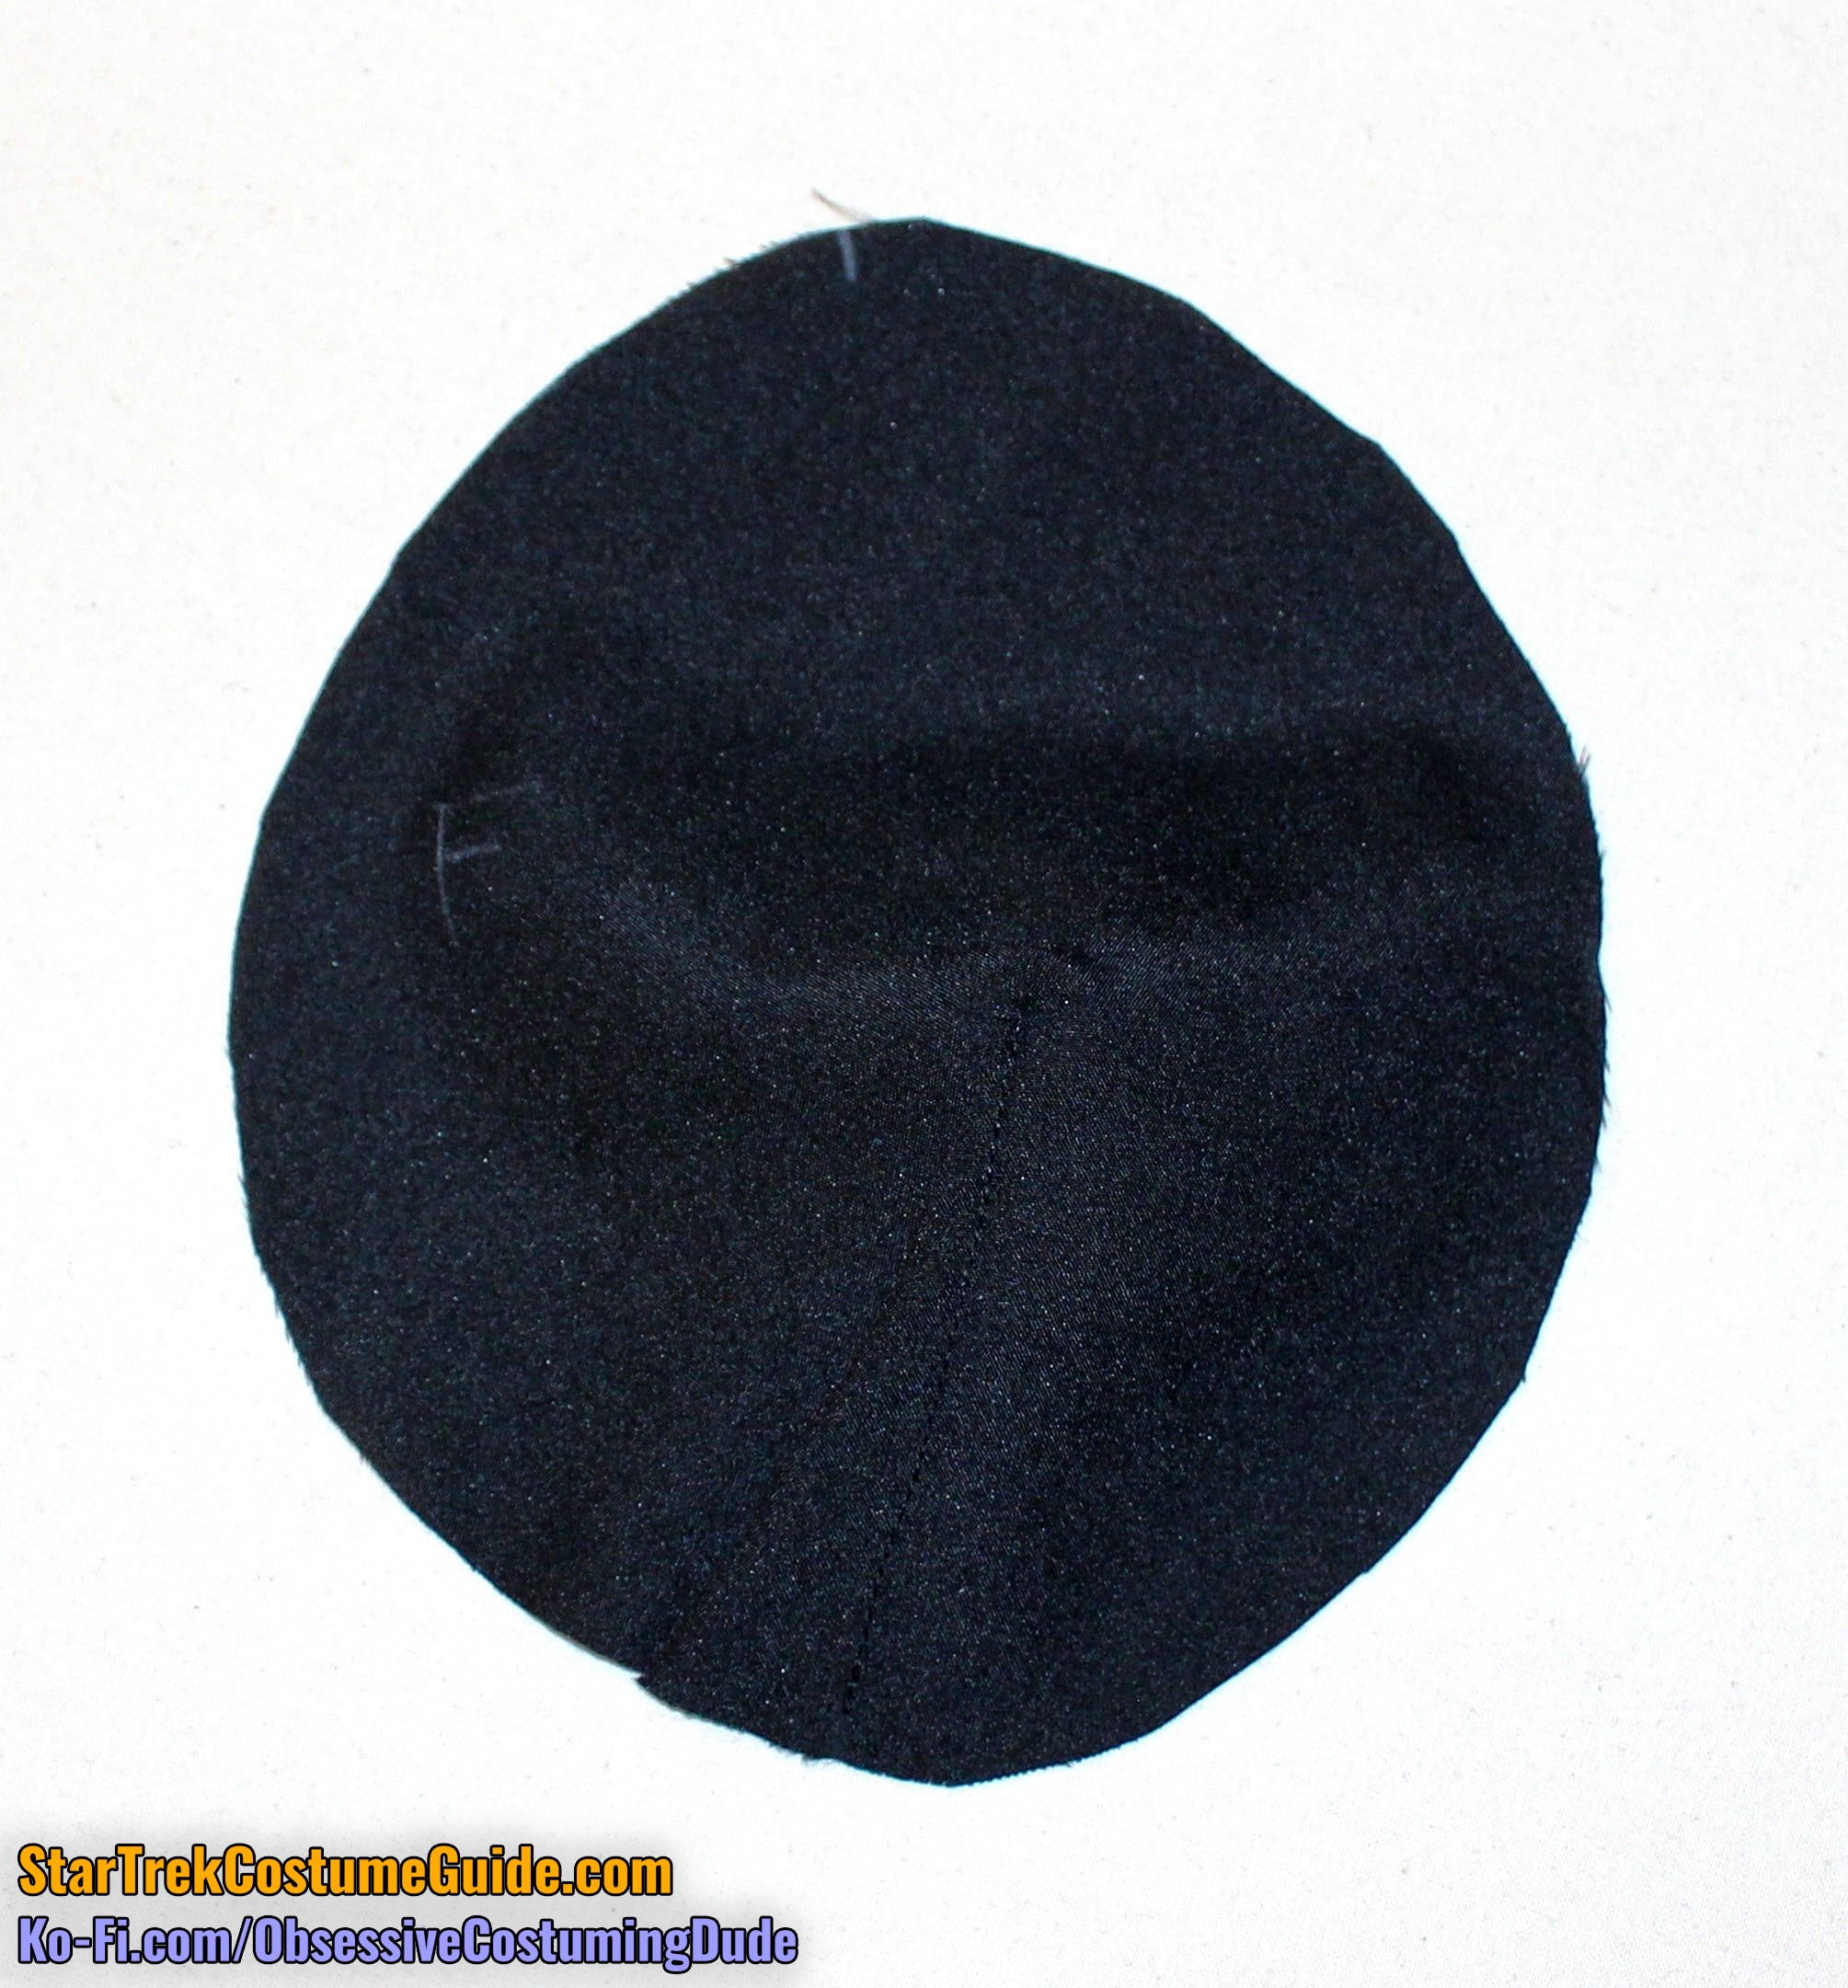
Trim the outer edge of the pad with pinking shears.
Press the pad into its gently-rounded shape over a tailor’s ham.
Repeat for the other pad.
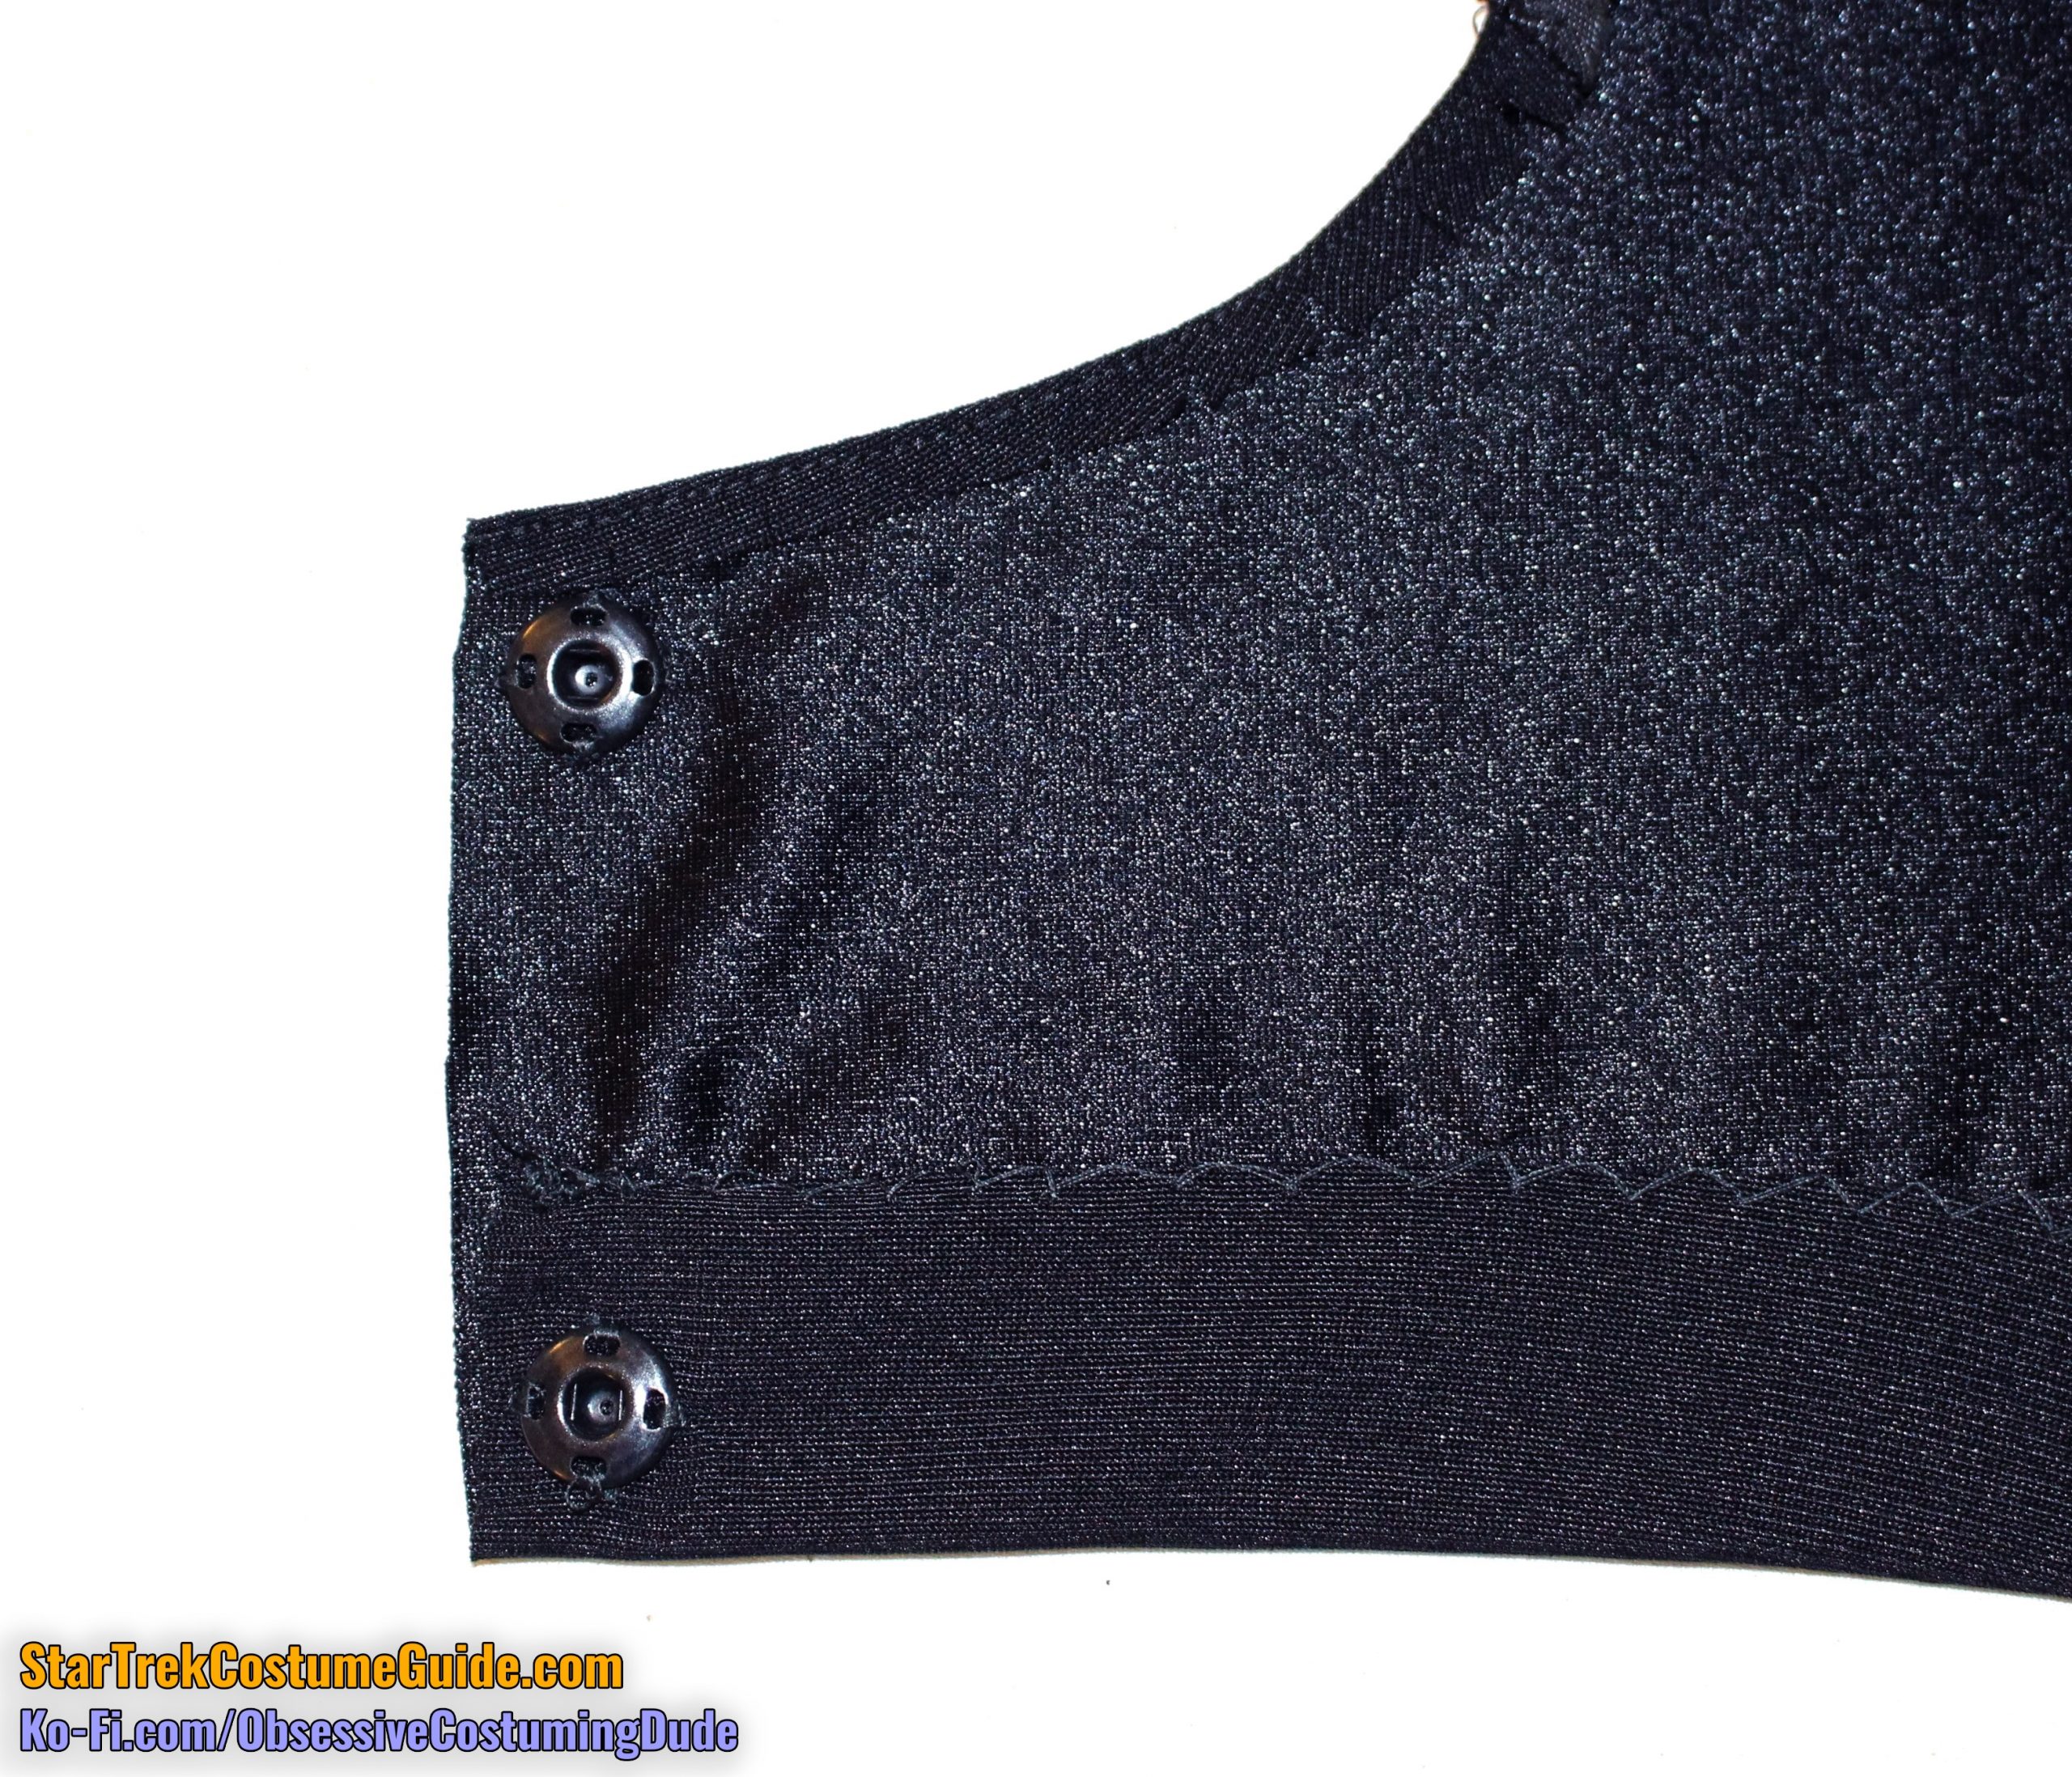
Hand-sew the shoulder pads to the shoulder seam allowances, leaving the bottommost 3” to 3 ½” free.
(Alternatively, attach a pair of snaps to each pad and the corresponding seam allowances, if you want your pads to be removable.)
NOTE: All hemming is done via catch-stitching.
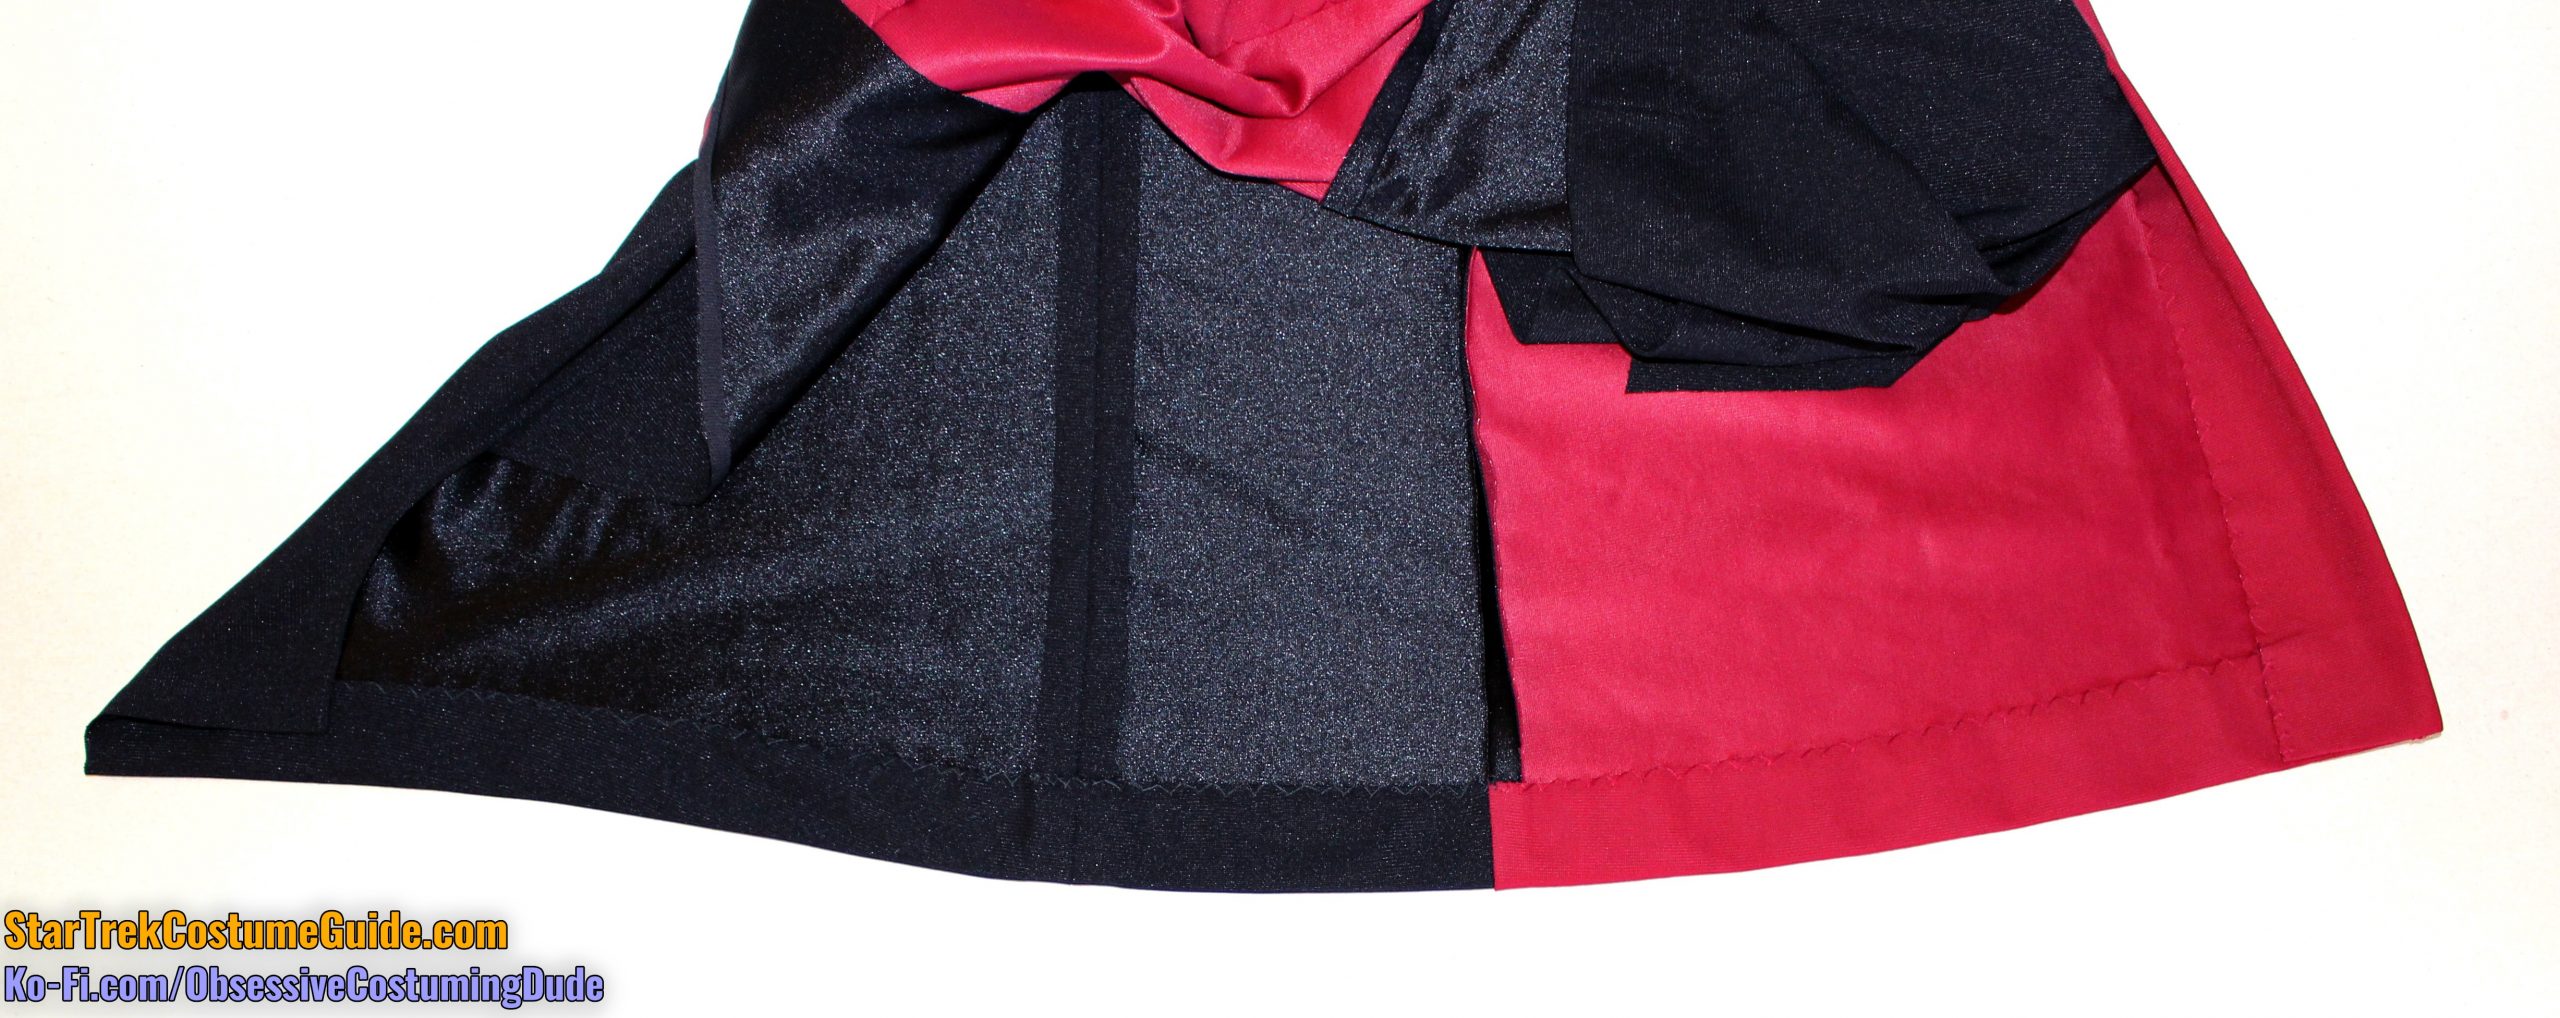
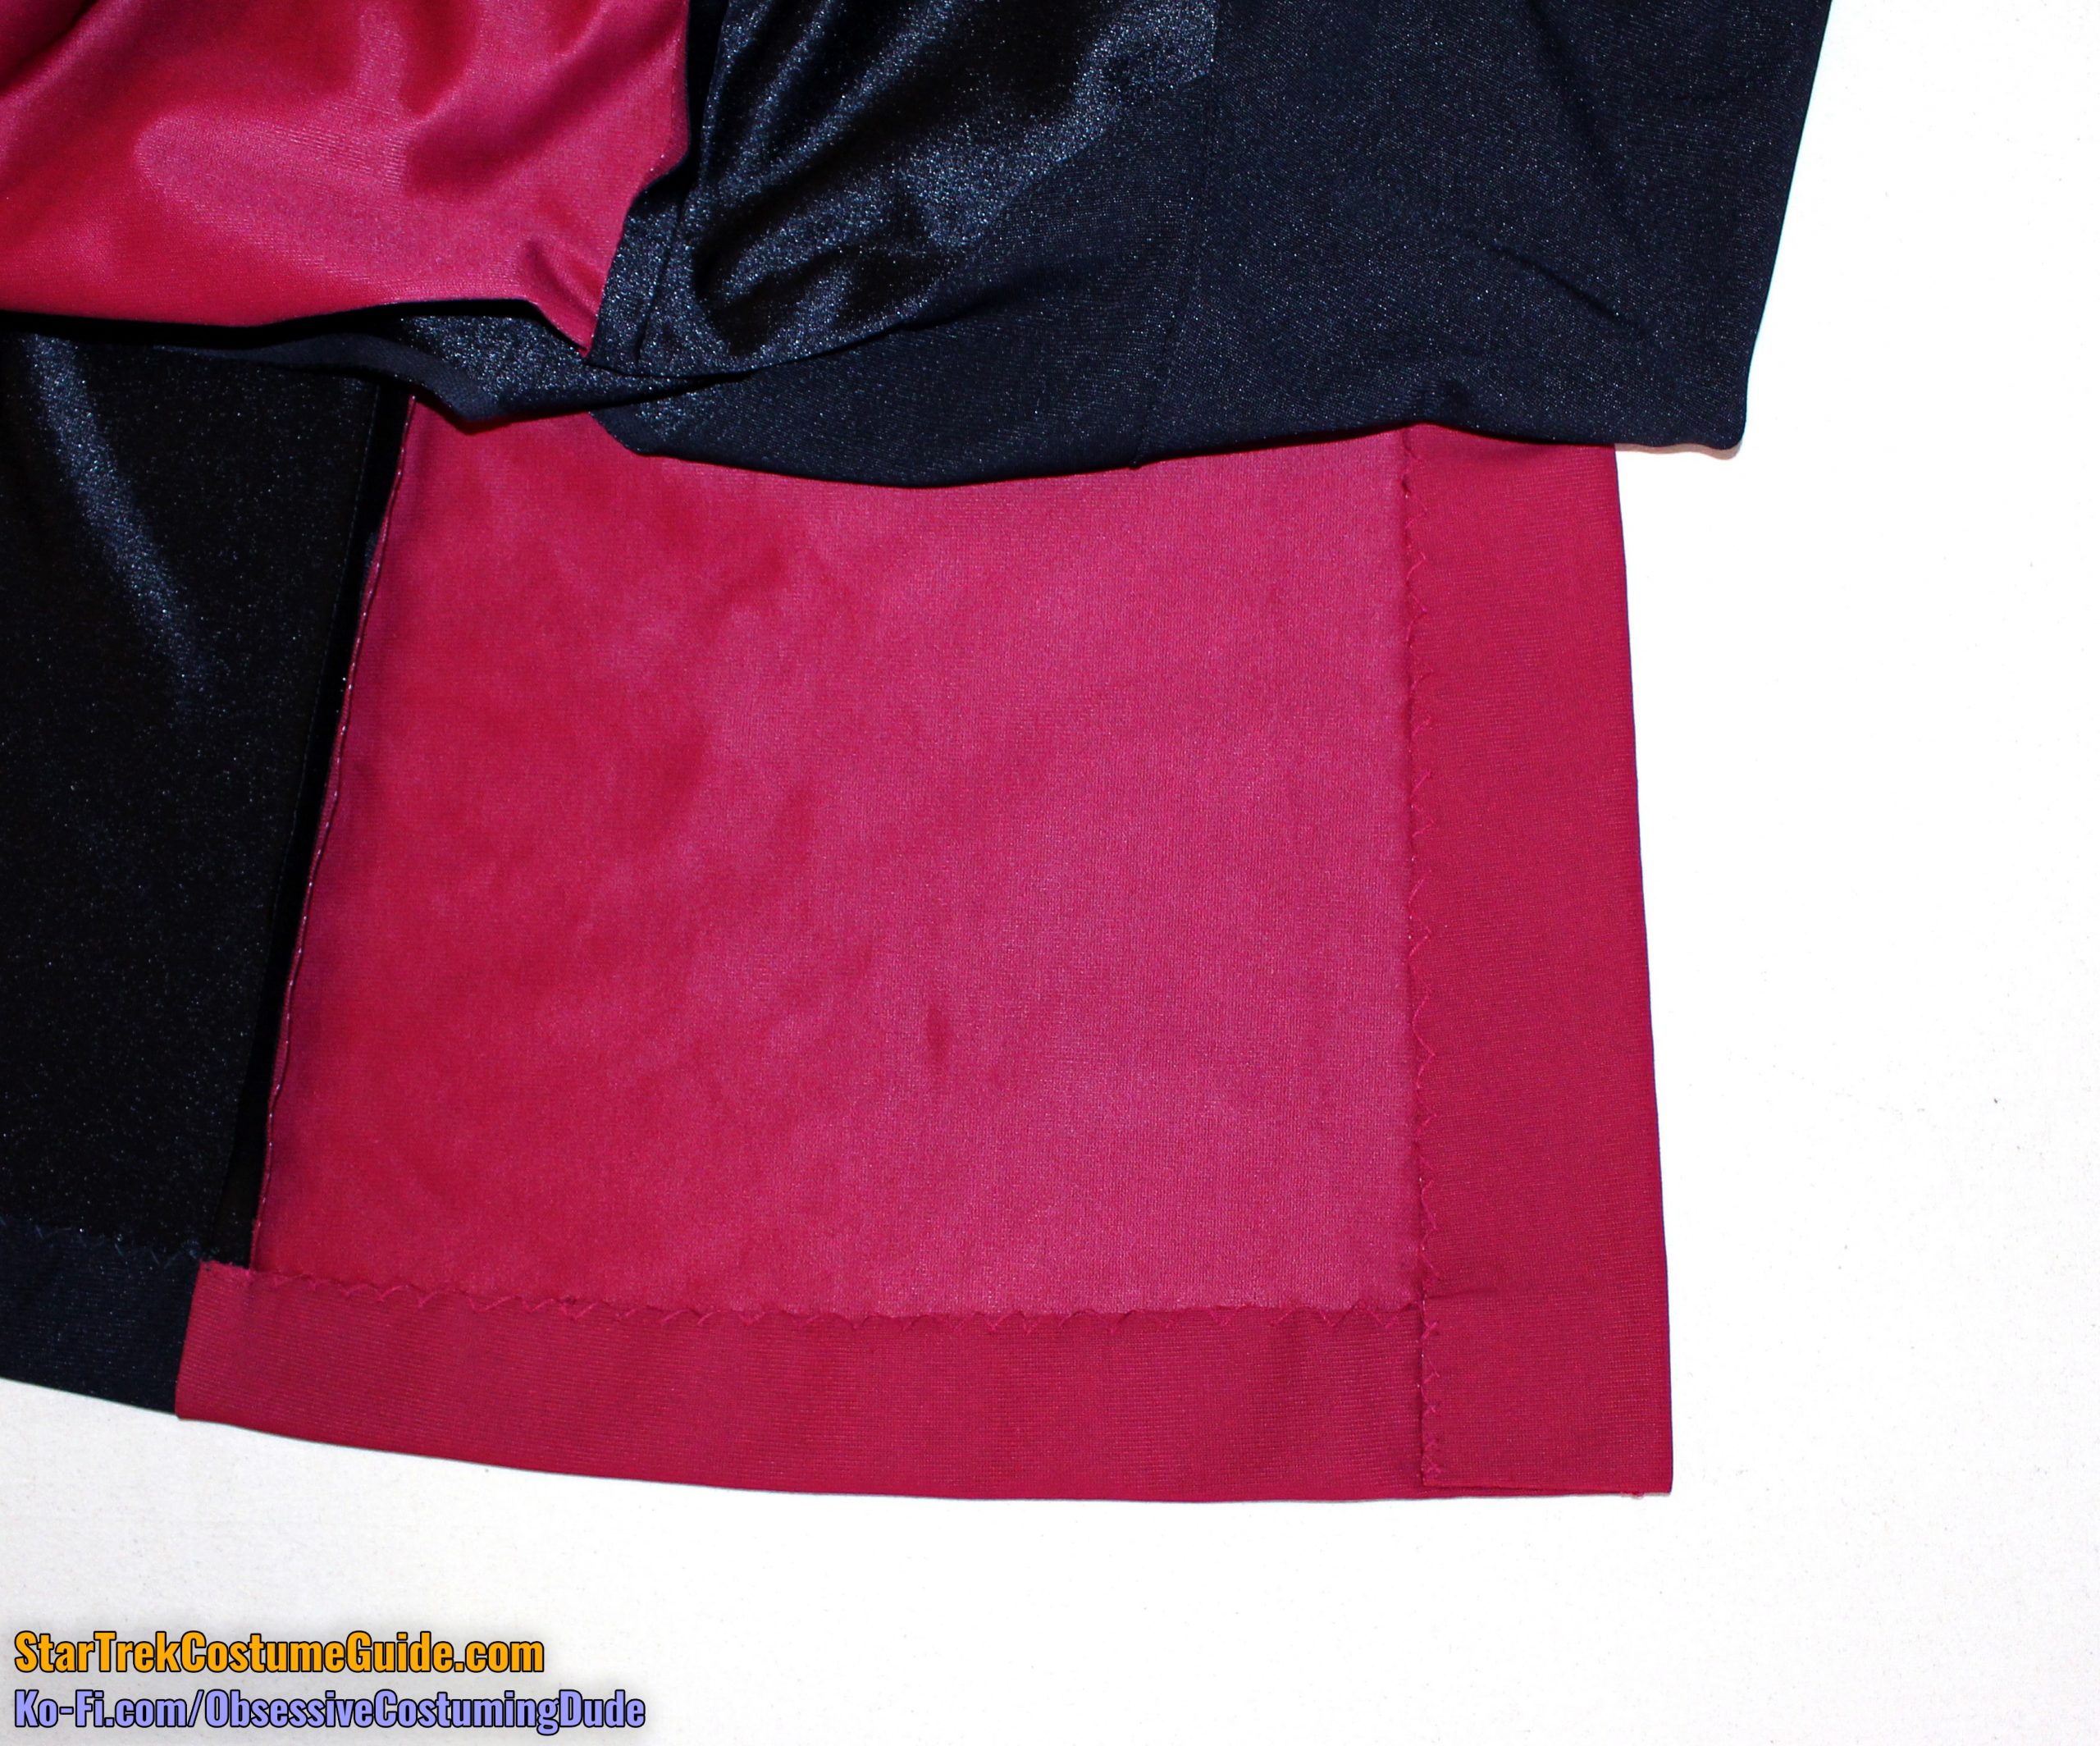
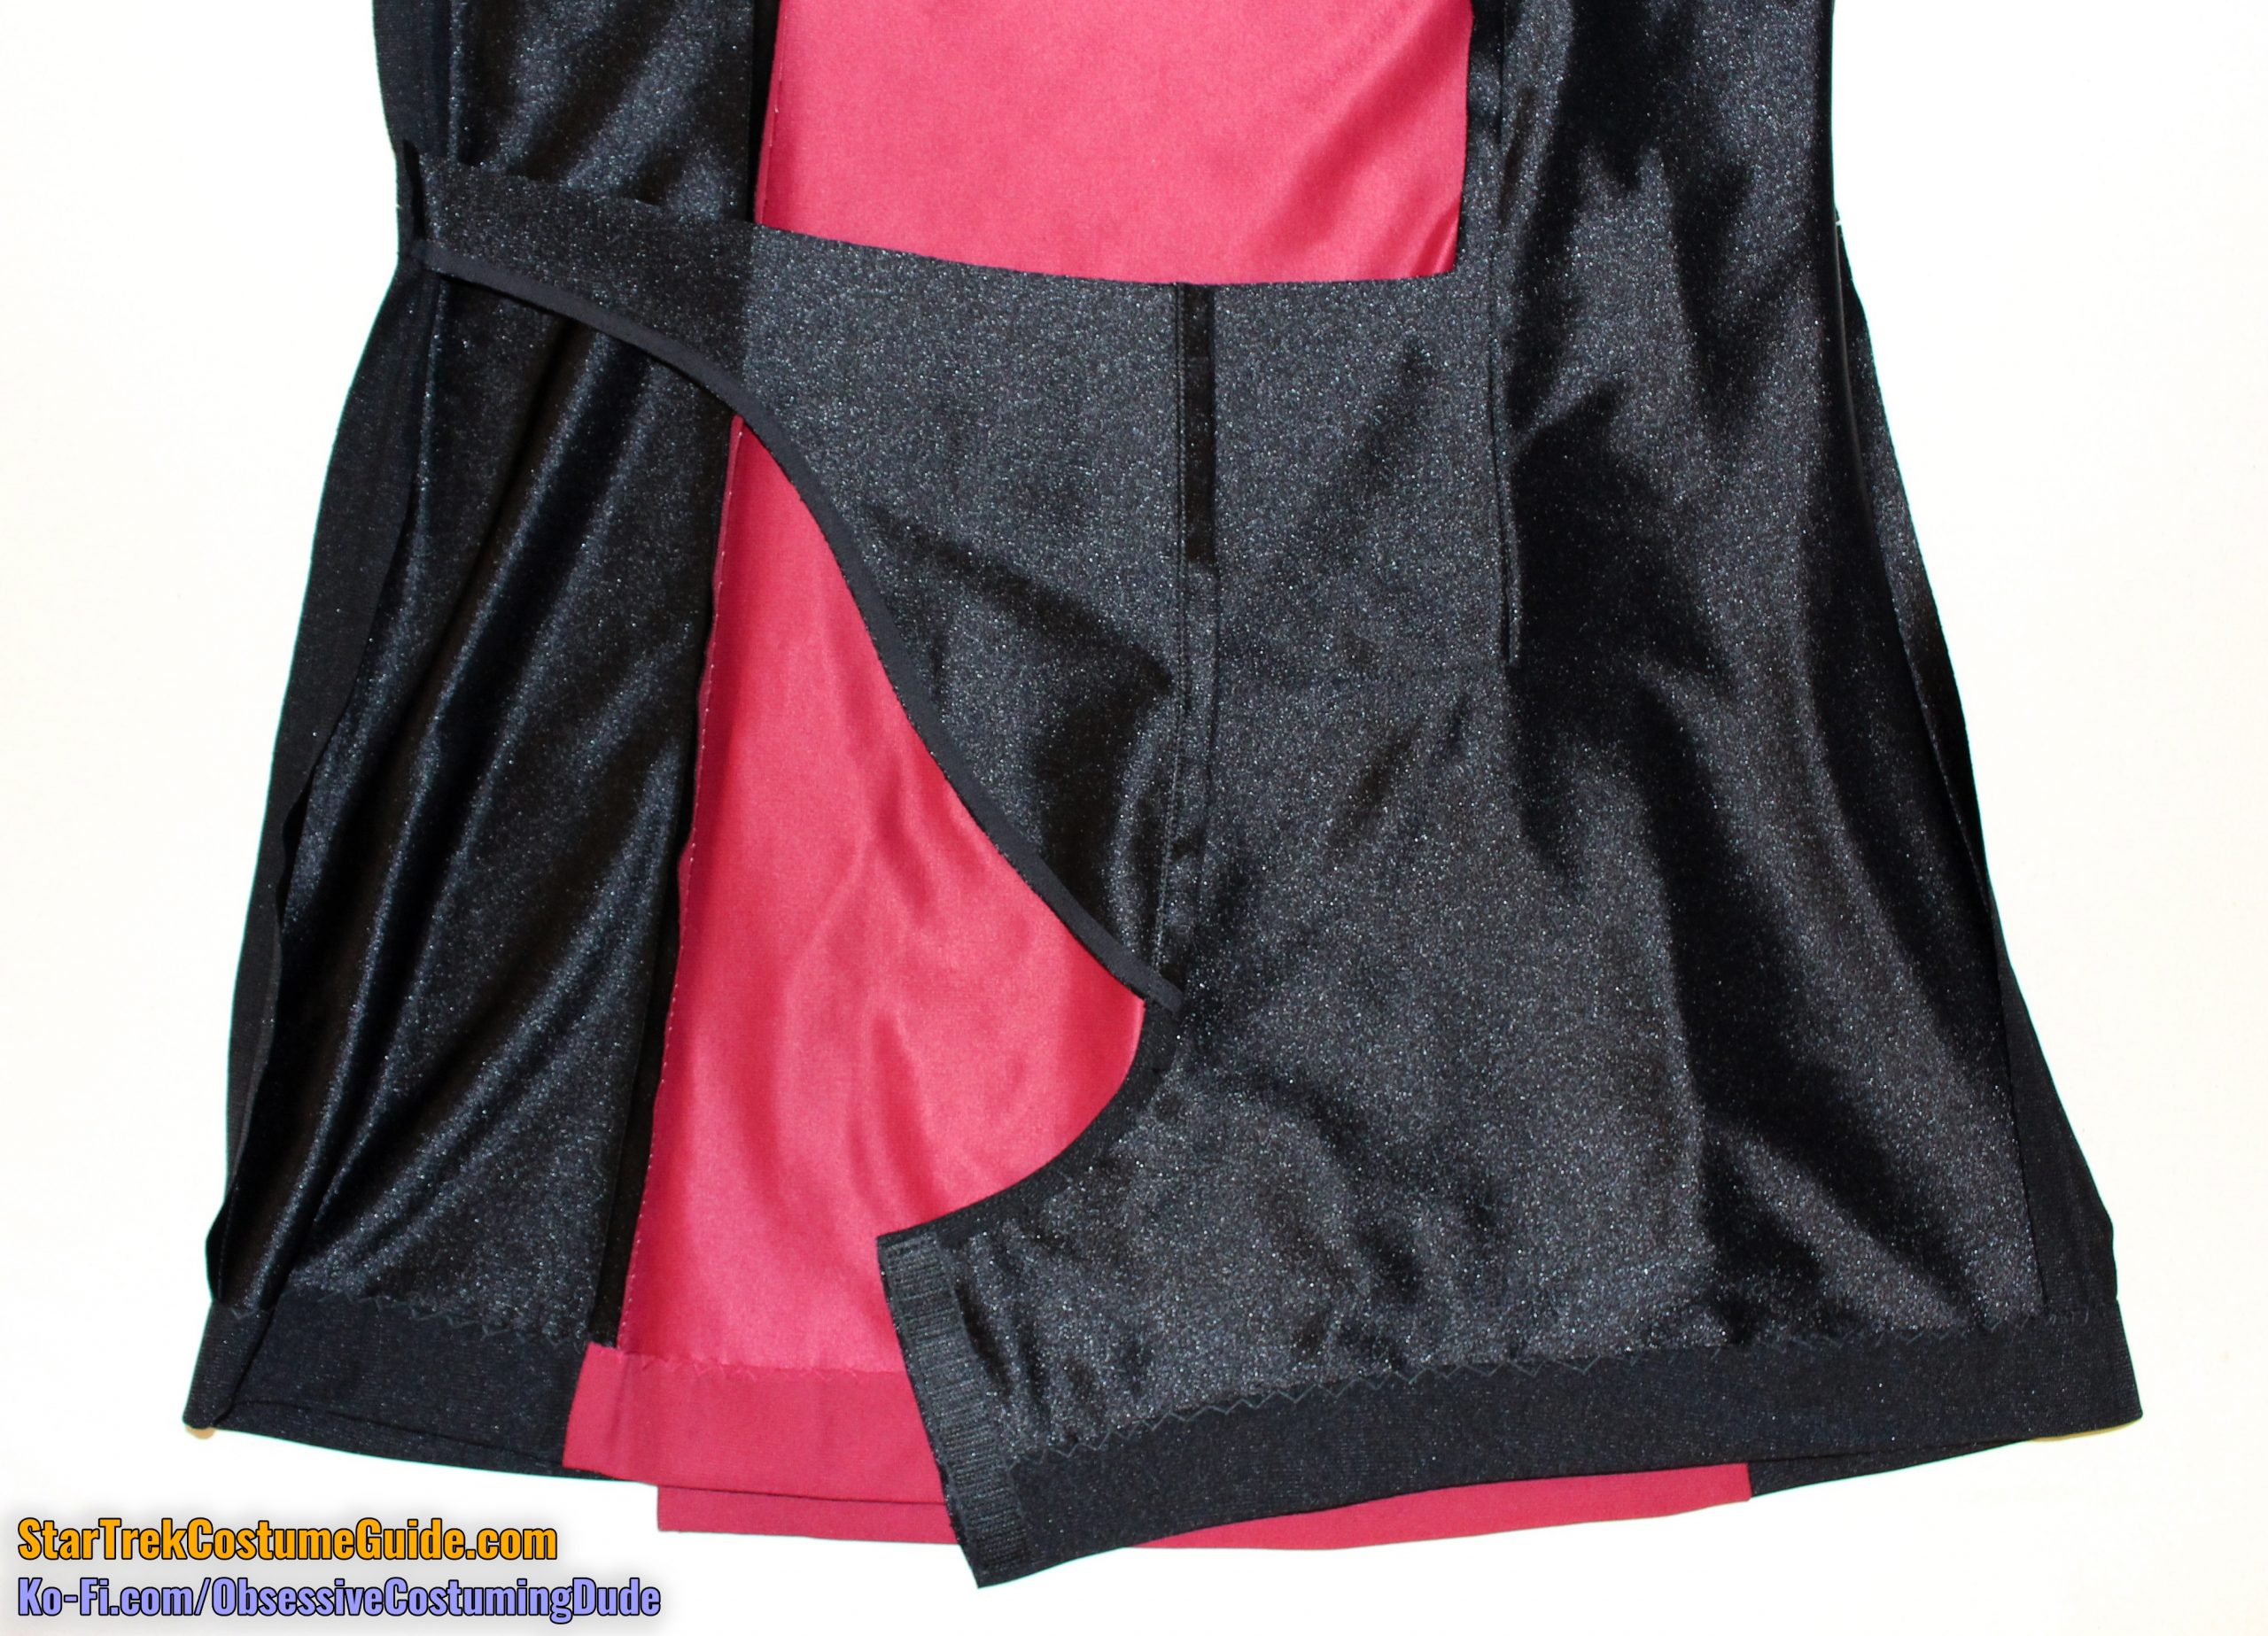
Hem the lower front, noting that the hem allowance tapers from 1 ¾” at the vent to 1 ½” at the left/front seam.
Hem the lower back, noting that the hem allowance tapers from 1 ¾” at the vent to 1 ½” at the left/front seam.
Hem the front vent, noting that the hem allowance tapers from 2” at the top to 2 ¼” at the bottom.
Hem the back vent with 2 ¼” hem allowance.
Hem the sleeves with 1” hem allowance.
Press all the hems.
Hand-sew two hook-and-eye closures to the upper right seam allowance, where the vertical zipper was left hanging free.