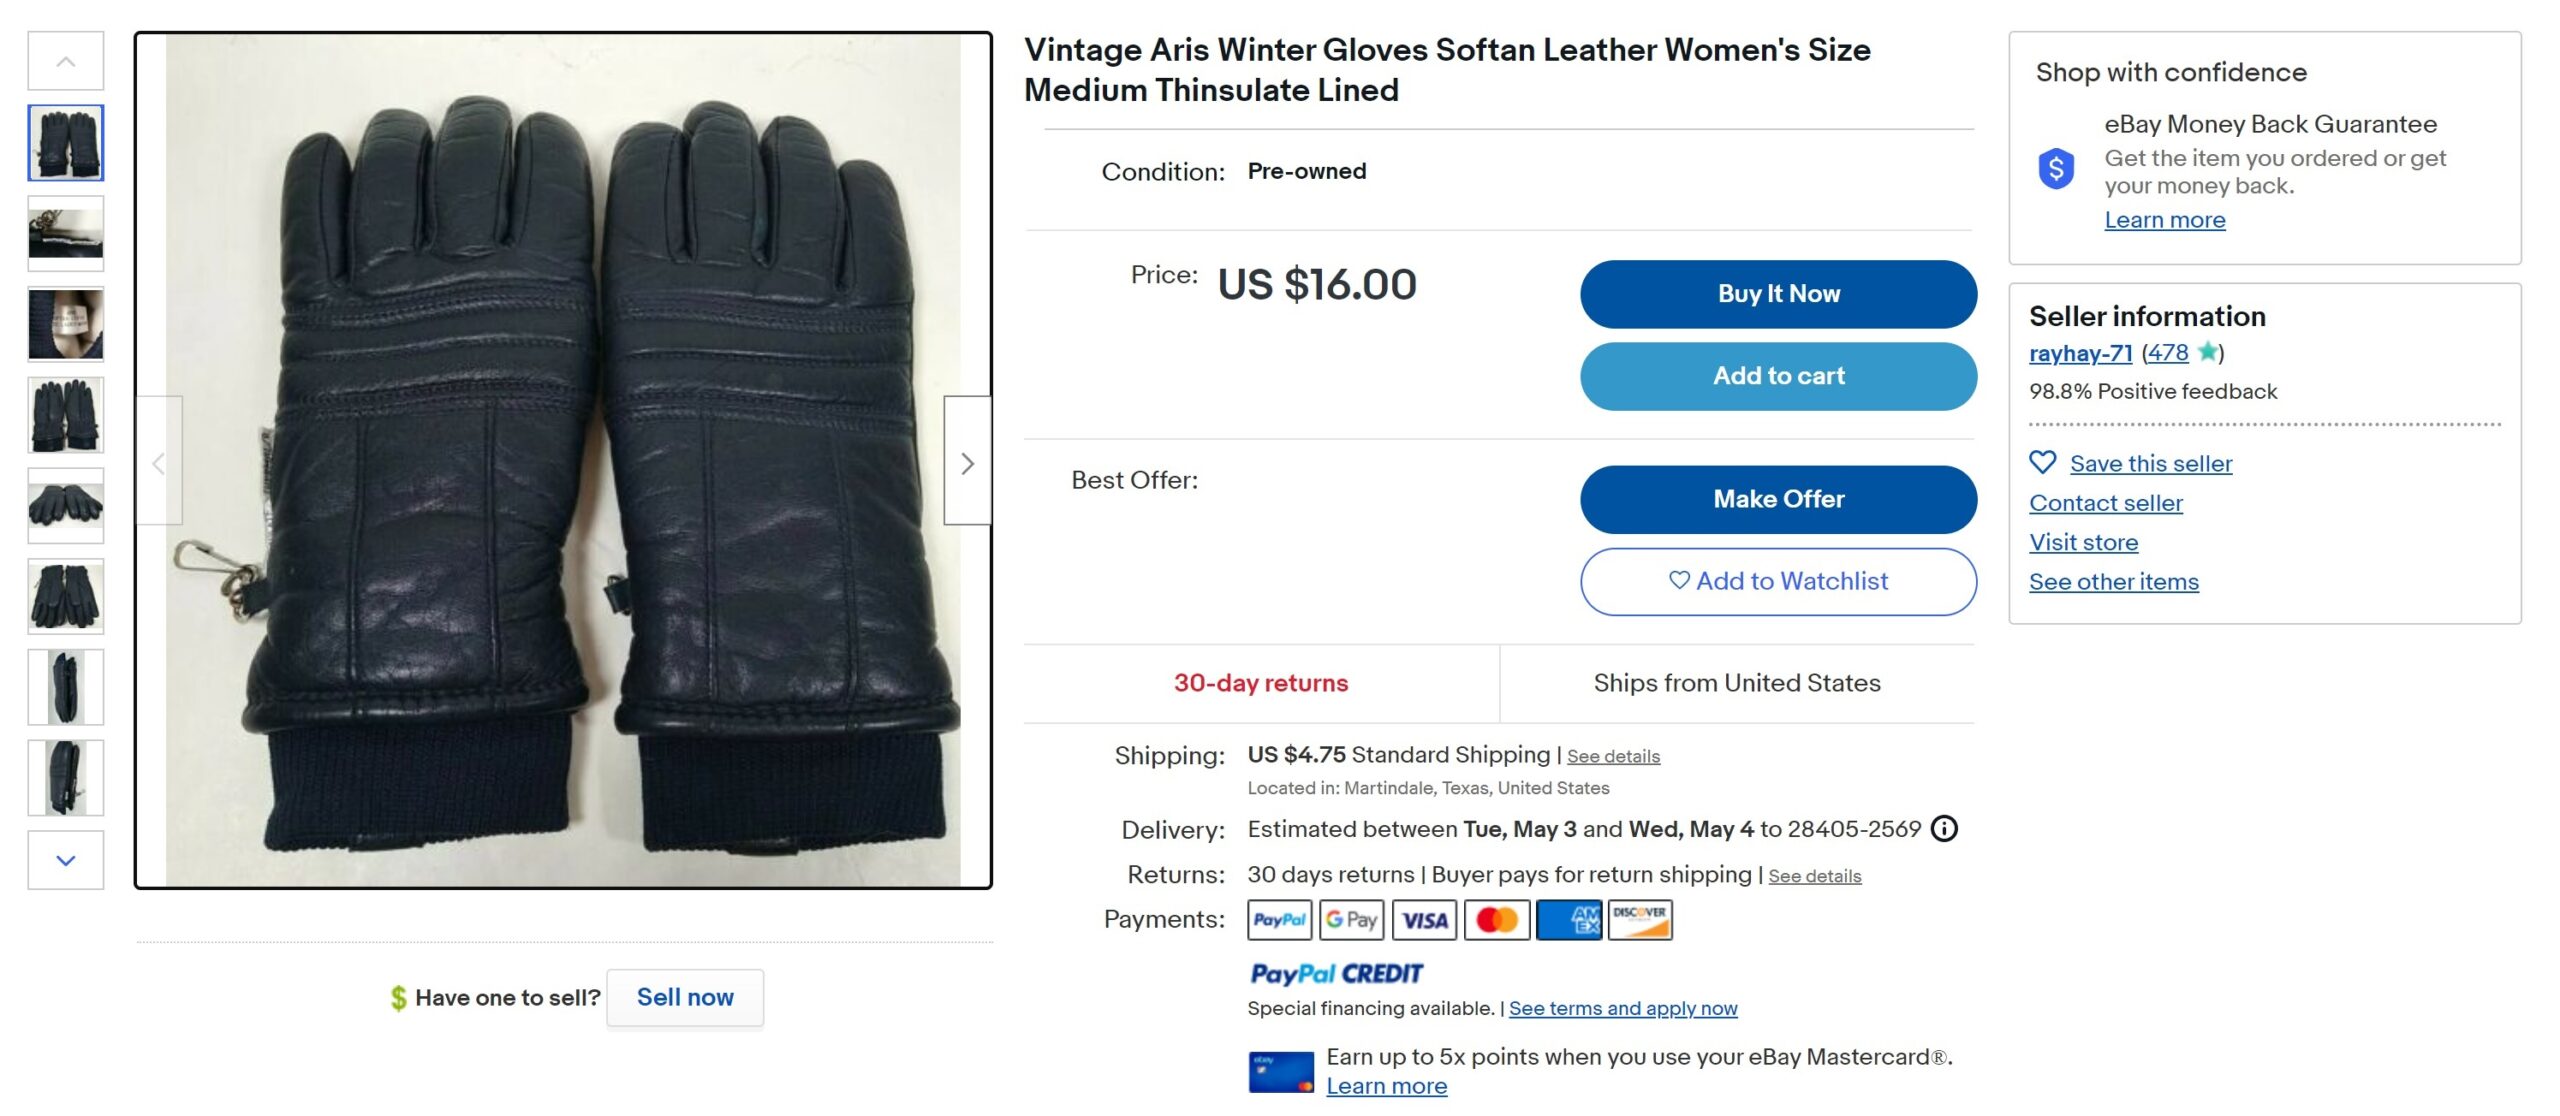
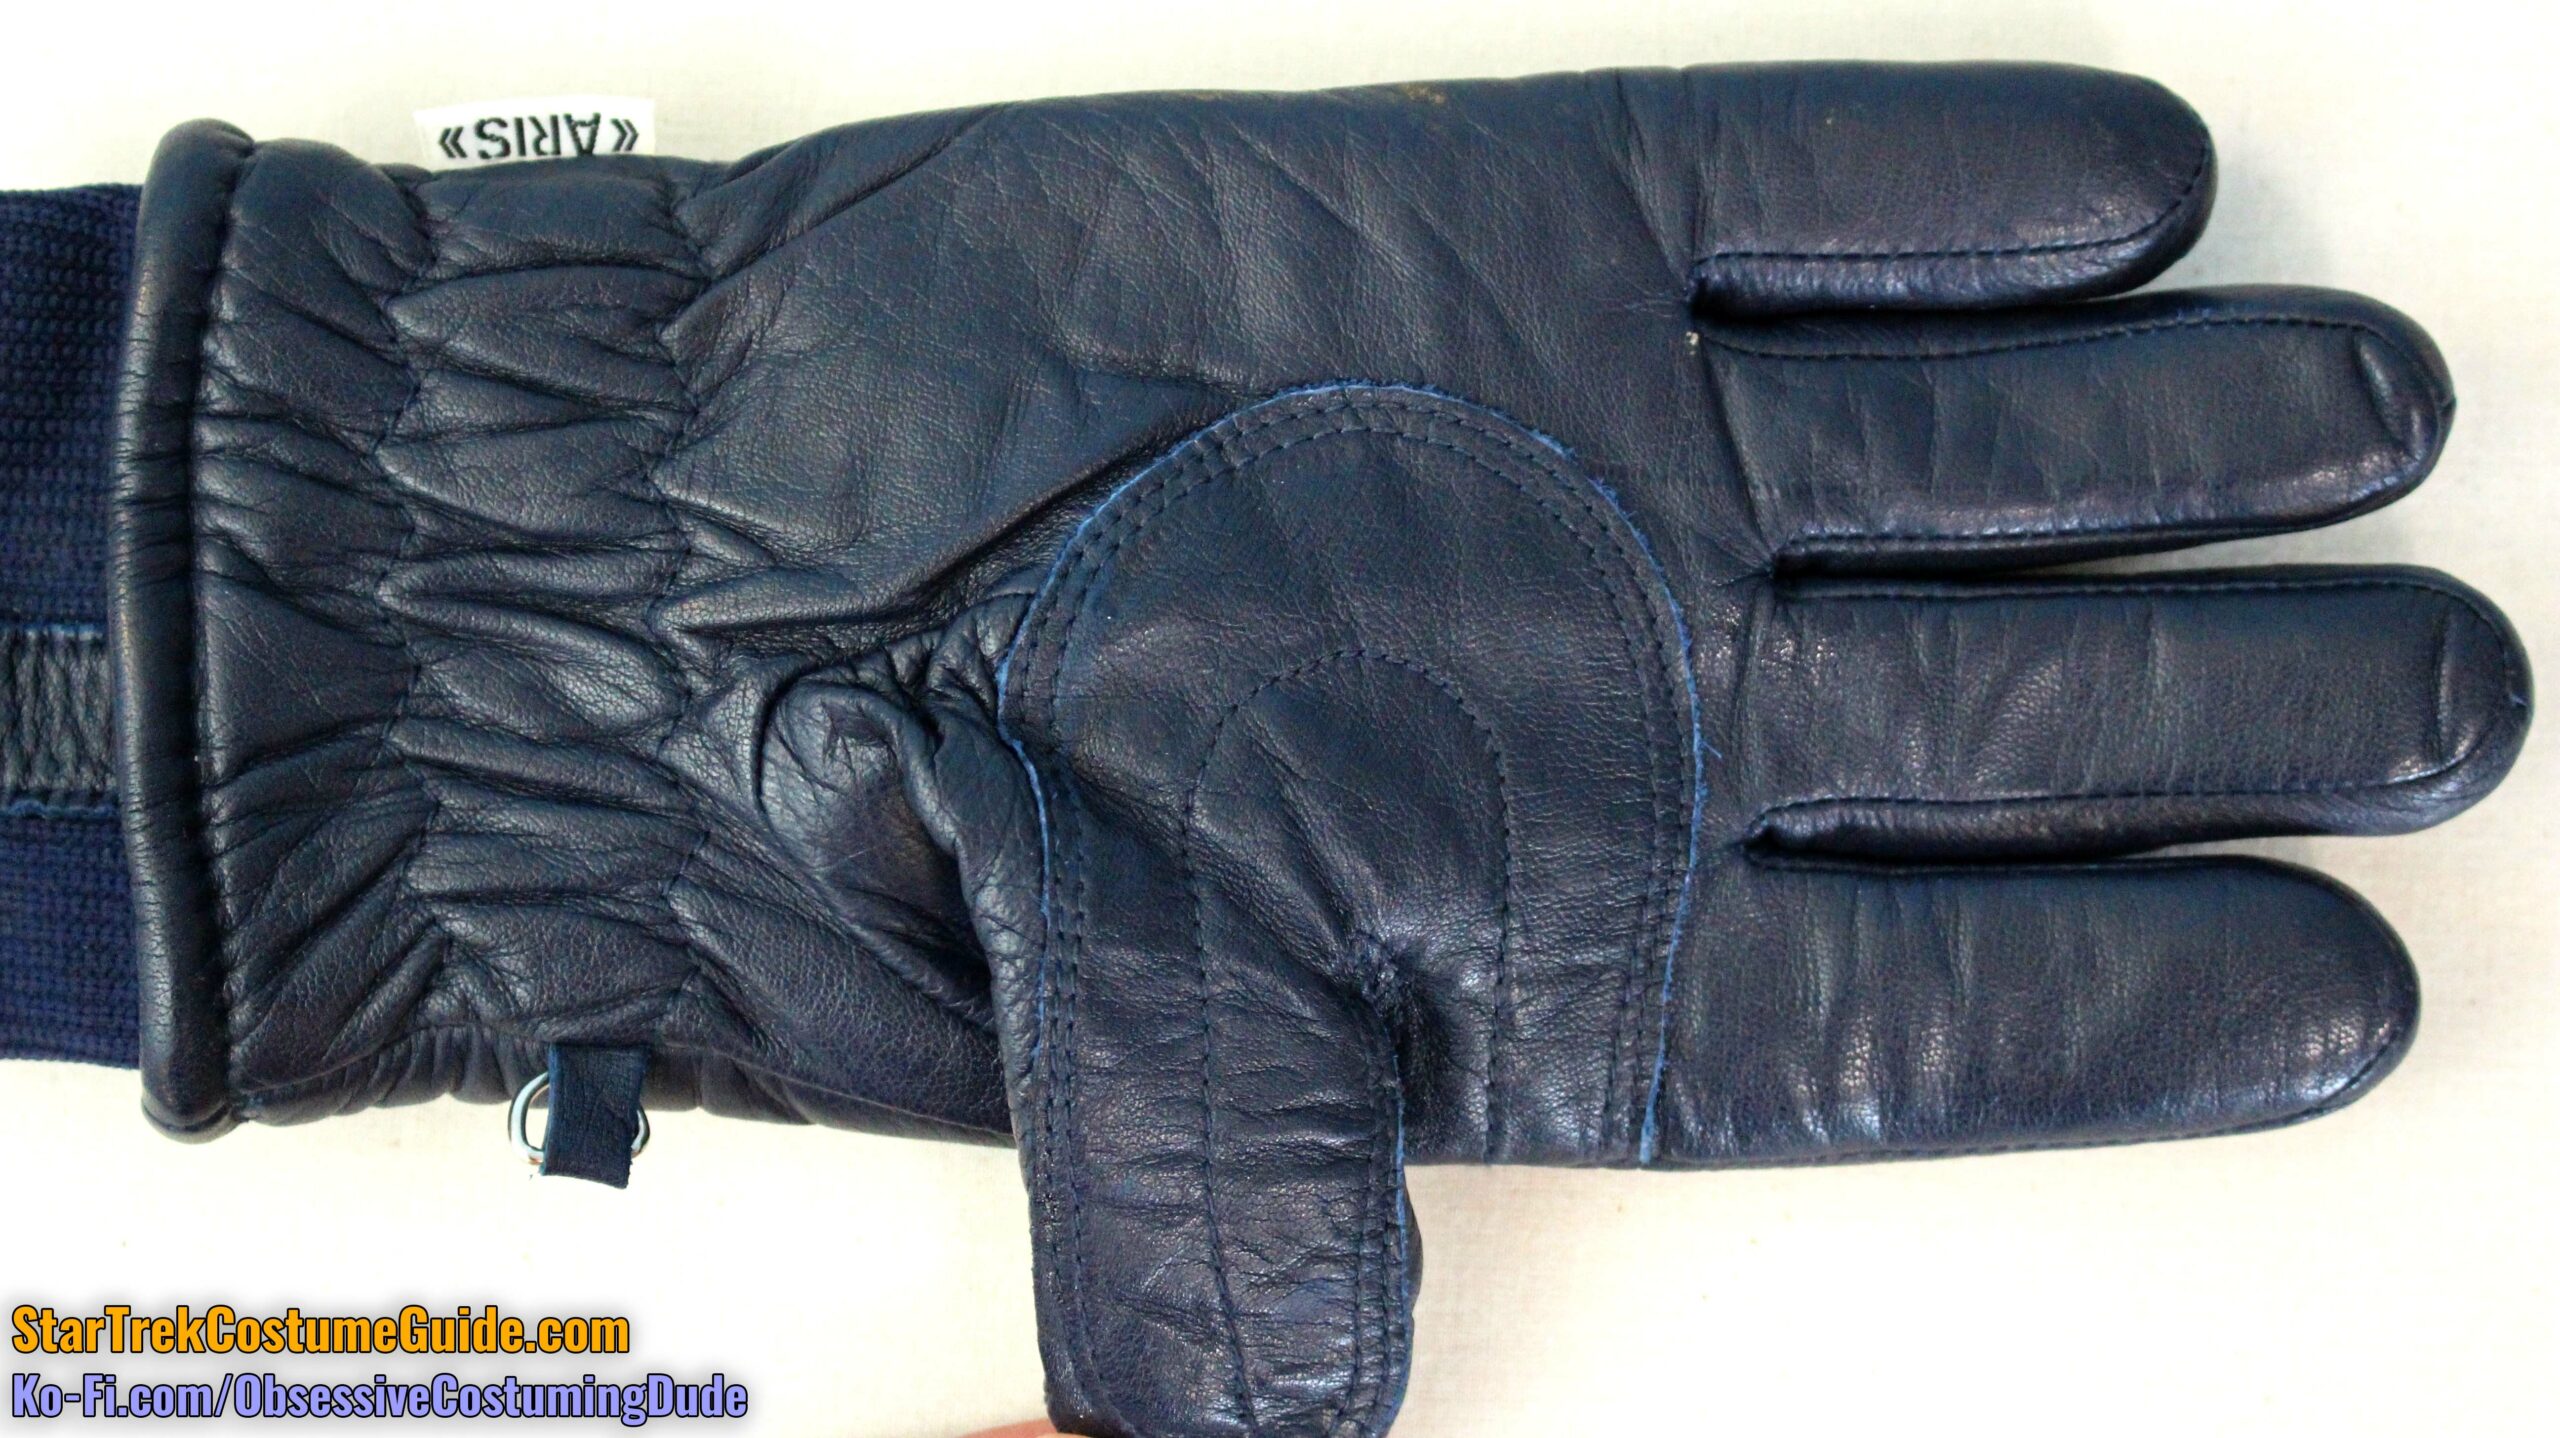
Unfortunately, these seem to no longer be made, although at least one pair of vintage gloves has turned up on eBay, snagged by yours truly.
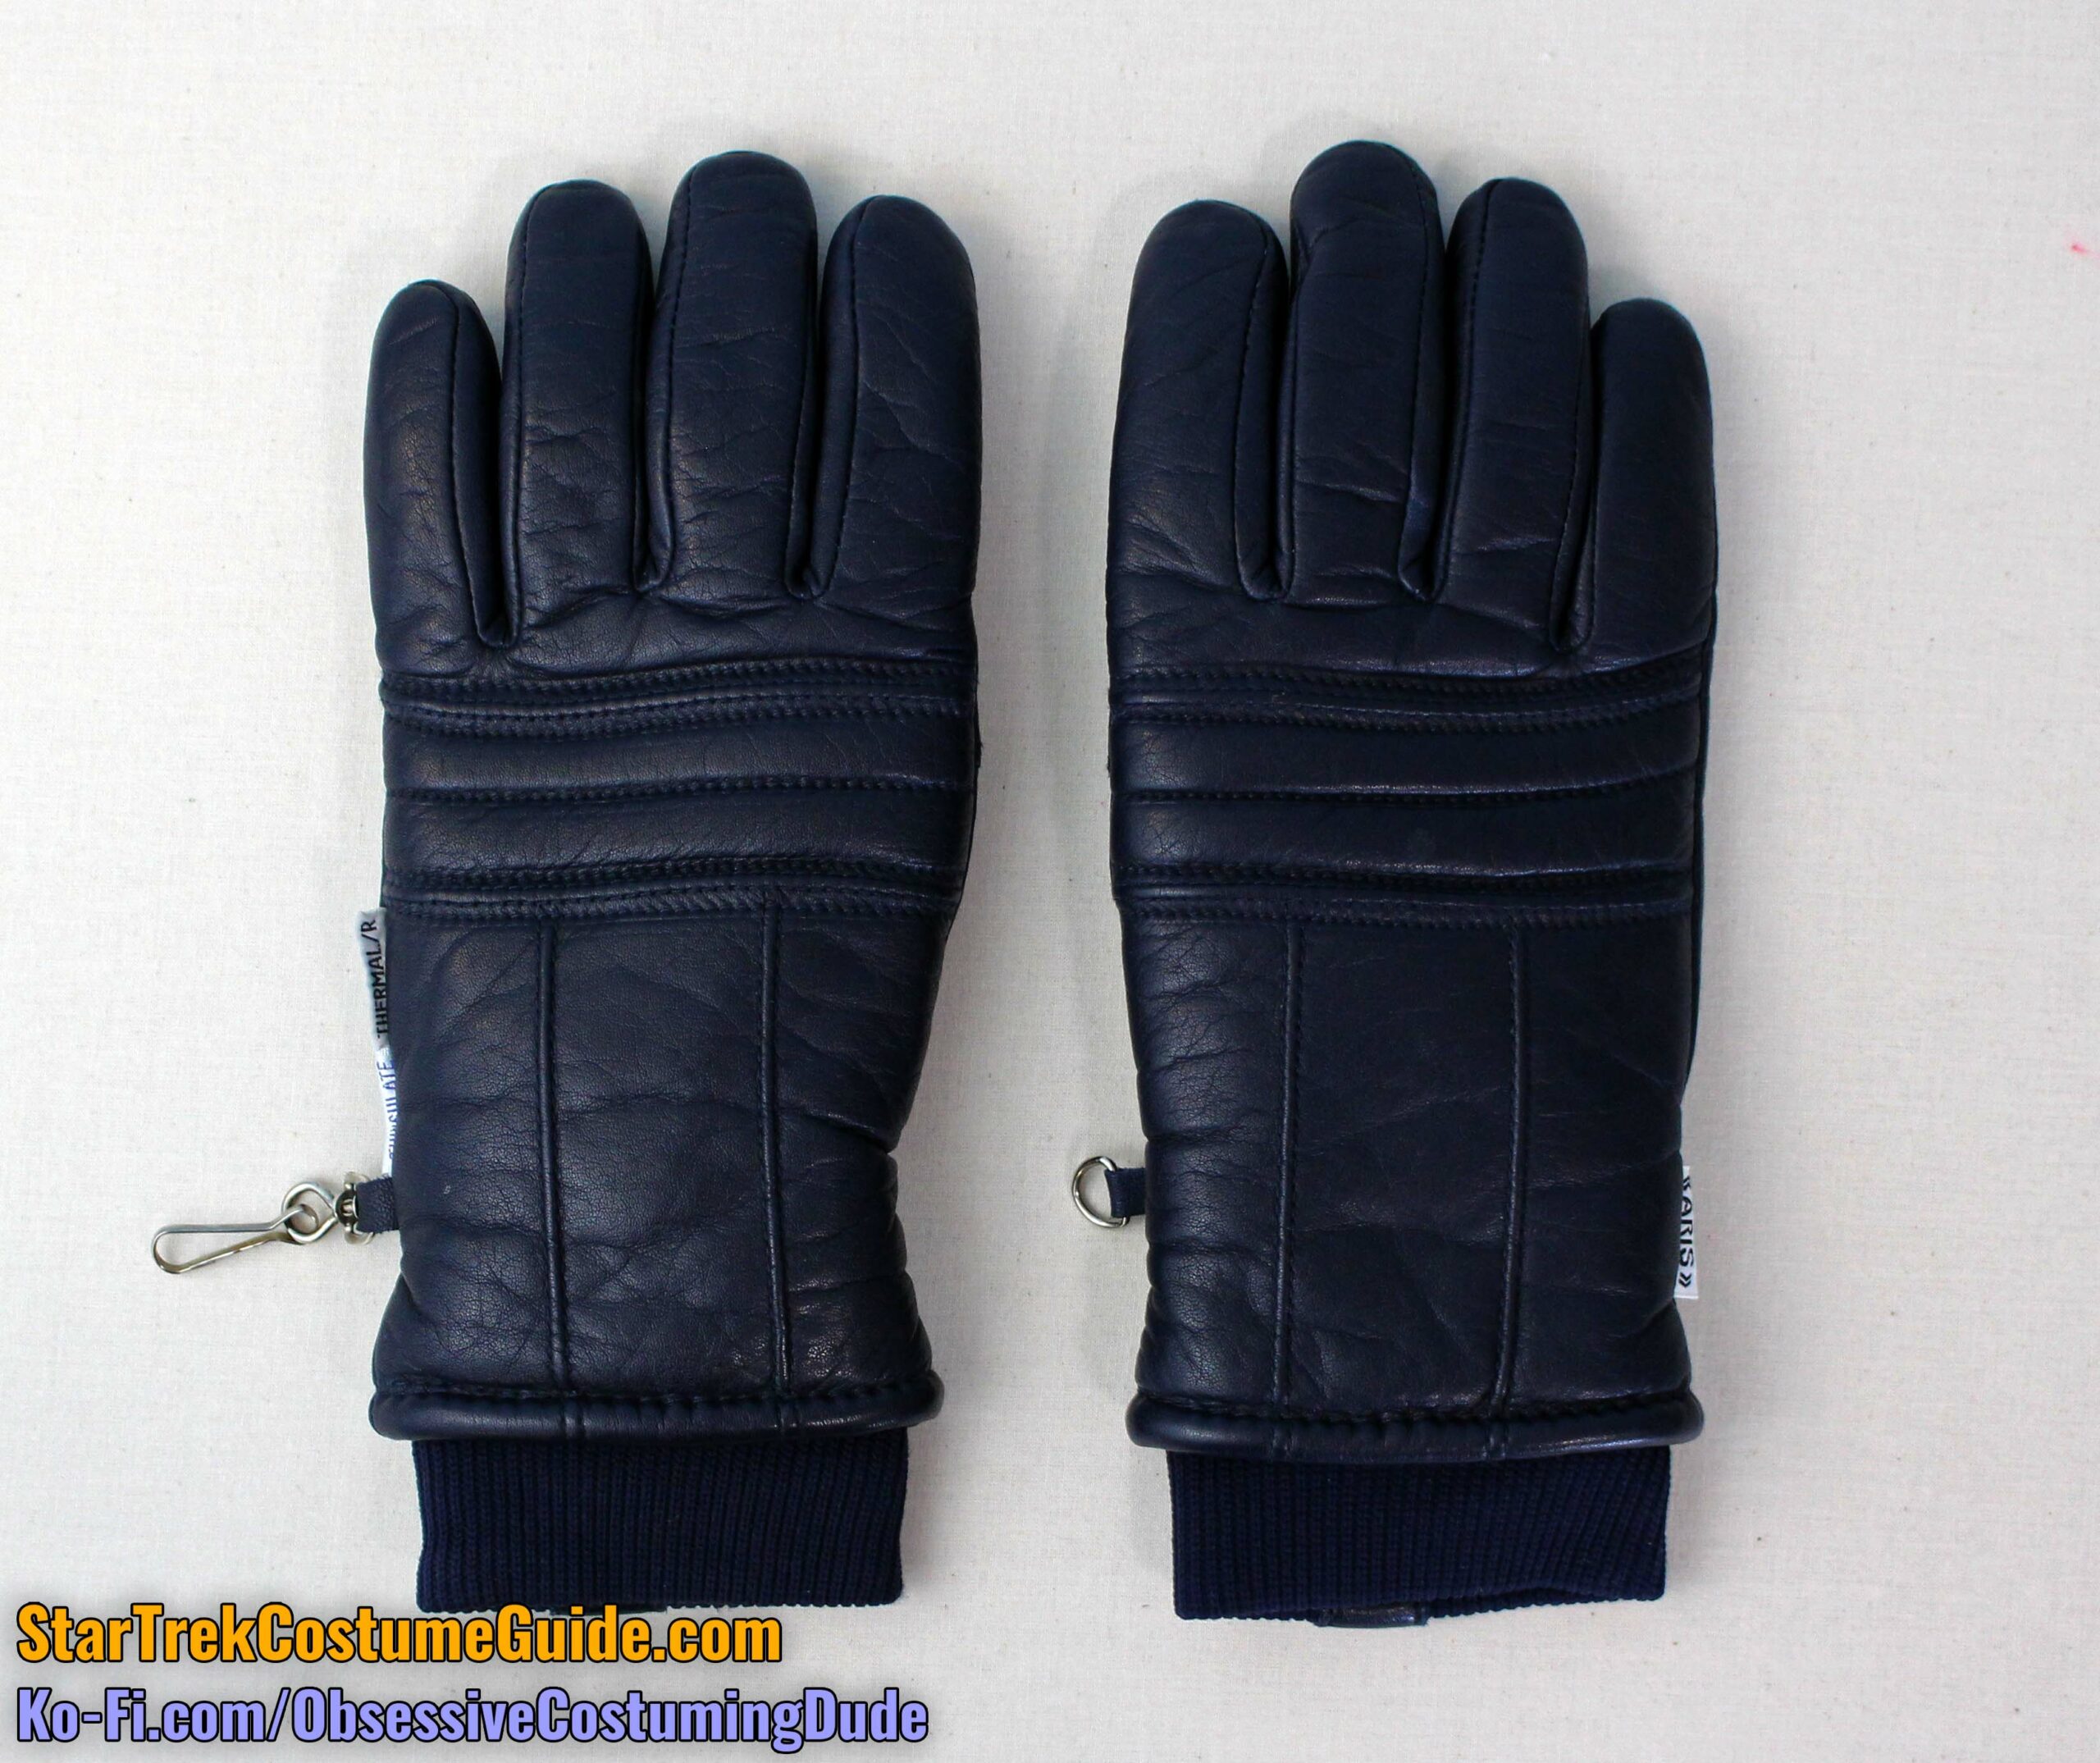
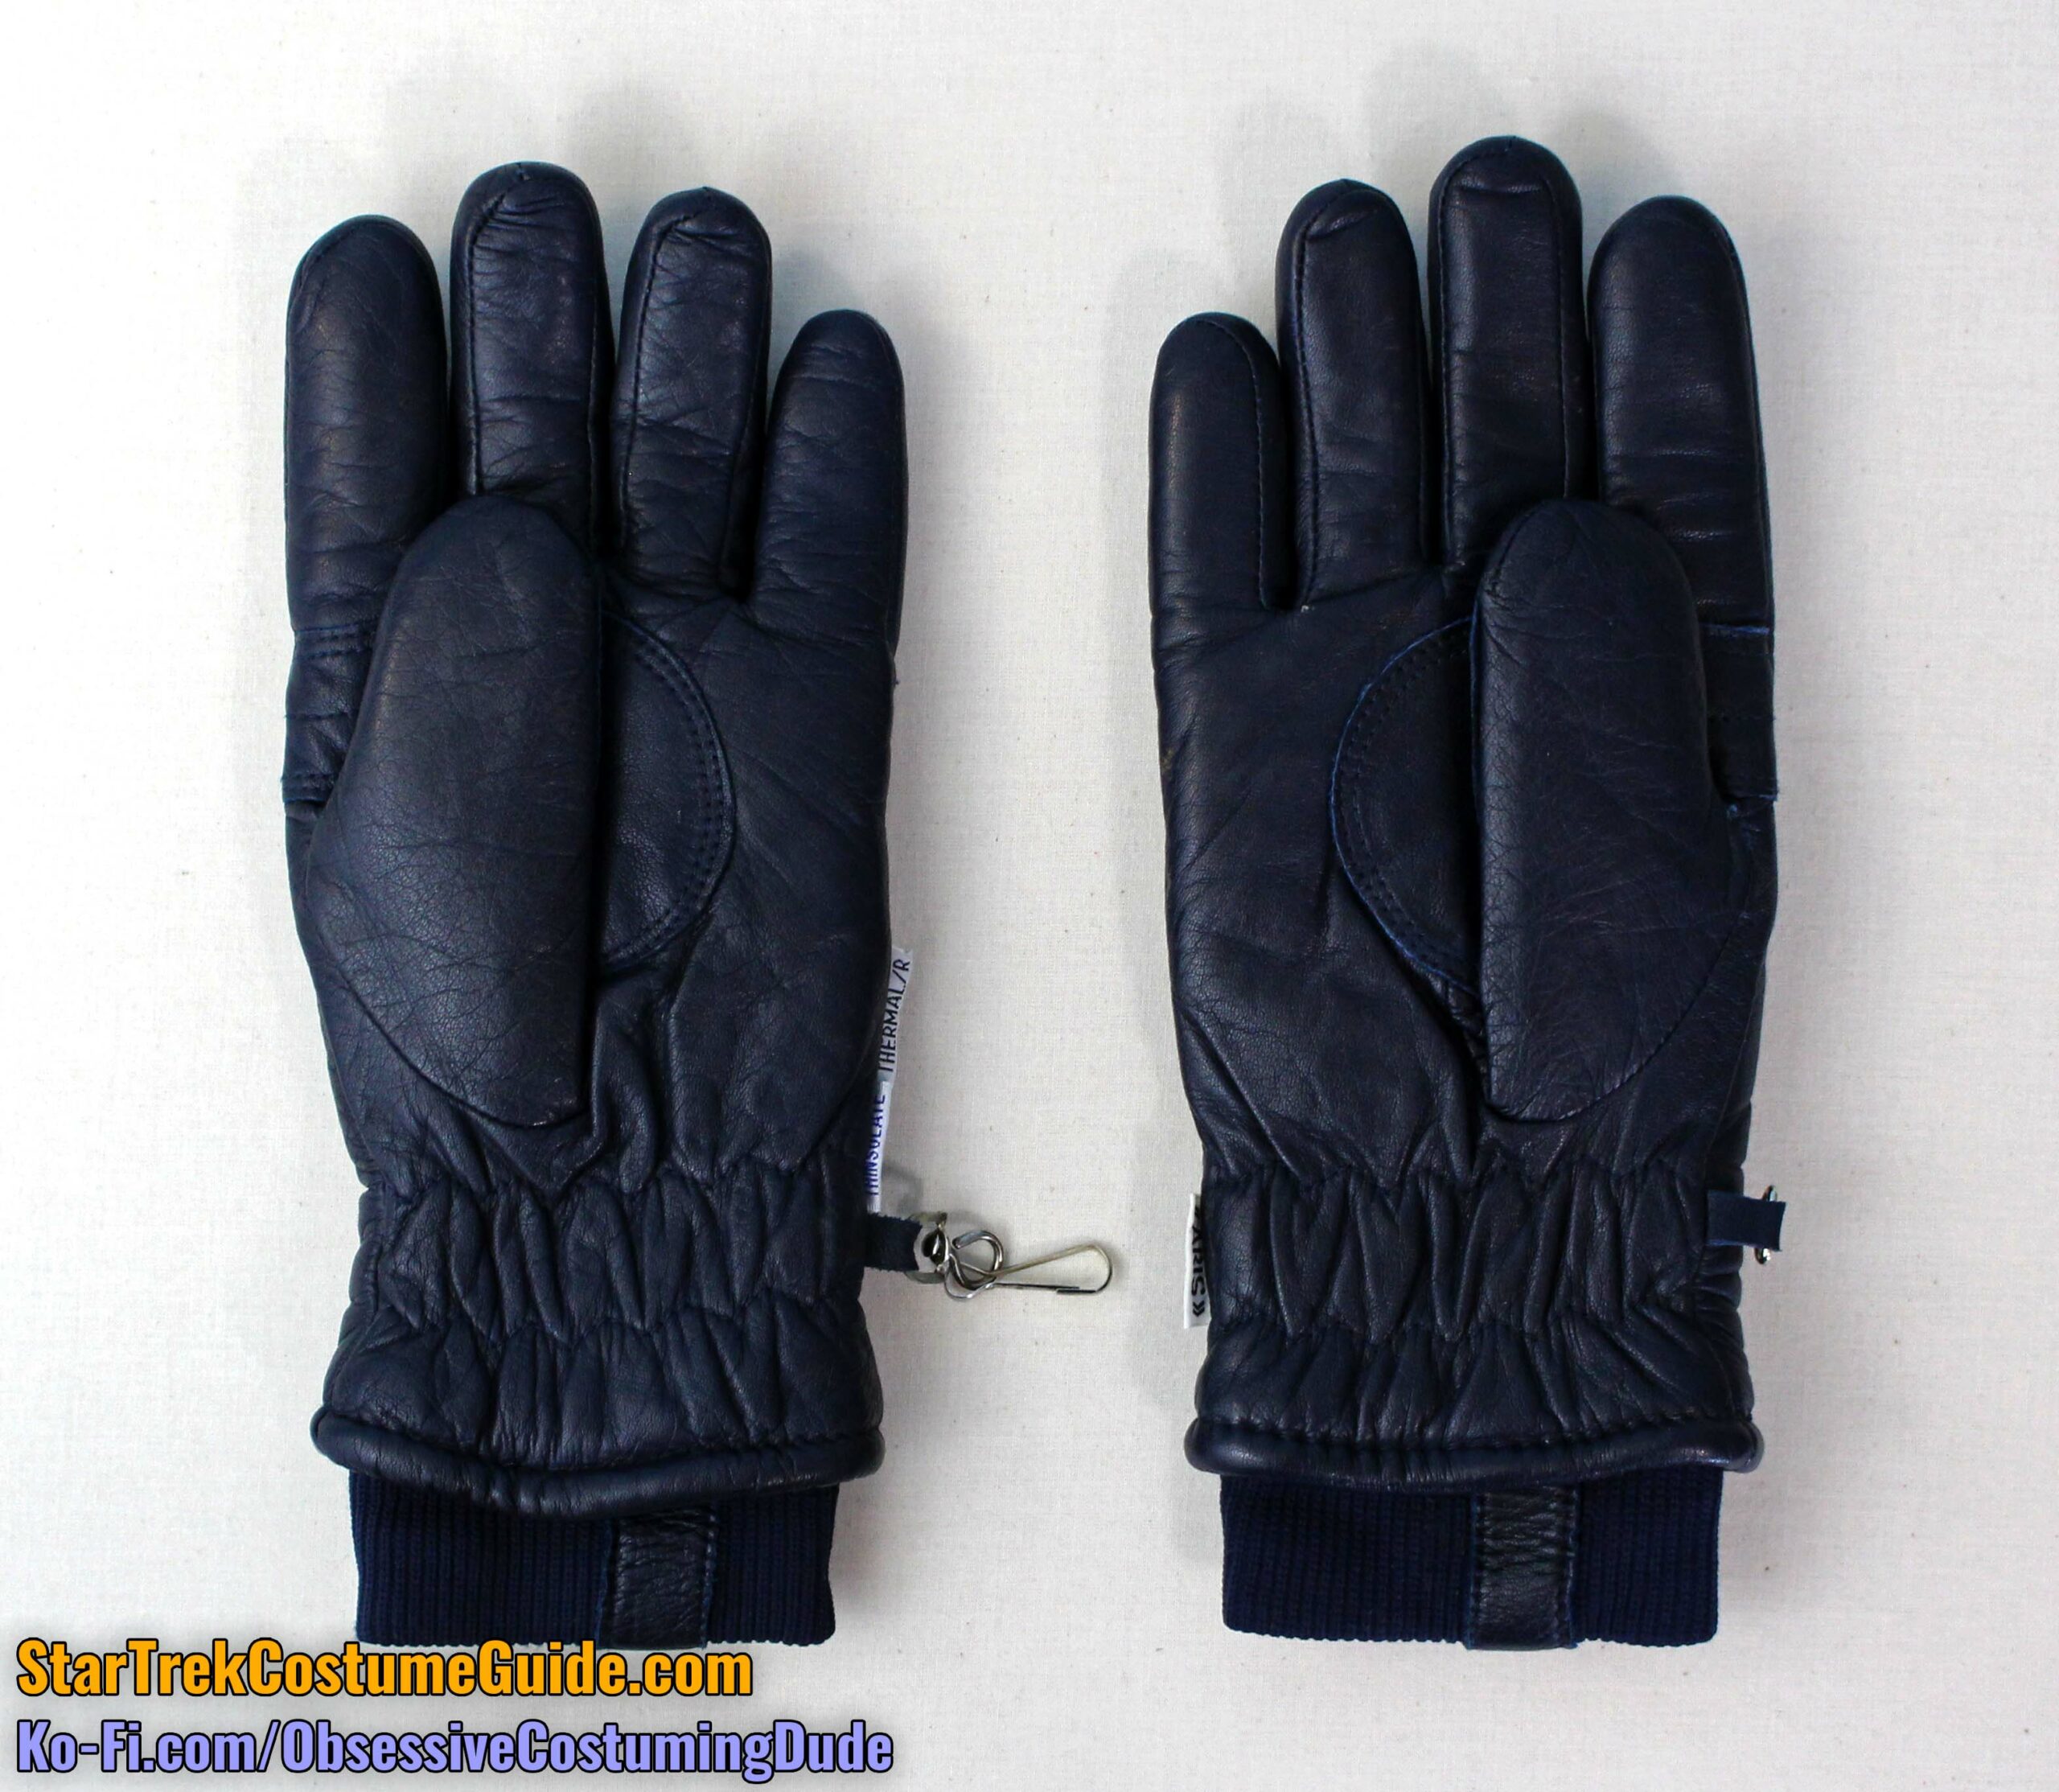
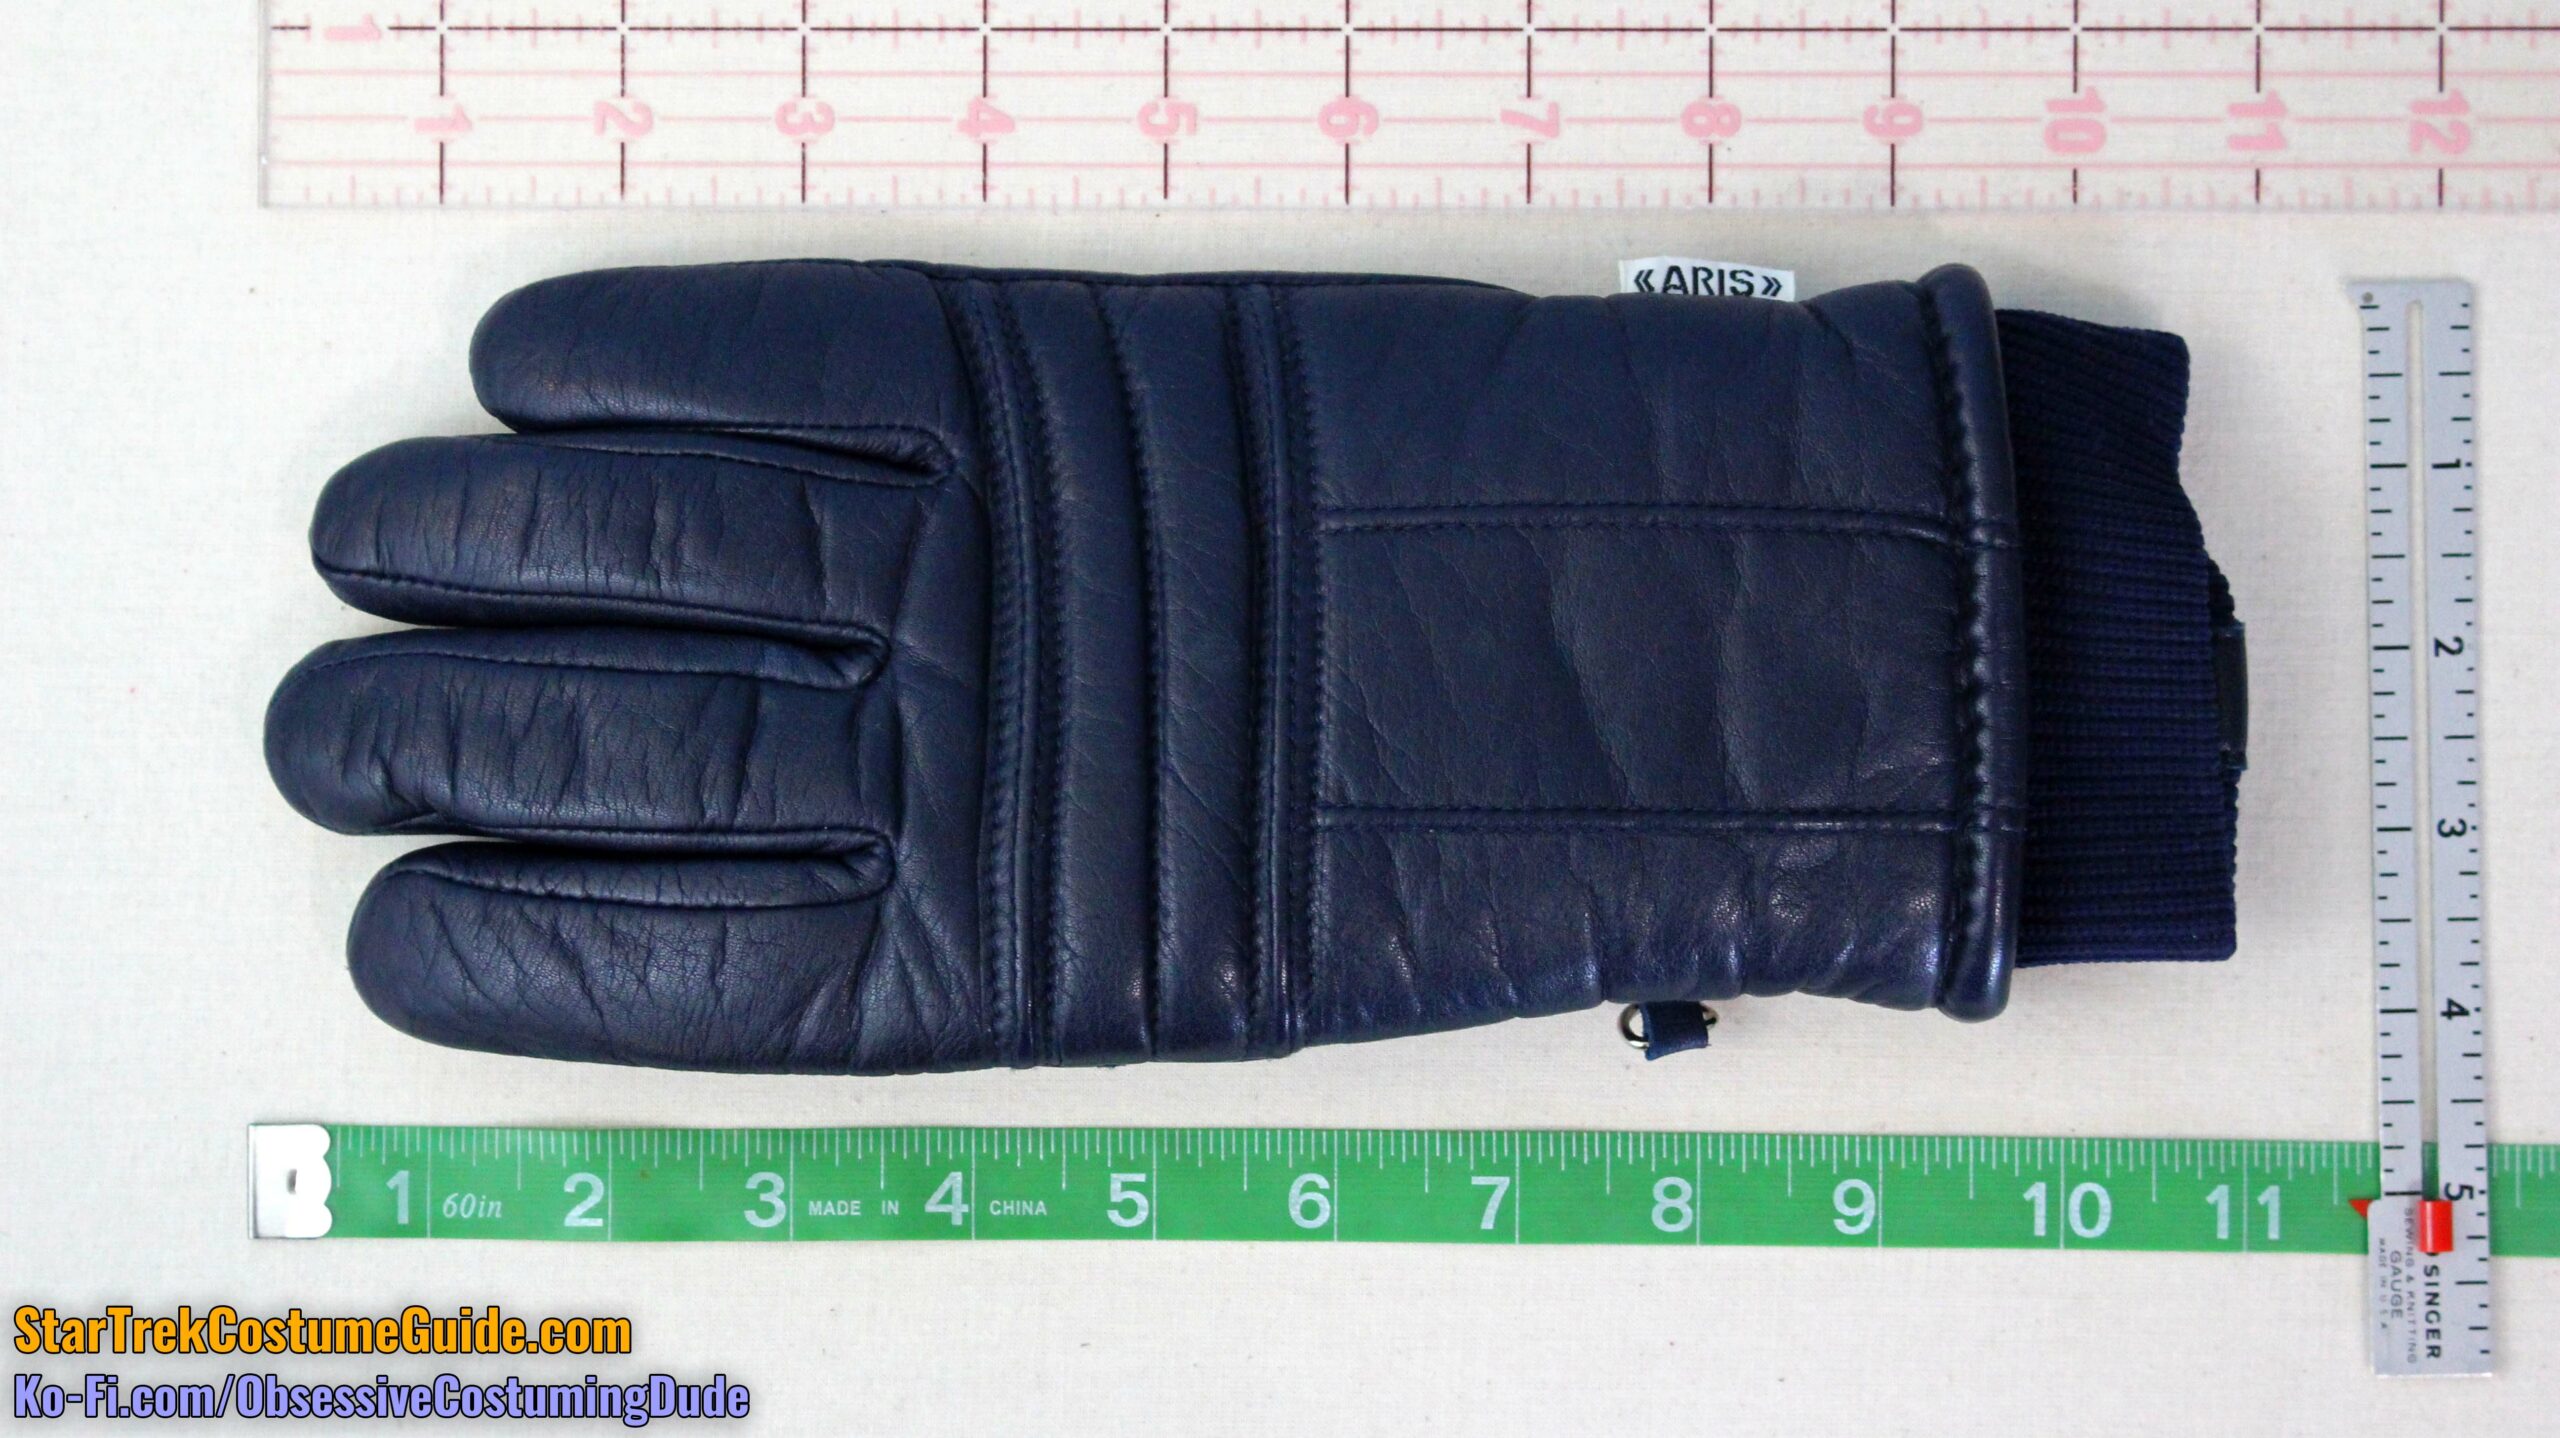
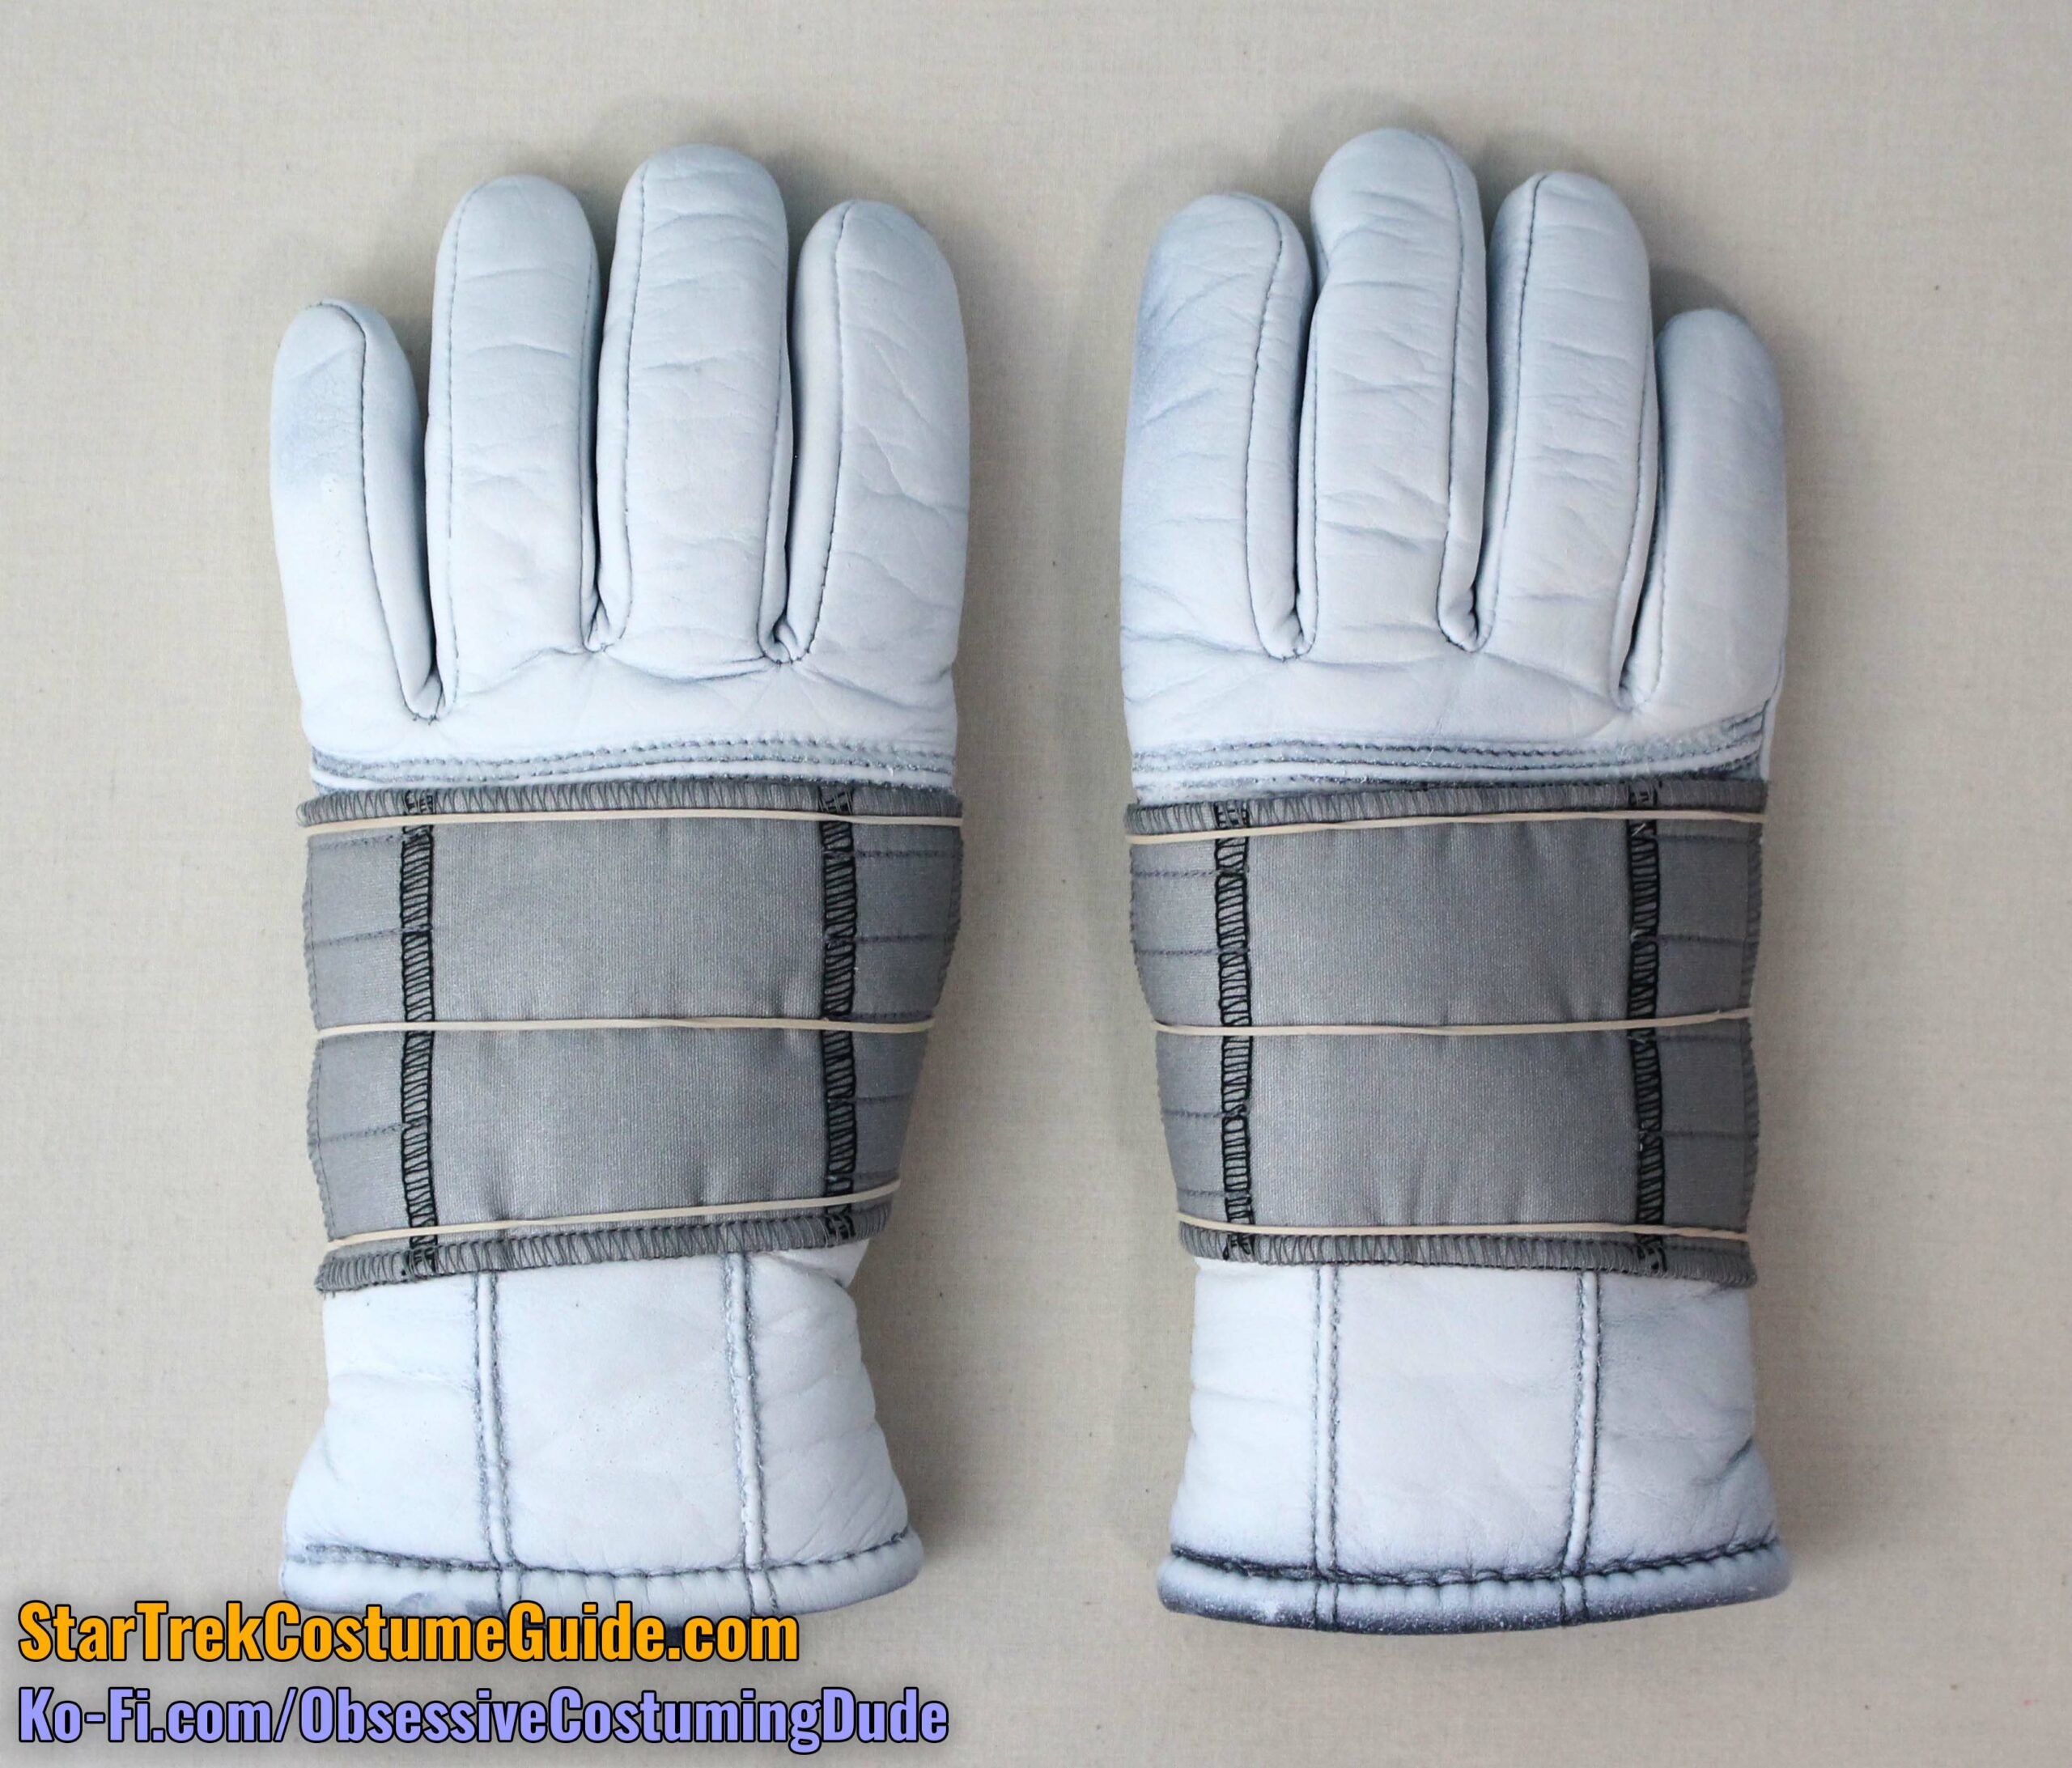
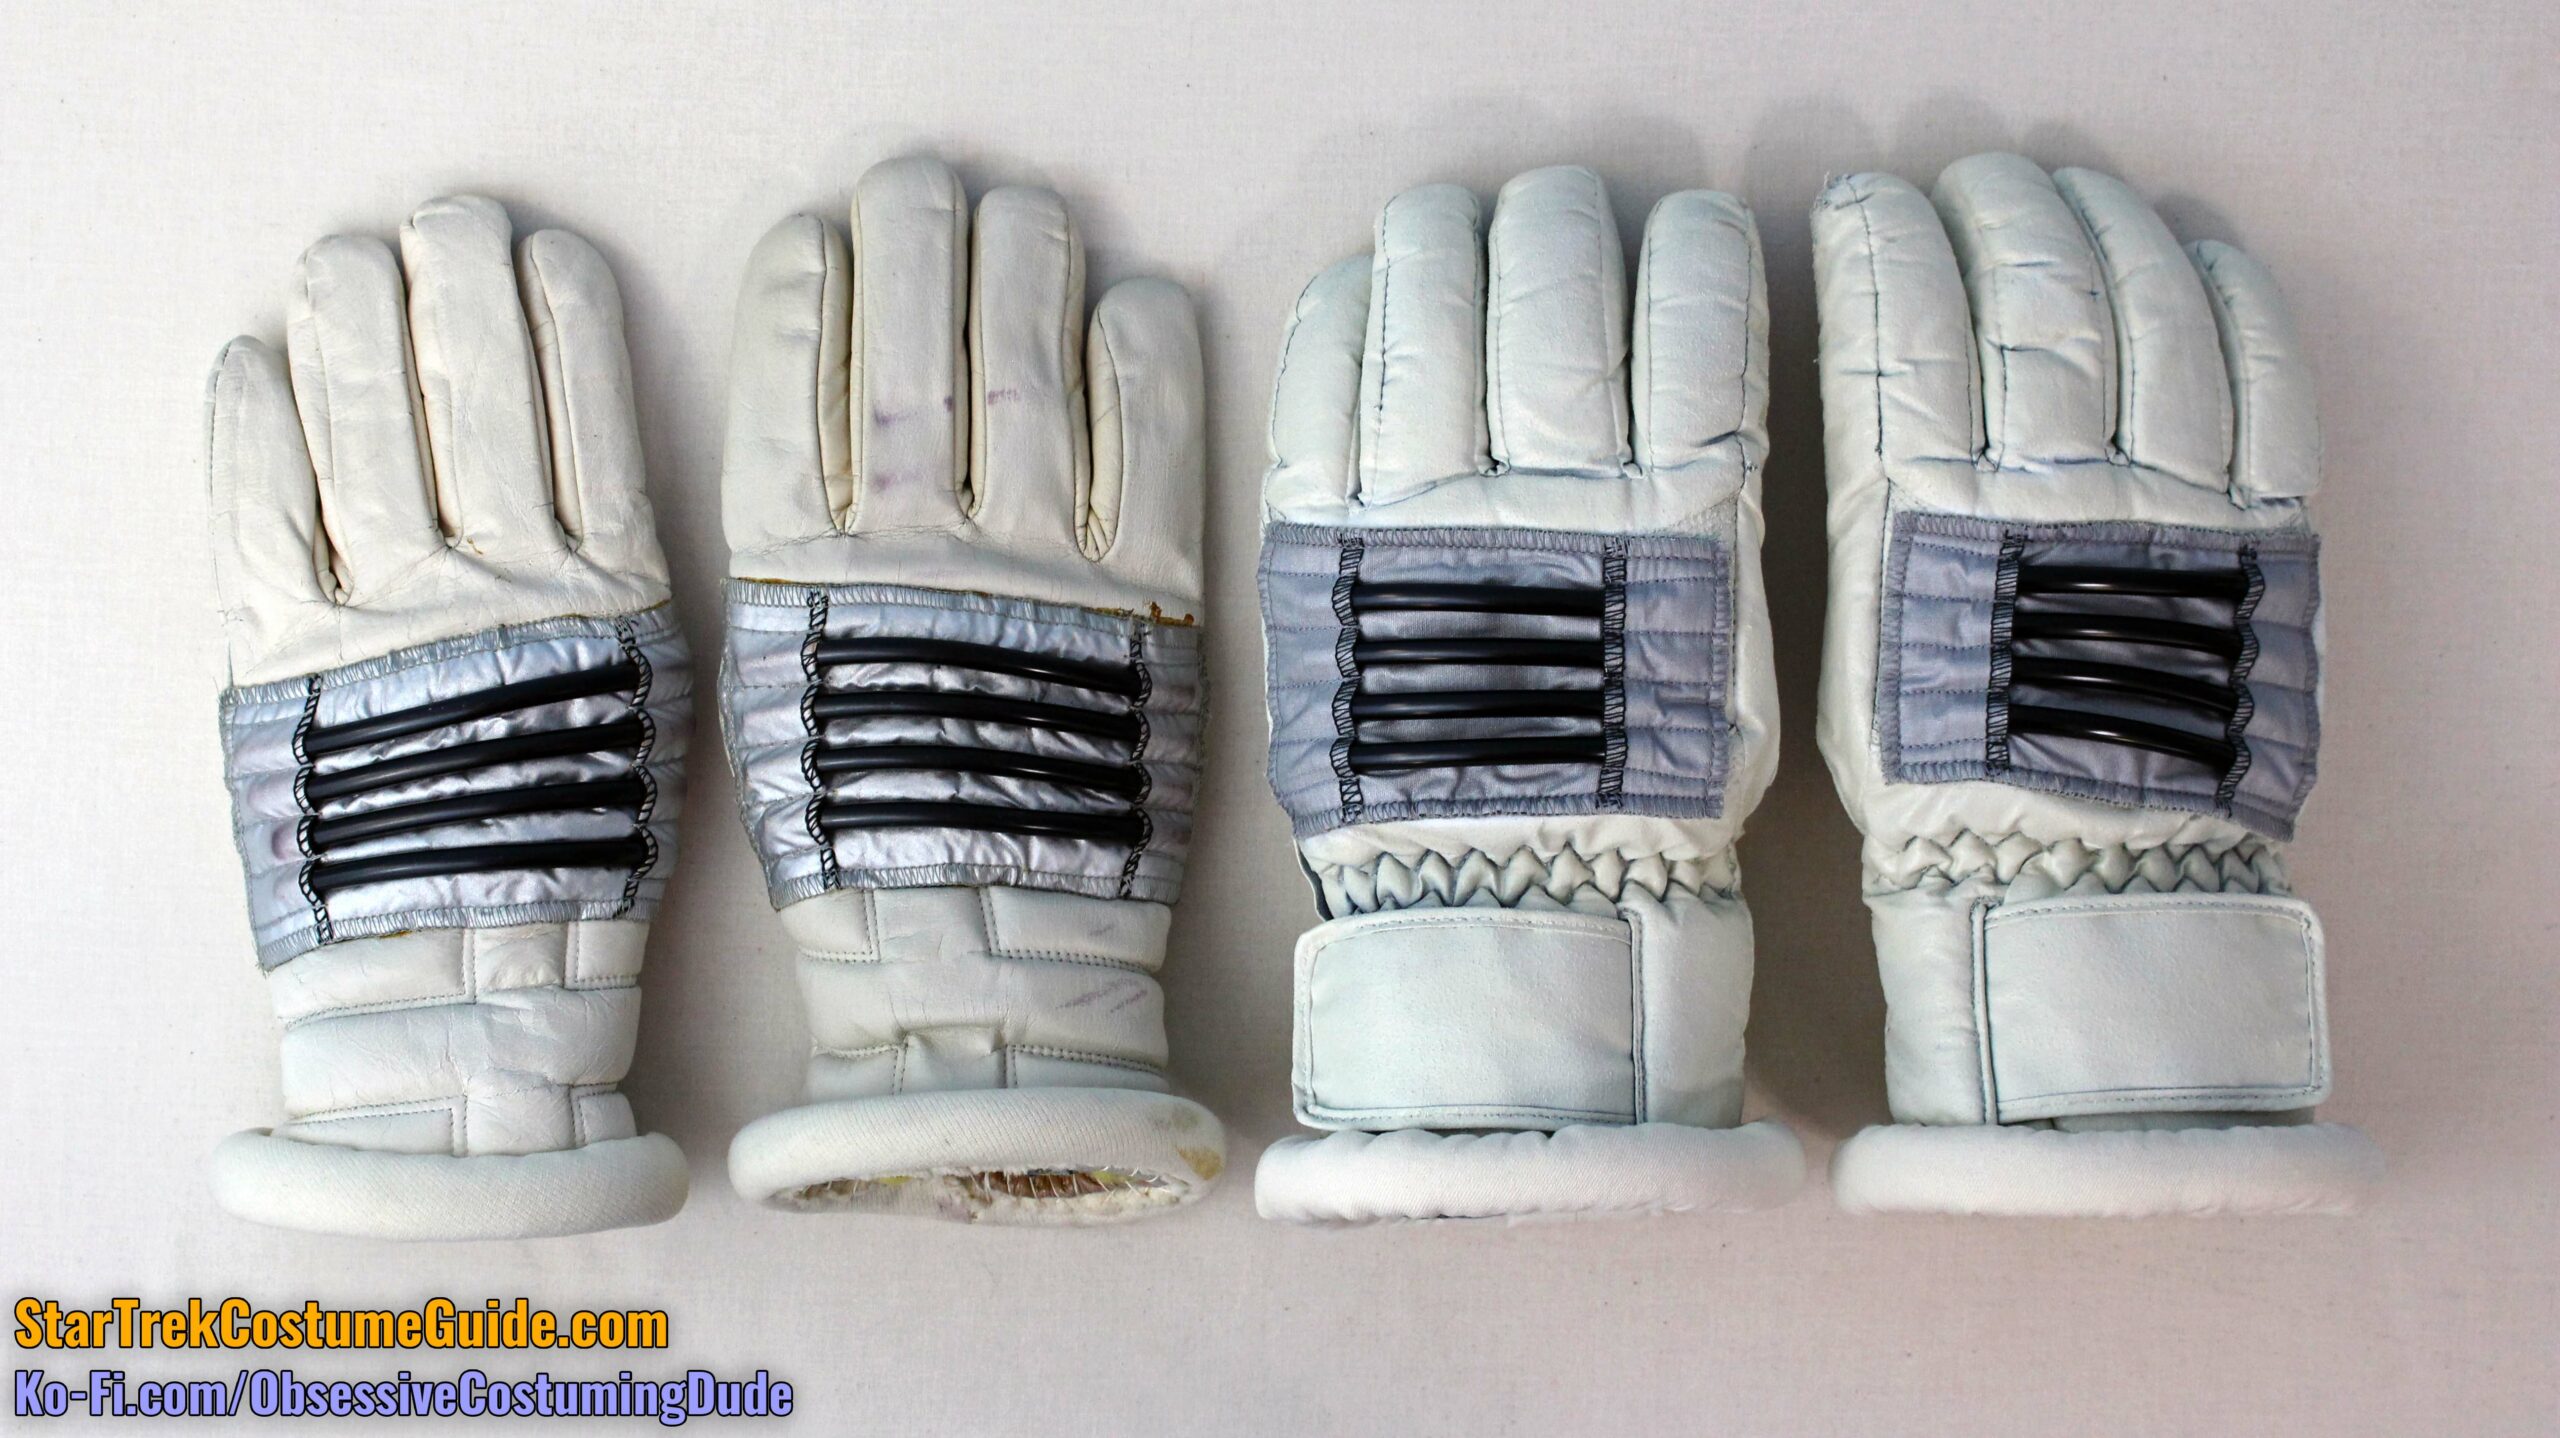
For those of you with the skills, means, and inclination to make your own gloves, here are some reference photos of these unmodified original ones.
In lieu of the vintage Aris gloves, almost any poofy gloves should work fine, within reason.
And if they’re already white or off-white, then even better!
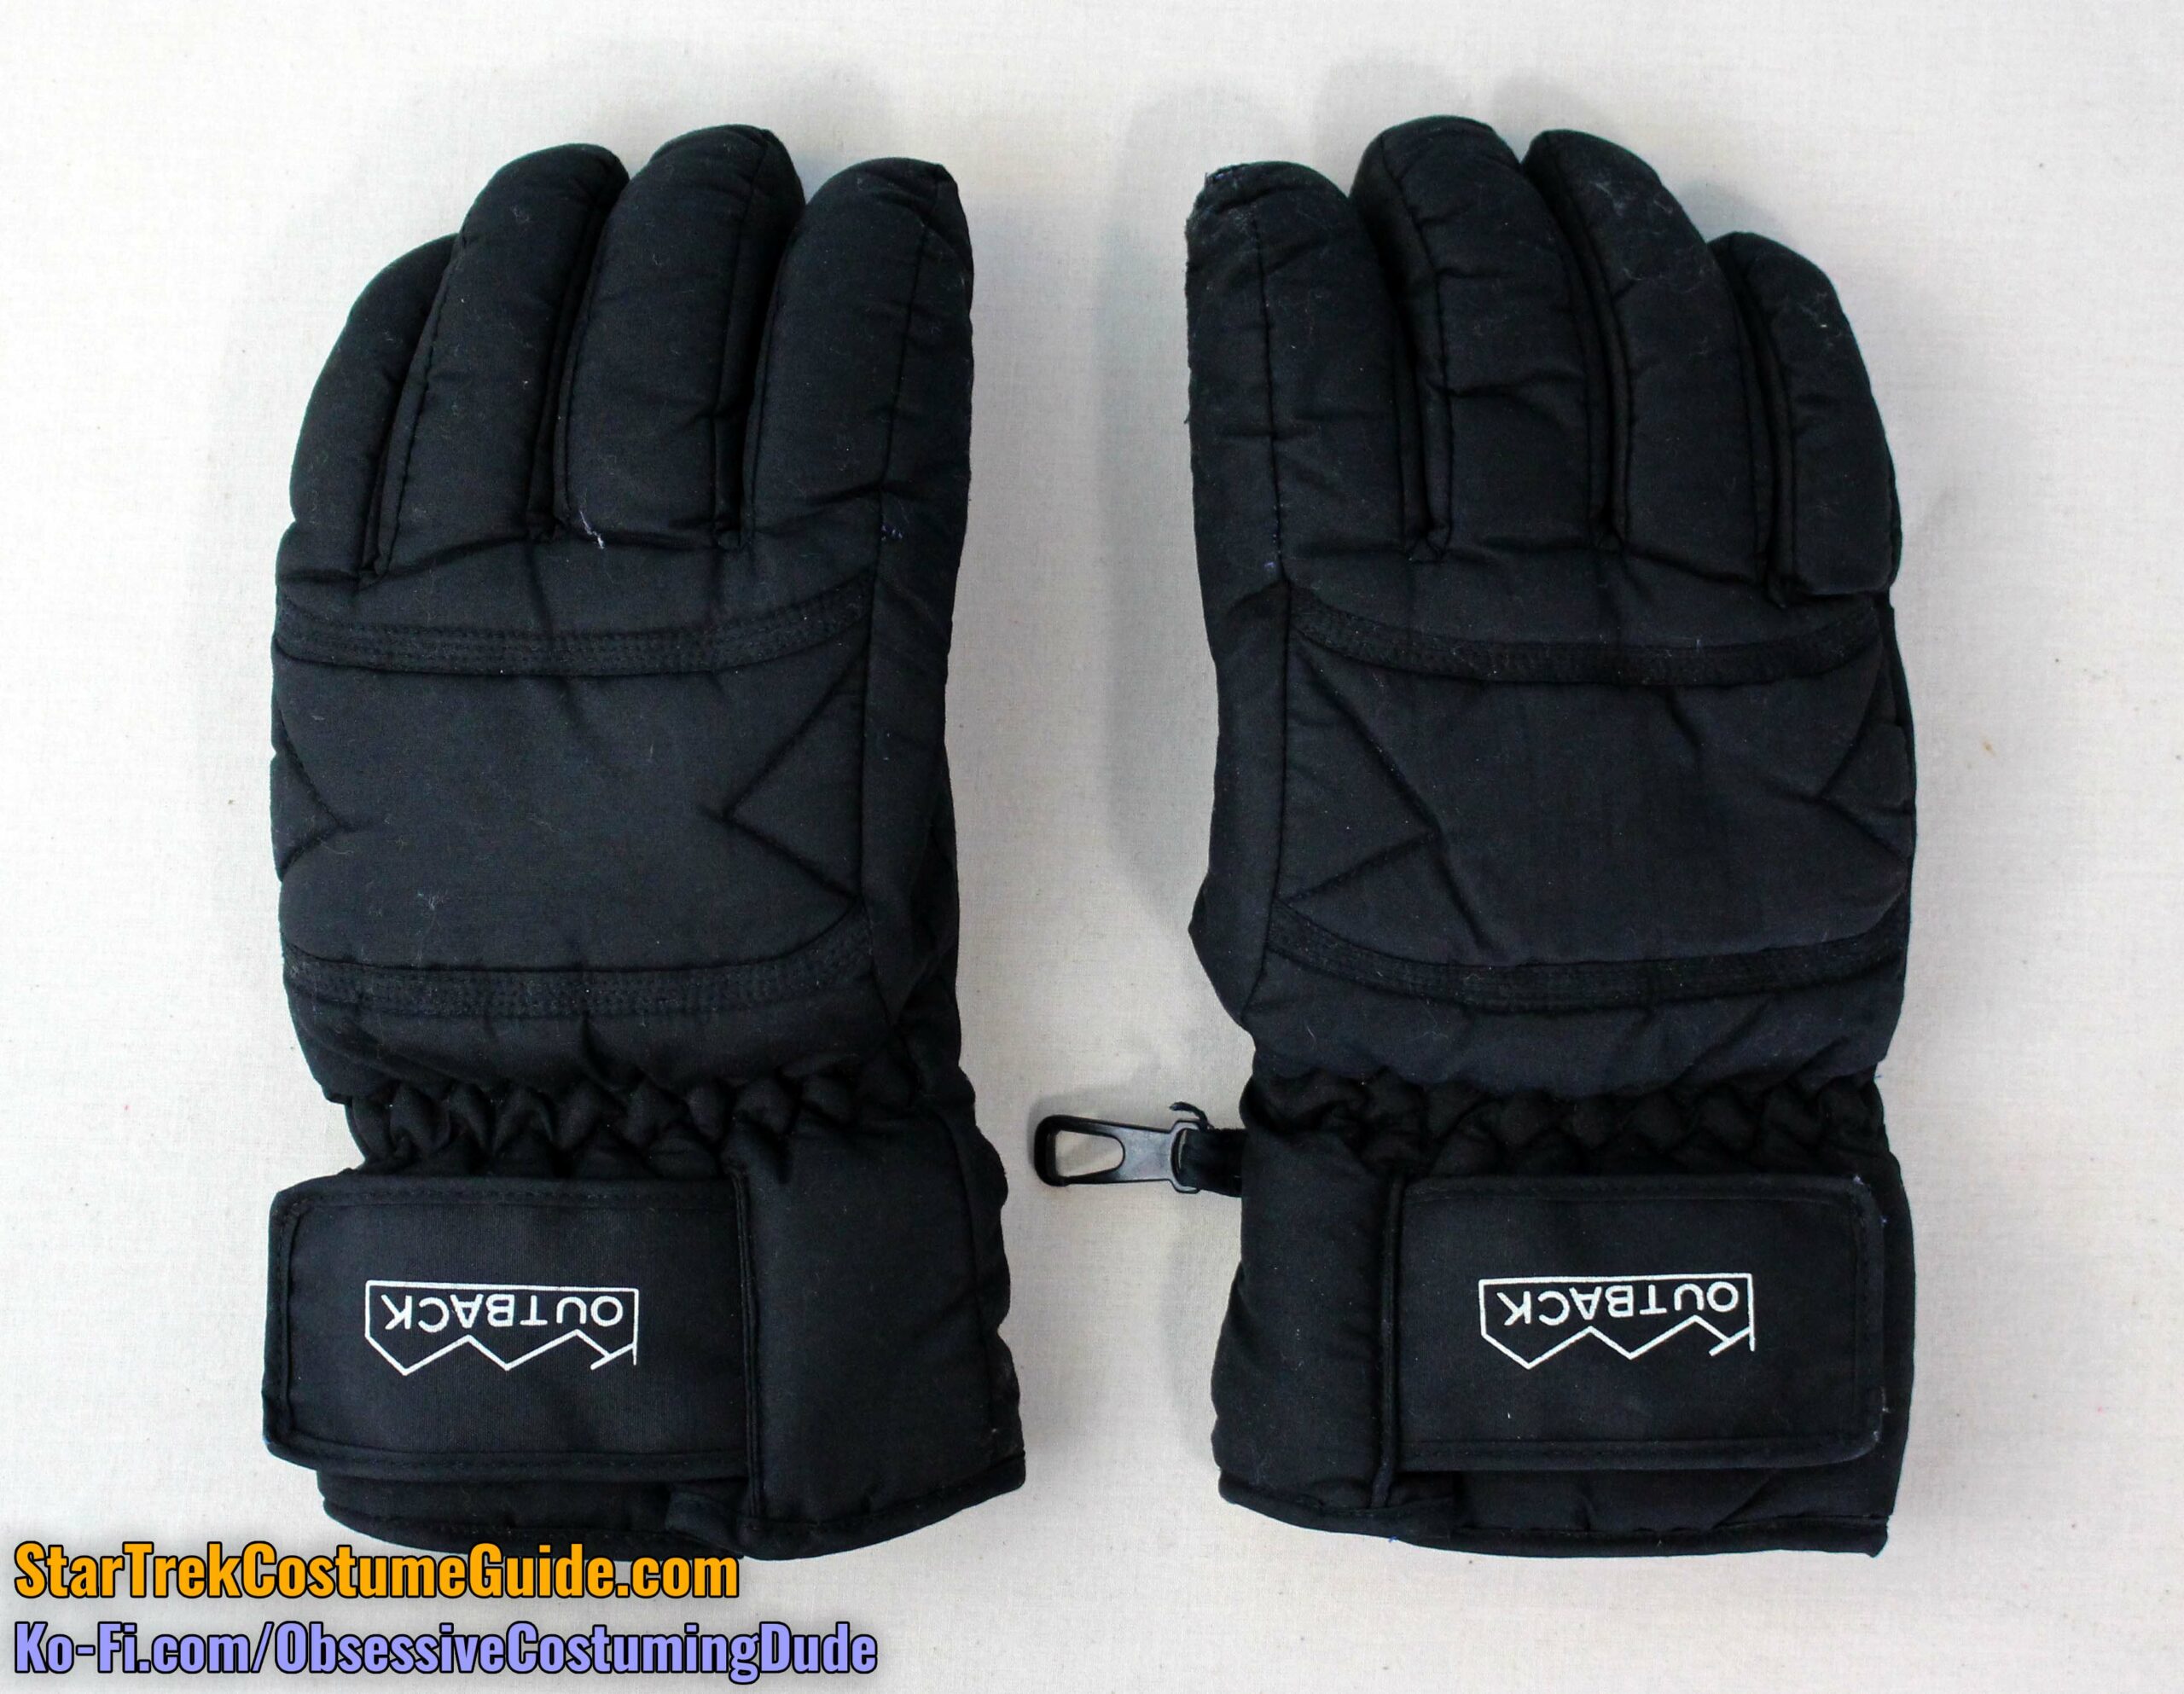
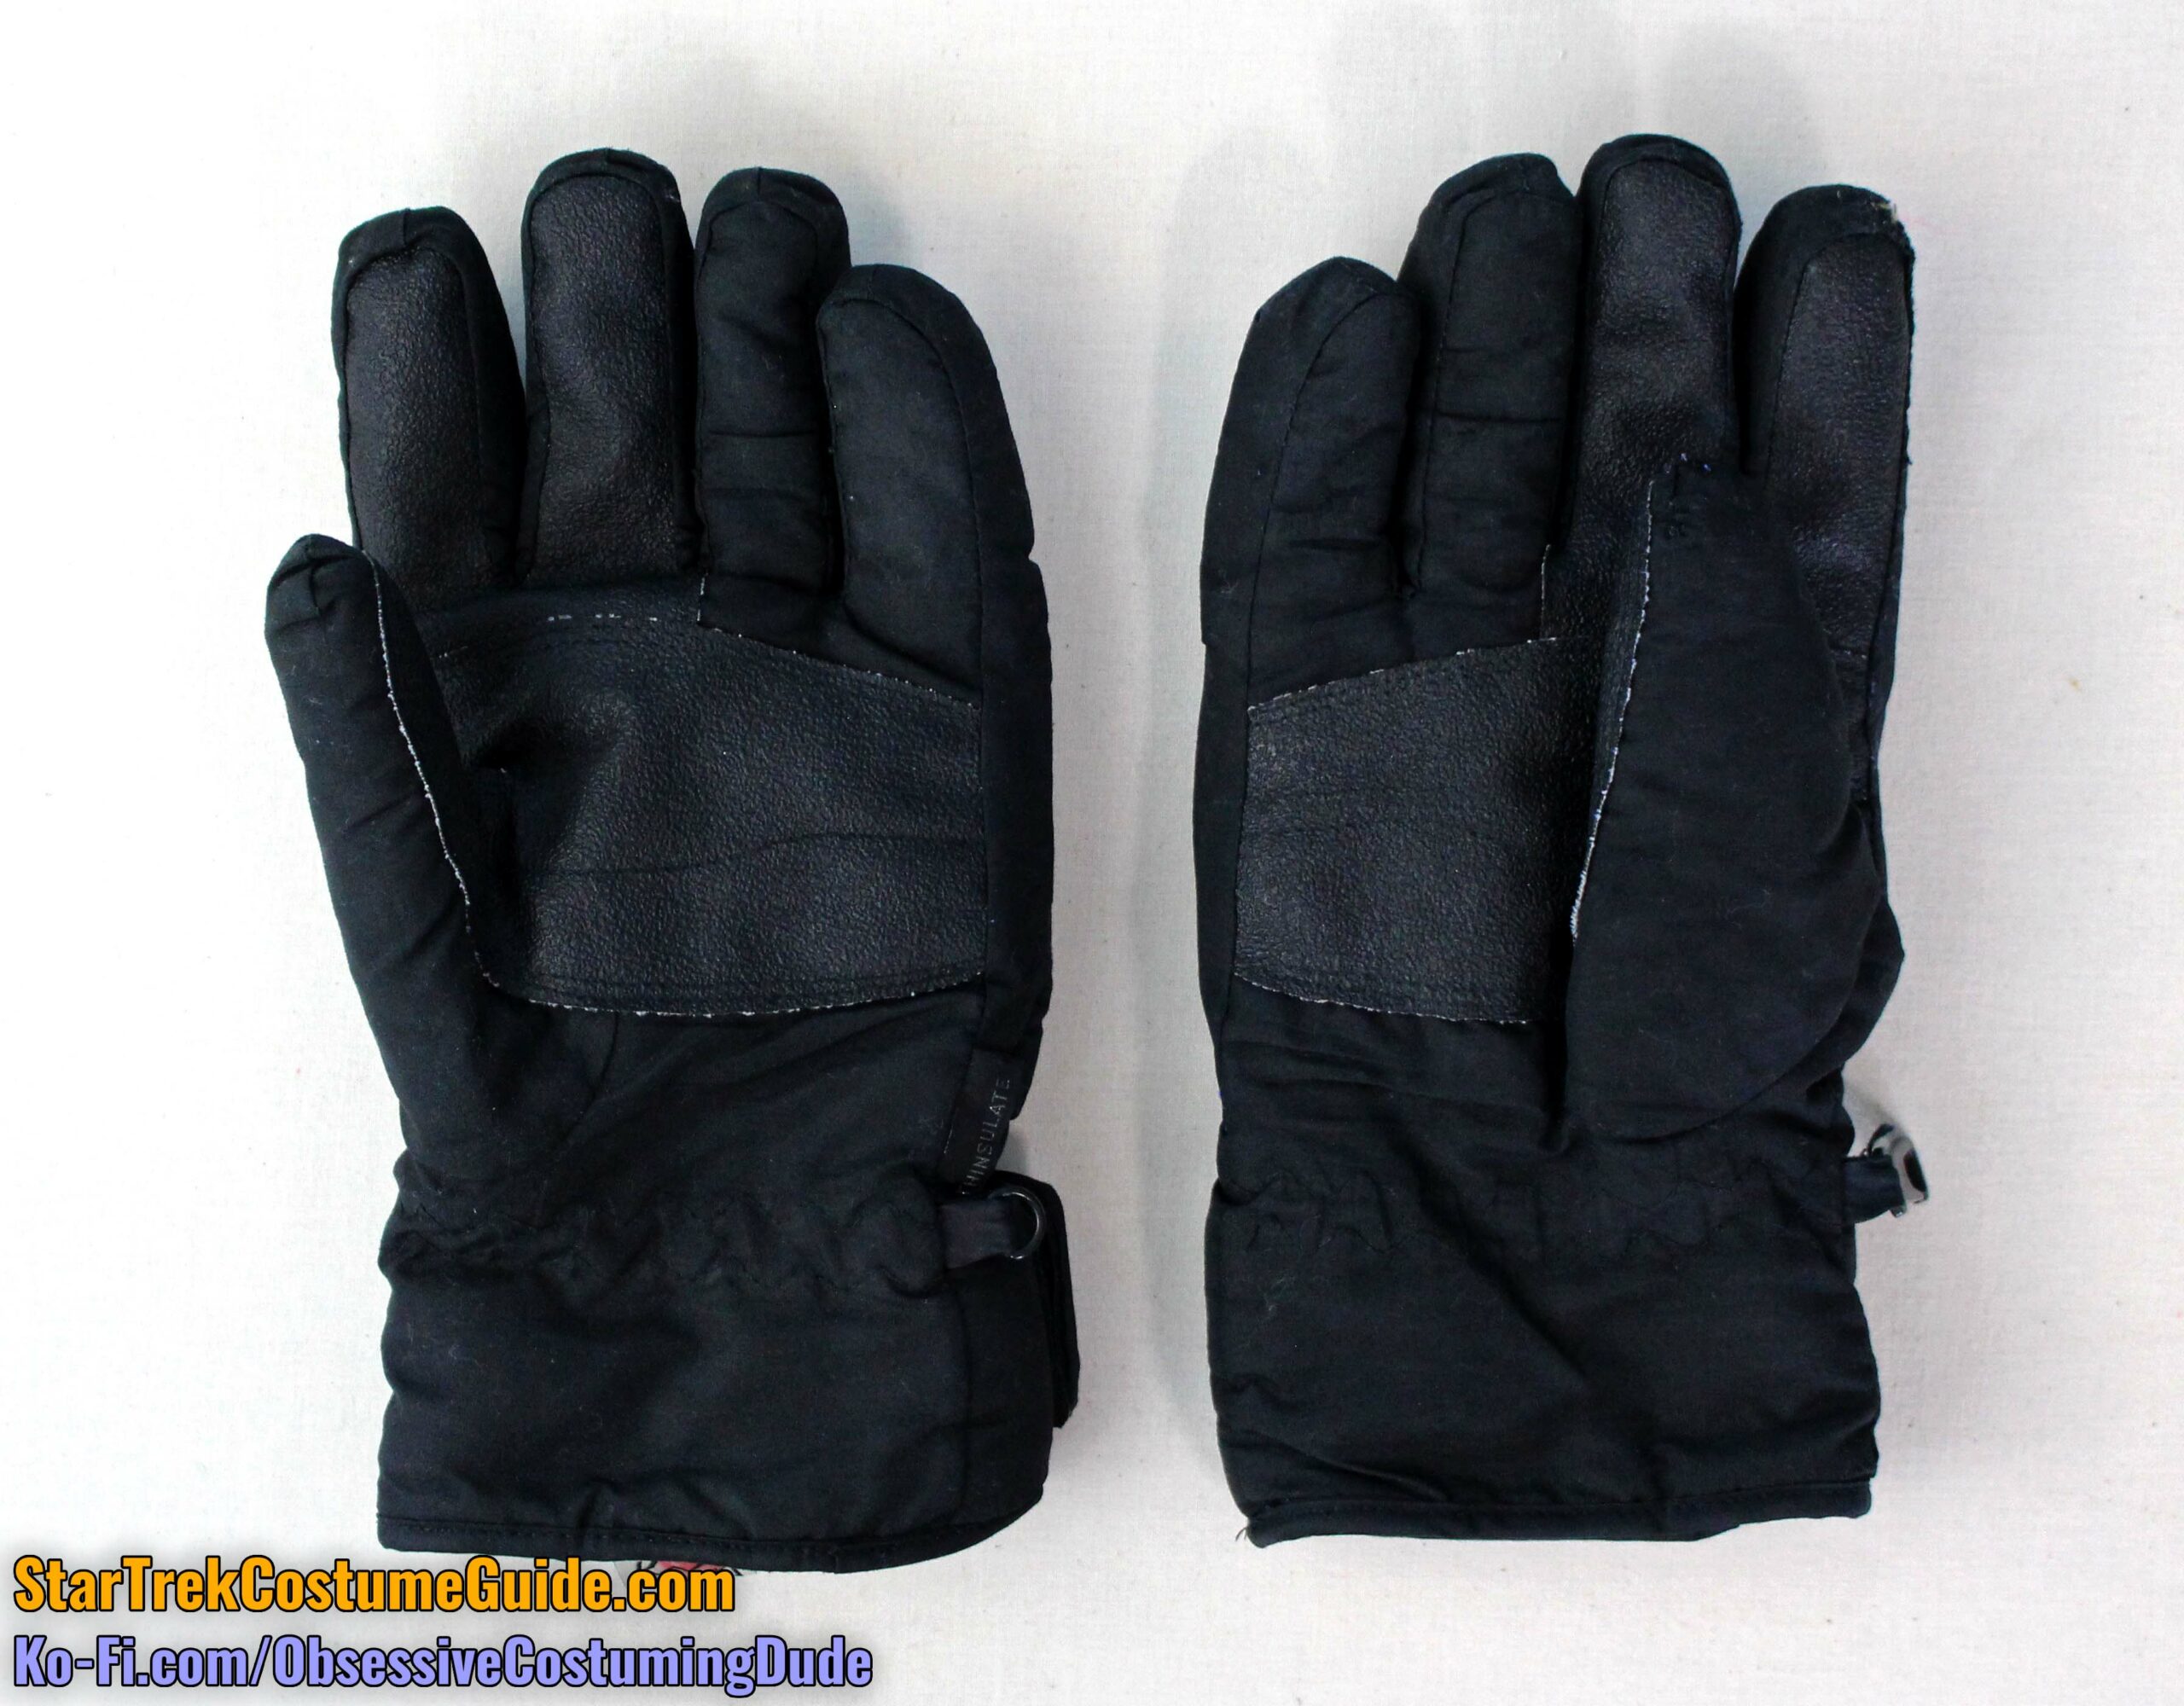
For my personal gloves (and demonstration purposes), I used a spare pair of black ski gloves I already had stored away and weren’t good for much else anyway.
One of the fingertips had a hole and the other glove had a small tear, so they weren’t as good for skiing anymore … but they made for excellent gloves to modify for this costume!
Once your gloves are painted and the custom accents are added, they should absolutely look the part.
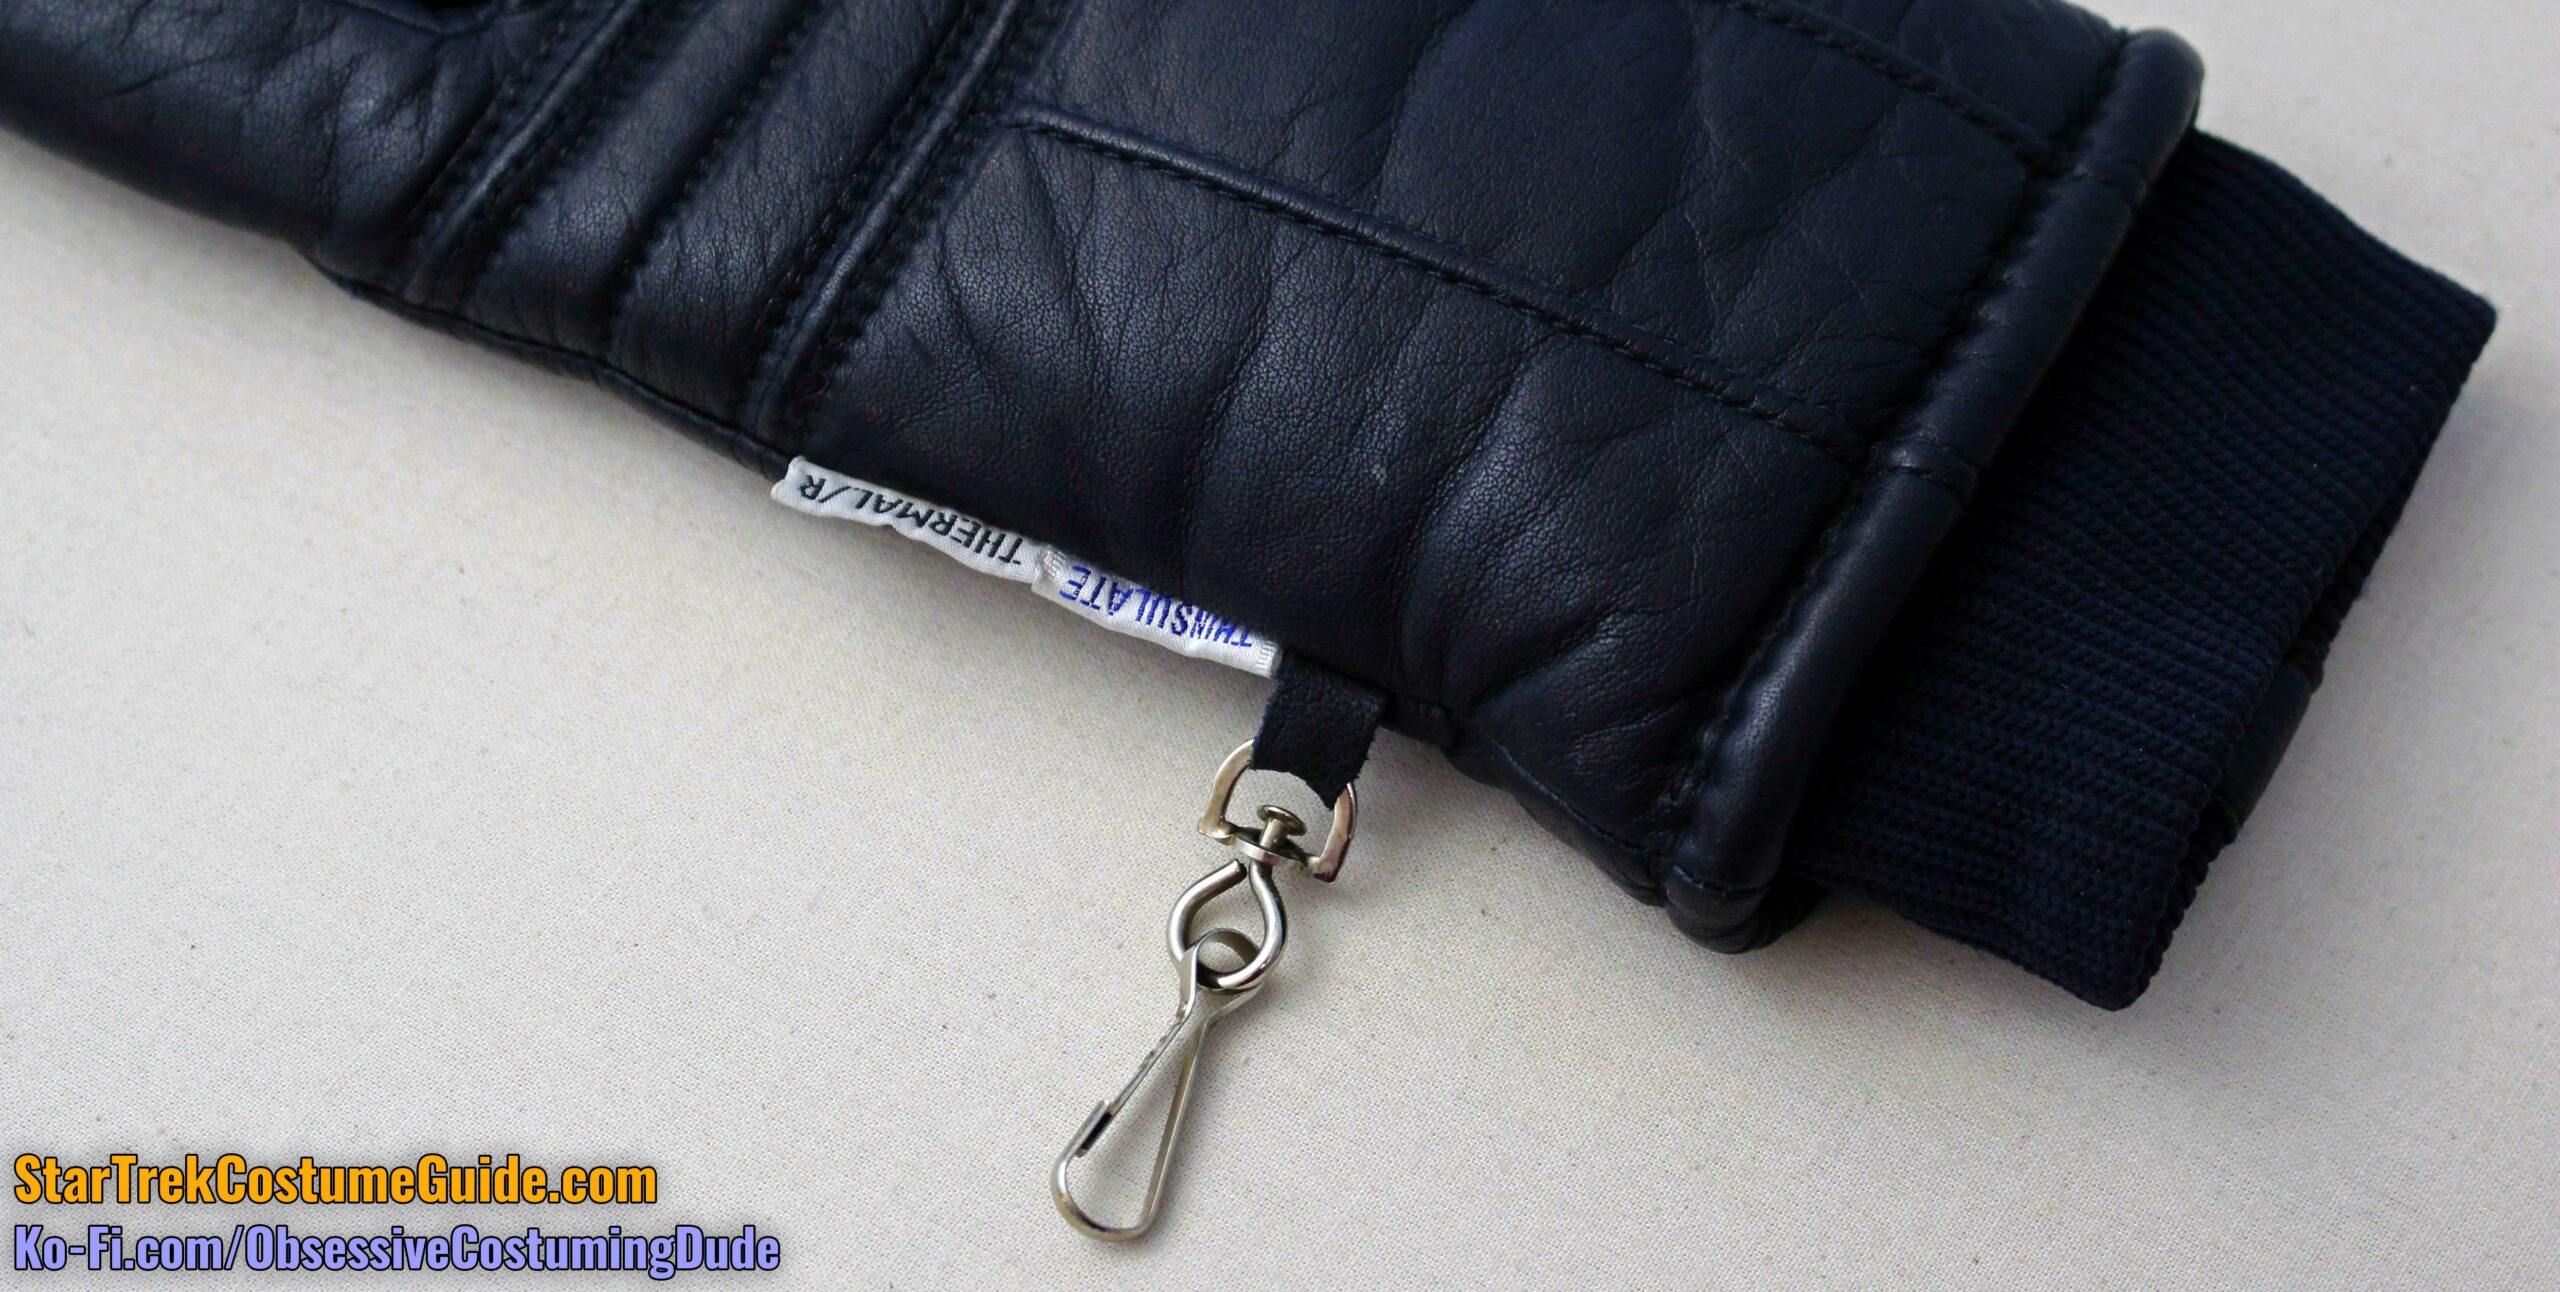
Trim away any external tags, loops, etc. from the gloves.
If your gloves have “cuff” extensions, trim those away as well, as close to the original stitching as you can get.
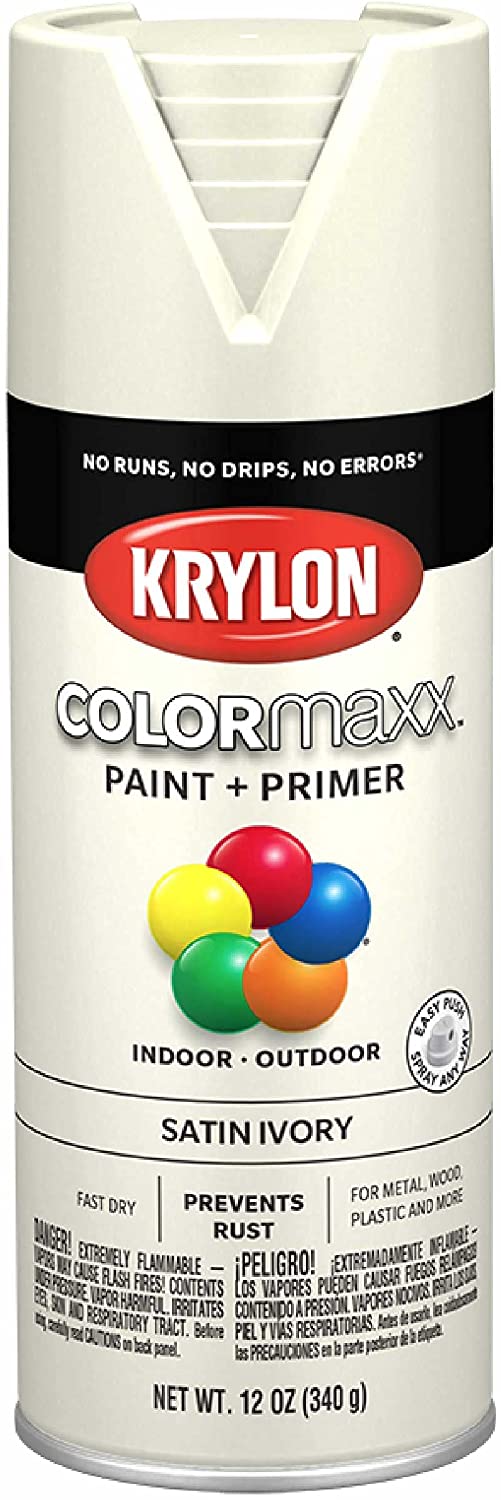
If you’re making an off-white/cream engineering radiation suit, spray paint your gloves with a paint that’s a close color match to your fabric.
I used Krylon COLORmaxx “Satin Ivory,” which is a convenient paint + primer in one.
If you’re making your costume bleached white (as opposed to off-white), I used Rust-oleum Painter’s Touch Ultra Cover “Flat White,” which is also a convenient paint + primer in one.
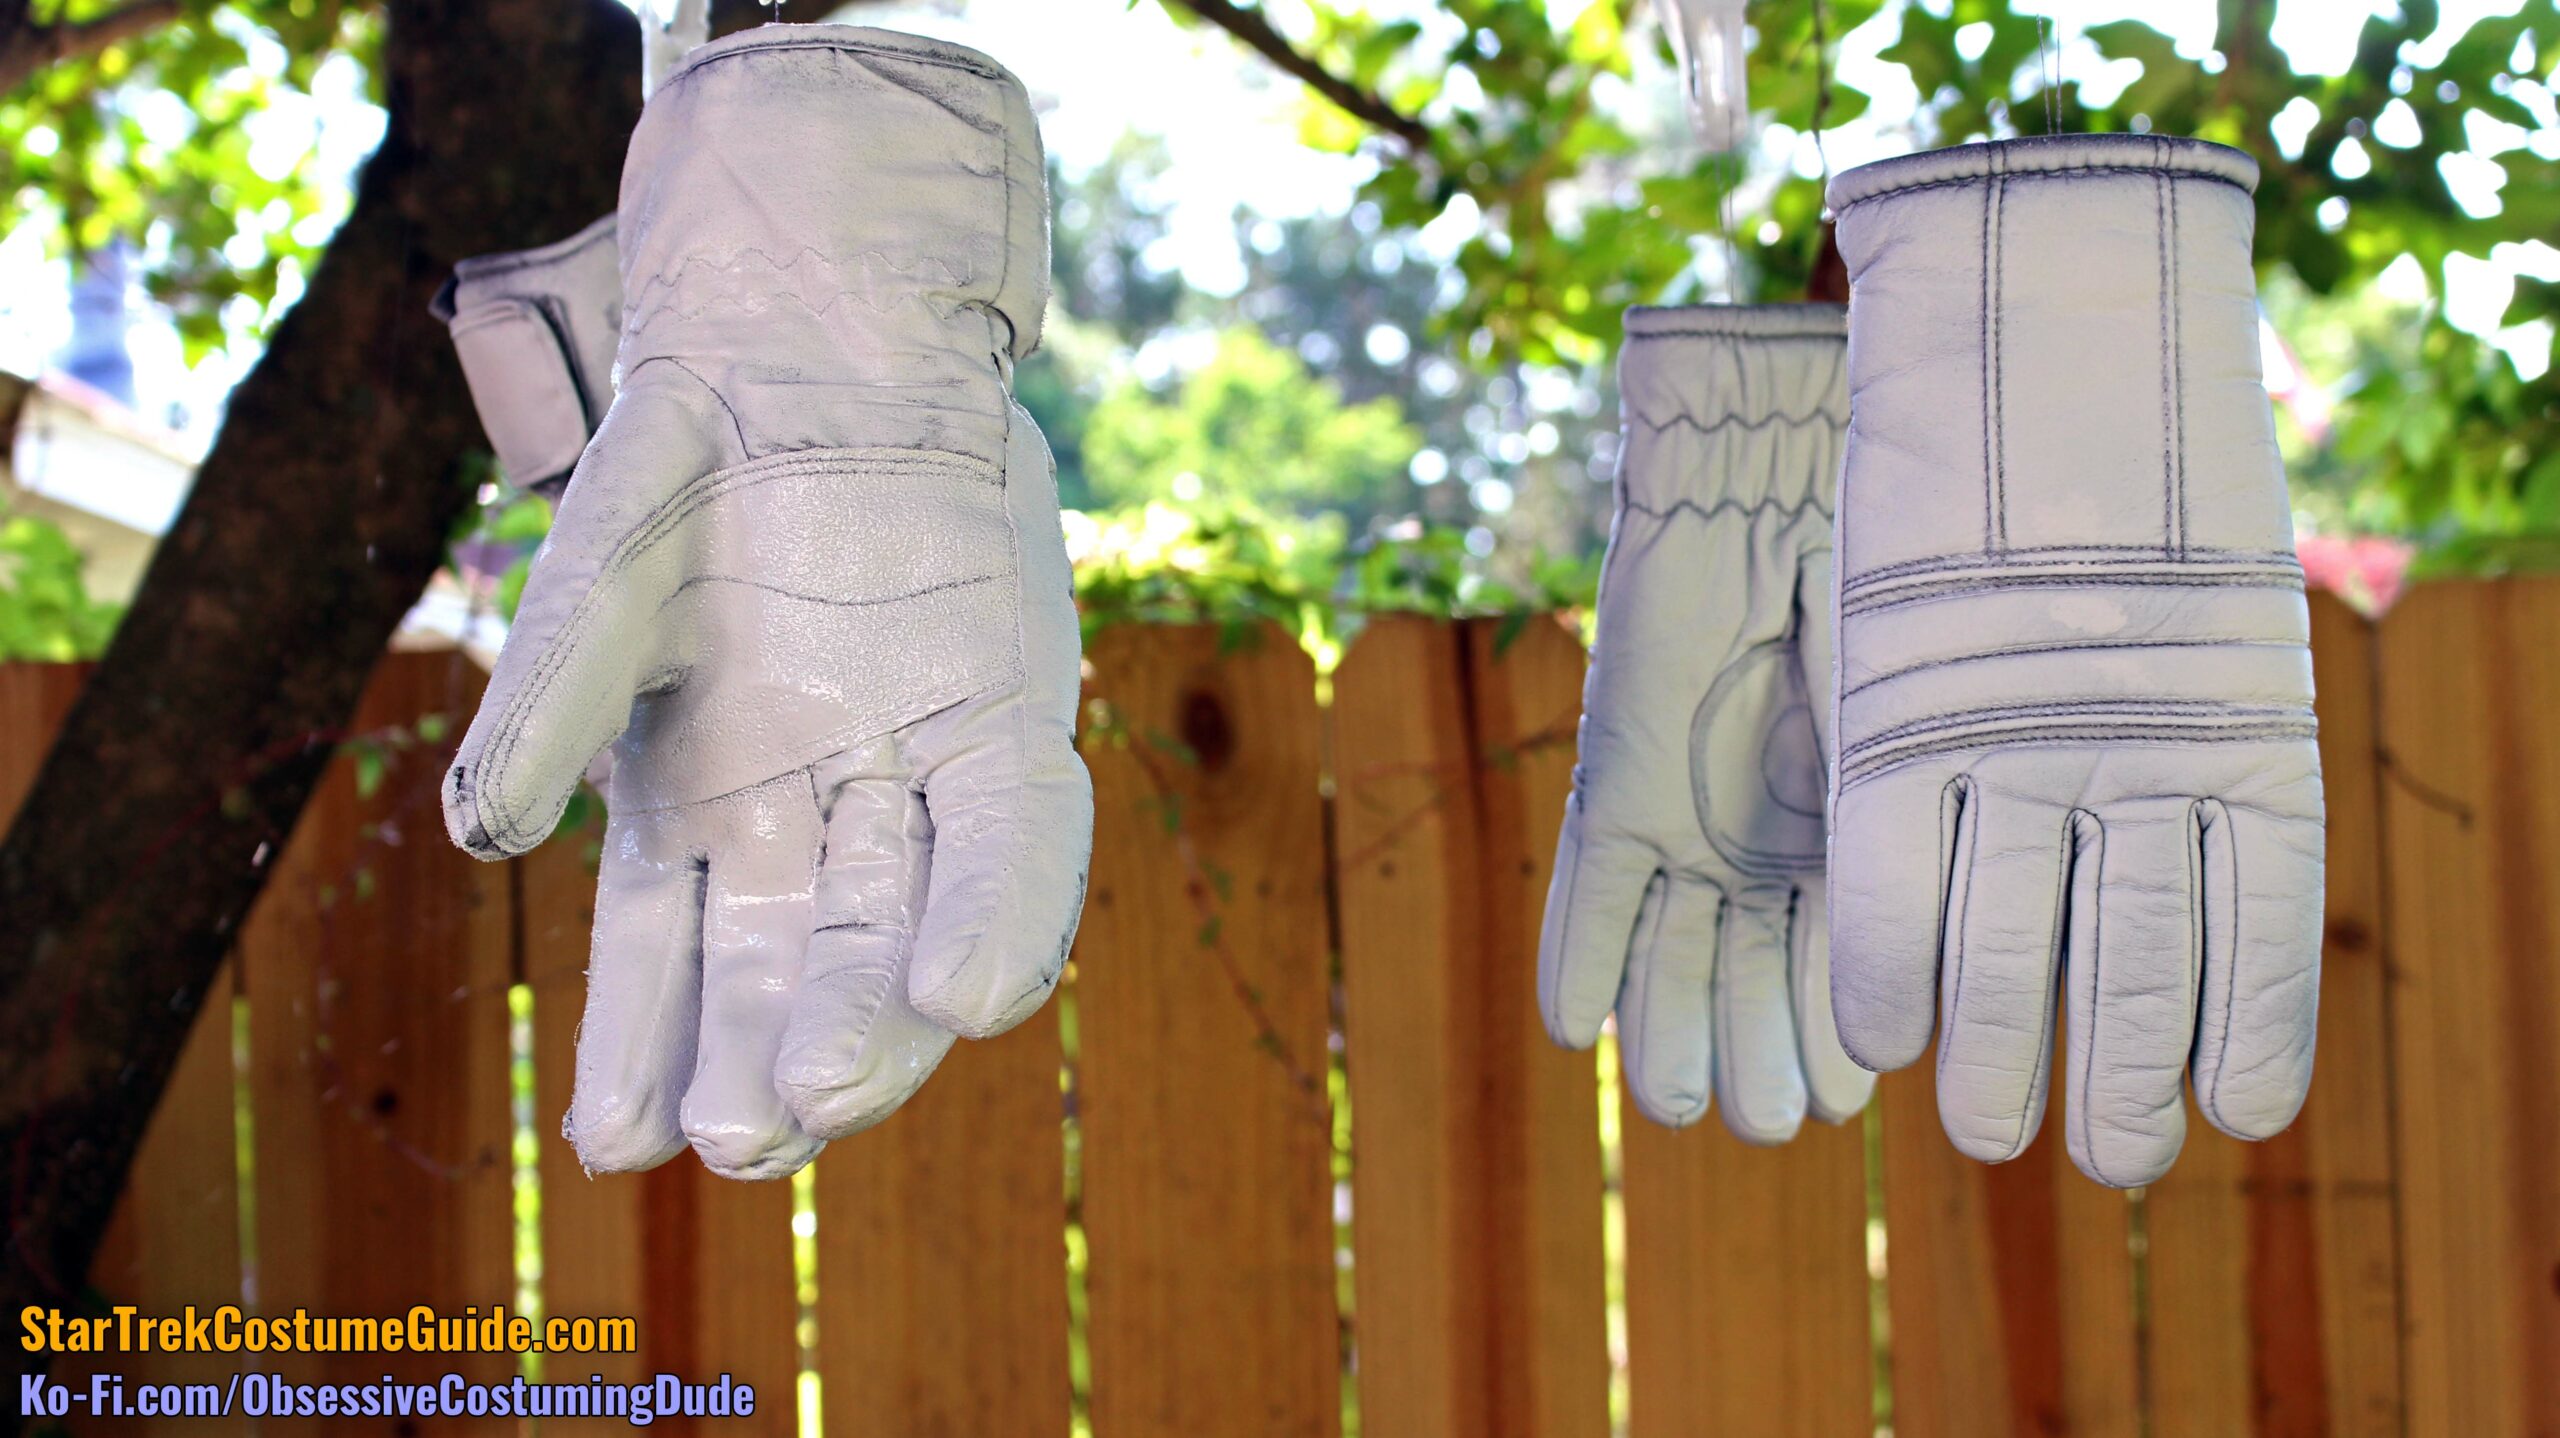
While it’s relatively easy to spray paint the outer surface area of the gloves, I found that to get between the fingers, you’ll probably either need to wear the glove and spread your fingers while a partner sprays them, or vice-versa.
(If you’re making an orange costume variant, then obviously paint the gloves a matching orange color.)
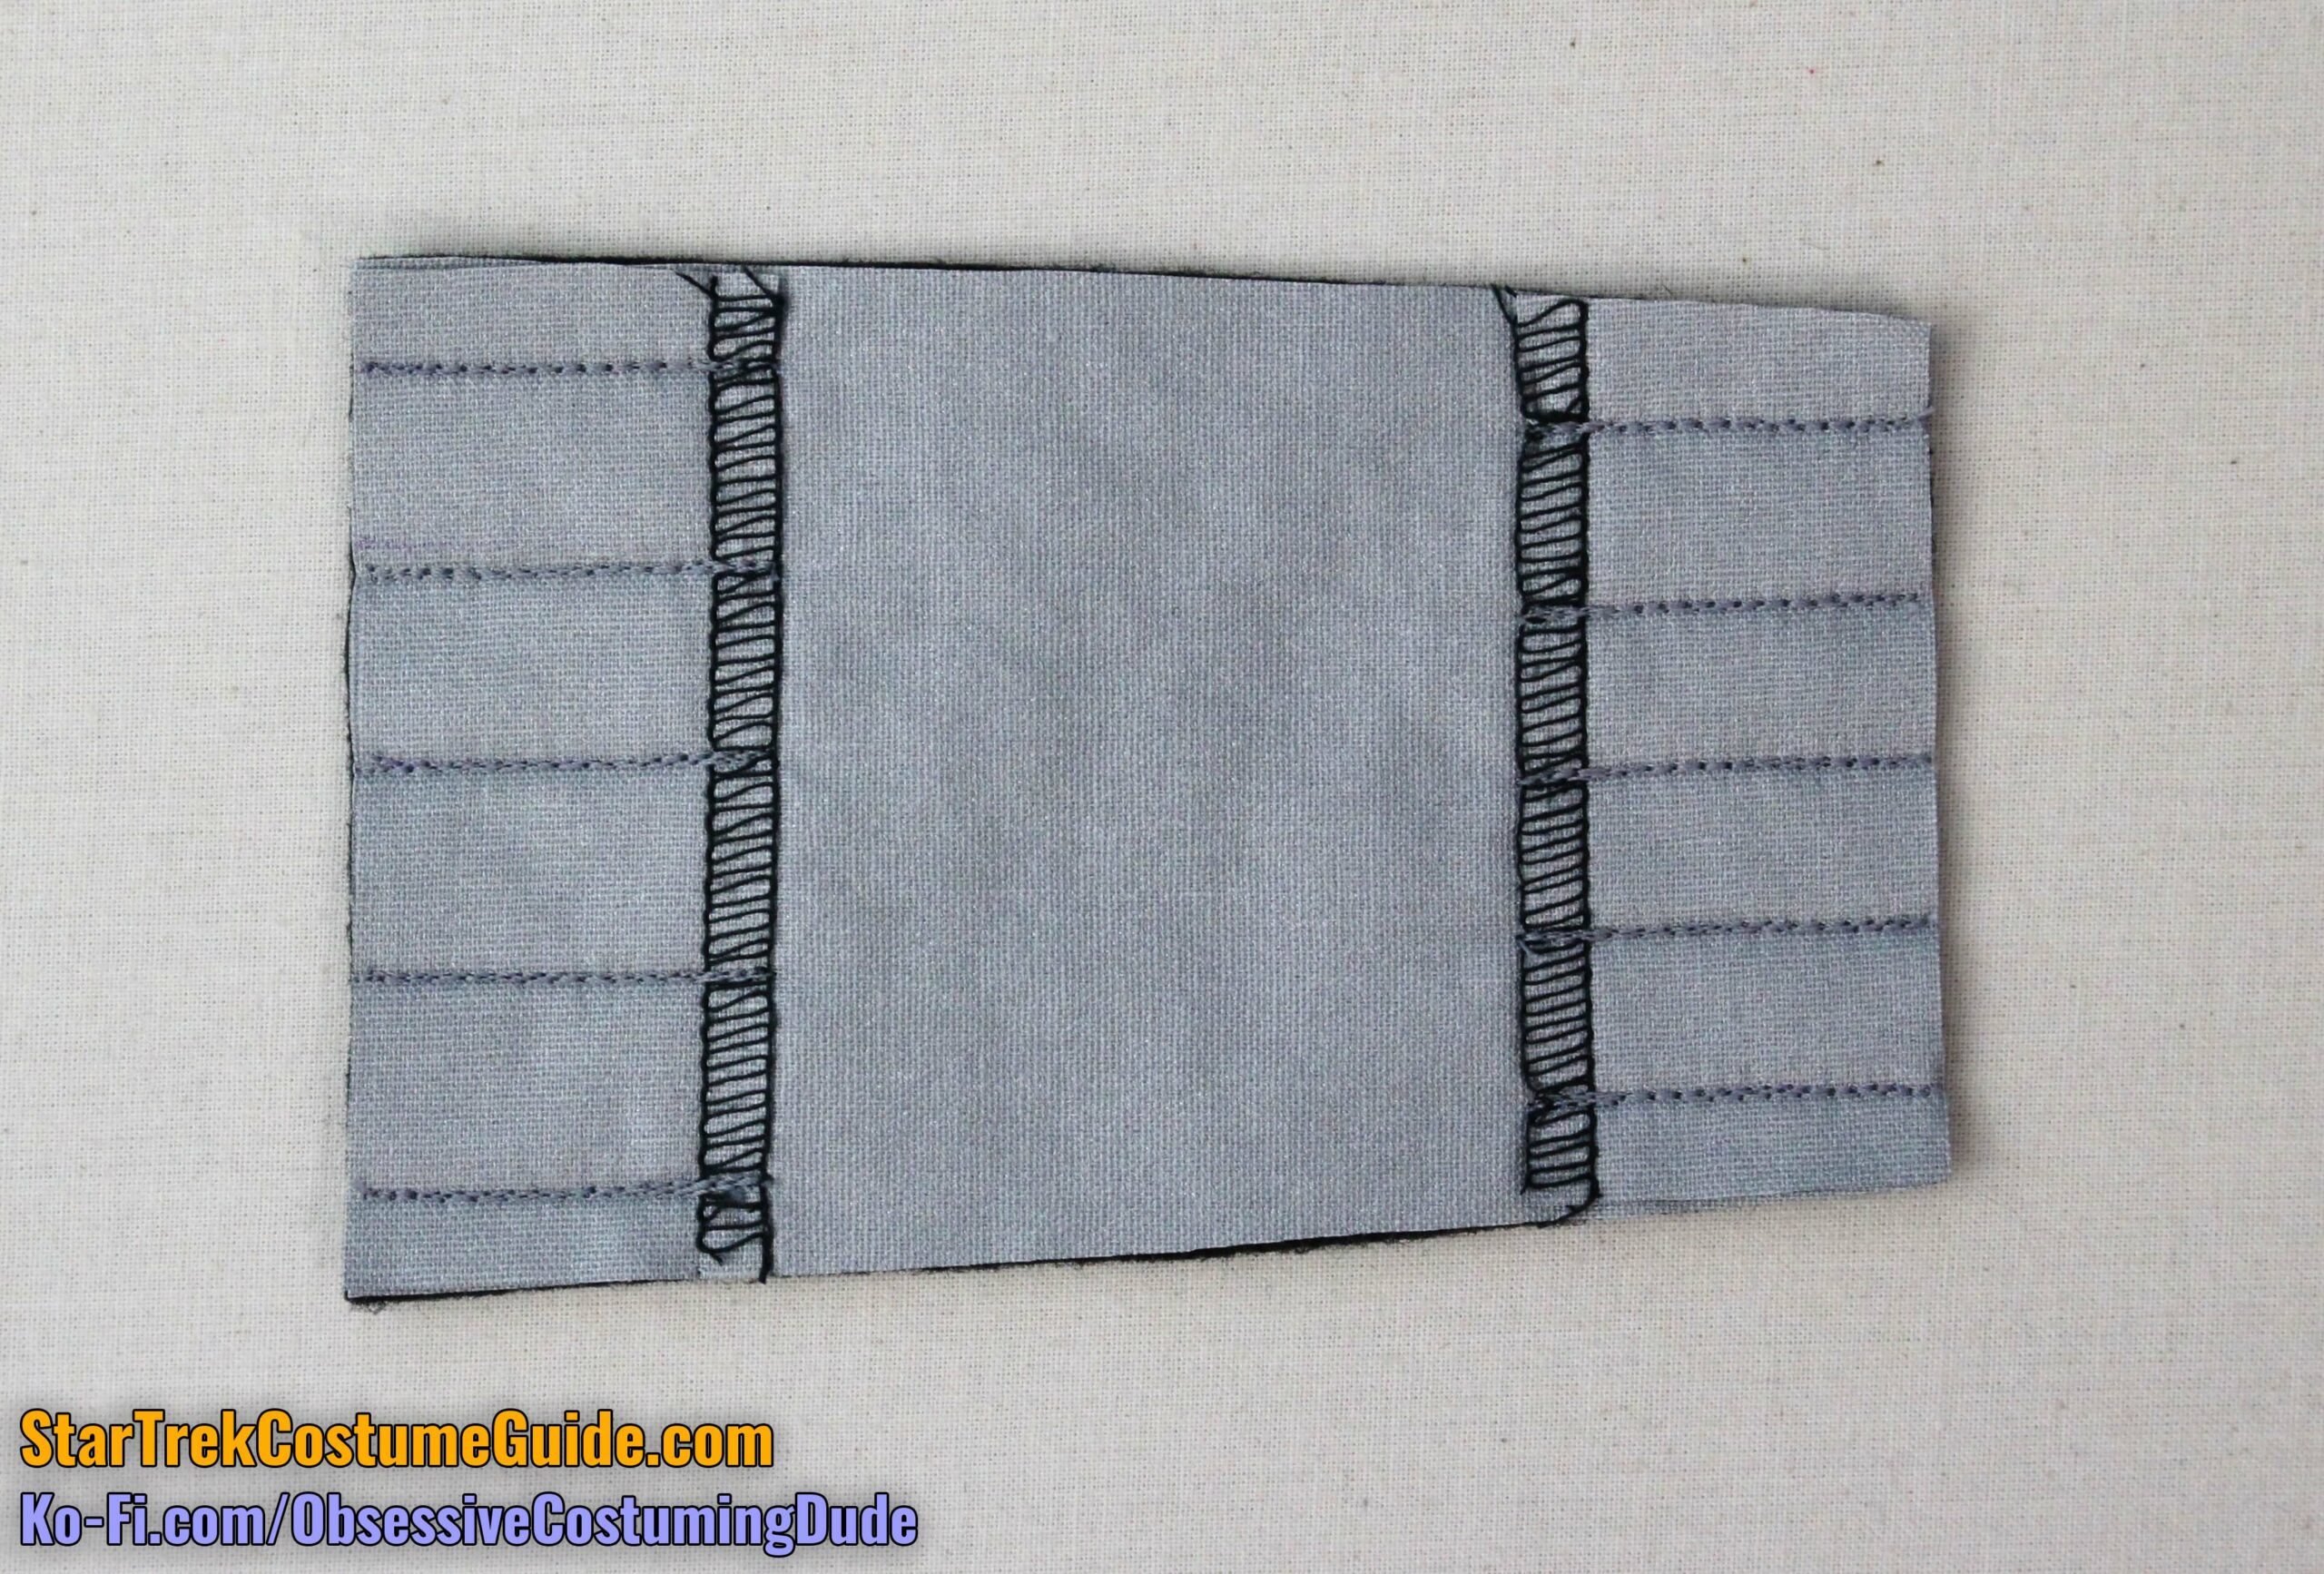
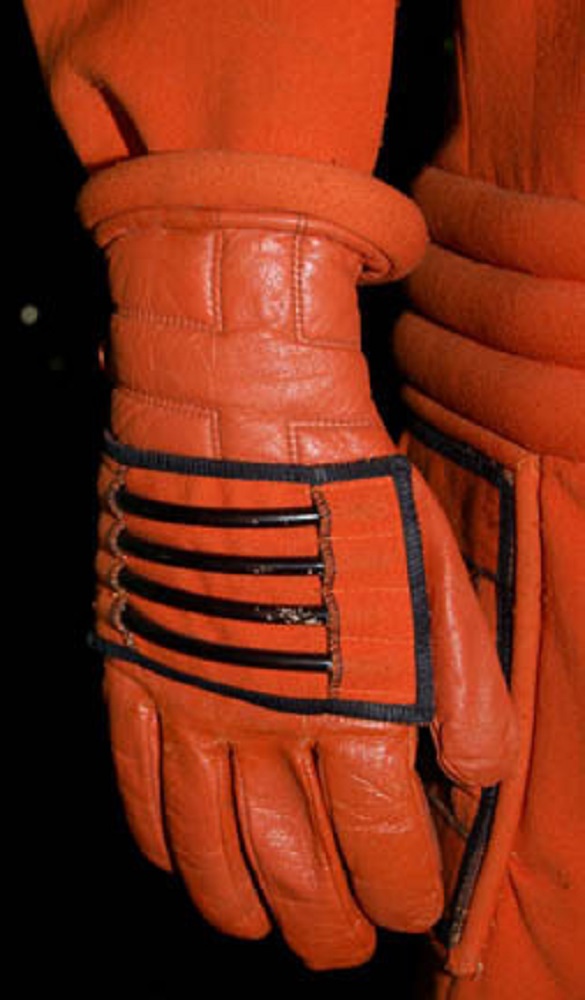
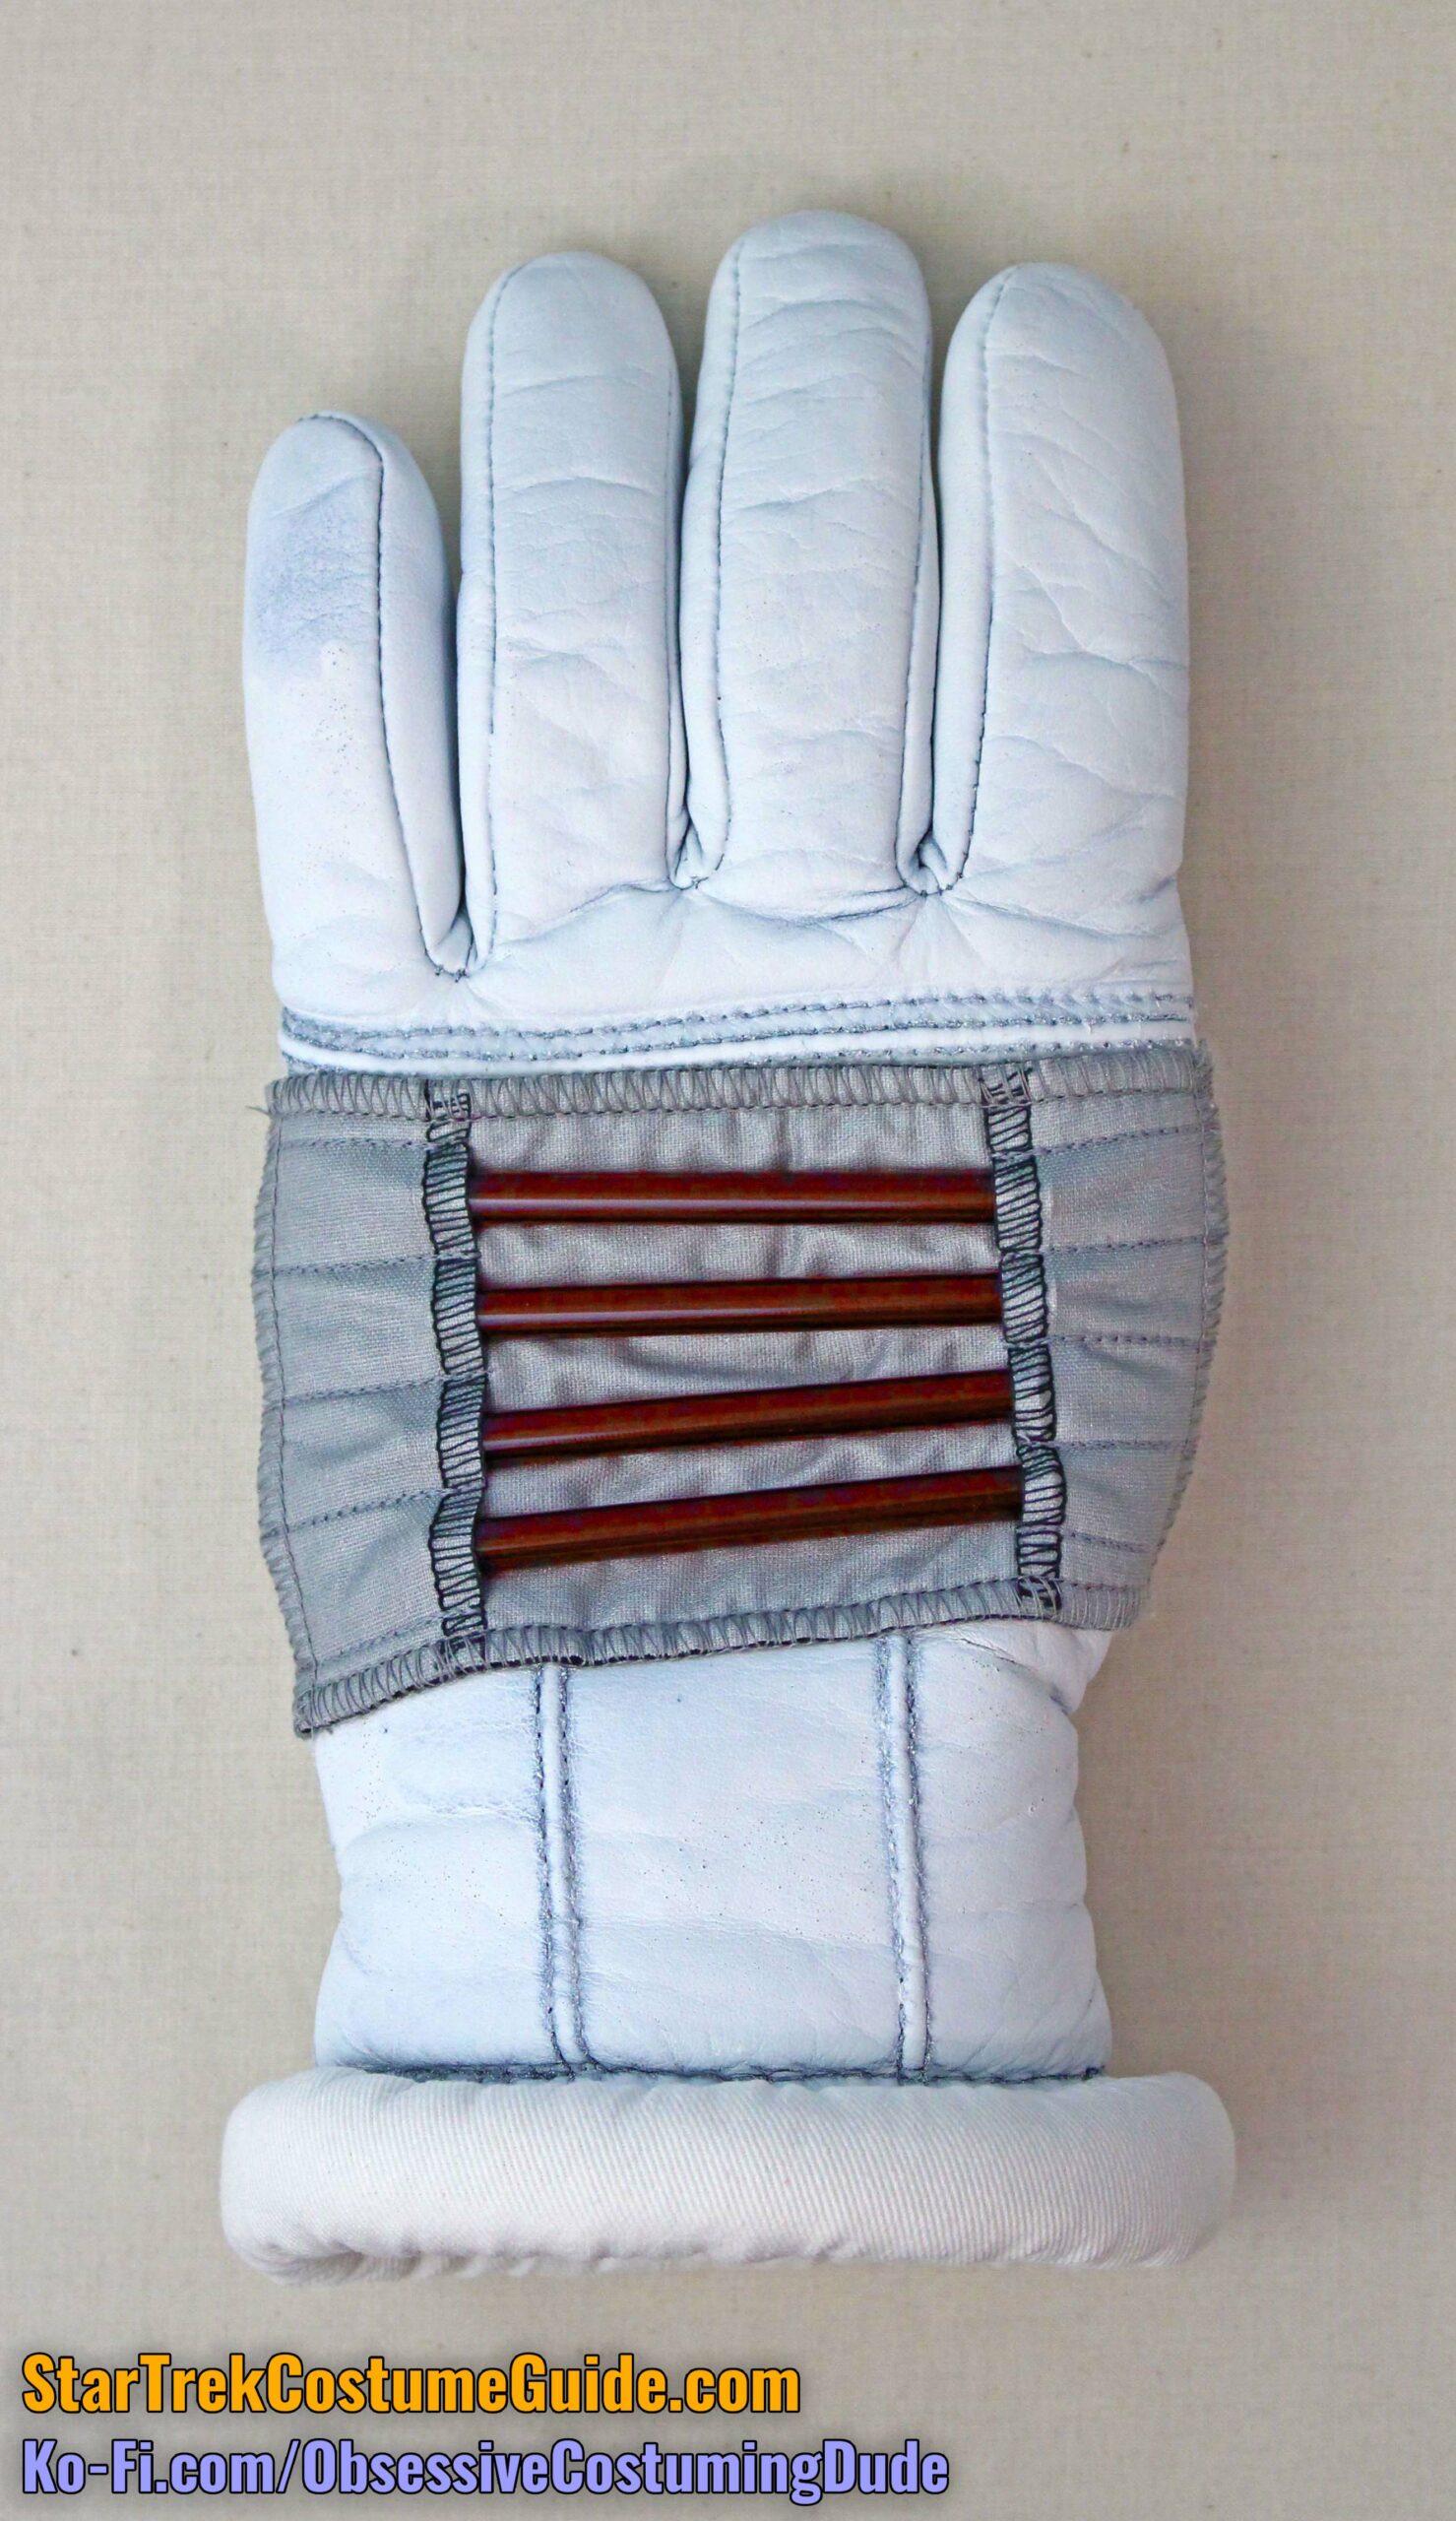
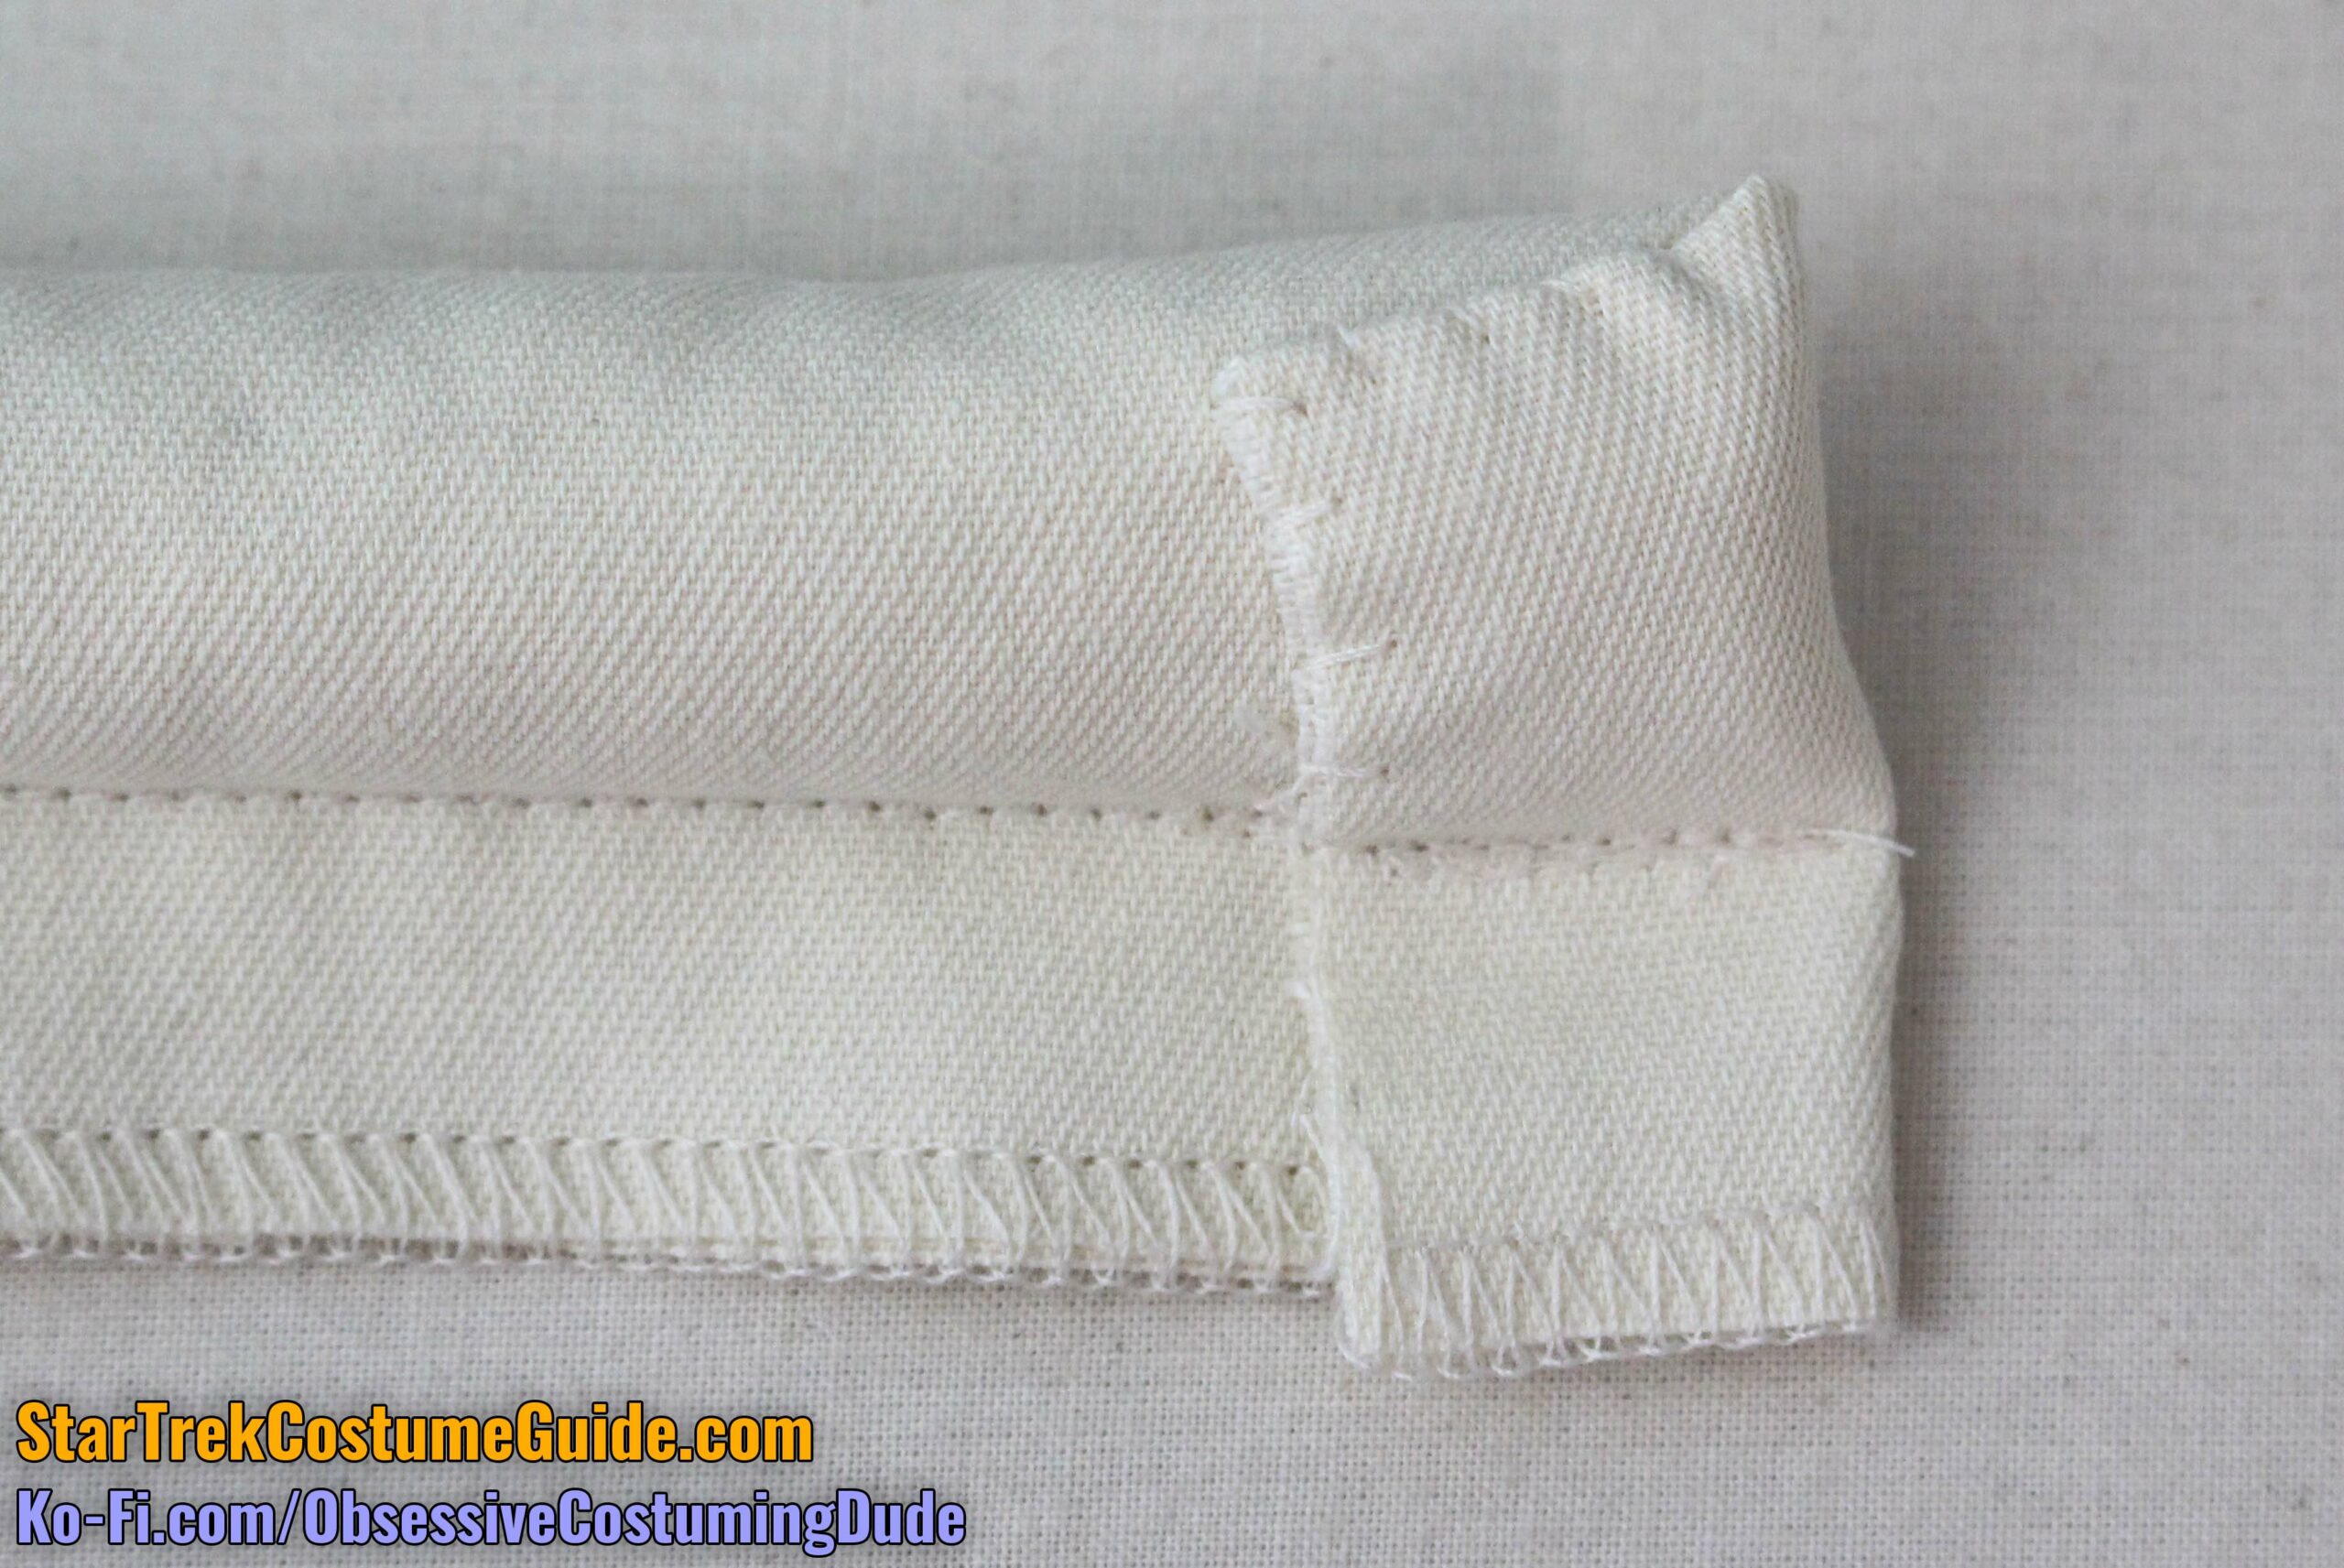
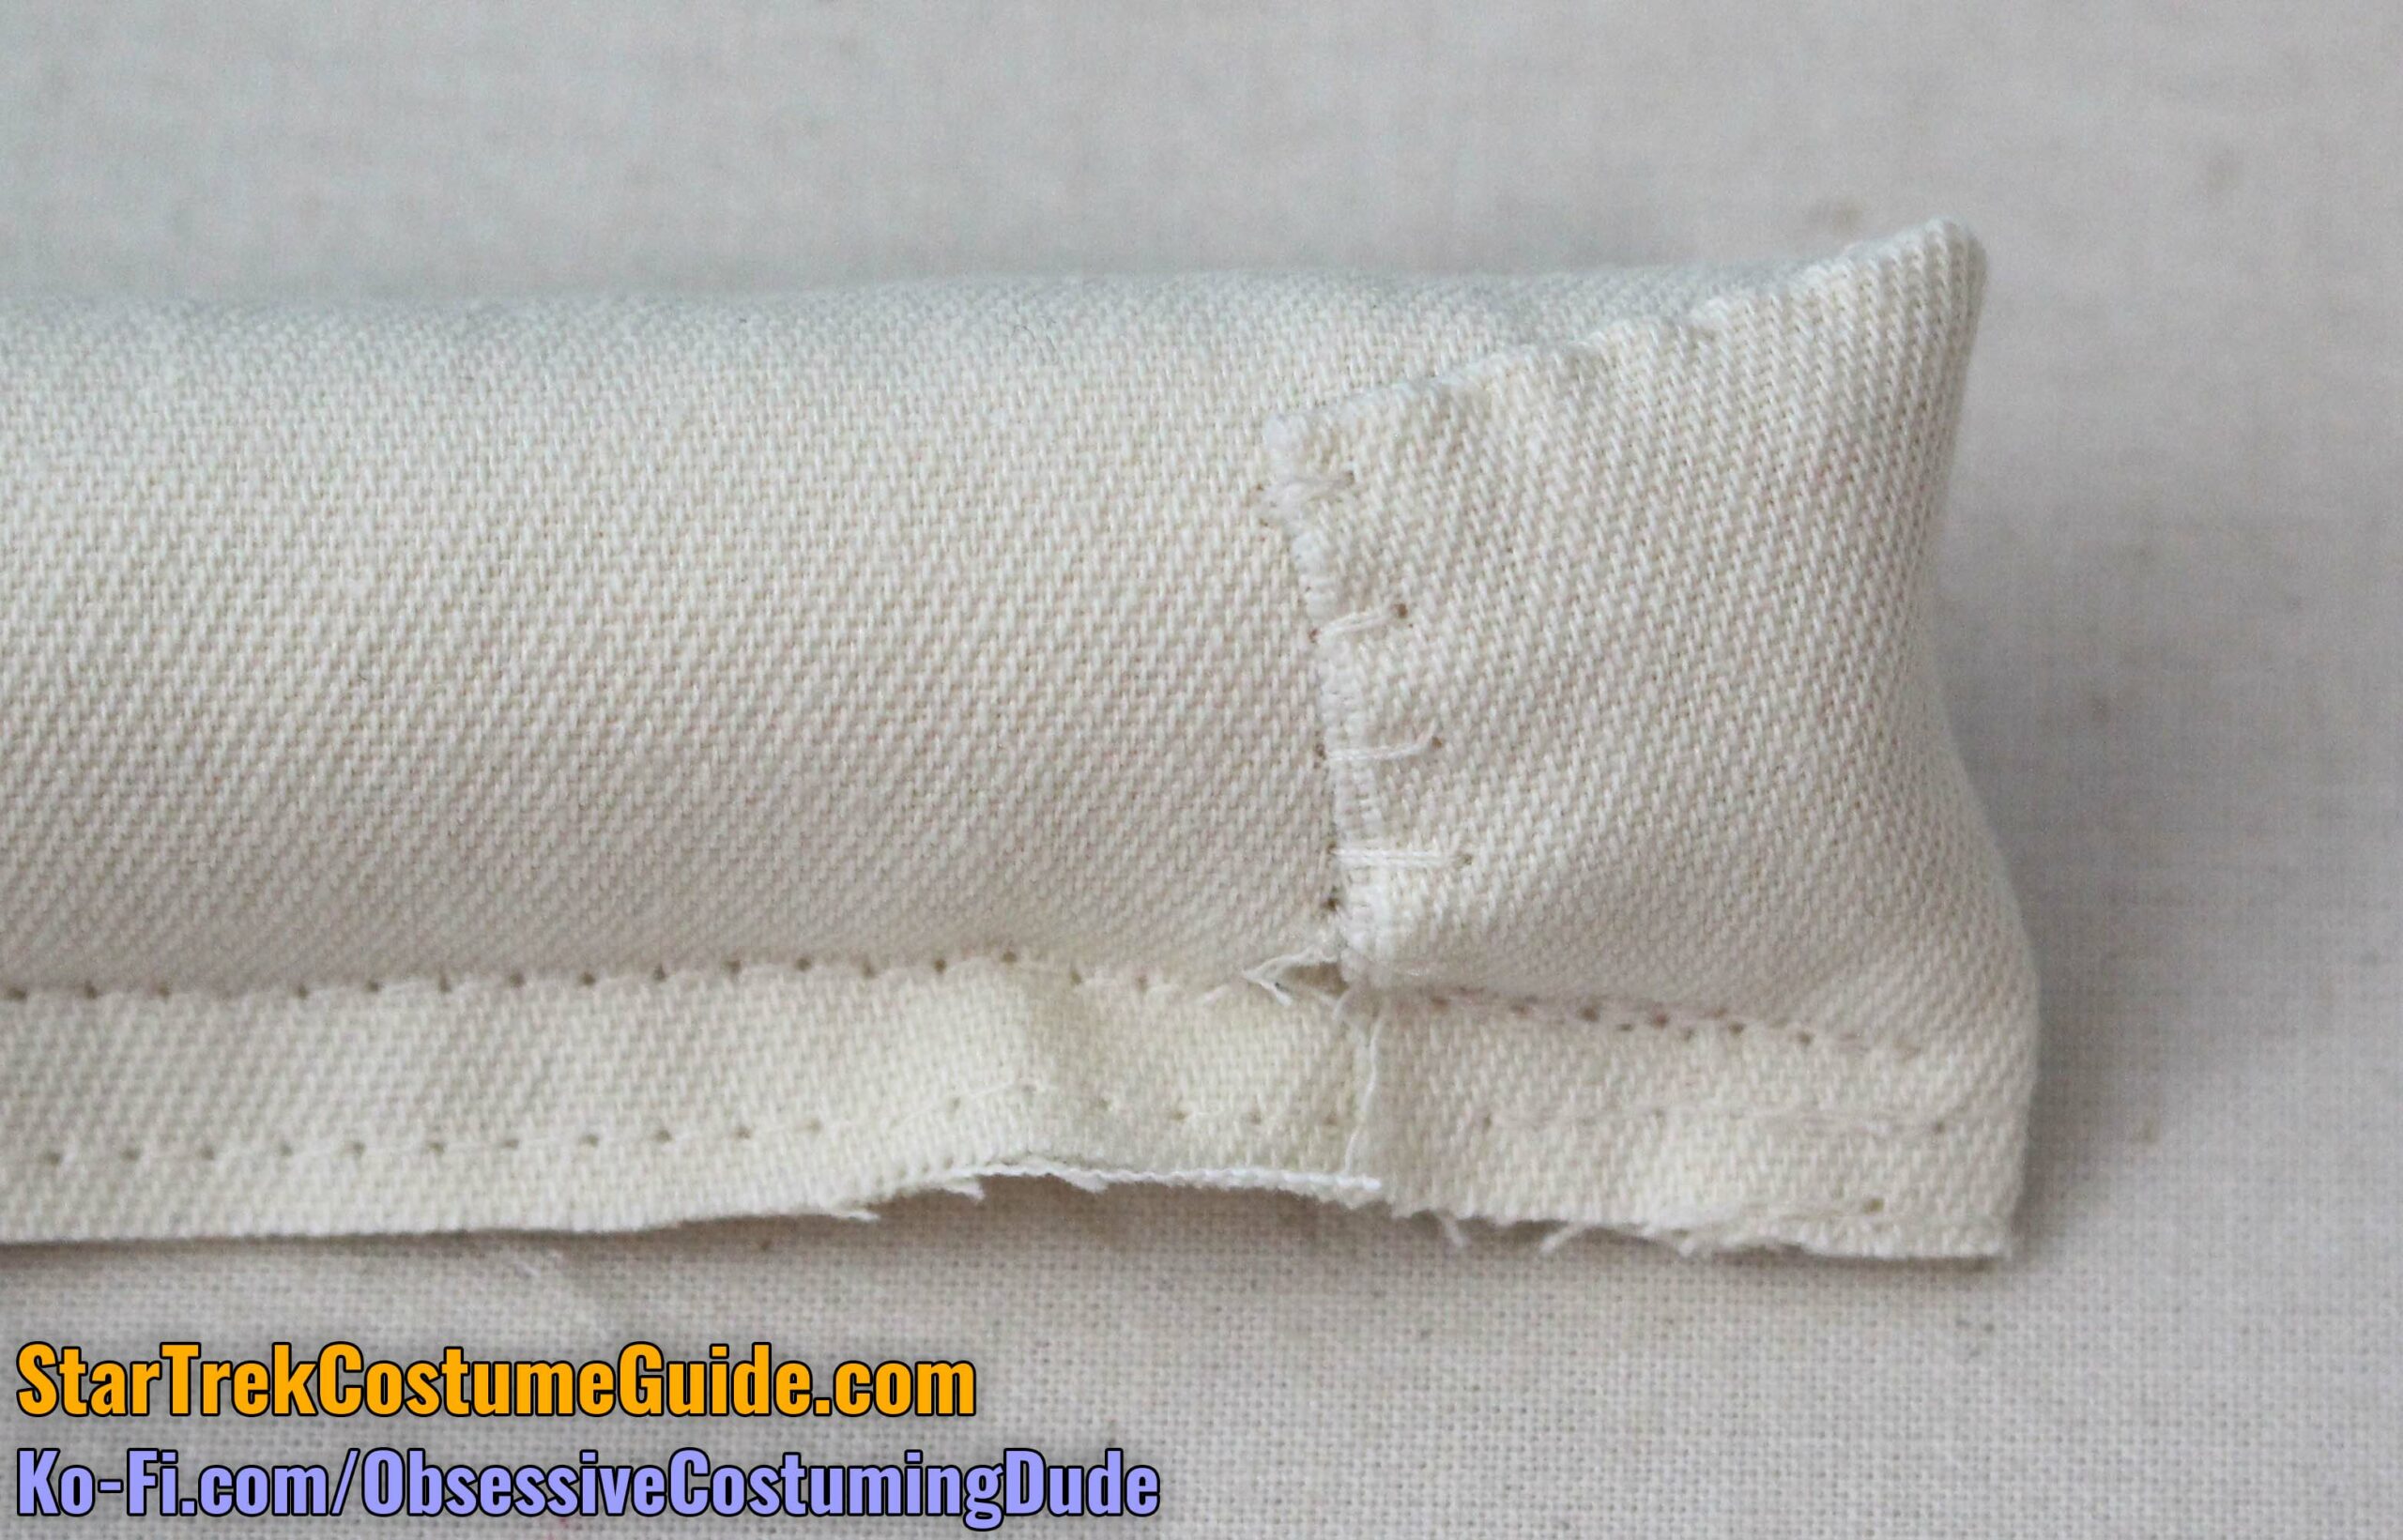
On the outer surface of the glove is another tubing assembly, again analogous to those on the jumpsuit thighs and upper left sleeve.
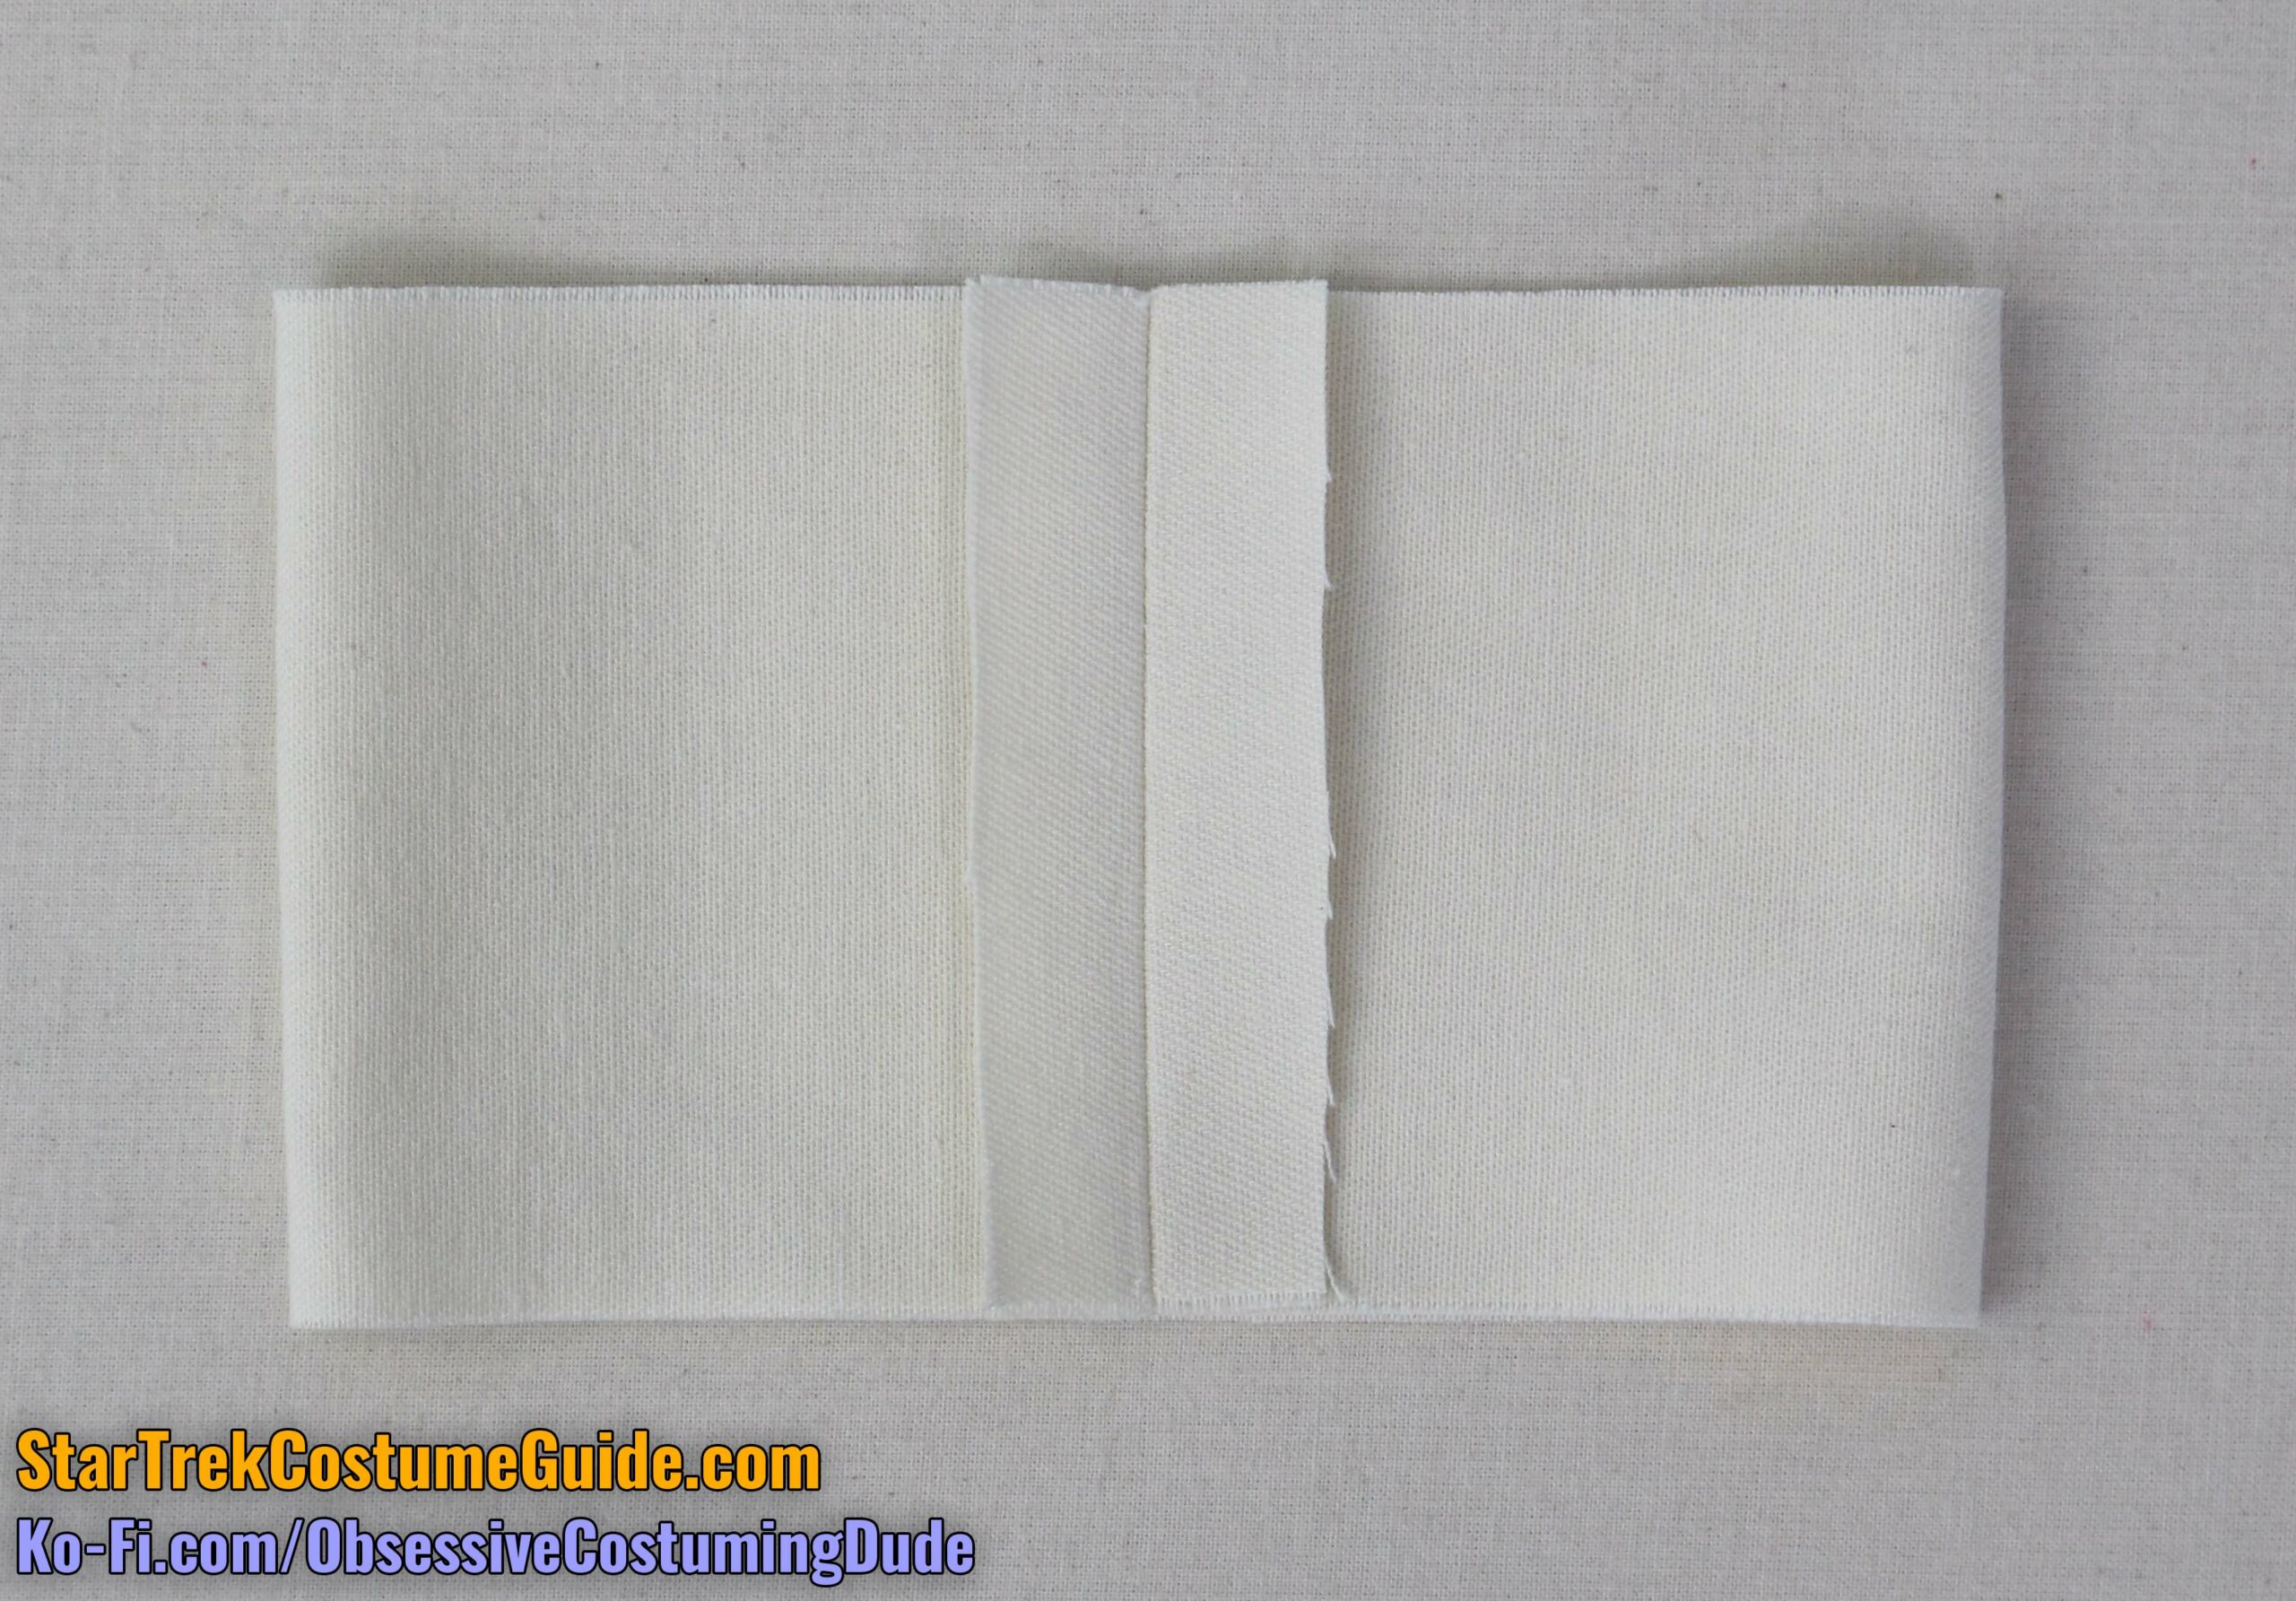
This panel is comprised of a base layer of ironing table fabric (piece T1) backed by a layer of felt or flannel (also piece T1), and two 1 ¼”-wide strips of ironing table fabric for the tubing channels (pieces T2 and T3).
The panel assembly should span across the top of the hand, so measure your glove beforehand and cut the base layer (piece T1) to the corresponding size.
Also trim your 1 ¼” tubing channel strips (pieces T2 and T3) so they’re flush with the base layer, and serge the innermost edges of both strips with black thread.
Apply some fabric temporary spray adhesive to your backing felt or flannel, and join it to the underside of your panel base.
Position the outer channel strips with the serged edges toward the panel center and the other edges flush.
Using gray thread, stitch the four horizontal tubing channels, reinforcing your stitching several times.
On the wider side of the panel, the channels are ⅝” wide; on the narrower side, they’re ½” wide. On both sides, the outermost channel stitching is about ⅜” from the edges of the assembly.
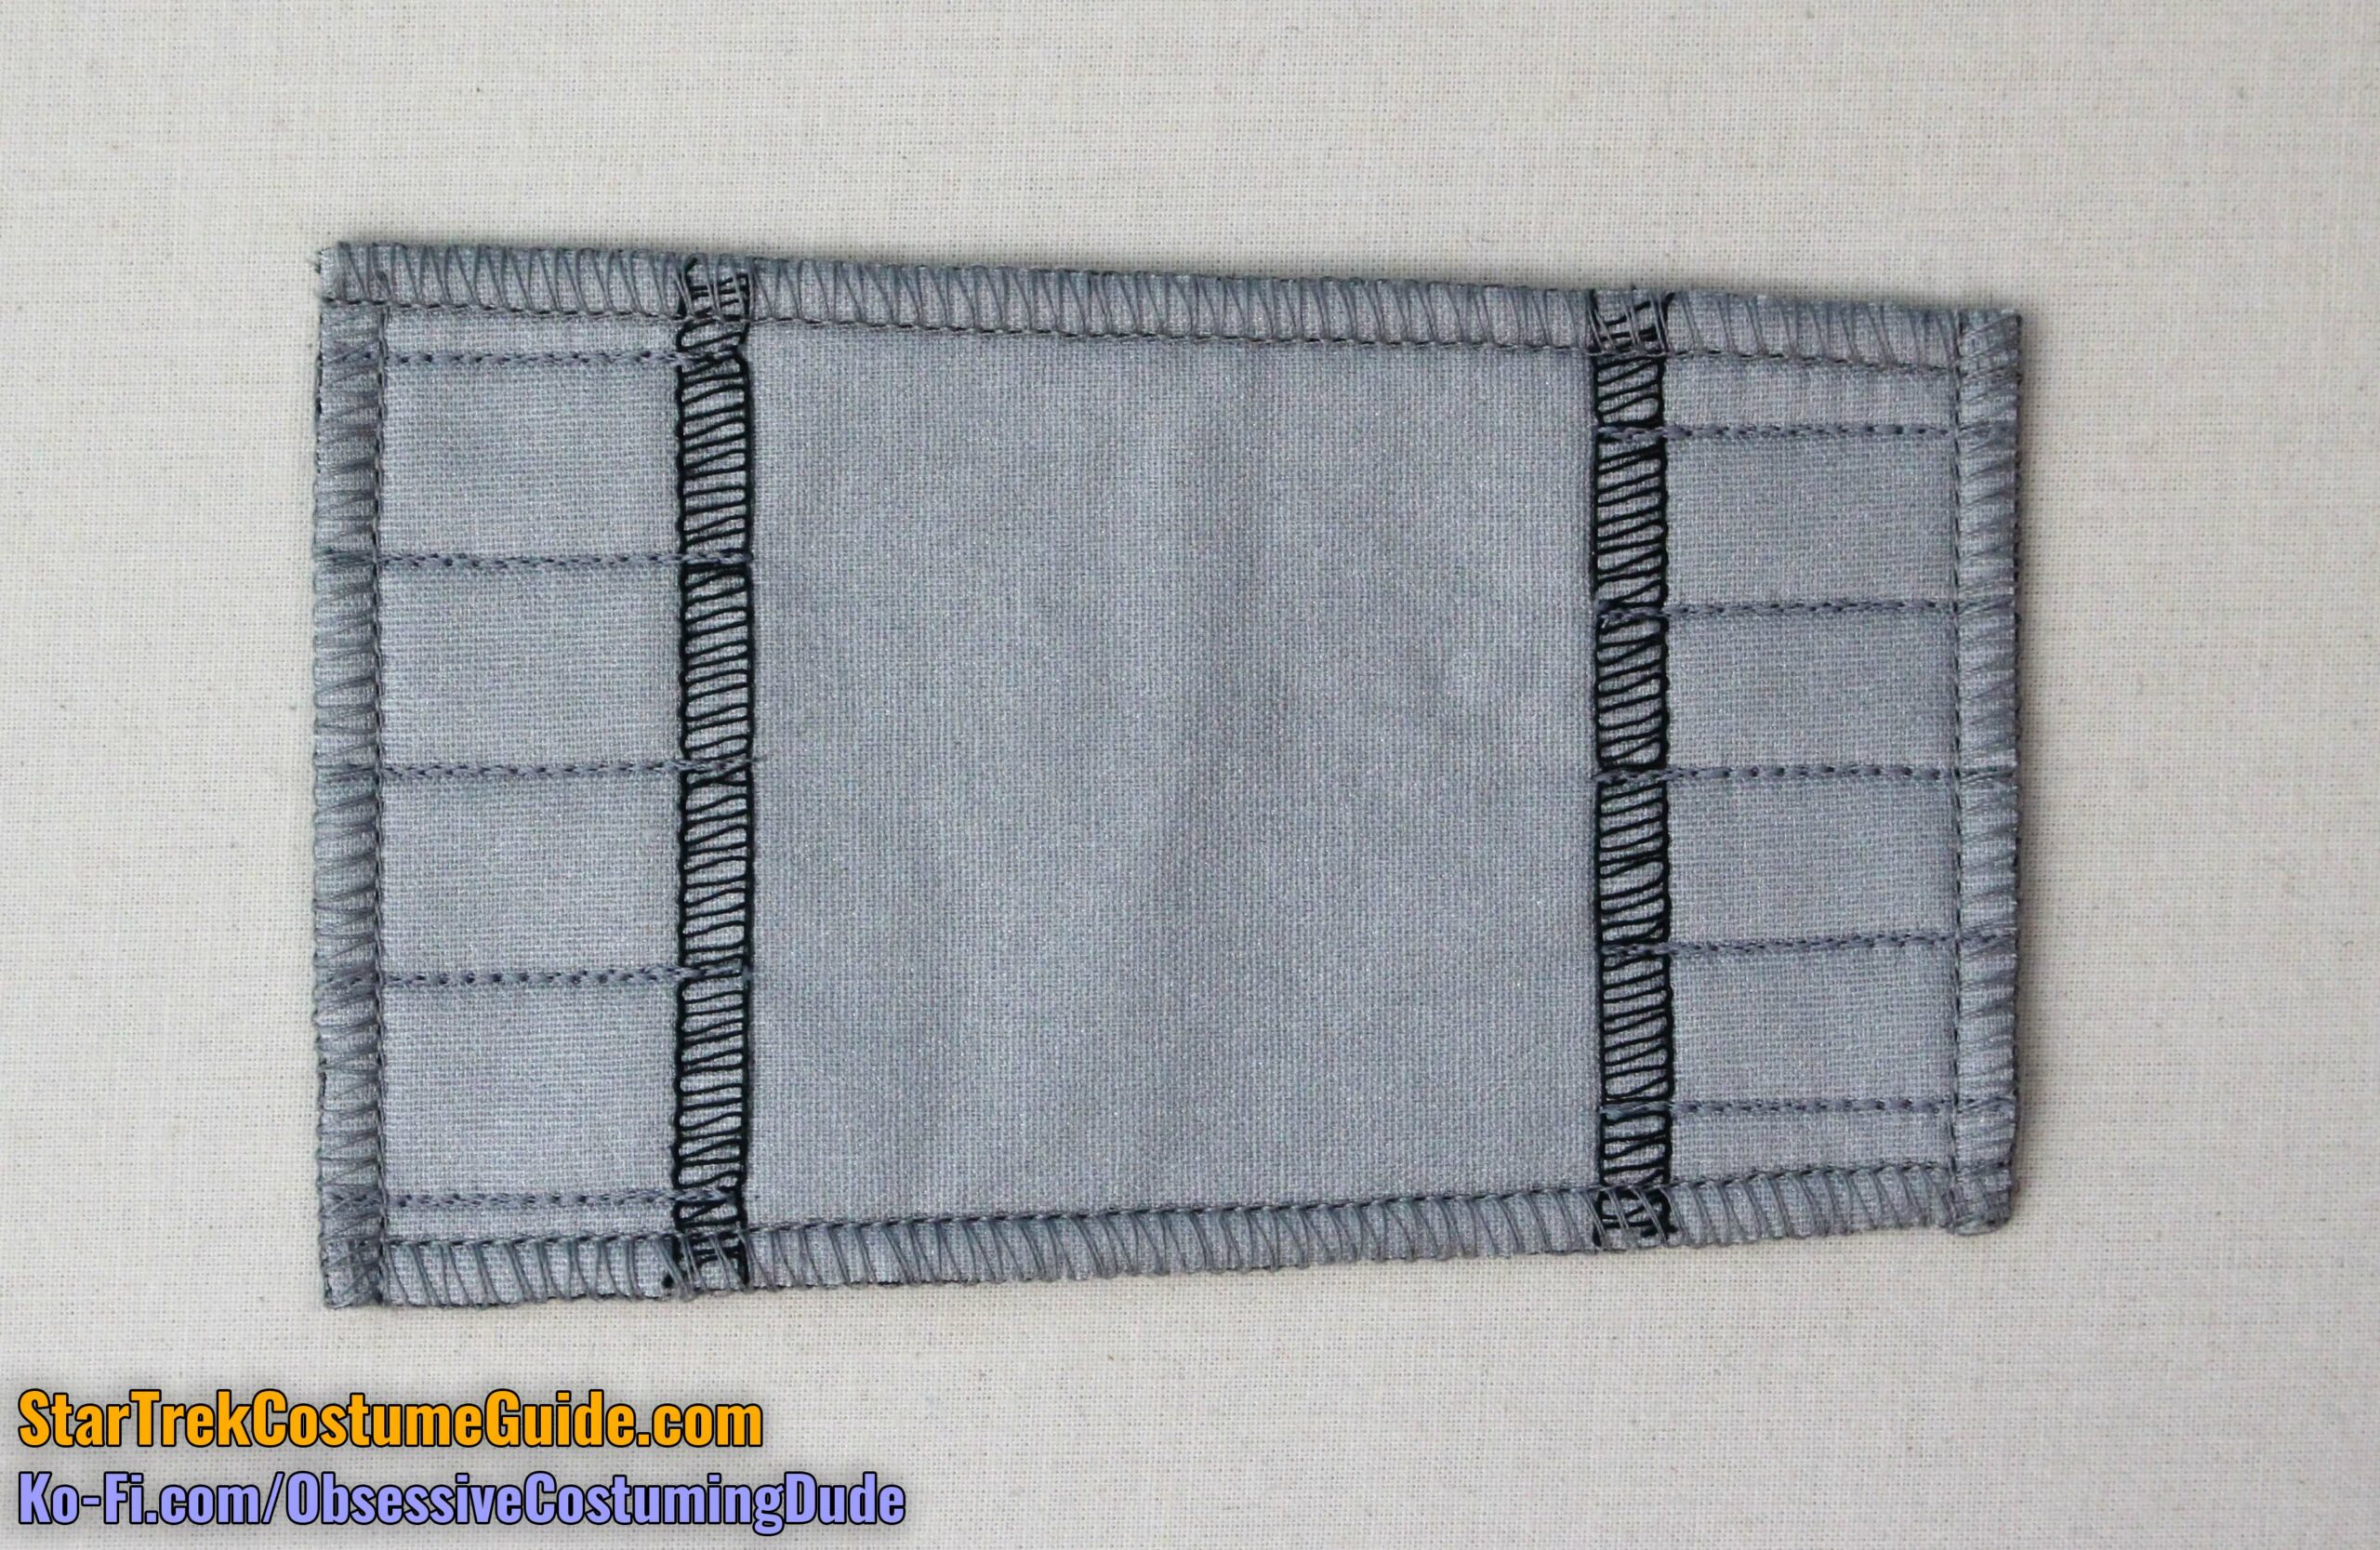
Serge all four edges of panel assembly with gray thread.
Note that like the thigh panels and left sleeve panel, the glove panels on the orange costume variants appear to have been covered with black (twill?) tape, rather than overlocked.
Apply a generous amount of E6000 glue to the underside of the panel assembly, then glue it to the glove.
I suggest wrapping some rubber bands around the glove to hold the panel in place while the glue dries.
(Also note that the wider end of the panel should be toward the thumb, and the narrower end toward the outer hand – the reverse of how they’re oriented in the photo below.)
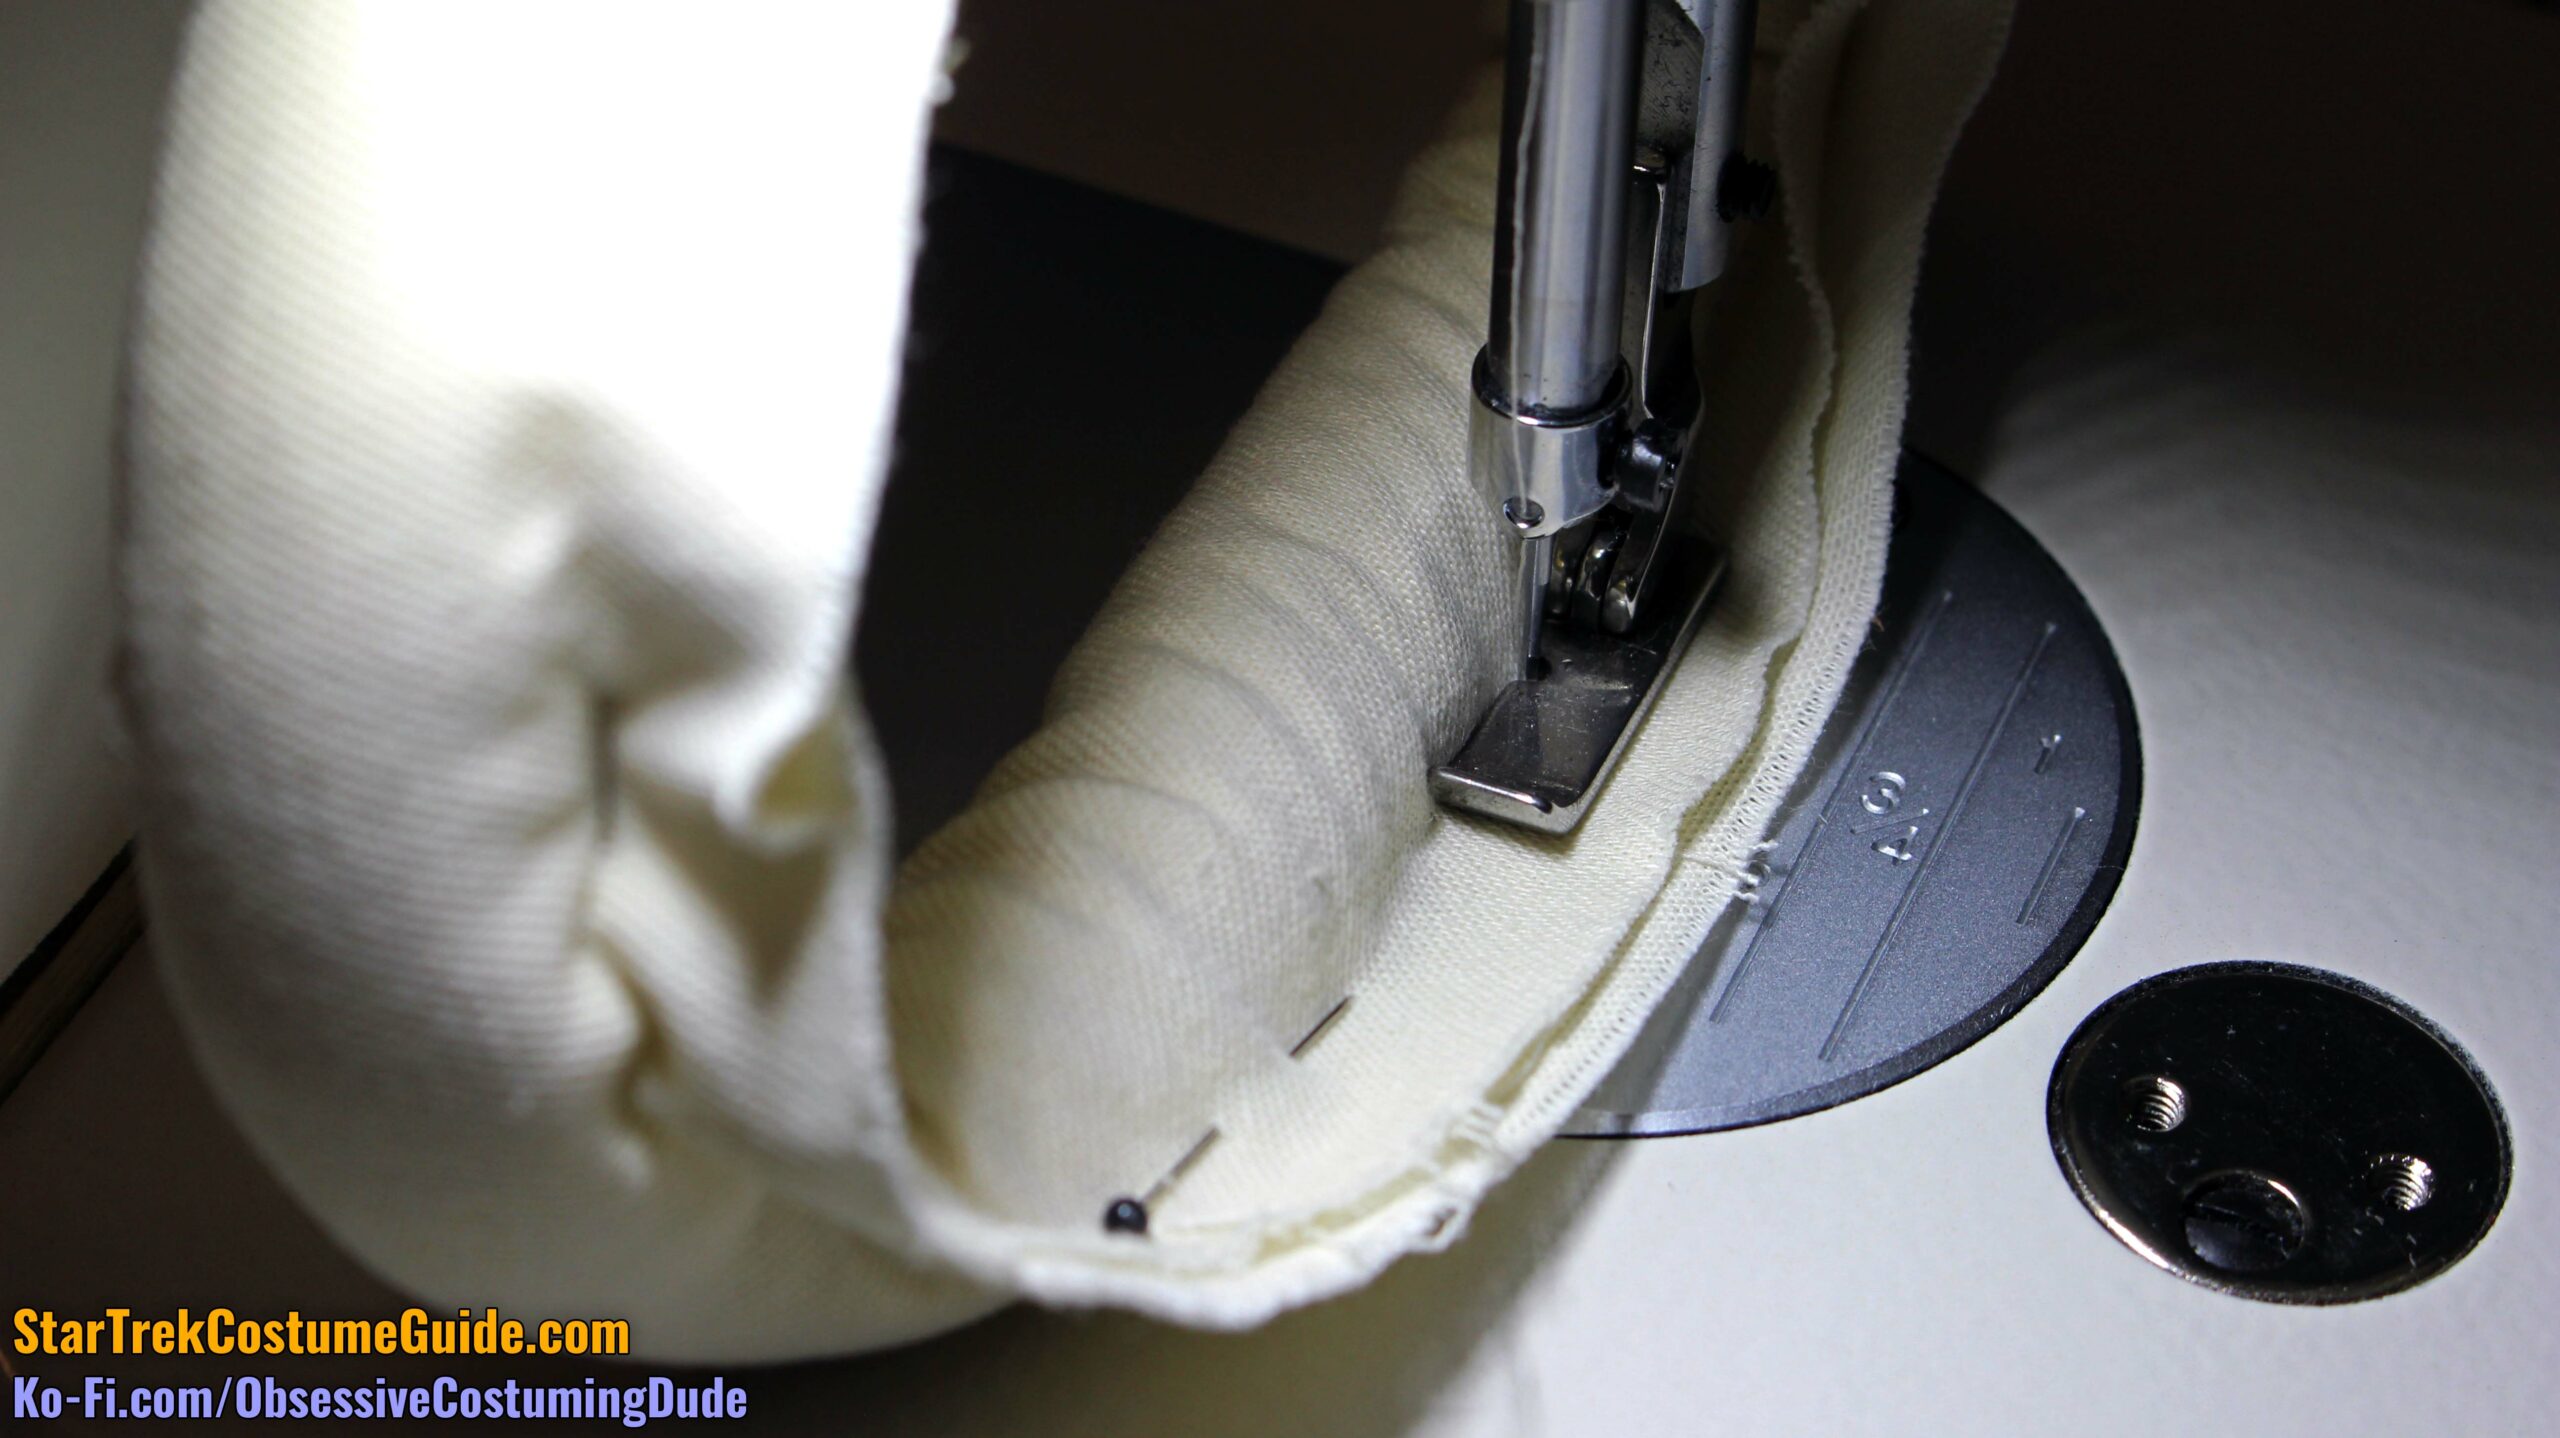
Cut a length of ¾” upholstery cord sufficient to wrap all the way around the glove opening.
There’s a pattern piece for the glove piping (piece U), but it’s just a 3 ½” wide strip of bias-cut jumpsuit fabric.
Trim the fabric so it only extends beyond the ends of the cord by your preferred seam allowance.
Sew the piping channel closed along the shorter ends and press the seam allowances open.
Wrap the fabric piping channel around the cord and pin the layers together.
Using your zipper/piping/edging foot, stitch the fabric layers together close to the edge of the cord.
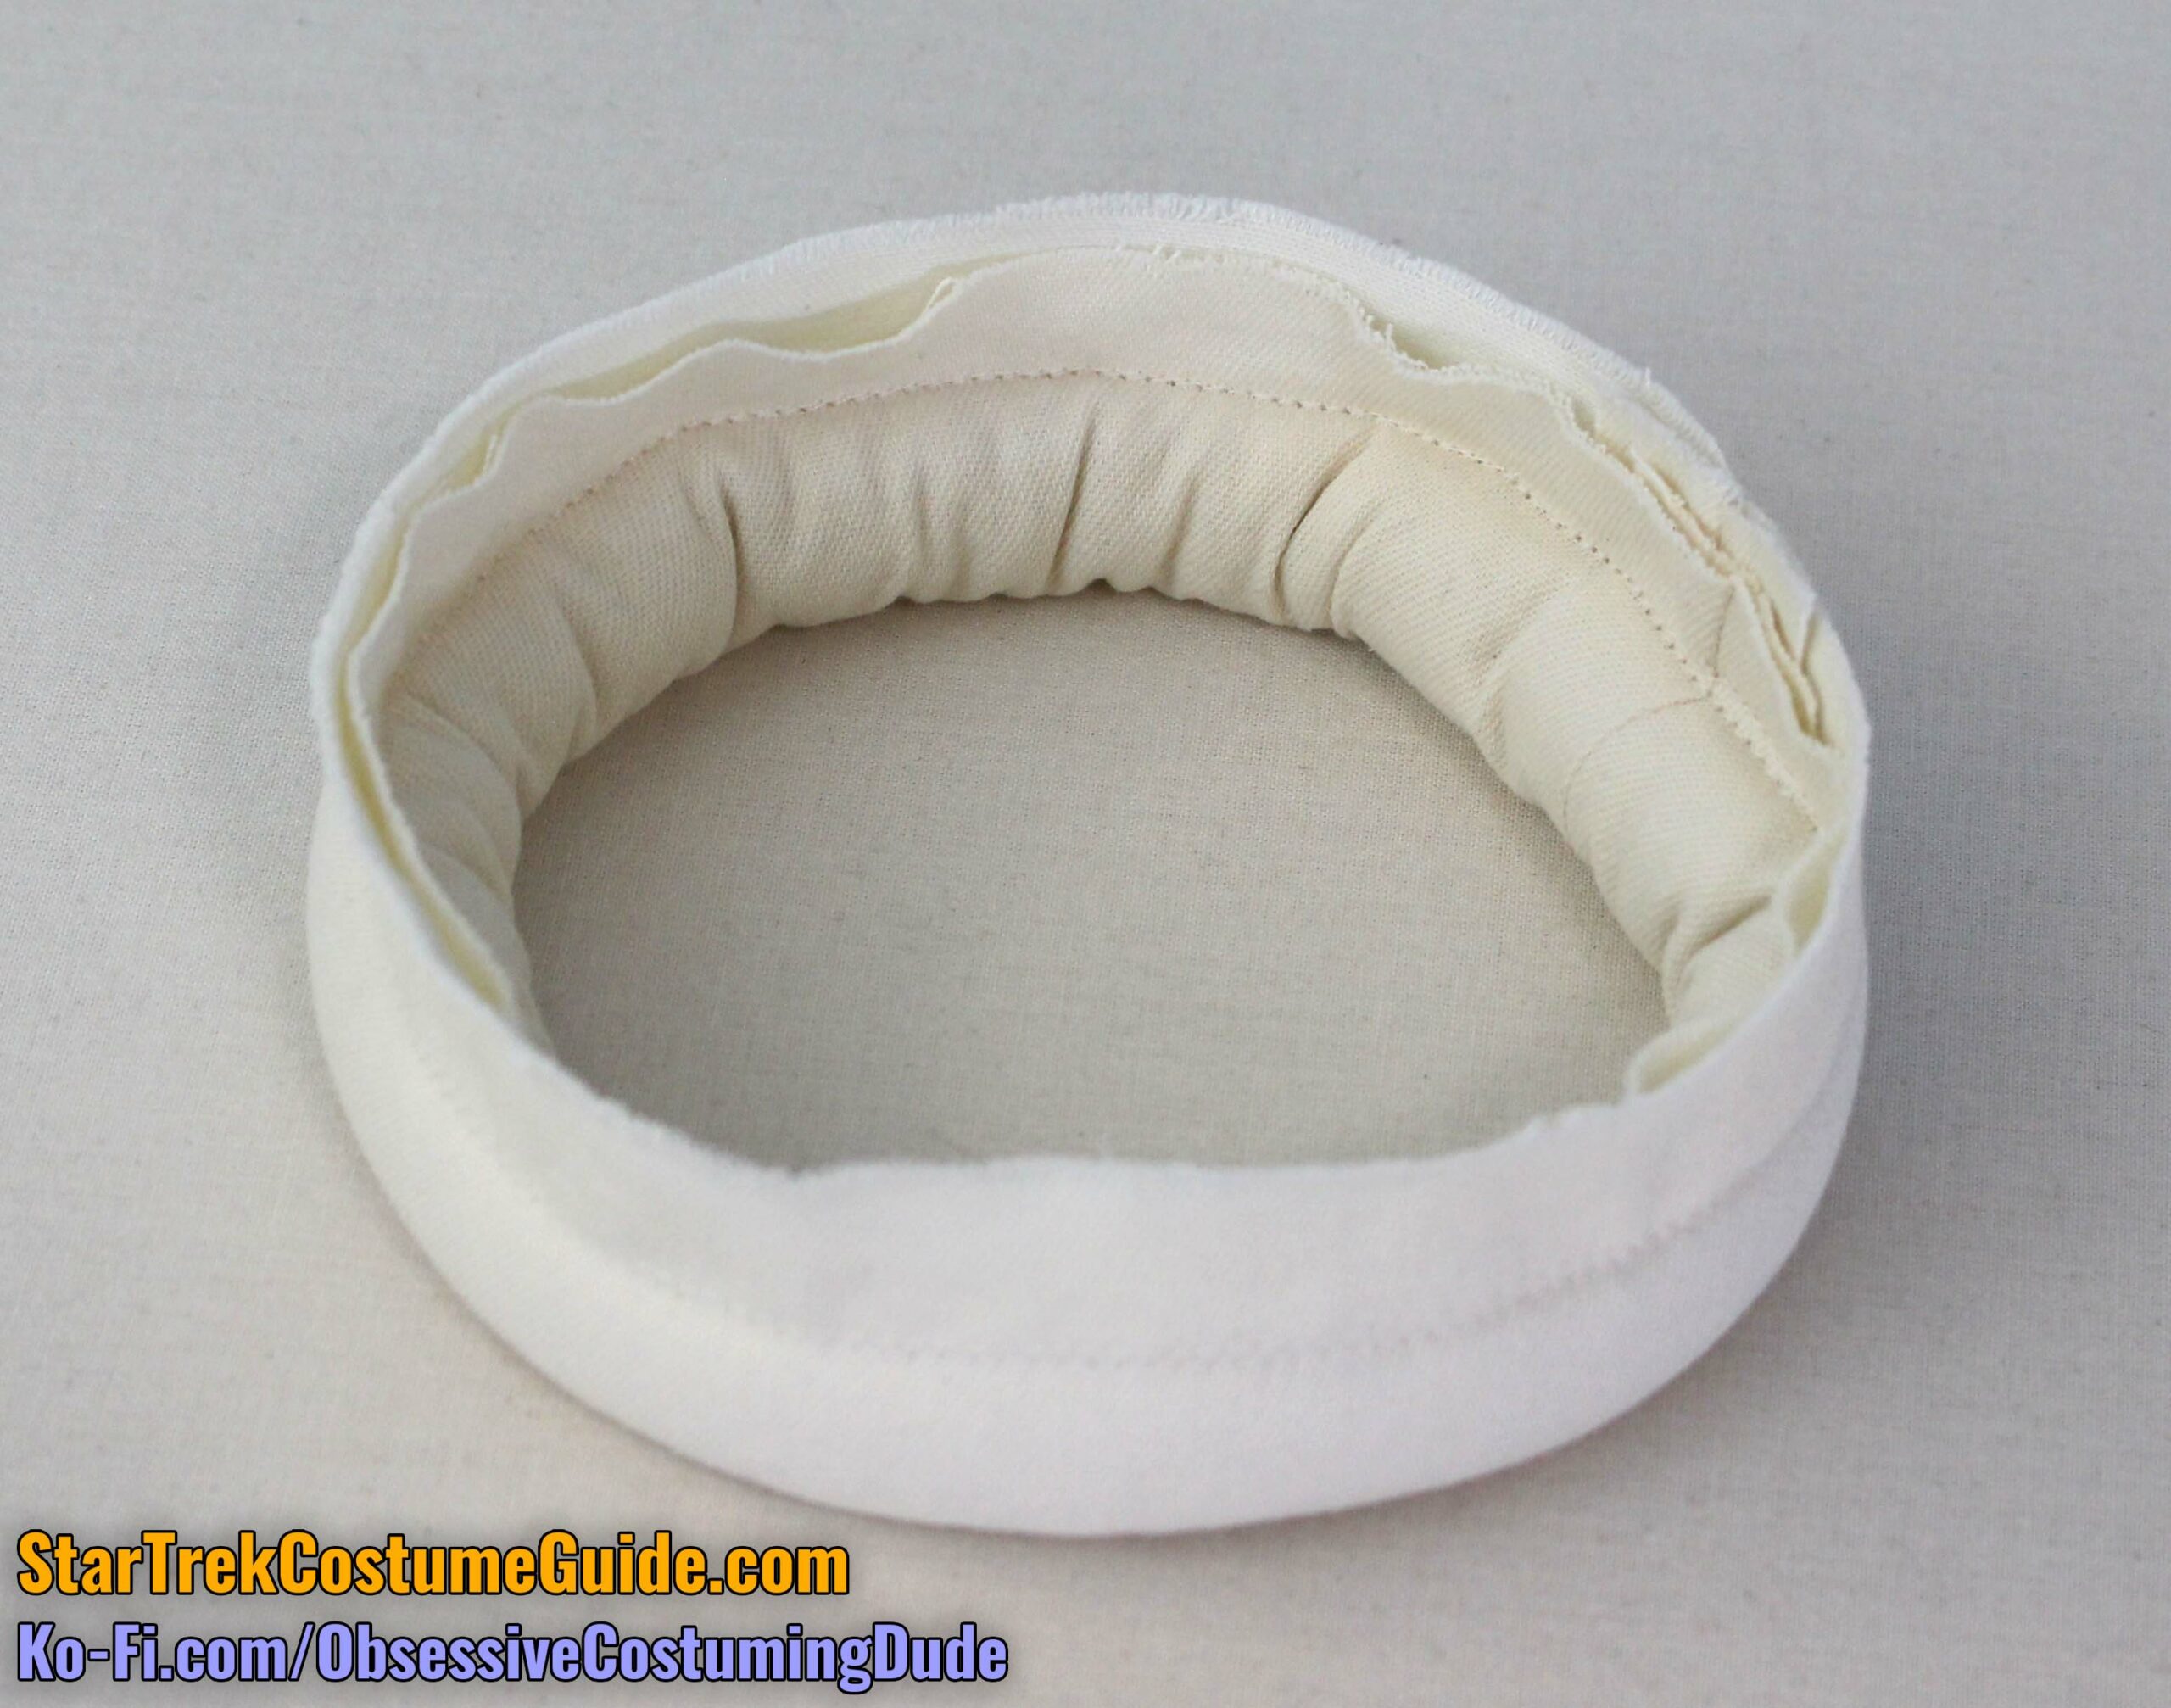
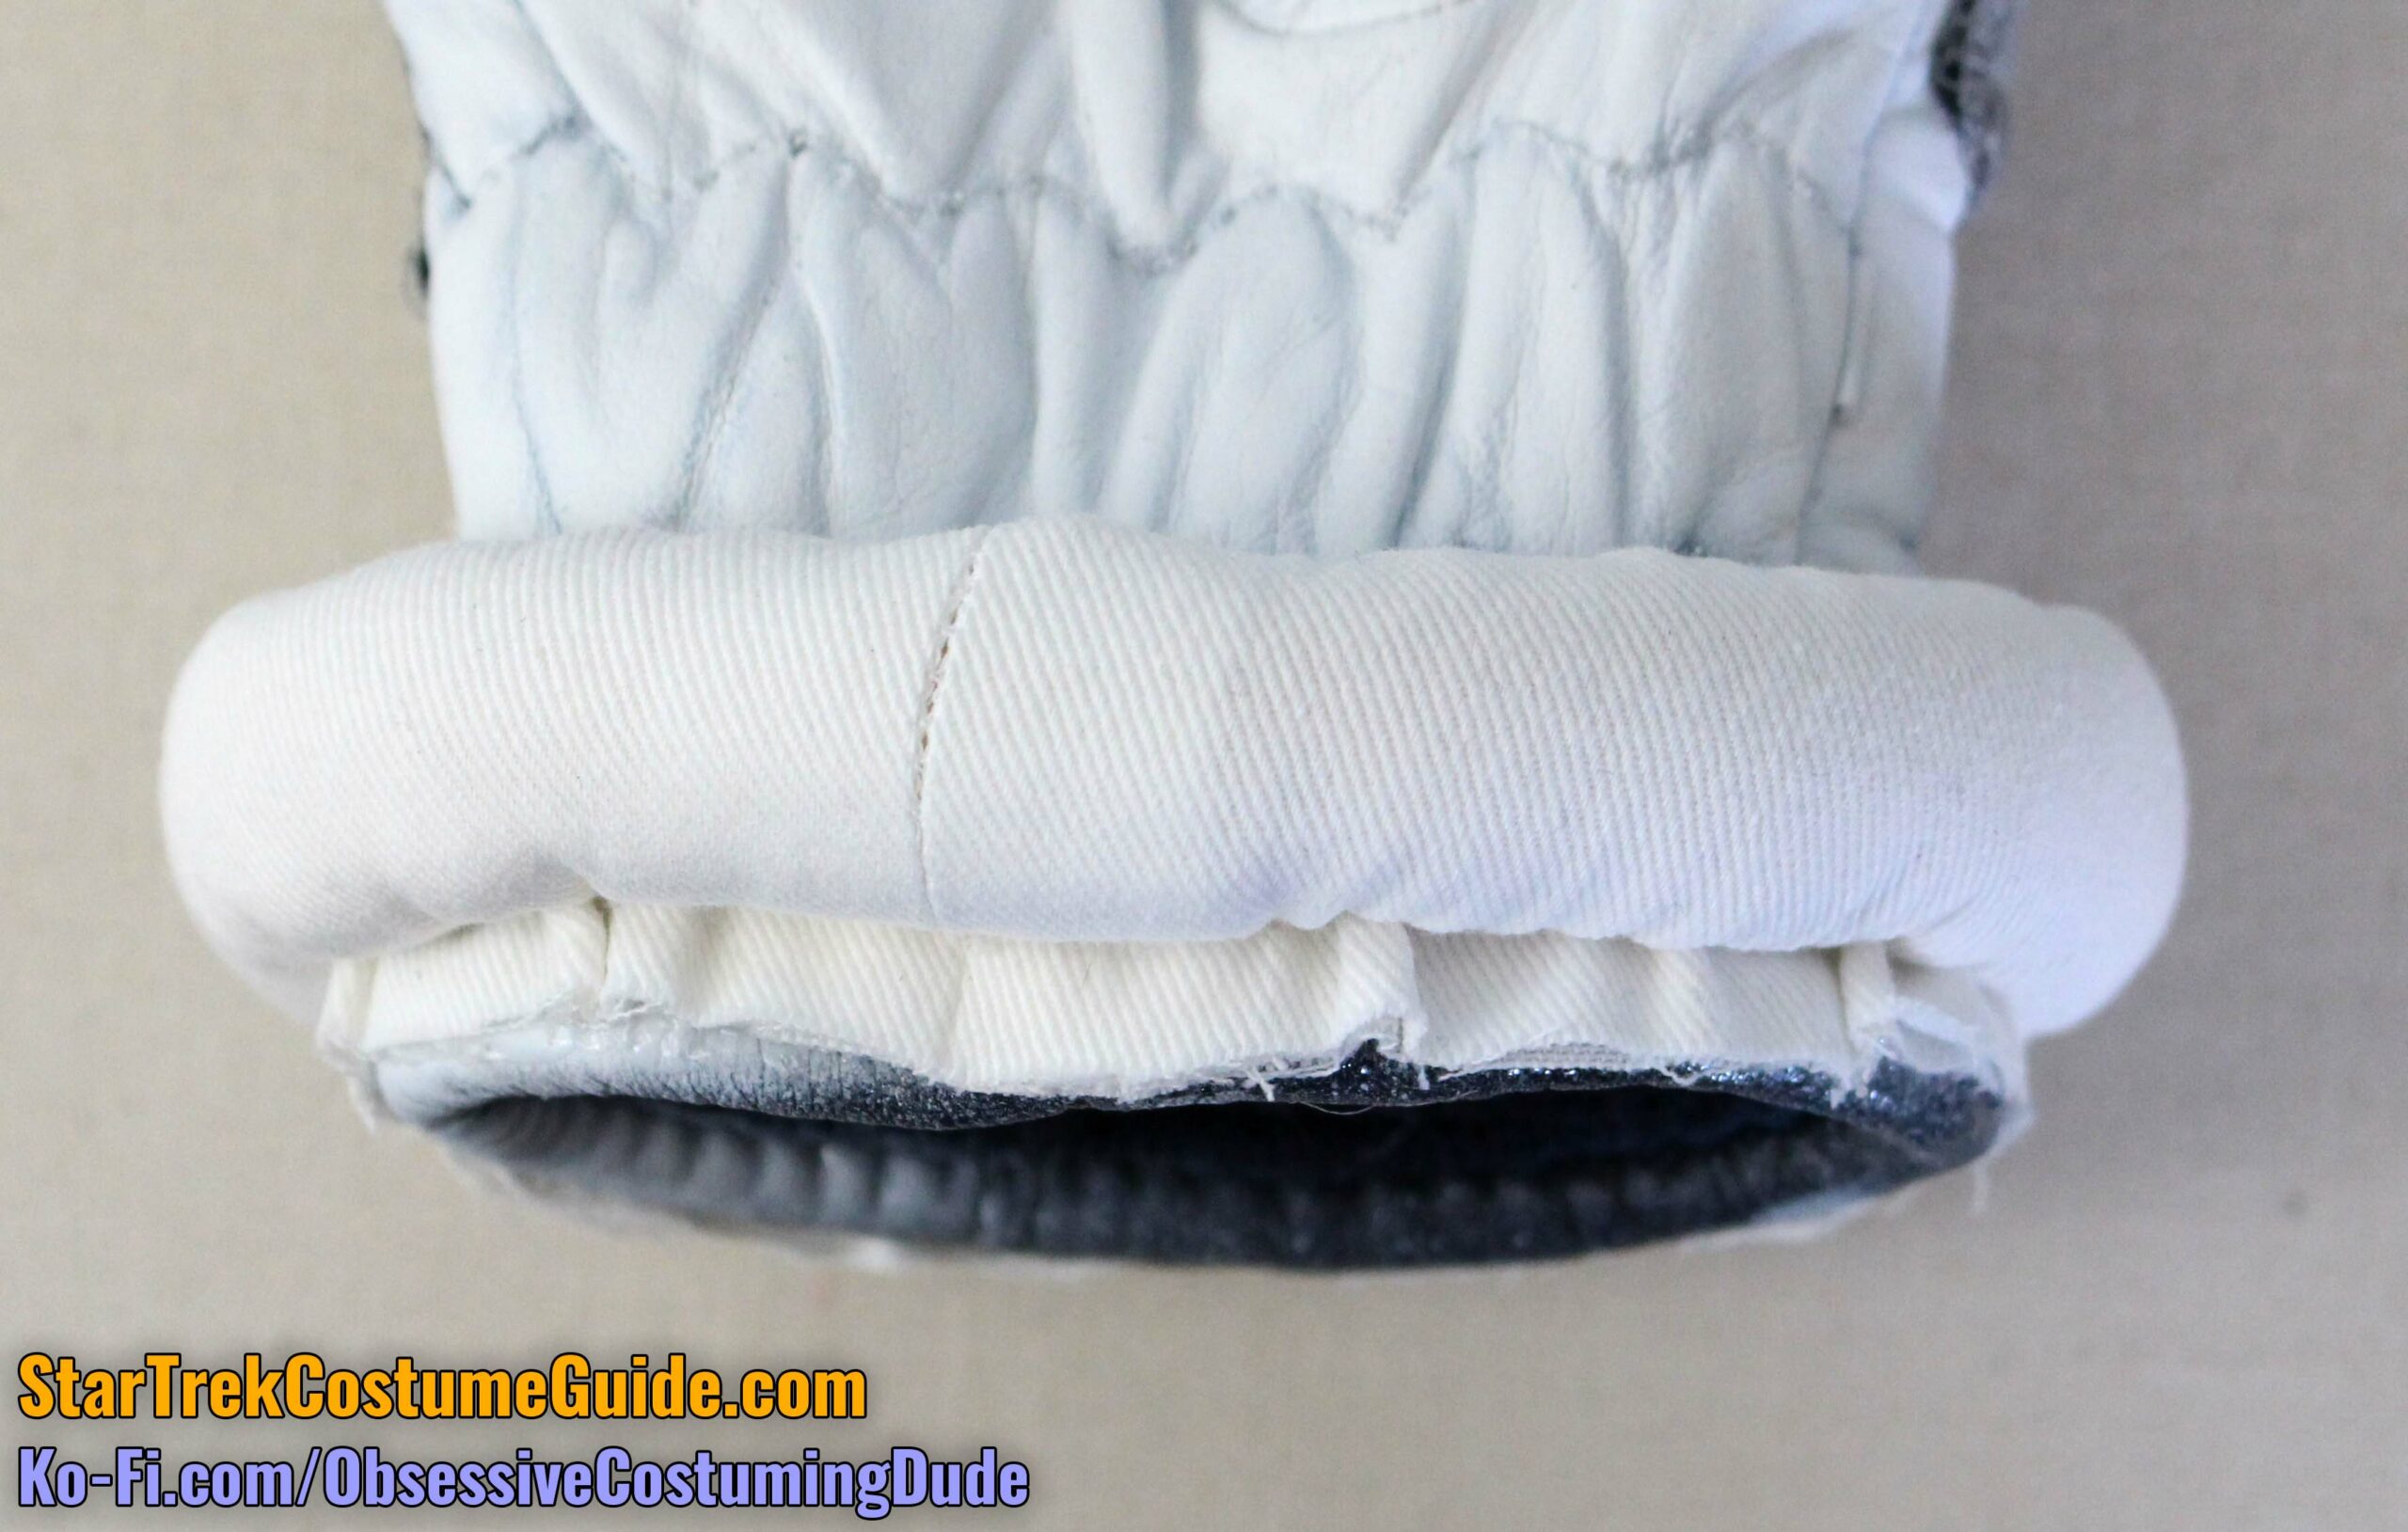
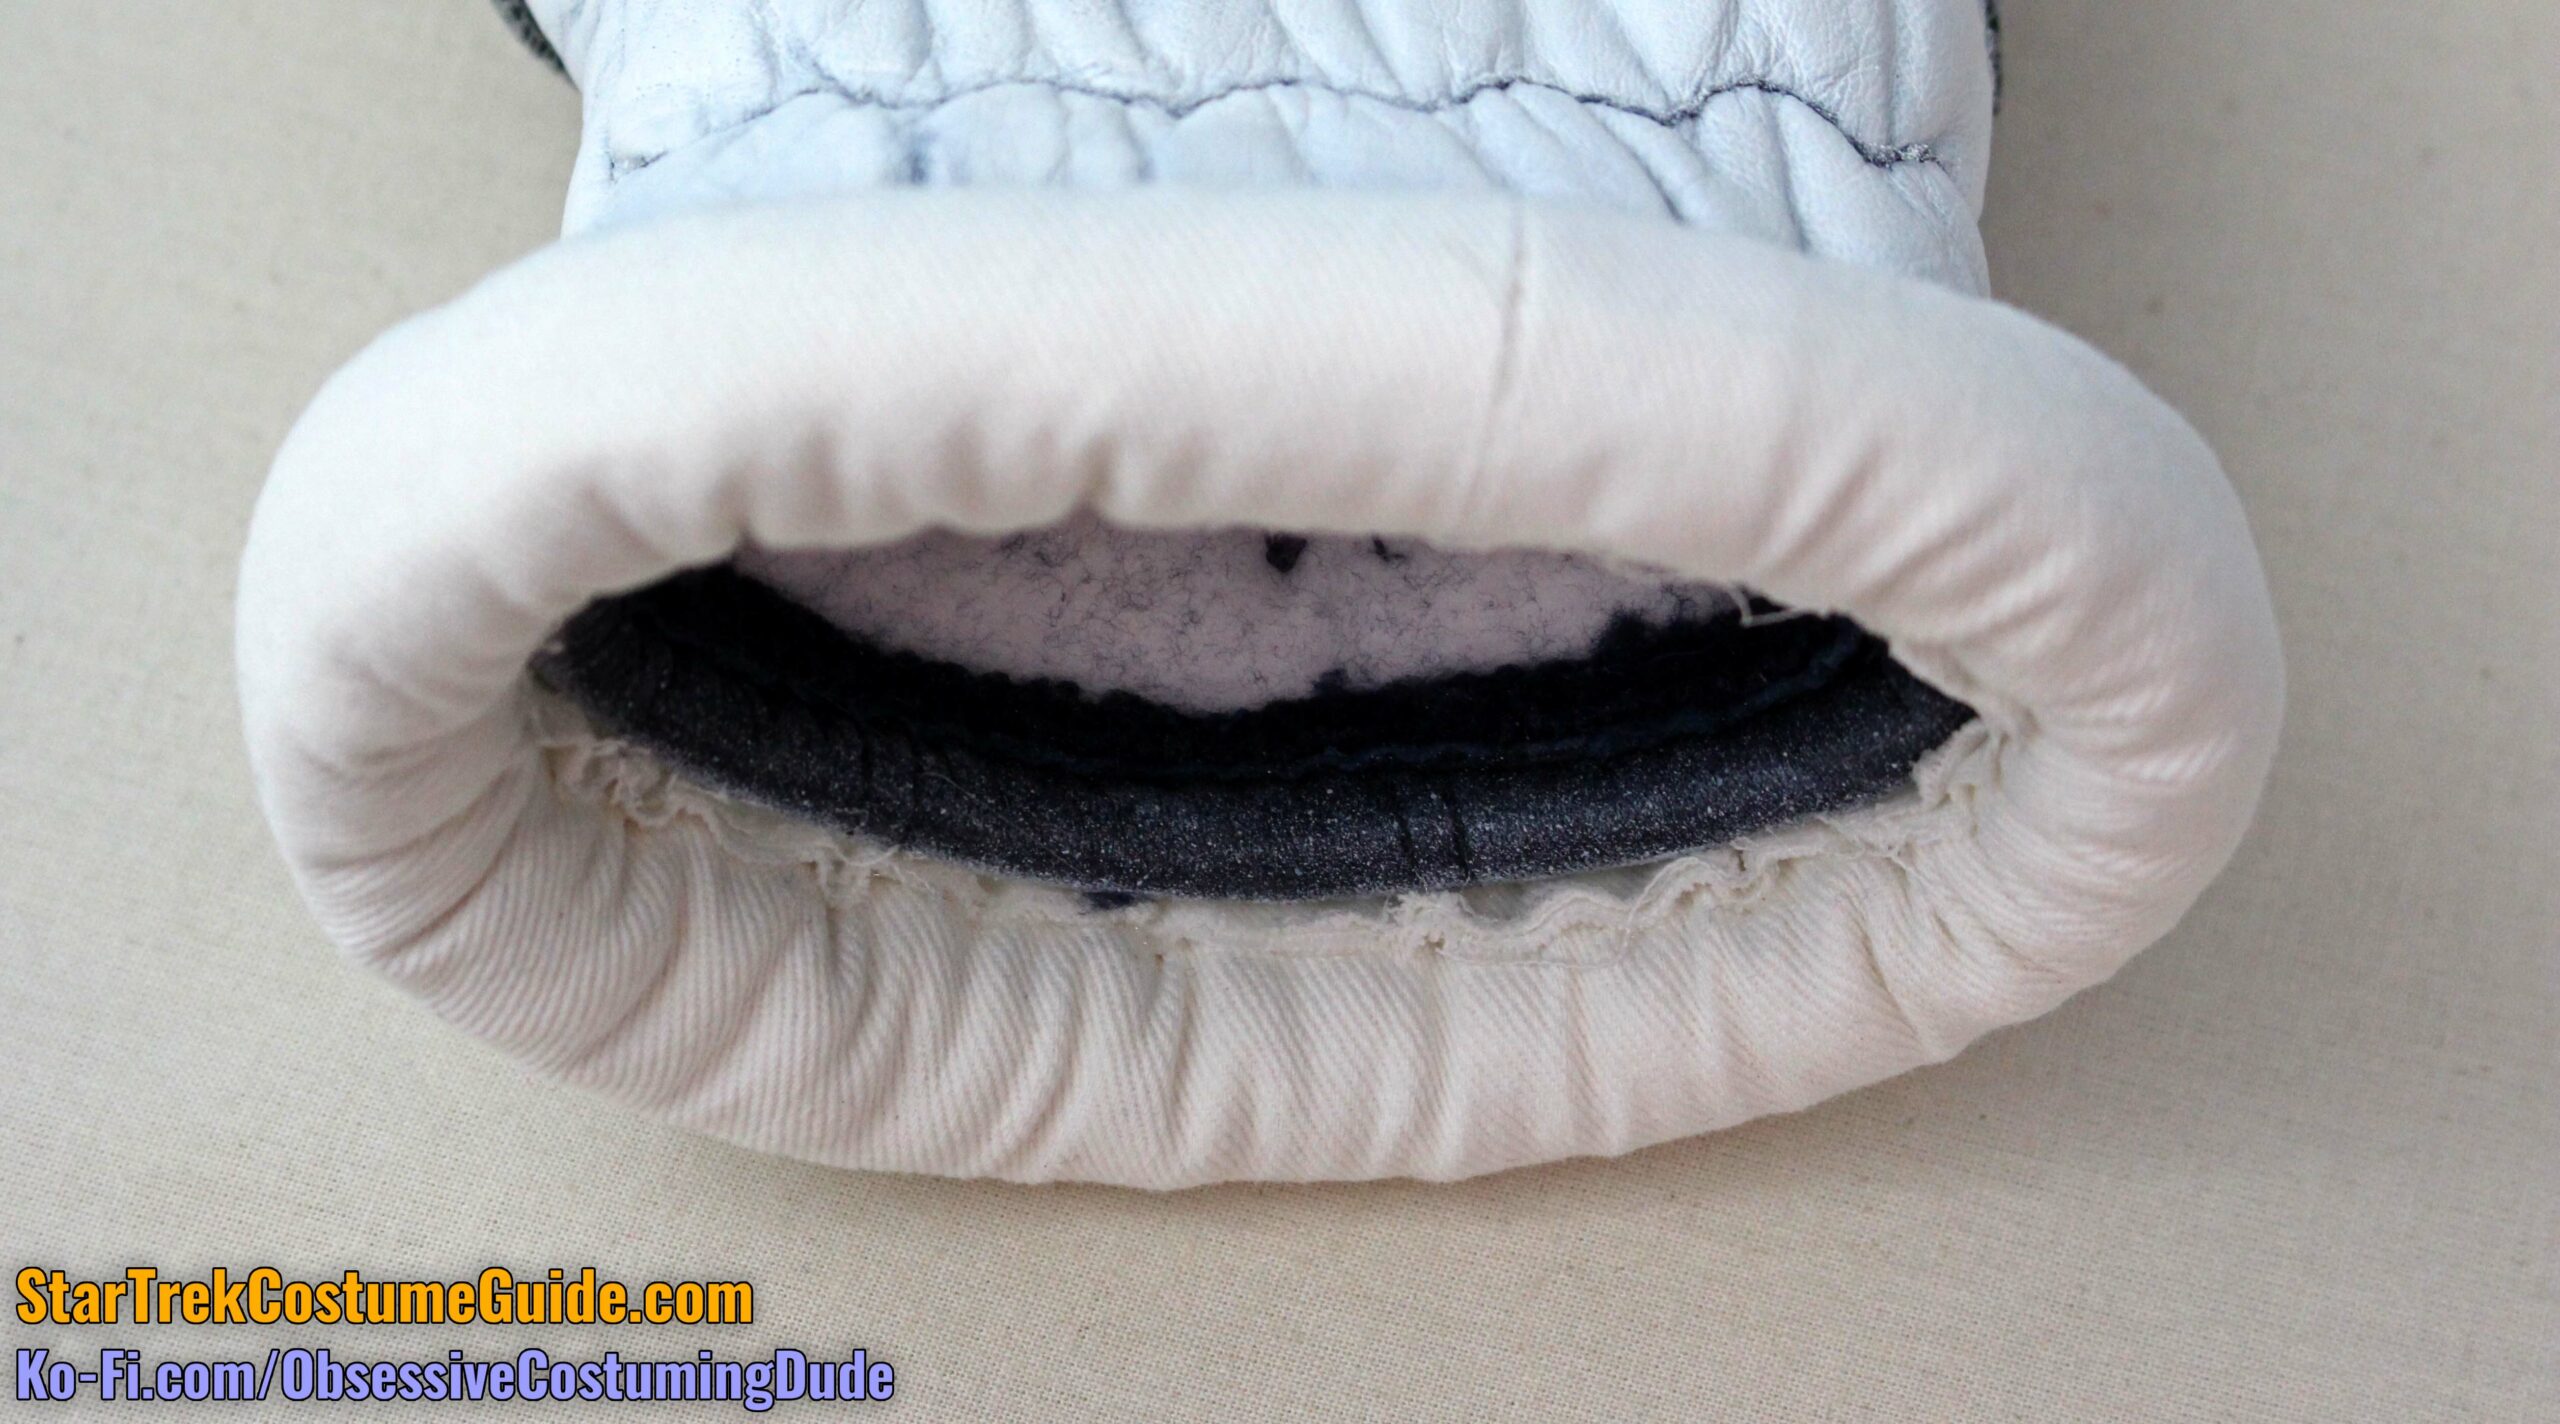
Or you can just apply some E6000 glue around the top of the glove, roll the piping cord downward, and glue the lip of the piping to the glove.
(I suggest positioning the piping seam on the center underside of the glove.)
Once that glue is dry, apply more glue to the piping lip and roll the cord back up so it covers the lip.
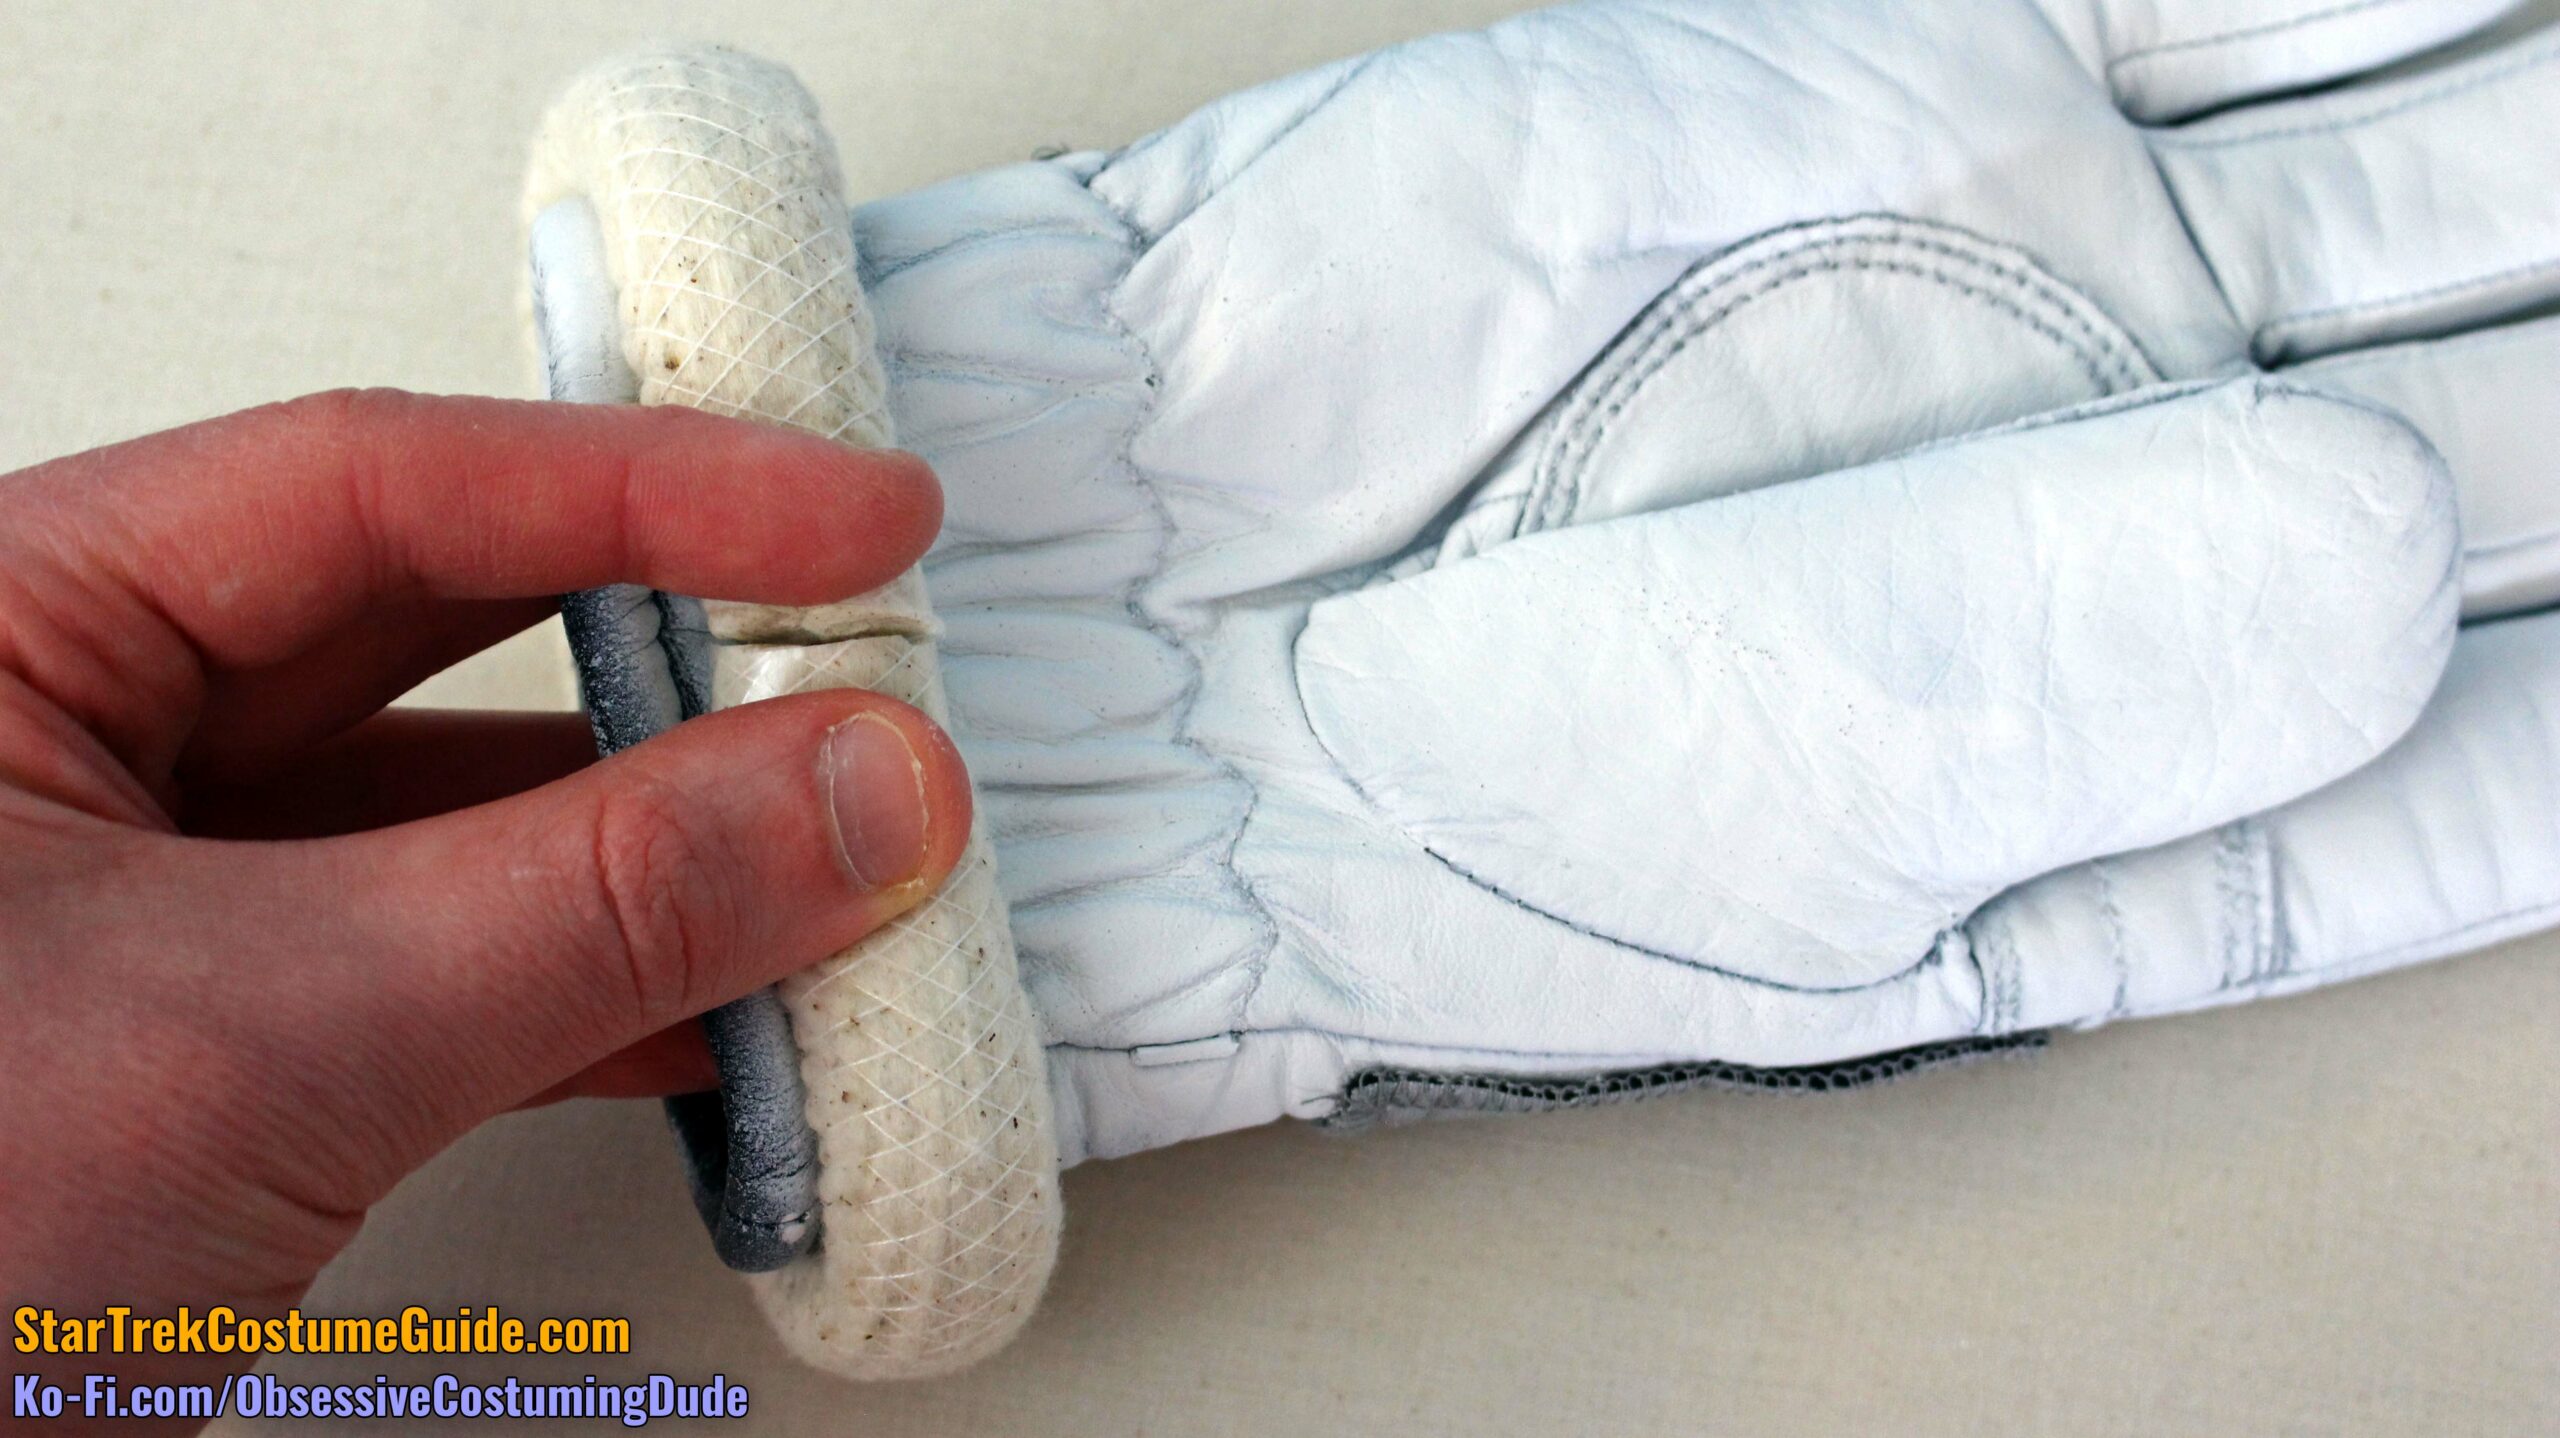
Cut four lengths of ¼” tubing sufficient to extend across your glove securely into the tubing channels on both ends. (Mine were about 3 ¼” long.)
Insert the tubes into their corresponding channels.
Repeat for the other glove.
Just so you can see how well a random pair of gloves can be modified for this costume, here’s a comparison between the screen-used gloves (left) and the replica pair I made with my spare pair of ski gloves (right):
Obviously for TWOK-era trainees, use the translucent red tubing instead of black.
Here’s a comparison between a screen-used glove (left), my modified ski glove painted off-white (middle), and a modified Aris Softan Leather glove painted flat white with trainee red tubing (right):
In either case, it pains me to say that accurately reproducing them is probably unrealistic – especially for those of us with little to no experience with (or appropriate tools for) making footwear.
Therefore as with the gloves, I suggest starting with whatever pair of boots you have or can find that are as close as possible to the originals.
If you have a spare pair you’d be willing to “sacrifice” for this project, you’ll save money and gain convenience.
And if they’re already white or off-white, then even better!
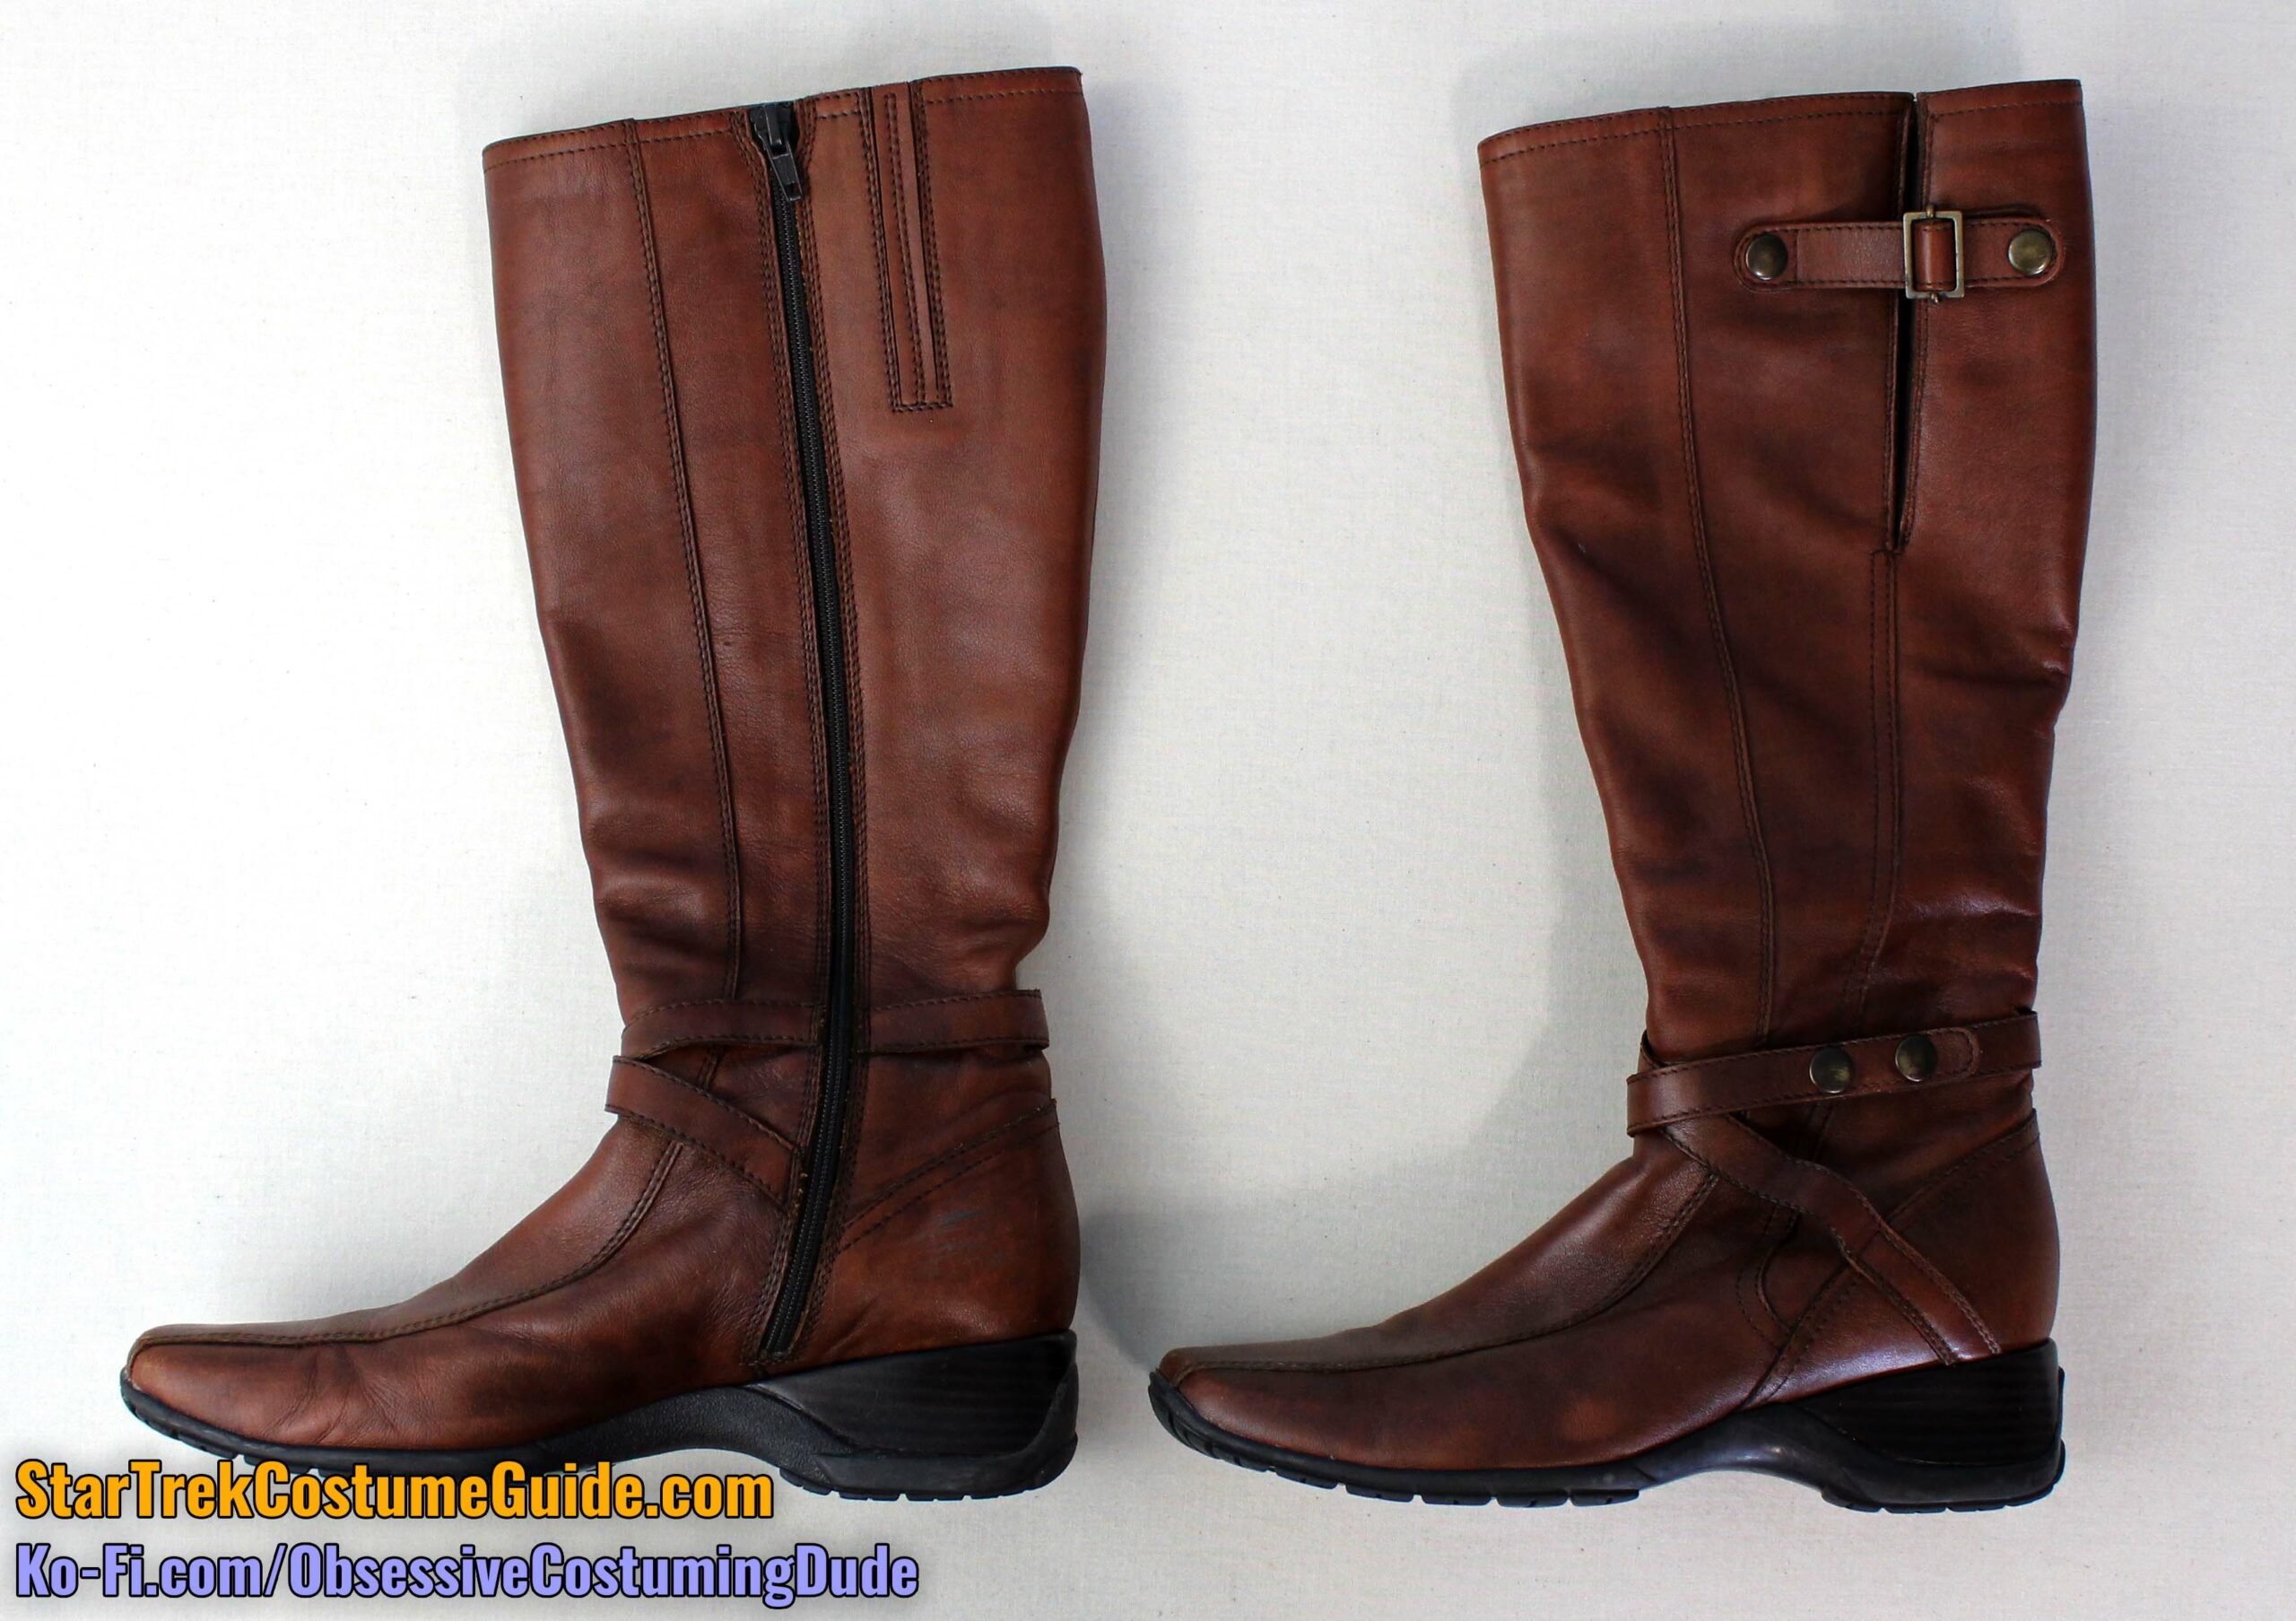
For my women’s demonstration boots, I used this spare pair that Katherine was about to donate to Goodwill:
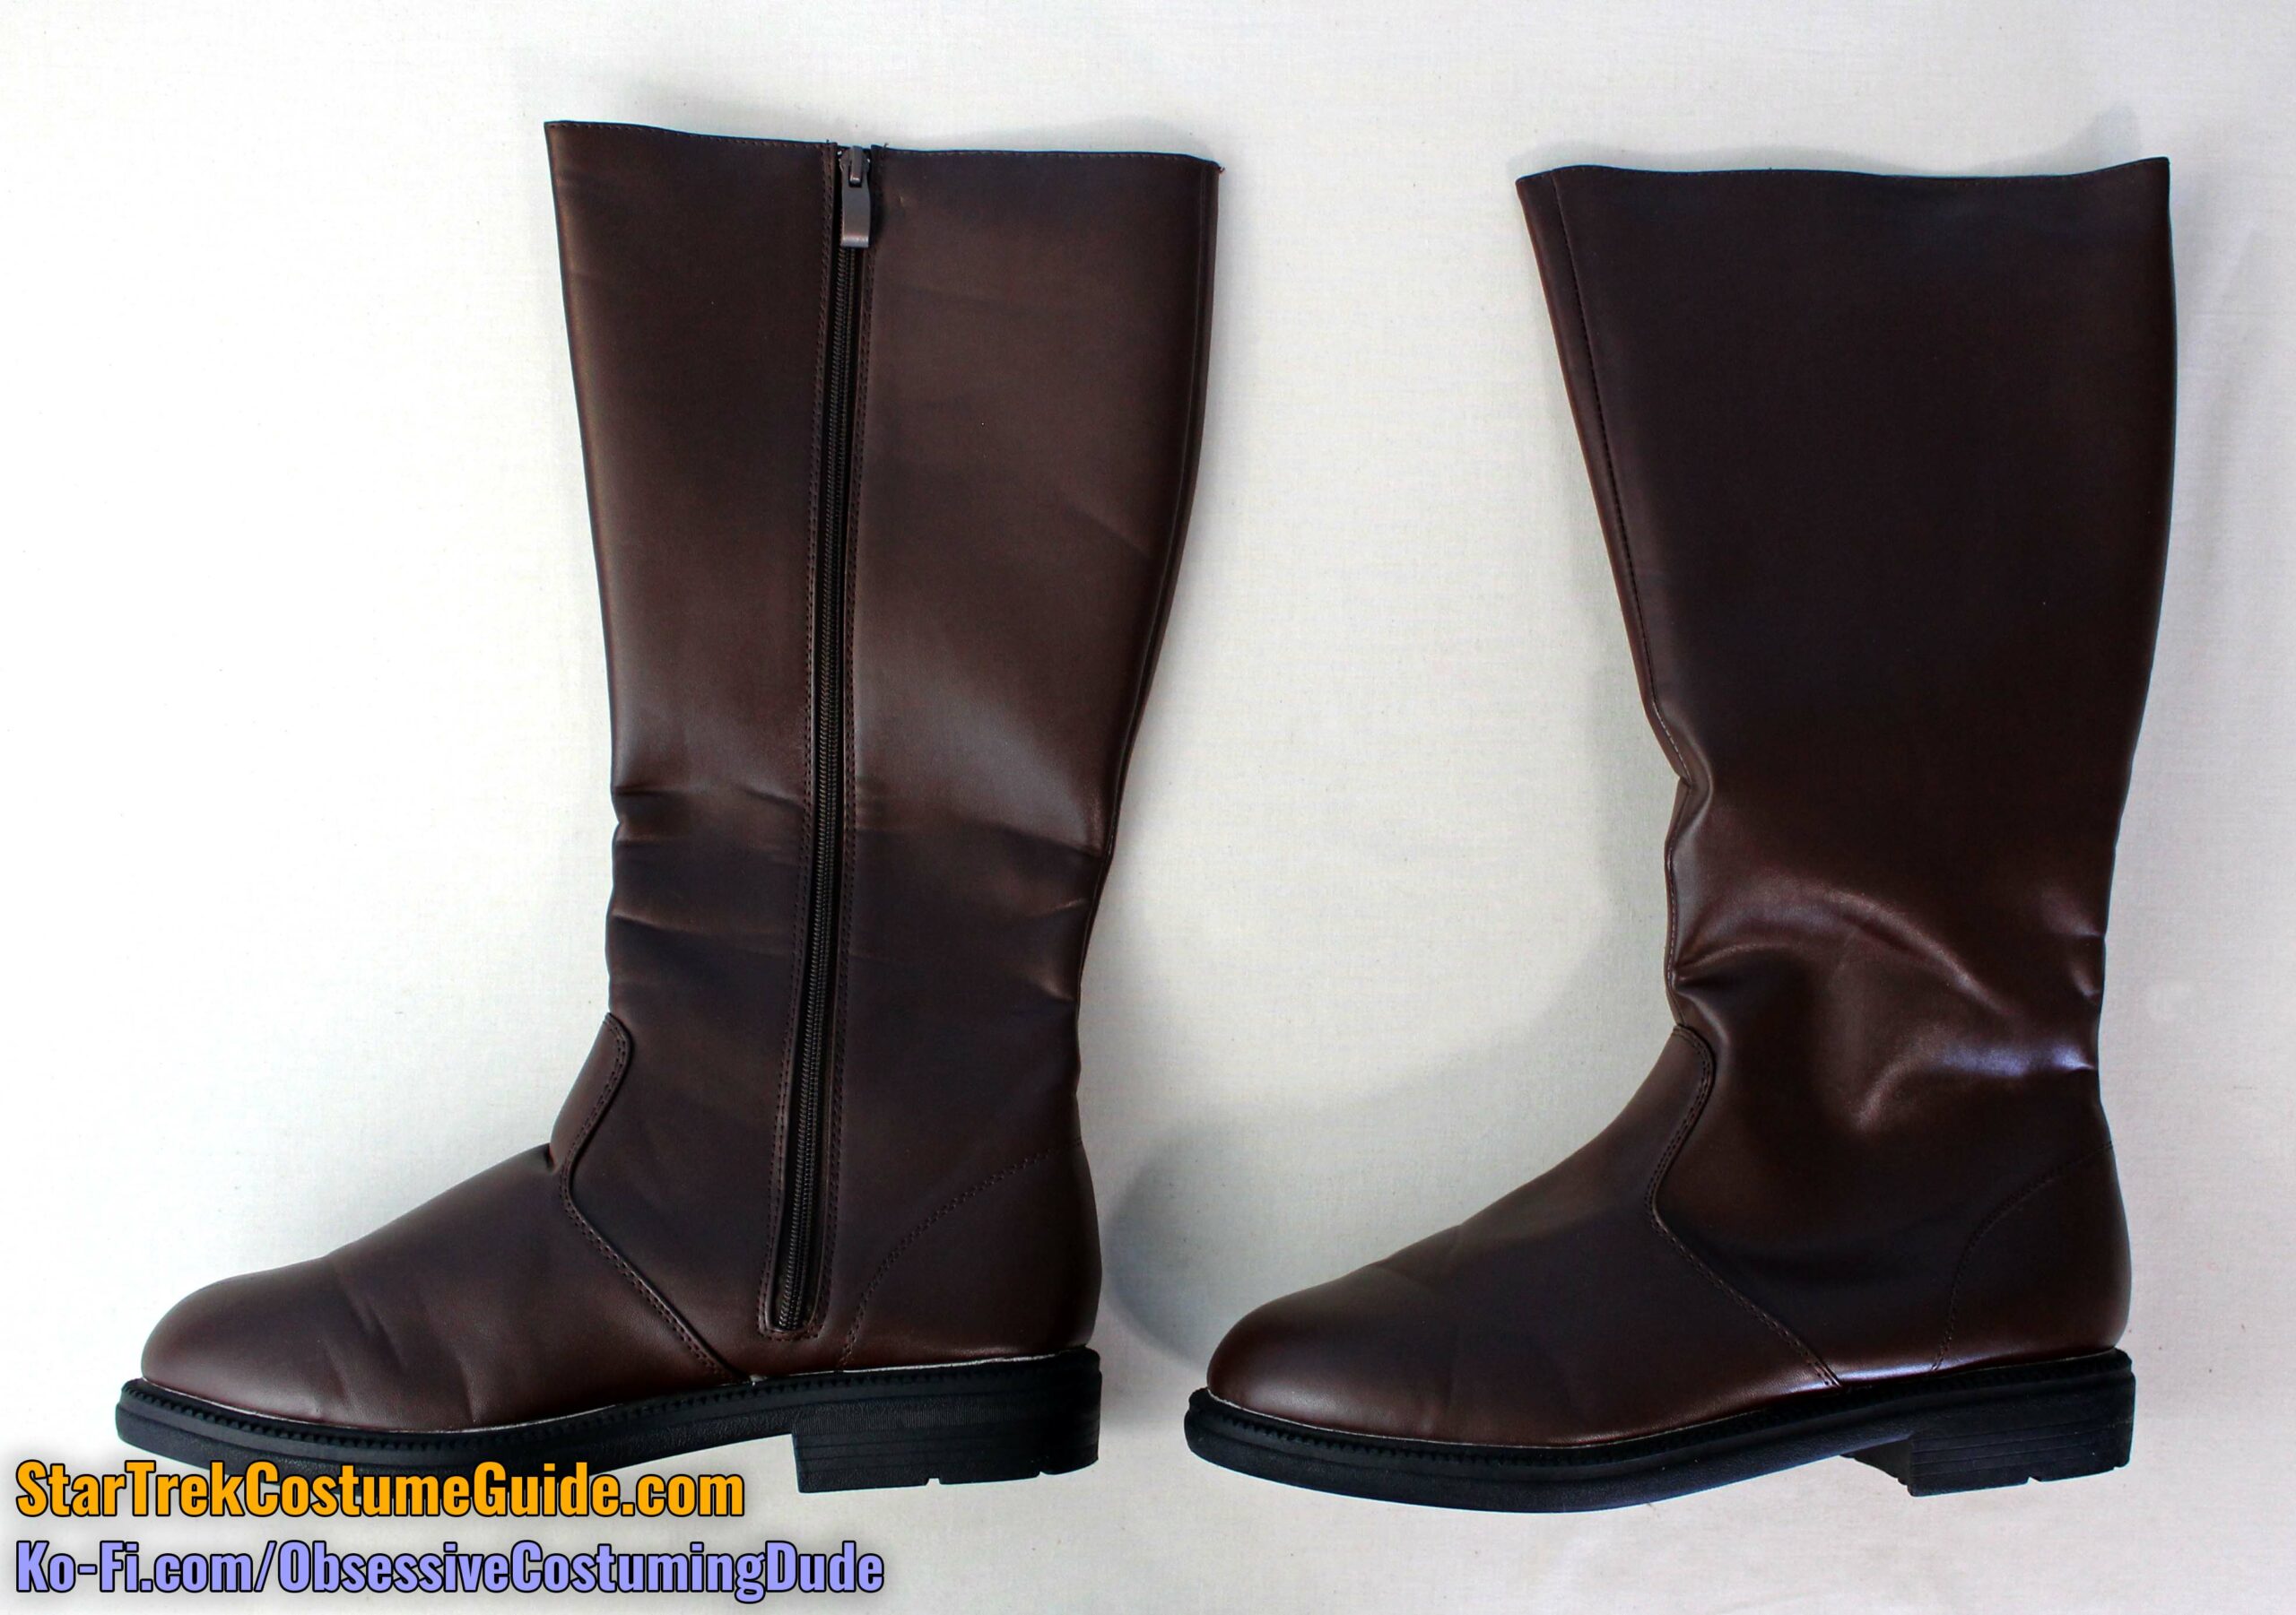
For my men’s demonstration boots, I used this pair of cheap cosplay boots I’d had in the closet for many years:
As you can see, neither pair bears much resemblance at all to the screen-used boots, but after some work they’ll go nicely with the full costume ensemble.
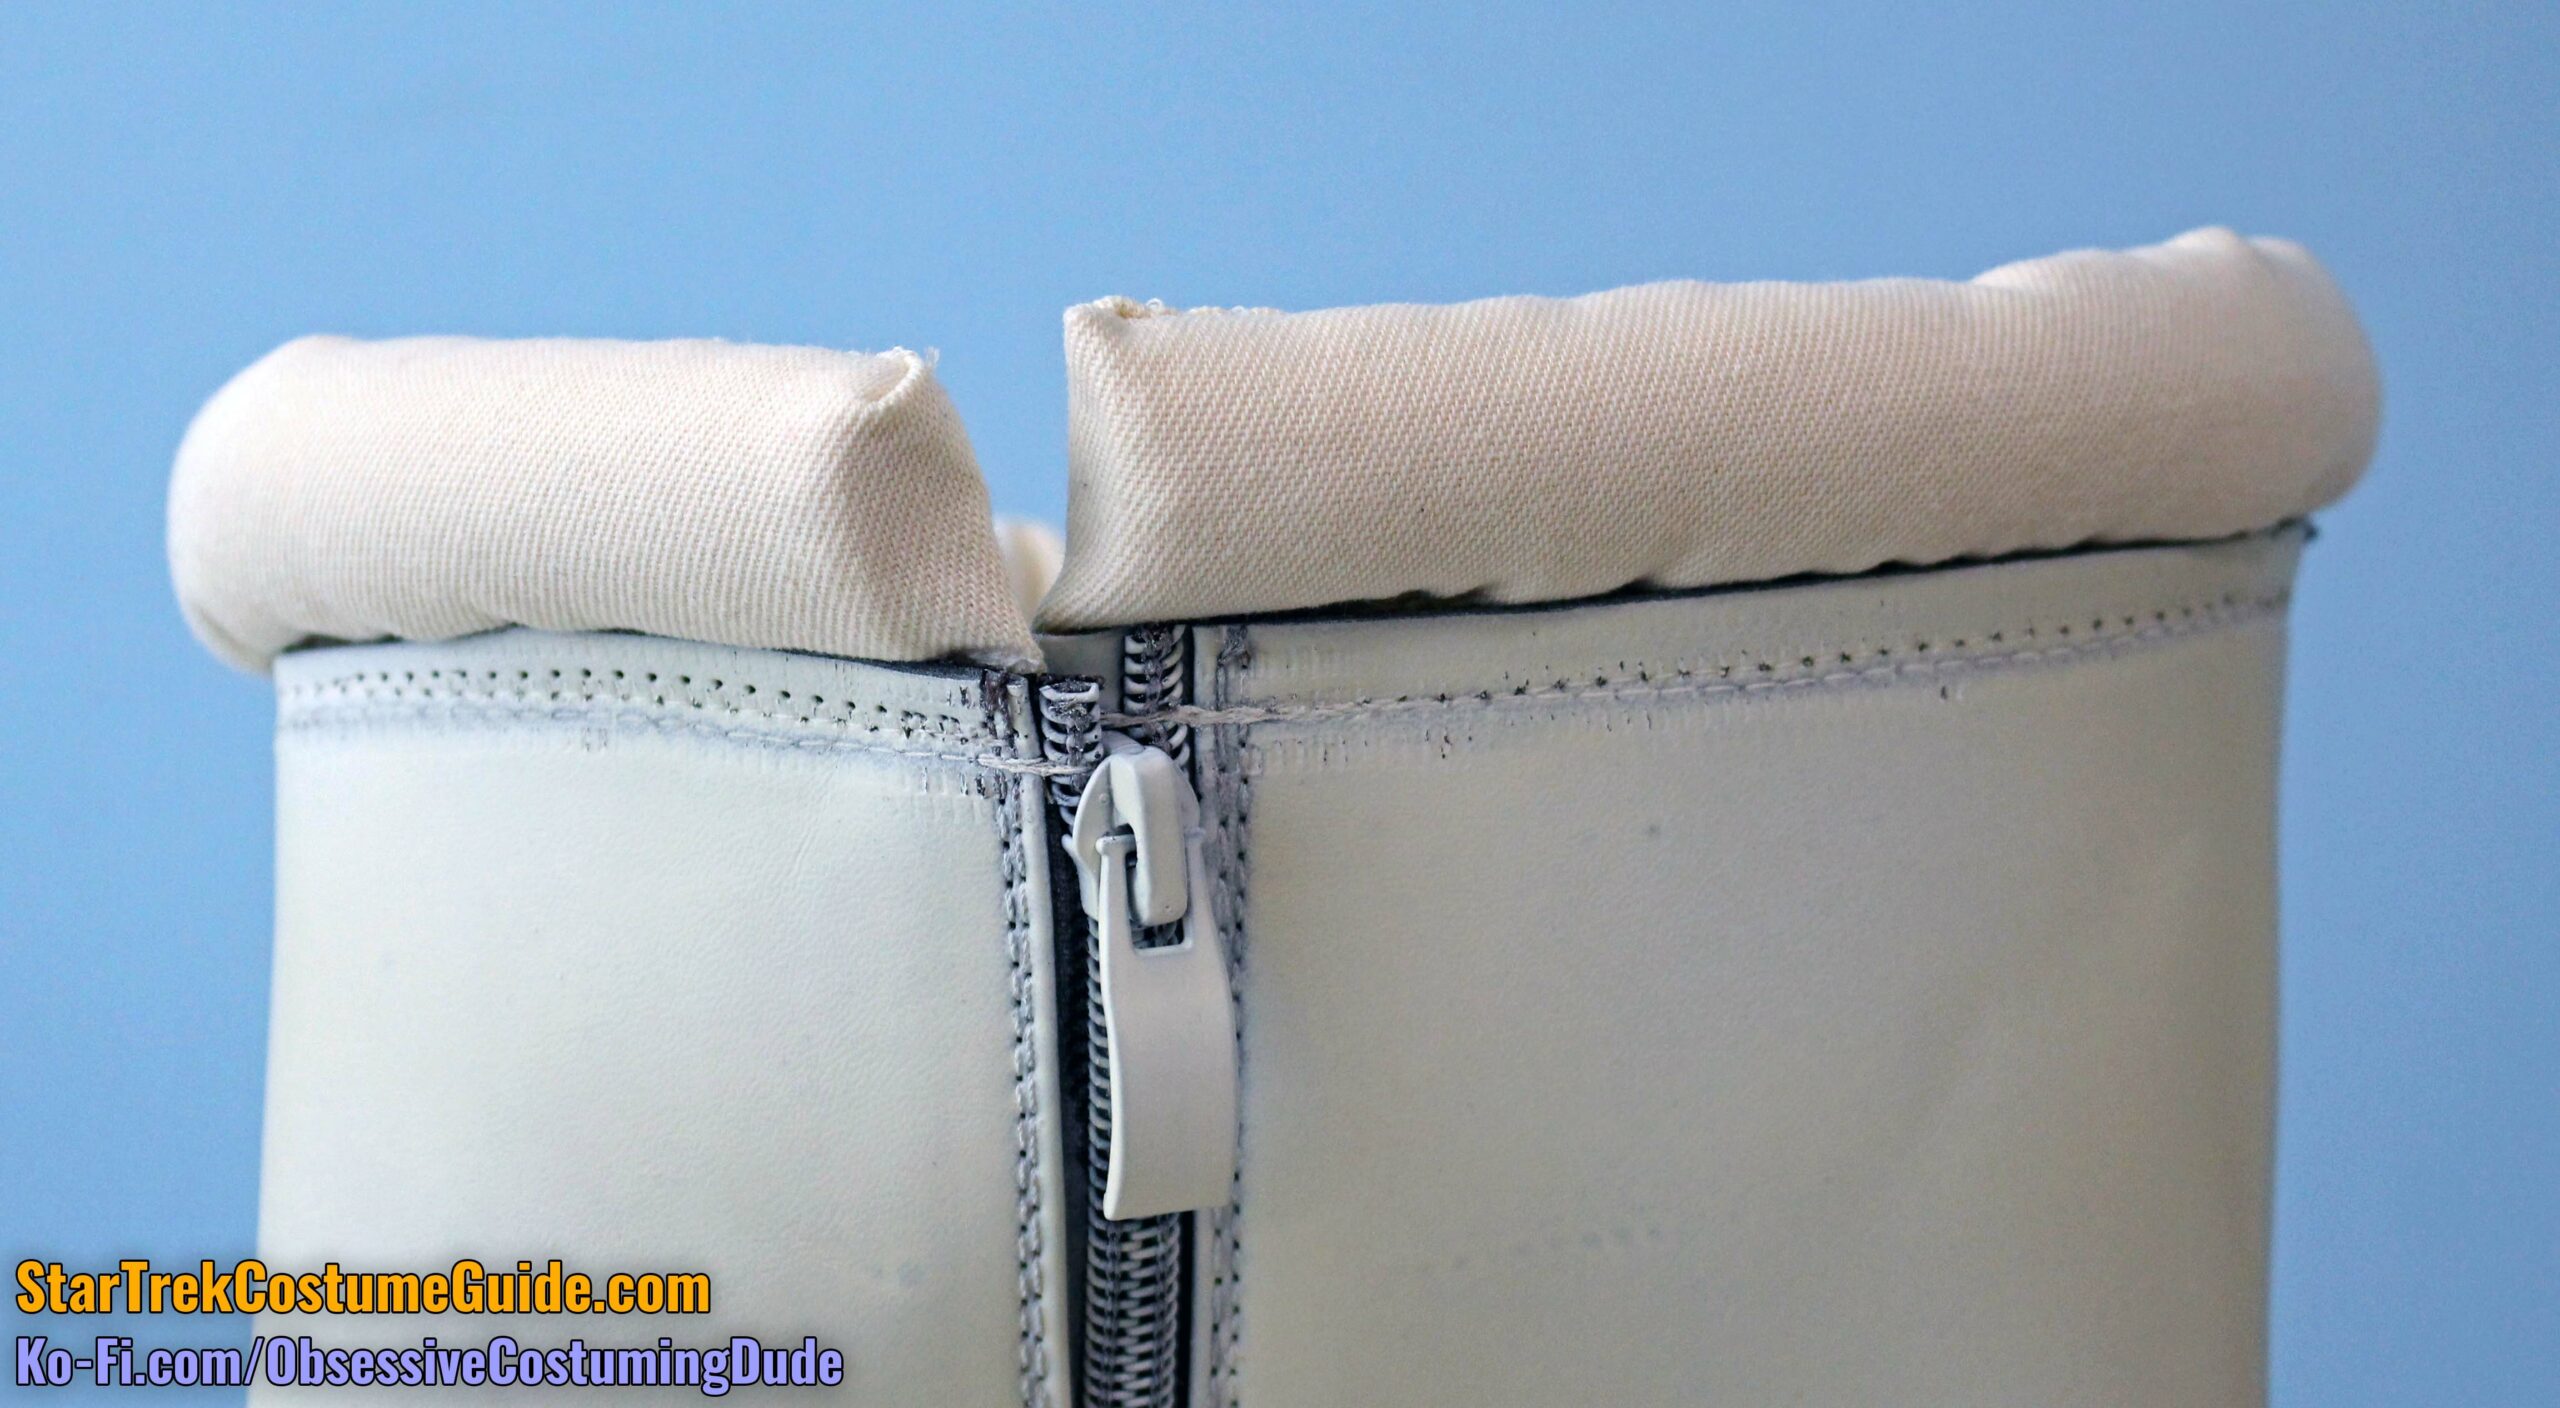
The screen-used boots didn’t have zippers, lacing, or closure of any kind; the tops were simply wide enough for the wearer to slip their feet all the way inside.
Personally, I would avoid lacing if possible because to me they’re too obvious a departure from the originals, but if your boots have side zippers, they should still work fine.
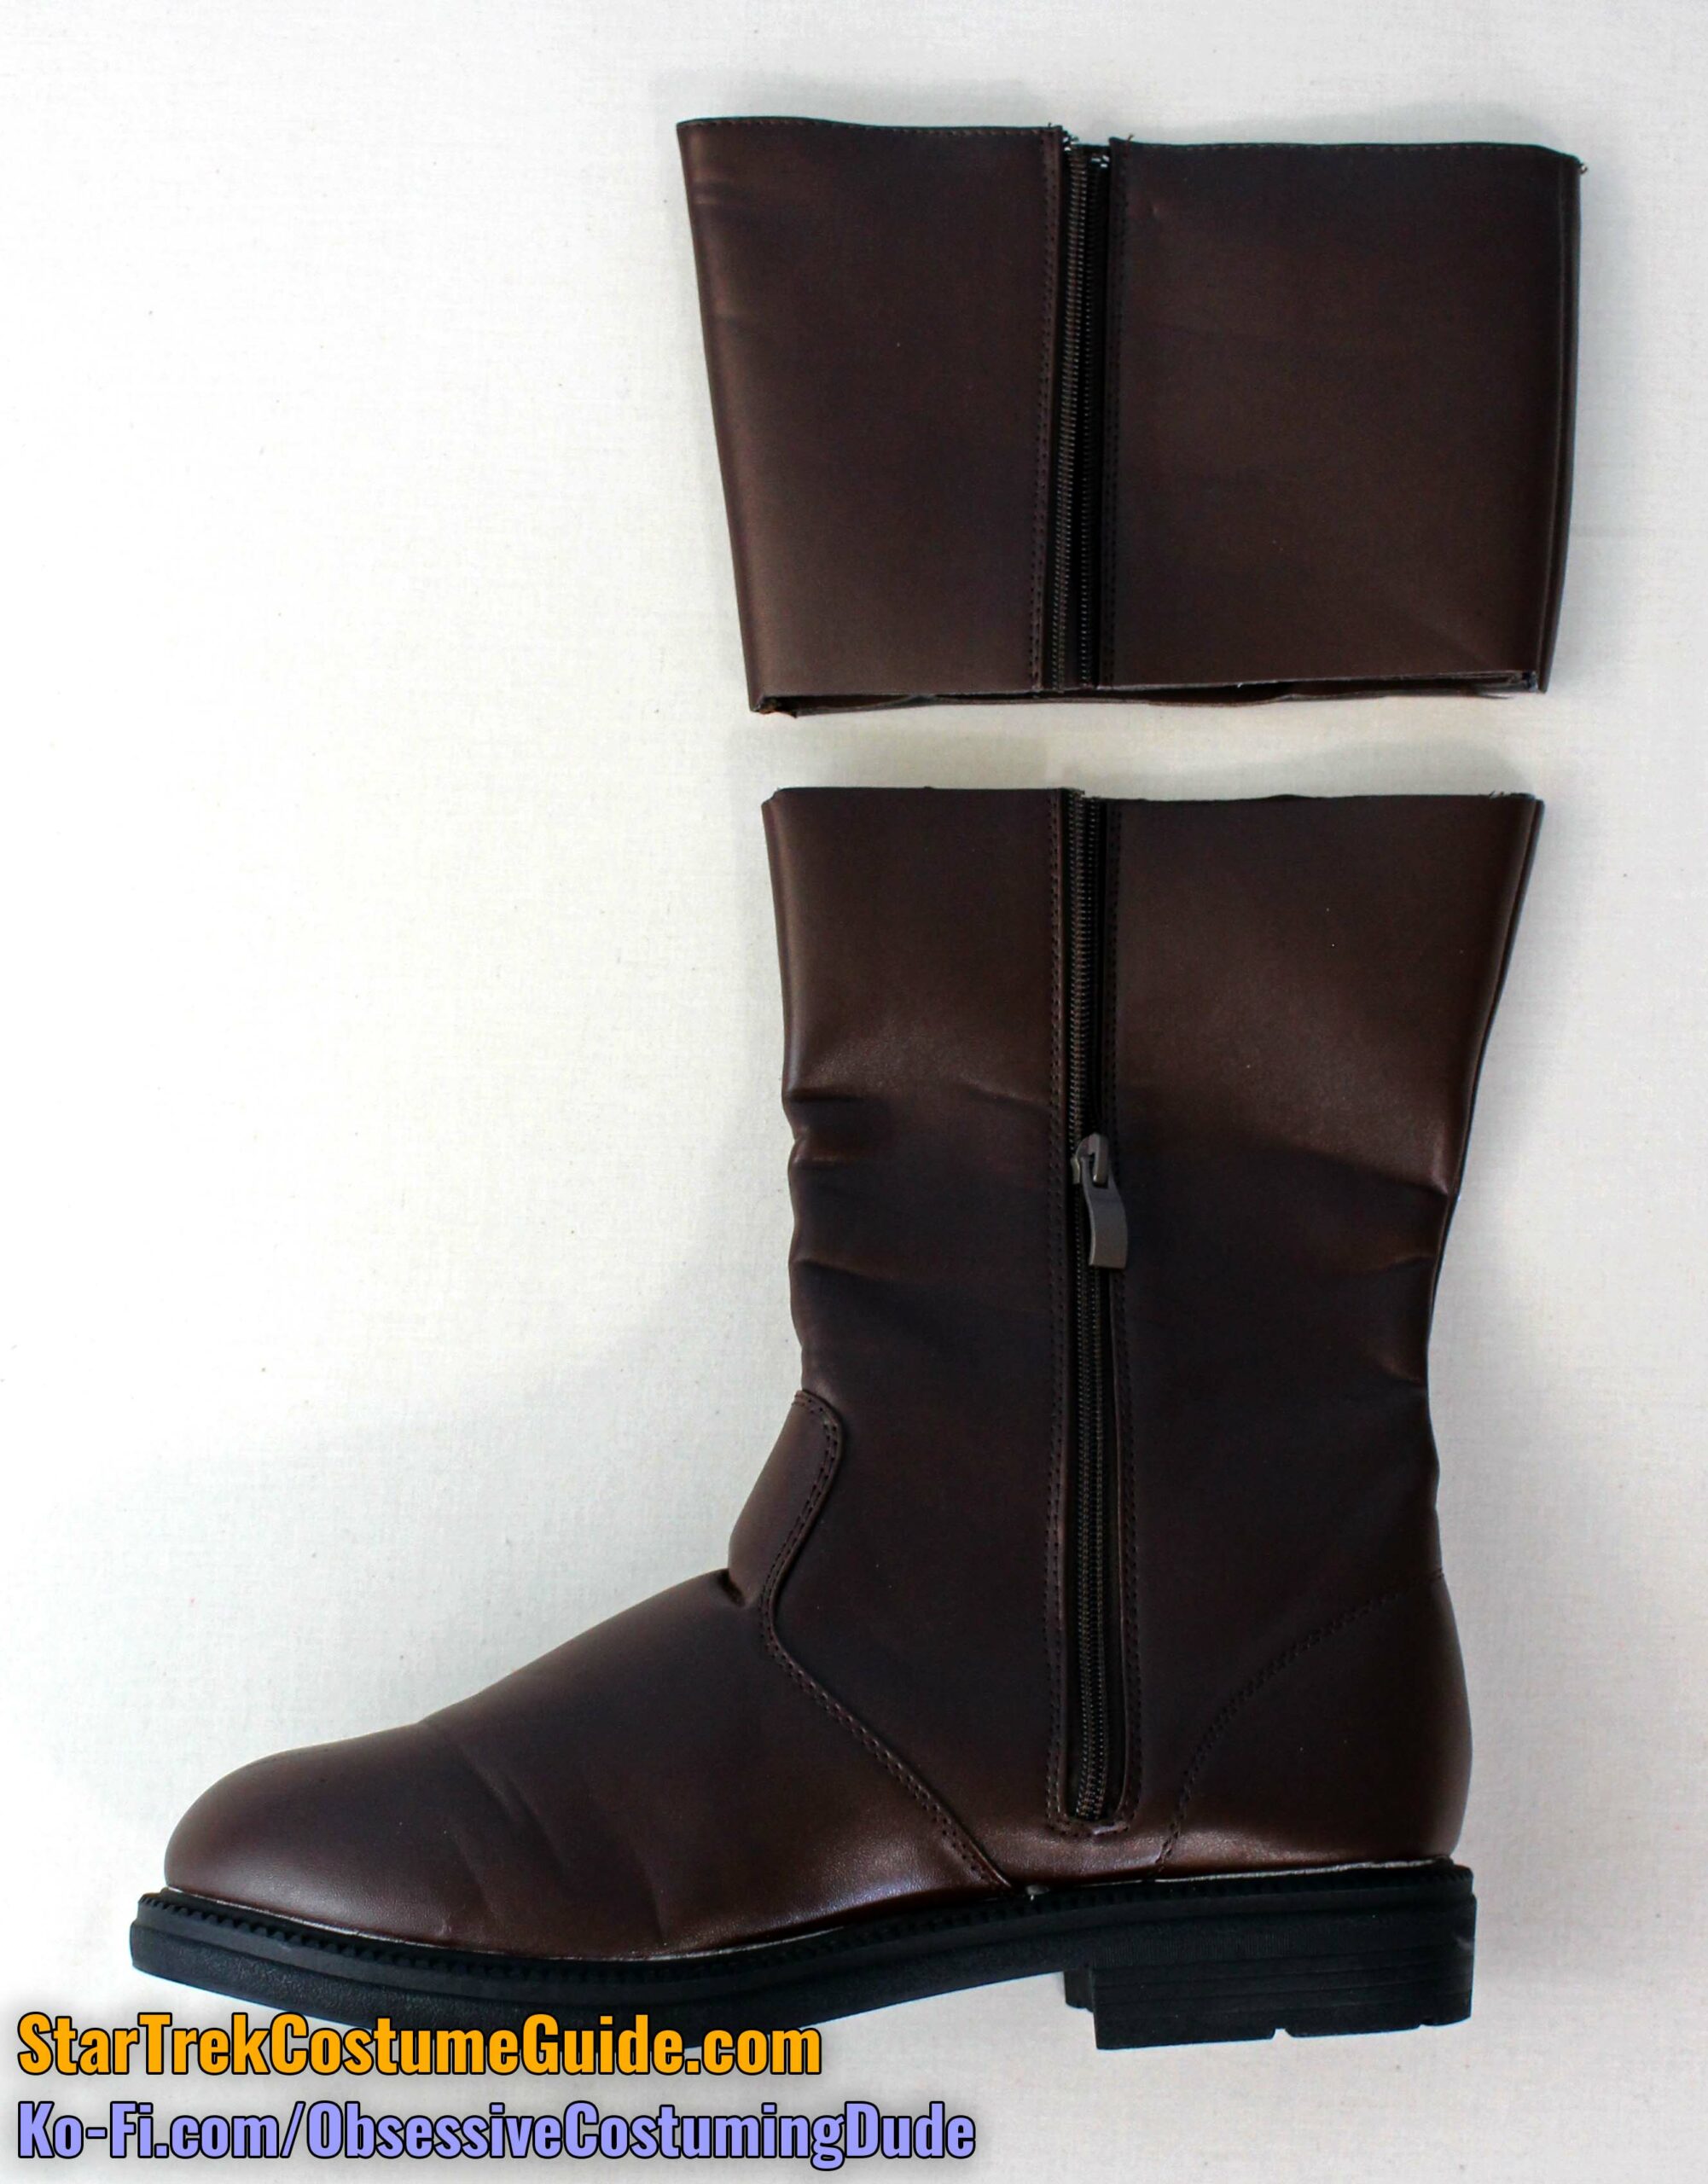
The first step is to shorten the boots to the desired height.
The boots with the screen-used costume I examined were approximately 12 ⅜” tall, but I have no idea how much these may have varied among all the production-made pairs, so feel free to adjust a bit in either direction.
Unzip the boot (if your boots have zippers) and simply trim however much off the top of the boot you need to.
Trim the boot to about 1” shorter than your desired boot height.
If your boots have structuring or lining, we don’t want to leave that flapping around inside.
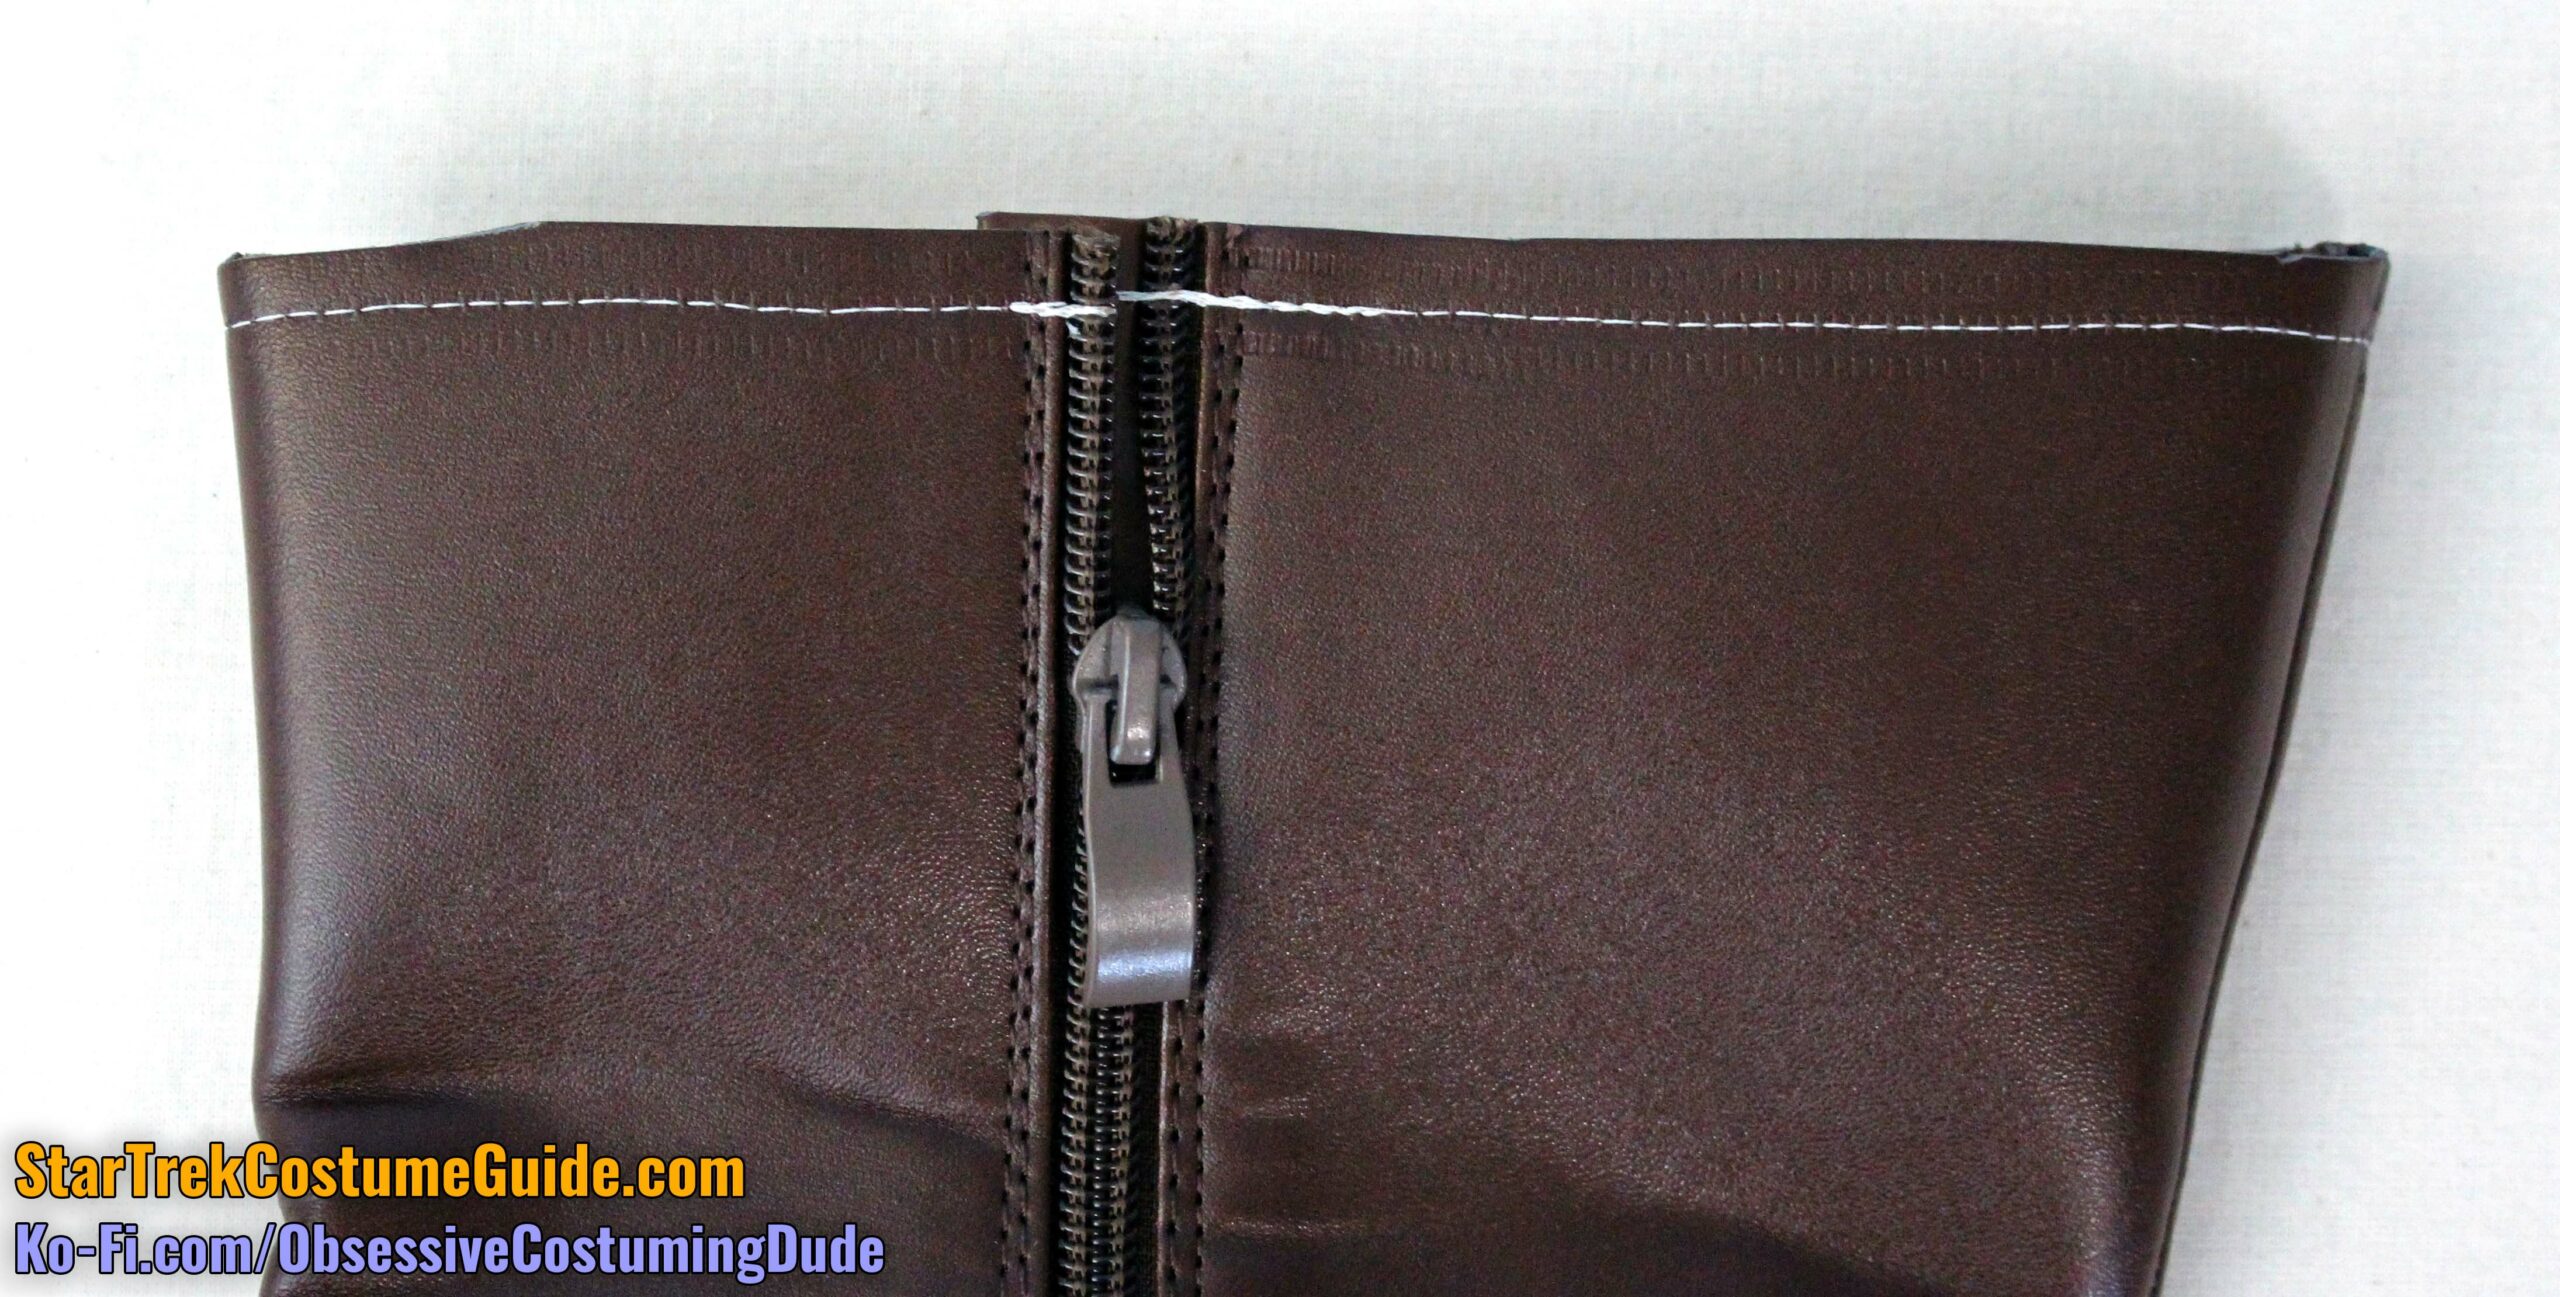
The top of the zipper also needs to be closed again so the zipper pull won’t come right off when zipped.
So, stitch around the top of your boot ¼’ or so from the upper edge with white/off-white thread.
I’m not ashamed to say that I took some shortcuts with the remainder of the boot detailing, or recommend that unless you have experience and means making footwear, you do the same.
(Okay, I’m mildly ashamed, but the recommendation stands.)
If you’re ambitious, skilled, and not too burned out by now, you can cover the entire surface of your boots with fabric like the originals were …
Should you share my inclination, mask off the soles with some masking tape beforehand.
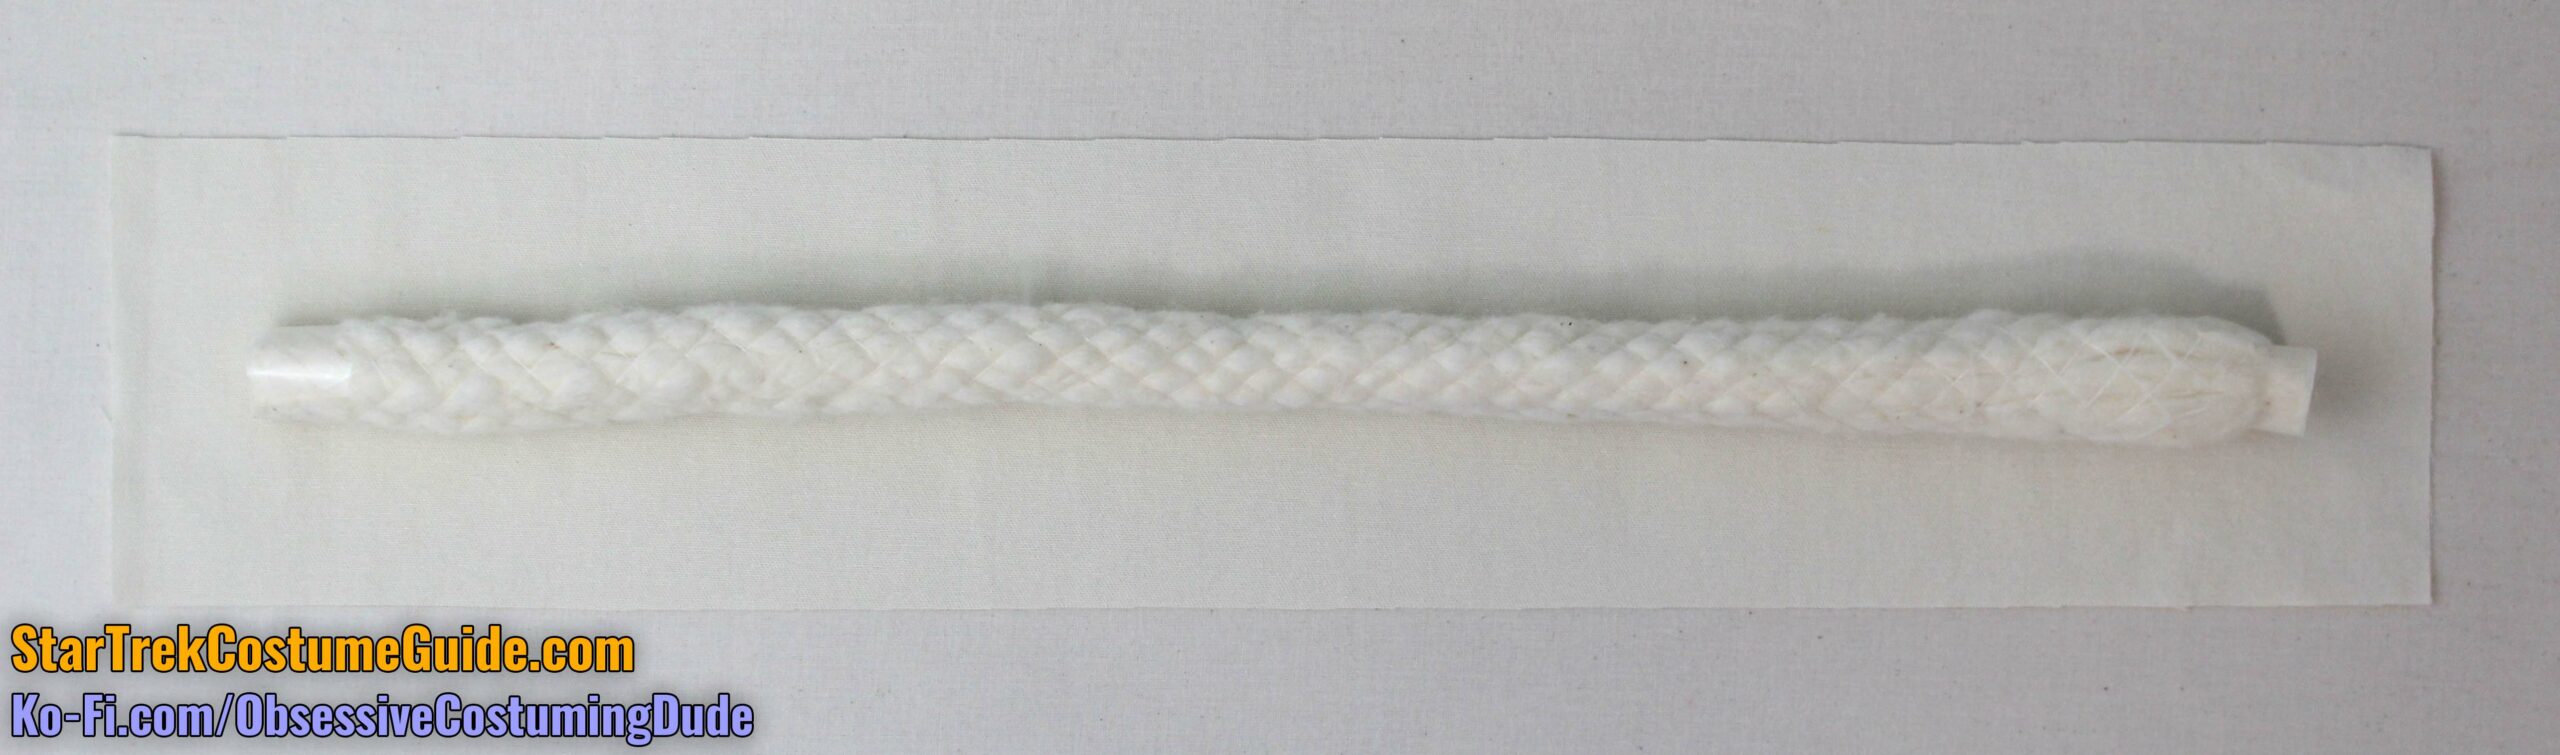
Cut a length of 1” upholstery cord sufficient to wrap all the way around the top of the boot, sans zipper.
There’s a pattern piece for the boot piping (piece V), but it’s just a 4 ½” wide strip of bias-cut jumpsuit fabric.
Trim the piping fabric so it only extends beyond the cord by about an inch on each end.
Wrap the fabric channel around the cord and pin the layers together.
Using your zipper/piping/edging foot, stitch the fabric layers together close to the edge of the cord.
(Surely you know the drill by now?!?)
Serge the edges of the piping lip together.
Turn the ends of the piping allowance under, angling them downward slightly to hide them, and machine stitch them into place outside the cord.
Hand-sew the upper edges of the allowance to the underside of the piping.
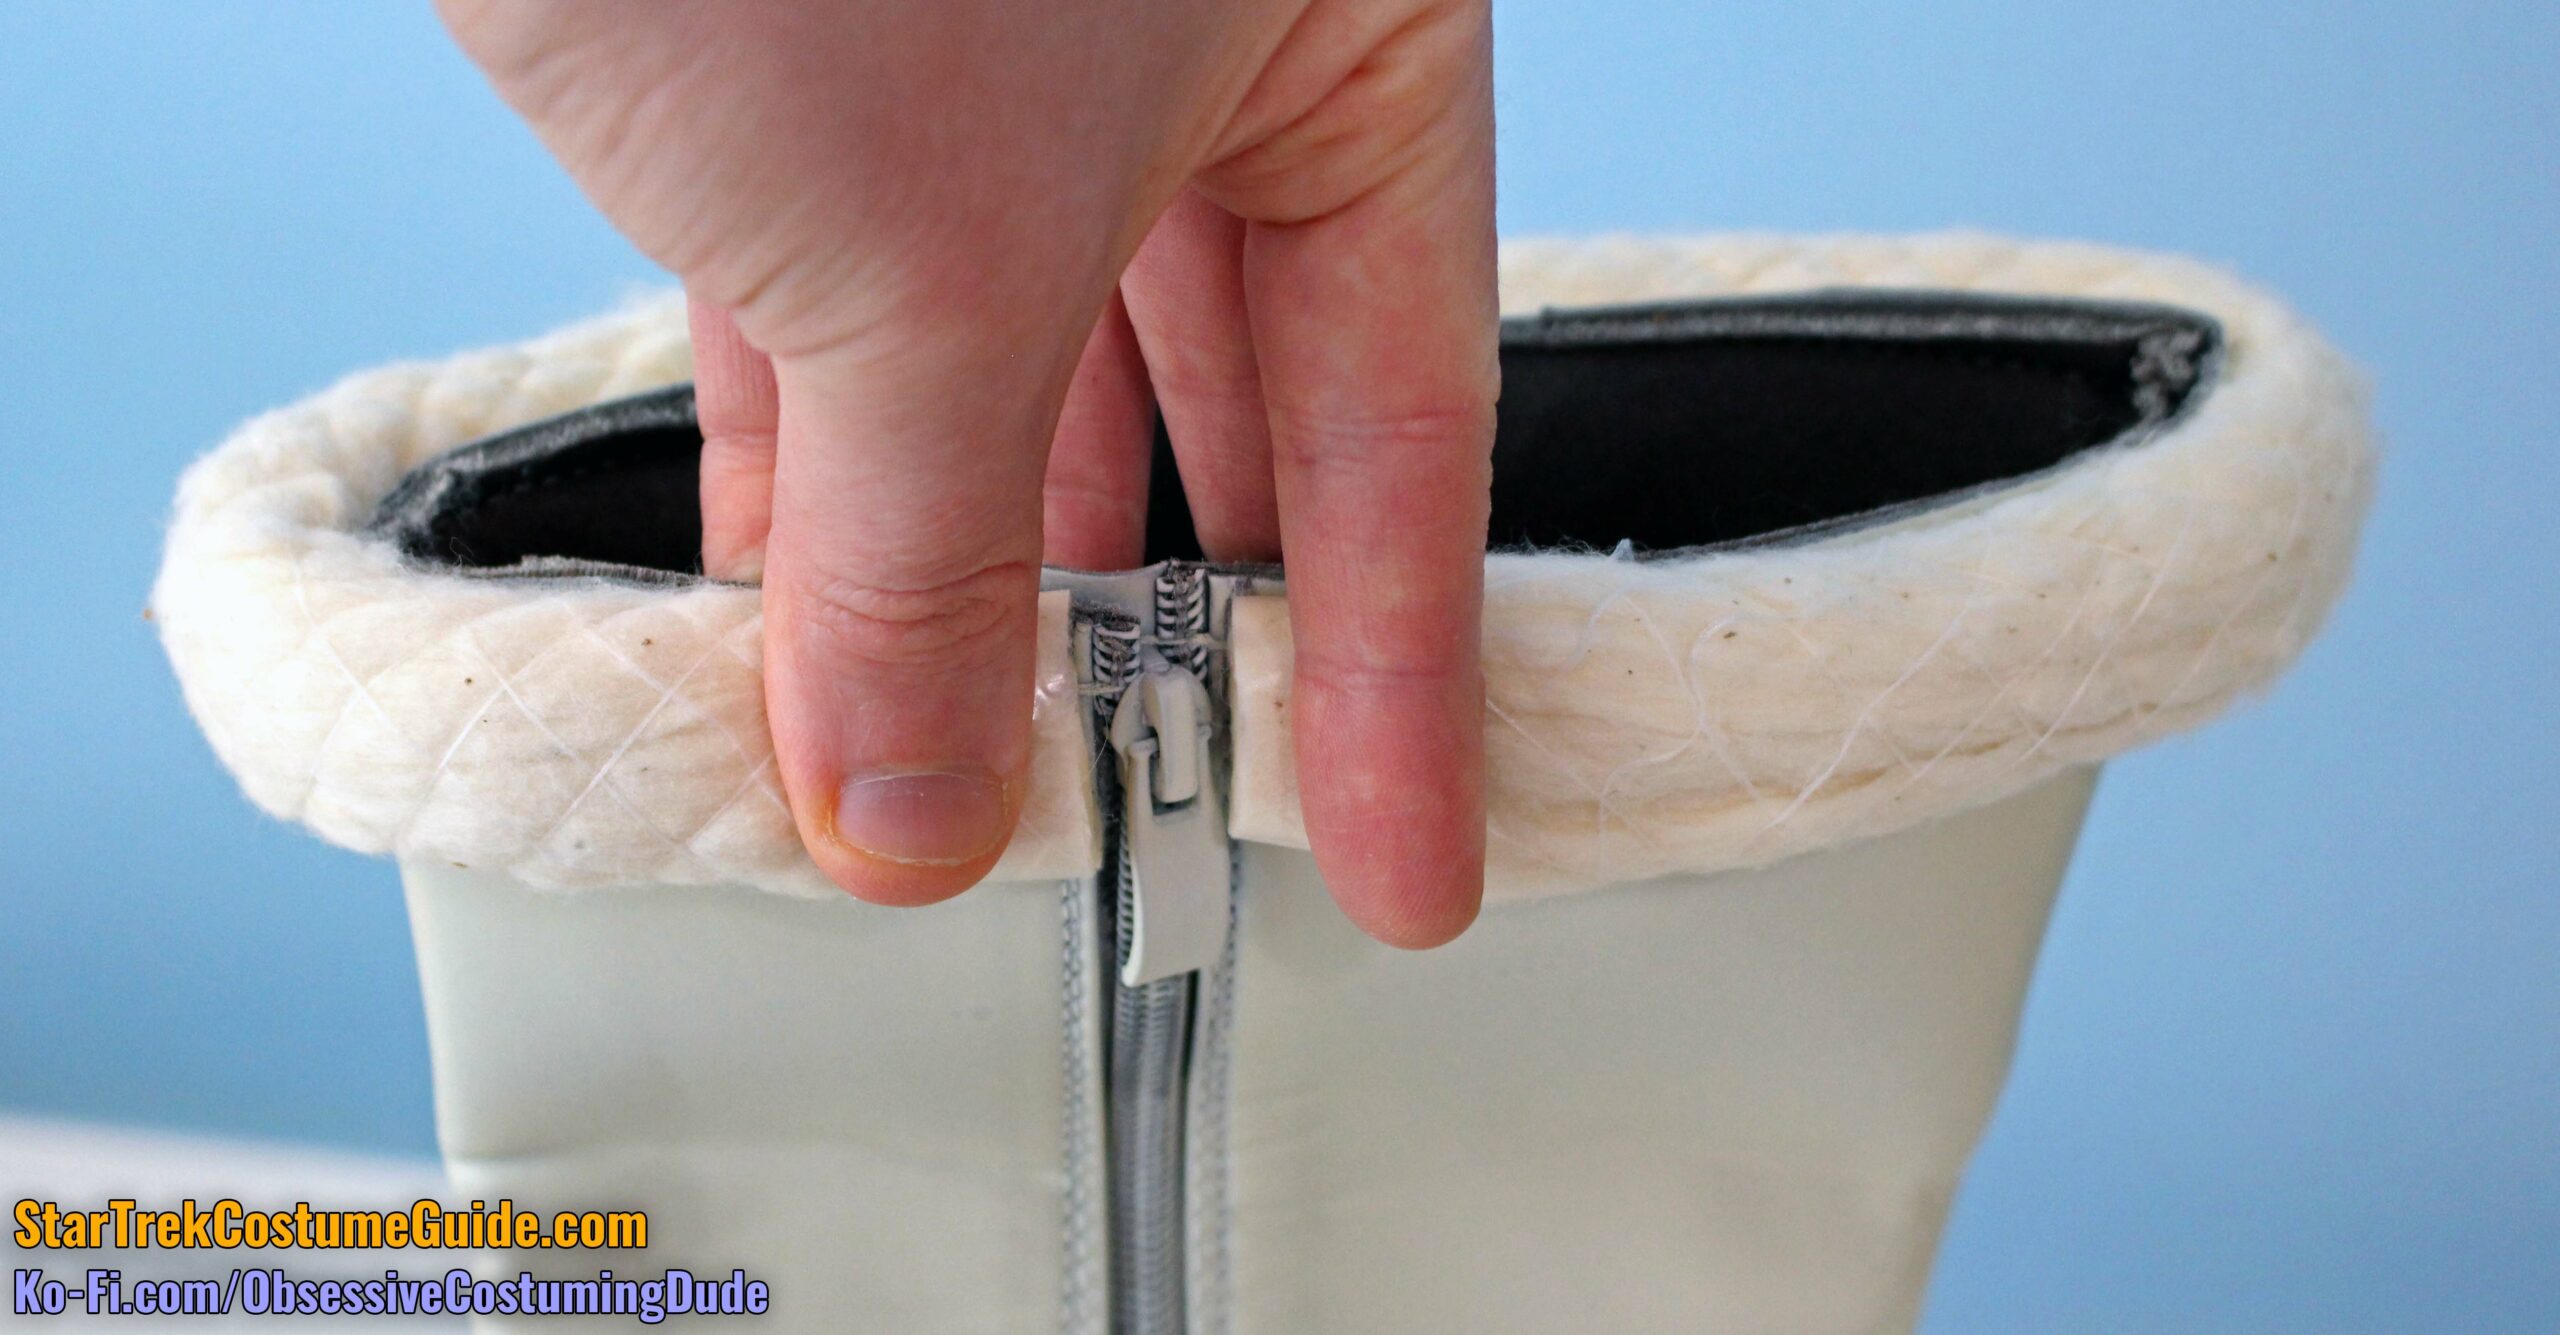
Place the piping along the upper edge of the boot with the lip on the inside of the boot and the ends flush with the zipper.
Sew the piping to the top of the boot close to the upper edge.
Since the piping is longer than the boot is while the top of the boot is flat, ease in the excess as best you can.
If you want to, you can hand-sew a small snap or hook-and-eye closure to the ends of the piping above the zipper.
Make another length of 1” piping the same way as the first, except stitch again ¼” away from the cord and trim the allowances close to the stitching.
Roll the allowance/lip under and tack it onto the piping fabric by hand.
Apply some E6000 glue to the boot directly underneath the first band of upholstery piping, and to the lower edge of the first band of piping, and attach this second length of piping to the boot so the two are flush.
I used a half-dozen or so clamps to hold the piping in place while the glue dried.
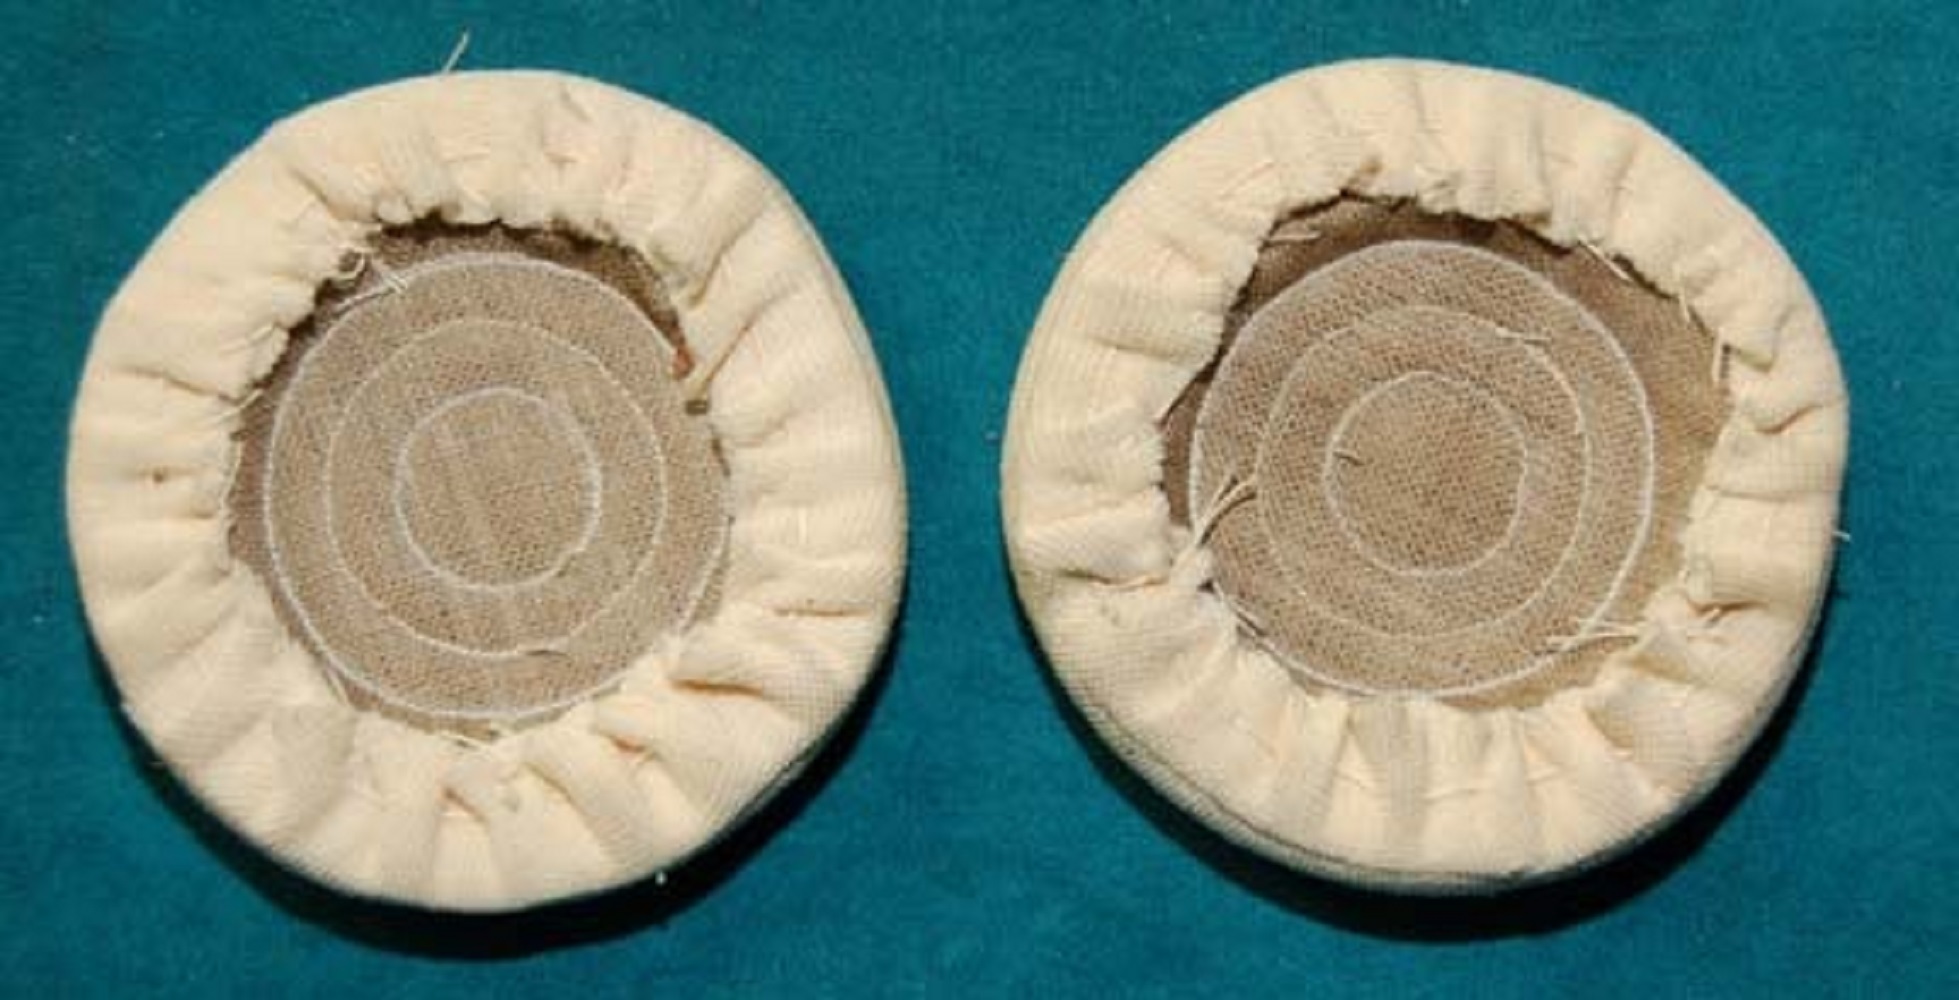
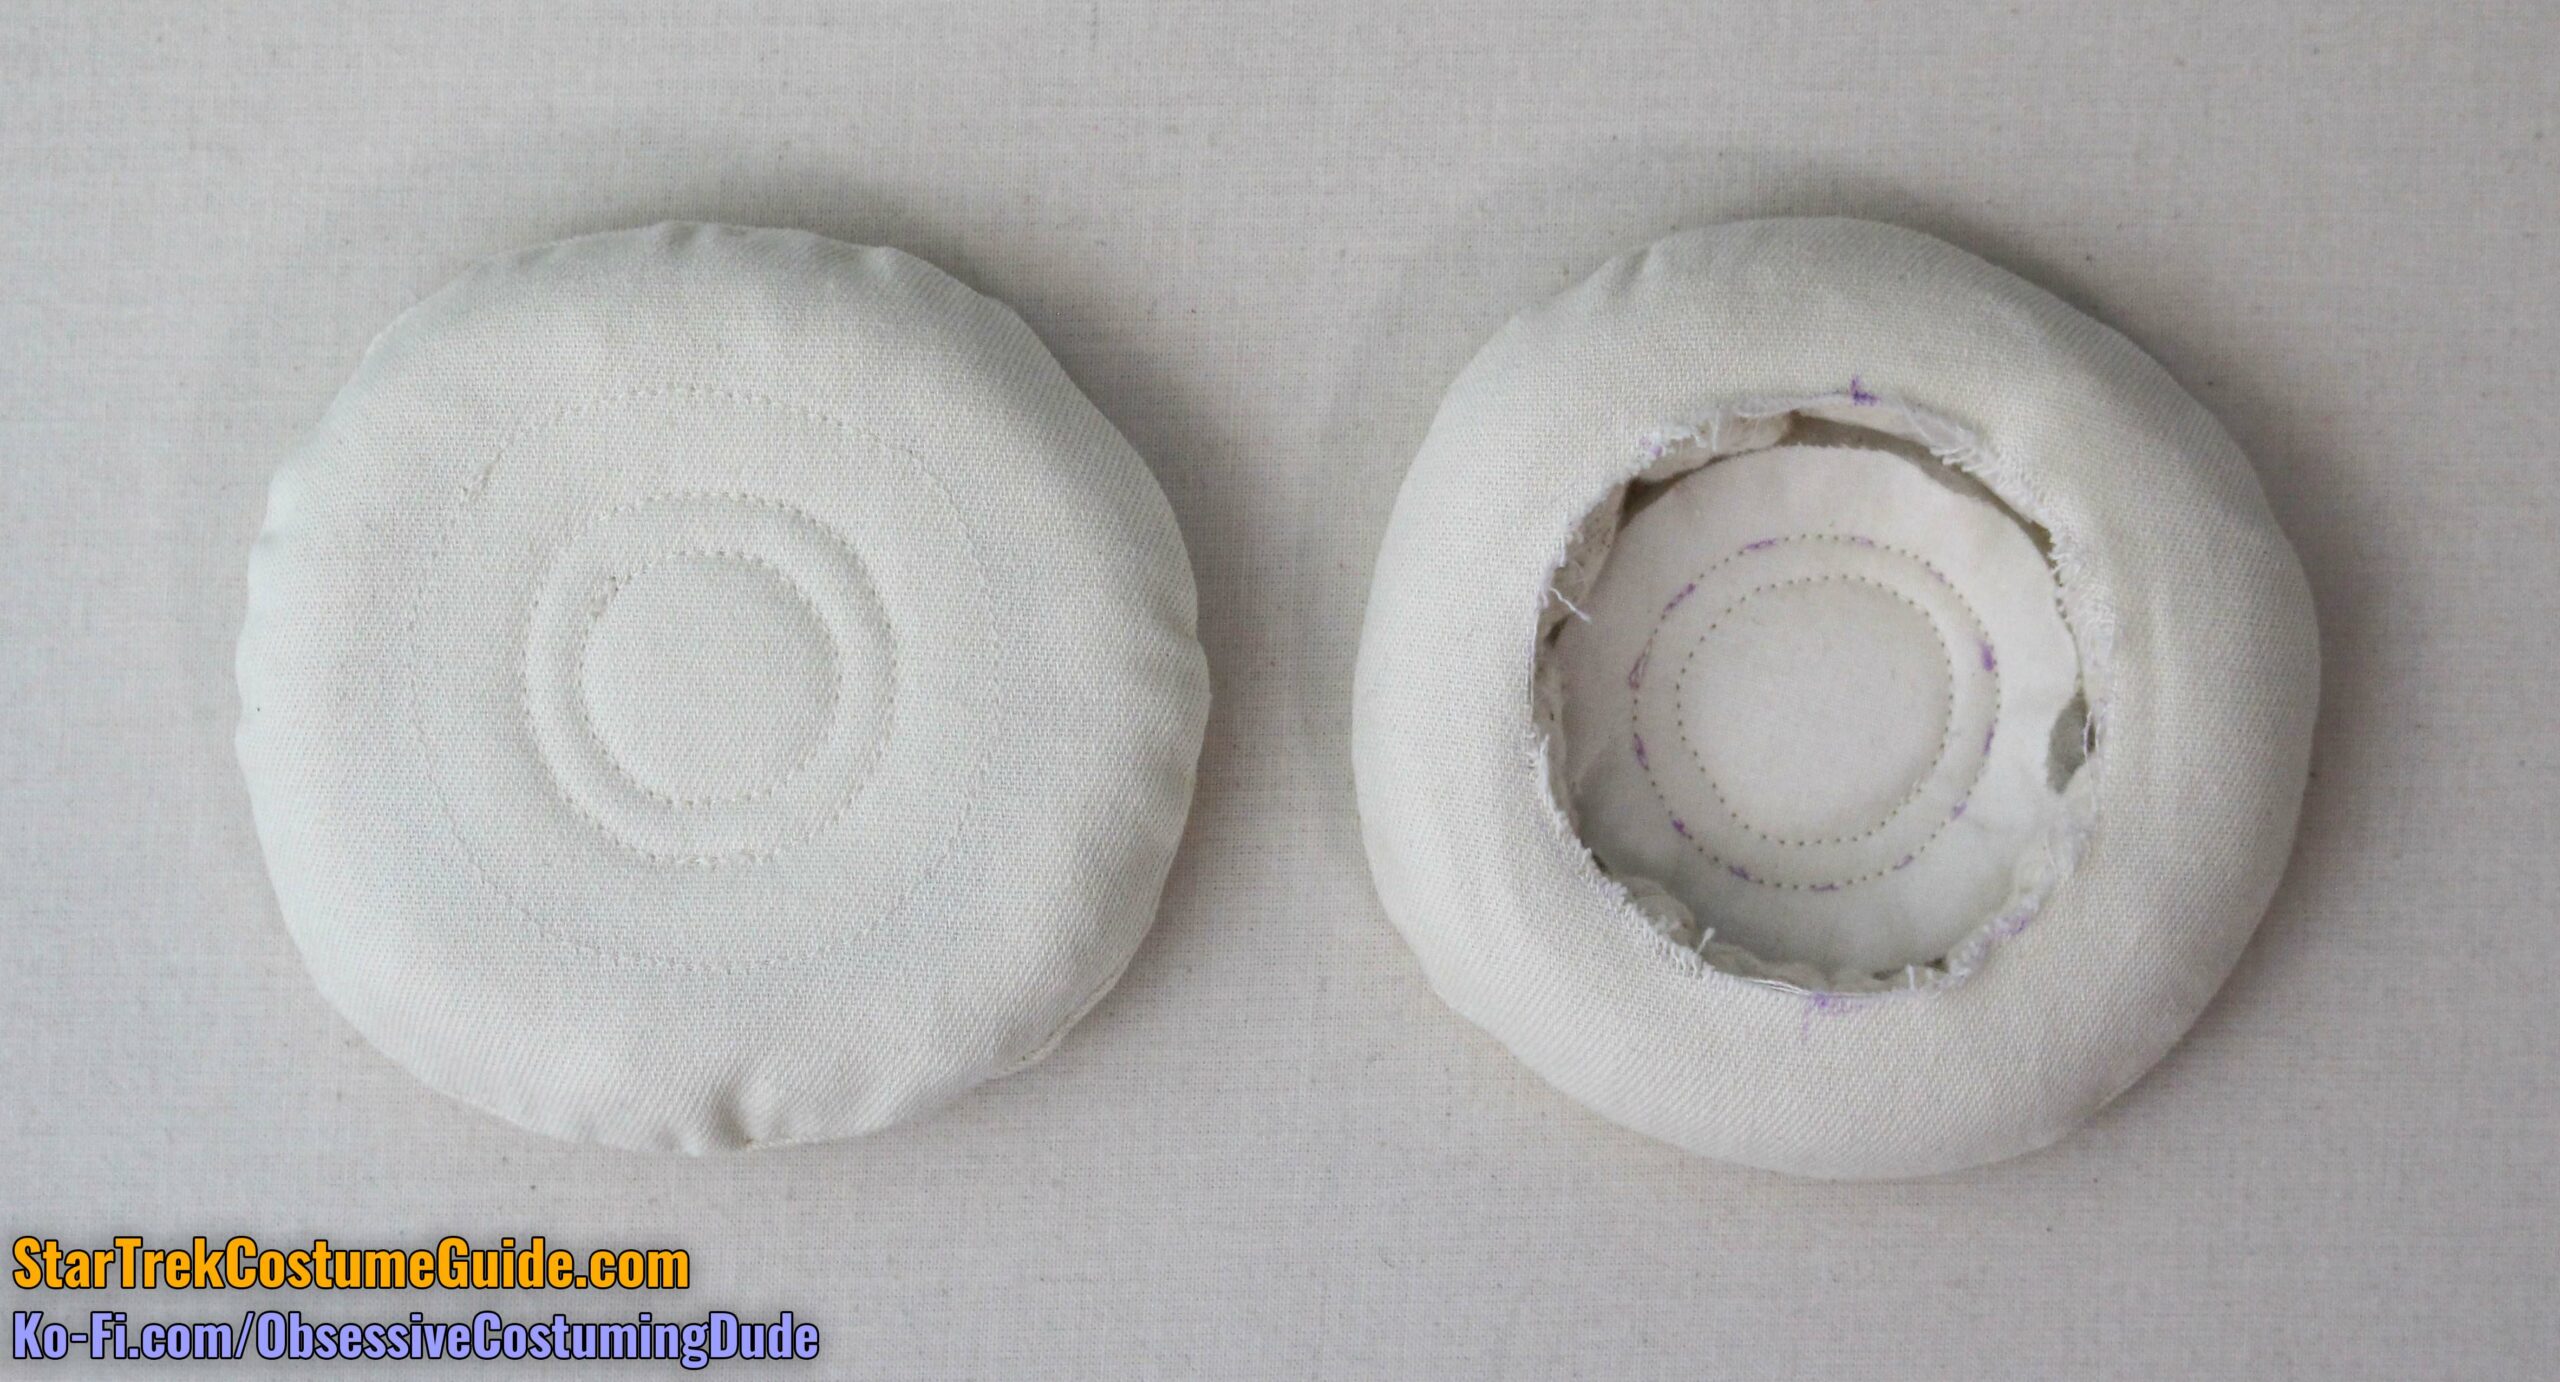
The circular accents on the sides of the boots appear to have been made by quilting the center with a French canvas backing, then wrapping the remainder of the fabric over ¾” cord and tacking it into place on the underside.
However, for the life of me I couldn’t seem to get the fabric to properly wrap around the upholstery cord without puckering, so I decided to make them a different way.
If you manage to make yours like the originals, then more power to you! 🙂
You could also use the matching knit fabric that you used of the chest circle(s) on the jumpsuit instead.
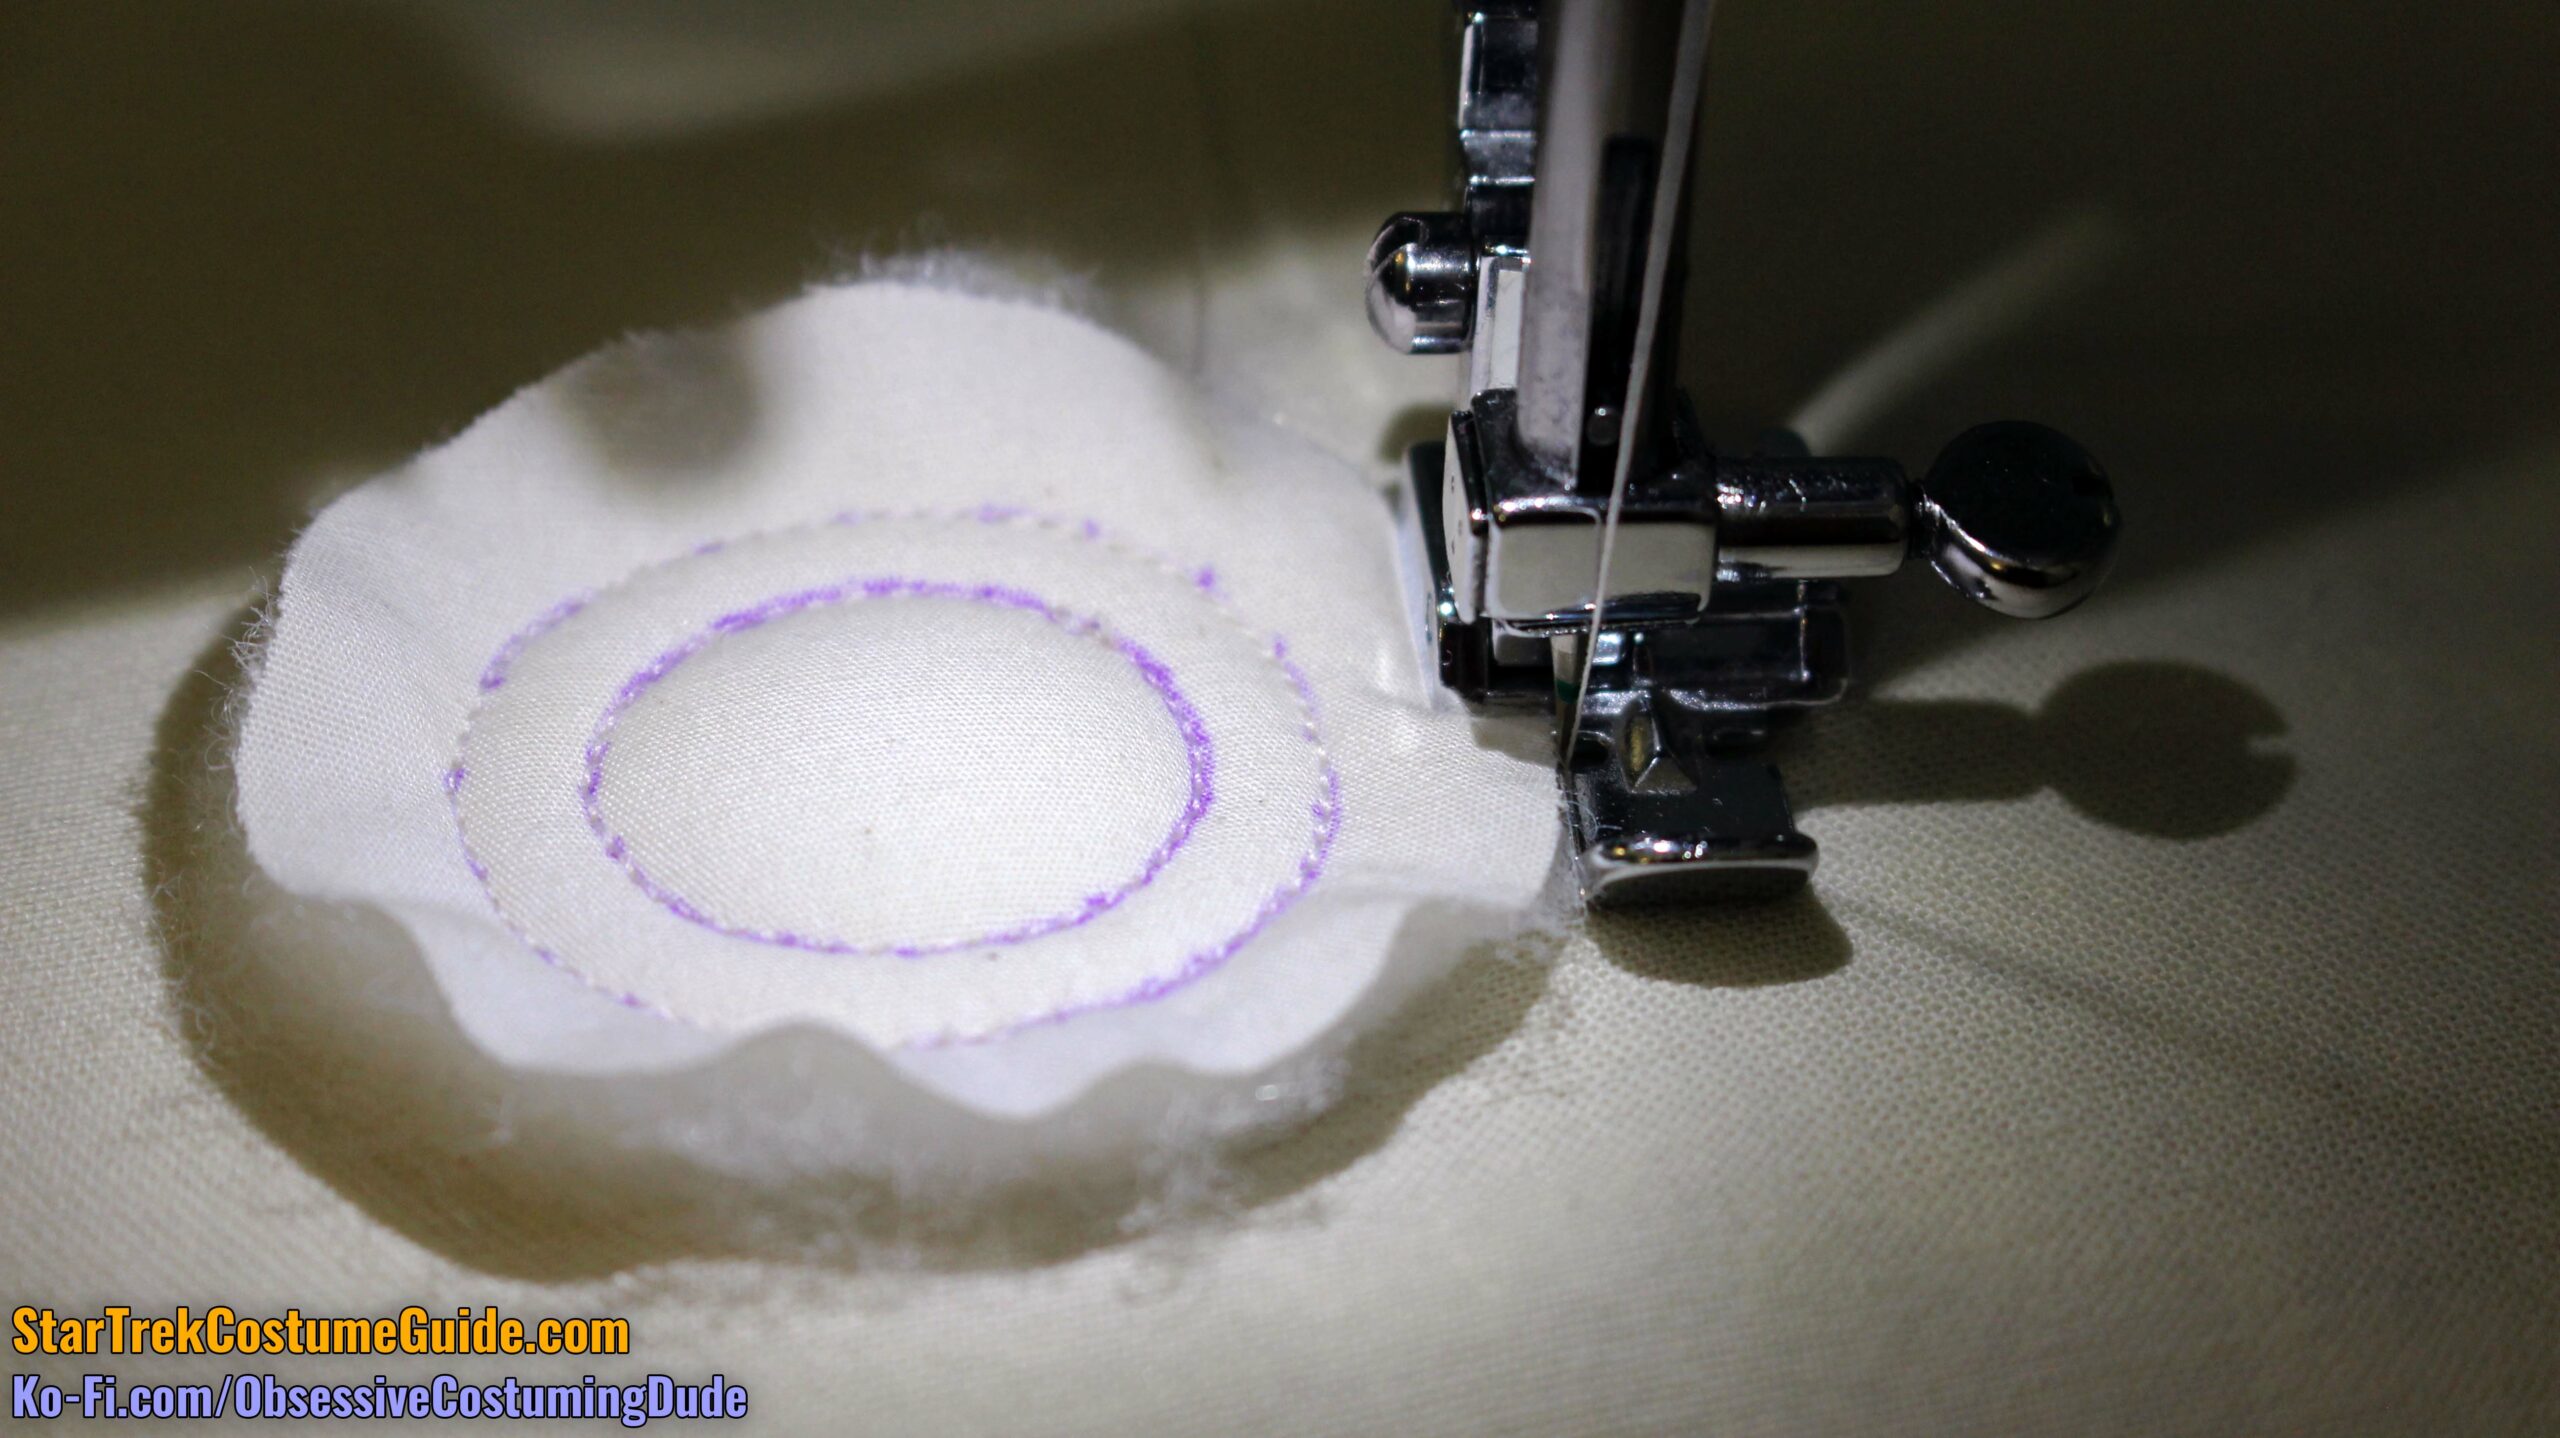
What I did was stitch the two quilted circles from the underside; the first is ⅜” from the edge of the batting/backing, and the second is ¼” inside that.
Then I simply topstitched around the batting/backing with a zipper/piping foot.
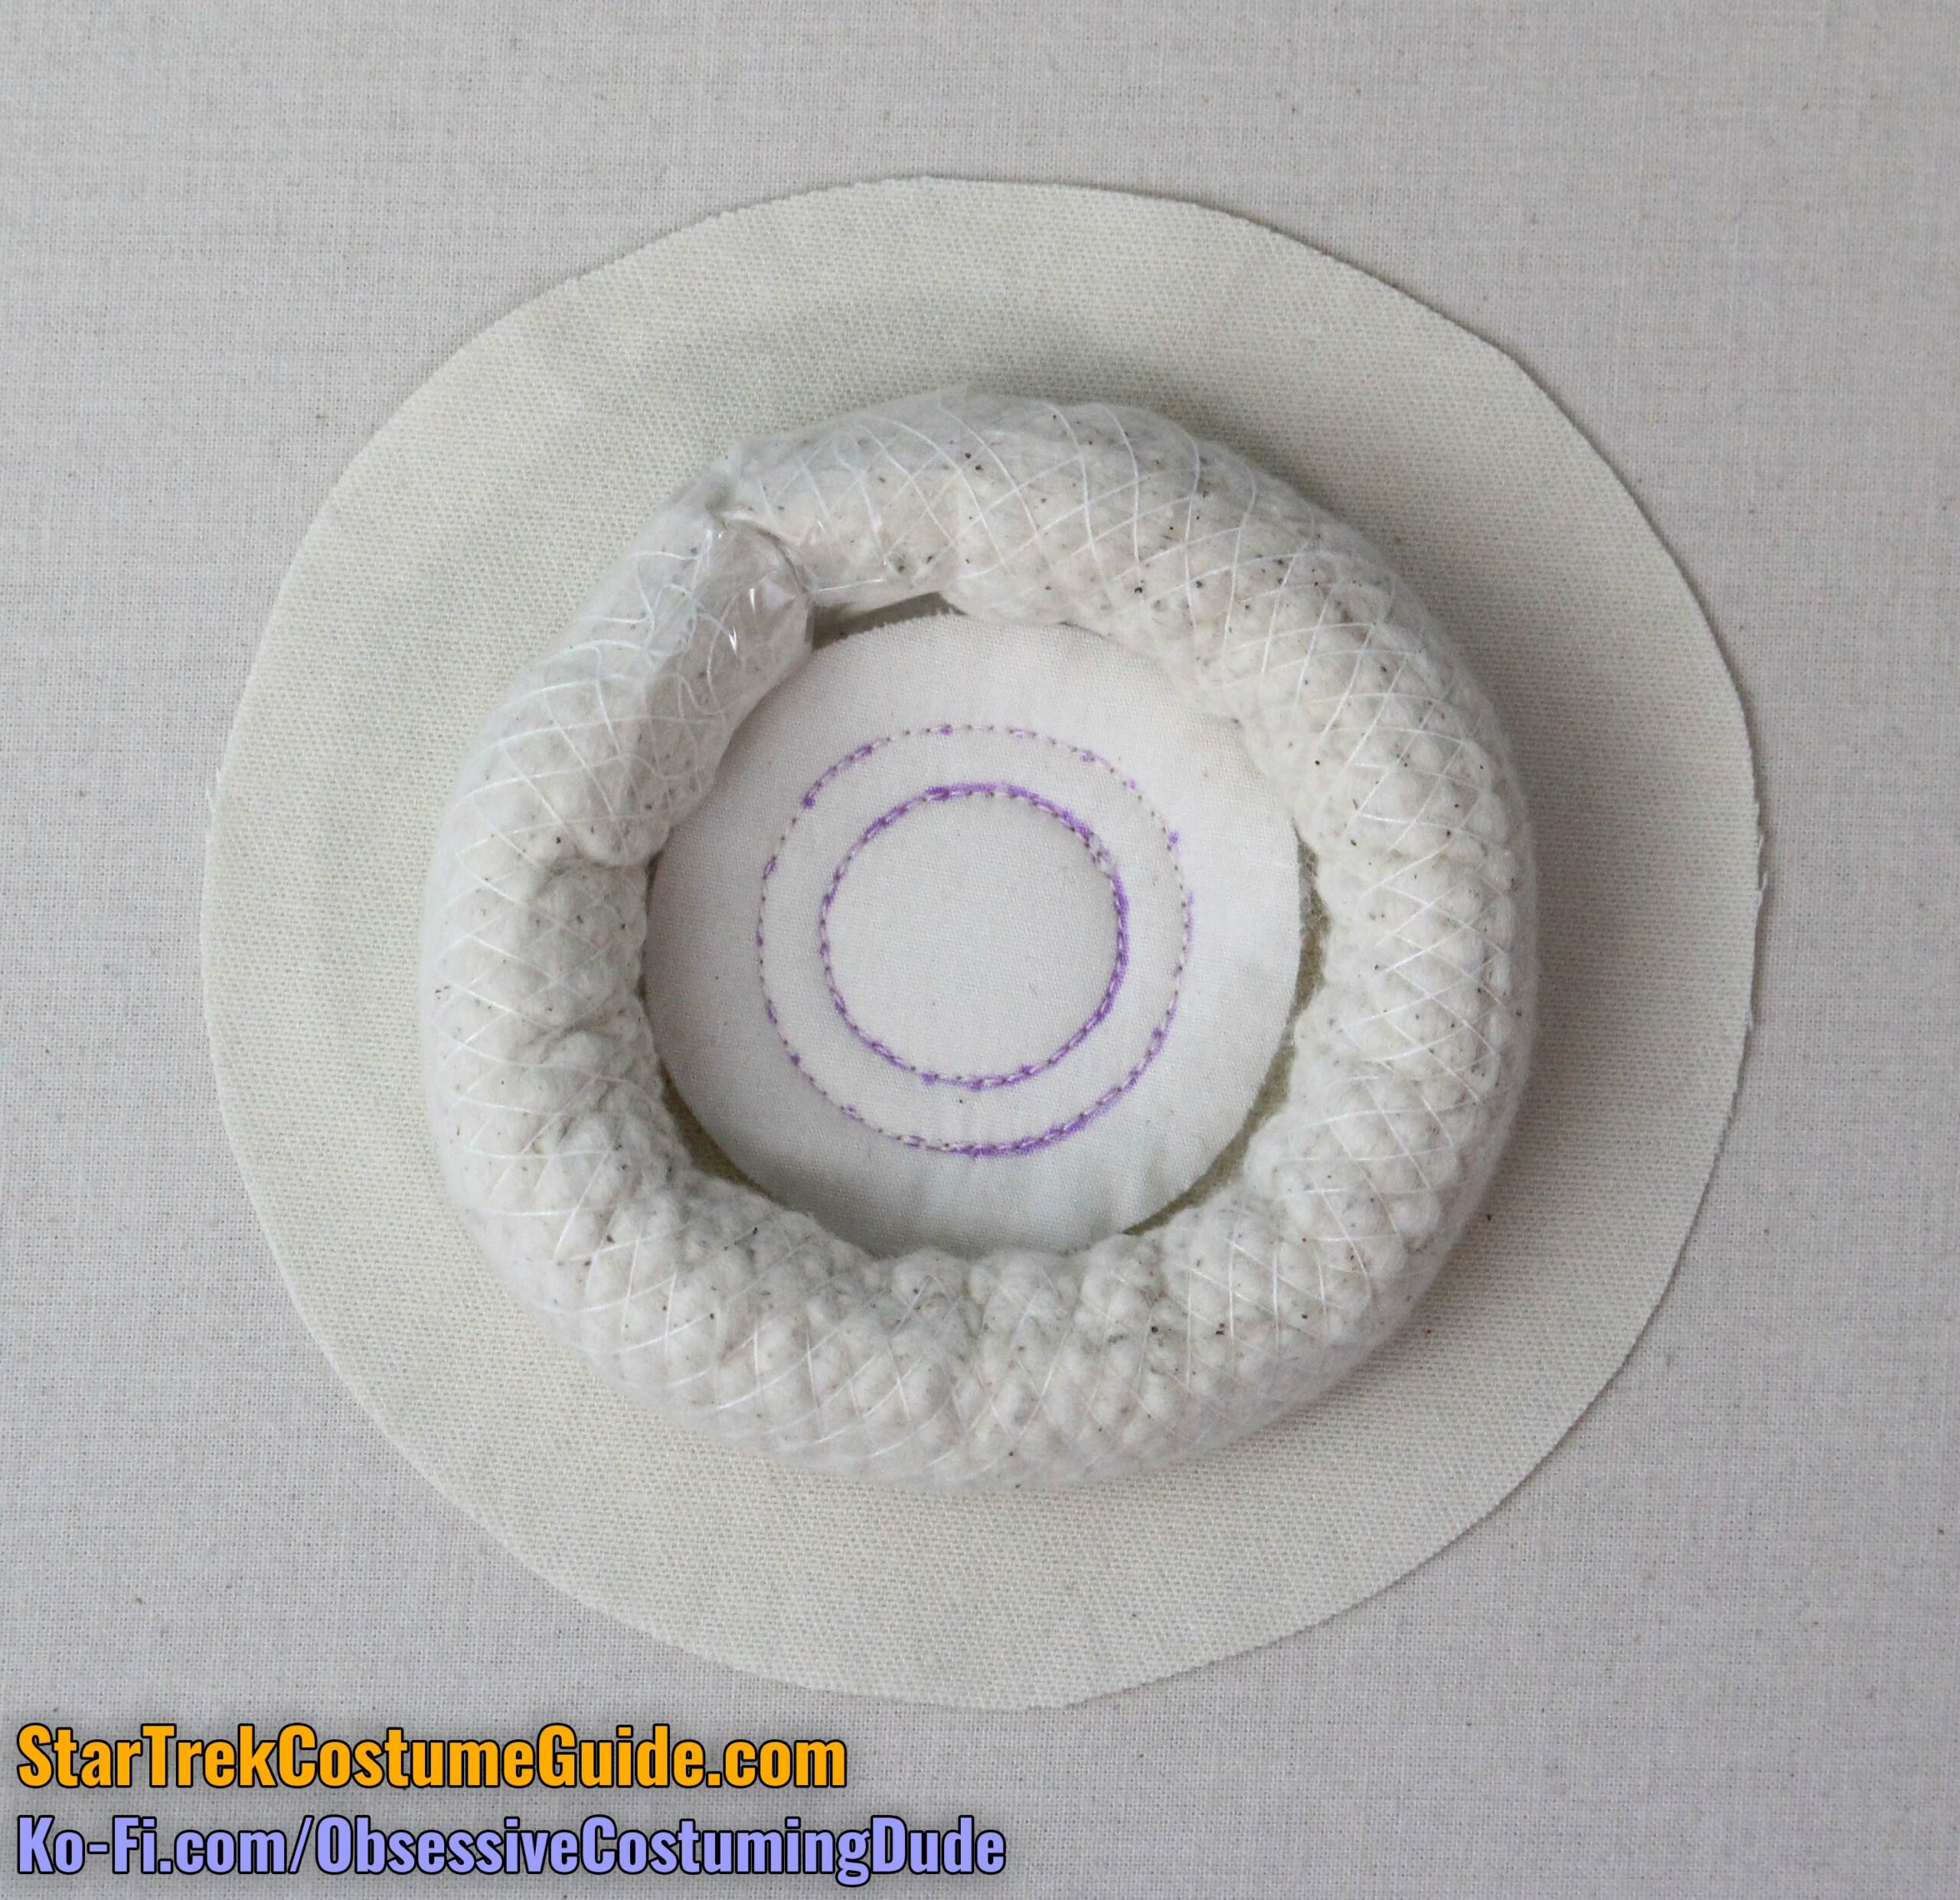
Cut a length of ¾” upholstery cord sufficient to wrap snugly around the batting/backing circle. (This length of cord should be about 10” long.)
Set the cord aside for the moment.
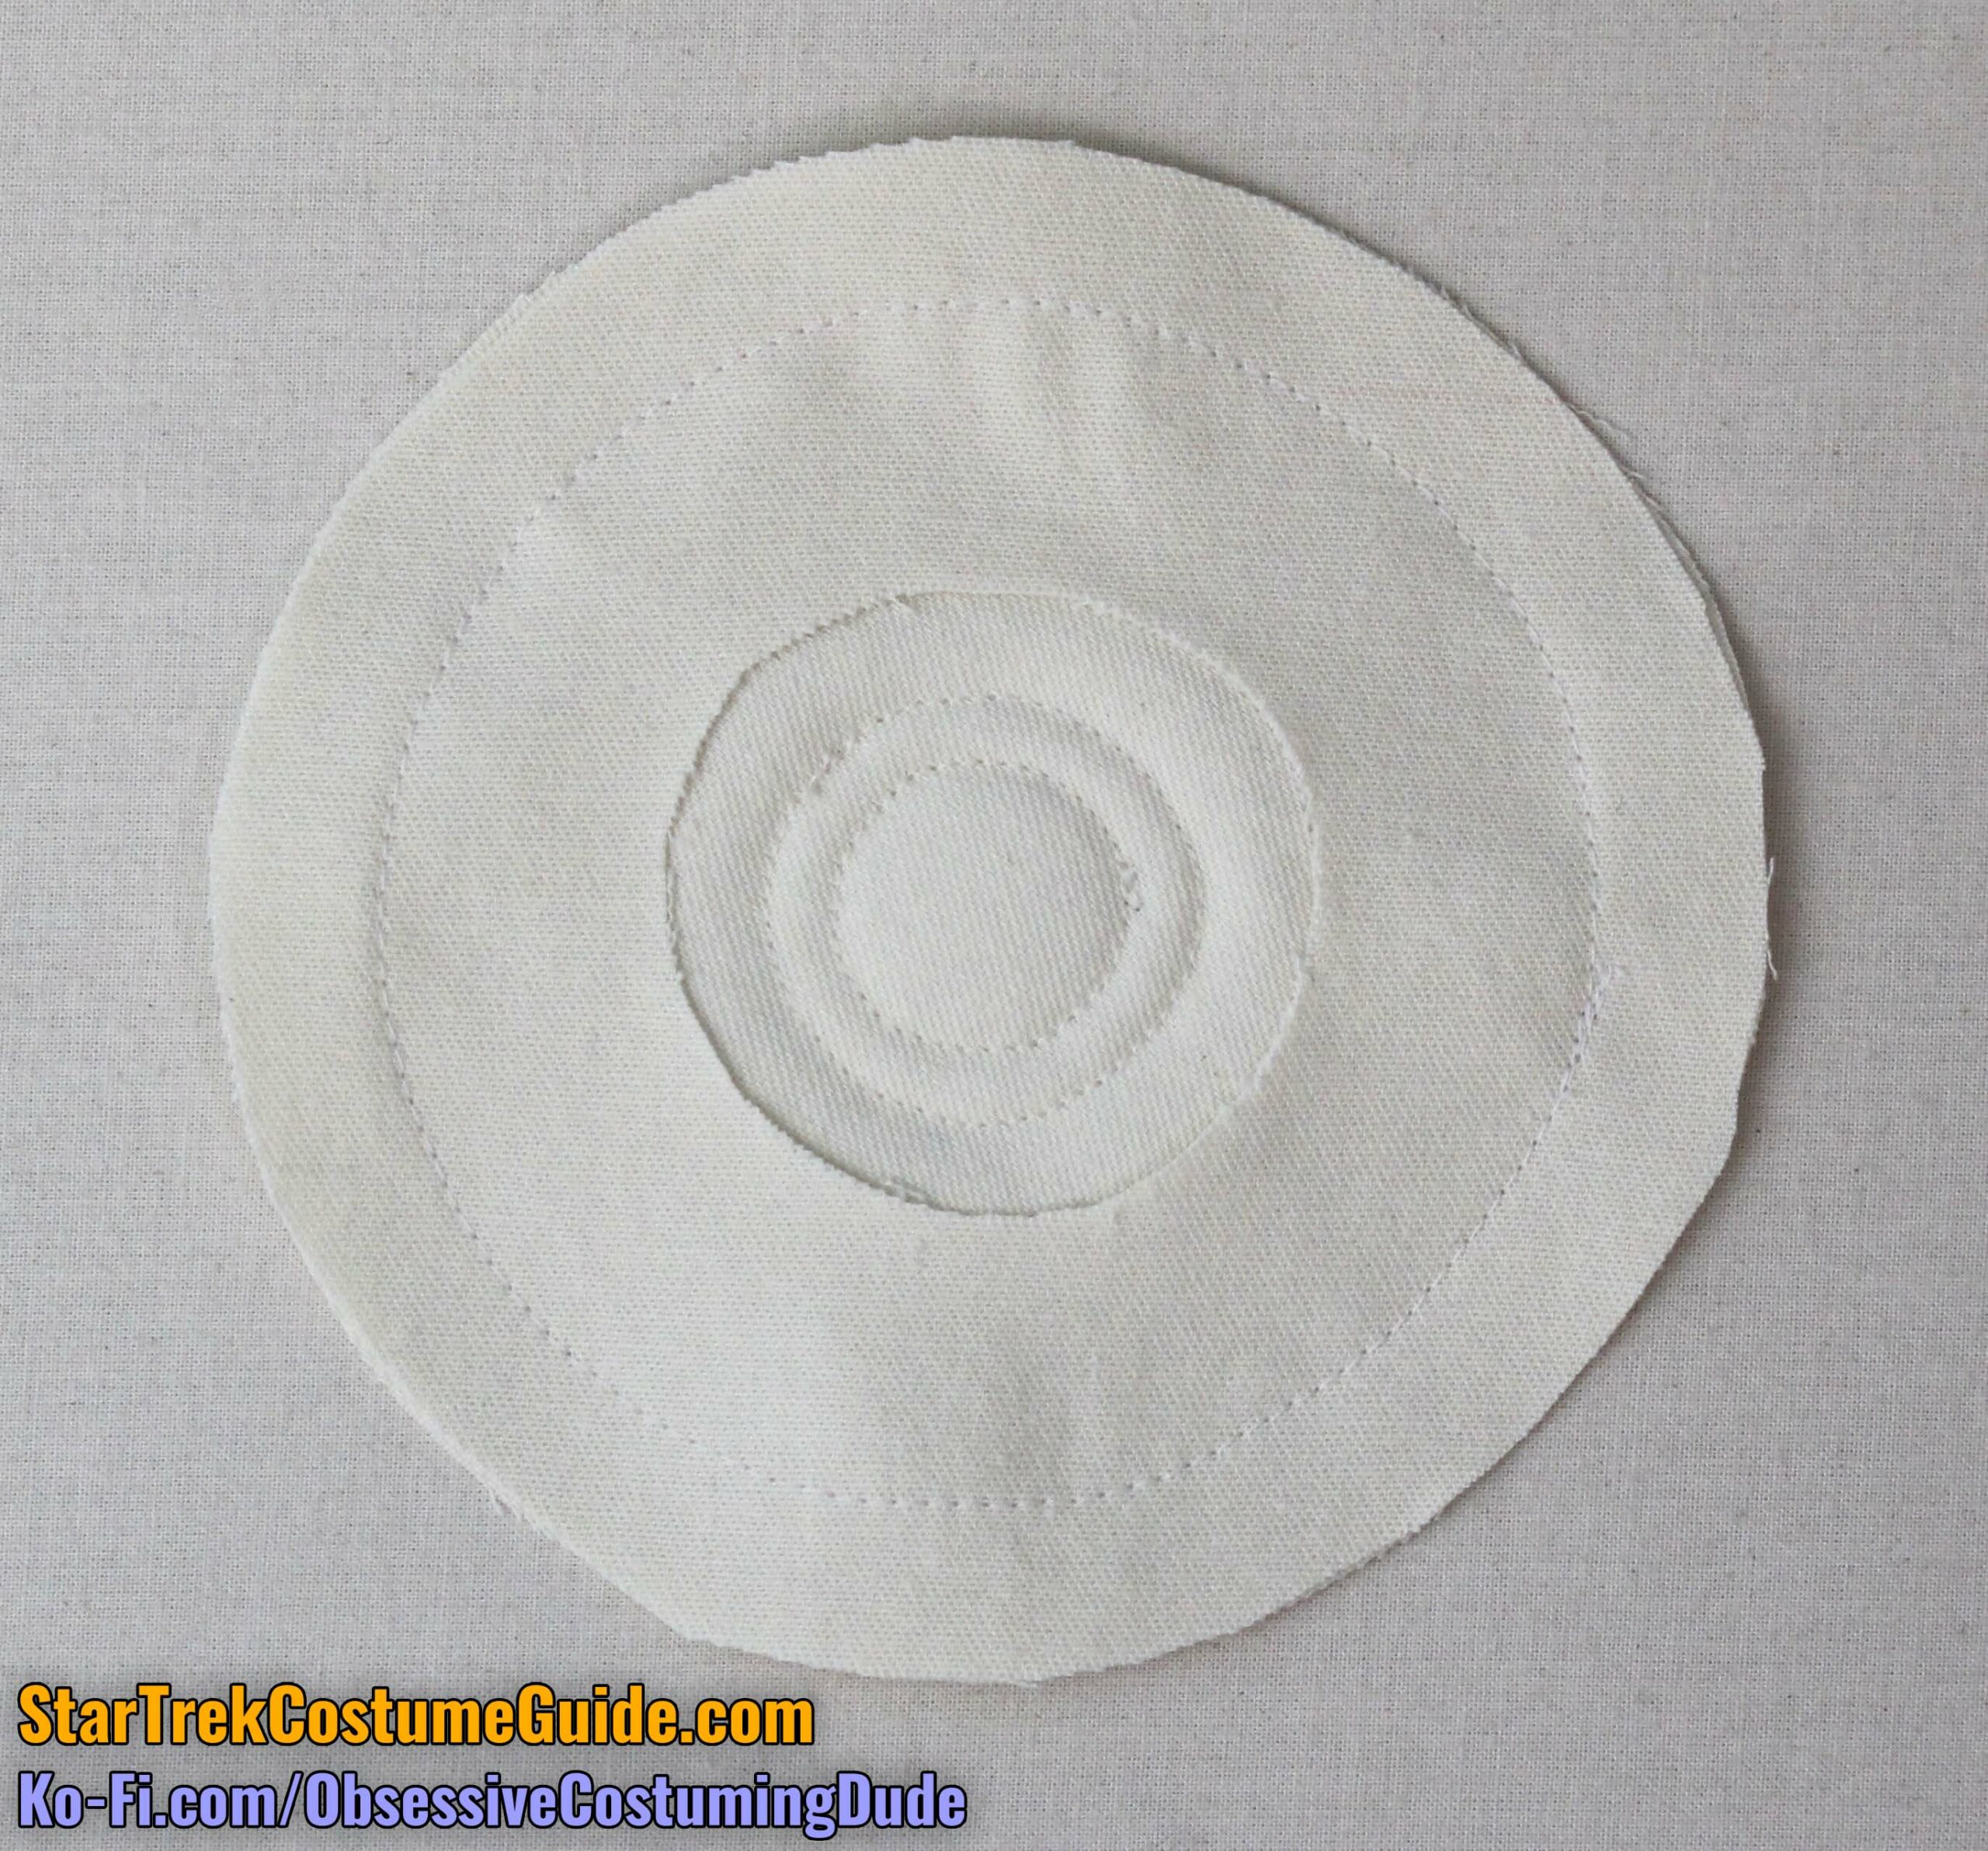
Sew the quilted shell to the facing along the outer edge with ⅝” seam allowance.
Trim the seam allowances down to ⅛”.
Turn the layers right-sides-out and press the seam flat around the circumference.
Tape the ends of the cord together so it forms a ring.
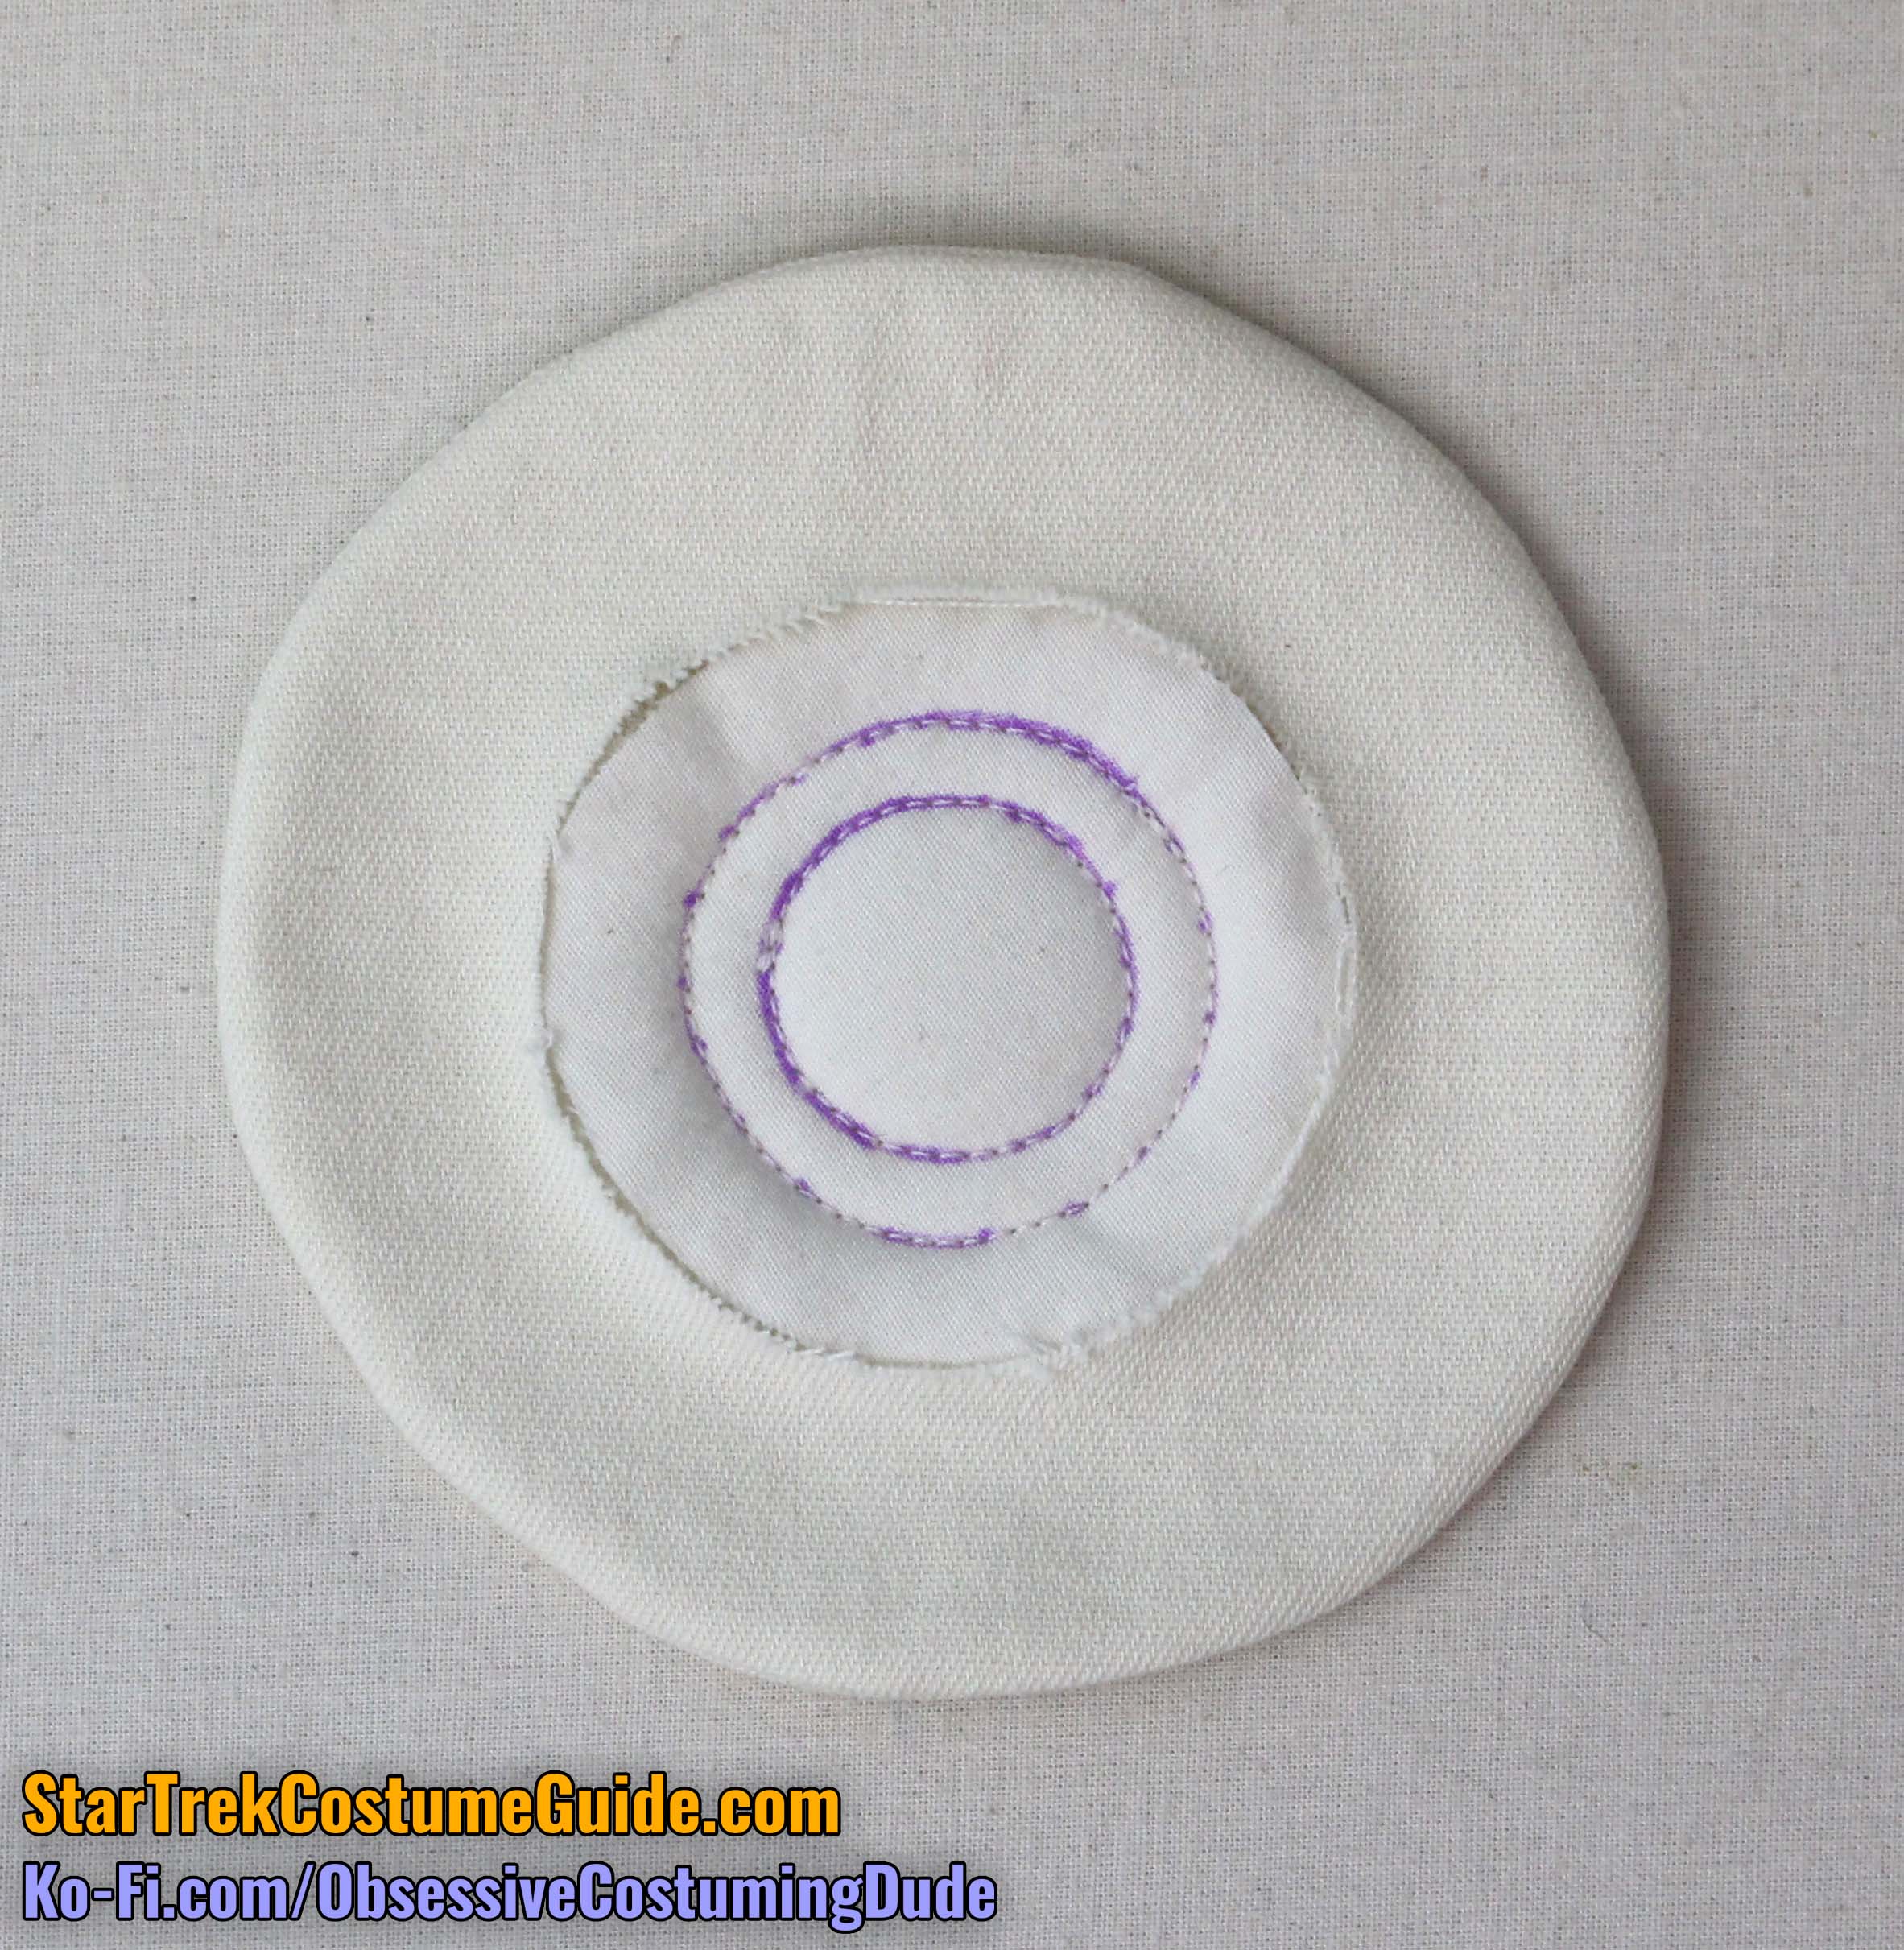
Insert the ring of cording into the assembly, between the shell and facing layers.
Apply some E6000 glue to the underside of the assembly and glue it to the outside of the boot.
Repeat for the other boot.
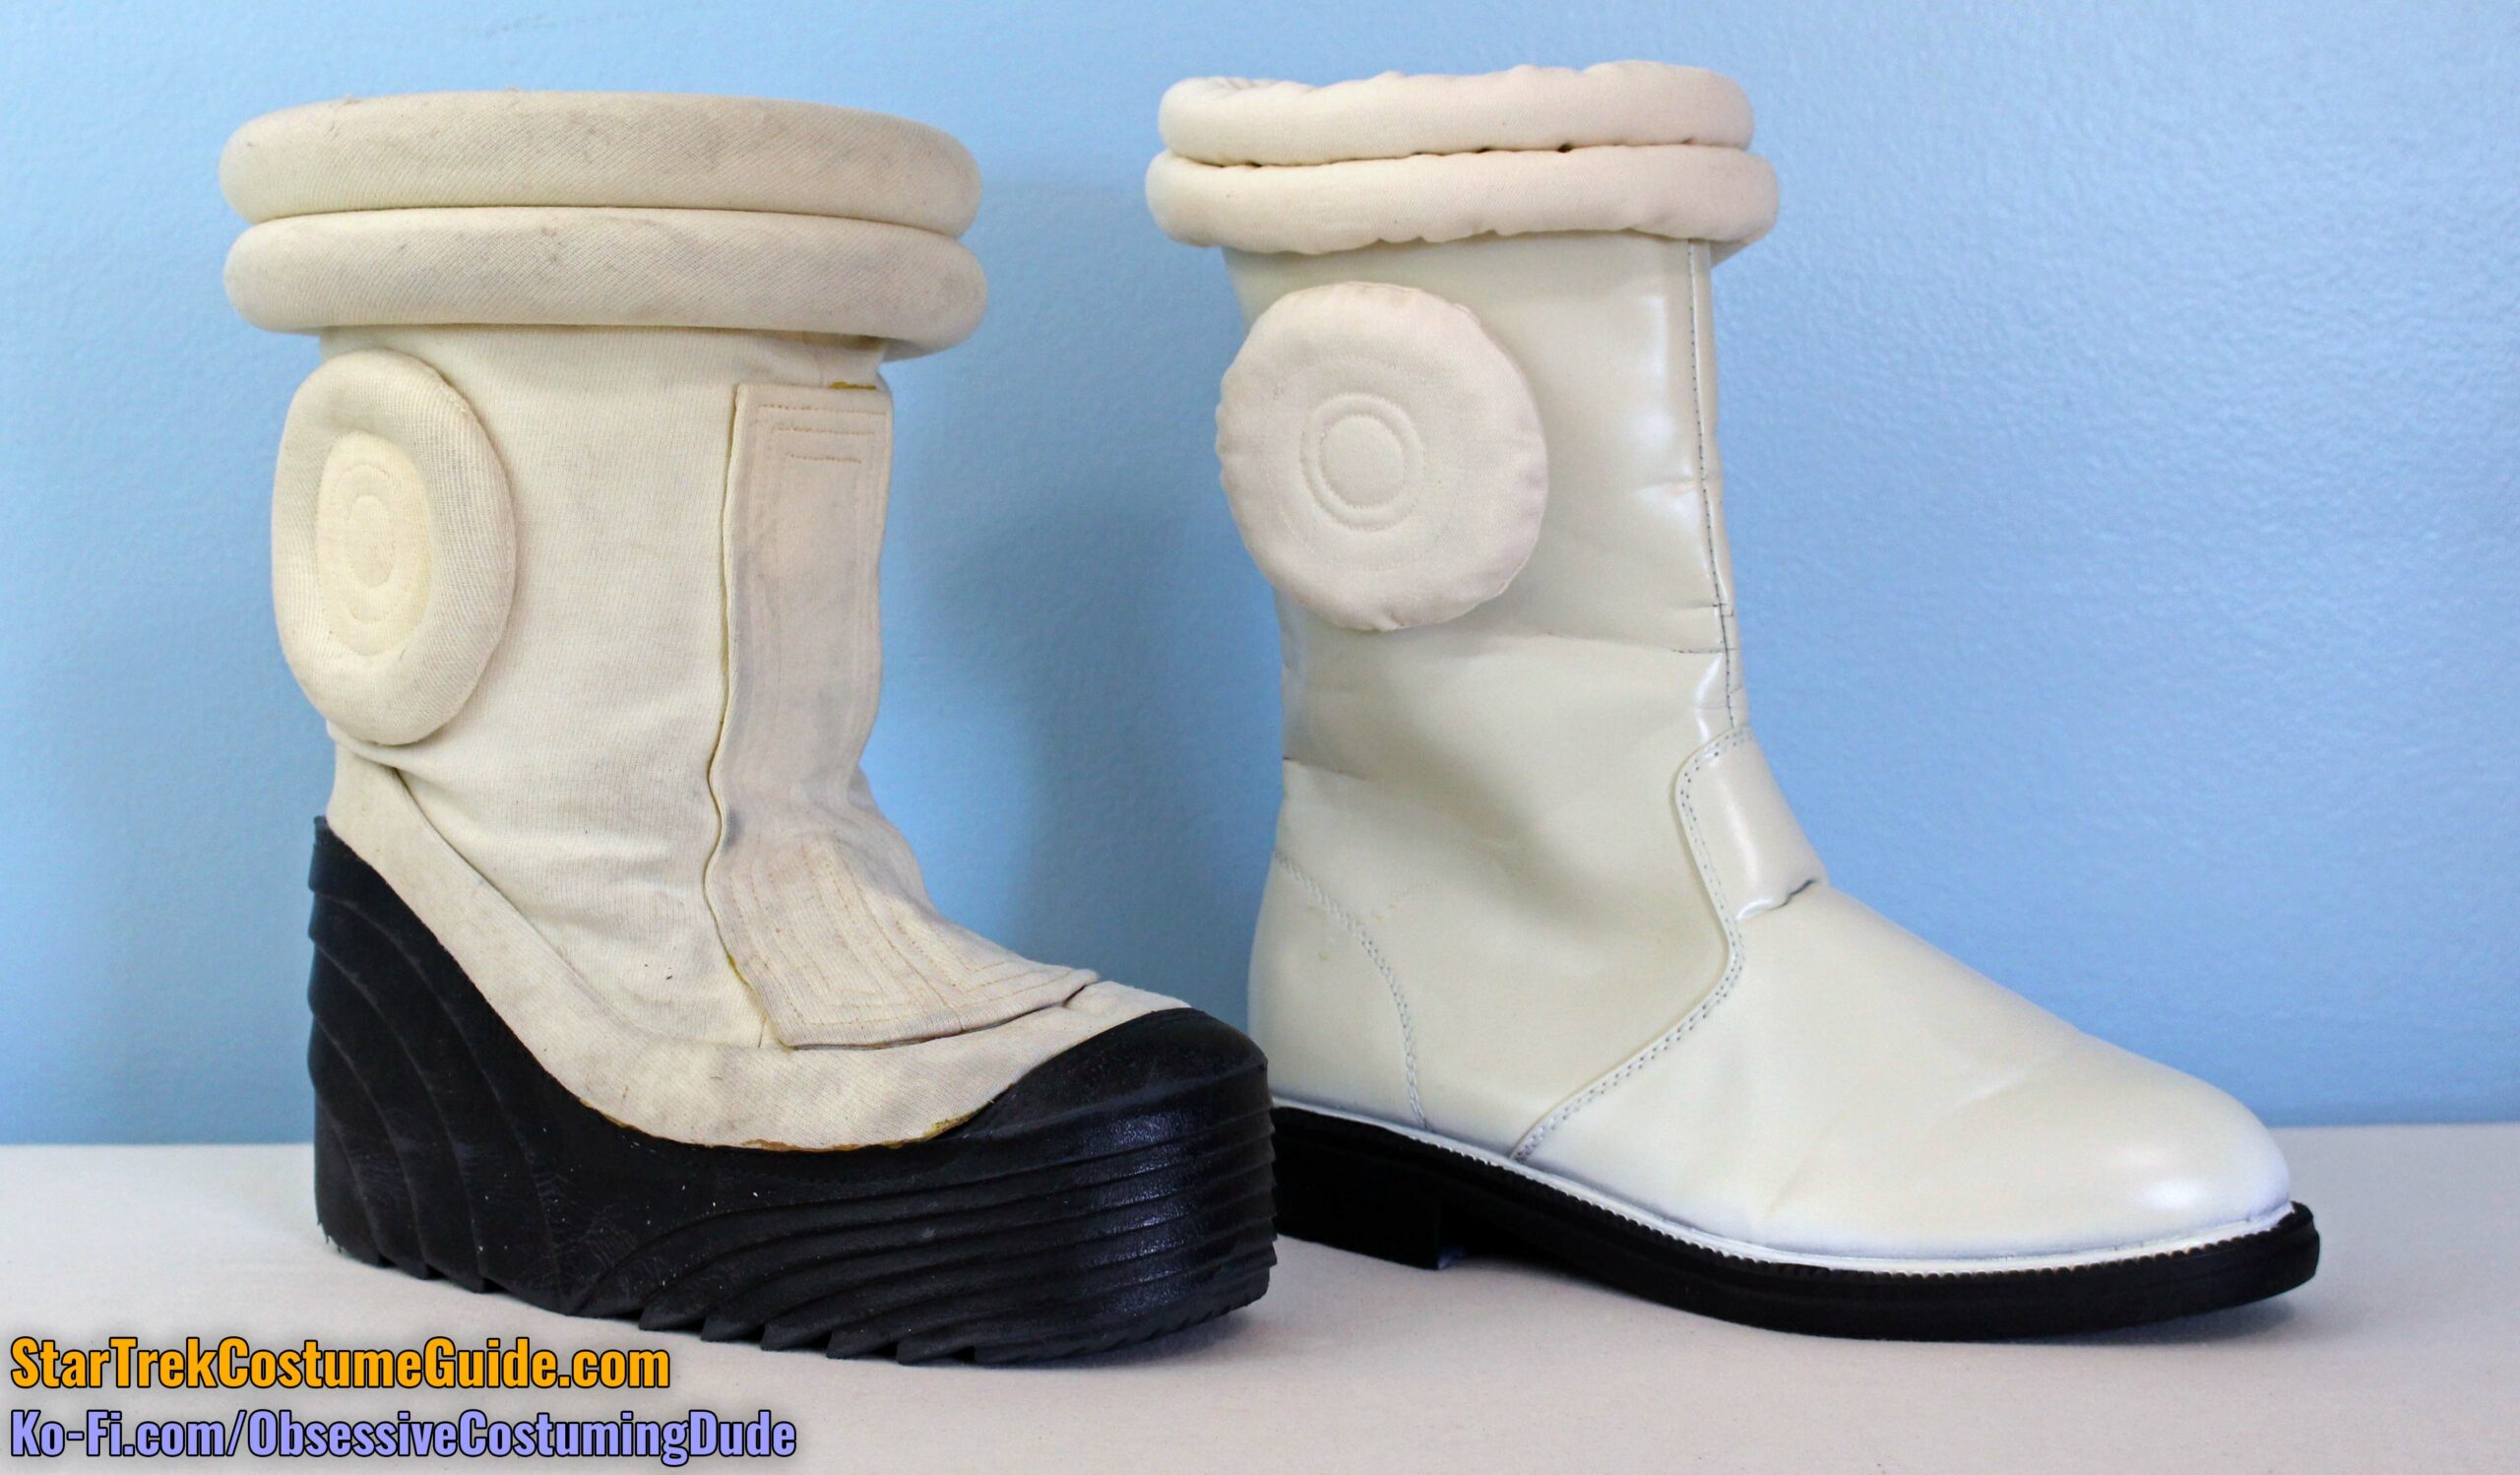
Here’s a comparison between the screen-used boot (left) and this replica (right):
I’ll be the first to admit that it’s far from perfect, but they do complete the costume ensemble and (in my opinion) look fine within that context.
After all, if people are staring at your feet while you’re wearing this entire, amazingly detailed costume, then there’s probably something else going on … 😉