“Accuracy” aside, wool is durable and resists wrinkling (which is probably why it was used for the original costumes), but it does tend to be on the upper range of fabric pricing.
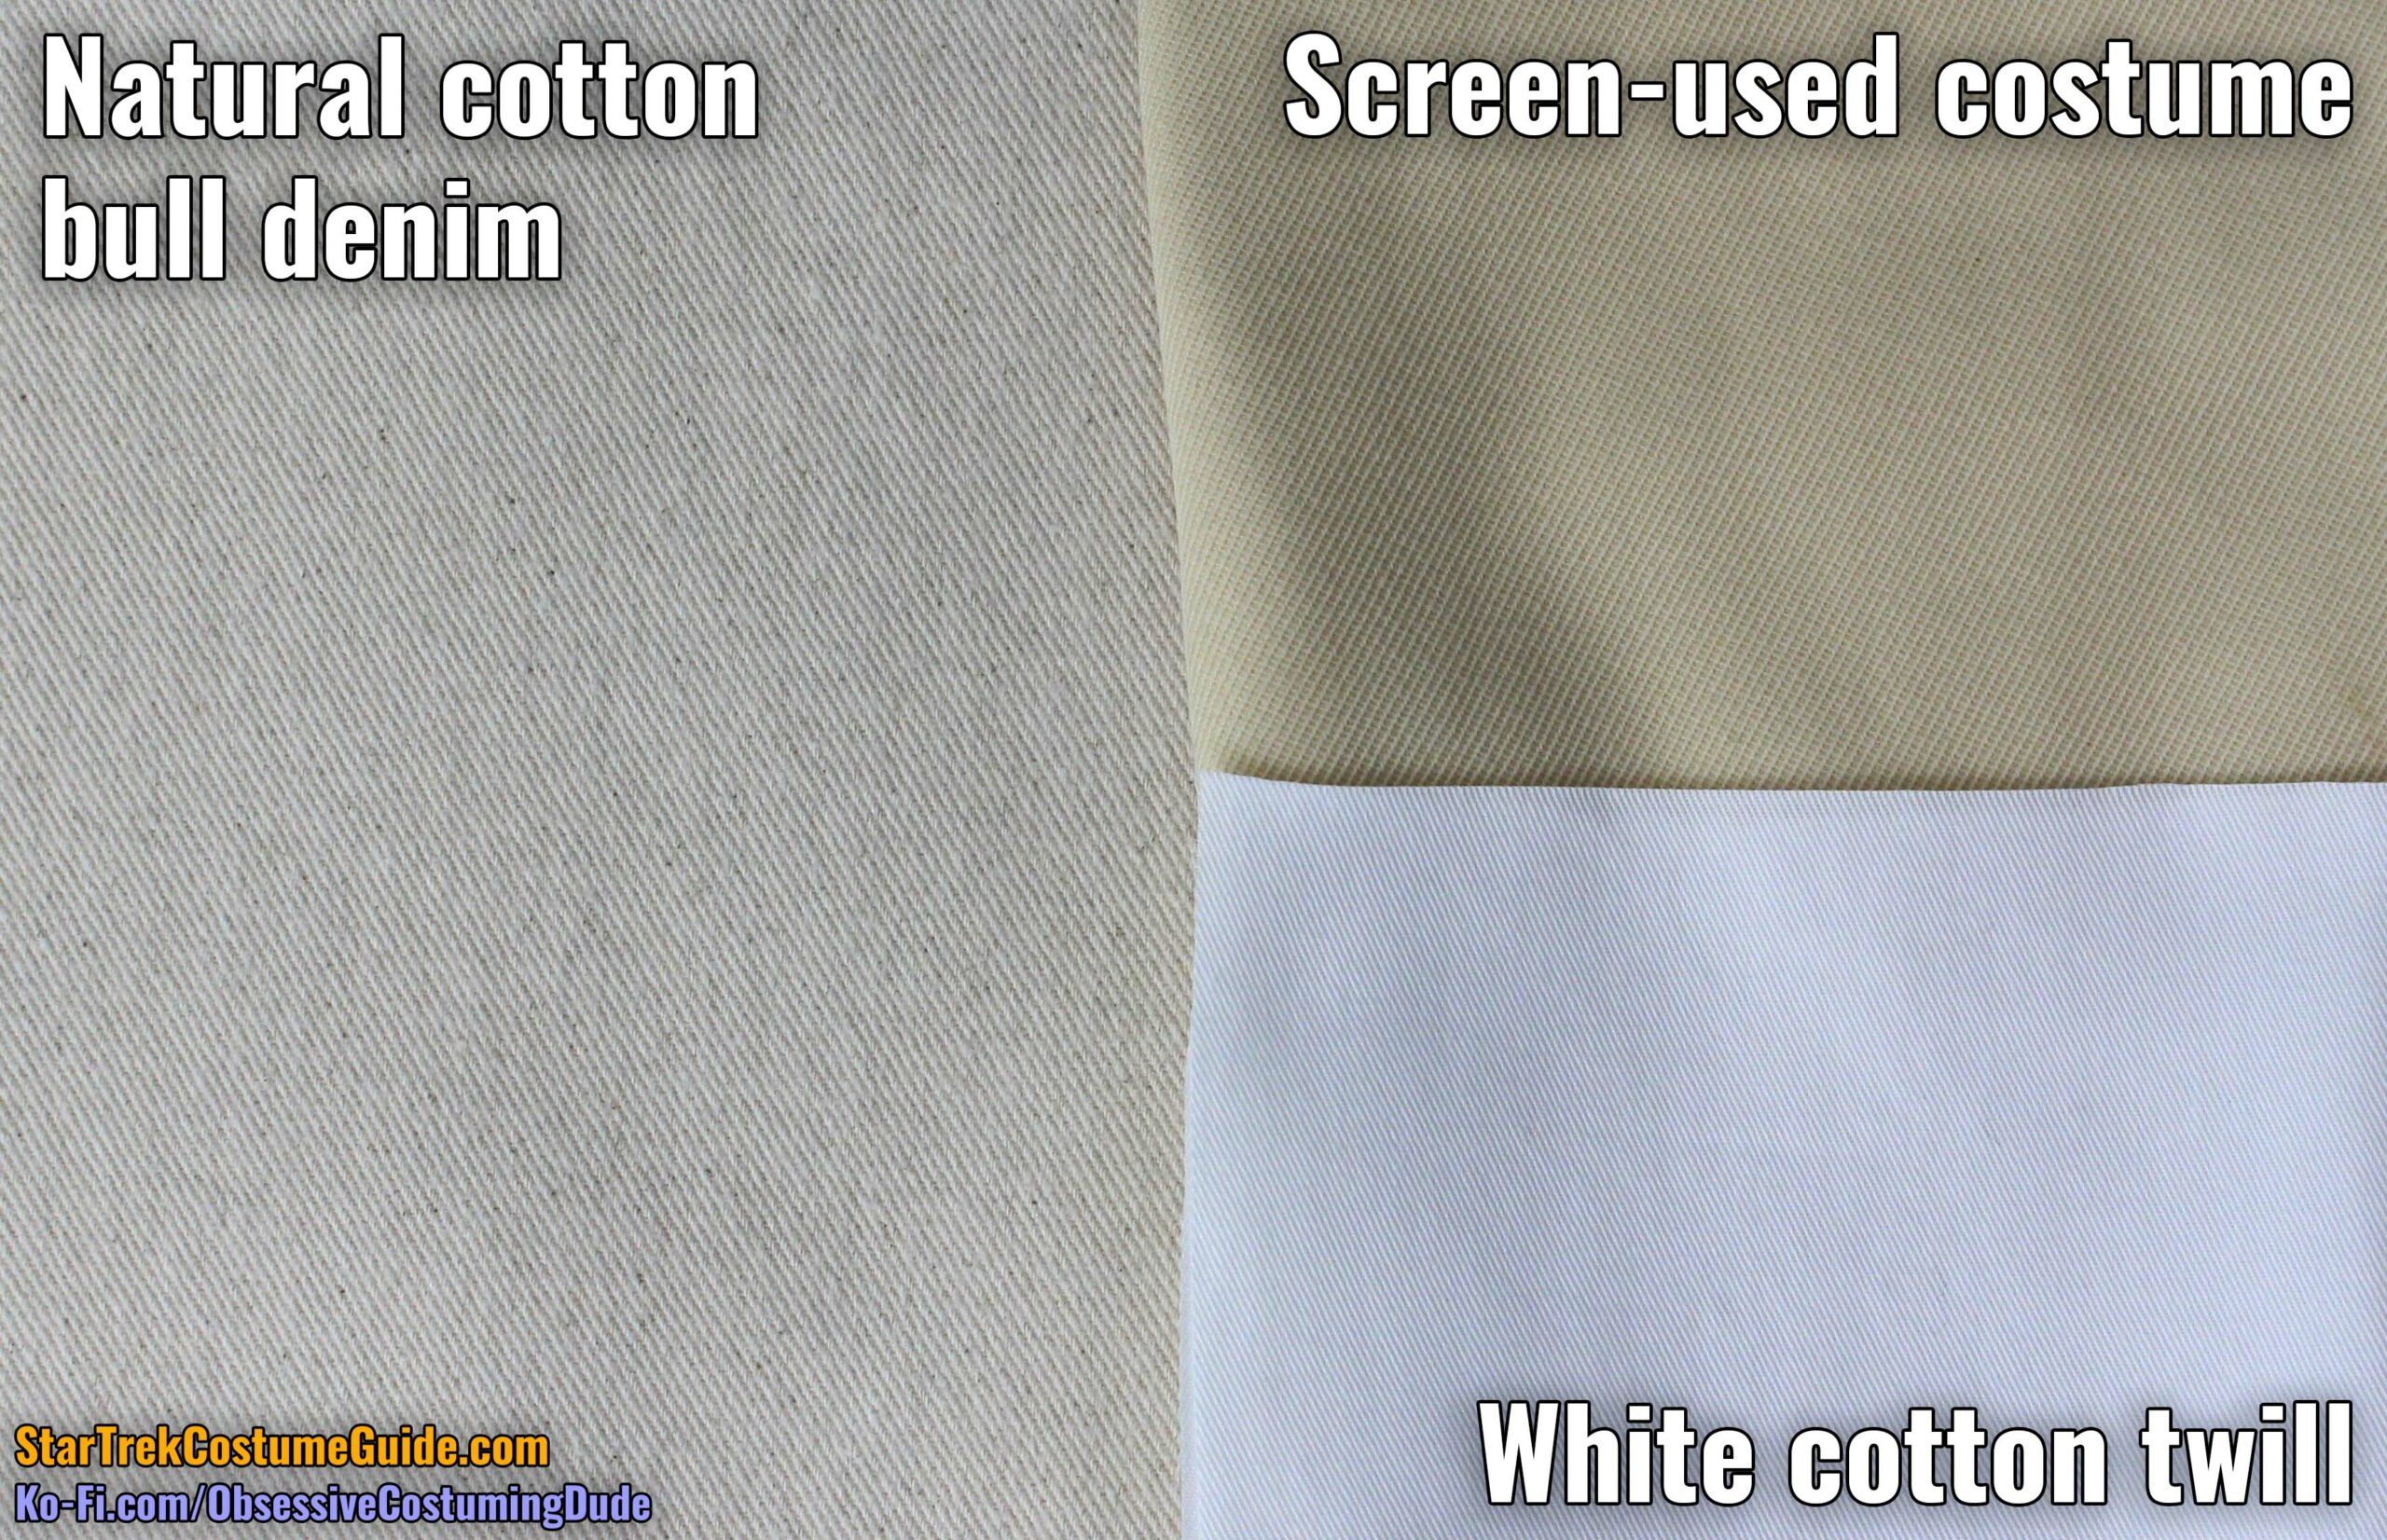
As a more budget-friendly alternative to the wool gabardine, I suggest using cotton bull denim.
Bull denim is tough and durable like the wool gabardine, but it’s usually much cheaper. The primary compromise is that it doesn’t resist wrinkling quite as well.
You could also use cotton twill, but in my opinion bull denim is an overall better option.
Polyester gabardine is perhaps the cheapest fabric option (within reason), but even though it resists wrinkling, I wouldn’t recommend it because in my experience it has a lifeless drape and doesn’t breathe well.
In my opinion, cotton bull denim is the best overall option for costuming/cosplay purposes.
The other factor to consider is color, and (as is often the case with replica costumes for cosplay purposes) what color you want your costume to be is a subjective issue.
The question becomes, what color do you want your jumpsuit to be?
Pure white, like the costumes looked in the movies?
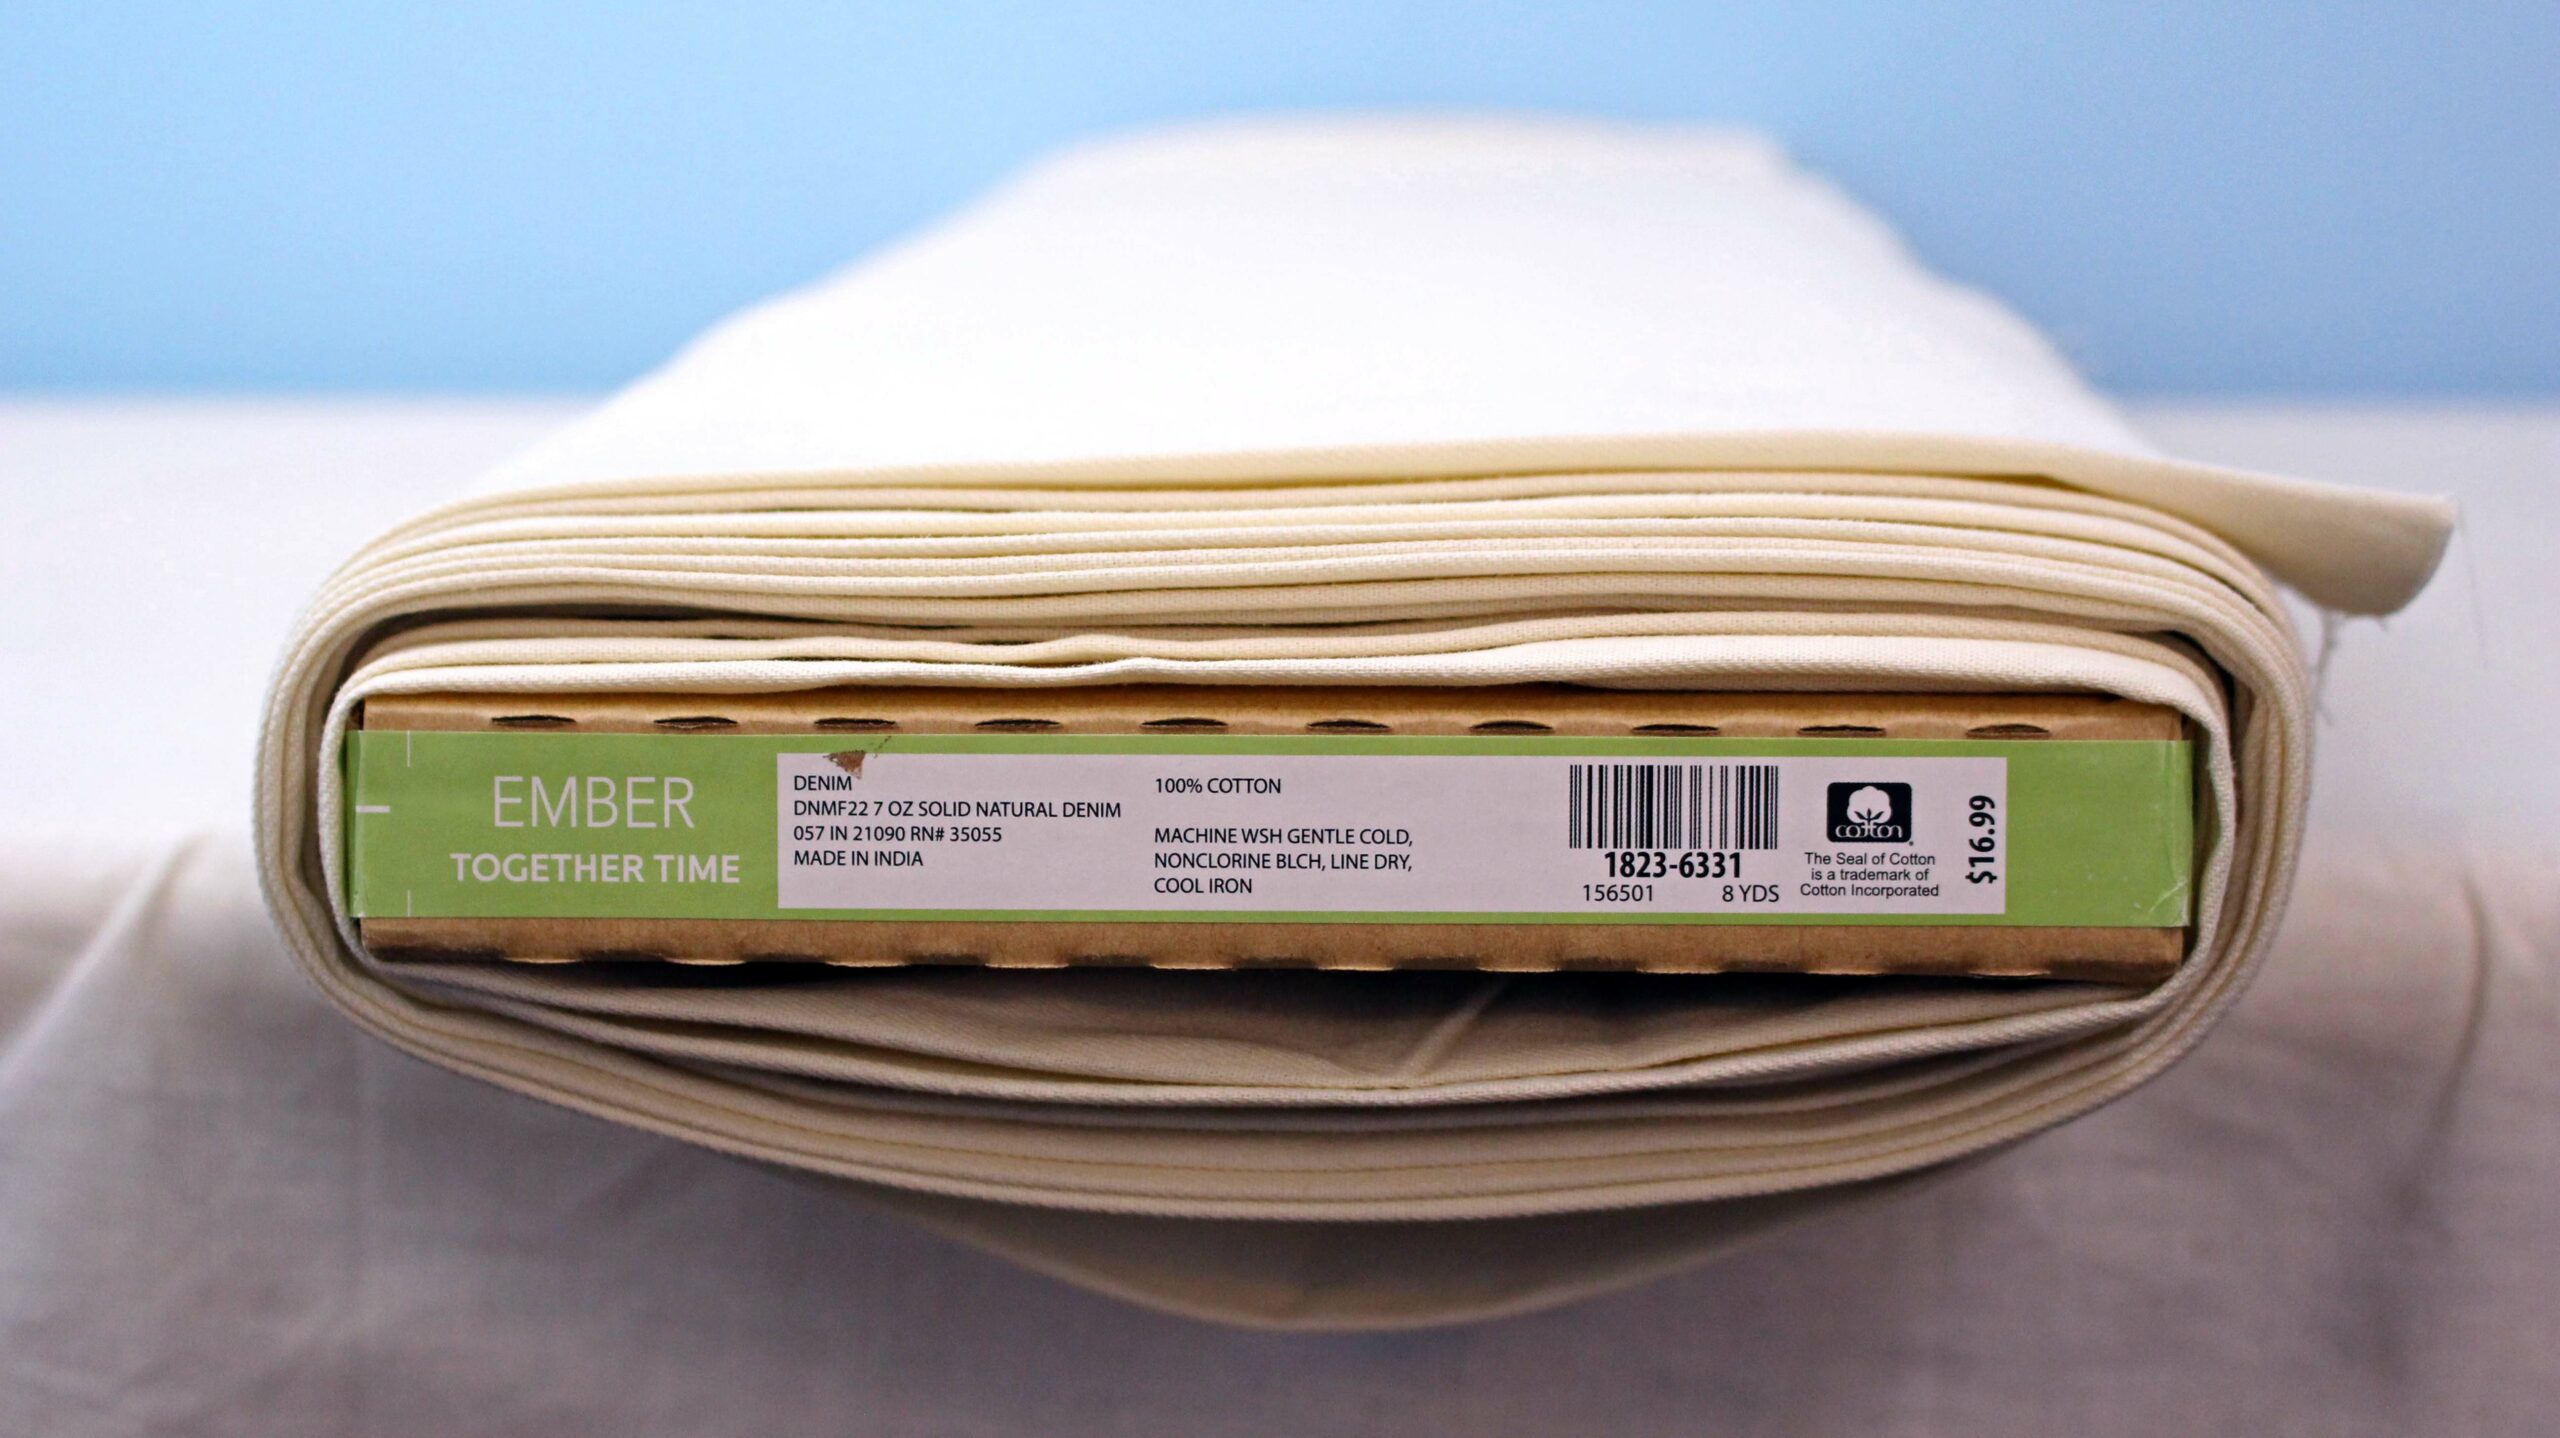
A “cream” color, just like the screen-used?
Or something in-between?
Should you favor the original fabric color, you can use the color references in the aforementioned costume examination to aid you in your hunt.
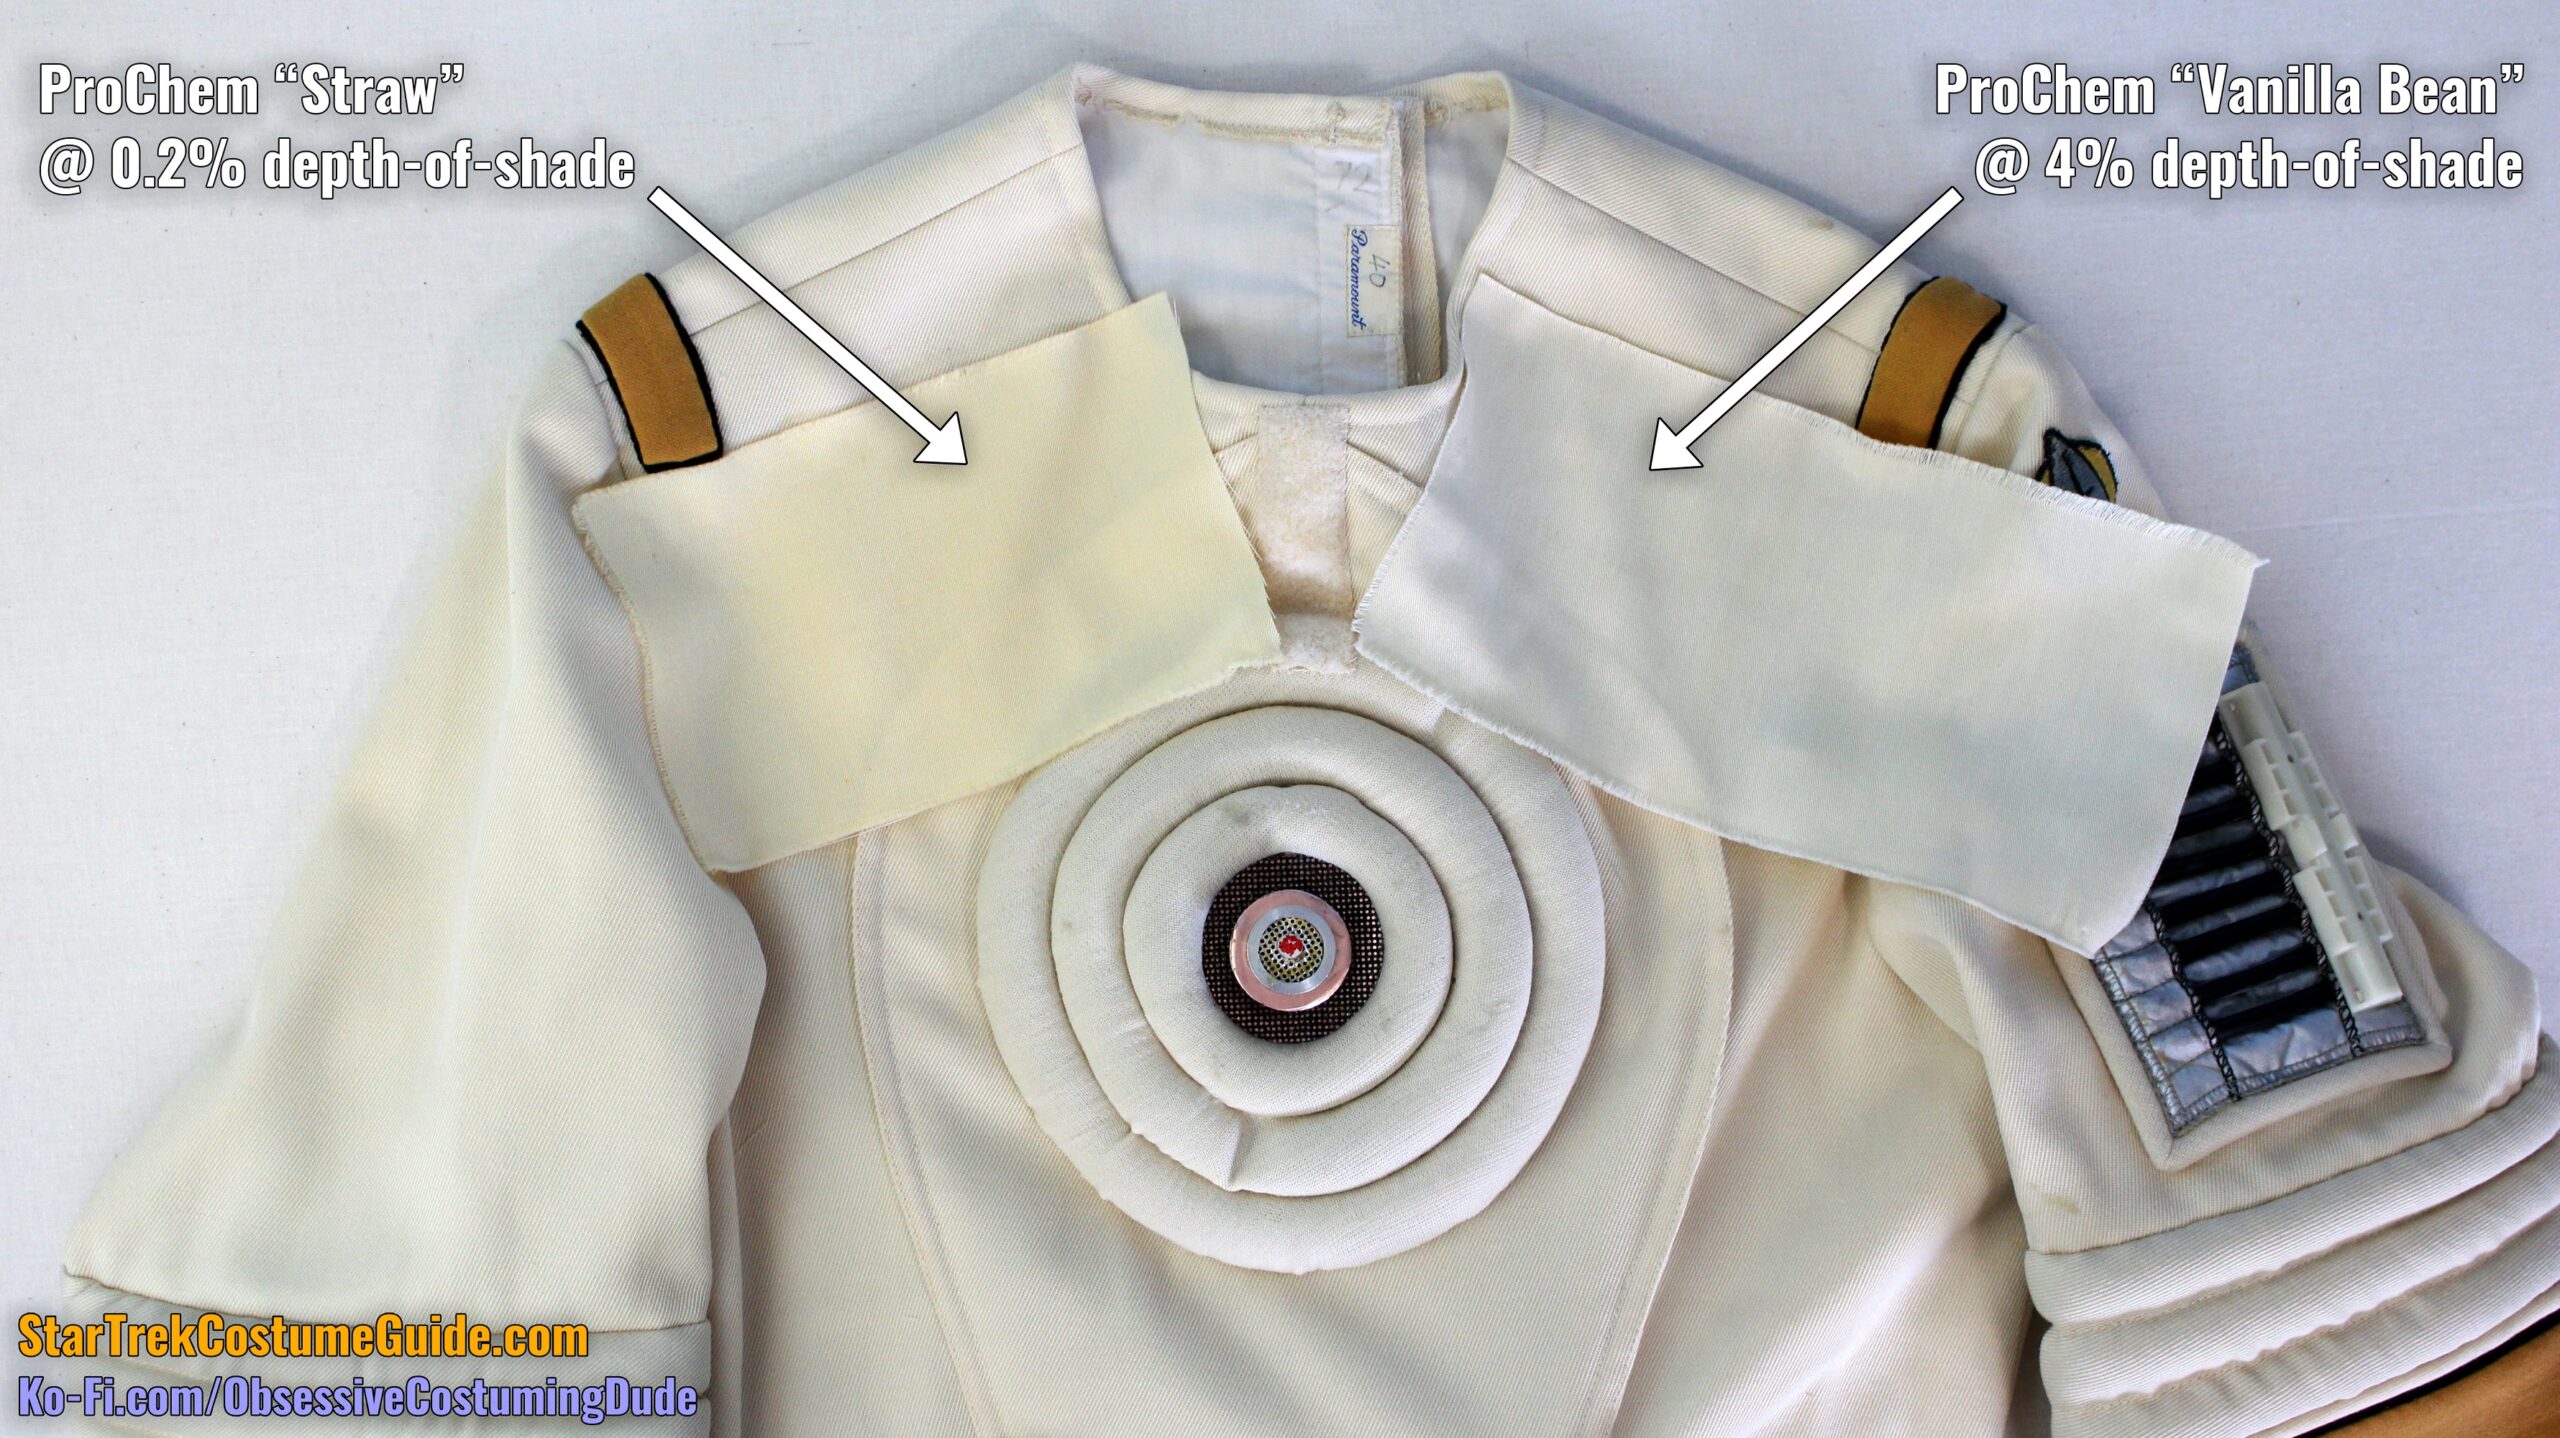
Or if you’re interested in custom-dyeing your fabric, the closest premixed colors I found were ProChem’s “Straw” (acid dye for wool) or ProChem’s “Vanilla Bean” (fiber-reactive dye for cotton):
Both of these were with standard 1% stock solutions (with the acid dye dissolved in boiling water to convert it to solution), at 0.2% and 4% depth-of-shade, respectively).
If is gibberish to you but but you’re interested in learning, I plan to produce a Tailors Gone Wild fabric-dyeing course, which will be specifically for aspiring costumers and cosplayers.
I suggest subscribing to my “Sewing Wizard Newsletter” for updates. 🙂
Although for my projects I nearly always favor the screen-used colors over subjective interpretations, in this case the “cream” color was beyond what I believe to be aesthetically-pleasing in-person.
For me, personally, a fabric in-between “bleached white” and “dingy beige” was an ideal compromise.
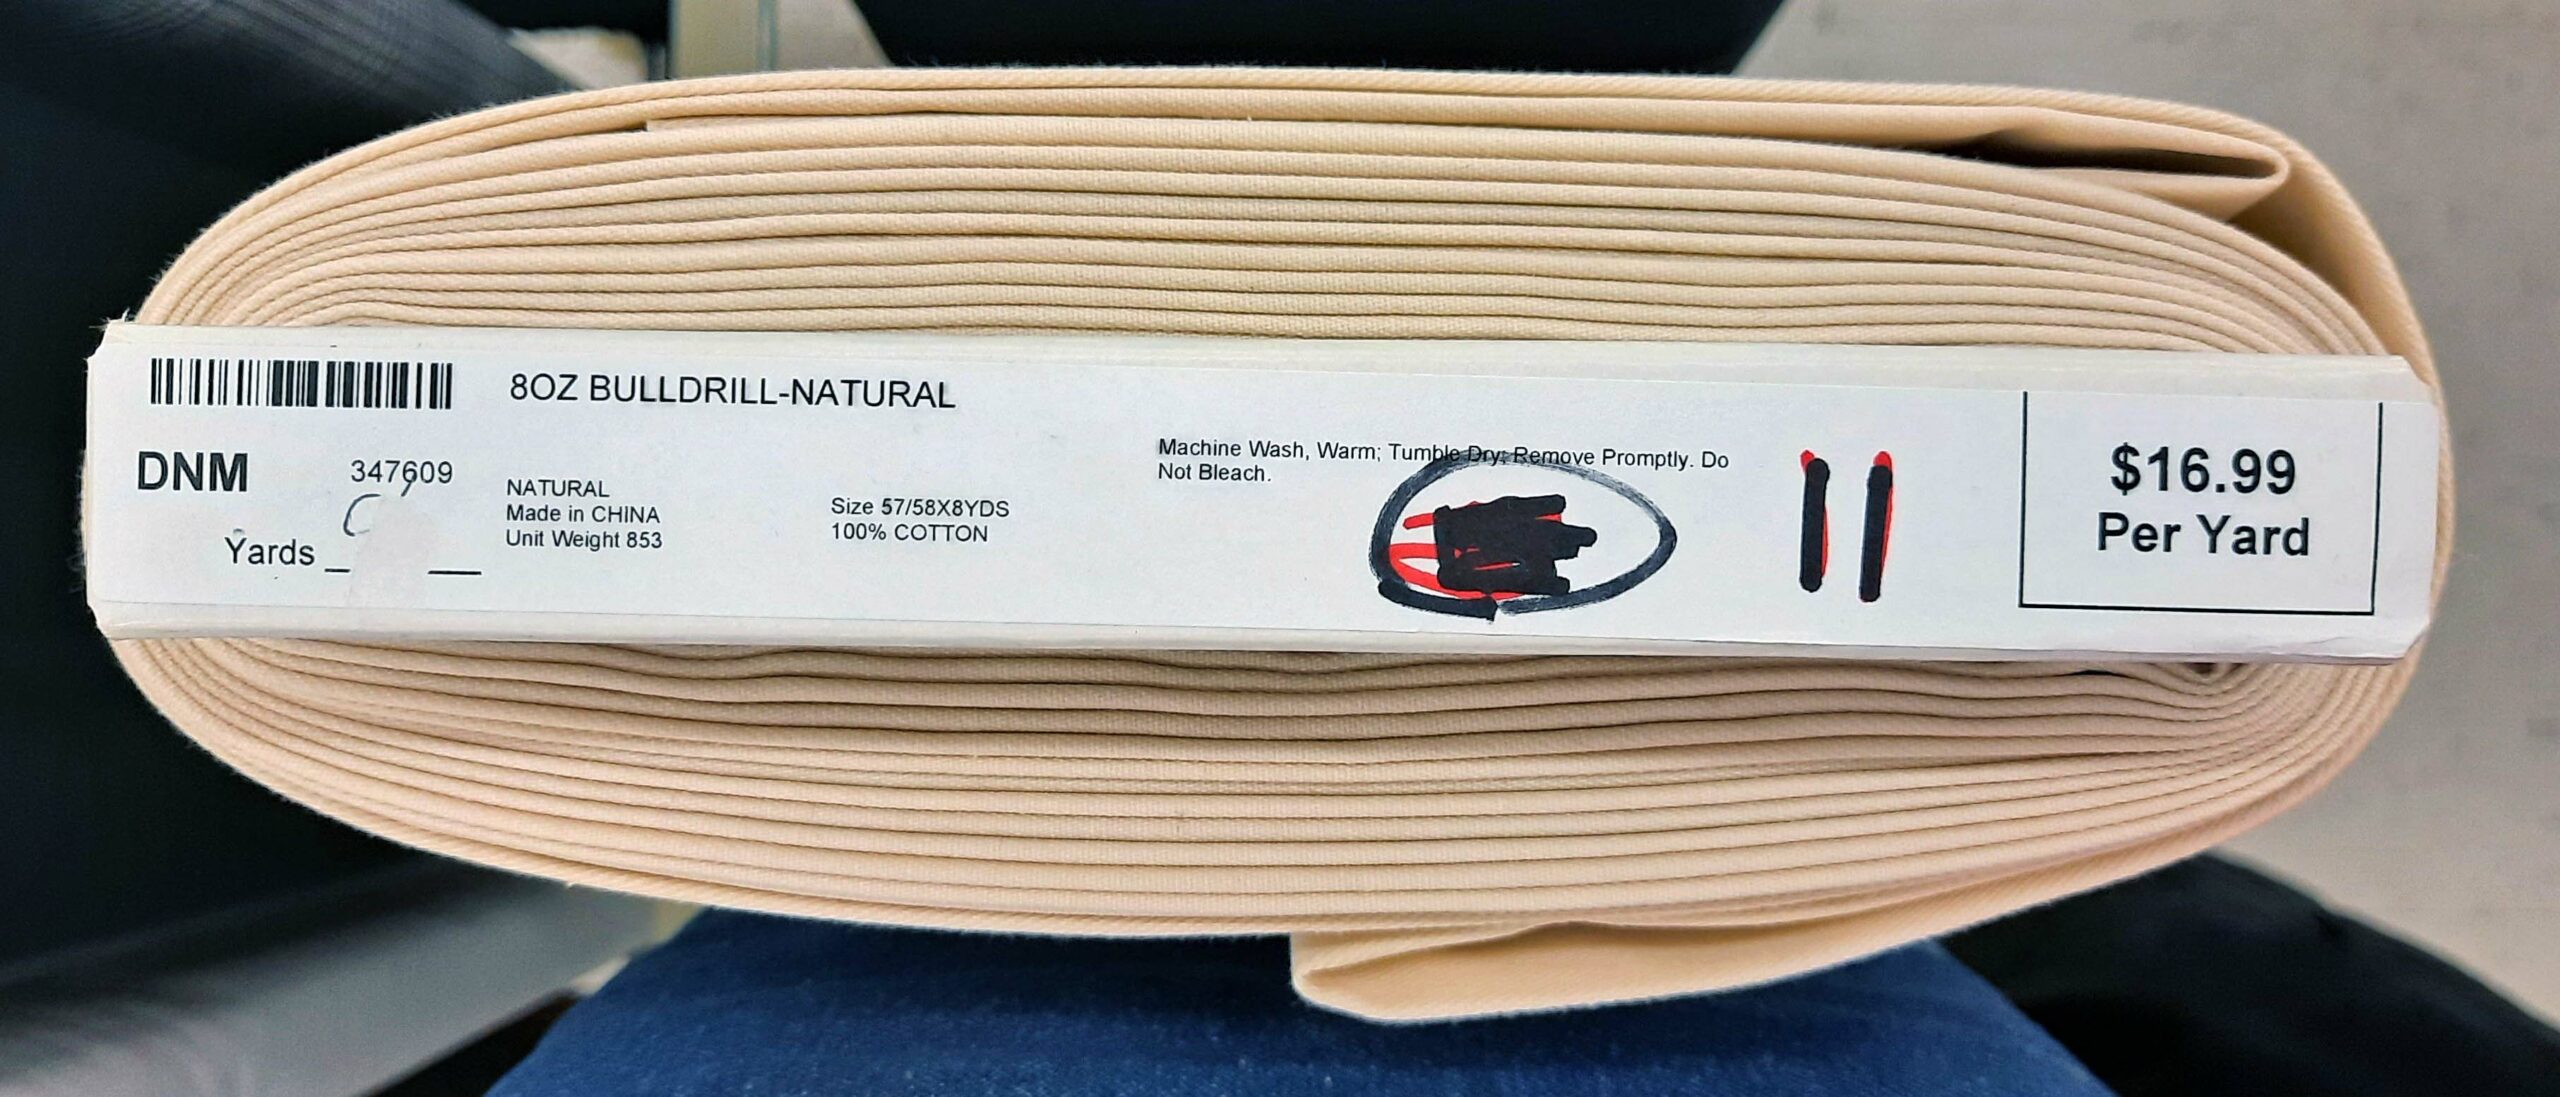
Should you agree, I suggest searching for fabrics with keywords like “natural,” “ivory,” “off-white,” “antique white,” “snow white,” or “cream.”
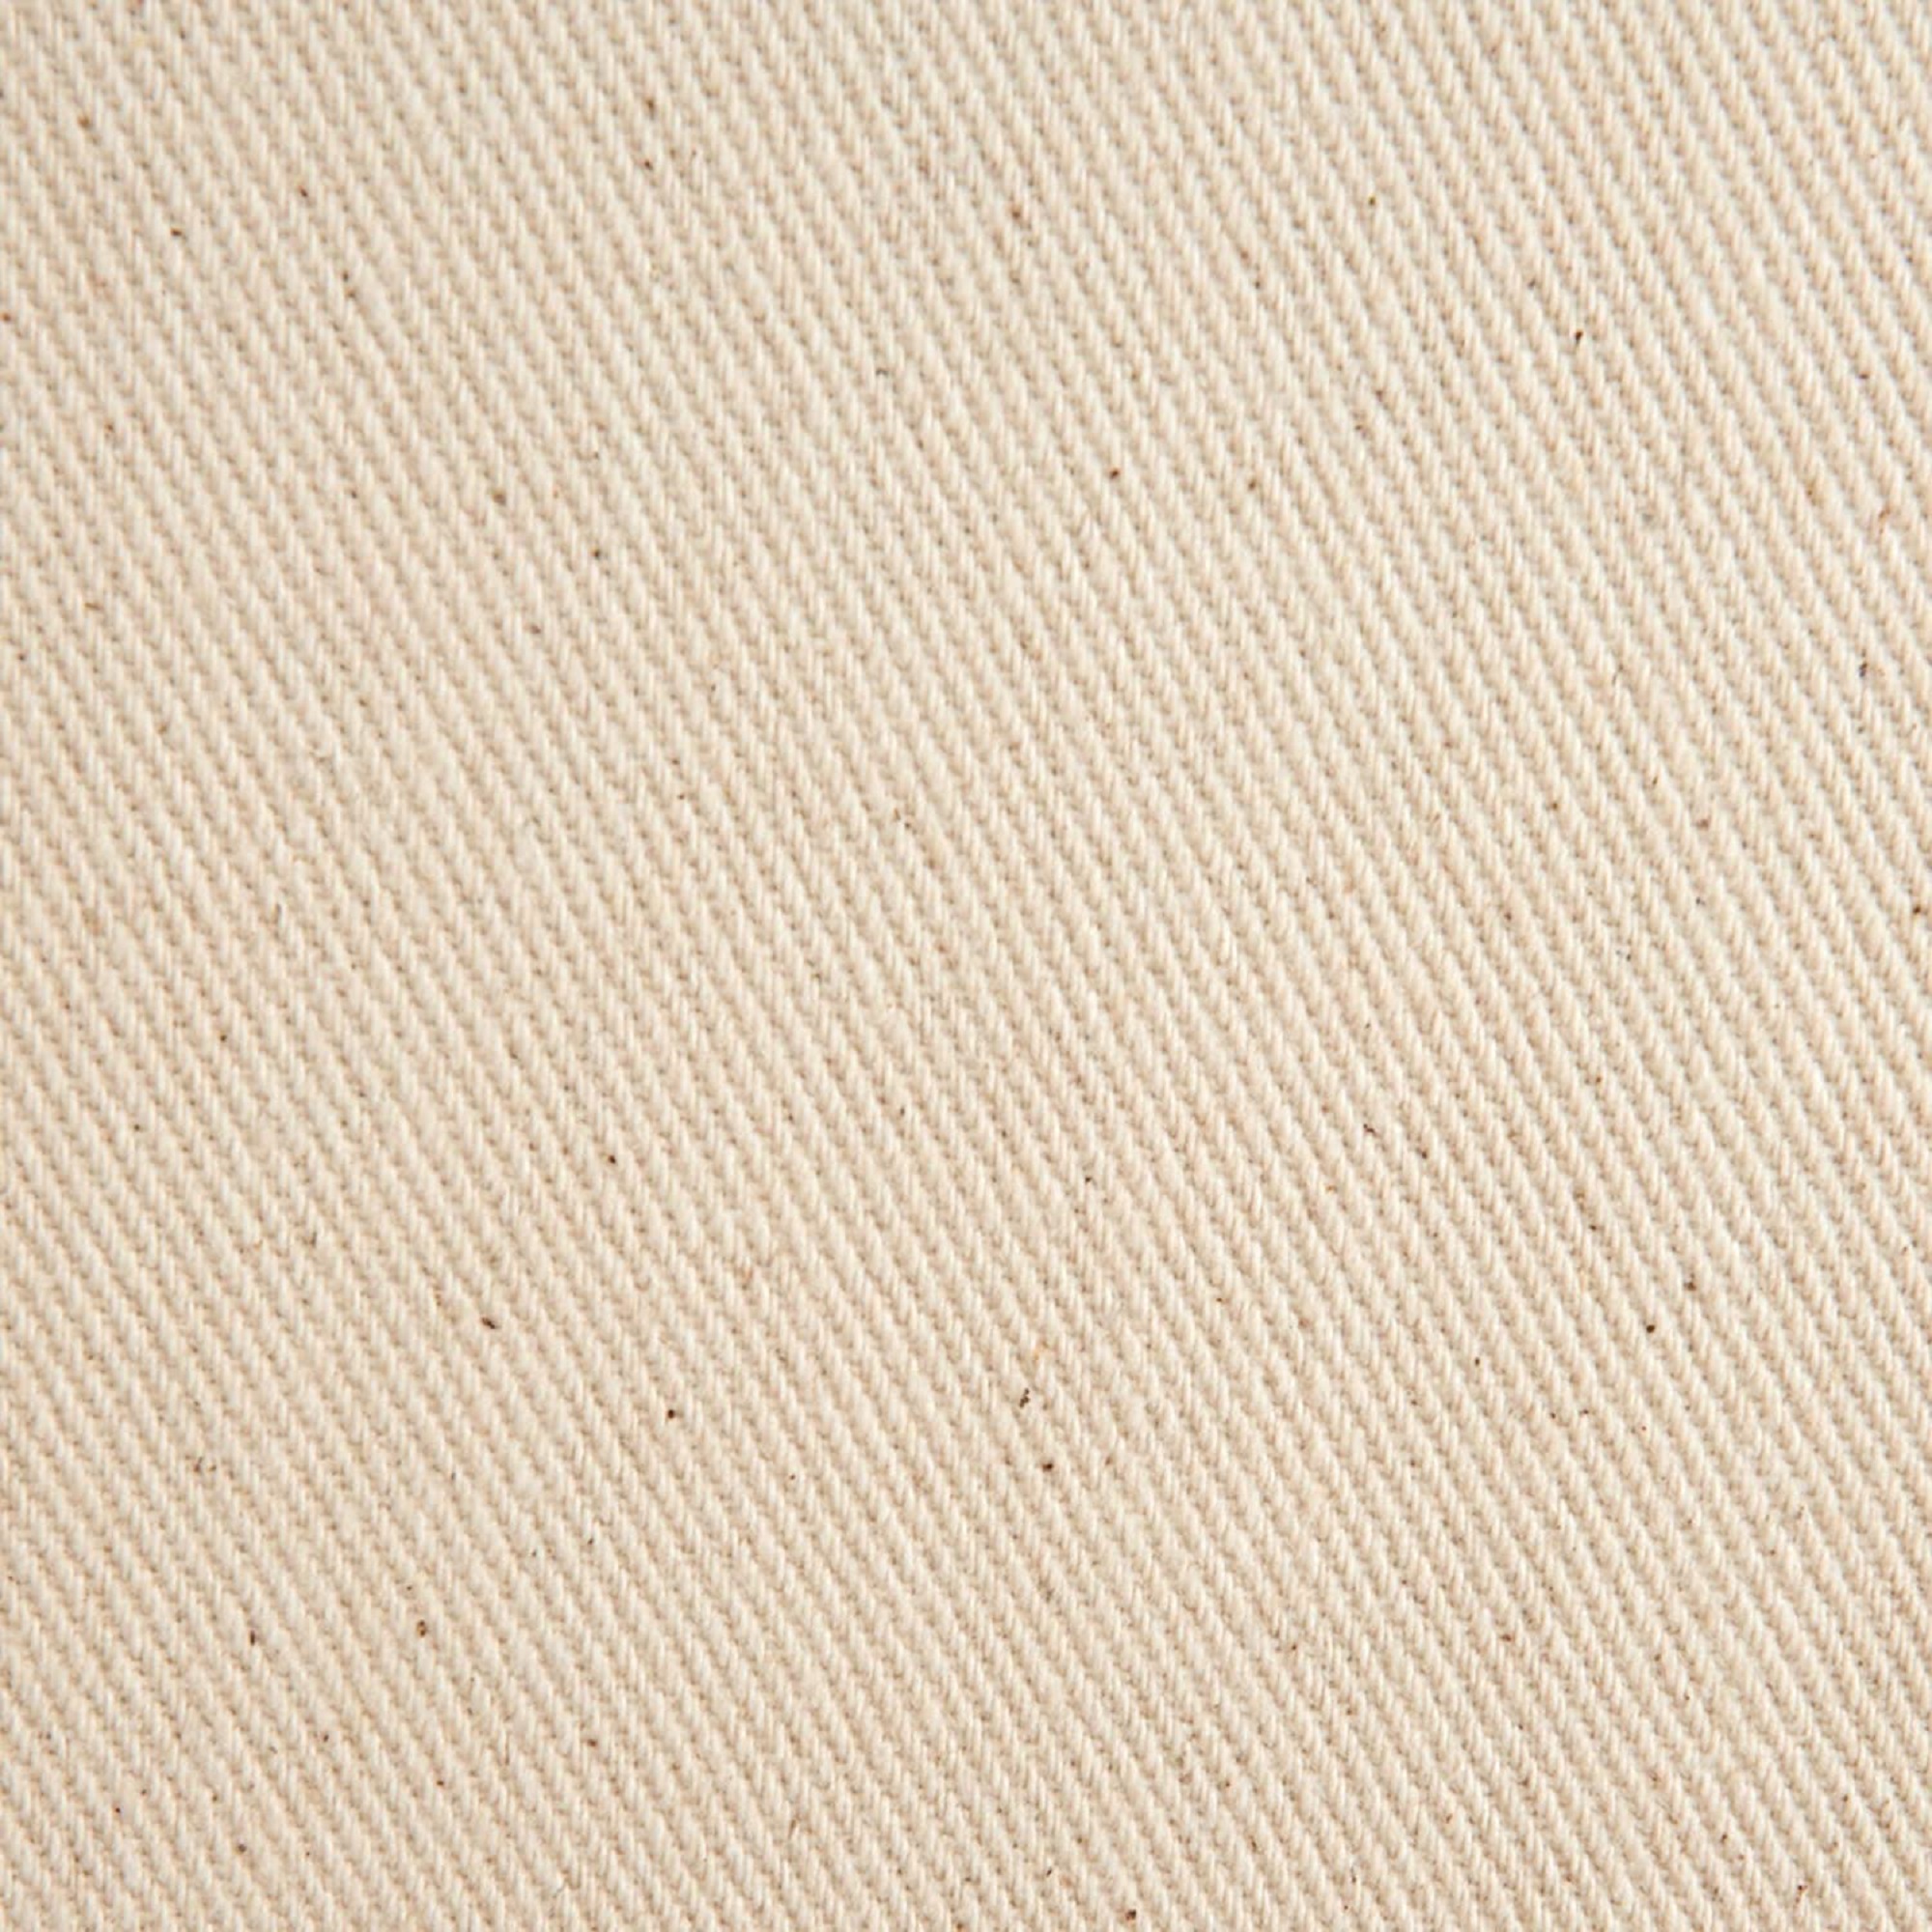
The catch with “natural” fabrics is that some of them are “natural” in the sense that they’re undyed and contain brown flecks – not ideal for this costume. (See right.)
Make sure it’s a fabric that’s been dyed “natural” and is completely even in color, with no little flecks or irregularities often found in undyed fabrics.
For the men’s demonstration jumpsuit featured throughout most of this tutorial, I used this “natural” denim from my local JoAnn (with a closely-matching knit fabric for the chest tubing):
Hobby Lobby carries a similar product:
And there are doubtless many others available from online fabric vendors.
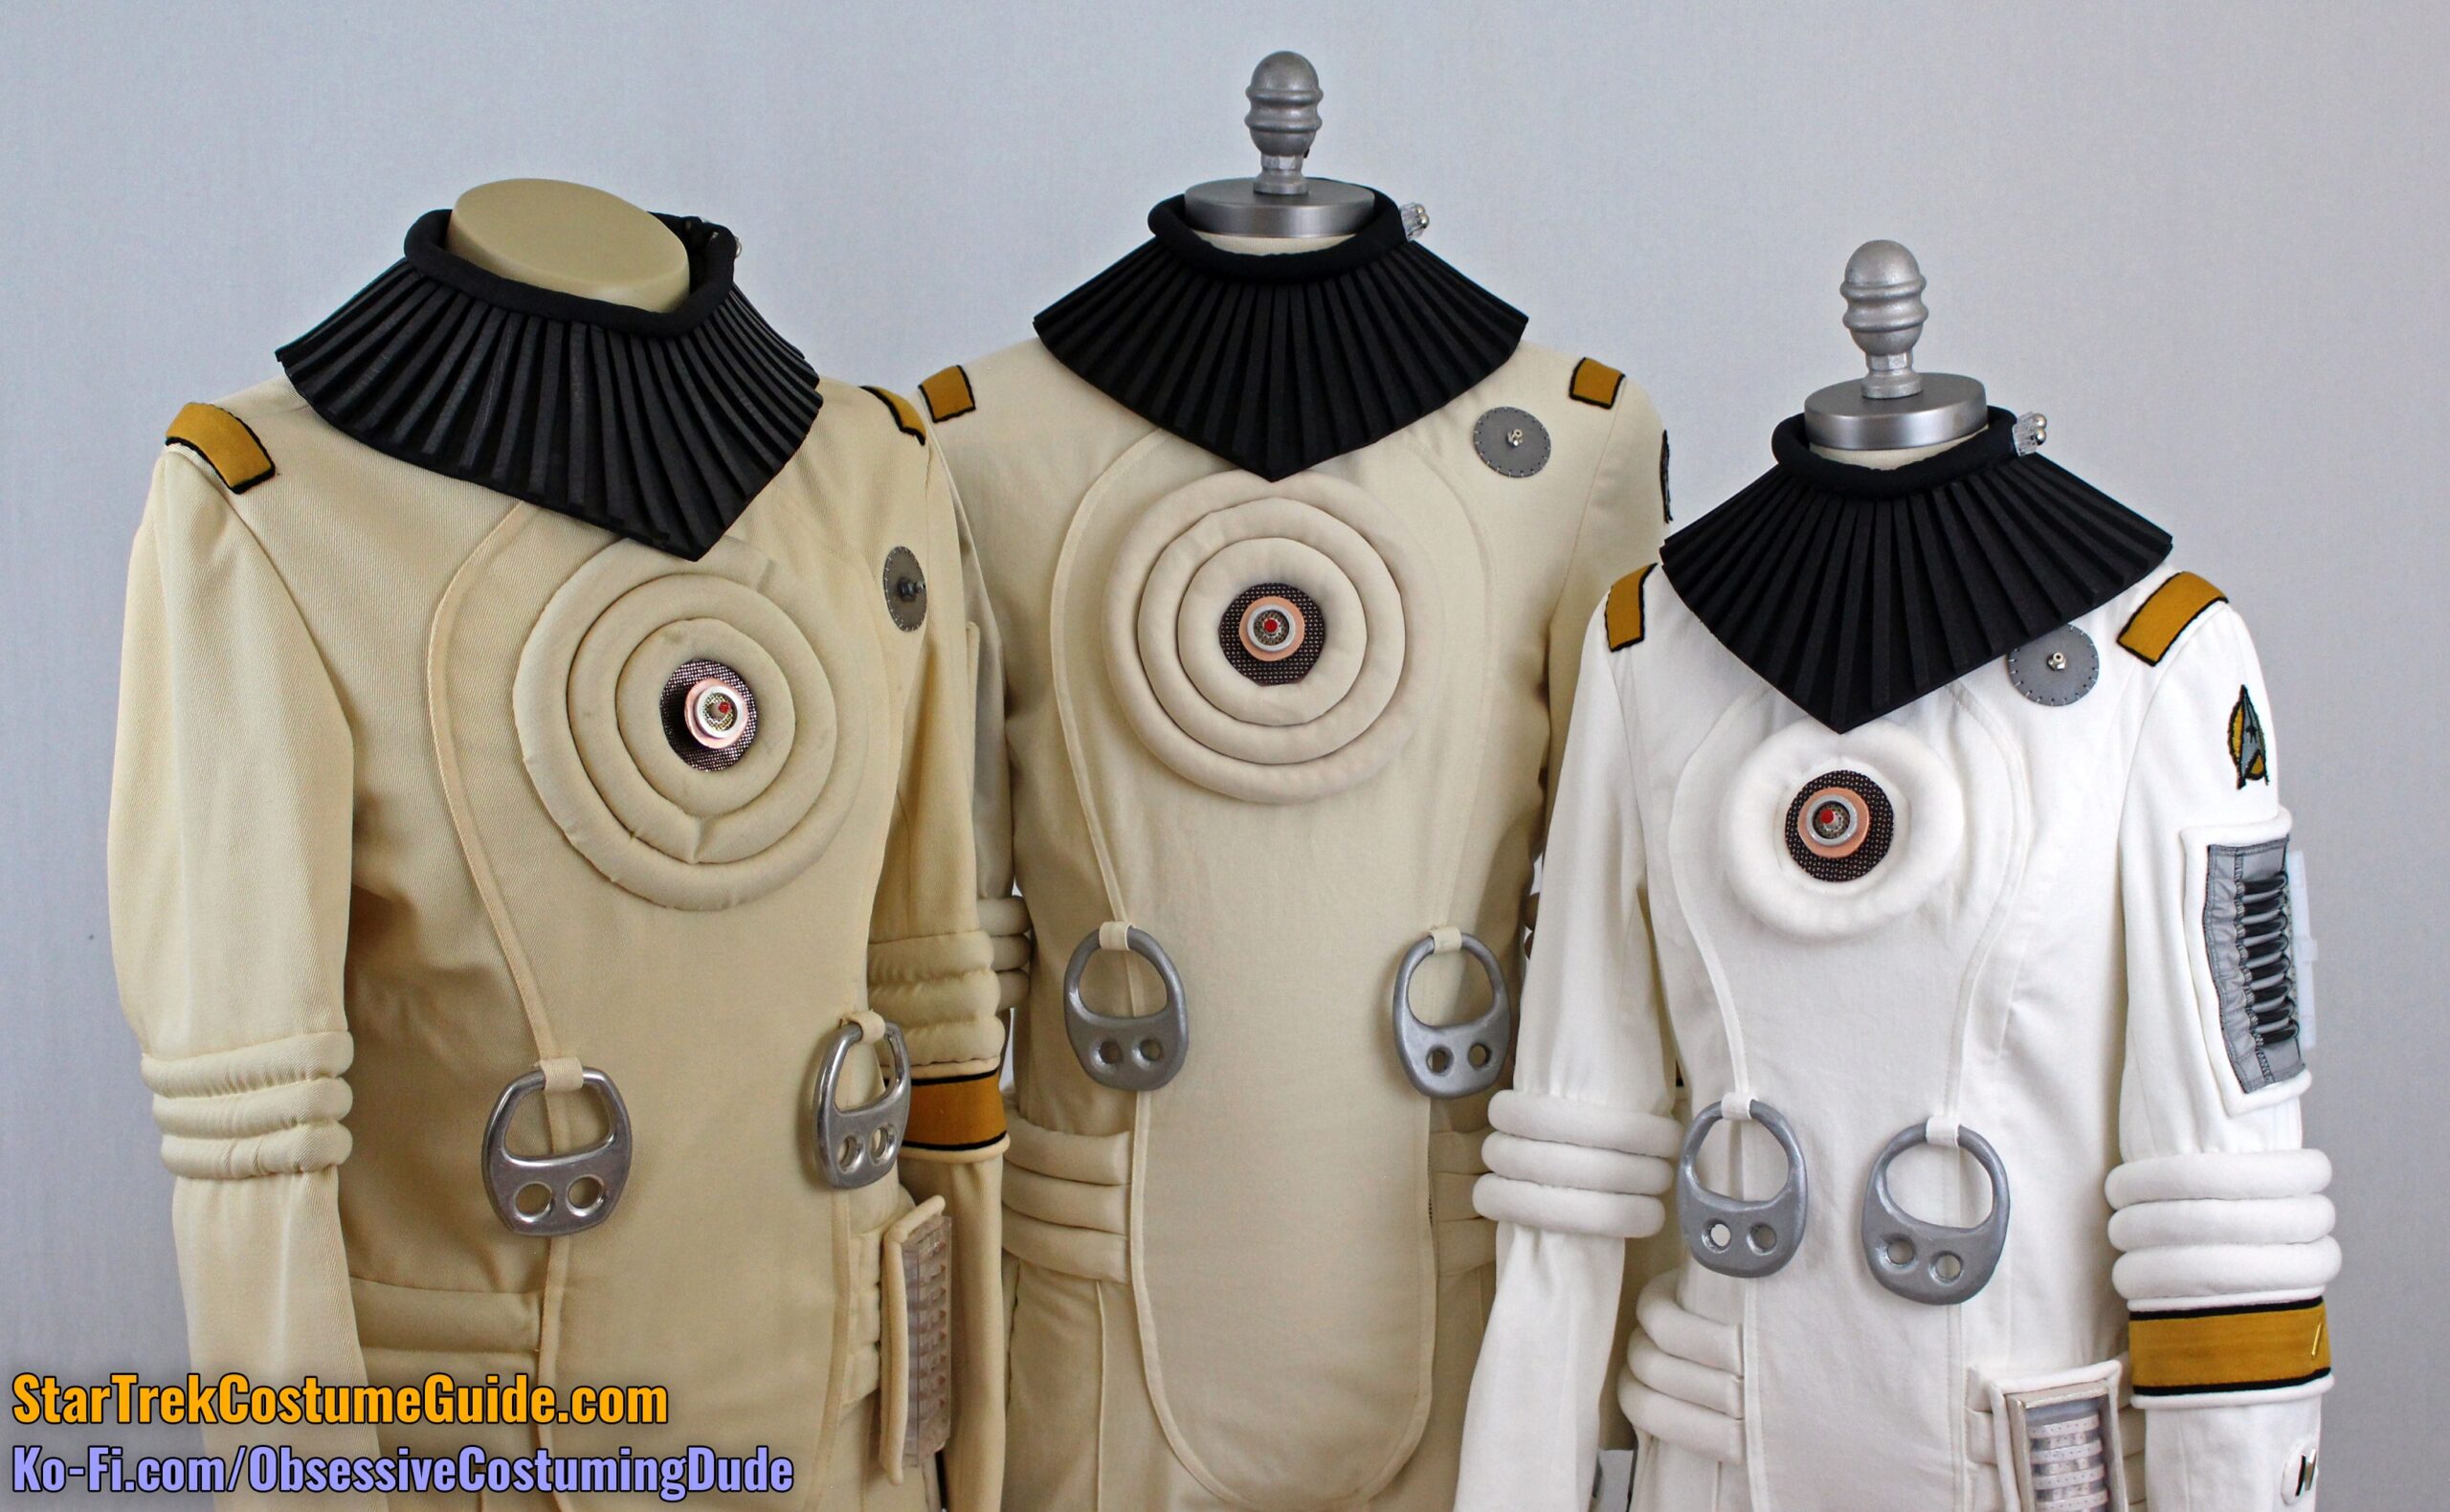
For the women’s jumpsuit occasionally featured in this tutorial, I used actual white cotton twill.
Here’s a side-by-side comparison between the screen-used radiation suit (left), my “natural”-colored replica men’s jumpsuit (center), and my white women’s jumpsuit (left).
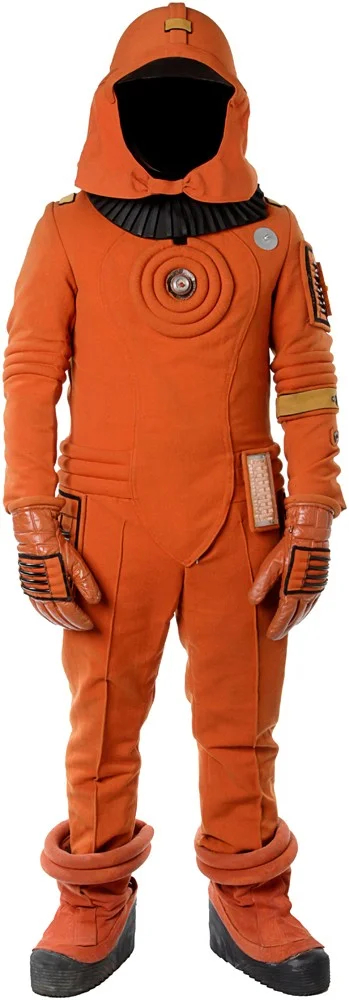
(If you want to make an orange variant, then obviously you can use whatever fabrics you like for that as well – or, in lieu of color-matching a screen-used costume, custom-dye your fabrics to your ideal color interpretation.)
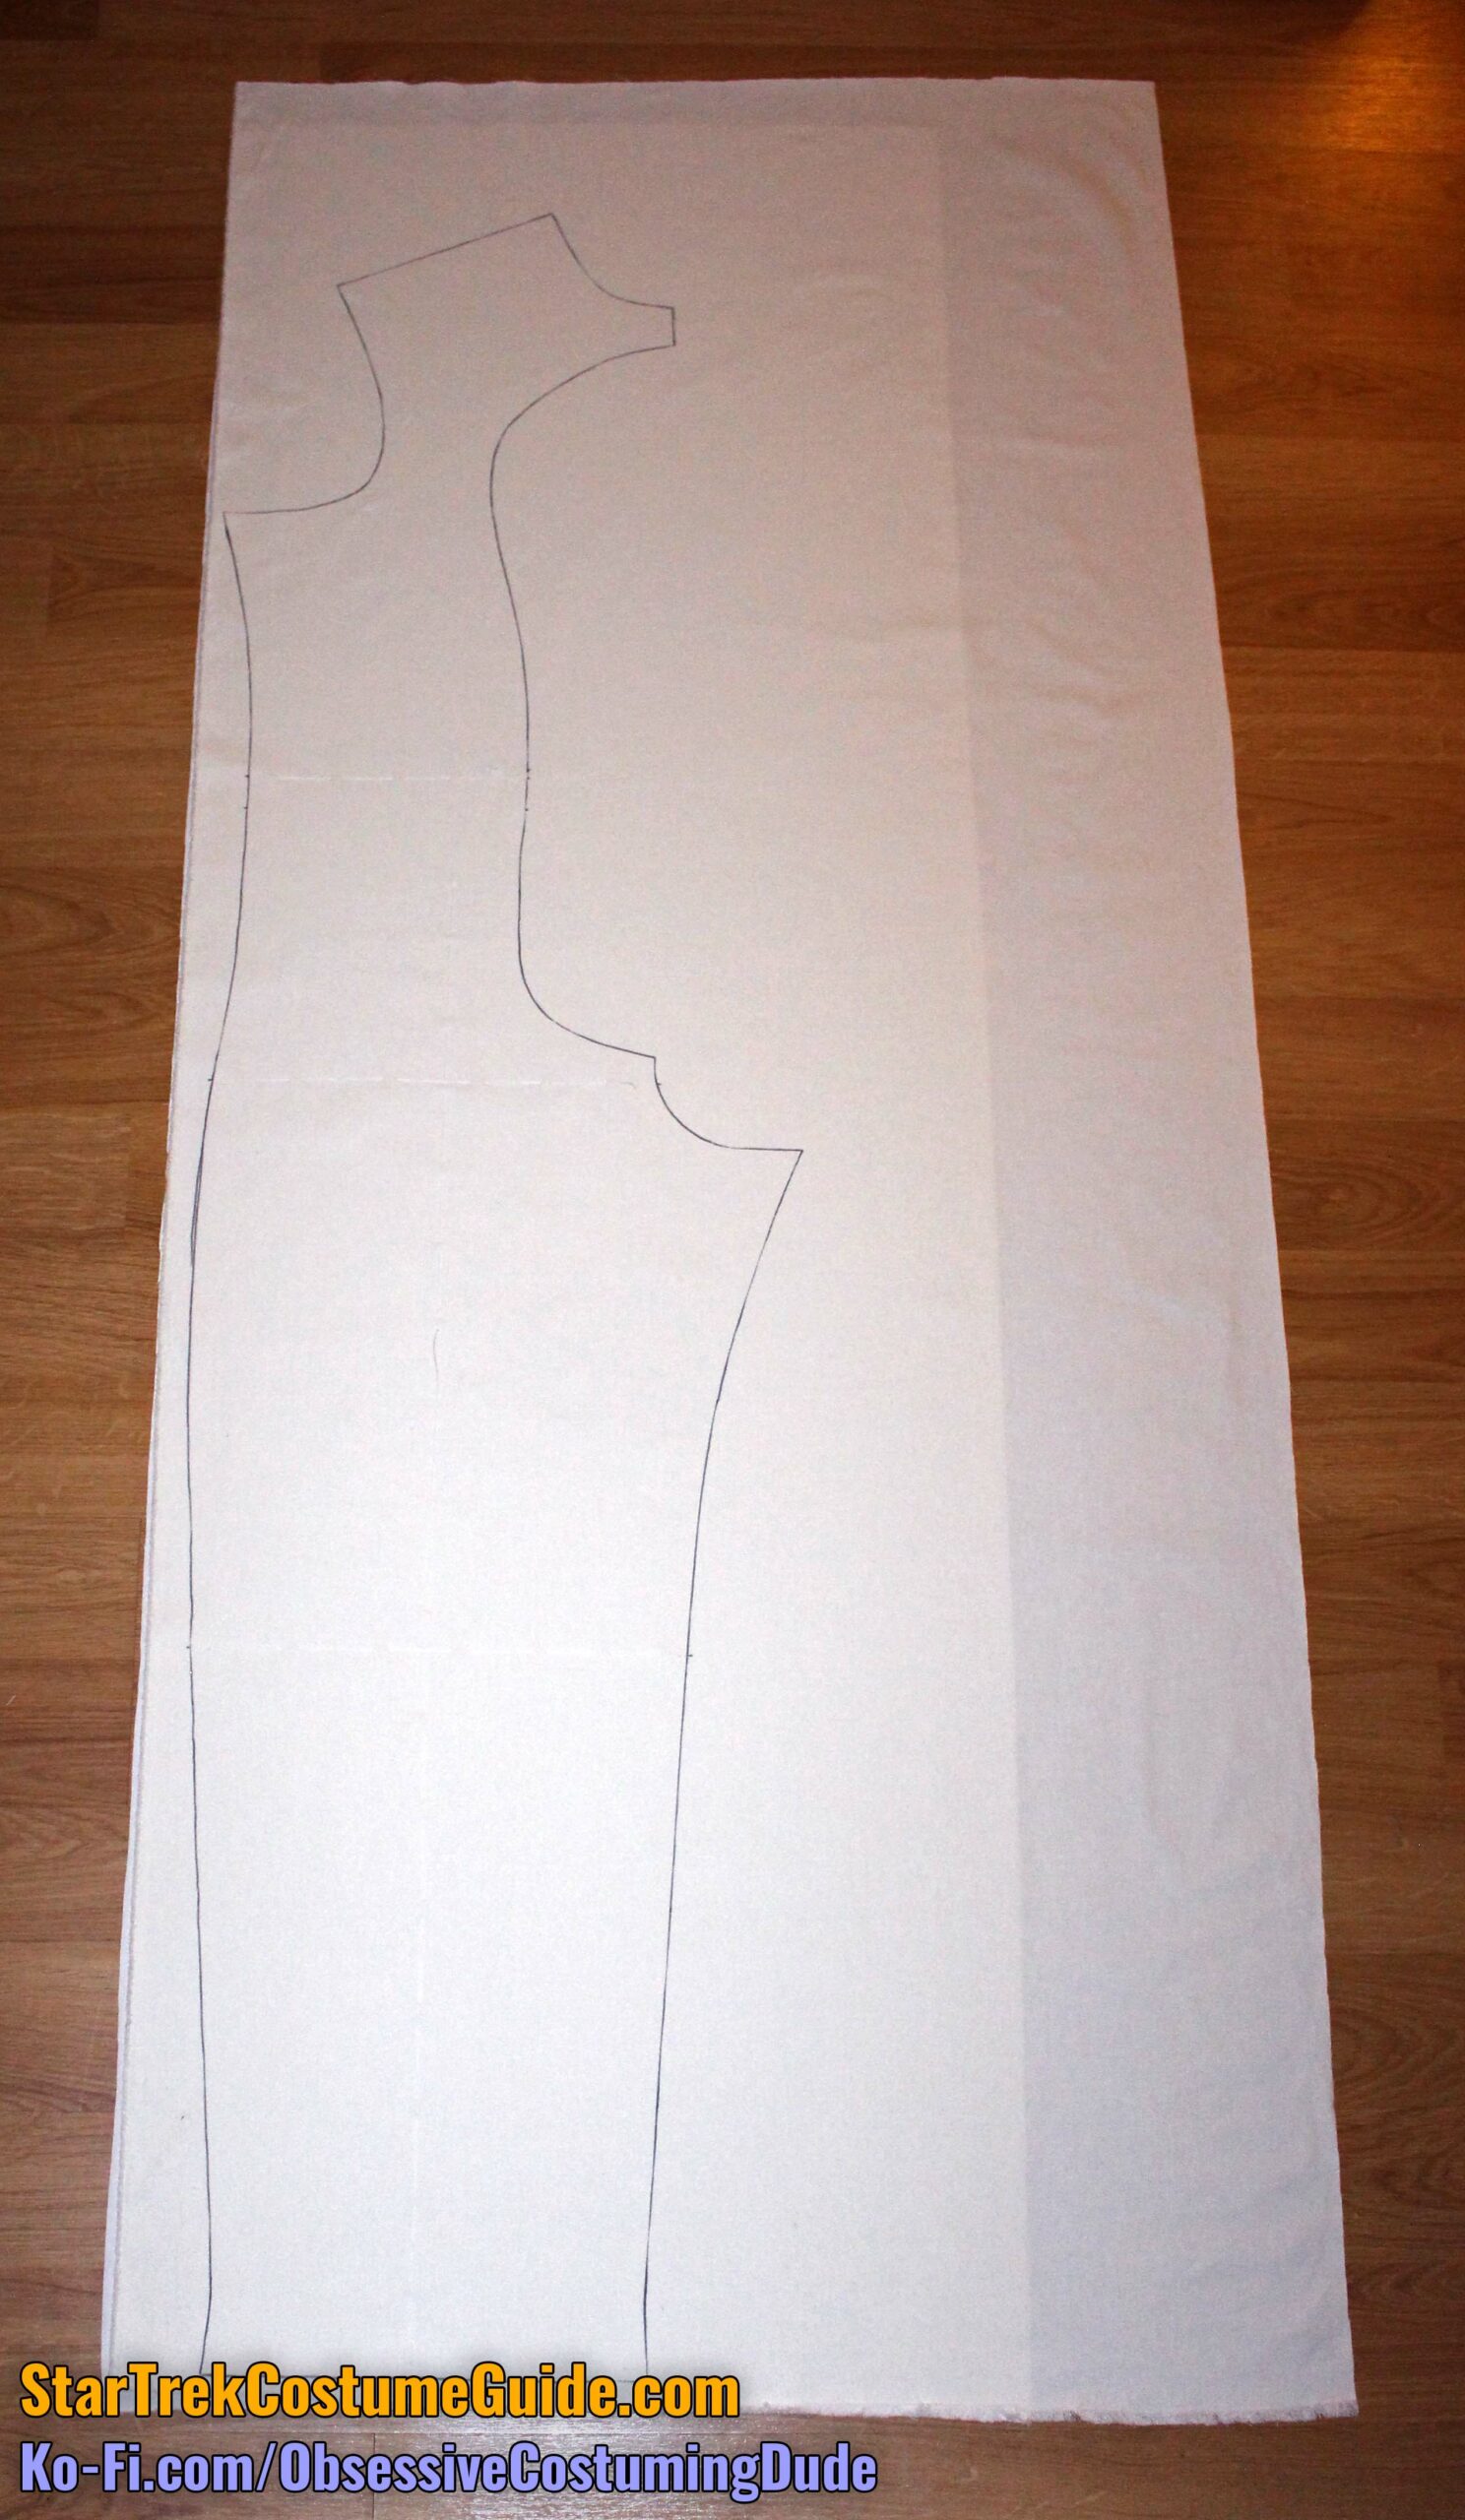
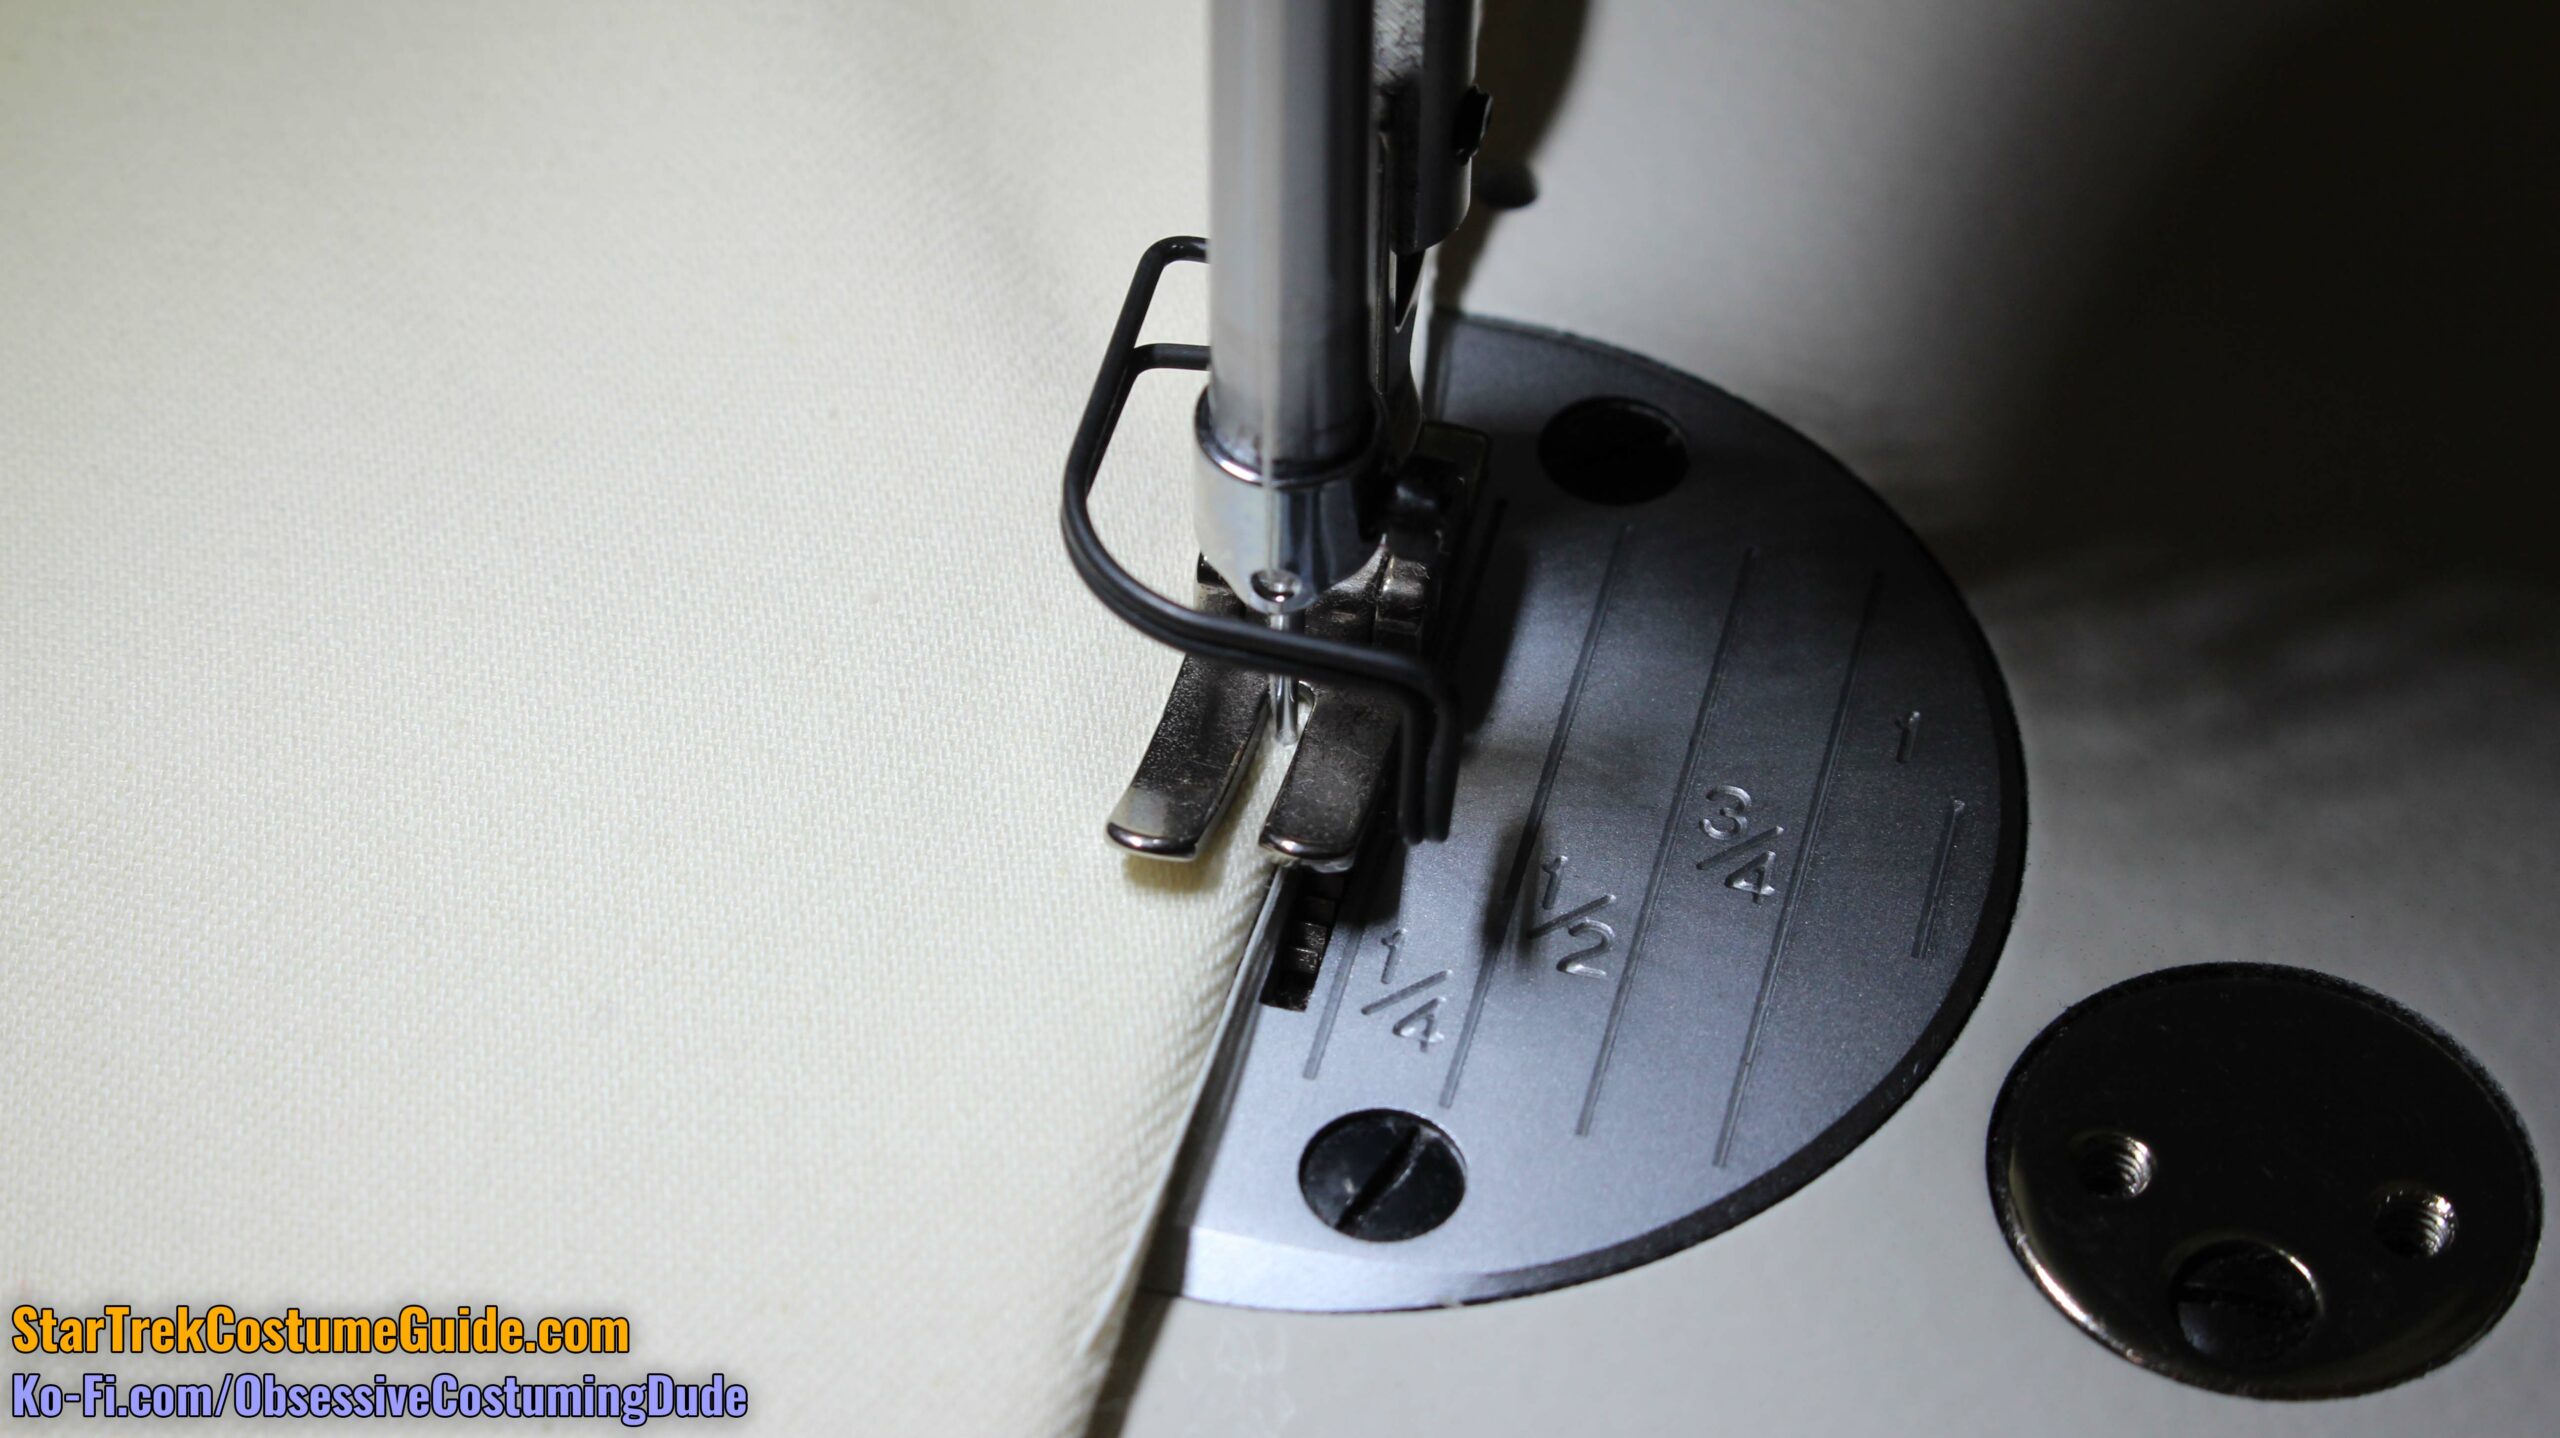
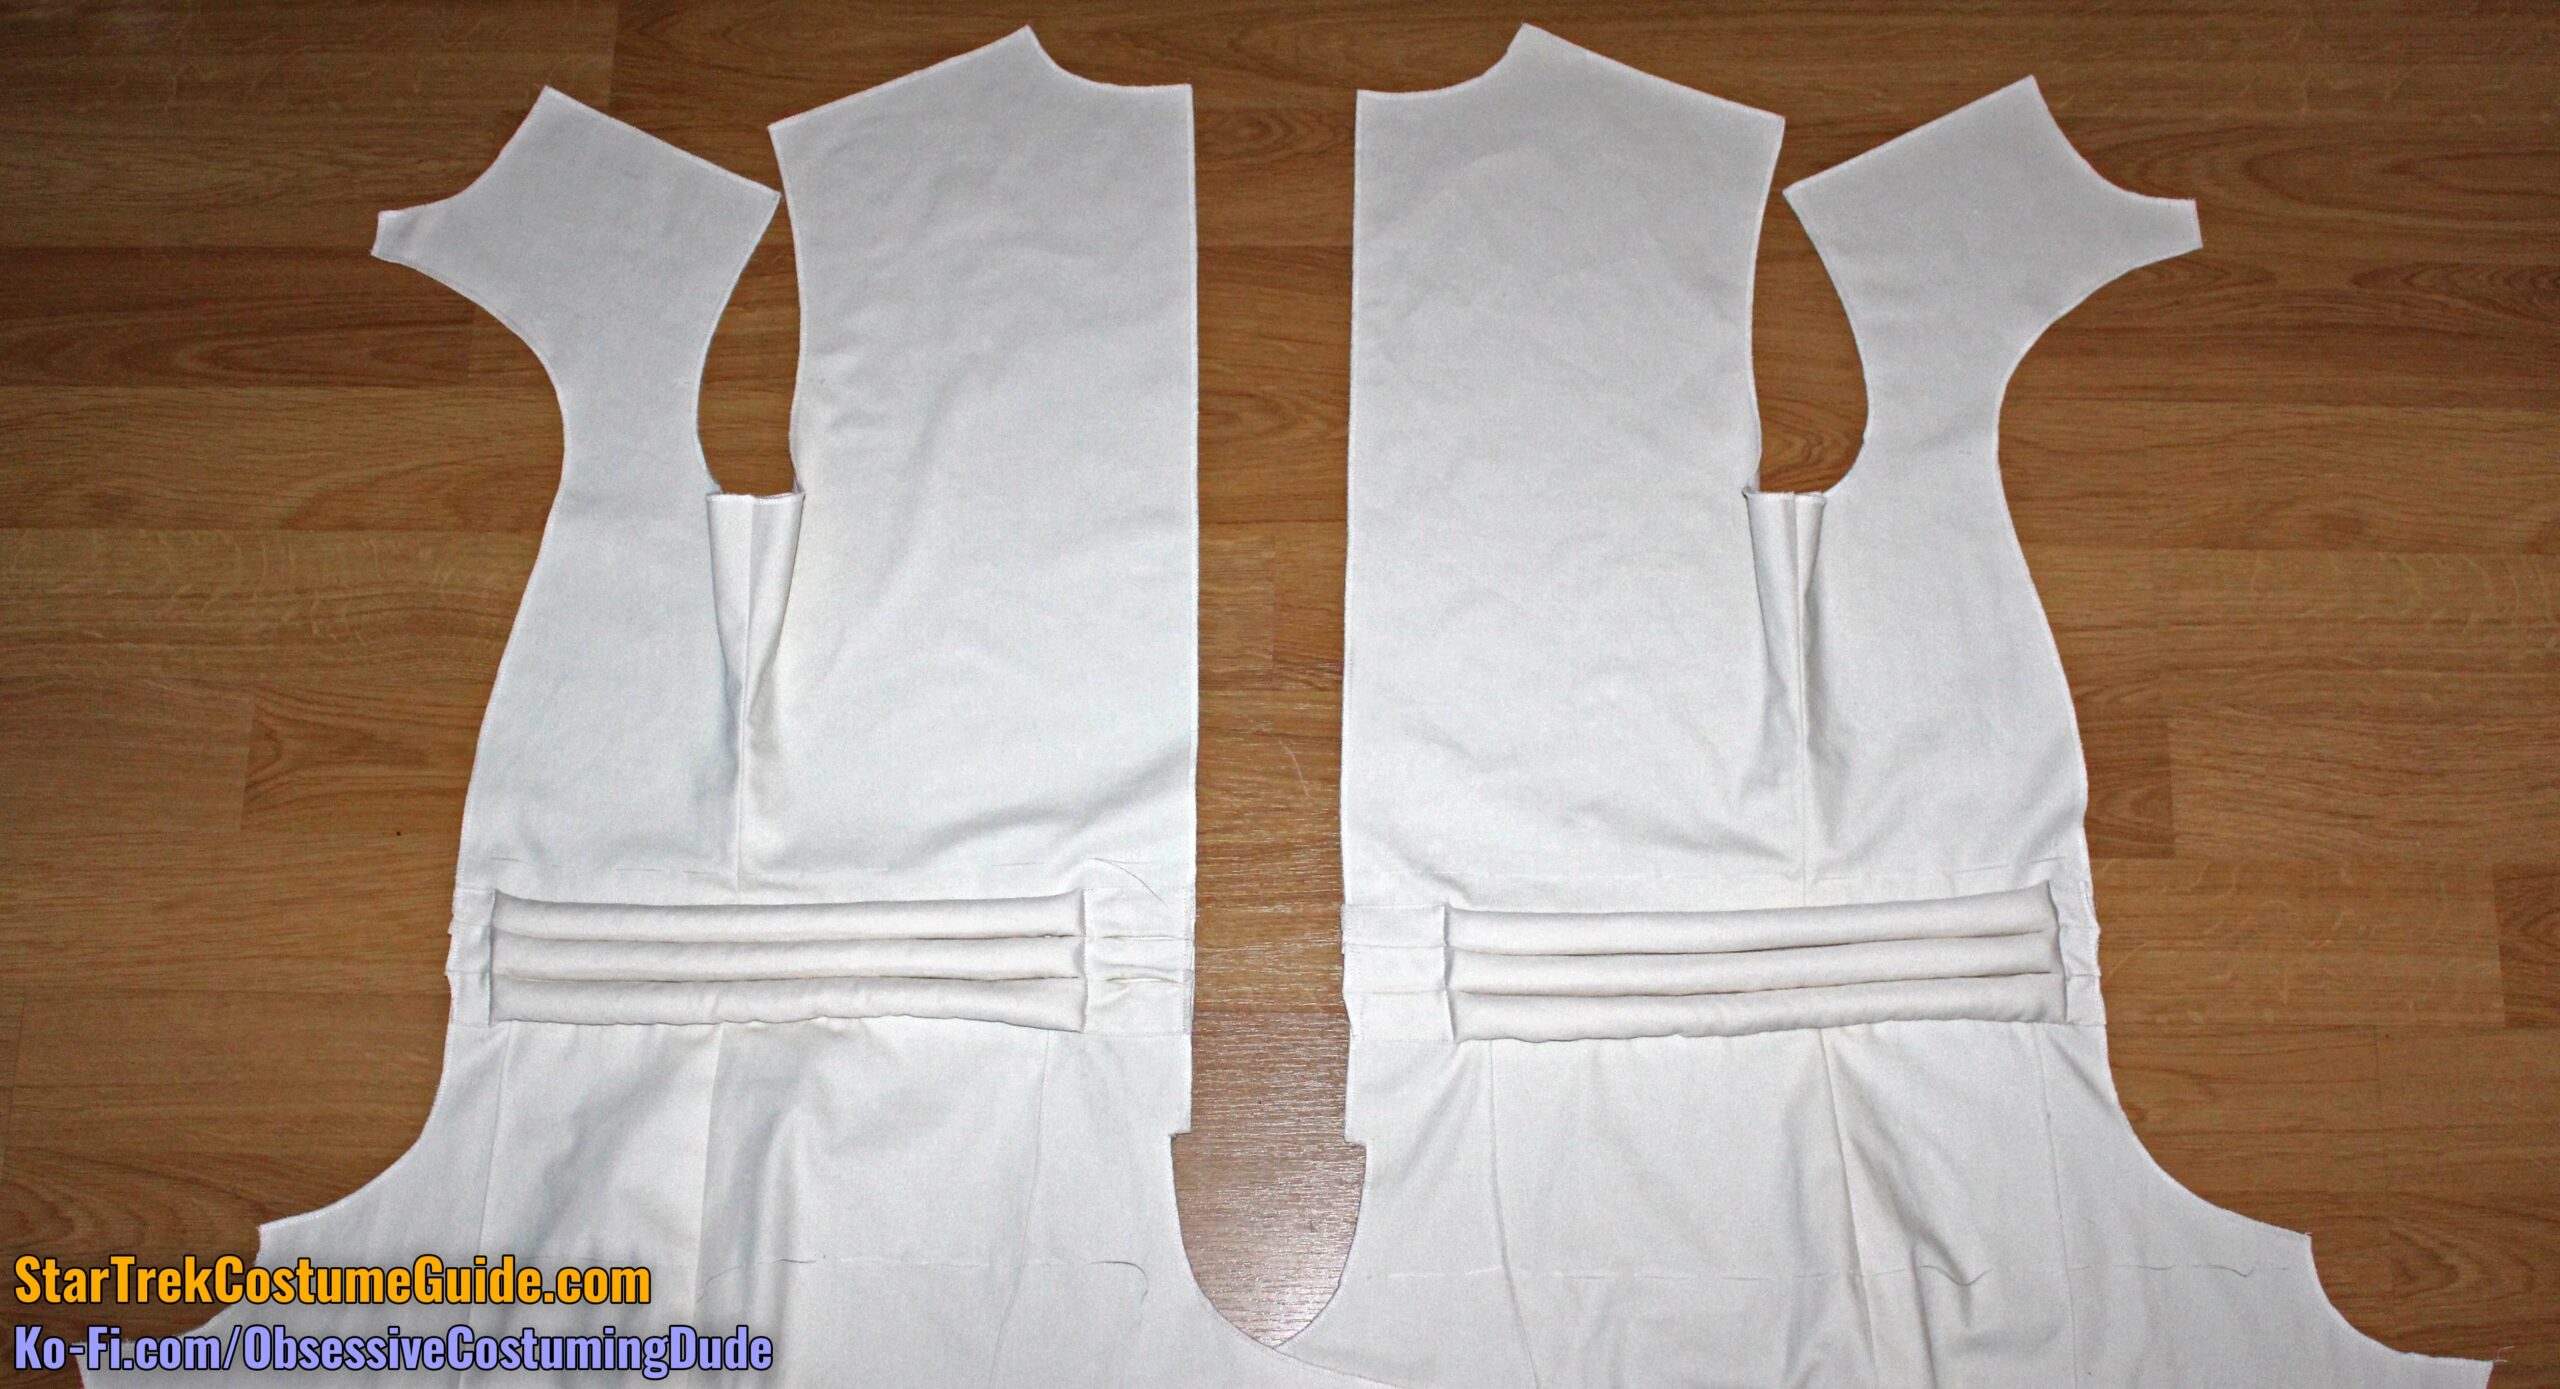
CUTTING YOUR FABRIC
I prefer to trace the pattern pieces onto the fabric before cutting, ideally with something temporary like disappearing tailor’s chalk.
But with this being white/off-white fabric, I simply traced it with a fine-tip Sharpie.
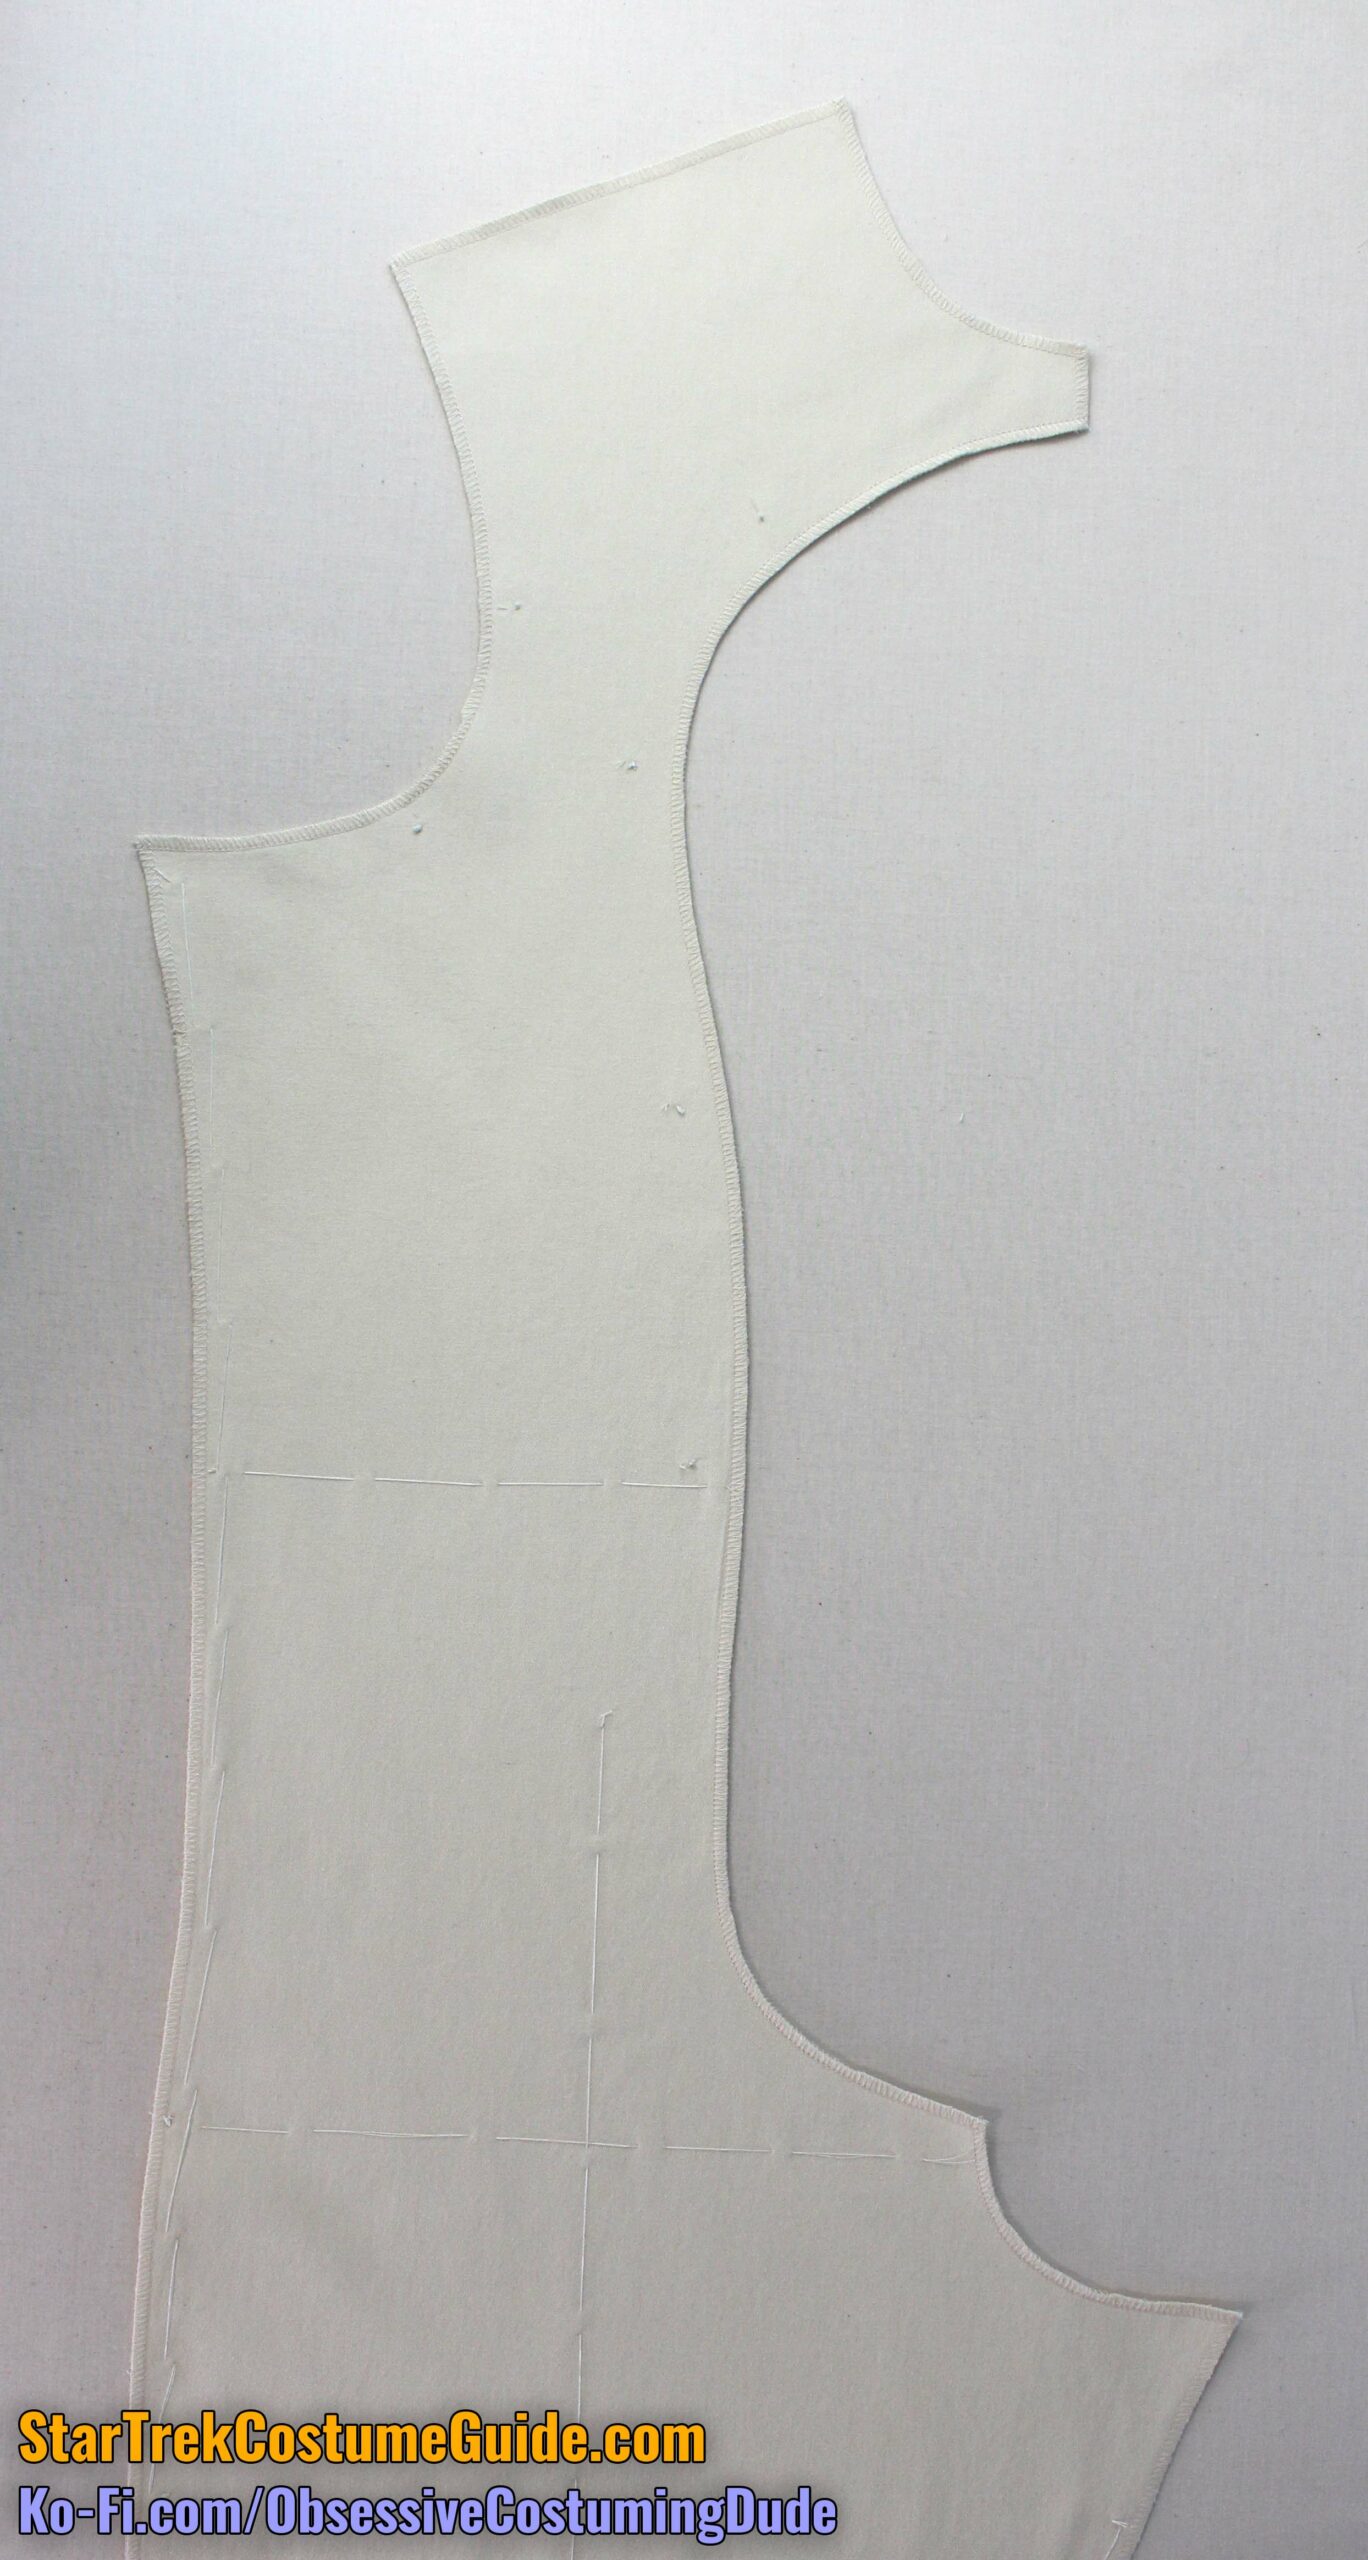
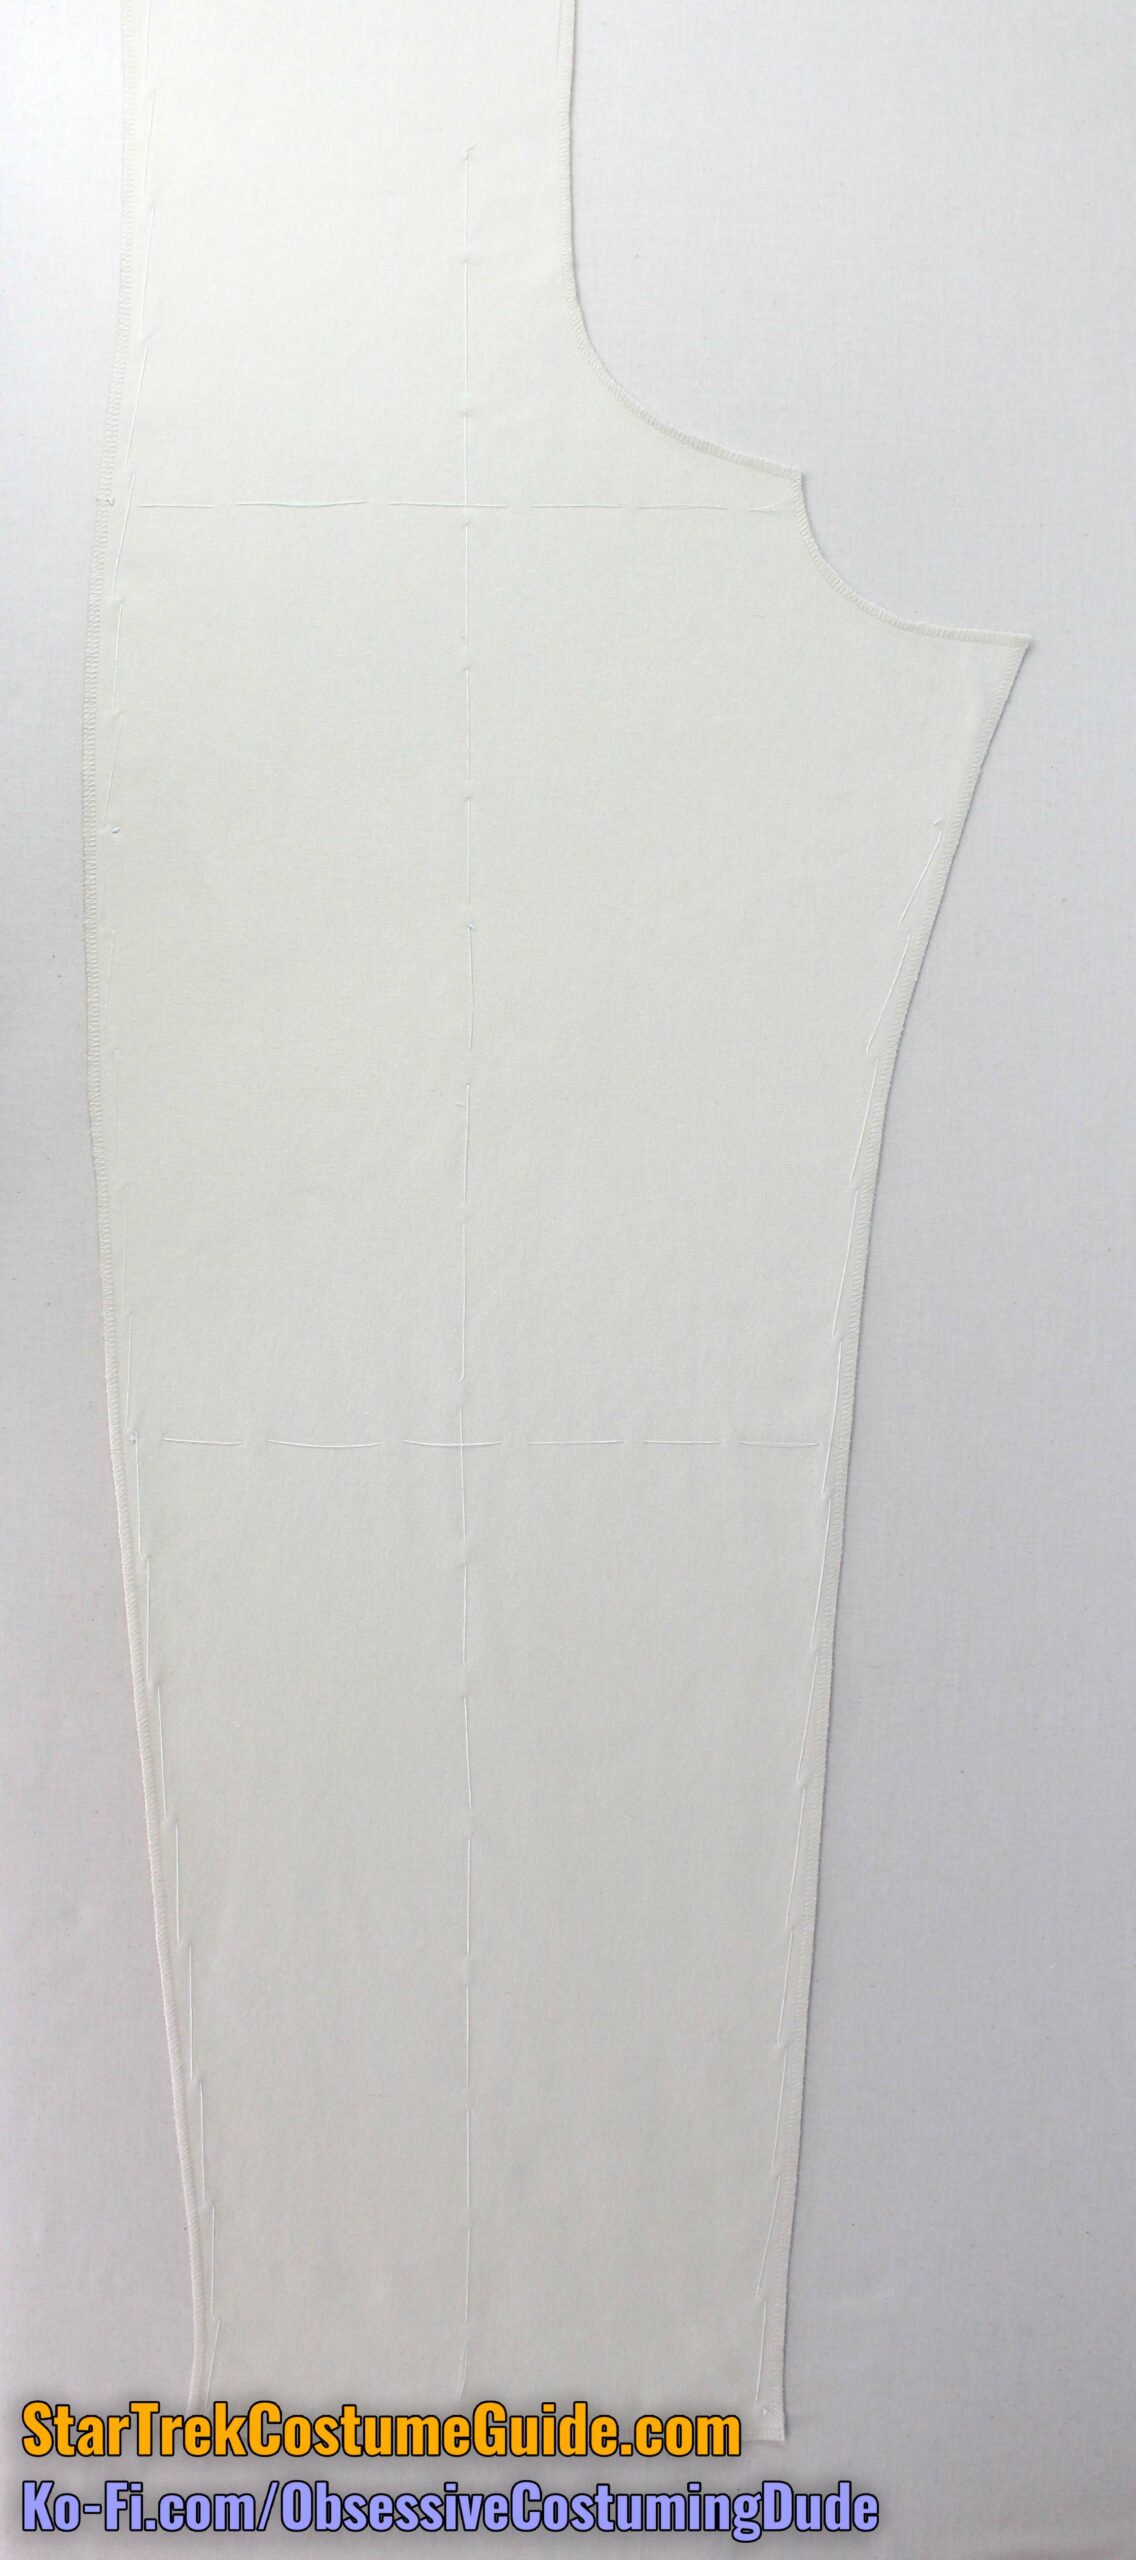
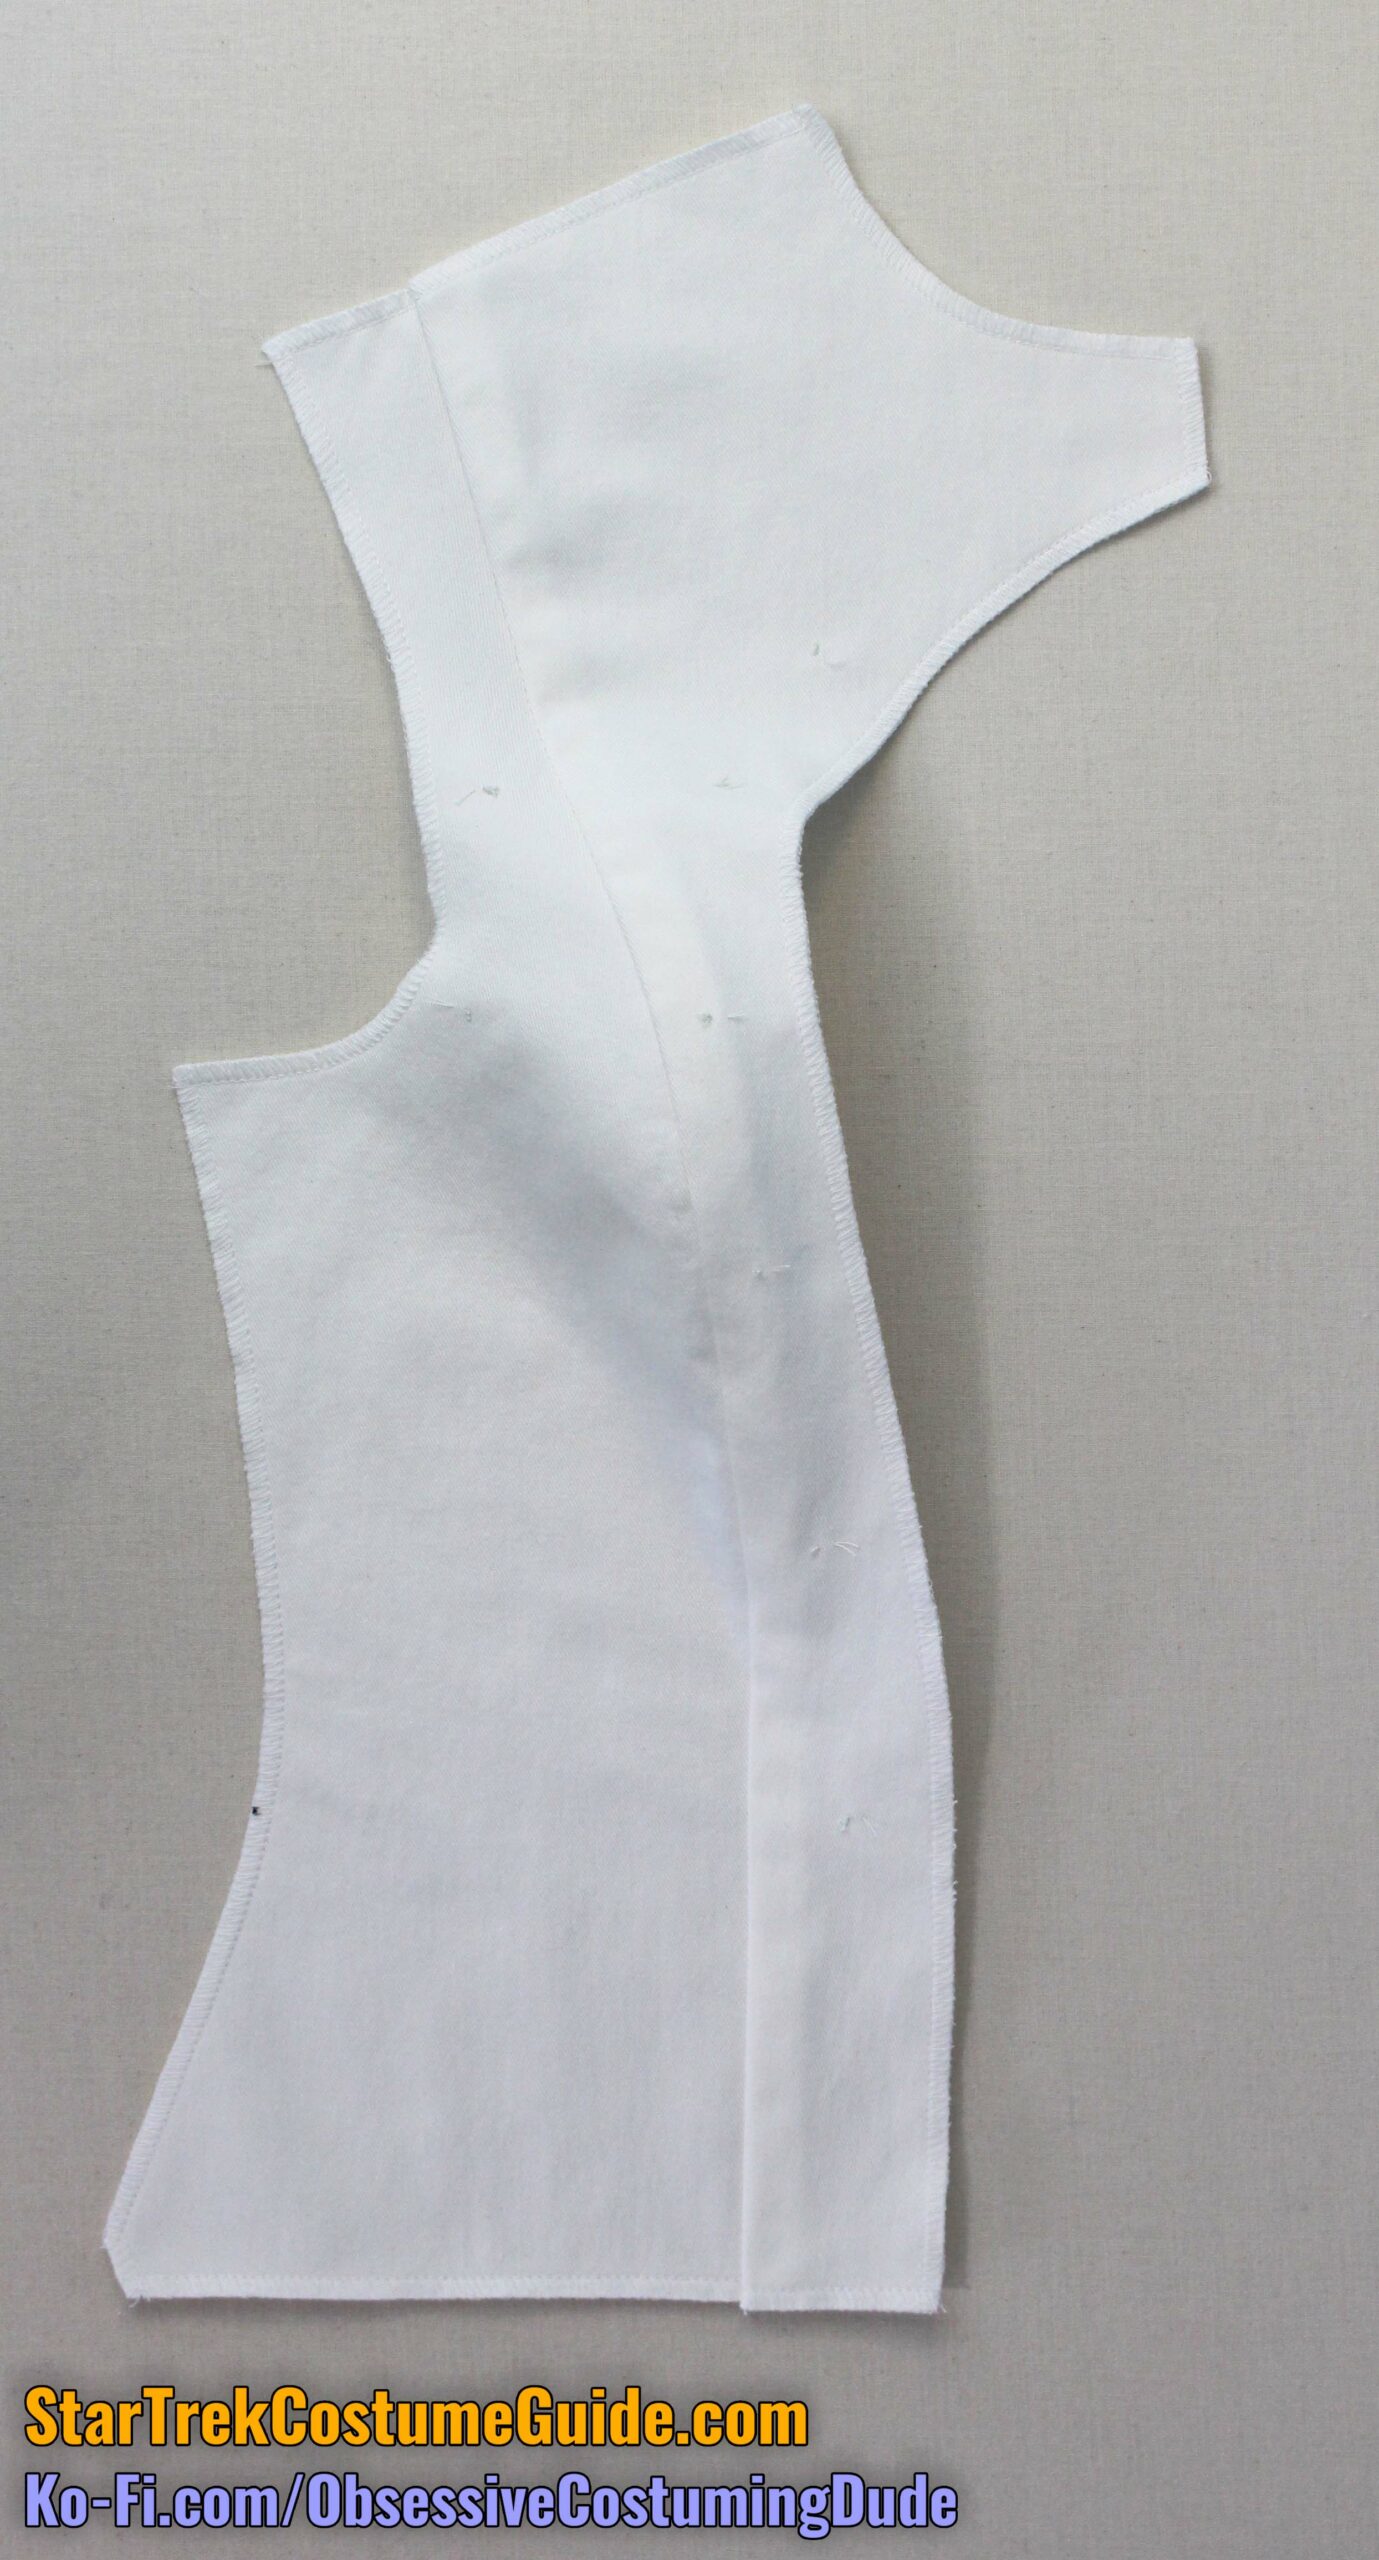
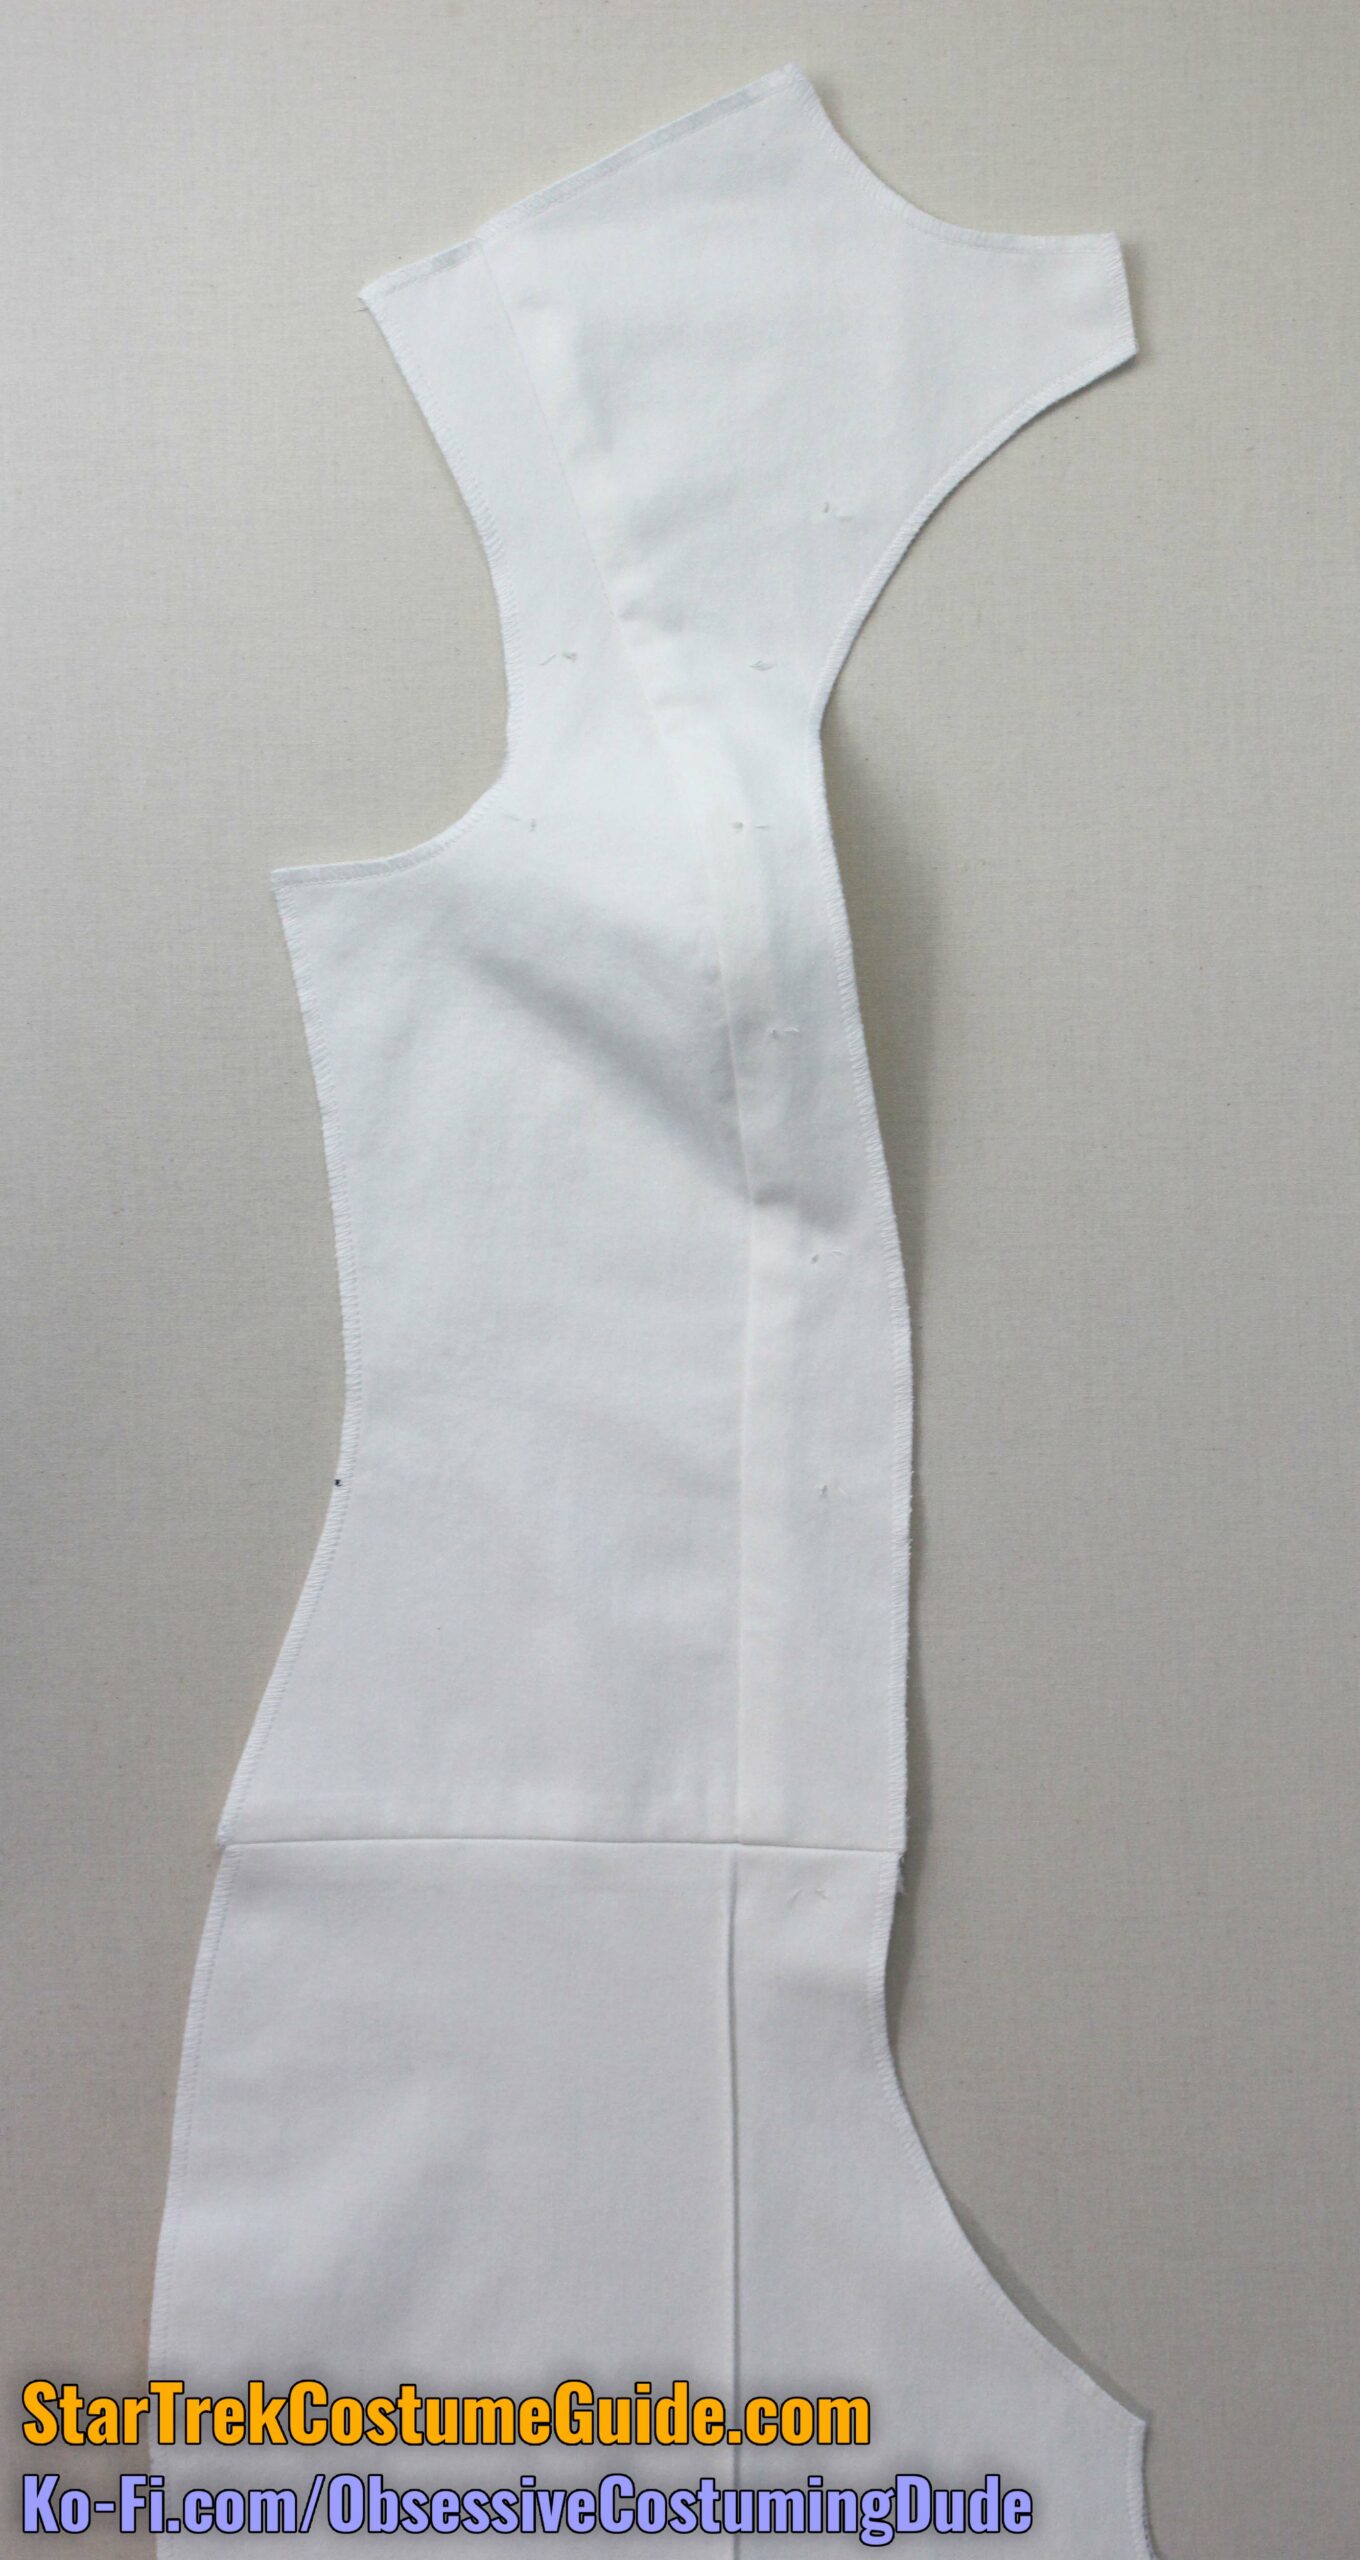
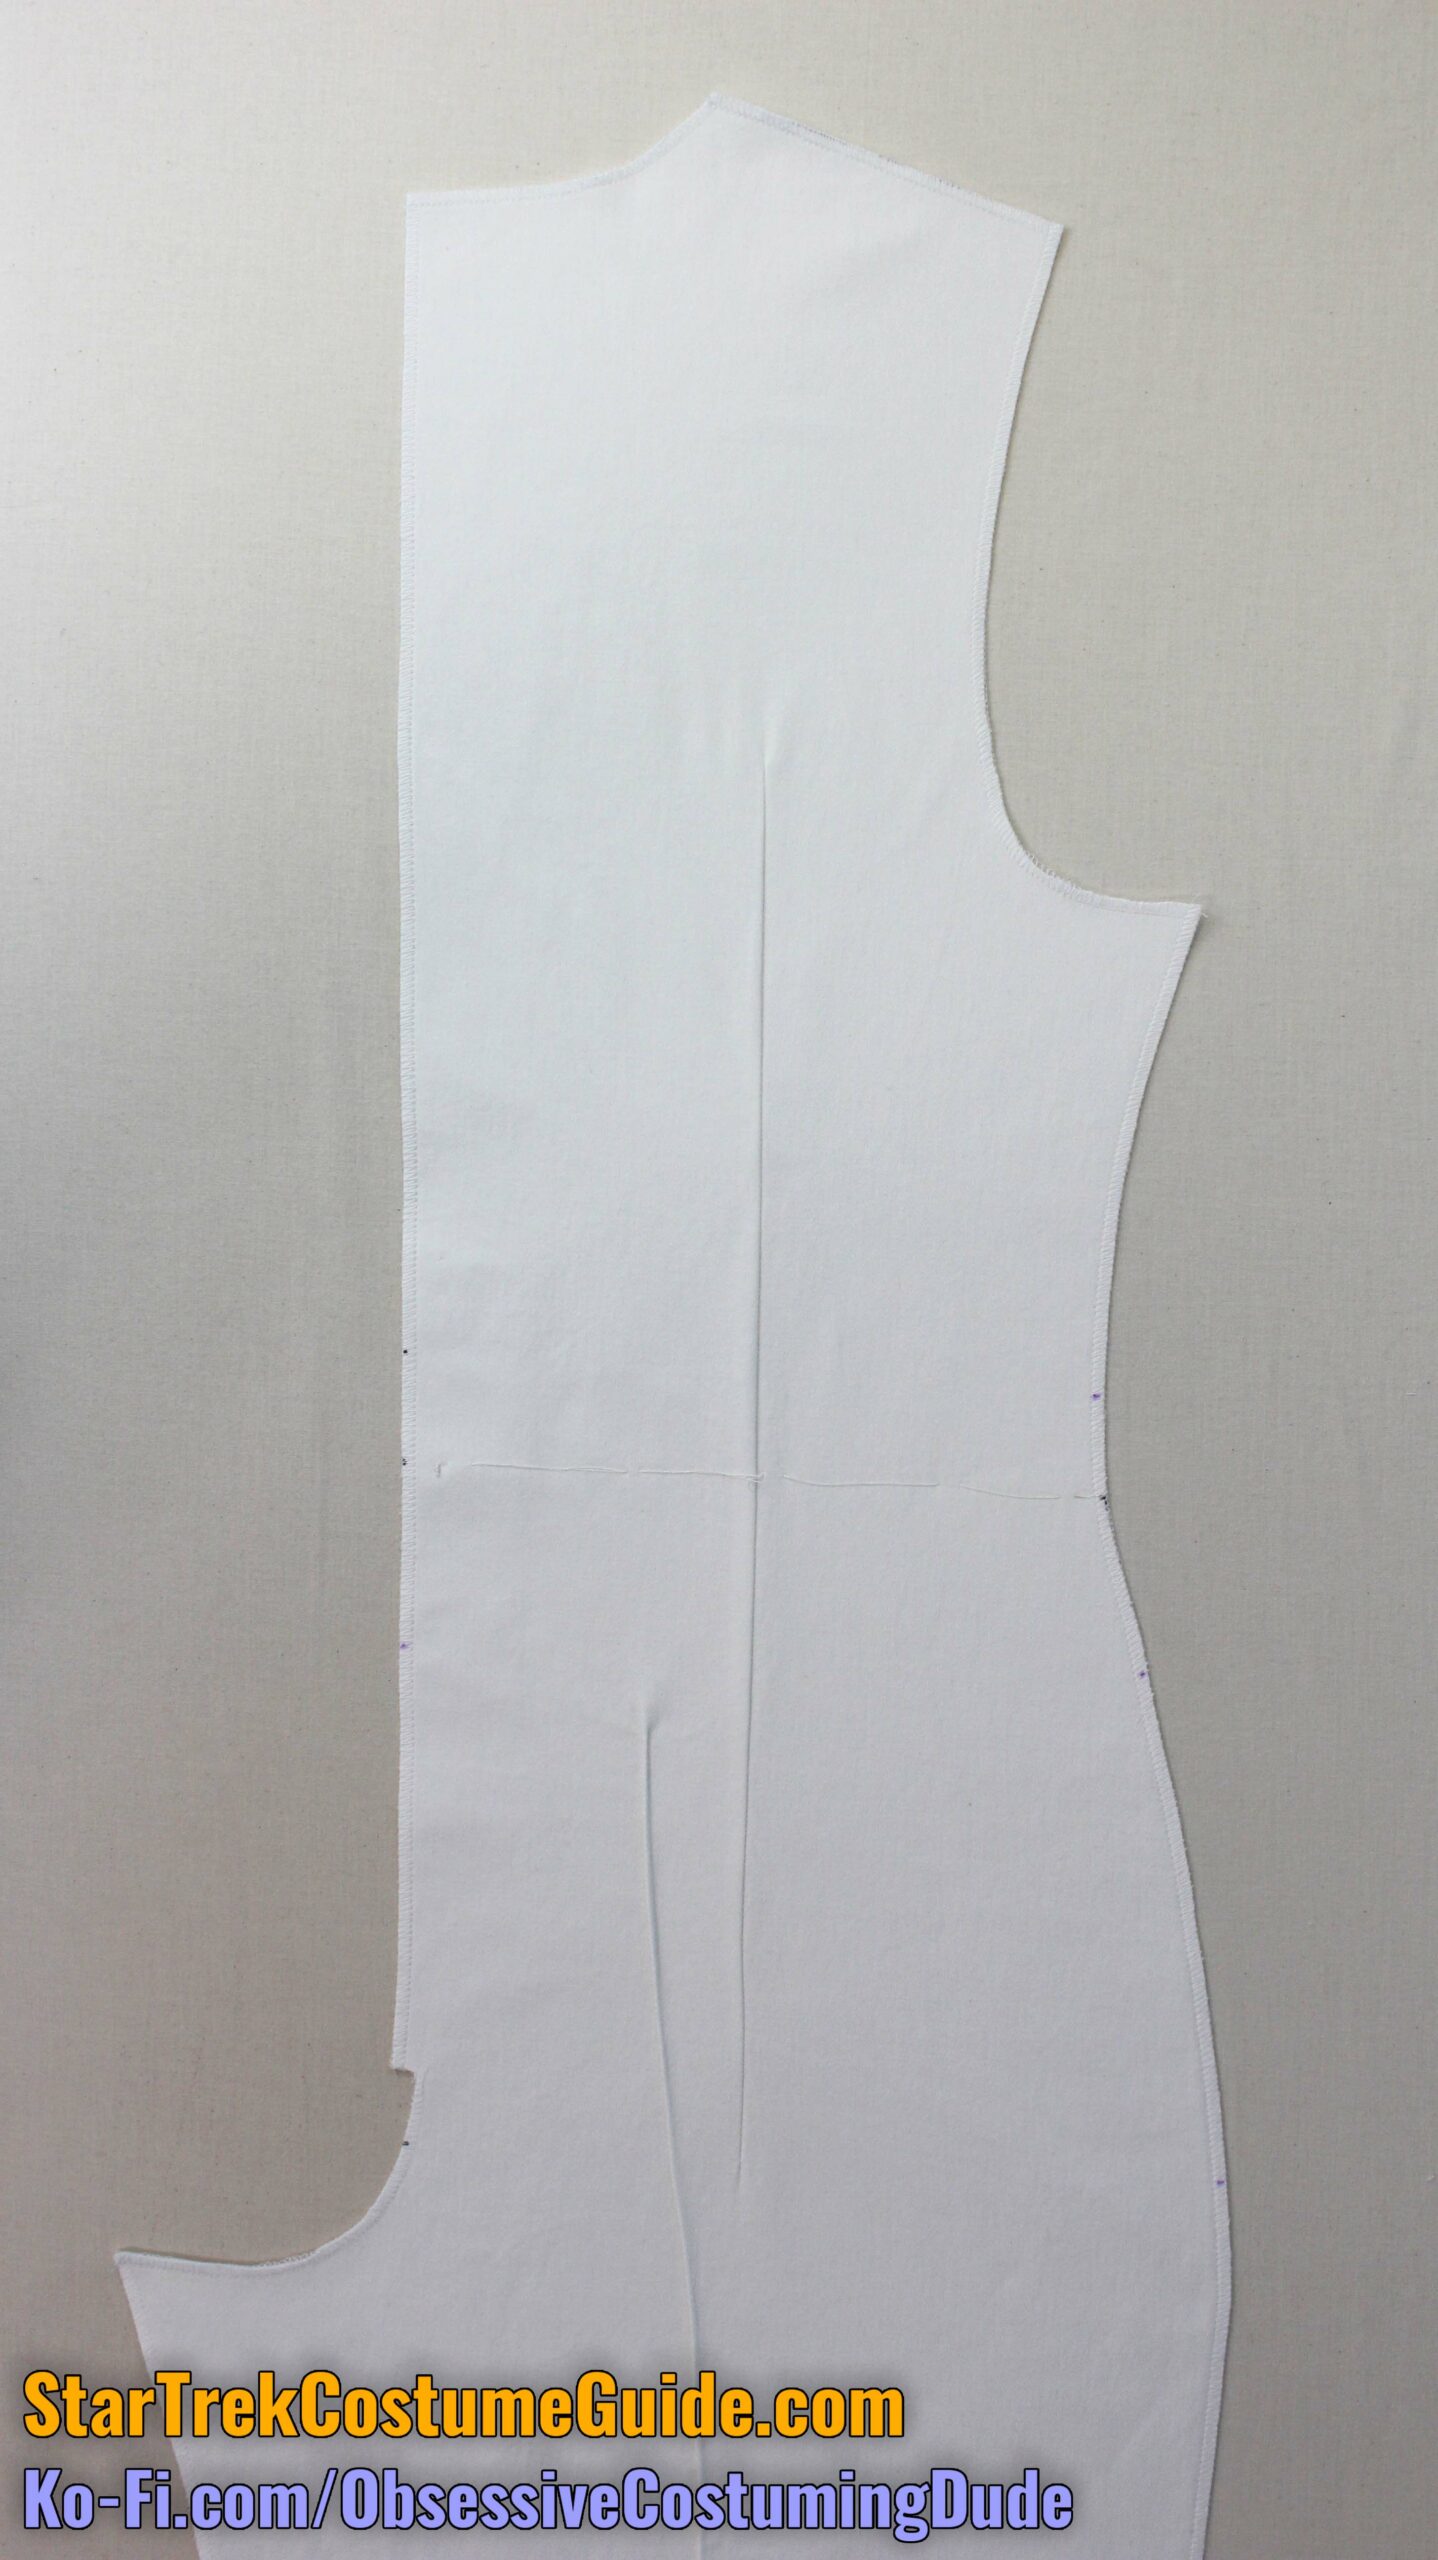
I strongly recommend tailor-basting the shell fabric and muslin underlining together near the edges and along the lengthen/shorten lines, then cutting the two layers simultaneously (except on the center front panel, piece B).
I also suggest making the pant leg pleats with a vertical row of tailor-basting or basic running stitch, and the various balance points with tailor’s tacks.
After you’ve cut your jumpsuit body panels, serge the shell/underlining layers together along every edge (except on the center front panel, piece B).
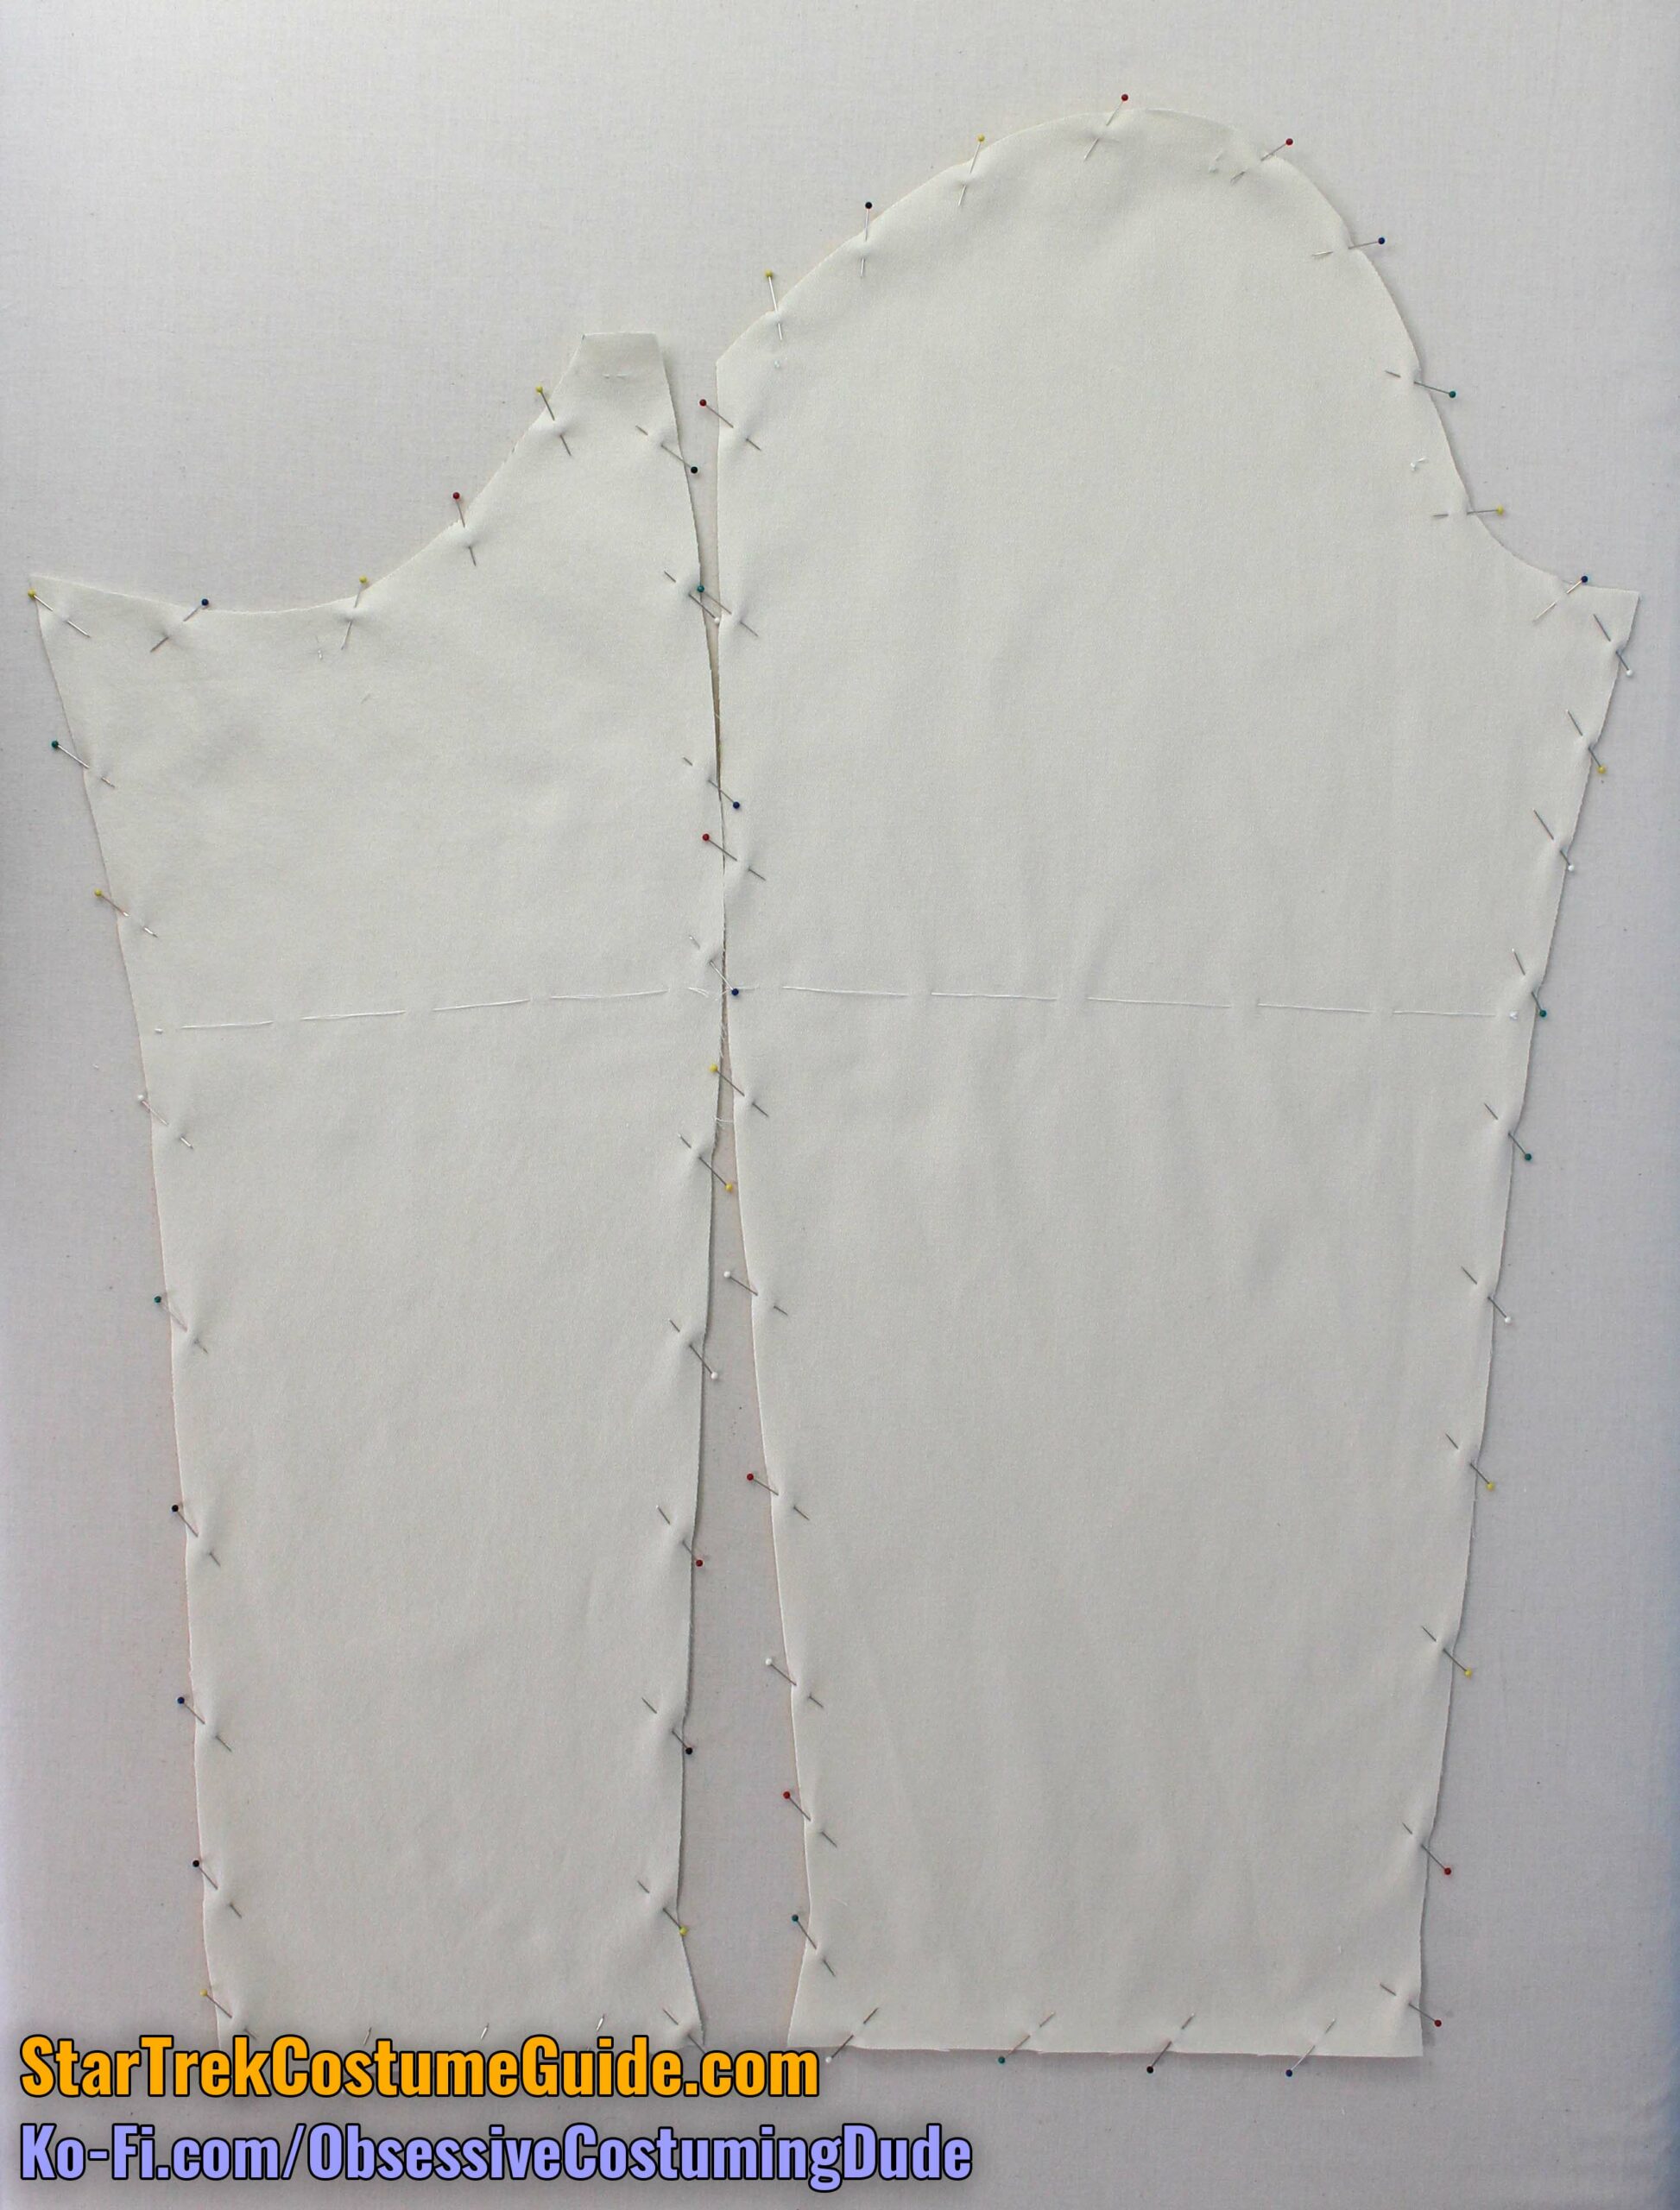
For the sleeves, you can tailor-baste the layers together if you’d like, but they’re small enough that you can probably get away with just pinning them together along the edges.
I do suggest doing a horizontal running stitch across the upper edge of the sleeve tubing, though.
Serge the sleeve shell/underlining layers together.
SEWING THE JUMPSUIT
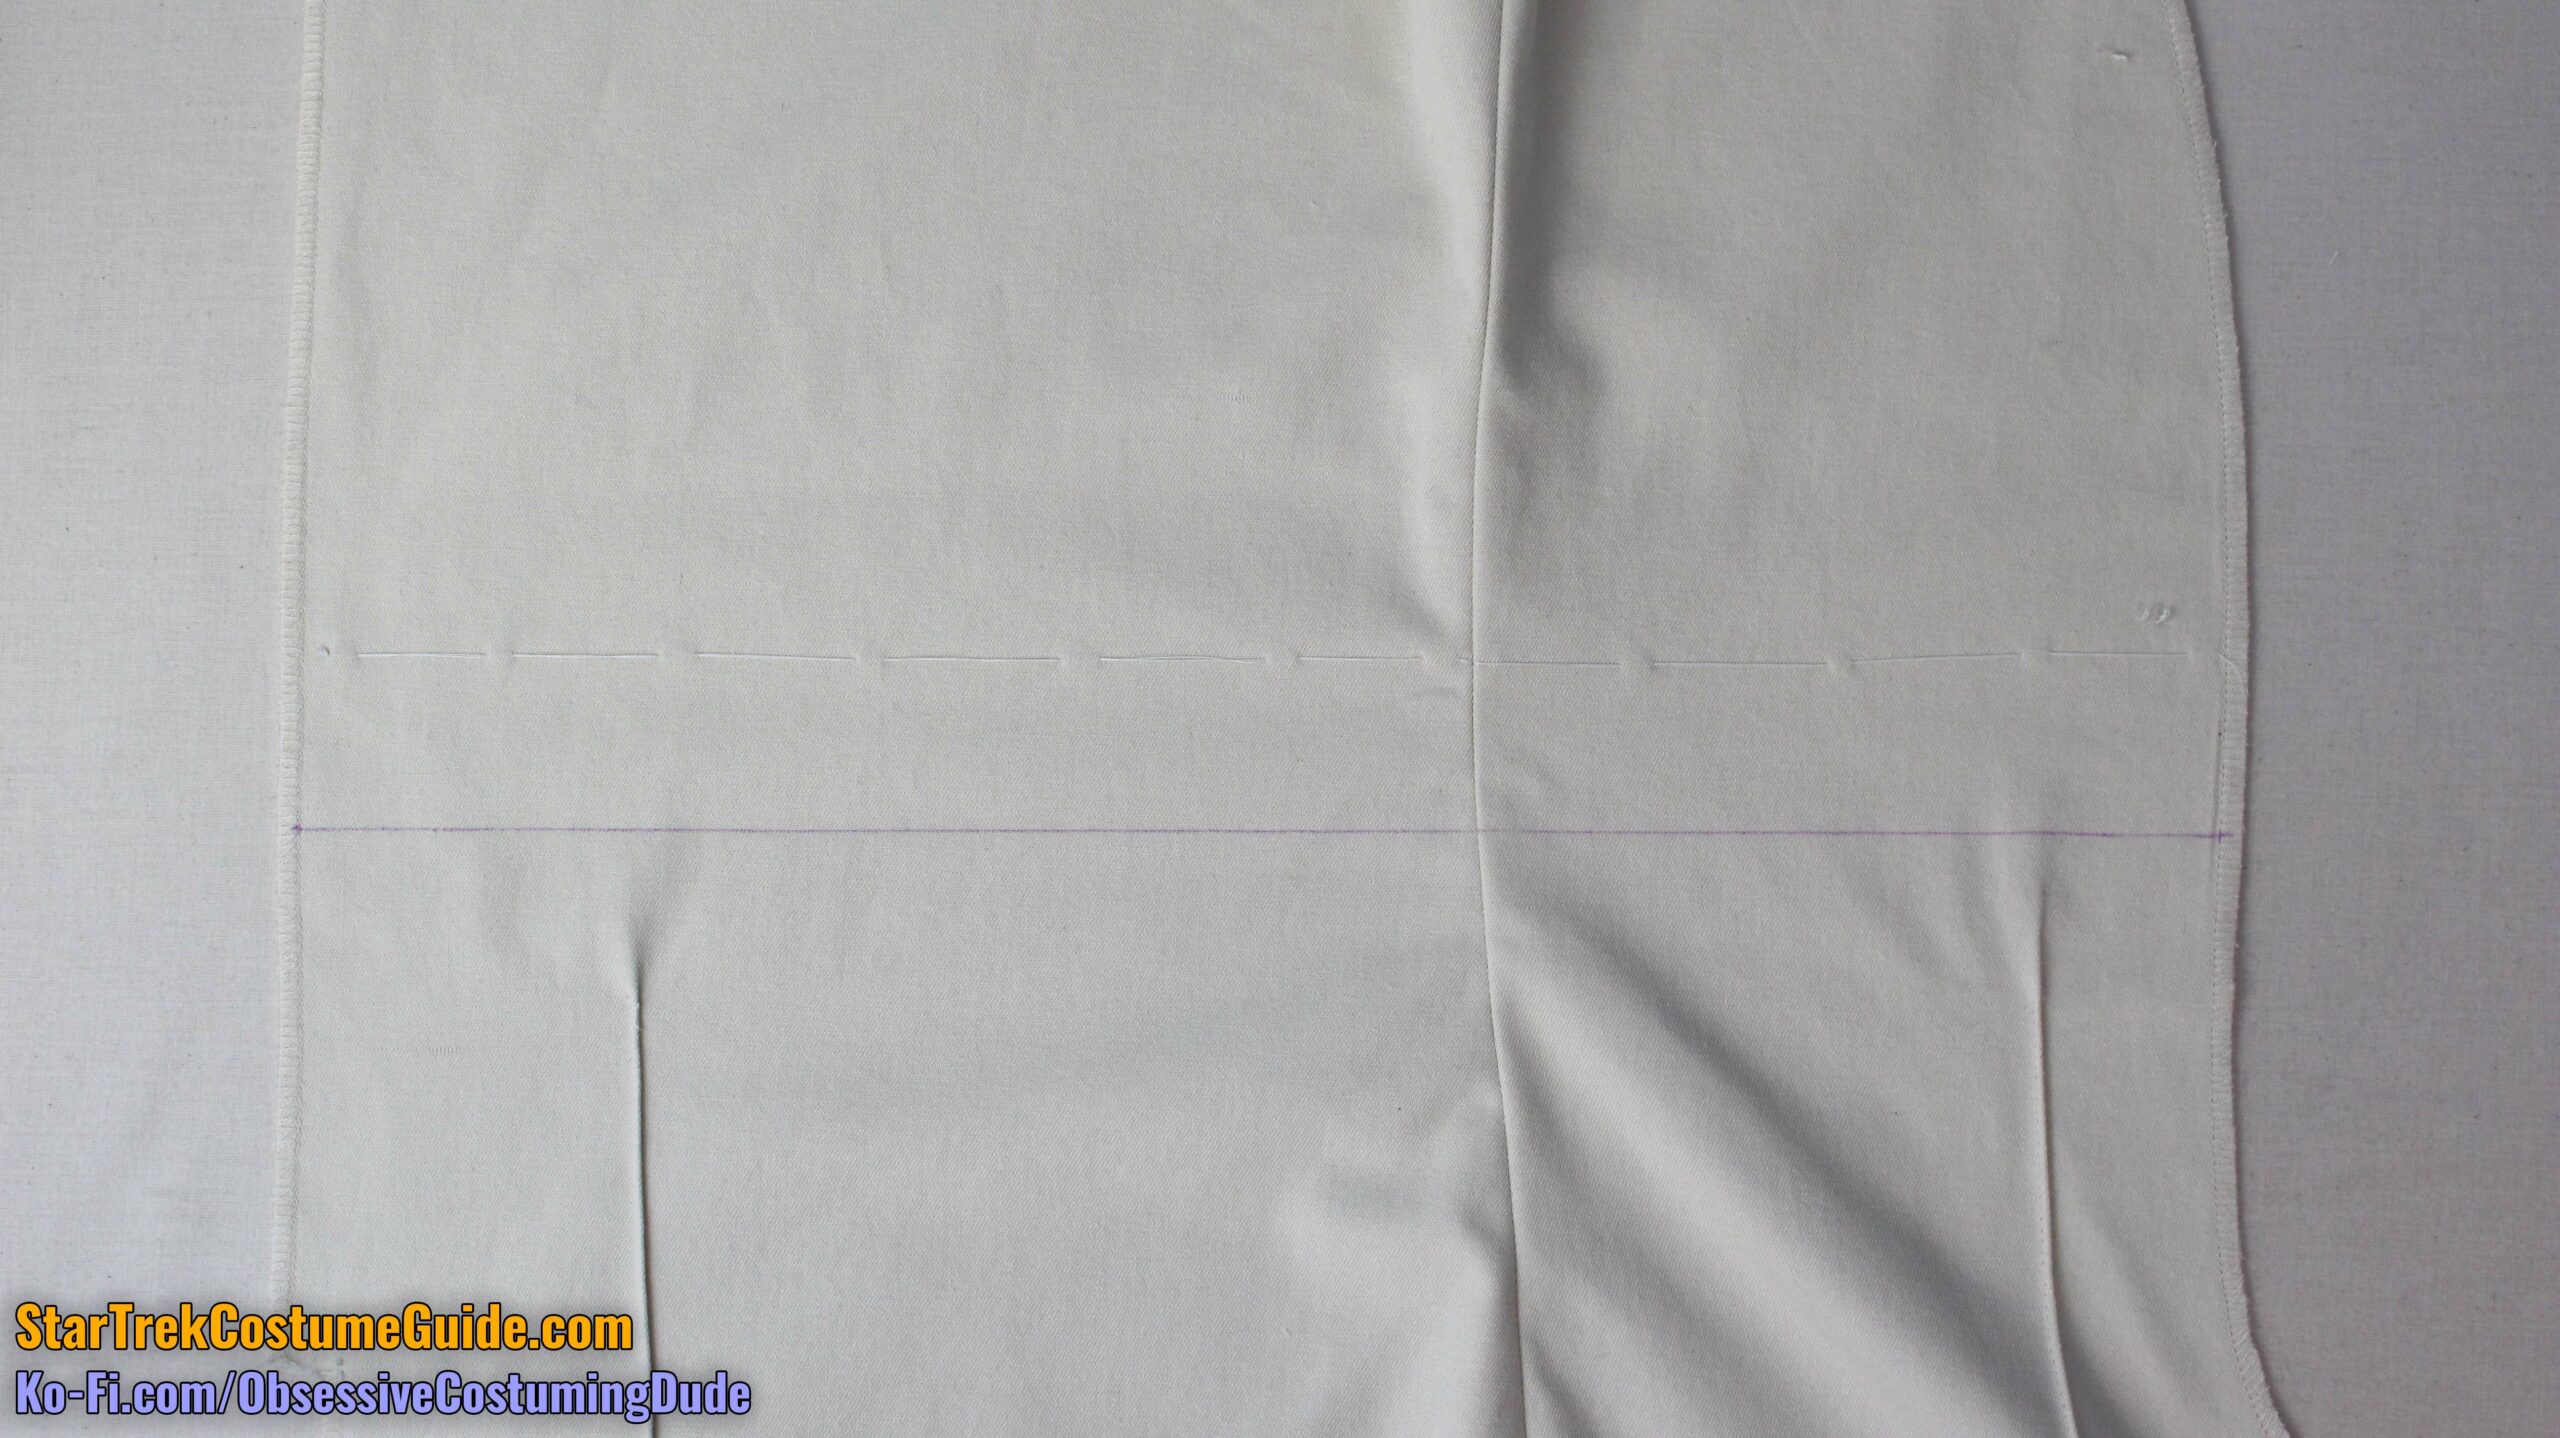
Fold the pant leg wrong-sides-together along the pleat line on the jumpsuit front (piece C on the men’s pattern, piece C3 on the women’s pattern).
Stitch the small pleat into place ⅛” inside the folded edge, from about an inch beneath the upper edge of the waist tubing all the way down to the bottom of the pant leg.
Press the pleat toward the center.
Repeat for the other front pant leg, and both back pant legs (piece D).
On the men’s pattern, the jumpsuit front is one single piece (not including the front panel).
On the women’s pattern, the jumpsuit front is divided into three pieces which need to be sewn together.
(I’m not sure exactly how the original women’s jumpsuits were patterned, but I think this way makes sense and is the most convenient way to reproduce the look and fit of the originals.)
For the women’s jumpsuit, sew the upper center front (piece C1) to the upper side front (piece C2) with ½” seam allowance, matching balance points along the princess seam.
Press the seam allowances toward the front.
Sew the upper front assembly to the lower front (piece C3).
Press the seam allowances open.
On the women’s jumpsuit back (piece D), sew the fitting darts closed and press them toward the center back.
Sew one jumpsuit front to the corresponding jumpsuit back along the sides with 1” seam allowance.
Press the seam allowances open.
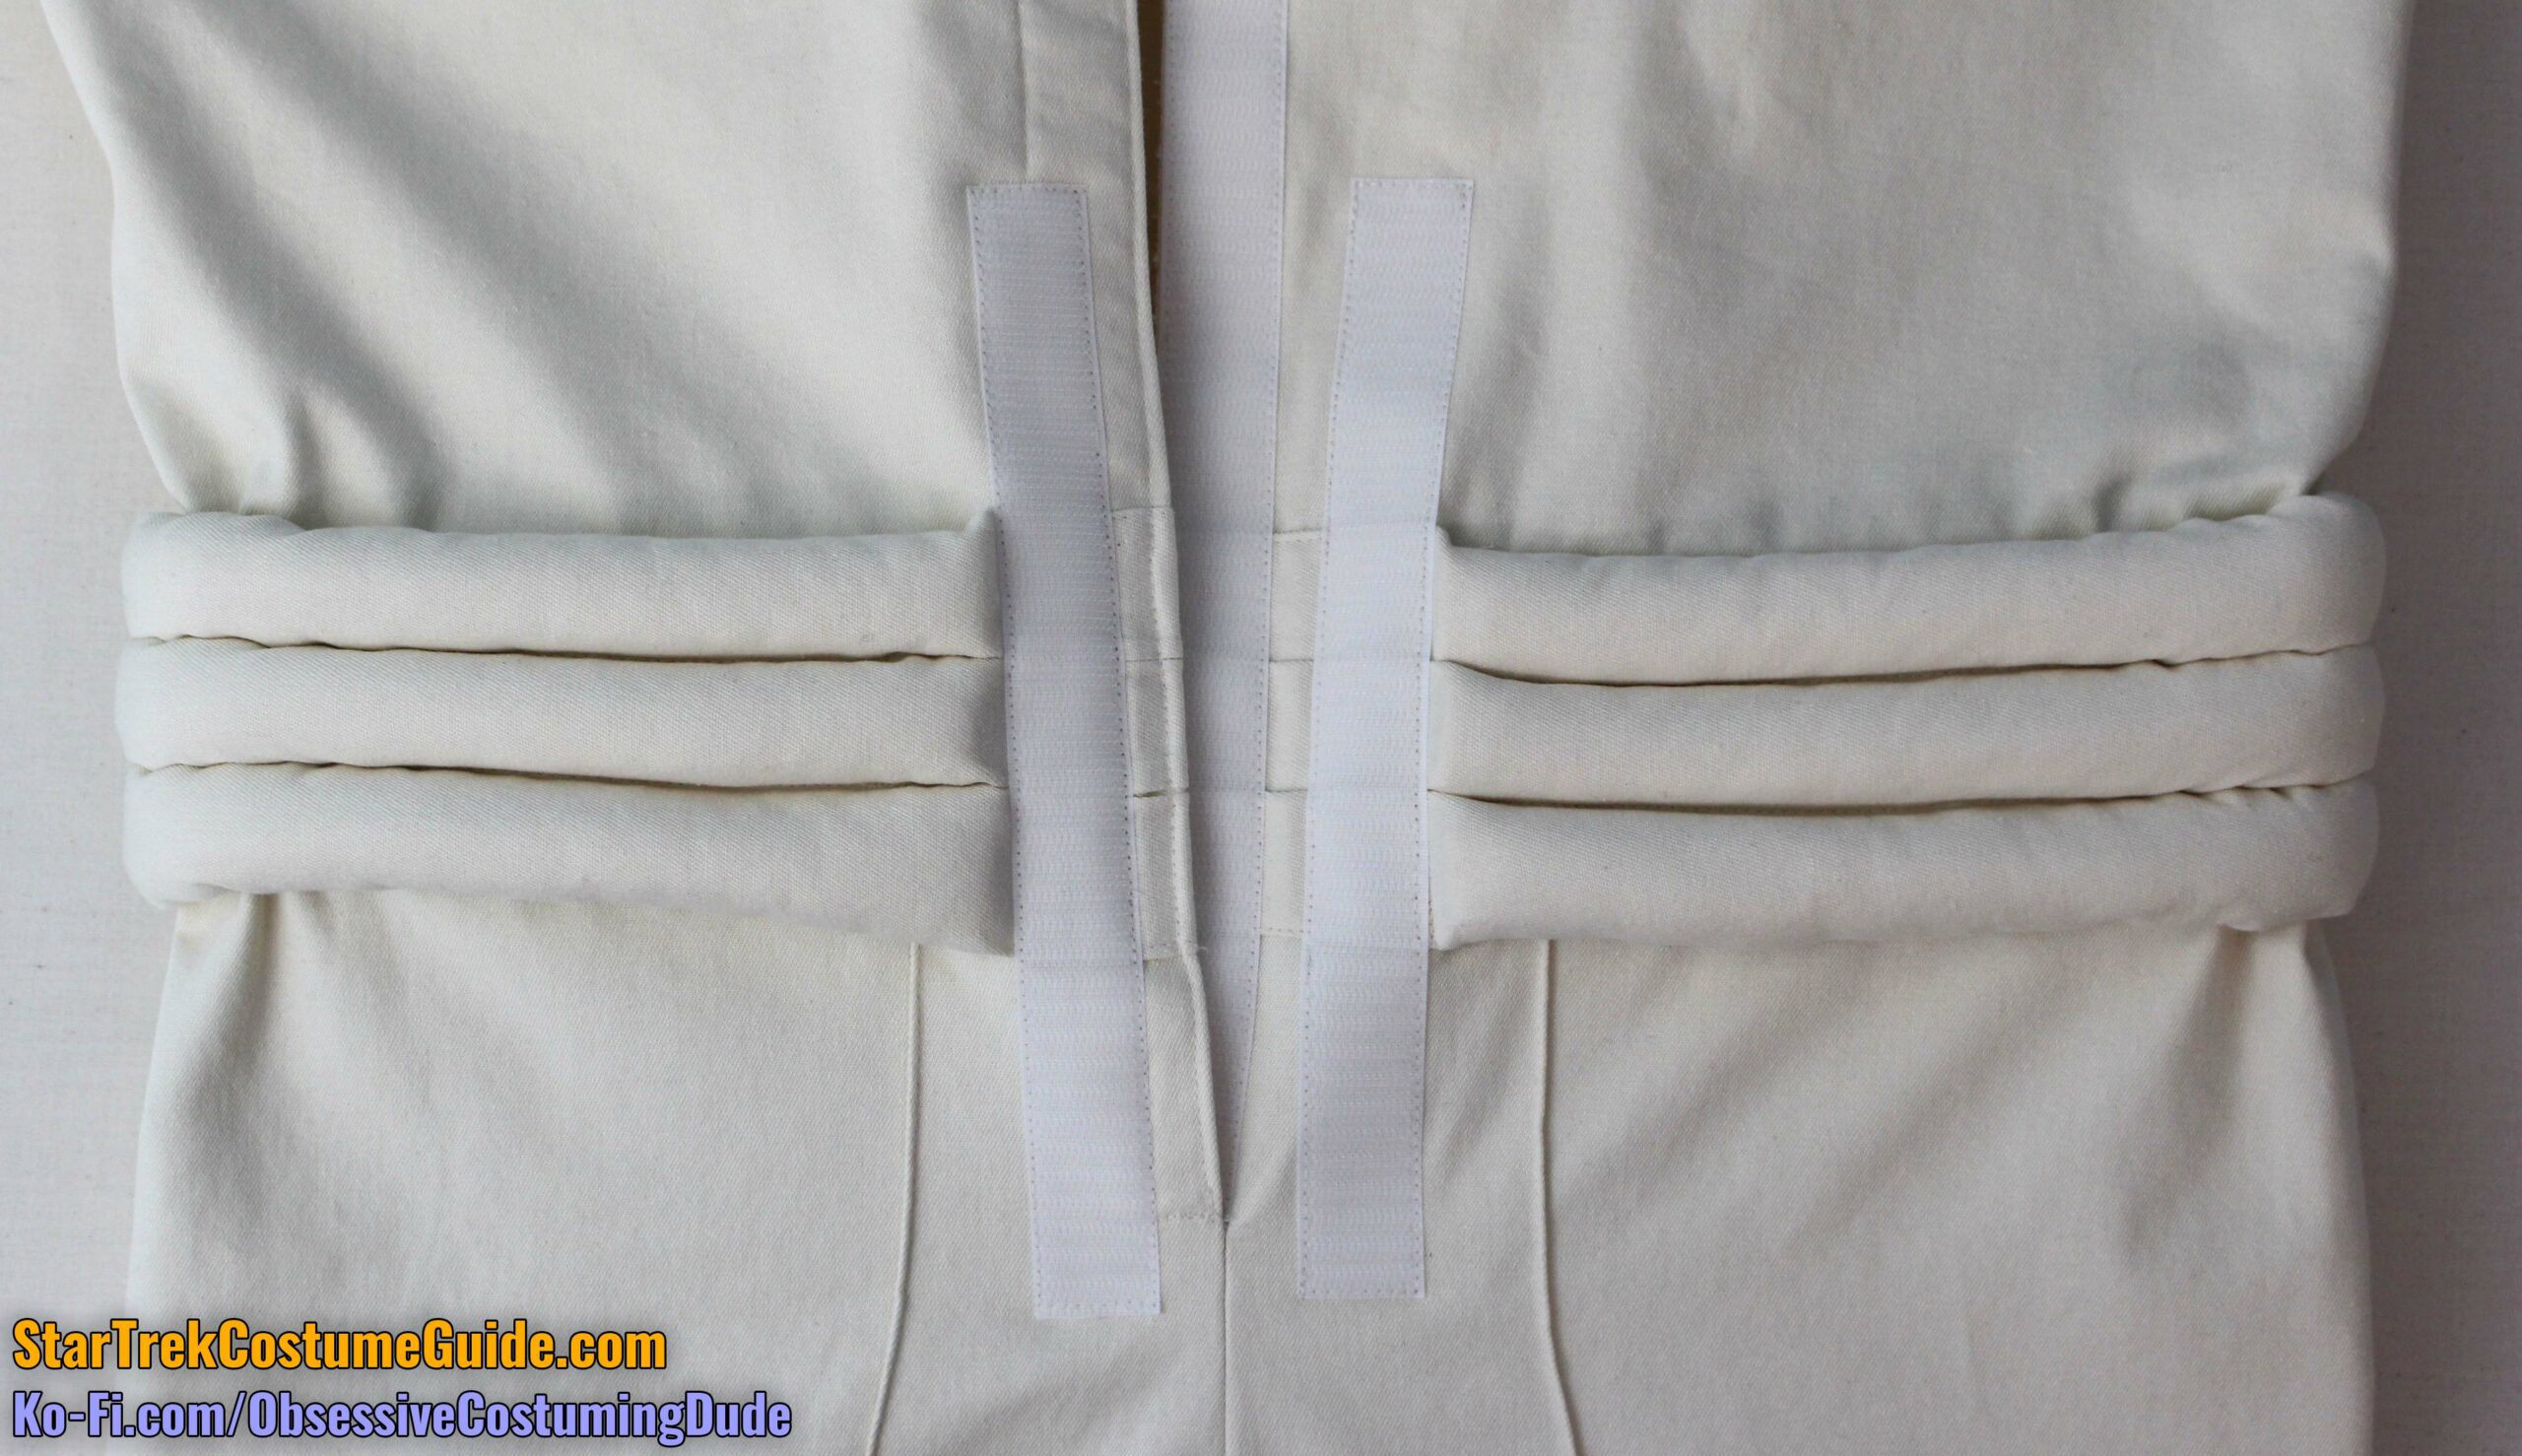
The upper edge of the waist tubing is marked for you on the pattern.
There is a pattern piece for the waist tubing channel (piece H), but it’s just a rectangle of bias-cut fabric 6 ½” tall.
You can serge the edges if you like, but bias-cut fabric edges generally don’t fray much, and the channel edges weren’t serged on the screen-used costume I examined.
Place your waist tubing channel on top of your jumpsuit and trim it down to the size of your jumpsuit waist, plus about an inch for tubing ease.
Position your waist tubing channel onto the jumpsuit, right-sides-together, so the lower edge is flush with the line you drew on the jumpsuit.
Pin the channel to the jumpsuit with the front and back ends flush with the jumpsuit edges, easing in the excess as evenly as you can.
Sew the channel to the jumpsuit ½” above the raw edge (which should be exactly along the pattern’s alignment guide, with ½” seam allowance along the edge of the channel).
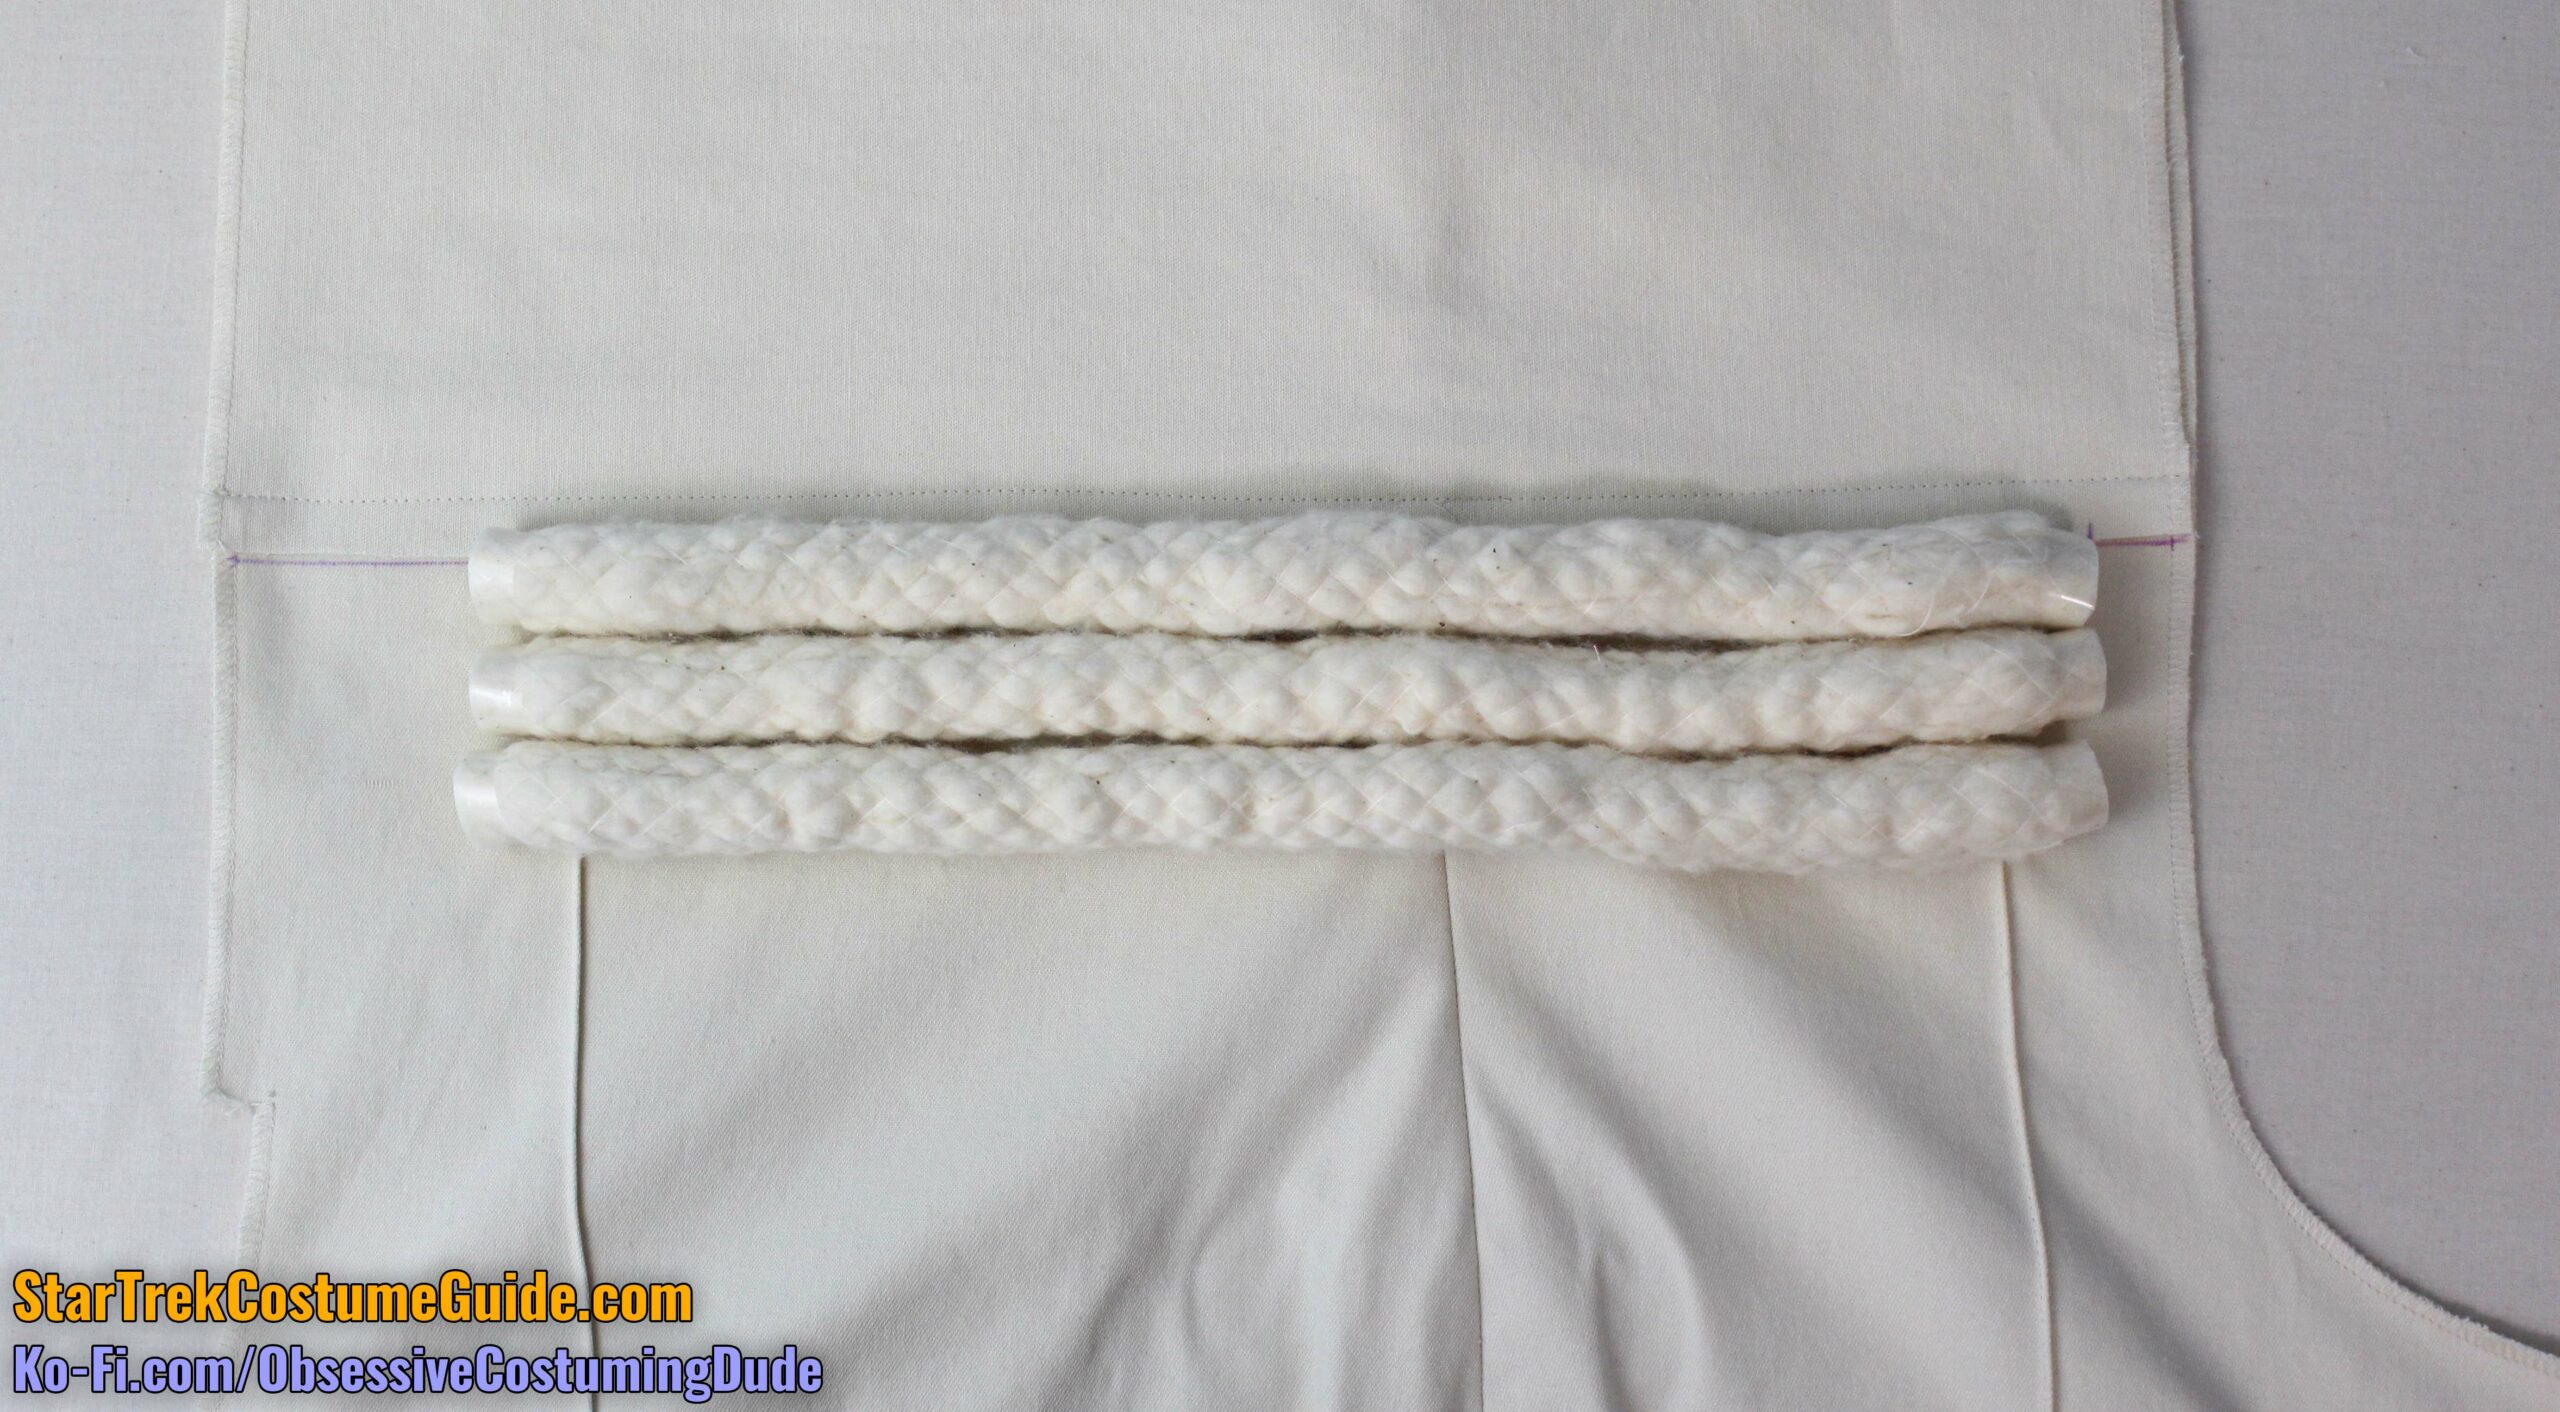
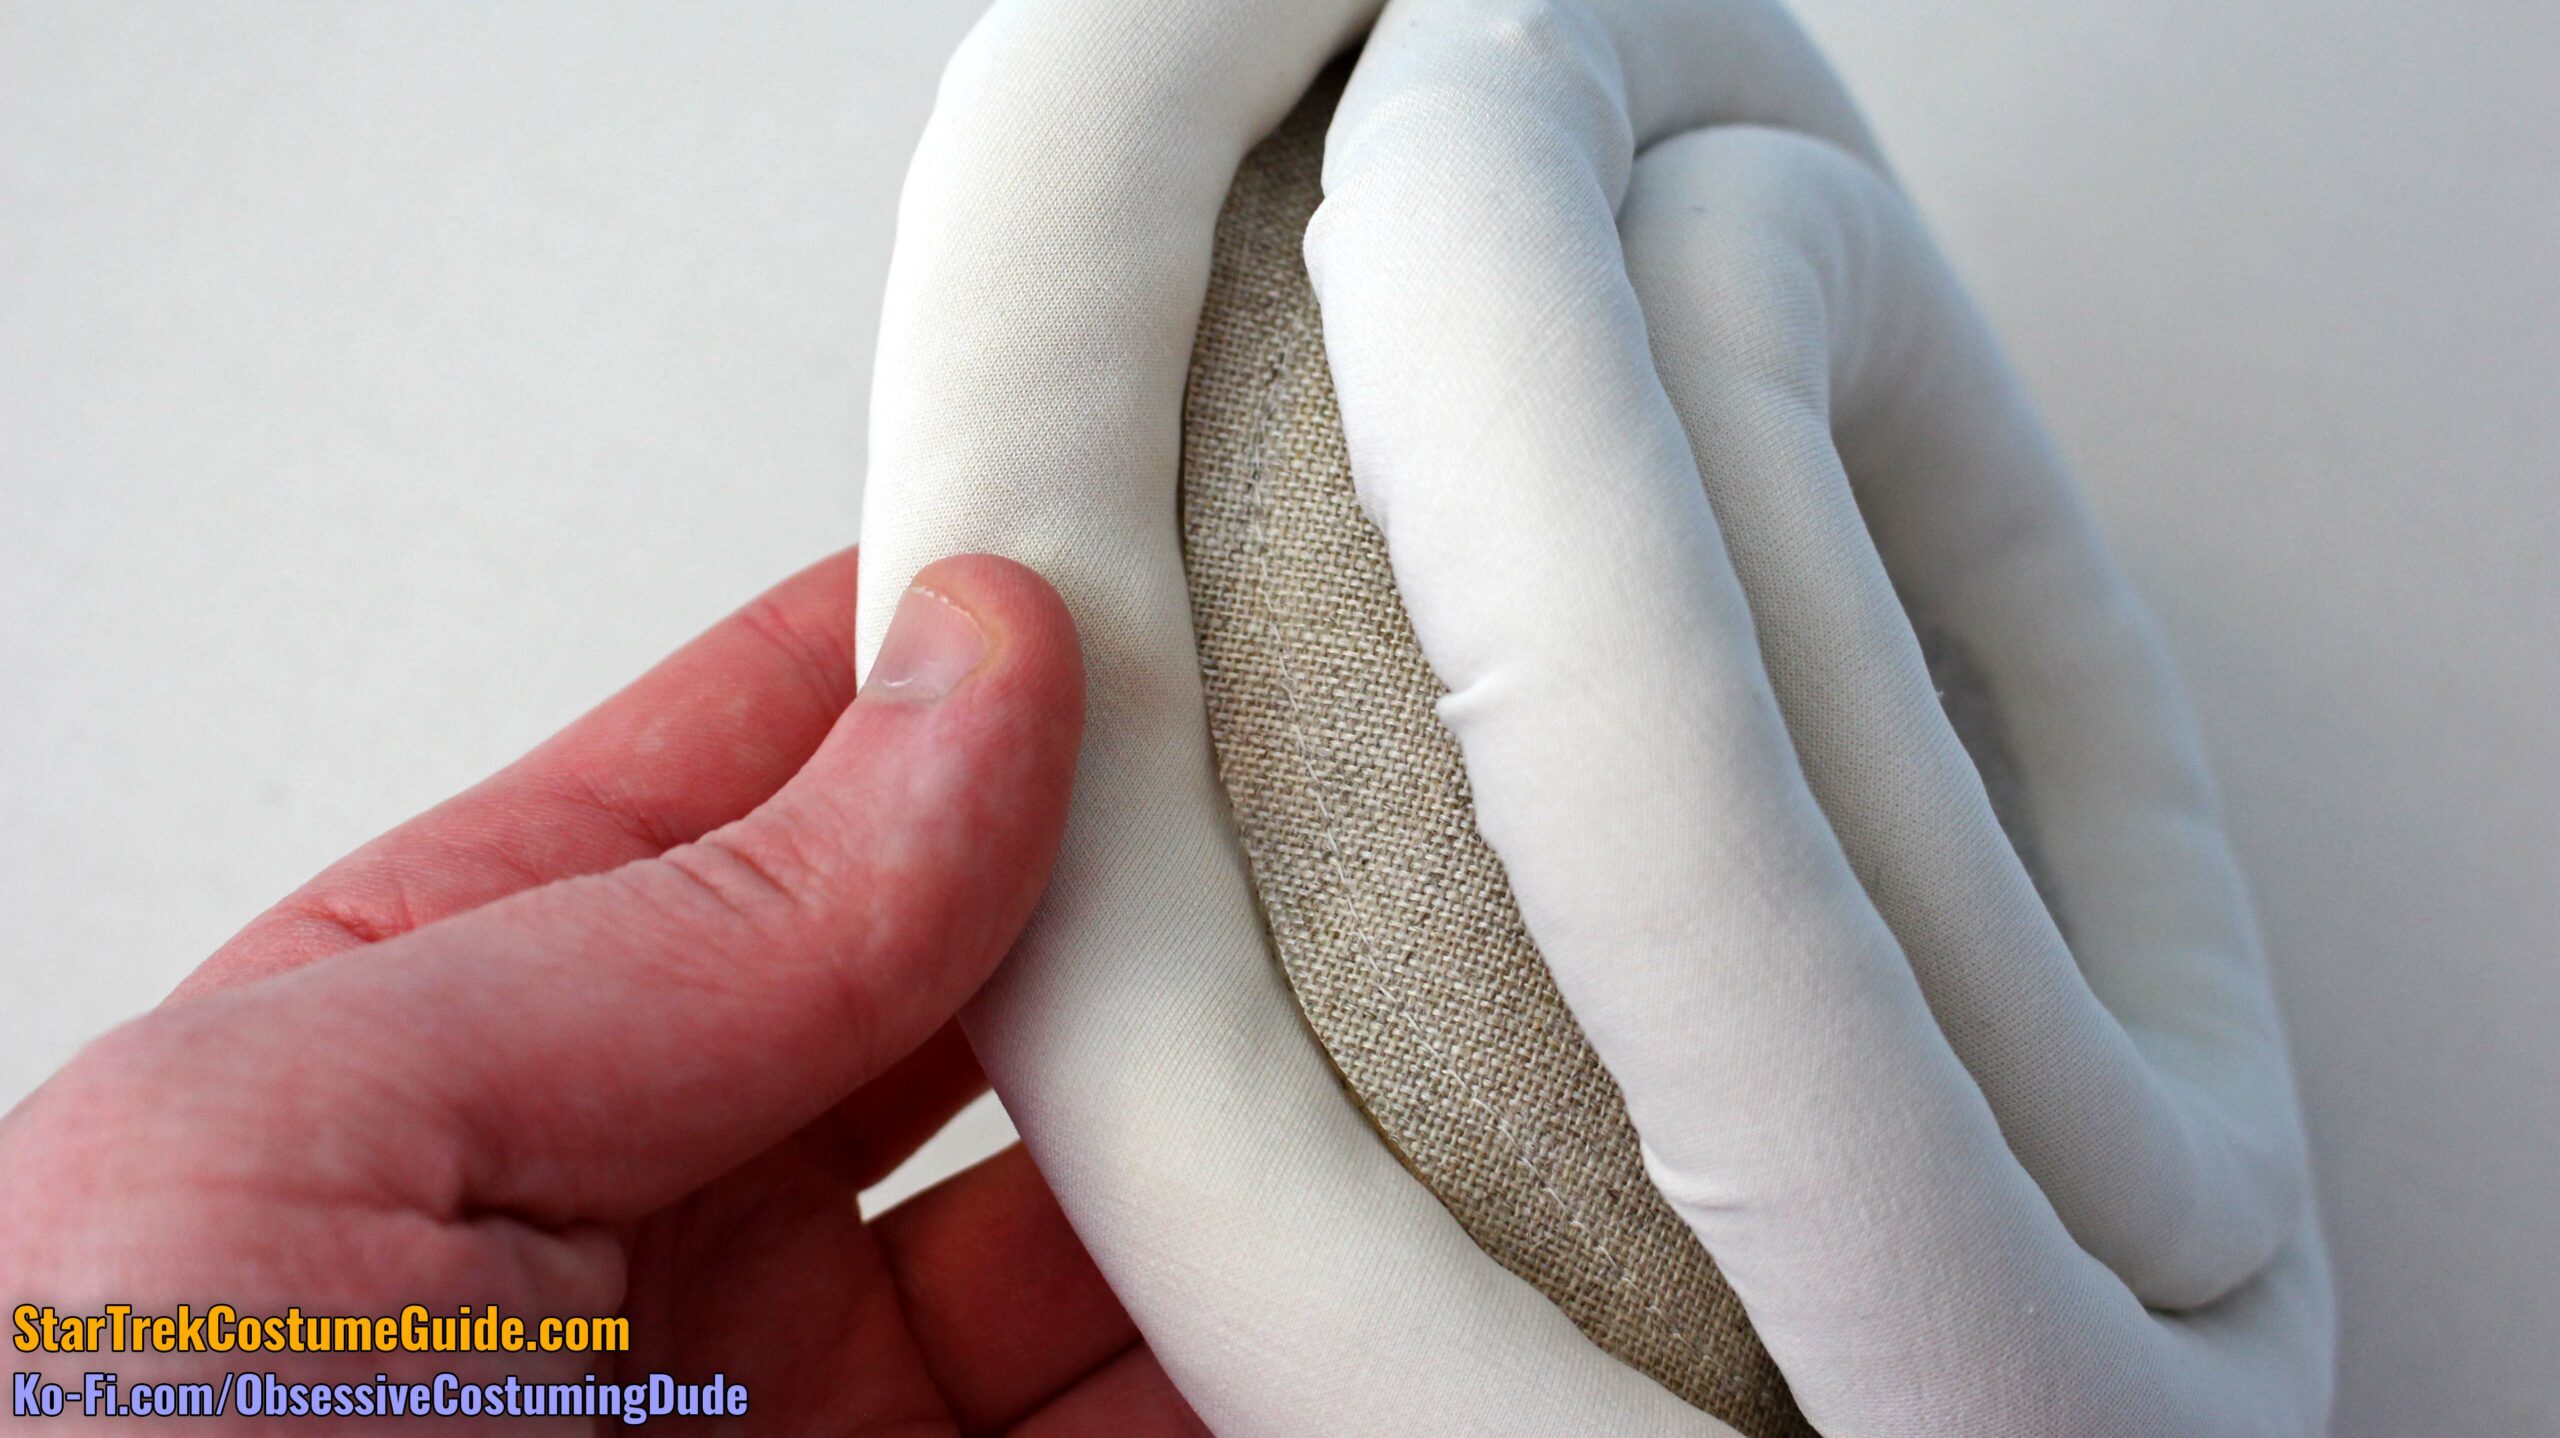
As I mentioned in the “required materials” at the beginning of this tutorial, I’m not sure what was used to fill the jumpsuit channels on the screen-used costumes, but upholstery cord produces a comparable final result.
Cut three lengths of your 1” upholstery cord for the waist tubing.
The back end of the cord should be 2 ¾” from the back edge of the jumpsuit.
The front end of the cord should be ⅞” from the front edge of the jumpsuit.
And as with the bias channel, include an extra inch or so of ease in the cord! Otherwise even though it looks fine while resting flat on a surface, once the jumpsuit takes shape and curves around the wearer’s body, it will pull the jumpsuit fabric together and cause unsightly puckering.
(The cords pictured above don’t include ease … I learned the hard way how important it is!)
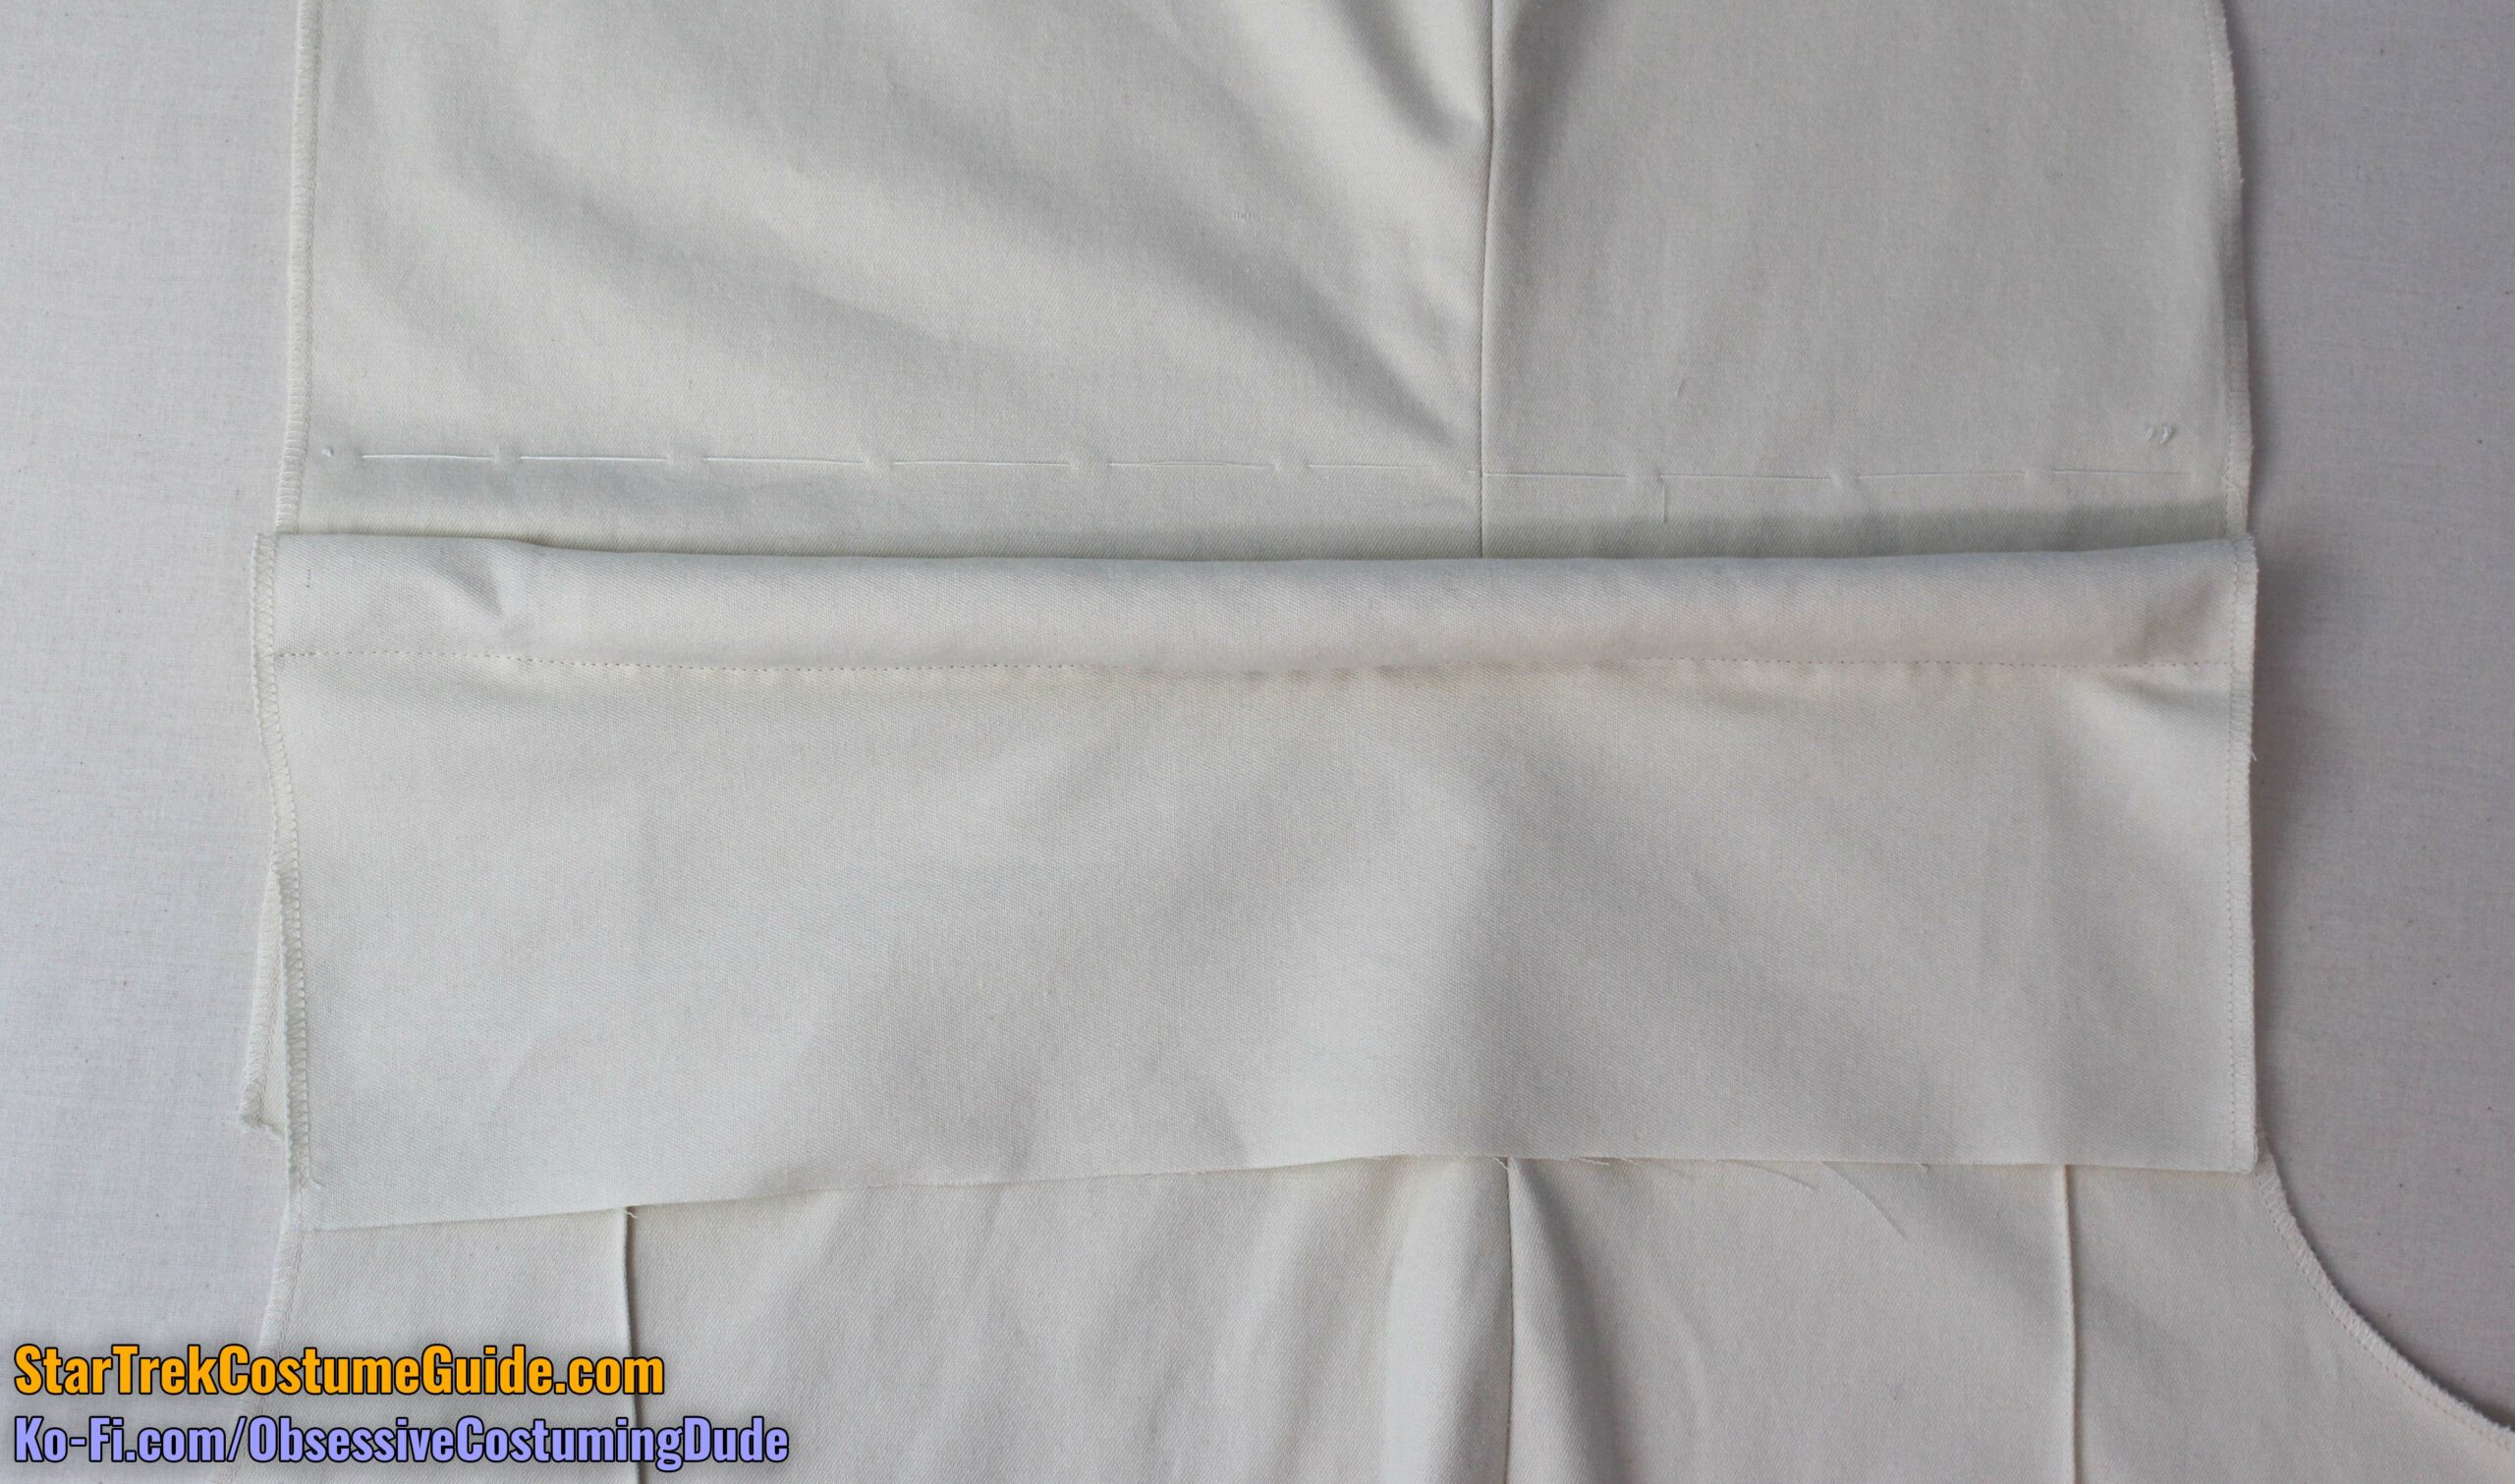
Fold the fabric channel back downward over the first length of upholstery cord.
Using a zipper/piping foot, stitch the channel to the jumpsuit close to the cord to enclose it.
Lift the fabric channel back up along the stitching and position the second length of cording underneath it.
Fold the fabric channel down over the second length of cord and stitch it closed like you did for the first.
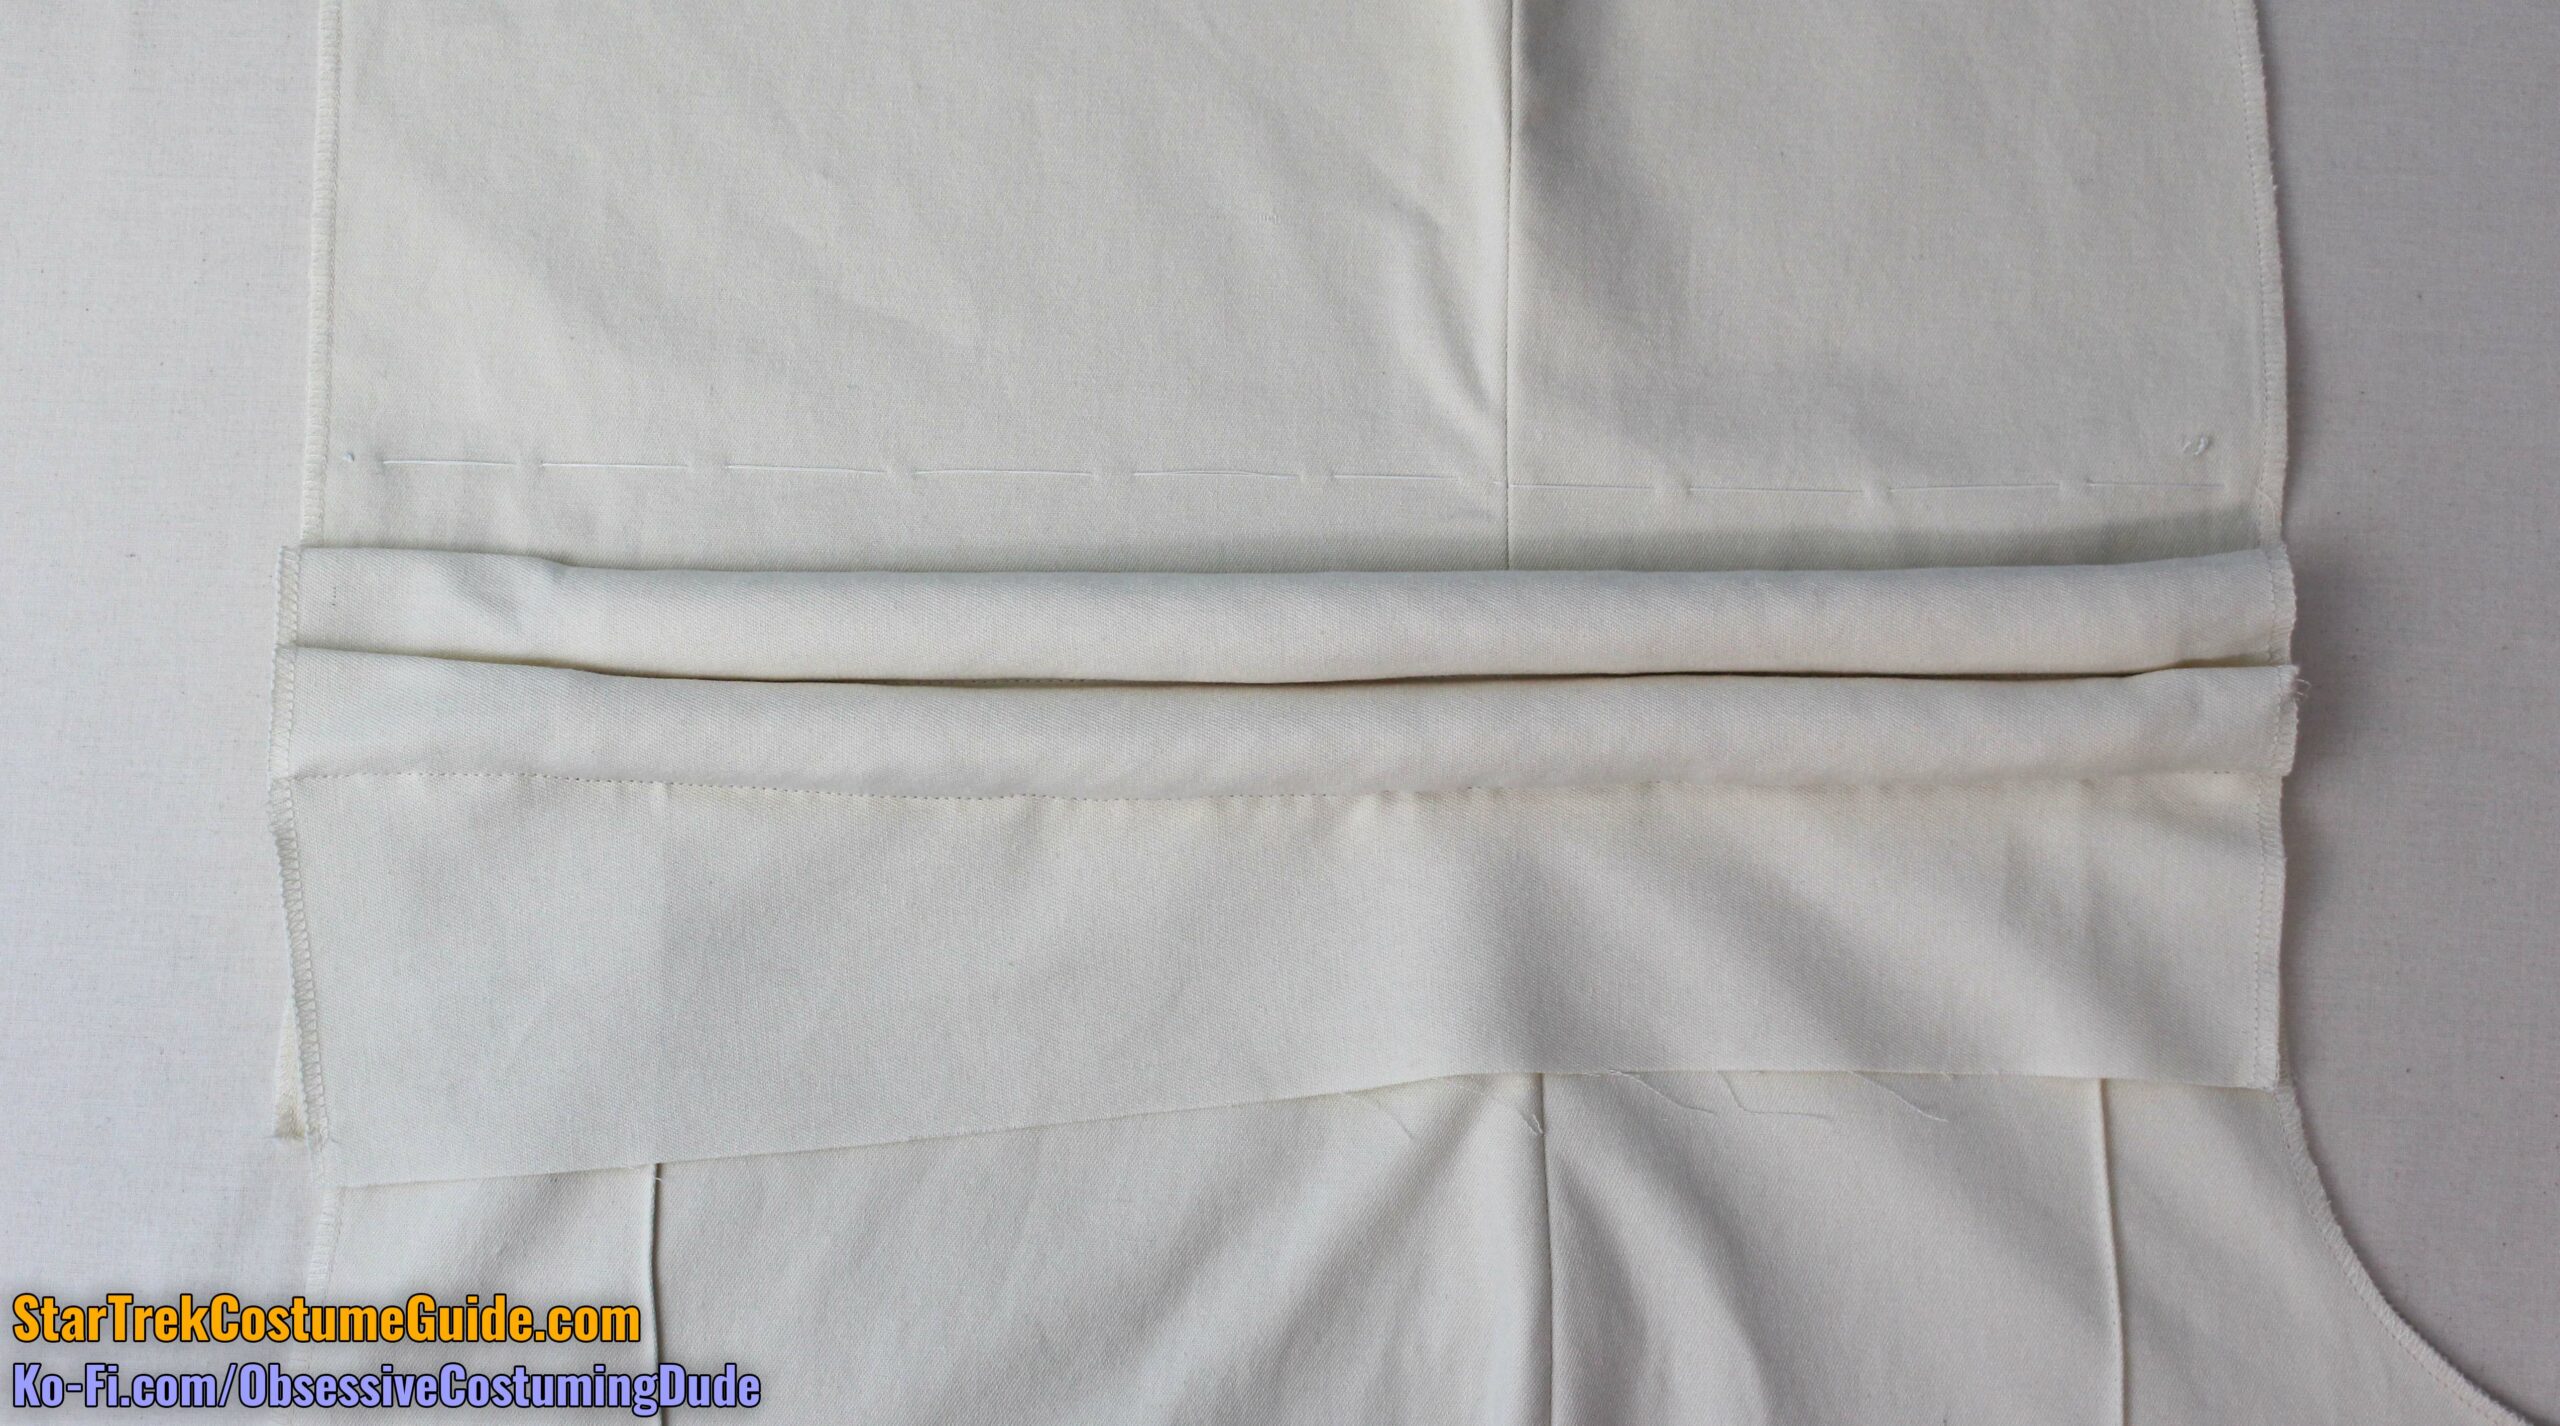
The third and bottom length of cord is a bit more involved.
Lift the fabric channel back up along the stitching and position the third length of cord beneath it.
The lower edge of the channel needs to be hand-sewn to the jumpsuit, so roll whatever’s left of the channel fabric underneath the tubing.
(If there’s too much for your liking, you can safely trim some of the extra fabric away as long as there’s enough for the raw edge to be hidden under the cord.)
Slip-stitch the lower edge of the channel to the jumpsuit.
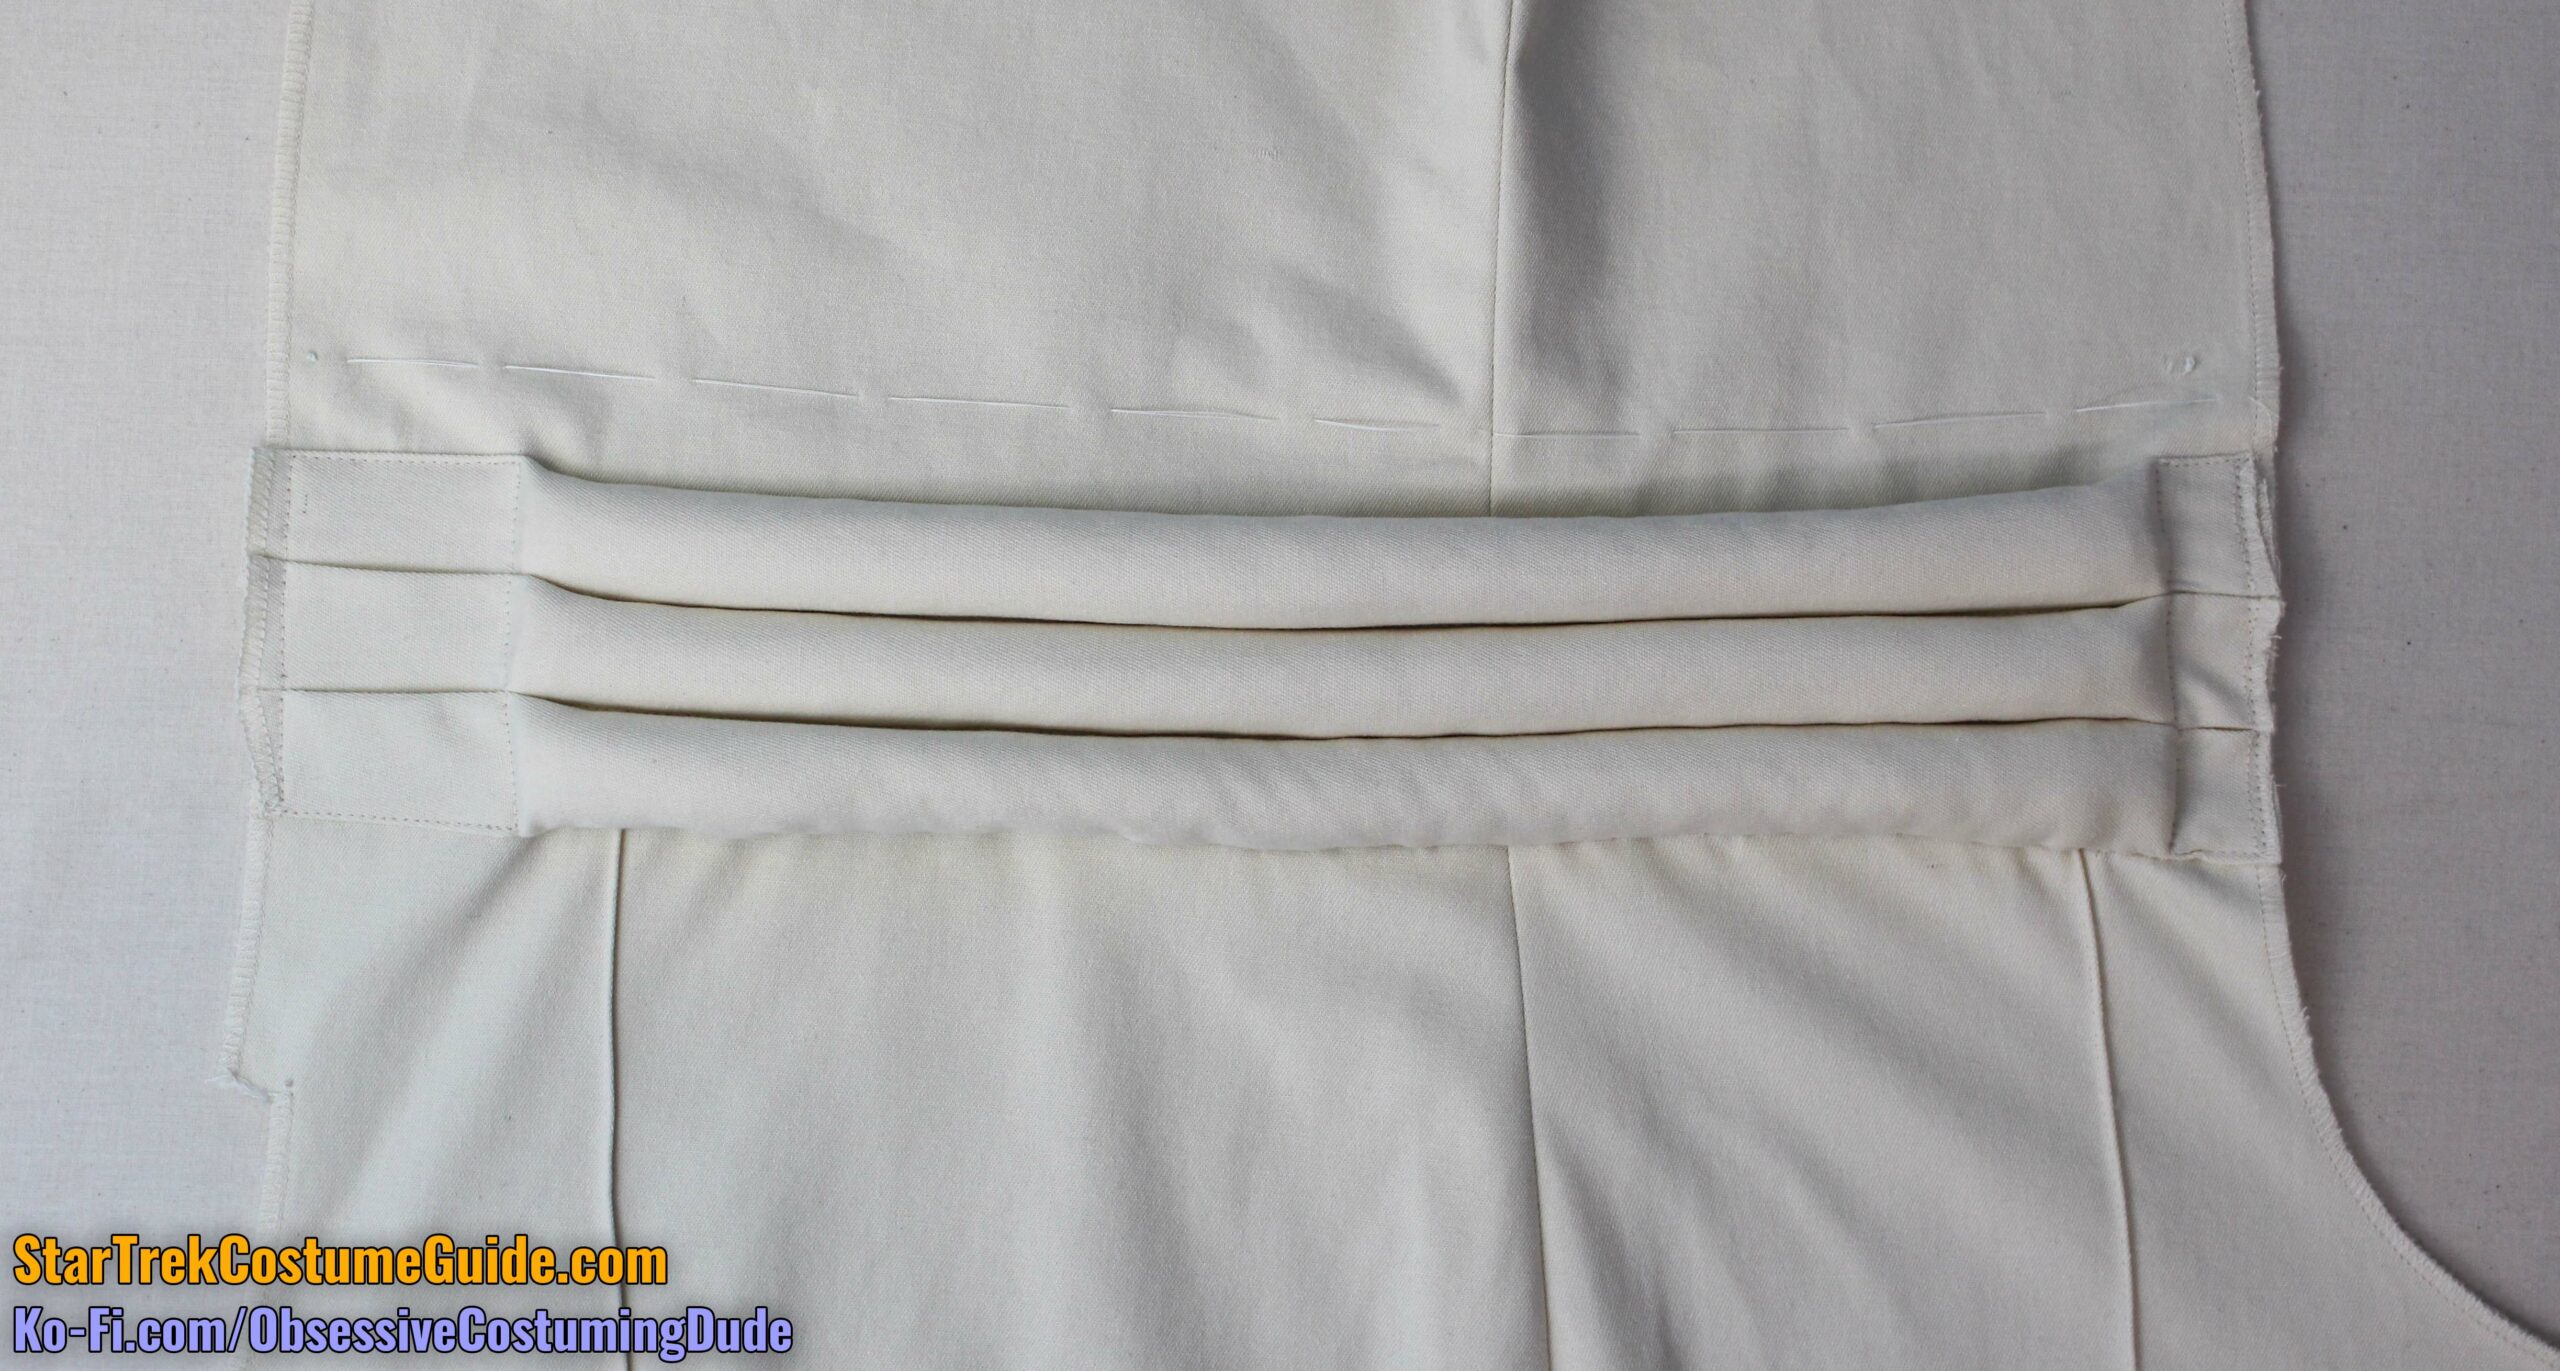
Flatten the ends of the fabric channel however you prefer; since there’s no cord on the ends, the channel will probably form small pleats. It doesn’t really matter how you handle them, but I do suggest doing them the same way.
Machine-sew the ends of the channel to the jumpsuit in whatever manner you like; they won’t be seen on the outside of the finished costume. (I just did a rectangle of topstitching to fasten everything into place.)
Repeat for the other side of the jumpsuit.
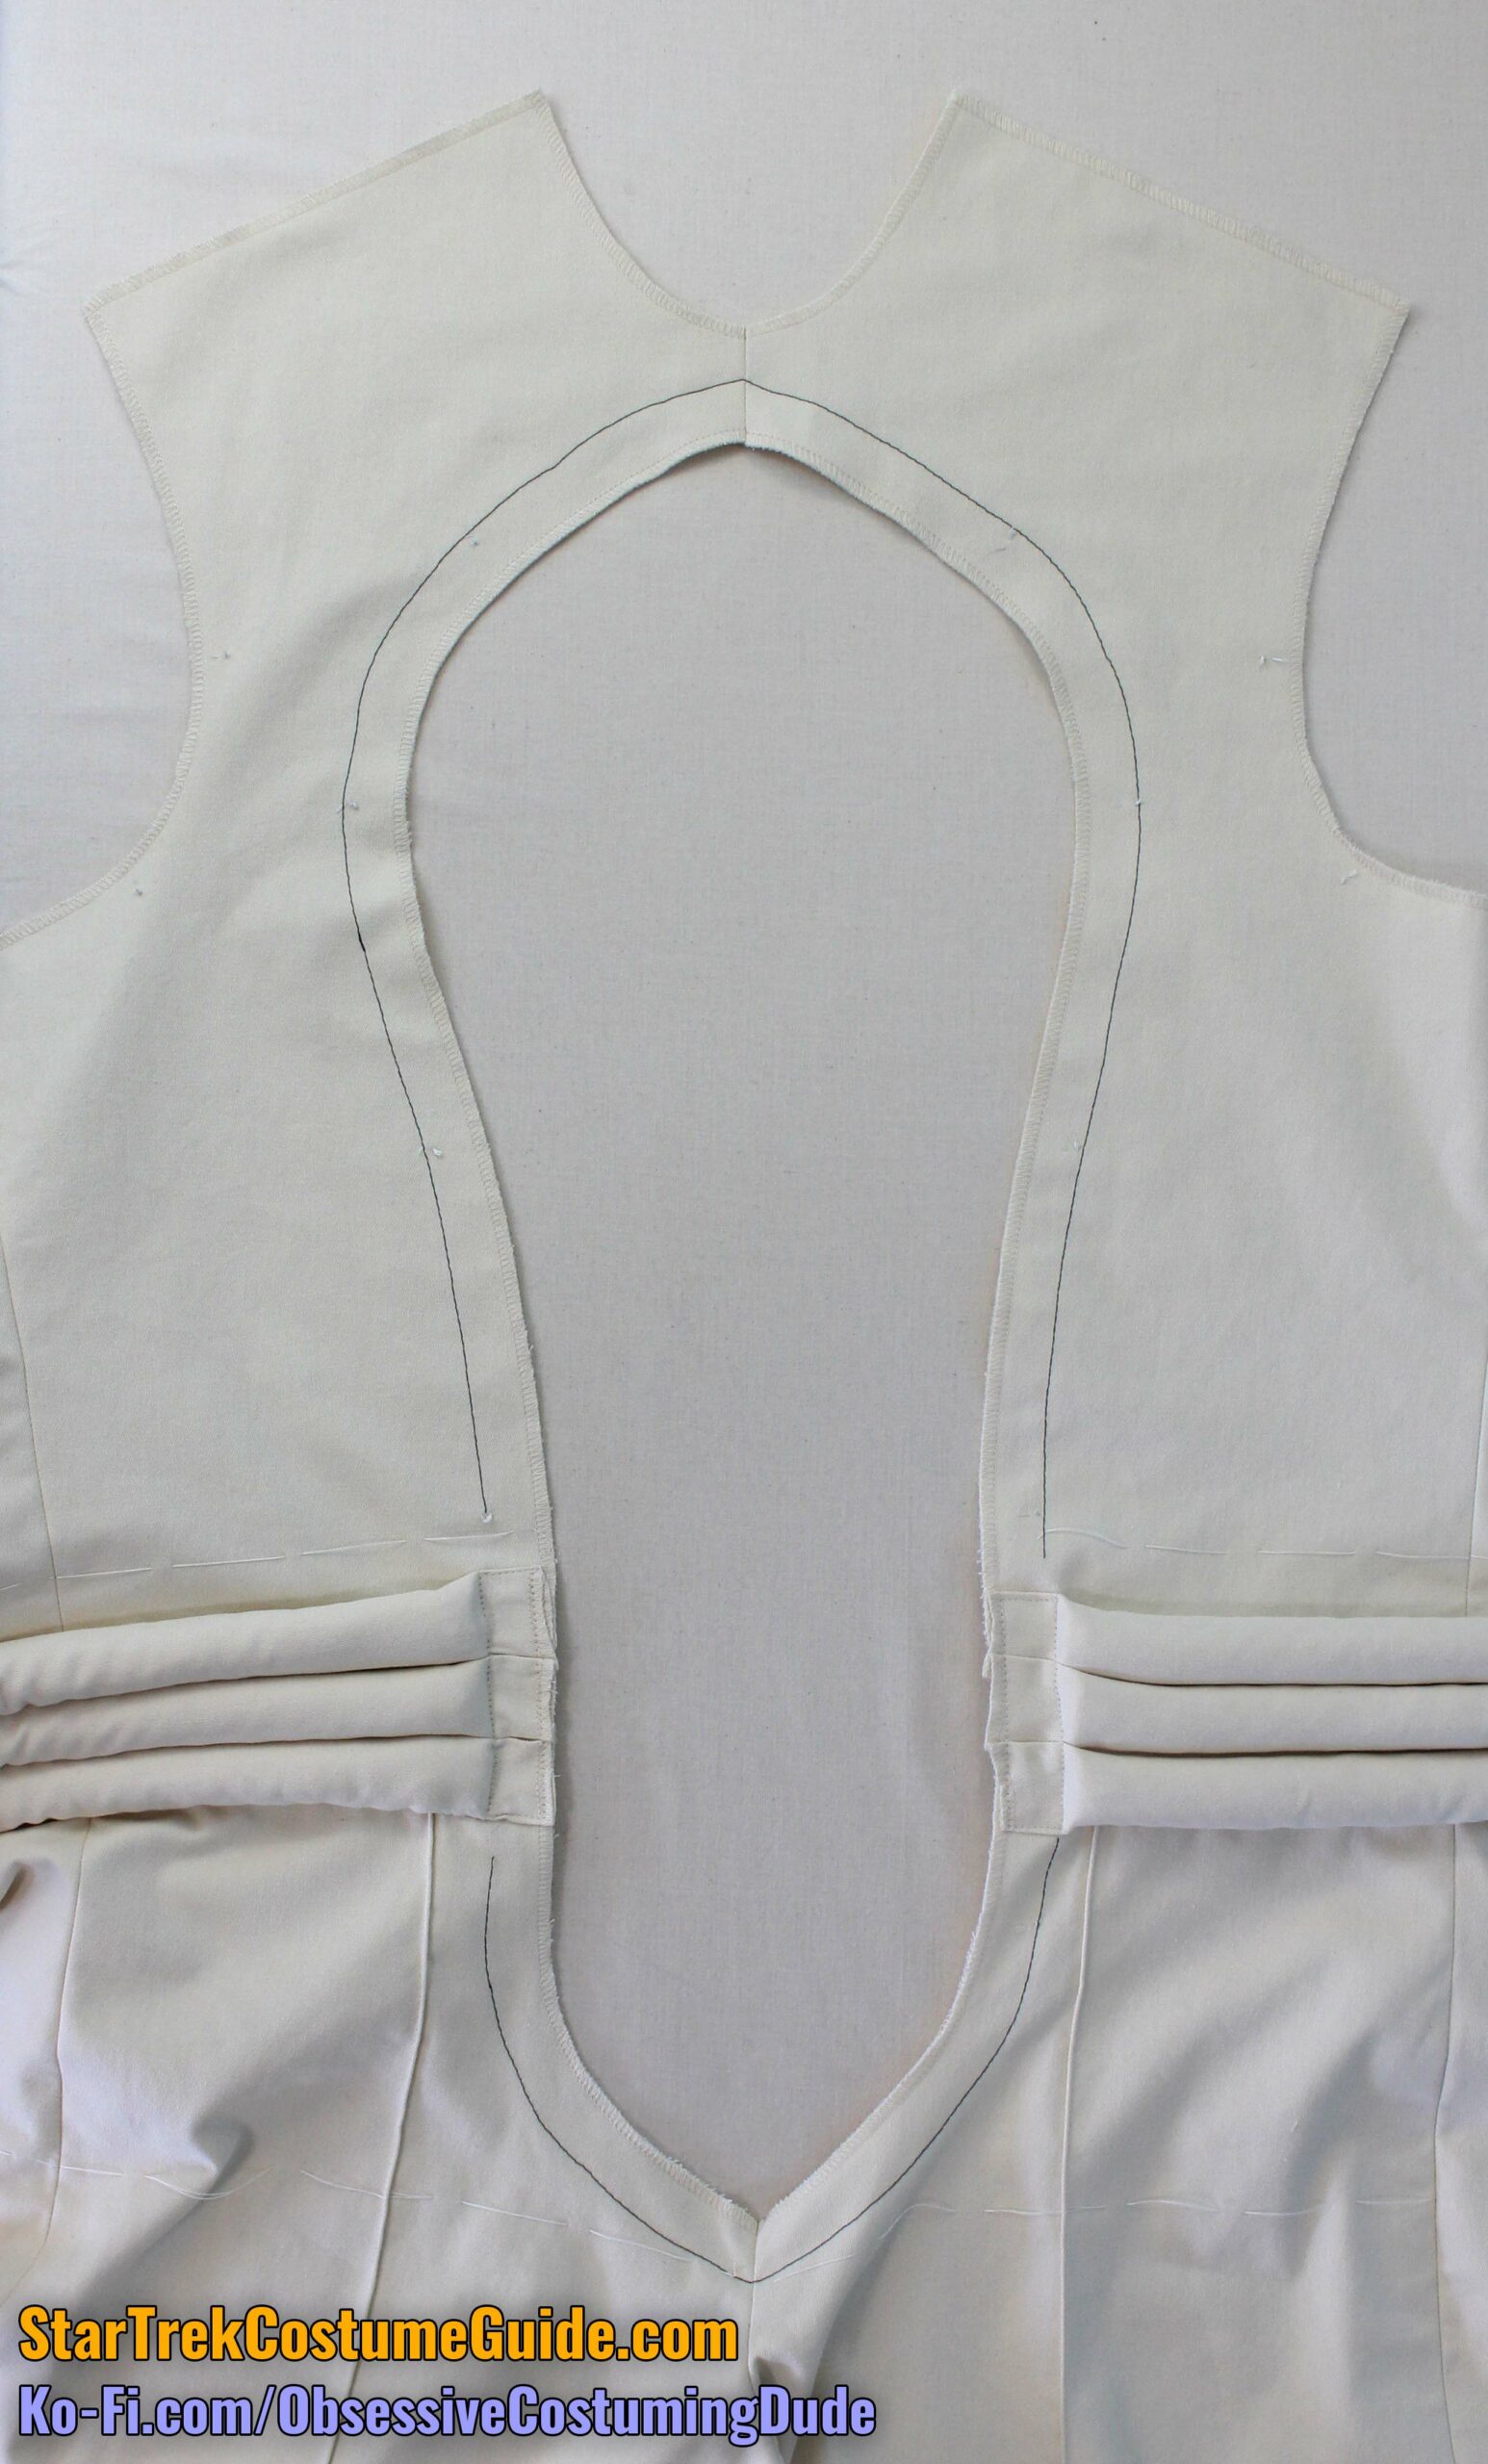
Sew the two jumpsuit assemblies together along the center front.
The upper front seam allowance (at the neckline) is a full inch; the lower front (crotch) seam allowance is ½”.
Press the seam allowances open.
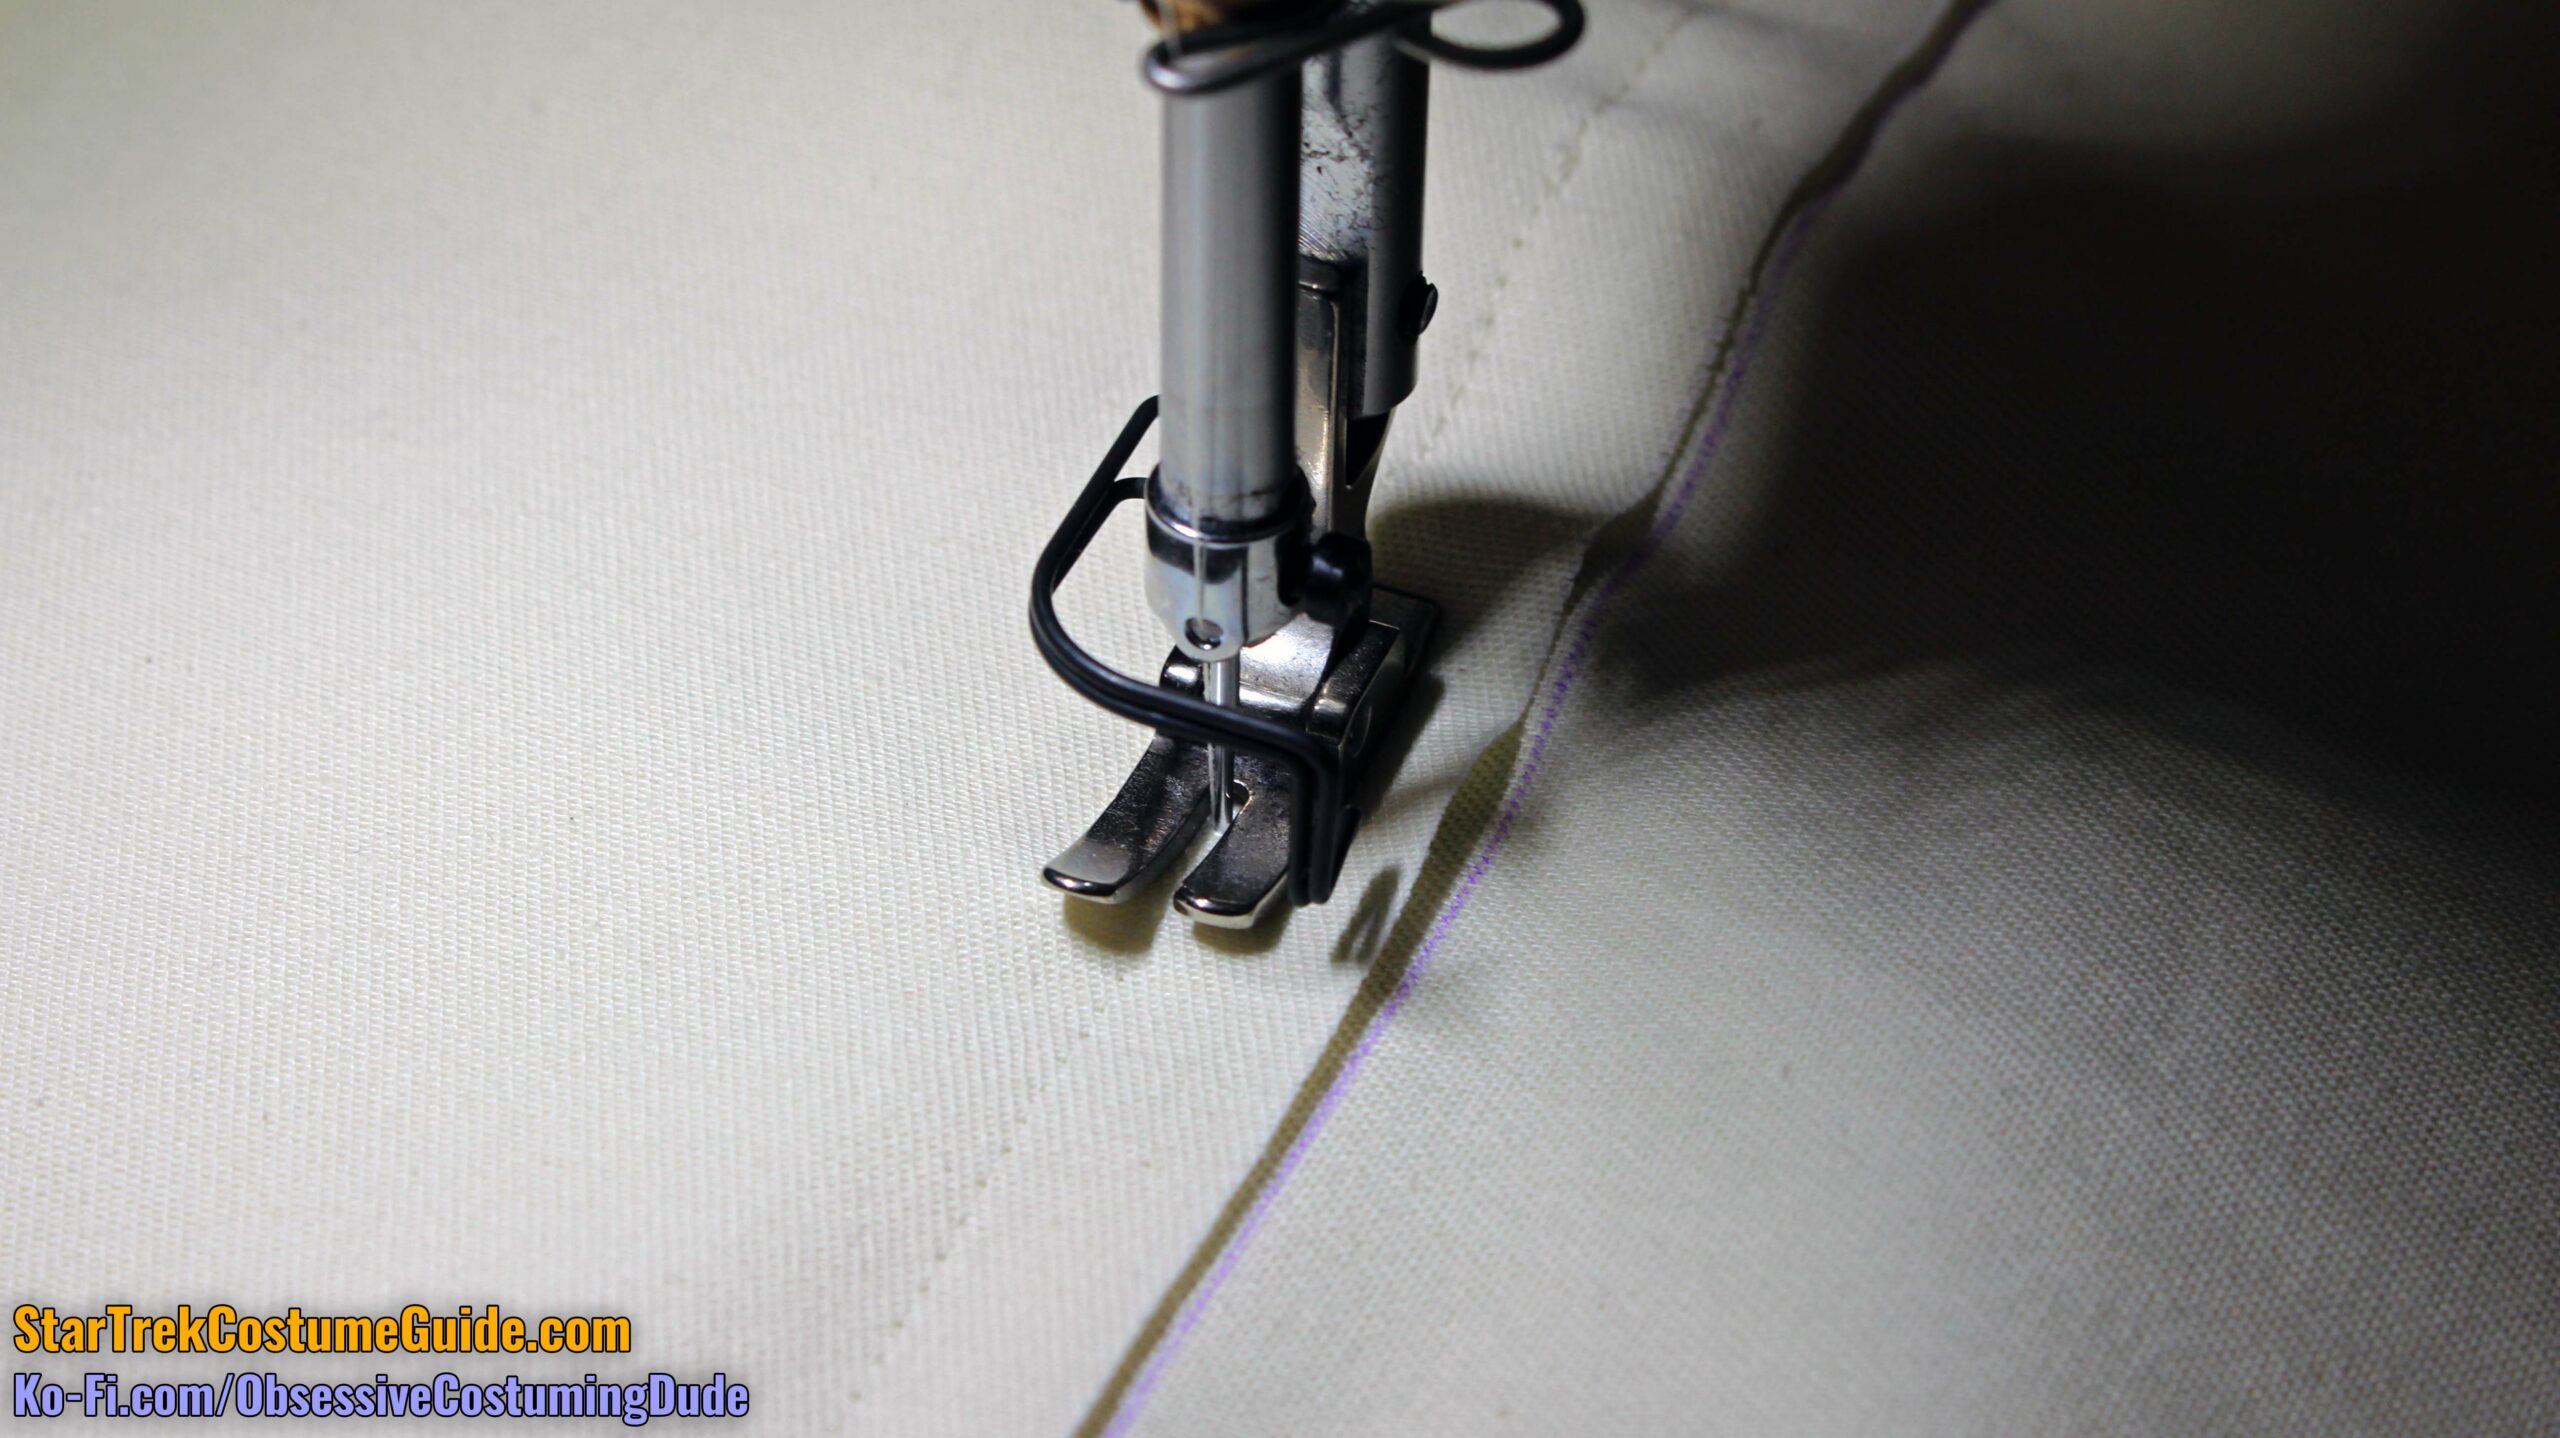
Sew a basting stitch ⅞” inside the center front edges. (This will serve as a guide to help you properly position the center front panel shortly.)
Here, I’ve demonstrated in a contrasting thread color.
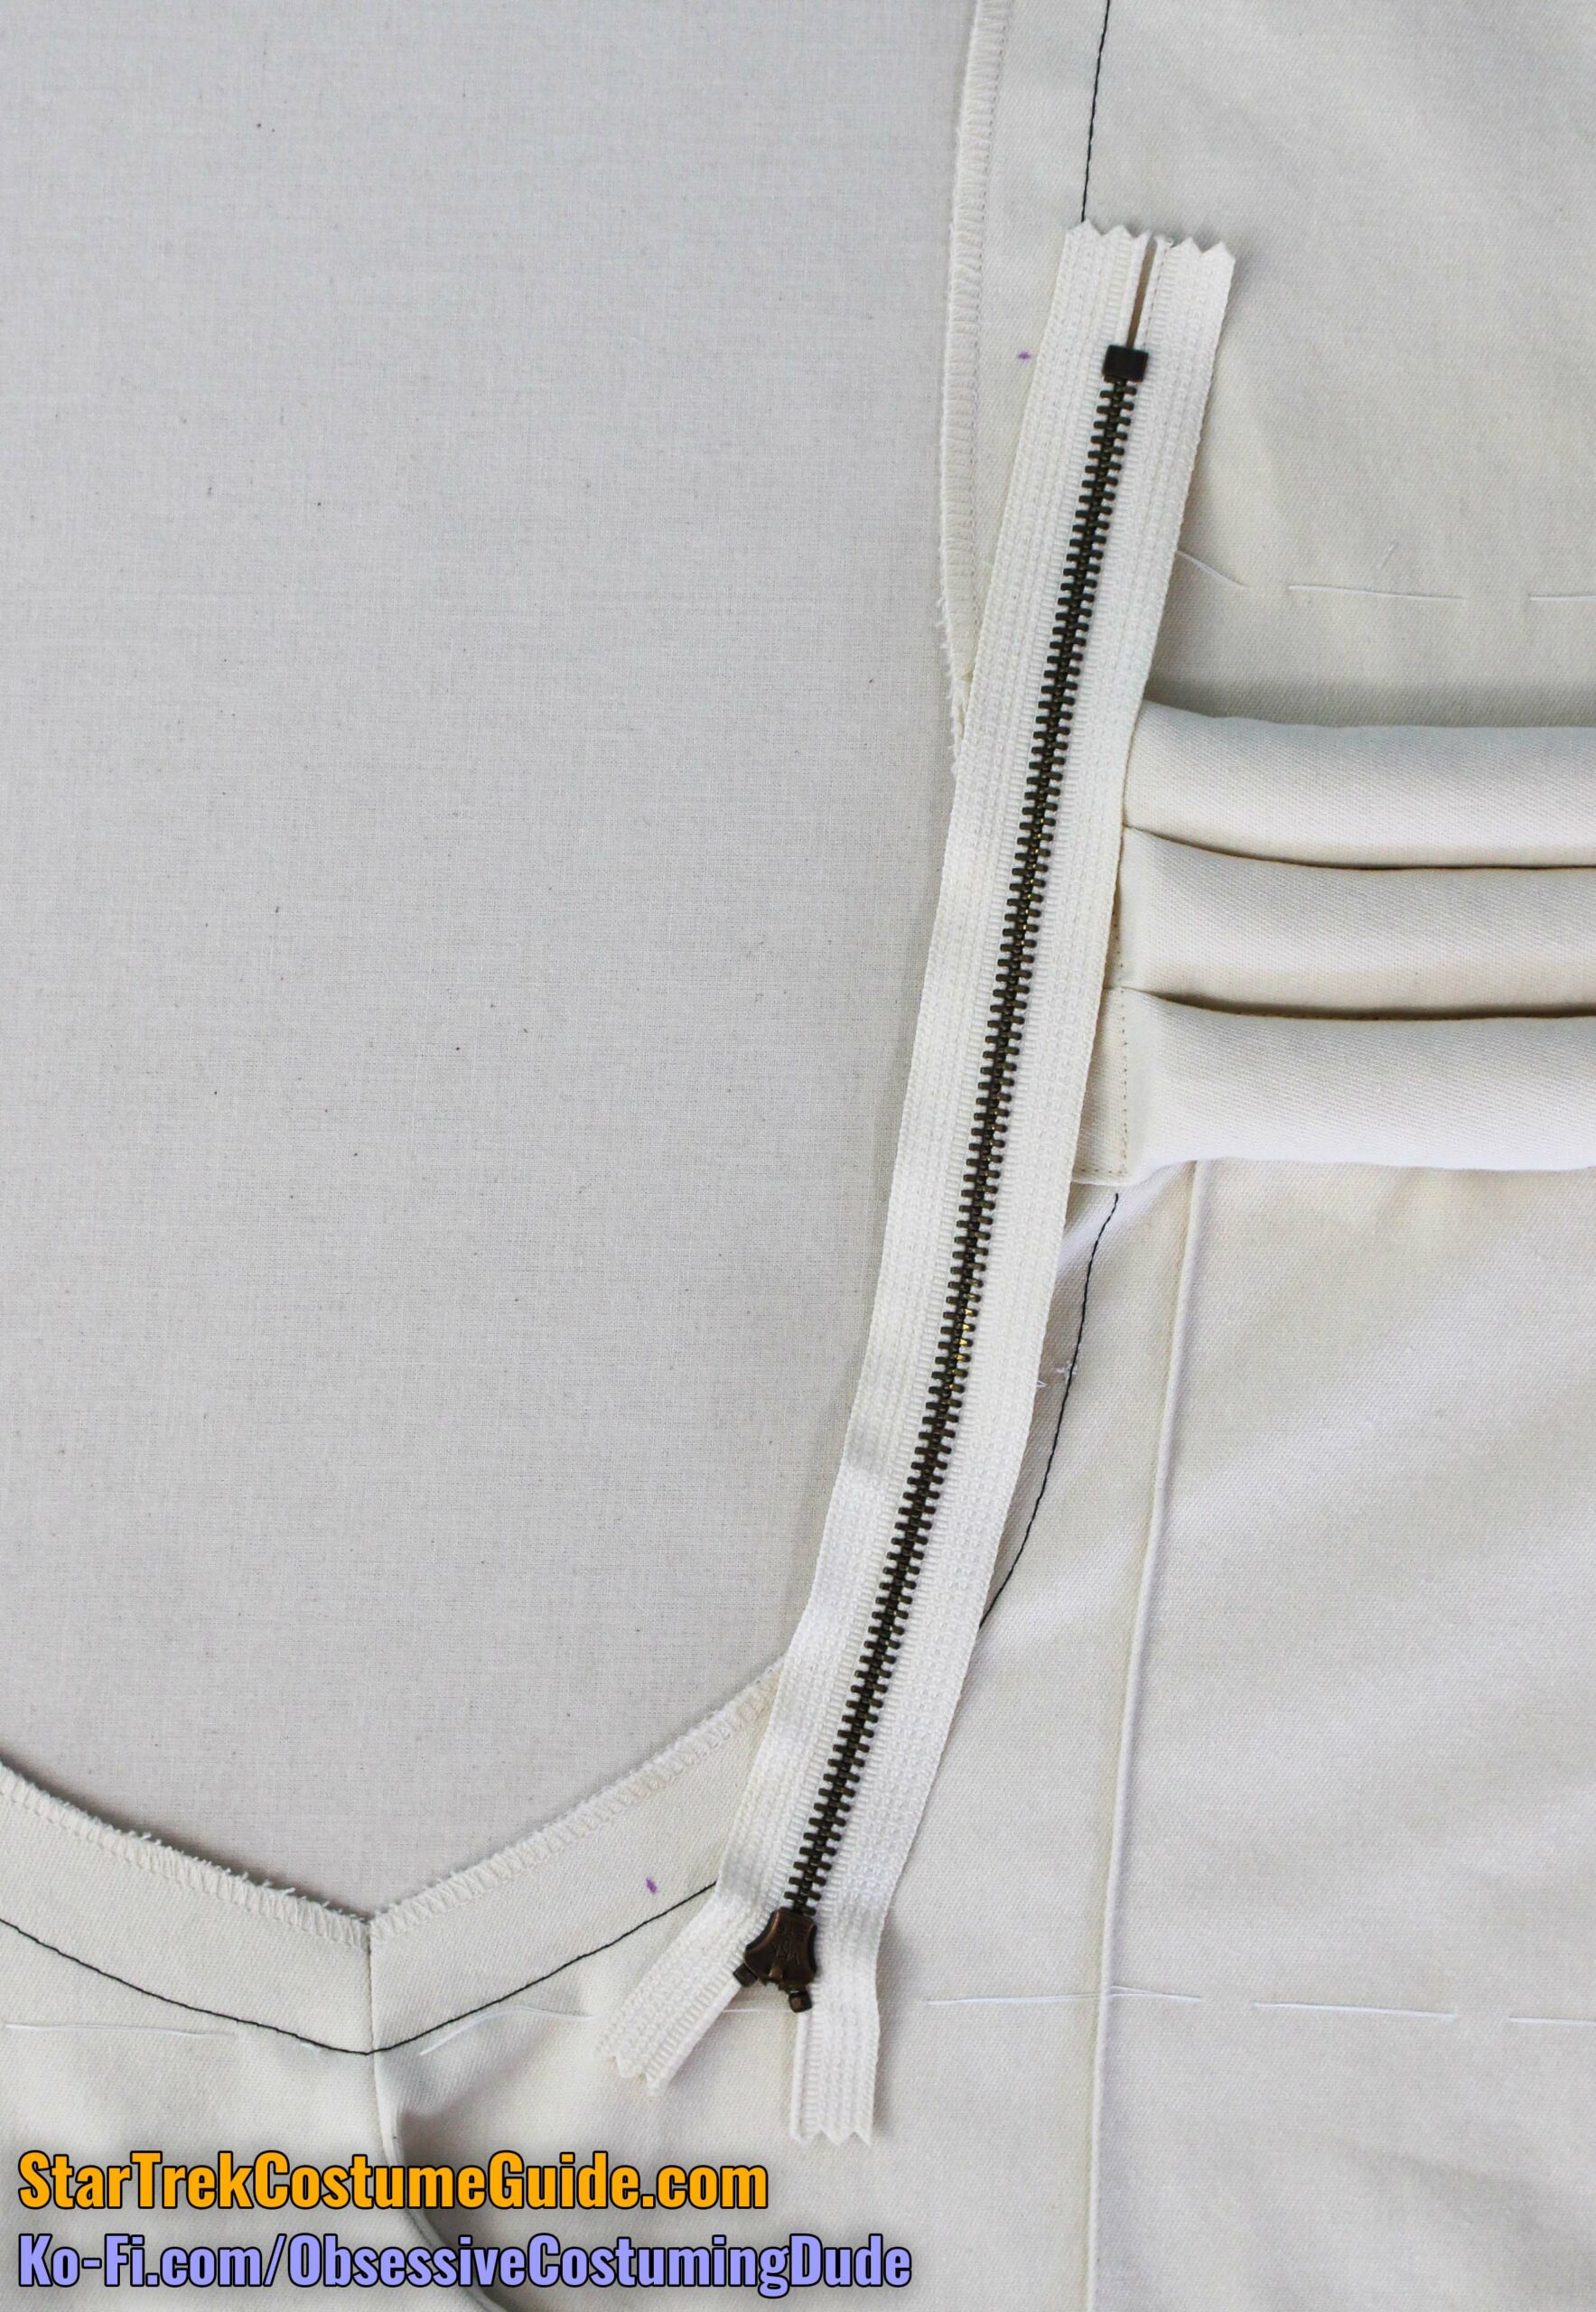
The men’s jumpsuit has a hidden fly zipper on the lower left, underneath the front panel.
(Omit this step for the women’s jumpsuit.)
The zipper is installed upside-down, so it closes downward and unzips upward.
The “bottom” of the zipper should be 2” from the lower front crotch seam, and the “top” should be 11” above that.
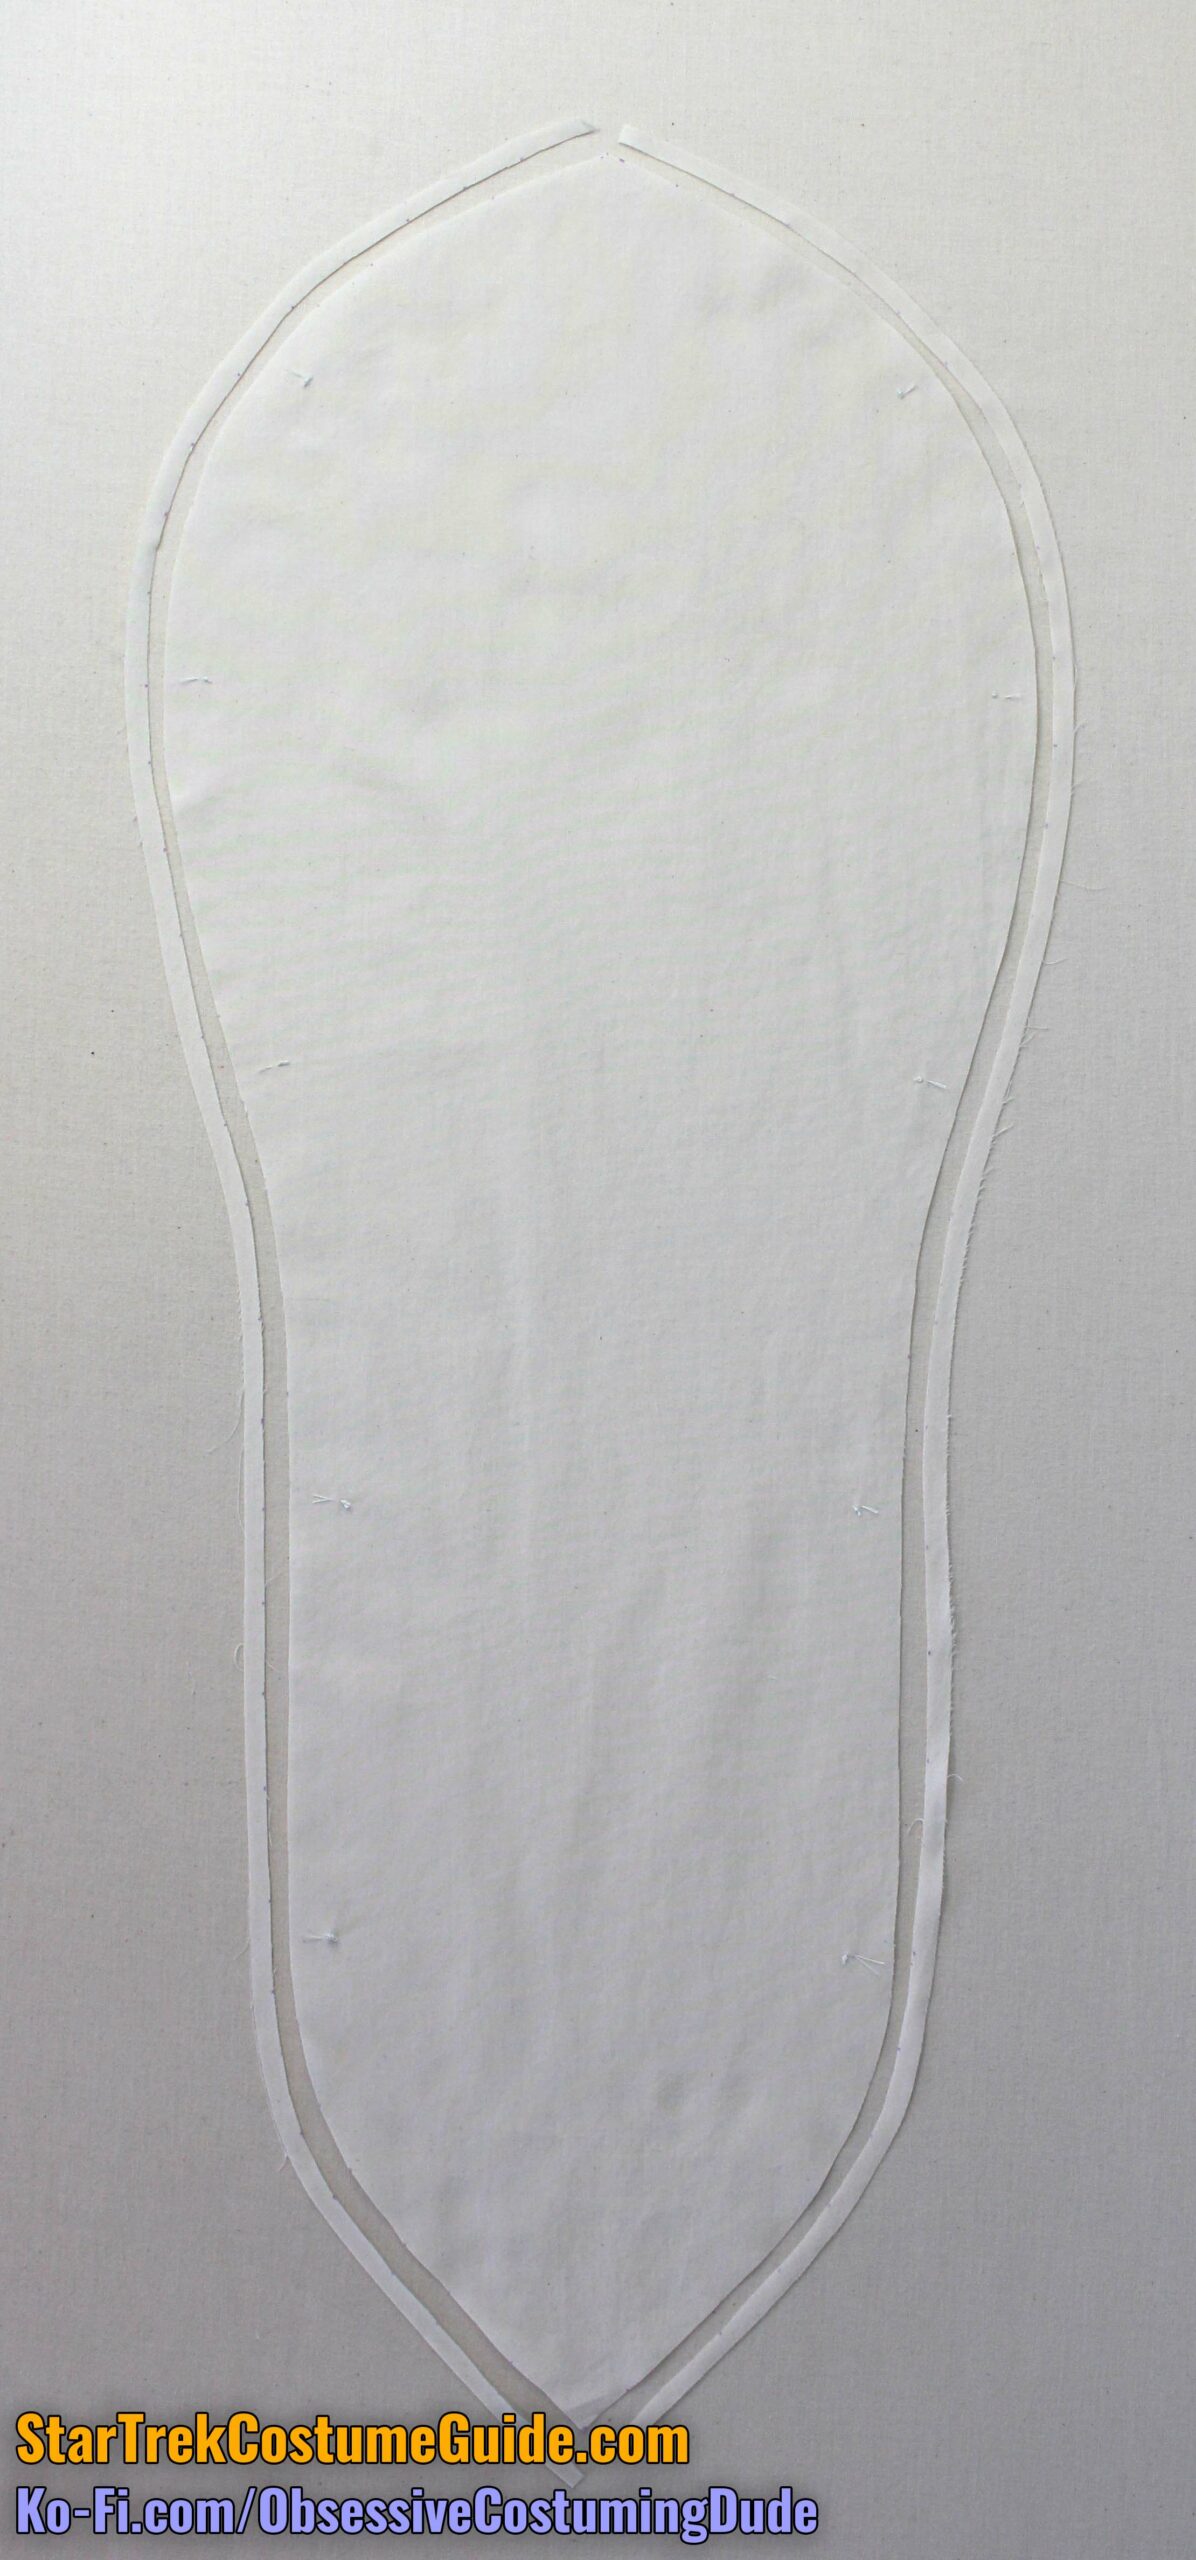
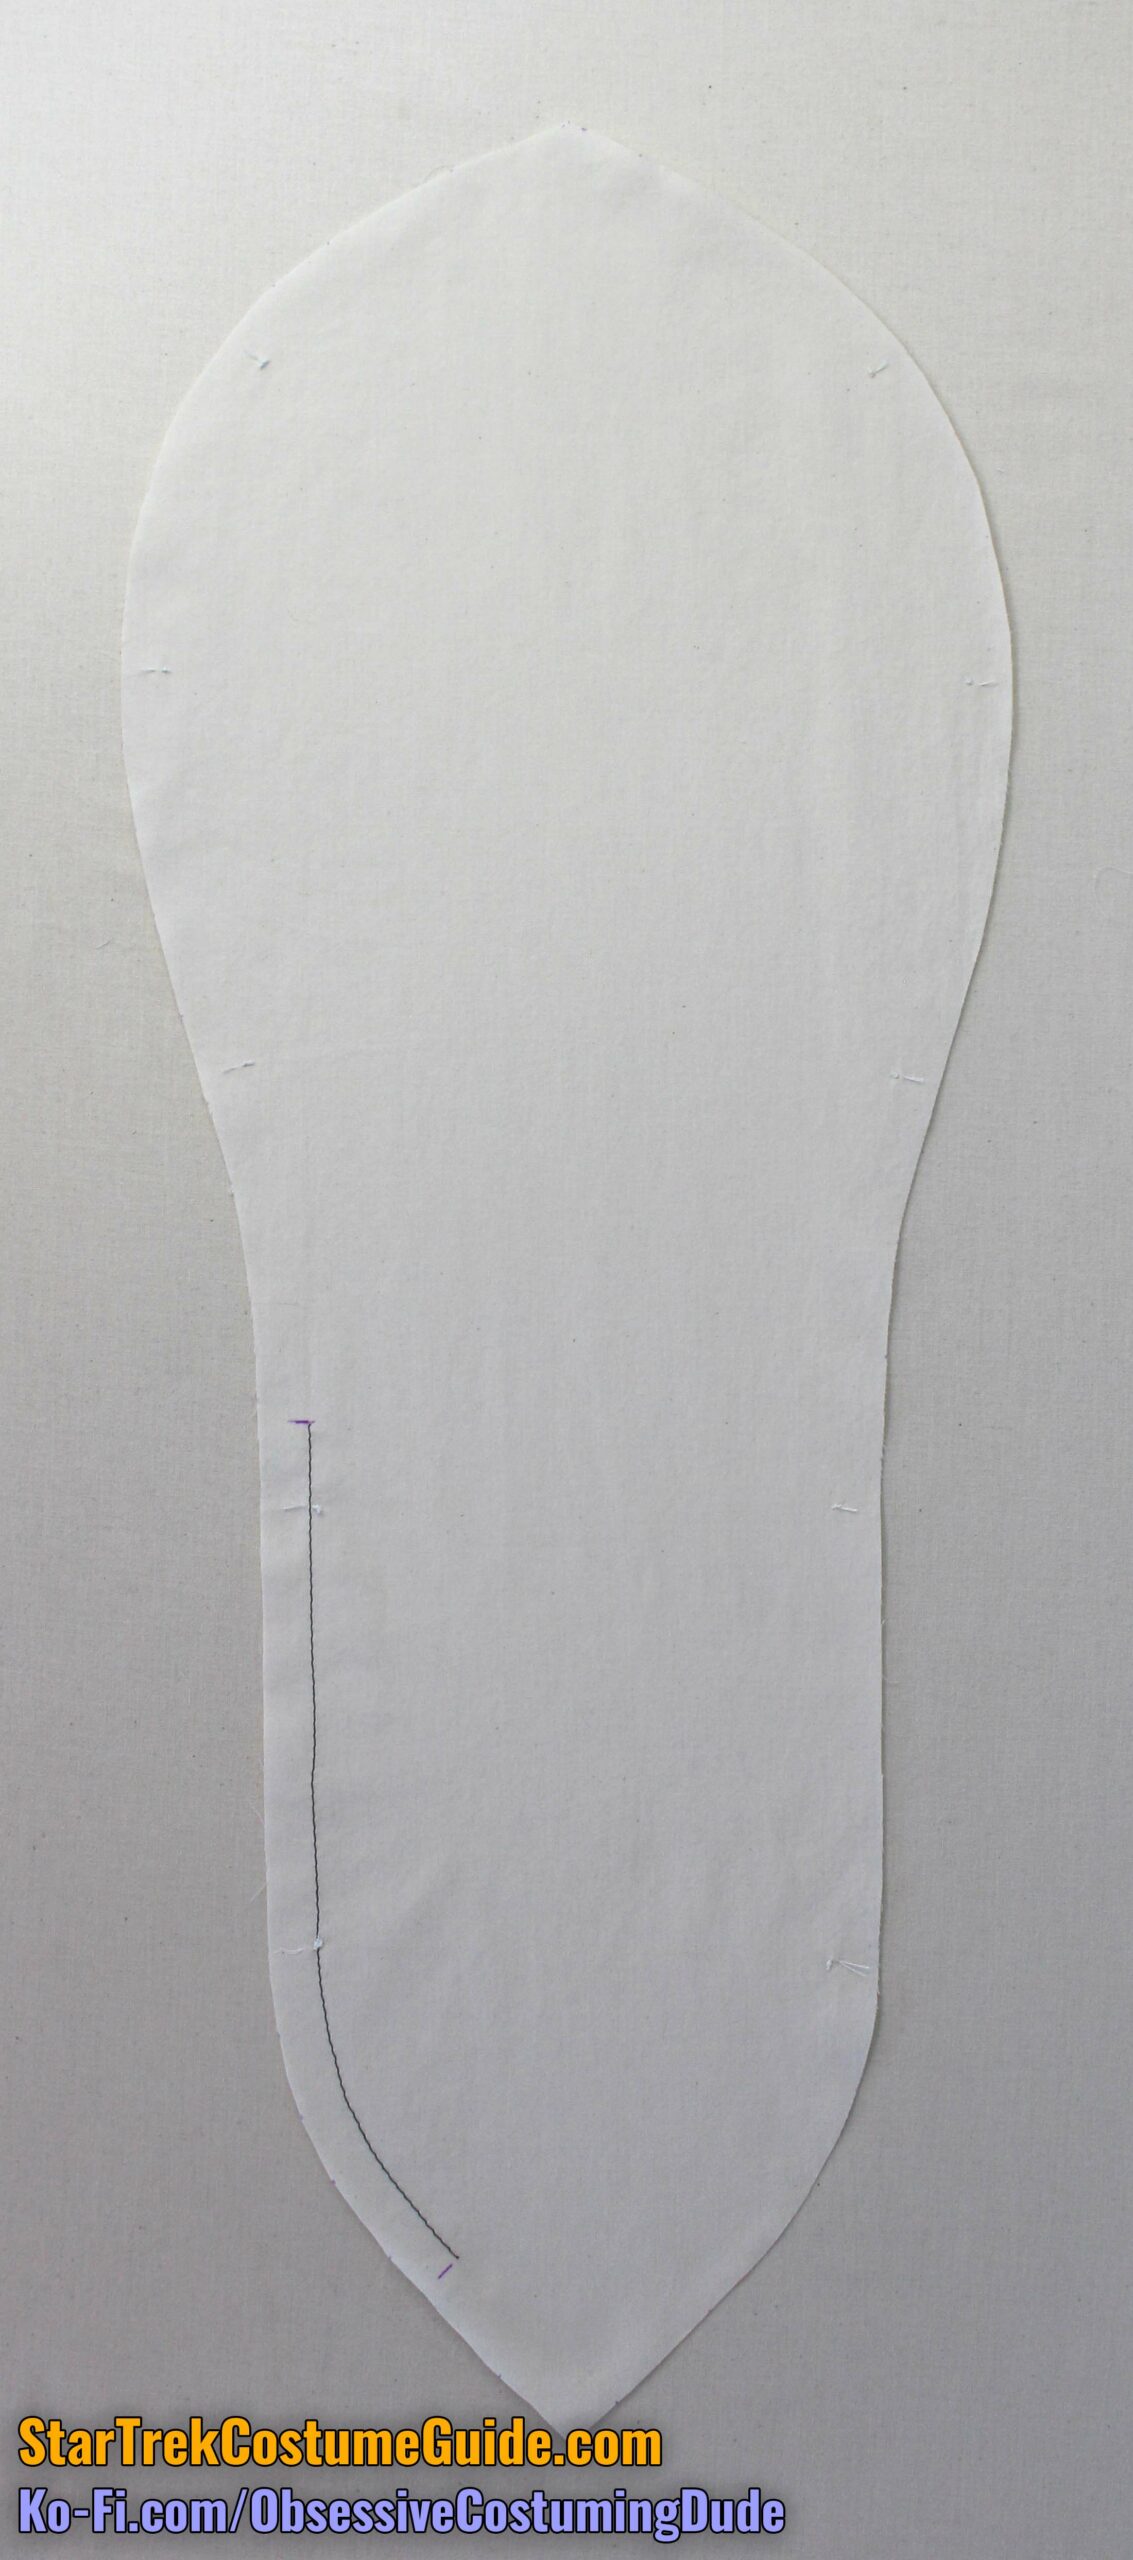
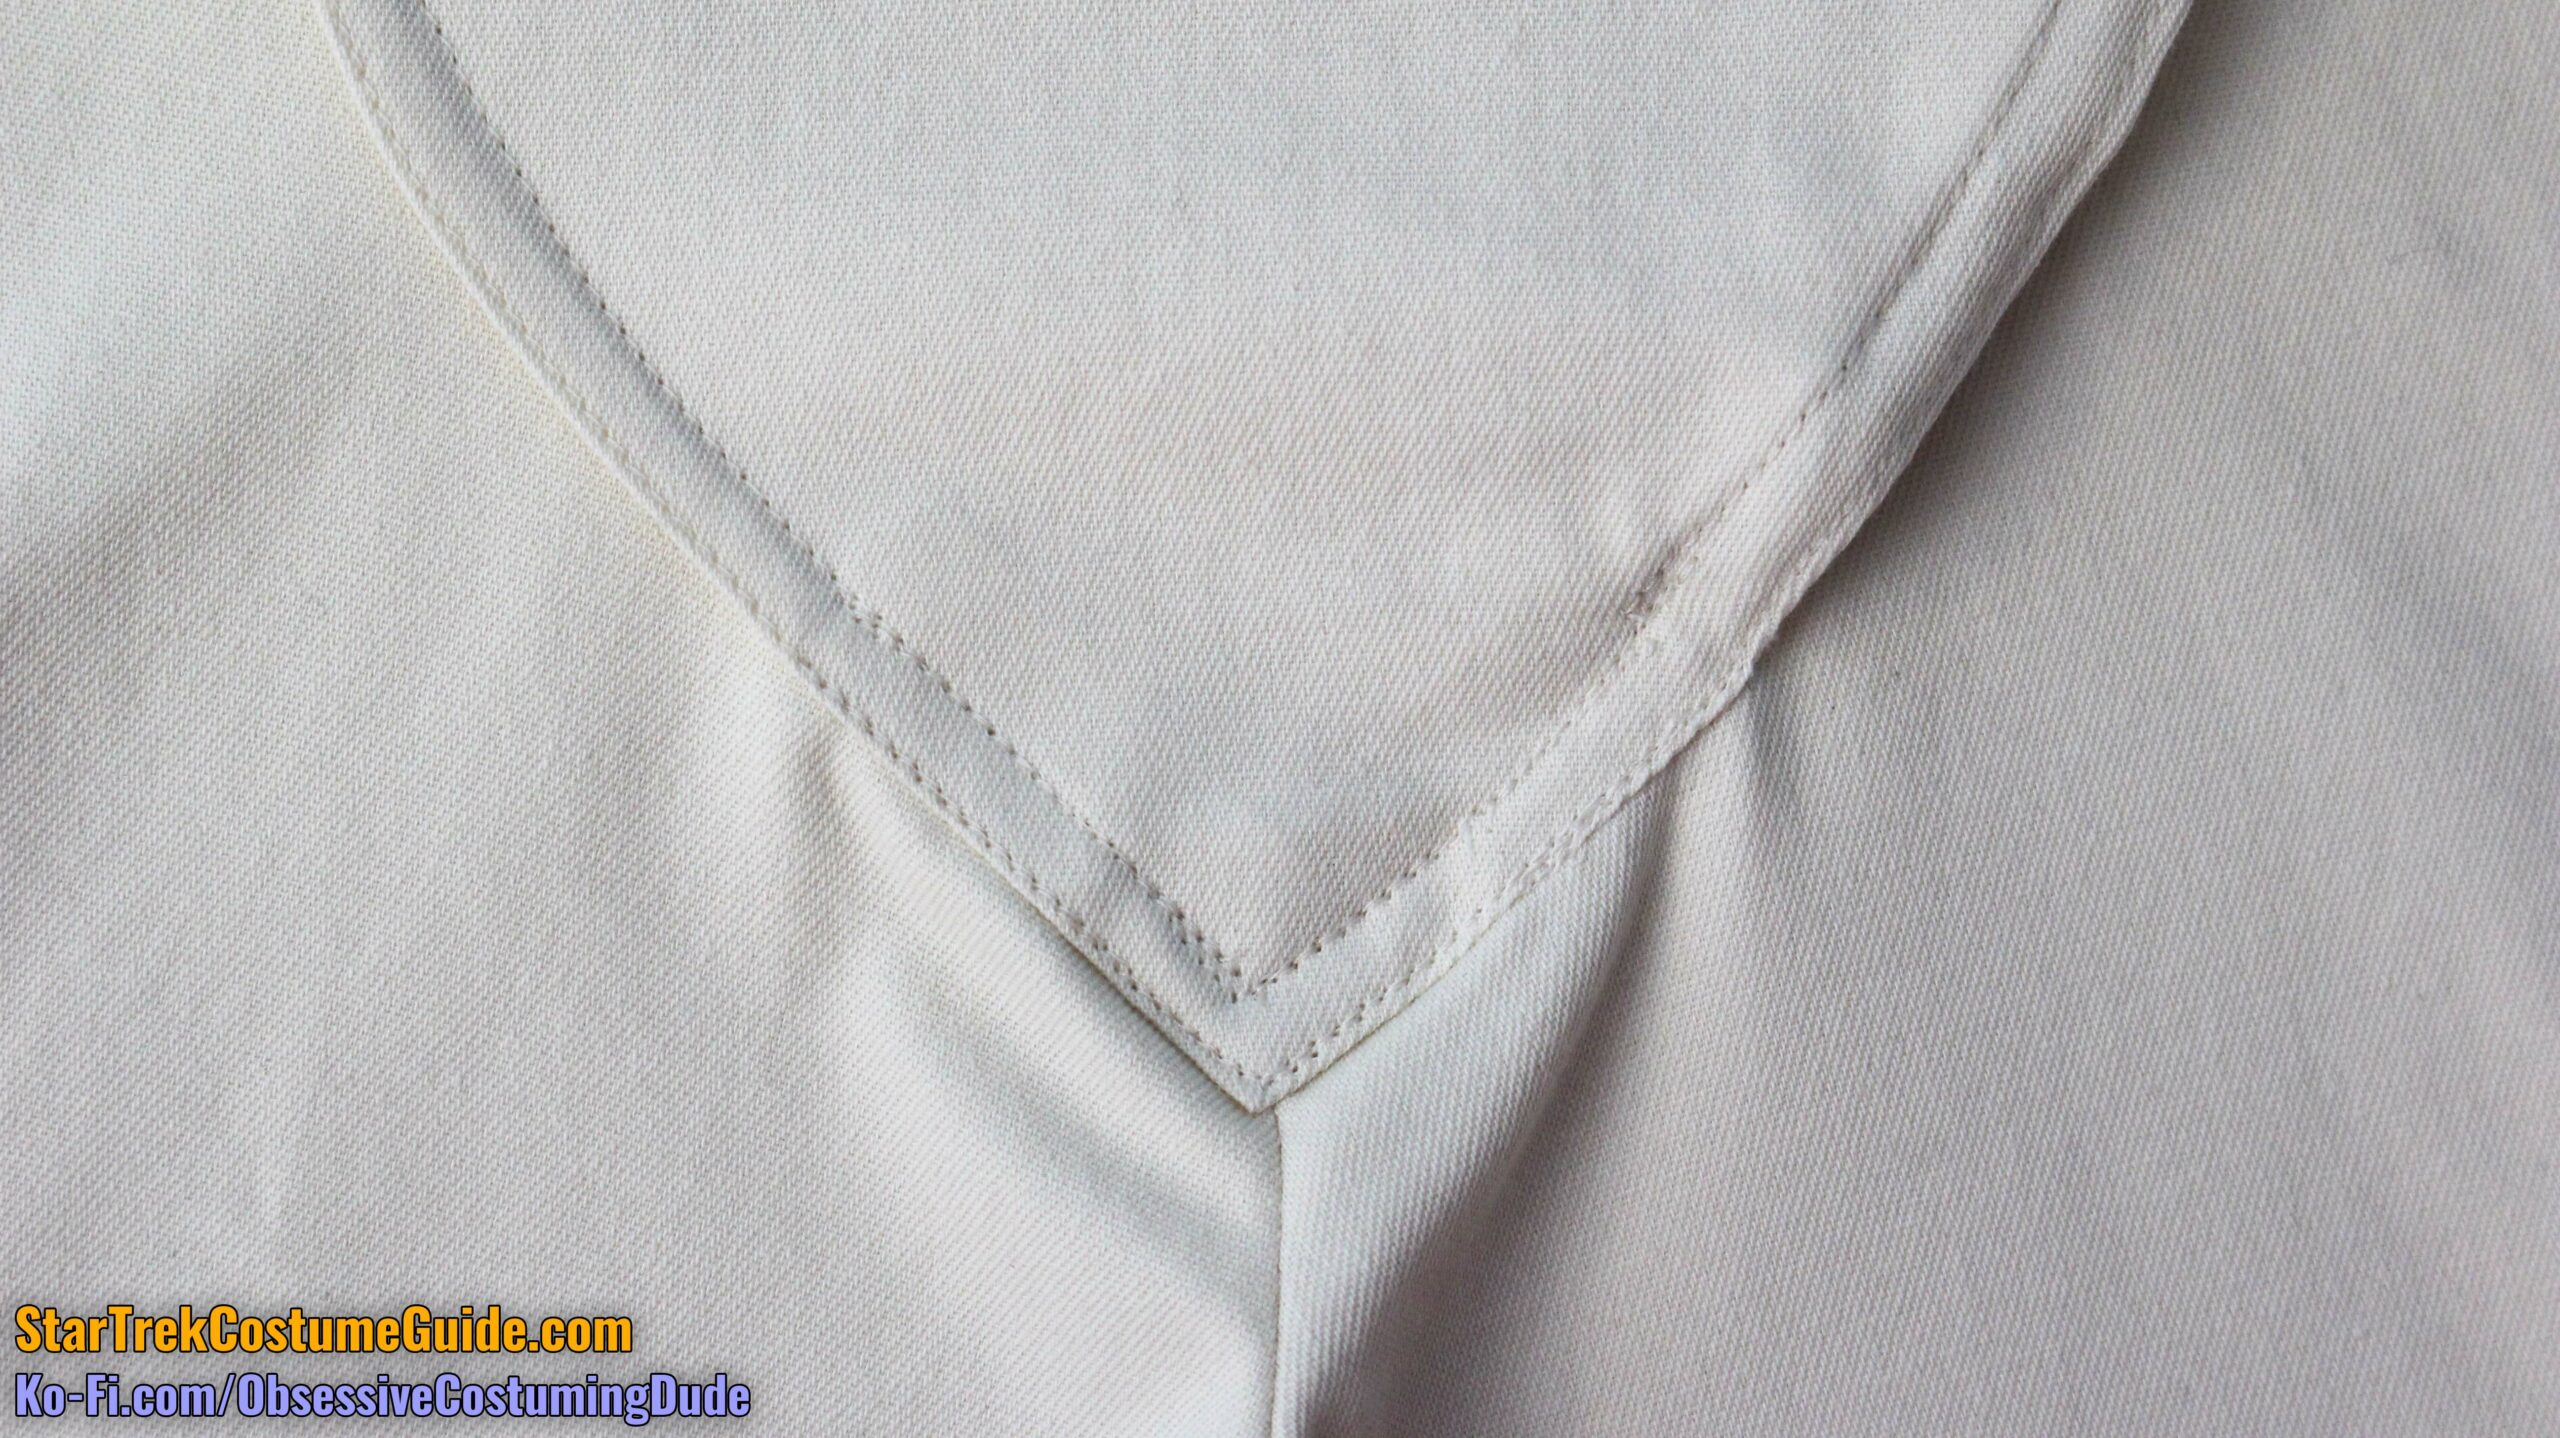
For both the men’s and women’s patterns, the center front panel (piece B) is comprised of two layers: the shell fabric, and a muslin facing underneath.
Trim away ¼” from the edges of the muslin facing. (This will roll the seam line to the underside on the assembled panel.)
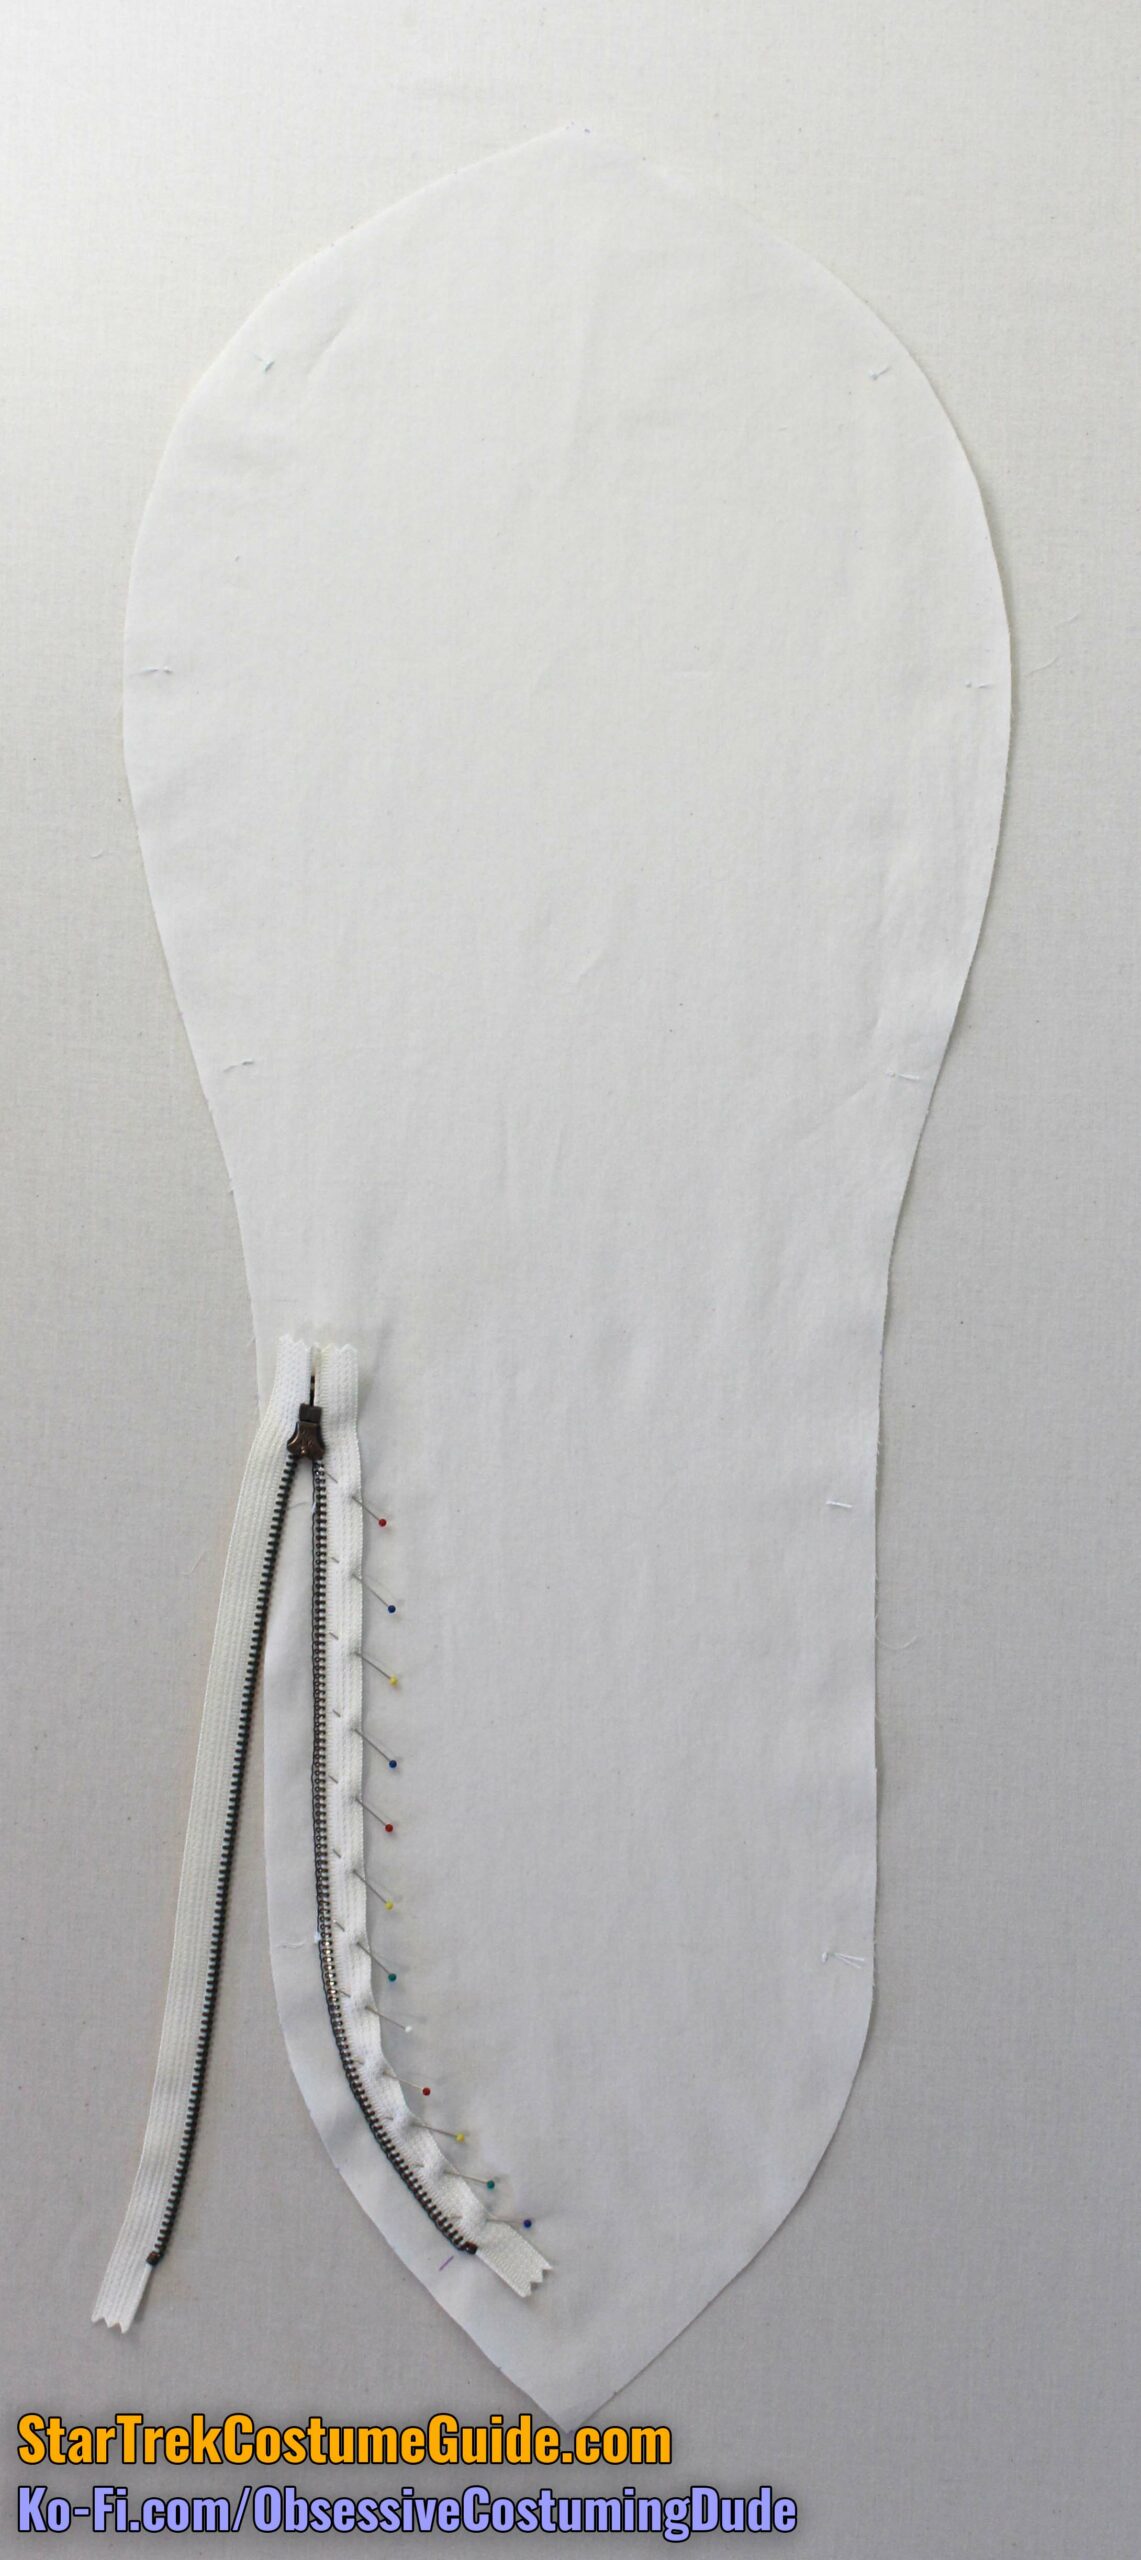
For the men’s version, I suggest basting along the lower left seam line (⅝” from the edge) to establish a guide for the zipper positioning.
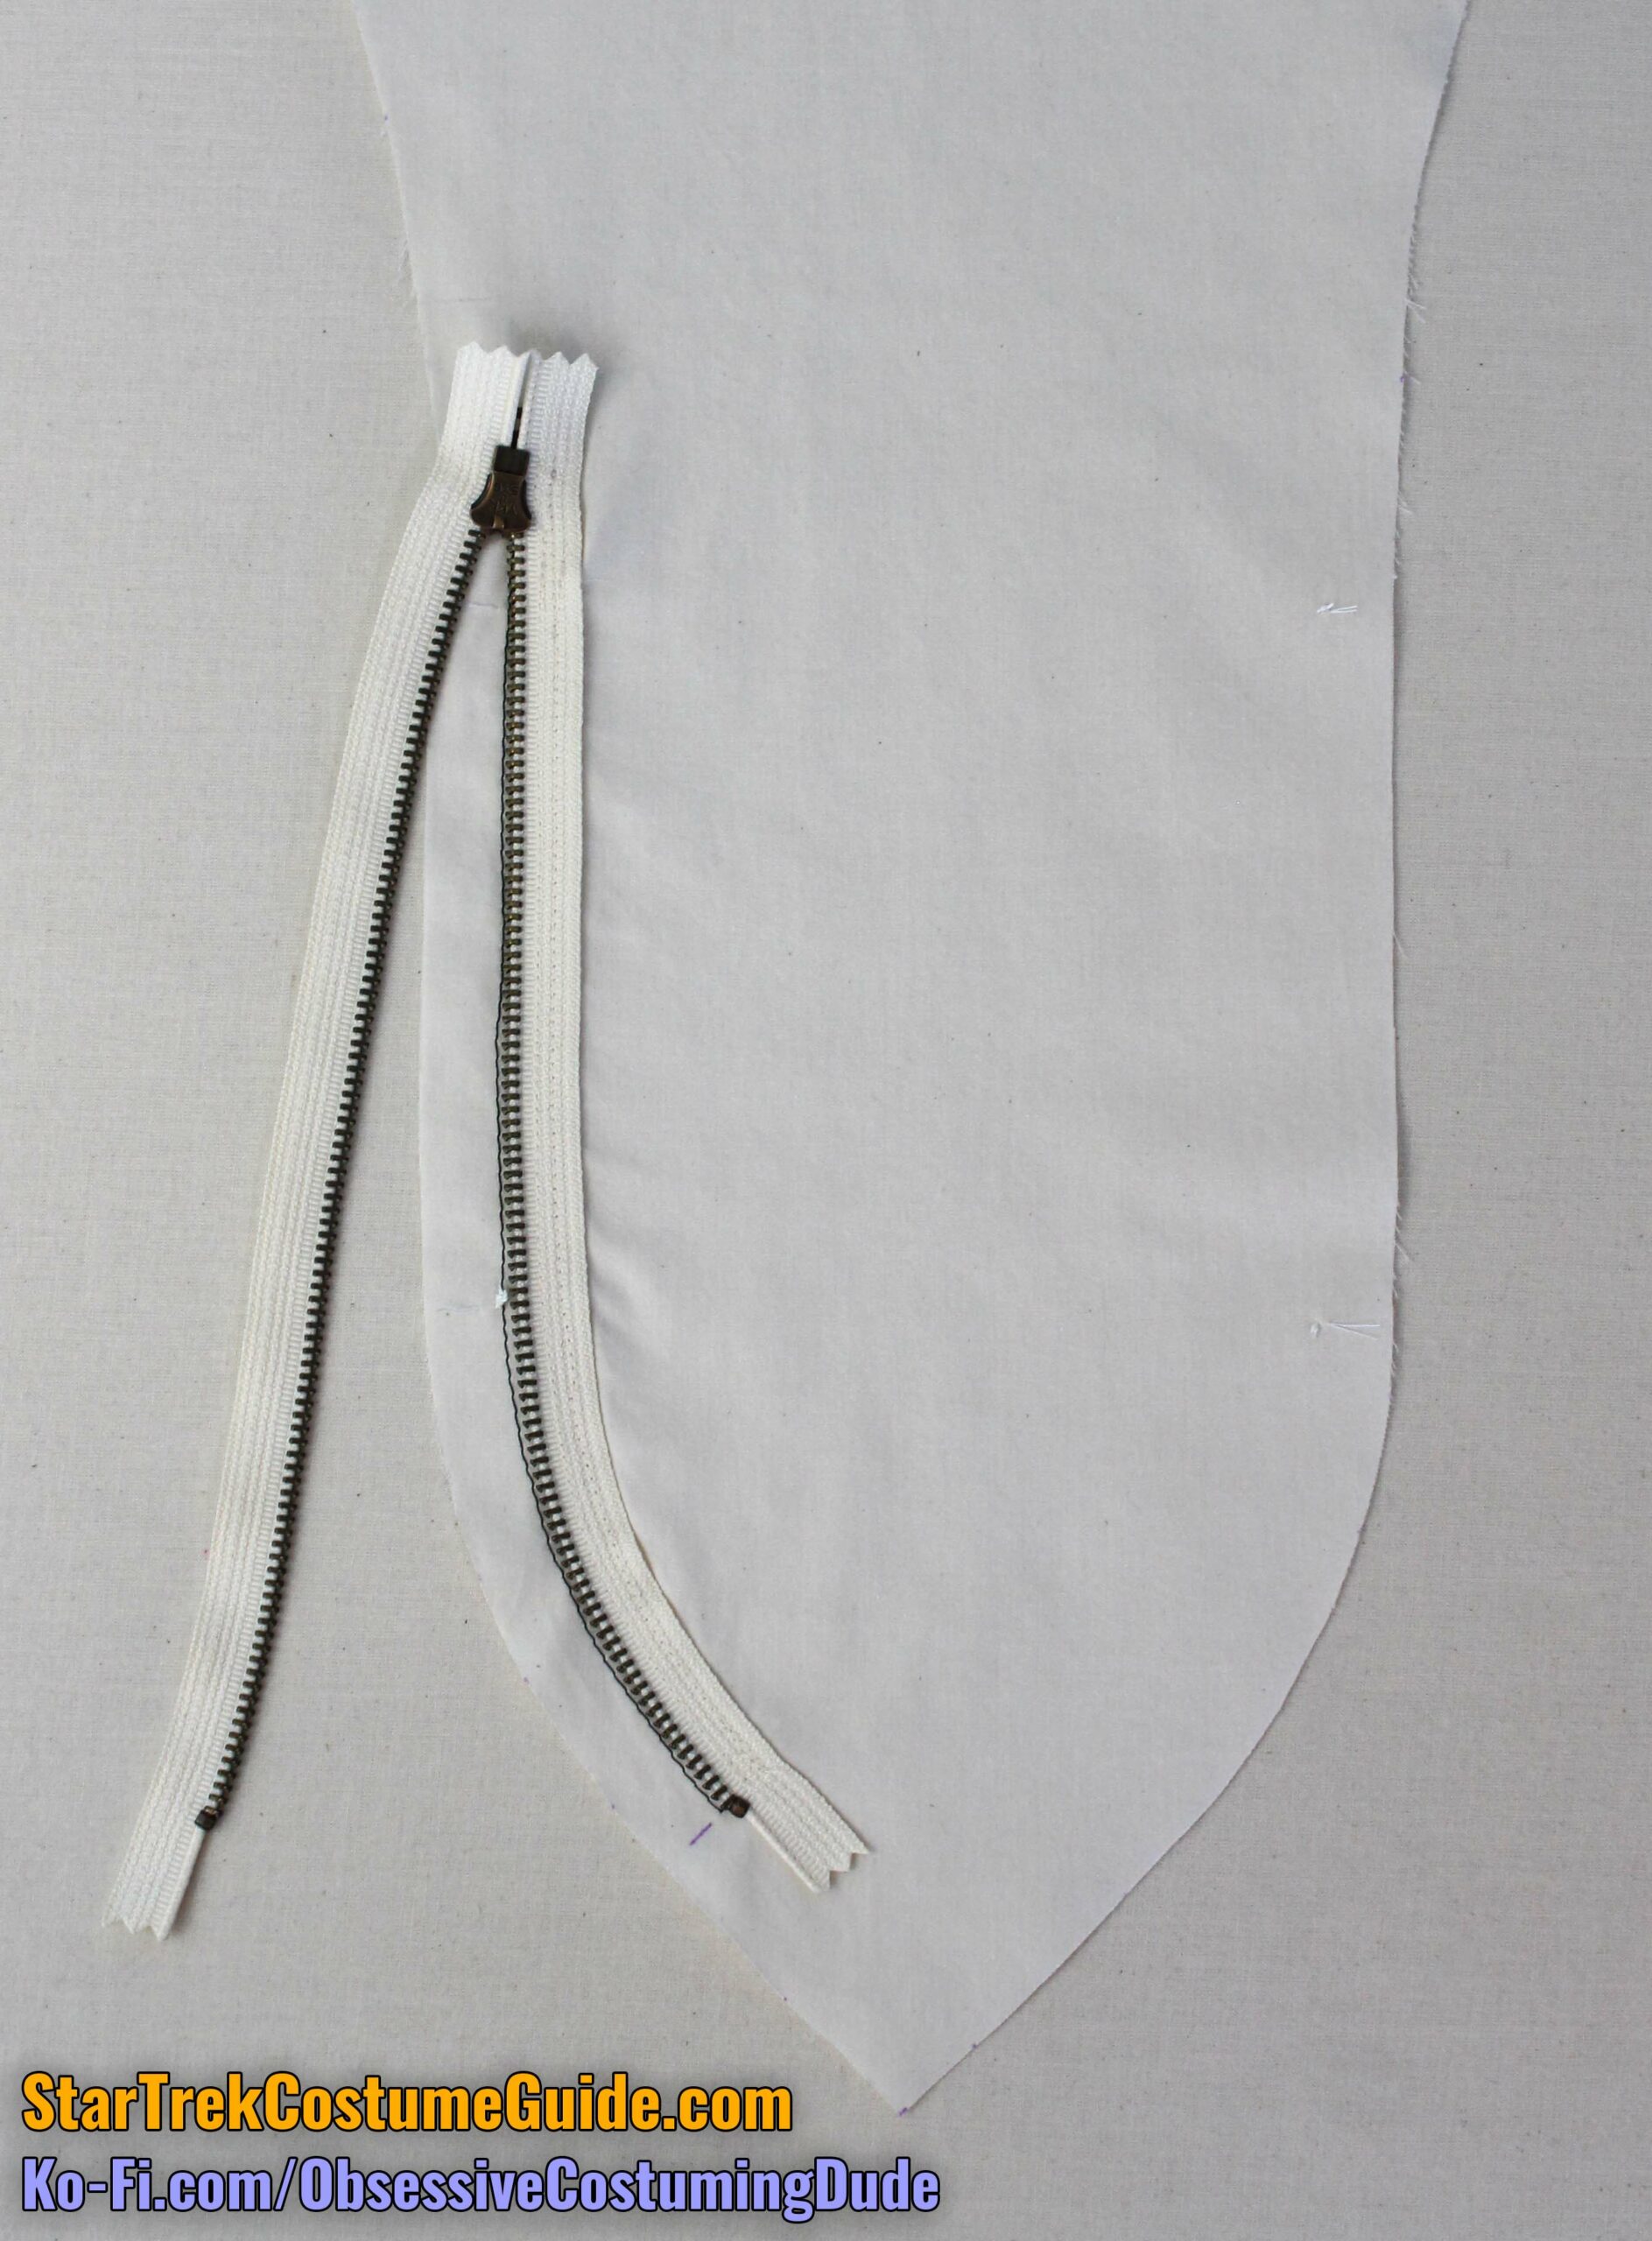
Unzip the zipper, turn it upside-down, and flip it over so the pull tab is facing the fabric.
Position the zipper so the zipper teeth are just inside the row of machine stitching, and pin it into place.
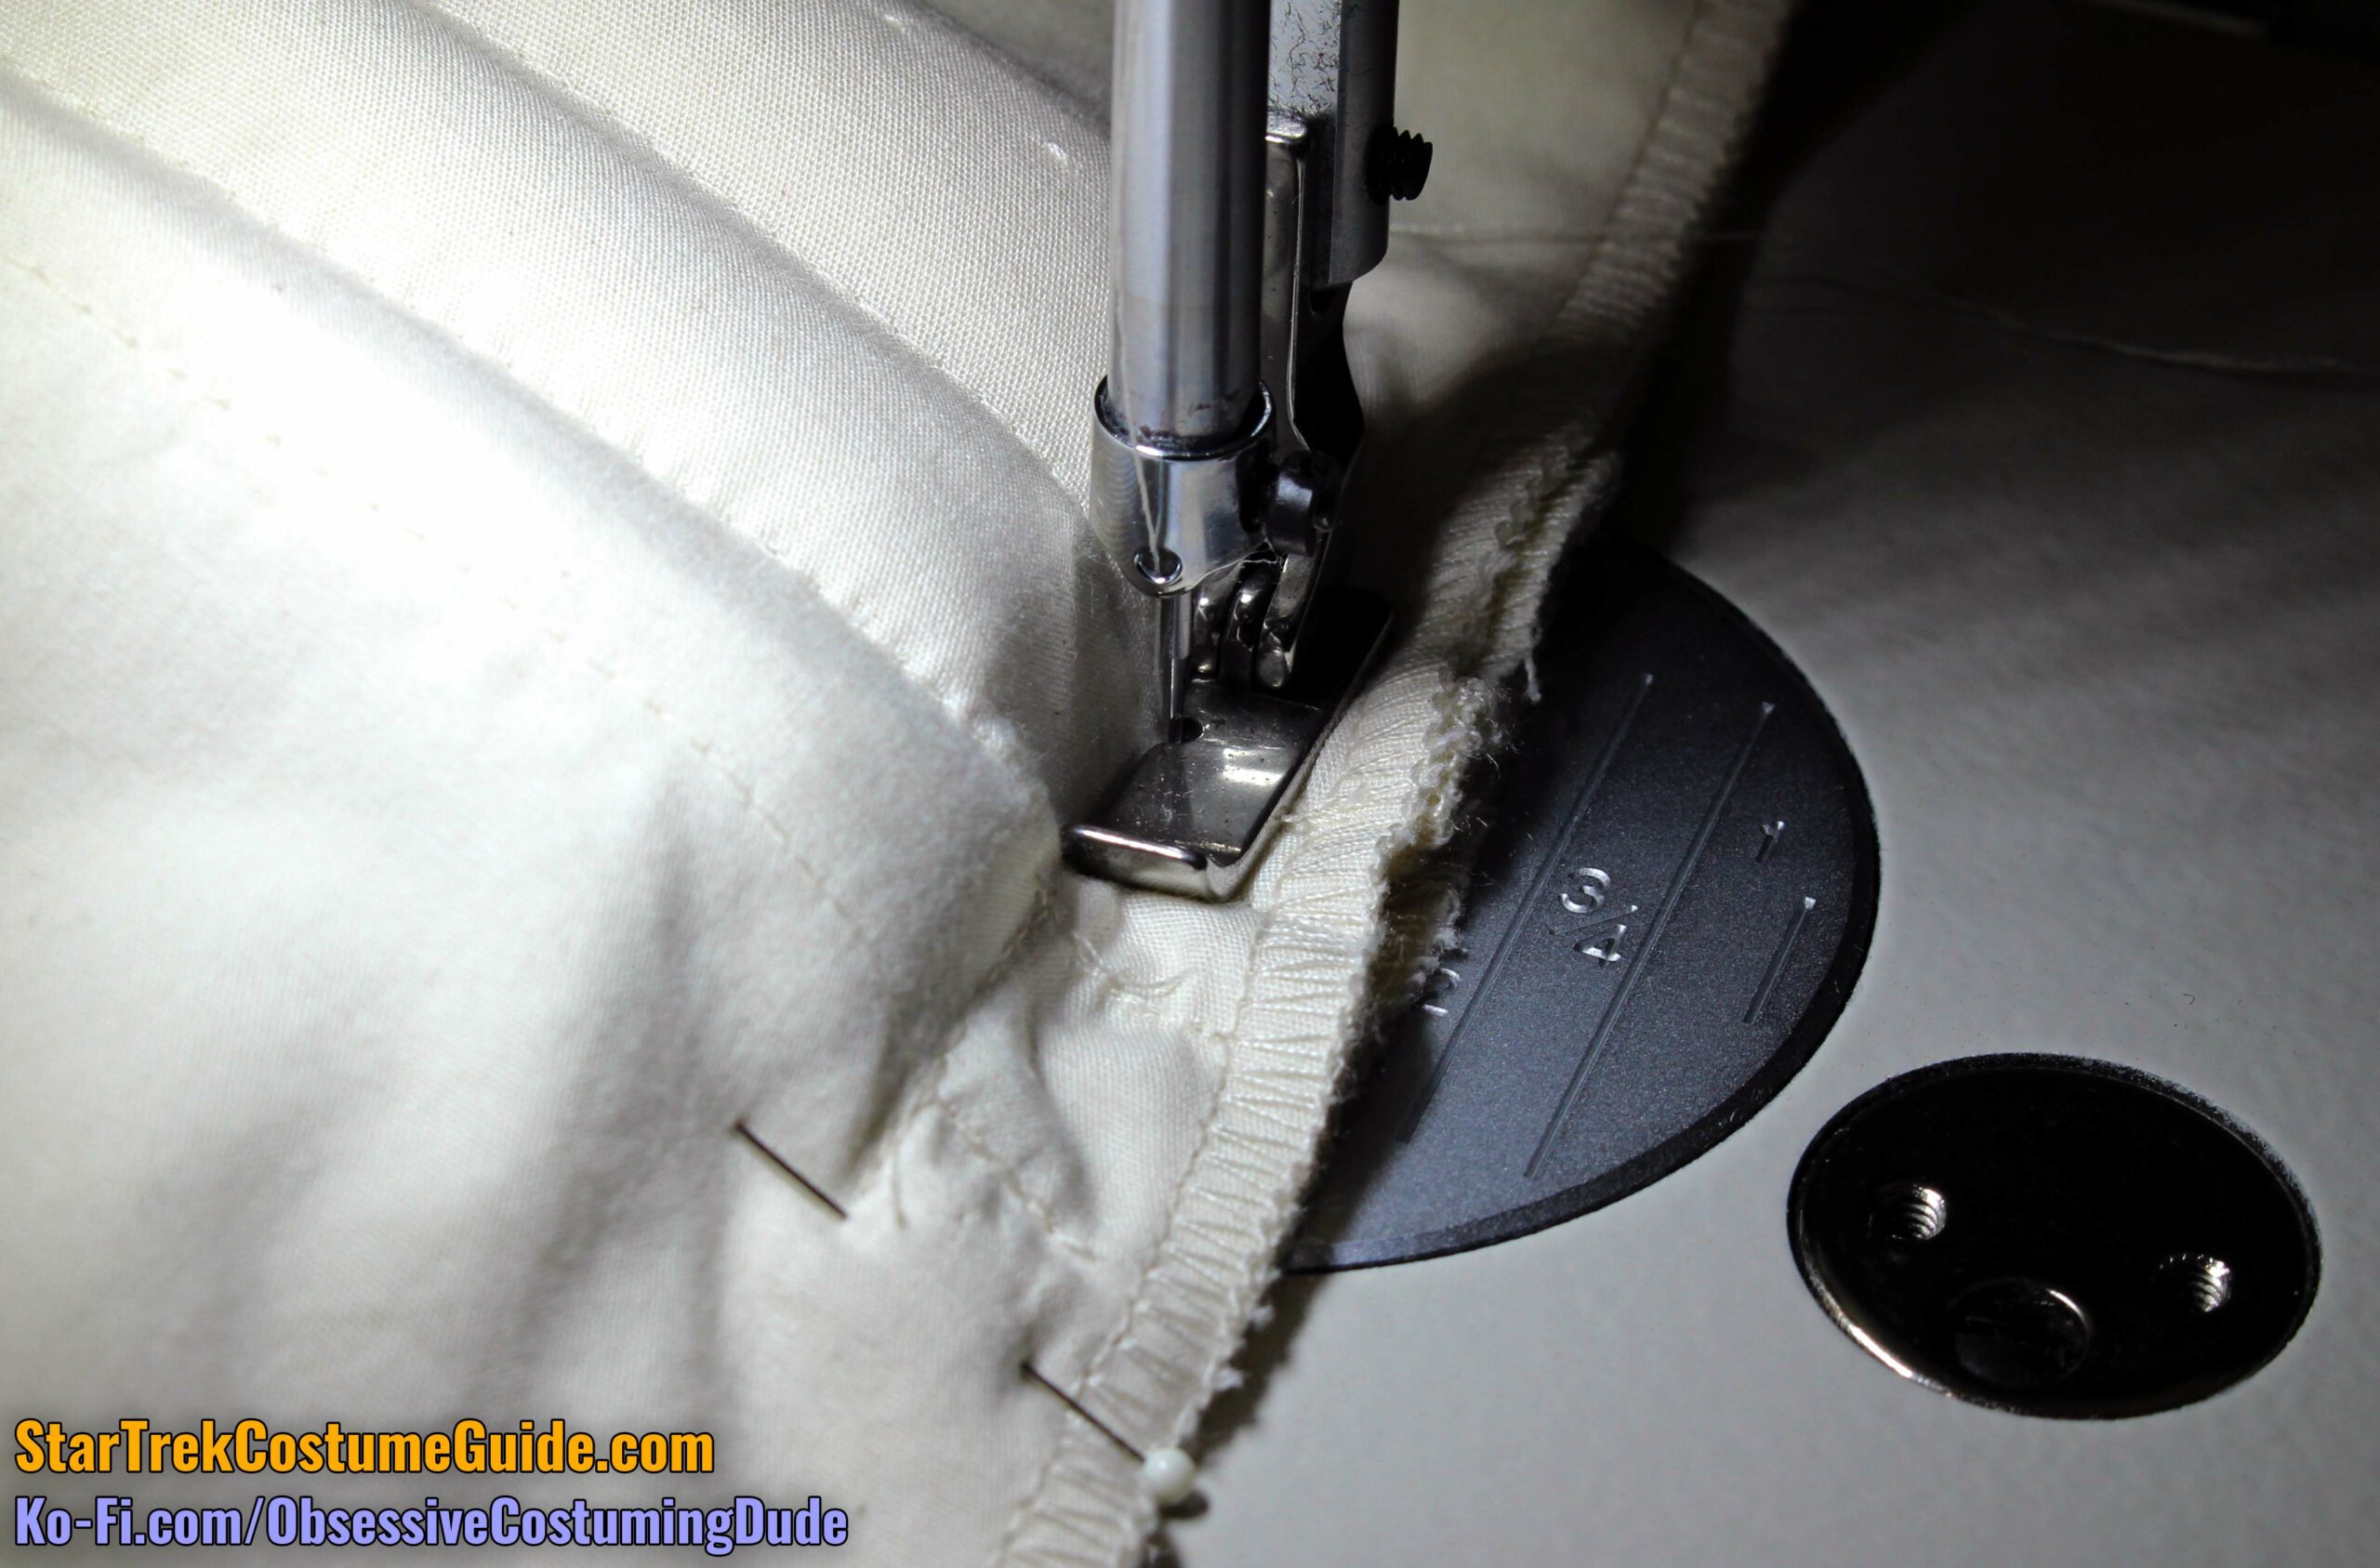
Using your zipper/piping foot, sew the zipper to the front facing ⅛” away from the zipper teeth, reinforcing your stitching at the ends of the zipper.
(Both sides of the finished zipper will need to fold over.)
Secure the zipper tape to the facing by stitching again ¼” from the zipper teeth.
Close the zipper and pull it toward the middle of the facing, out of the way.
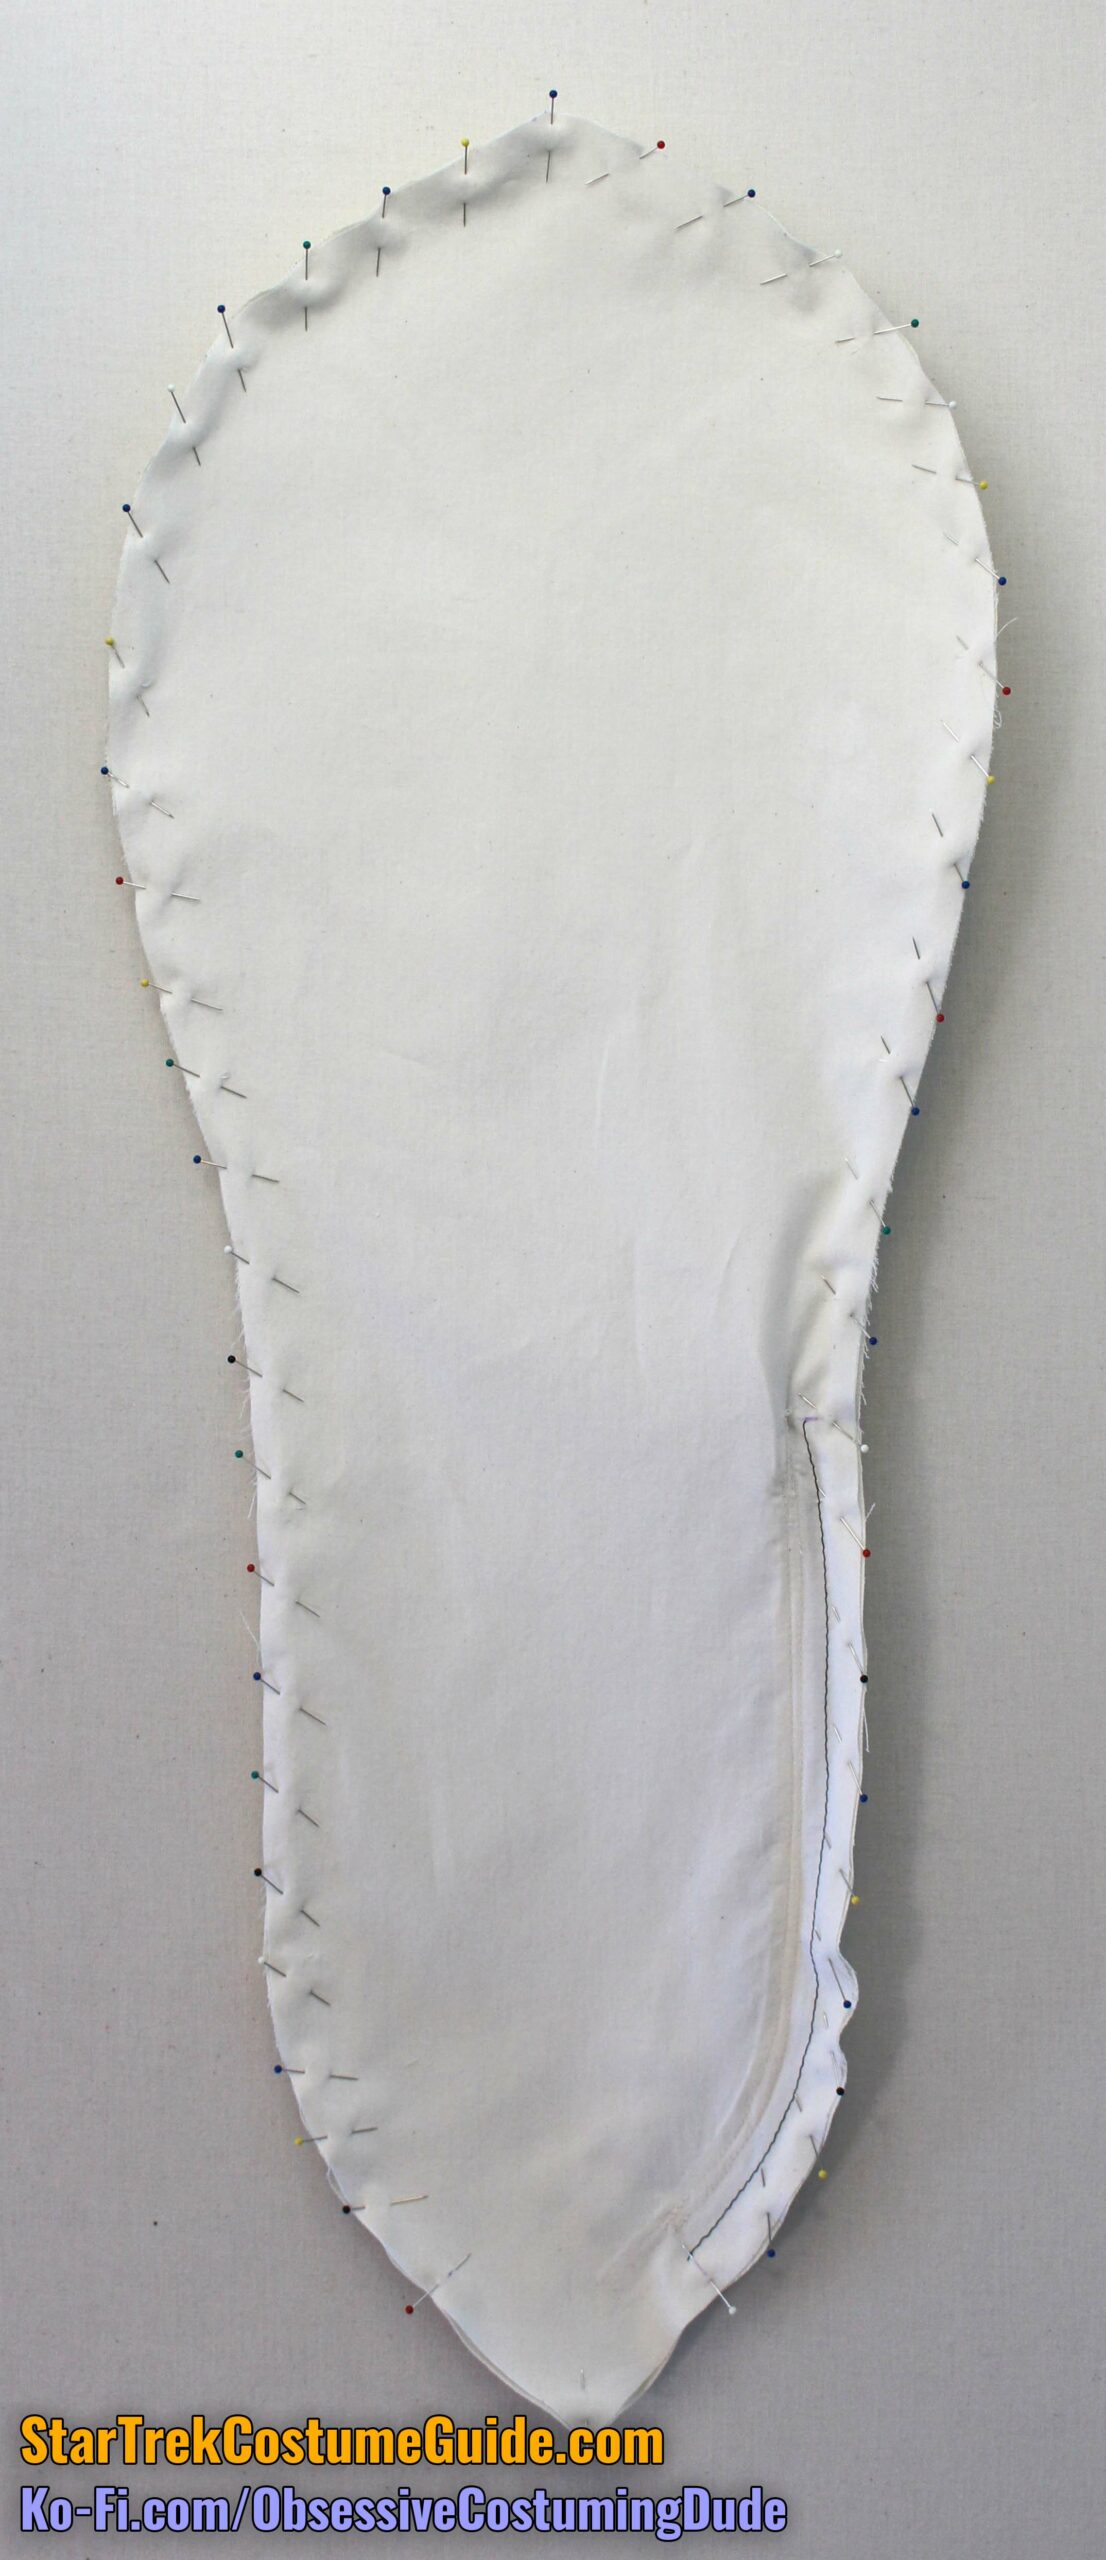
For both the men’s and women’s jumpsuits, pin the muslin facing to the shell fabric.
The facing panel is slightly smaller, so the shell fabric will buckle a bit. Gently ease in and distribute the excess as evenly as you can.
Sew the layers together with ⅝” seam allowance, leaving the bottommost 2-3” free to turn it outward shortly.
Clip the seam allowances where you began and ended your stitching, and trim the seam allowances down to ⅛” along the stitch line.
Turn the front panel assembly right-sides-out through the opening you left at the bottom.
Gently poke out the upper corner if-needed, and pull the lower seam allowances outward where you clipped them.
The seam line should roll about ⅛” to the underside.
For the men’s jumpsuit, the zipper teeth should be just inside the seam line.
Press the front assembly flat along the edges.
Press the lower front allowances under one at a time. (You can trim them a bit if you want.)
Hand-sew the lower front of the panel assembly closed. It will be machine-sewn closed multiple times as we continue, so your stitching doesn’t need to be perfect or invisible.
Topstitch around the entire perimeter of the front panel assembly ⅛” from the folded edge.
On the men’s jumpsuit, topstitch again ¼” from the previous stitching (⅜” from the folded edge) along the zipper.
Position the front panel assembly onto the jumpsuit so its folded edges are flush with the basting stitch you made earlier, matching balance points.
Pin the front panel assembly to the jumpsuit.
(On the men’s jumpsuit, don’t pin over the zipper; just leave that area free for now.)
Note that the jumpsuit and front panel have differently-curved contours; the seam lines are the same distance, but the seam itself is fitted.
Therefore, your jumpsuit/panel assembly will not want to lie flat.
Topstitch the front panel assembly to the jumpsuit ¼” inside the previous stitch line (⅜” from the folded edge).
On the women’s jumpsuit, topstitch around the entire perimeter of the front panel assembly.
On the men’s jumpsuit, begin and end your stitching at the previous stitch line (which runs parallel to the zipper fly).
For the men’s jumpsuit, close the zipper and pin it to the lower left allowance on the jumpsuit.
Using your zipper/piping foot, sew the zipper to the jumpsuit ⅛” away from the zipper teeth, reinforcing at the ends of the zipper.
Secure the zipper tape to the jumpsuit by stitching again ¼” from the zipper teeth.
On both the men’s and women’s jumpsuits, topstitch over the previous stitch lines again through all layers for the bottom 2” or so of the lower front corner.
For the men’s version, reinforce your stitching several times at the bottom of the zipper, where the lower left stitch lines meet.
Remove the basting stitch from the front of the jumpsuit.
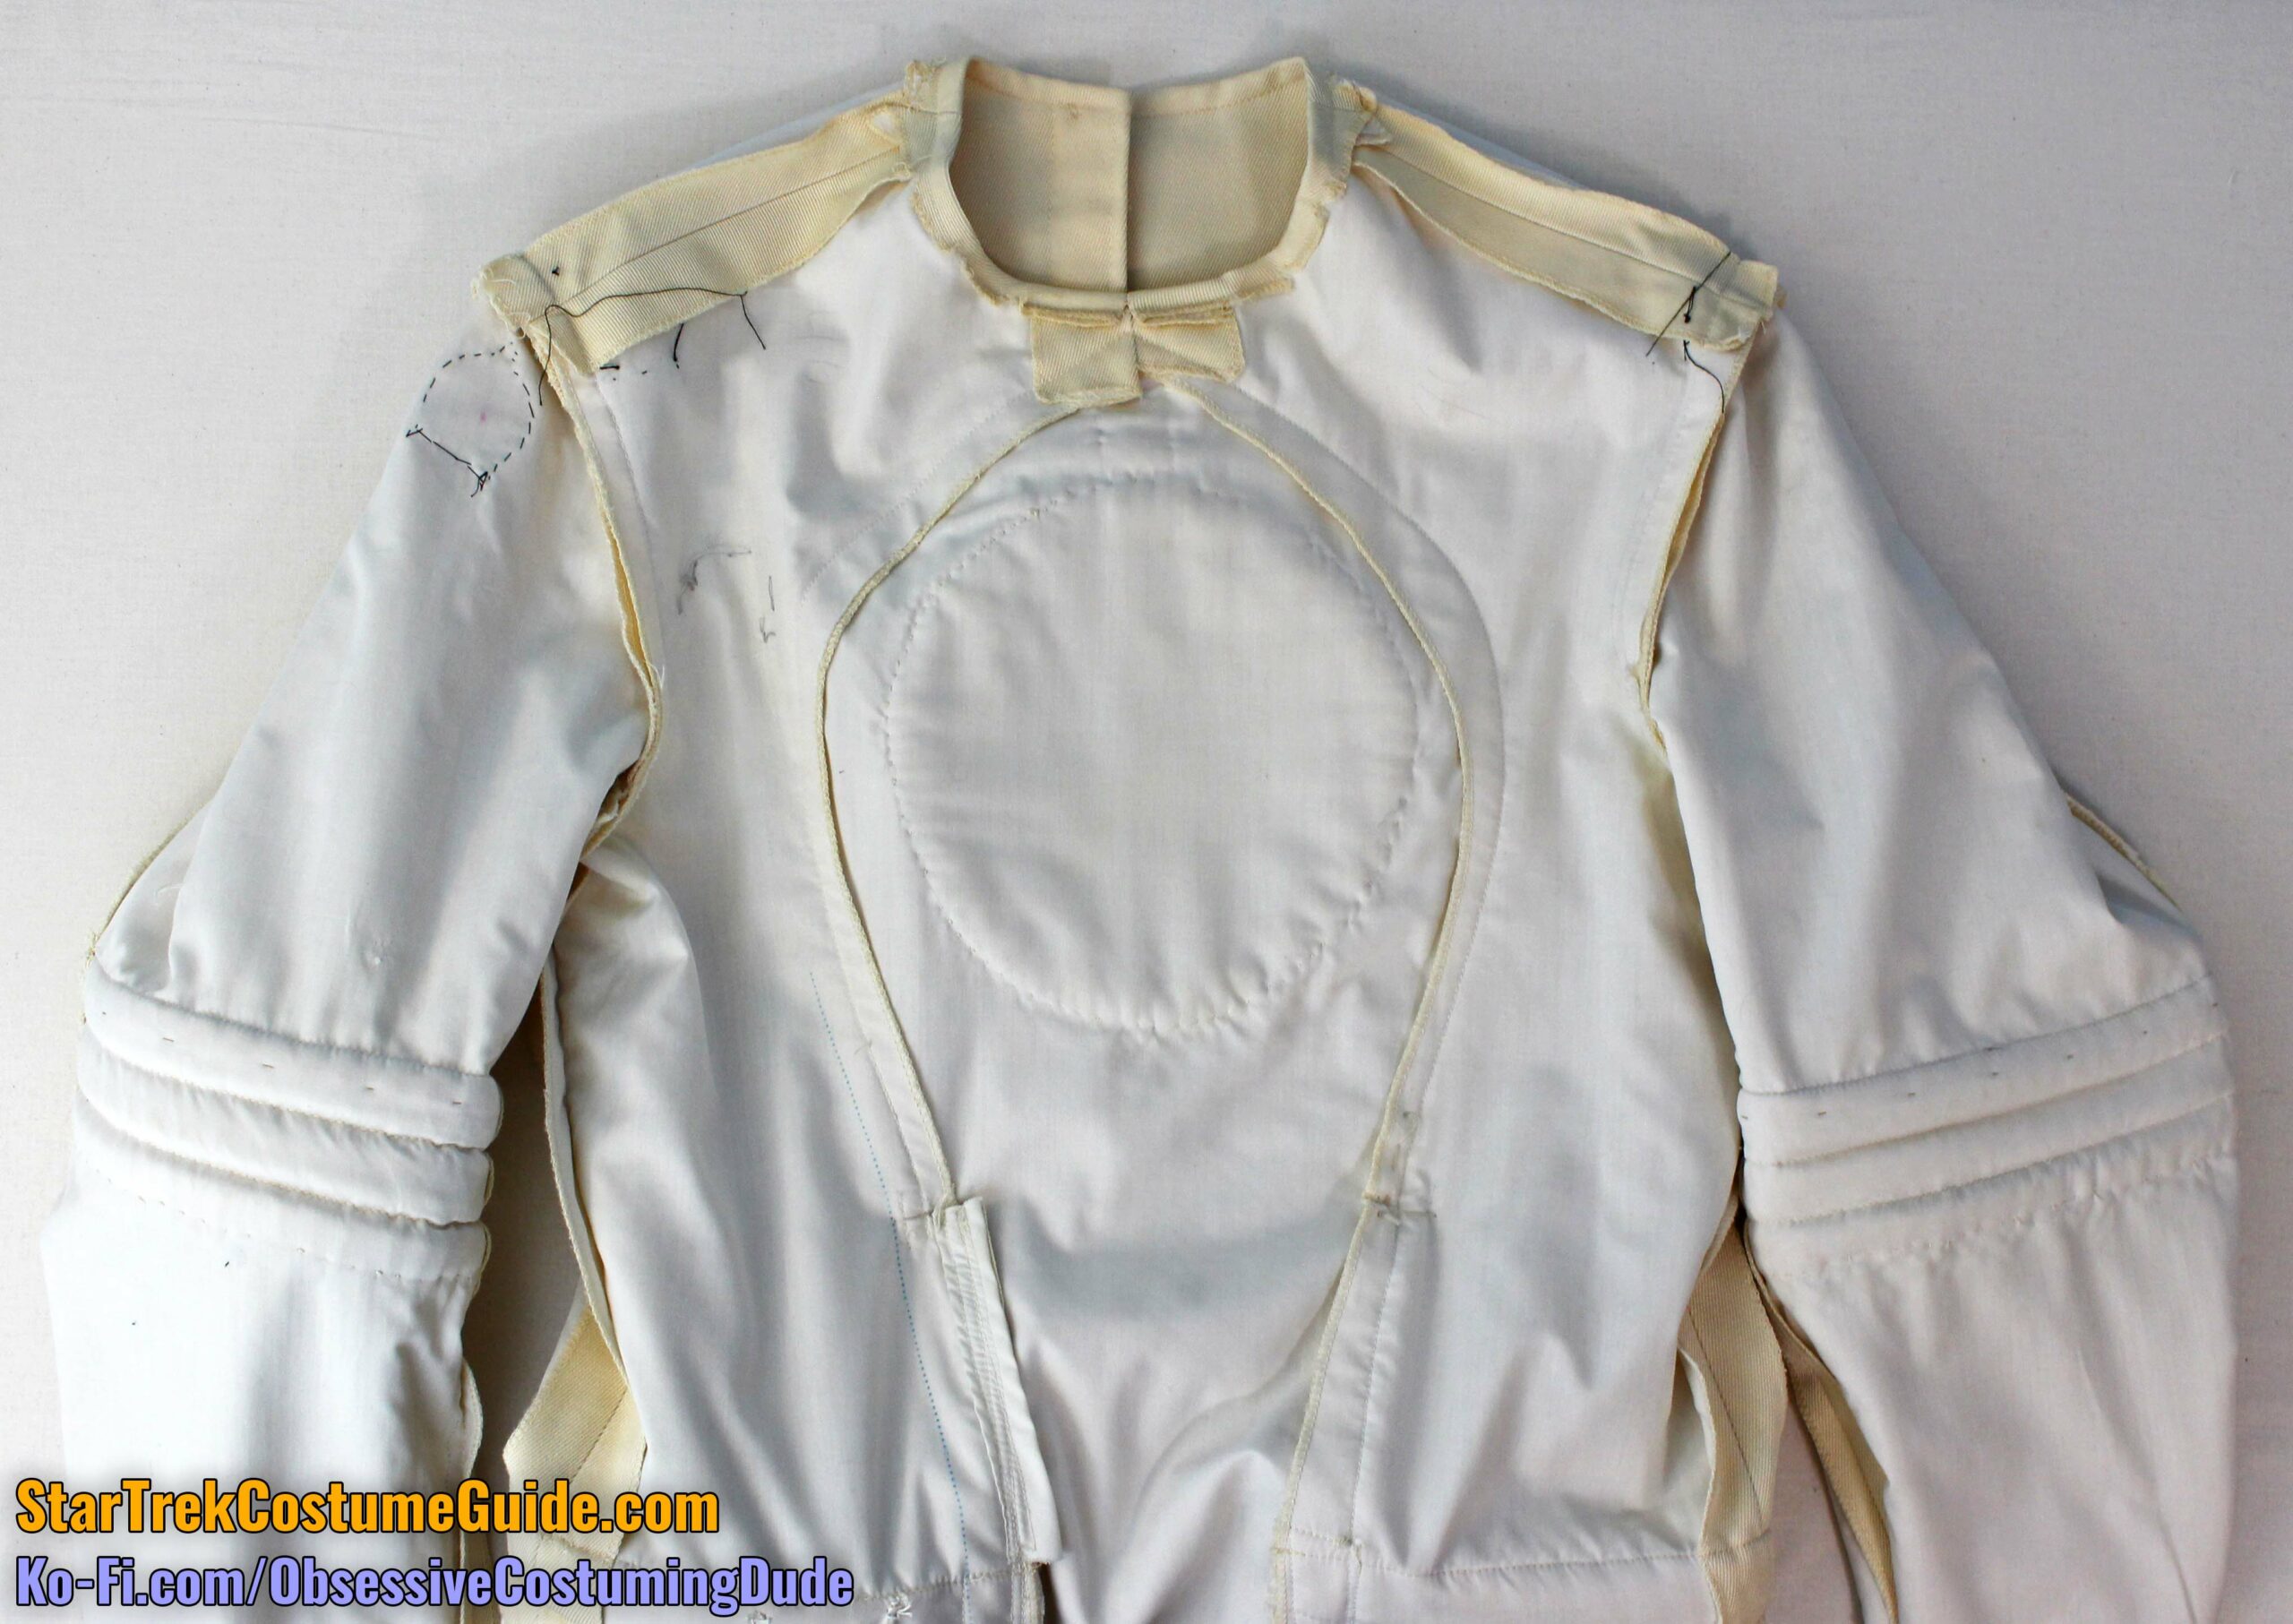
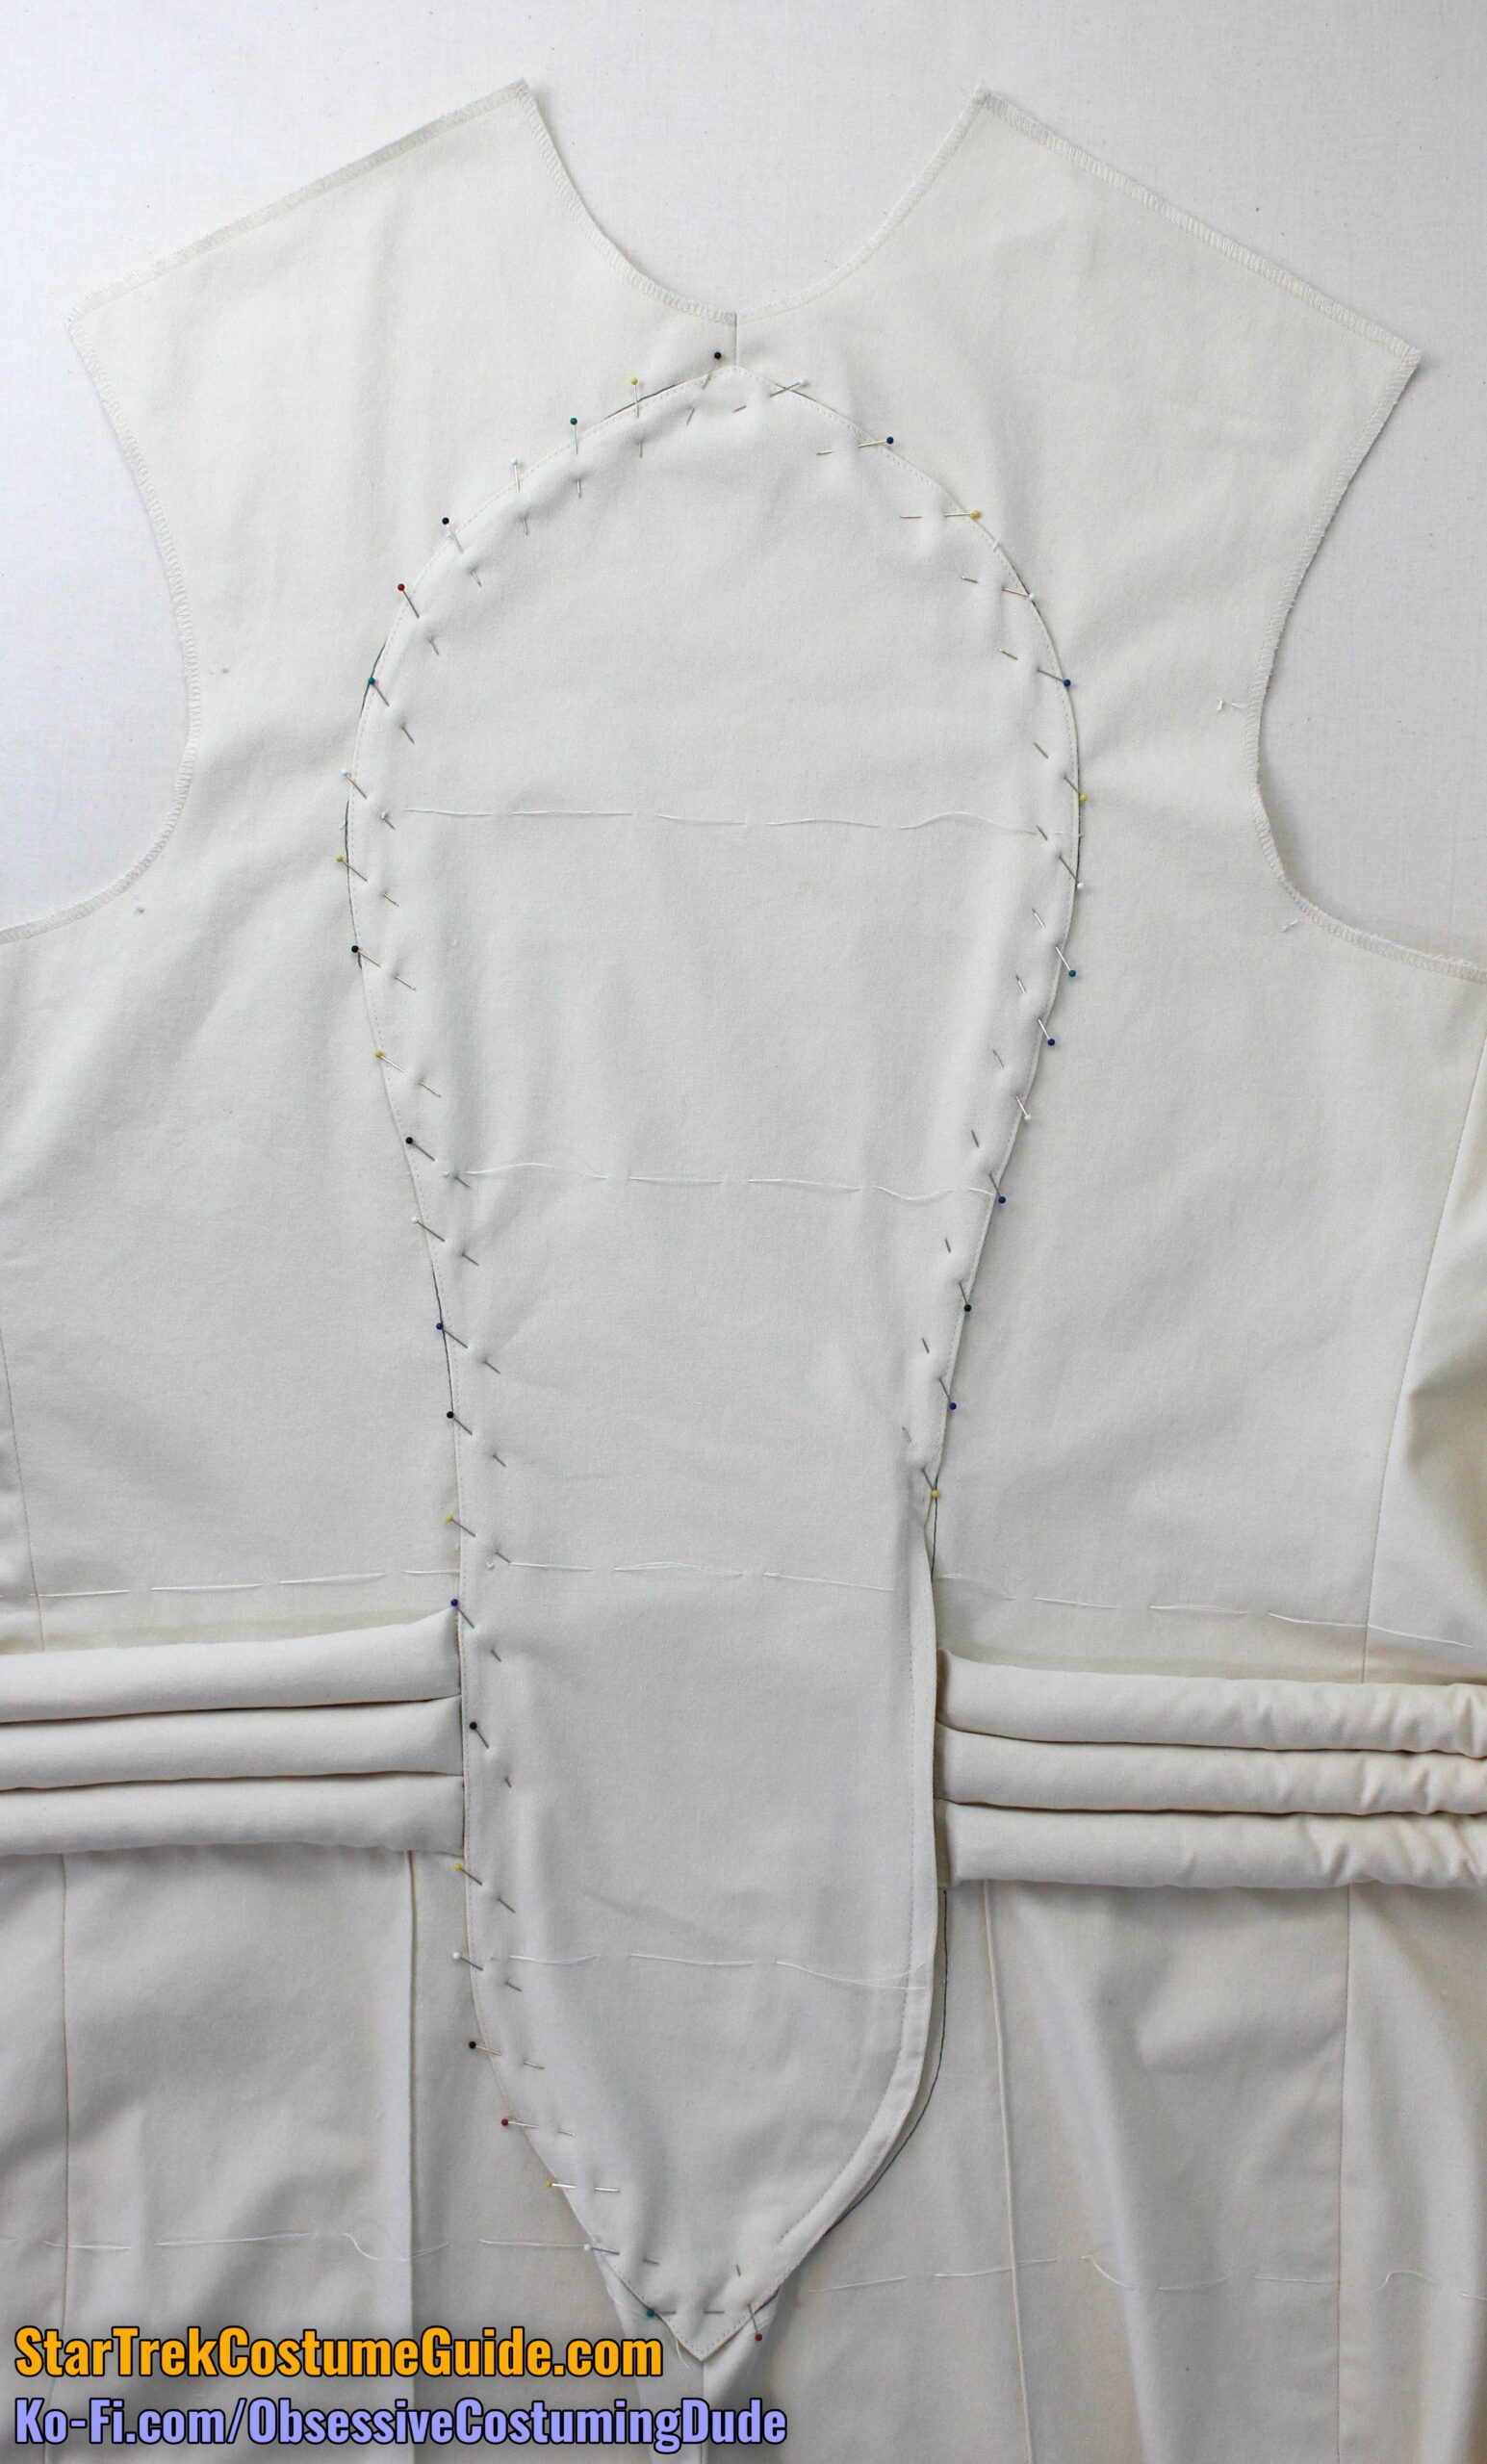
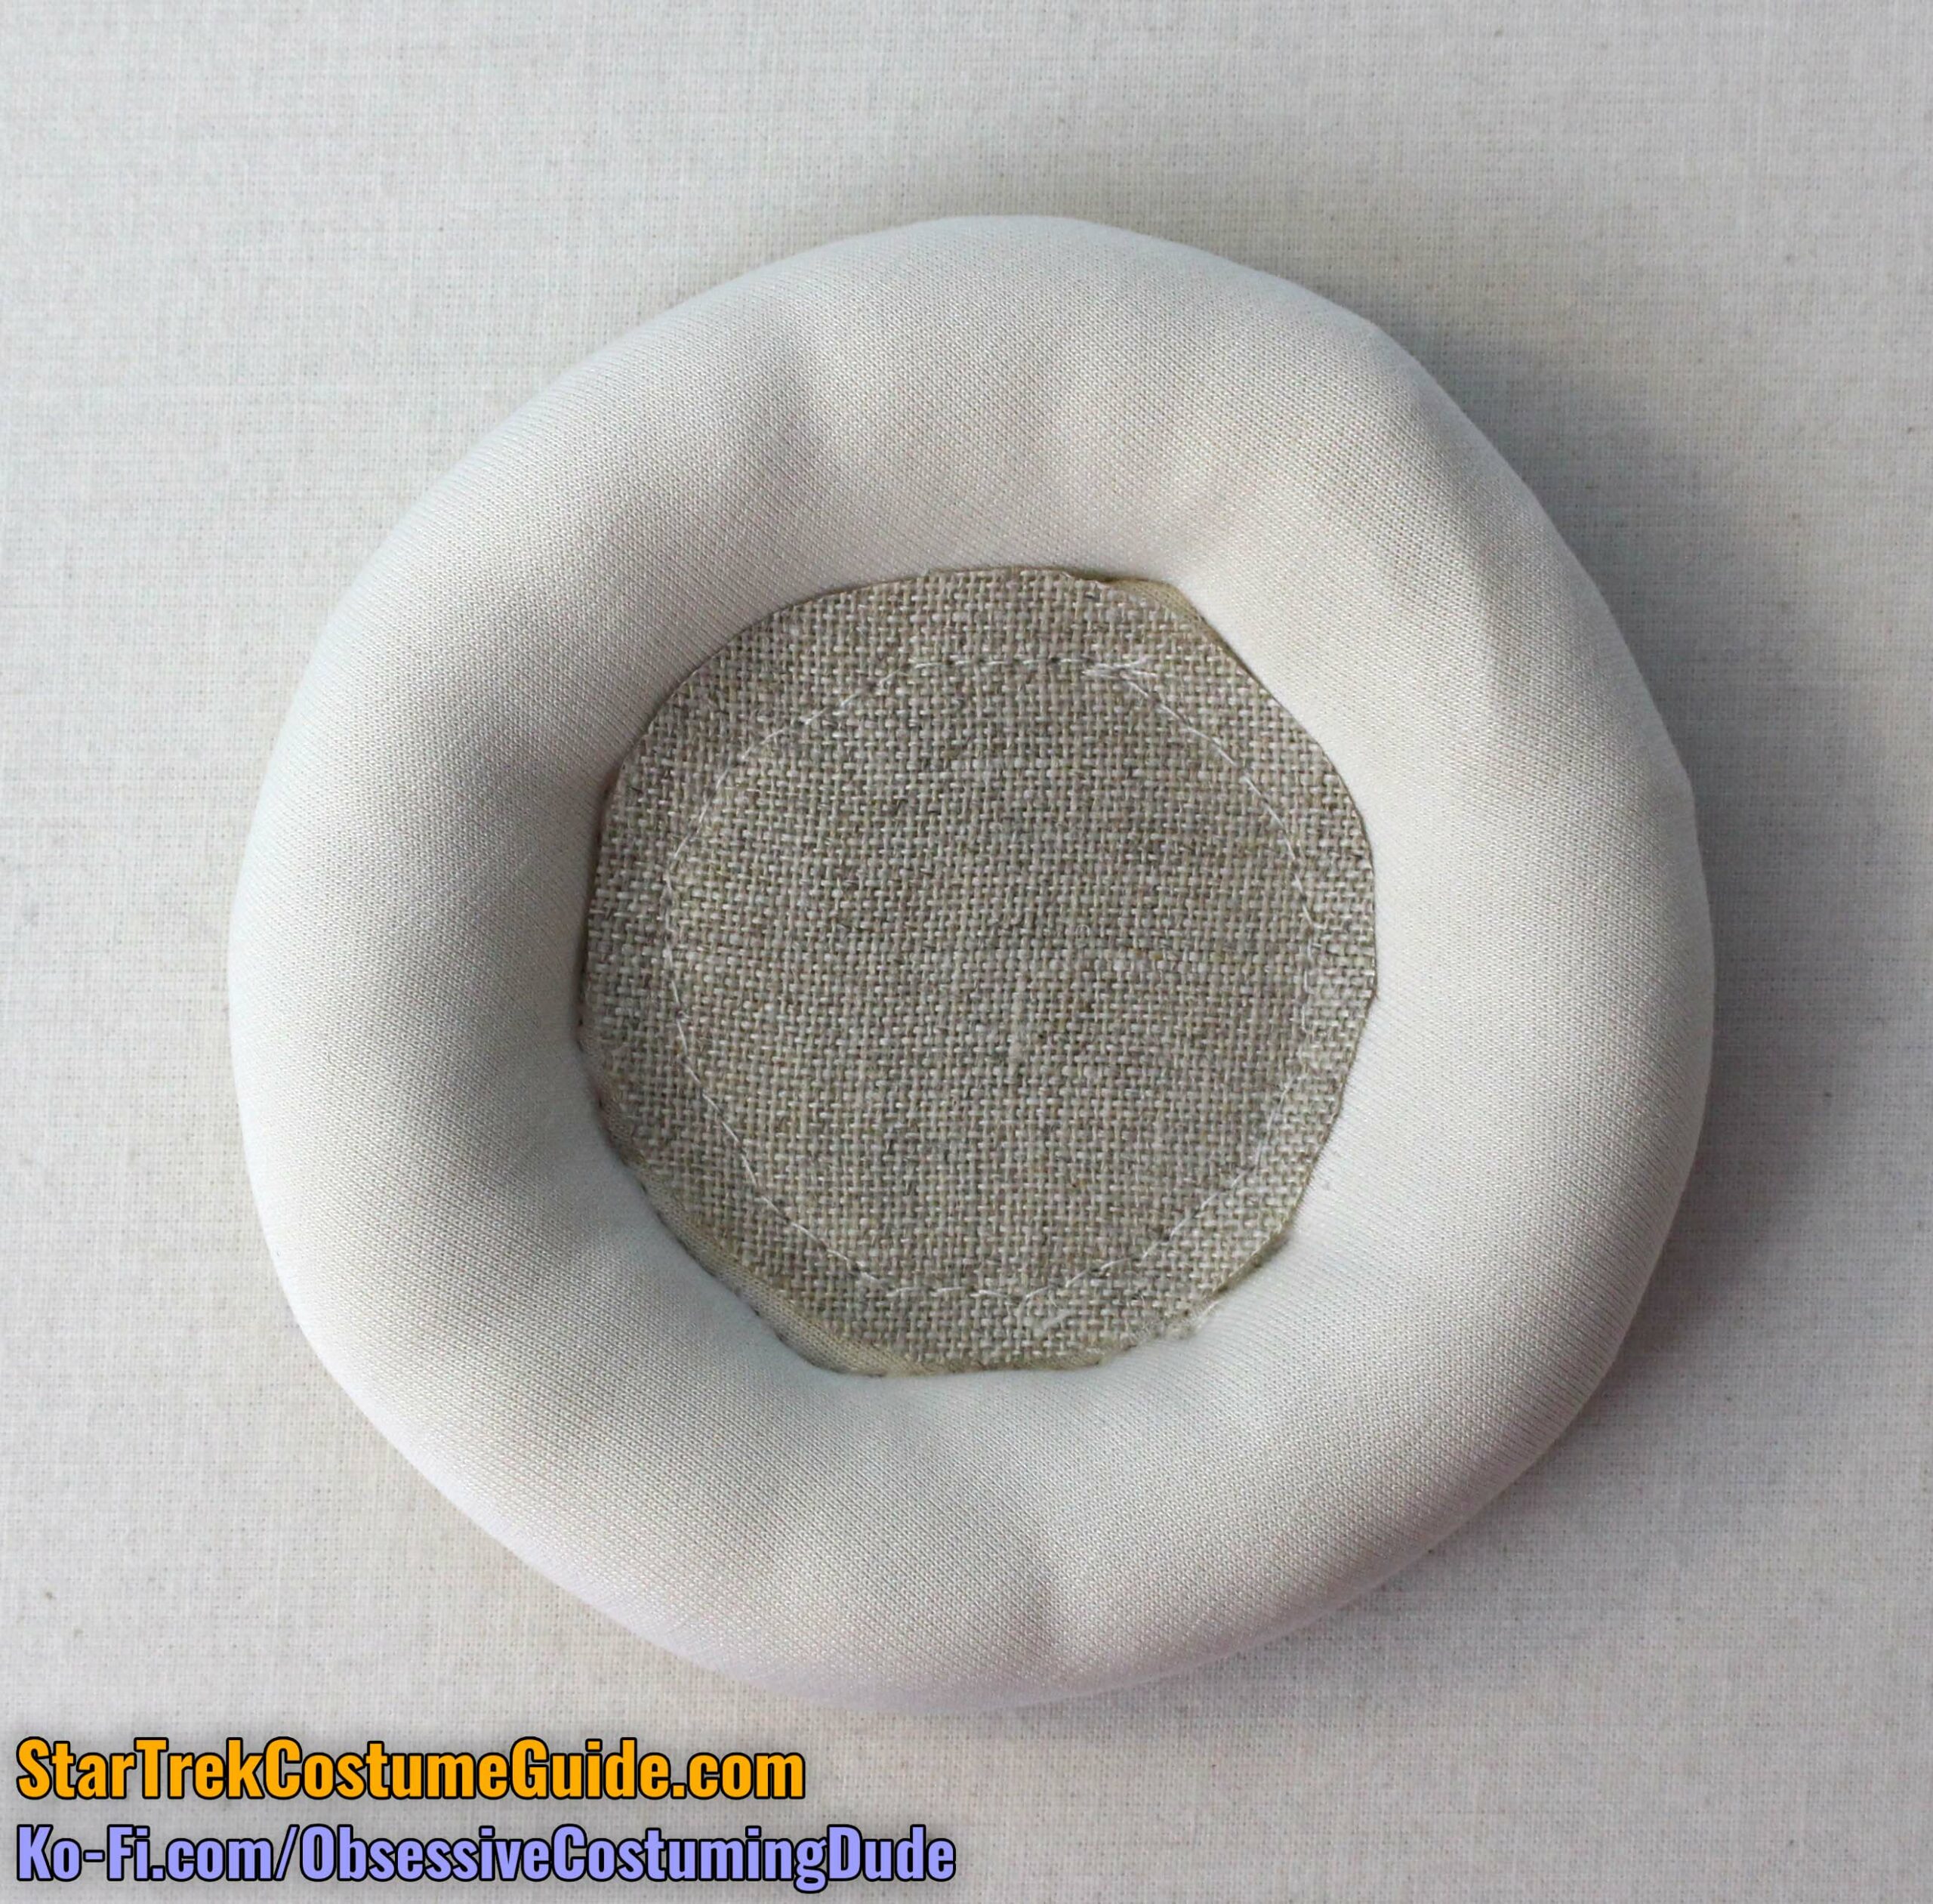
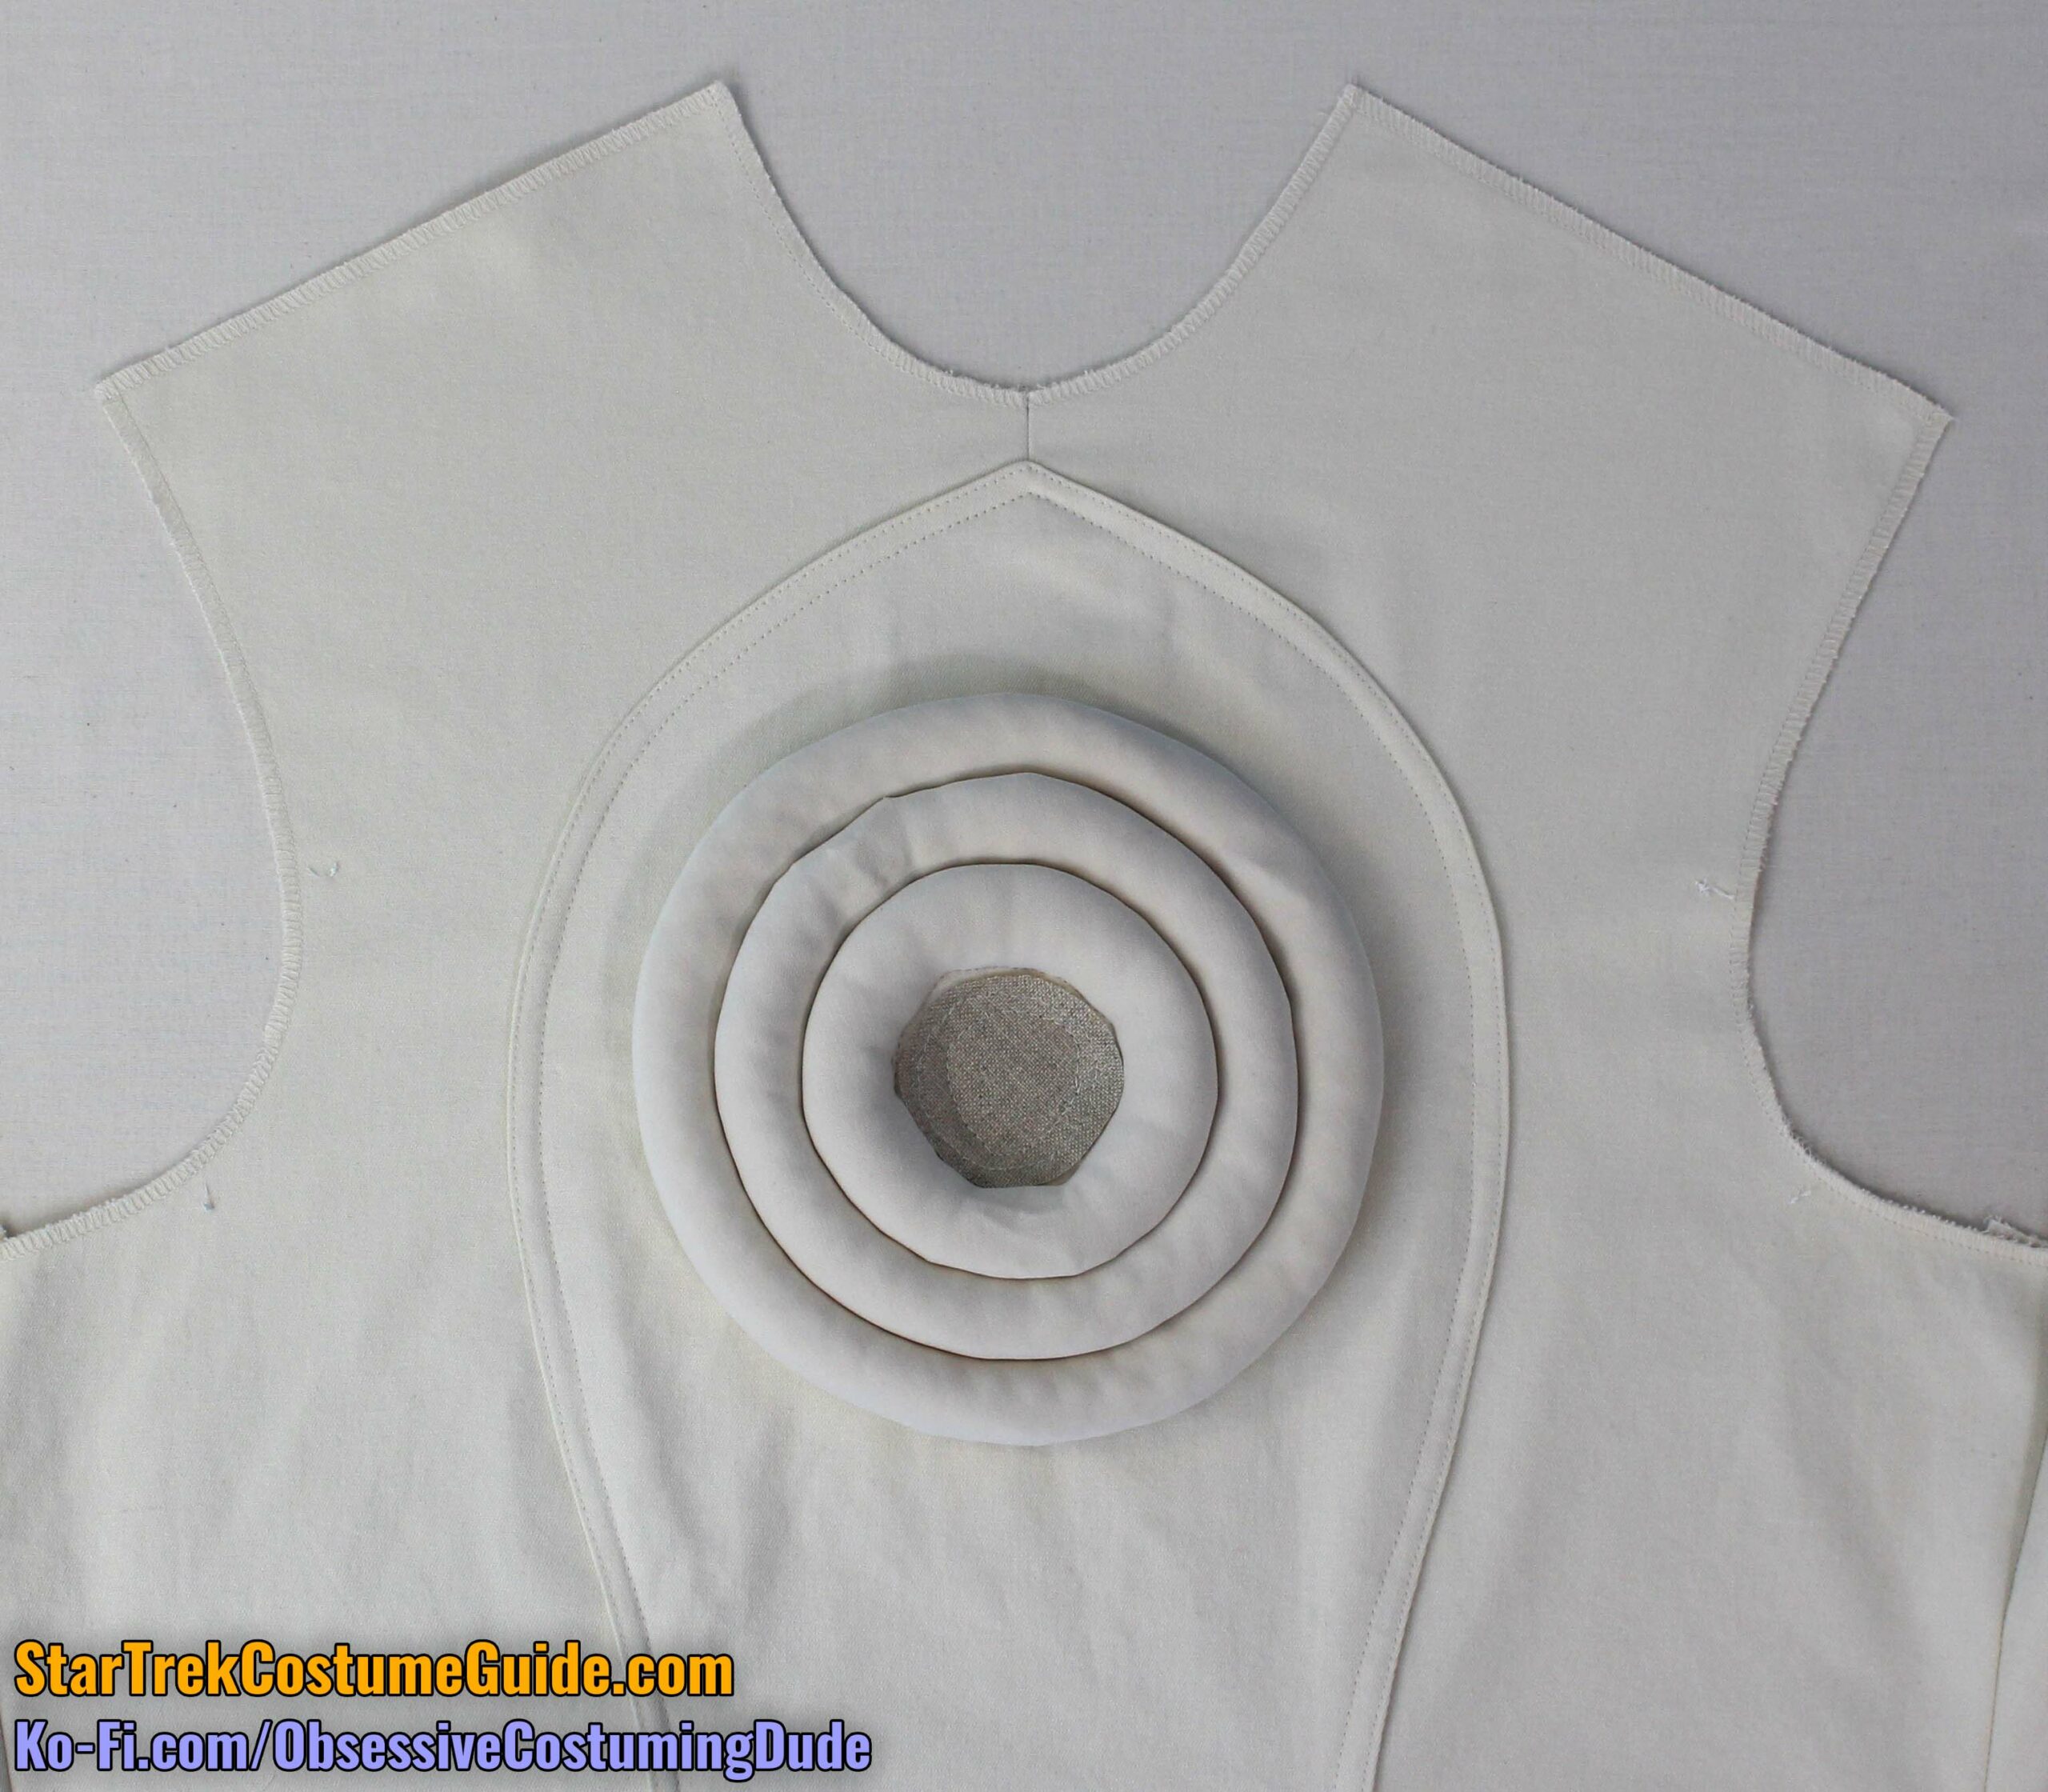
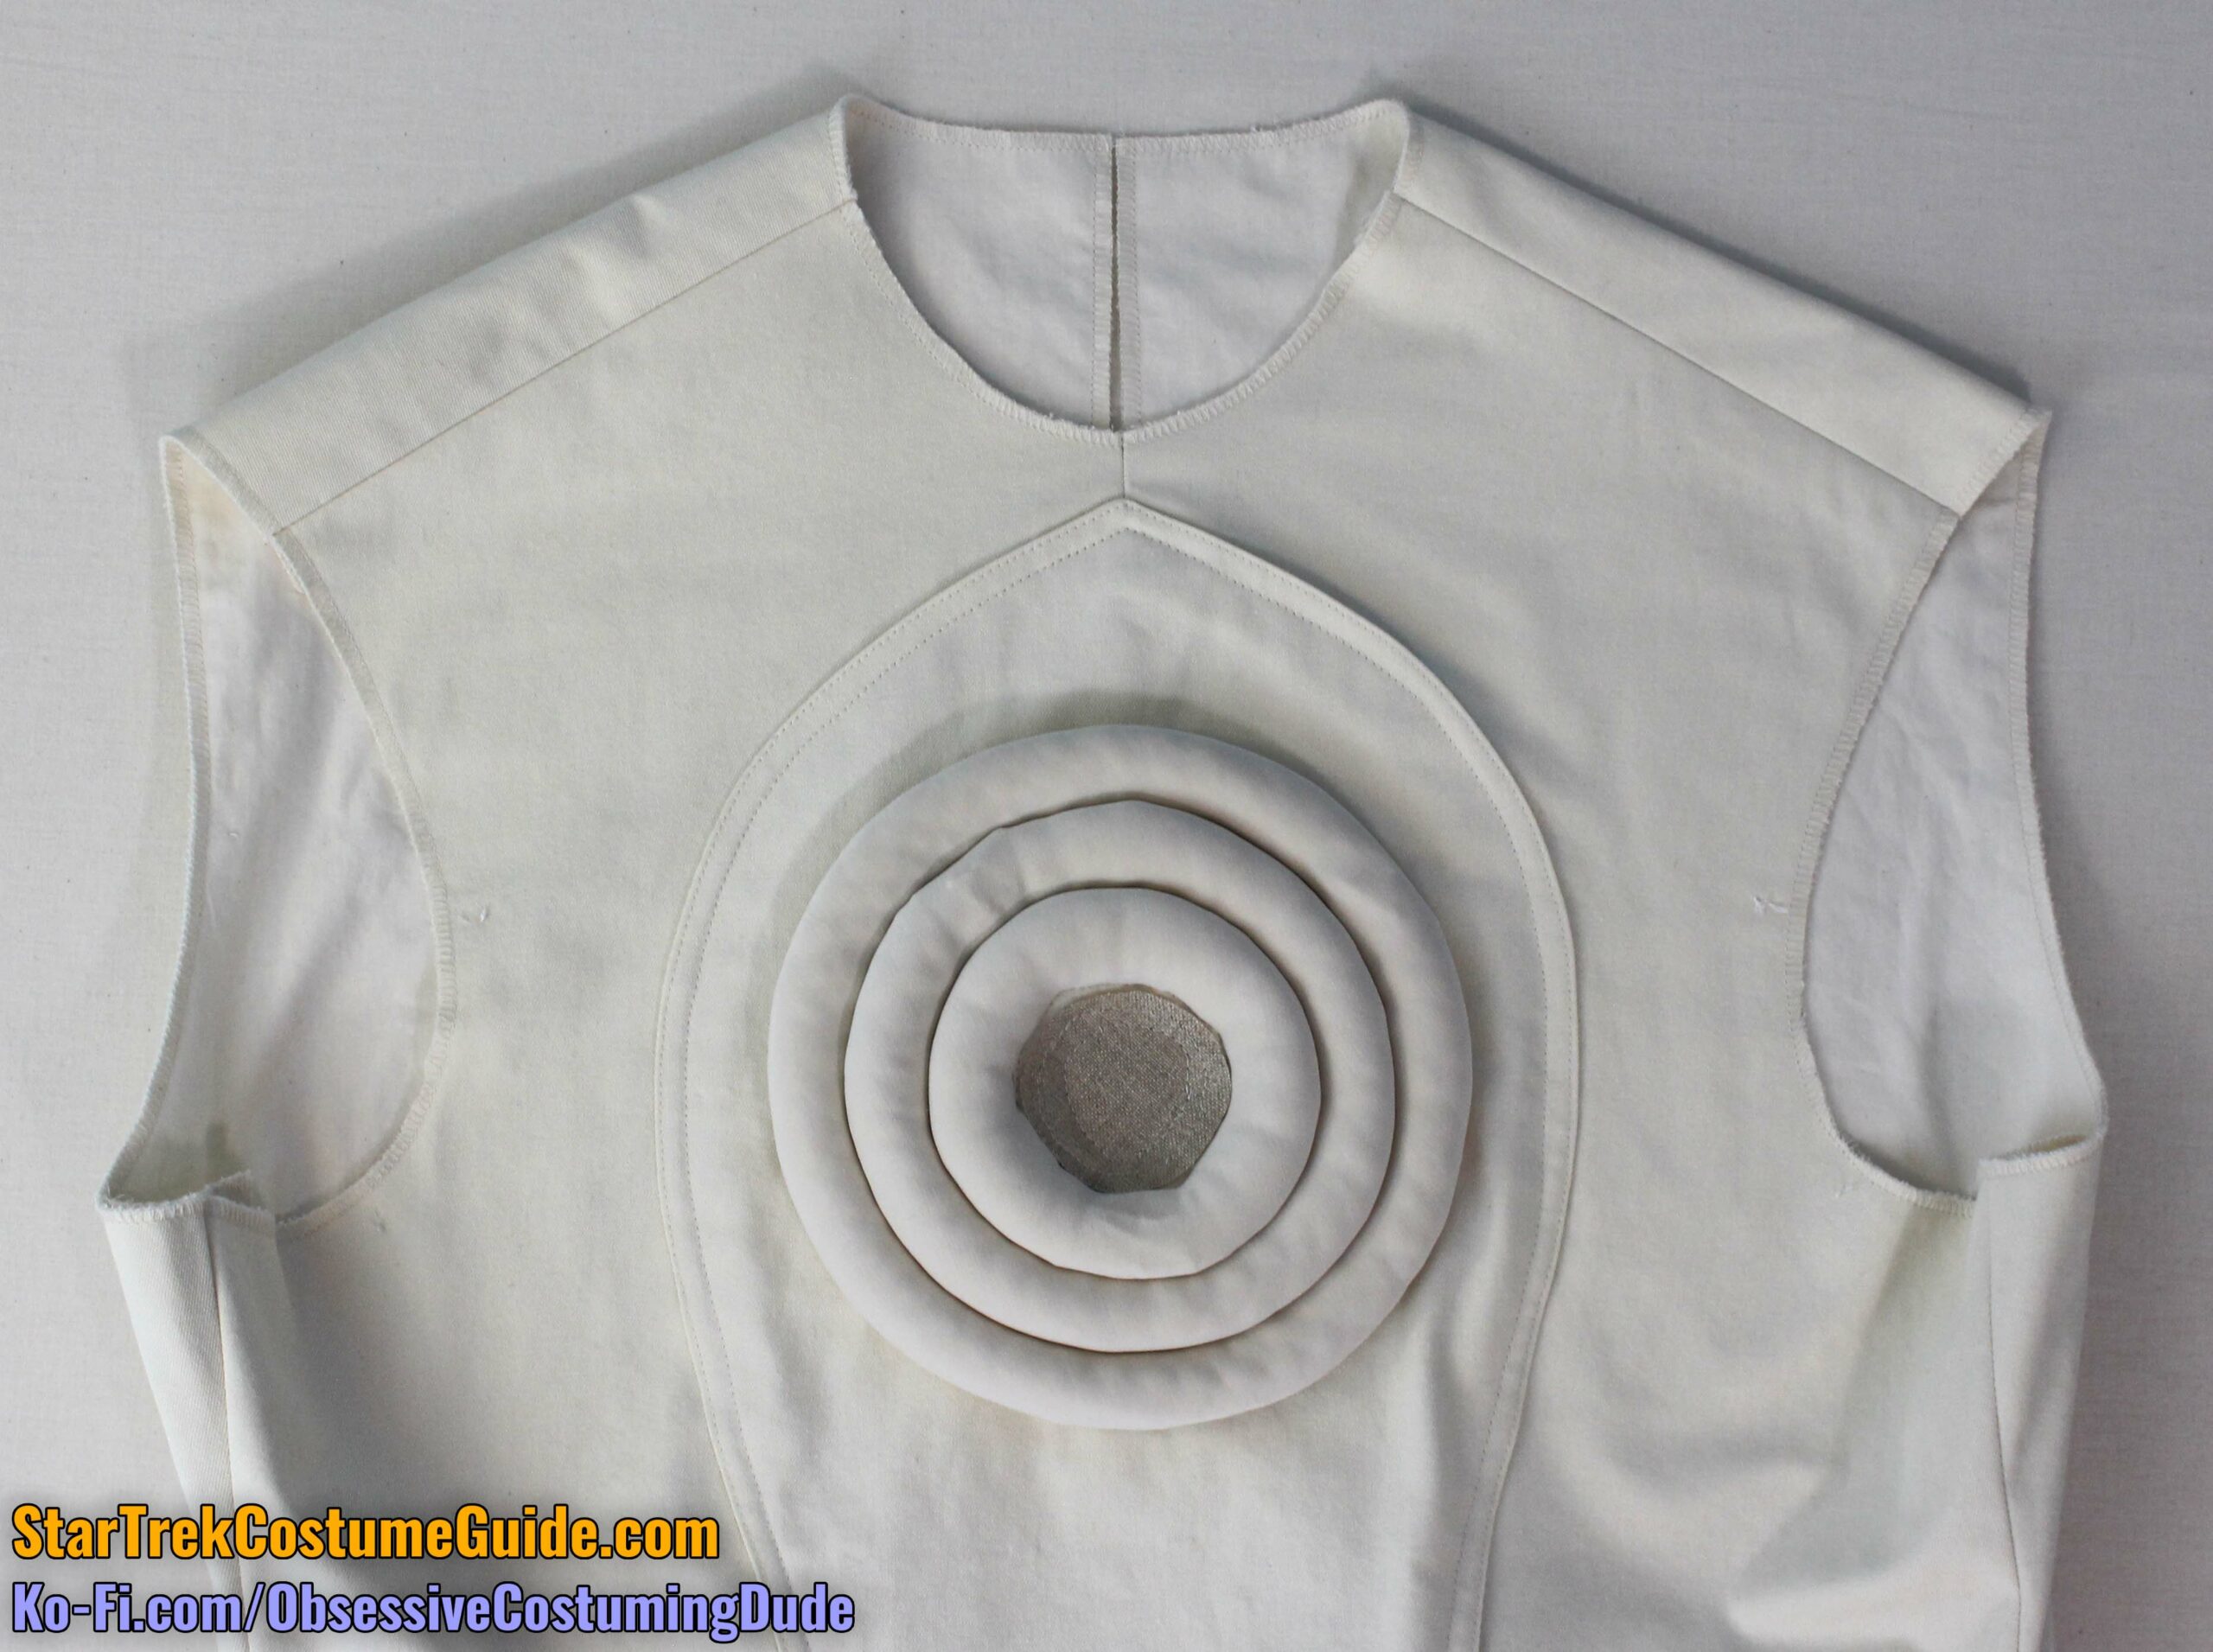
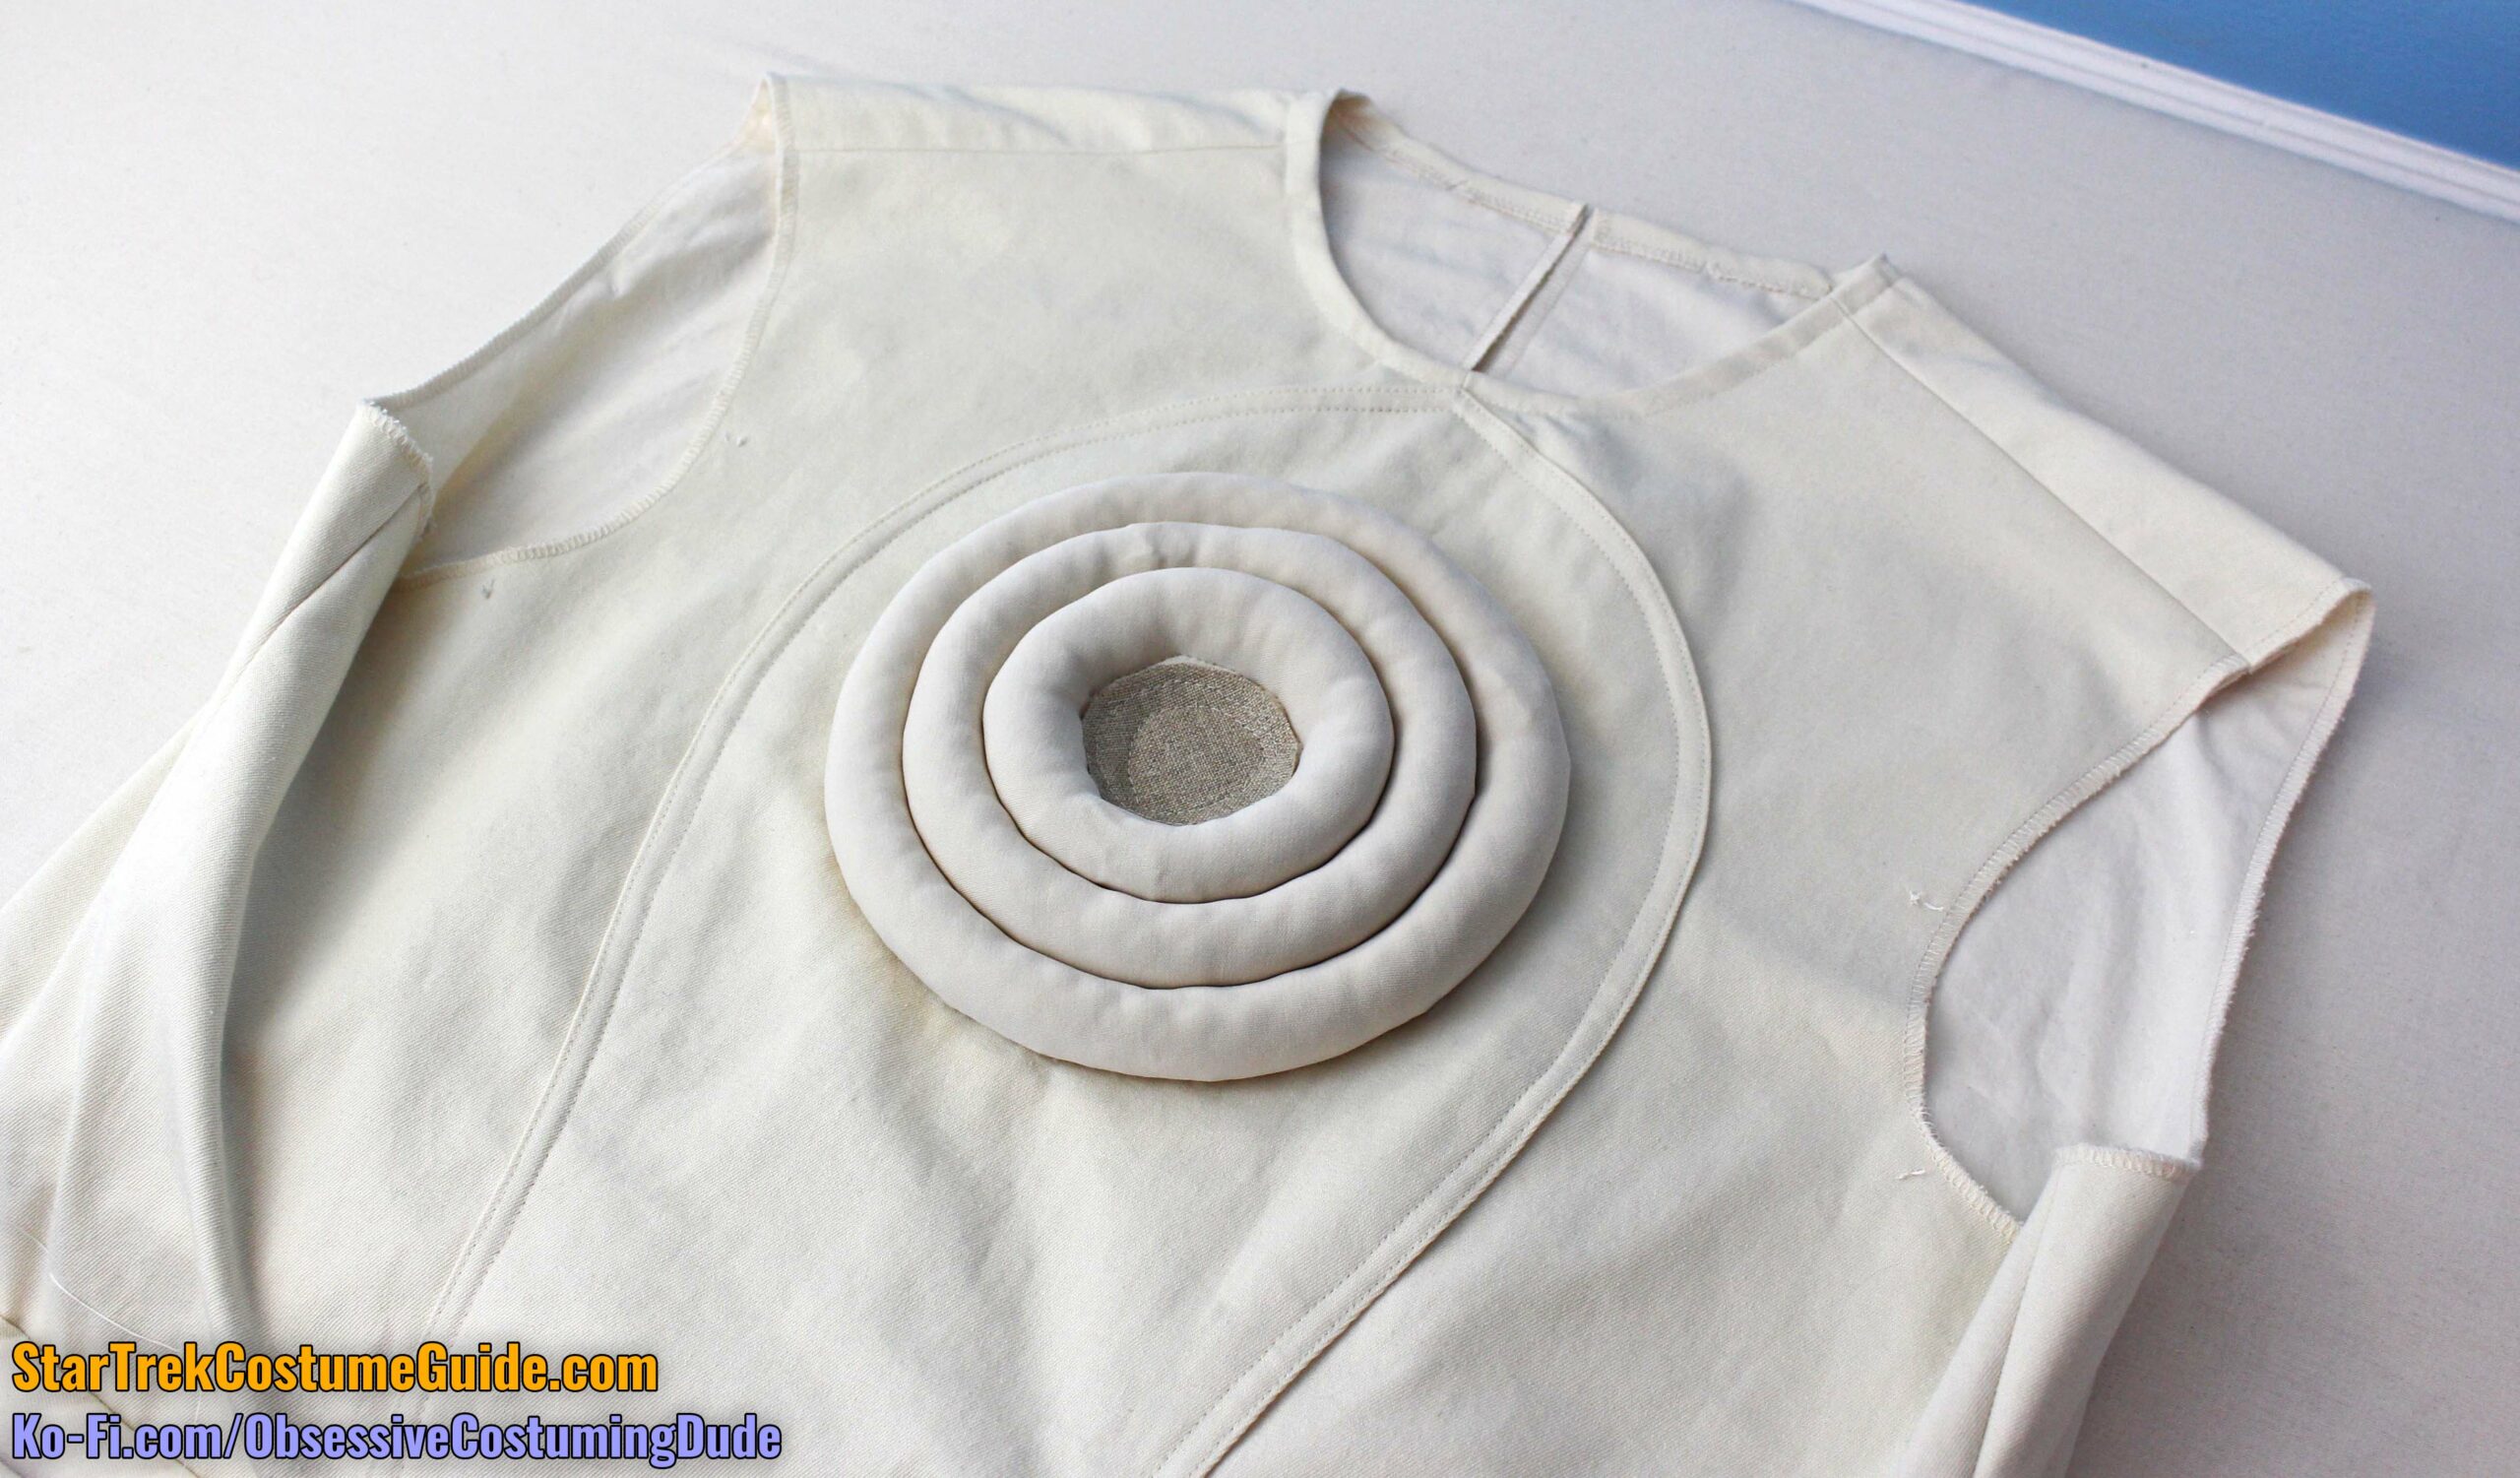
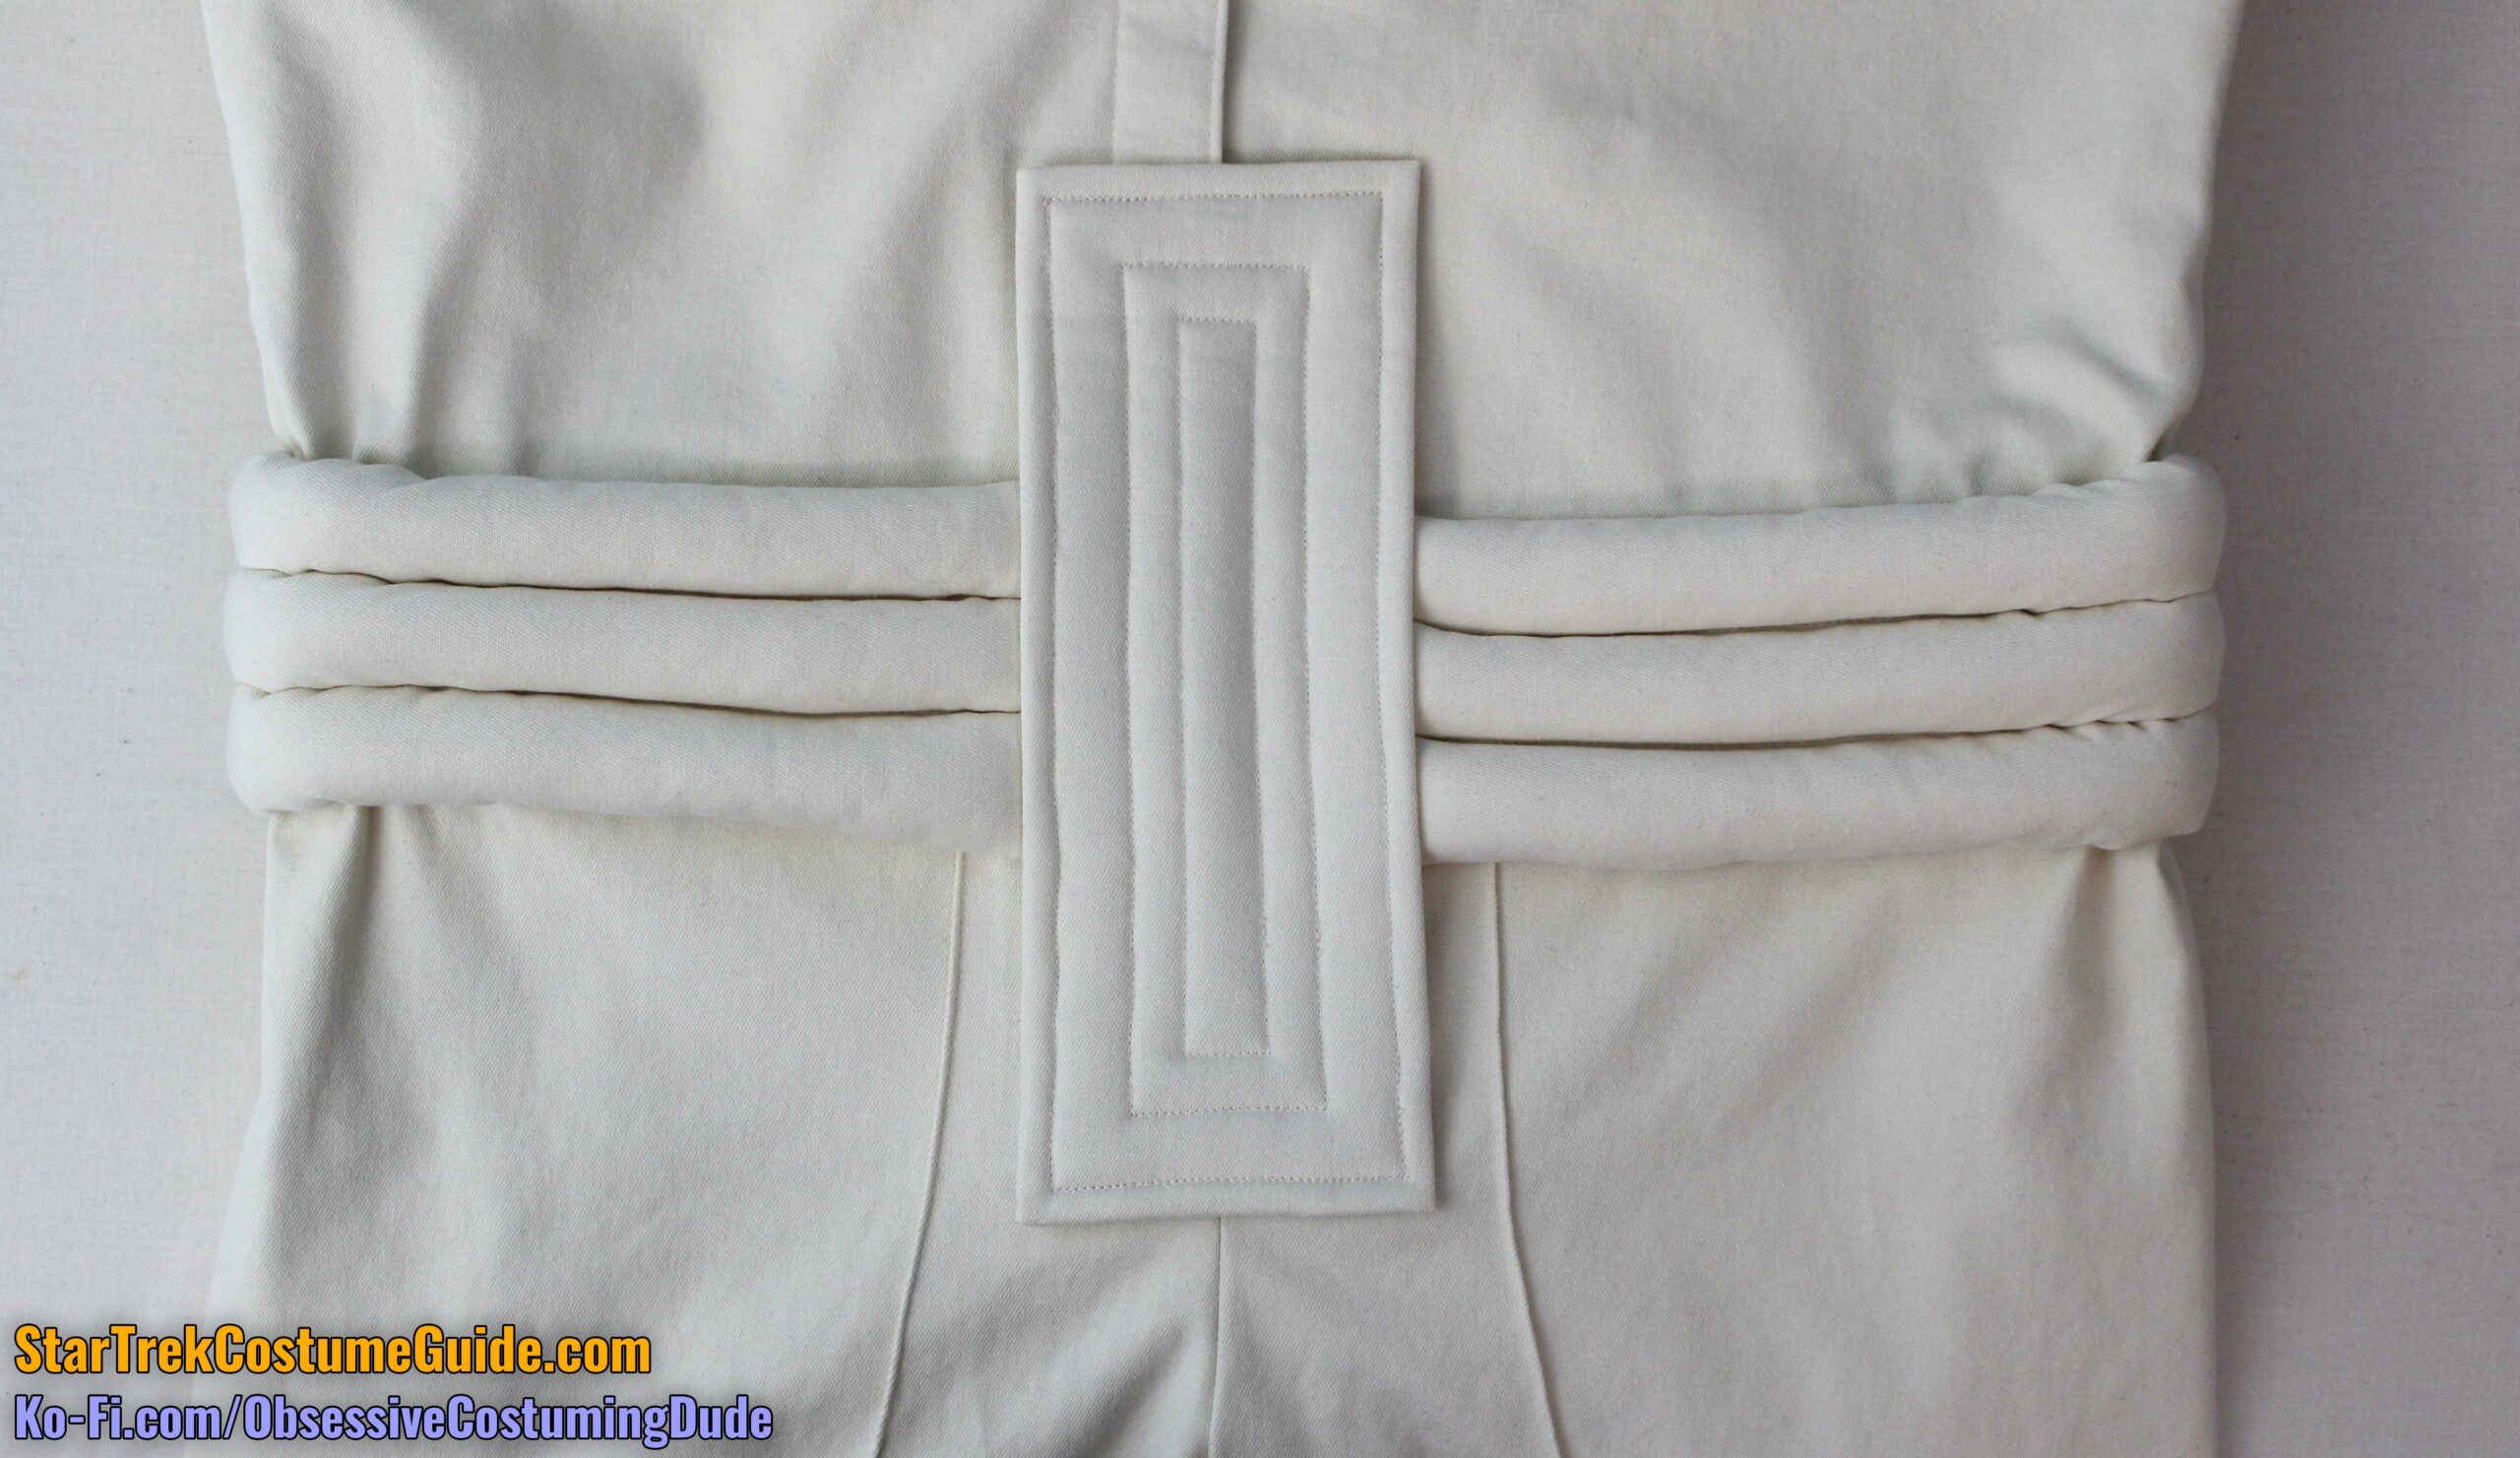
On the upper front chest area, the men’s jumpsuits had three circular rings of chest tubing, while the women’s only had a single circle of tubing.
As with the waist tubing, I’m not sure what was used as tubing on the screen-used jumpsuits, but upholstery cord produces a comparable final result.
For the men’s jumpsuit, I suggest starting with the innermost circle of tubing and working outward.
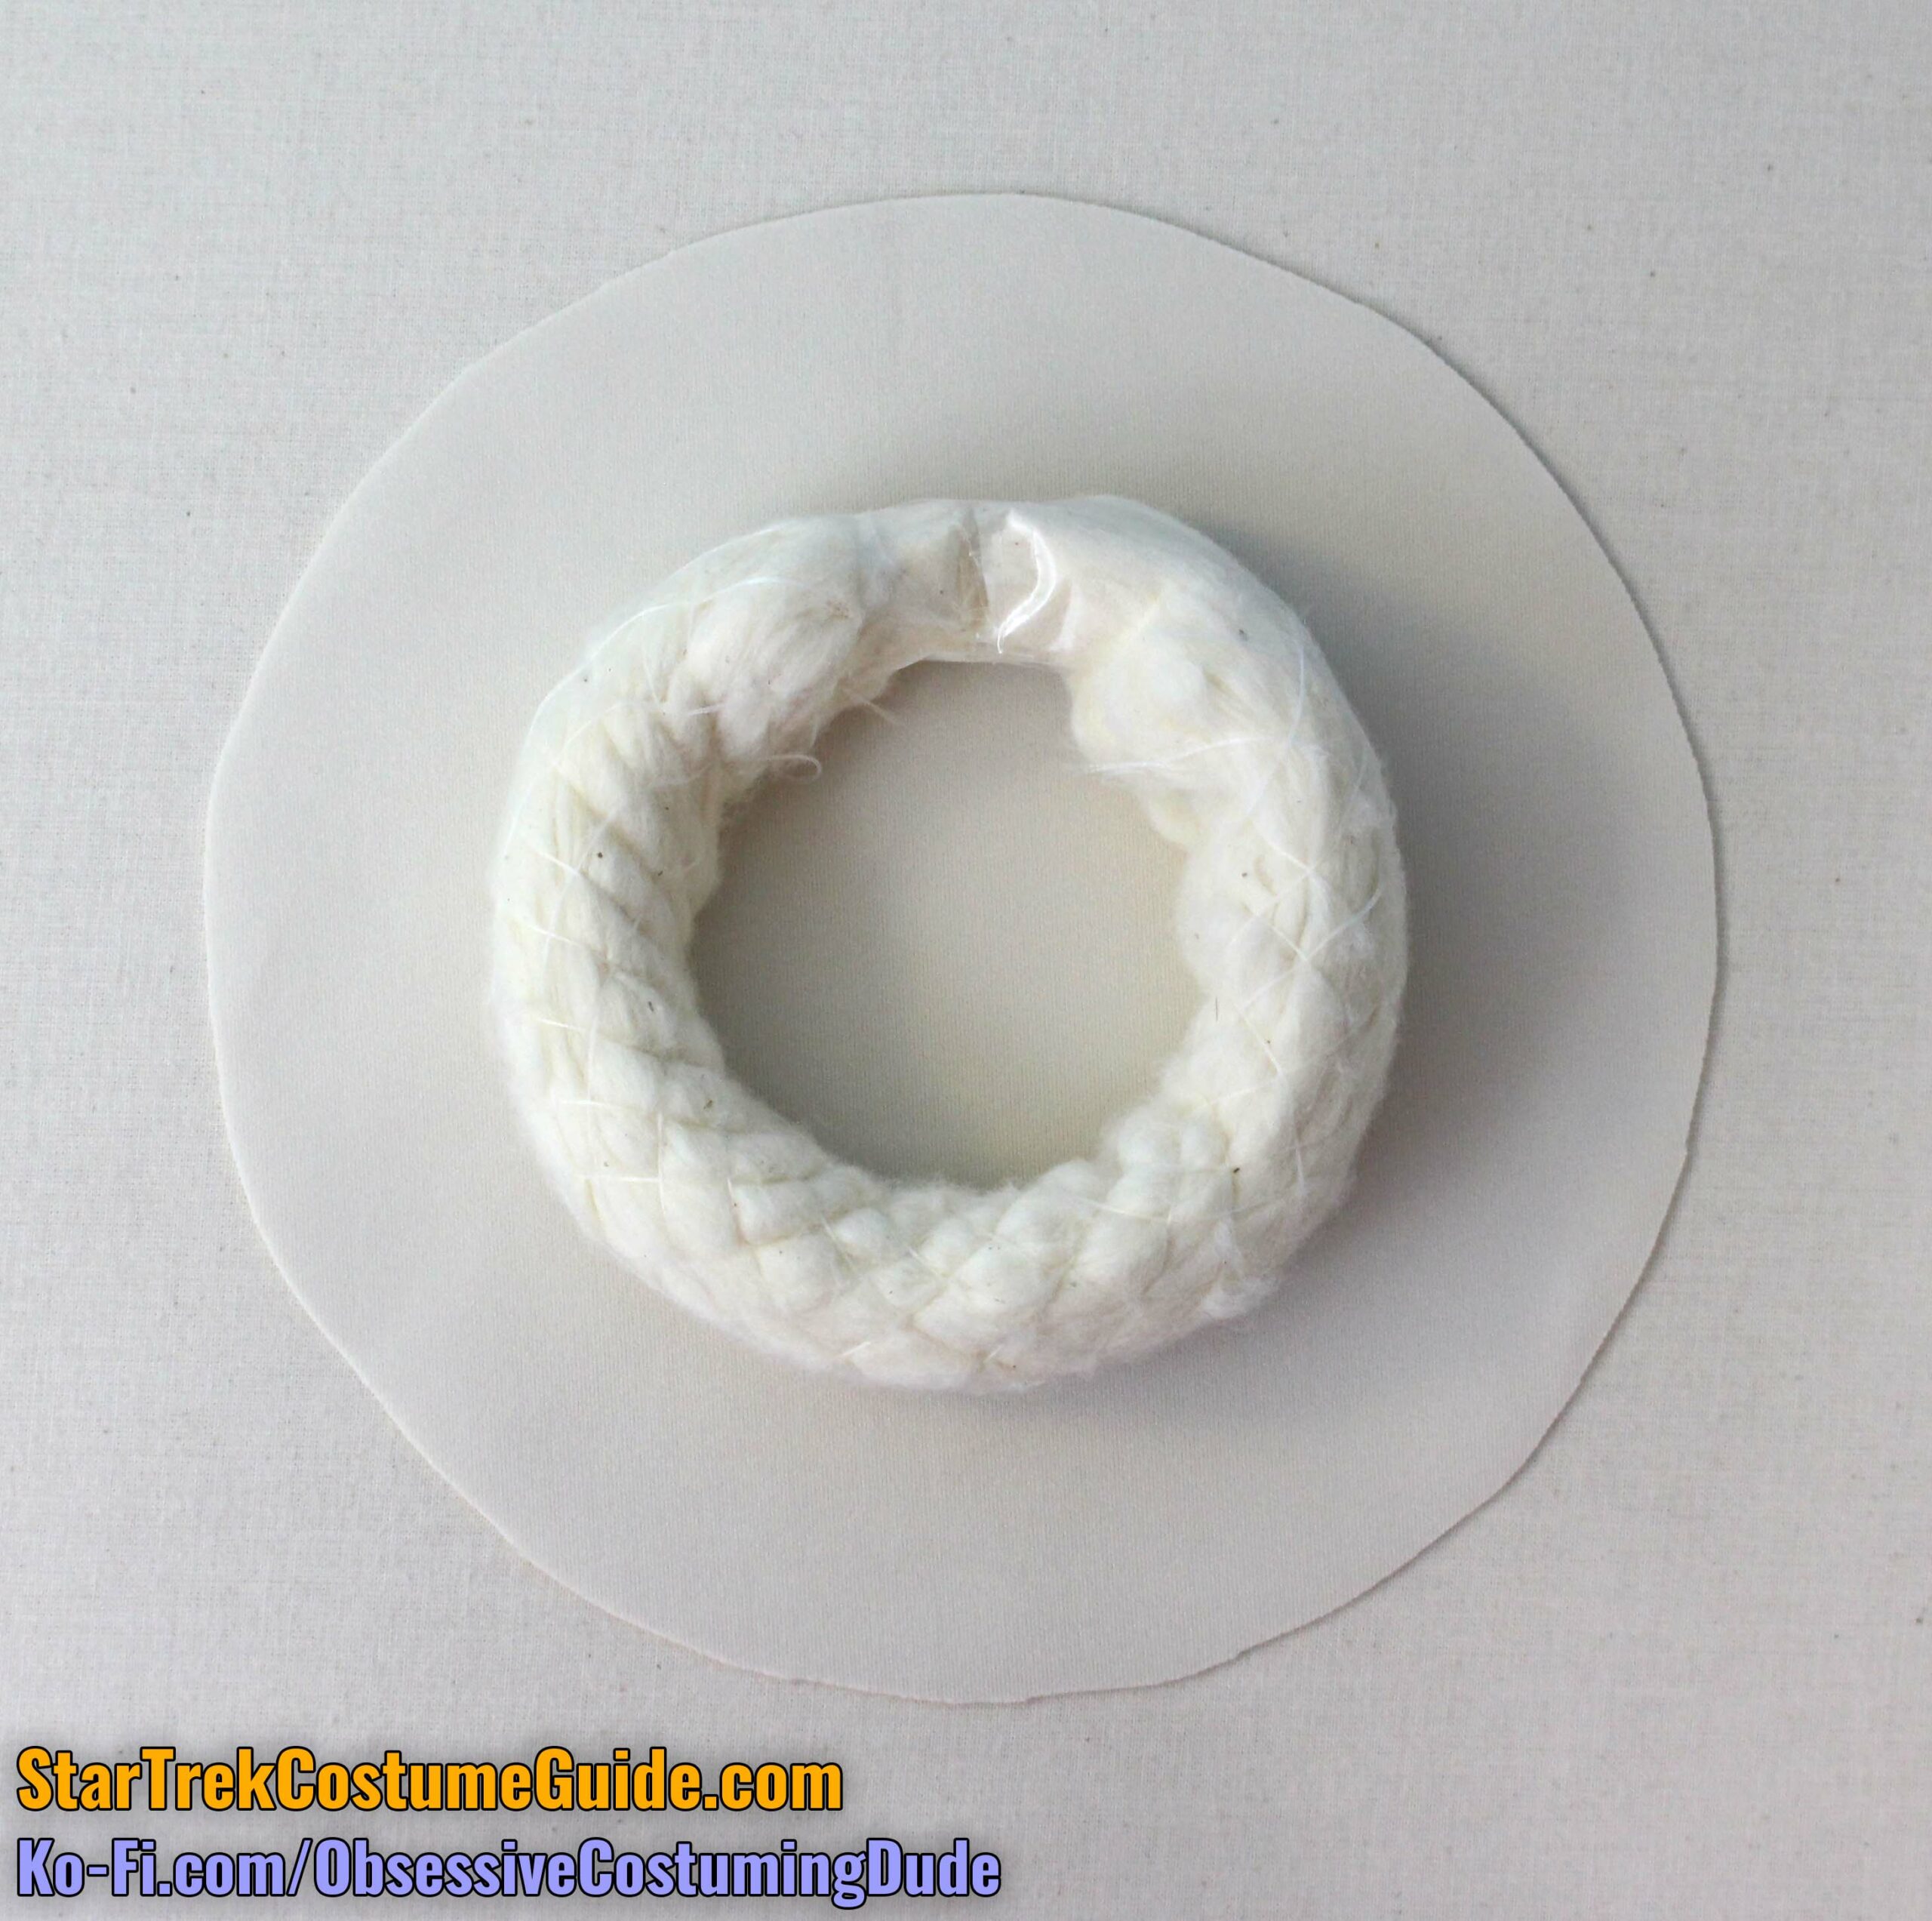
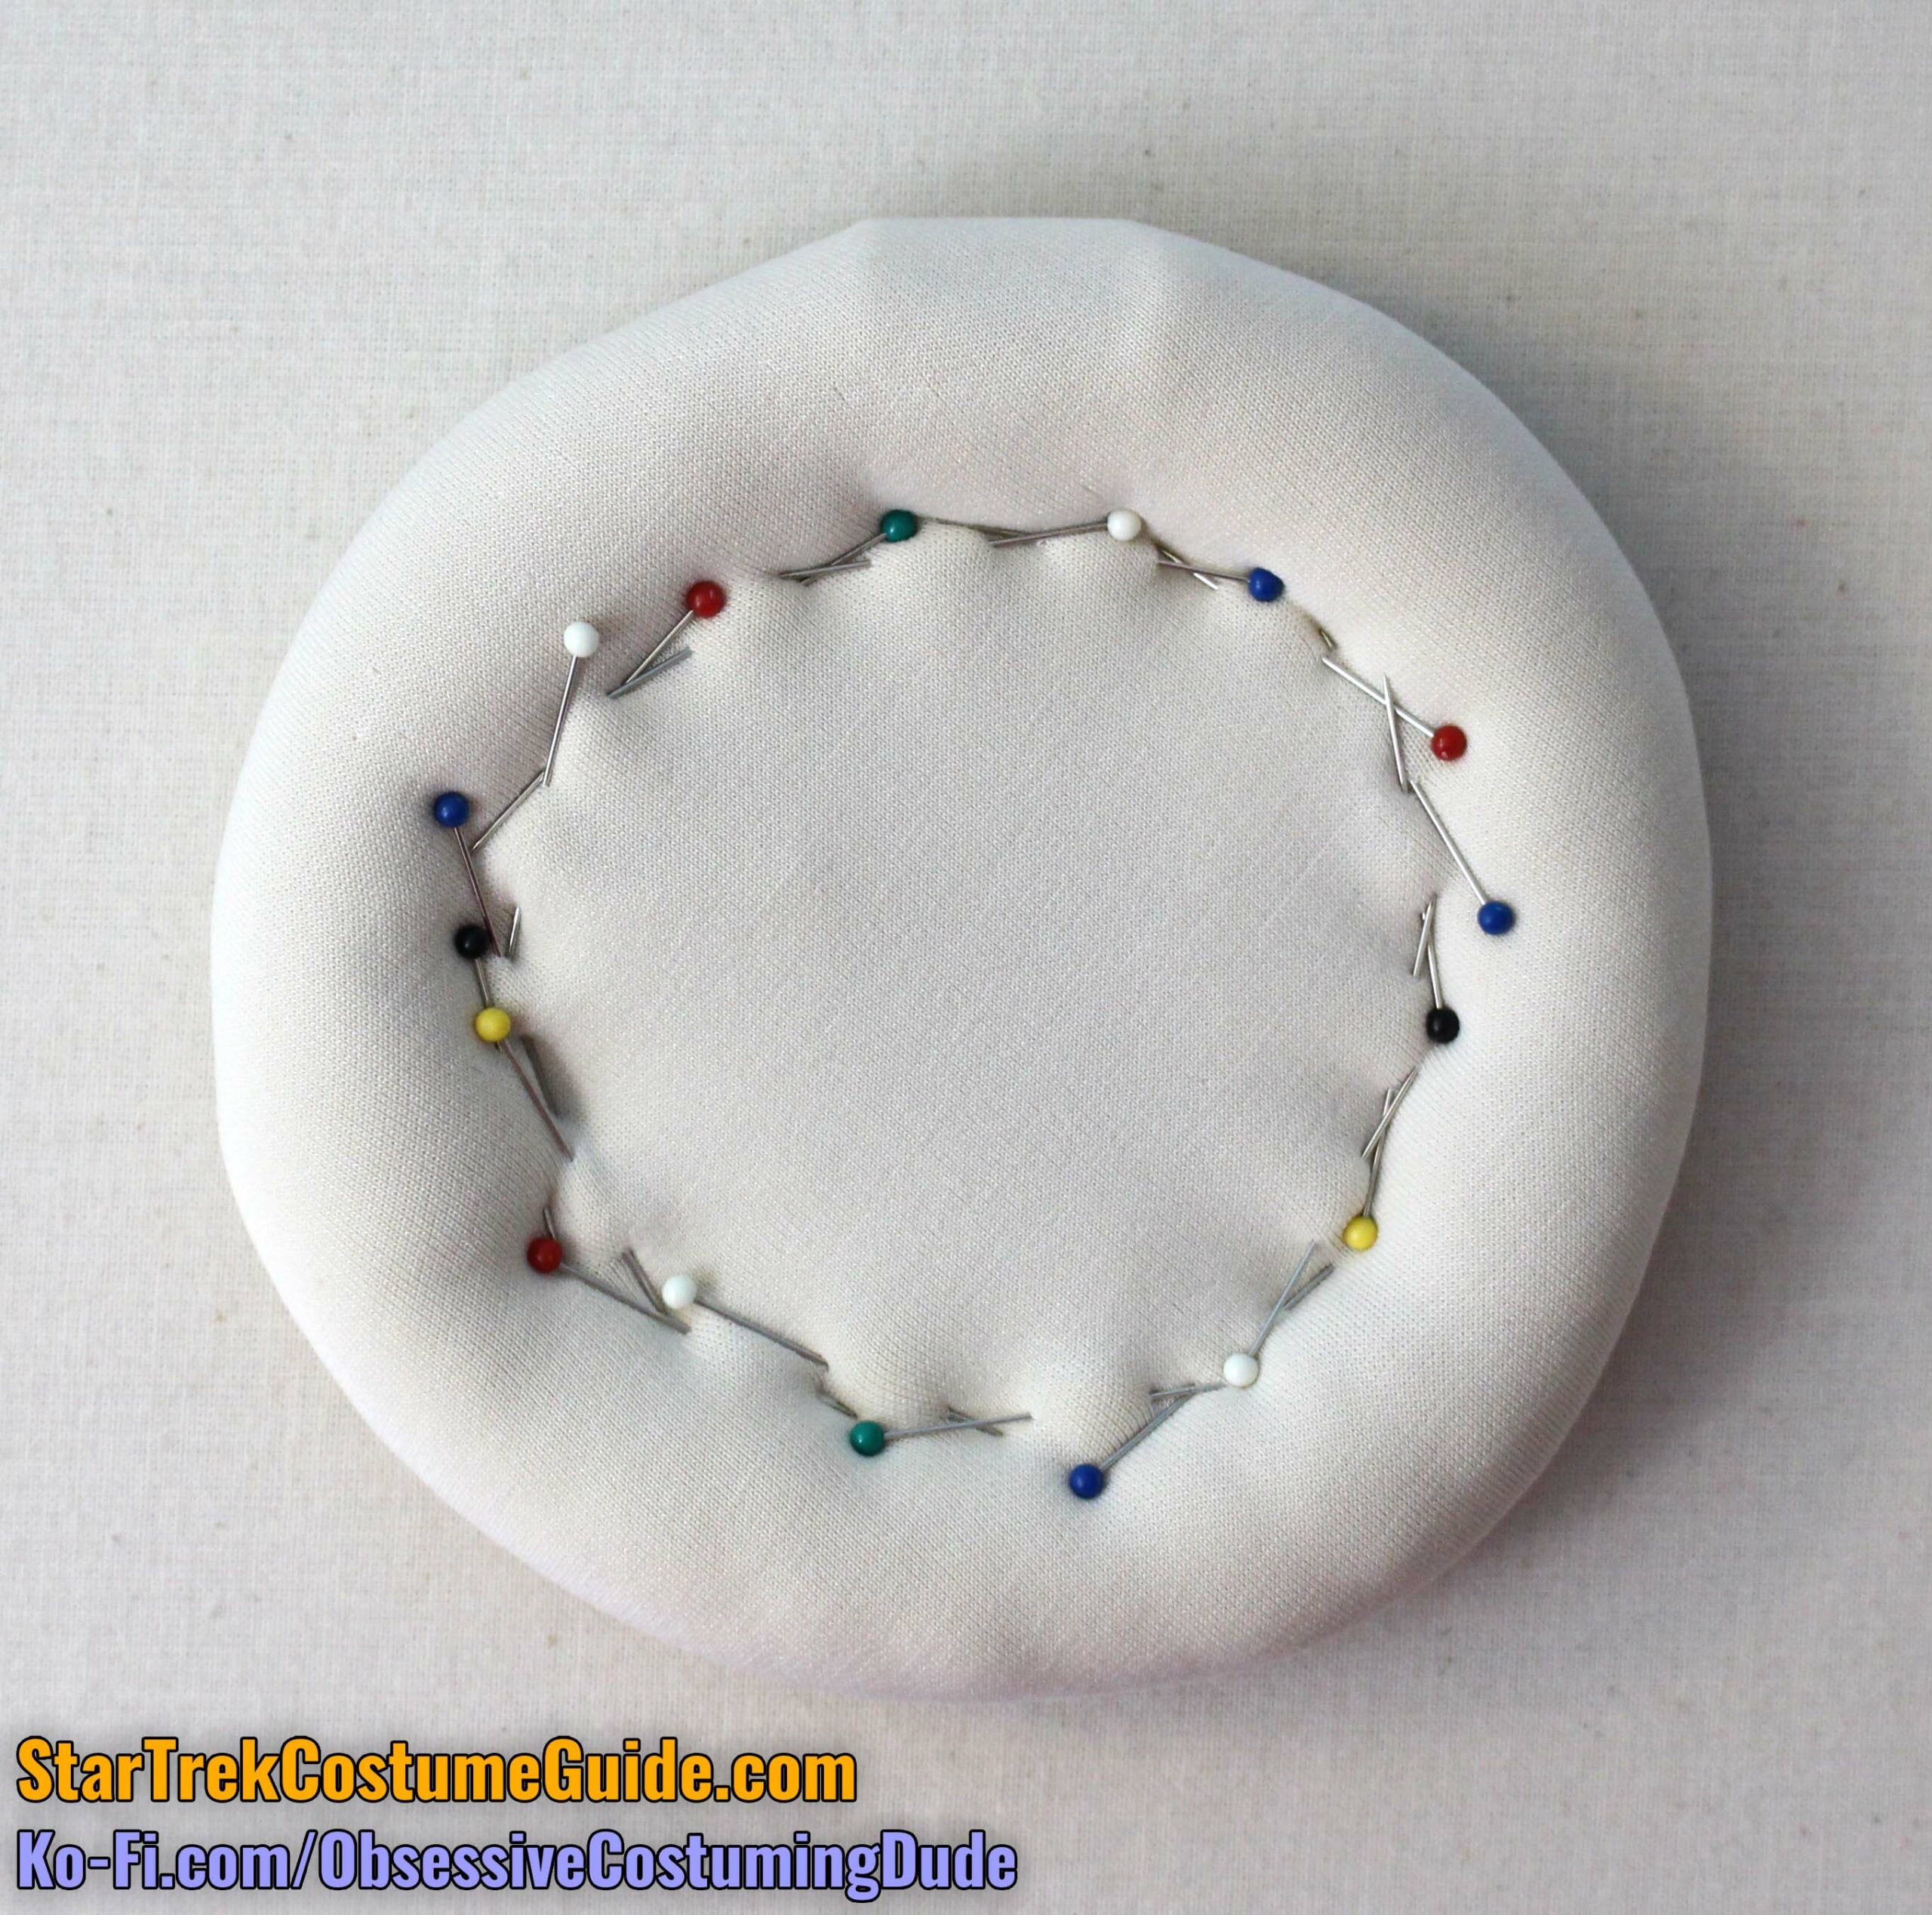
Cut a length of your ⅞” upholstery cord that’s long enough to snugly wrap around the “bullseye” assembly (which is 2 ¼” in diameter). This length of cord should be about 10 ½” long.
The cord will enclosed in a larger circle of knit fabric (piece G1).
I suggest taping the ends of your upholstery cord together to form a circle.
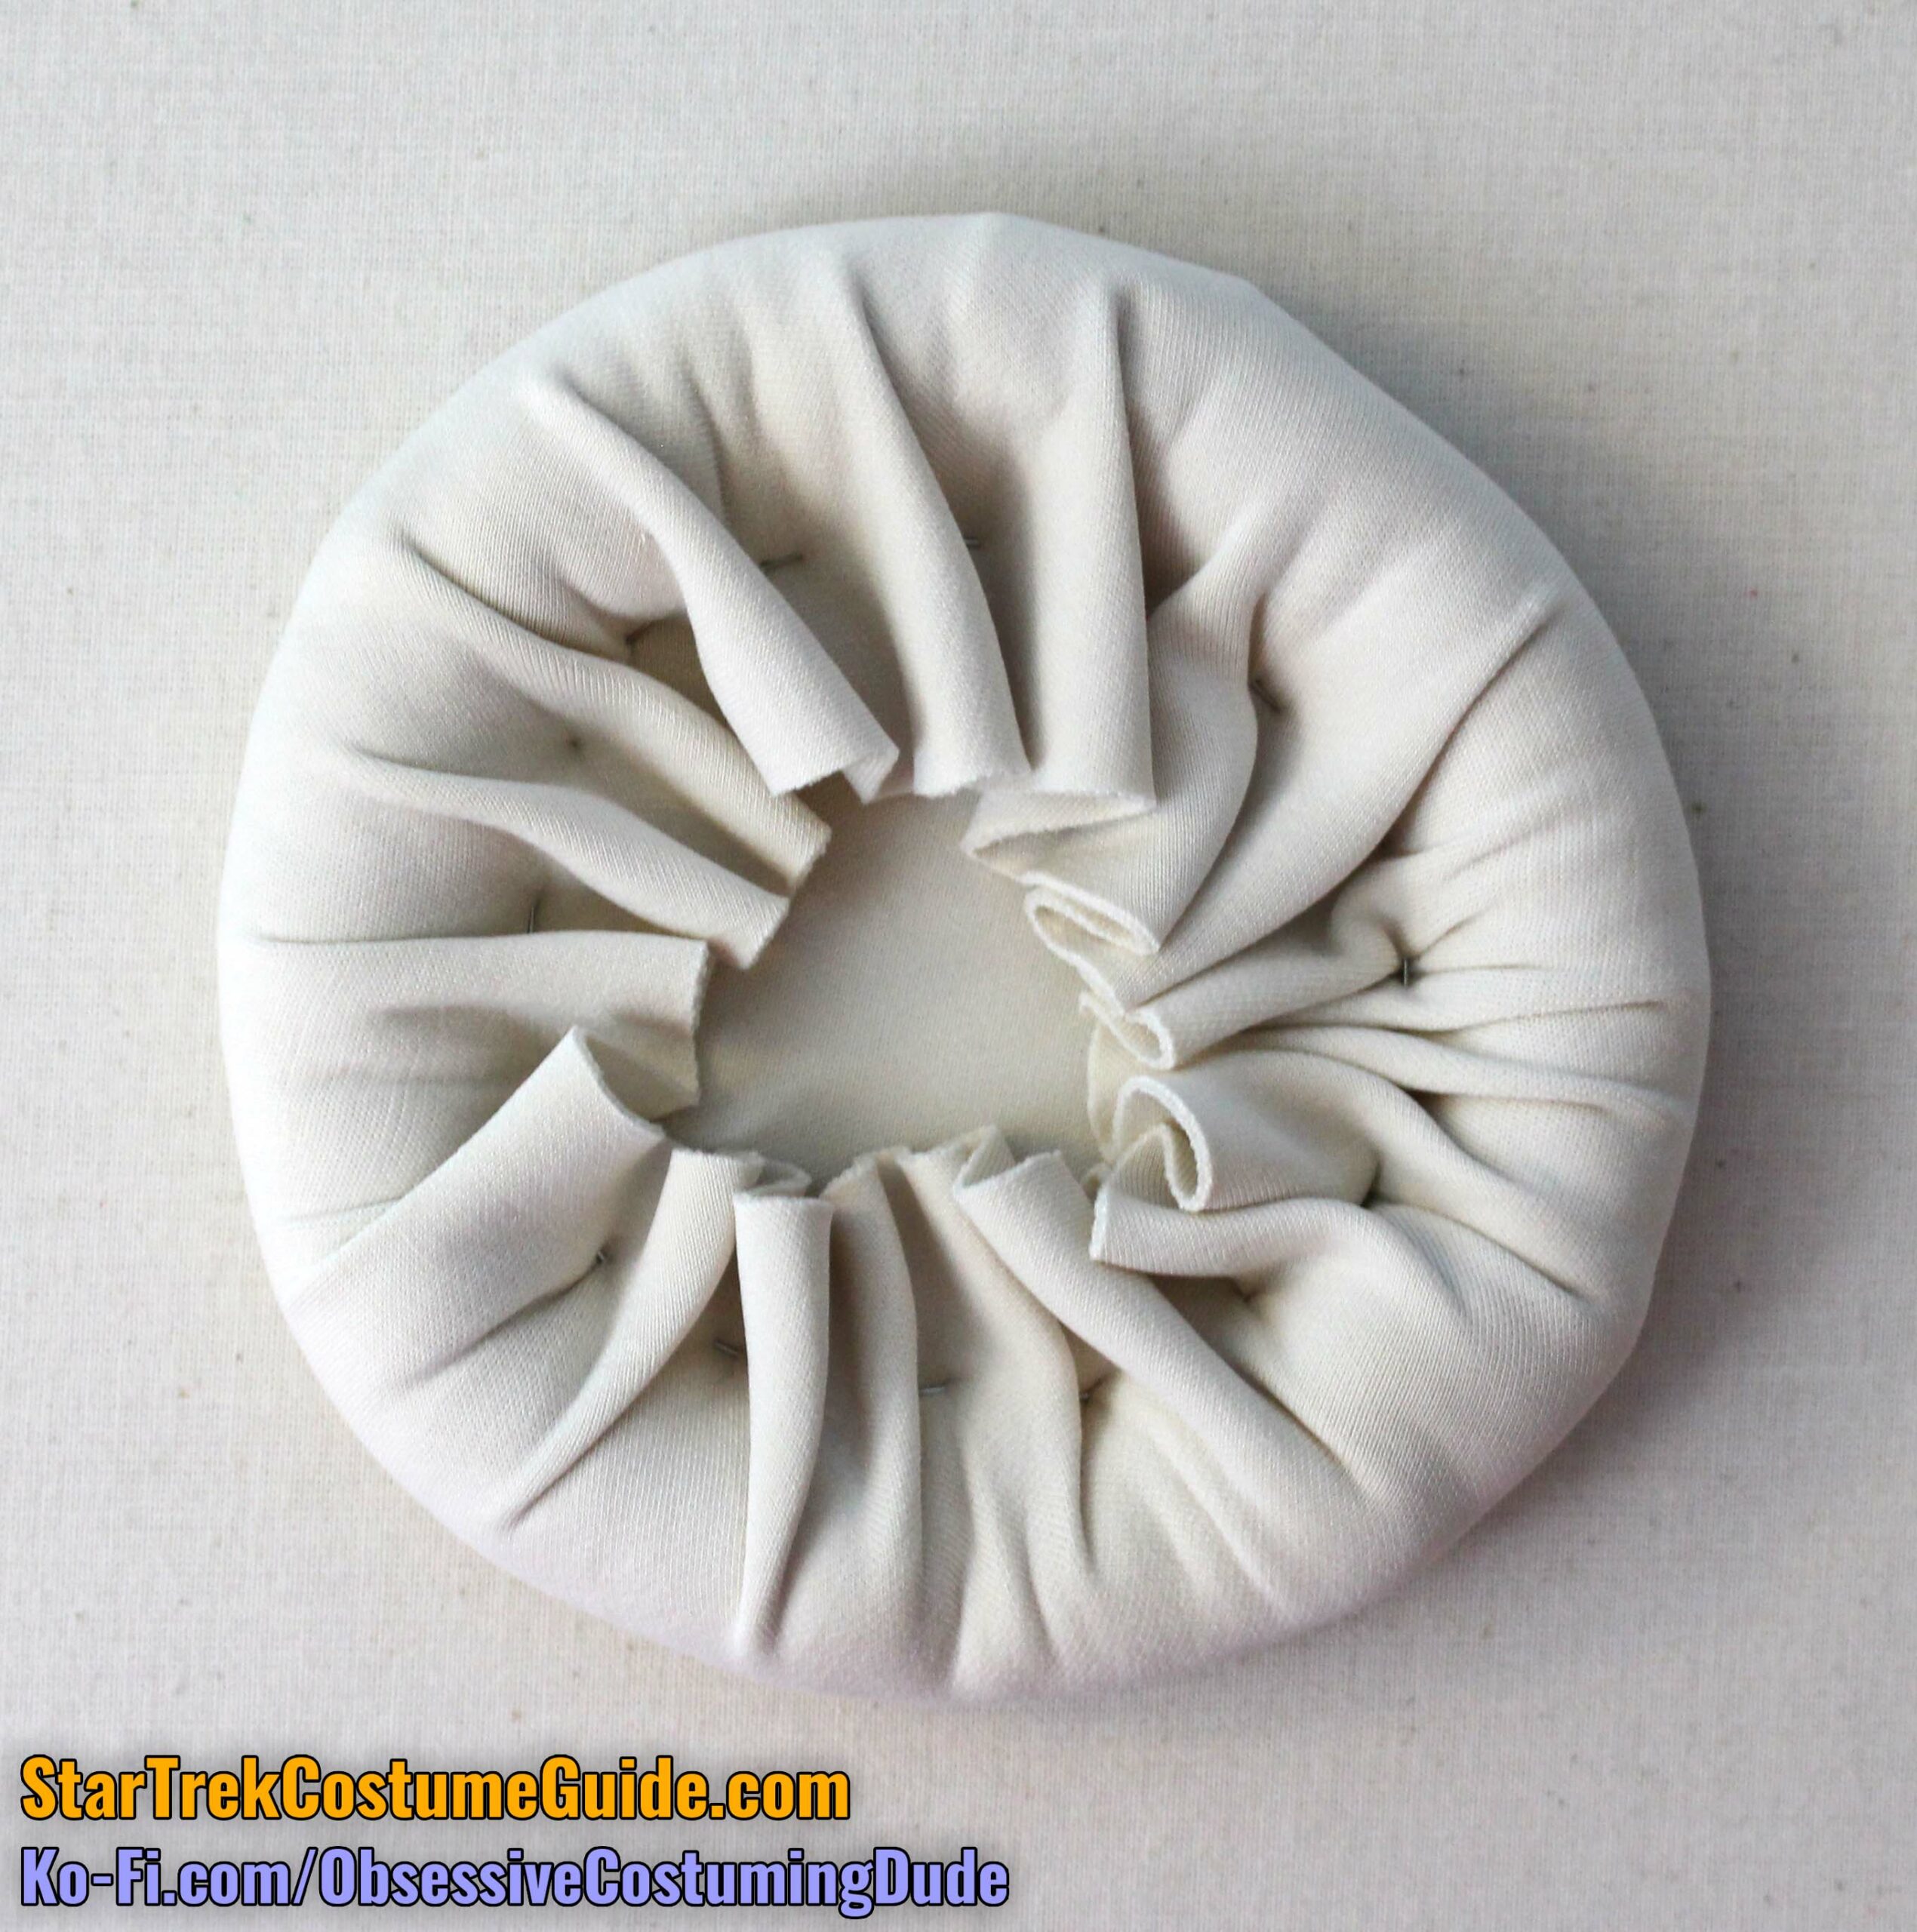
Stretch your knit fabric around the cord and pin the allowance into place a little at a time.
The allowance will form overlapping pleats underneath, but keep the fabric as smooth as possible around the surface of the cord.
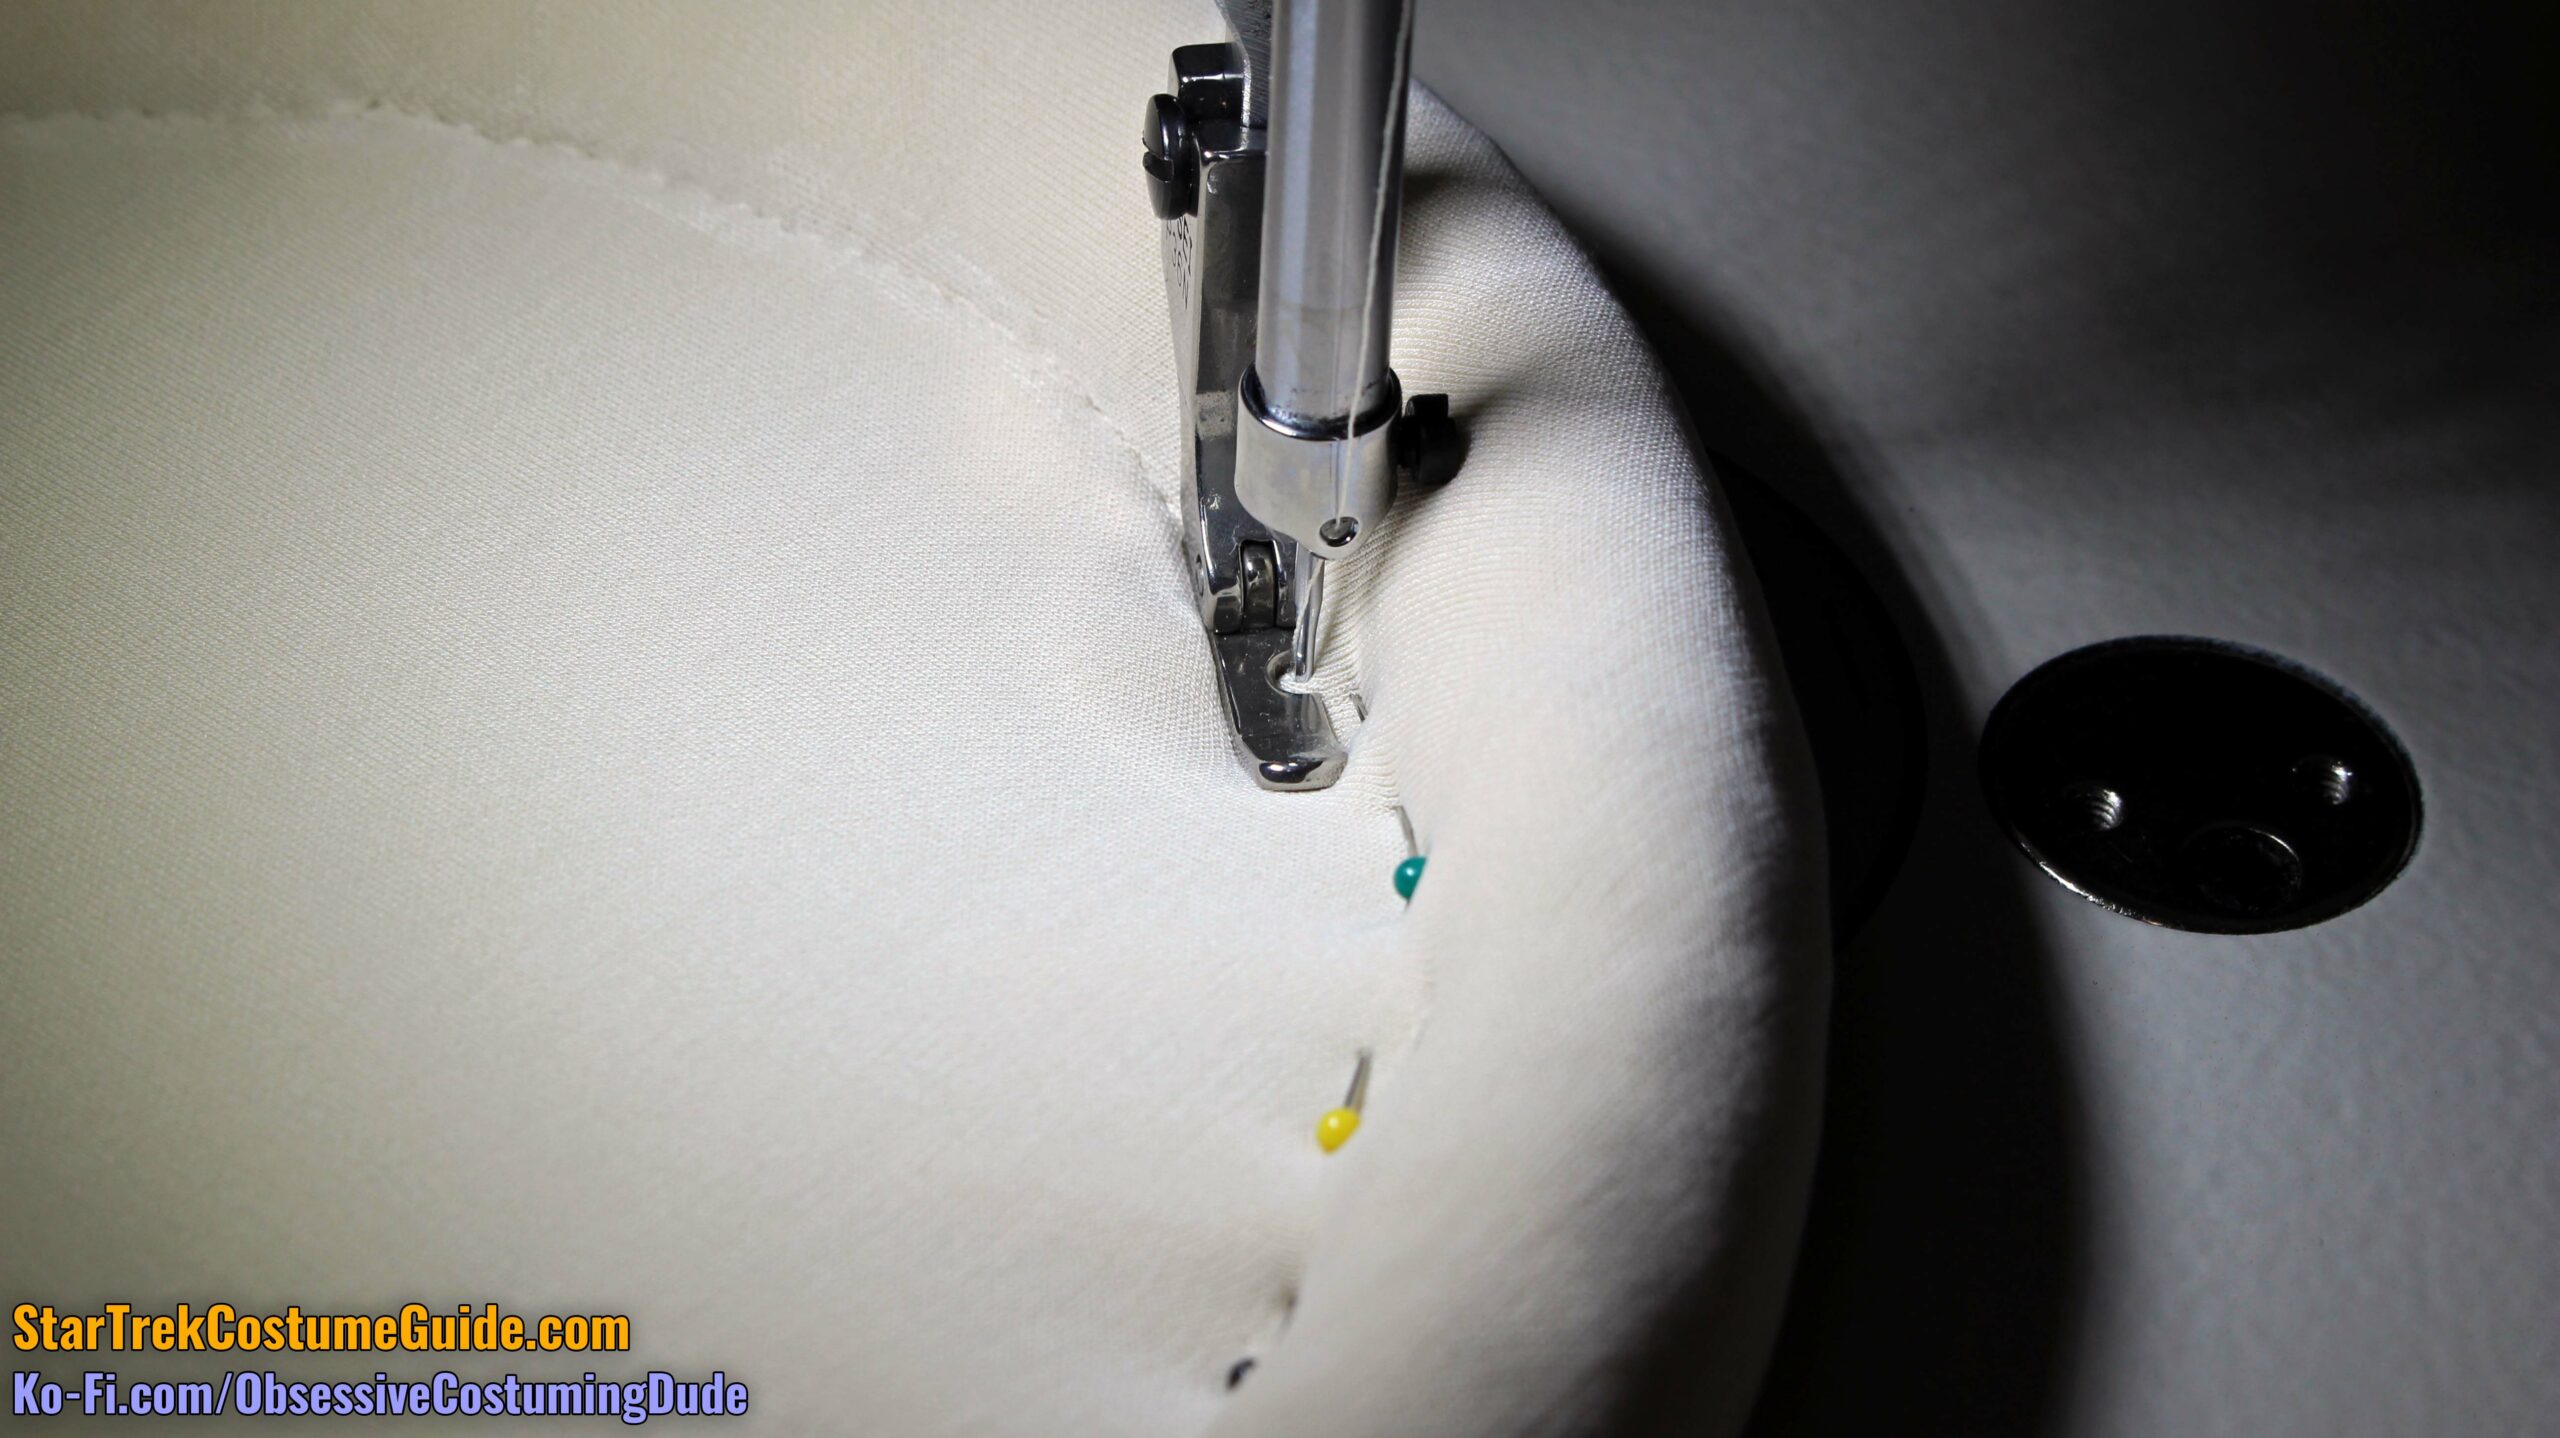
Using a zipper/piping foot, carefully stitch the allowance into place from the right side of the assembly, next to the edge of the cord.
I like to pull out one pin with a pair of tweezers, take a few stitches, stop with the needle in the fabric, raise the presser foot, rotate the assembly a bit, lower the presser foot, pull out the next pin, and keep going.
Ideally, your stitching should be as close to a perfect circle as possible … although this is a challenging stitch to attempt, and (for the men’s version) it’s not catastrophic if it’s slightly less-than-perfect.
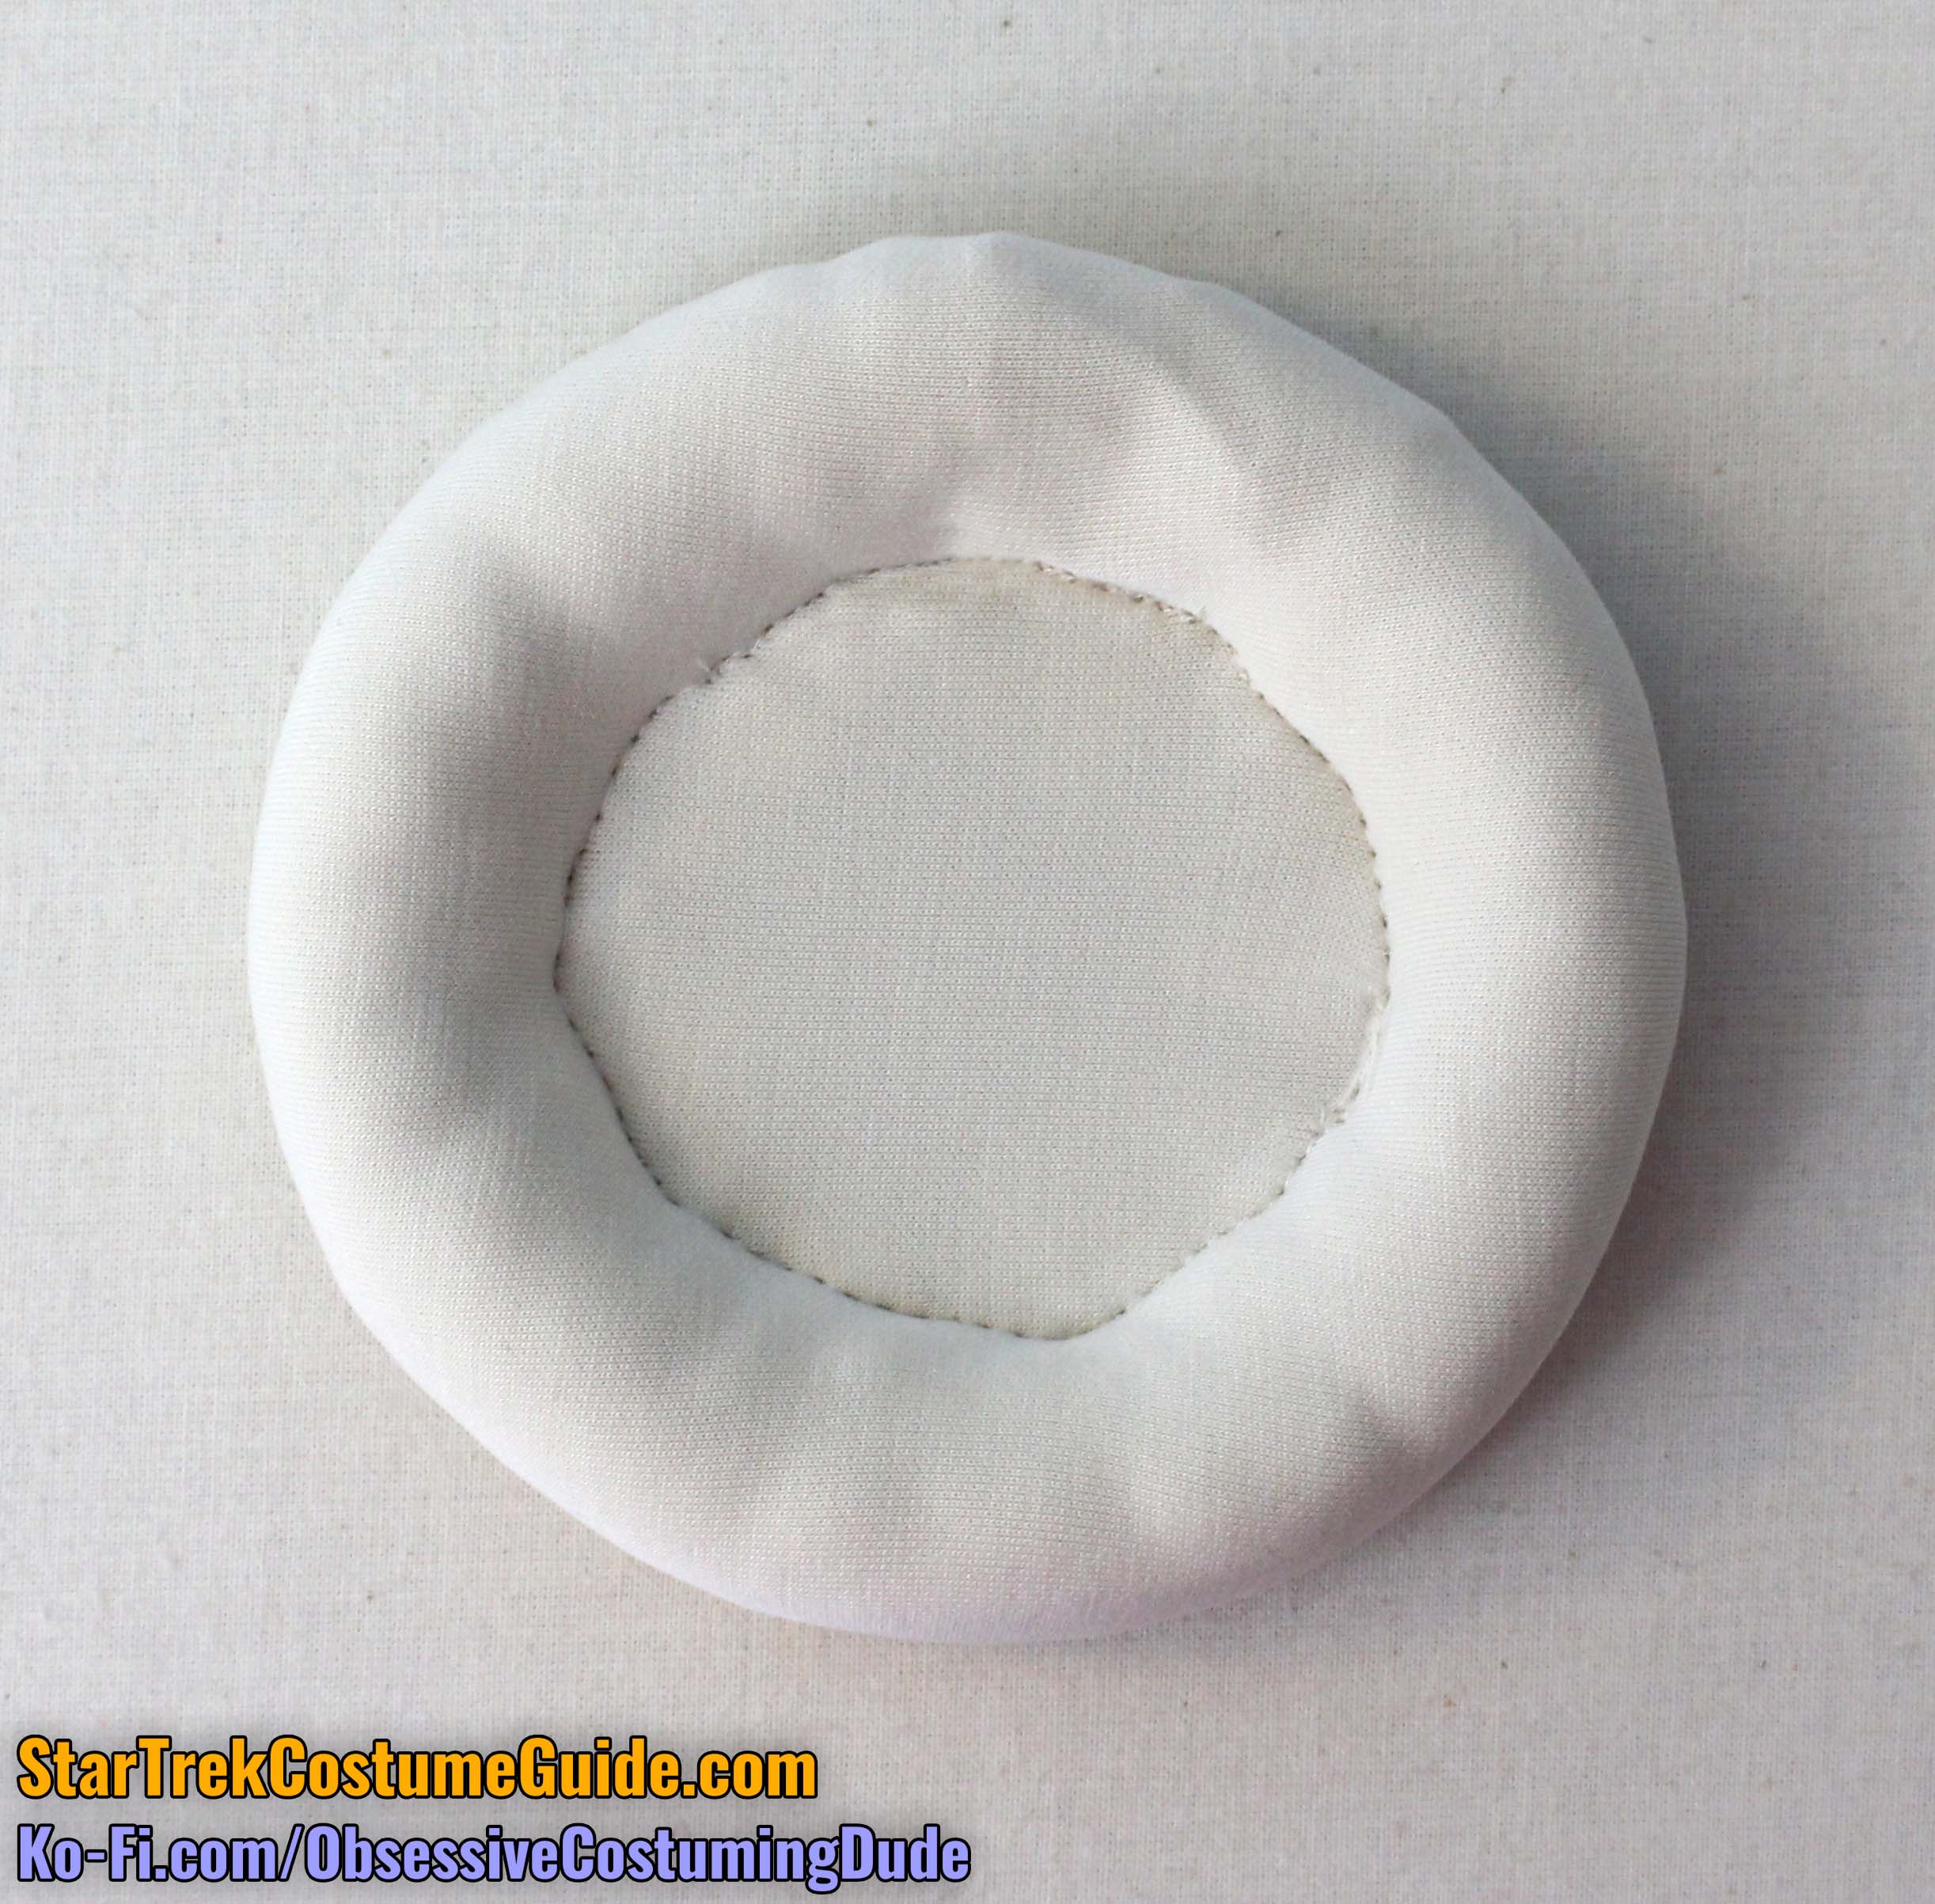
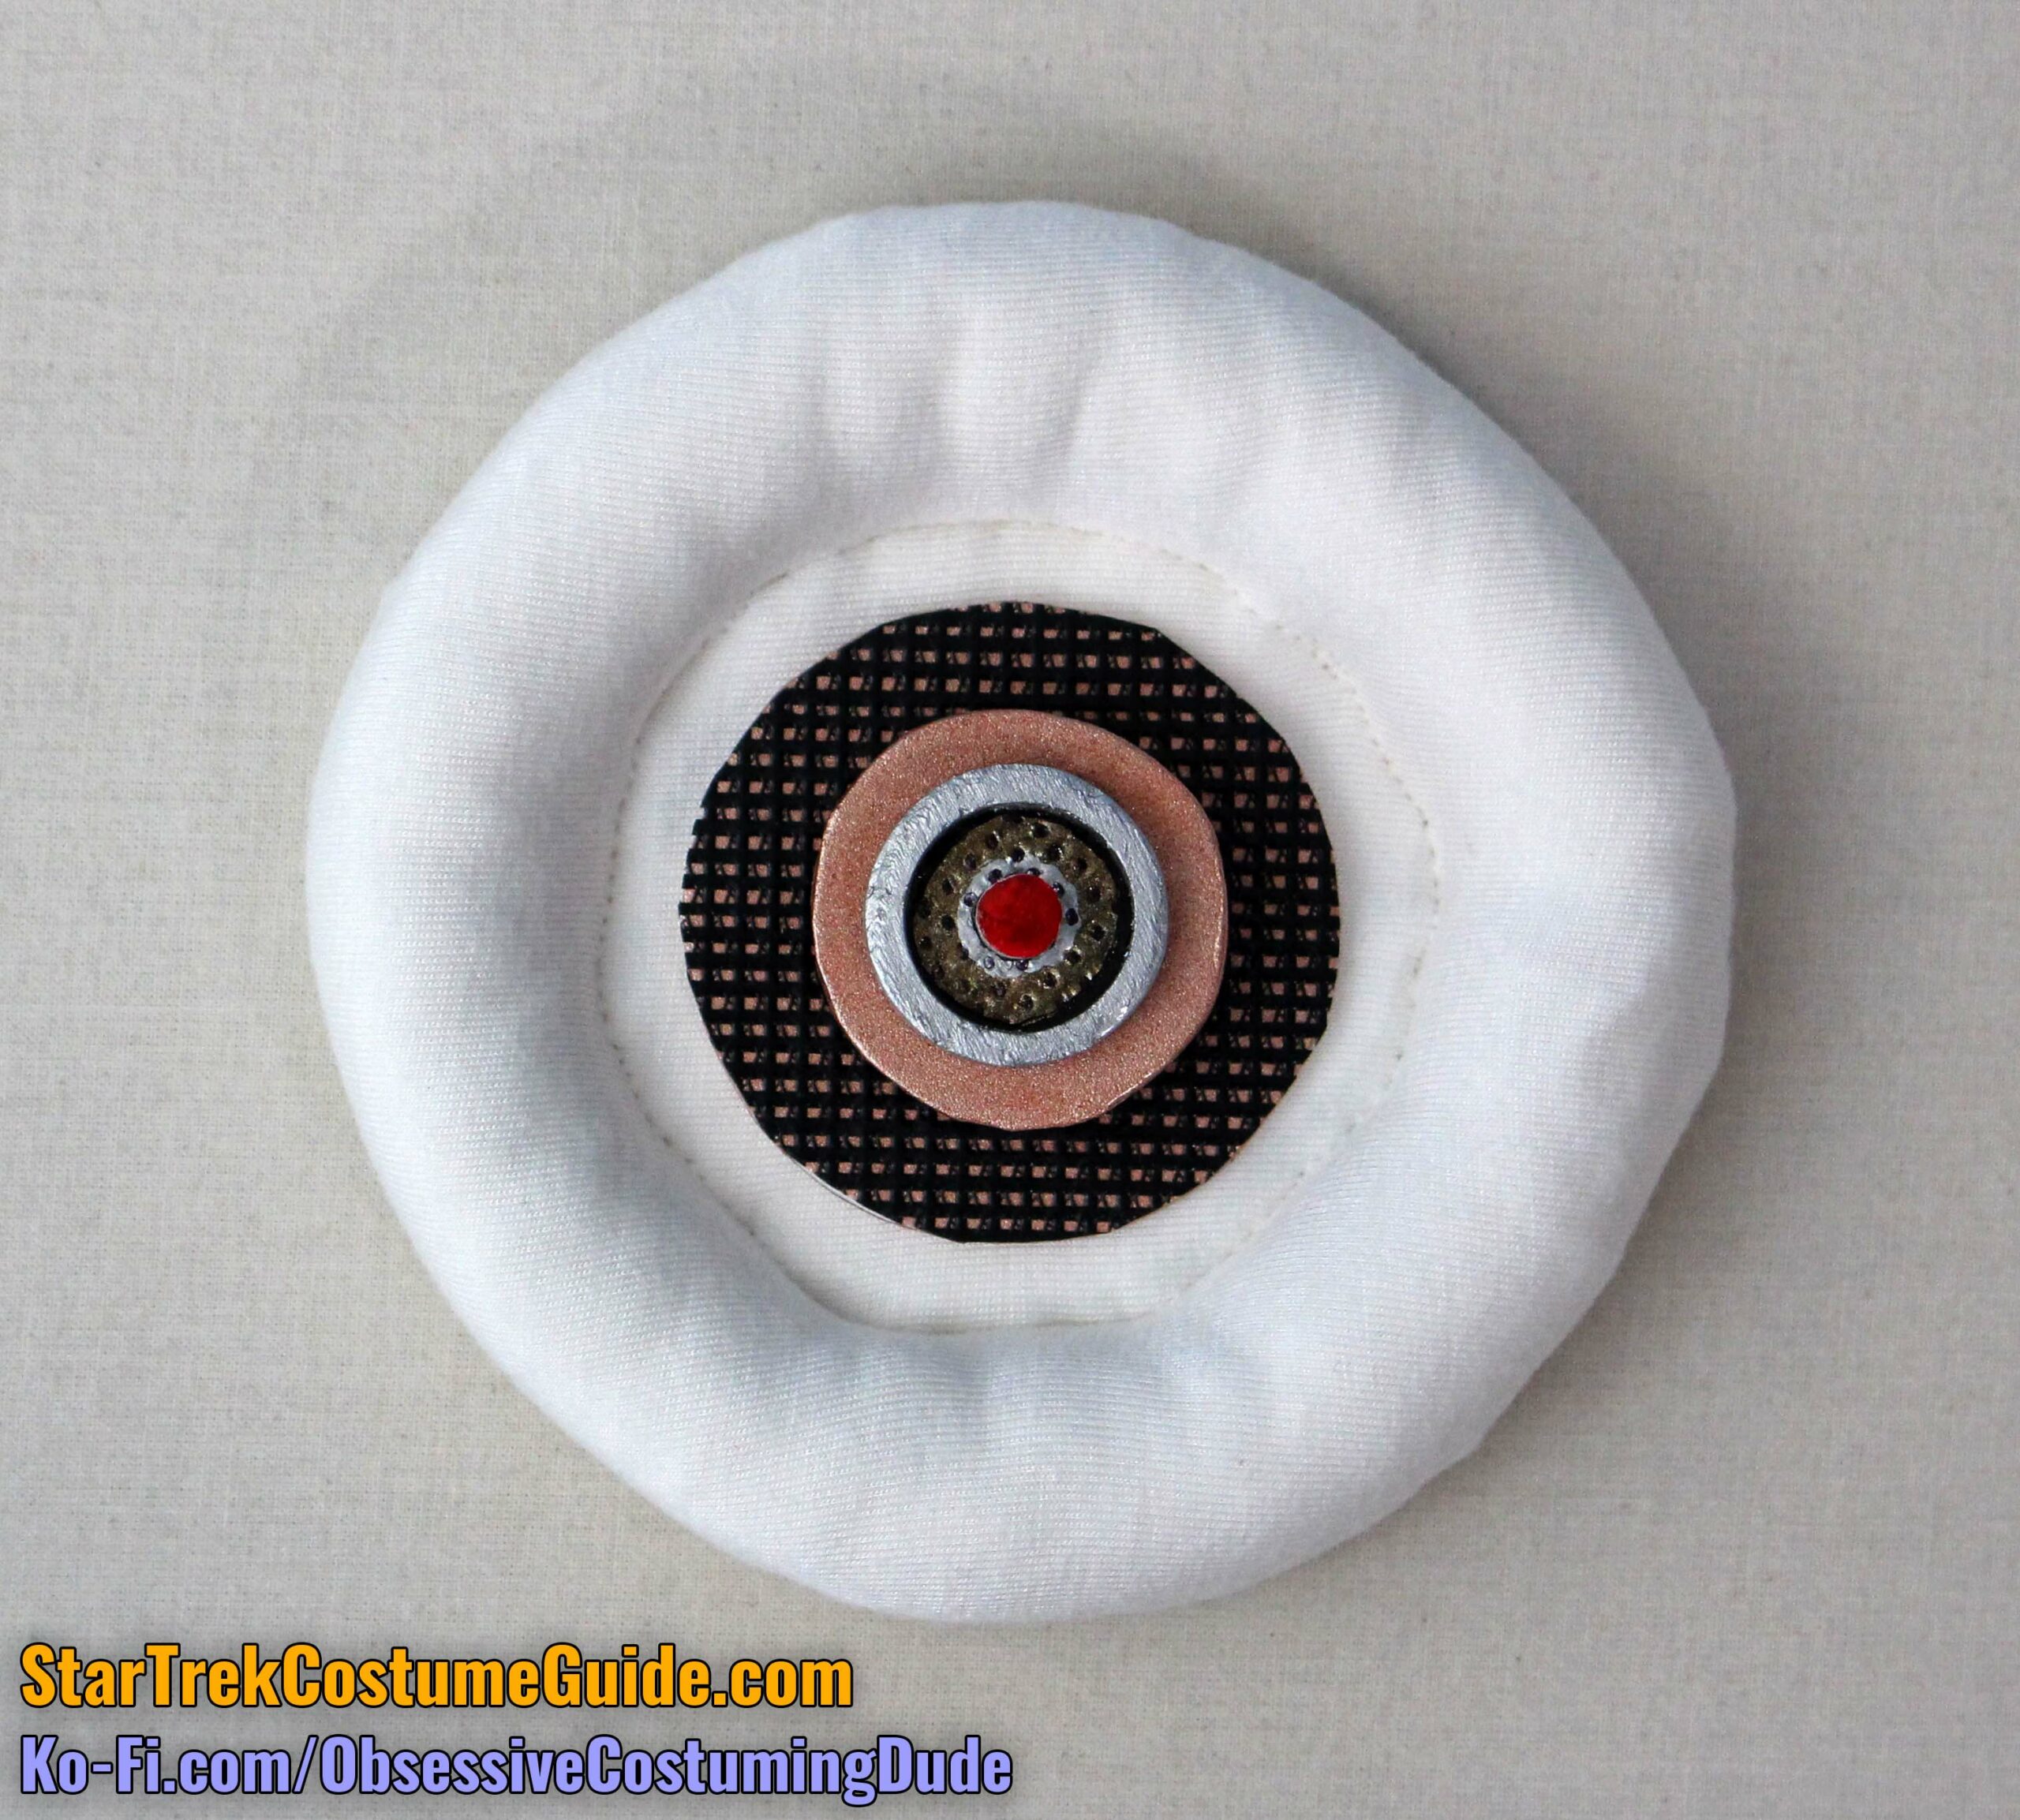
Inside the ring, stitch a small circle of French canvas (piece G2) to stabilize the assembly.
(It doesn’t really matter how; the canvas will be covered by the “bullseye” assembly on the finished costume.)
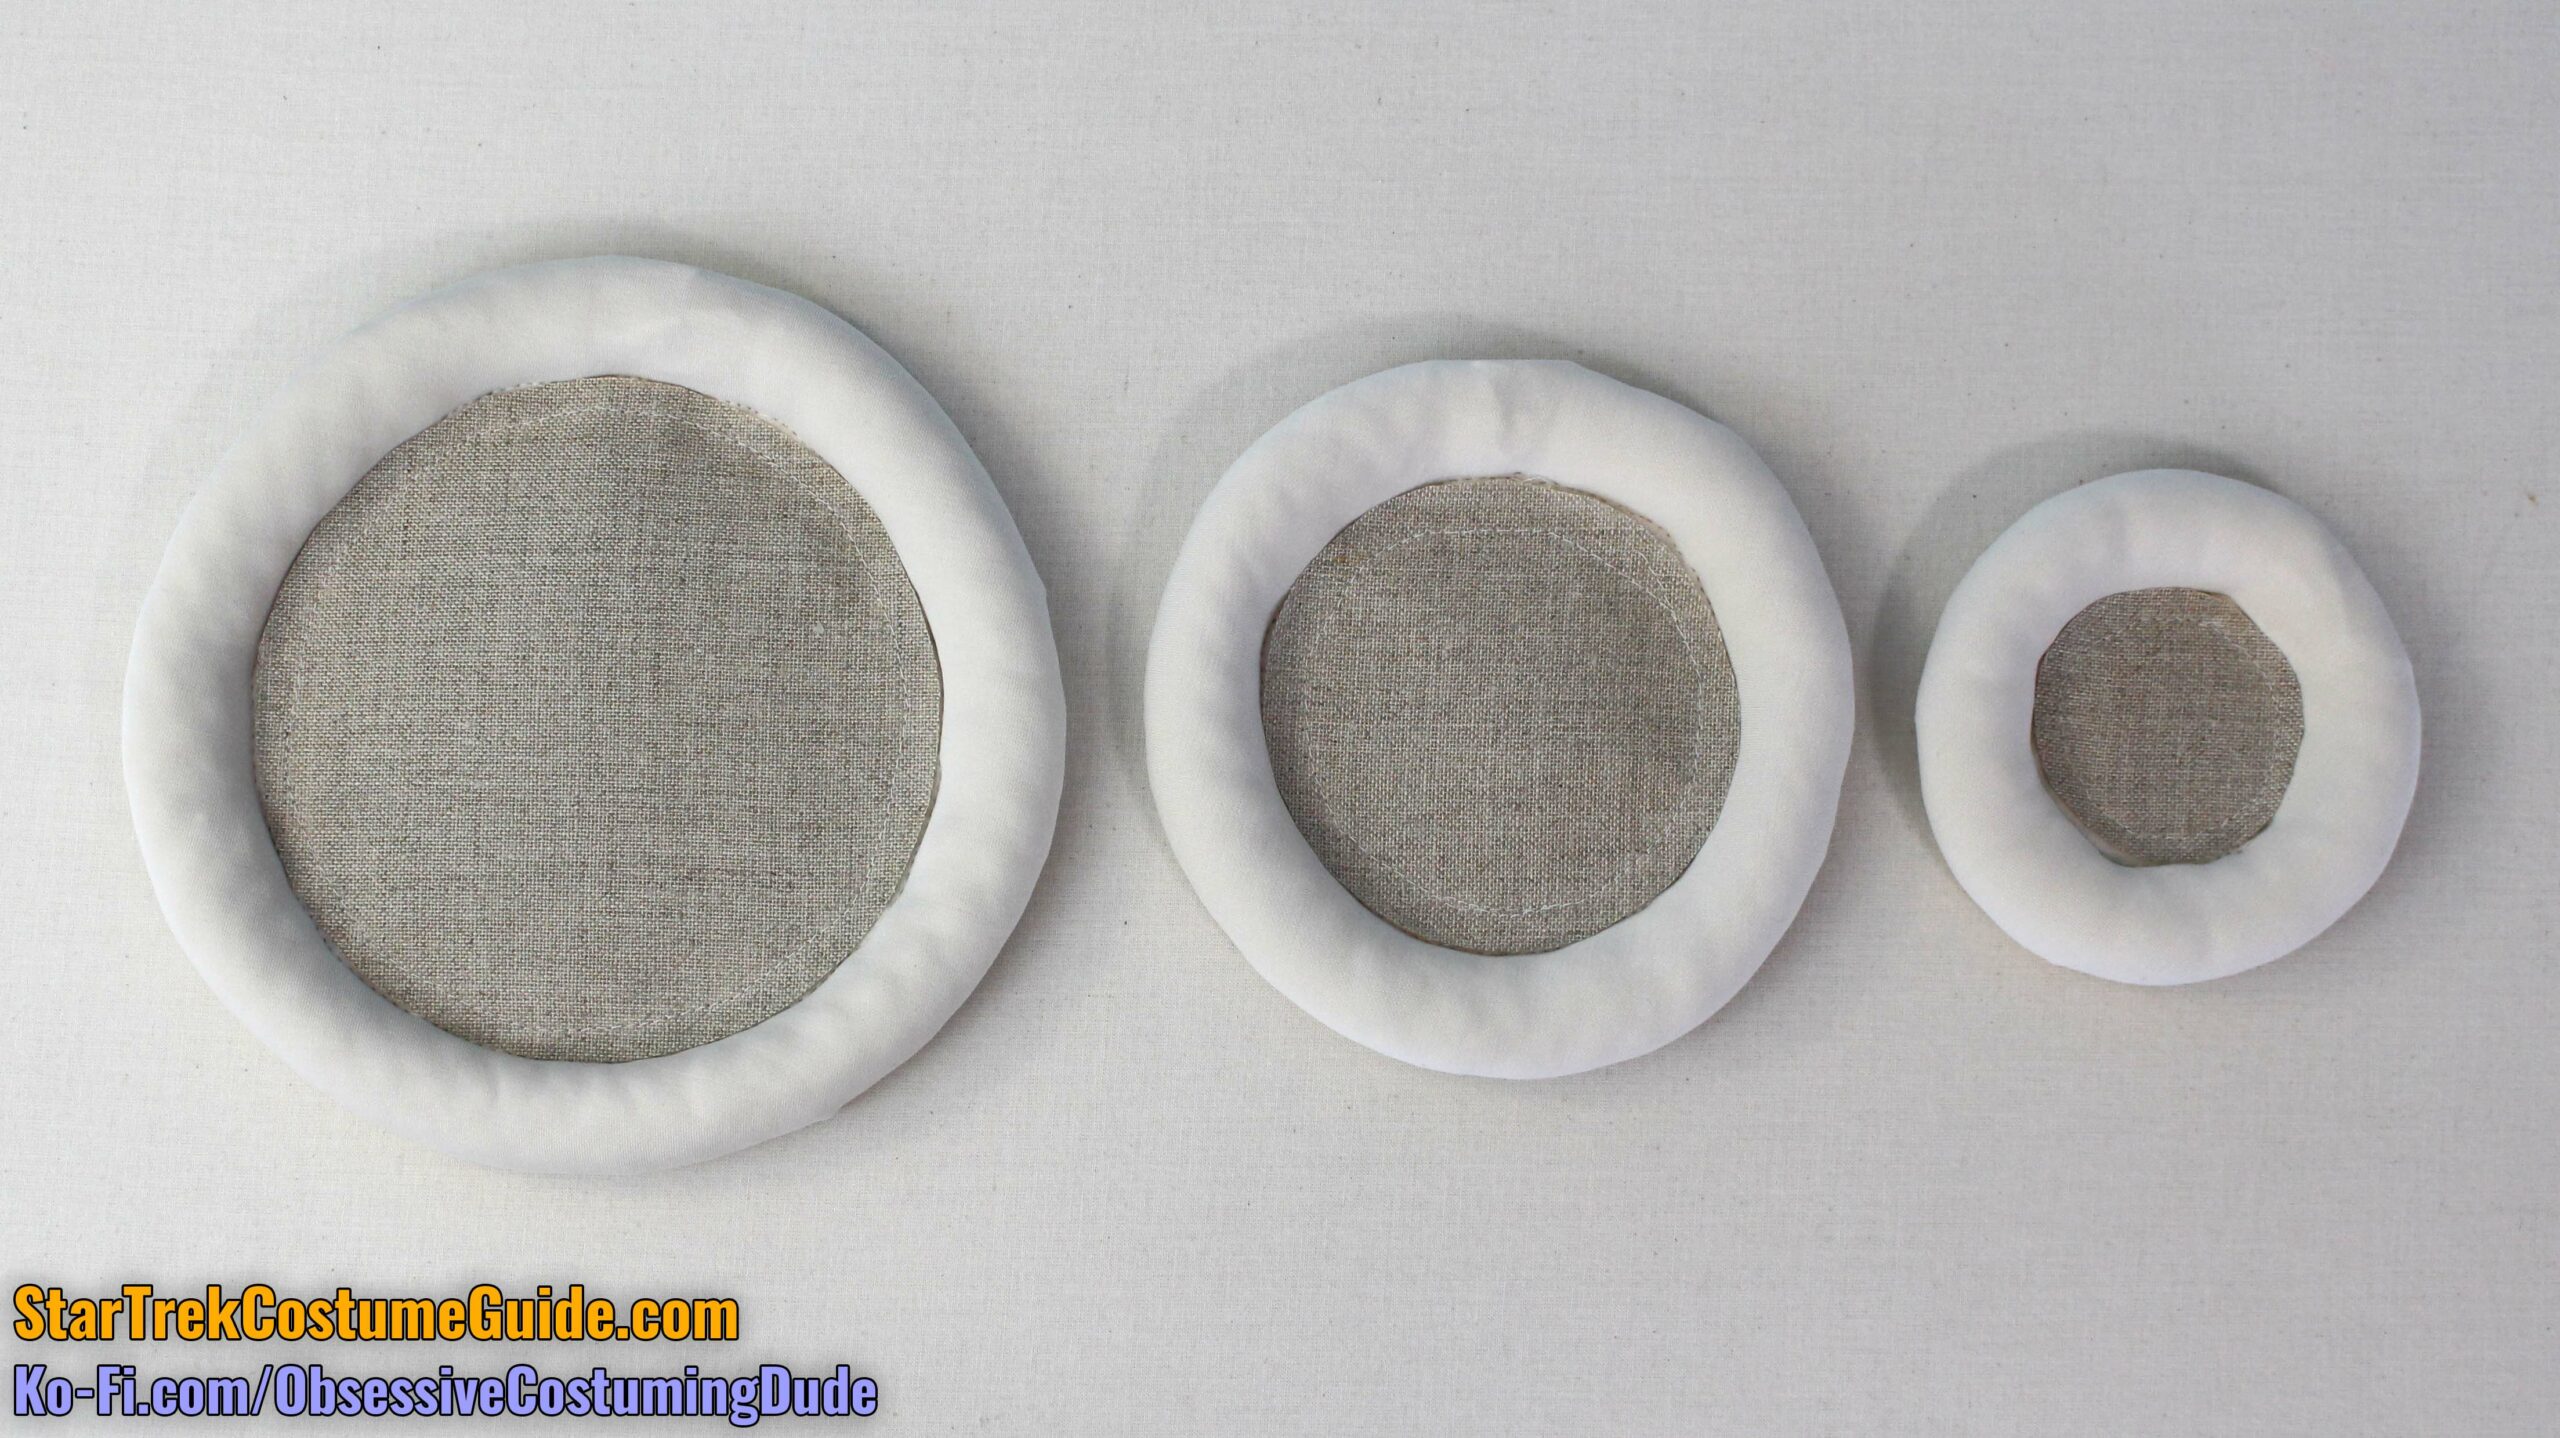
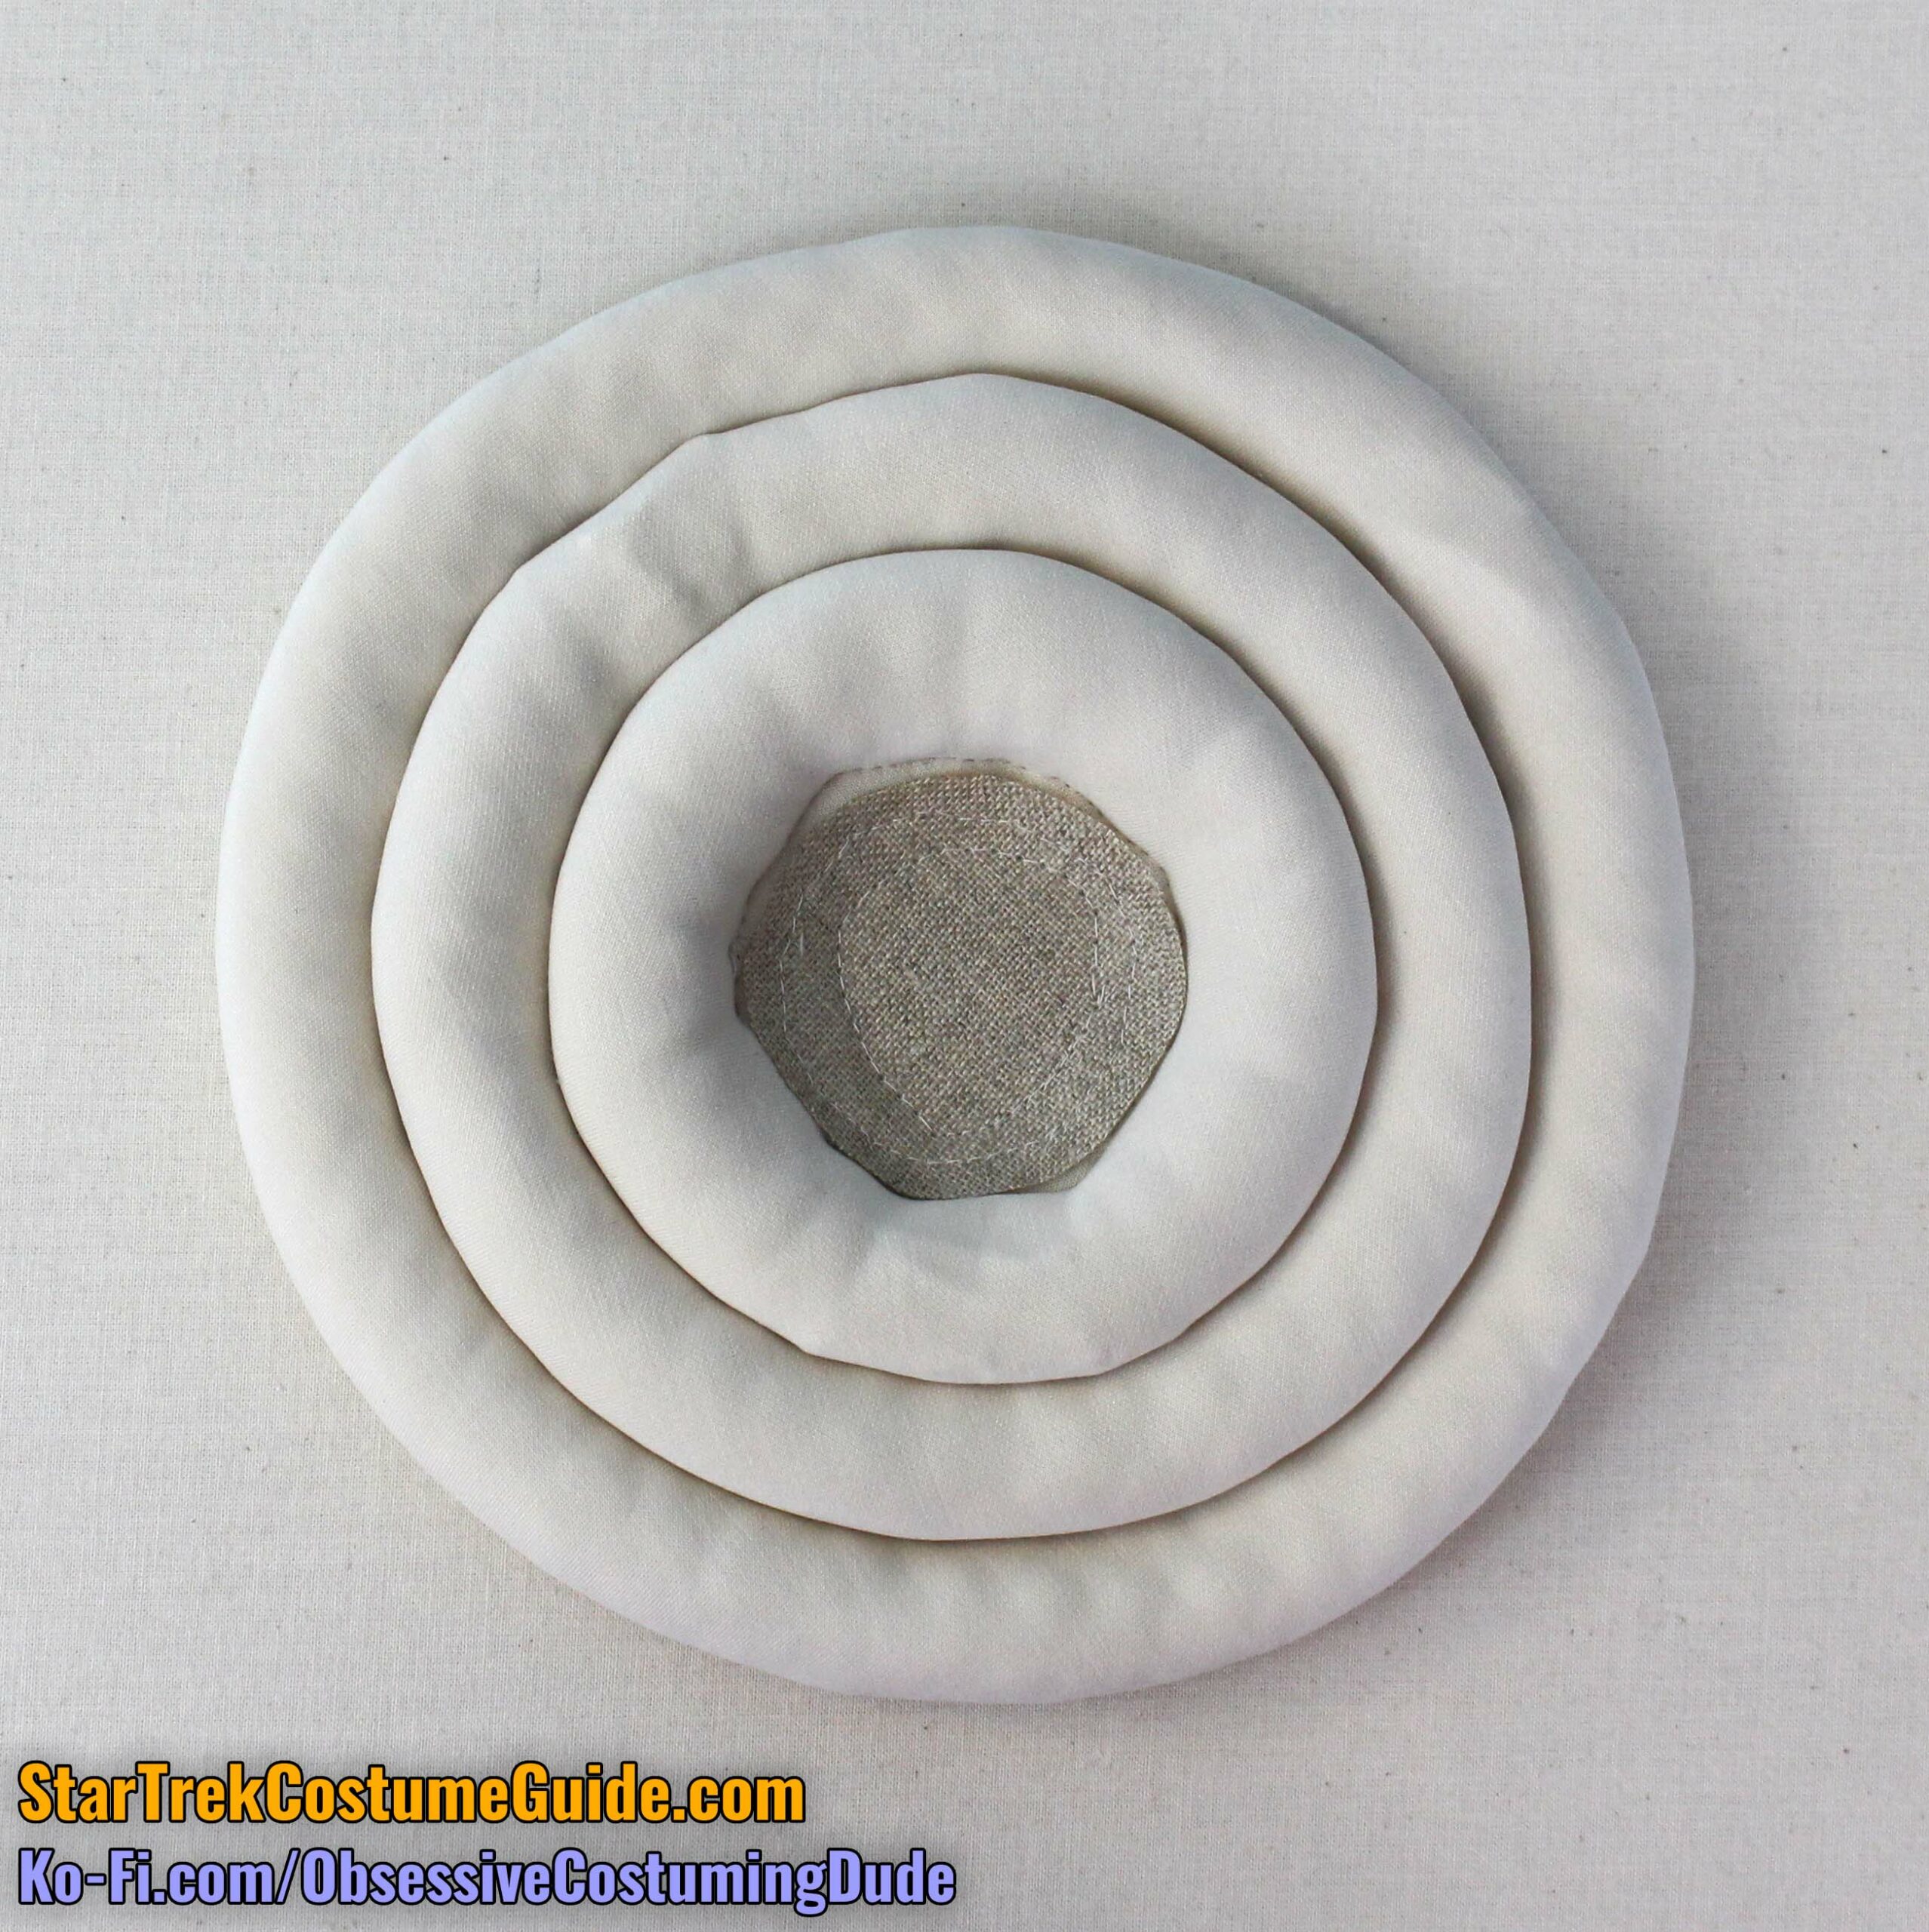
Repeat this process for the other two rings of chest tubing.
Both the middle and outer lengths of cord should wrap snugly around the one inside of it, so all three are flush when “stacked” together.
The cord for the middle circle should be about 15 ¾” long, and the cord for the outer chest circle should be about 20 ¾” long.
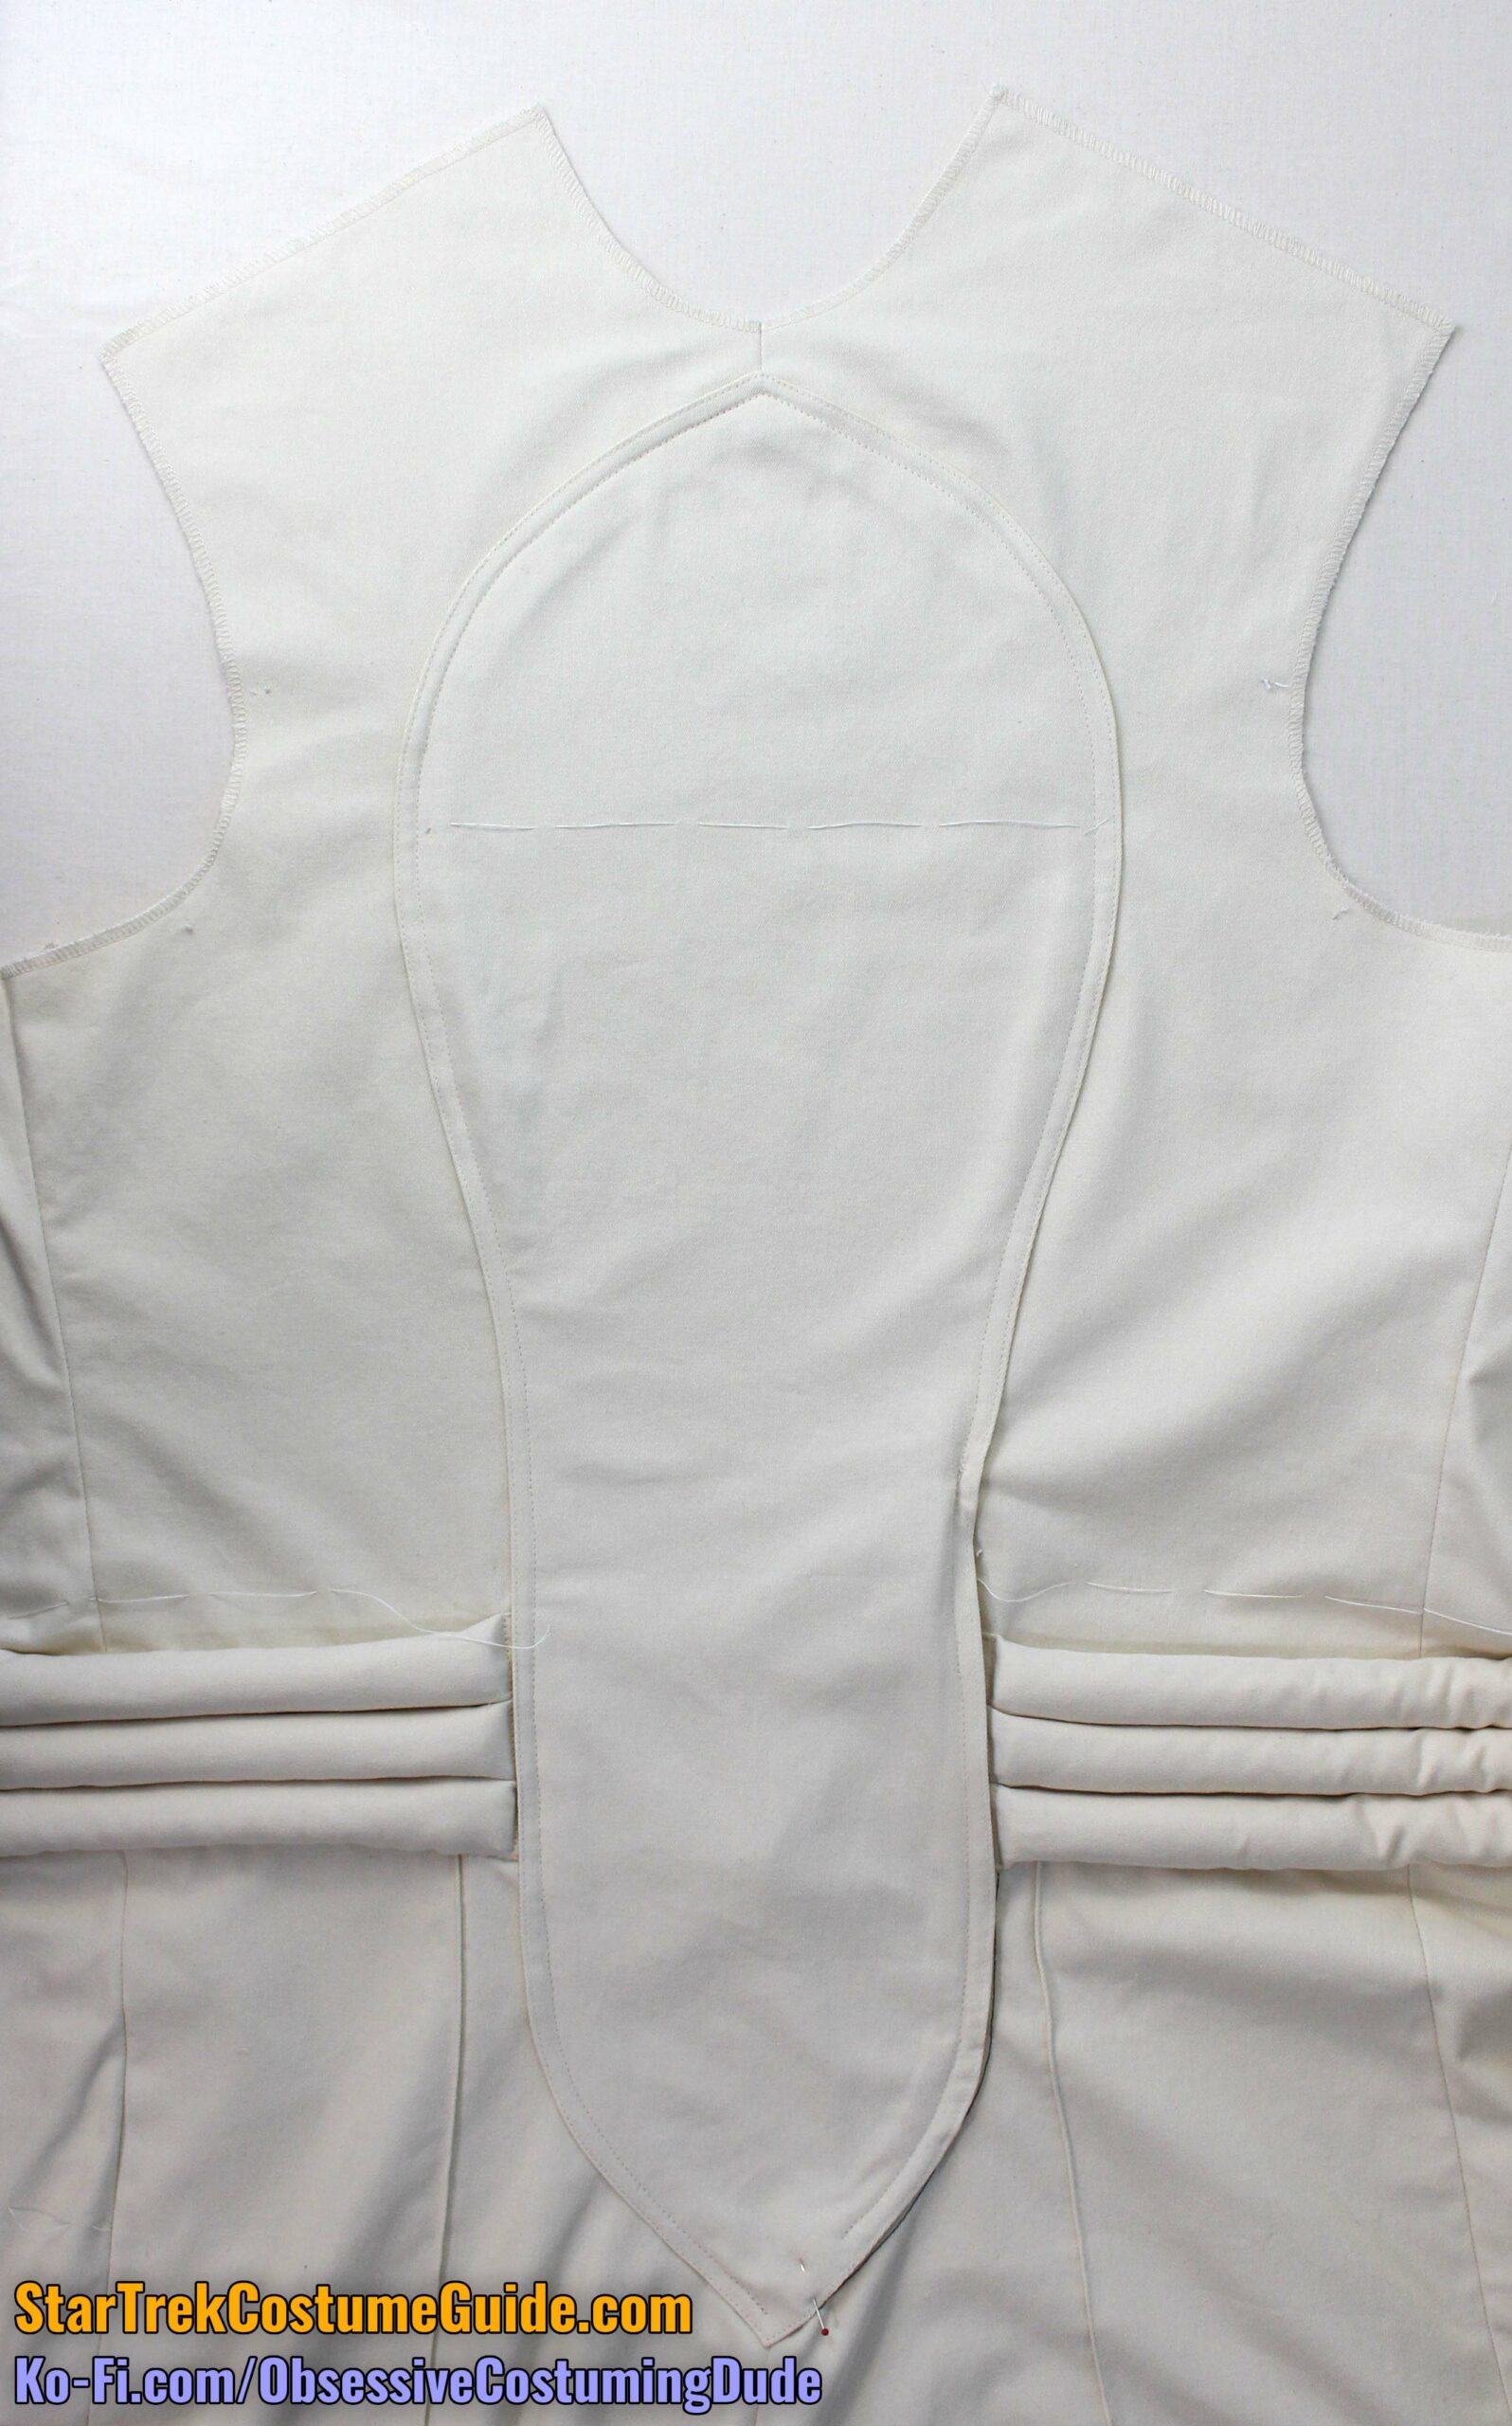
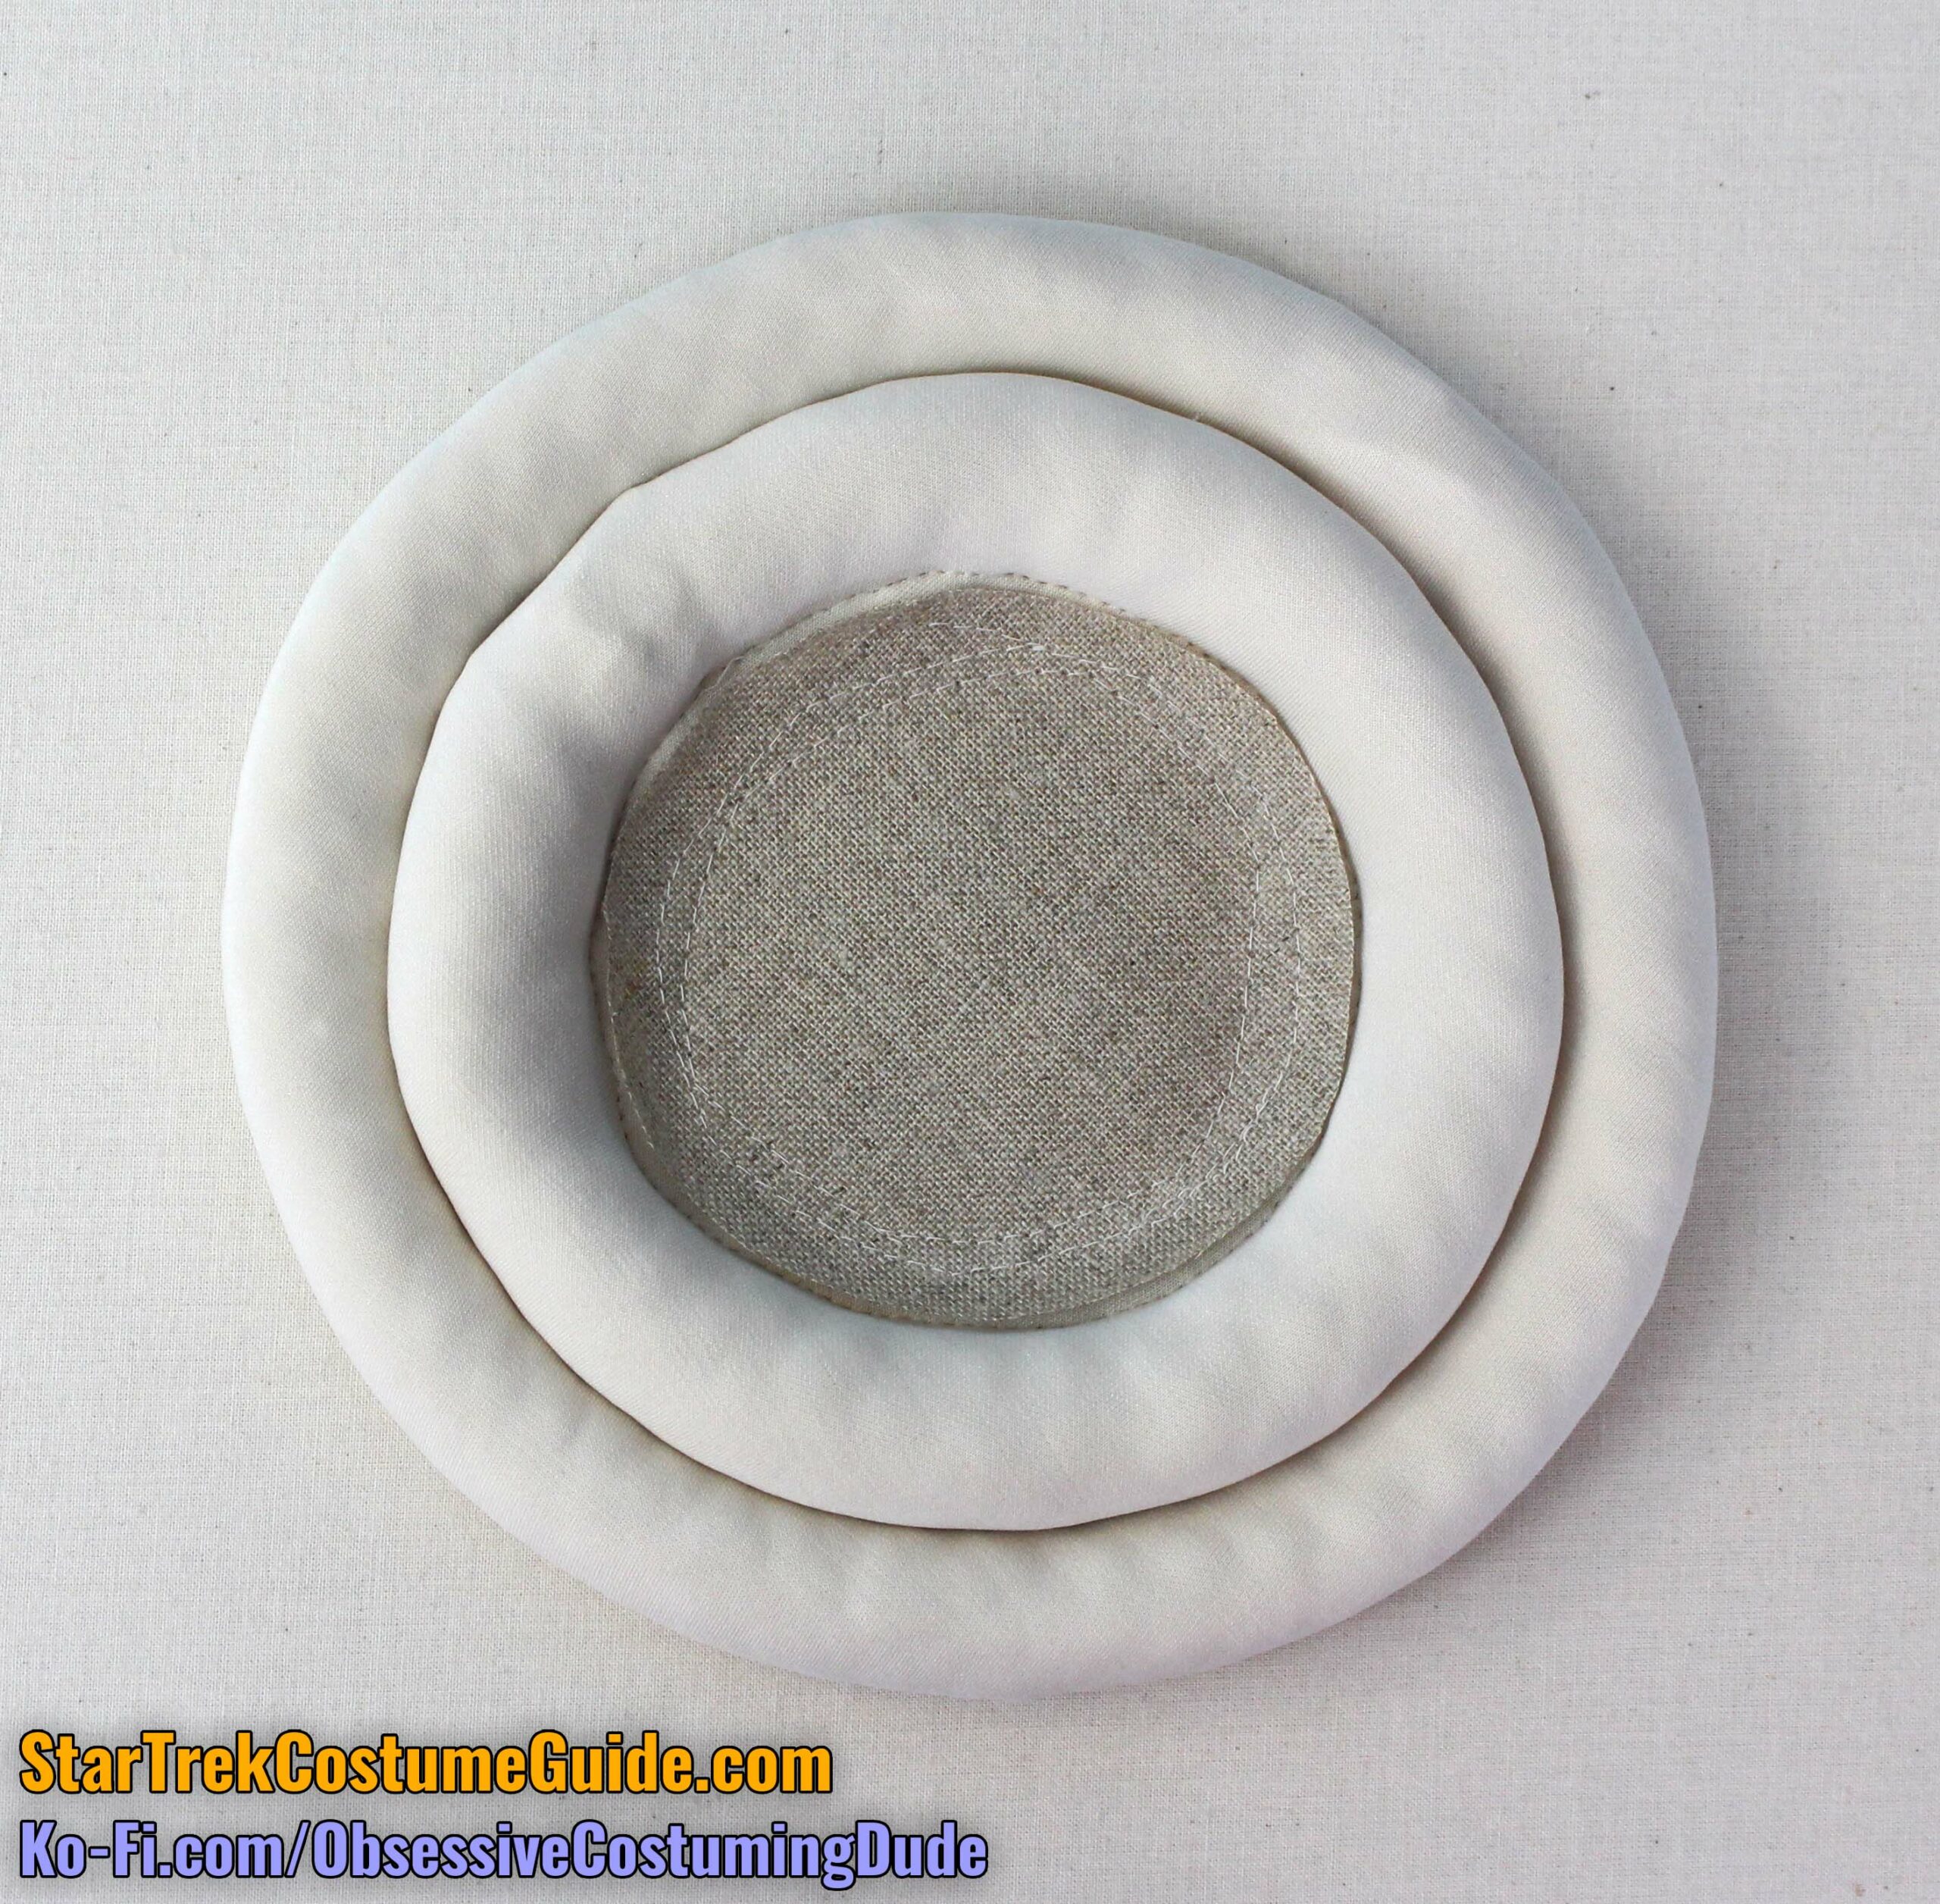
Place the middle chest tubing assembly inside the outer one, and stitch them together inside the middle area.
Place the innermost chest tubing assembly inside the outer/middle tubing assembly, and stitch them together again inside the middle area.
Apply some clear E6000 glue to the underside of the middle and inner rings, to secure them to the canvas around their circumference as well.
Set a few large, heavy books on top of the assembly to flatten it to a consistent height as the glue dries.
This auction photo of a screen-used chest tubing assembly has what appears to be another layer of French canvas on the underside of the outermost chest circle, as well as a square of (muslin?) fabric caught in the various circles of machine-stitching.
I don’t know what purpose it serves, if any, so I omitted it on both of my demonstration costumes and never missed it. Feel free to include it on your costume, though. 🙂
Auction photo of screen-used engineering radiation suit “chest circles”
Hand-sew the chest tubing assembly to the front panel of the jumpsuit along the underside of its perimeter.
For the women’s jumpsuit, the cord for the single circle of “tubing” isn’t flush with the “bullseye” assembly; it should be about ¼” outside of it.
The ⅞” upholstery cord for the women’s jumpsuit chest circle should be about 12 ½” long.
The women’s tubing assembly appears to have been otherwise constructed the same way the men’s was, except you’ll want to stitch or glue the French canvas to the underside of the assembly instead of the outside.
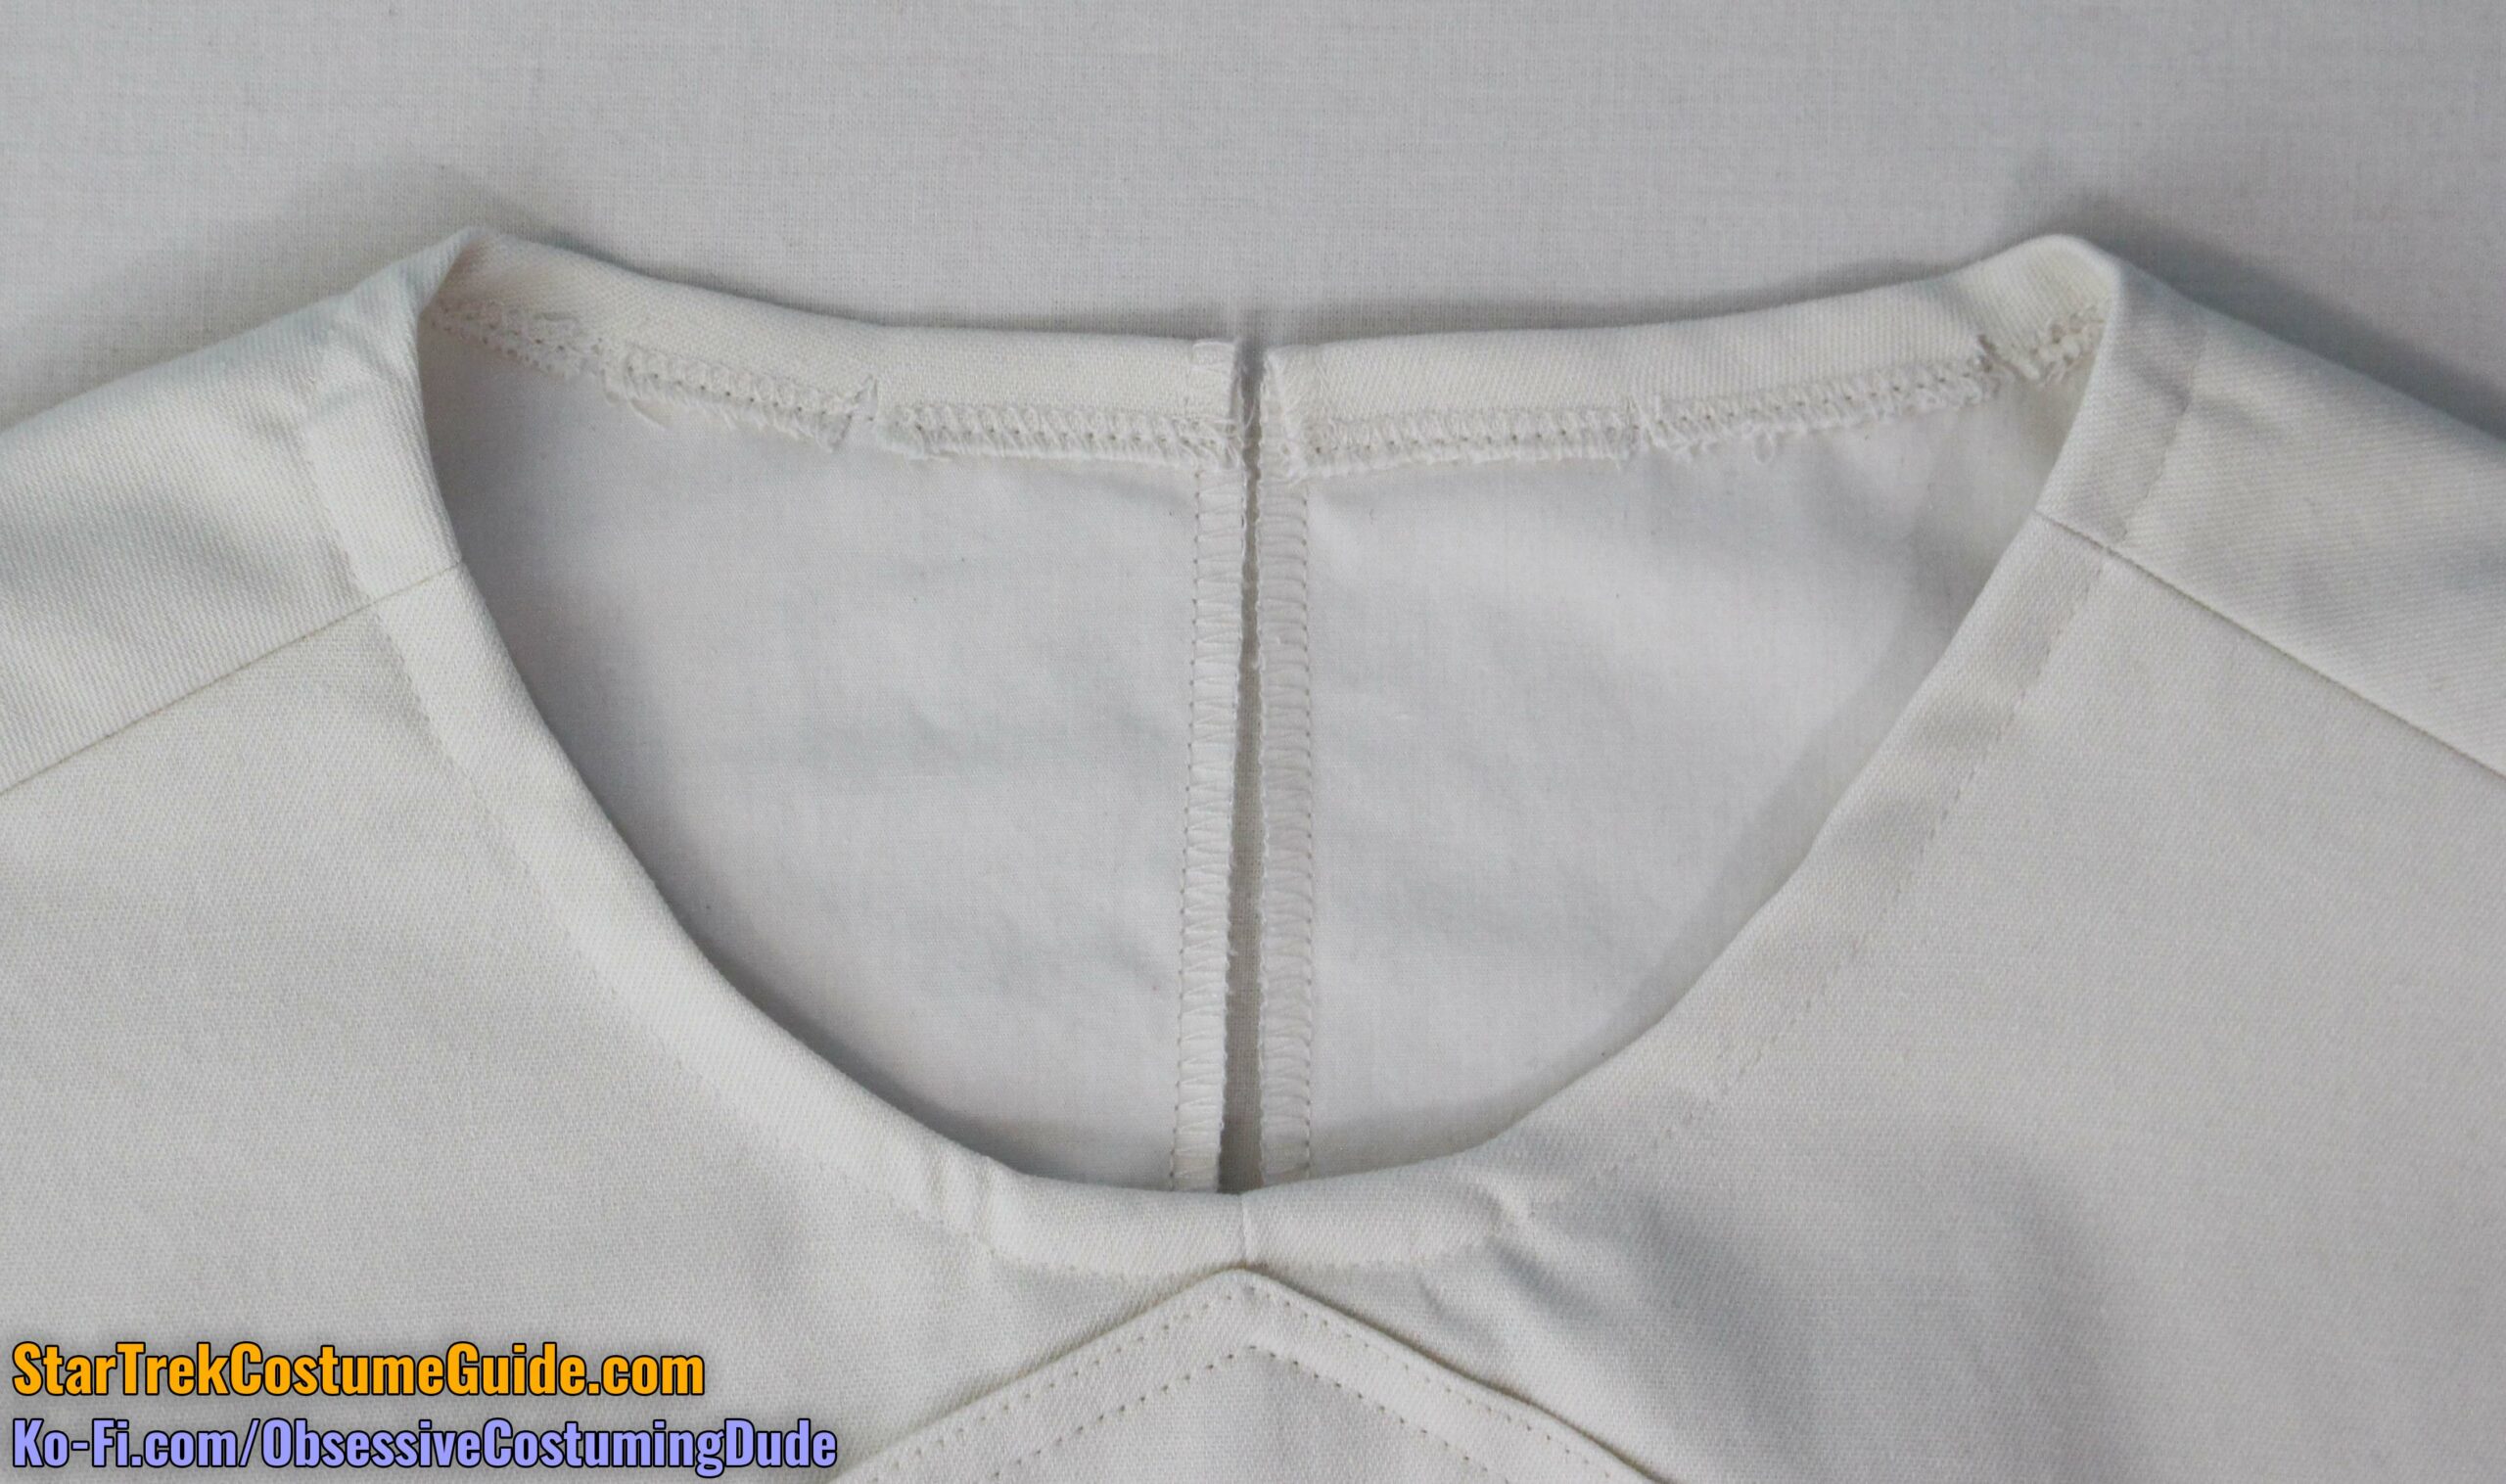
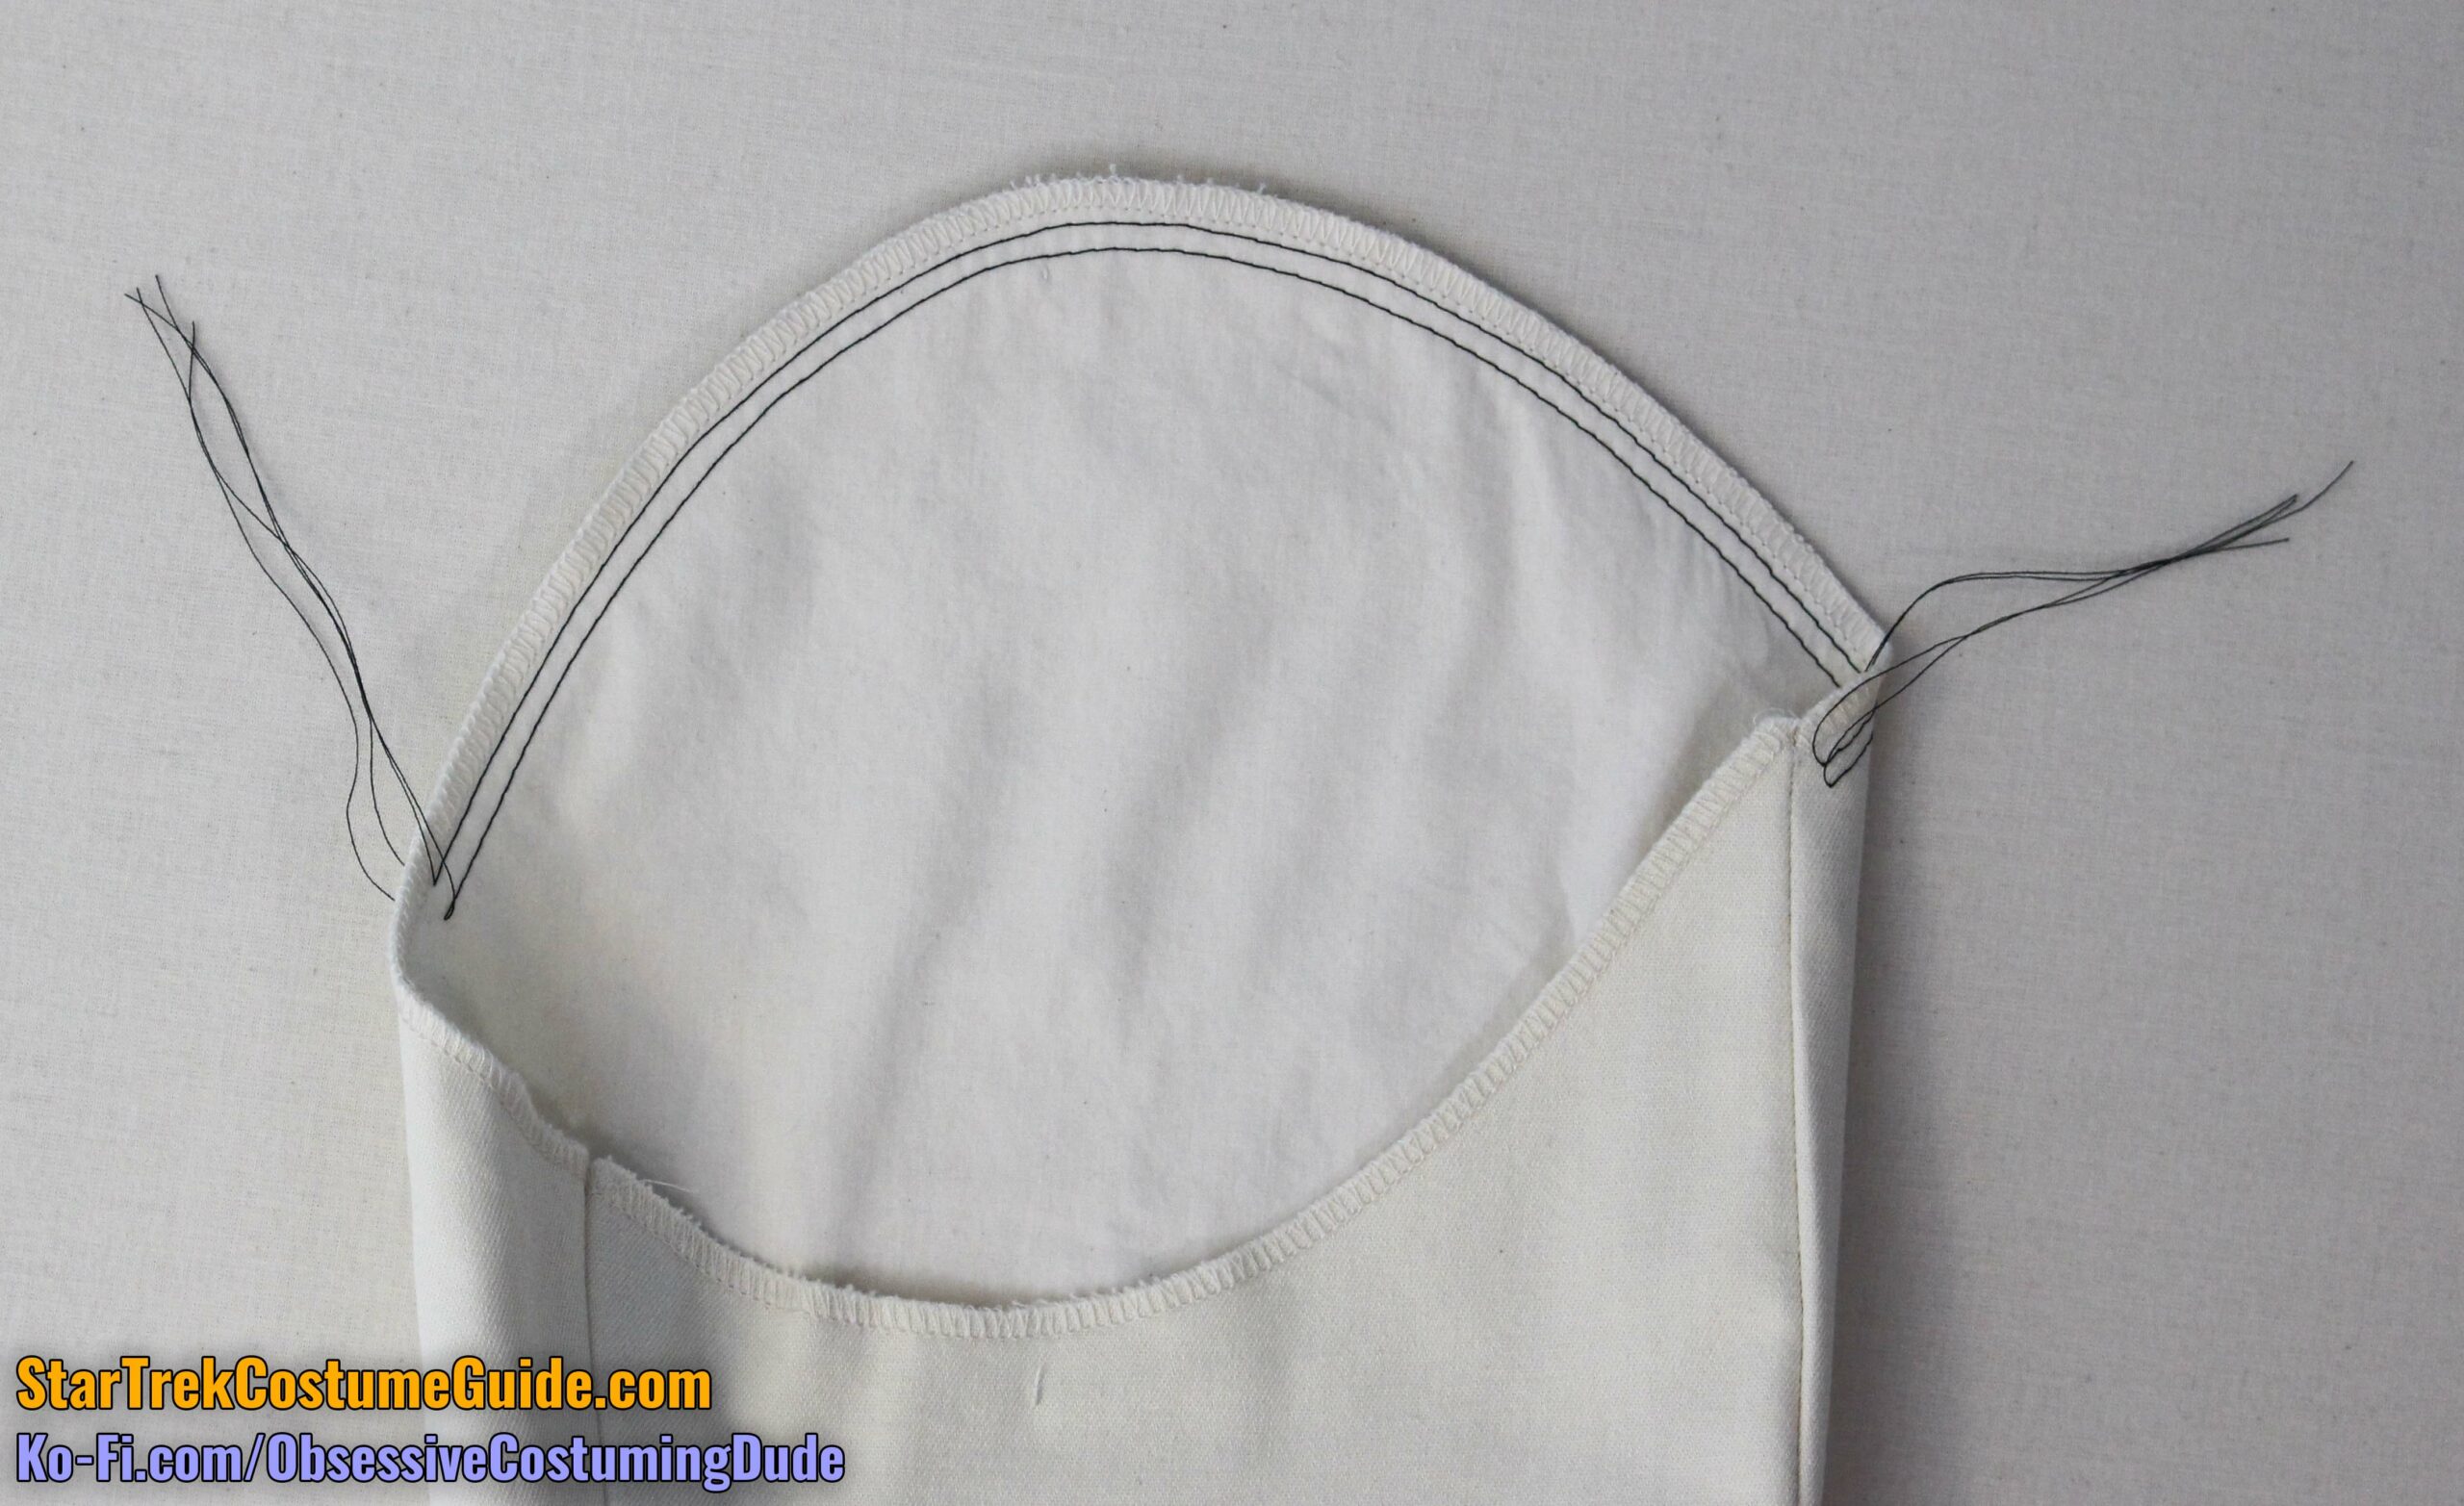
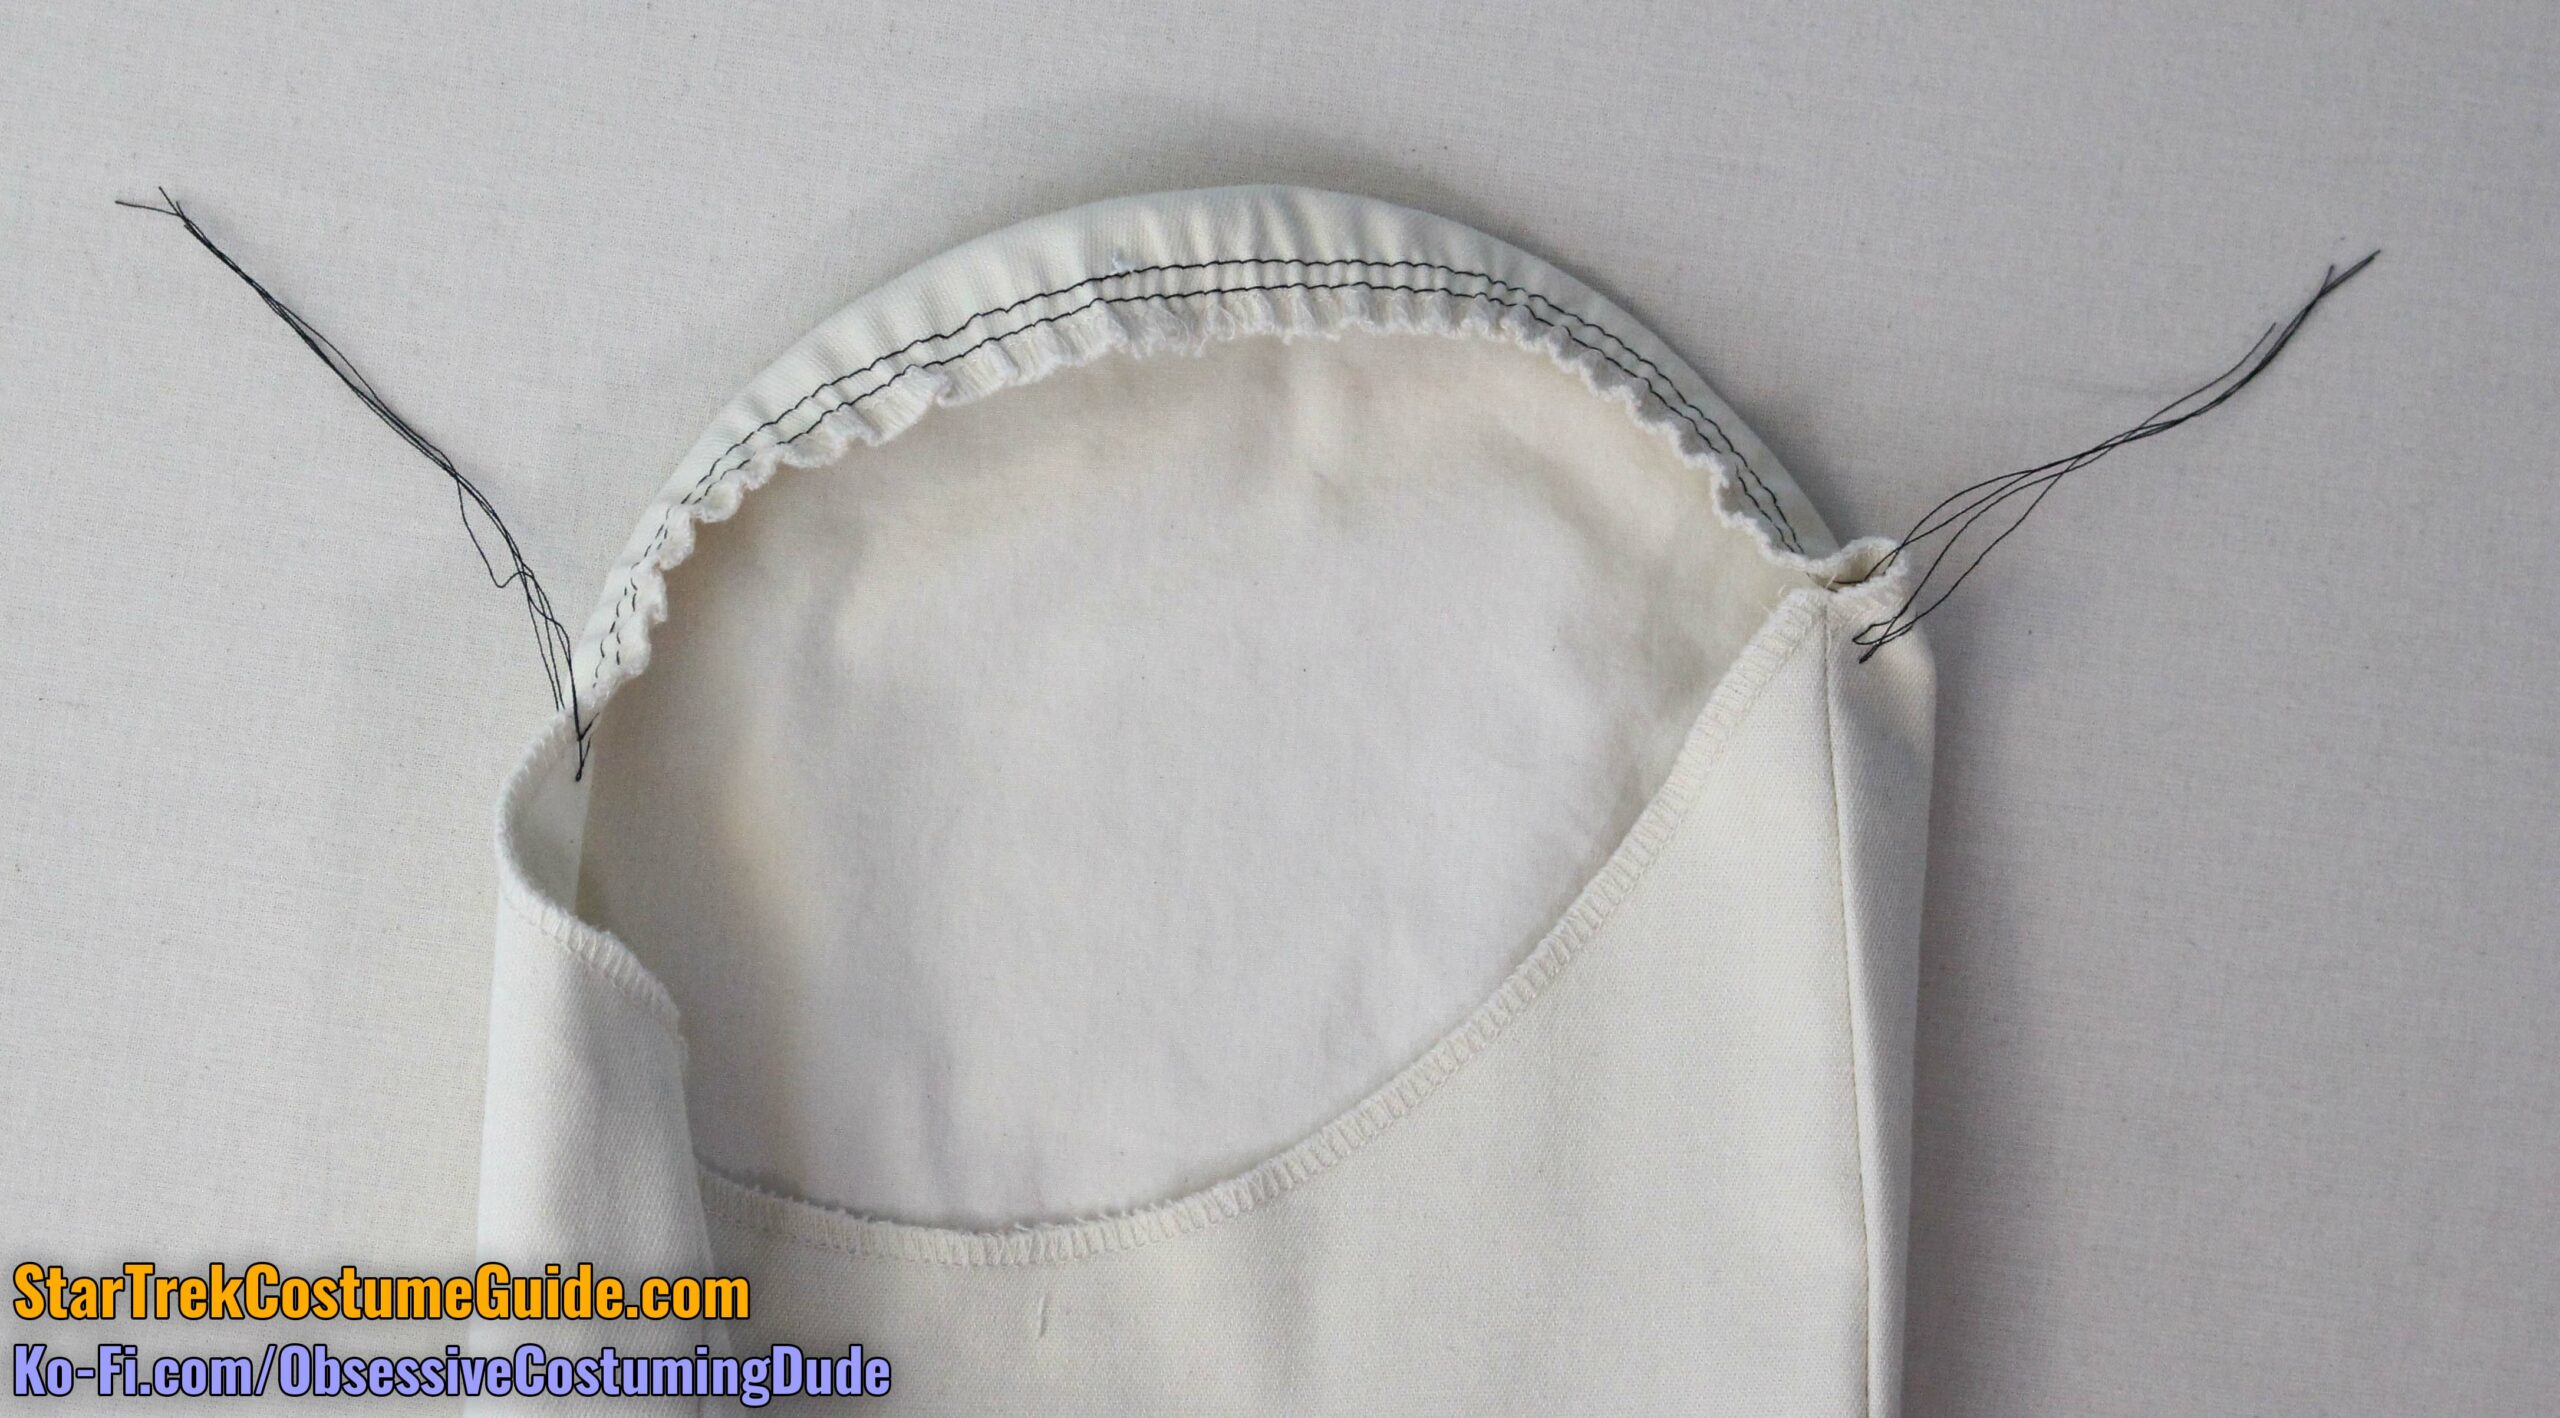
Sew the jumpsuit shoulders closed with ¾” seam allowance, and press the seam allowances open.
Press the neckline’s ½” hem allowance under, clipping the allowance as-needed for it to lie flat.
Hem the jumpsuit neckline.
At this point, your jumpsuit should be starting to look familiar …
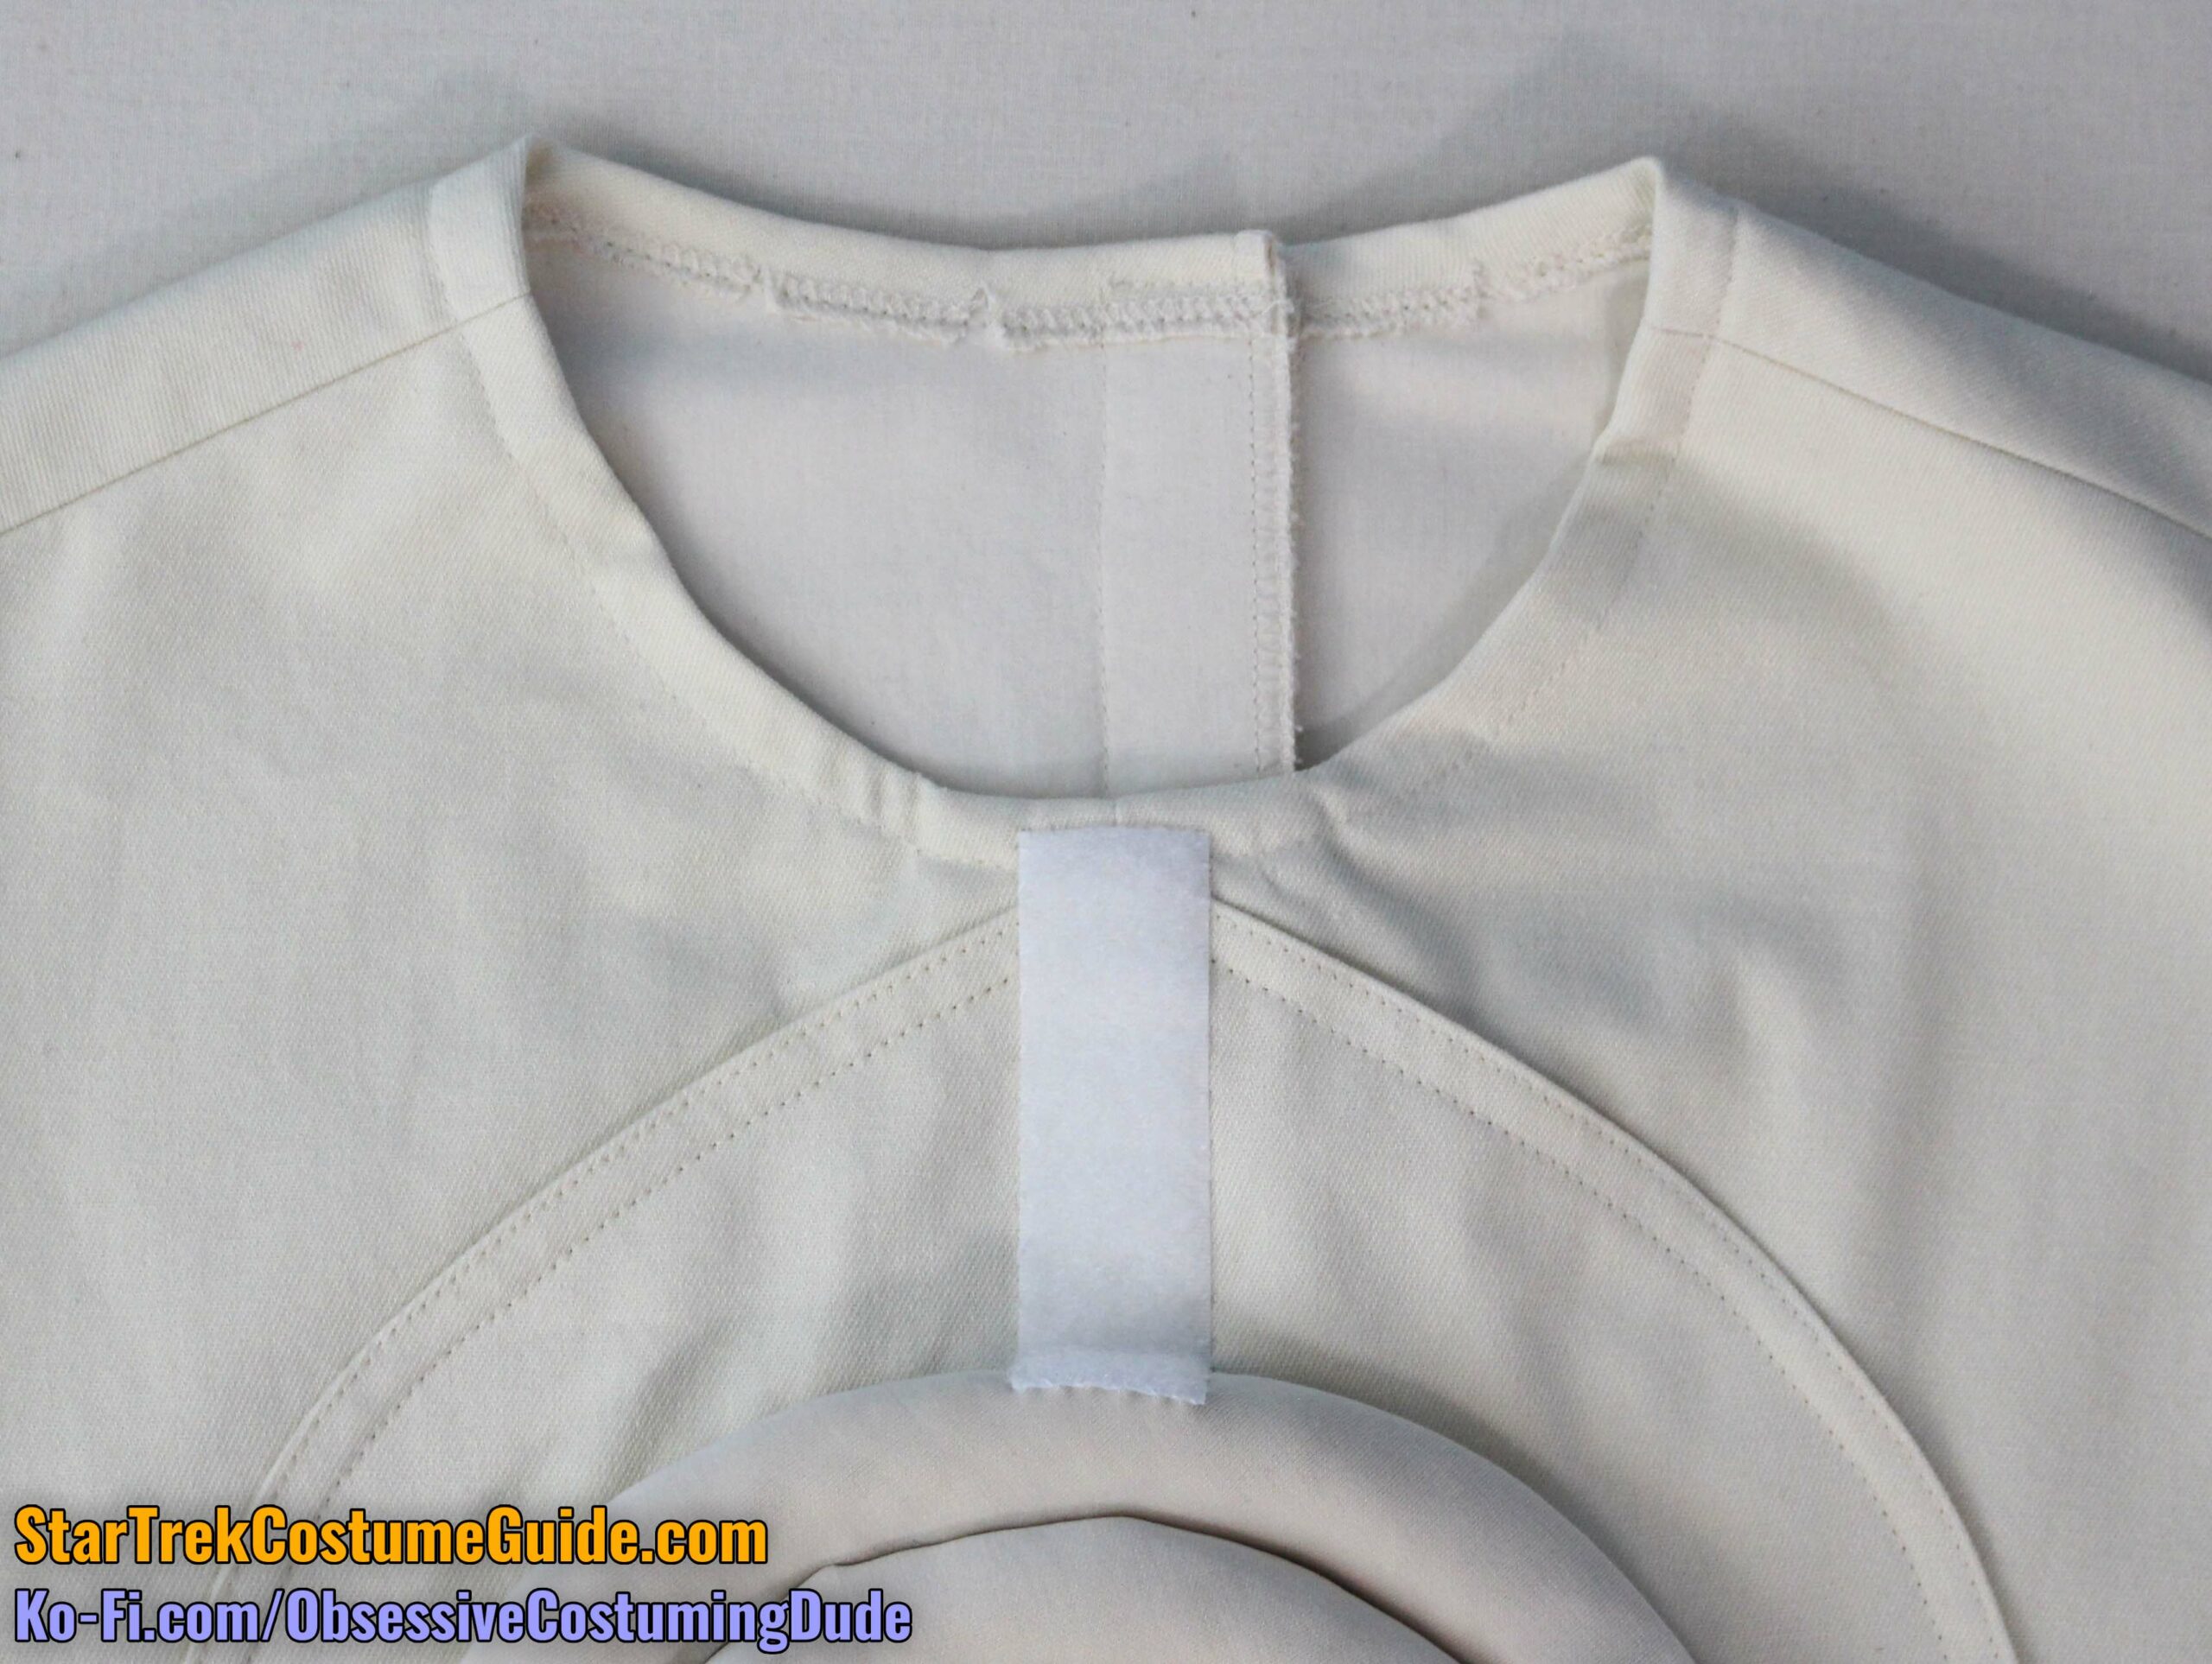
Cut a length of your 1” white hook-and-loop tape (“Velcro”) sufficient to extend from just below the neckline down to where the back seam allowance changes from 1” to ½”.
Position the hook-and-loop tape flush with the center back edges of the jumpsuit.
Edge-stitch the hook-and-loop tape to the center back.
For a men’s jumpsuit, sew the “hook” (scratchy) tape on the back right, and the “loop” (fuzzy) tape on the back left.
For a women’s jumpsuit, do the opposite: the “hook” (scratchy) tape on the back left, and the “loop” (fuzzy) tape on the back right.
Sew the lower back crotch closed with ½” seam allowance, up to the bottom of the hook-and-loop tape, and reinforce your stitching several times.
On the men’s jumpsuit, clip the left seam allowance just beneath the hook-and-loop tape so the back left will overlap the back right.
On the women’s jumpsuit, do the opposite; clip the back right seam allowance just beneath the hook-and-loop tape so the back right will overlap the back left.
Press the seam allowances open.
Fold the back overlap (left for the men, right for the women) under and machine-sew it into place by edge-stitching again over the hook-and-loop tape.
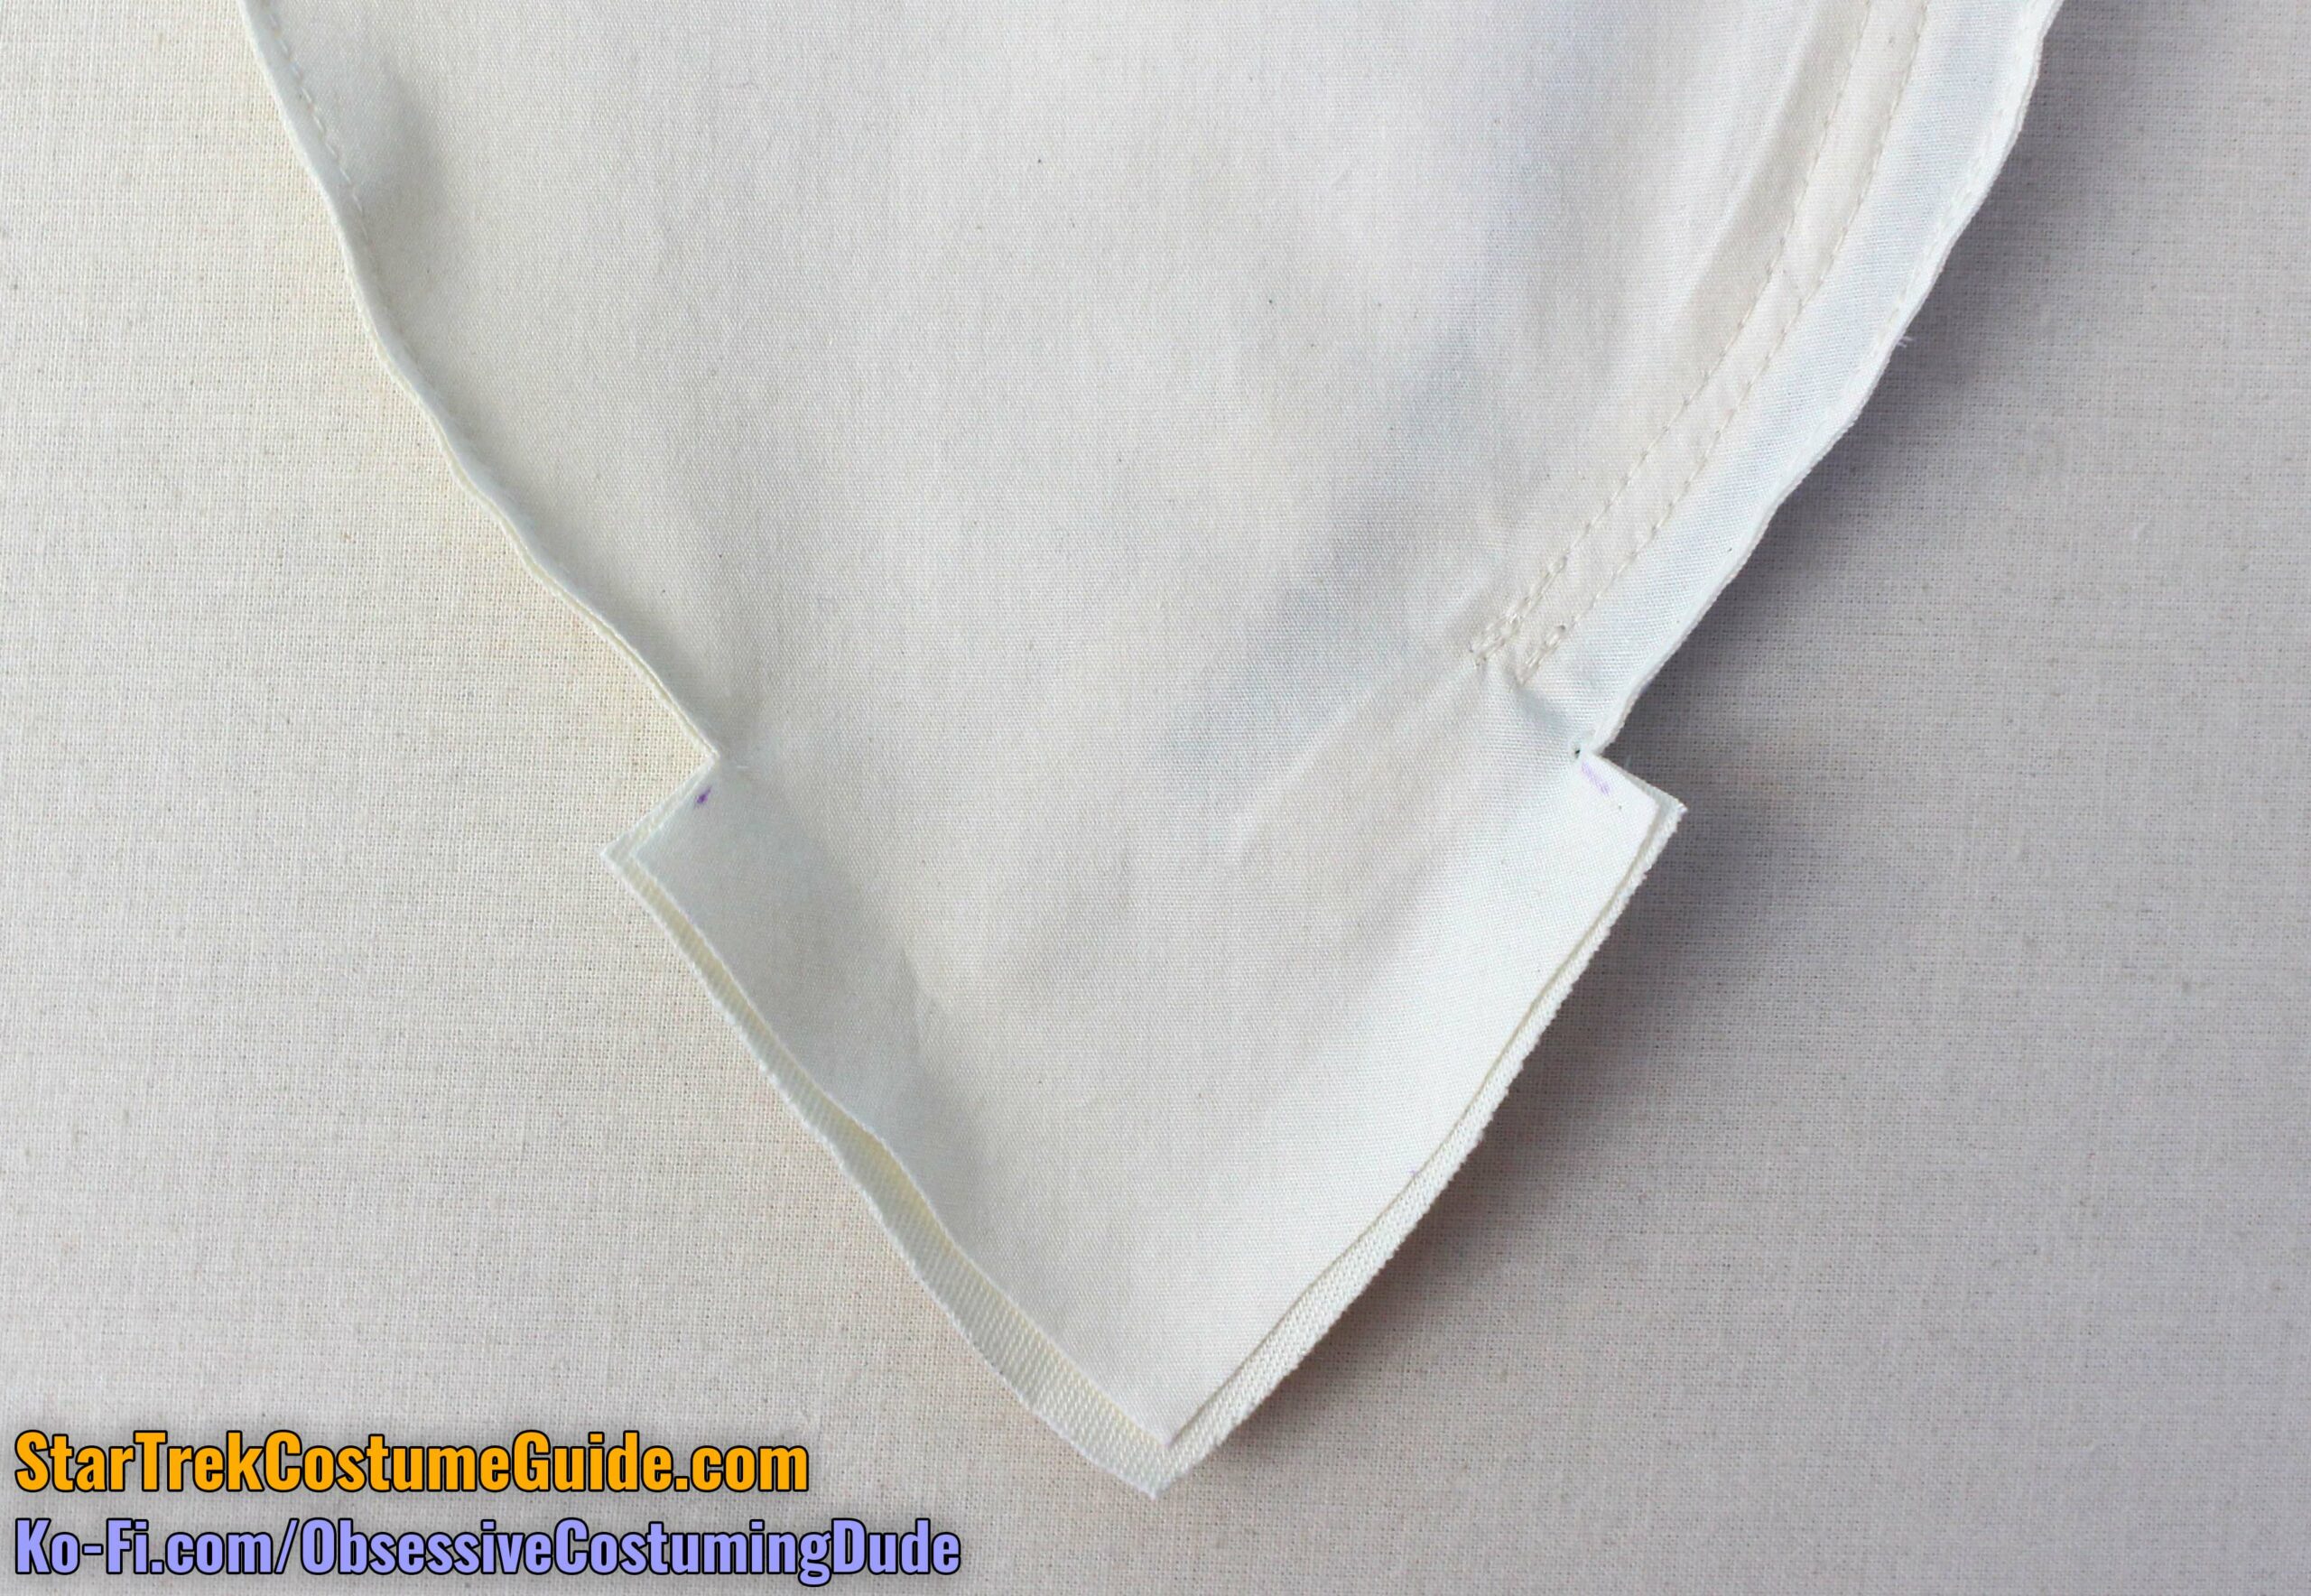
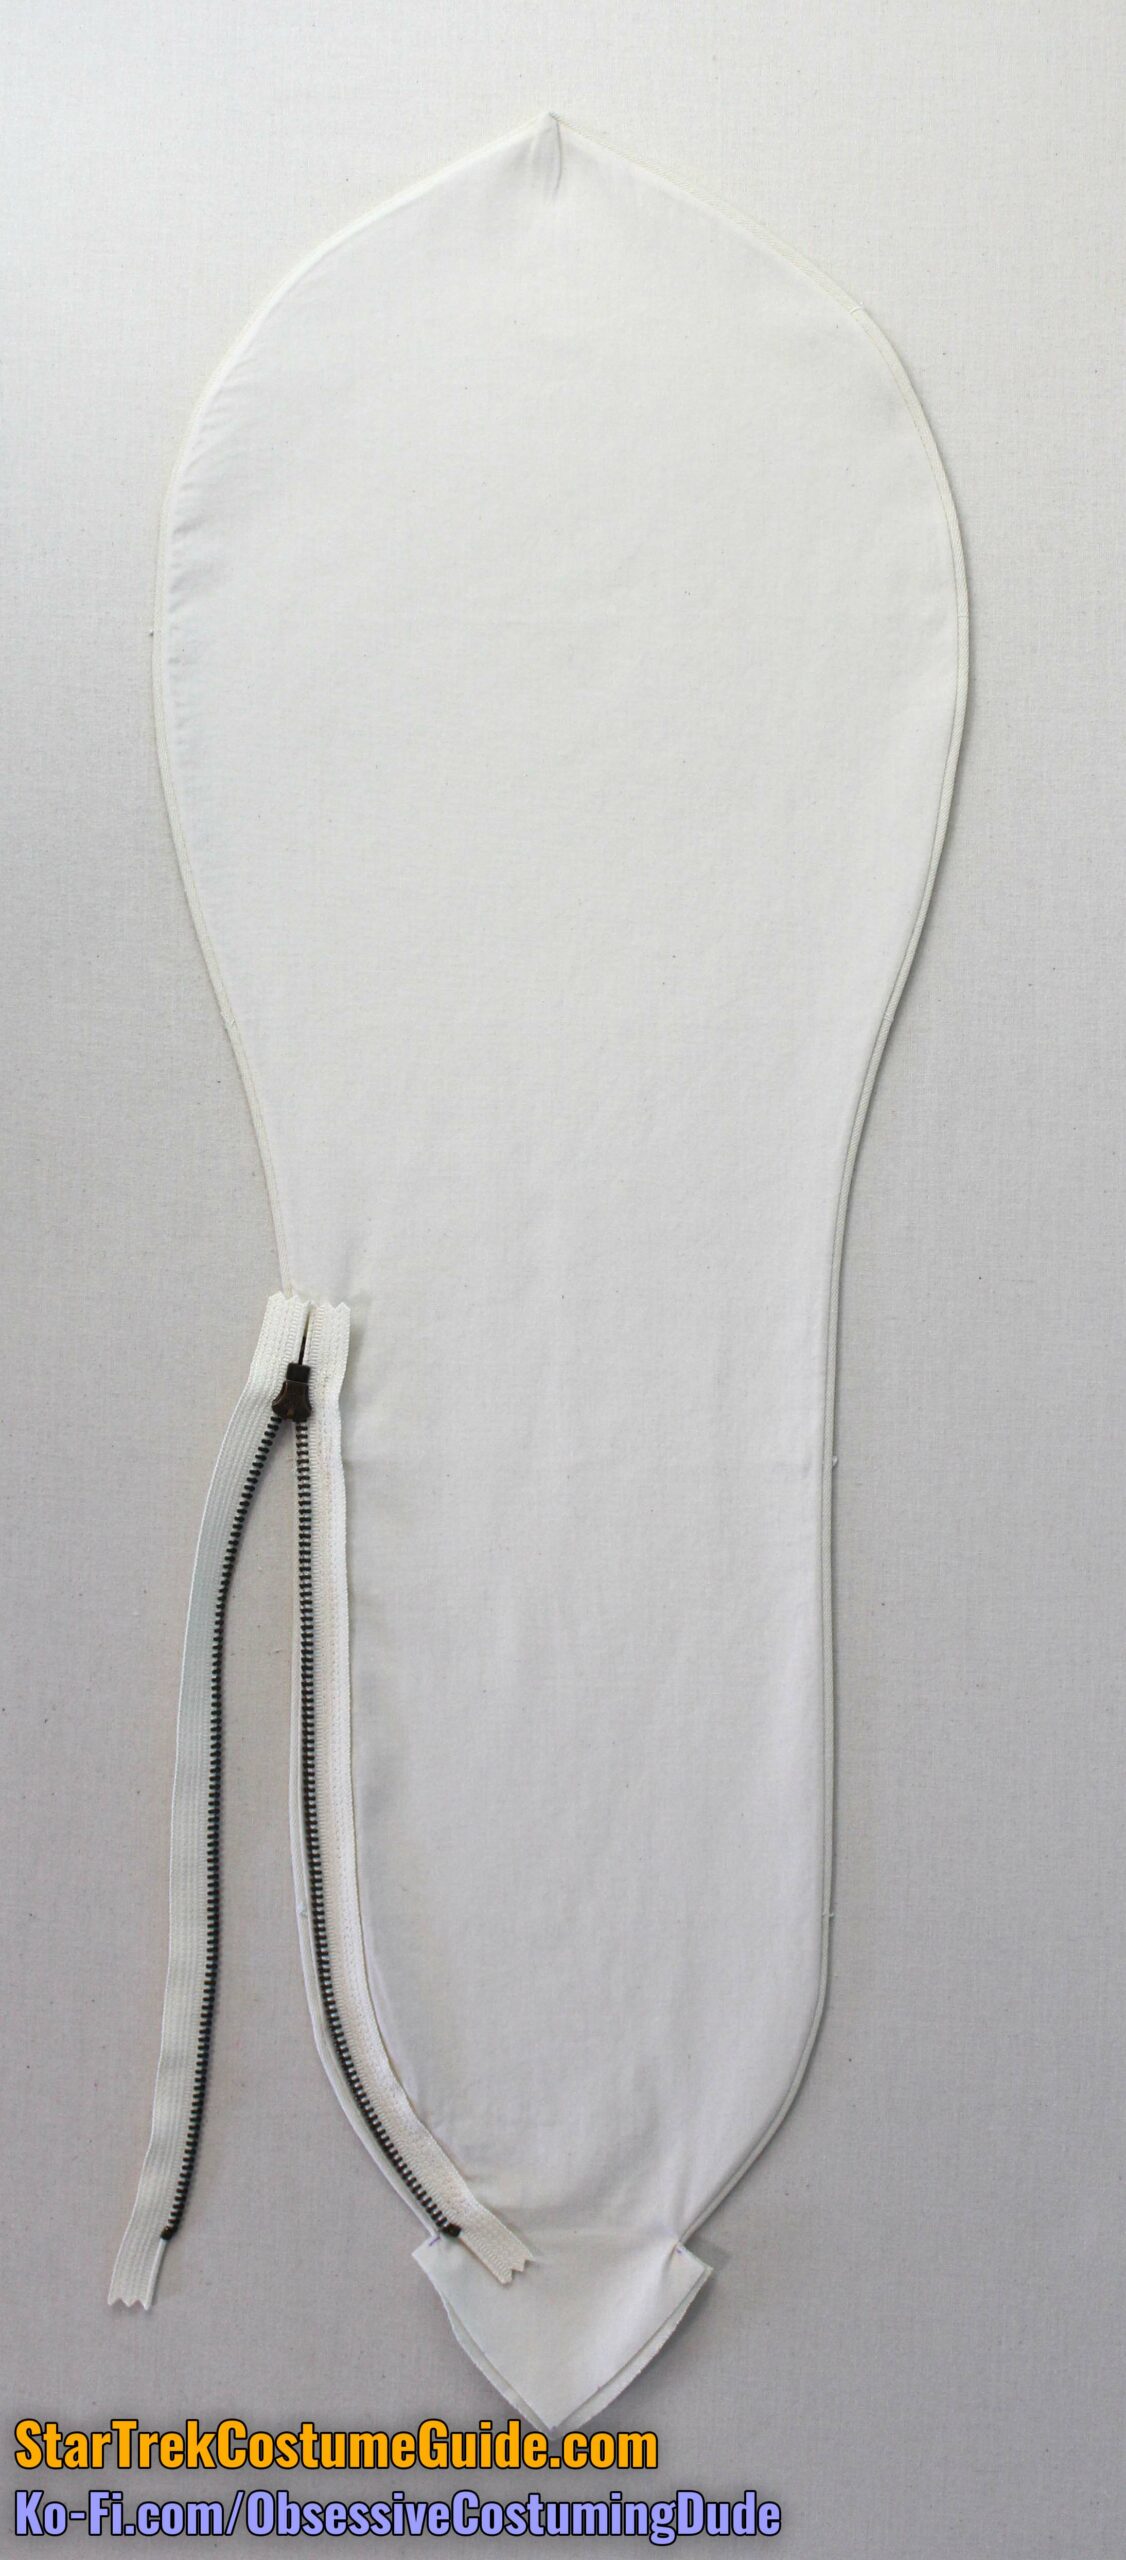
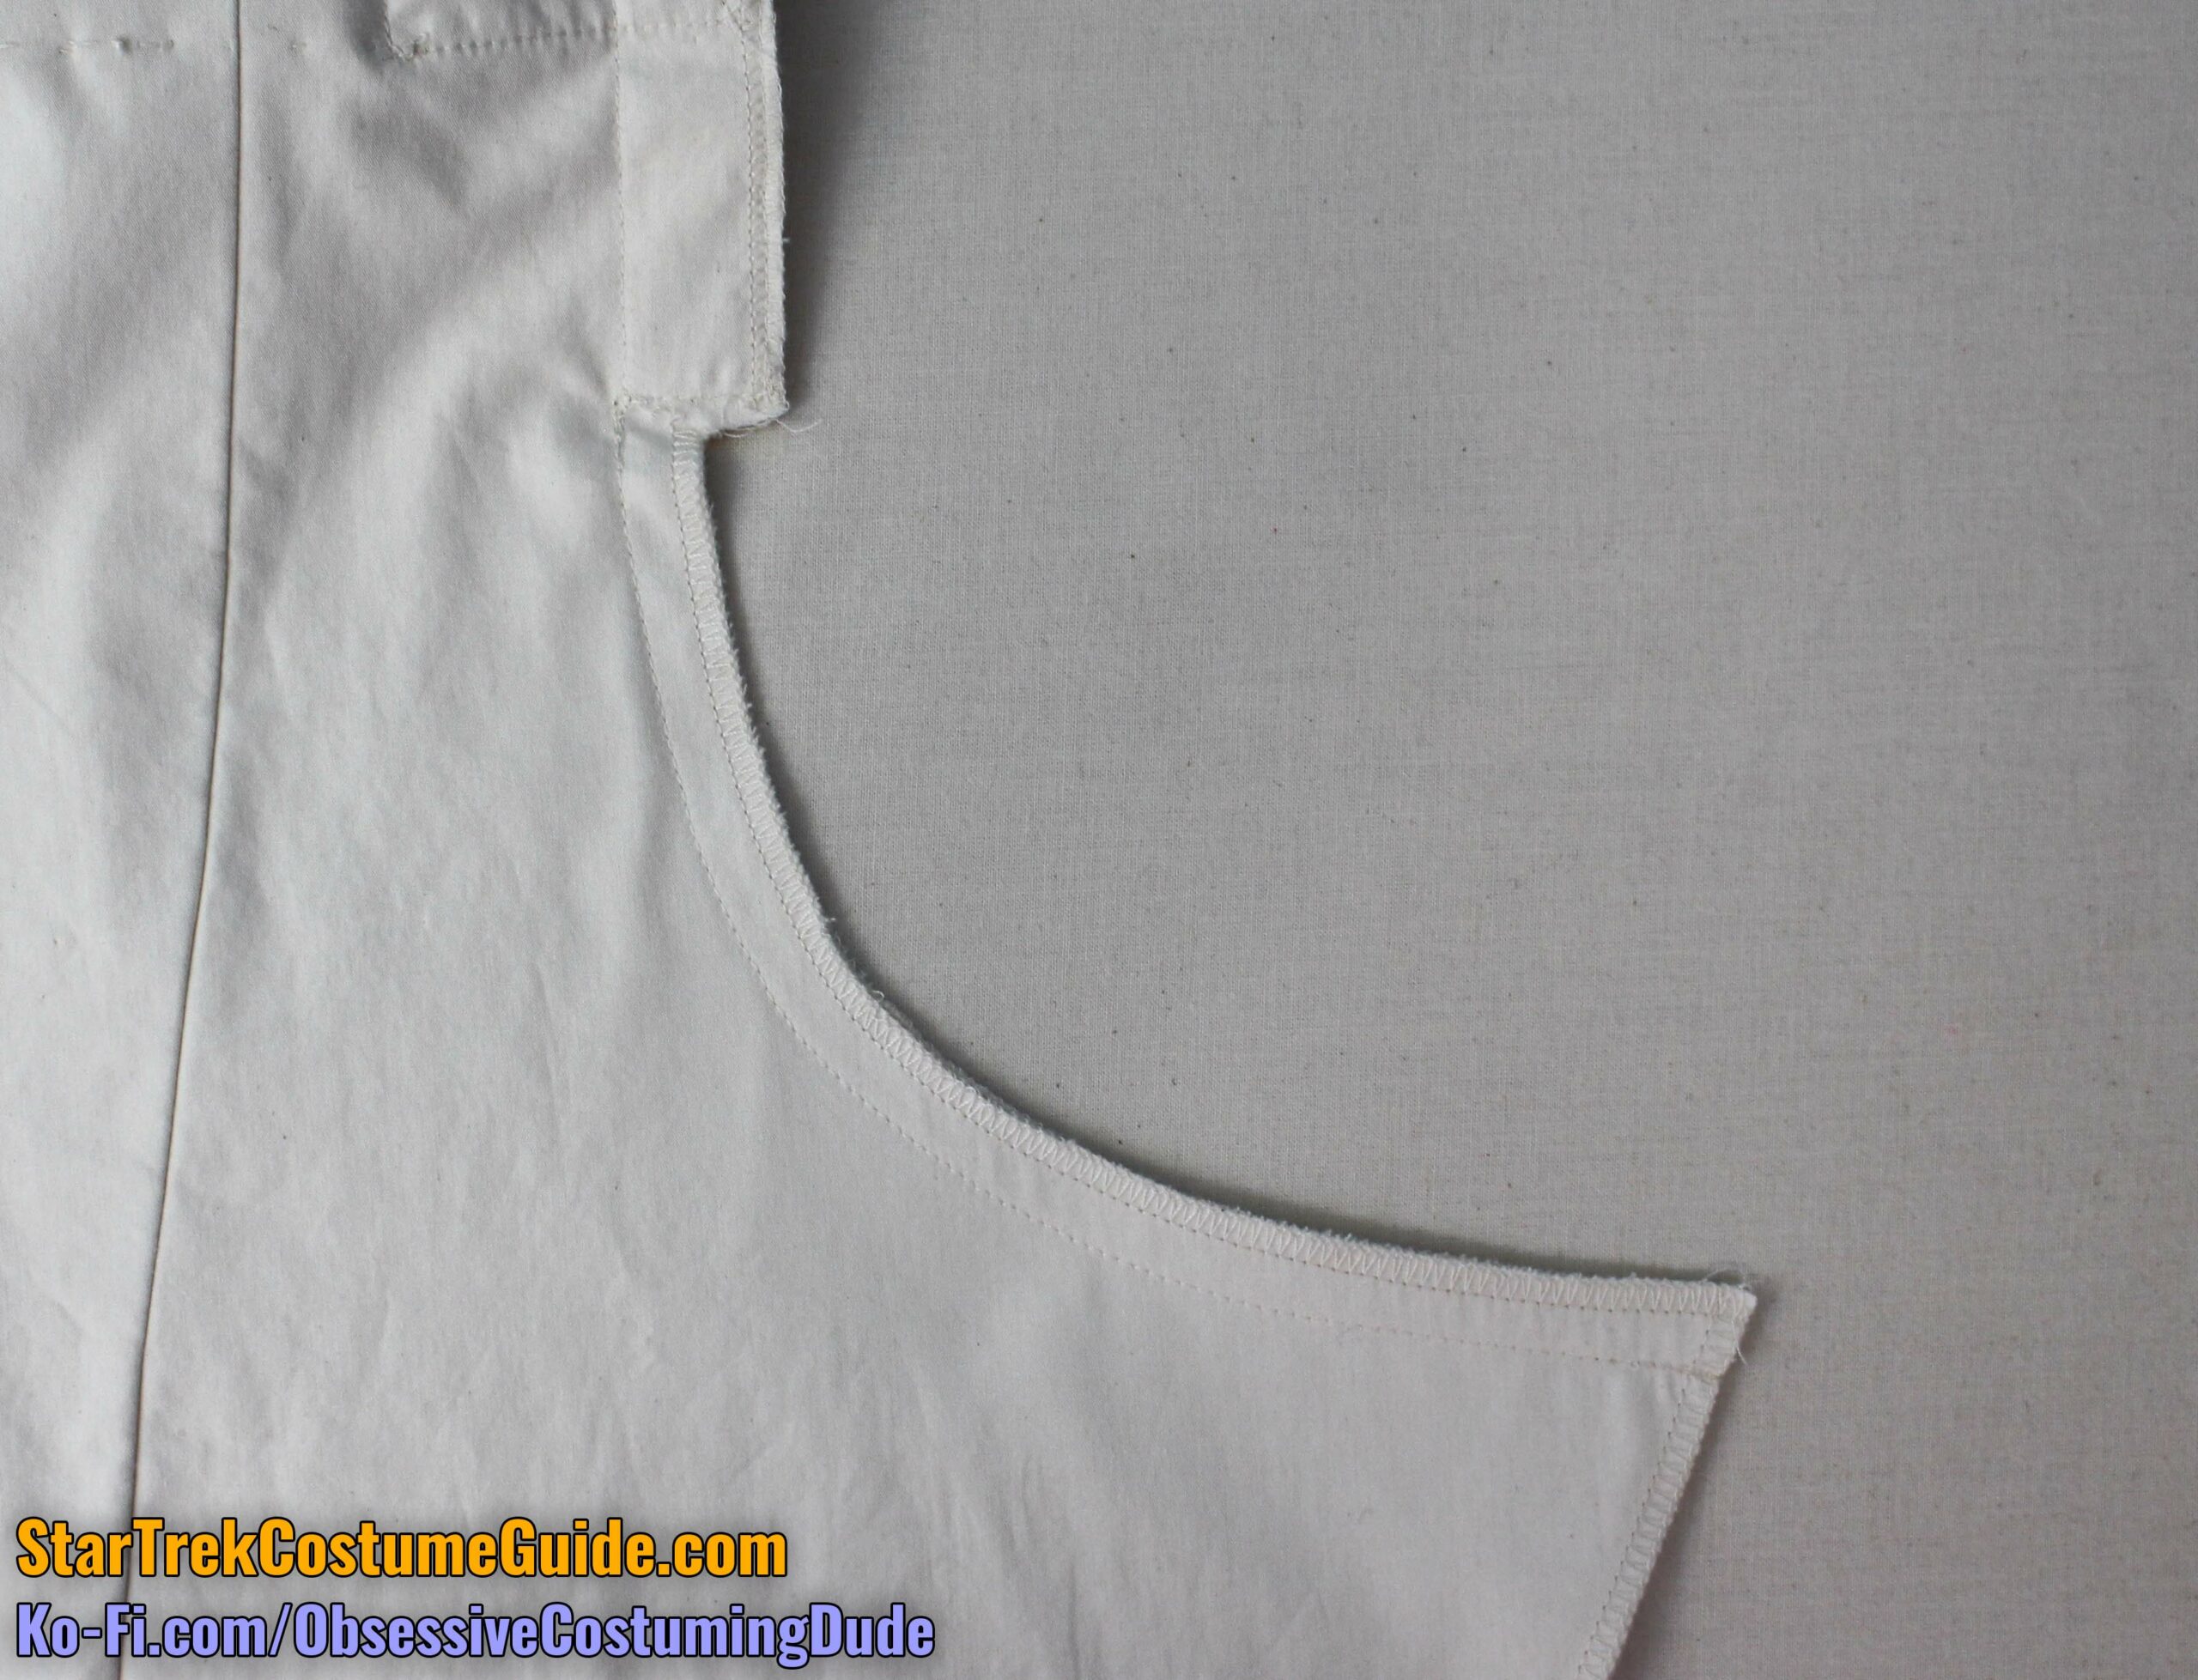
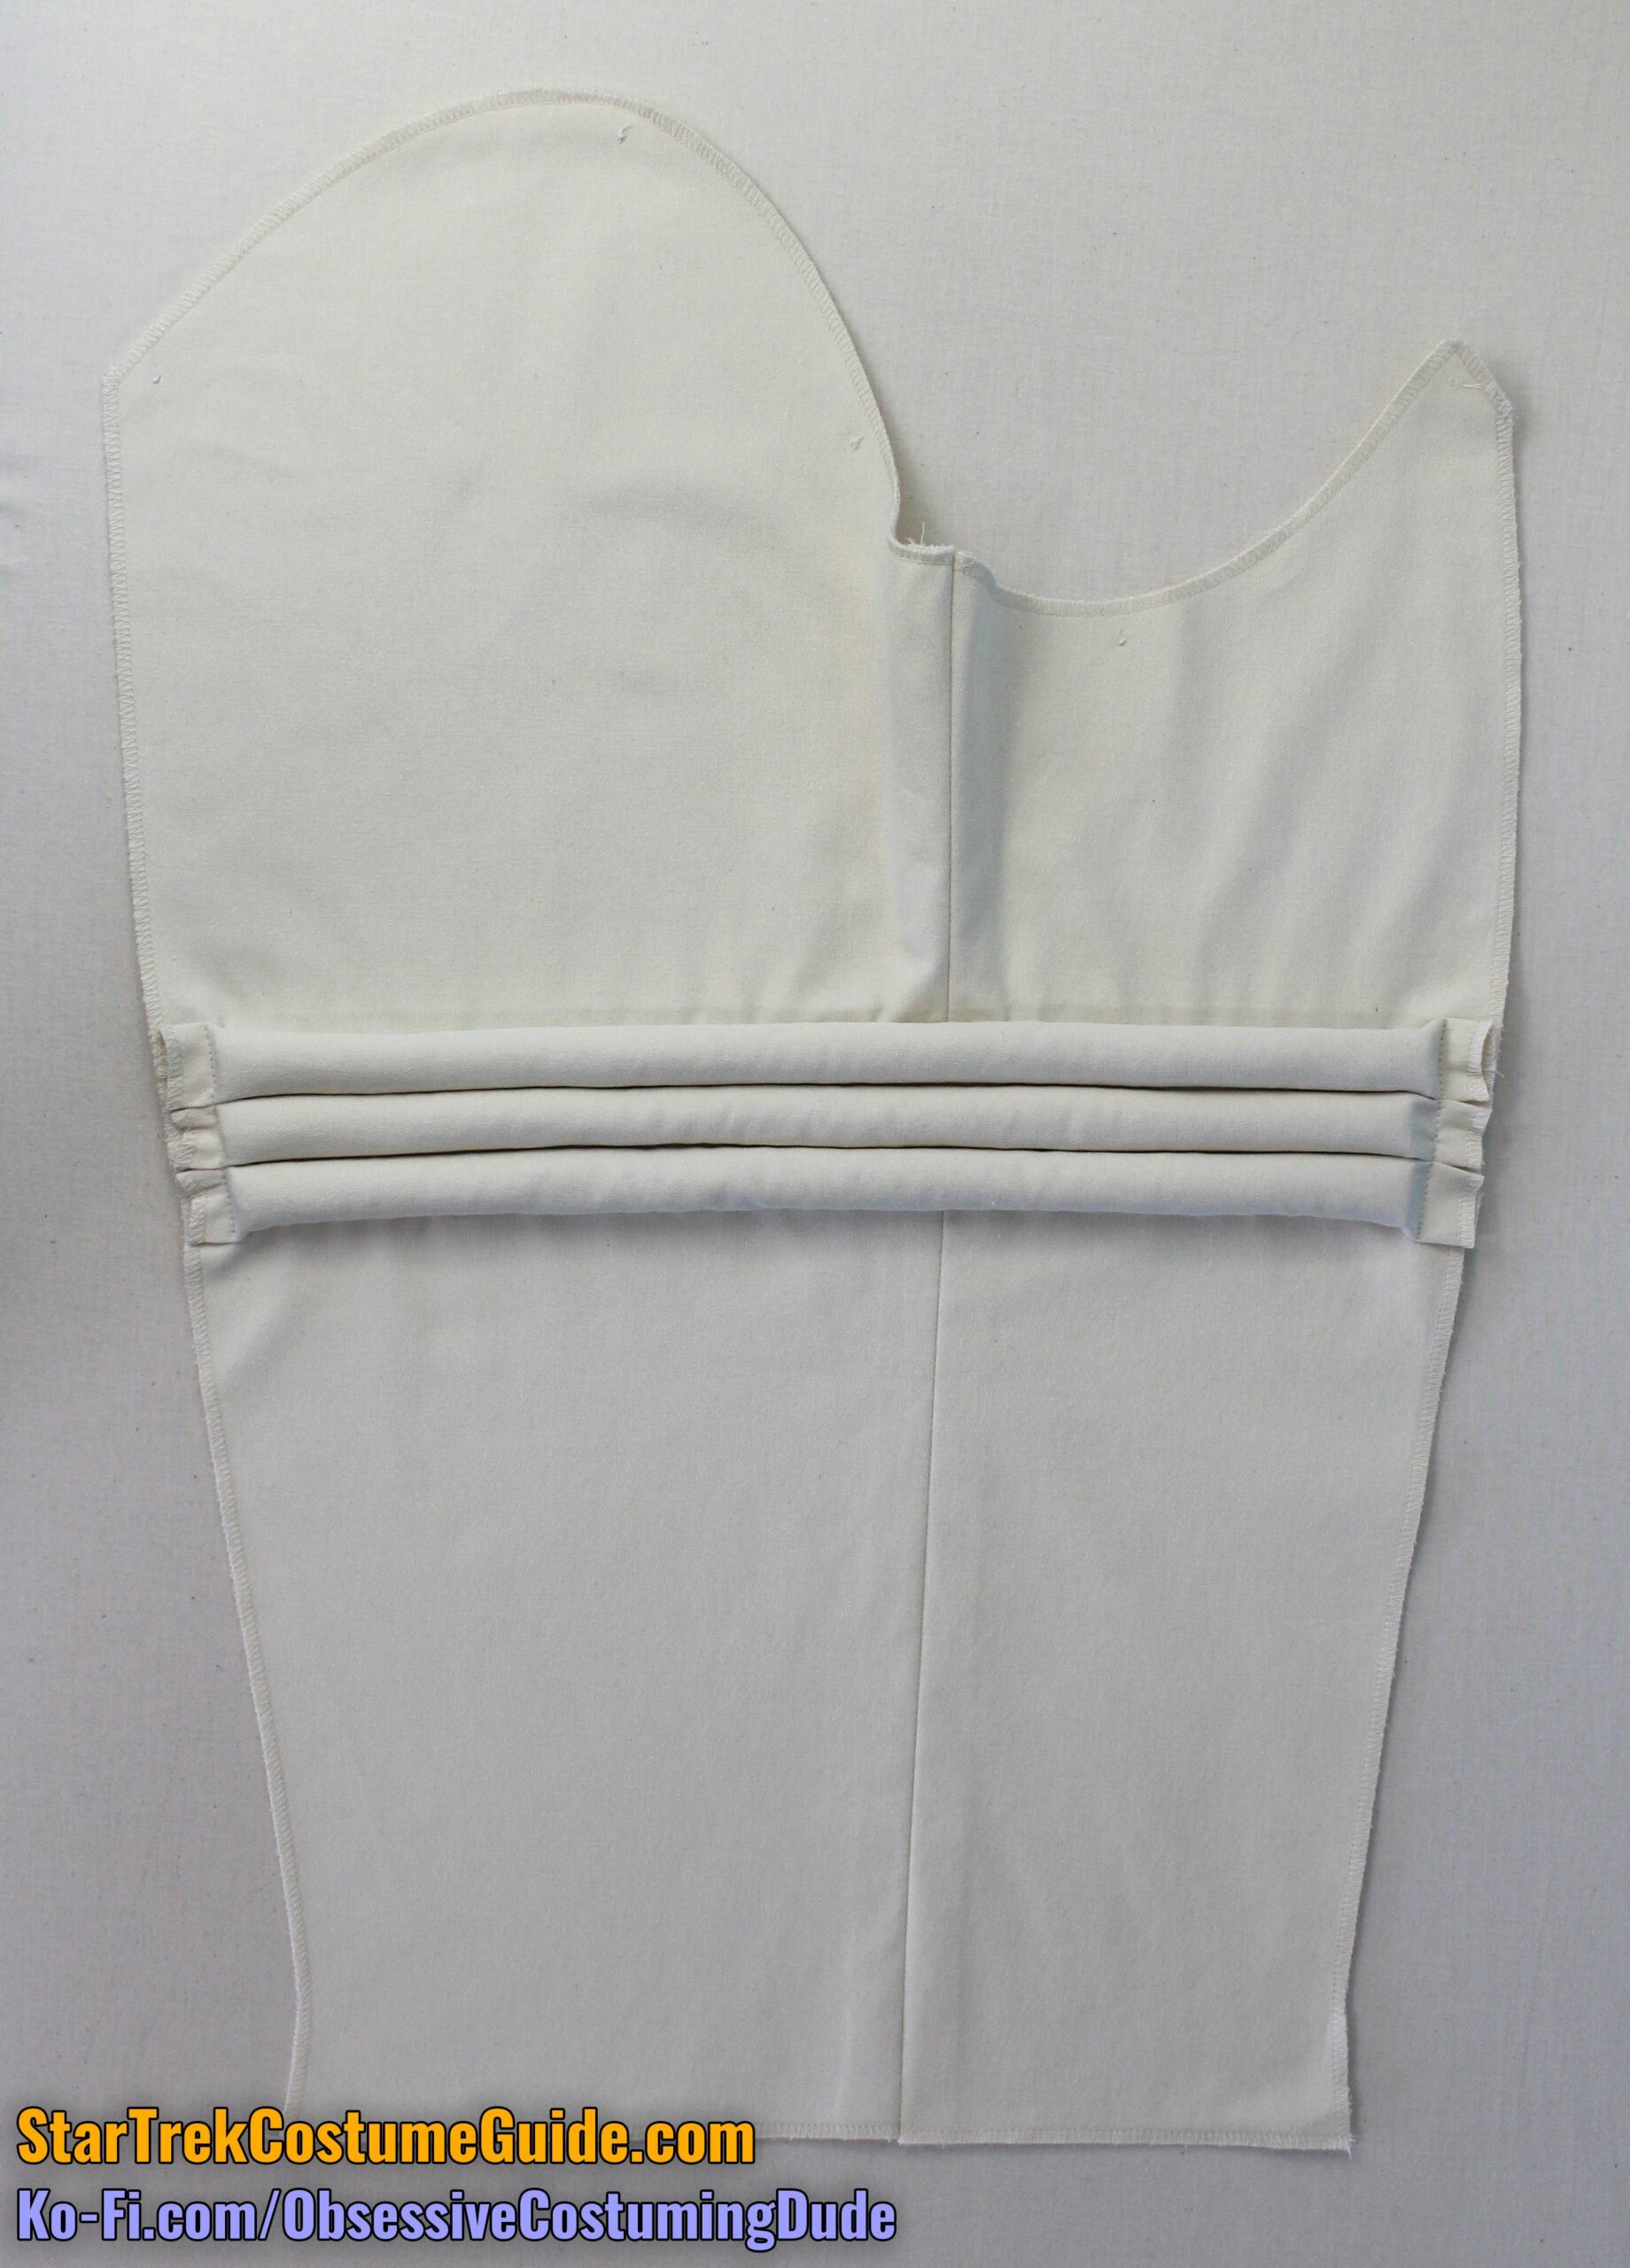
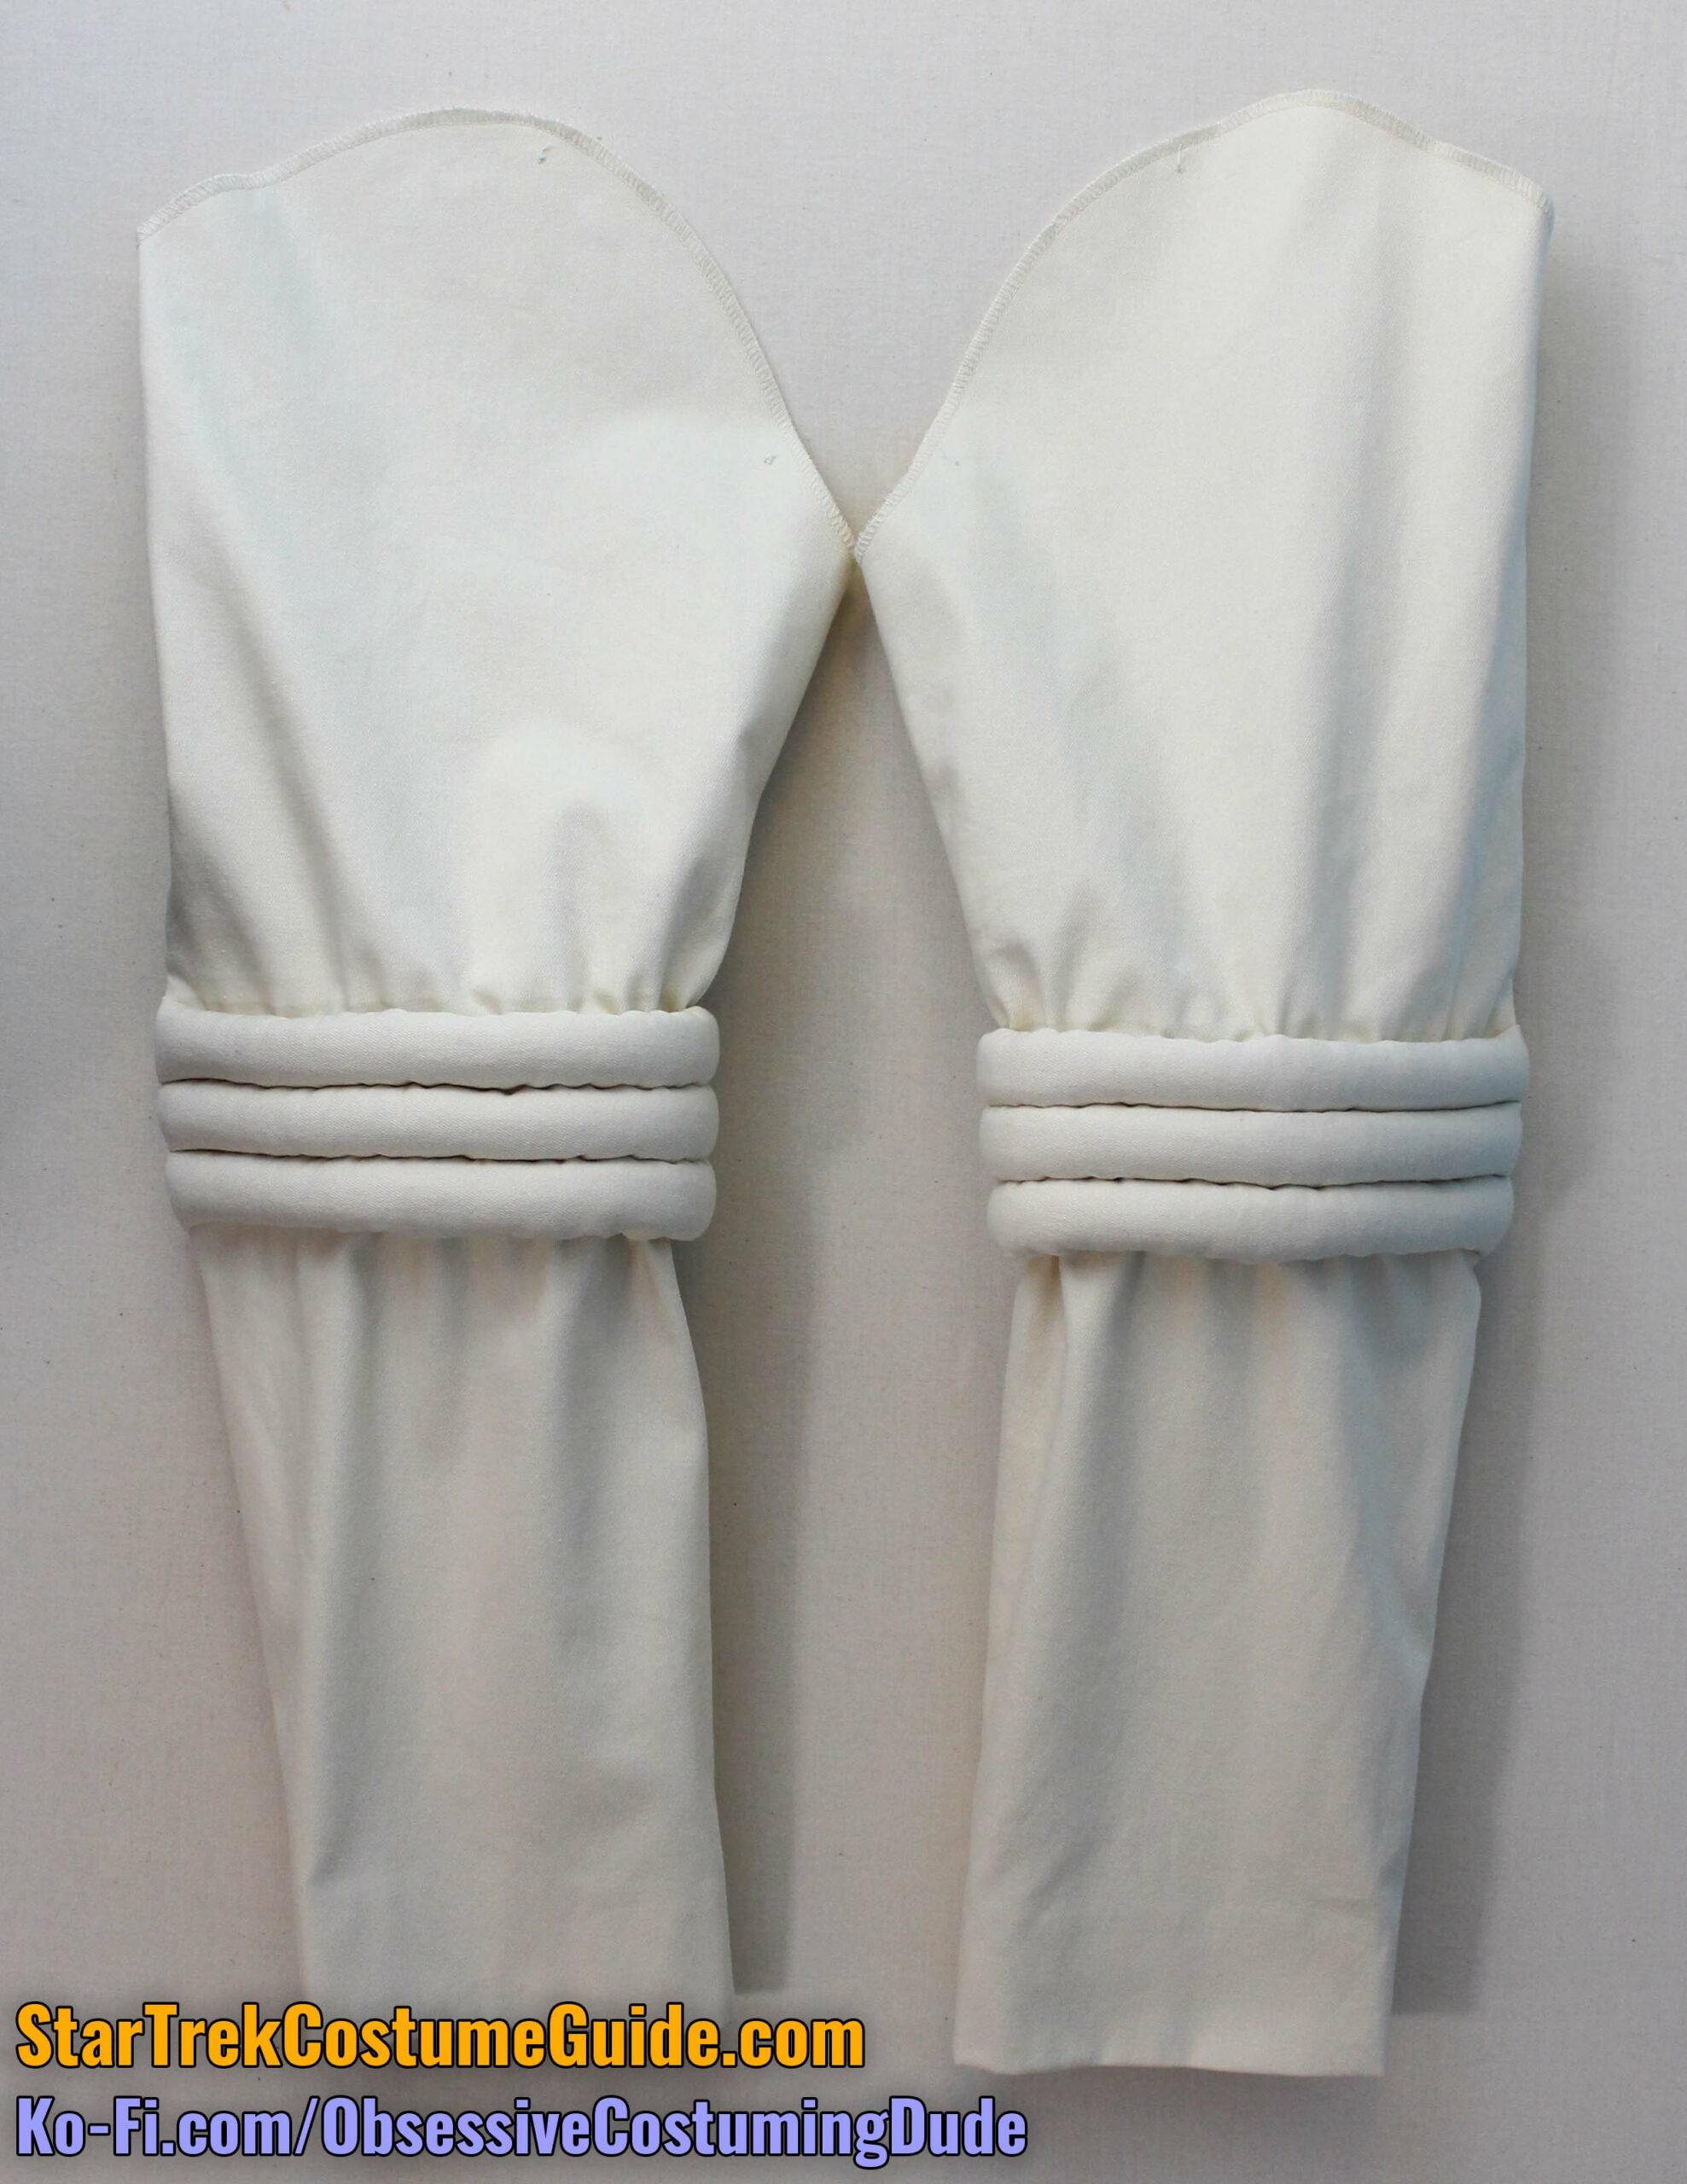
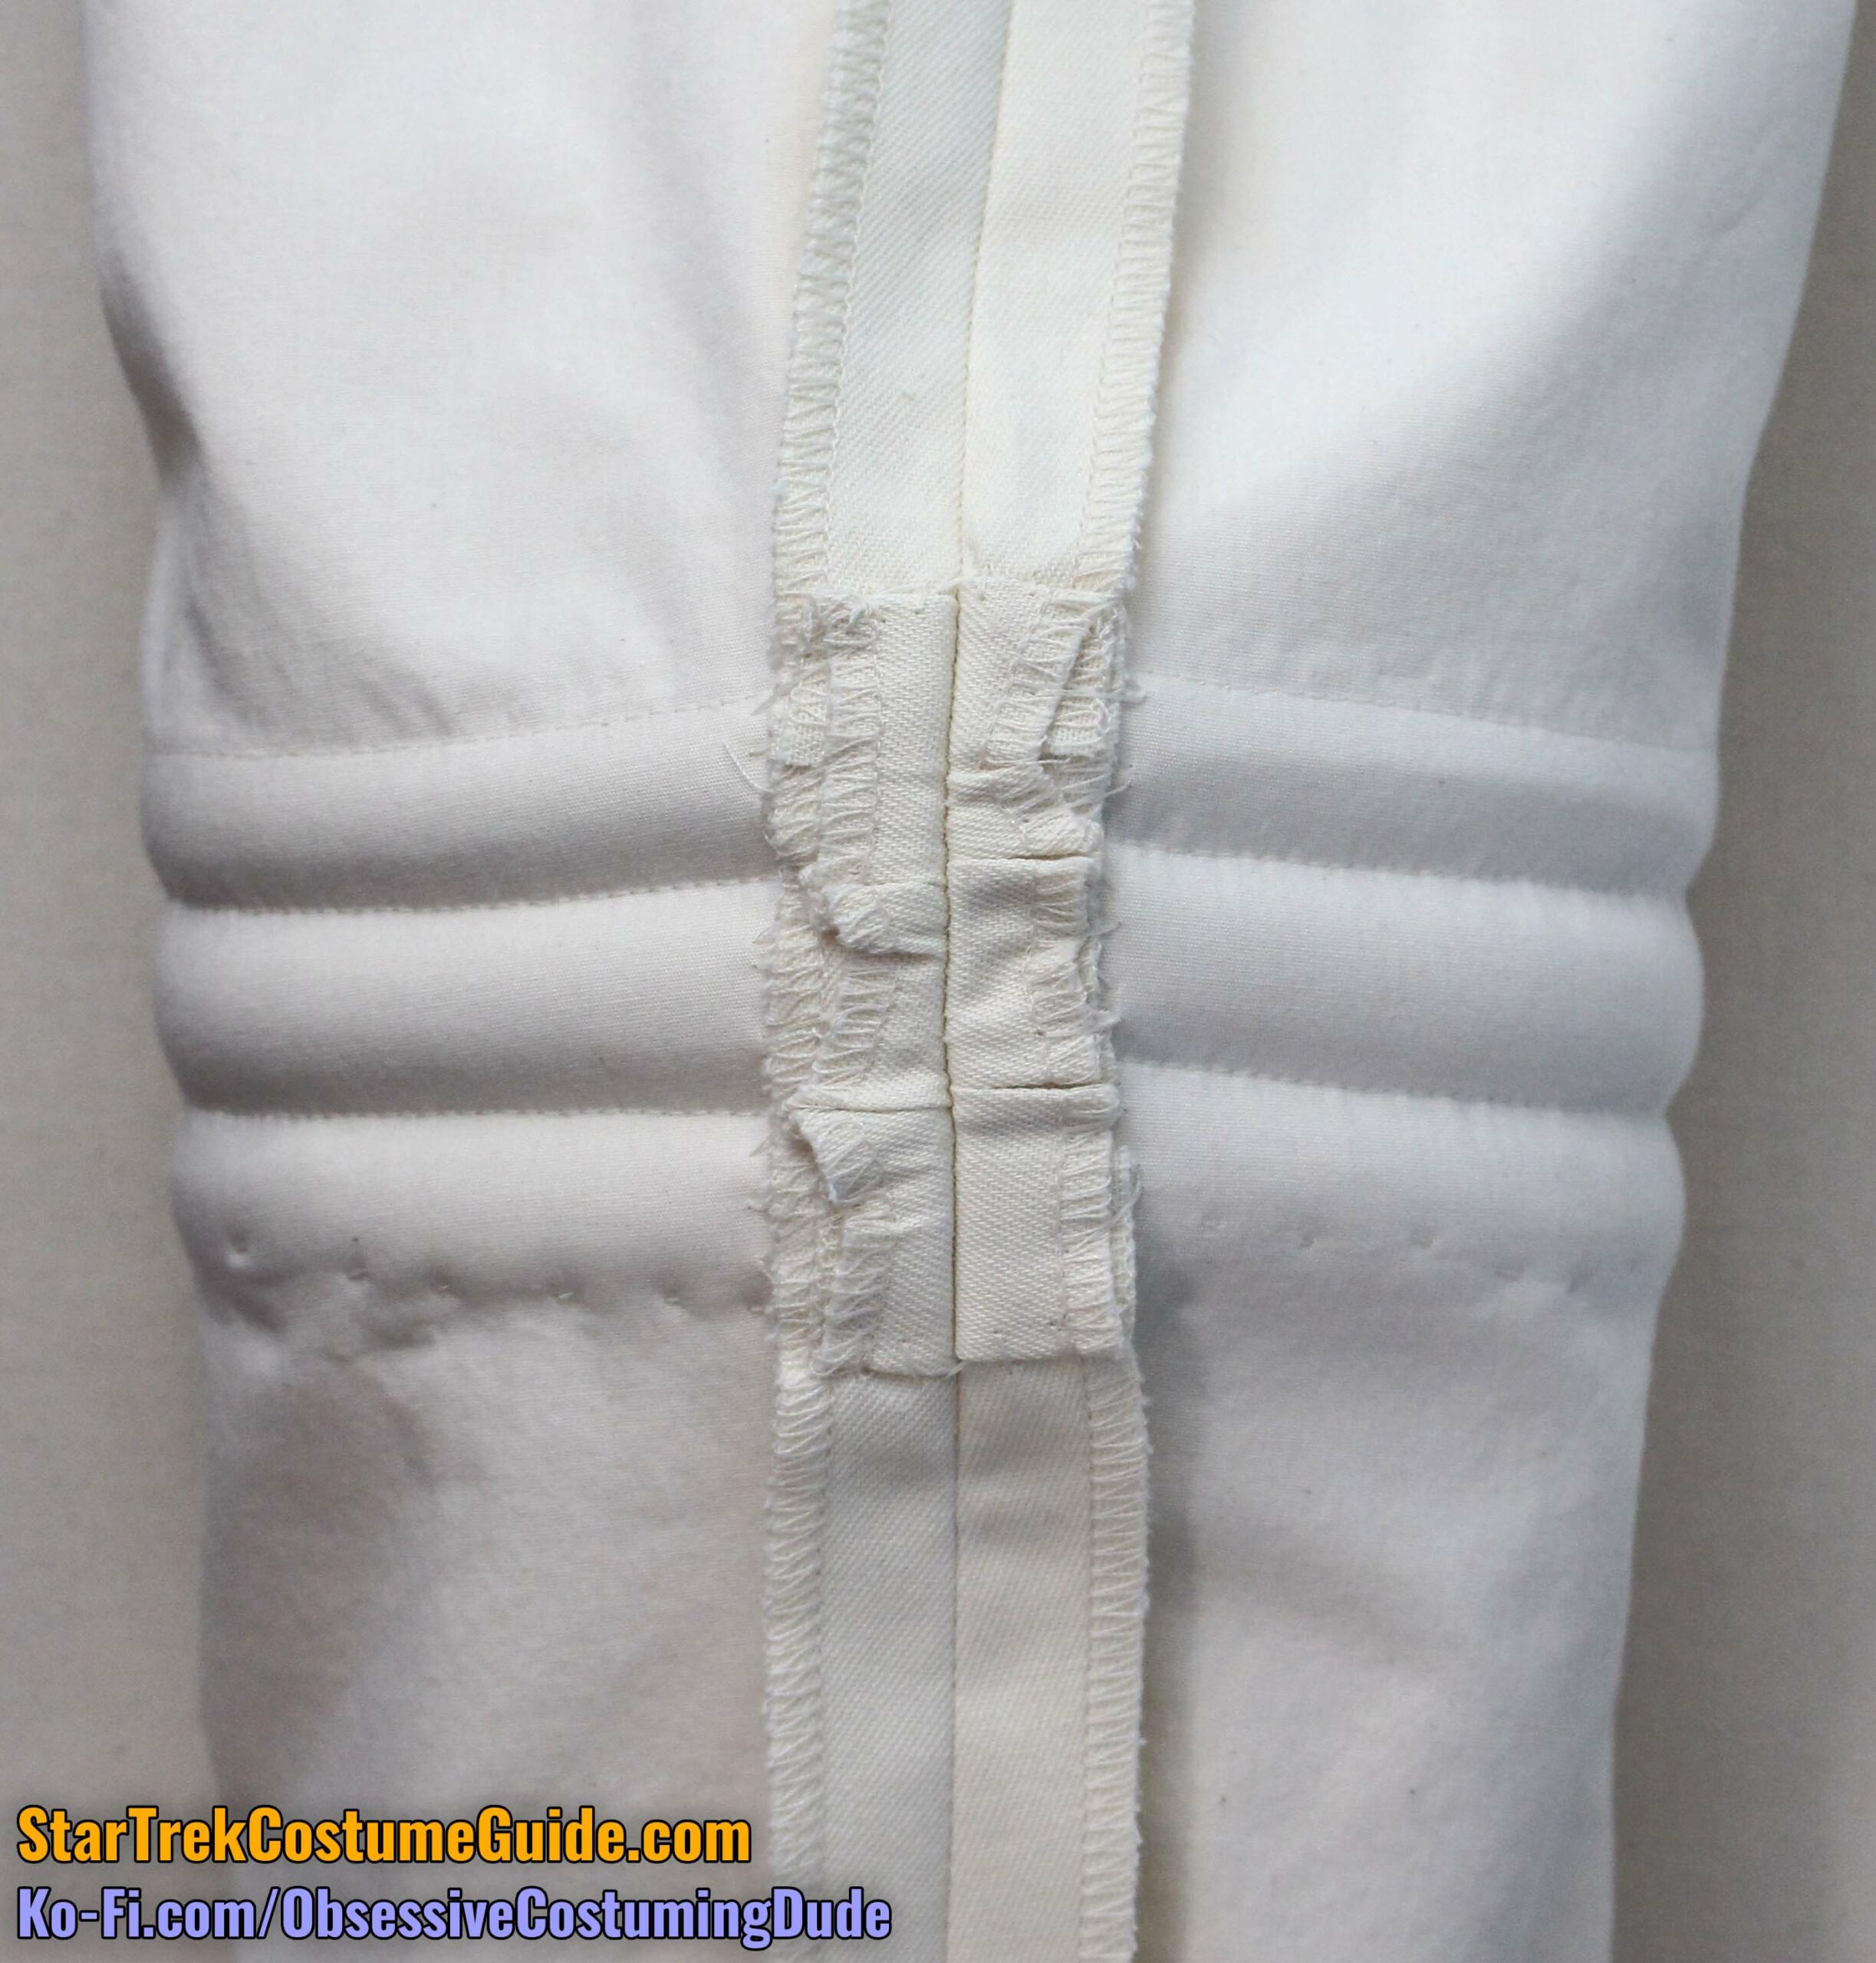
Sew the upper sleeve (piece E) to the under sleeve (piece F) along the front sleeve seam with ¾” seam allowance.
Press the seam allowances open.
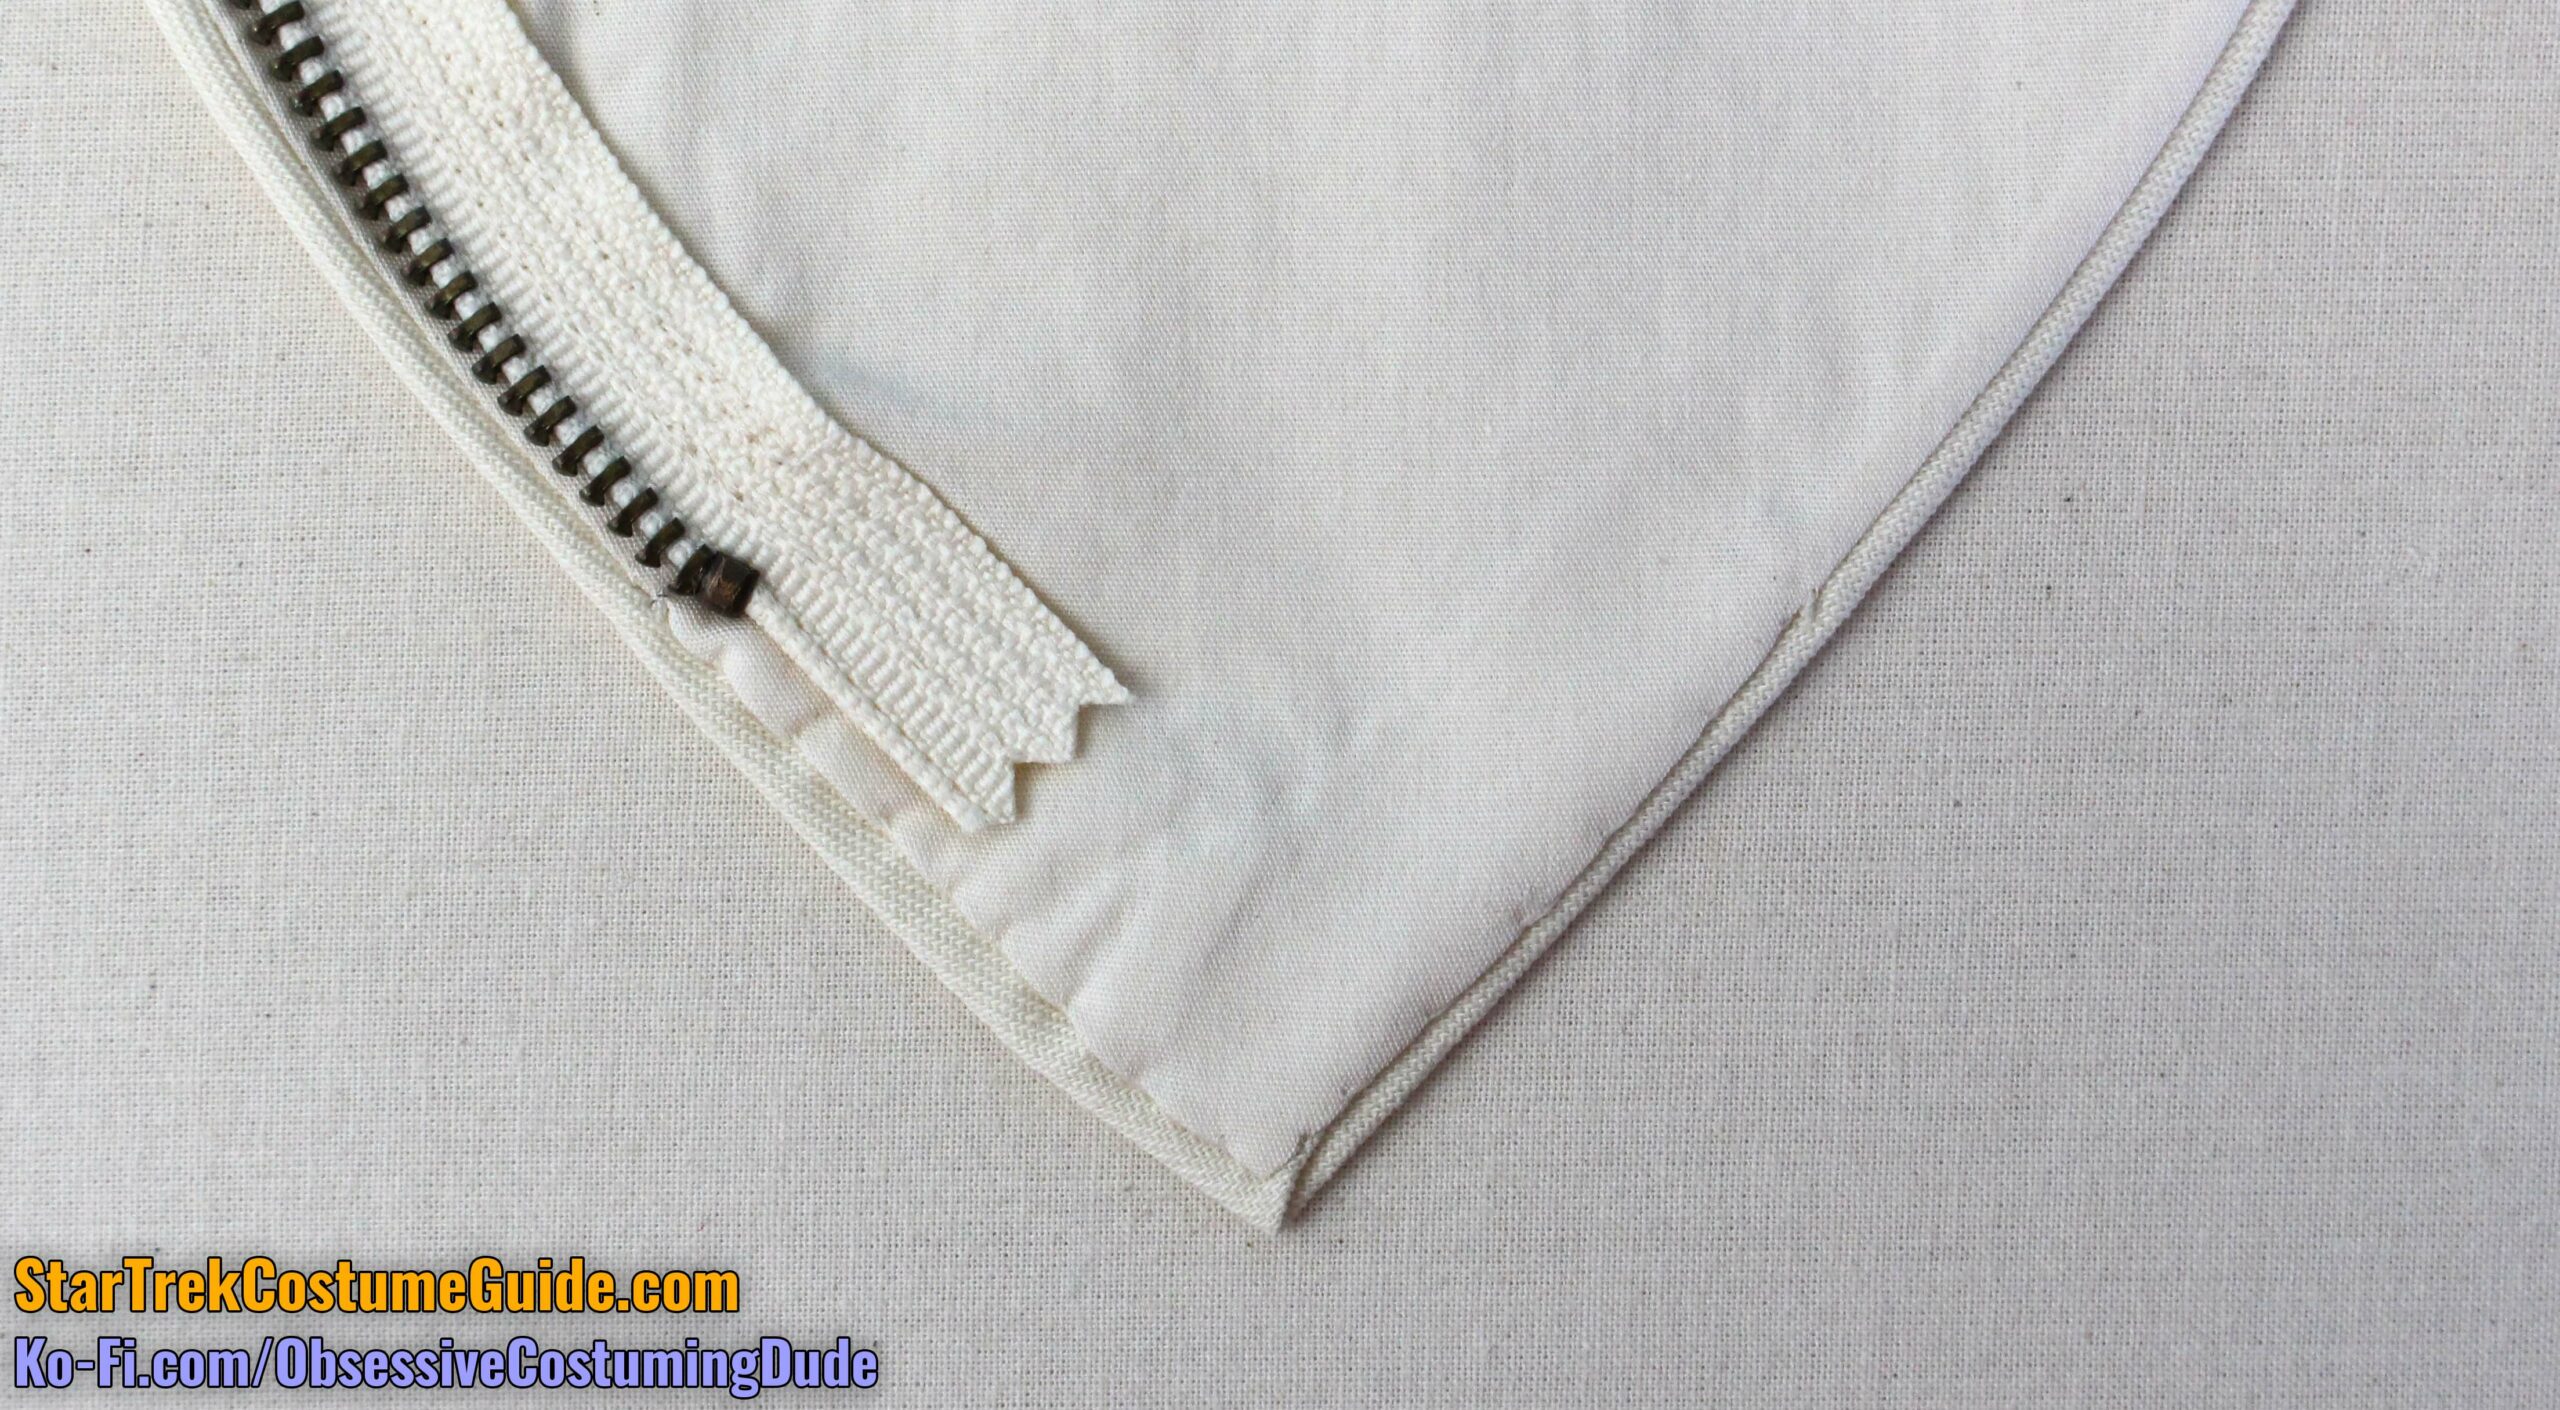
Construct and attach the sleeve tubing assembly as described previously for the jumpsuit waist, using the sleeve tubing channel (piece I) and ¾” upholstery cord.
Remember to include as much extra ease in the channel and cord as you can manage – at least ¾”, or a full inch if you can manage it.
Although my first tubing assembly was nice and smooth while lying flat on the table (see previous photo), after I sewed the sleeves closed, the tubing cinched the sleeves in and produced some unsightly gathering.
Sew the sleeve back seams closed with ¾” seam allowance.
I suggest using a zipper/piping foot over the tubing assembly area, to stitch as close to the cording as possible.
Press the sleeve back seam allowances open.
Tack the seam allowances open by hand over the tubing assembly area.
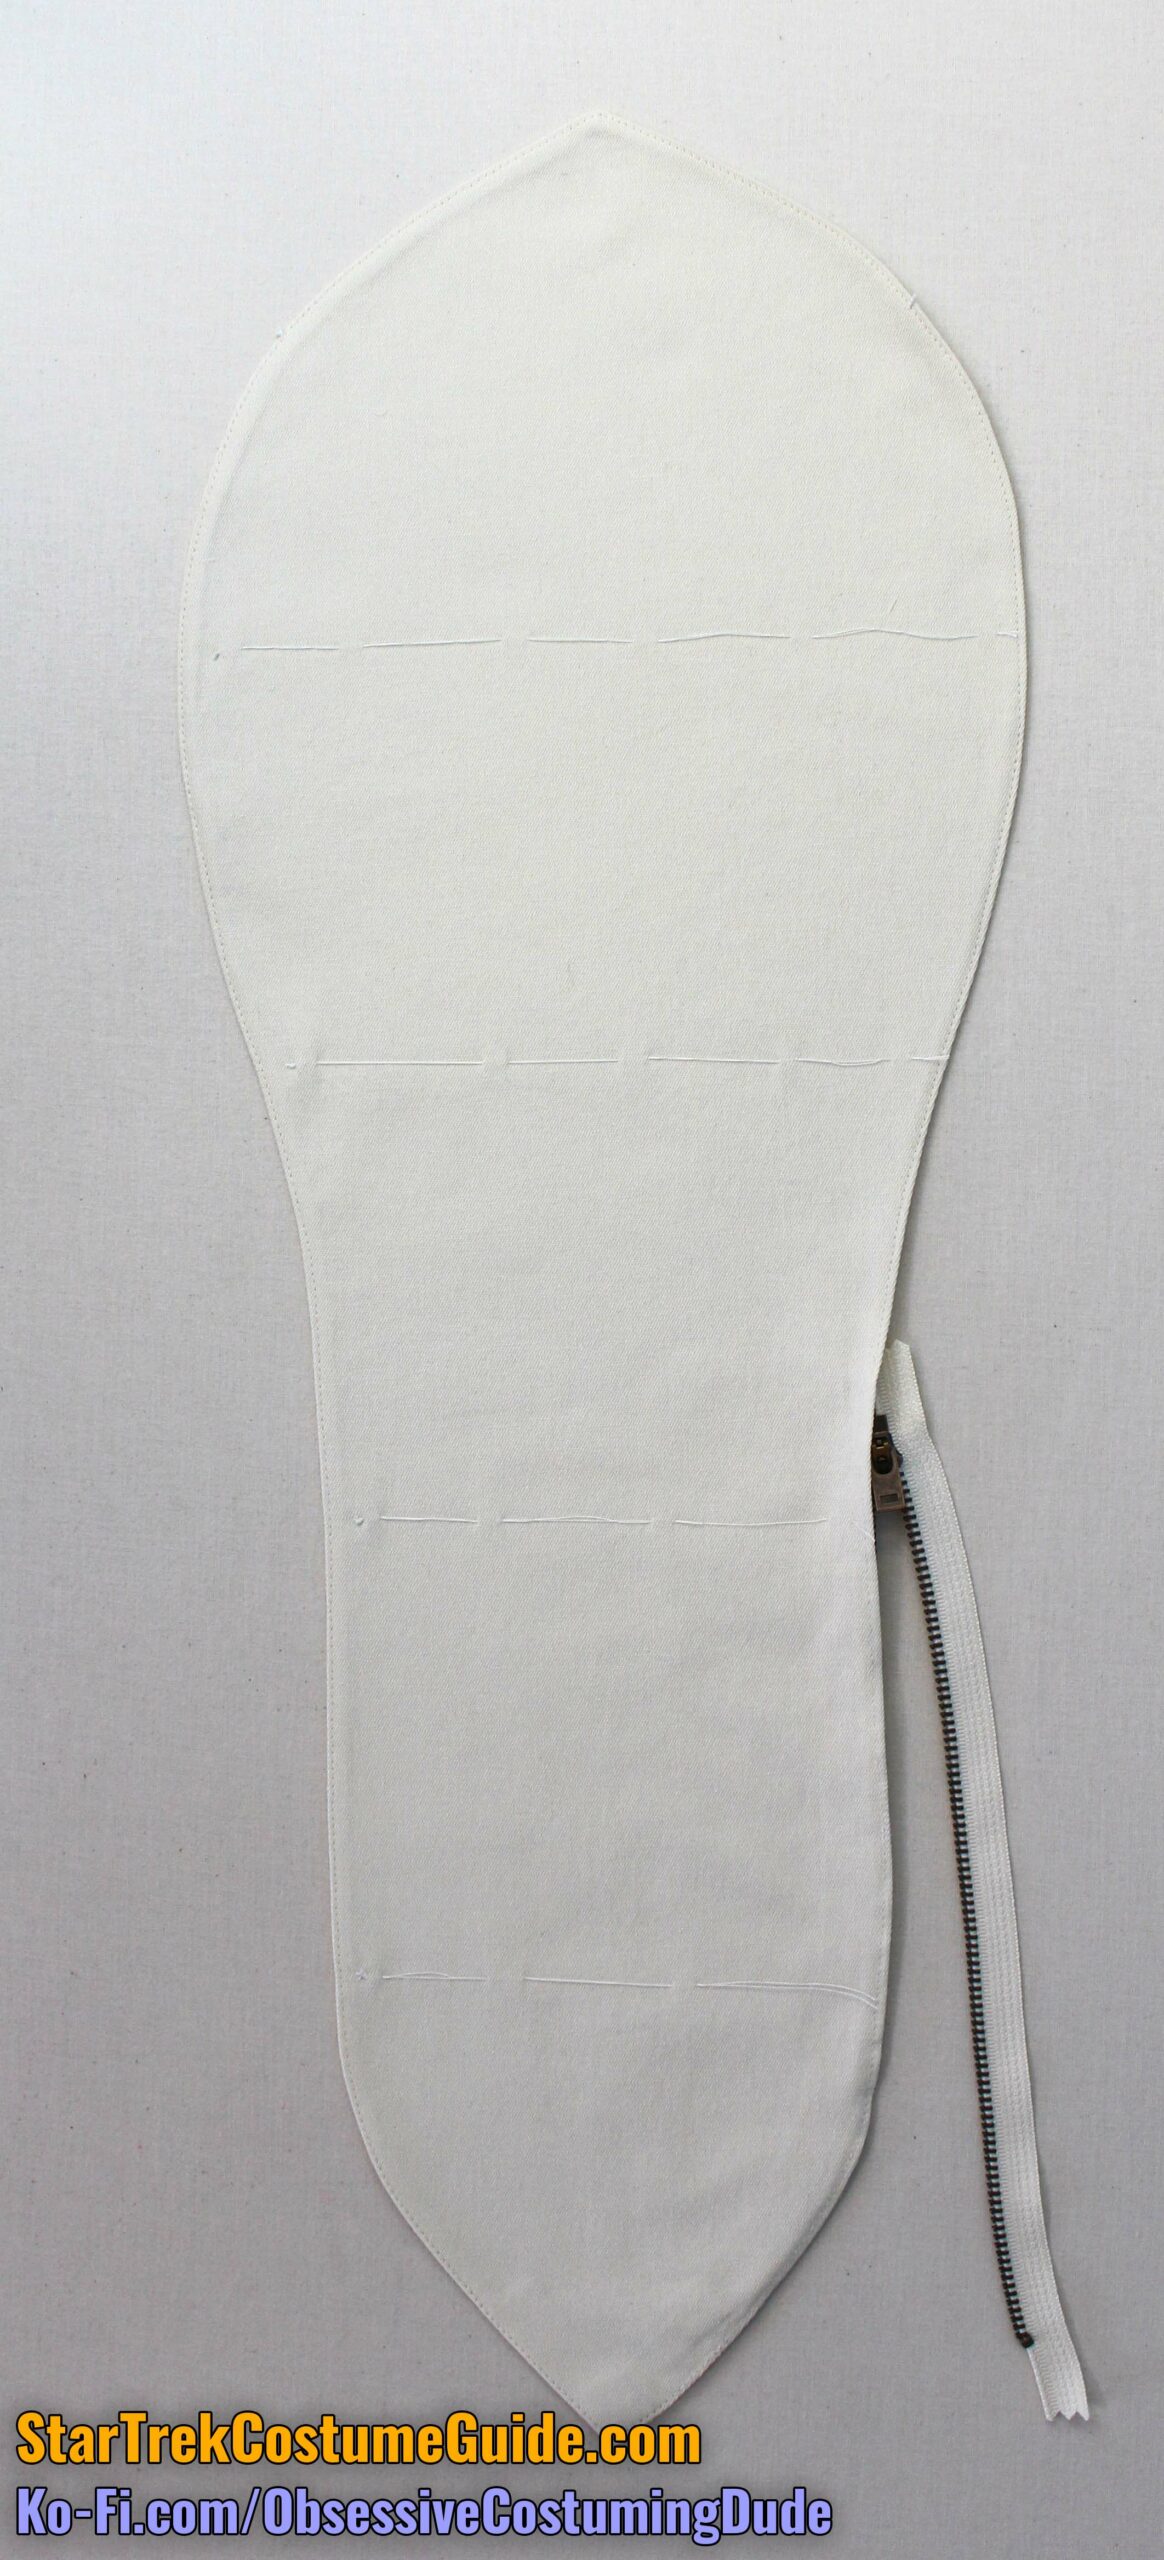
I find it easier to go ahead and hem the sleeves now, before they’re attached to the jumpsuit.
If you wish to do so now, press the sleeve’s 2” hem allowance upward and hand-sew the hem allowance into place, taking care to only stitch through the muslin underlining (and not onto the outside of the sleeve).
There’s a slight amount of ease in the sleeve cap – not a troublesome amount, but the cap does need to be gathered down to size before attaching it to the jumpsuit.
Sew two rows of gathering stitches around the sleeve cap, inside the seam allowance.
Gather the ease along the stitches and smooth the cap by steaming it over a tailor’s ham.
Sew the sleeves to the jumpsuit with ½” seam allowance, matching balance points.
Press the seam allowances toward the sleeves.
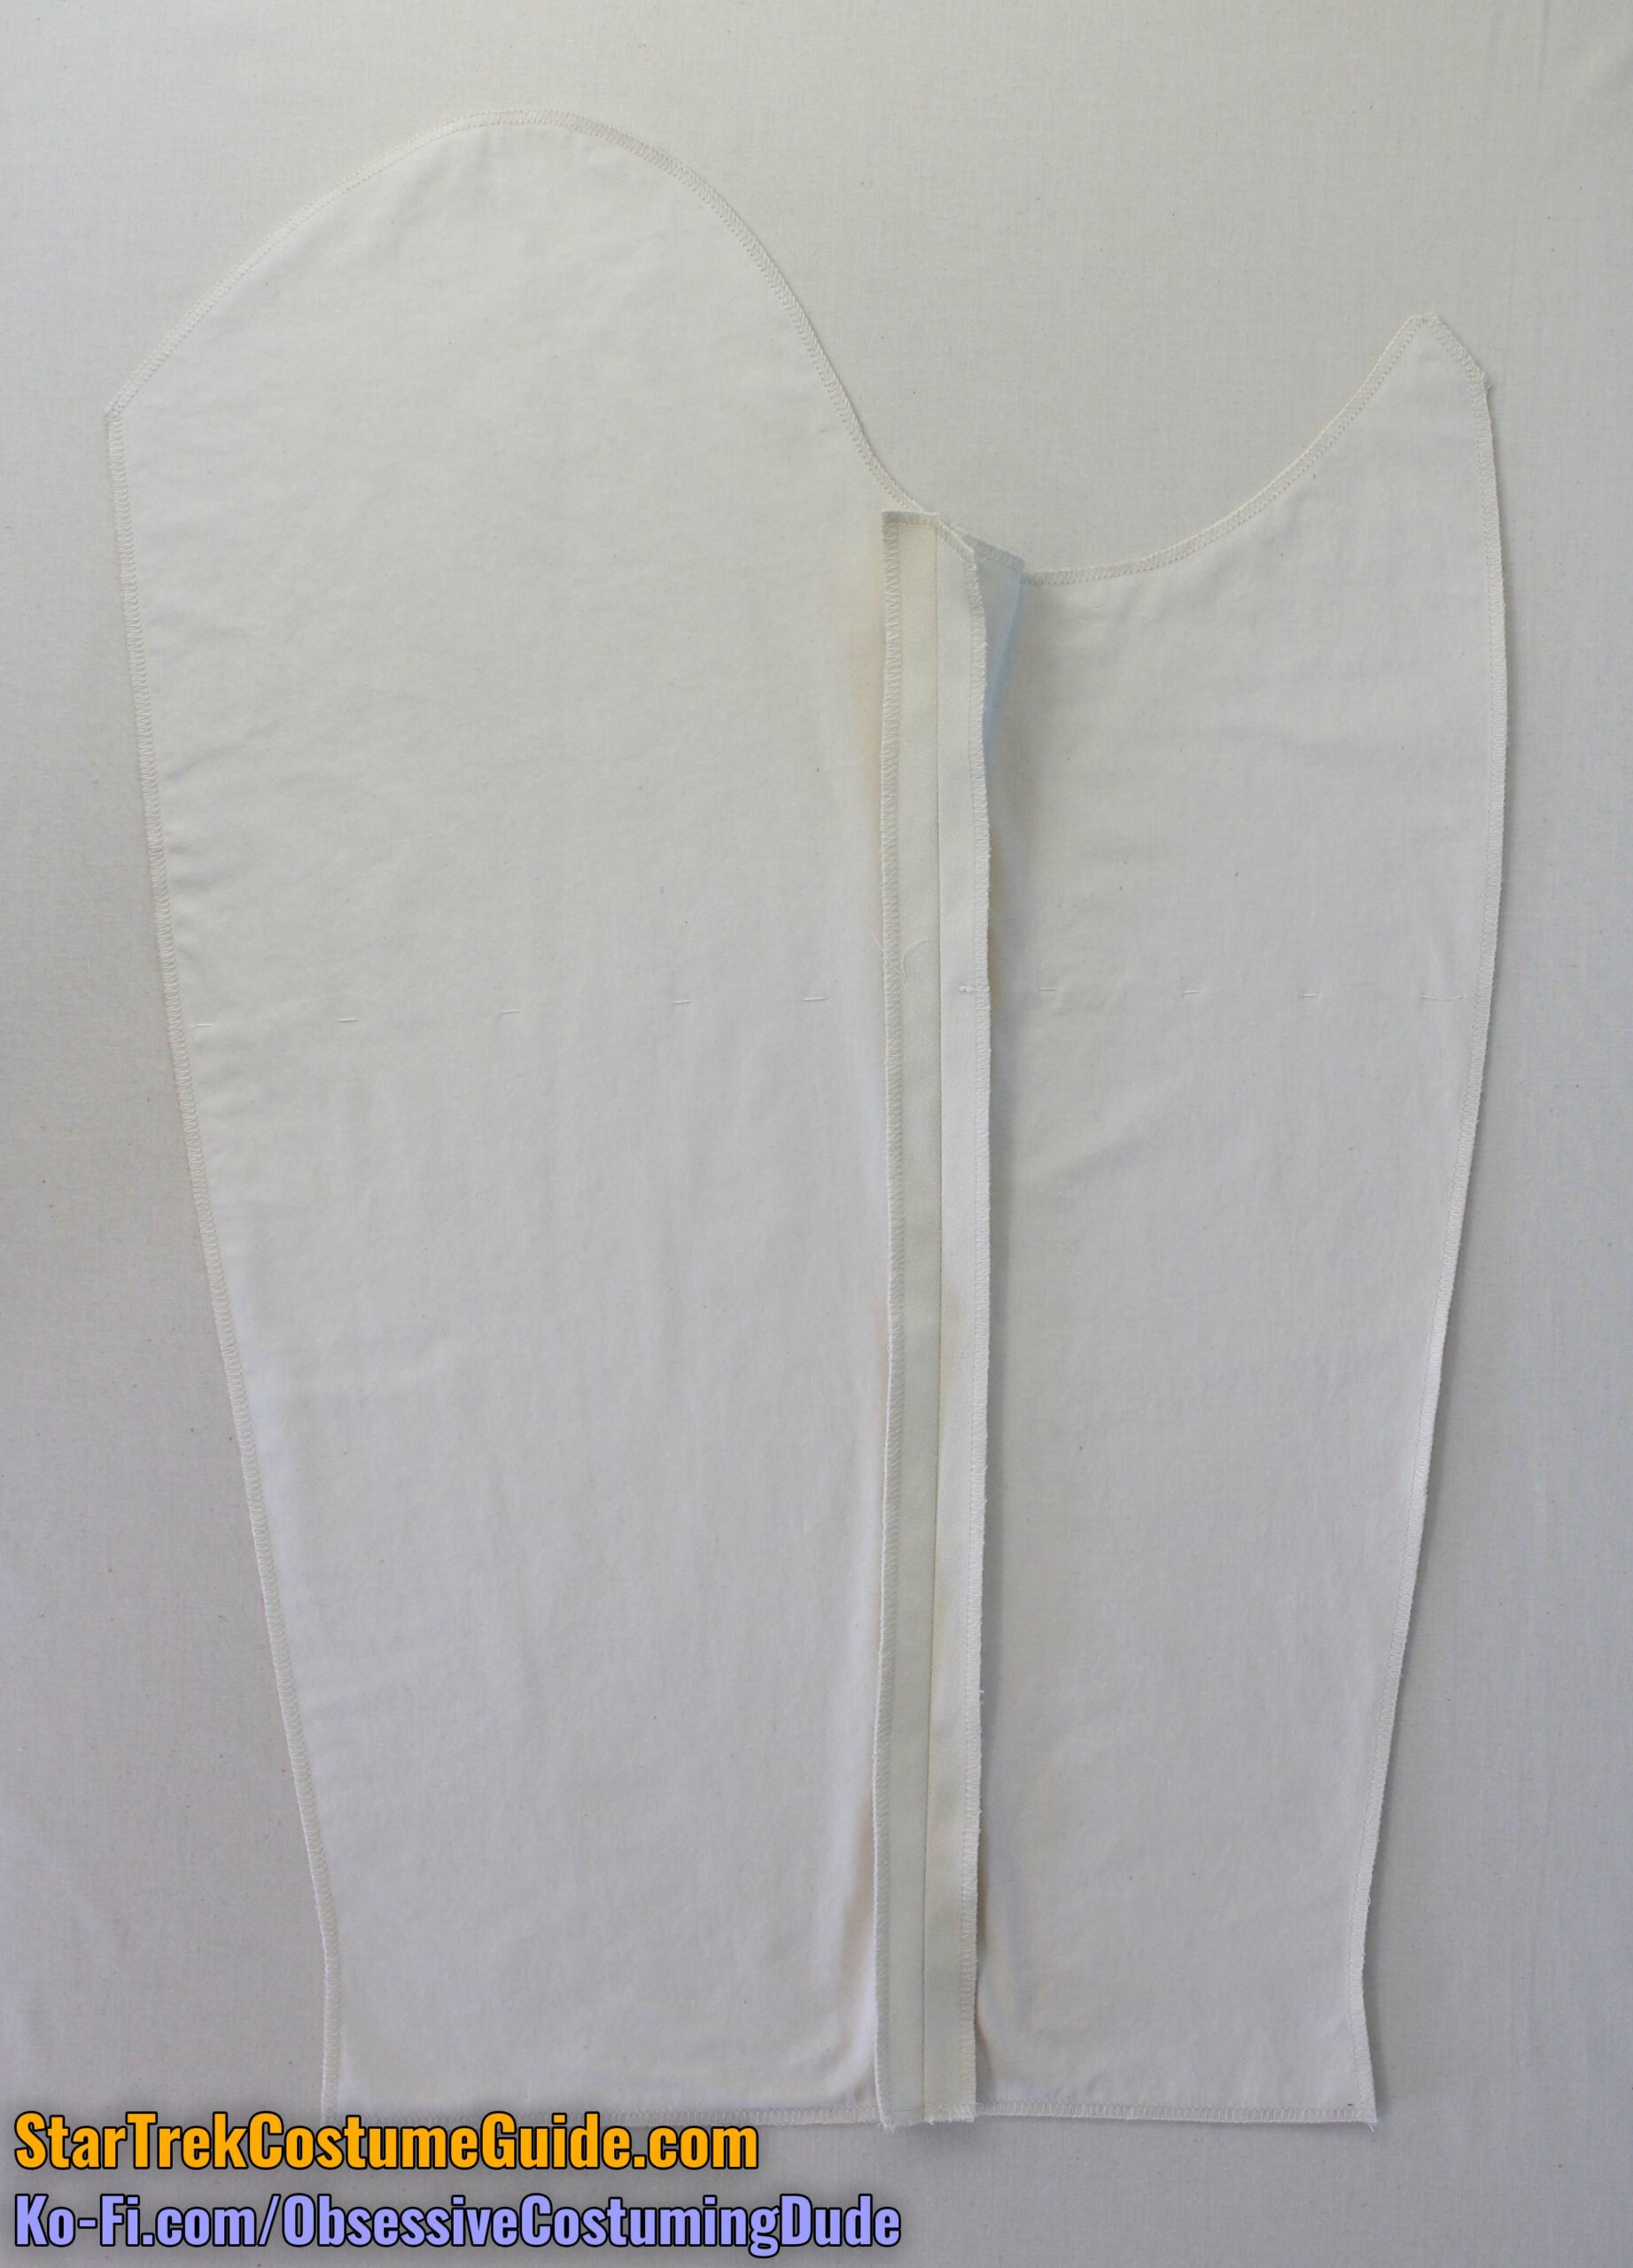
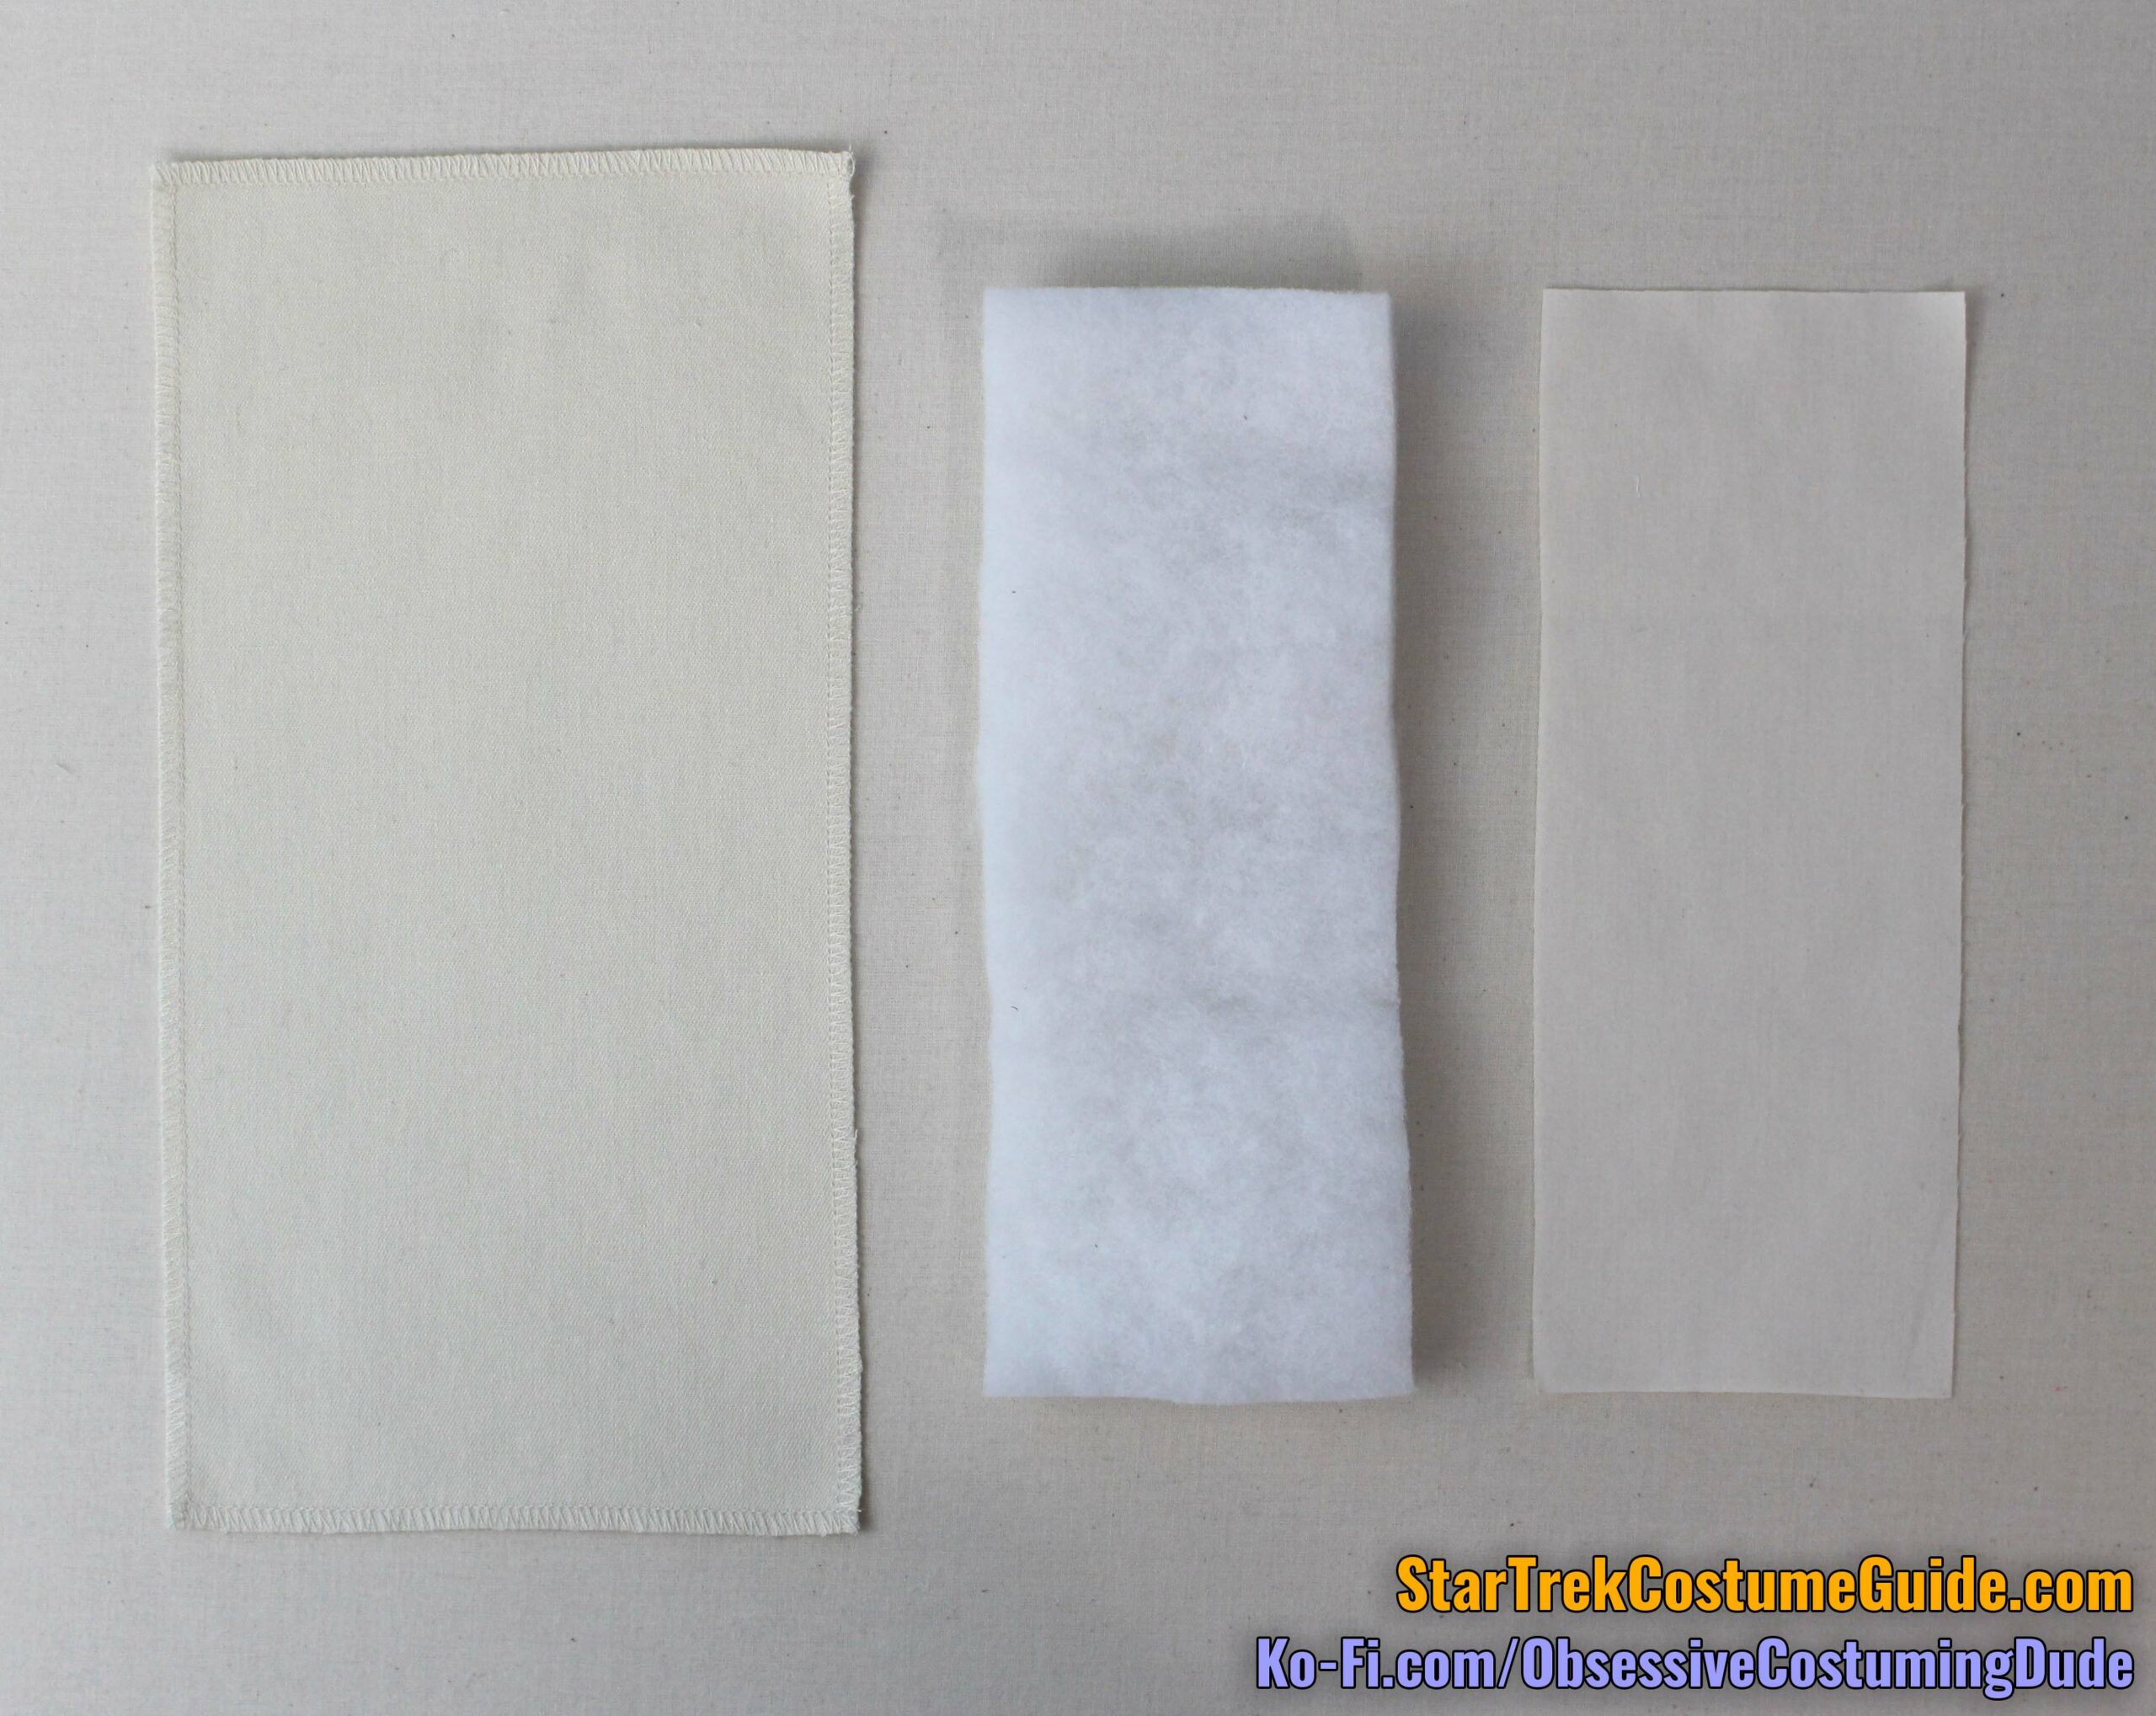
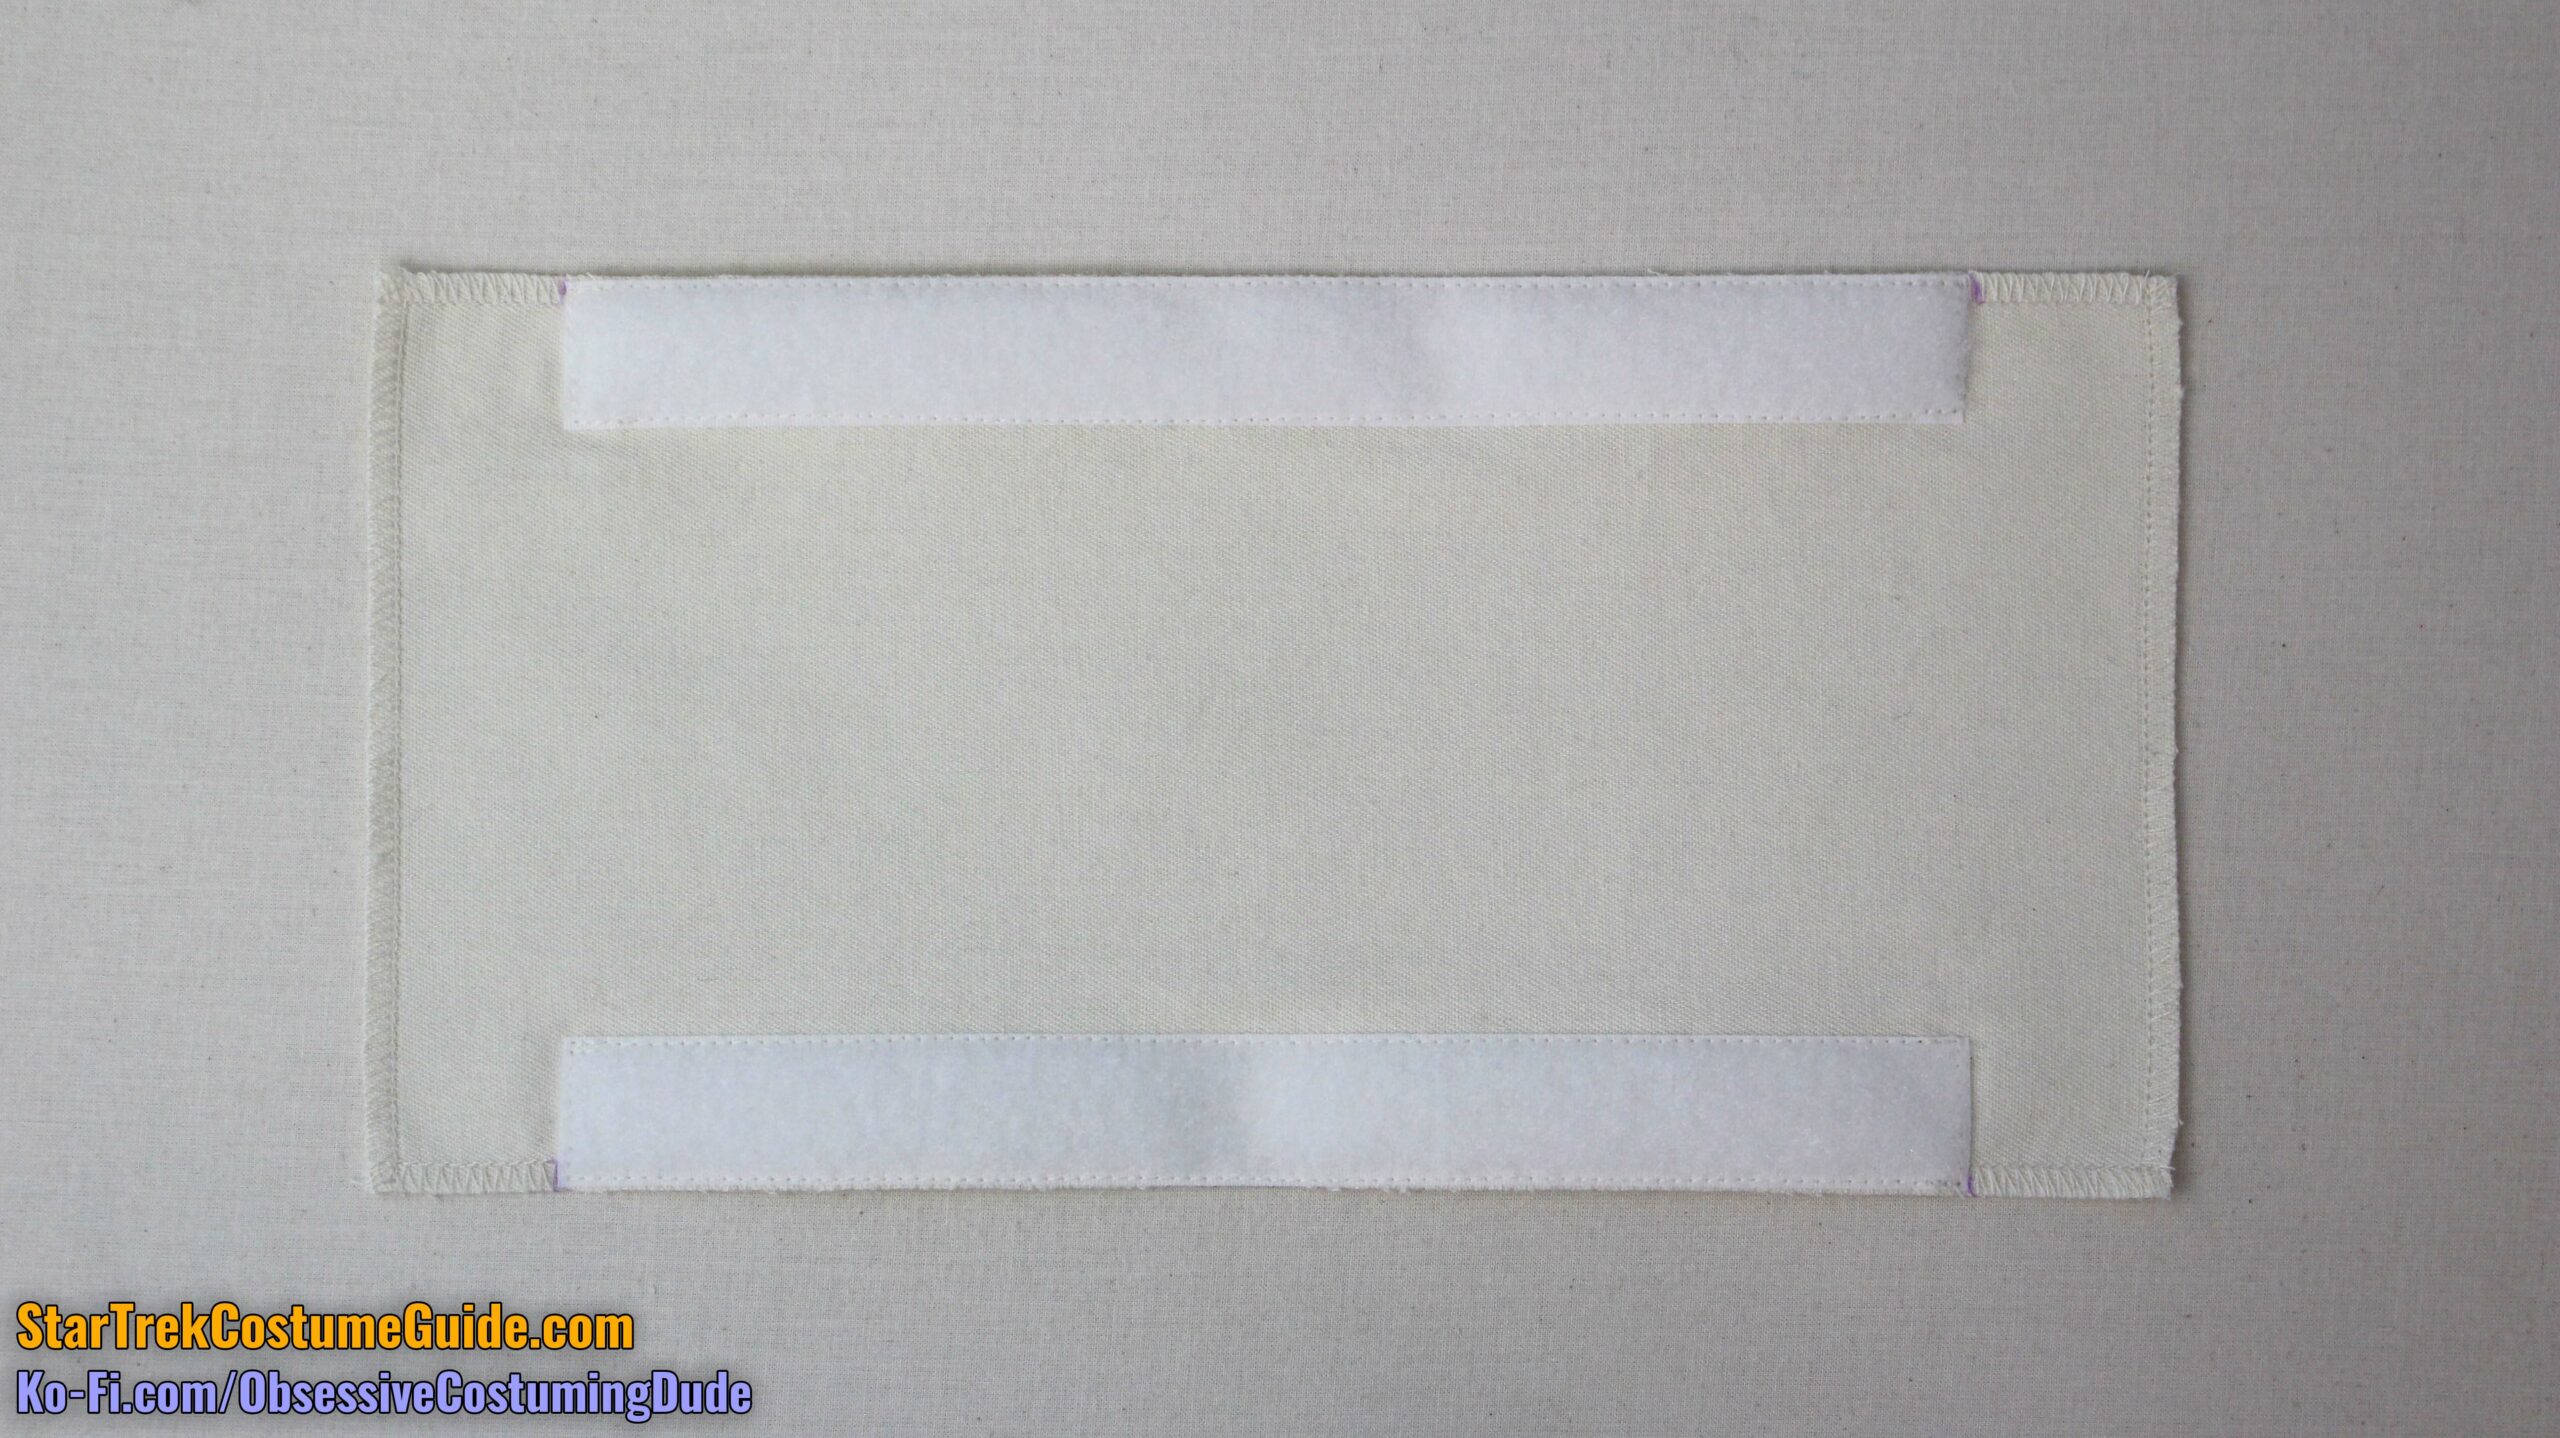
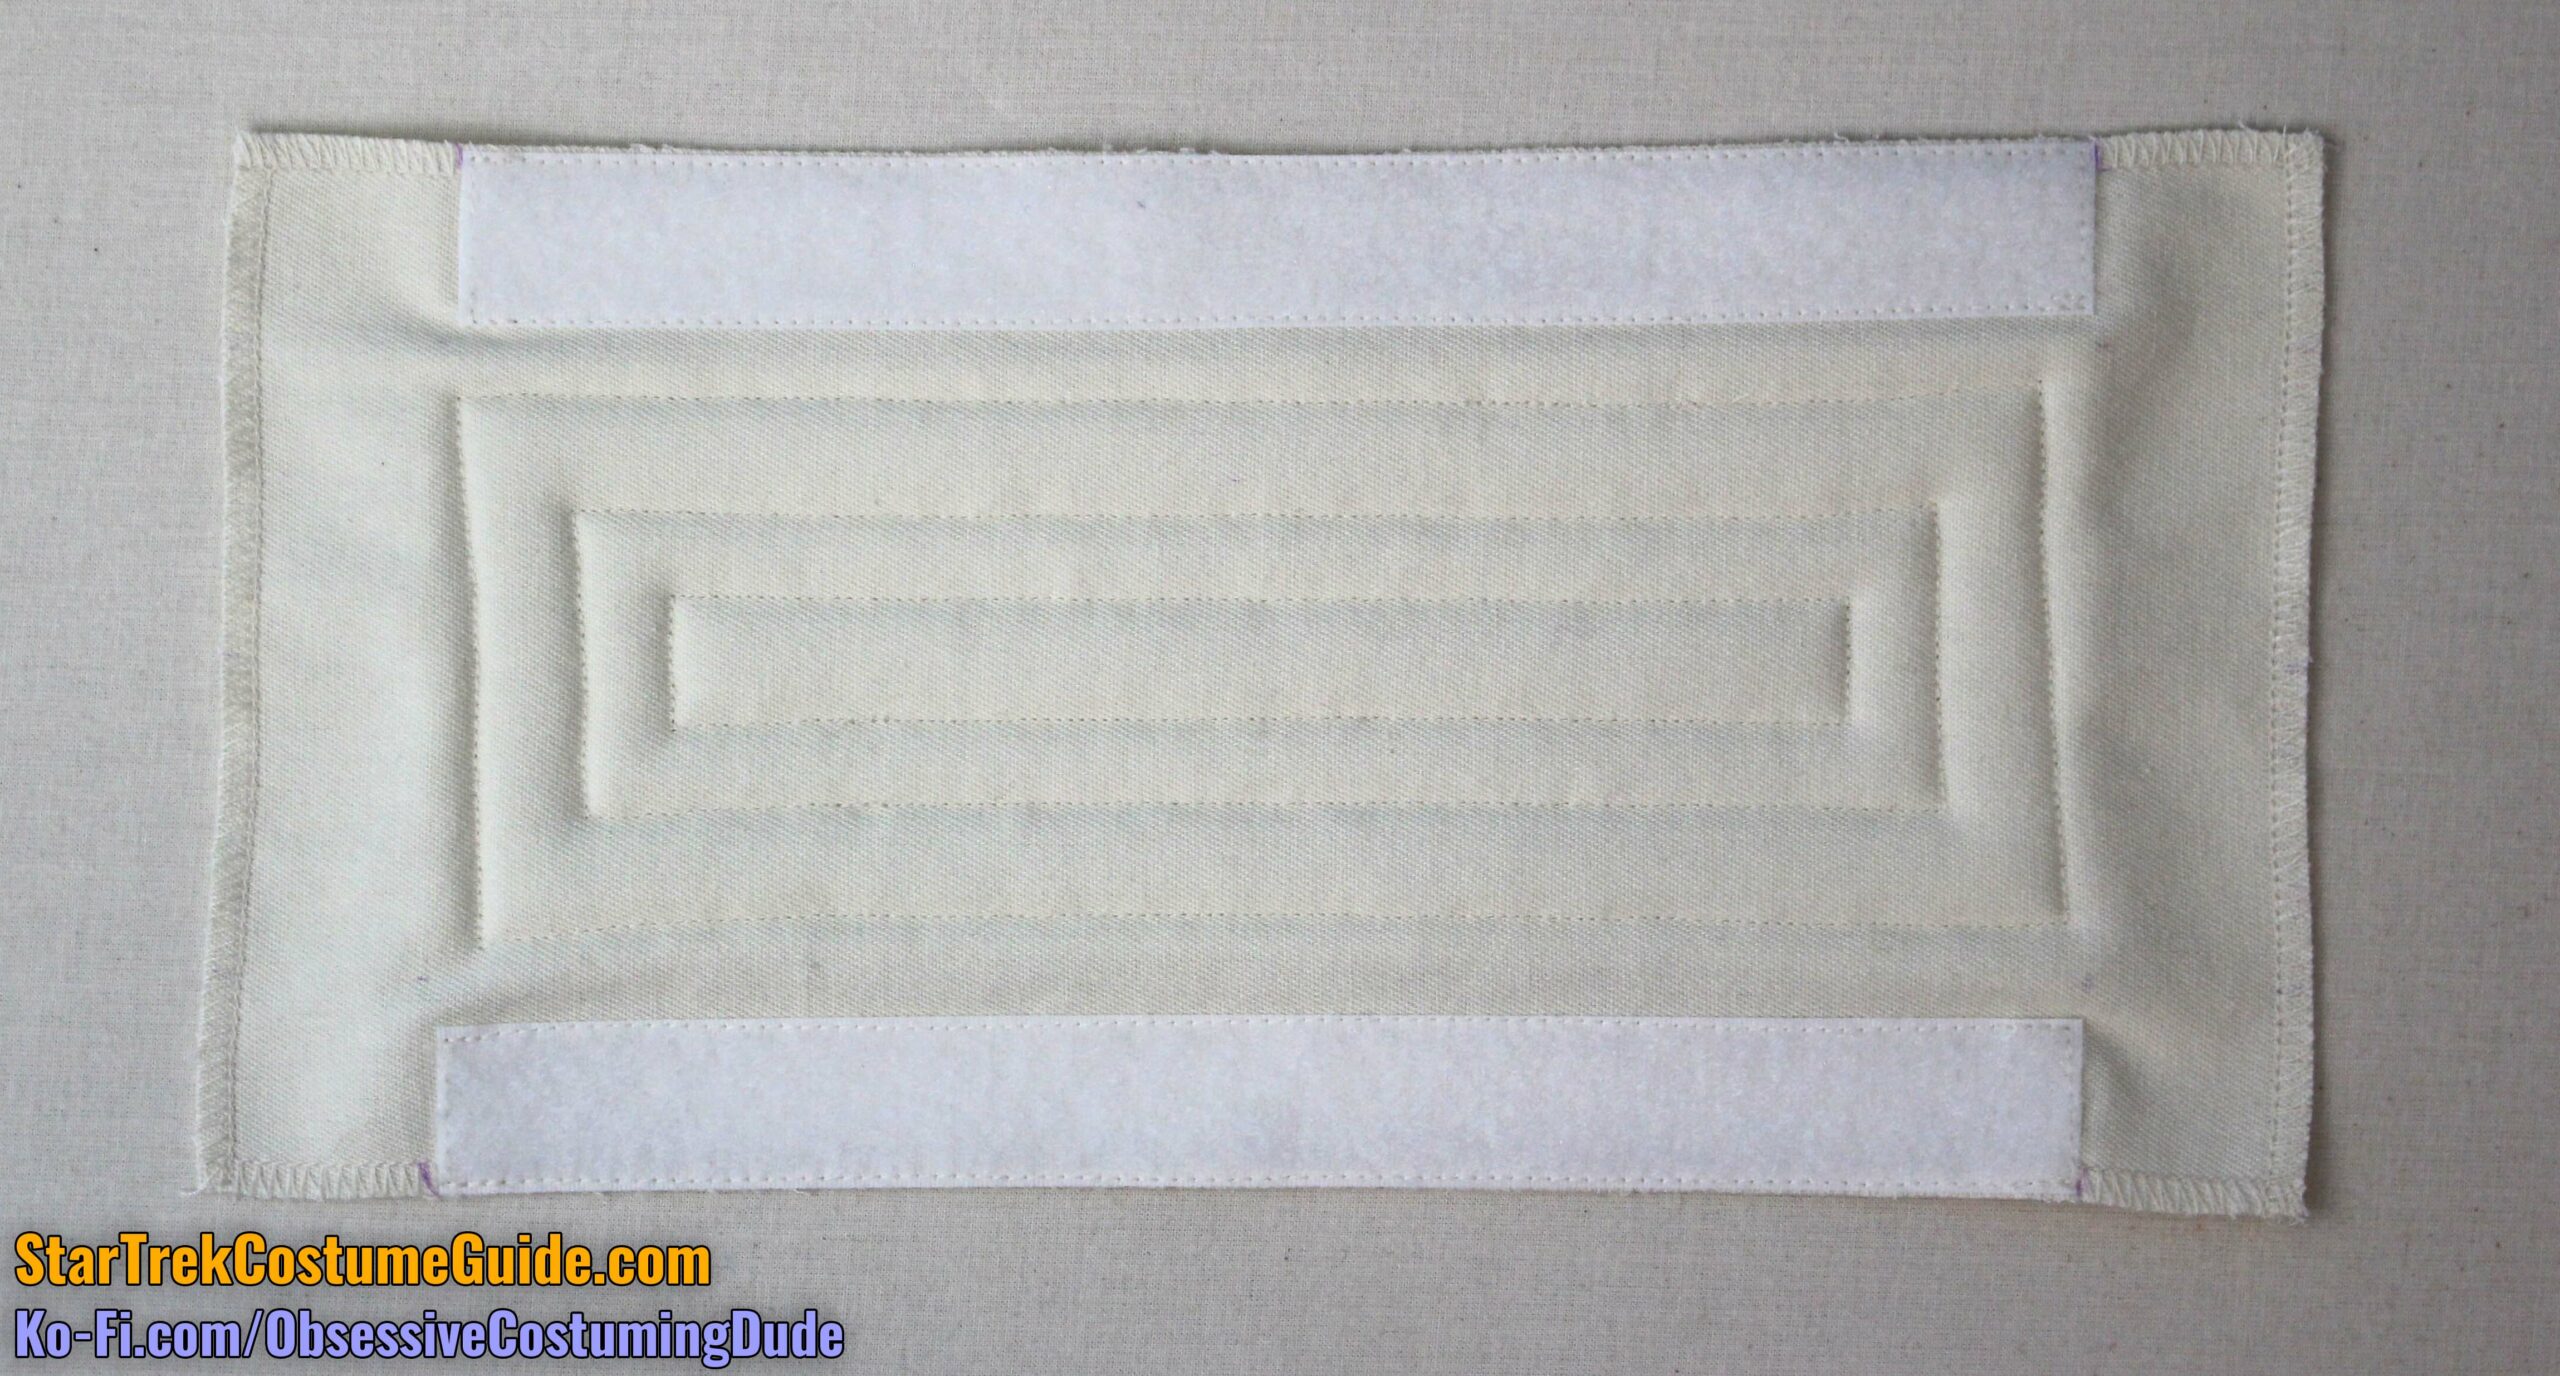
For the lower back rectangle, you’ll need a cut of “shell” fabric (piece J1), a layer of high-loft quilt batting (piece J2), and a backing layer of muslin (also piece J2).
Serge the edges of your “shell” fabric.
Cut two 9 ⅜” lengths of the 1” white hook-and-loop tape.
Position the two “loop” (fuzzy) sides along the longer, outer edges of the “shell” layer (piece J1). The ends of the tape should be just over 1 ½” from the ends of the fabric.
Edge-stitch the lengths of “loop” tape to the fabric.
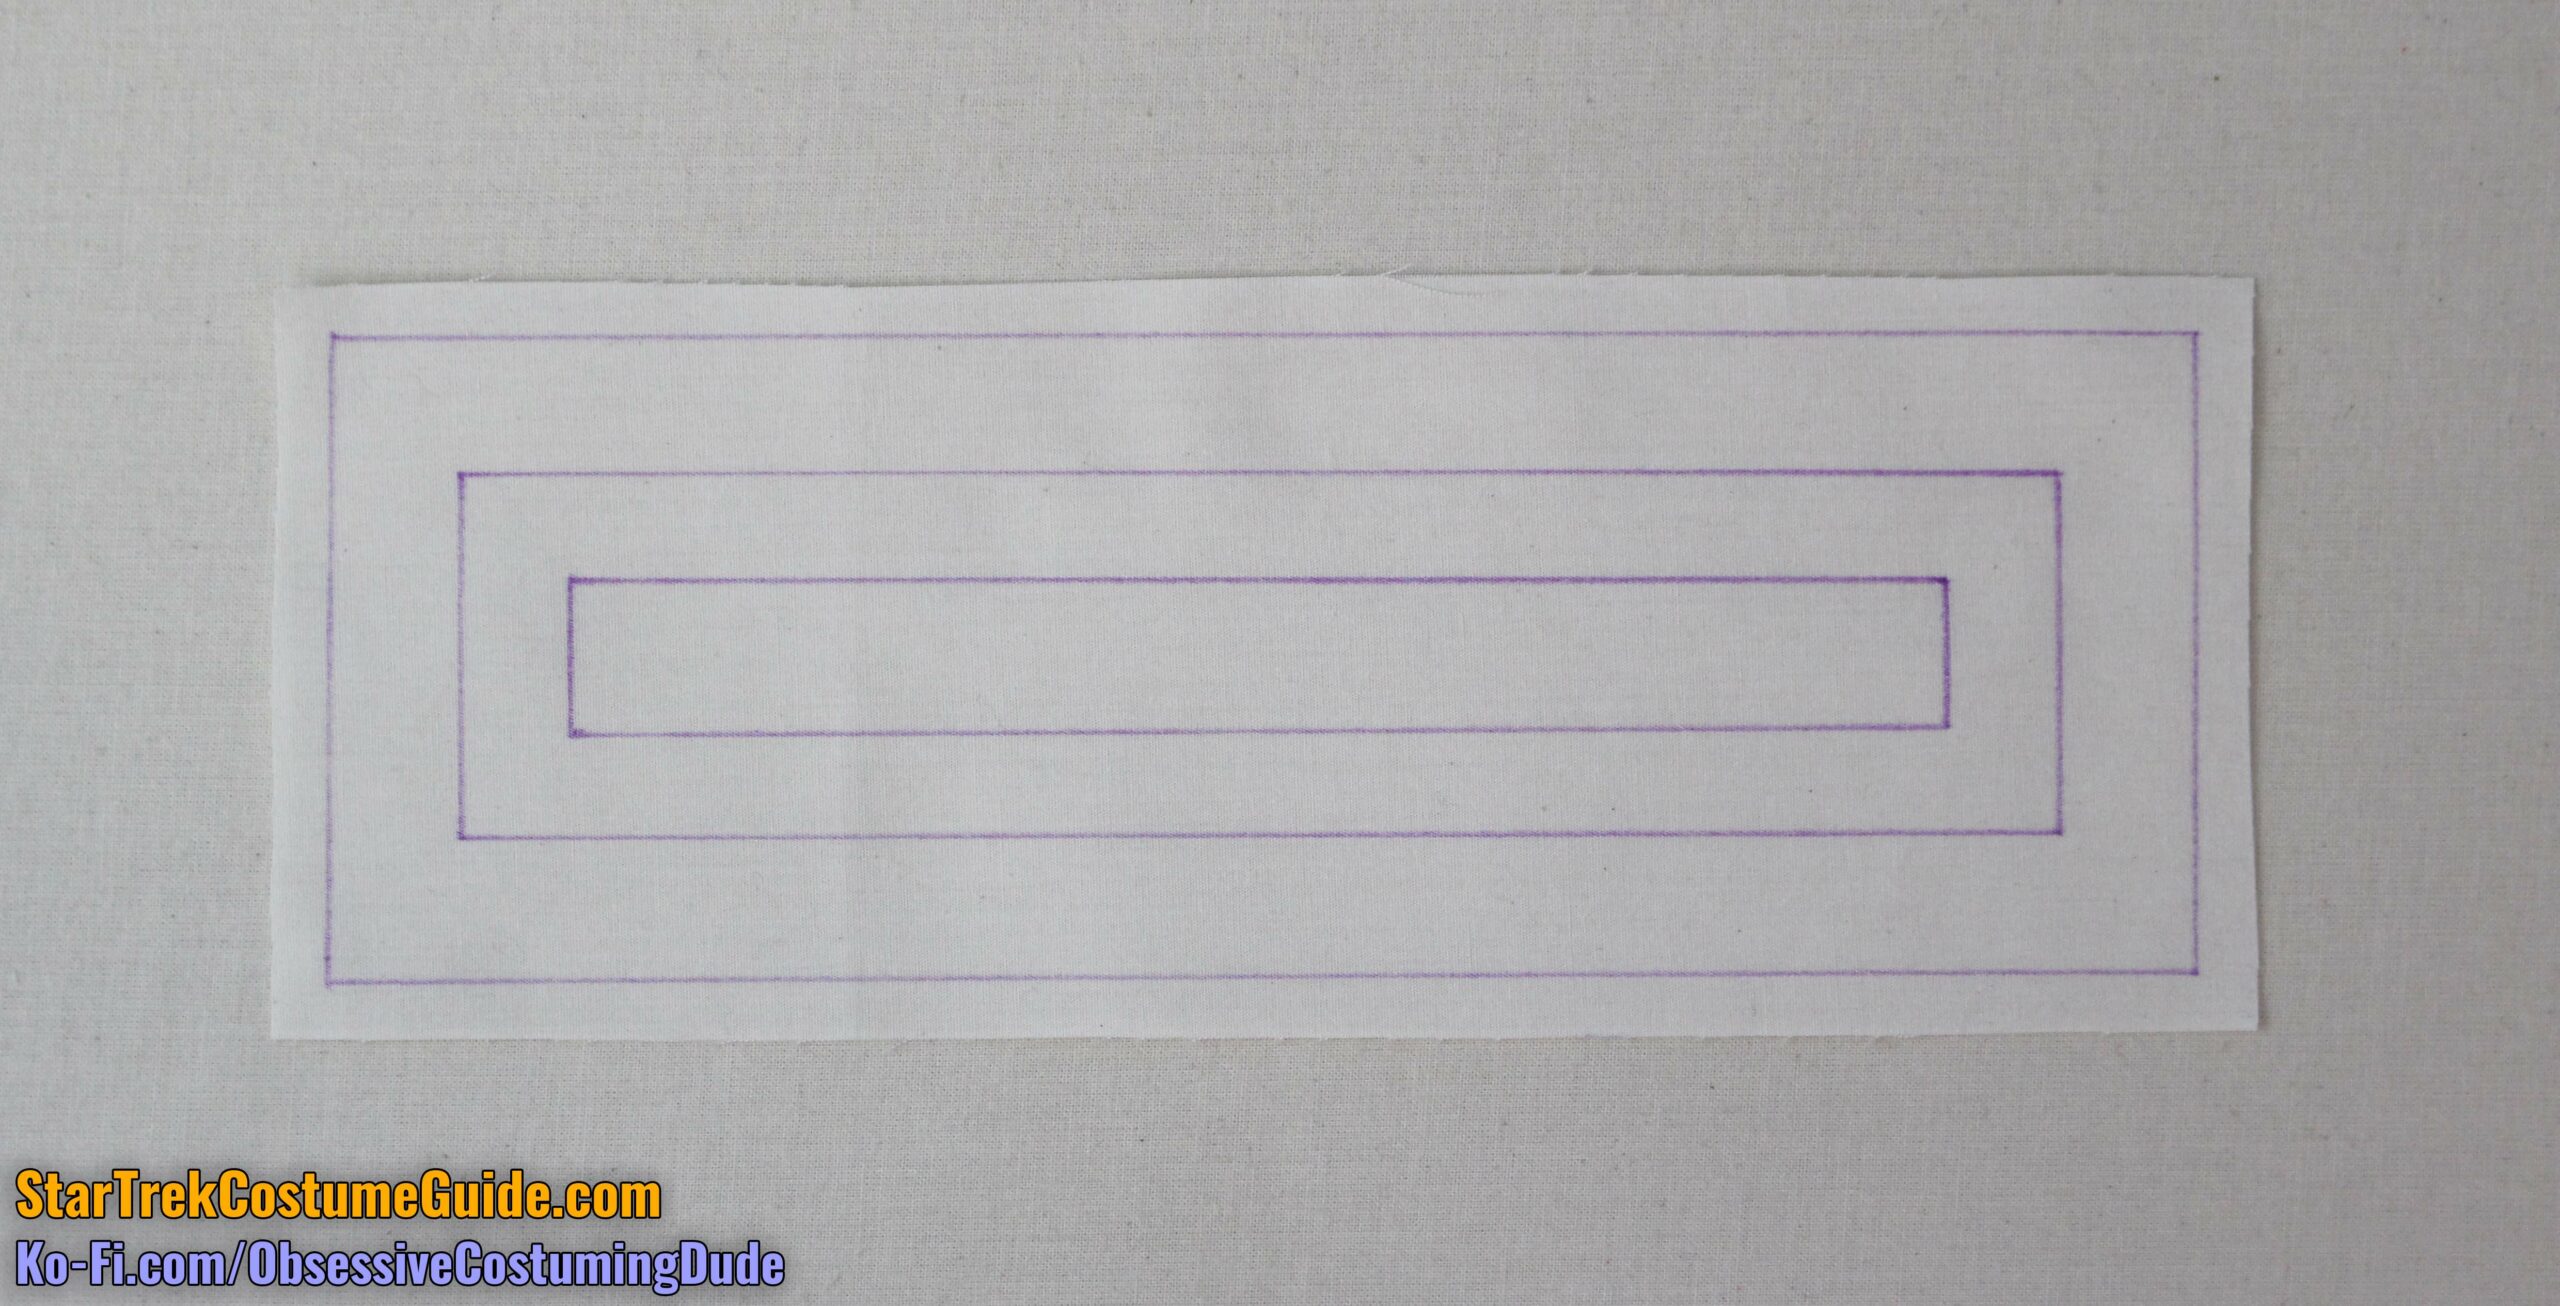
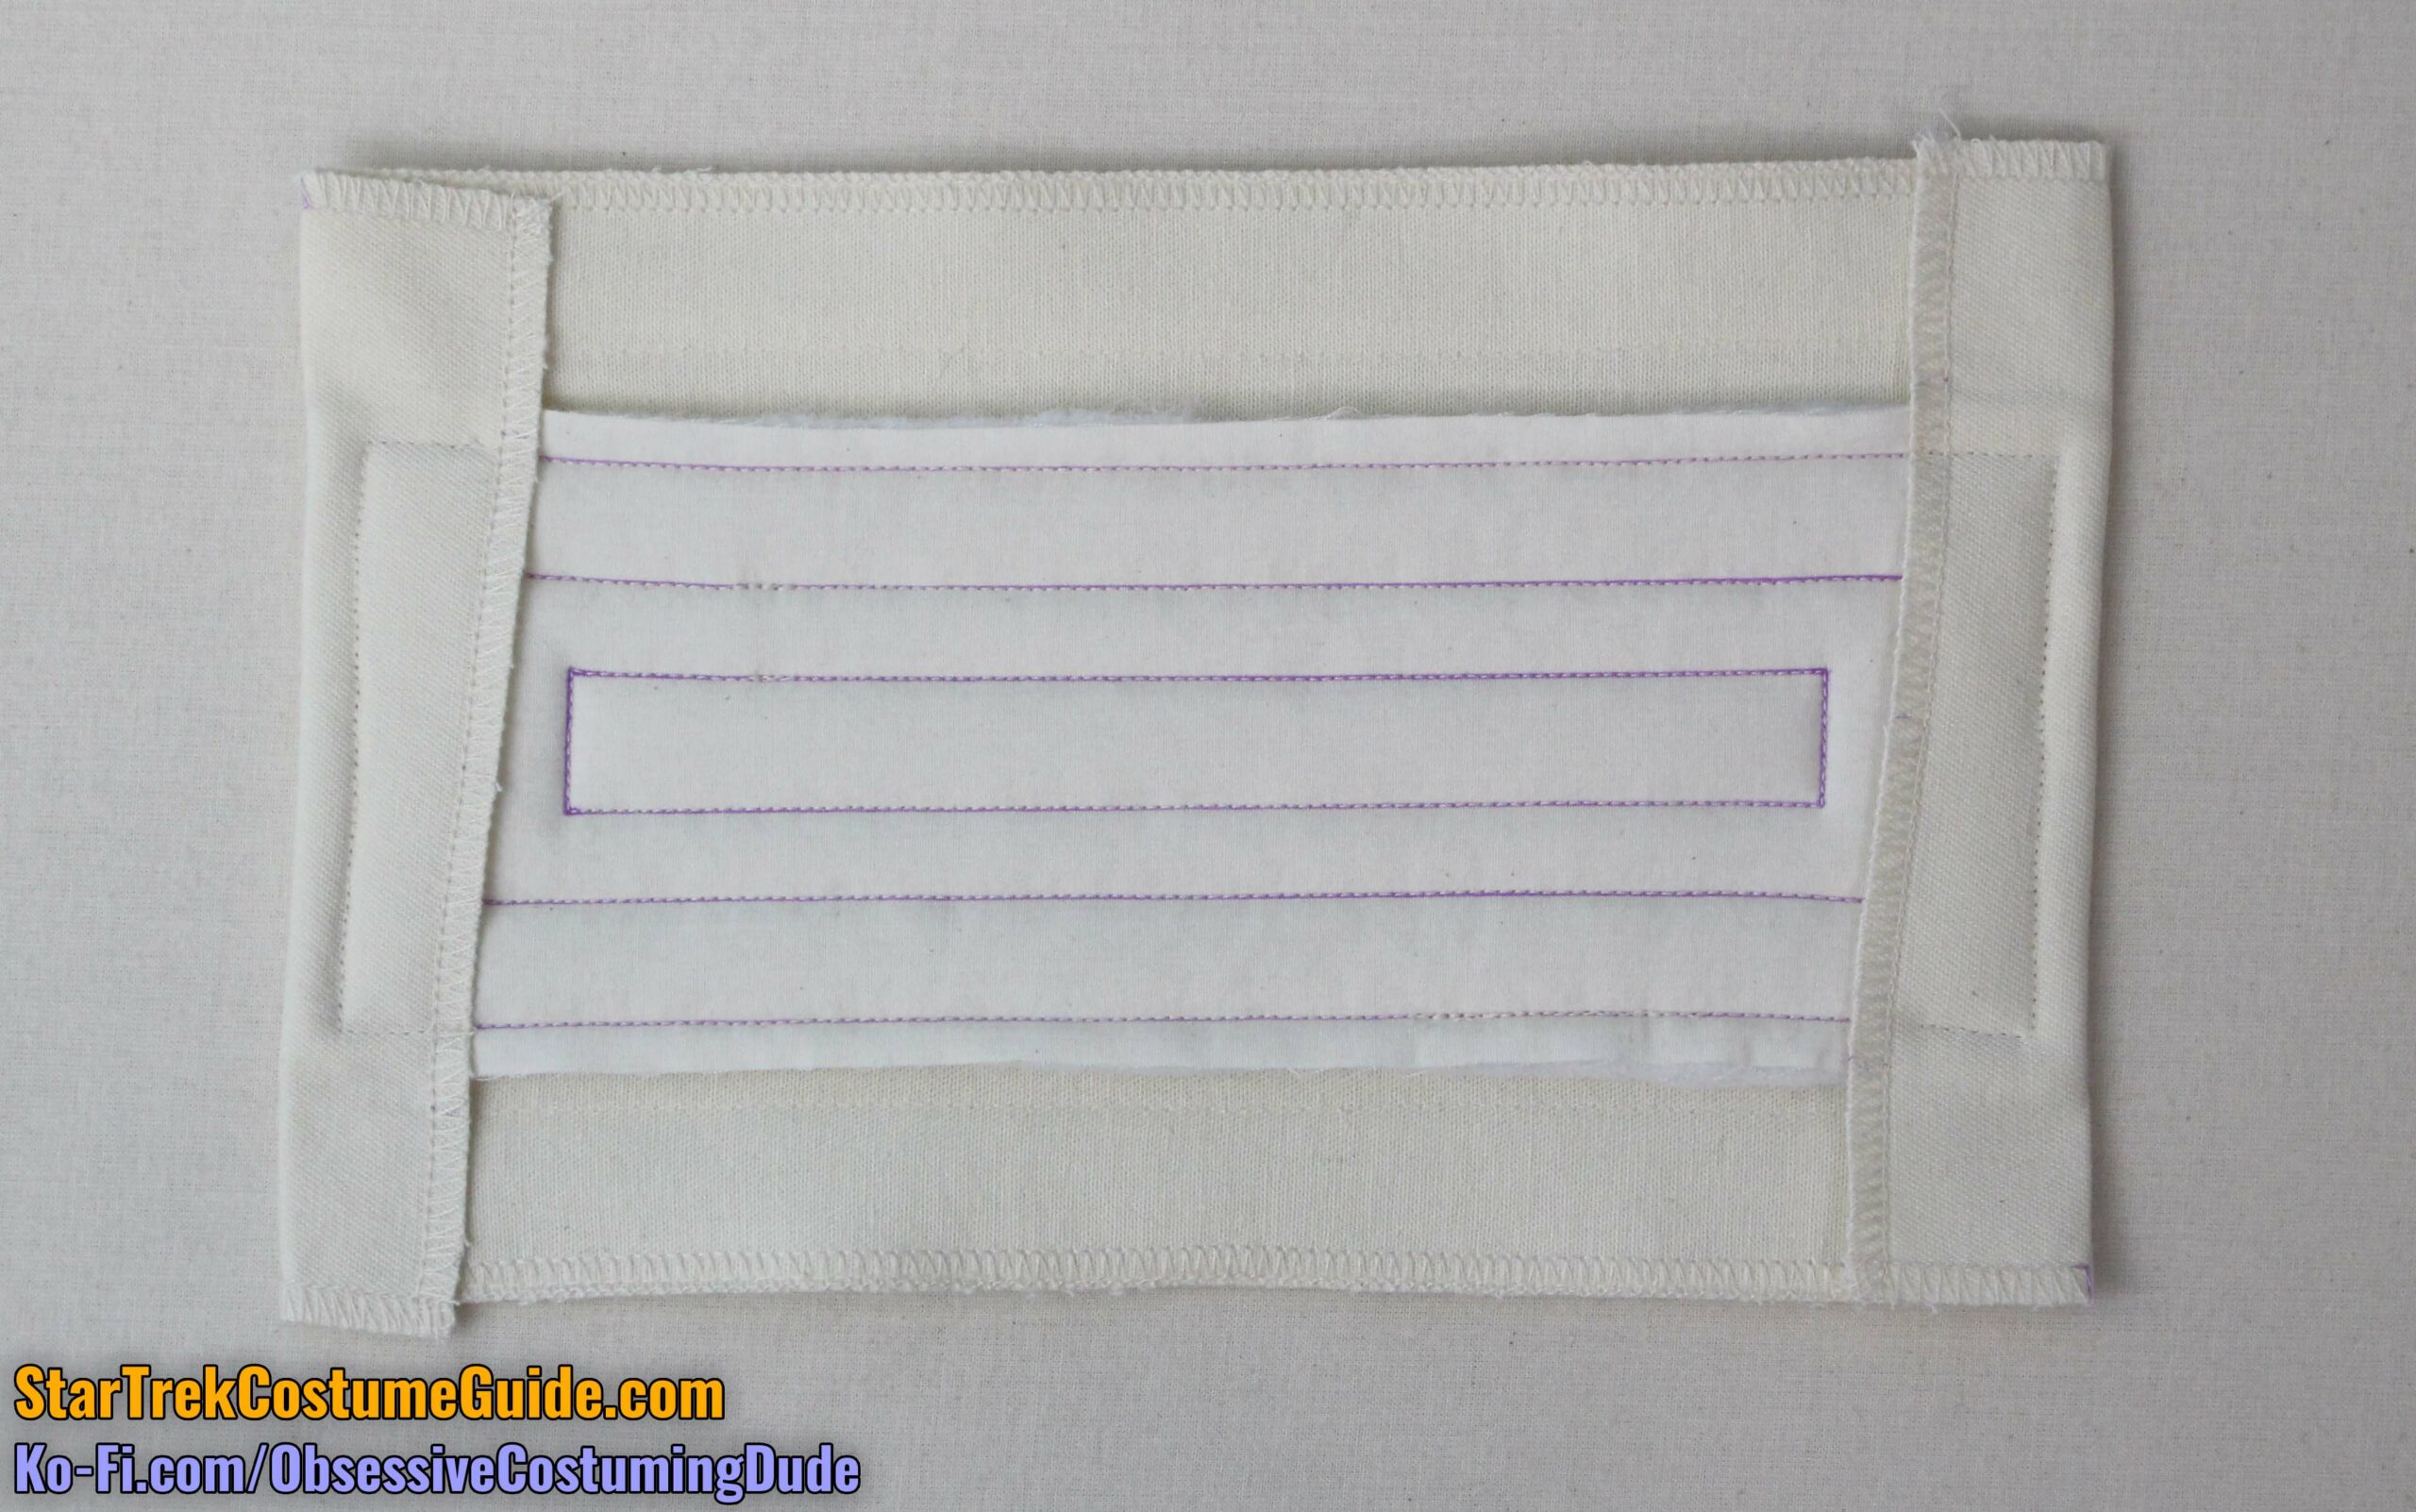
Using the implement of your choice (I prefer a disappearing ink fabric marker), draw the rectangular boxes of topstitching onto your muslin backing (piece J2).
The outer box of topstitching is ¼” from the edge.
The middle box of topstitching is ⅝” inside the first.
The inner box of topstitching is ½” inside the second.
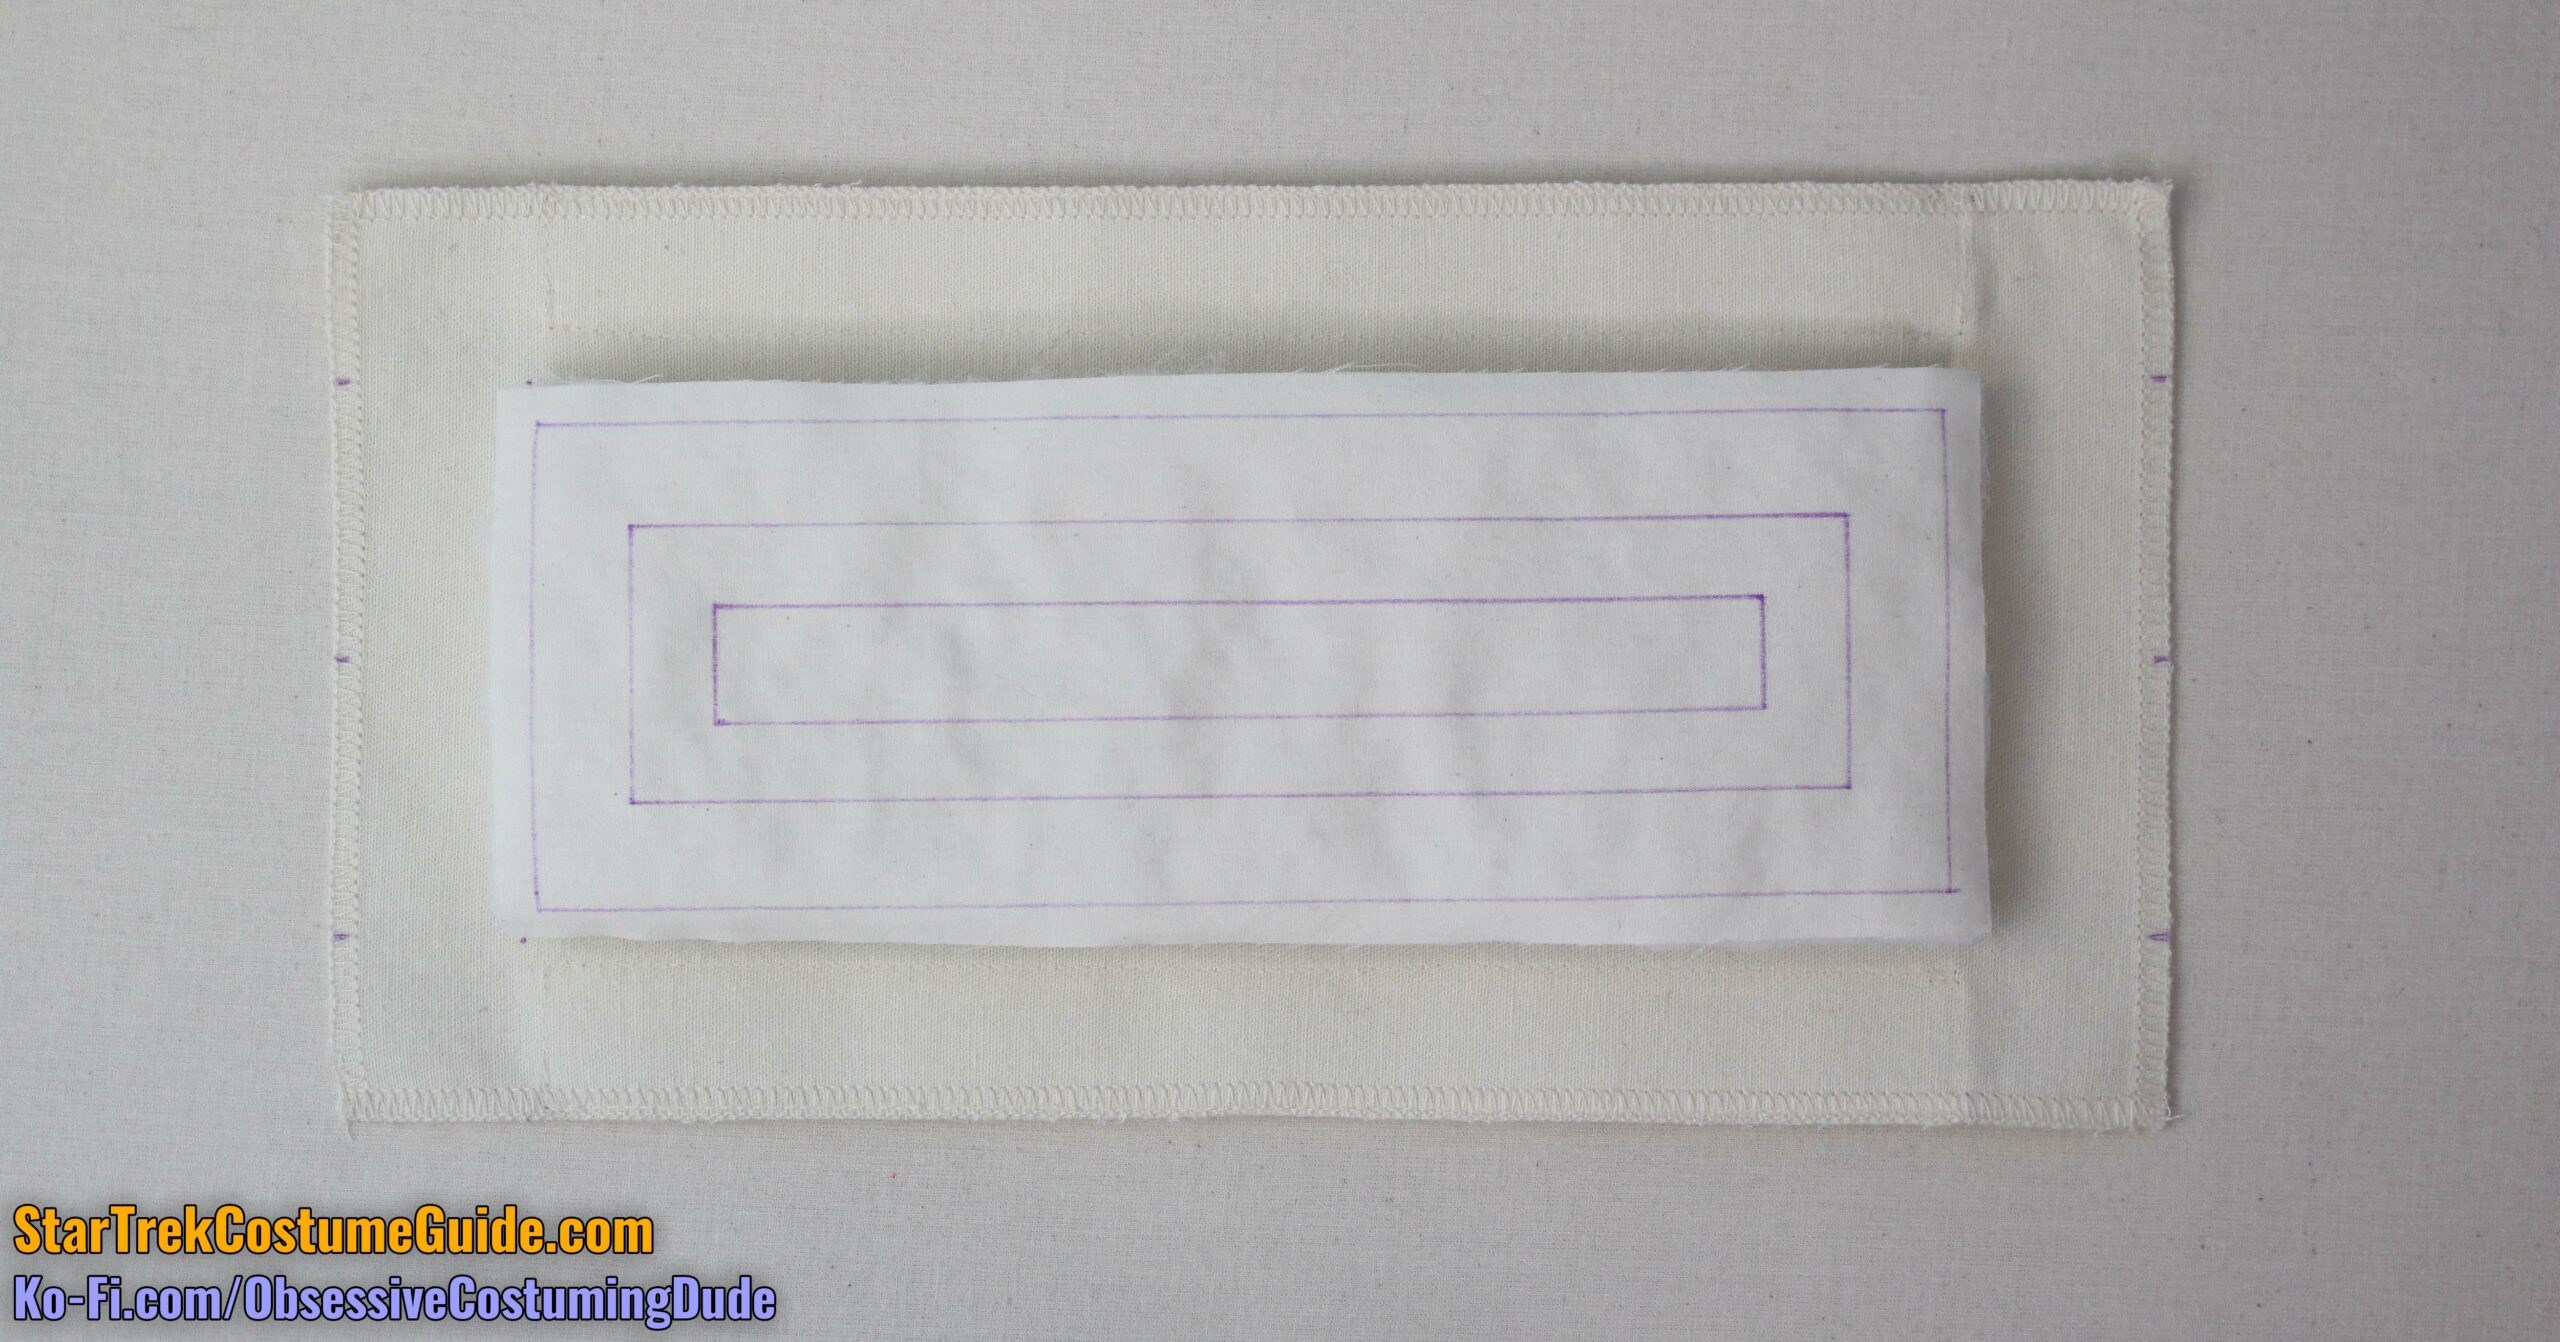
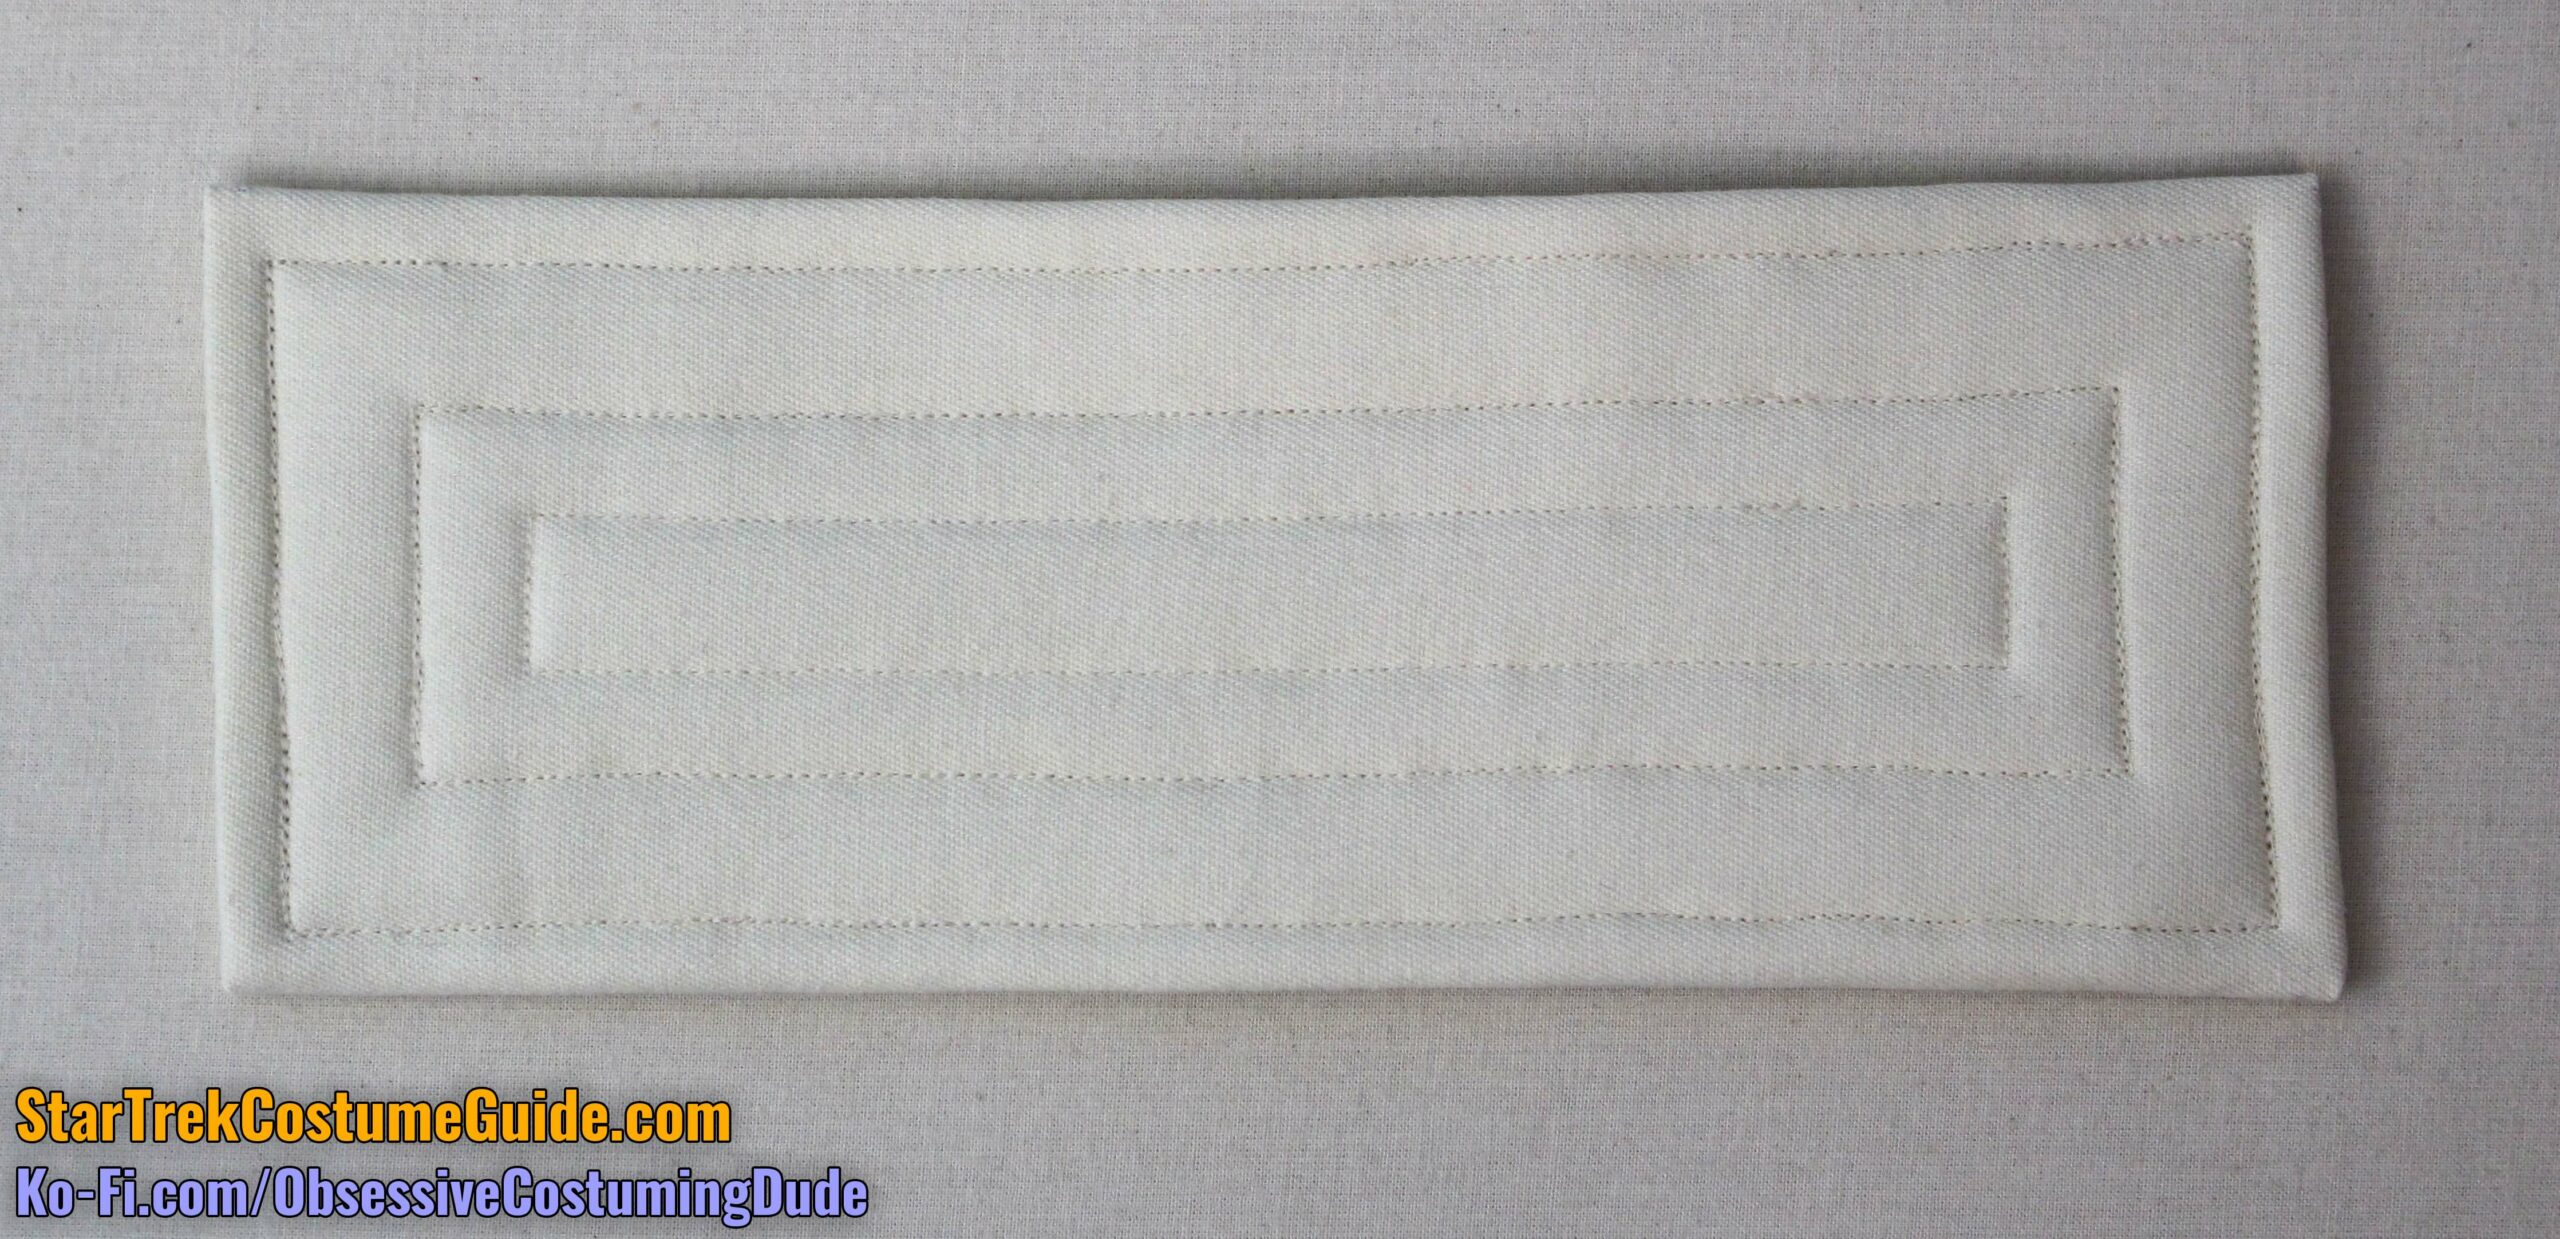
Apply some fabric temporary spray adhesive to the batting and backing layers, then center them onto the underside of the shell fabric.
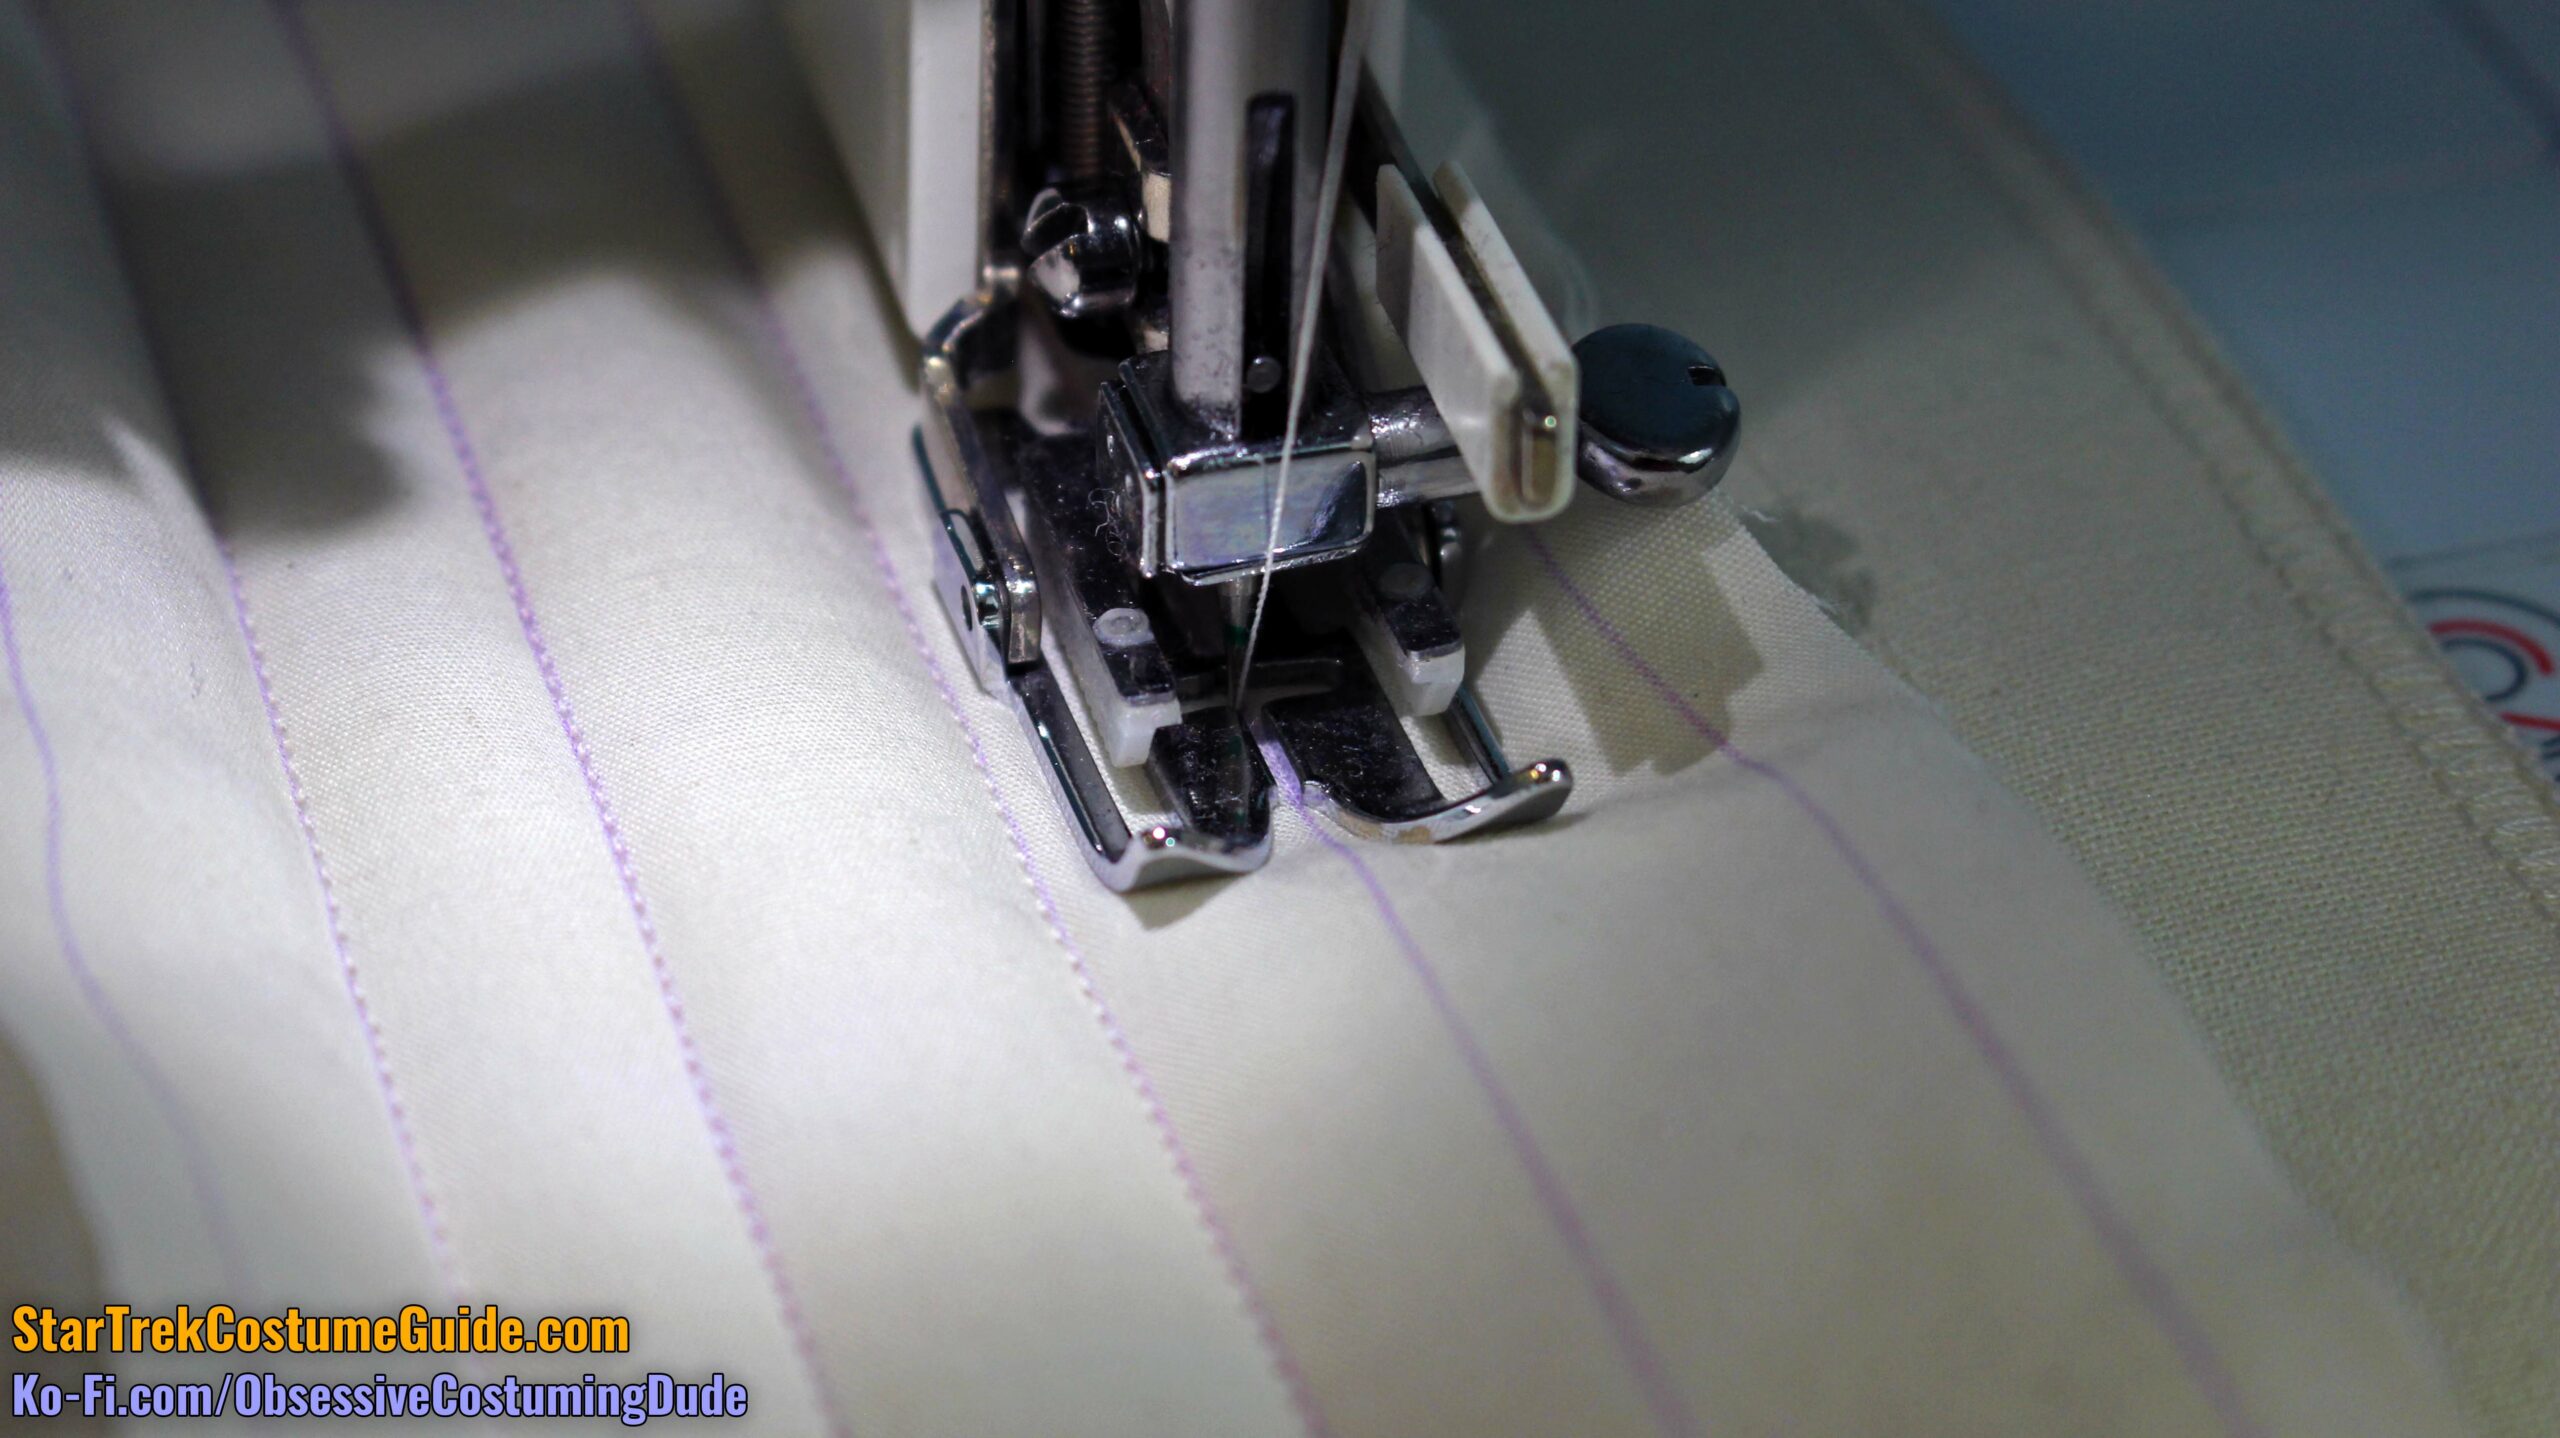
Using an even-feed walking foot, stitch over the quilting lines you marked through all layers.
I suggest starting with the innermost rectangle of stitching and working your way outward.
Turn the upper and lower 1 ¼” allowances of the shell fabric under and lightly press.
From the right side, stitch again over the outermost areas of the quilt topstitching to secure the allowances.
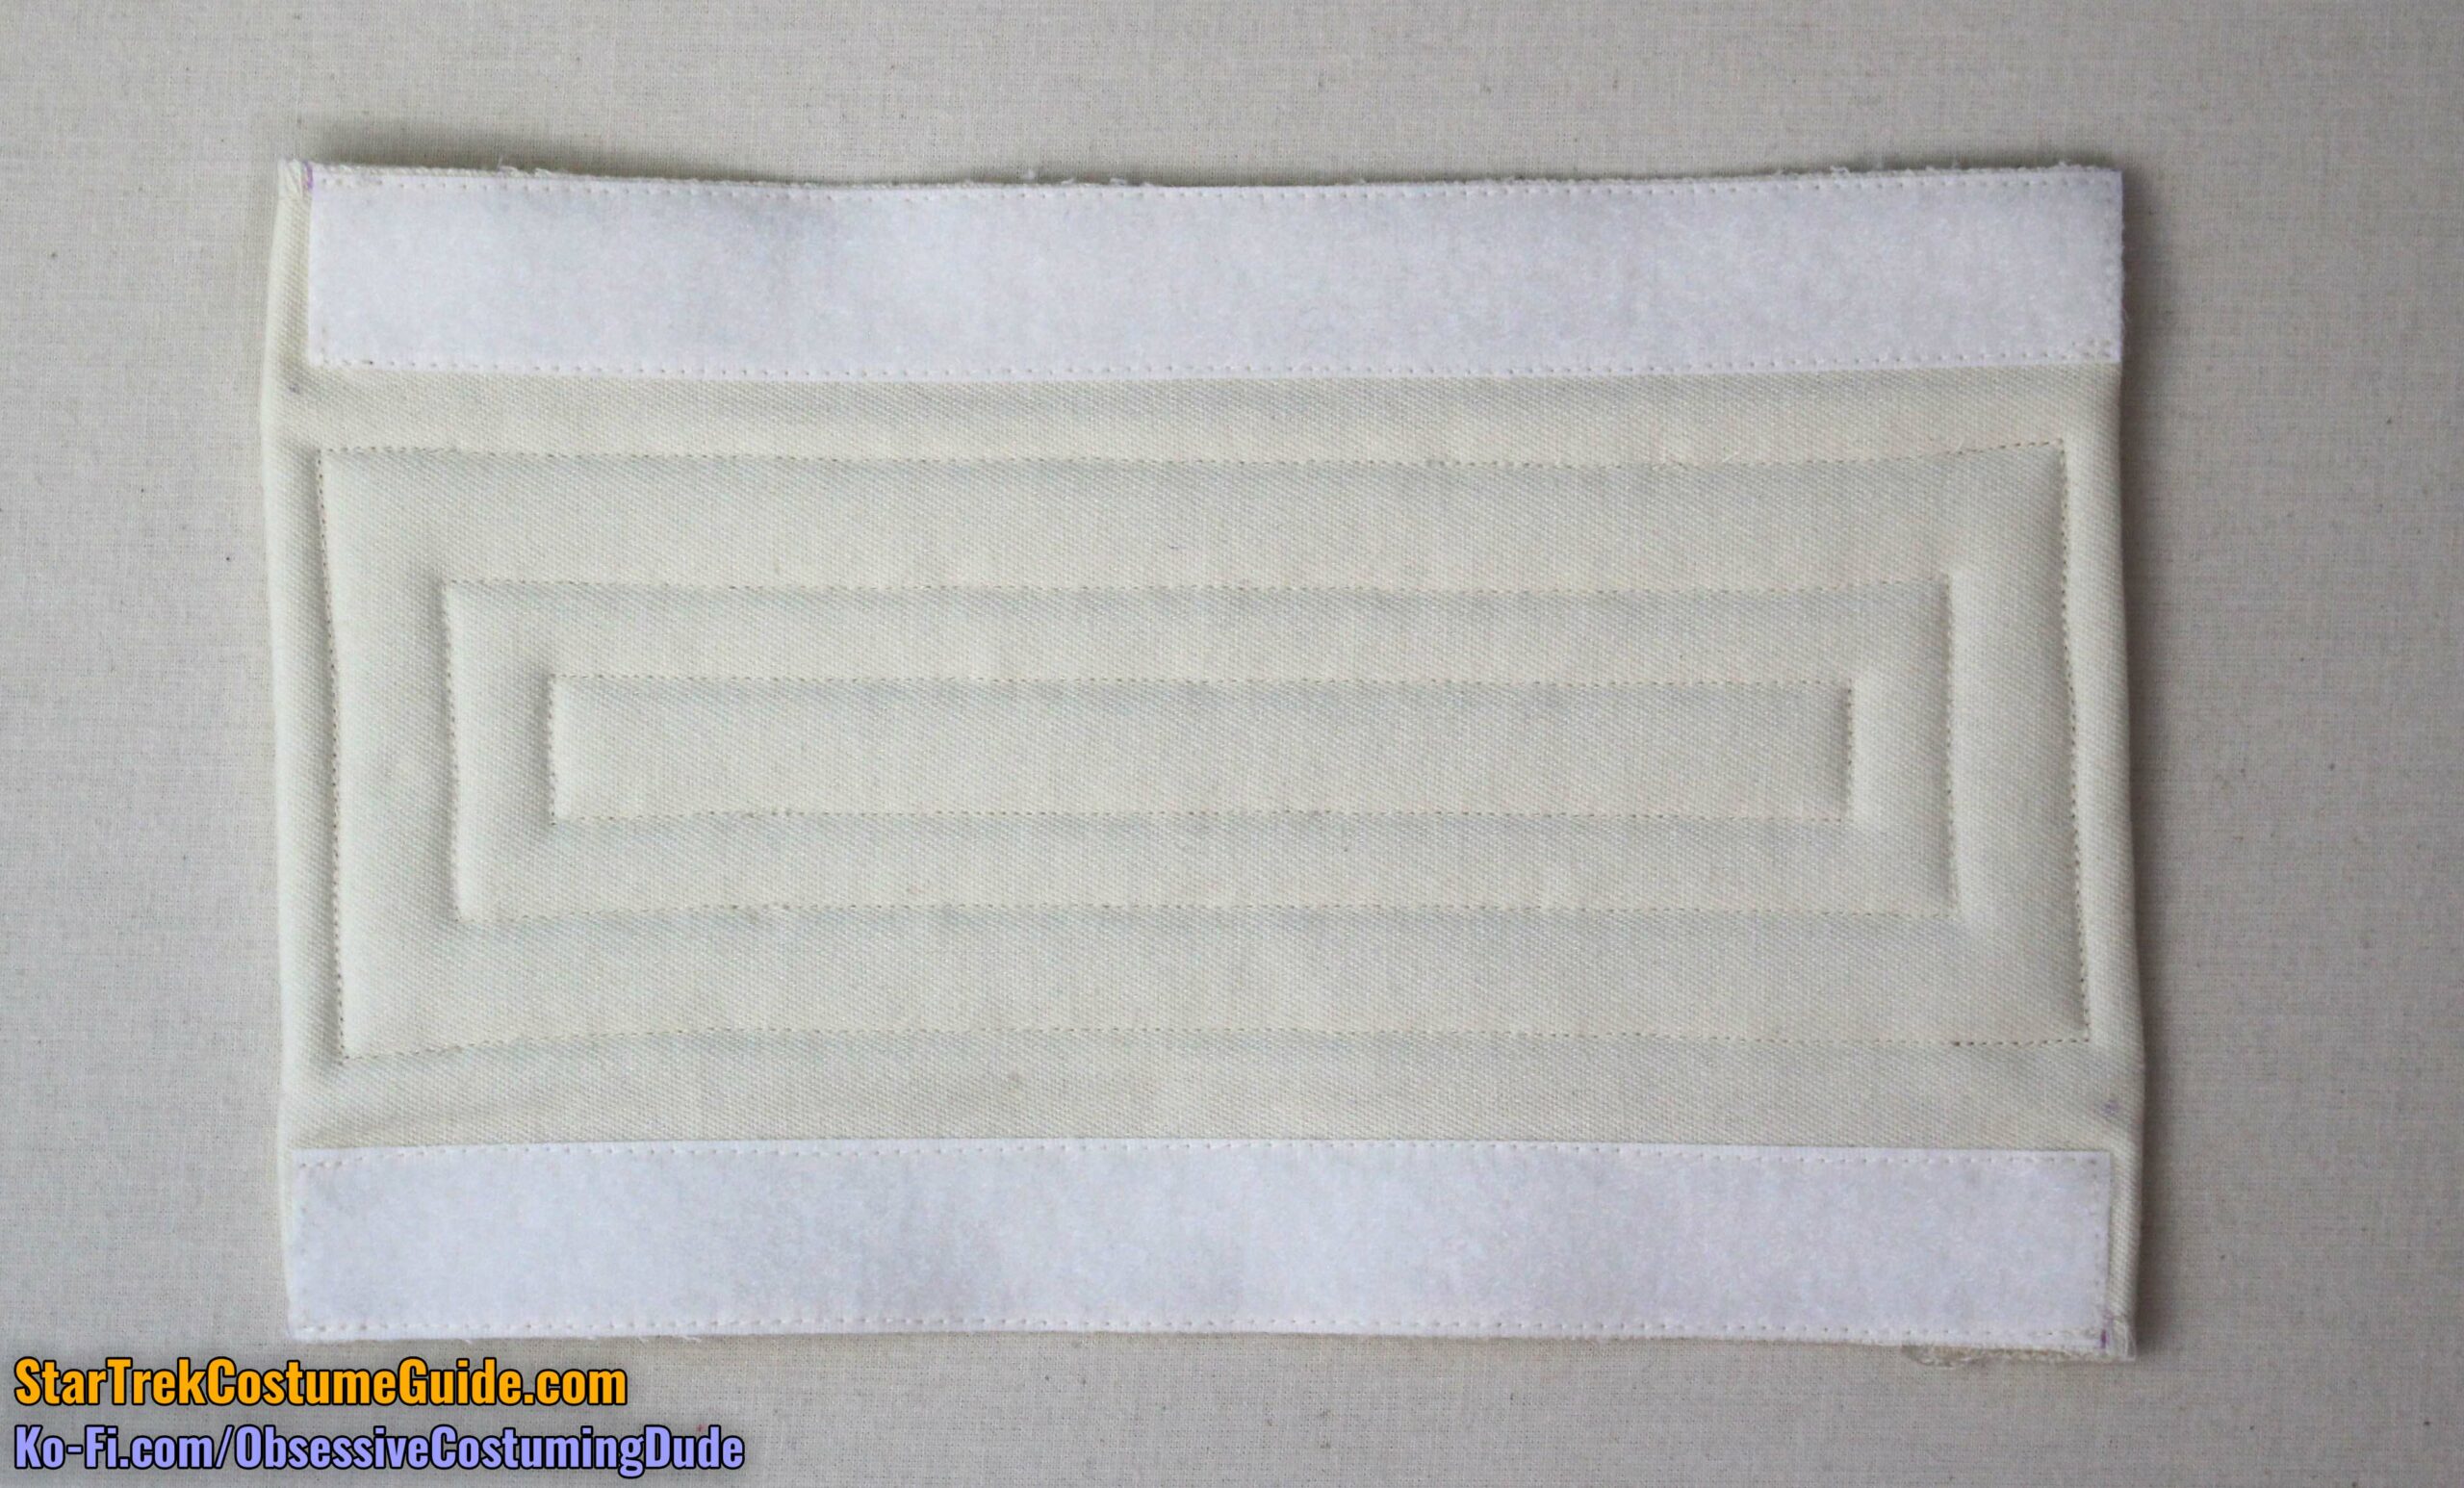
While it’s obviously ideal for your quilted assembly to retain its original shape, don’t be alarmed if the assembly winds up a bit asymmetrical. Straighten it as best you can with an iron, and compensate by tapering the allowance.
Turn the 1 ¼” allowance under along the sides of the quilted assembly and lightly press.
Stitch again over the rows of topstitching to secure the allowances.
Edge-stitch the corresponding lengths of “hook” (scratchy) tape to lower back of the jumpsuit, vertically centered over and horizontally flush with the tubing assembly.
Position the quilted back assembly onto the lower back of the jumpsuit, matching lengths of hook-and-loop tape. (The top of the quilted rectangle should barely extend over the hook-and-loop tape.)
Stitch again over the lower third or so of the quilting stitches through all layers to secure the quilted rectangle assembly to the jumpsuit.
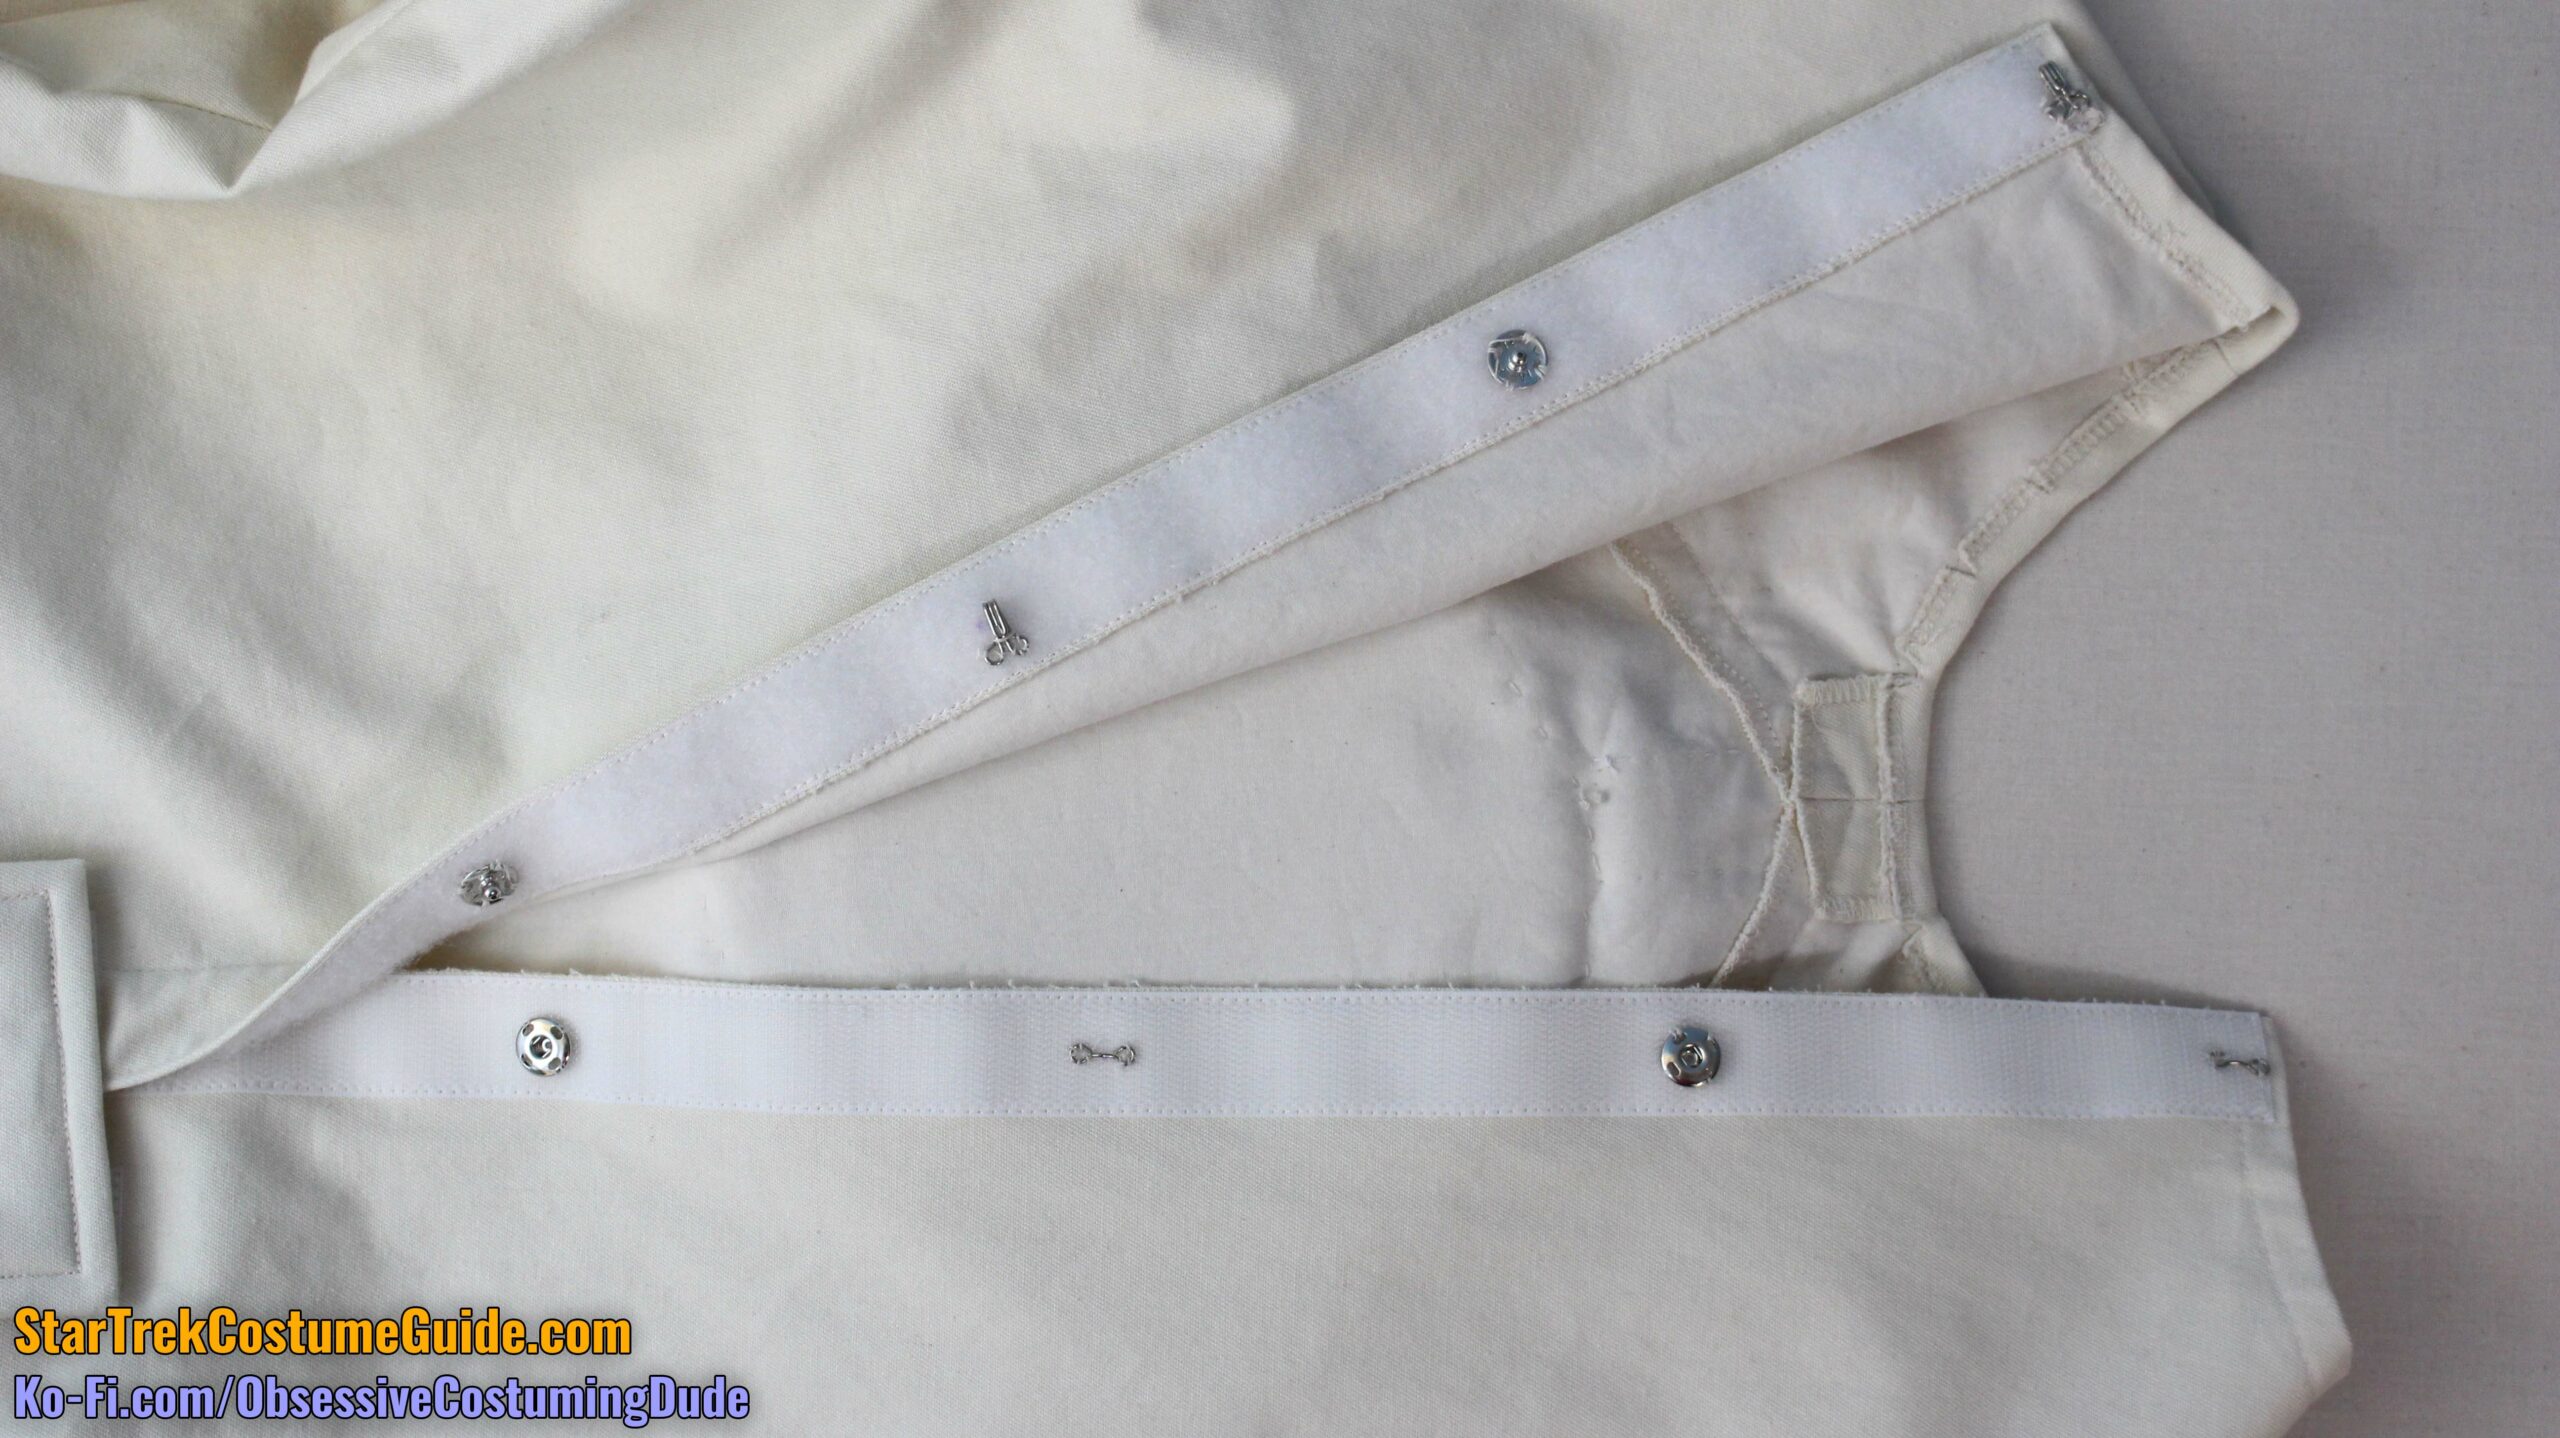
Hand-sew two silver snaps and two silver hook-and-eye closures onto the back hook-and-loop tape.
The top closure (at the neckline) should be a hook-and-eye closure, then alternate downward.
The exact spacing doesn’t really matter; just space them evenly down the back.
(Personally, I find it difficult to use hook-and-eye closures embedded in hook-and-loop tape, so you might consider using only snaps instead.)
Sew the jumpsuit’s inseams closed with 1” seam allowance, matching balance points (lengthen/shorten lines) and crotch seams.
Press the seam allowances open.
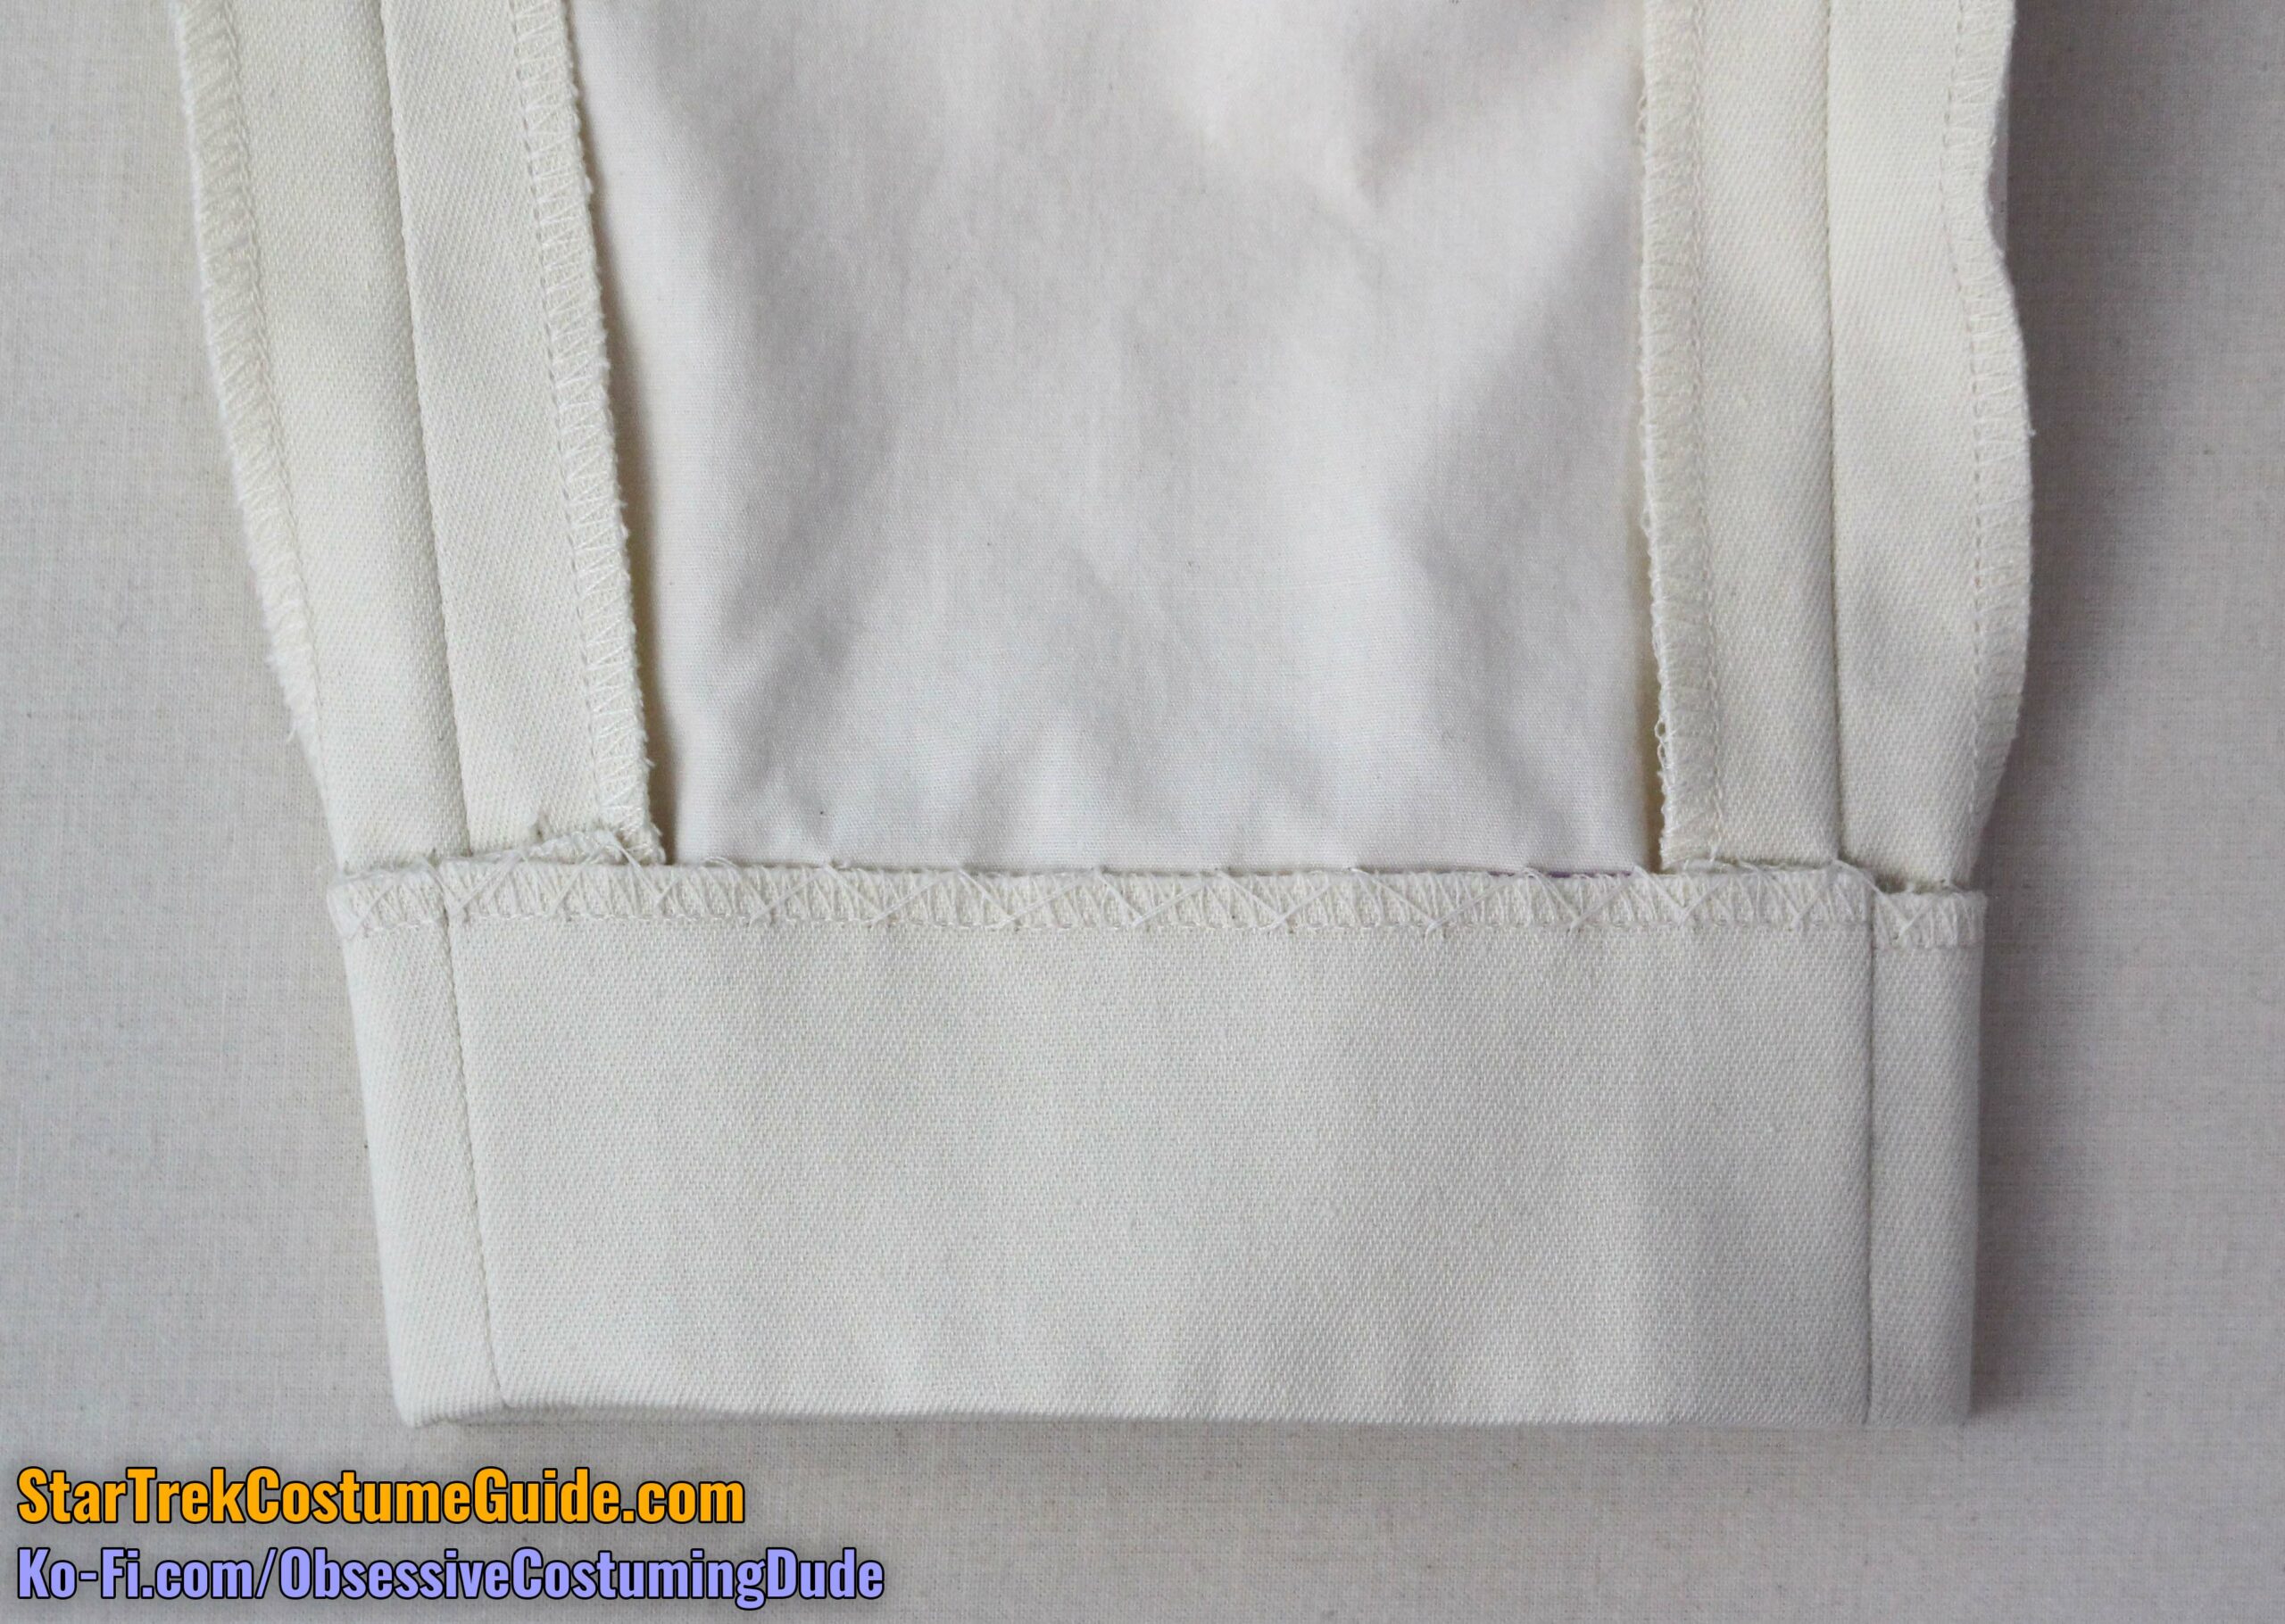
Like with the sleeves, I believe it’s easier to hem the pant legs at this point, before all the accents, panels, etc. are attached to the jumpsuit.
If you wish to do so now, press the pant legs’ 2” hem allowance upward and hand-sew the hem allowance into place, taking care to only stitch through the muslin underlining (and not onto the outside of the pant legs).
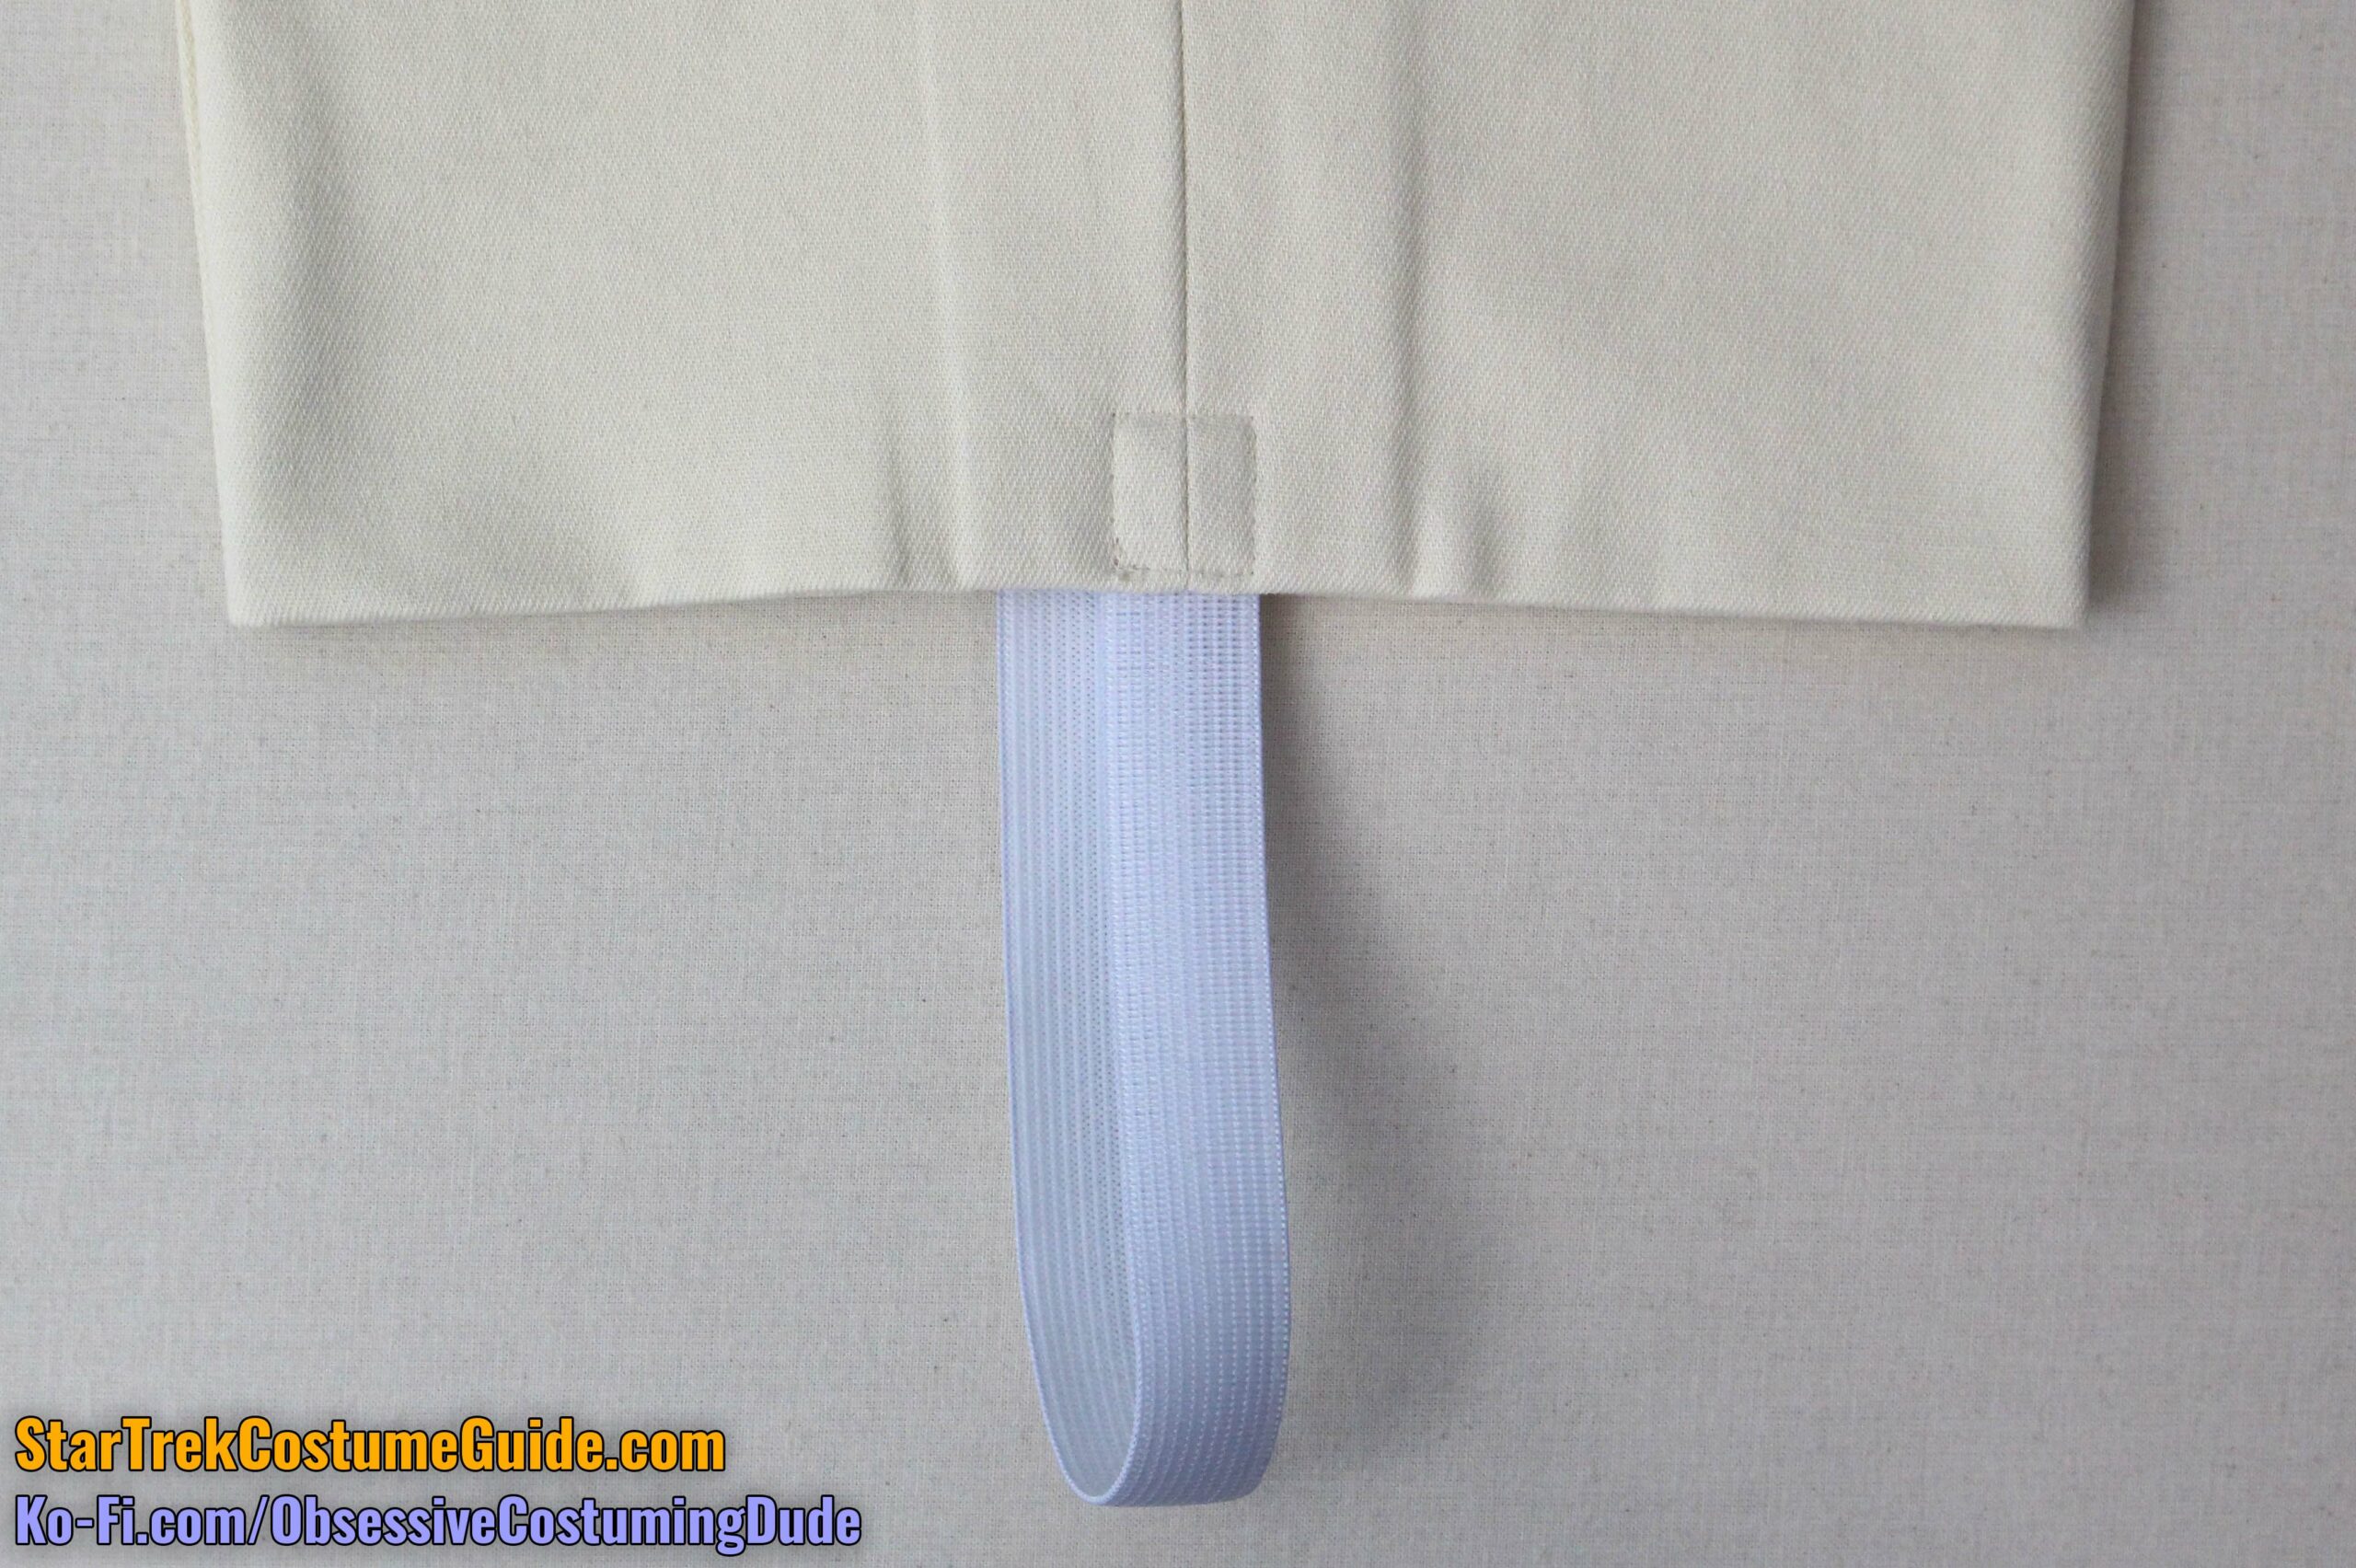
Cut two 11” lengths of ⅝” white elastic for the pant leg “stirrups.”
(This is 9” for the stirrup itself and 1” allowance on each end.)
Extend 1” of the elastic upward underneath the pant hem and stitch it into place with a small square of topstitching.
Repeat for the other end.
Repeat for the other pant leg.
Cut a 2 ¾” length of 1” white hook-and-loop tape and discard the “hook” (scratchy) side.
Hand-sew the “loop” (fuzzy) side onto the upper front of the jumpsuit, horizontally centered, so the upper edge is just beneath the neckline and the lower edge slightly extends onto the outer chest circle.
This is to fasten the collar to the jumpsuit on the finished costume.