For the back-zipping later uniform style, you’ll need the following pattern pieces:
A1 – Collar
B3 – Front yoke
C3 – Back yoke
D3 – Upper front
E – Right side front
F – Left side front
G2 – Upper right back
G3 – Upper left back
H – Right side back
I – Left side back
J3 – Lower front
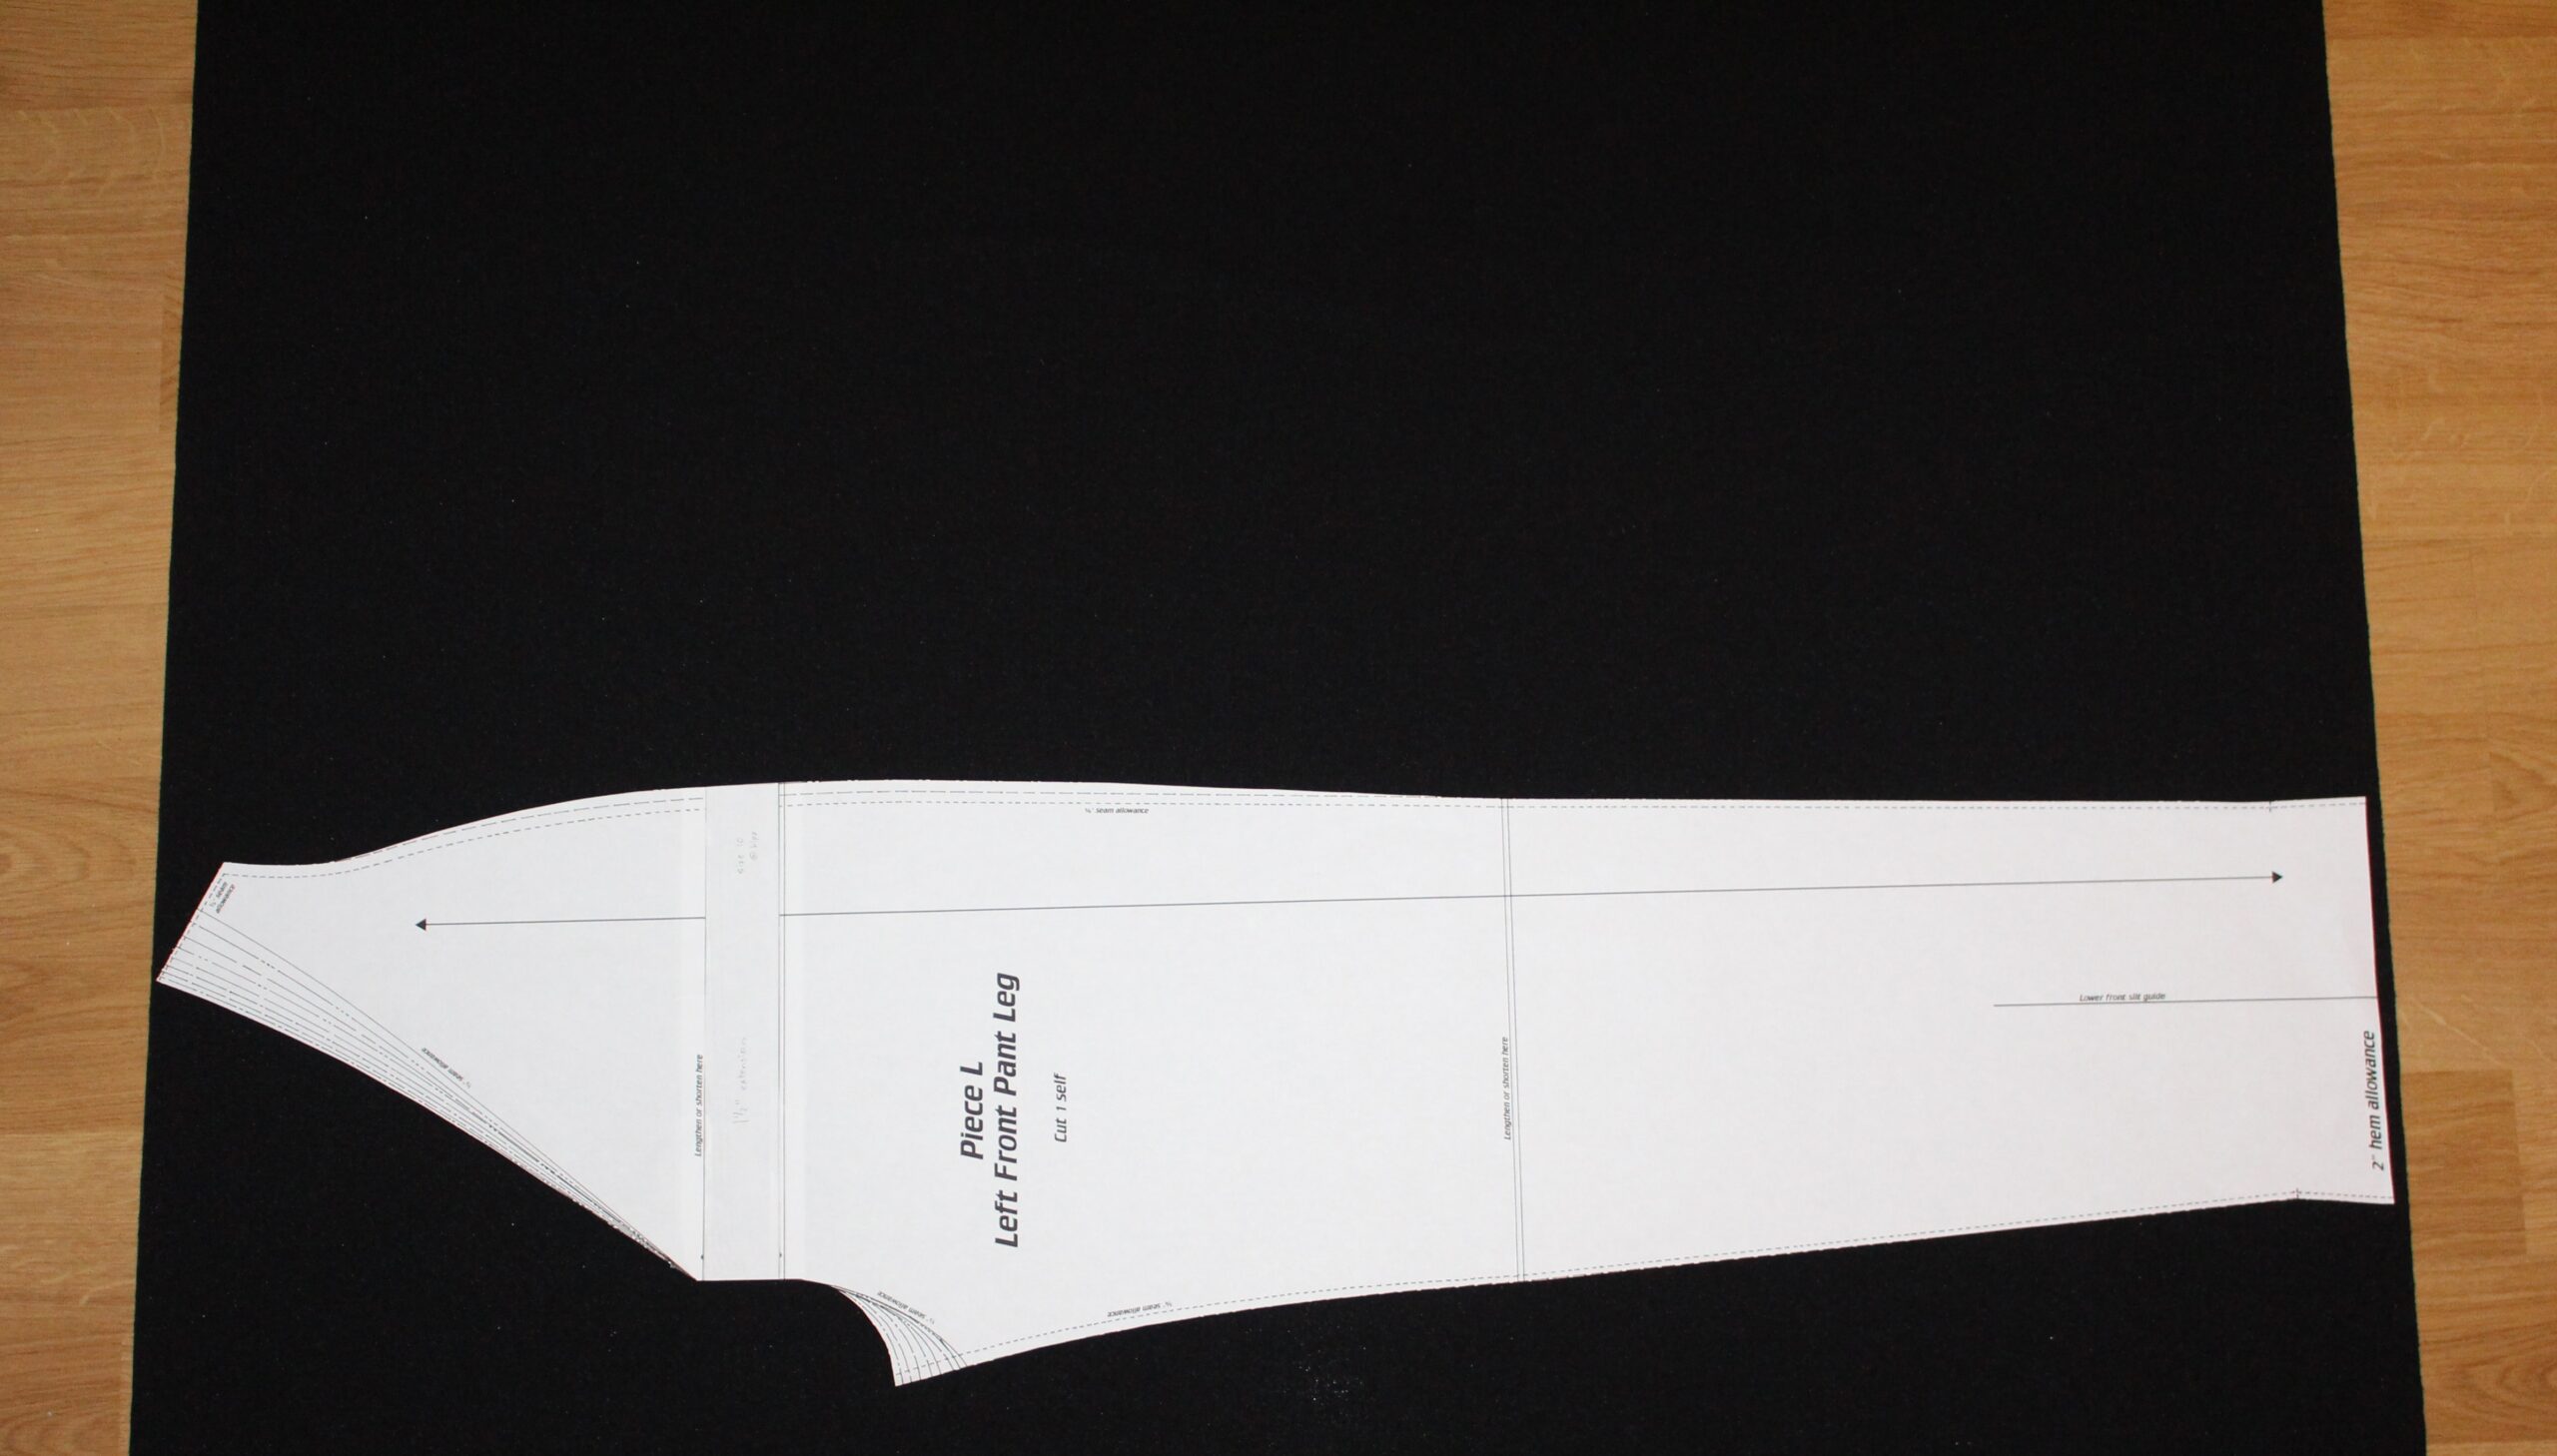
K – Right front pant leg
L – Left front pant leg
M – Right back pant leg
N – Left back pant leg
O – Front sleeve
P – Back sleeve
S – Lower front pant facing
U2 – Shoulder pad (women’s version 2)
U – Shoulder pad (men’s version)
"YESTERDAY'S ENTERPRISE" UNIFORM VARIANT
For the “Yesterday’s Enterprise” uniform variant, you’ll need the following pattern pieces:
A2 – “Yesterday’s Enterprise” collar
B3 – Front yoke
C3 – Back yoke
D3 – Upper front
E – Right side front
F – Left side front
G2 – Upper right back
G3 – Upper left back
H – Right side back
I – Left side back
J3 – Lower front
K – Right front pant leg
L – Left front pant leg
M – Right back pant leg
N – Left back pant leg
O – Front sleeve
P – Back sleeve
Q – “Yesterday’s Enterprise” sleeve cuff
S – Lower front pant facing
U2 – Shoulder pad (women’s version 2)
U – Shoulder pad (men’s version)
FABRIC CUTTING
There are a few important factors to keep in mind when cutting your fabric.
First, remember to cut your fabric using the matte/”dull” (non-shiny) side of the fabric as the “right” side.
With the Tailors Gone Wild TNG jumpsuit patterns, this means cutting your pattern pieces with the fabric “right” (matte/dull) side up and the printed pattern pieces facing upward, as well.
Second, for the later TNG jumpsuit styles you have multiple grain options, which are indicated on the printed patterns when applicable.
As best I’ve been able to determine, the majority of the later-style TNG jumpsuits (including the “hero” uniforms) were cut in the same manner as the early ones, with the jumbo spandex “weave” horizontally, and the stretch oriented vertically.
Here are a few examples from the show in which the jumbo spandex “weave” was visible and clearly horizontal.
TNG, 4x5 "Remember Me"
TNG, 5x24 "The Next Phase"
TNG, 6x25 "Timescape"
TNG, 7x7 "Dark Page"
TNG, 7x18 "Eye of the Beholder"
Note that these were all back-zipping TNG jumpsuits from seasons 4-7, on two main cast members and a recurring character.
Furthermore, here are some close-up auction photos of various screen-used TNG jumpsuits, in which the jumbo spandex “weave” is clearly horizontal:
Counselor Troi TNG jumpsuit auction photo
Counselor Troi TNG jumpsuit auction photo
Counselor Troi TNG jumpsuit auction photo
Ensign Ro TNG jumpsuit auction photo
Ensign Rager TNG jumpsuit auction photo
Note that Tasha Yar’s uniform from “Yesterday’s Enterprise” was also cut with the grain in this direction.
Tasha Yar "Yesterday's Enterprise" TNG jumpsuit (photo by Angelo Cifaldi)
Should you desire to cut your TNG jumpsuit in this manner, an easy way to orient your pattern pieces is to match the horizontal lengthen/shorten lines to the fabric crossgrain (the jumbo spandex “weave”).
That said, at least some of the later-style TNG jumpsuits were cut on the opposite grain – with the stretch going around the wearer’s body (rather than vertically), and the jumbo spandex “weave” vertical.
Here is a screen-used Dr. Crusher stunt uniform, which was similarly cut (observe the vertical “weave”):
Dr. Crusher stunt TNG jumpsuit auction photo
To add further variety, here are a few “hero” TNG jumpsuits that were cut with the yokes on the straight grain (jumbo spandex “weave” horizontal), but the body and sleeves on the crossgrain (“weave” vertical)!
Screen-used Dr. Crusher TNG jumpsuit
Screen-used Dr. Crusher TNG jumpsuit
Screen-used Counselor Troi TNG jumpsuit
Screen-used Counselor Troi TNG jumpsuit
While it might be tempting to disregard that last Counselor Troi uniform since it was specifically from the Enterprise finale (“These Are the Voyages …”), it is consistent with the Dr. Crusher uniform (which would’ve definitely been specifically from TNG), so the different grain options are definitely worth considering.
As I see it, the primary advantage of the crossgrain-cut jumpsuits is that the stretch goes around the wearer (rather than vertically), so they’re more comfortable to wear.
However, in my opinion they tend to not look quite as good for some intangible reason. The cornered areas are also slightly more prone to puckering, as are the tips of the bust darts on the women’s uniforms.
Should you wish to cut your jumpsuit on the crossgrain, the limitation is the width of the black spandex; specifically, it needs to be wide enough for the entire pant legs. (The left front pant leg is the tallest of the four.)
Also keep in mind that you can “mix-and-match” the grains, as evidenced by the aforementioned Dr. Crusher and Counselor Troi uniforms.
(I don’t know if the pant legs on those last two uniforms were on the crossgrain or not, but in the absence of any evidence to the contrary I’d say that option’s definitely on the table too.)
One final grain-related element to consider is the sleeves: they can be cut in any of three directions!
They can be cut on the straight grain, like the majority of the TNG jumpsuits appear to have been. (See the first few examples at the beginning of this section.)
They can be cut on the crossgrain, like on the Ensign Sito uniform I examined and the last two Dr. Crusher/Counselor Troi uniforms I mentioned.
Or they can be cut on a strong diagonal, like some of the front-zipping TNG jumpsuits were, as evidenced by these photos of Tasha Yar’s uniform from “Yesterday’s Enterprise”:
Tasha Yar "Yesterday's Enterprise" TNG jumpsuit (photos by Angelo Cifaldi)
So to recap, here are the grain options and combinations directly observed on the aforementioned uniforms:
Entire jumpsuit on the straight grain (“weave” horizontal, stretch vertical)
Entire jumpsuit on the straight grain except sleeves on a strong diagonal
Entire jumpsuit on the crossgrain (“weave” vertical, stretch horizontal)
Yoke and collar on the straight grain, body on the crossgrain
Yoke on the straight grain, collar and body on the crossgrain
Personally, my preference is the first option (entire jumpsuit on the straight grain, including the sleeves), since that seems to be how the majority of the screen-used TNG jumpsuits were made and I think it looks the best.
My second pick is to cut the entire jumpsuit on the crossgrain (including the sleeves).
But obviously it’s your costume, so you can choose to cut yours however you prefer. 🙂
There are several important dots on the pattern pieces, which indicate where to align specific pieces (and in most cases, where to start and/or stop your stitching).
I suggest marking these dots on your fabric with small “tailor’s tacks.”
And finally, the seam and hem allowances vary (just like the originals), so reference both the printed pattern and the following sewing tutorial while assembling your uniform.
(I did consider “standardizing” all the seam allowances for my patterns, but I ultimately decided to preserve the original allowances, for the sake of authenticity.)
Personally, I like to cut my paper pattern pieces using paper scissors, then trace my pattern pieces onto the fabric using tailor’s chalk.
Now that you’ve gathered your materials, determined your sizing and grain preference, and cut your pattern pieces, it’s time to actually start making your TNG jumpsuit!
FRONT ASSEMBY
Here’s a quick YouTube video on how to sew the lower pant leg areas on all three TNG jumpsuit styles (season 1, season 2, and seasons 3-7):
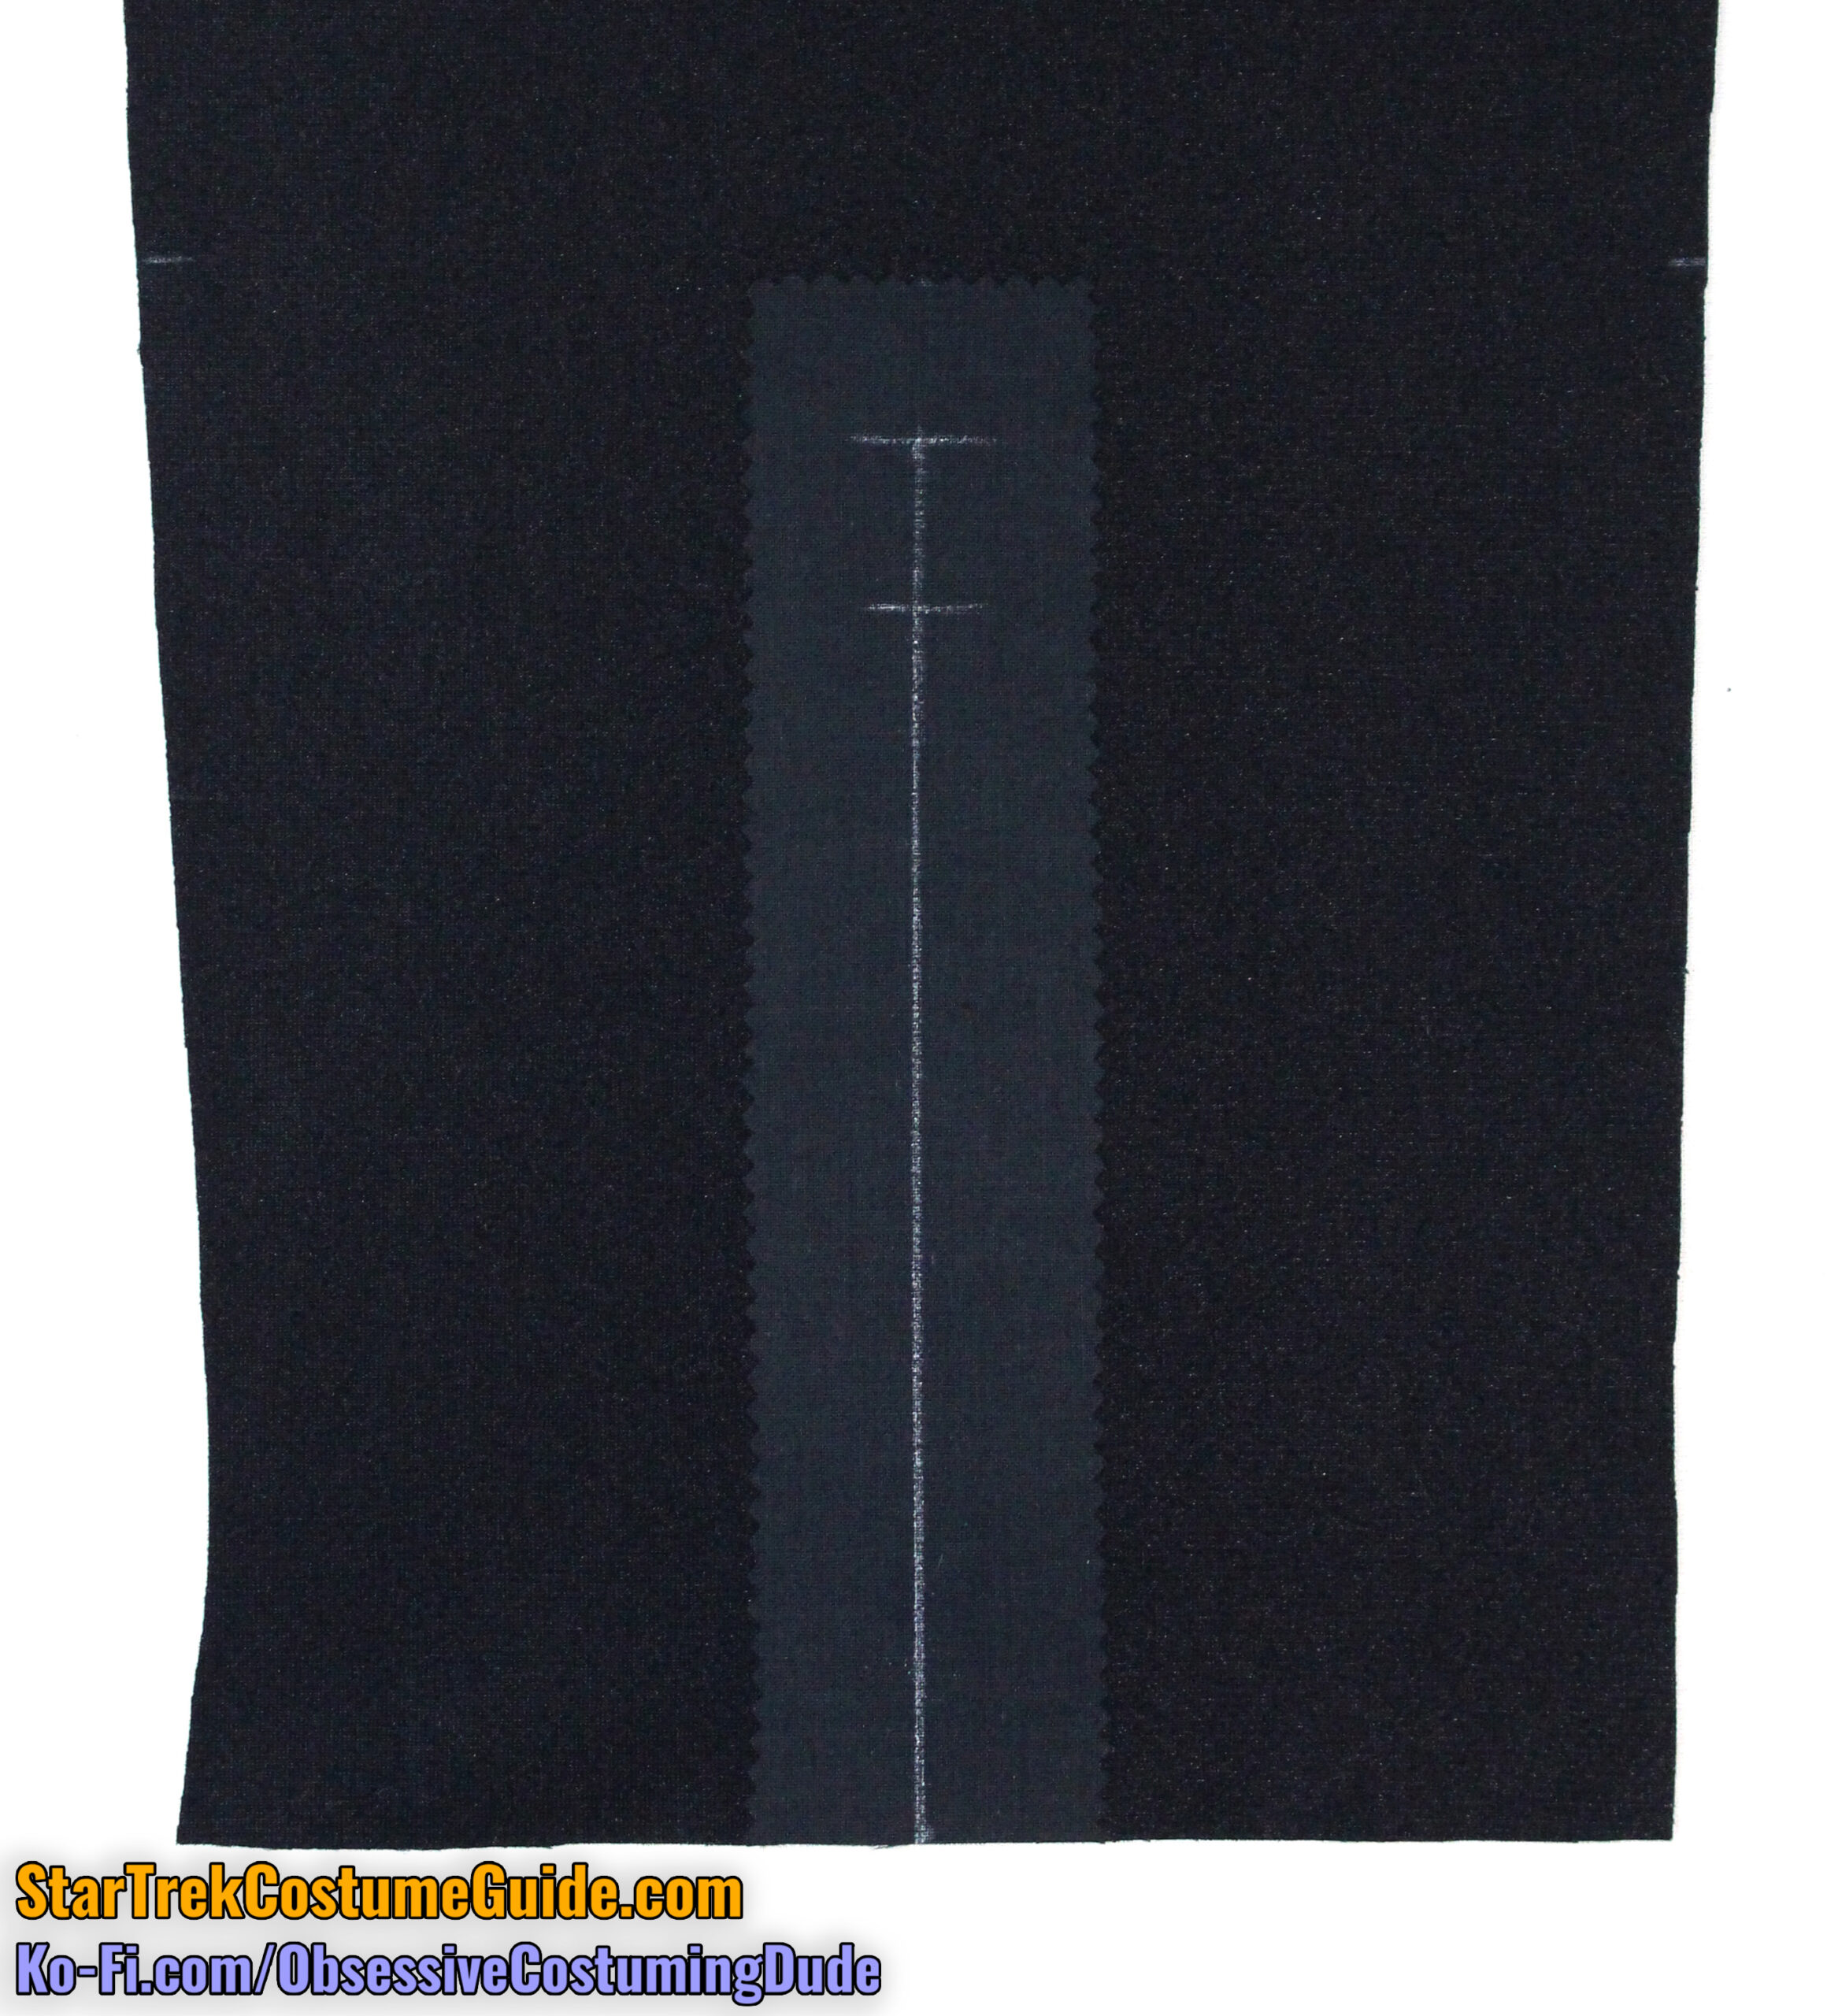
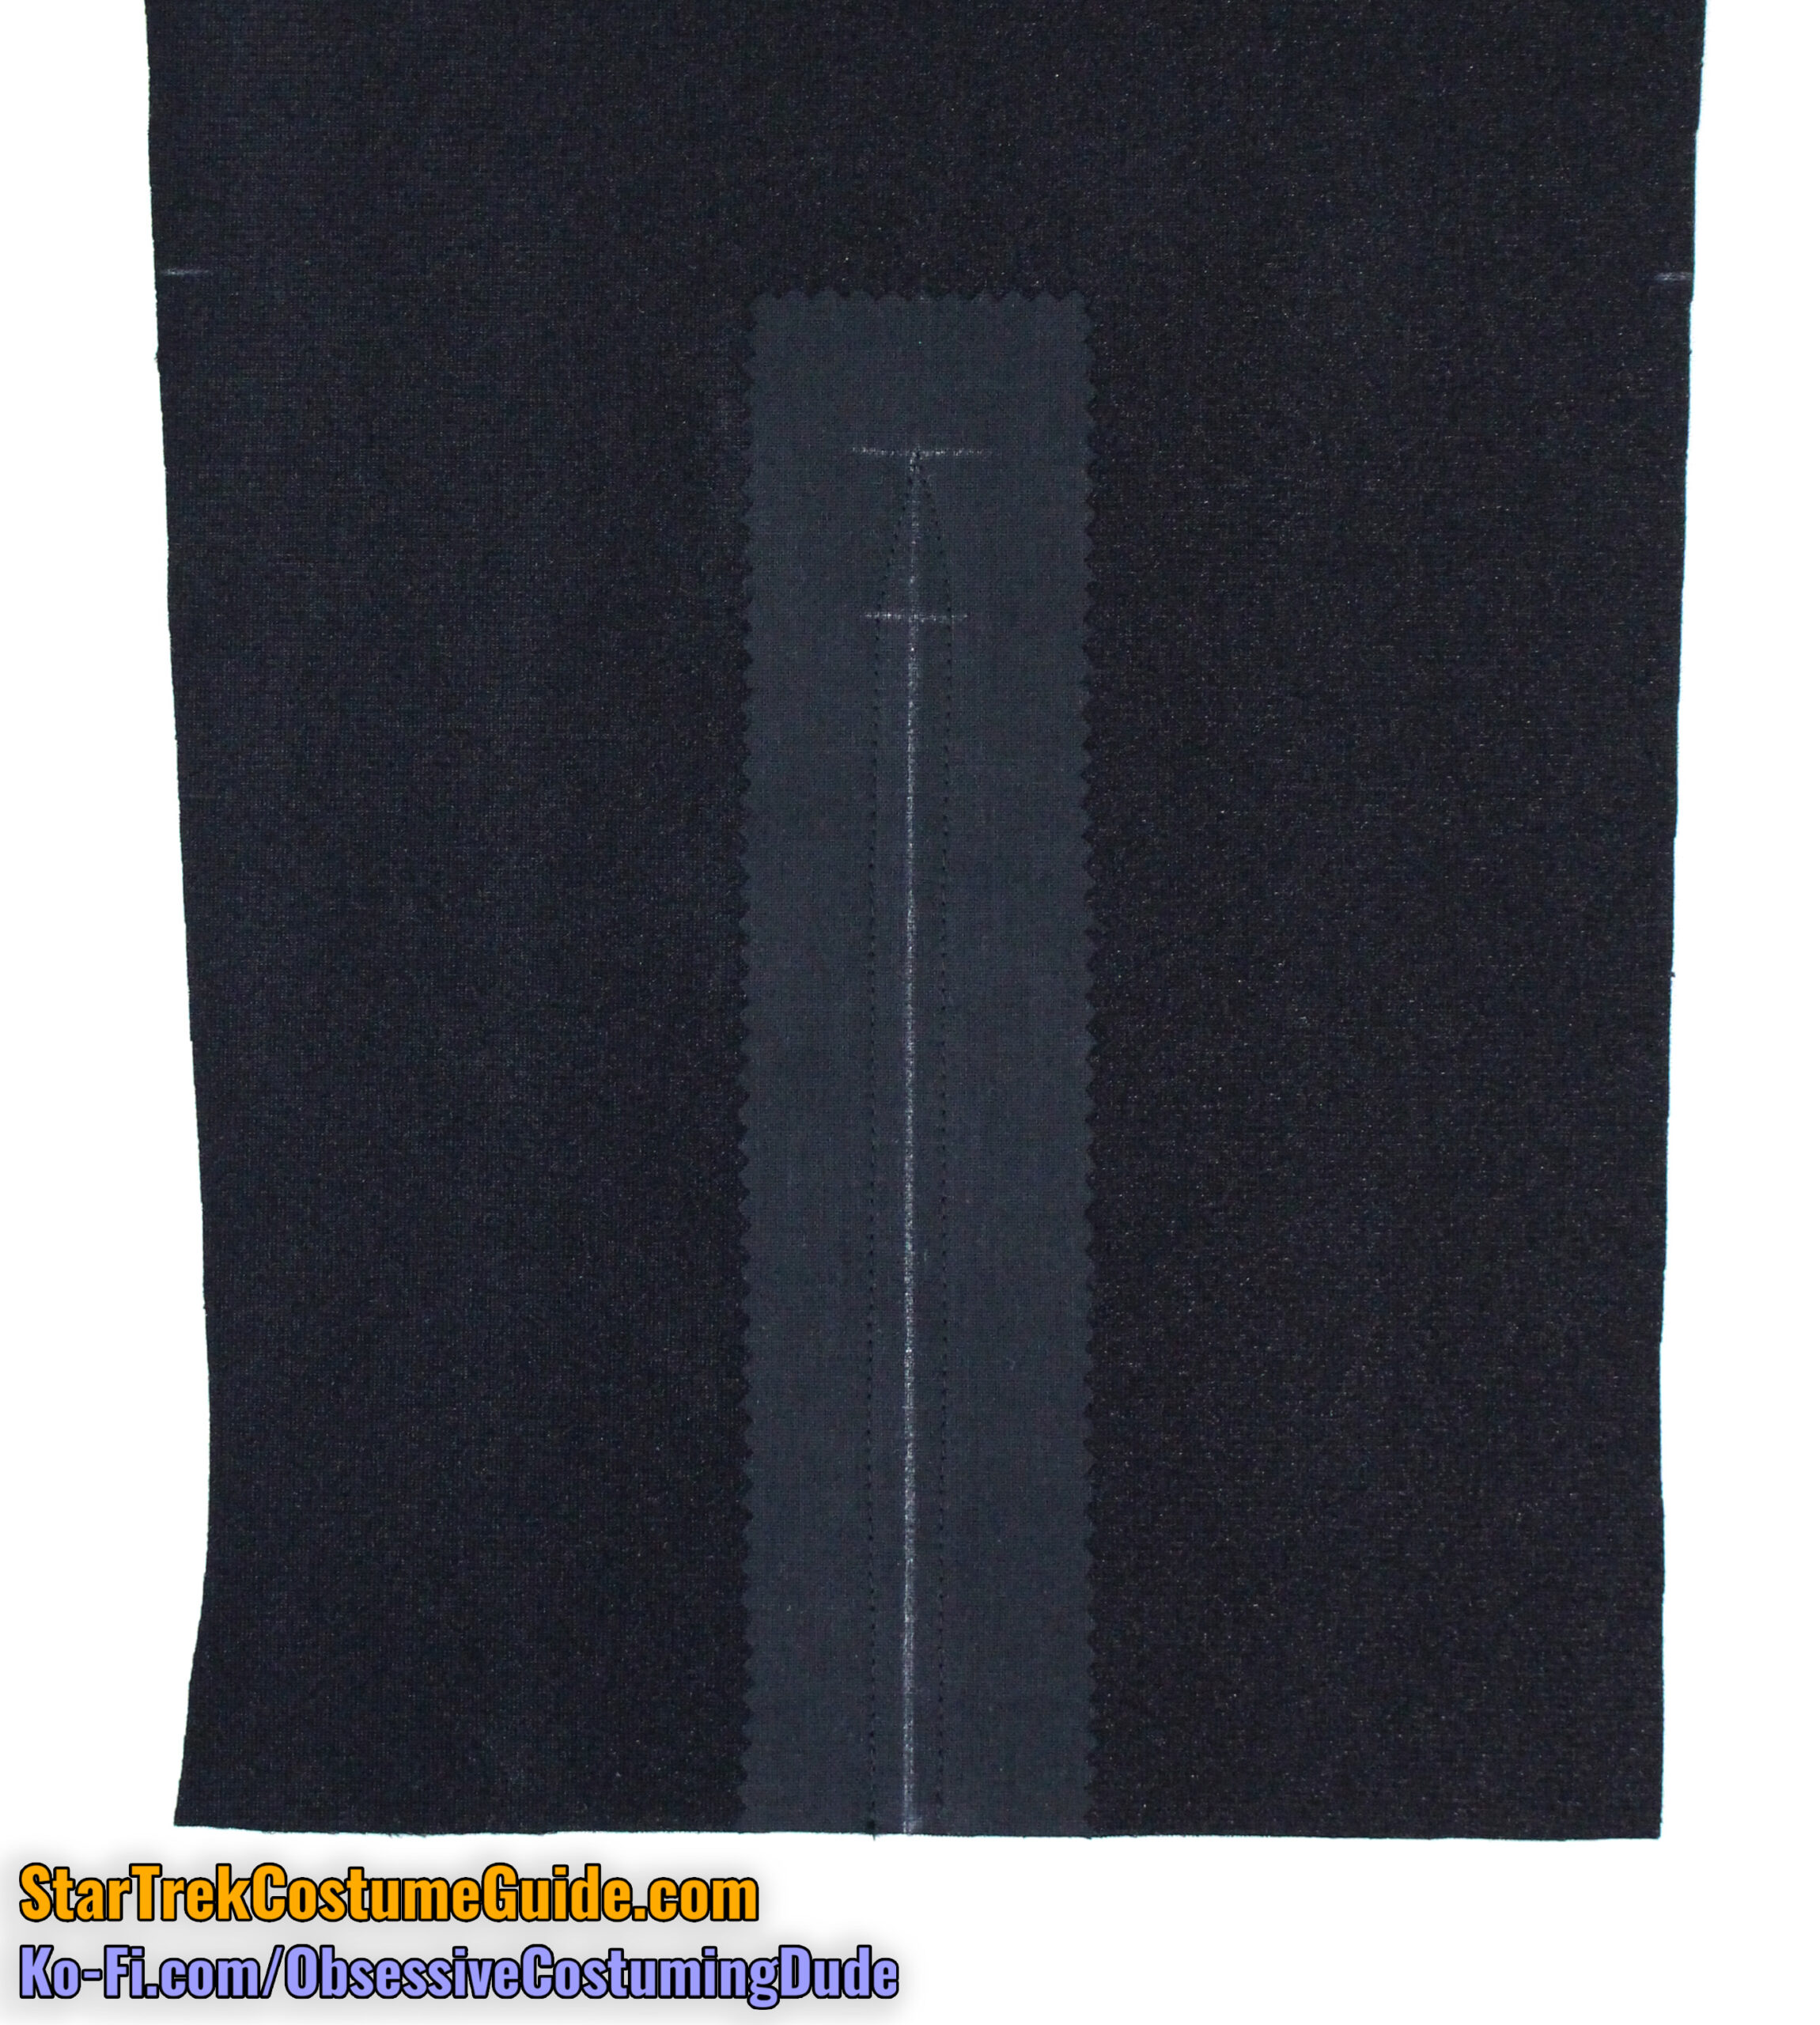
I like to start by applying a narrow strip of fusible interfacing (approximately 2” wide by 9” tall) to the underside of the lower front pant leg, horizontally centered over the alignment guide.
Mark the alignment guide on the fusible interfacing using white tailor’s chalk, then mark a horizontal line perpendicular to it 1” beneath the top.
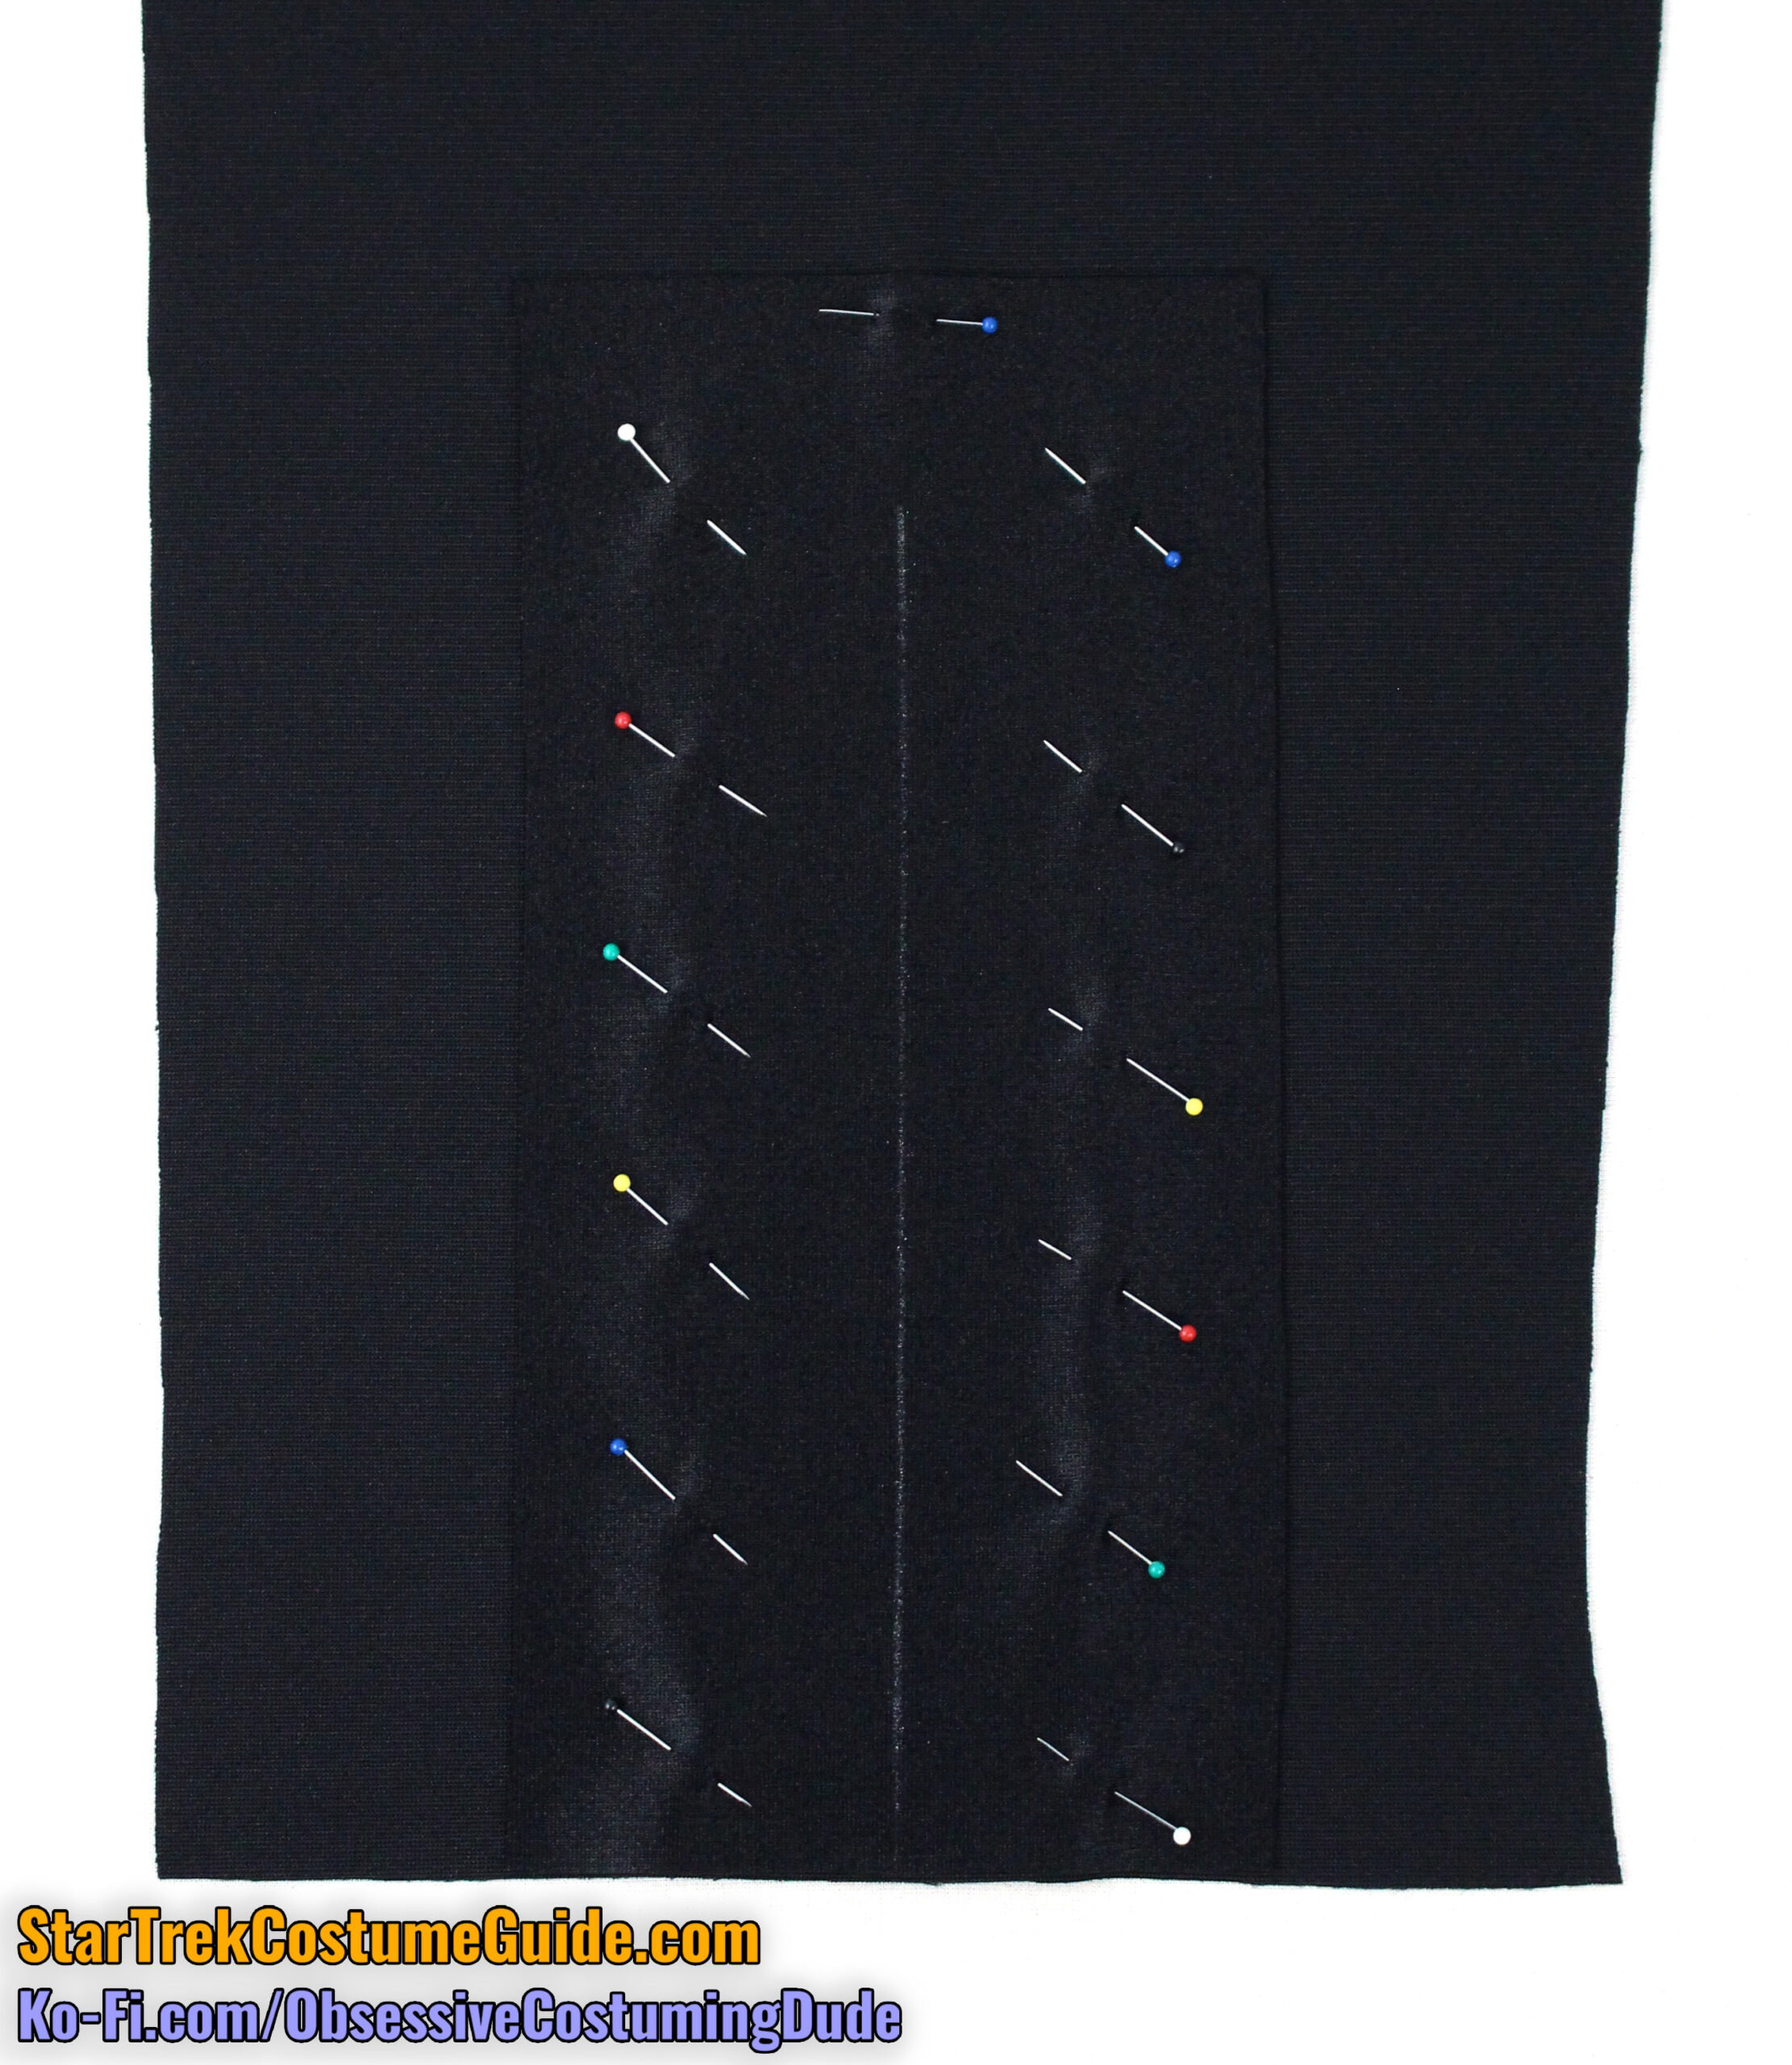
Pin the lower pant leg facing (piece S) to the lower pant leg, right sides together and centered over the alignment guide.
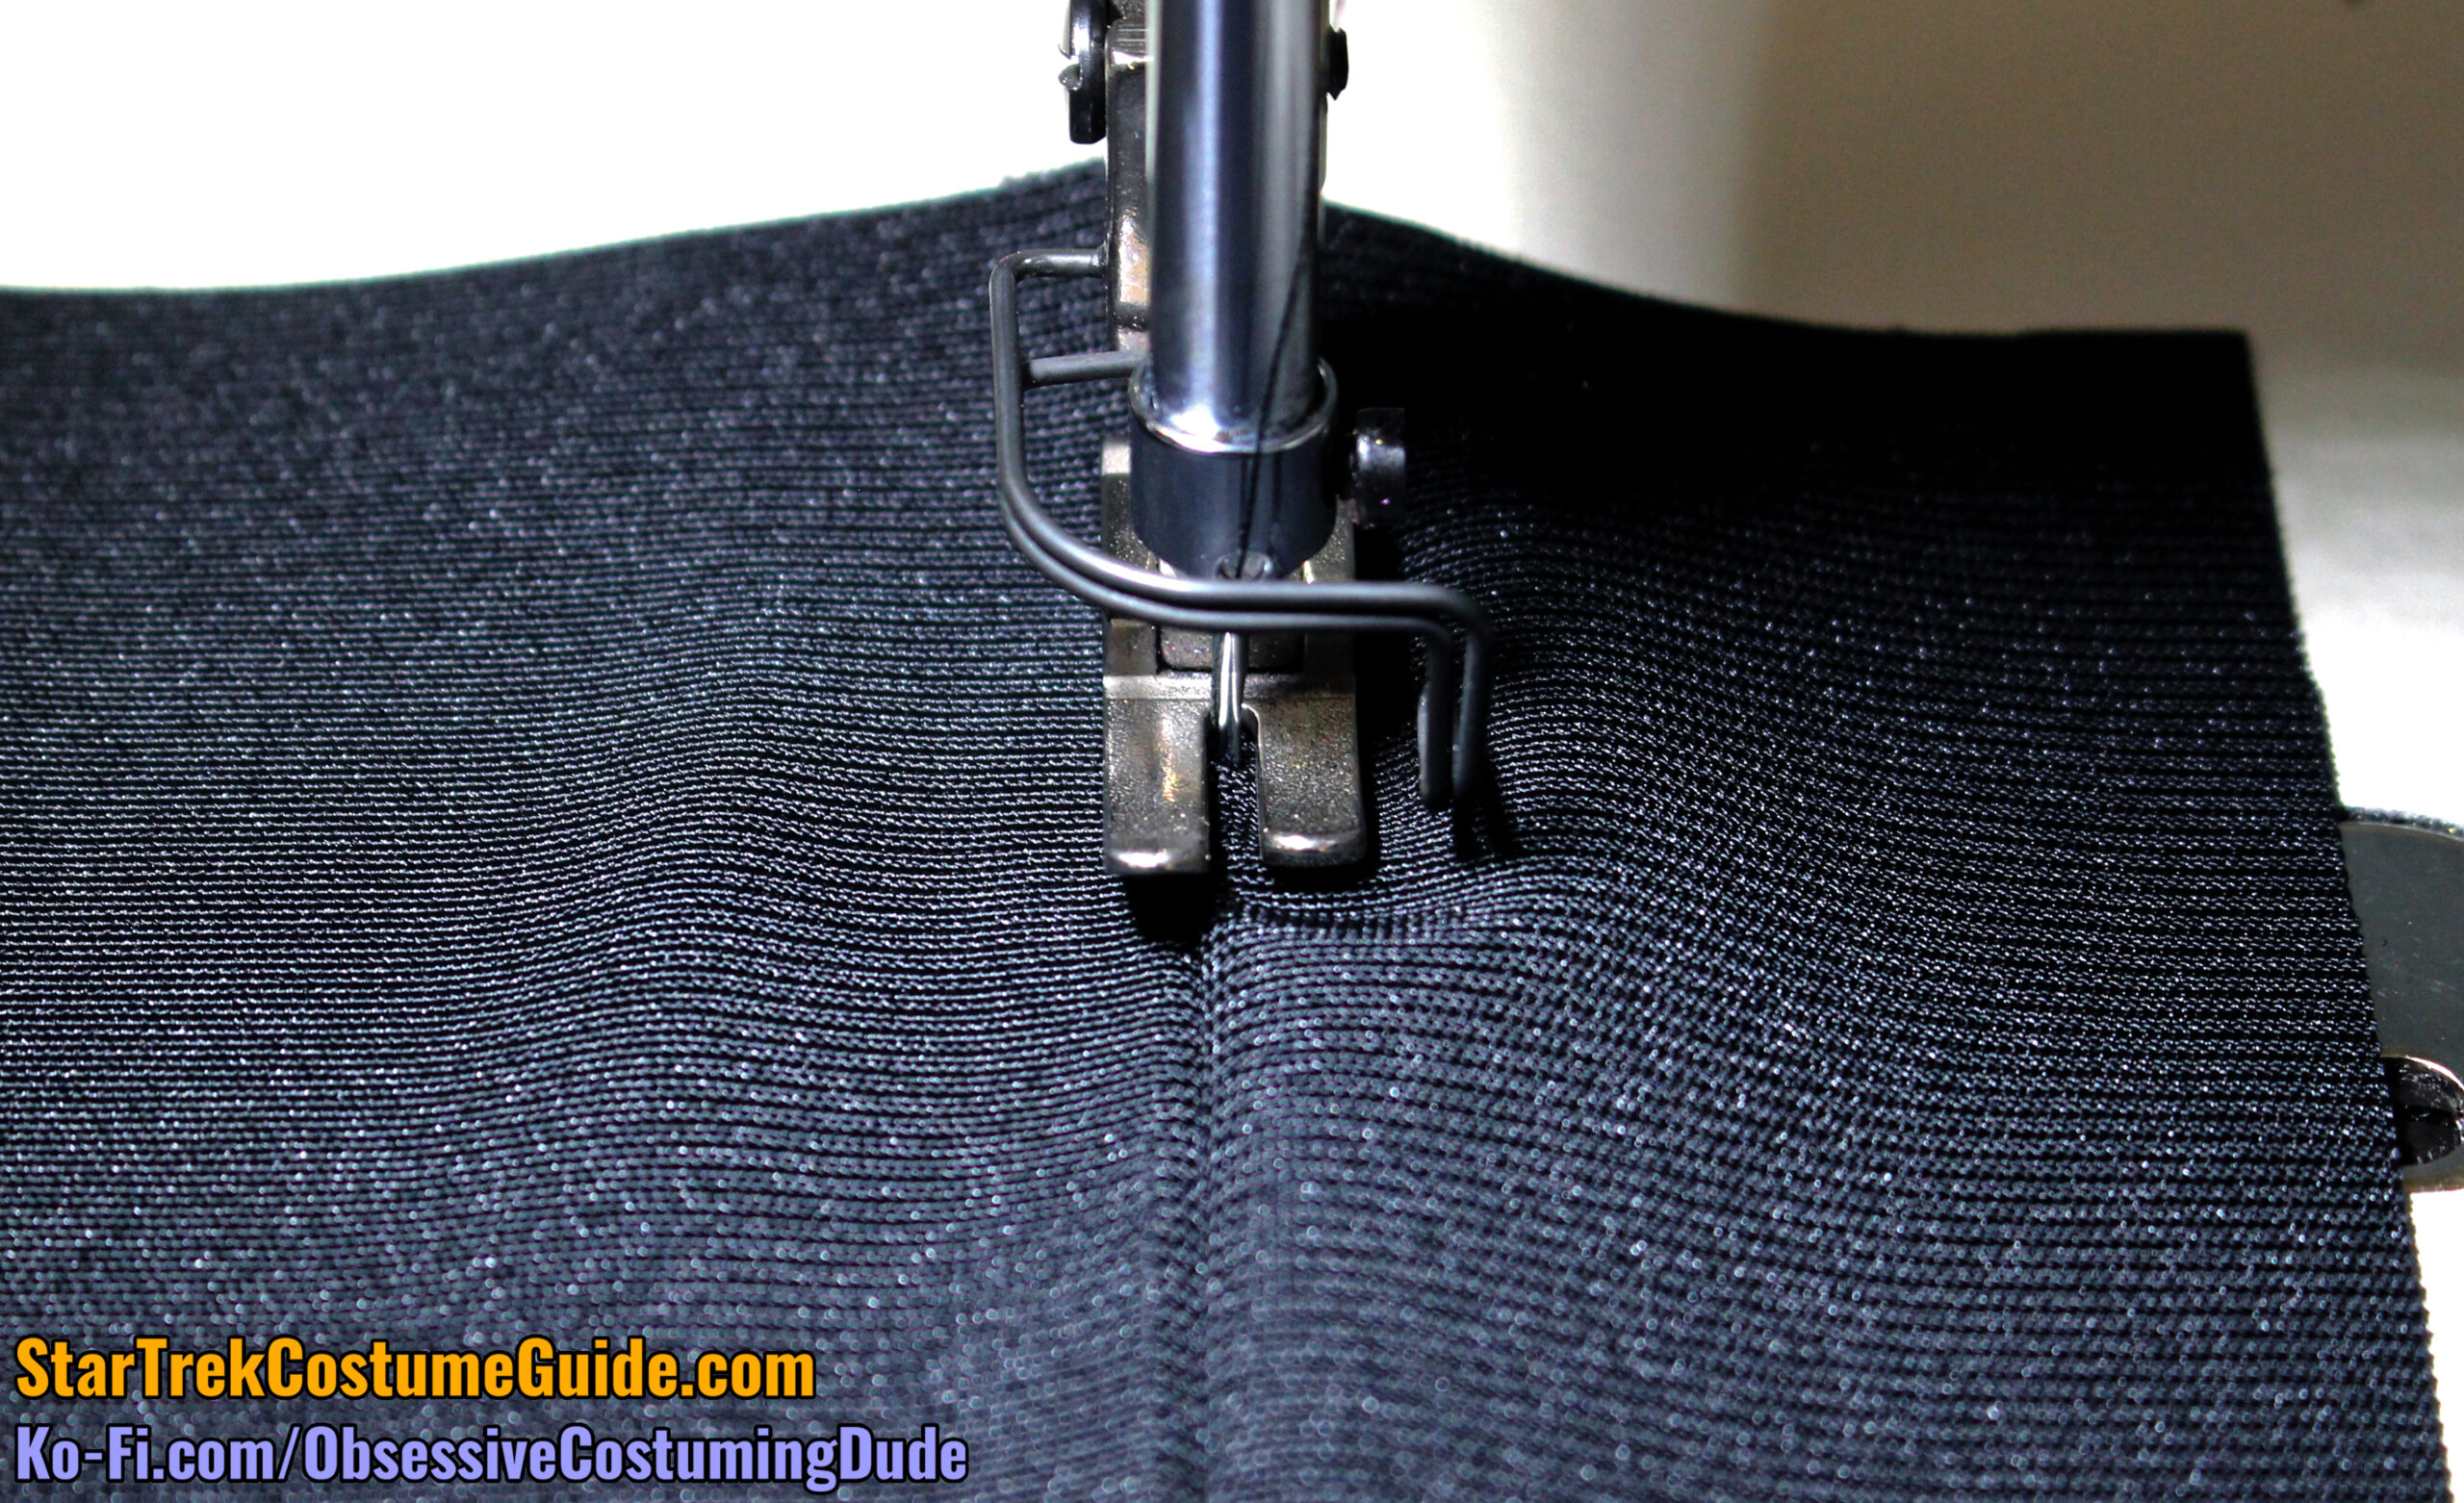
Starting at the bottom of the pant leg, stitch ¼” away from the alignment guide up to the horizontal line you marked (1” from the top of the opening).
Shorten your stitch length and pivot your stitching to the upper corner. Pivot again and stitch back to the horizontal line, then pivot again and stitch down the opposite edge.
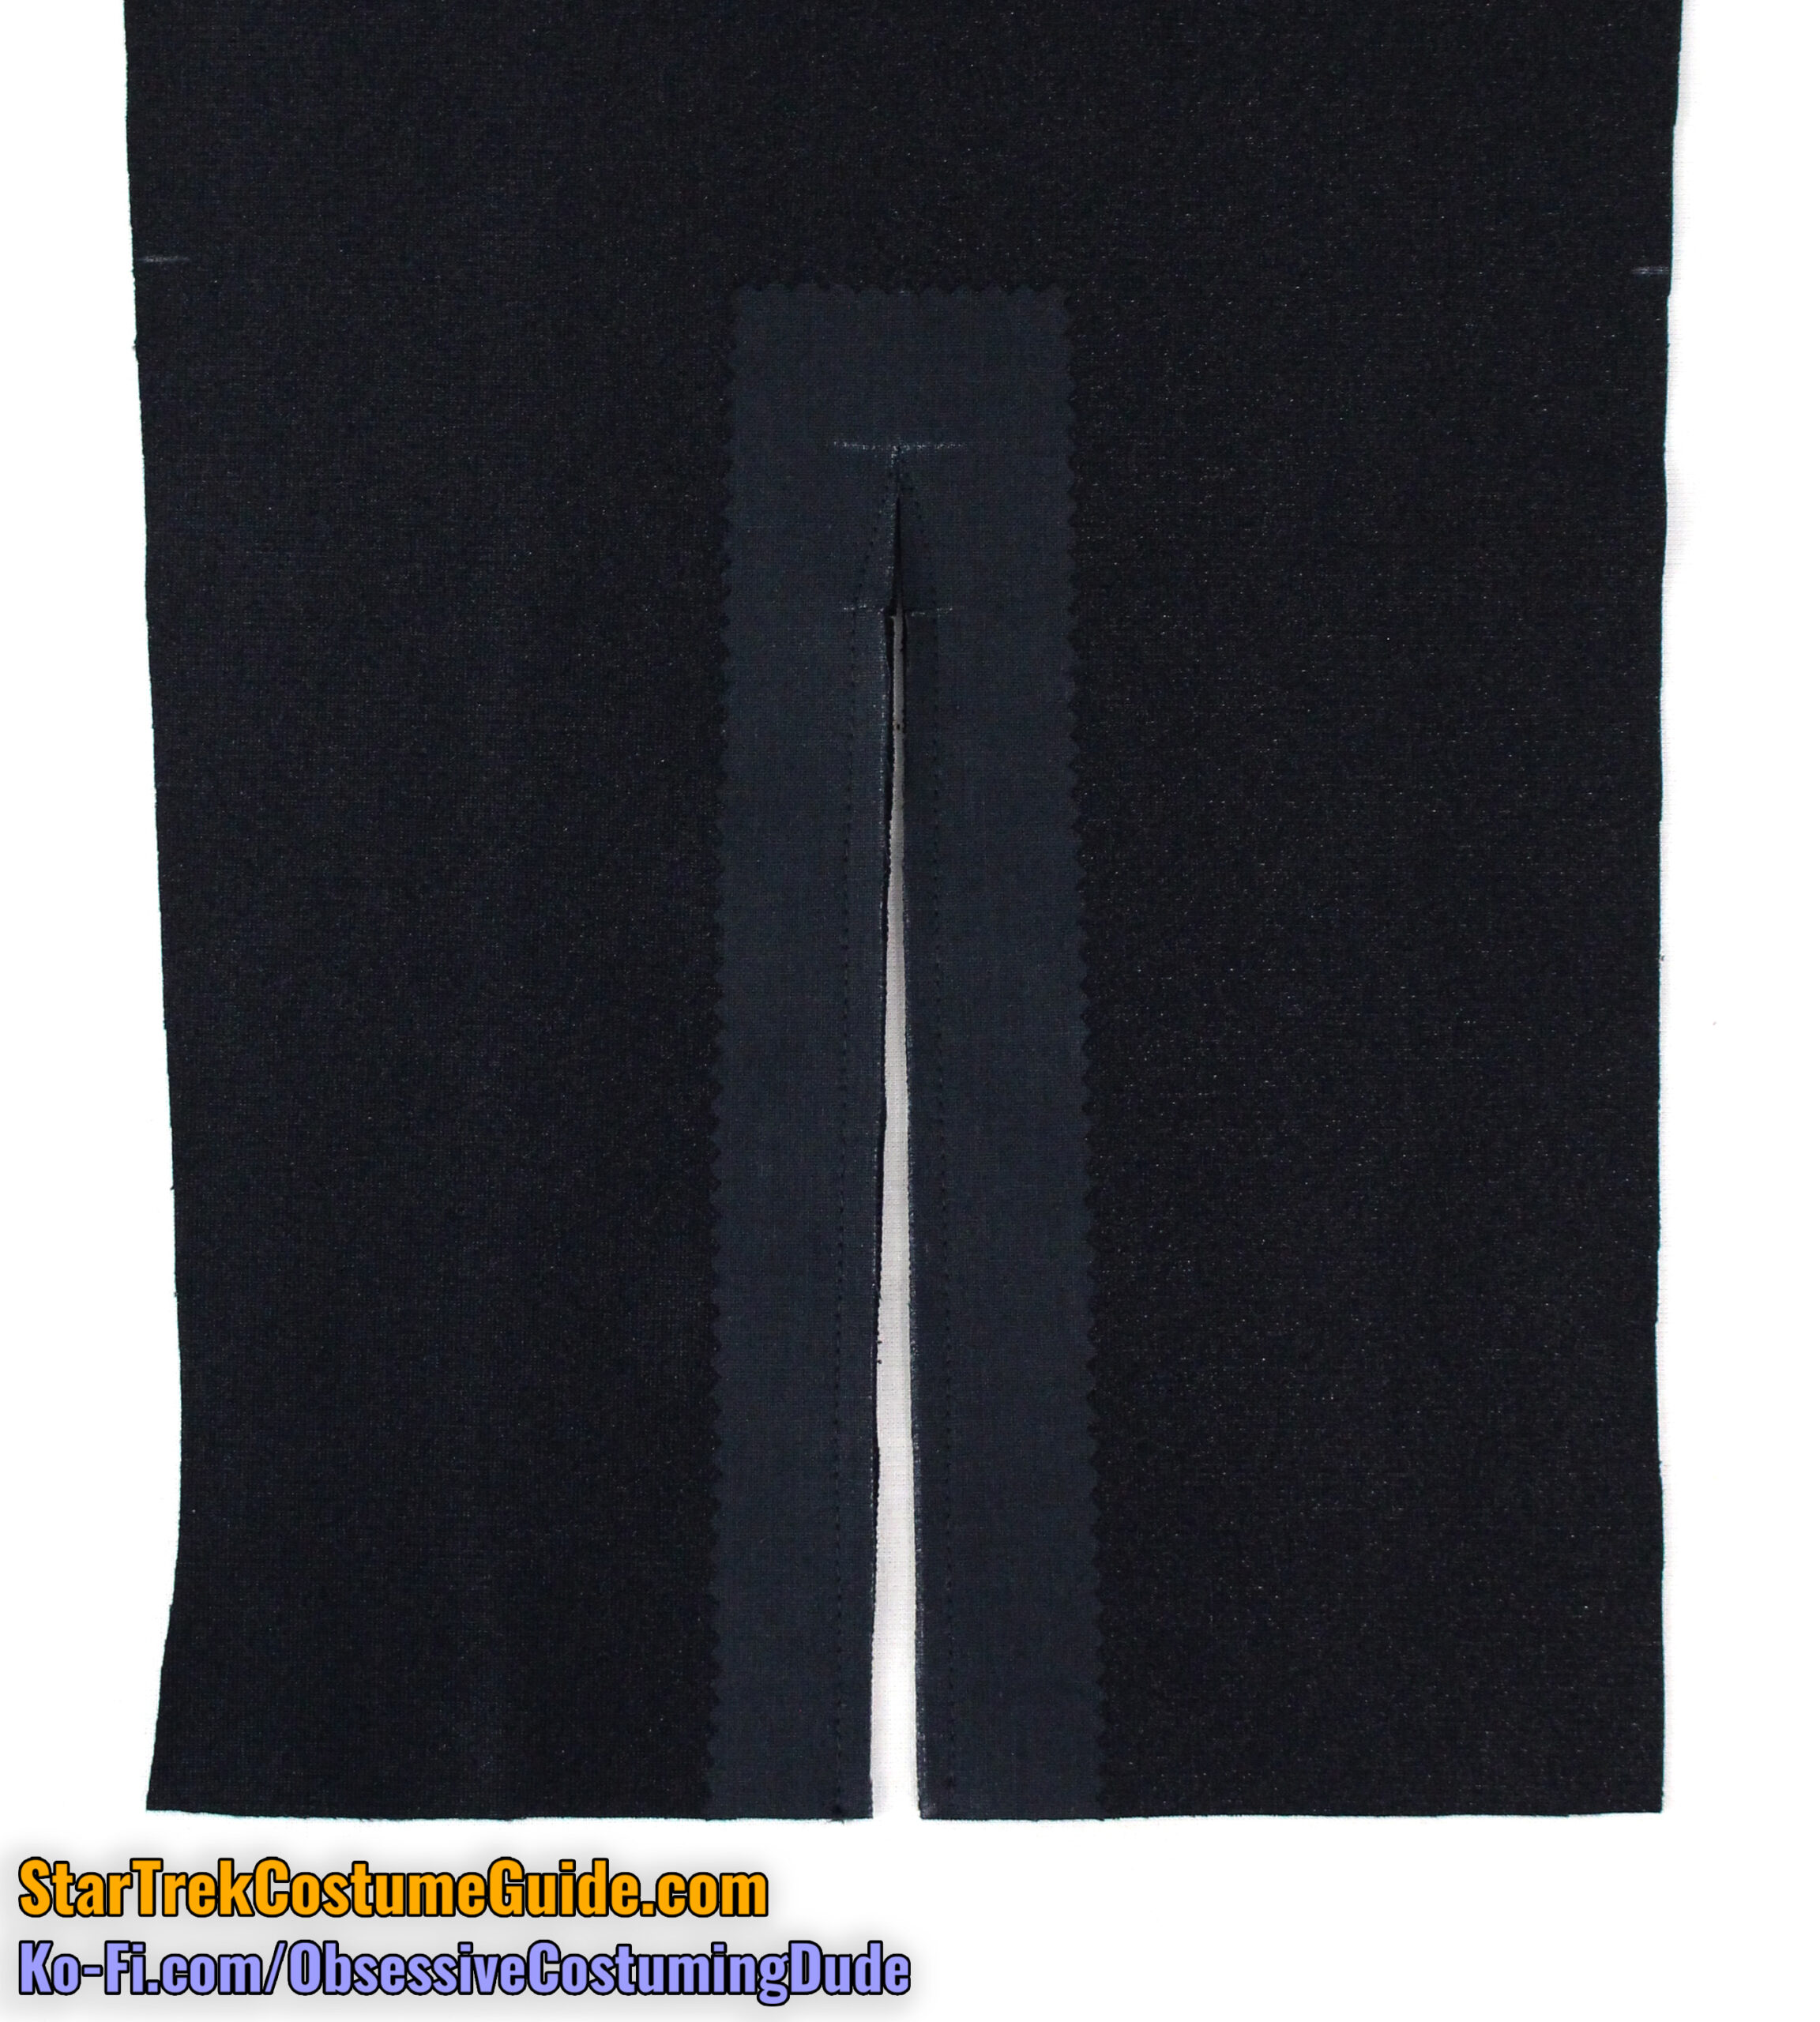
Clip the fabric open along the alignment guide, from the bottom of the pant leg to the upper corner.
Also clip the allowances horizontally to the stitching at the line you marked (1” from the top of the opening).
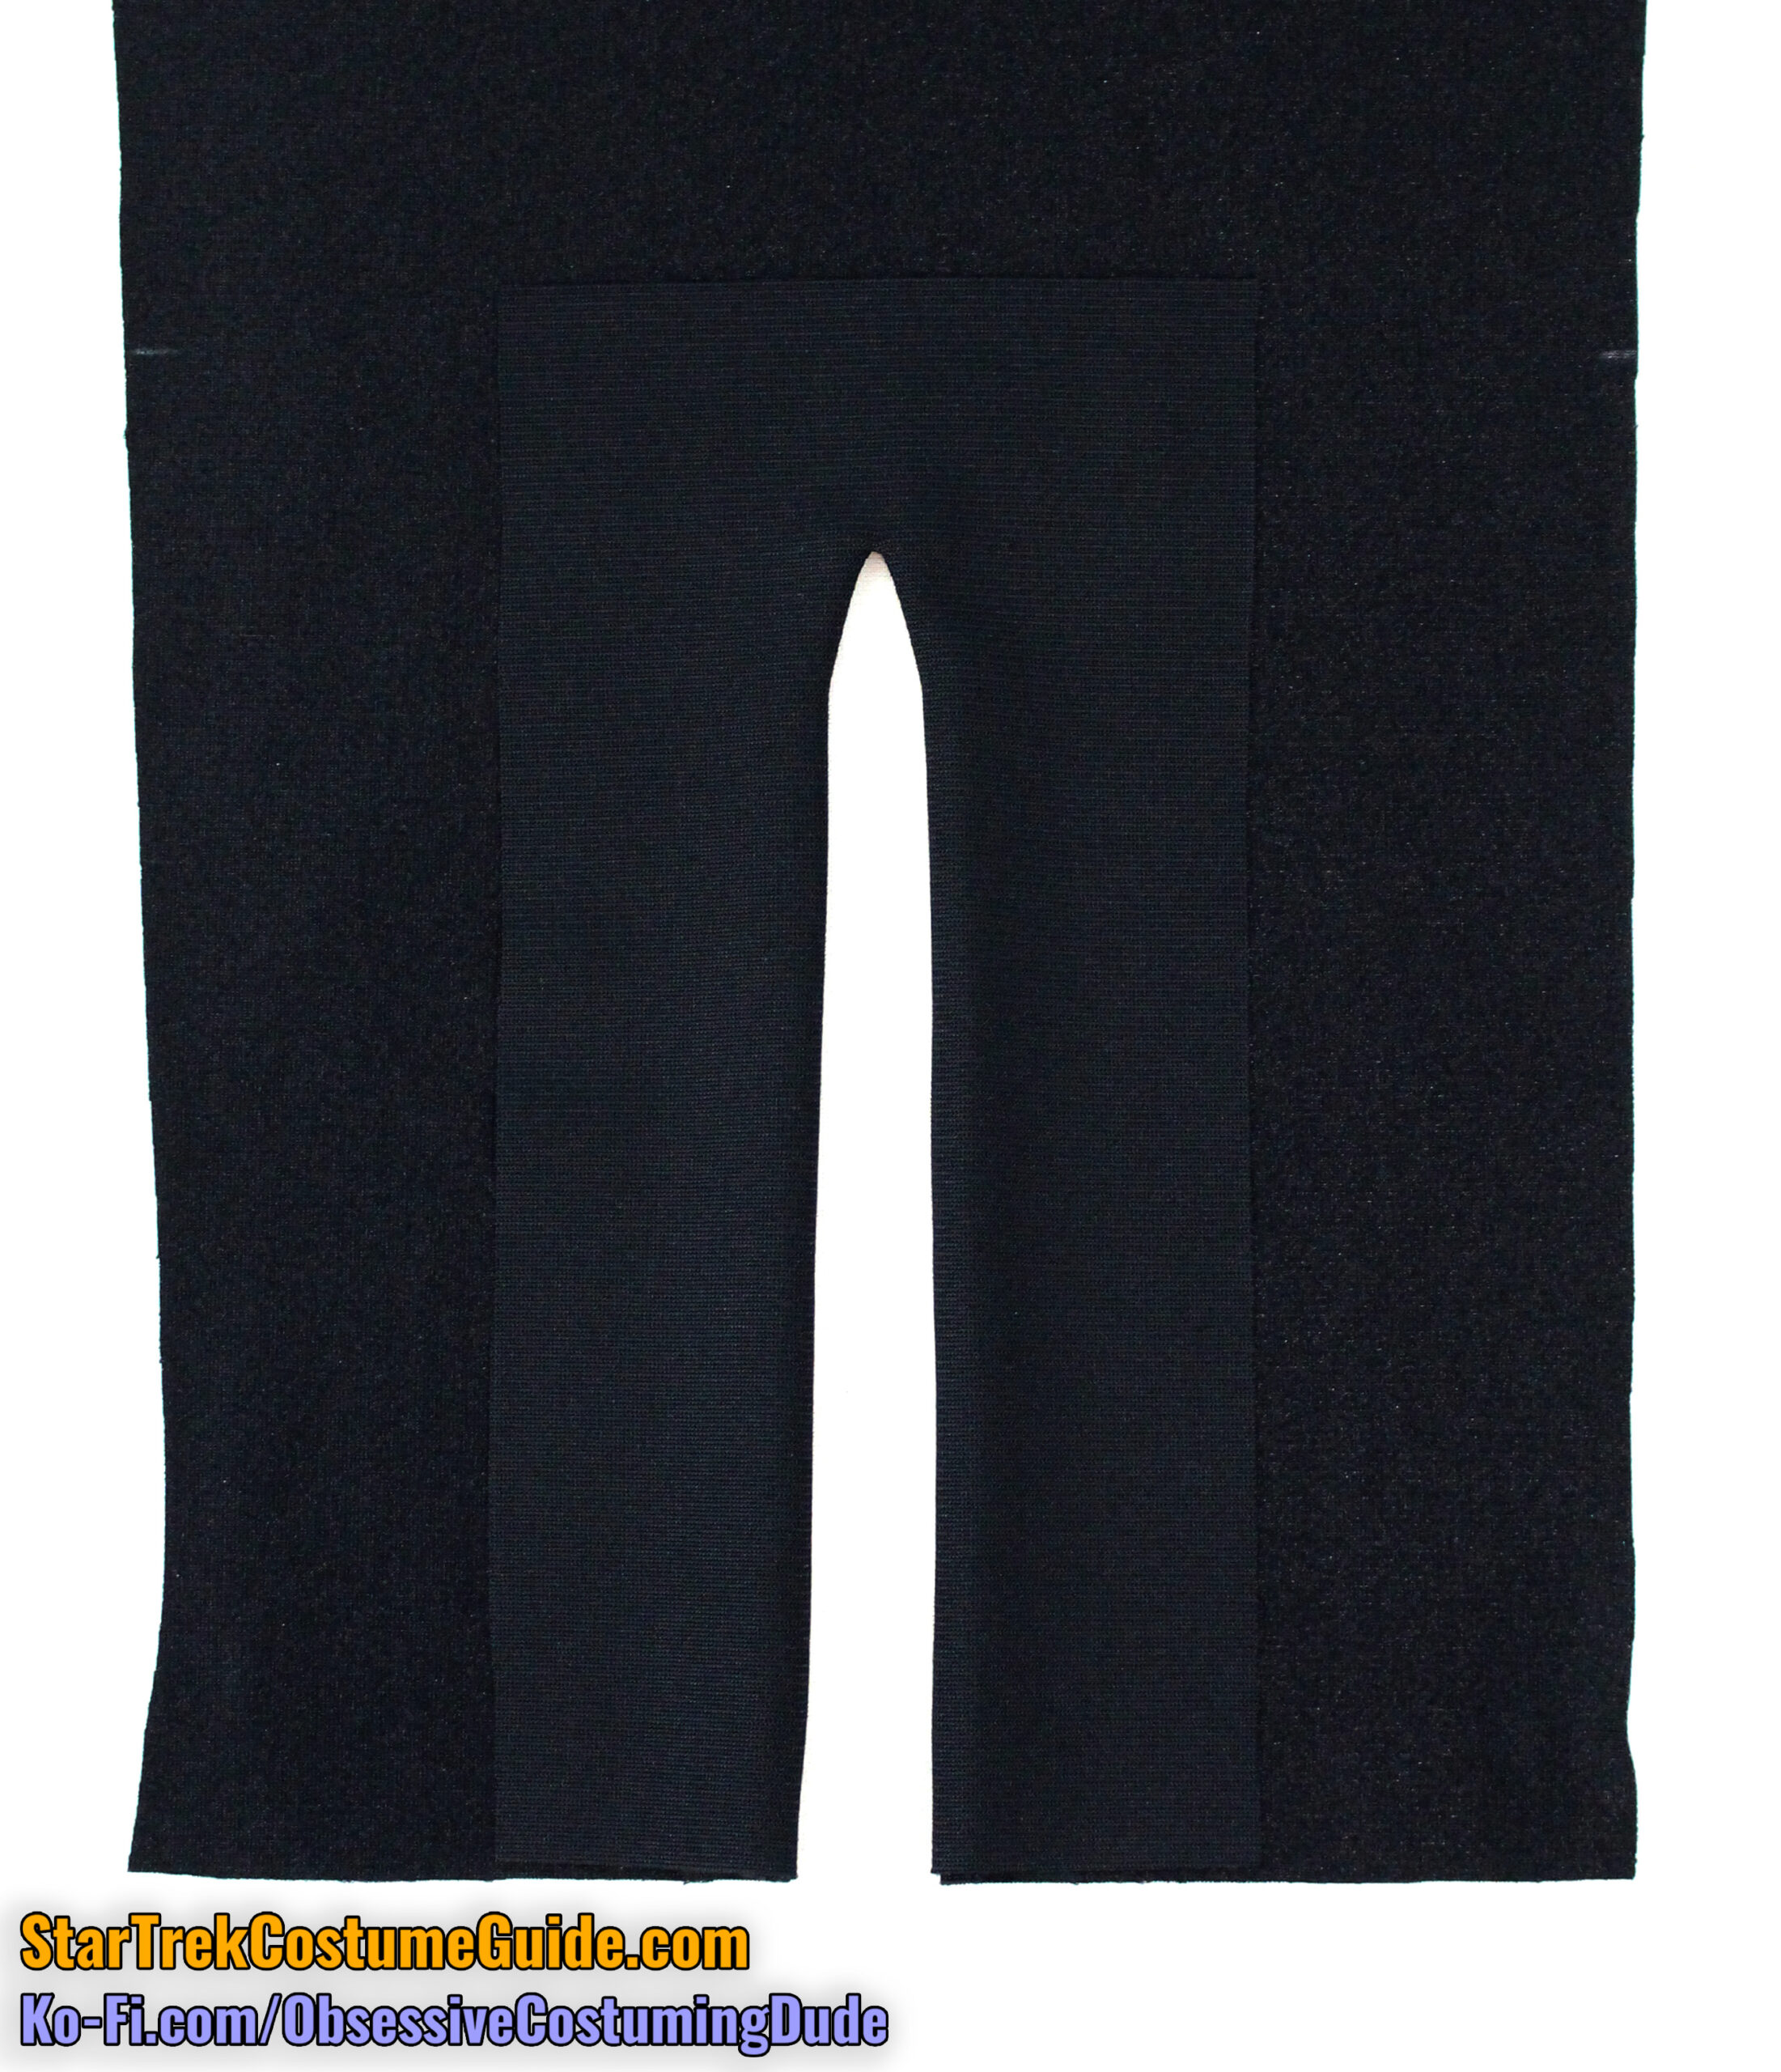
Turn the facing under and press.
Unfold the facing and allowances toward the opening, and understitch the facing to the allowances along the entire opening. (Just do your best around the top.)
Turn the facing back under and press.
That’s all for now; we’ll finish the area toward the end of the process.
Repeat for the other pant leg.
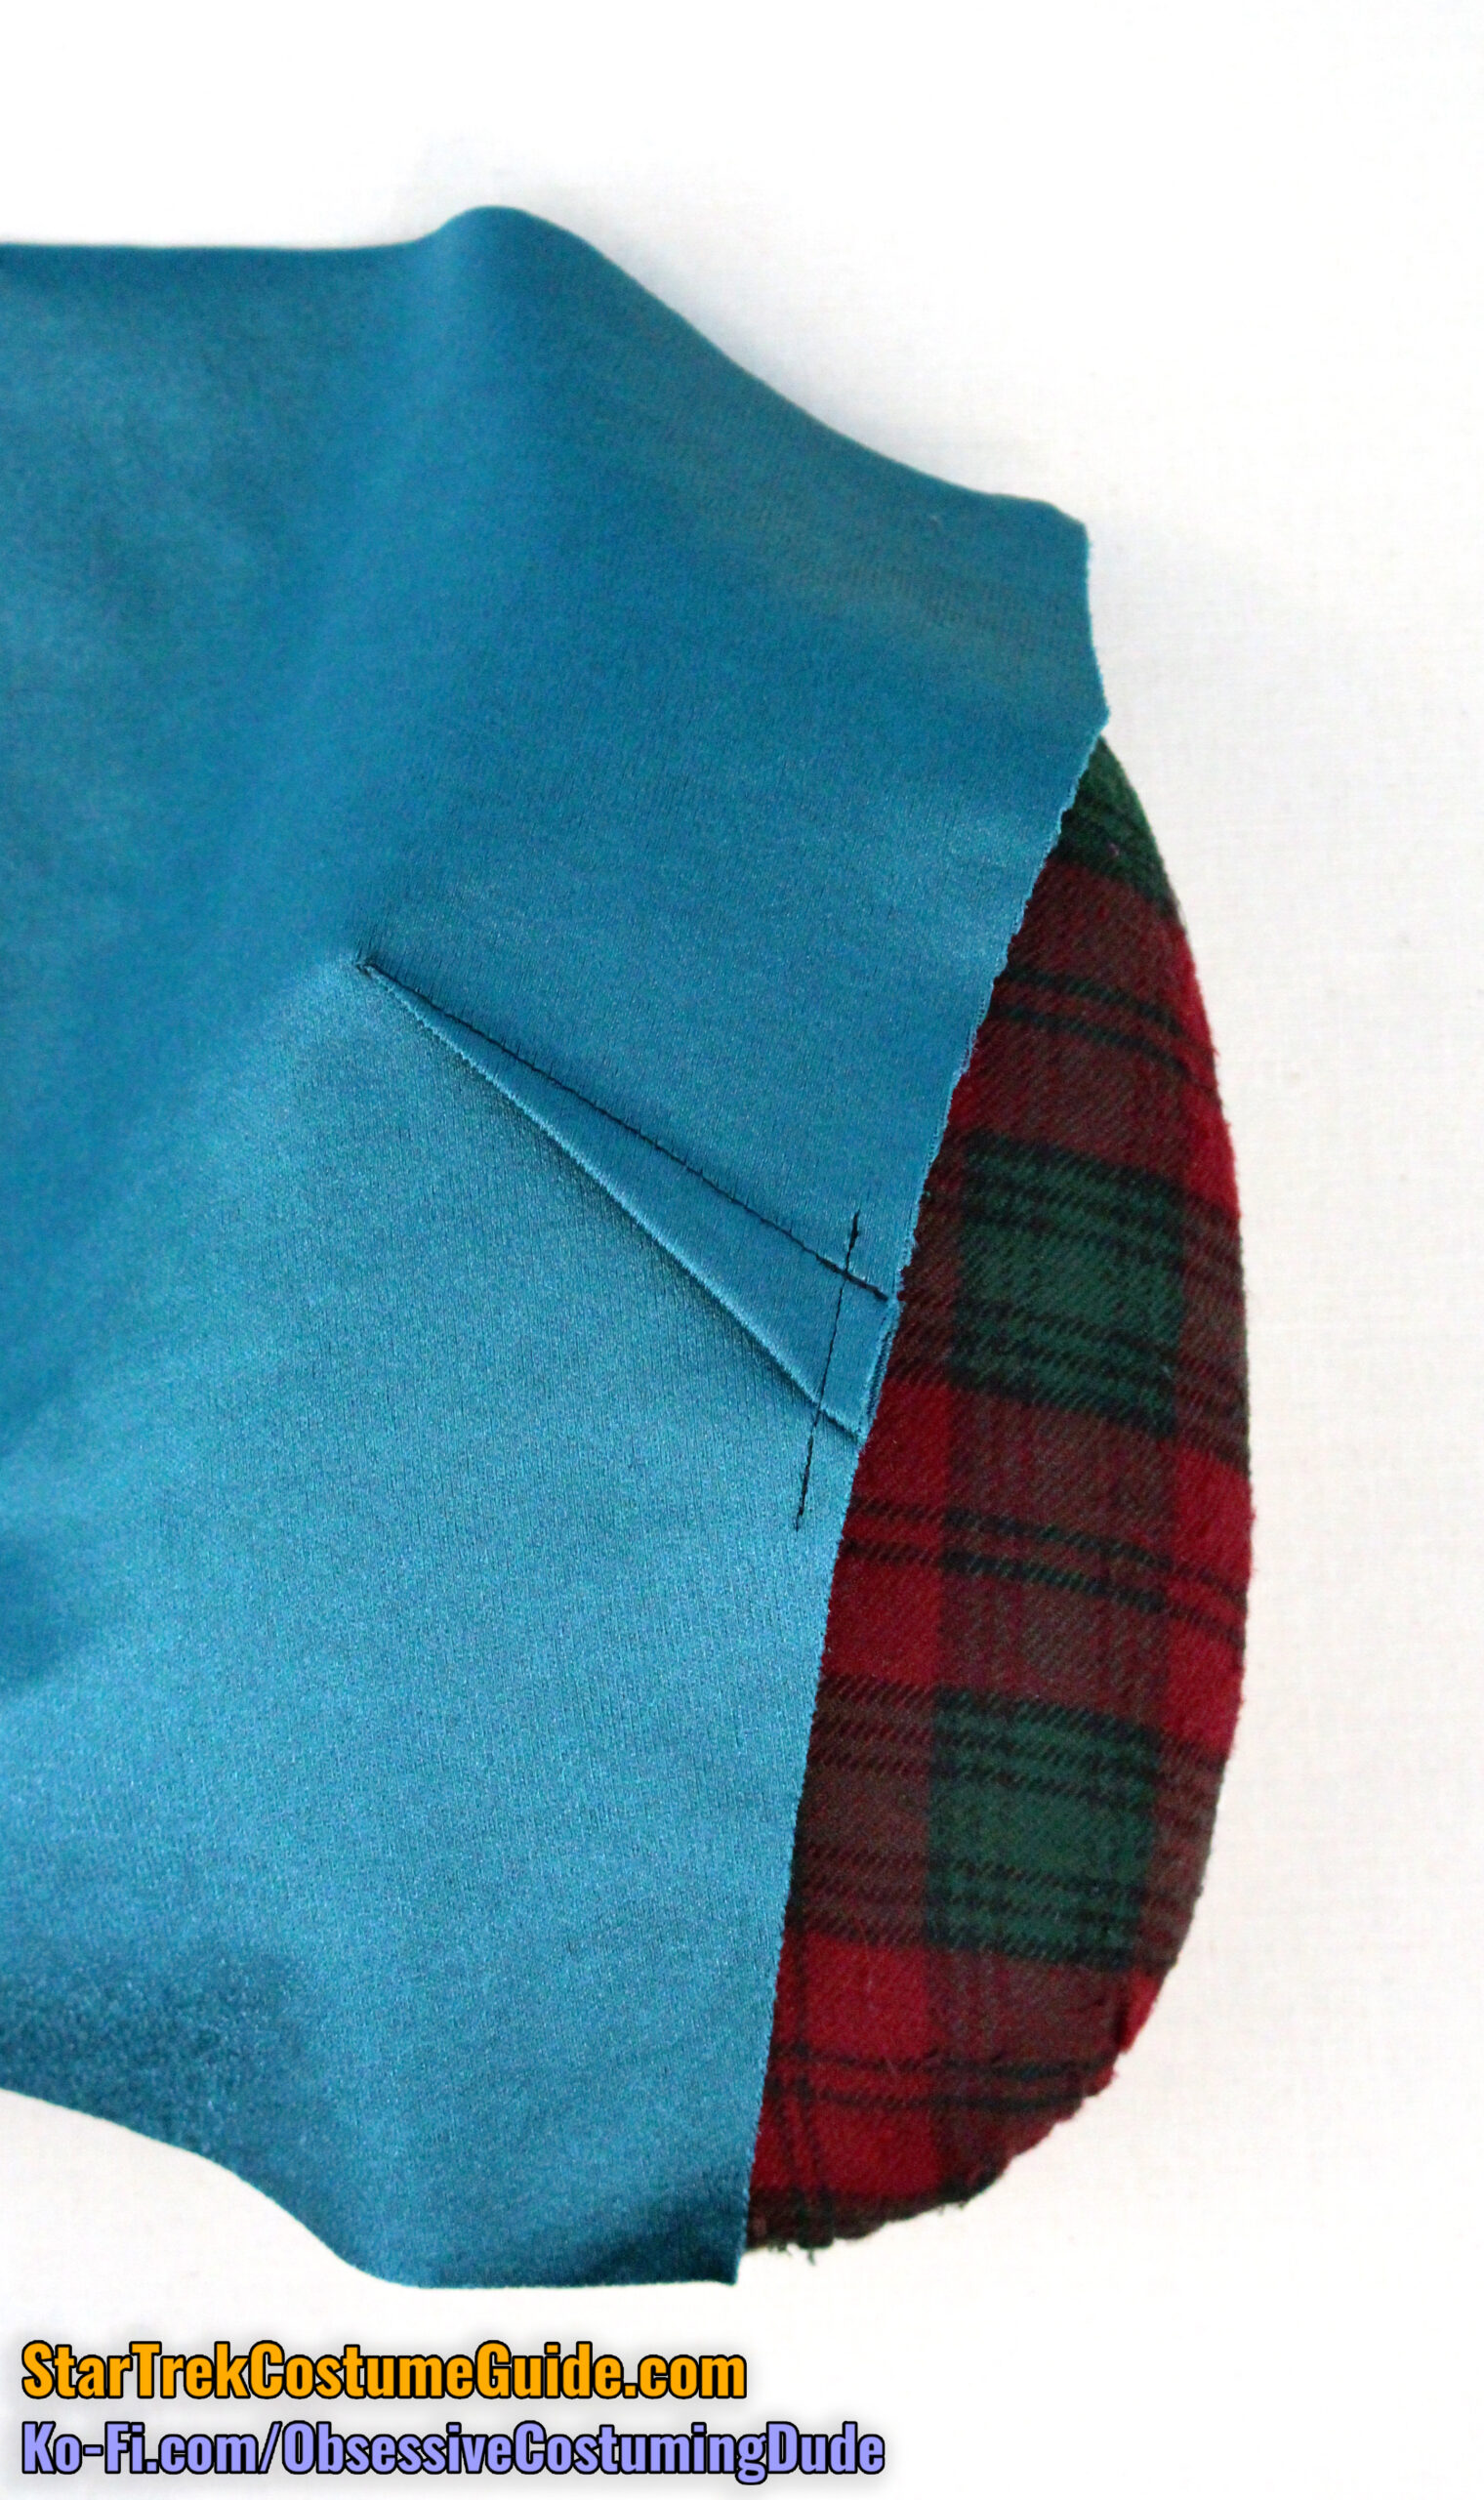
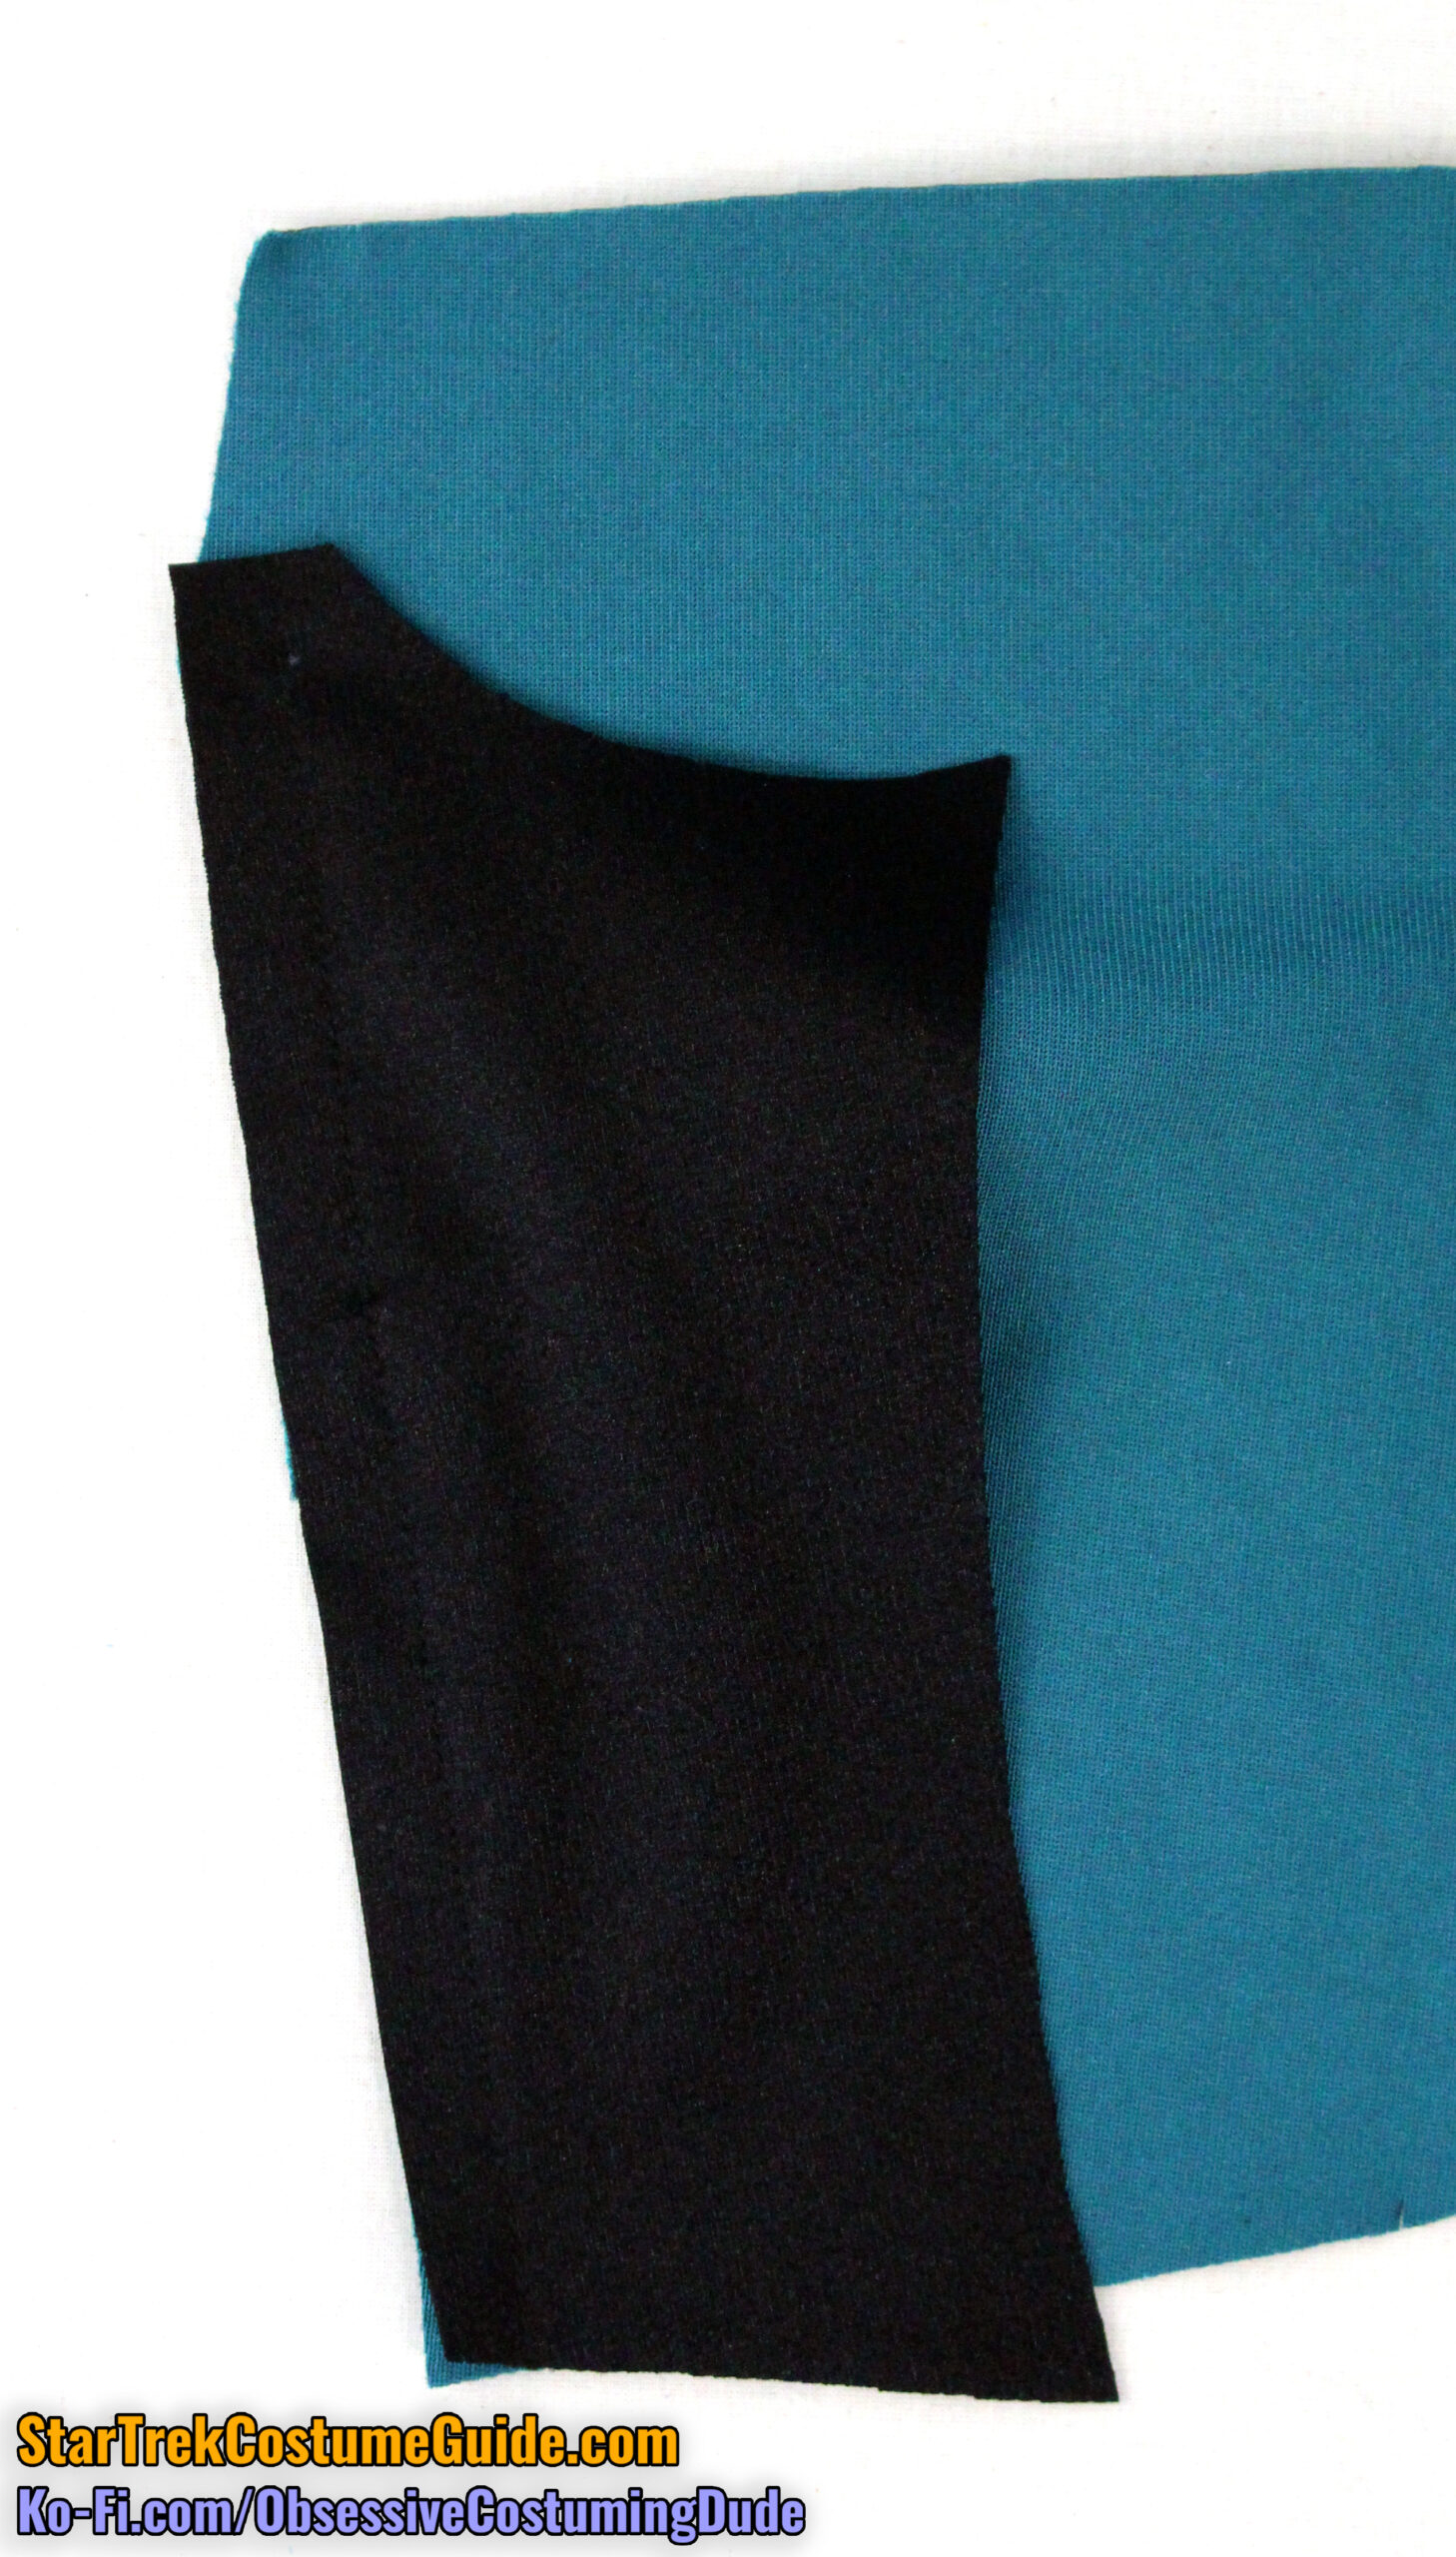
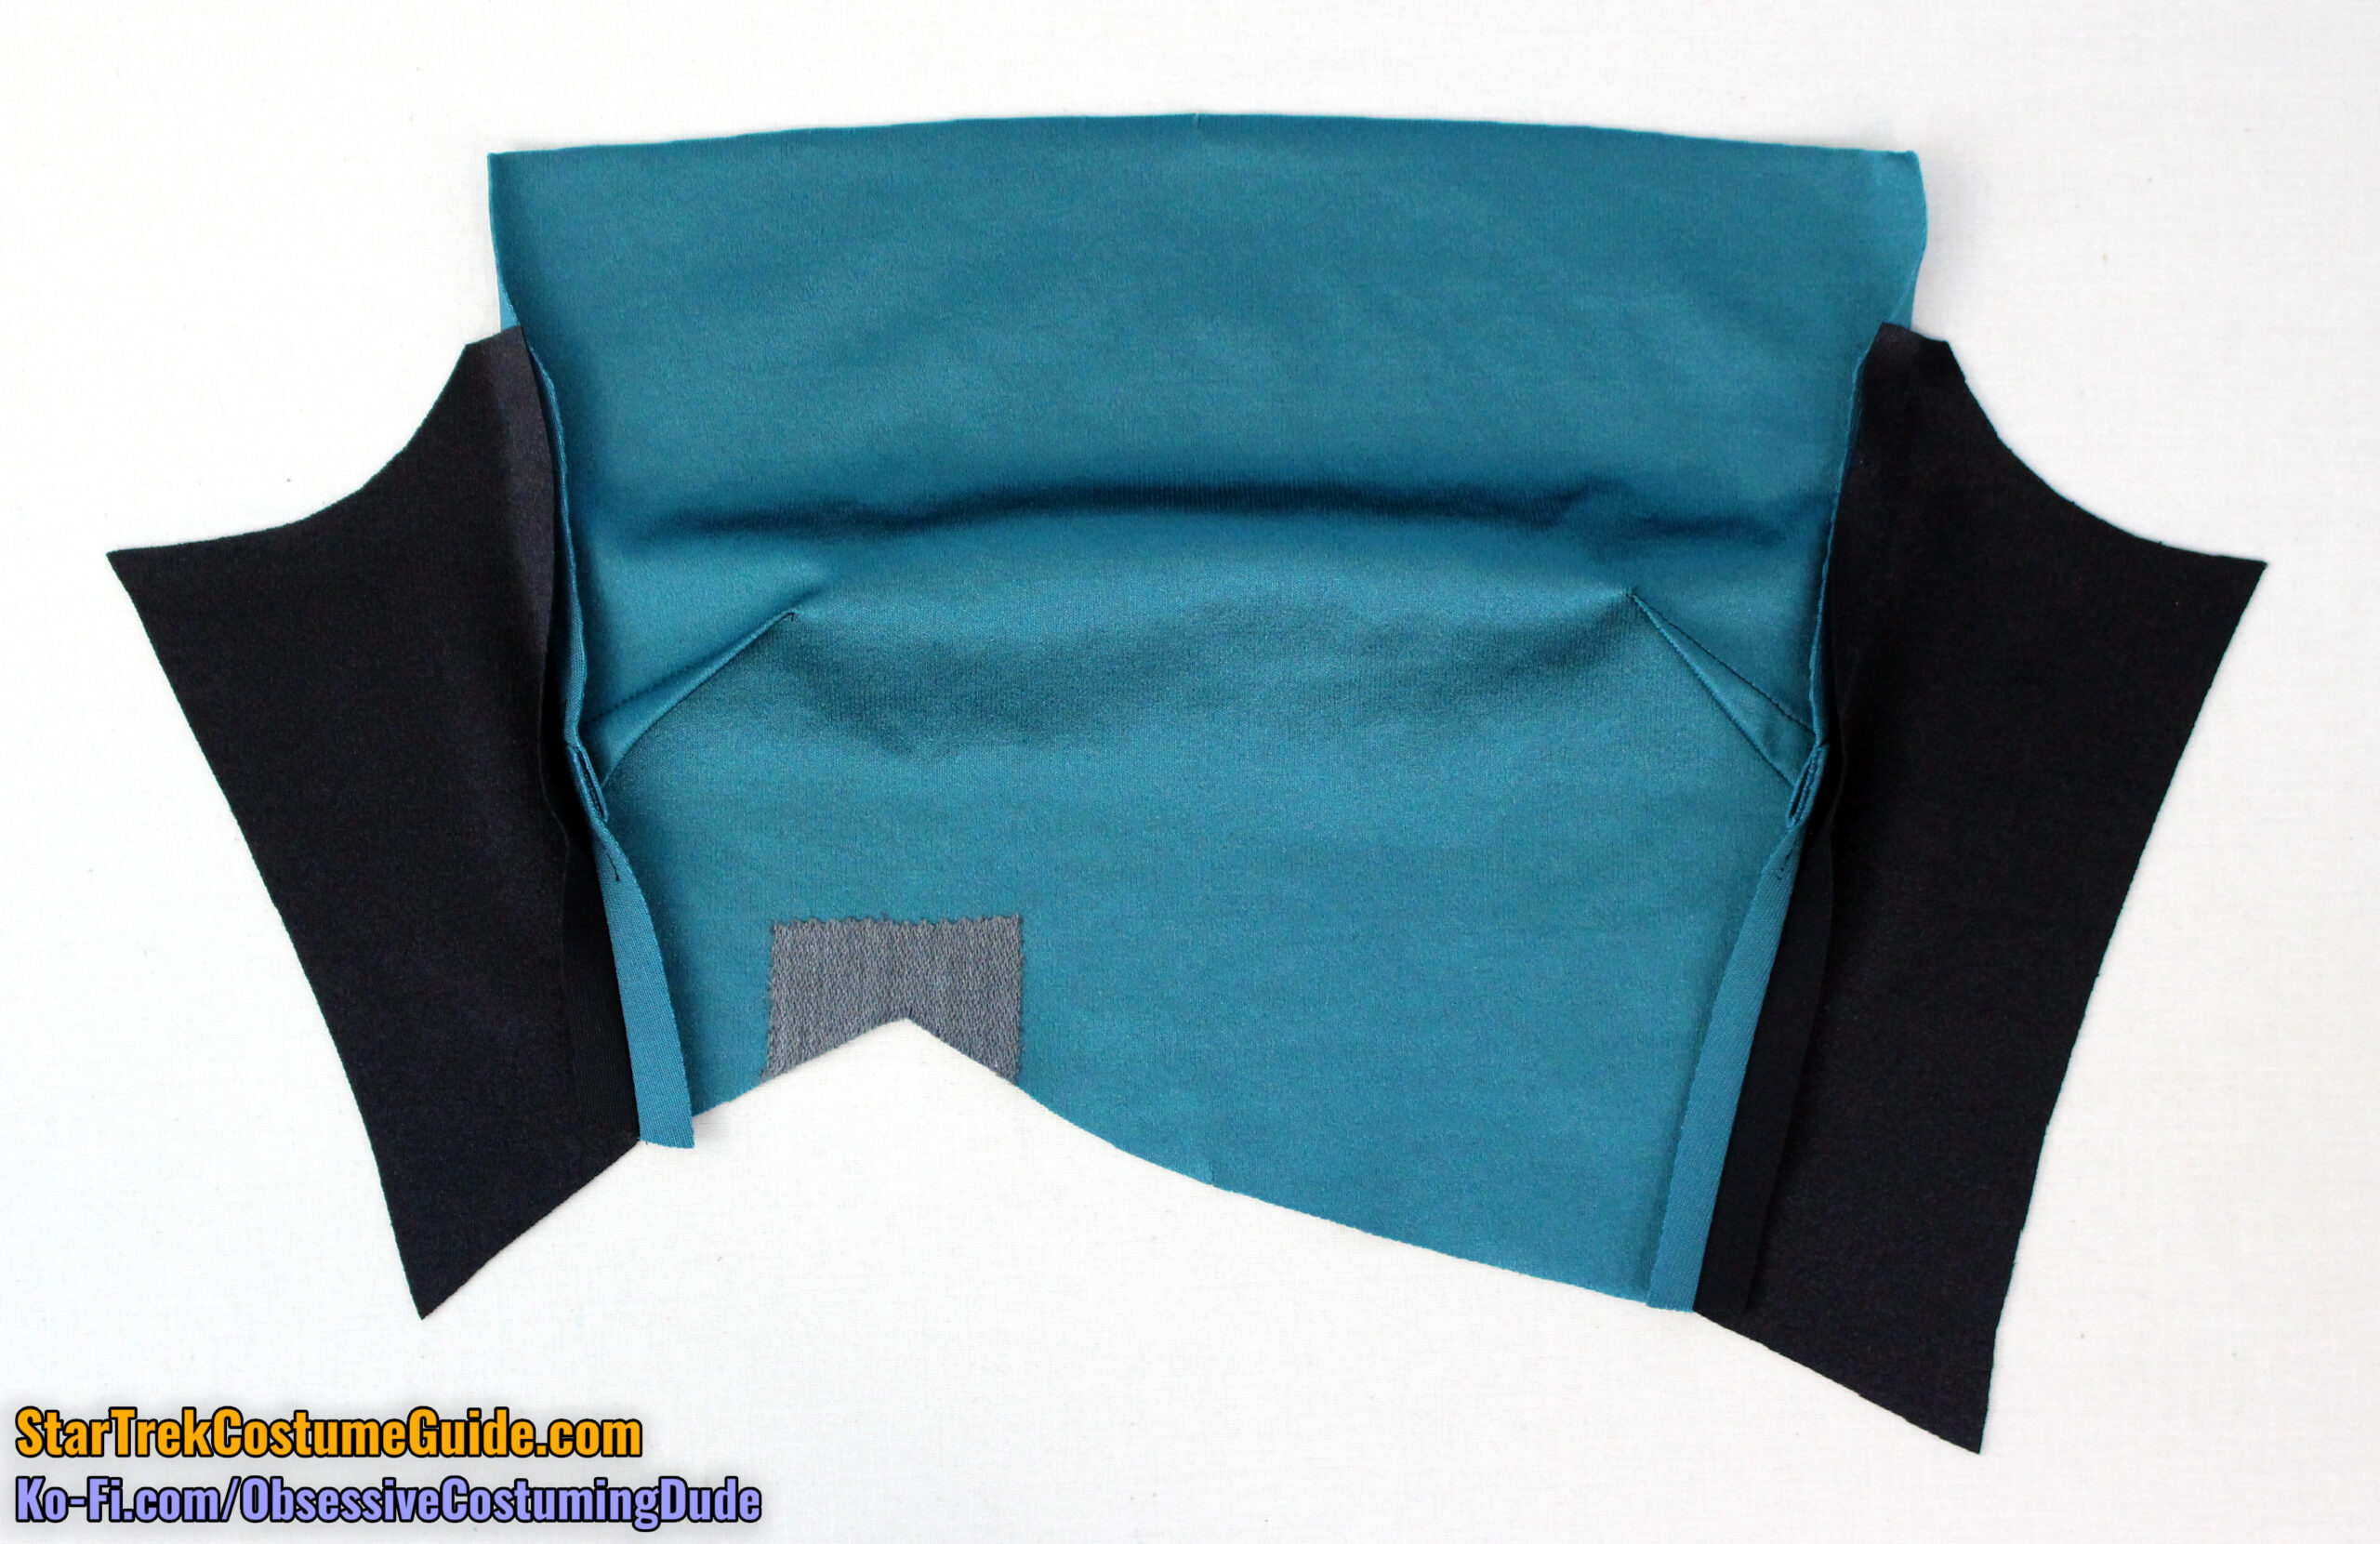
For the women’s version, sew the bust darts closed on the upper front (piece D3).
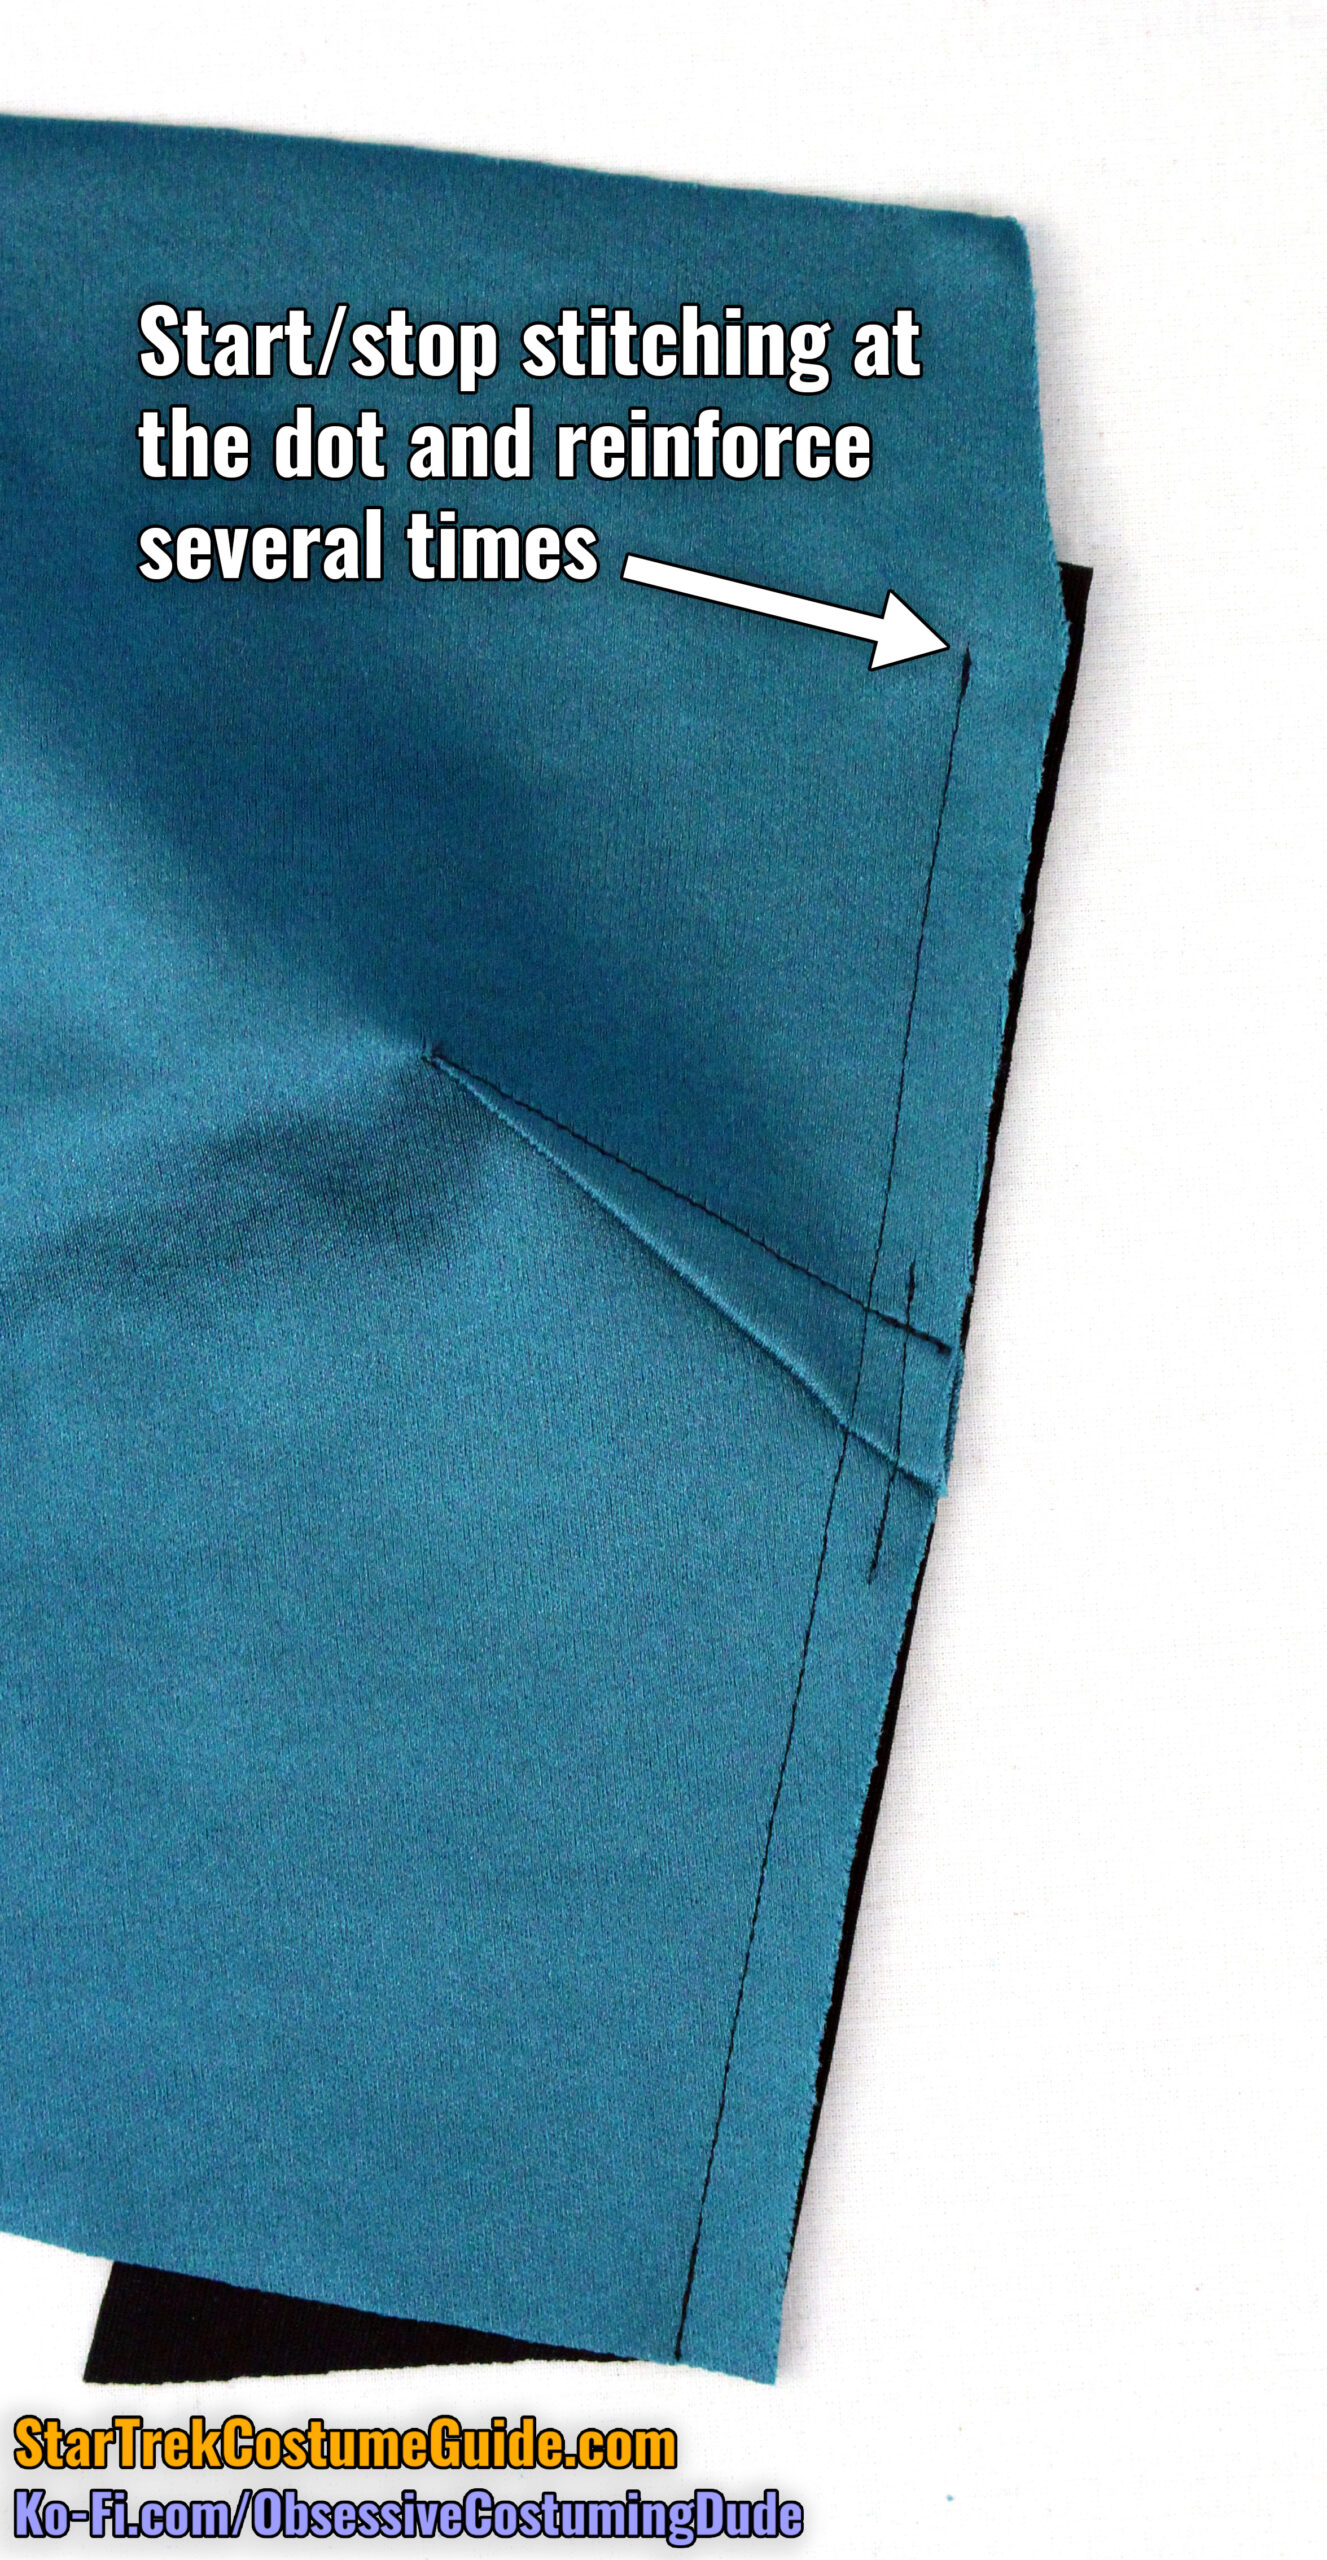
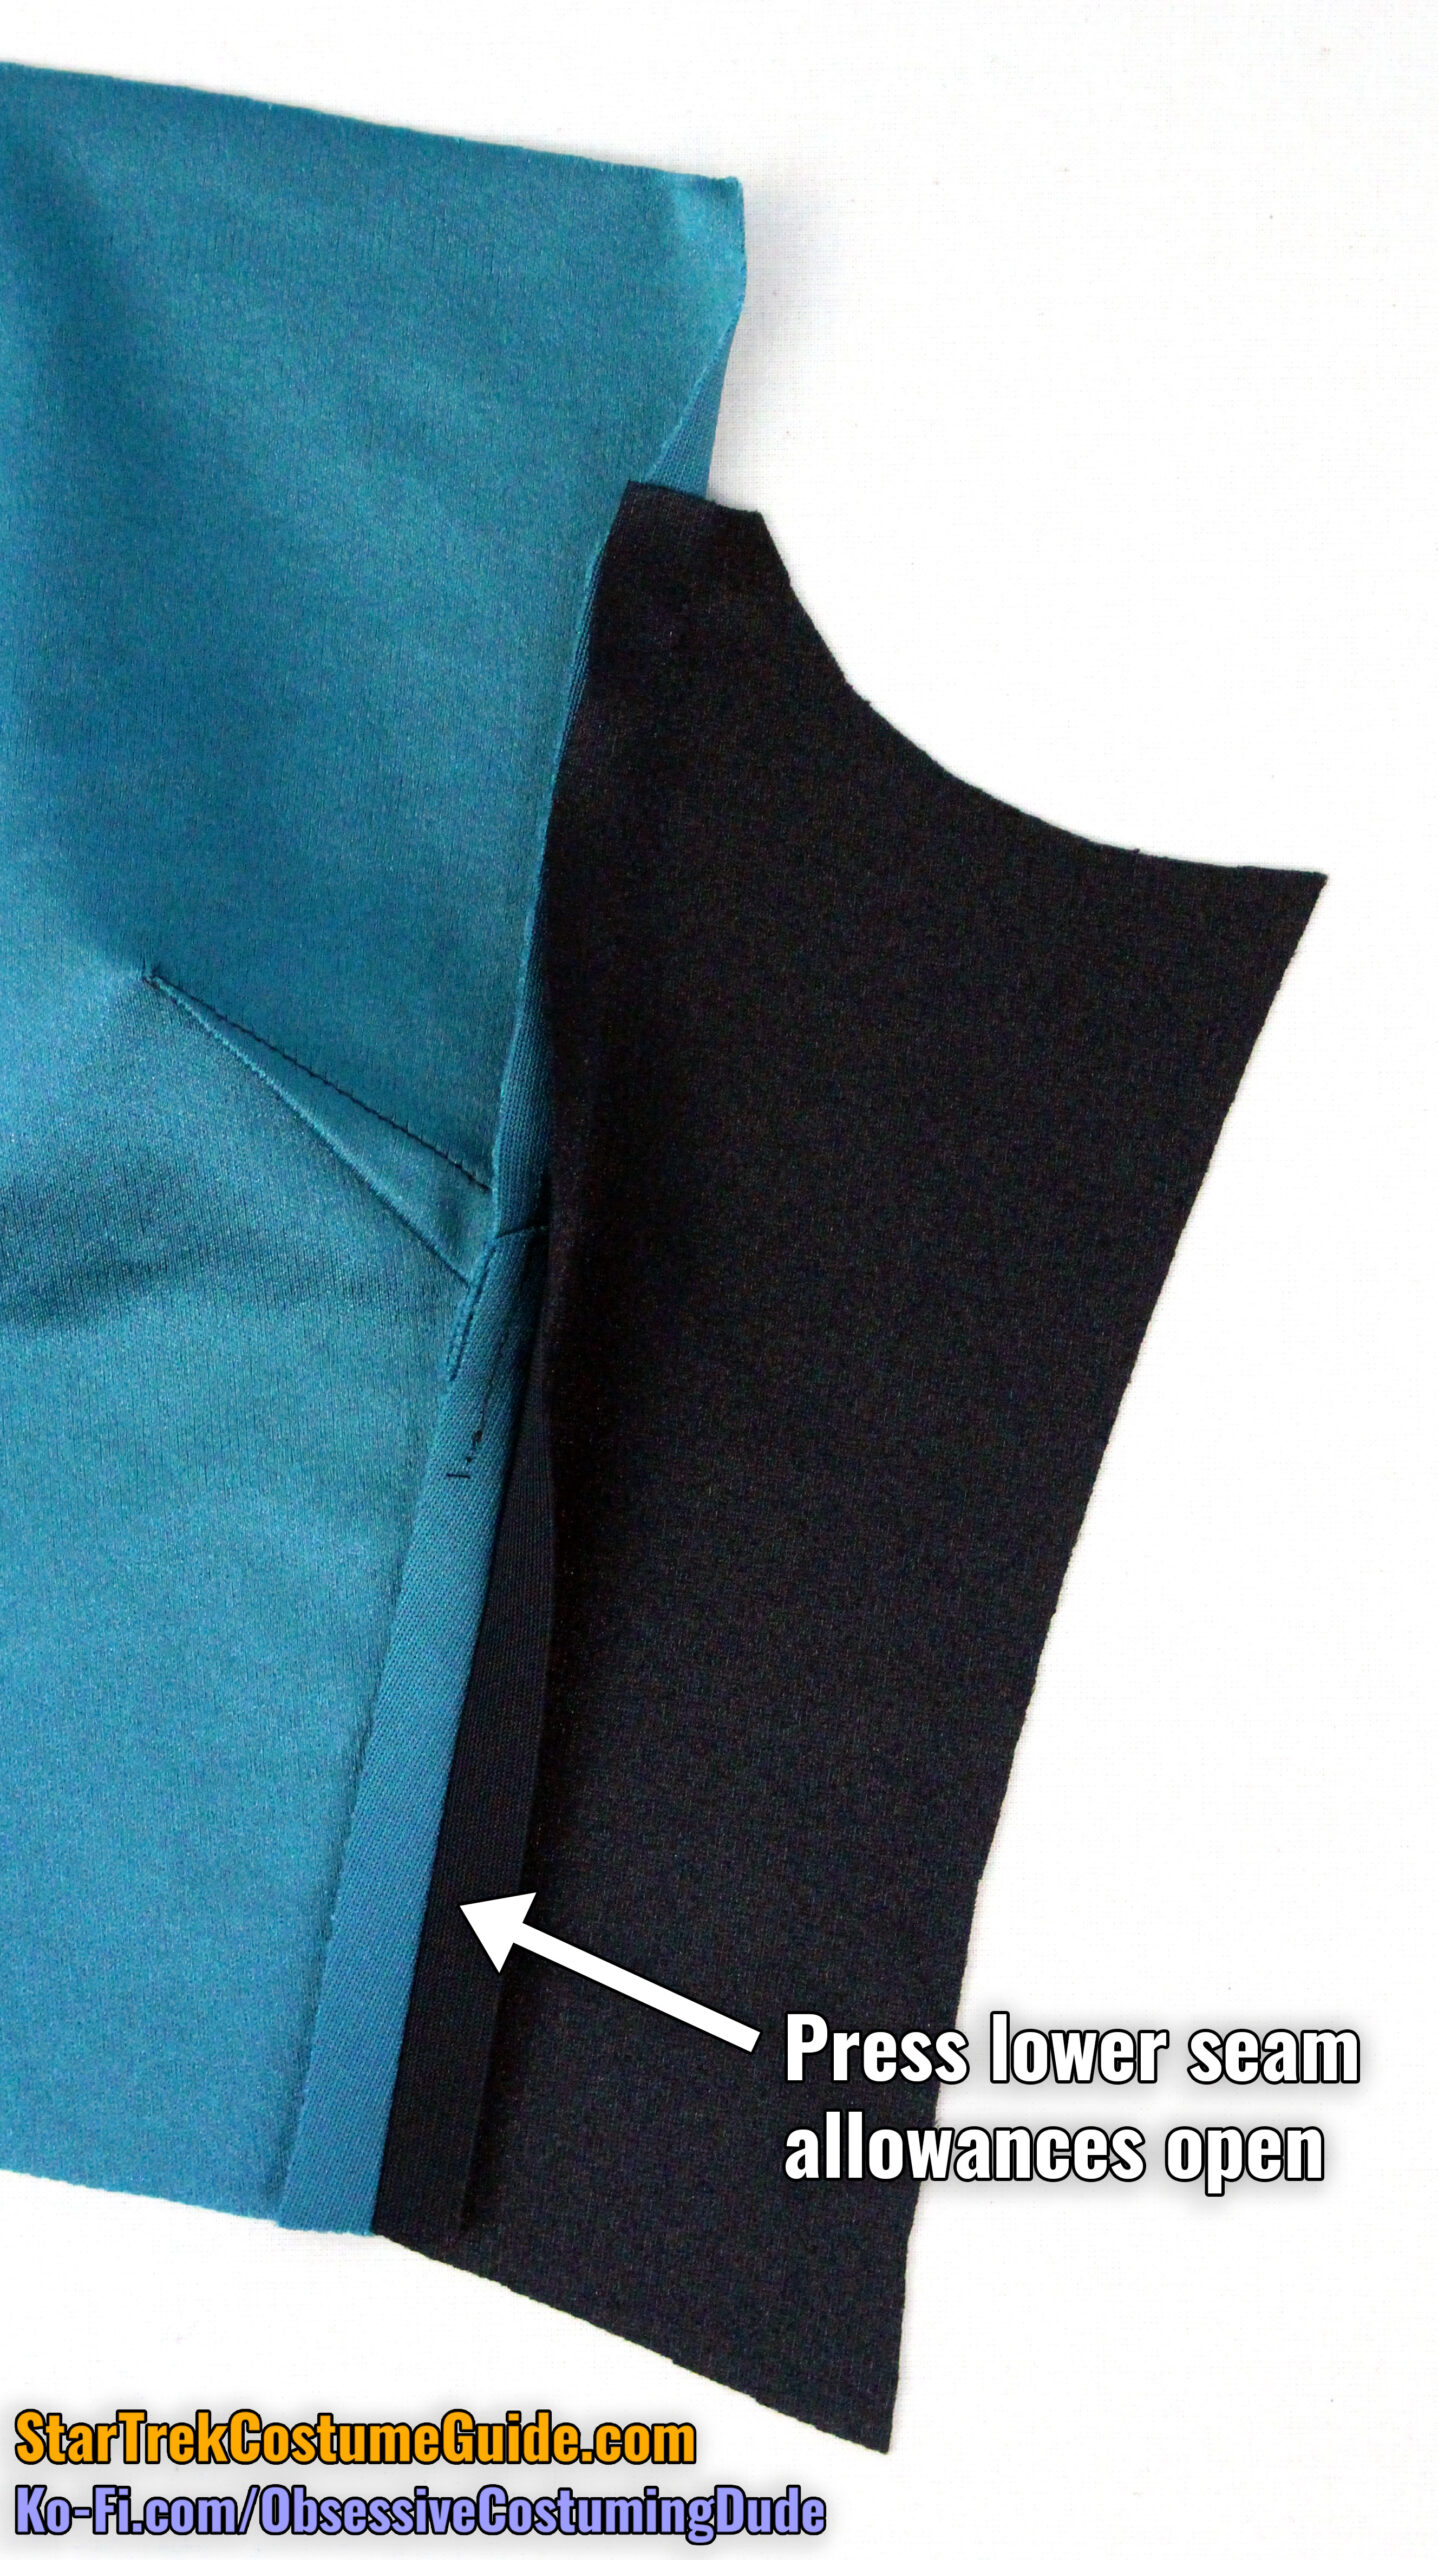
Sew the right side front (piece E) to the upper front, right sides together with ½” seam allowance, starting/stopping and reinforcing your stitching several times at the dot.
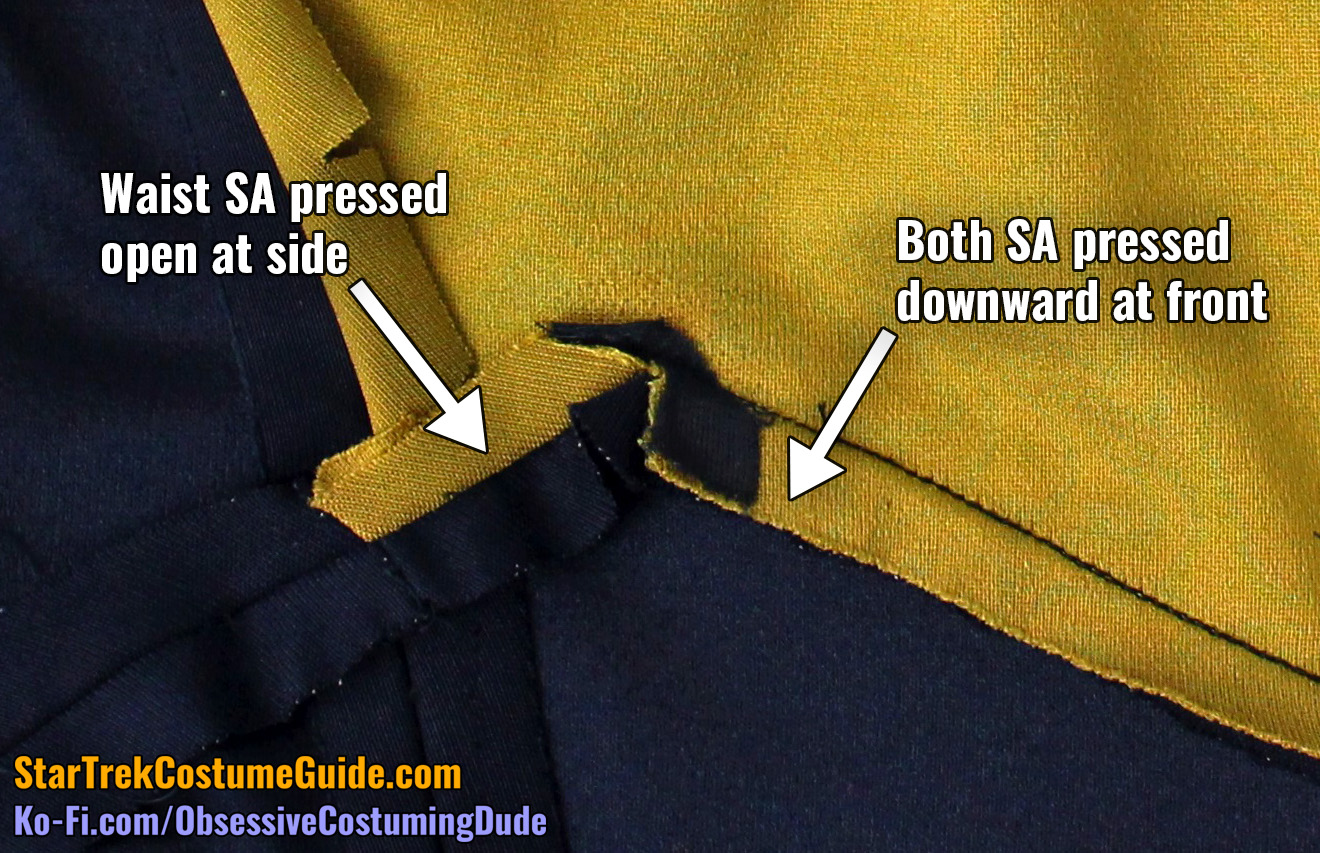
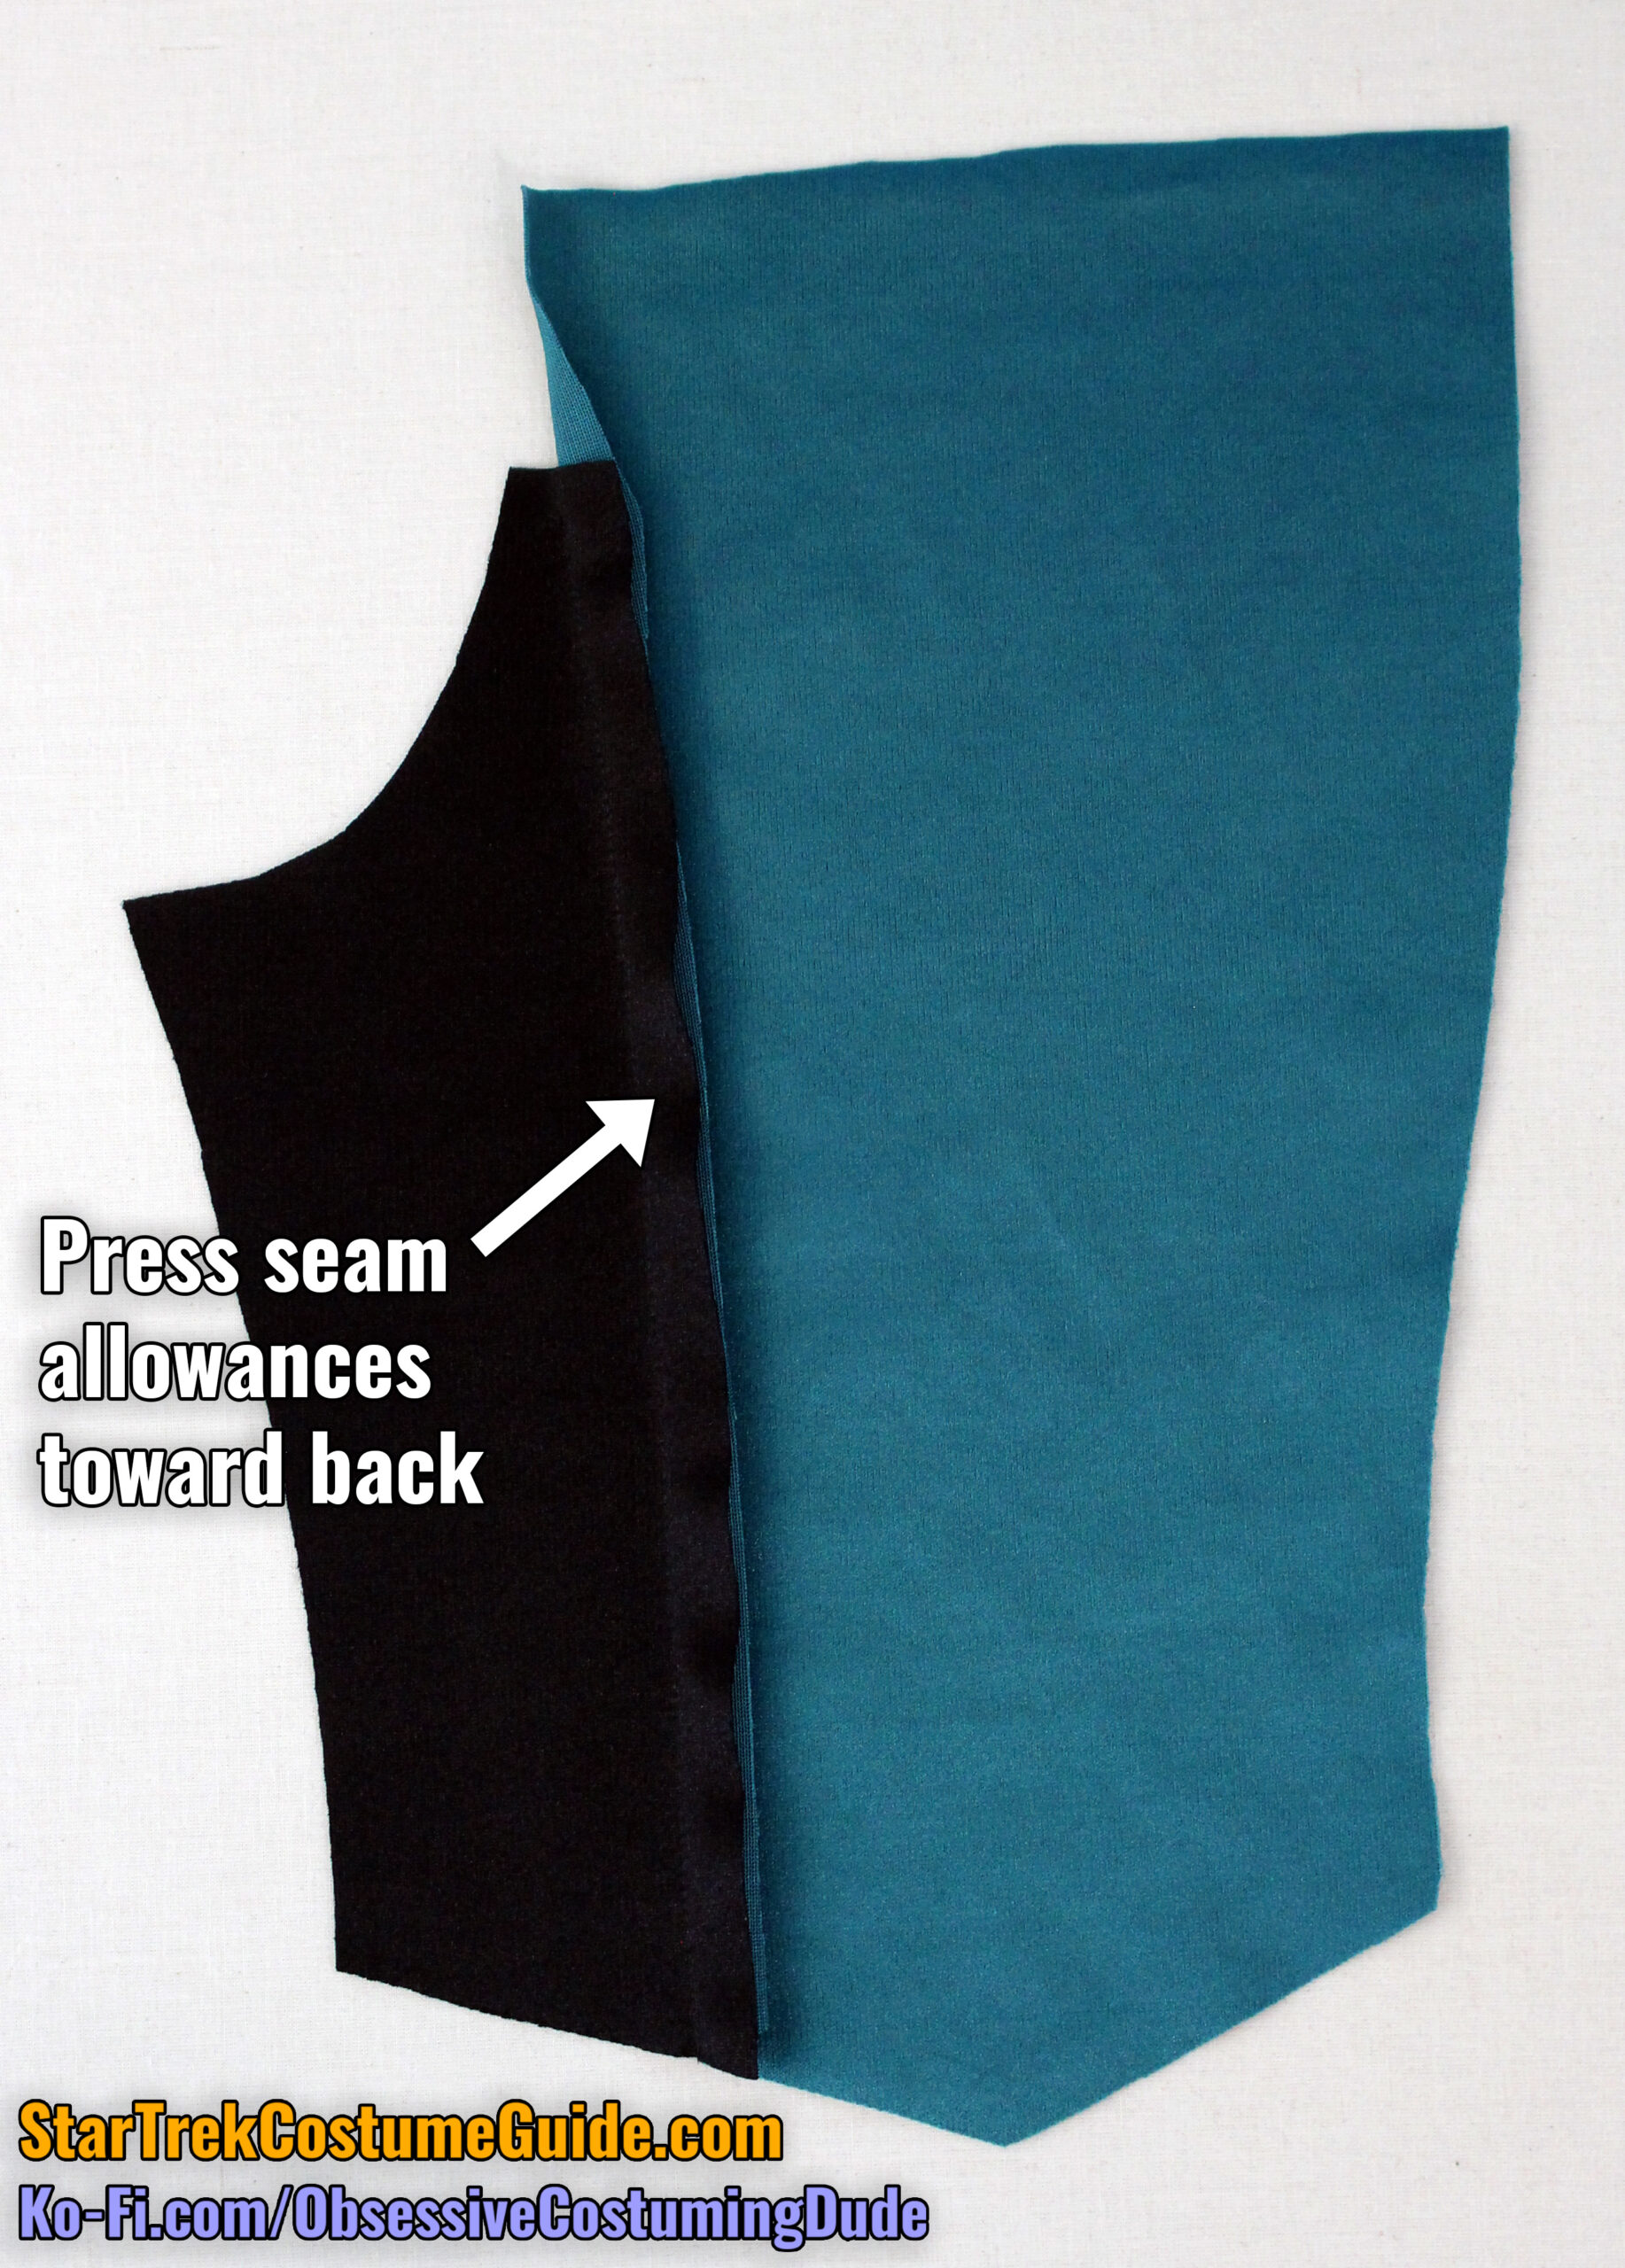
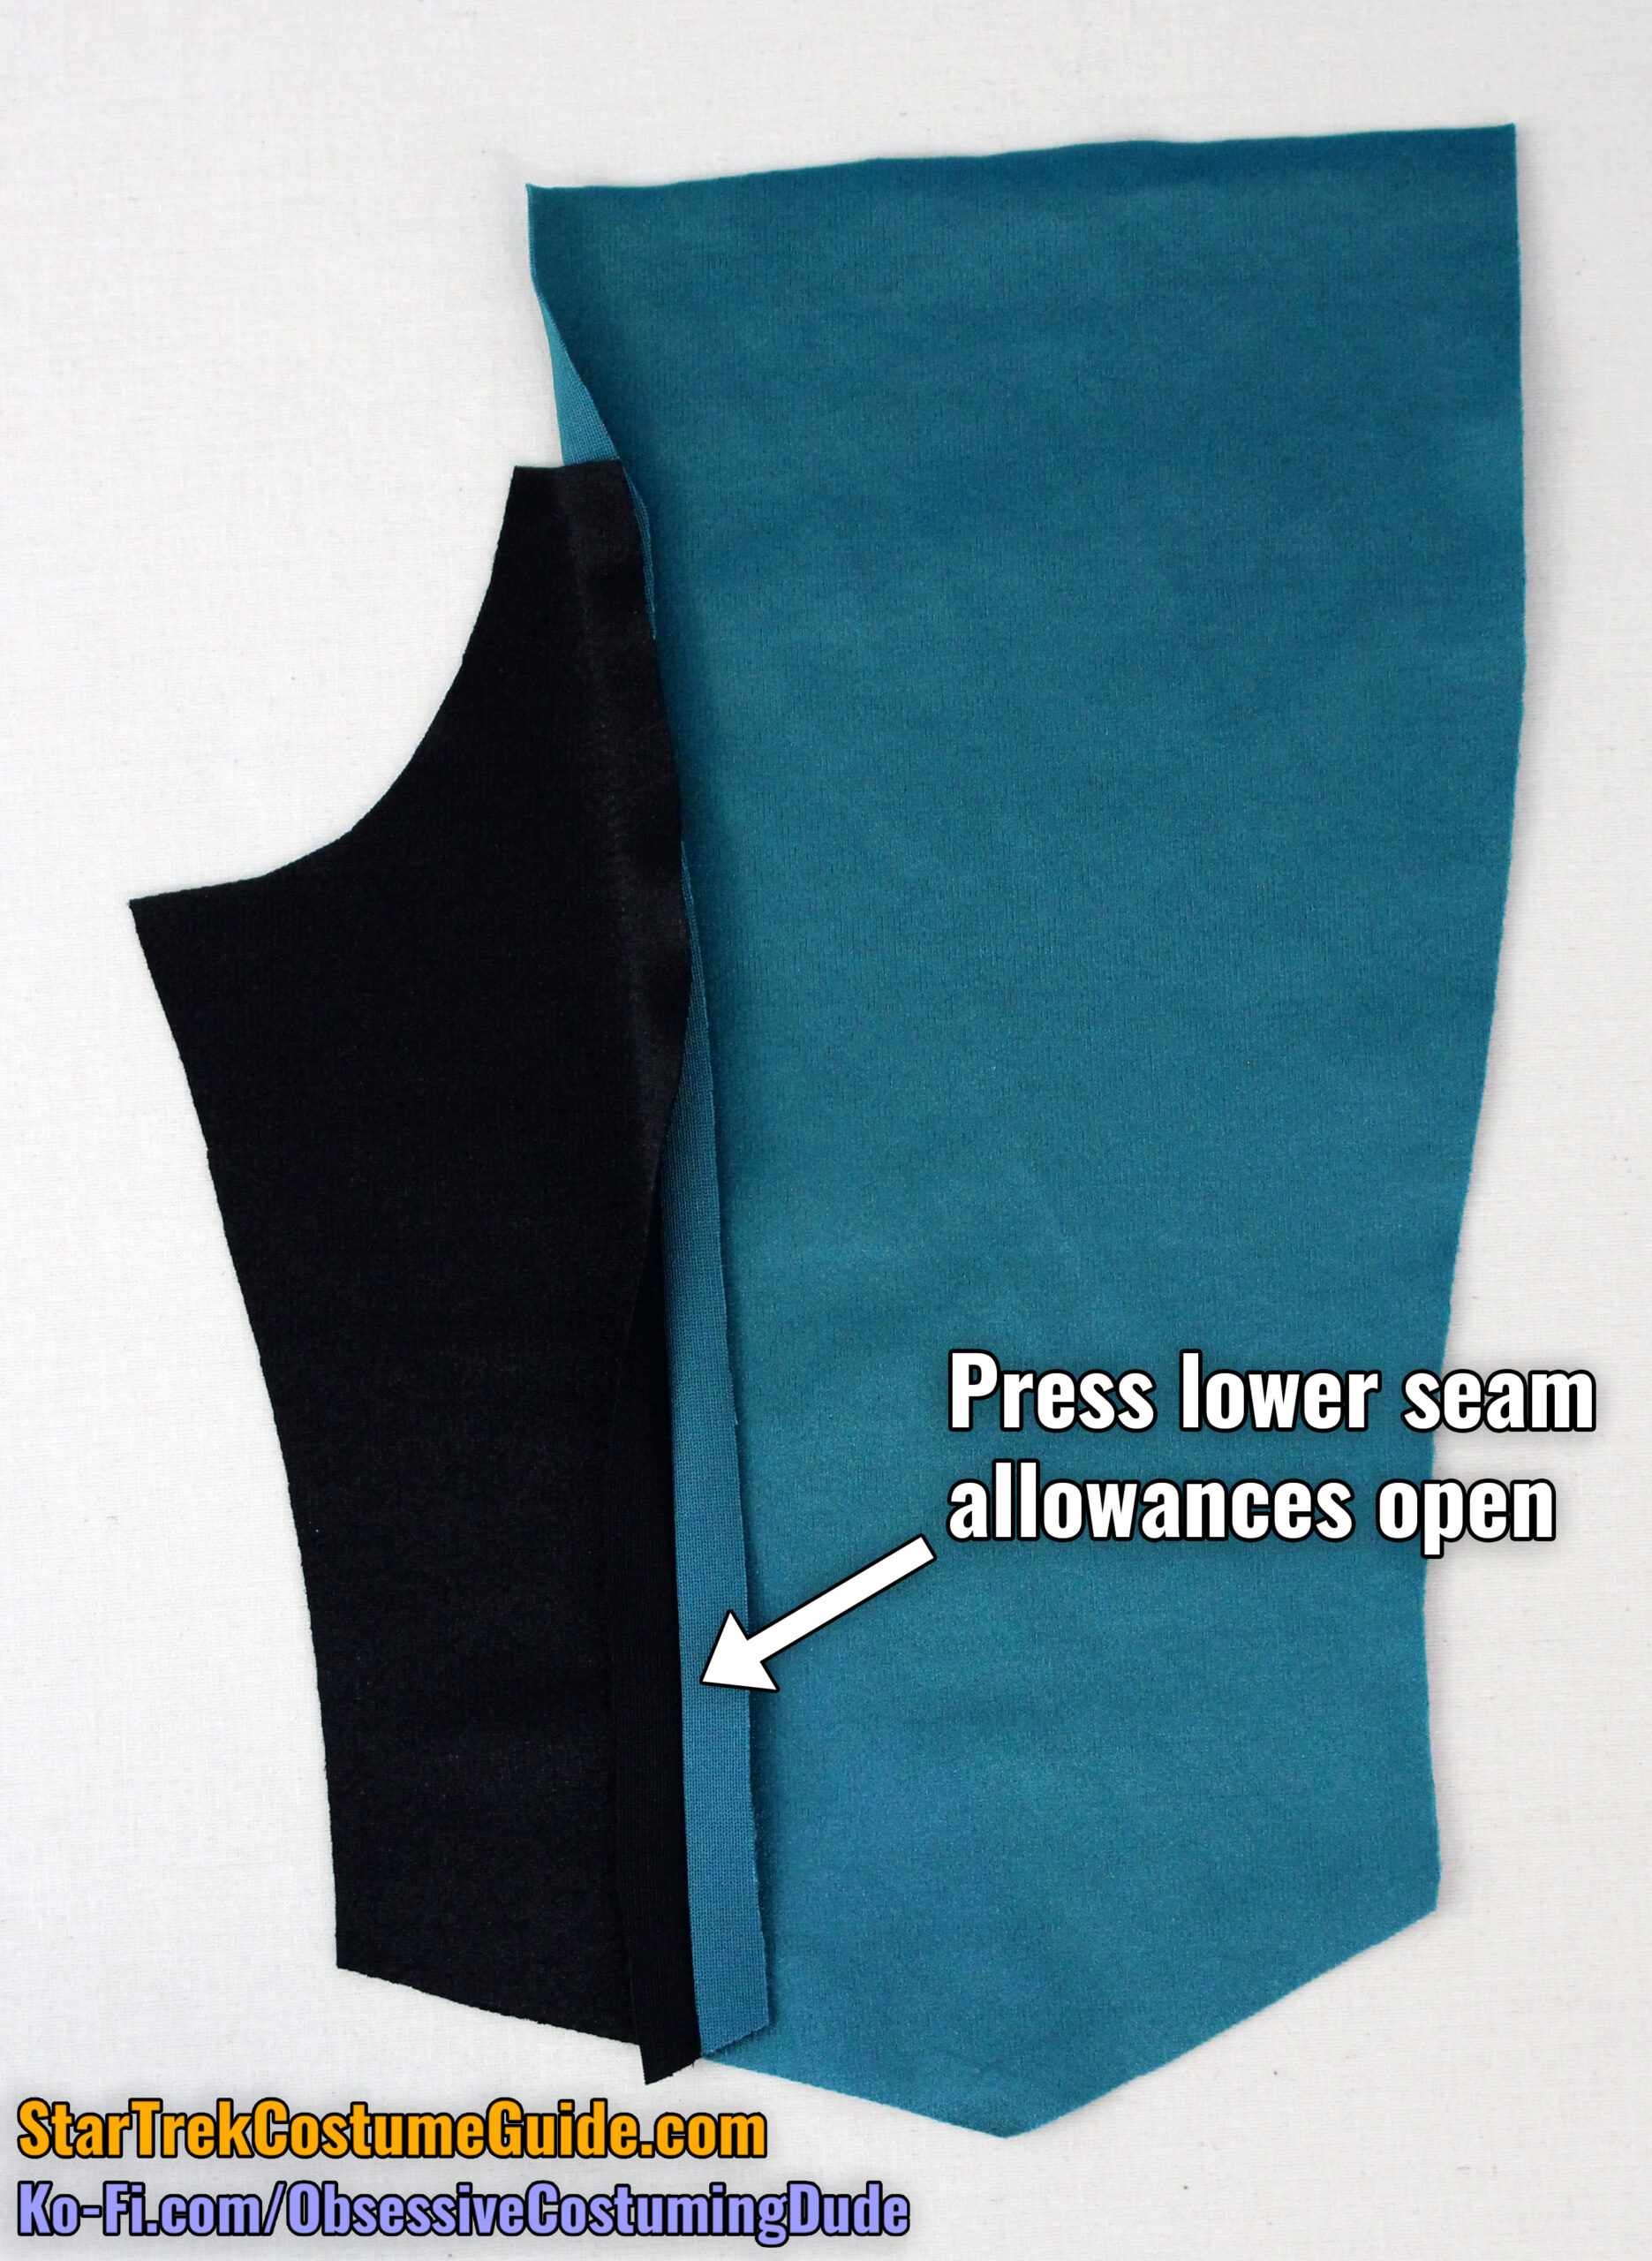
As with the early TNG jumpsuits, the side front (and side back) allowances were … wonky.
More specifically, the allowances changed directions partway down the seam.
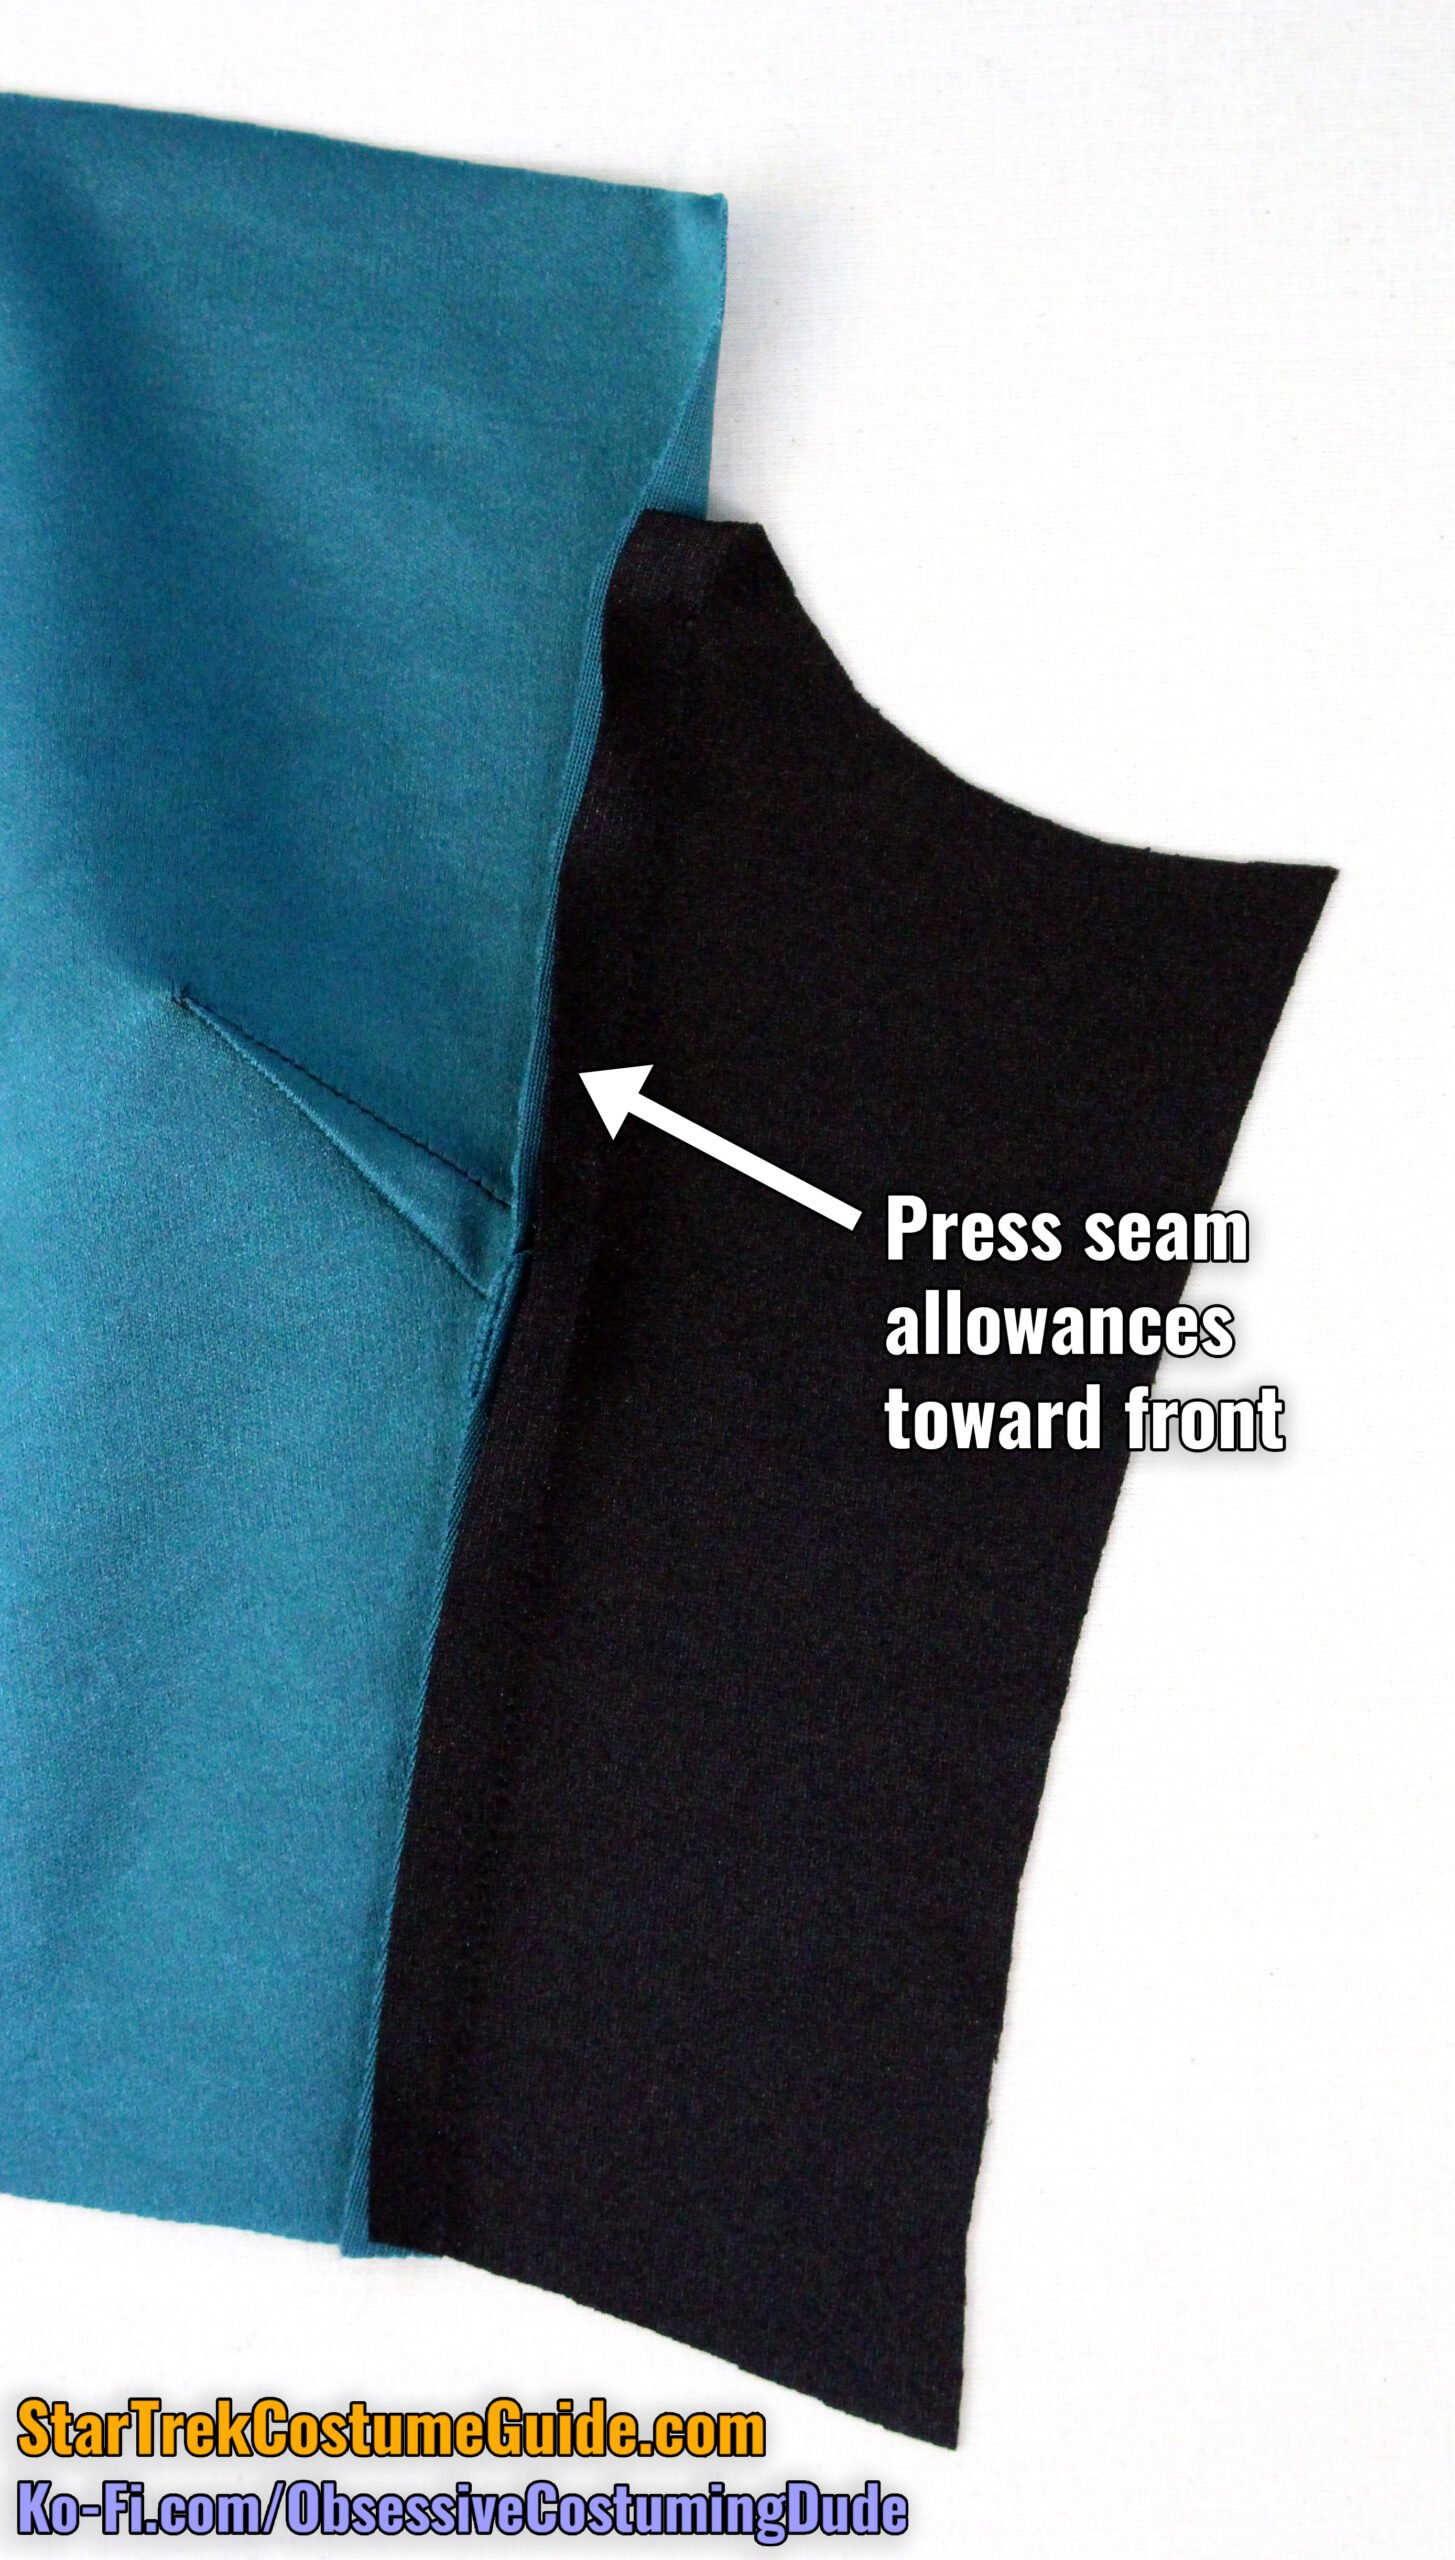
To best replicate the original uniforms, first press the seam allowances open.
Then, press both seam allowances toward the front.
And finally, press the seam allowances open again, but only on the lower portion of the seam.
Strange as this is, I believe it to have been an attempt to maintain the allowances pressed forward at the top (the way the side panel wants to drape) while avoiding otherwise unnecessary bulk in the waist seam.
Repeat for the left side front (piece F).
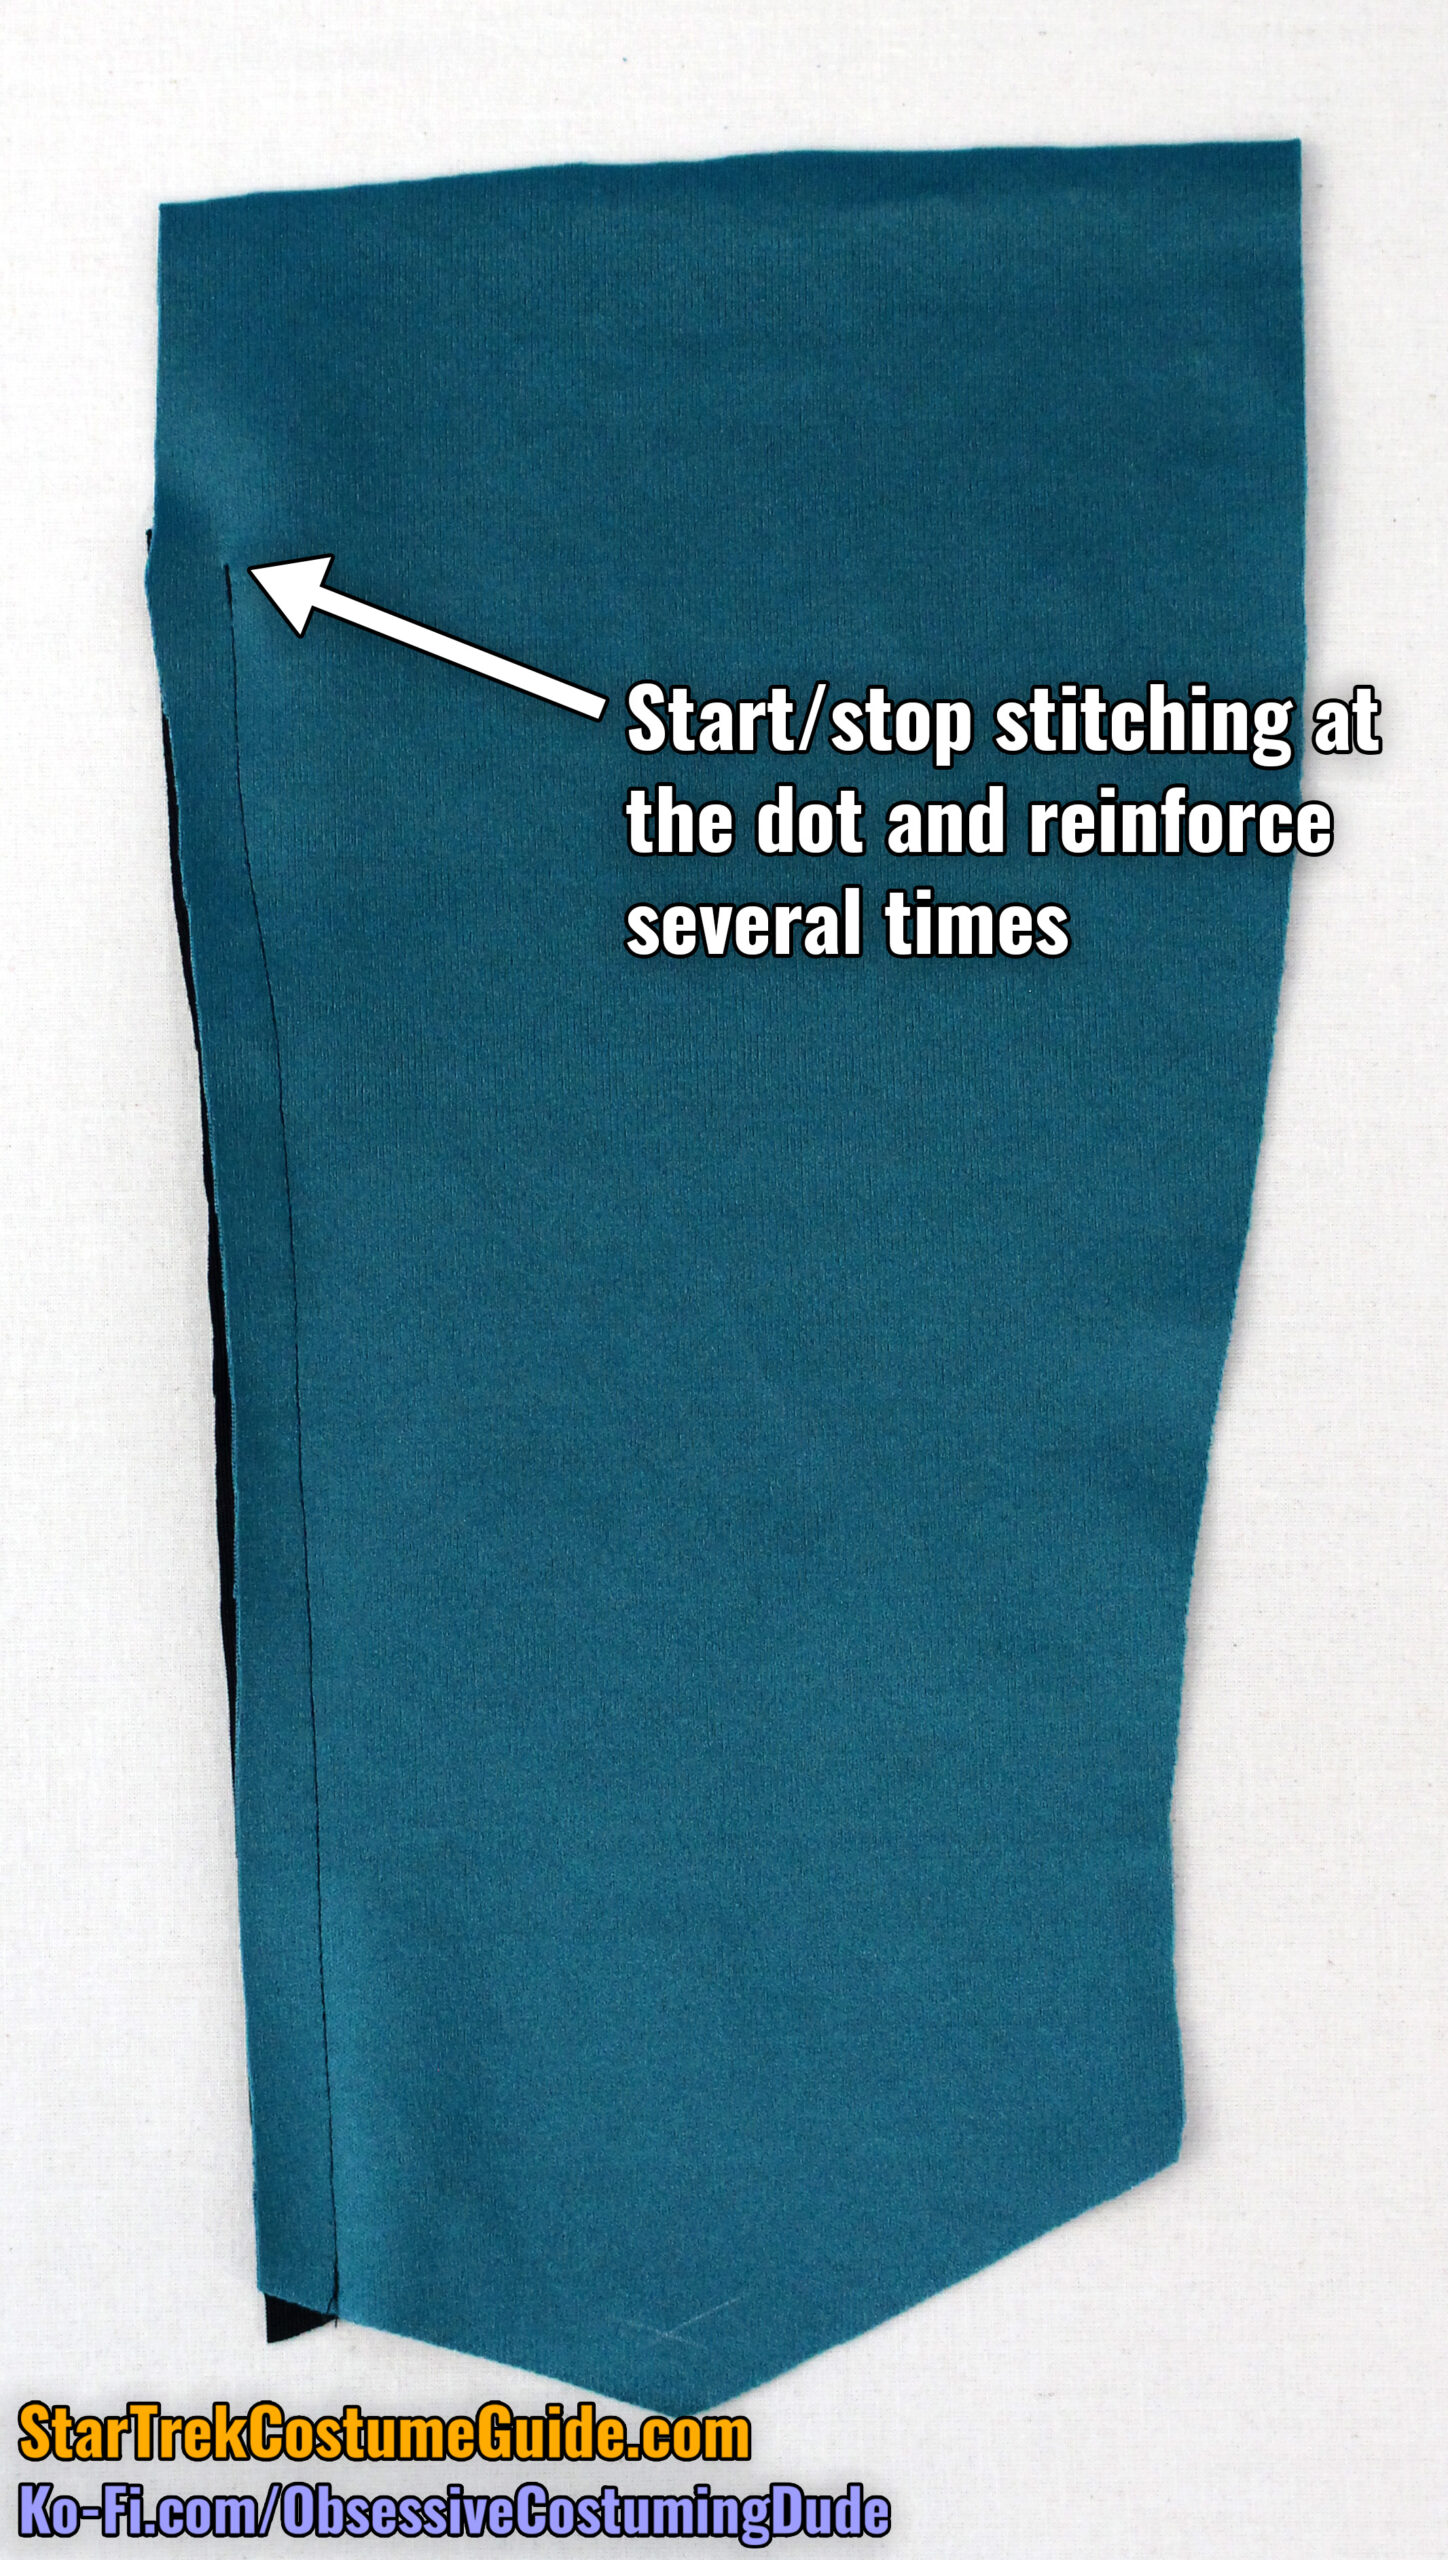
Sew the lower front pant legs (pieces K and L) together from the lower crotch up to the dot, right sides together, with ½” seam allowance. Reinforce your stitching several times at the dot.
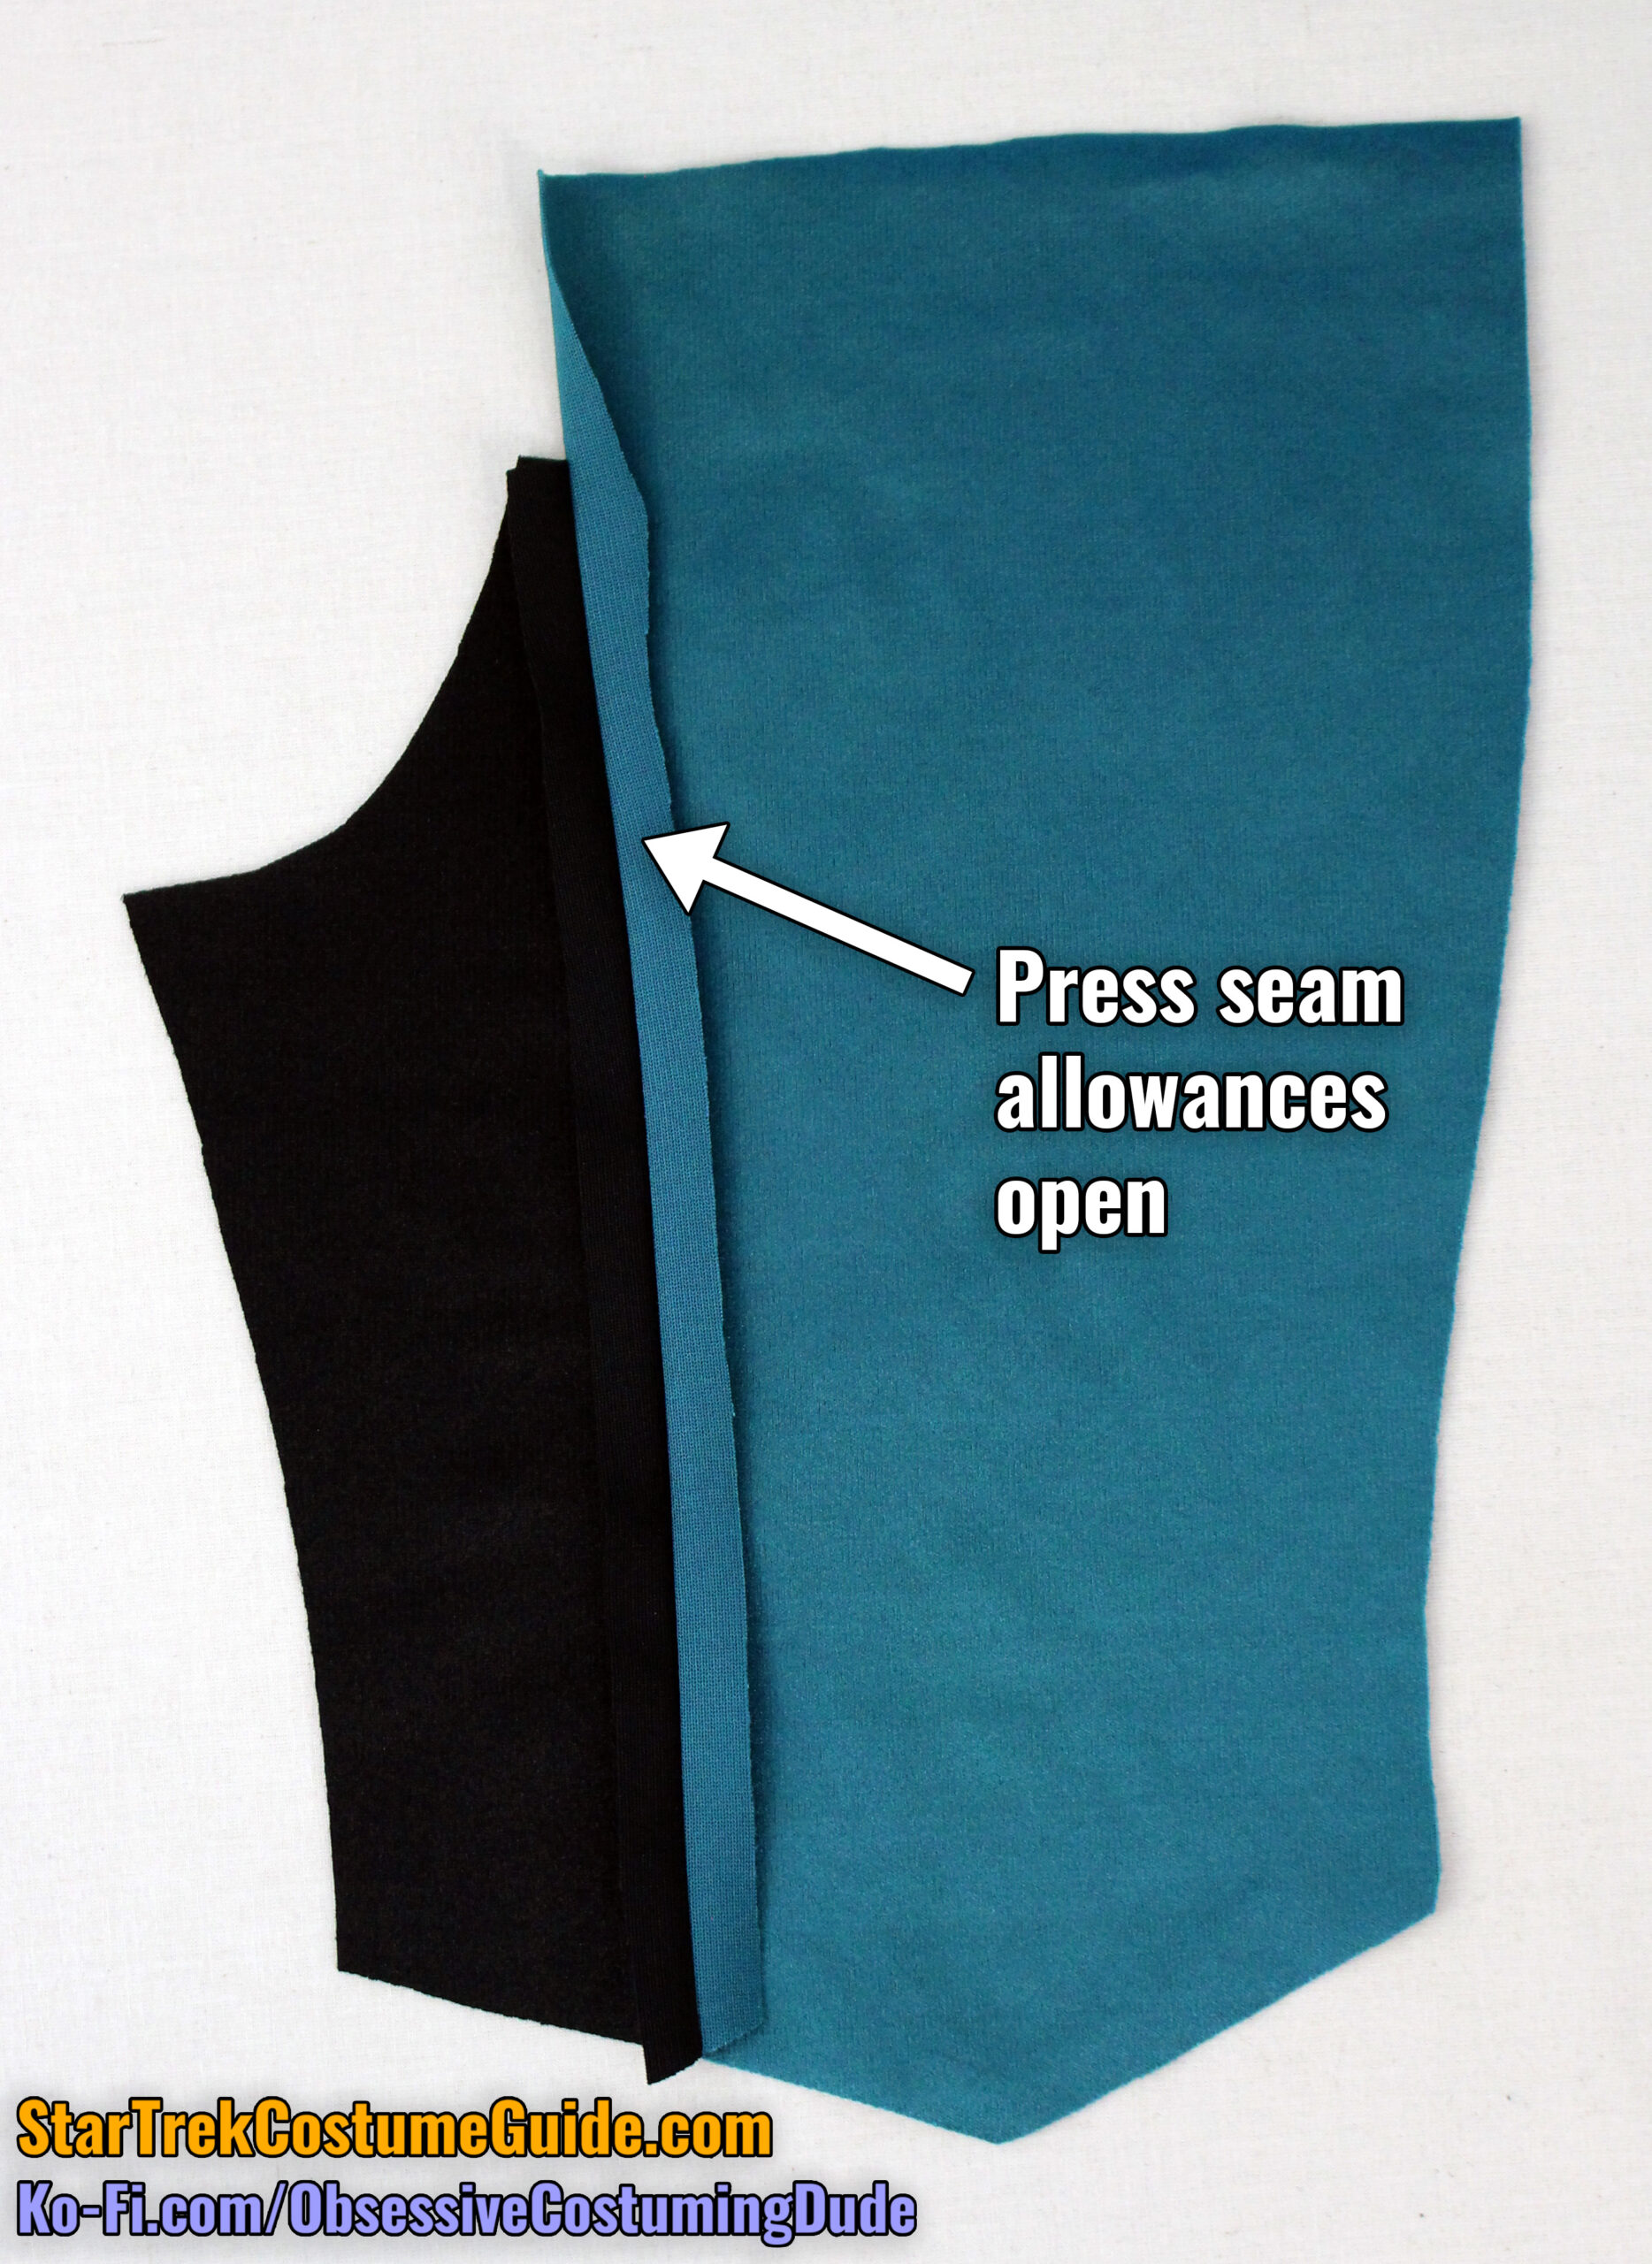
Press the seam allowances open.
Sewing the lower front (piece J3) to the pant legs is done in two separate stitches, one for each side.
Sew the lower front panel to the corresponding pant leg along one side, right sides together and matching lower dots, with ½” seam allowance. Reinforce your stitching several times at the dot.
Then sew the opposite side, again matching lower dots and reinforcing your stitching several times at the bottom.
All three stitch lines (crotch, left diagonal seam, and right diagonal seam) should intersect exactly at the dot.
Press all the seam allowances open.
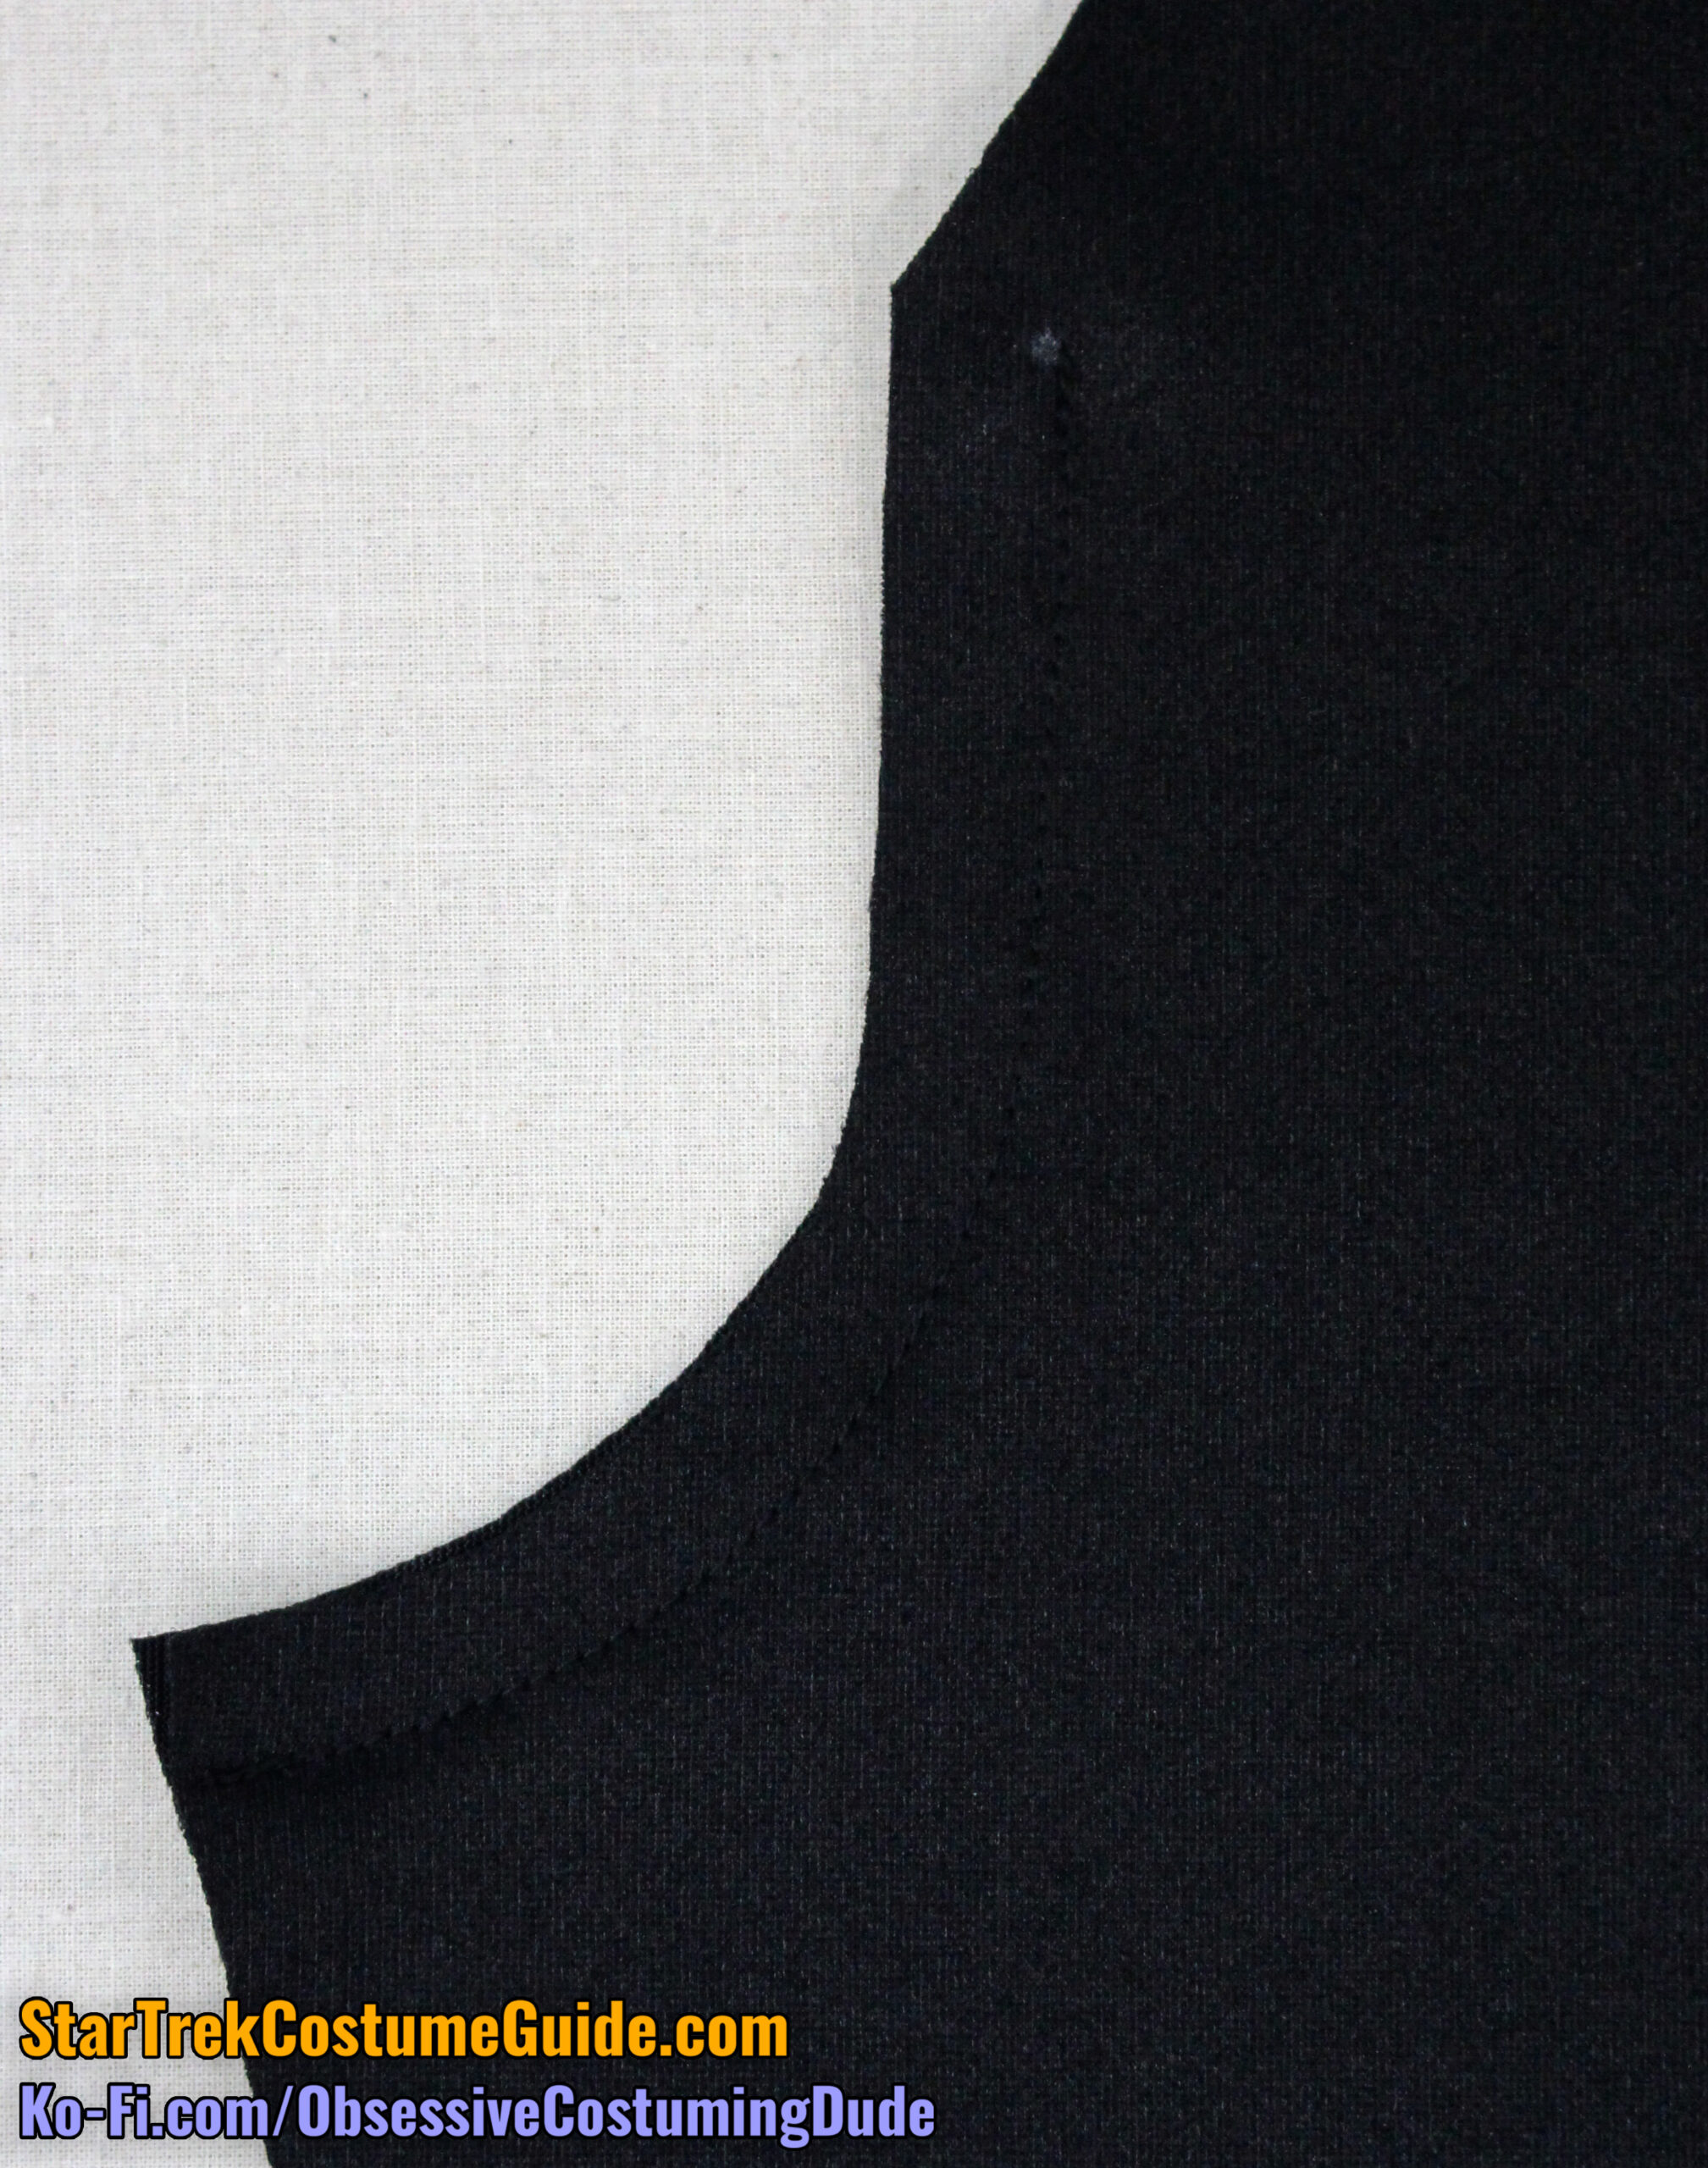
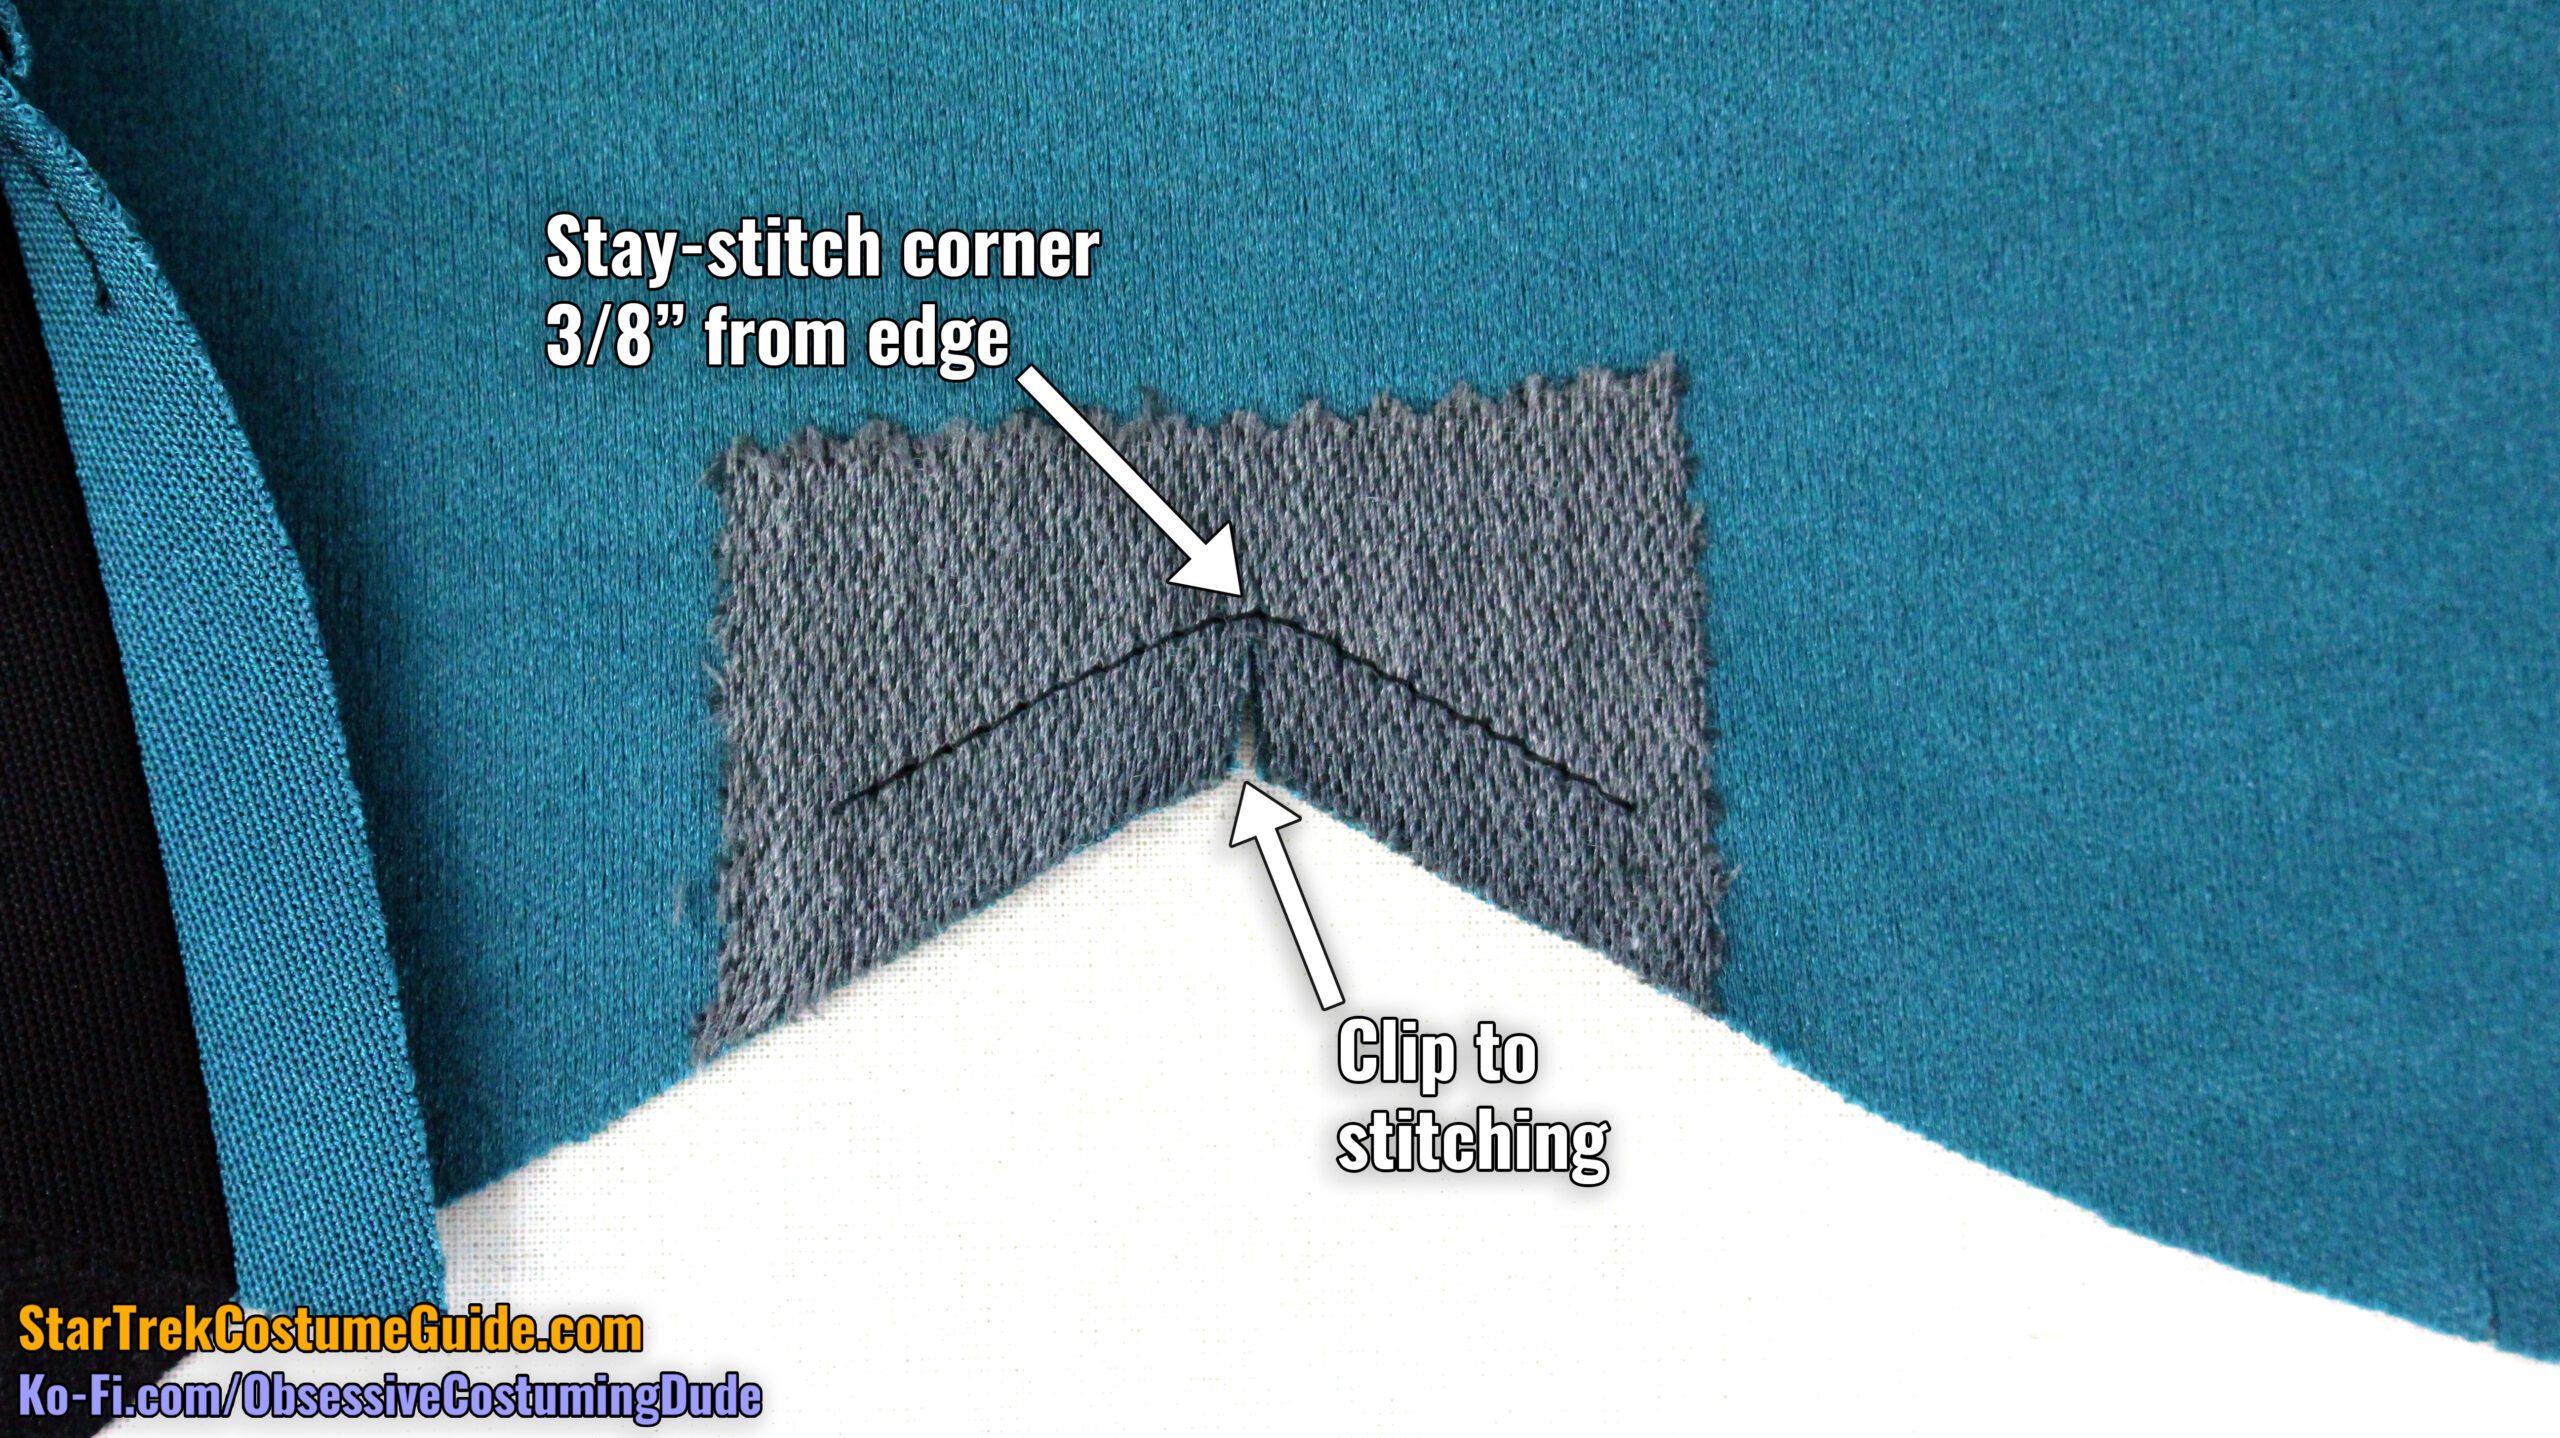
I recommend stabilizing the corner area on the upper left front by applying a small piece of lightweight fusible interfacing to the underside.
Stay-stitch the corner ⅜” from the edges, and clip the allowance to the stitching at the corner.
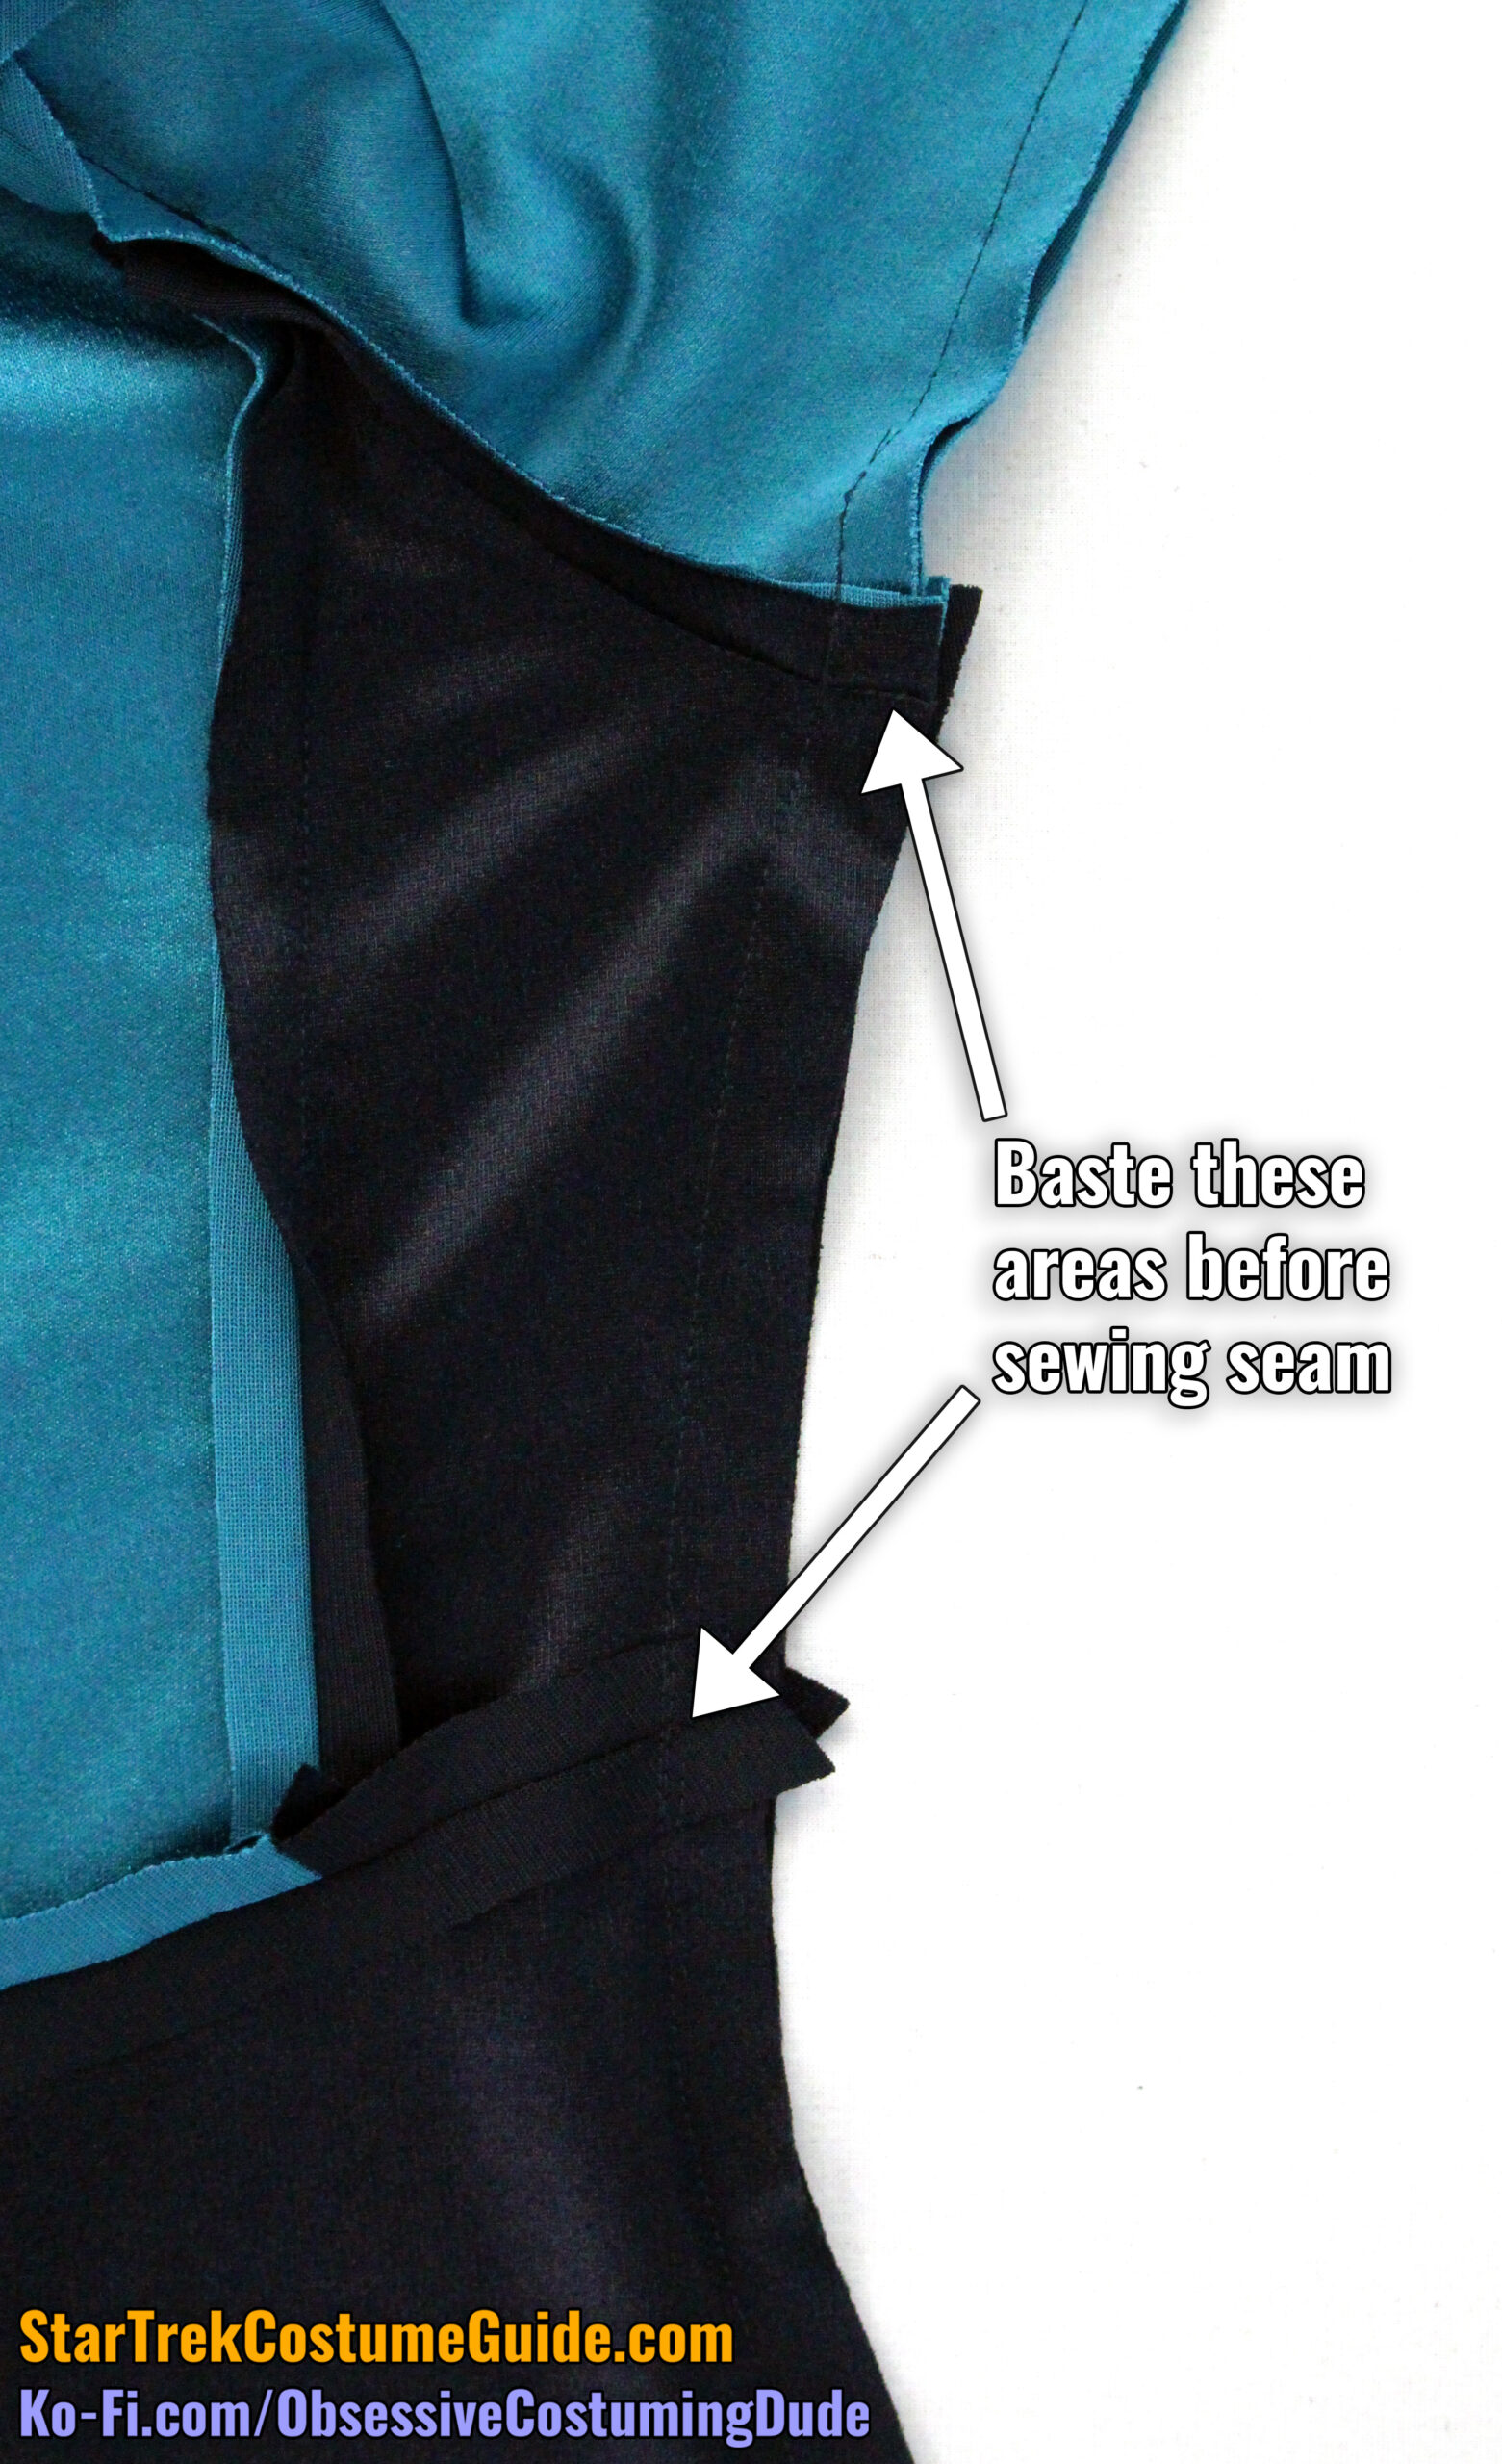
Sew the lower front assembly to the upper front assembly at the waist, right sides together with ½” seam allowance, pivoting at the corner.
I suggest basting across the lower front/side front seam lines to ensure they properly align before sewing the entire seam.
After you’ve sewn the waist seam, clip the upper front allowance exactly to the stitching at the corner.
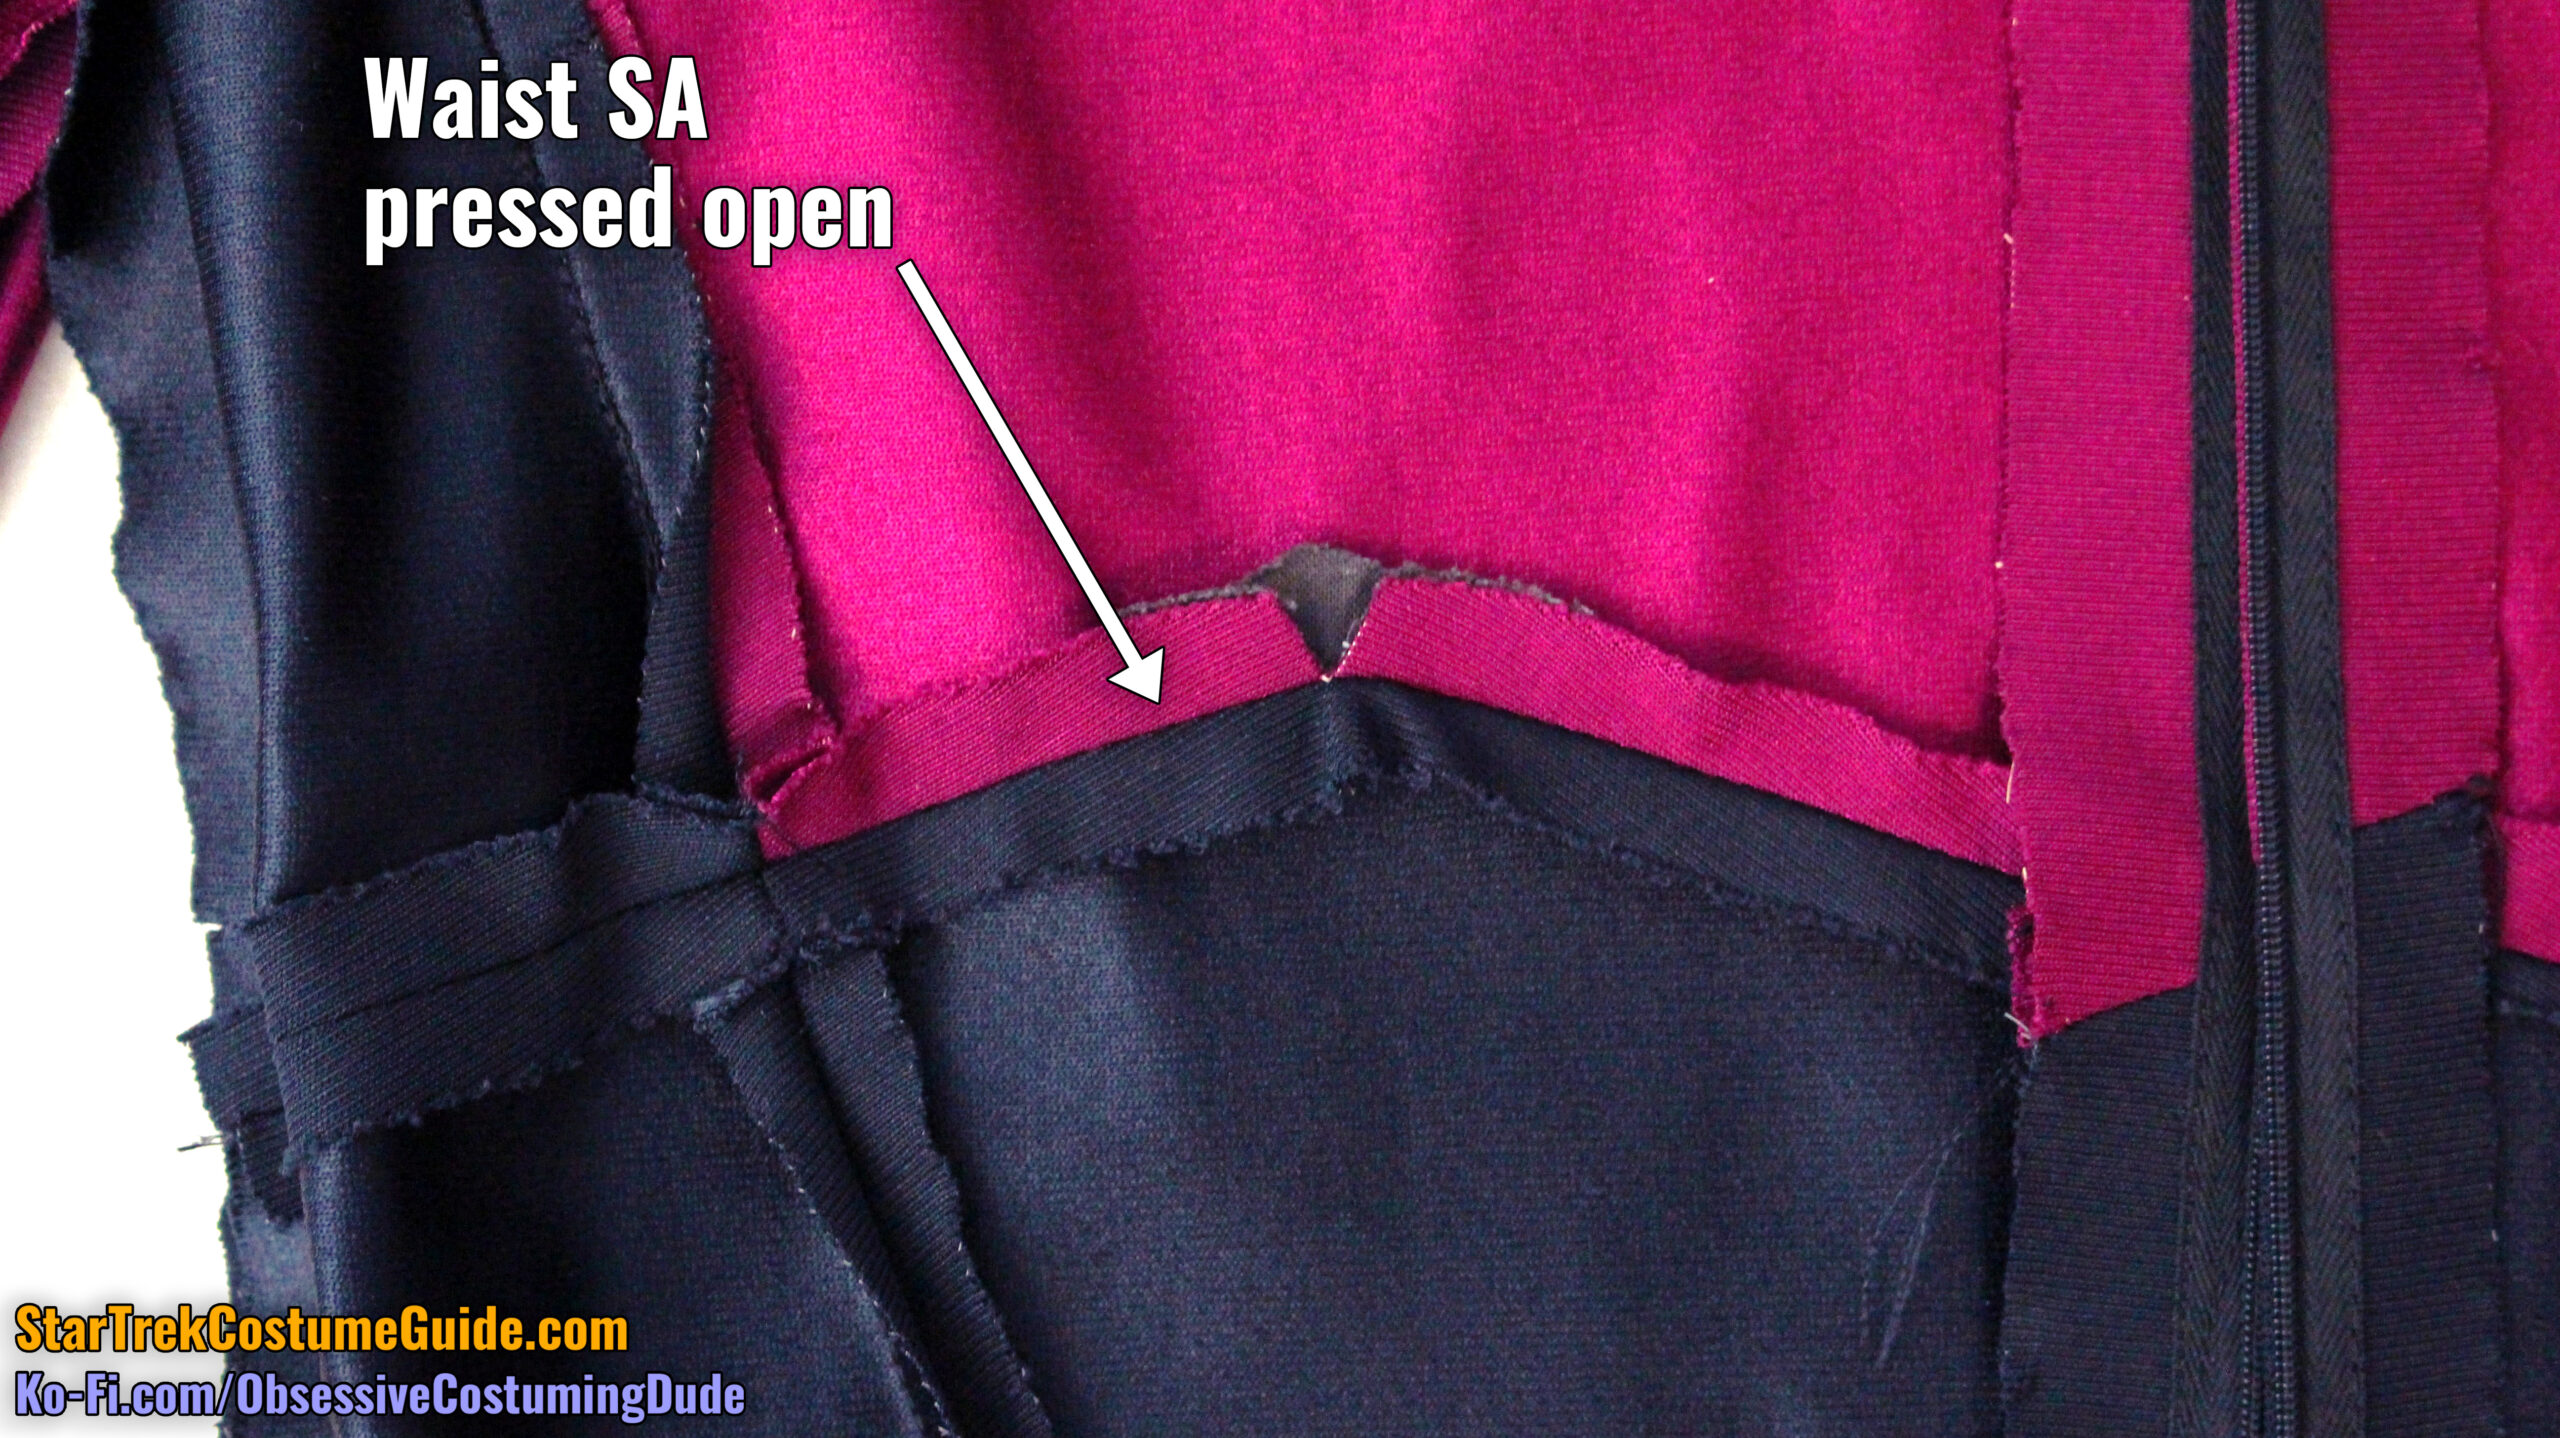
Unfortunately, even if the corner is sewn perfectly, once the area is pressed, the impression of the upper body allowances can form an unsightly pucker above the corner.
As you might recall from my multiple screen-used TNG jumpsuit examinations, a variety of increasingly unholy measures were taken to prevent these ugly puckers.
The Dr. Crusher and male extra (“Scranton”) uniforms I looked at had the left front waist allowances simply pressed open.
Screen-used Dr. Crusher TNG jumpsuit
Screen-used male extra TNG jumpsuit
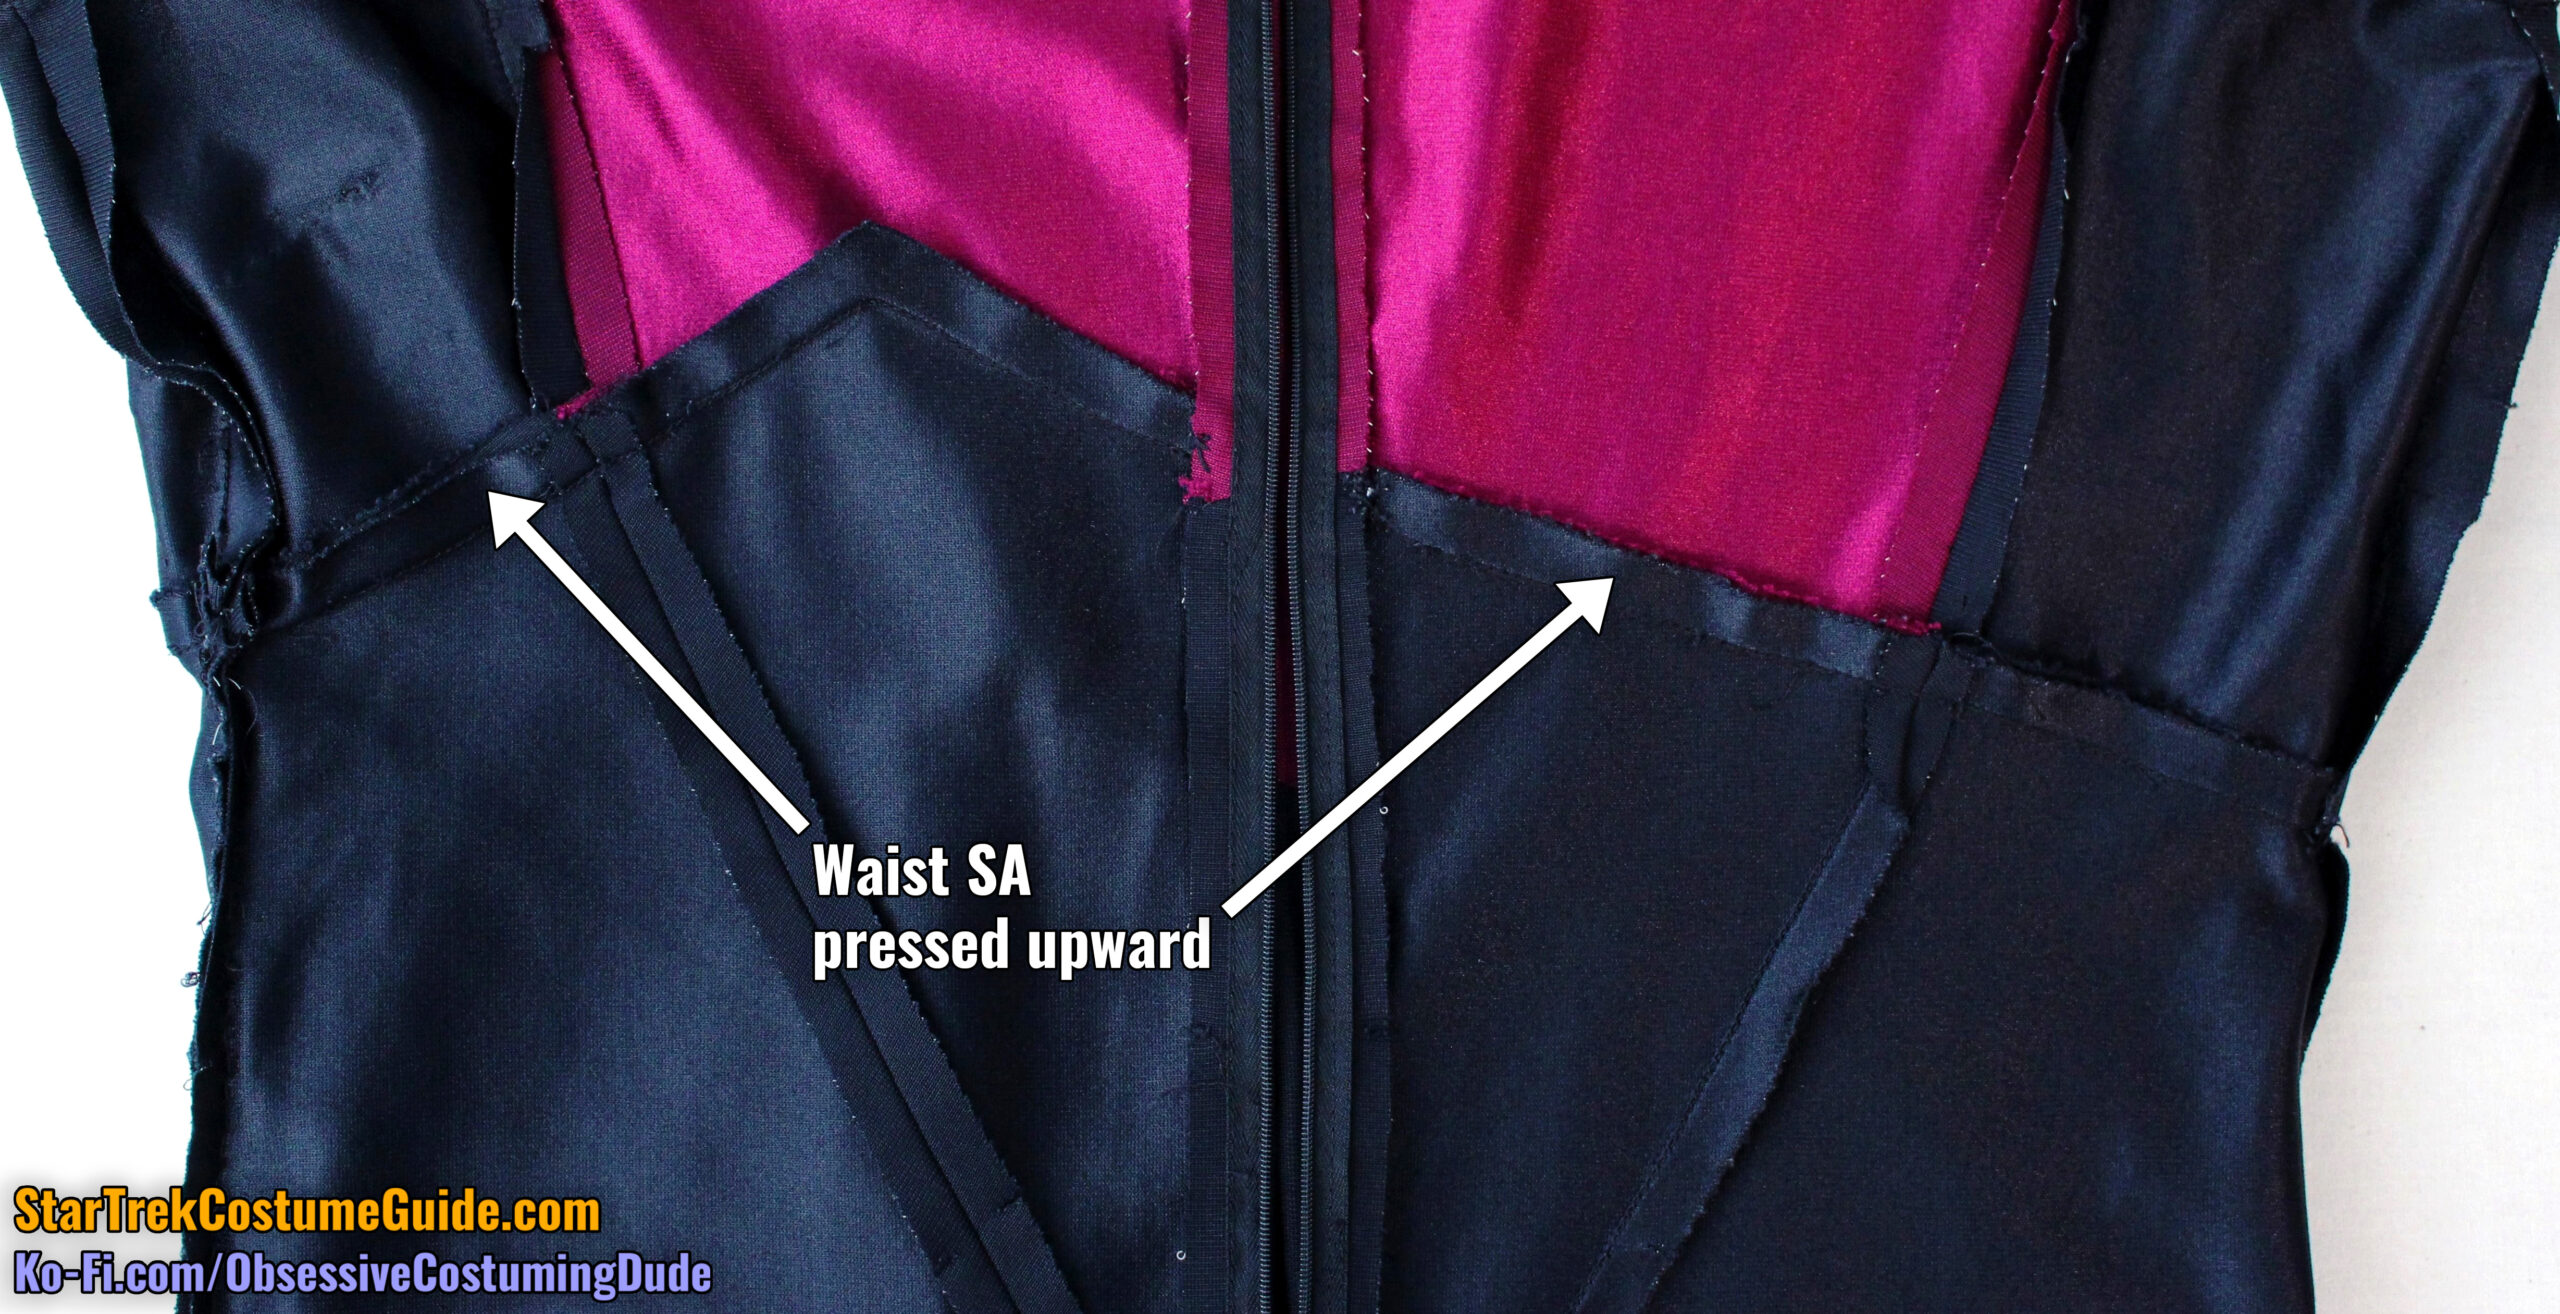
However, the Worf uniform I studied had the front waist allowances all pressed upward.
Screen-used Worf TNG jumpsuit
The Tasha Yar and Ensign Sito uniforms I studied had the allowances actually pressed in different directions!
Screen-used Tasha Yar TNG jumpsuit
Screen-used Ensign Sito TNG jumpsuit
(Some of these examples were obviously early and/or front-zipping uniform styles, but I mention them here because the issue of the front left corner applies to all of the TNG jumpsuit uniforms.)
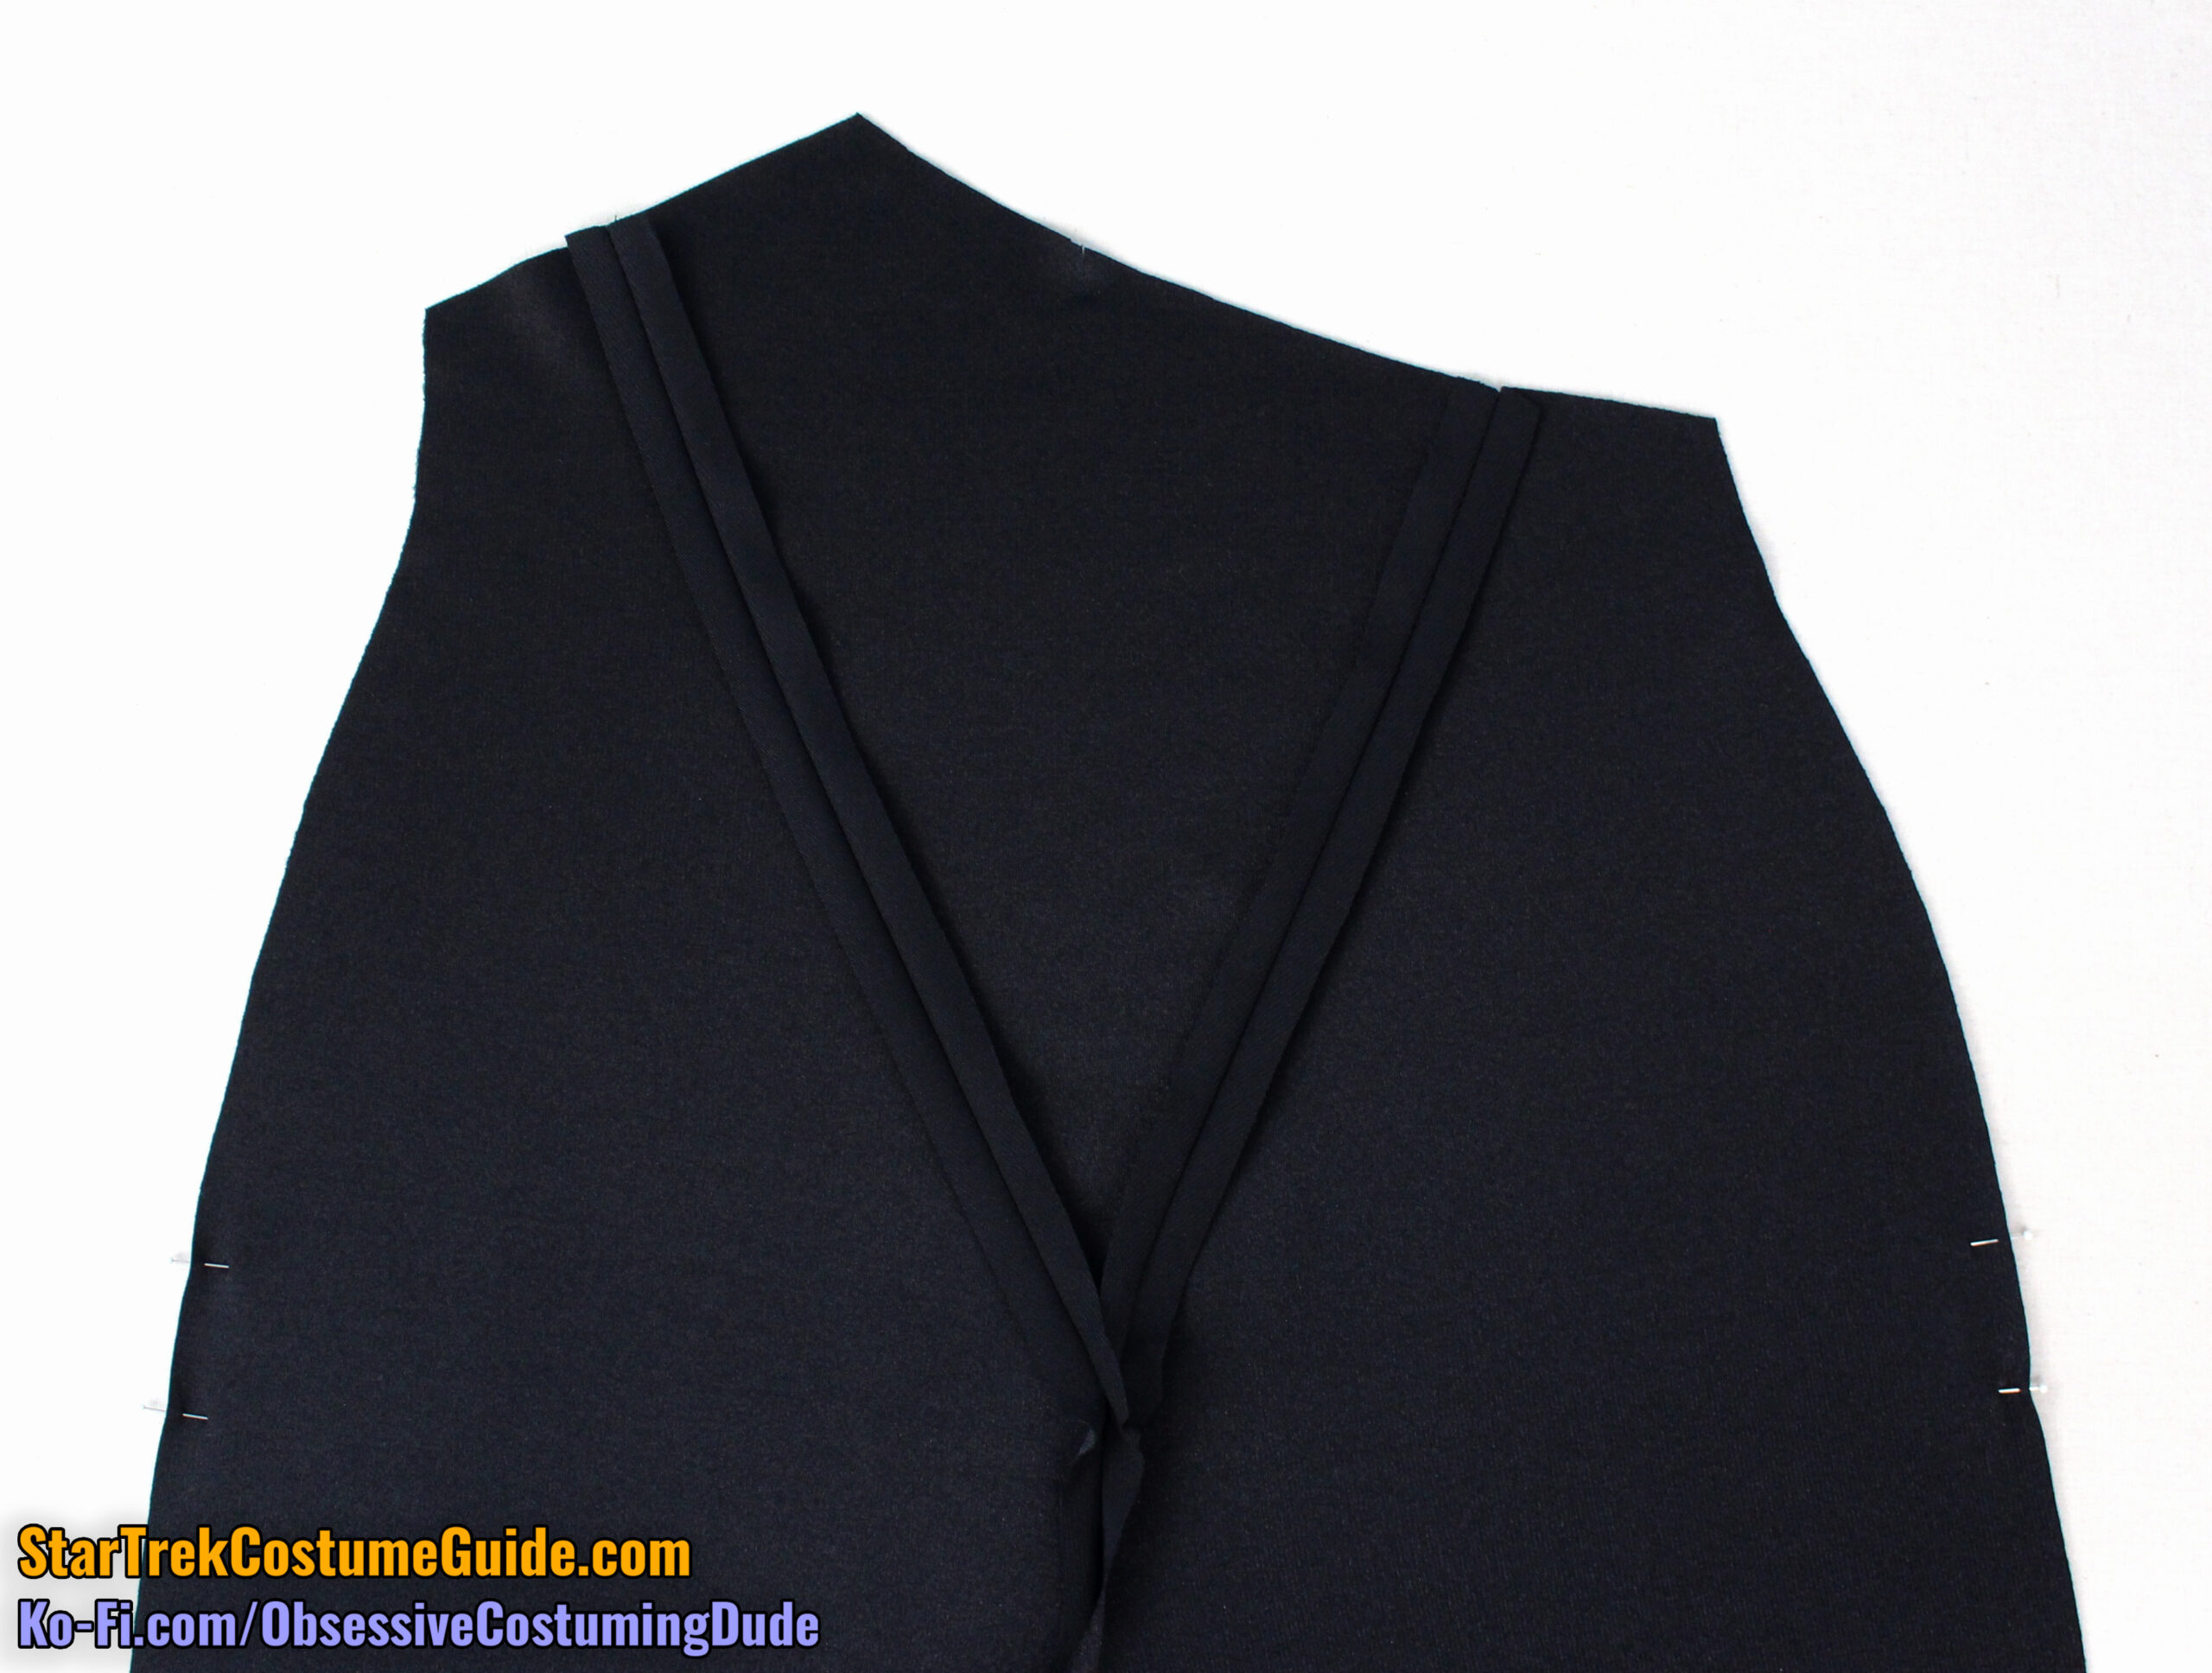
Personally, I favor simply pressing the seam allowances open, albeit carefully and with a press cloth on each of the upper edges.
I also recommend pressing the corner area on the upper body (but not with any of the allowances – just the upper body) both at first, and as a final step.
This particular method has generally produced acceptable results for me, although you may wish to experiment on some scraps to determine which method(s) you prefer.
On both sides of the front assembly, I recommend basting the waist allowances open ½” from the side edges – provided you chose to press your waist allowances open, of course.
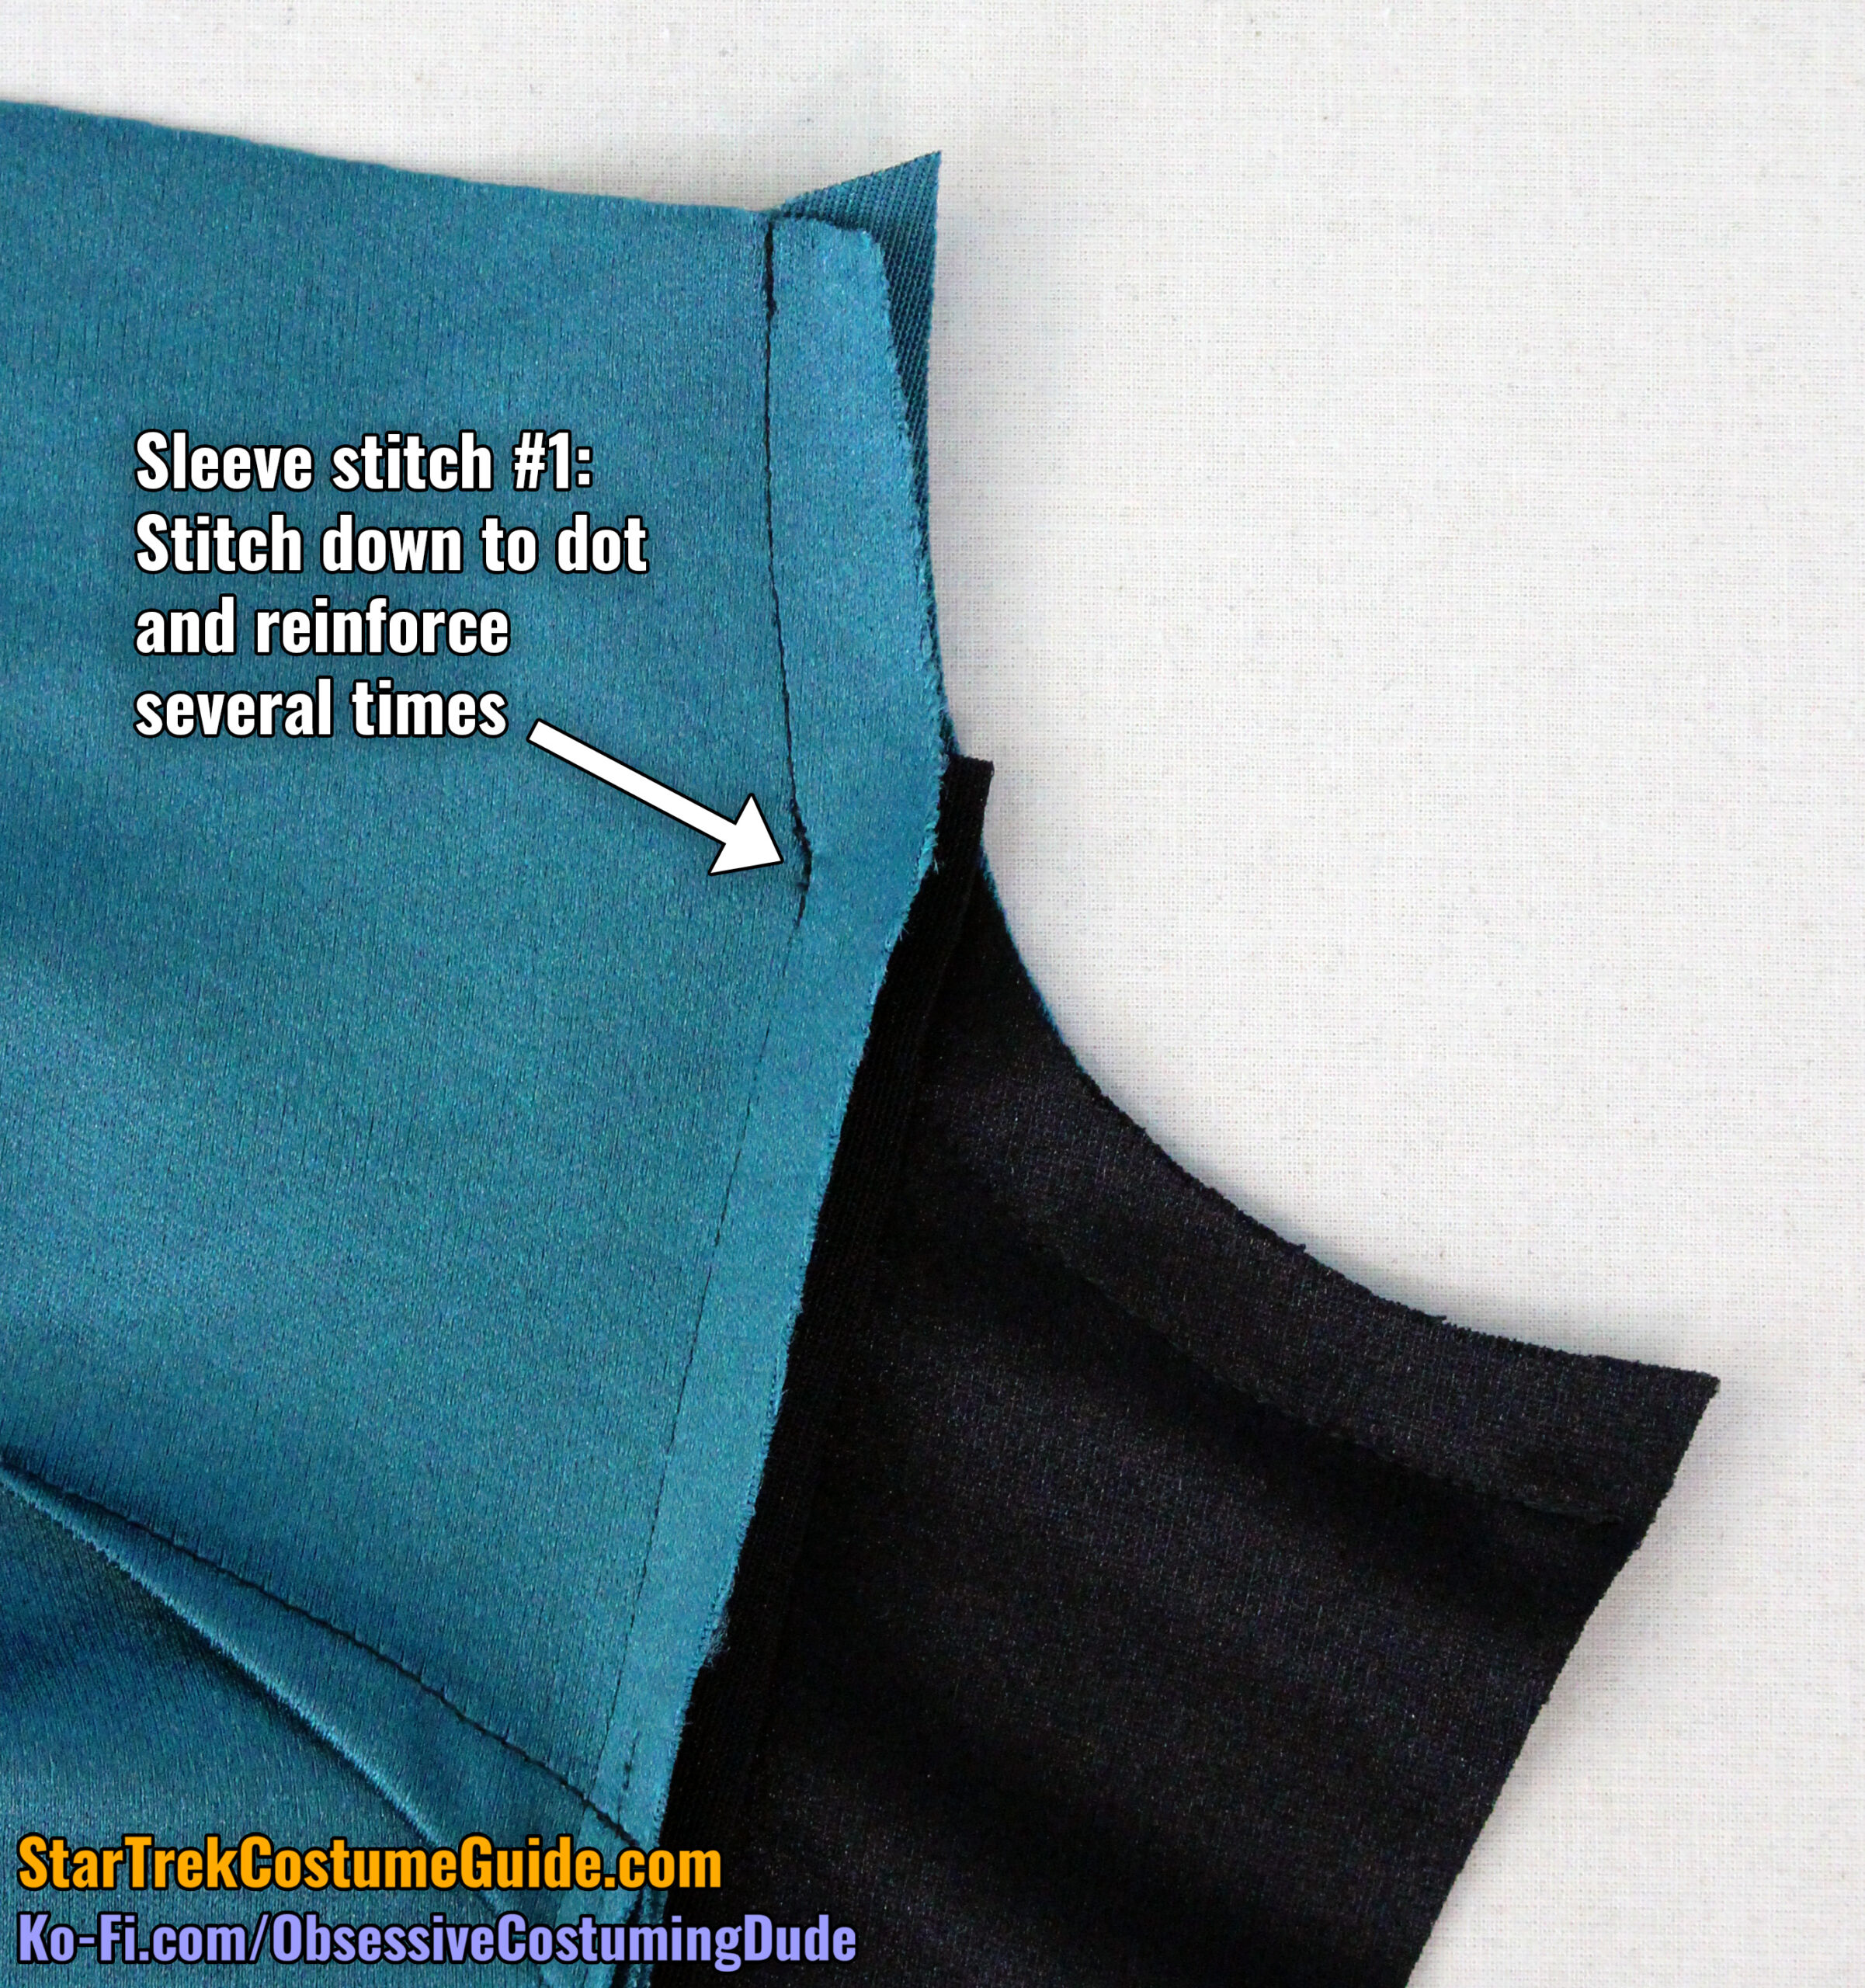
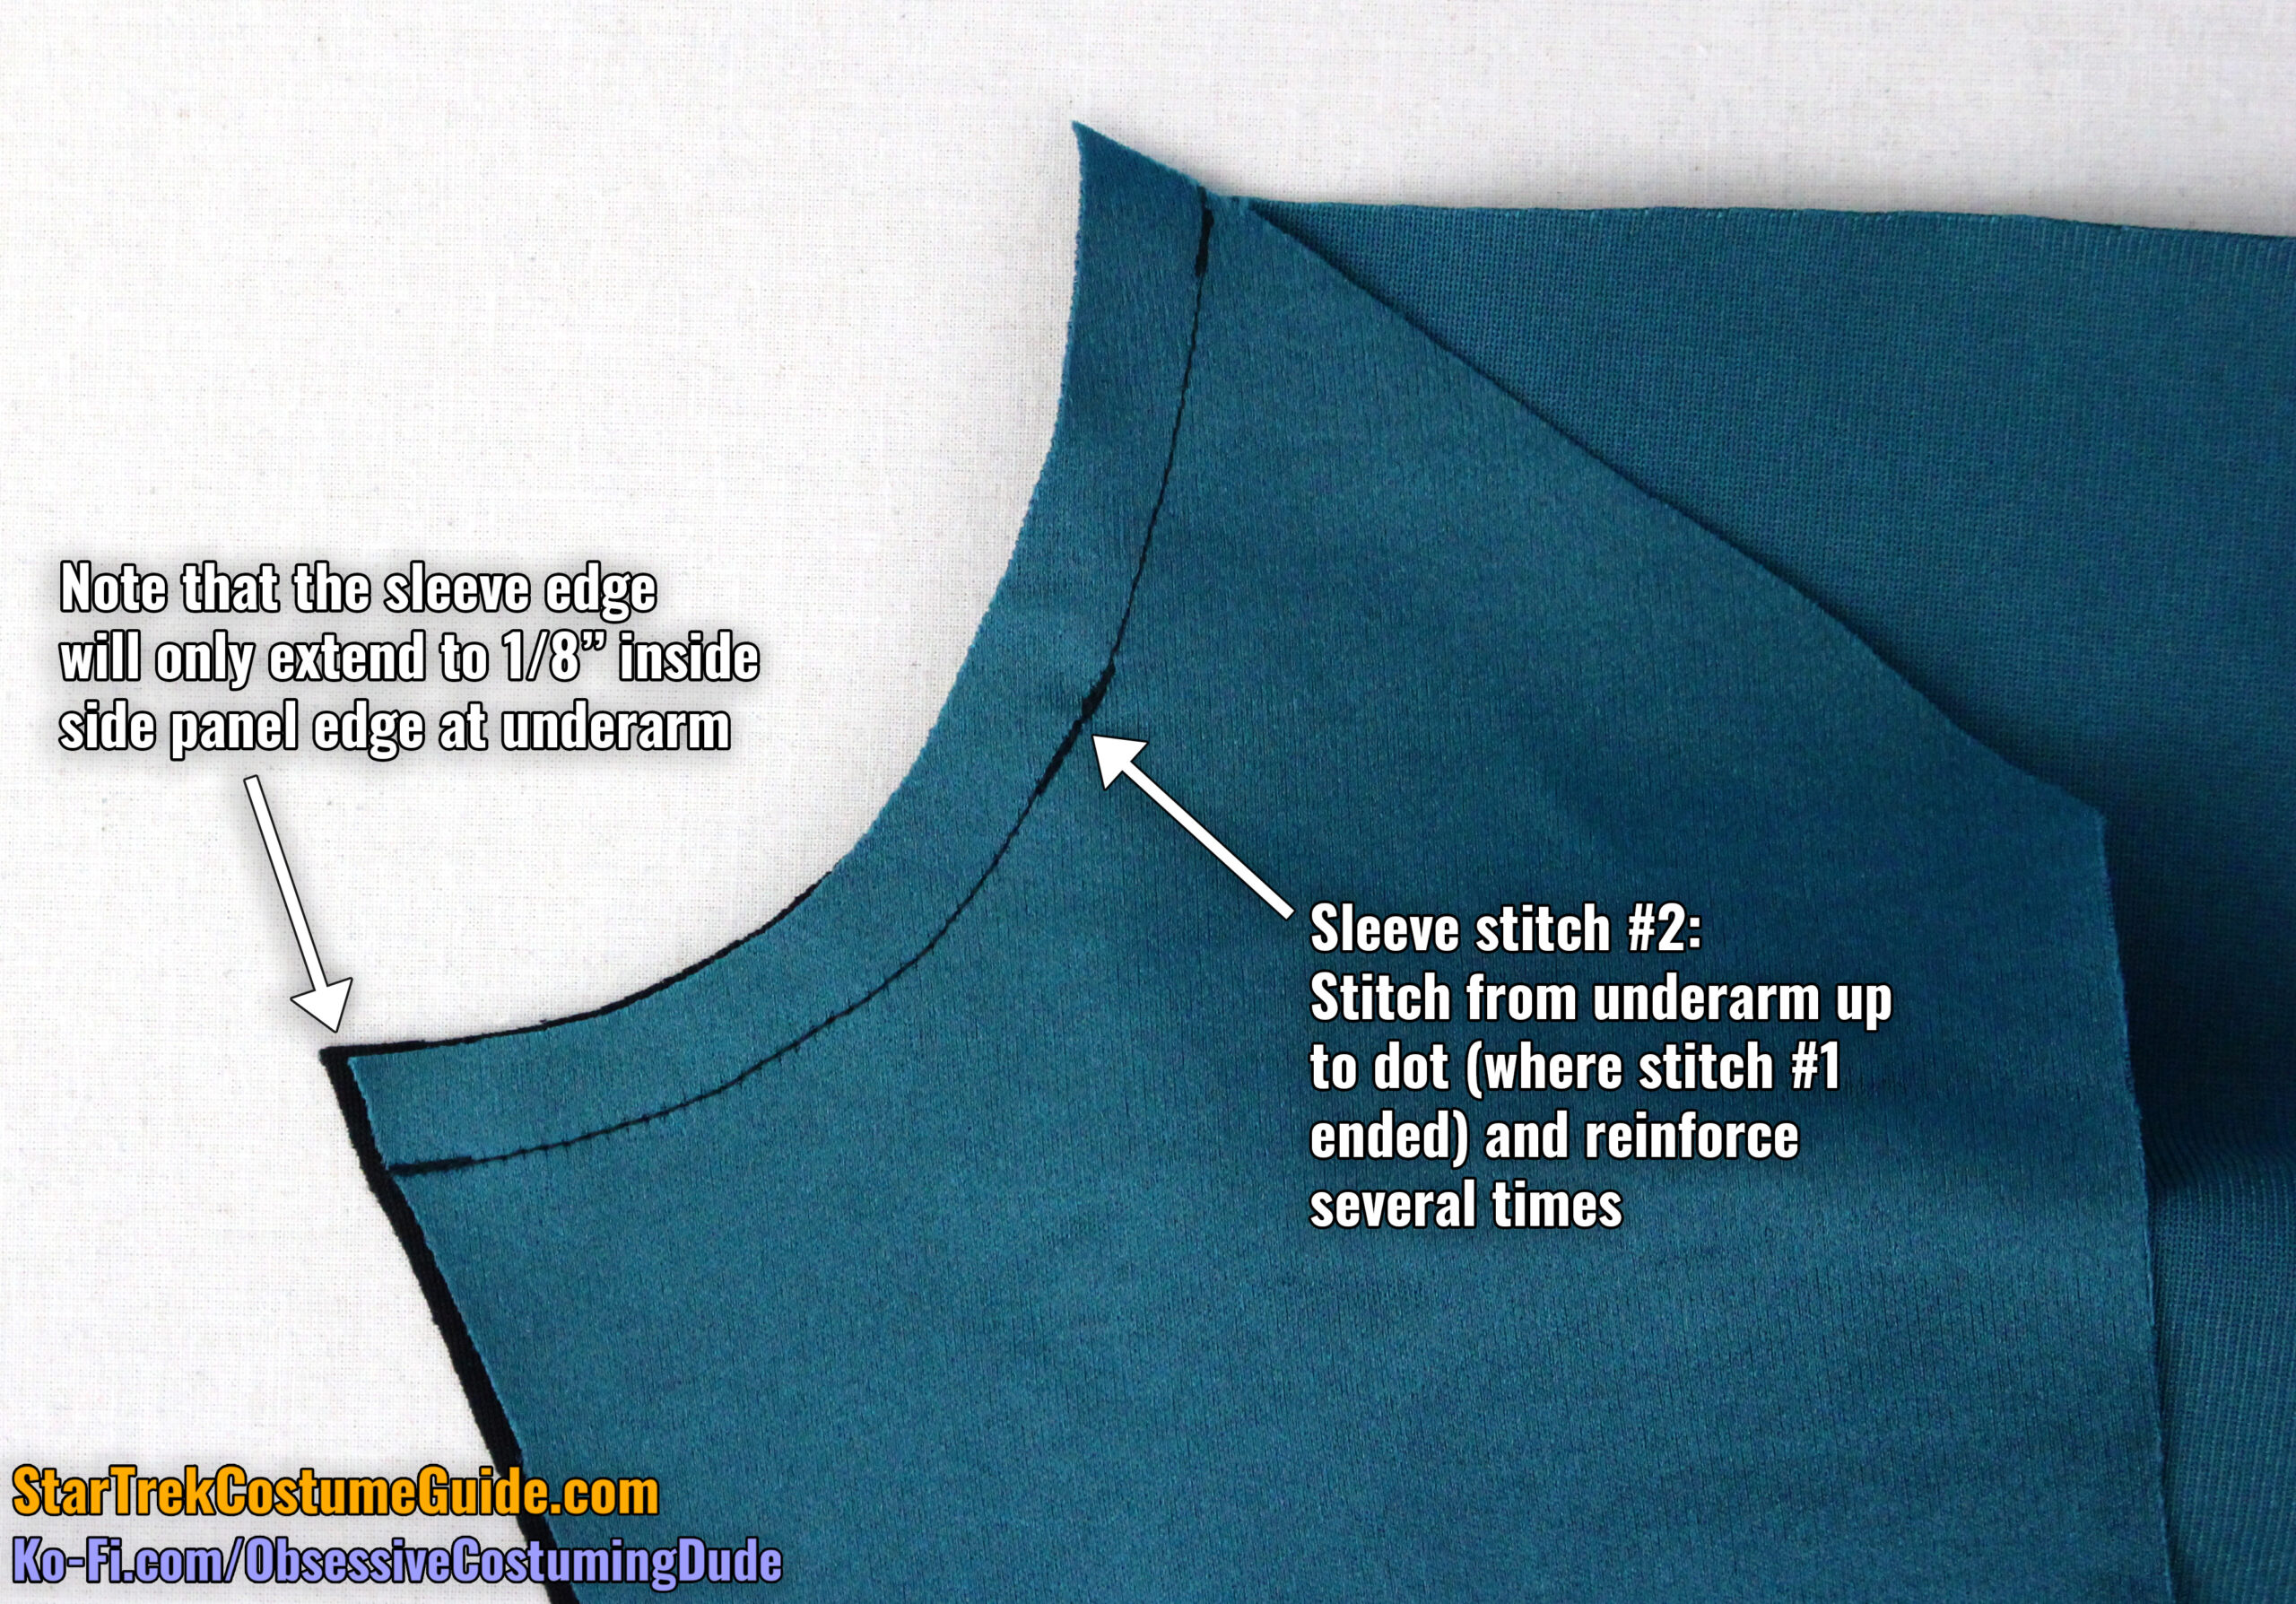
The TNG jumpsuit sleeves are attached to the body via two separate stitches, which can be done in either order.
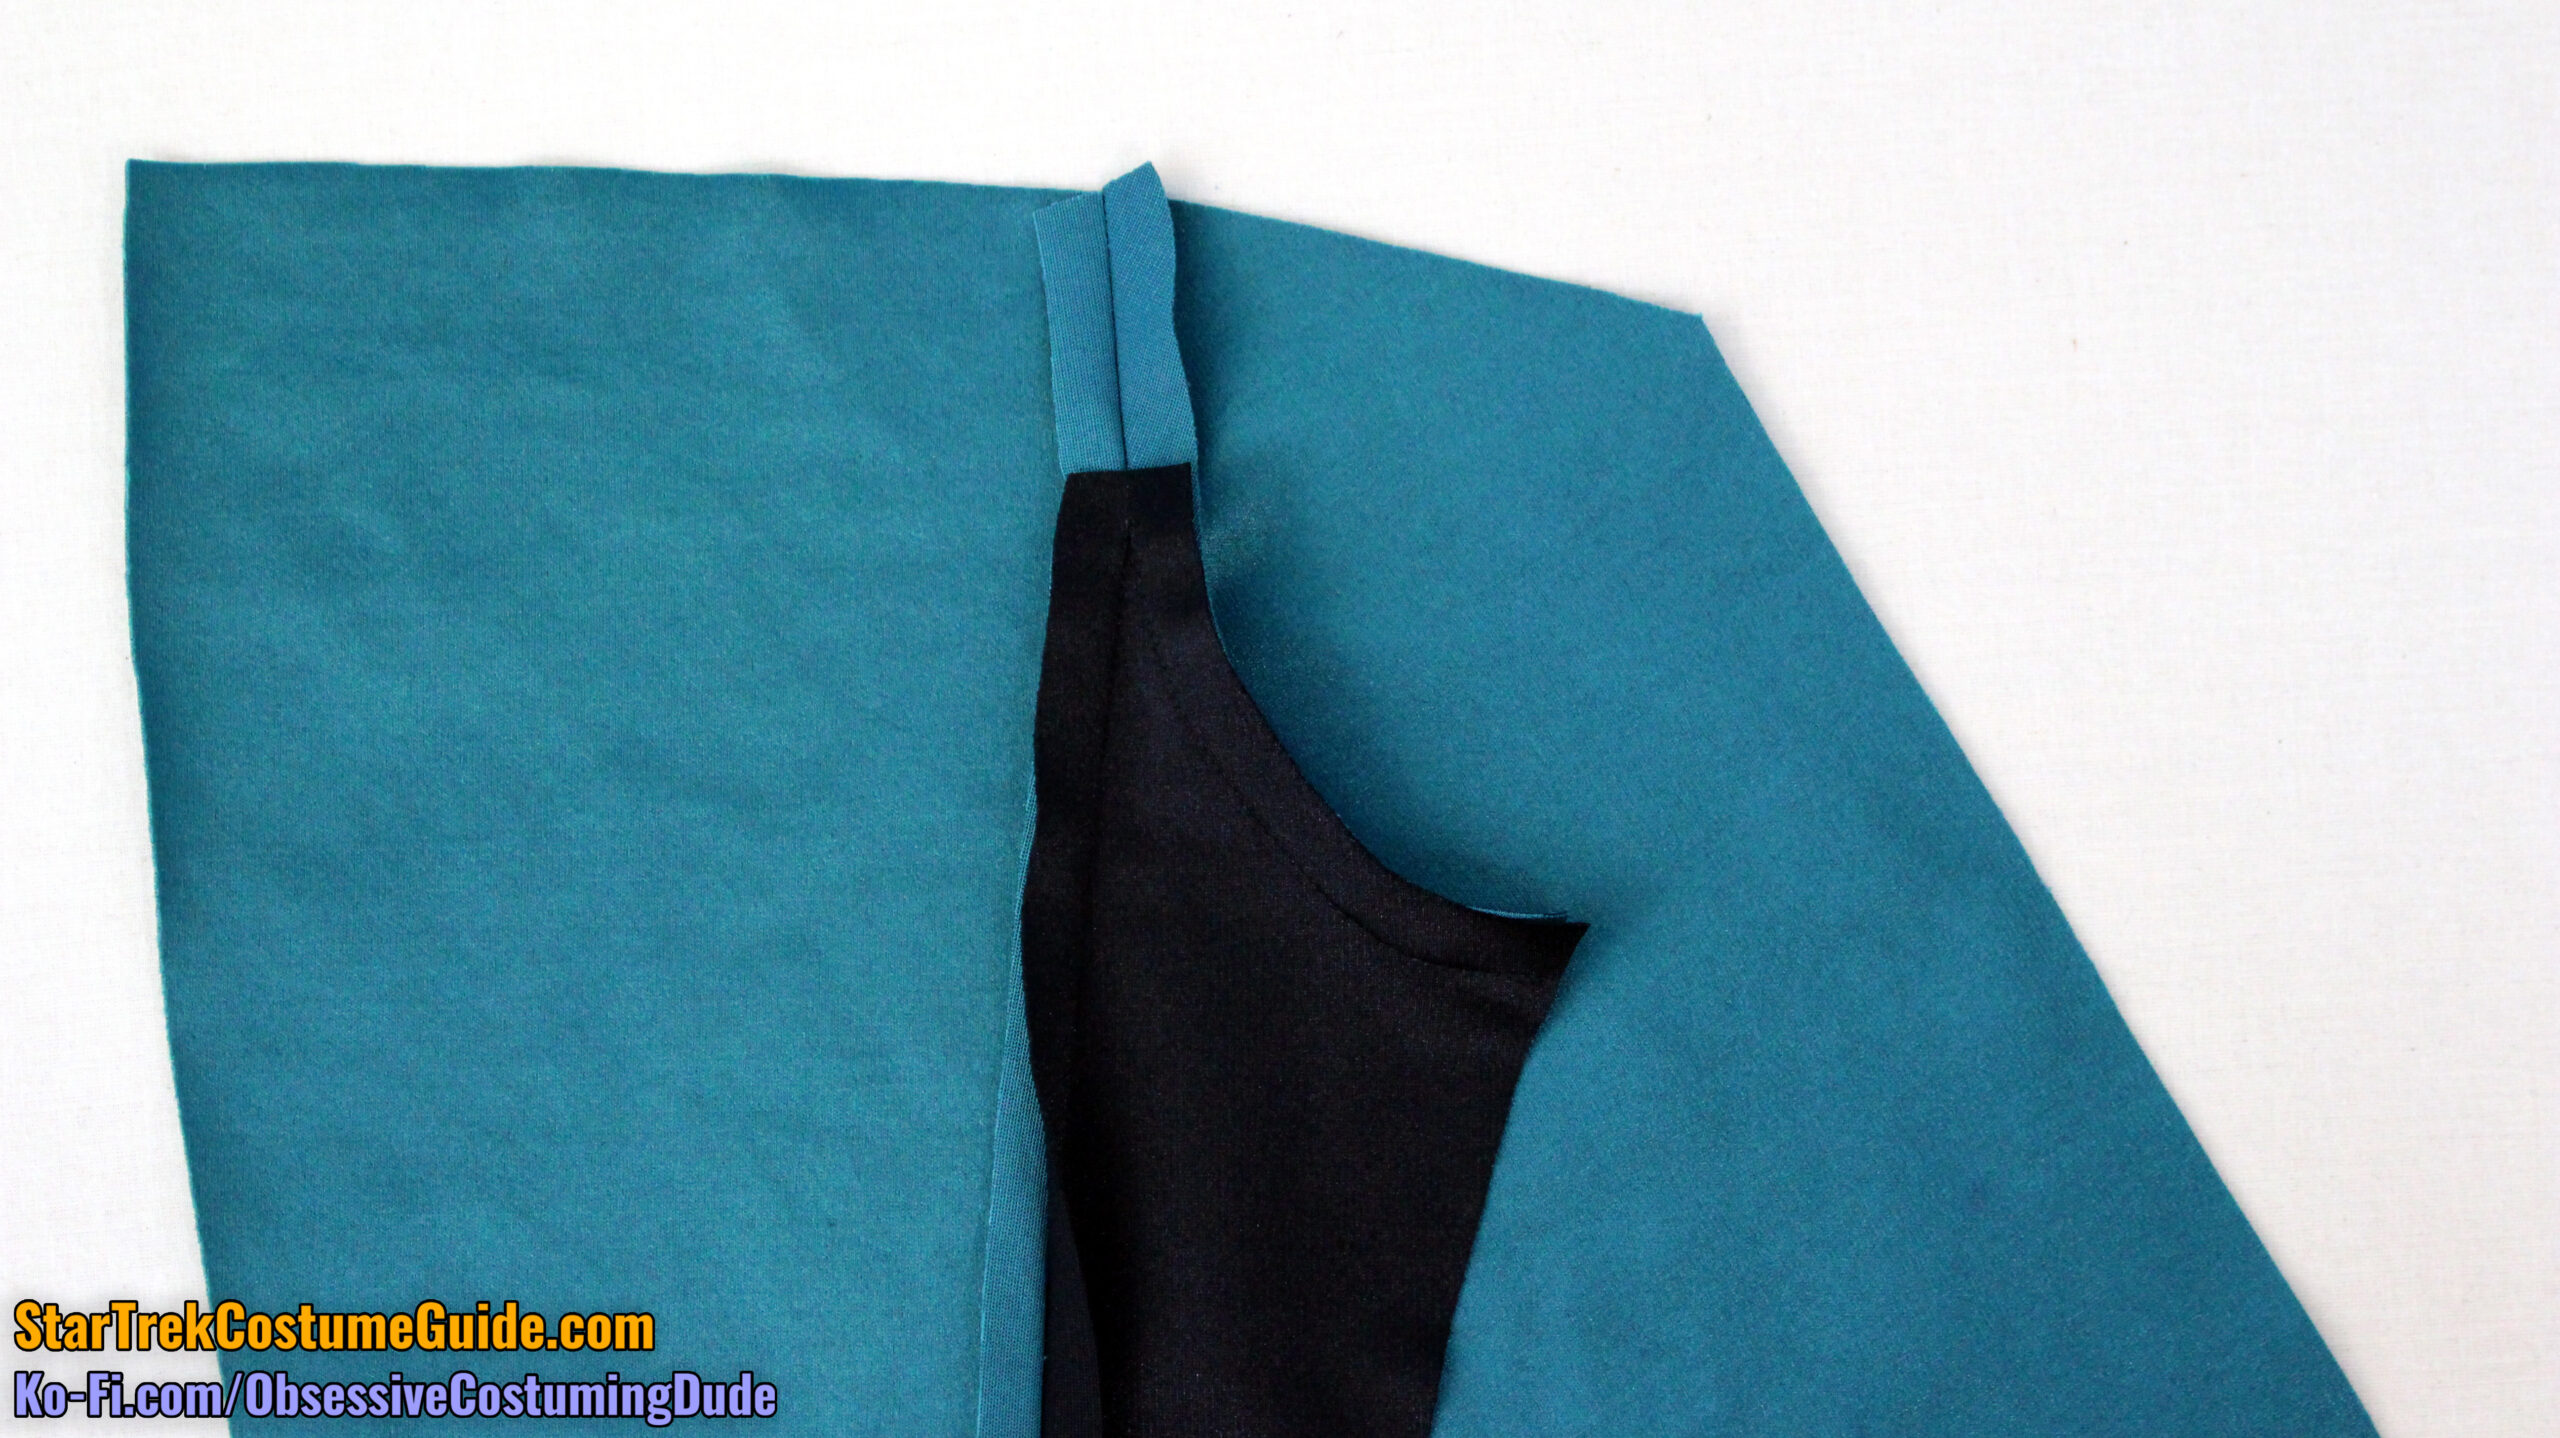
Position the front sleeve (piece O) onto the body assembly, right sides together and matching armscyes.
Note that because the sleeve has ½” seam allowance but the body’s side seam has ⅝” seam allowance, the sleeve edge will only extend to ⅛” inside the side panel edge at the underarm.
Stitch from the upper body down to the dot (where the side front stitching ended) and reinforce several times.
Then, flip the assembly over and stitch from the underarm up to the dot (again, where the previous stitching ended) and reinforce several times.
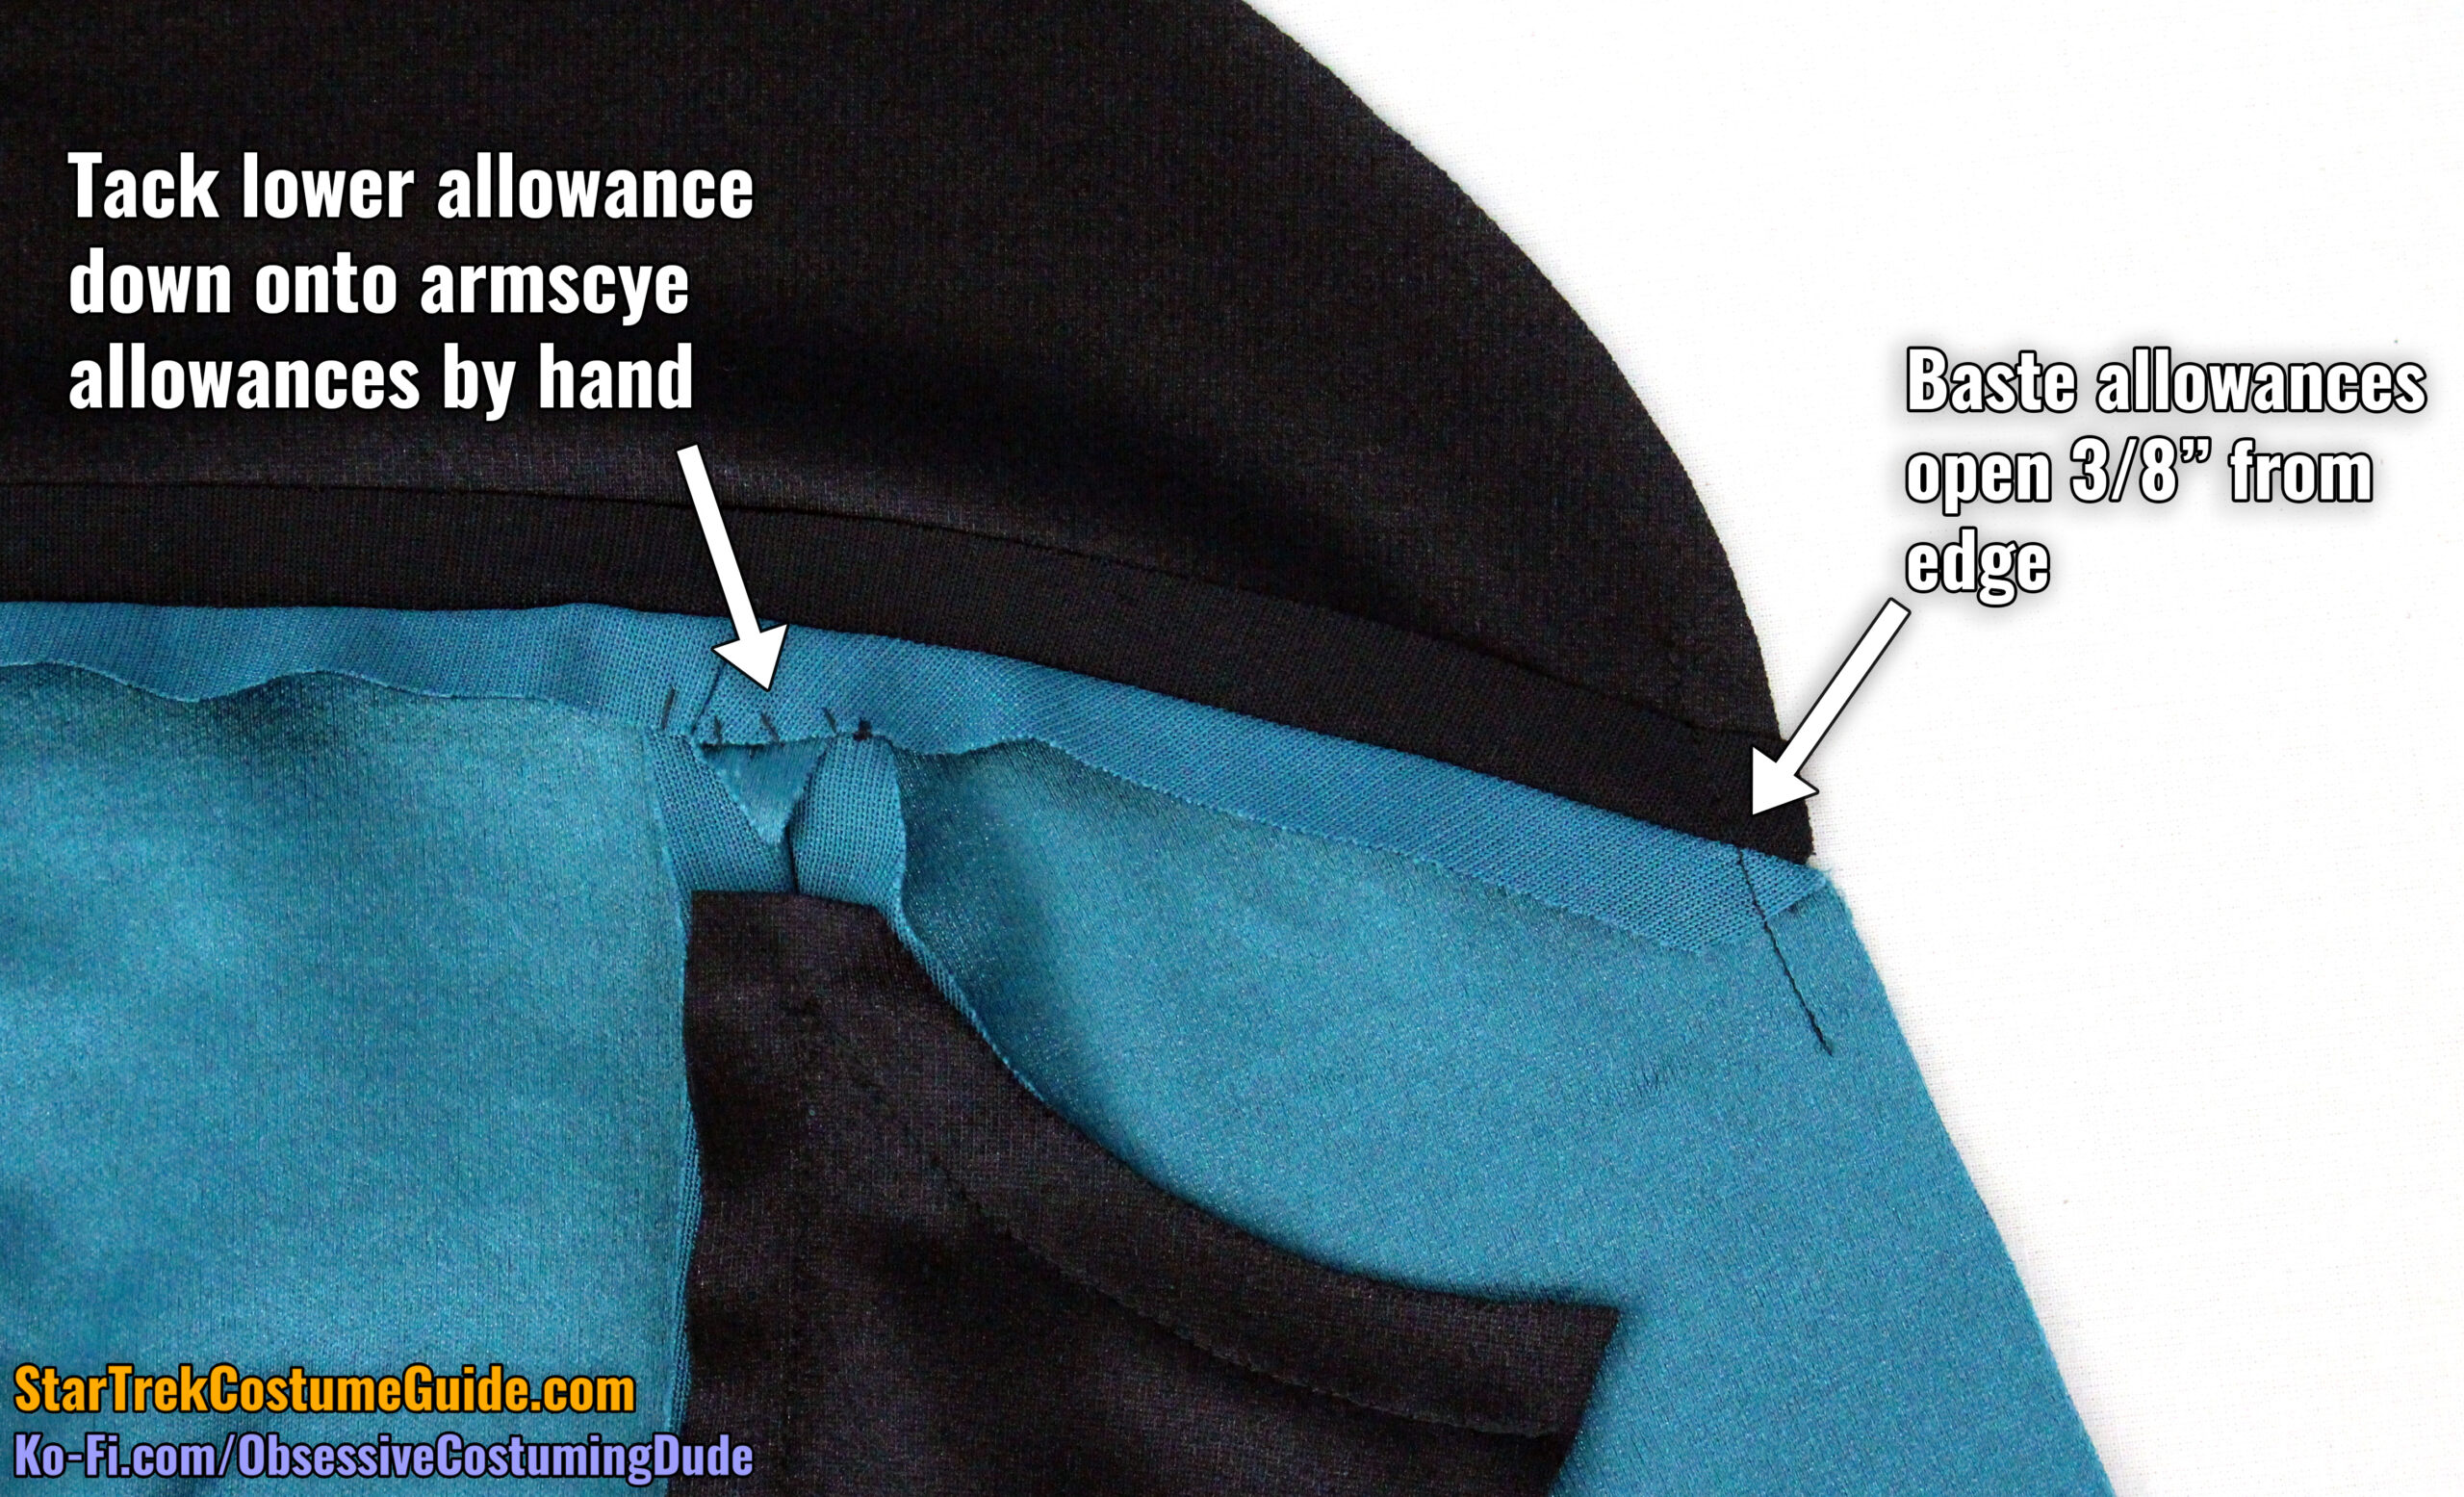
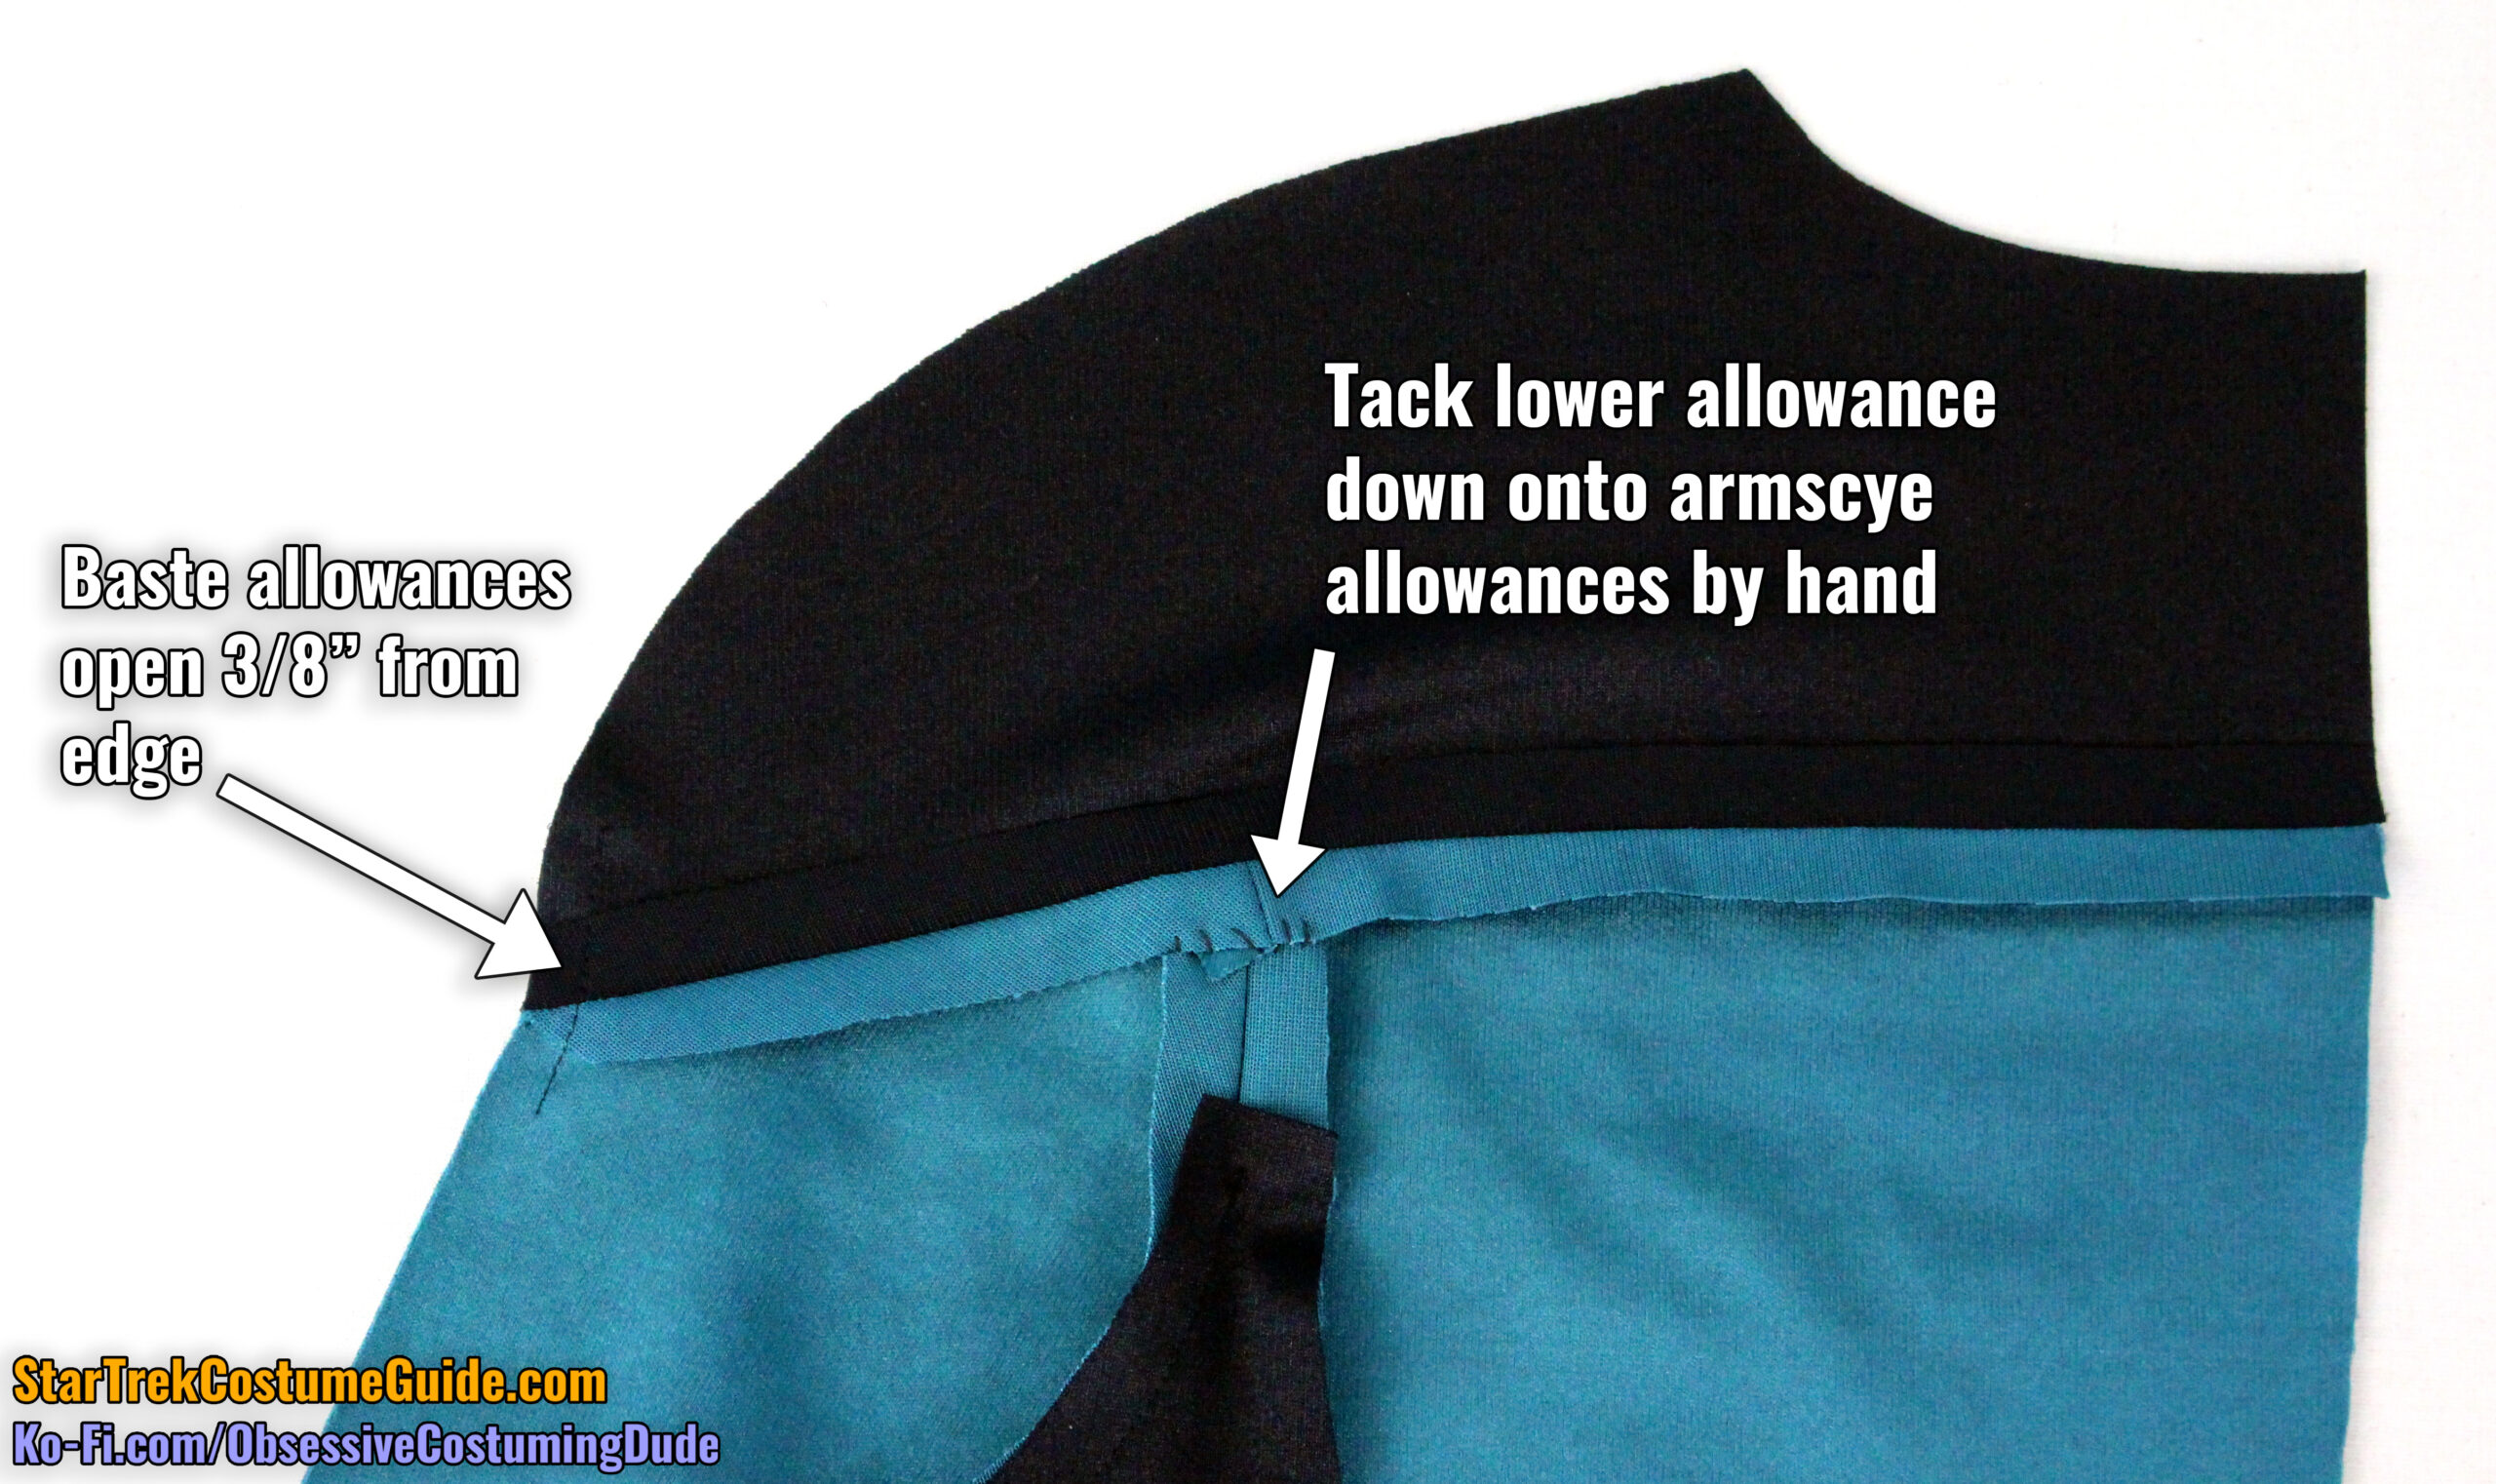
Press the lower armscye/sleeve (underarm) allowances toward the sleeve, and press the upper armscye/sleeve allowances open.
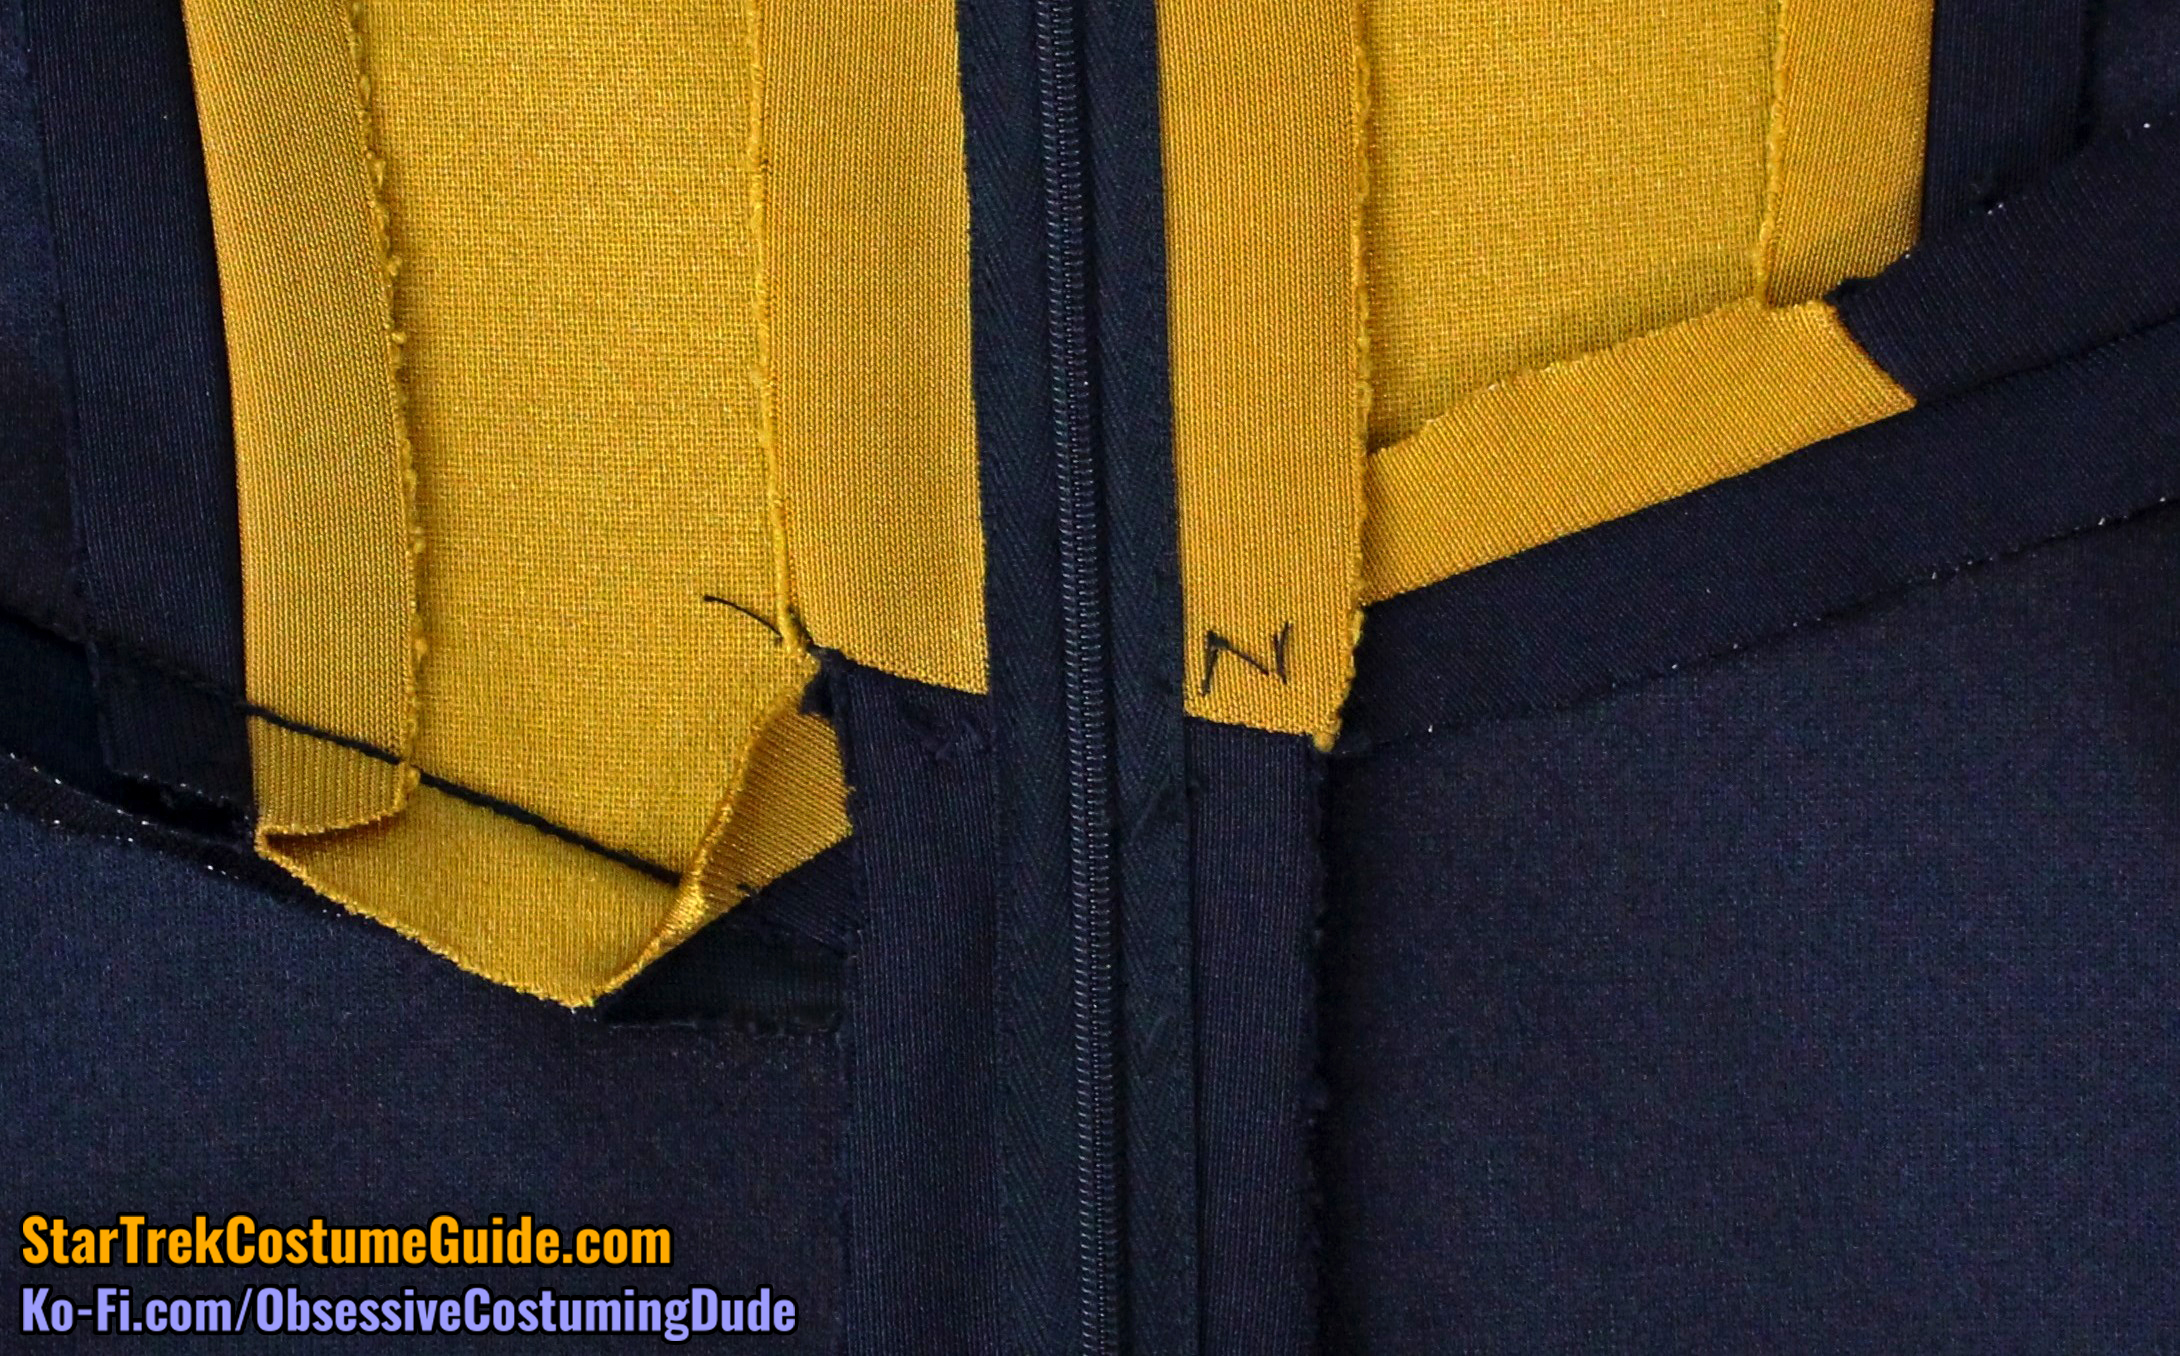
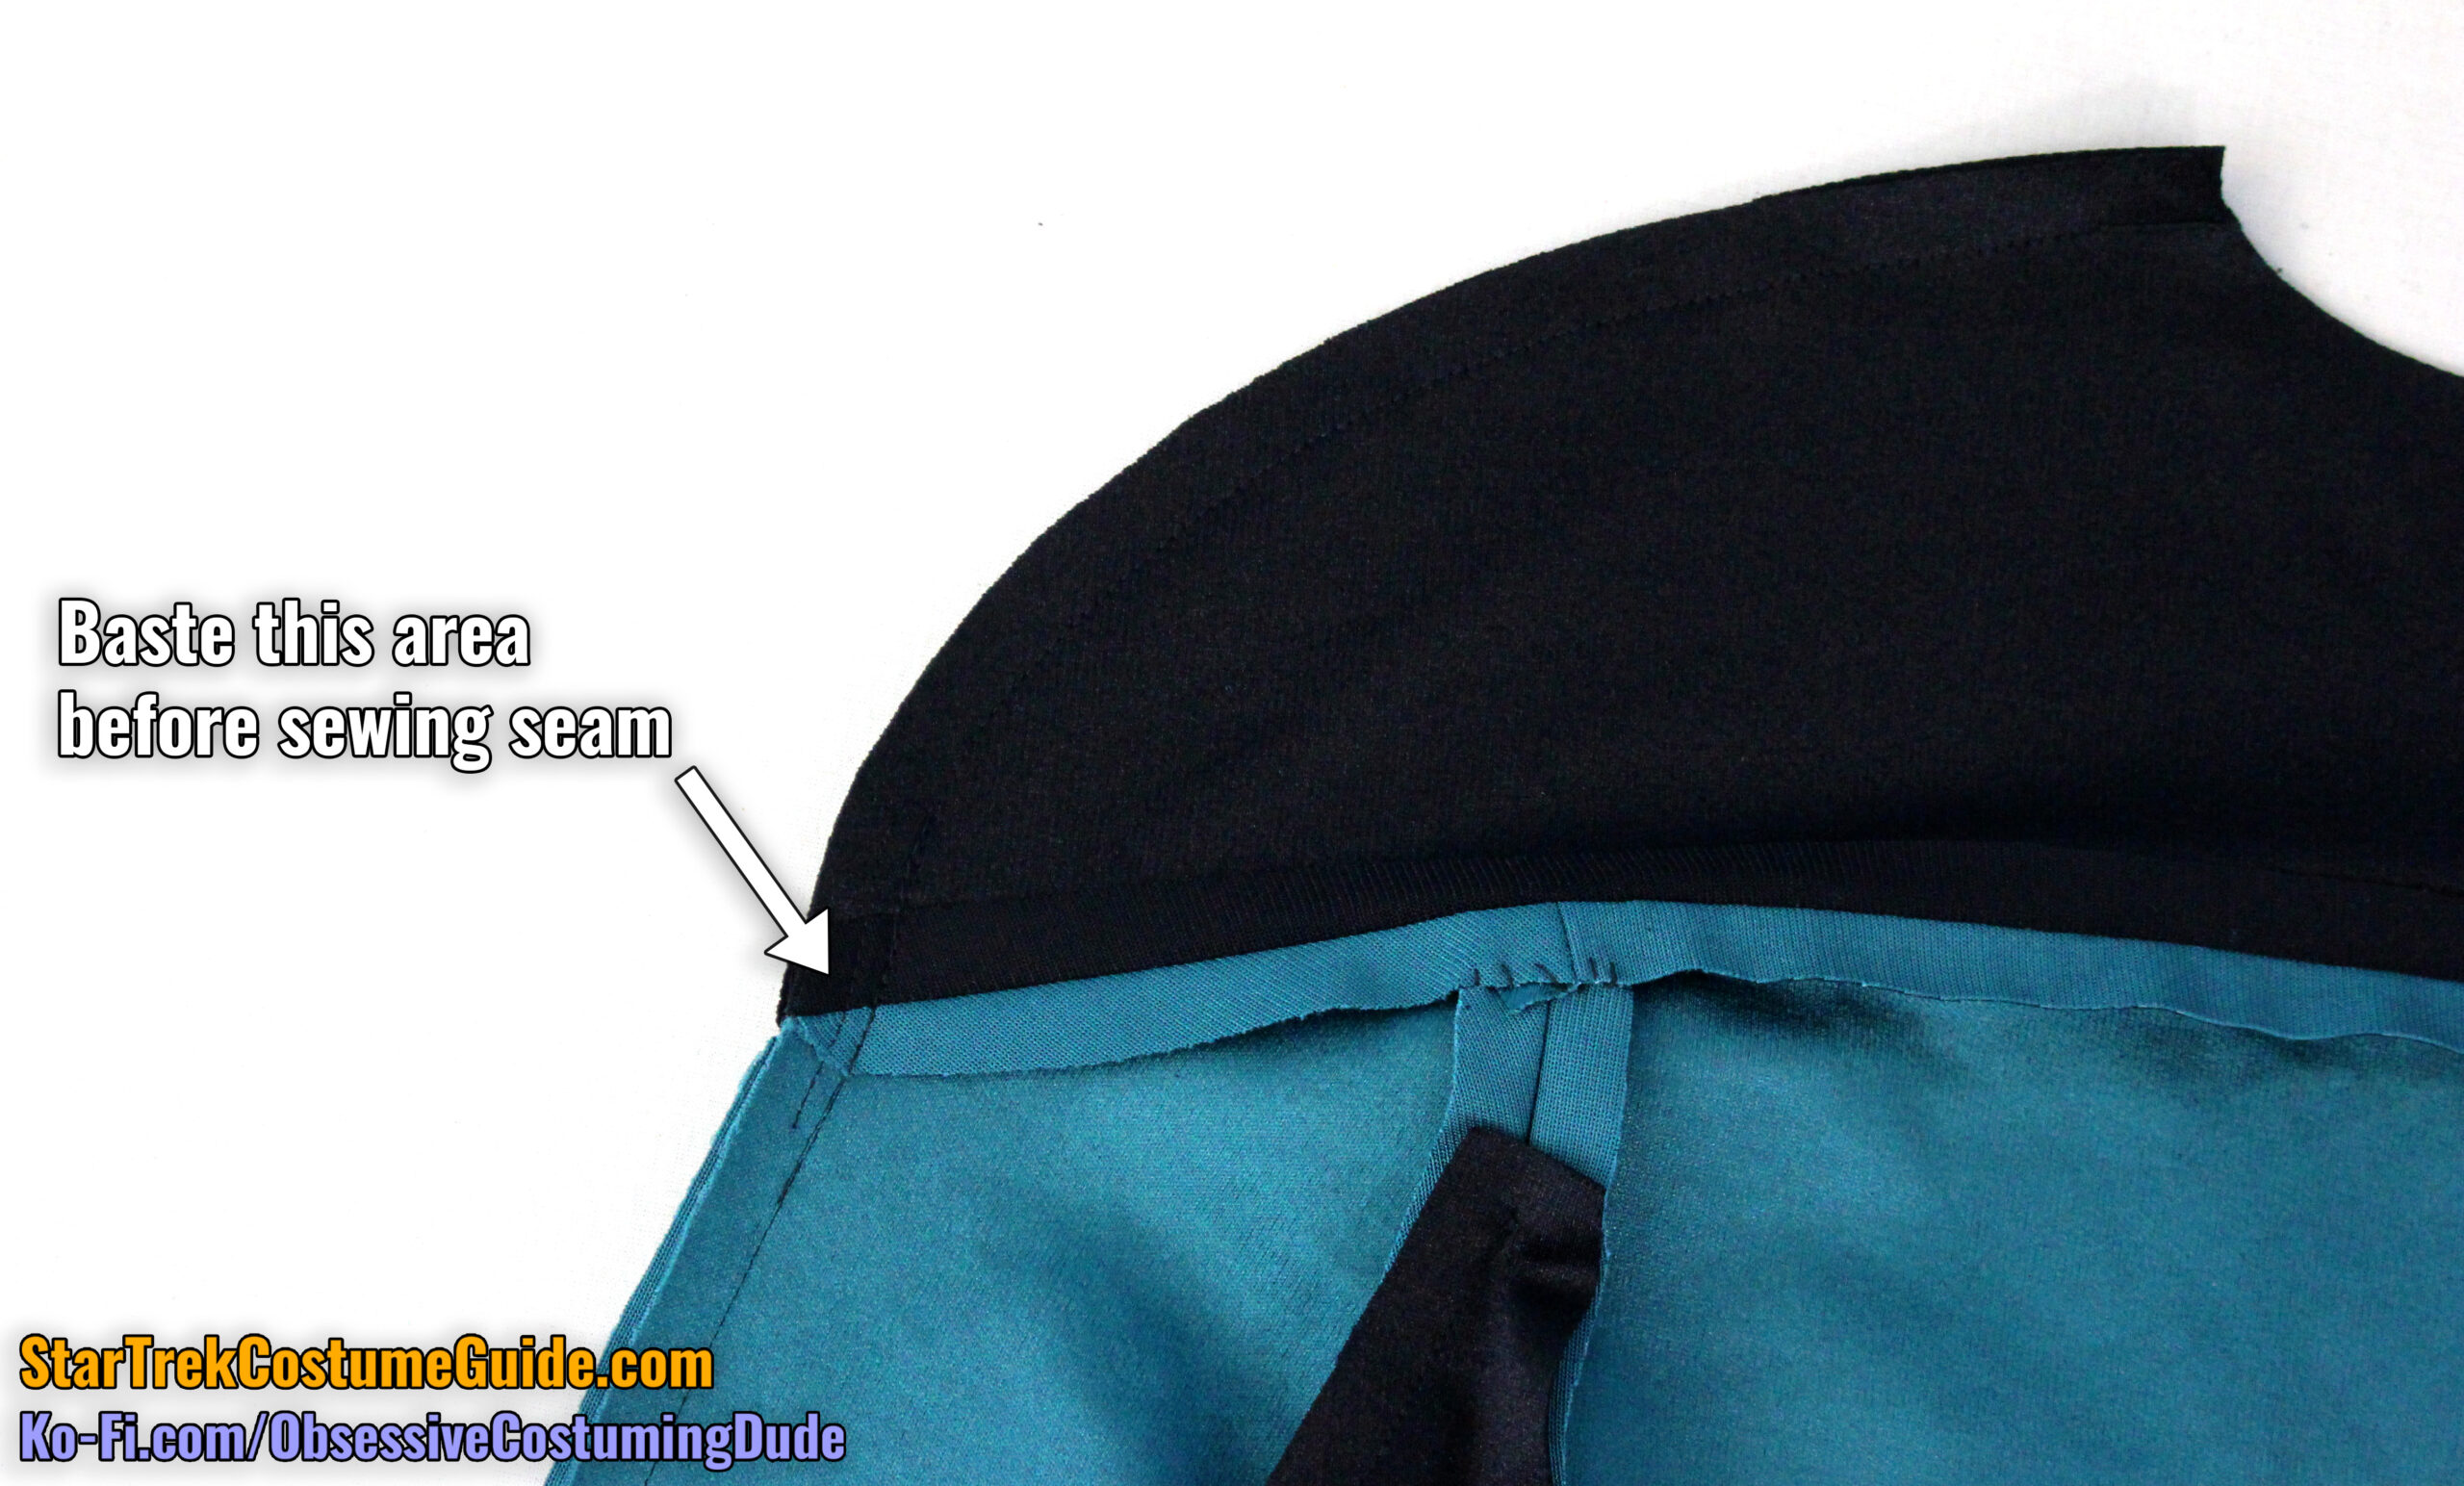
Sew the front yoke (piece B3) to the front body assembly, right sides together with ½” seam allowance.
Press the seam allowances open.
I also suggest machine-basting the allowances open at the lower, outer corner of the yoke, and tacking the upper body allowance down by hand at the armscye.
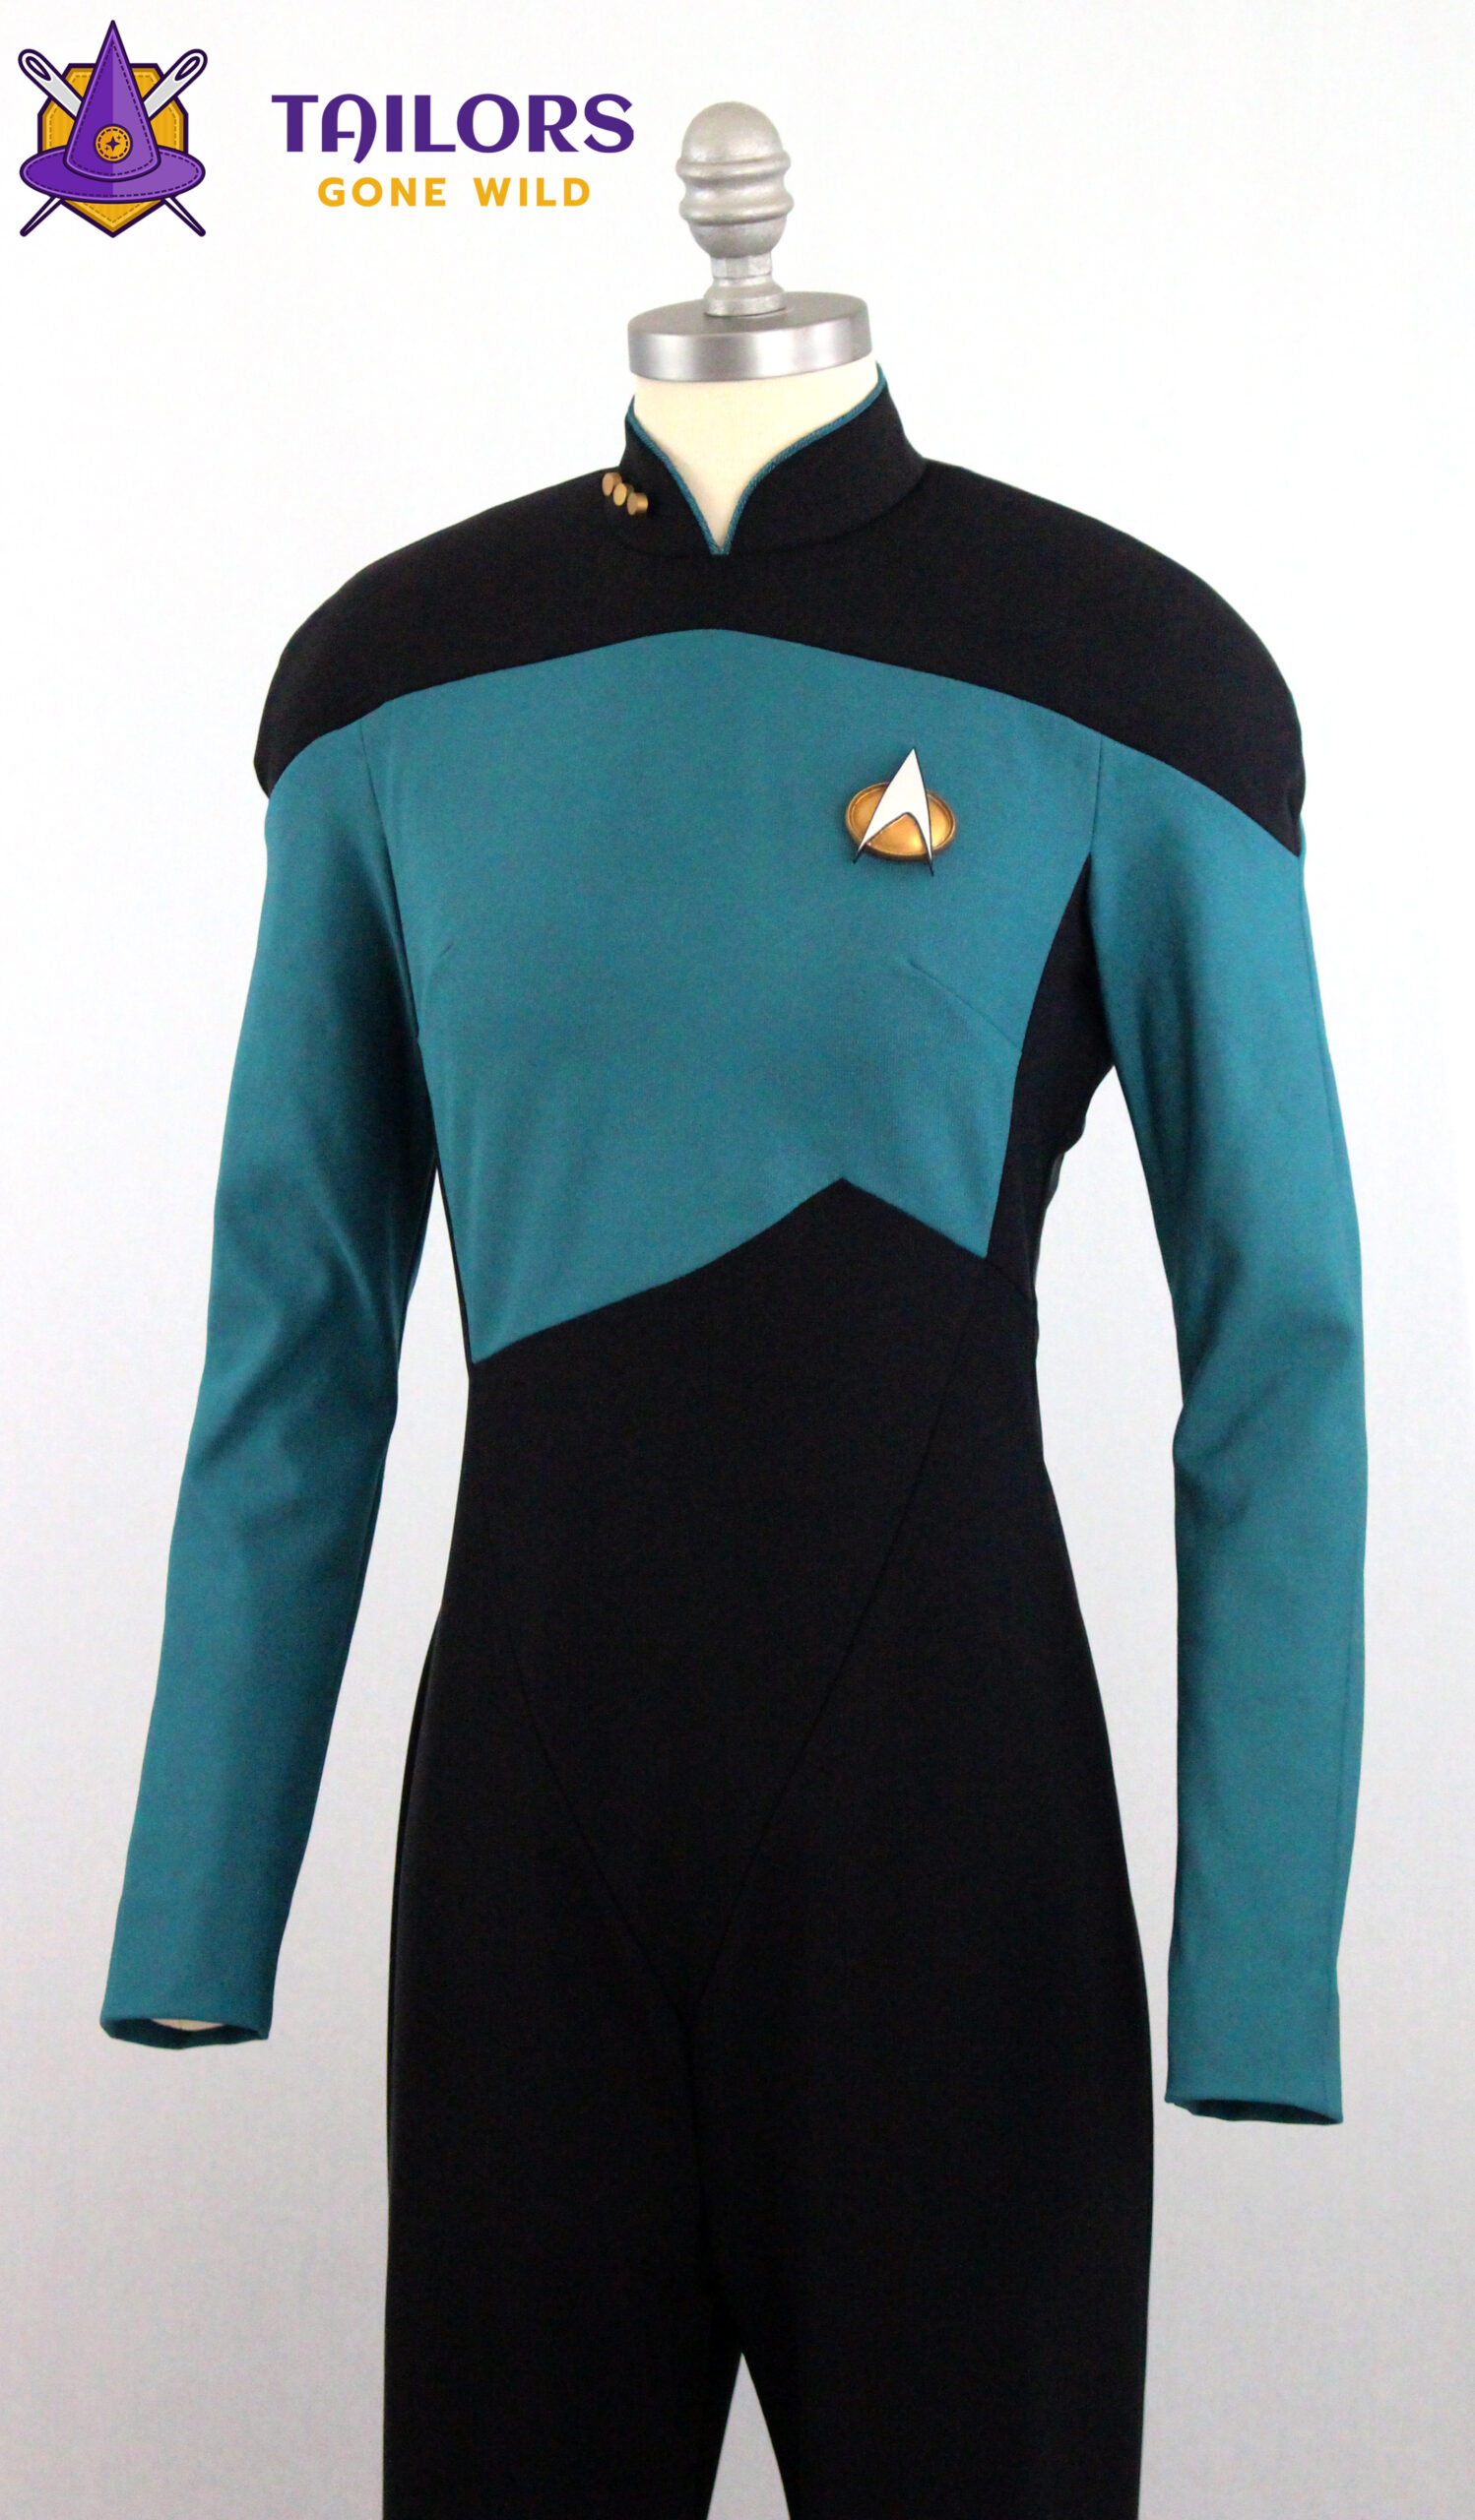
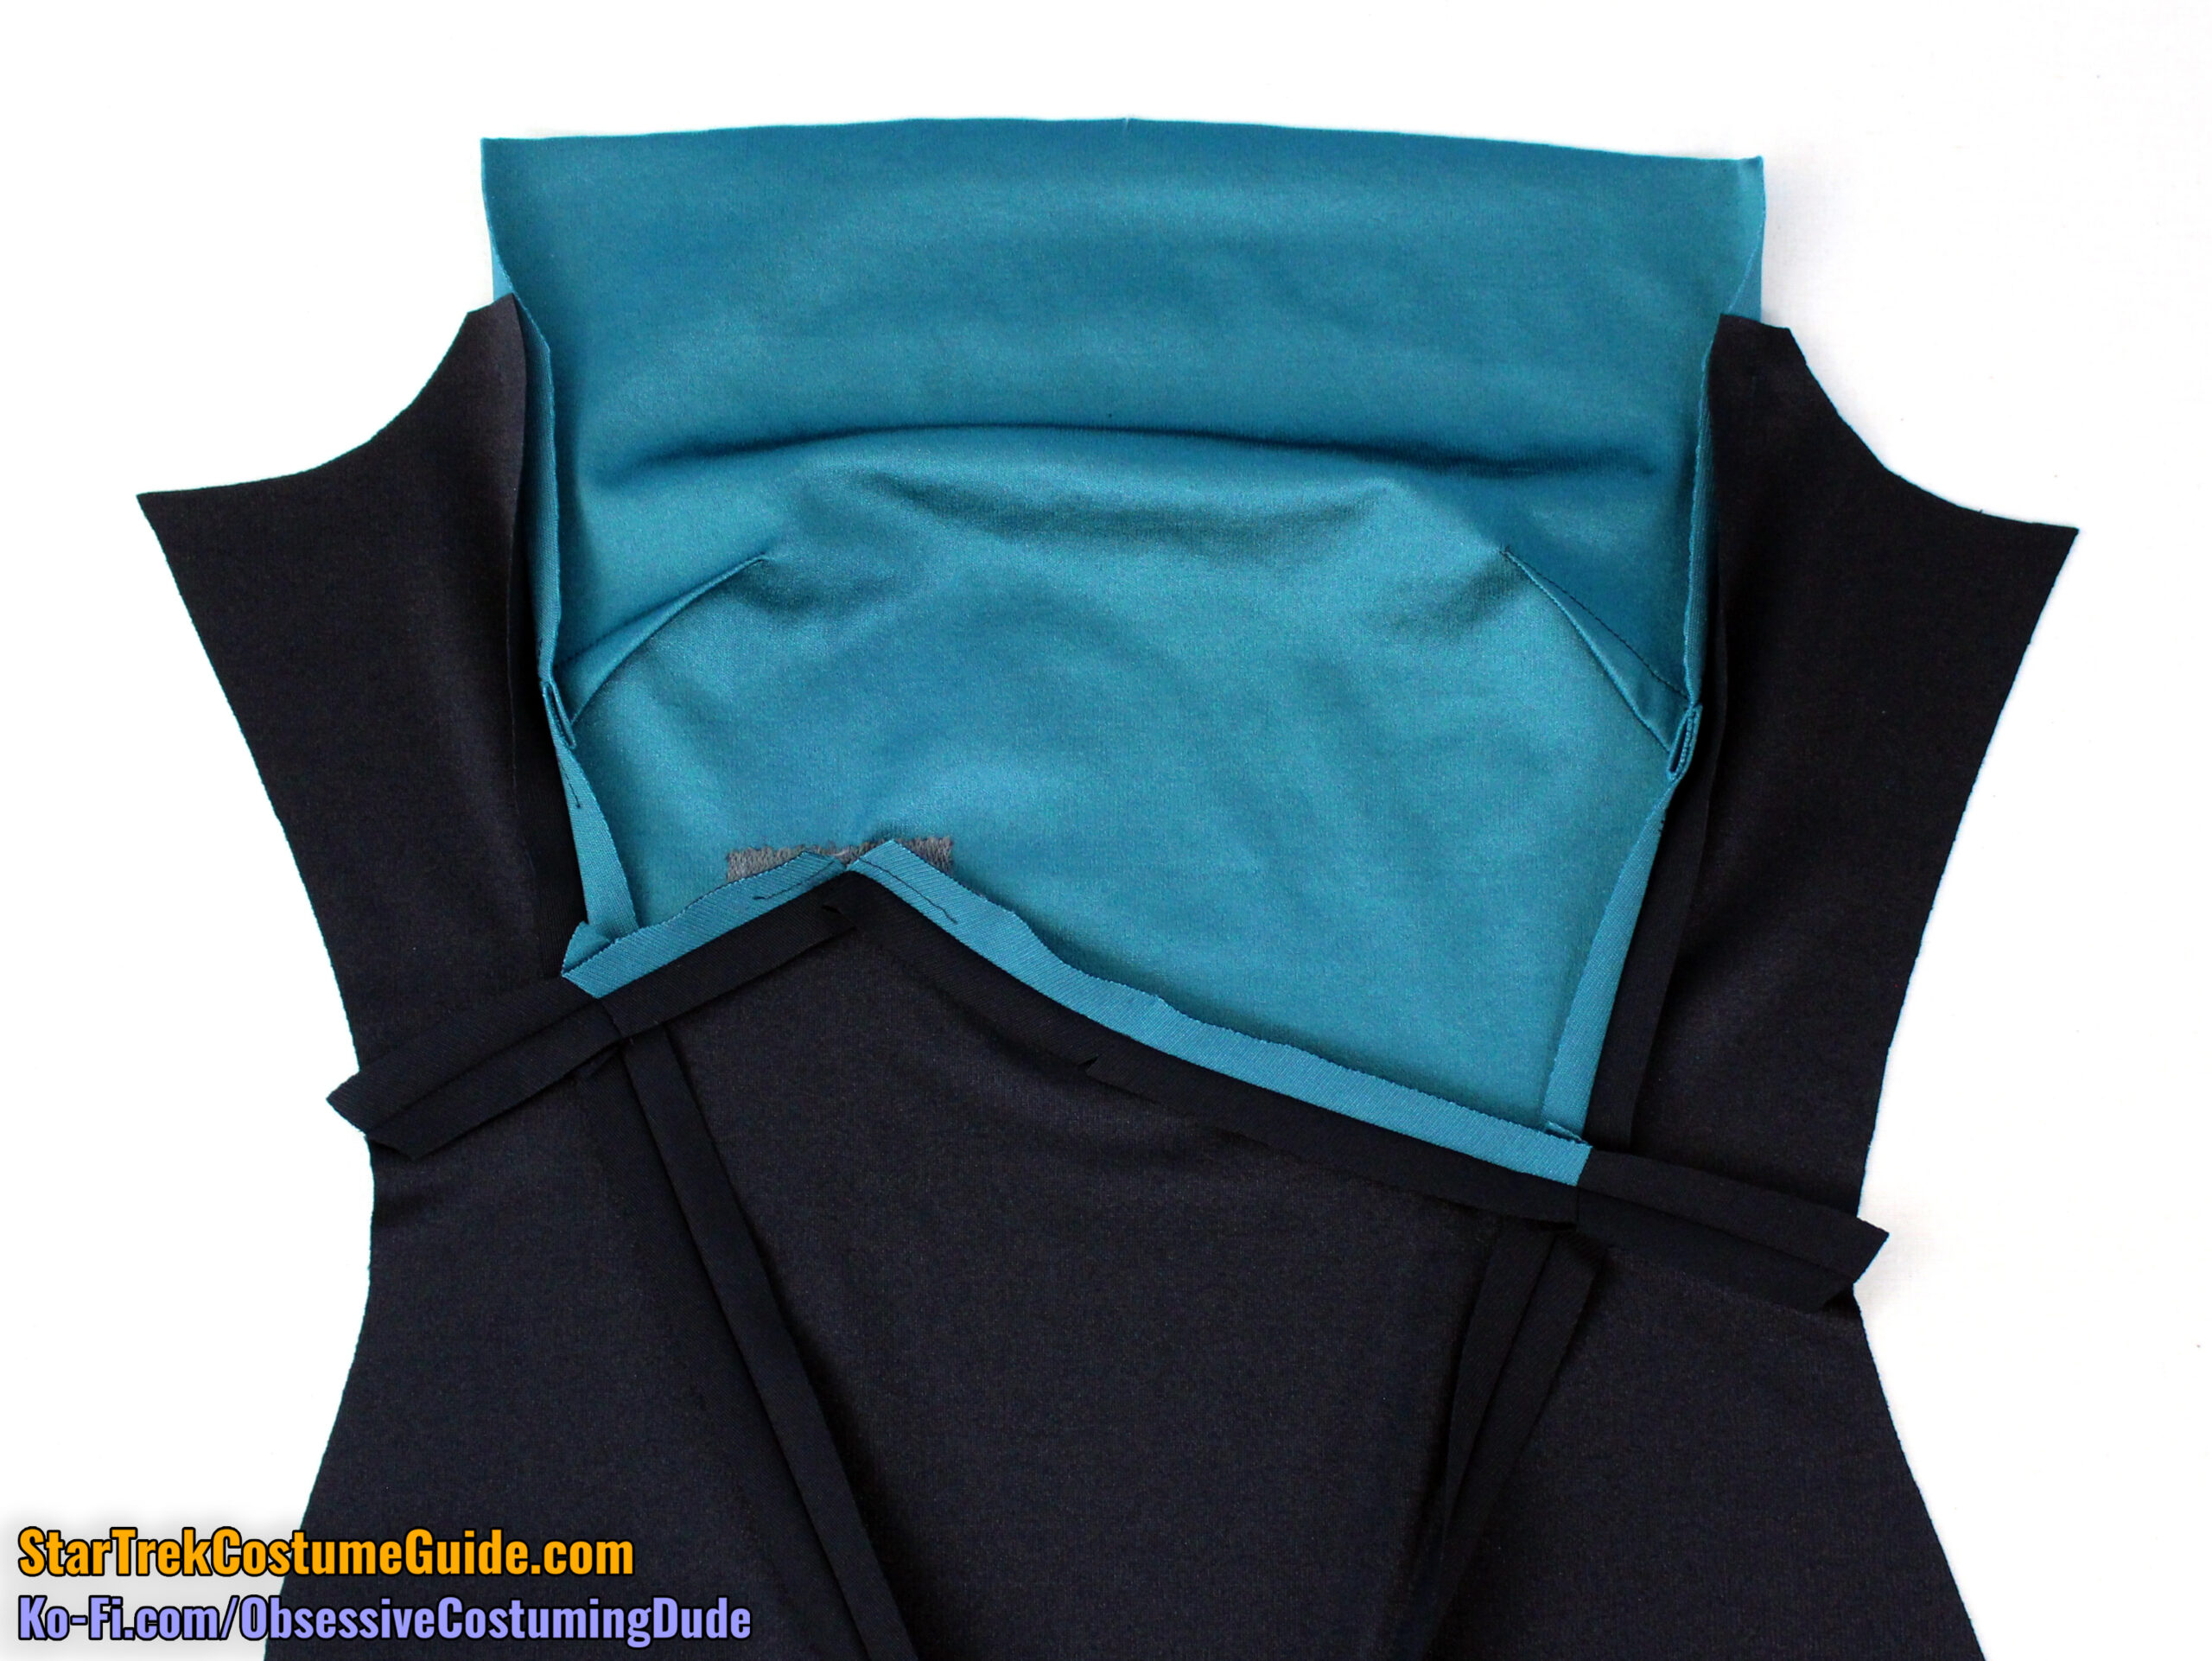
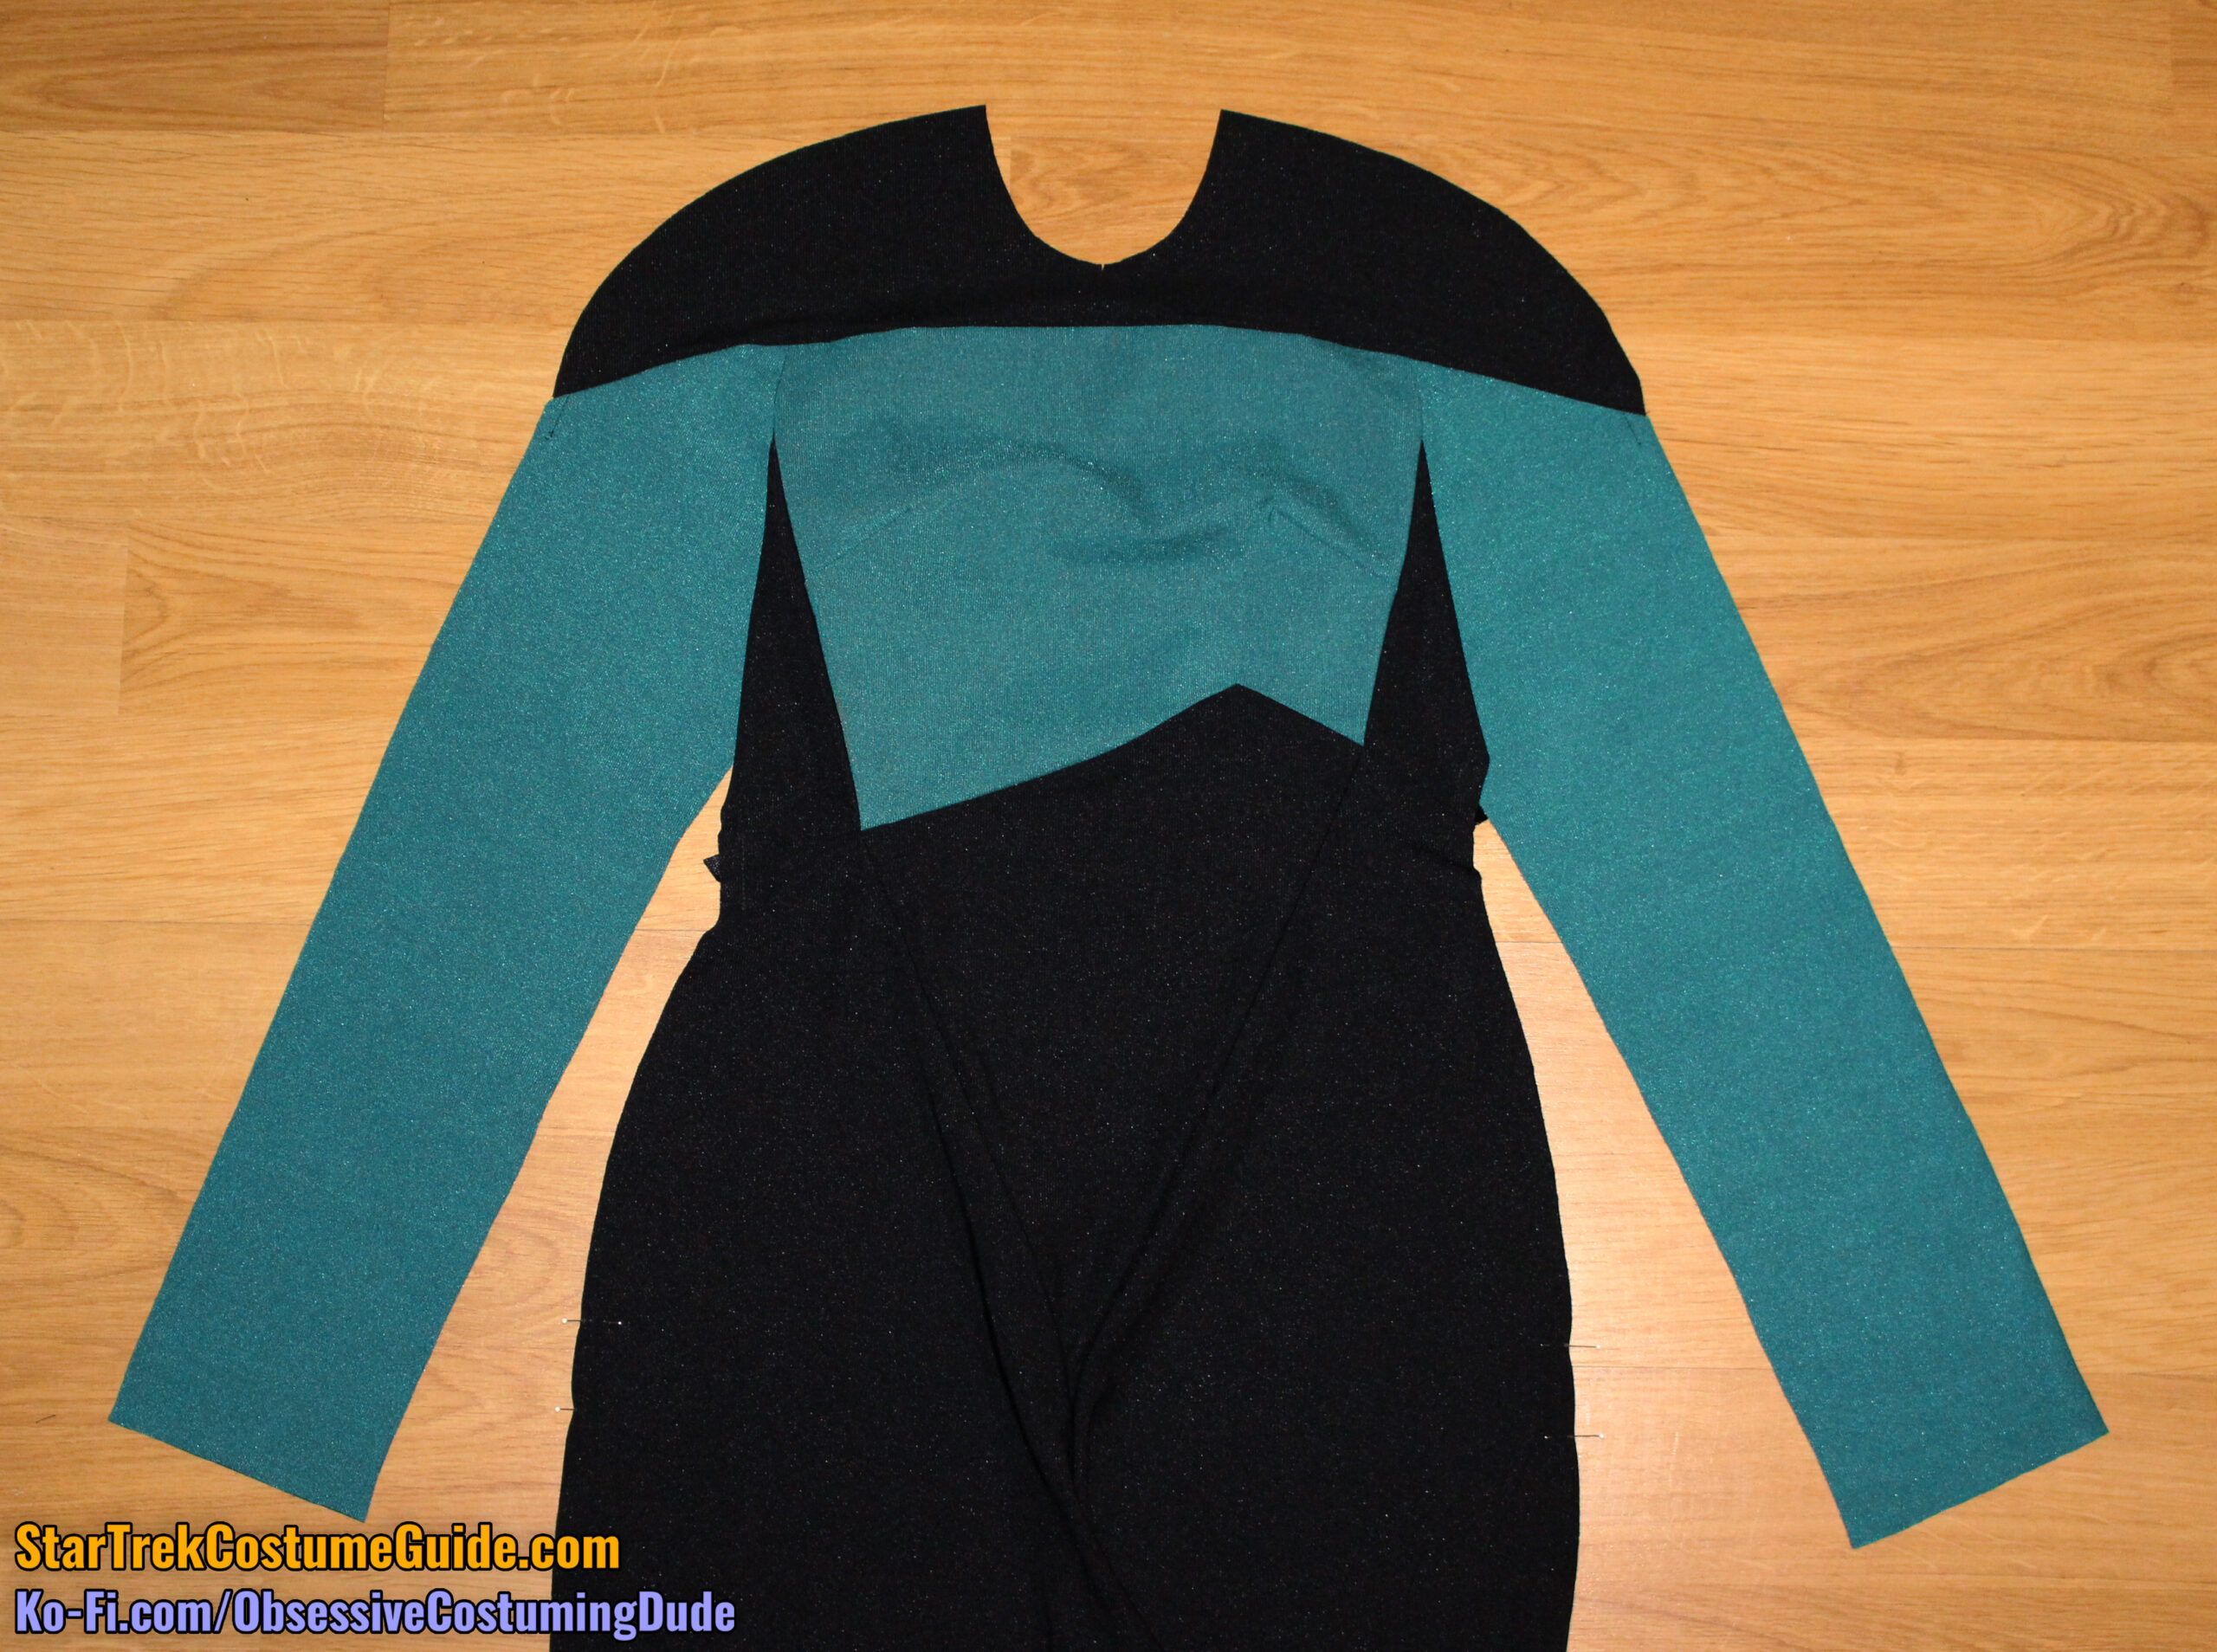
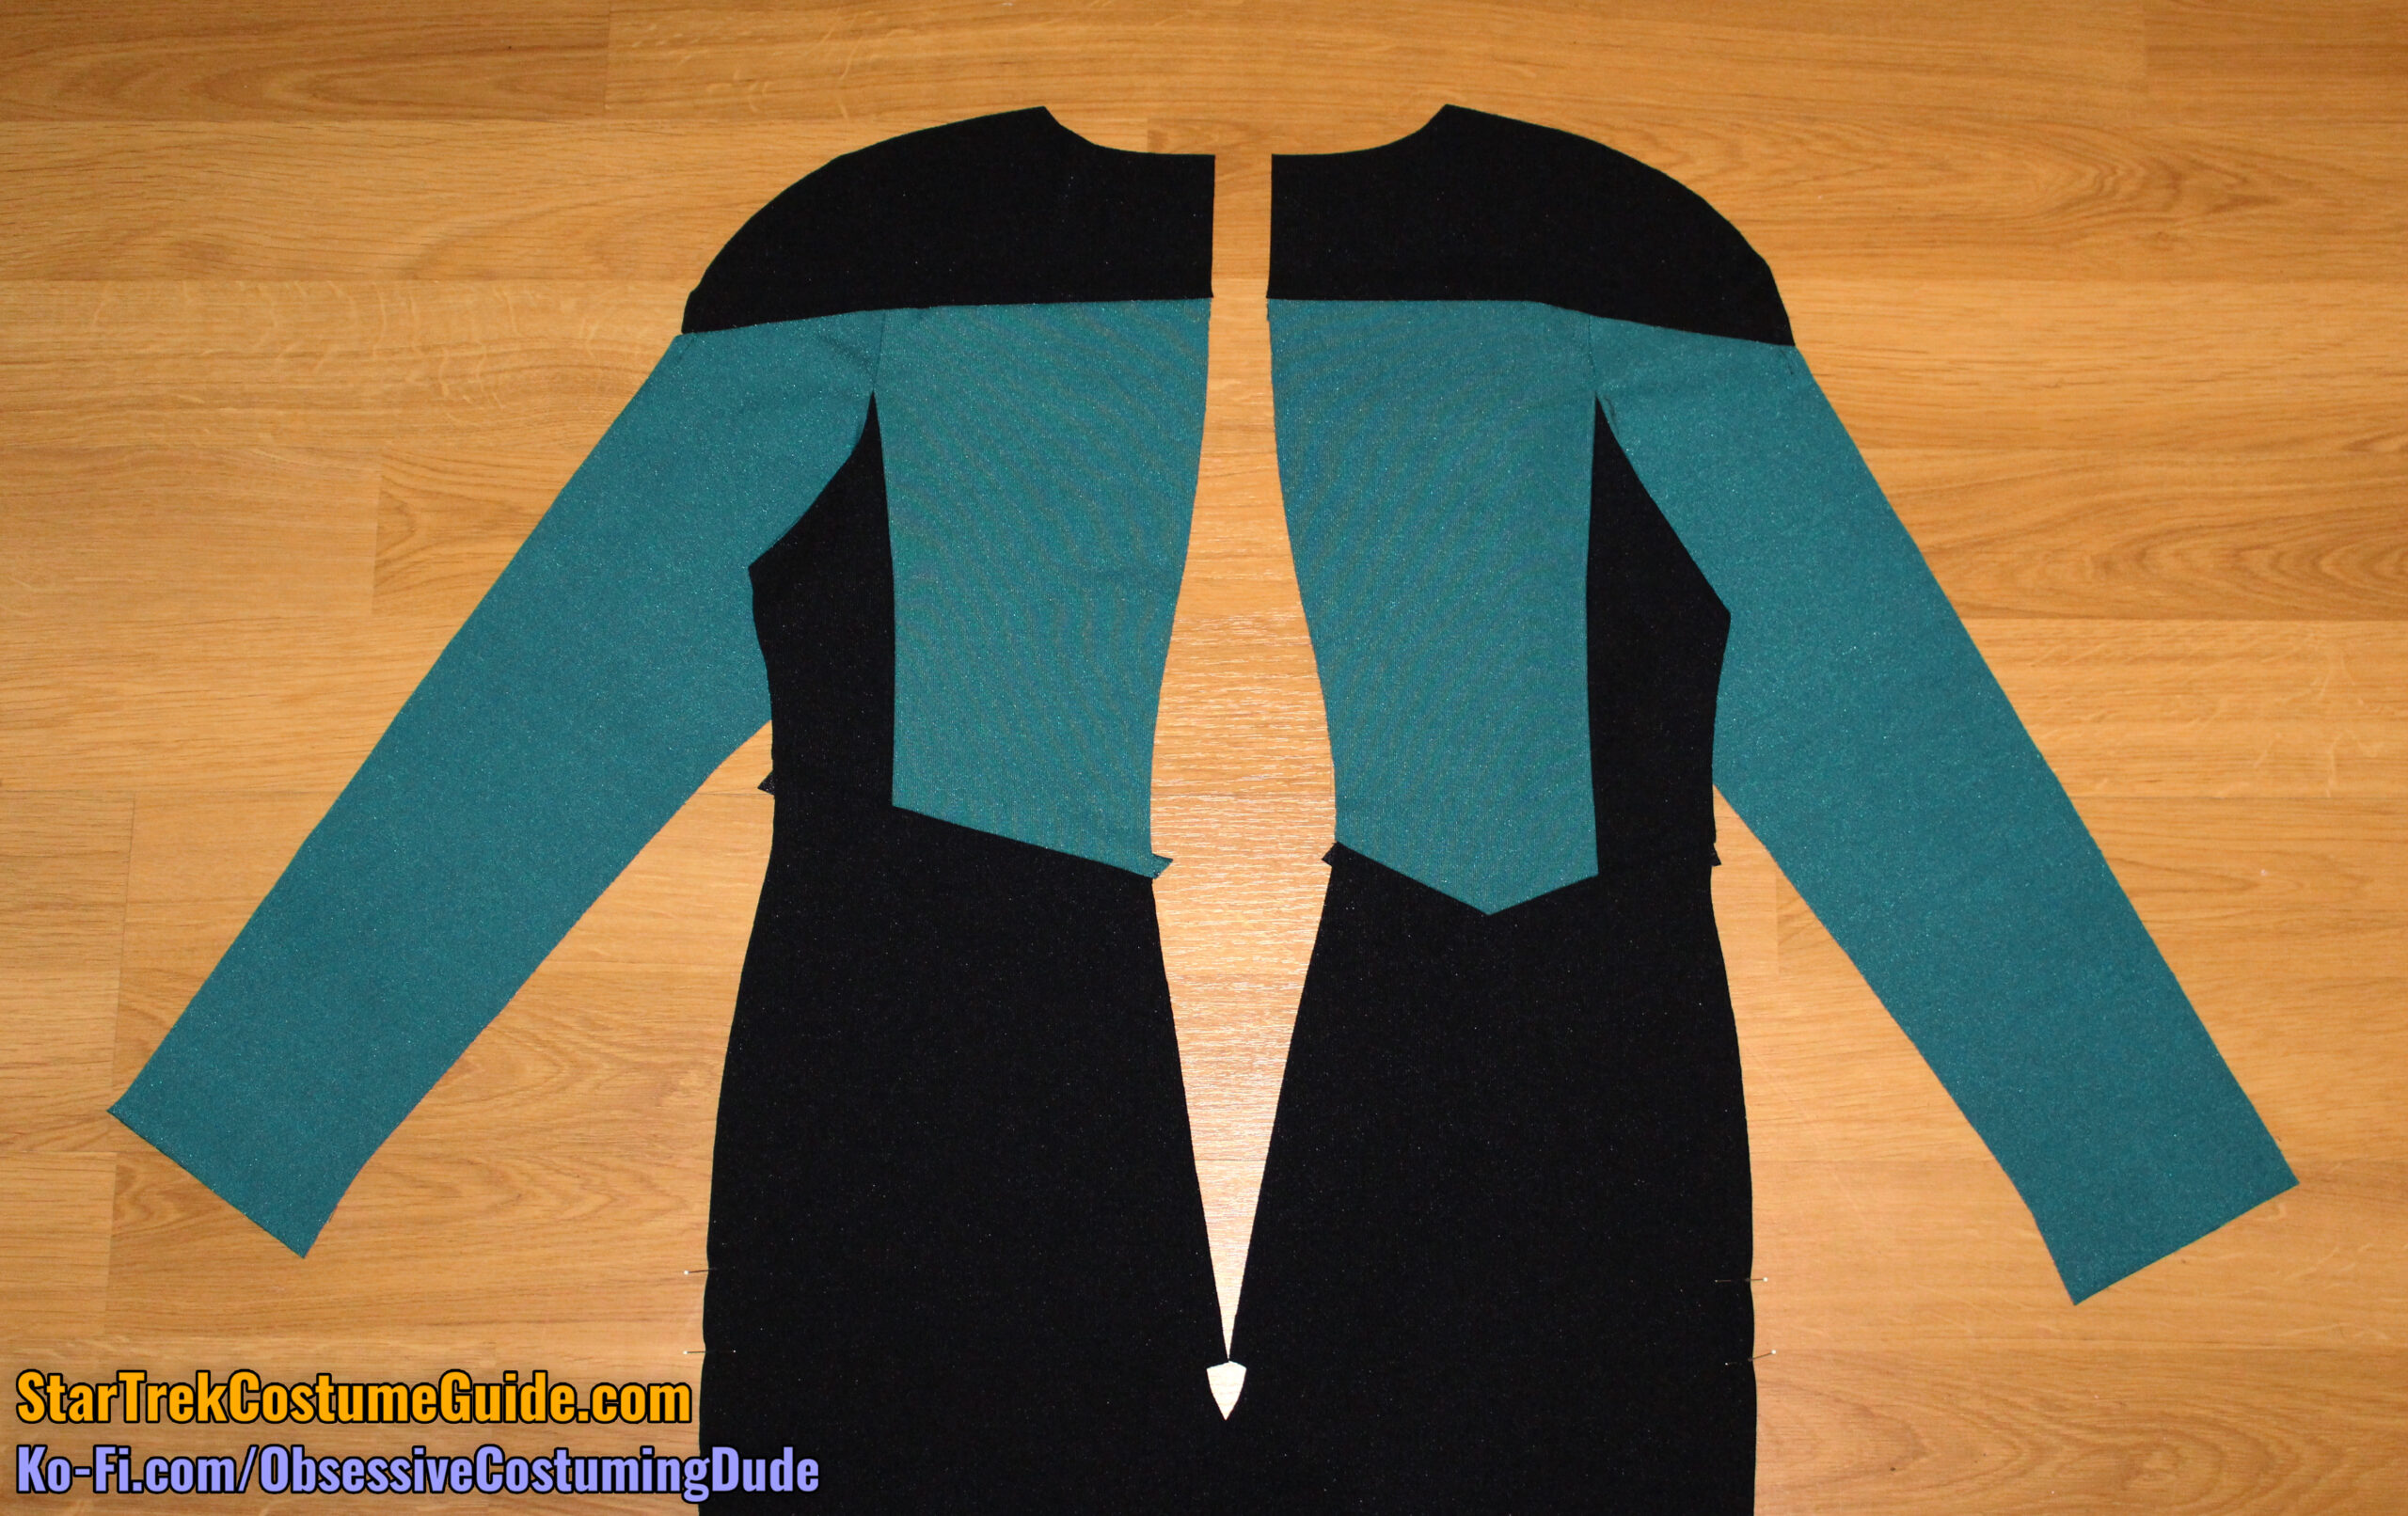
Your jumpsuit front assembly is complete for now and should look something like this:
BACK ASSEMBLIES
Sew the right side back (piece H) to the upper right back (piece G2), right sides together with ½” seam allowance, starting/stopping and reinforcing your stitching several times at the dot.
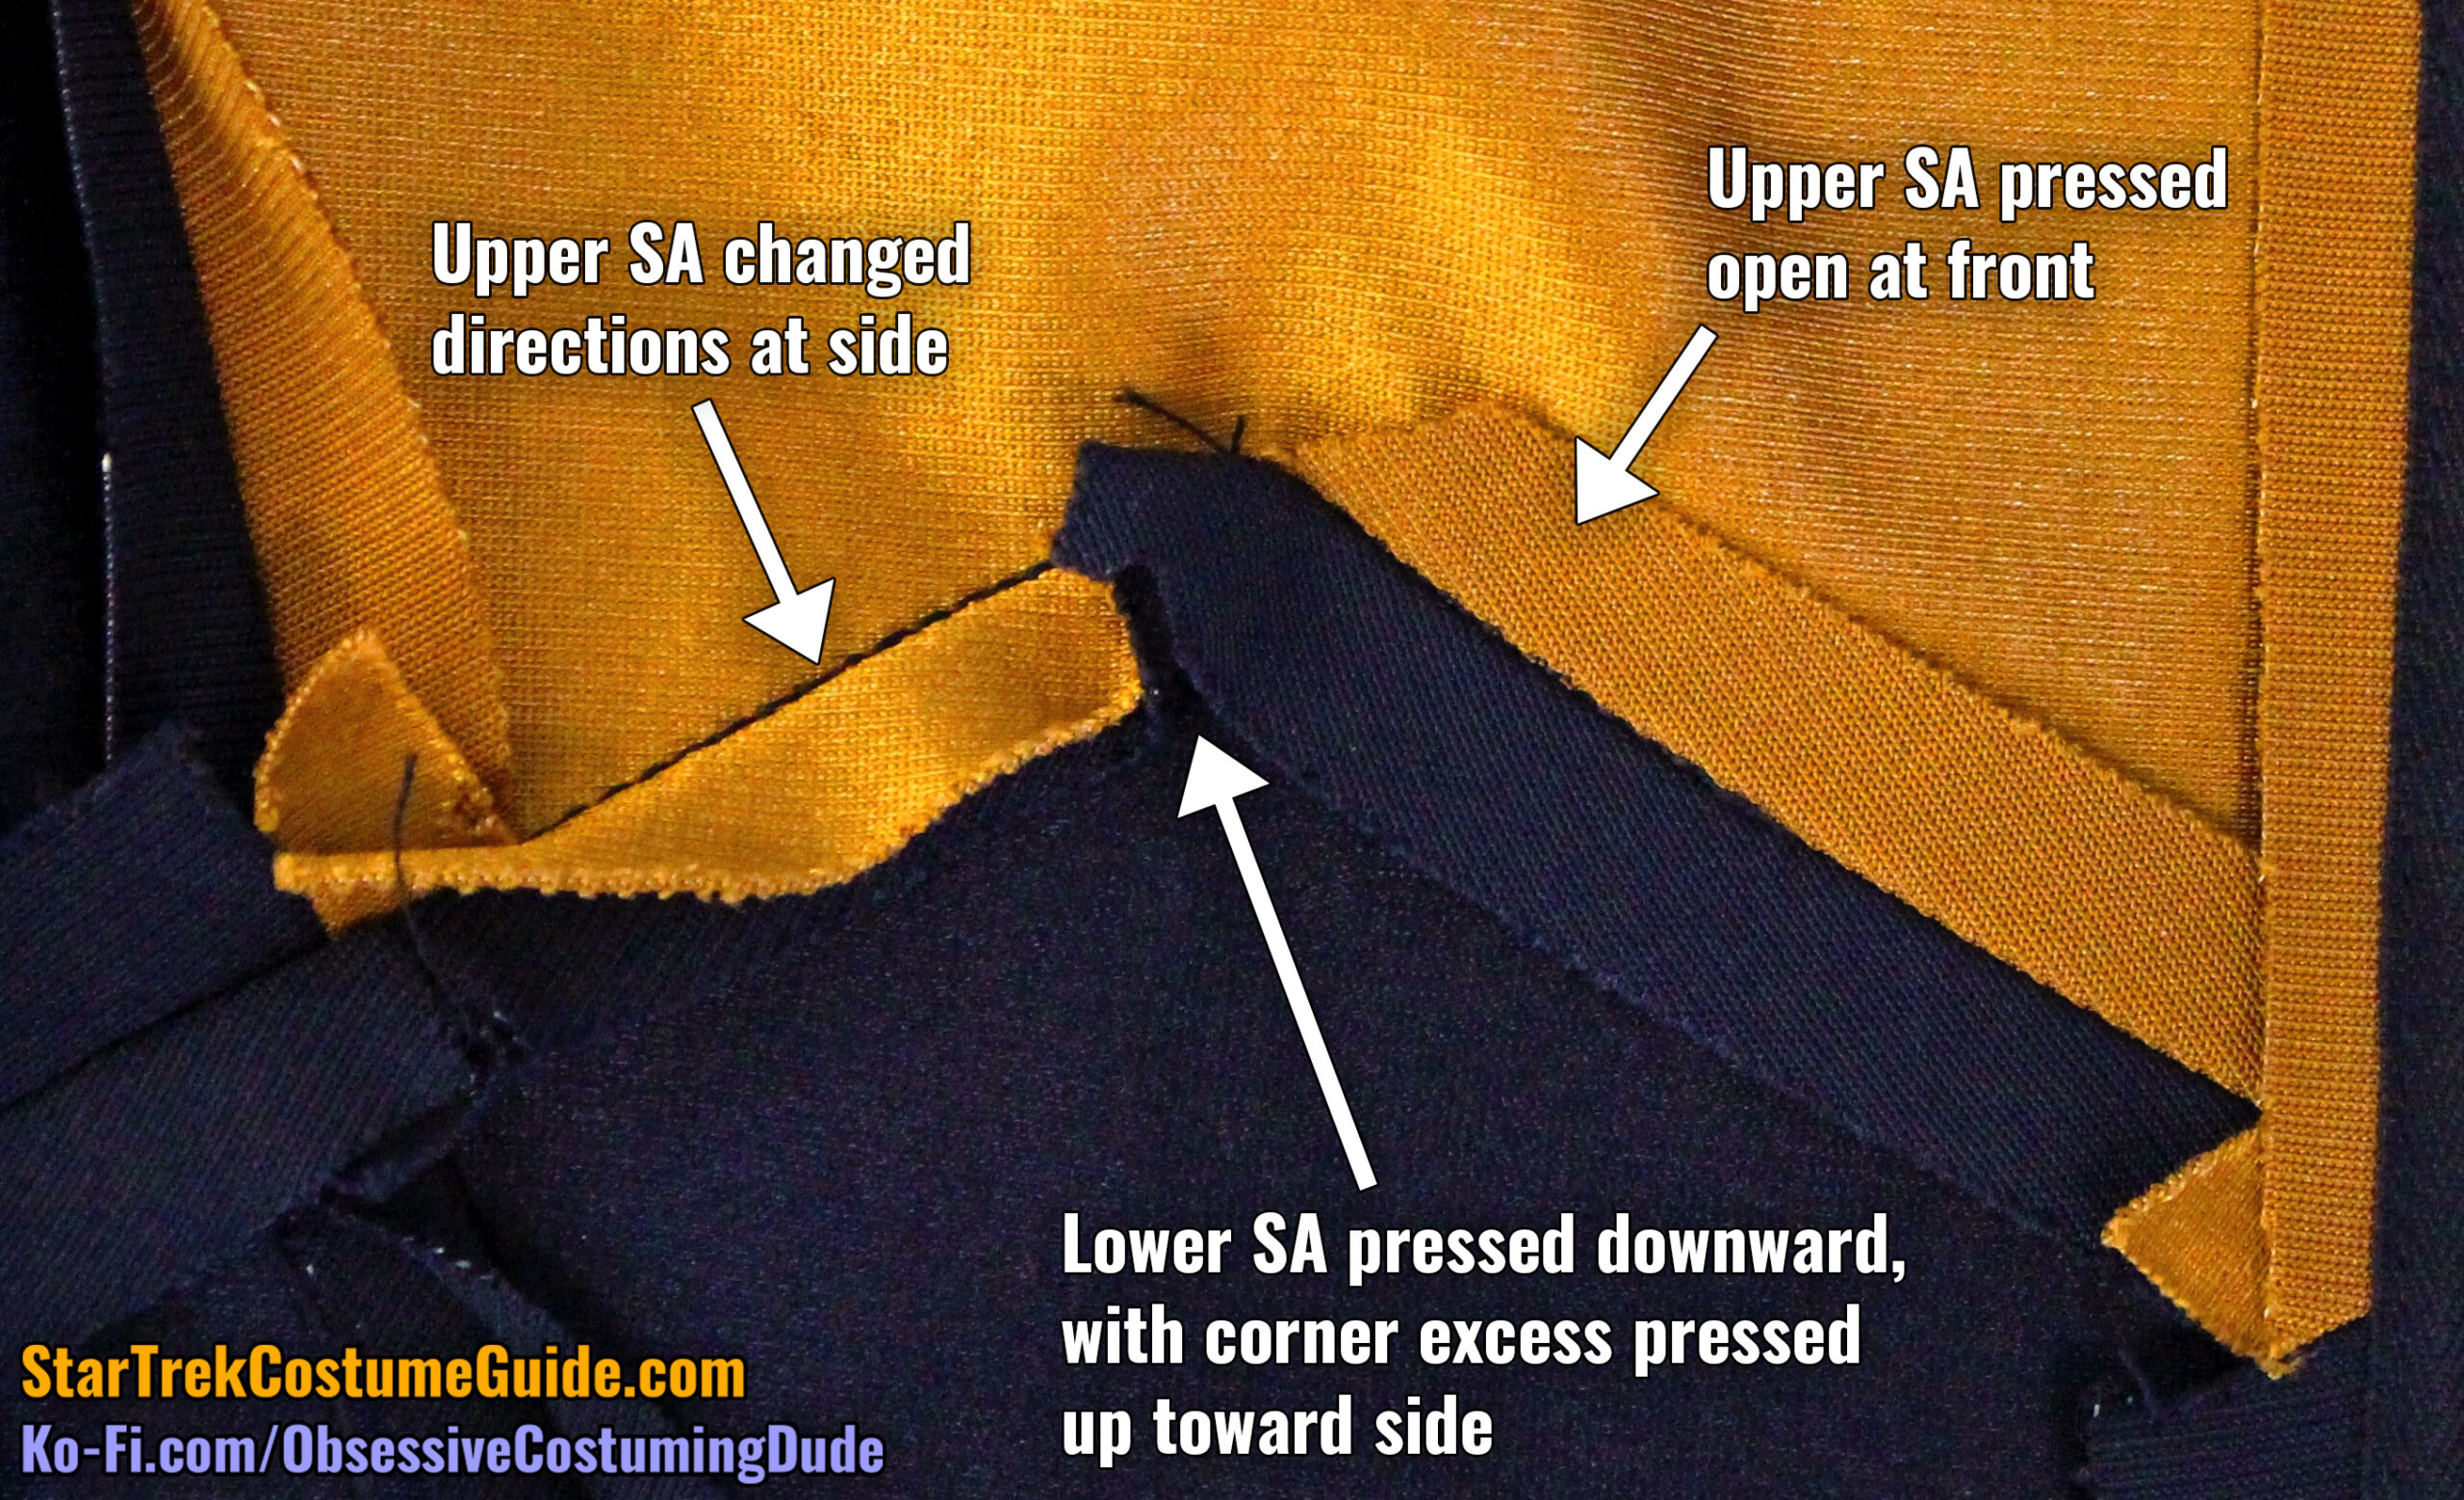
As with the side front allowances, the side back allowances on the screen-used TNG jumpsuits I studied consistently changed directions partway down the seam.
To best replicate the originals, first press the seam allowances open.
Then, press both seam allowances toward the back.
And finally, press the seam allowances open again, but only on the lower portion of the seam.
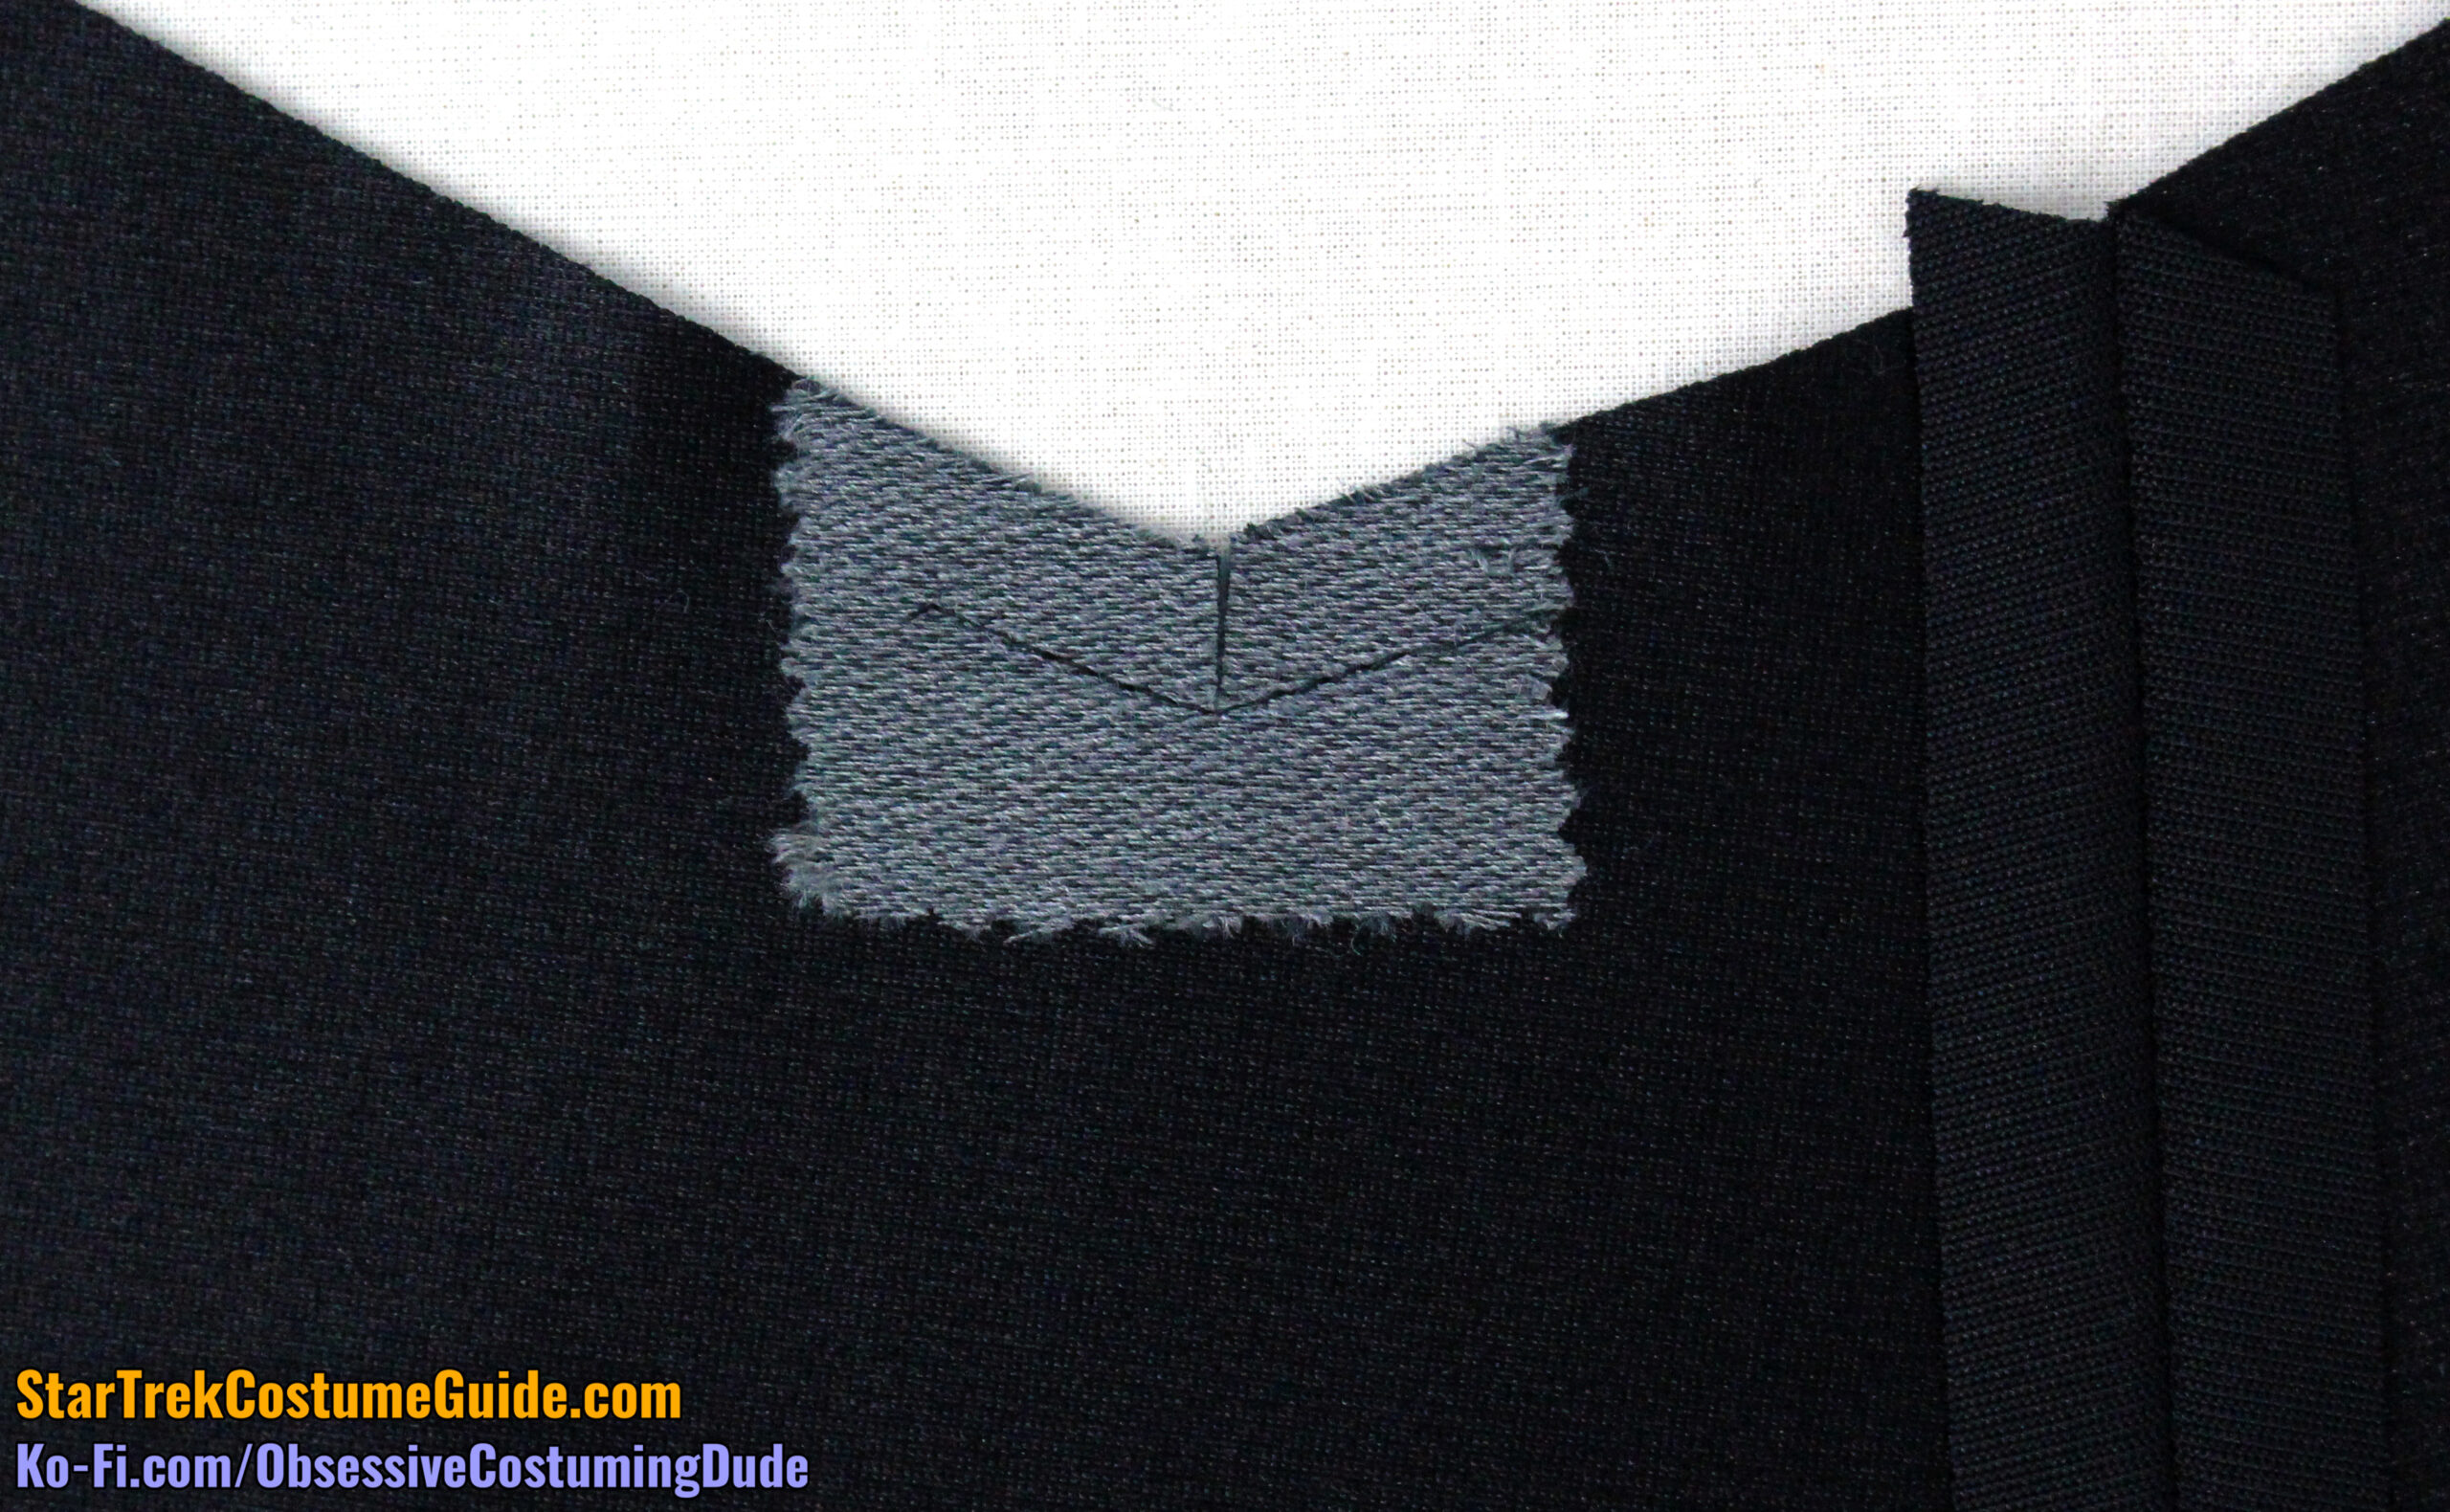
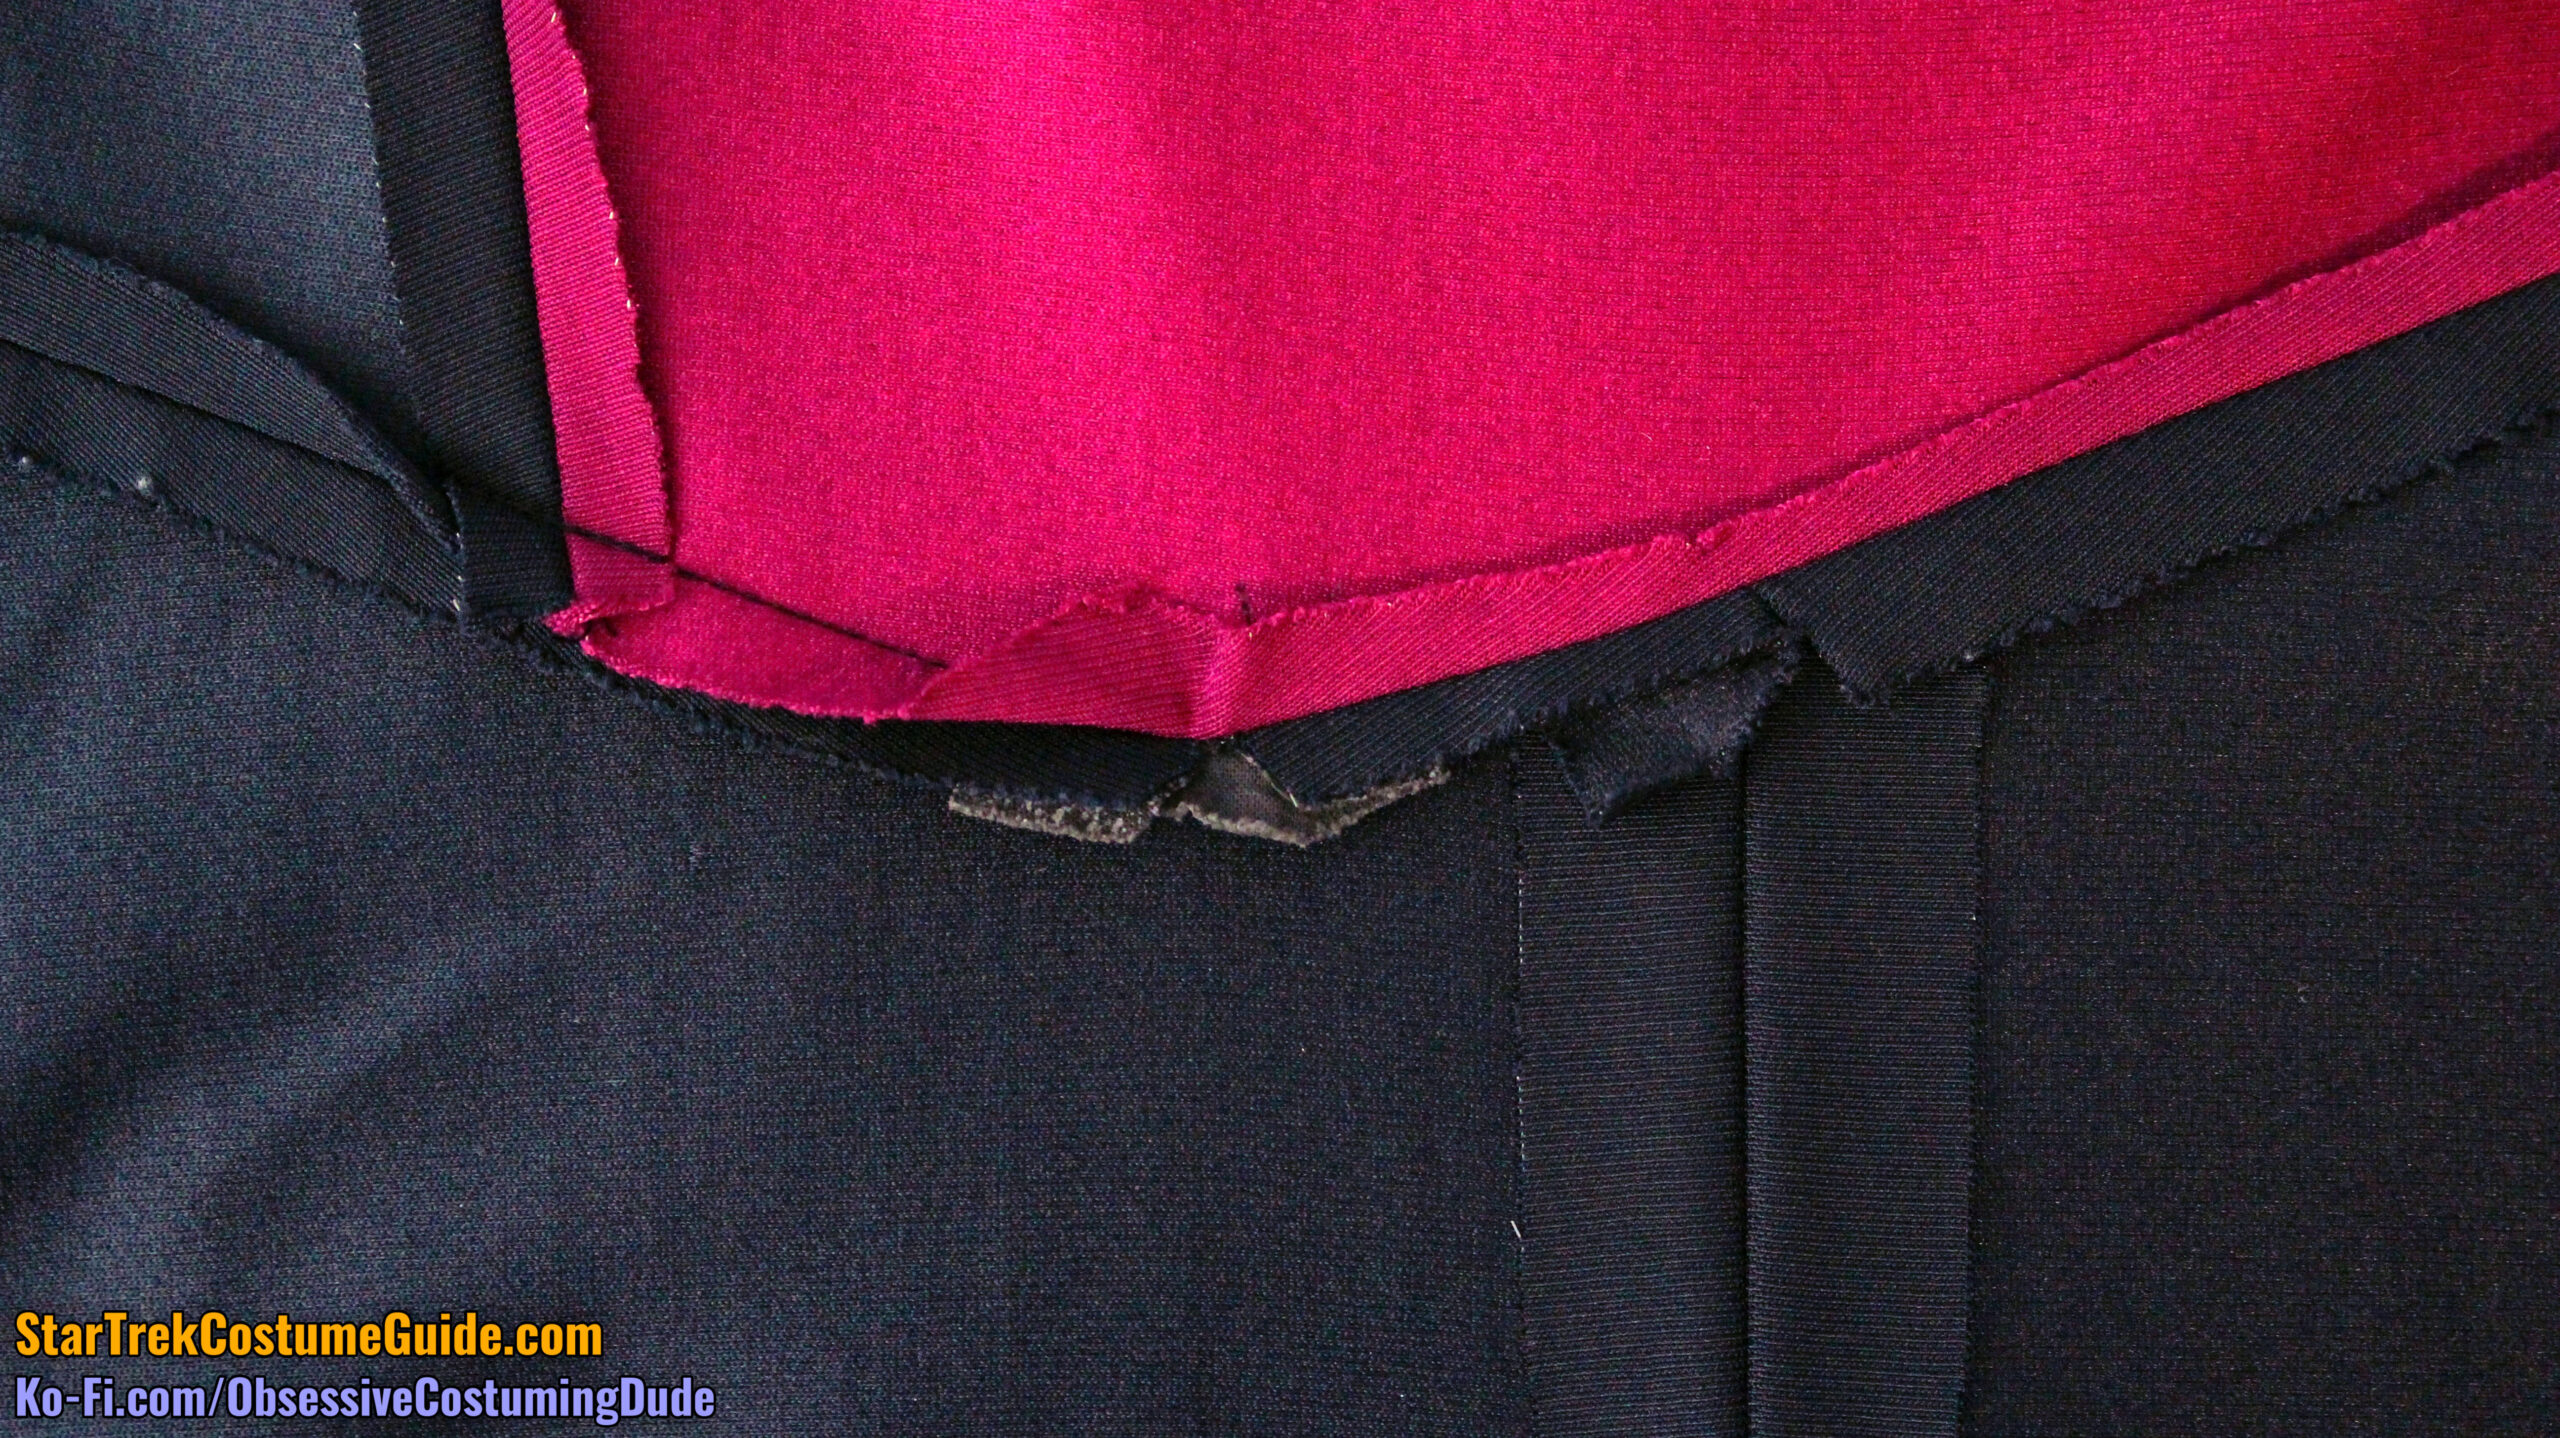
As with the front left corner, I recommend stabilizing the corner area on the lower back right pant leg by applying a small piece of lightweight fusible interfacing to the underside.
Stay-stitch the corner ⅜” from the edges, and clip the allowance to the stitching at the corner.
(Front-zipping TNG jumpsuit pictured)
Sew the upper right back assembly to the right back pant leg (piece M), right sides together with ½” seam allowance, pivoting at the lower back corner.
After you’ve sewn the waist seam, clip the upper pant leg allowance exactly to the stitching at the corner.
Fortunately, there’s less risk of a visible pucker beneath the lower back corner – both because the corner isn’t as sharp as the front, and because the outer corner is on black fabric (where indentions from the allowances are less likely to be visible).
Even still, equally desperate attempts were made by the original wardrobe department to avoid creating an ugly puckers beneath the corner.
Even though the waist allowances were otherwise all pressed upward on the screen-used Worf uniform I examined, they changed directions and were pressed open along the center back area.
Screen-used Worf TNG jumpsuit
And even though the waist allowances were otherwise all pressed open on the screen-used male extra’s uniform I examined, they briefly changed directions and were pressed downward to the right of the back corner.
As with the front corner area, I prefer simply pressing the seam allowances open, albeit carefully and with a press cloth on each of the upper edges.
I recommend basting the waist allowances open ½” from the side edge – provided you chose to press your waist allowances open, of course.
Attach the back sleeve (piece P) and press the allowances as described previously for the jumpsuit front.
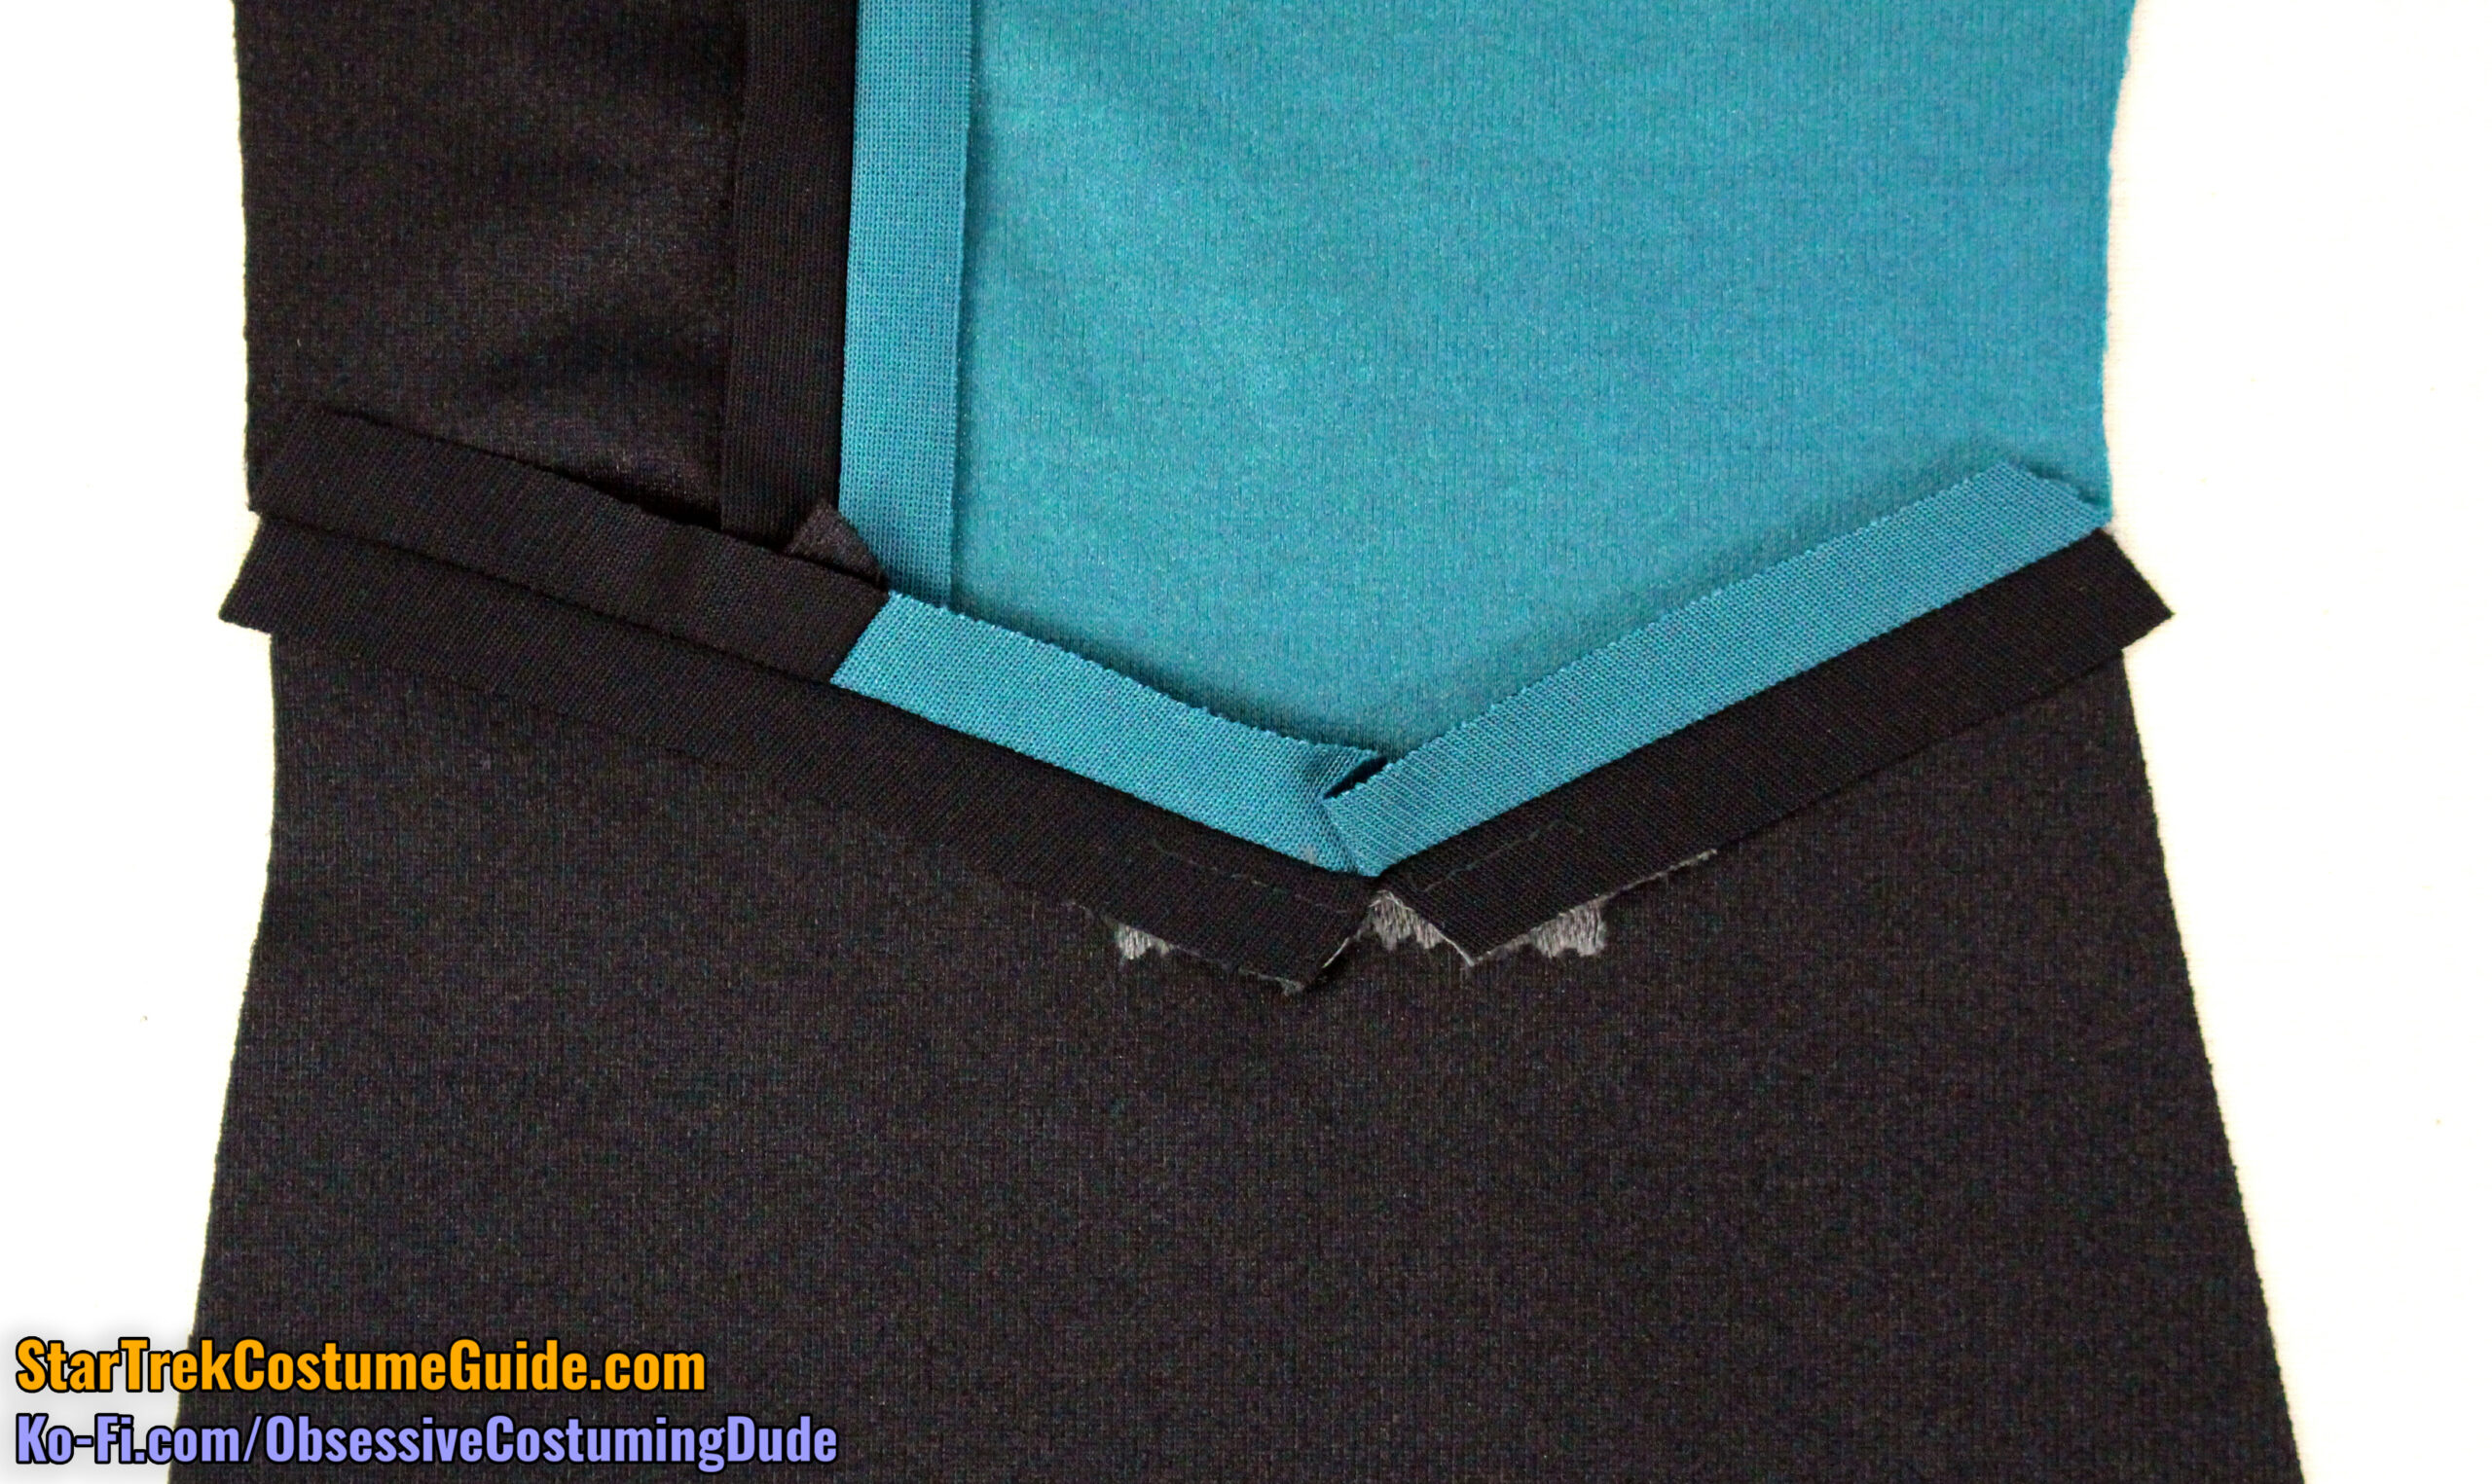
Sew the back right yoke (piece C3) to the right back assembly, right sides together with ½” seam allowance.
Press the seam allowances open.
I also suggest machine-basting the allowances open at the lower, outer corner of the yoke, and tacking the upper body allowance down by hand at the armscye.
Repeat for the left back assembly.
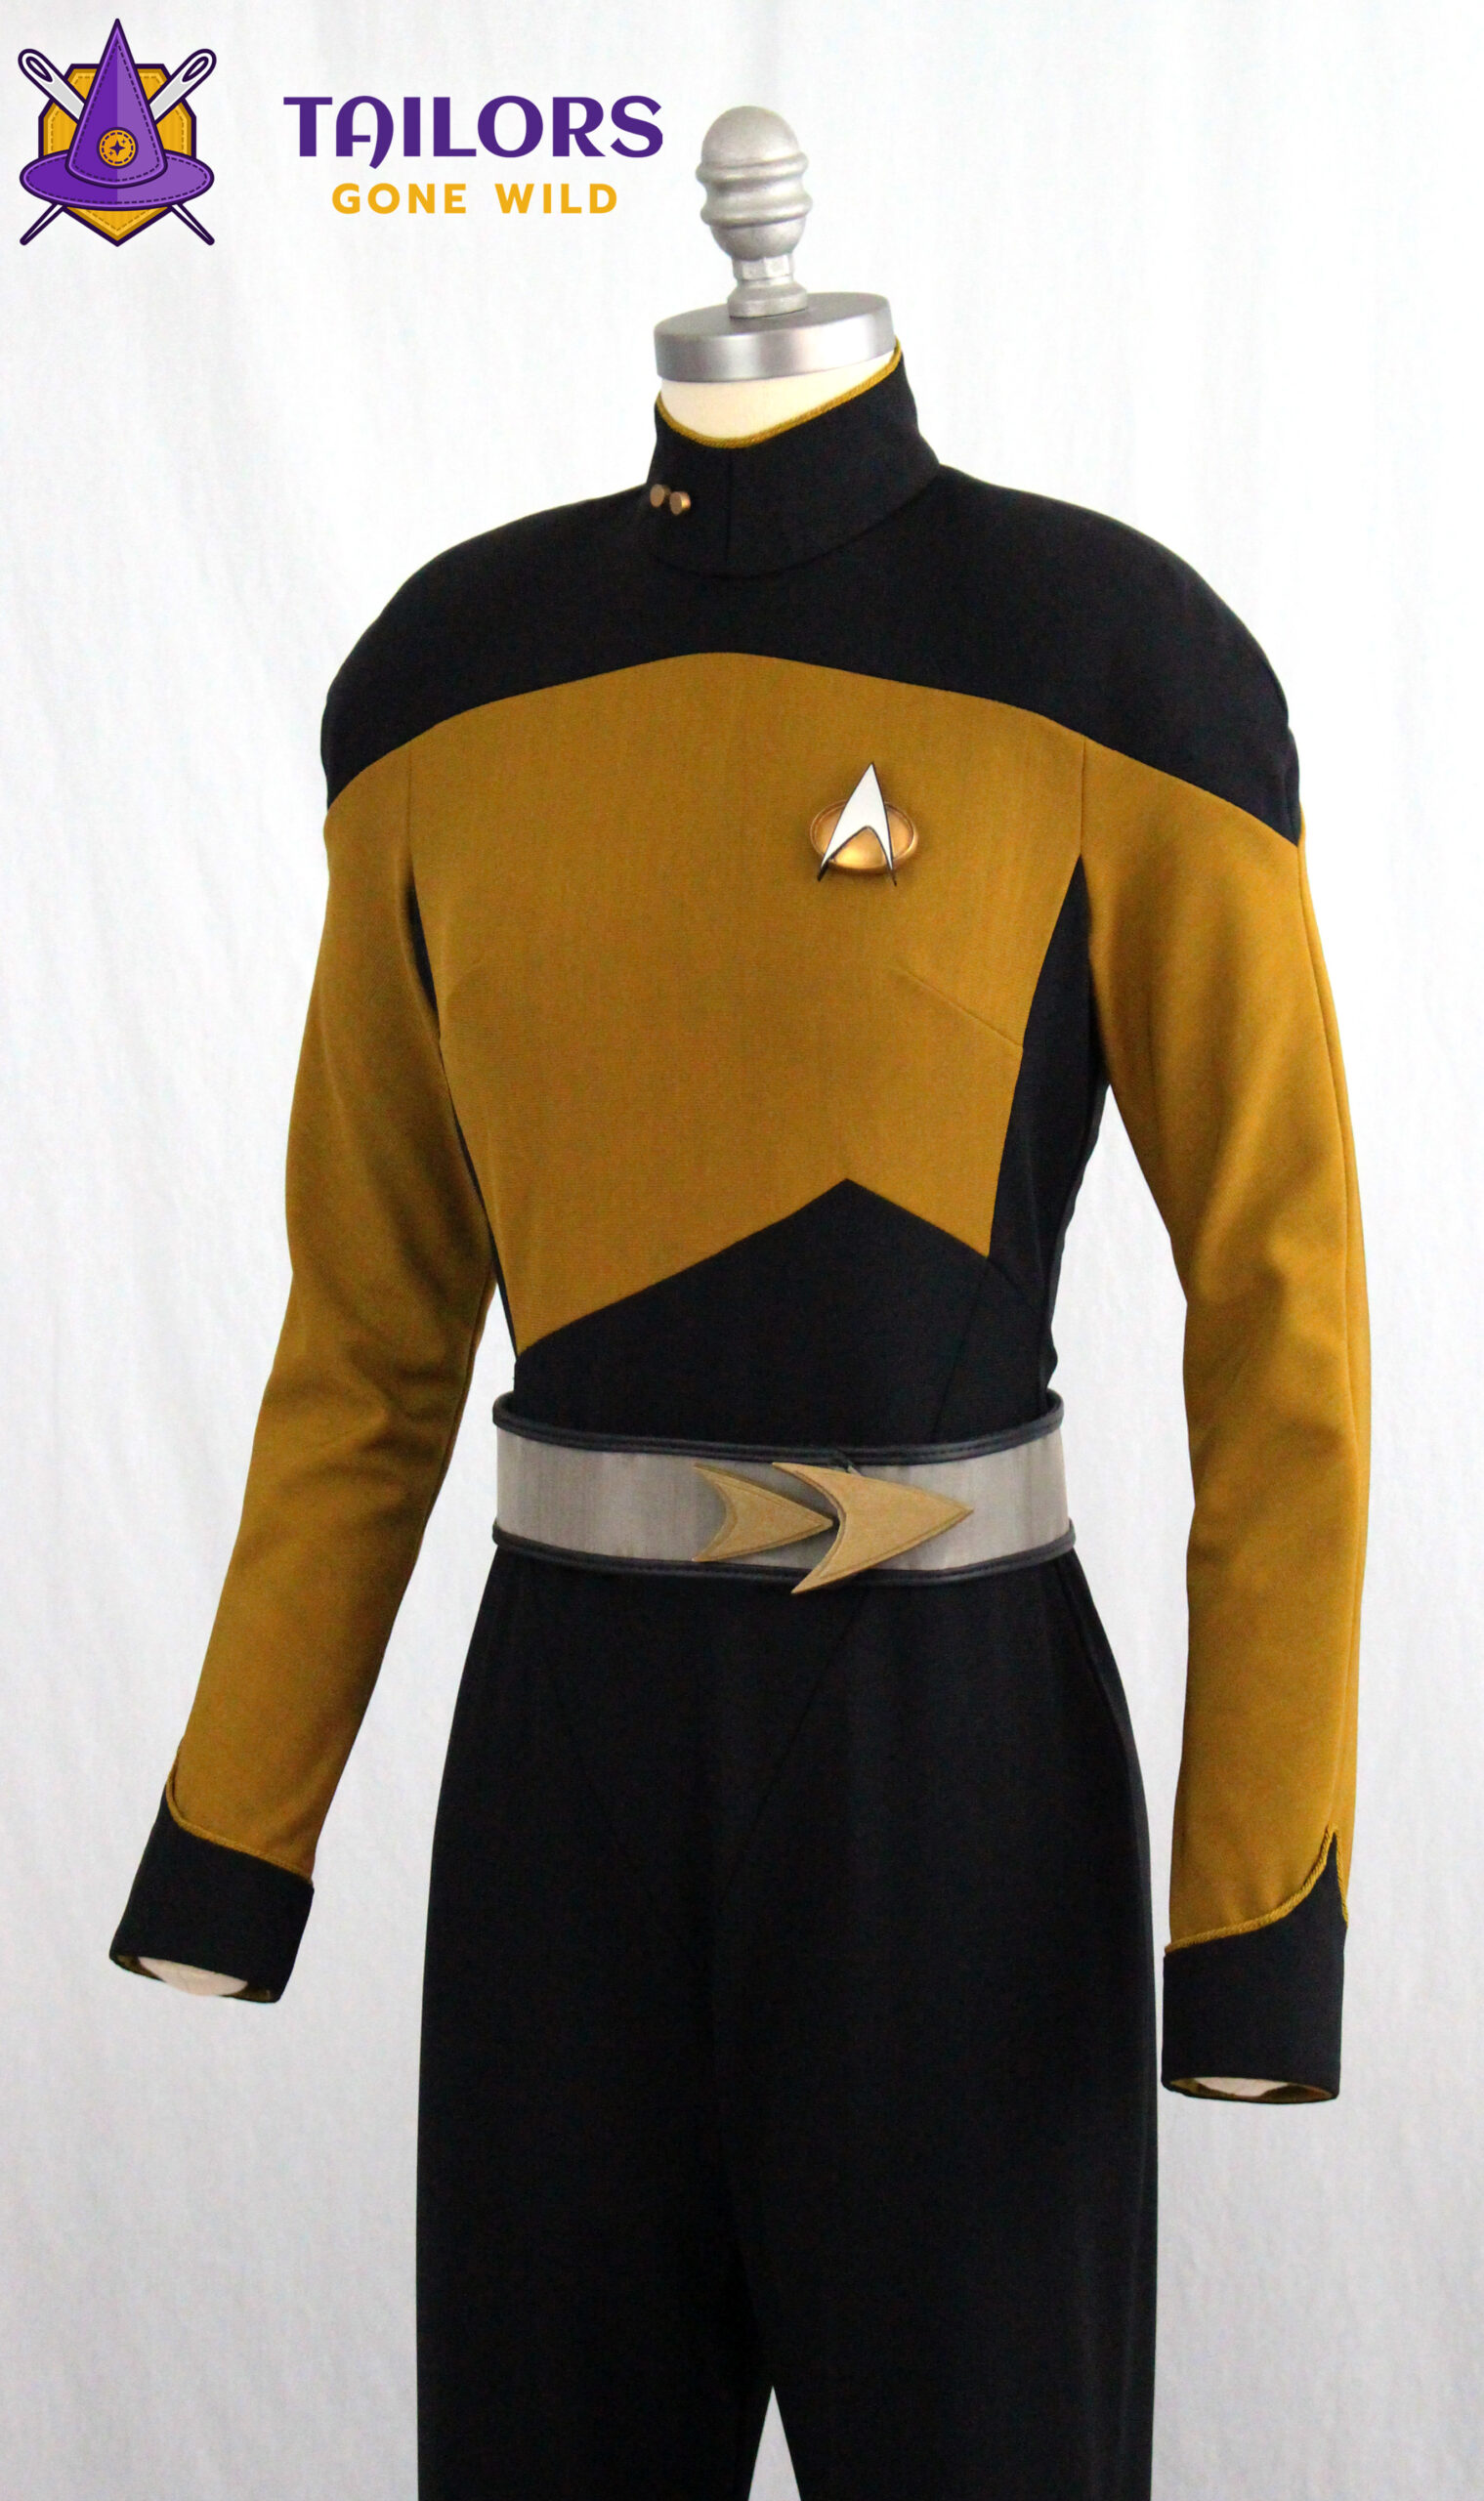
Your jumpsuit back assemblies are complete for now and should look something like this:
FINISHING
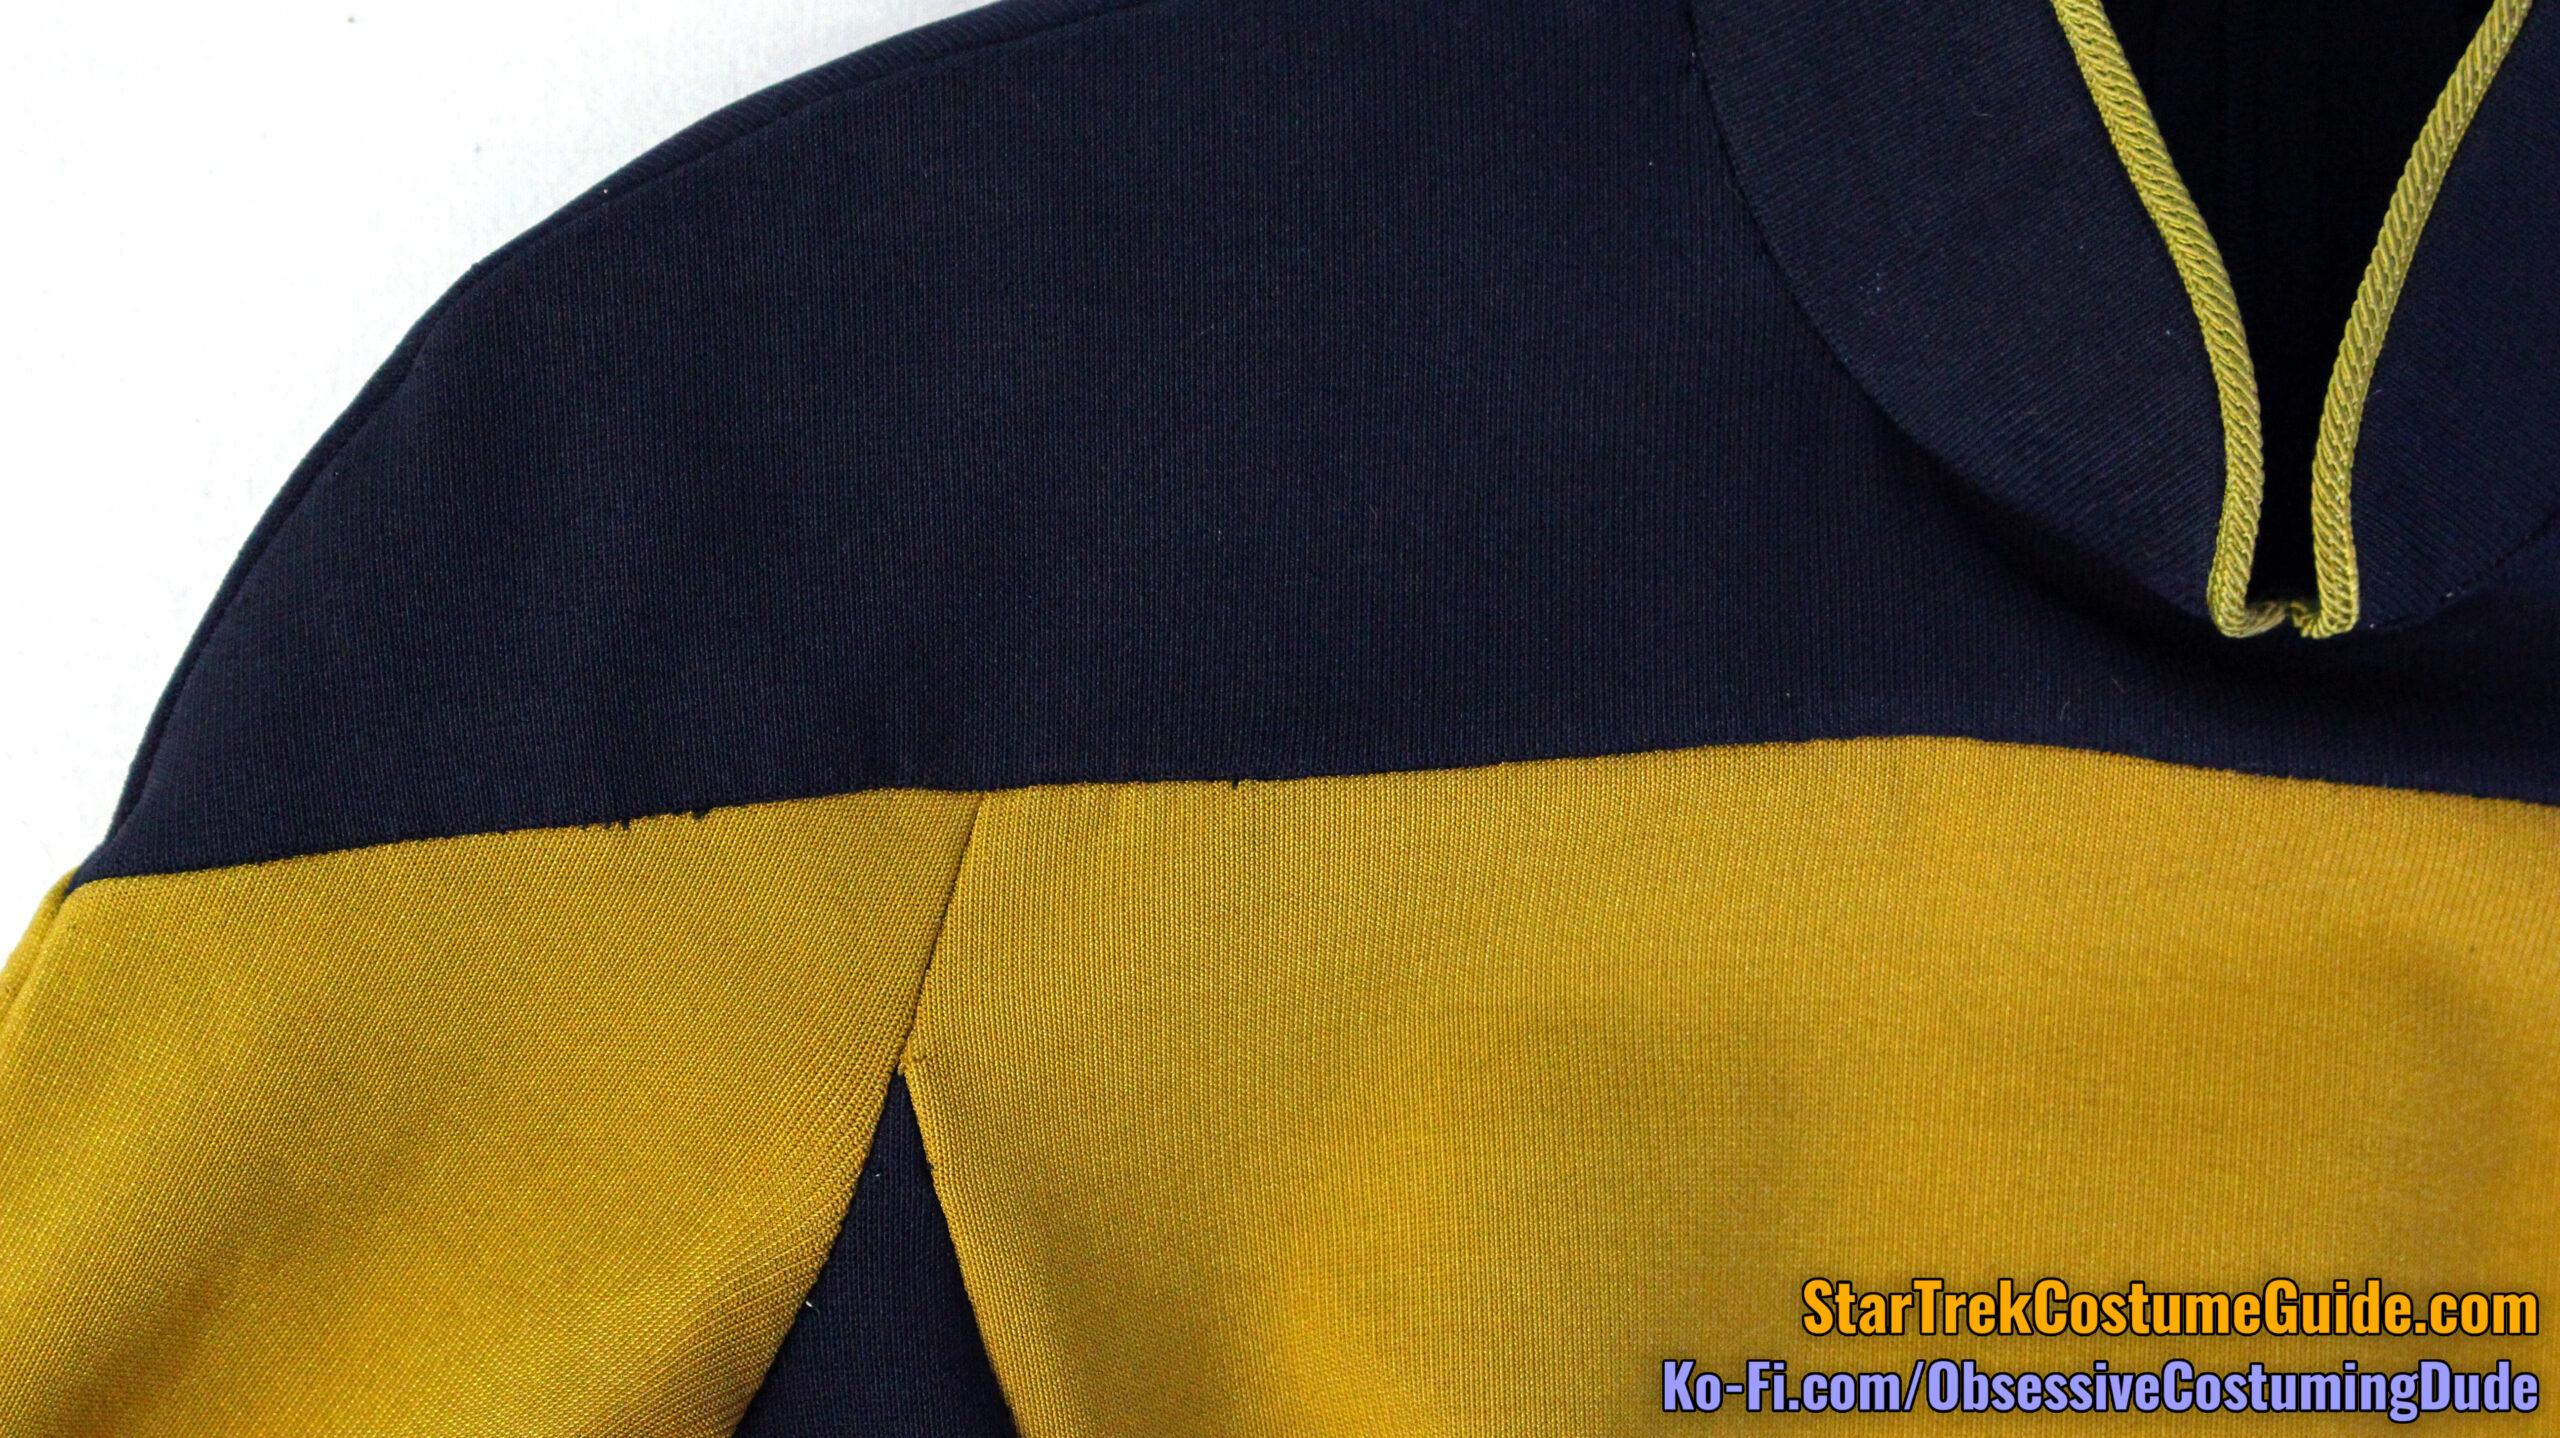
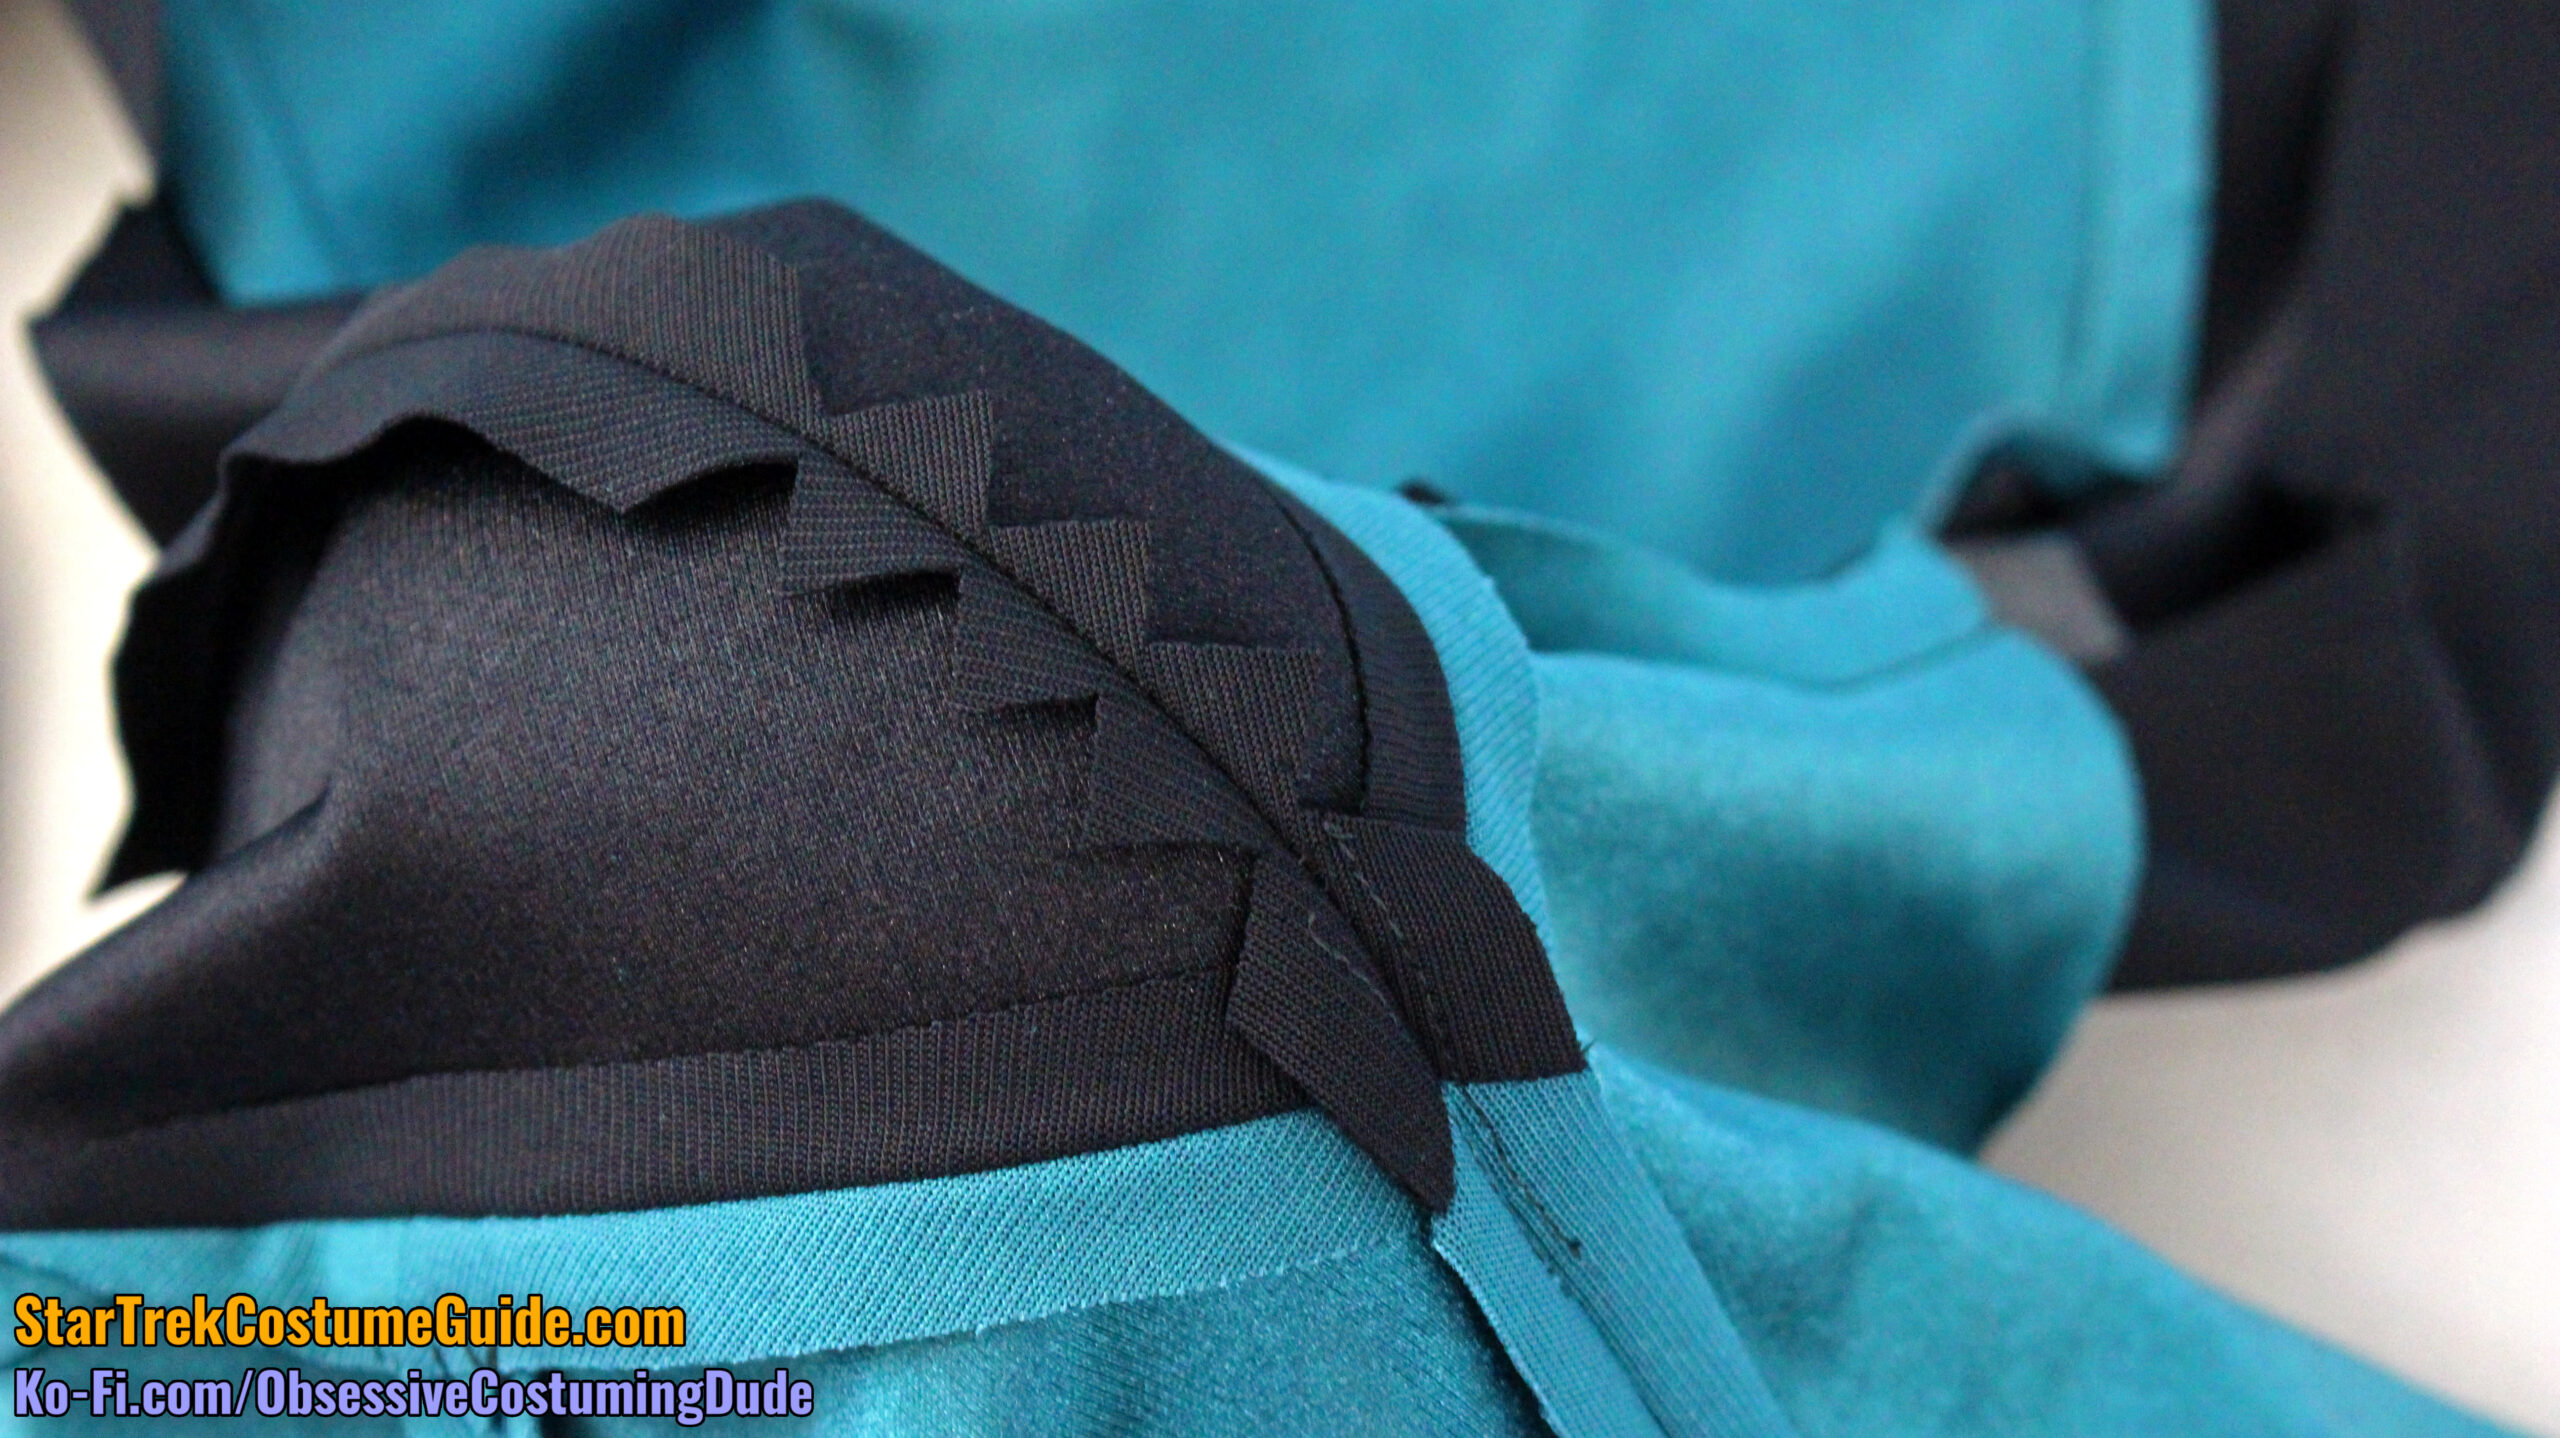
Sew the jumpsuit front assembly to the back right assembly along the shoulders and outer sleeve, right sides together with ½” seam allowance, matching outer yoke corners.
I recommend basting the aforementioned area and ensuring the yoke seams properly align before sewing the entire seam.
I also suggest notching the outer shoulder allowances along the curve, to help them remain open.
Furthermore, I recommend tacking the allowances open by hand along the lower, outer area of the yoke – taking care to only stitch through the yoke/body allowances (and not onto the outside of the jumpsuit), of course.
Repeat for the other side of the jumpsuit.
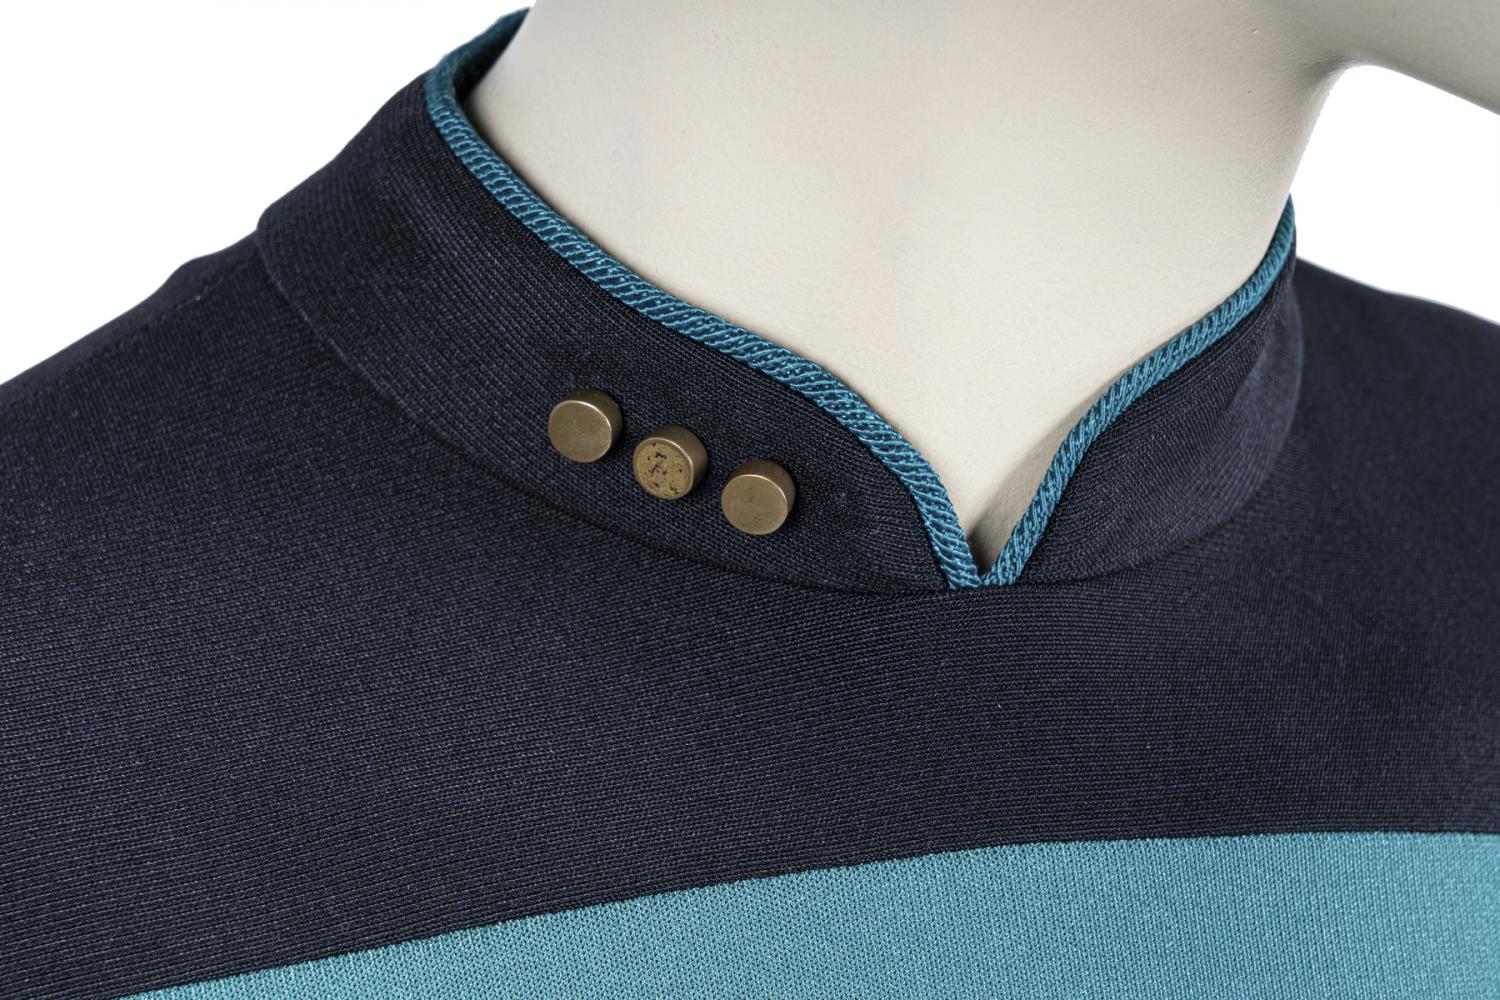
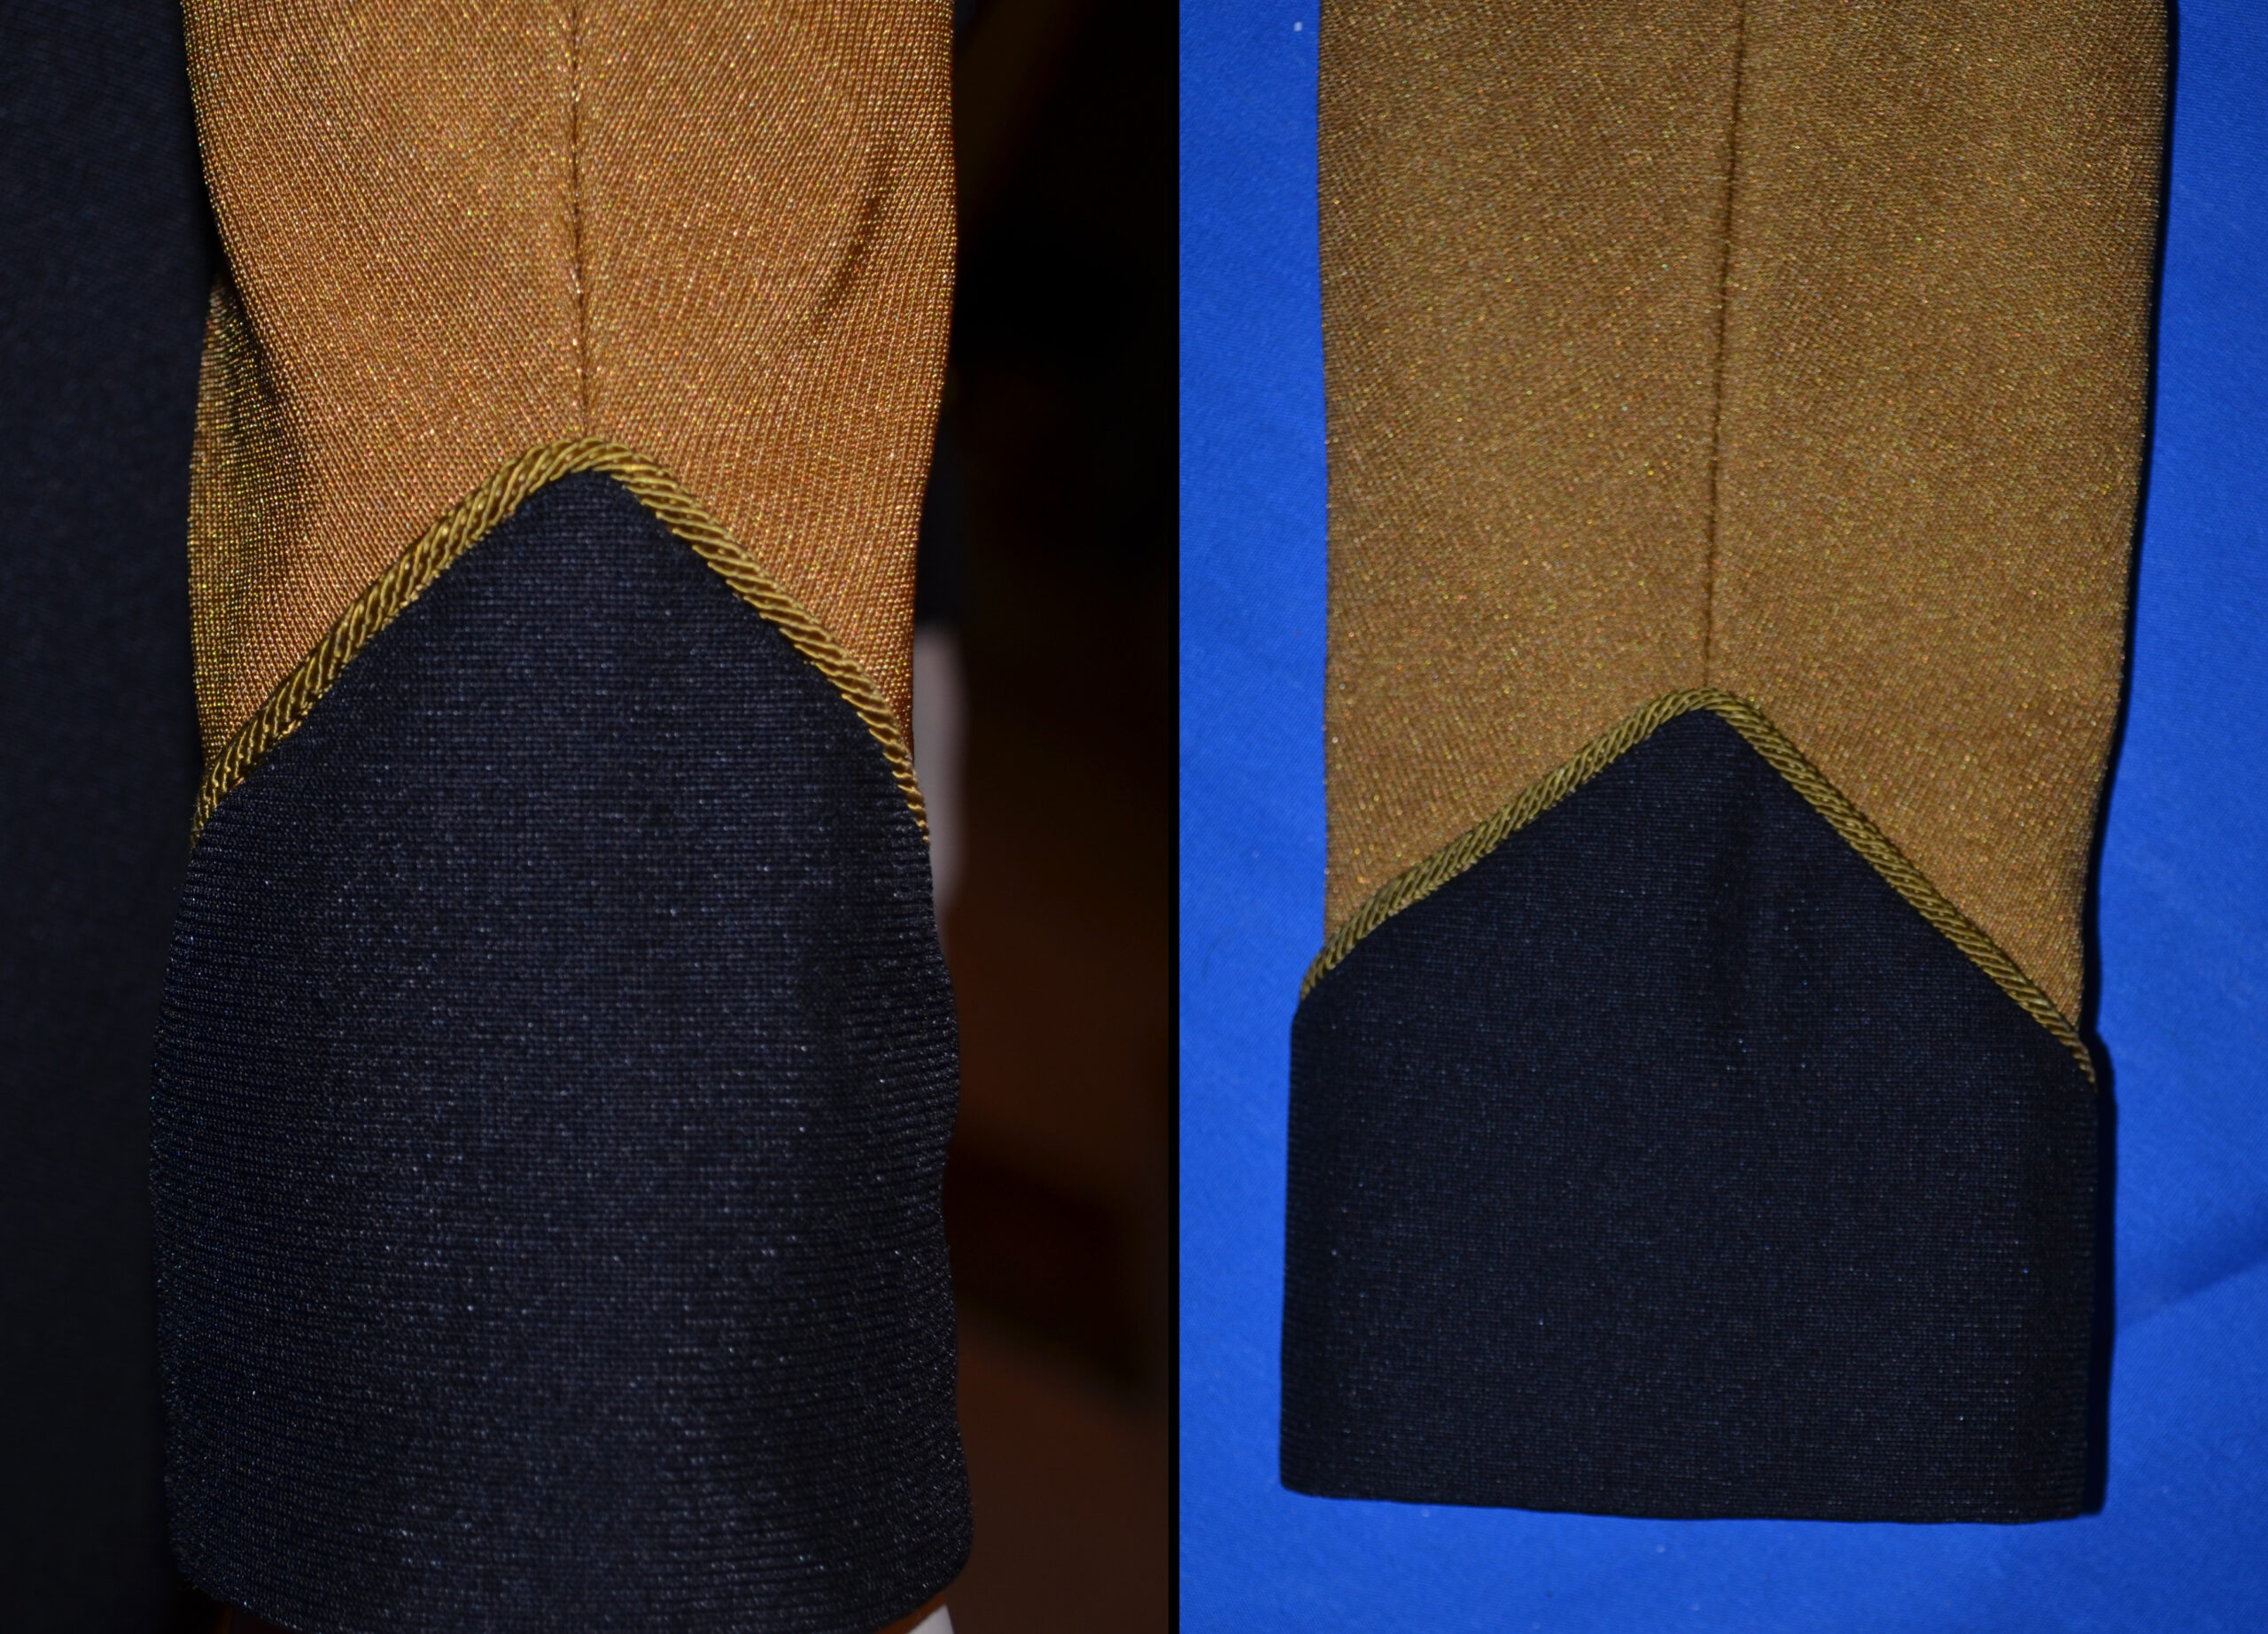
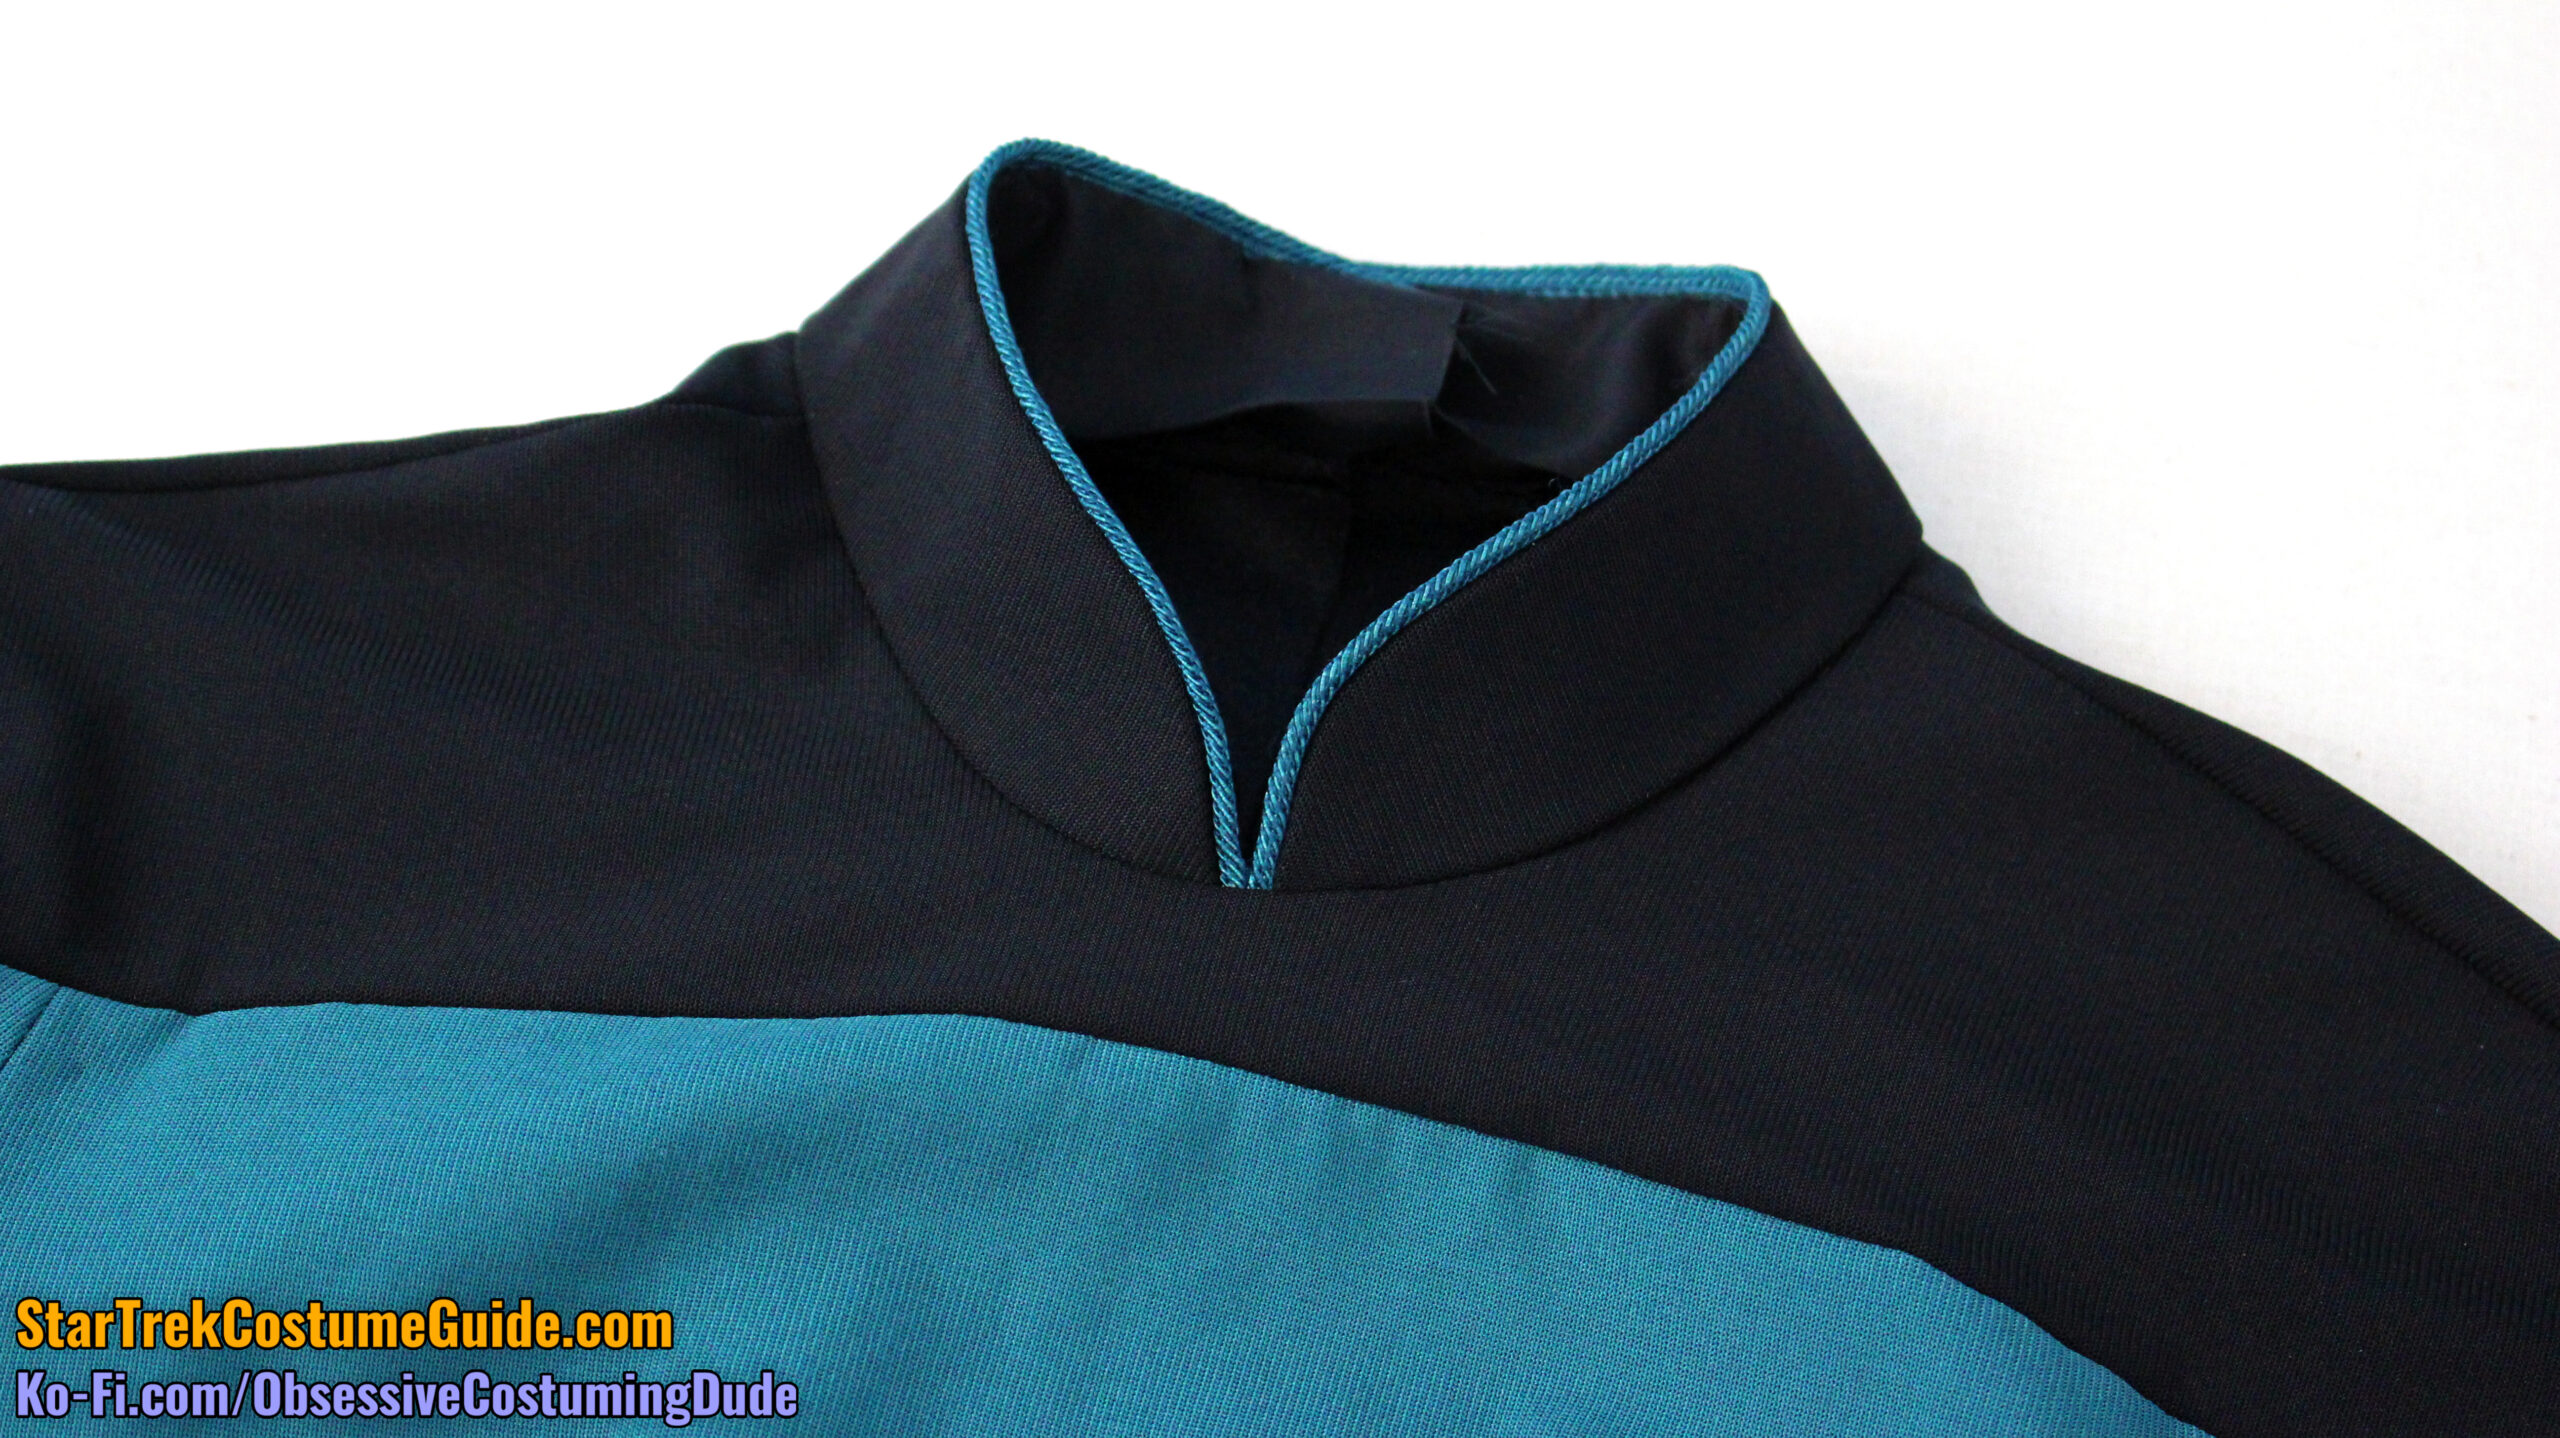
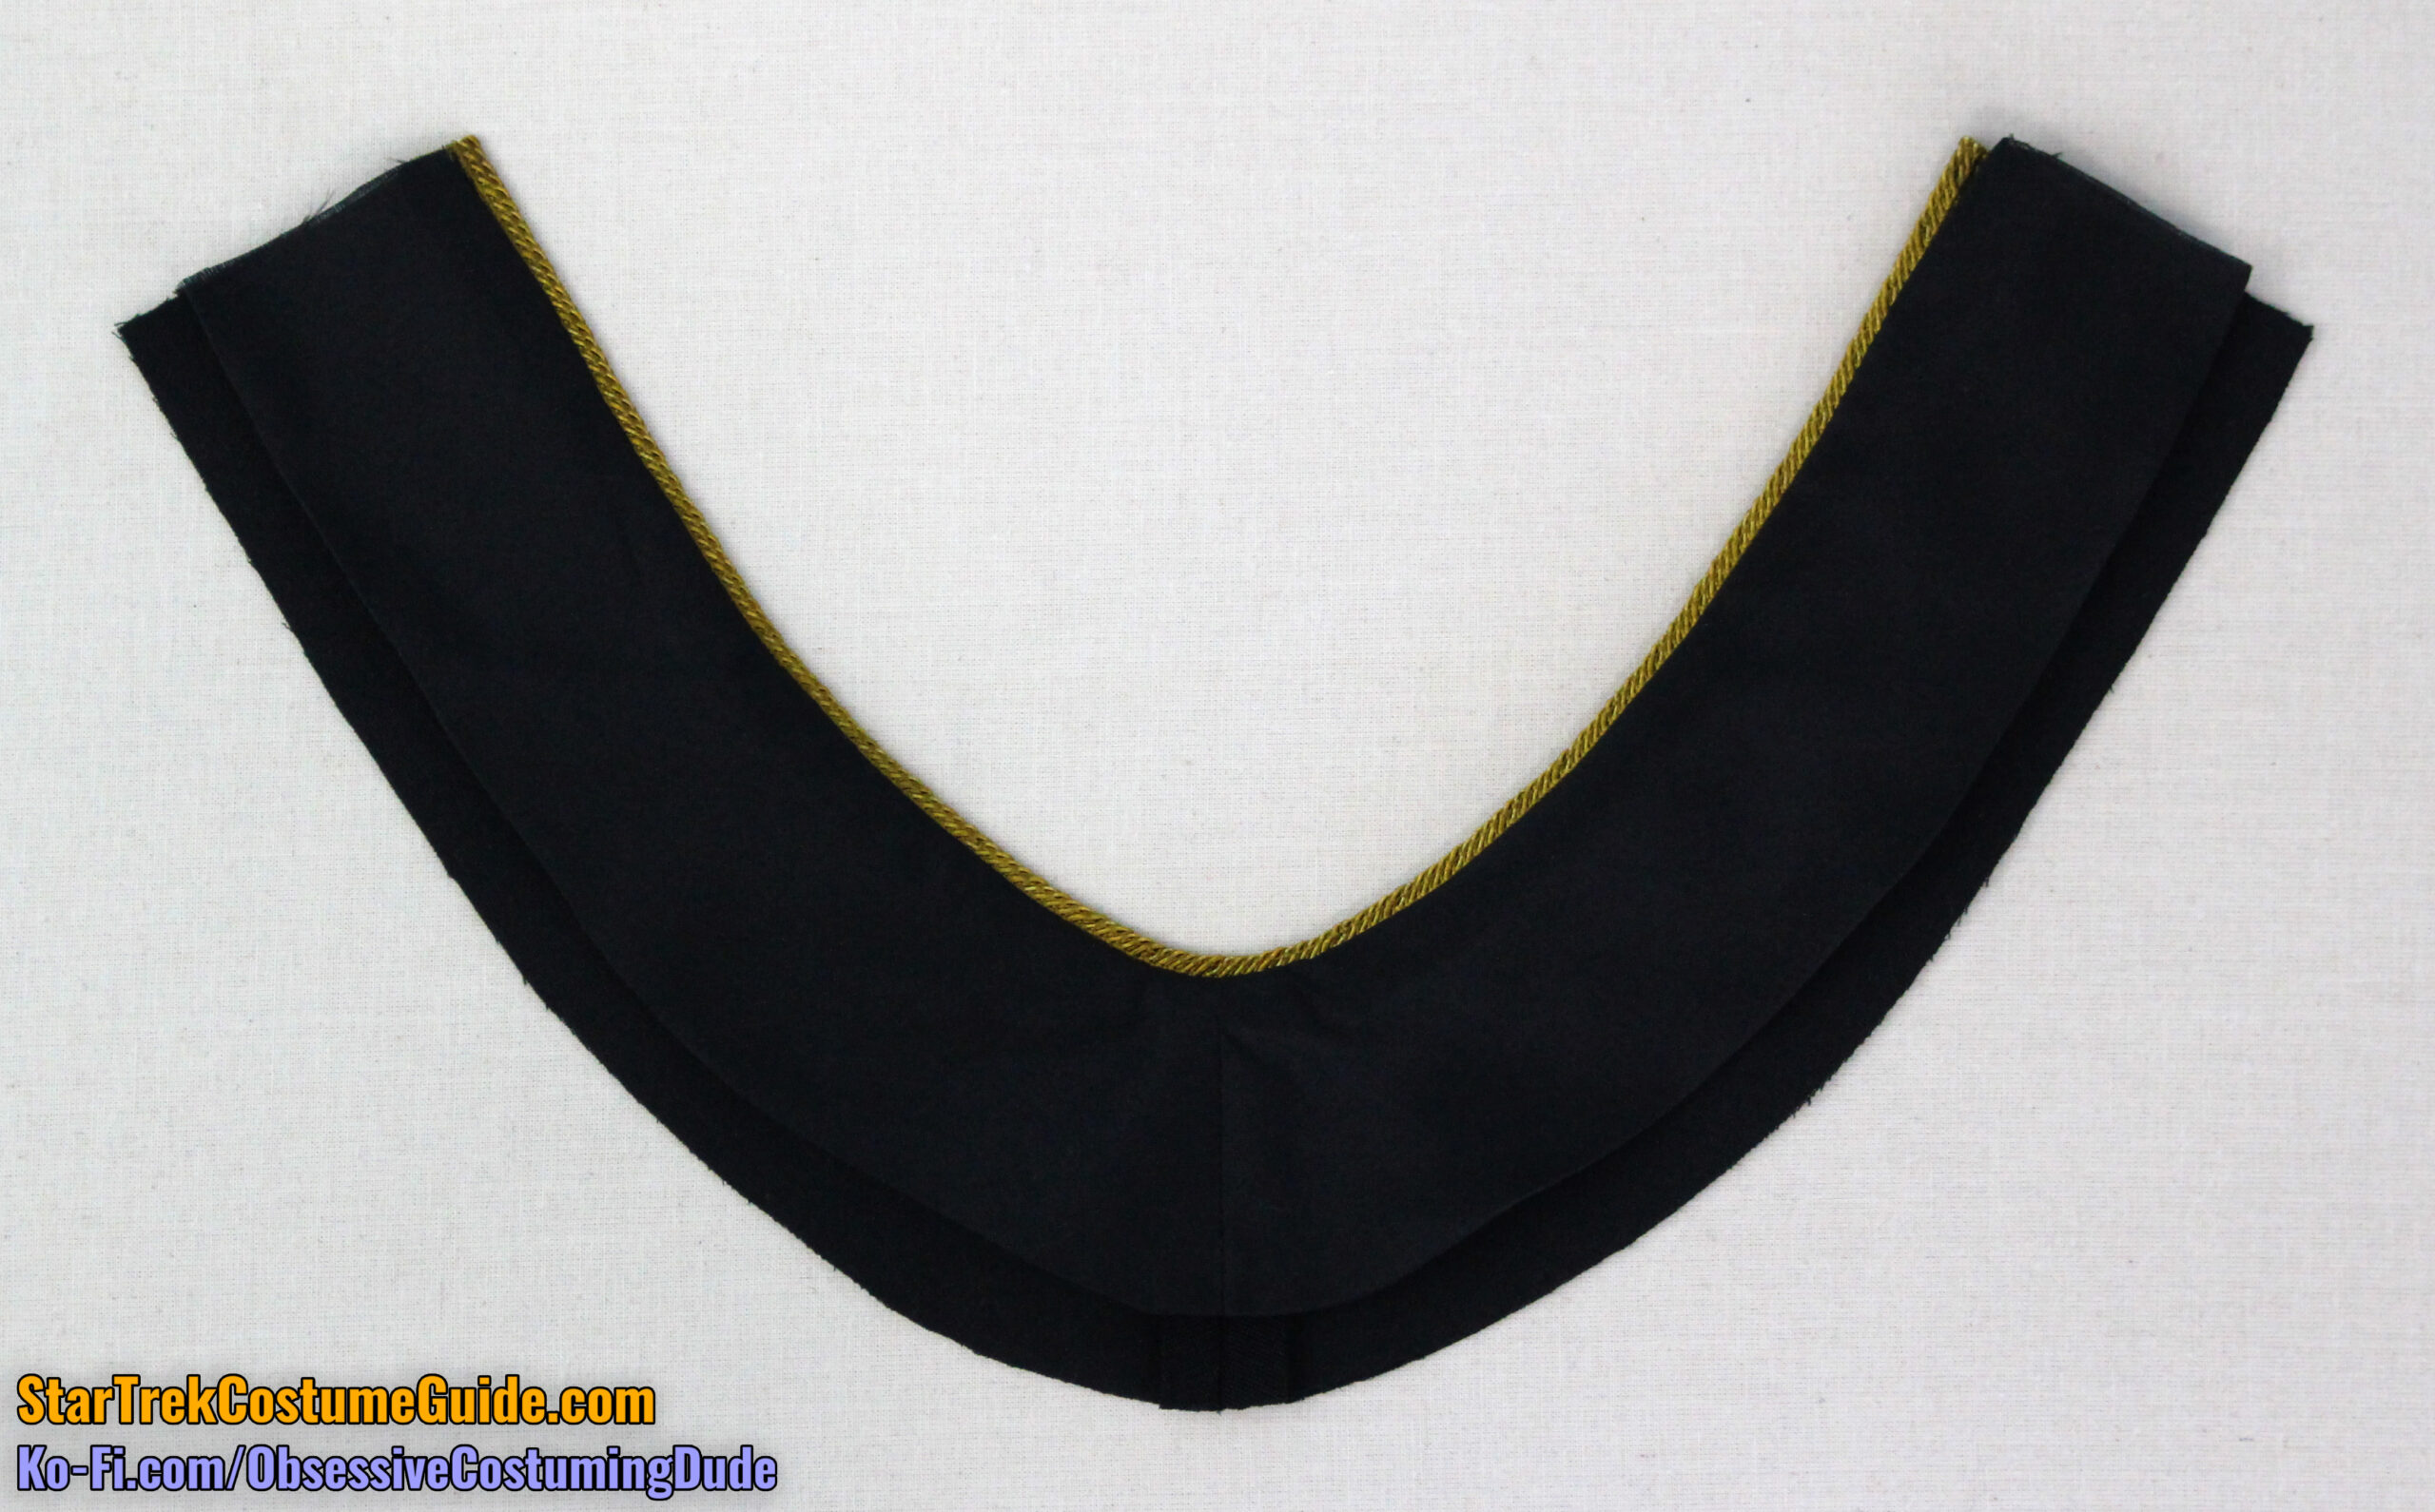
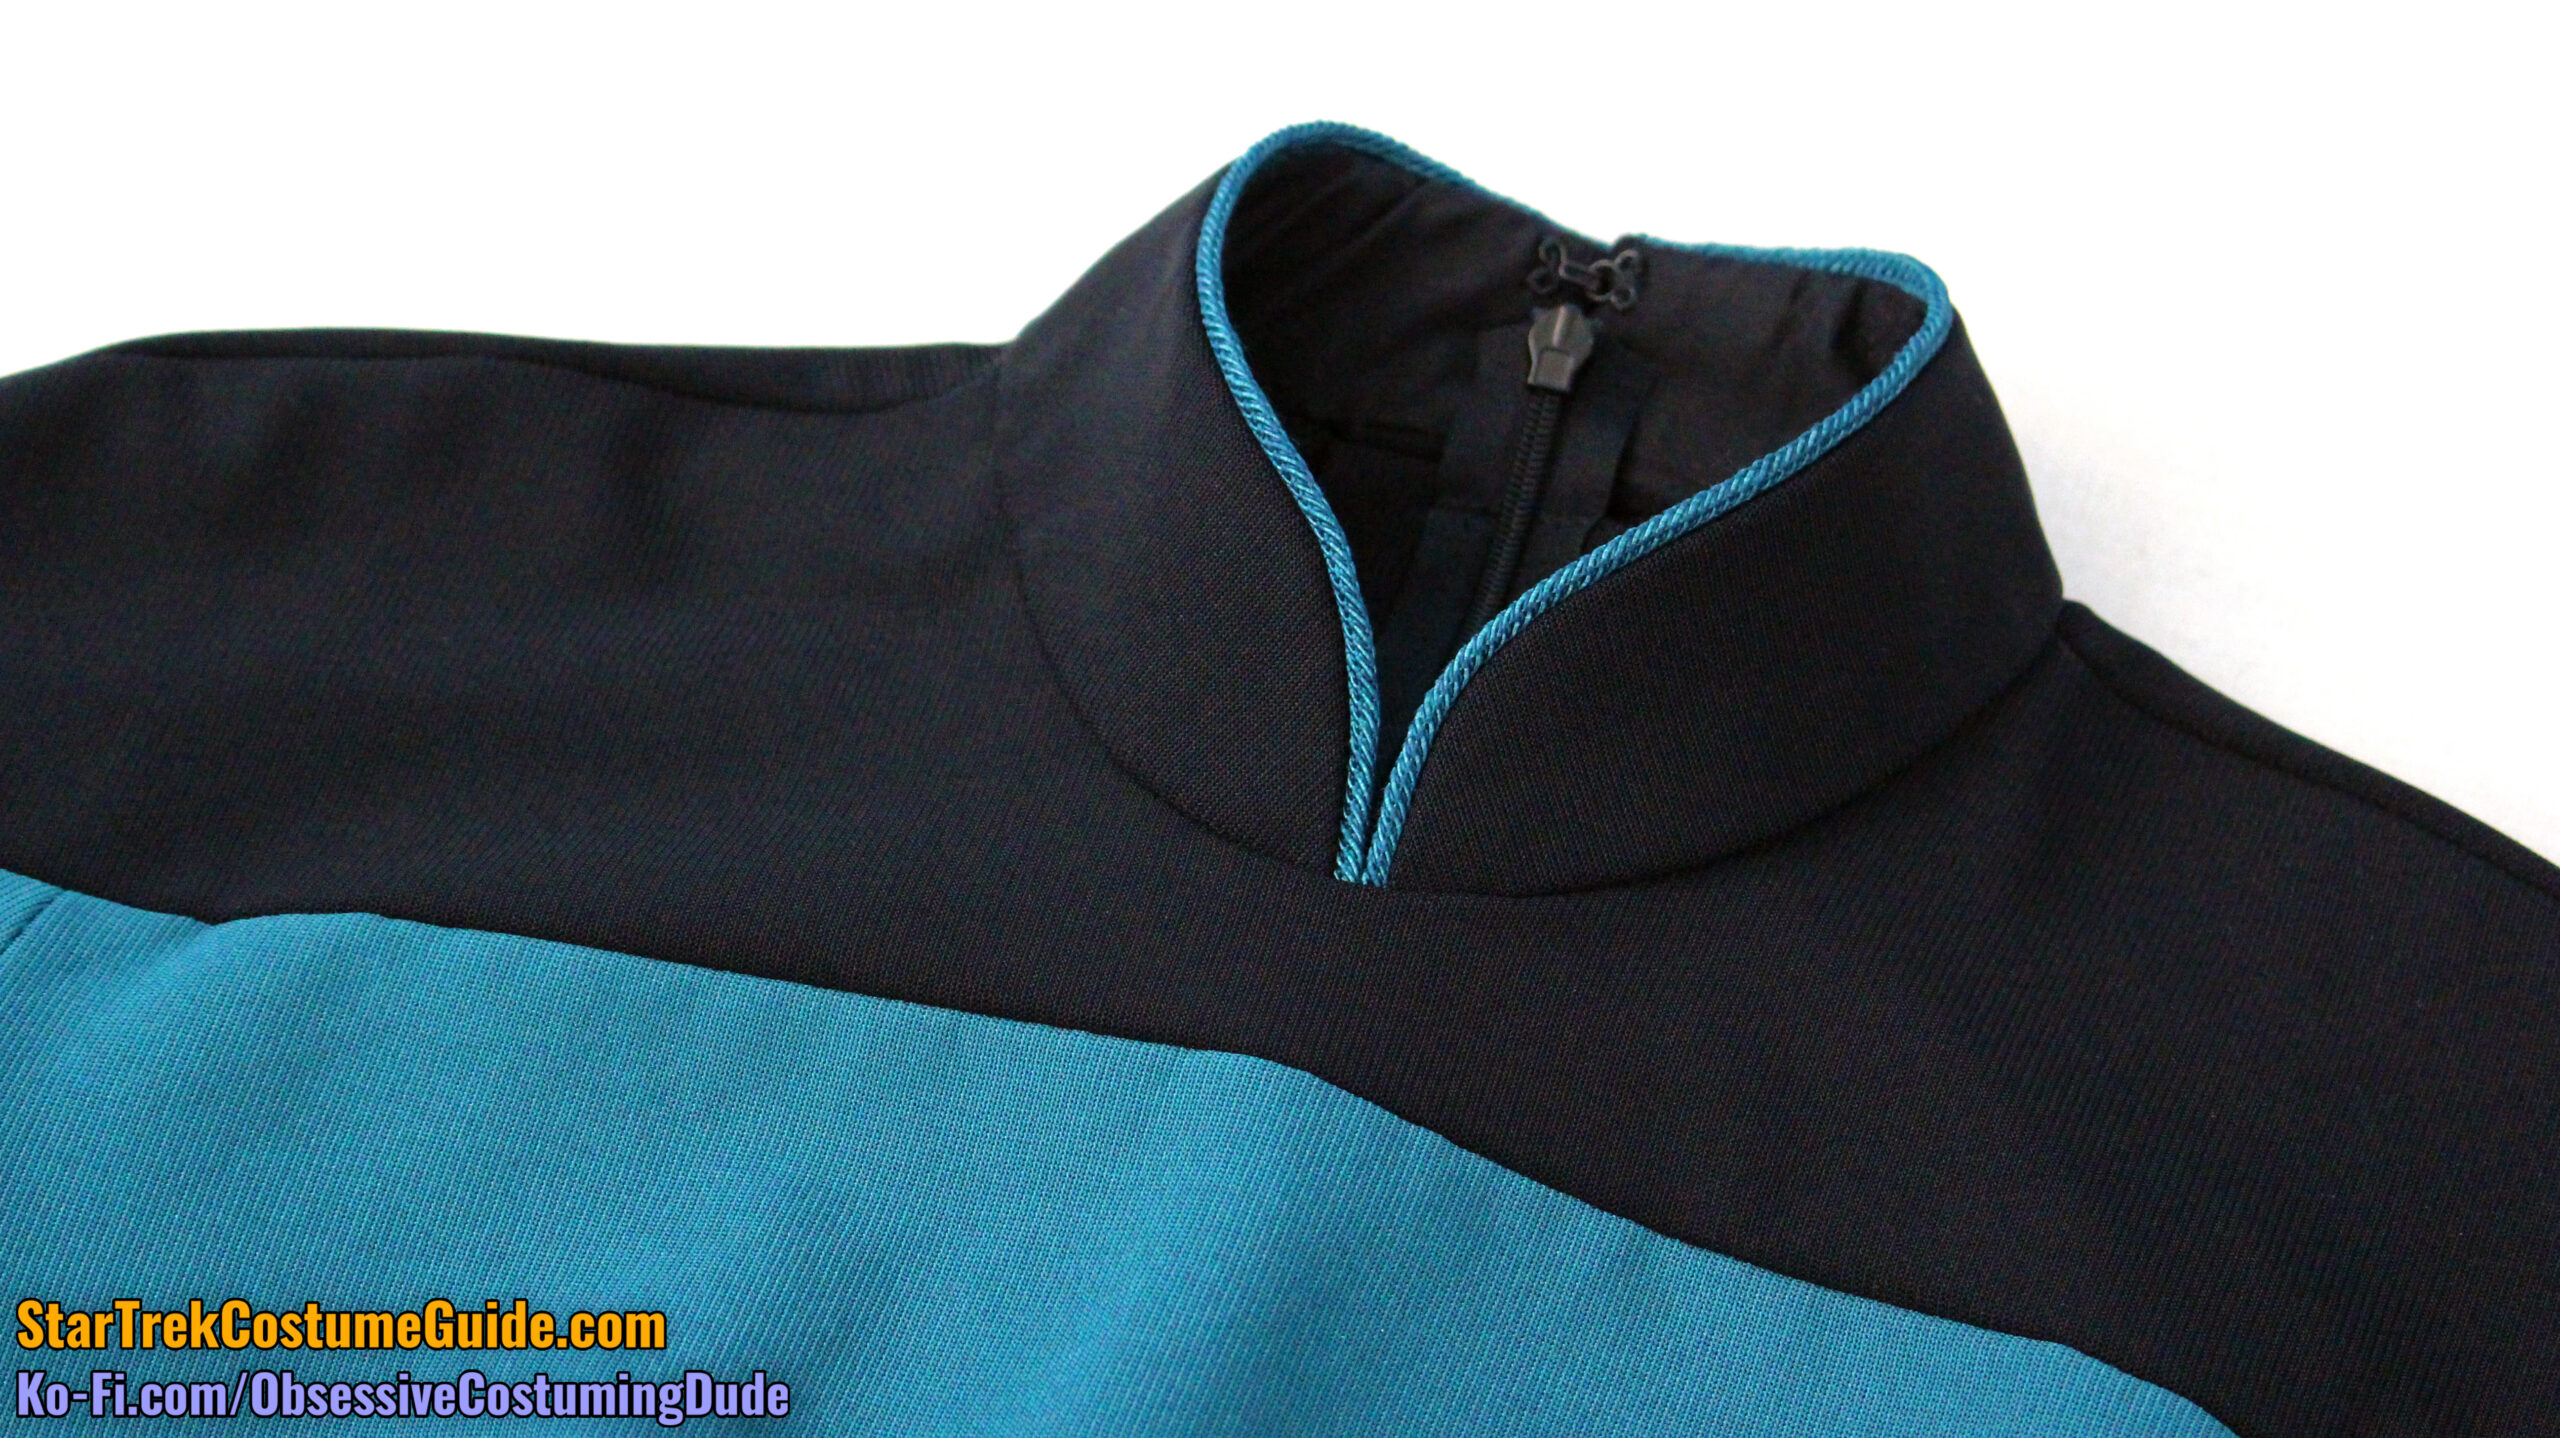
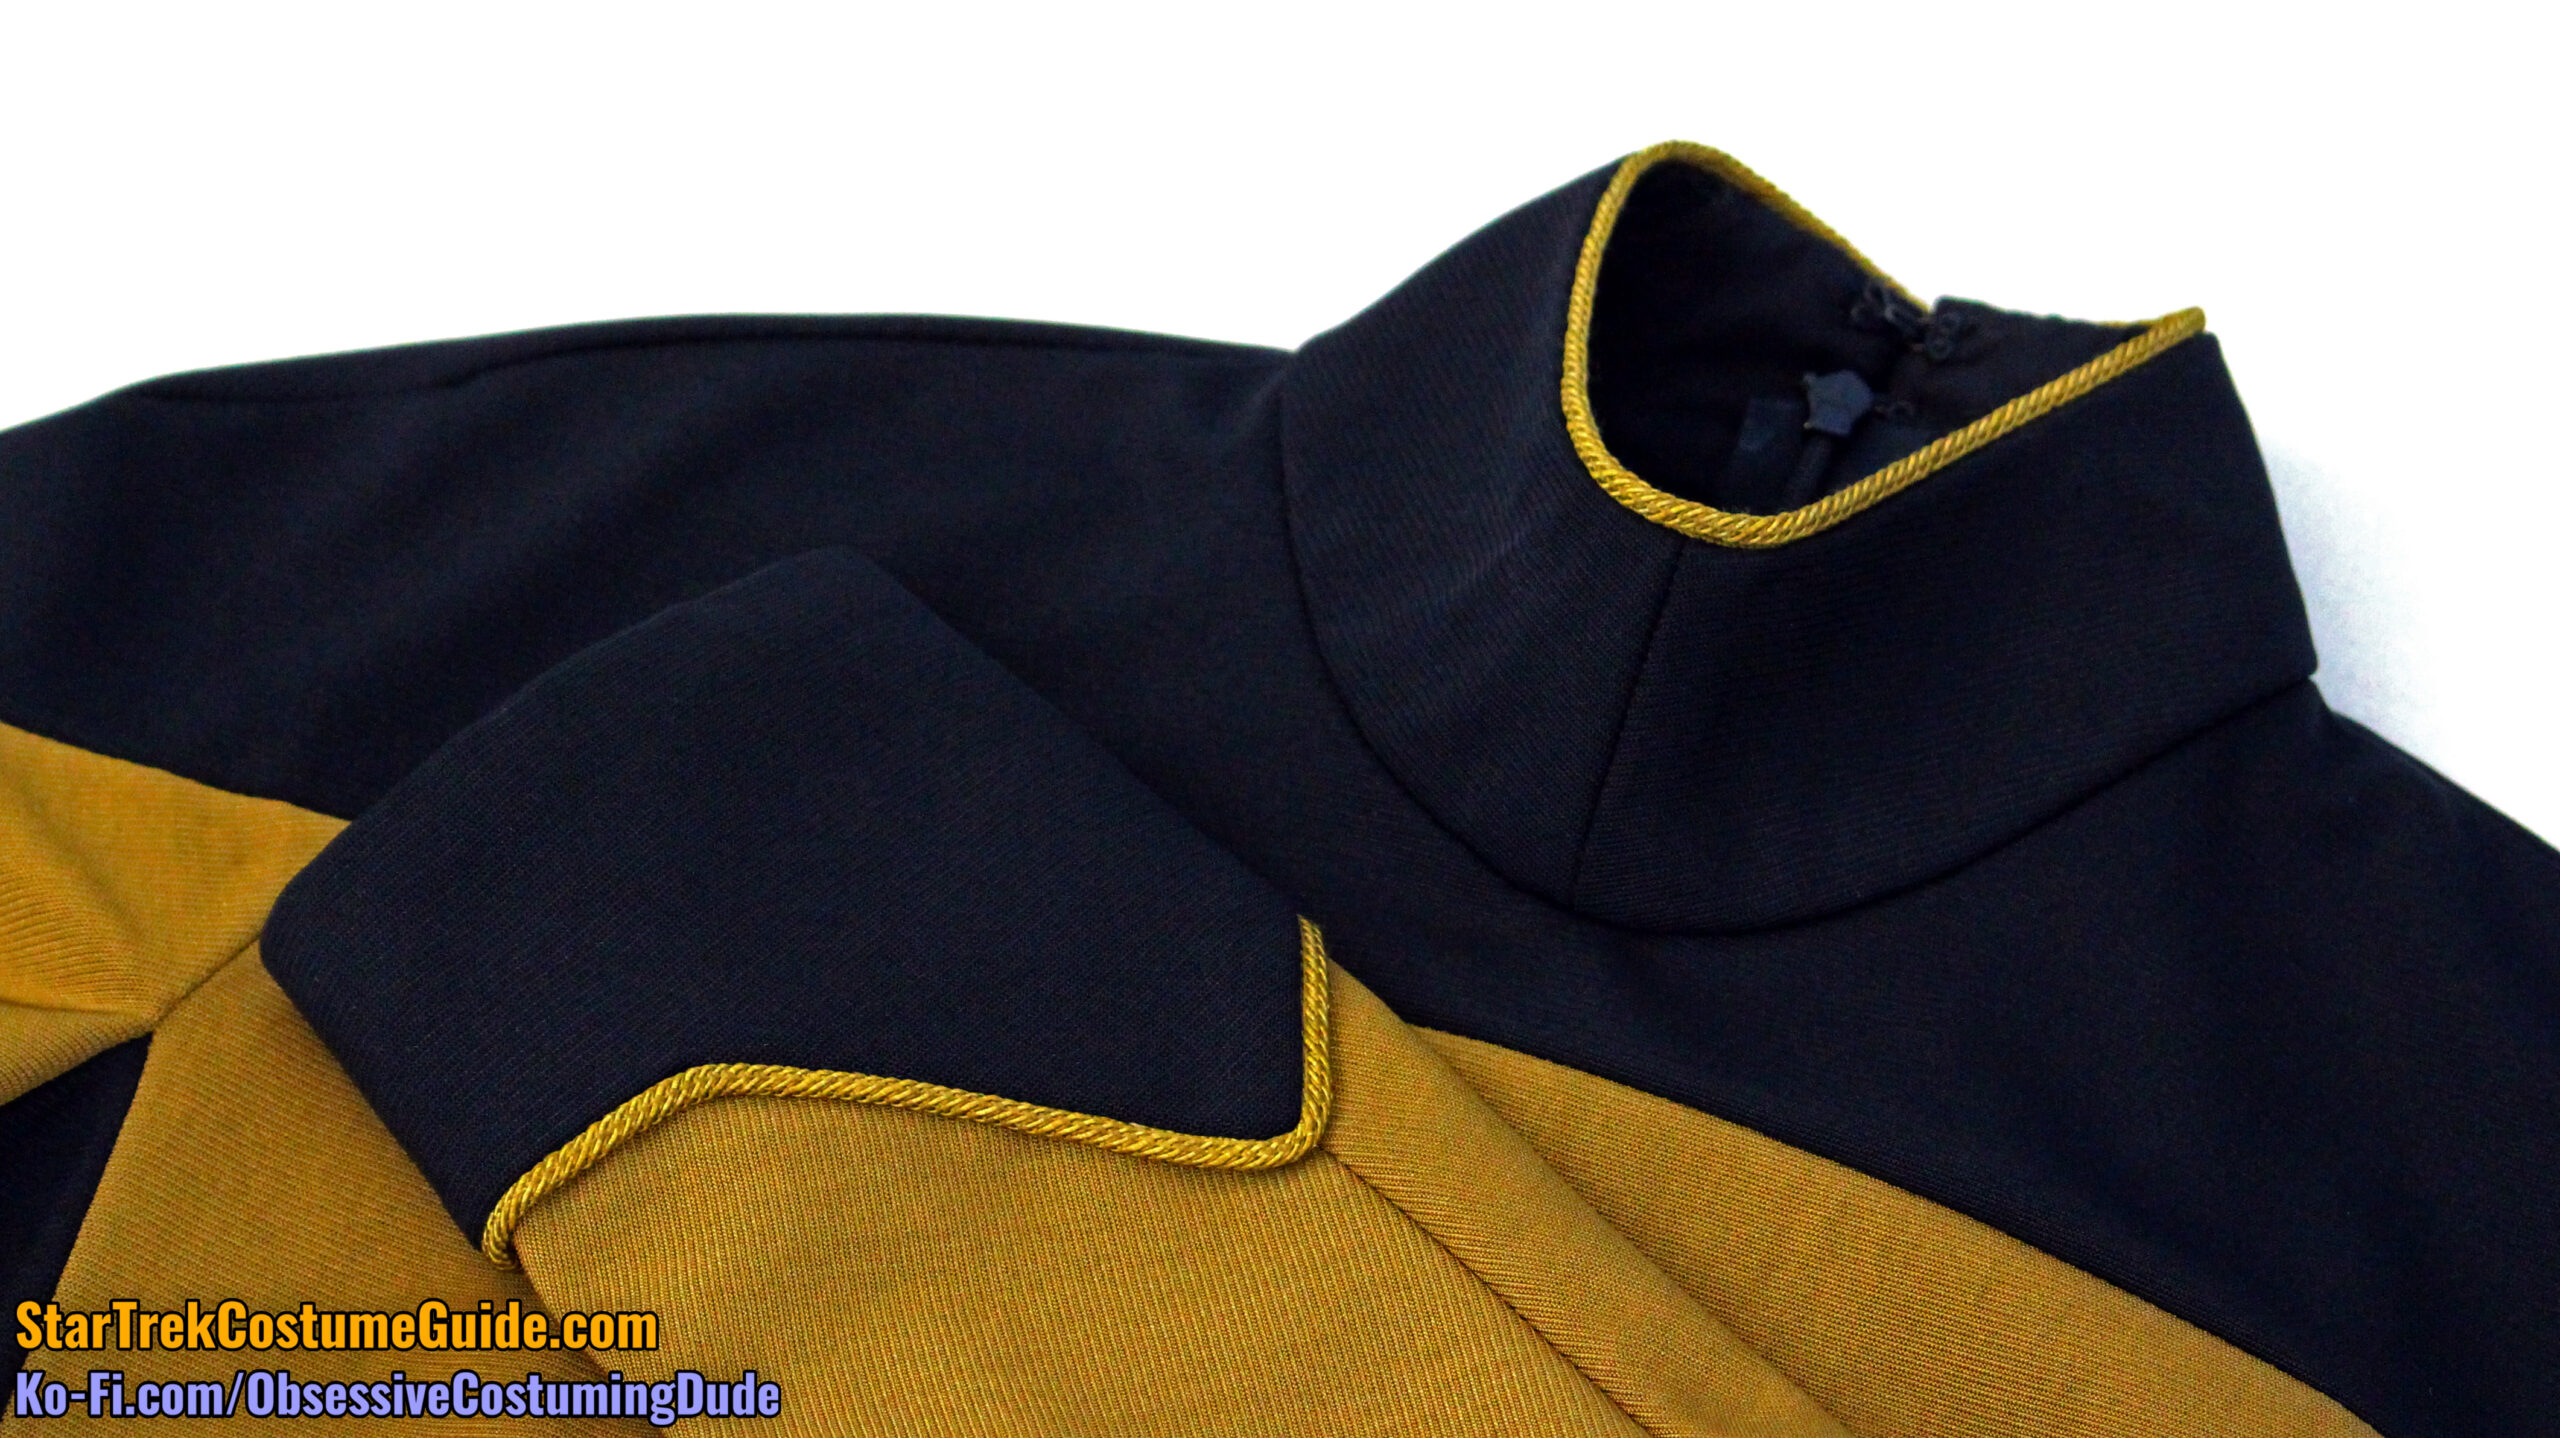
Here’s a YouTube video on how to make a back-zipping TNG jumpsuit collar:
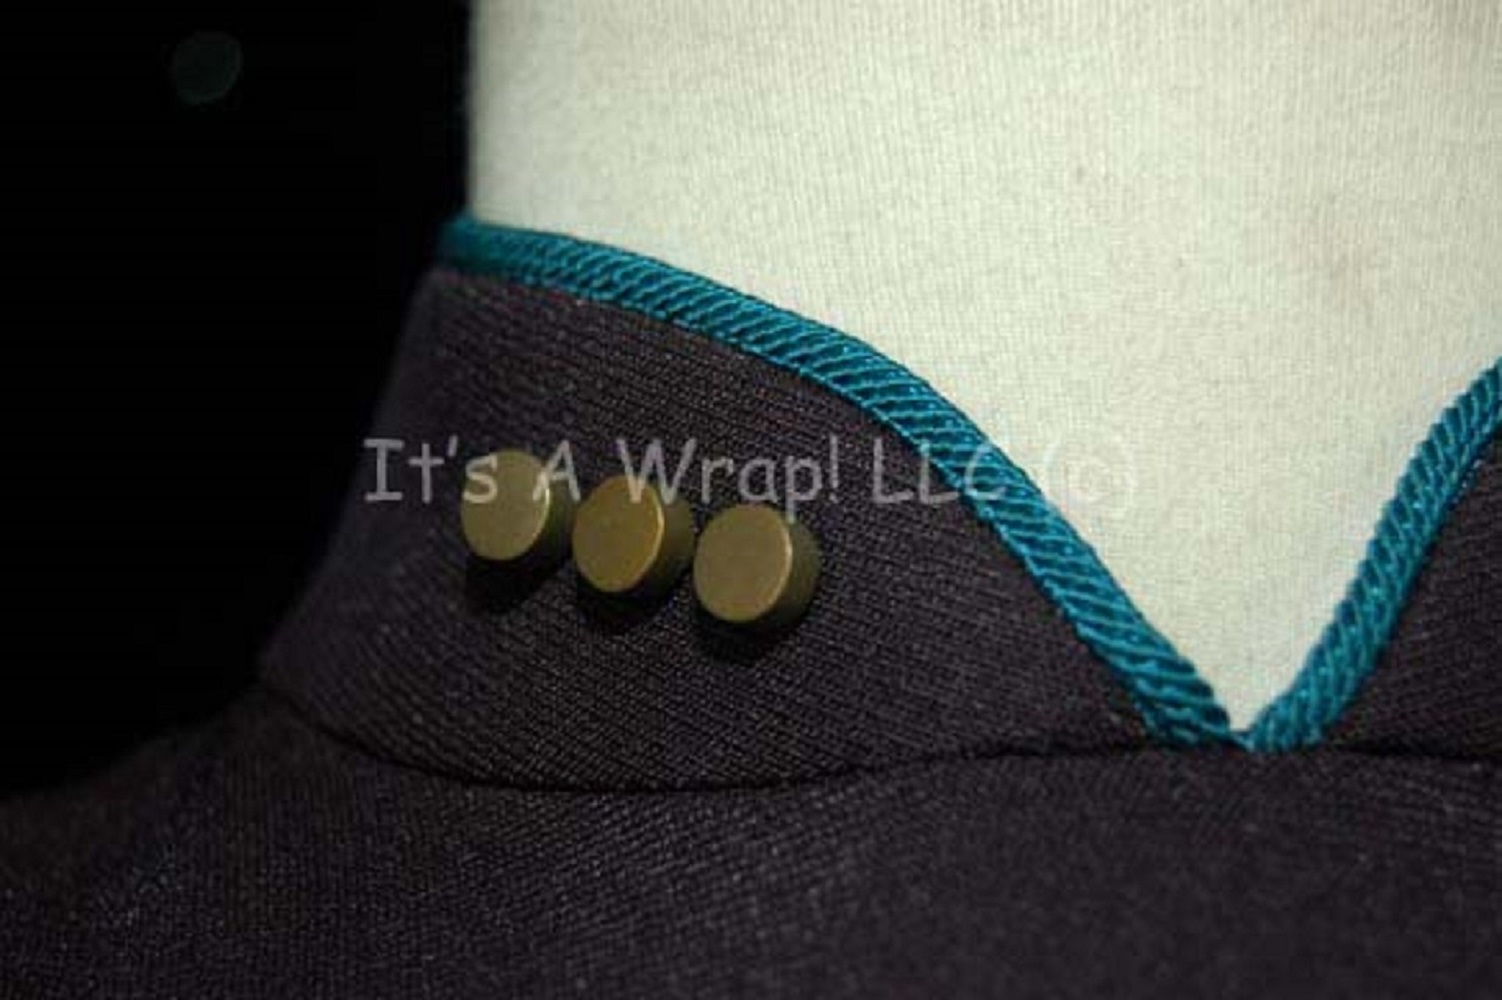
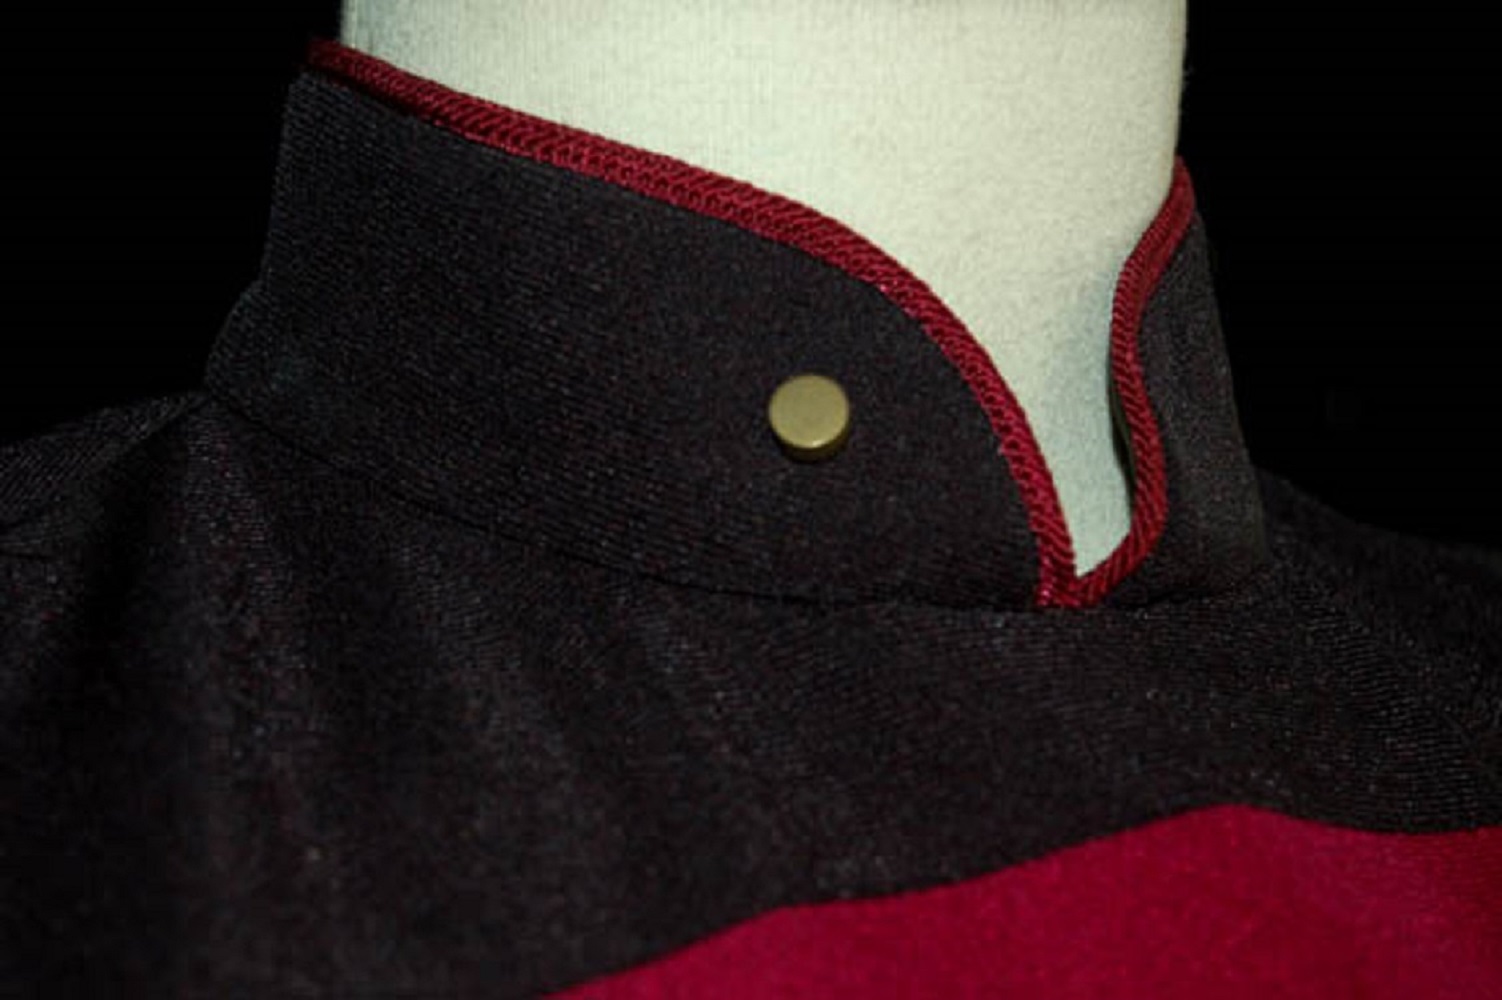
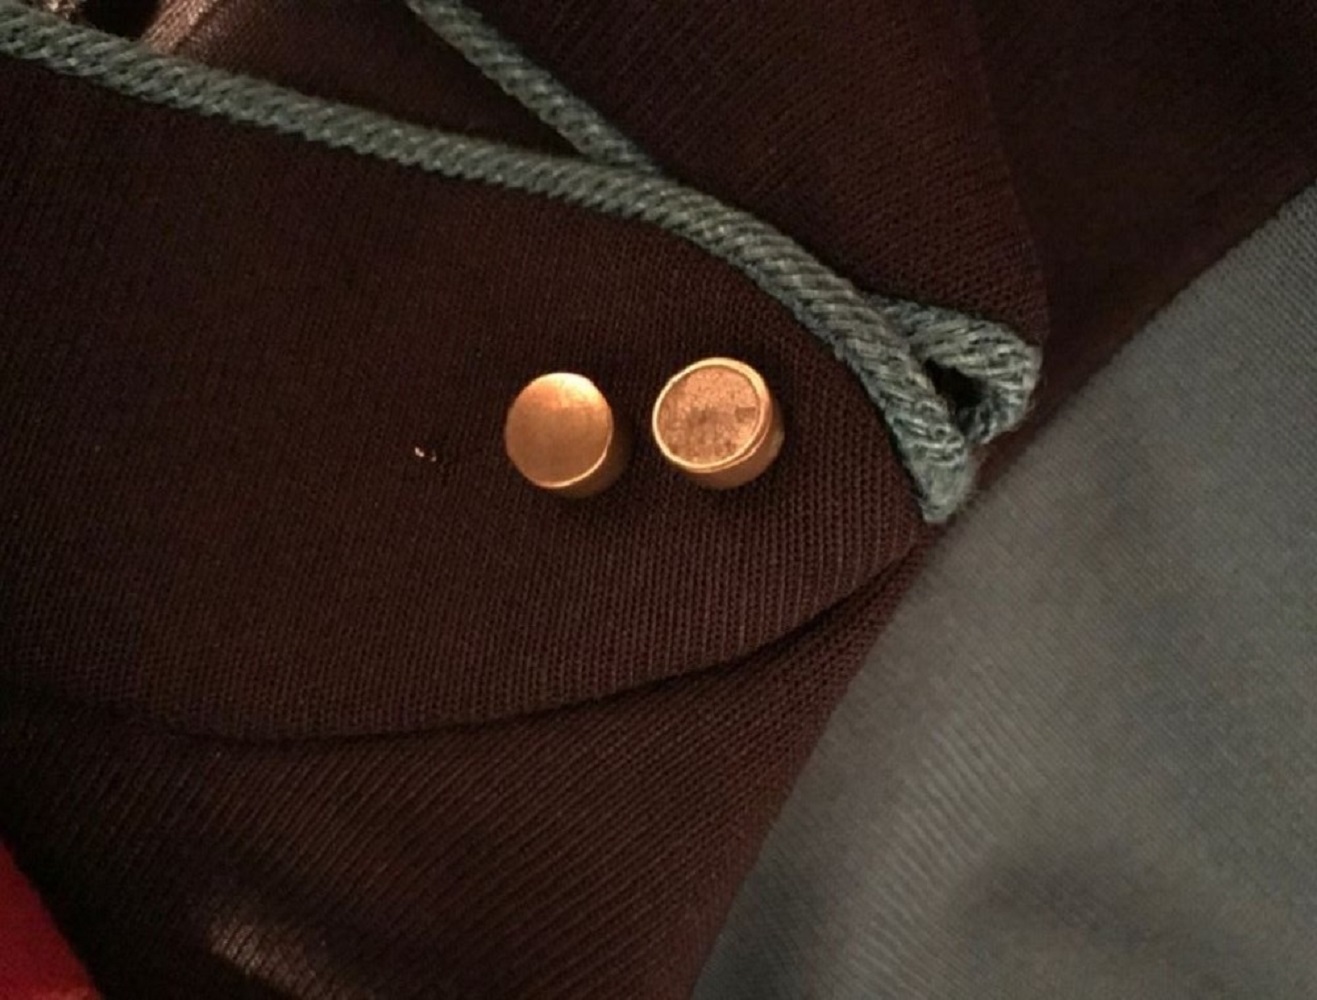
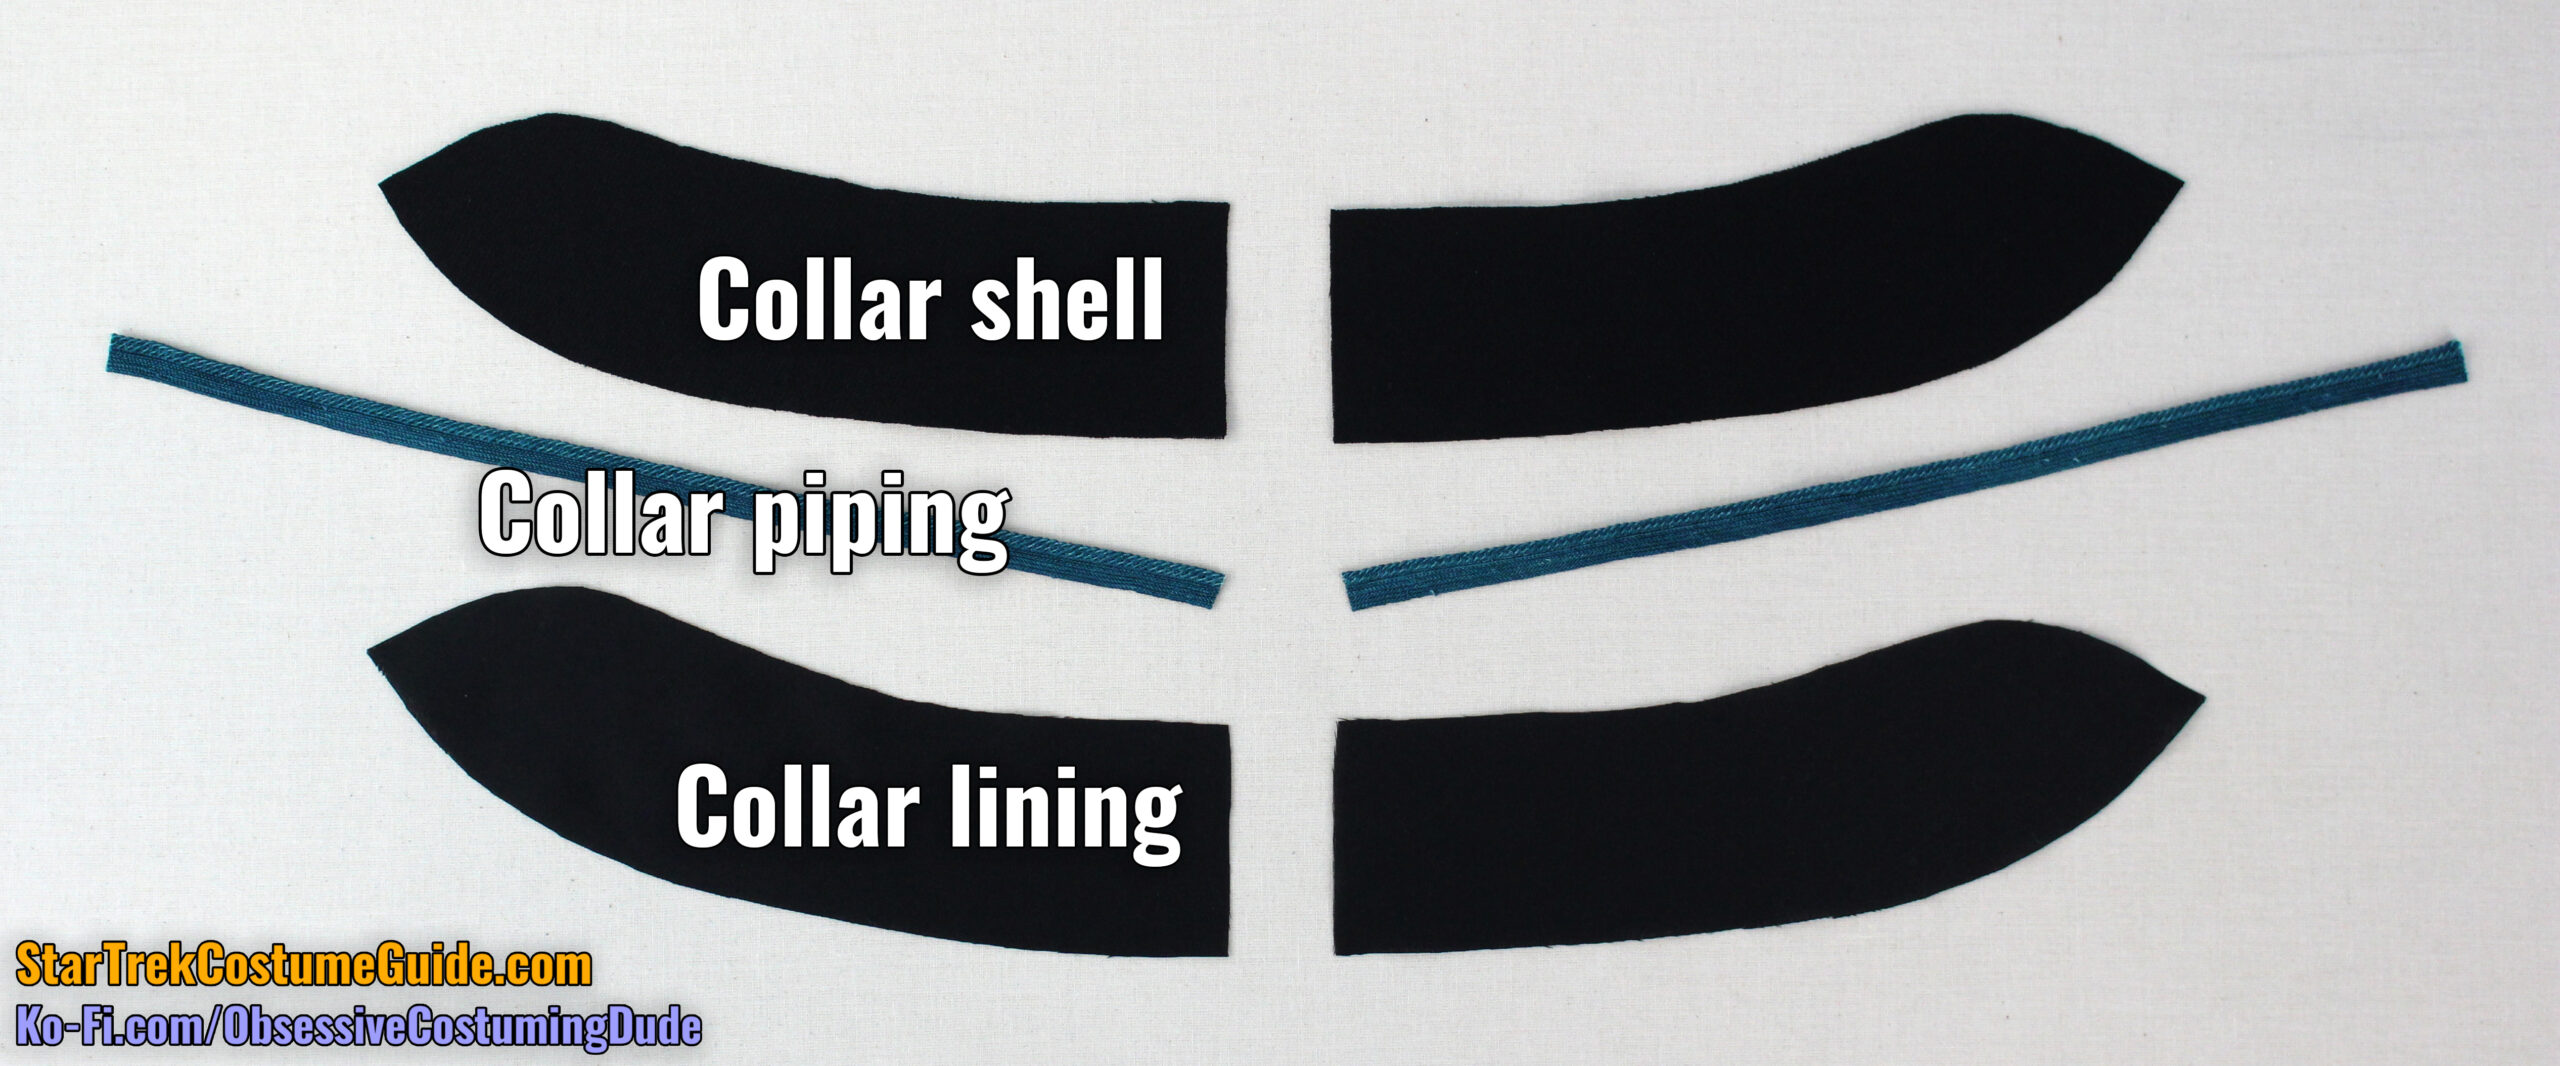
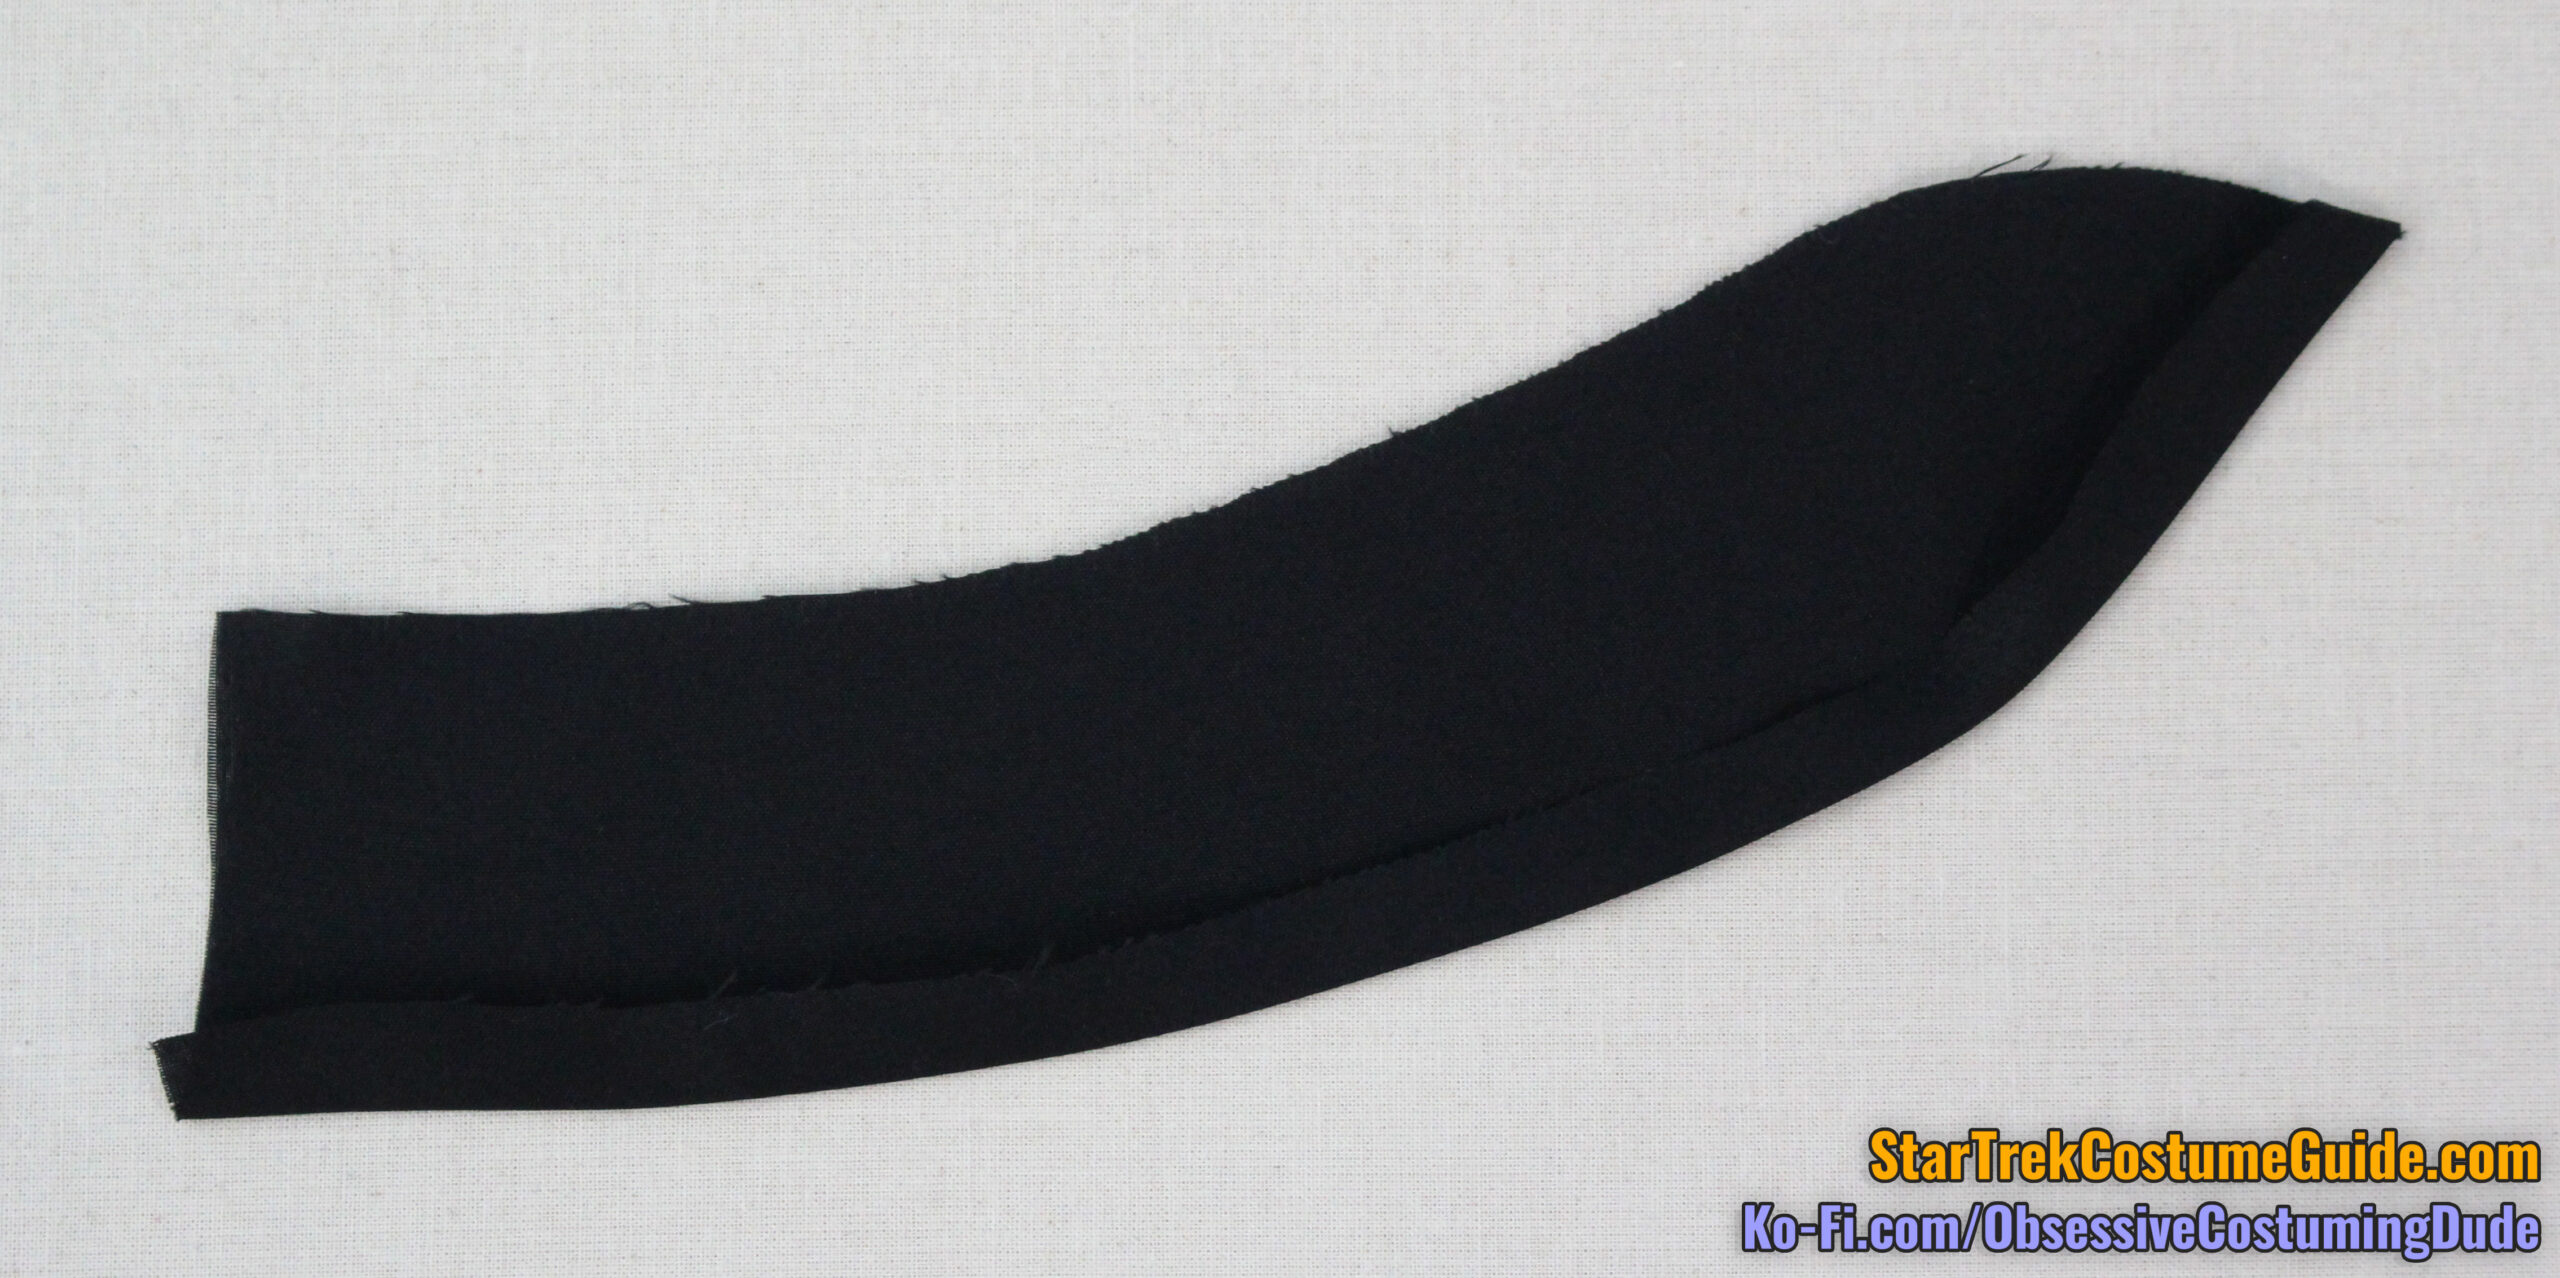
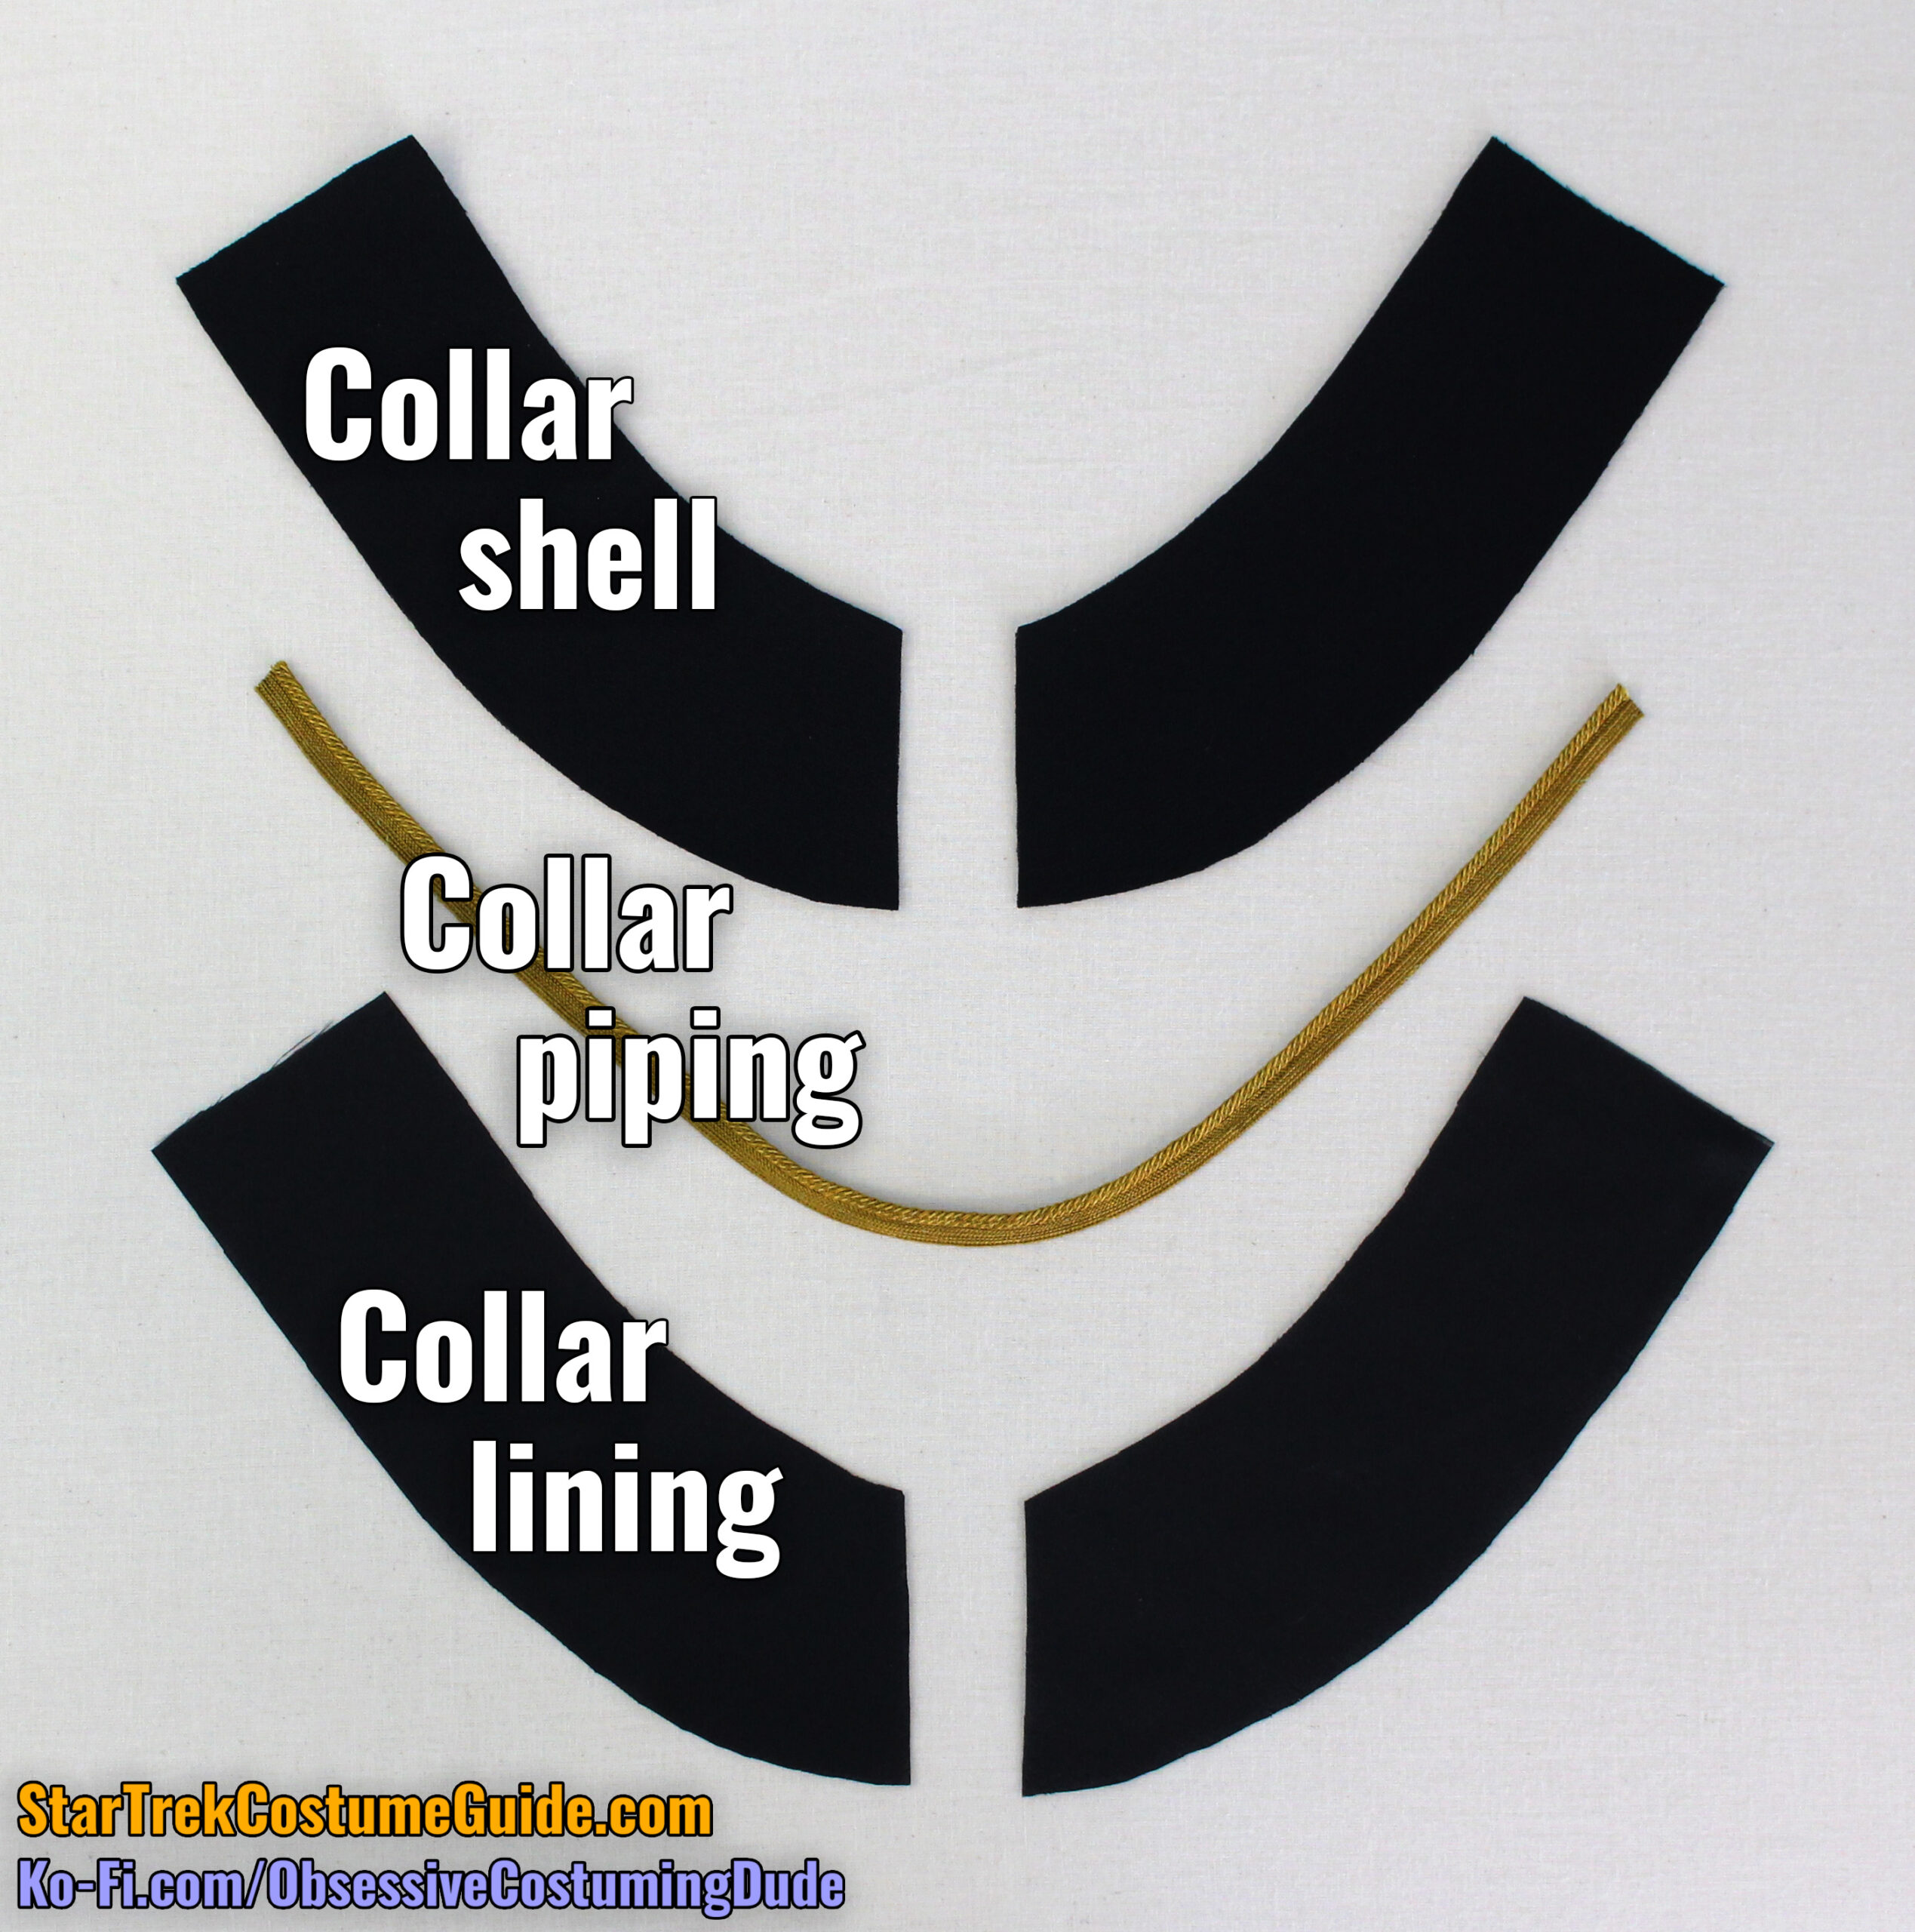
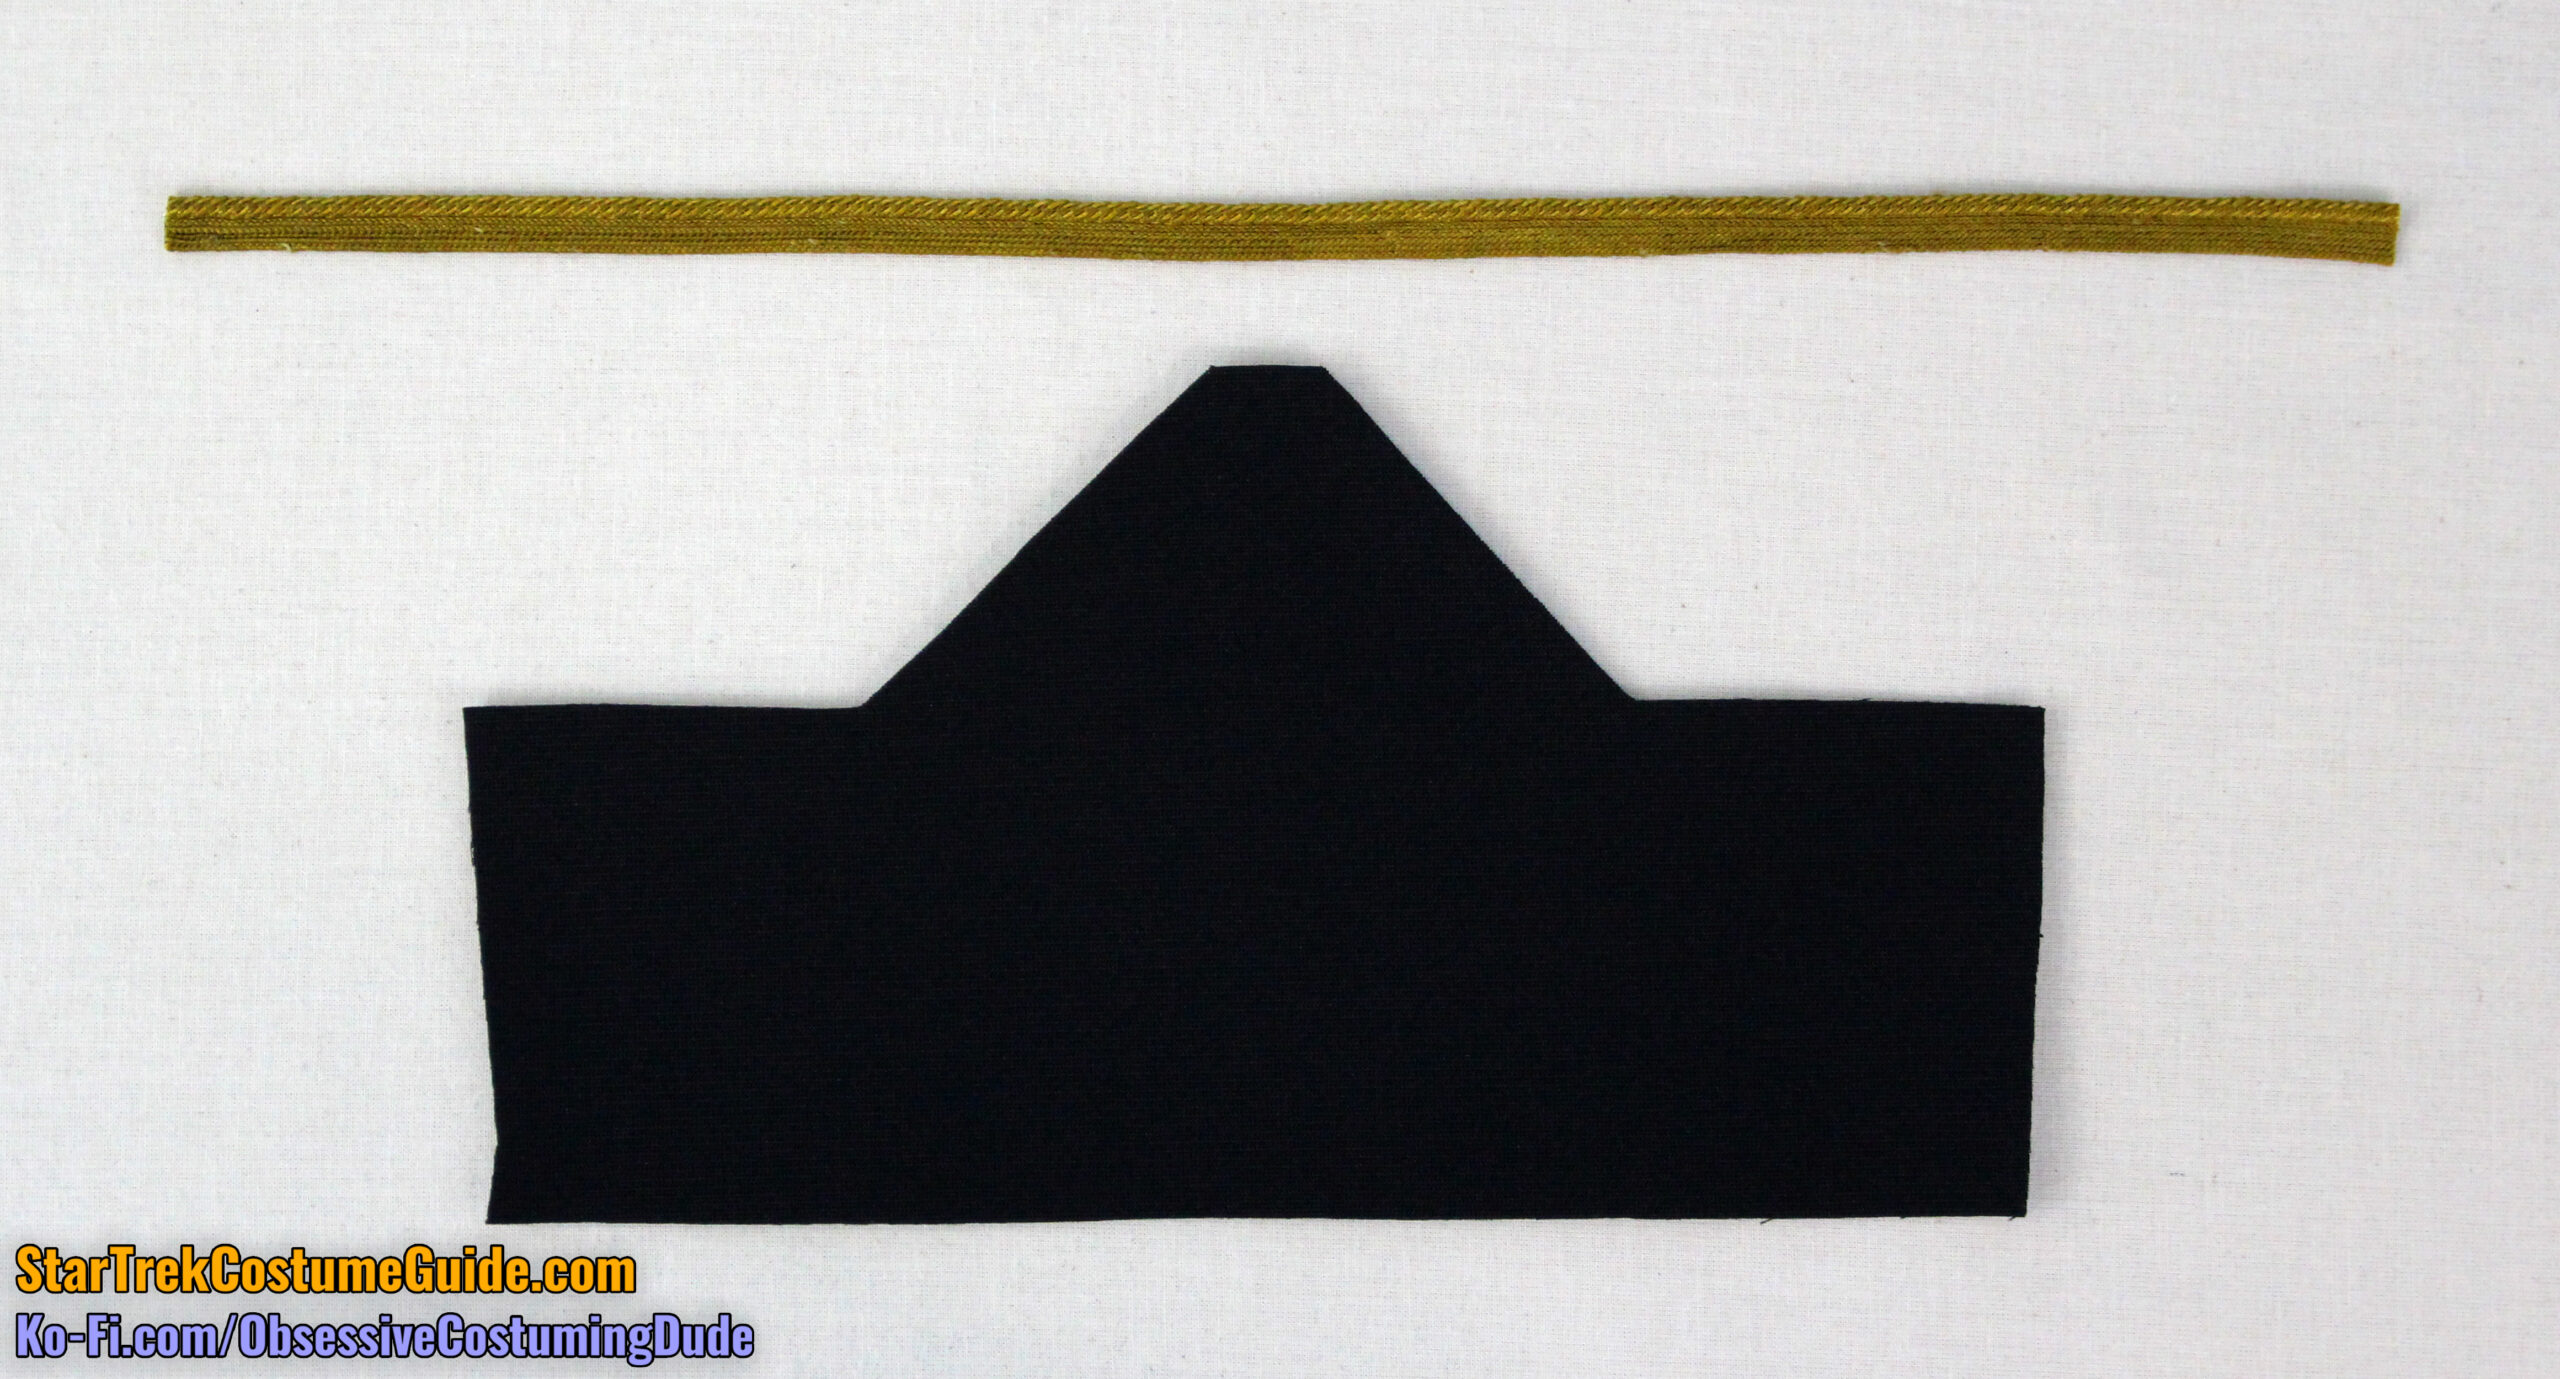
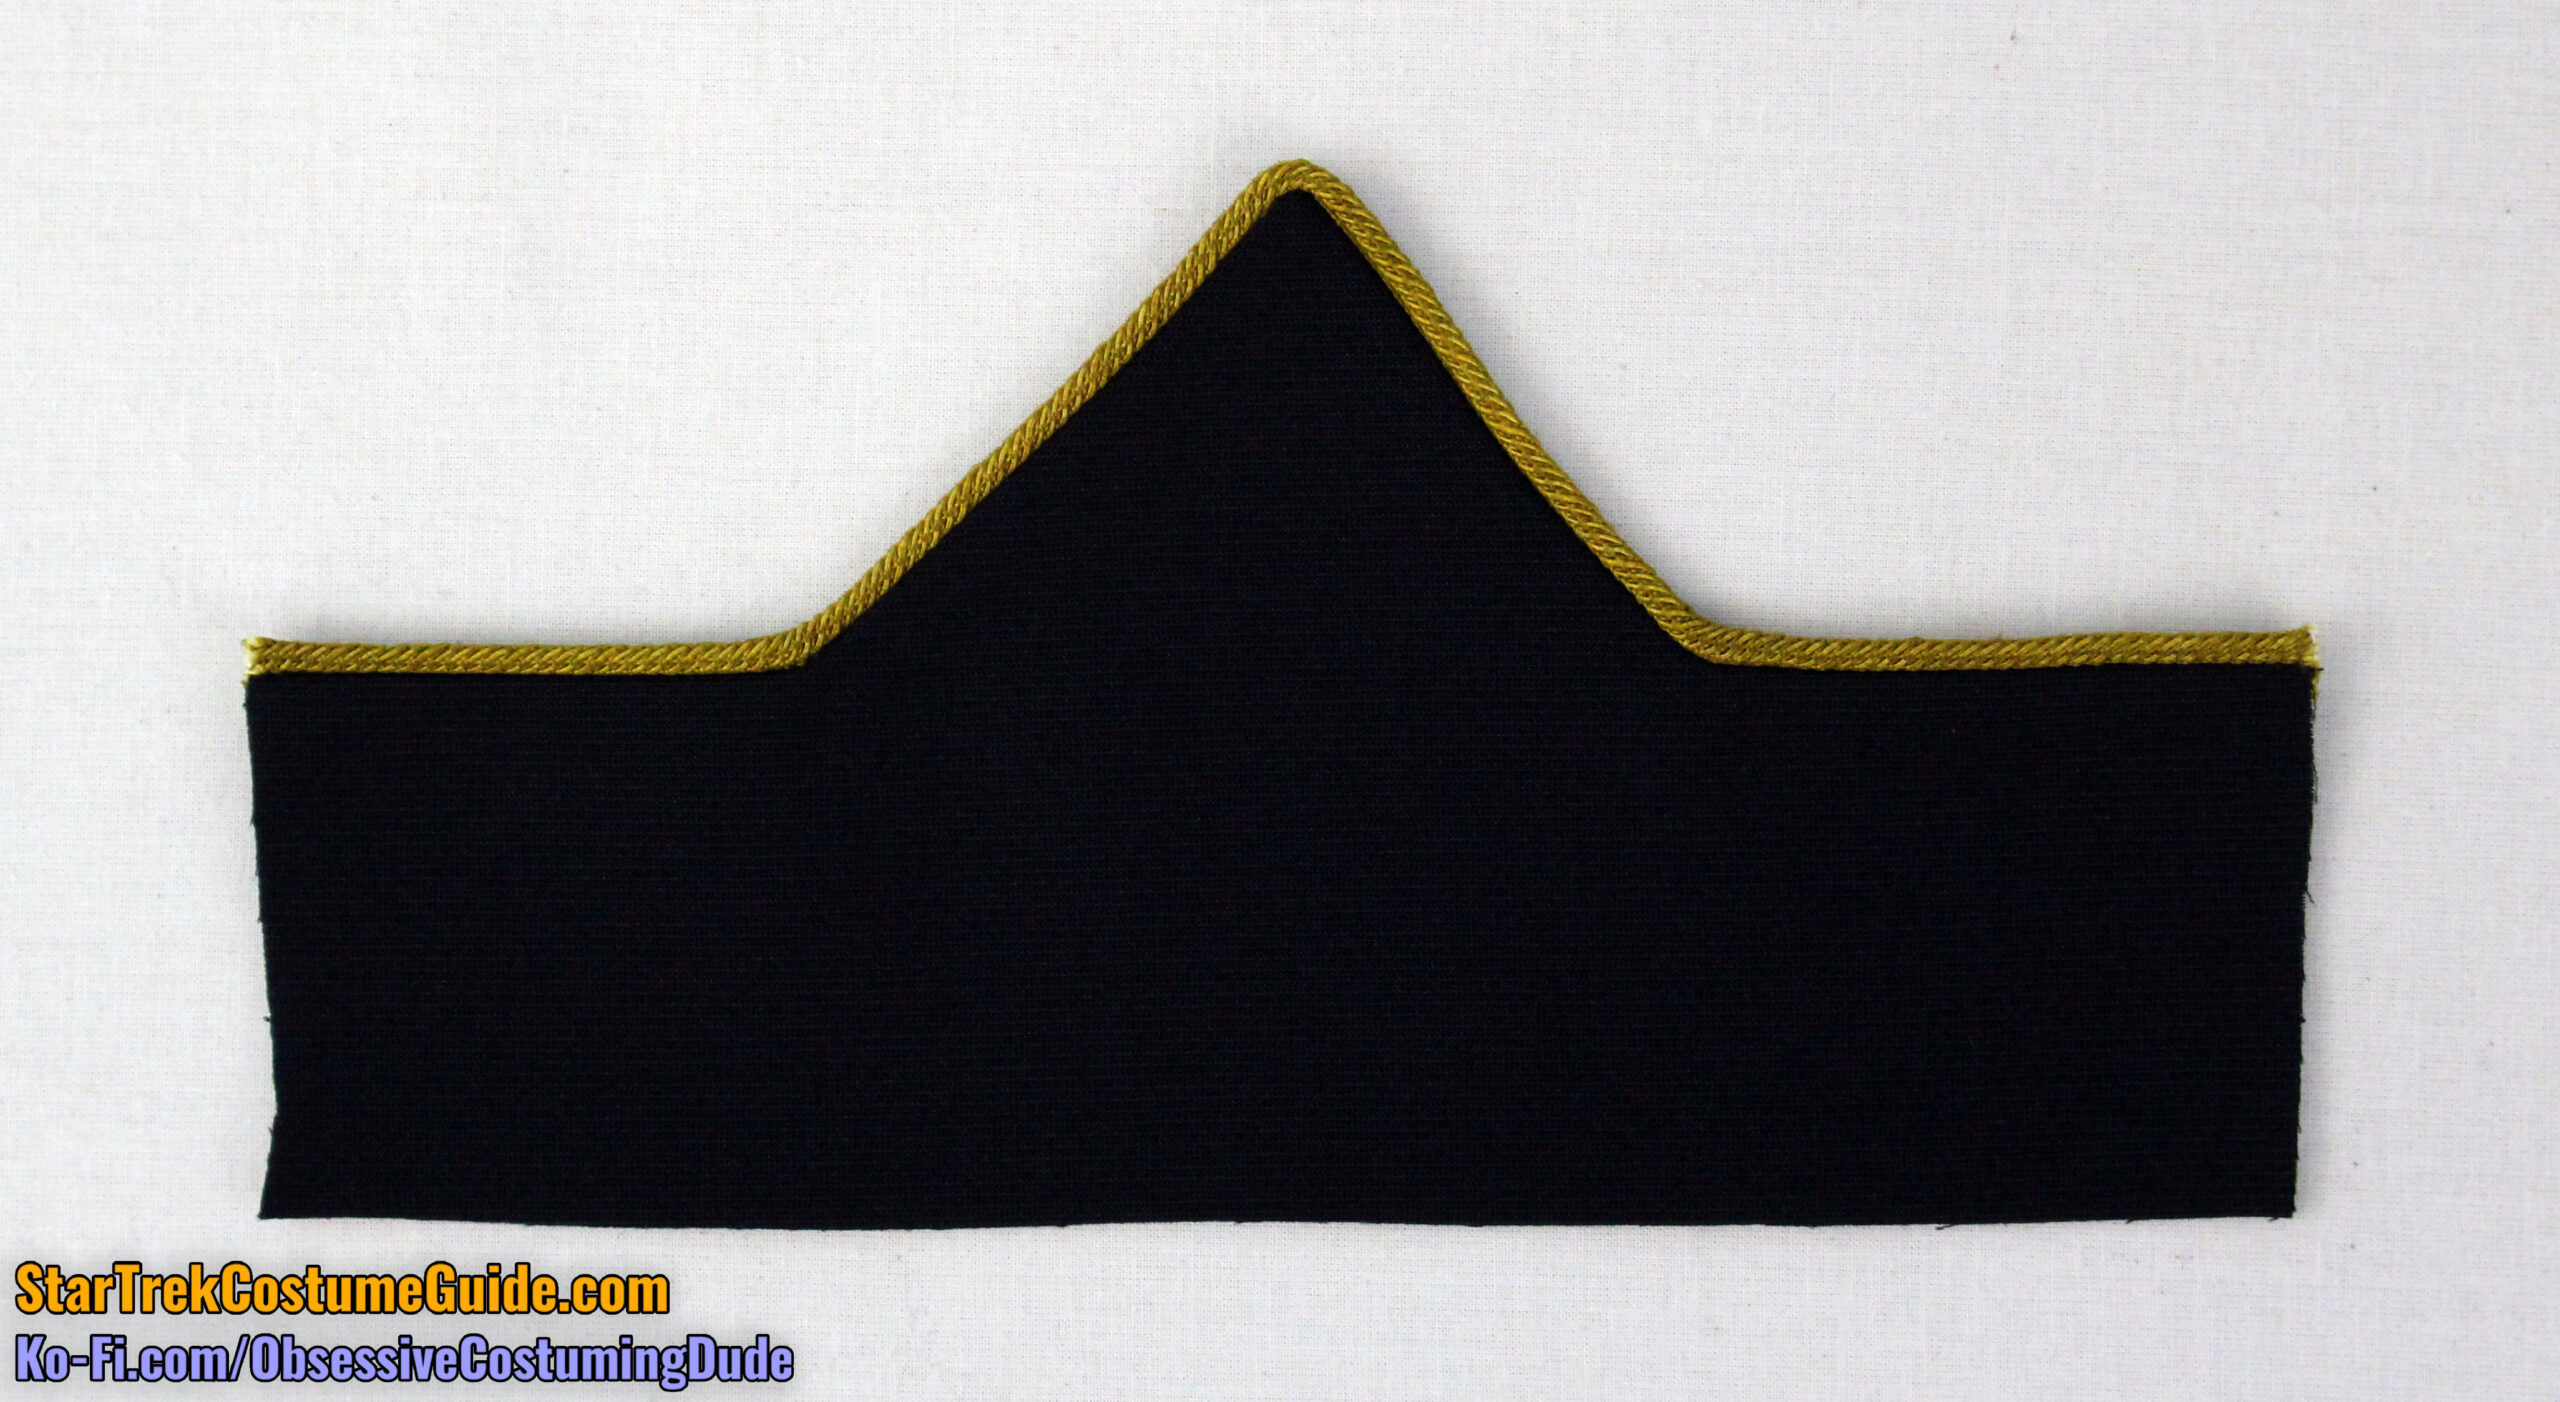
In this case, the TNG jumpsuit collar is comprised of three layers on each side: the collar shell (piece A1), the collar lining (also piece A1), and the division-colored collar piping.
Apply a midweight or heavyweight fusible interfacing to the undersides of your collar shells.
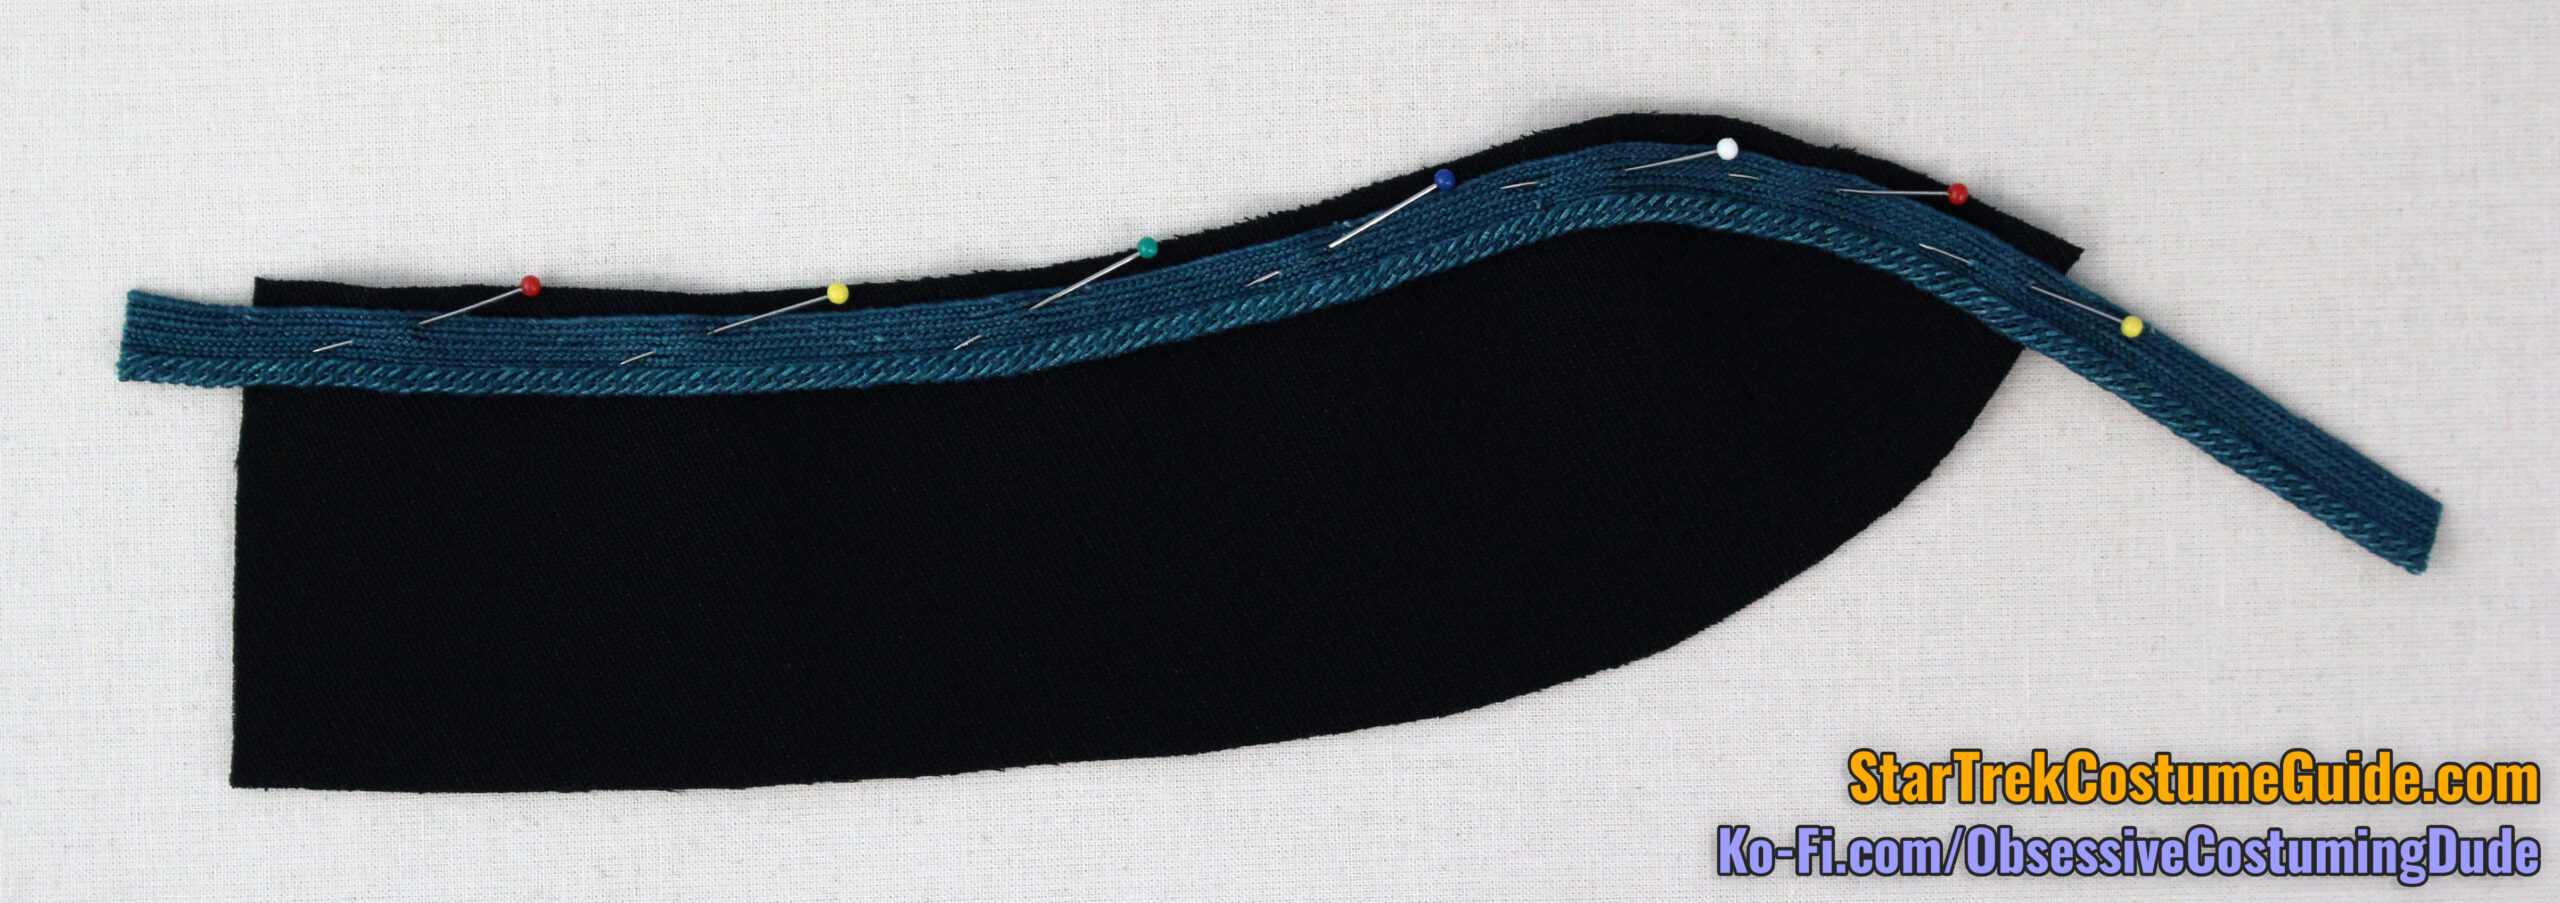
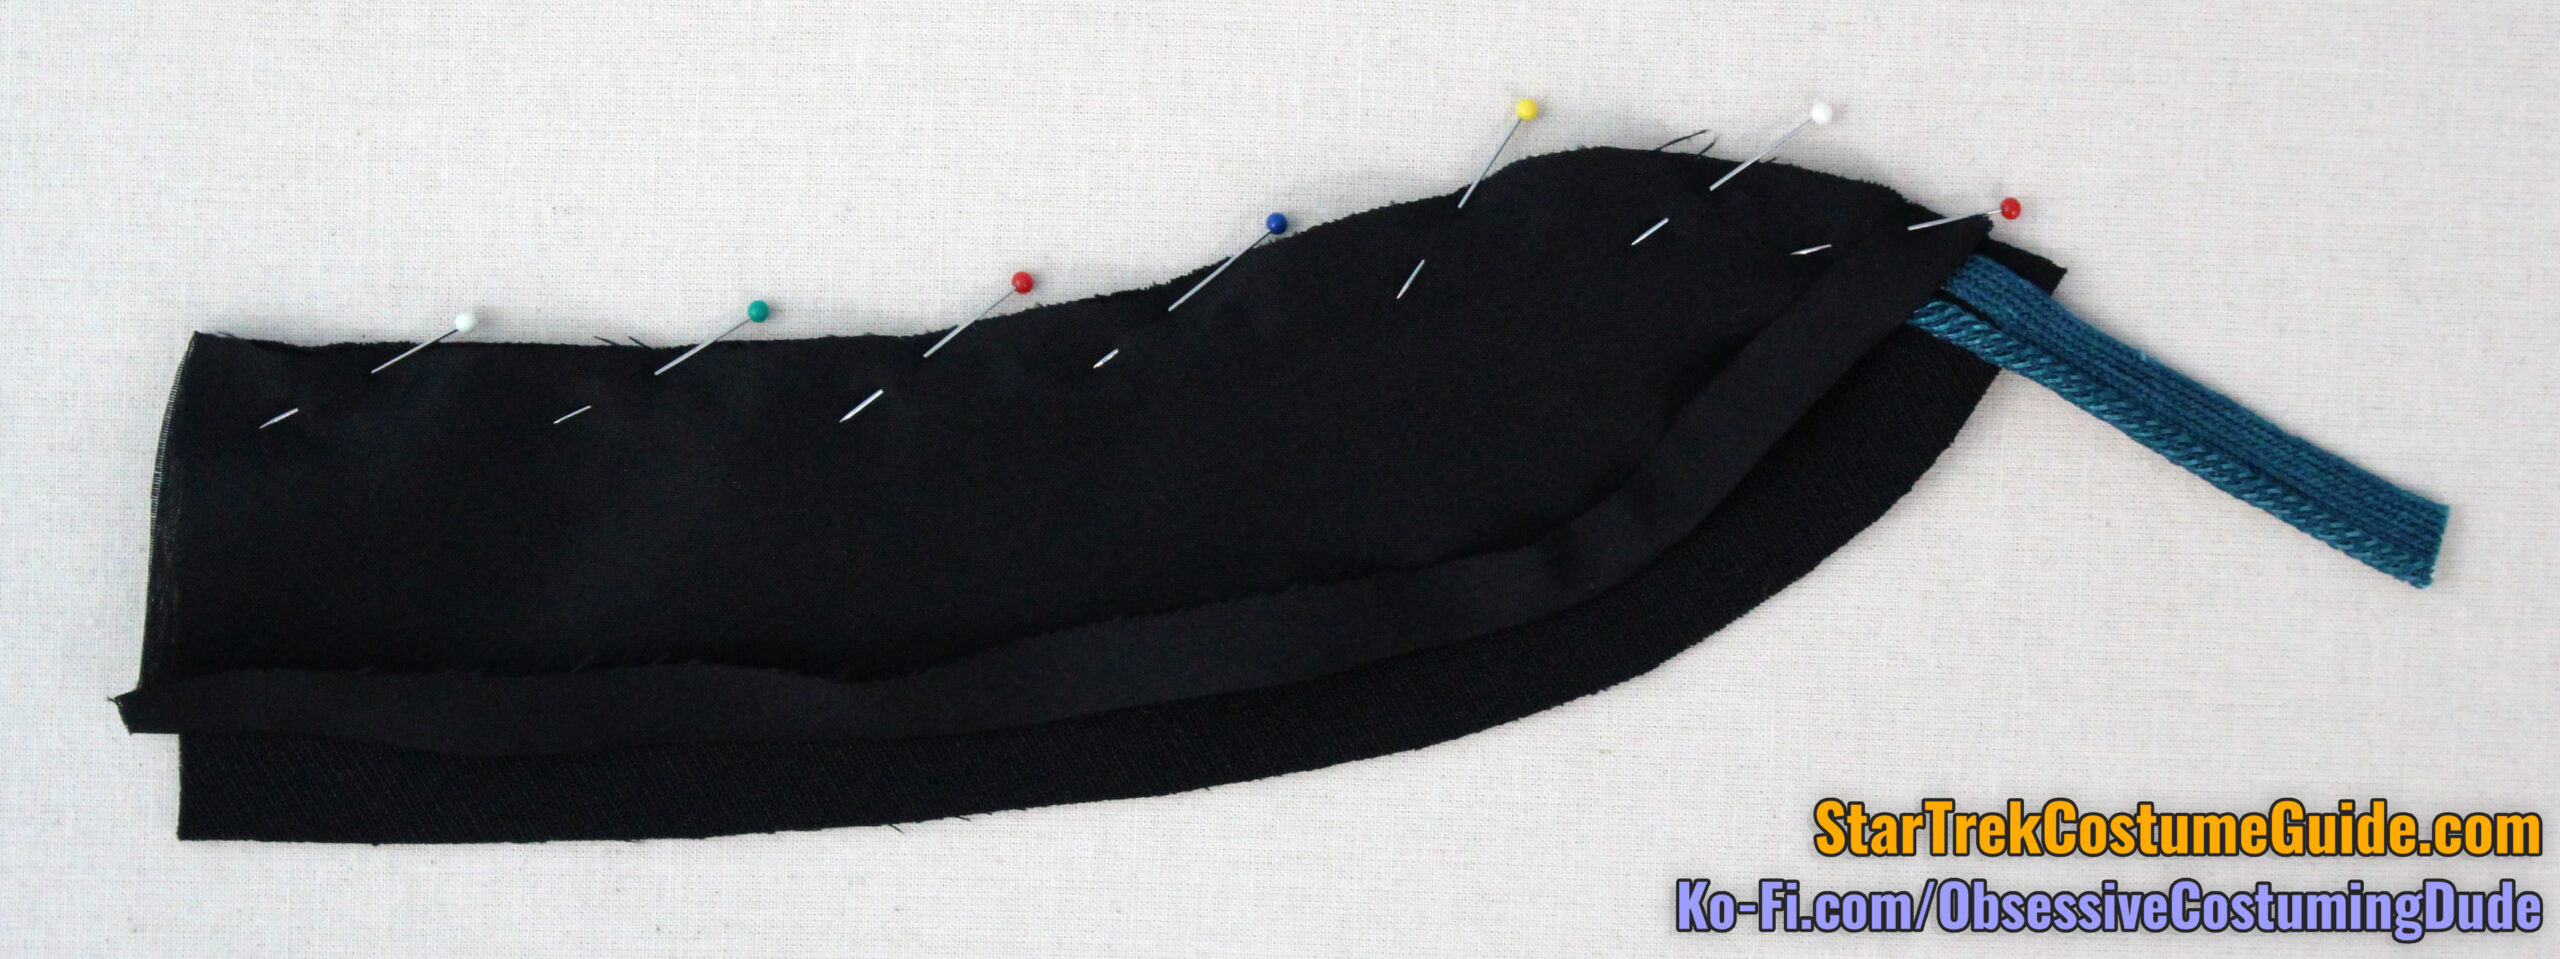
Cut a length of piping several inches longer than the collar itself.
Pin the collar piping into place along the upper edge of the collar, extending slightly beyond the back edge and at least a couple inches past the lower front.
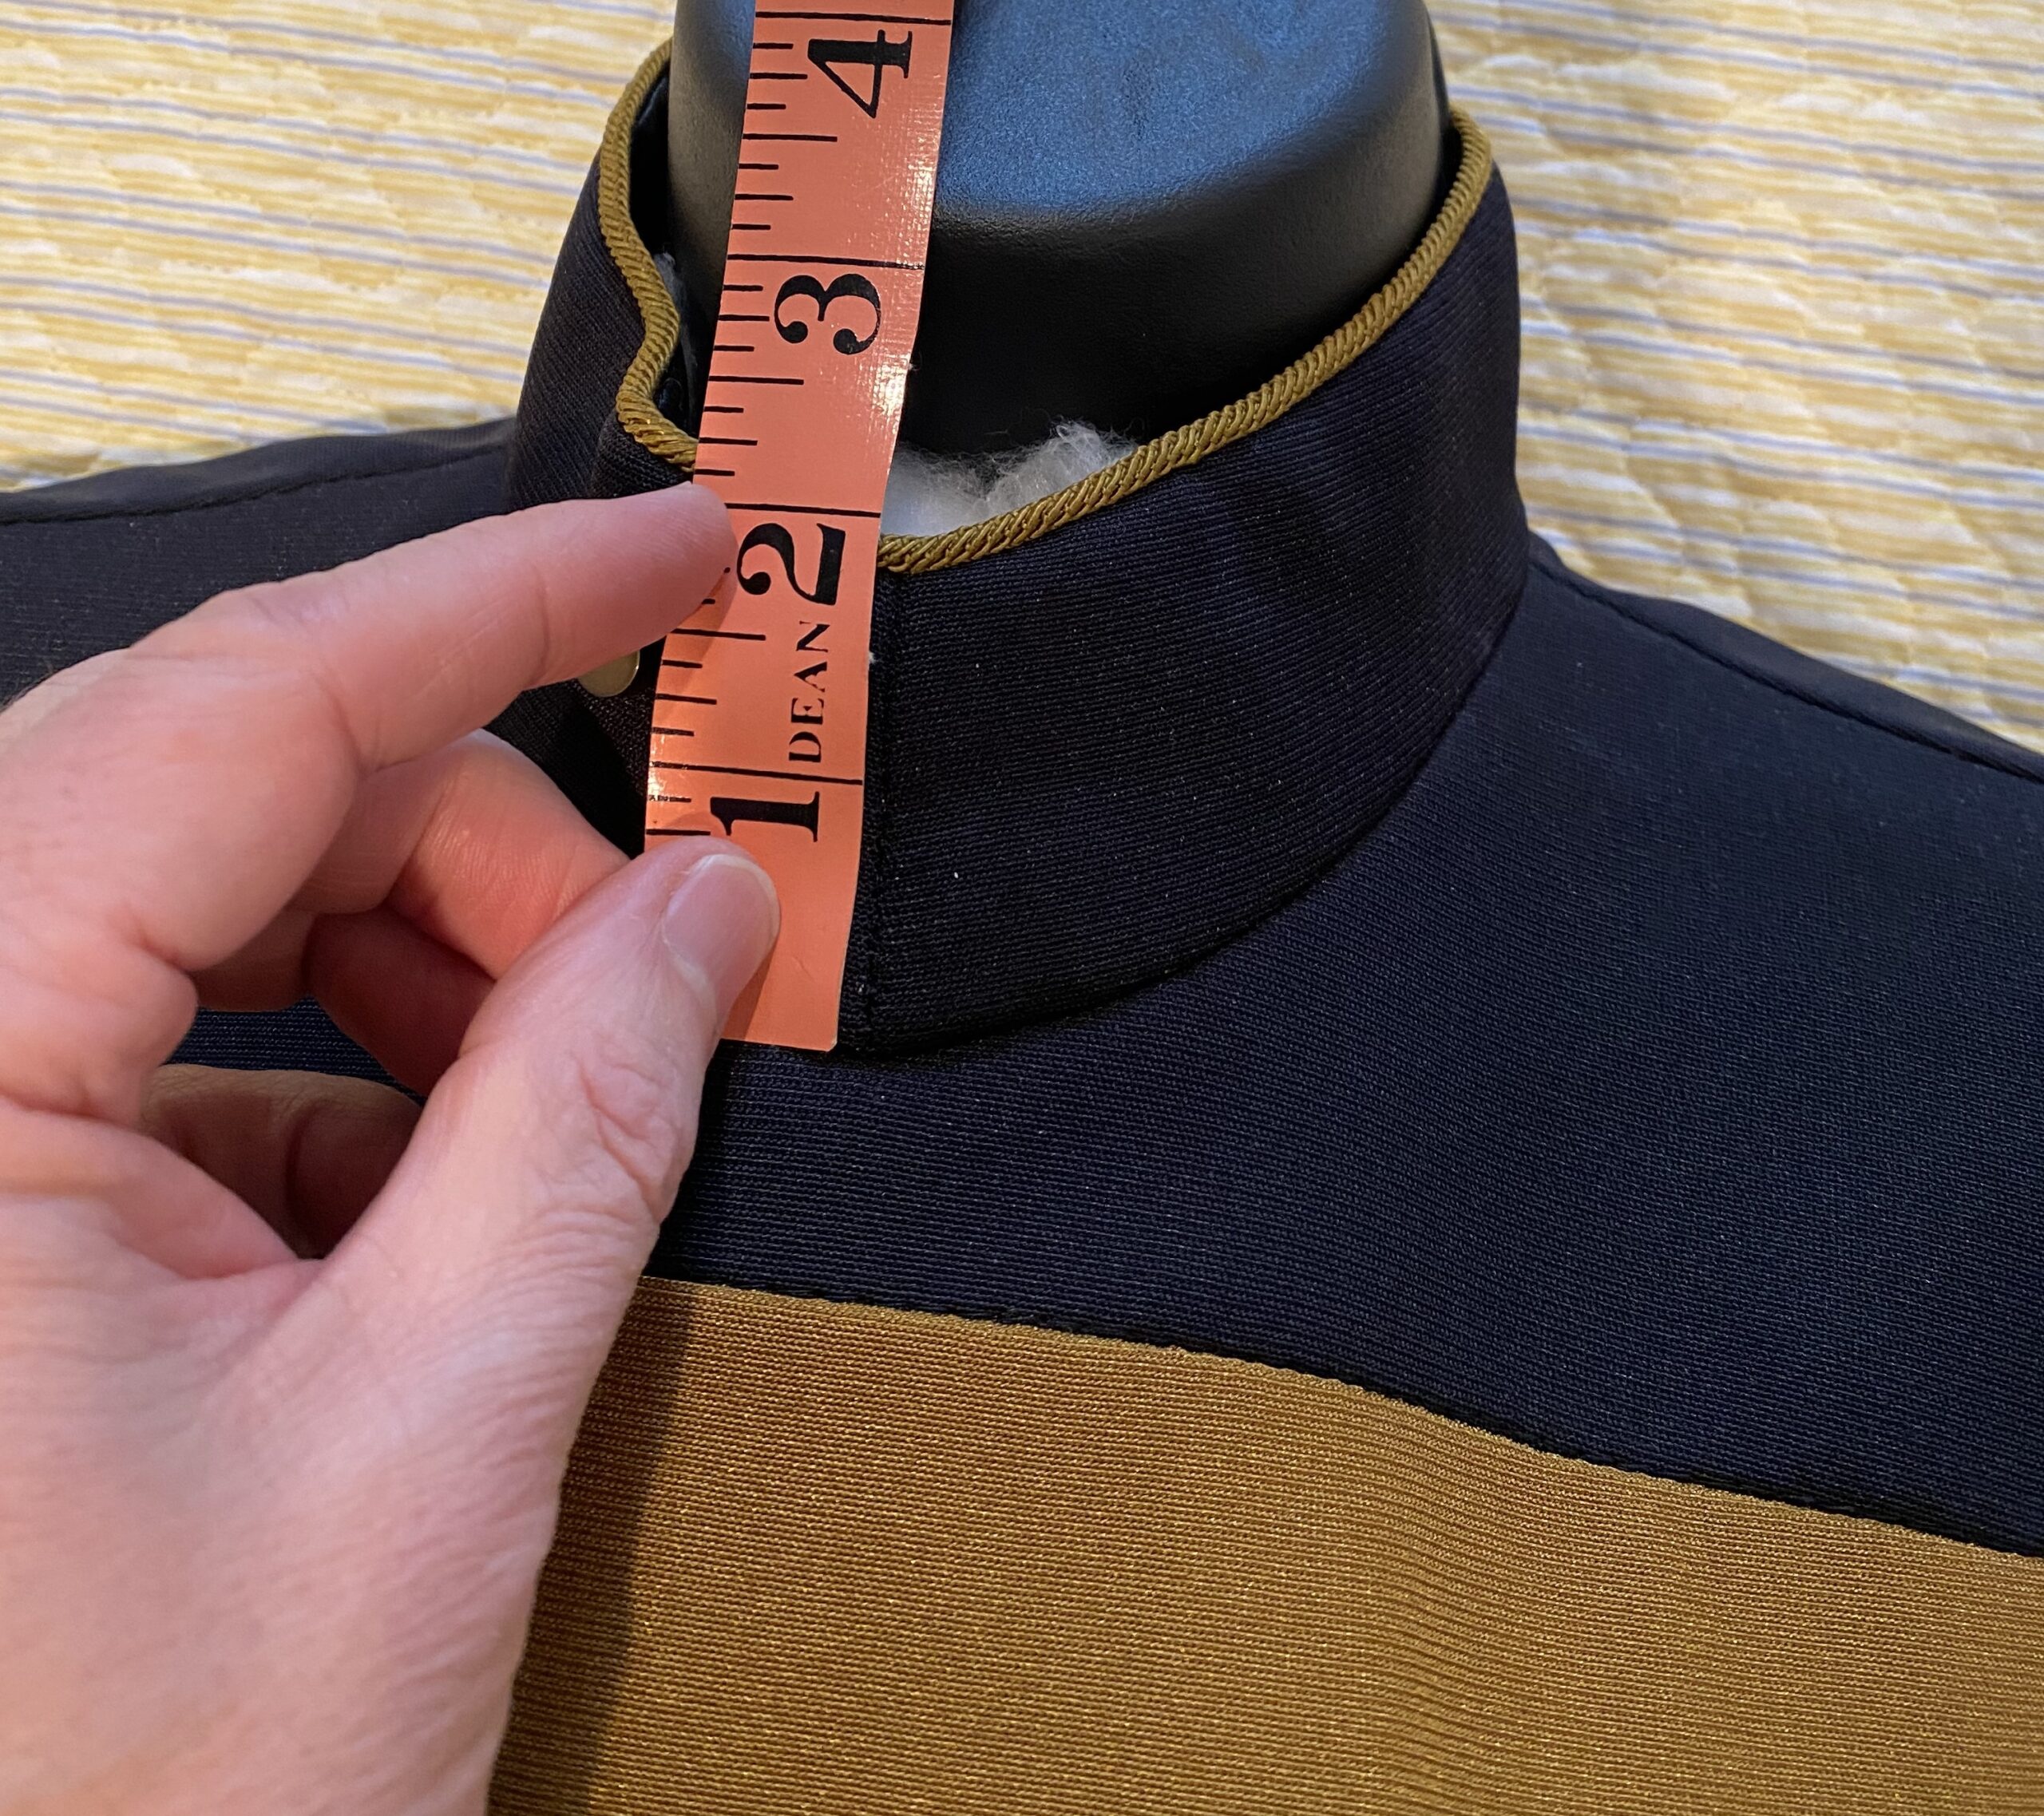
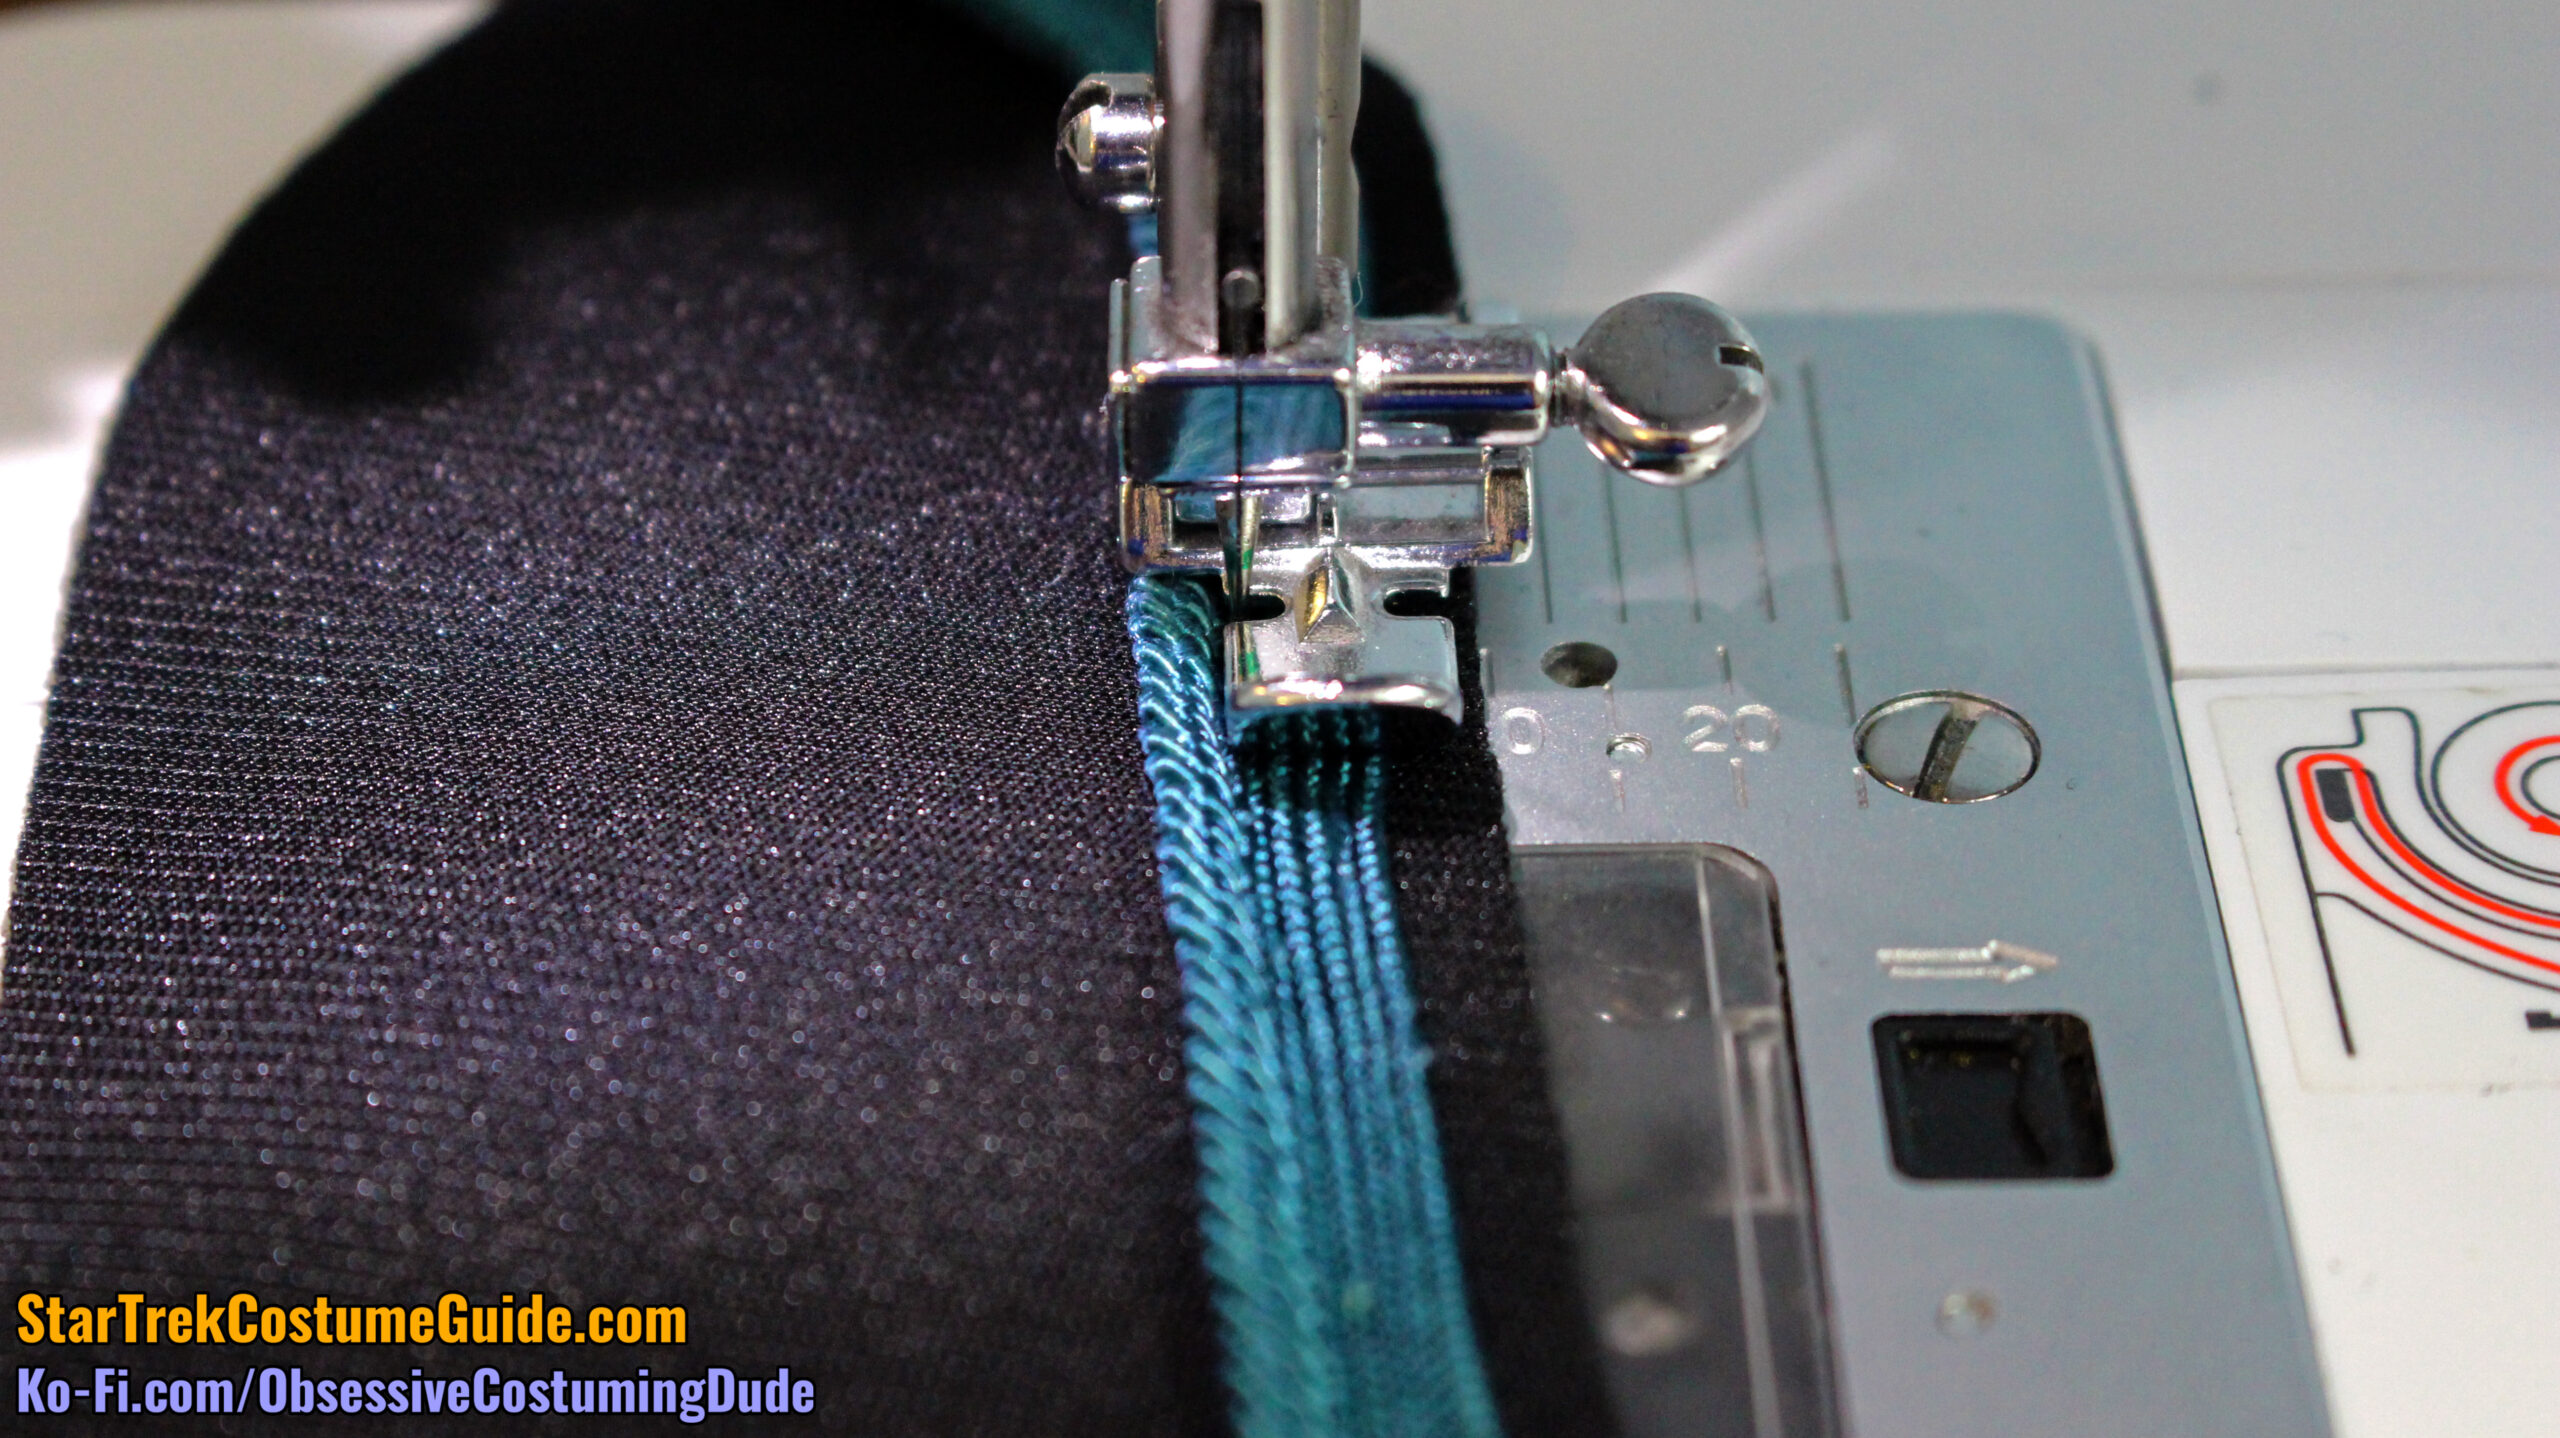
Note that the upper edge of the collar has ⅜” seam allowance, so if your piping lip is smaller than that (most piping like this has ¼” lip), the piping will be need to be inset a bit so the edge of the cord is exactly along the seam line.
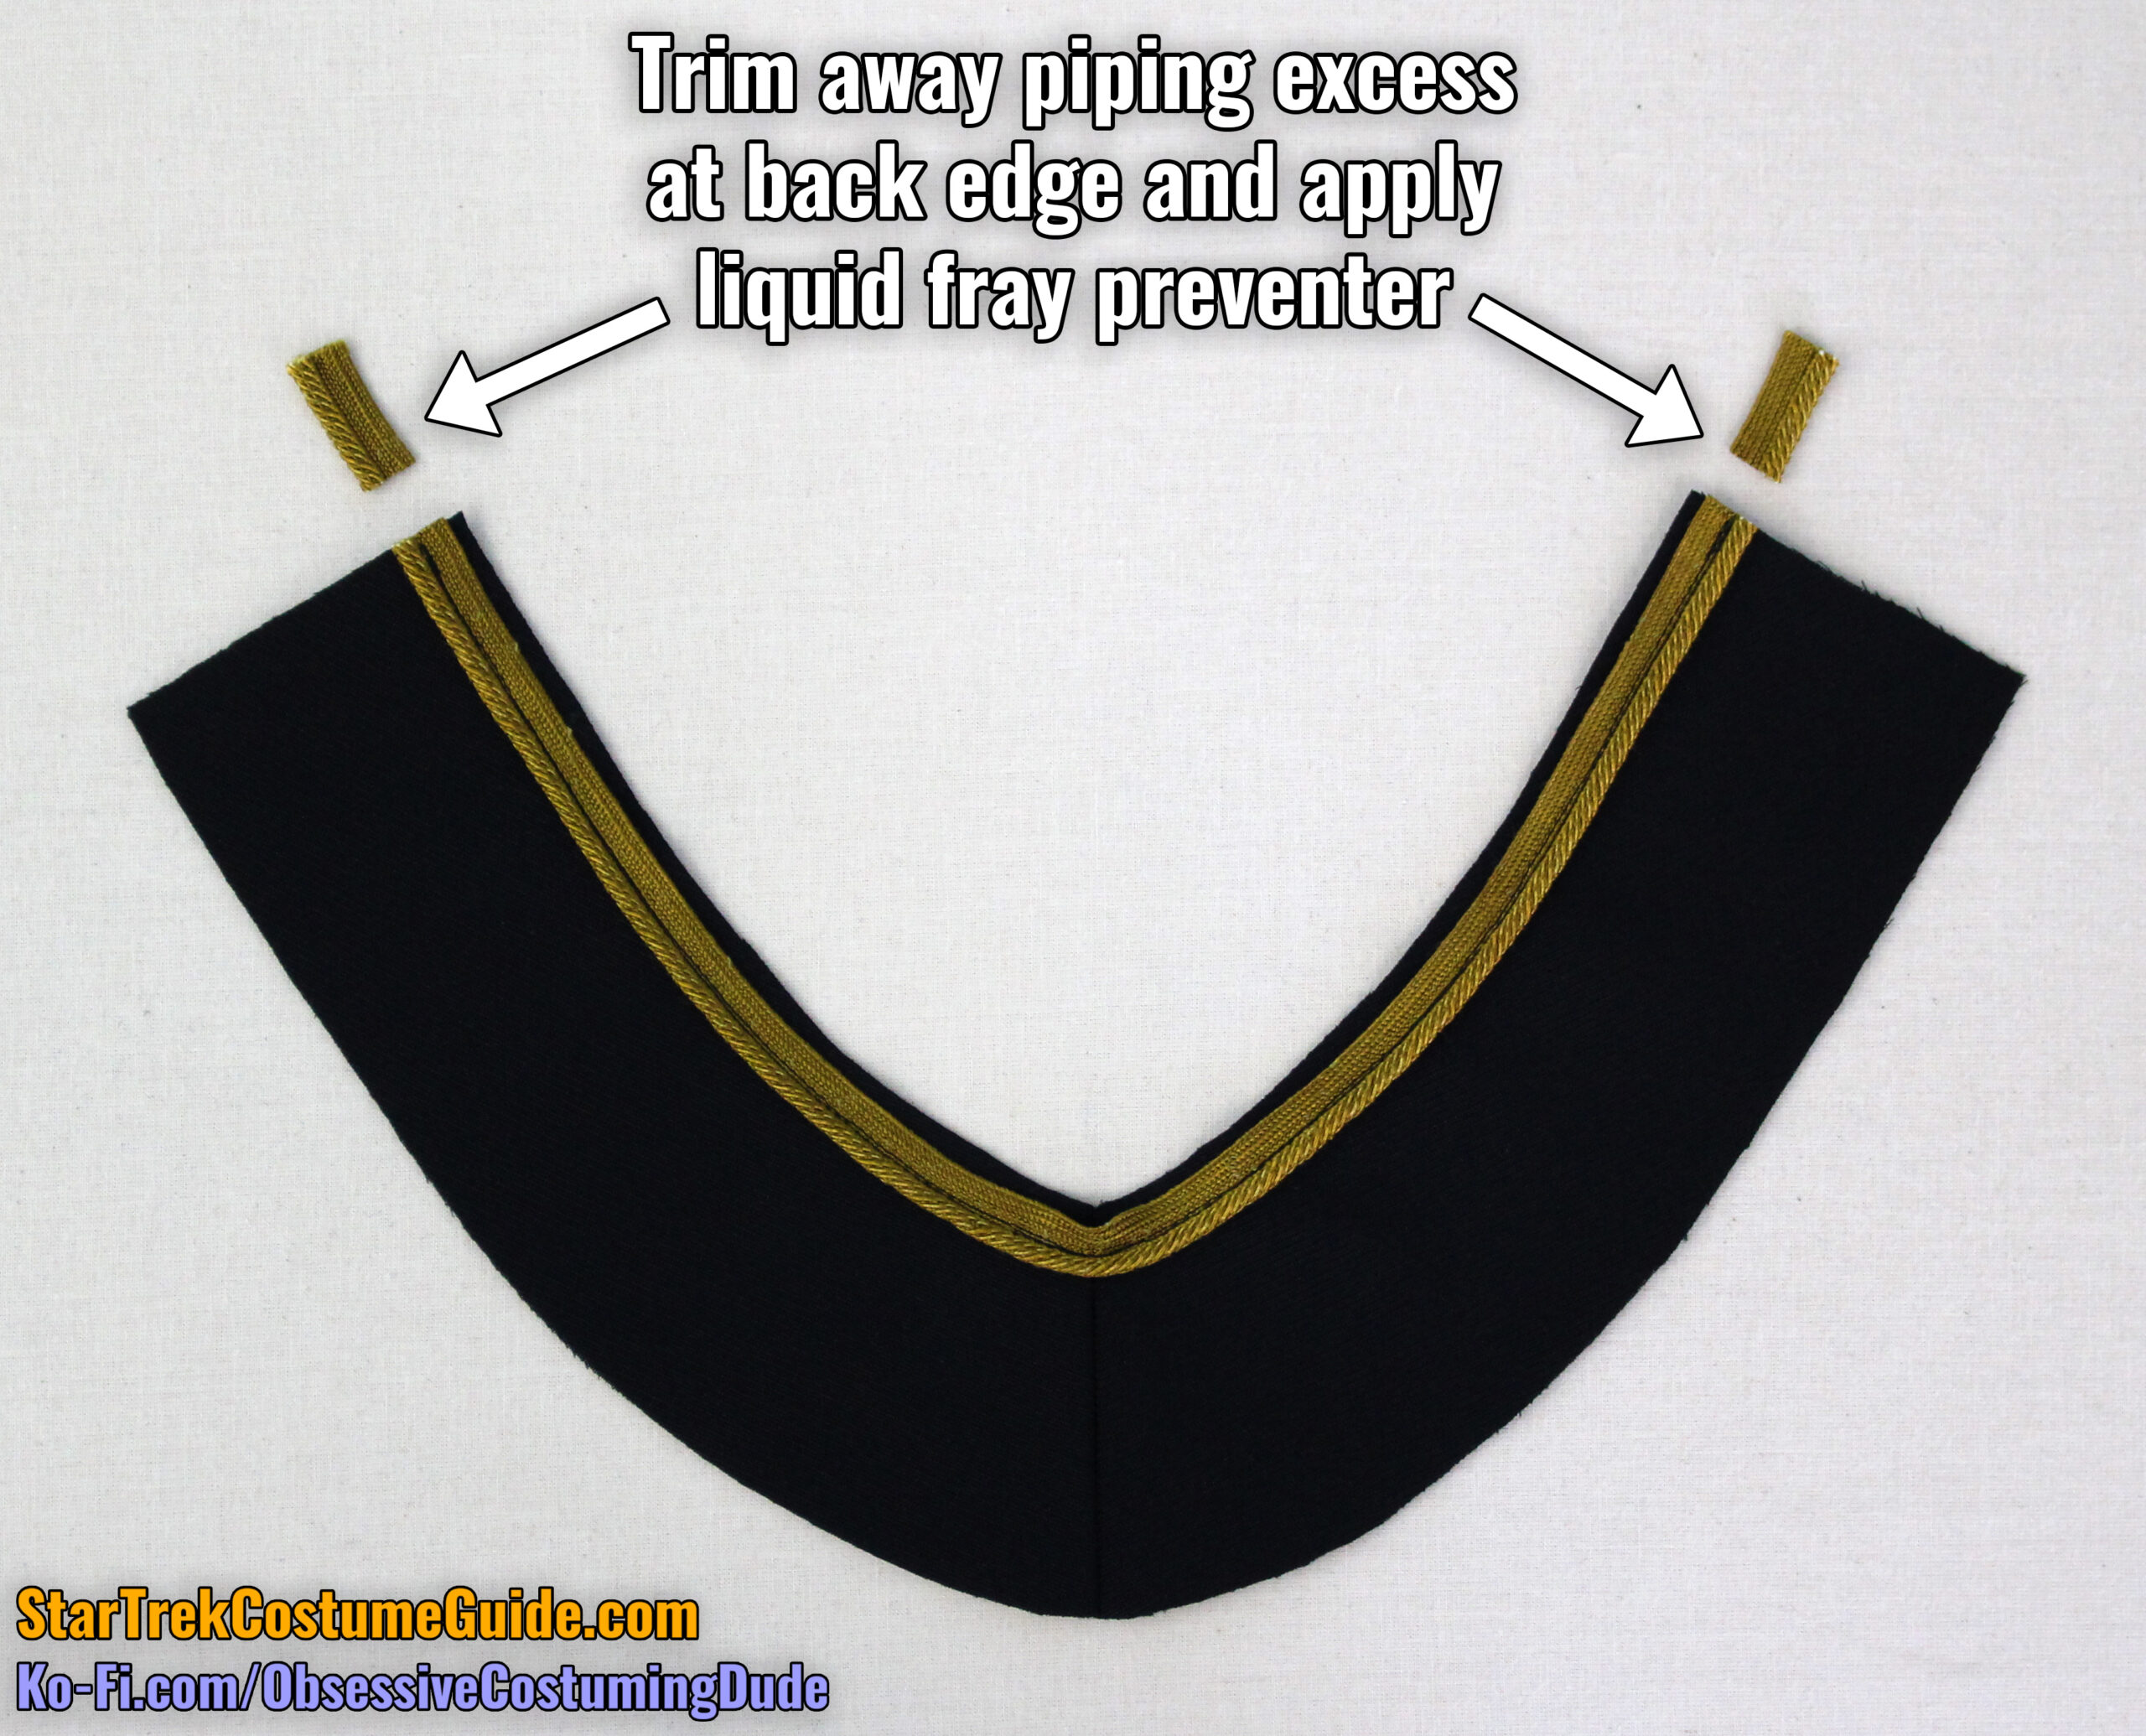
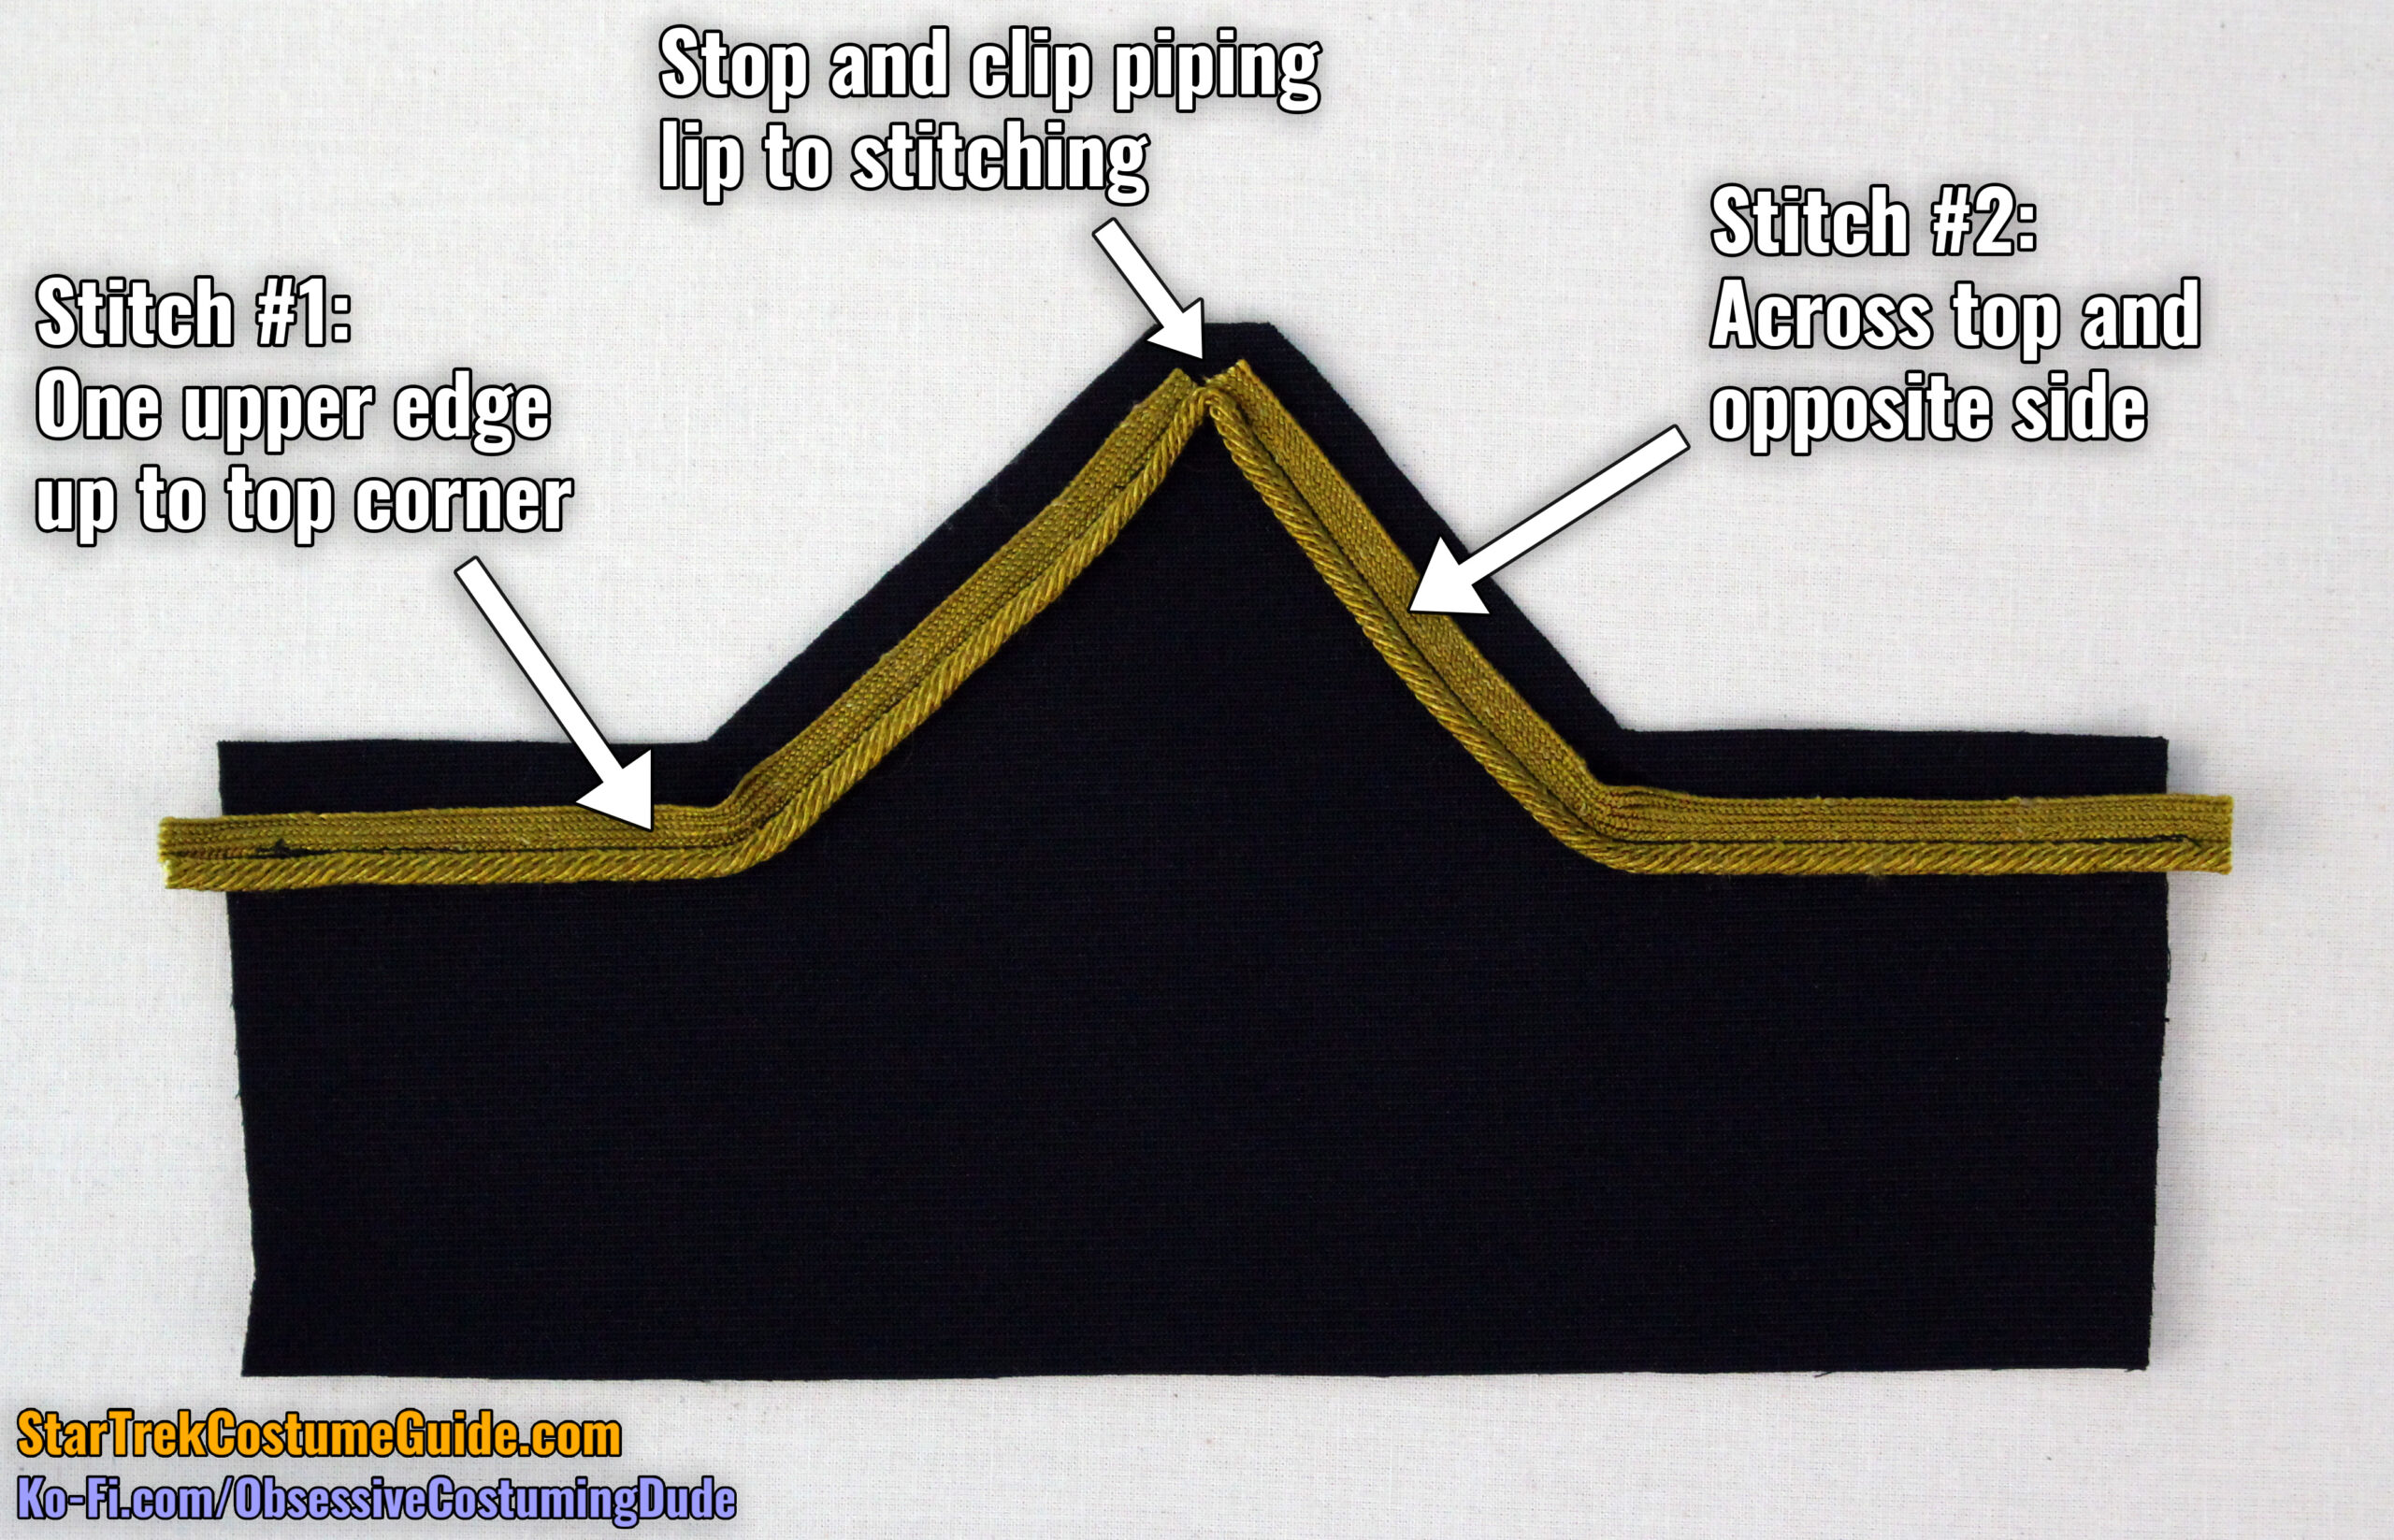
Using a zipper/piping foot, sew the piping to the upper edge of the collar with ⅜” seam allowance.
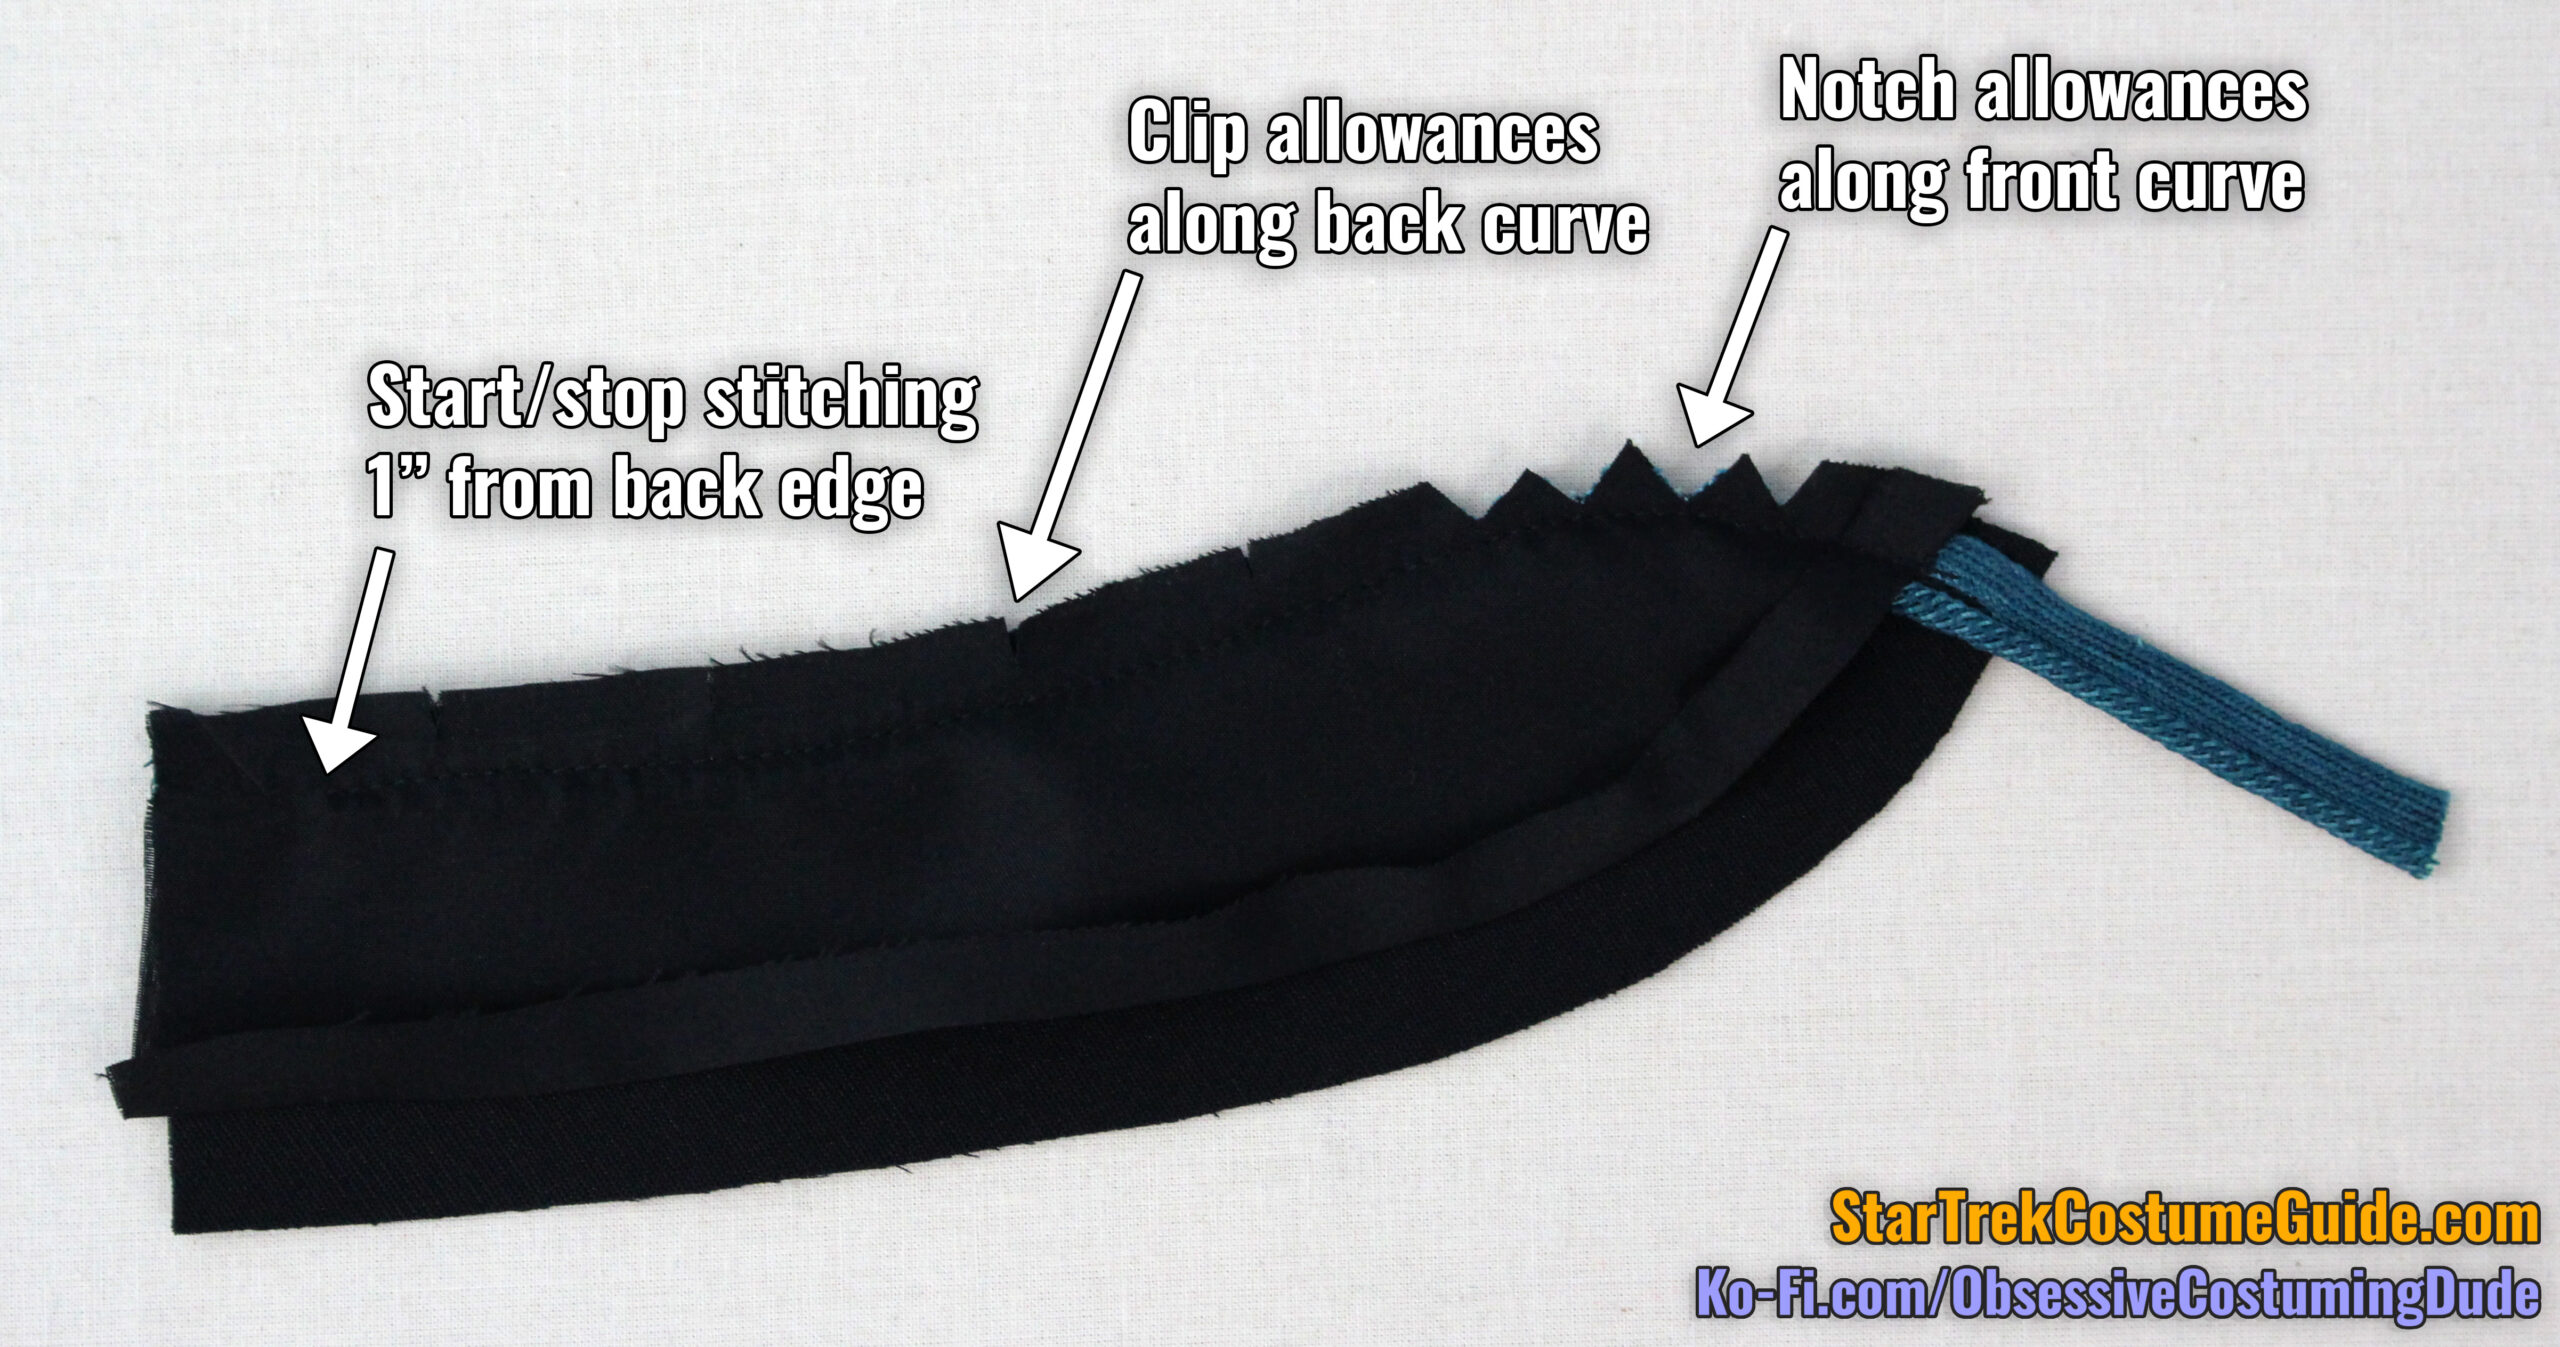
Trim away the excess length at the back edge (but not the front!) and carefully apply some liquid fray preventer.
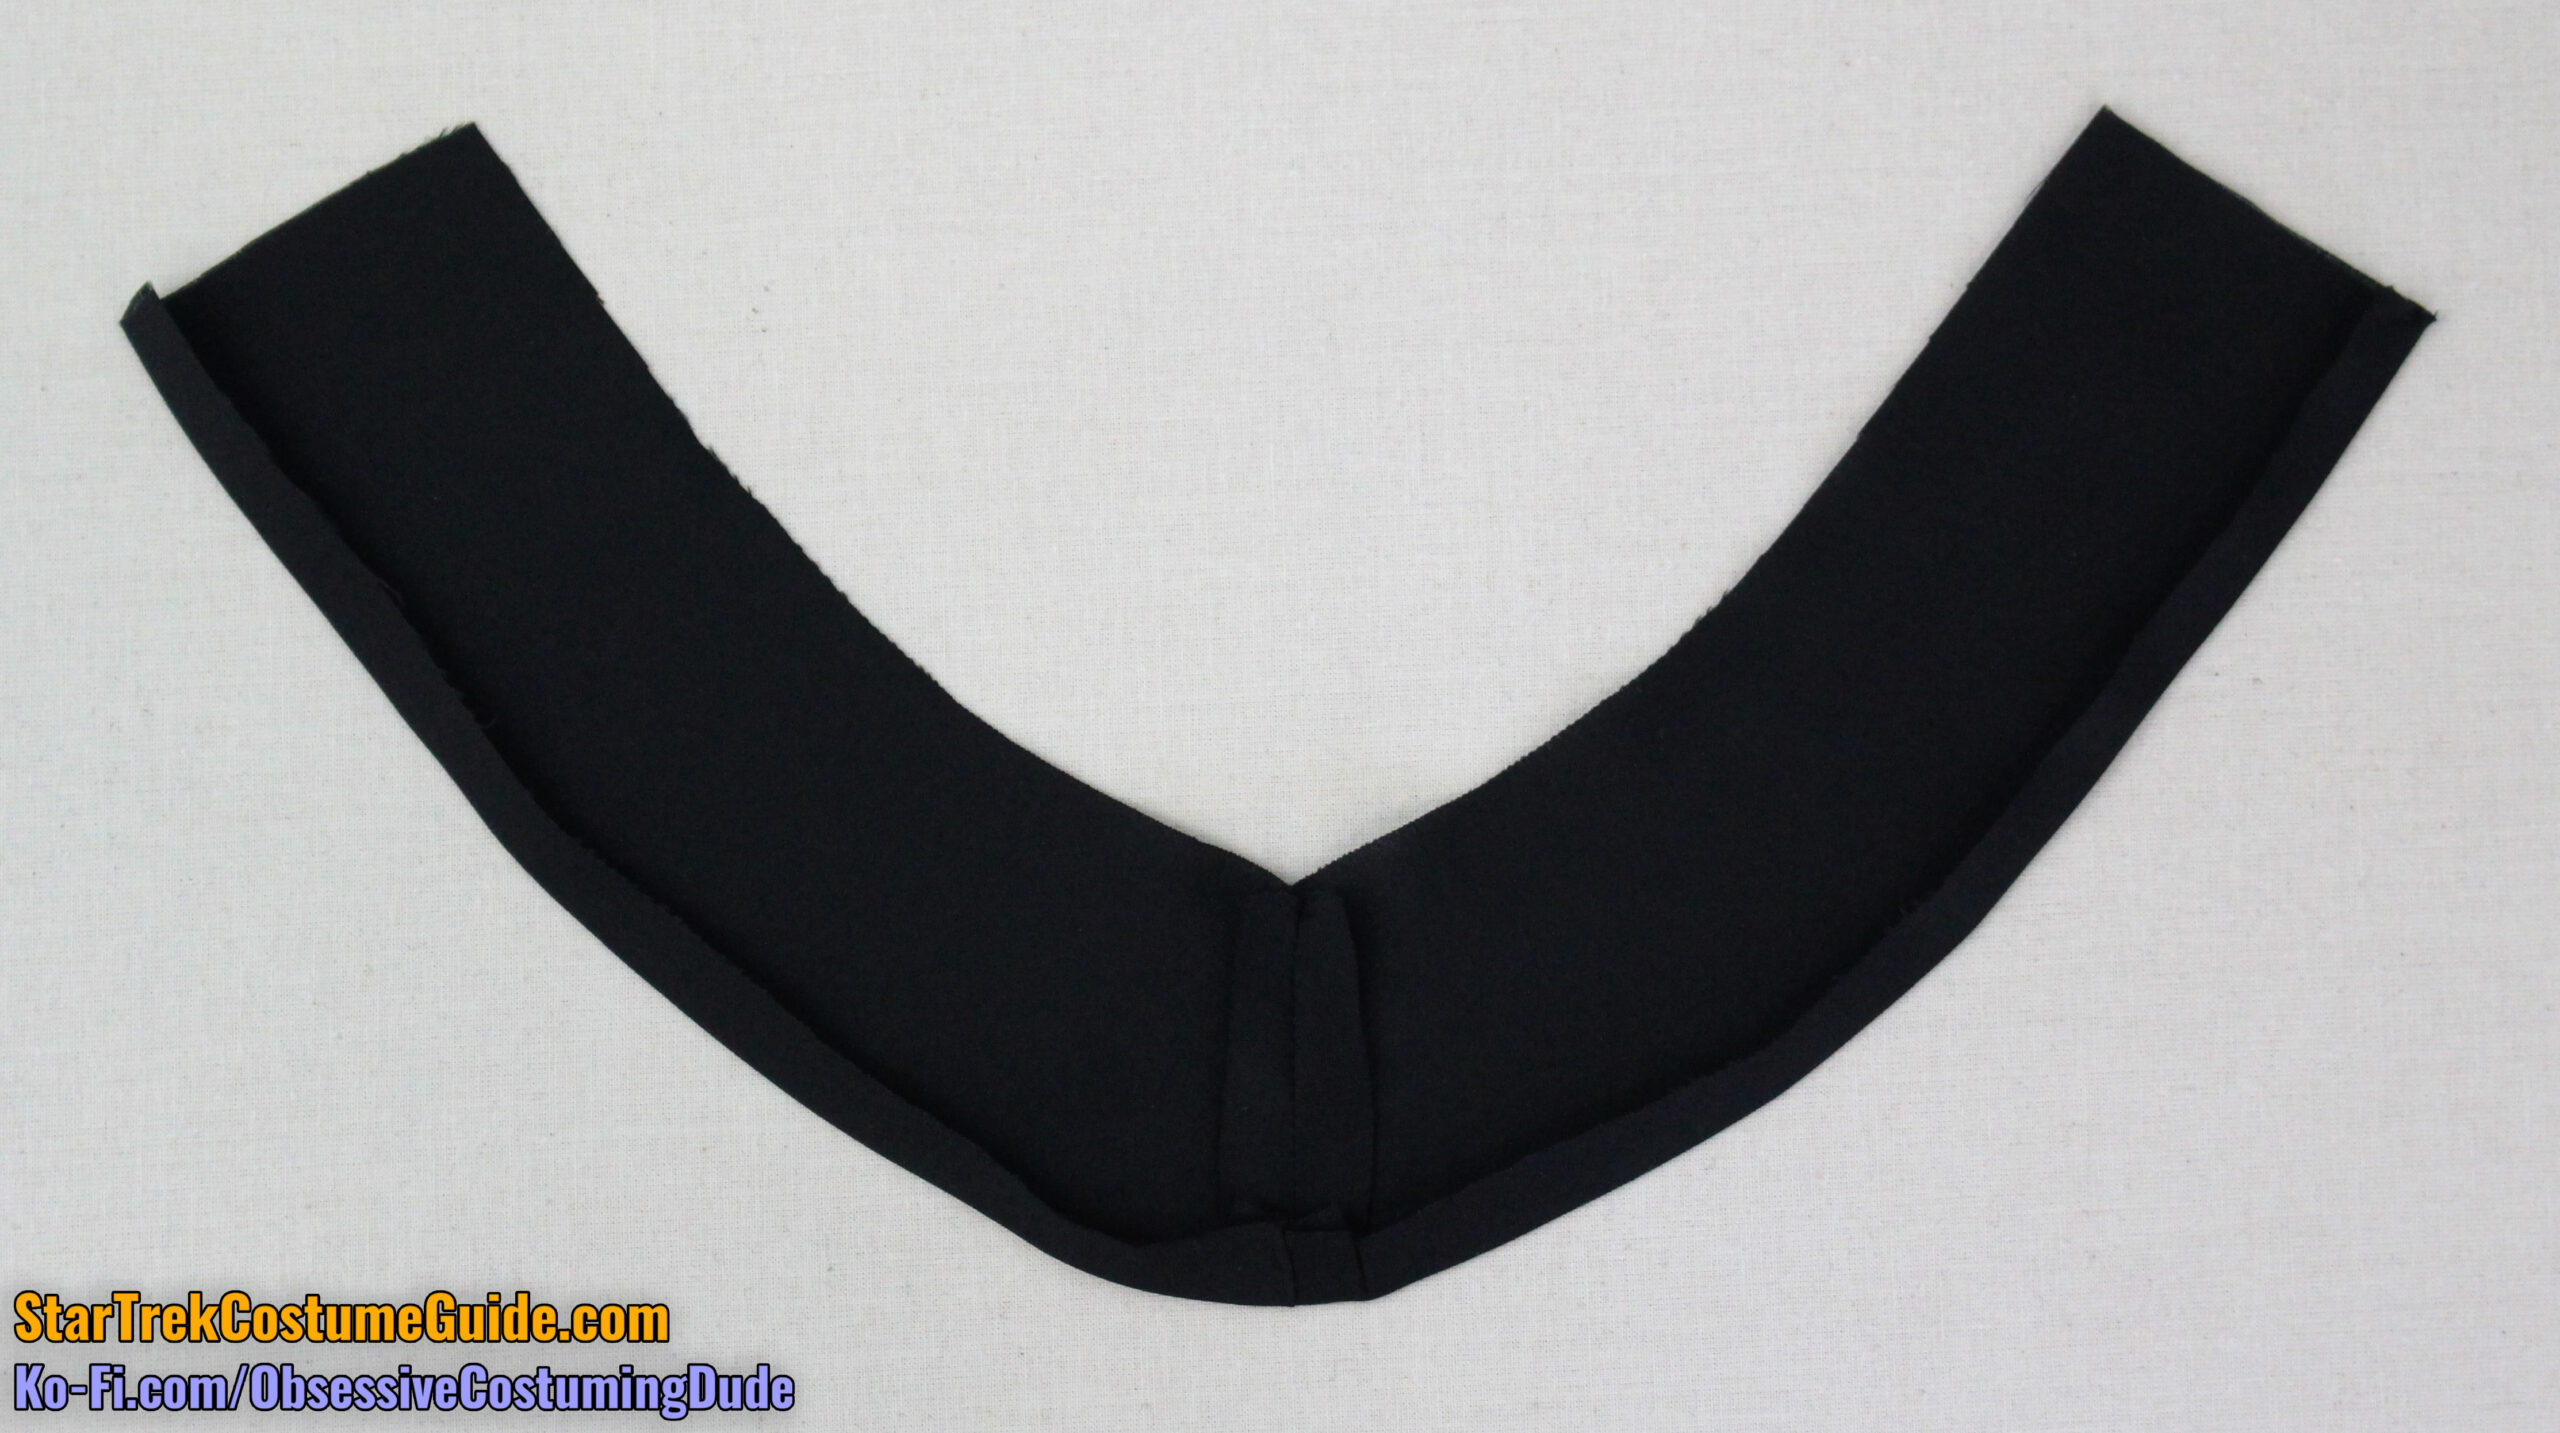
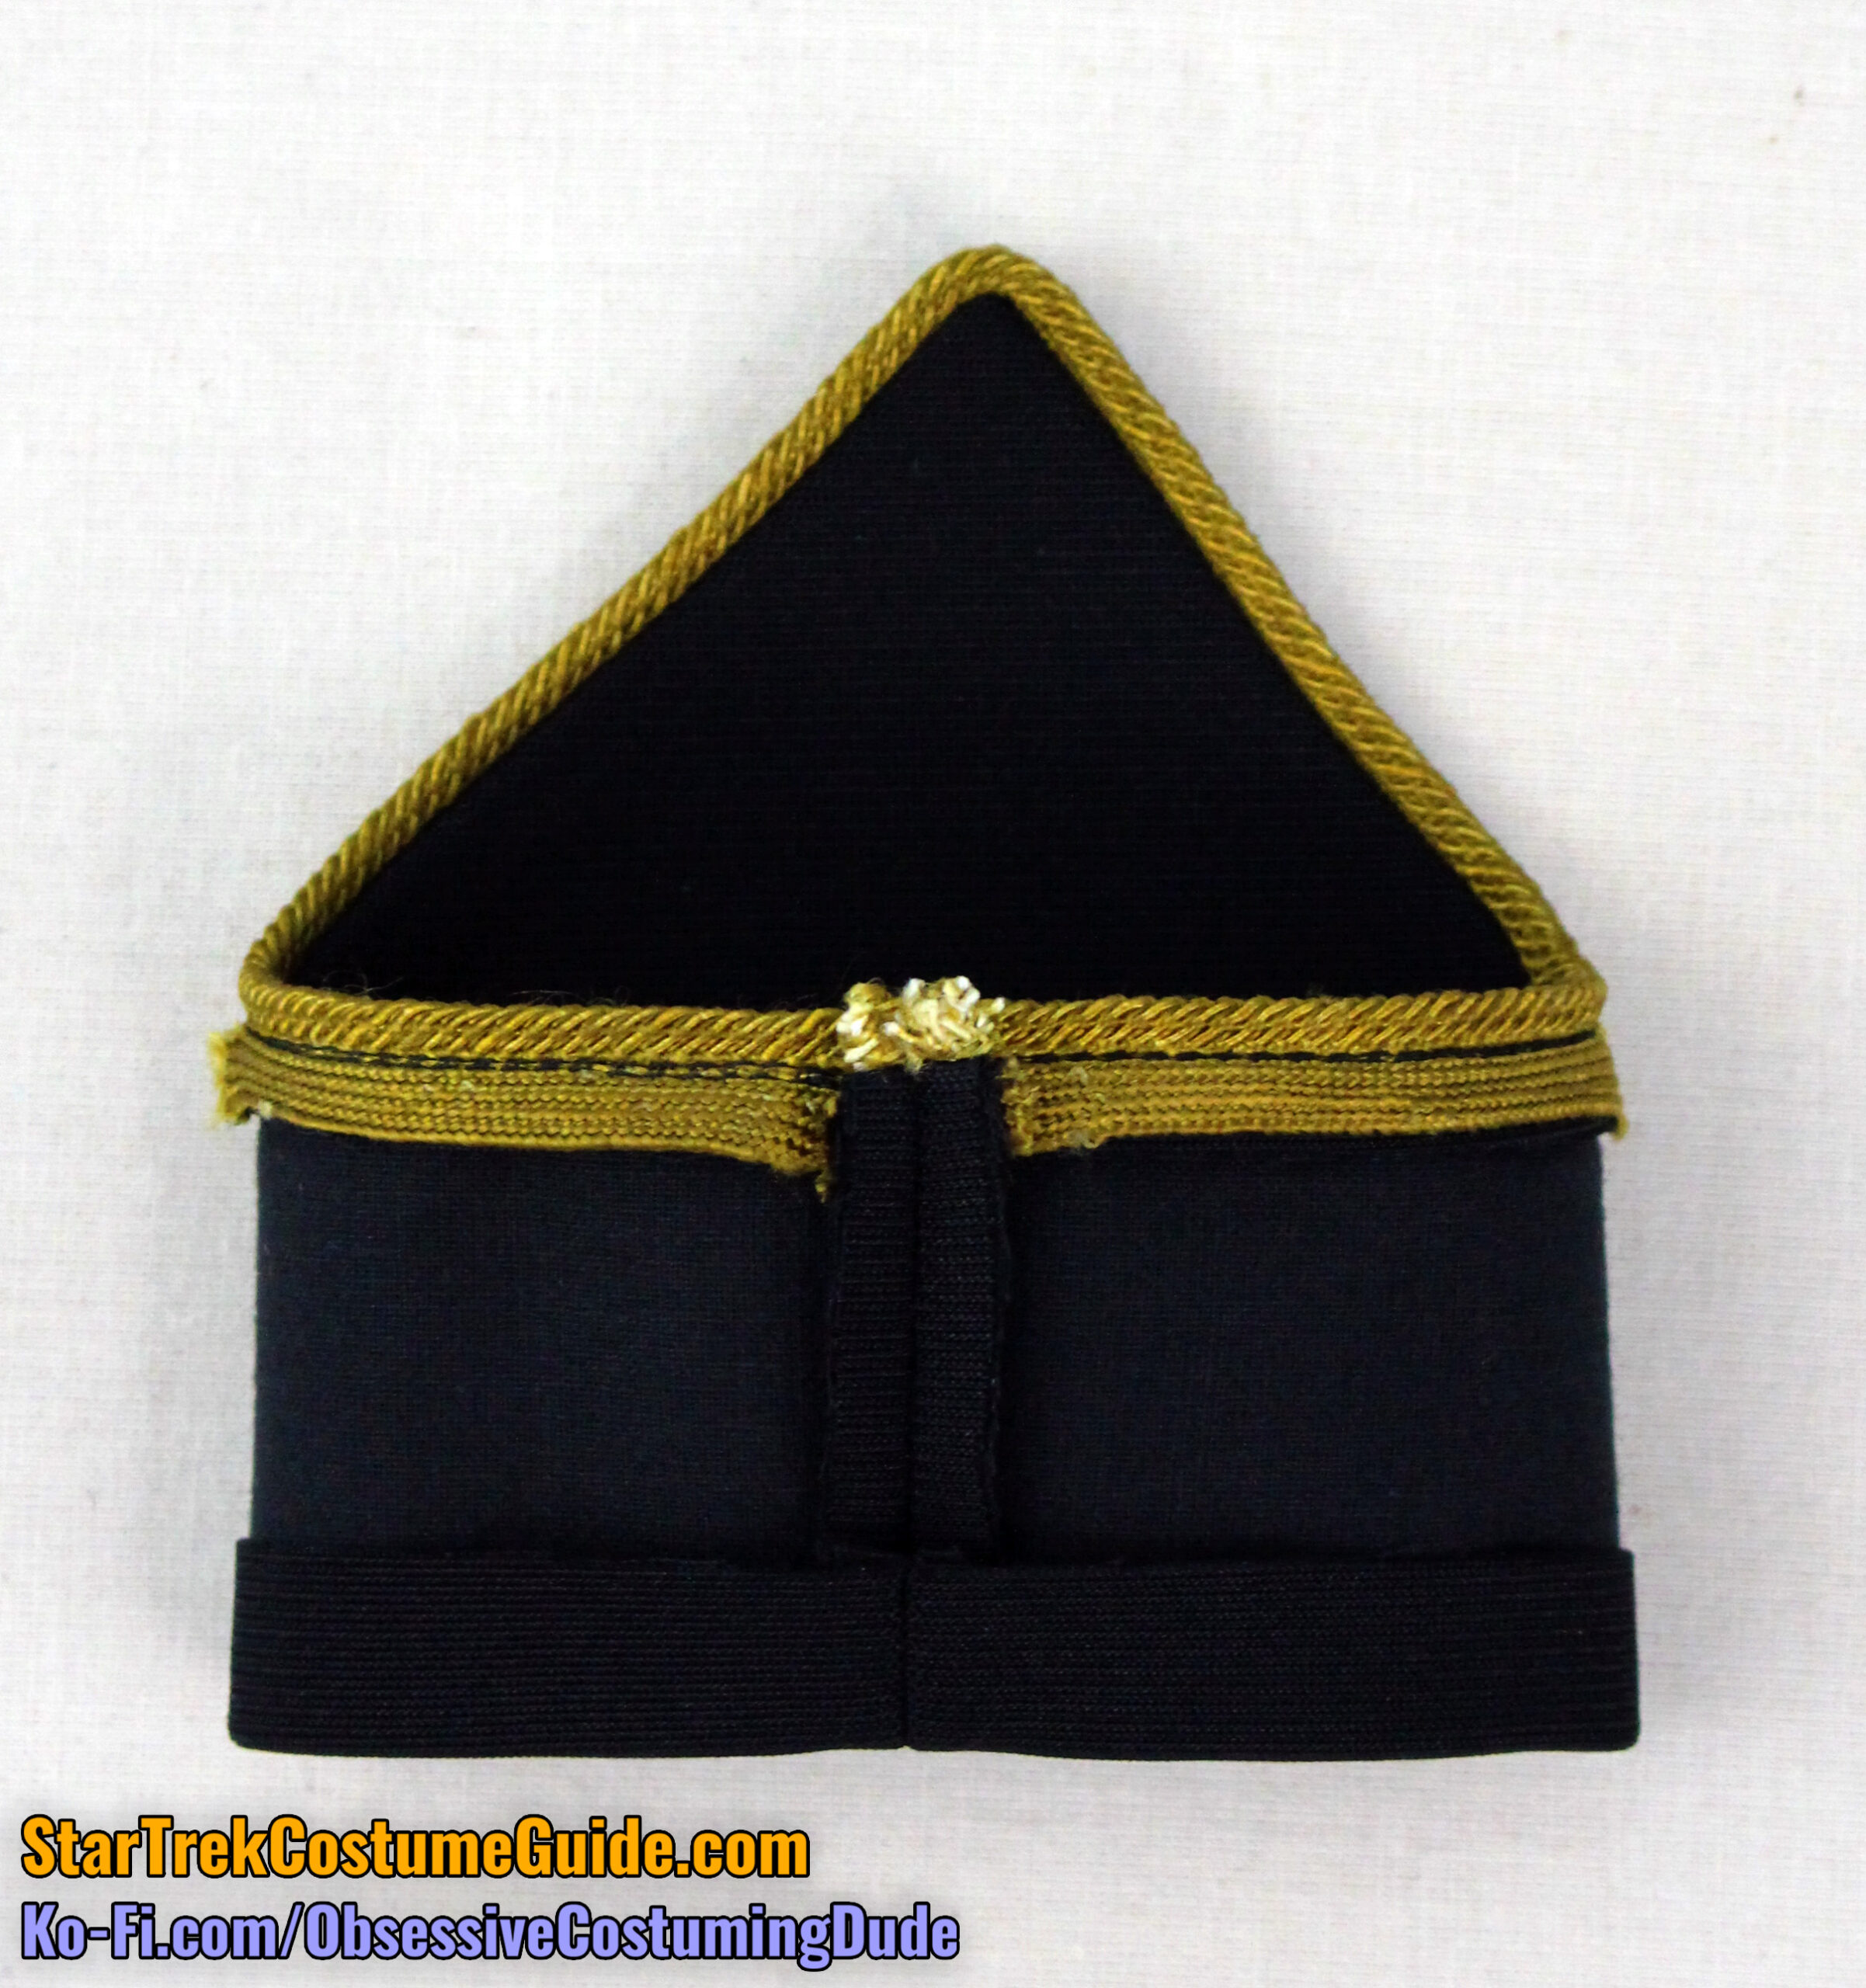
Press the ⅜” lower (neckline) allowances upward on your collar lining.
Pin the collar lining to the collar along the upper edges, right sides together.
Sew the collar lining to the collar along the upper edge, right sides together with ⅜” seam allowance. Start/stop your stitching 1” from the back of the collar.
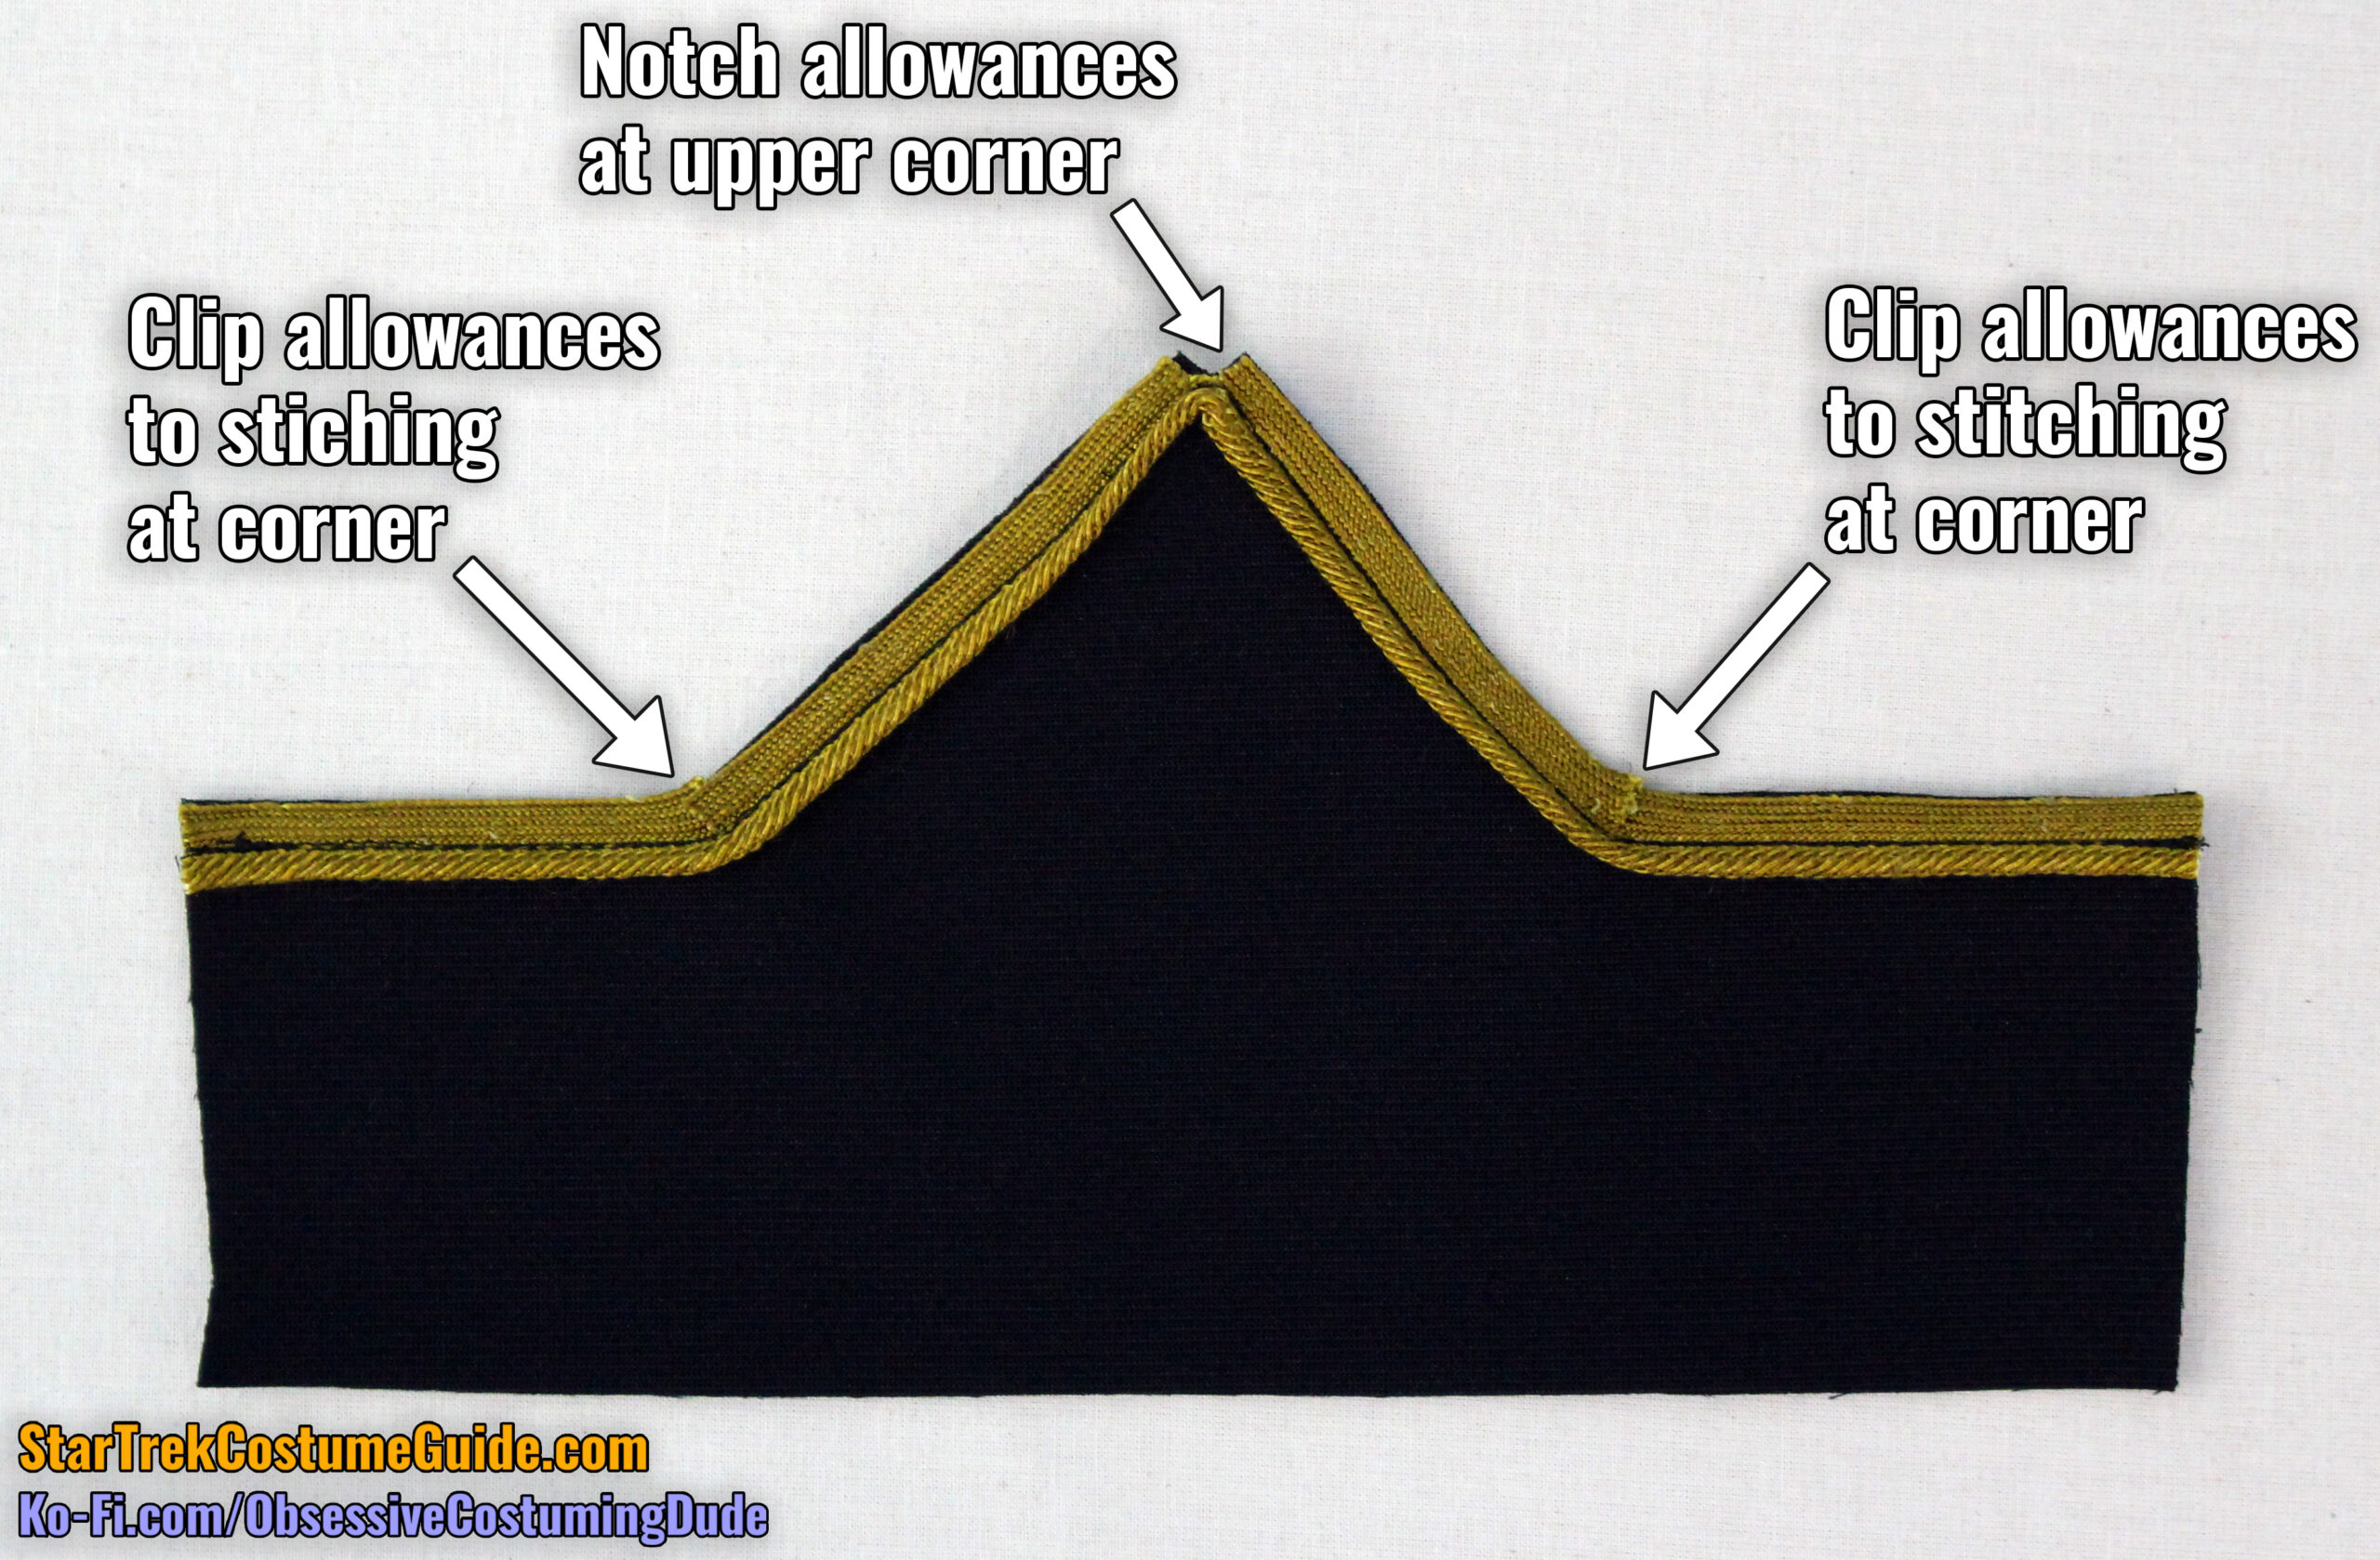
Notch the seam allowances along the front curve, and clip the allowances along the remainder of the upper seam.
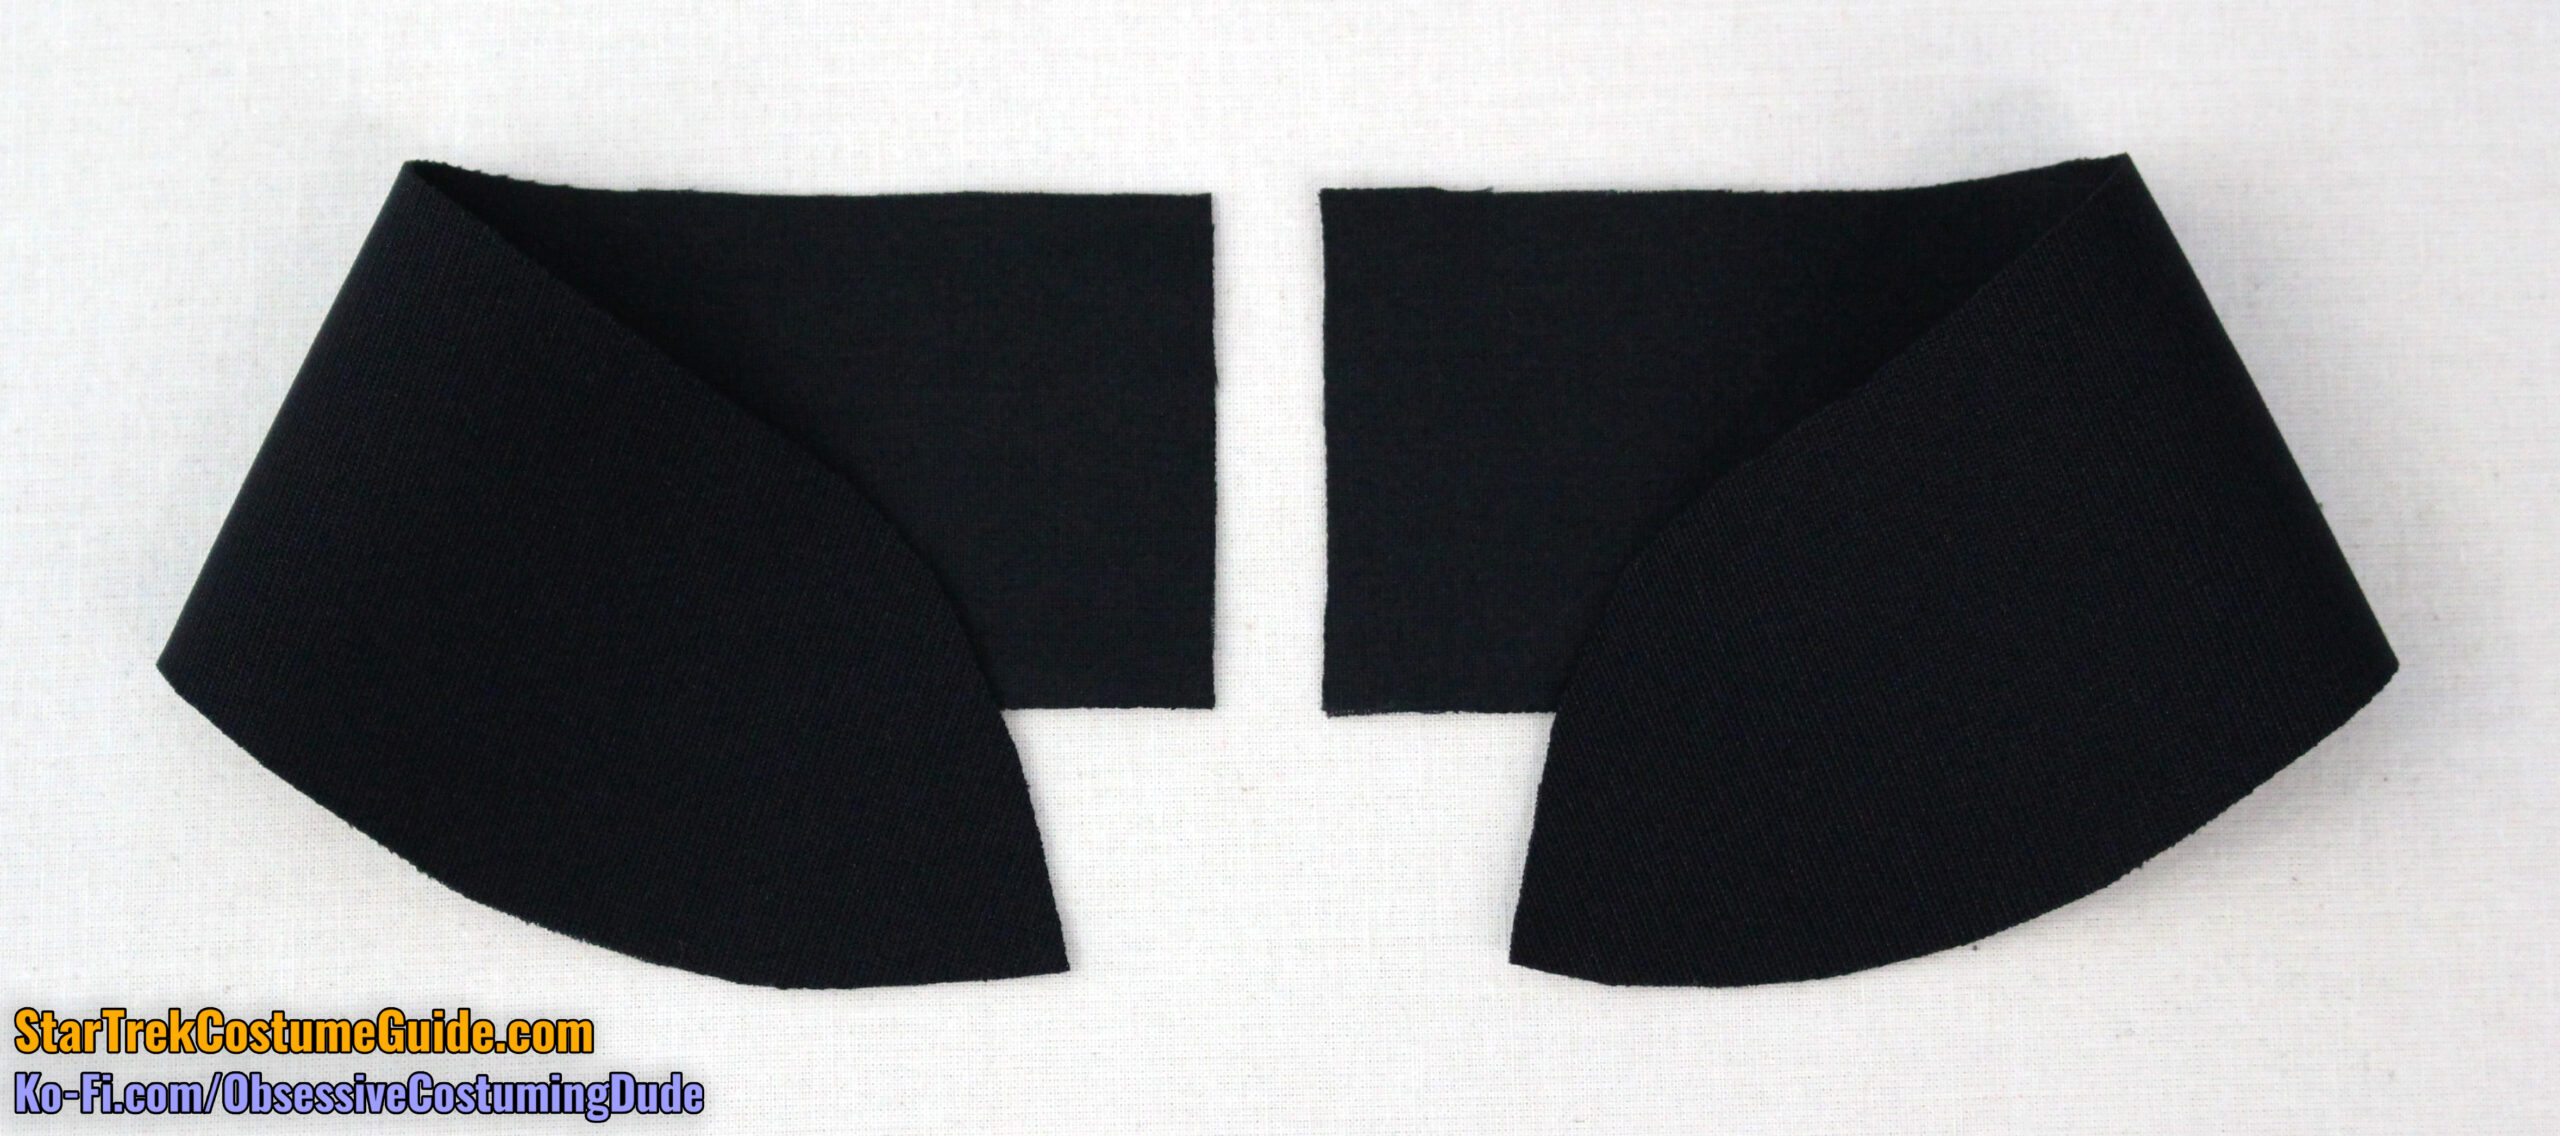
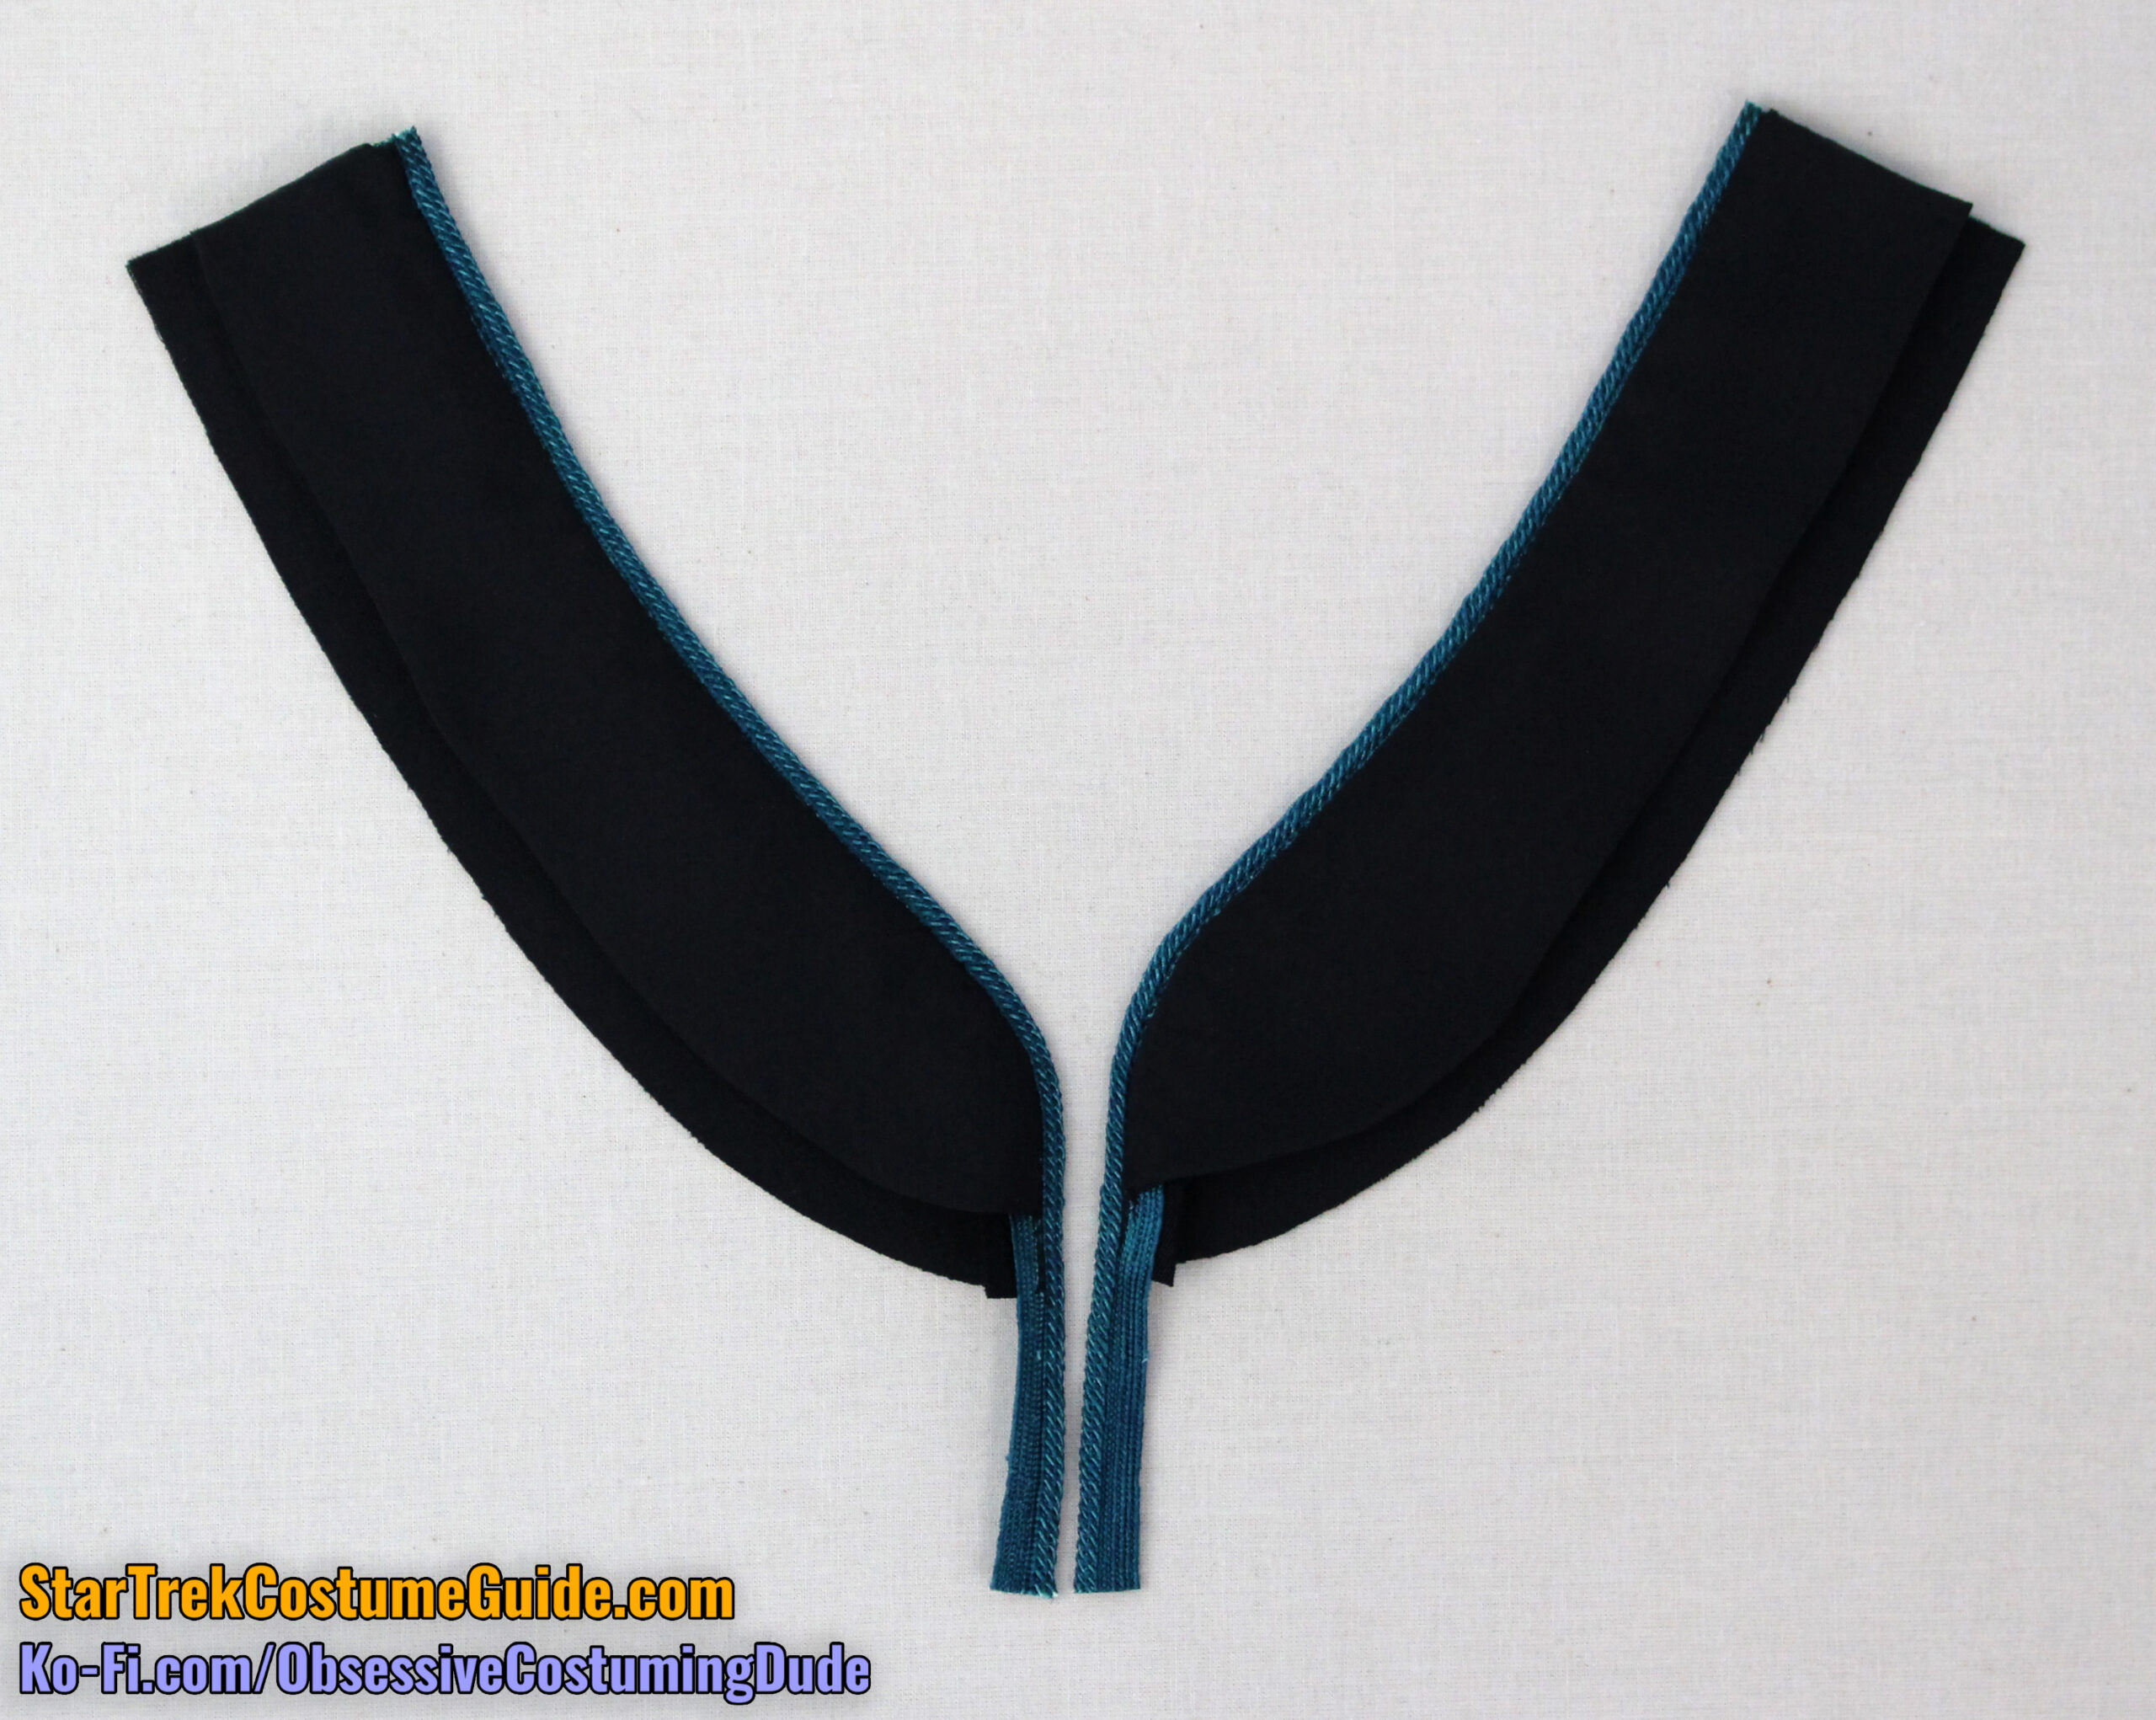
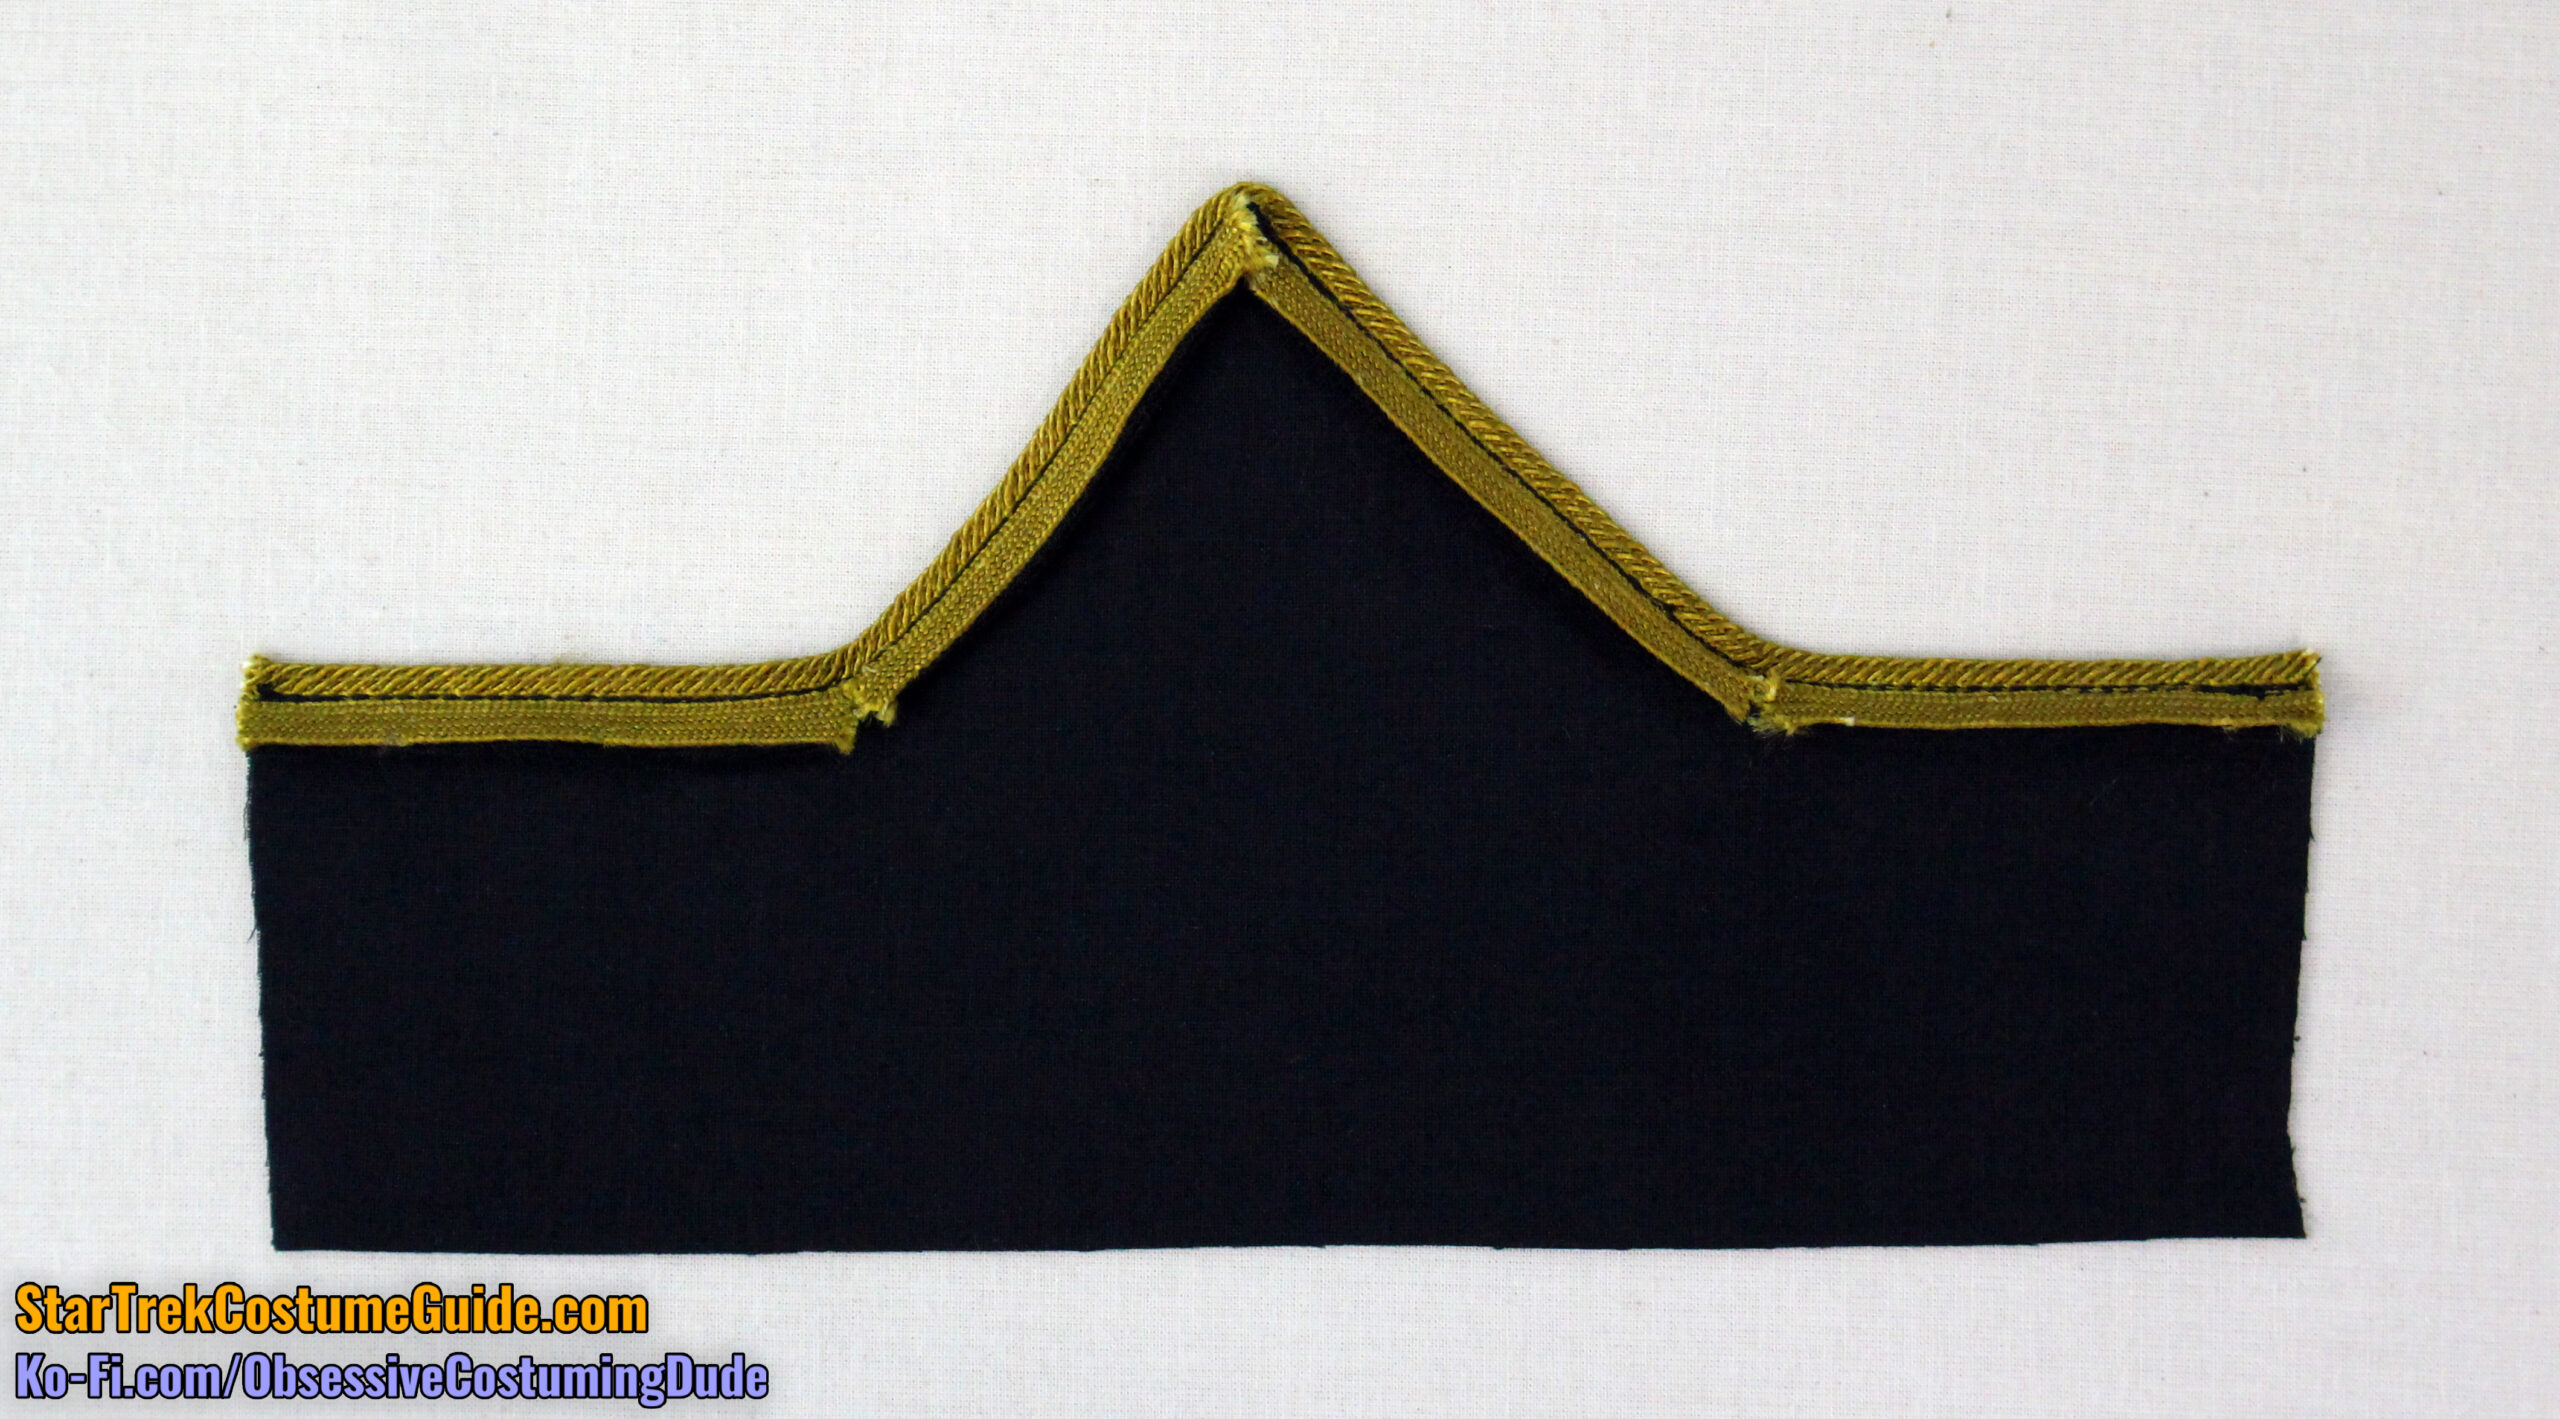
Turn the collar lining under and press.
Repeat for the other side of the collar.
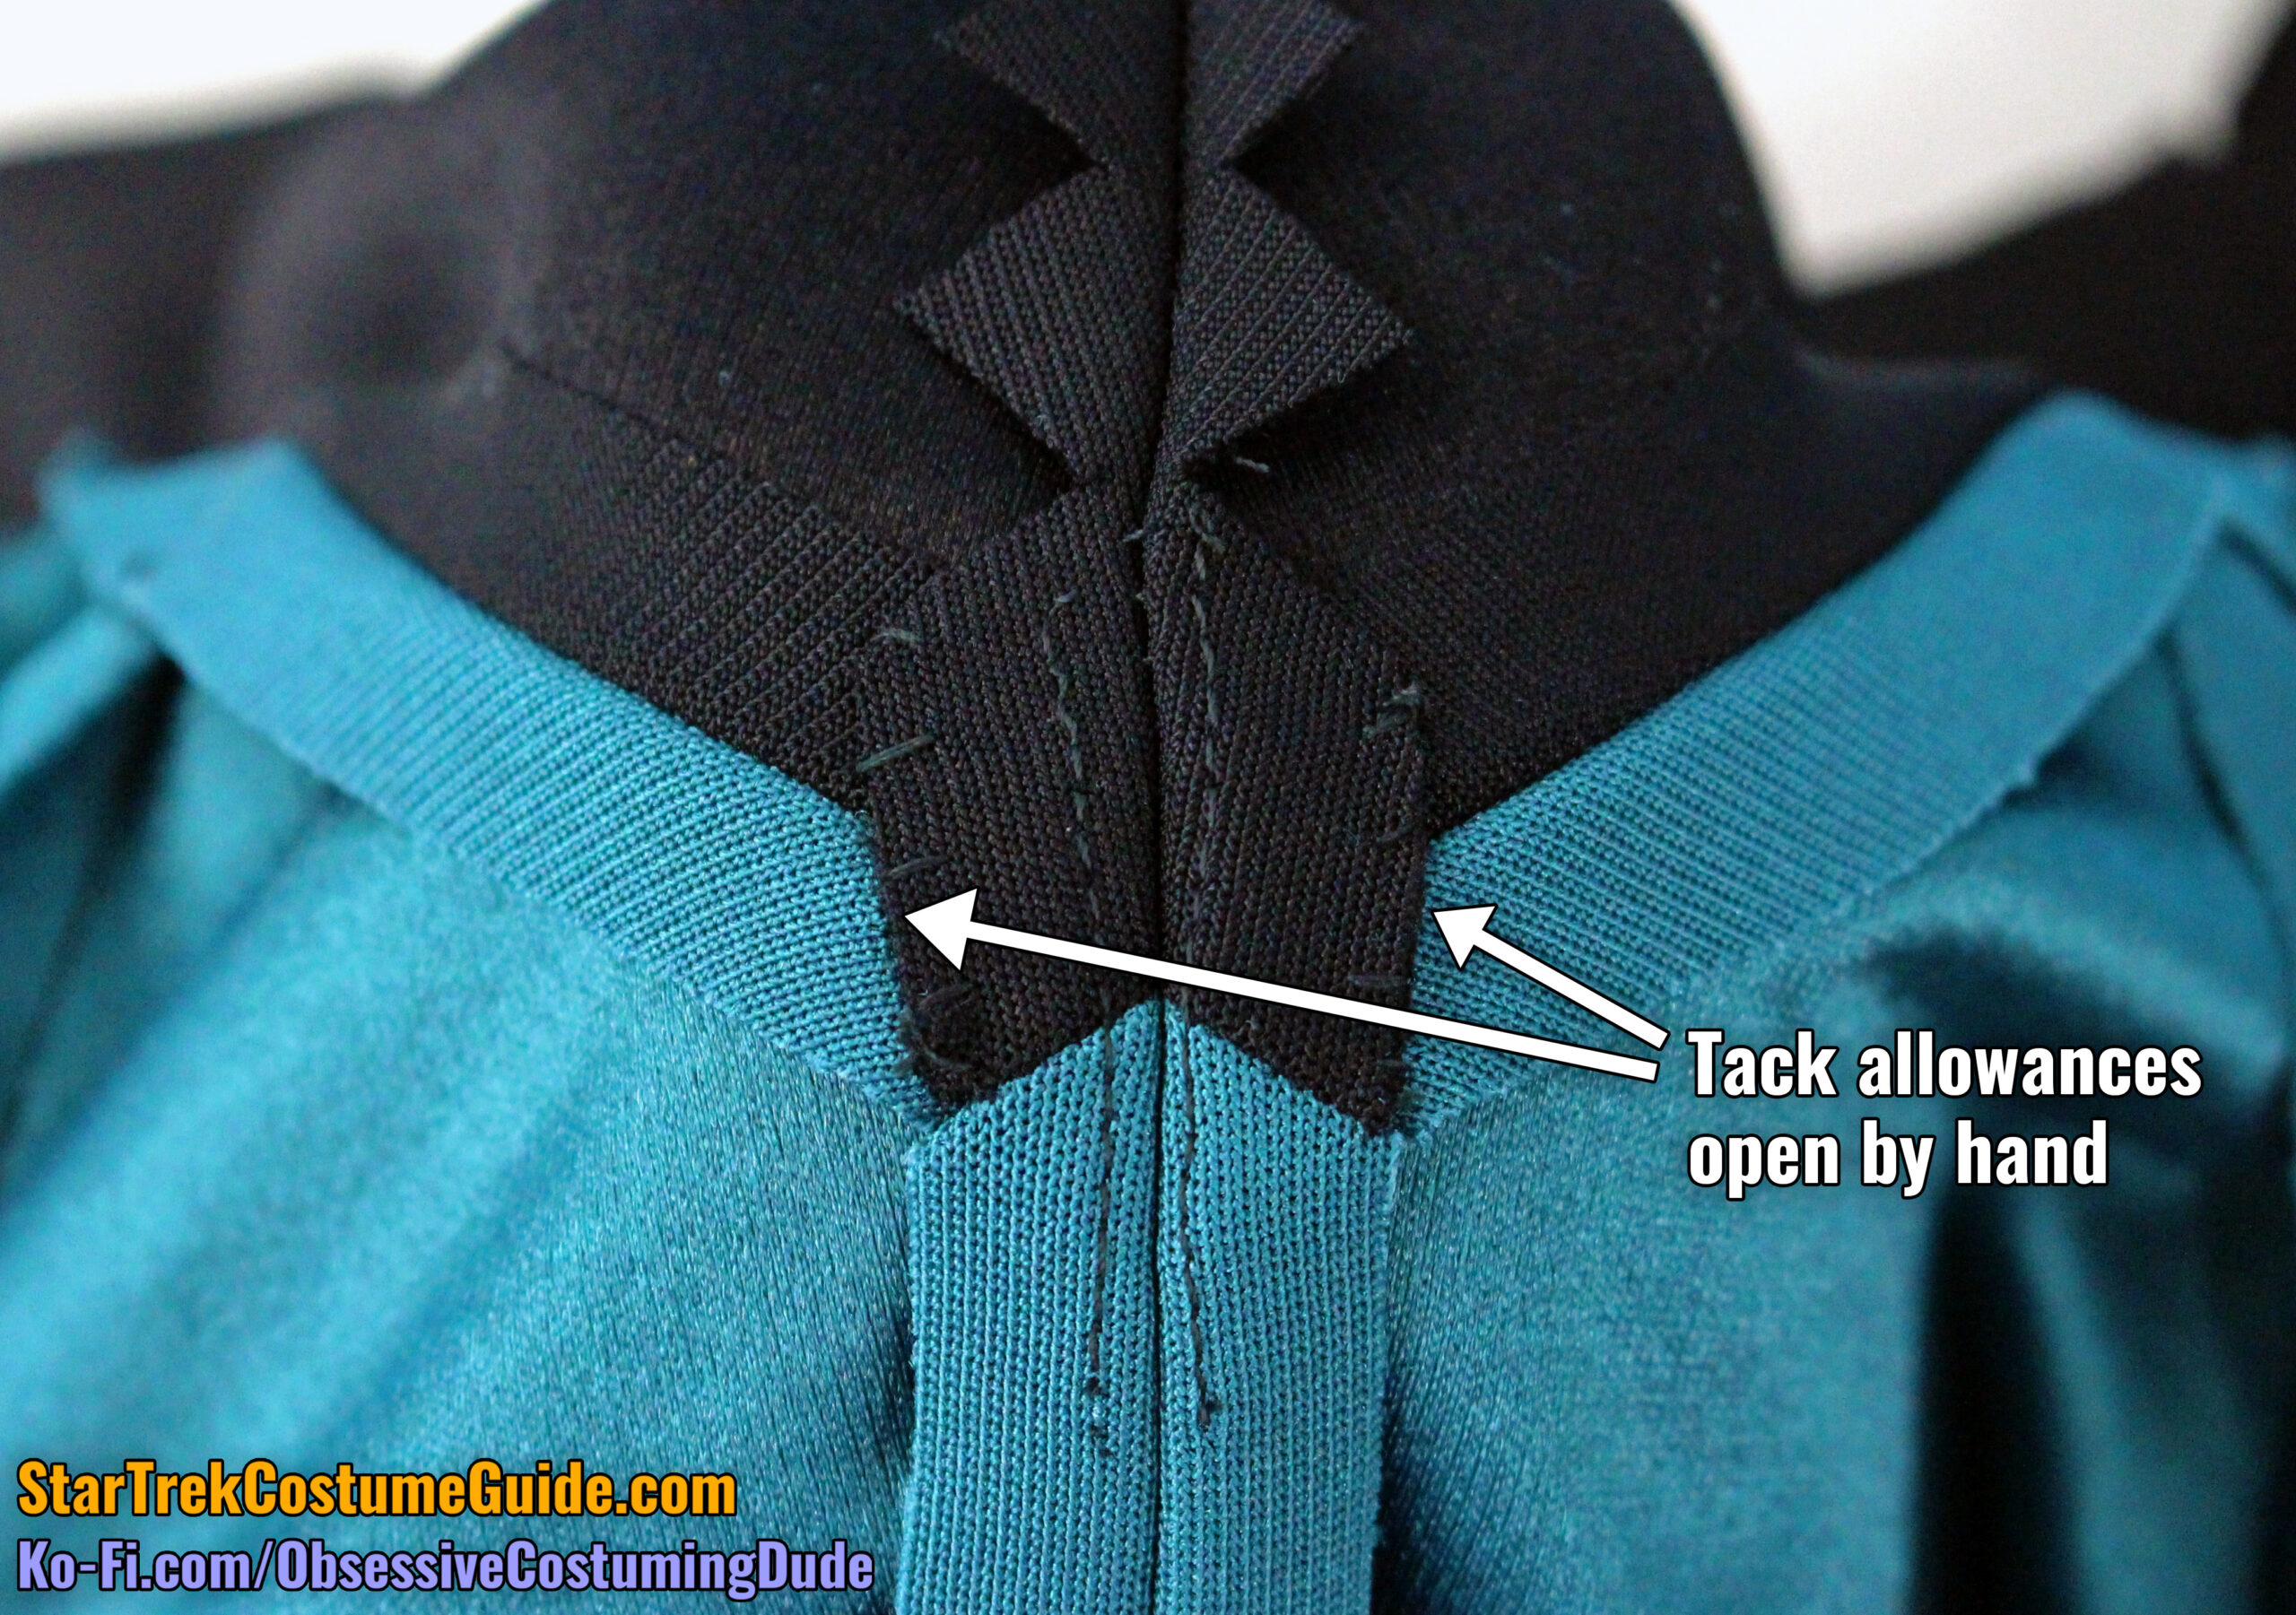
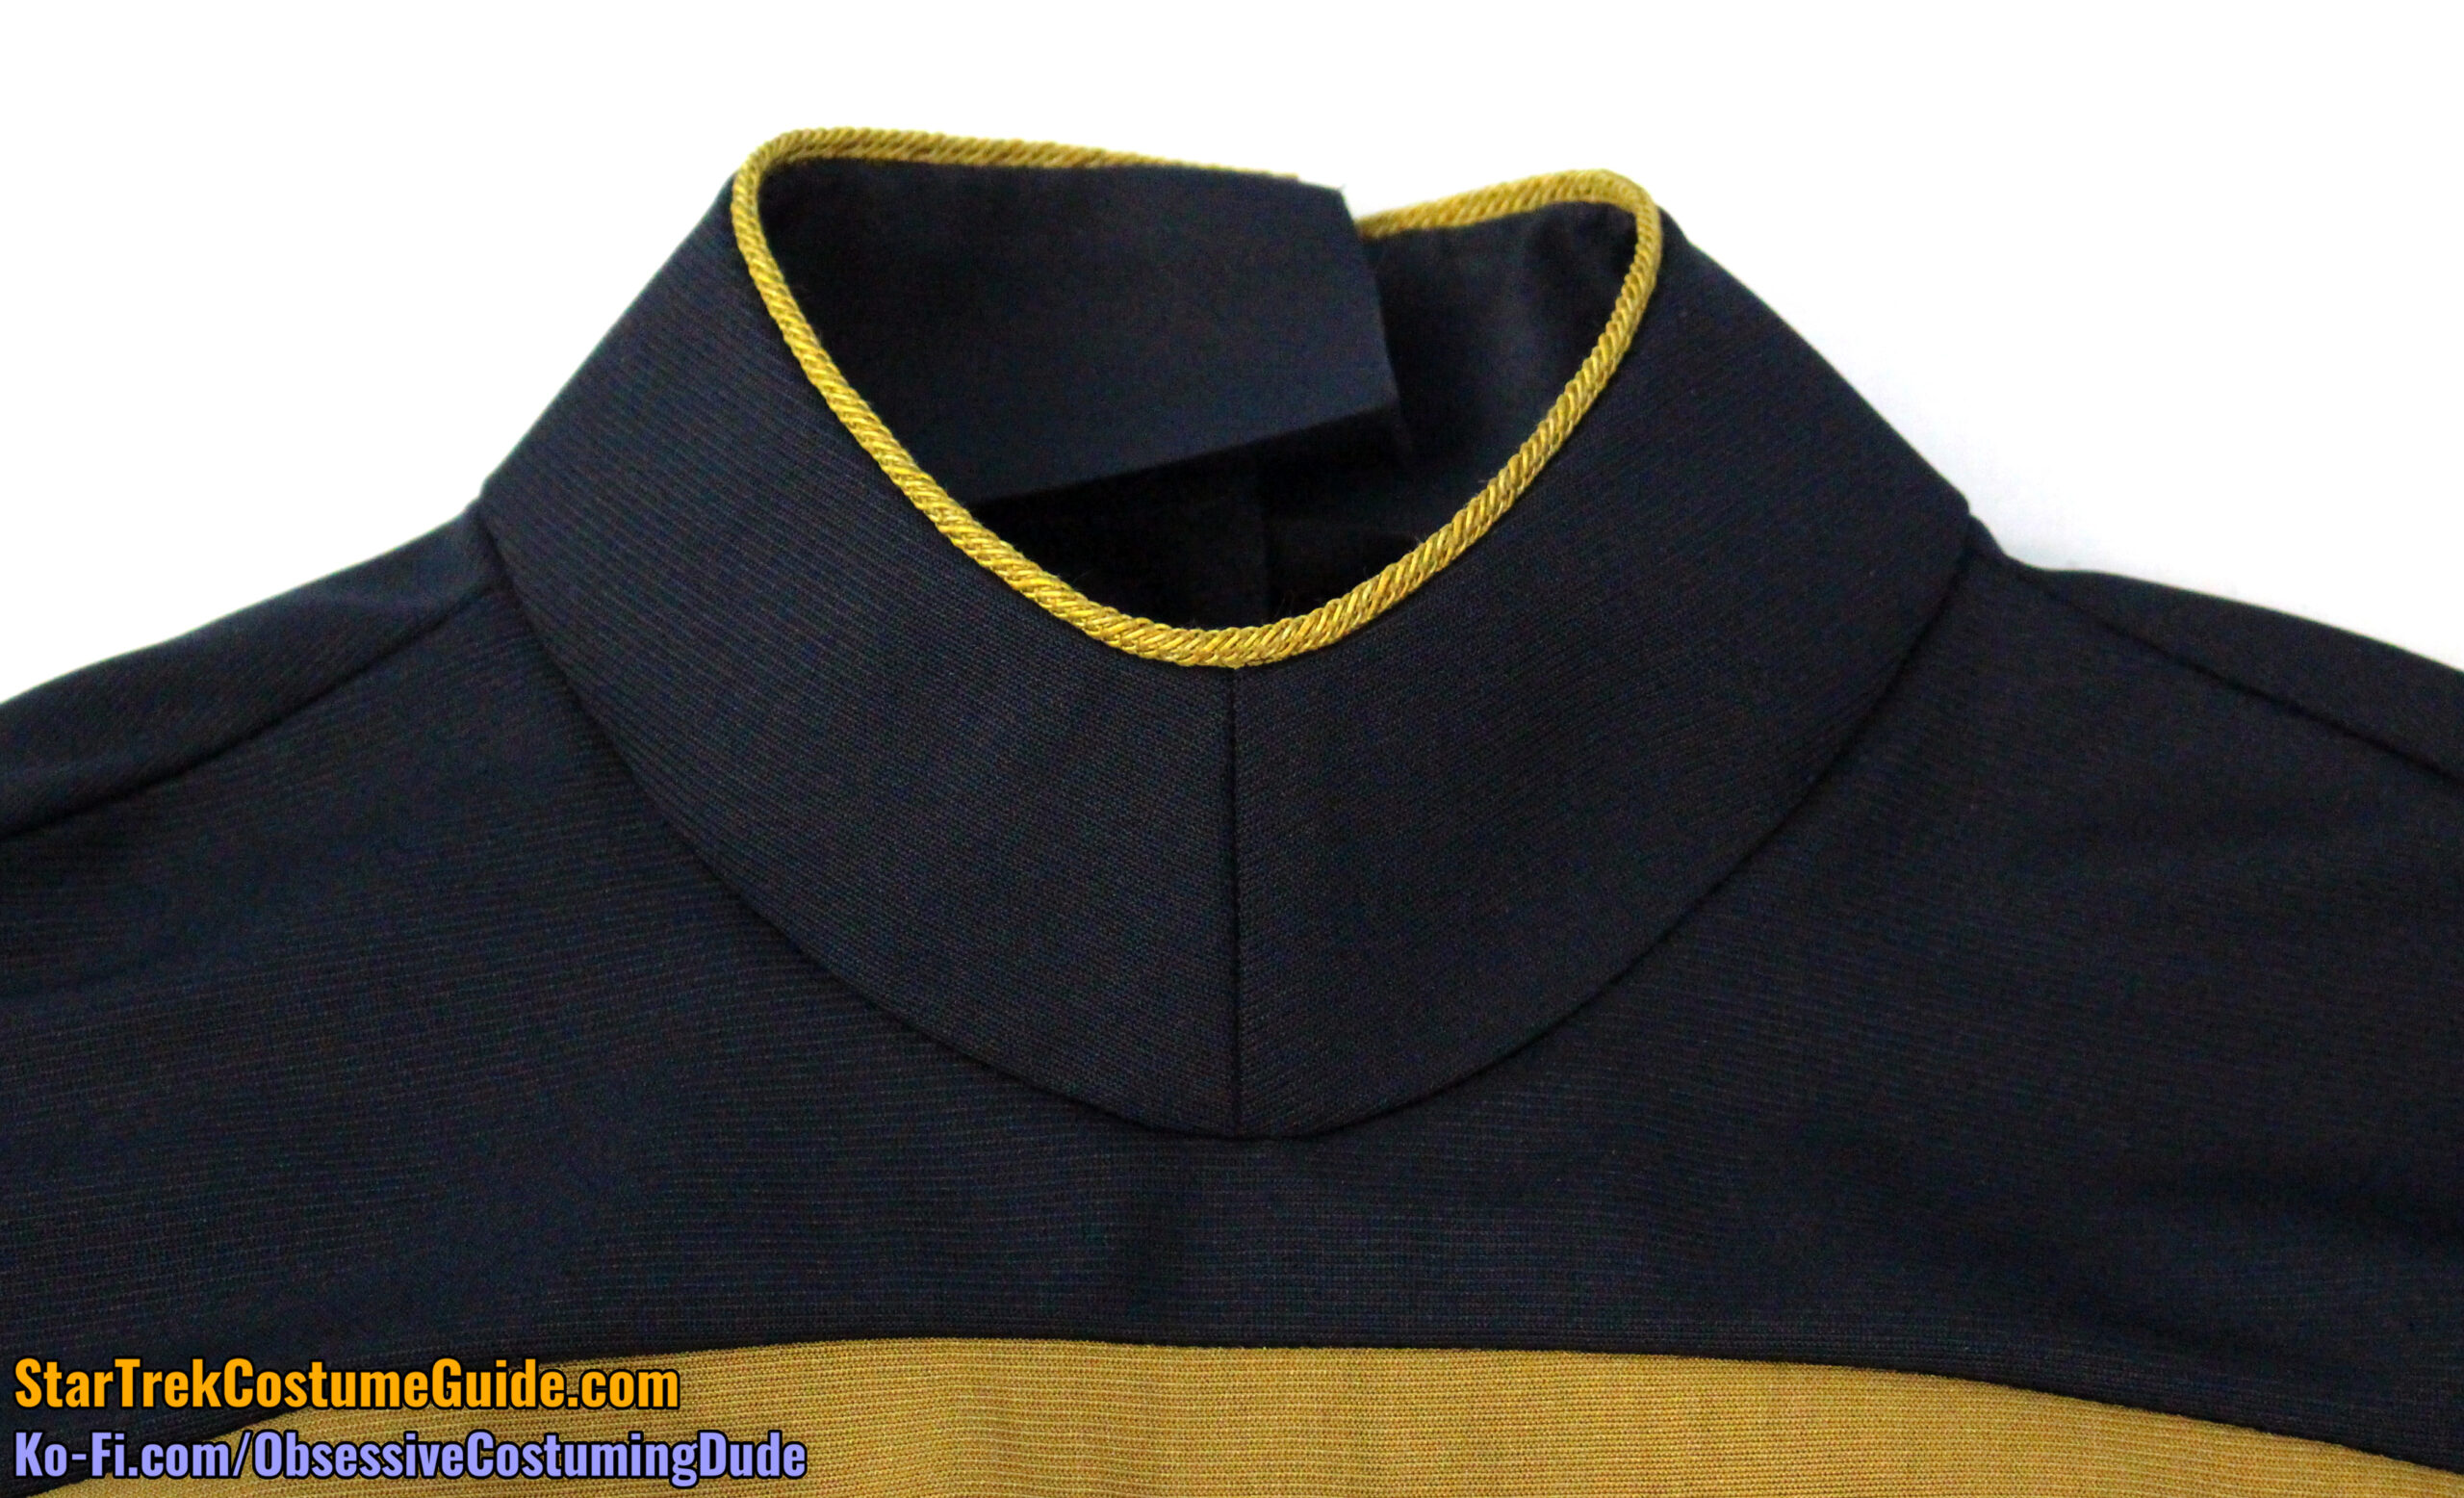
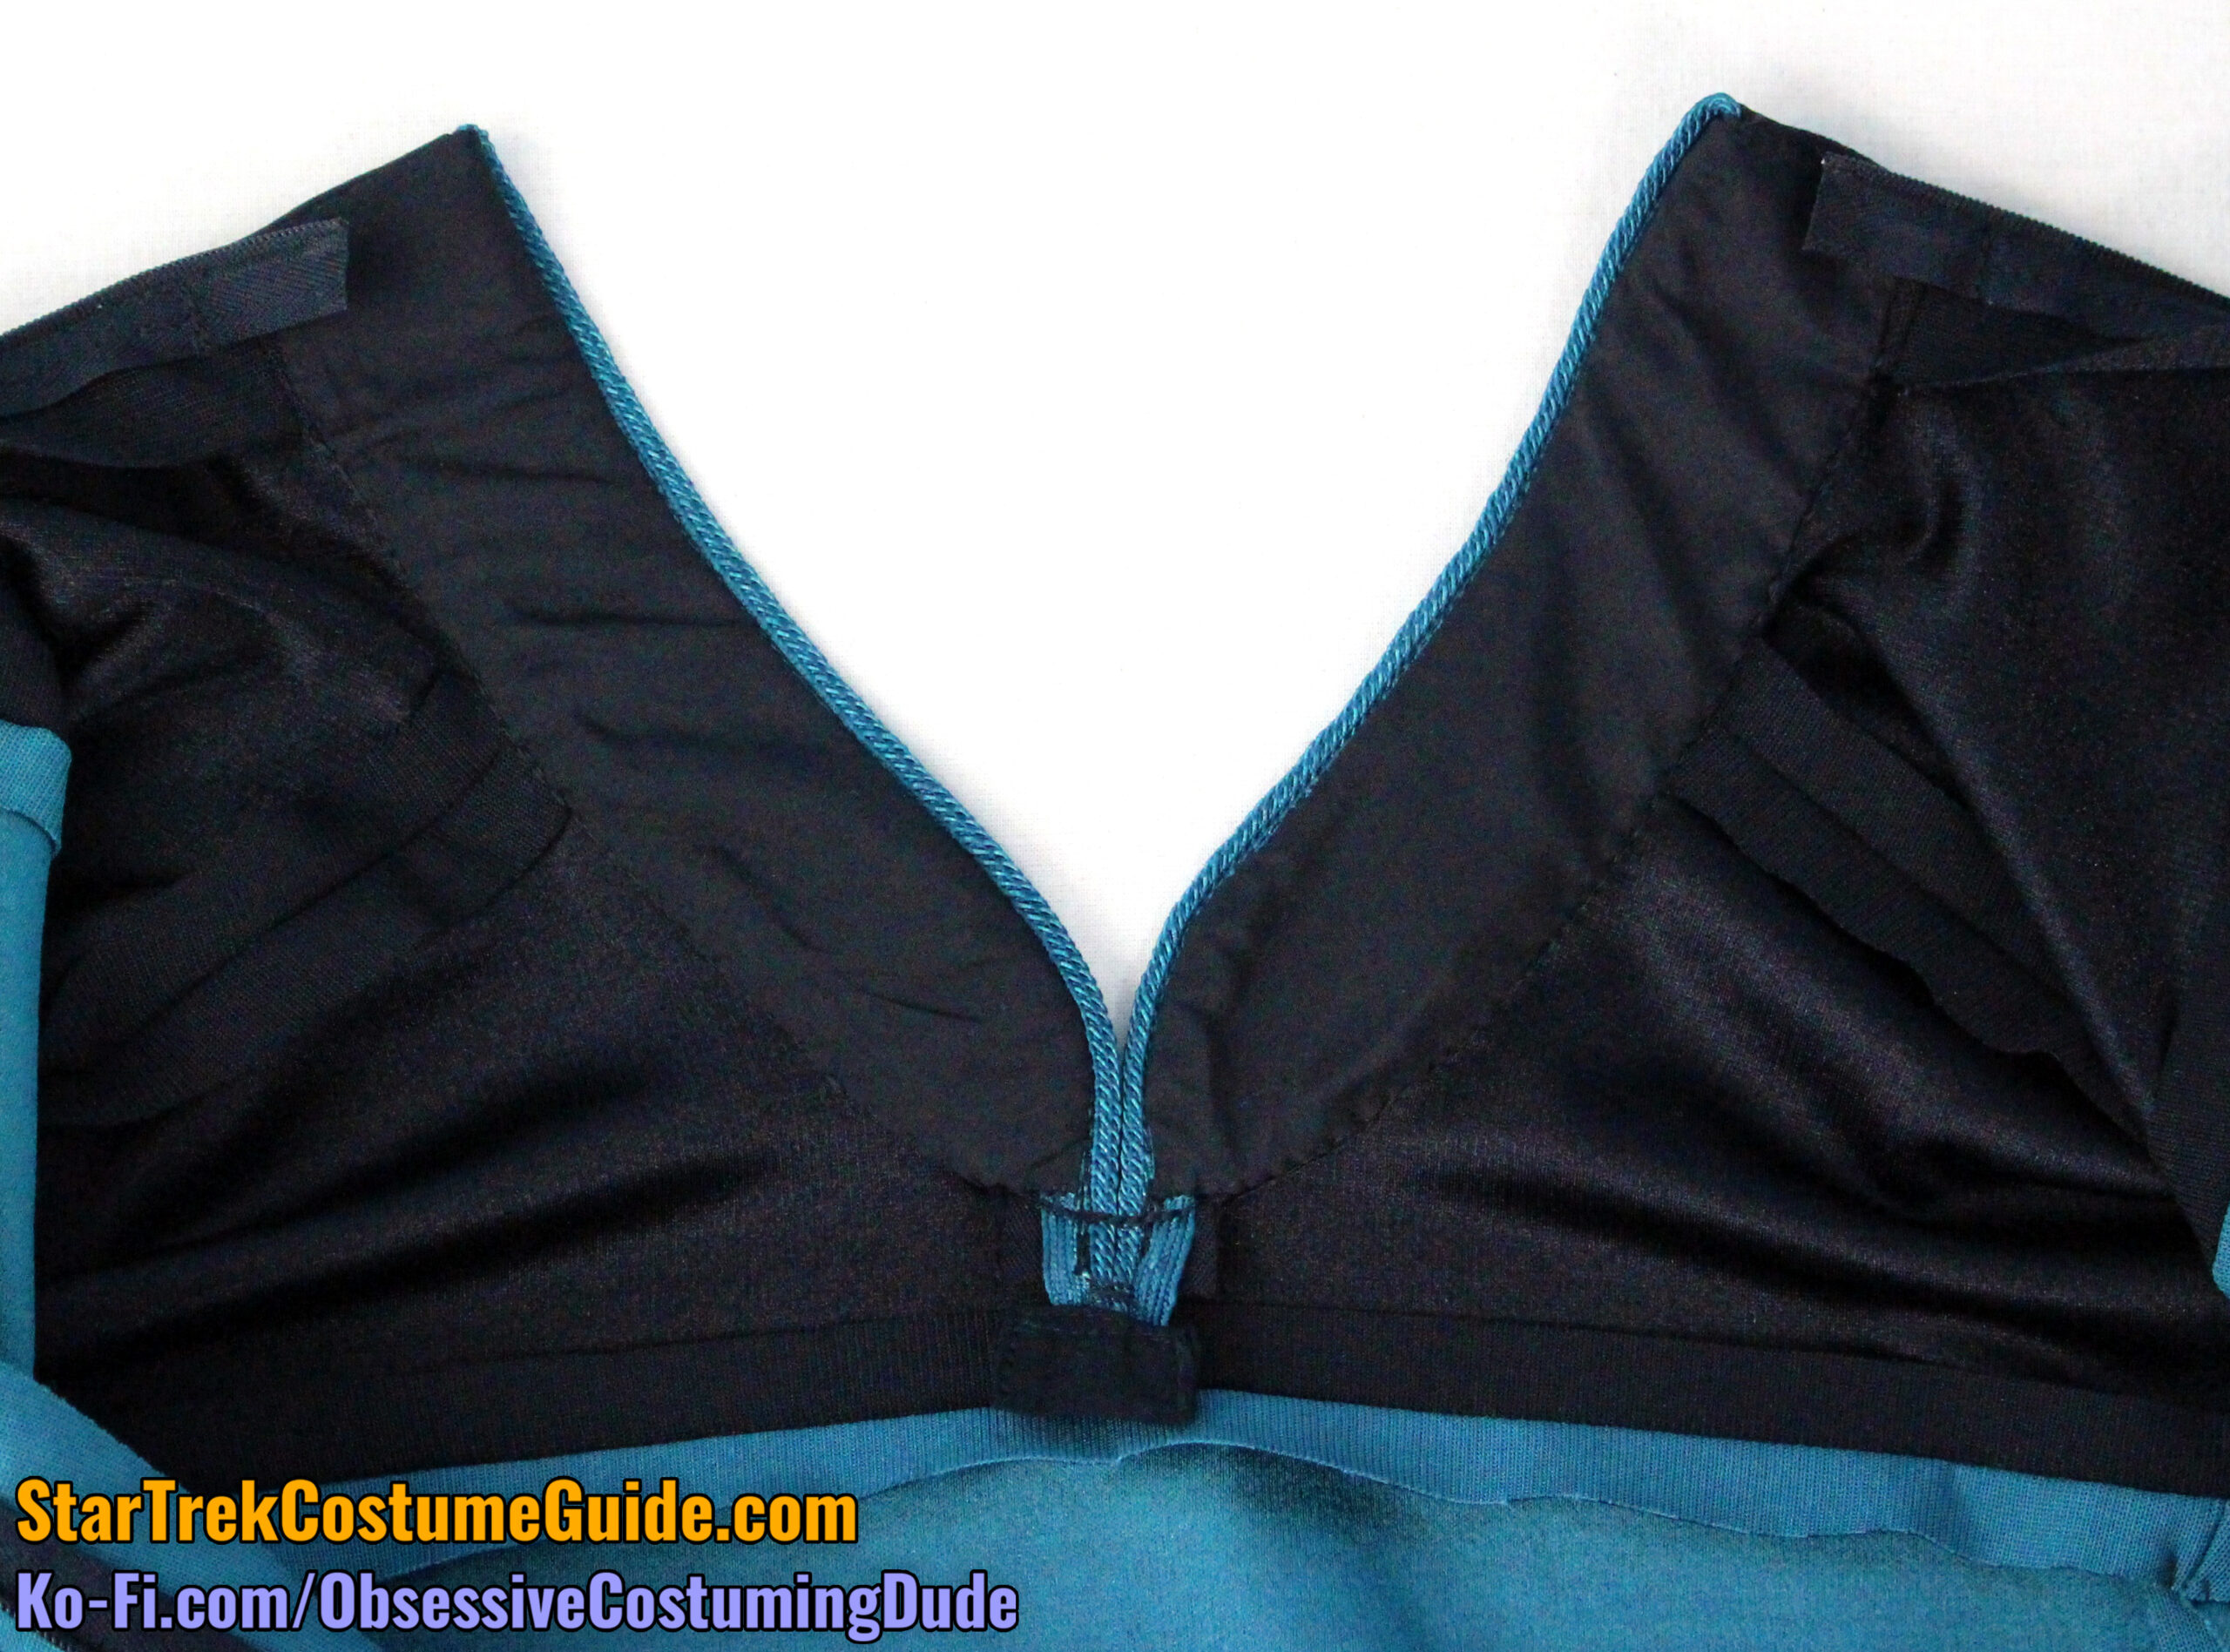
Stay-stitch the jumpsuit neckline ¼” from the edge.
Pin the collar onto the jumpsuit neckline, matching center fronts, center backs, and shoulders.
Baste the collar to the jumpsuit neckline with ⅜” seam allowance. (I recommend anchoring the center front area first!)
Check to make sure the collar is properly basted, with no pleats, tucks, pulls, etc.
Once satisfied with the collar’s state, sew the collar to the jumpsuit with ⅜” seam allowance. (I suggest reinforcing your stitching several times across the center front.)
Clip the neckline/collar seam allowances to the stitching about 1” from each side of the center front.
Press the seam allowances downward (toward the yoke) at the center front, and press the allowances upward (into the collar) around the remainder of the neckline.
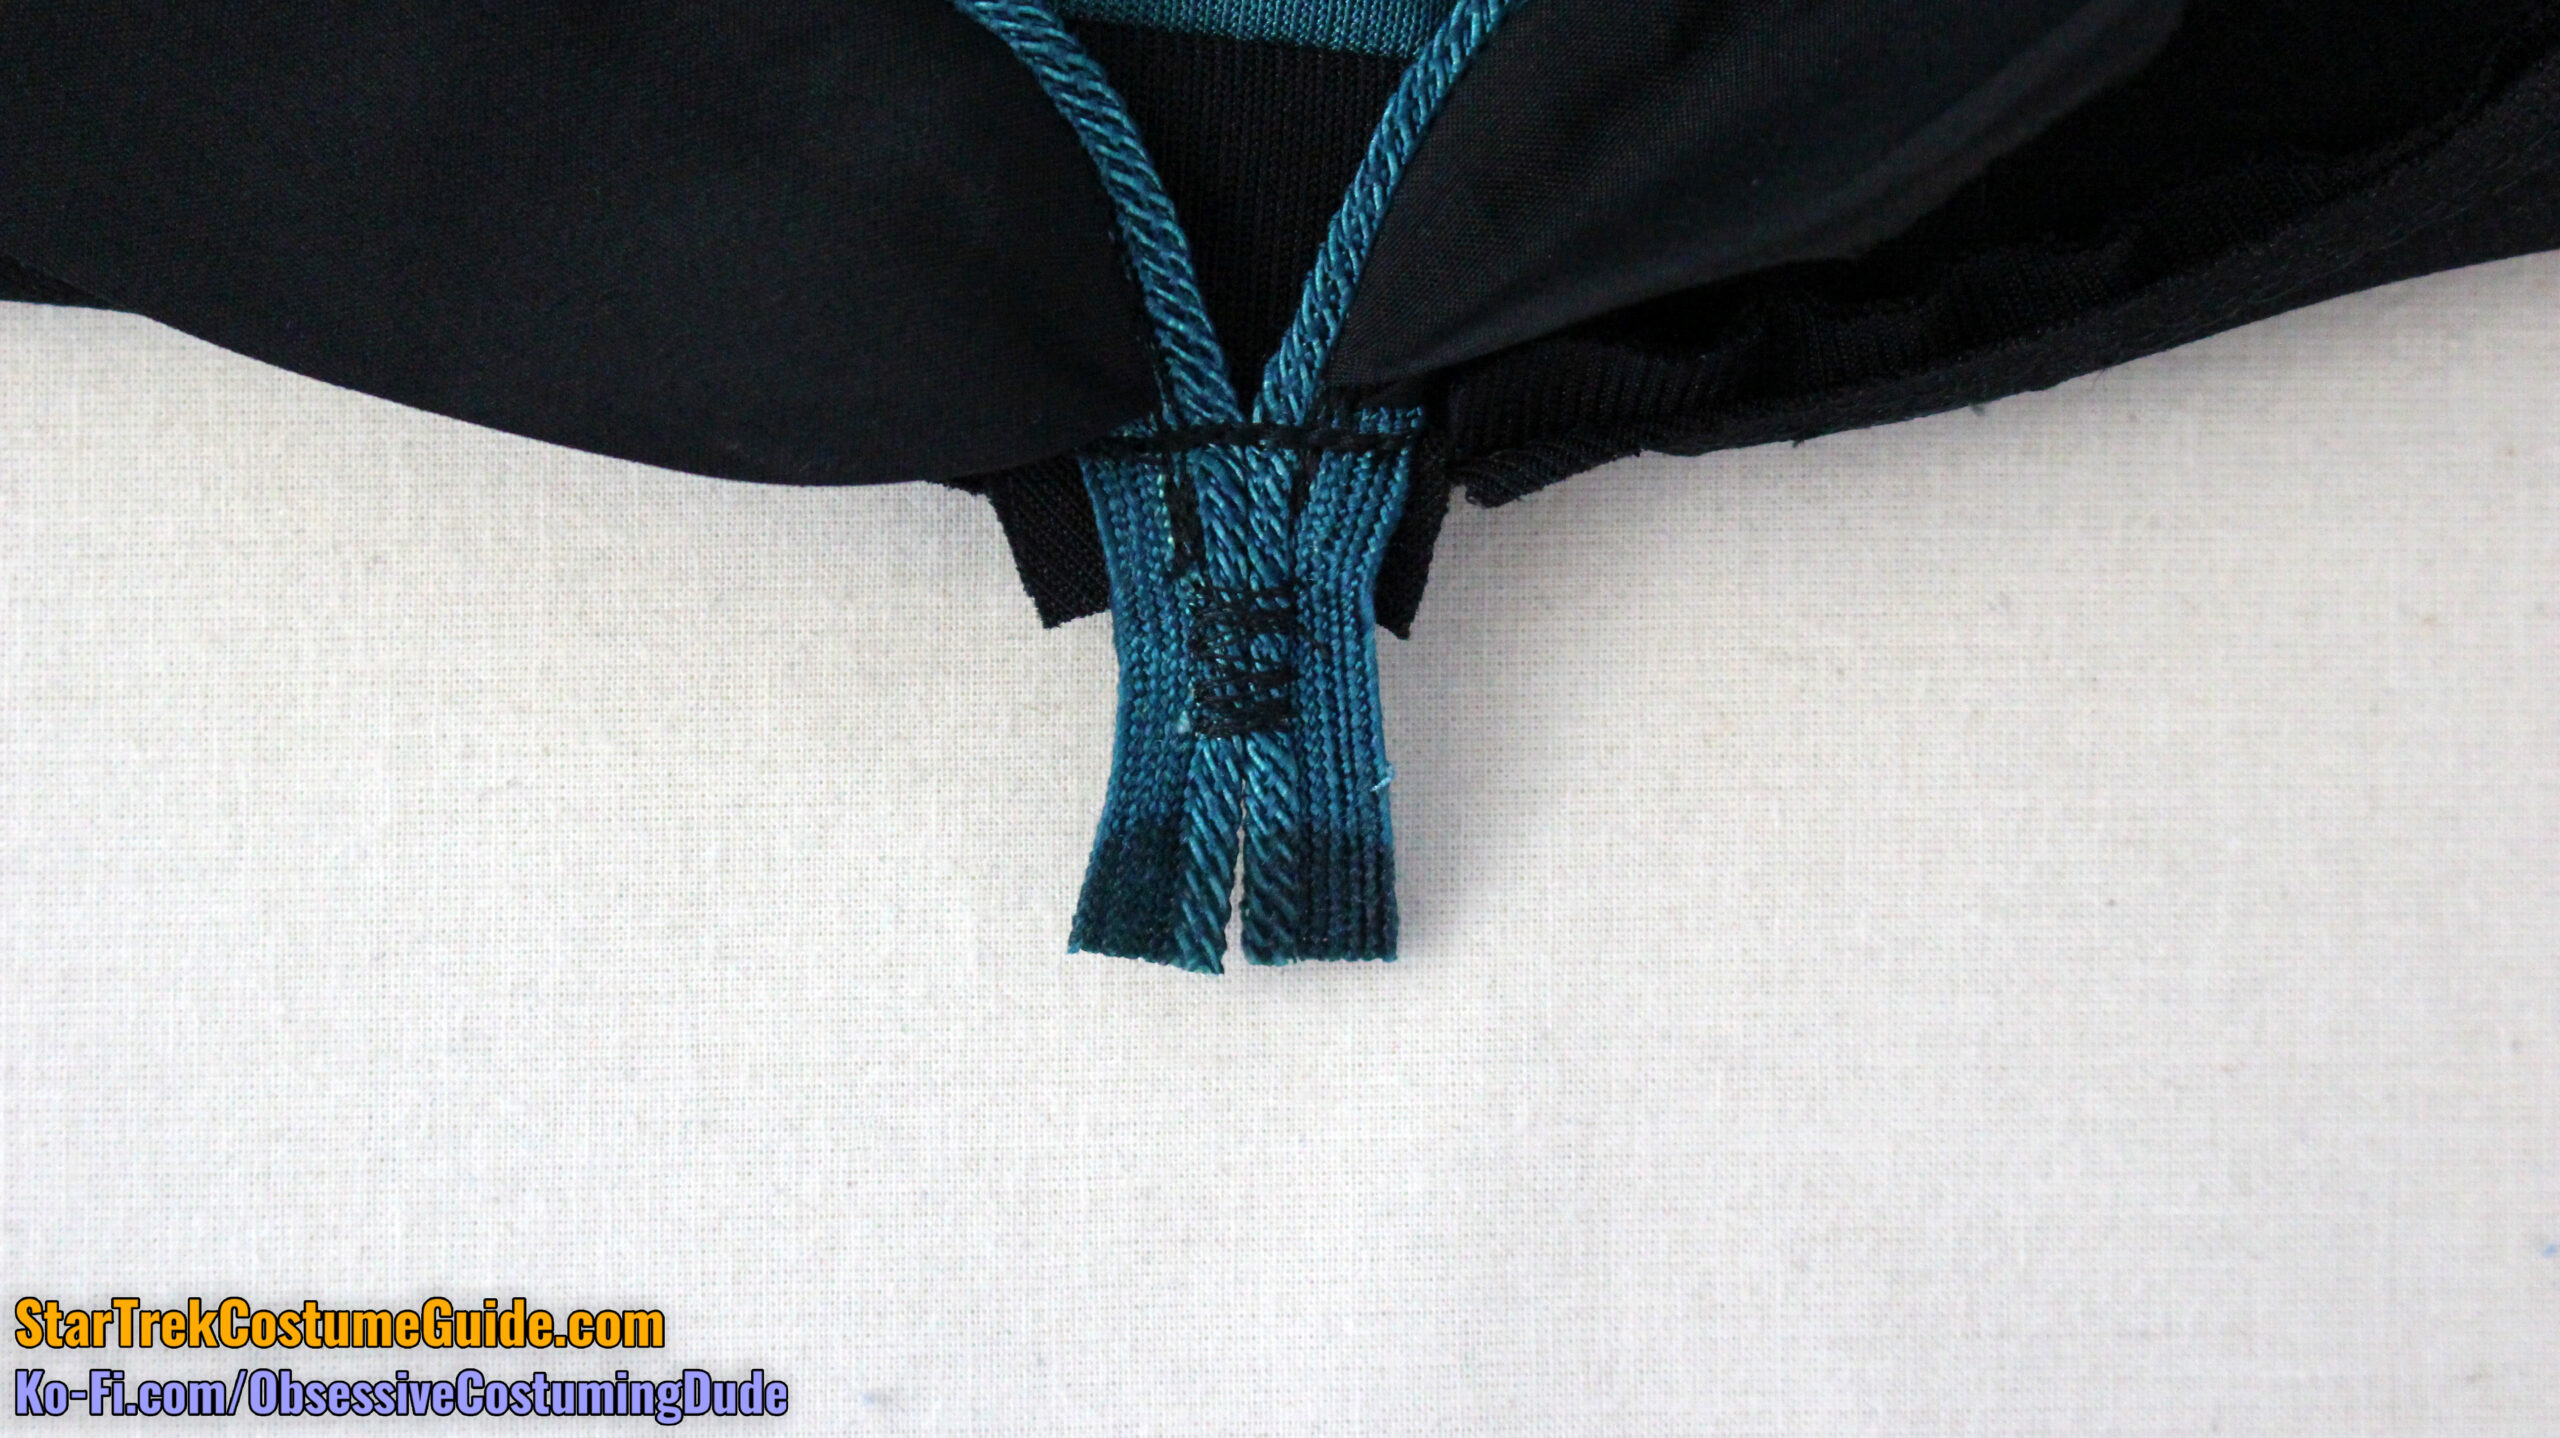
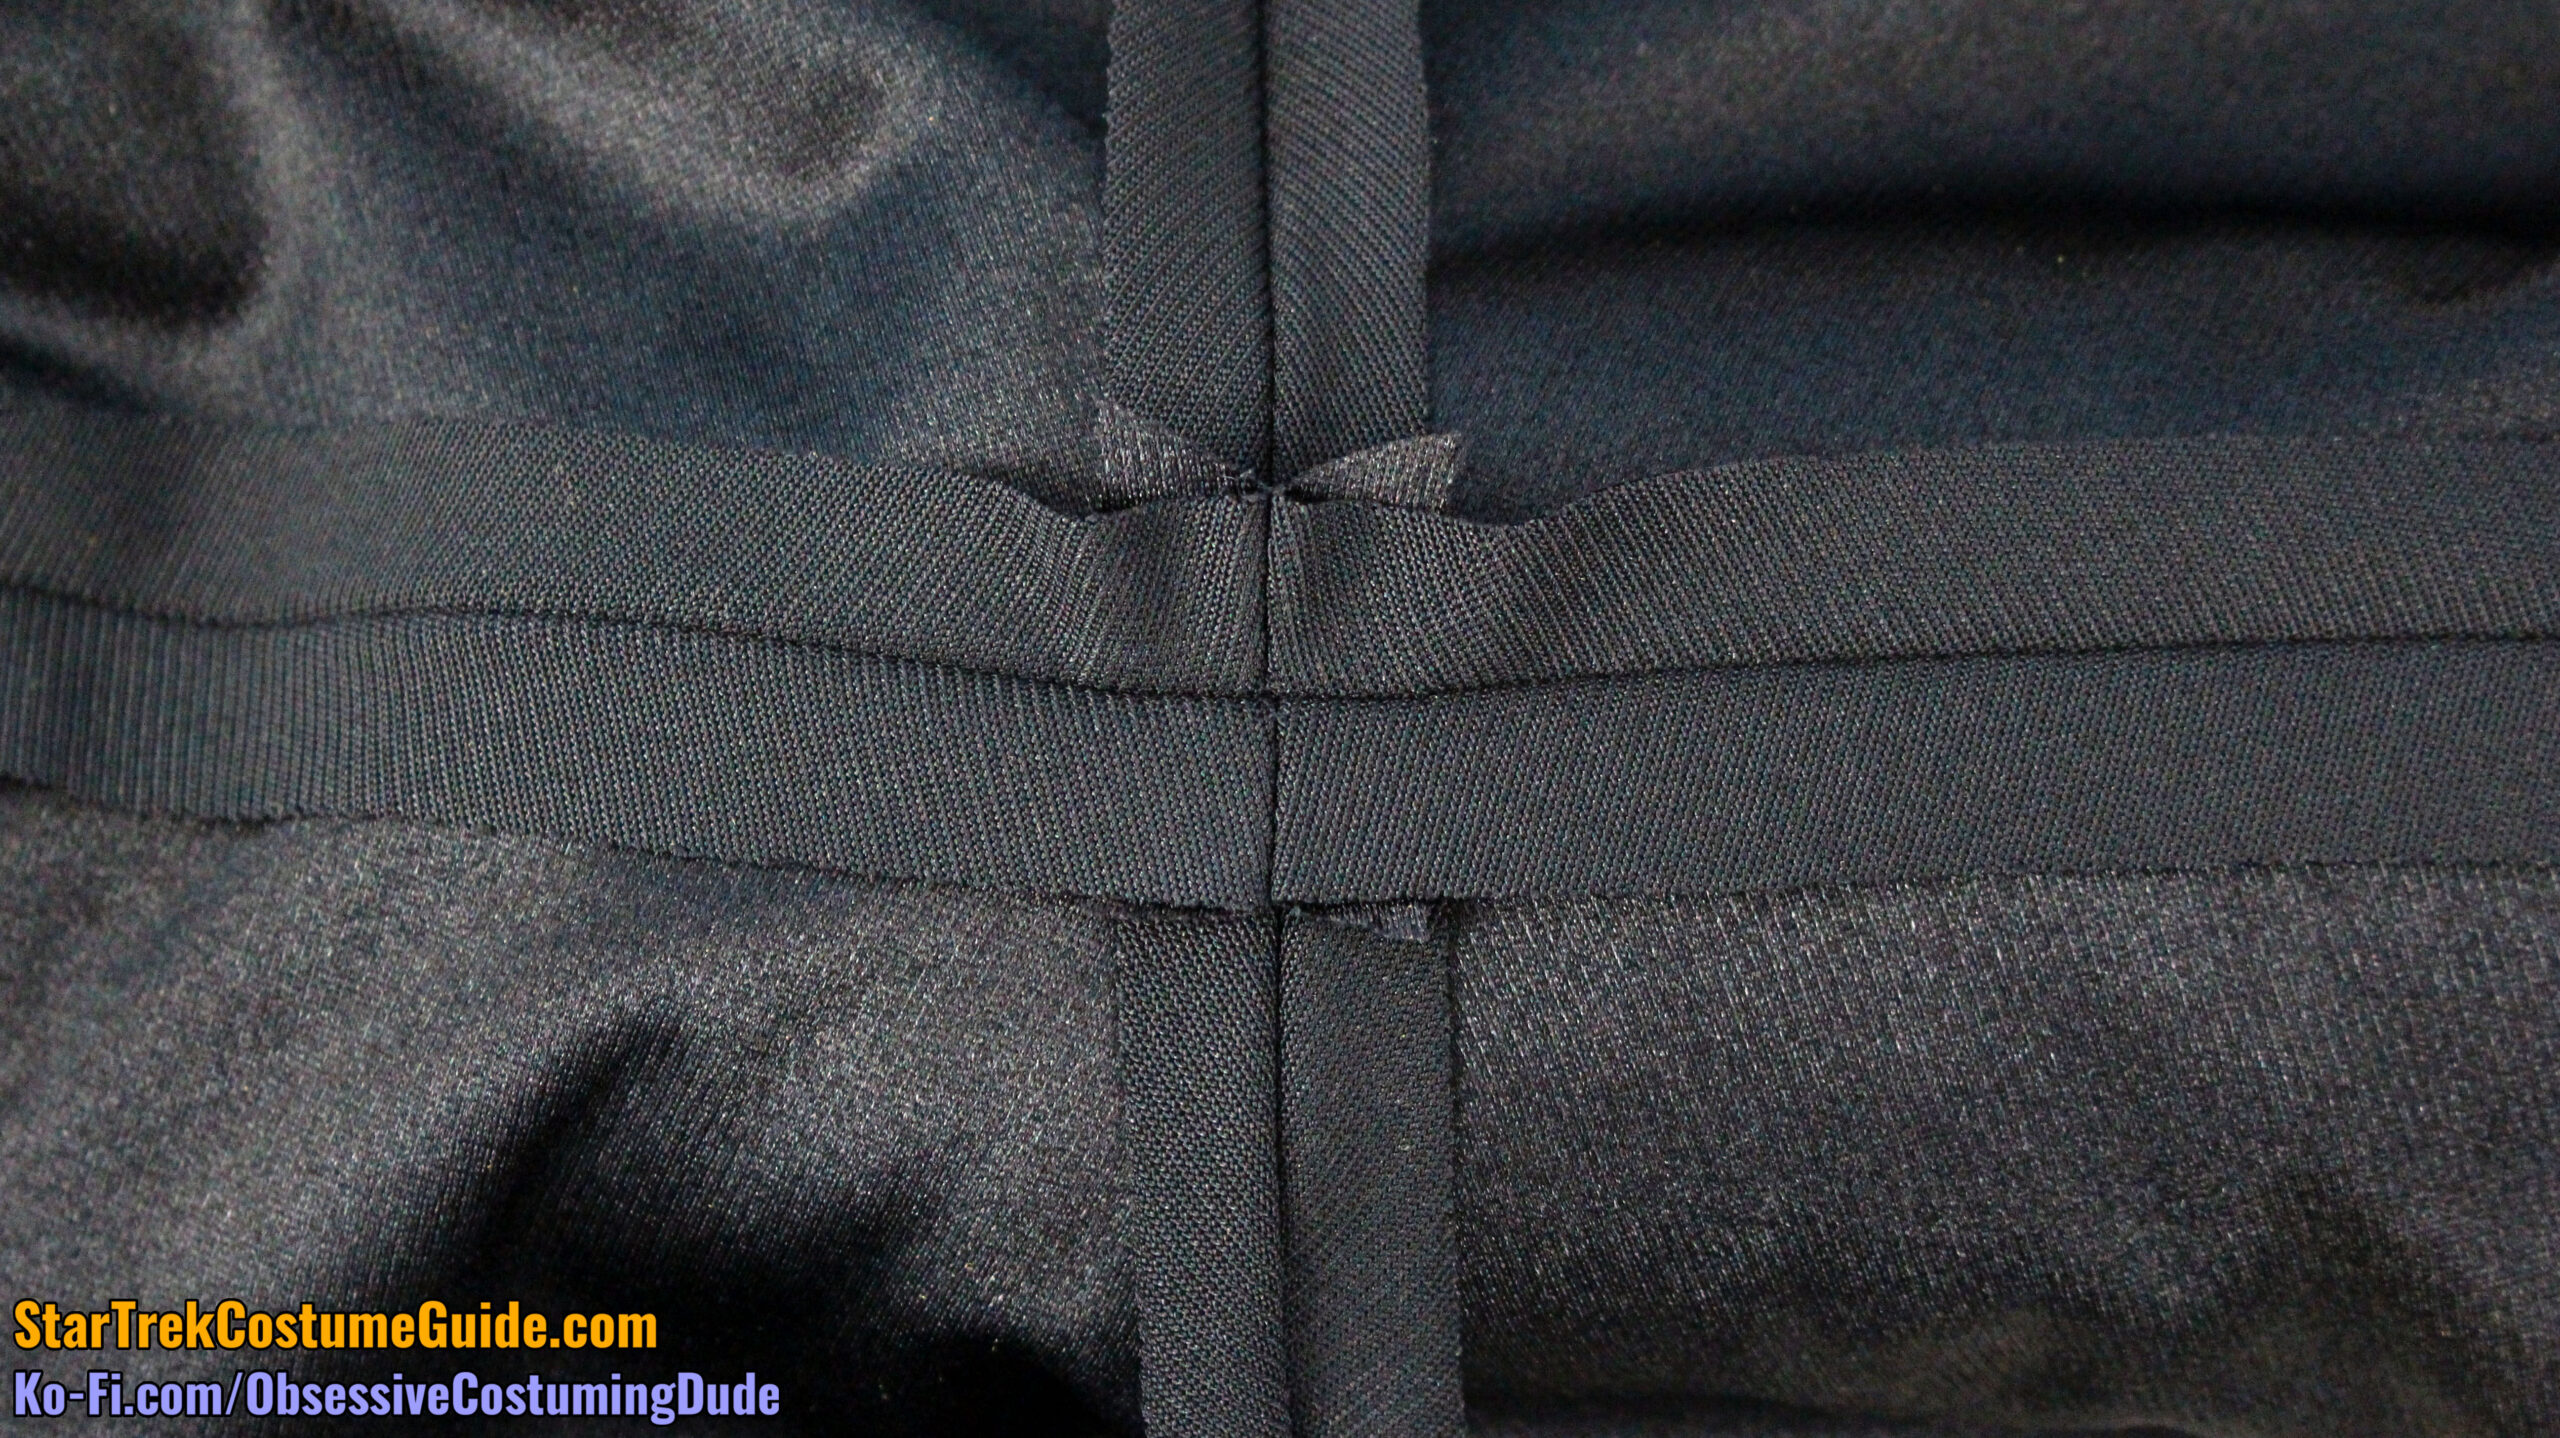
I recommend anchoring the two lengths of piping together beneath the seam with a bar tack or slightly longer zig-zag stitch.
Then trim away all but a couple inches or so of the collar piping and apply some liquid fray preventer to the new ends.
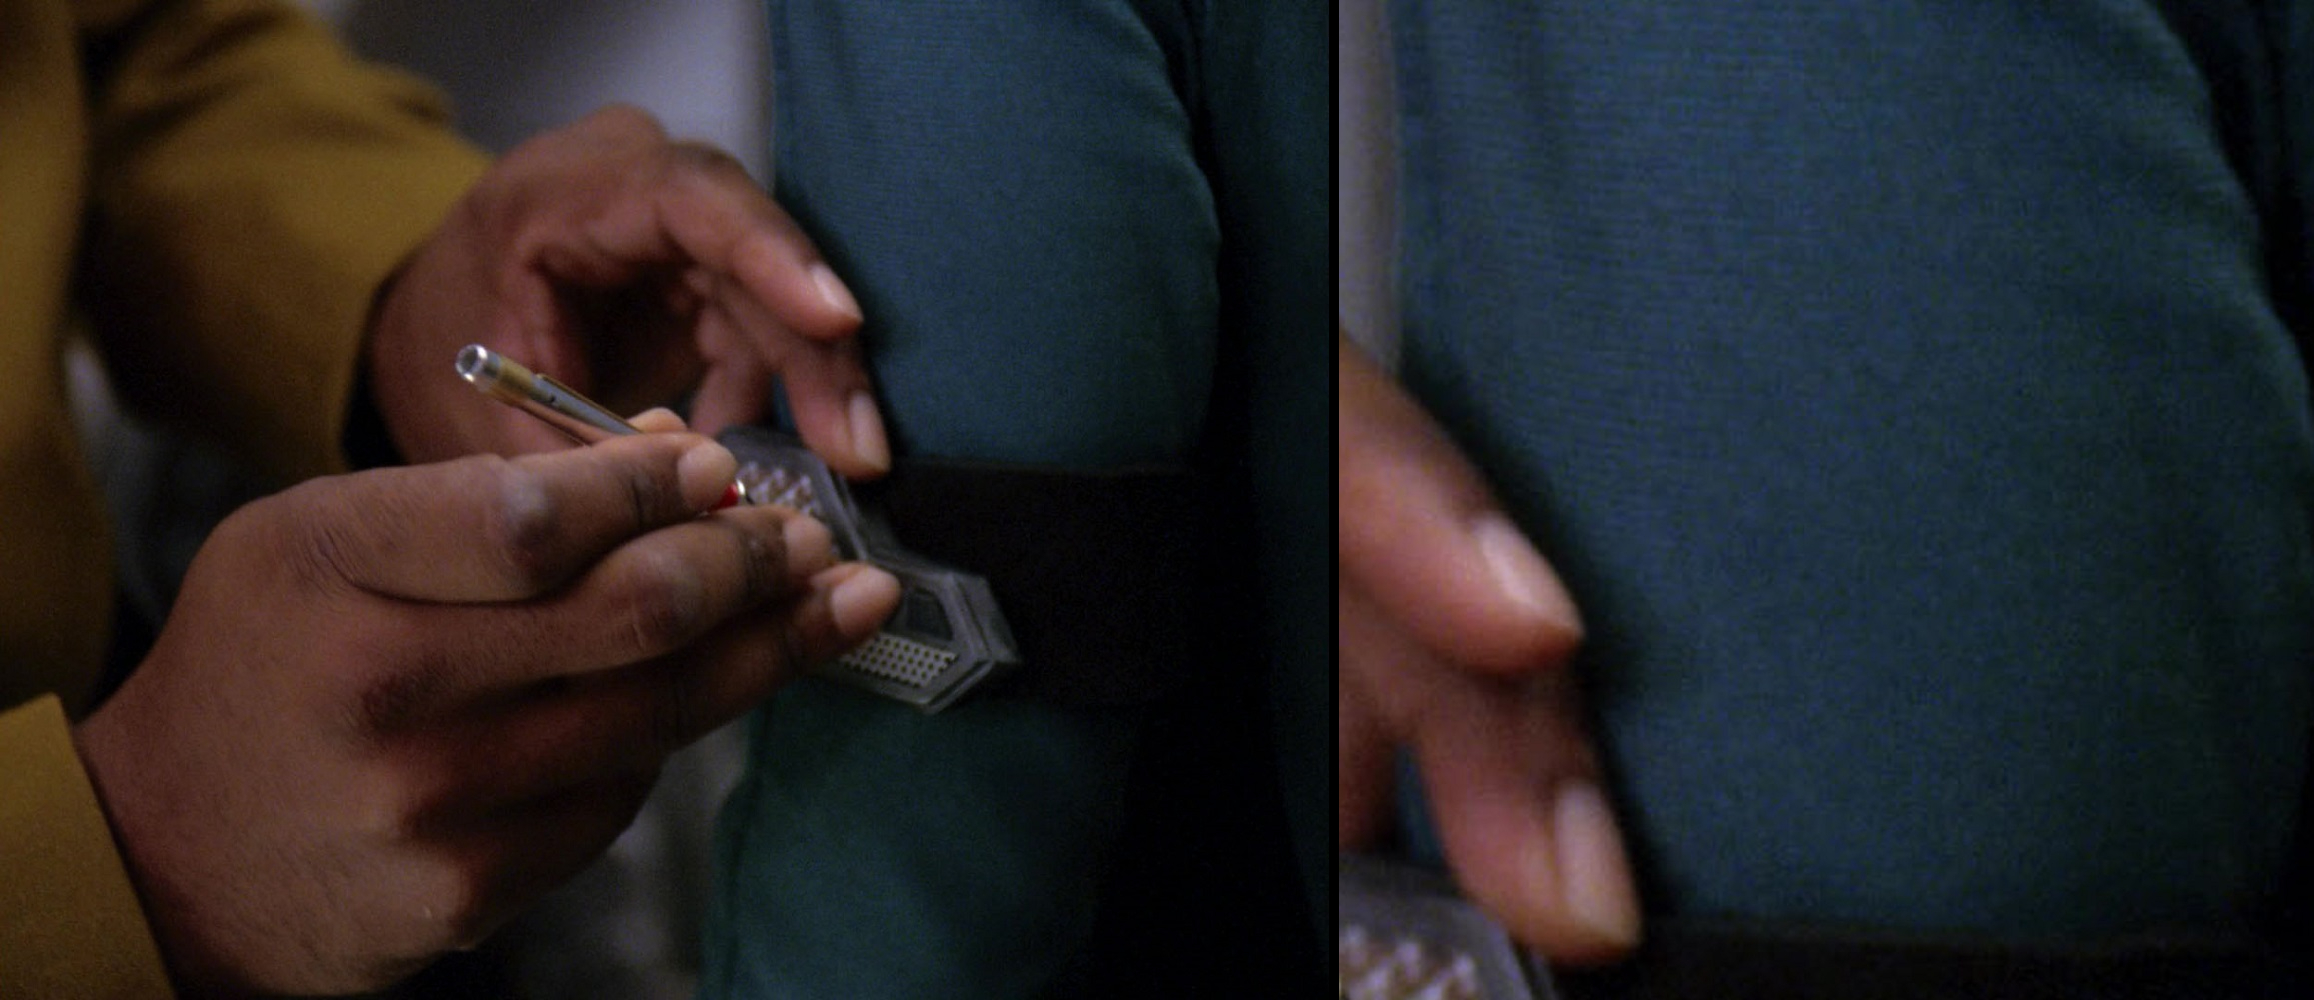
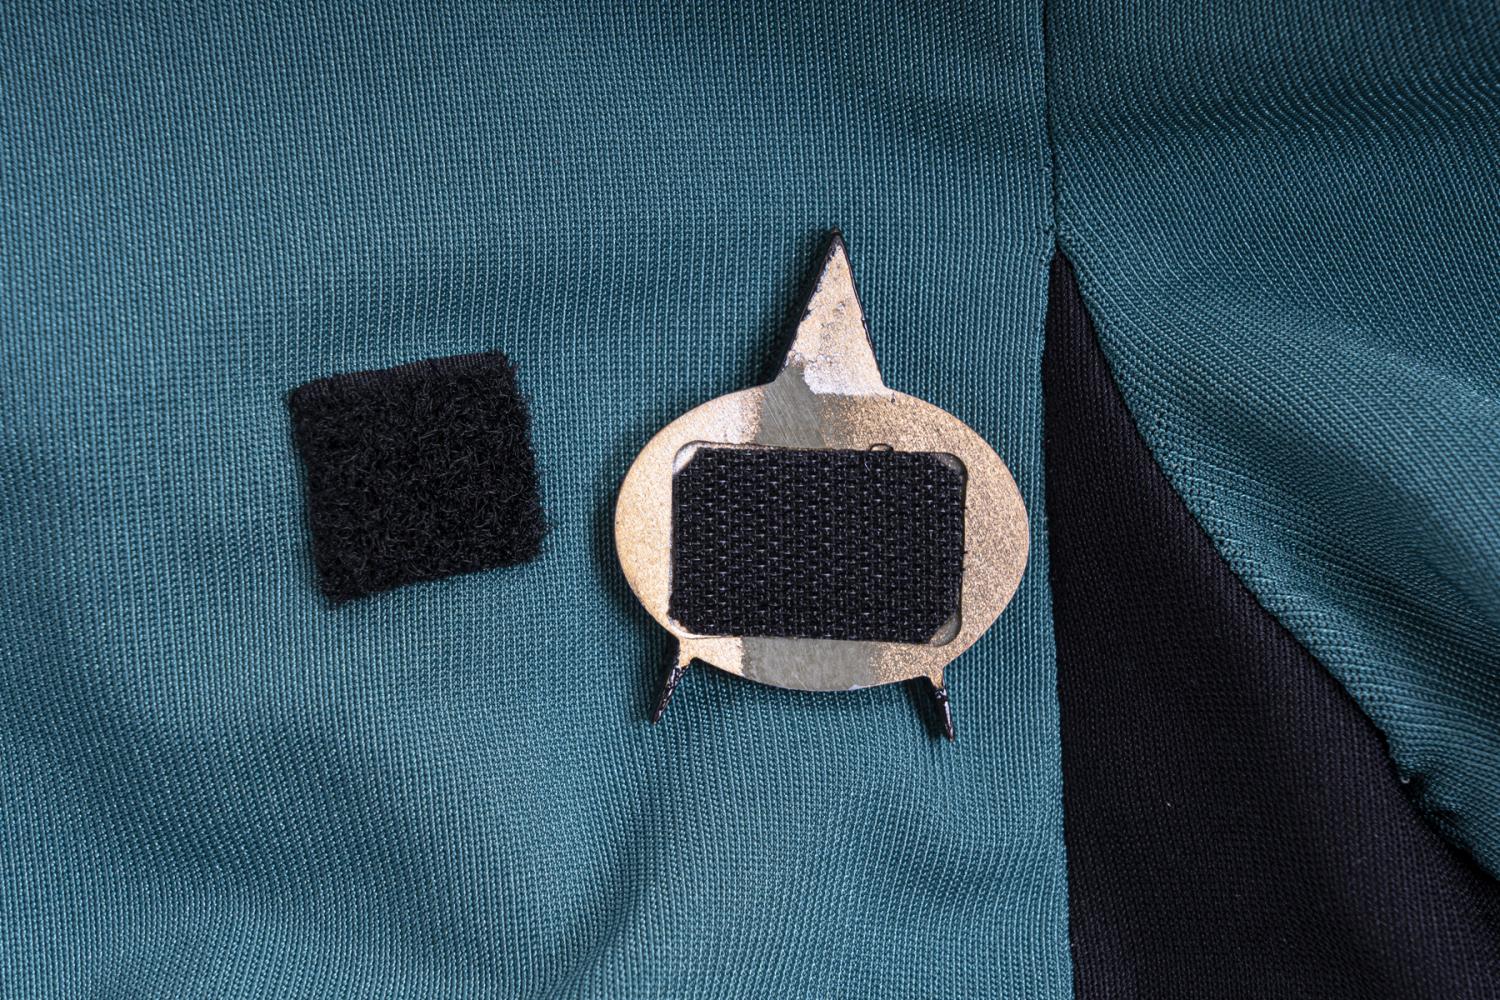
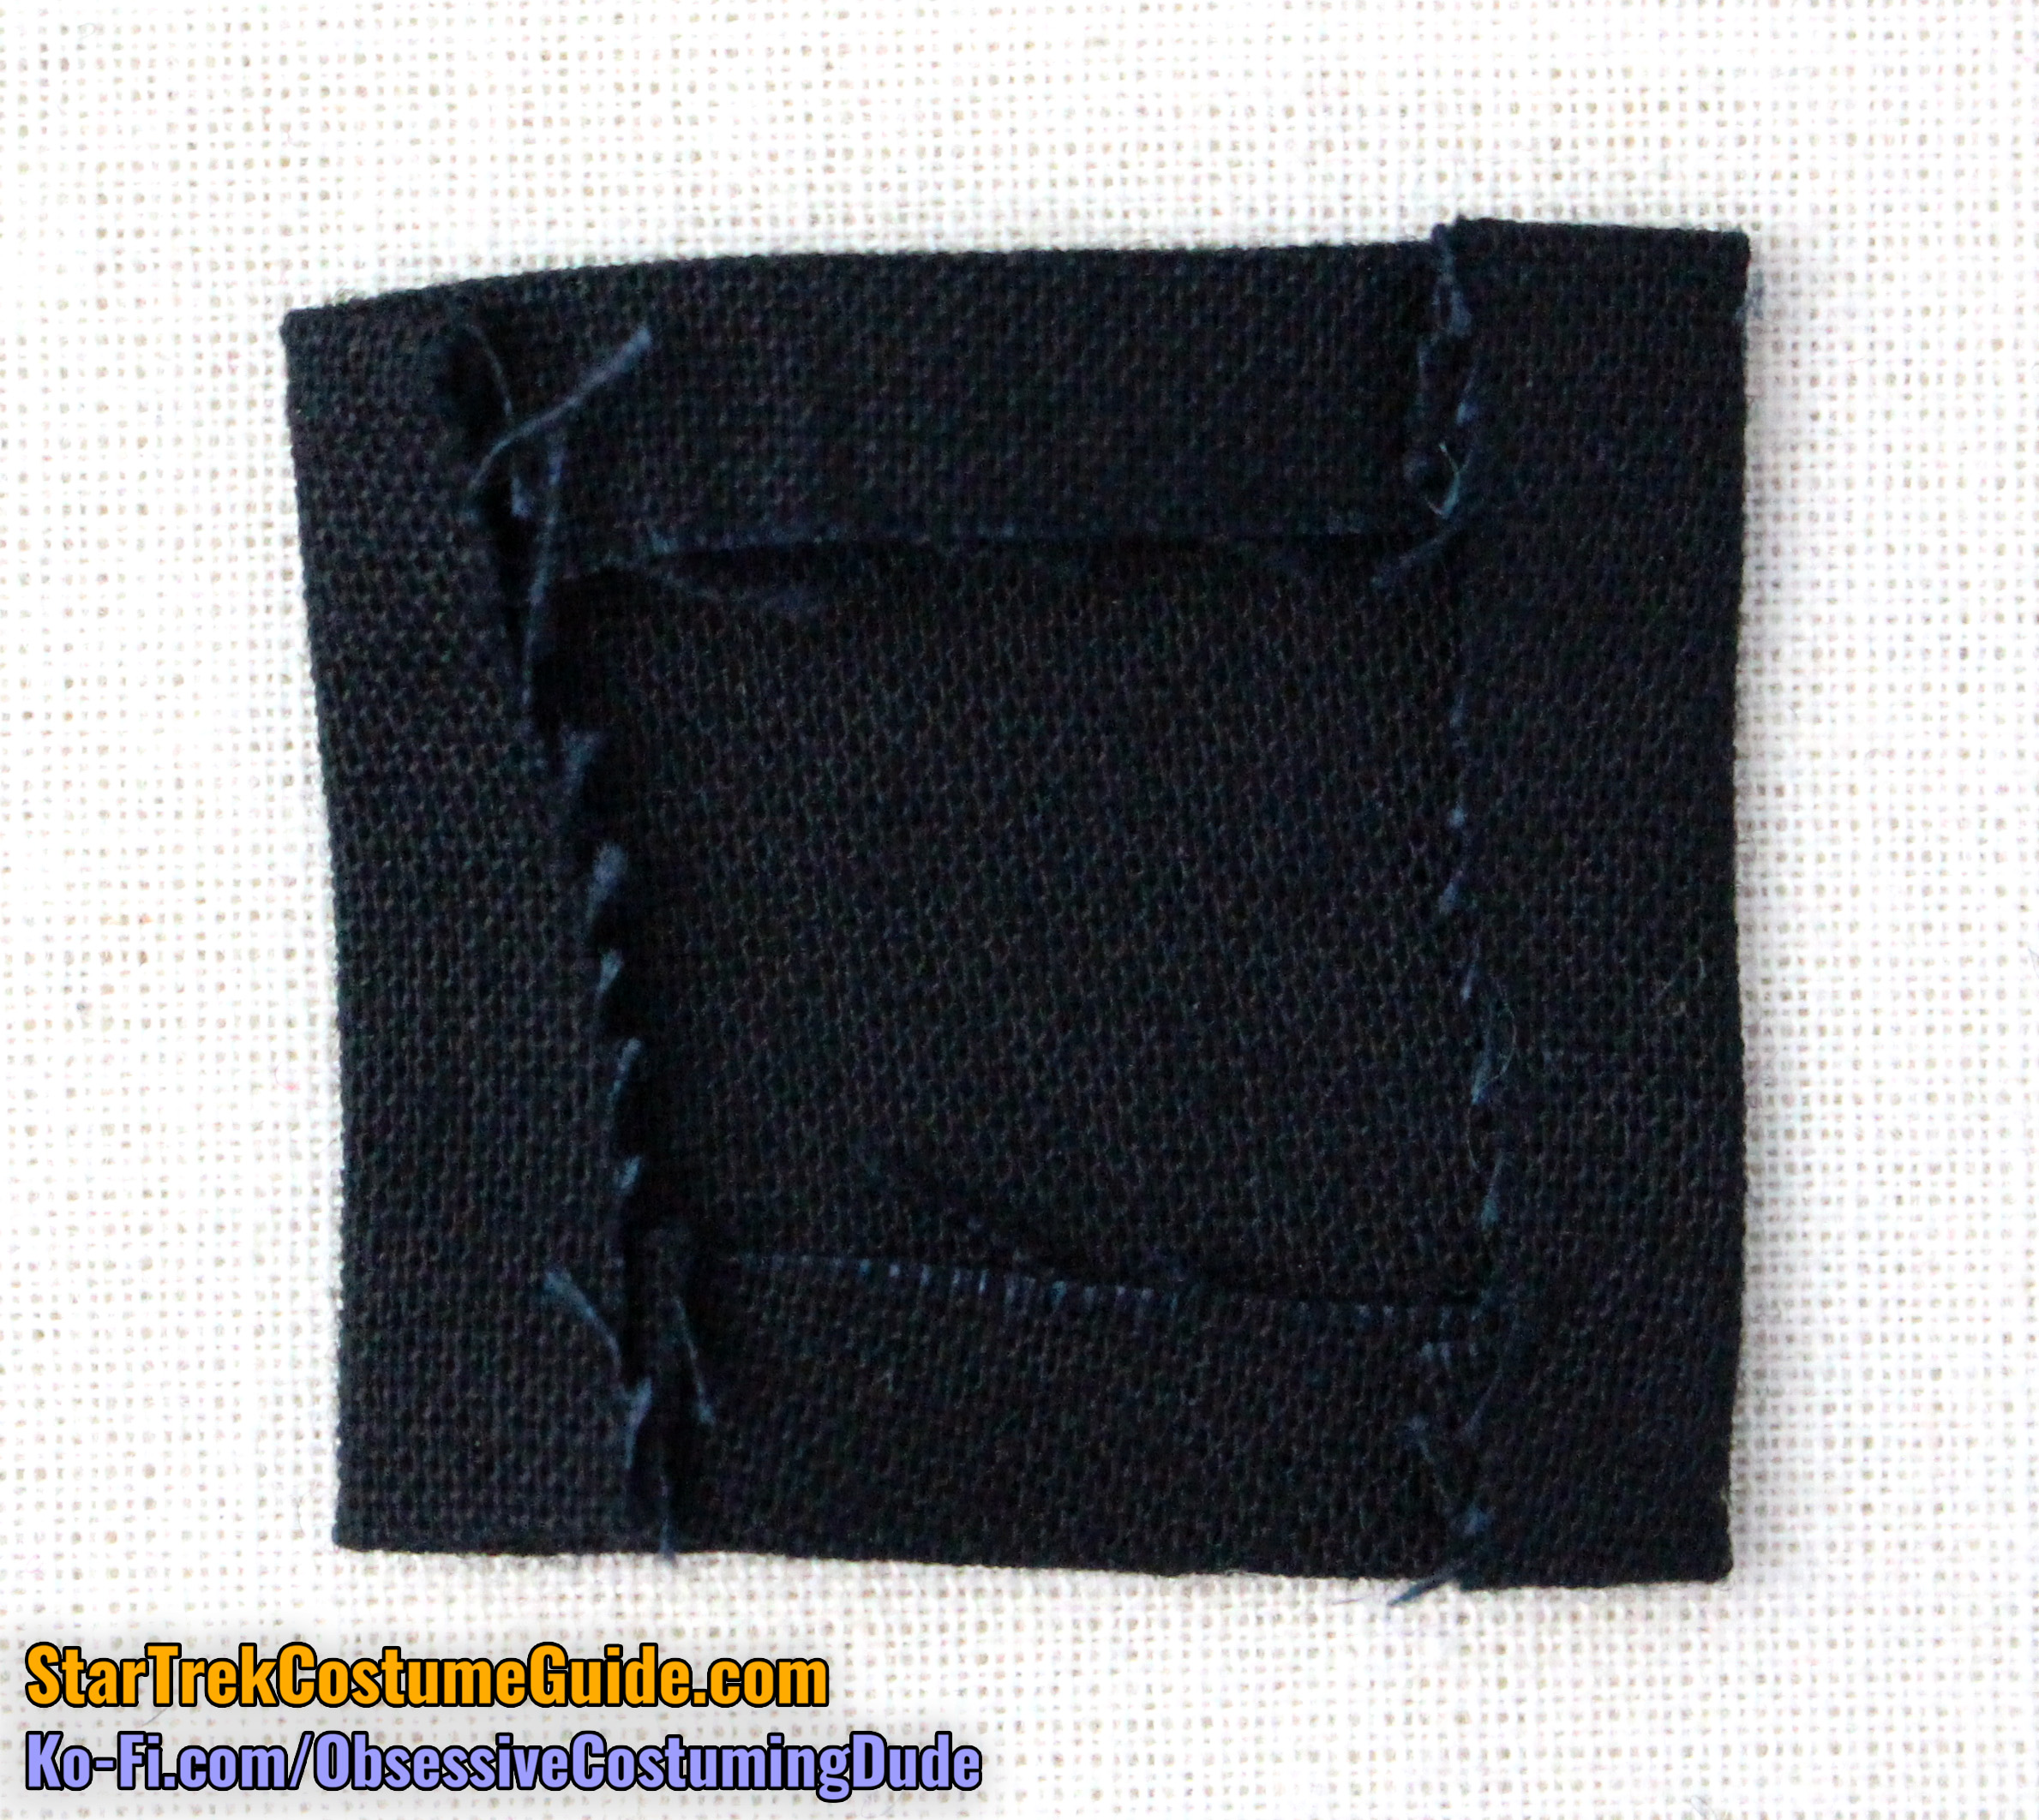
Cut a small 1 ½” square of a lightweight fabric of your choice; this was simply a black lightweight cotton fabric on the Ensign Sito uniform I examined.
Press under ¼” along each edge.
Fold the fabric square in half and slip it over the ends of the piping, enclosing them.
Edge-stitch the protective fabric square (now a rectangle) into place over the piping.
The “Yesterday’s Enterprise” collar process is similar, but also simpler.
You’ll again have three layers on each side: the collar shell (piece A2), the collar lining (also piece A2), and the division-colored collar piping.
Apply a midweight or heavyweight fusible interfacing to the undersides of your collar shells.
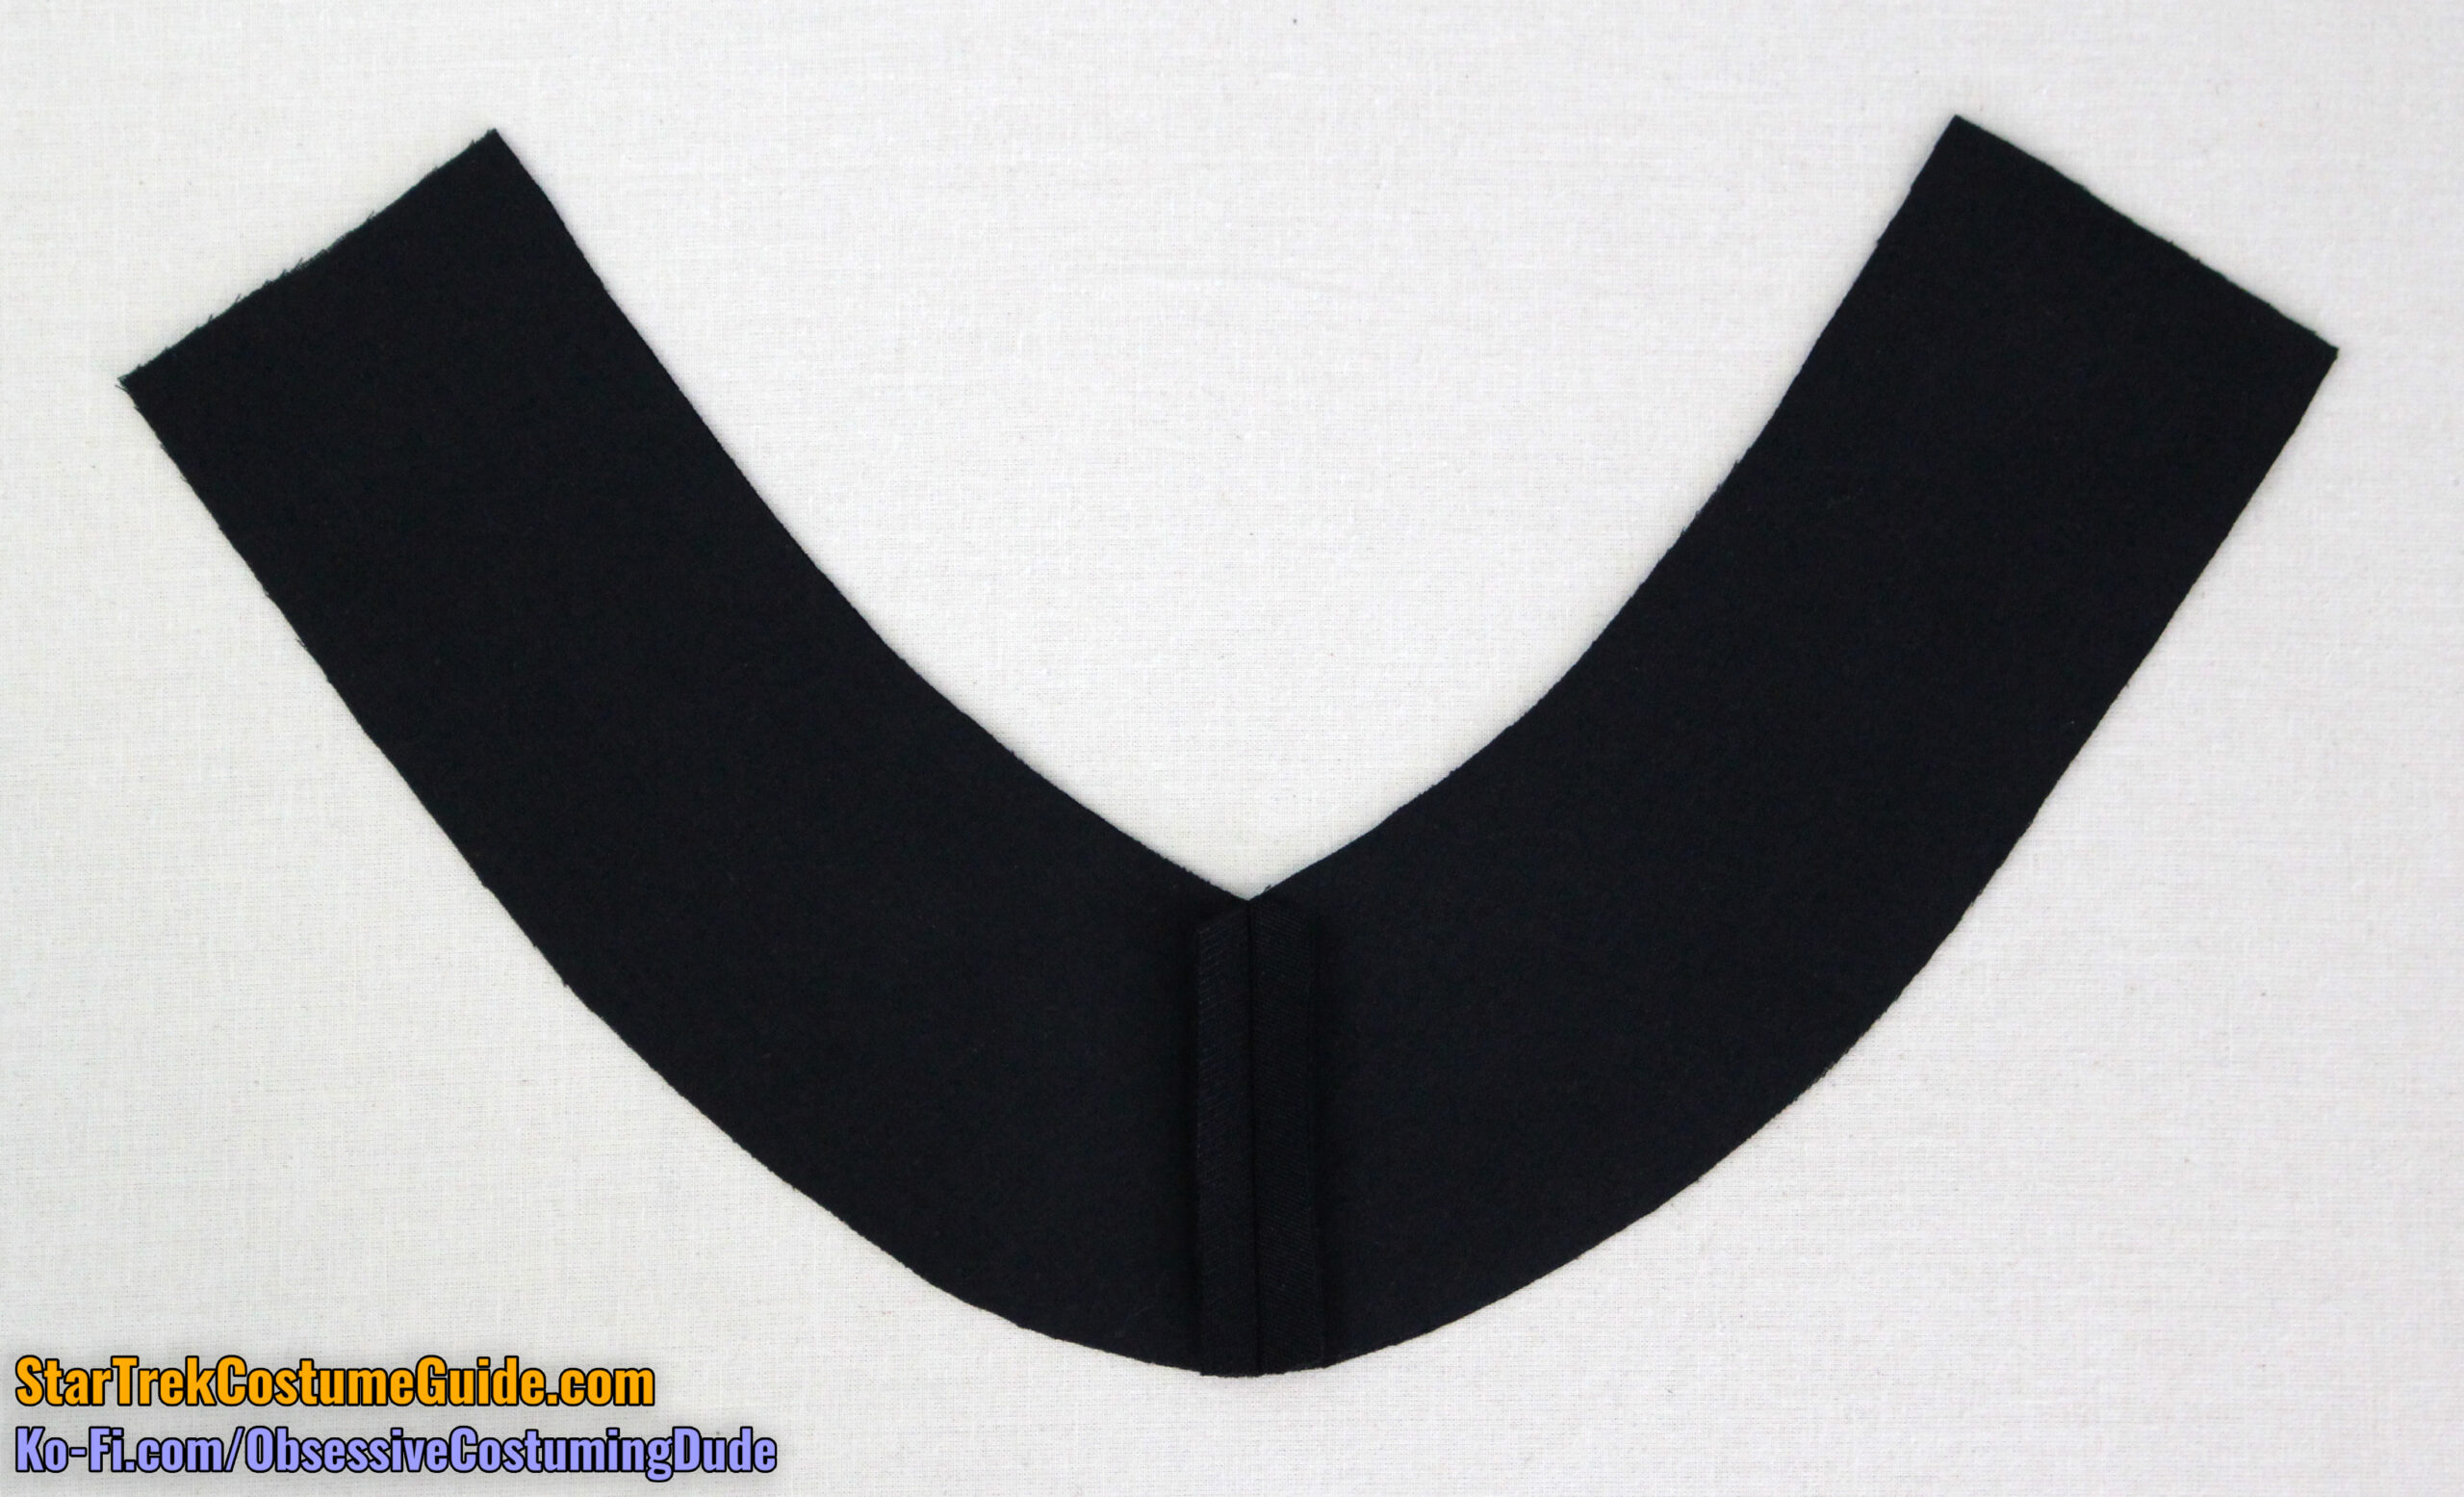
Sew the two halves of the collar together at the center front, right sides together with ⅜” seam allowance.
Press the seam allowances open.
Cut a length of piping several inches longer than the collar itself.
Using a zipper/piping foot, sew the piping to the upper edge of the collar with ⅜” seam allowance.
Trim away the excess length at the back edges and carefully apply some liquid fray preventer.
Sew the two halves of the collar lining together at the center front, right sides together with ⅜” seam allowance.
Press the seam allowances open.
Press the ⅜” lower (neckline) allowances upward.
Pin the collar lining to the collar along the upper edges, right sides together.
Sew the collar lining to the collar along the upper edge, right sides together with ⅜” seam allowance. Start/stop your stitching 1” from the back of the collar.
Clip the seam allowances along the upper seam.
Turn the collar lining under and press.
Stay-stitch the jumpsuit neckline ¼” from the edge.
Pin the collar onto the jumpsuit neckline, matching center fronts, center backs, and shoulders.
Baste the collar to the jumpsuit neckline with ⅜” seam allowance.
Check to make sure the collar is properly basted, with no pleats, tucks, pulls, etc.
Once satisfied with the collar’s state, sew the collar to the jumpsuit with ⅜” seam allowance.
Press the seam allowances upward (into the collar) around the neckline.
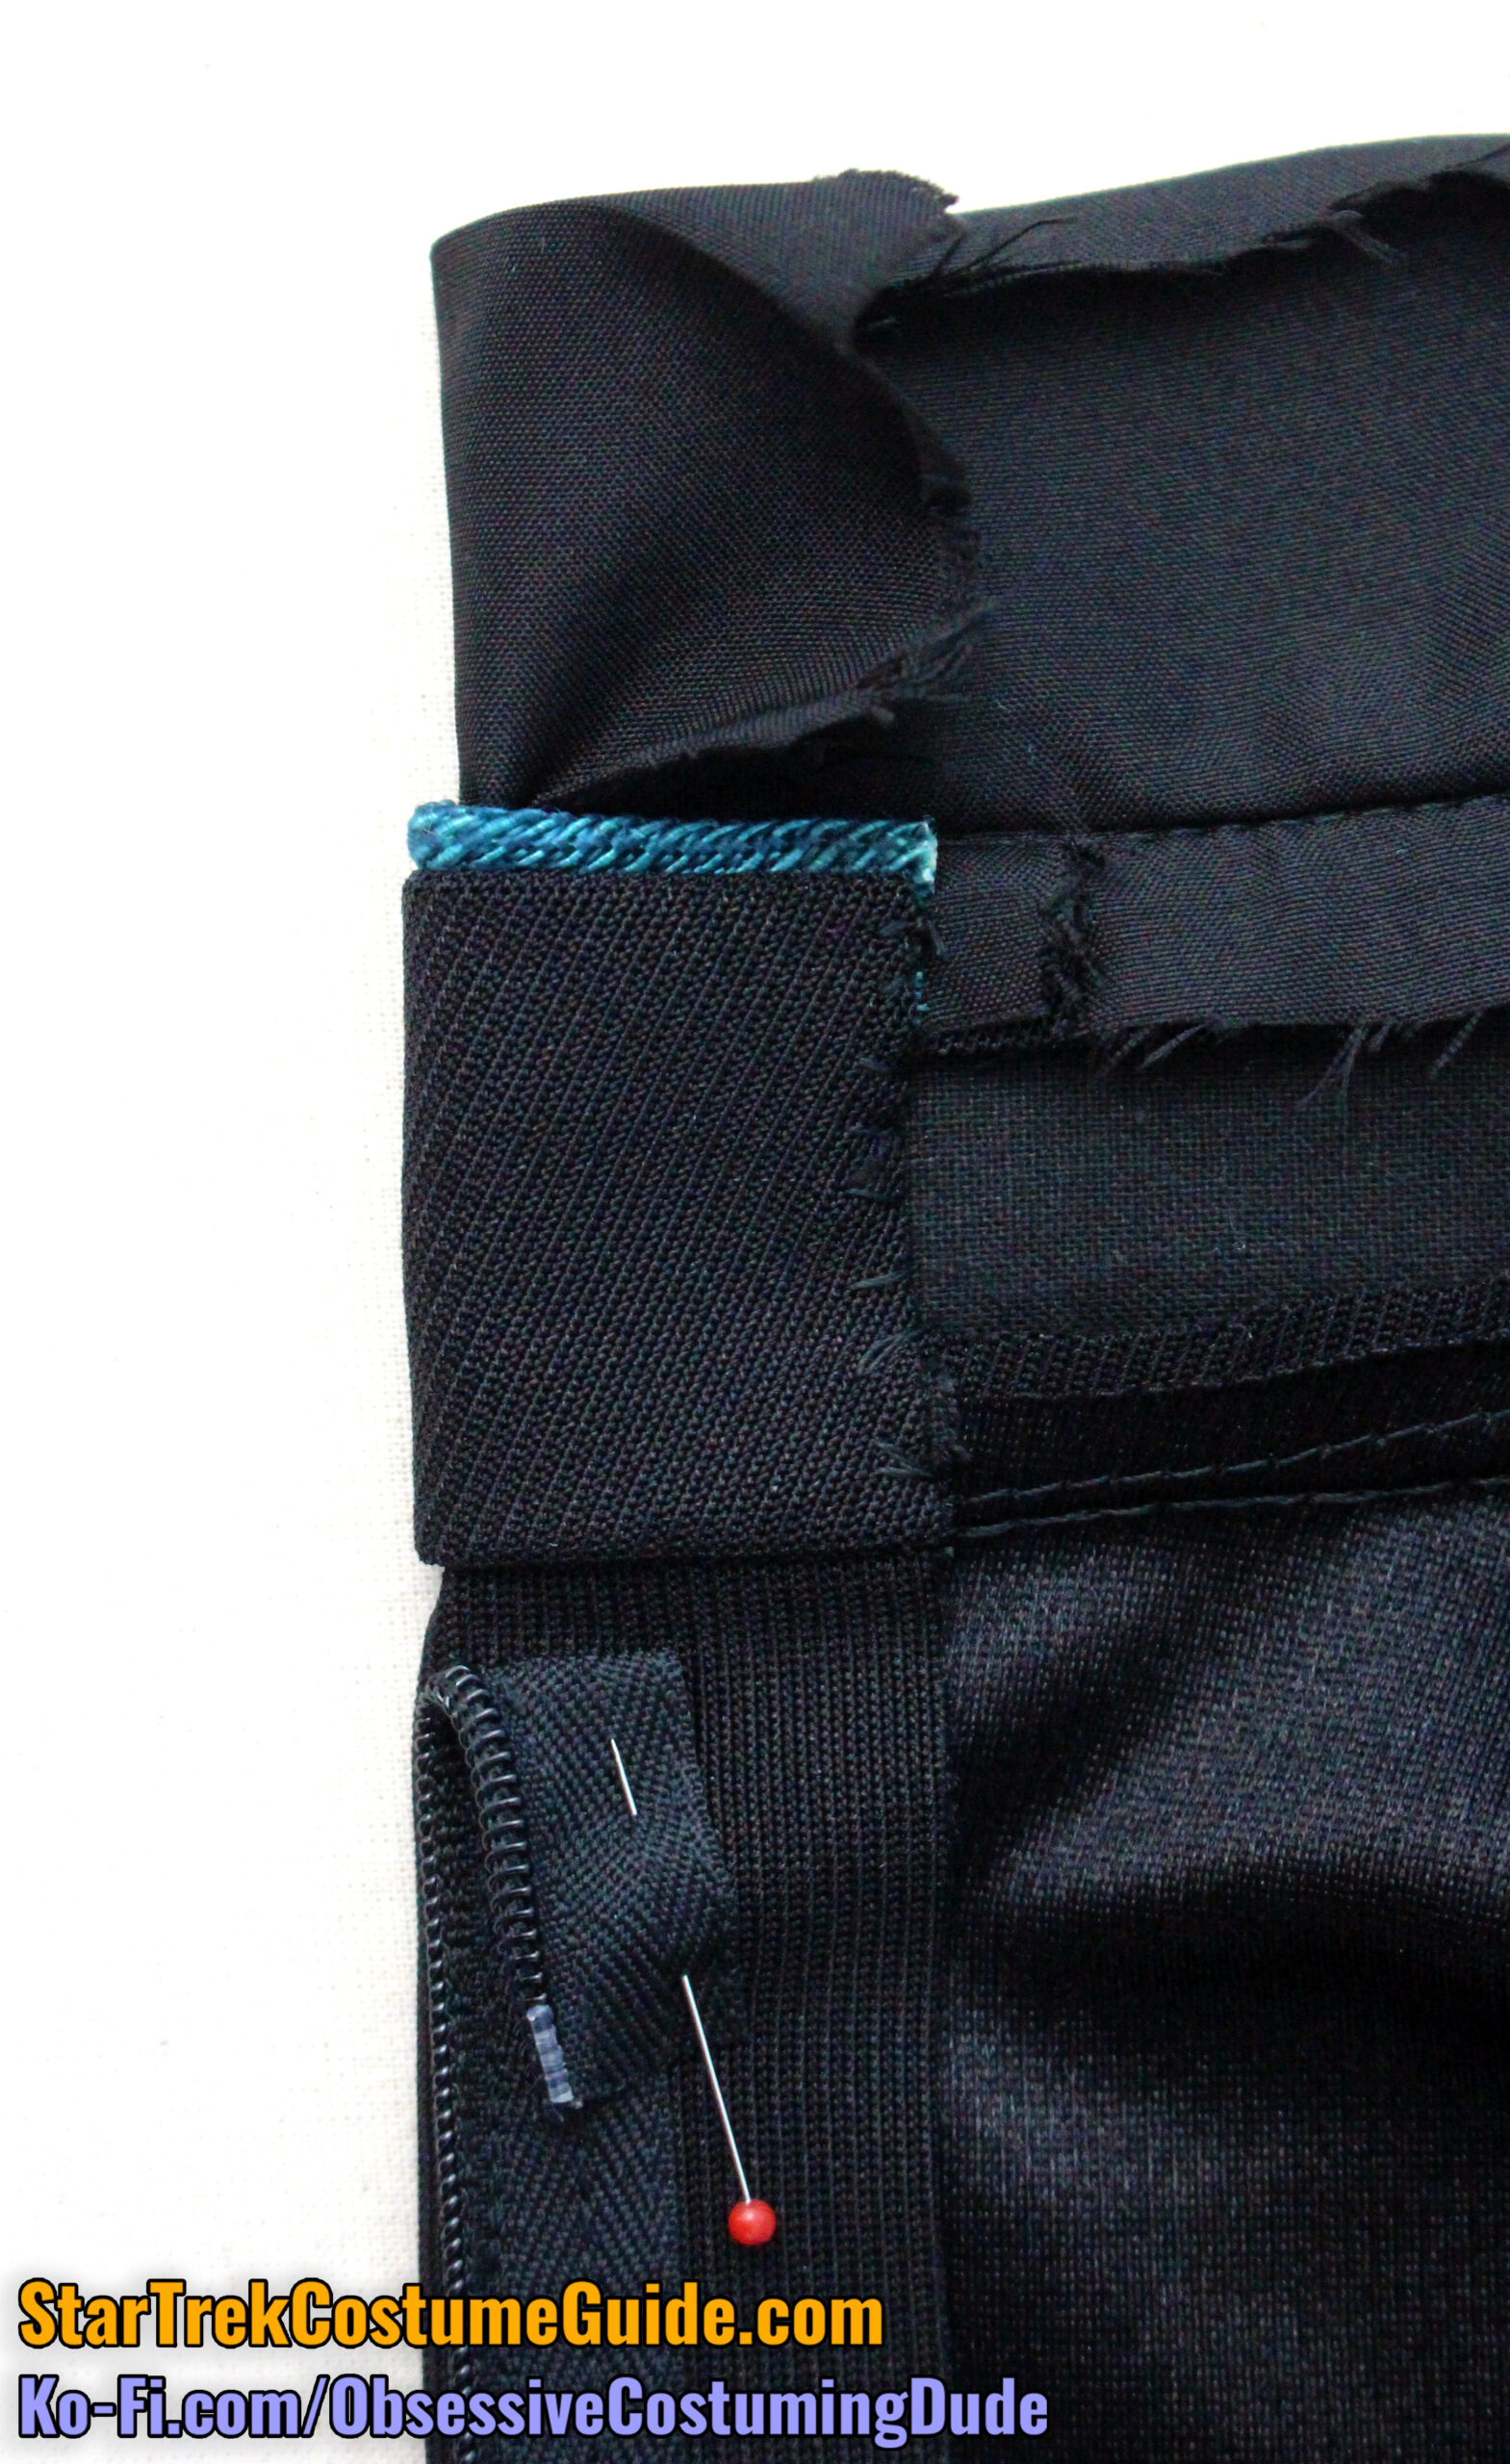
Now it’s time for my least-favorite part of the entire process … attaching the zipper.
Ordinarily invisible zippers don’t bother me, but in this case there are compounding issues … specifically that it’s on spandex (that stretches in the direction of the zipper, because of course) and the multiple points – both symmetrical and asymmetrical – at which the seam lines need to properly align across the zipper.
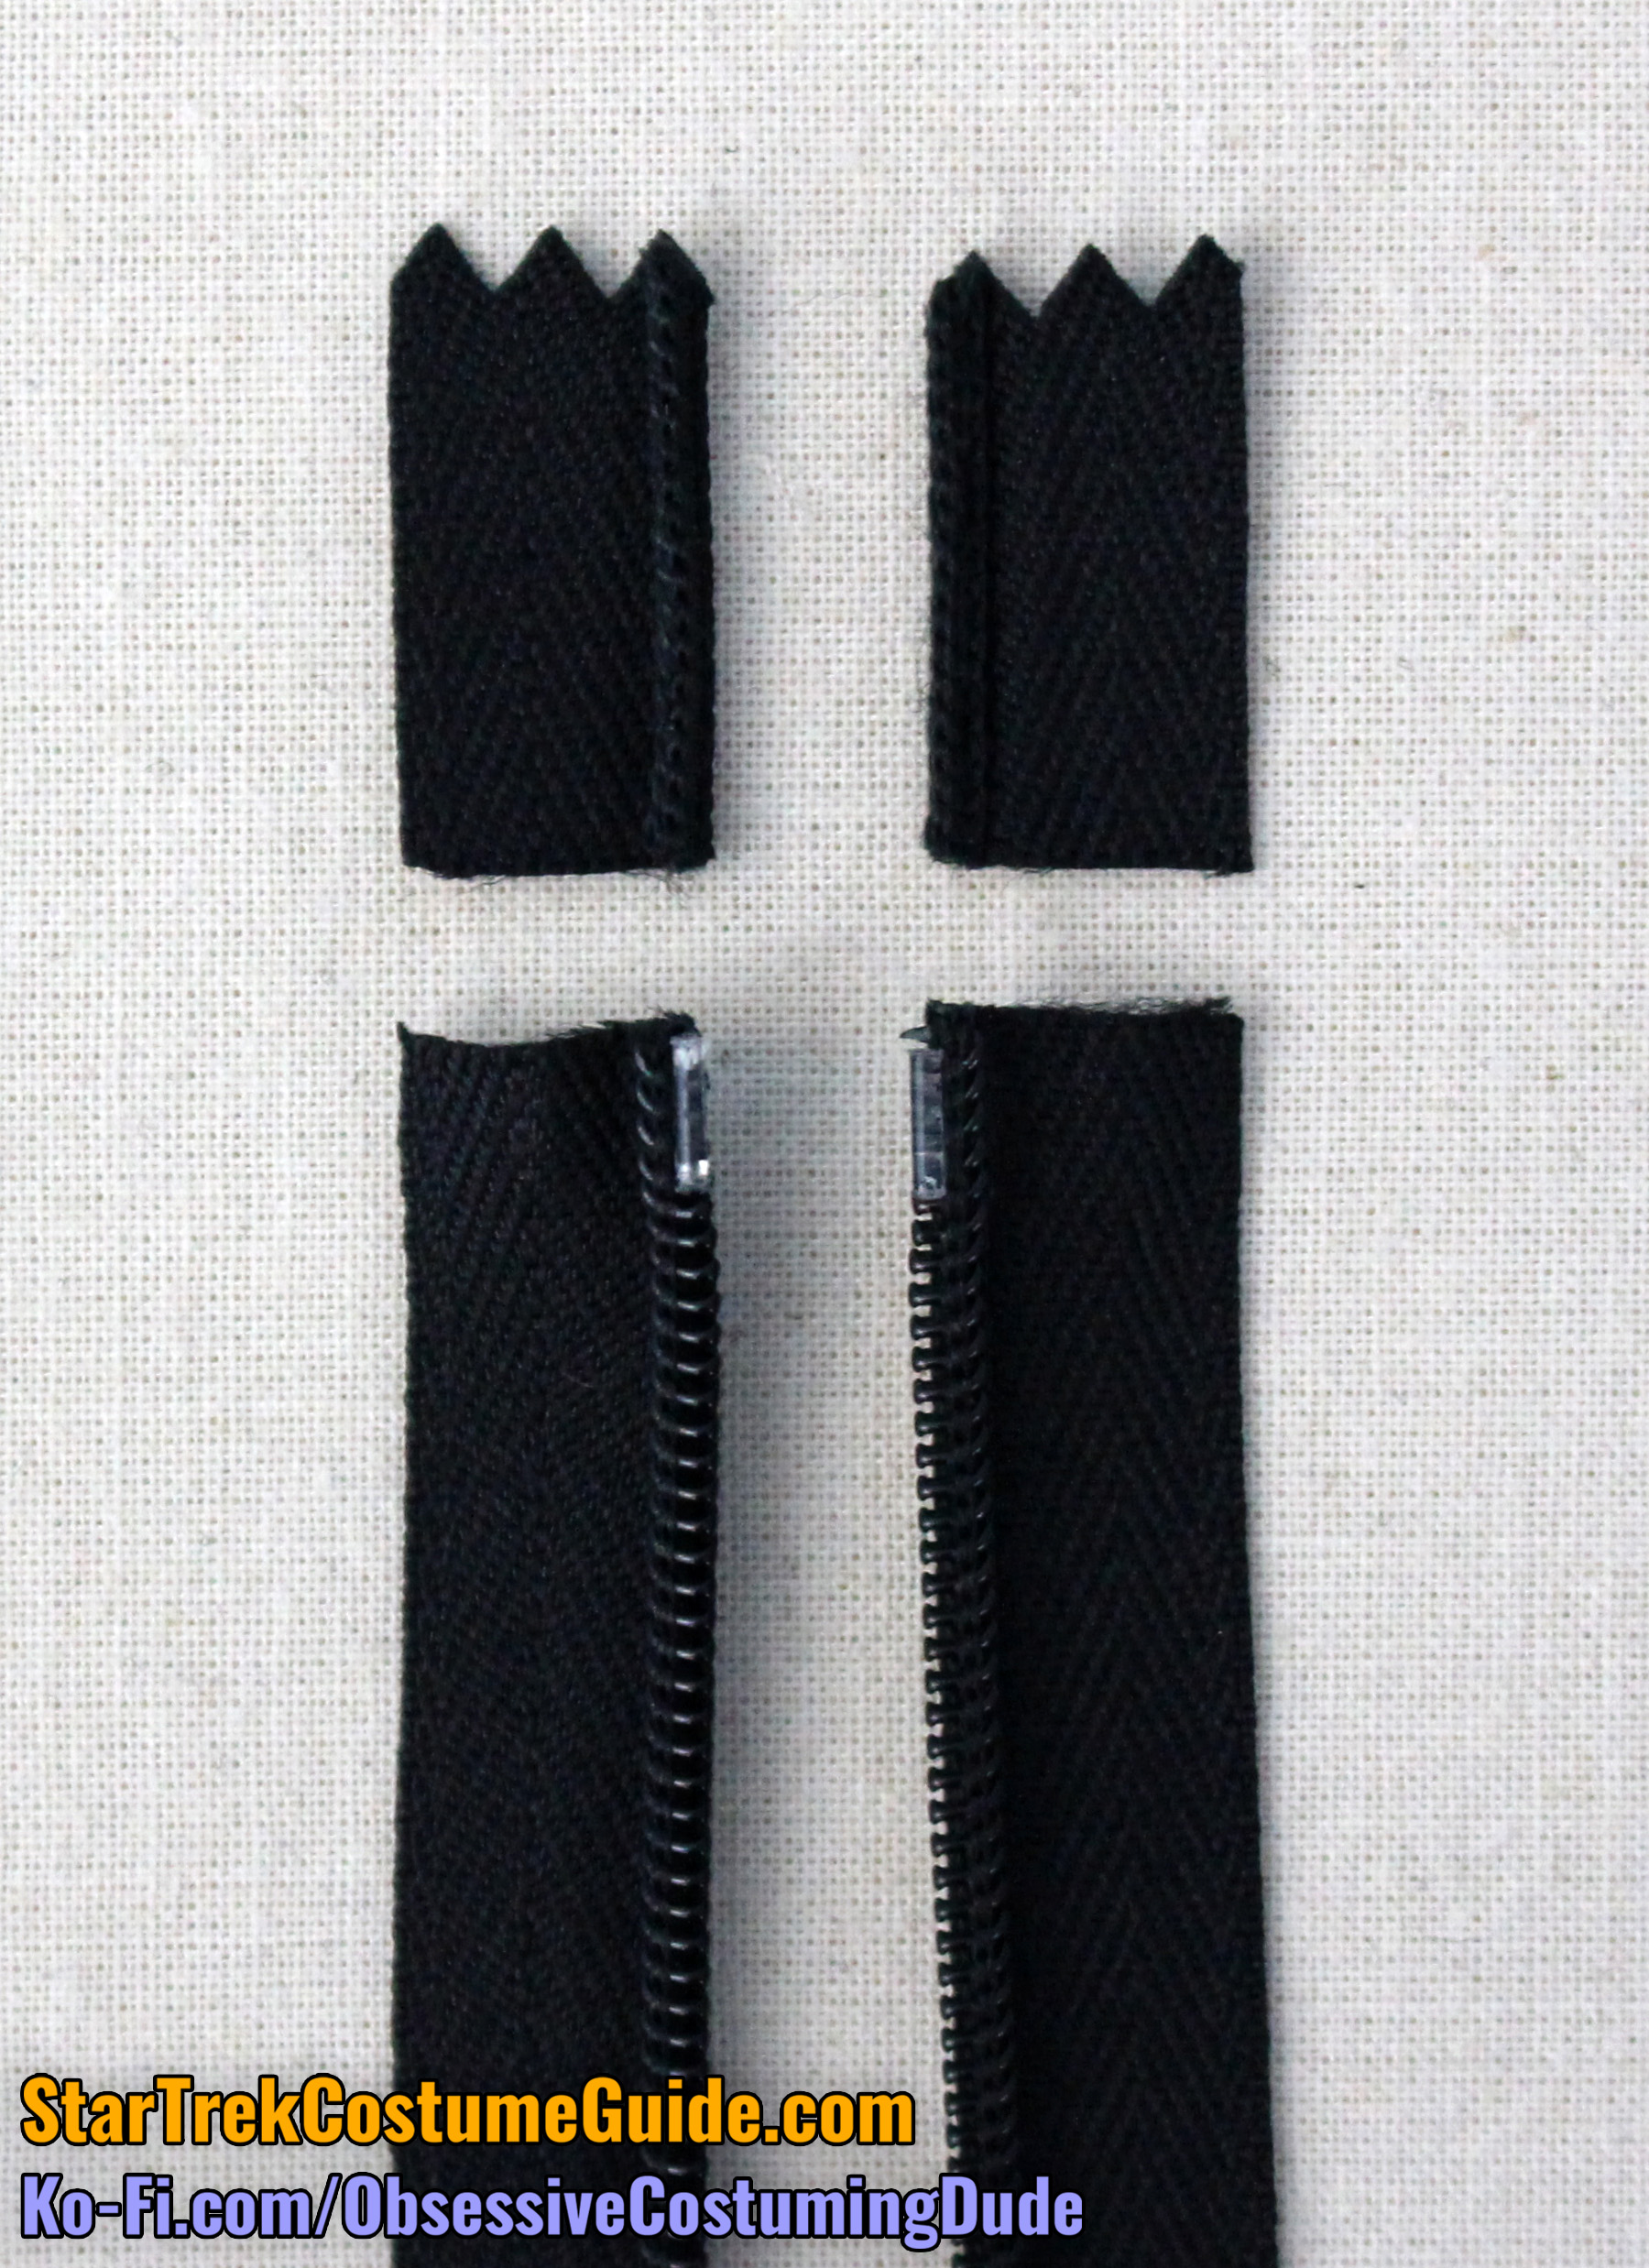
To begin, either turn the excess zipper tape at the top of the zipper under and stitch it down, or trim it away just above the zipper stop and apply some liquid fray preventer. (I prefer the latter.)
Fortunately for us all (I suppose), I’ve made enough of these uniforms – and thus installed enough of these cursed zippers – that I’ve established a process to make it as relatively painless as possible.
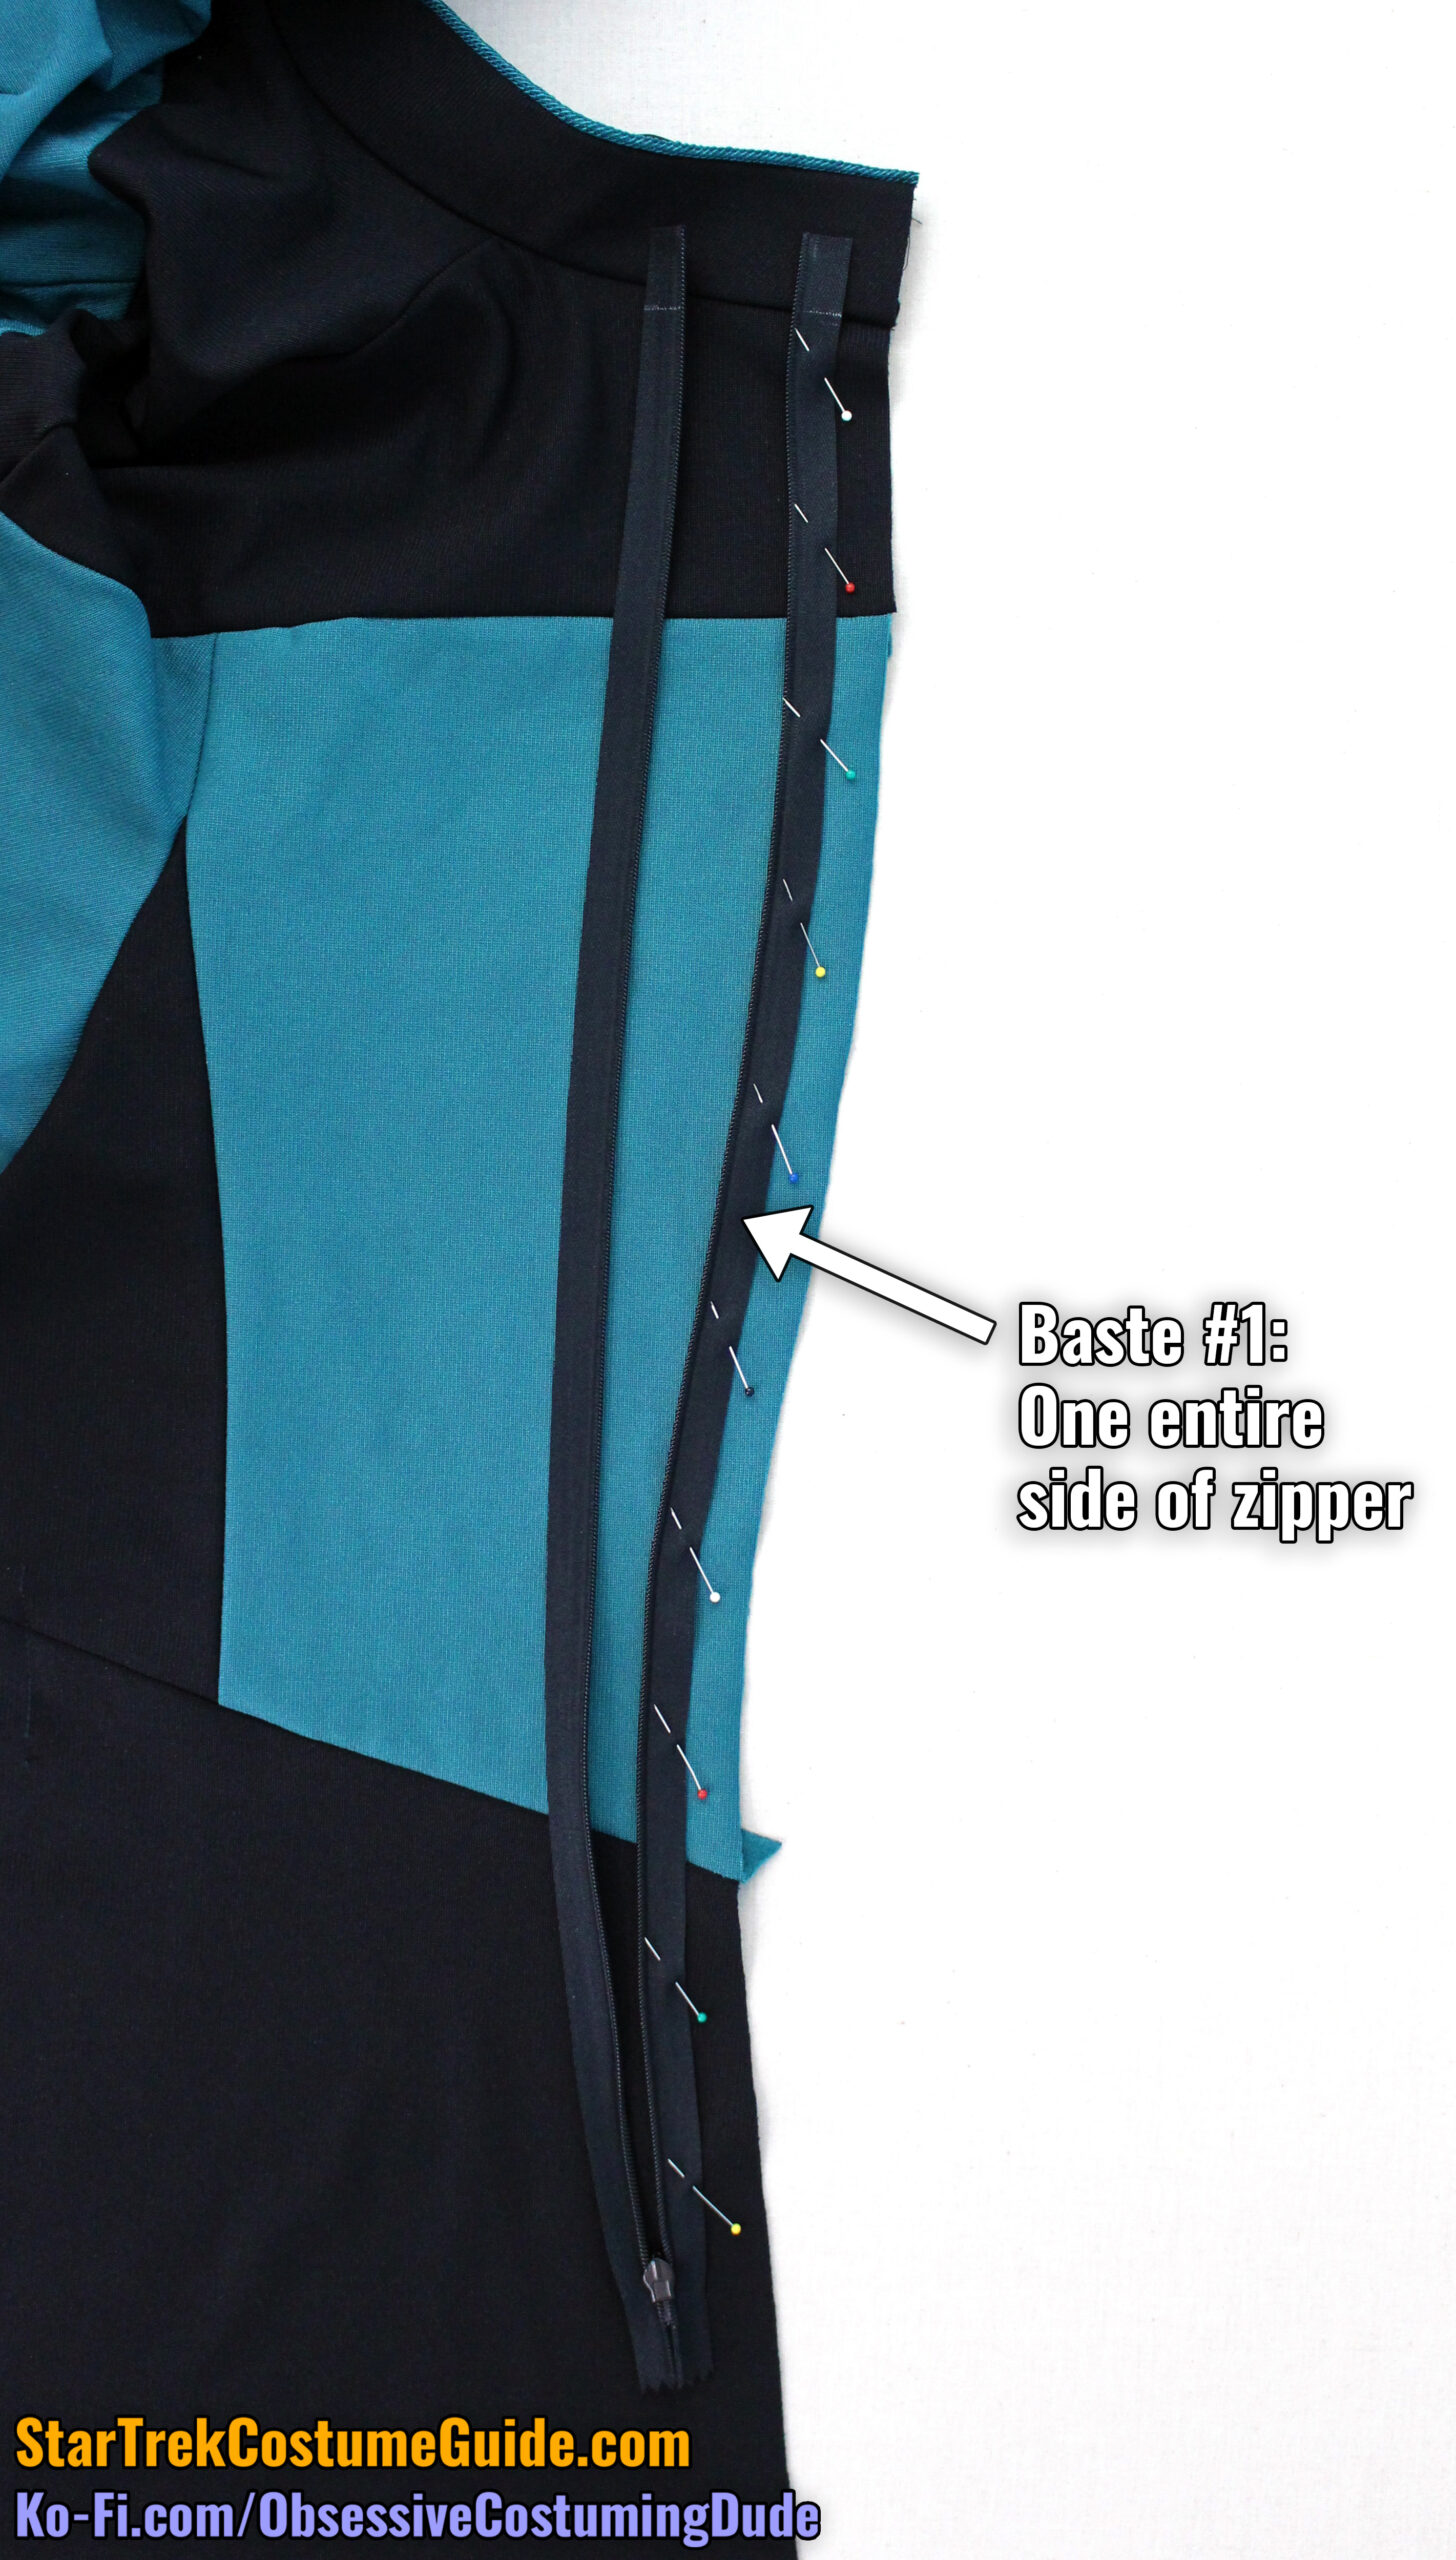
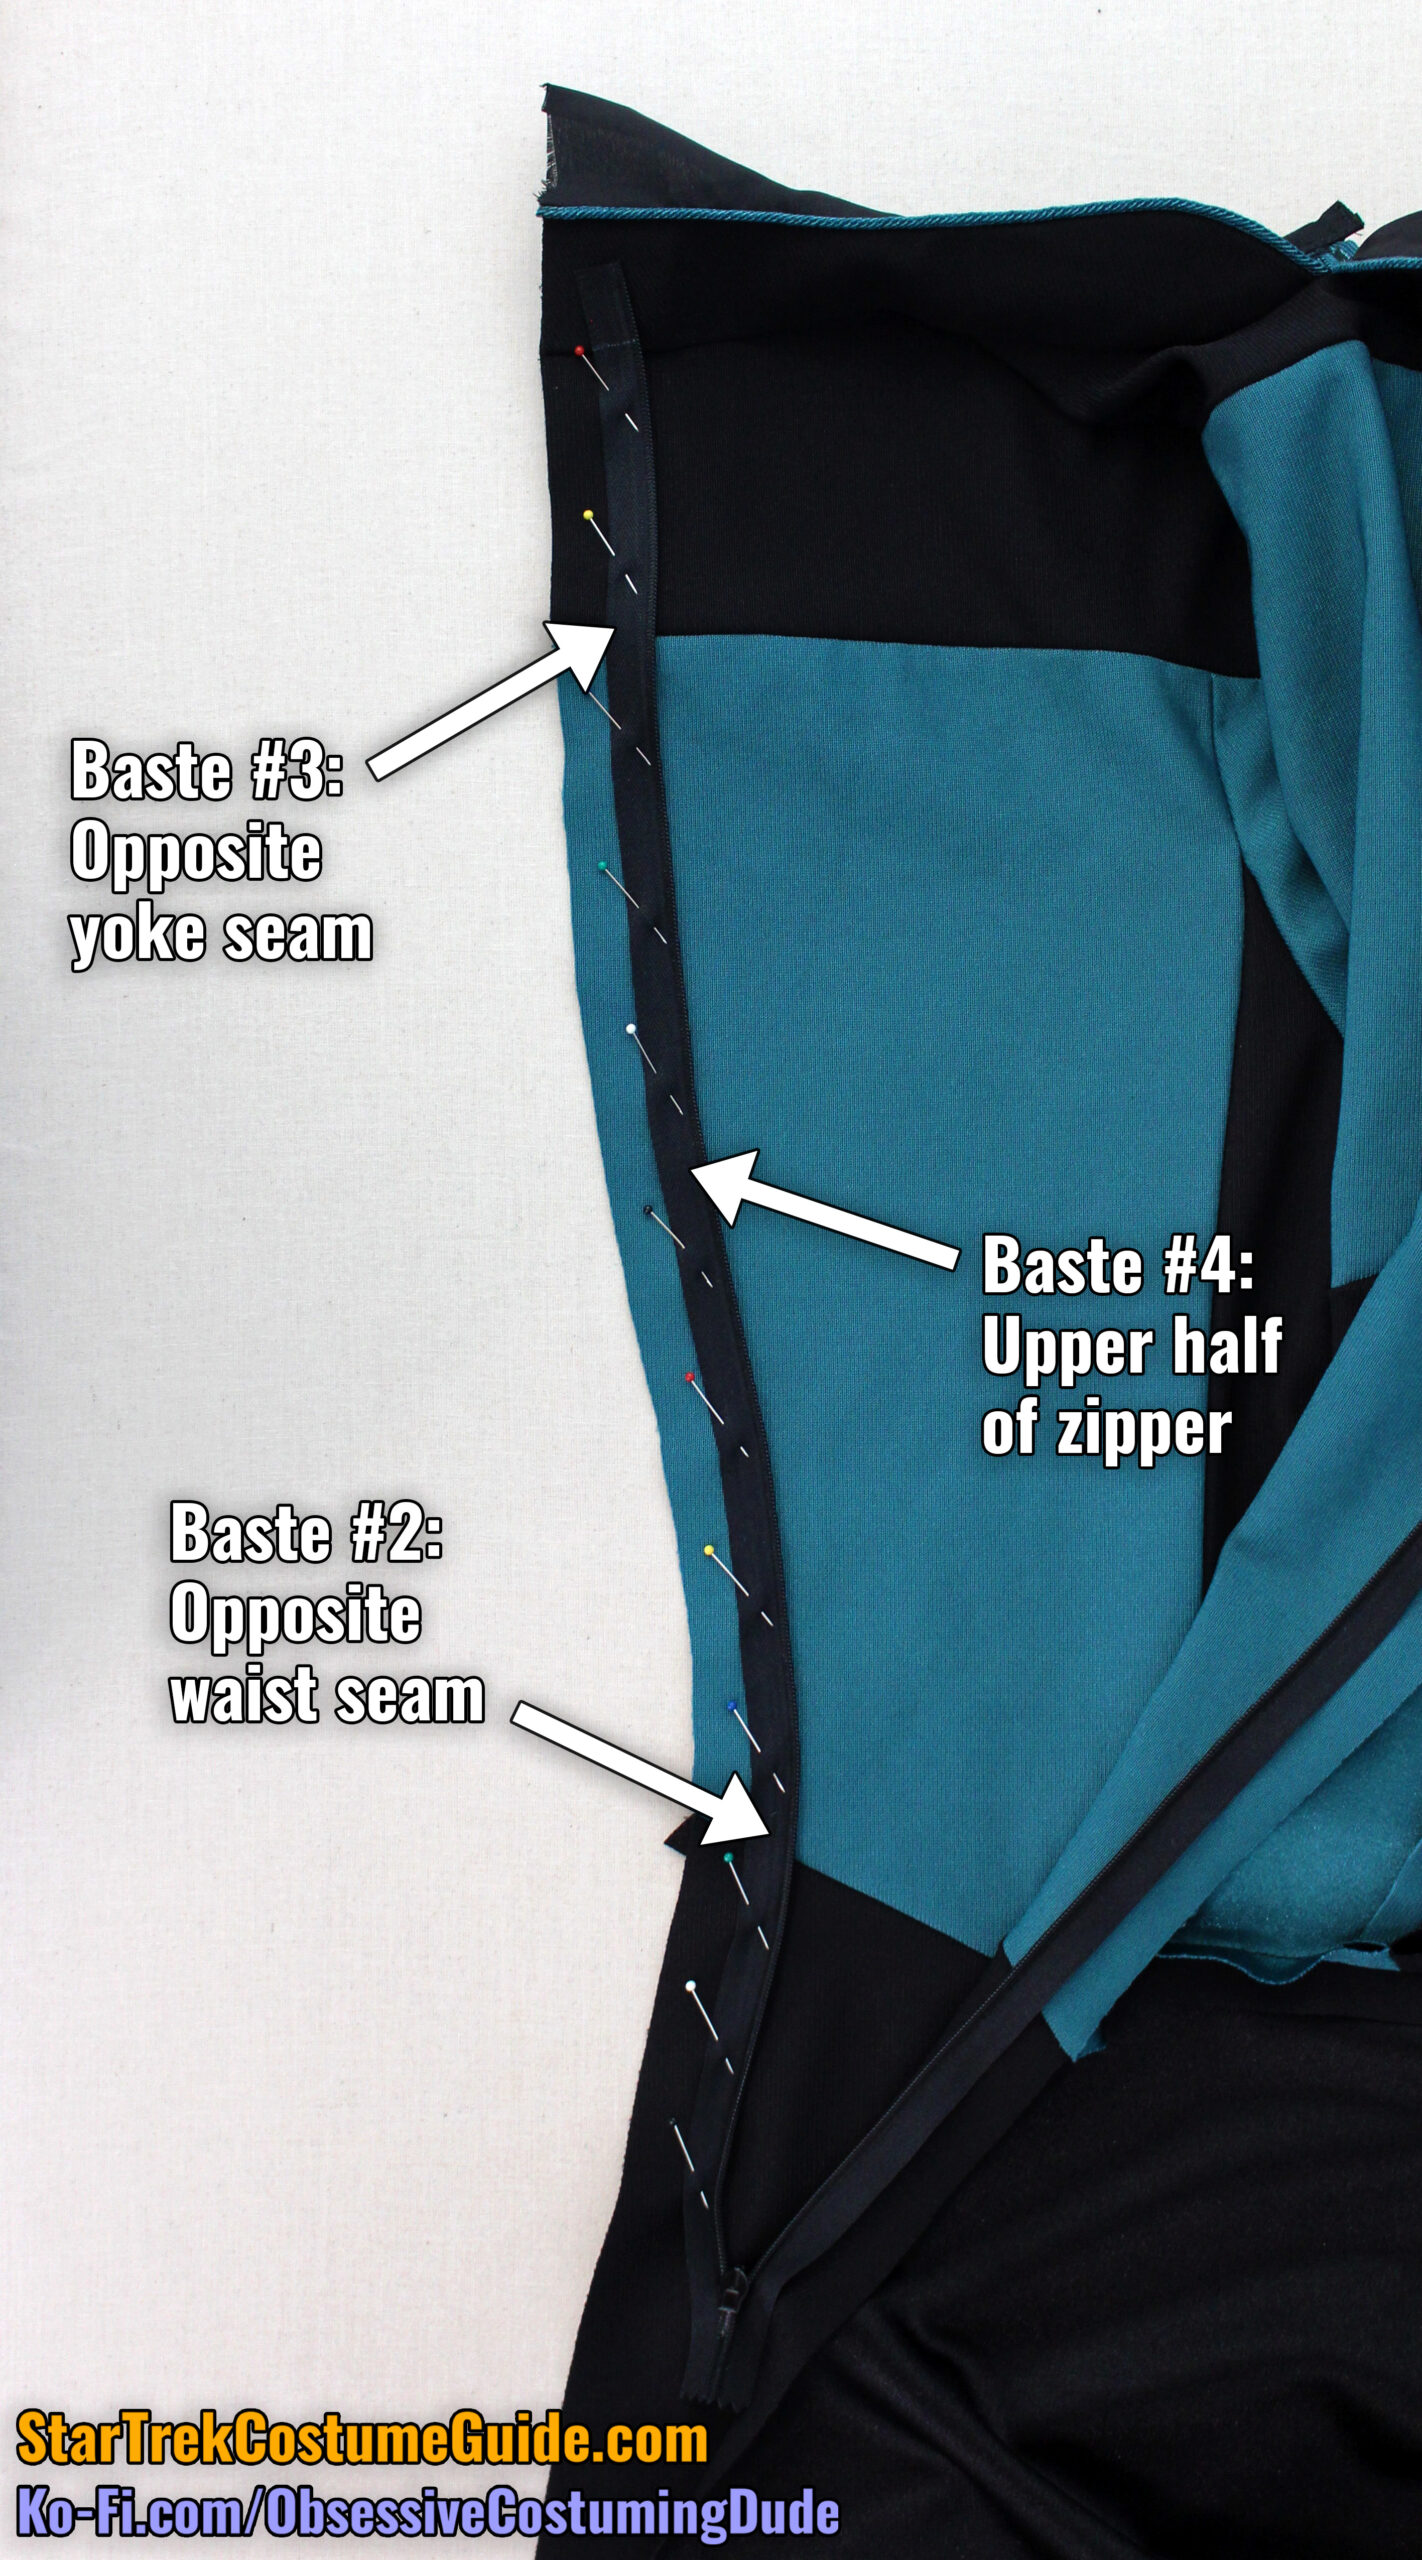
After prepping your invisible zipper, carefully pin it to one side of the jumpsuit as flatly as possible, making sure no part of the jumpsuit fabric is stretched.
I suggest positioning the zipper so it extends upward ¾” above the neckline/collar seam at the center back.
Also remember that the center back/zipper allowance is a full inch.
Baste the zipper to the jumpsuit all the way from top to bottom. (I baste the top of the zipper as well, even though it will be left hanging free once it’s installed.)
Carefully pin the other side of the zipper to the opposite side of the jumpsuit, starting at the top and keeping everything as flat as possible.
Baste the zipper into place over the asymmetrical waist seam (an inch or so above and below it should work fine).
Remove the lower pins and close the zipper up to just past the waist.
Ideally the asymmetrical waist seam will perfectly match across the zipper on your first try, but realistically, it may take a few tries. (Just accept it.)
Remove and adjust the basting stitch in that area as-needed.
Once you’re satisfied of the waist seam is properly aligned, do the same for the opposite yoke seam. (Again, this may take you a few tries.)
With those points anchored, baste the upper half of the zipper (from the waist seam up to the top).
And finally, baste the lower half of the zipper into place, from the bottom up to the waist.
With both sides of the zipper basted and every area theoretically aligned, close the entire zipper to confirm everything is correct.
If so, sew both sides of the zipper to the jumpsuit, leaving the top inch of the zipper hanging free. (If you positioned your zipper the way I recommended, start/stop your stitching ¼” beneath the neckline/collar seam.)
Reinforce your stitching several times at the bottom and 1” from the top of the zipper.
Using a regular presser foot, stitch again ¼” from the zipper teeth to secure the zipper tape, again reinforcing your stitching at the bottom and 1” from the top of the zipper.
Horizontally stitch across the zipper tape ¼” beneath the neckline/collar seam, leaving the top of the zipper hanging free.
Remove the basting stitching from the top inch of the zipper.
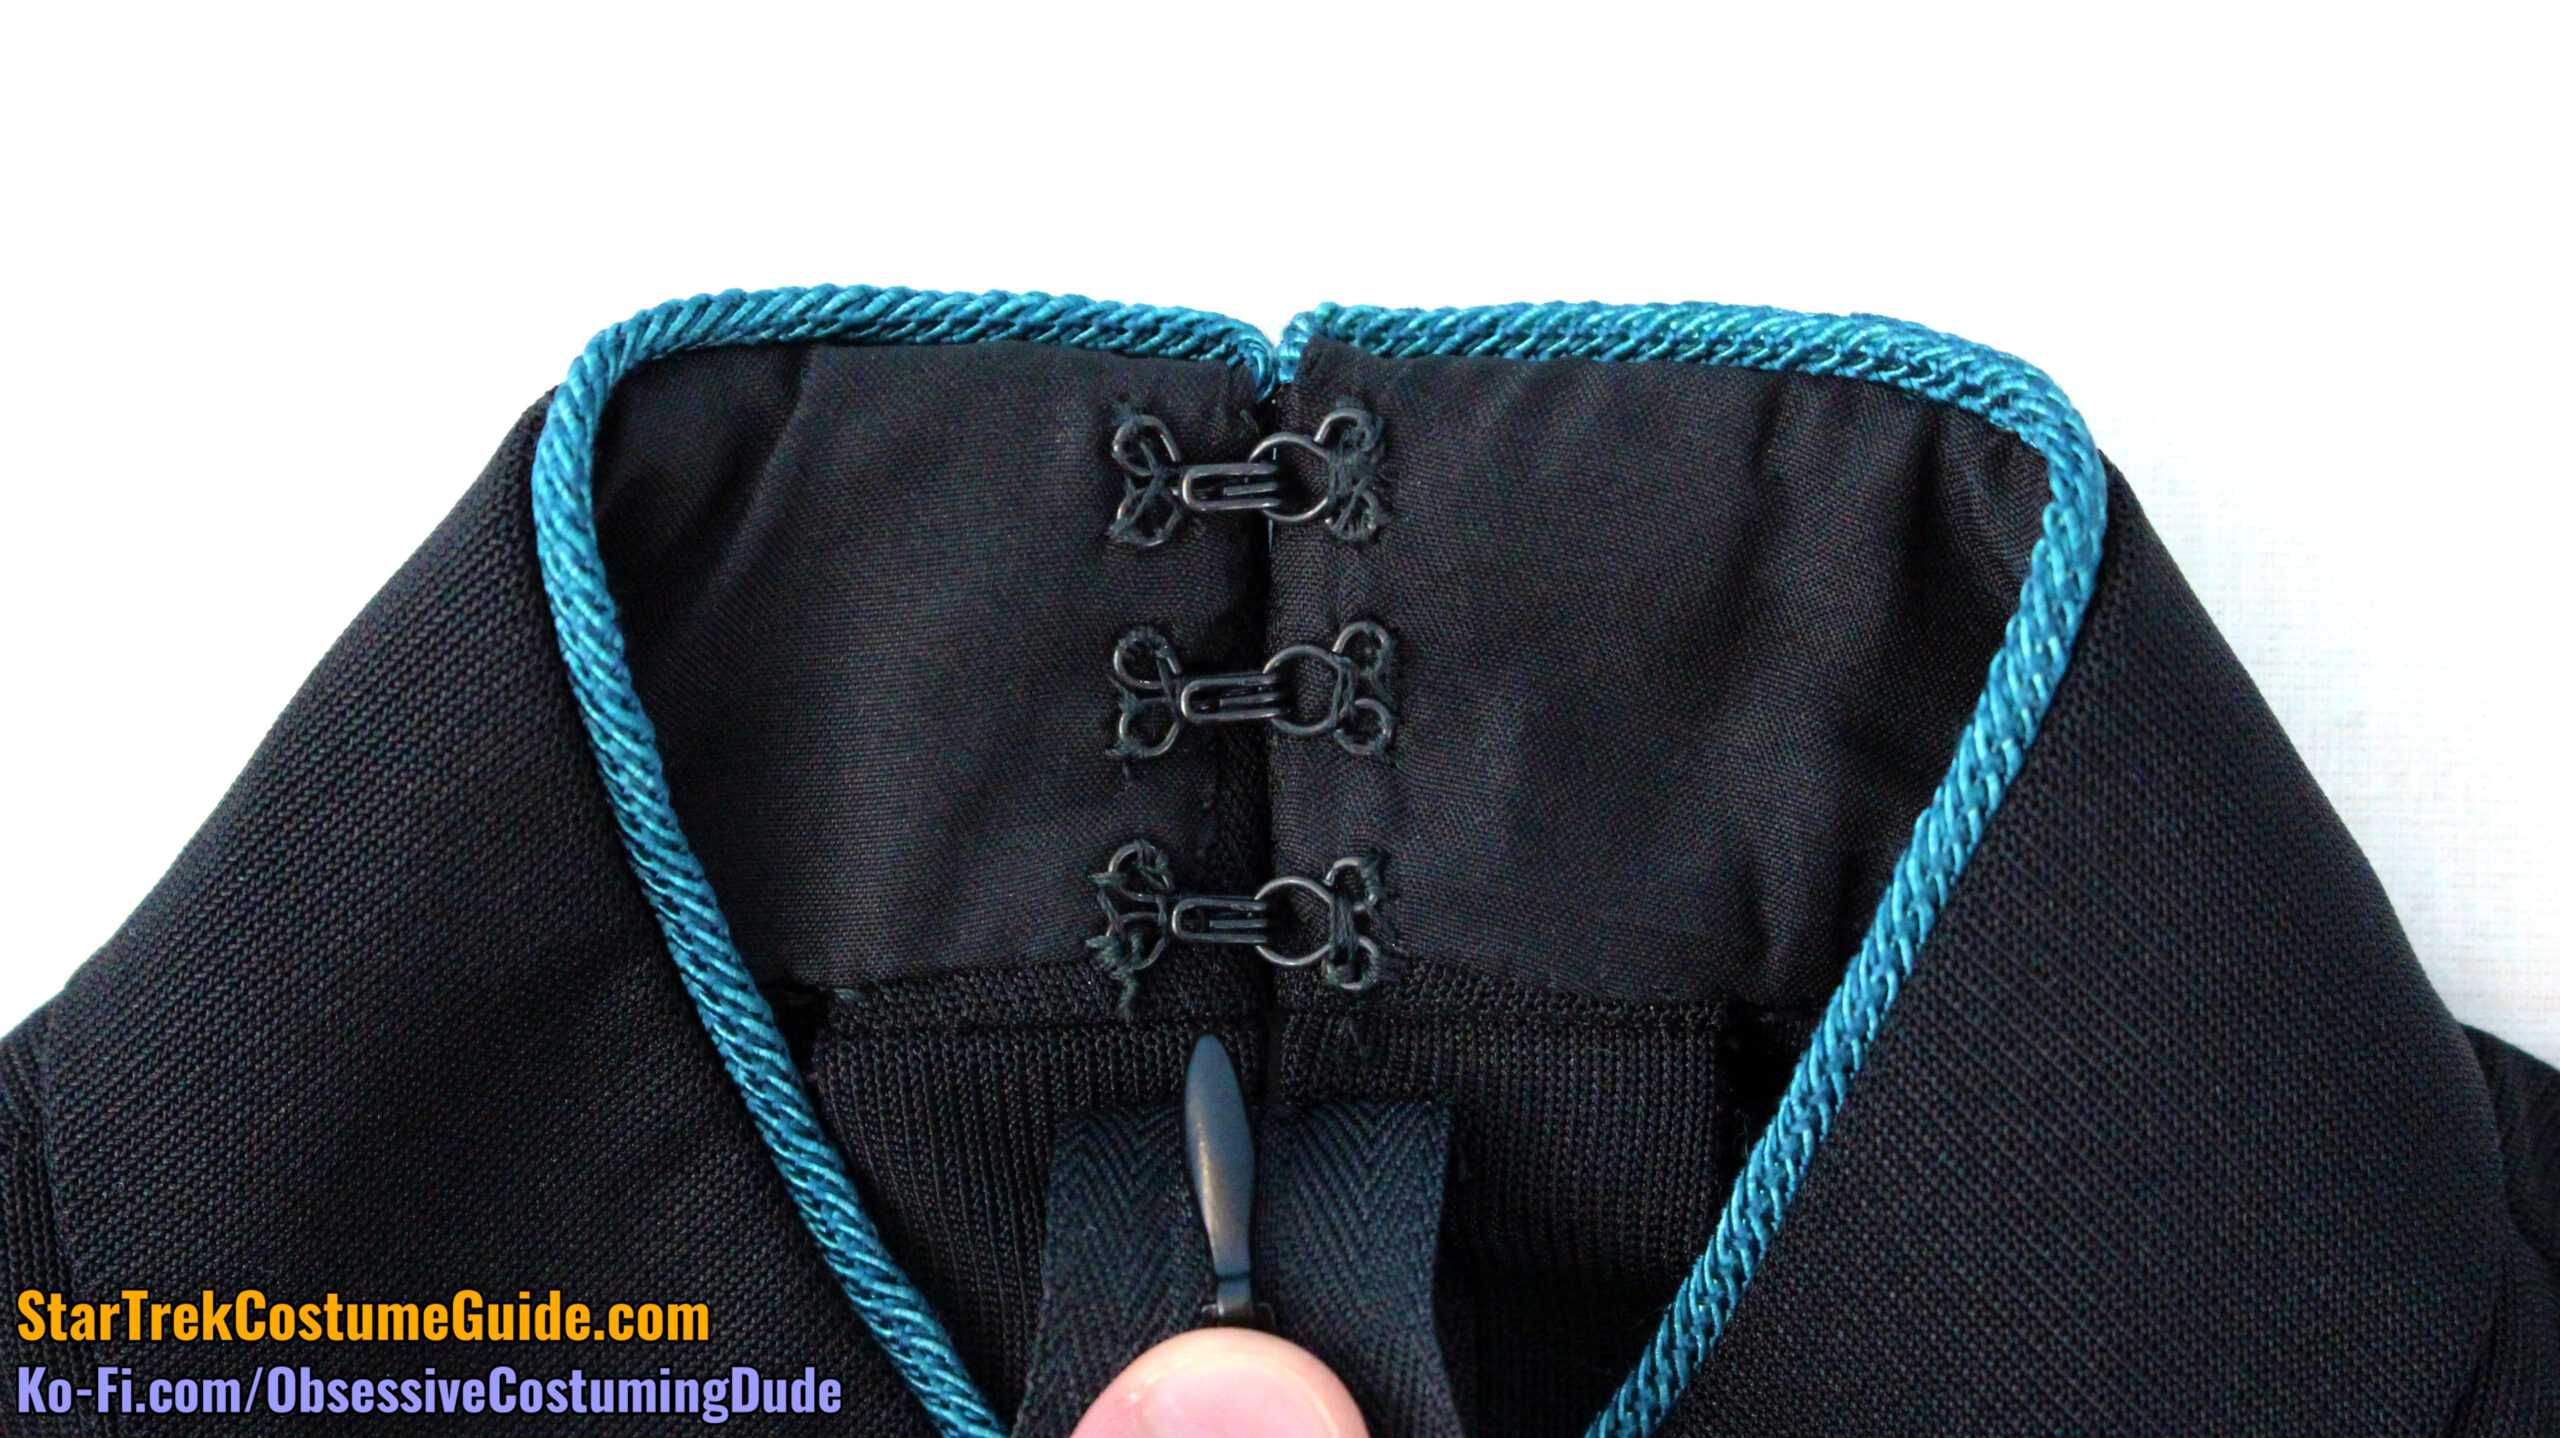
Tack the back collar allowances under by hand, taking care to only stitch through the seam allowances and fusible so your stitches won’t be visible on the outside of the jumpsuit.
Hand-sew the lower, folded edge of the collar lining to the collar back and jumpsuit neckline, just inside the neckline/collar stitching. (A whip-stitch, fell-stitch, or slip-stitch will all work great for this.)
Hand-sew three hook-and-eye closures to the back of the collar, above the zipper.
Sew the lower back closed, from the crotch up to the bottom of the zipper.
Note that the seam allowance is ½” along the crotch, but it widens to a full inch in the general vicinity of the zipper bottom.
Press the lower back seam allowances open.
Sew the jumpsuit sides closed, right sides together, all the way from the bottom of the pant leg to the bottom of the sleeve, matching balance waist and underarm seams. The lengthen/shorten lines on the printed pattern also serve as balance points.
Note that the seam allowance is ⅝” on the jumpsuit sides but only ½” on the sleeve.
I recommend basting across the waist and underarm seams and confirming they properly align before sewing the entire seam.
Press the seam allowances open.
Repeat for the other side of the jumpsuit.
Sew the inseam closed, right sides together with ⅝” seam allowance, matching crotch seams and balance points.
Press the seam allowances open.
Press the pant leg 2” hem allowance upward and hand-sew it into place, taking care to only catch a tiny thread of the body fabric so your stitches won’t be visible on the outside of the pant leg.
Press the lower pant leg facing back into place and hand-sew it to the underside of the pant leg as well.
Repeat for the other pant leg.
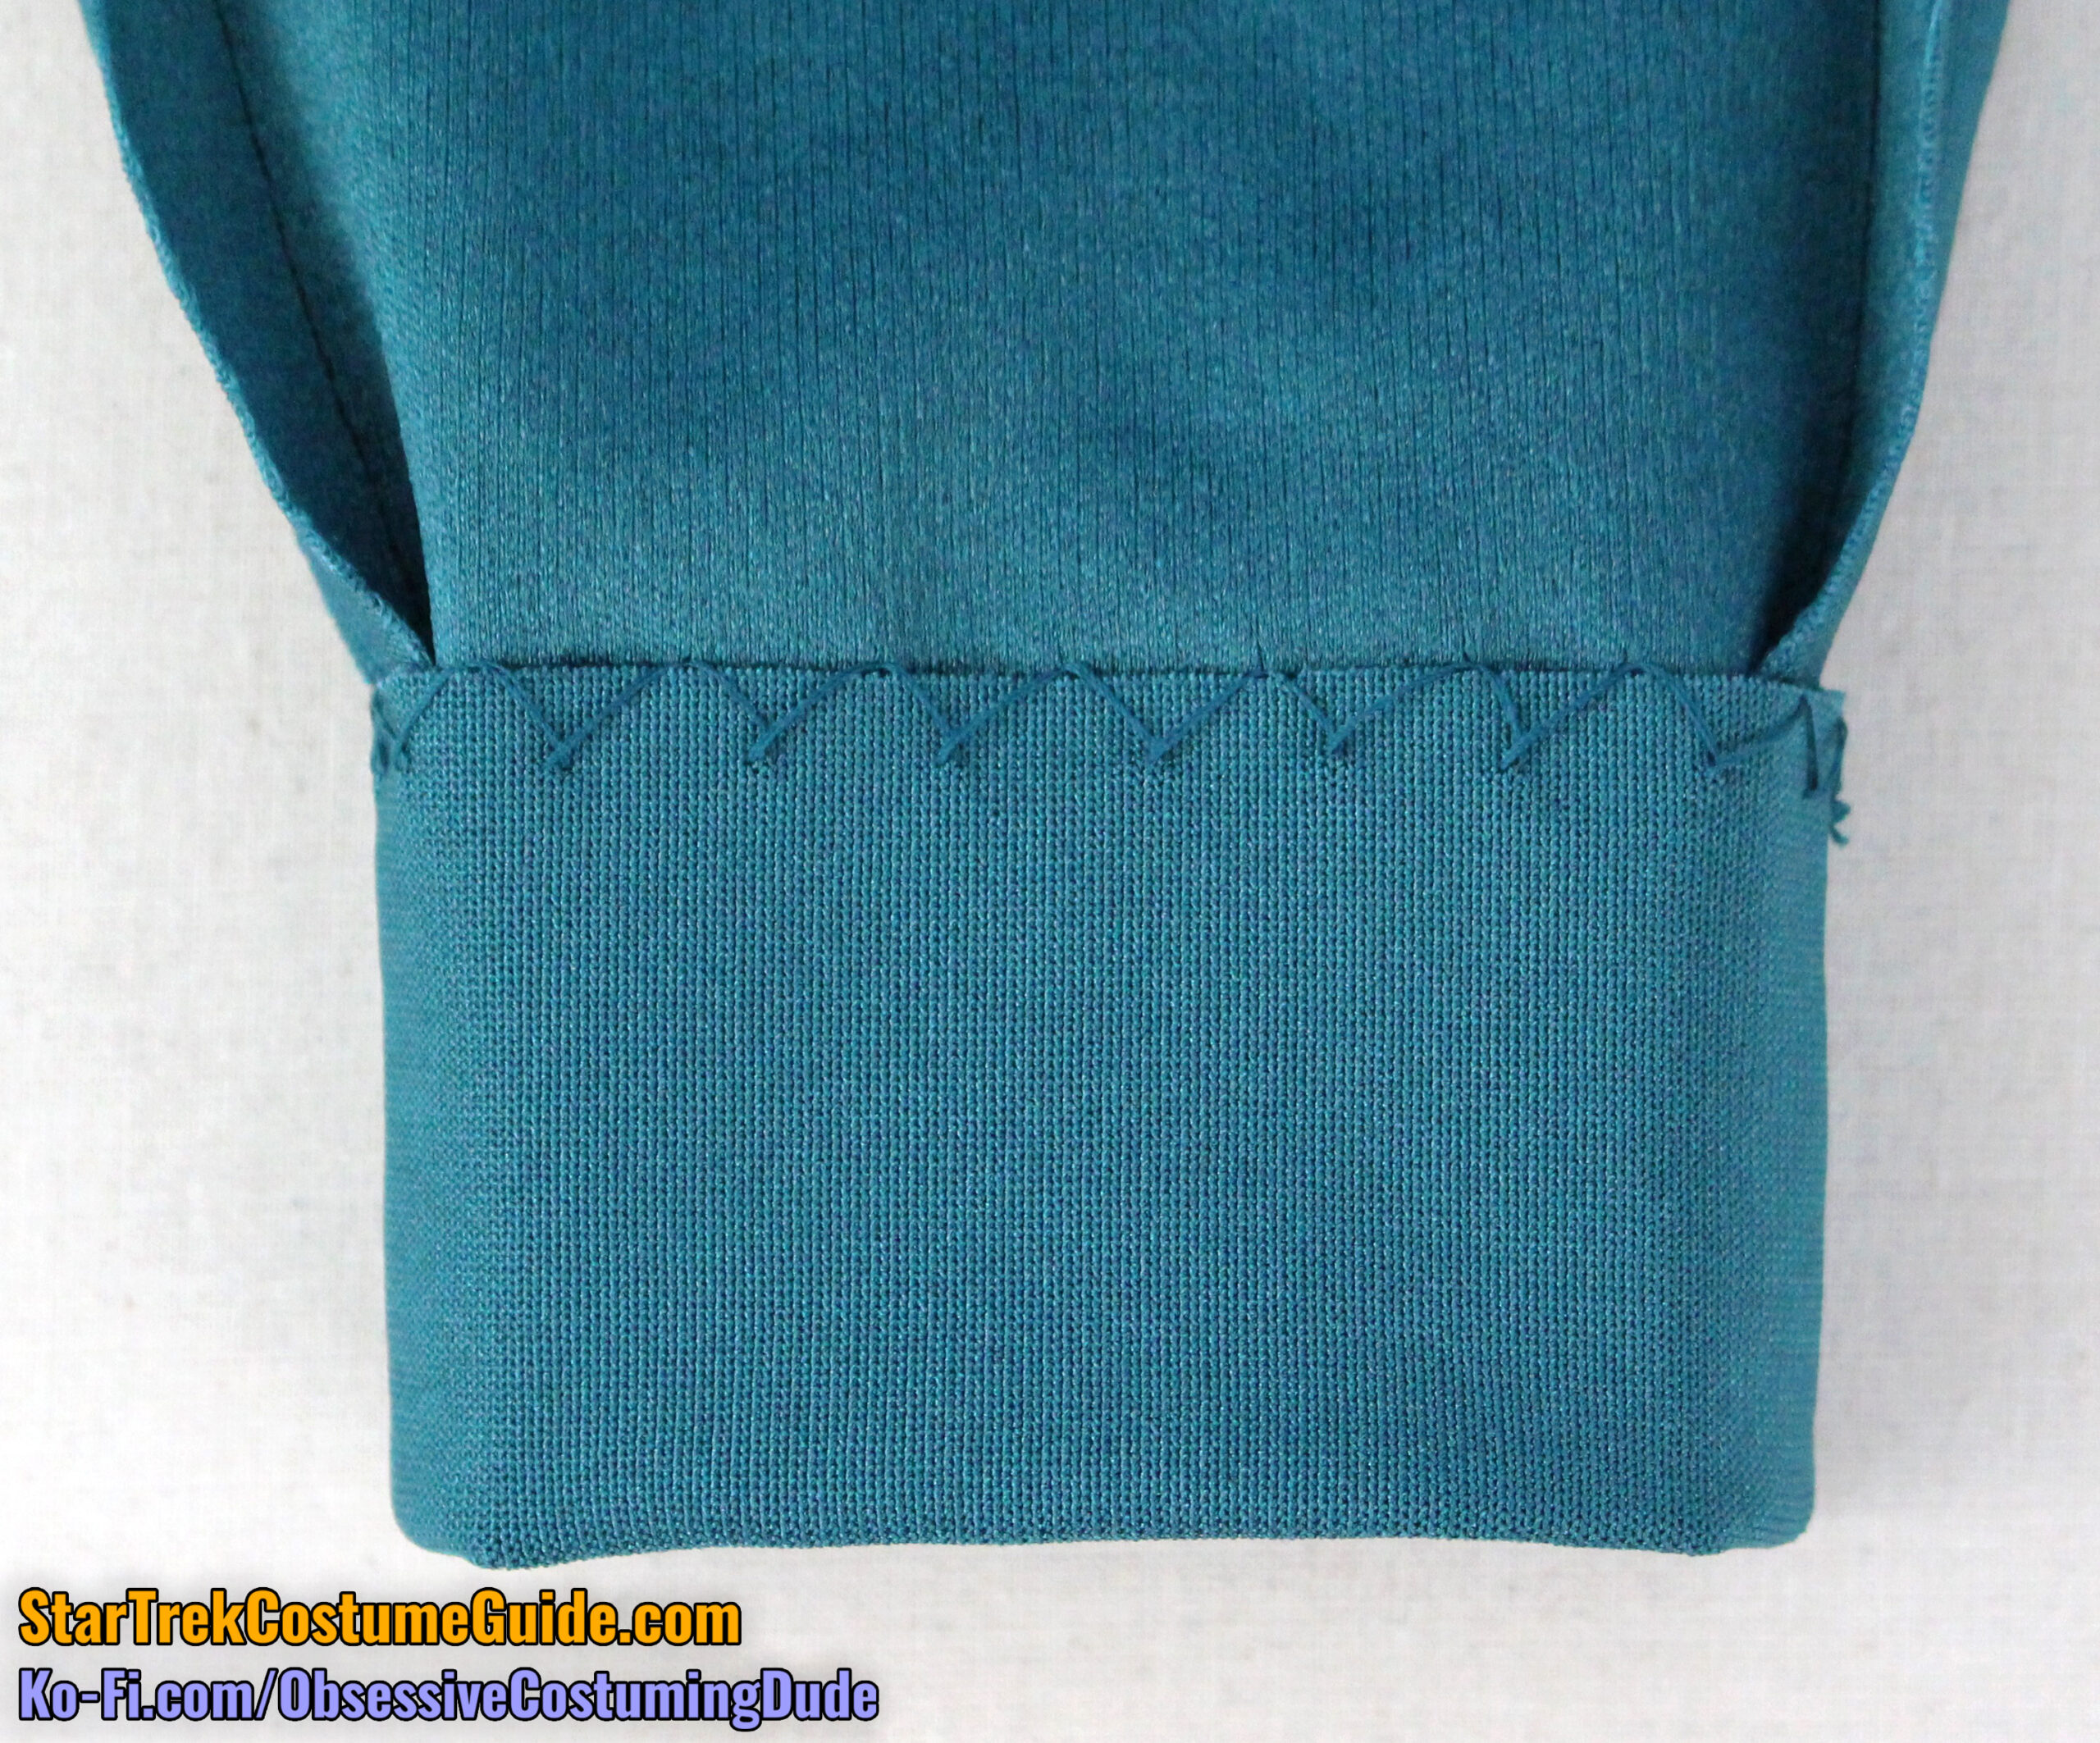
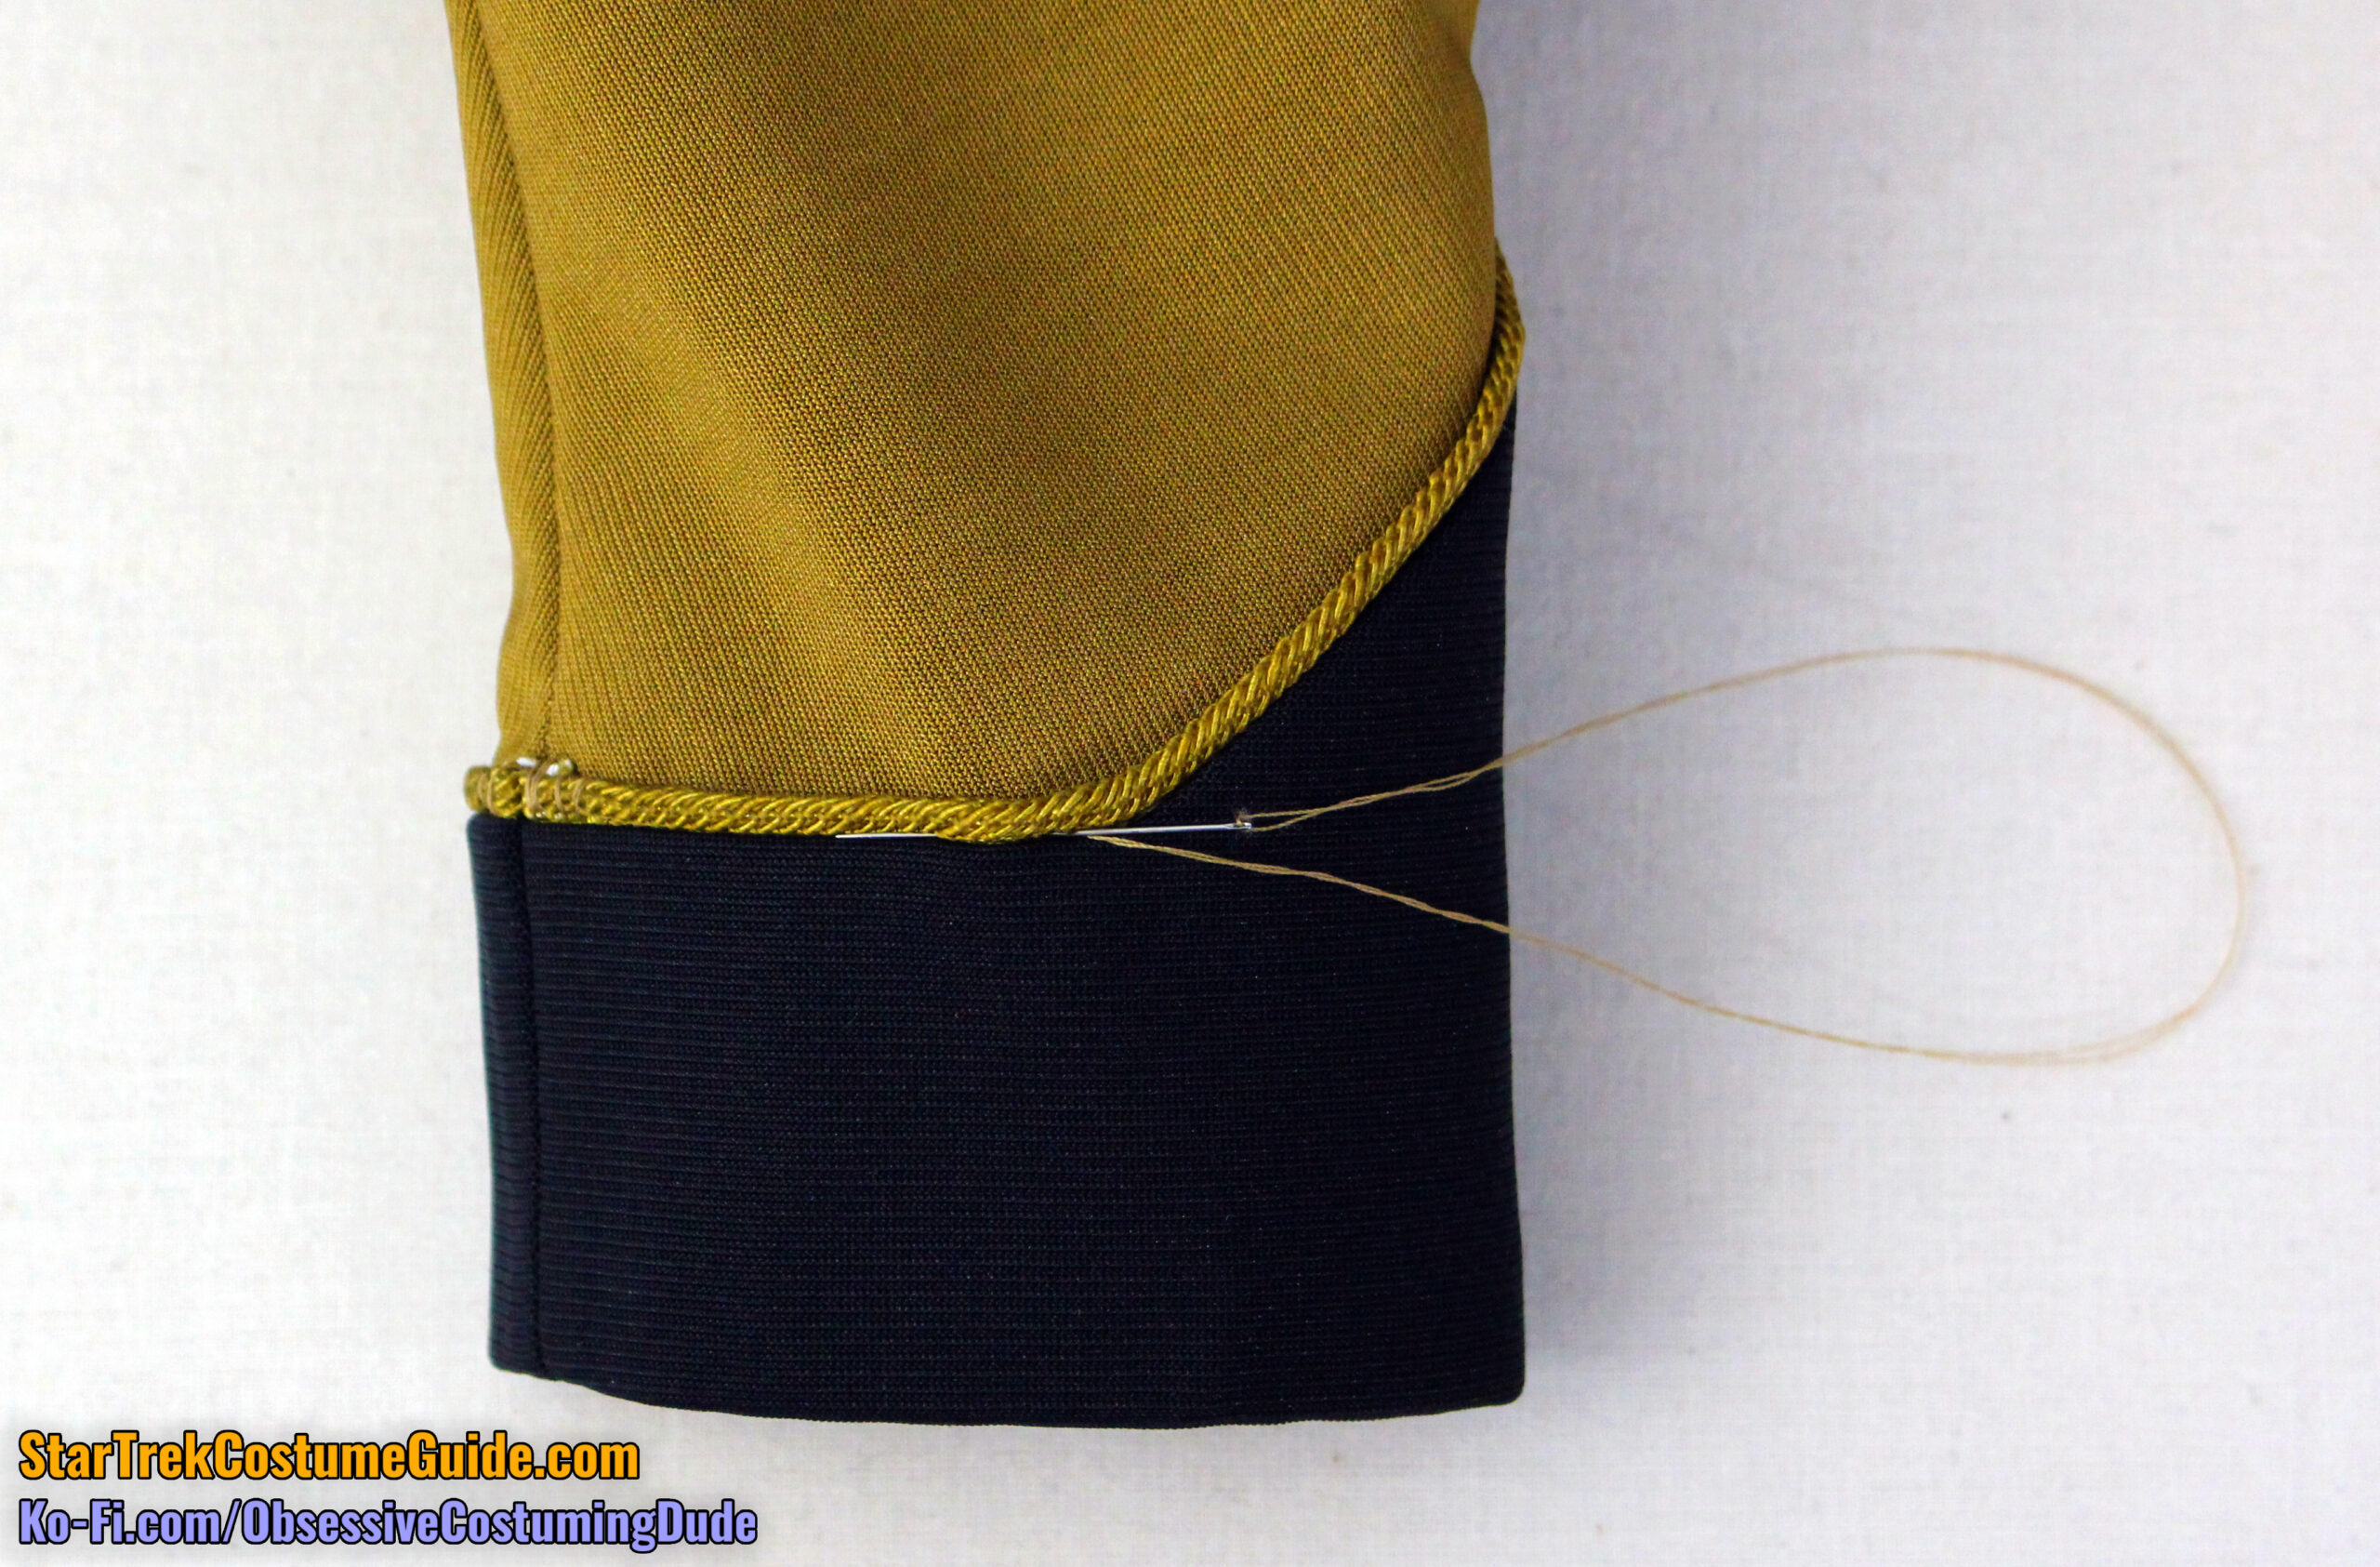
Press the sleeve’s 2” hem allowance upward and hand-sew it into place using division-colored thread, again taking care to only catch a tiny thread of the body fabric so your stitches won’t be visible on the outside of the sleeve.
Repeat for the other sleeve.
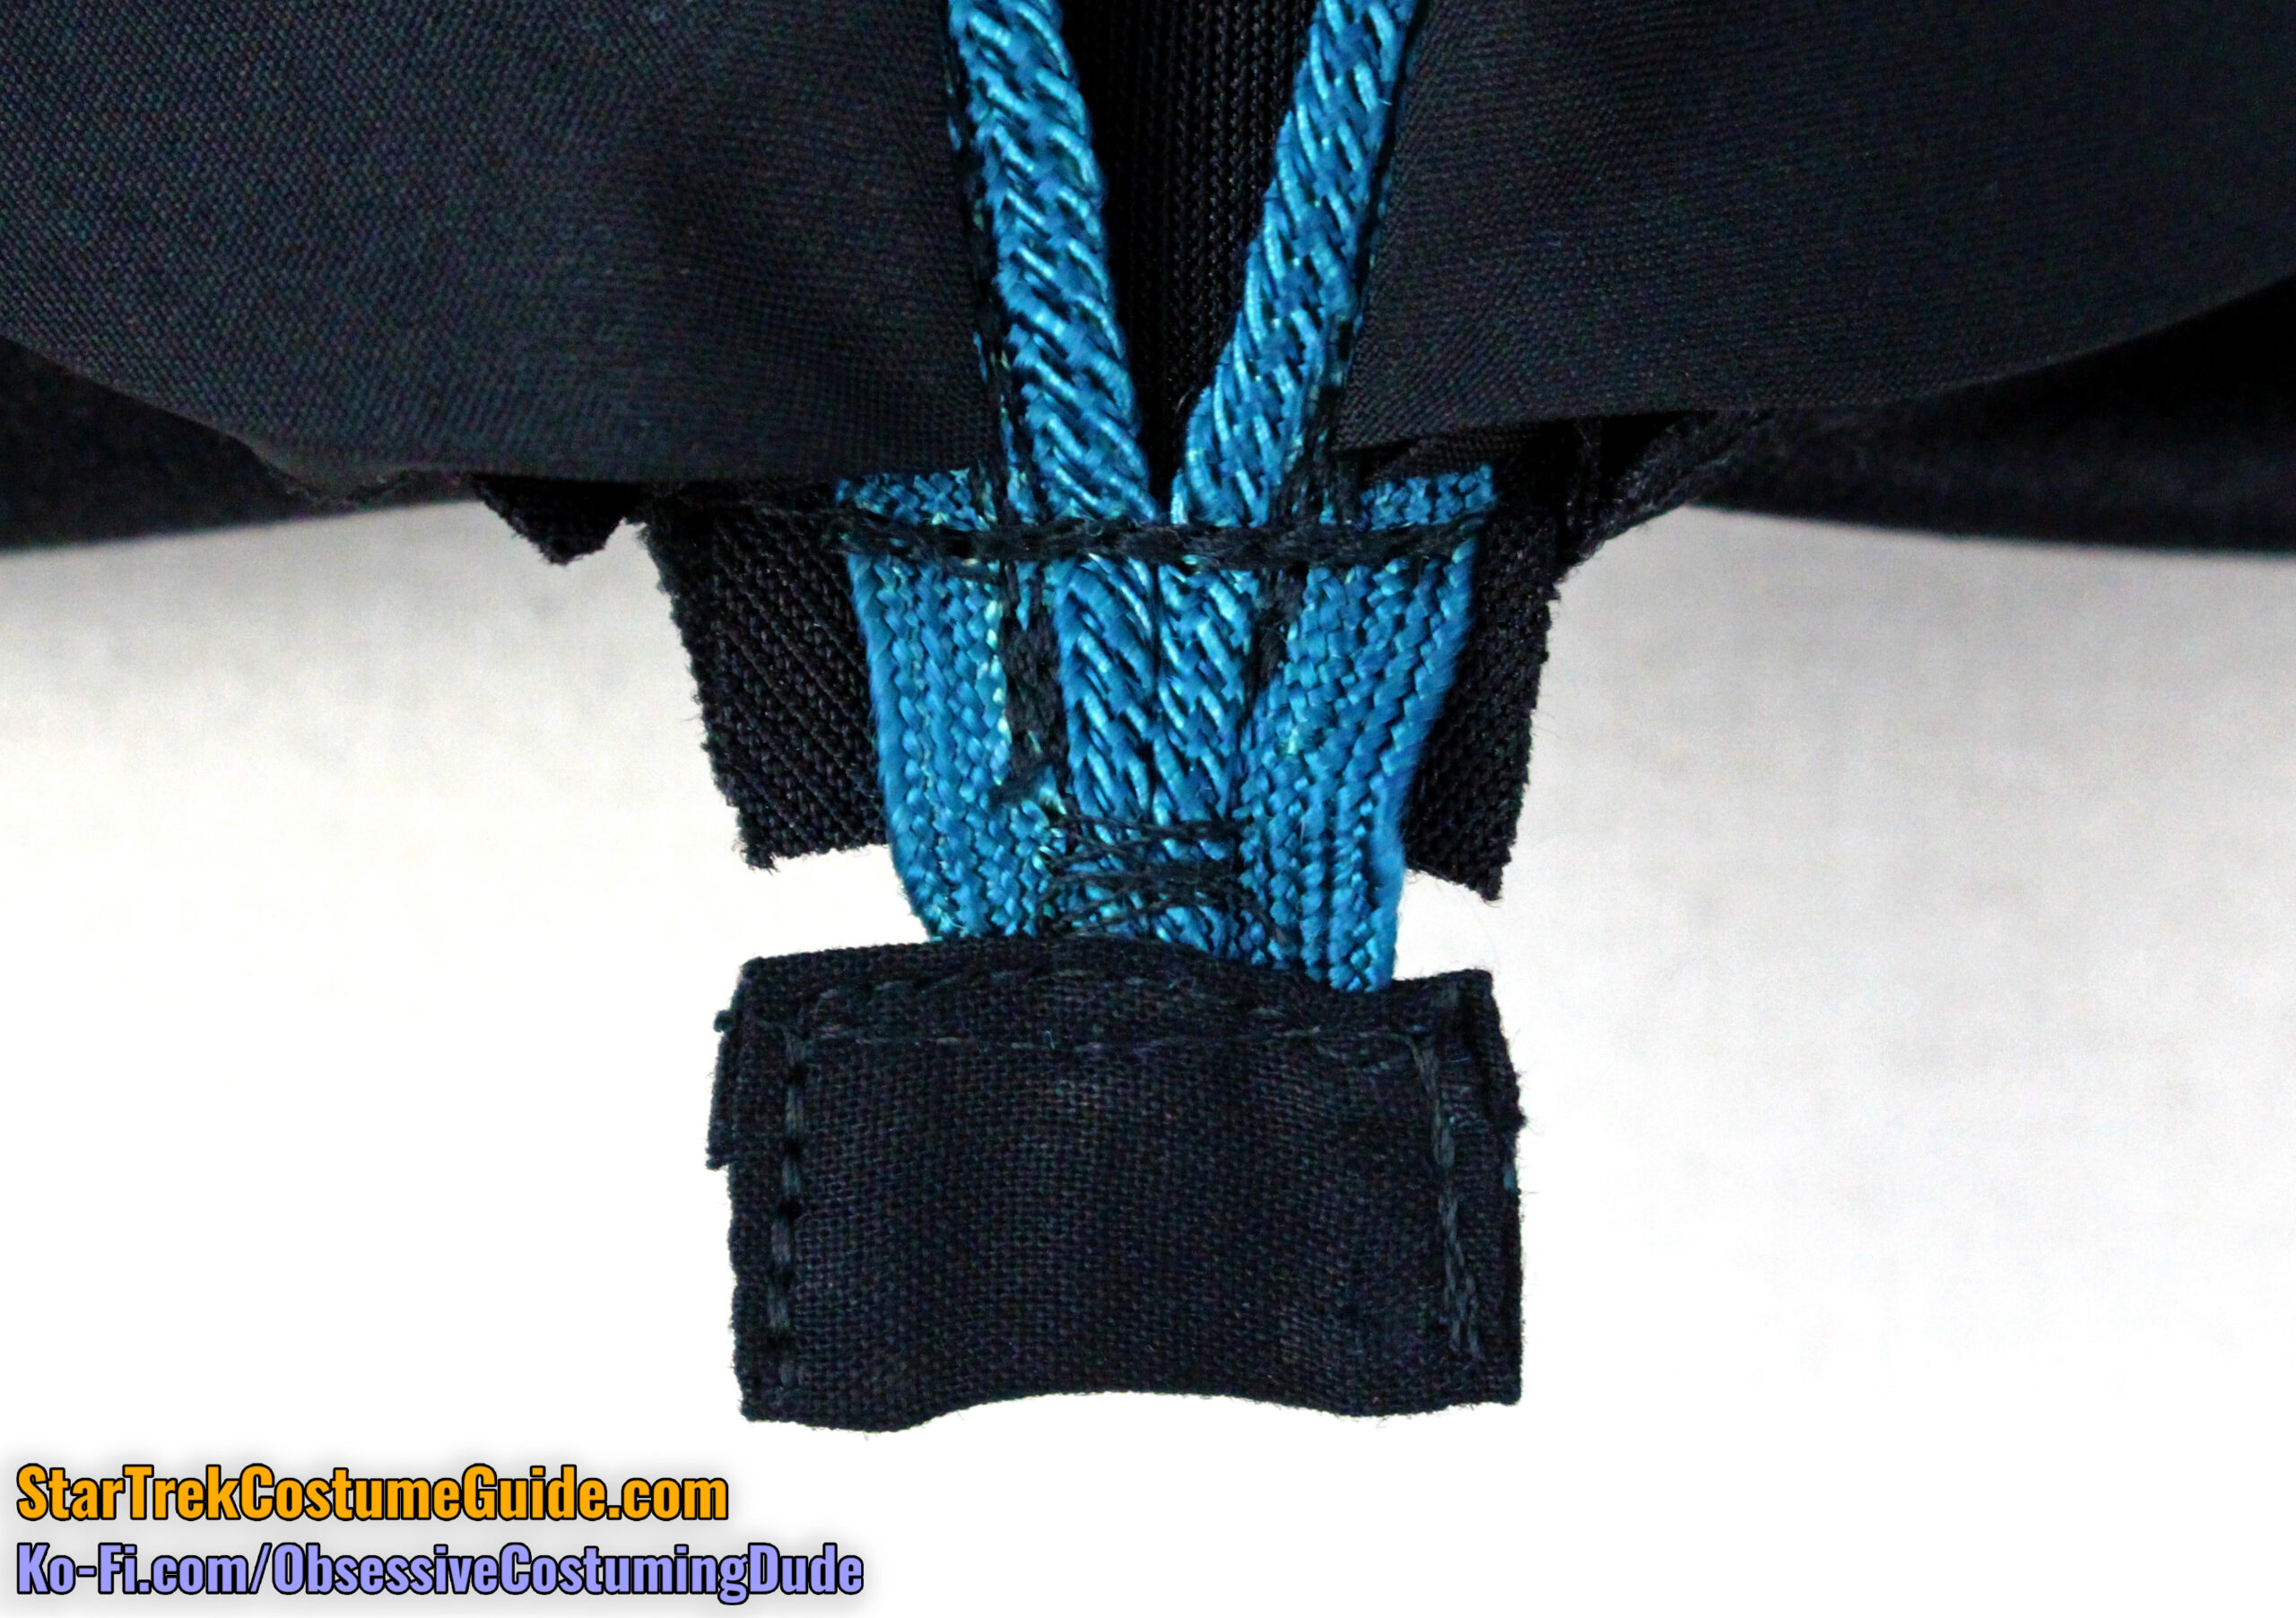
For the “Yesterday’s Enterprise” variant, you’ll need to make and attach the sleeve cuffs.
The cuff is comprised of two elements: the cuff itself (piece Q) and a length of division-colored piping.
I recommend applying a lightweight fusible interfacing to the underside of your cuff.
Cut a length of piping slightly longer than you’ll actually need for the top of the cuff.
To sew the piping to the cuff, first stitch along the upper edge from one side up to the top corner (at the dot) using a zipper/piping foot and pivoting at the lower corner. Shorten your stitch length and reinforce your stitching several times toward the dot.
Note that the upper edge of the cuff has ½” seam allowance, so if your piping lip is smaller than that (most piping like this has ¼” lip), the piping will be need to be inset a bit so the edge of the cord is exactly along the seam line.
Remove the cuff from the sewing machine and clip the lip of the piping almost to the cord at the top.
Rotate the other end of the piping in the opposite direction, toward the remaining side of the cuff.
Begin stitching again toward the upper end of the first side, overlapping your previous stitch a little.
When you get to the top, pivot and turn the corner as sharply as you’re able to, then stitch back down the opposite side of the cuff.
Trim the upper allowances down to ¼” if you want, and clip the allowances to the stitching at the lower corners.
Notch the allowances at the upper corner.
Turn the allowances under and press.
Although the cuff theoretically has ½” seam allowance on the ends, I suggest wrapping the cuff around the otherwise-finished sleeve to determine the appropriate seam line for an ideal fit.
(The cuff pattern piece is the same size as the sleeve, but the finished cuff will need to wrap around the sleeve; therefore it needs to be slightly larger than the sleeve itself to avoid contorting the sleeve once it’s attached.)
Sew the ends of the cuff together with the appropriate seam allowance (probably about ¼”).
Press the seam allowances open.
Press the cuff’s lower ½” allowance upward.
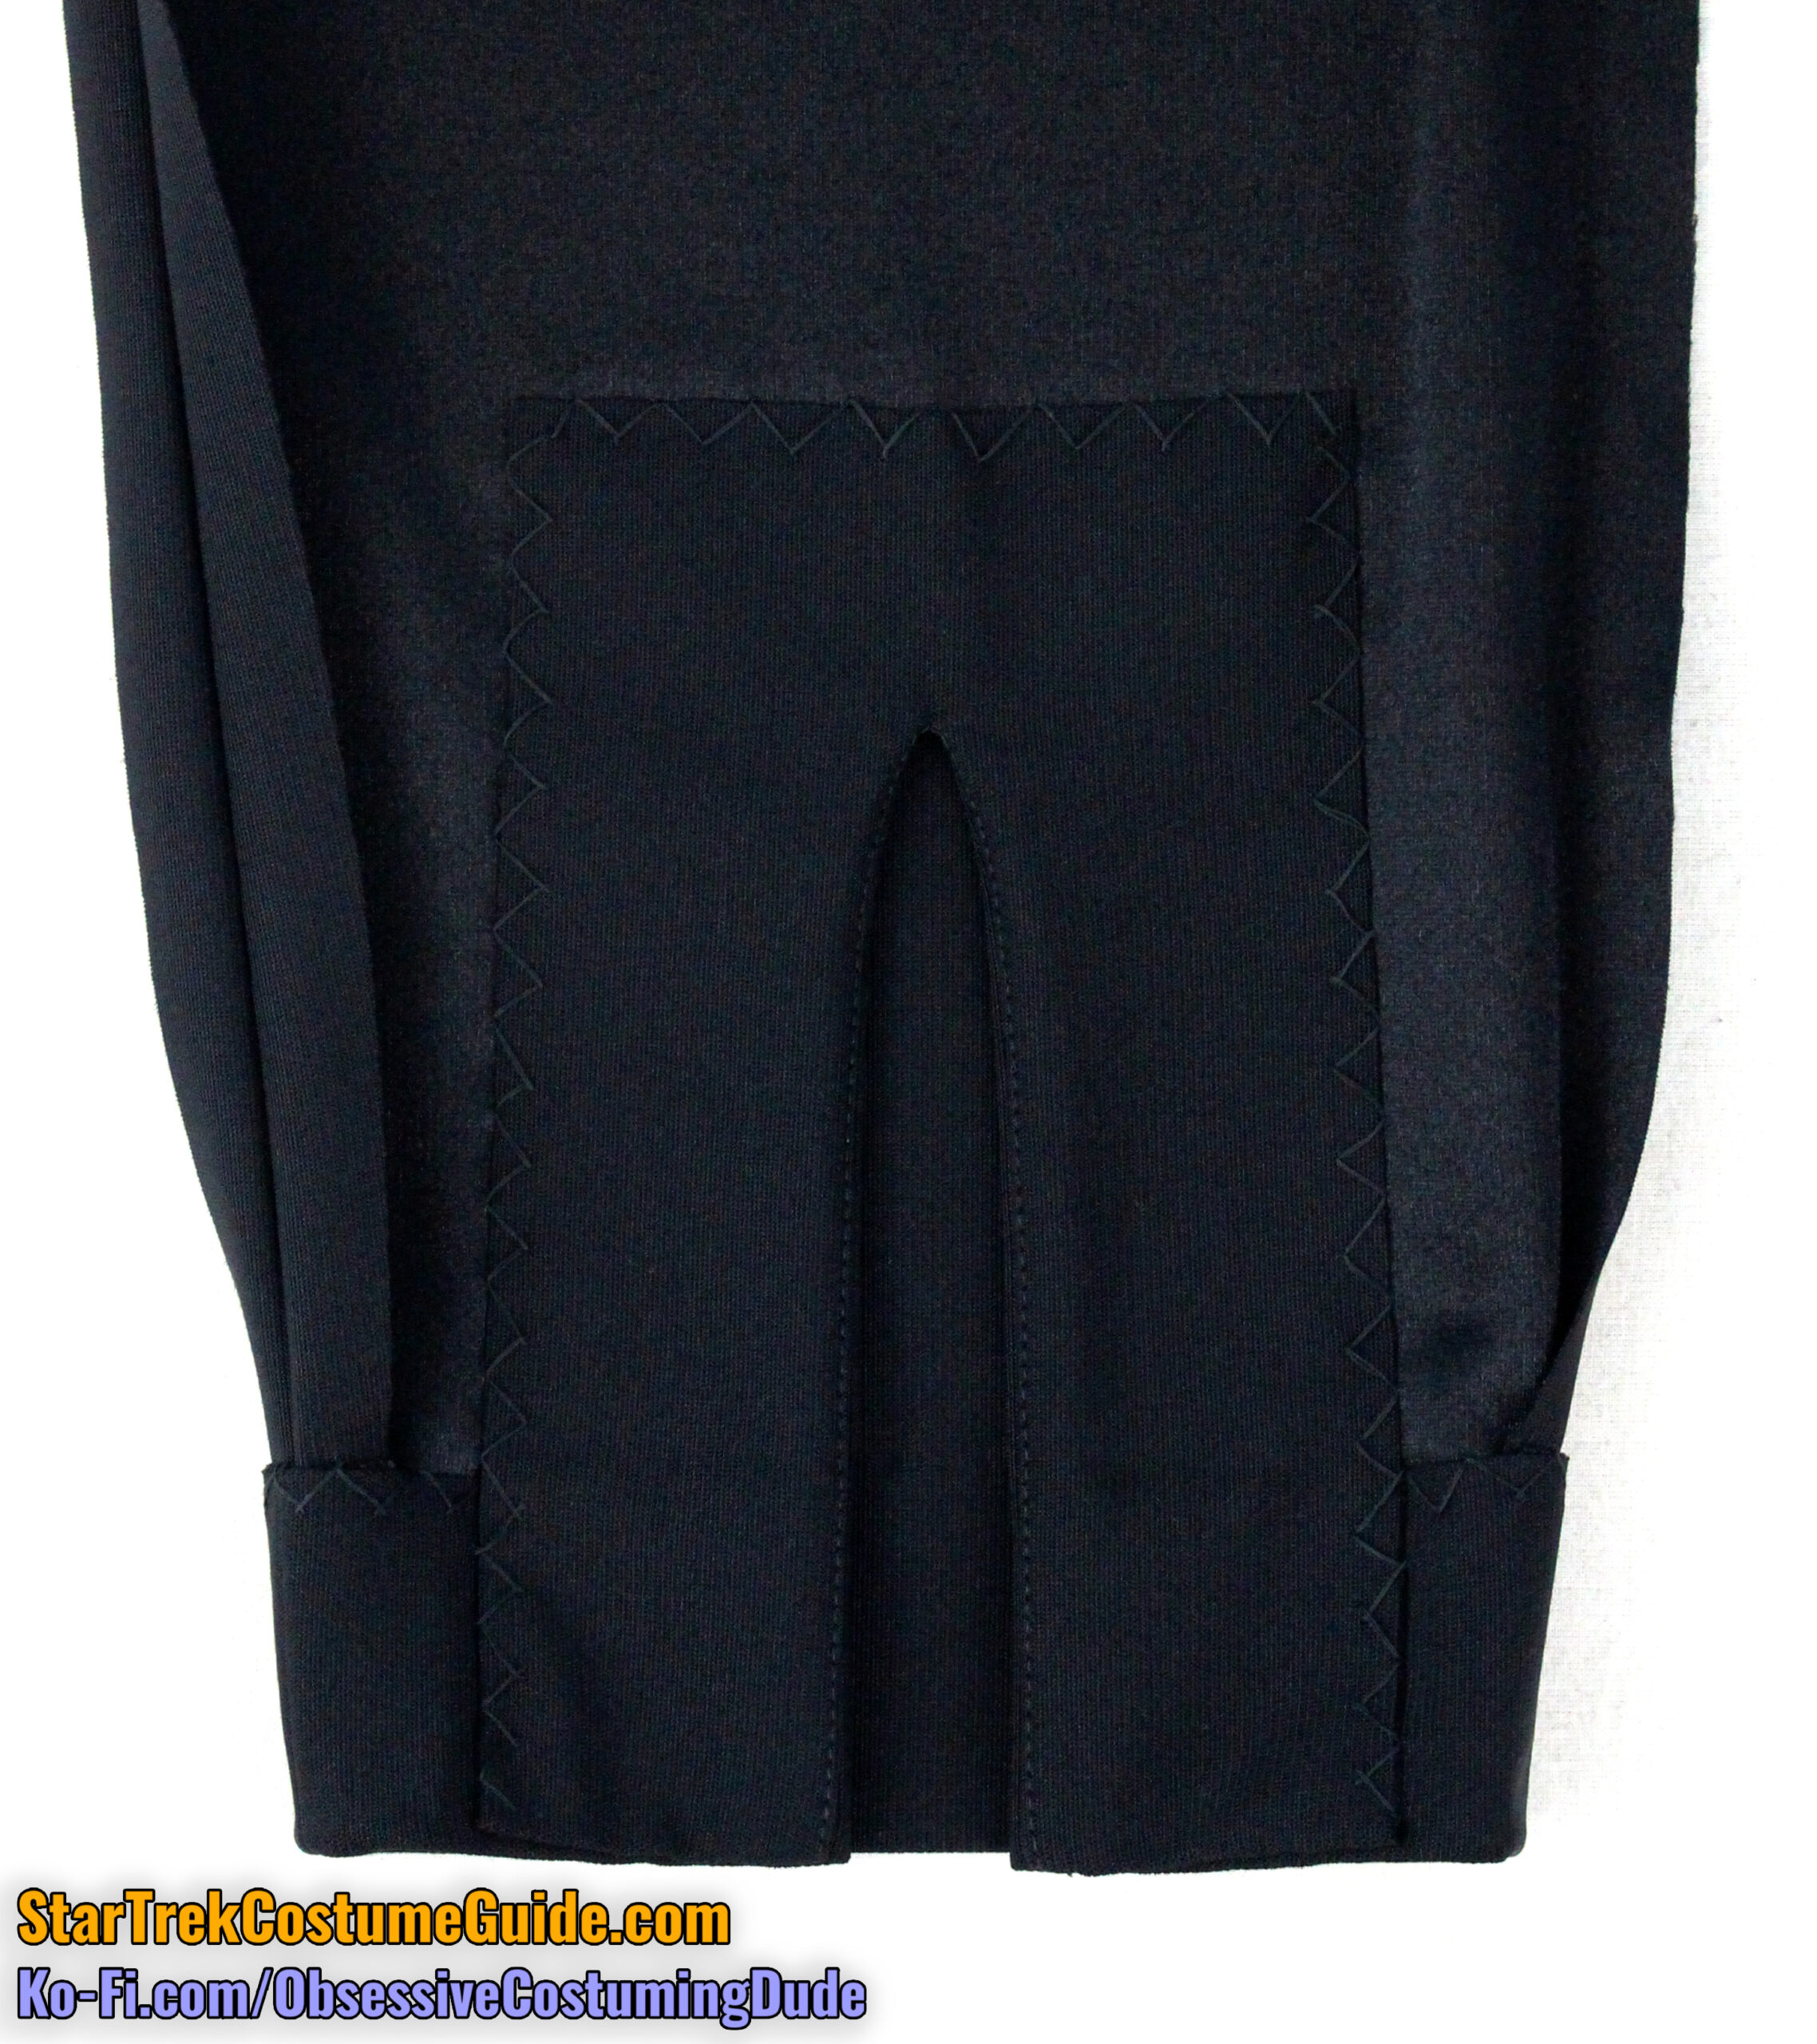
Turn the cuff right-side-out and mount it onto the jumpsuit sleeve, matching lower folded edges. Align the cuff seam with the inner sleeve seam, and the upper corner with the outer sleeve seam.
Slip-stitch the cuff to the sleeve along the lower hems.
Using division-colored thread, hand-sew the cuff to the sleeve along the cuff/piping seam – essentially doing a manual “stitch-in-the-ditch” with a basic running stitch.
Repeat for the other cuff and sleeve.
Although the TNG-era uniforms had raglan-style shoulder padding, unfortunately modern retail raglan shoulder pads aren’t large enough and don’t cover nearly enough surface area to establish the “idealized” silhouettes of the original costumes.
(I believe the original TNG-era shoulder pads to have been custom-made for production, but some attest that they were retail shoulder pads from the 80s that are no longer available. In either case the situation is the same: modern retail shoulder pads are too small.)
To replicate the fit and silhouette of the screen-used TNG jumpsuits, it’s best to make your own replica shoulder pads to go with your uniform.
As you might recall from my various screen-used TNG uniform examinations, there were at least two different styles of shoulder pads used – generally speaking, one style for the early uniforms and another for the later ones – and the men’s pads were slightly larger than the women’s.
Here’s a YouTube video on how to make the shoulder pads for many of the TNG-era uniforms, including the TNG jumpsuits:
I’m not sure if or how commonly the early-style shoulder pads continued to be used with the later jumpsuits, but they’re both ways to achieve a similar effect so I’ll walk you through both styles here.
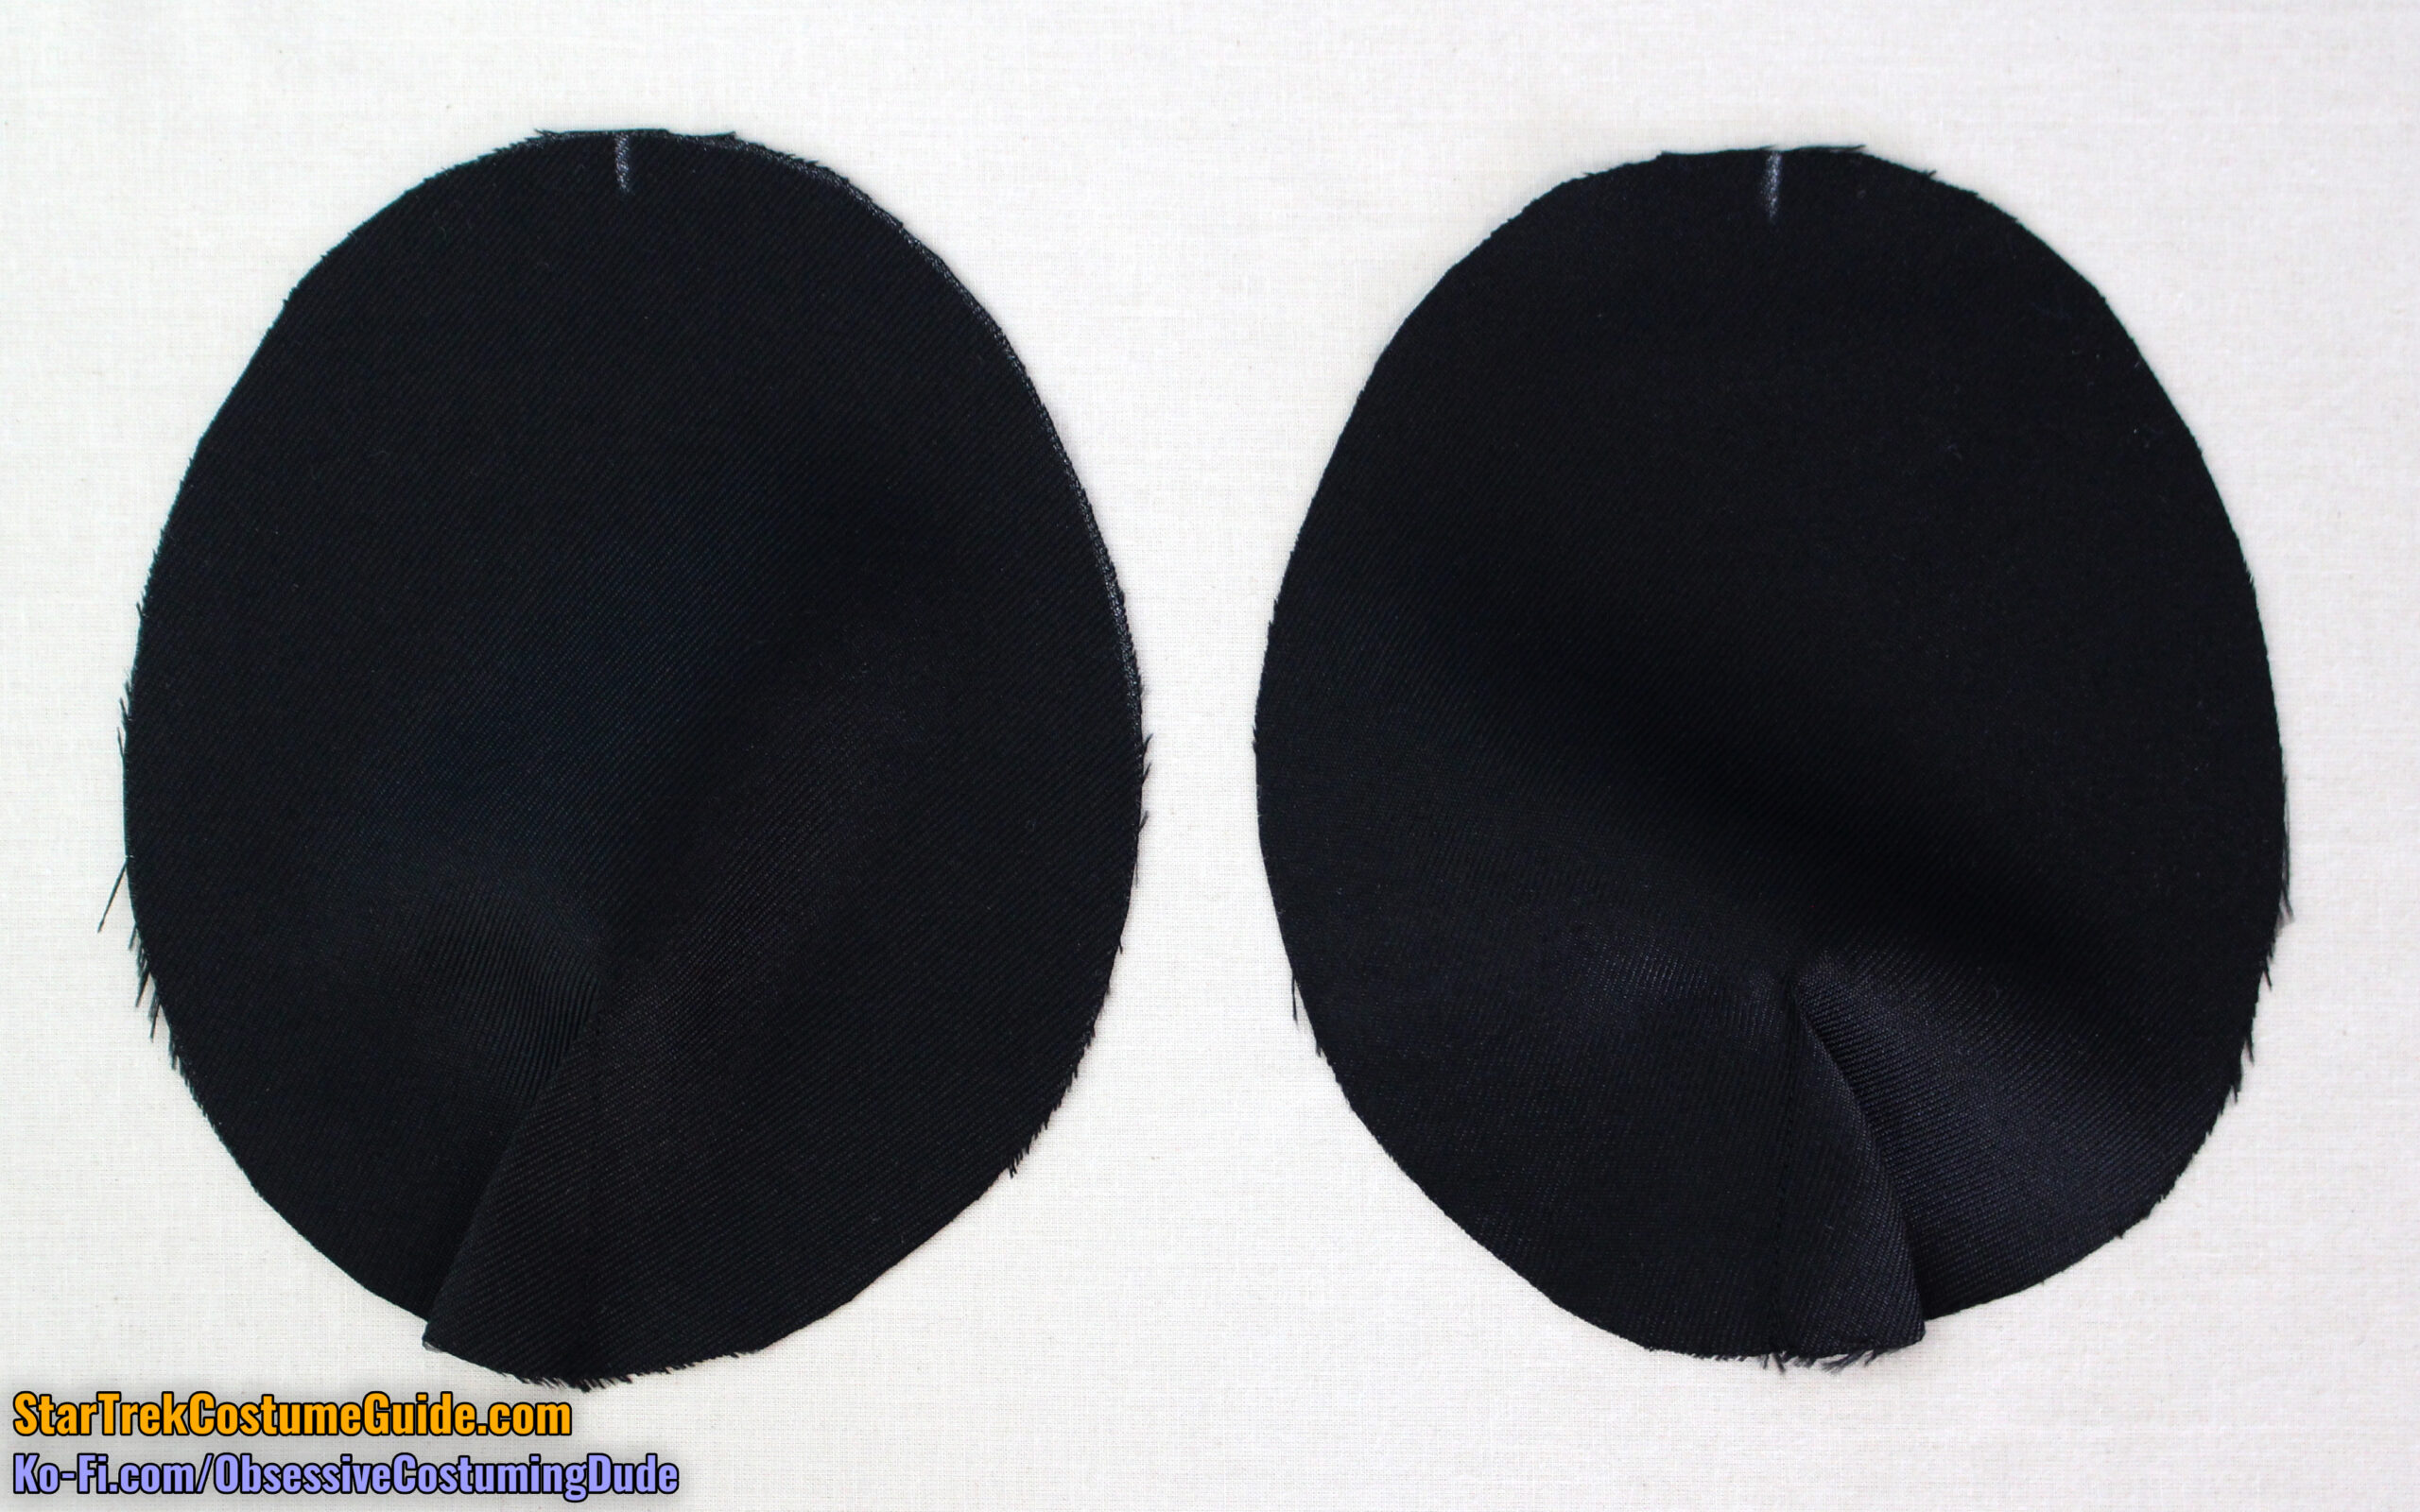
The early-style shoulder pads are easier to make; you’ll need piece U1 from the women’s pattern, and piece U for the men’s pattern.
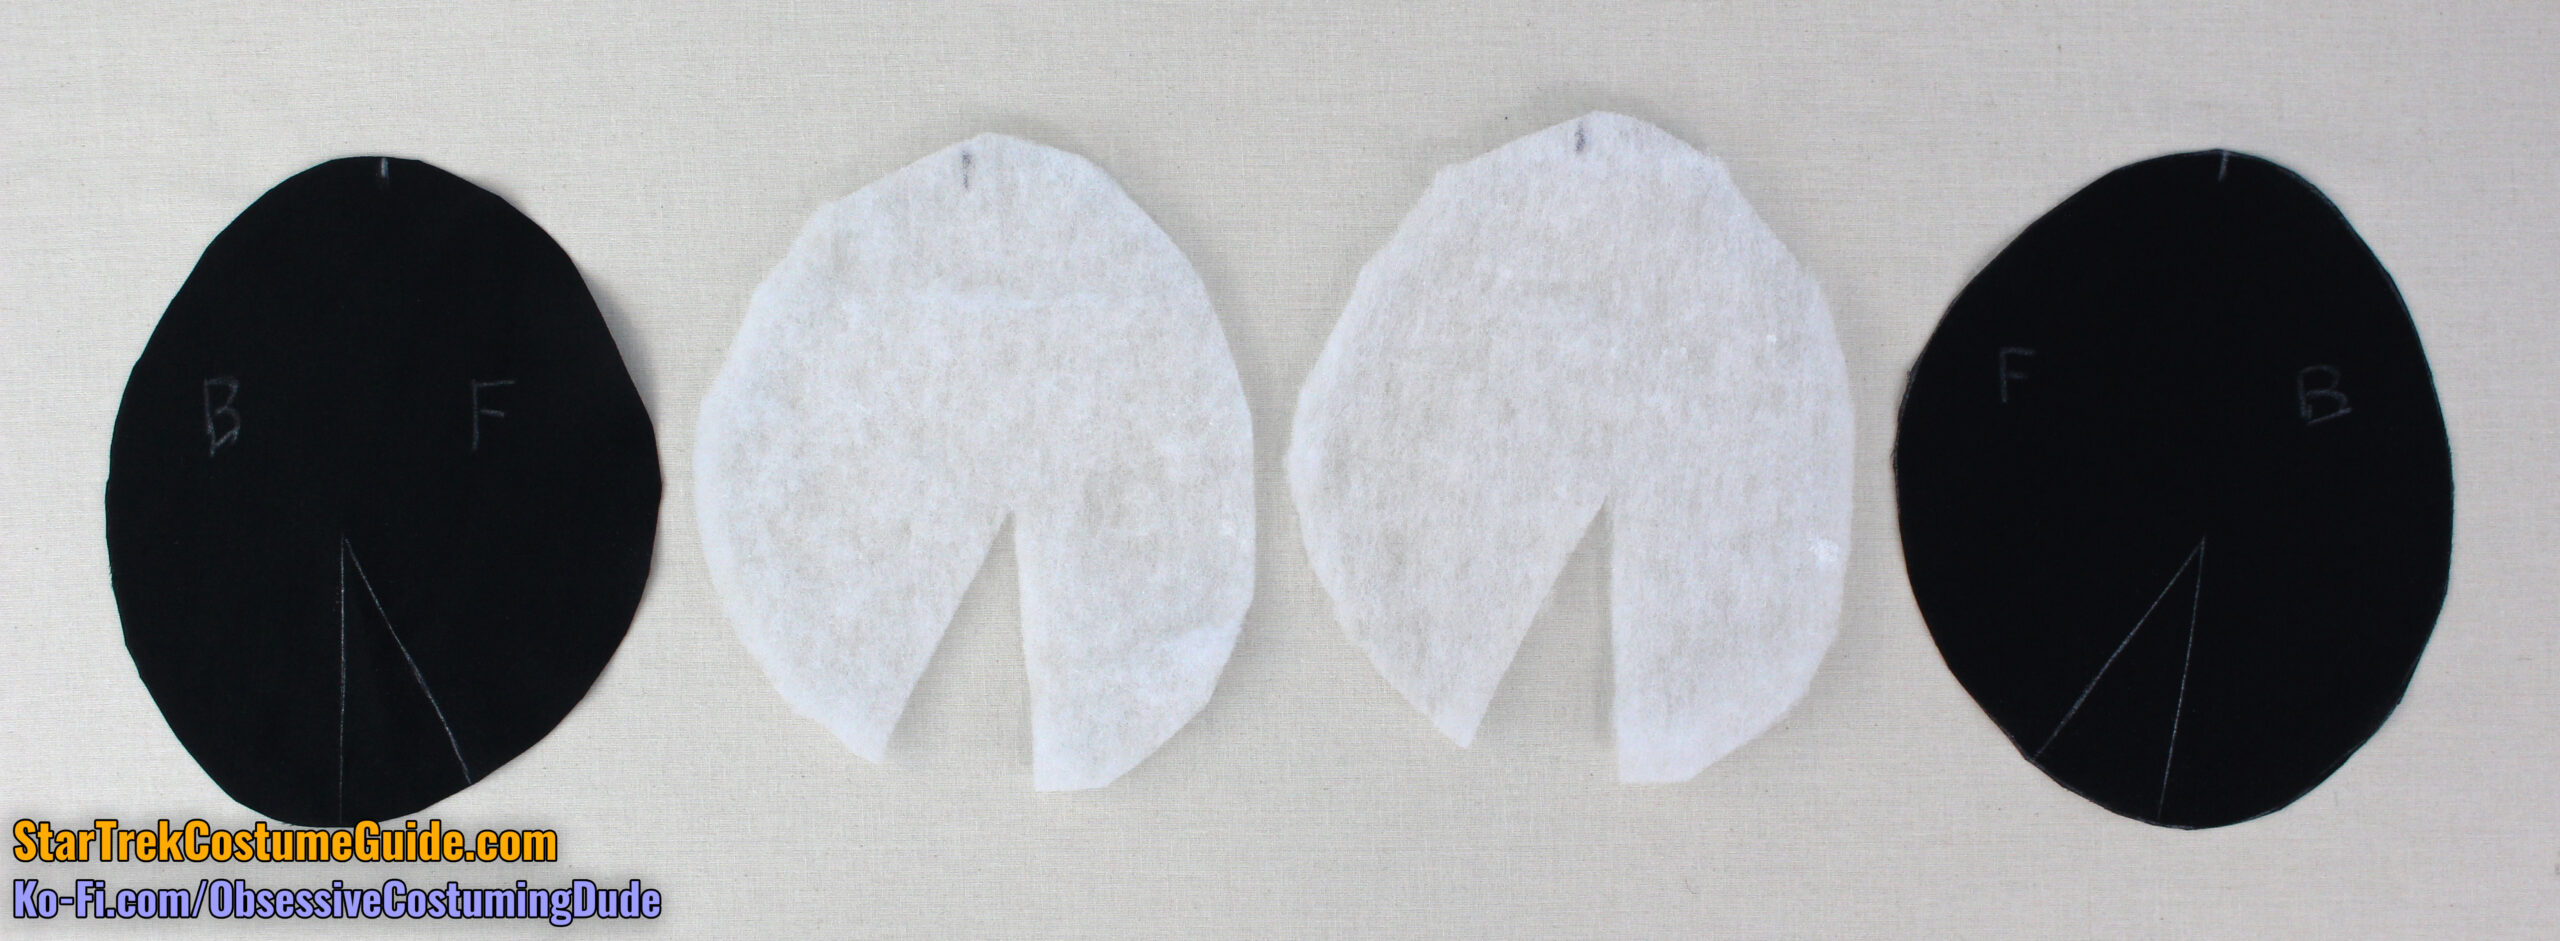
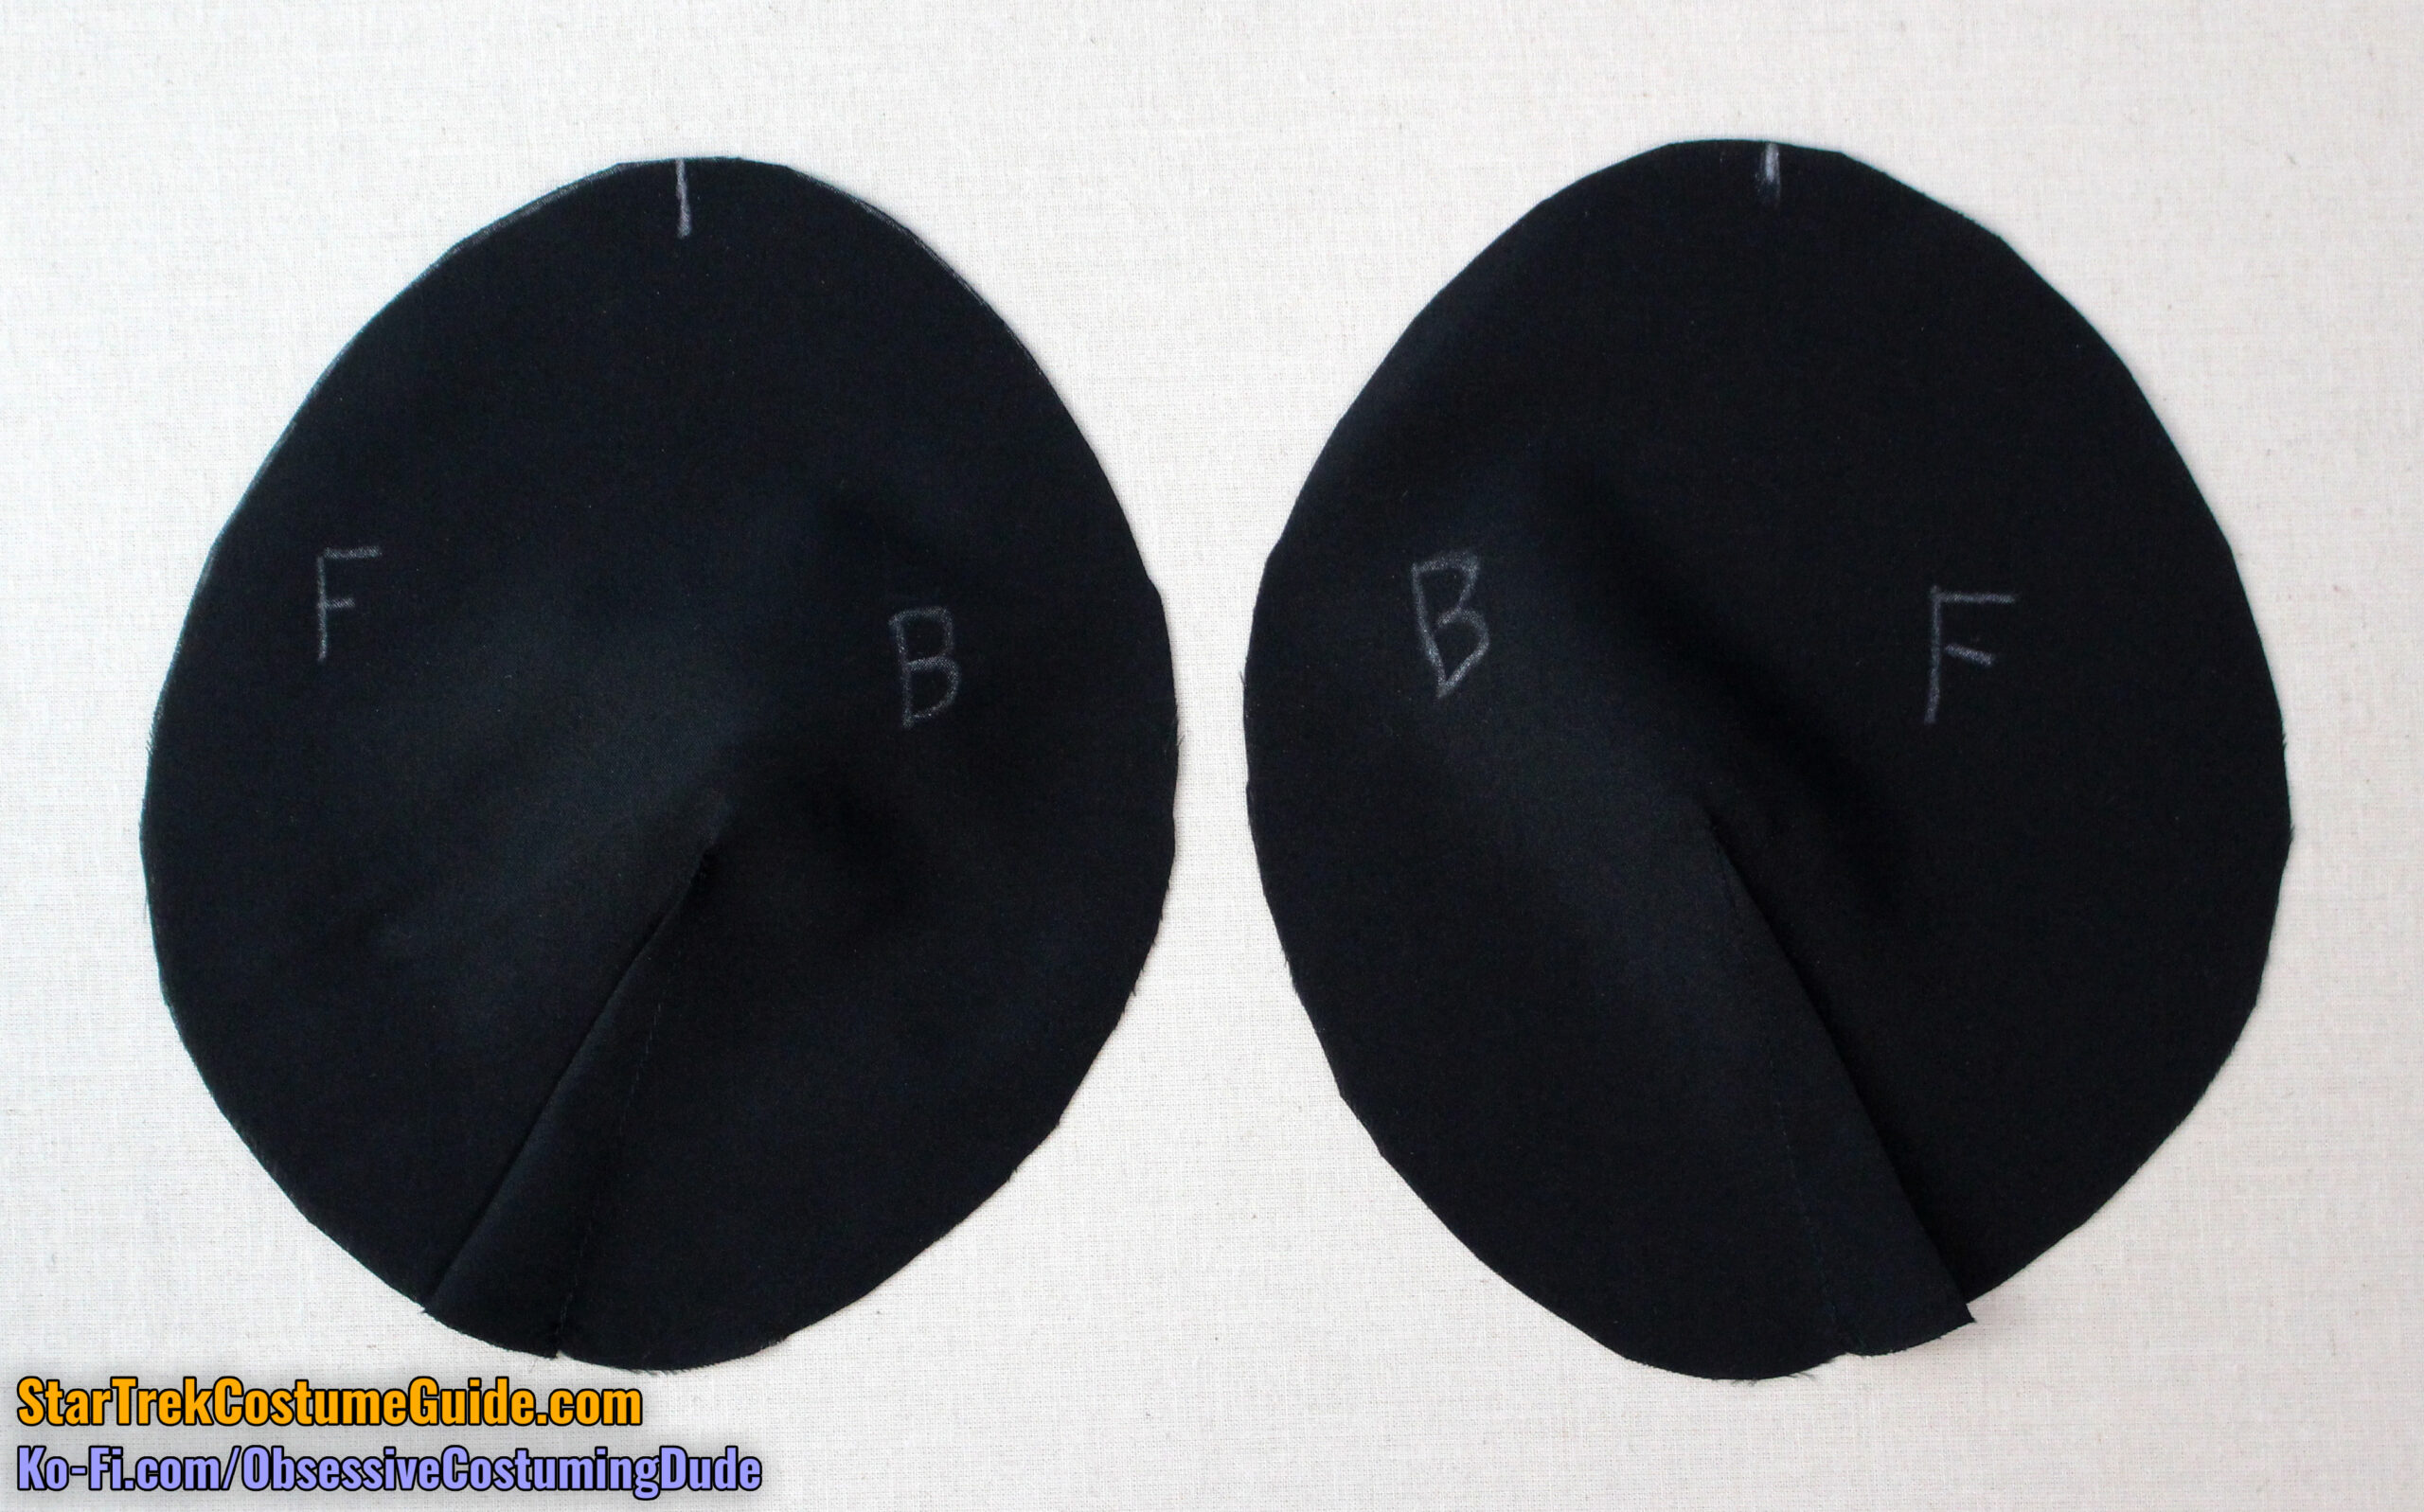
For the women’s early shoulder pad, you’ll need two cuts of lining and two layers of low-loft batting.
I suggest tracing the dart onto the lining layers, marking the shoulder seam, and marking the front/back of the pad with disappearing tailor’s chalk.
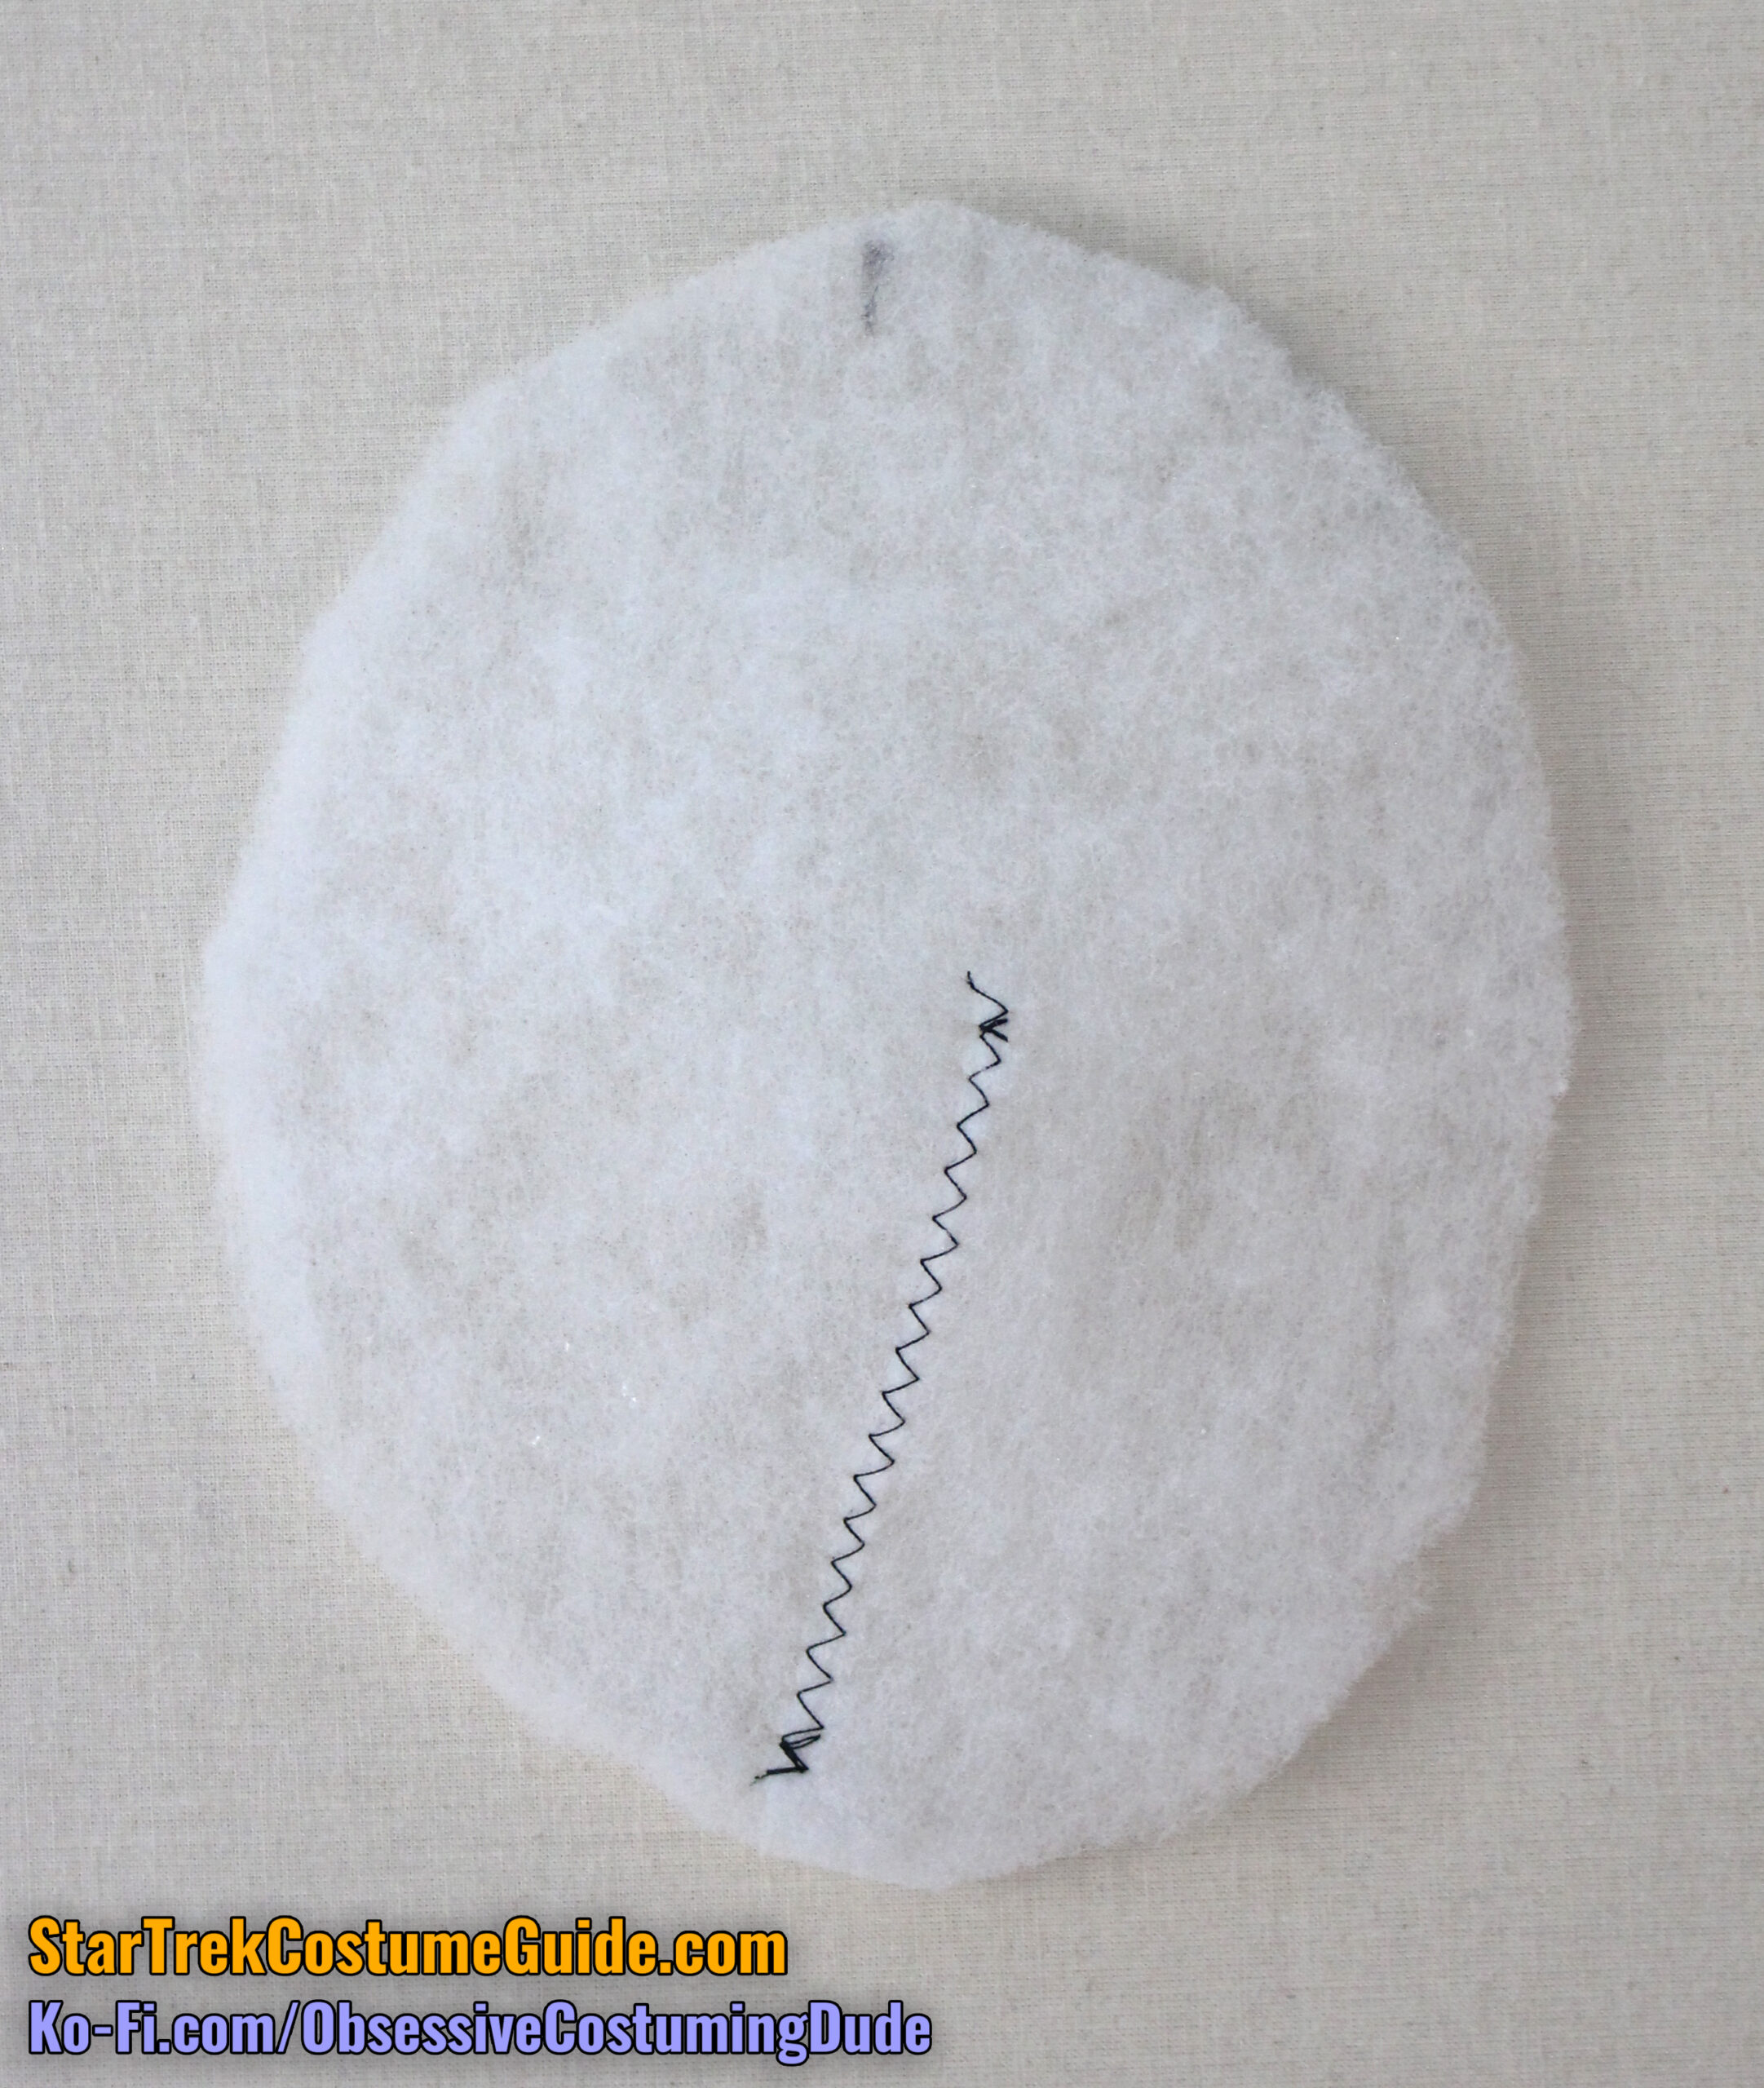
Trim the dart out of the batting layers.
Sew the darts closed in the lining layers, and press the darts toward the front.
Pull the edges of the dart together on the batting and zig-zag stitch them together.
Pull the edges of the dart together on the batting and zig-zag stitch them together.
Repeat for the other layer of batting.
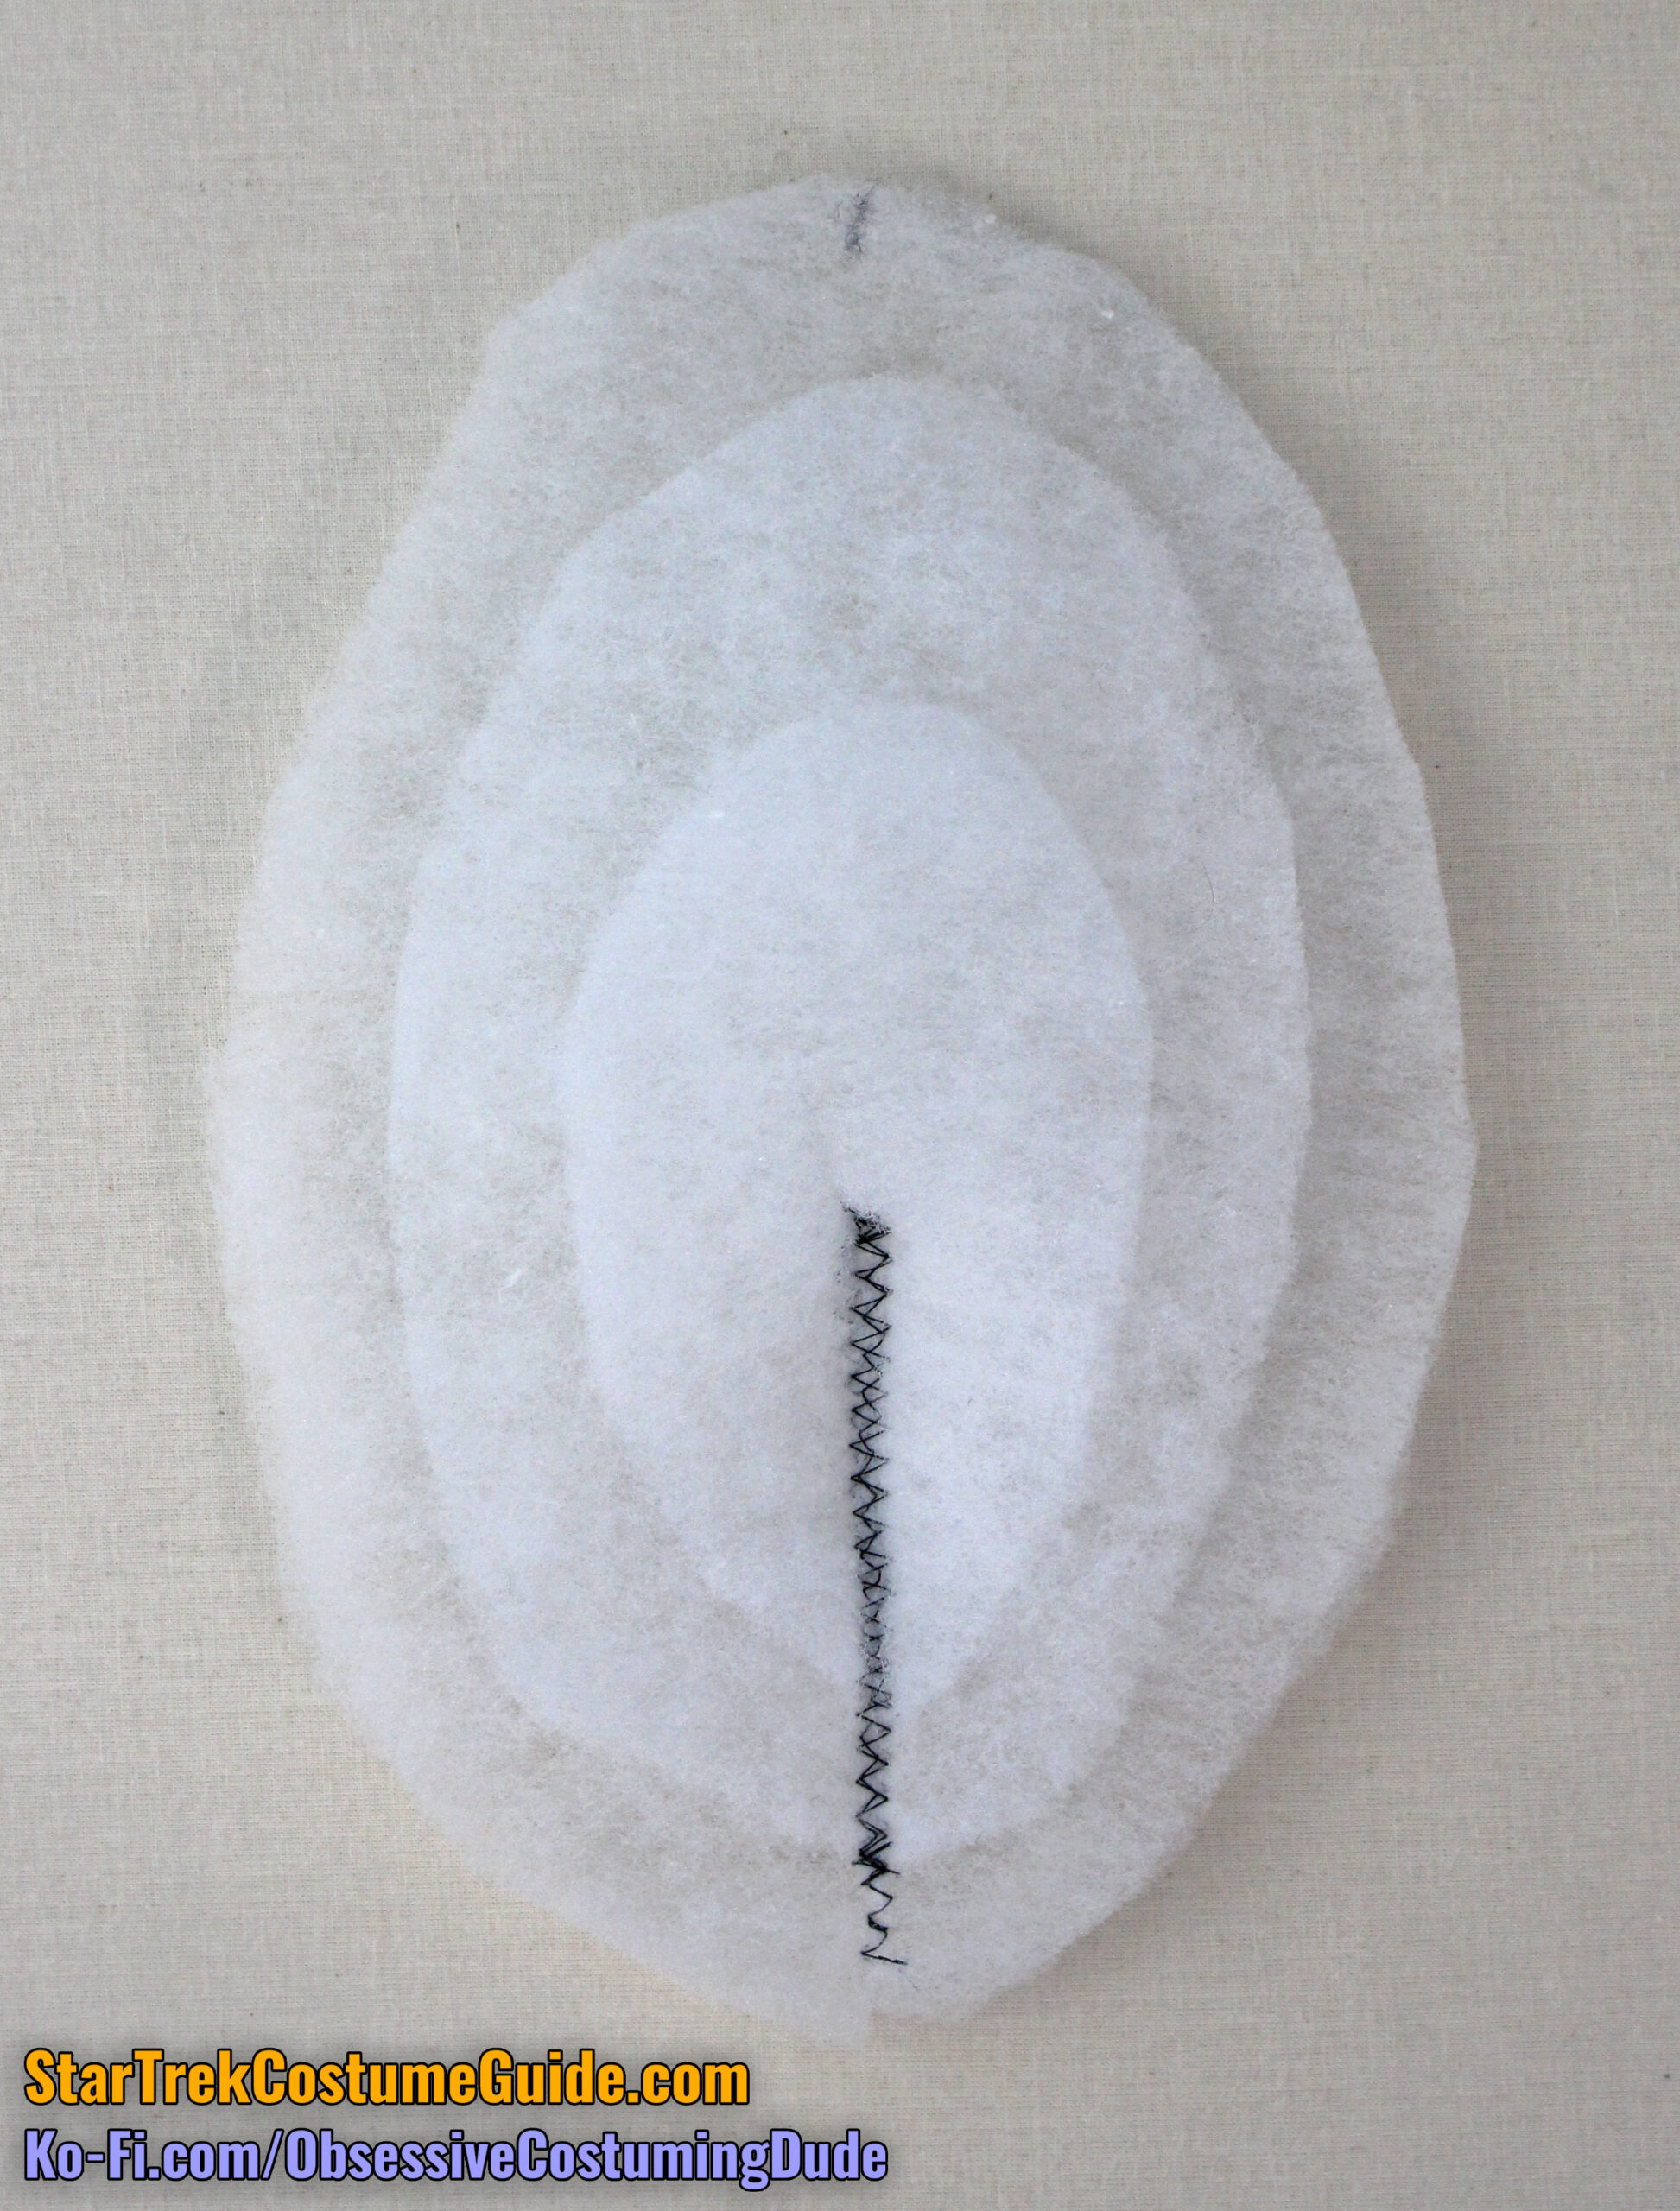
Place the two layers of batting together, matching darts and shoulder seams.
Trim away about ¾” from the second layer of batting.
Anchor the two layers of batting together over the dart with another zig-zag stitch.
For the men’s shoulder pad the process is the same, but I suggest using three layers of batting and grading them in larger increments toward the shoulder seam.
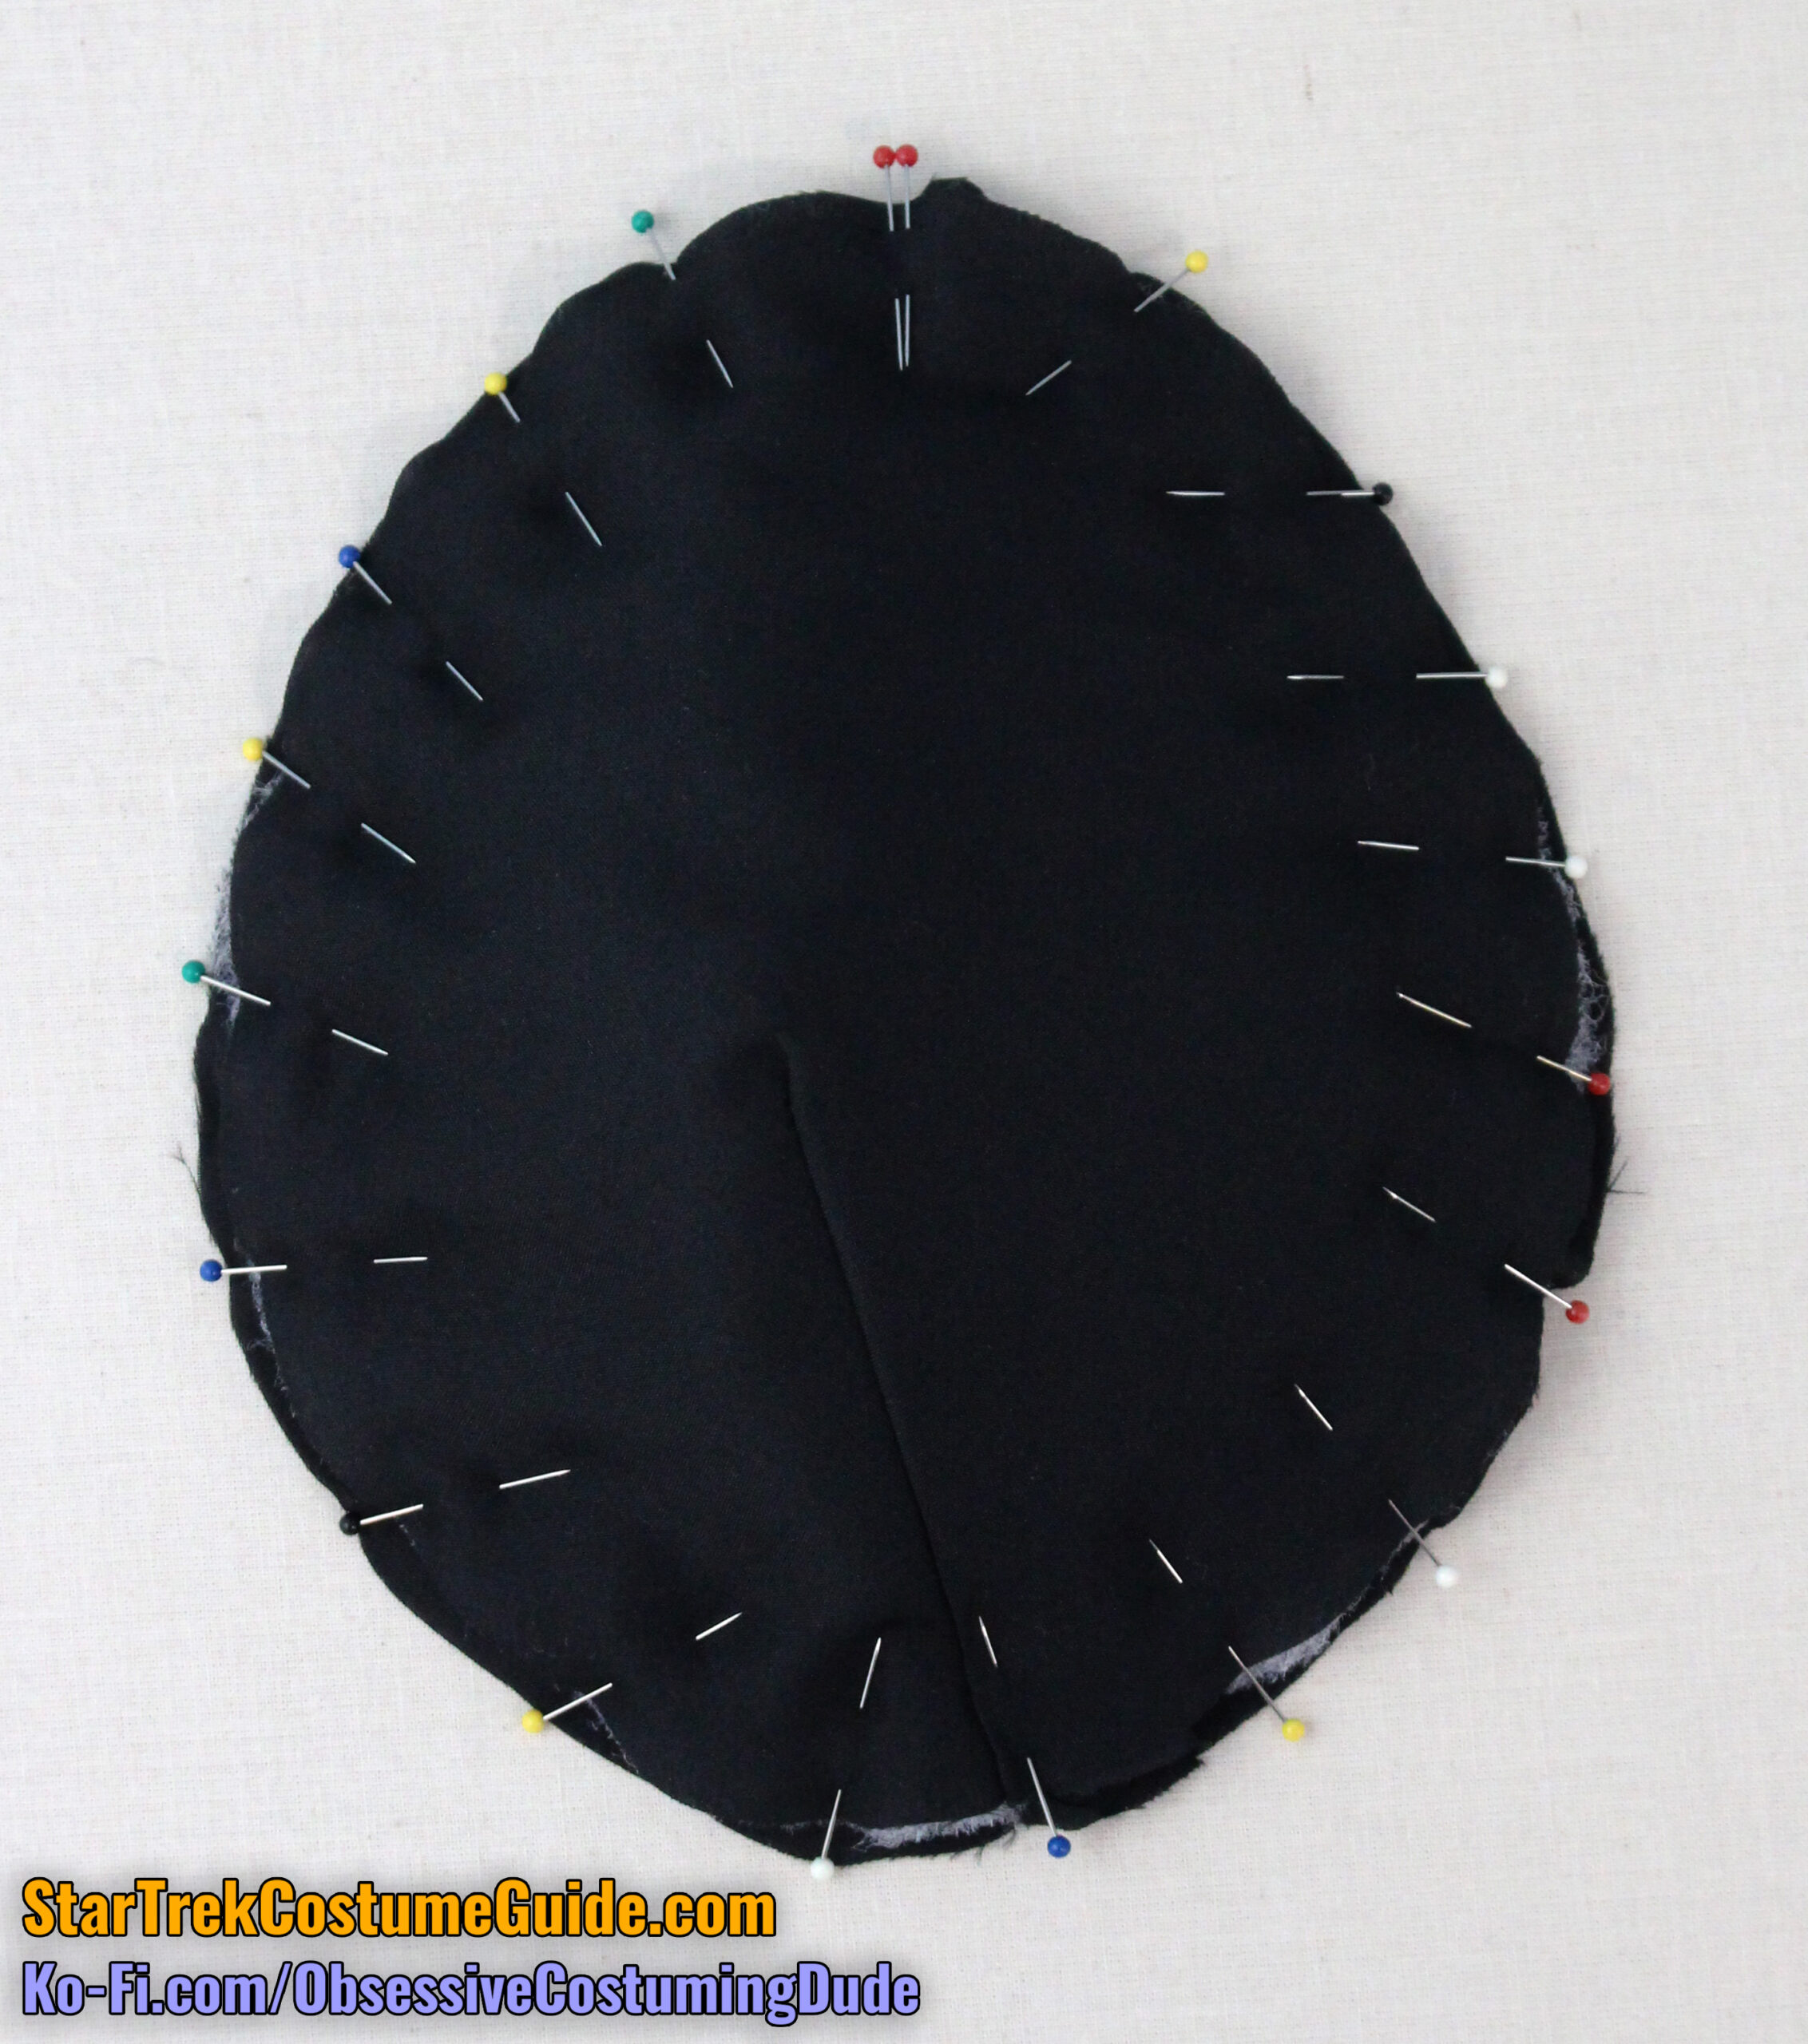
“Sandwich” the batting assembly between the two layers of lining, matching darts and shoulder seams.
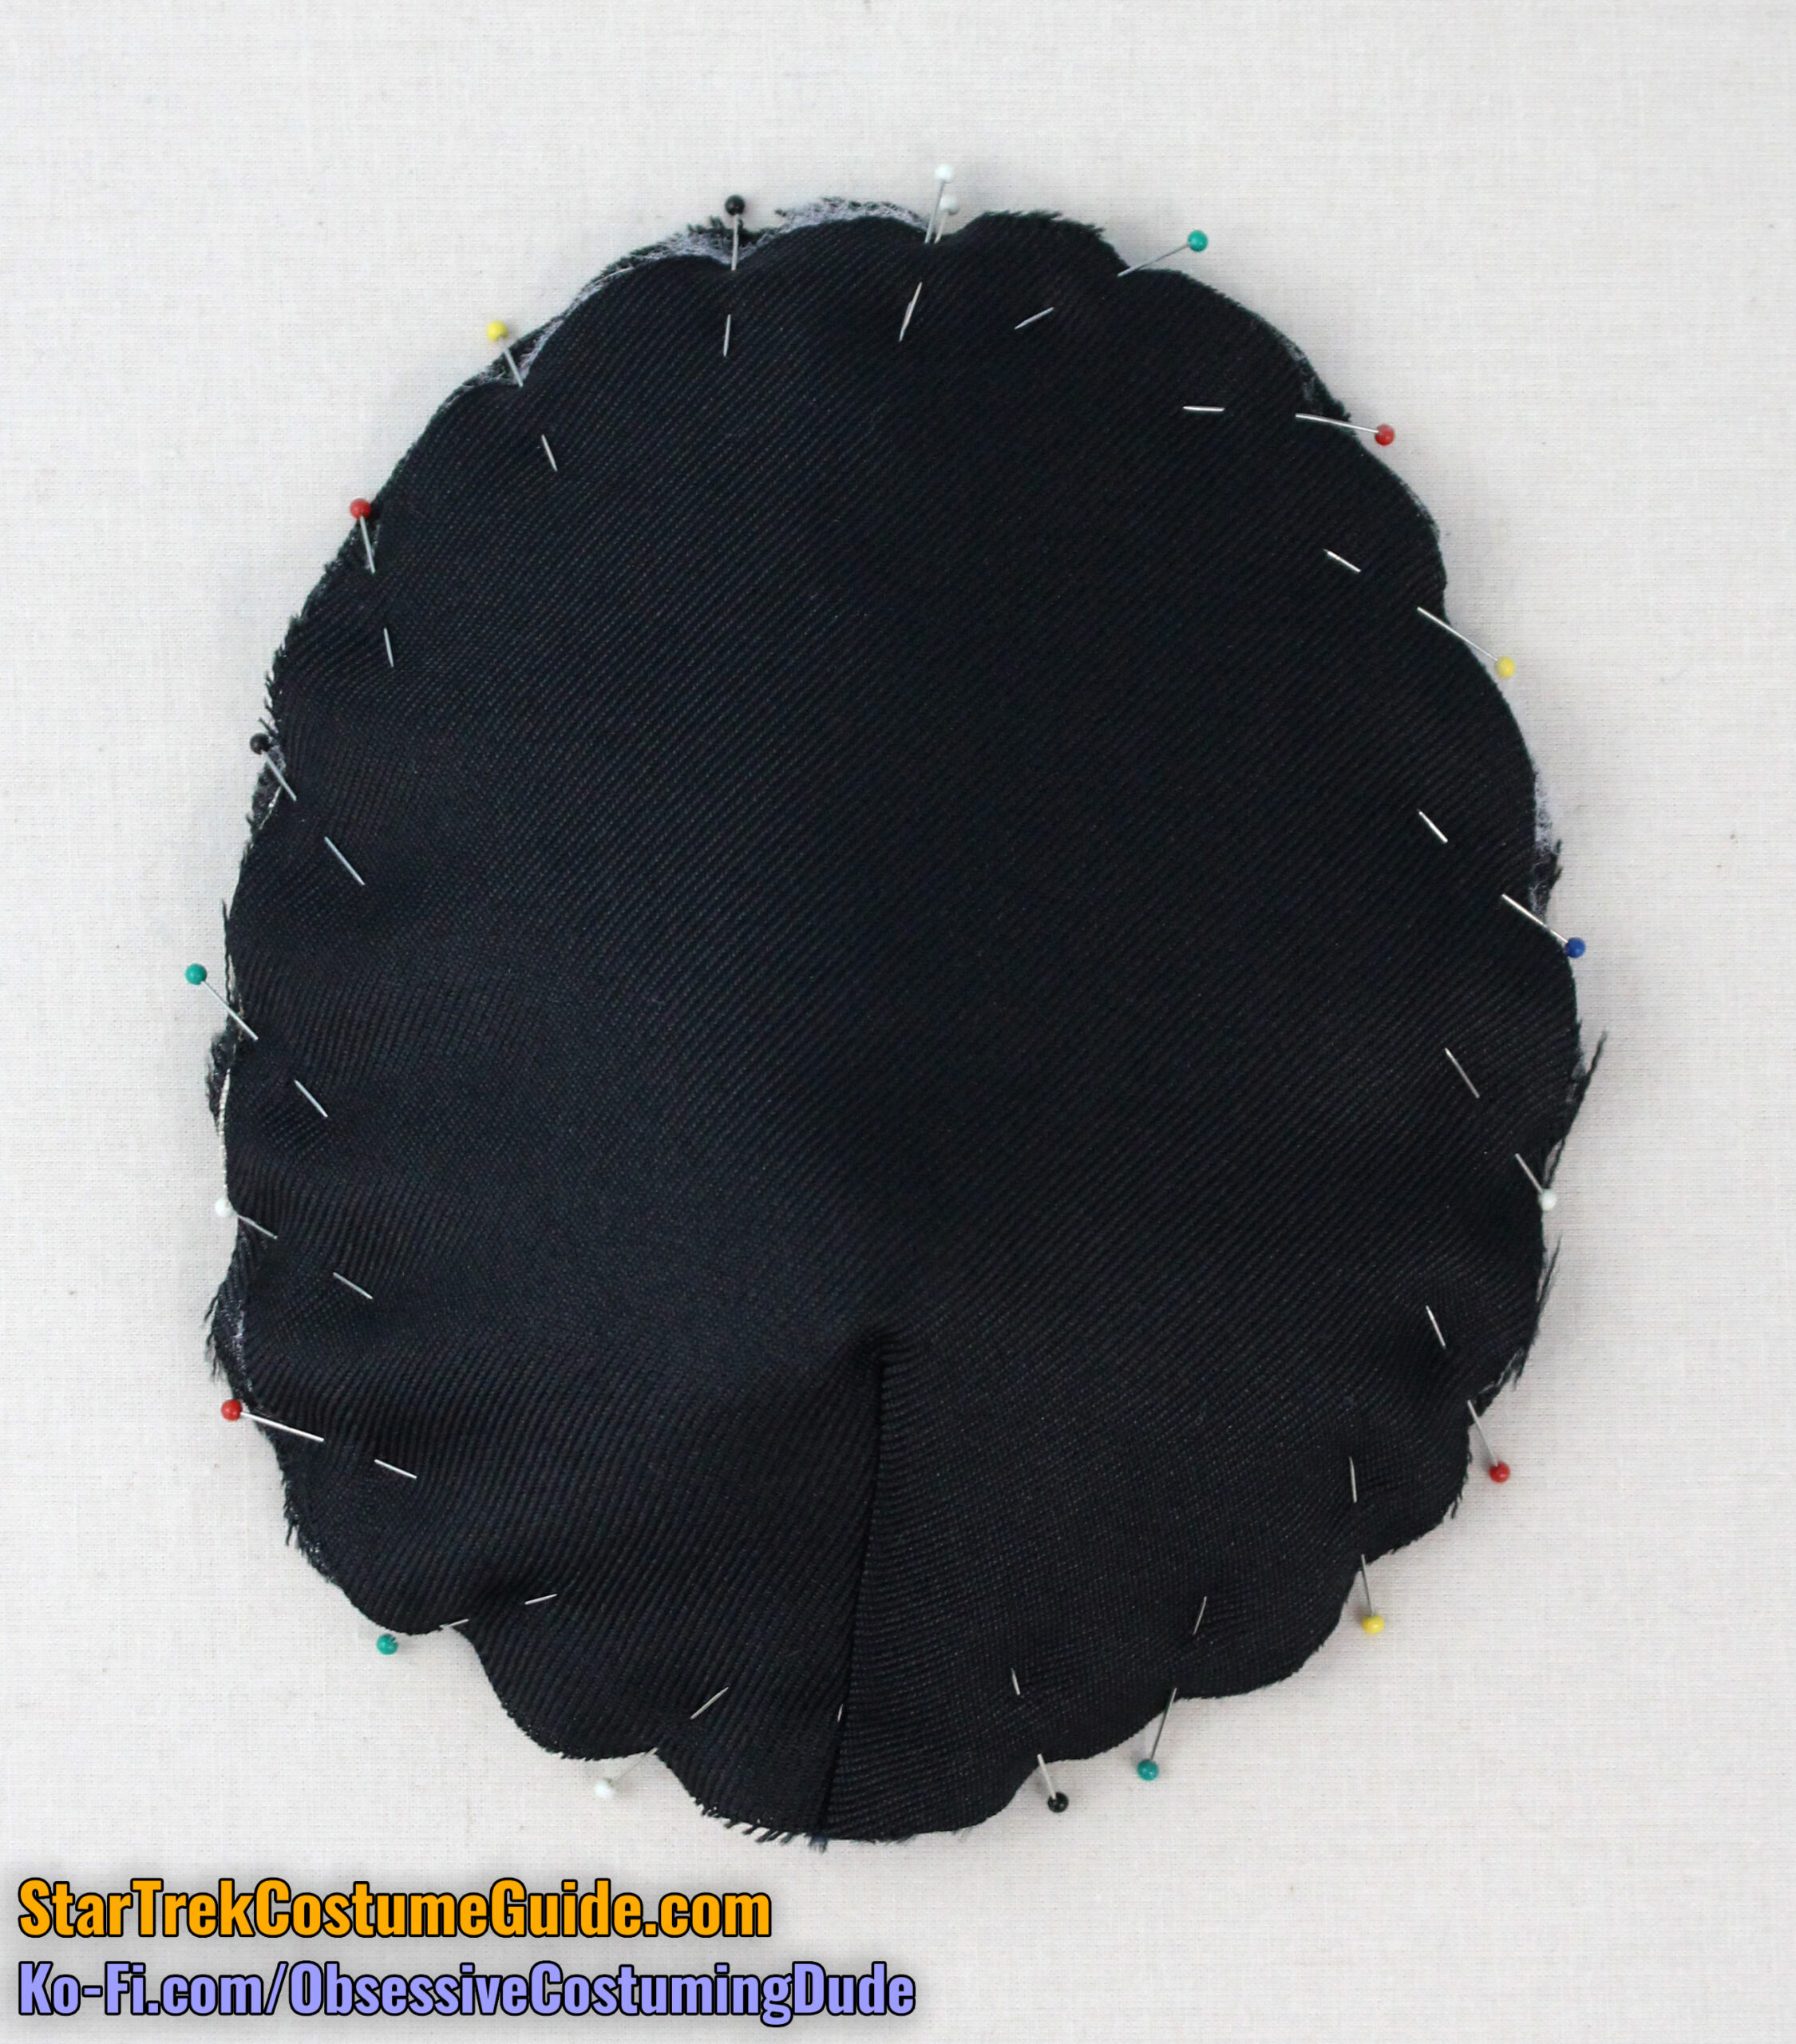
Pin the layers together along the entire perimeter.
I recommend pulling the bottom layer of lining slightly tighter to help pull the pad into shape. (The edges won’t quite line up, but that’s fine.)
Using a quilting/walking foot, sew the shoulder pad closed ⅜” from the edge.
Stitch again ⅛” outside the first row of stitching, ¼” from the edge of the pad.
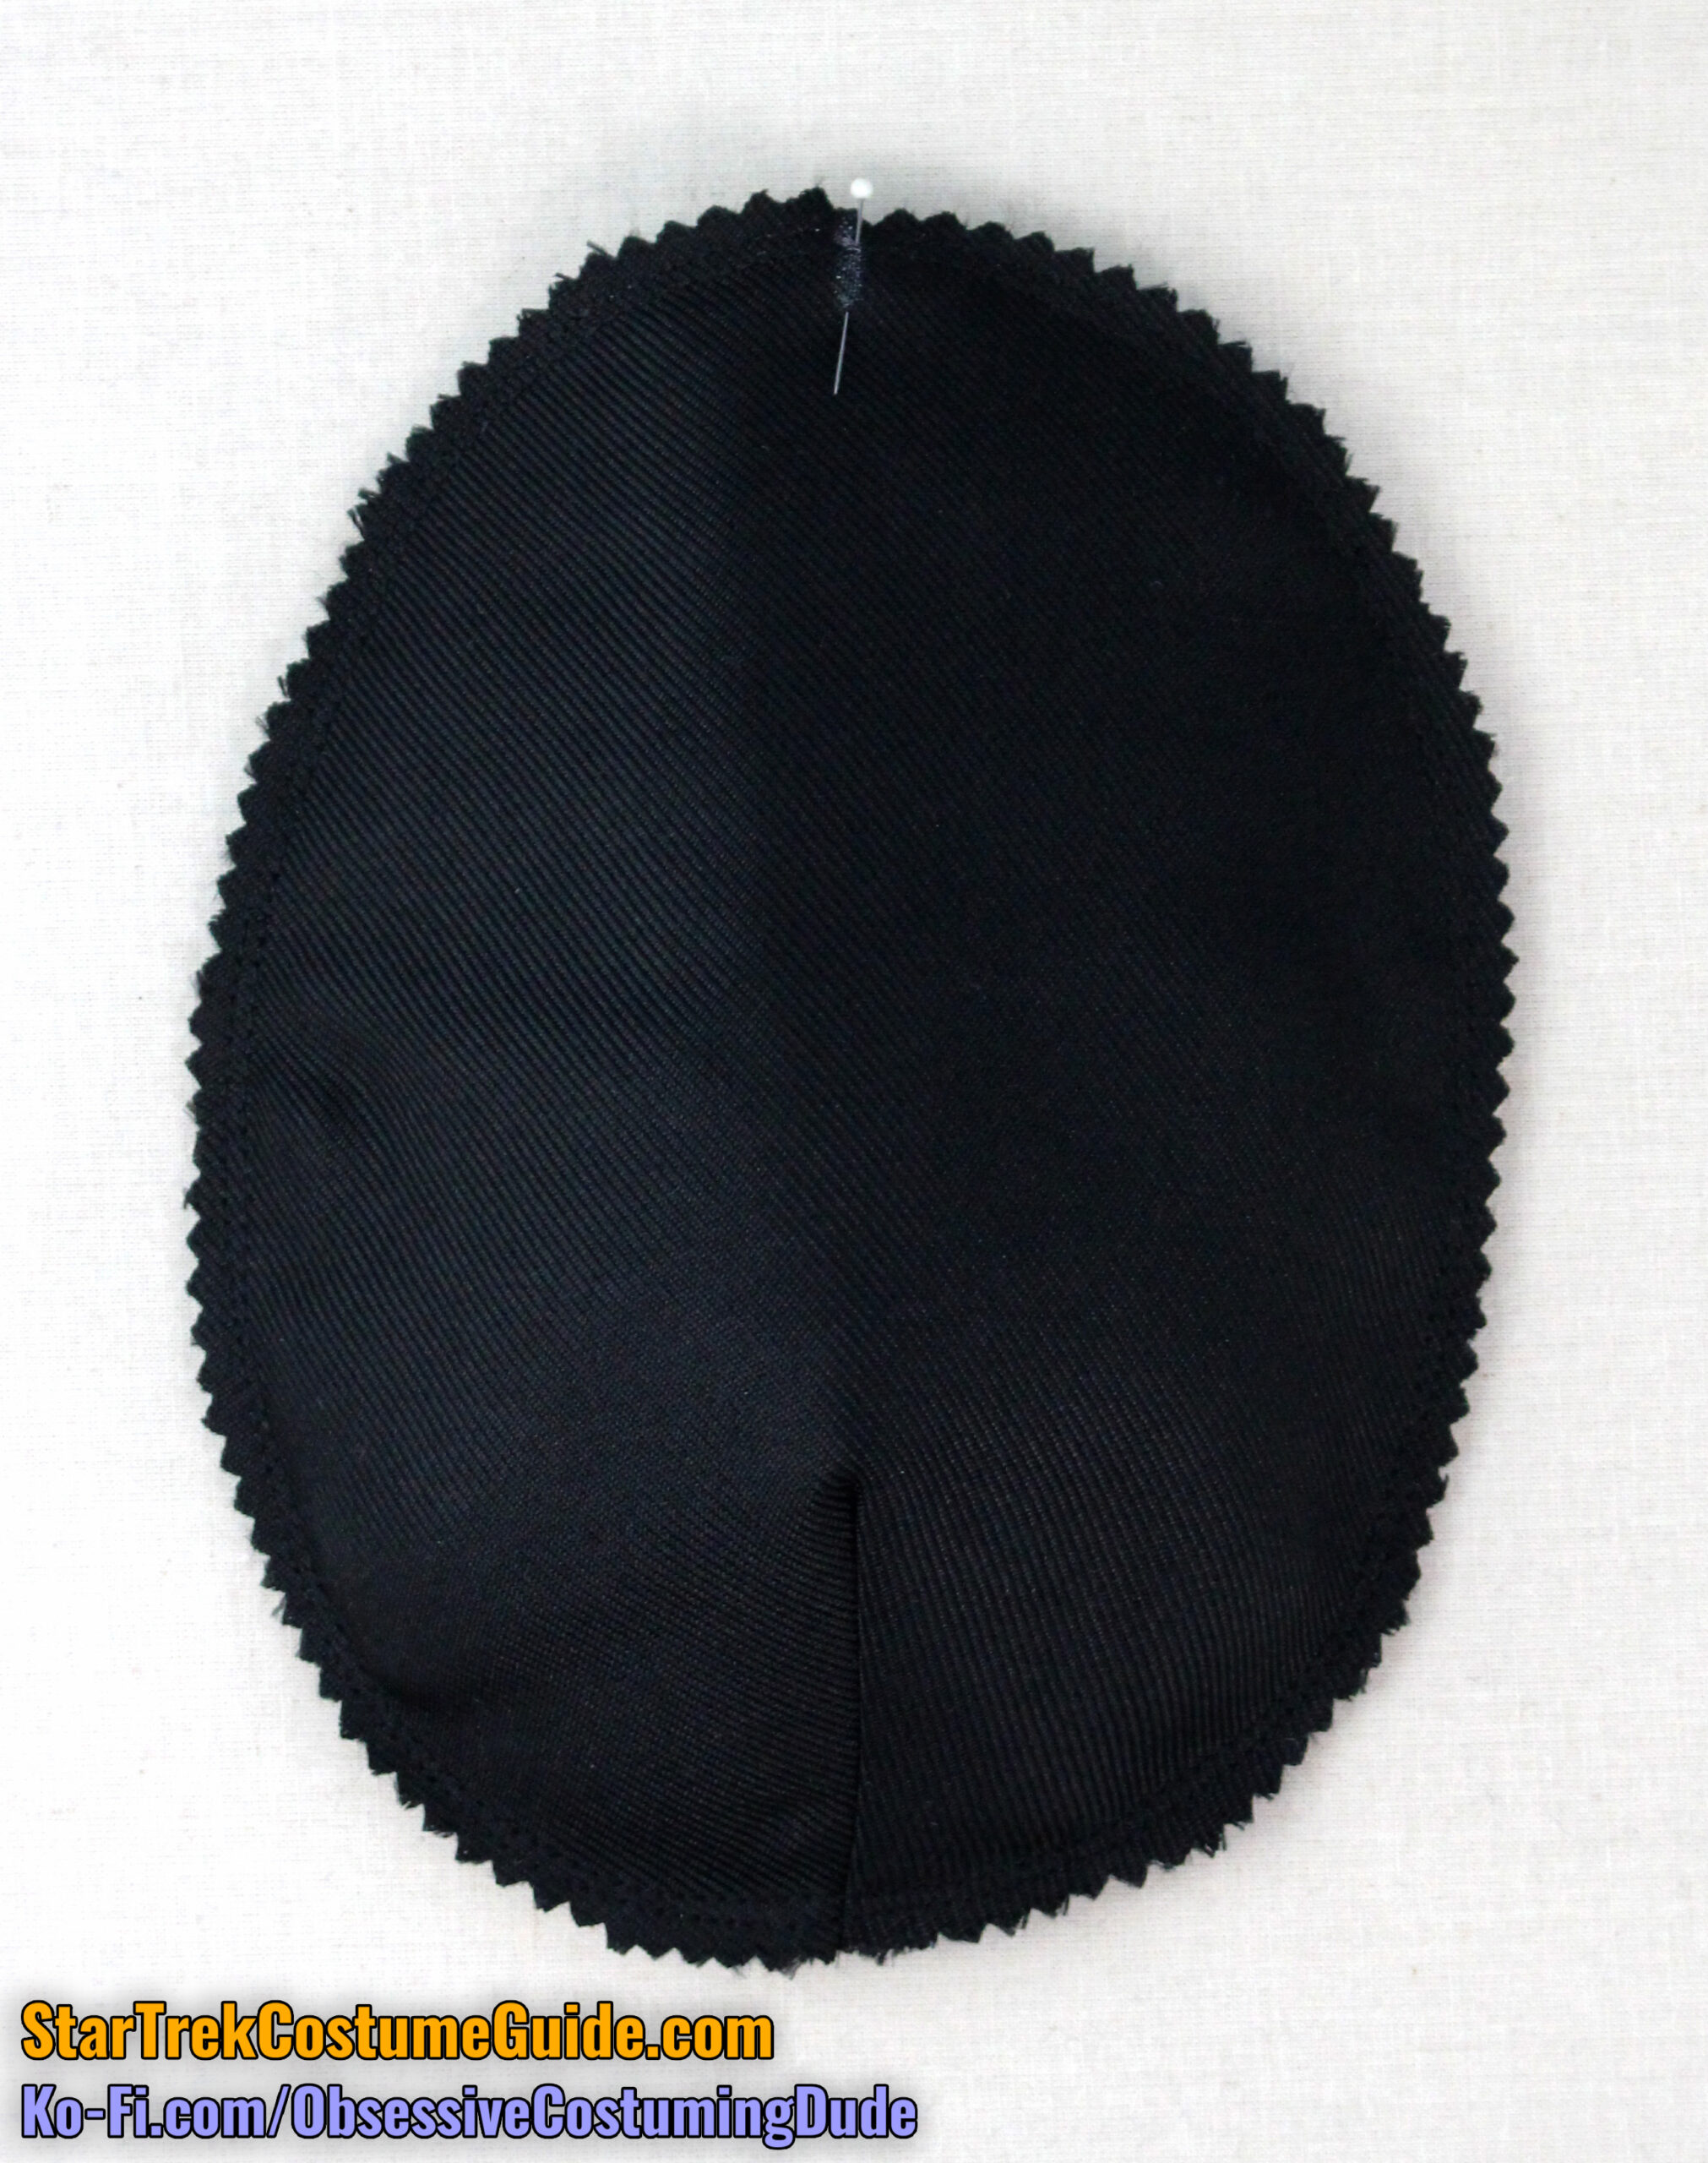
Trim the edge of the pad with pinking shears.
Steam the shoulder pad into shape over a tailor’s ham.
Hand-sew a pair of snaps to the pad – one close to the edge at the shoulder seam, and another at the tip of the dart. (The “male” end goes on the pad, and the “female” end goes inside the uniform.)
Repeat for the other shoulder pad.
The later-style shoulder pads are a bit more involved … and to be honest, even after studying a few pairs in-person, I’m not entirely sure how they were made, or with what materials.
But the process I describe here will produce a convincing facsimile.
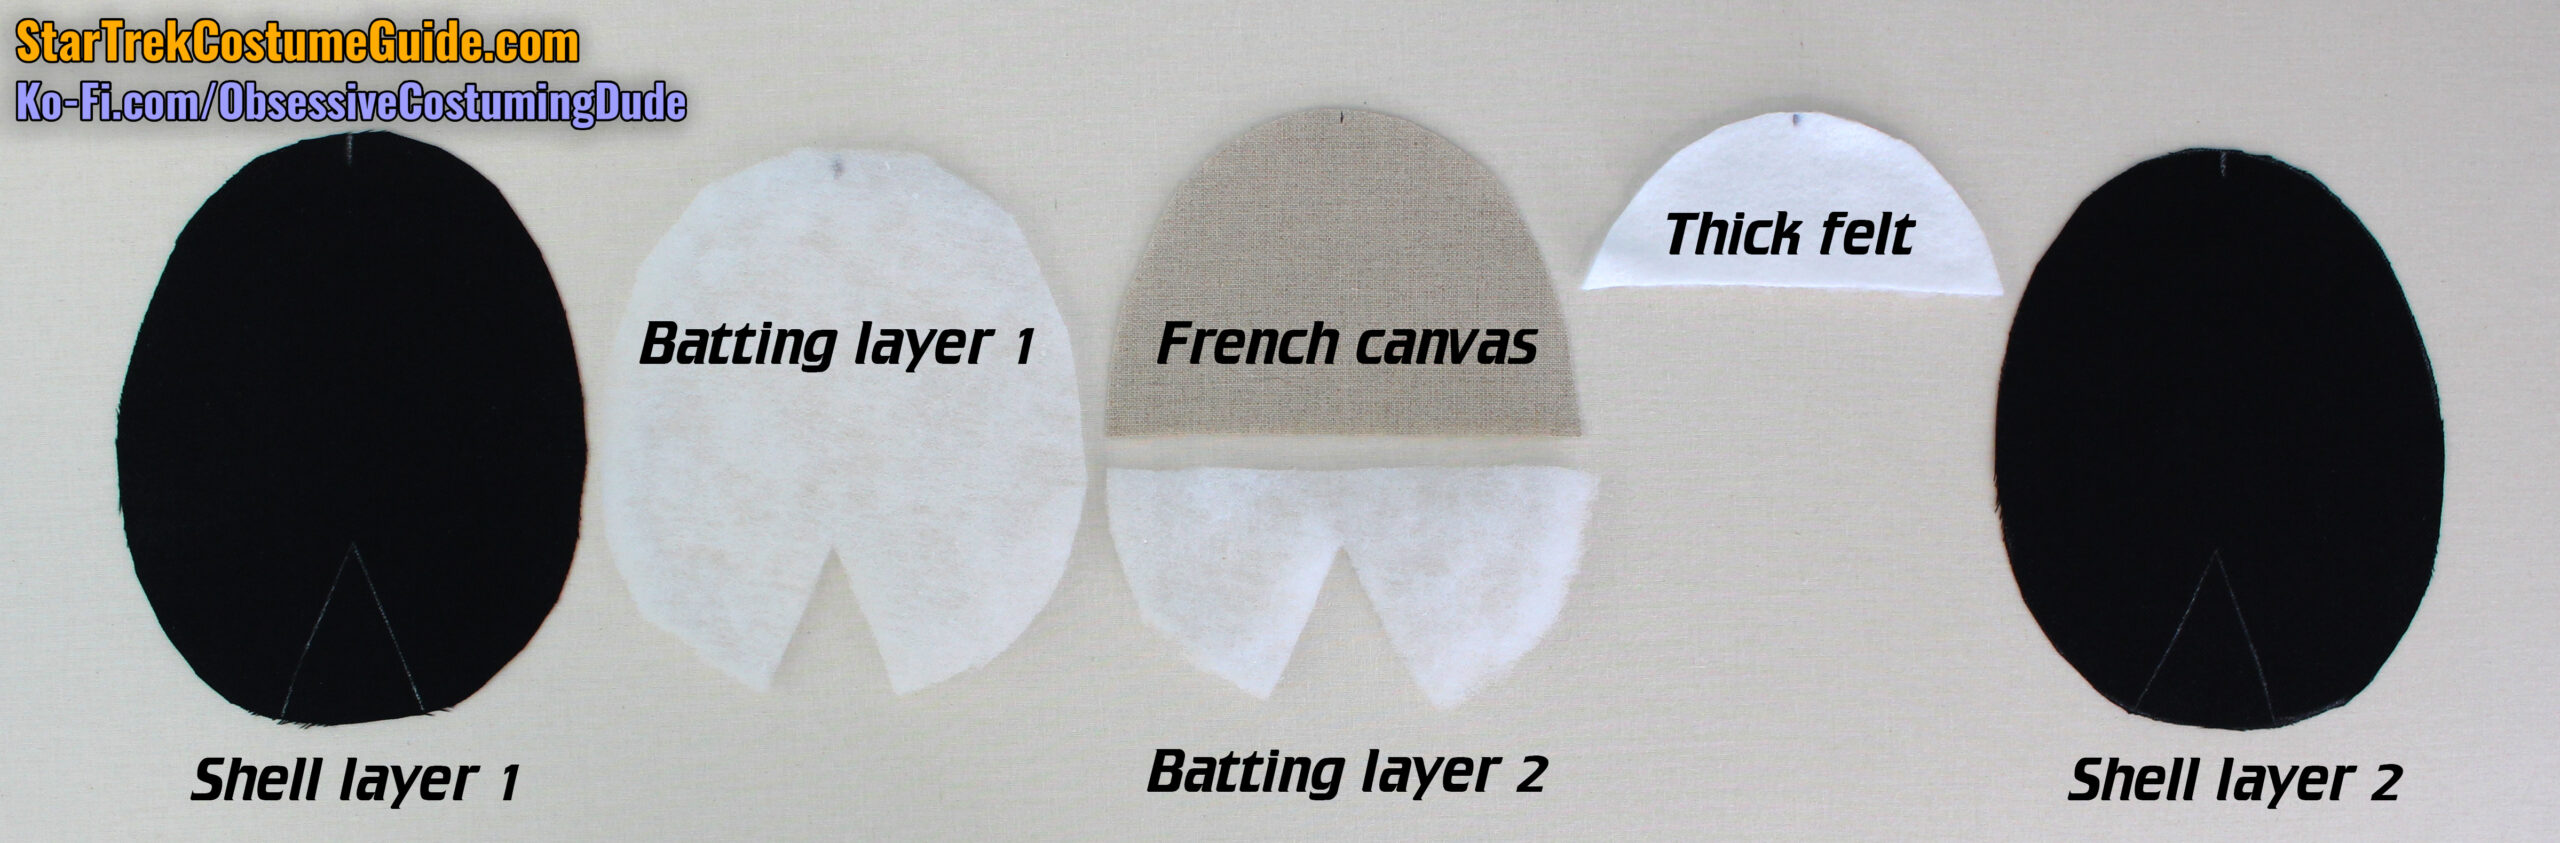
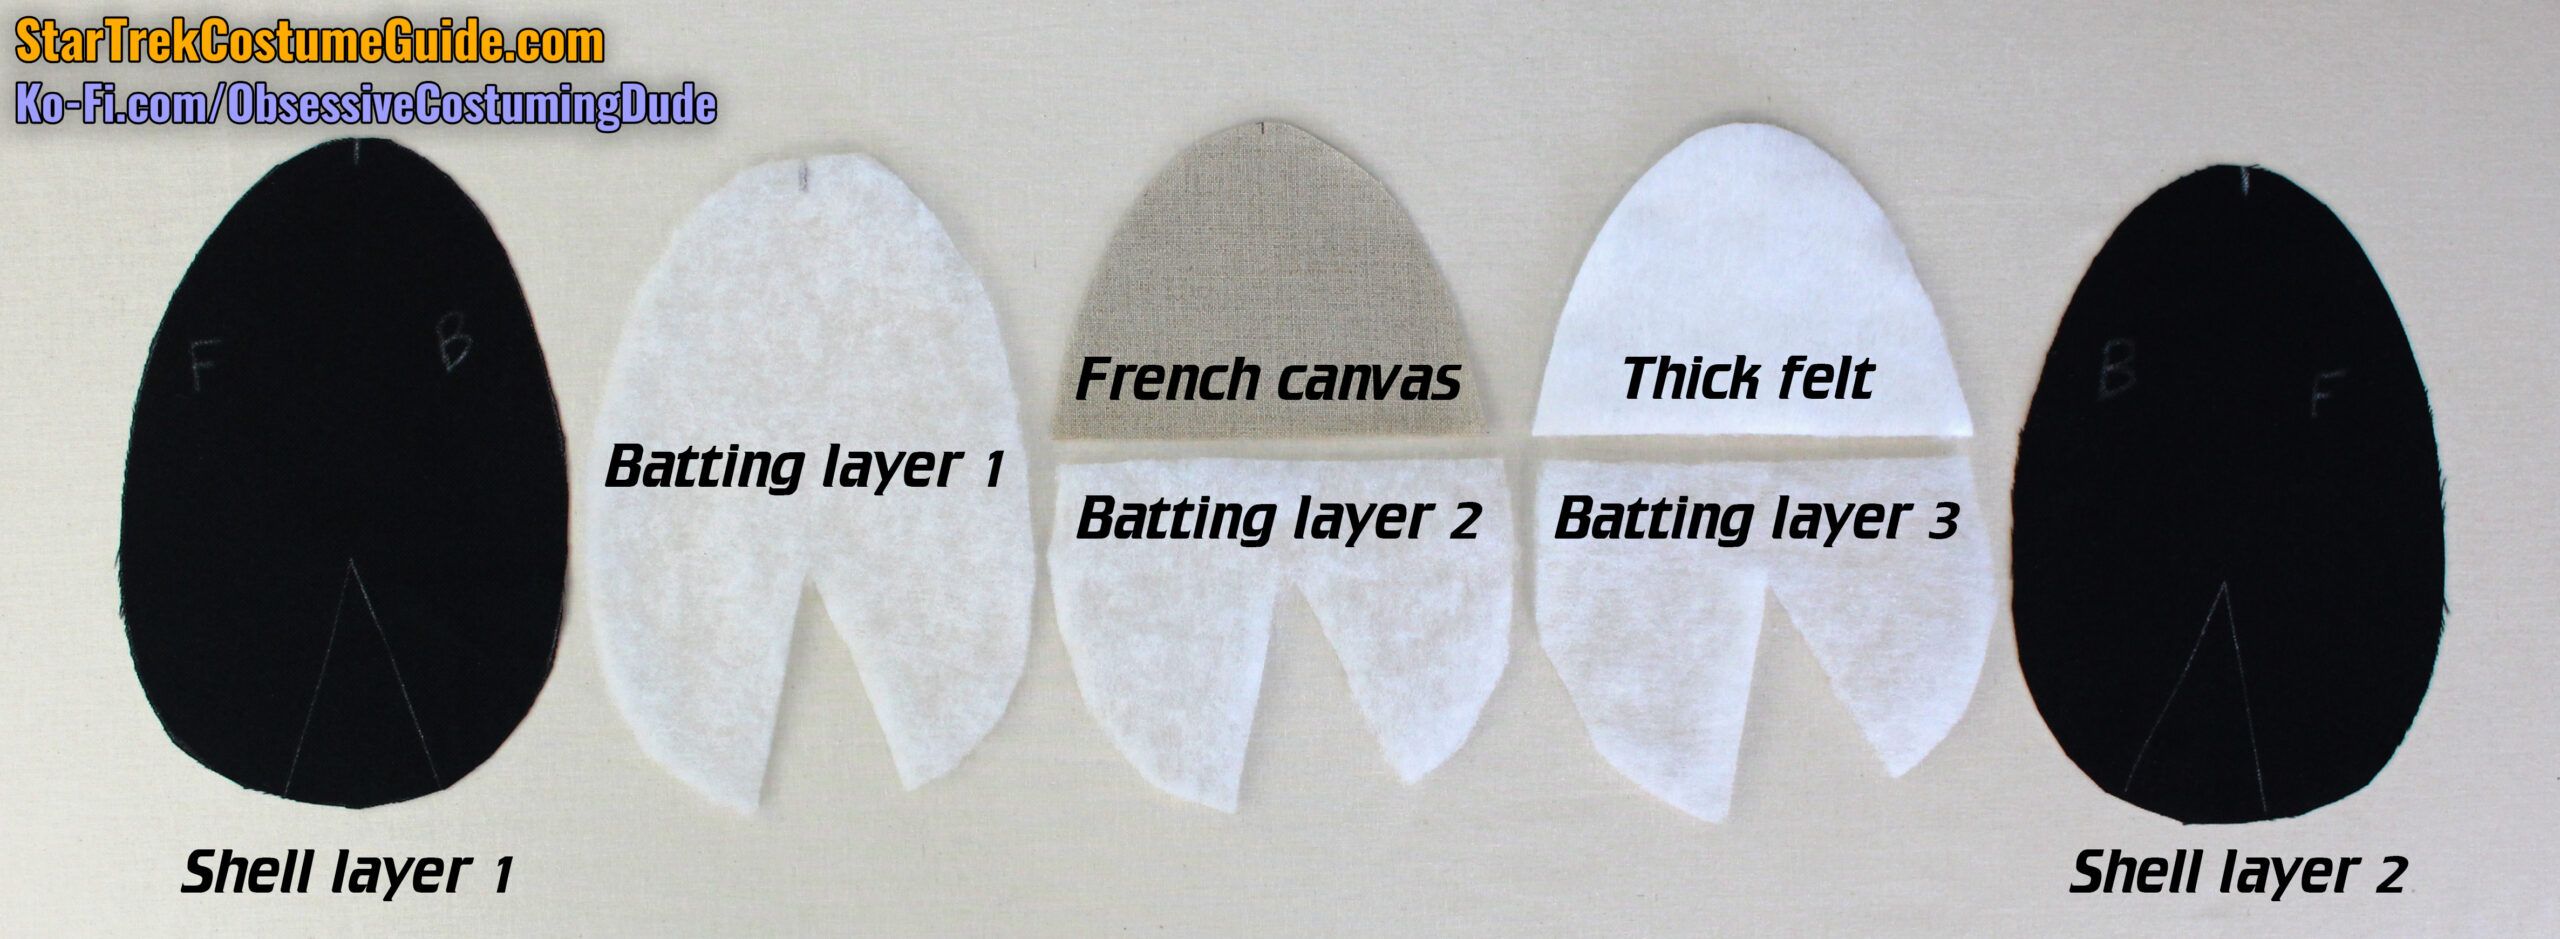
Use pattern piece U2 for the women’s version, and use the same piece U for the men’s.
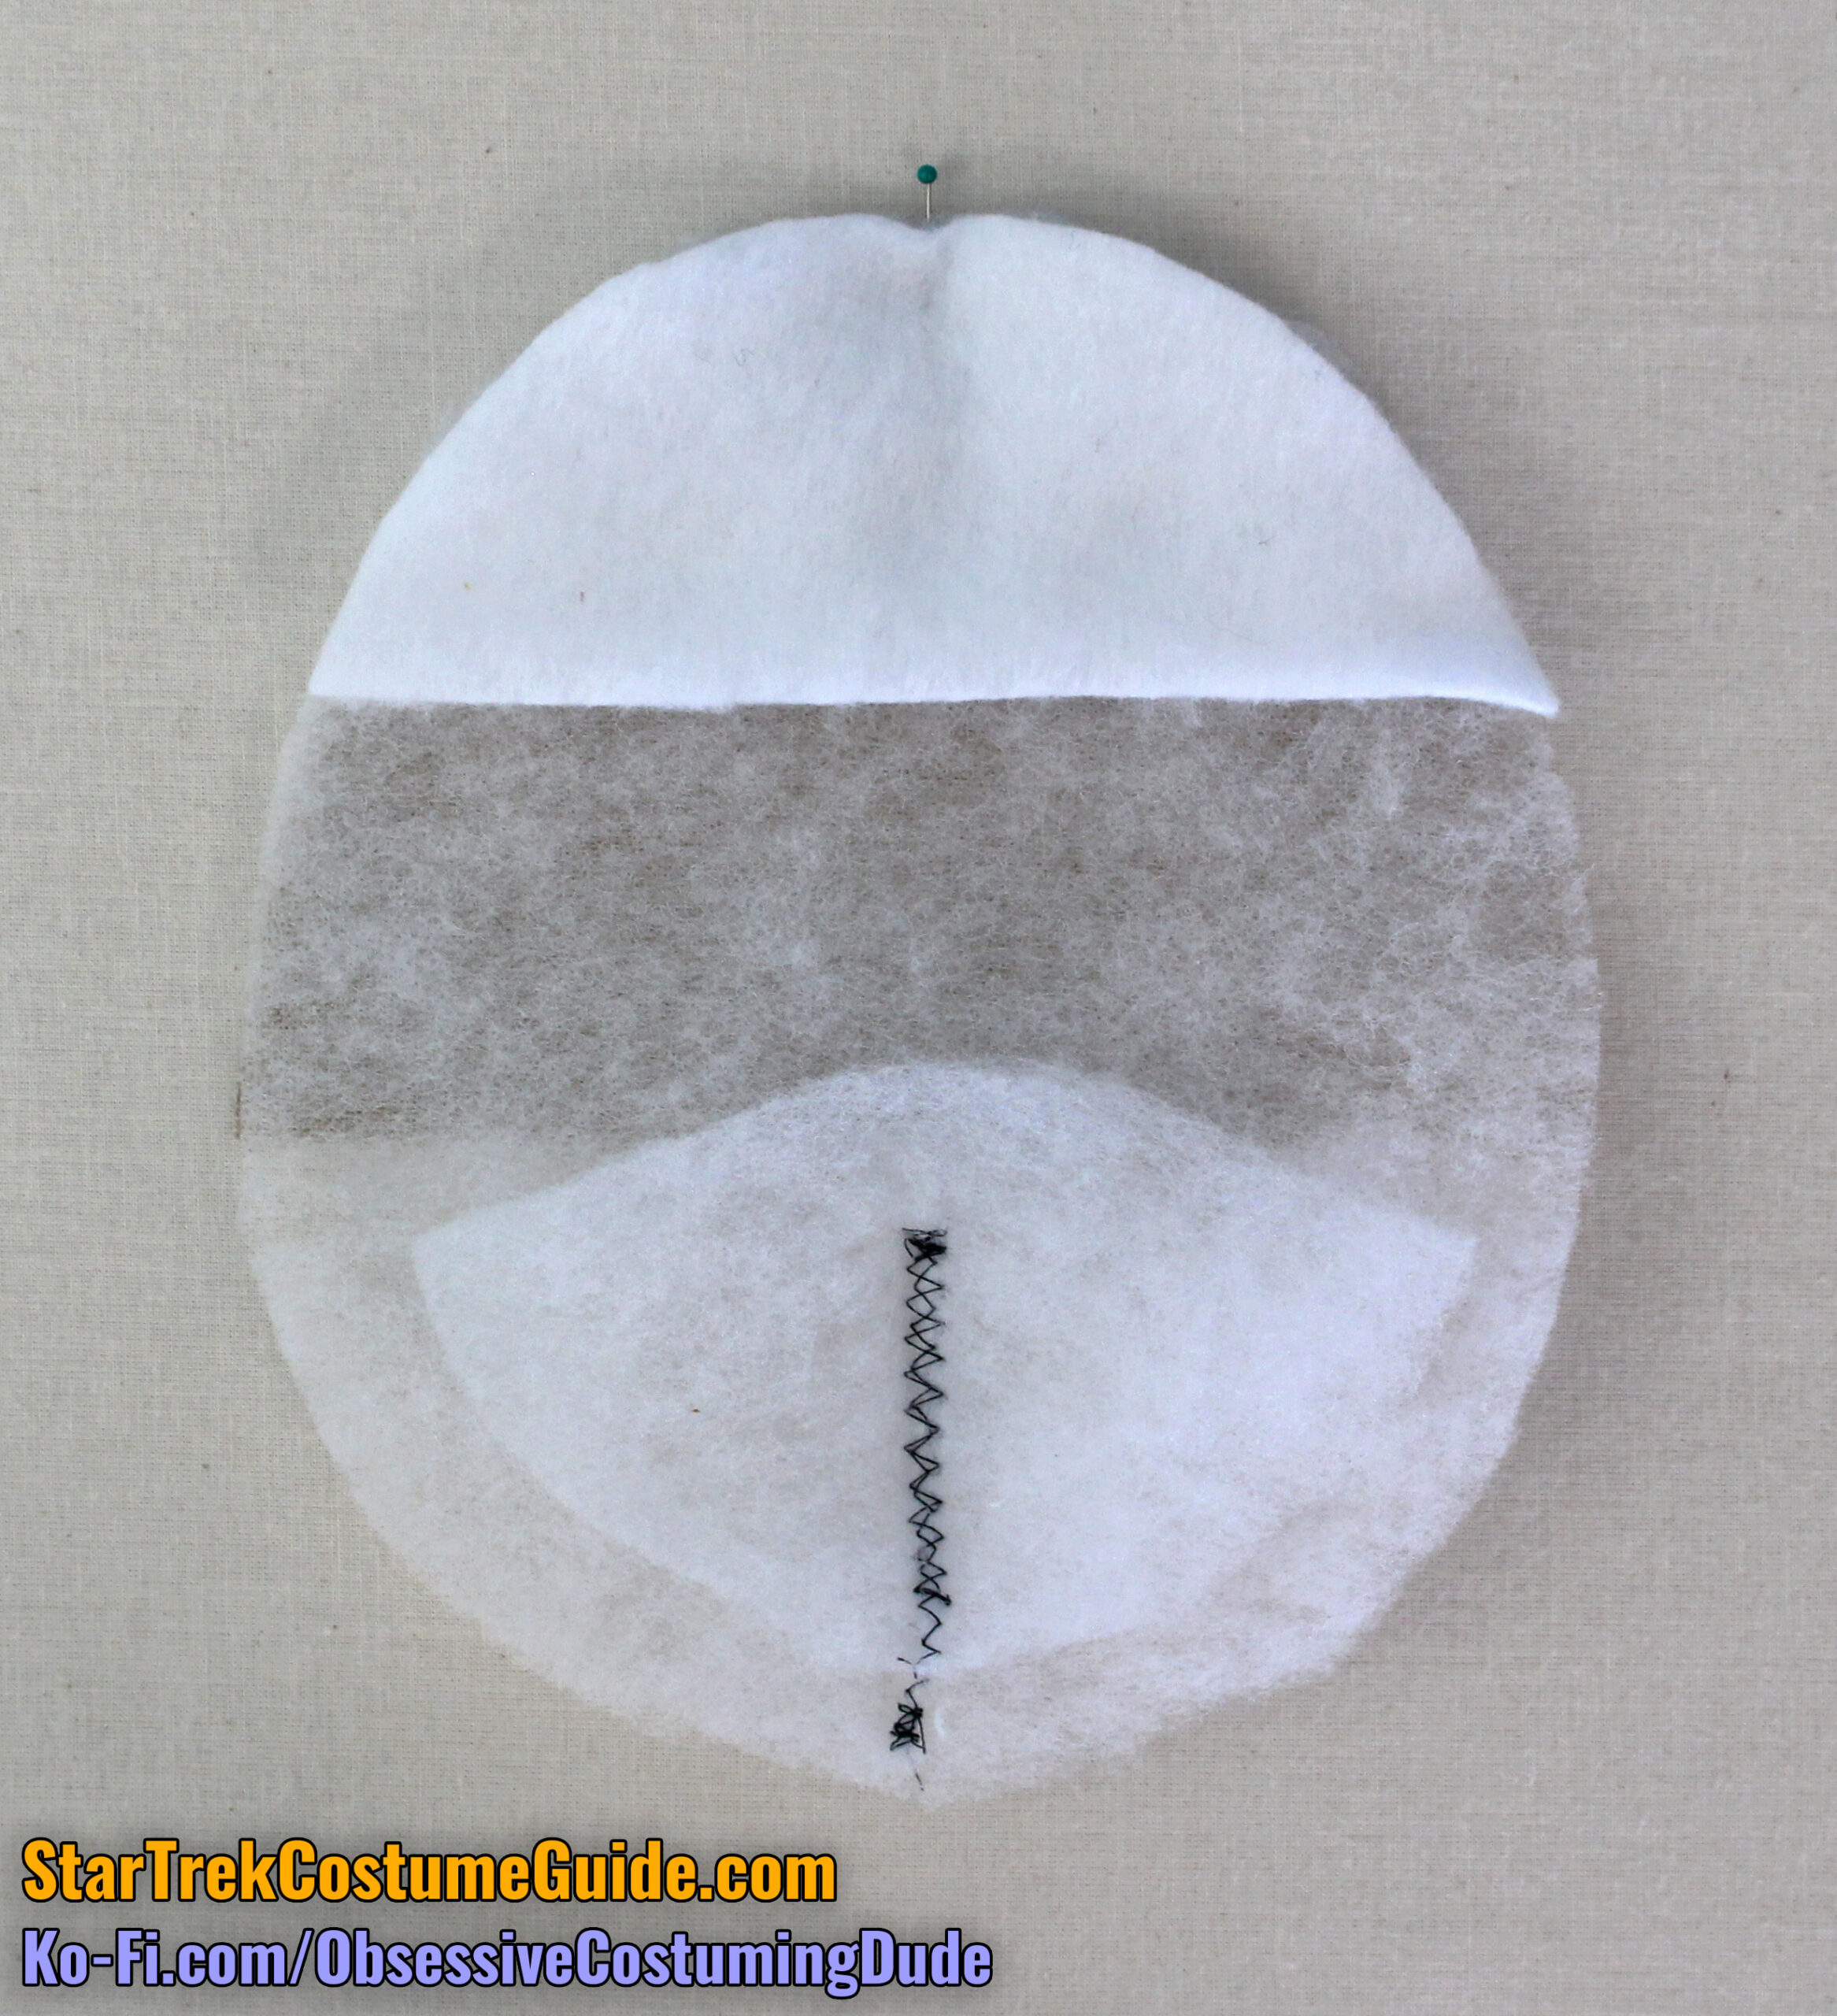
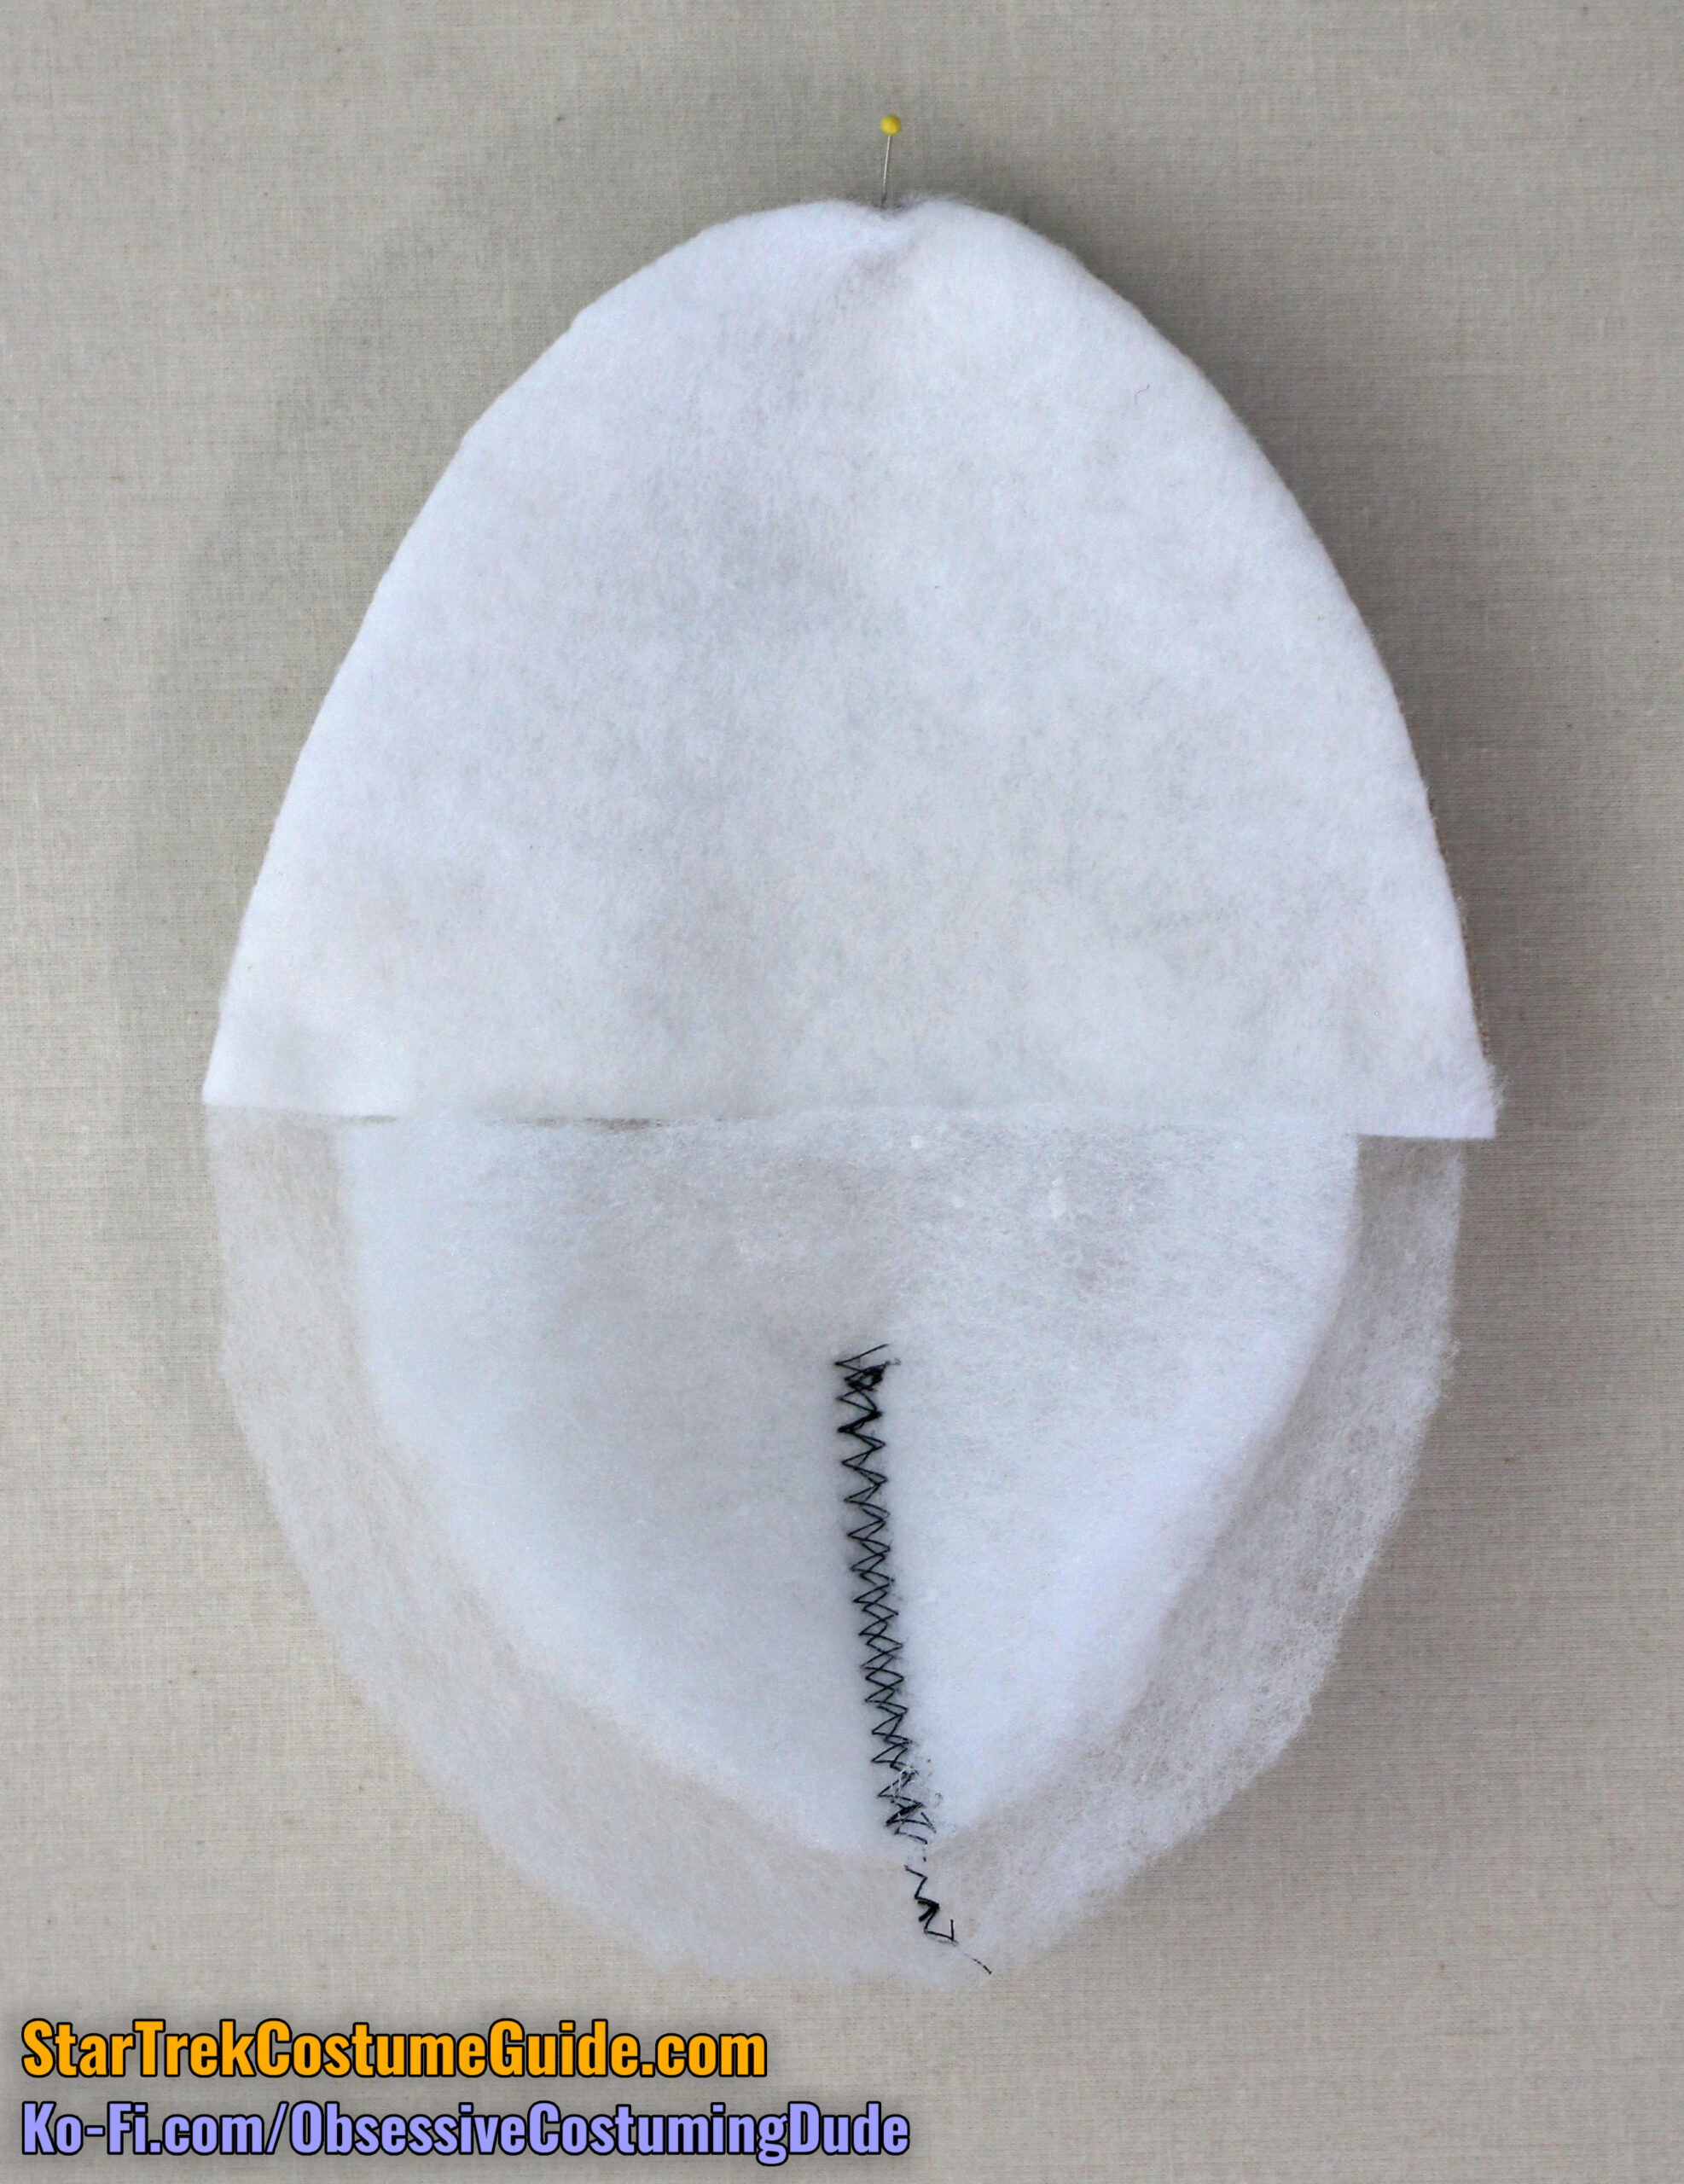
For the women’s pad you’ll need two shell layers, a layer of low-loft batting the size of the entire pad, a layer of heavy French canvas roughly two-thirds the size of the pad, a second layer of low-loft batting for the outside of the pad, and a small cut of thick felt for the opposite area.
The men’s pad is similar, but the proportions are slightly different, and you’ll probably want a third layer of low-loft batting for the outer area of the pad.
You can use black lining for the shell fabric, but the screen-used shoulder pads I studied were made out of a more durable fabric akin to polyester gabardine, so I recommend using that.
Sew the darts closed in the shell layers, and press the darts toward the front.
(The women’s later-style shoulder pads are symmetrical, so either direction can be the “front.”)
Close the batting darts and join the batting layers as described previously for the early shoulder pad.
“Sandwich” the batting assembly between the heavy French canvas (on top) and the thick felt (on bottom).
Women's version
Men's version
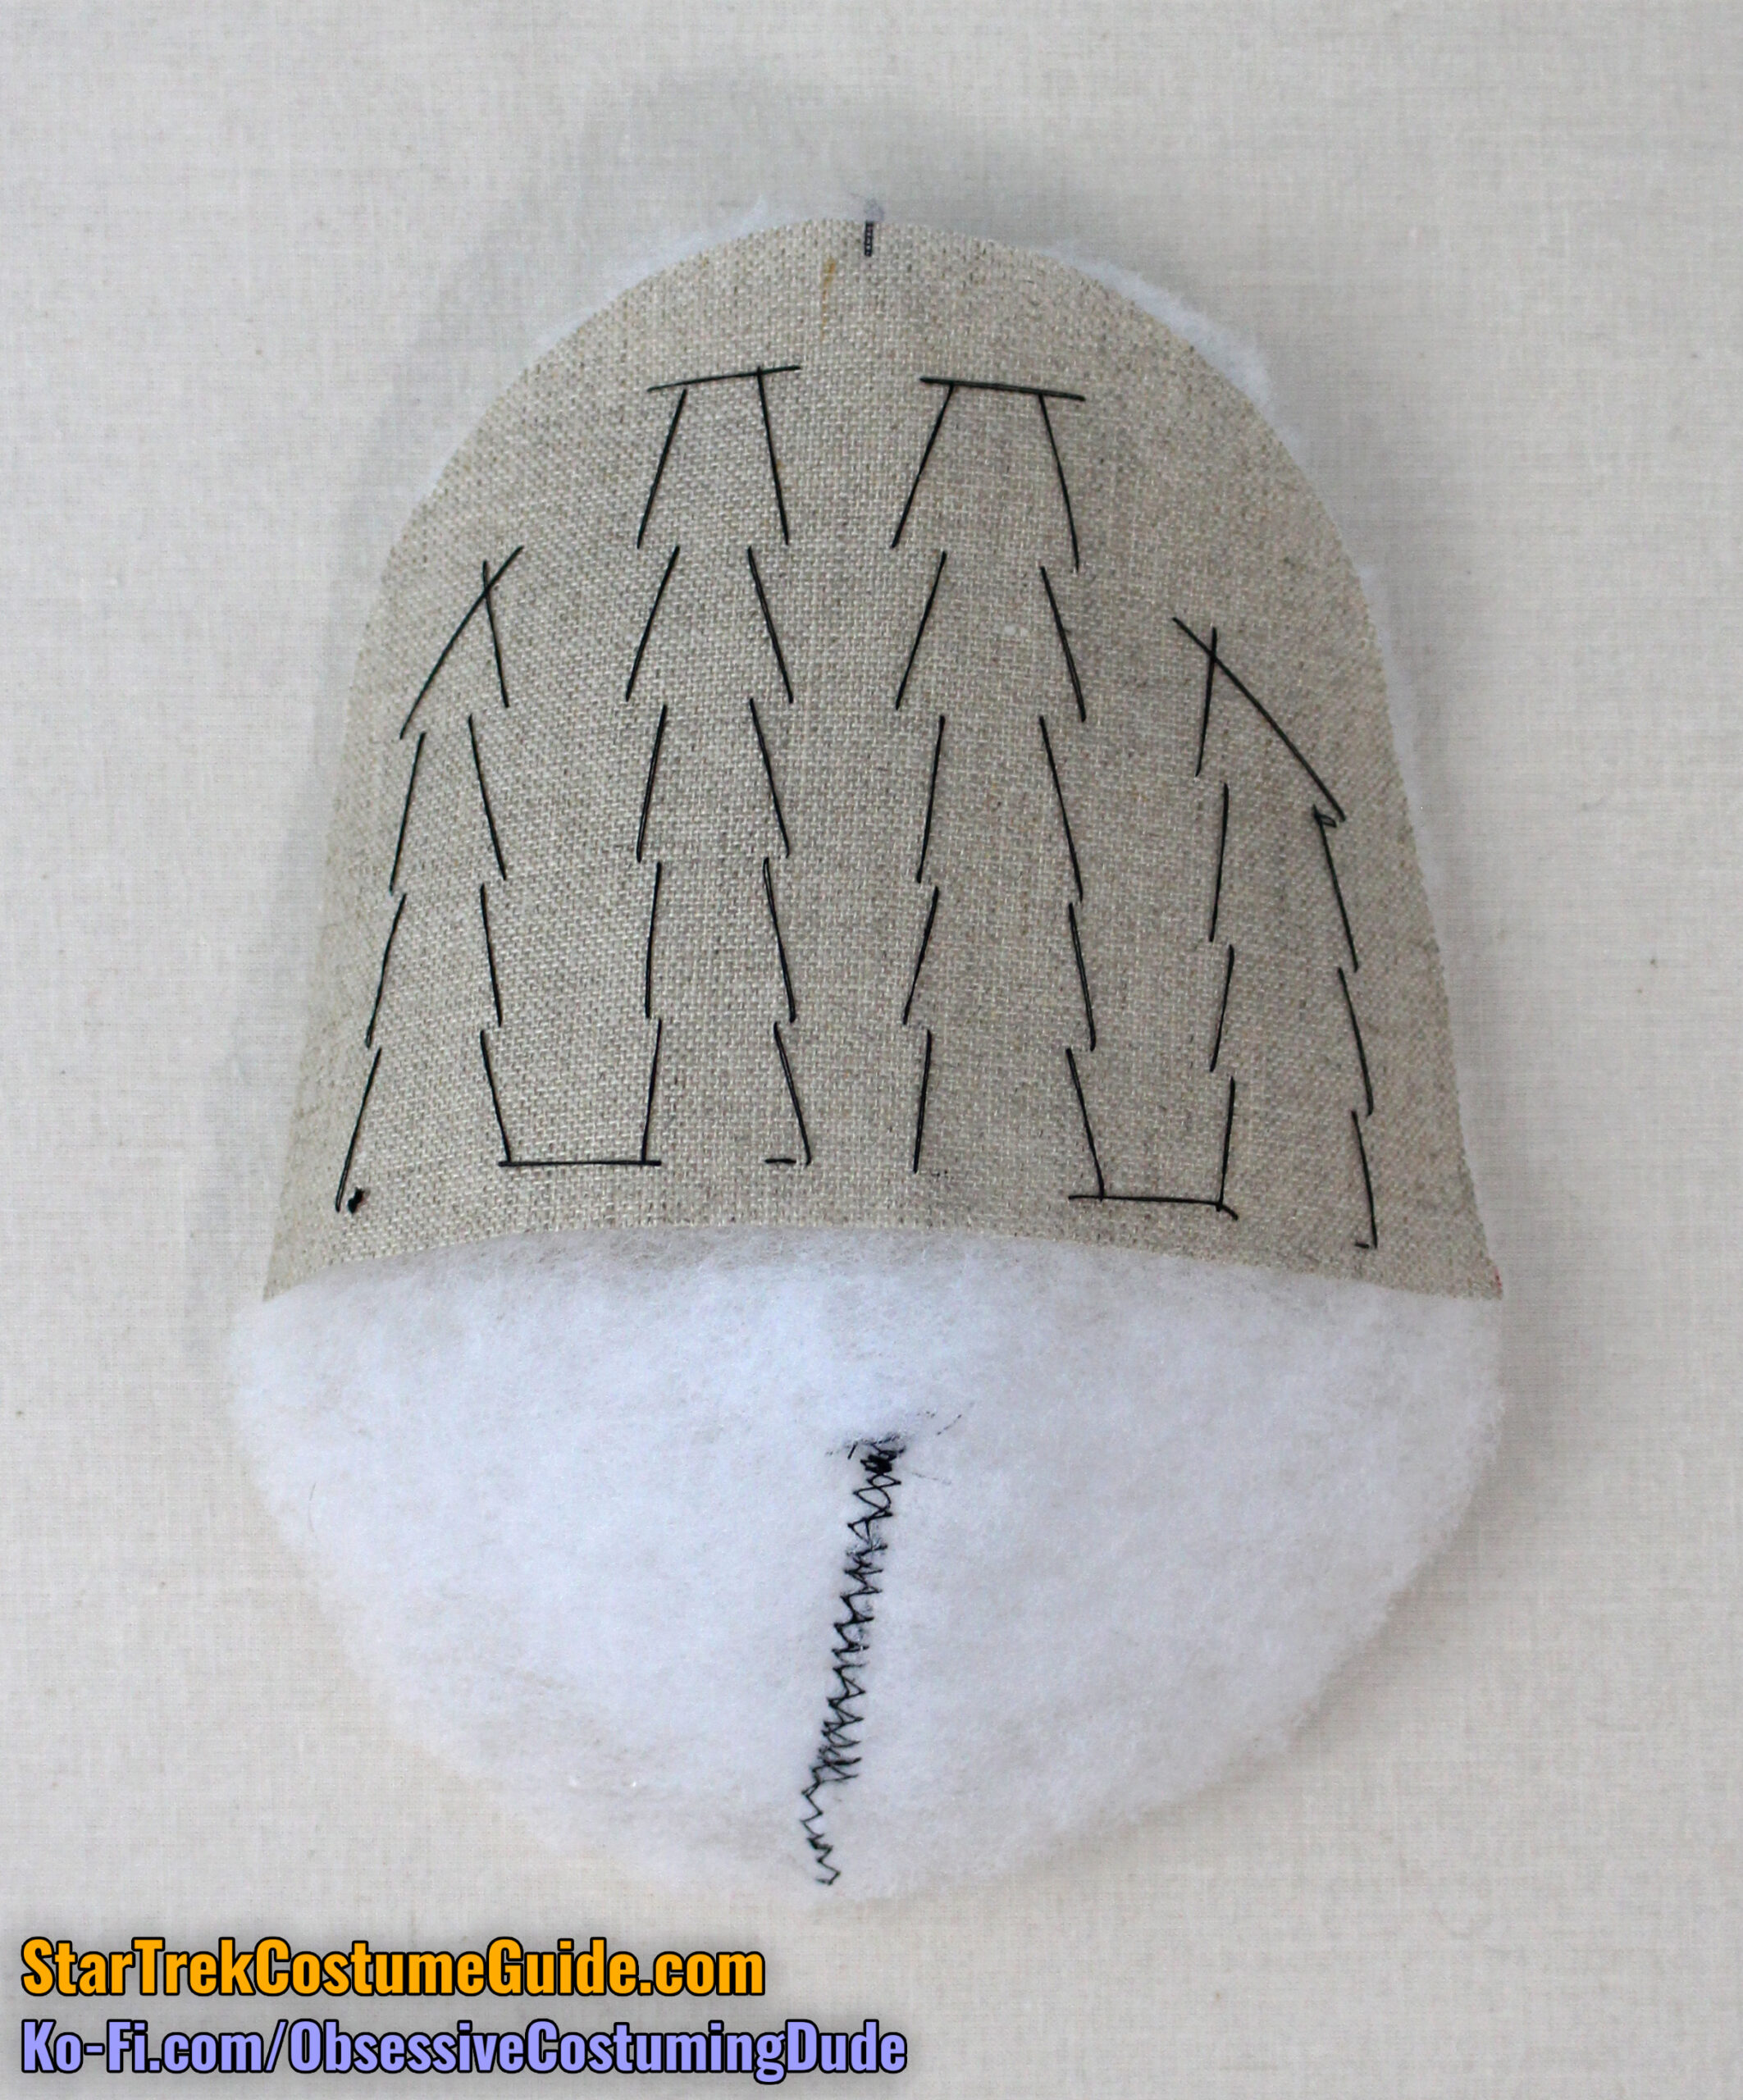
From the top, padstitch the layers together over the French canvas, gently pulling the pad into its rounded shape.
Trim the French canvas and felt about ½” from the edges.
“Sandwich” the batting assembly between the two shell layers, matching darts and shoulder seams.
Pin the layers together along the entire perimeter.
I recommend pulling the bottom layer of lining slightly tighter to help pull the pad into shape. (The edges won’t quite line up, but that’s fine.)
Using a quilting/walking foot, sew the shoulder pad closed ⅜” from the edge.
Stitch again ⅛” outside the first row of stitching, ¼” from the edge of the pad.
Trim the edge of the pad with pinking shears.
Steam the shoulder pad into shape over a tailor’s ham.
Hand-sew a pair of snaps to the pad – one close to the edge at the shoulder seam, and another at the tip of the dart. (The “male” end goes on the pad, and the “female” end goes inside the uniform.)
Repeat for the other shoulder pad.
After you’ve made your shoulder pads, hand-sew a pair of corresponding snaps to the shoulder allowances of the jumpsuit.
Obviously the ideal positioning will depend on the wearer, but generally speaking, I suggest positioning both pad styles about an inch away from the neckline/trim or neckline/collar seam on the men’s version.
I recommend the same for the women’s early pad, but since the later pad is larger you’ll probably want to position it closer to the neckline/collar seam.
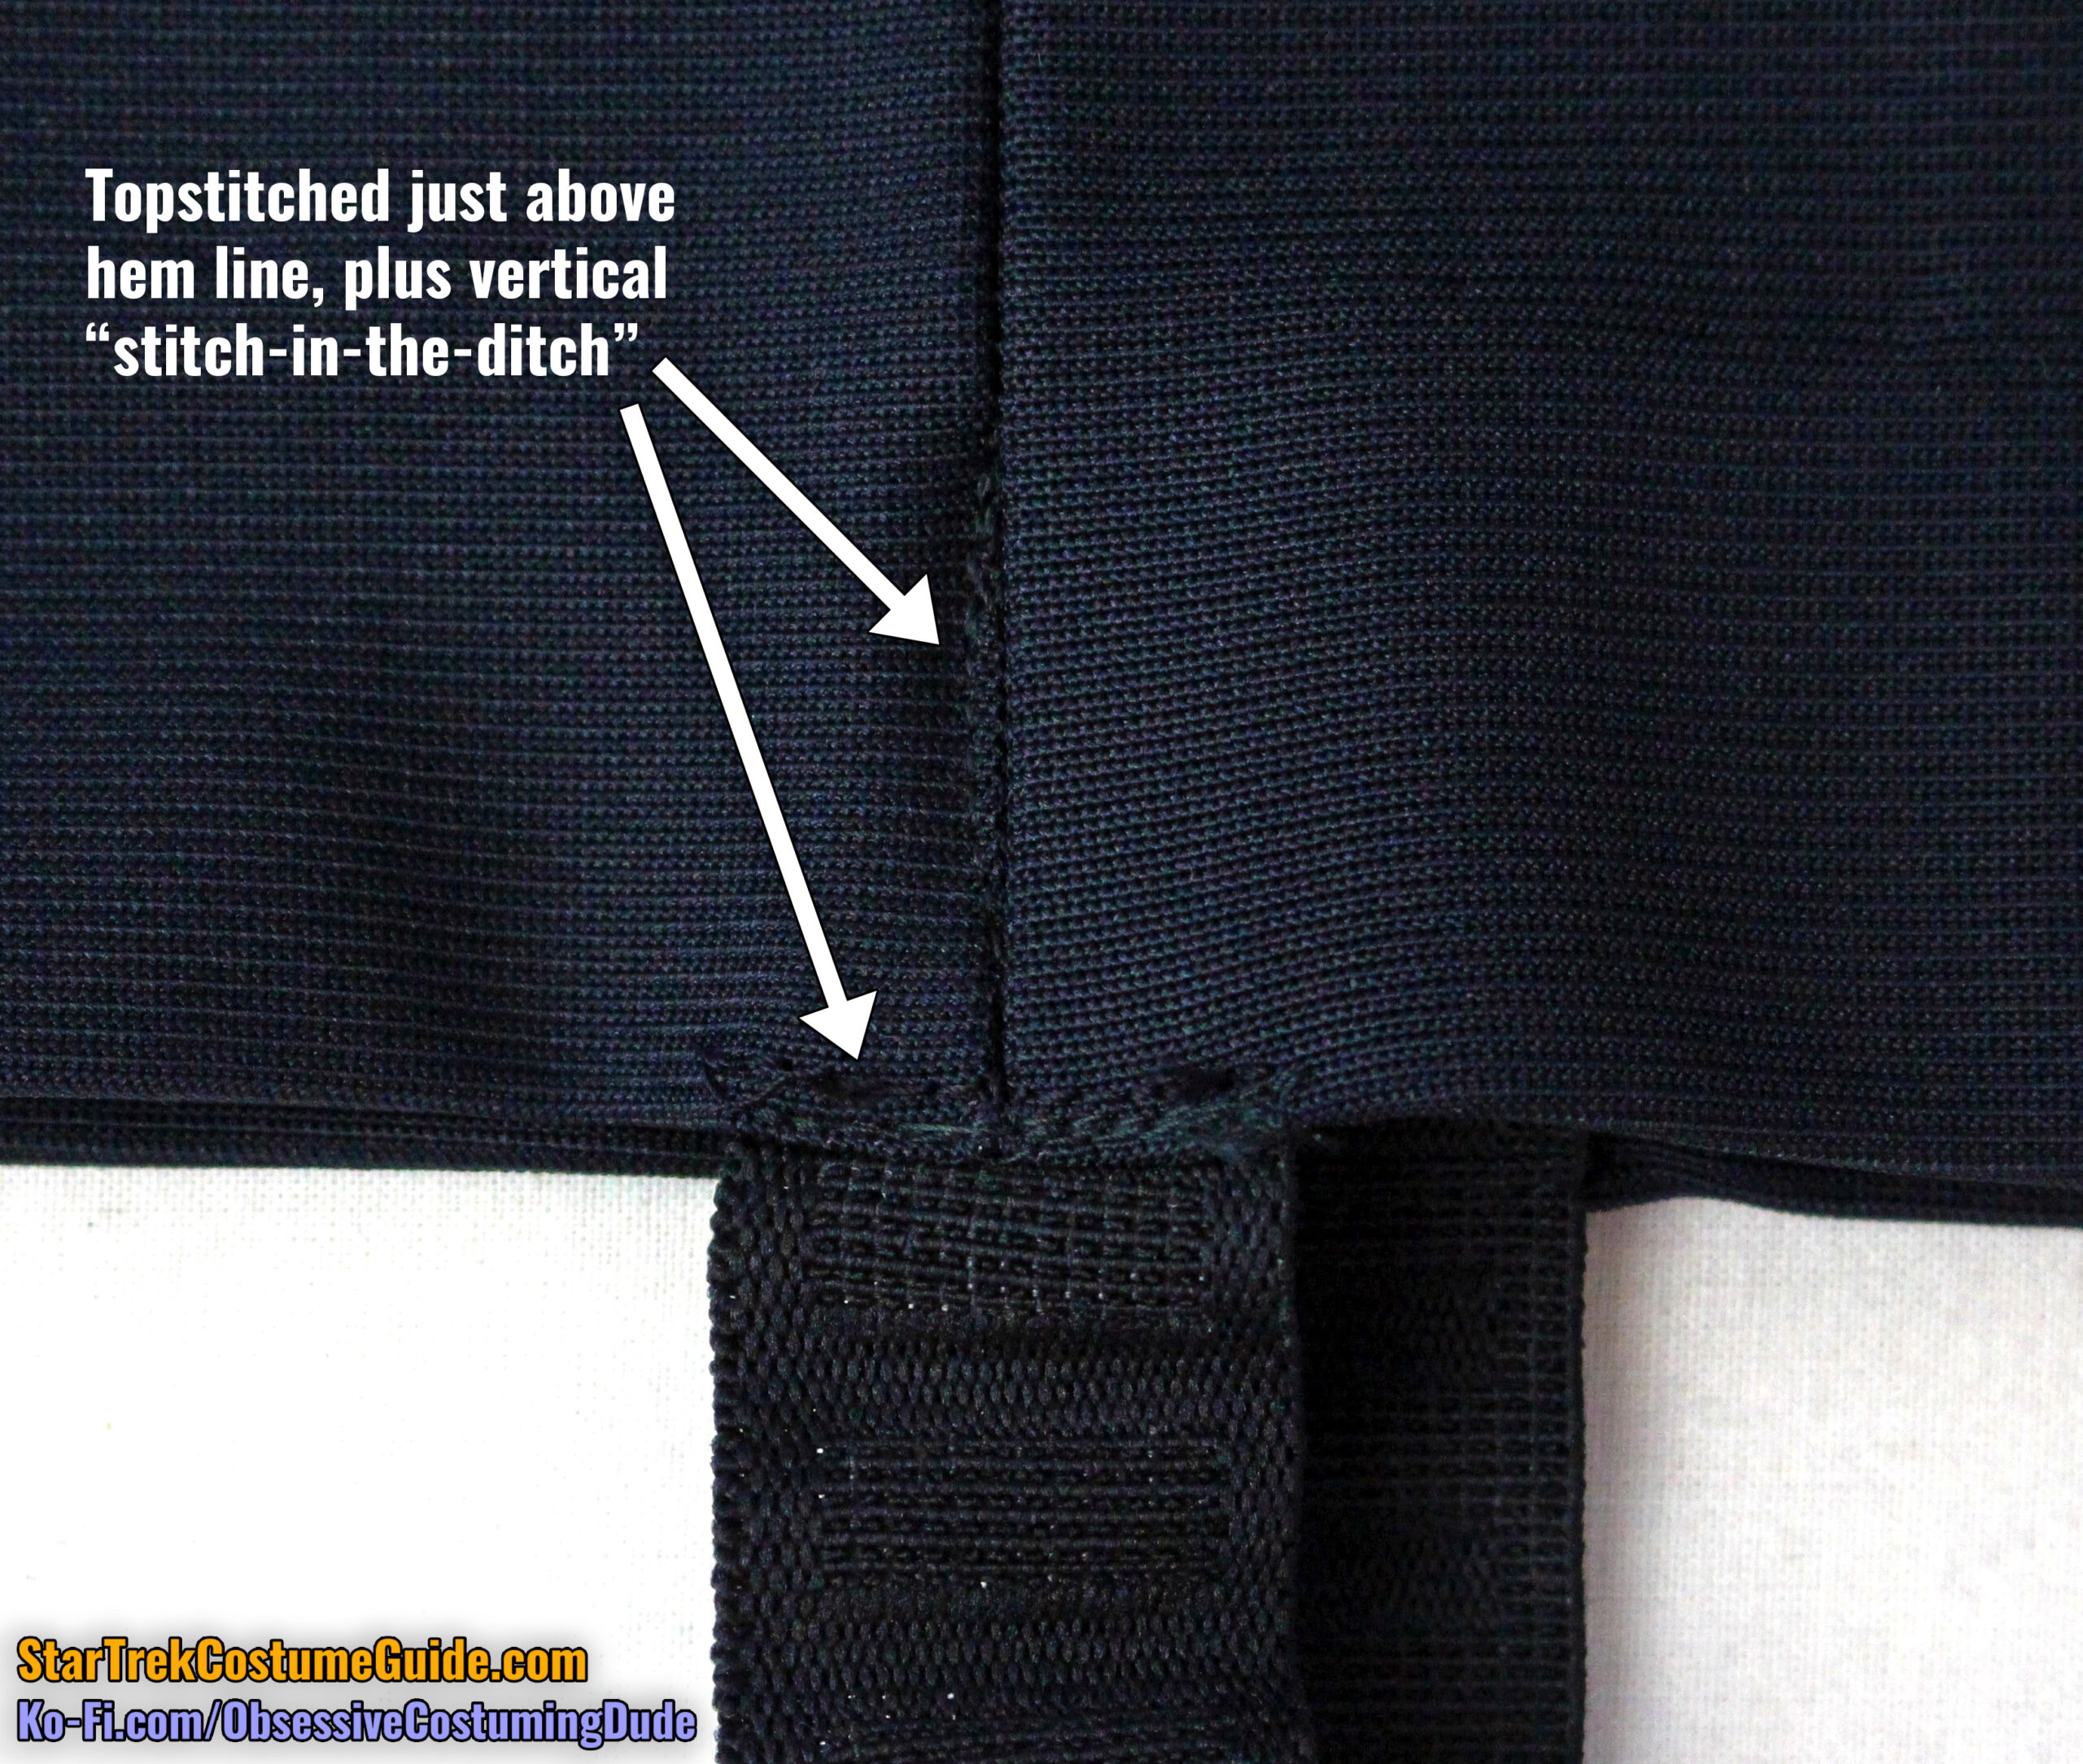
And finally, you’ll need to sew elastic “stirrups” to the bottom of the pant legs.
On all of the screen-used TNG jumpsuits I’ve seen, the stirrups were 1” black non-roll elastic, but feel free to make do with a different kind of elastic if you need to. (The most important characteristic is that it’s black.)
The exact length may vary a bit depending on the size of your boot and/or sole, but I generally suggest a length of 7” for the stirrup.
(That’s 5” for the stirrup itself and 1” allowance on each end.)
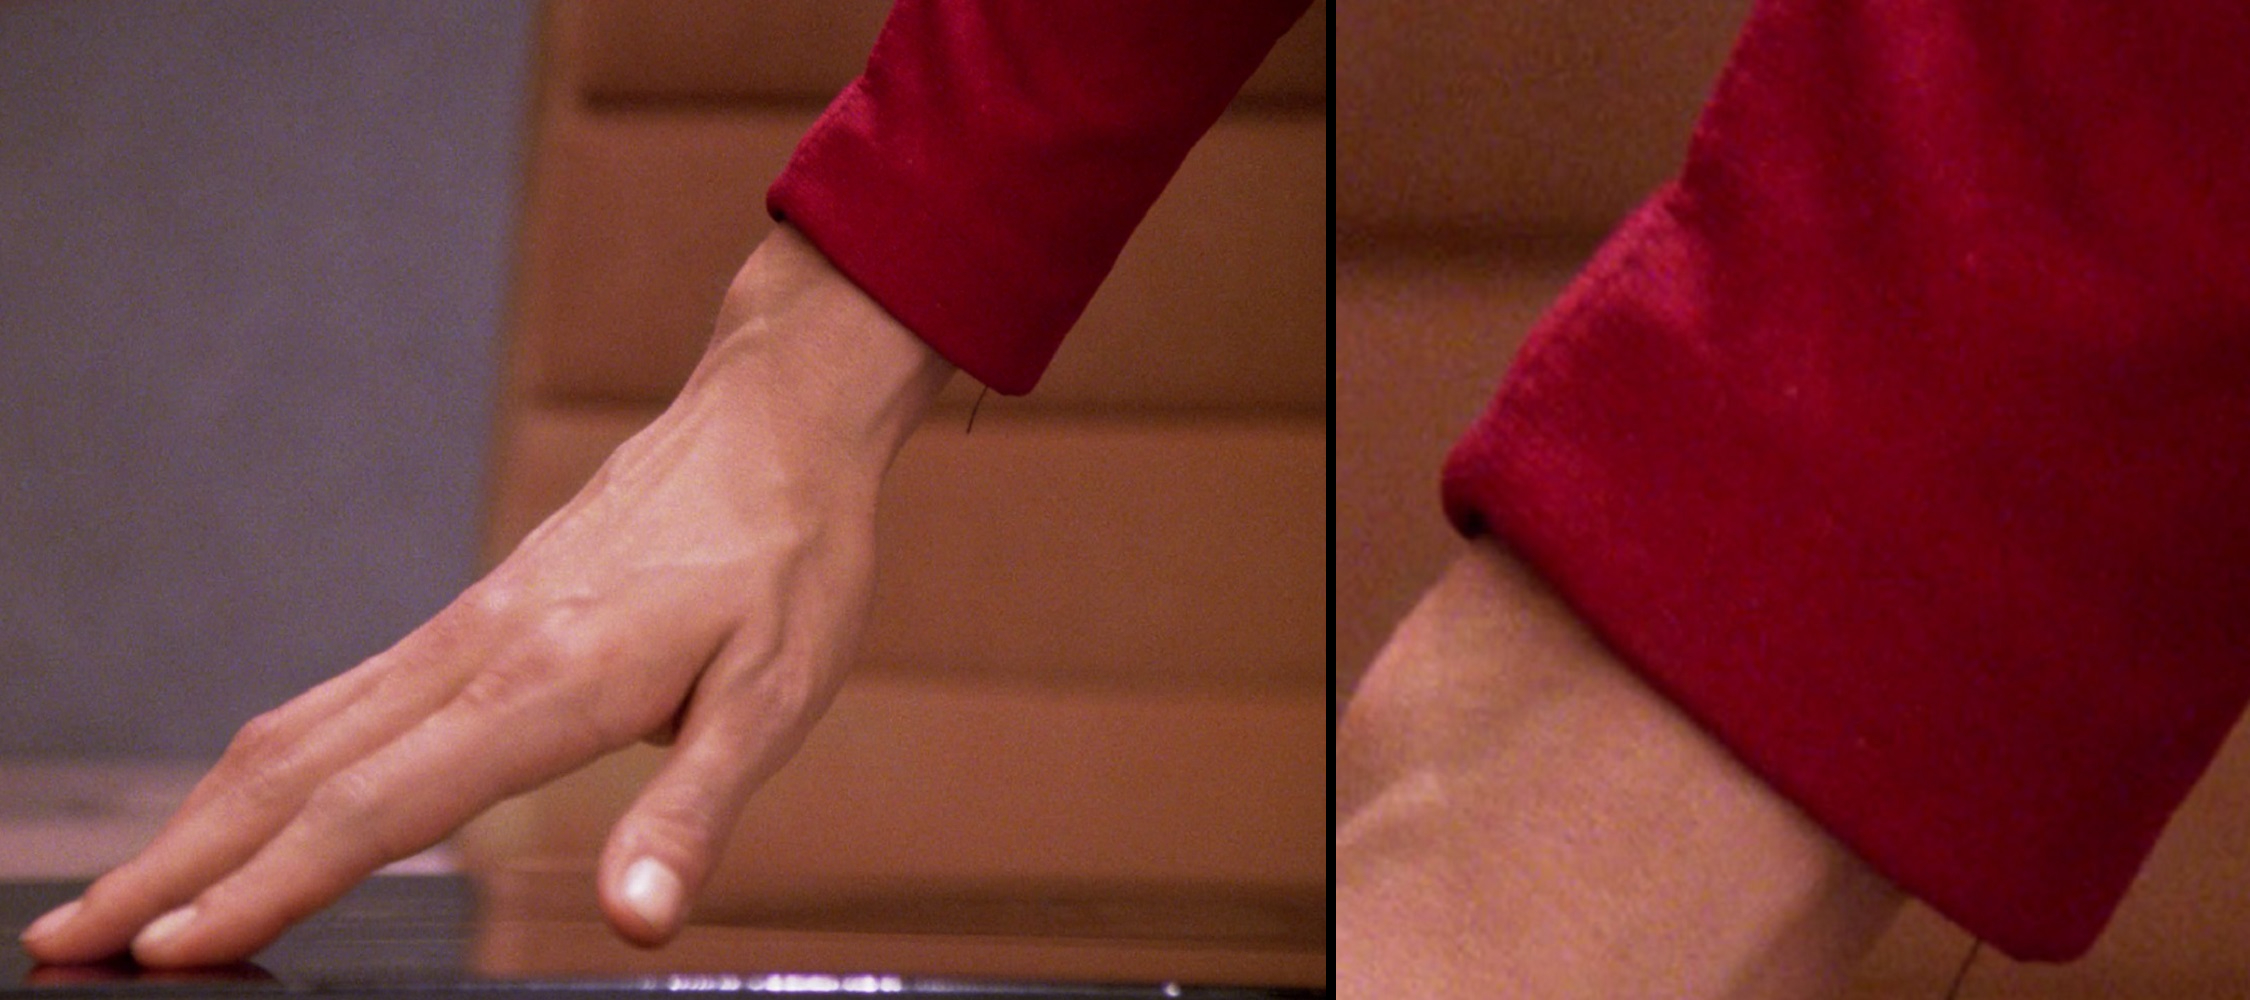
As you might recall from my multiple screen-used TNG jumpsuit examinations, these stirrups were attached several different ways. (I believe this may have been left up to the individual discretion of those in the wardrobe department.)
Screen-used Tasha Yar TNG jumpsuit
Screen-used Ensign Sito TNG jumpsuit
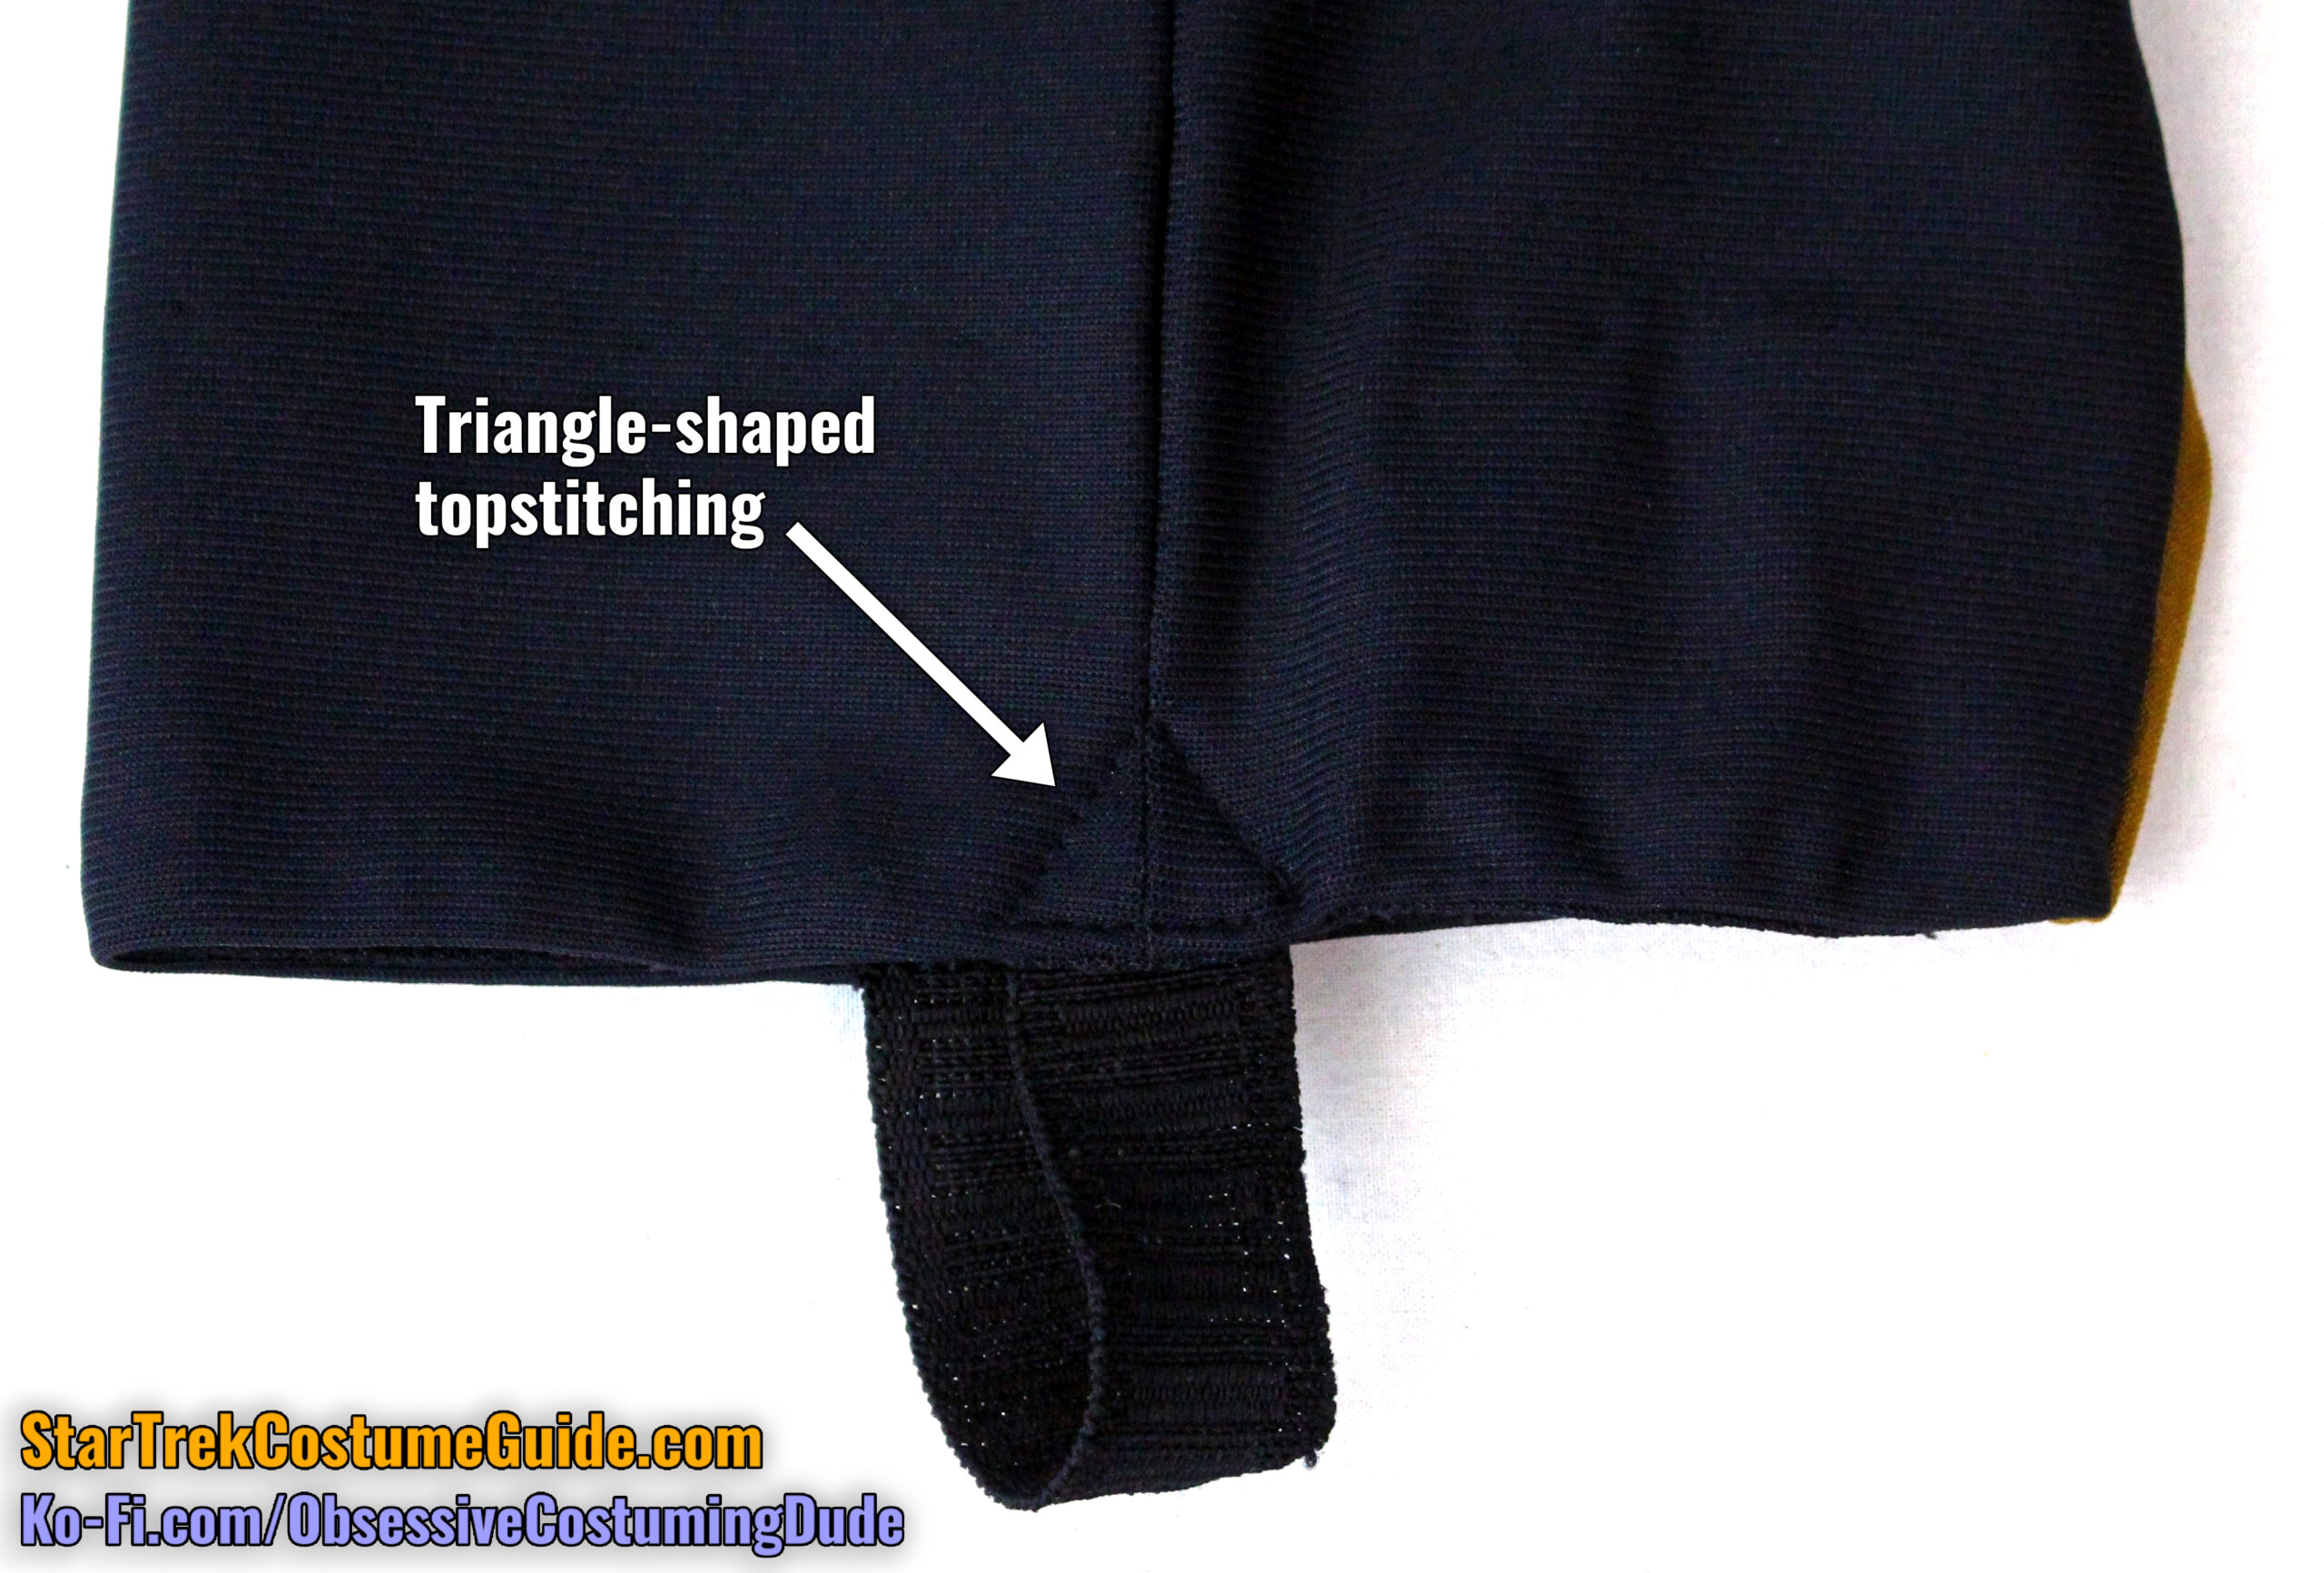
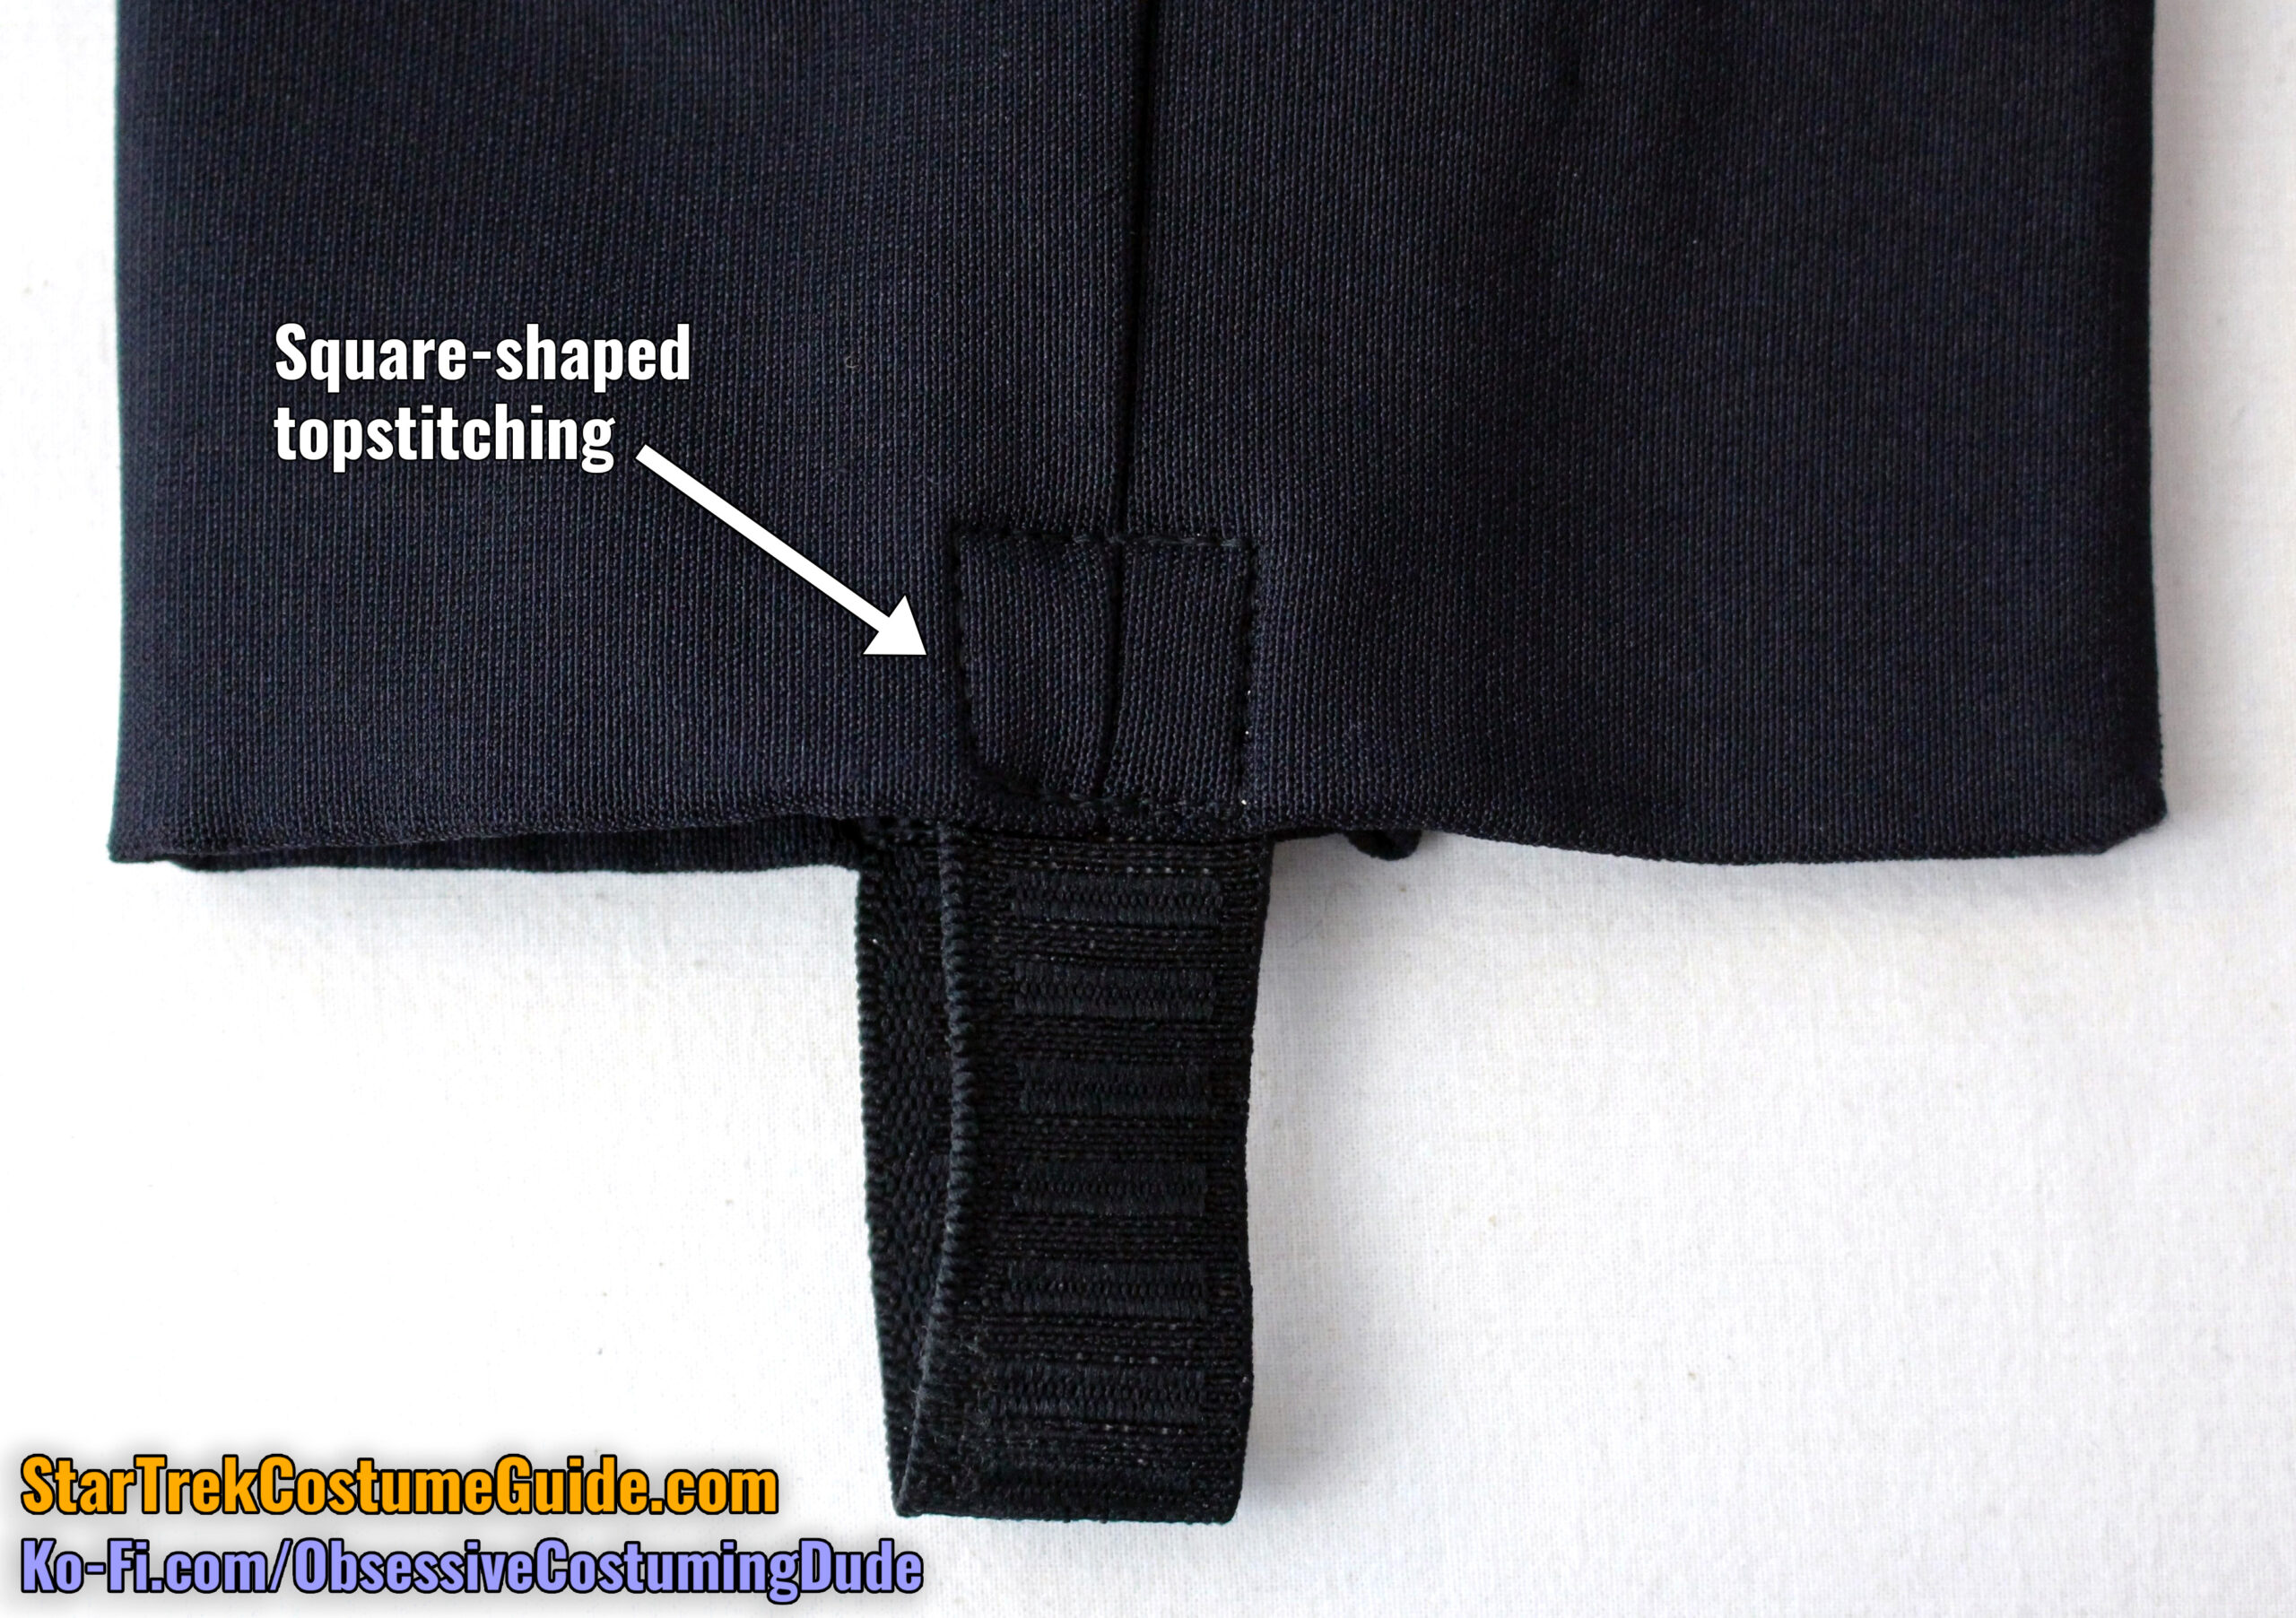
Personally, I prefer the method seen to the right – the elastic topstitched just above the hem line, and further secured with a vertical “stitch-in-the-ditch.”
Obviously, feel free to attach your elastic stirrups with whichever method you prefer. 🙂