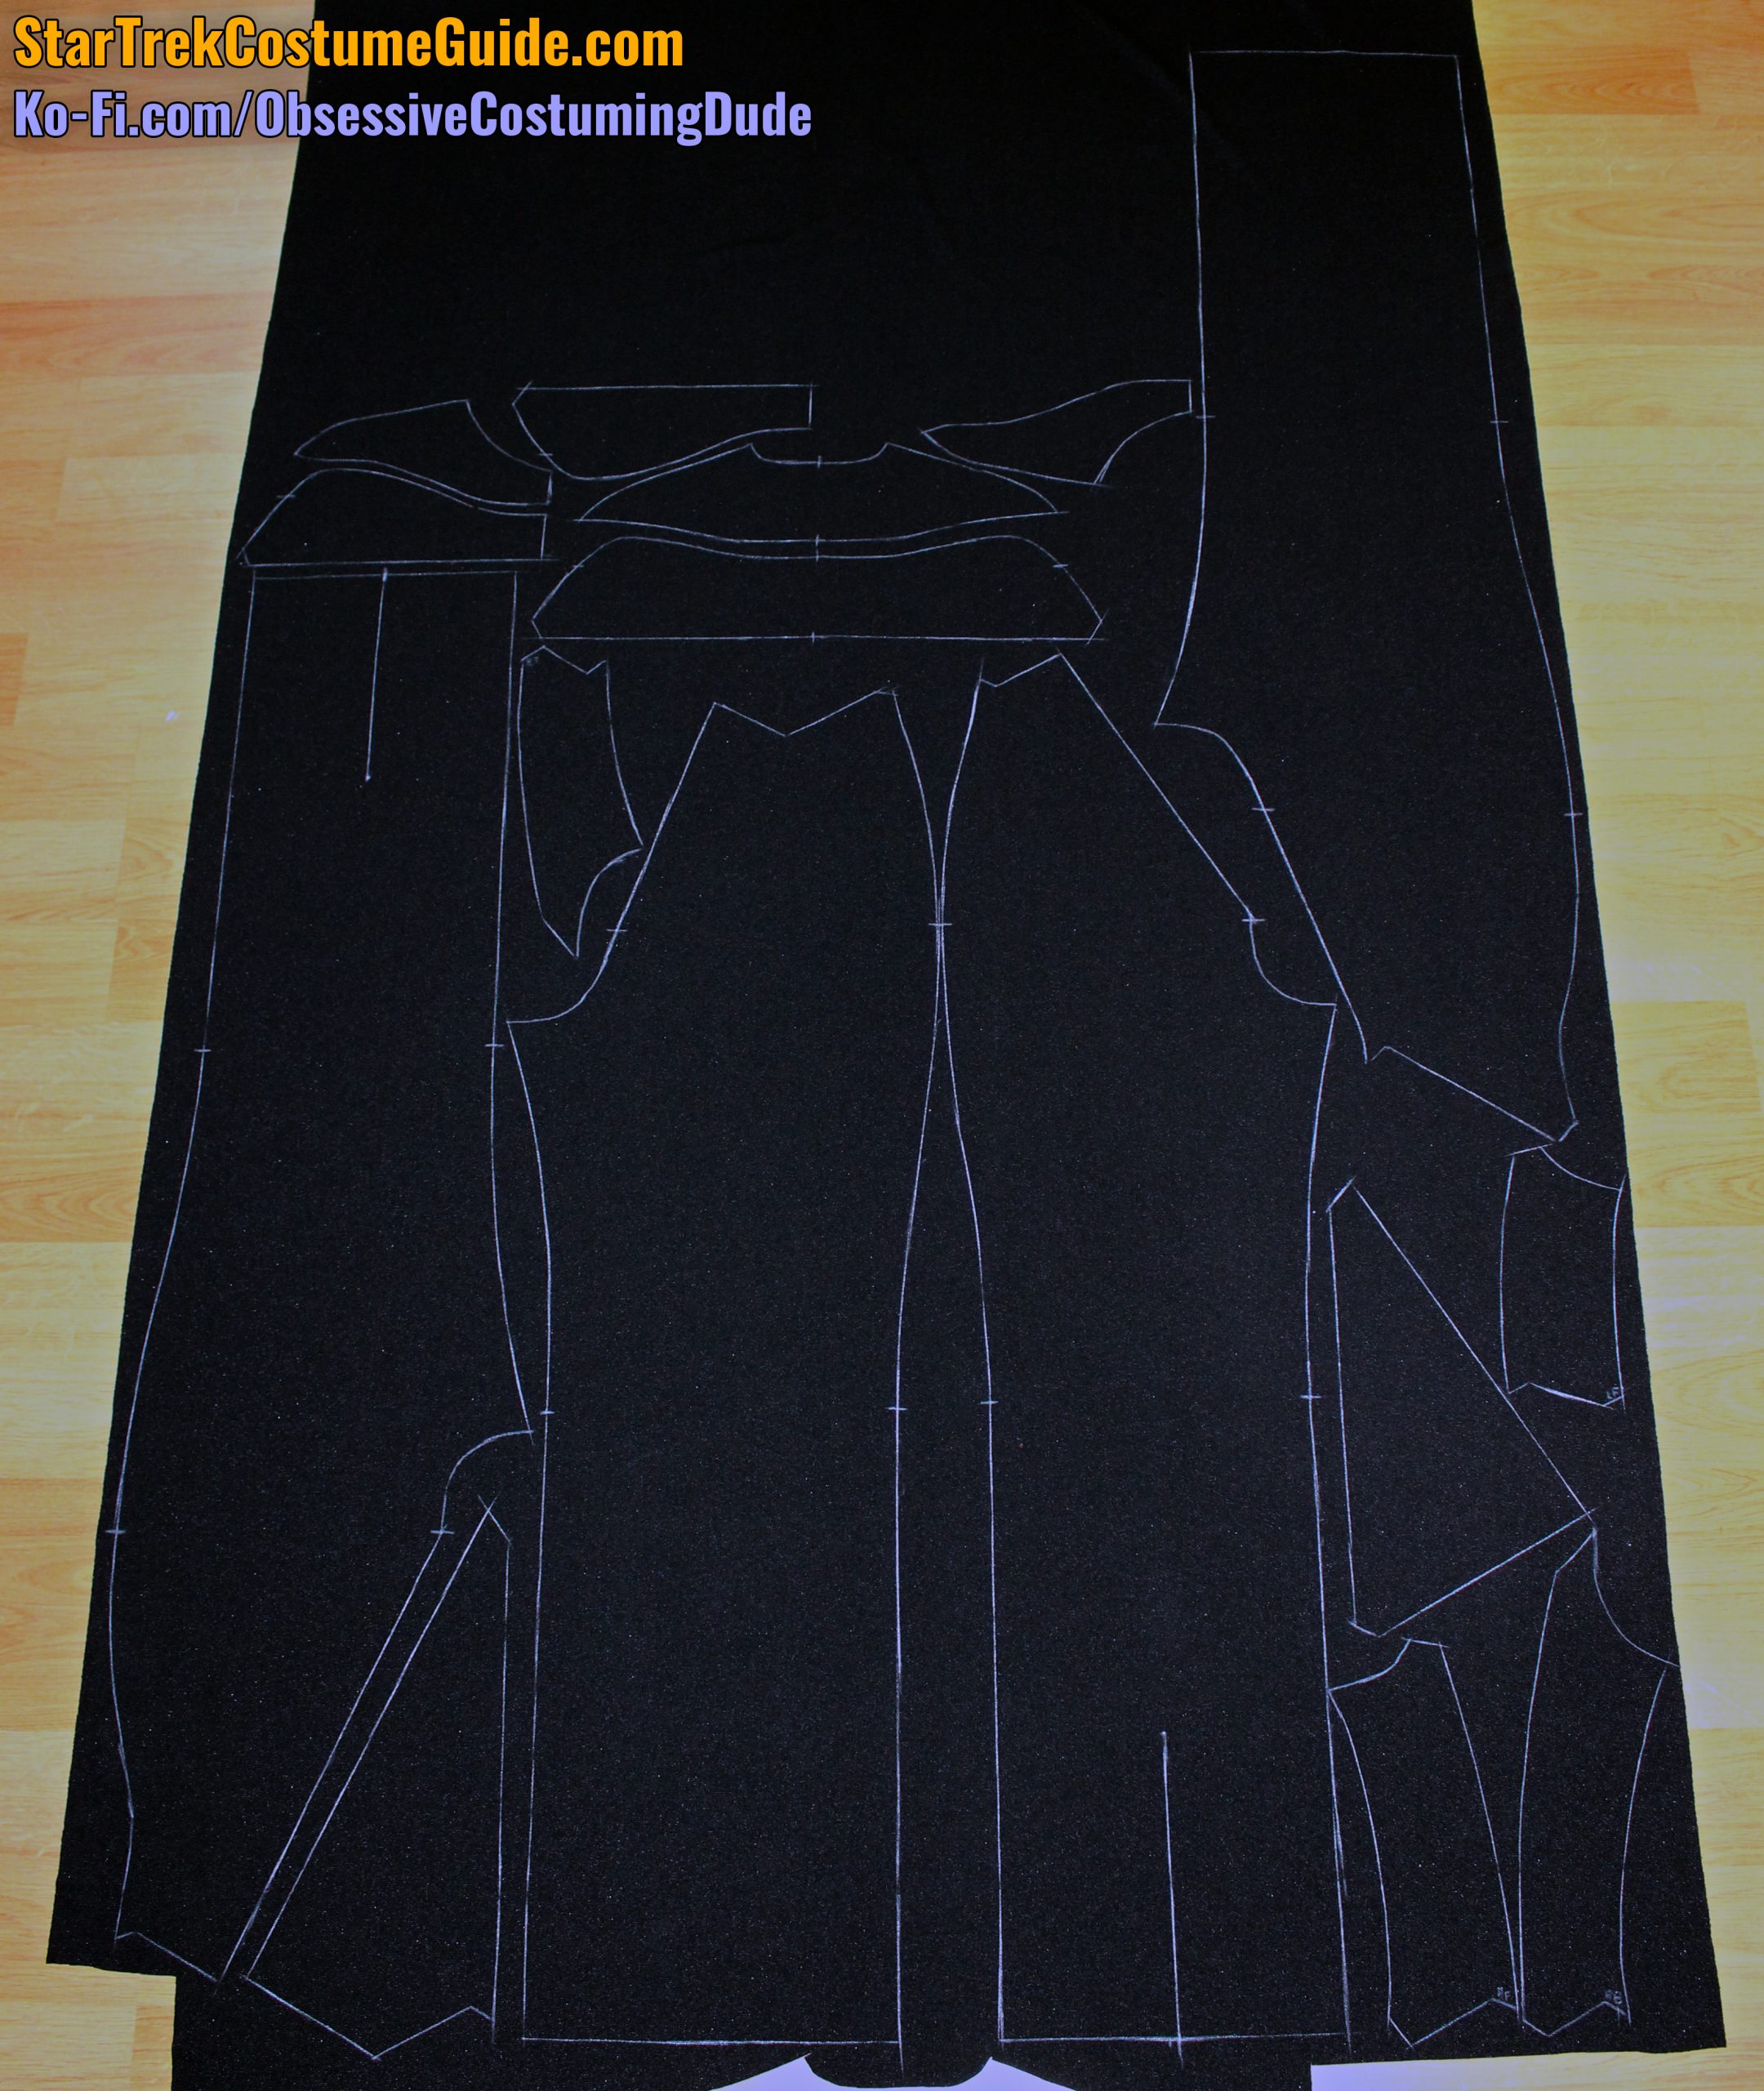
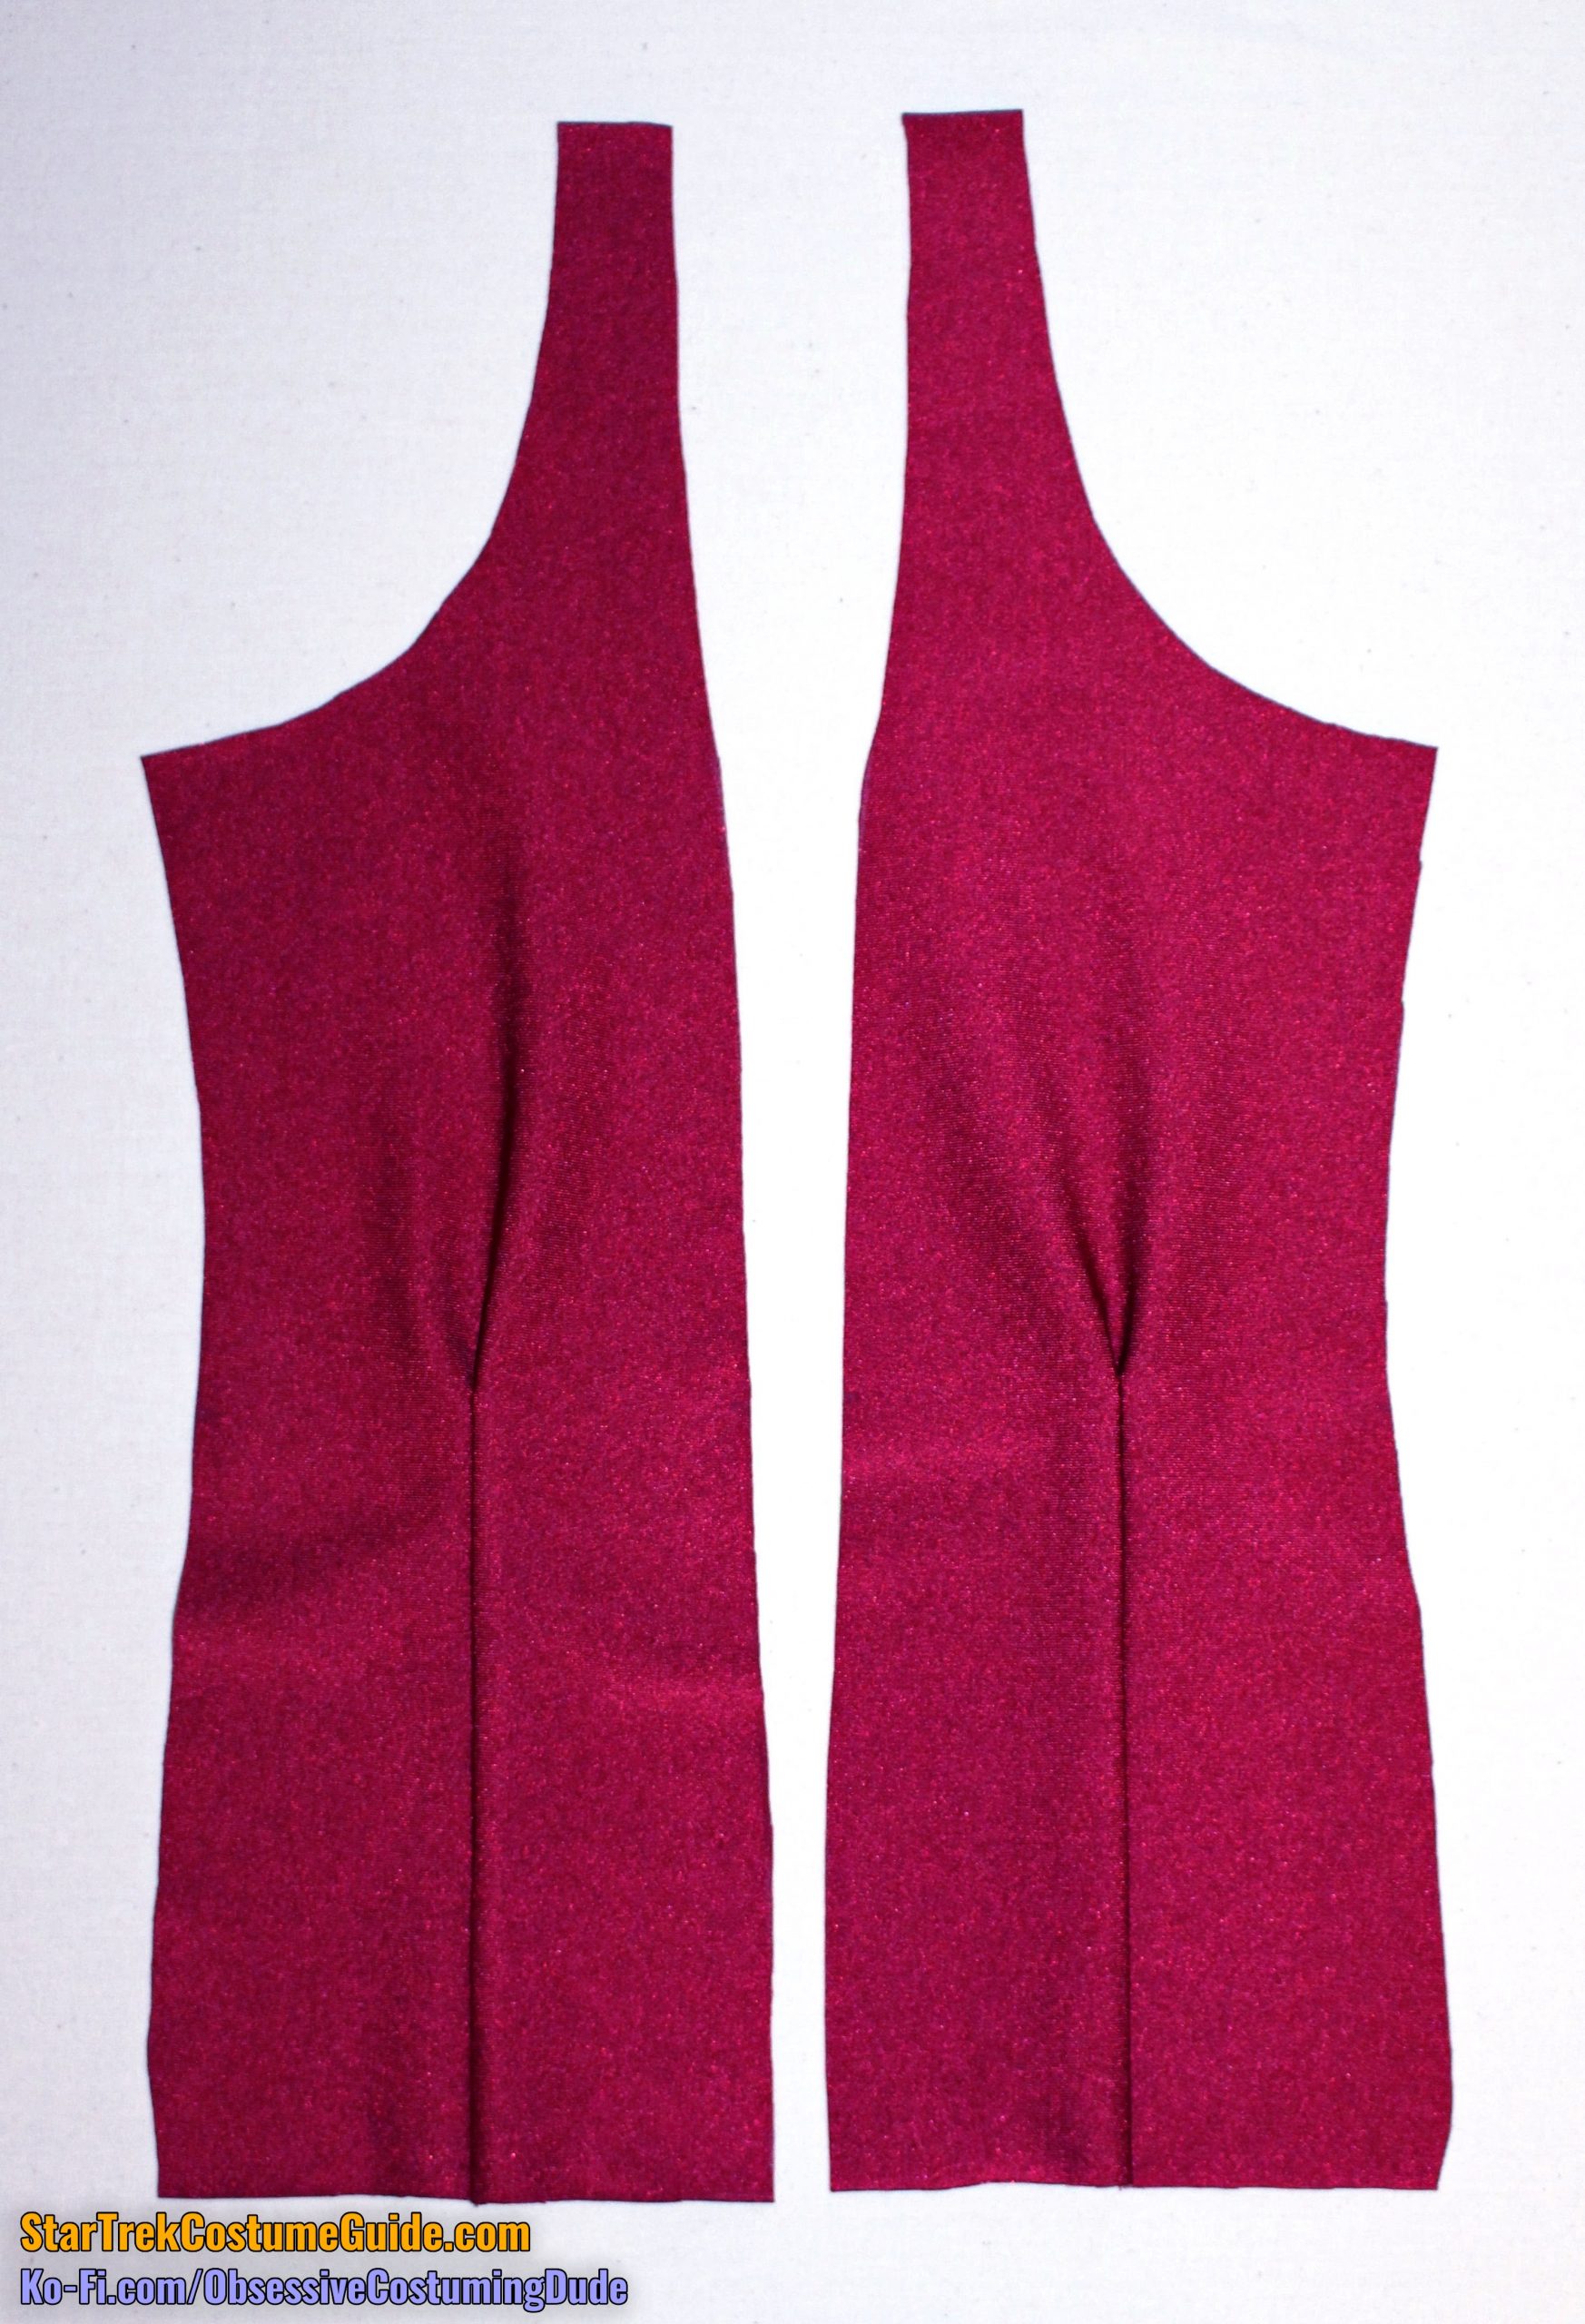
TIP: I like to cut my paper pattern pieces using paper scissors, then trace my pattern pieces onto the fabric using tailor’s chalk. (See TNG jumpsuit example to the right.)
Second, on the aforementioned TGW sewing pattern, the “grain line” references actually indicate the crossgrain, not the straight grain!
Personally, I find it easier to align these with the horizontal weave of the jumbo spandex.
And finally, the seam and hem allowances do vary a bit (though not as much as the original’s did), so reference both the printed pattern and the following sewing tutorial while assembling your uniform.
(I did “standardize” some the seam allowances for my pattern, but I tried to only do so within reason, for the sake of authenticity.)
All pattern pieces include ½” seam allowance, except for the side seams, which have ⅝” seam allowance, and the upper back/back yoke seam, which has ¾” seam allowance.
Now that you’ve gathered your materials, determined your sizing, and cut your pattern pieces, it’s time to actually start making your admiral uniform!
However, in lieu of both correctly identifying the original trim and having viable source for it, I suggest the following method to create a reasonable facsimile of the original gold trim that achieves a very similar effect.
It’s easy, inexpensive, and will pass all but the closest inspections by those intimately familiar with the screen-used uniforms.
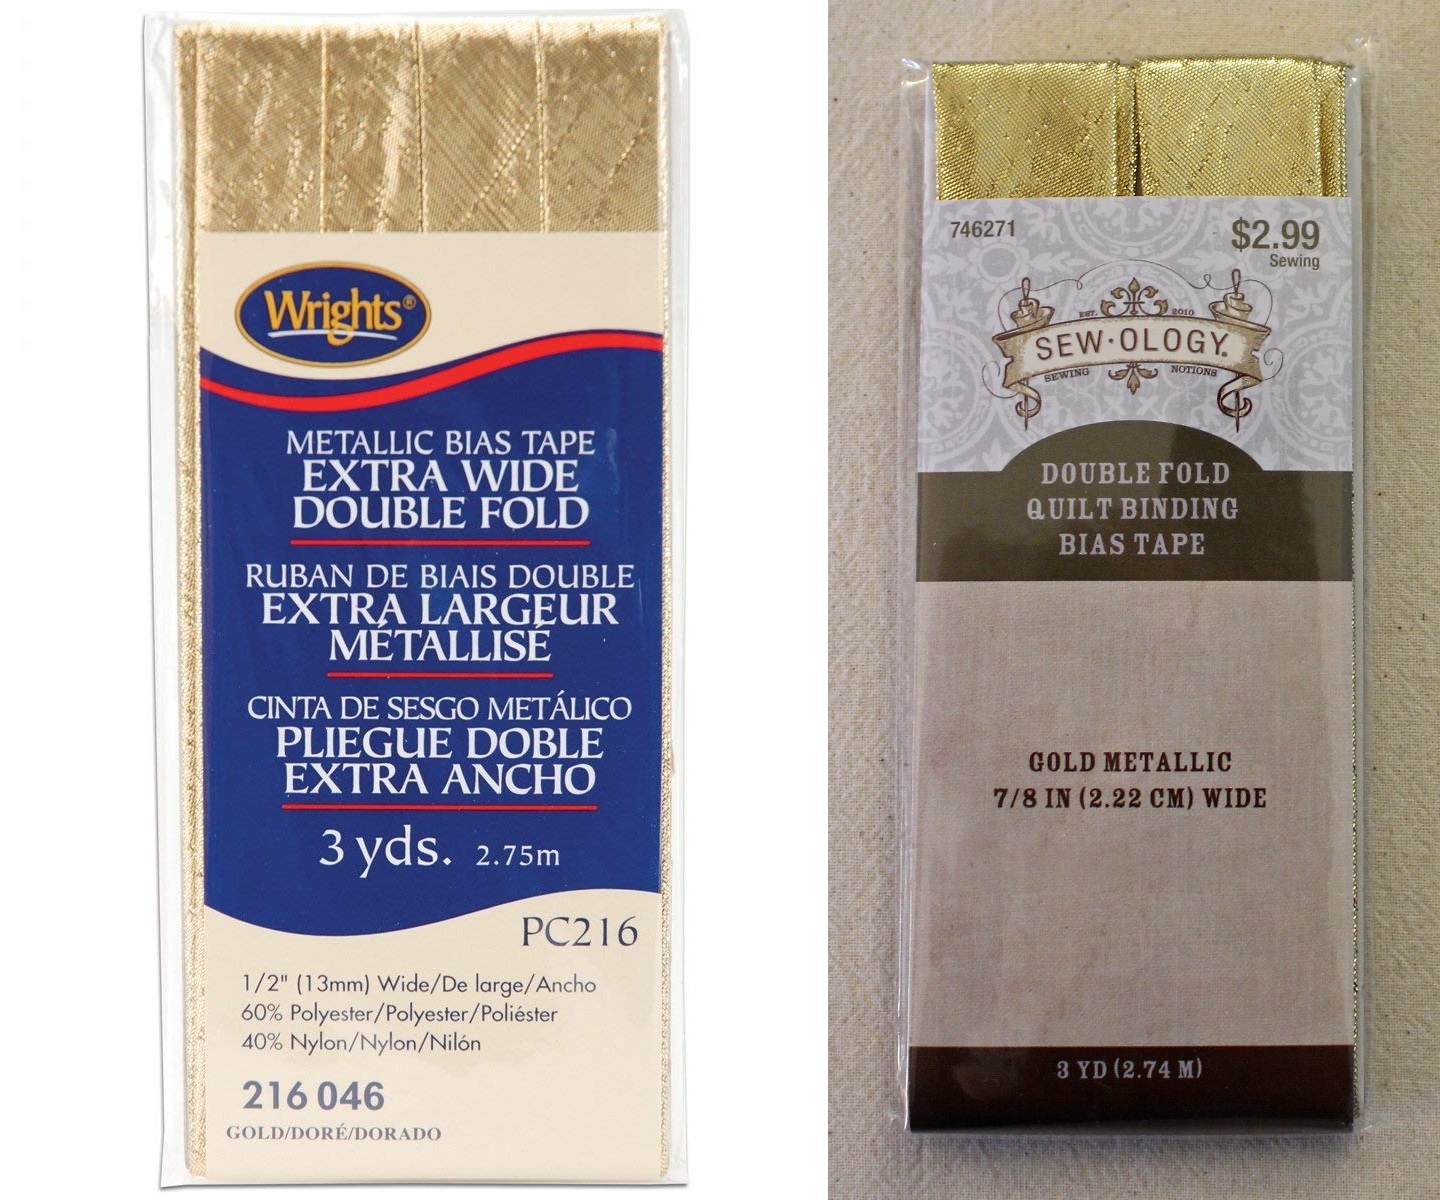
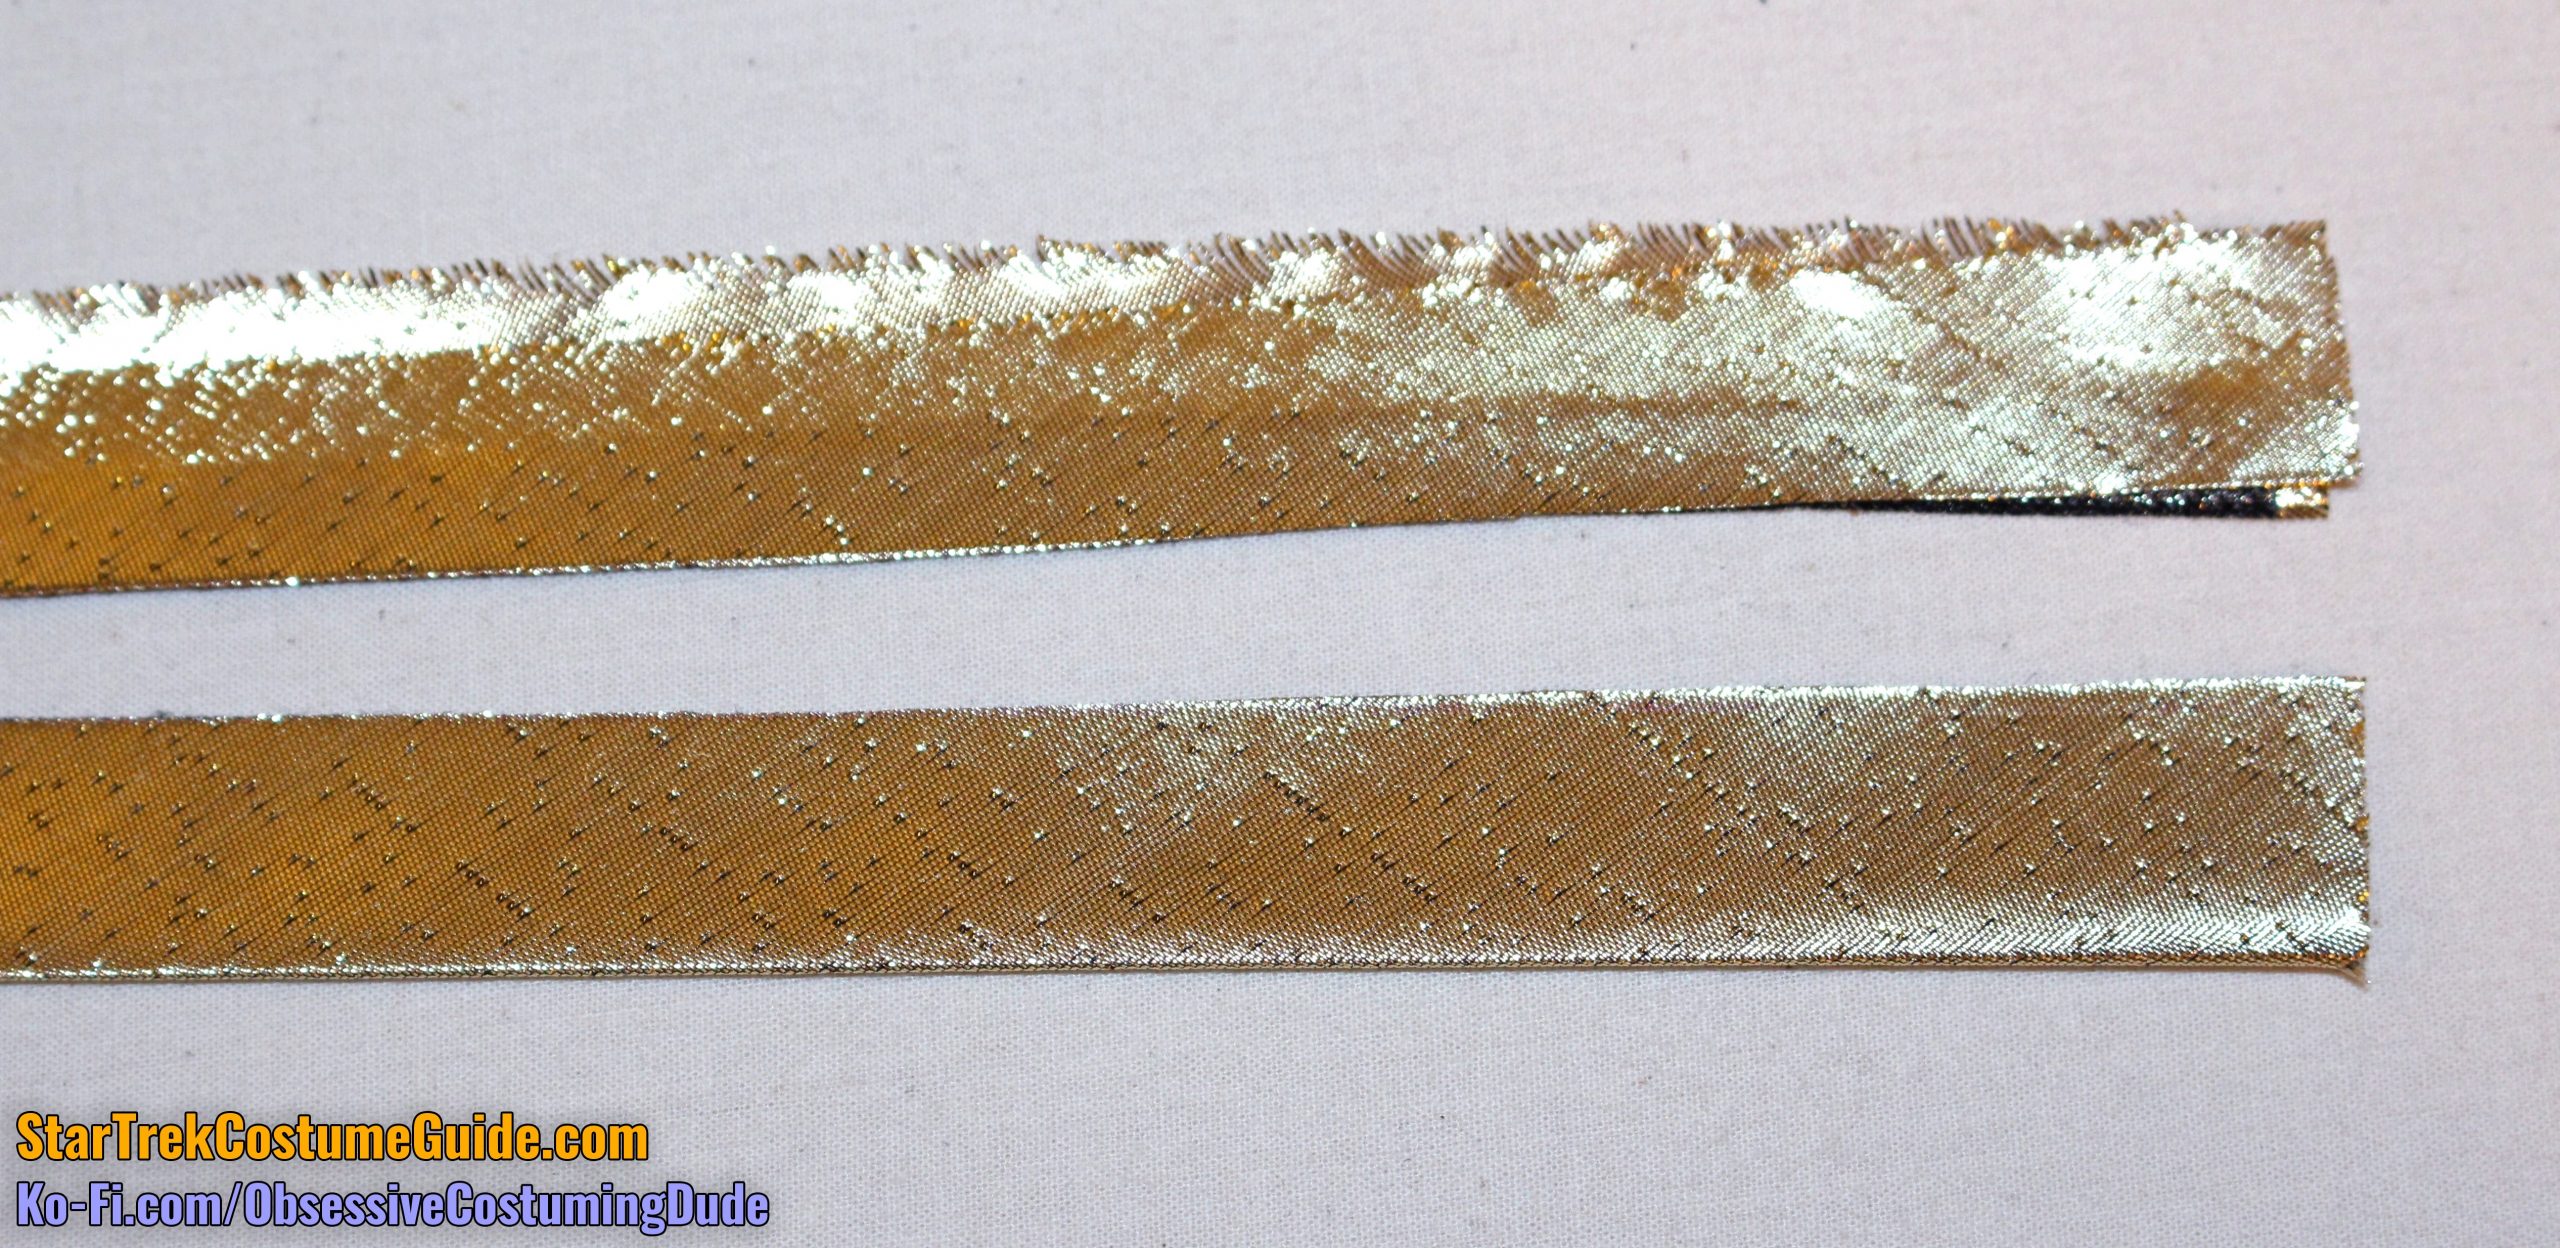
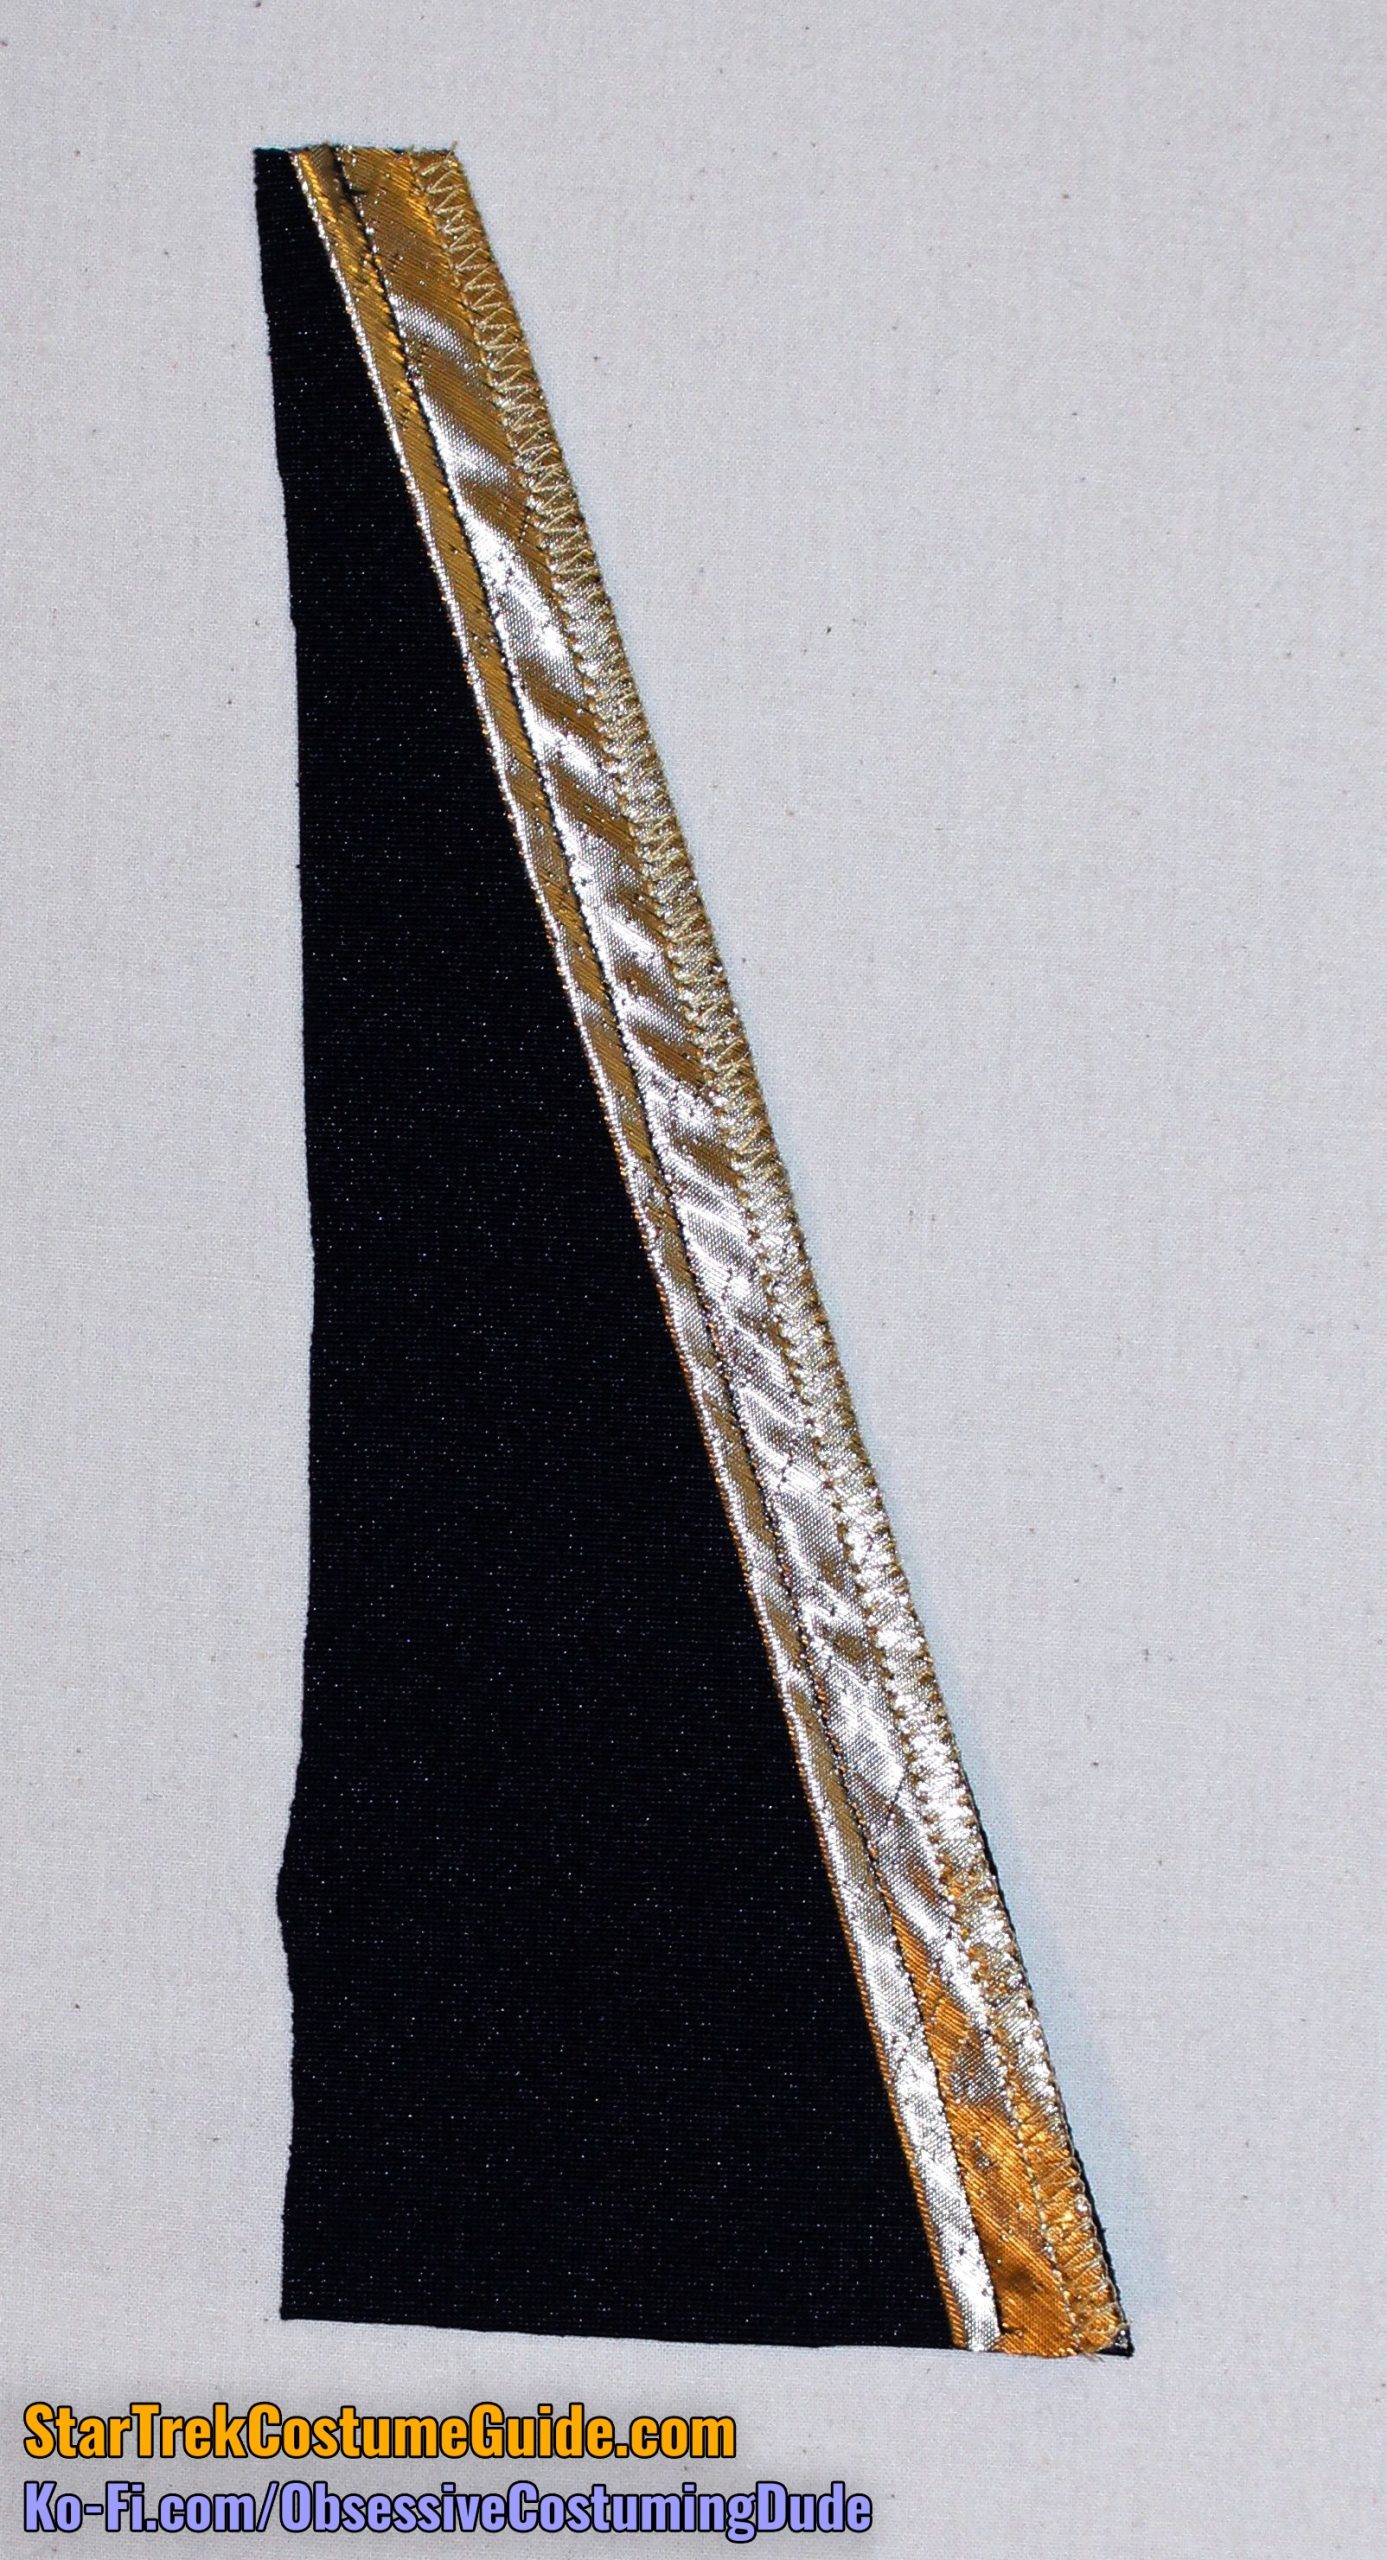
Believe it or not, I achieved excellent results using standard retail metallic gold quilt binding from my local Hobby Lobby. I believe the Wright’s brand (and other comparable products) would produce a comparable result, as well.
Double-fold bias tape can work, but wider is better. (Quilt binding is essentially just extra-wide double-fold bias tape.)
You’ll need about 6 yards, so two packages should be plenty.
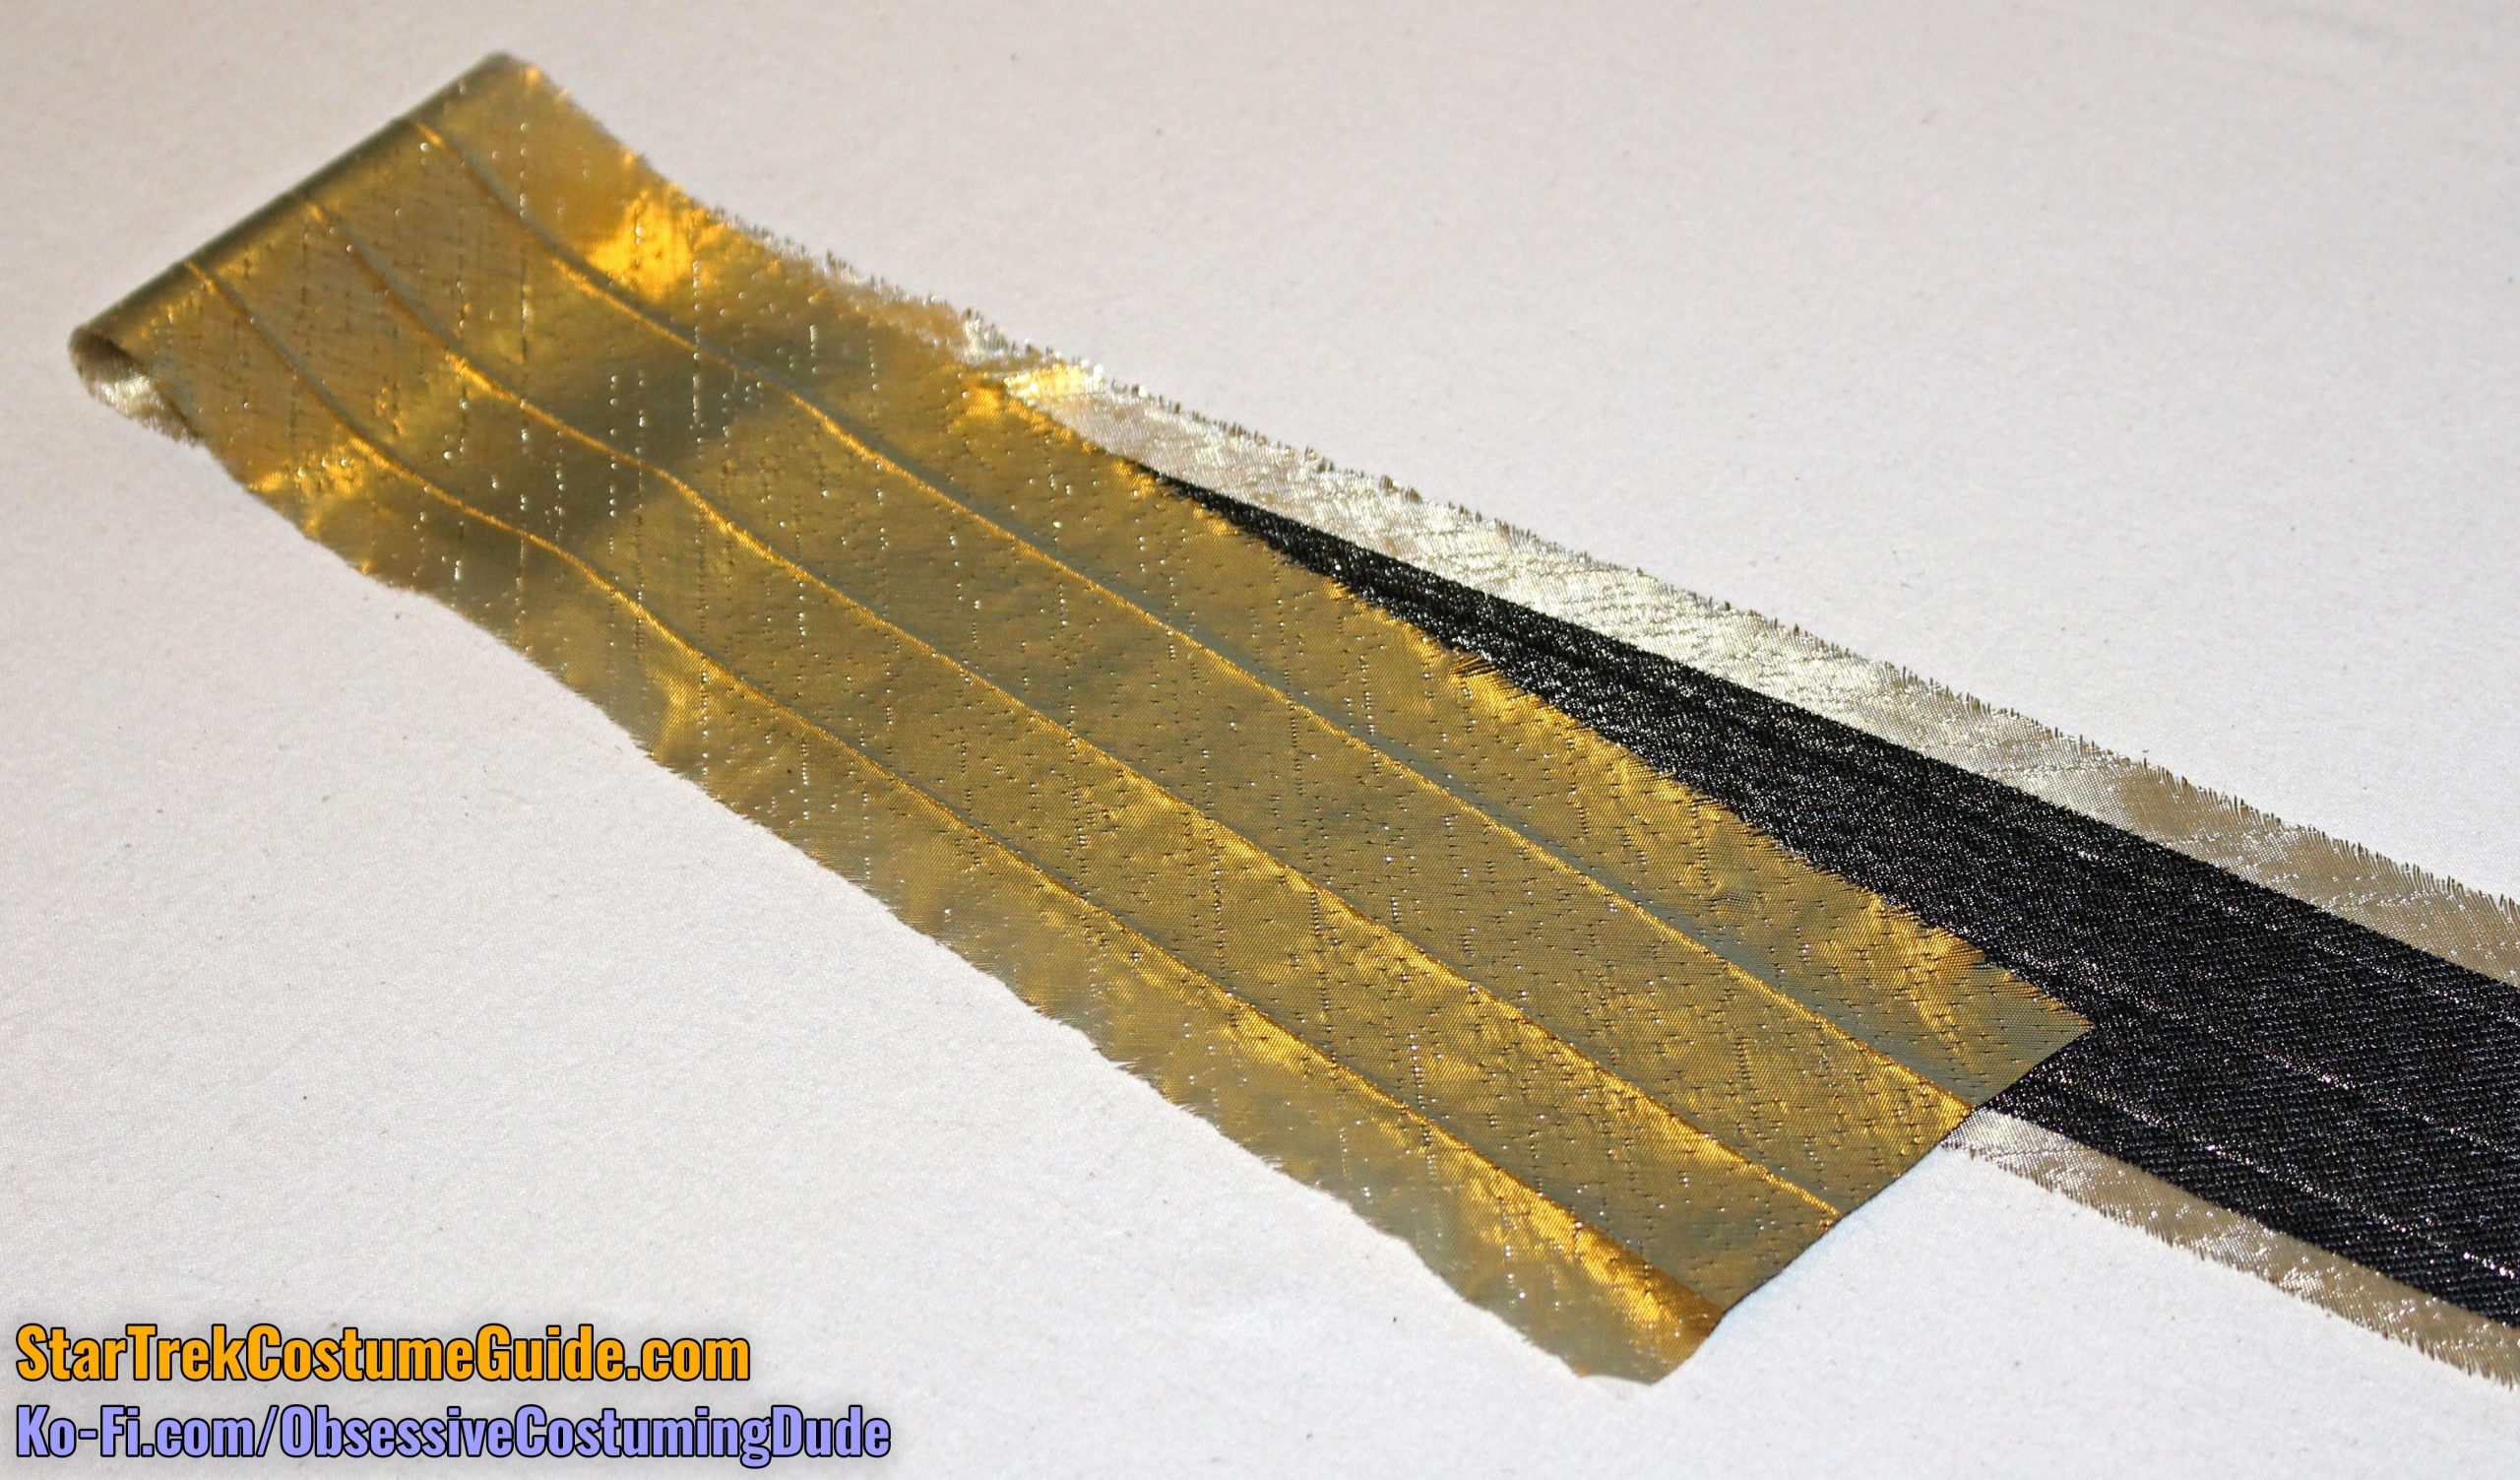
However, this stuff is somewhat brittle and frays rather quickly, so I suggest unfolding it, pressing it open as best you can, and applying a bias-cut lightweight fusible interfacing onto the underside.
(You may not be able to entirely press the creases out of the product, but don’t worry about it.)
Press the trim back in half over the center fold line.
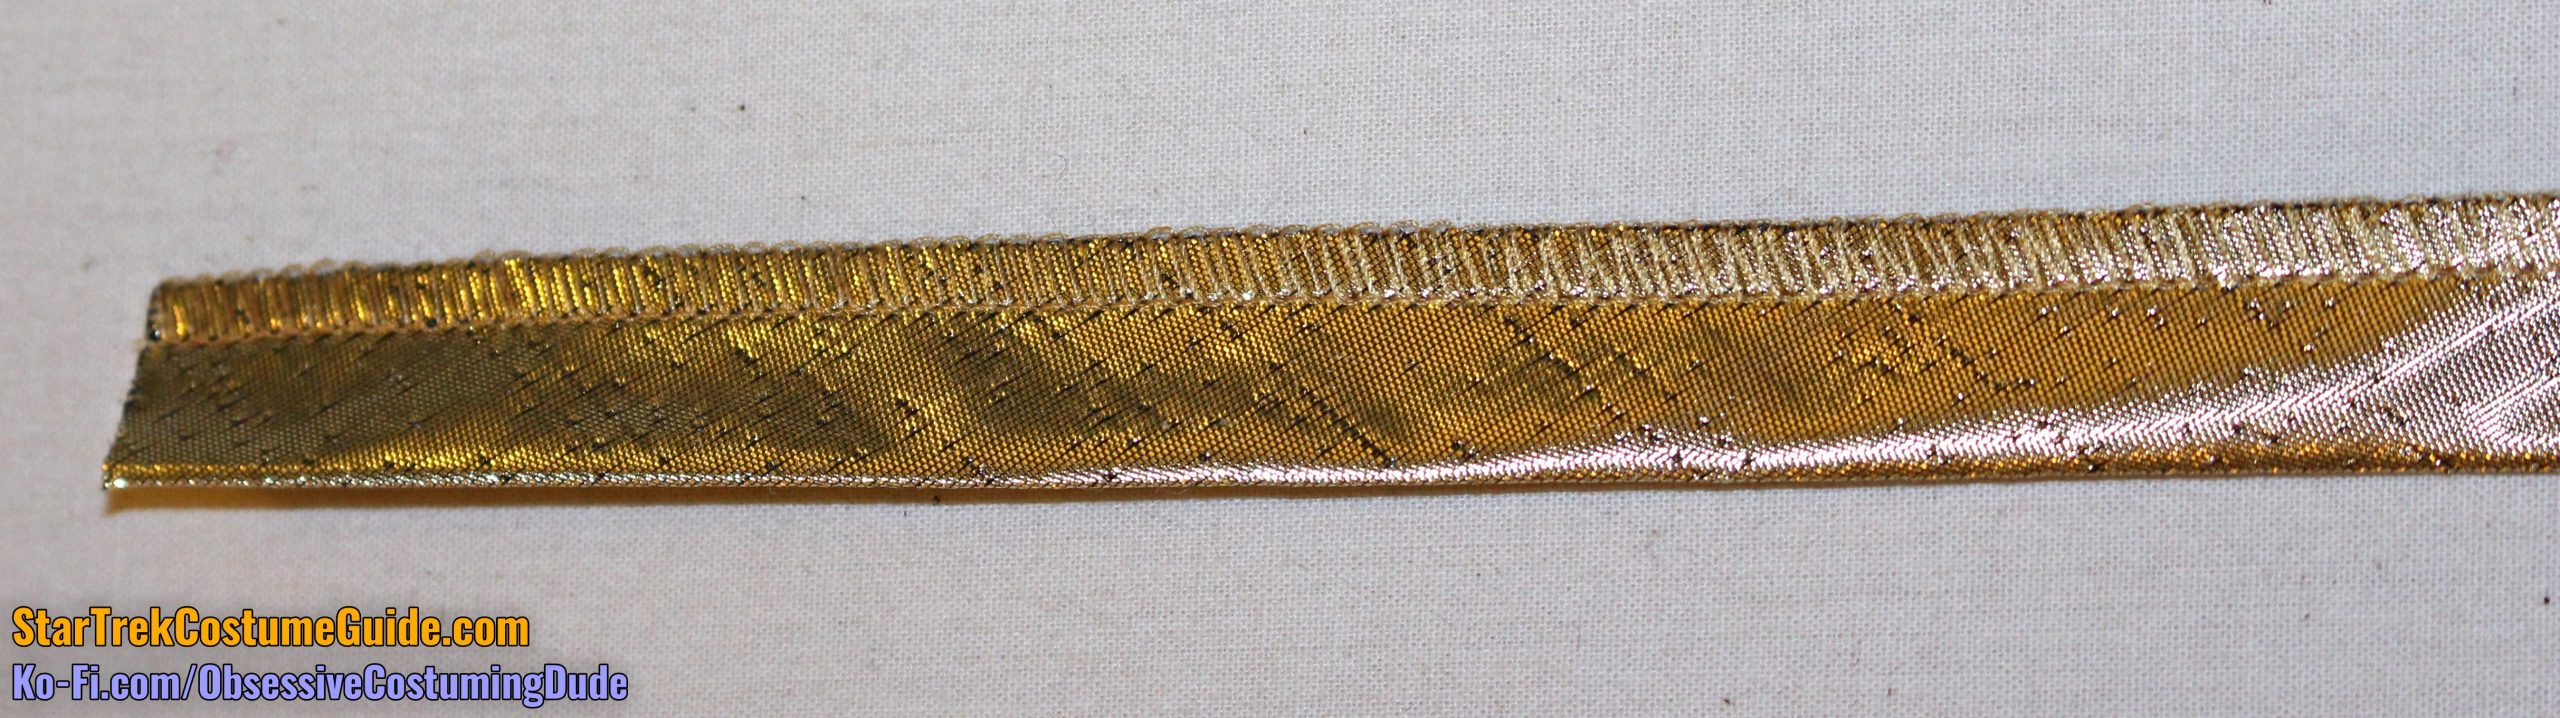
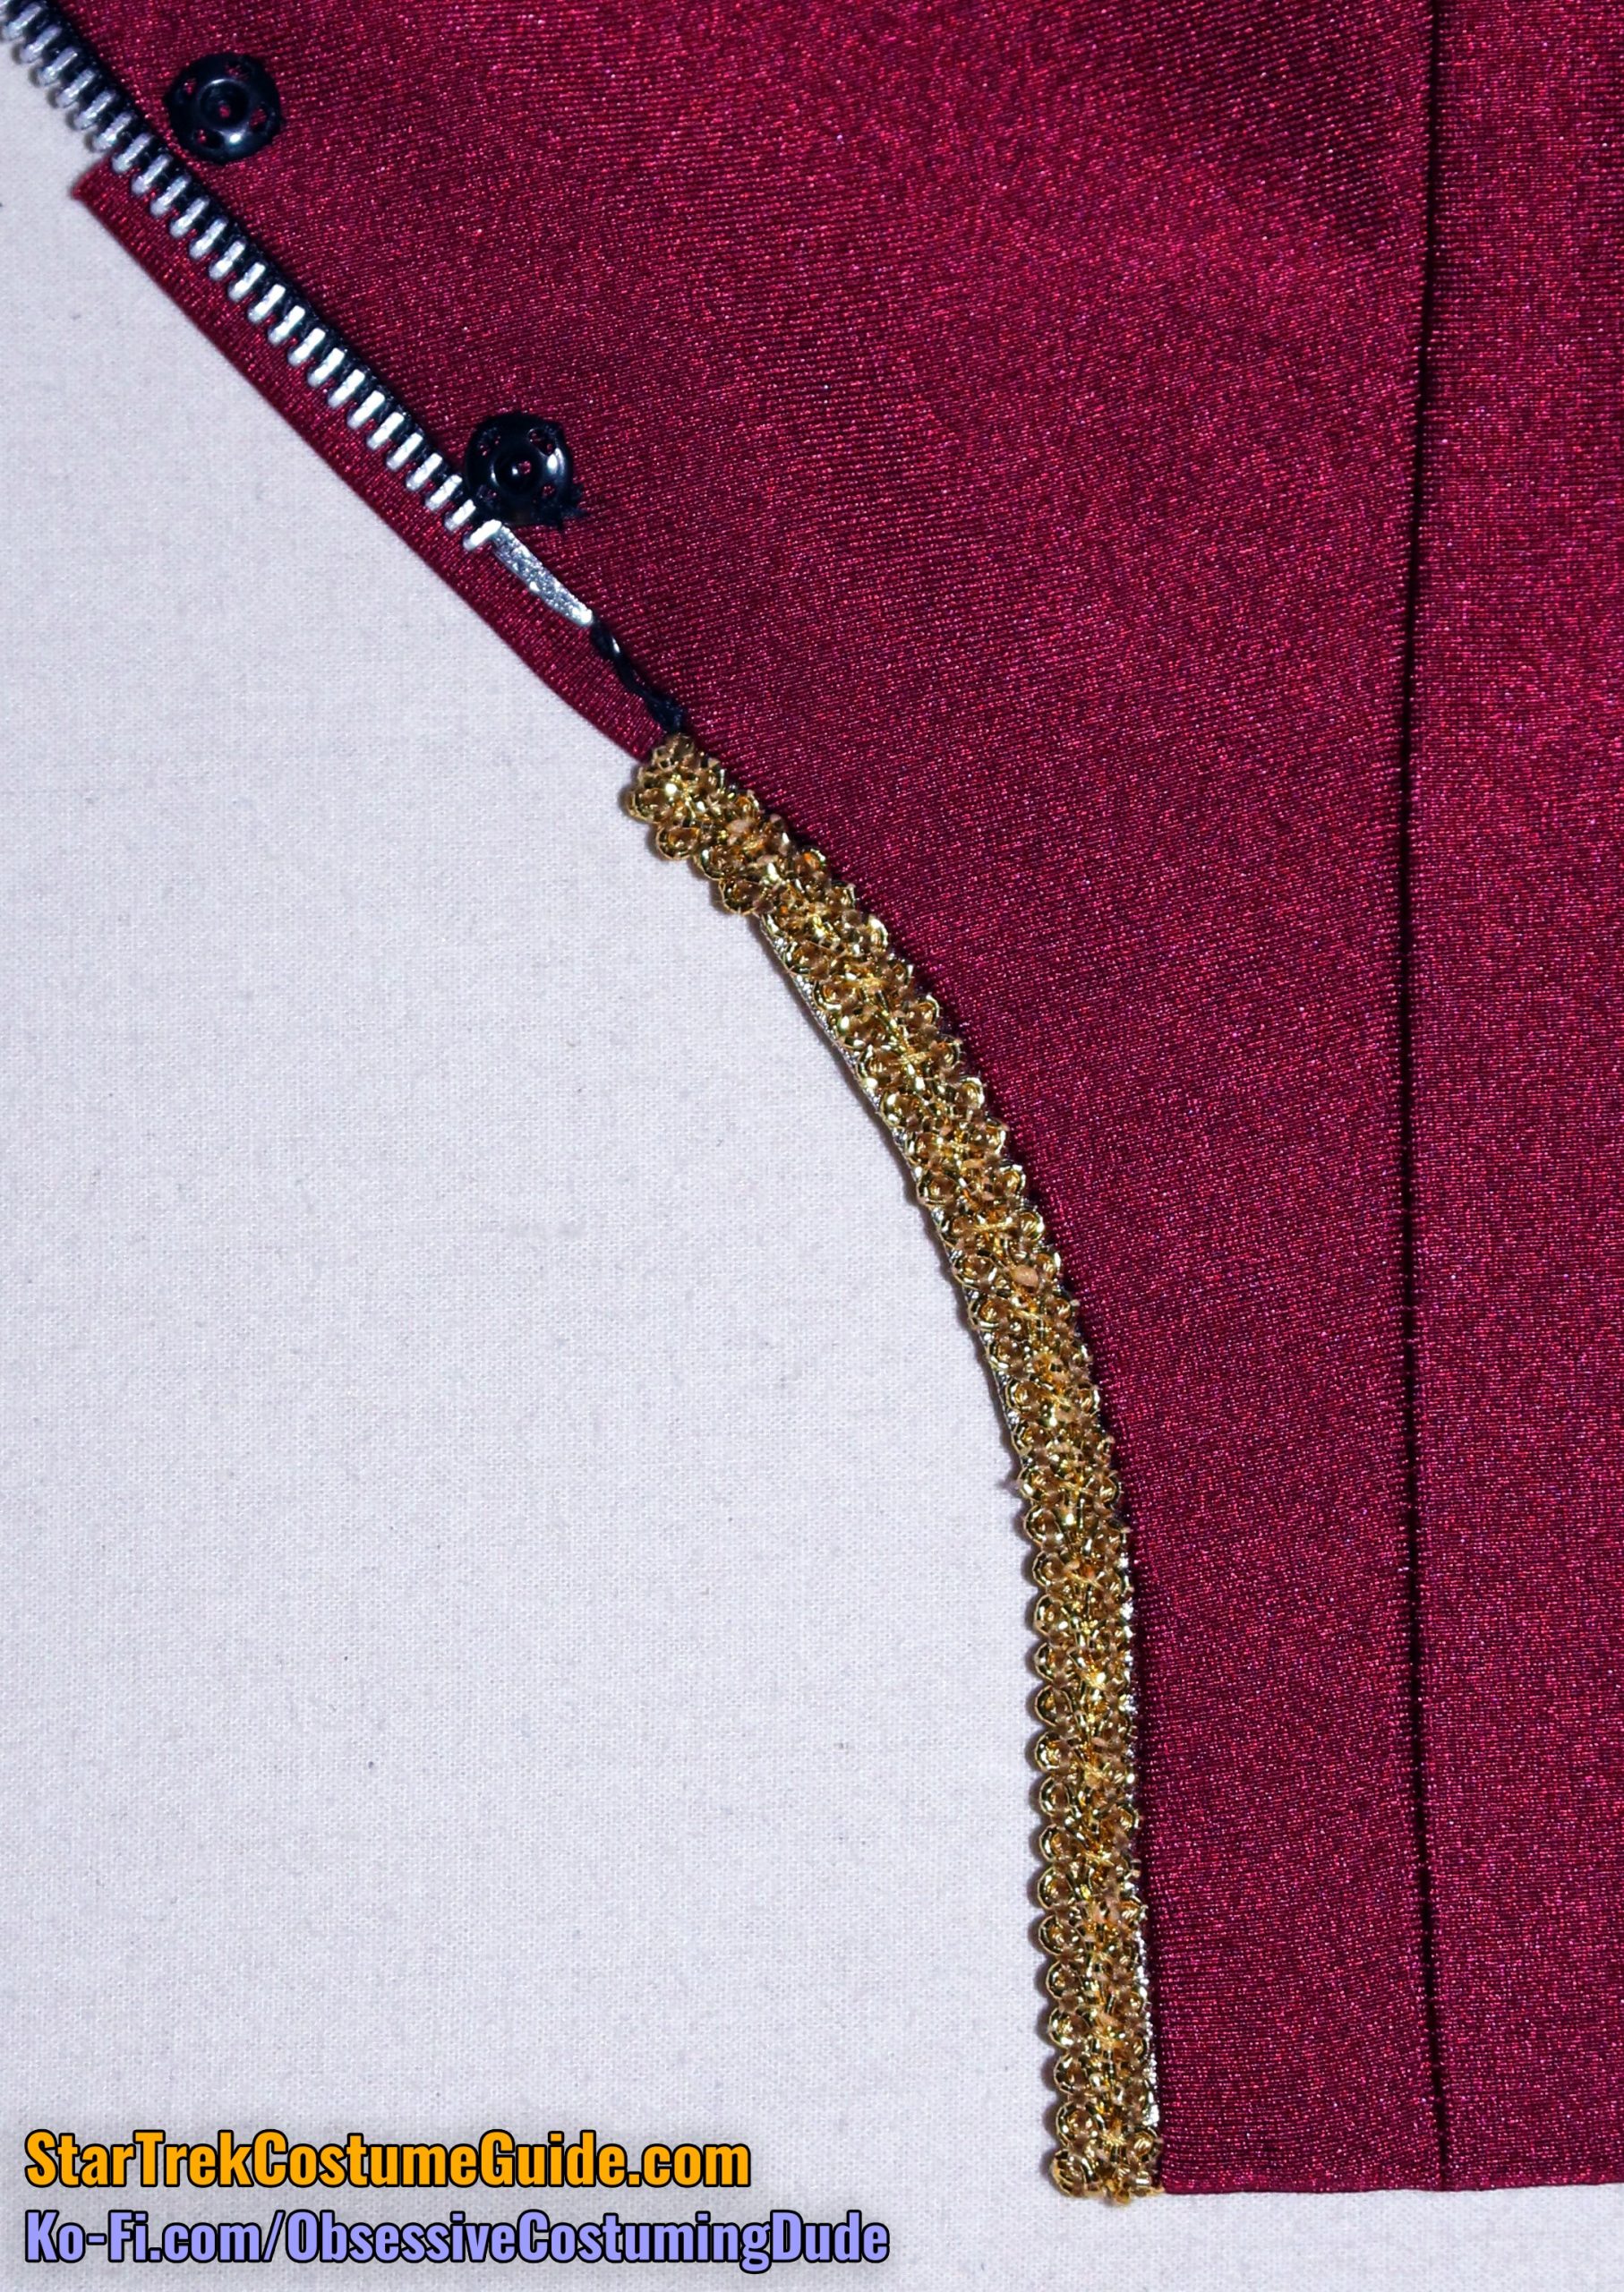
The gold trim on the screen-used Admiral Jameson uniform I examined was usually 2” wide total (1” folded in half), although usually only about 3/16” extended past the seams. (The rest was sewn into the seams.)
The neckline/front trim may have extended outward a bit farther (perhaps ¼”) to support the gimp trim, and the trim at the bottom of the sleeves extended downward ⅜” past the hem line.
All of which I mention because, while you’re free to cut your trim into strips exactly 2” wide like was done on the original jacket, I find it easier to align the edges of the trim with the edges of the fabric while I’m sewing.
While the original seam allowances varied drastically in both size and direction, I standardized most of them for my (Tailors Gone Wild) pattern, so you may find it advantageous to use narrower trim as well.
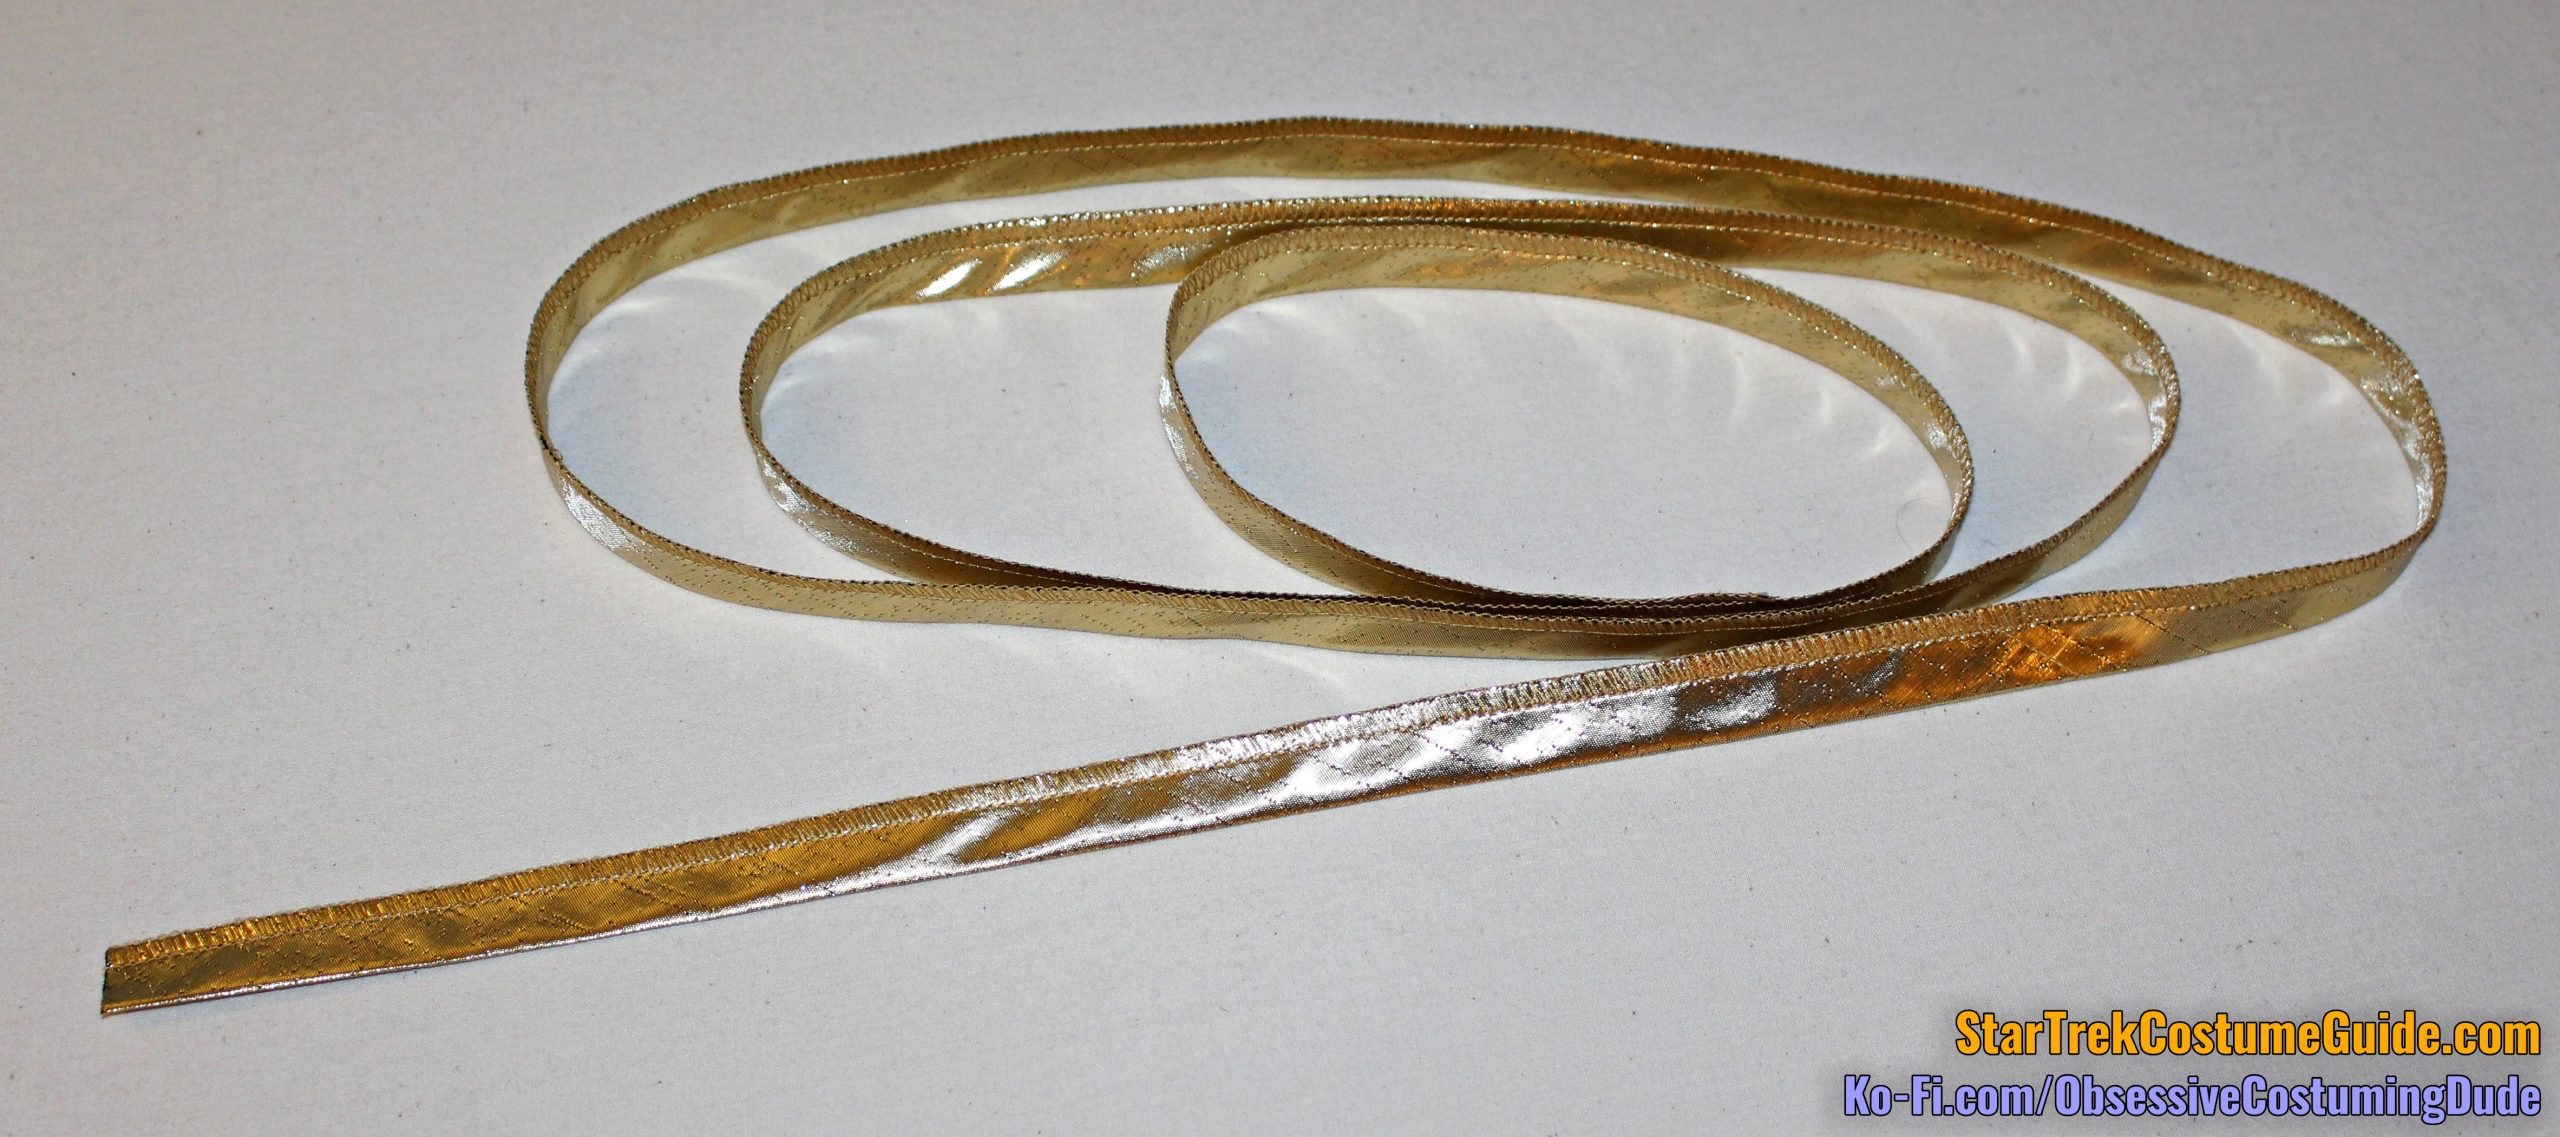
Simply put, I like to cut my trim to size.
Should you wish to as well, I suggest 1 ⅜” wide strips for the yoke and shoulders/outer sleeves, 1 ½” strips for the neckline/front (slightly wider to support the gimp trim), and the full 2” wide for the lower sleeves.
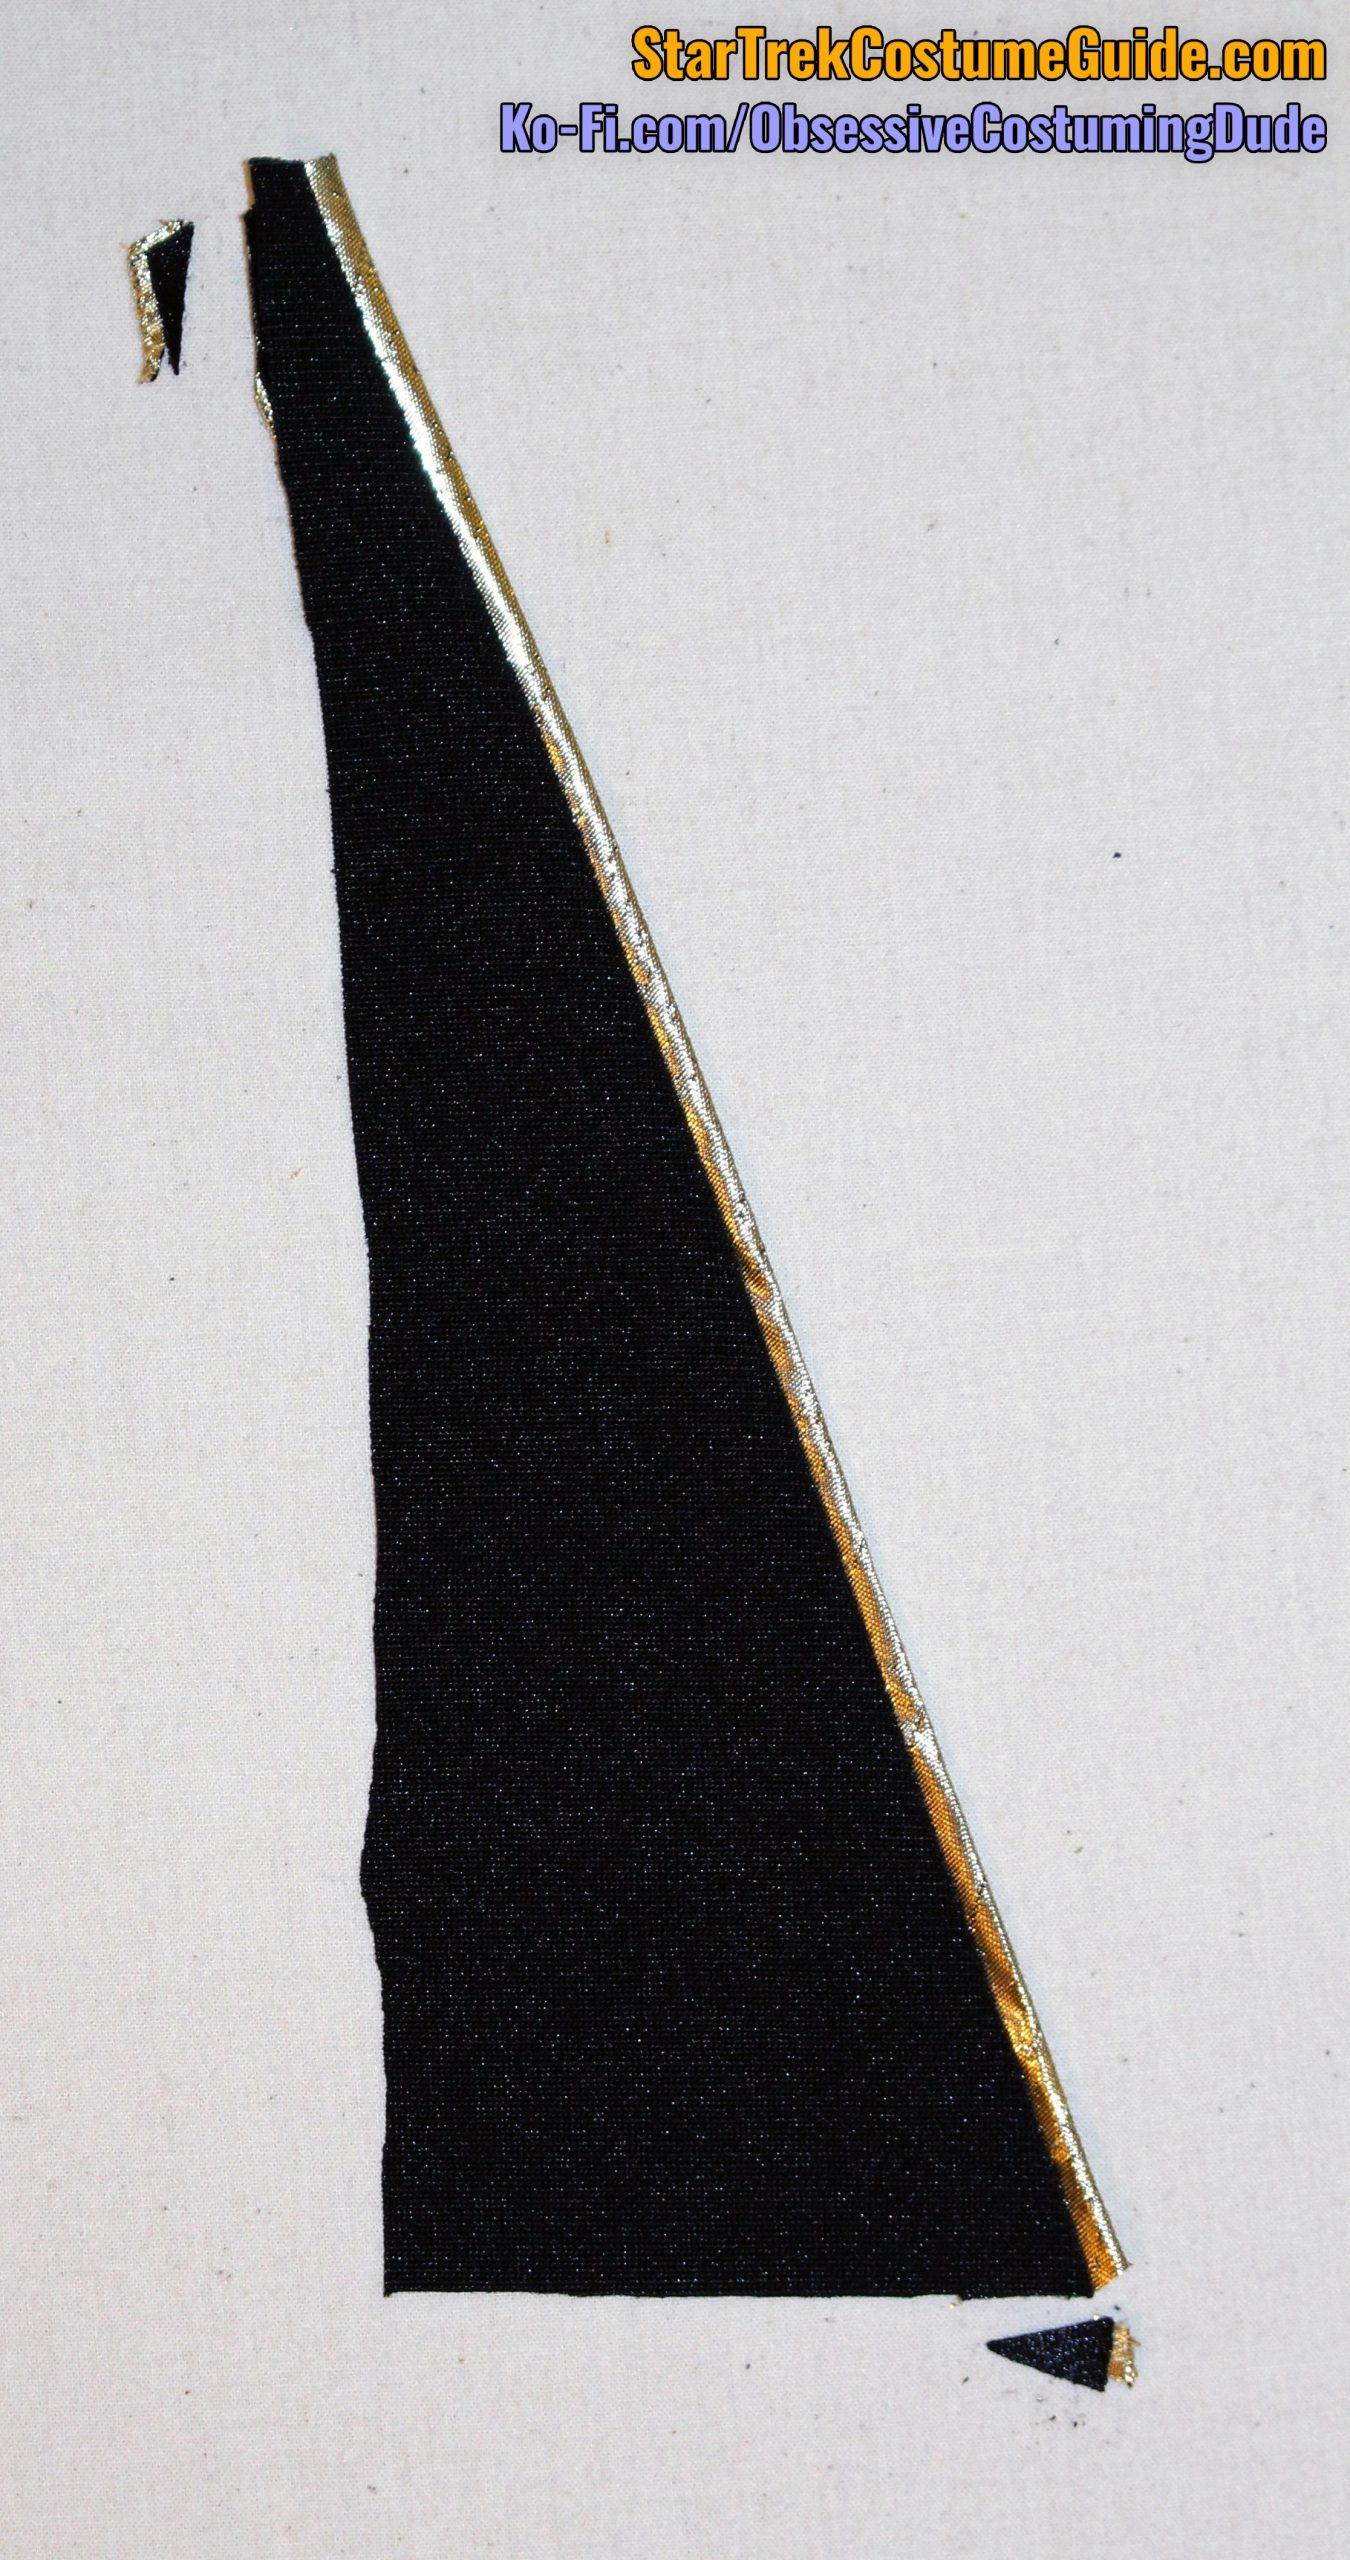
Cut your trim down to your desired size and press your strips in half.
I also suggest serging the raw ends of the trim to further prevent it from fraying over time.
Now, you should have some metallic gold trim ready to go for the jacket construction!
(FYI, this is the same way I do the gold trim at the bottom of the corresponding trousers for this uniform.)
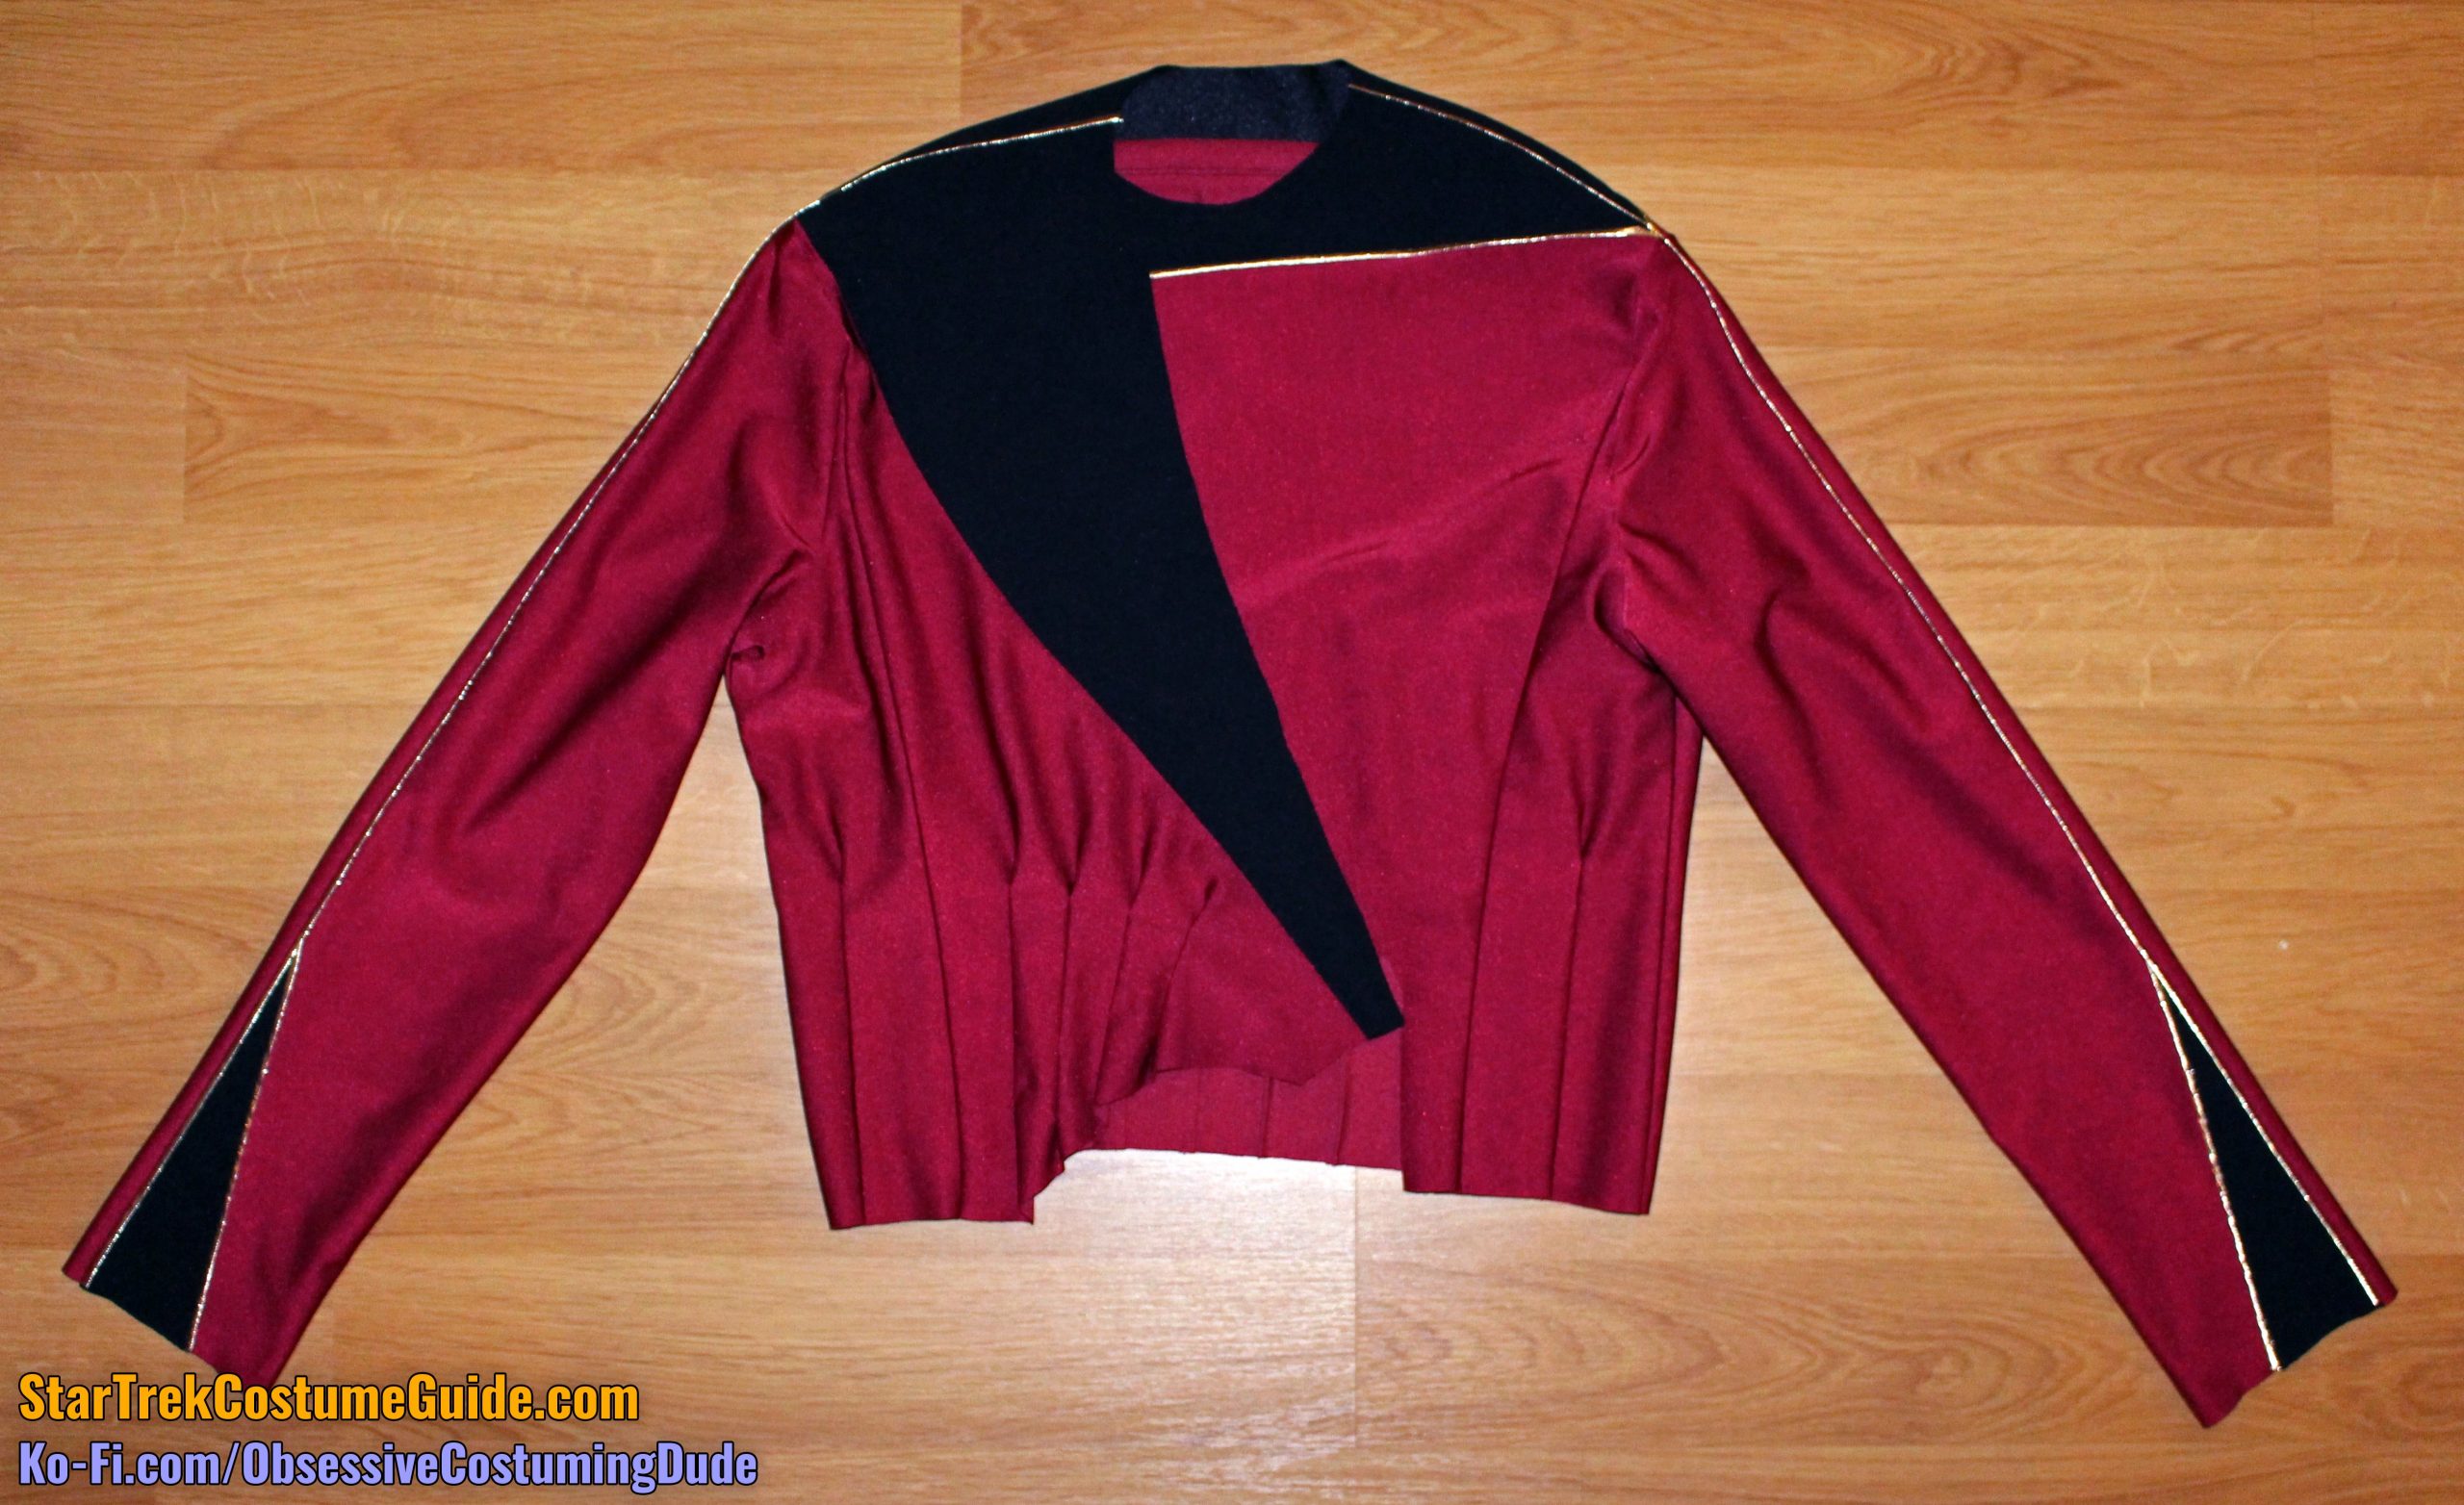
STEP 1 - Front Assembly
NOTE: All pattern pieces include ½” seam allowance, except for the side seams, which have ⅝” seam allowance, and the upper back/back yoke seam, which has ¾” seam allowance.
Brian Tracy often says, “Eat that frog.” He’s even written an actual book of the same title.
The premise (though comical) is that, the first thing one should do every day is eat a live frog; then, no matter what happens the rest of the day, it probably won’t be any worse than that.
Or, more simply, do the hardest thing first and get it over with.
Well, the most difficult and involved aspect of this jacket is probably determining the proper positions of the lower front pleats, so we’ll start with that.
Fortunately, considering how seldom these uniforms were seen during The Next Generation’s first season, and how the pleats were actually positioned on the screen-used Admiral Jameson uniform I examined, there’s some room for personal interpretation and adaptation regarding the positioning of the pleats – and for several other aspects of this particular jacket (which I’ll mention as we go).
In the aforementioned costume examination, you can observe the positioning of the pleats on the screen-used jacket.
However, that was only a single size, worn by a single character (which was the base for the size 38 on my sewing pattern), so adjustments will need to be made for other sizes.
Depending on your interpretation of the uniform, adding or subtracting a pleat is an option if you want the specific distance between pleats to remain fixed, but I prefer to keep the same overall proportions instead.
I also prefer my pleats to be equidistant, even though the original intervals varied a bit.
But this method can be modified to position the pleats however you want them to be on your jacket.
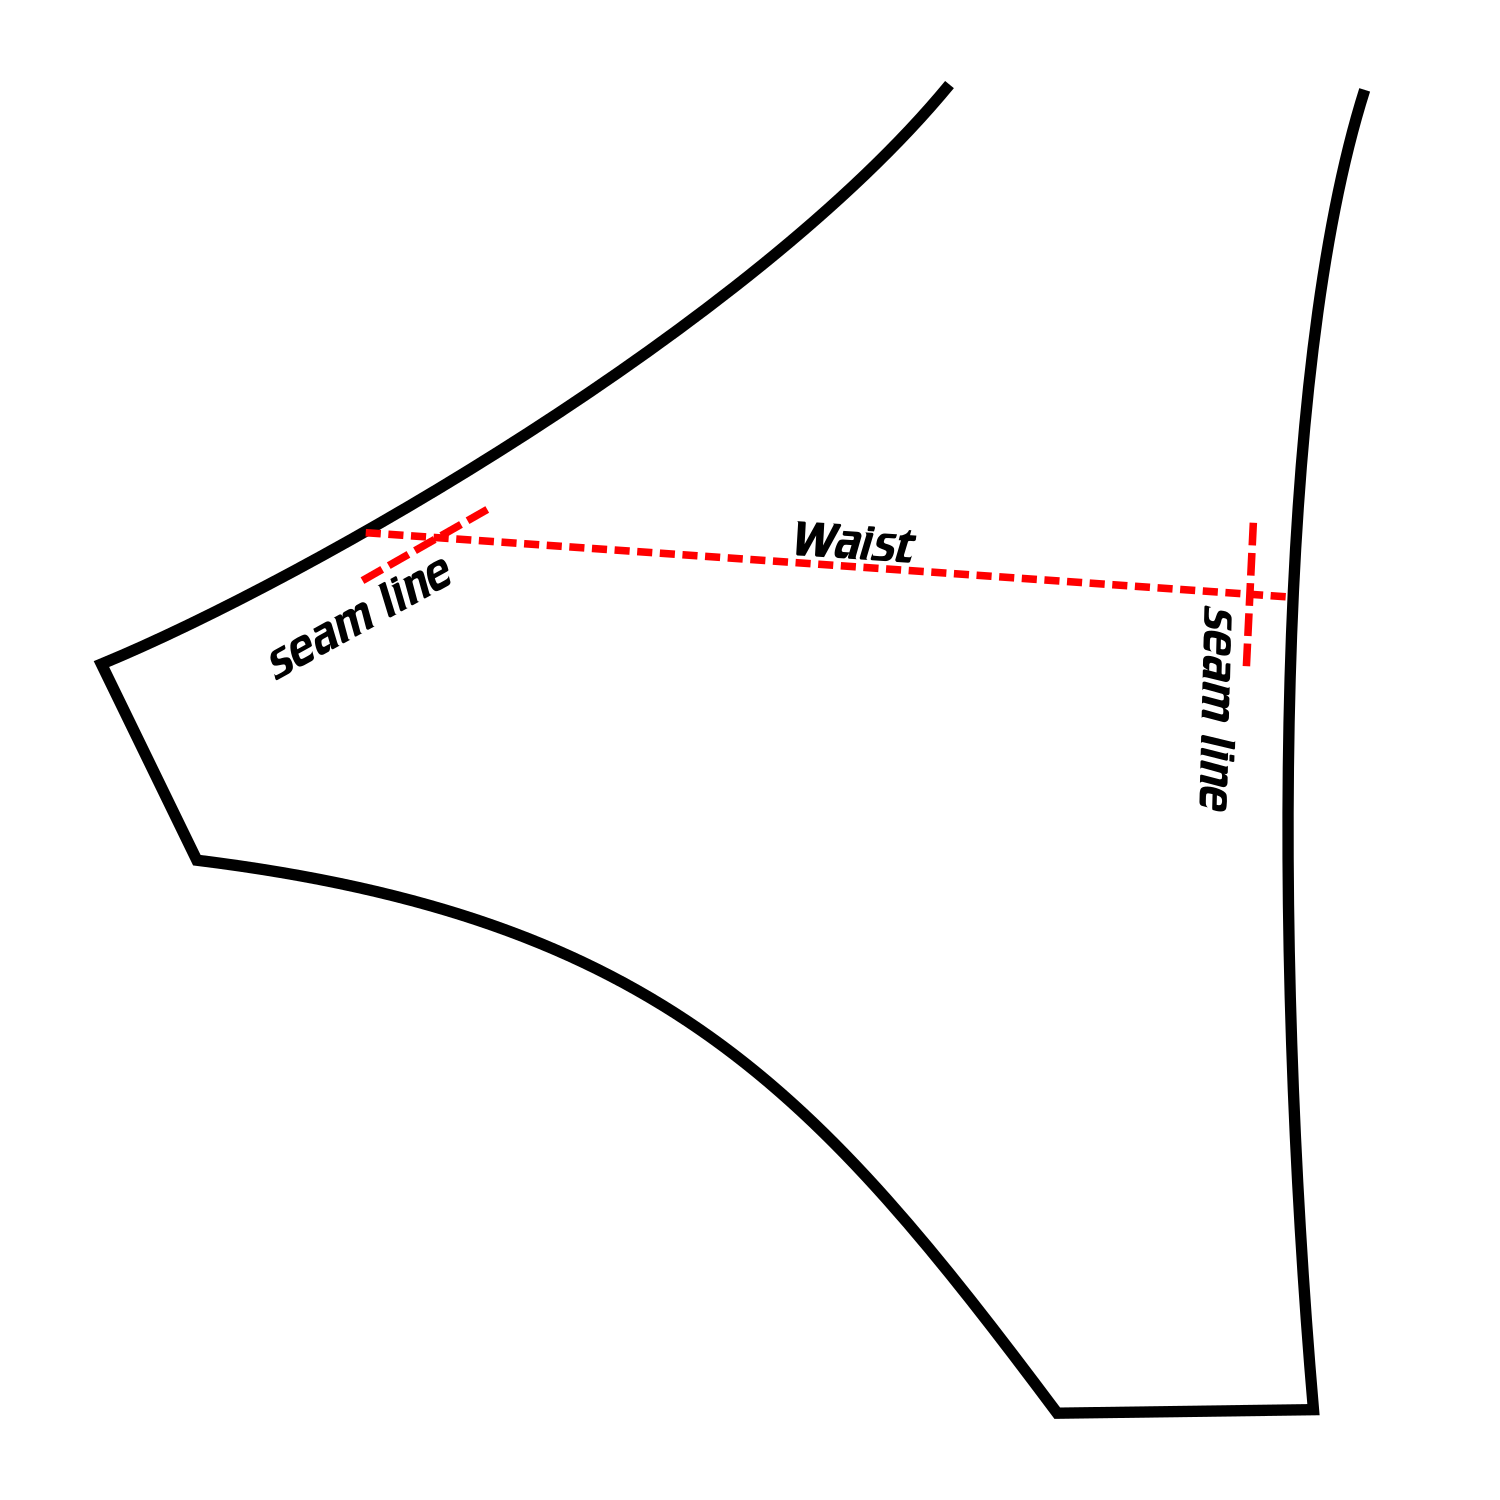
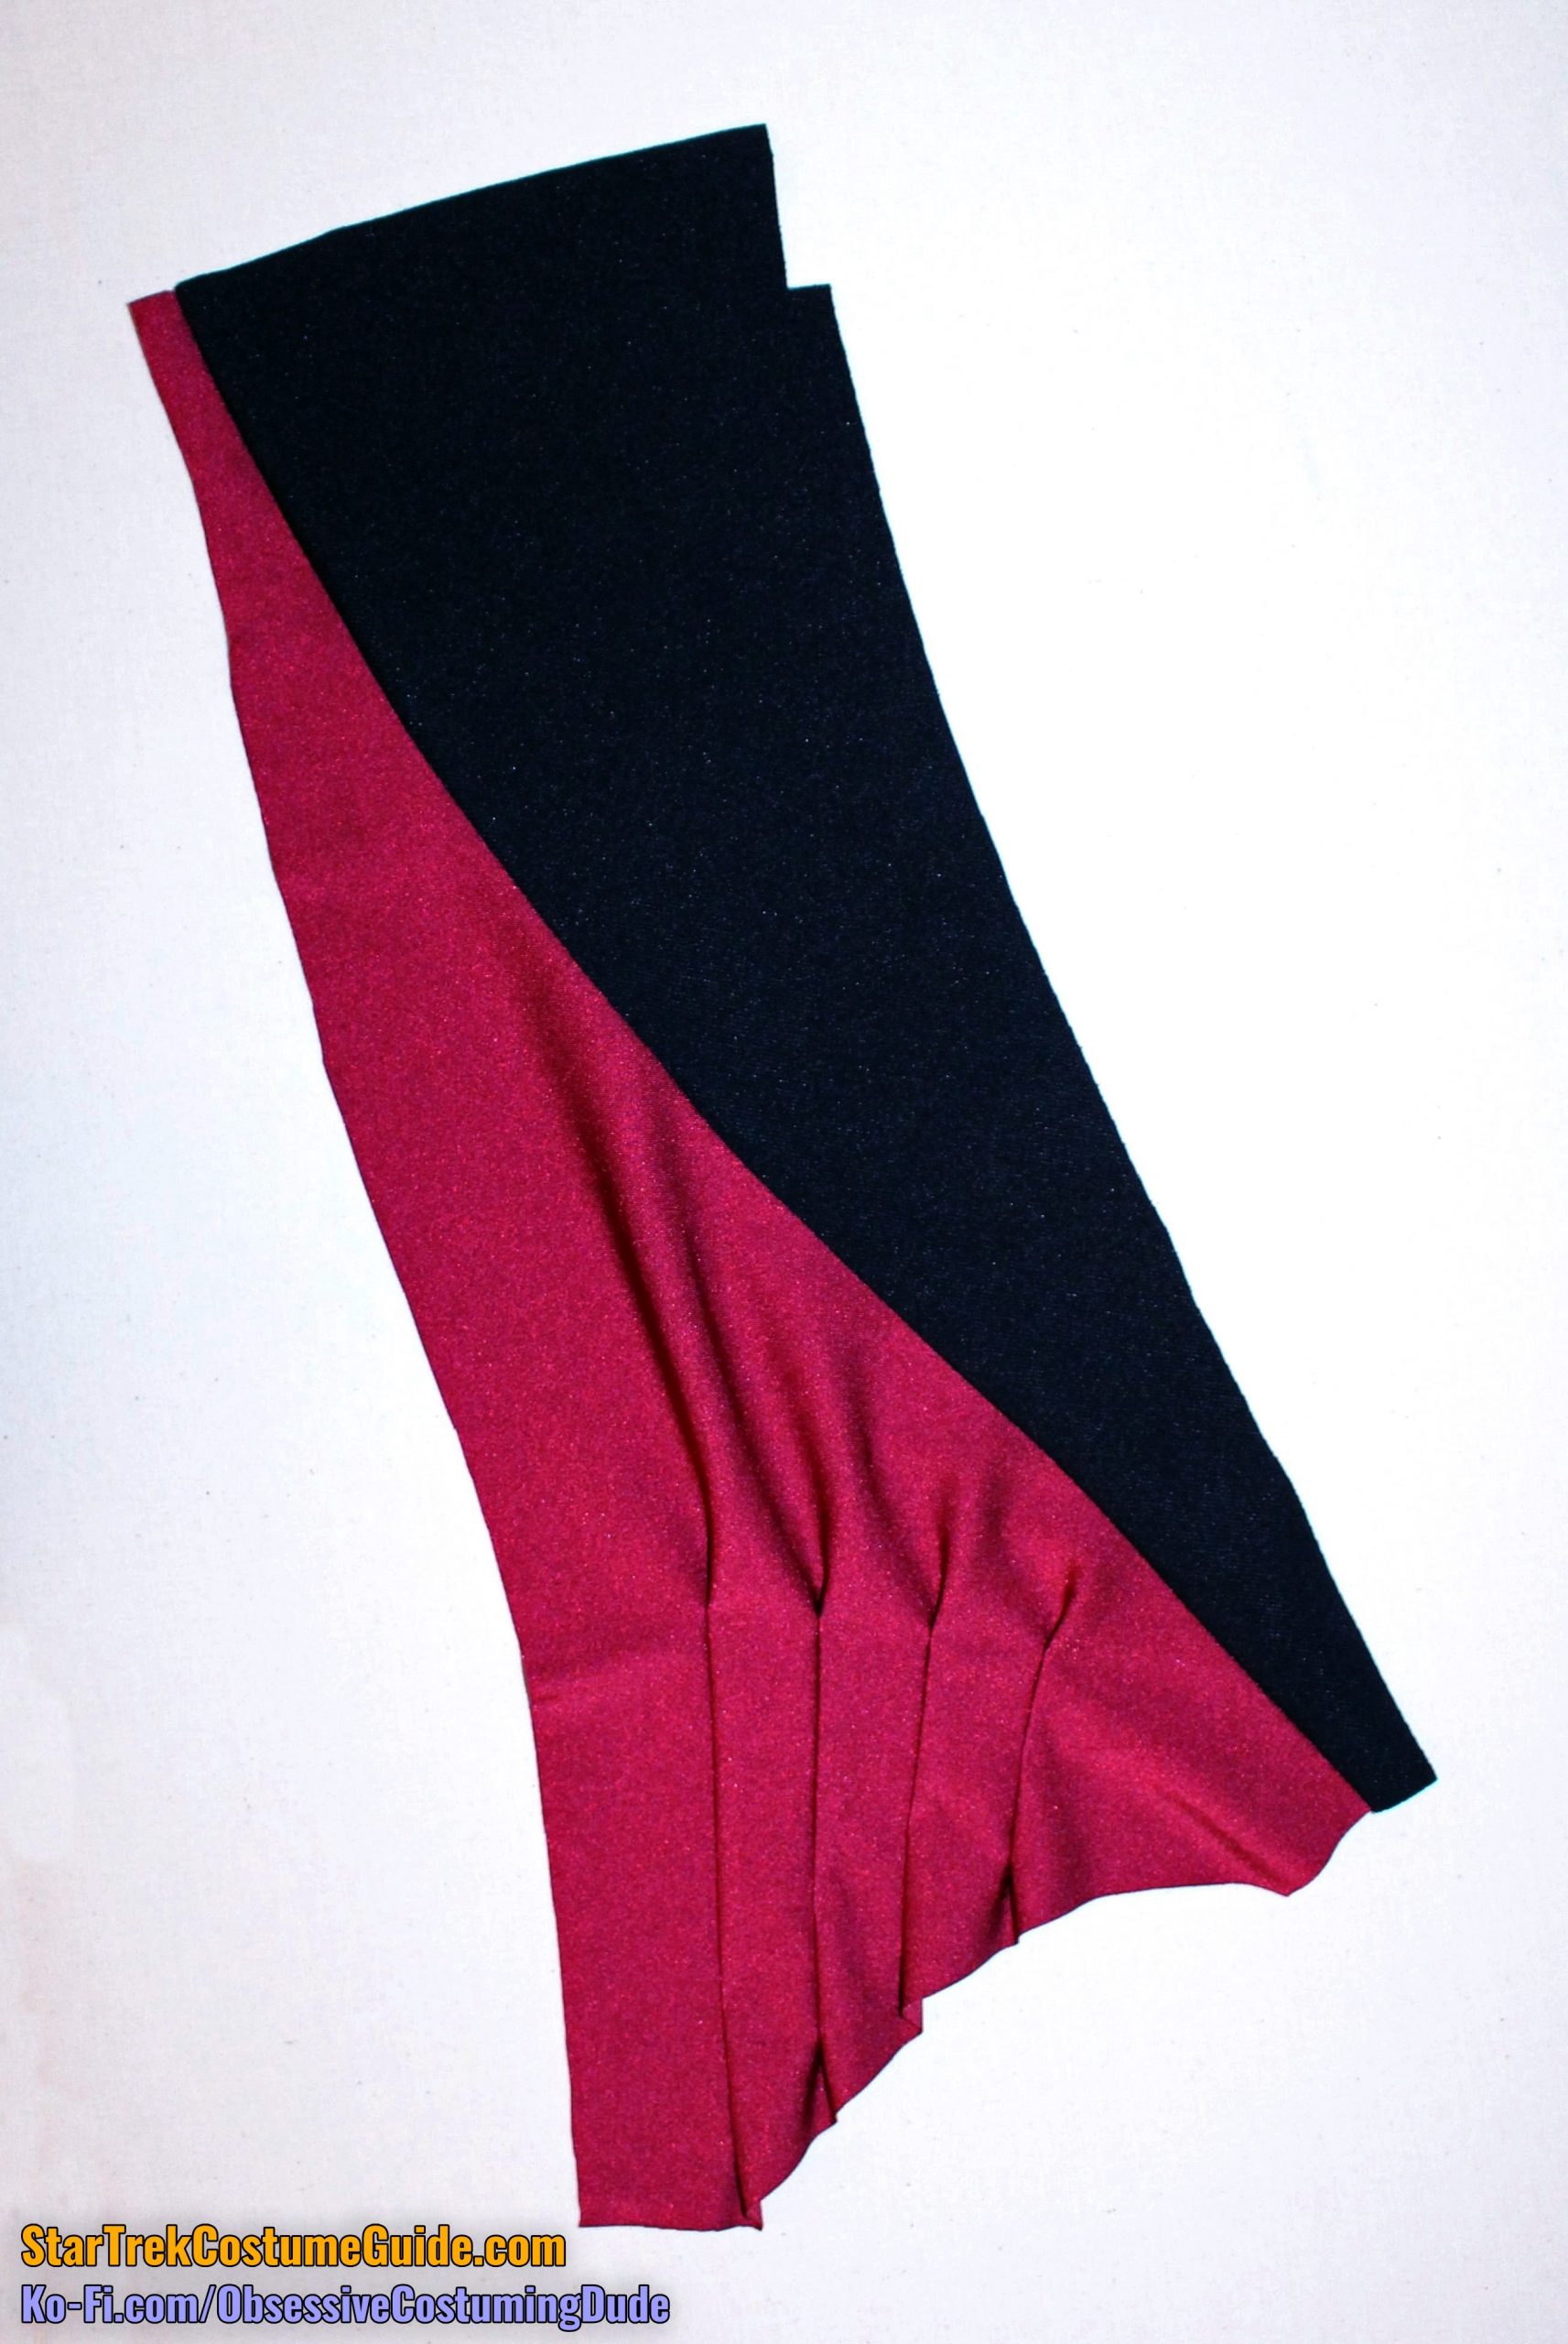
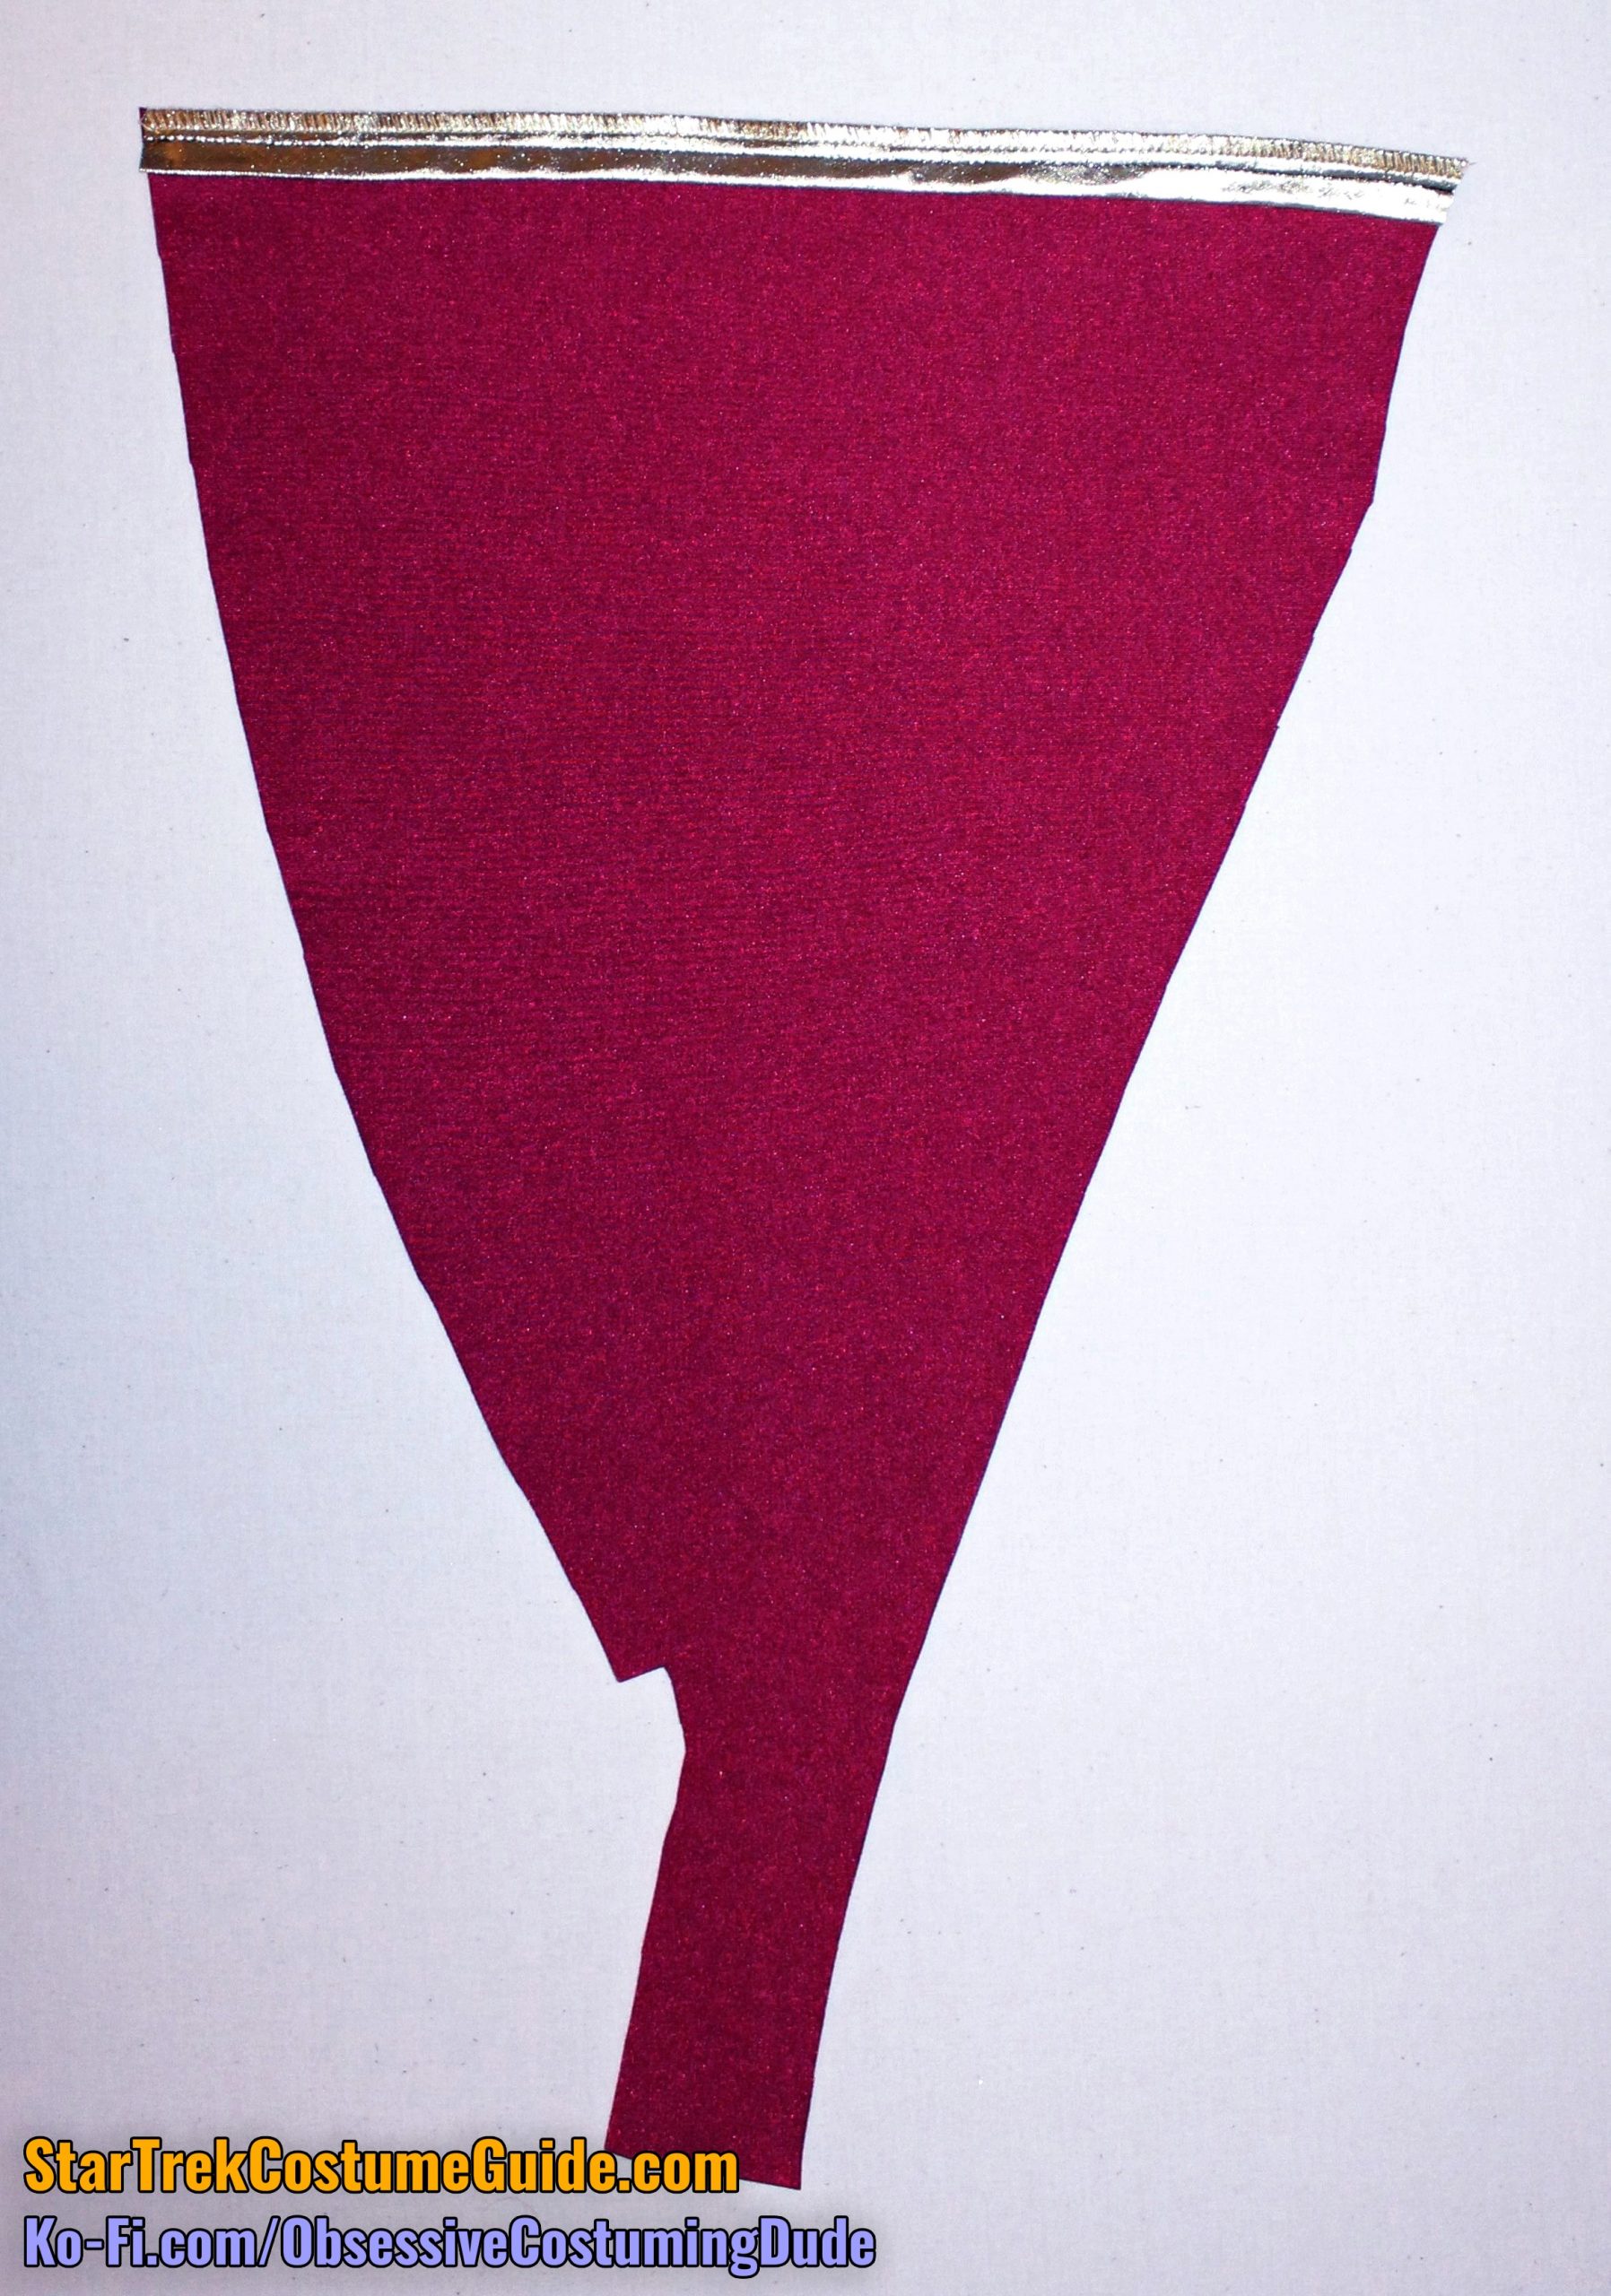
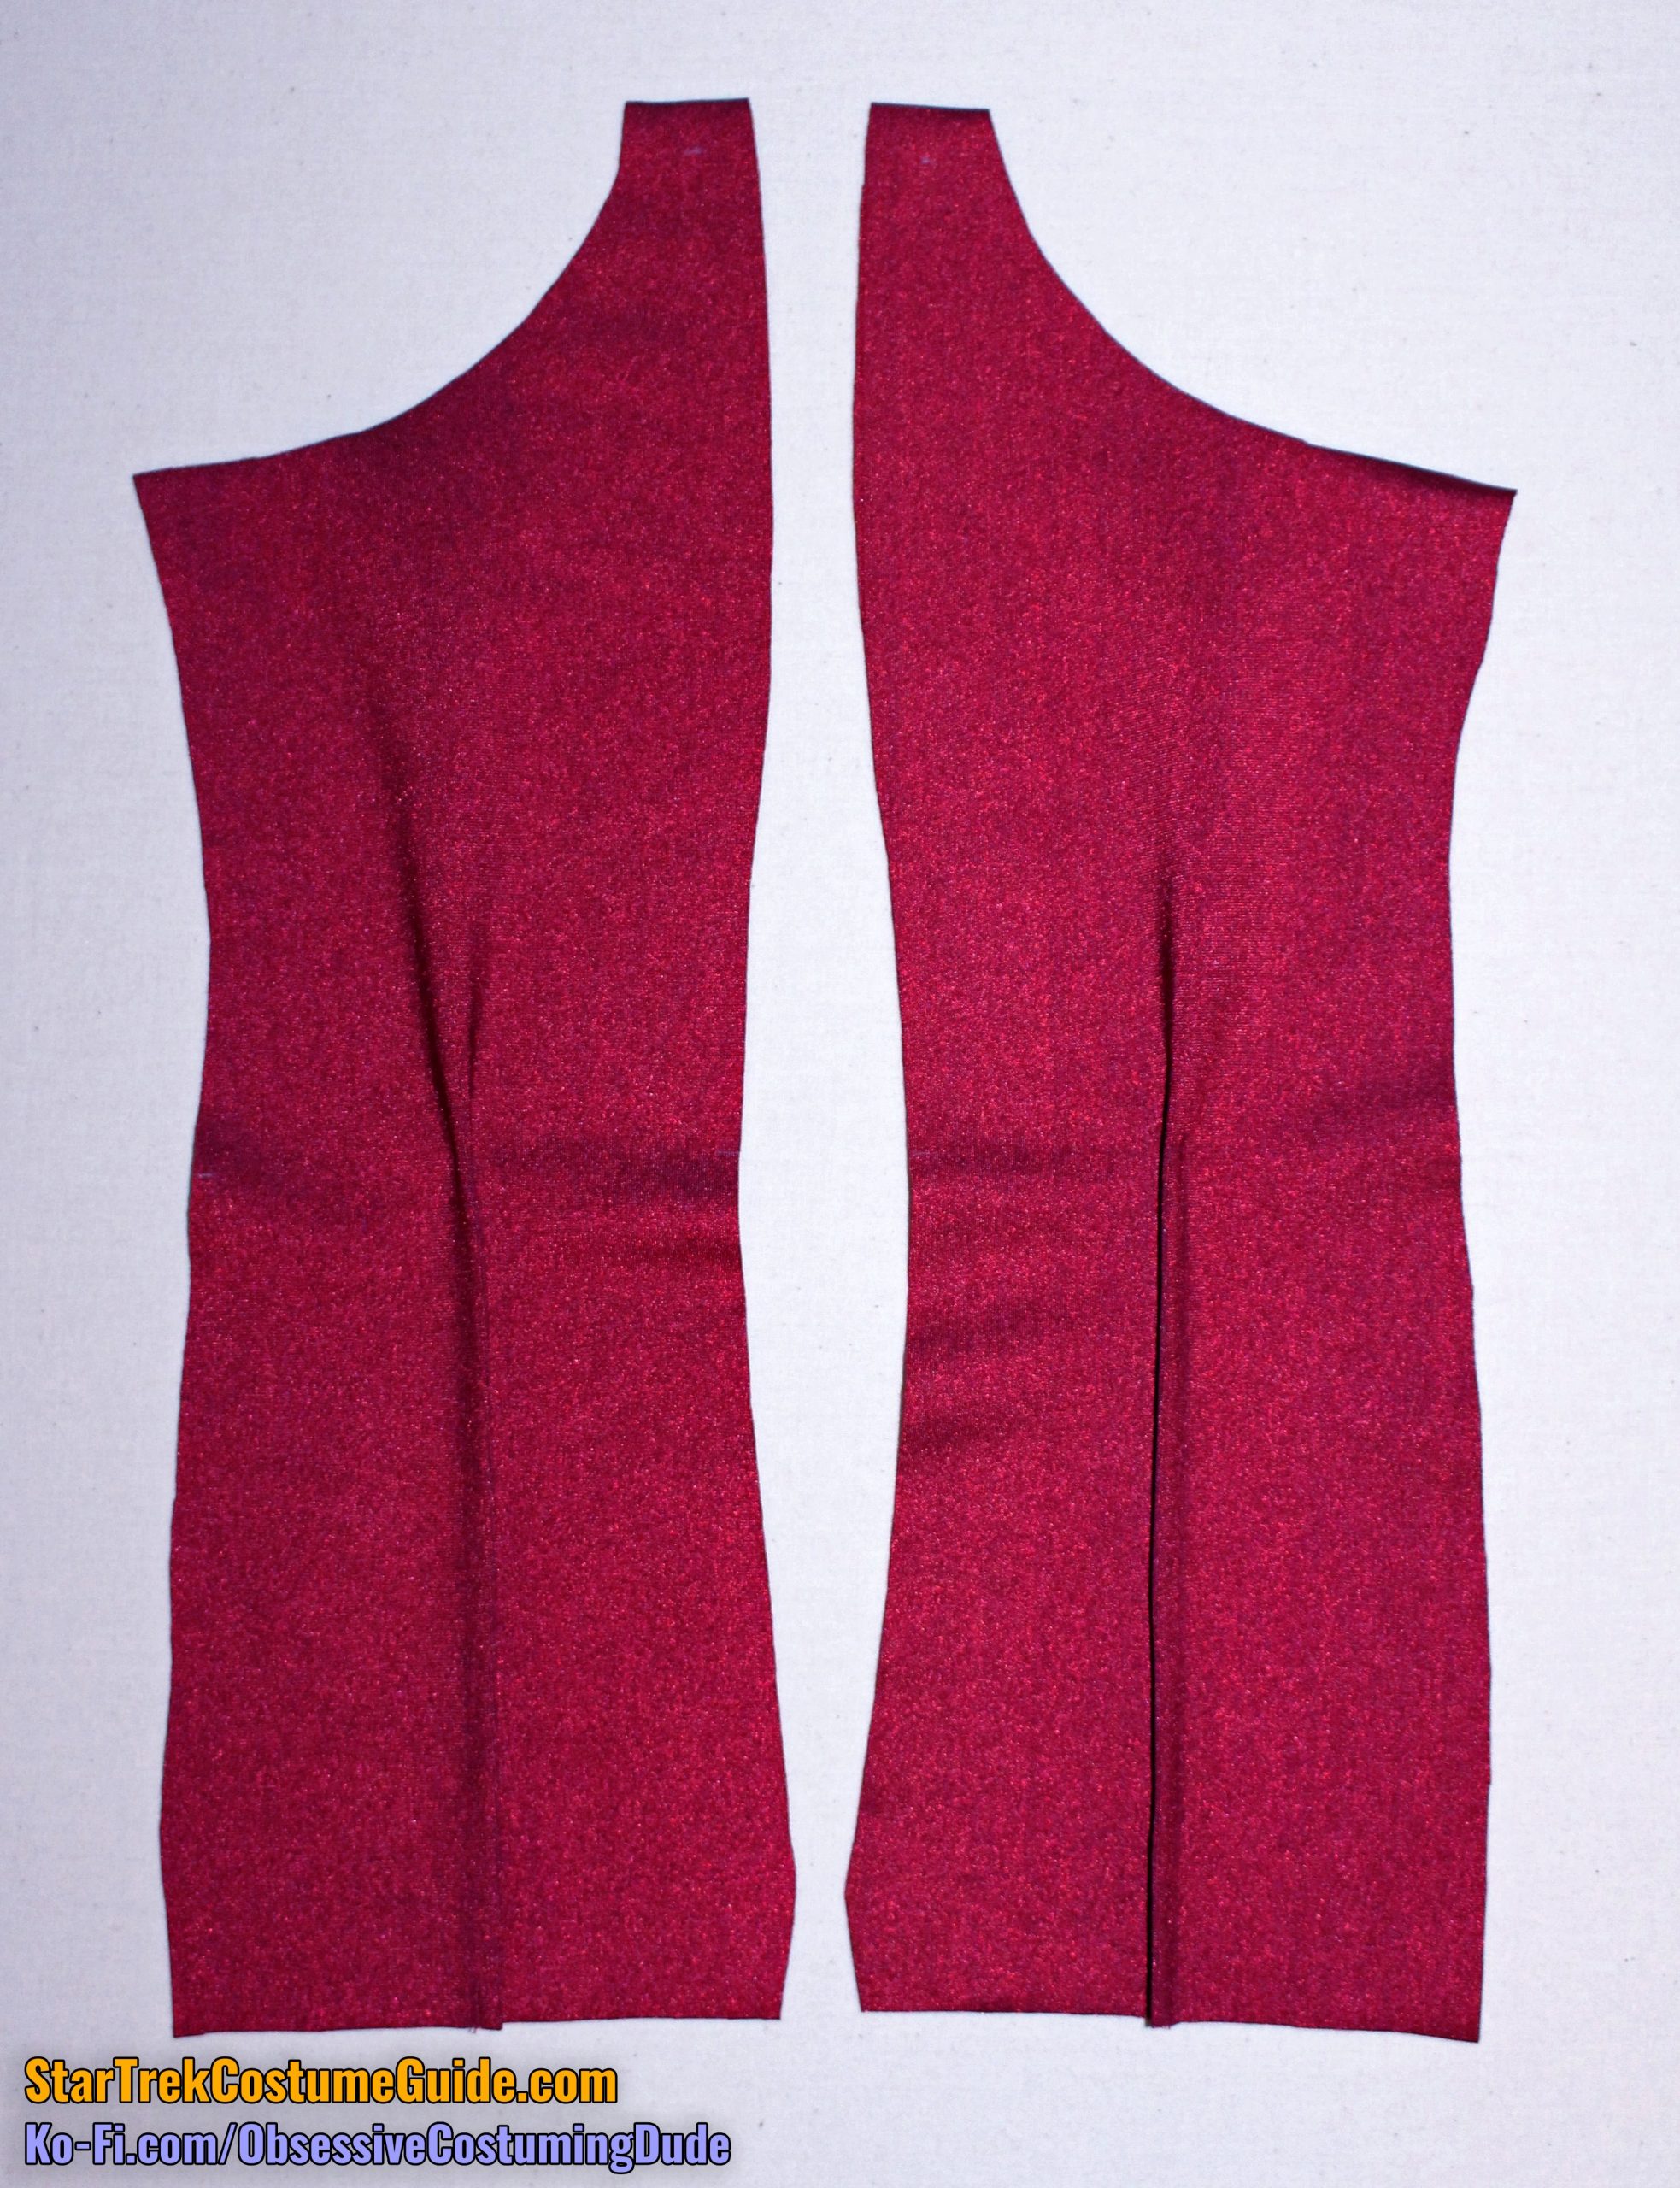
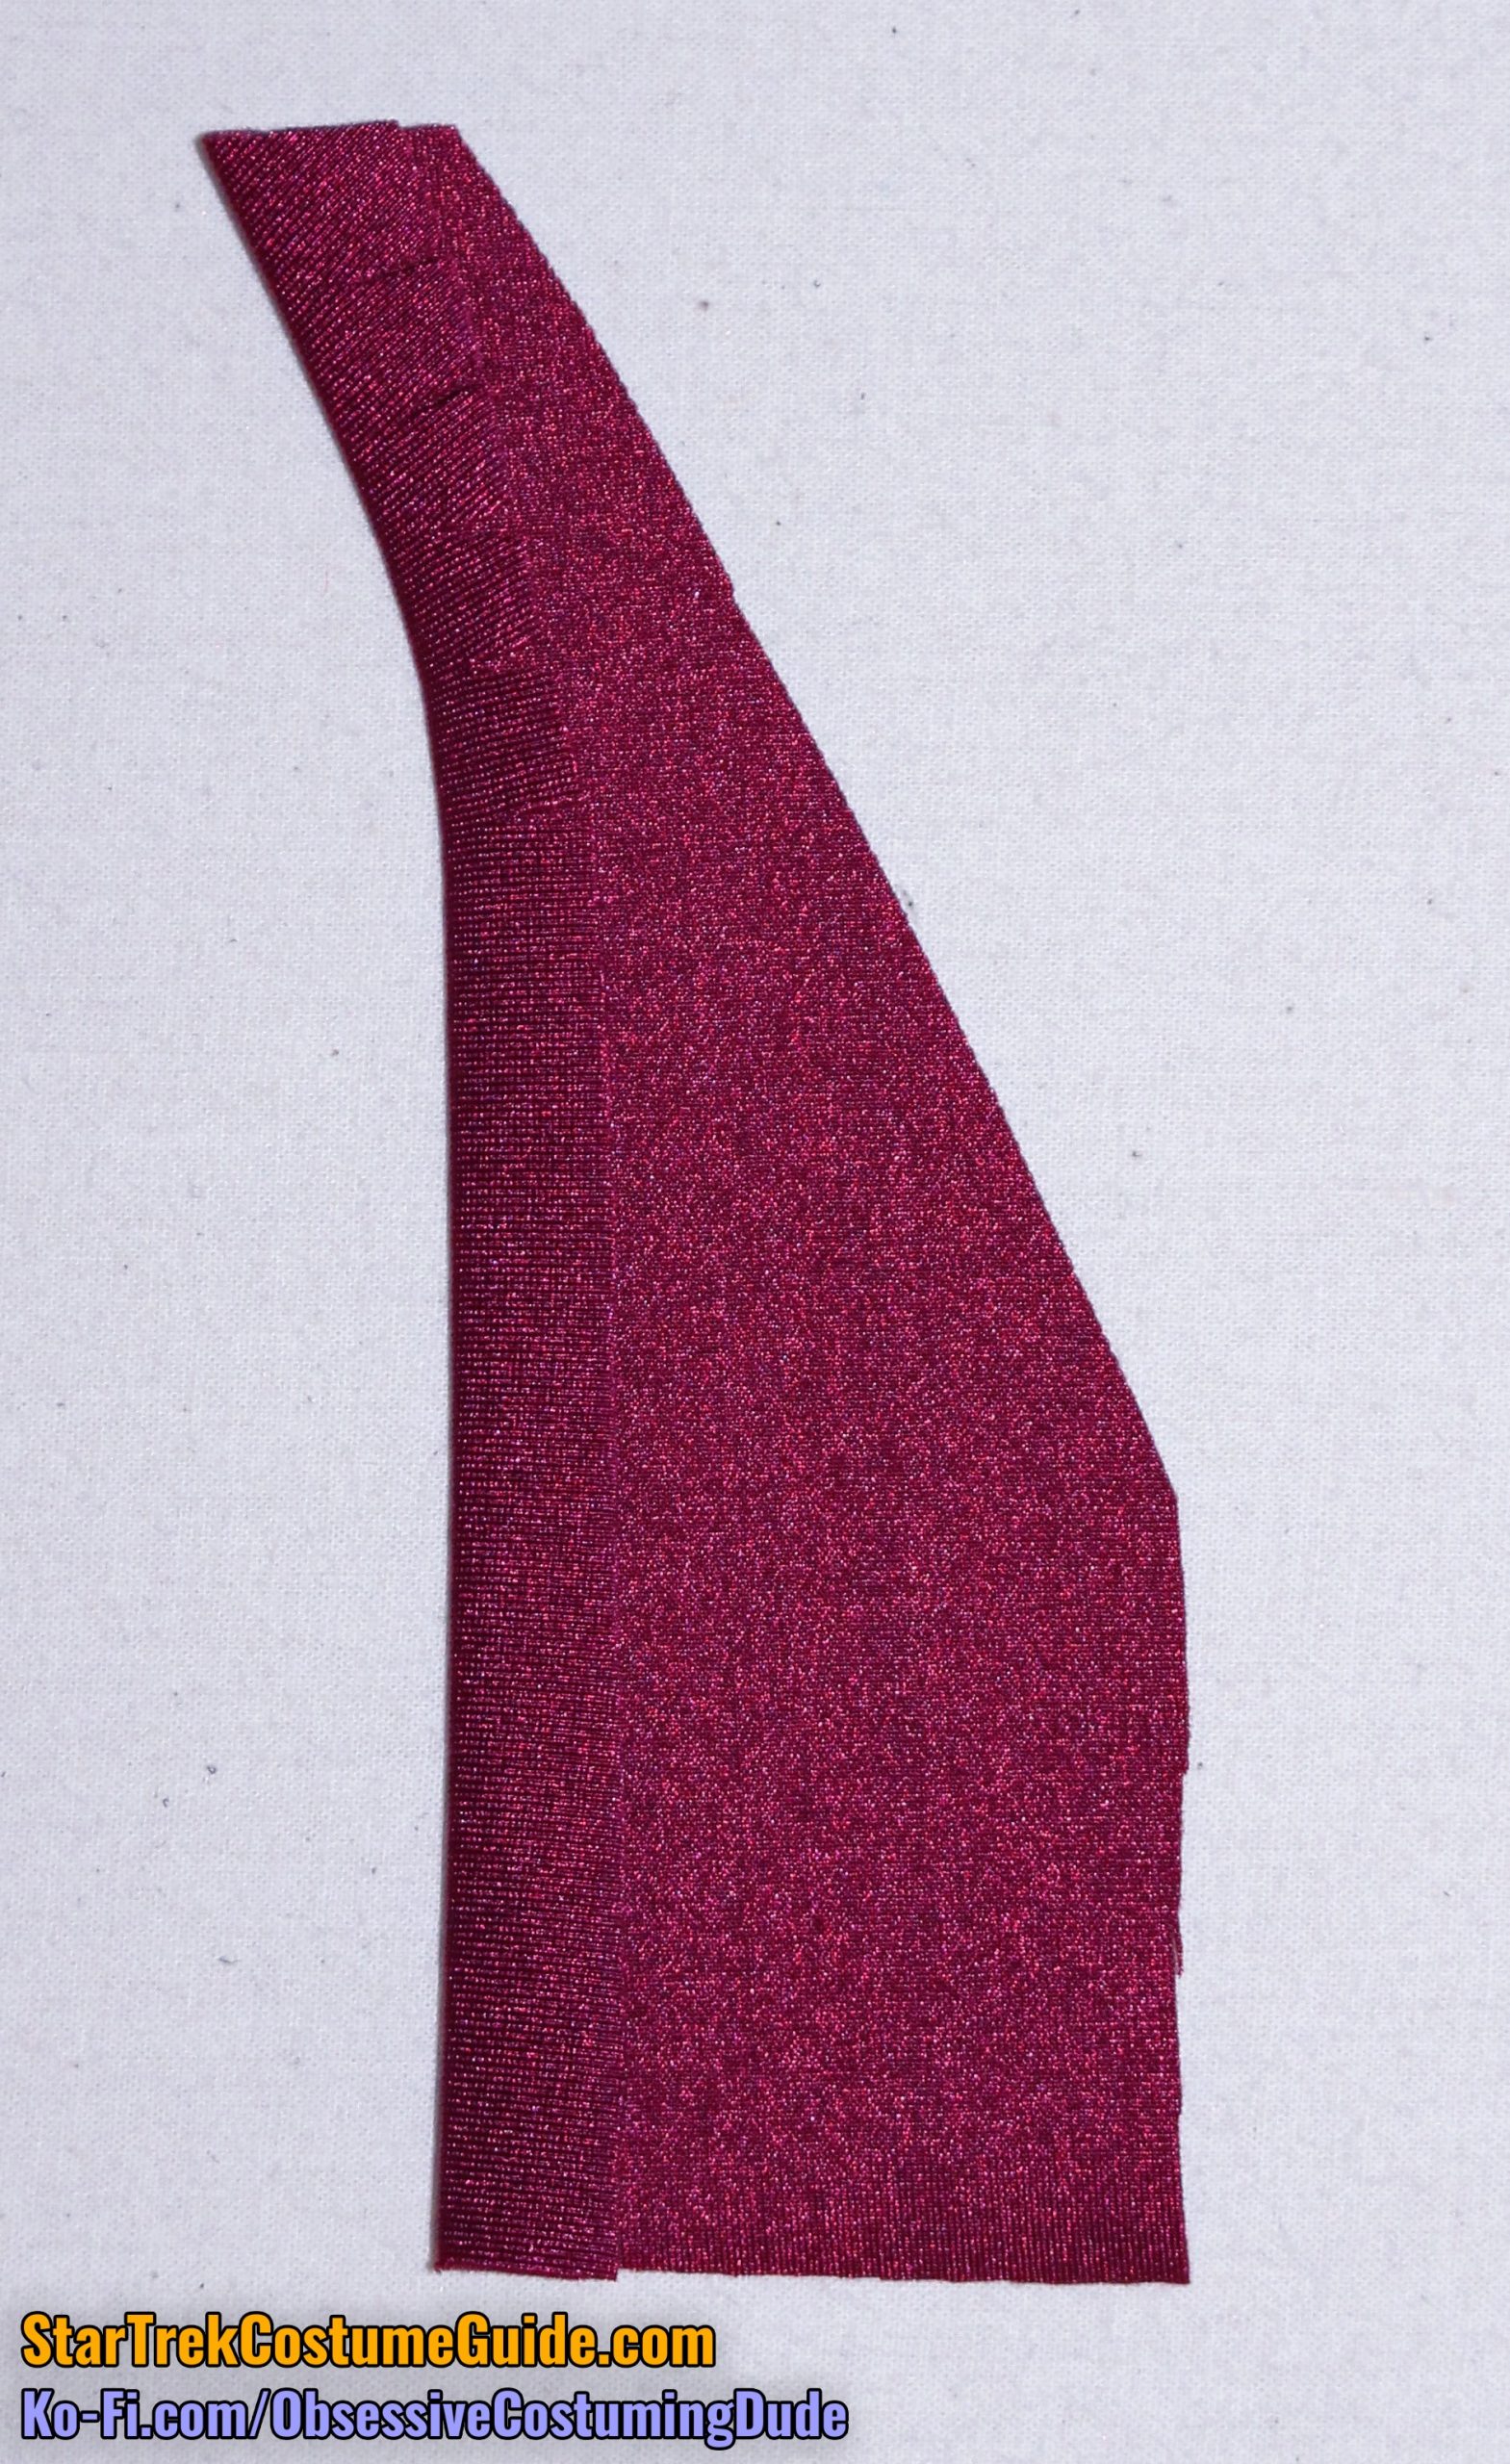
To begin, flip the right front (piece E) over so it’s “wrong” (shiny) side up.
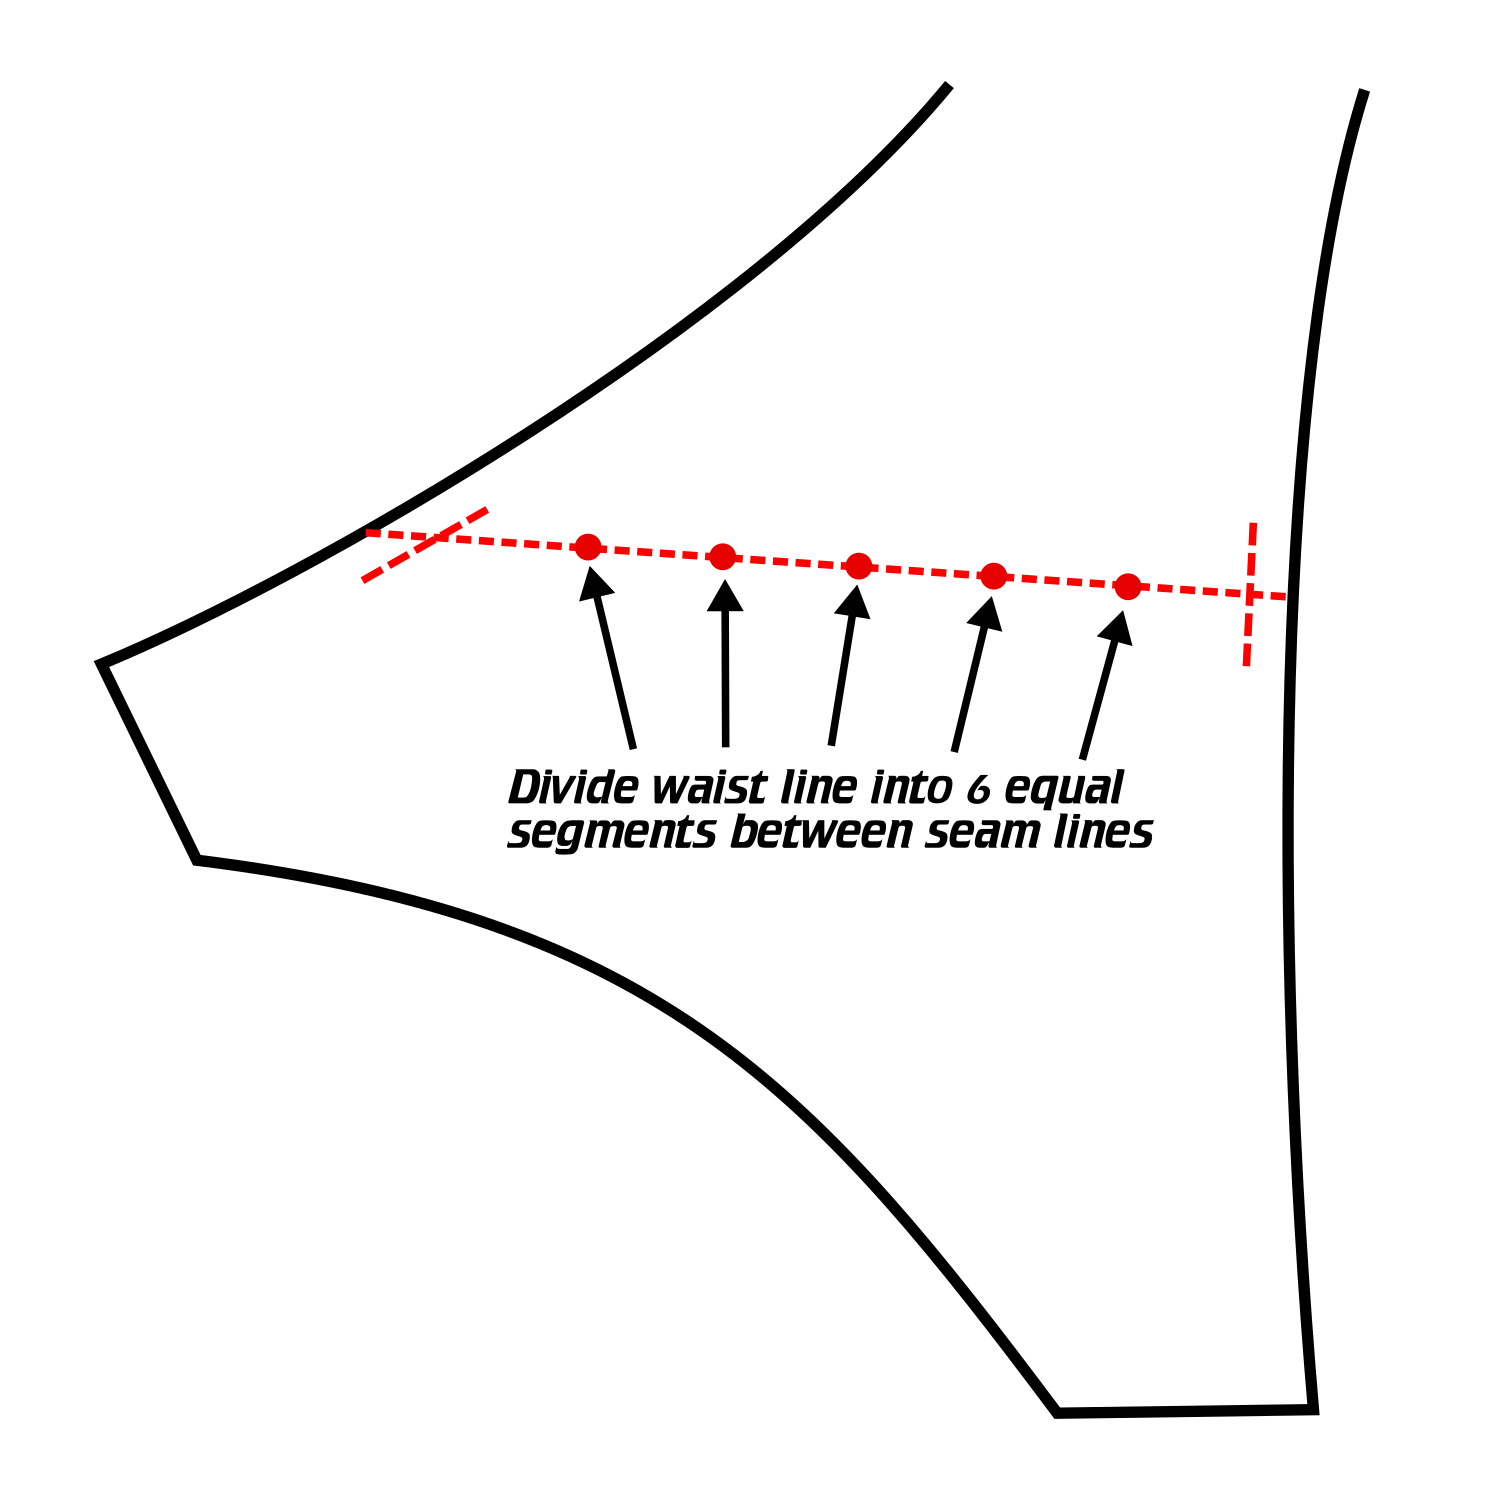
Using tailor’s chalk, lightly draw a horizontal line across the waist. This will be the top of the pleats.
Also mark the front and side front seam lines where they meet the waist.
(Note that the following diagrams are for illustrative purposes only and are NOT drawn to scale.)
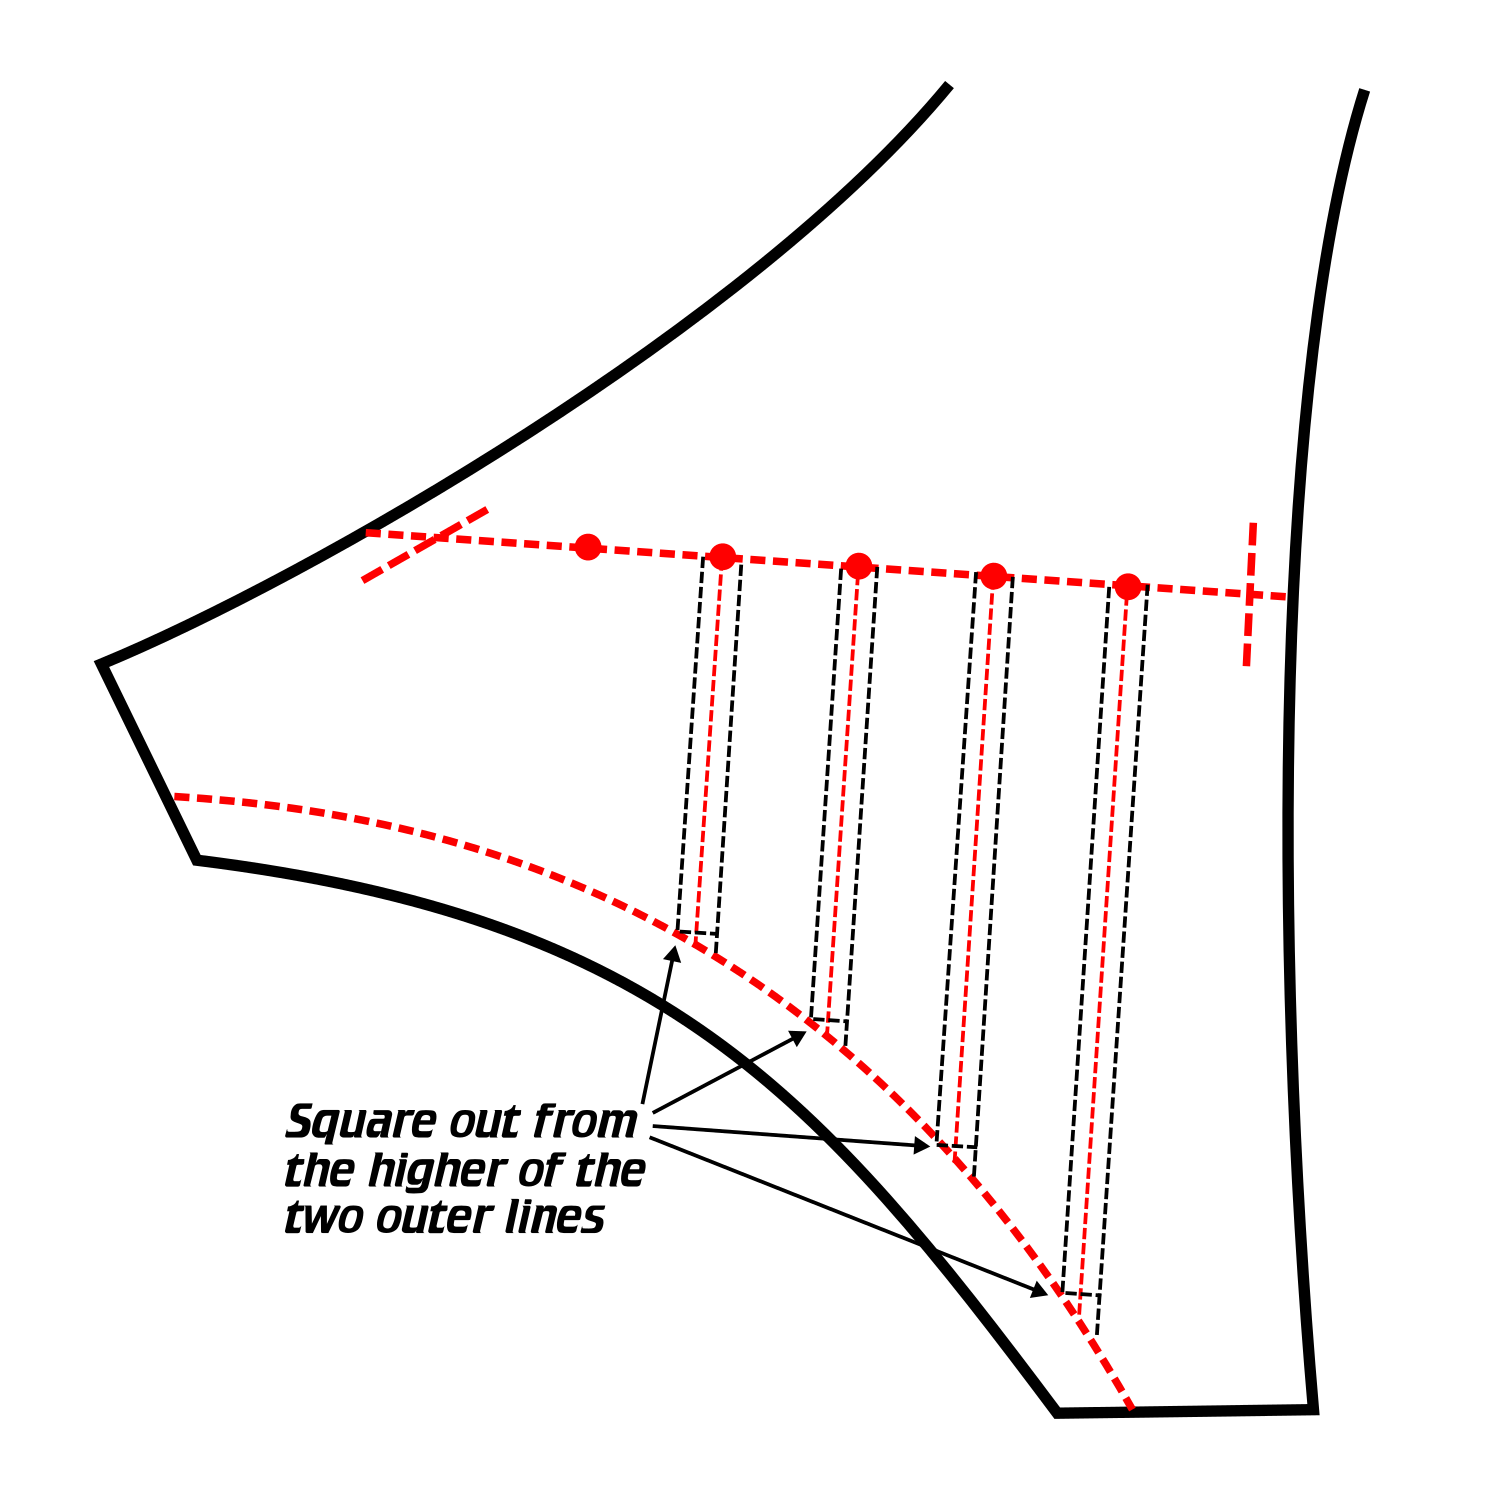
Divide the waist line into 6 equal segments between the outer seam lines.
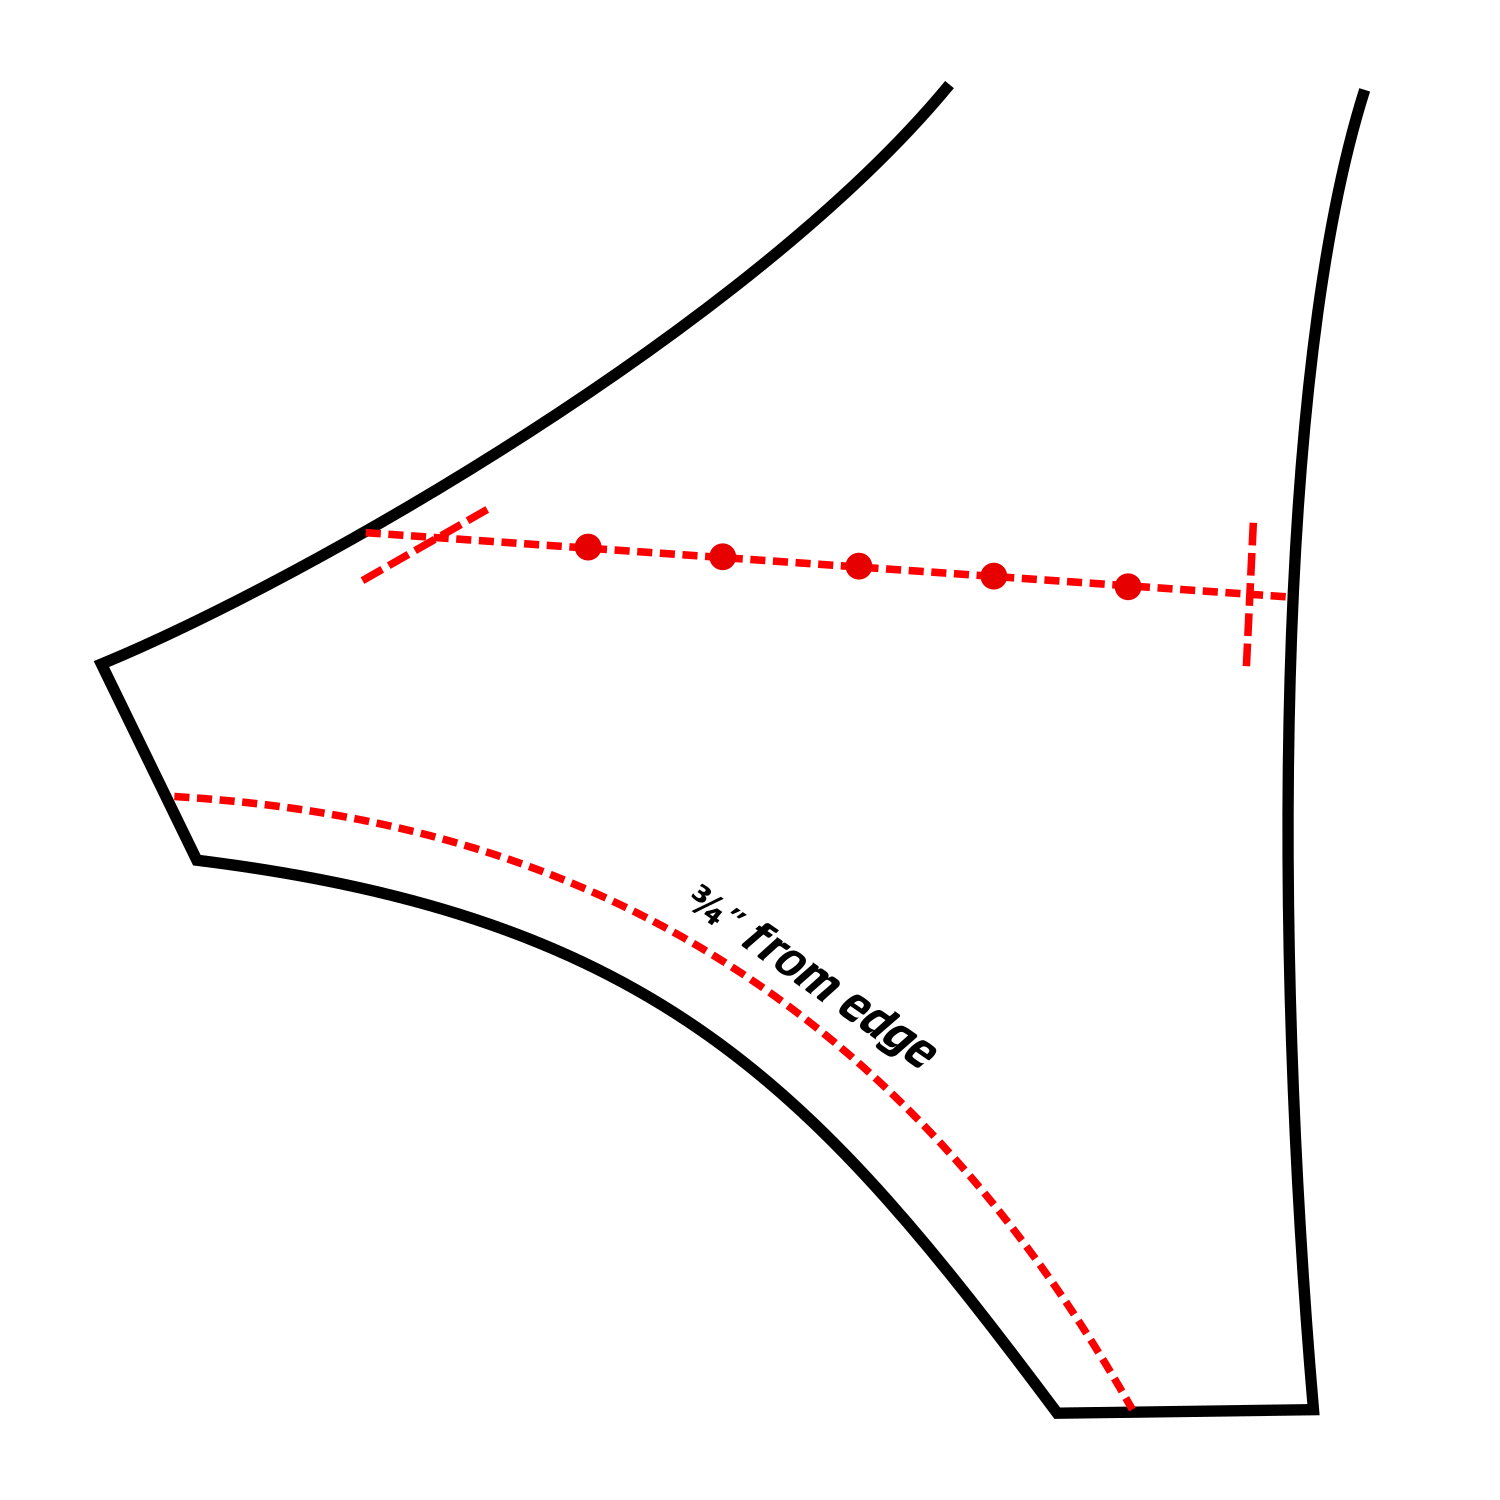
Lightly mark another guide ¾” from the lower edge.
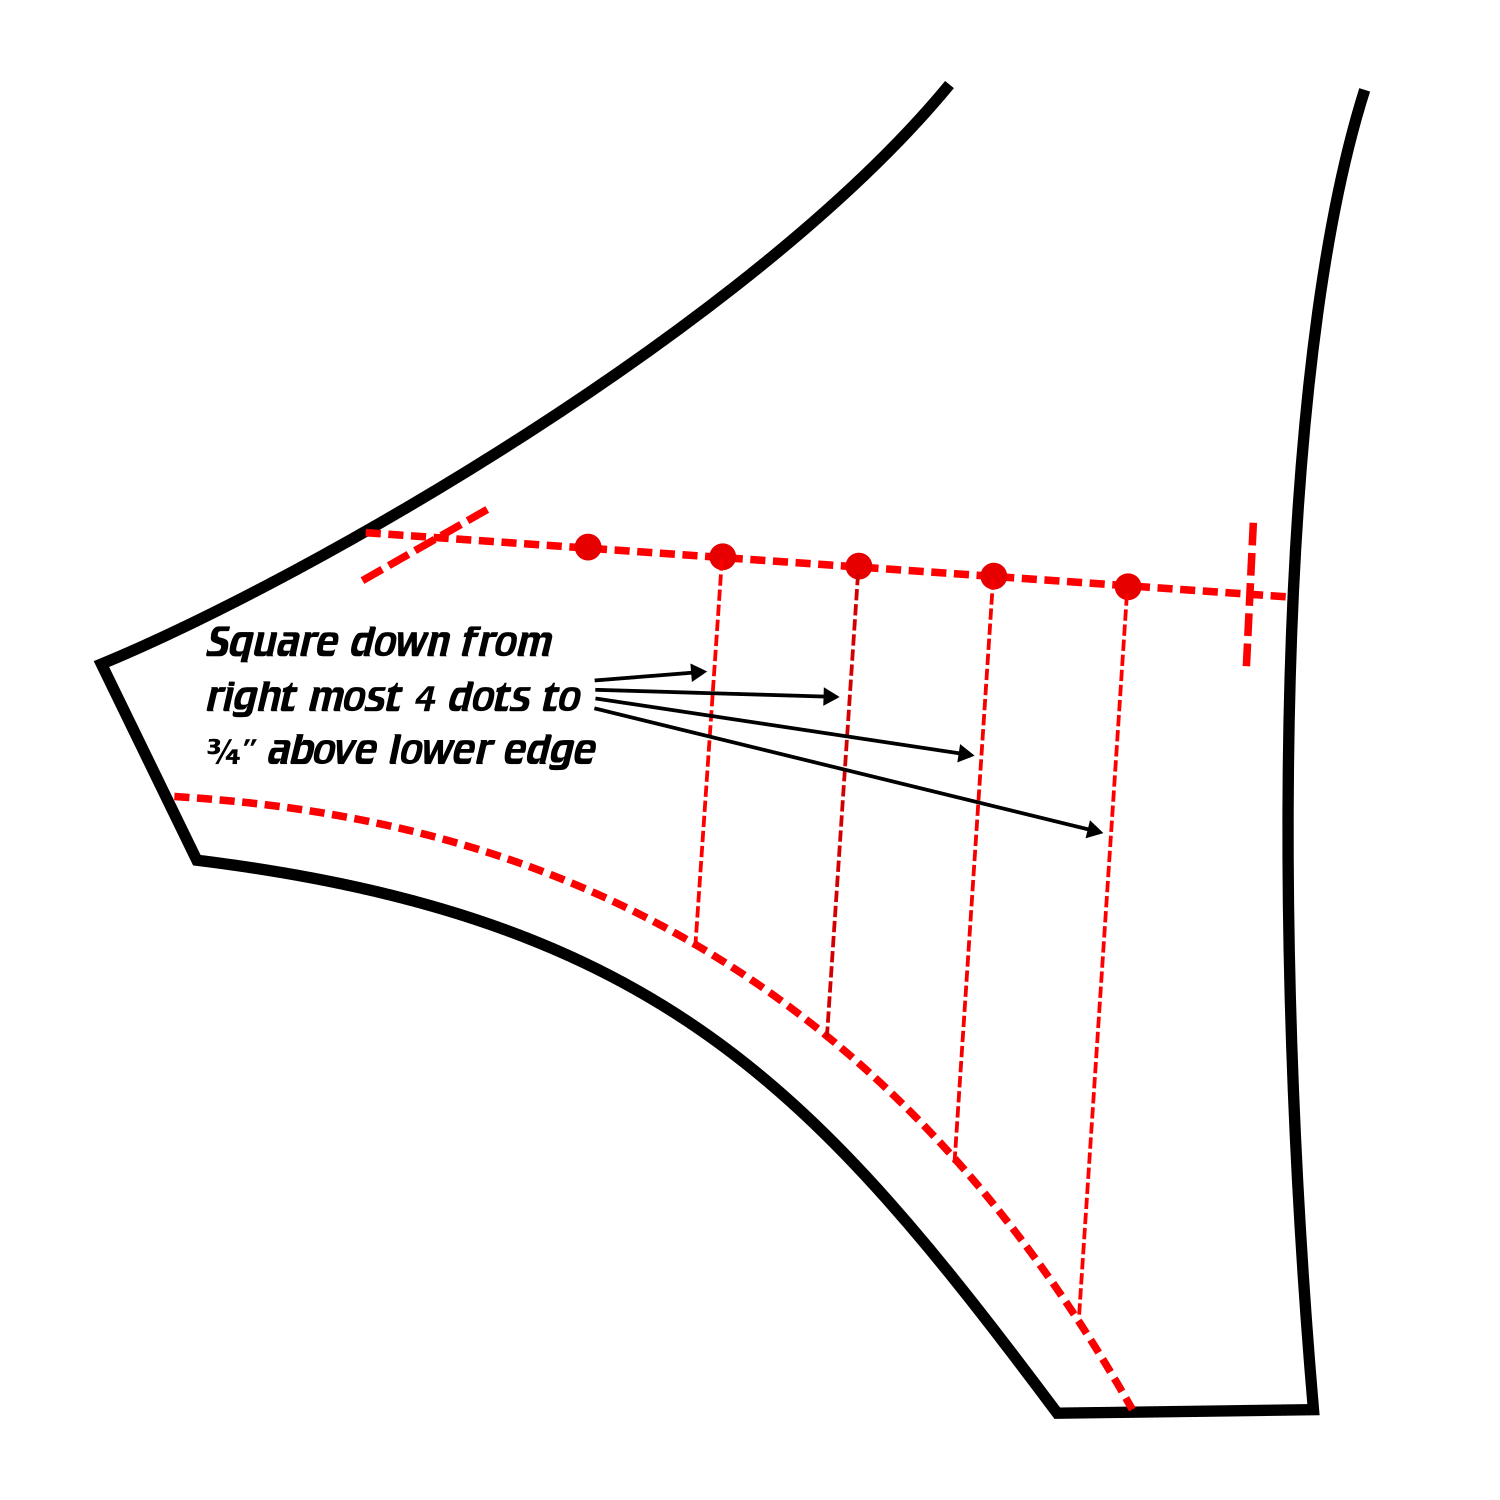
Square down from the rightmost 4 dots to ¾” above the lower edge.
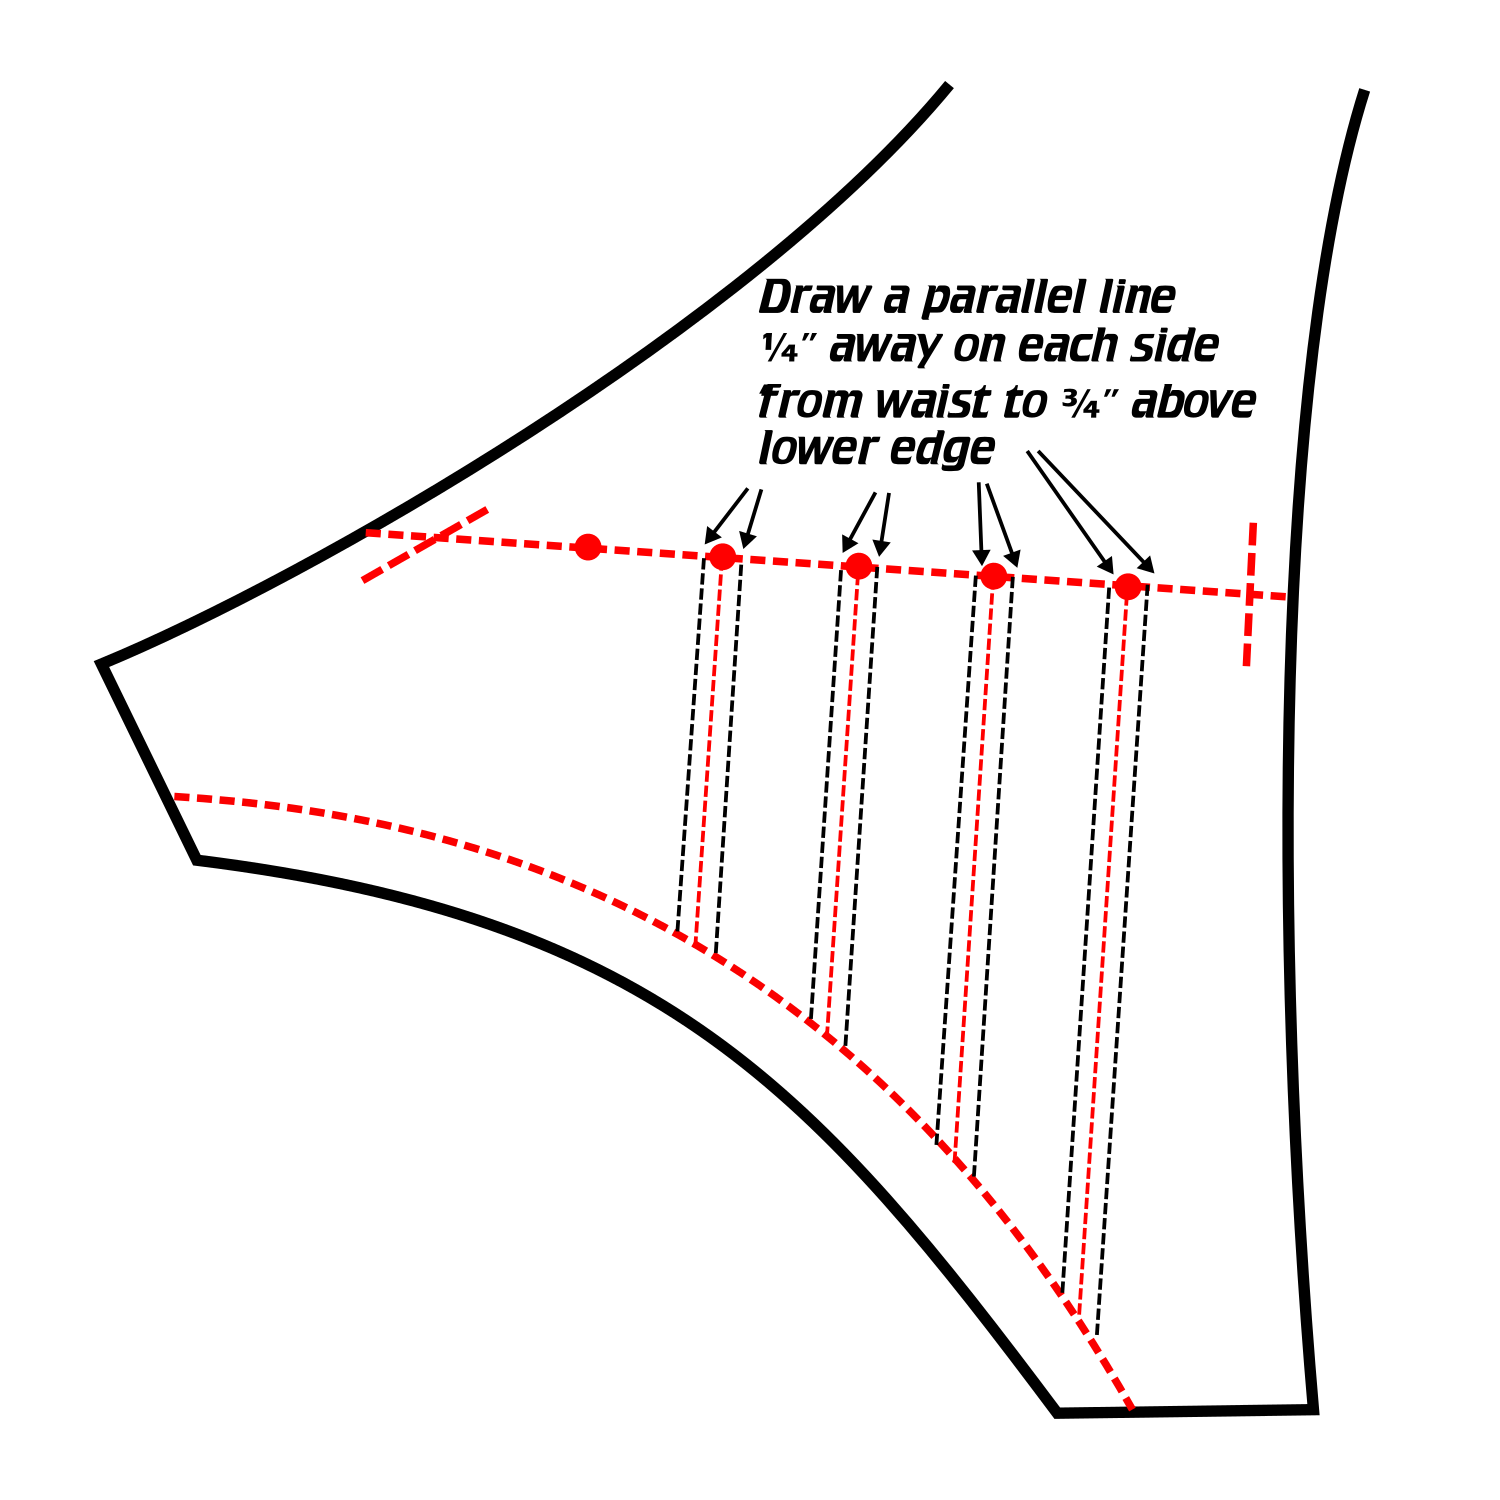
Draw a parallel line ¼” away on each side of the four previous lines, from the waist to ¾” above the lower edge.
Square out from where the higher of the two outer lines meets the guide ¾” from the lower edge.
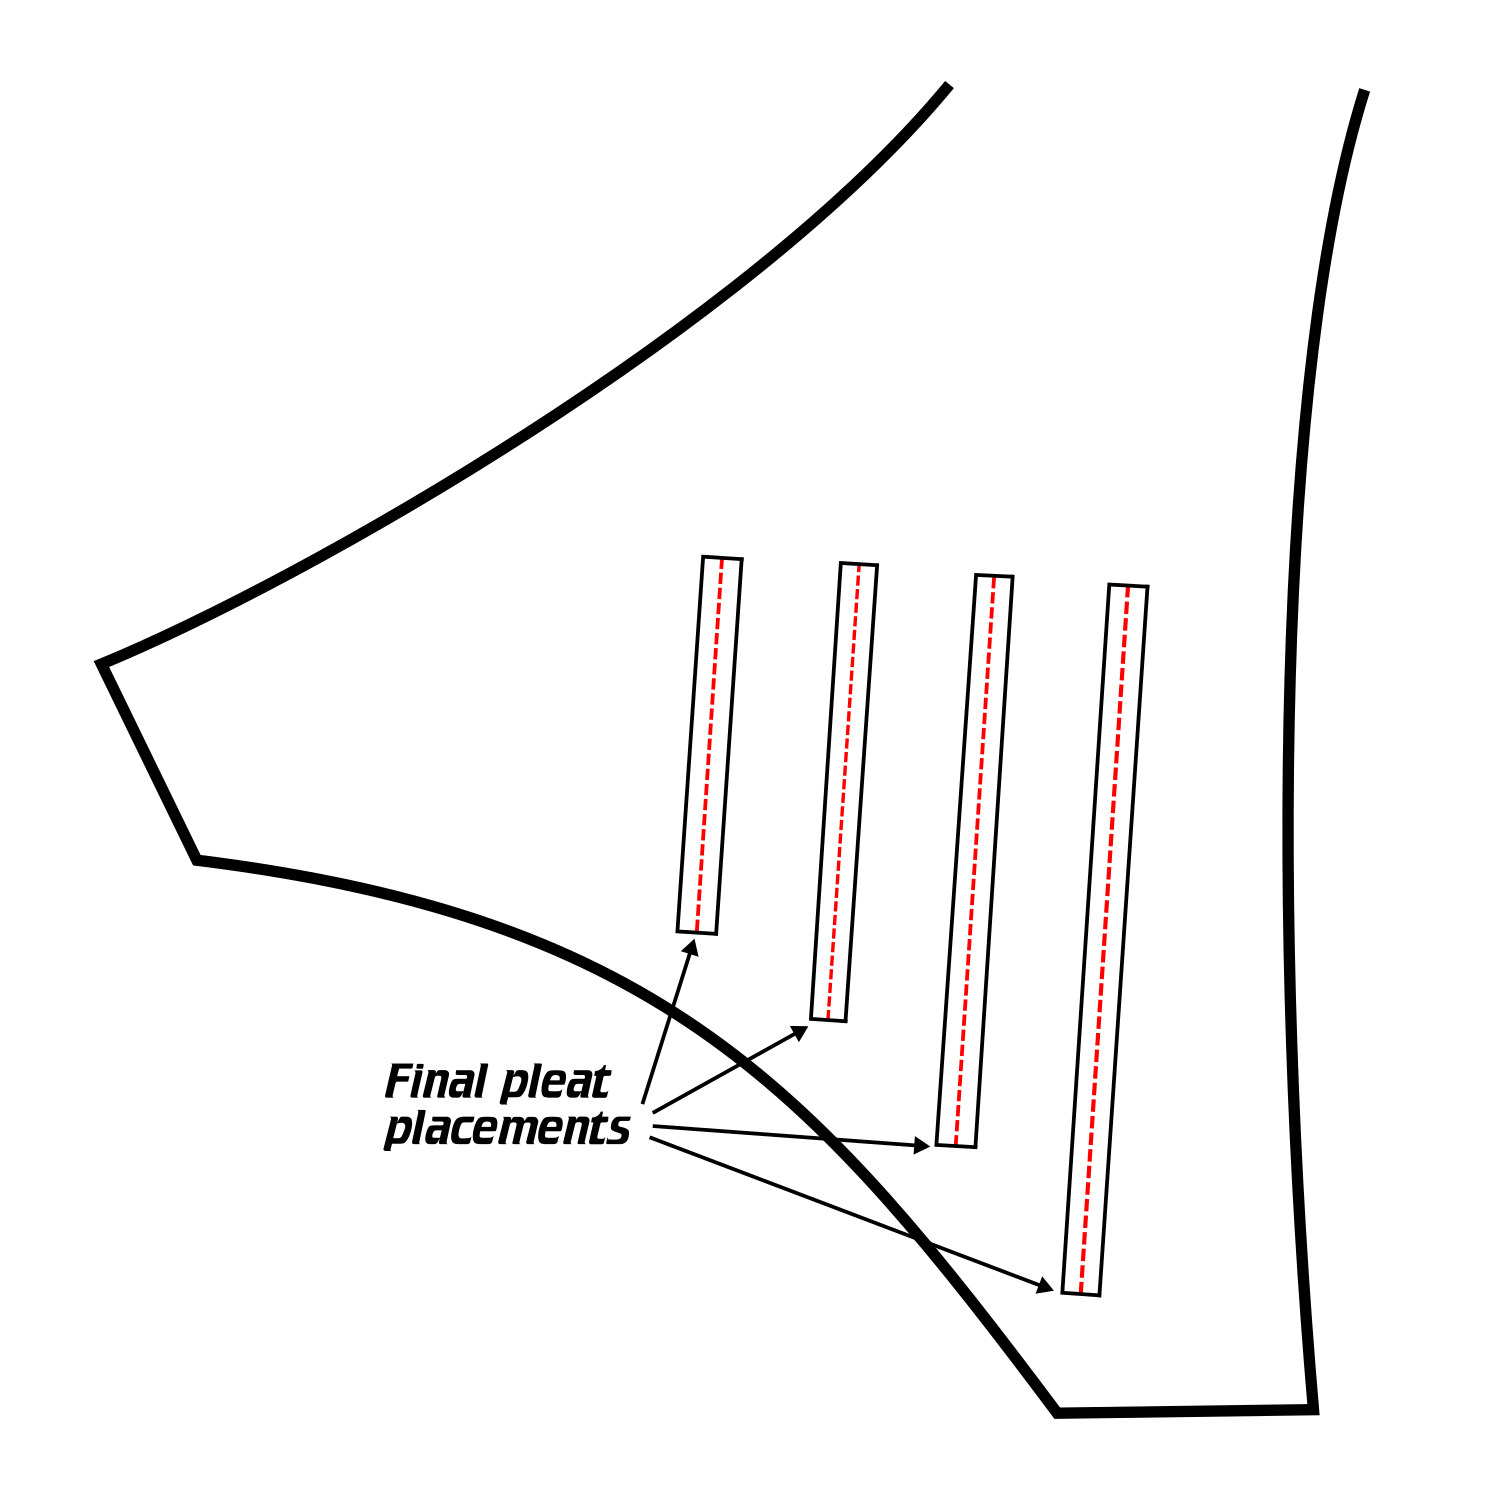
The “boxes” you just drew are now the final pleat placements.
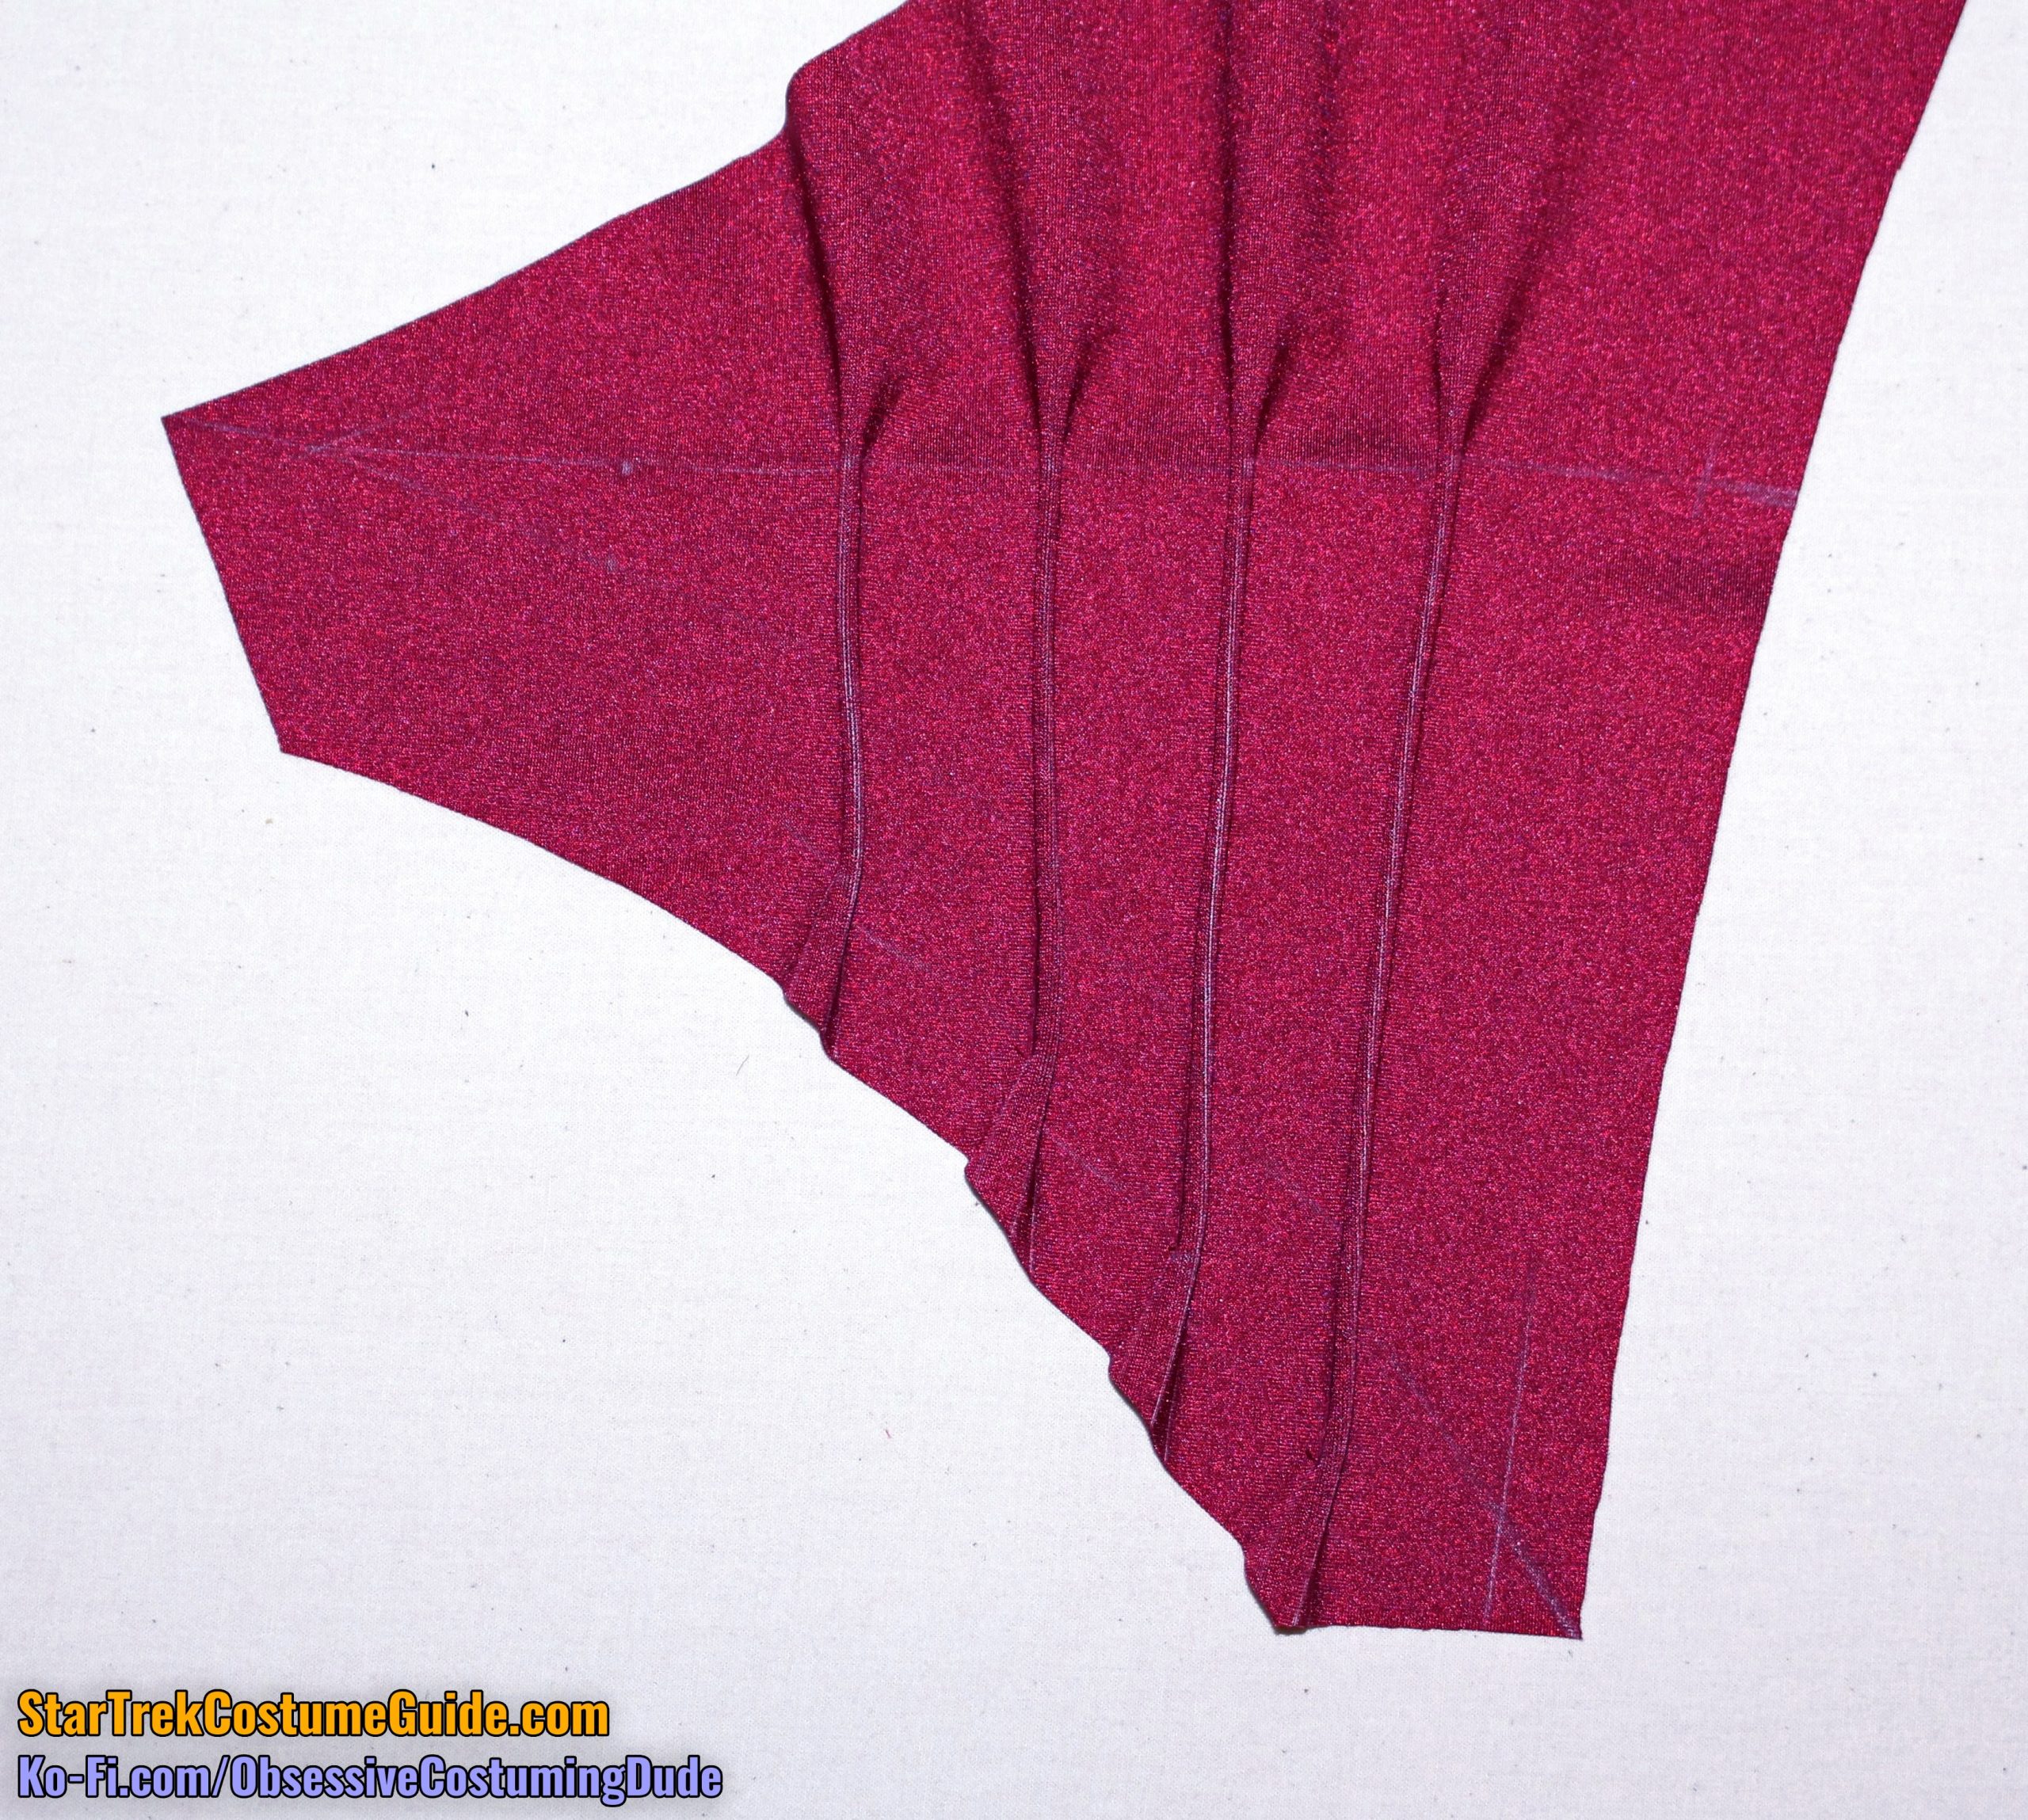
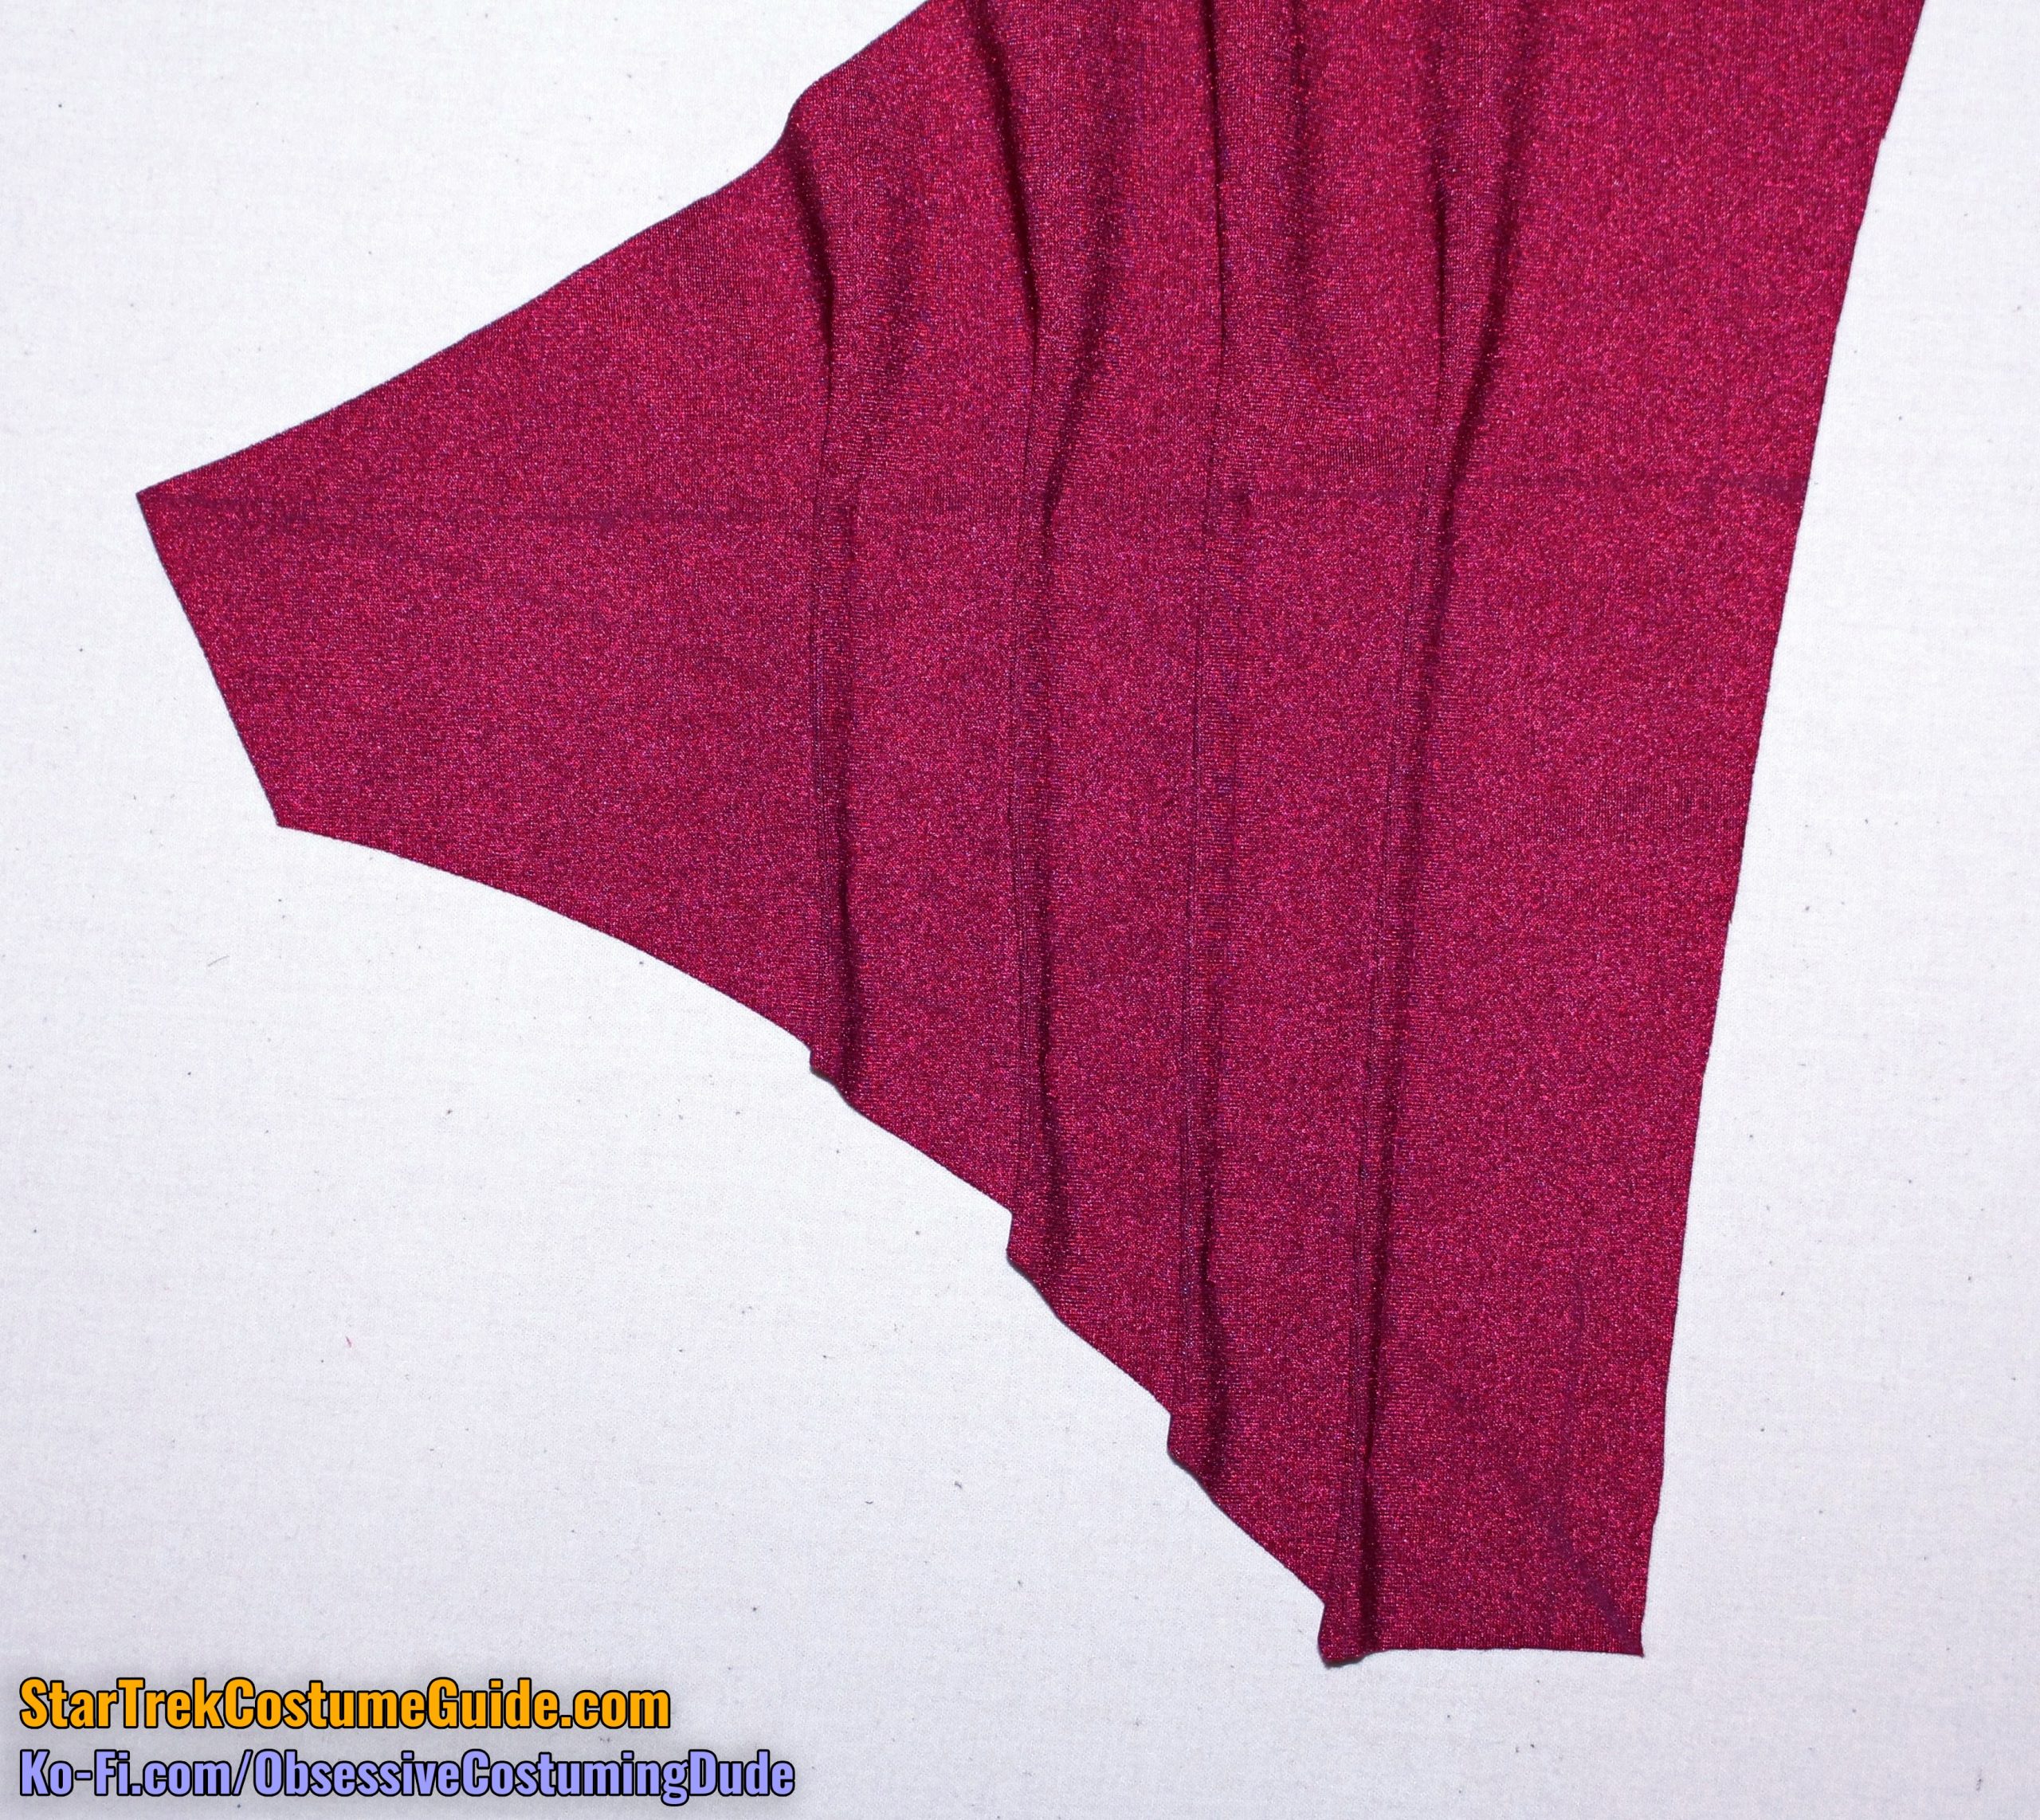
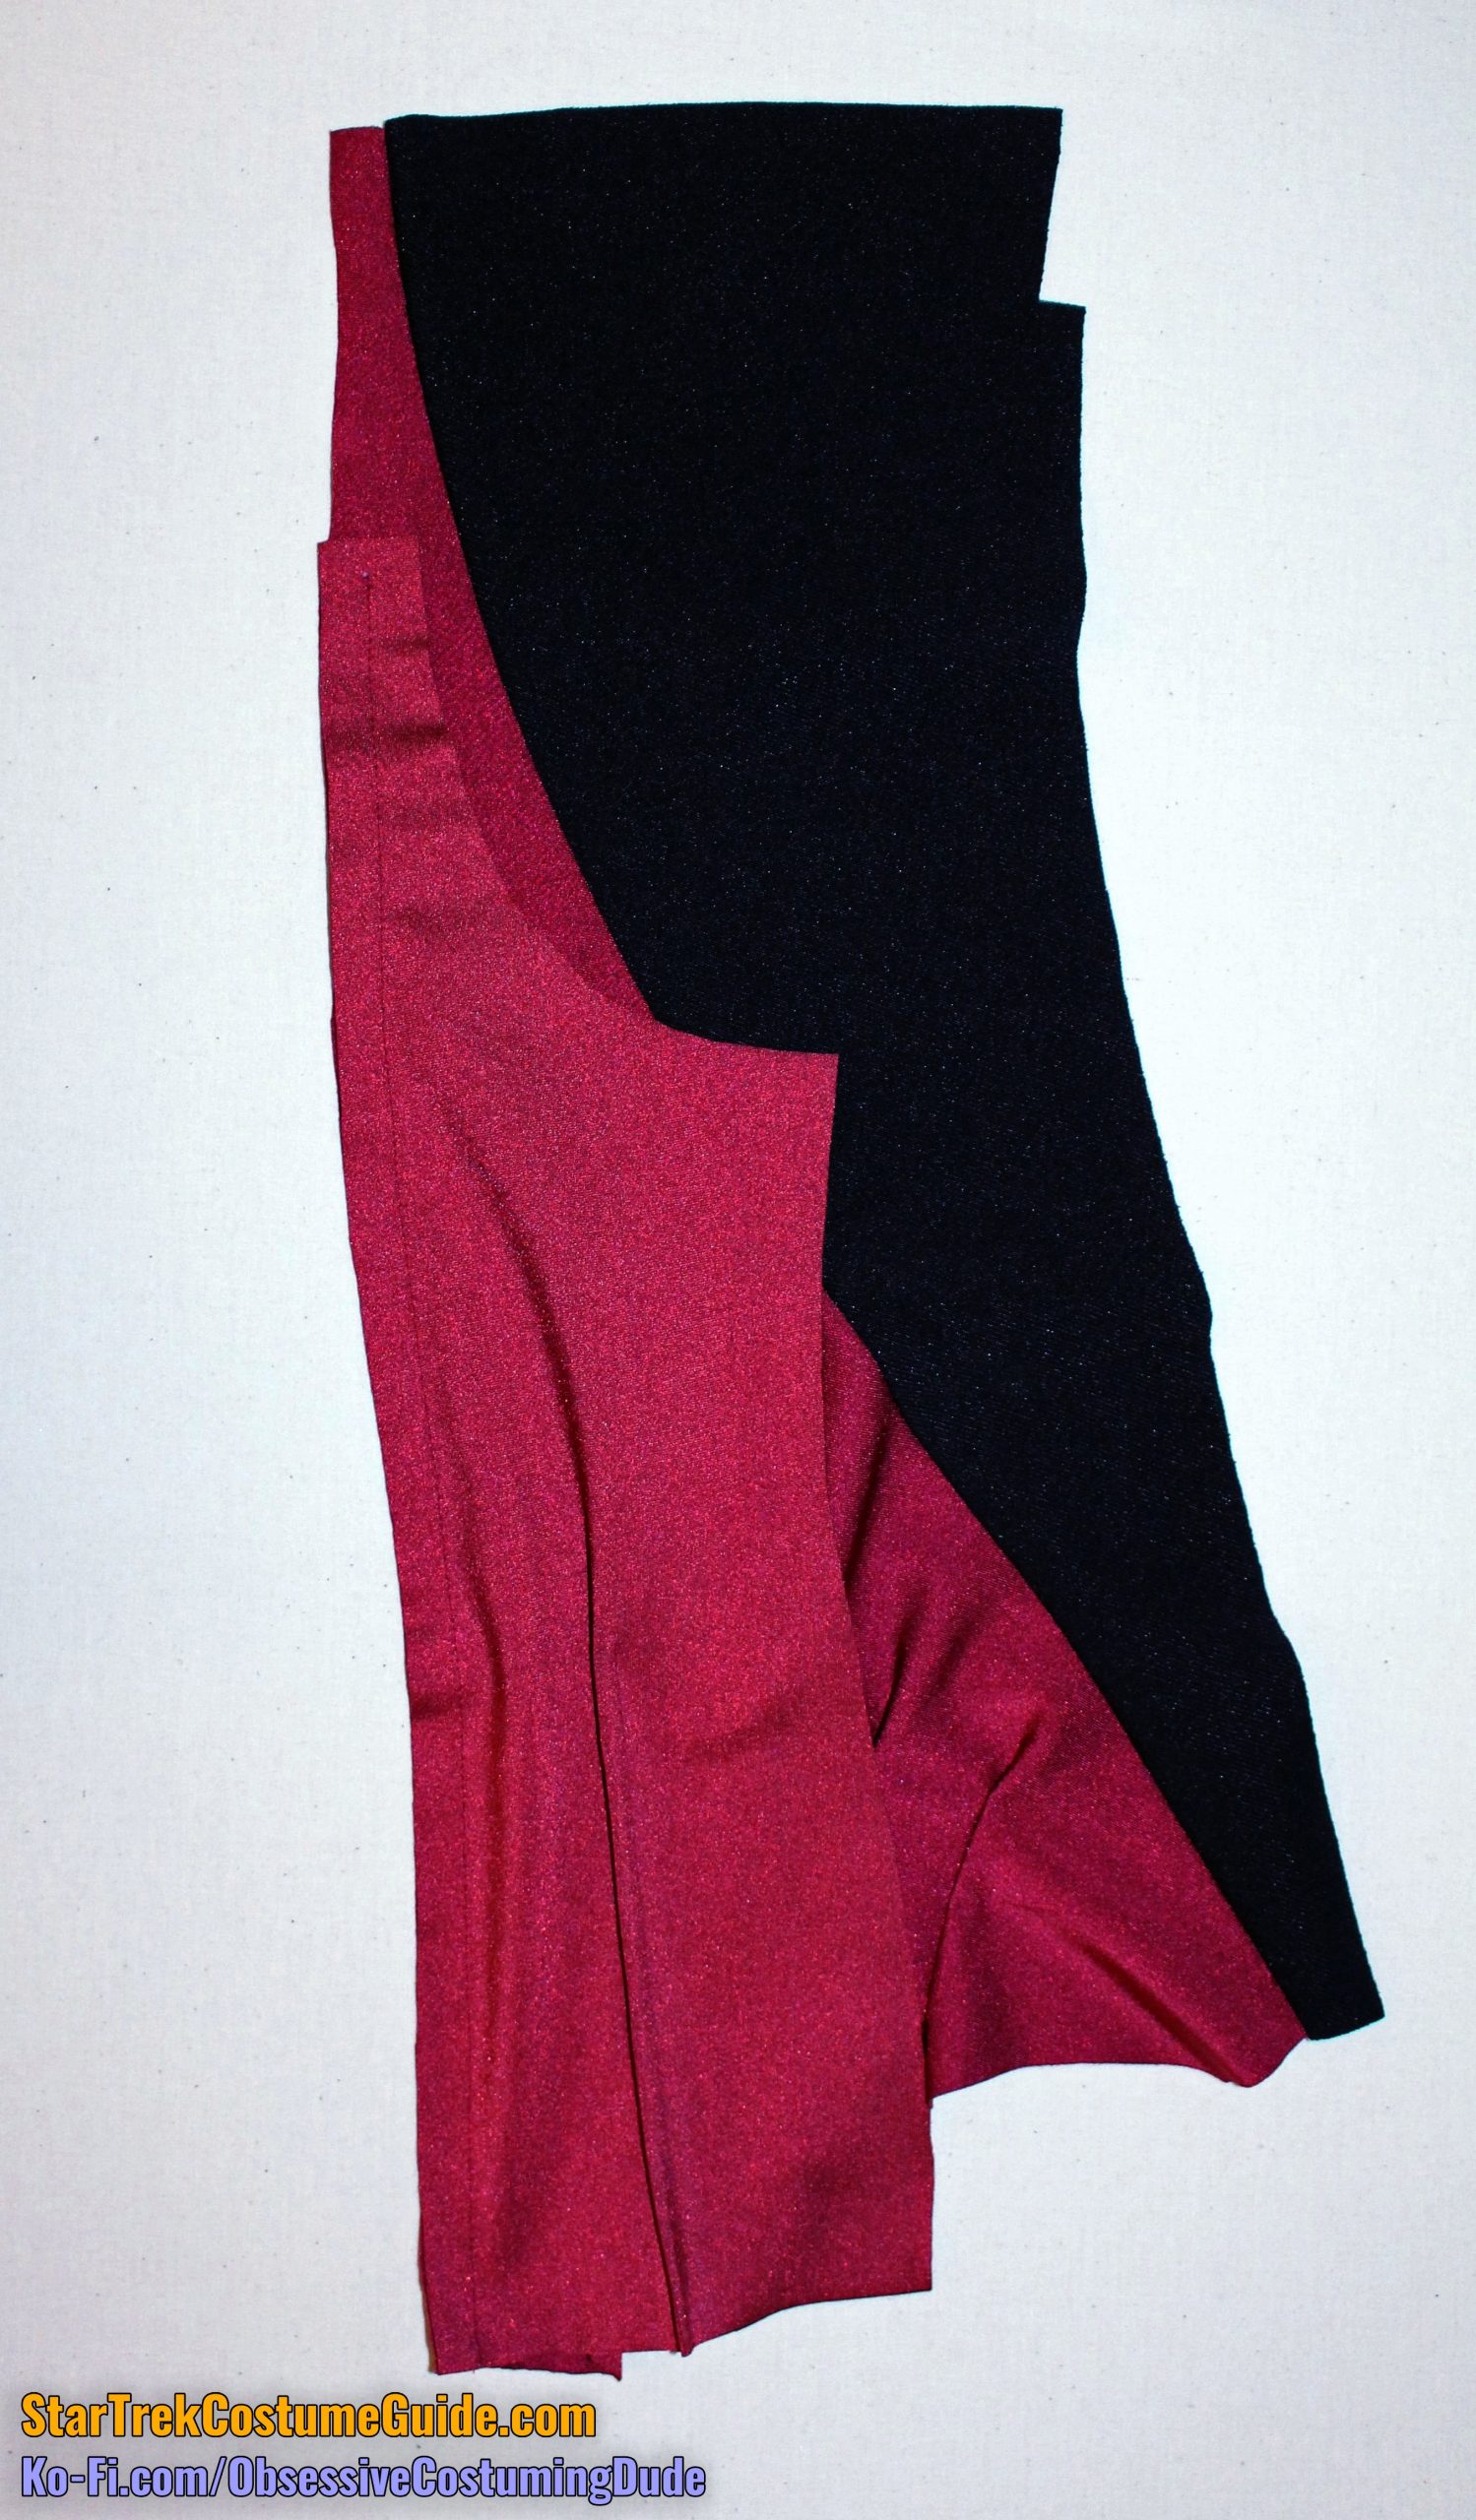
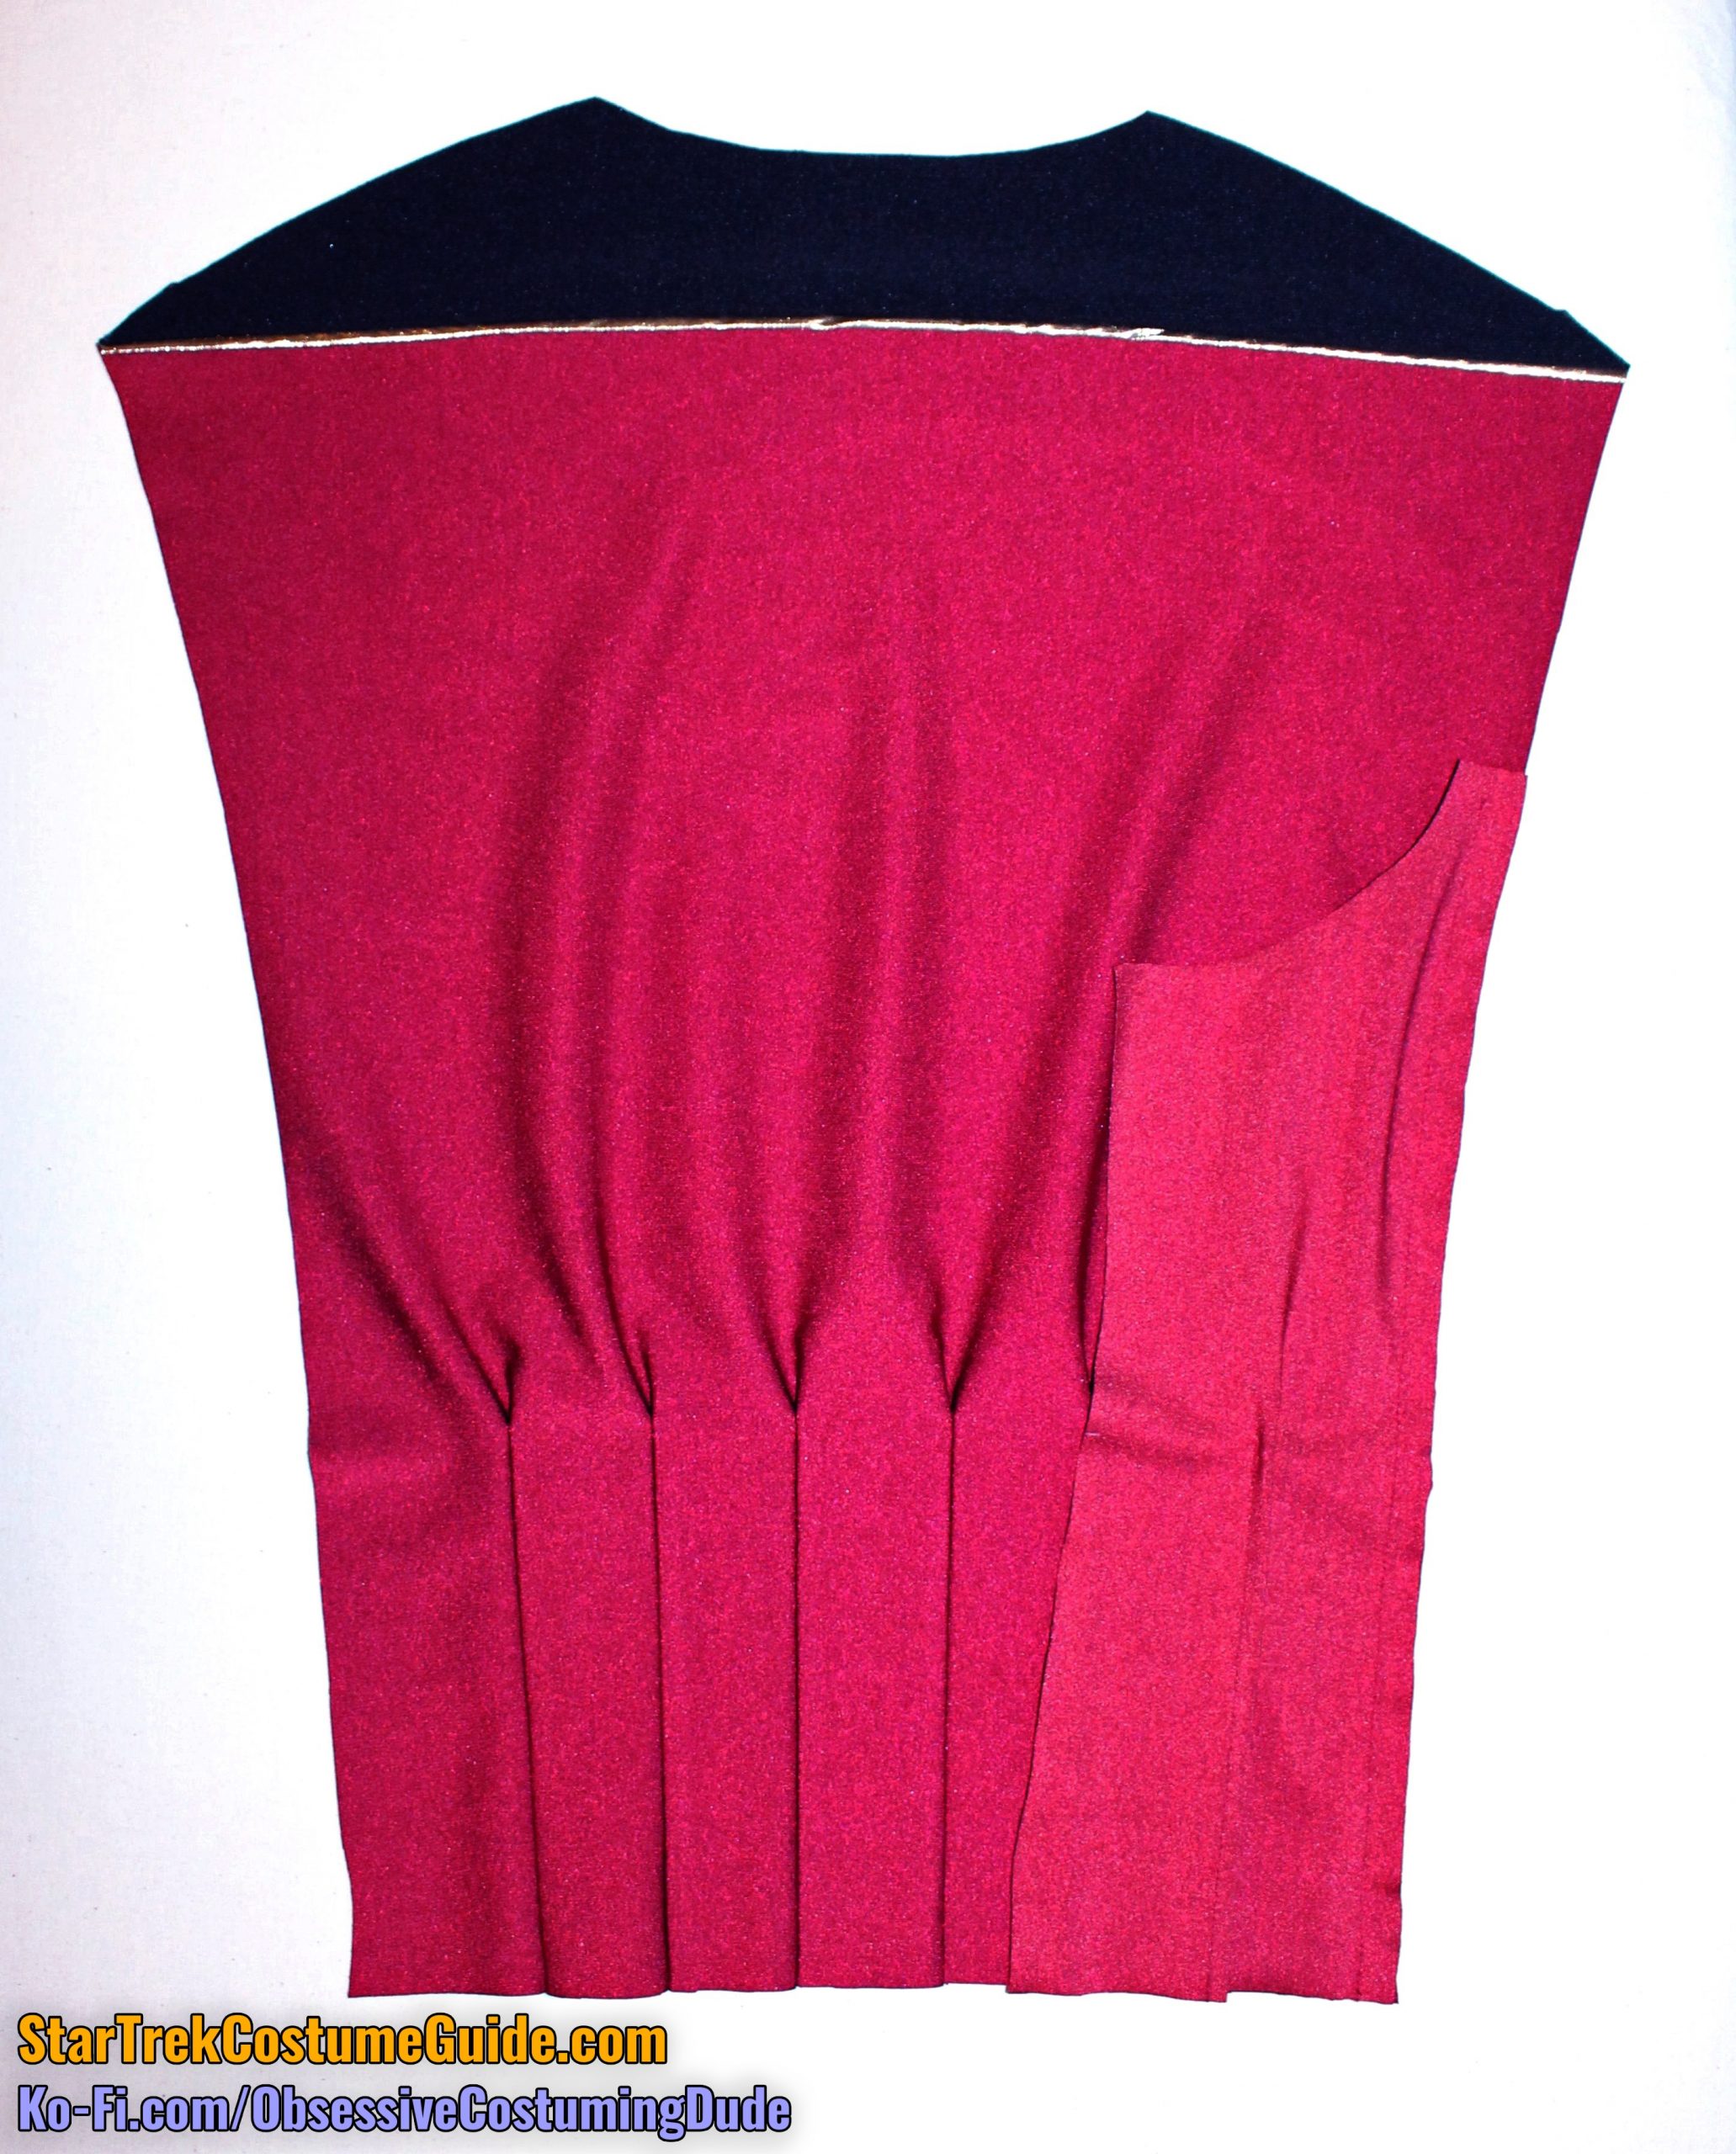
Sew the pleats closed, reinforcing several times at the ends.
NOTE: The screen-used Admiral Jameson uniform I examined was mostly sewn with black thread, but I prefer to sew with thread that closely matches the color of the fabric. Doing so is particularly advantageous here, in the event that the uppermost stitches at the tops of the pleats ever loosen. Better some inconspicuous matching “red” than black!
Press the pleats toward the center front.
OPTIONAL: Stitch across the lower hem line, 1 ¾” from the lower edge. This was done on the screen-used Admiral Jameson uniform I examined, and it will be a useful guide when hemming the jacket.
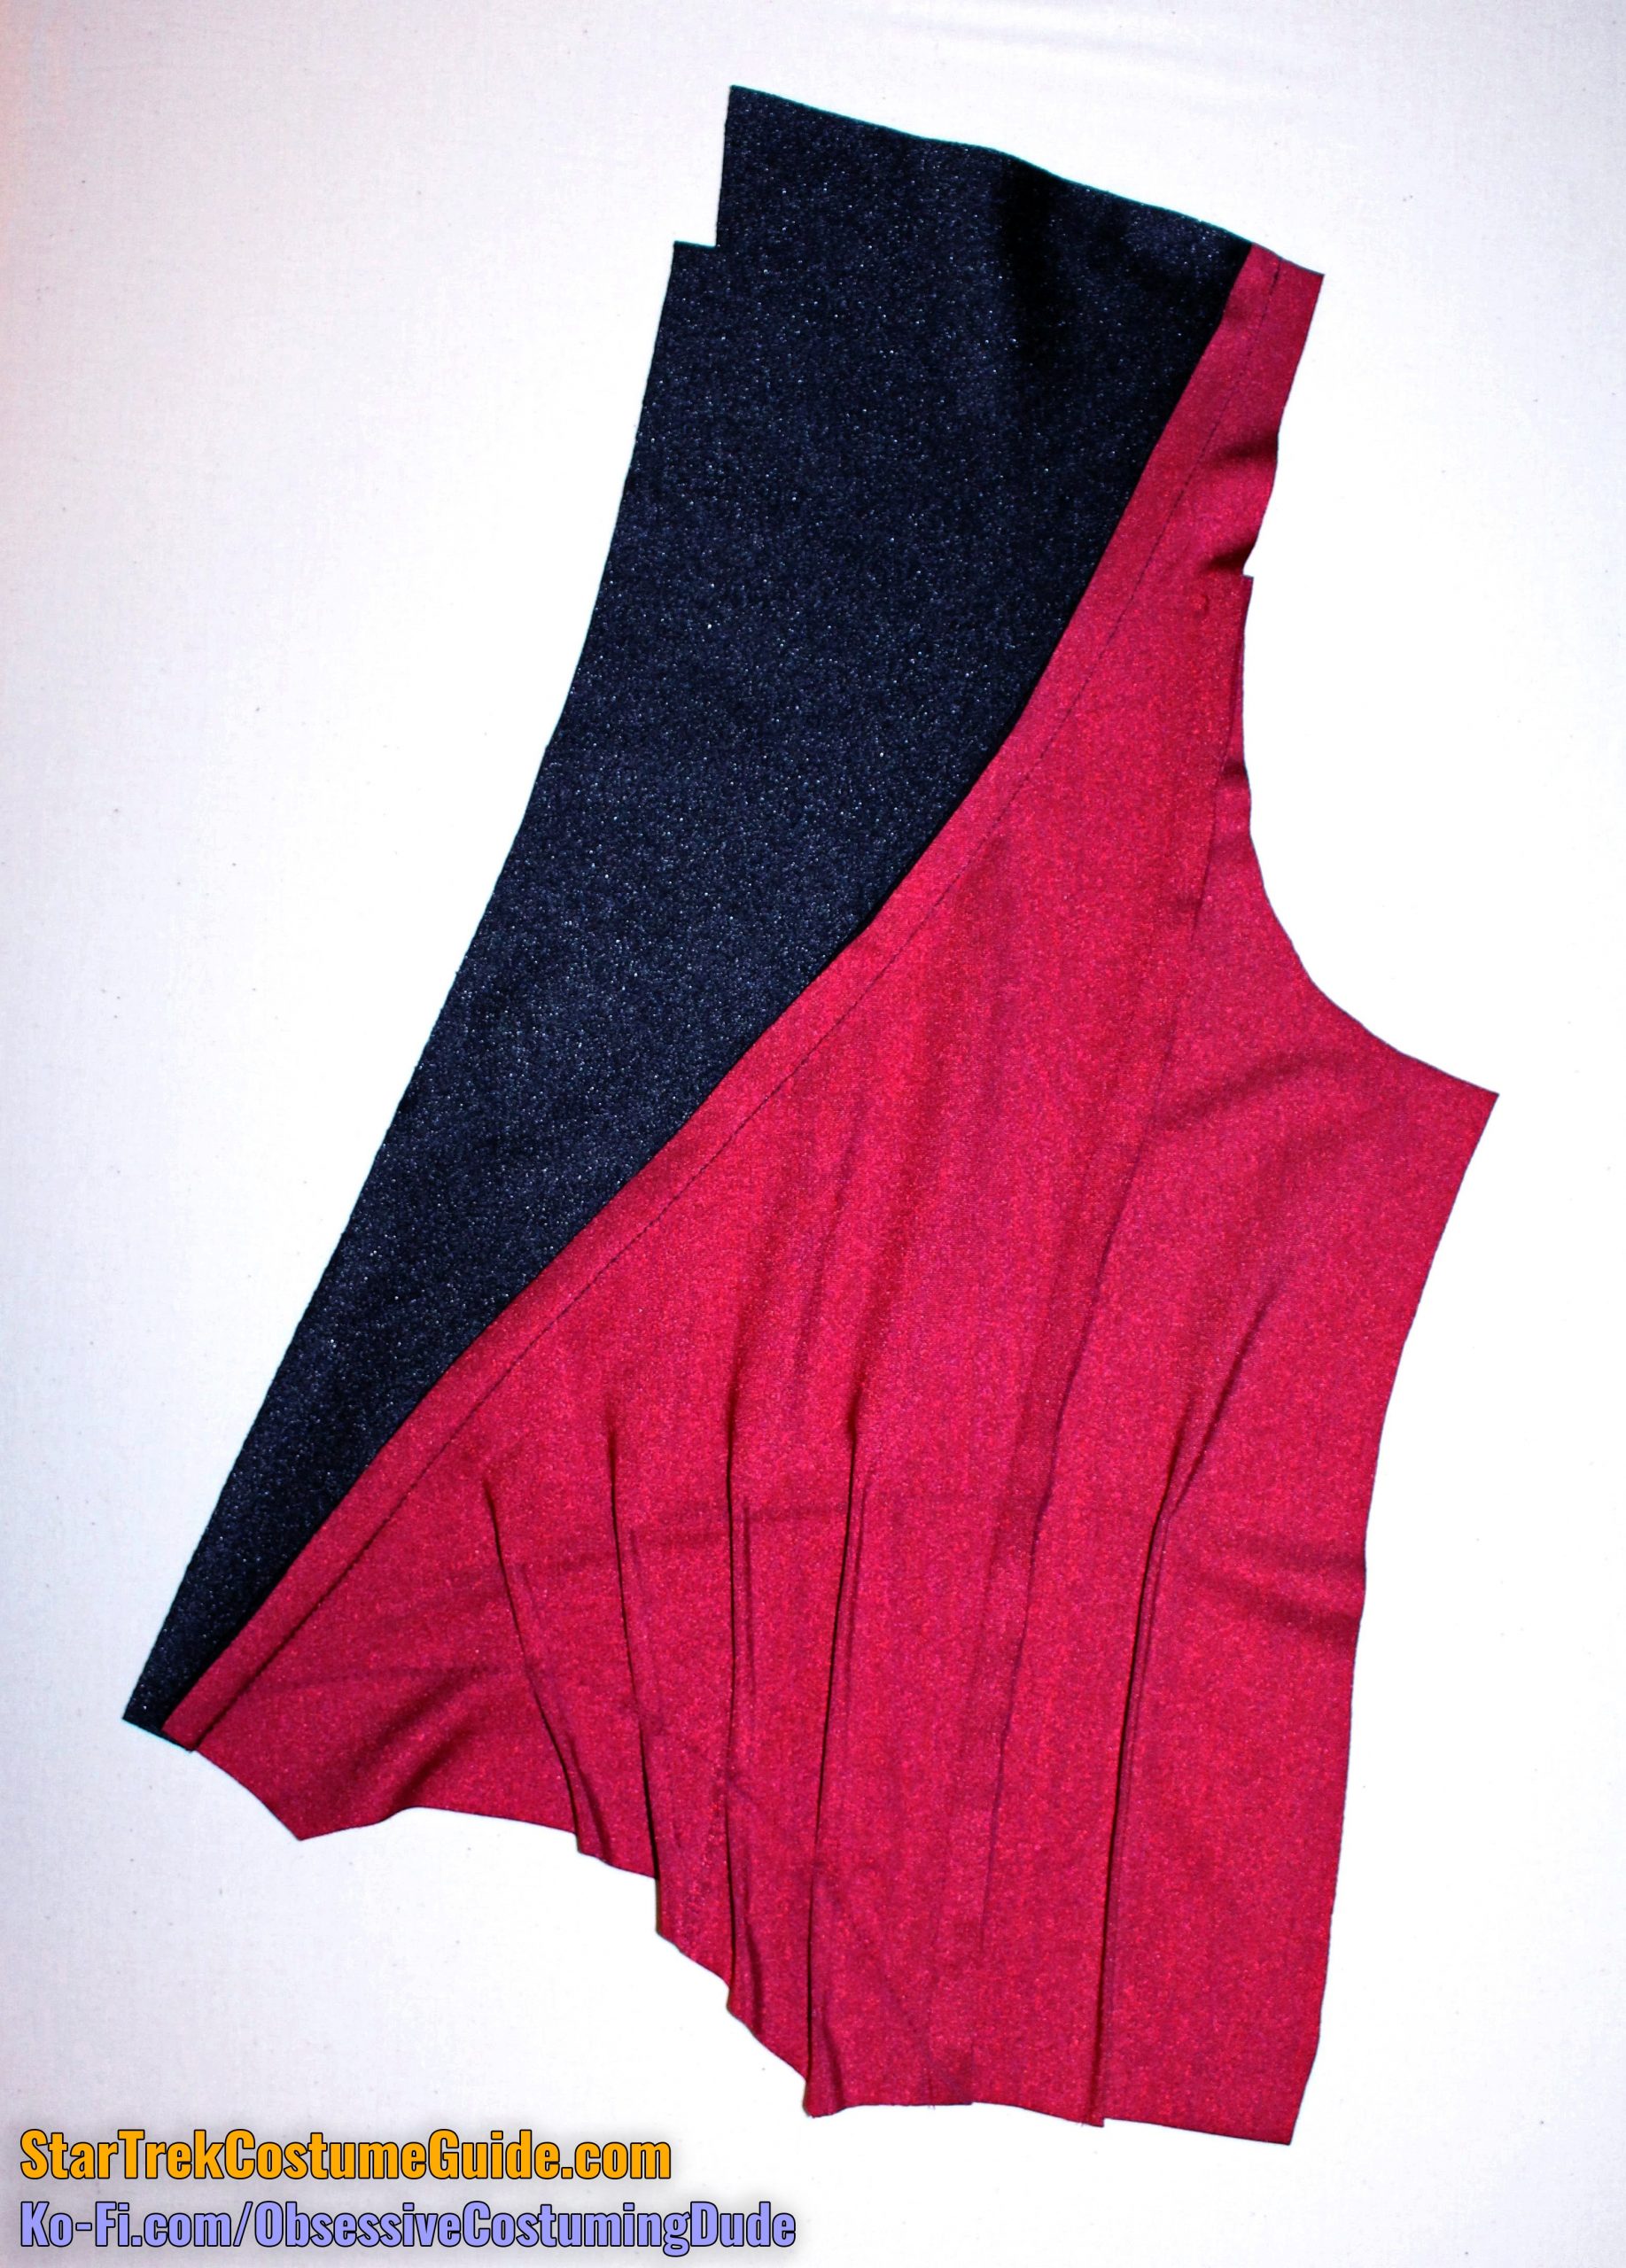
Positioning the pleats on the side panels (pieces G and I) is a simple matter, compared to those on the lower right front.
The lengthen/shorten lines on the printed pattern also coincide with the top of the pleats.
As you may recall, the side pleats on the screen-used Admiral Jameson uniform I examined were a bit off-center, but I believe this may have been due to fitting alterations rather than intentional design.
Nevertheless, you can laterally position the pleats wherever you like. (I prefer mine centered.)
Simply draw a vertical line from the lower edge up to the lengthen/shorten lines where you want the pleat to be positioned.
Then draw a parallel vertical line on each side, ¼” away from the first one.
Sew the pleat closed, reinforcing several times at the top edge.
(Note that unlike the lower right front pleats, the rest of the jacket pleats all extend all the way down to the lower edge of the fabric.)
Press the side front pleats toward the front, and the side back pleats toward the back.
Repeat for both sides.
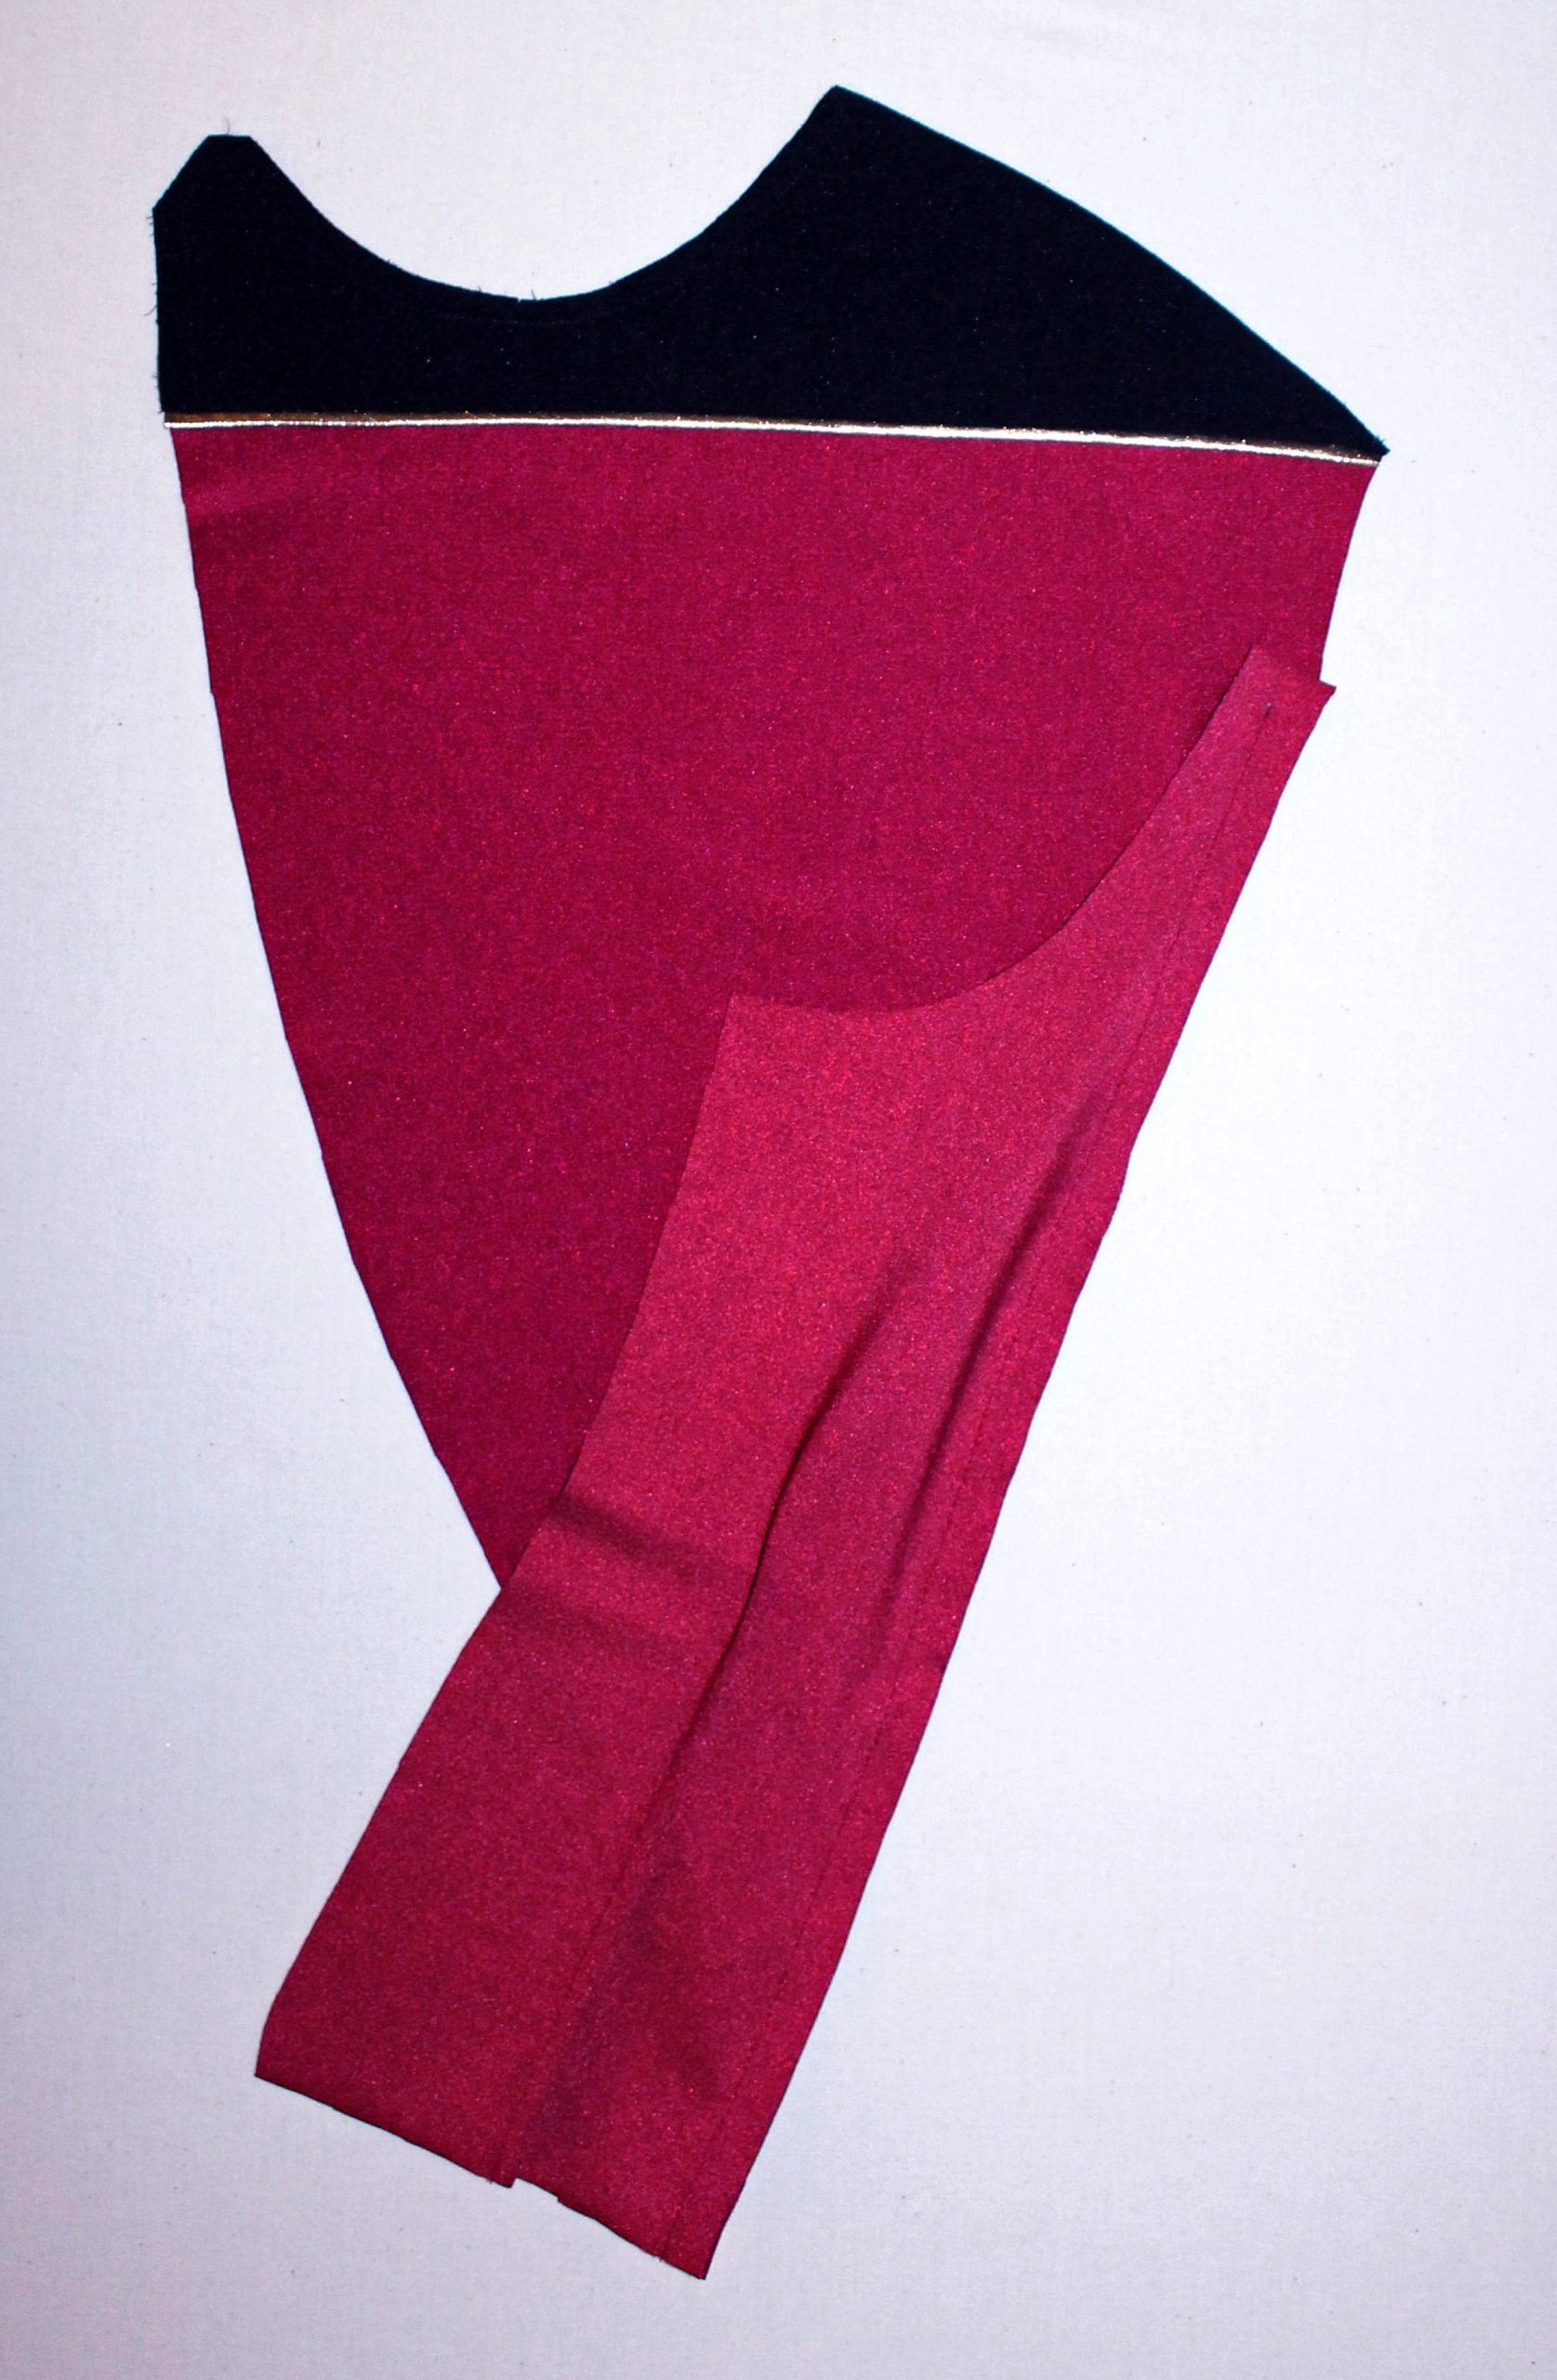
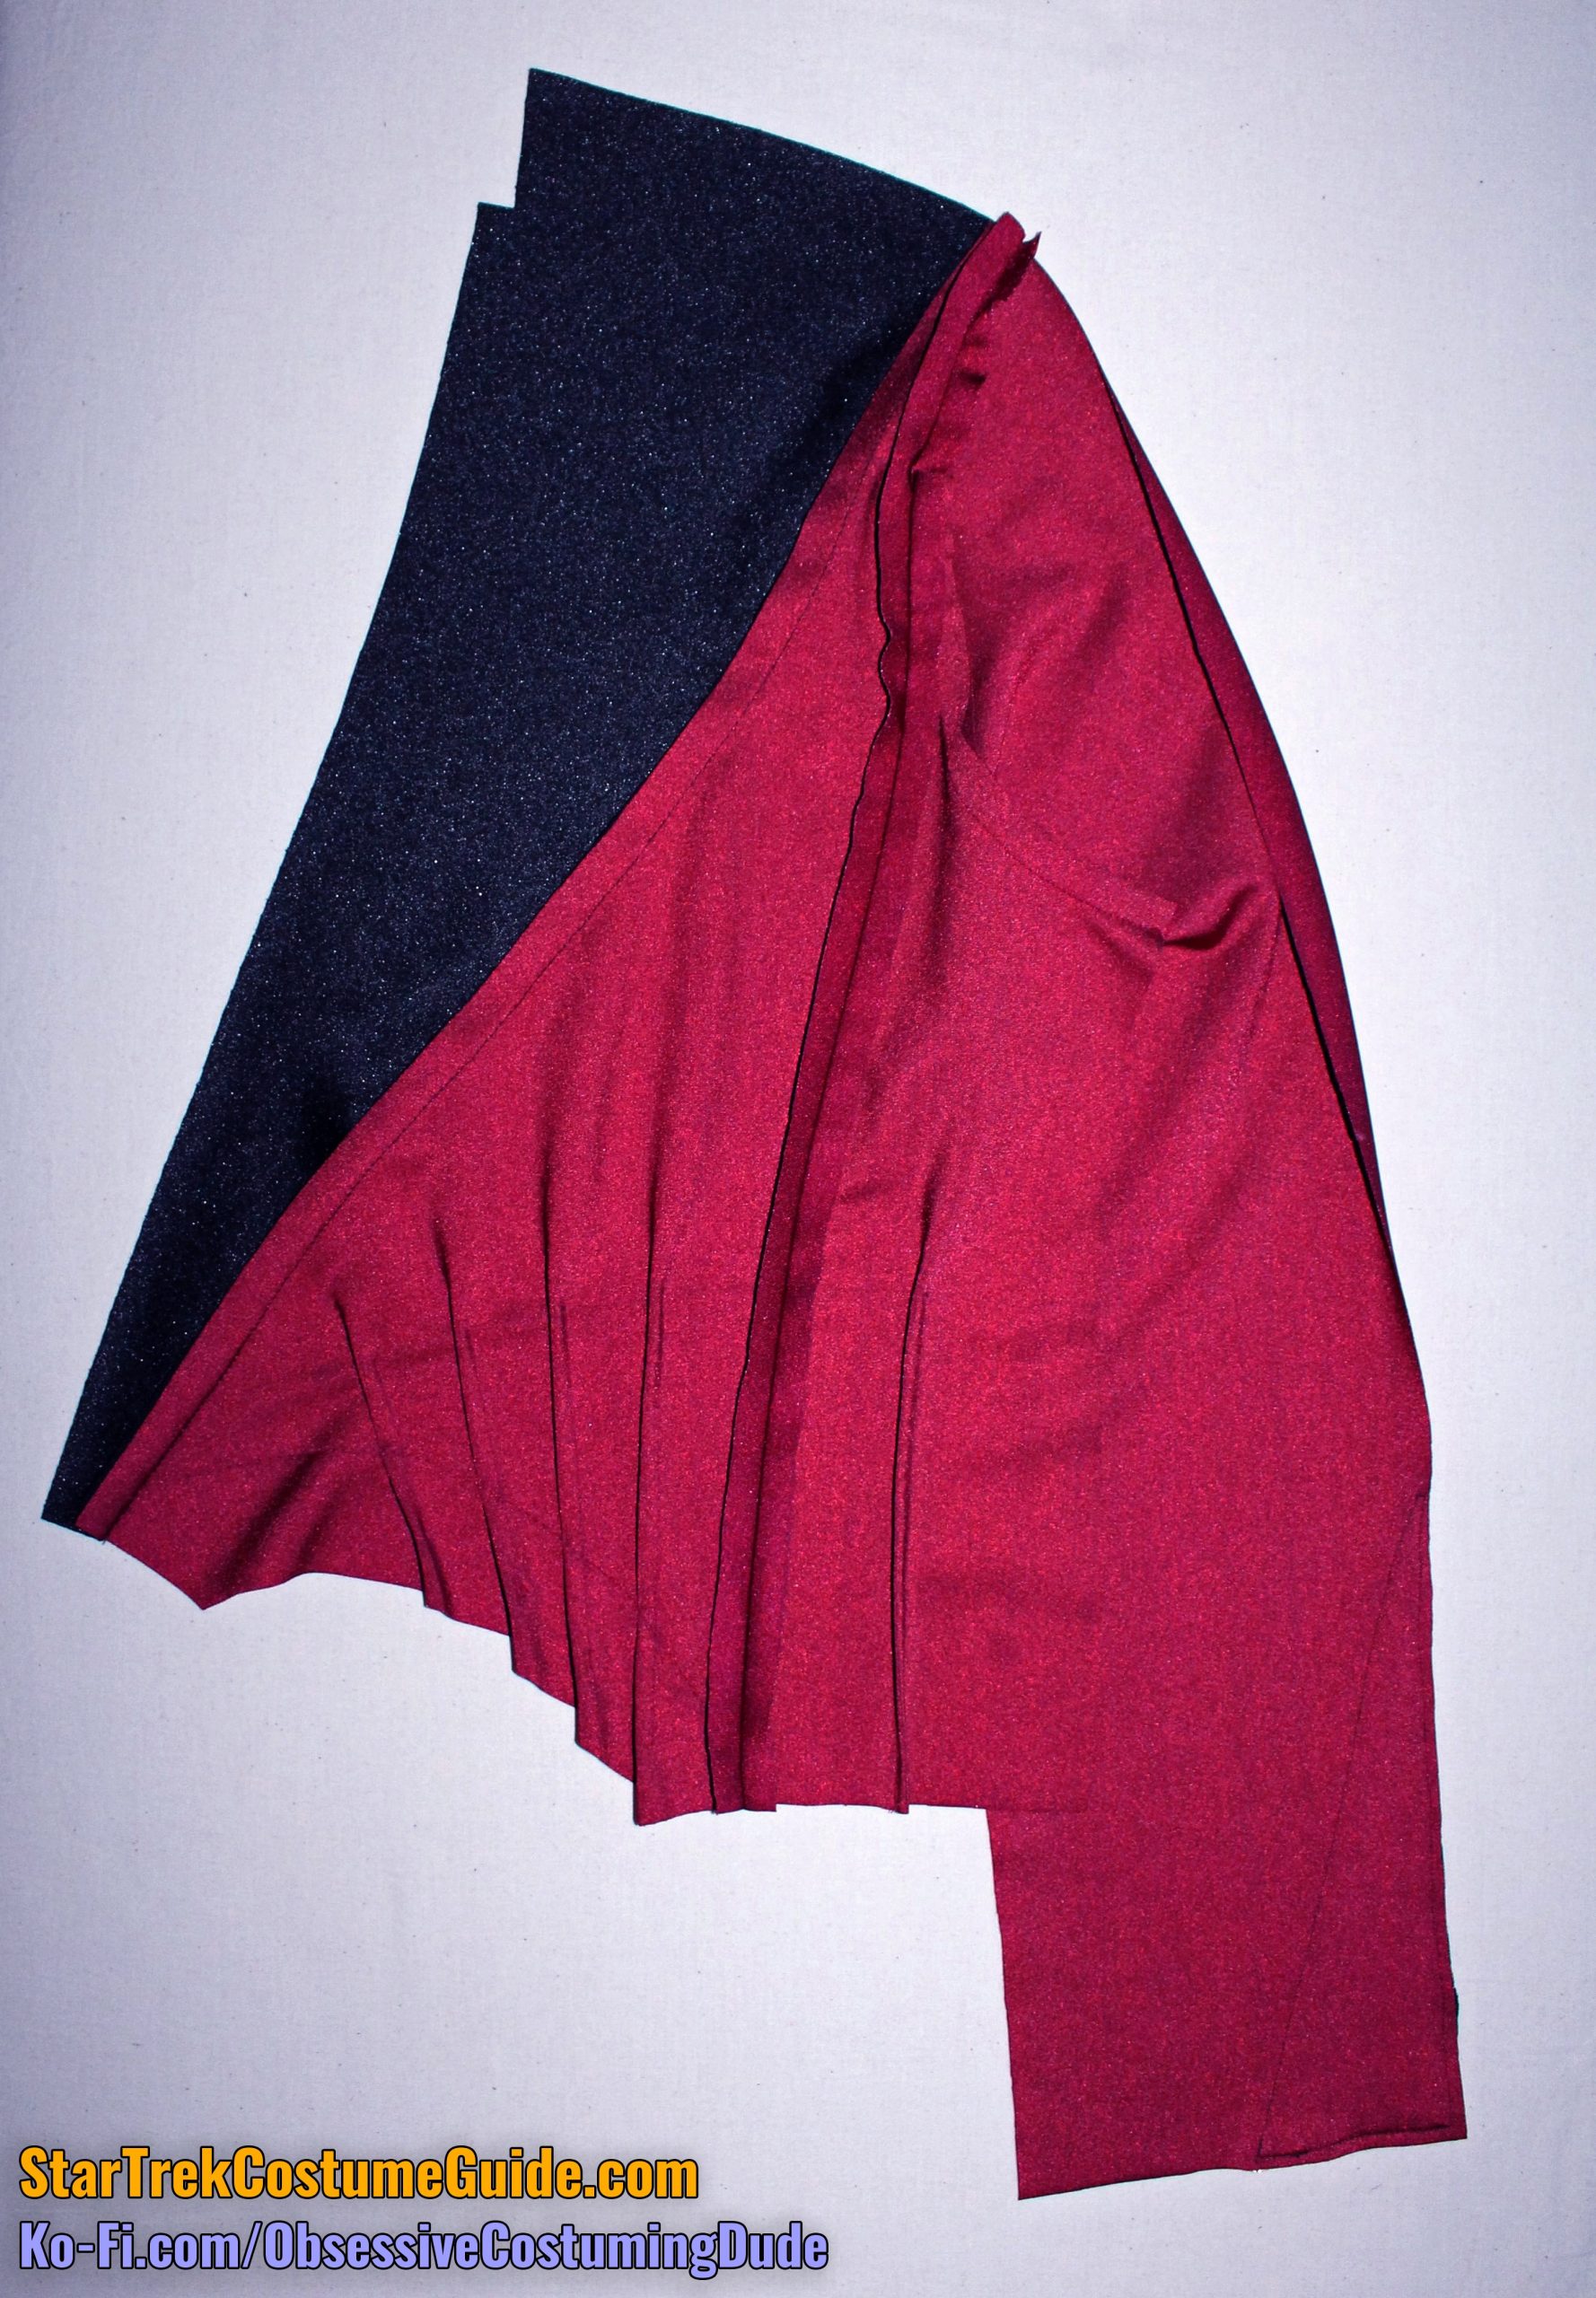
Sew the right front insert (piece F) to the right front (piece E).
Press the seam allowances toward the insert.
For the side front and side back seams, you have several options regarding the direction of the seam allowances.
On the one hand, pressing the seam allowances toward the sides makes for a smoother lower armscye.
On the other hand, pressing the seam allowances open makes for a smoother (less bulky) hem.
And on the screen-used Admiral Jameson uniform I examined, the allowances actually changed direction from top to bottom! They were pressed (and sewn in) toward the armscye at the top, but actually opened at the bottom, which is weird but does make for “the best of both worlds,” at the expense of … well, most likely the original costumer’s sanity?
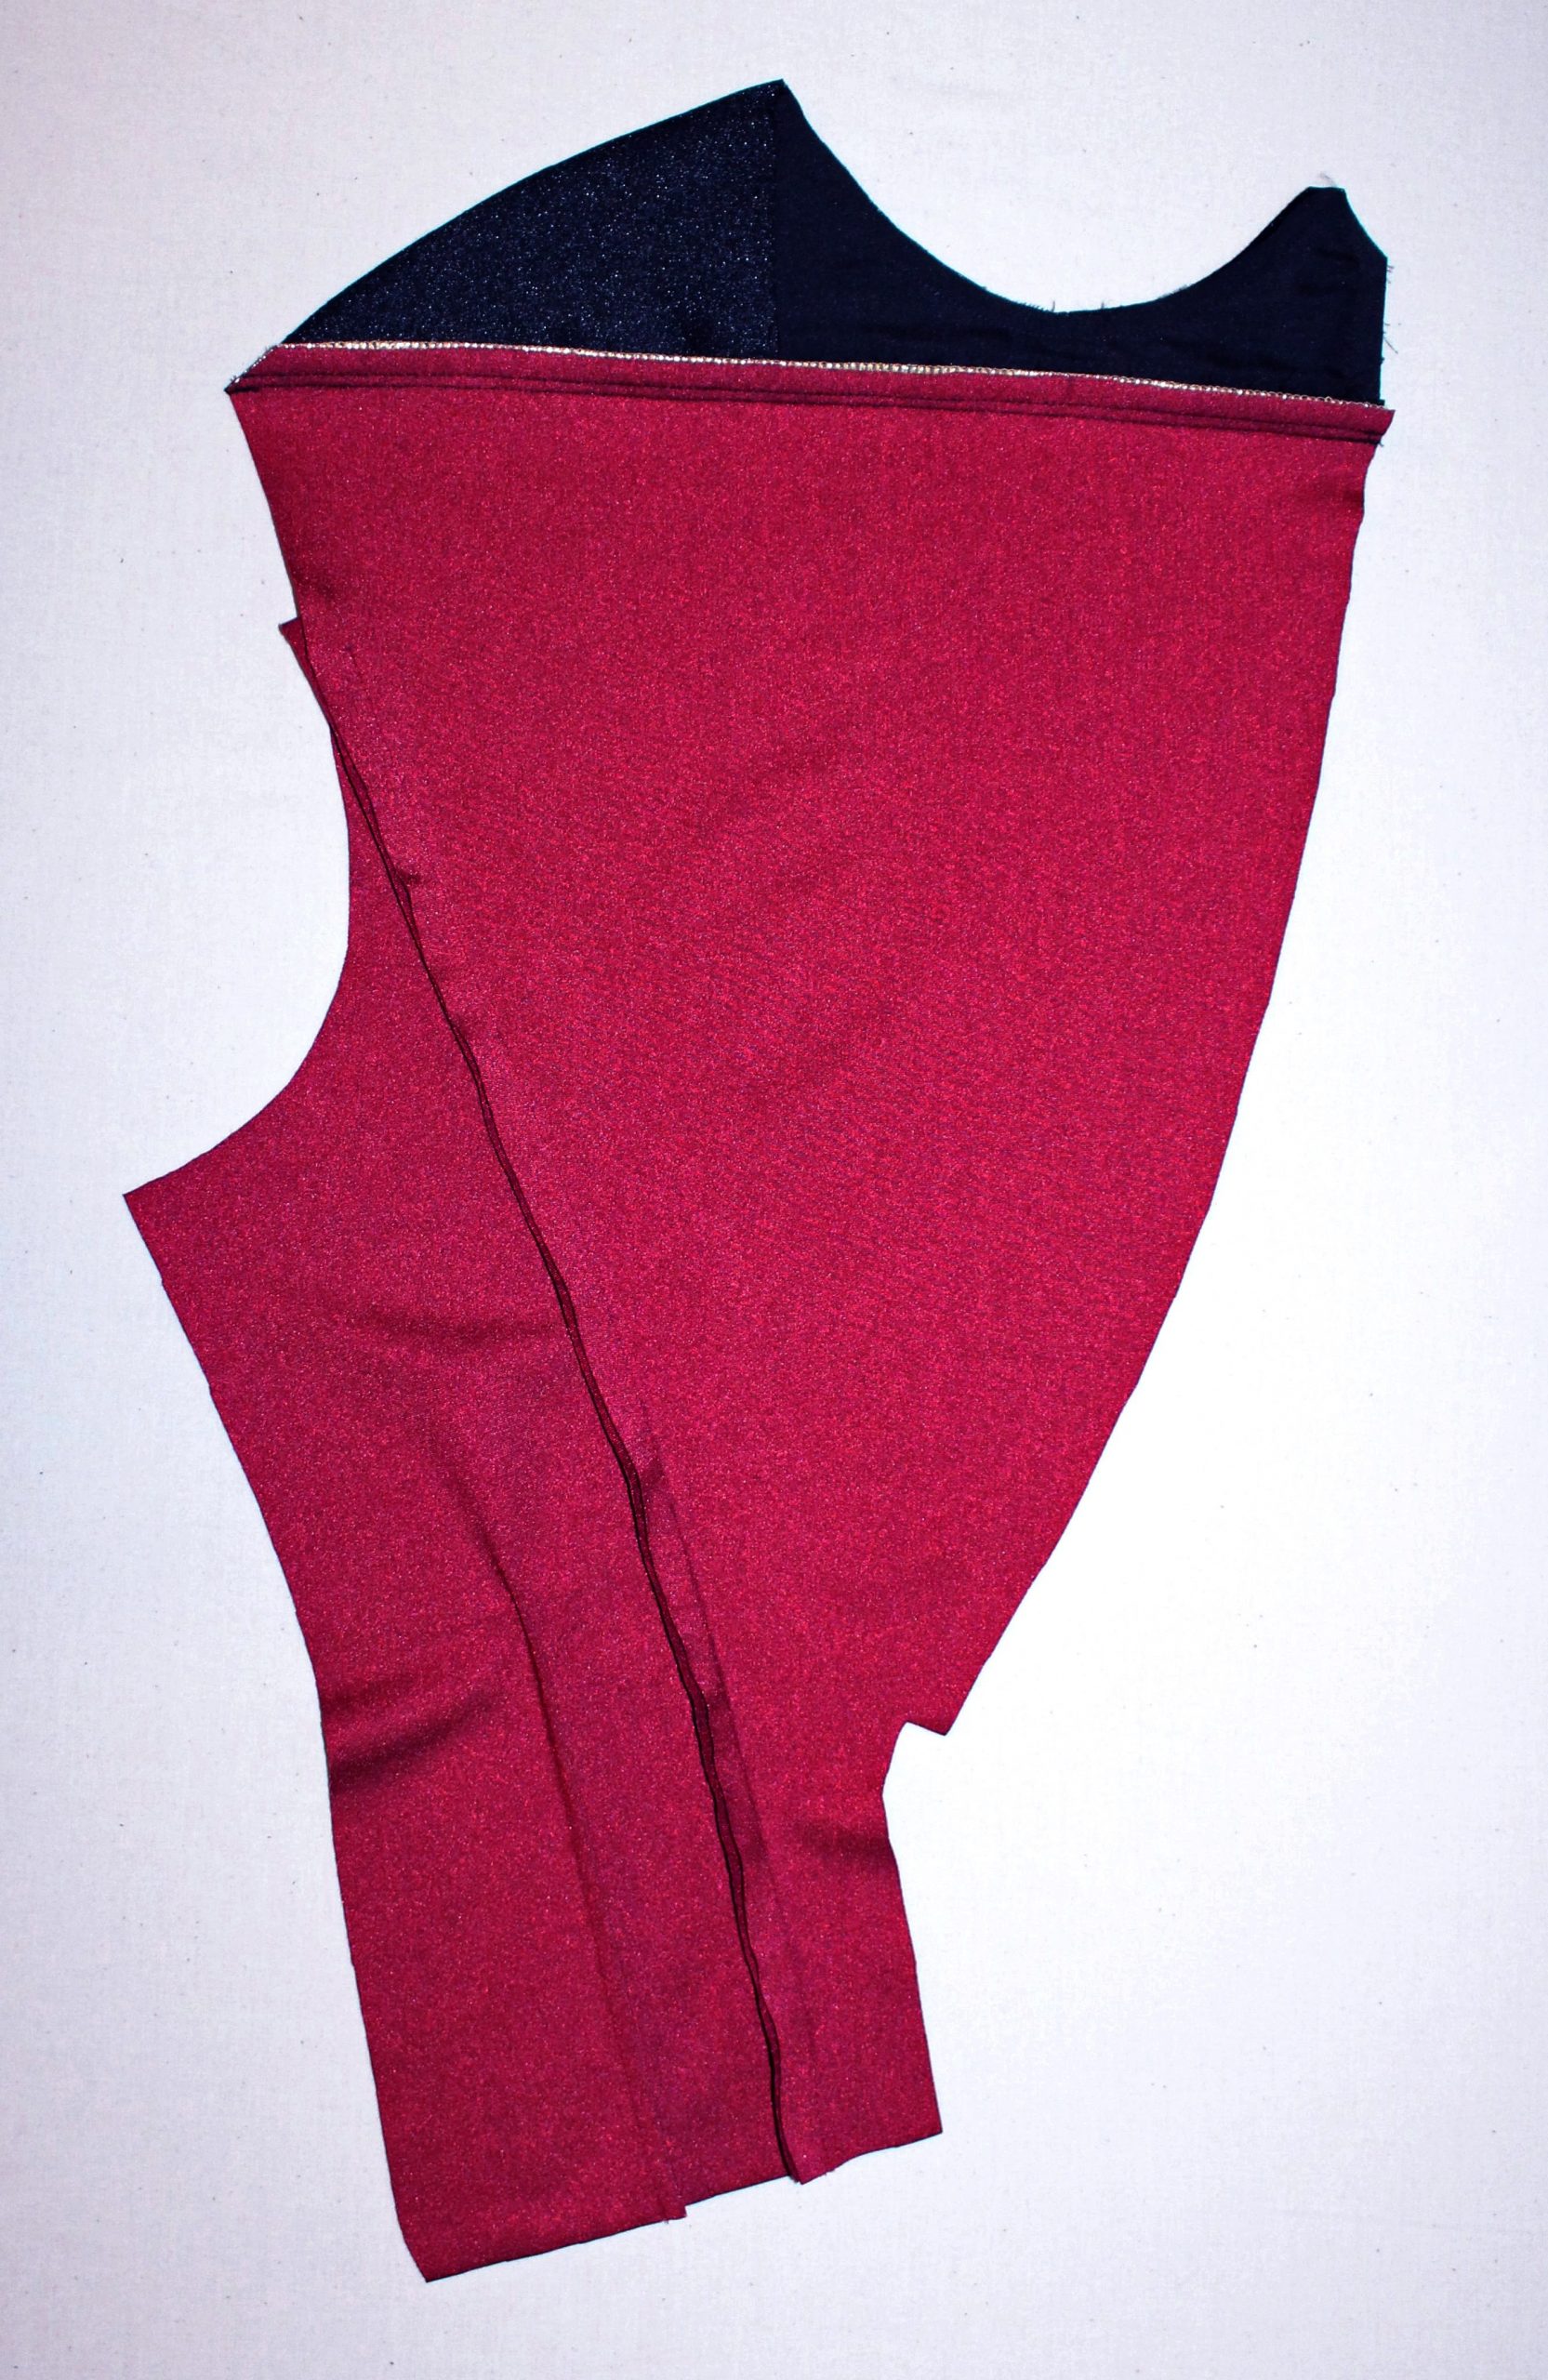
For the first and third options, sew the right side front to the right front assembly, matching upper dots, and press the seam allowances toward the side.
For the second option, sew the right side front to the right front assembly, matching upper dots and ending your stitching at the dot and reinforcing several times. Press the seam allowances toward the side for now.
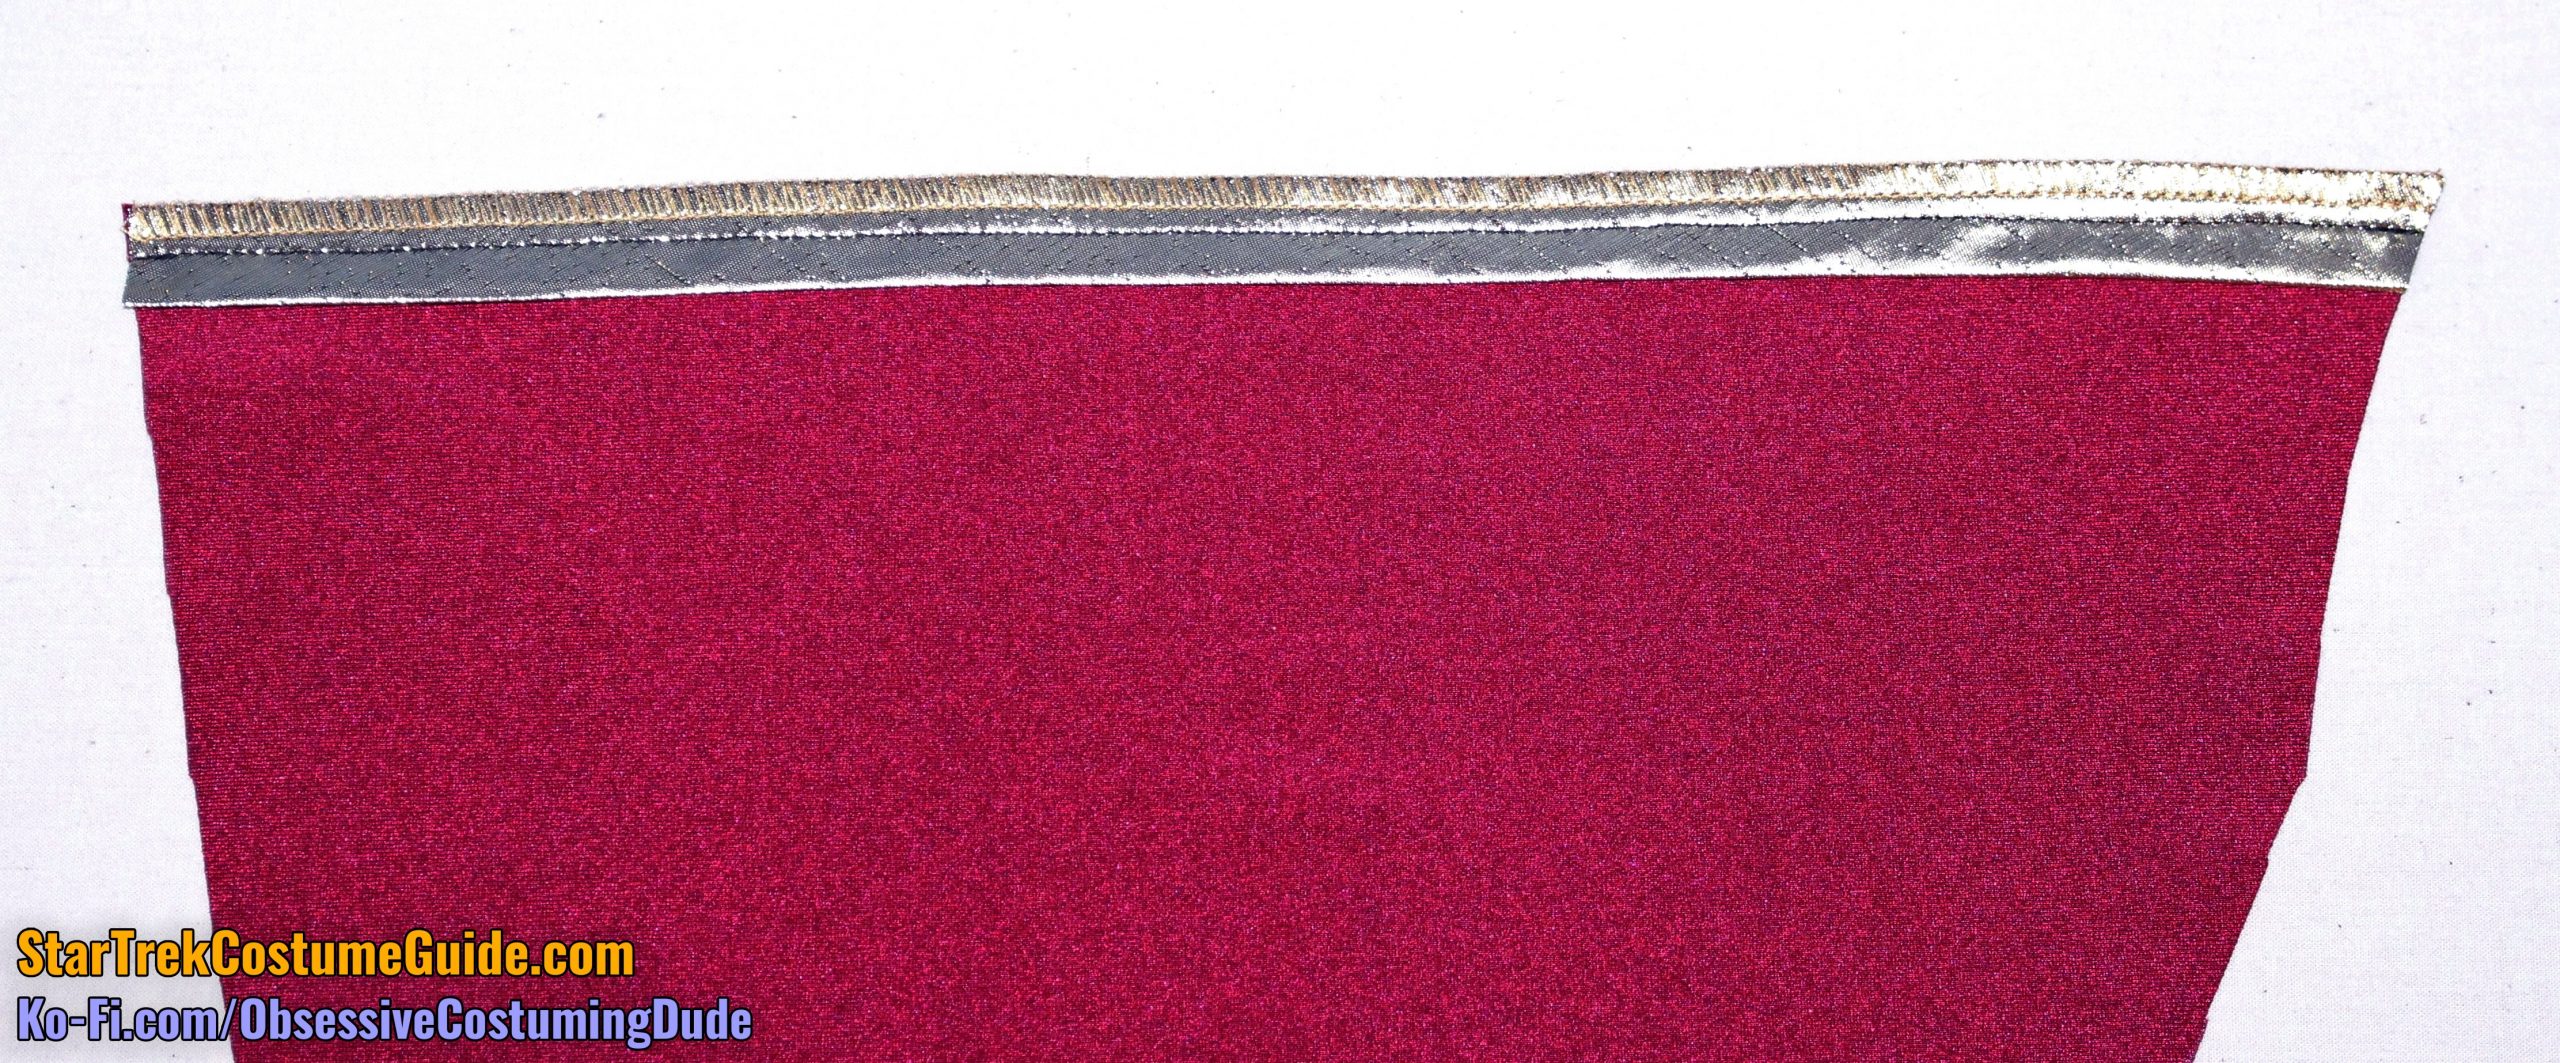
Sew or baste a length of the metallic gold trim to the top of the left front (piece D) inside the seam line.
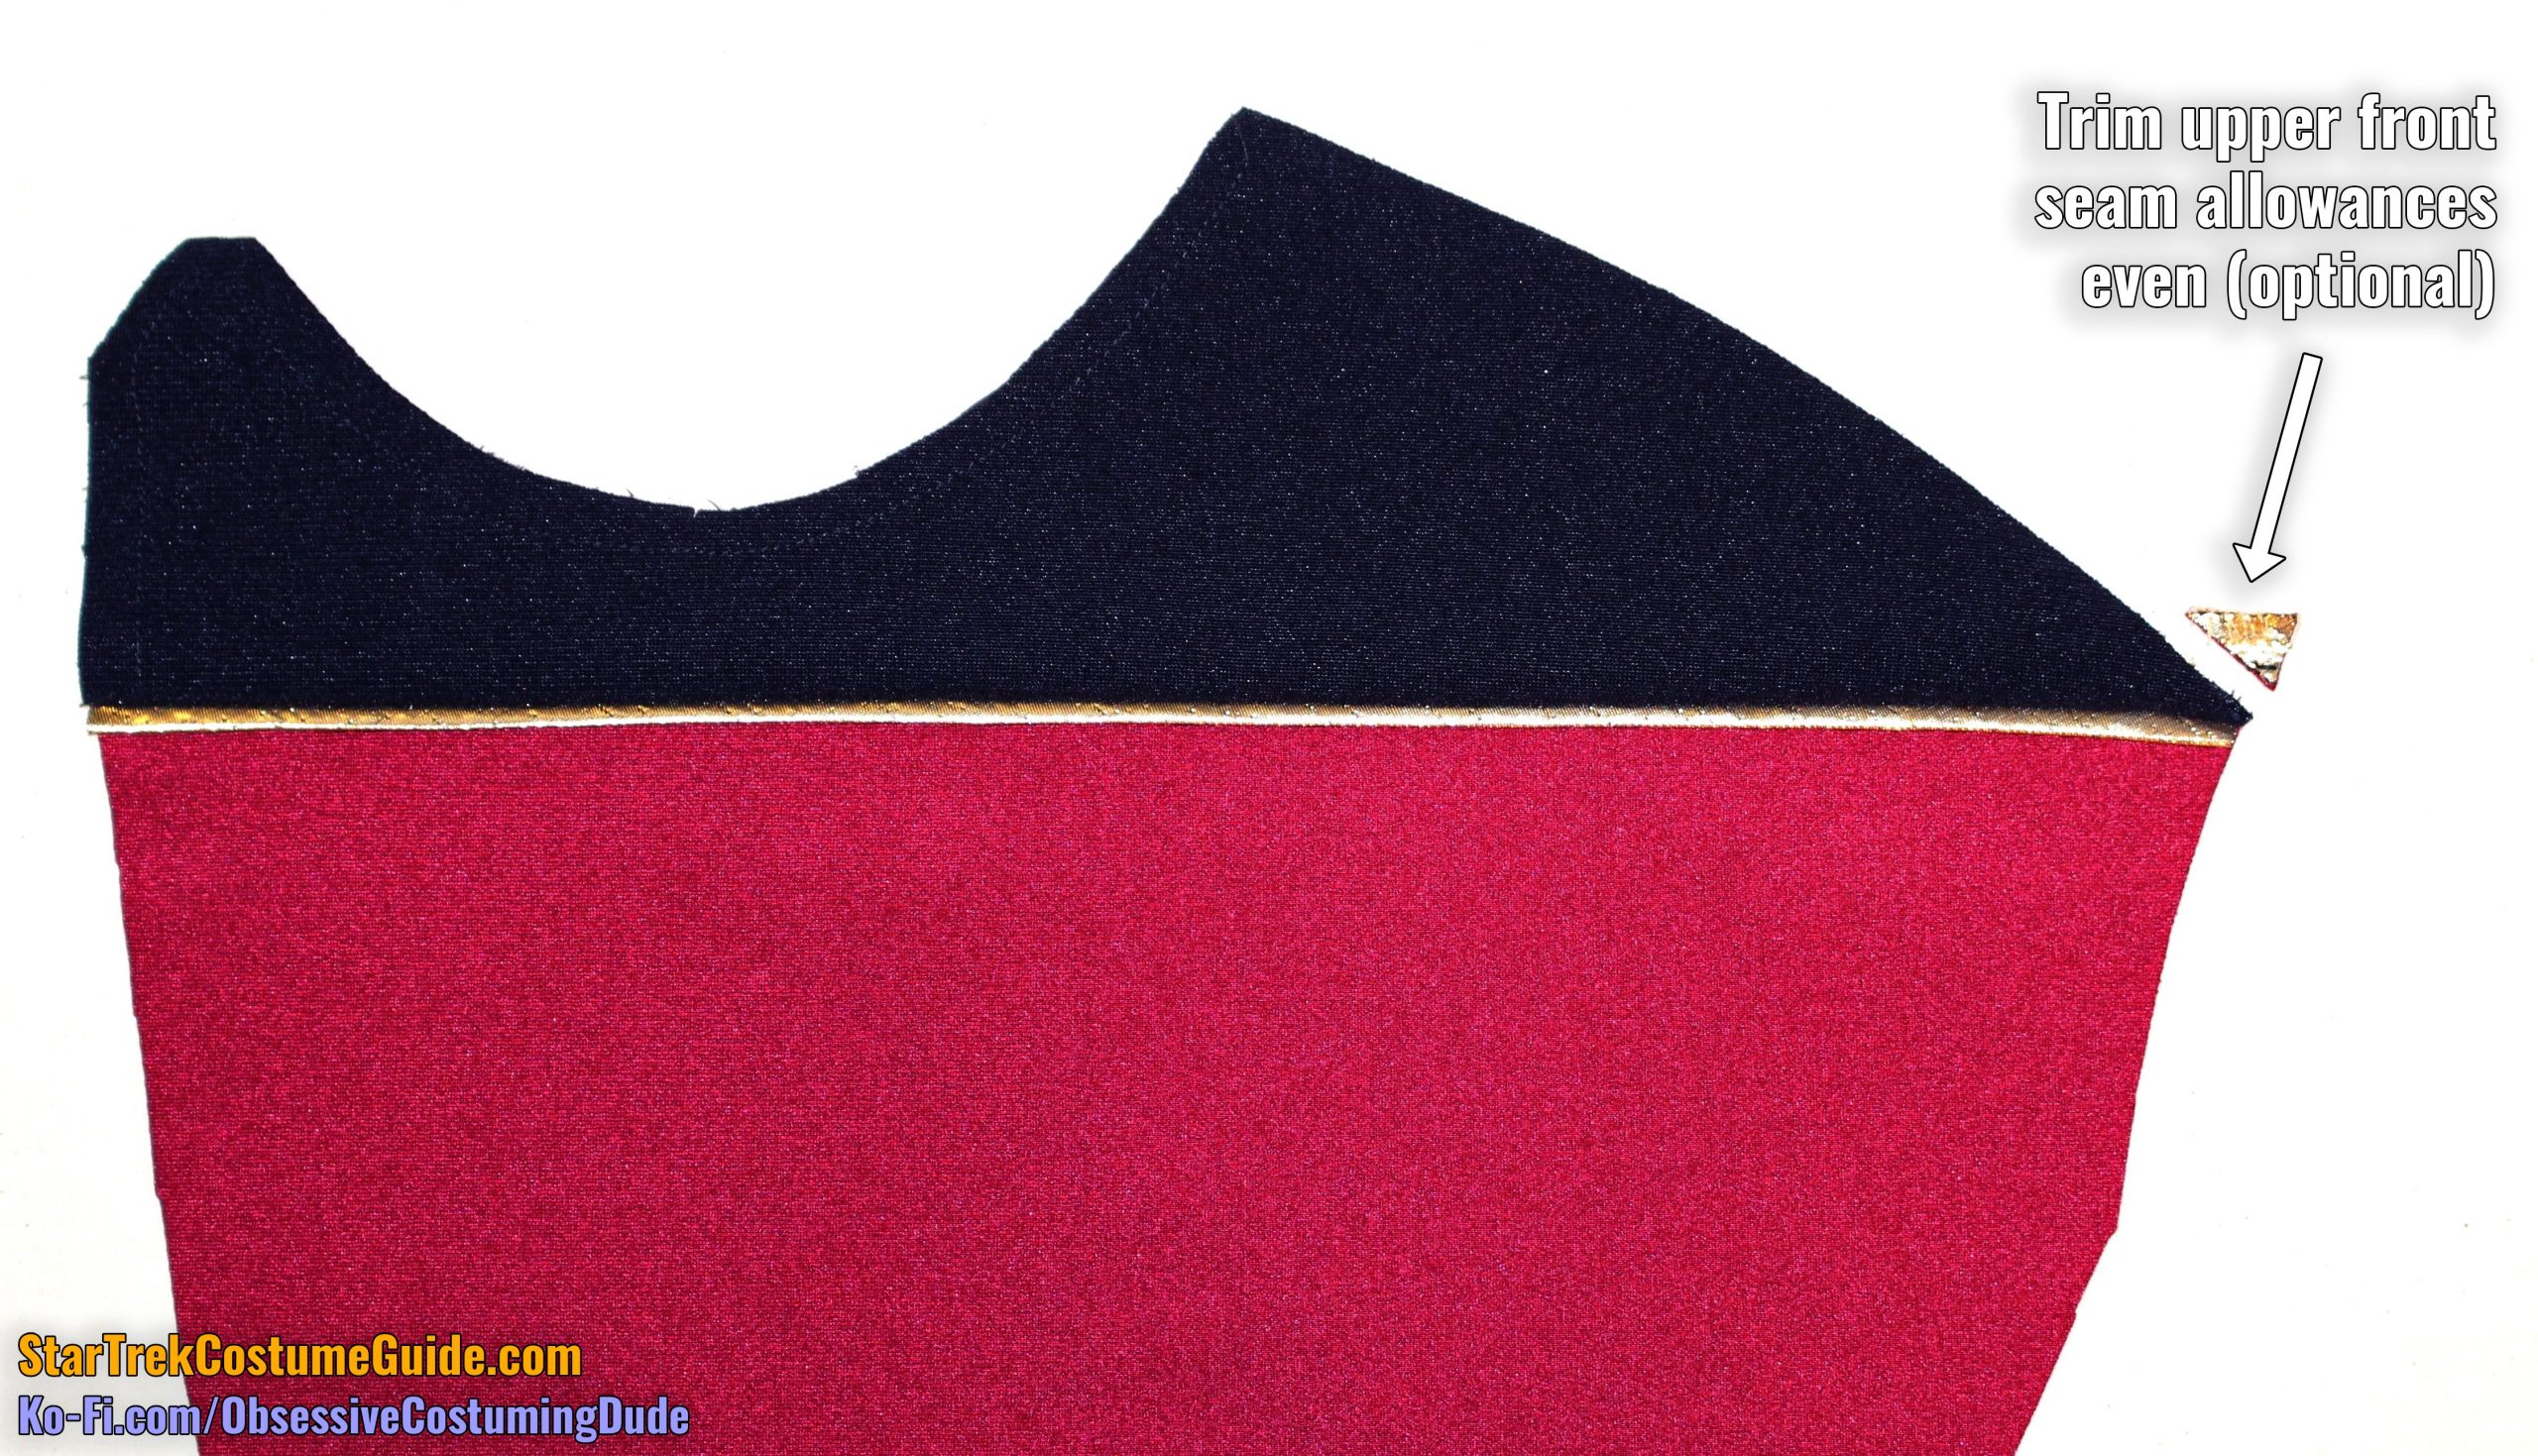
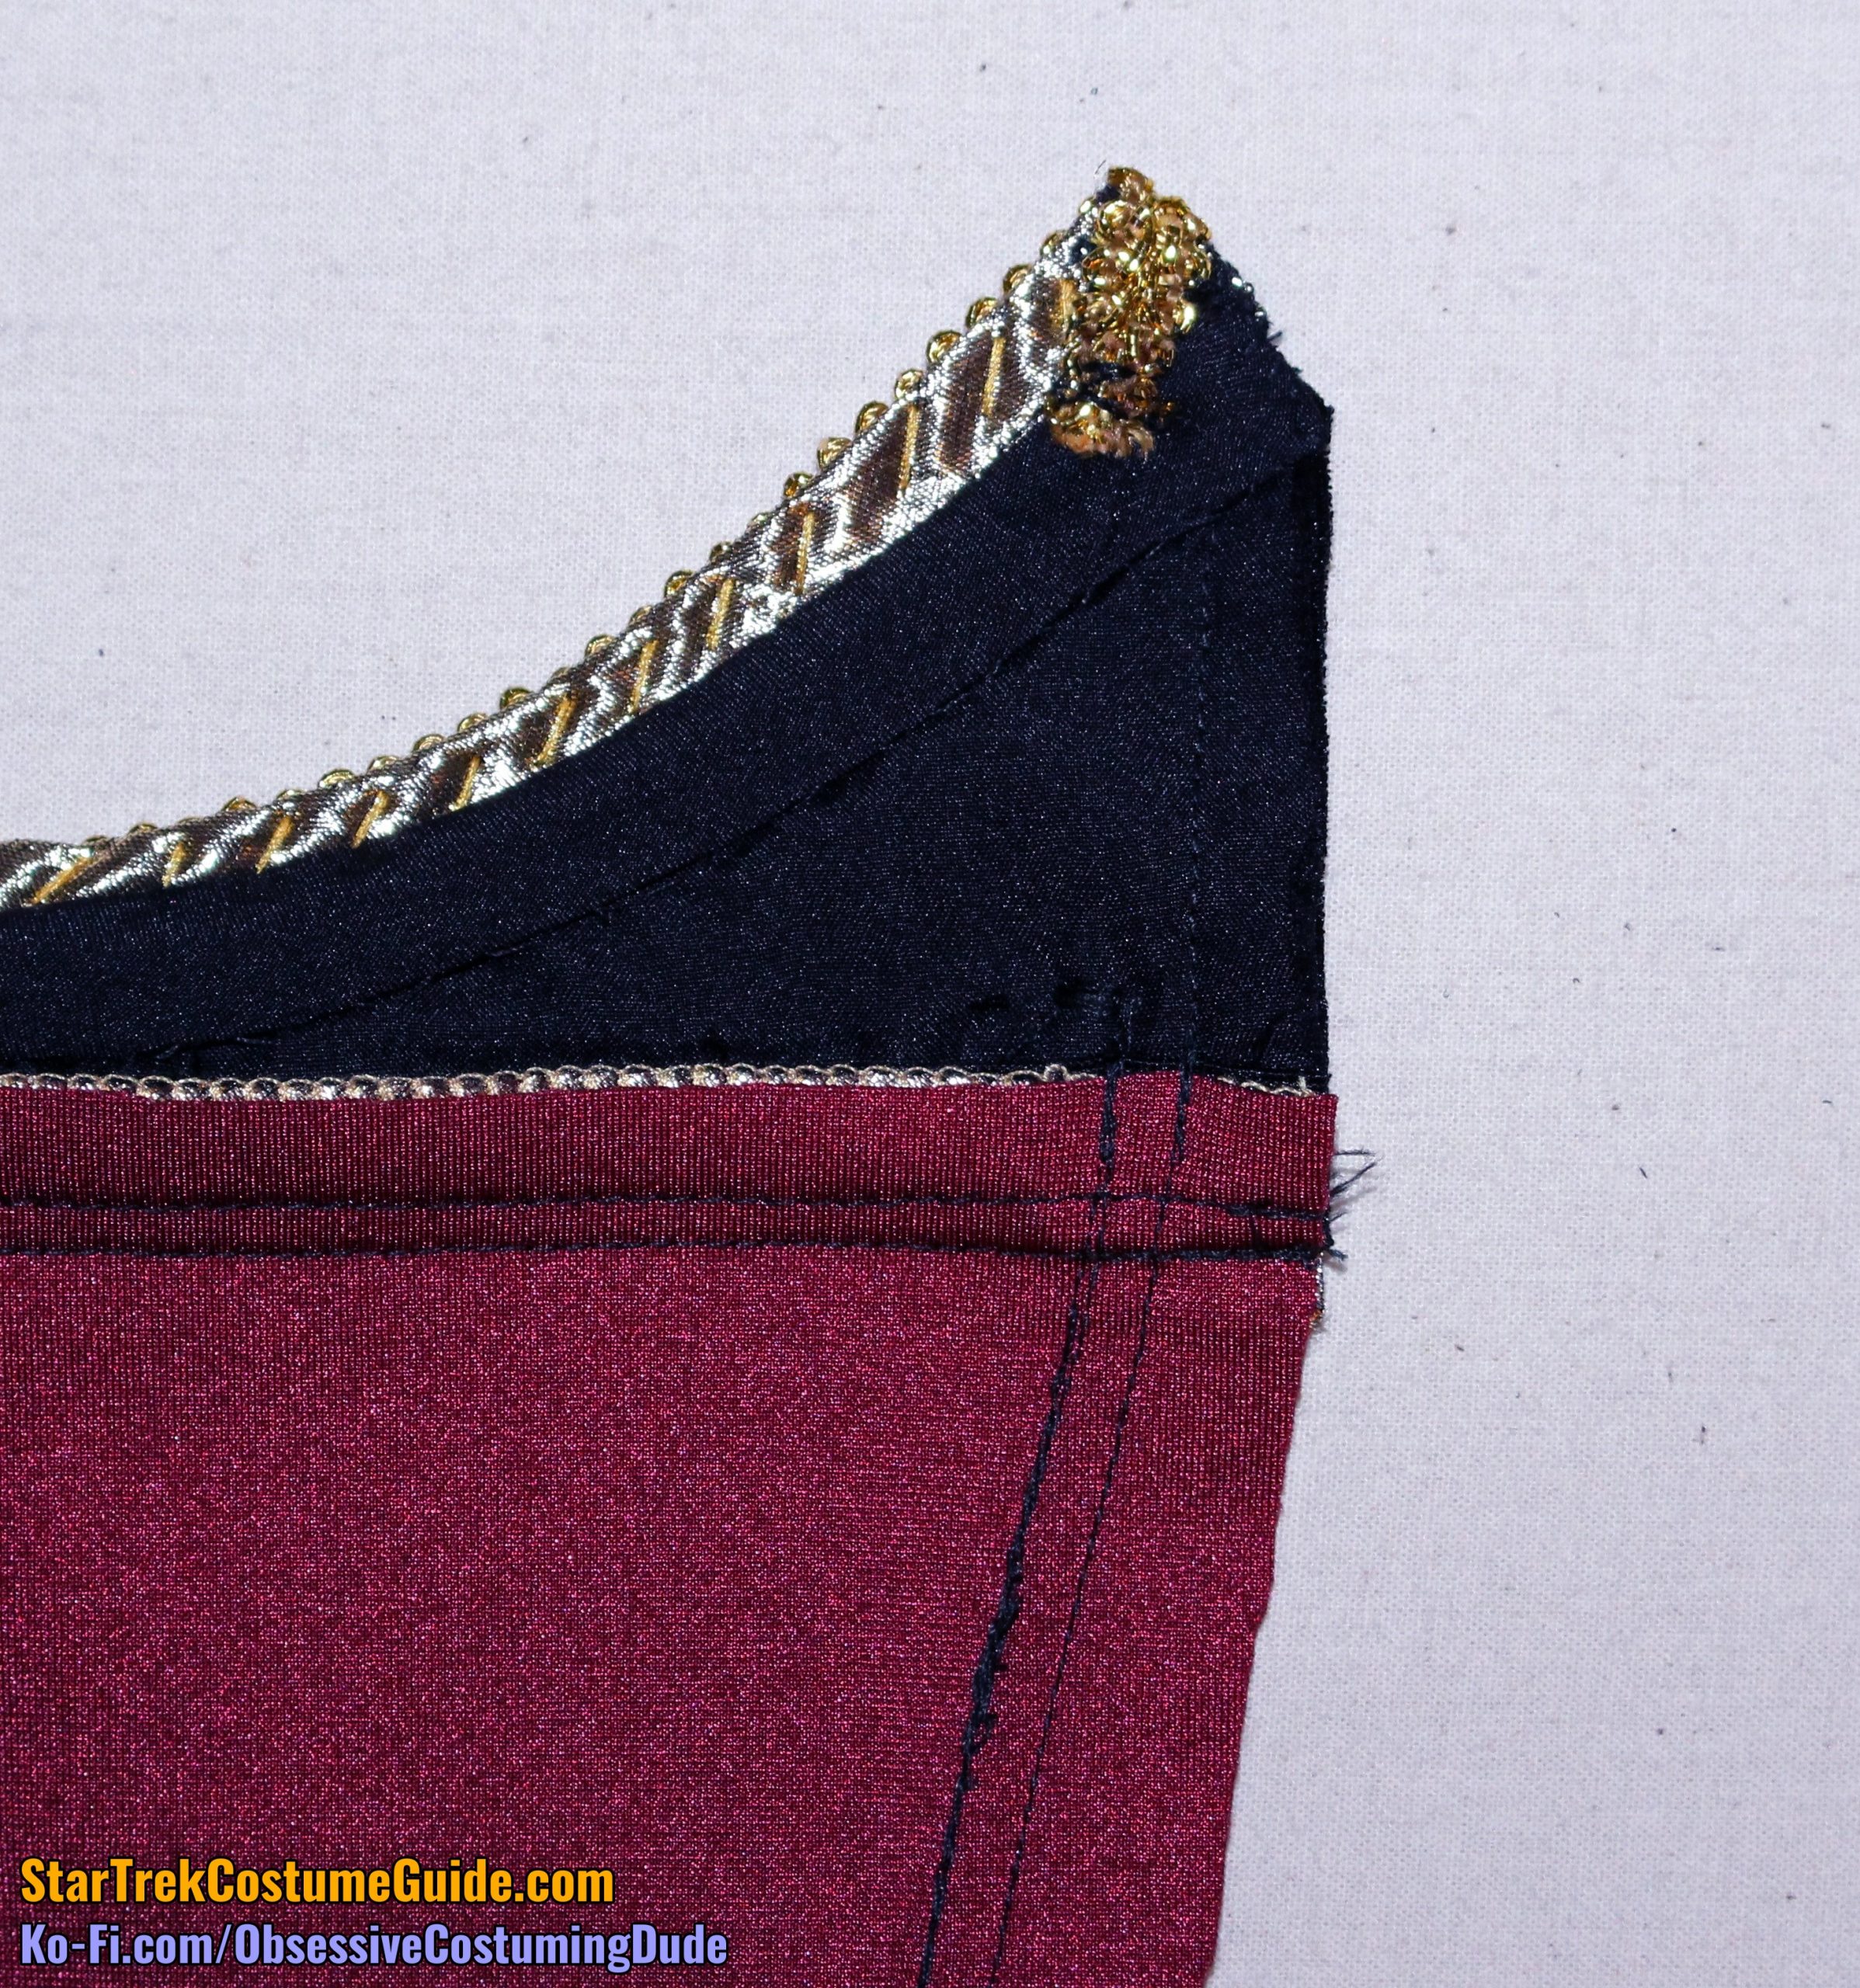
Sew or baste the front yoke lining (piece B) to the underside of the left front yoke (piece A) along the neckline, rightmost, and bottom, ¼” from those edges. (Leave the left edge free.)
Sew the left front yoke to the upper left front, with the gold trim “sandwiched” between the two pieces.
Press the yoke and seam allowances upward, and trim off the little corner overhanging the outer yoke.
TIP: Use a quilting/walking foot to sew through all those layers, to help prevent undesired stretching and/or sliding.
Sew the left side front to the left front in the same manner you did for the right side front.
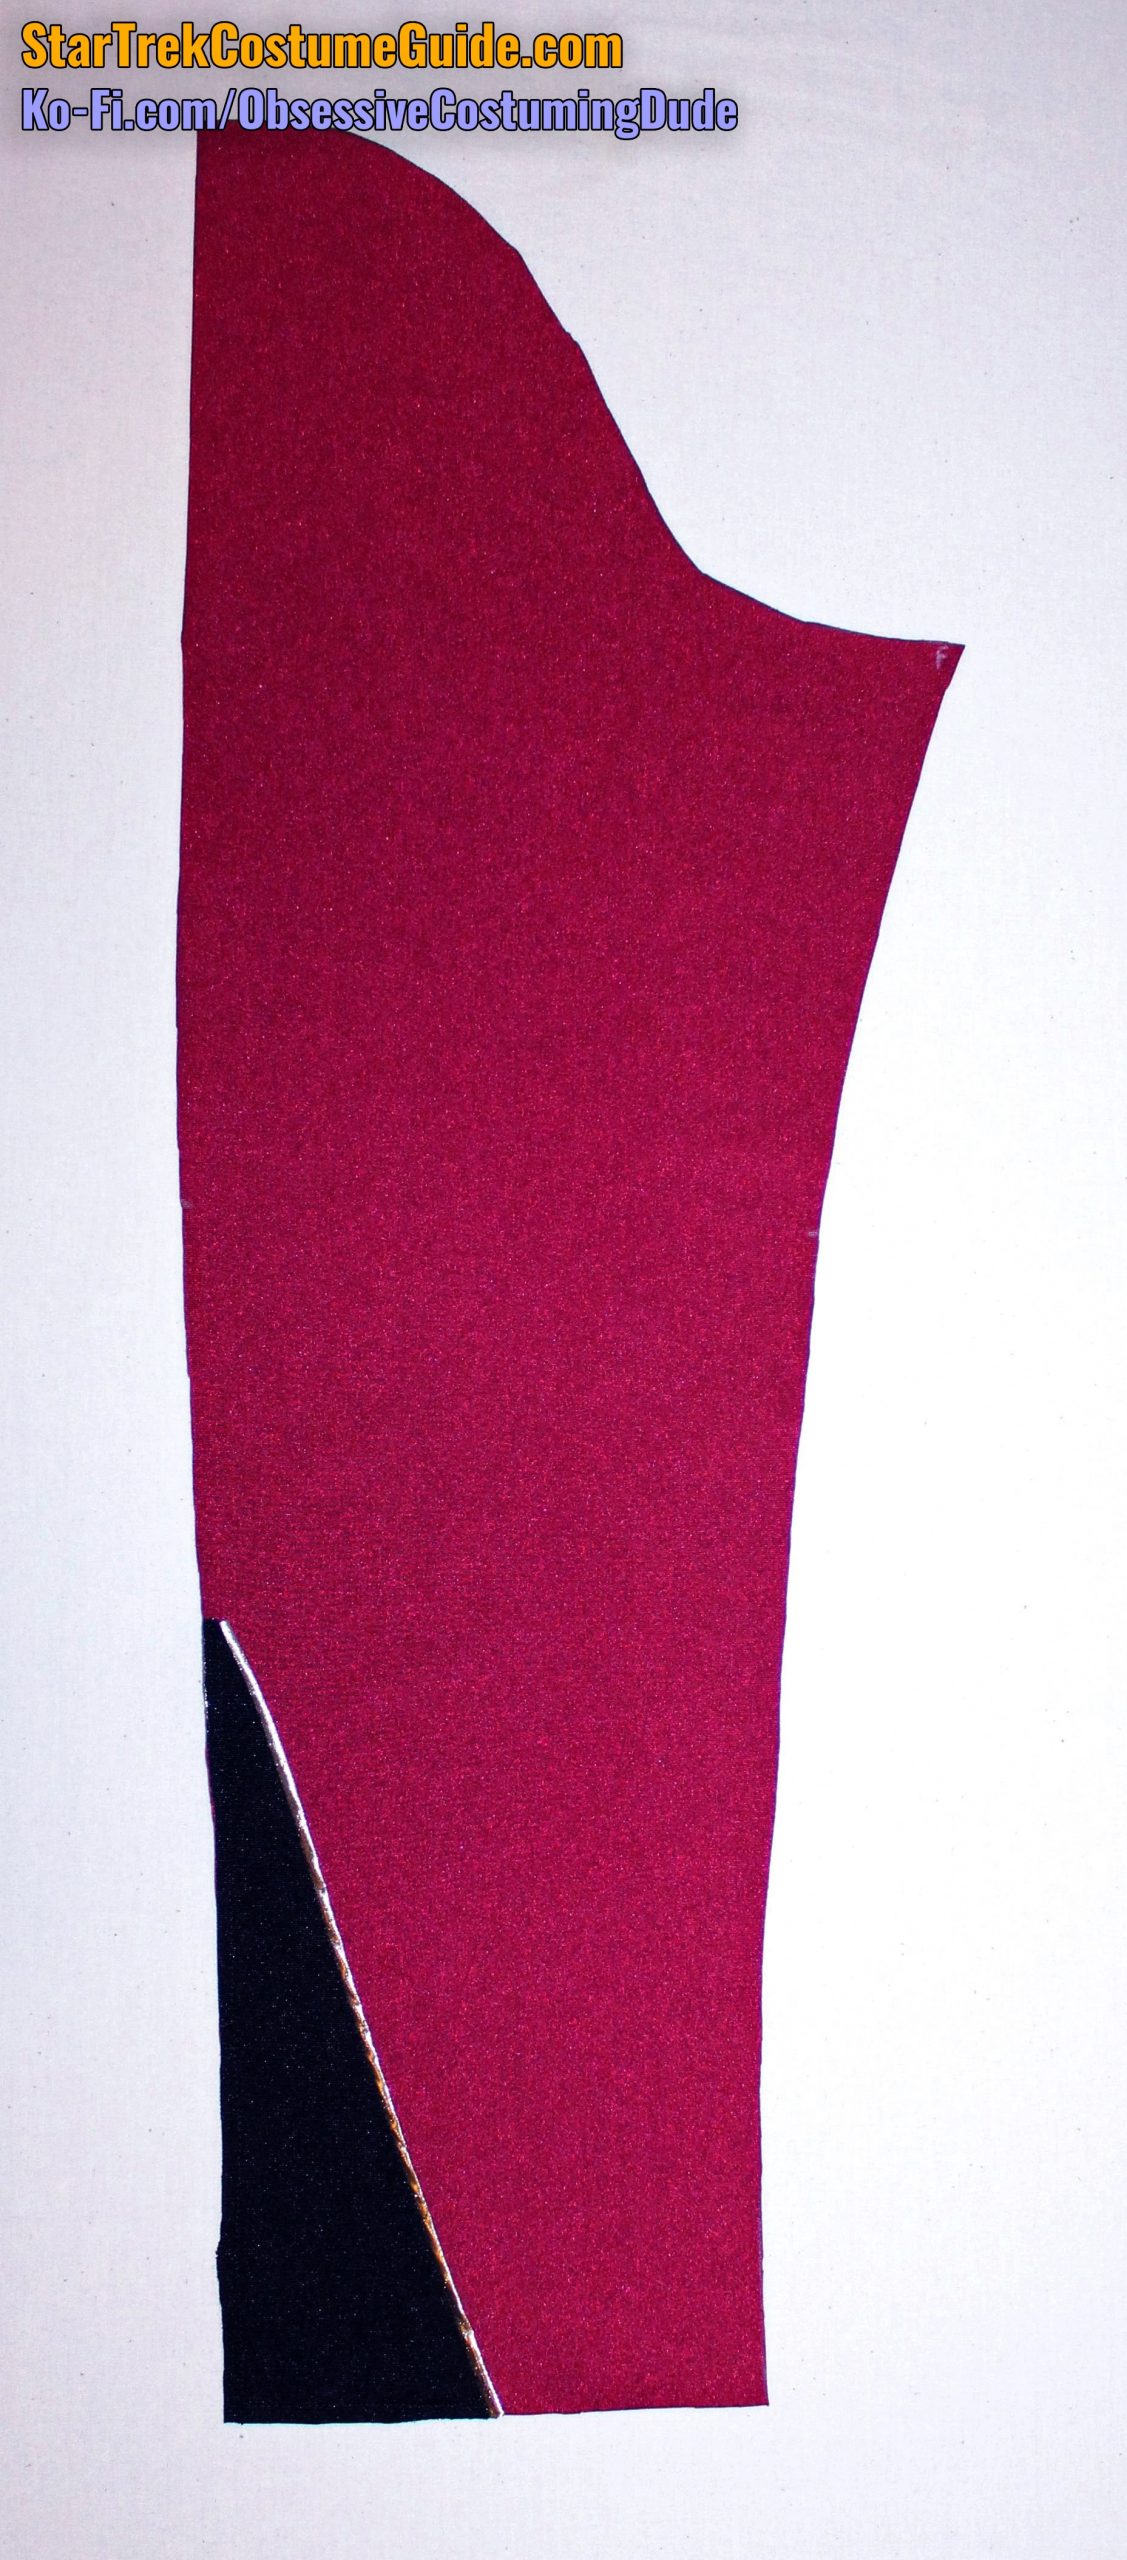
Sew a length of gold trim to the diagonal edge of the front sleeve insert (piece K), stitching ½” from the edge.
Turn the diagonal allowance under and press.
Trim the overhanging corners of the allowance.
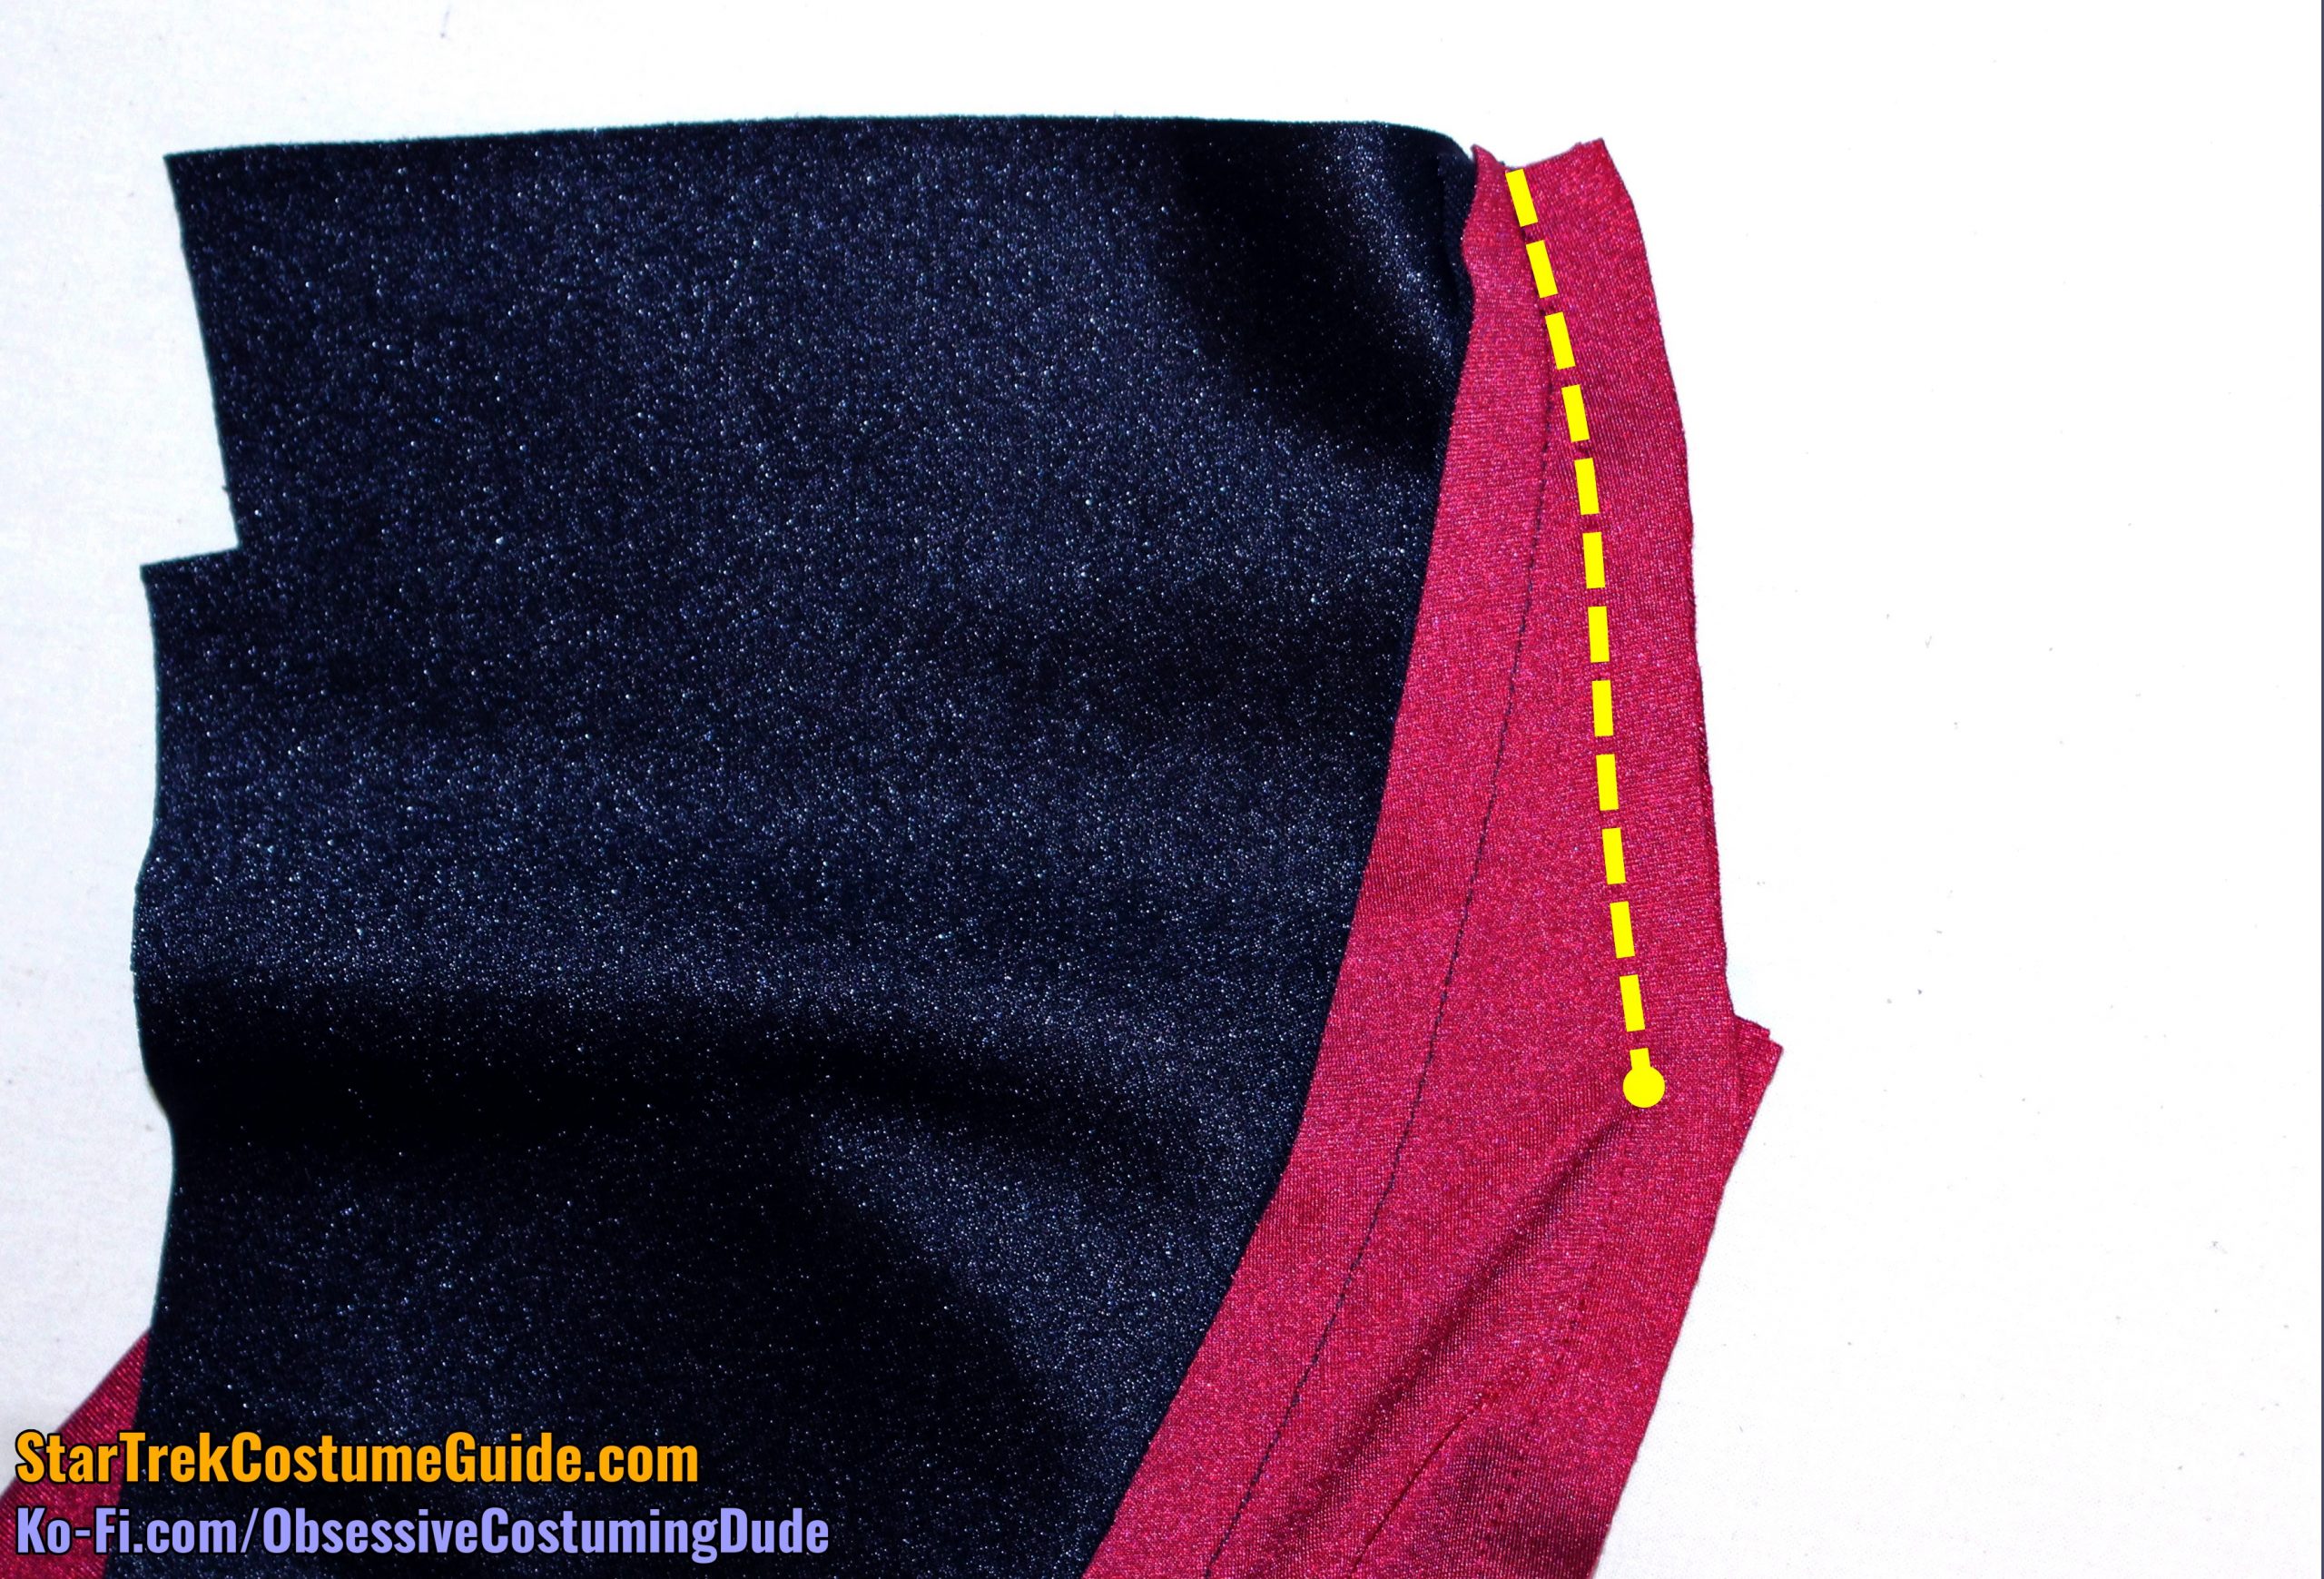
Position the sleeve insert onto the front sleeve (piece J).
Sew the sleeve insert onto the front sleeve, inside the allowance along the outer and lower edges. (I suggest stitching ¼” from the edges.)
“Stitch-in-the-ditch” along the diagonal edge, where the black spandex meets the gold trim.
If you’re planning to have your side front allowances both pressed toward the side, OR you’re fine with letting them change direction partway down, sew the right front sleeve to the right front assembly and press the armscye seam allowances toward the sleeve.
If you’re planning to have your side front allowances pressed open, though, attaching the sleeve will need to be done in two separate stitches.
First, sew the upper sleeve/armscye from the shoulder down to the dot, where the side front stitch line ended.
Second, sew the lower sleeve/armscye from the side up to the dot, where all three stitch lines should meet.
Then press the side front seam allowances open.
Repeat for the left front assembly.
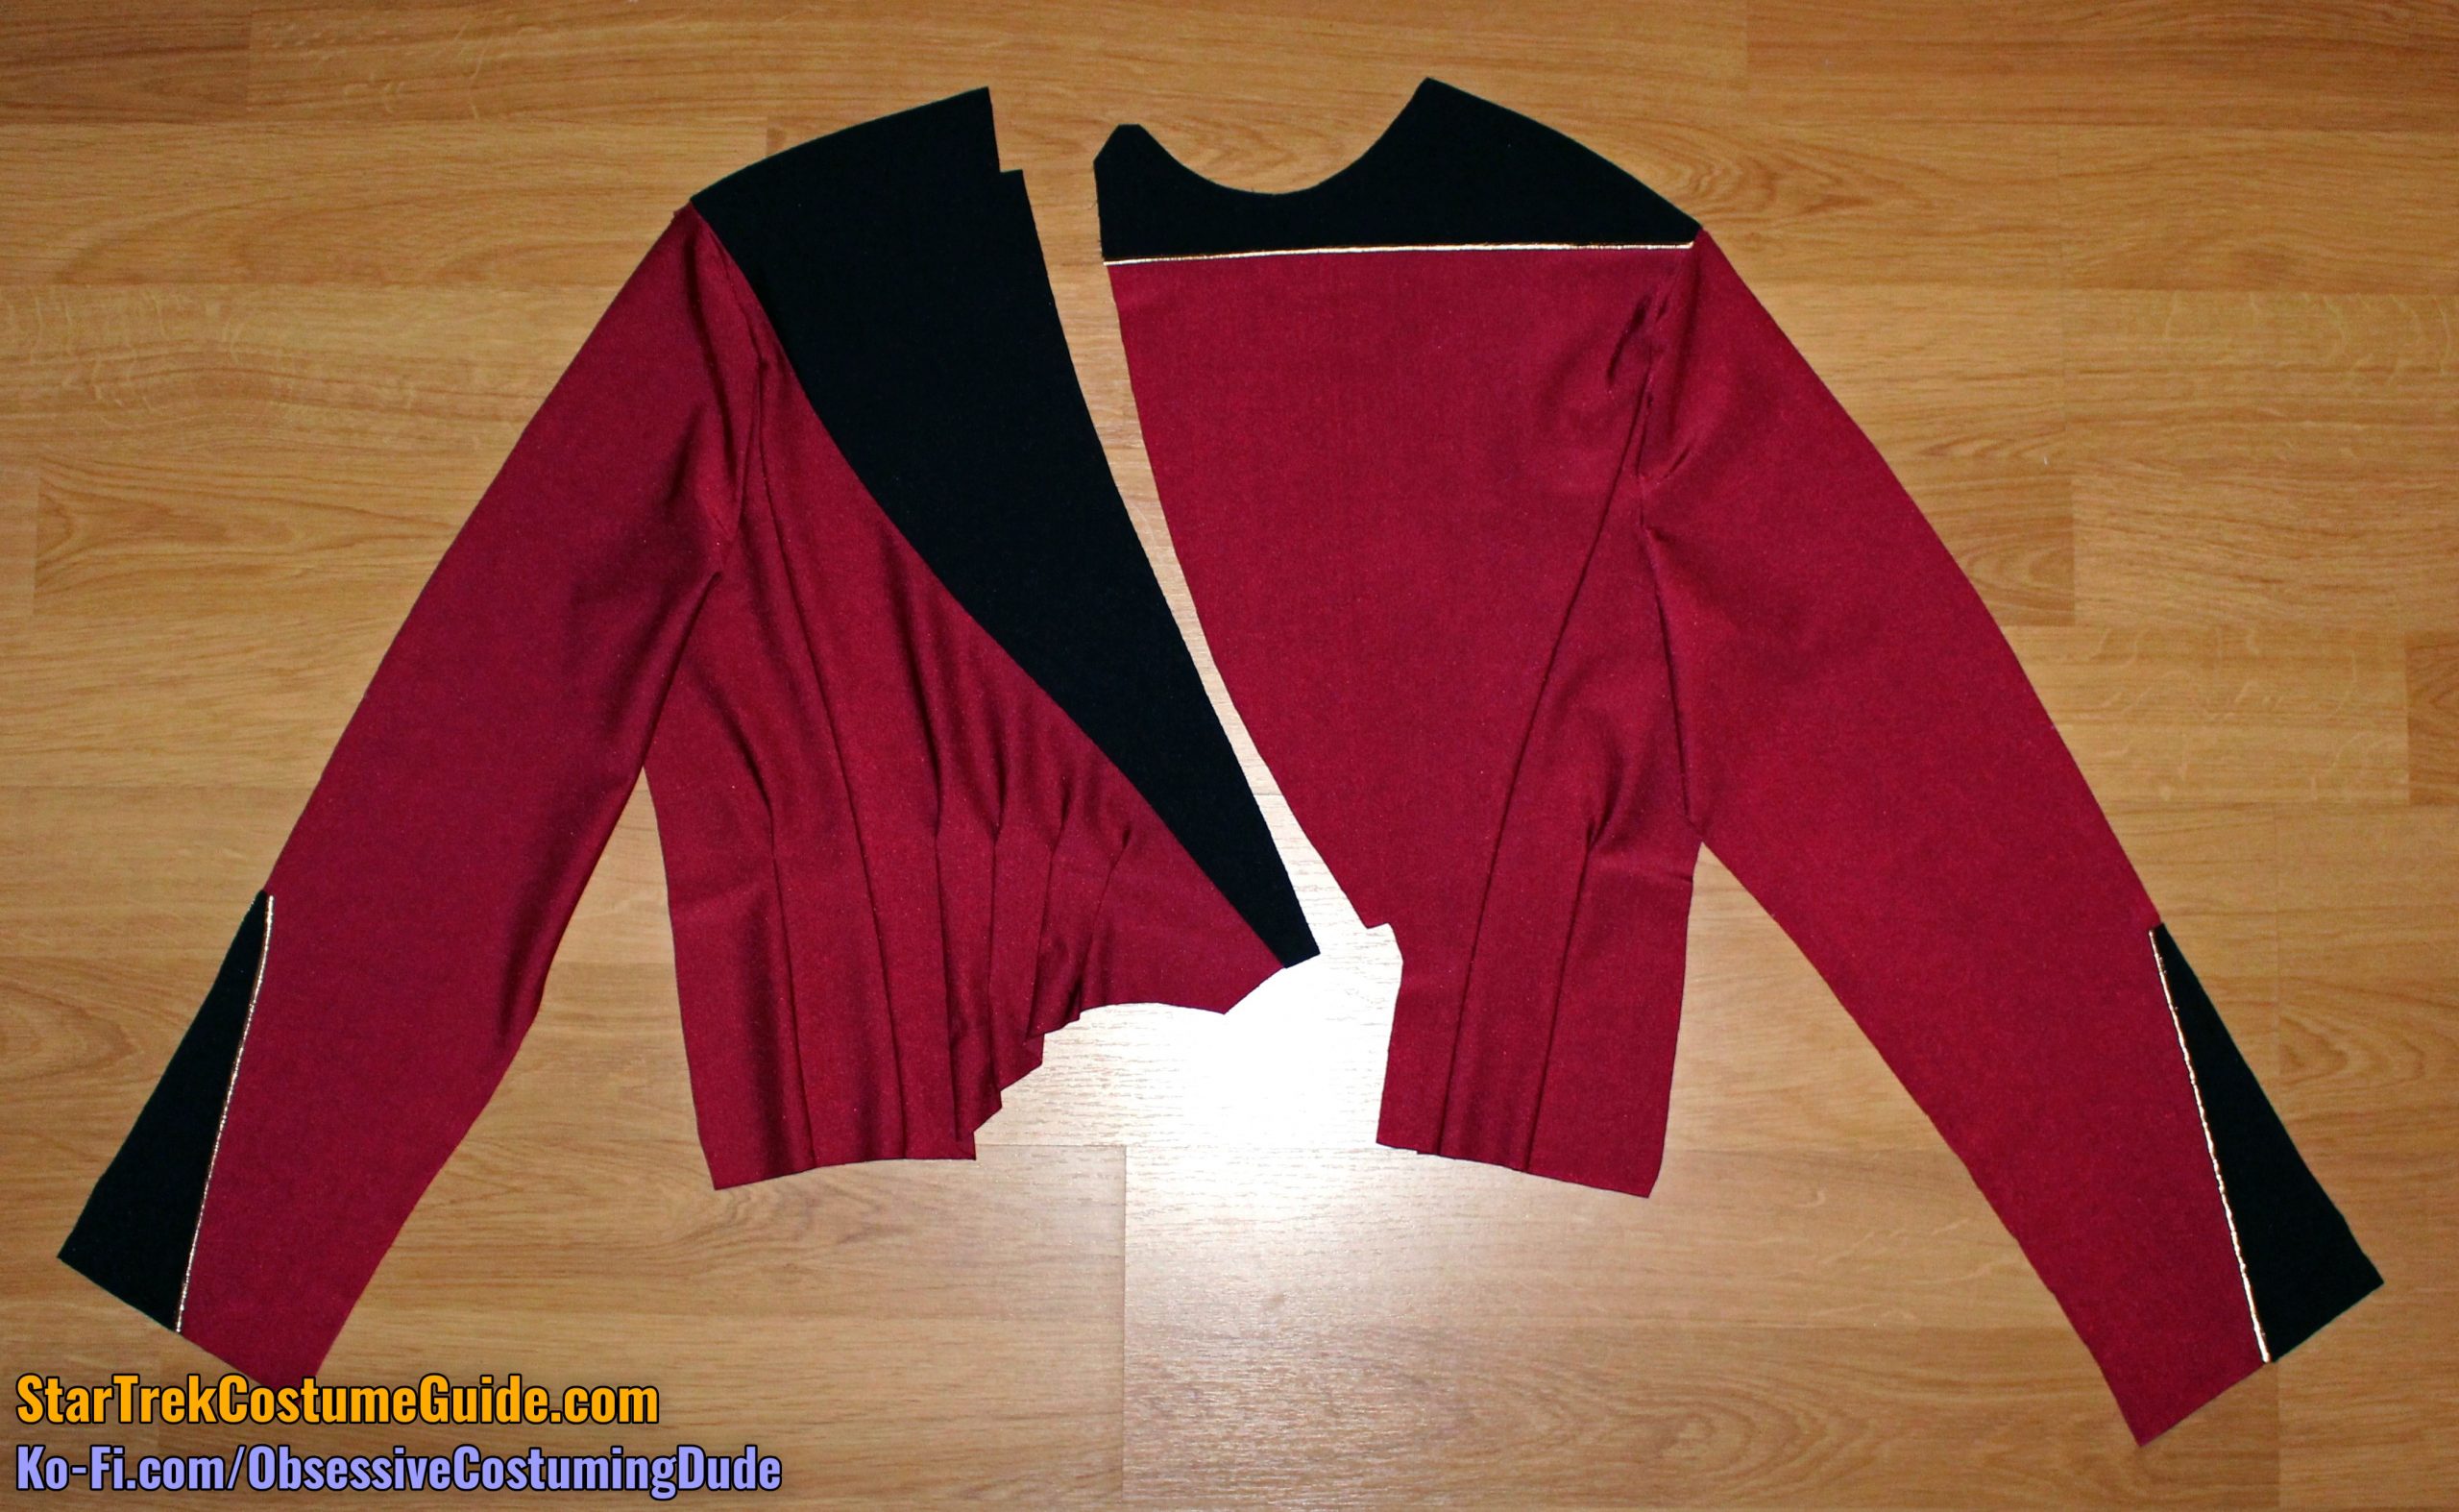
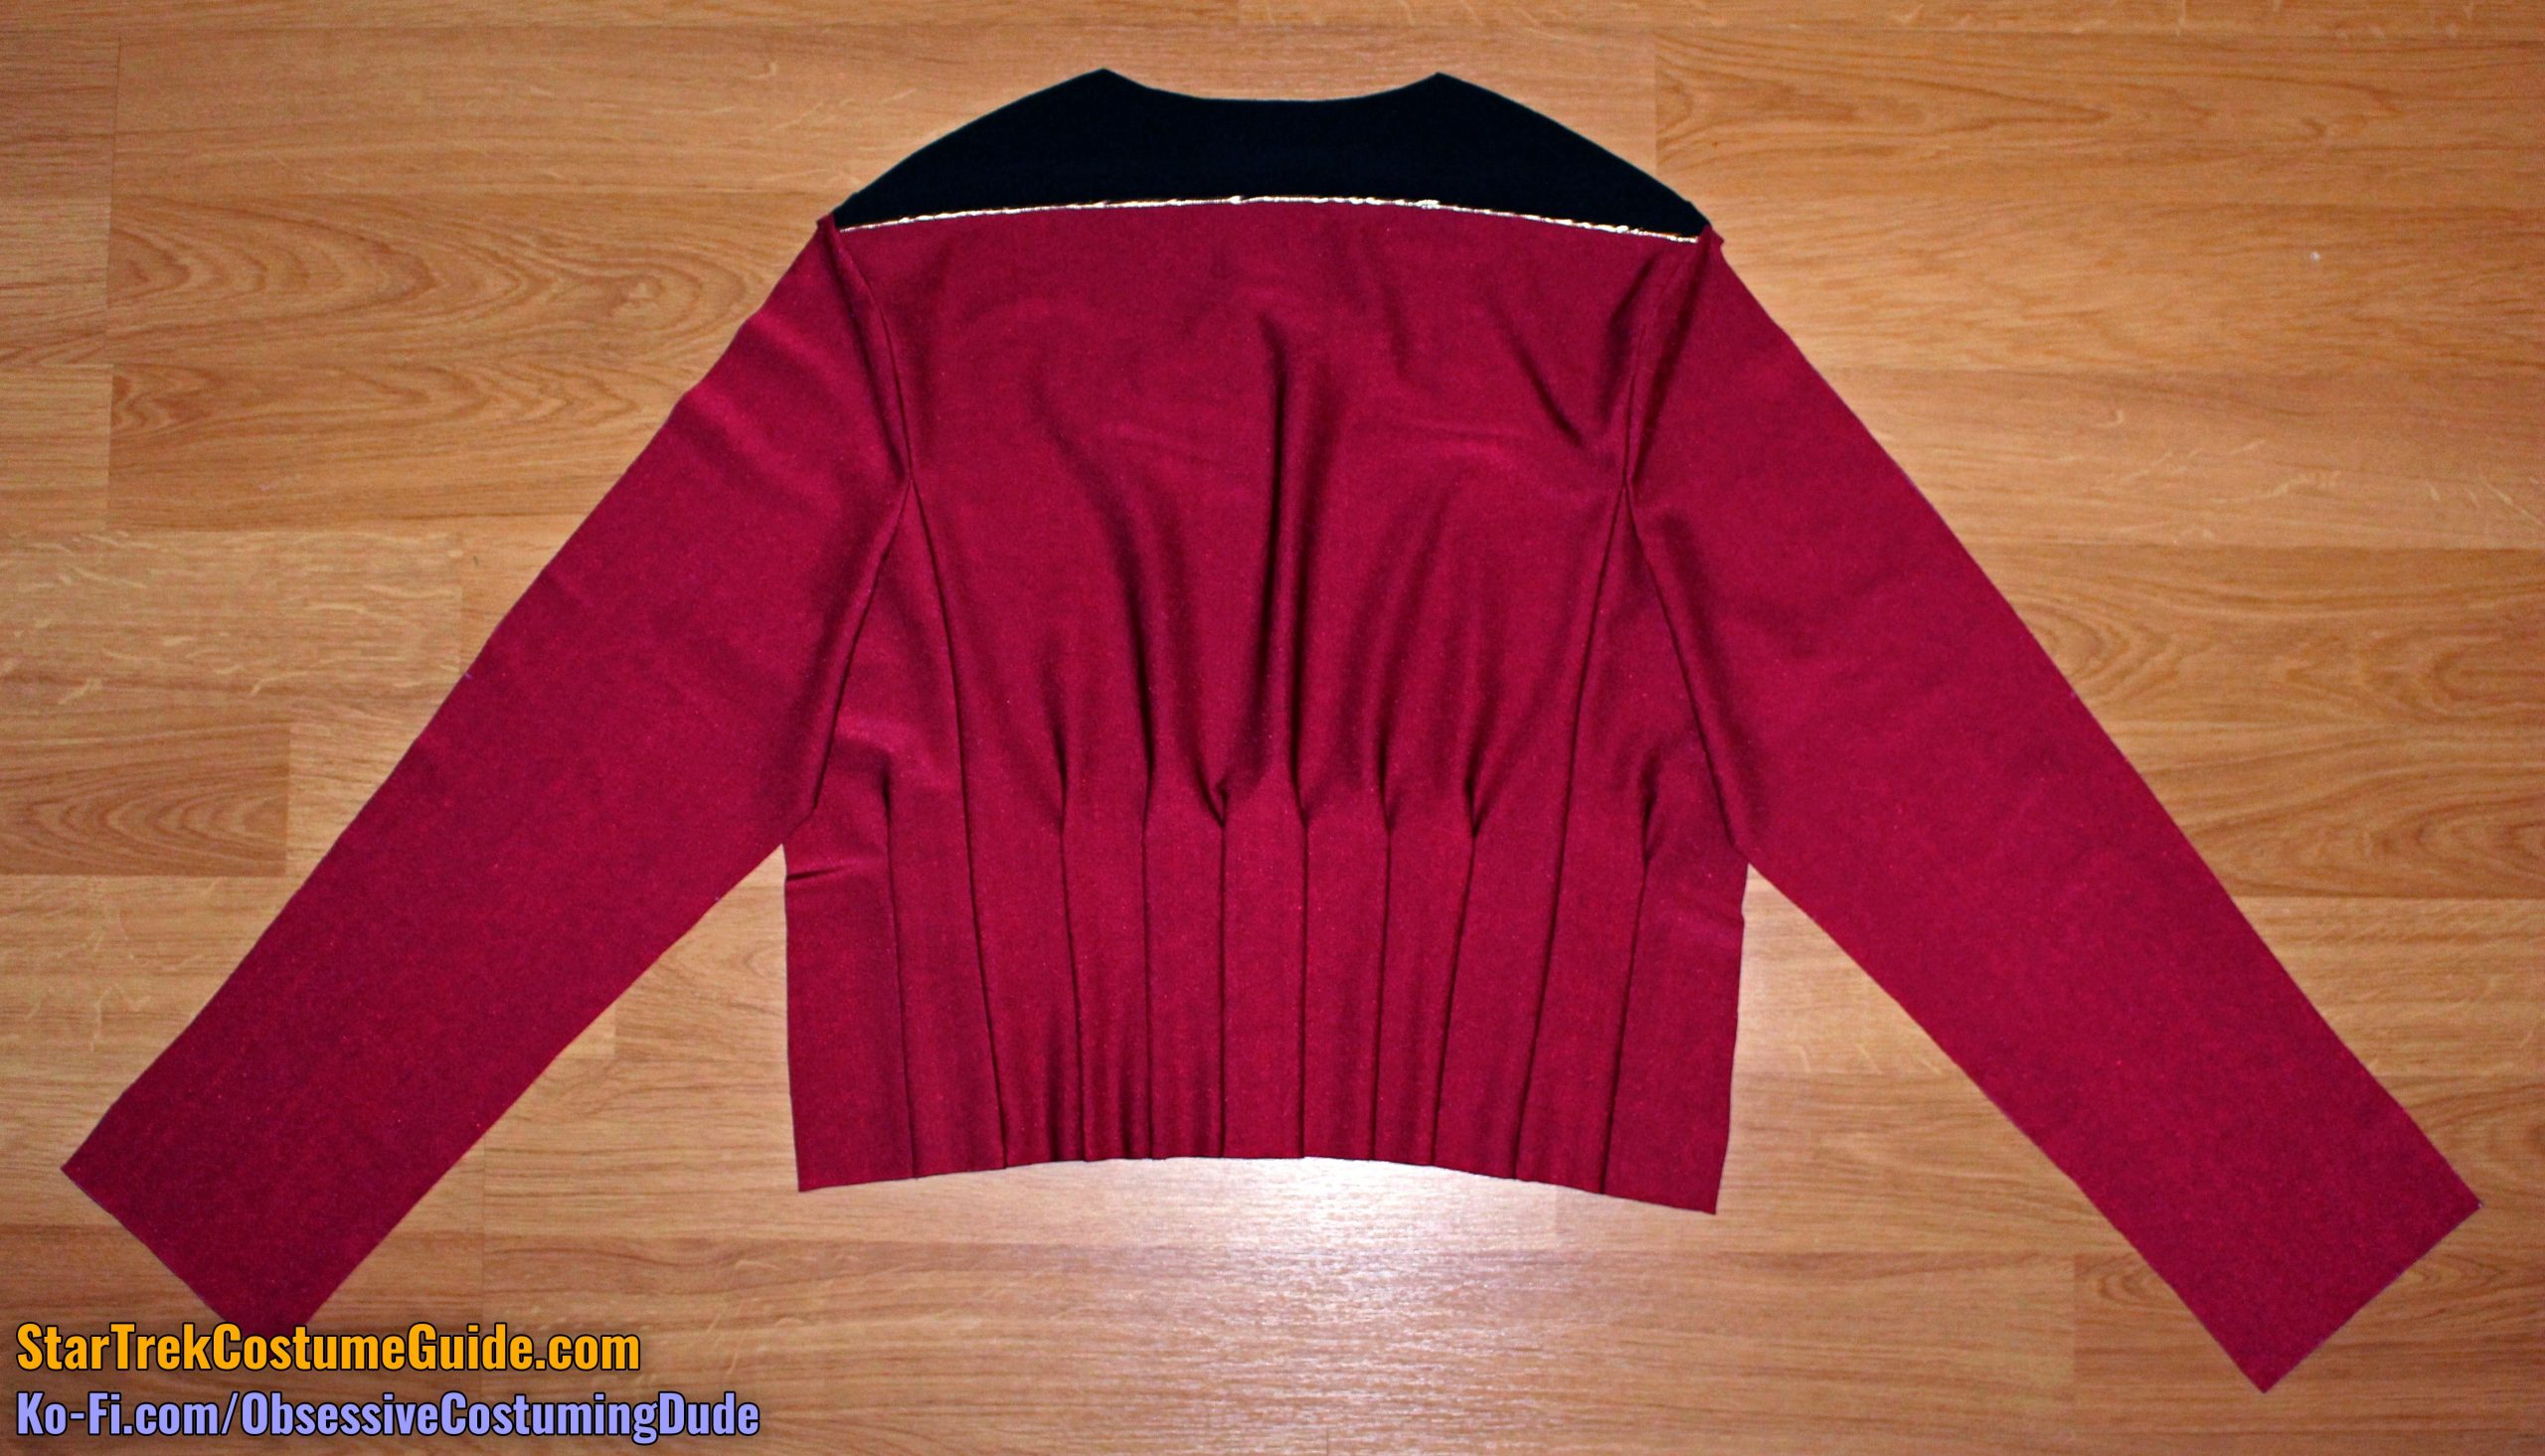
STEP 2 - Back Assembly
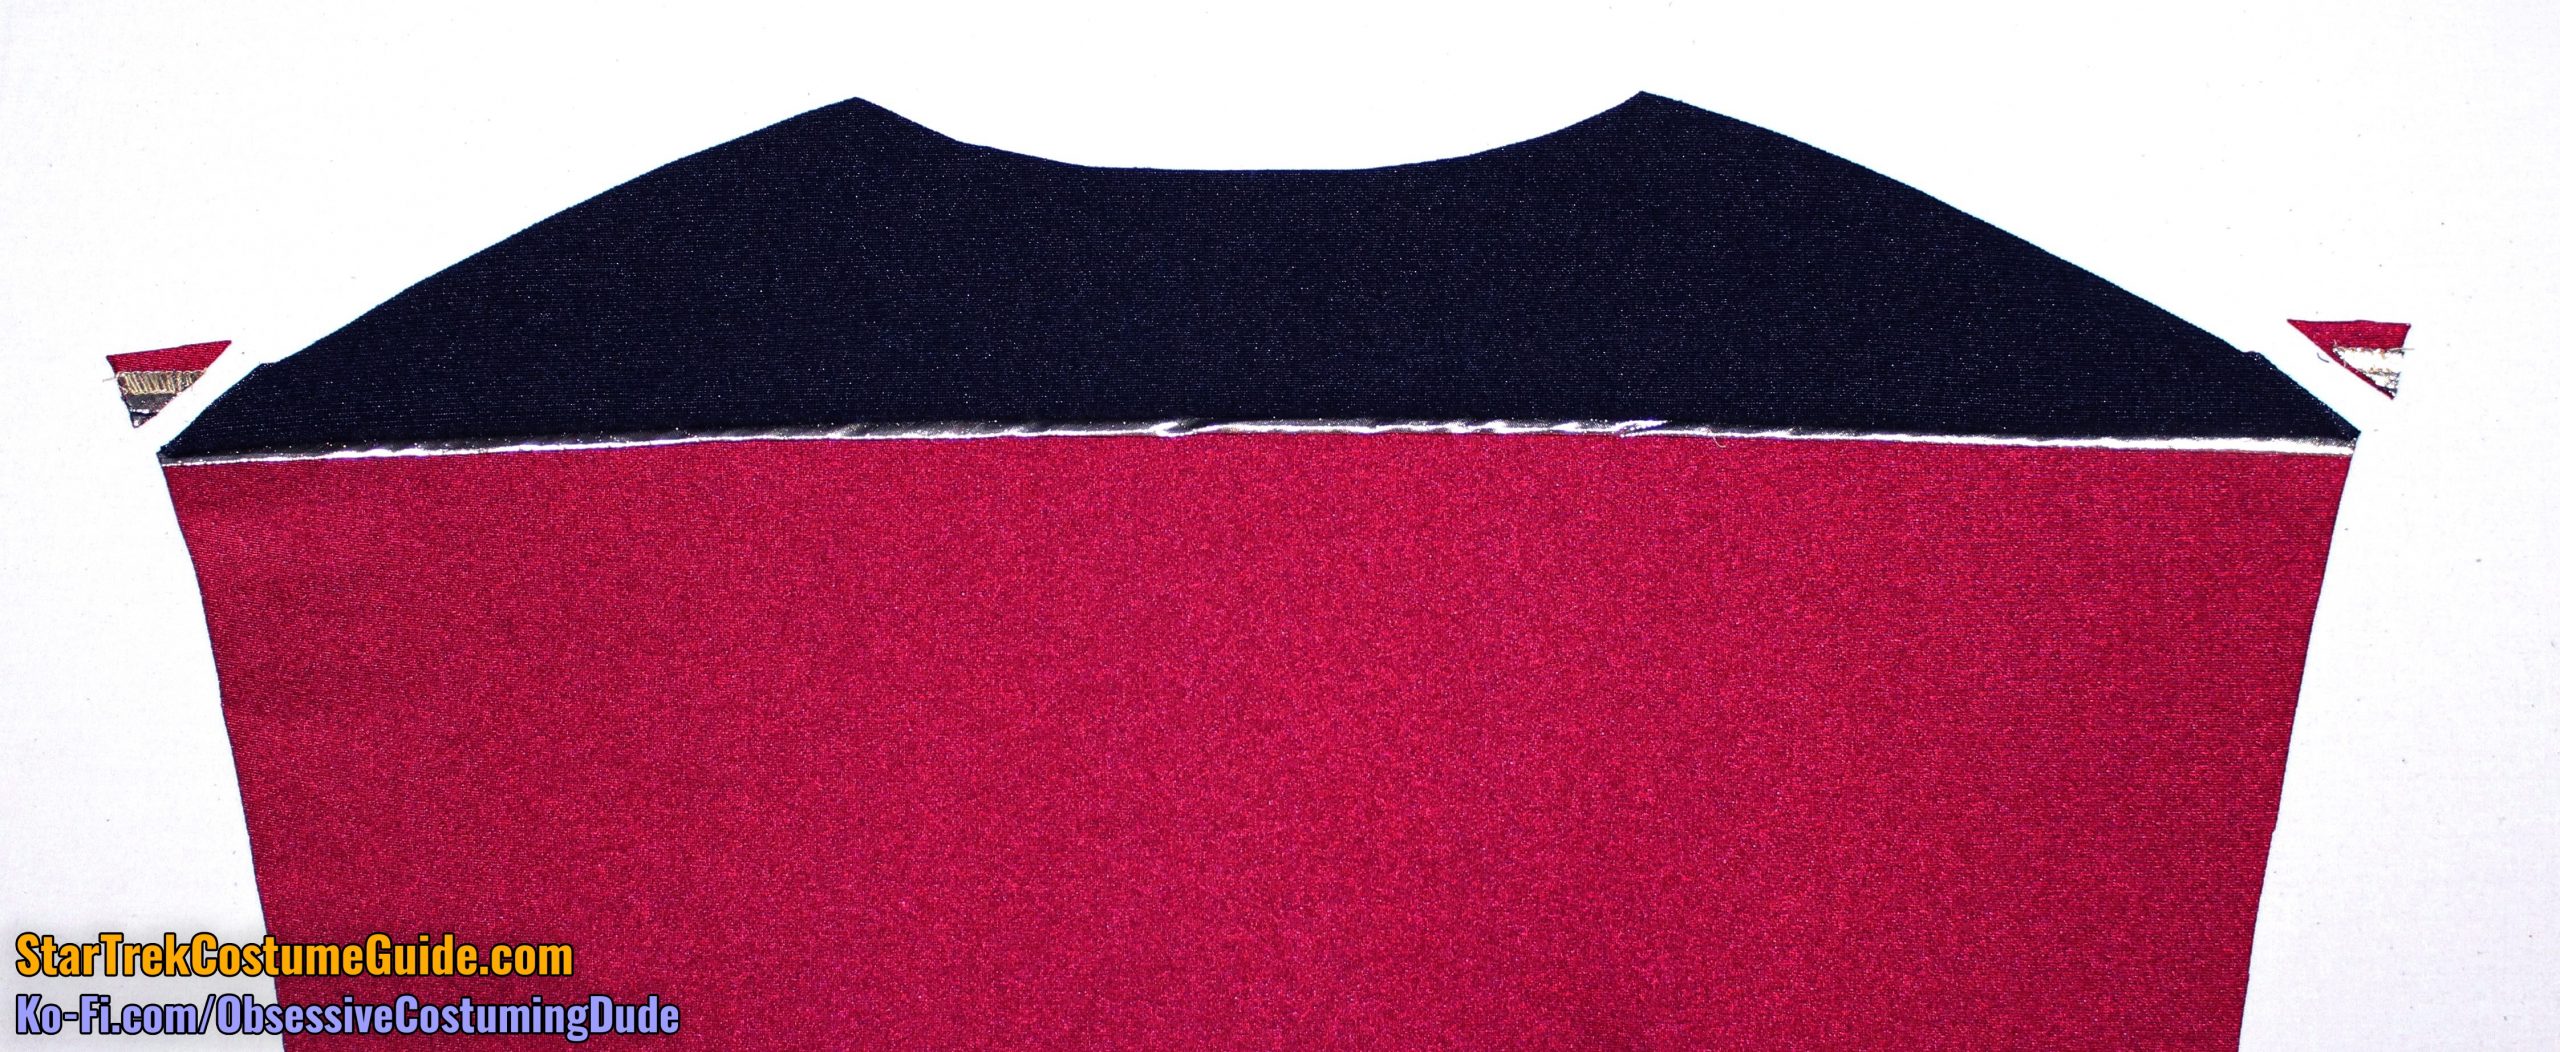
Sew or baste a length of metallic gold trim to the top of the upper back (piece H).
Remember that the upper edge of the back has ¾” seam allowance, rather than the standard ½”, so you’ll either need to cut your trim ½” wider or position it ¼” from the edge to compensate.
Sew the back yoke (piece C) to the upper back with ¾” seam allowance, and with the gold trim “sandwiched” between the two pieces.
Press the yoke and seam allowances upward, and trim away the little corners overhanging the outer yoke.
TIP: Use a quilting/walking foot to sew through all those layers, to help prevent undesired stretching and/or sliding.
The lower back pleats are also much easier to establish than the lower front ones.
As with the side panels, the lengthen/shorten lines coincide with the top edge of the pleats.
On the screen-used Admiral Jameson uniform I examined, there were six pleats across the lower back. Their spacing was subtly irregular, albeit symmetrical, leading me to believe they may have been intentionally irregular.
On the other hand, the intervals were arguably close enough (plus or minus ⅛”) that one could reasonably conclude they were intended to be equidistant.
As with the lower front, depending on your interpretation of these uniforms, changing the number of pleats may be an option for different sizes.
But again as with the front, I prefer to have the same number of pleats as the original (six, in this case), equally positioned and equidistant.
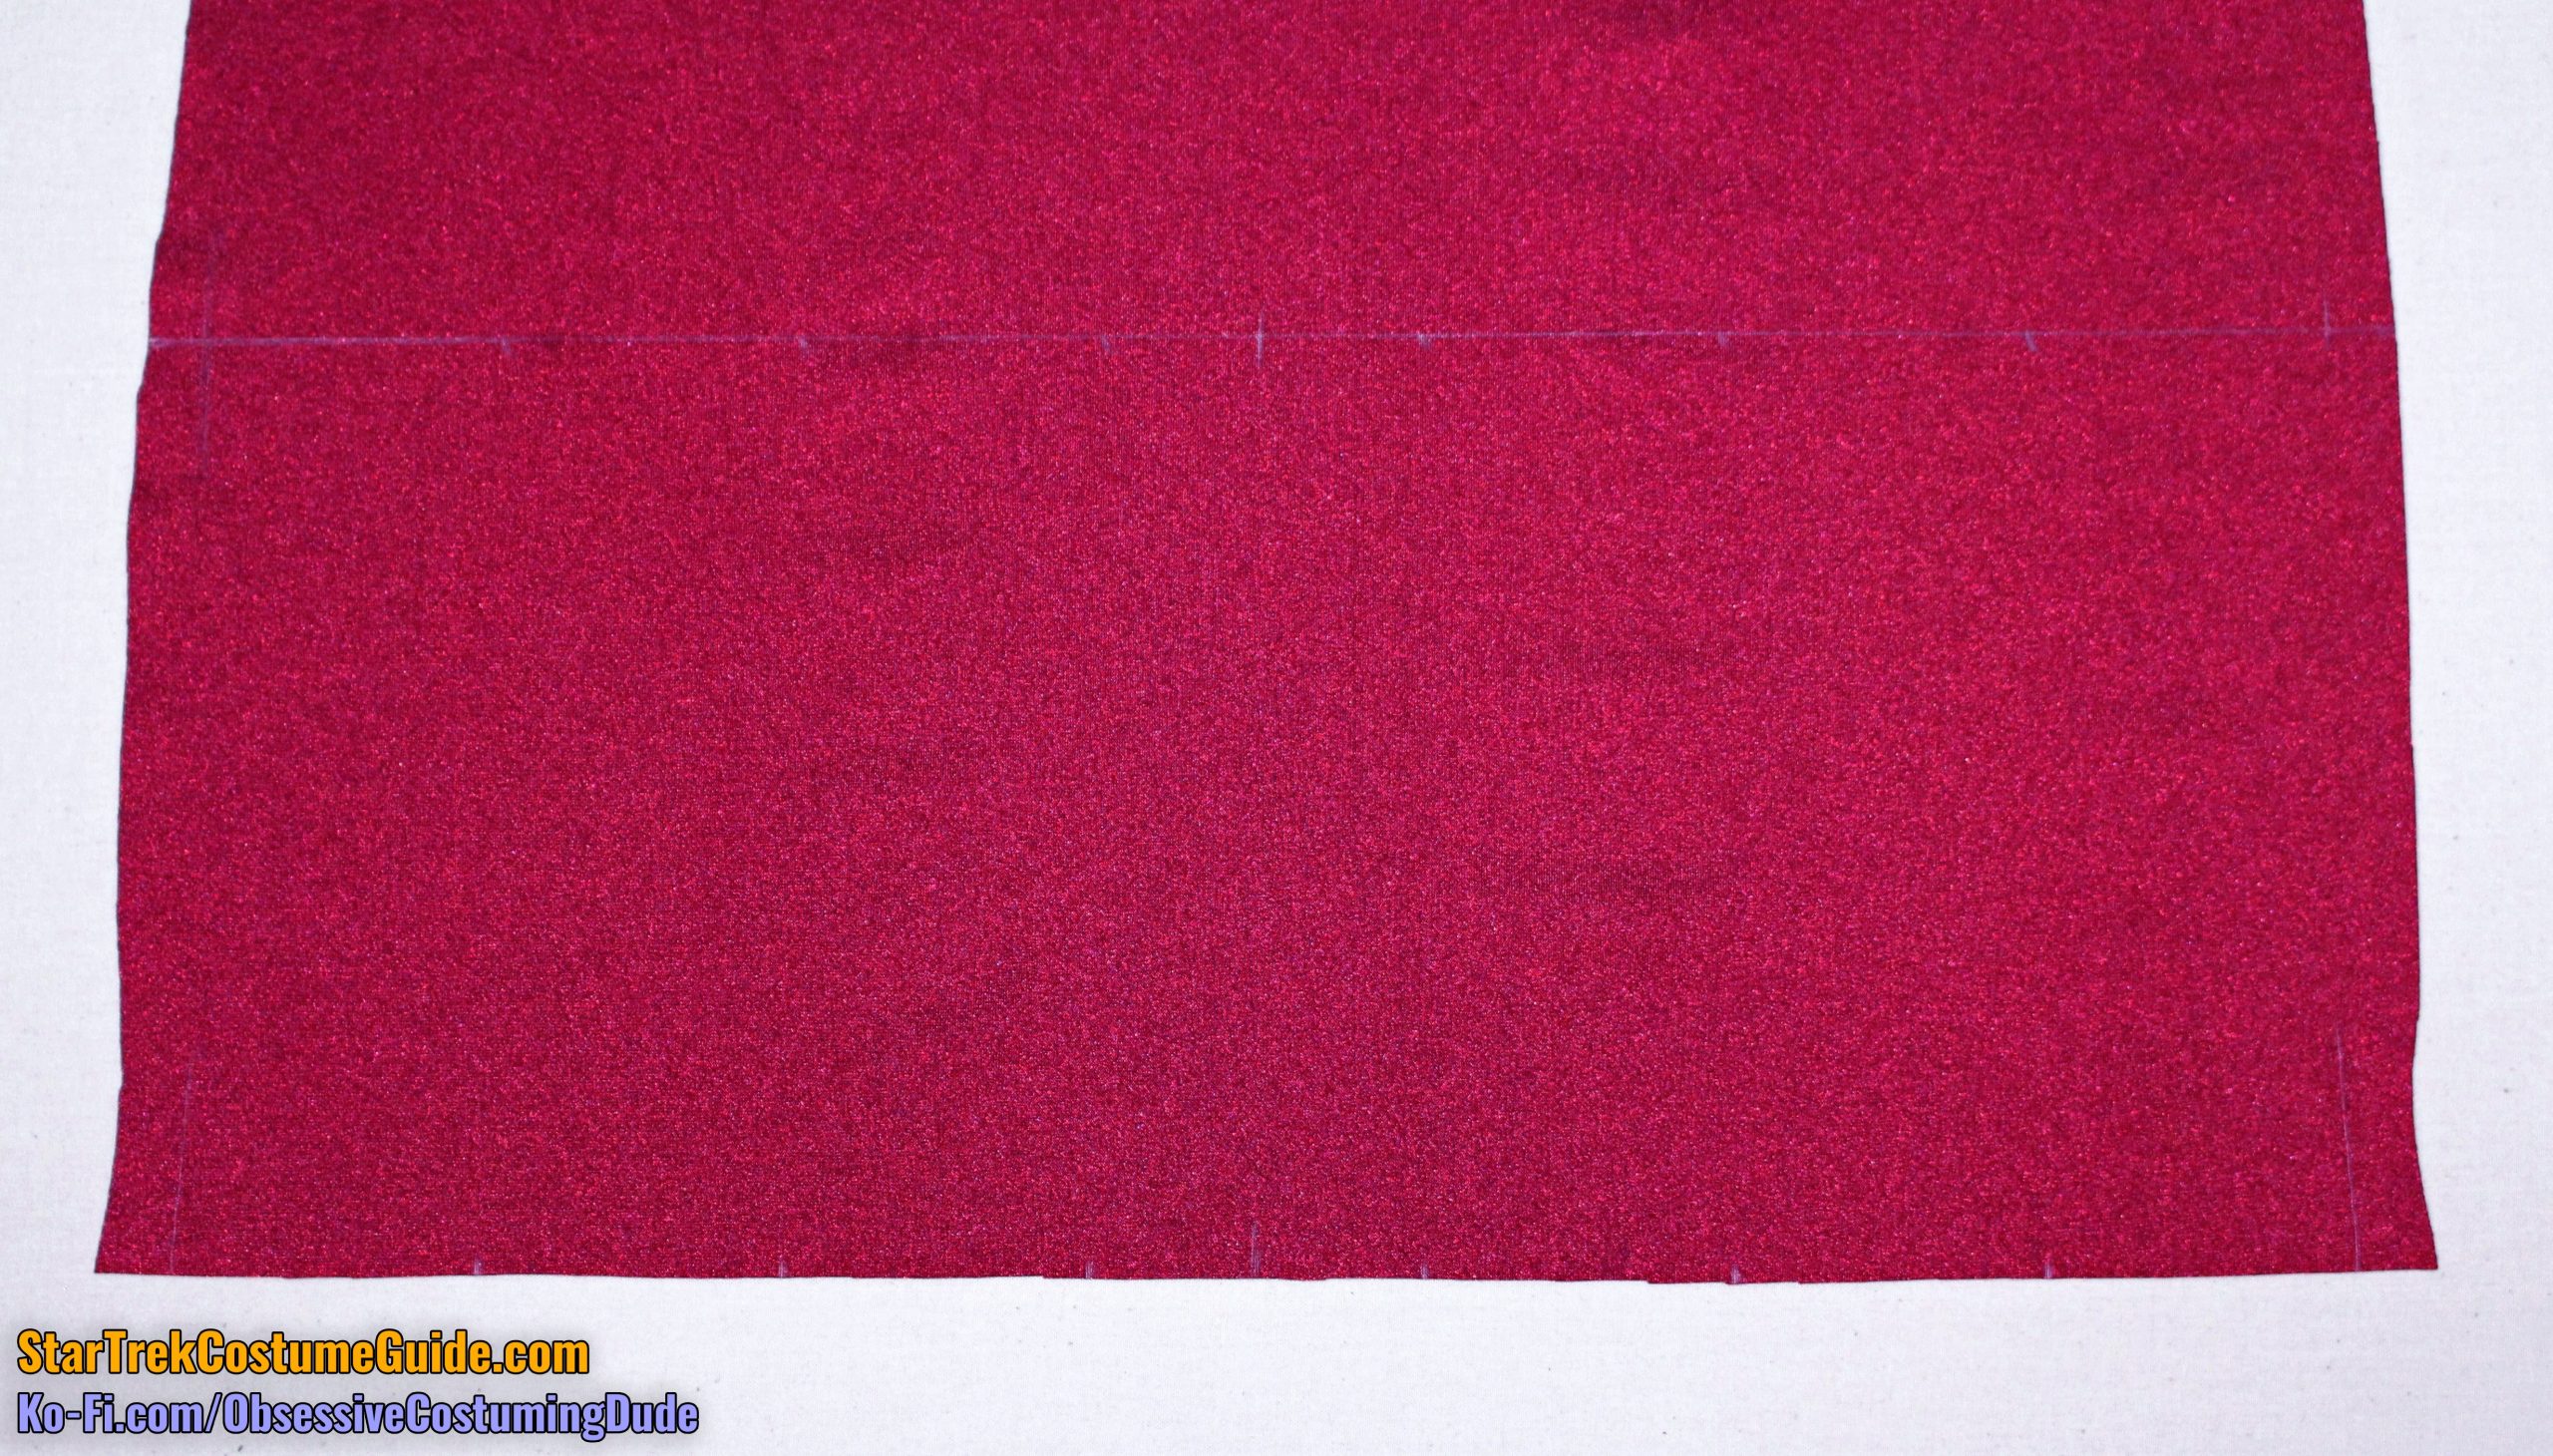
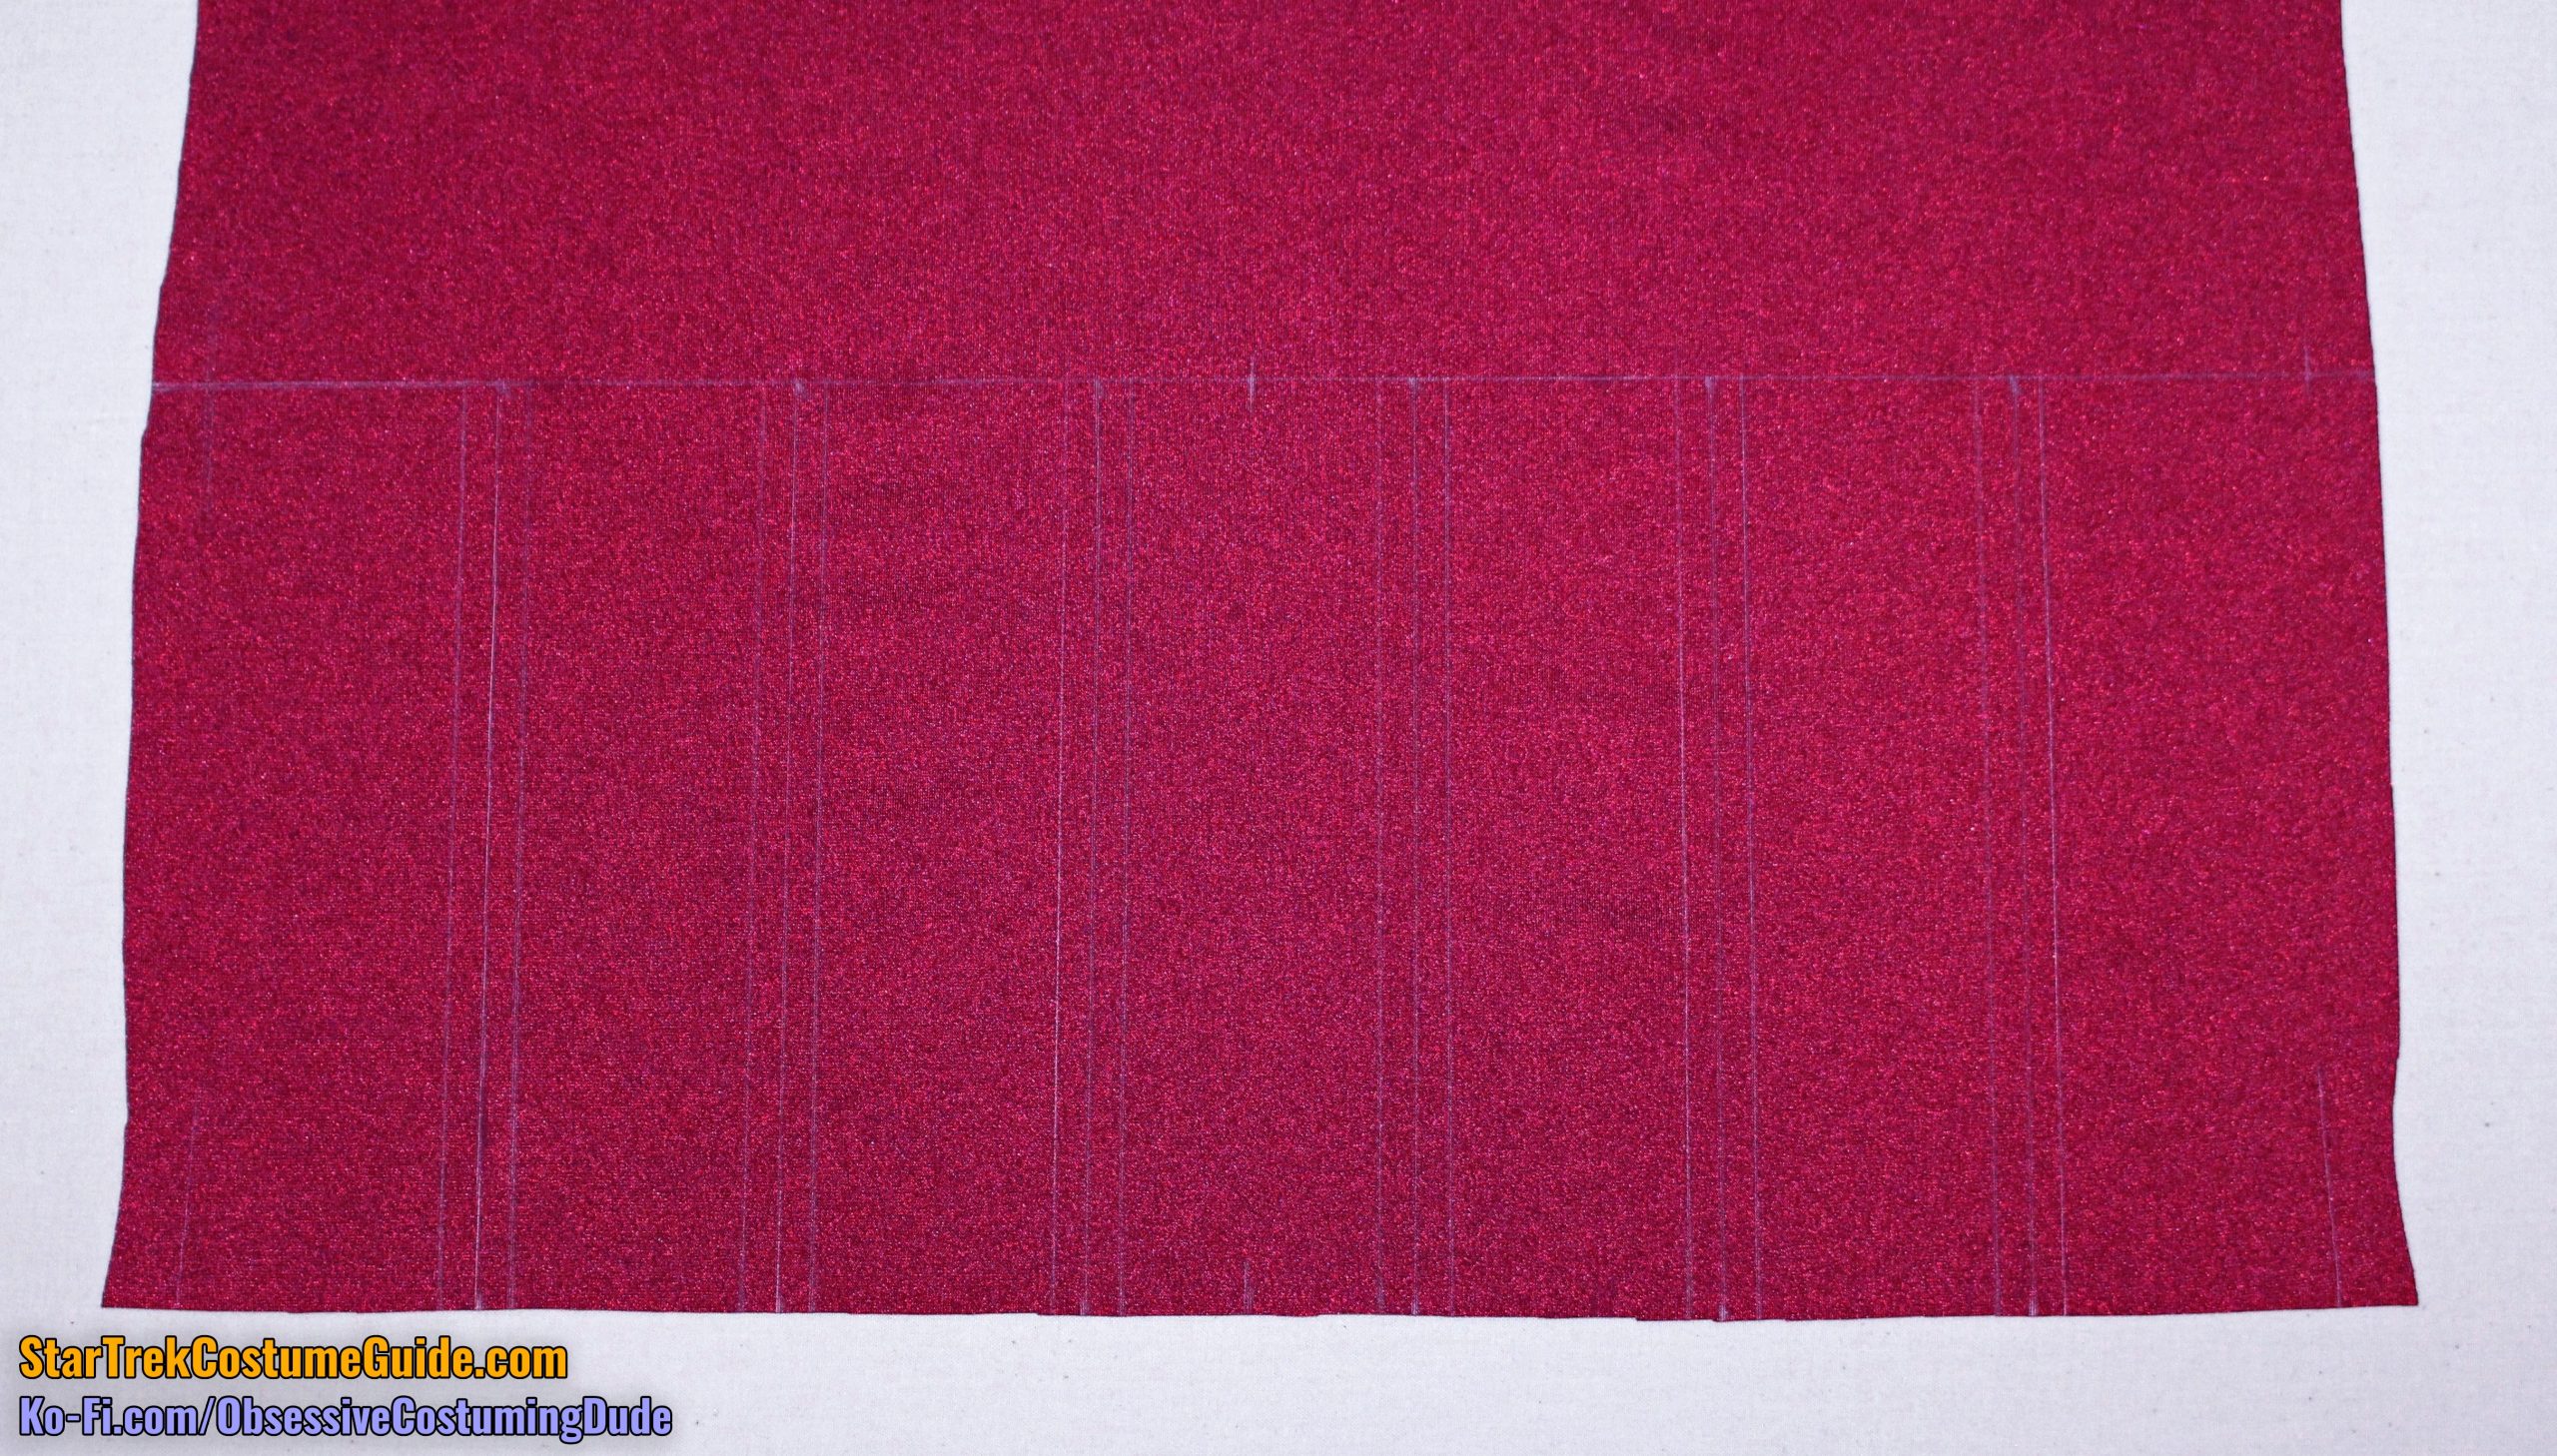
On the wrong side of the back, draw a line across the waistline (where the lengthen/shorten lines are on the printed pattern) to mark the top of the pleats.
Then divide both the waistline and the bottom edge into seven segments.
Connect the corresponding dots from the waistline down to the lower edge.
Then draw a line on each side of those, ¼” away.
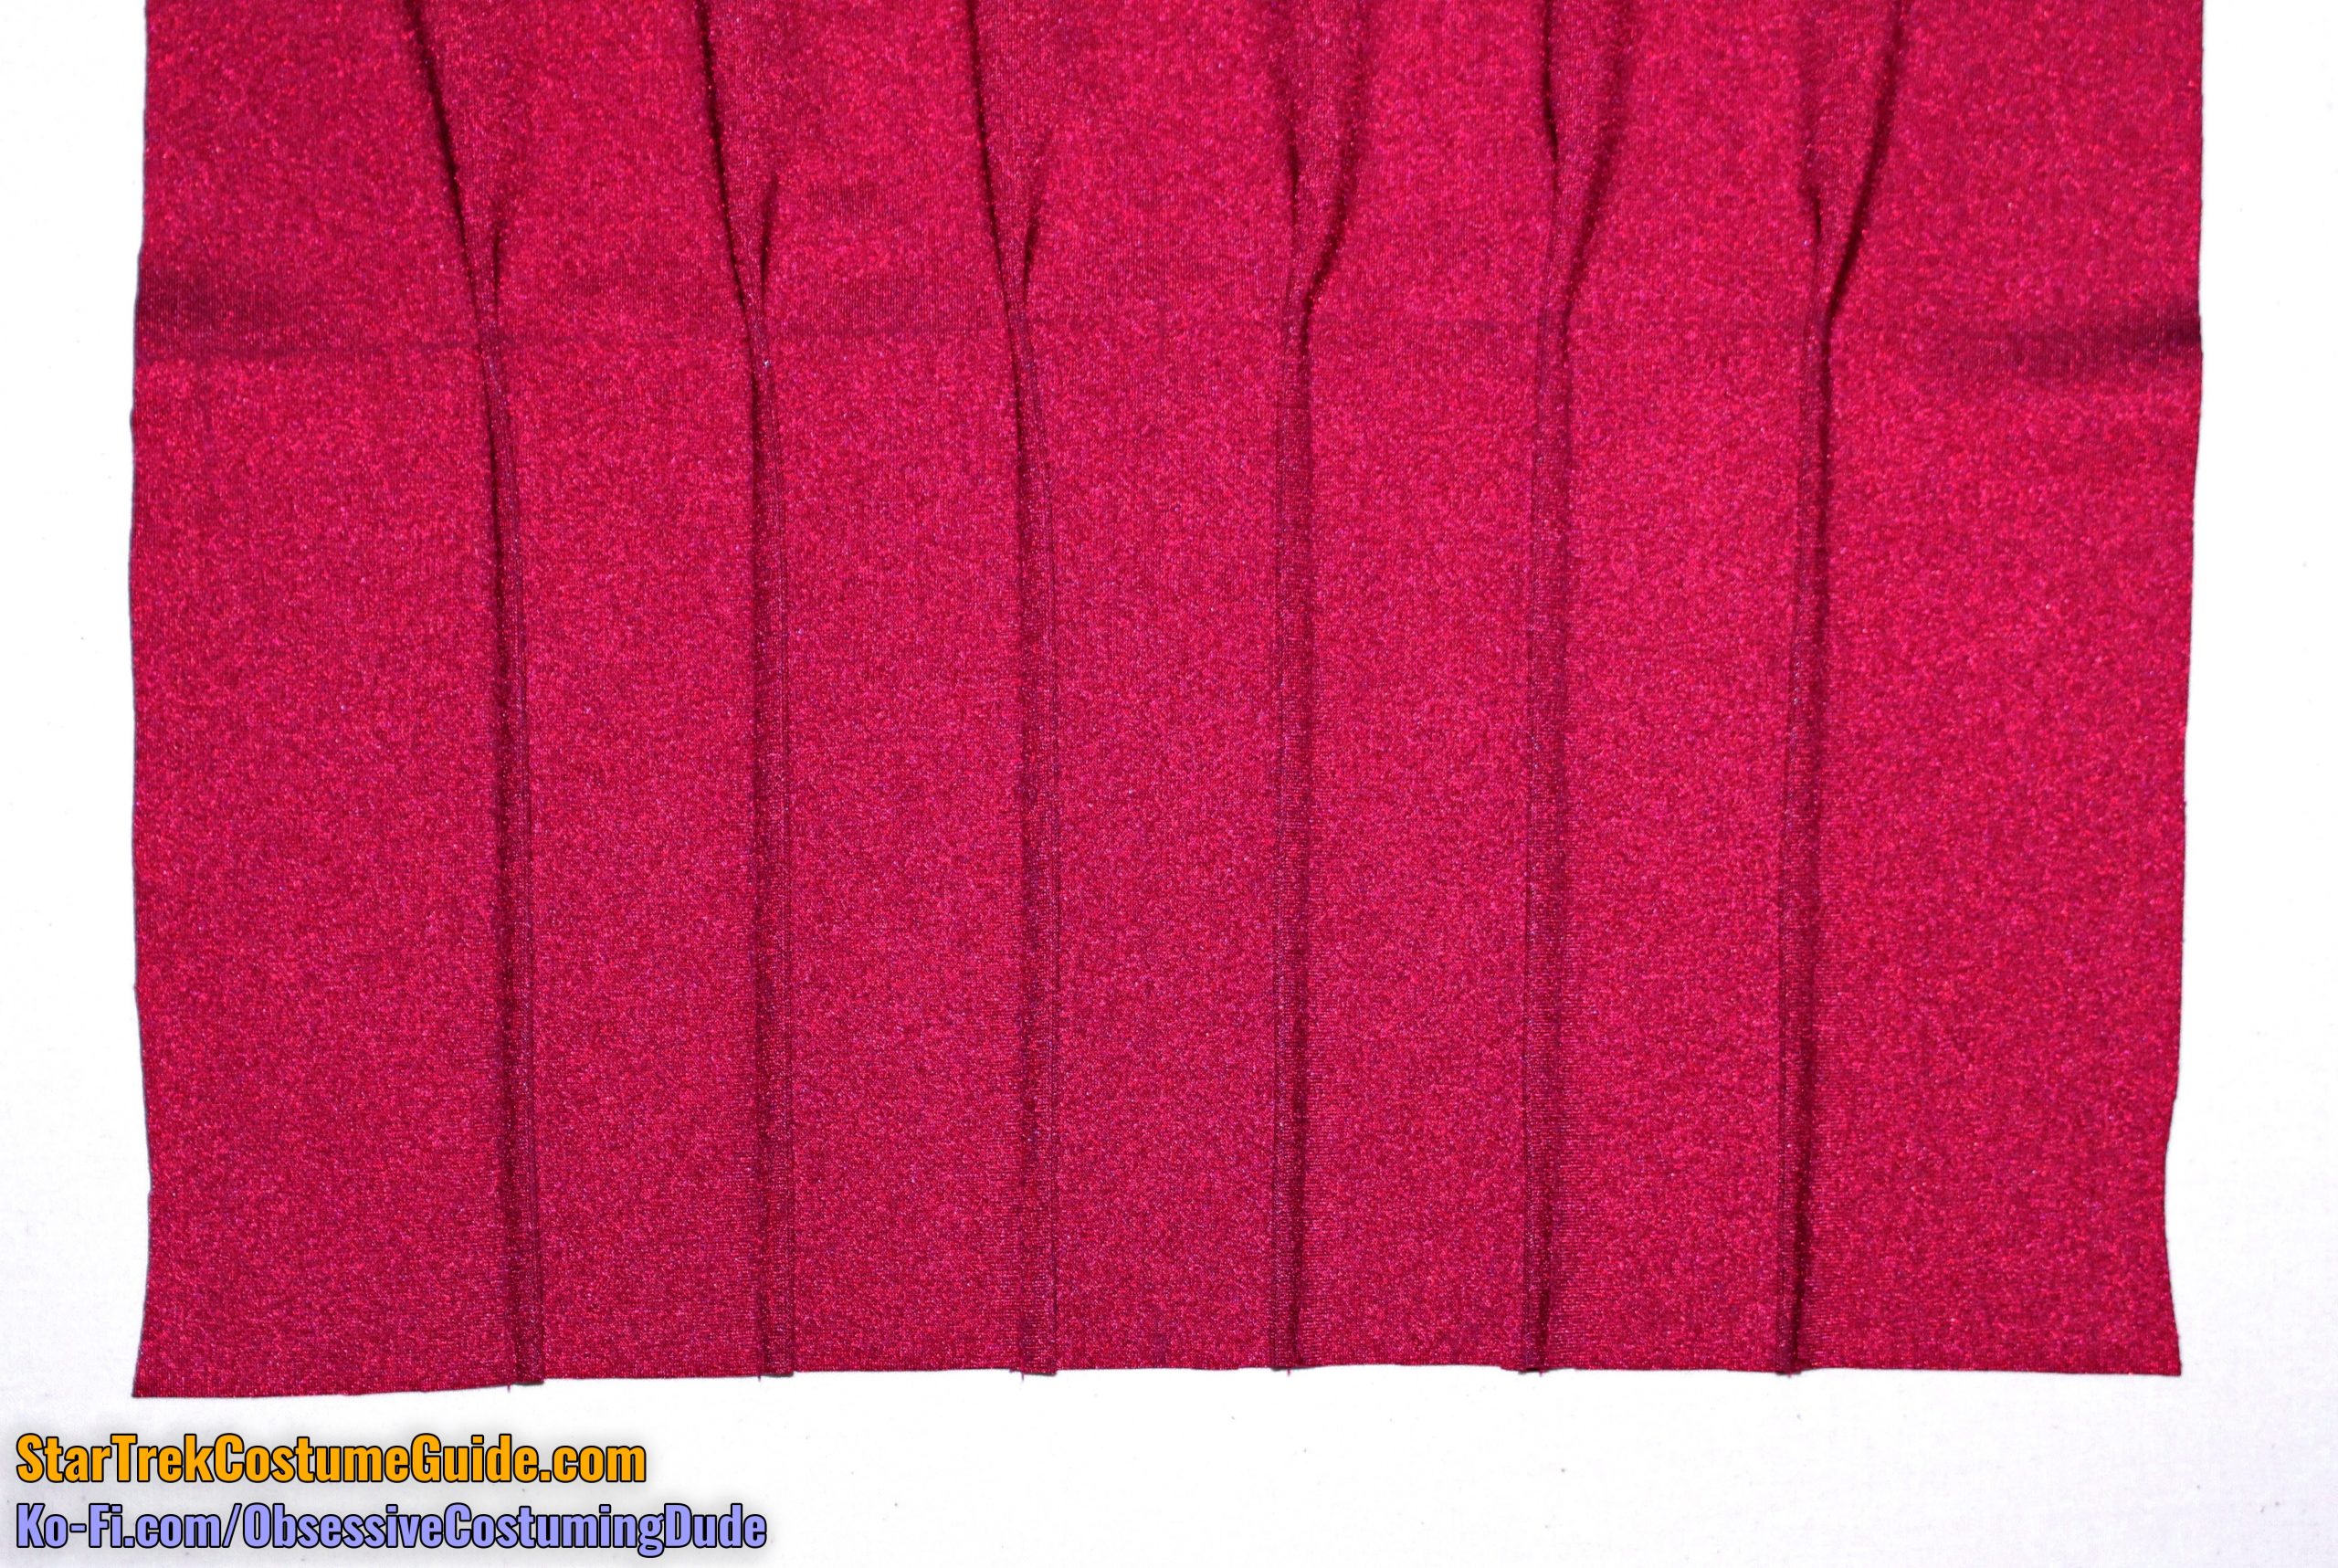
These will be your lower back pleats.
Sew the lower back pleats closed, reinforcing the stitching at the top several times.
Press the pleats toward the center back.
Position and sew the pleats on the side back panels (piece I), as done previously on the side front panels.
As with the side front seams, on the side back, you have the same three options regarding the direction(s) of the seam allowances.
I suggest proceeding in the same manner as done previously with the side front seams, to remain stylistically consistent with your jacket.
Sew the side back panels to the back of the jacket, sewing and pressing as done previously on the front assemblies.
Attach the back sleeves (piece L) to the back assembly, as done previously on the front assemblies.
Also, the gold trim can go in whichever direction you like.
I prefer for the gold trim to go forward, because I think it looks better that way beside the lower sleeve insert.
I also prefer the seam allowances to be pressed open the entire length of the seam.
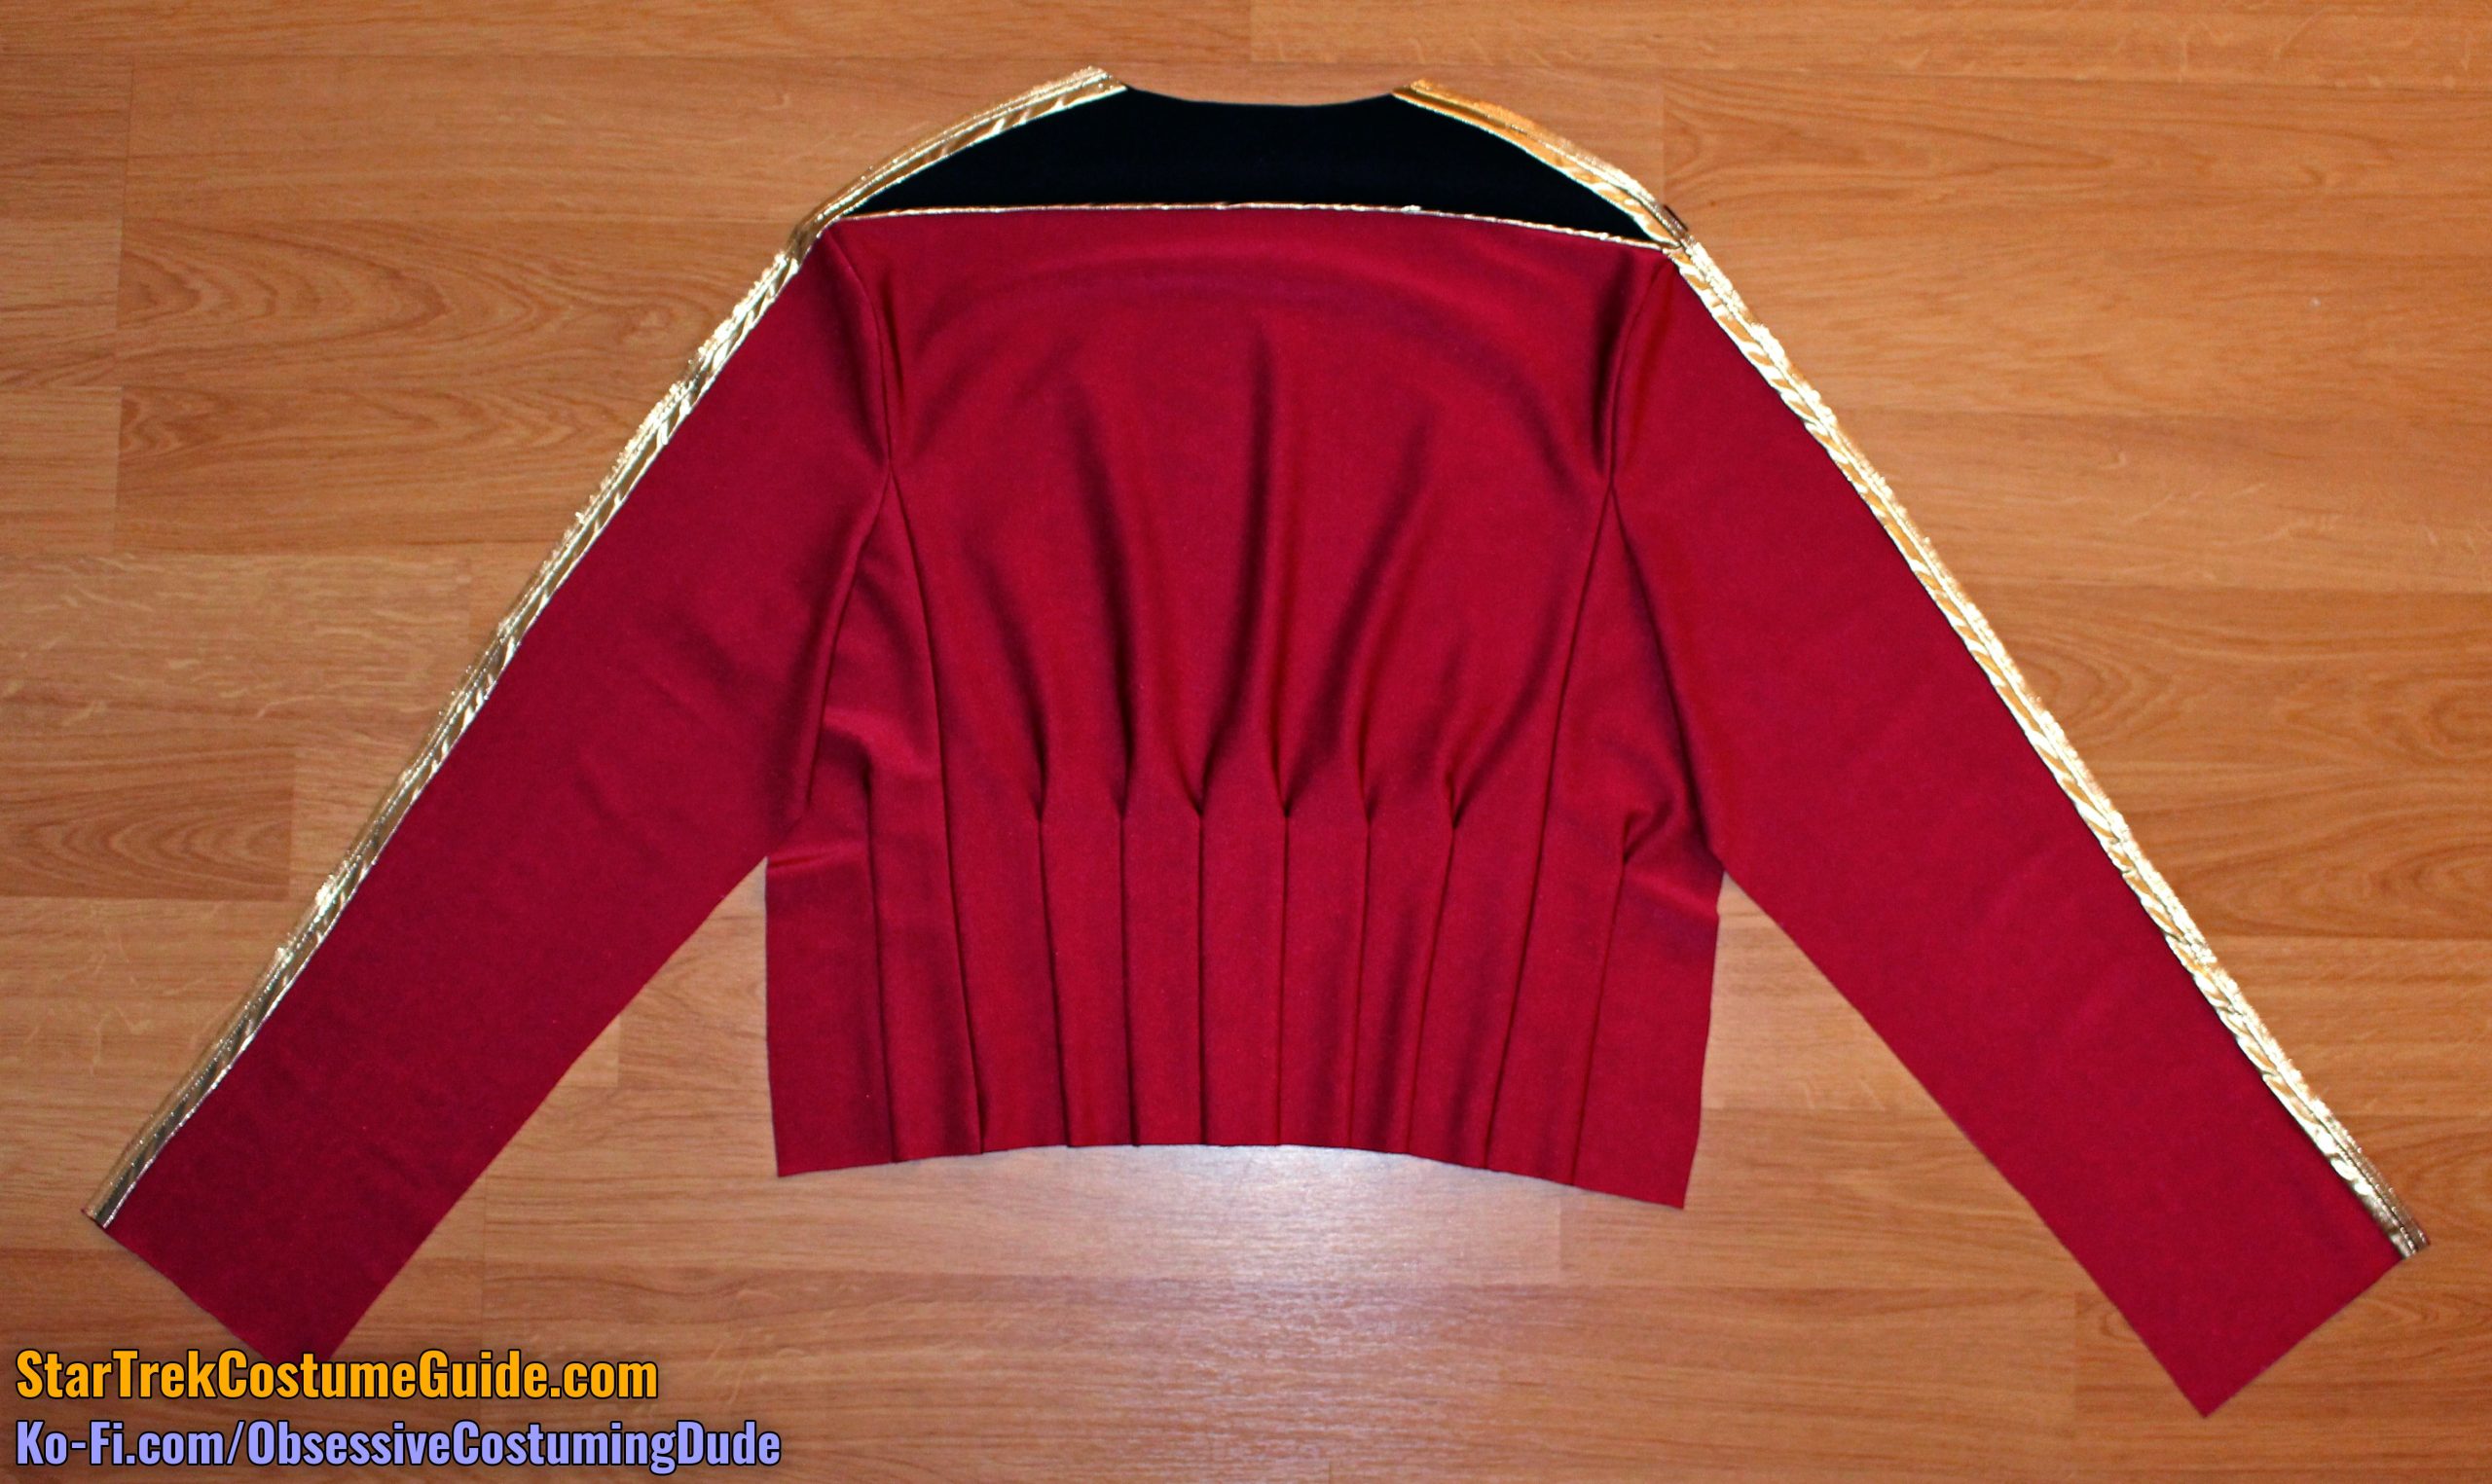
Sew or baste a length of gold trim to each shoulder/outer sleeve seam inside the seam allowance. (If you want your trim to face forward, this is best done on the back assembly, or vice-versa if you want your trim to face the rear.)
Sew the front assemblies to the back assembly along the shoulder/outer sleeve seam and press the seam allowances open.
TIP: Use a quilting/walking foot to sew through all those layers, to help prevent undesired stretching and/or sliding.
Sew the side/inner sleeve seams closed, all the way from the bottom of the jacket to the bottom of the sleeve, matching seam lines at the armscye. (Remember that the side seams have ⅝” seam allowance!)
Press the side/inner sleeve seam allowances open.
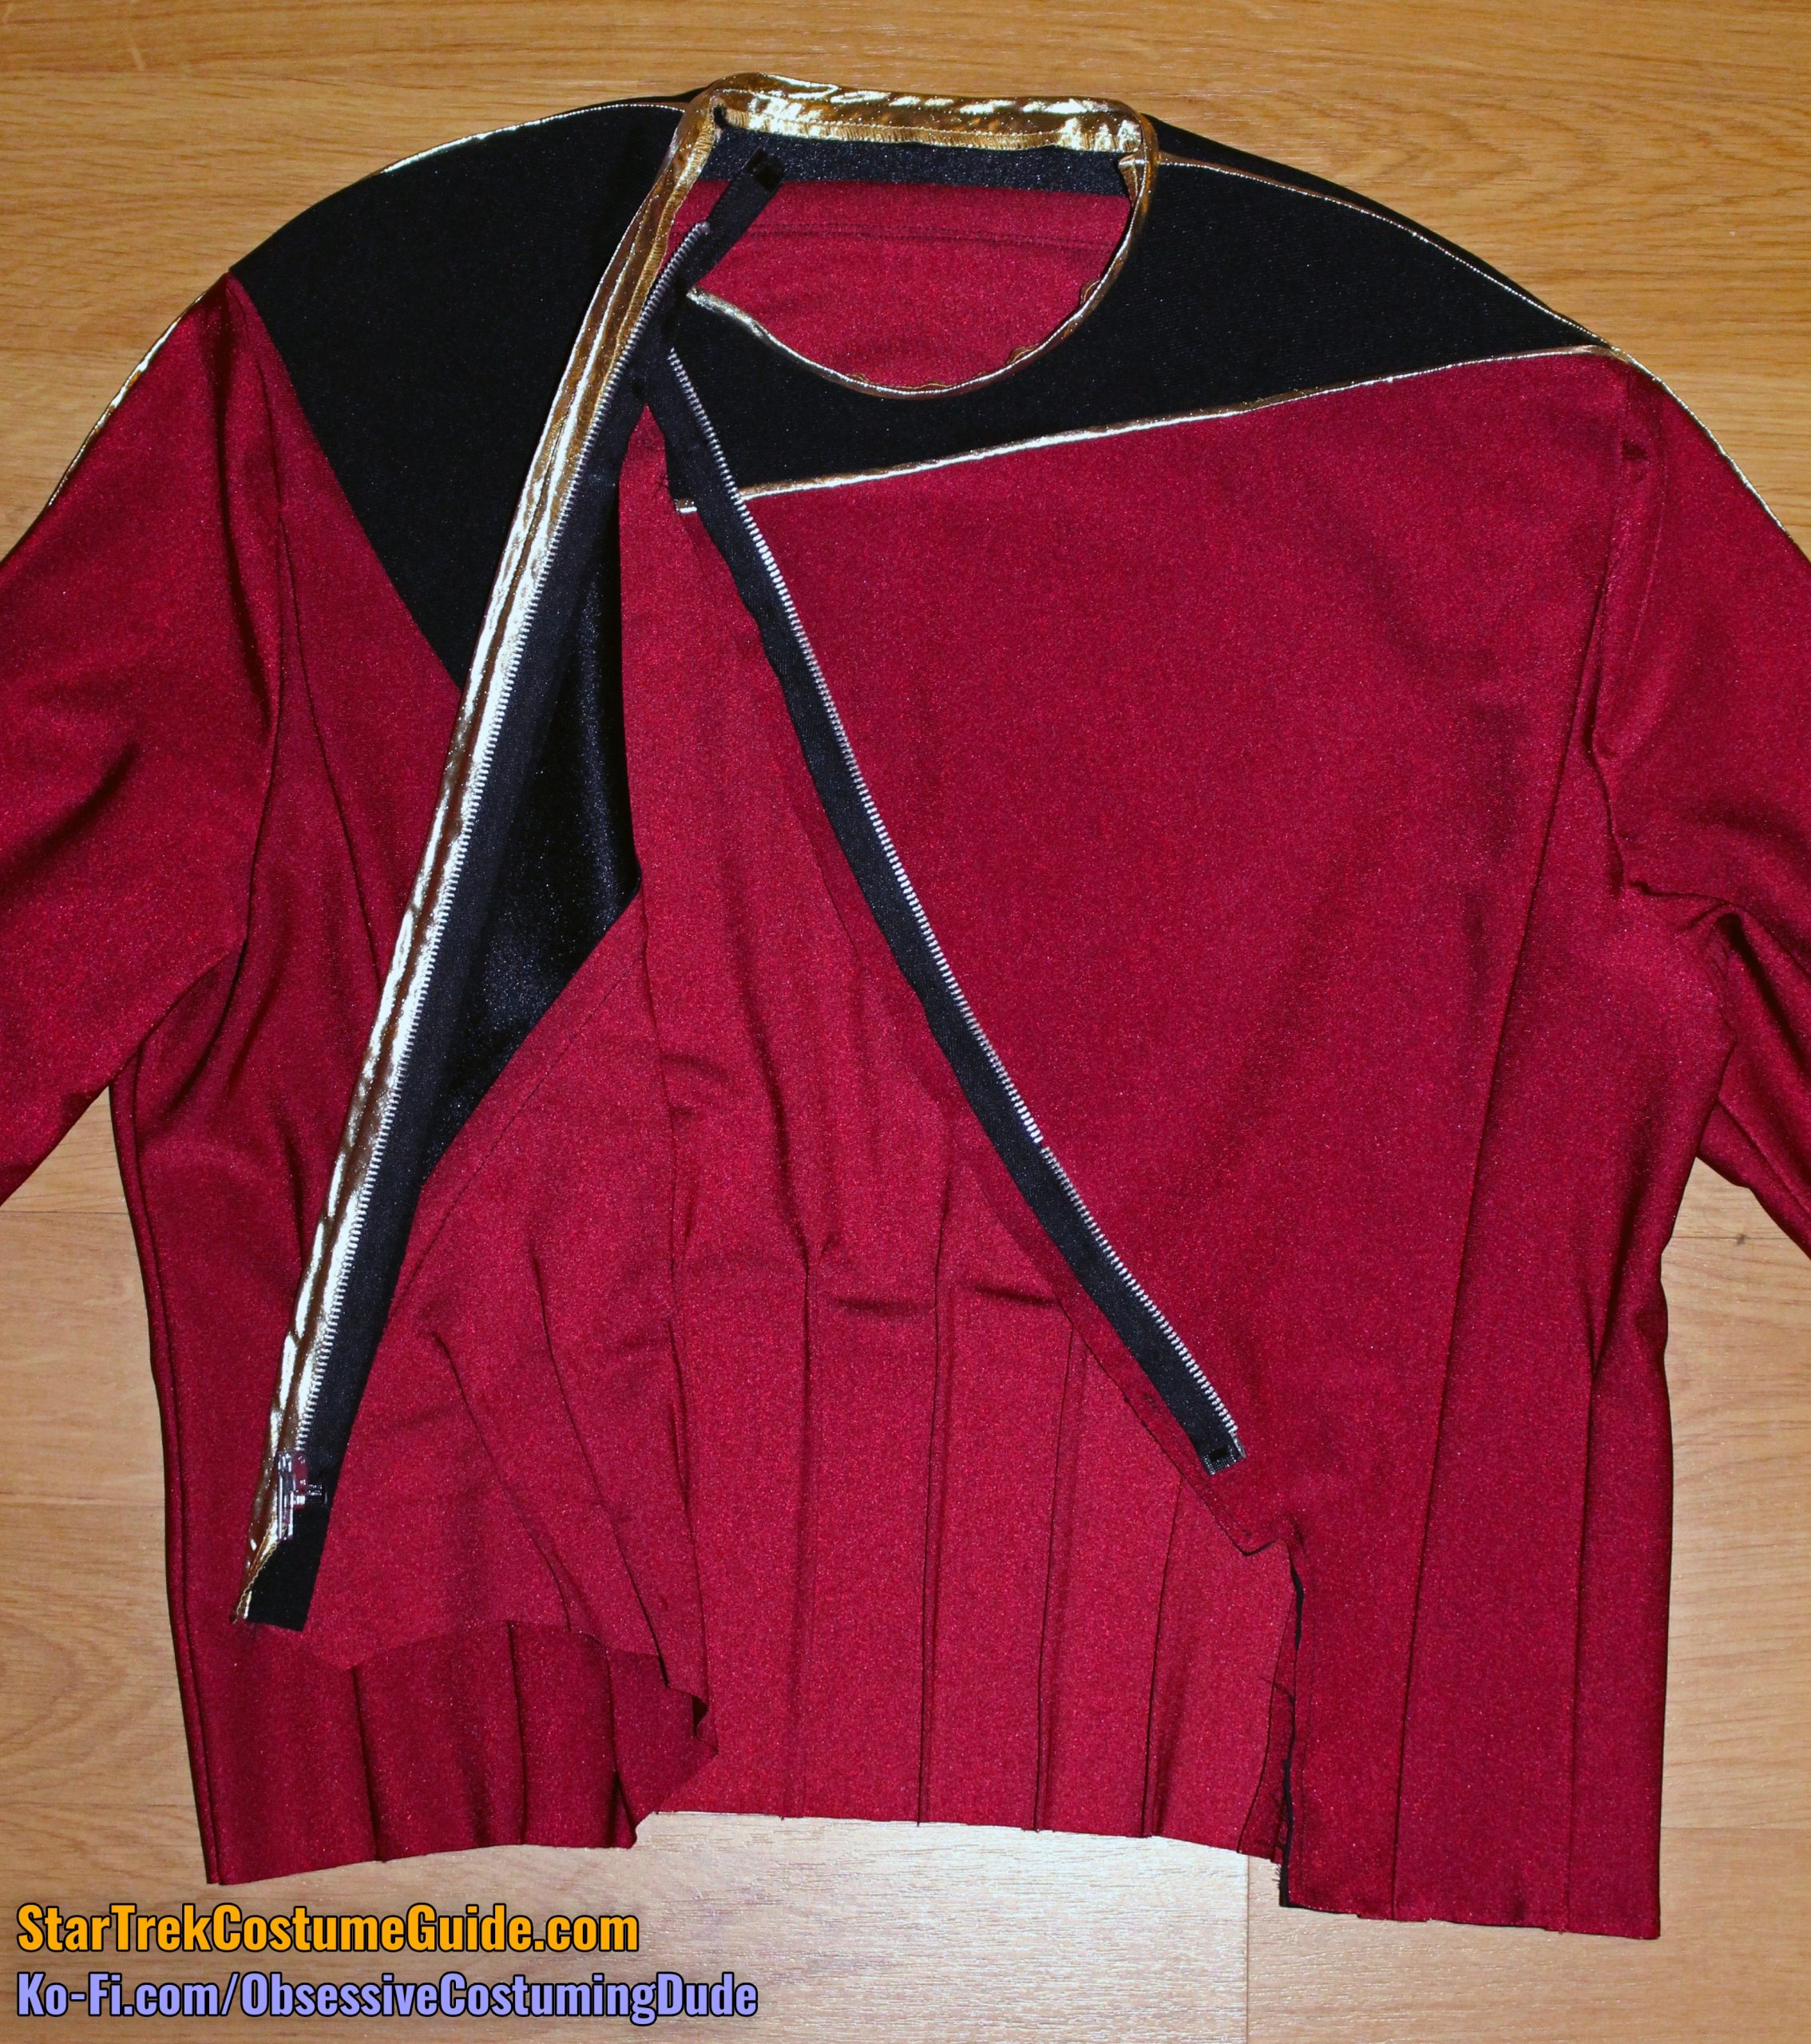
STEP 4 - Zipper
Before we attach the zipper, we need to do a bit of prep work on the areas involved.
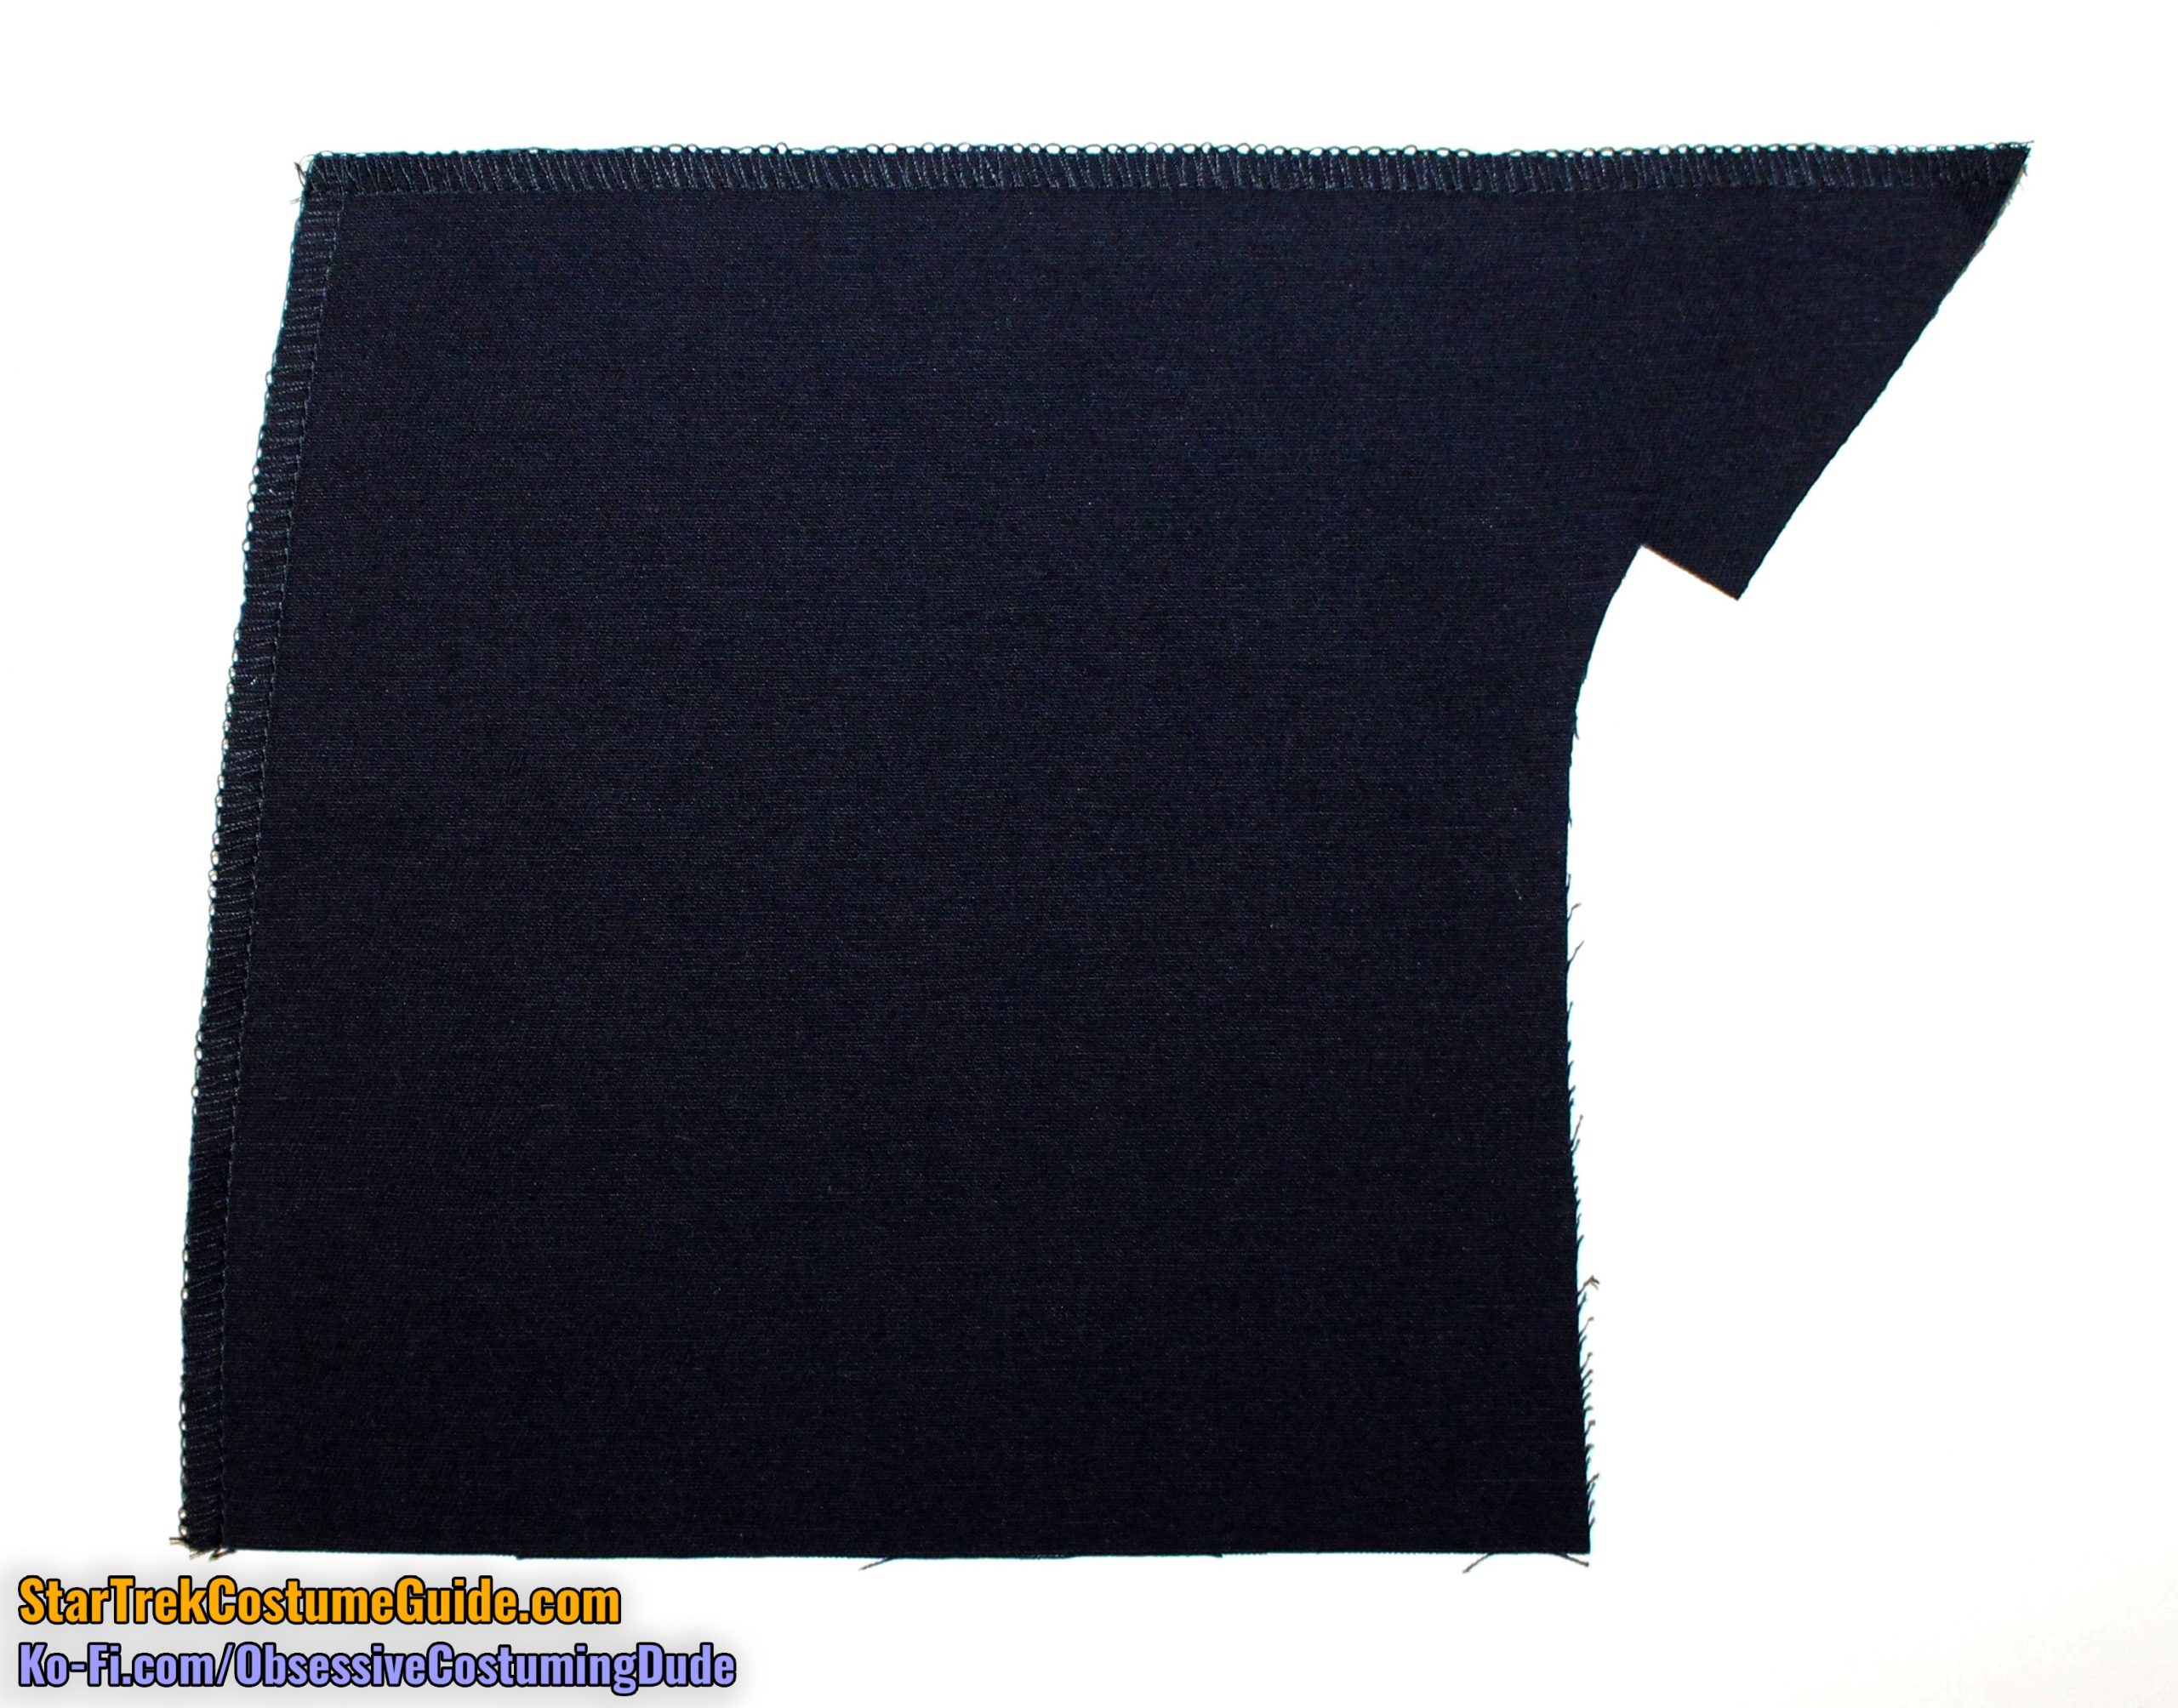
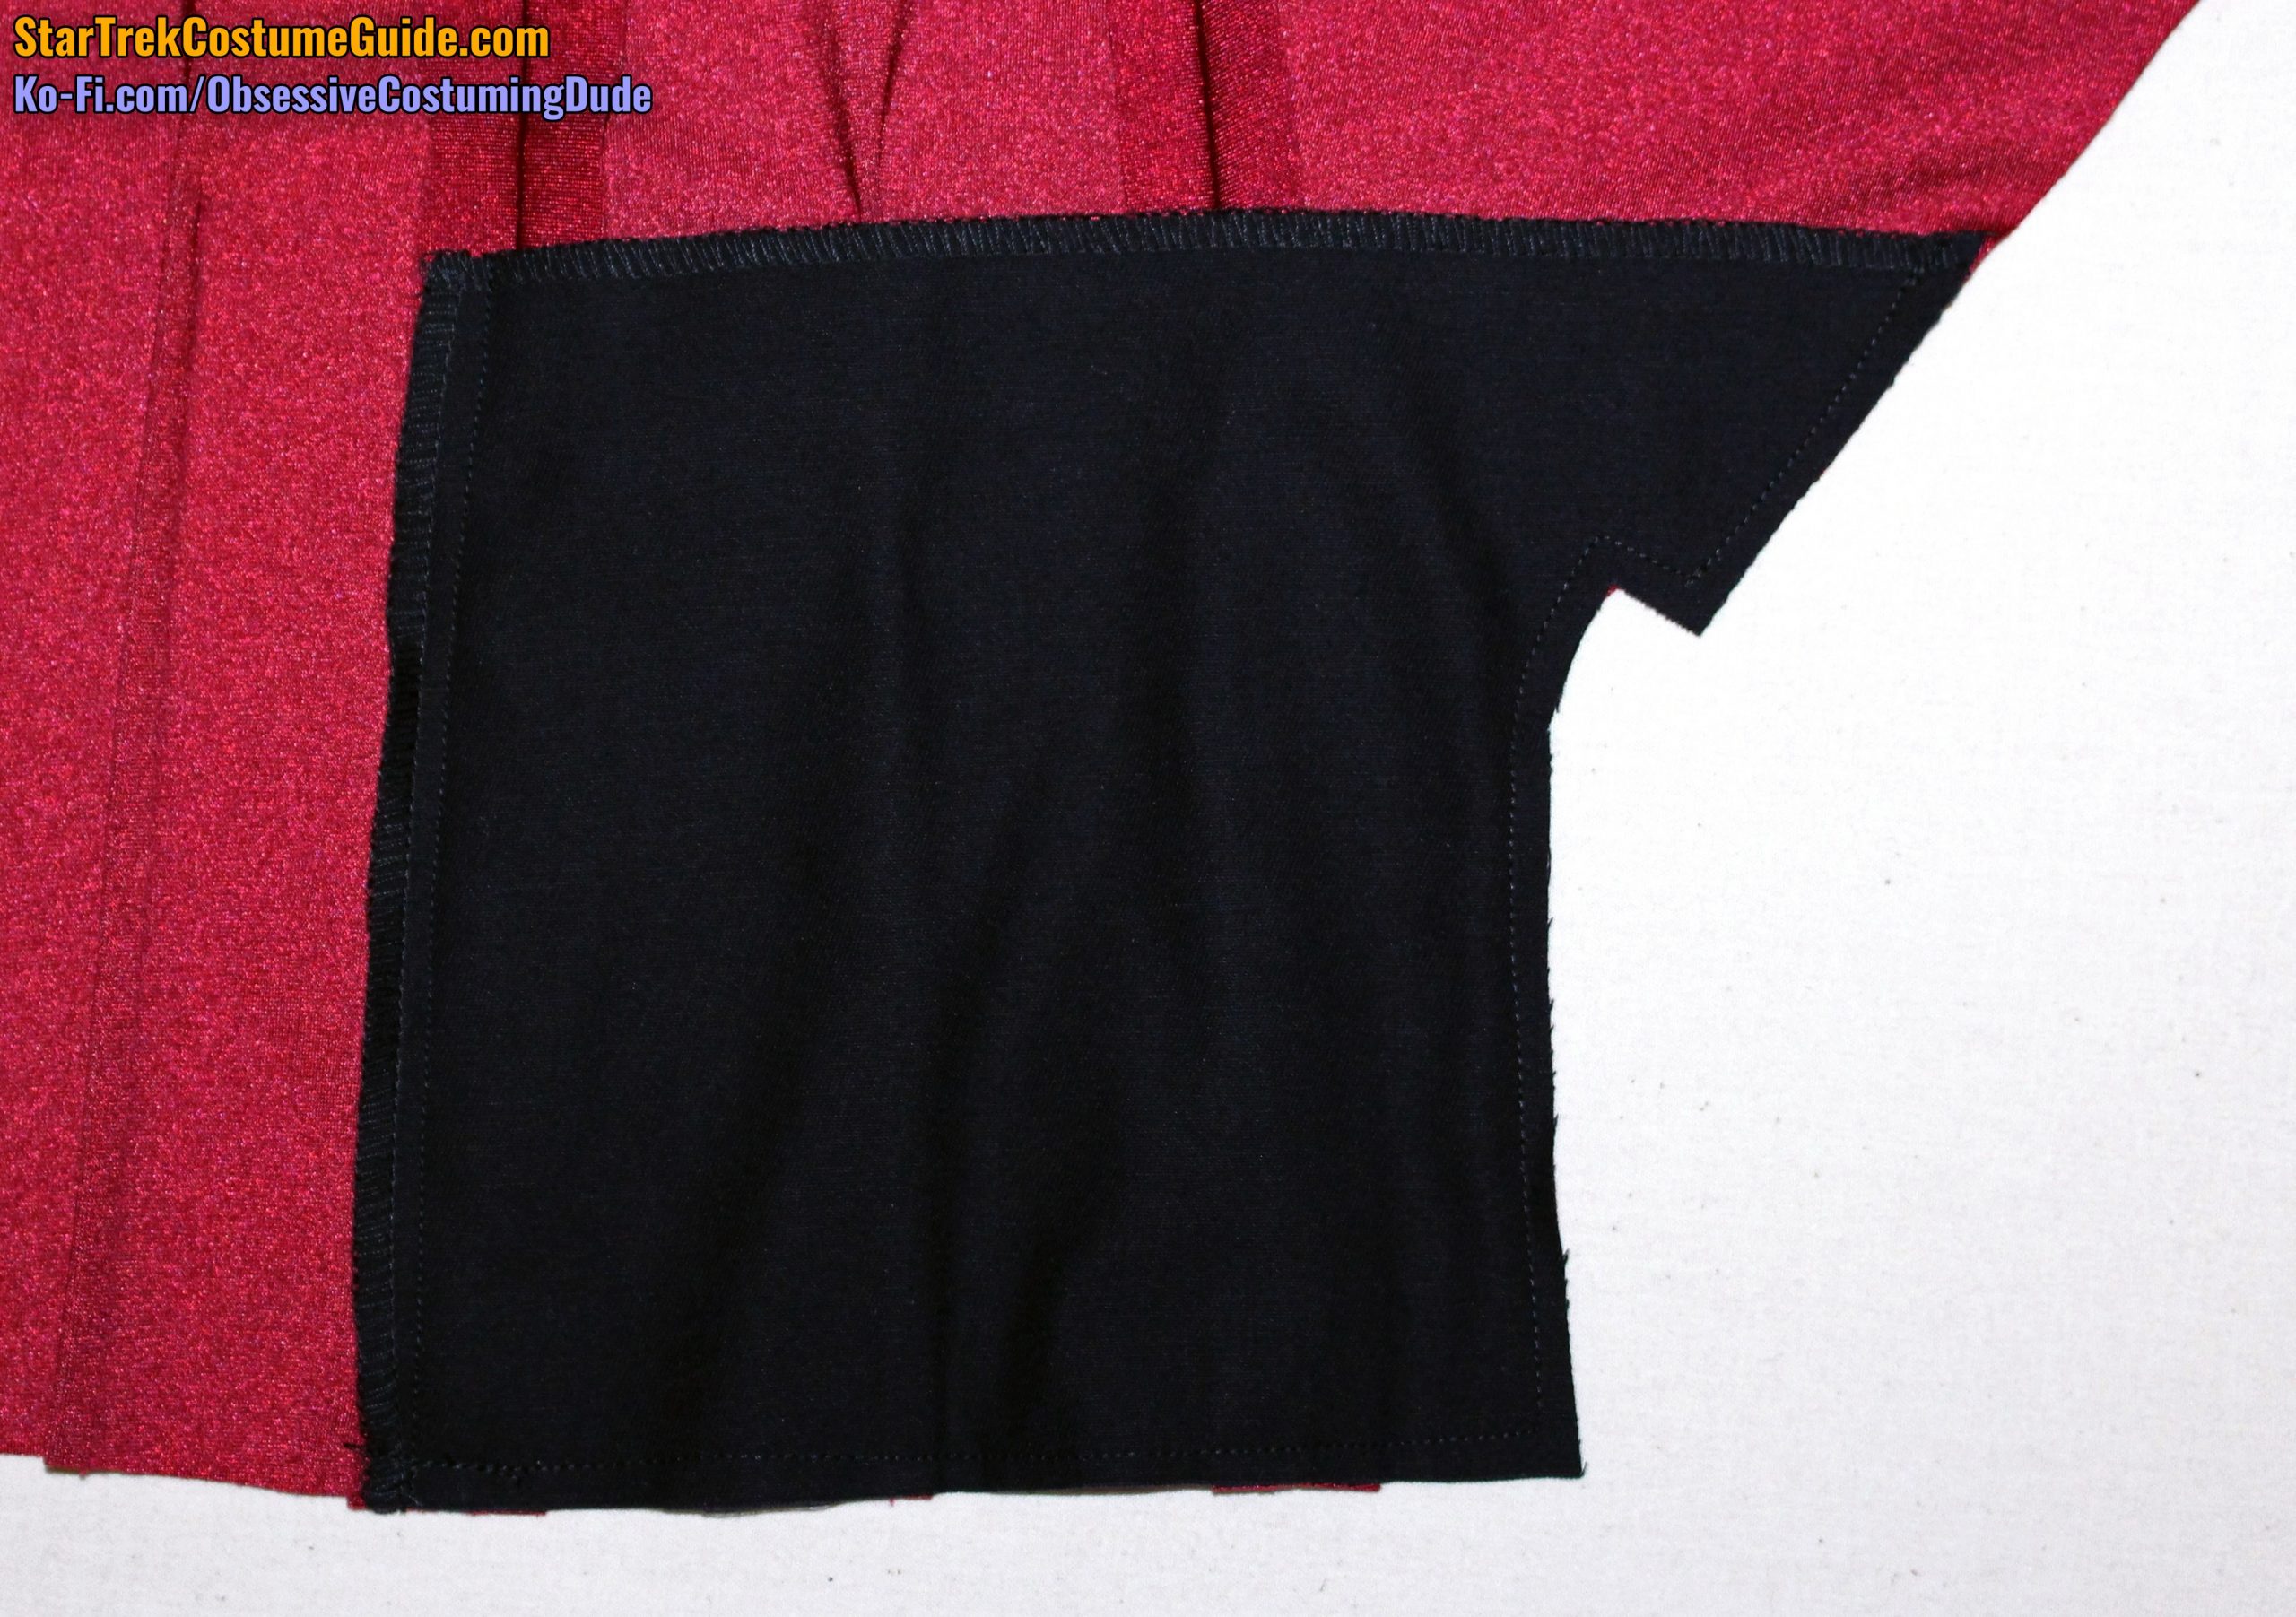
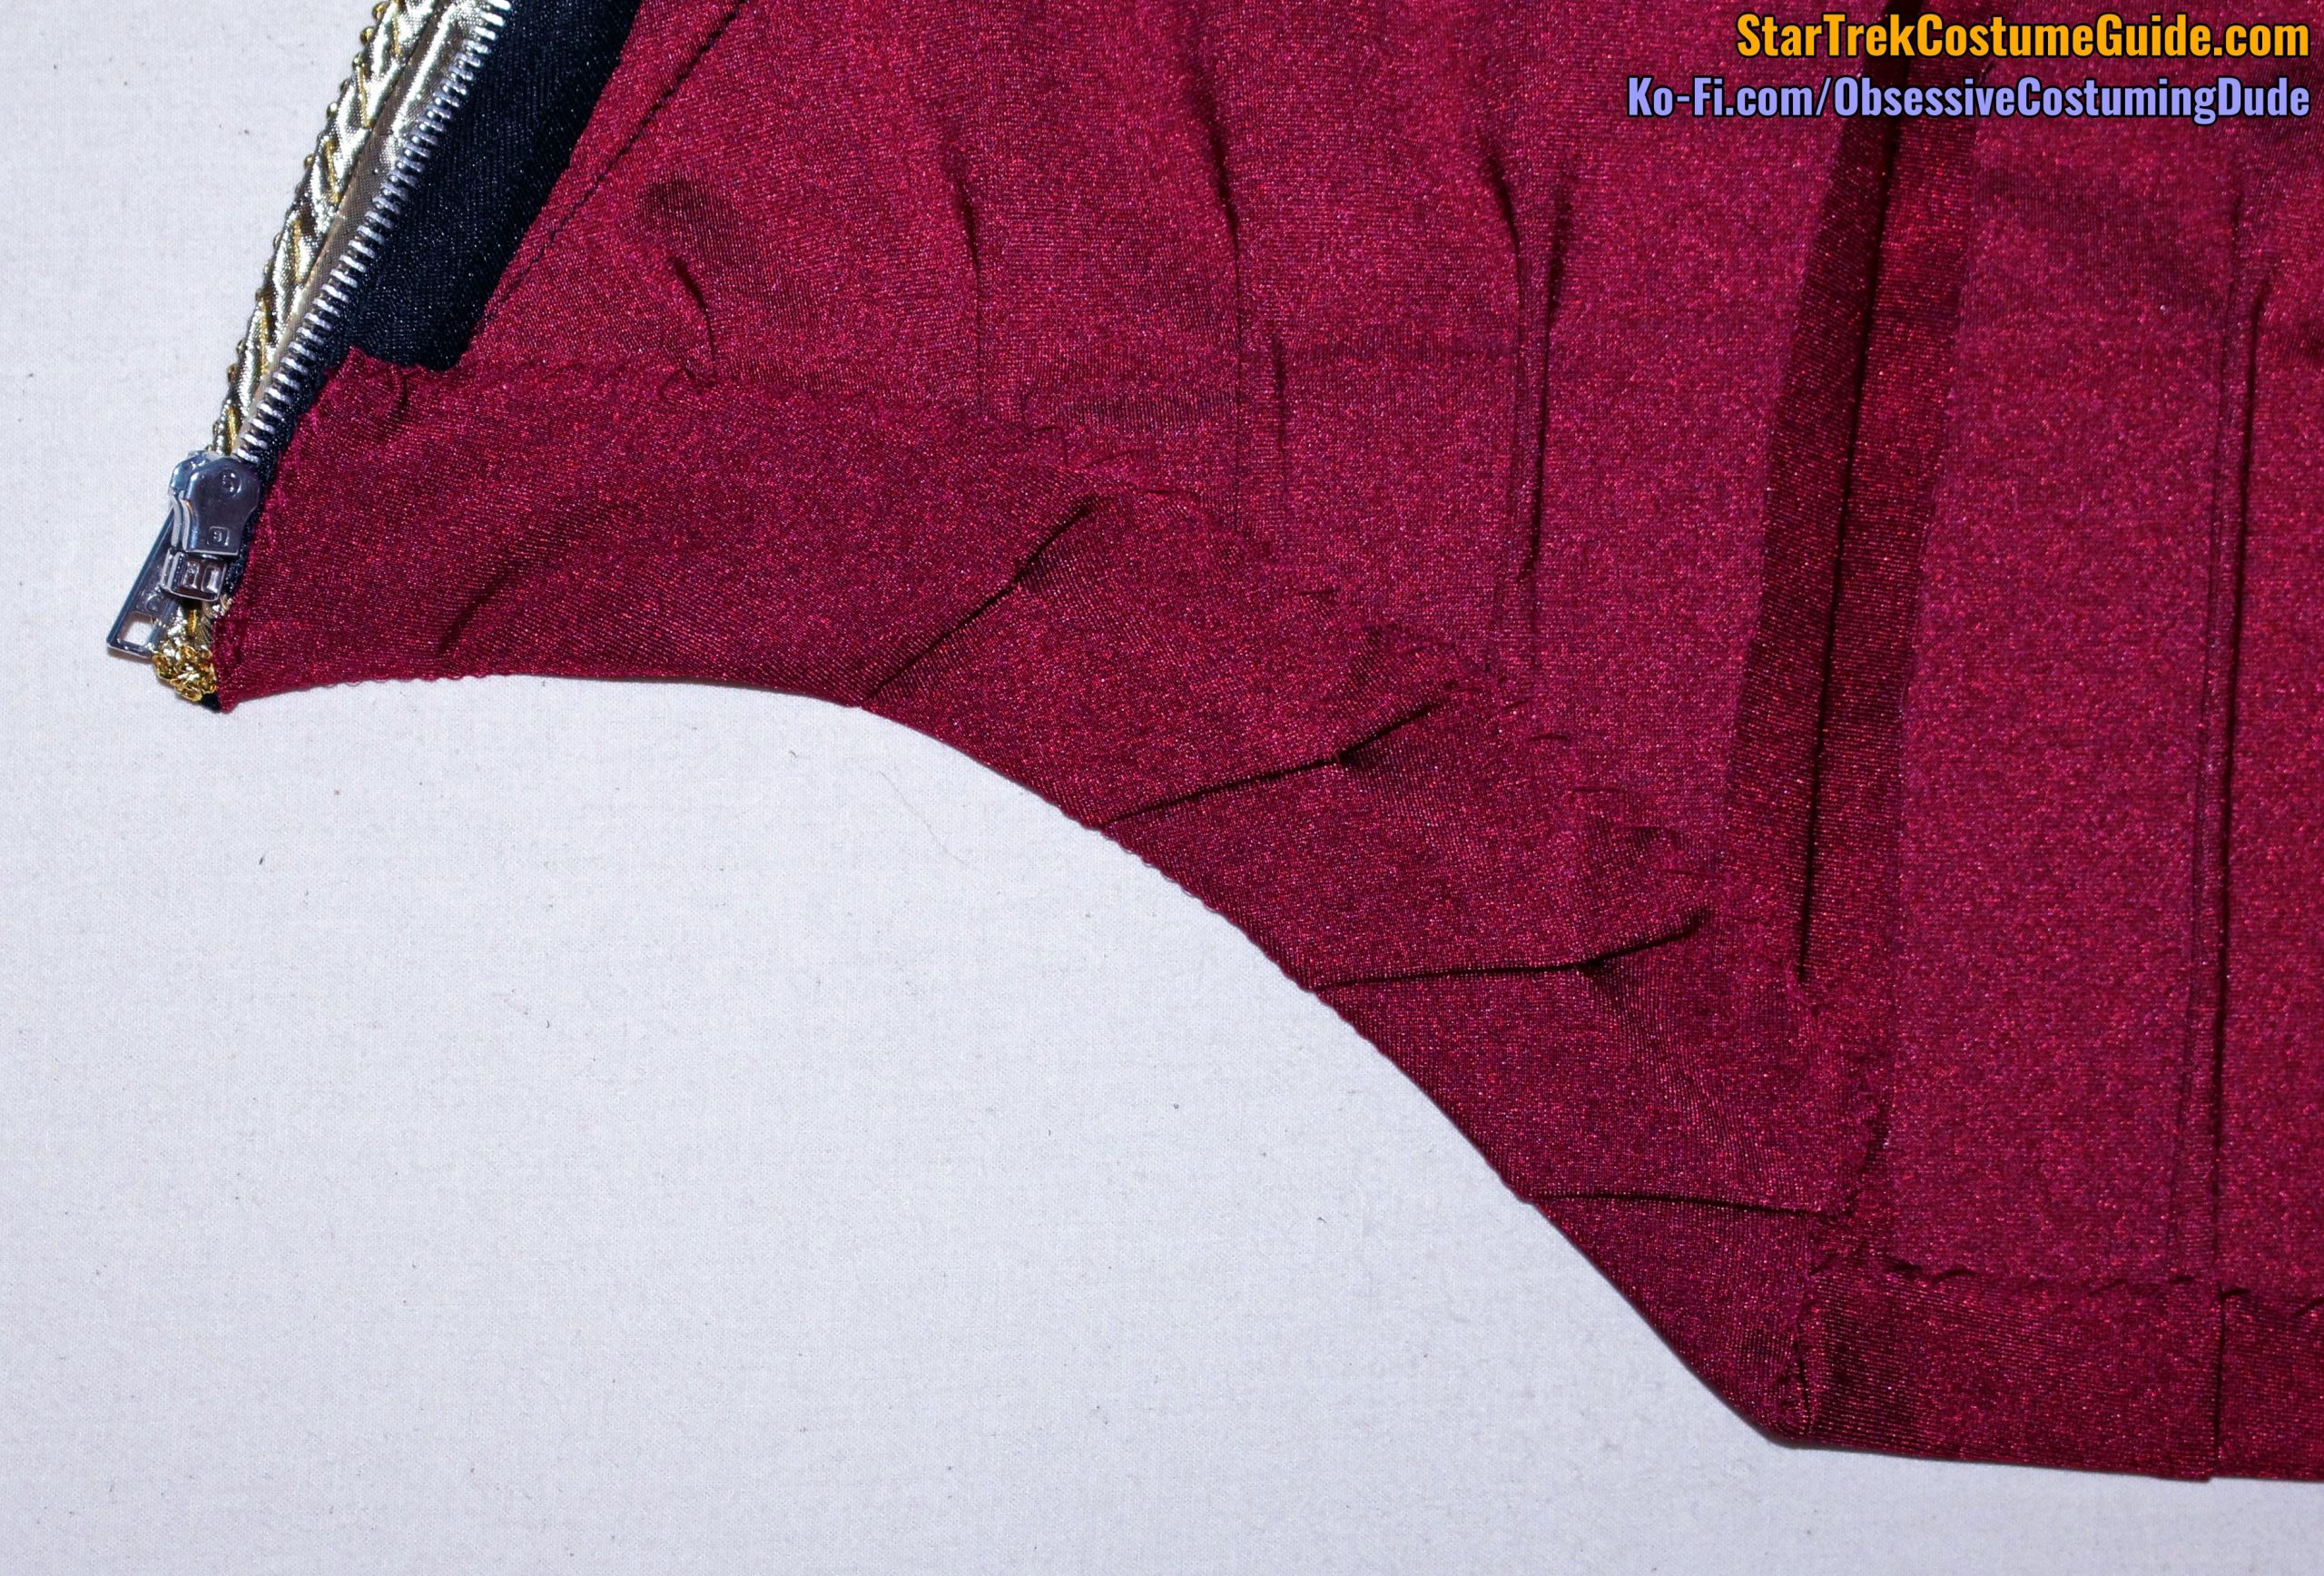
First, we need to stabilize the lower left front area with the black canvas (piece M).
As you may recall, on the screen-used Admiral Jameson uniform I examined, the area was simply stabilized with a piece of black woven fabric, comparable in weight to cotton sateen but definitely with a synthetic feel.
However, pretty much any lightweight, black, sturdily-woven fabric should work fine for our purposes. Black cotton canvas, twill, denim, drill, target, and rodeo are all common and inexpensive fabrics.
The original fabric was cut with the outer edge on the fabric selvage, and the upper edge was simply left raw.
I suggest serging both the outer and upper edges to prevent the fabric from fraying over time, though.
Position the lower left canvas over the lower left of the jacket, with the edges flush. The outermost edge should also be flush with the back side seam allowance.
Sew the lower left canvas to the lower left of the jacket along the front and lower edges inside the allowances. (I suggest stitching ¼” from the edges.)
Then sew the canvas to the back side seam allowance.
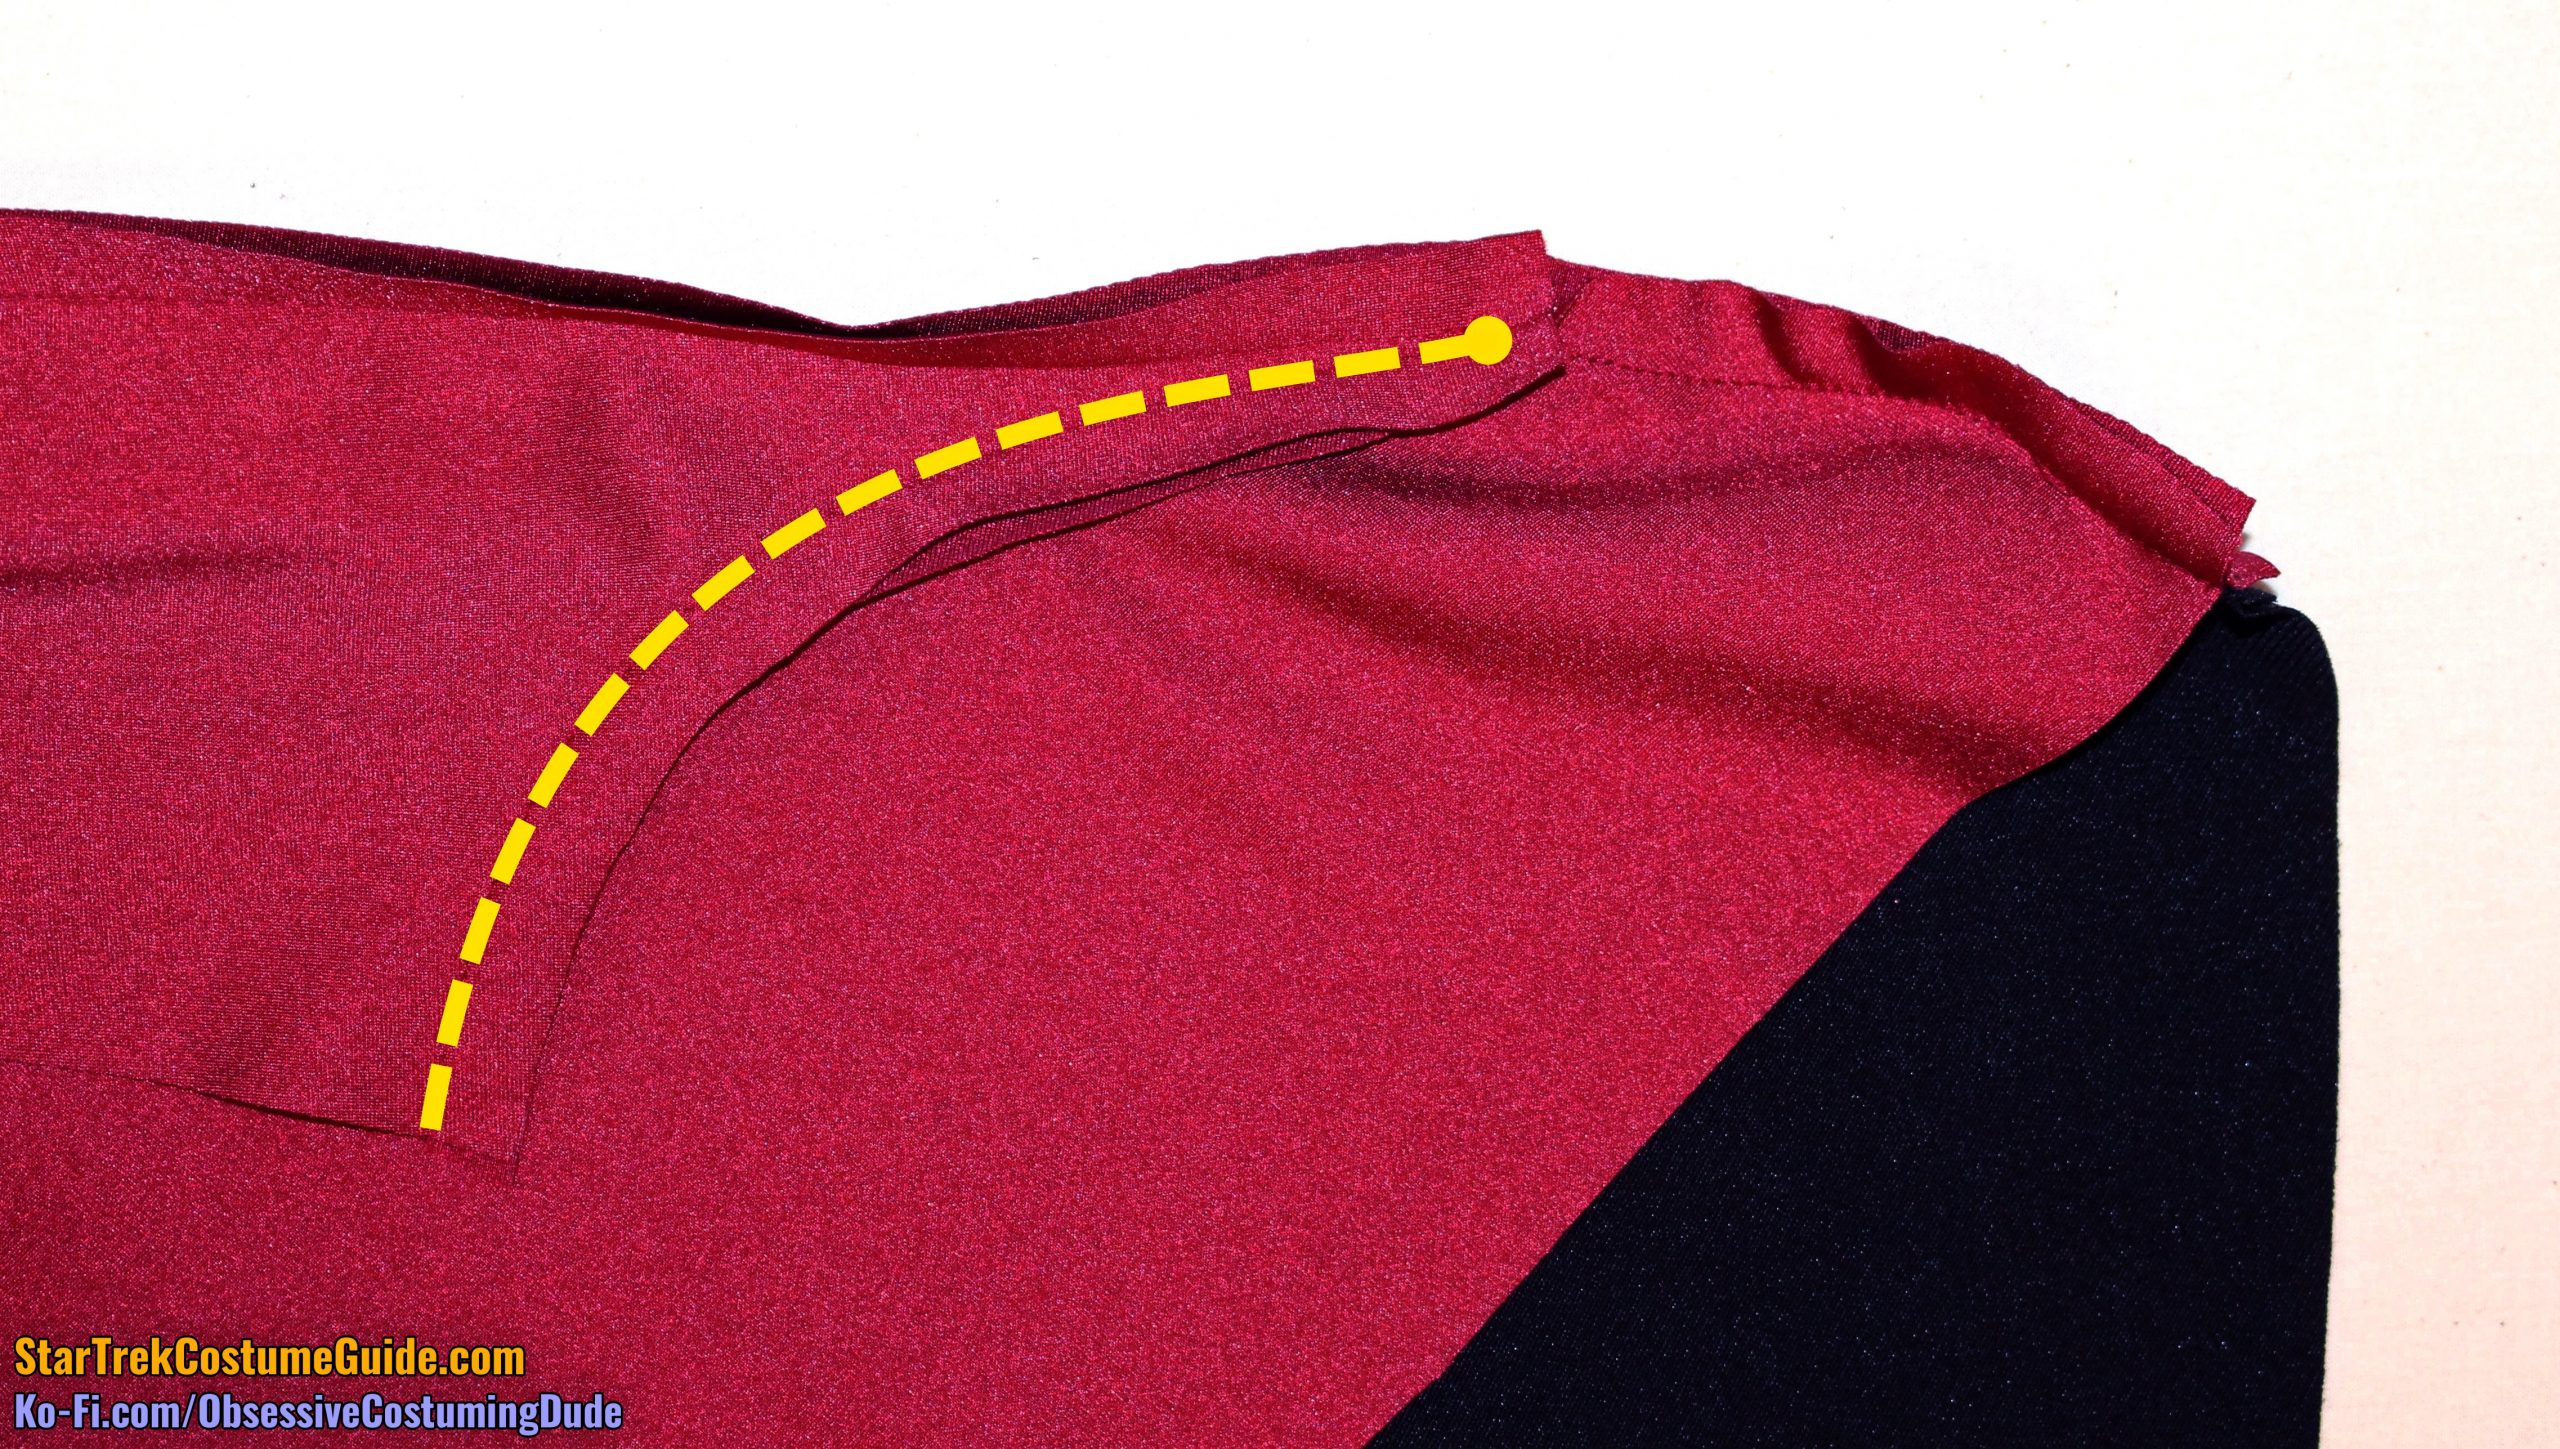
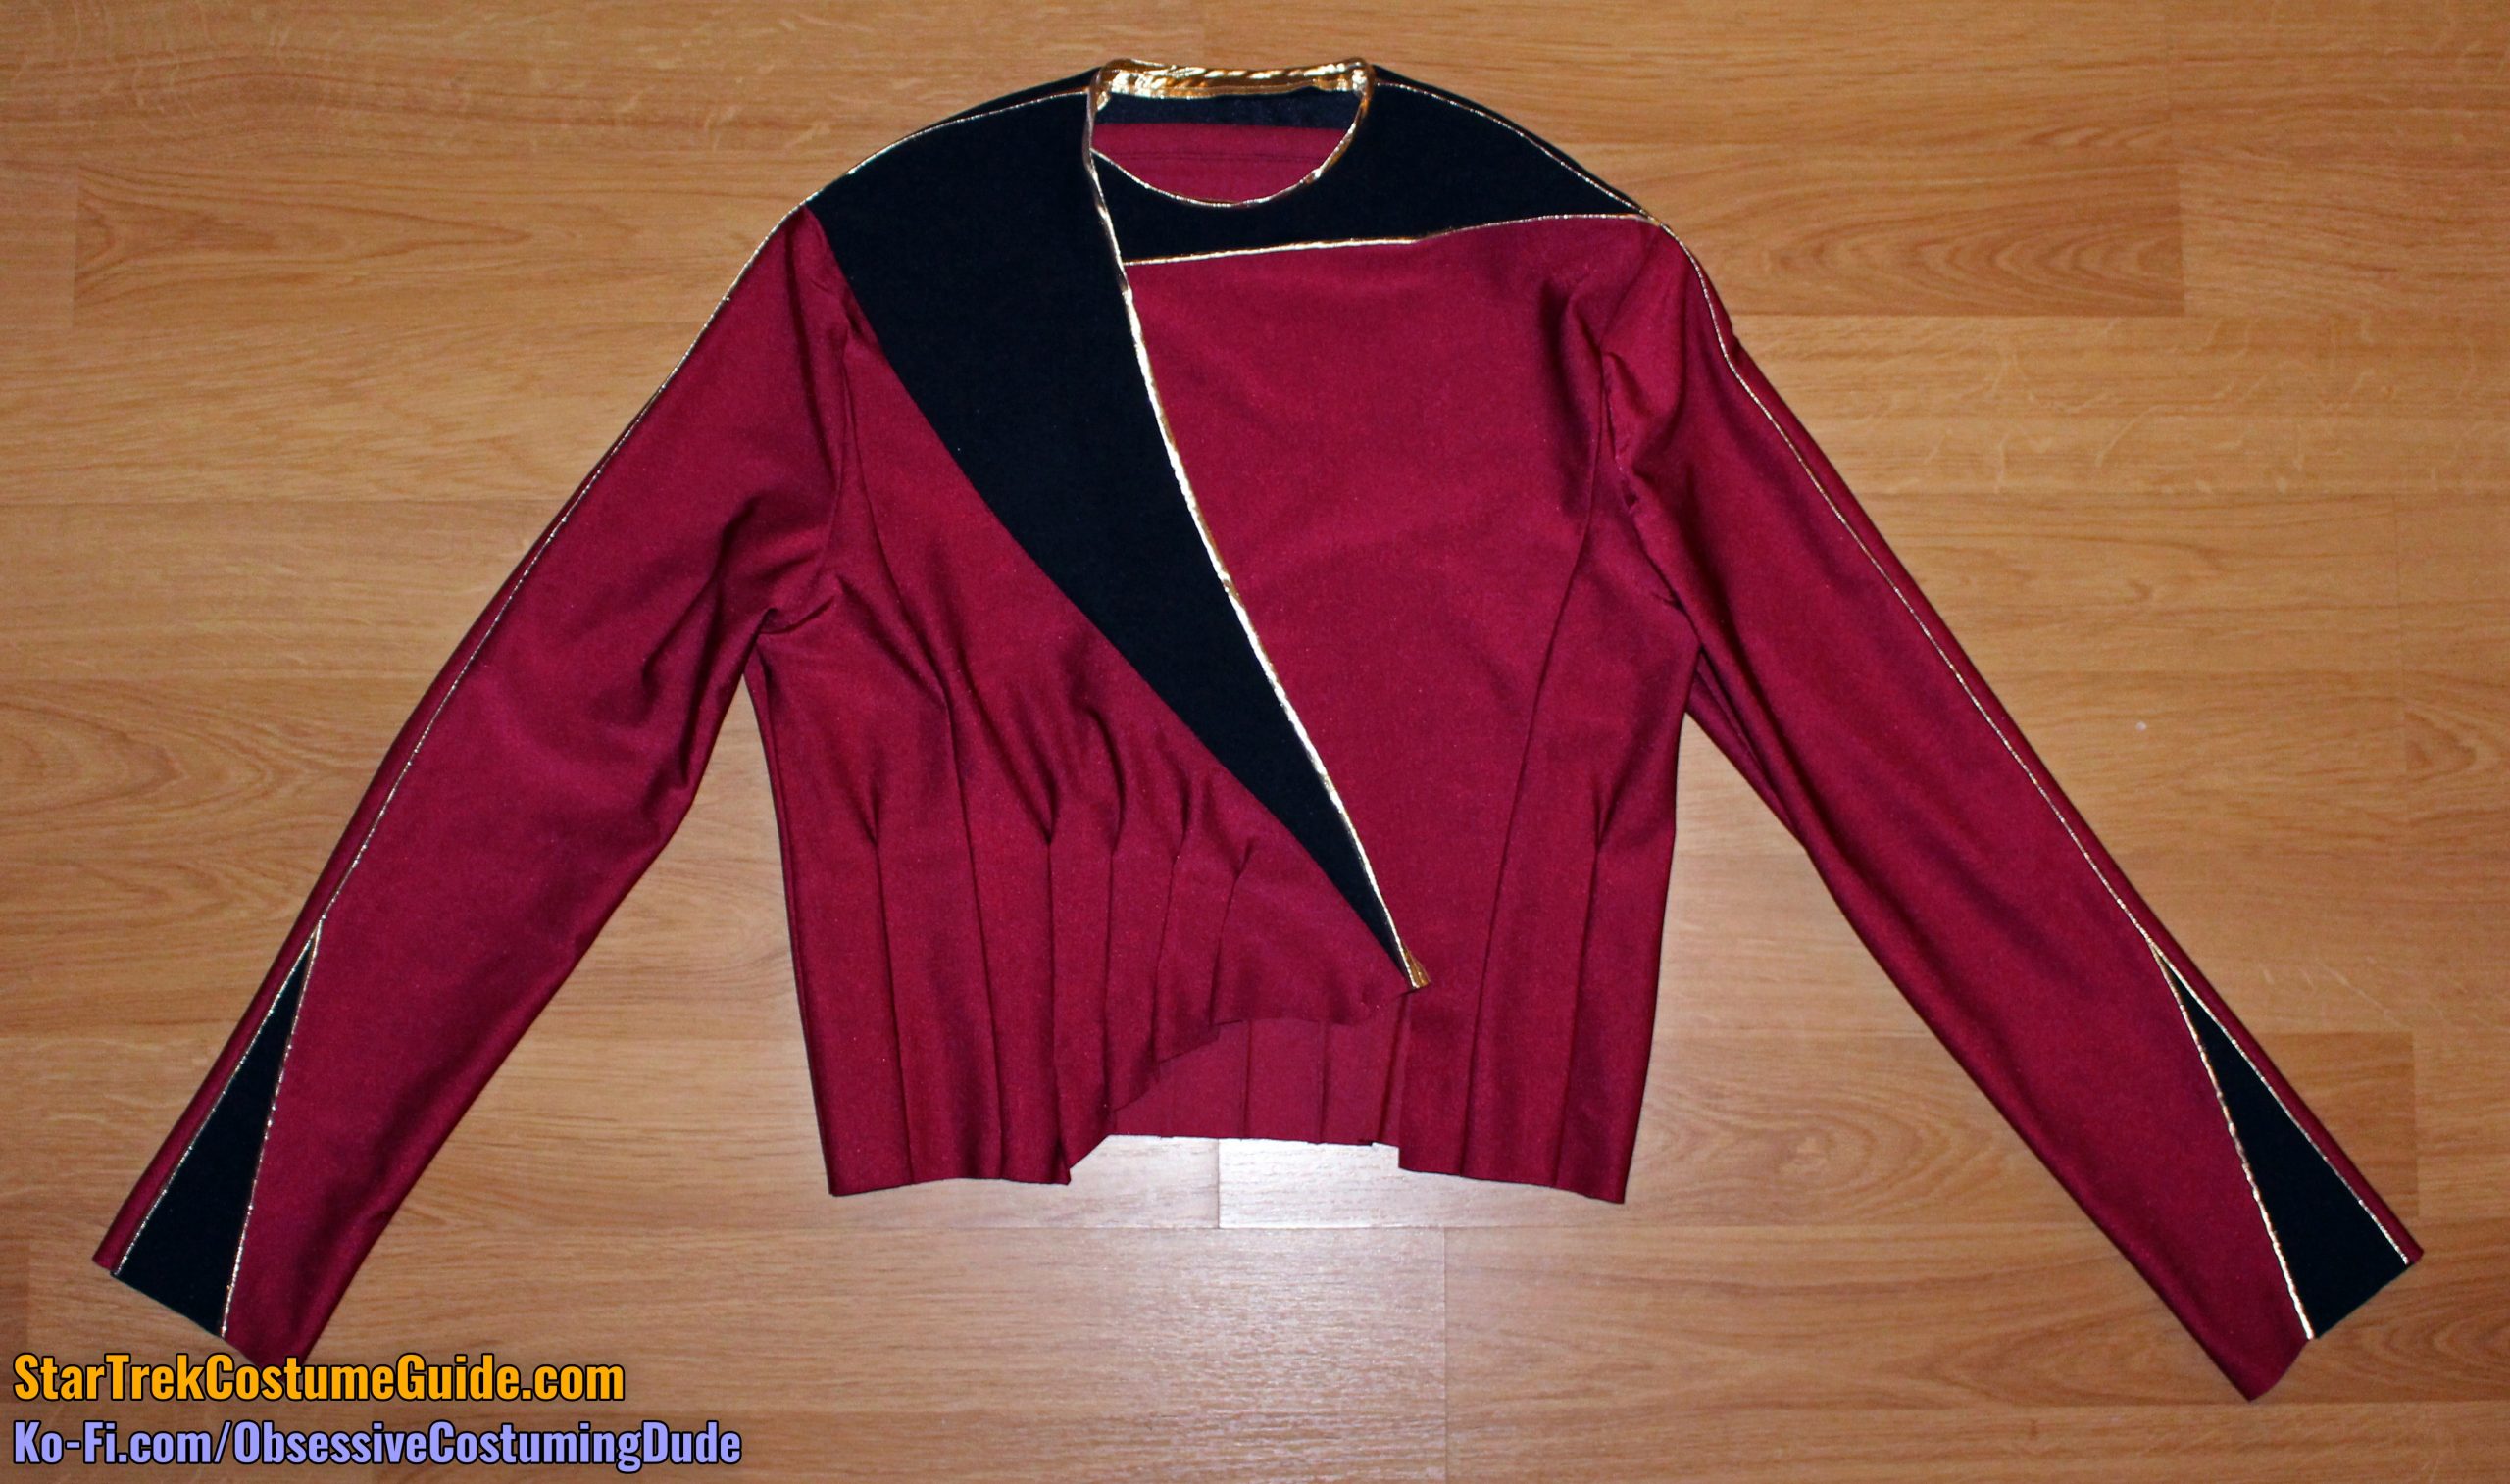
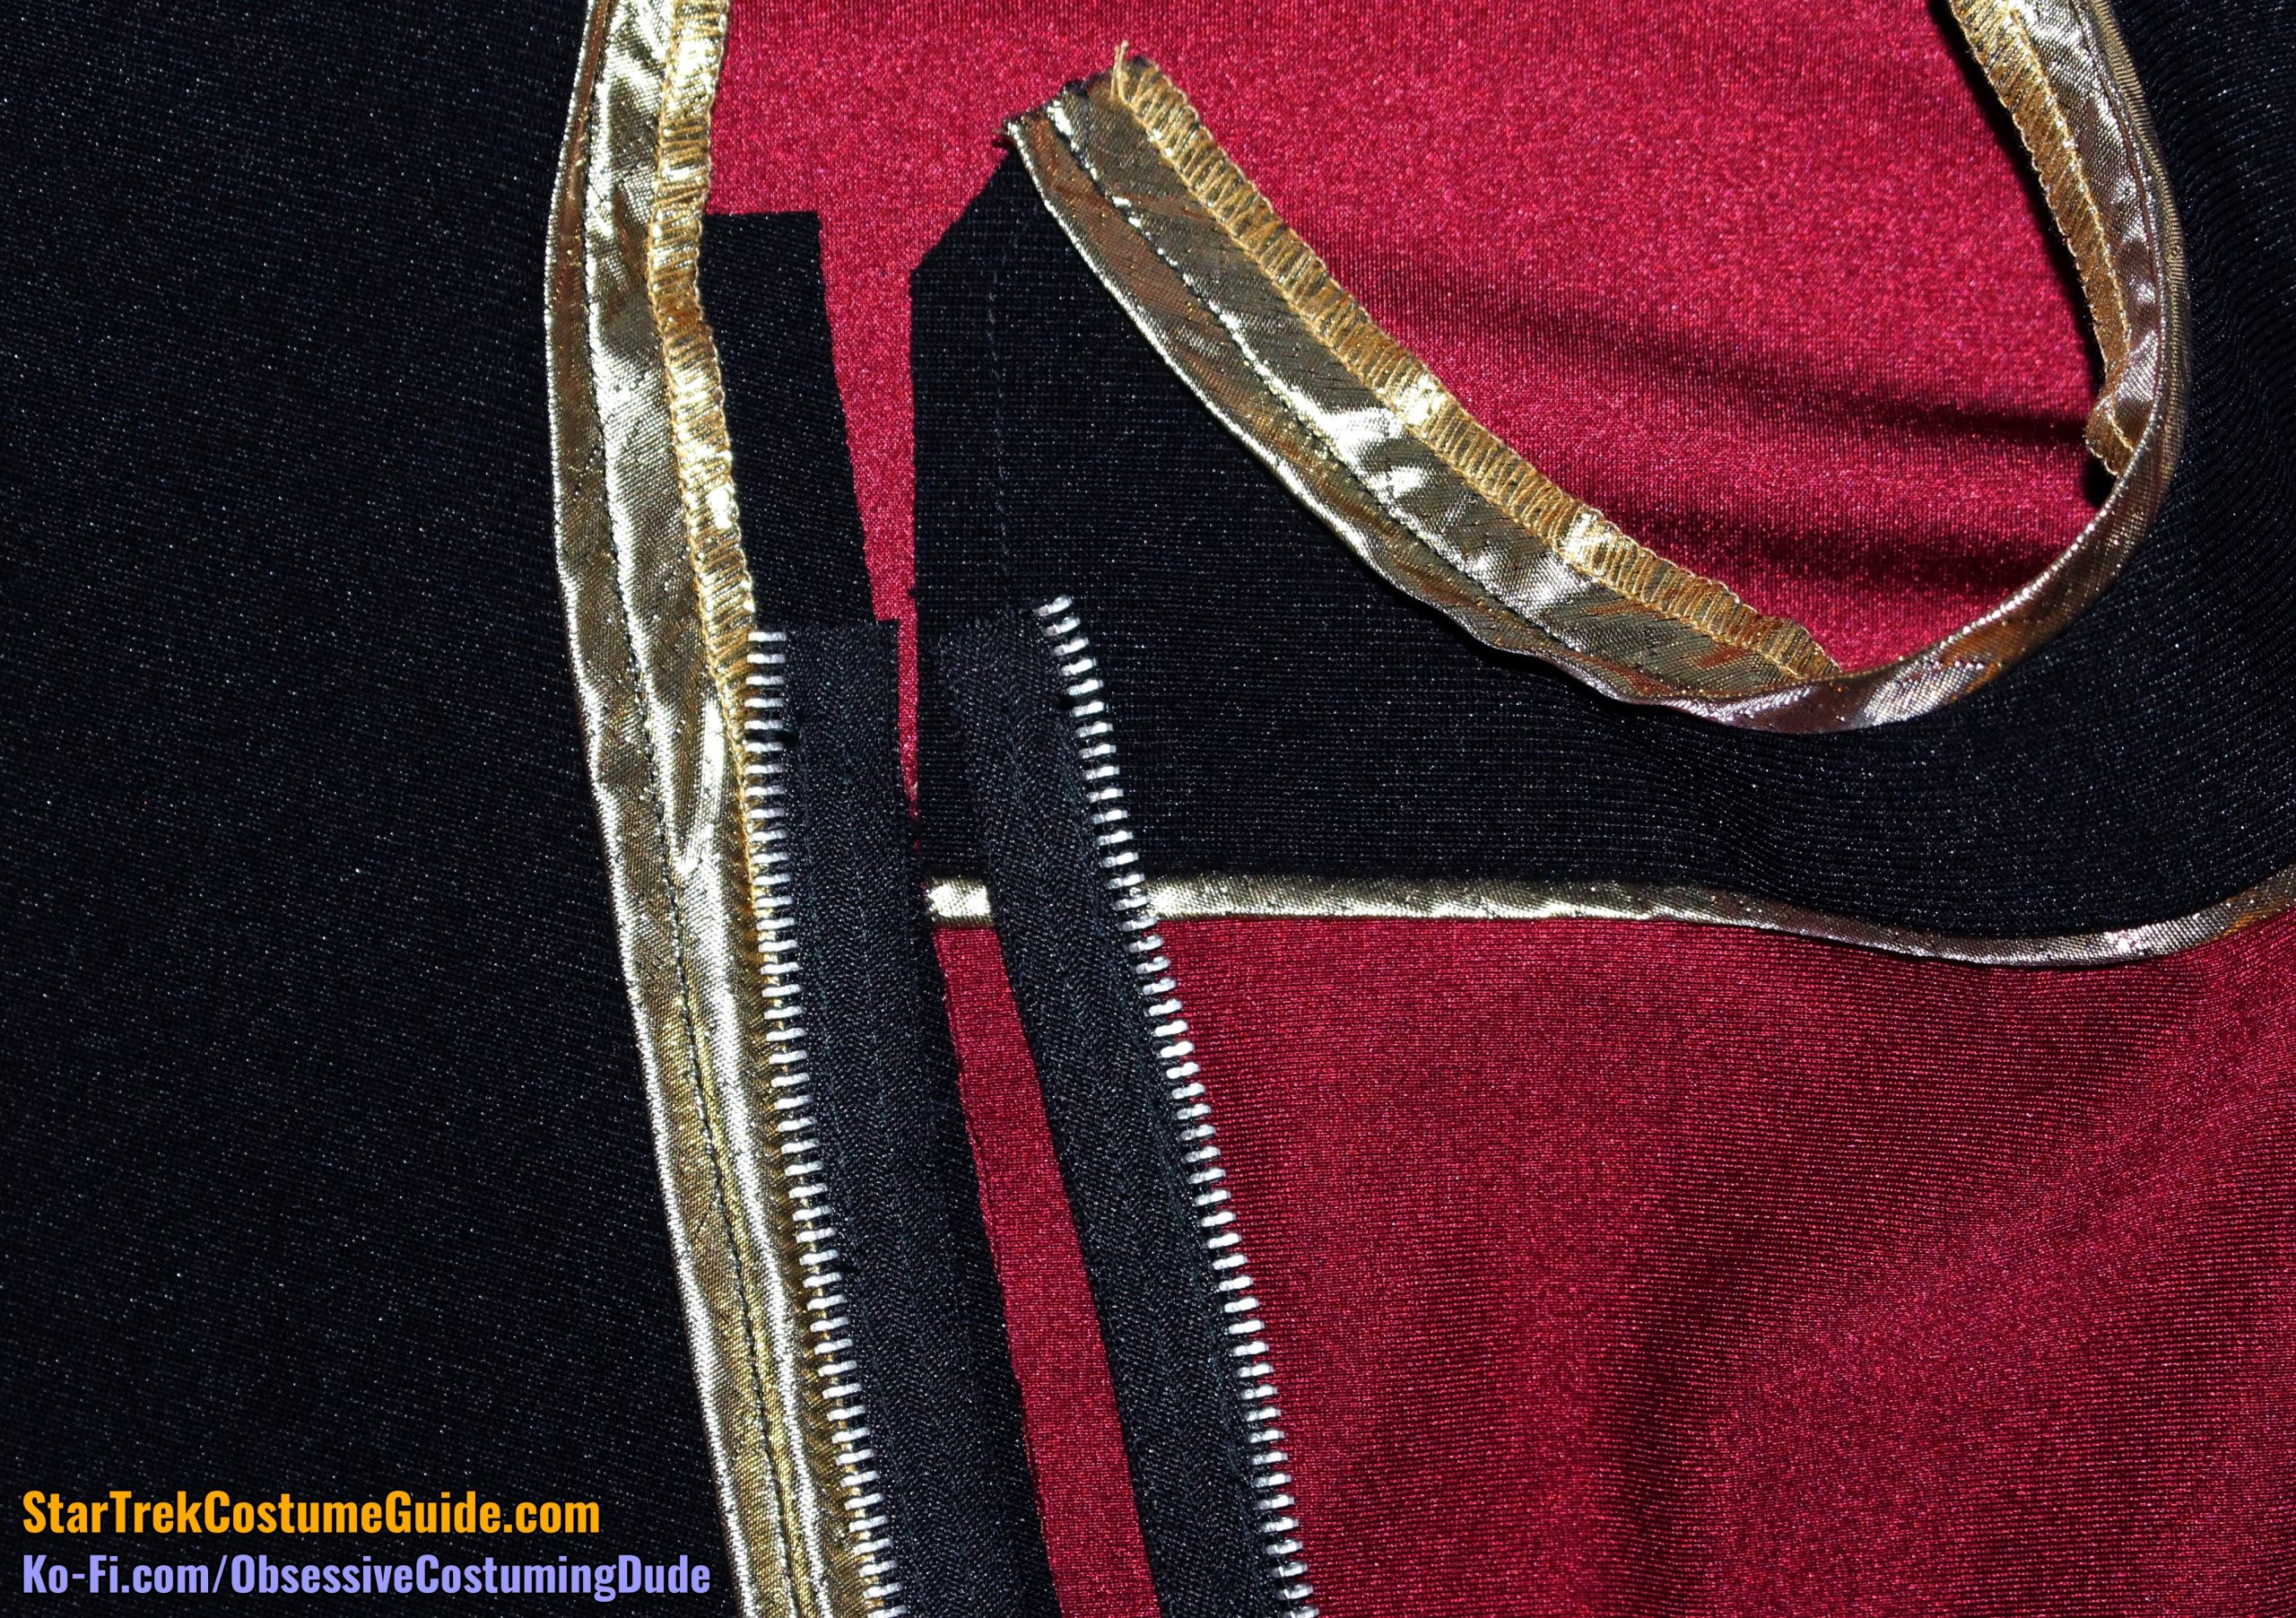
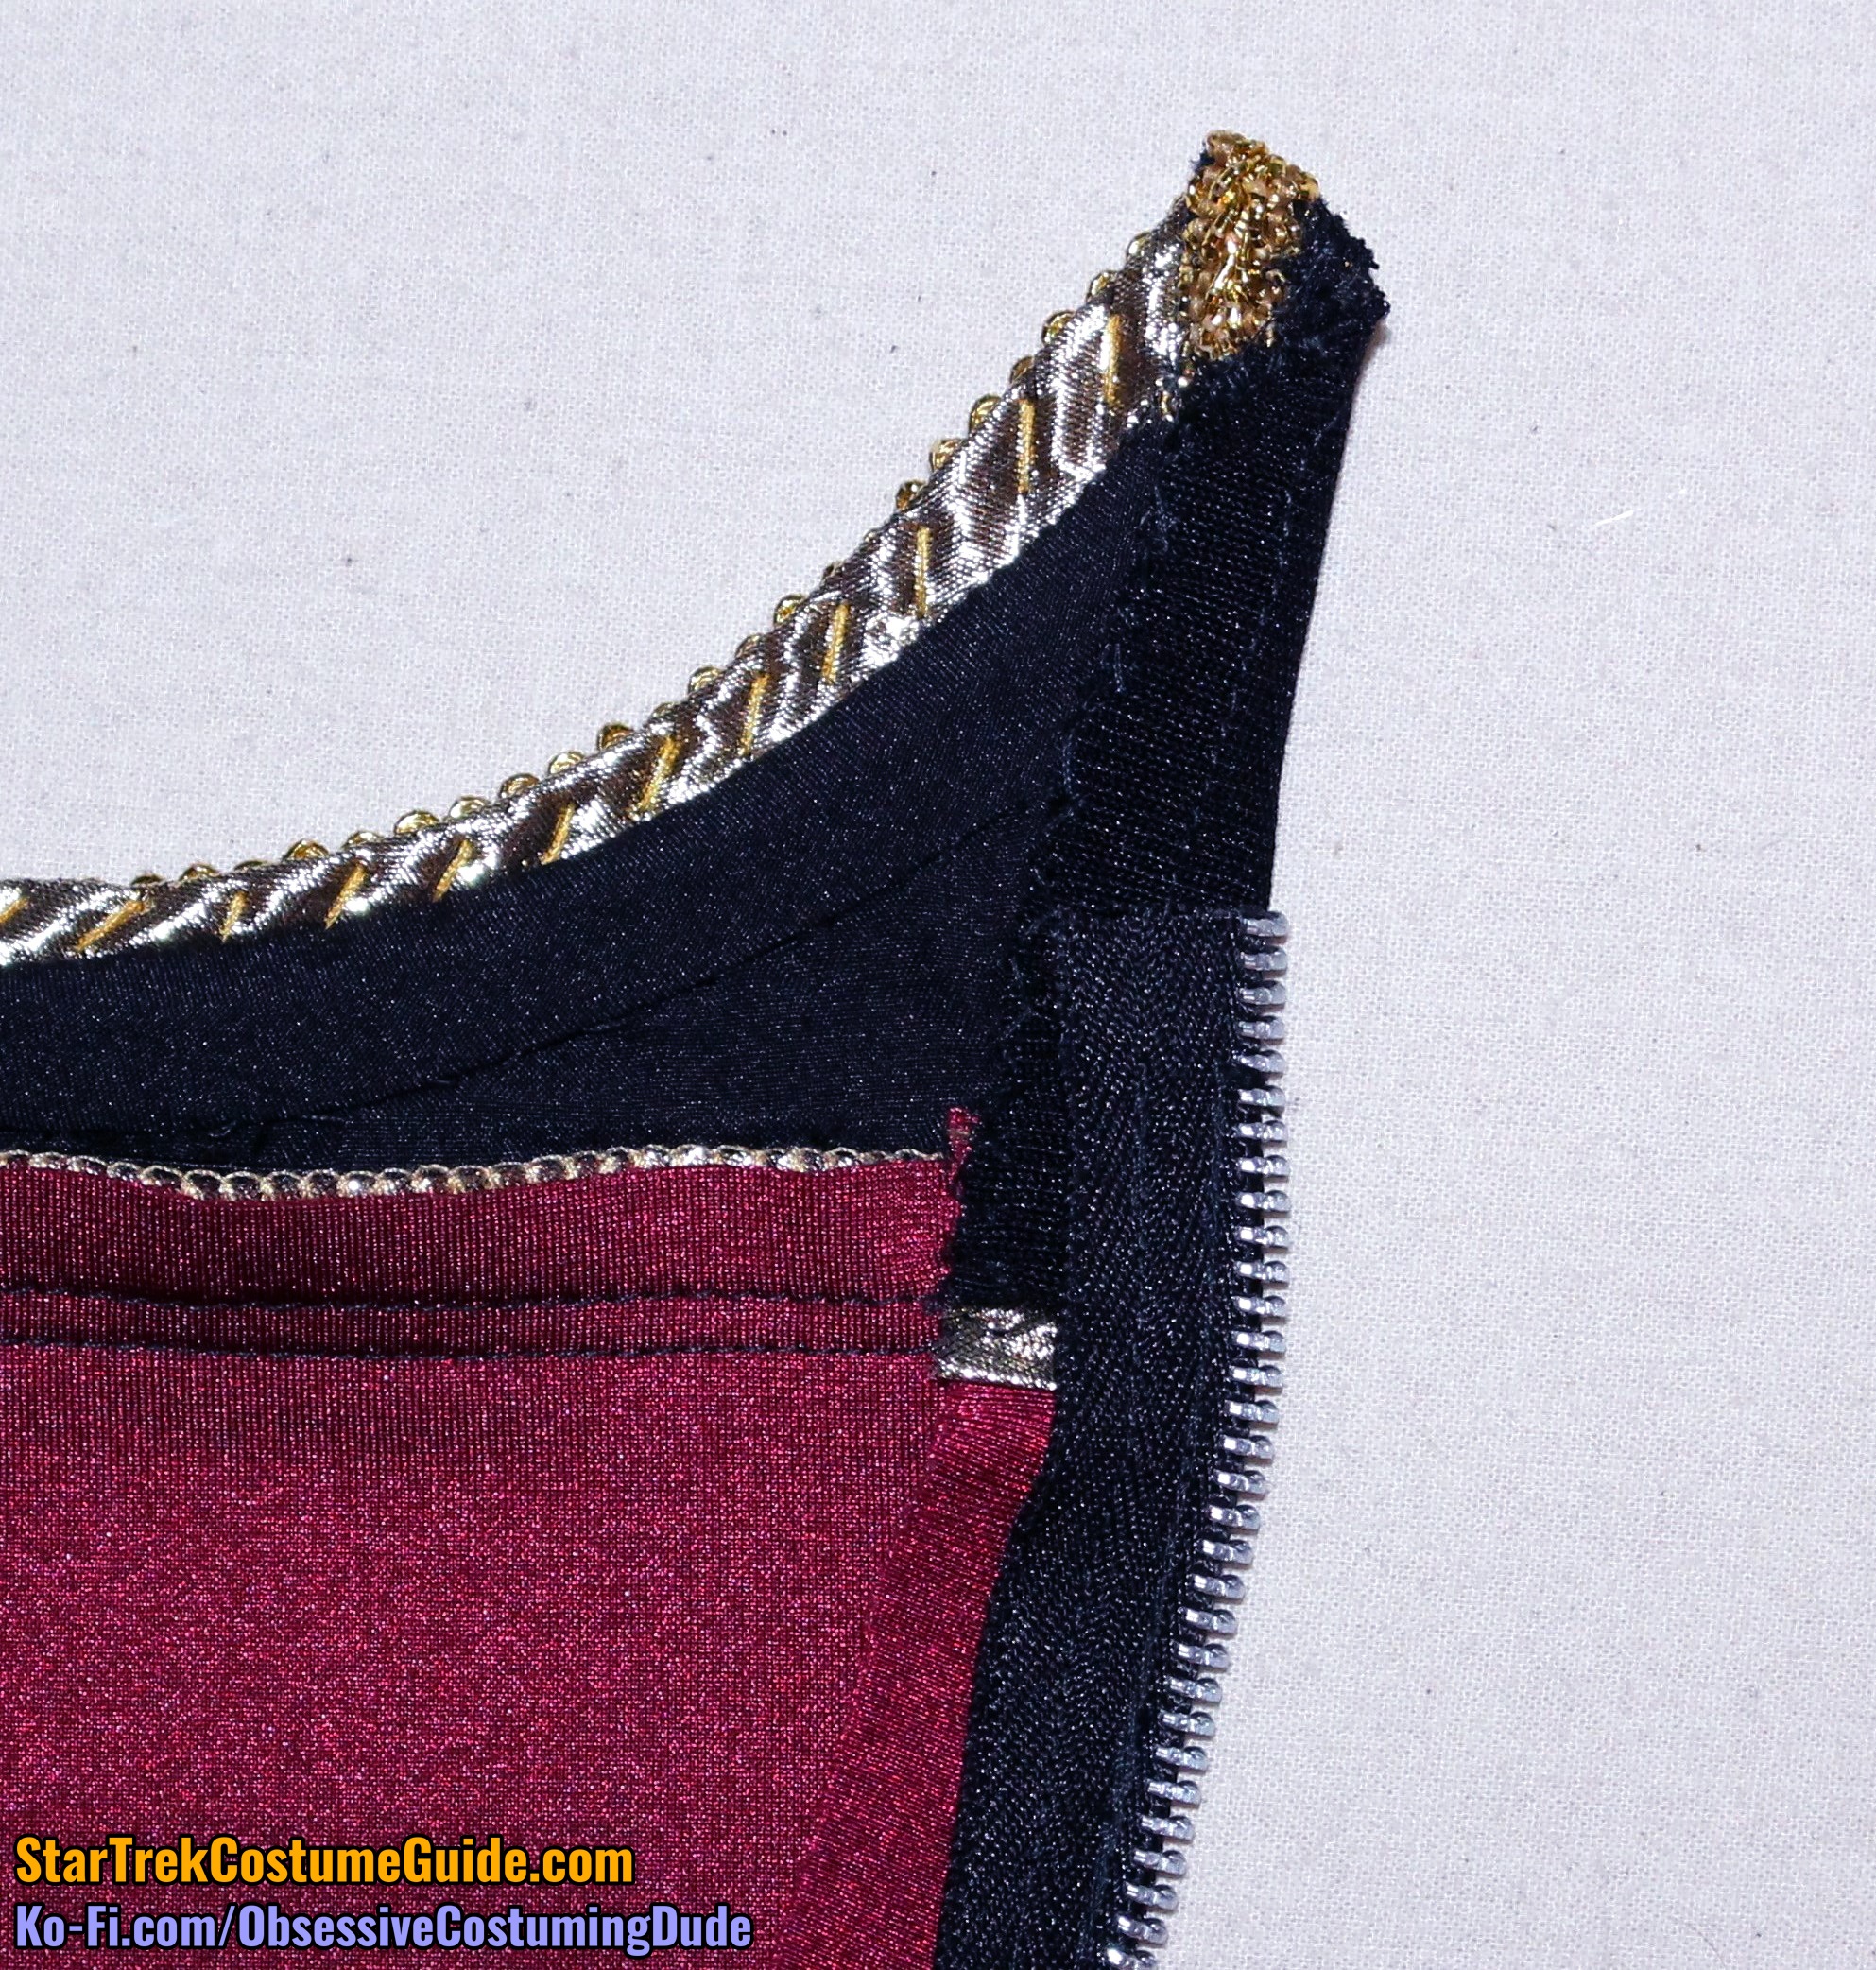
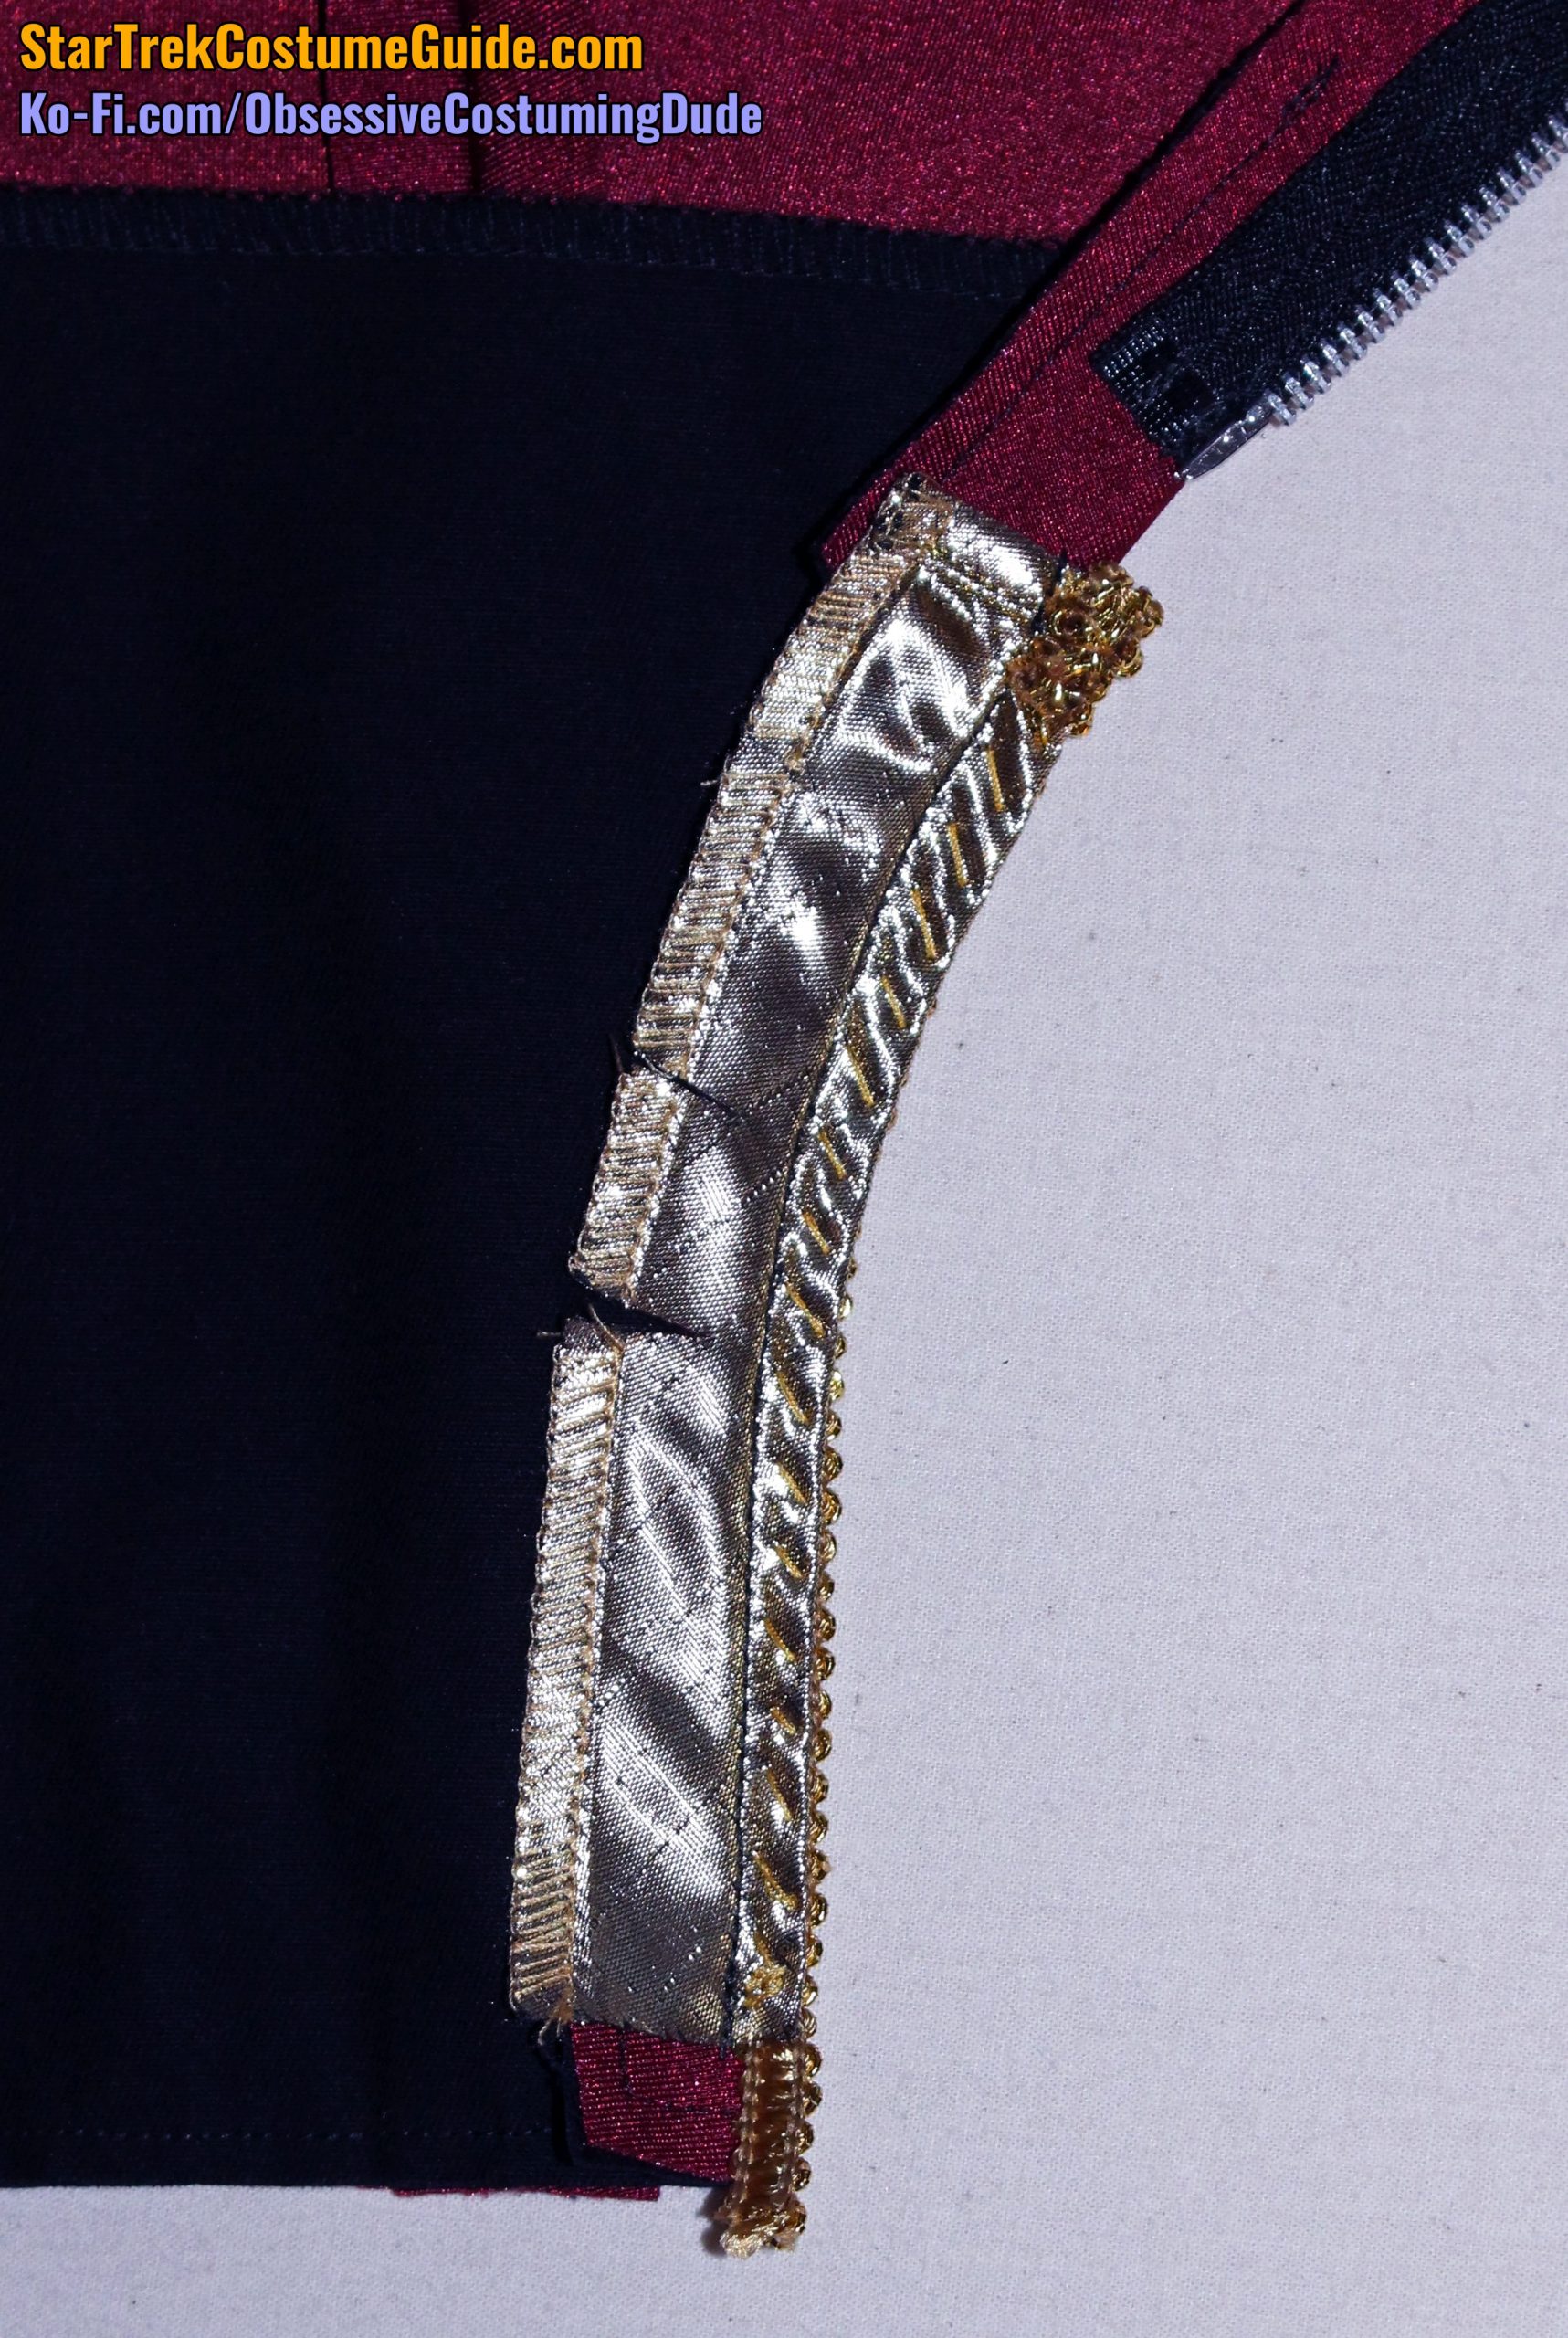
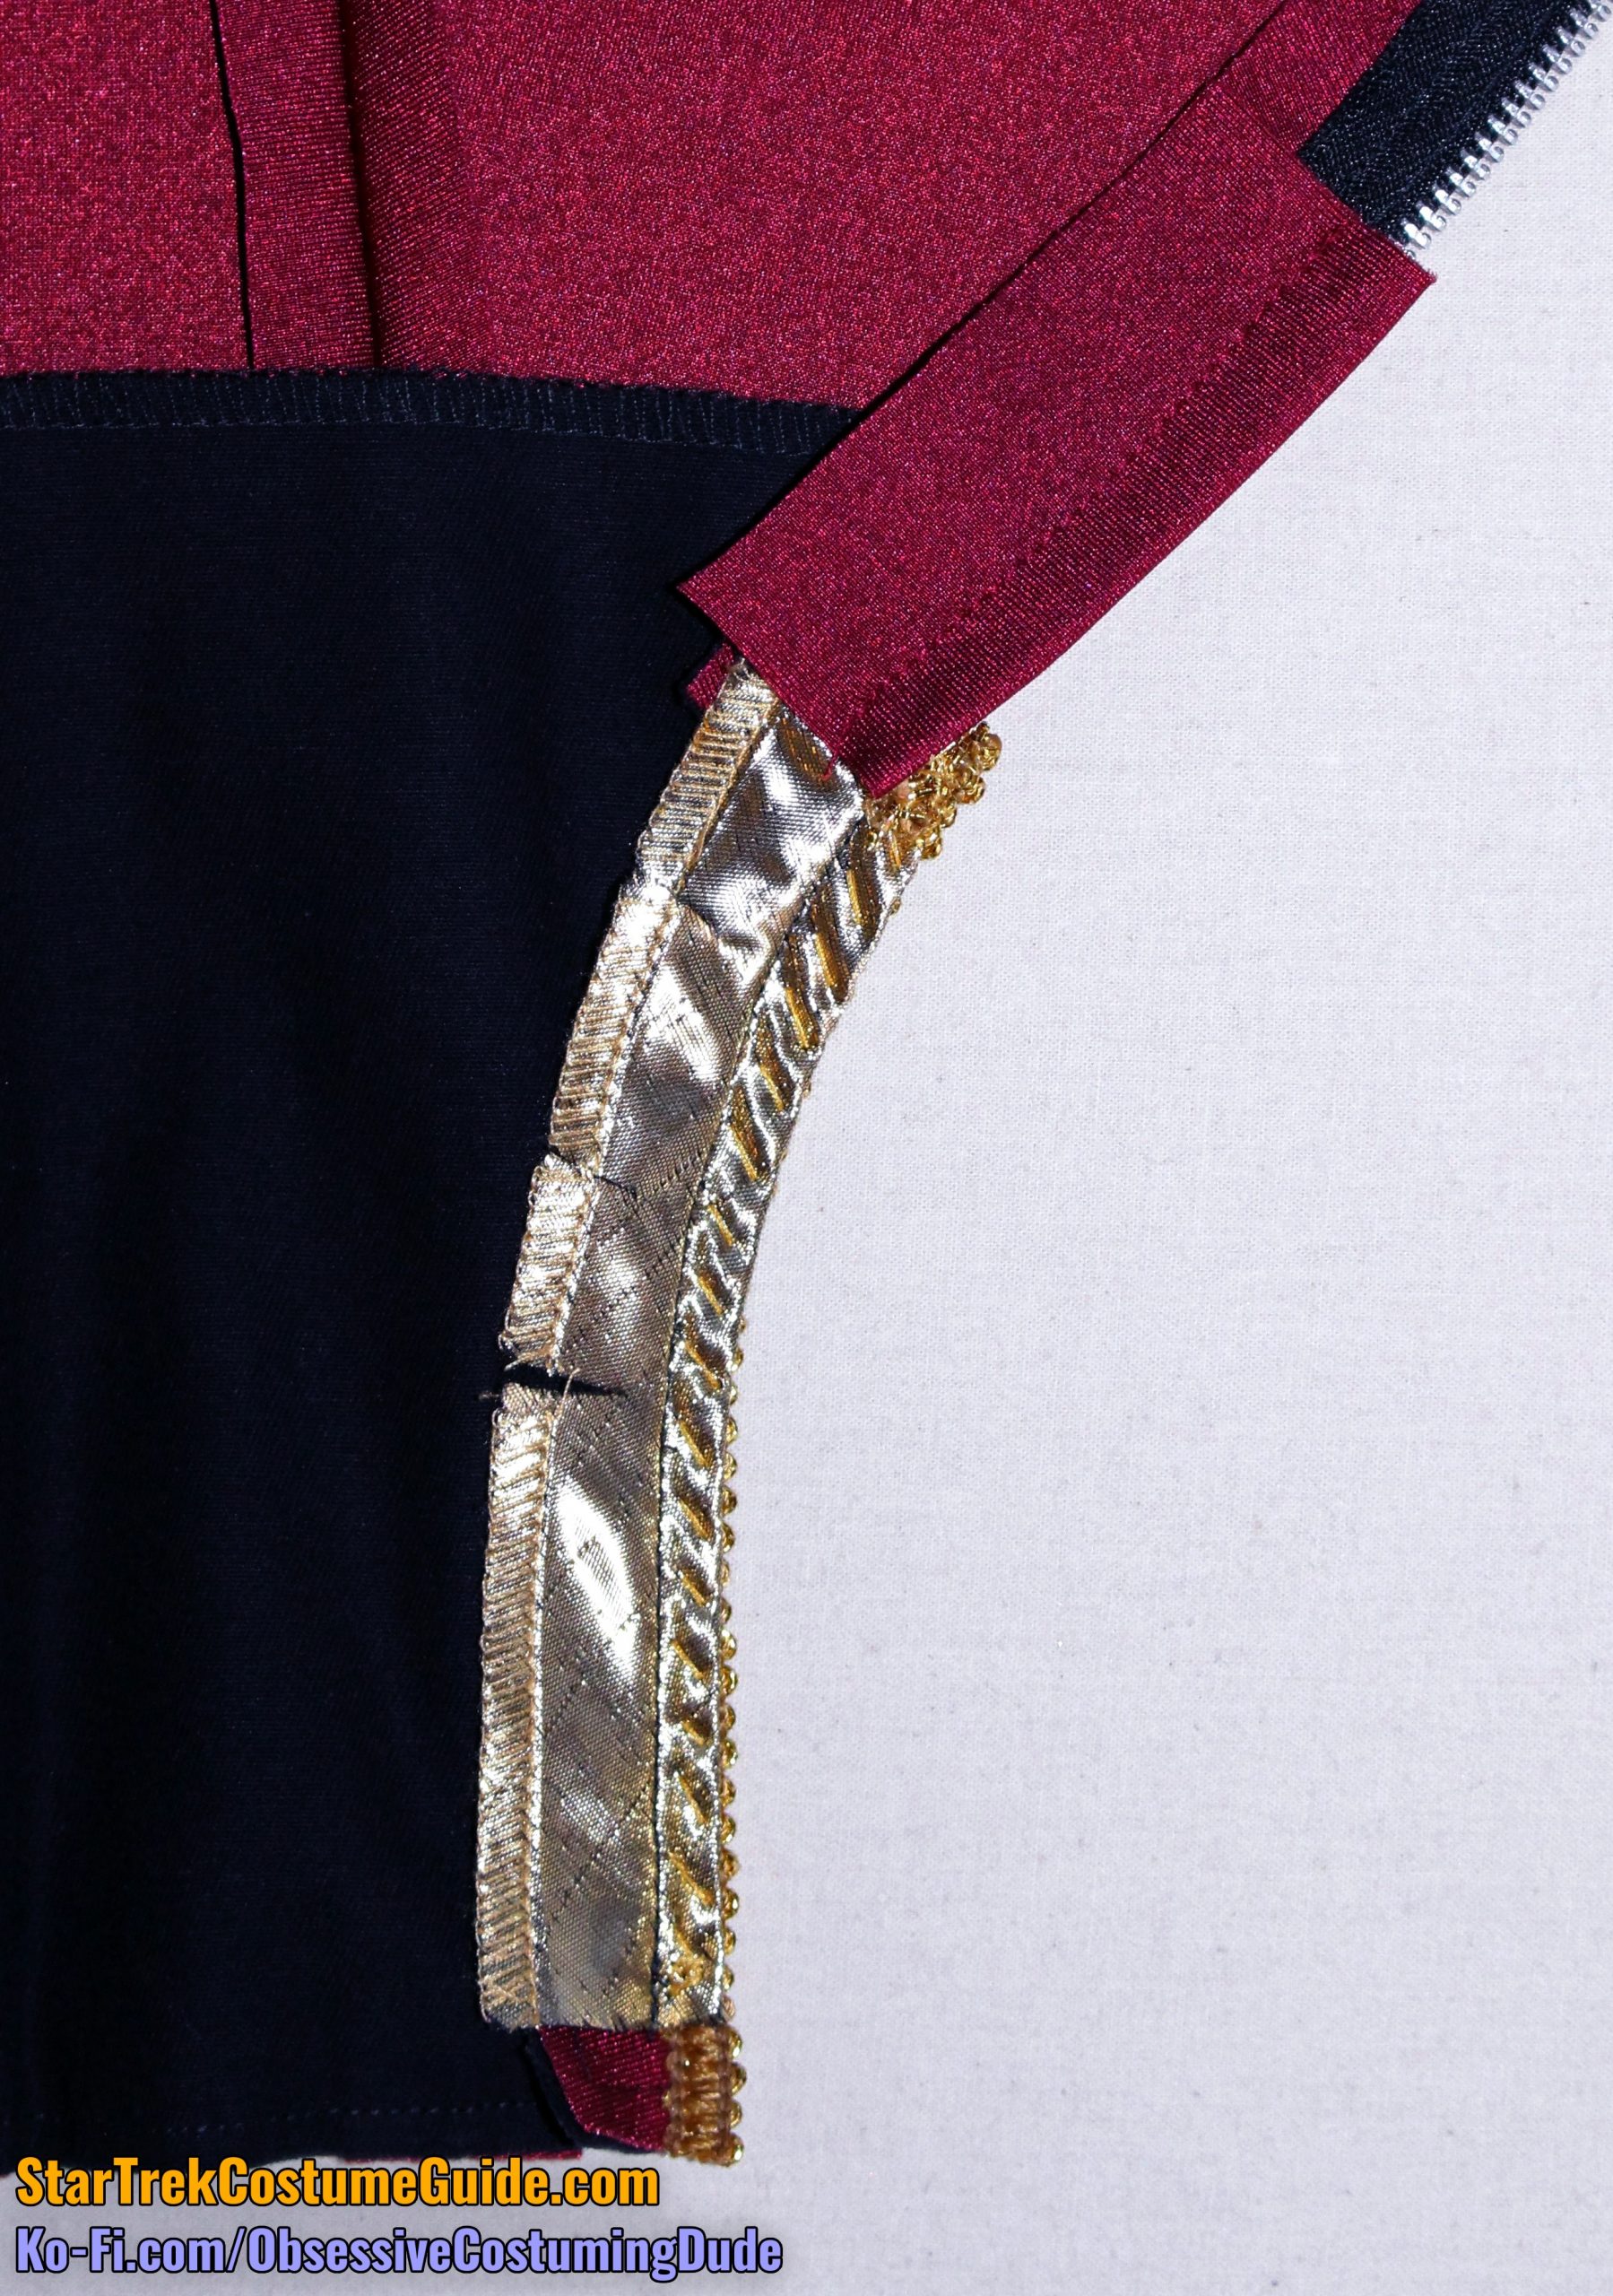
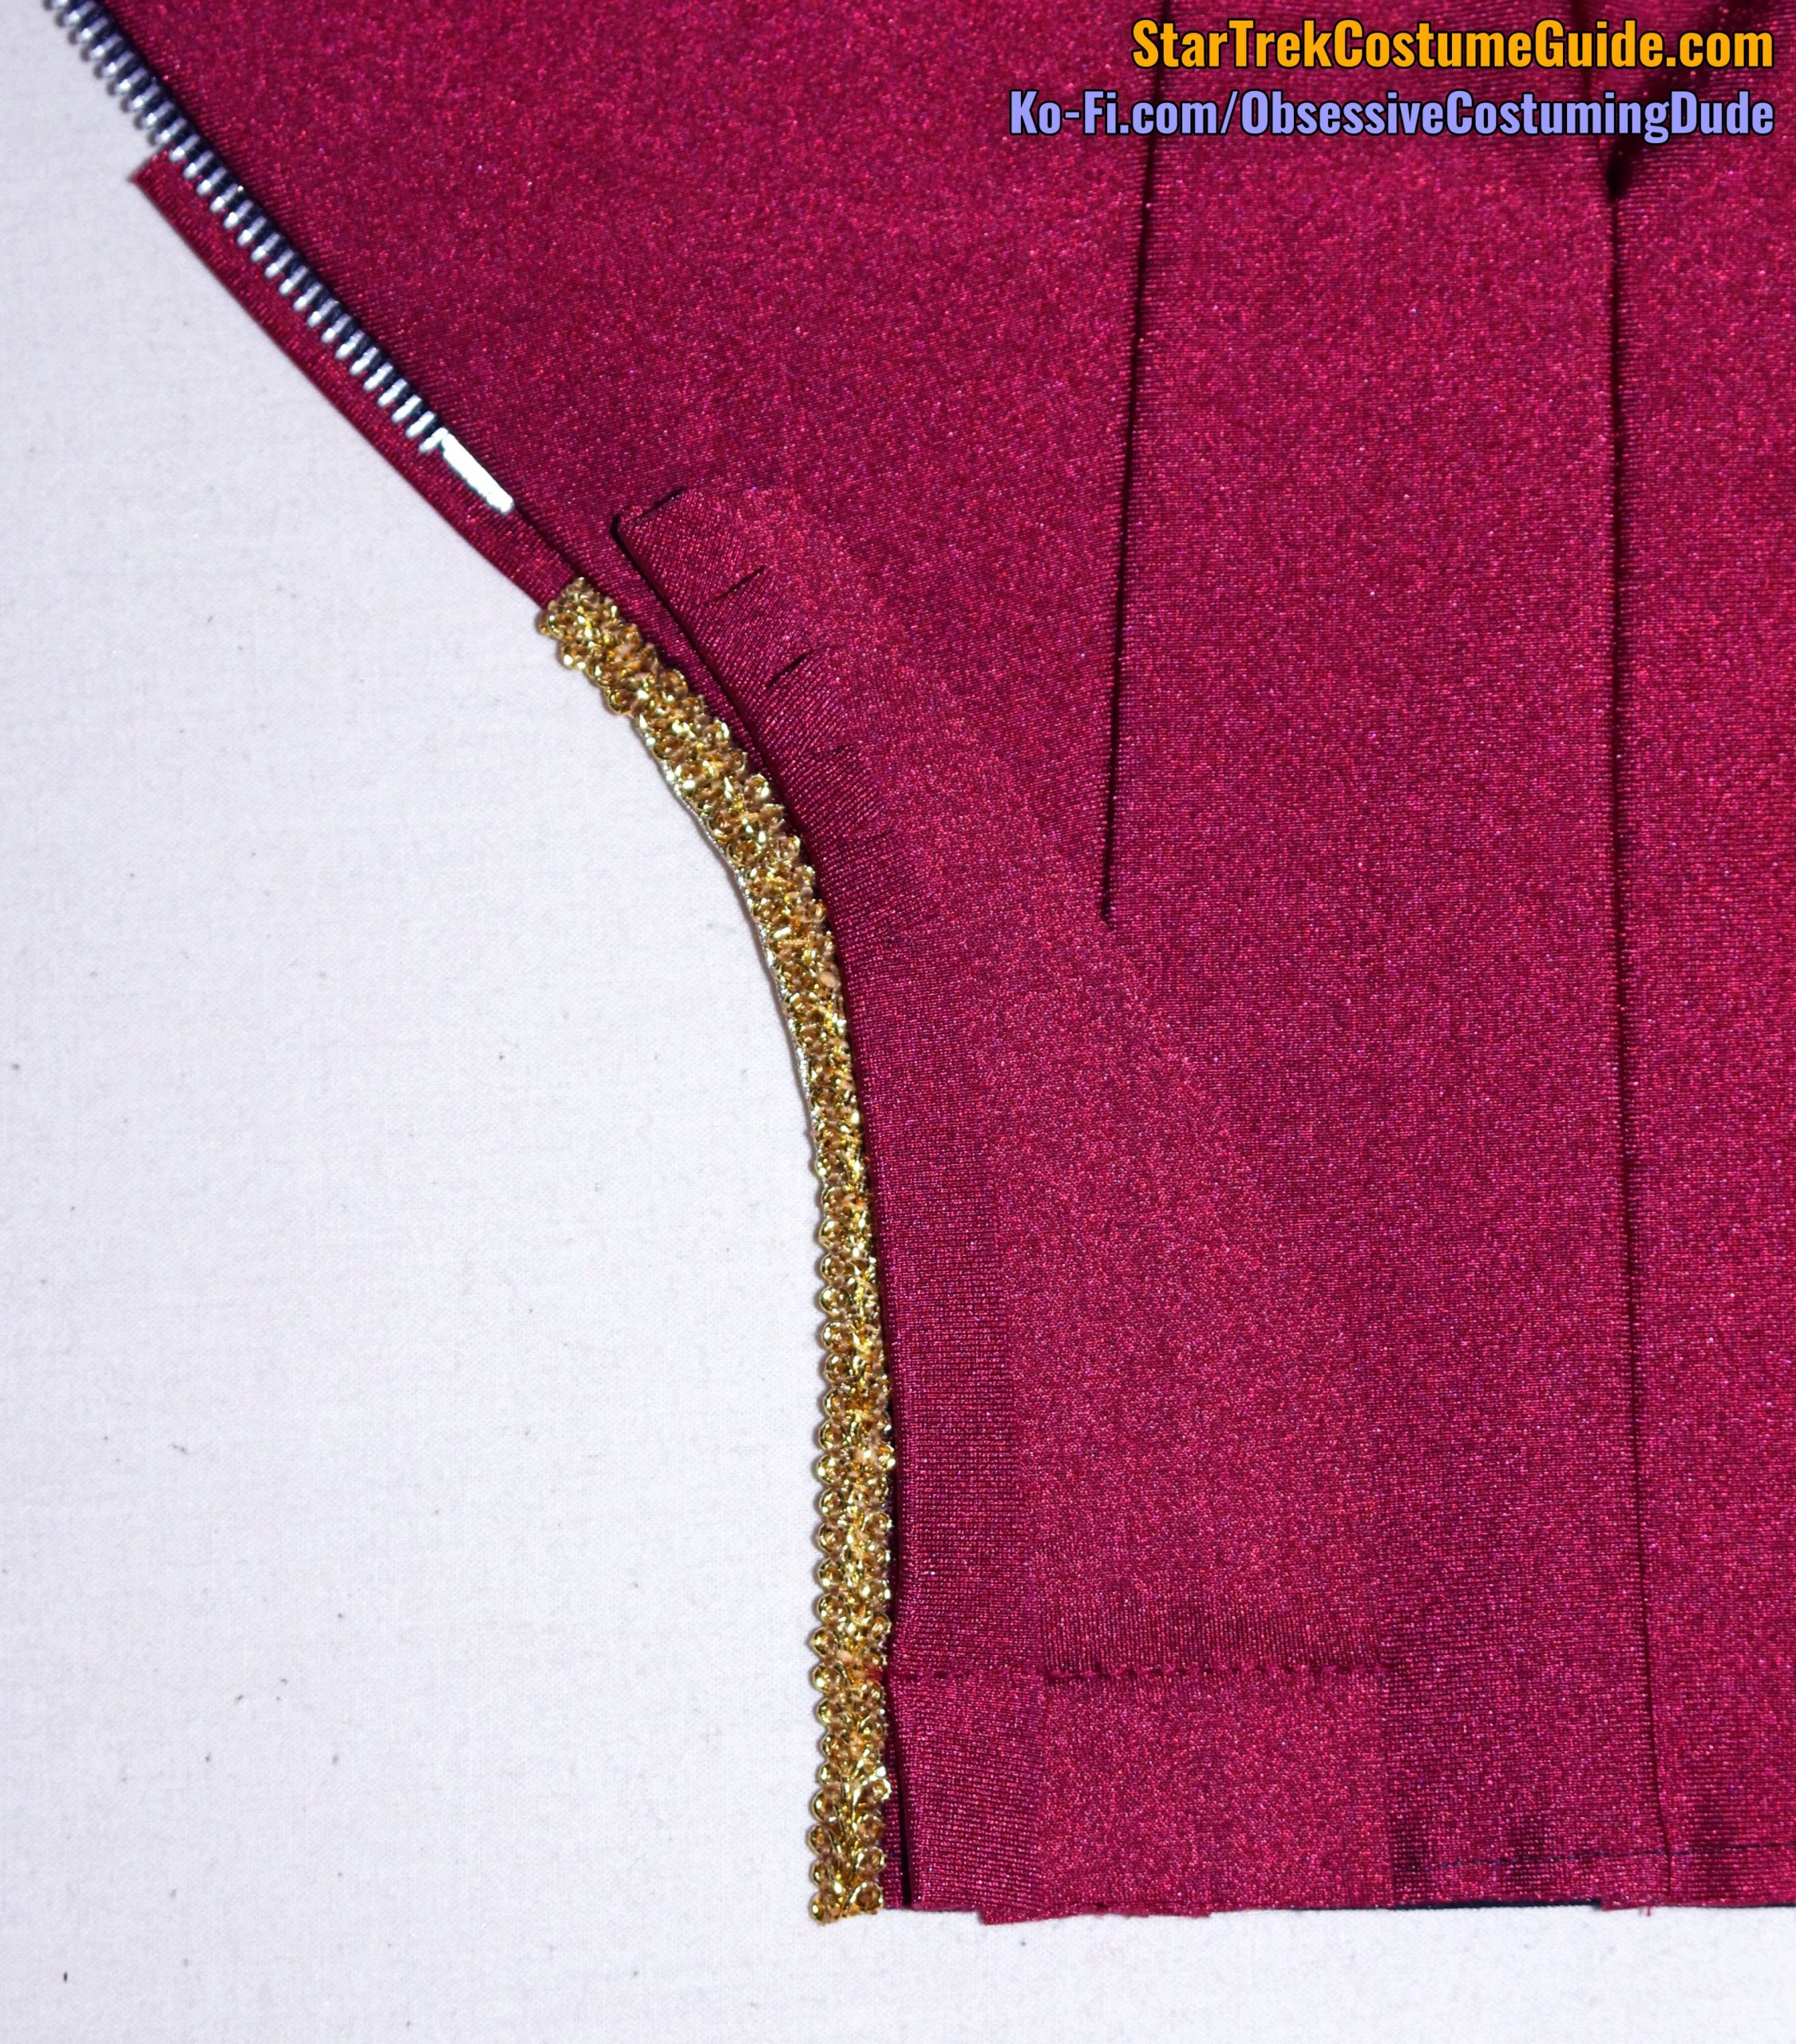
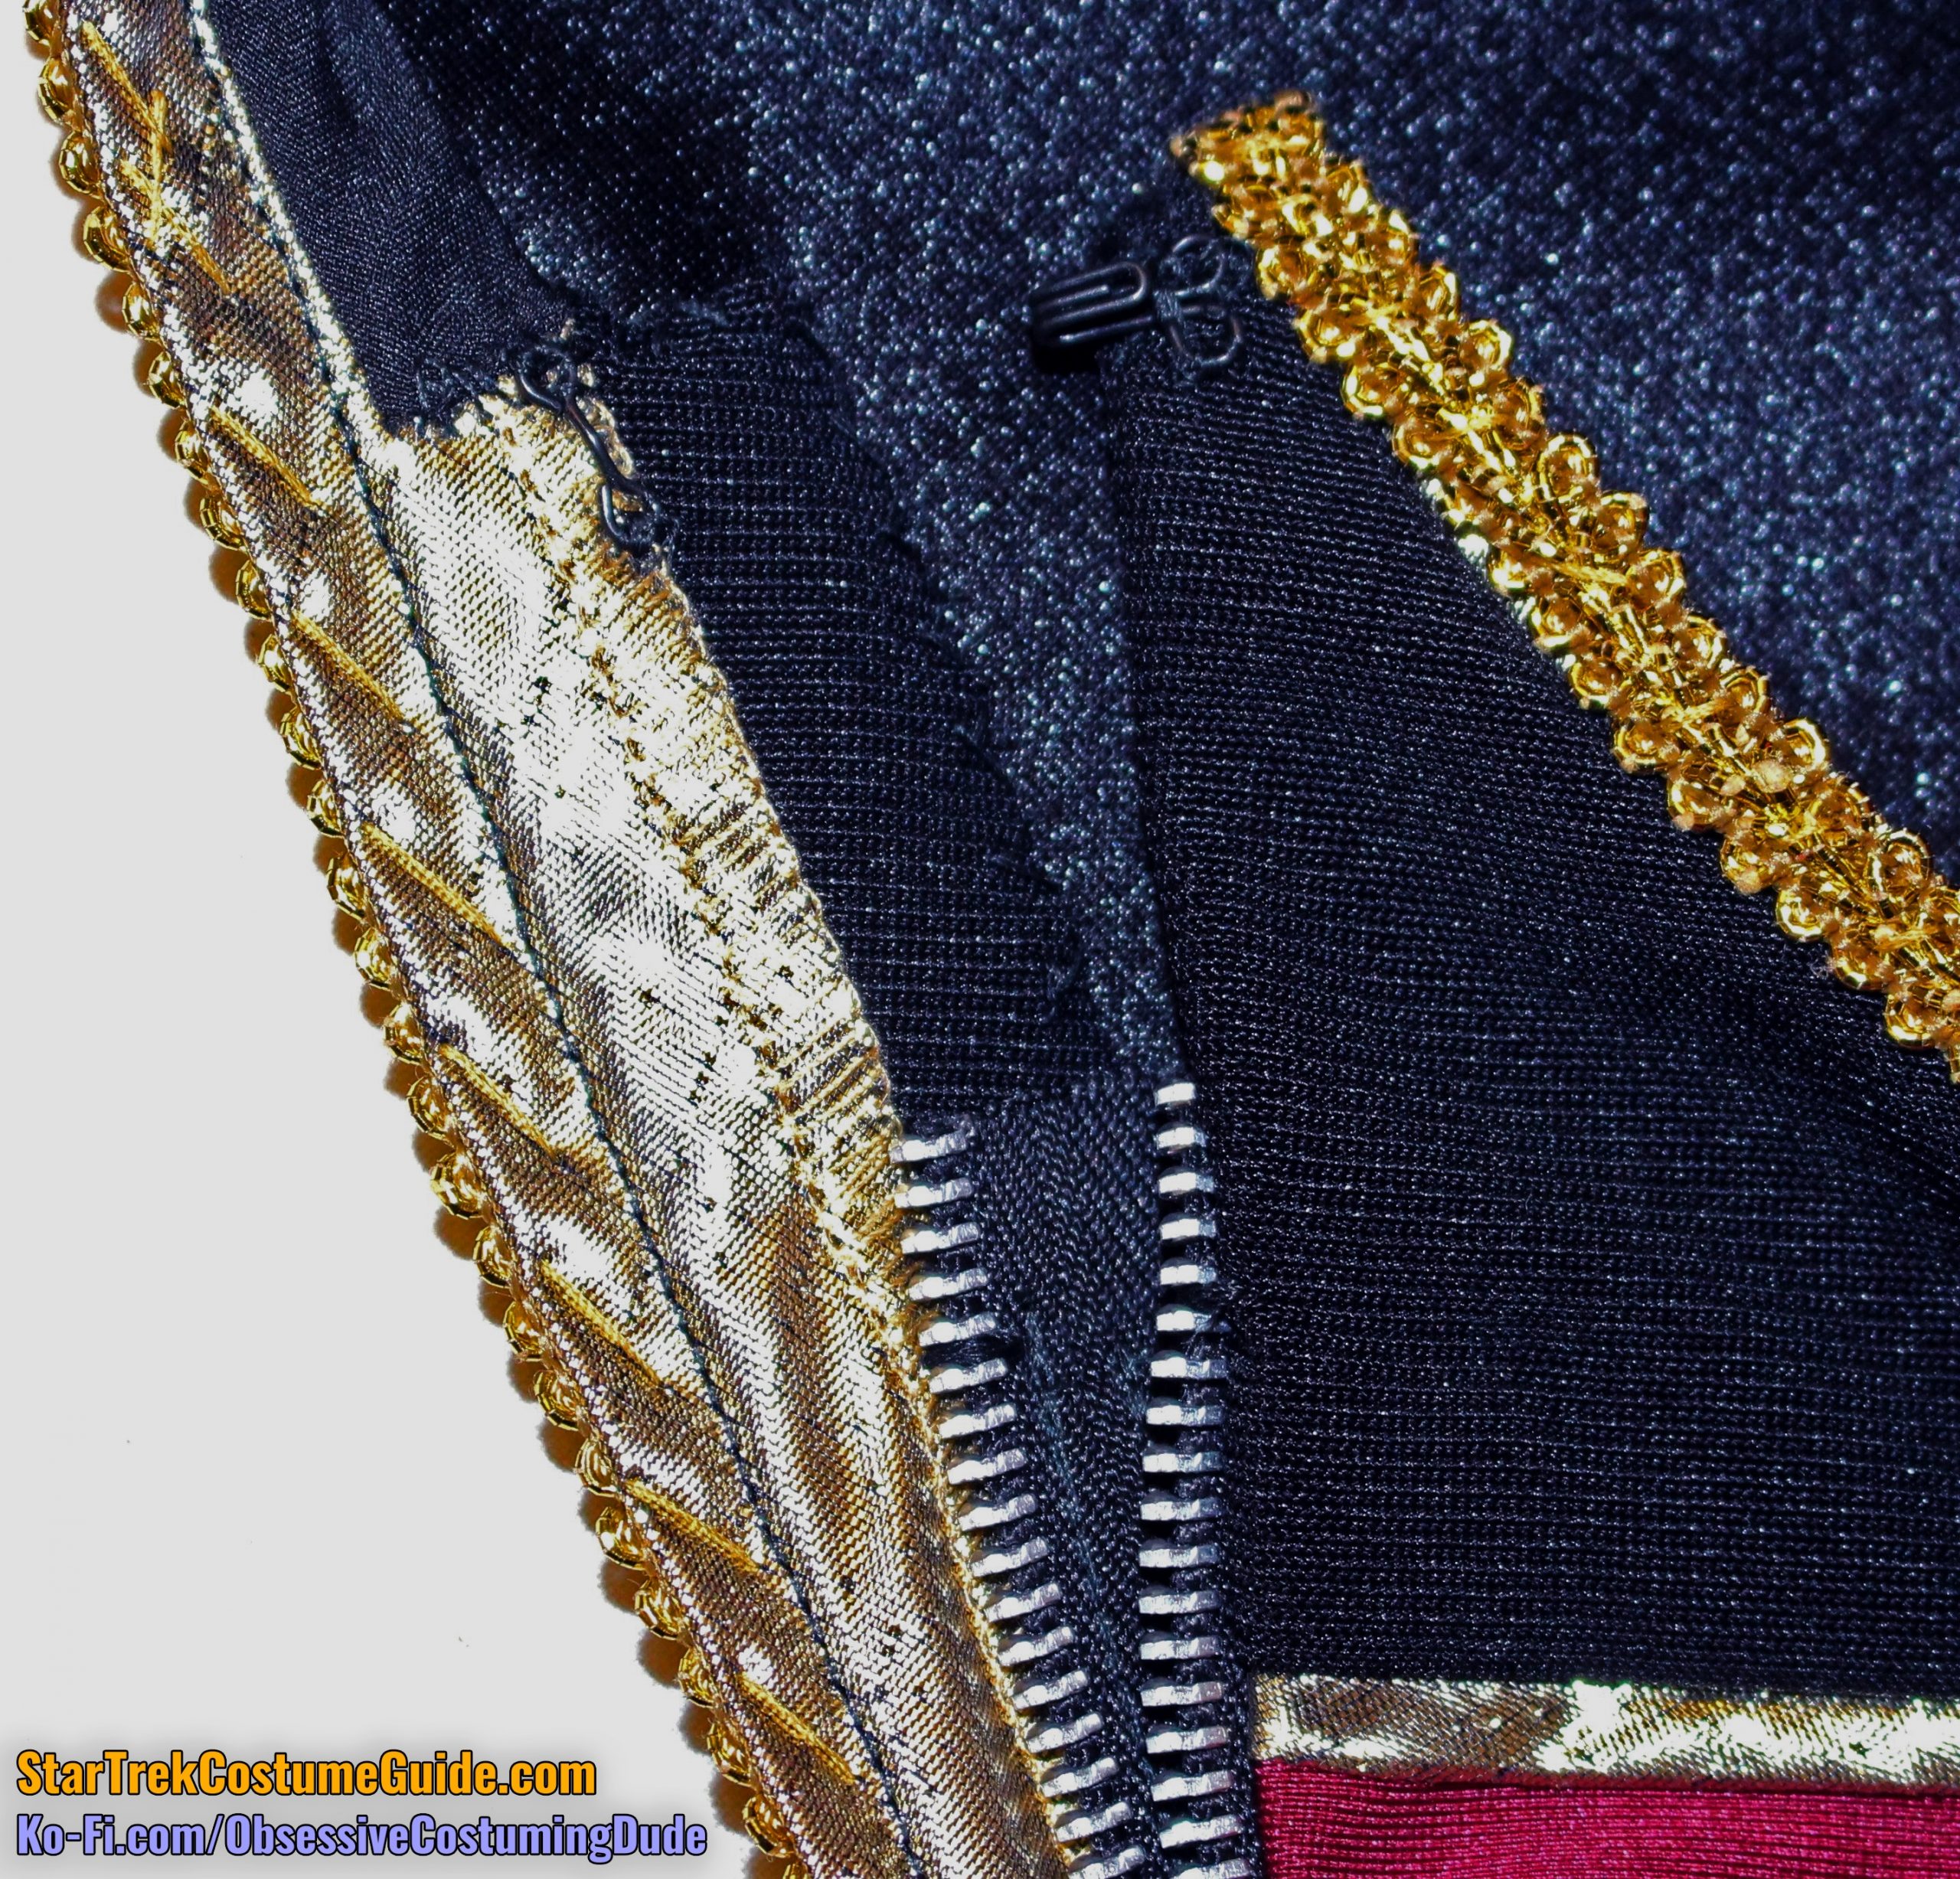
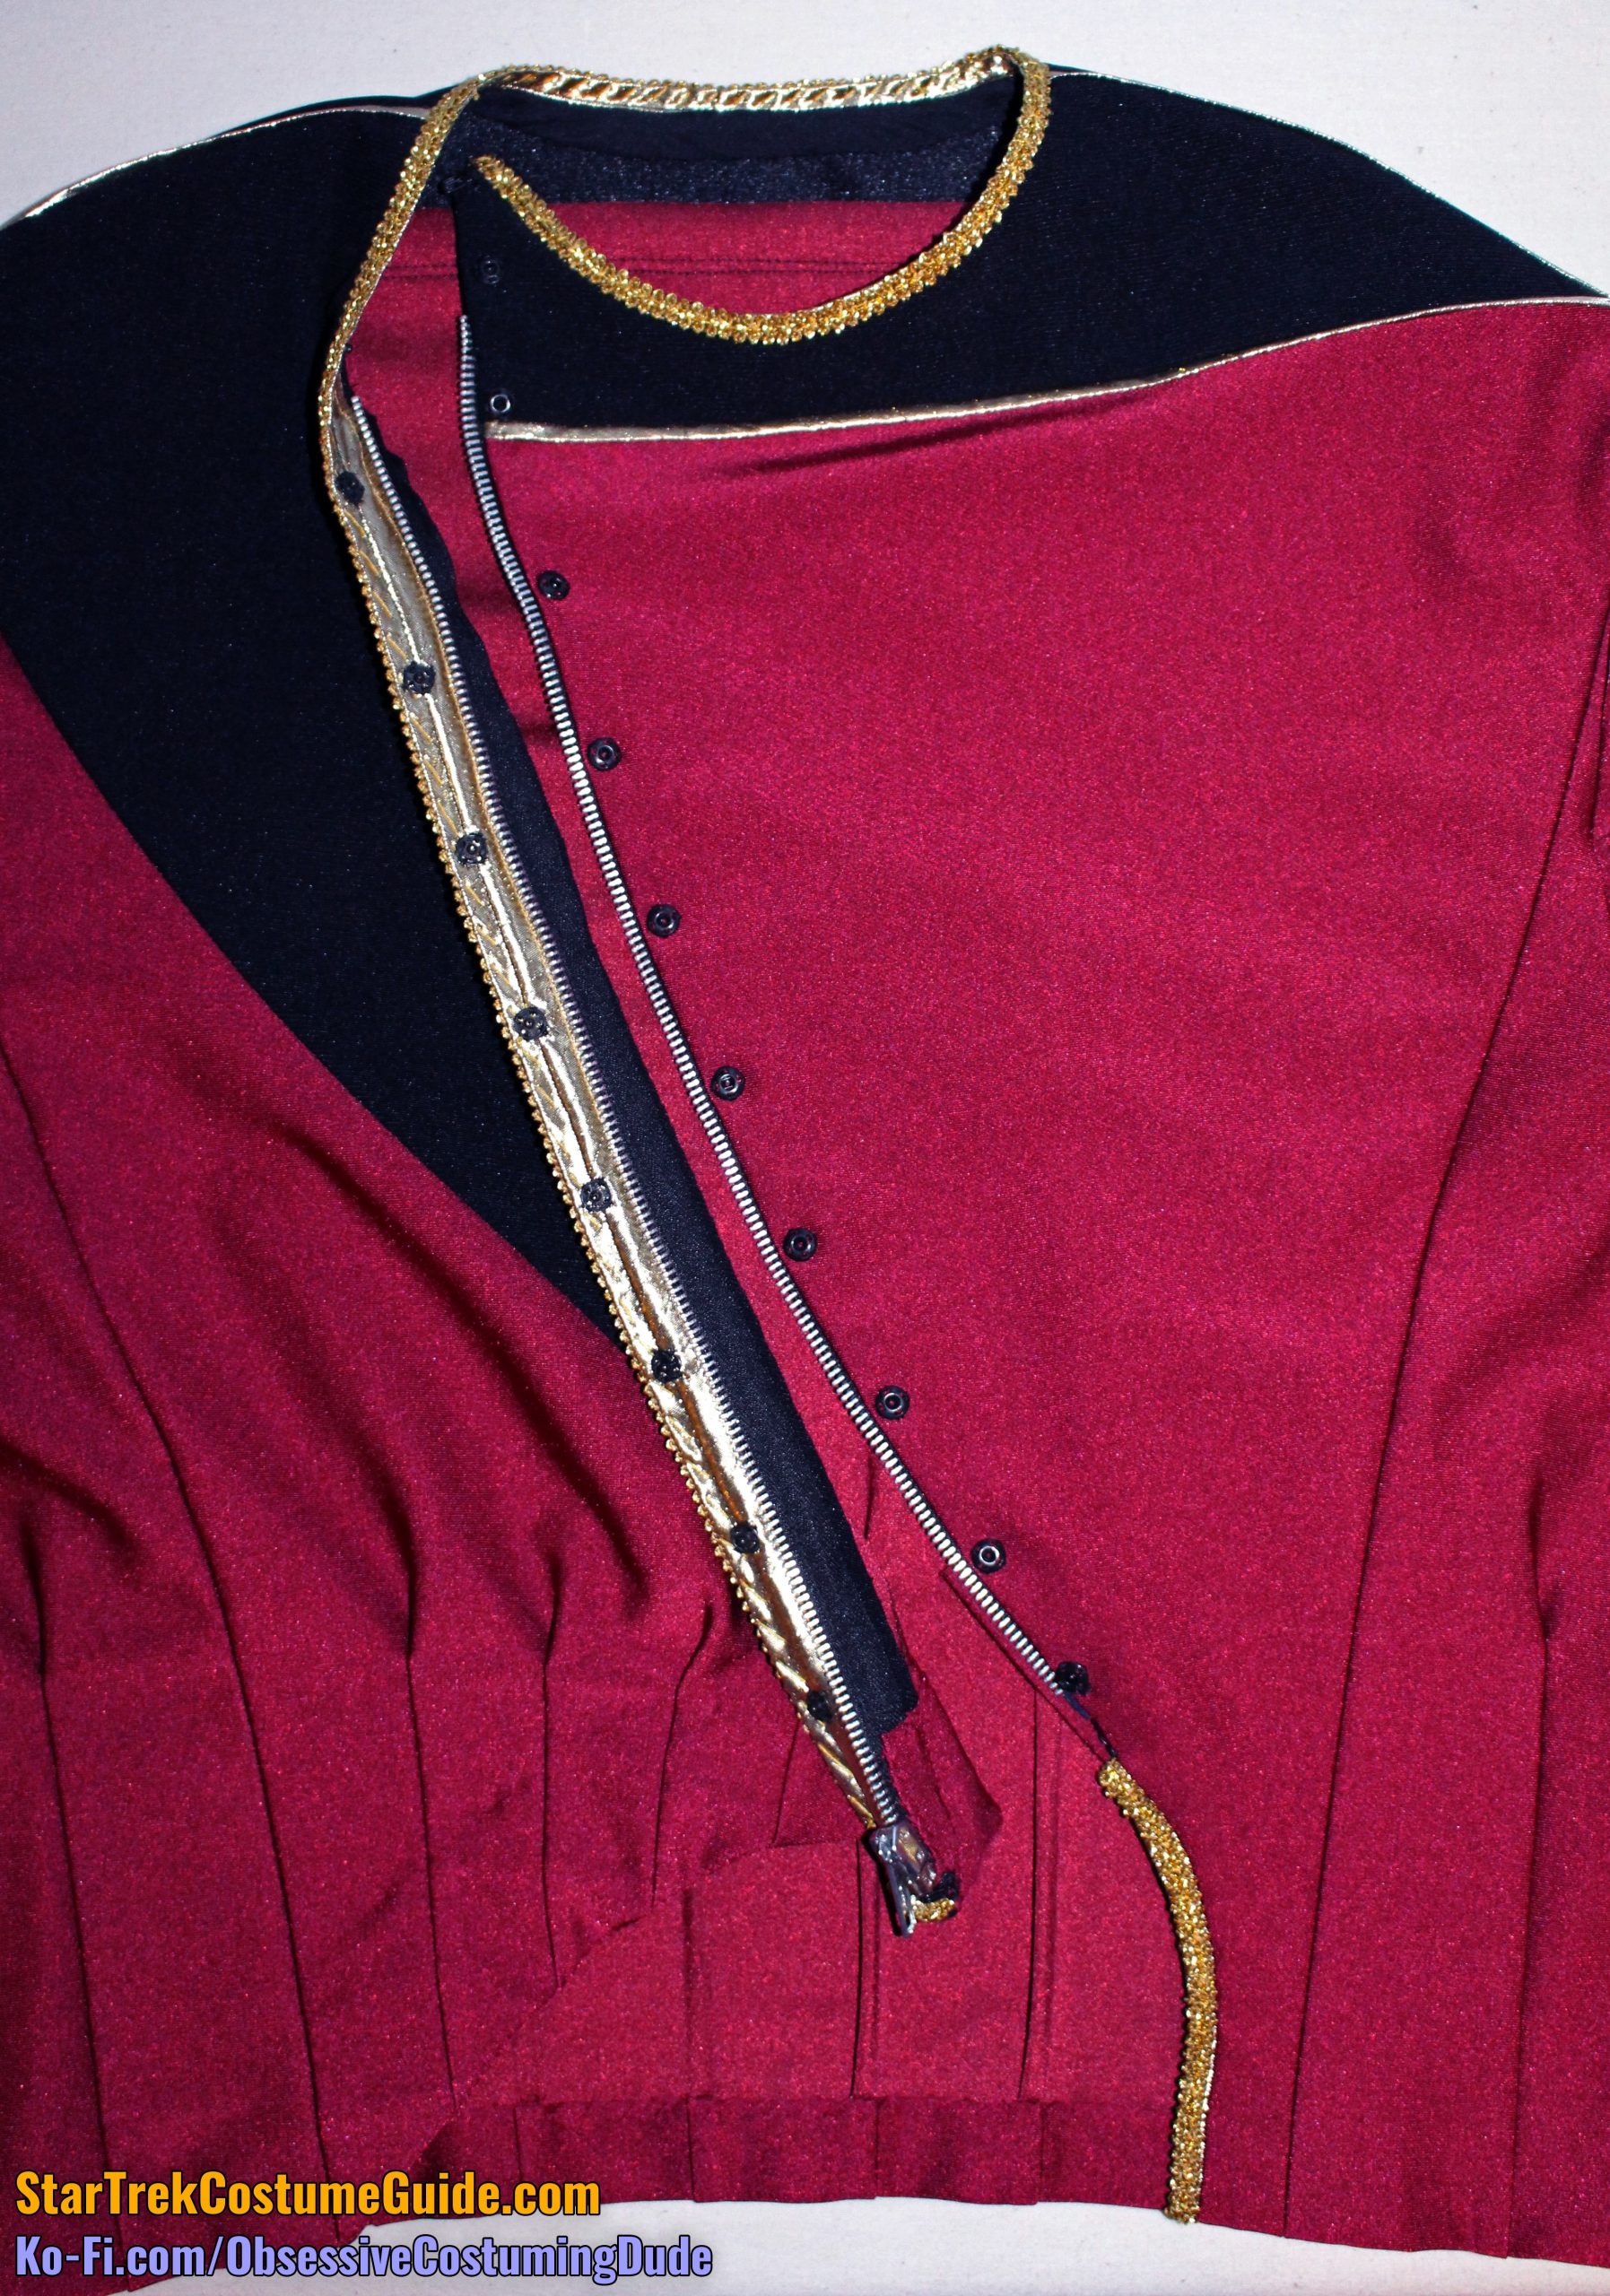
Next, sew a length of metallic gold trim to the neckline and the front edge of the right front insert.
Note that the right seam allowance changes from ½” to a full 1” partway down from the right shoulder seam.
Also remember that for this particular edge, I suggest leaving a full ¼” of gold trim extending outward beyond the seam line, to support the gold “gimp” trim.
Turn the gold trim under and press.
Carefully position the zipper and baste it into place, keeping in mind the front seam allowance is a full 1”.
(Honestly, I don’t see why it needs to be, but the original was, so I incorporated it into my pattern for the sake of authenticity.)
On the left side, the bottom of the zipper should be about 1” to 1 ¼” above the corner of the wider seam allowance, to allow room for the lower hook-and-eye closures later.
On the right side, the bottom of the zipper should be similarly positioned.
The zipper should extend upward onto the left yoke at least 1”, but no more than about 2”. (Although, I’d say there is some “wiggle room” here; the two most important things are that the jacket successfully zip closed, and the zipper remain hidden.)
Once satisfied with your zipper’s positioning, sew it onto the jacket with your zipper foot.
Then, switch back to your all-purpose (or walking) foot and sew the zipper tape down to the seam allowances.
(Don’t worry if this takes you several tries. Zippers can already be tricky, and spandex can make them even more so – not to mention that in this case we have two curved edges that follow slightly different curves!)
At the top, if your zipper is too long, carefully sew a bar tack across the zipper teeth where you want it to end, then trim away the top of the zipper and apply some liquid fray preventer to the upper edges of the zipper tape.
STEP 5 - Finishing
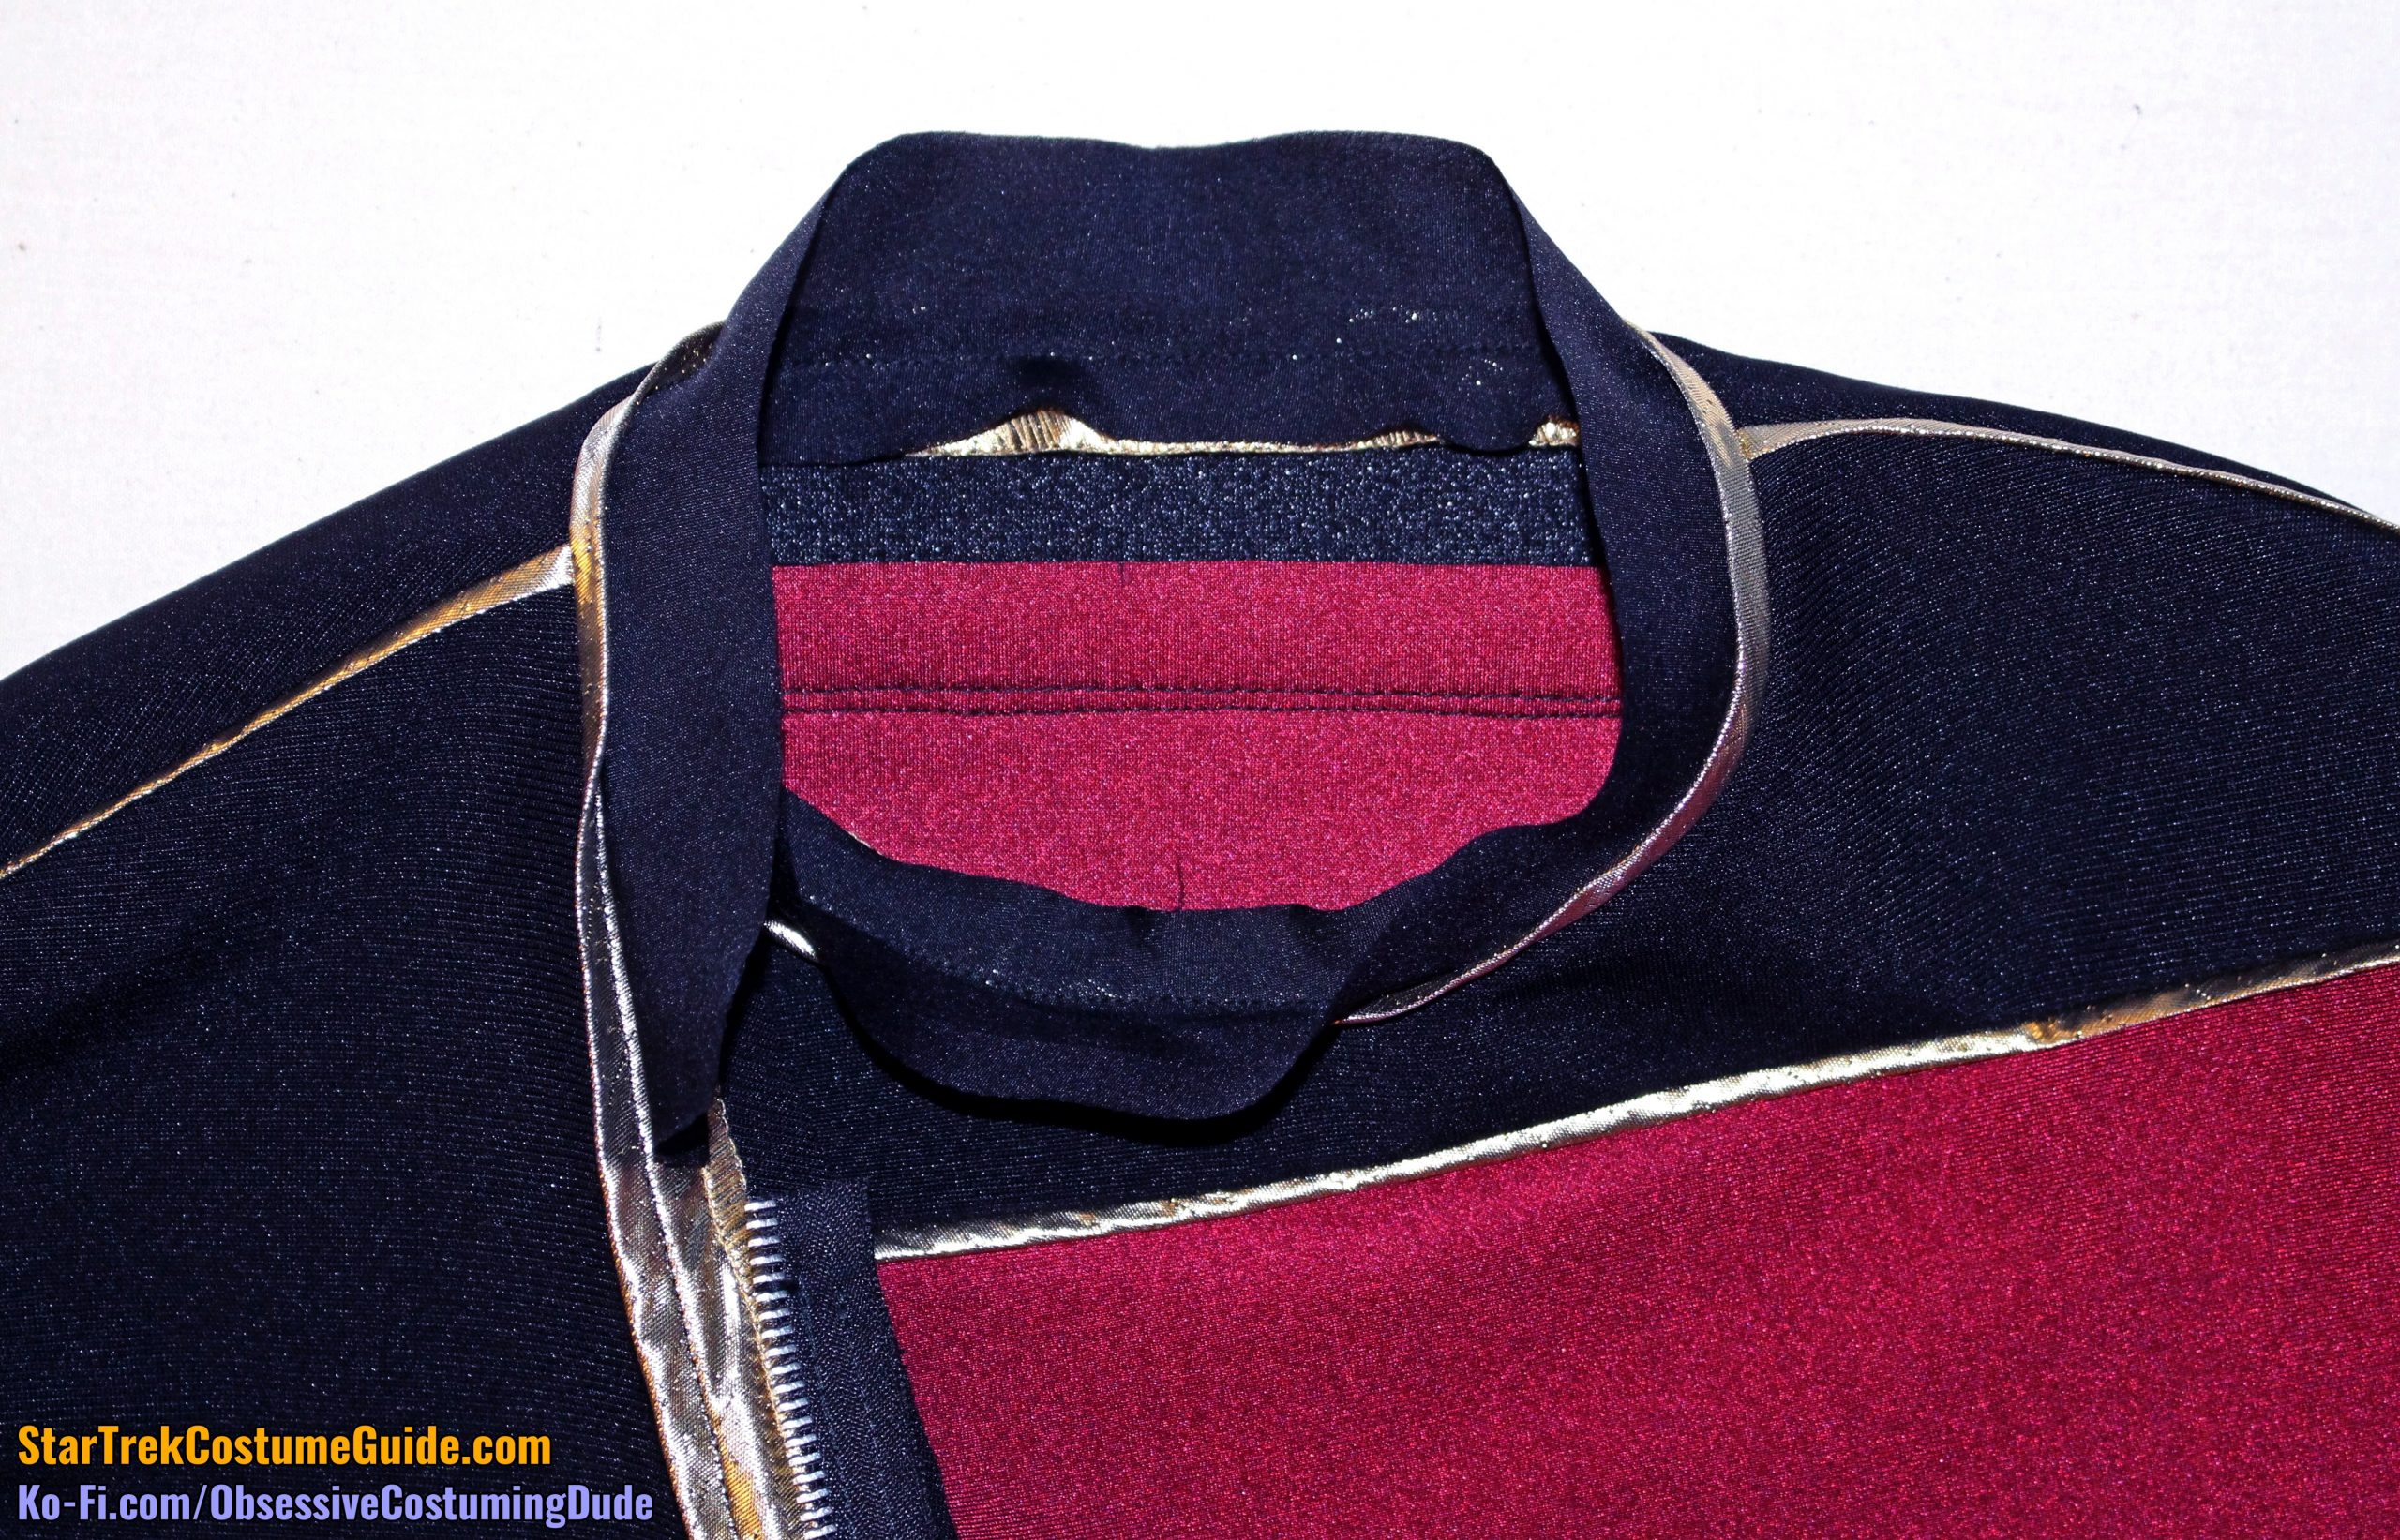
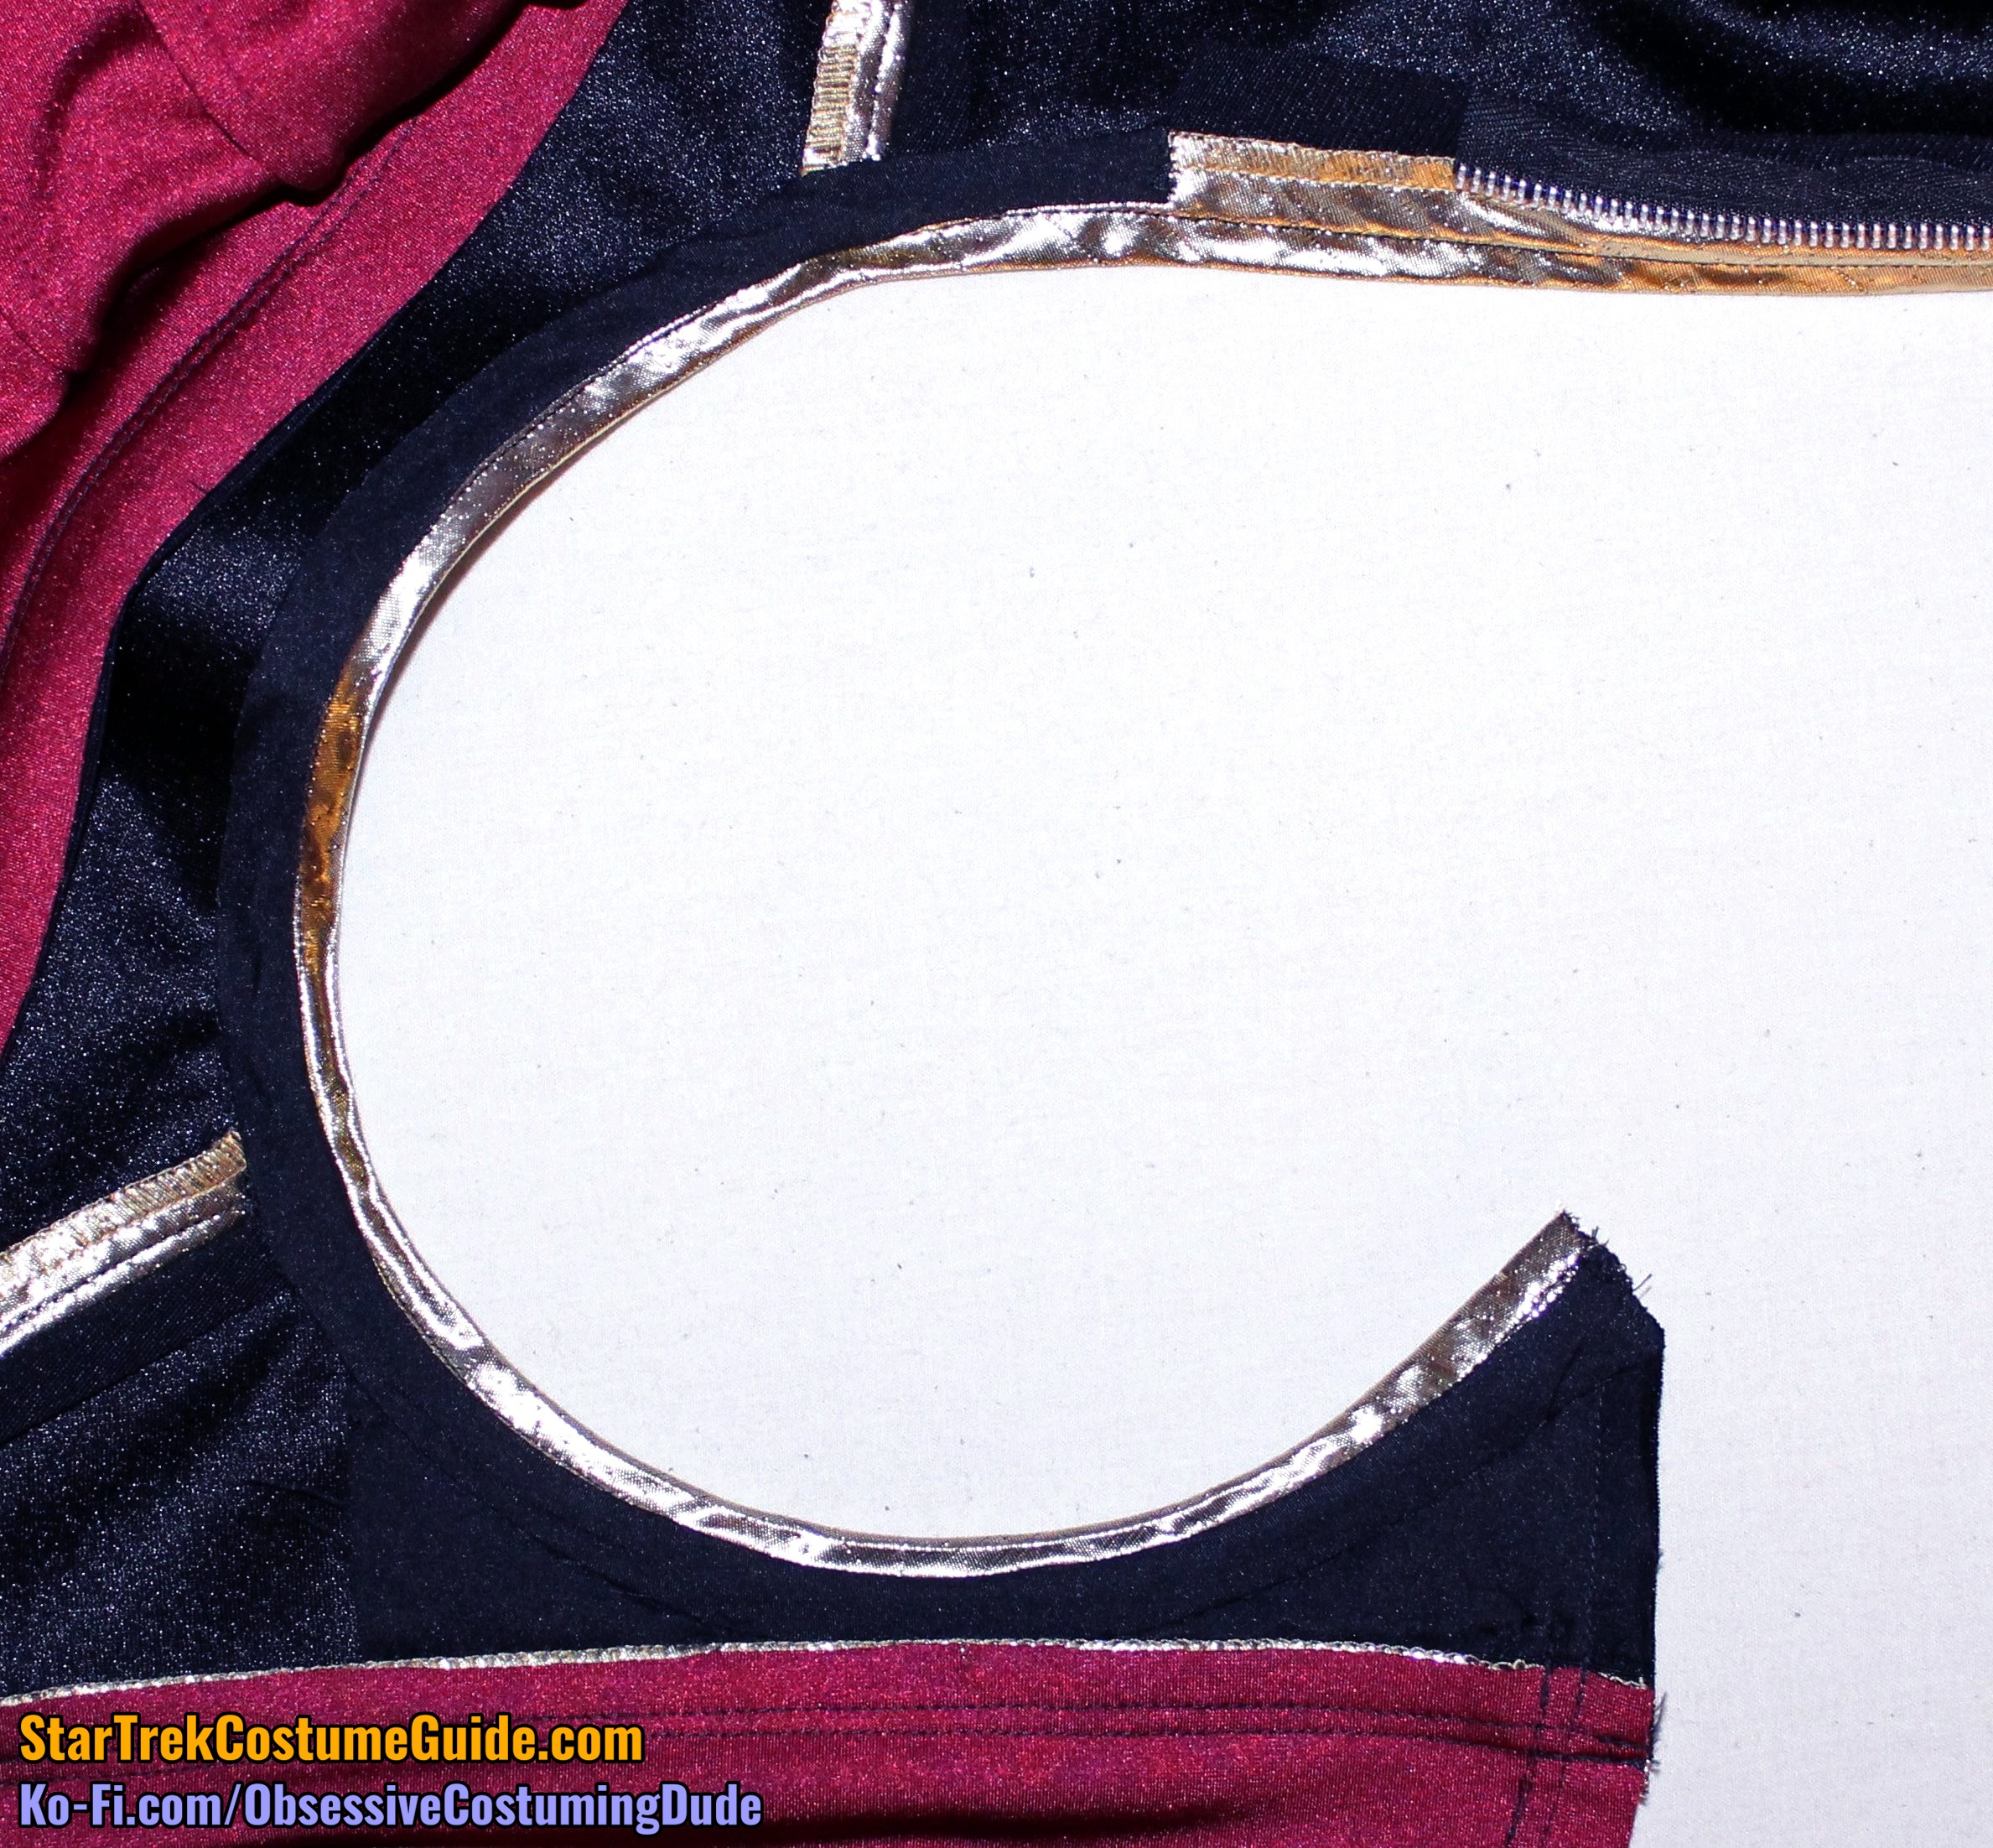
Cut a bias strip of black lining, 1 ½” wide and long enough to wrap around your neck, plus a few inches.
Sew the lining to the jacket around the neckline, stitching exactly over (or perhaps just inside of) the previous stitch line. Stop when you get to the corner of 1” seam allowance. (Anywhere in that general area is fine.)
Trim the neckline seam allowances down to ¼” and clip them close to the stitching along the curve.
Turn the lining under and press.
Turn the raw edge of the lining under and press.
Hand-sew the lower/folded edge of the lining to the underside of the yoke, catching only a single thread of garment fabric along the spandex so your stitches don’t show on the right side of the garment. Only sew through the yoke lining along the front of the neckline.
At the lower right end of the lining, turn the raw edges under and tack it onto the seam allowance.
Cut a length of the gold “gimp” trim, long enough to extend all the way around the neckline to the bottom of the right front edge, plus an inch or two on each end.
From the underside, using gold (or metallic gold) thread, hand-sew the “gimp” trim to the gold quilt binding/bias trim. Stitch in whatever interval you feel most comfortable with; along the front edge, I caught every three “loops” of the “gimp” trim, but I tightened my stitching to every other “loop” along the neckline.
At the upper right corner of the left front, turn the “gimp” trim under and tack into place on the lining, then carefully apply some liquid fray preventer.
OPTIONAL: Turn the seam allowance under on the left front yoke and tack it into place, only stitching through the upper front/yoke seam allowances and front lining. On the screen-used Admiral Jameson uniform I examined, the allowance wasn’t tacked under, but I believe it may have been intended to be. Also note that in the example below, I let the allowance out some. It would normally be a full 1”.
Now we need to turn our attention to the bottom of the jacket, and the area beneath the zipper.
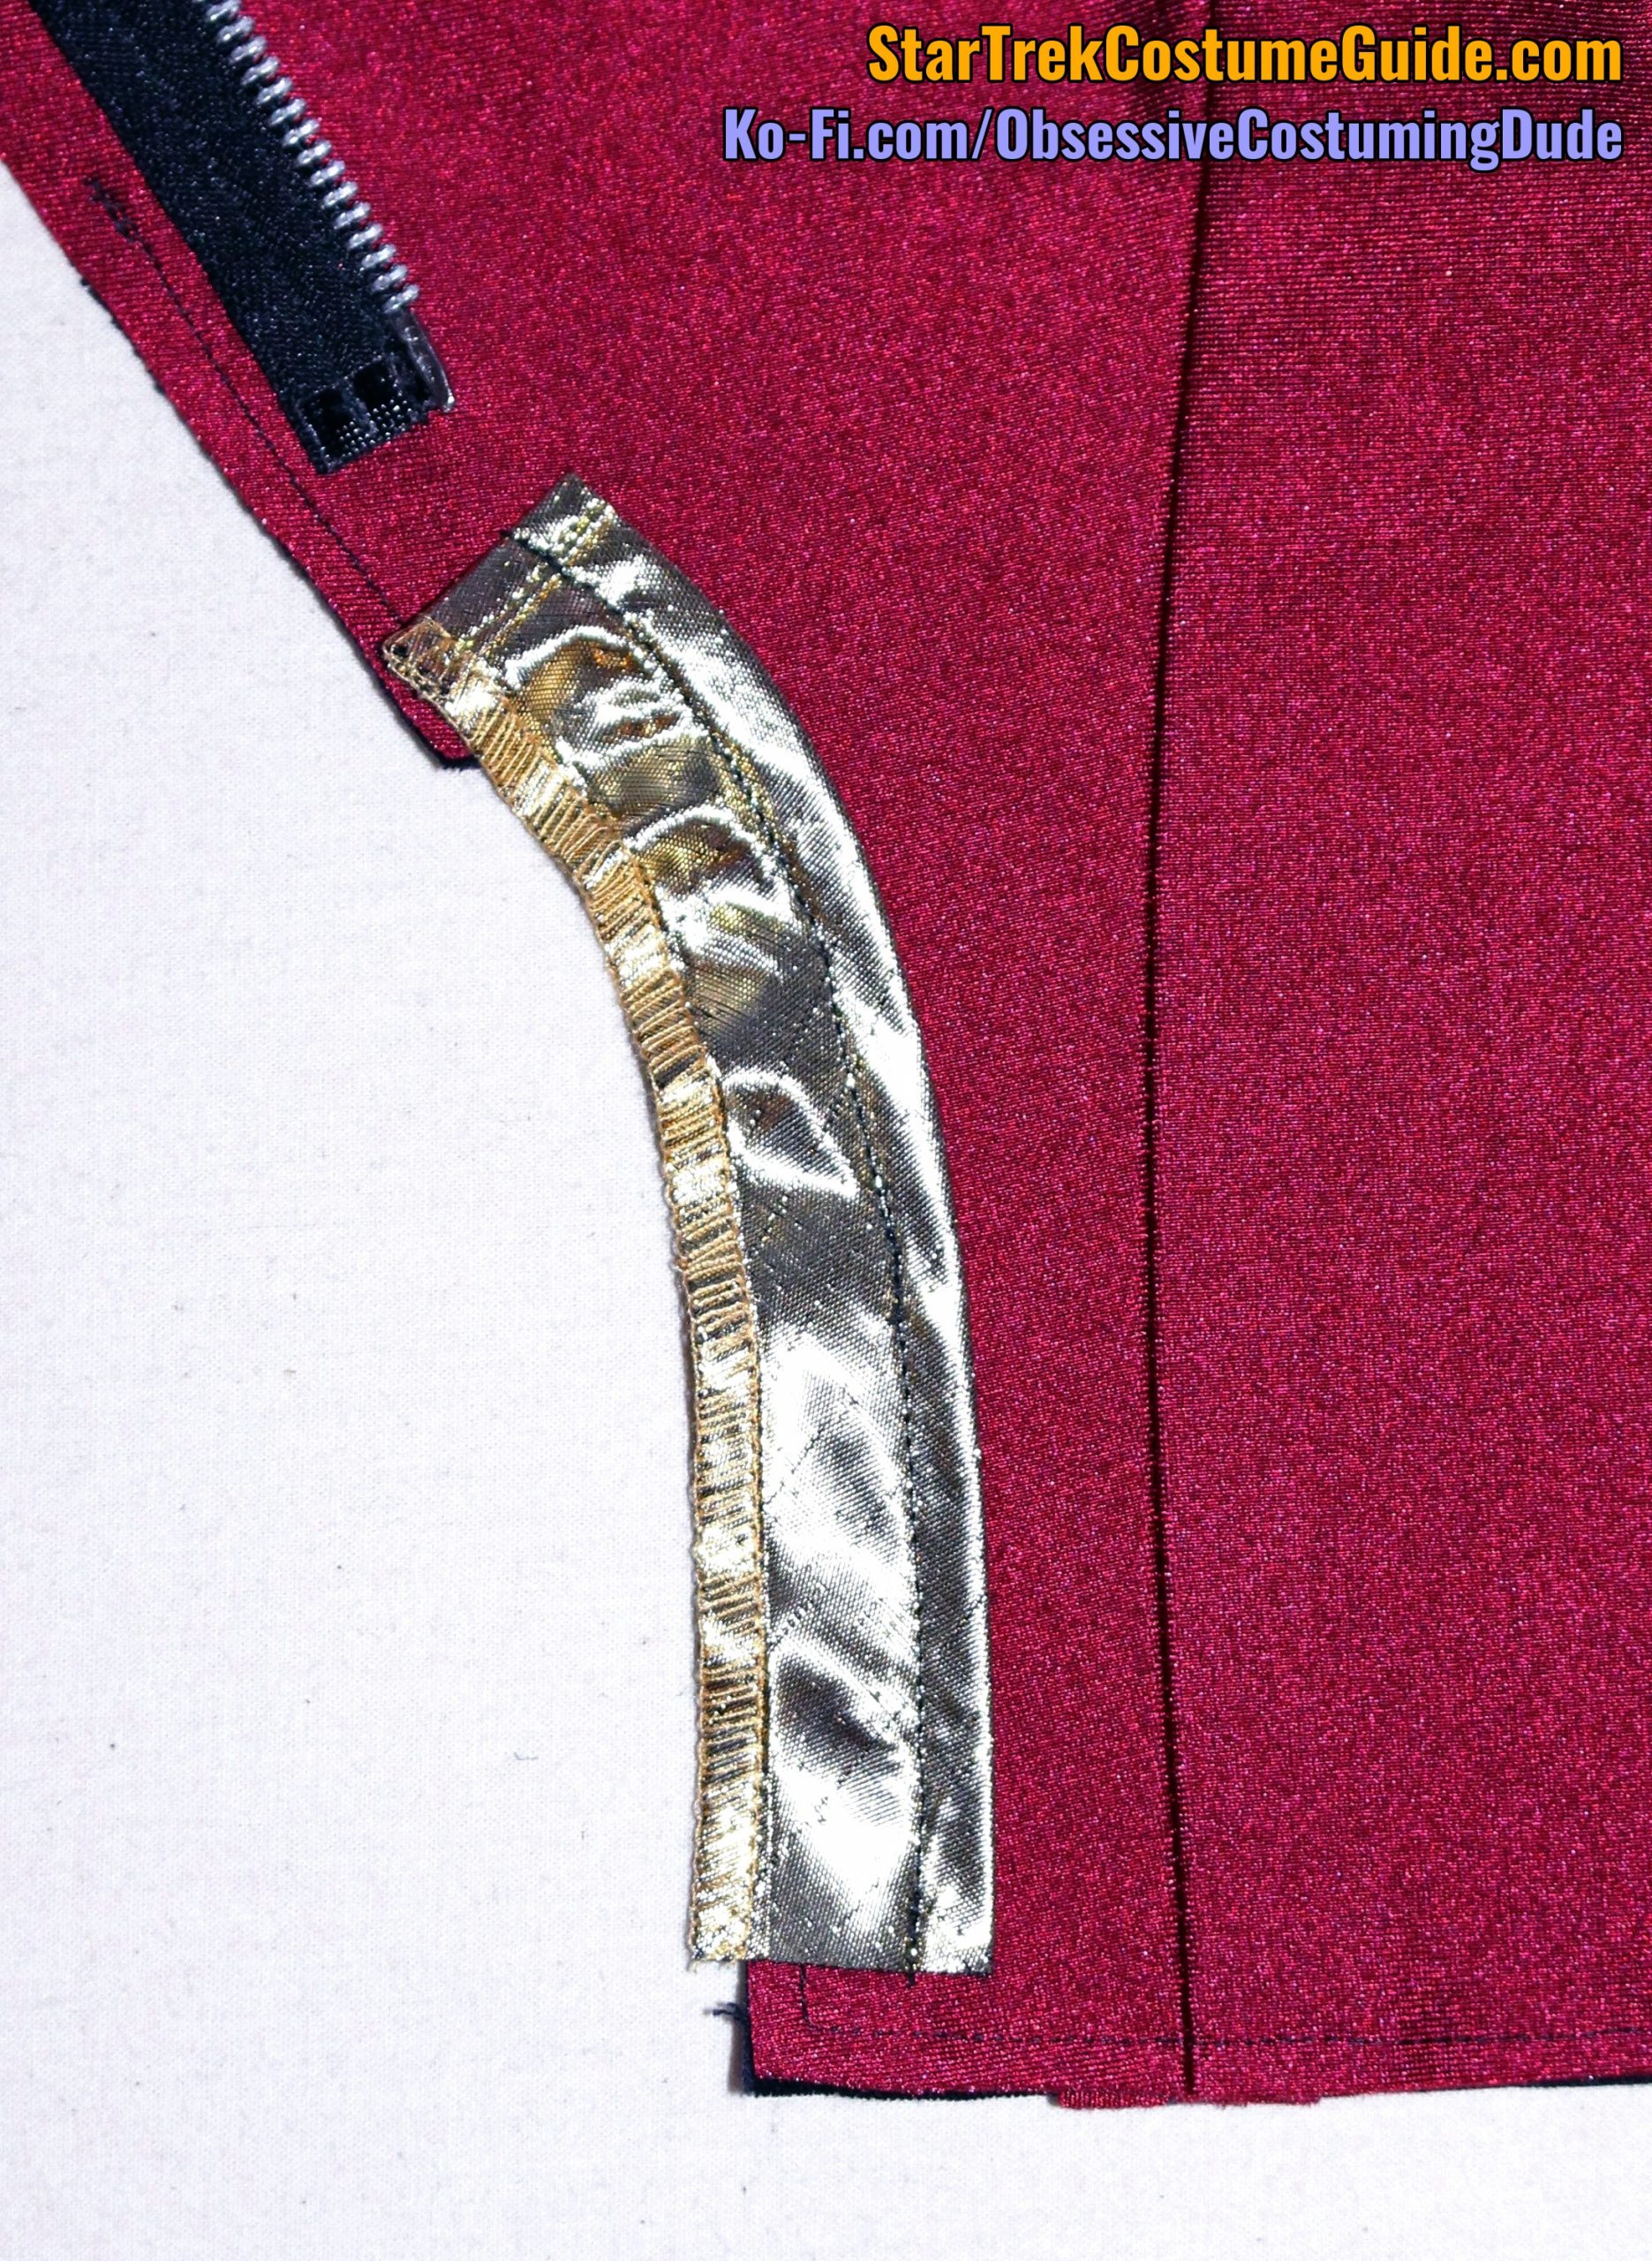
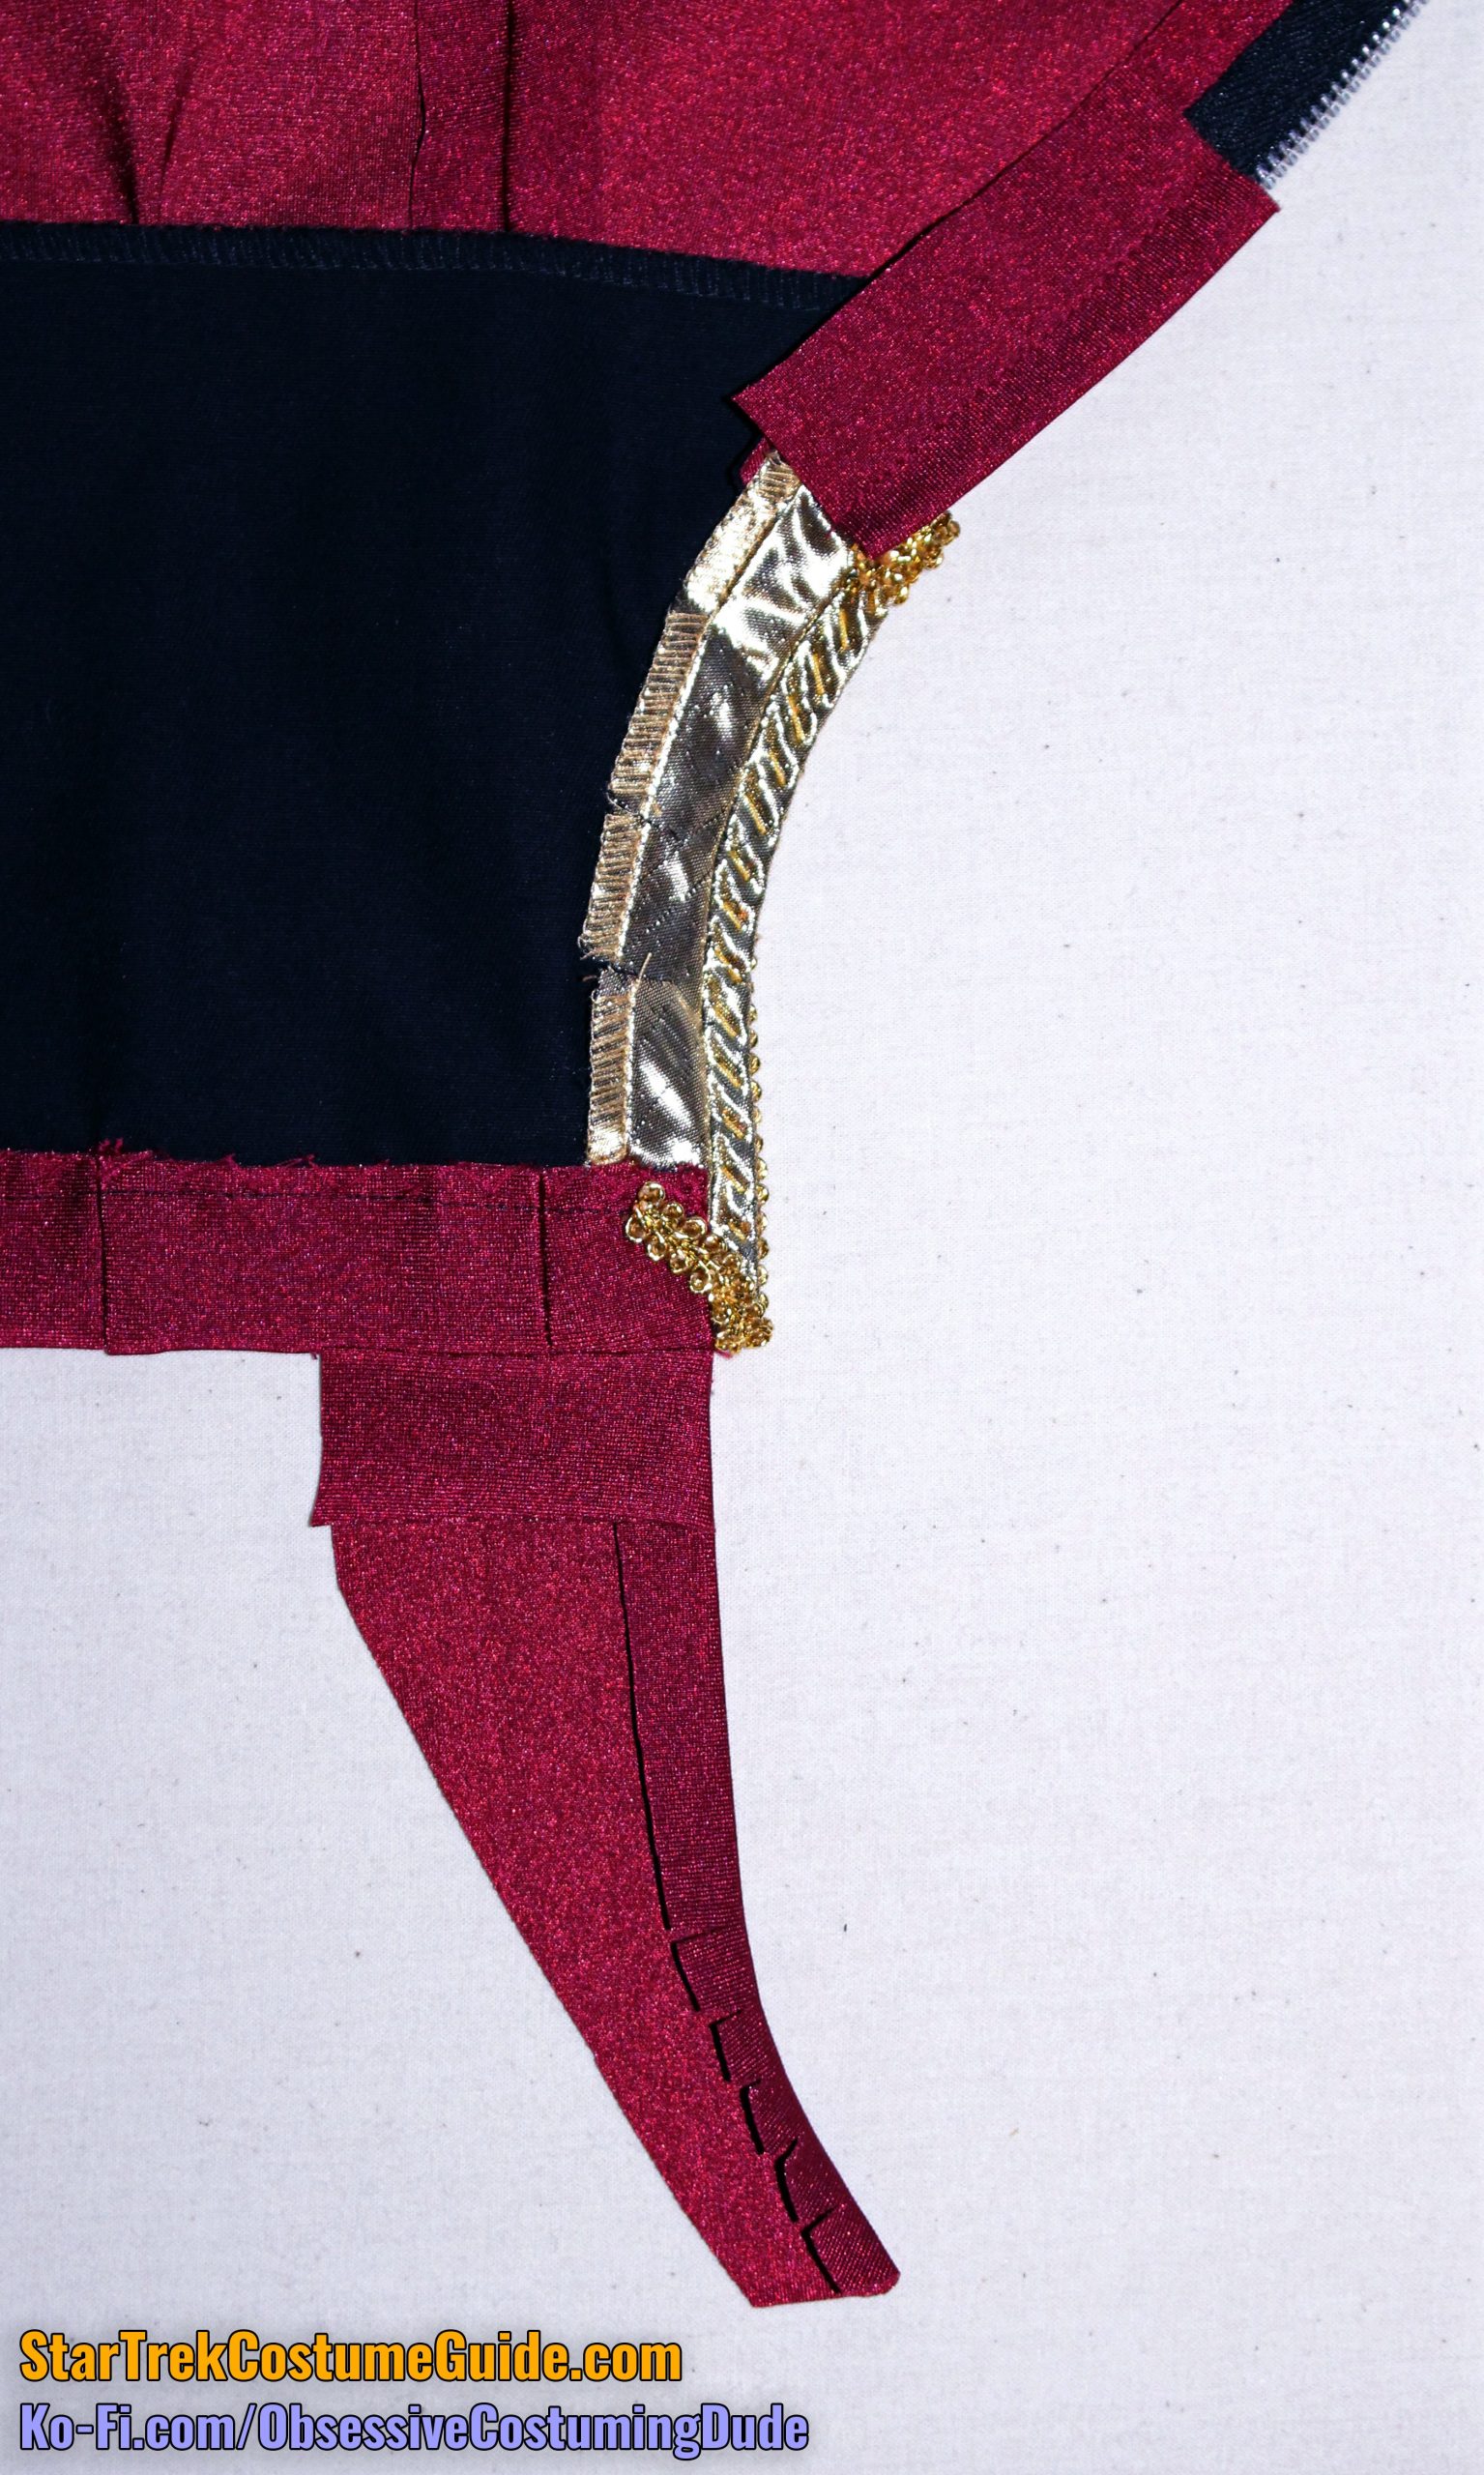
Cut a length of metallic gold trim, long enough to extend from inside the hem allowance to the bottom corner of the lower right front when the jacket is zipped closed.
I also suggest either turning the upper and lower ends under before serging, OR hemming the ends of the trim – in either case, preventing the ends from fraying.
Sew the trim to lower left front. As with the neckline/front trim, I suggest having it extend outward a full ¼” from the seam to support the “gimp” trim.
Turn the trim under, clip the seam allowances close to the stitching along the curve, and press the area flat.
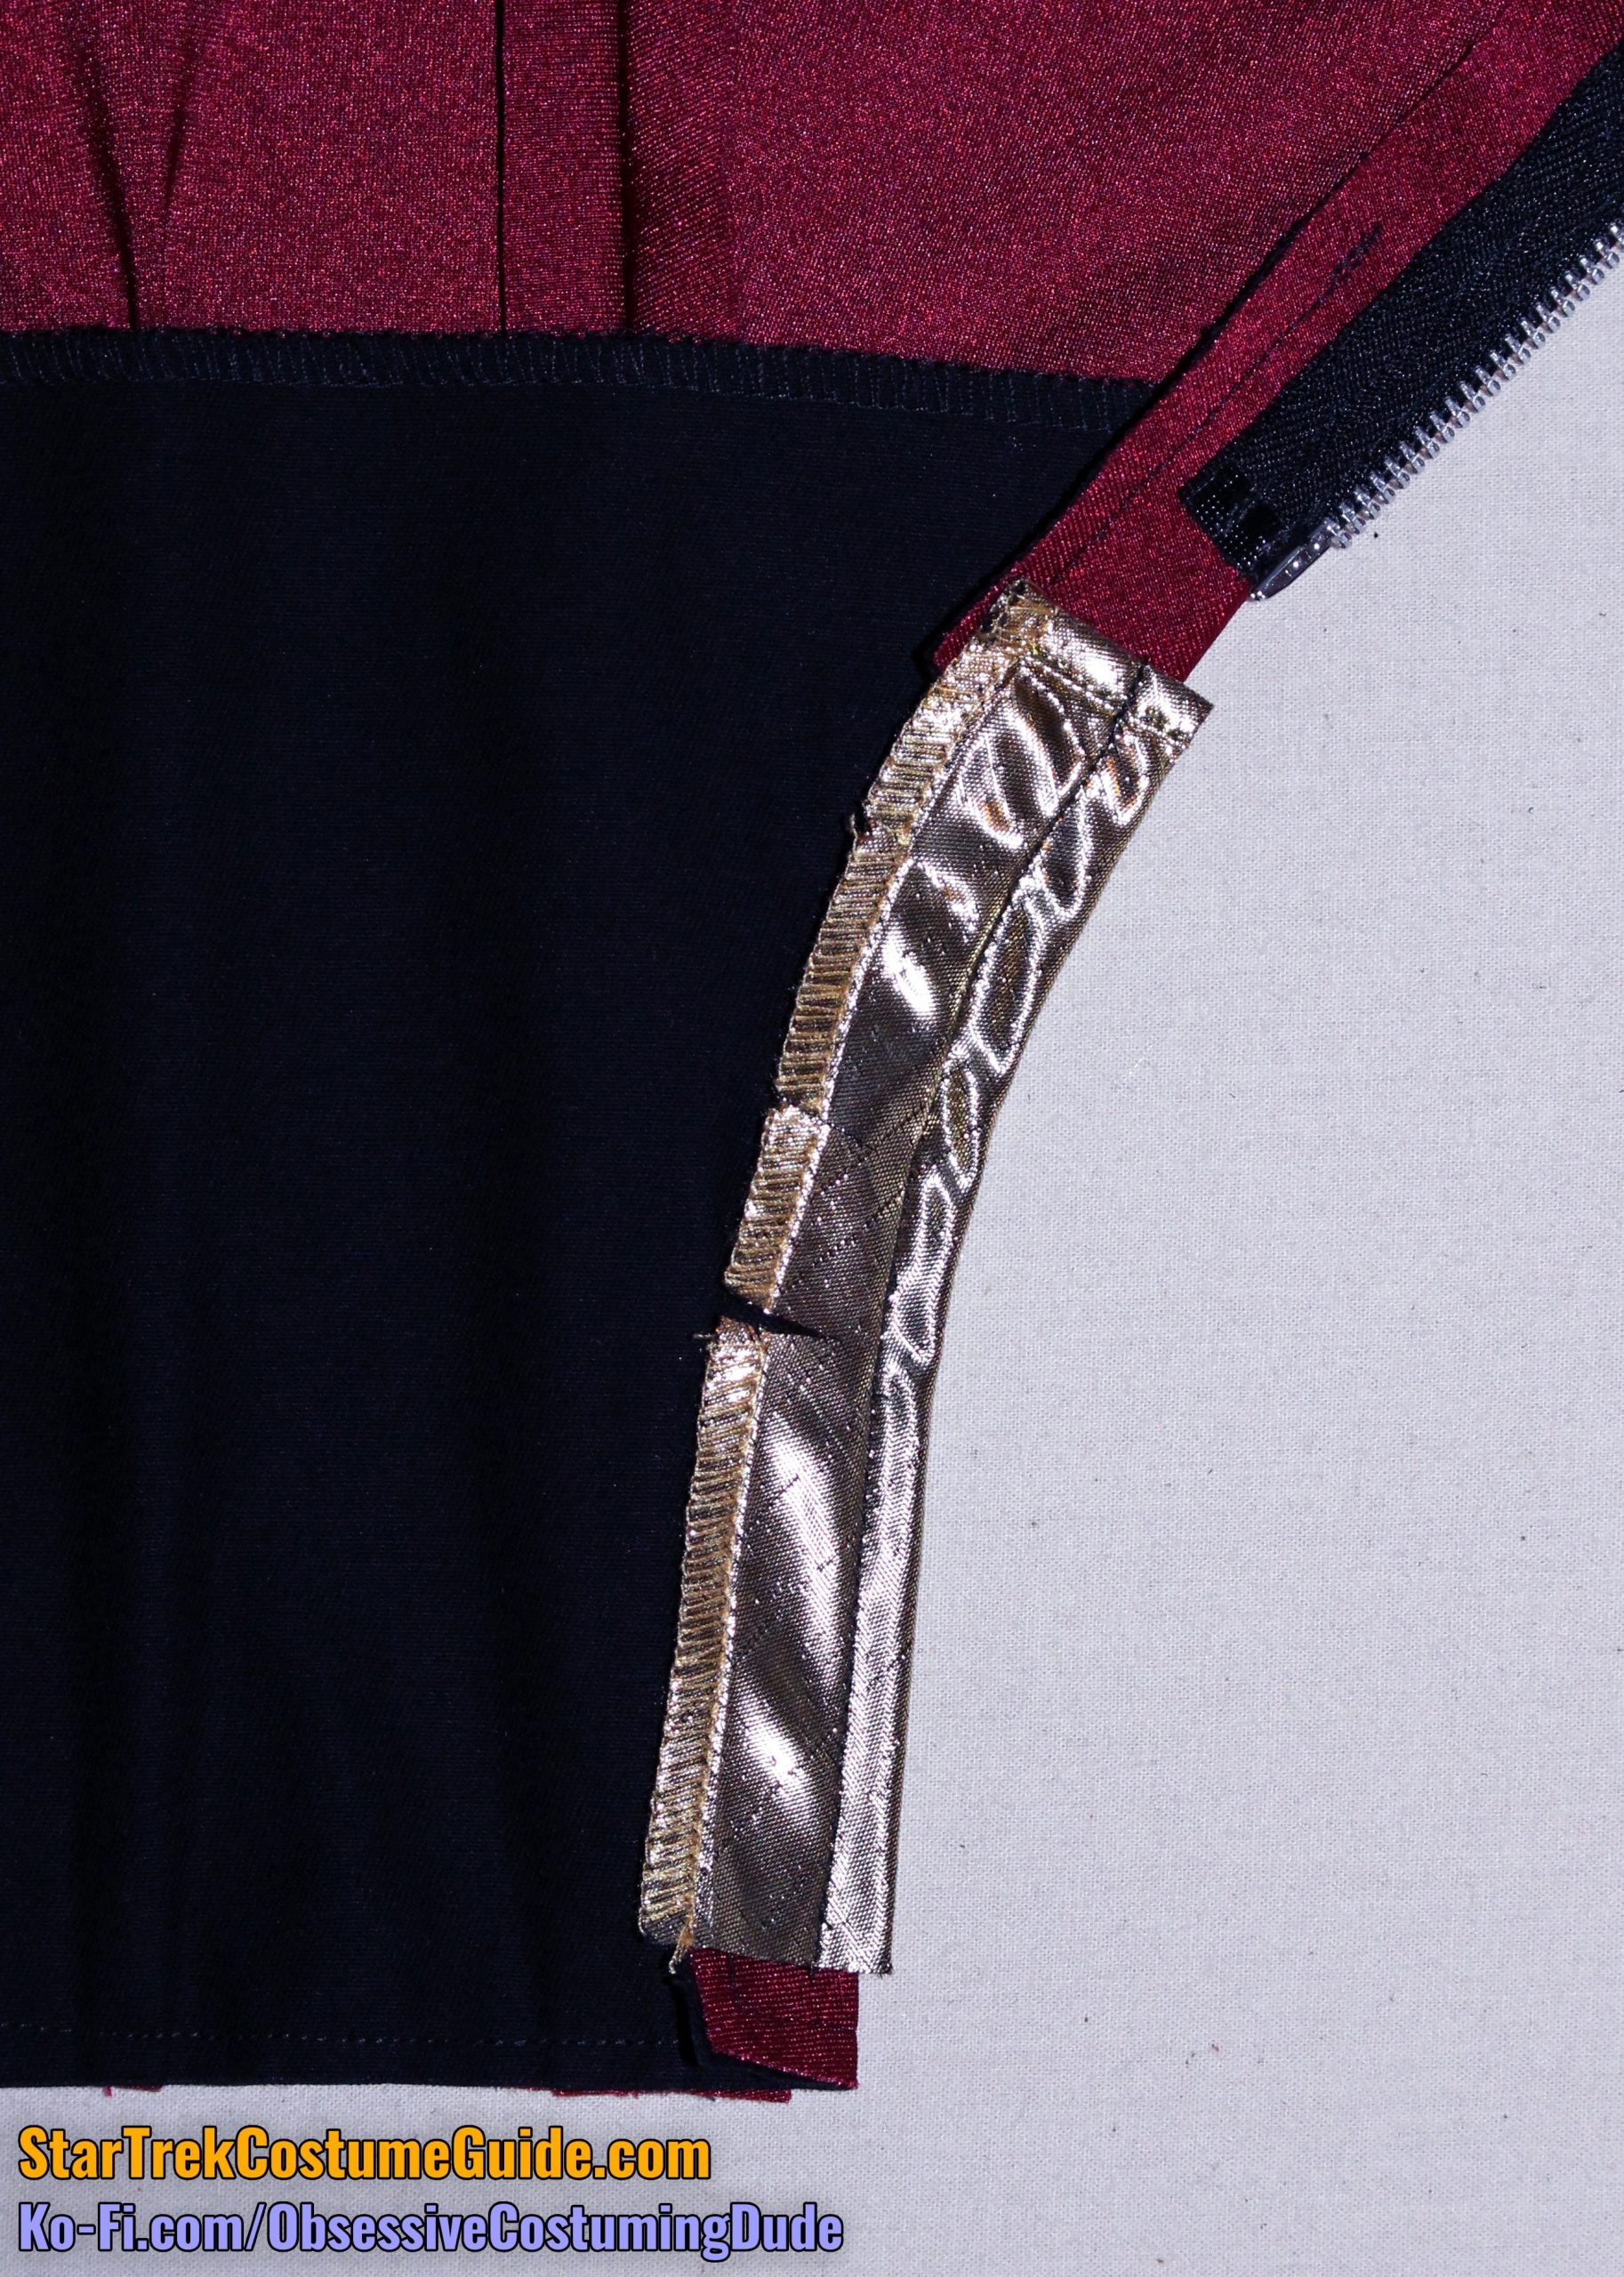
Cut another length of gold “gimp” trim, sufficient to extend from the bottom of the gold quilt binding/bias tape to the top, plus an inch or so of overhang on each end.
From the underside, hand-sew the “gimp” to the trim using gold thread.
Turn the upper end of the “gimp” trim under and tack it into place, then carefully apply some liquid fray preventer.
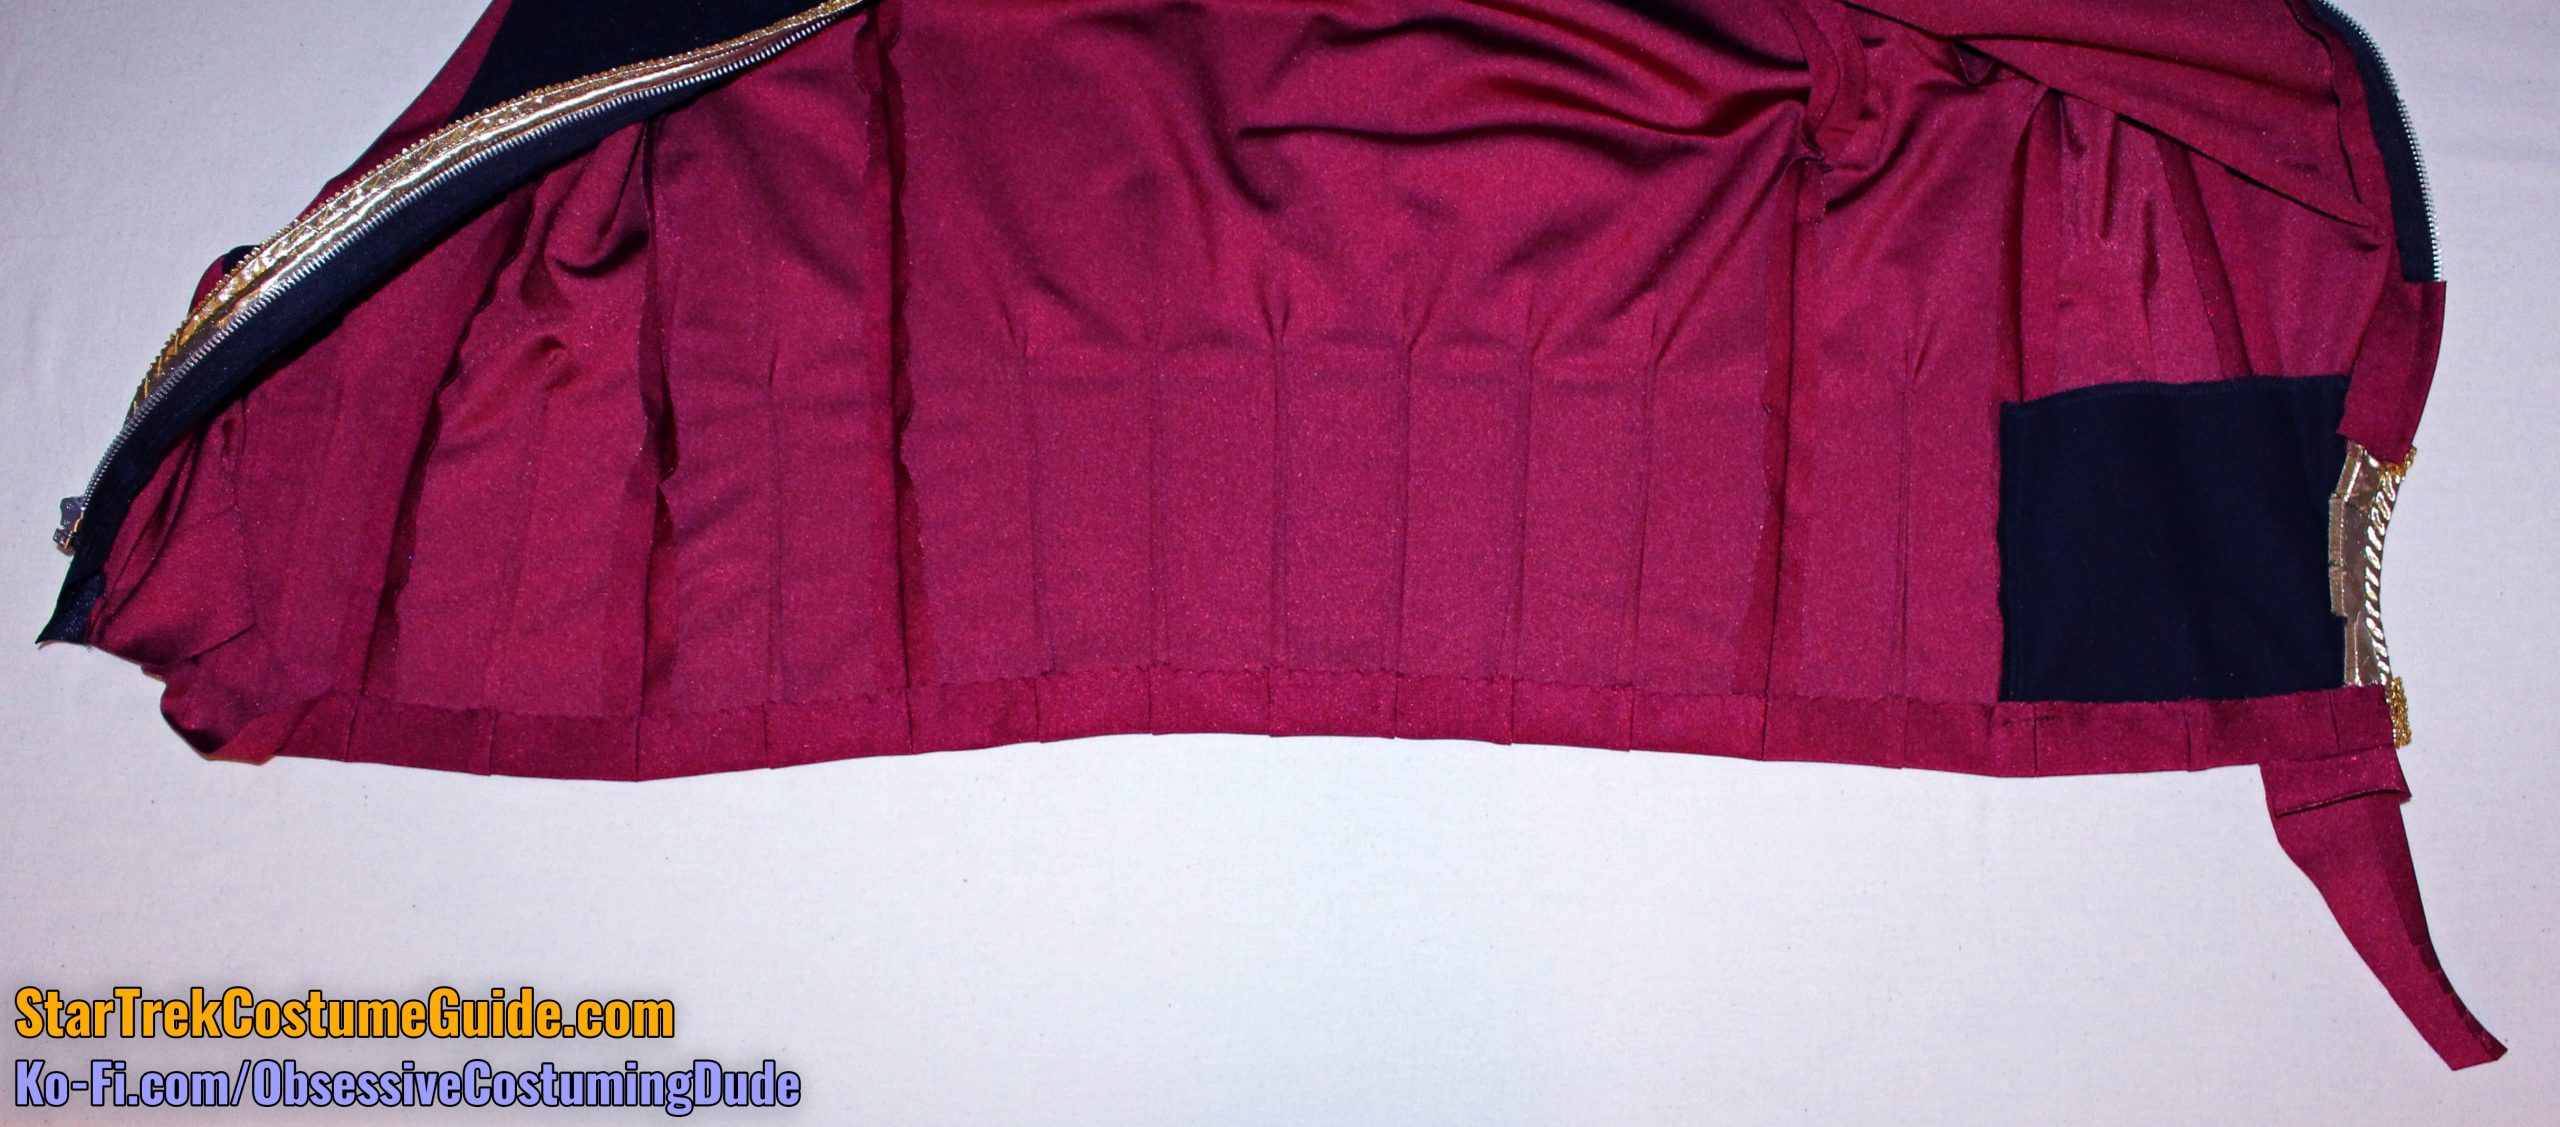
Fold your lower left front extension (piece O) in half, the long way, and press.
Position the extension so it overlaps both the zipper and the upper edge of the gold trim, “bridging the gap” between the two and disappearing underneath the gold trim.
Fold the zipper seam allowance back and sew the extension to the seam allowance, close to the previous stitching.
Fold the frontmost seam allowance under on the left front facing (piece N) and press it flat, clipping the upper curve as-needed.
Position the facing so the front and lower edges are flush with the jacket, right-sides-together.
Sew the facing to the jacket along the lower hem line, 1” from the bottom edge.
Fold the facing downward and press.
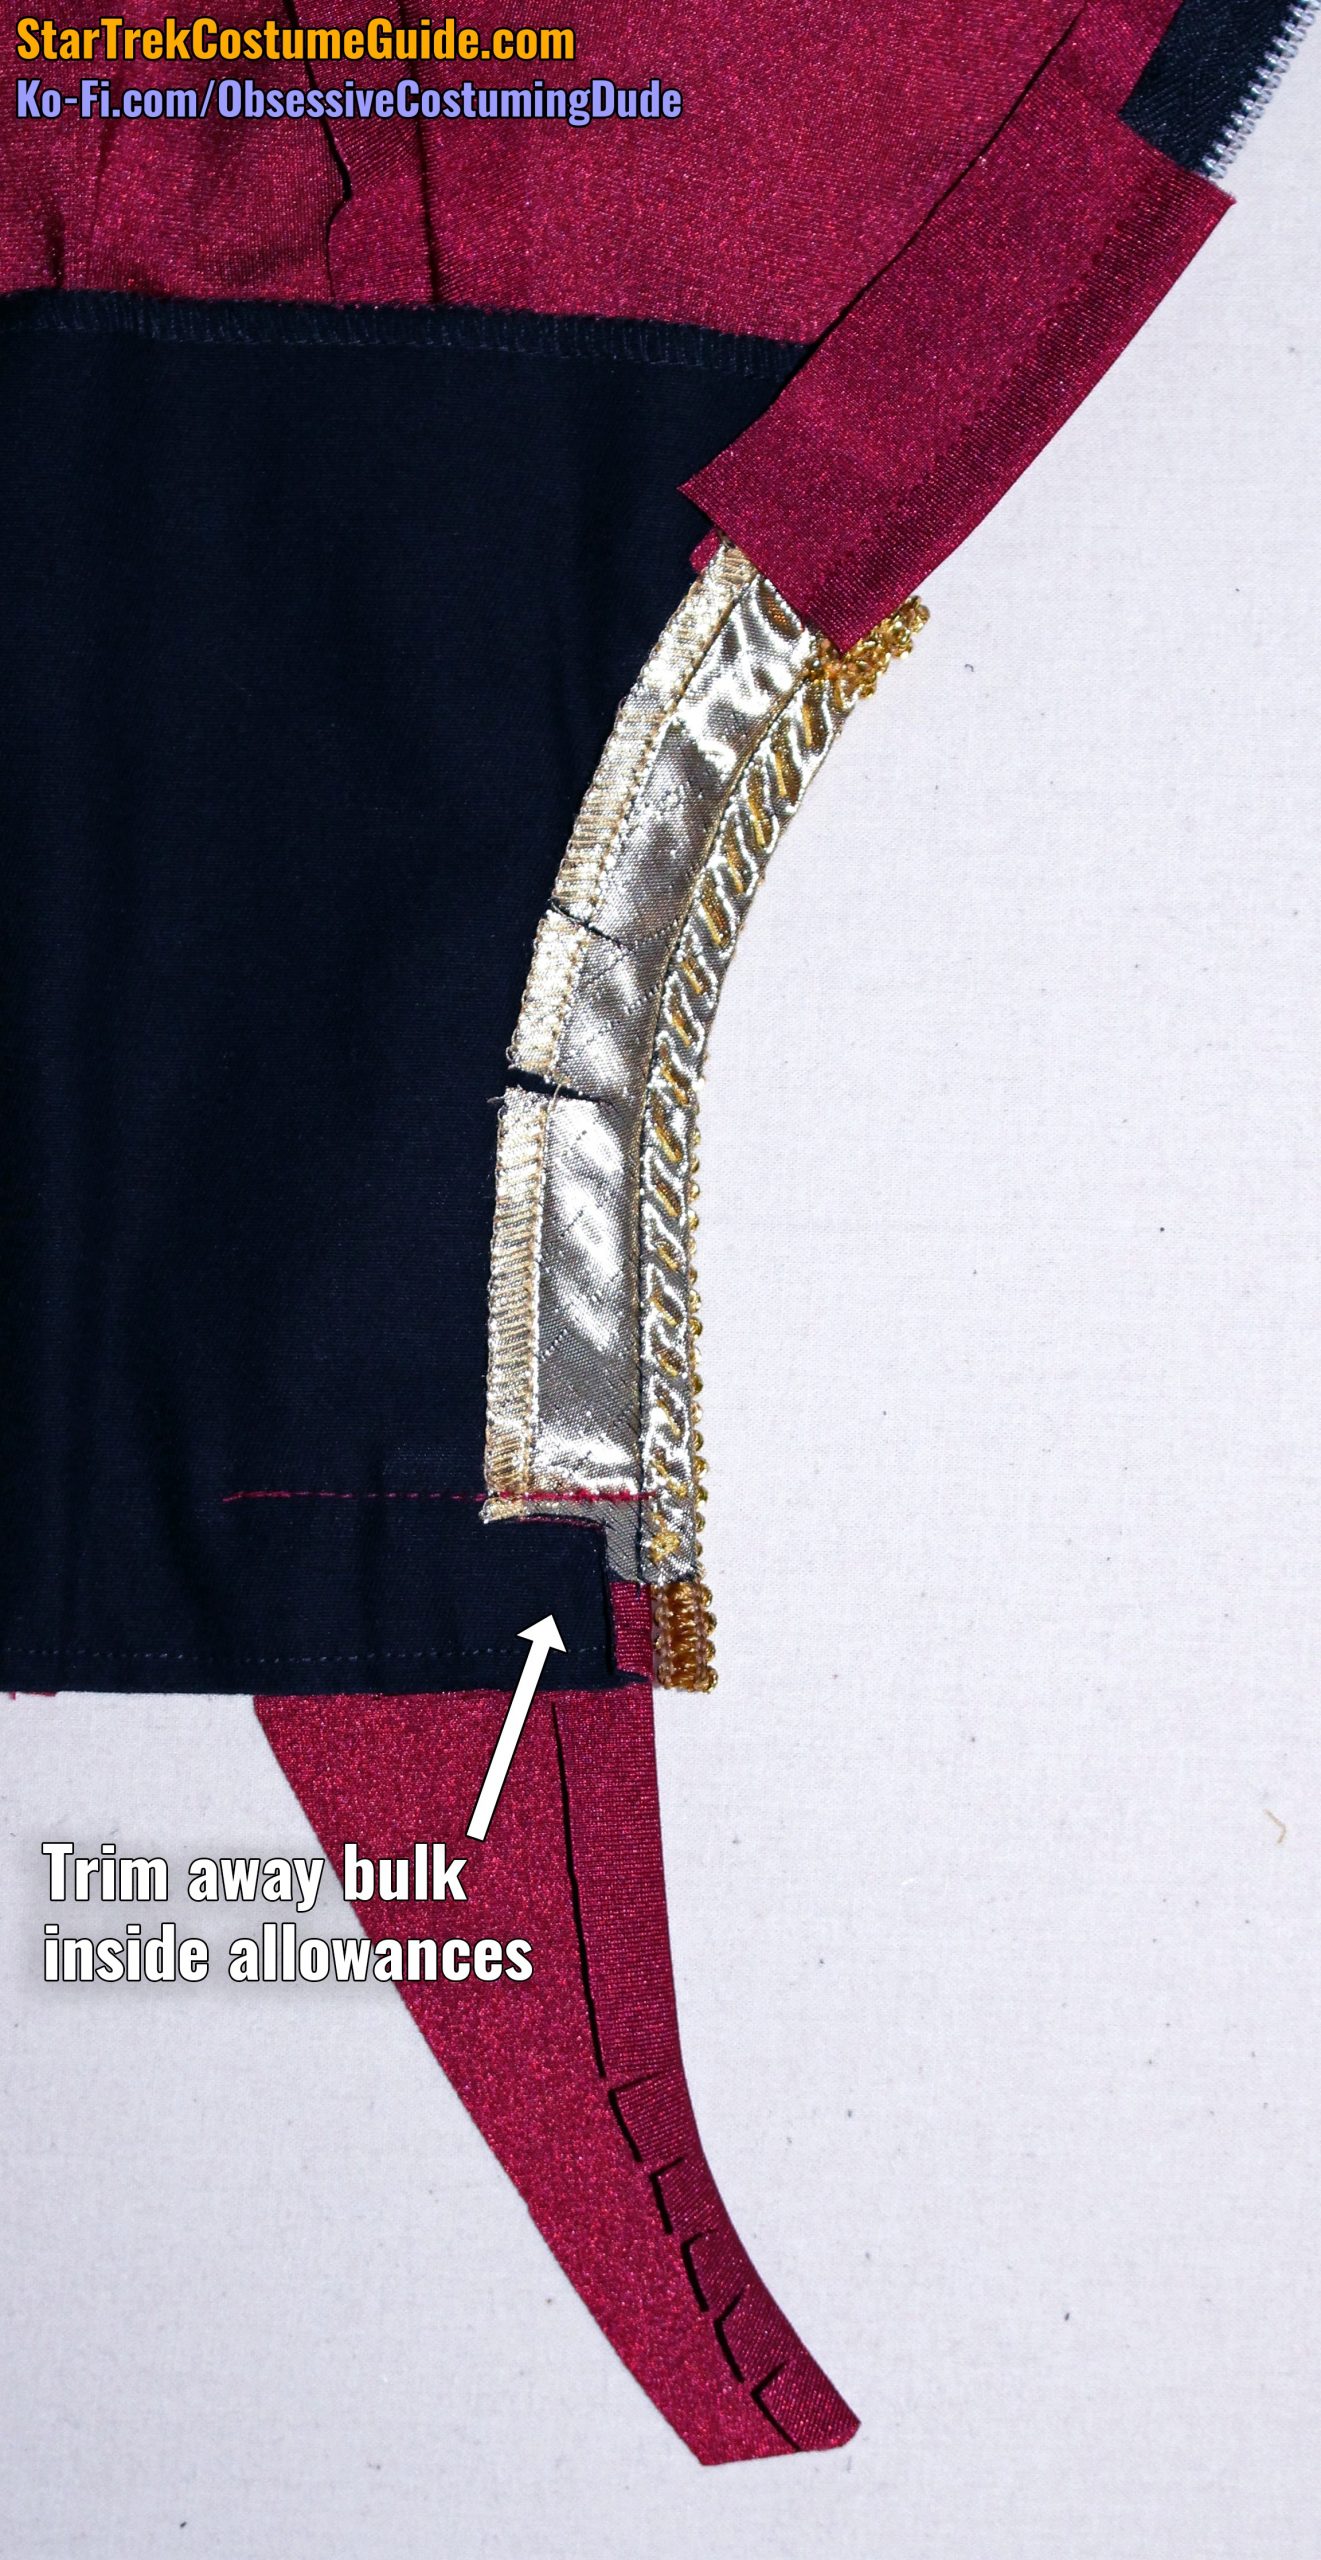
Clip out some of the bulk in the lower corner.
Turn up the jacket’s lower 1” hem allowance and press.
Carefully hem the bottom of the jacket by hand, catching only a thread of the garment fabric so your stitches won’t show on the right side.
Twist the lower edge of the “gimp” trim over so it’s inside the allowance. You can also tack it into place.
Press the facing’s lower allowance upward, and trim out some of the bulk in the corner.
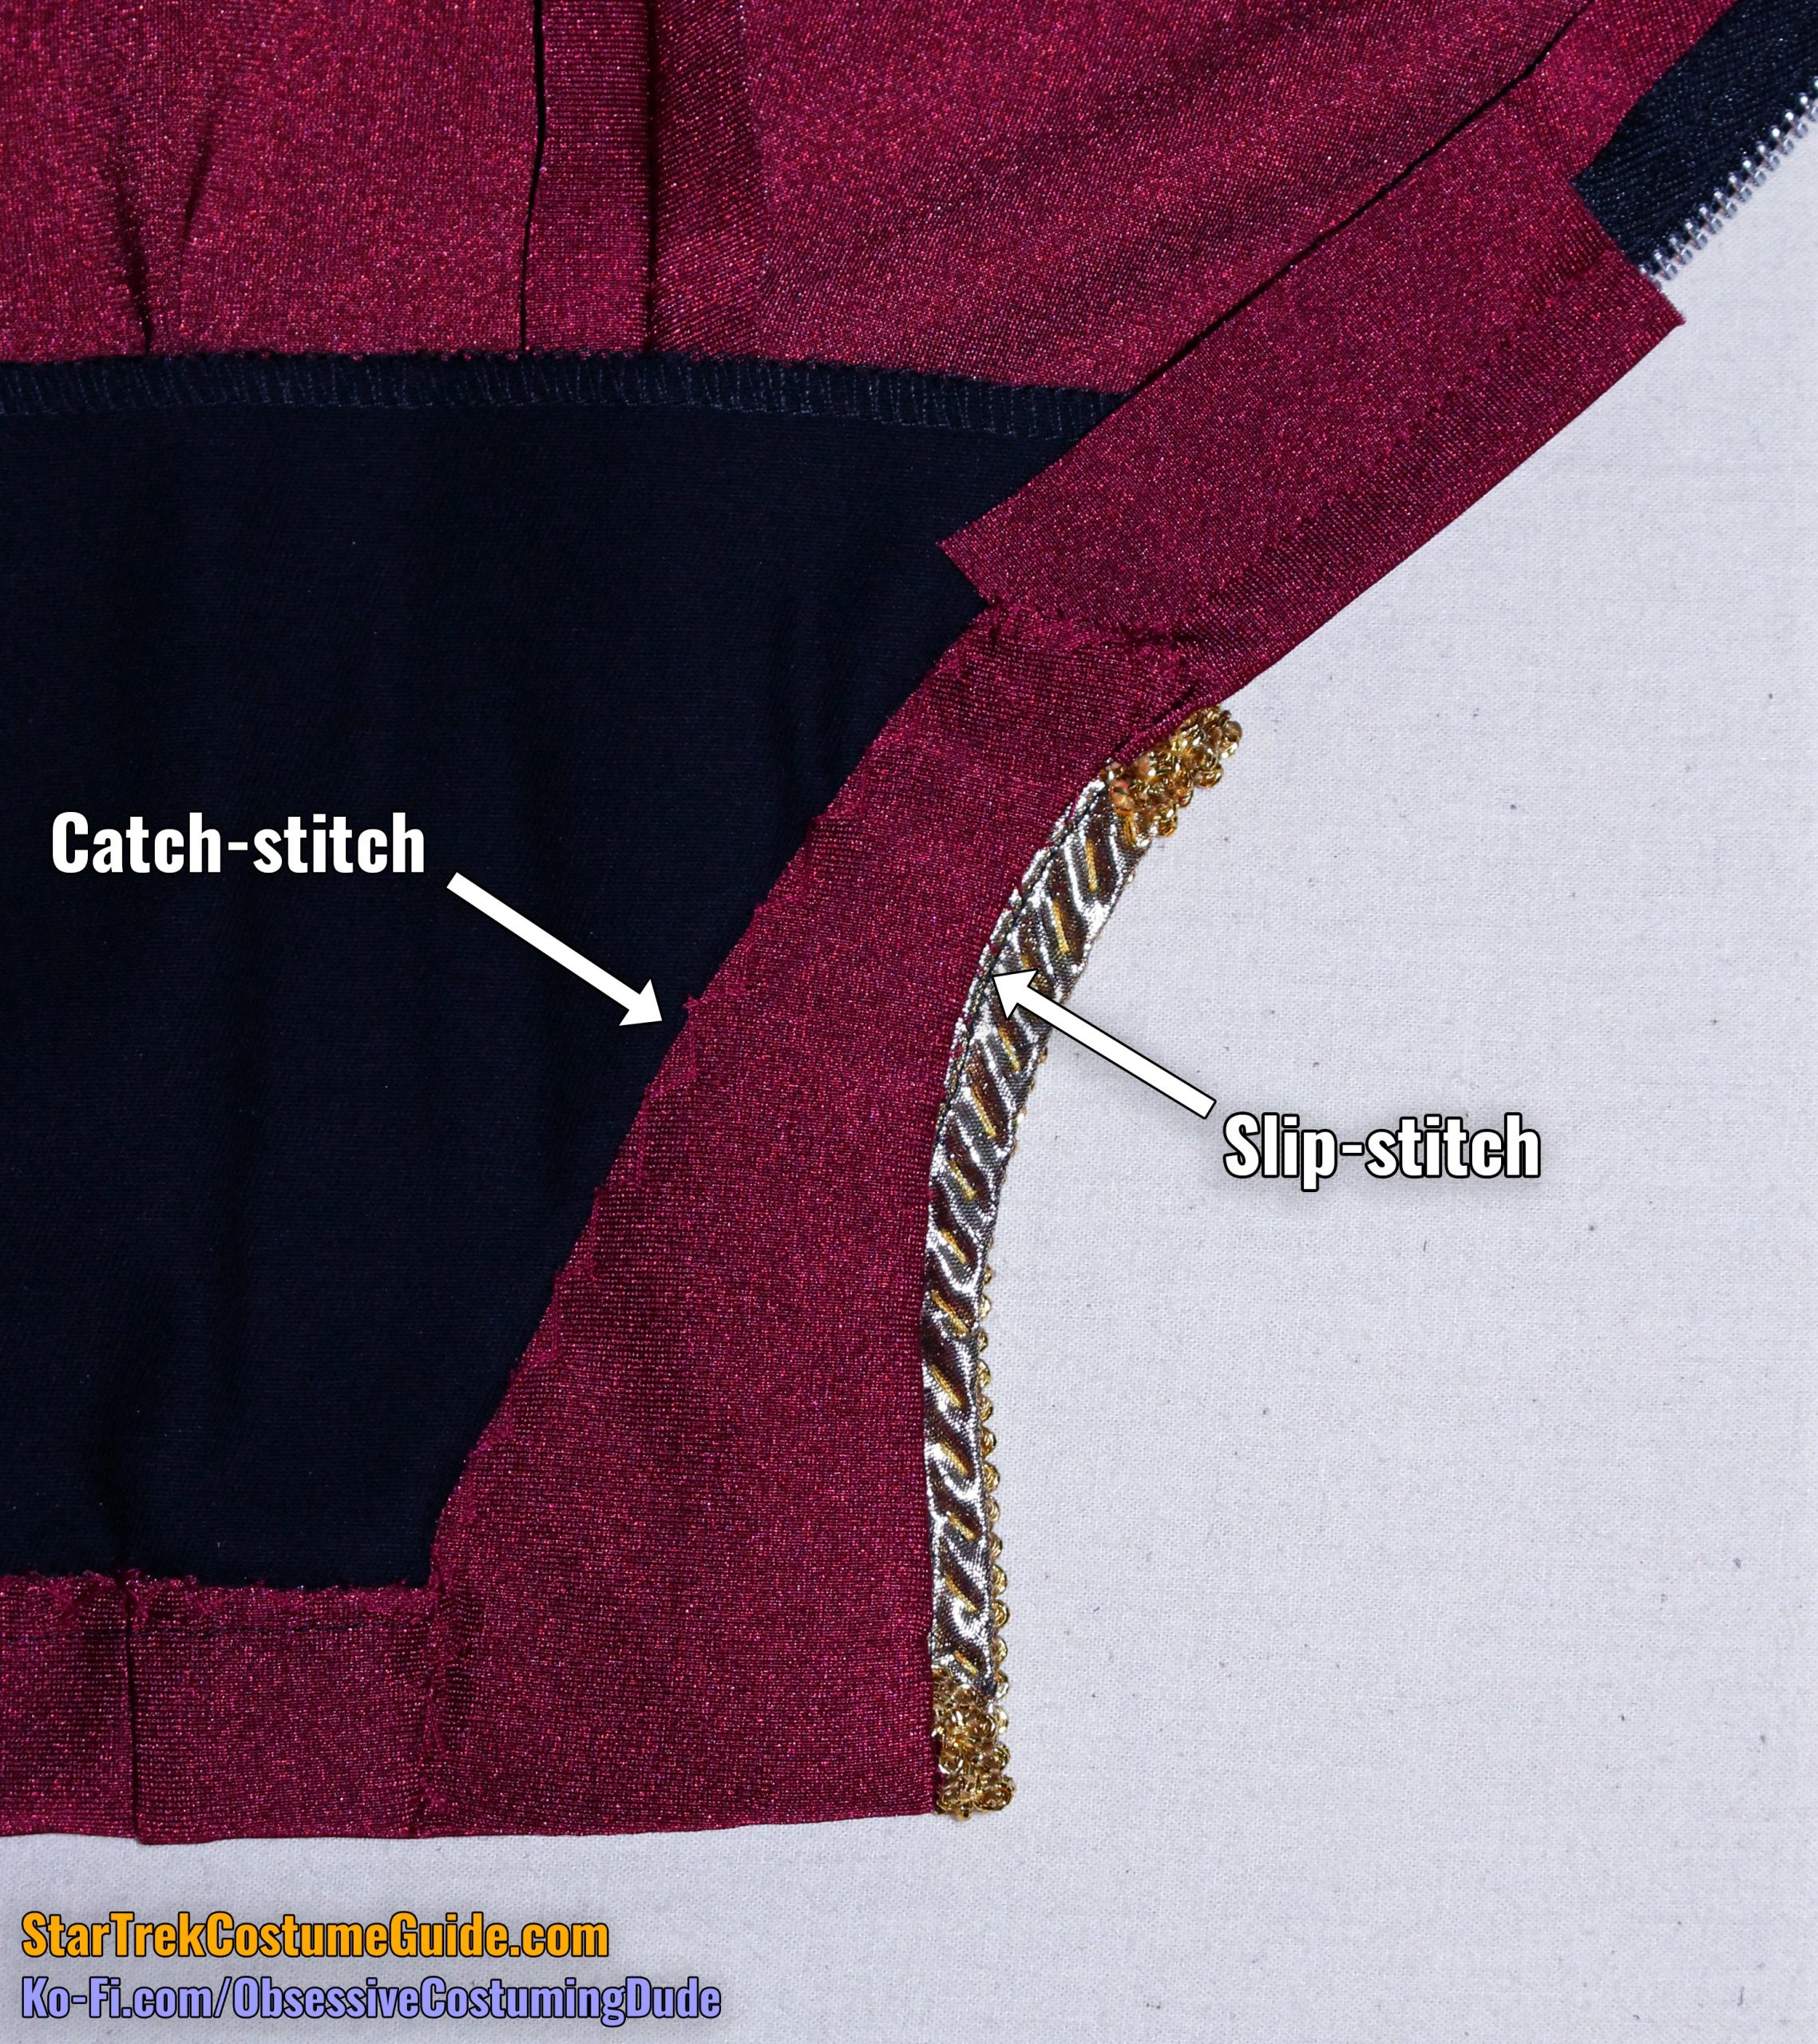
Press the lower left facing upward and hand-sew it into place.
Along the left and upper edges, catch-stitch it to the hem allowance and black canvas.
Along the front edge, slip-stitch it to the front seam allowances at the previous stitch line.
Turn under the front corner of the lower right hem allowance, then turn the allowance upward along the stitch line and press.
Carefully hem the lower right by hand, catching only a thread of the garment fabric so your stitches won’t show on the right side. (You can grab a little bit more over the pleats, though.)
Tack the corner below the zipper securely into place.
You can also do a “stitch-in-the-ditch” along the right front/insert seam line to catch the allowance, if you dare!
Once the lower right is hemmed, you can leave the stitching there (it was there on the screen-used jacket I examined), or you can remove it.
Hemming that curve exactly on the stitching can be tricky, so if you’re a little off, just remove it and nobody will know! (You know, “If at first you don’t succeed, destroy all evidence that you tried” kind of thing.)
Now let’s turn our attention to finishing the sleeves.
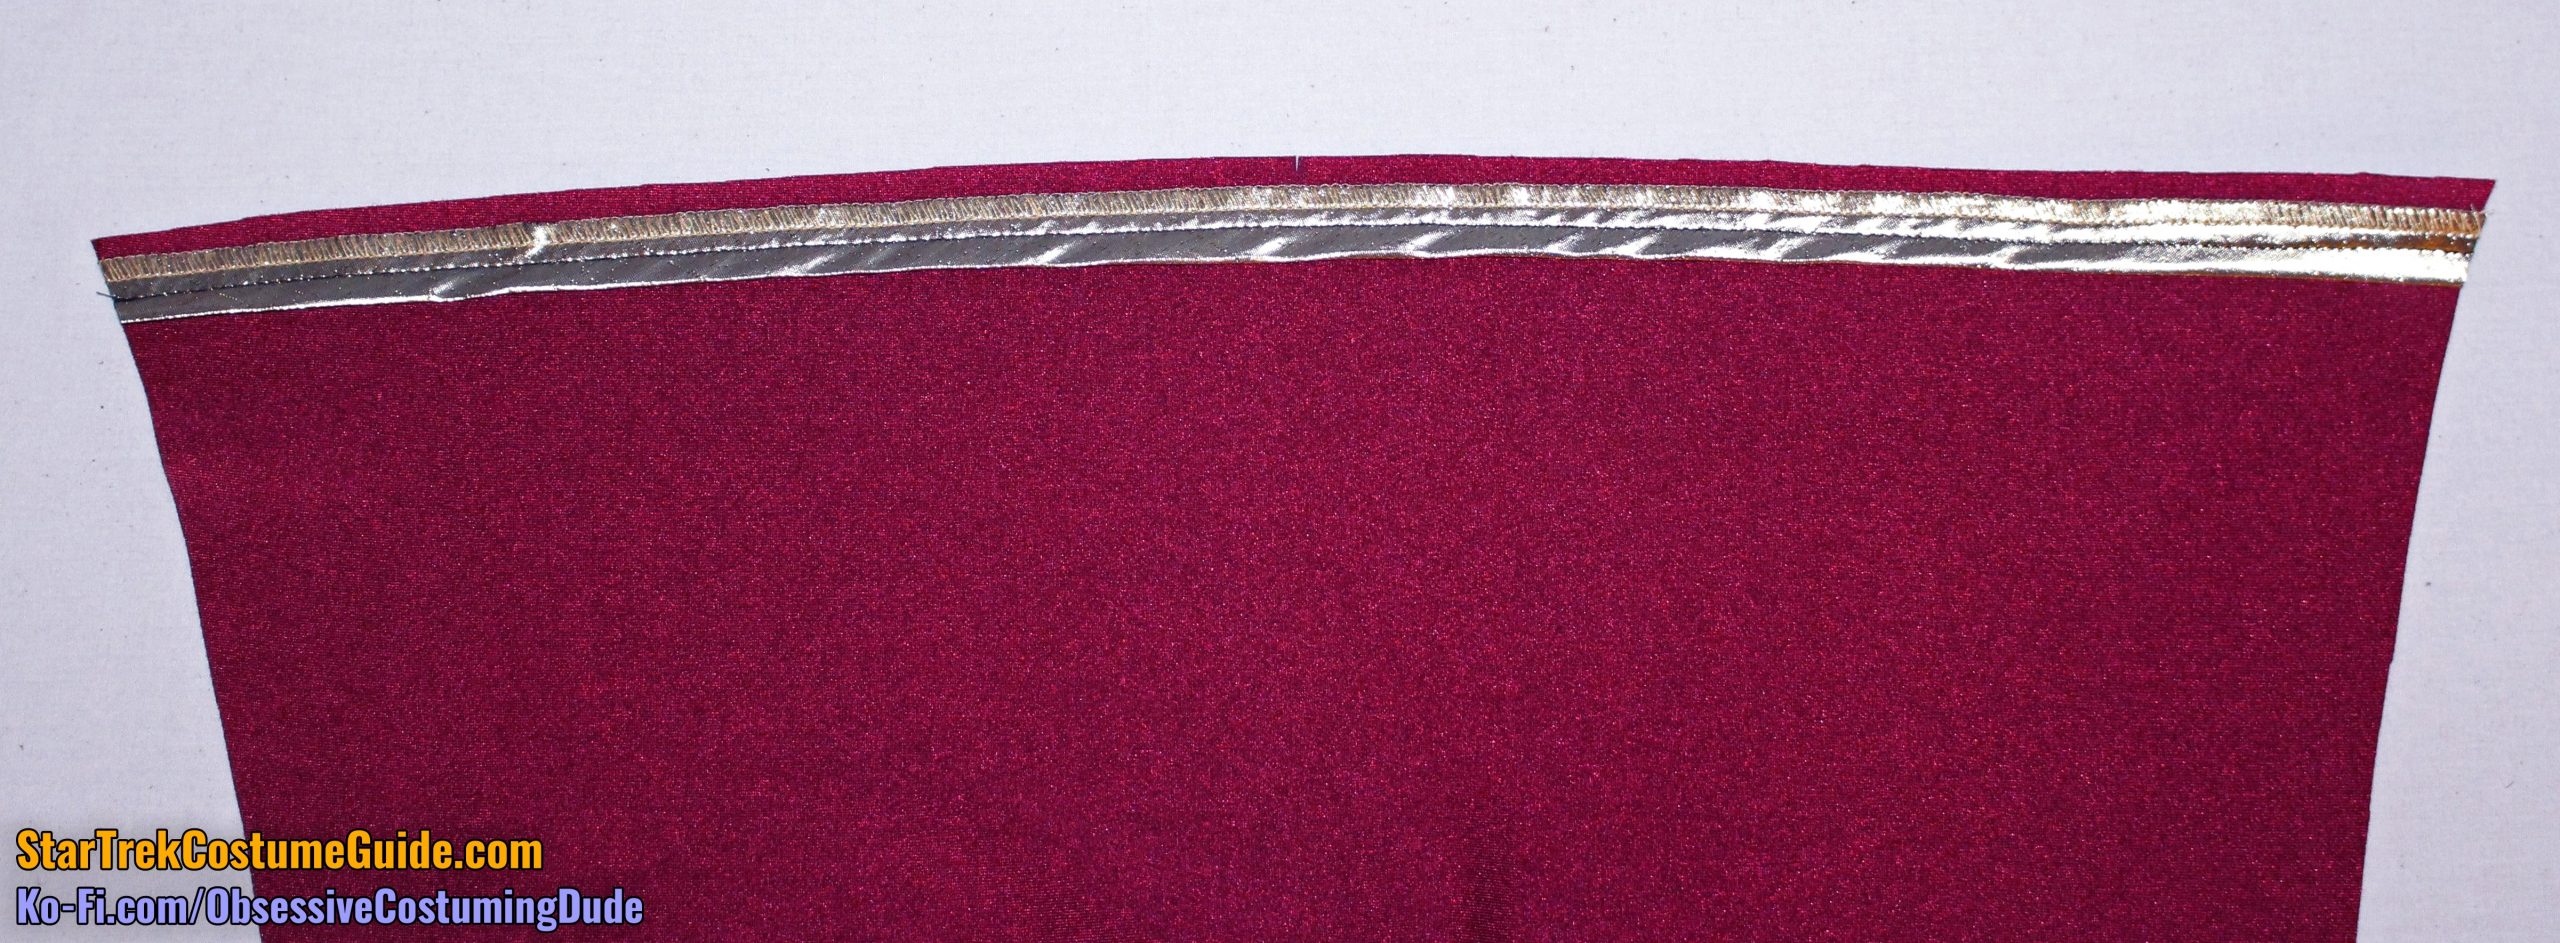
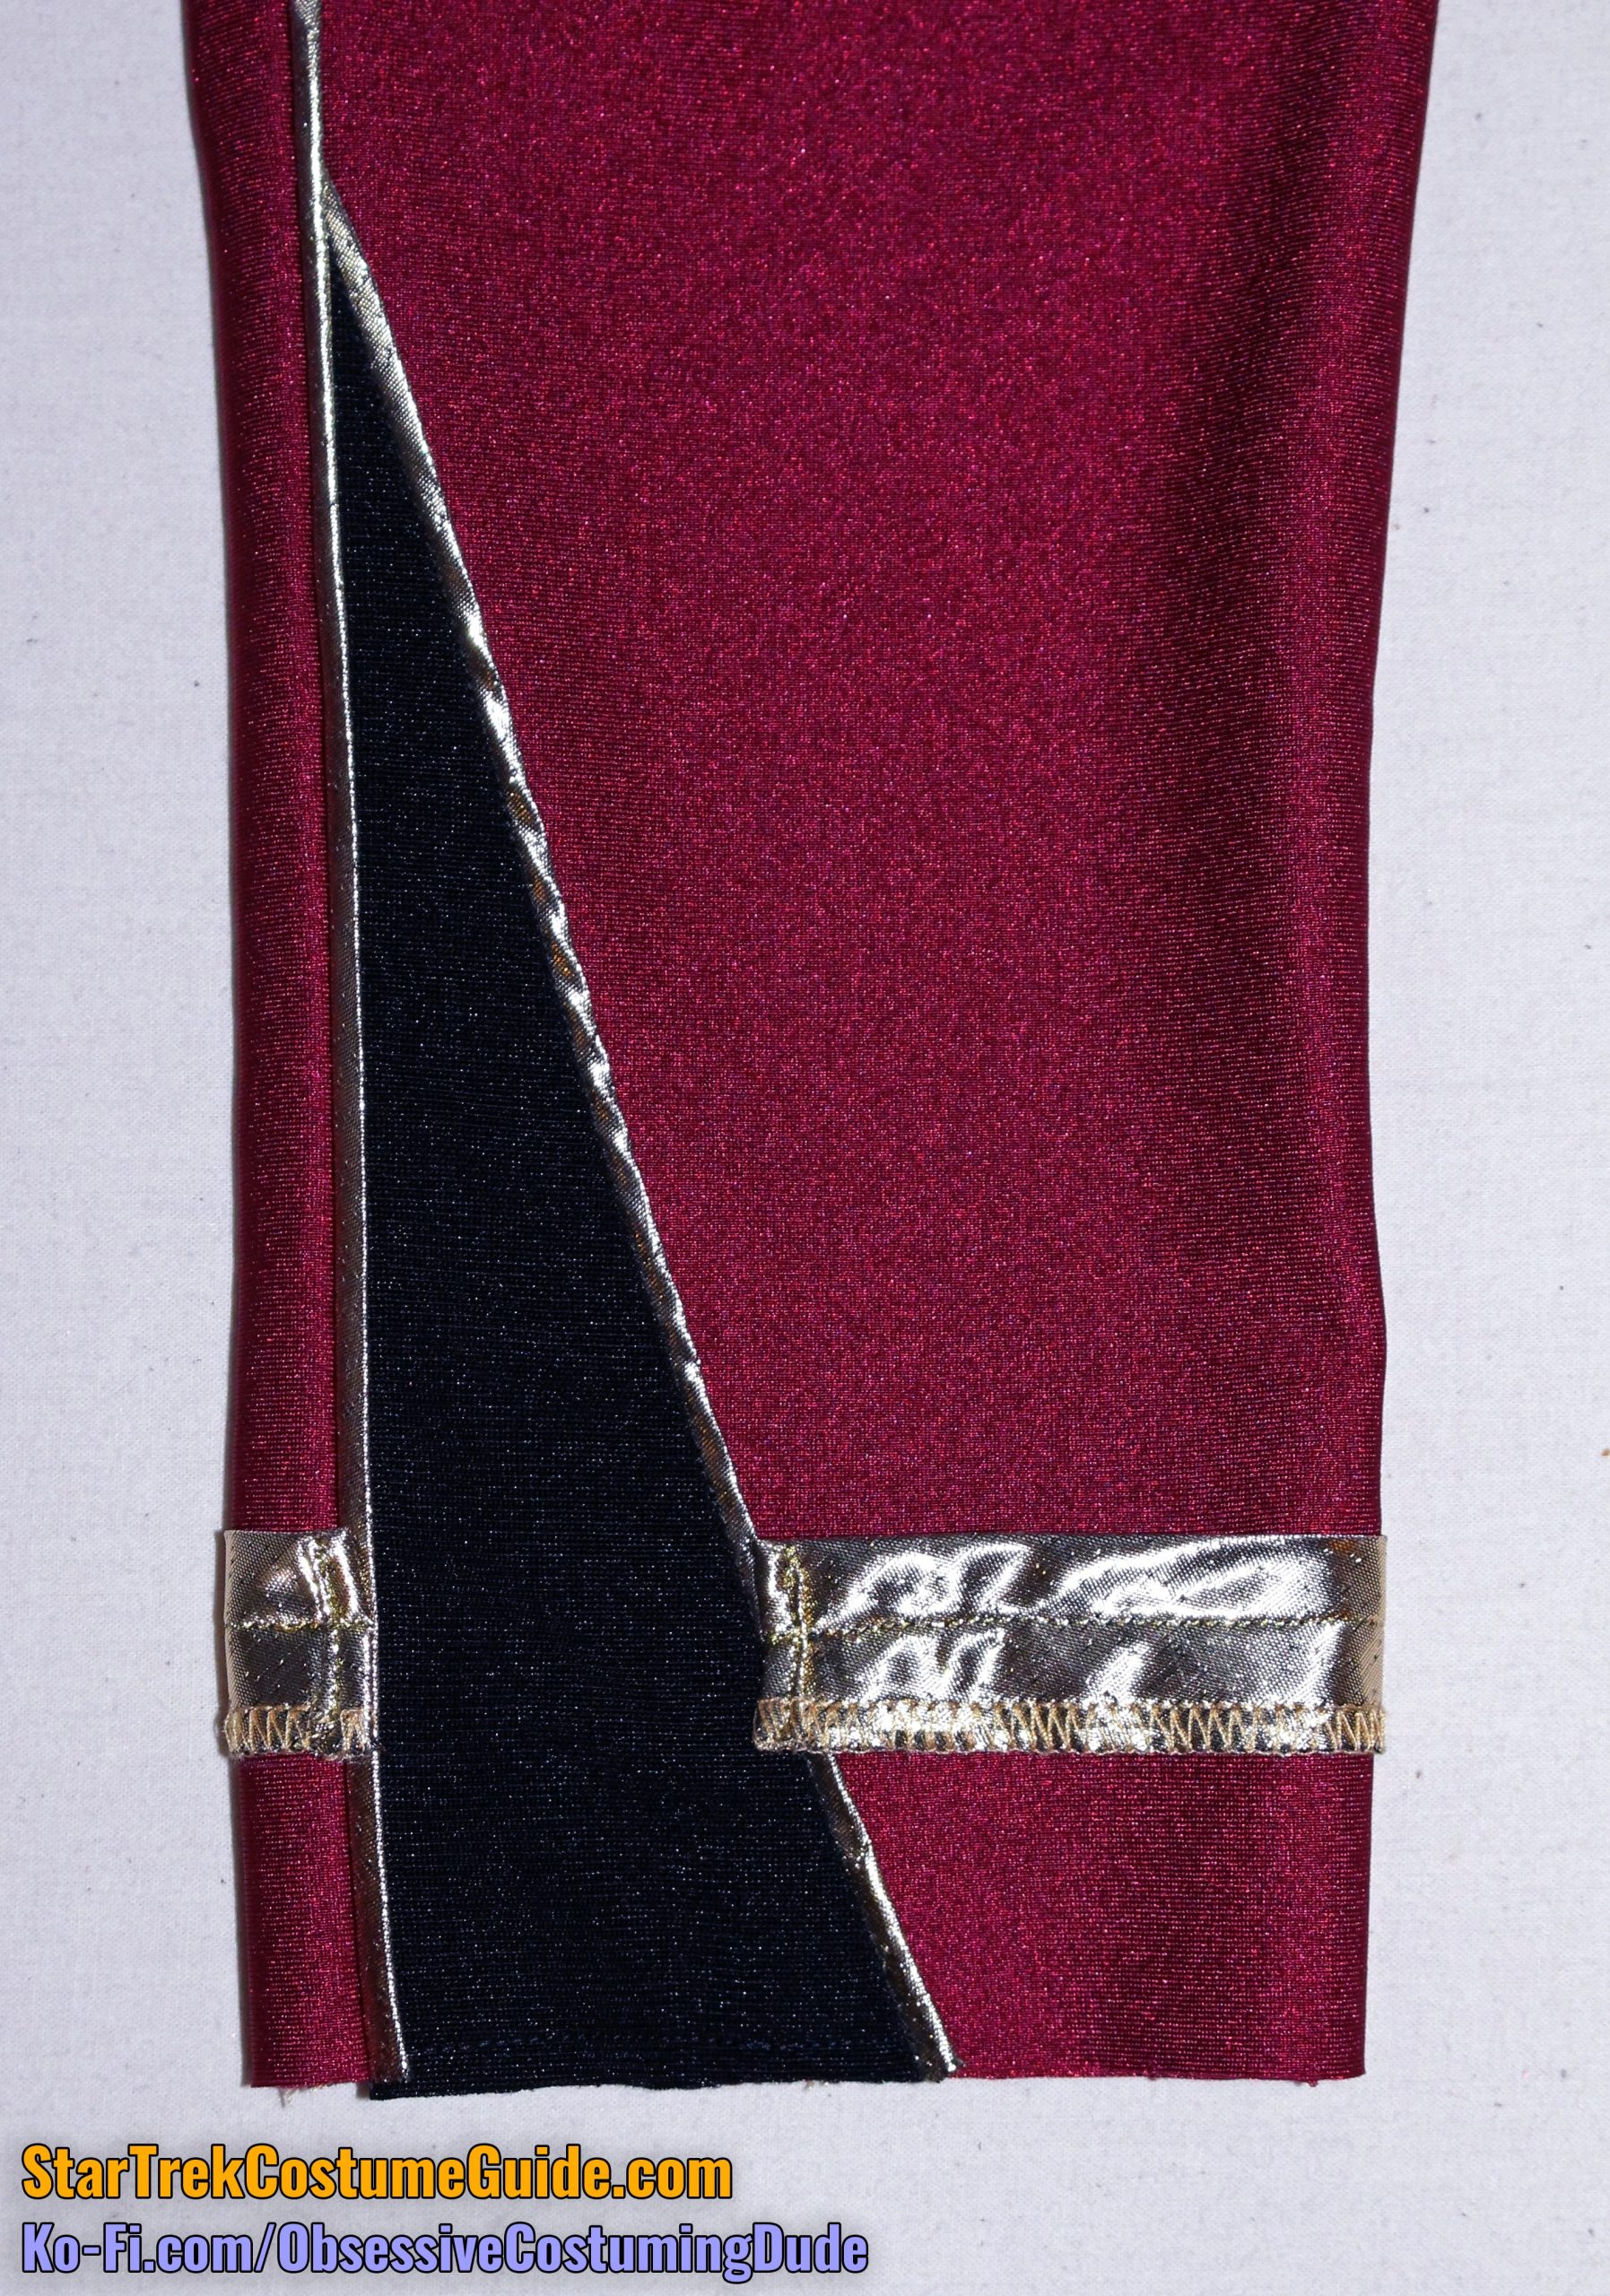
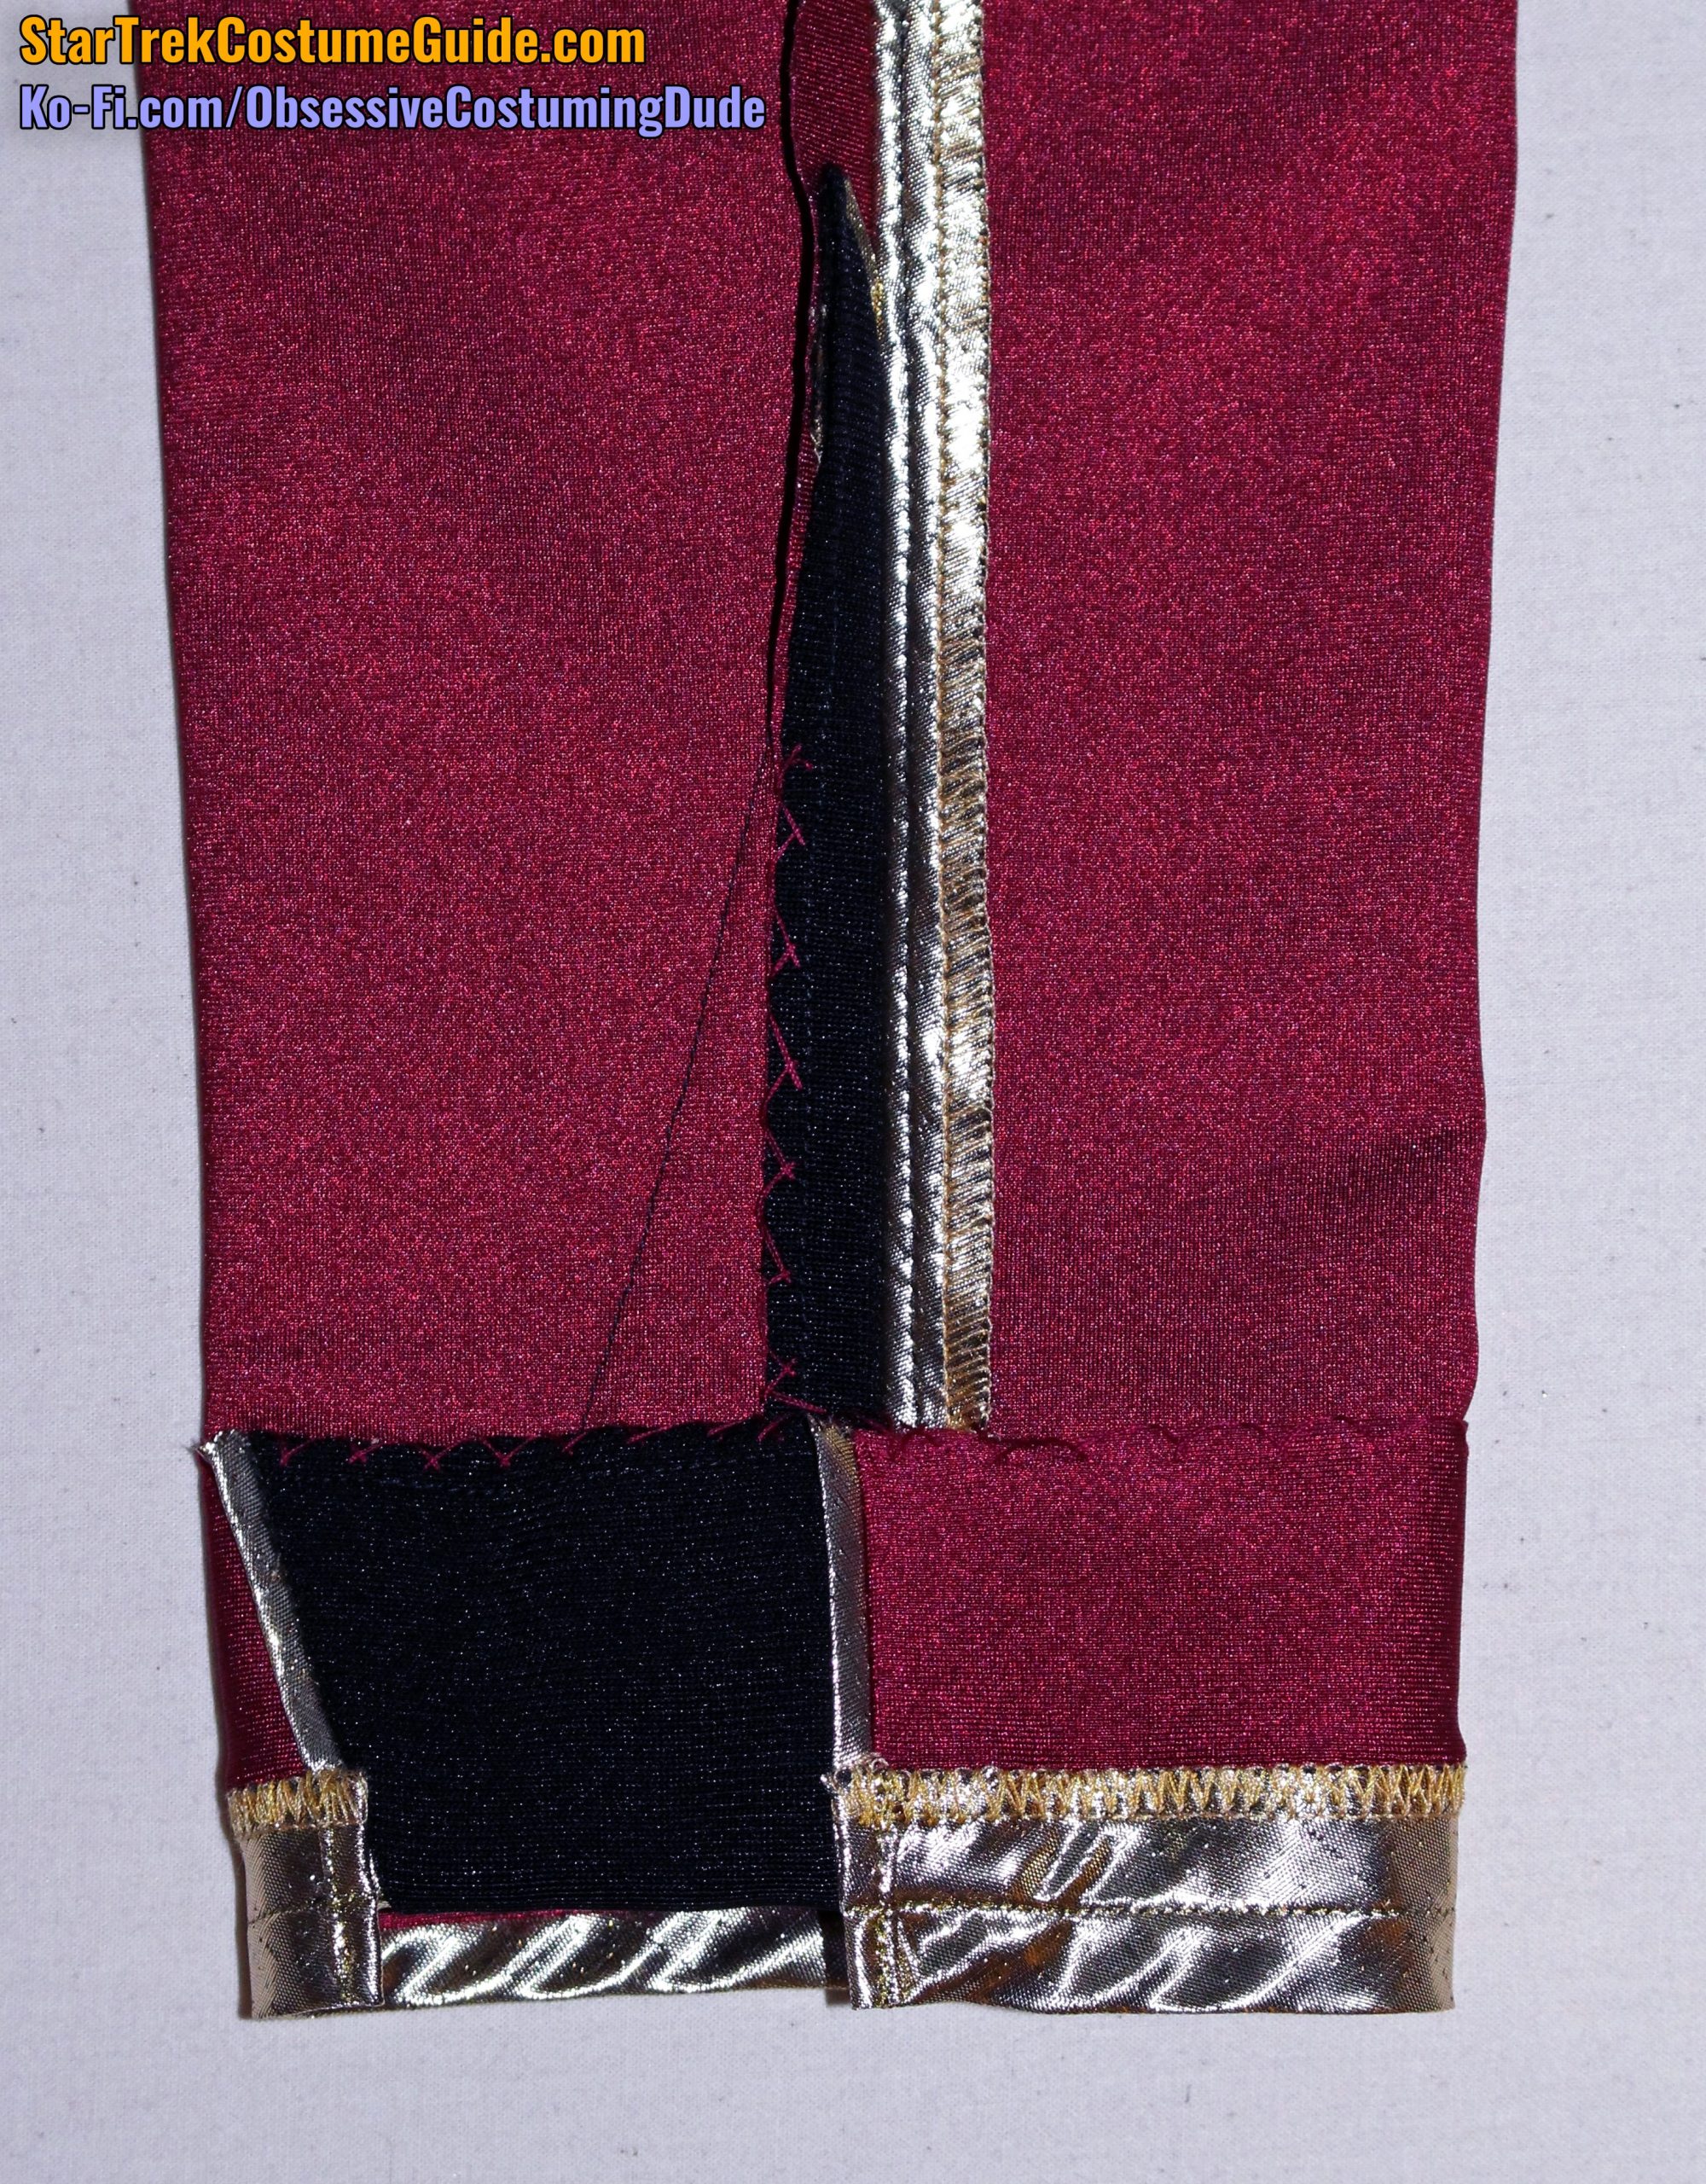
The gold trim at the bottom of the sleeves should extend ⅜” beneath the hem, and it should wrap around the entire sleeve except for the black sleeve insert.
Regardless of how you handled the gold trim on the rest of the jacket, I suggest using the full width (1” when pressed in half, or 2” total) at the bottom of the sleeves, since one can actually see up into the bottom of the sleeve a sometimes.
I also suggest either turning the ends under before serging OR hemming the ends of the trim, prior to attaching it to the bottom of the sleeve.
Cut a length of the gold trim the appropriate length, position it on the right side of the sleeve with the folded side upward, so ⅜” extends above the hem line. (We’ll be turning it under once it’s sewn, which will rotate the trim downward.)
Sew the trim to the sleeve along the hem line, 2” from the lower edge.
OPTIONAL: On the screen-used Admiral Jameson uniform I examined, the raw edges of the gold trim were hand-sewn to the sleeve’s hem allowance, but you can just zig-zag them down with your sewing machine if you want.
Turn the sleeve’s hem allowance upward, the gold trim downward, and press.
Carefully hem the sleeve by hand, catching only a thread of the garment fabric so your stitches won’t show on the right side. (You can grab a little bit more over the sleeve insert, though.)
I also suggest tacking the front seam allowance down over the sleeve insert area, to hold it open (unless you don’t want it to be open, or you want it pressed toward the back).
Press the lower sleeve area, and repeat for the other sleeve.
The jacket body structure is now finished, and we can start properly “finishing” the jacket!
The zipper area needs some more attention before it’s really usable.
First, hand-sew a small black hook-and-eye closure above the zipper. The “hook” goes on the upper corner of the left yoke, and its “eye” goes on the corresponding area on the upper right seam allowance.
Beneath the zipper, attach a pair of hook-and-eye closures, in the reverse direction; the “hooks” go on the lower right, with the “eyes” on the lower left, between the zipper and the lower left trim and anchored to both the jacket body and the lower left “extension.”
(Note that on this demonstration jacket, I accidentally positioned the zipper about ½” too low and only had room for one, single hook-and-eye closure. It works fine, but the screen-used jacket I examined had two. Two would be better.)
The ends of the zipper are secure, but it’s going to desperately want to pull open and reveal the zipper teeth unless we fasten down the seam allowance outside the zipper.
The snaps on that jacket were irregularly spaced (you can reference their specific positioning in the aforementioned blog post), but I suggest concentrating instead on simply using as few or as many as you see fit, focusing on where your zipper wants to pull open.
On this demonstration jacket, I used all ten of the (size 1/0) snaps that came with the set – two on the yoke, then eight more on the body, positioned approximately 1 ¾” apart – and I was pleased with the end result.
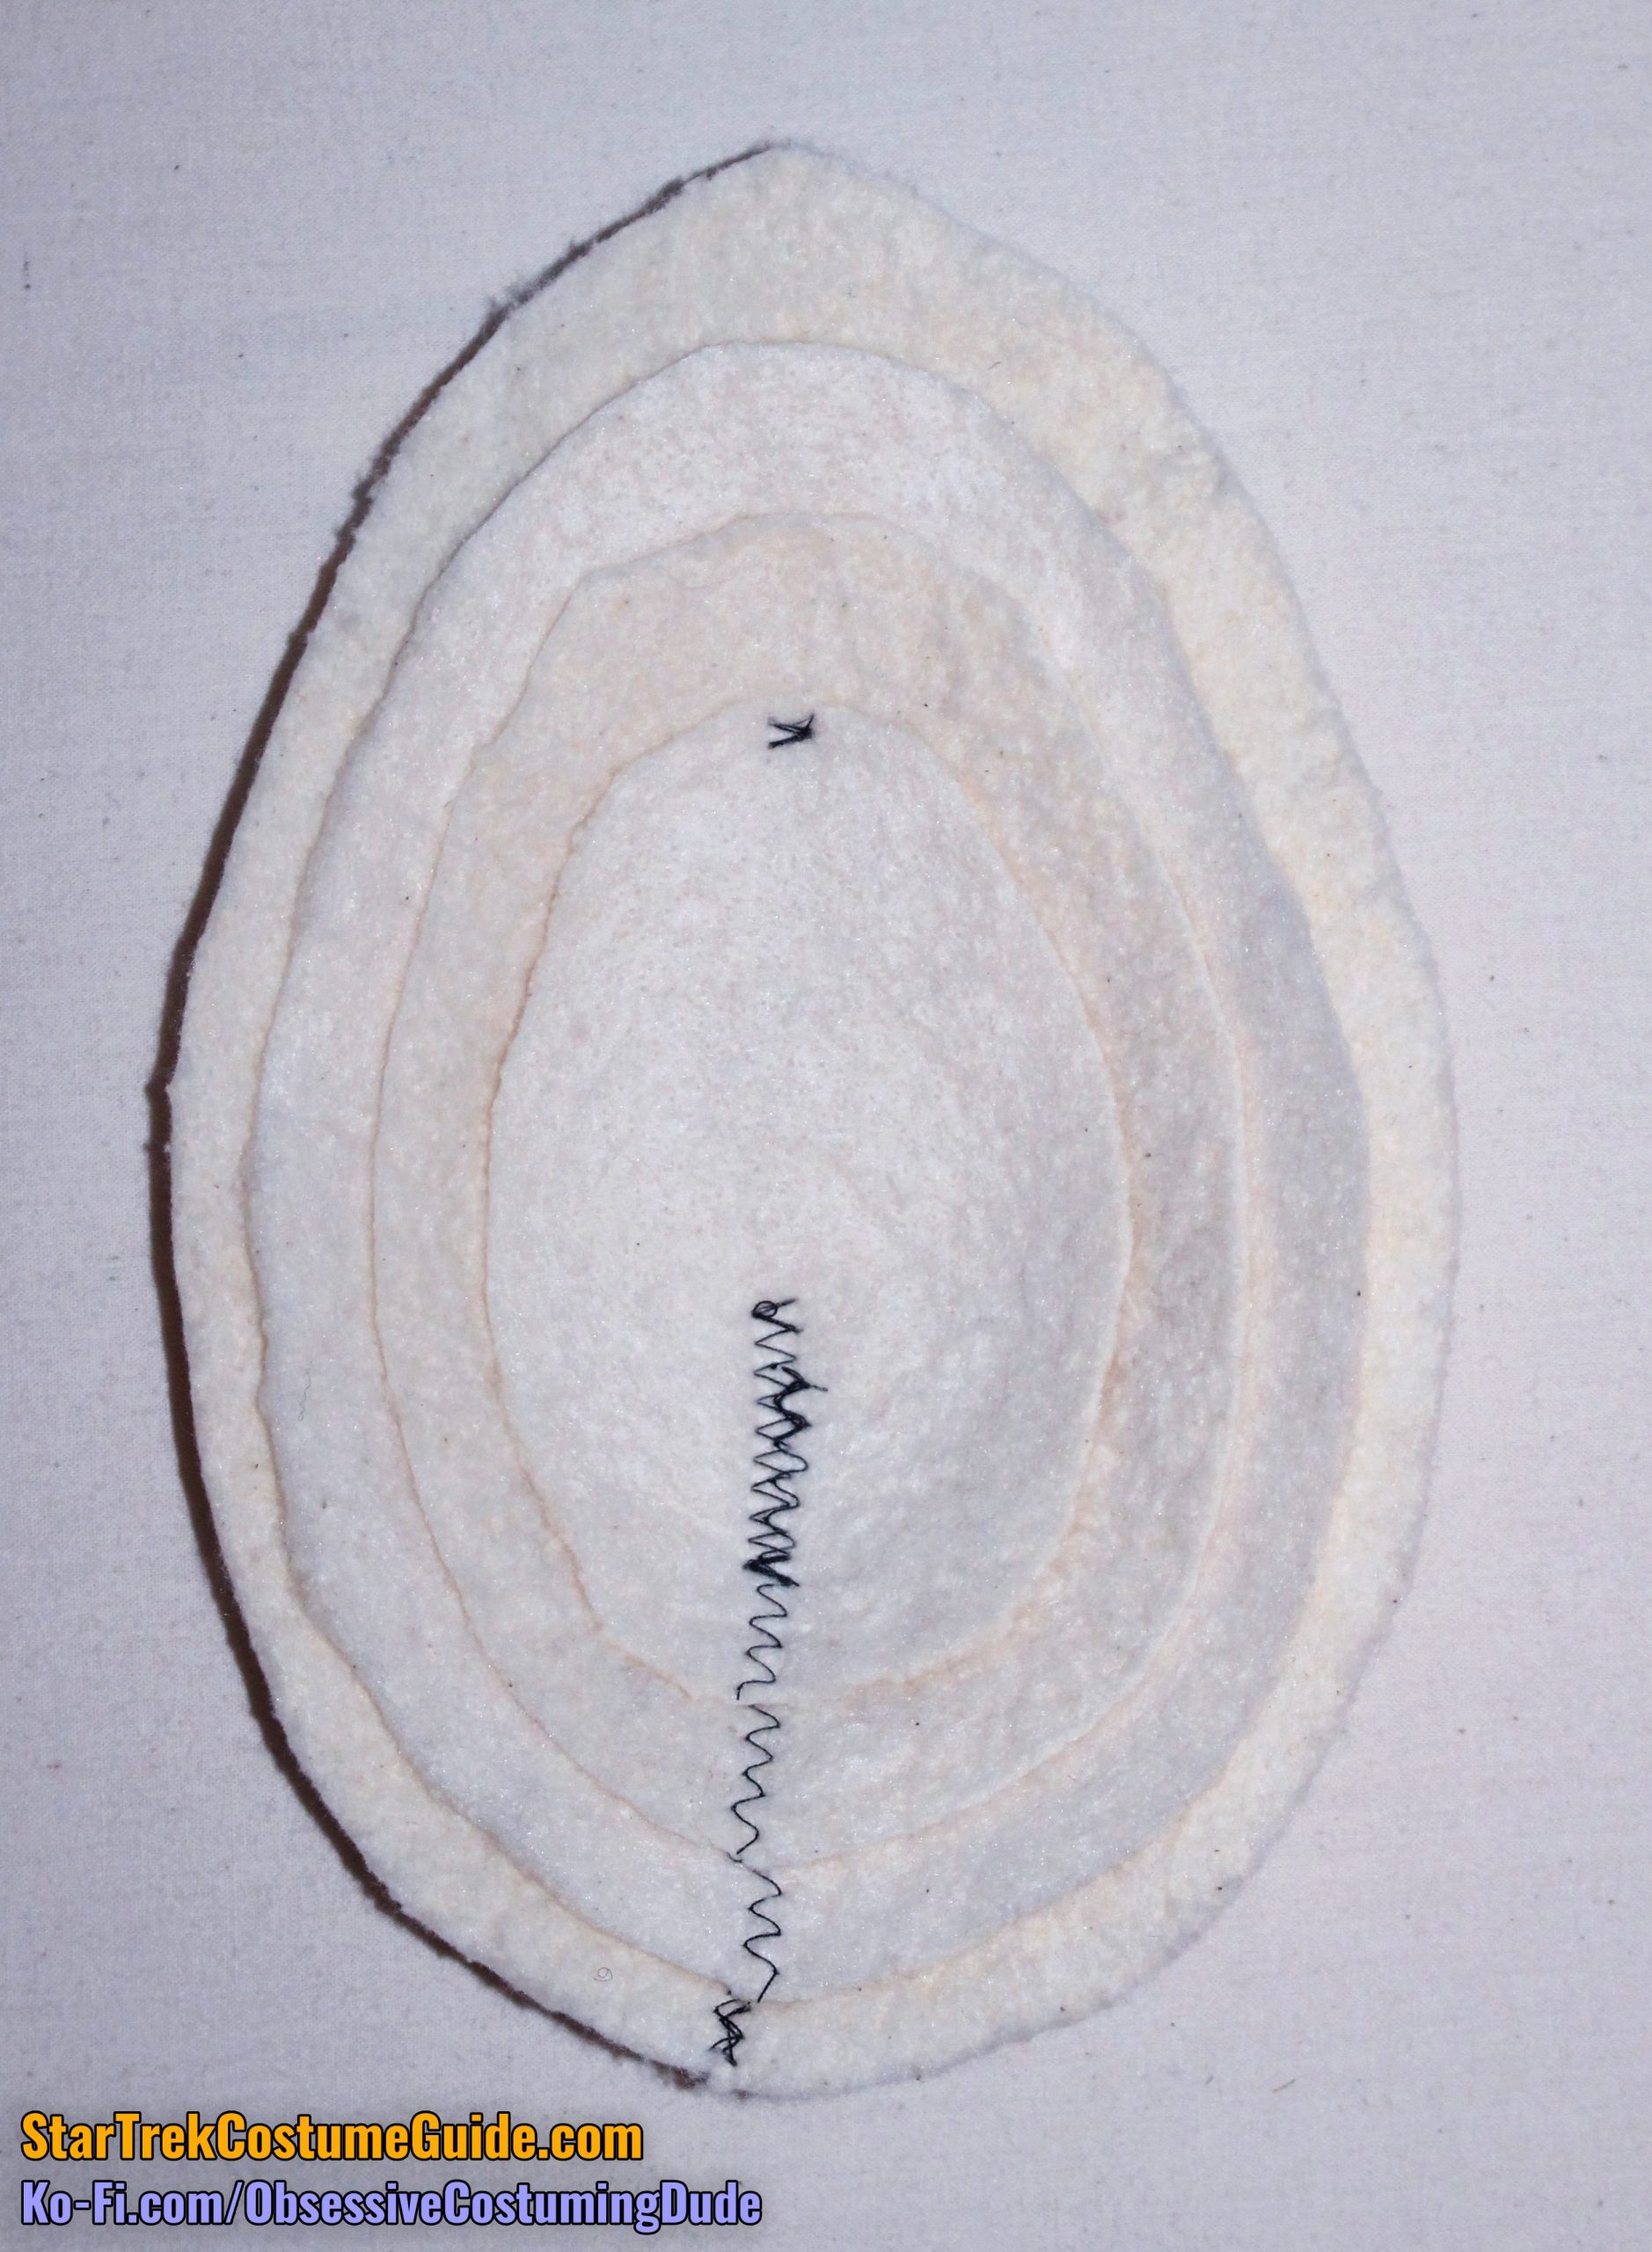
The last bit of machine-sewing we need to do is to make the shoulder pads.
Cut two pieces of black lining and however much padding you want, using the shoulder pad pattern (piece P).
(I like to use lightweight cotton batting for the padding.)
I believe four layers is comparable to the loft of the original pads, although another layer or two is reasonable (especially if you have sloped shoulders).
Cut out the darts in the padding.
Pull the cut edges together flush, and join them with a zig-zag stitch.
Repeat for all padding layers.
Trim the additional layers of padding smaller around the edges. (I like to trim mine about ½” around the outer edges, and ¾” at the neckline edge.)
“Stack” the layers of padding so they’re all oriented the same way and anchor them together with a couple quick machine stitches.
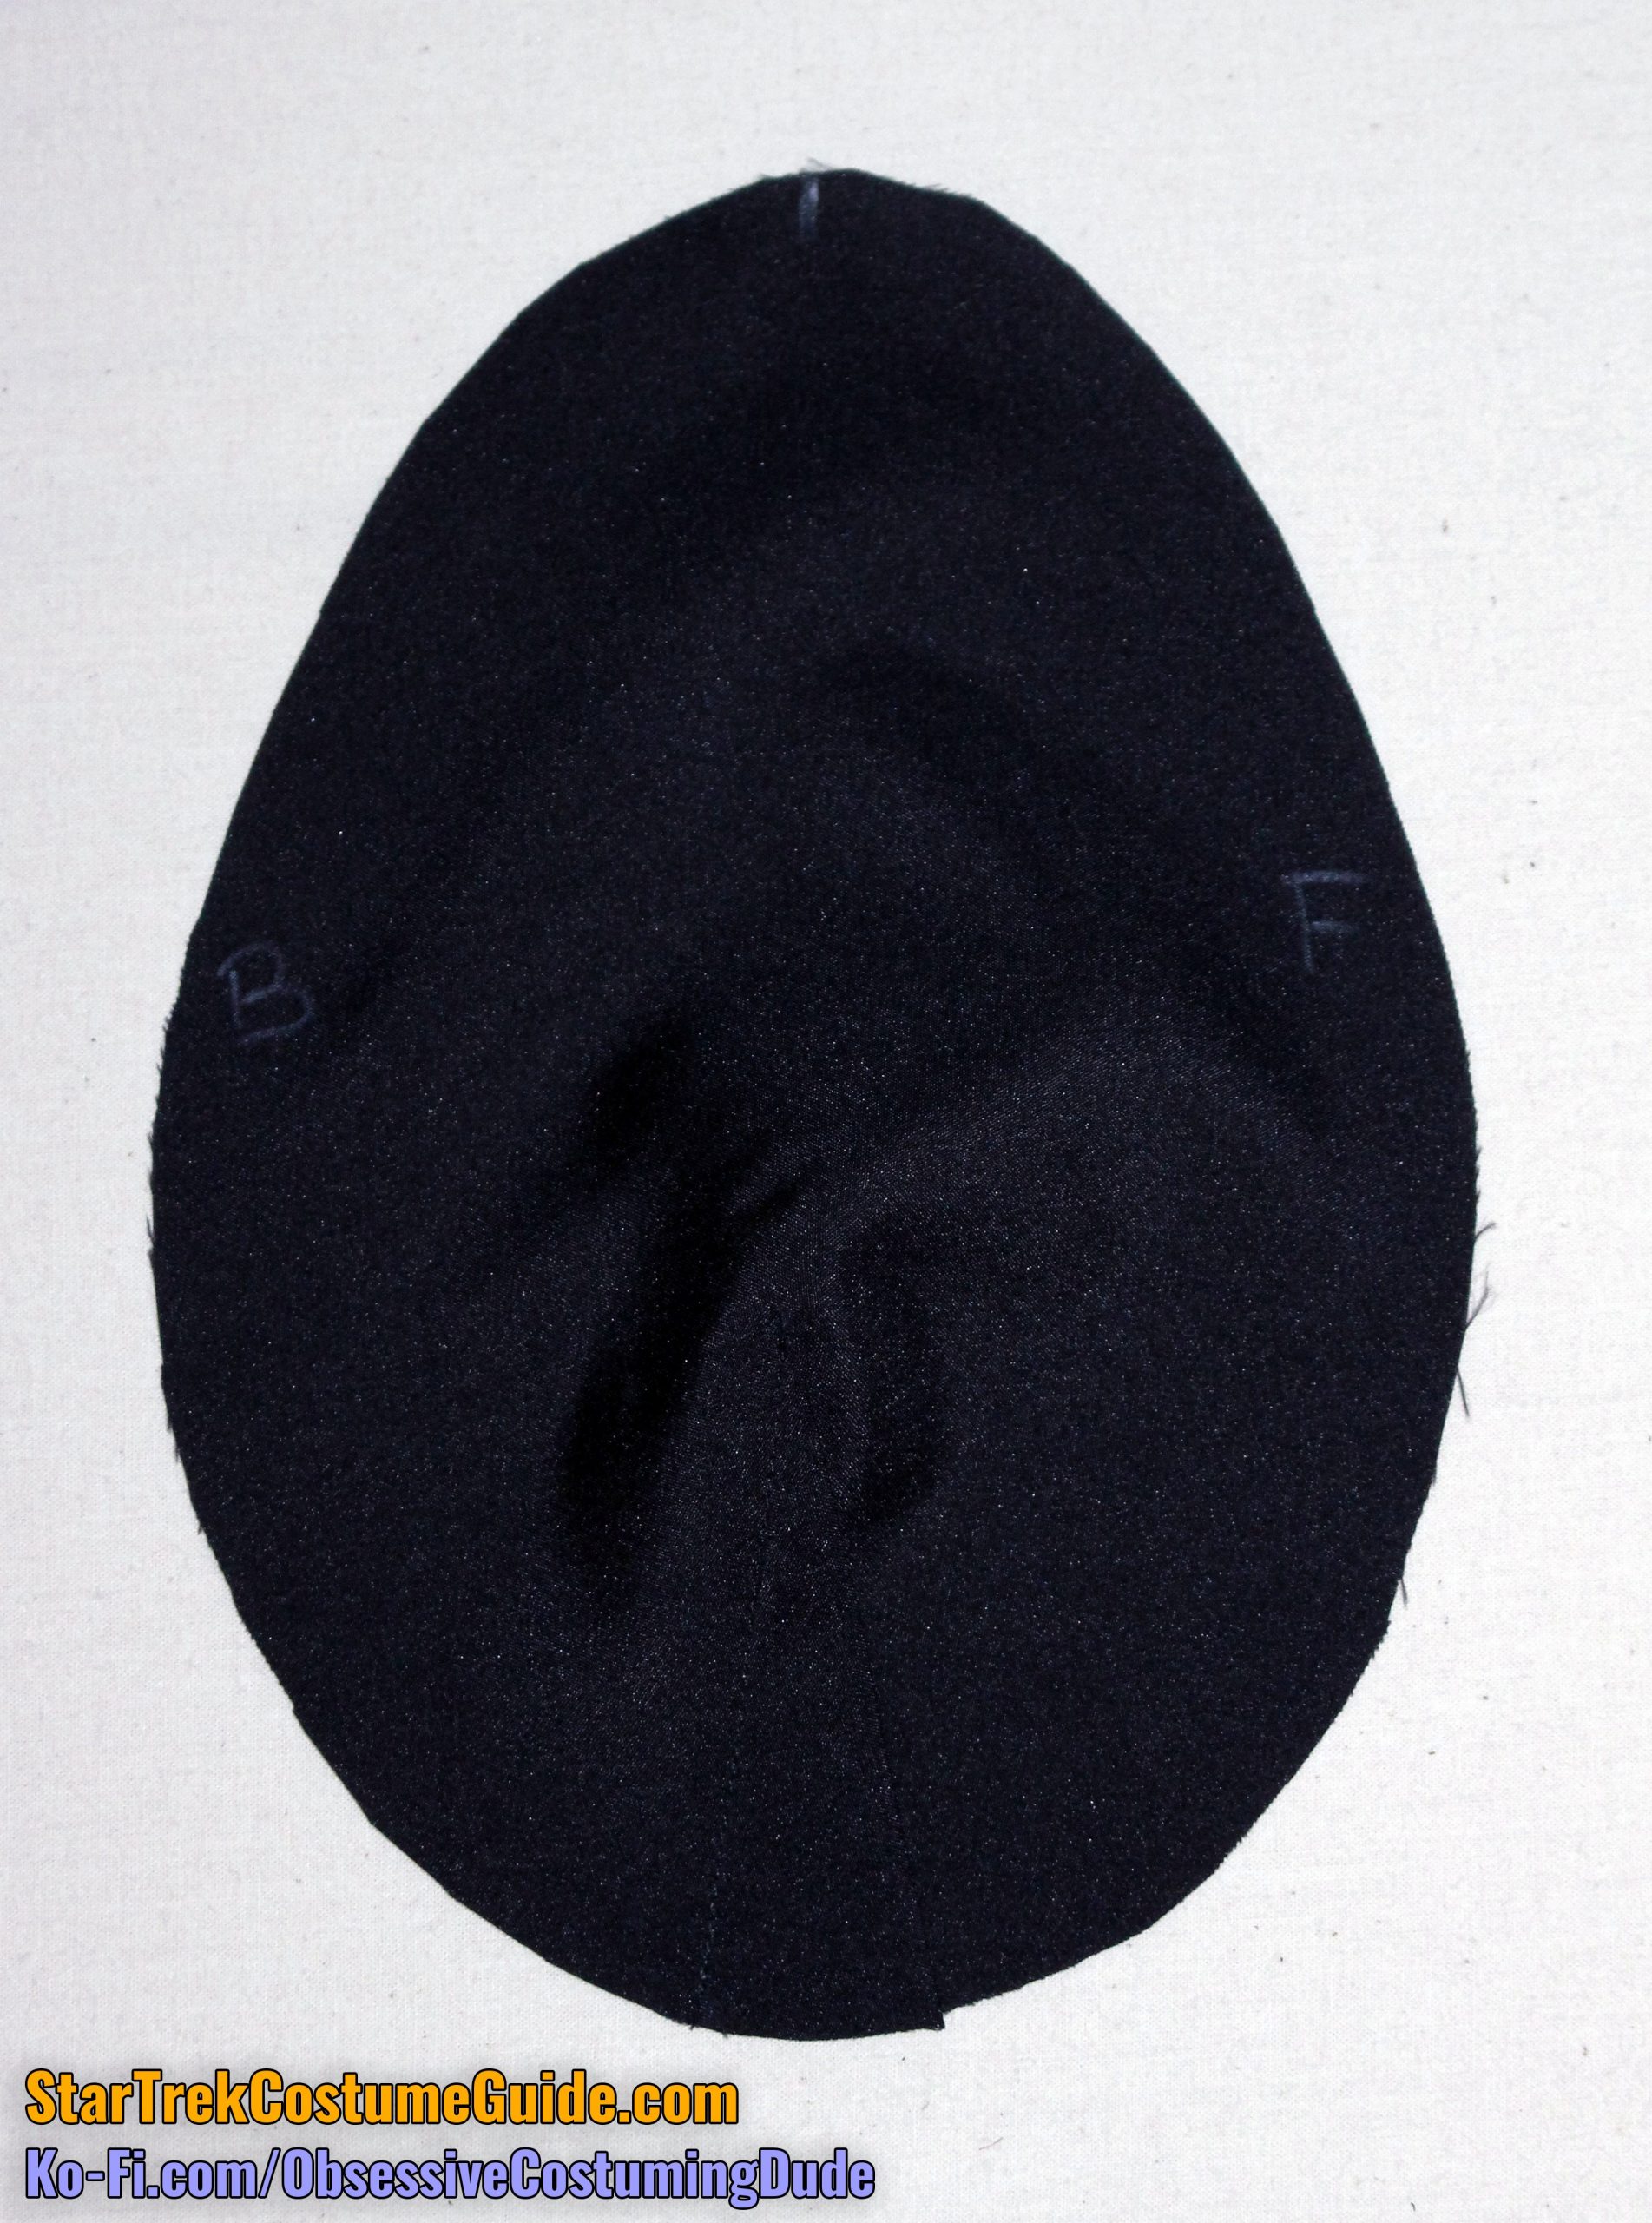
Sew the darts in the lining pieces, and press the darts toward the front.
Position the padding between the two layers of lining, edges flush, and pin the layers together.
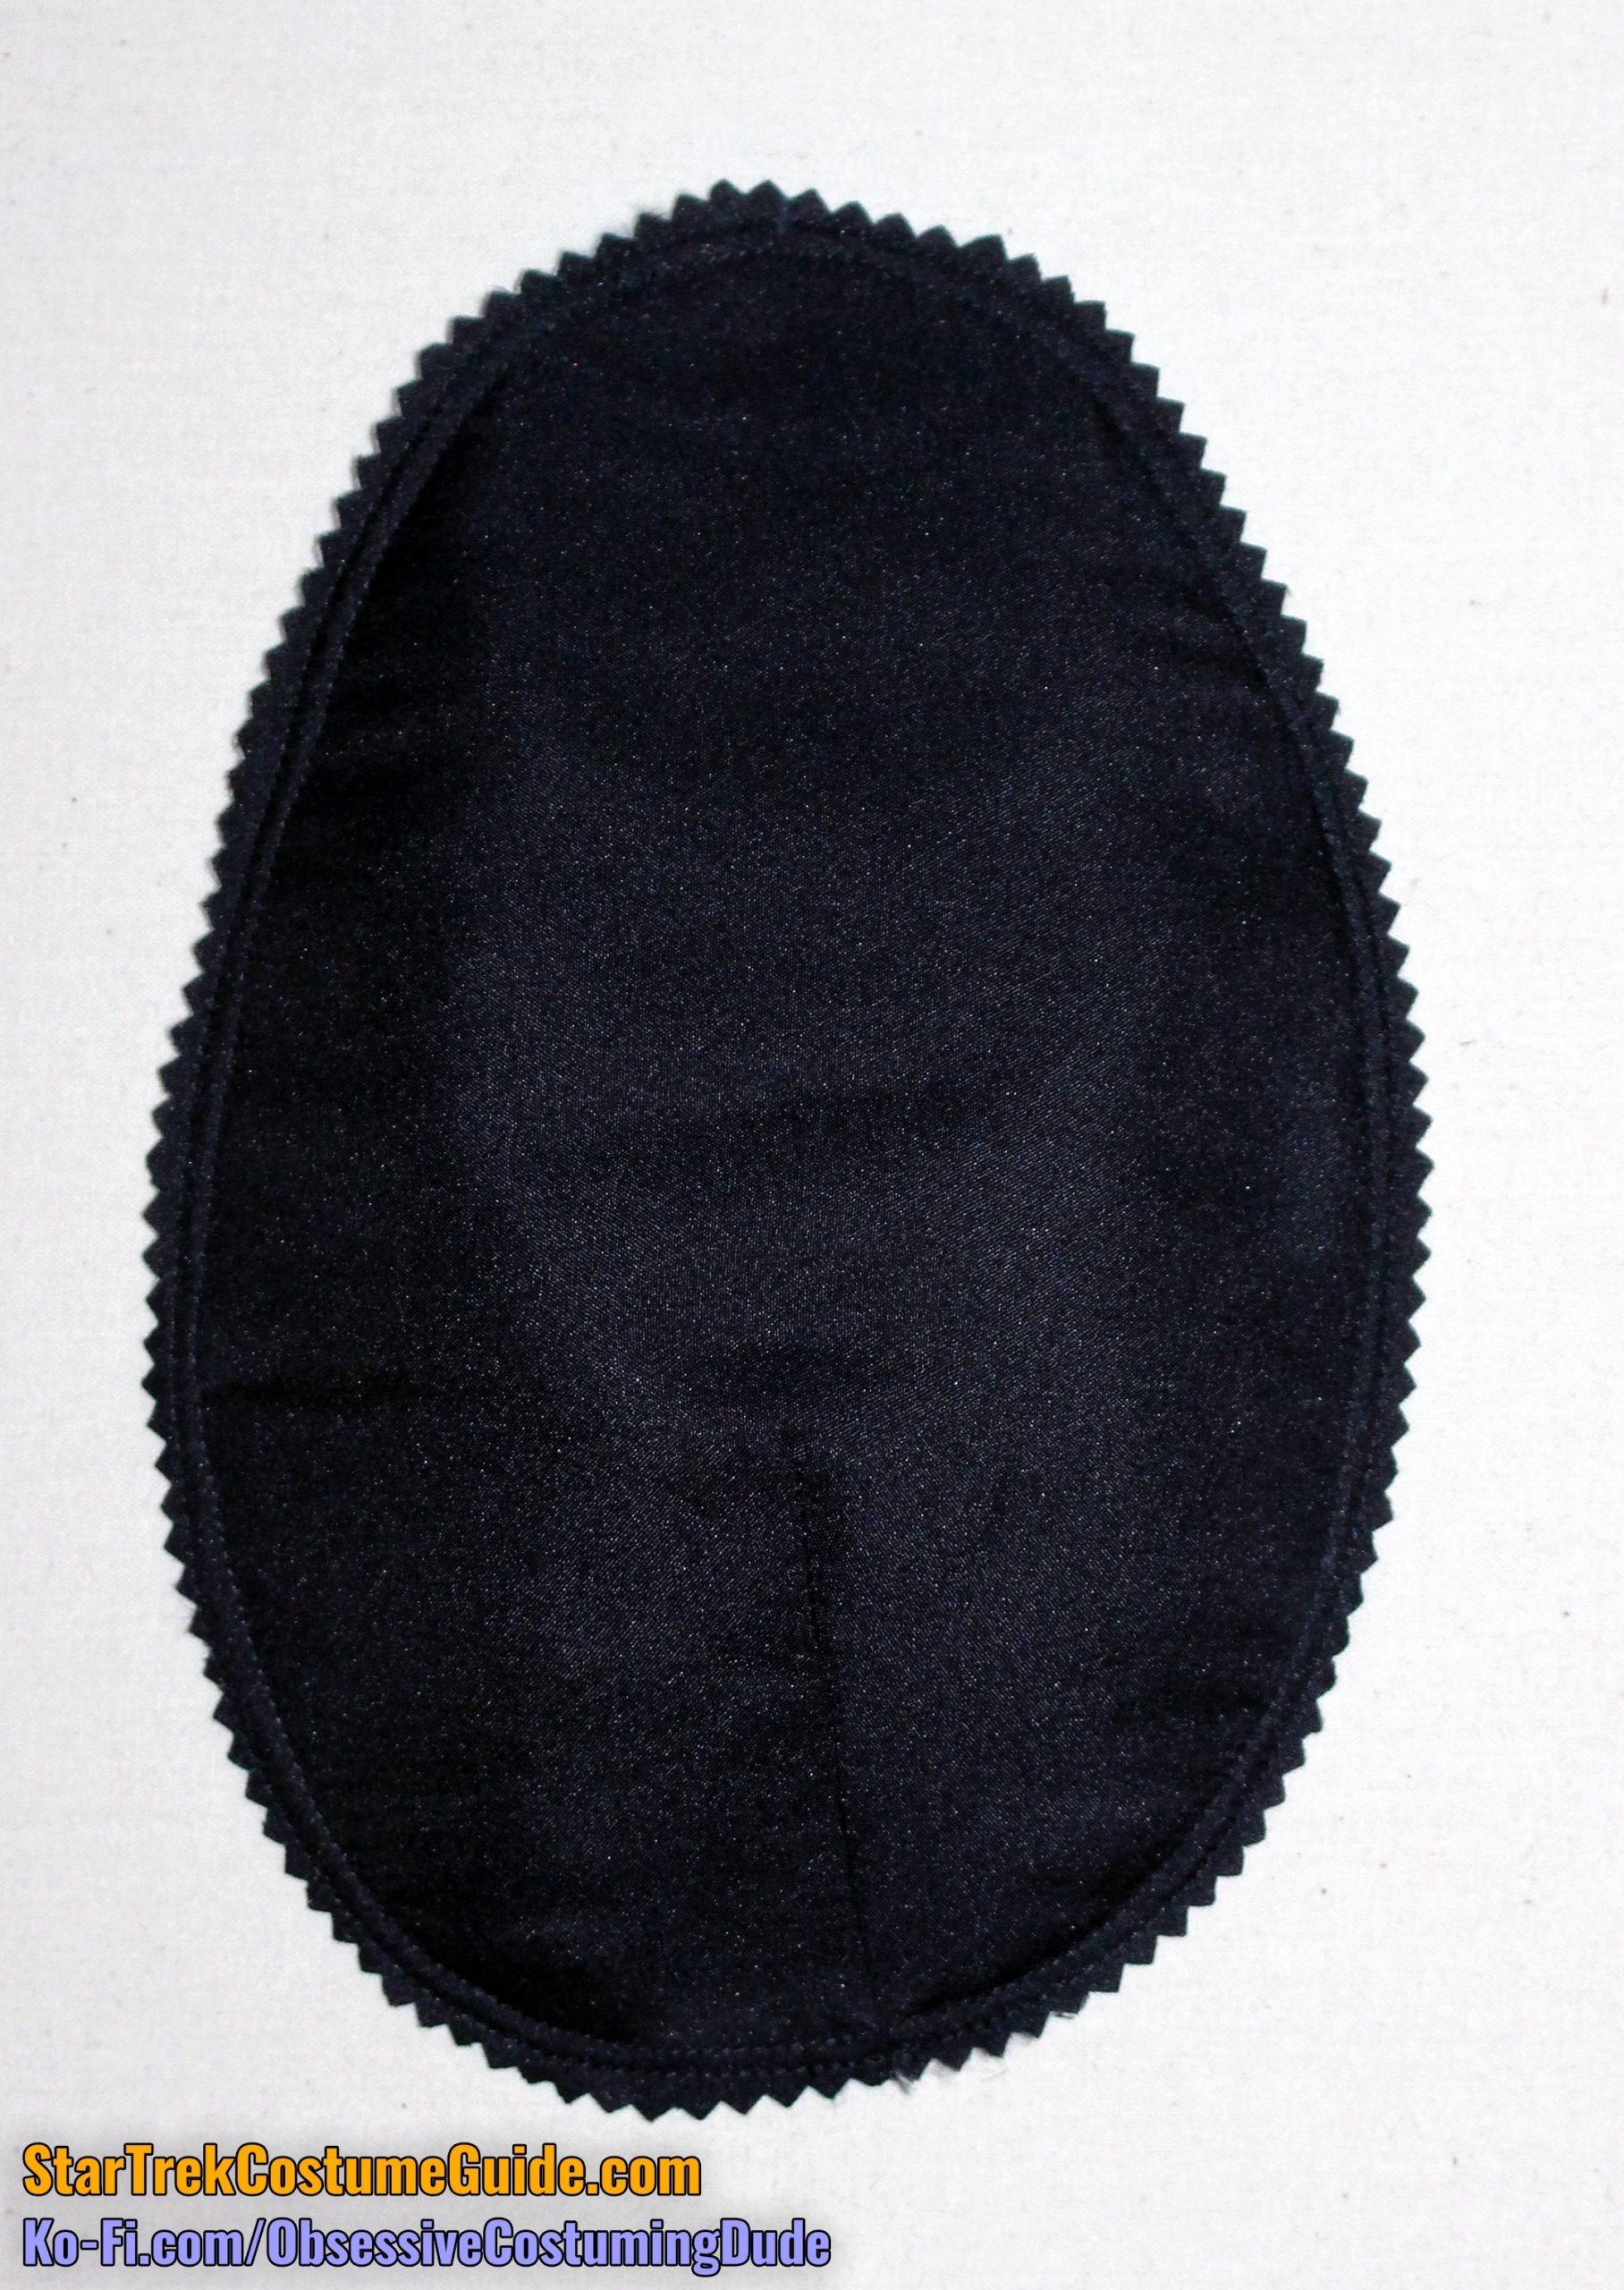
Sew the layers together around the perimeter of the pad ⅜” from the edge, then again ¼” from the edge.
Trim the outer edge of the pad with pinking shears.
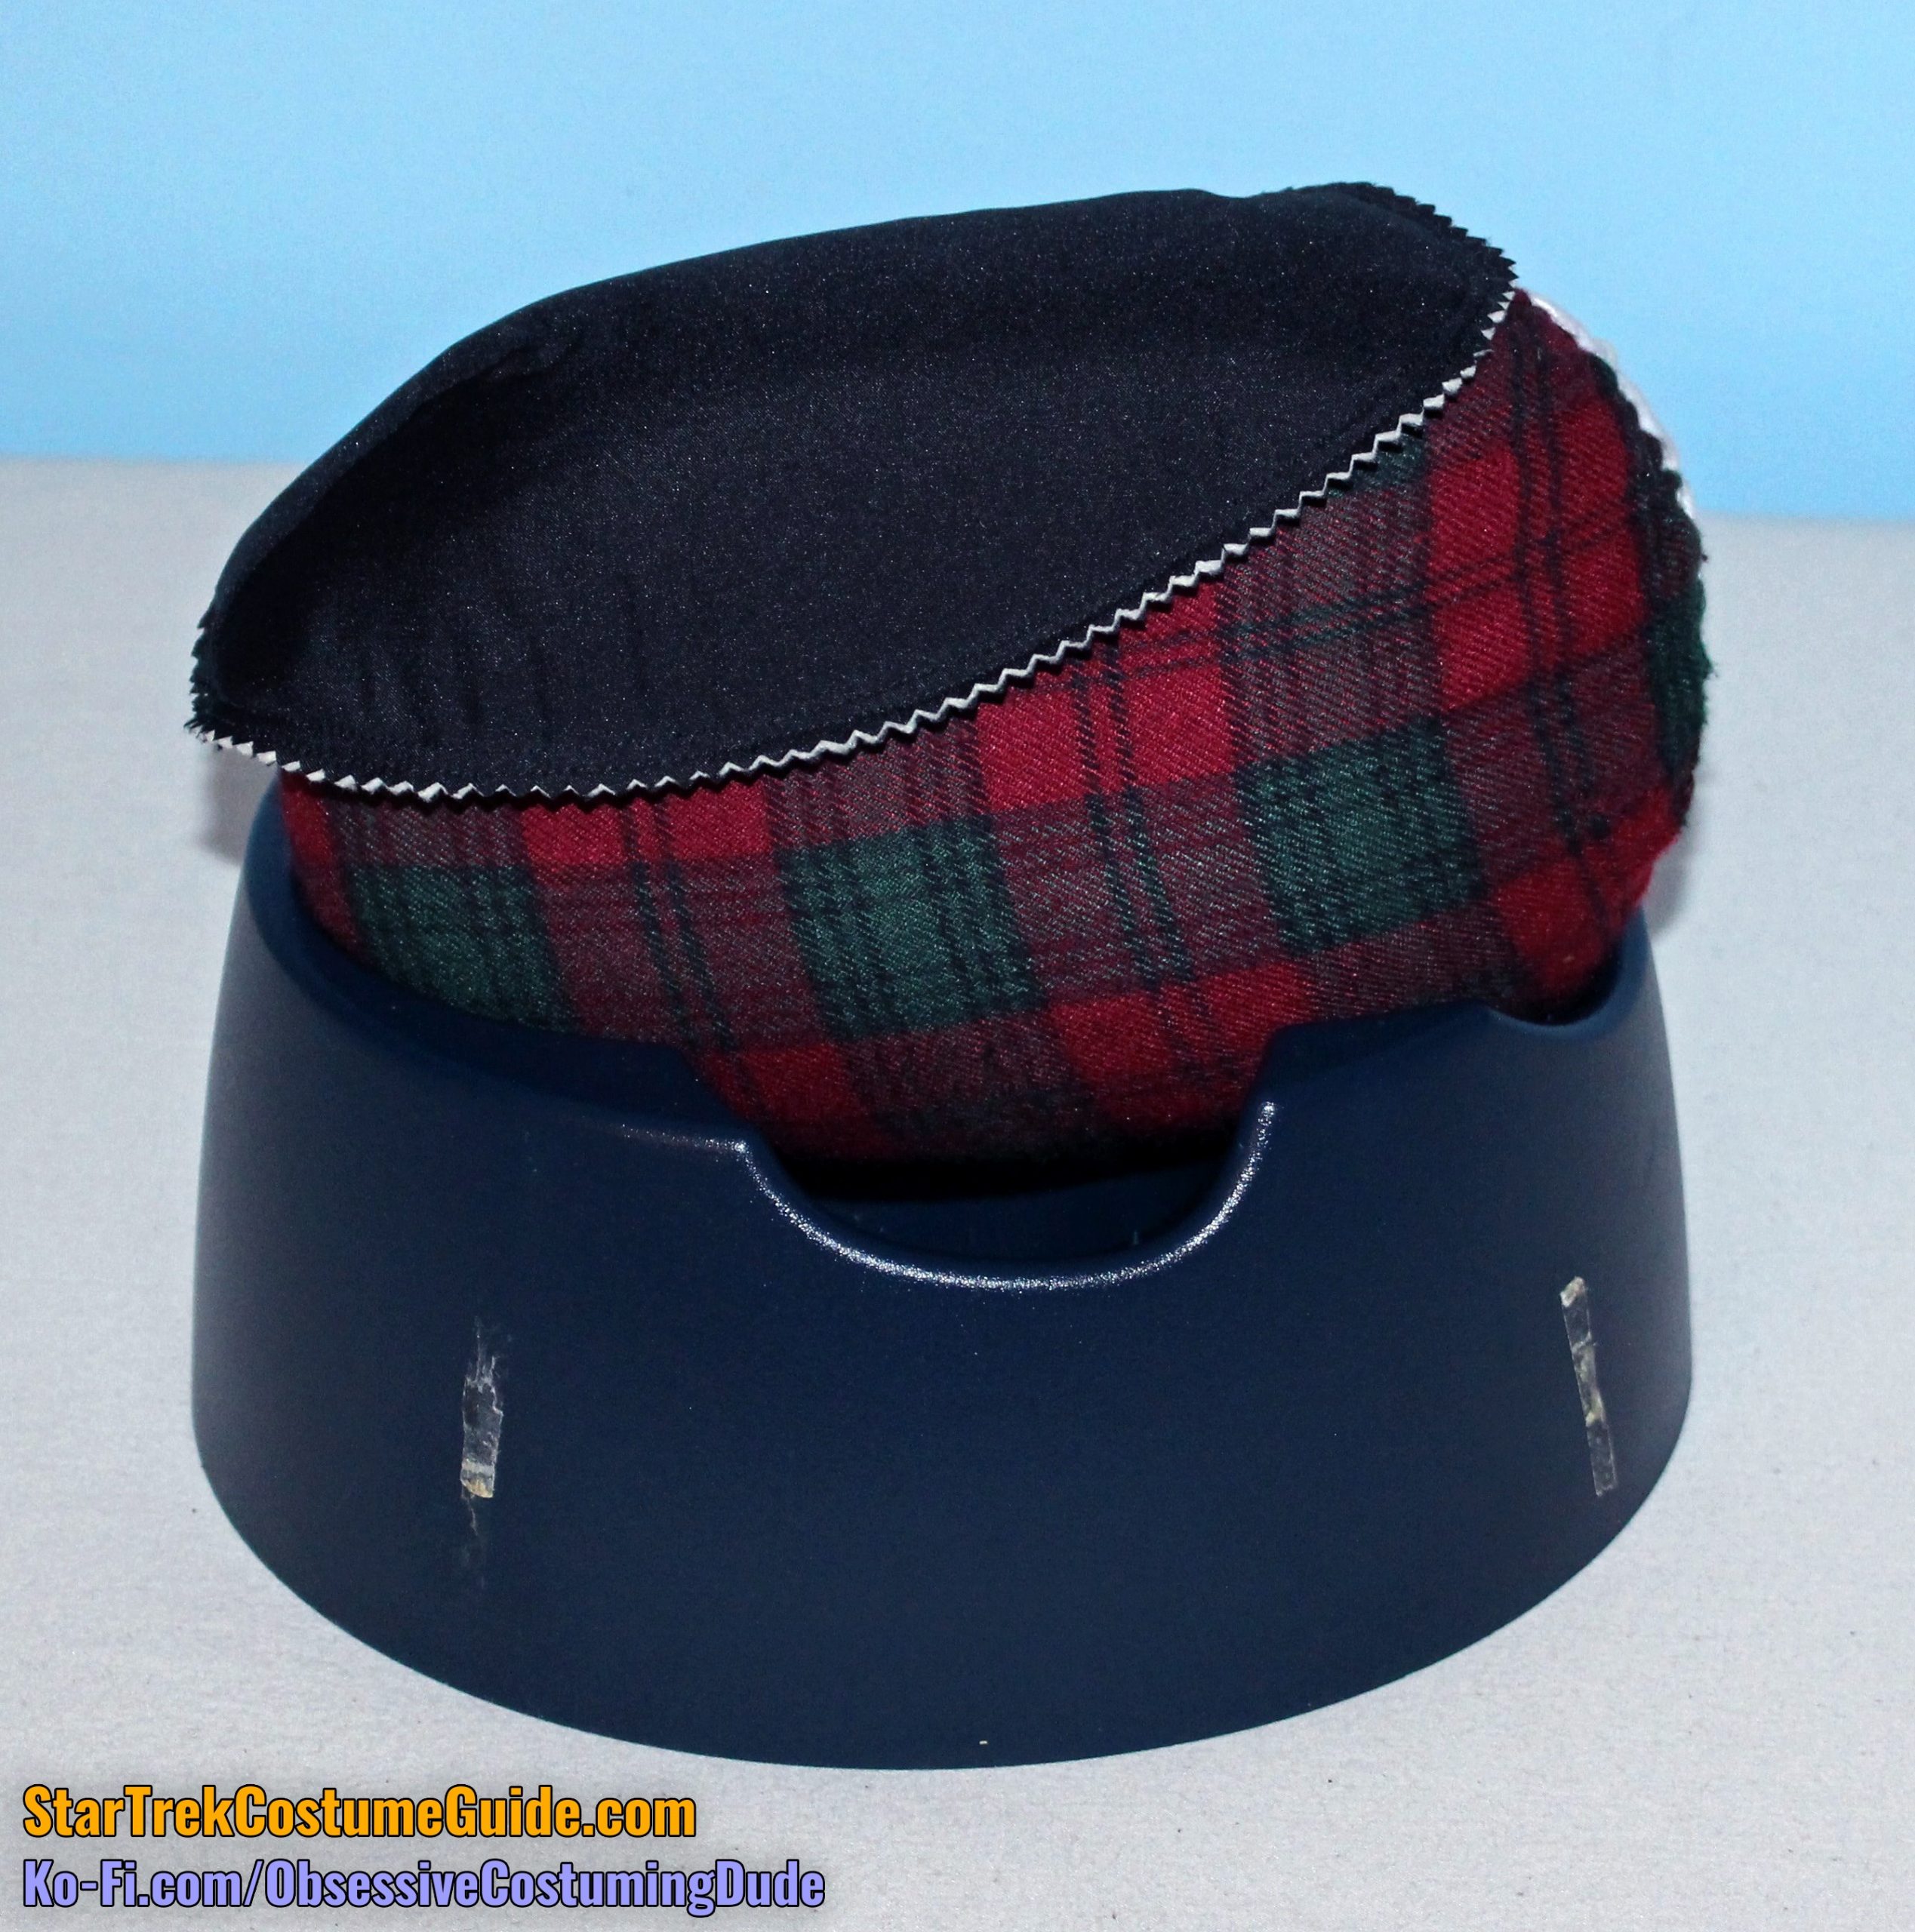
Press the pad into its gently-rounded shape over a tailor’s ham.
Repeat for the other pad.
Hand-sew the shoulder pads to the shoulder seam allowances, leaving the bottommost 3” to 3 ½” free.
(Alternatively, attach a pair of snaps to each pad and the corresponding seam allowances, if you want your pads to be removable.)
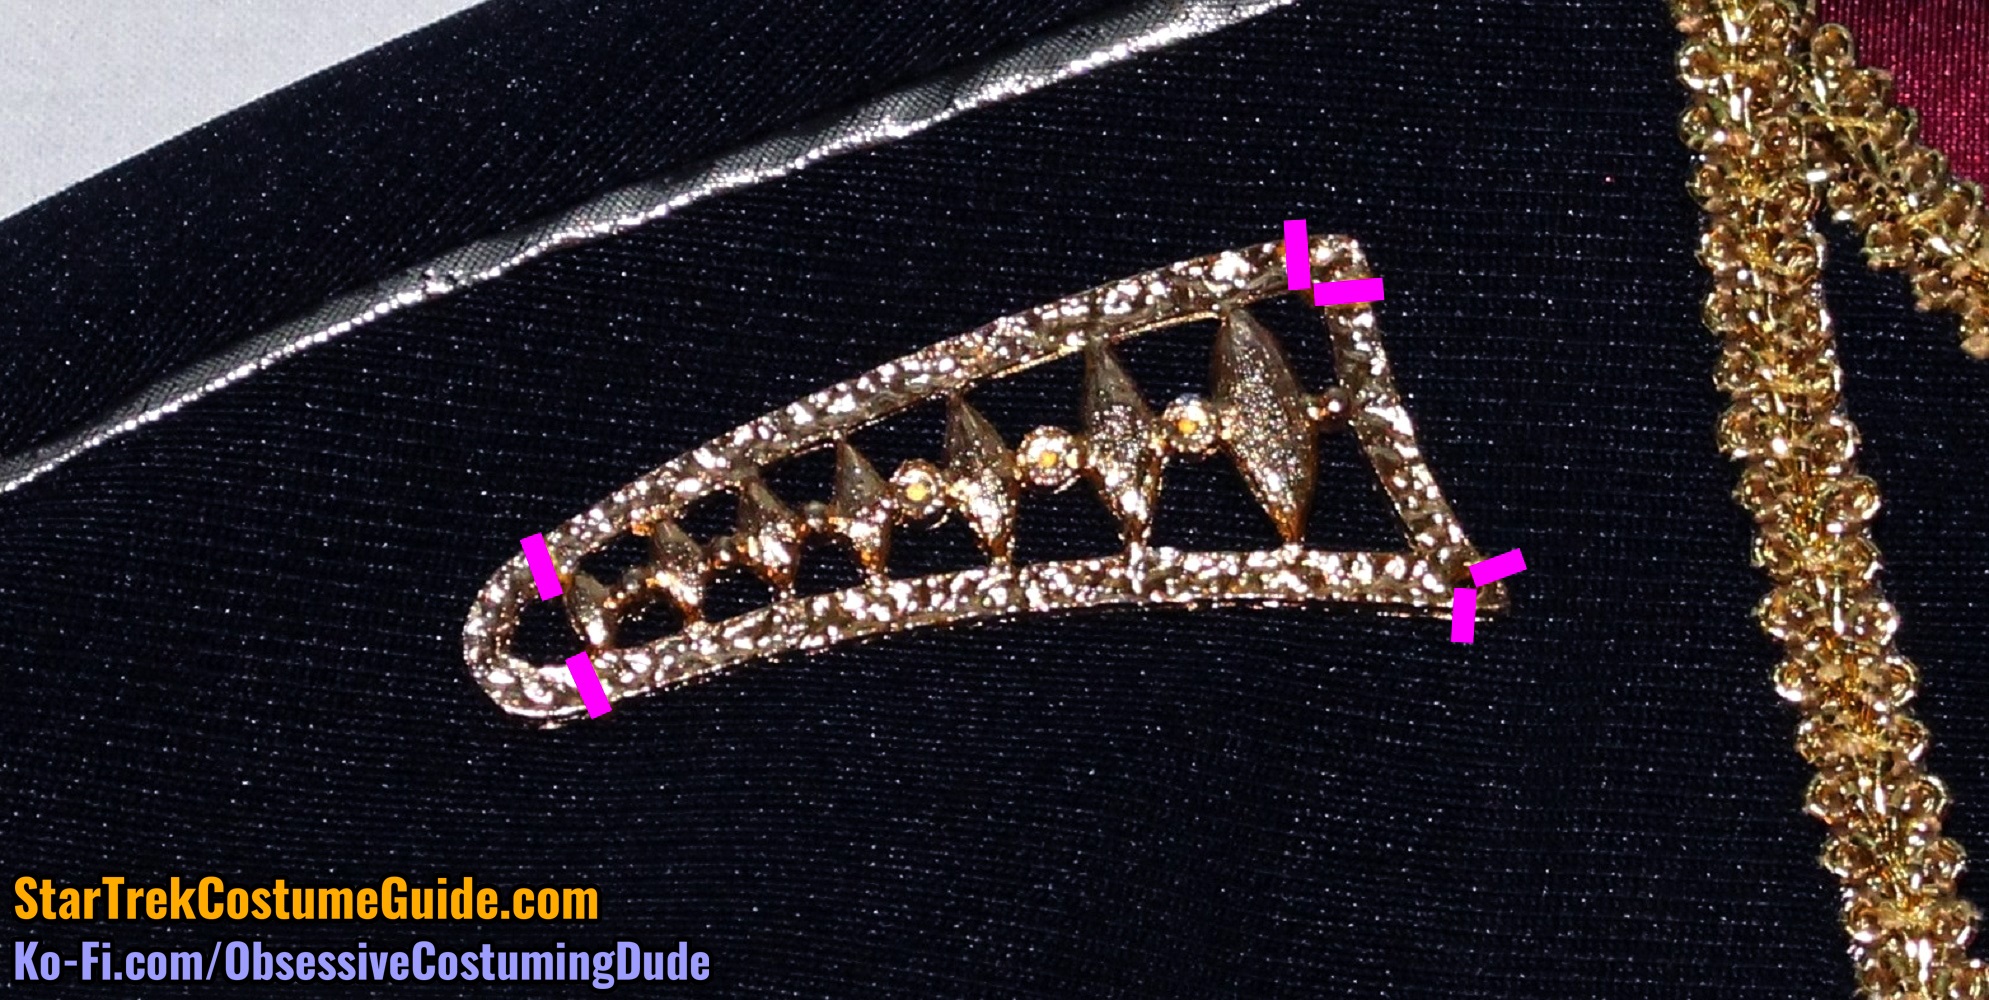
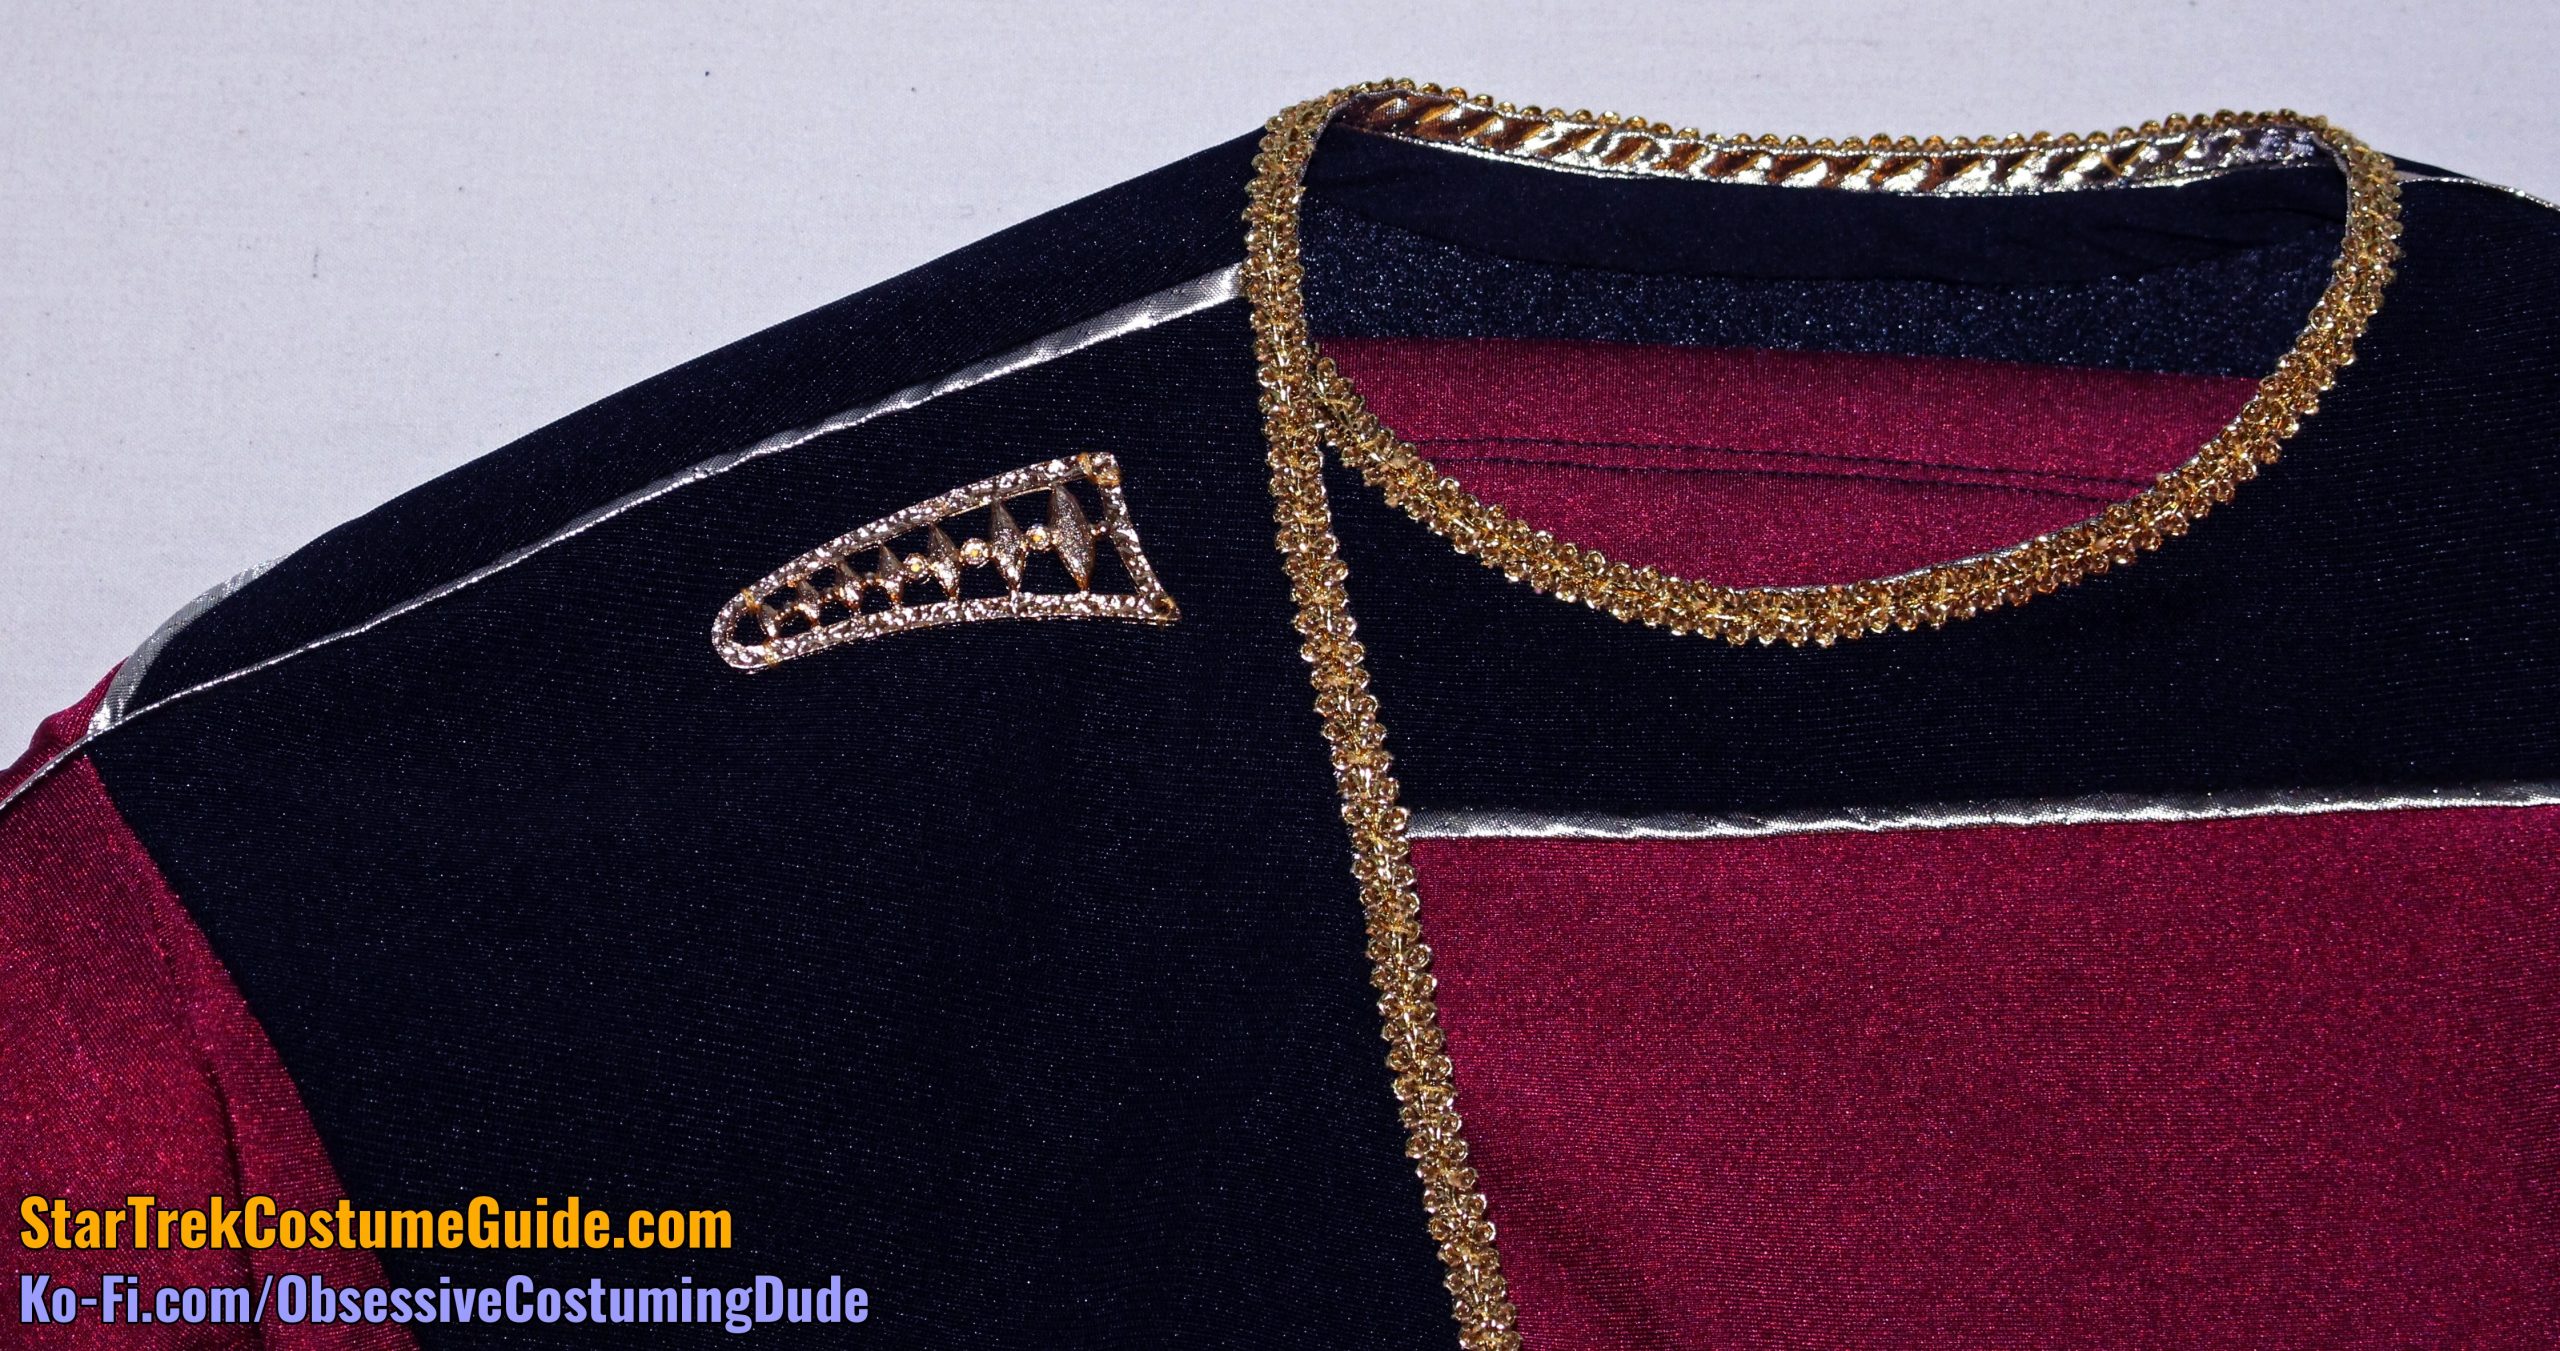
Last but certainly not least, using gold (or metallic gold) thread, hand-sew your brooch to the upper right front of the jacket!