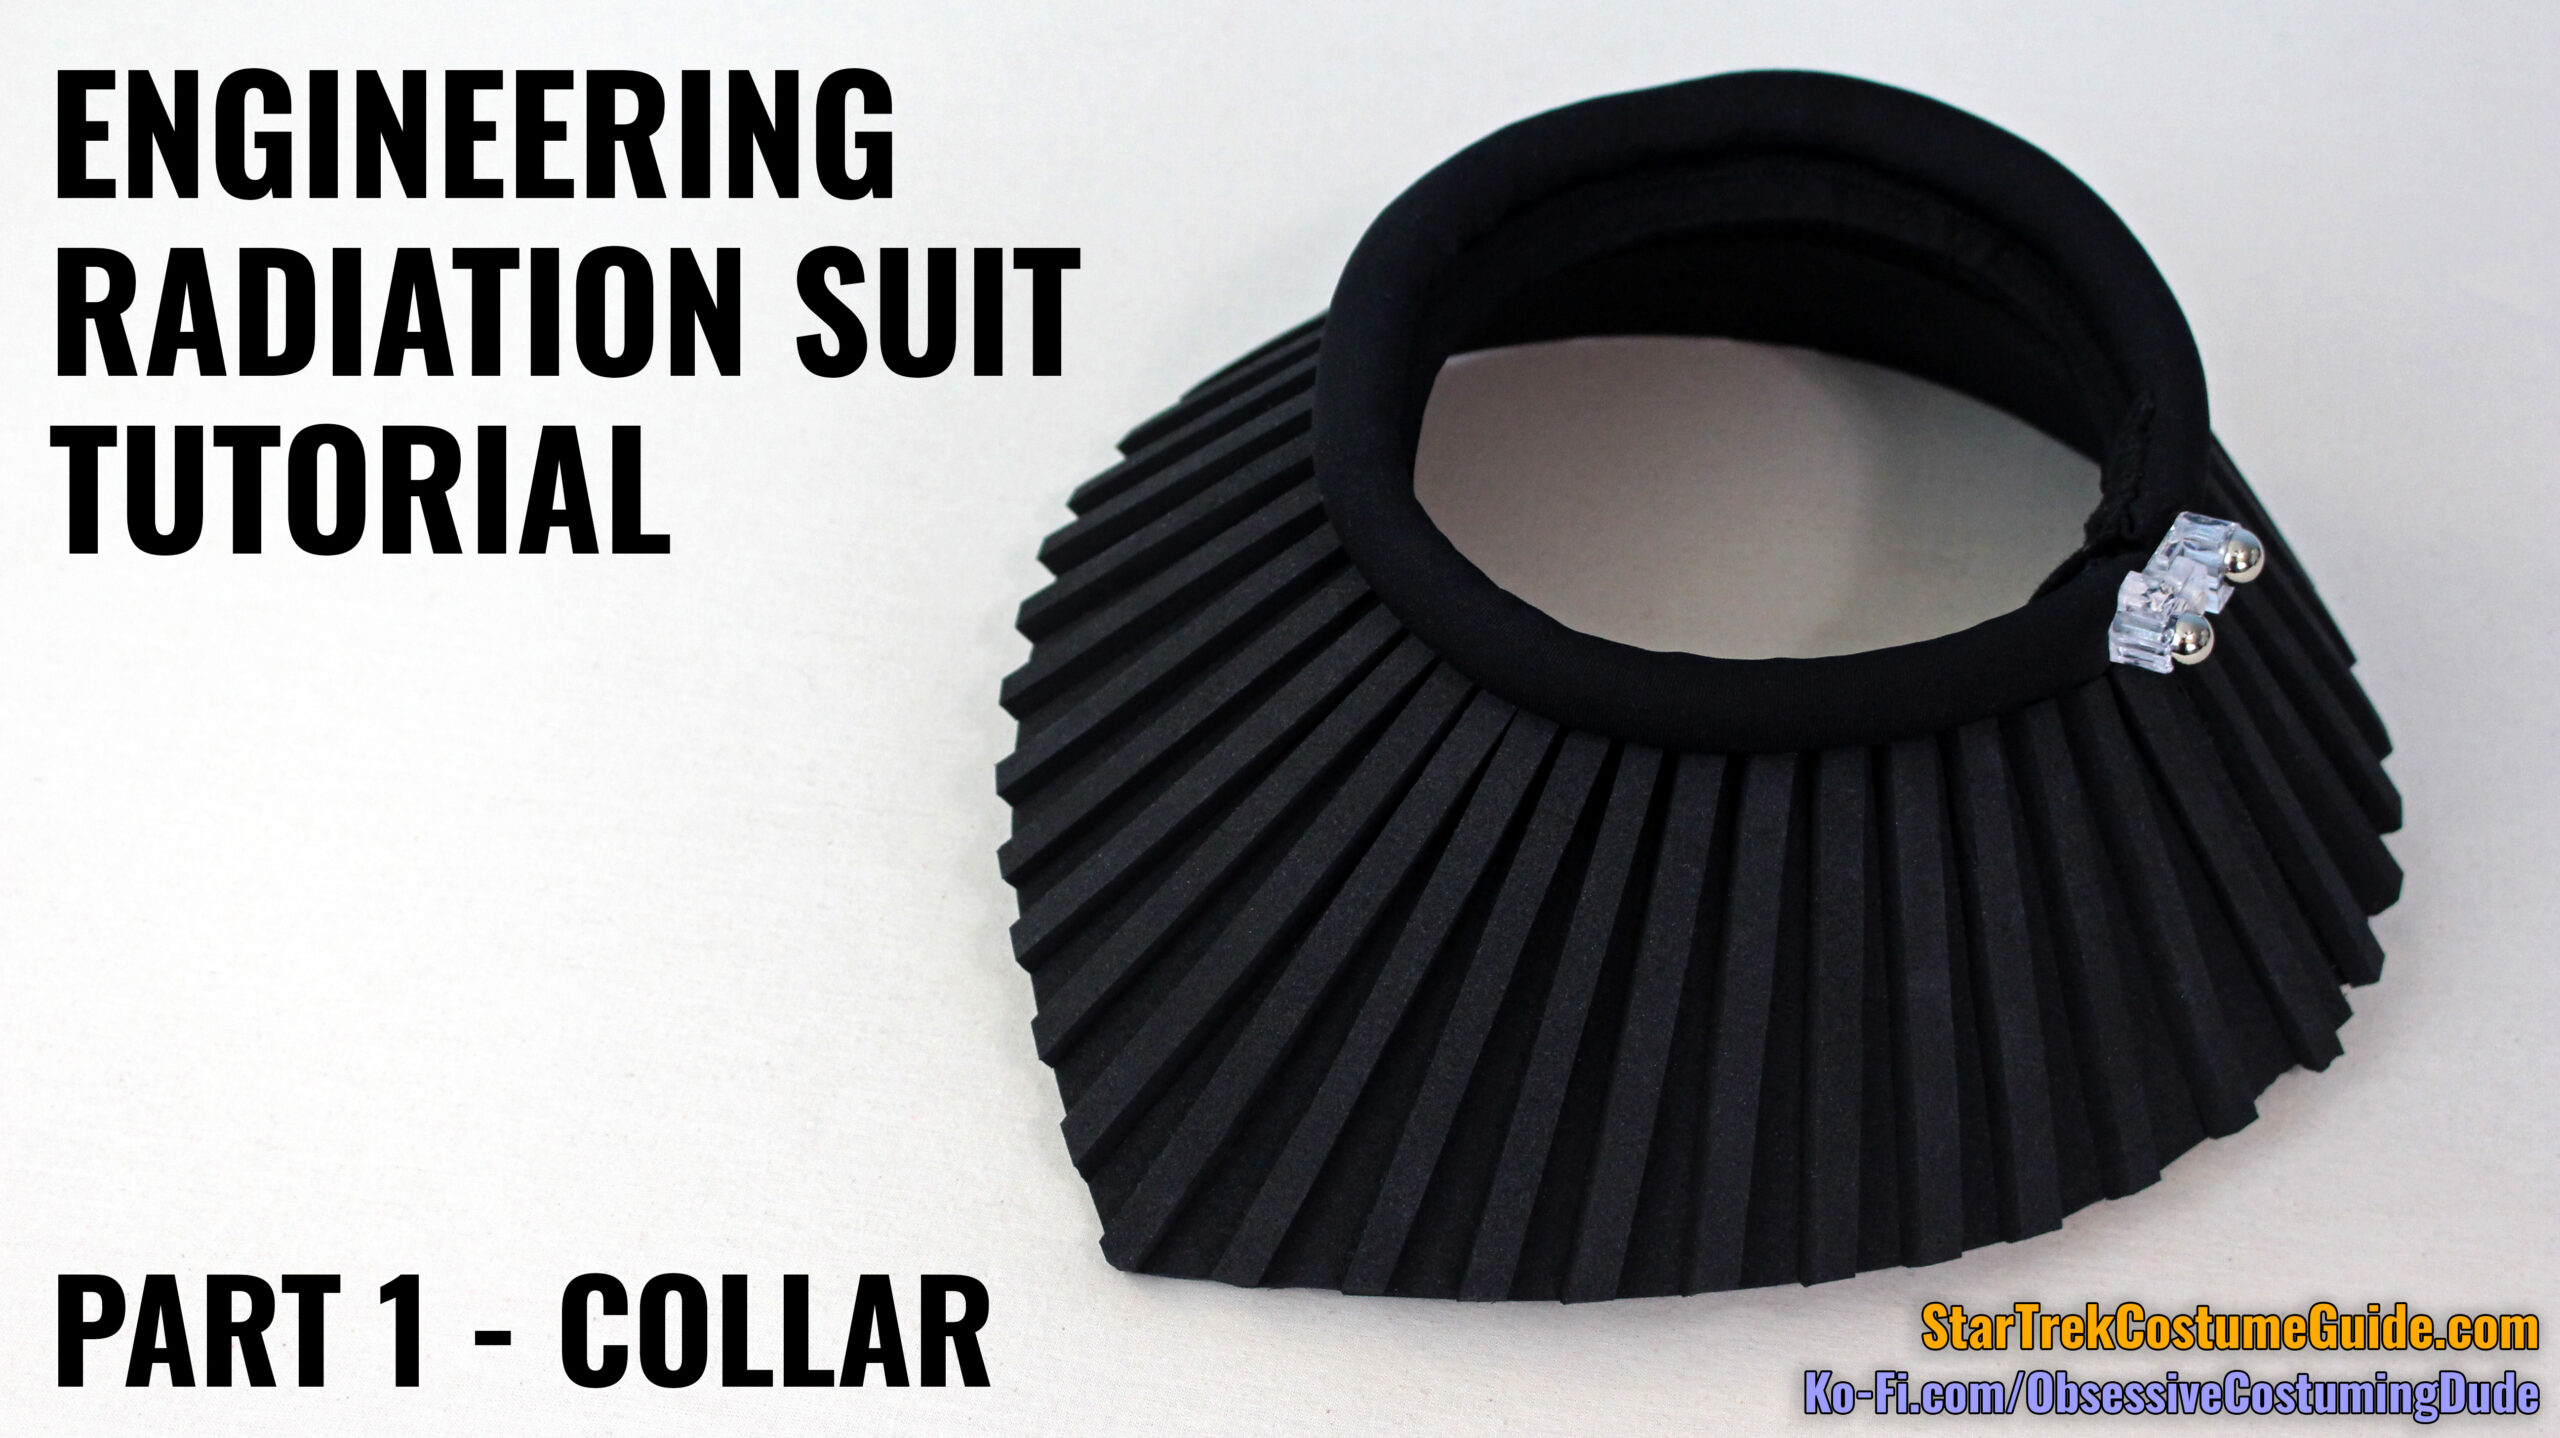
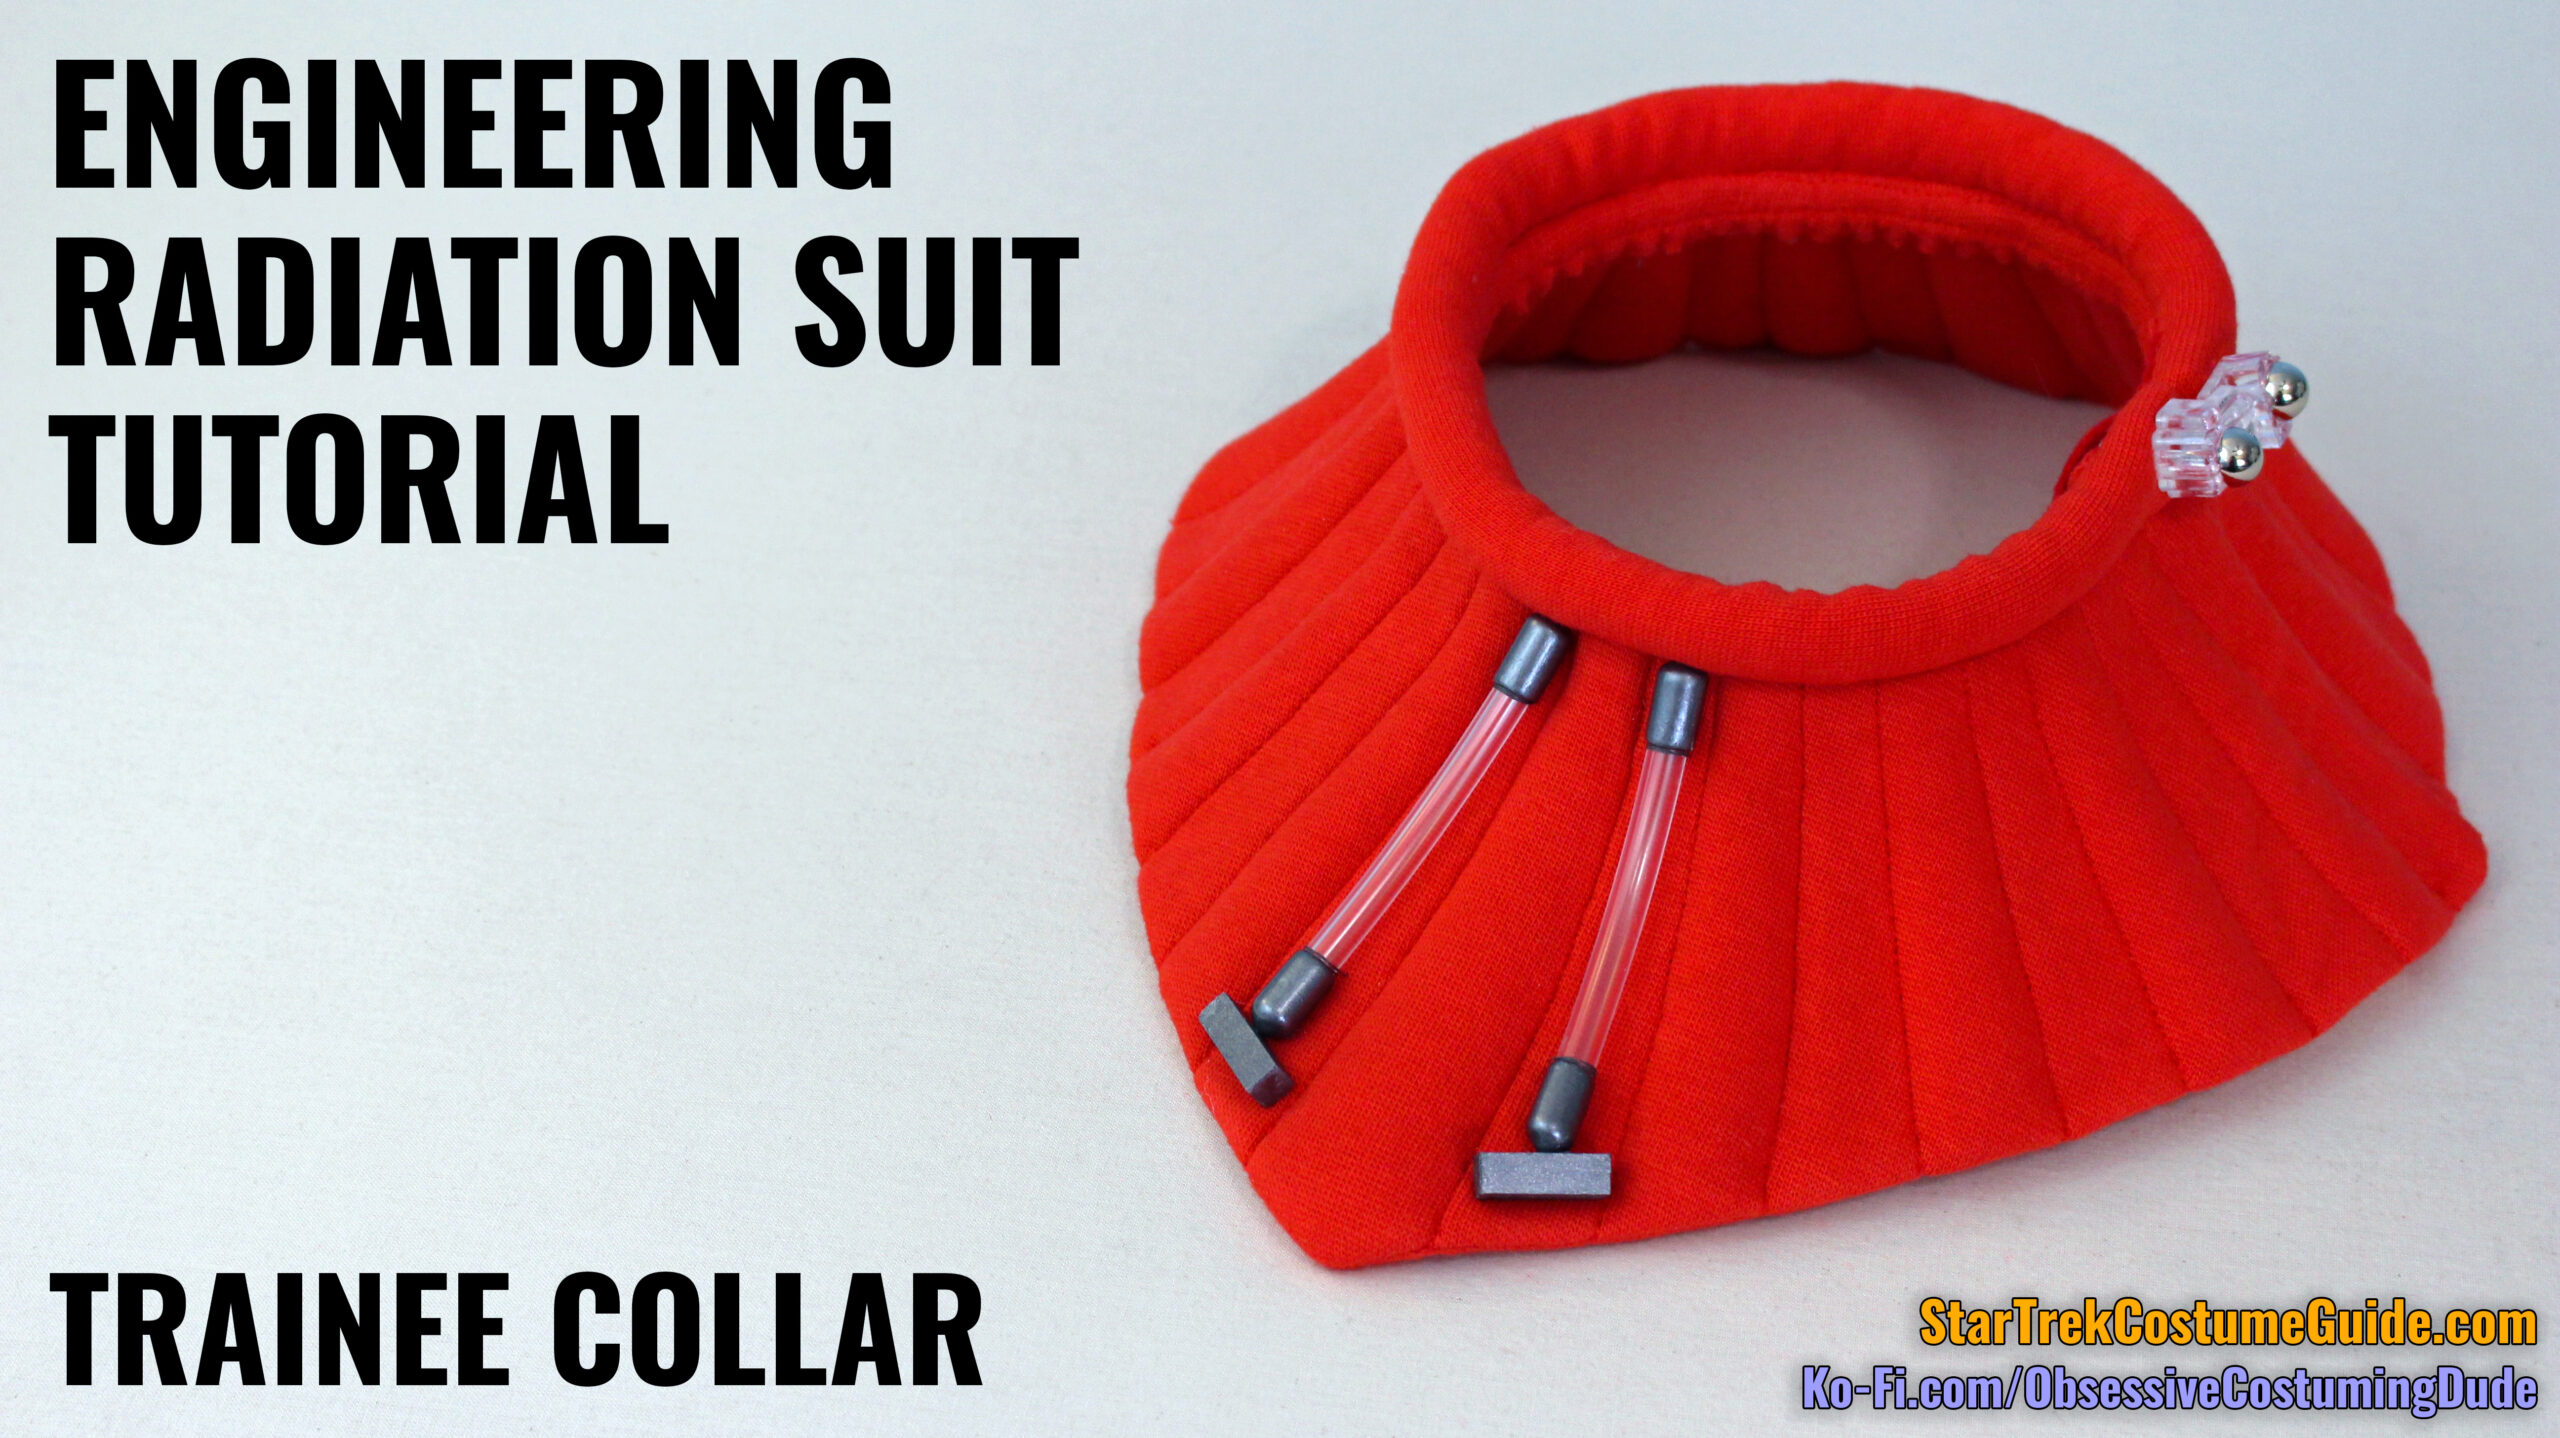
Engineering Radiation Suit Tutorial, Part 1 – Collar
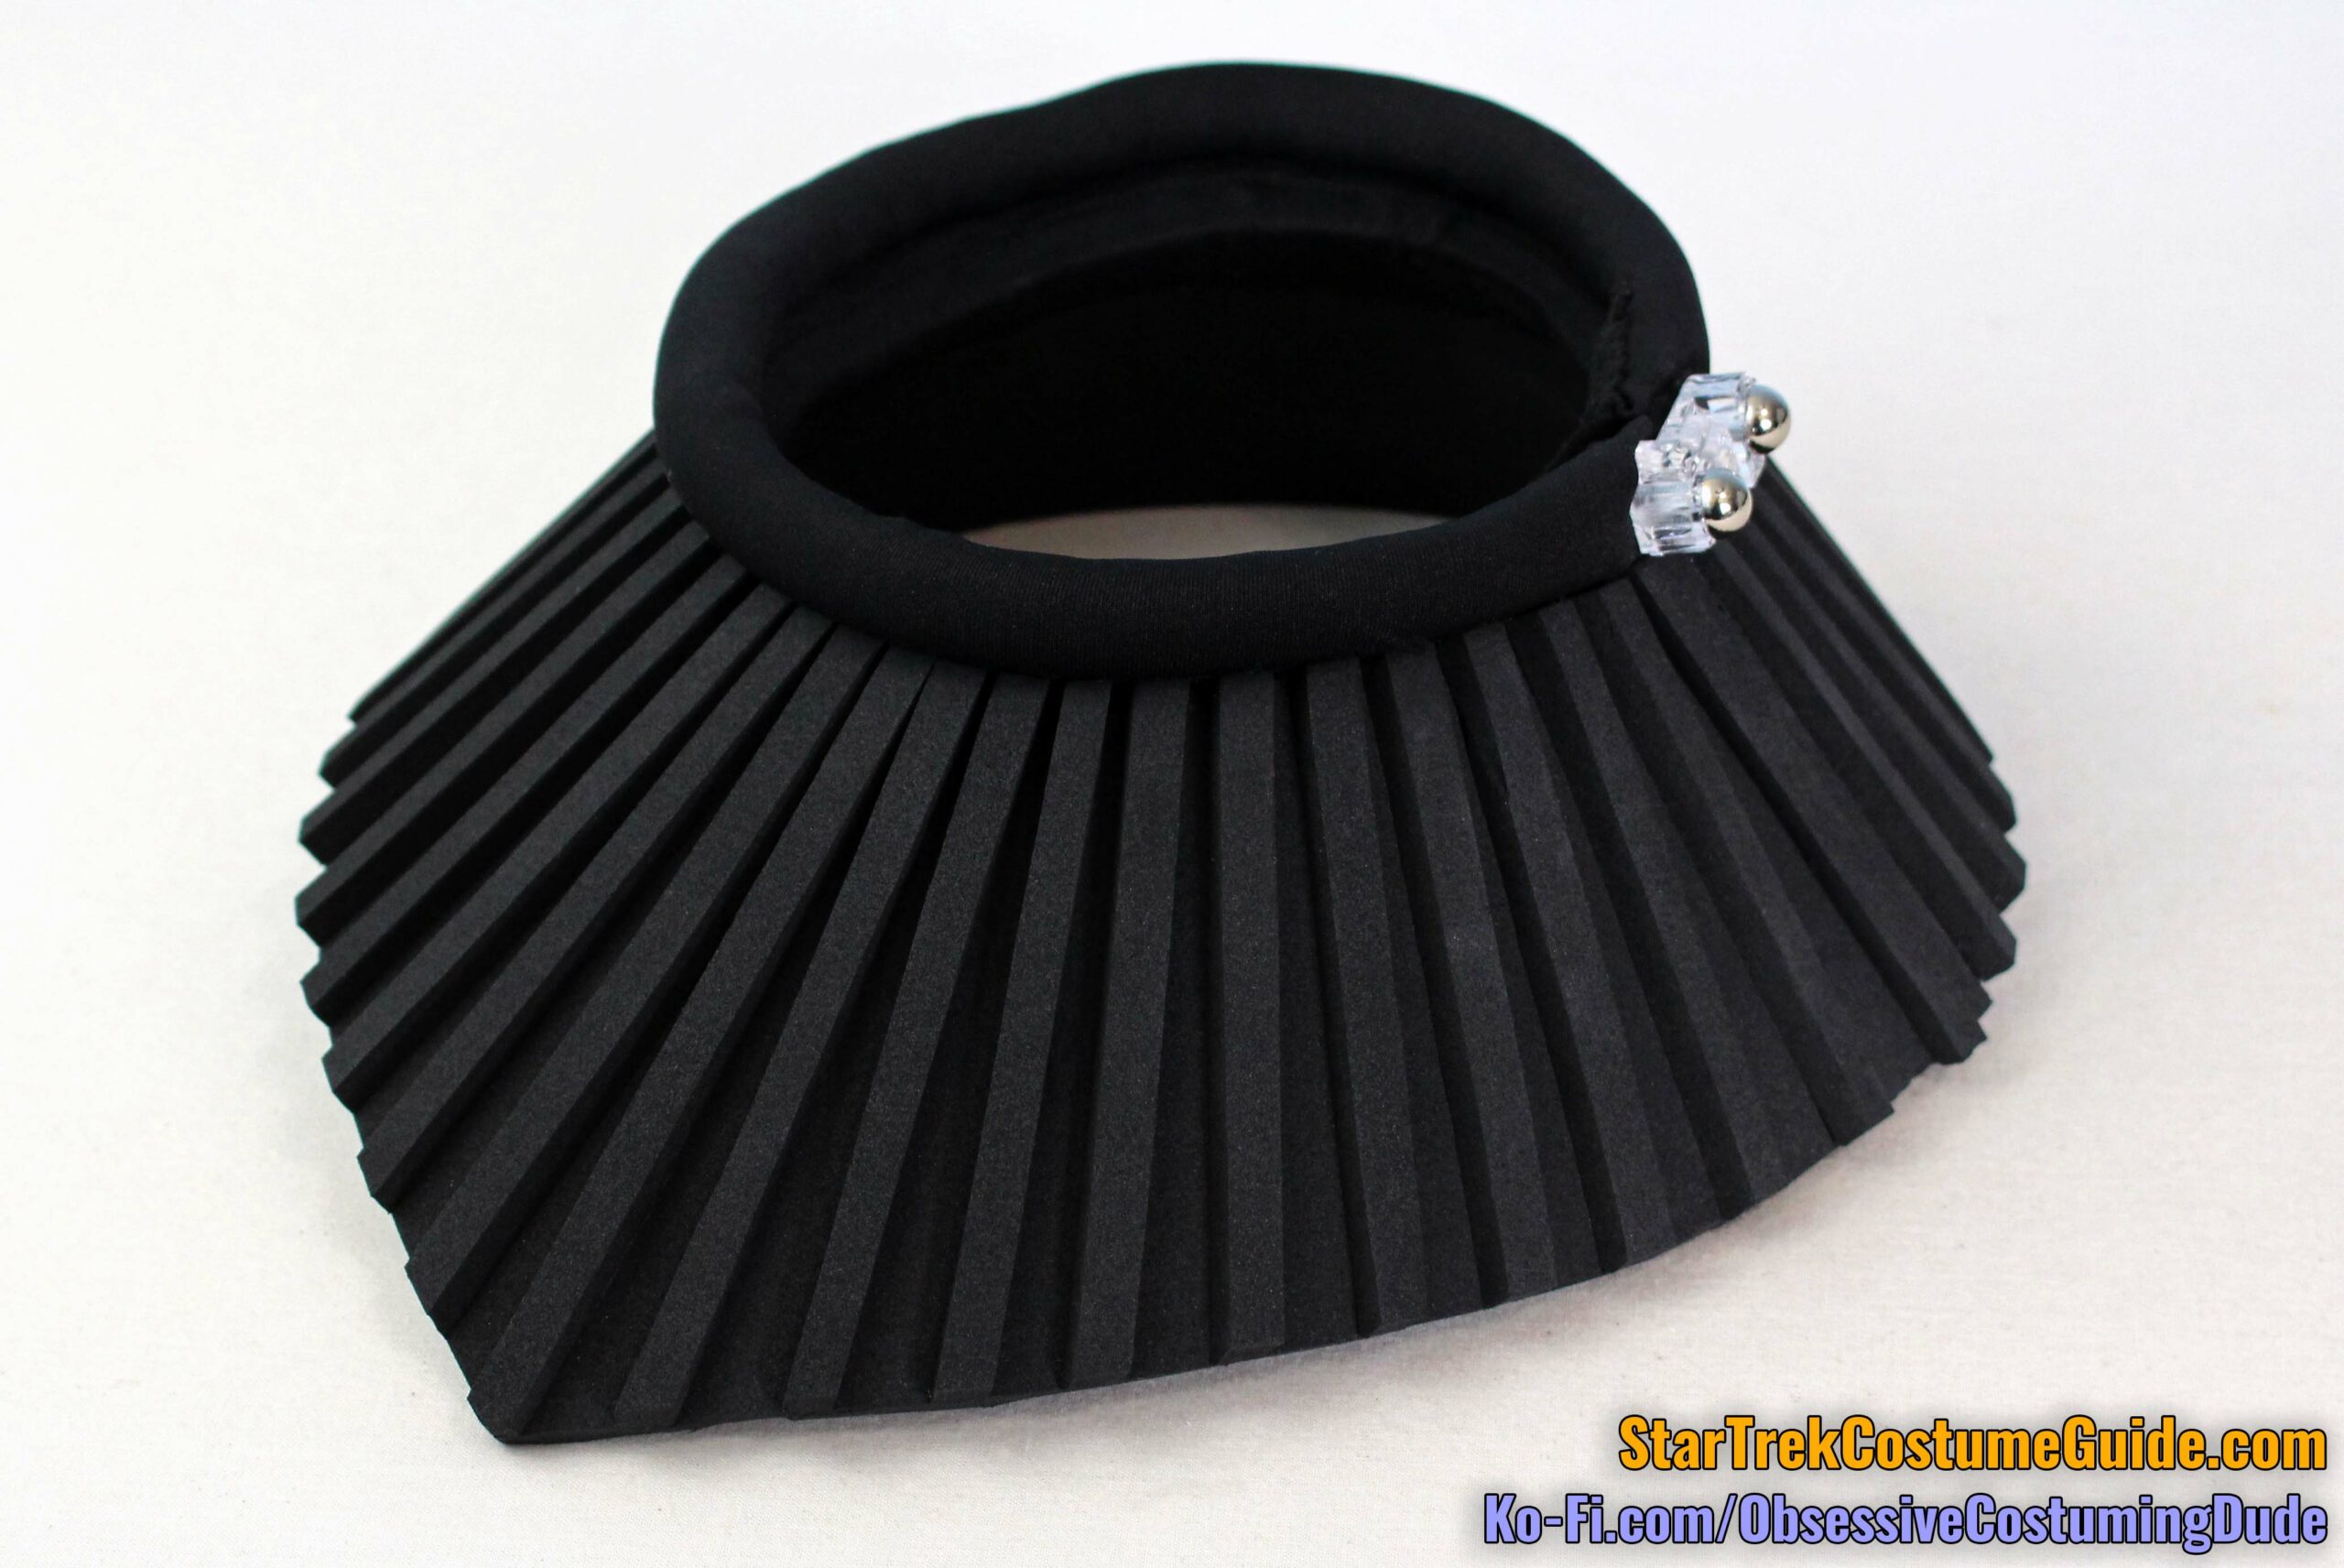
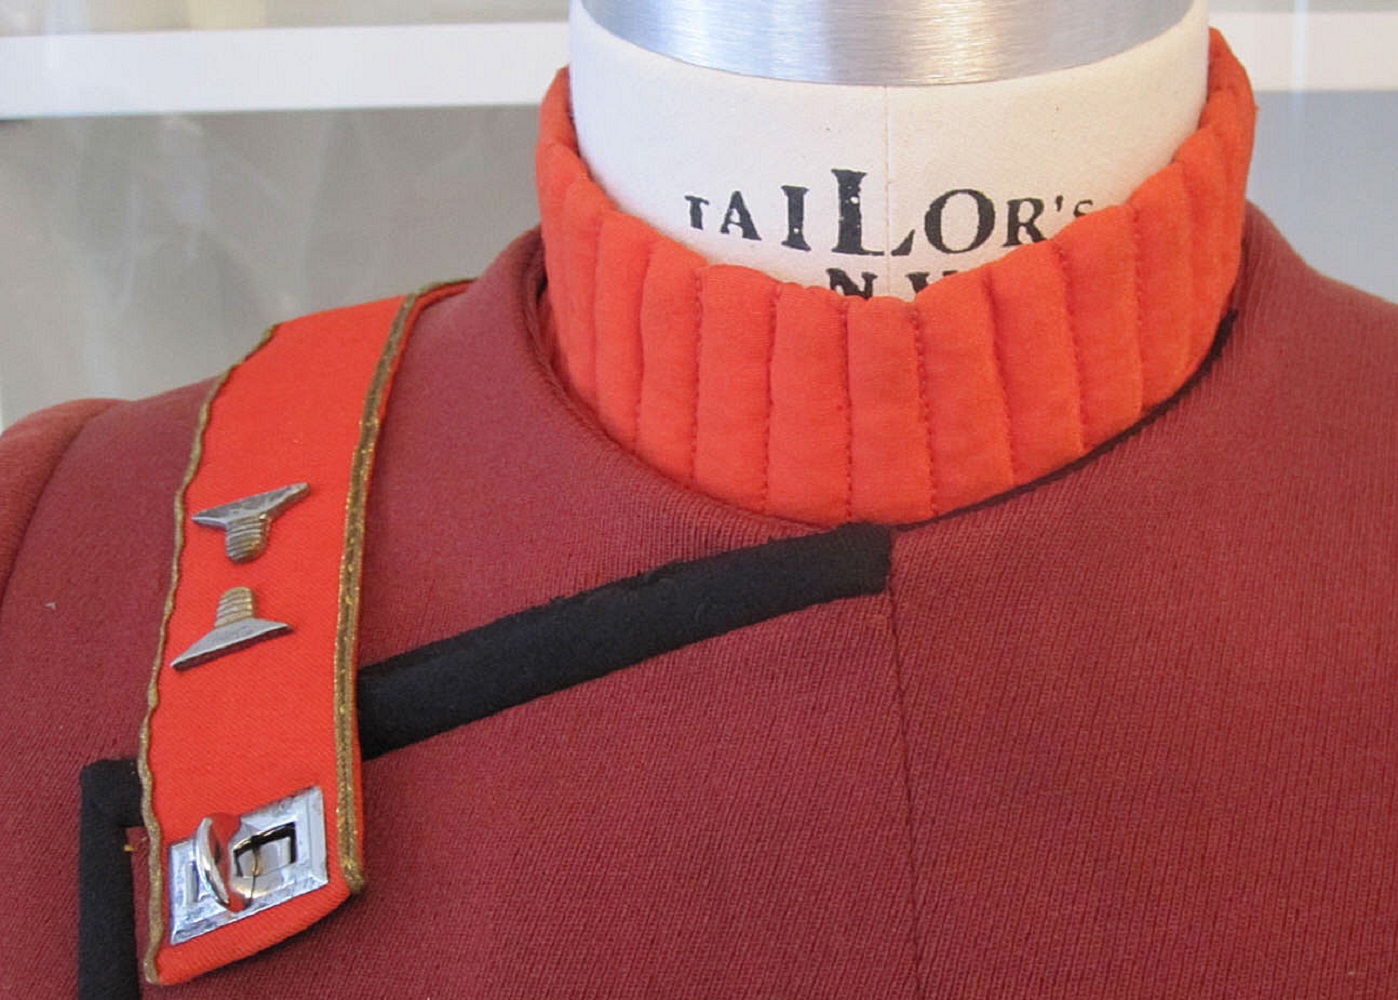
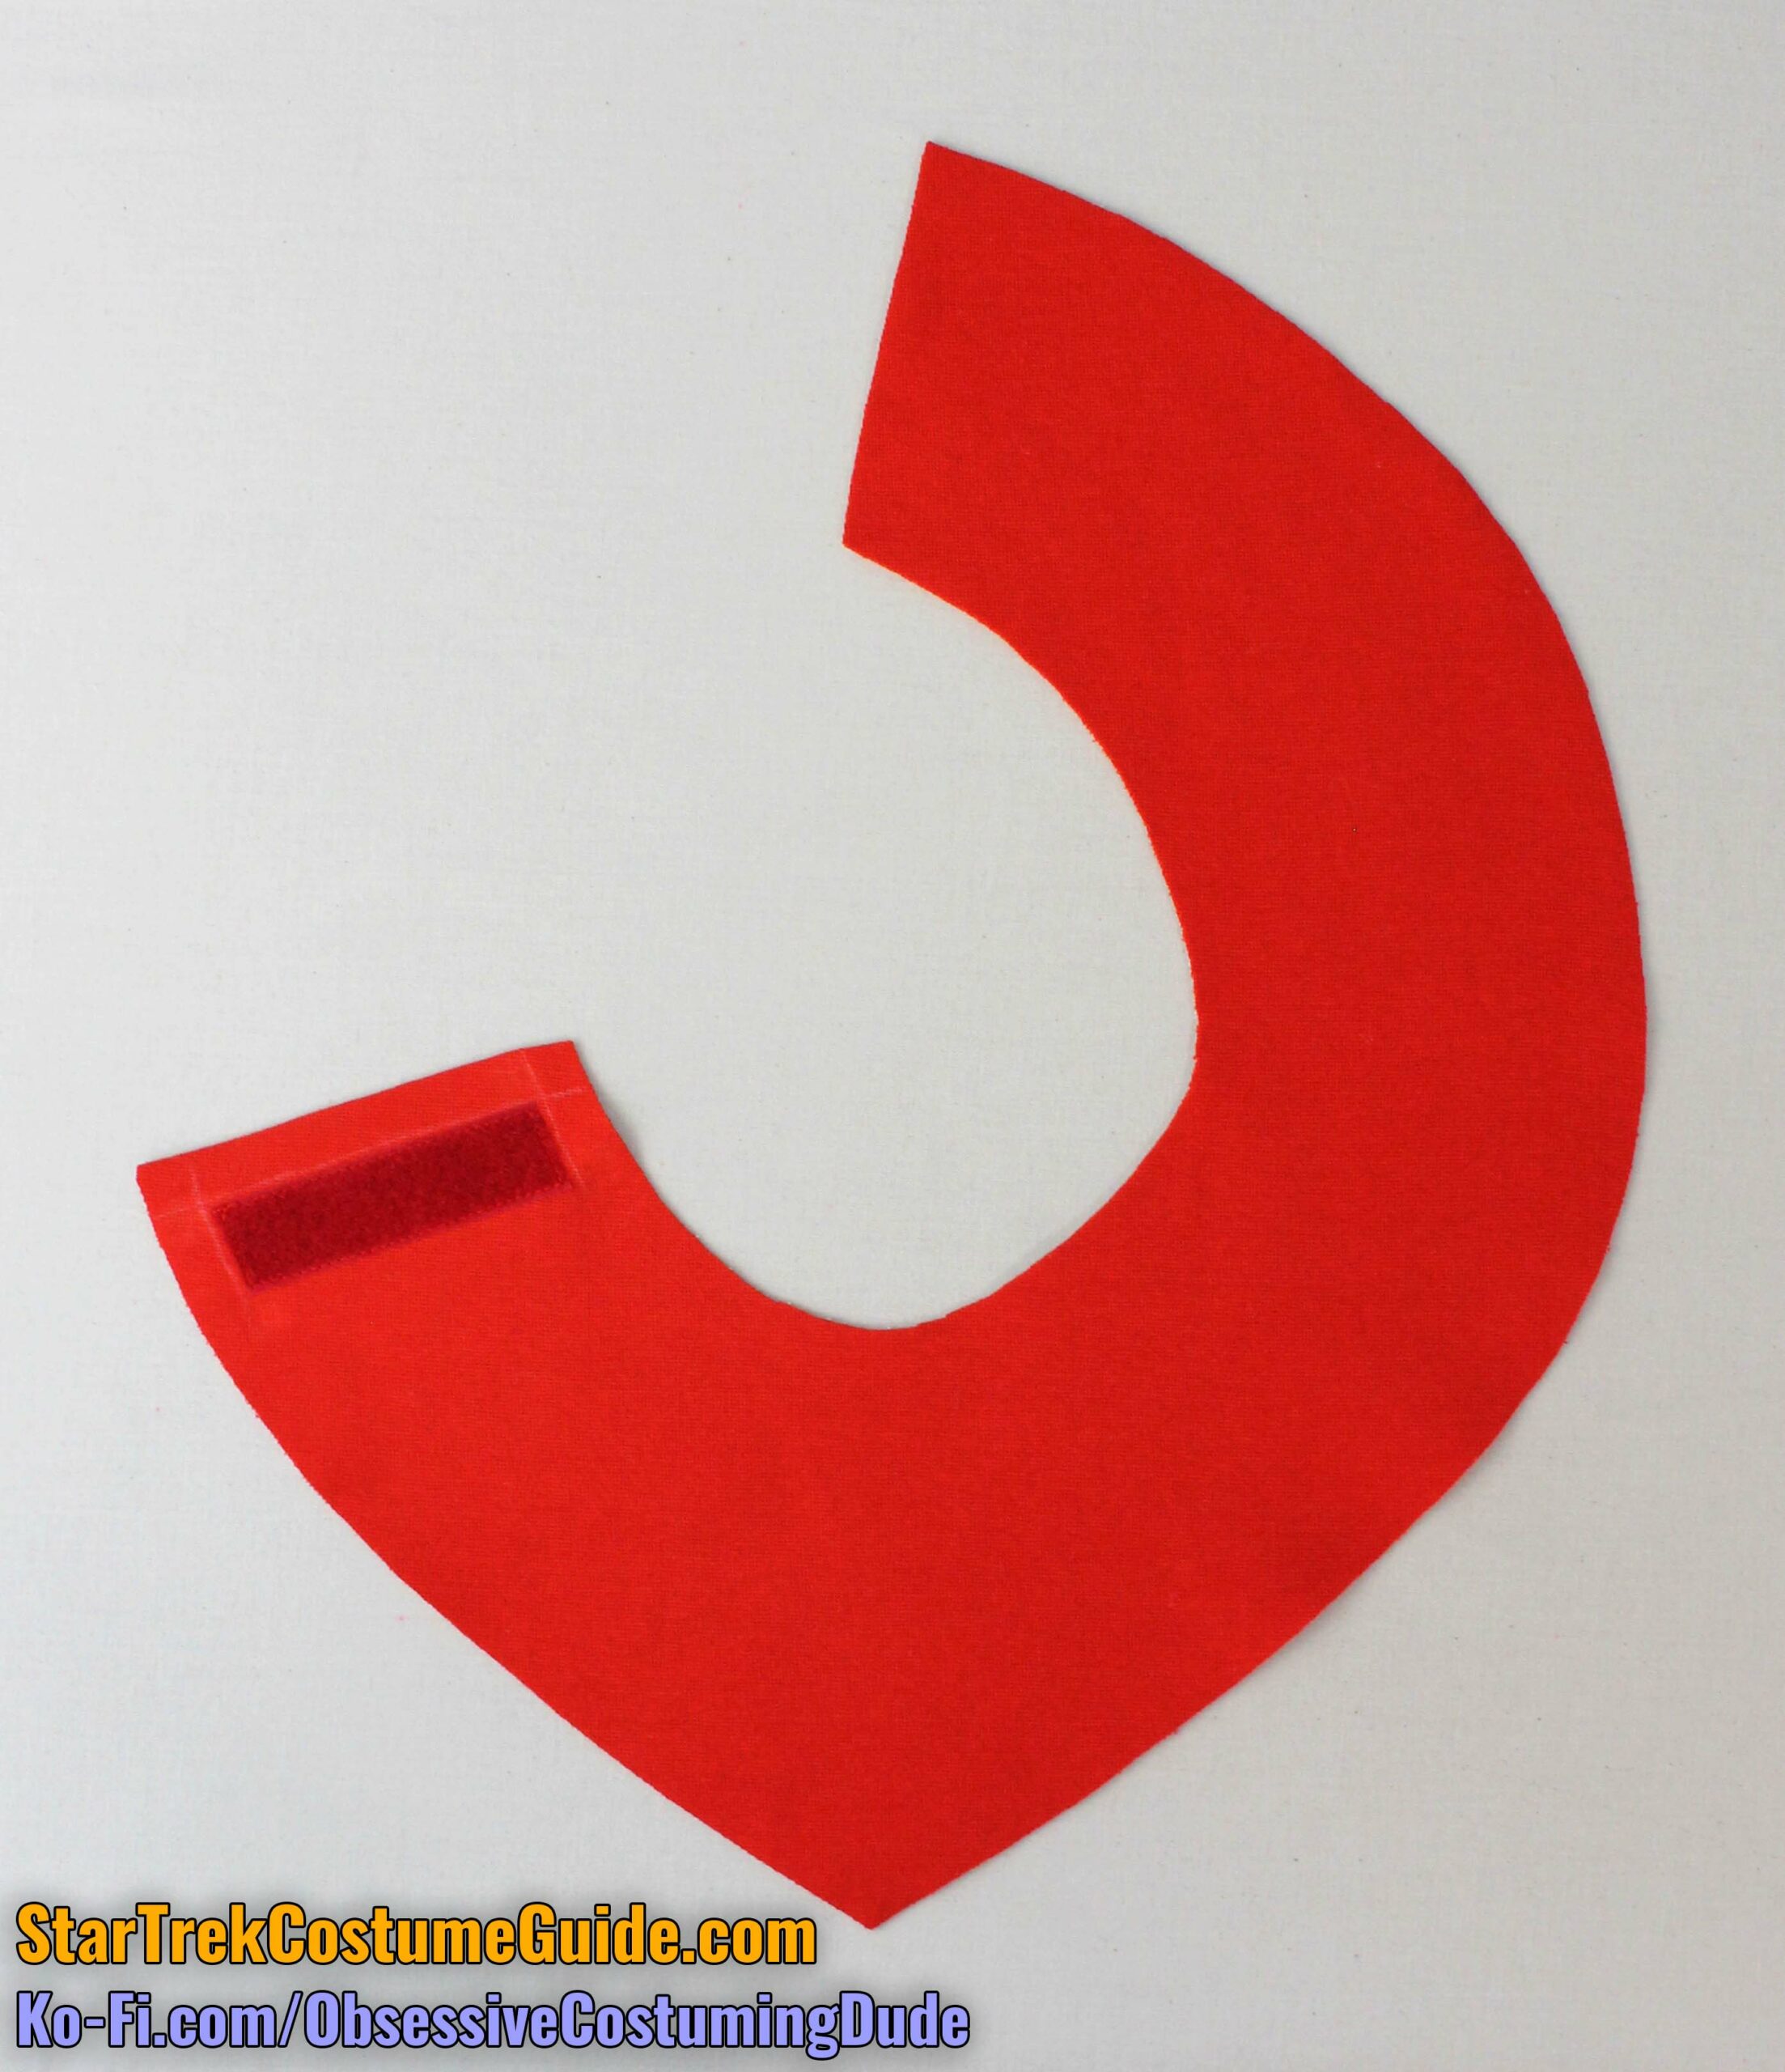
TMP and TWOK-era OFFICER/ENLISTED COLLAR
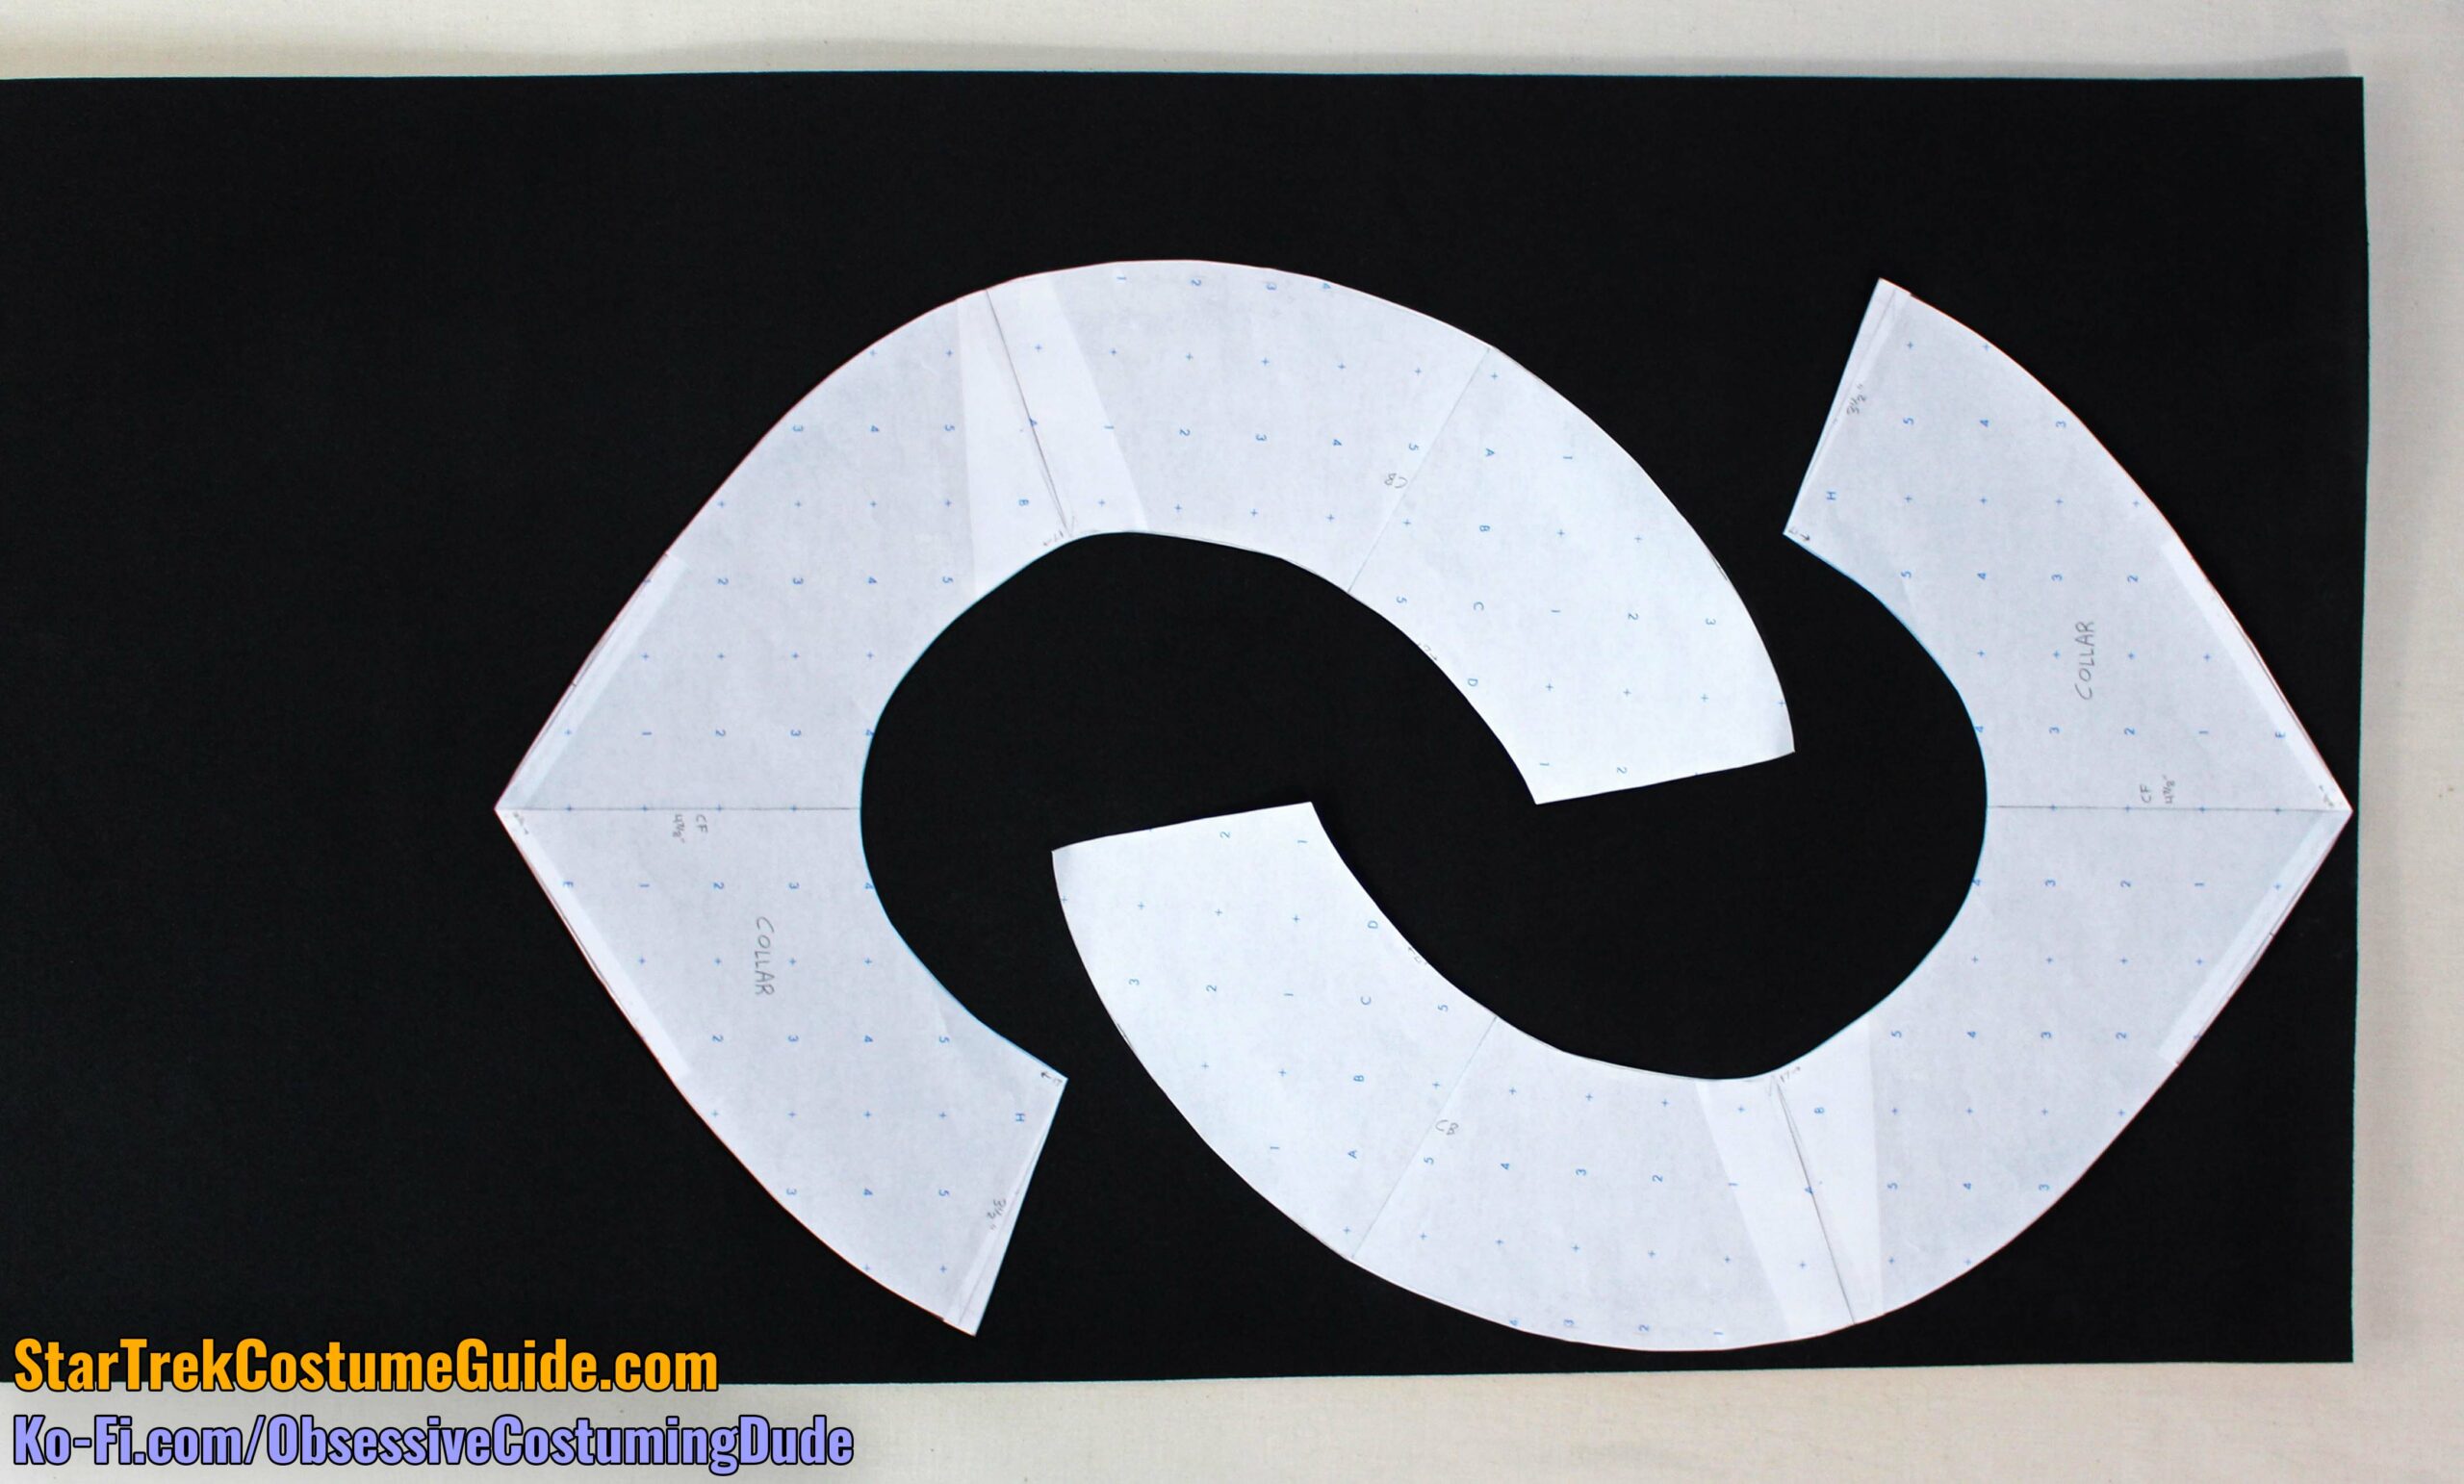
Unlike most fabrics, neoprene has no directional grain, so you can orient your collar pattern (piece A1) on the neoprene however you like to get the most use out of your sheet.
If you plan to make multiple collars (making one for practice is a good idea, if you have enough material), interlocking your collar pattern pieces is a way to make efficient use of your neoprene sheet.
For these (non-trainee) versions of the collar, there are no seam or hem allowances; the raw edges of the neoprene won’t fray and the neckline piping is the only sewing involved.
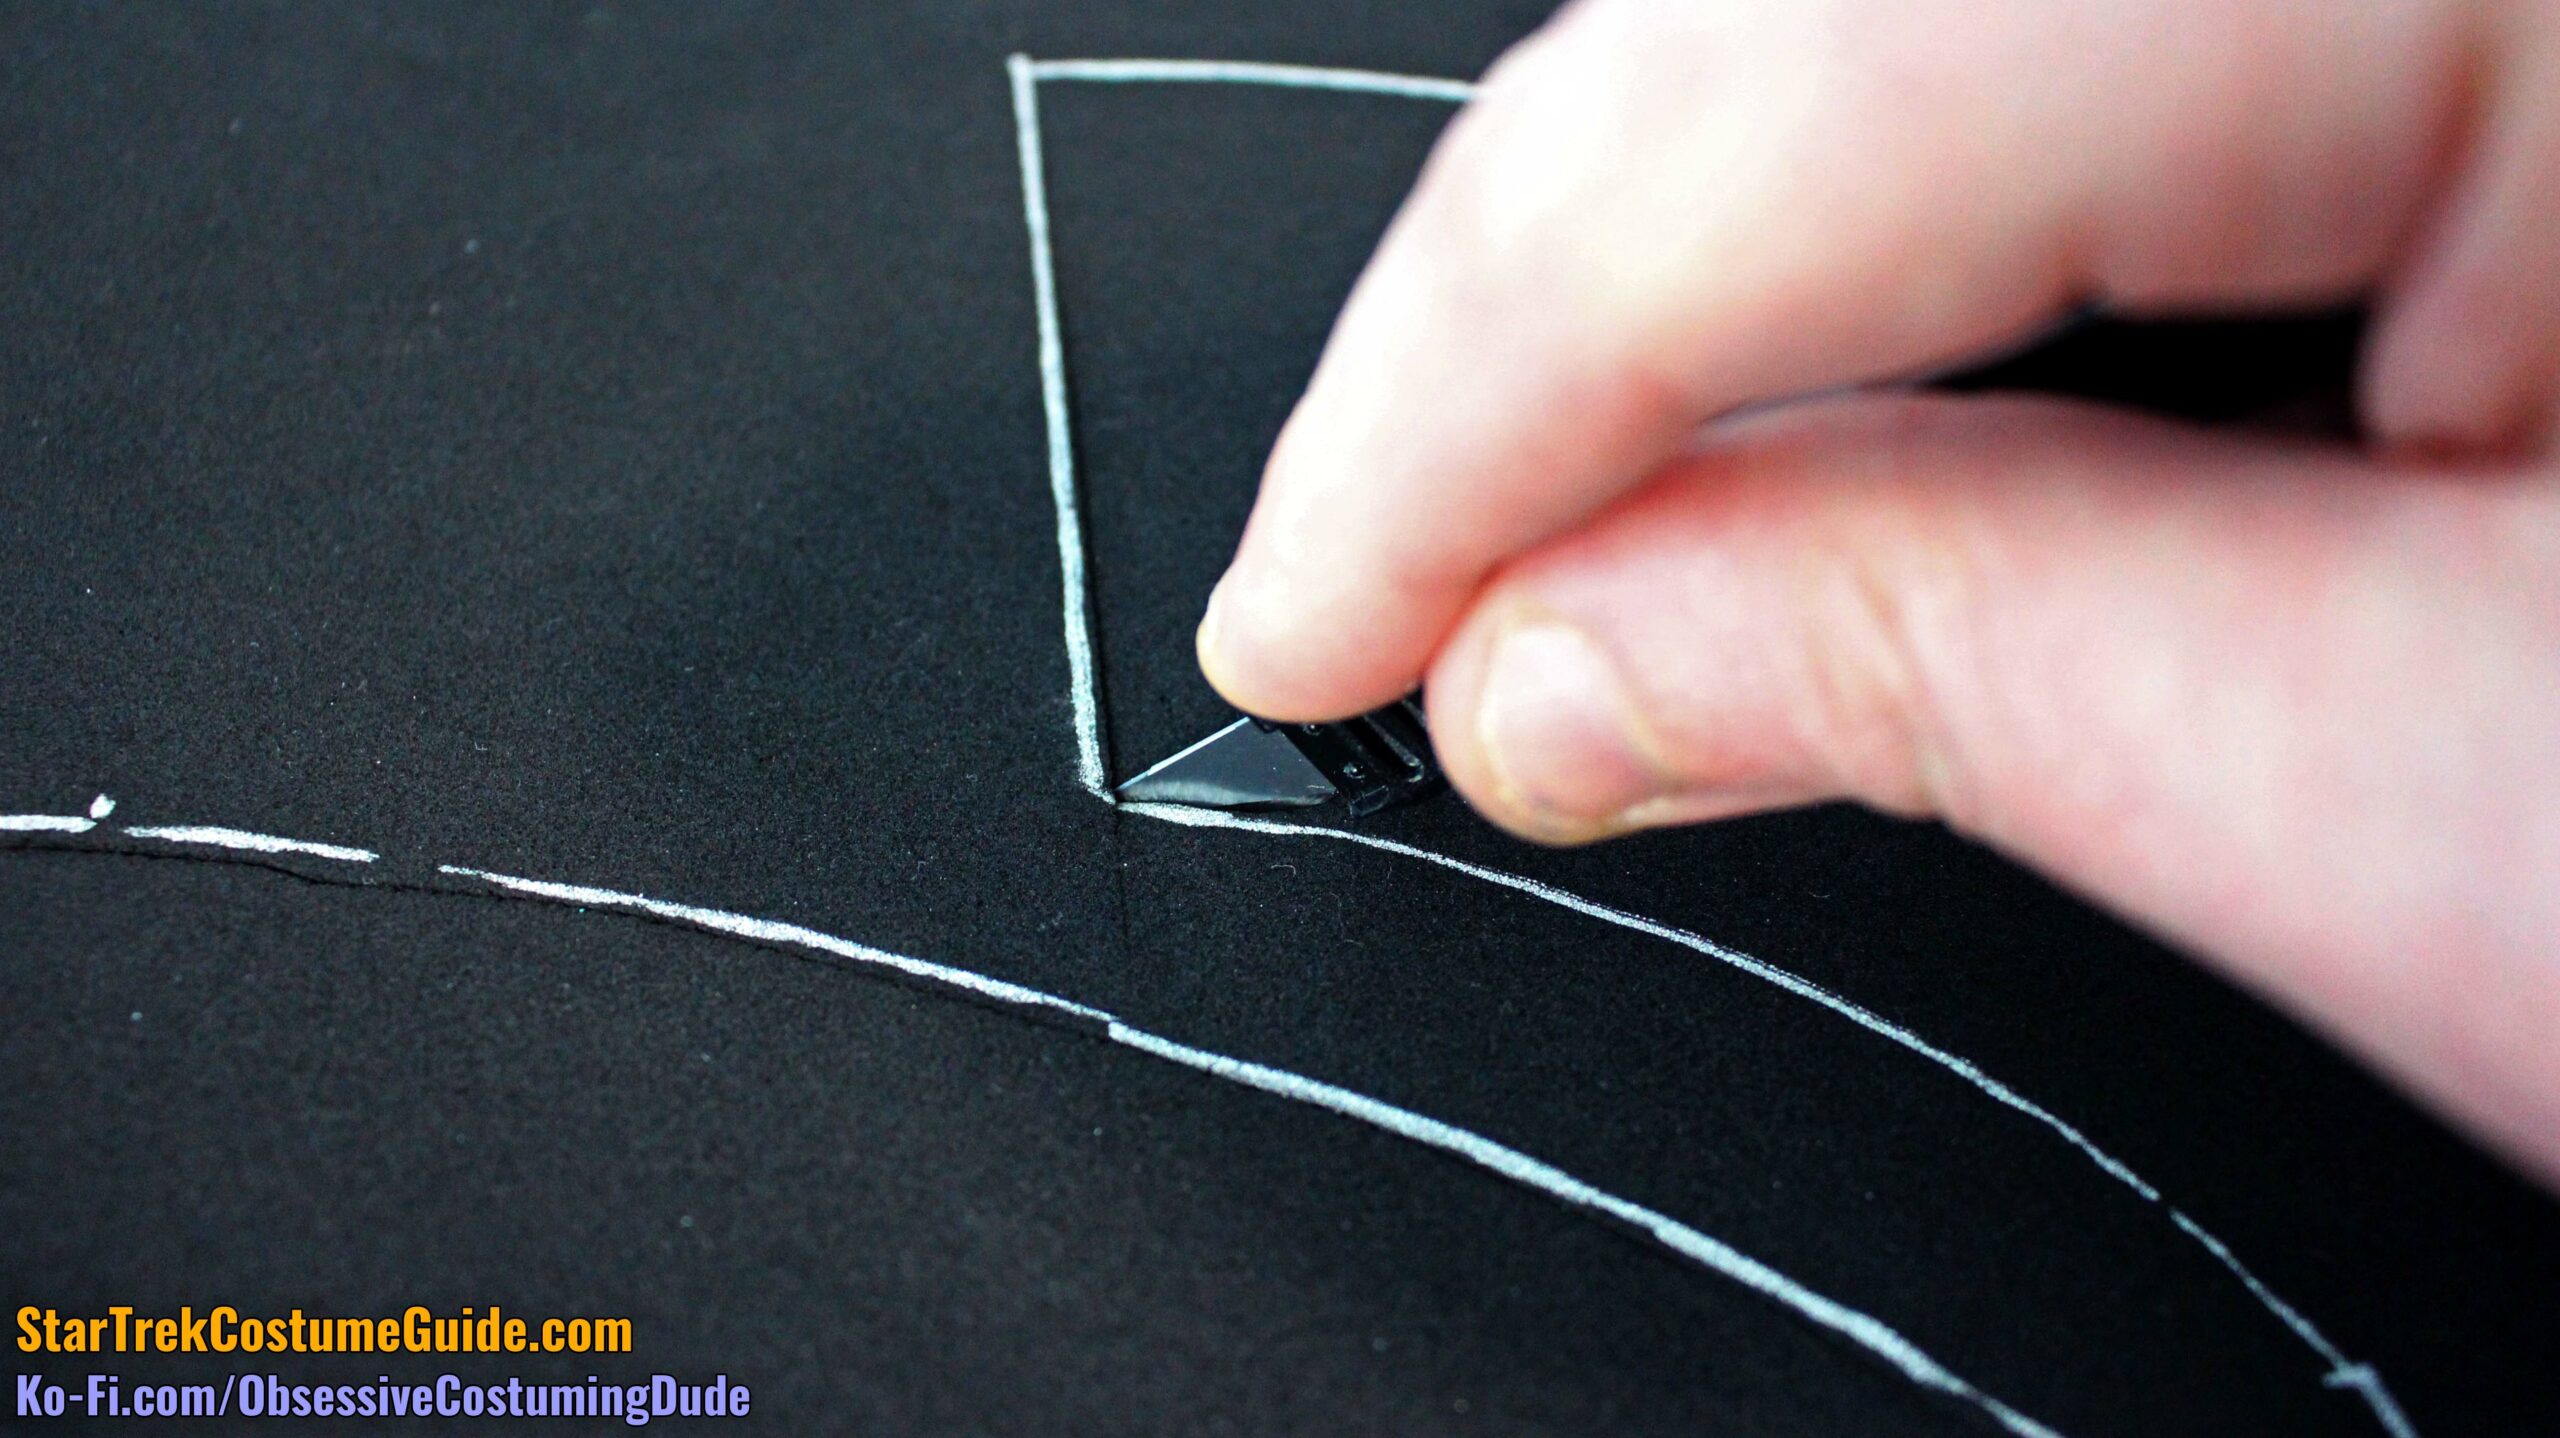
However, that does mean that the neoprene must be cleanly cut.
After some experimentation, I found the best way to achieve a smooth cut on the neoprene was to trace the collar pattern with a metallic silver Sharpie (although any marker that leaves a clear outline on the neoprene should work), then slowly cut inside of the traced outline with a sharp X-acto knife over a cutting mat.
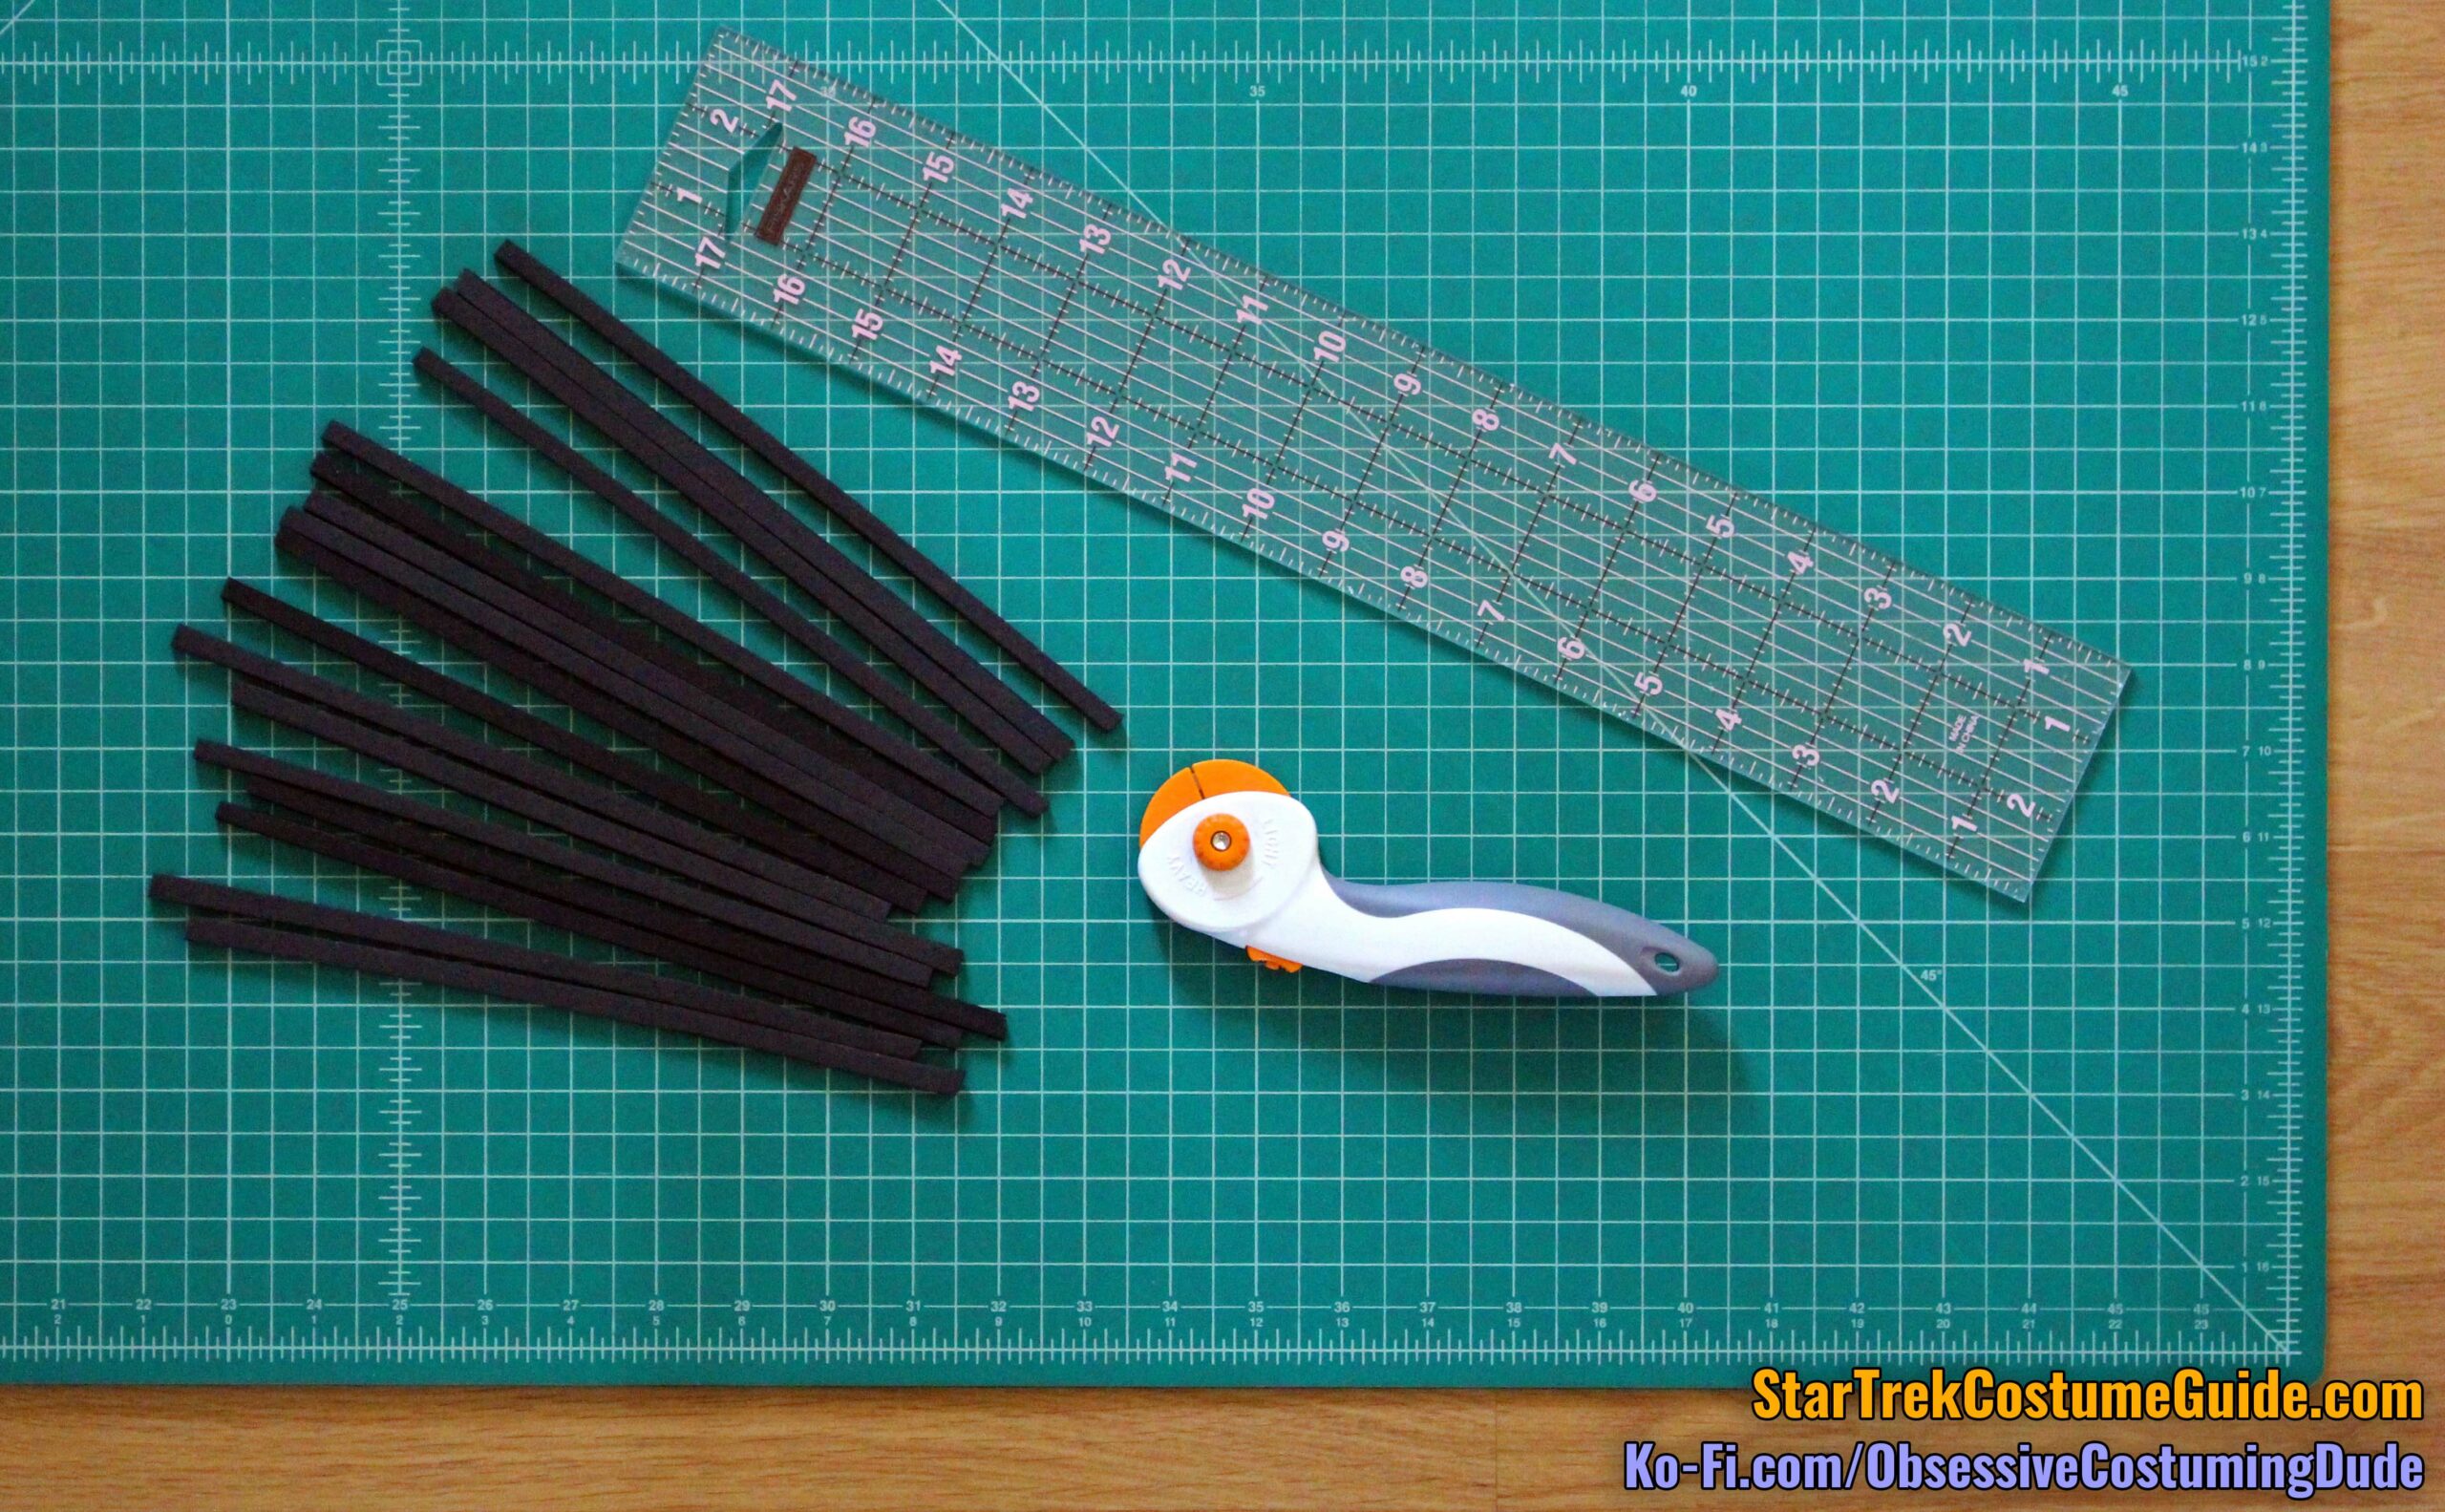
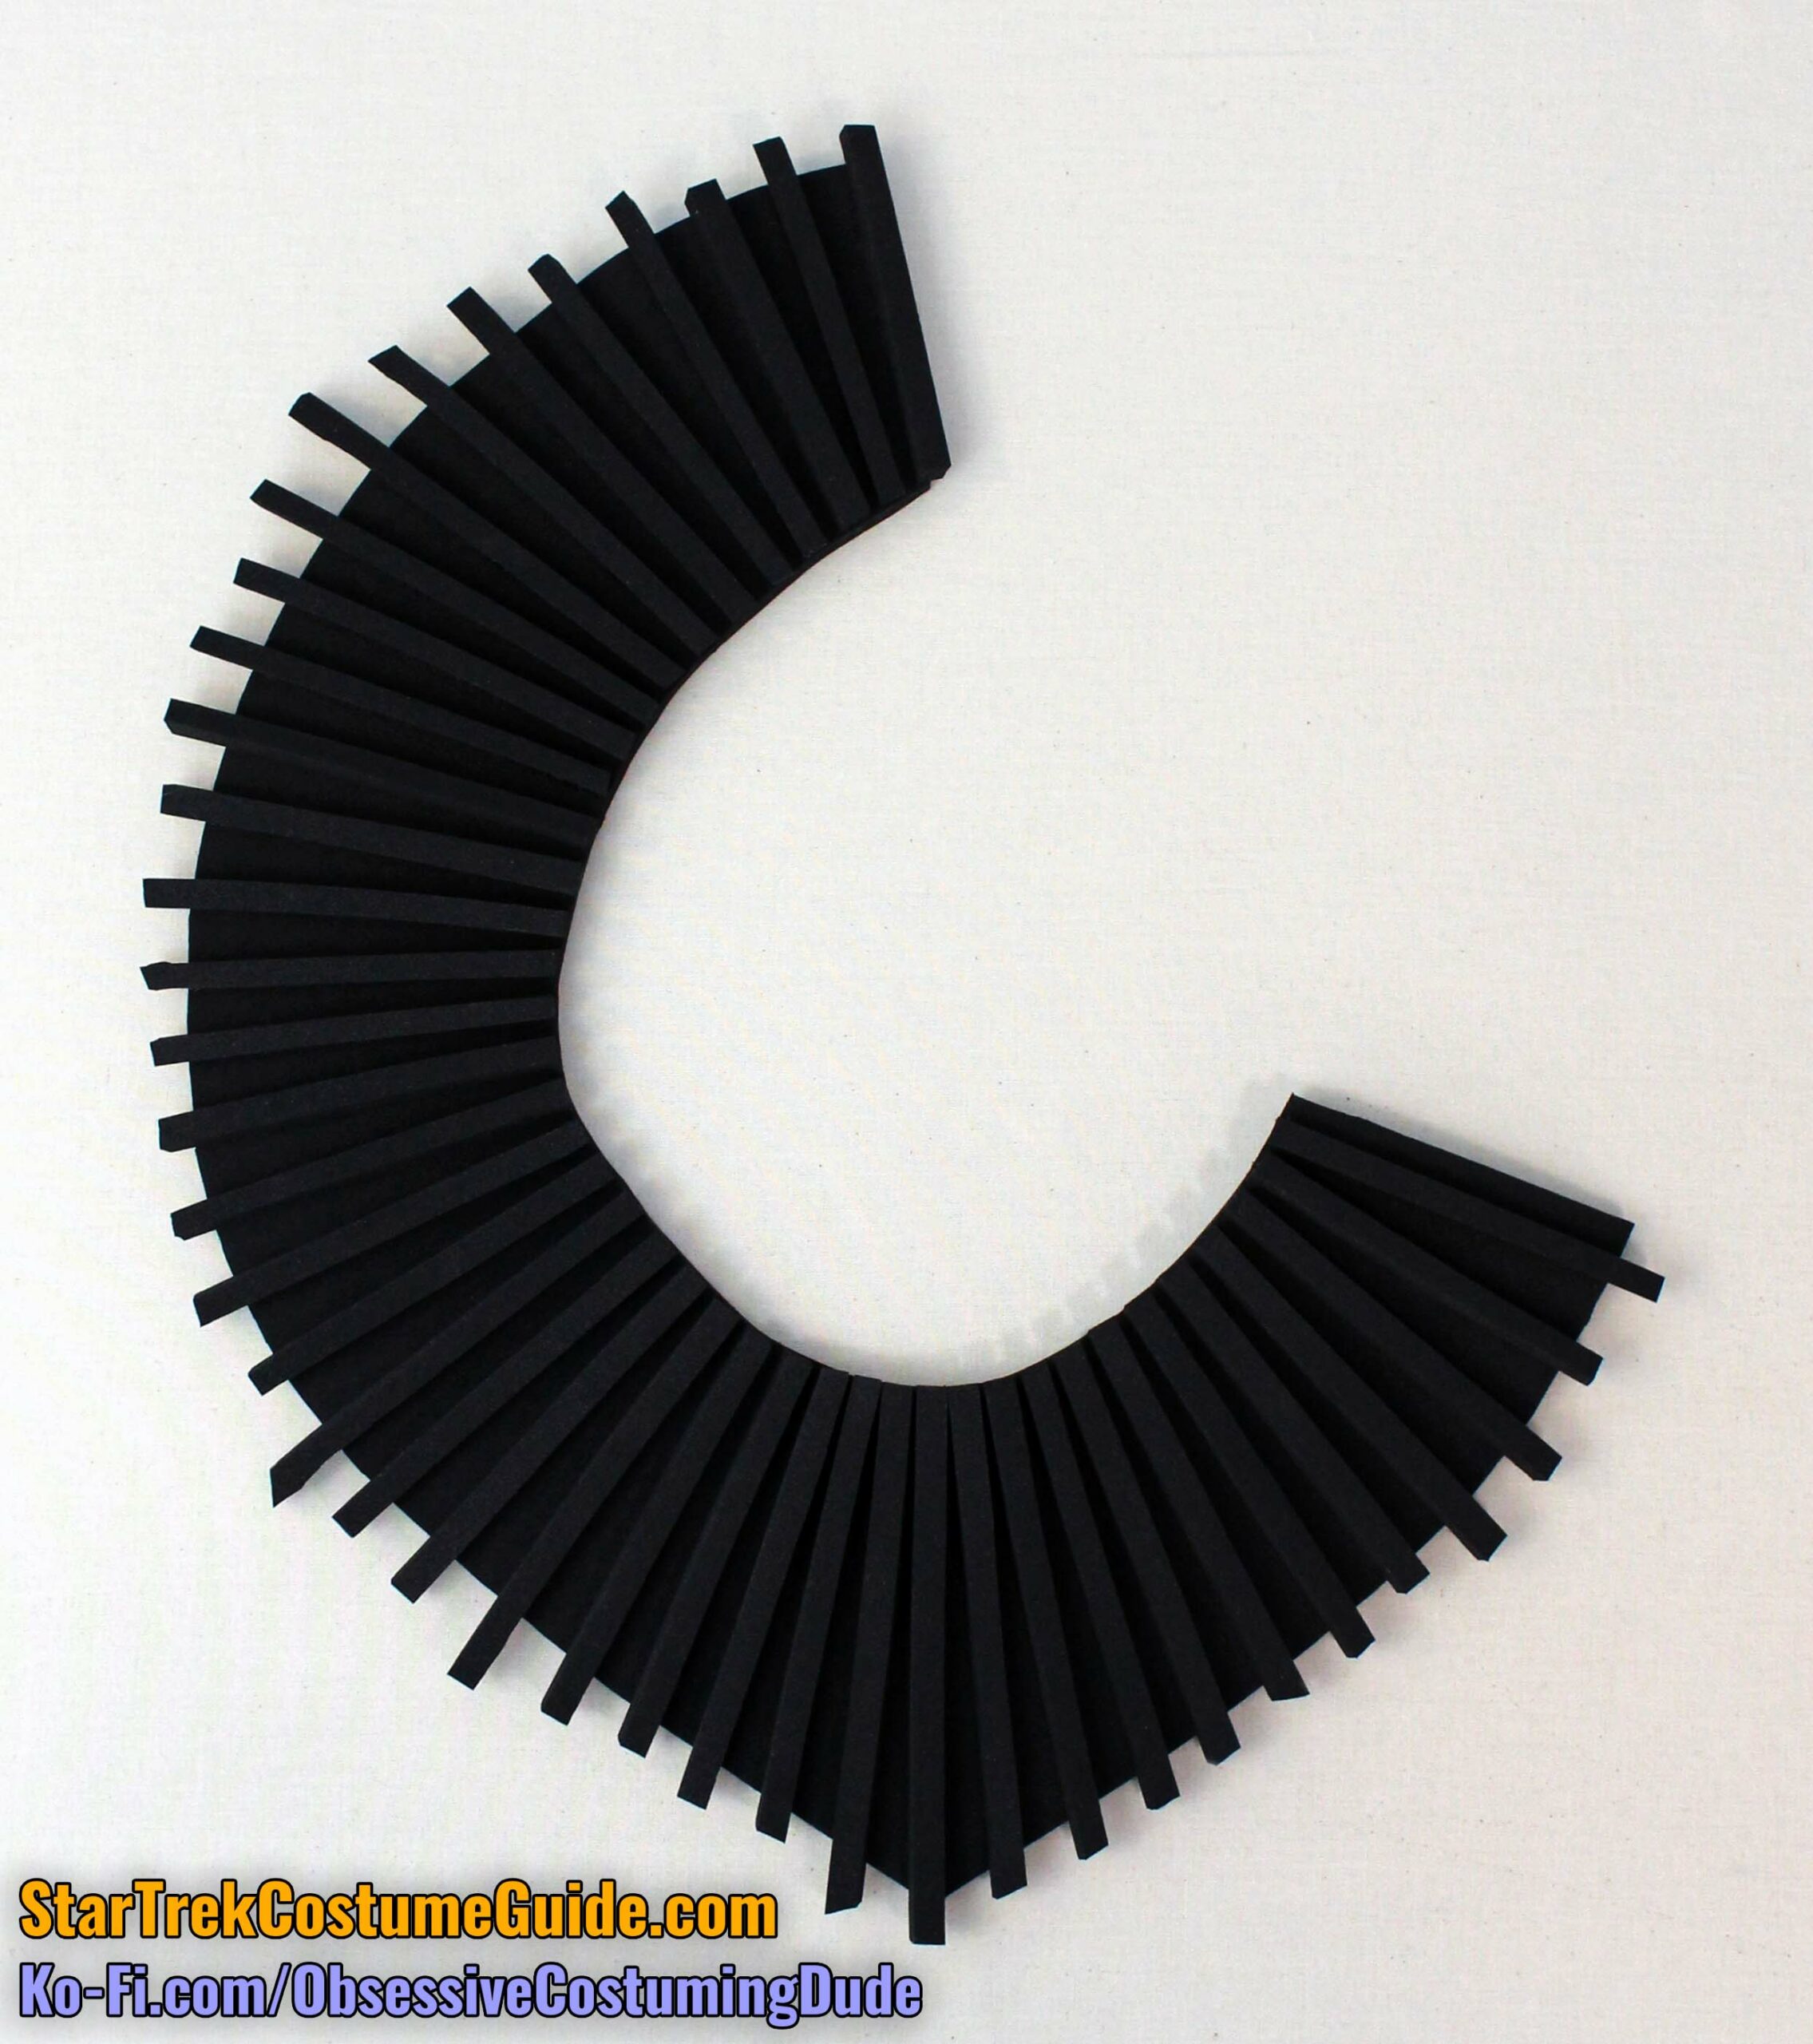
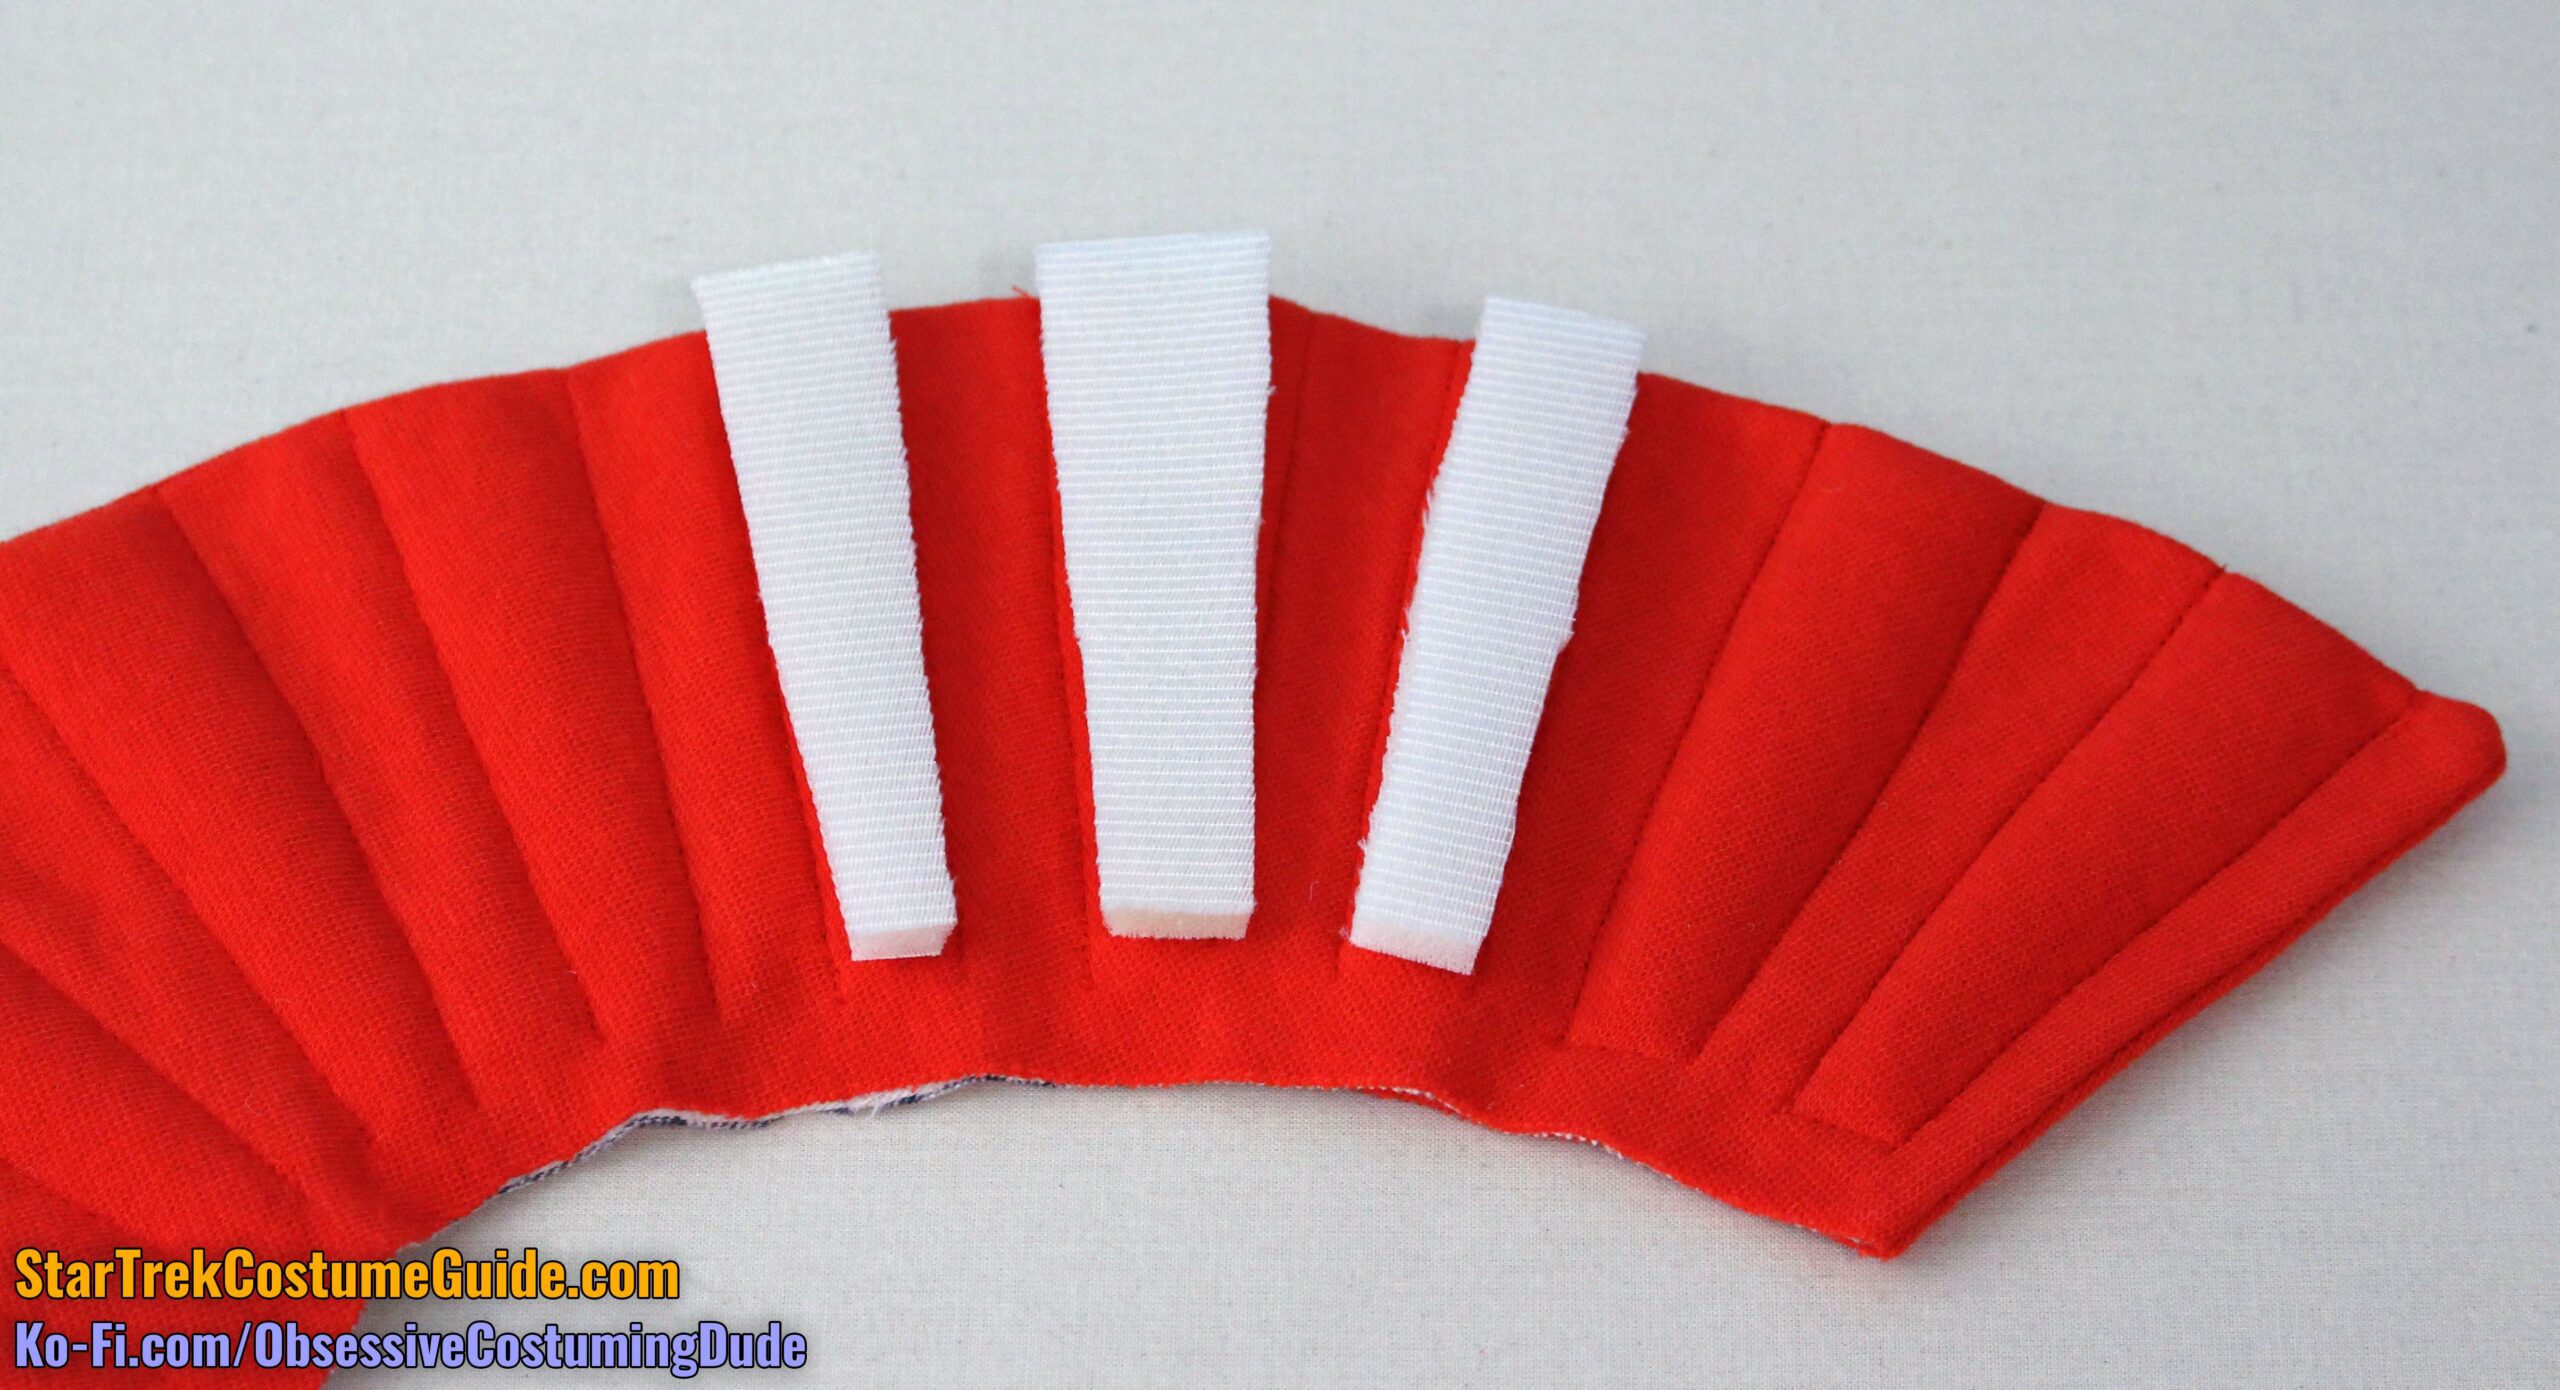
In addition to the collar itself, you’ll need a bunch of ¼” wide neoprene strips.
These can be cut in any direction, and you can use the larger scraps from where you cut around your collar, too.
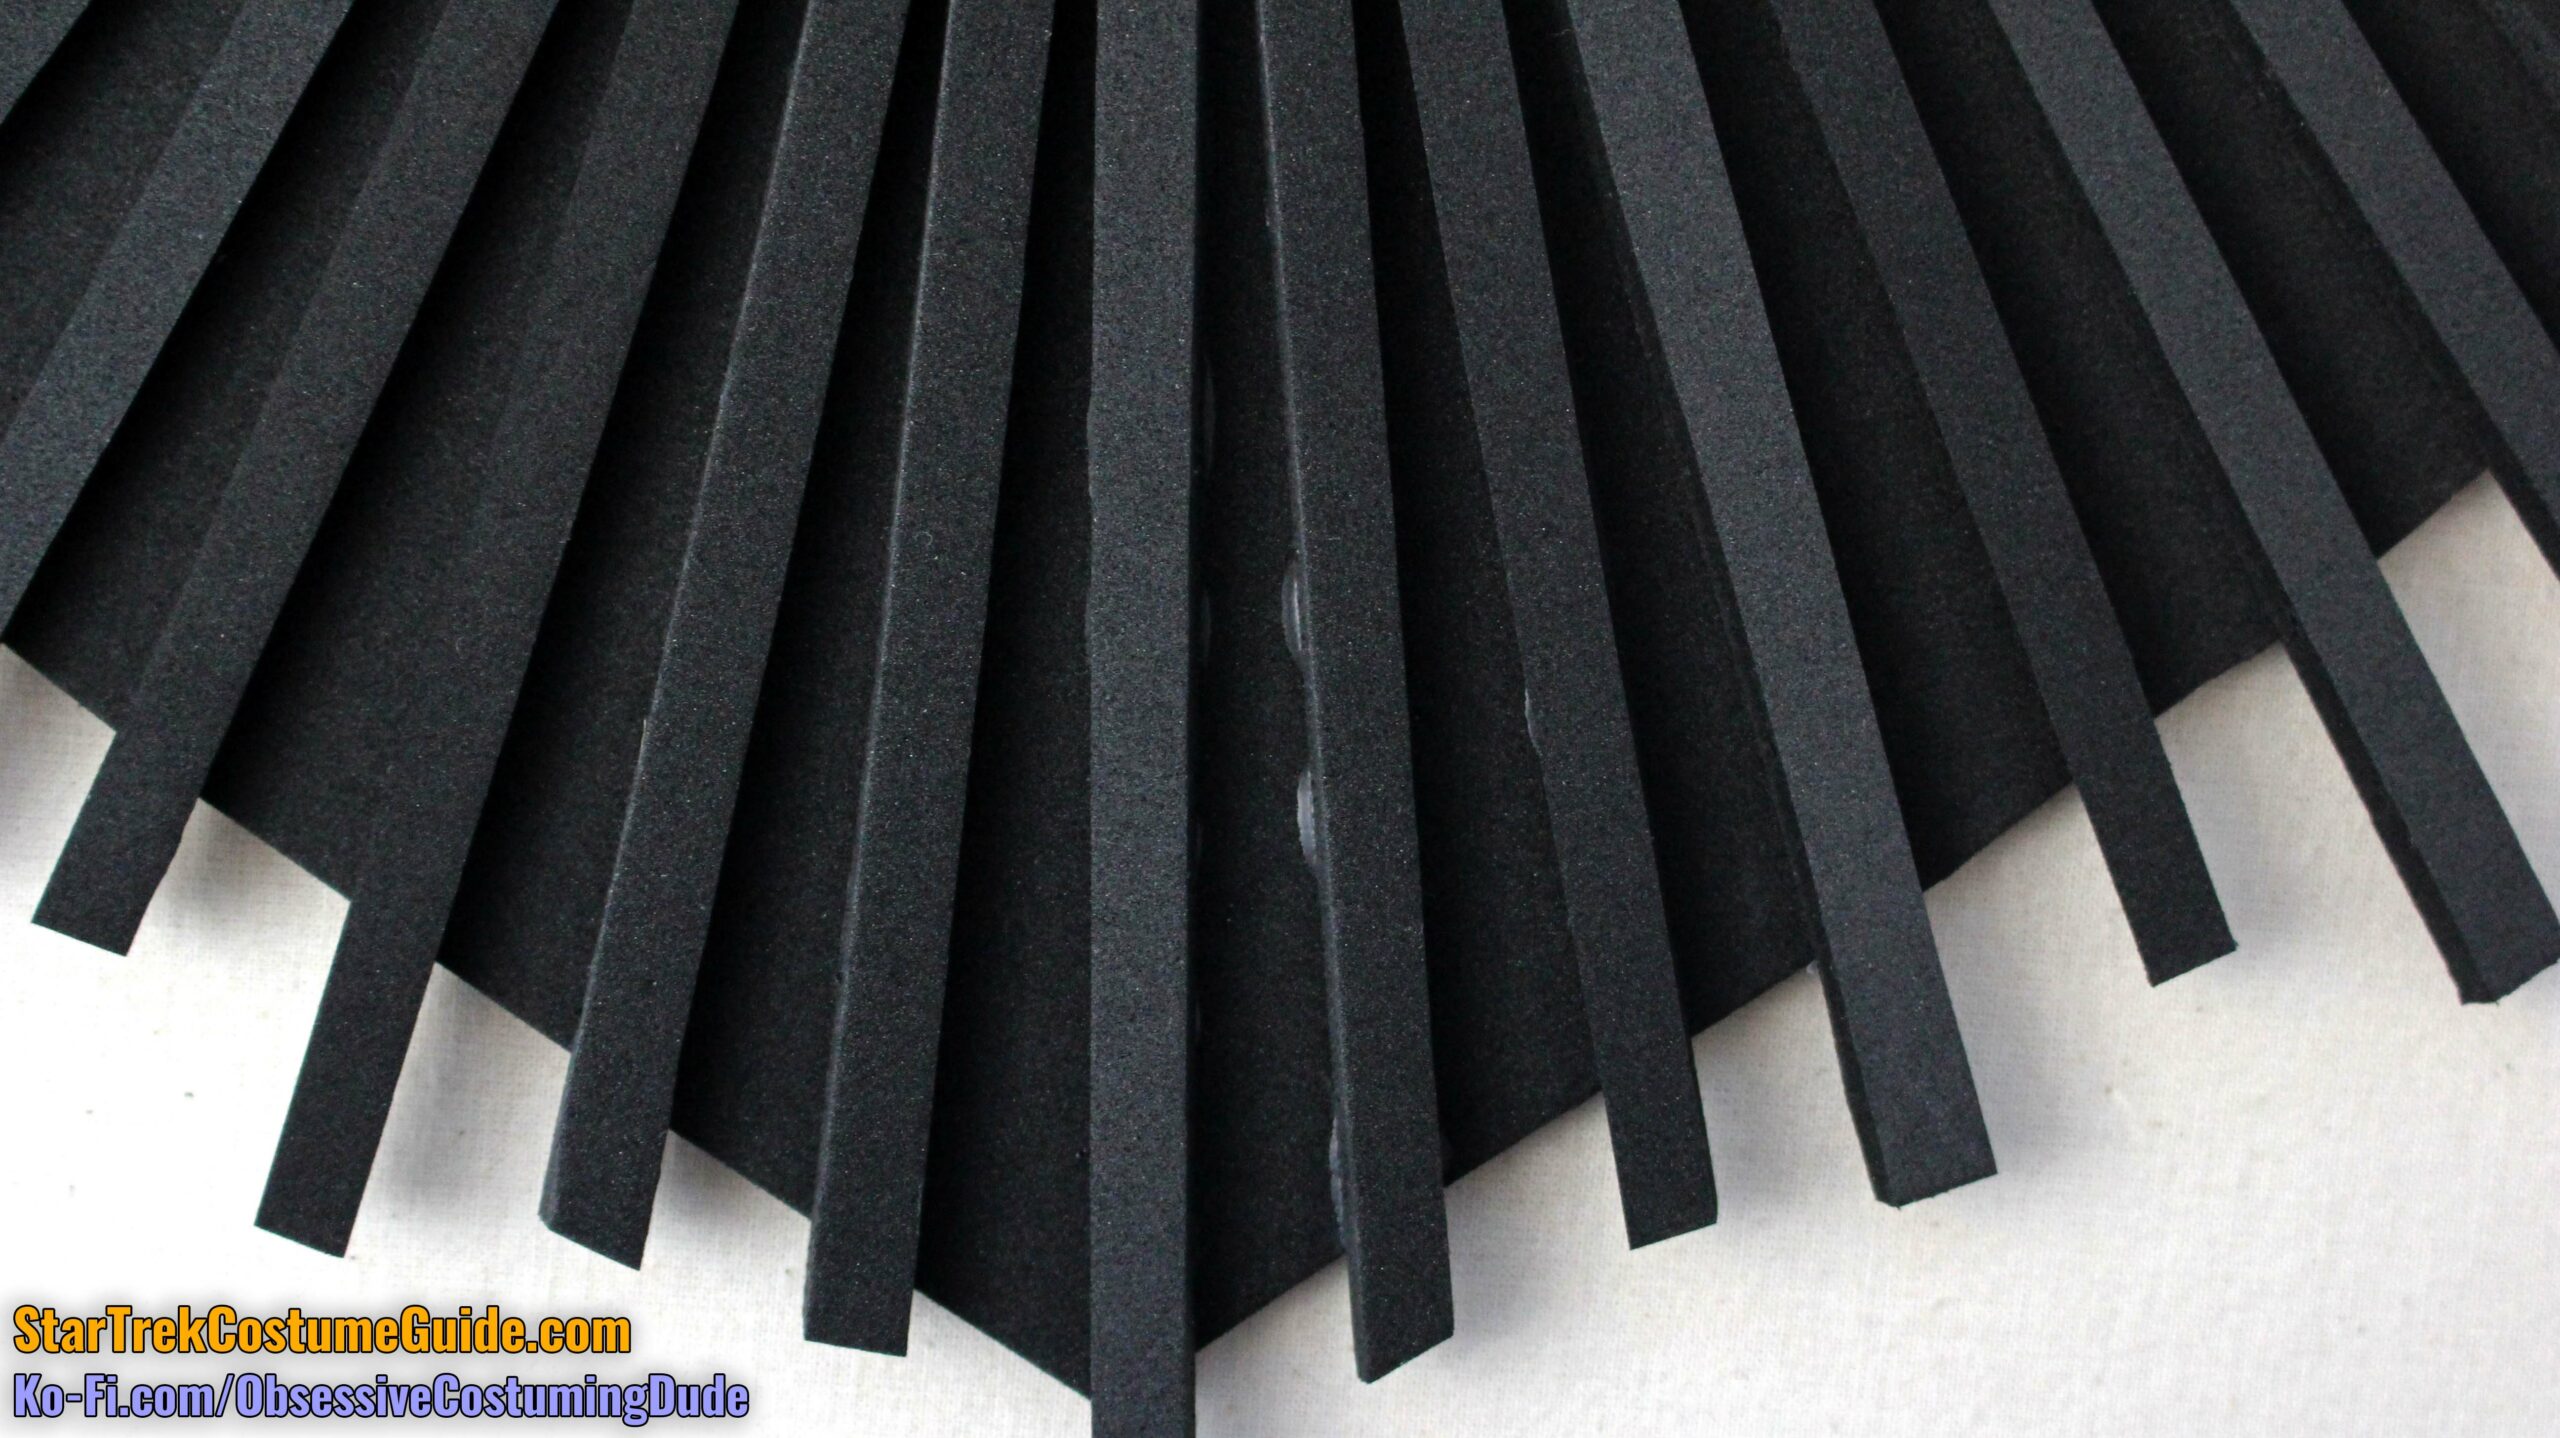
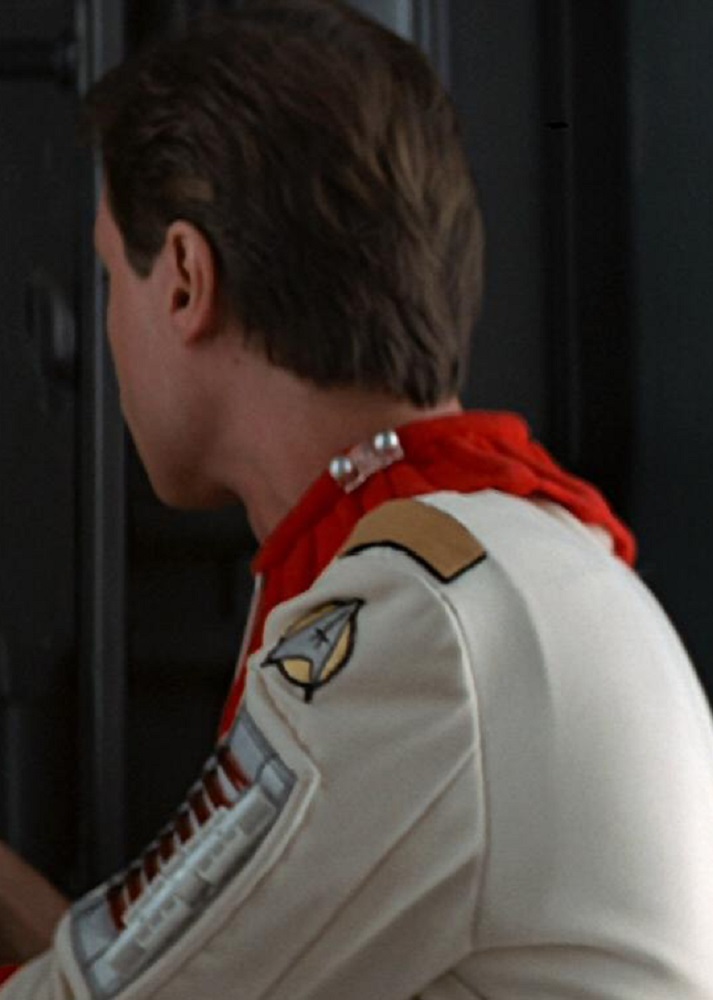
As you might recall from my screen-used engineering radiation suit examination, there doesn’t appear to have been much rhyme or reason to the concentration or positioning of the ¼” strips along the collar, except that the ends were generally closer together along the neckline and flared outward a bit toward the lower edge.
So position them however looks best to you and carefully apply a thin strand of glue along the underside of each strip, one by one, using the E6000 black glue.
I suggest cutting your strips so they’re slightly longer than the collar itself and extend beyond the lower edge.
TIP: Practice applying a thin strand of glue to a few spare strips and attaching them to neoprene scraps to get a feel for how much to safely use. (It doesn’t take much.) Also, only use quick, minimal pressure when positioning the glued strips onto the collar, to avoid glue oozing out from underneath.
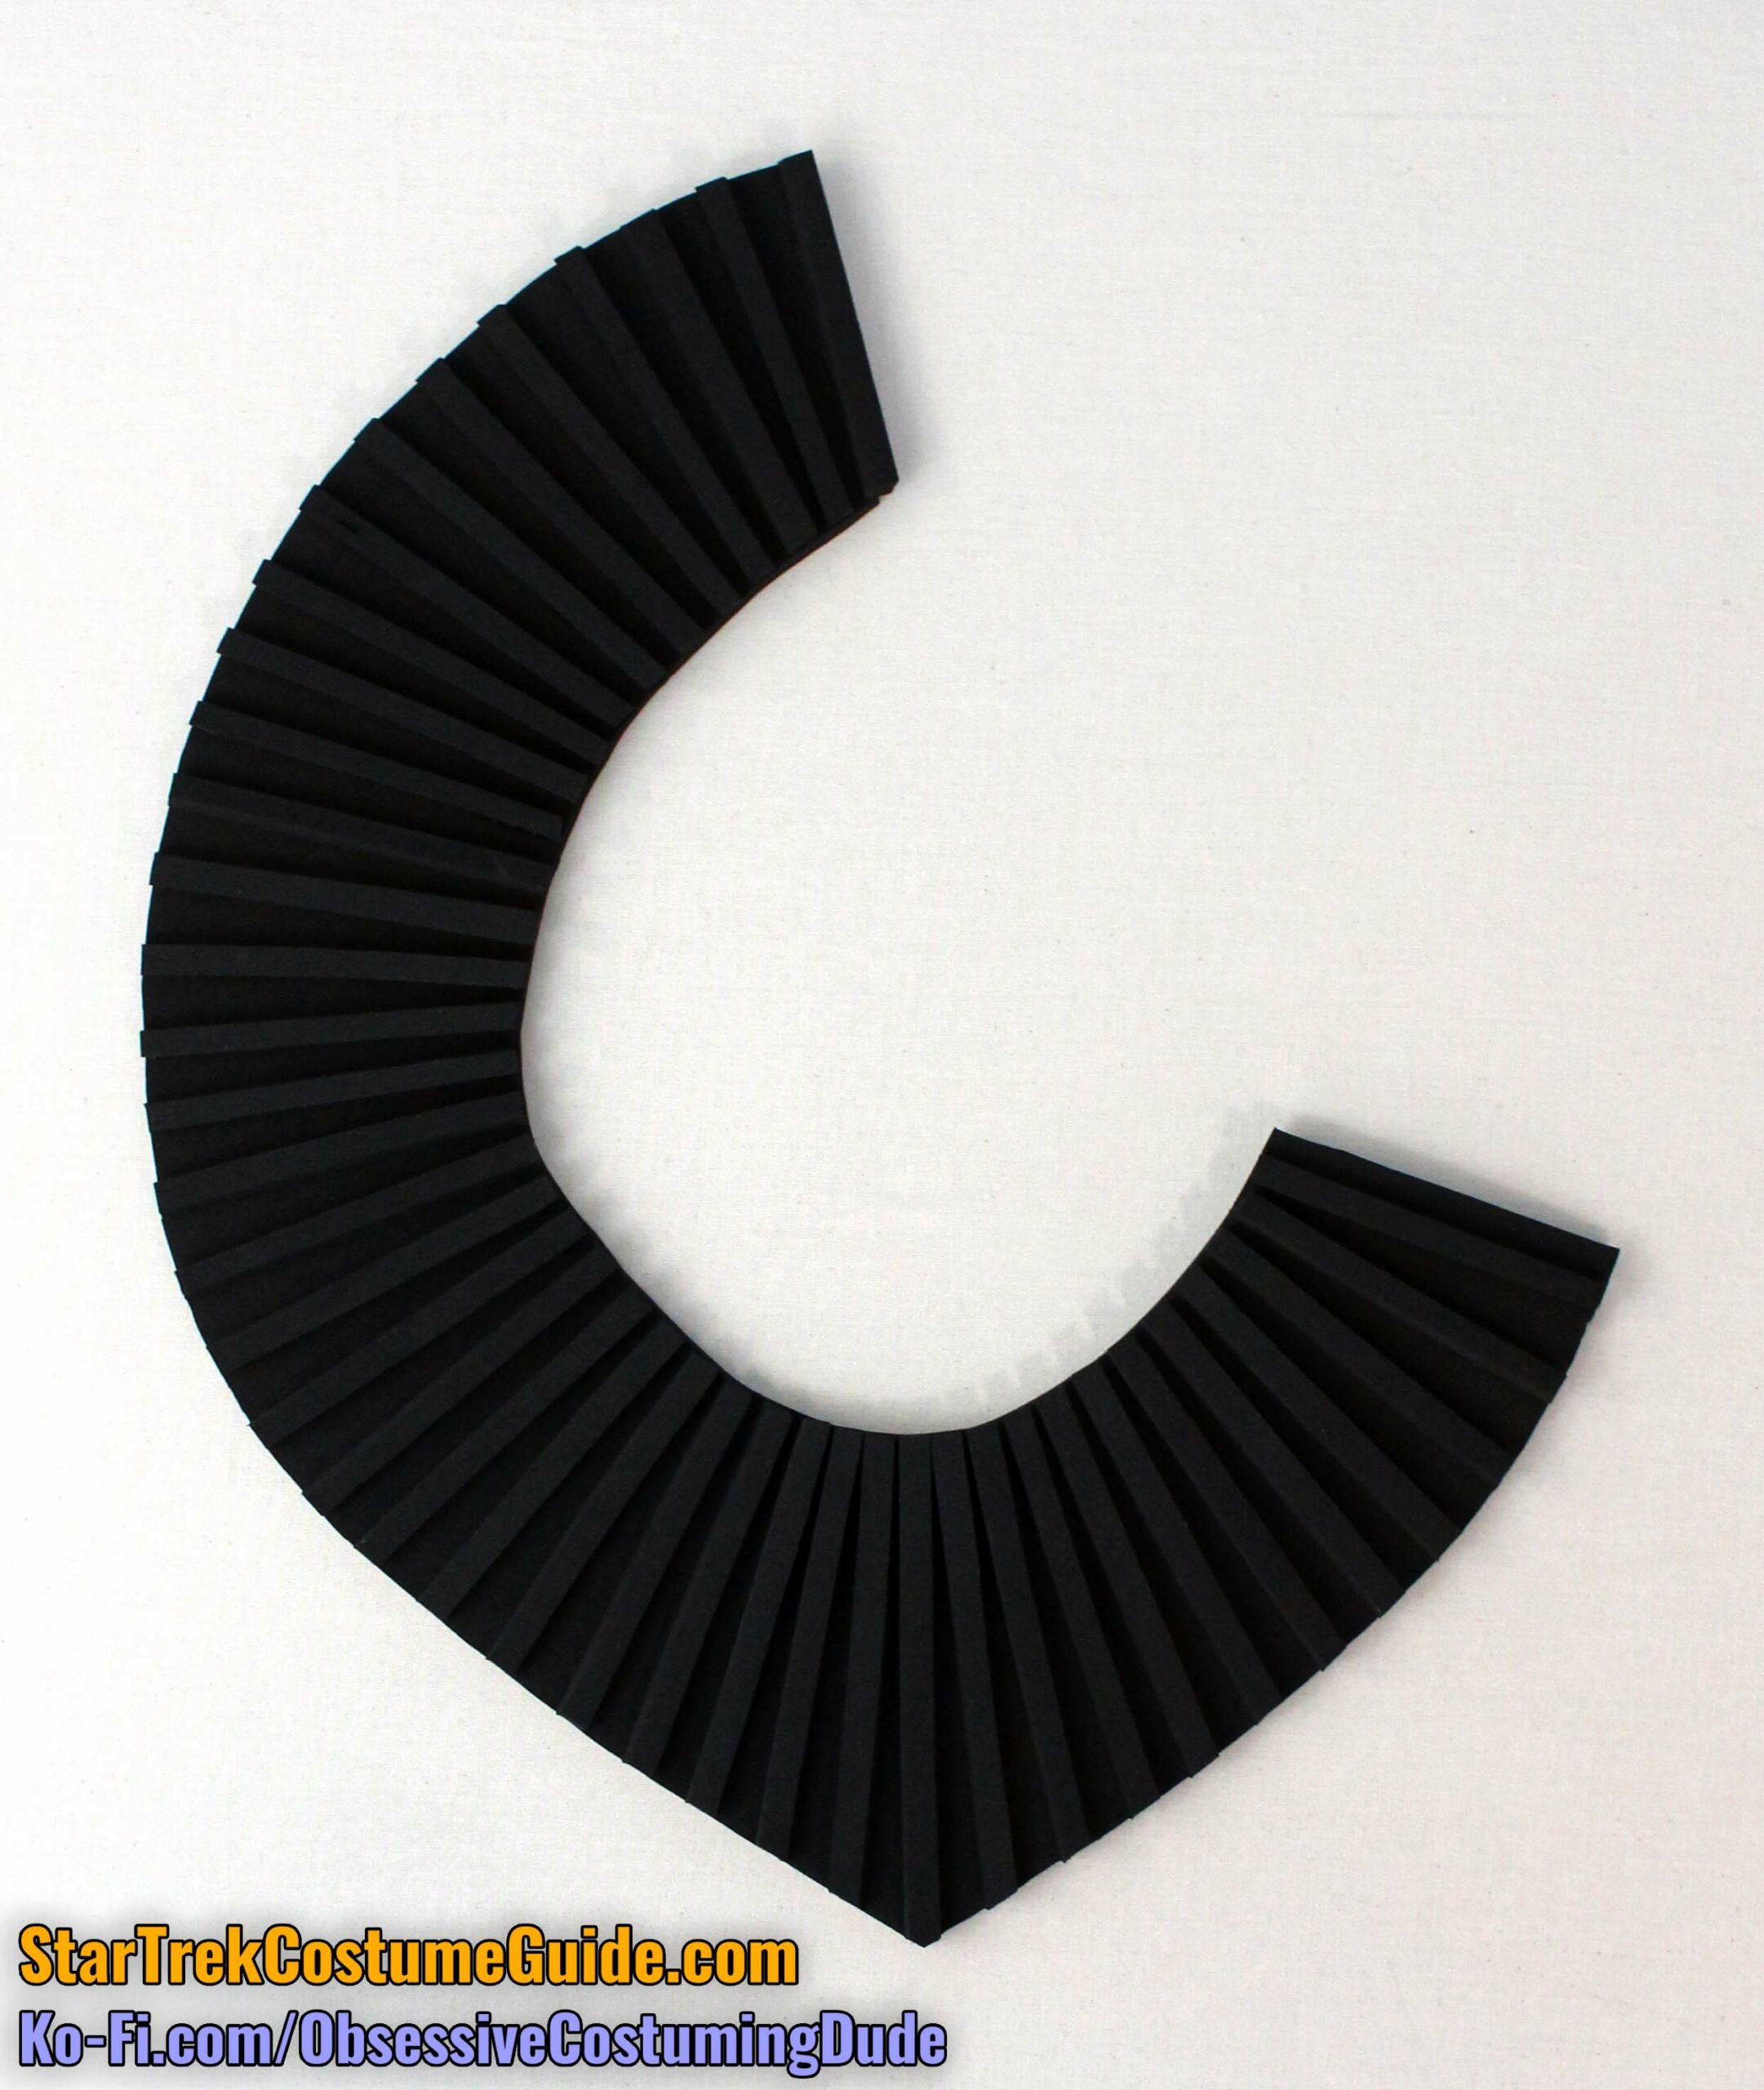
Once the glue is dry, trim the ¼” strips even with the lower edge of the collar.
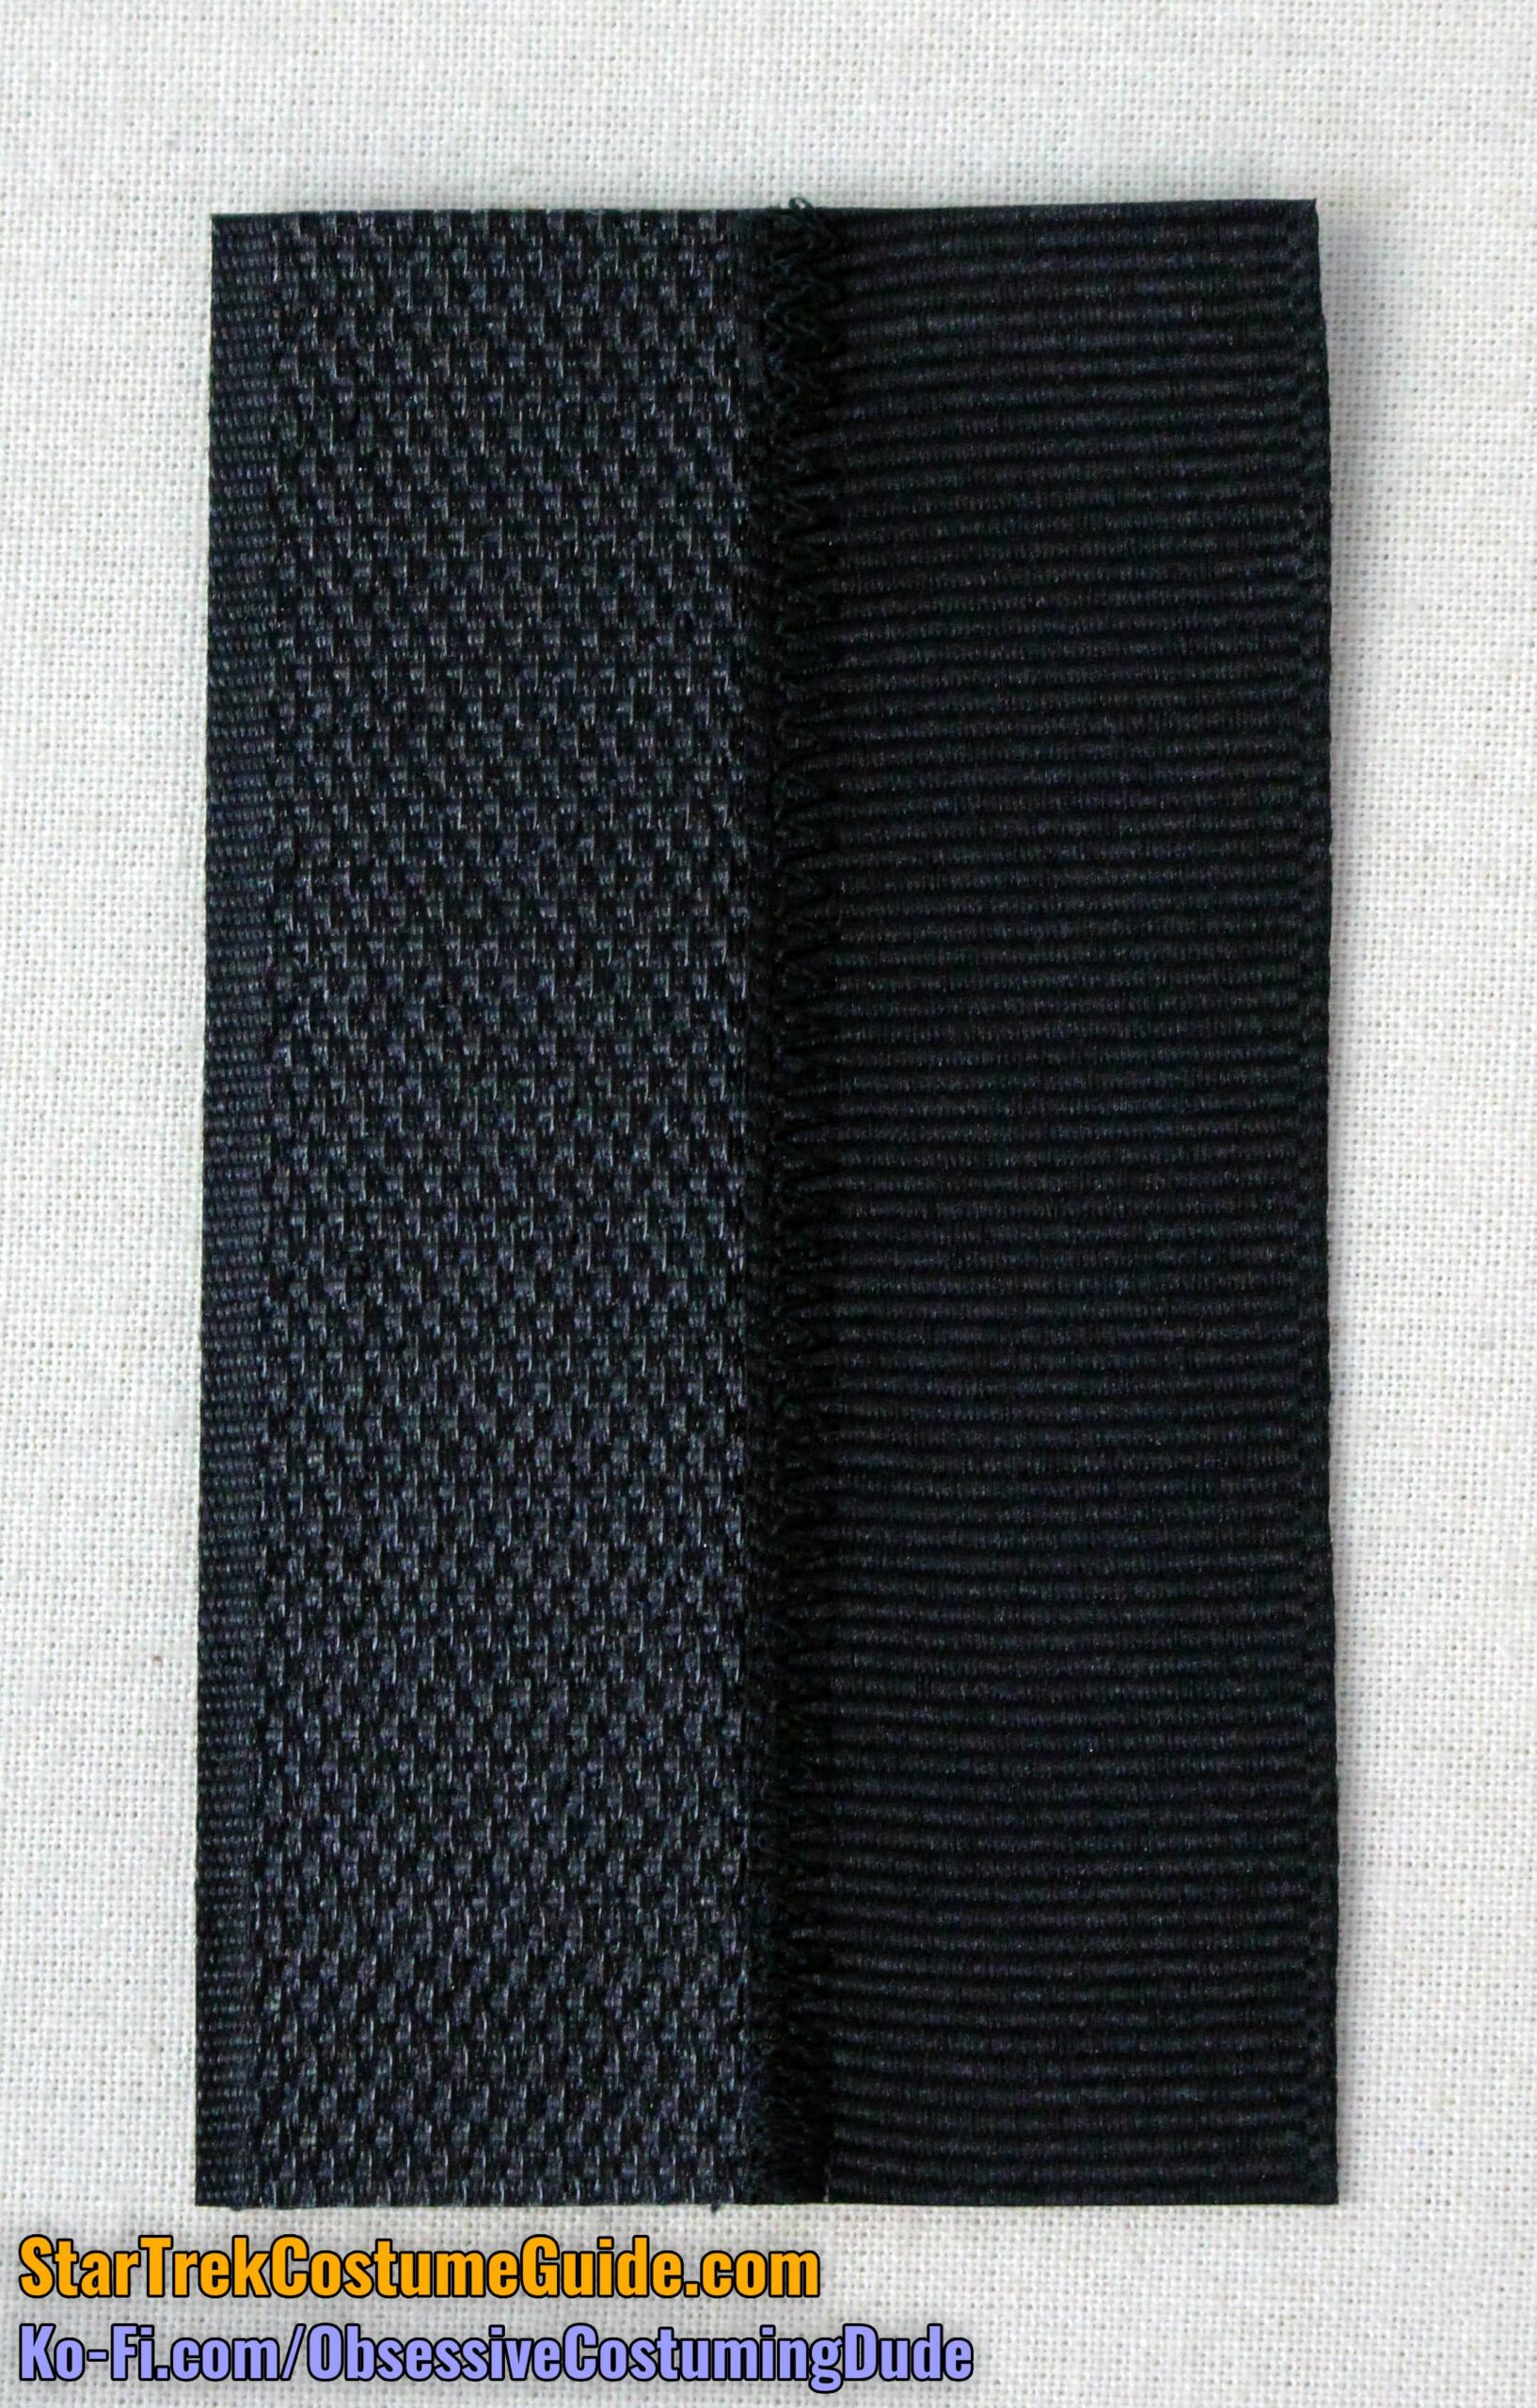
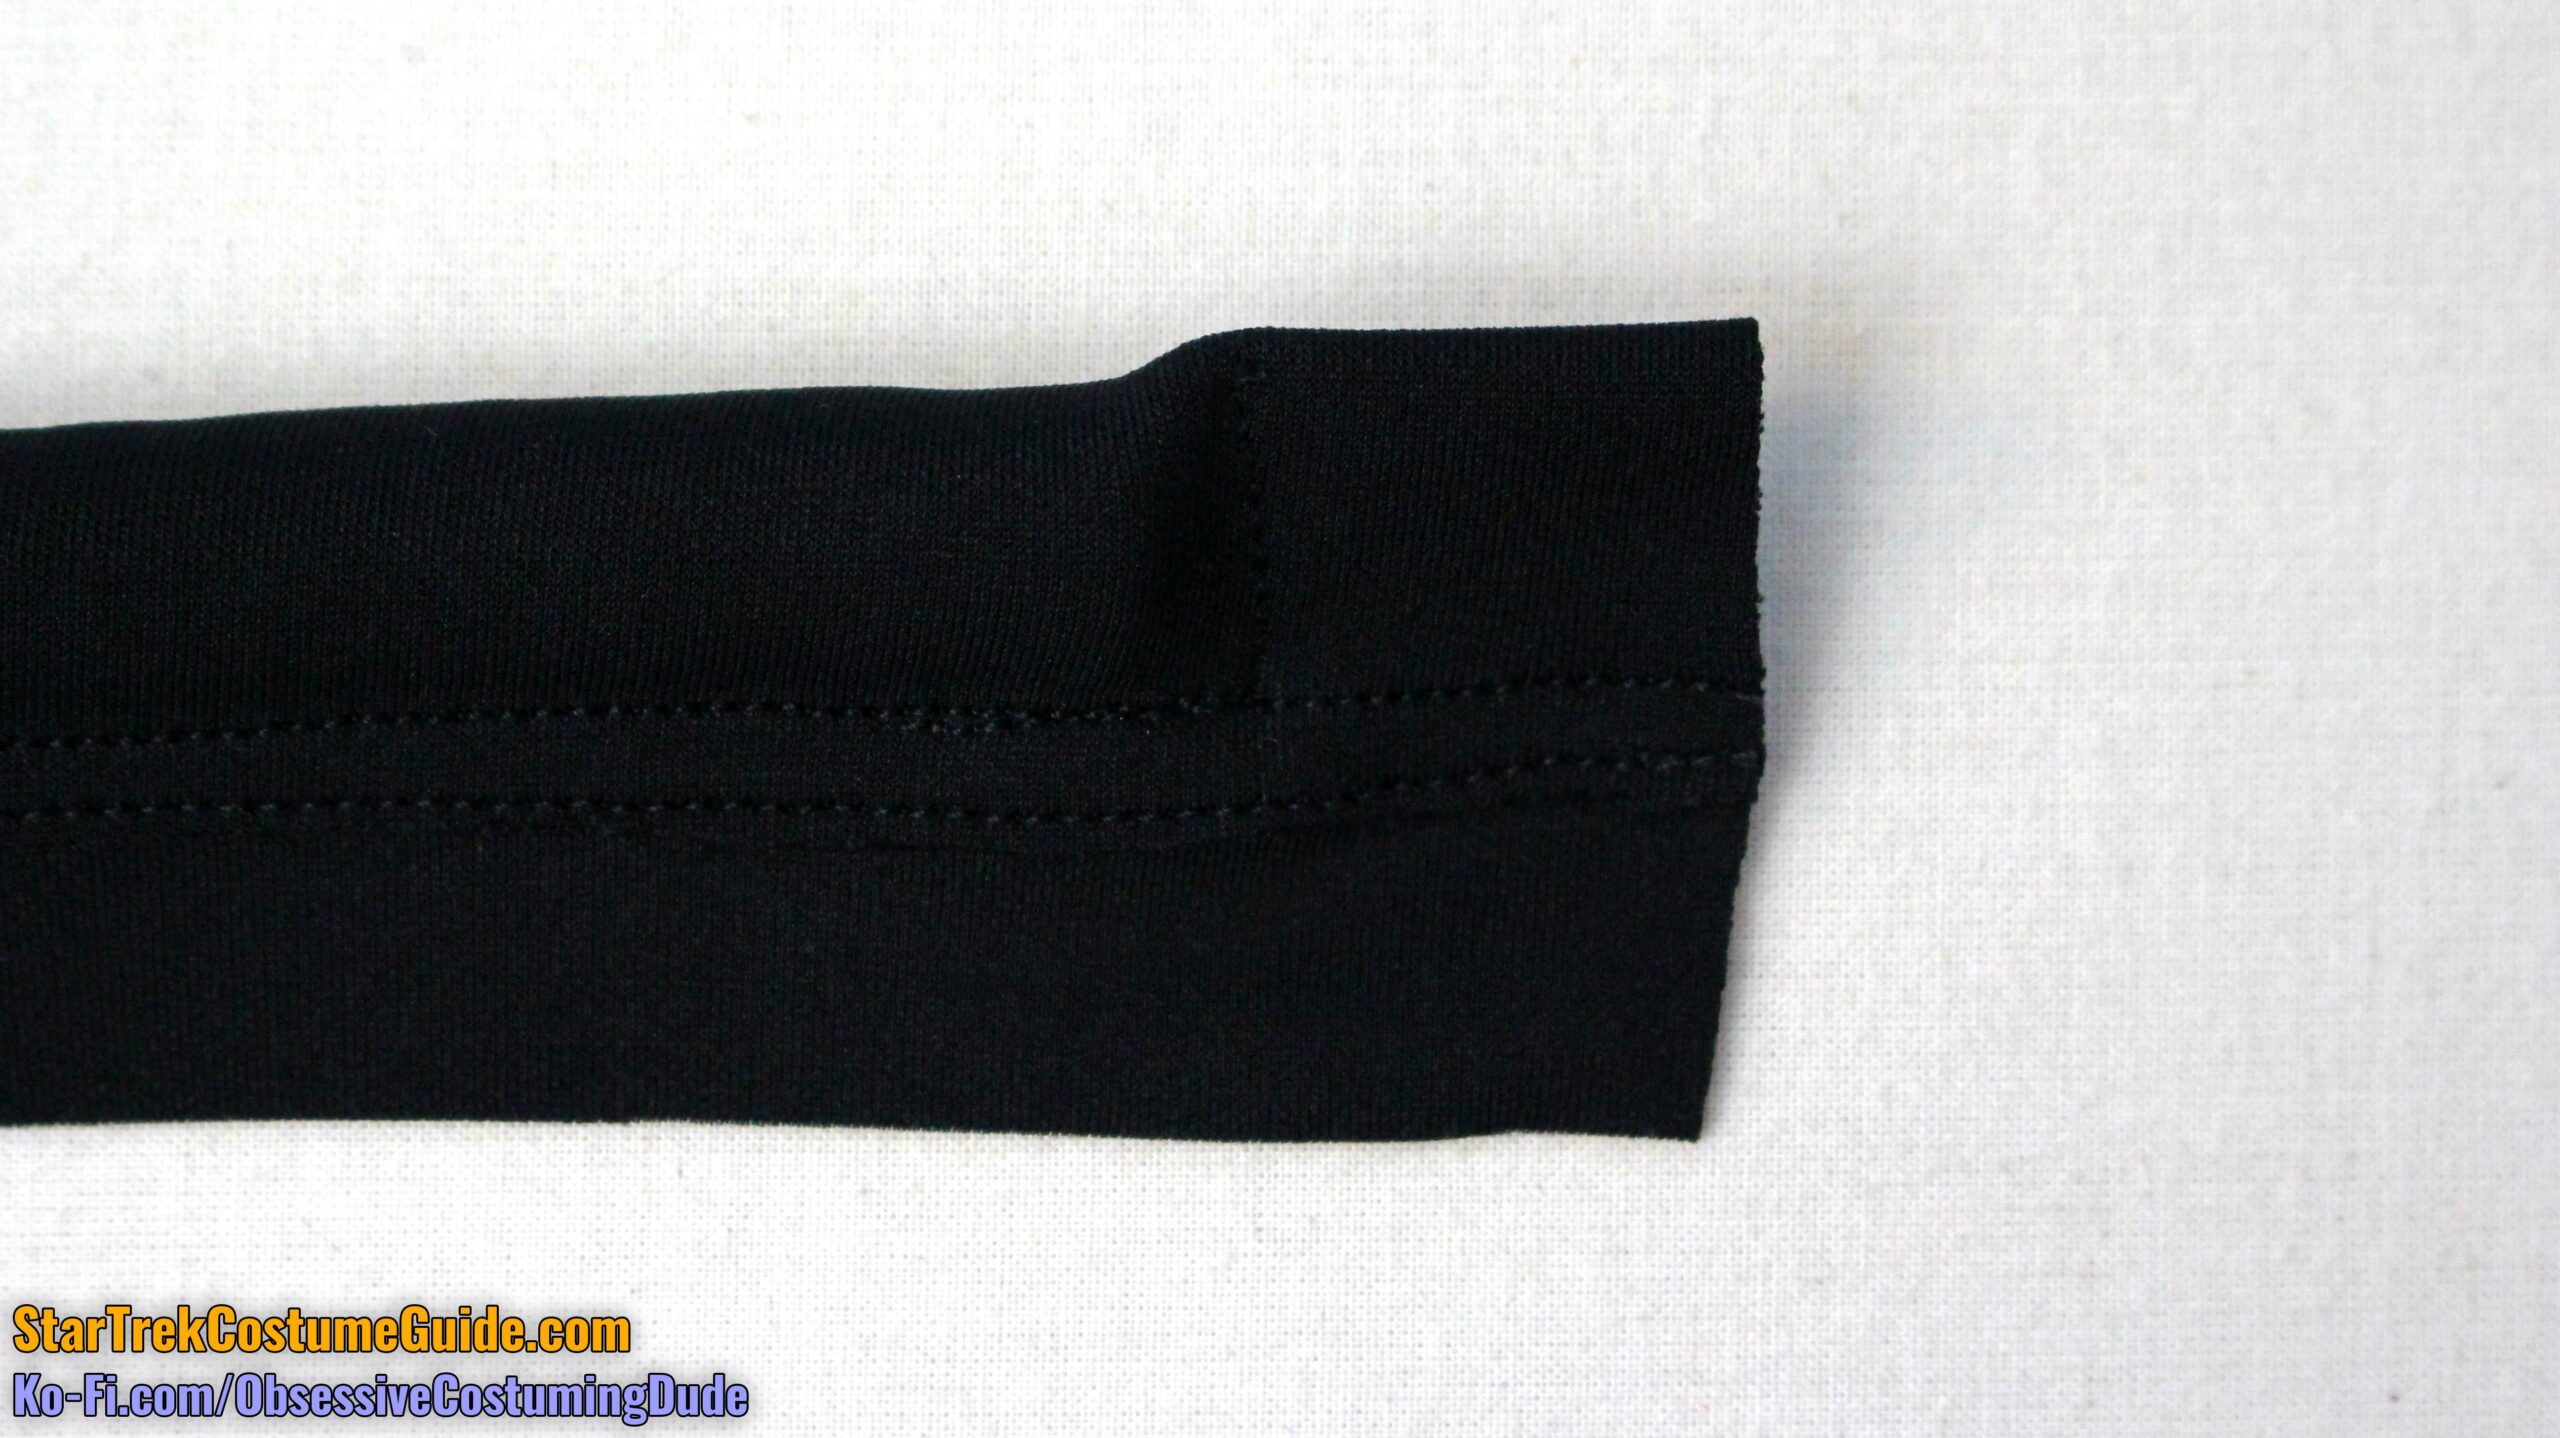
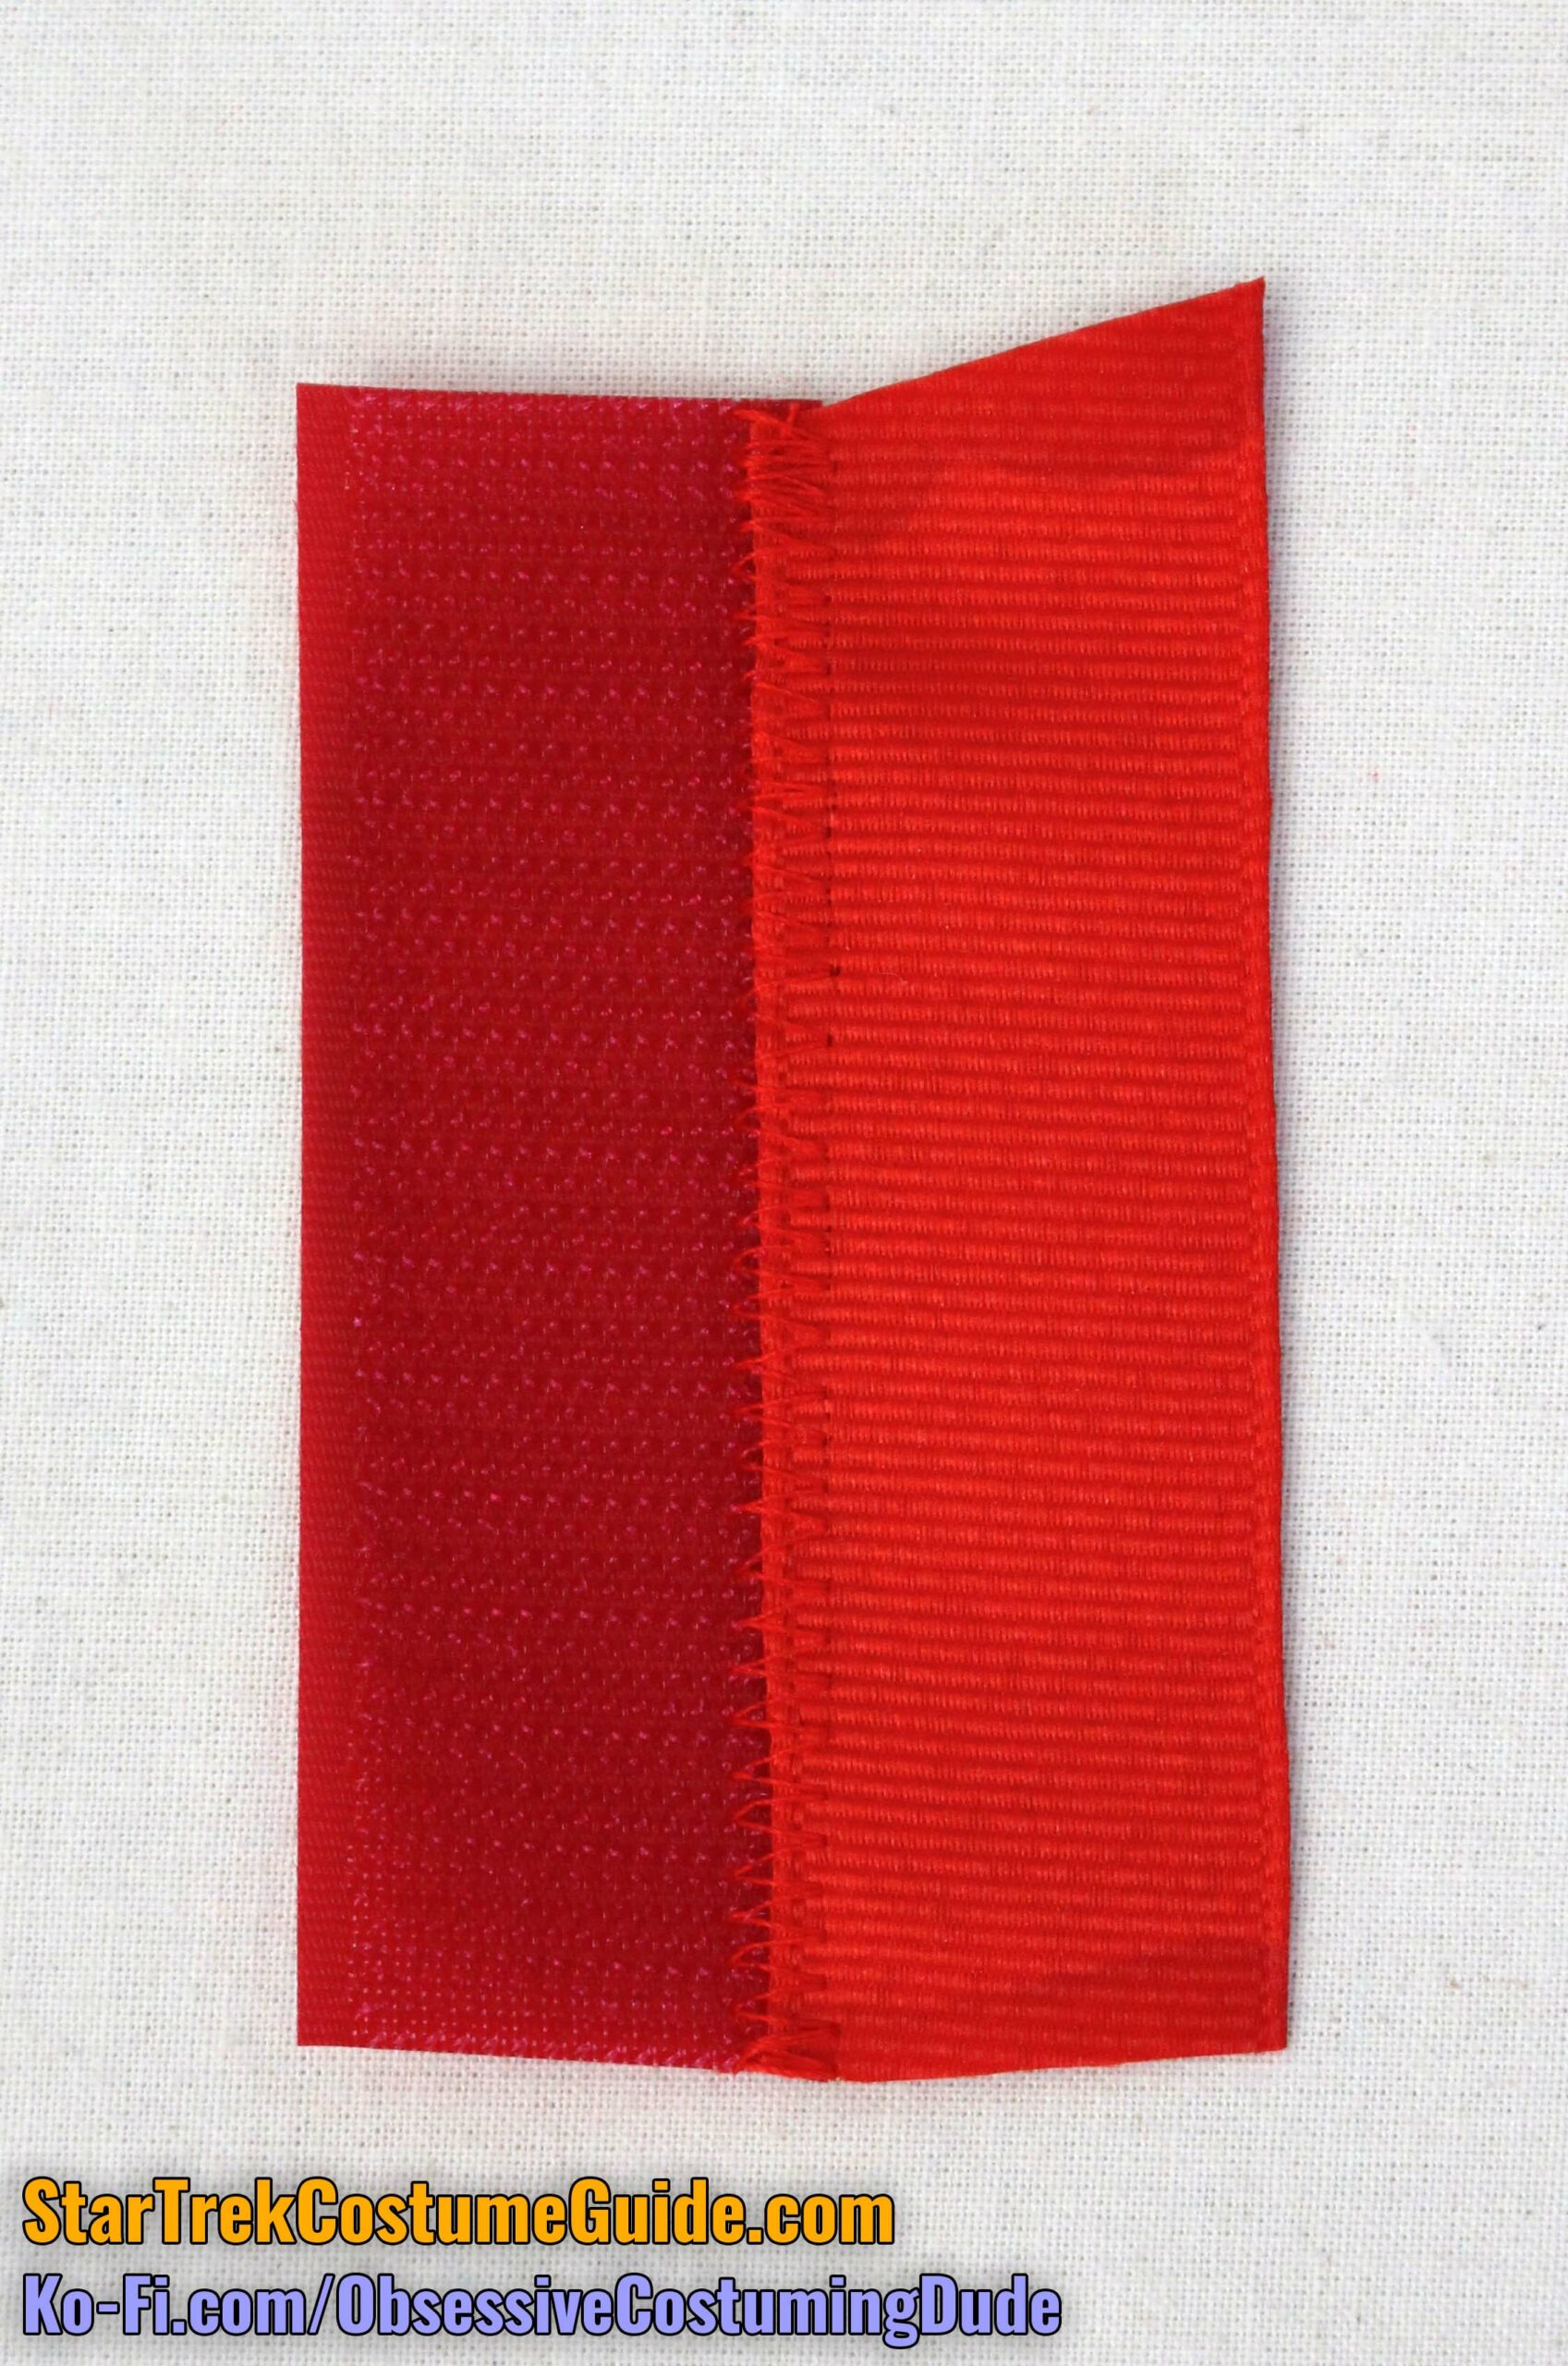
Apply some liquid fray preventer to the ends of the ribbon.
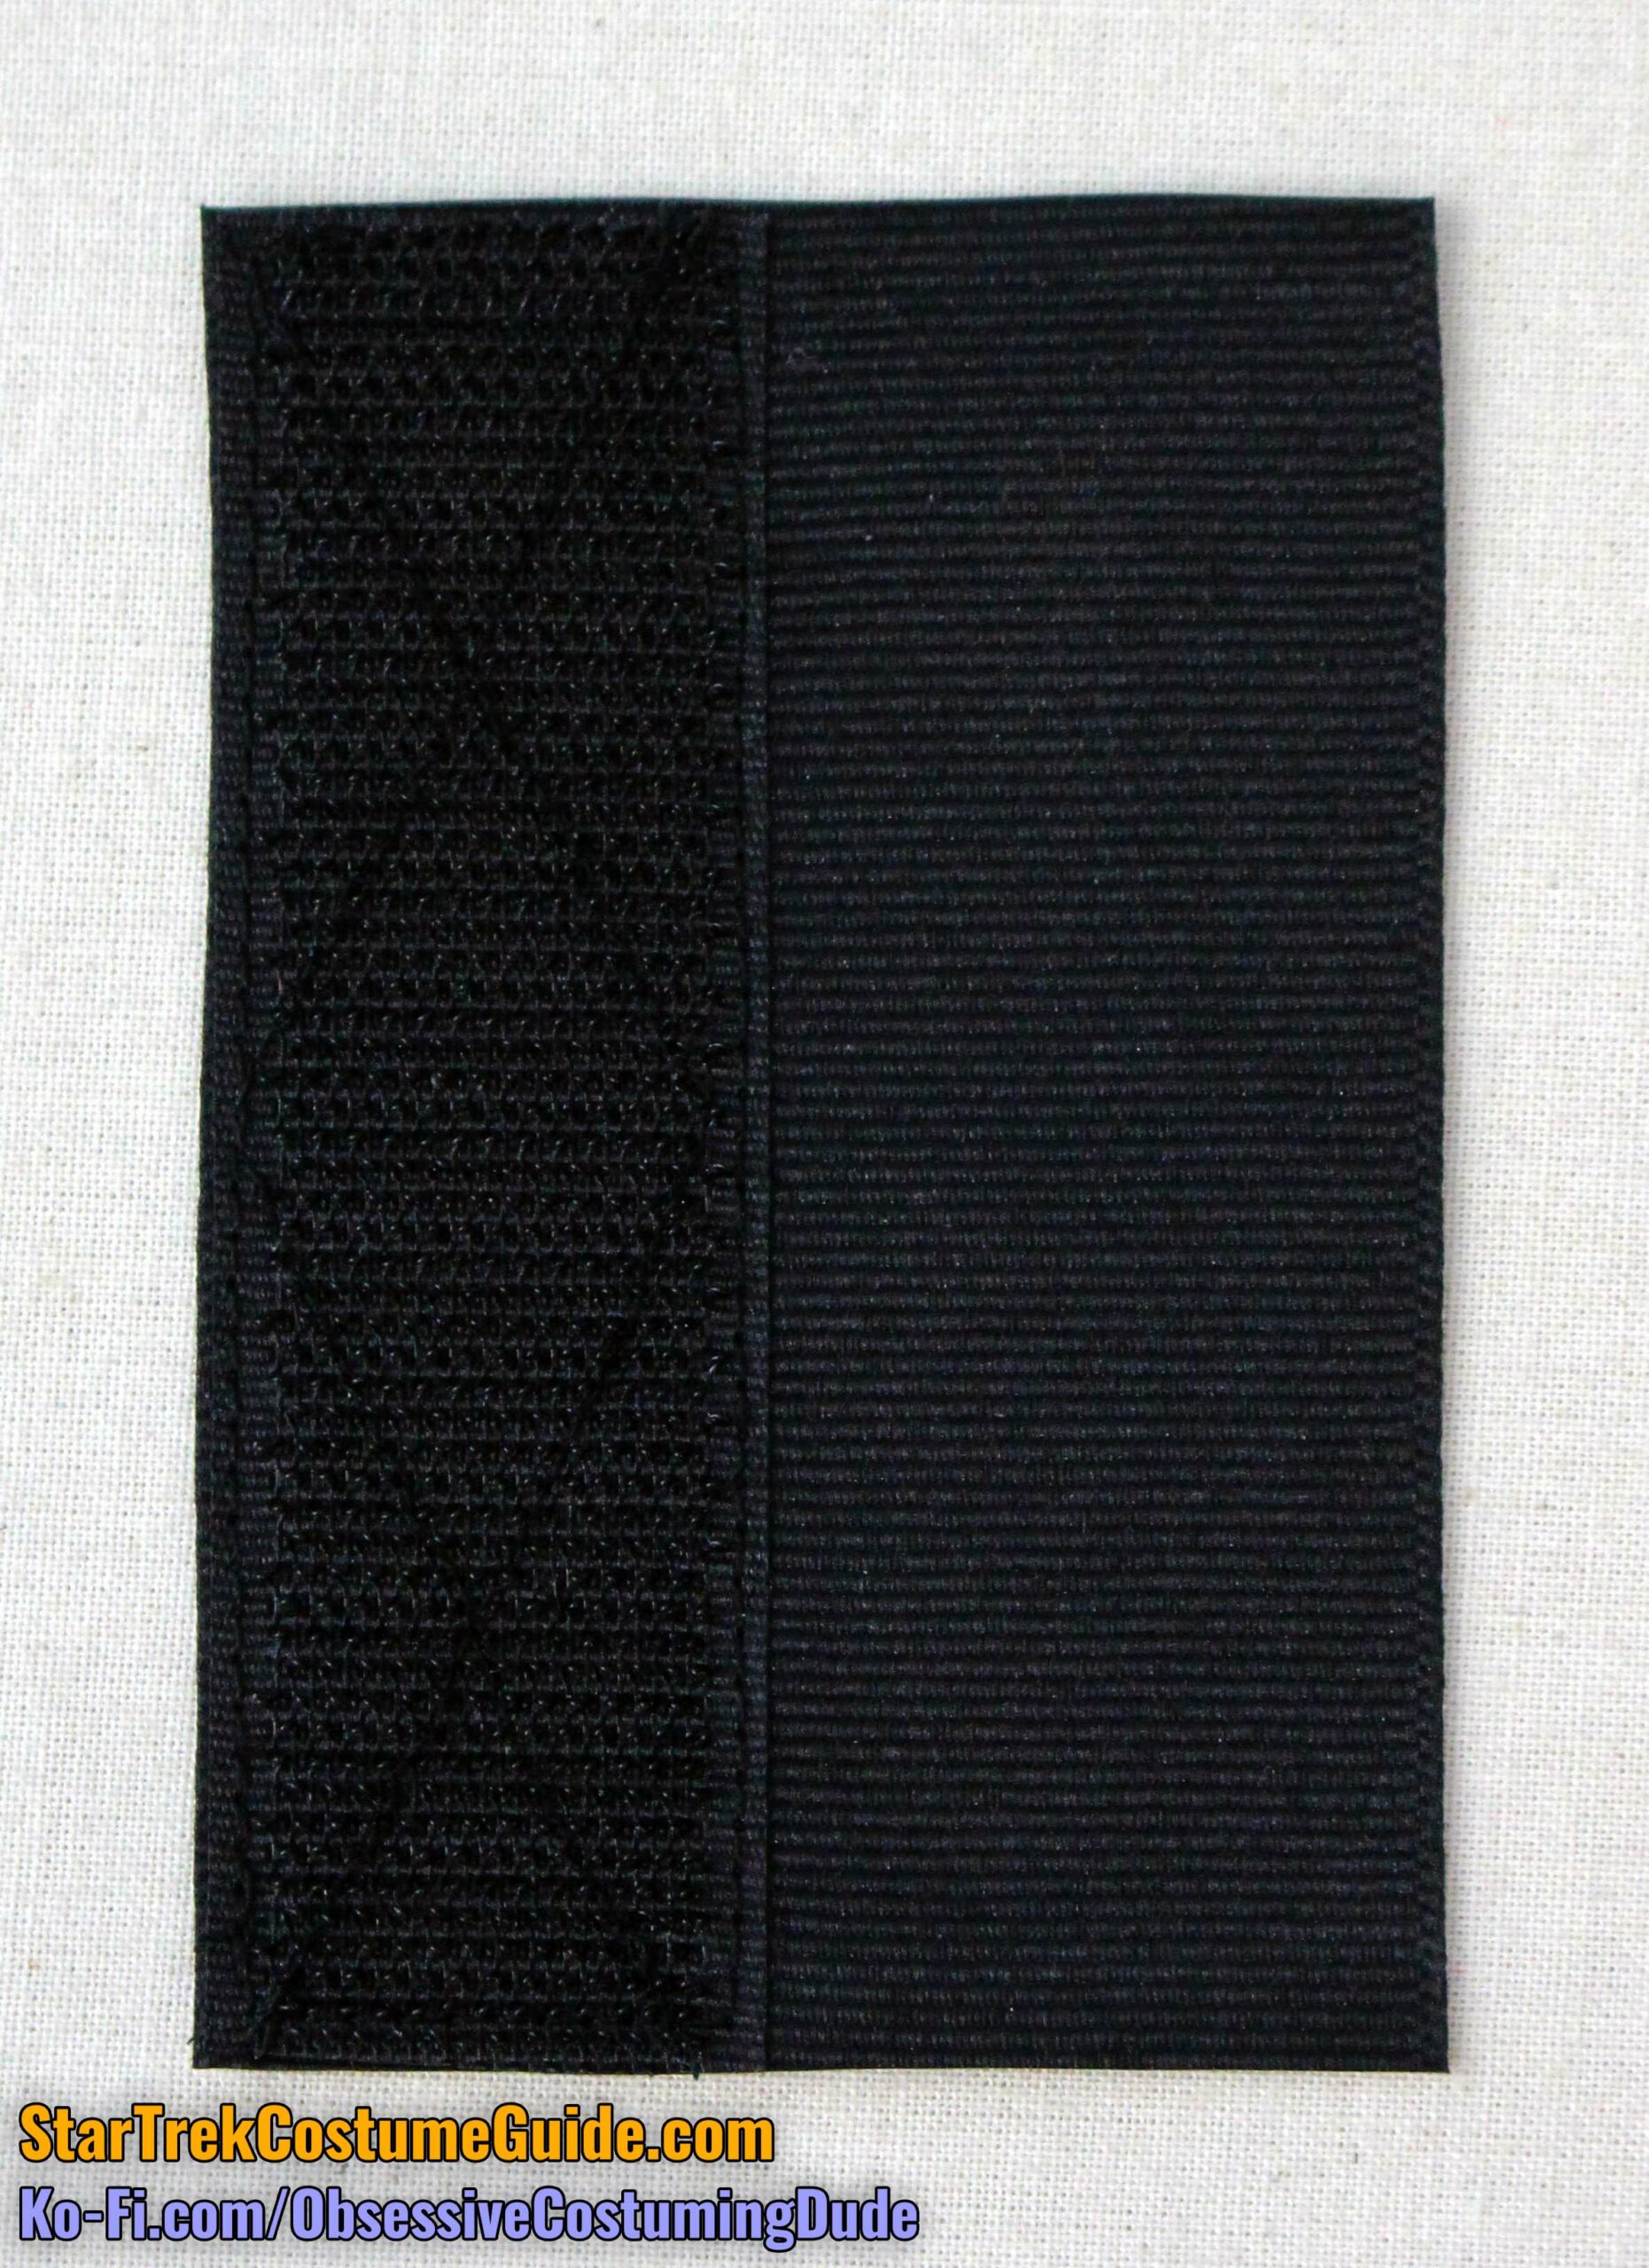
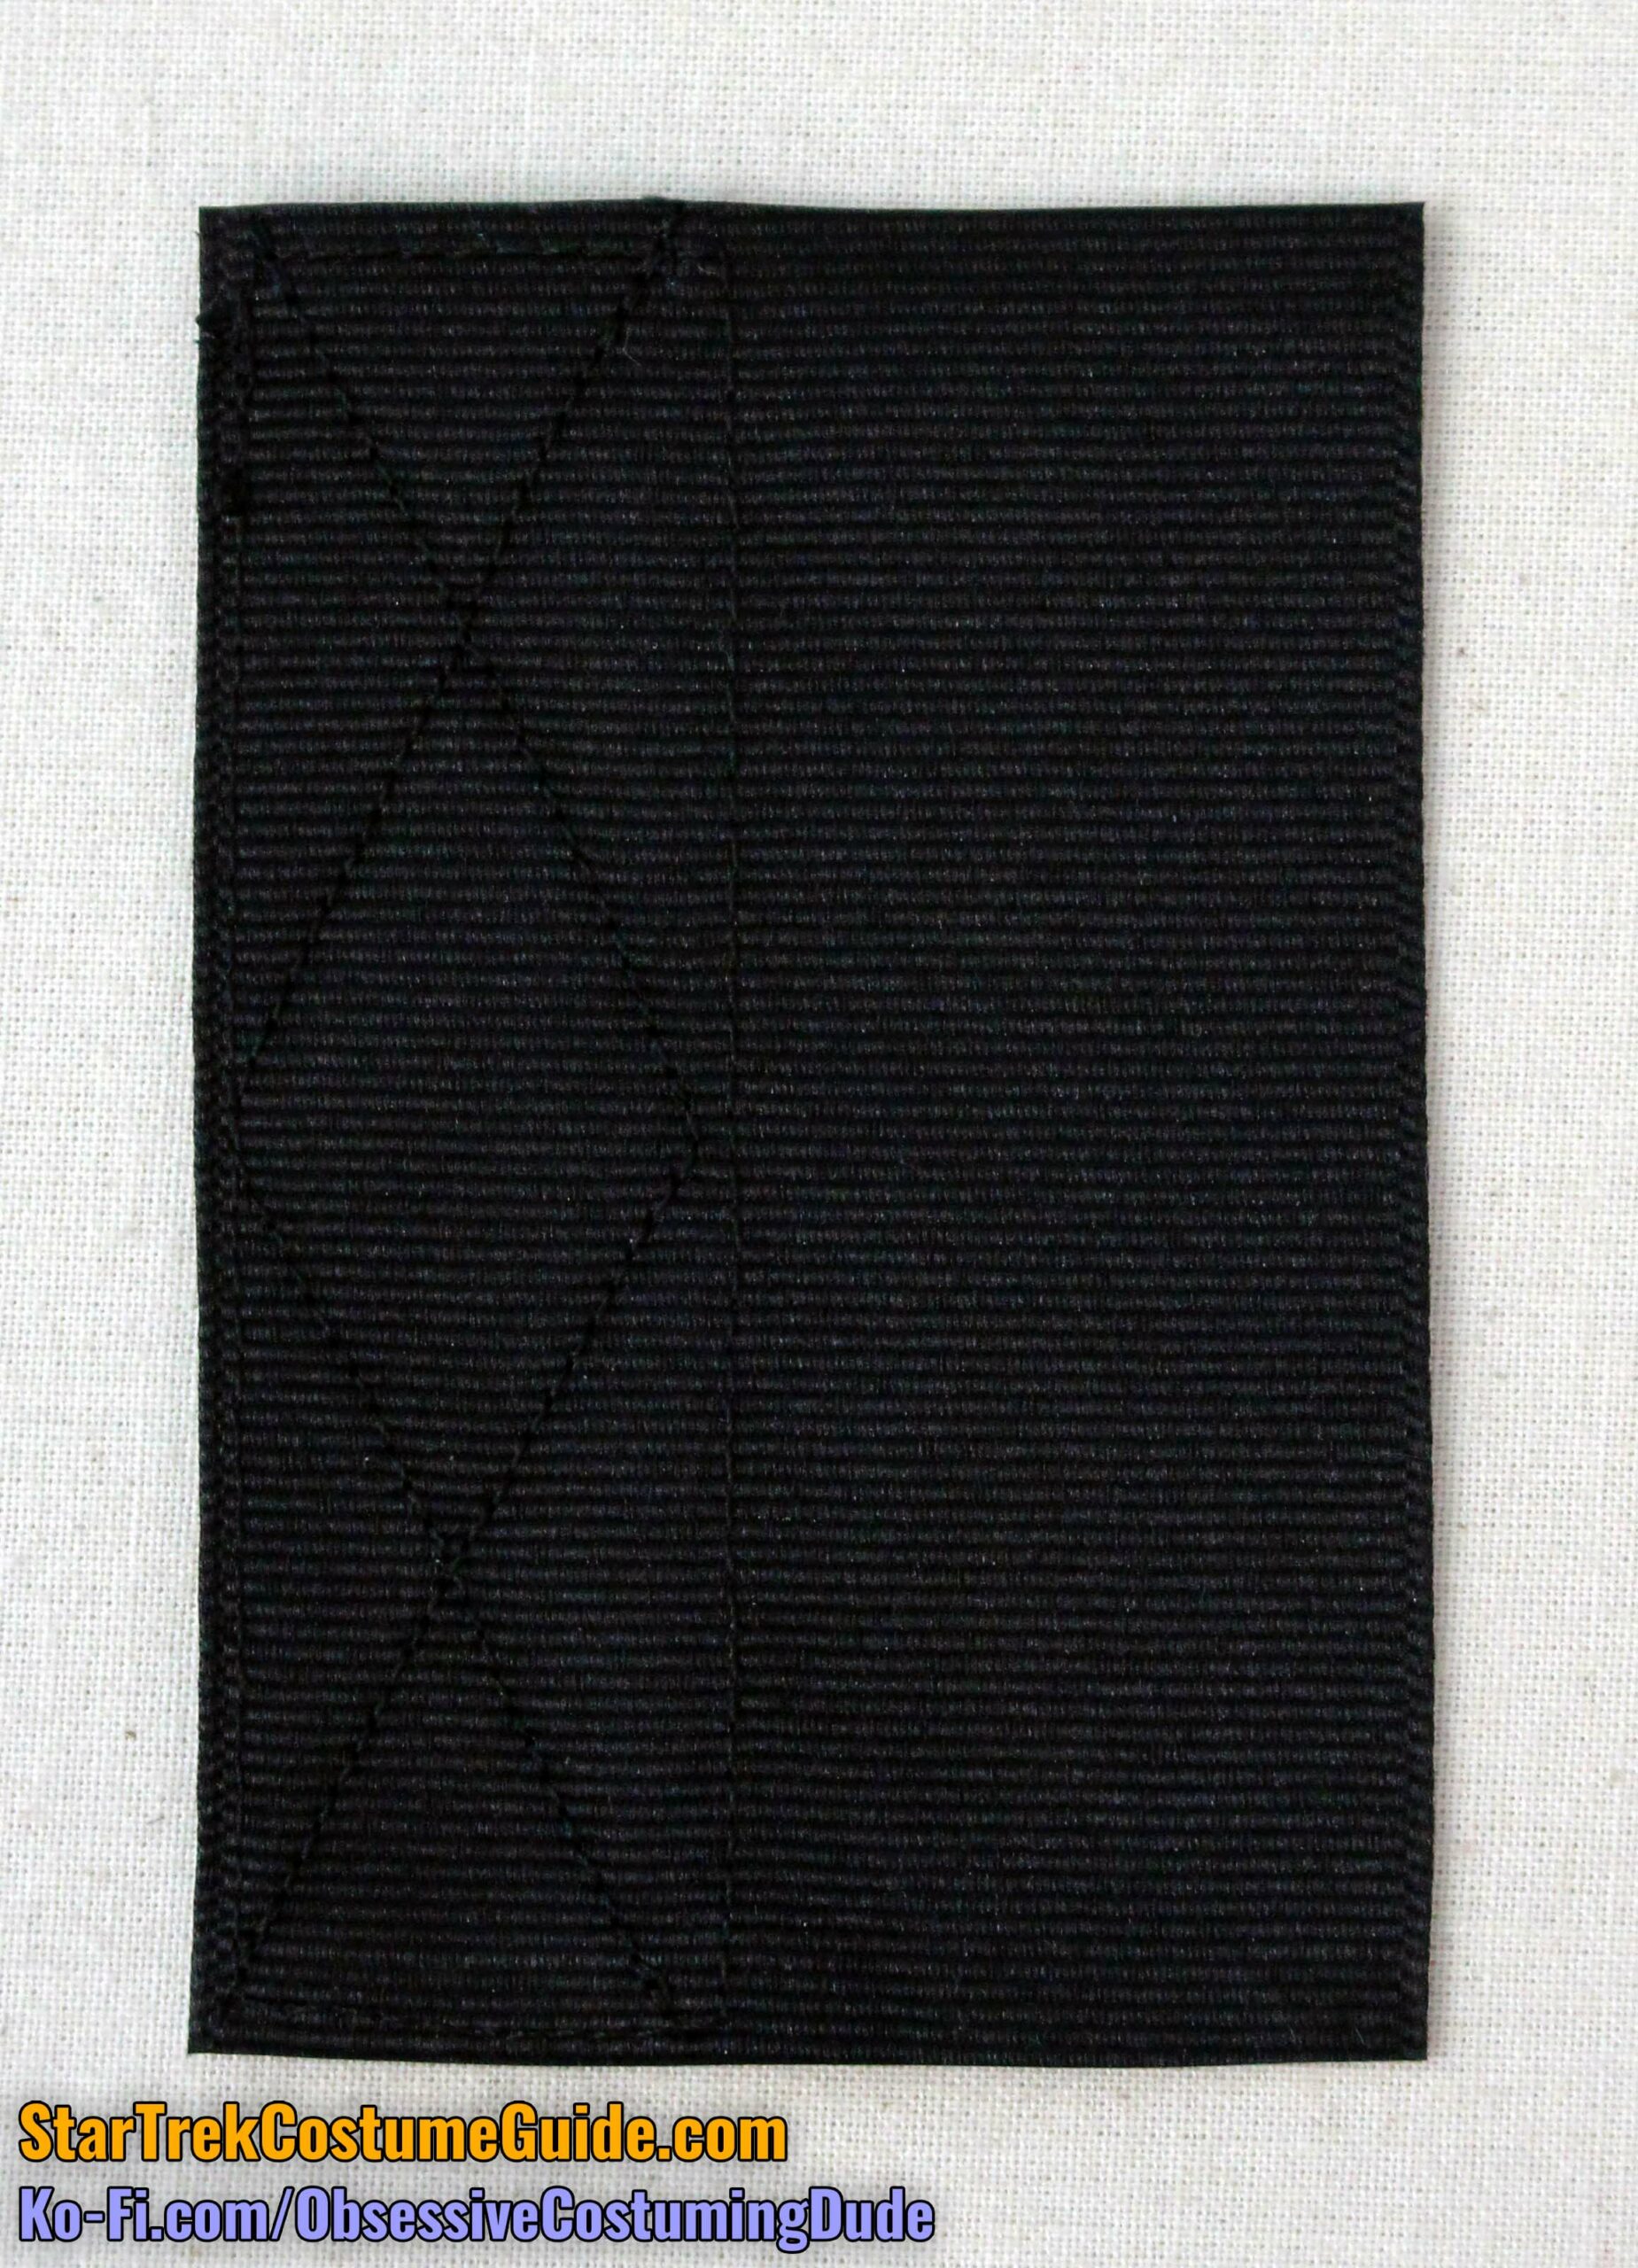
Once the liquid fray preventer is dry, slightly overlap the ribbon and the “hook” (scratchy) side of the hook-and-loop tape along the long edges, and secure the two with a machine zig-zag stitch.
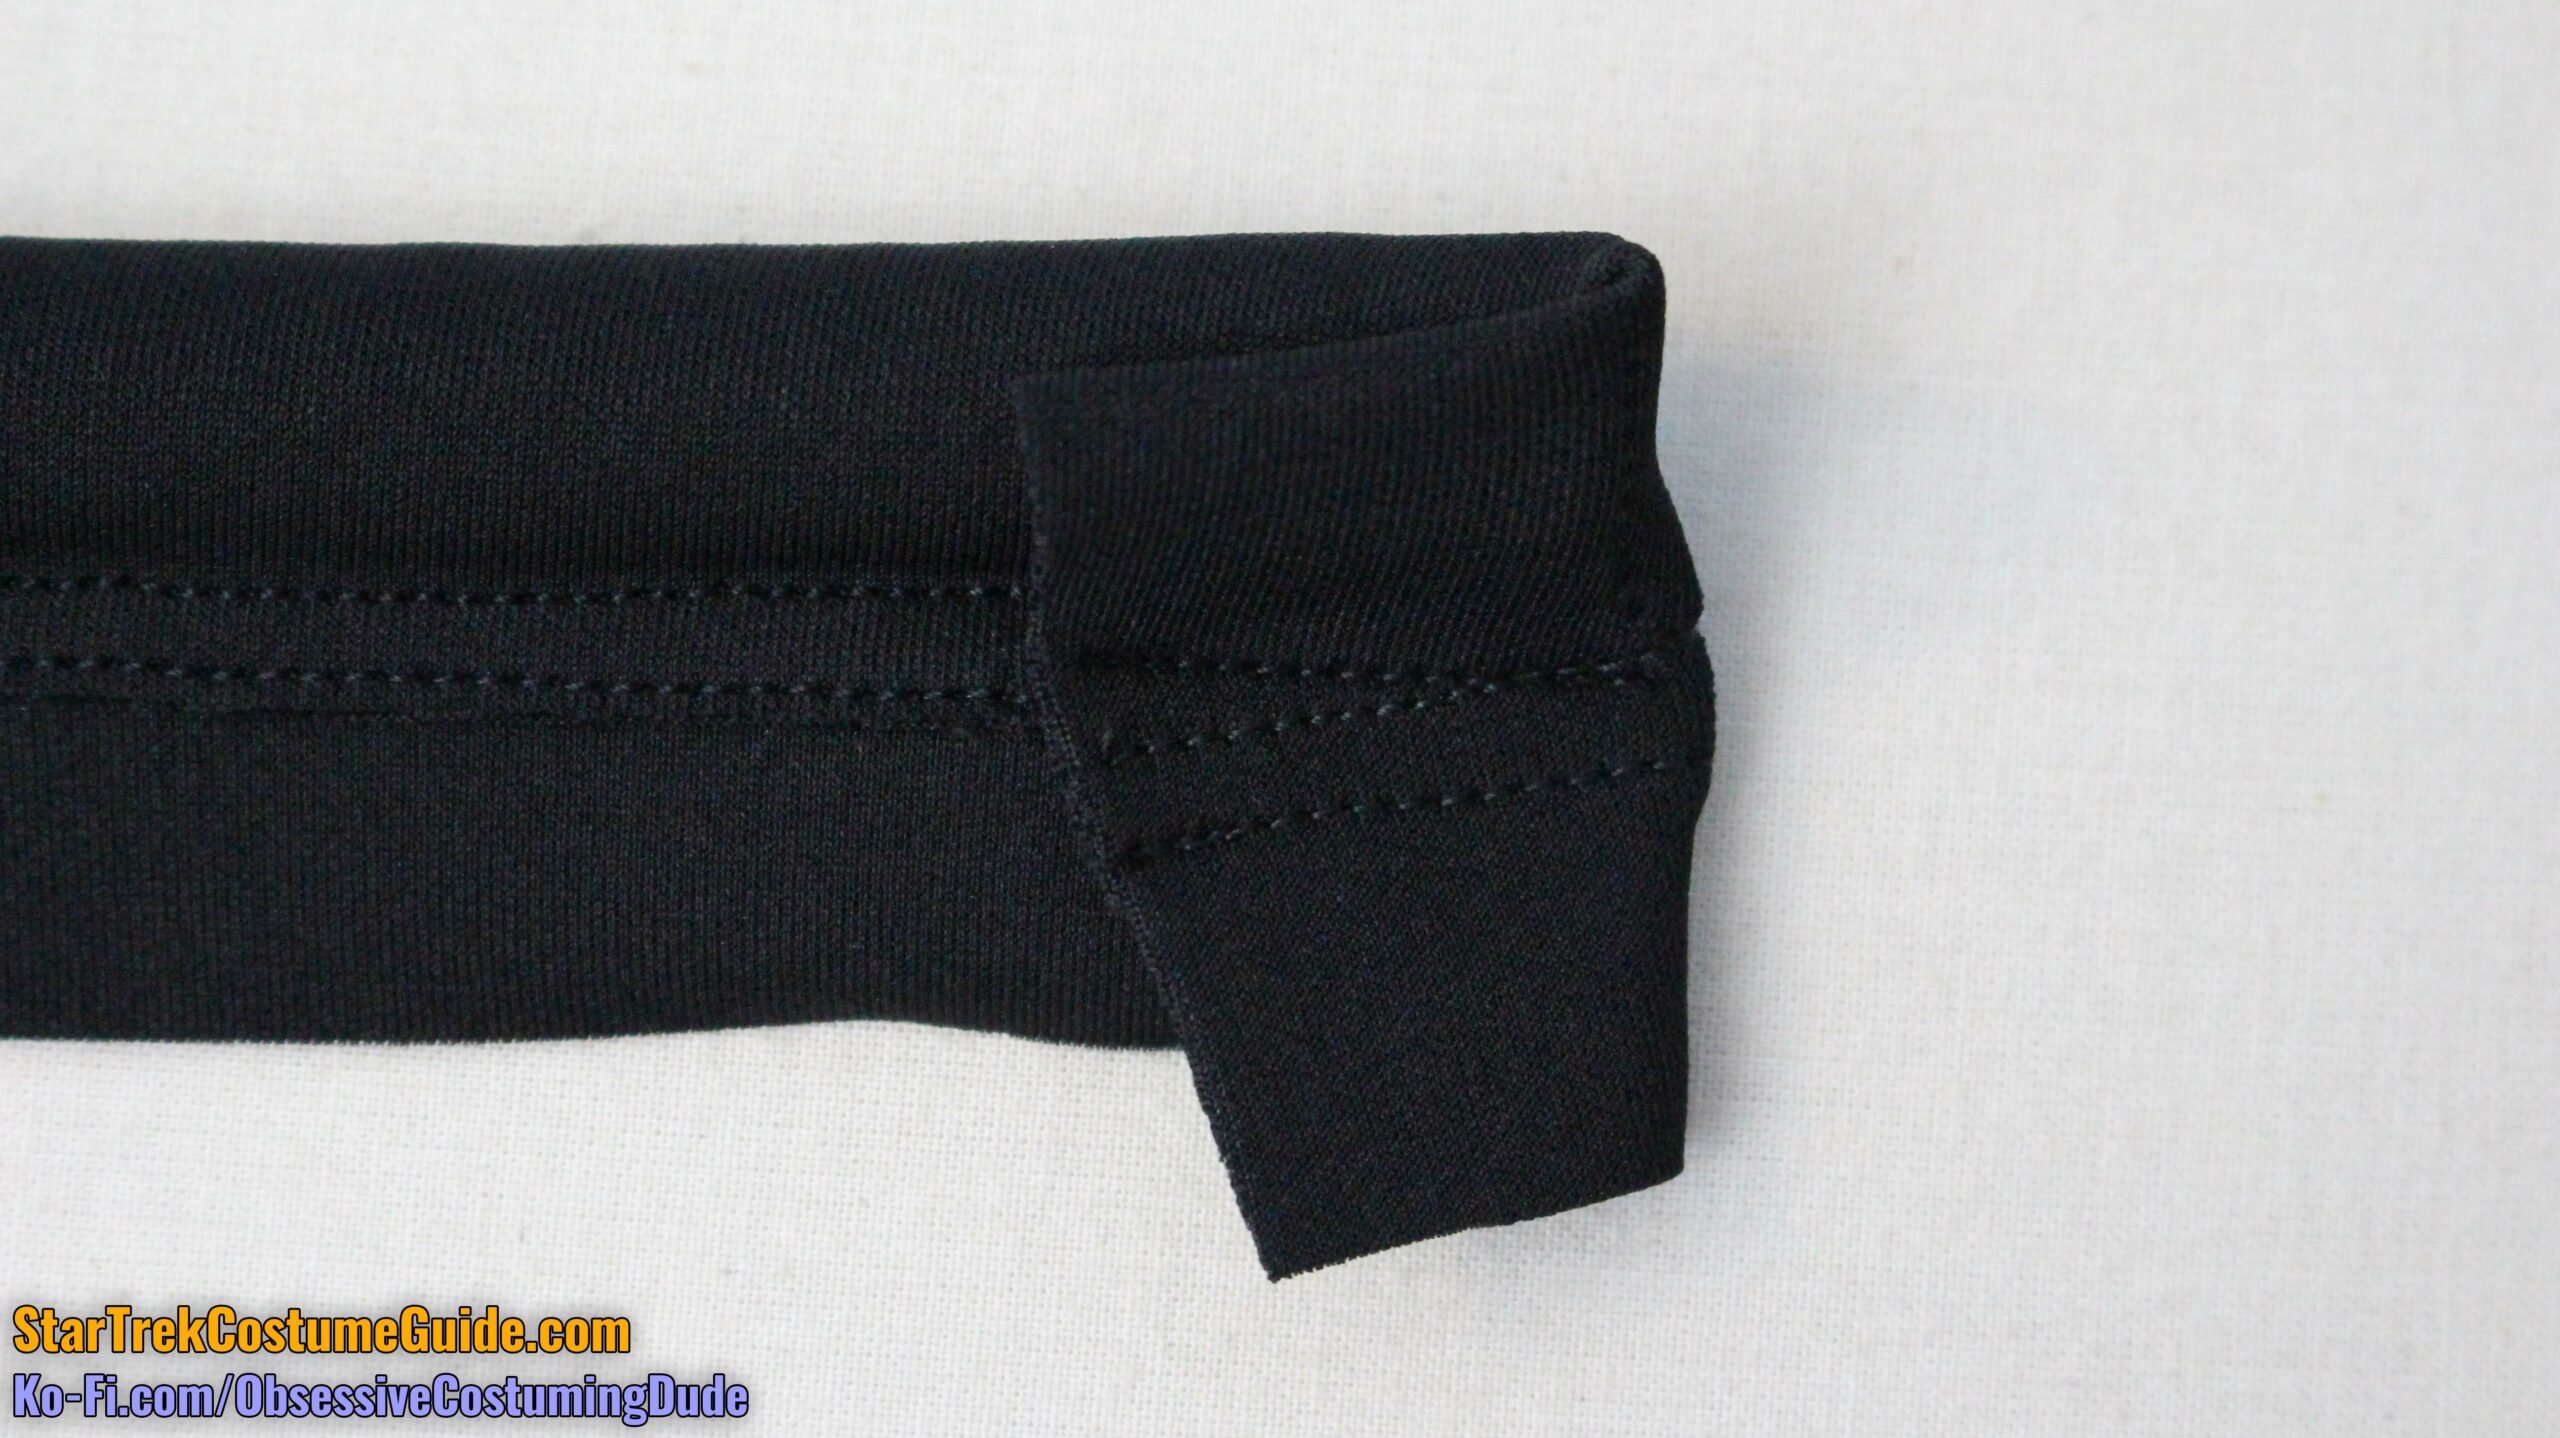
This combined assembly forms the back underlap of the collar closure.
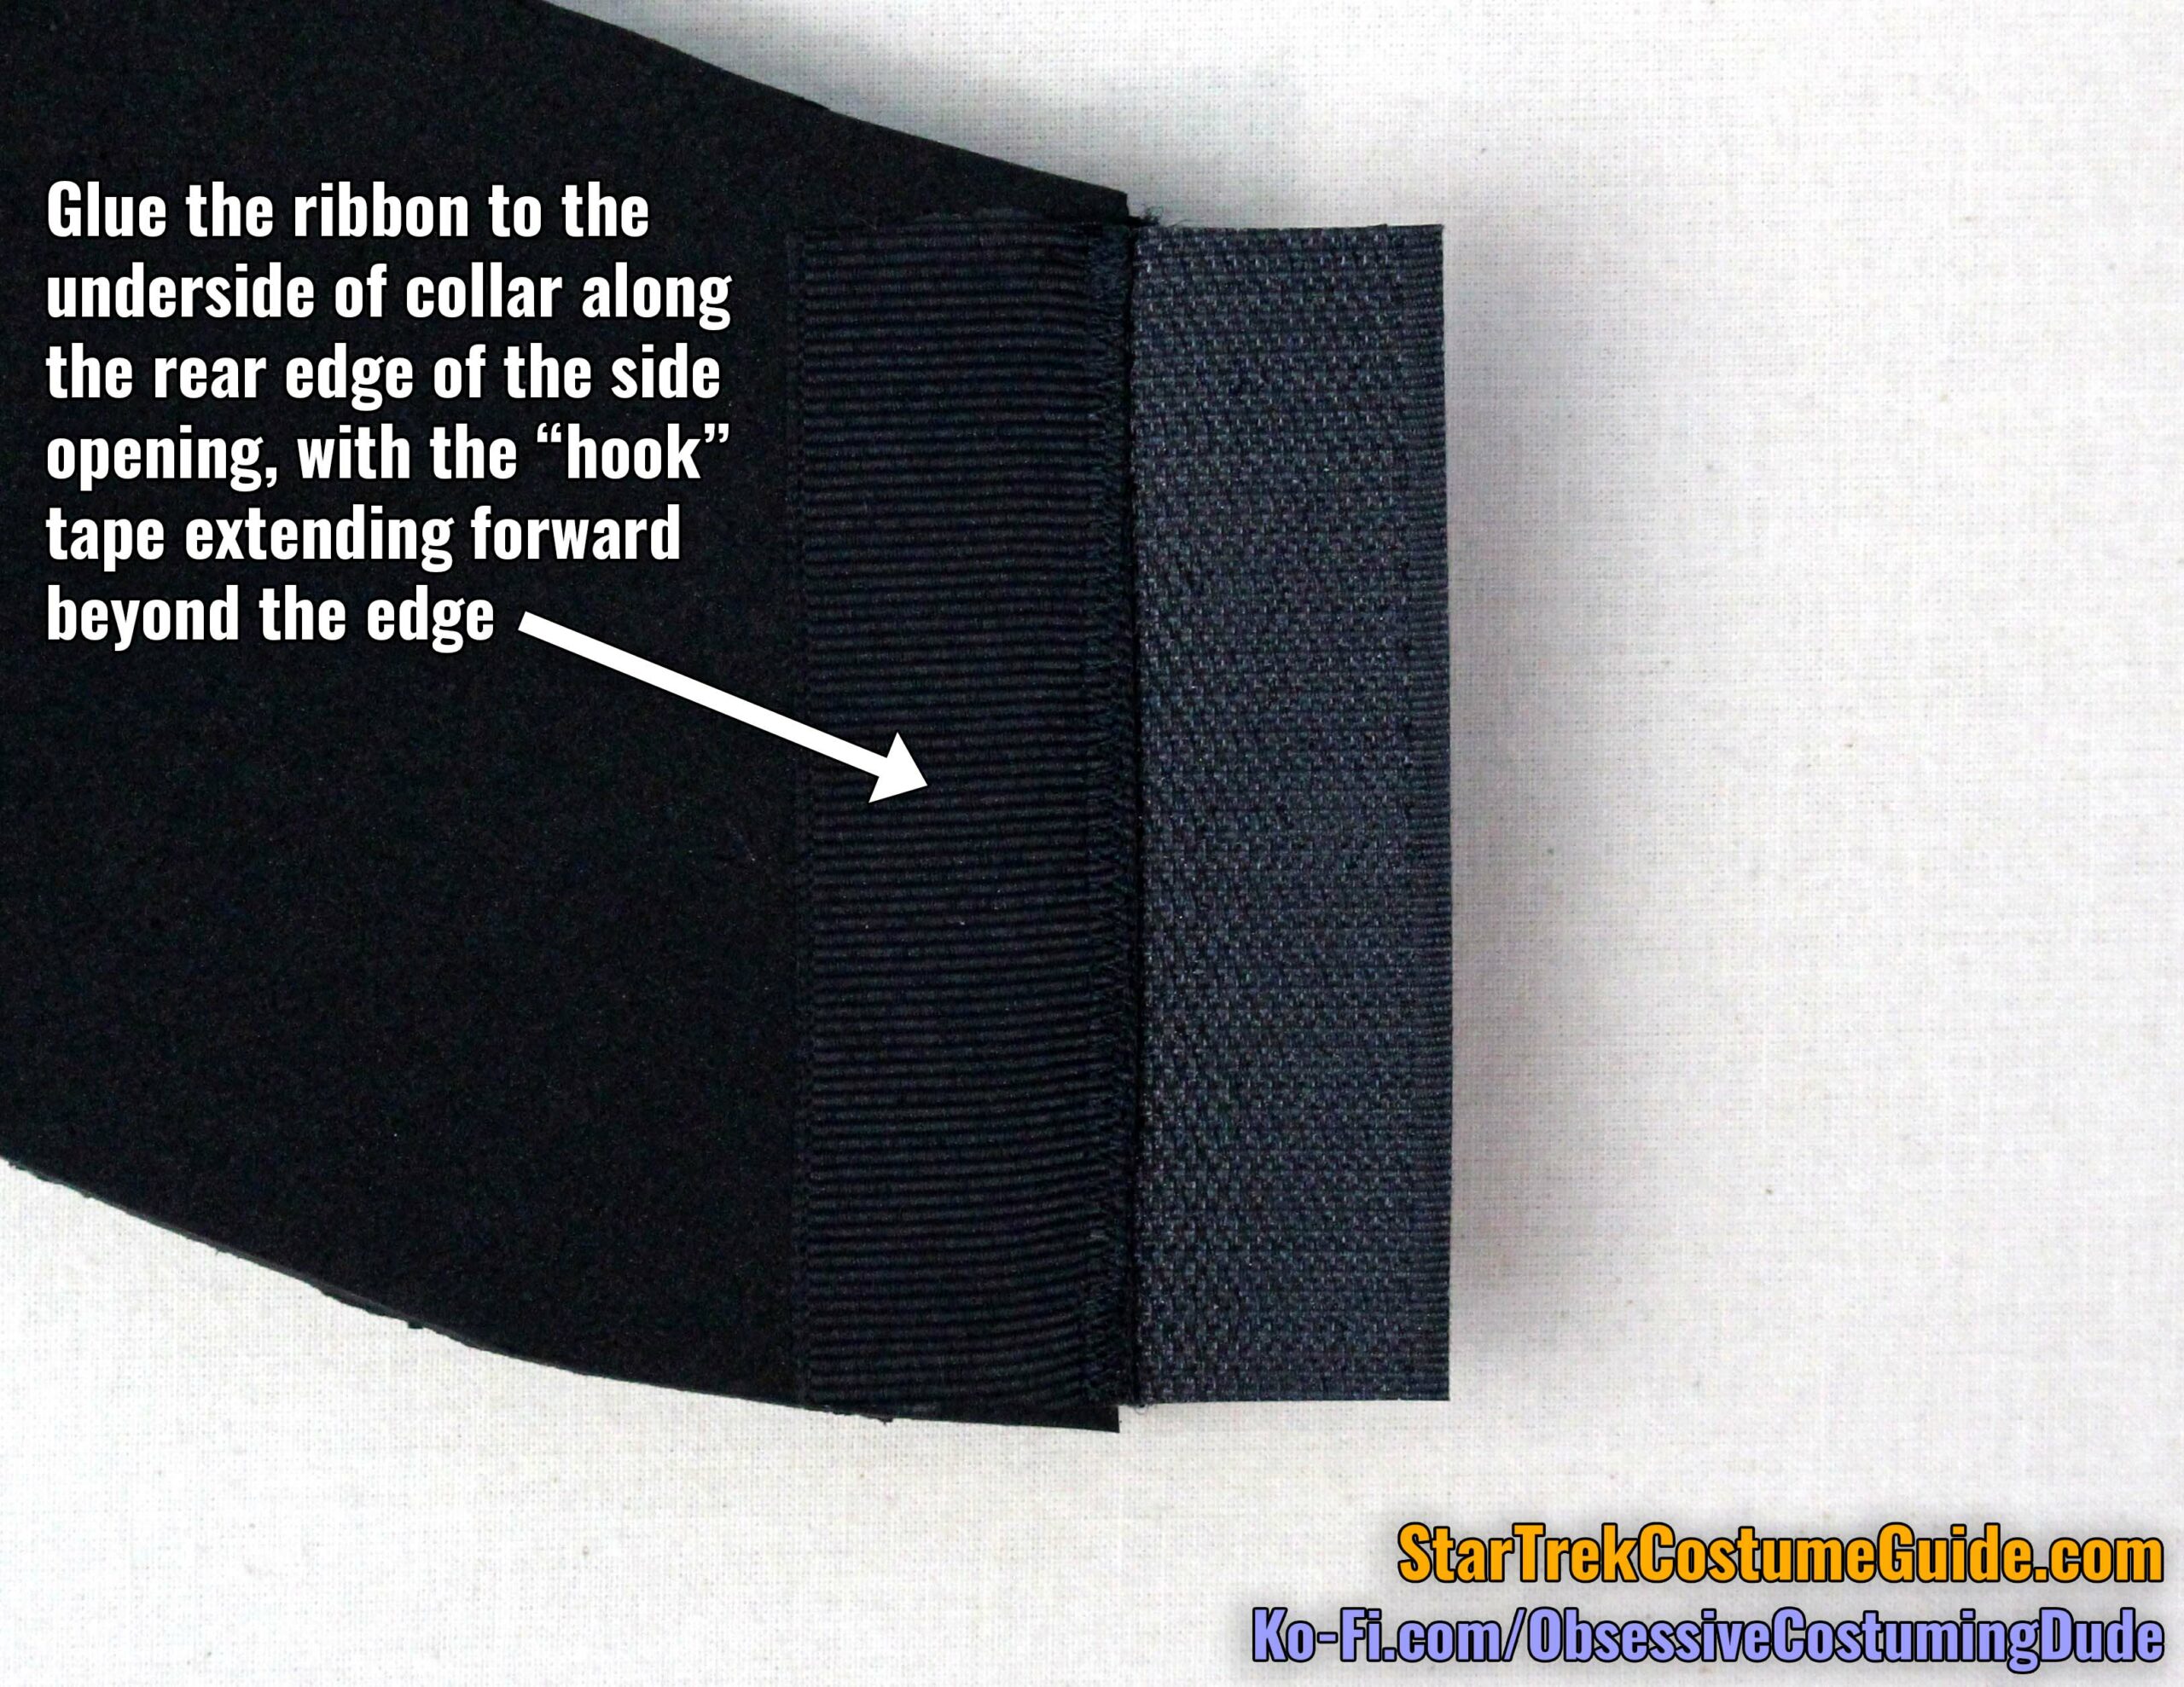
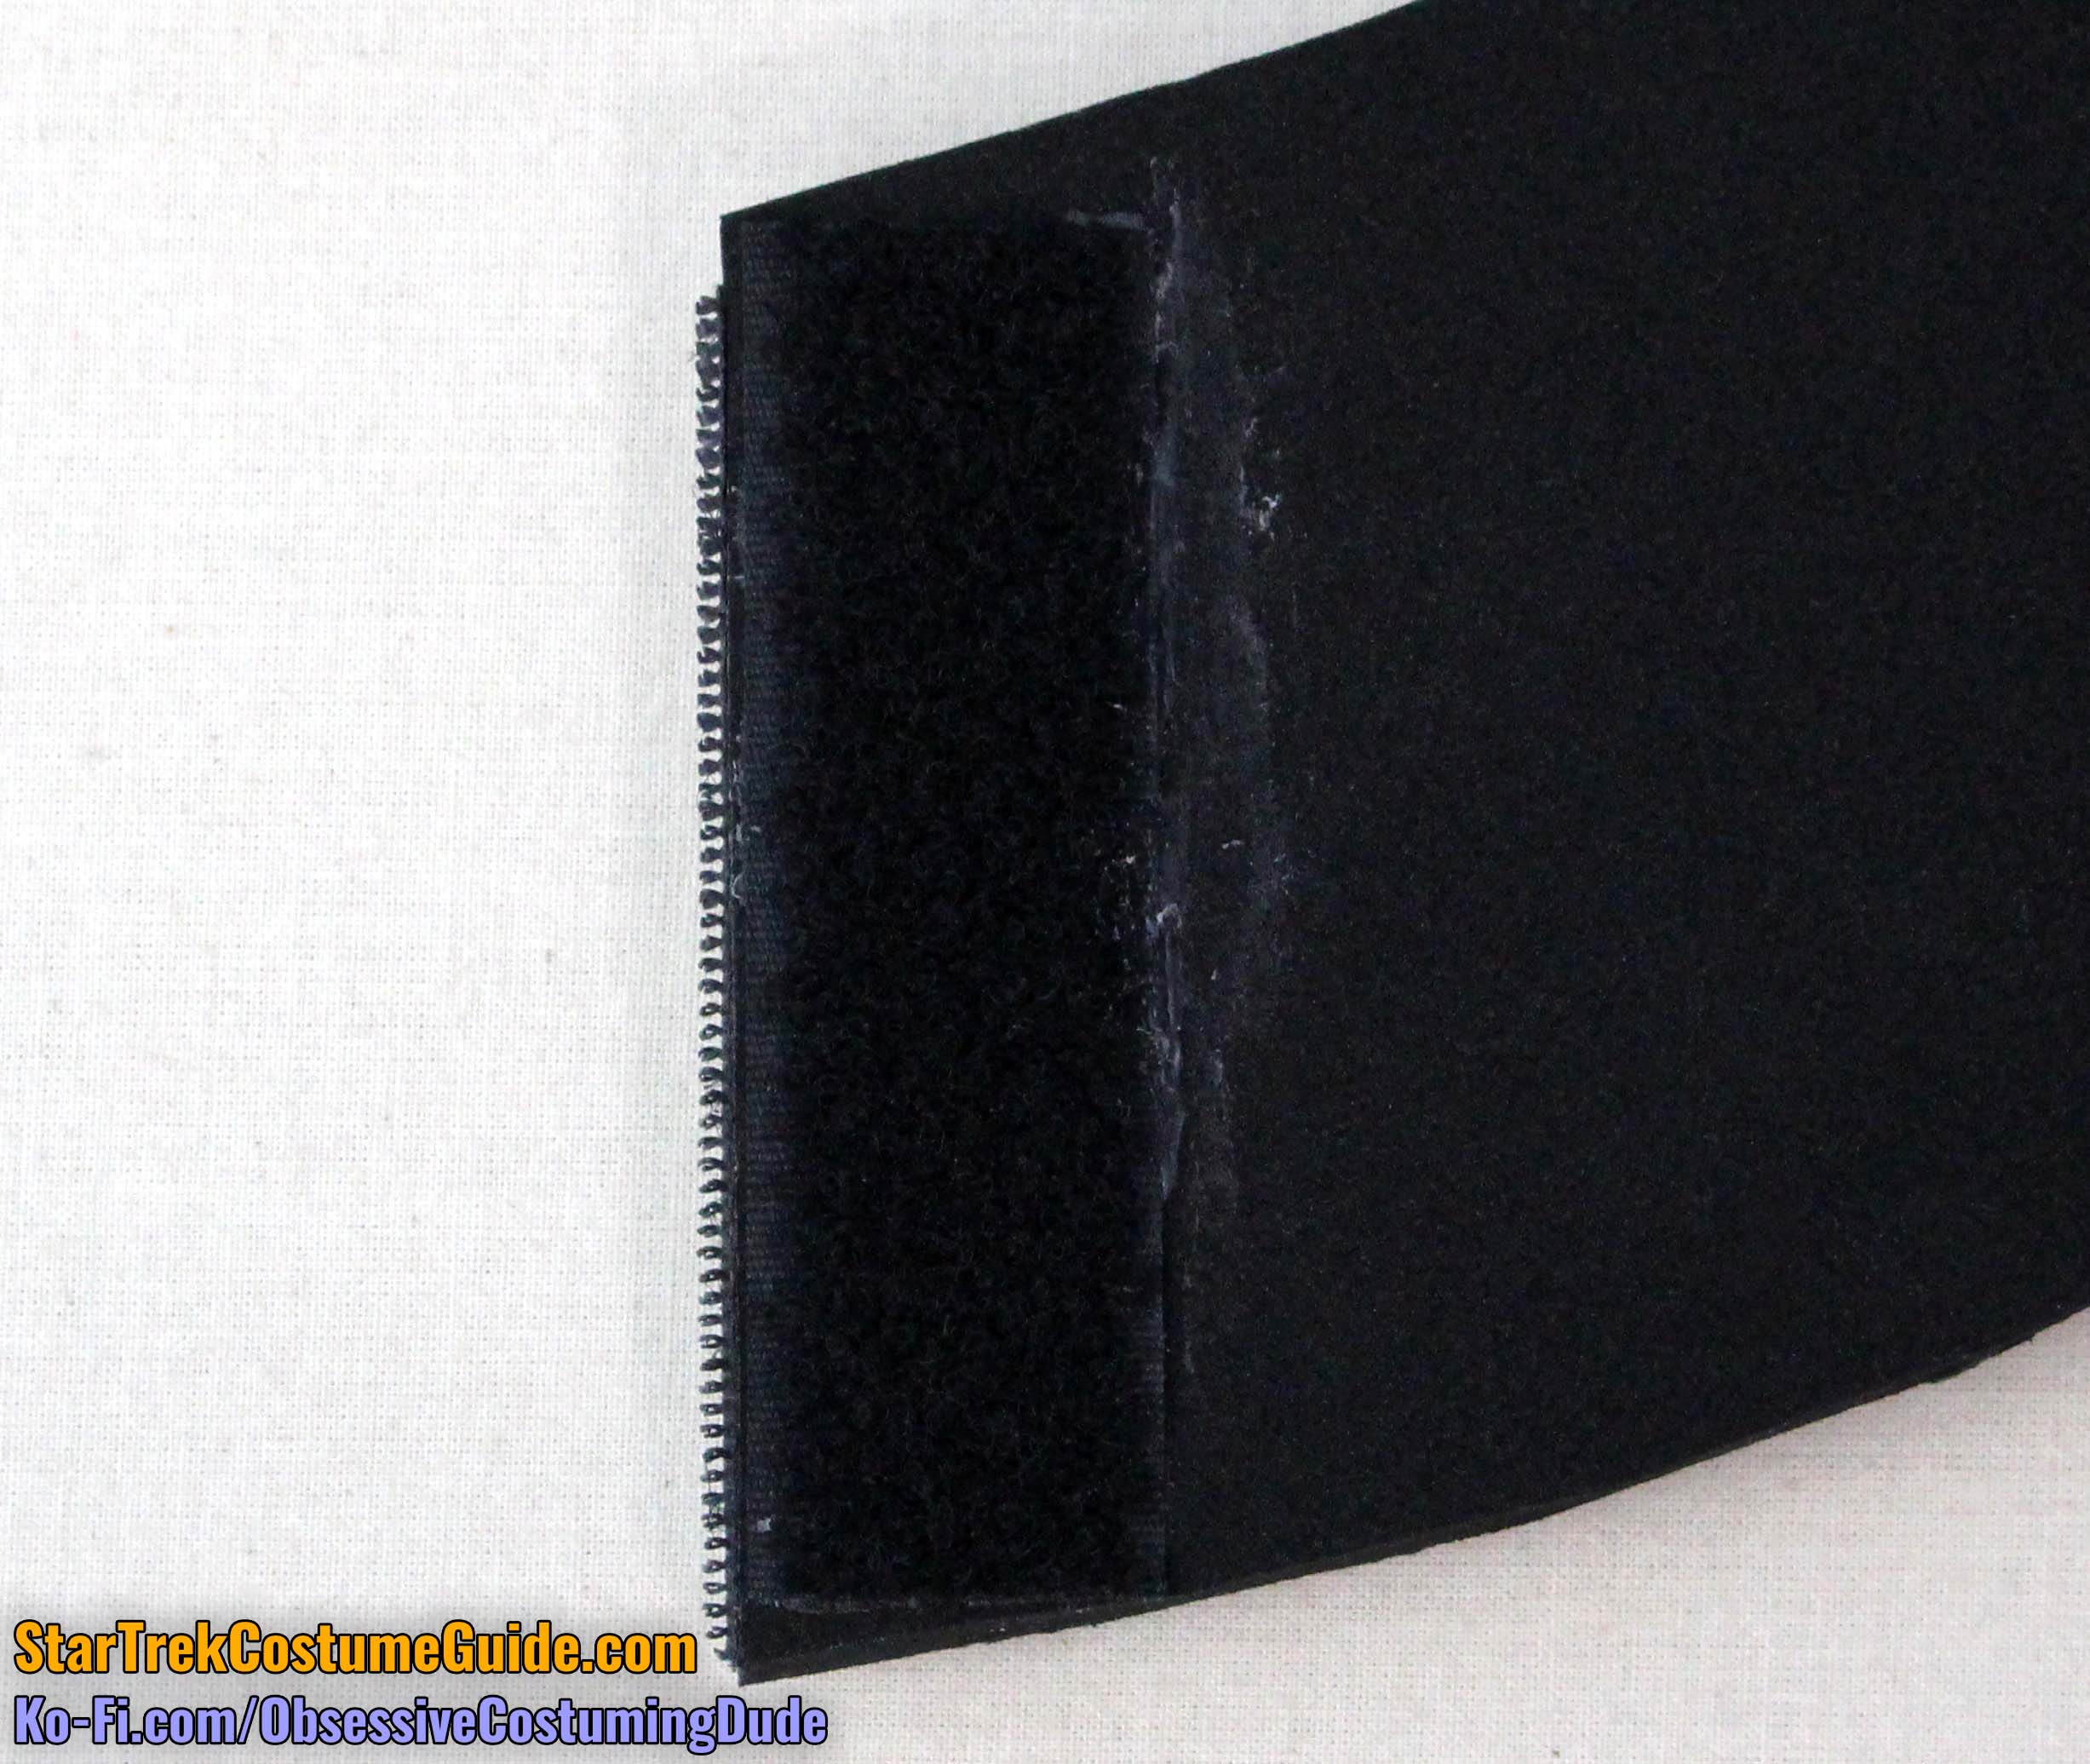
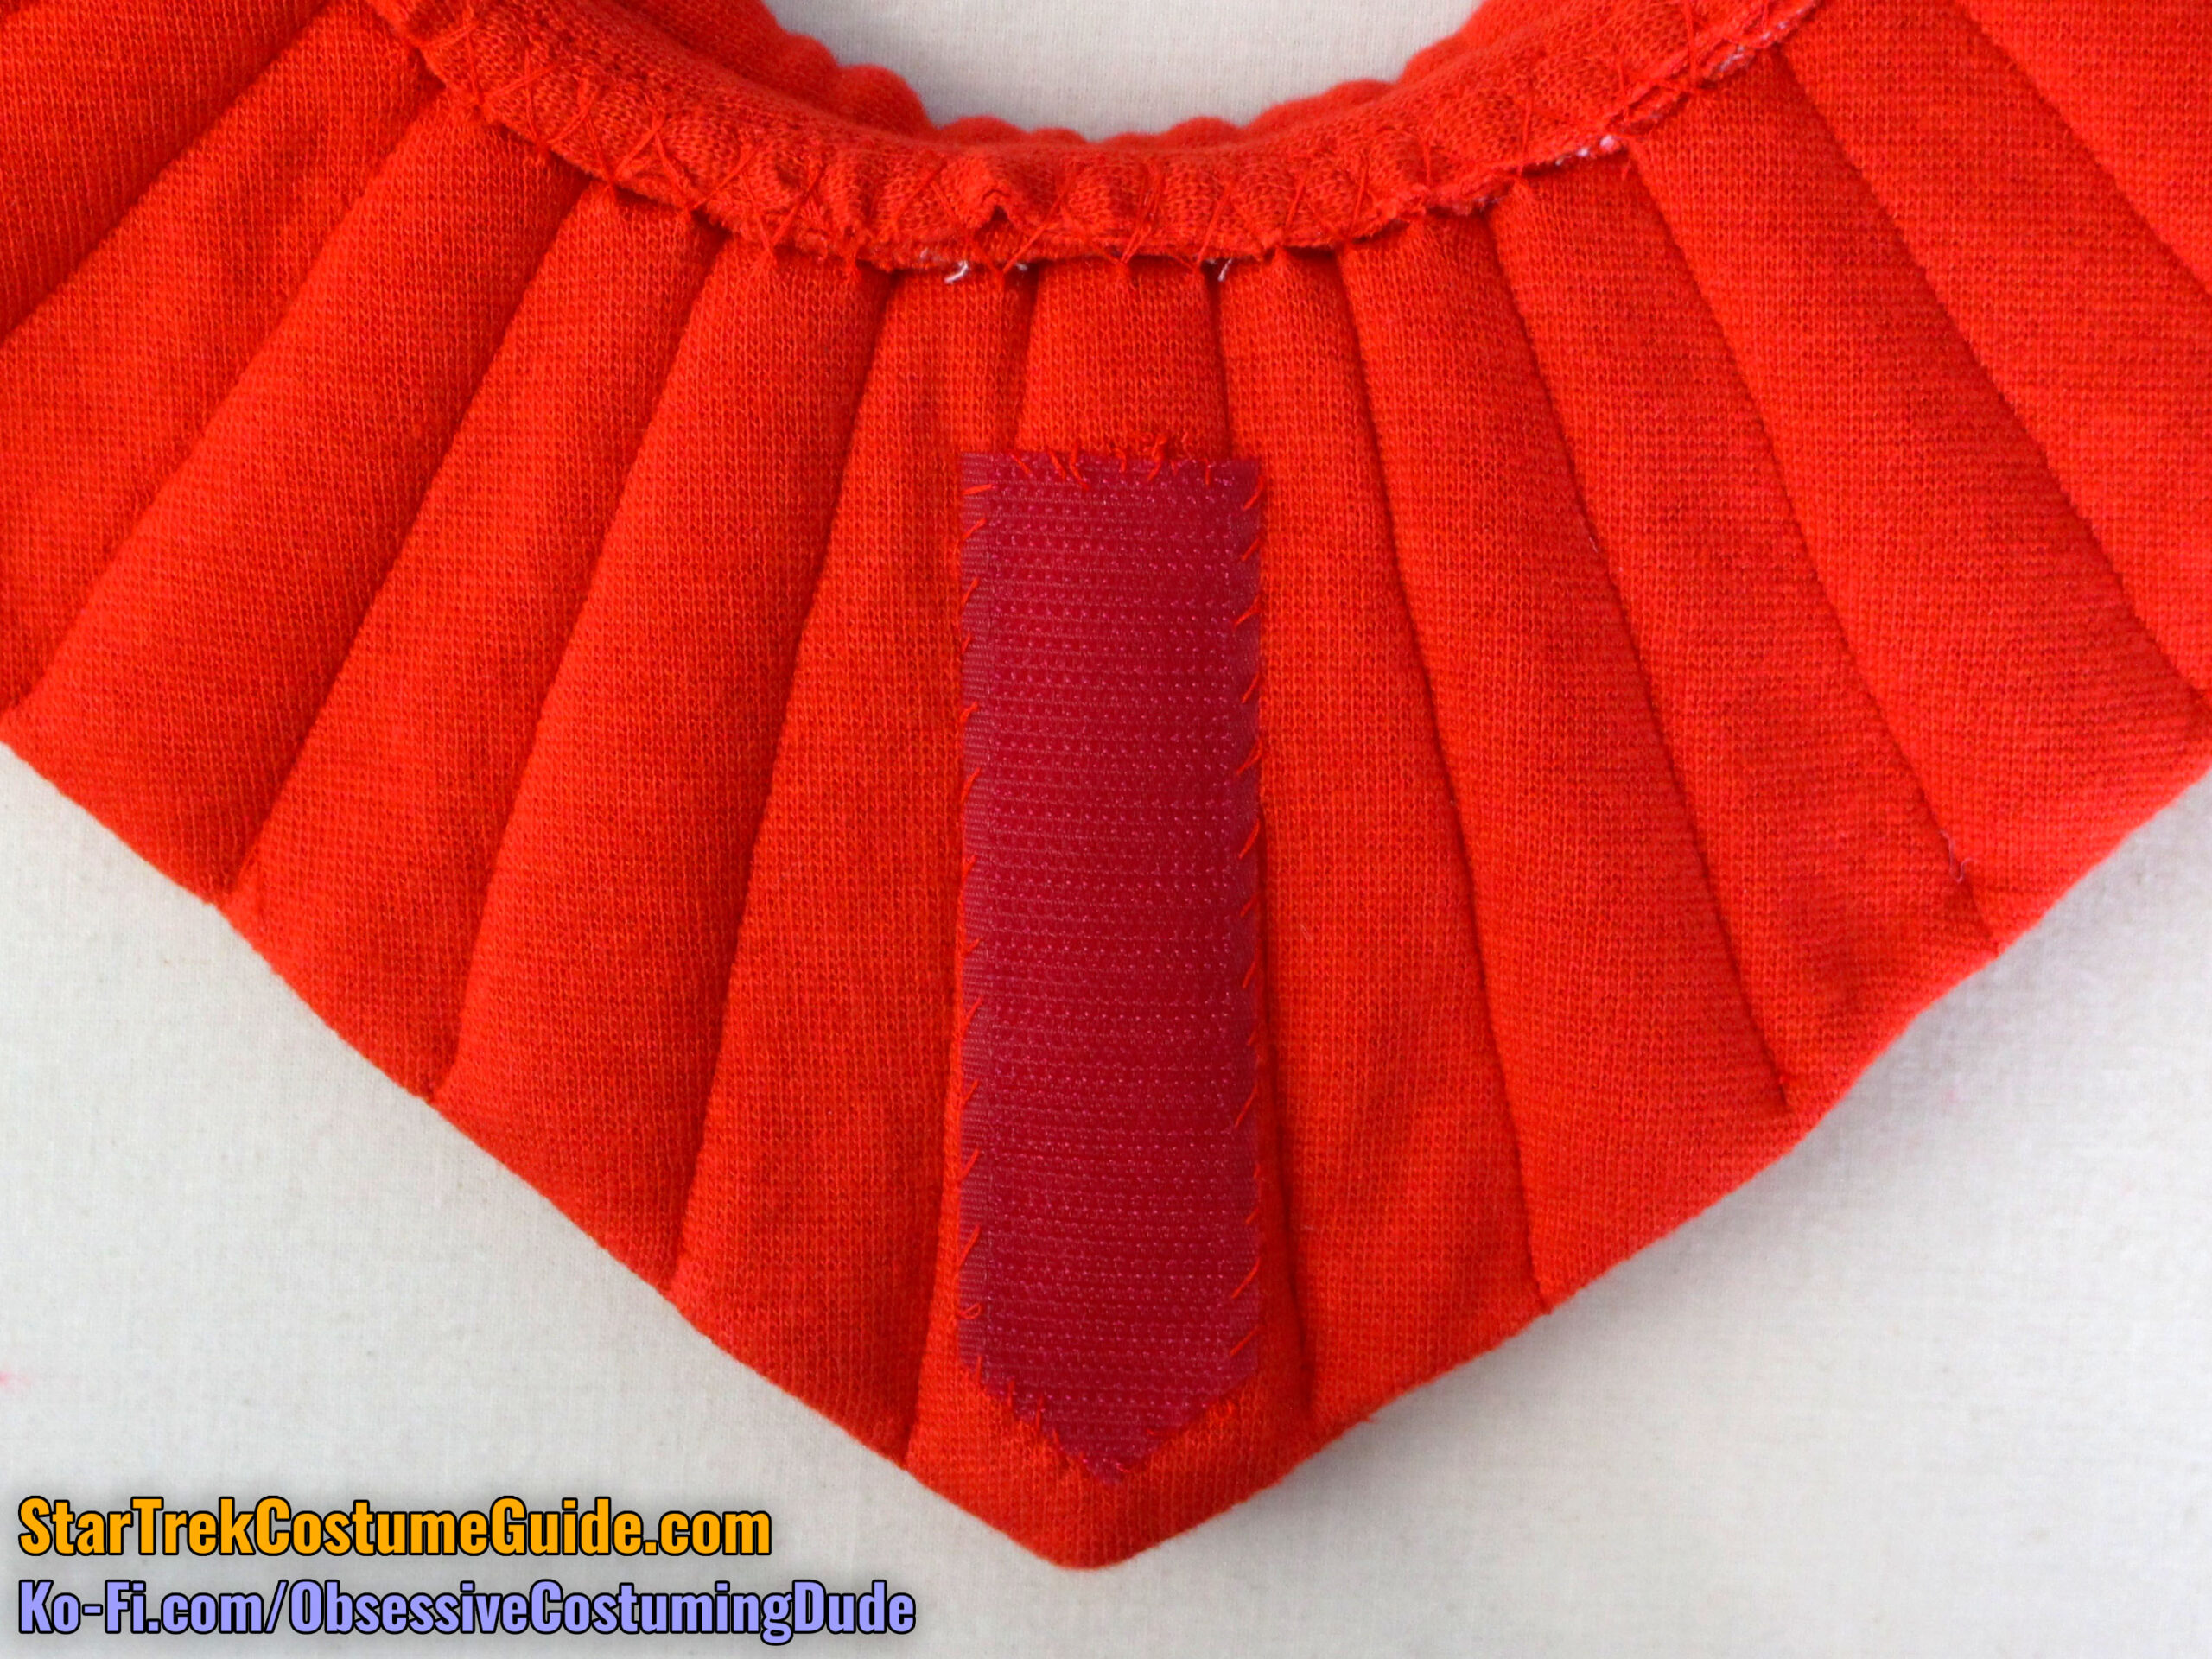
Position the assembly onto the underside of the collar so the hook tape (“Velcro”) extends forward beyond the rear side edge, and trim the lower edge of the ribbon if necessary so it doesn’t extend beyond the bottom of the collar.
Then glue the ribbon (using the E6000) to the underside of the collar.
Although that was how the back of the screen-used collar I examined was constructed, an alternative construction method would be to machine-sew a length of hook tape to a 2” (or wider) length of grosgrain ribbon, thus foregoing the overlapping-the-two-layers-and-zigzag-stitching-them-together process.
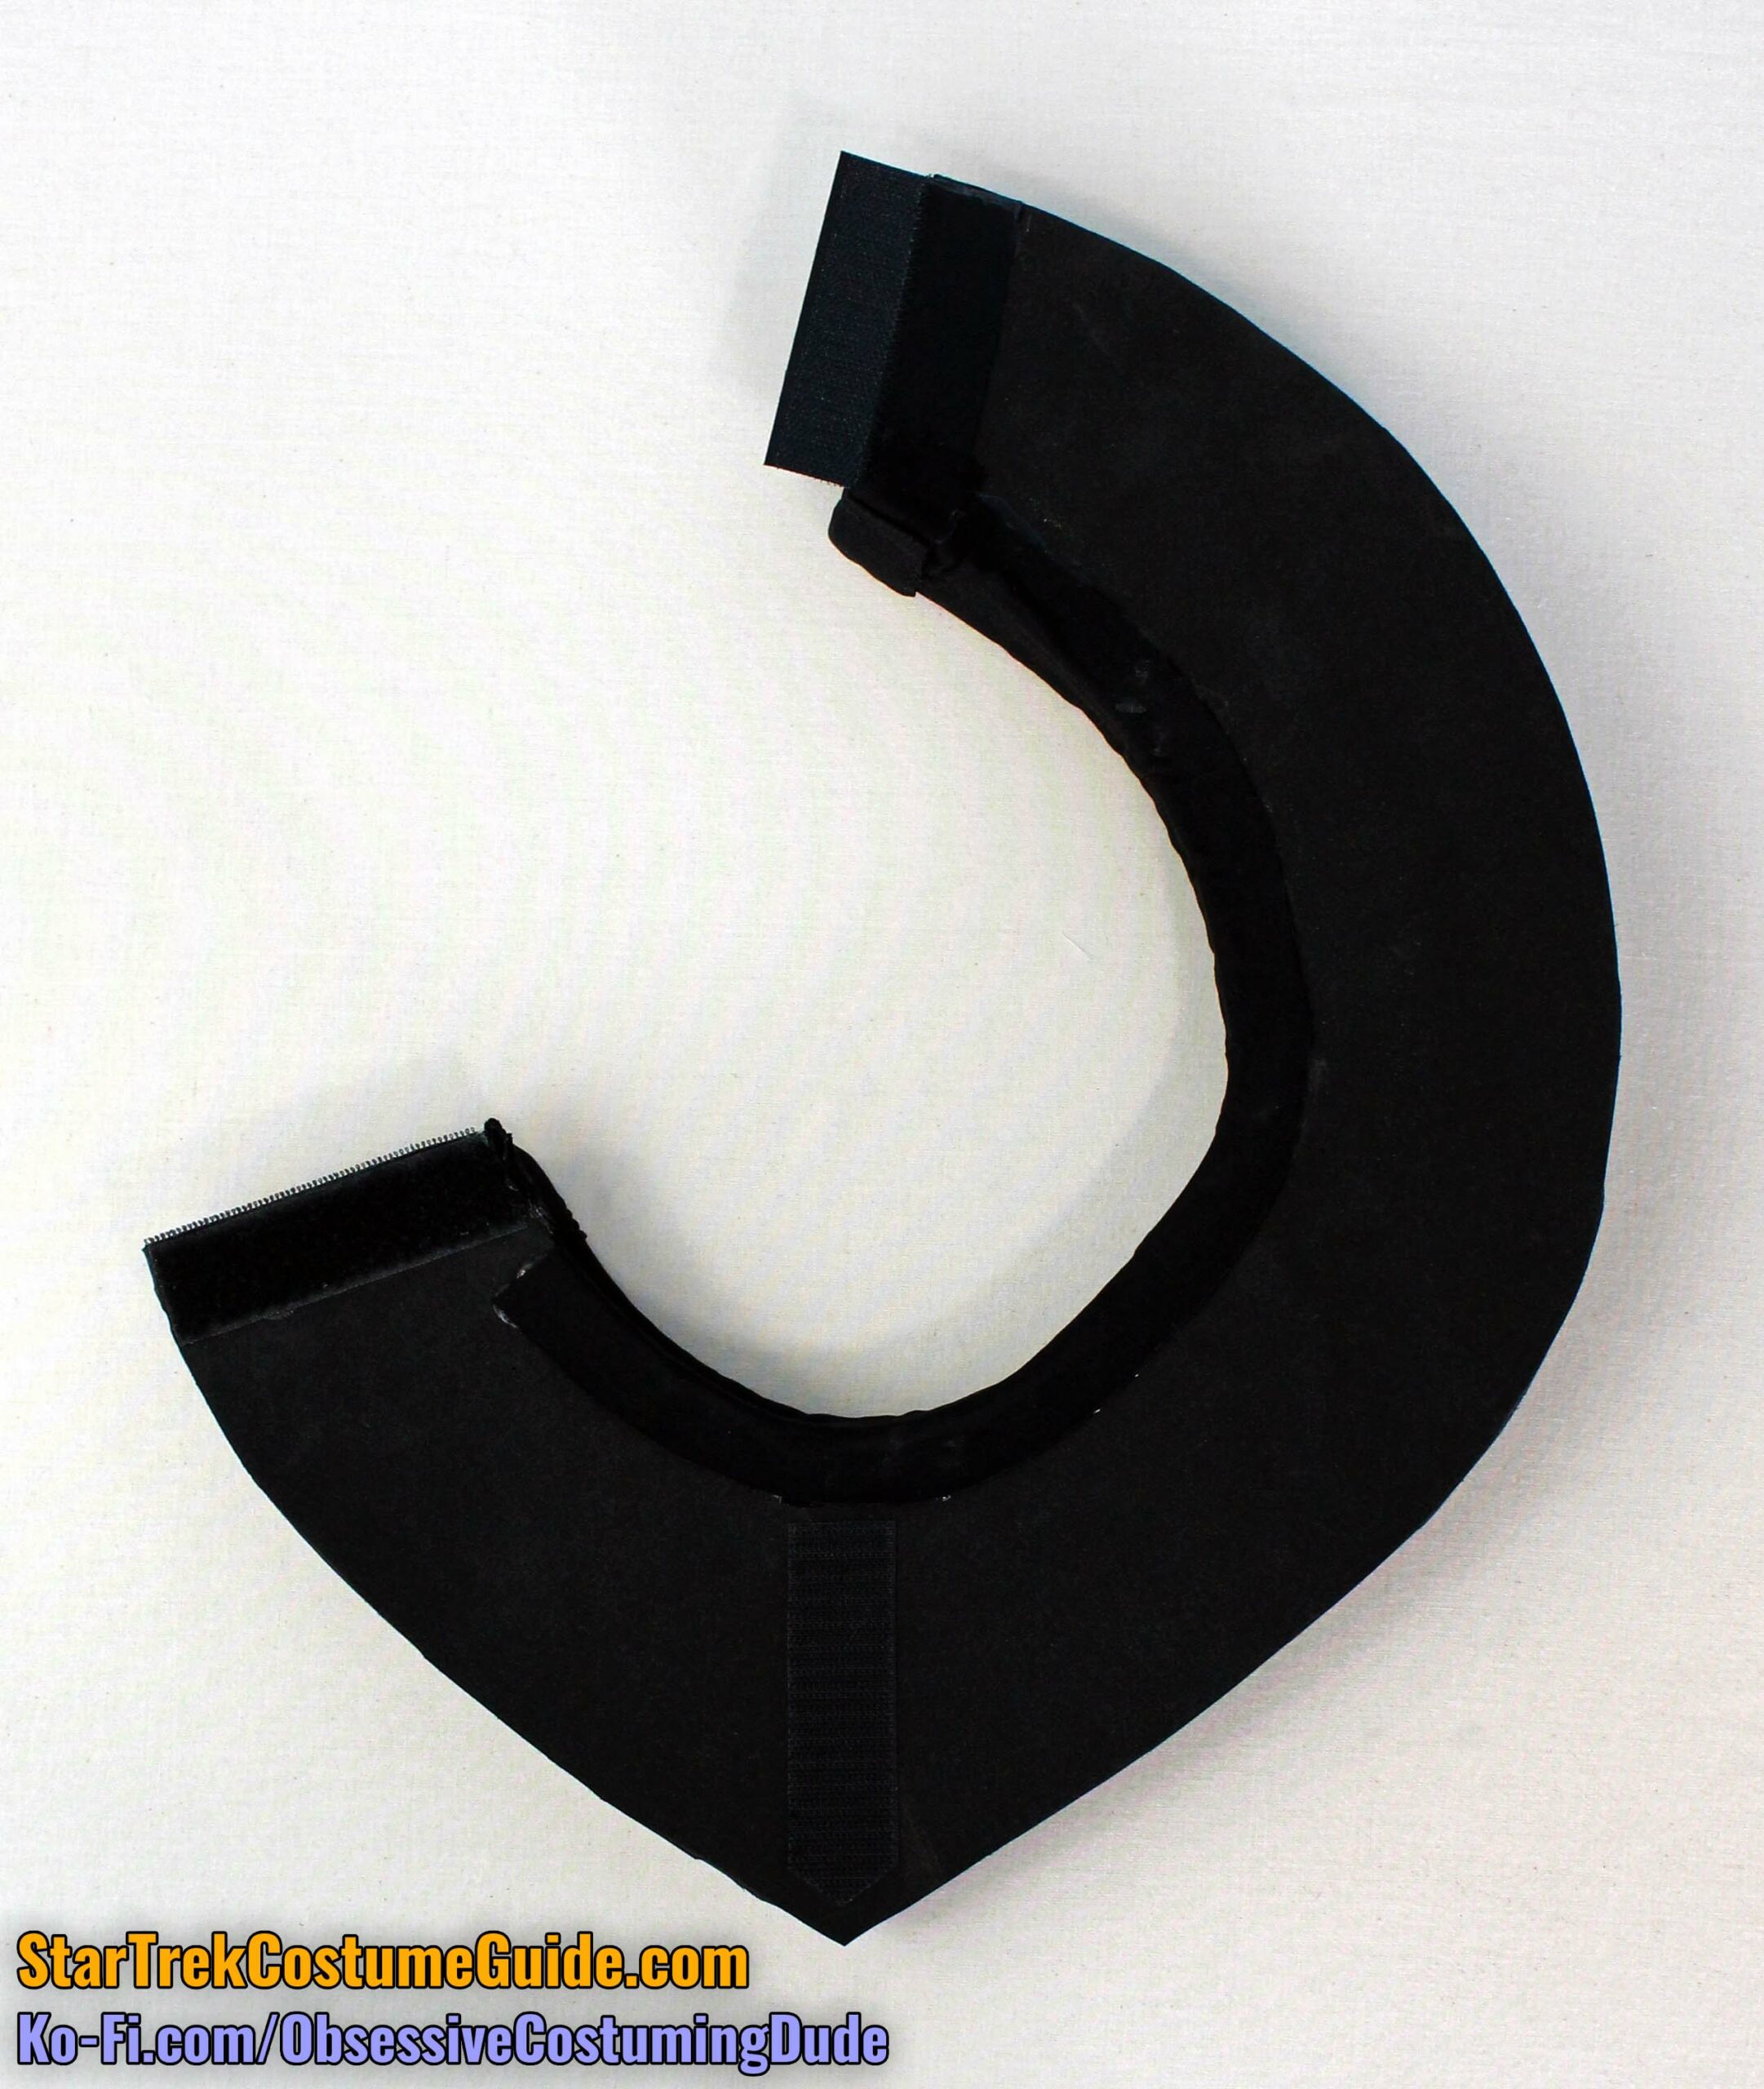
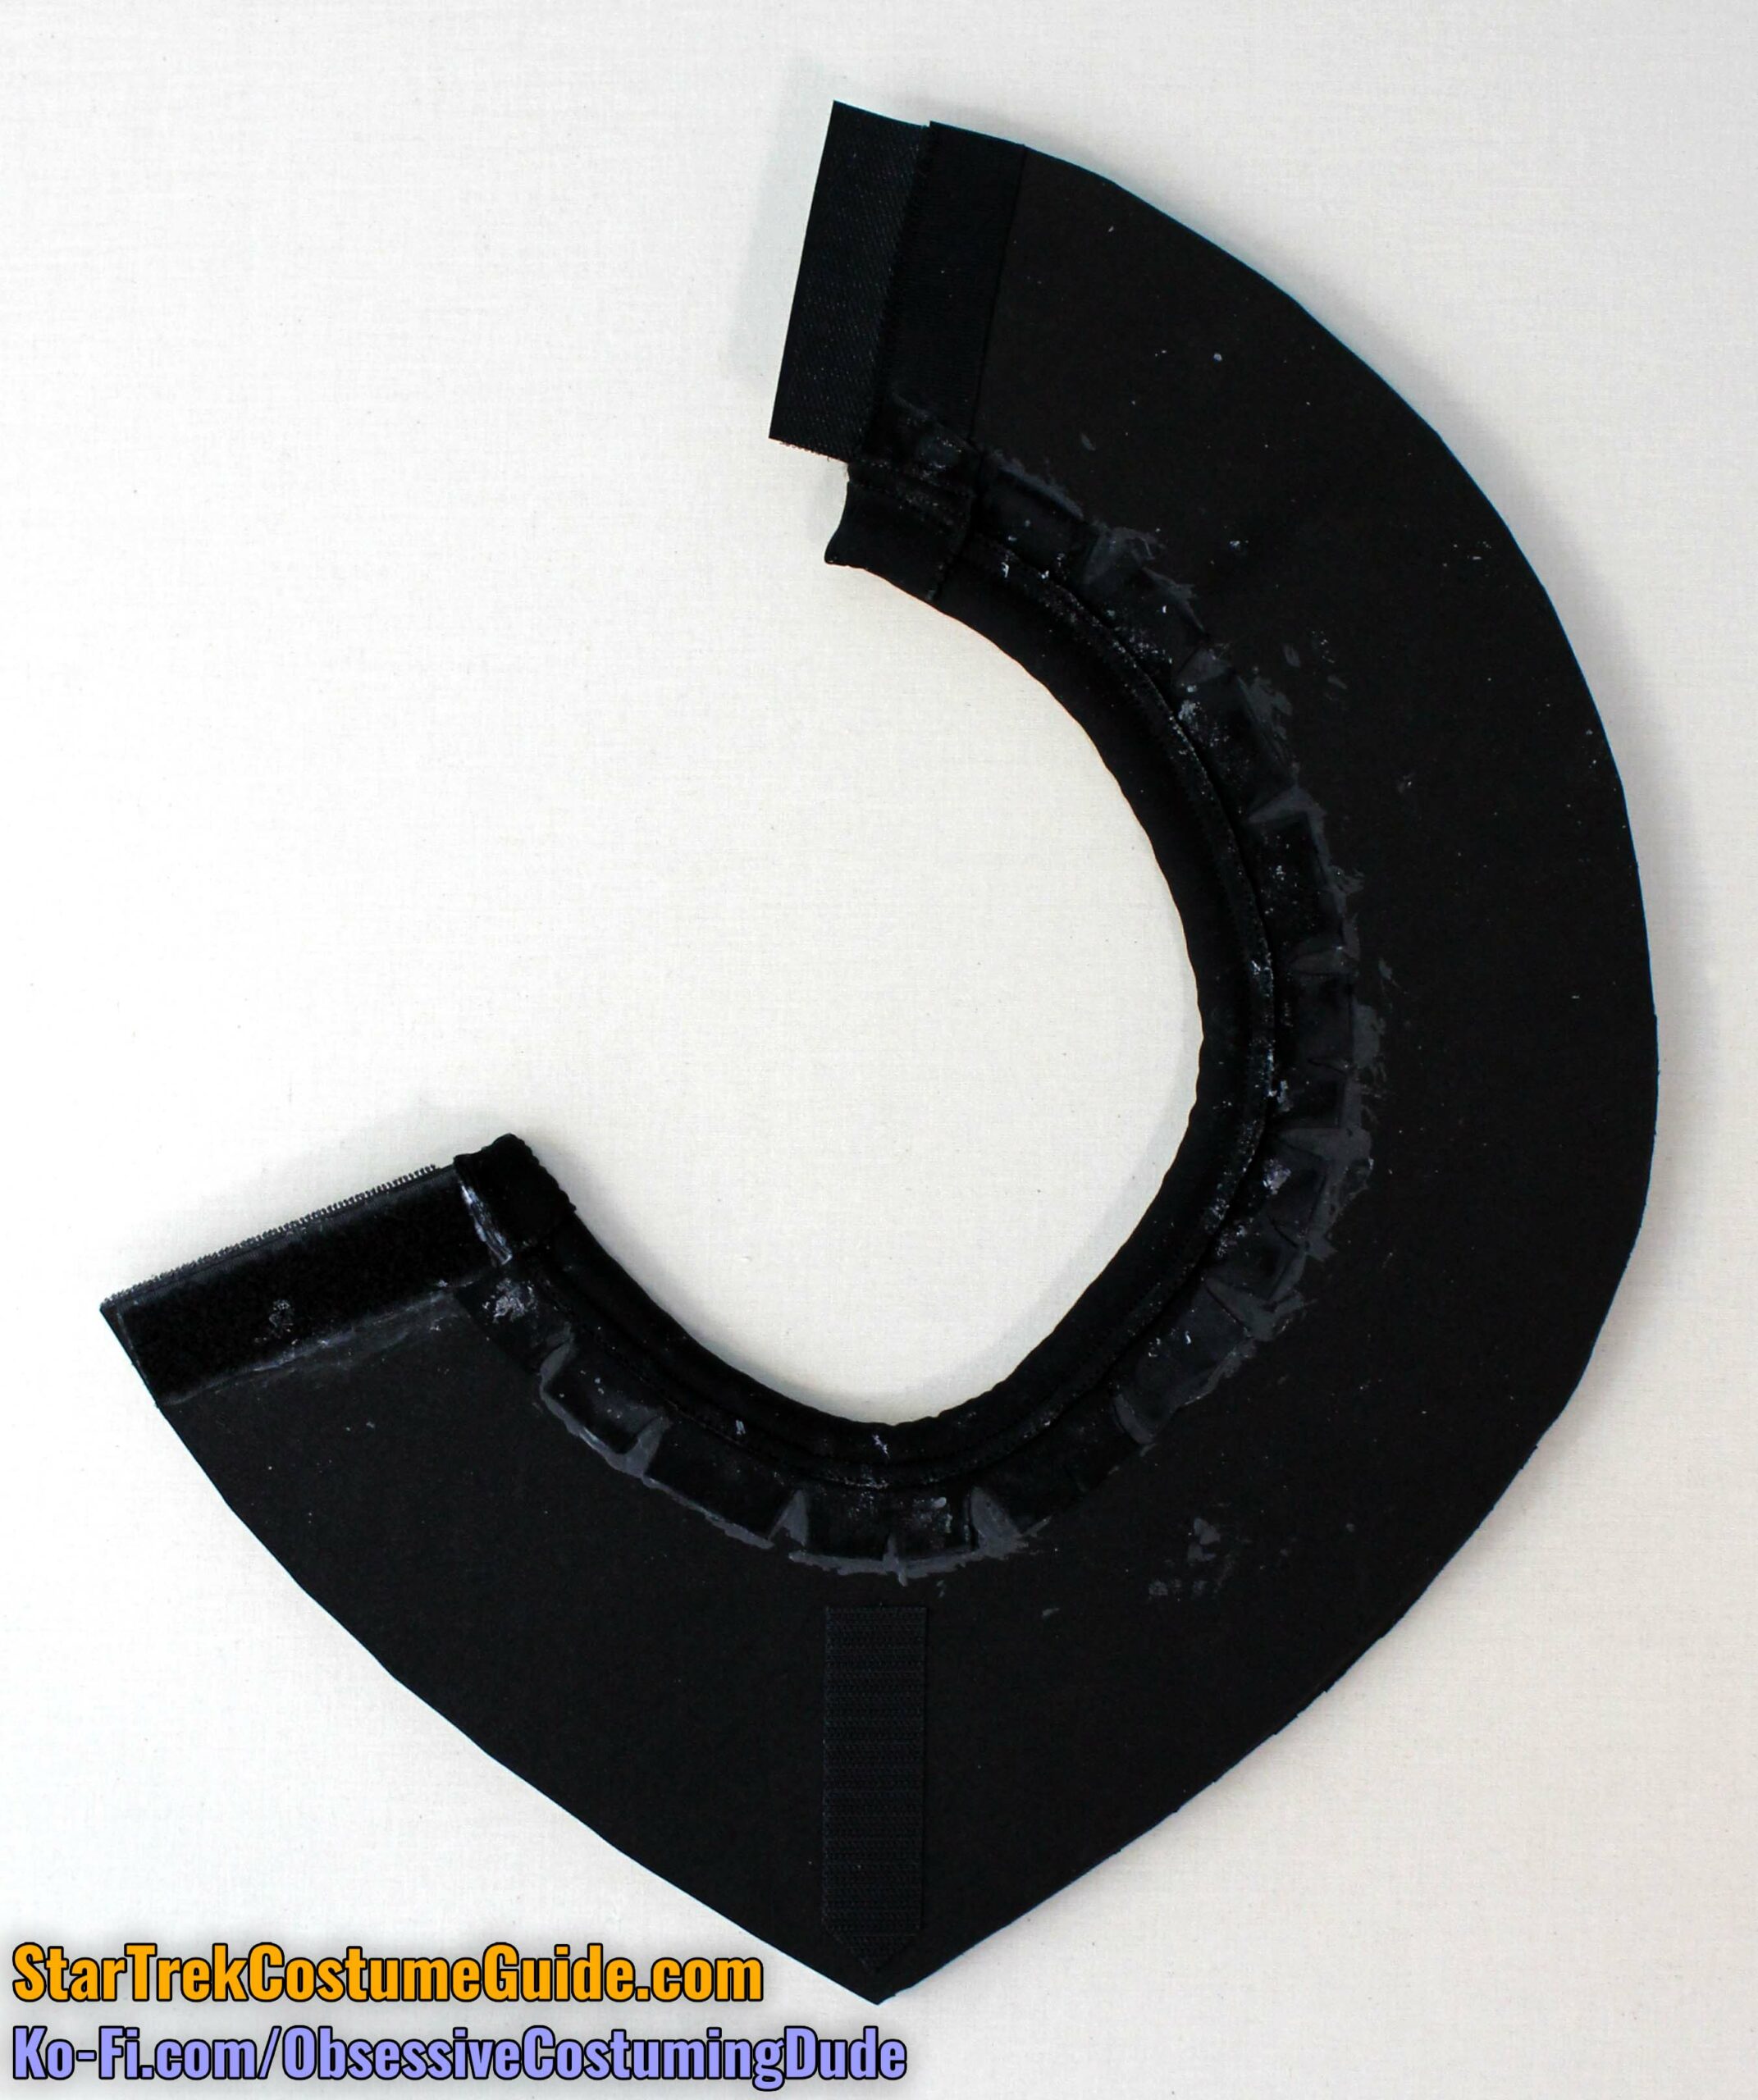
Position the corresponding “loop” tape onto the underside of the collar side front edge, again trimming as-necessary, and glue it into place.
(In the example above I used “Tacky Glue,” which bonds well enough to these surfaces but is messier to work with and more difficult to control. I definitely prefer the E6000!)
Cut a thin strip of ¼” wide black hook-and-loop tape, 3 ½” long.
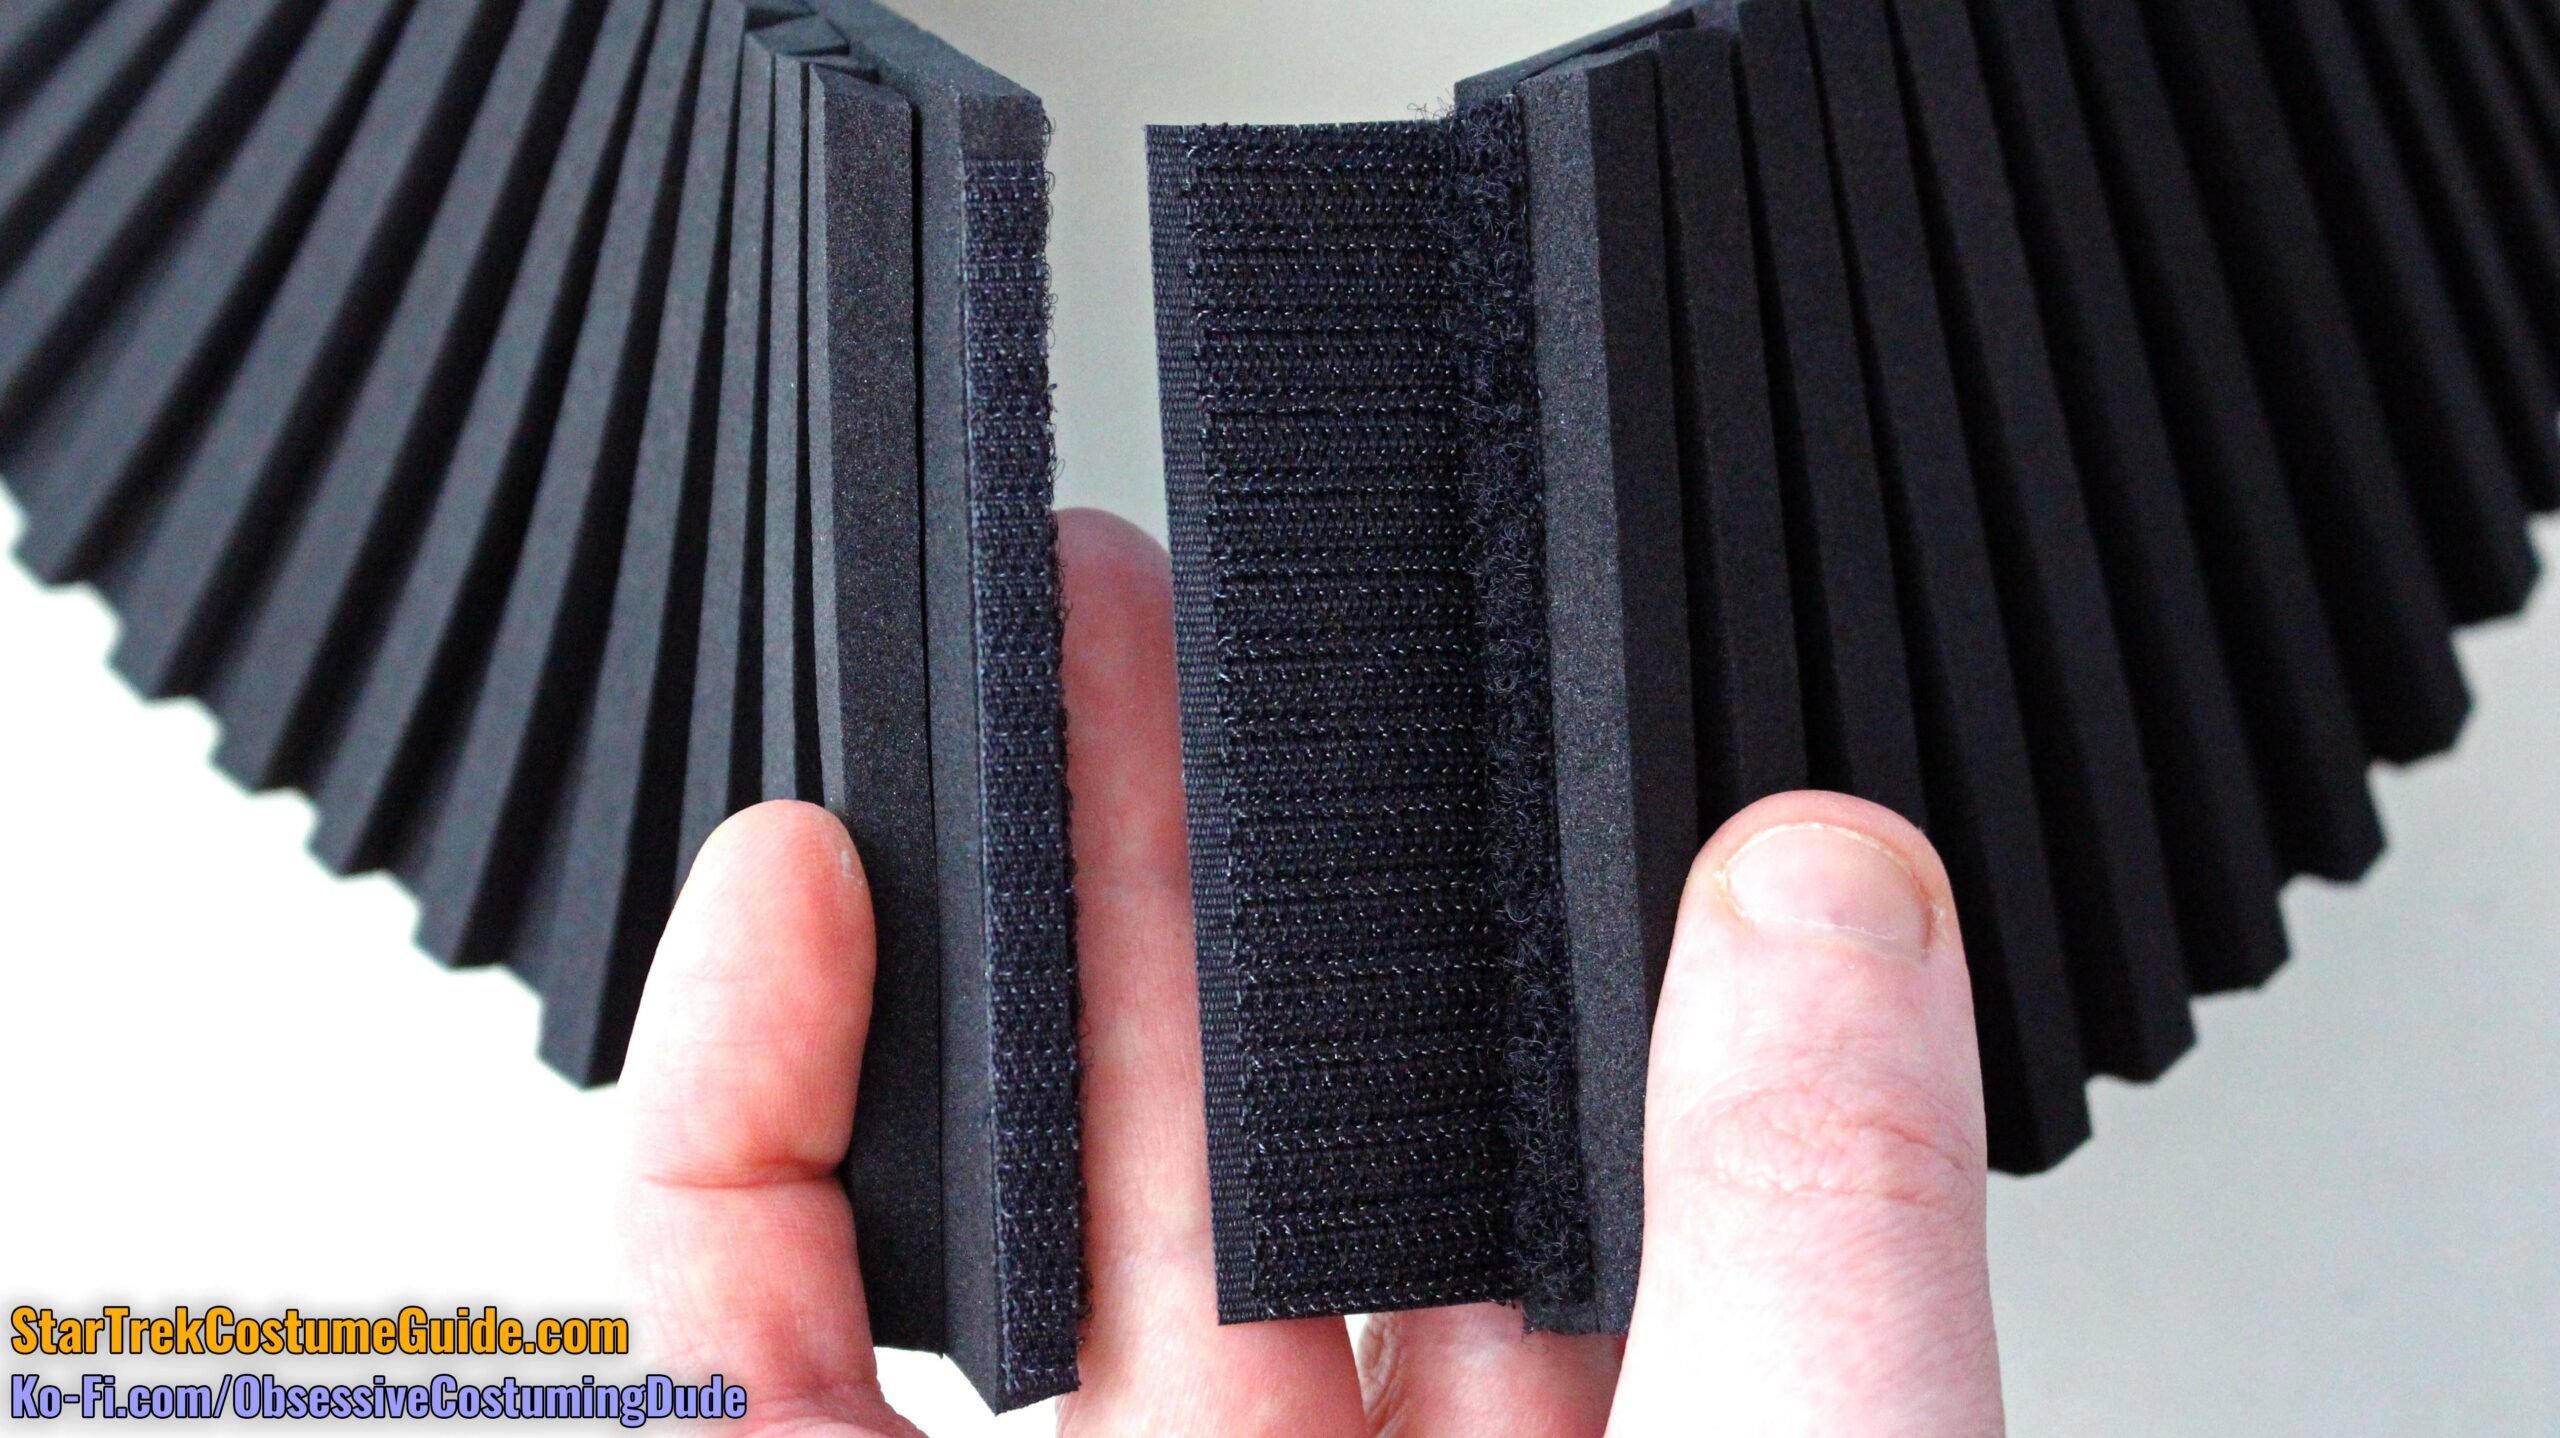
Place the opposite lengths along the vertical edges of the collar opening, and glue them into place.
In other words, place the “hook” (scratchy) tape along the front vertical edge, and place the “loop” (fuzzy) tape along the back vertical edge.
You can use sticky-back “Velcro” for this, but in my experience they don’t stay attached for very long. It’s better to glue these into place with the E6000.
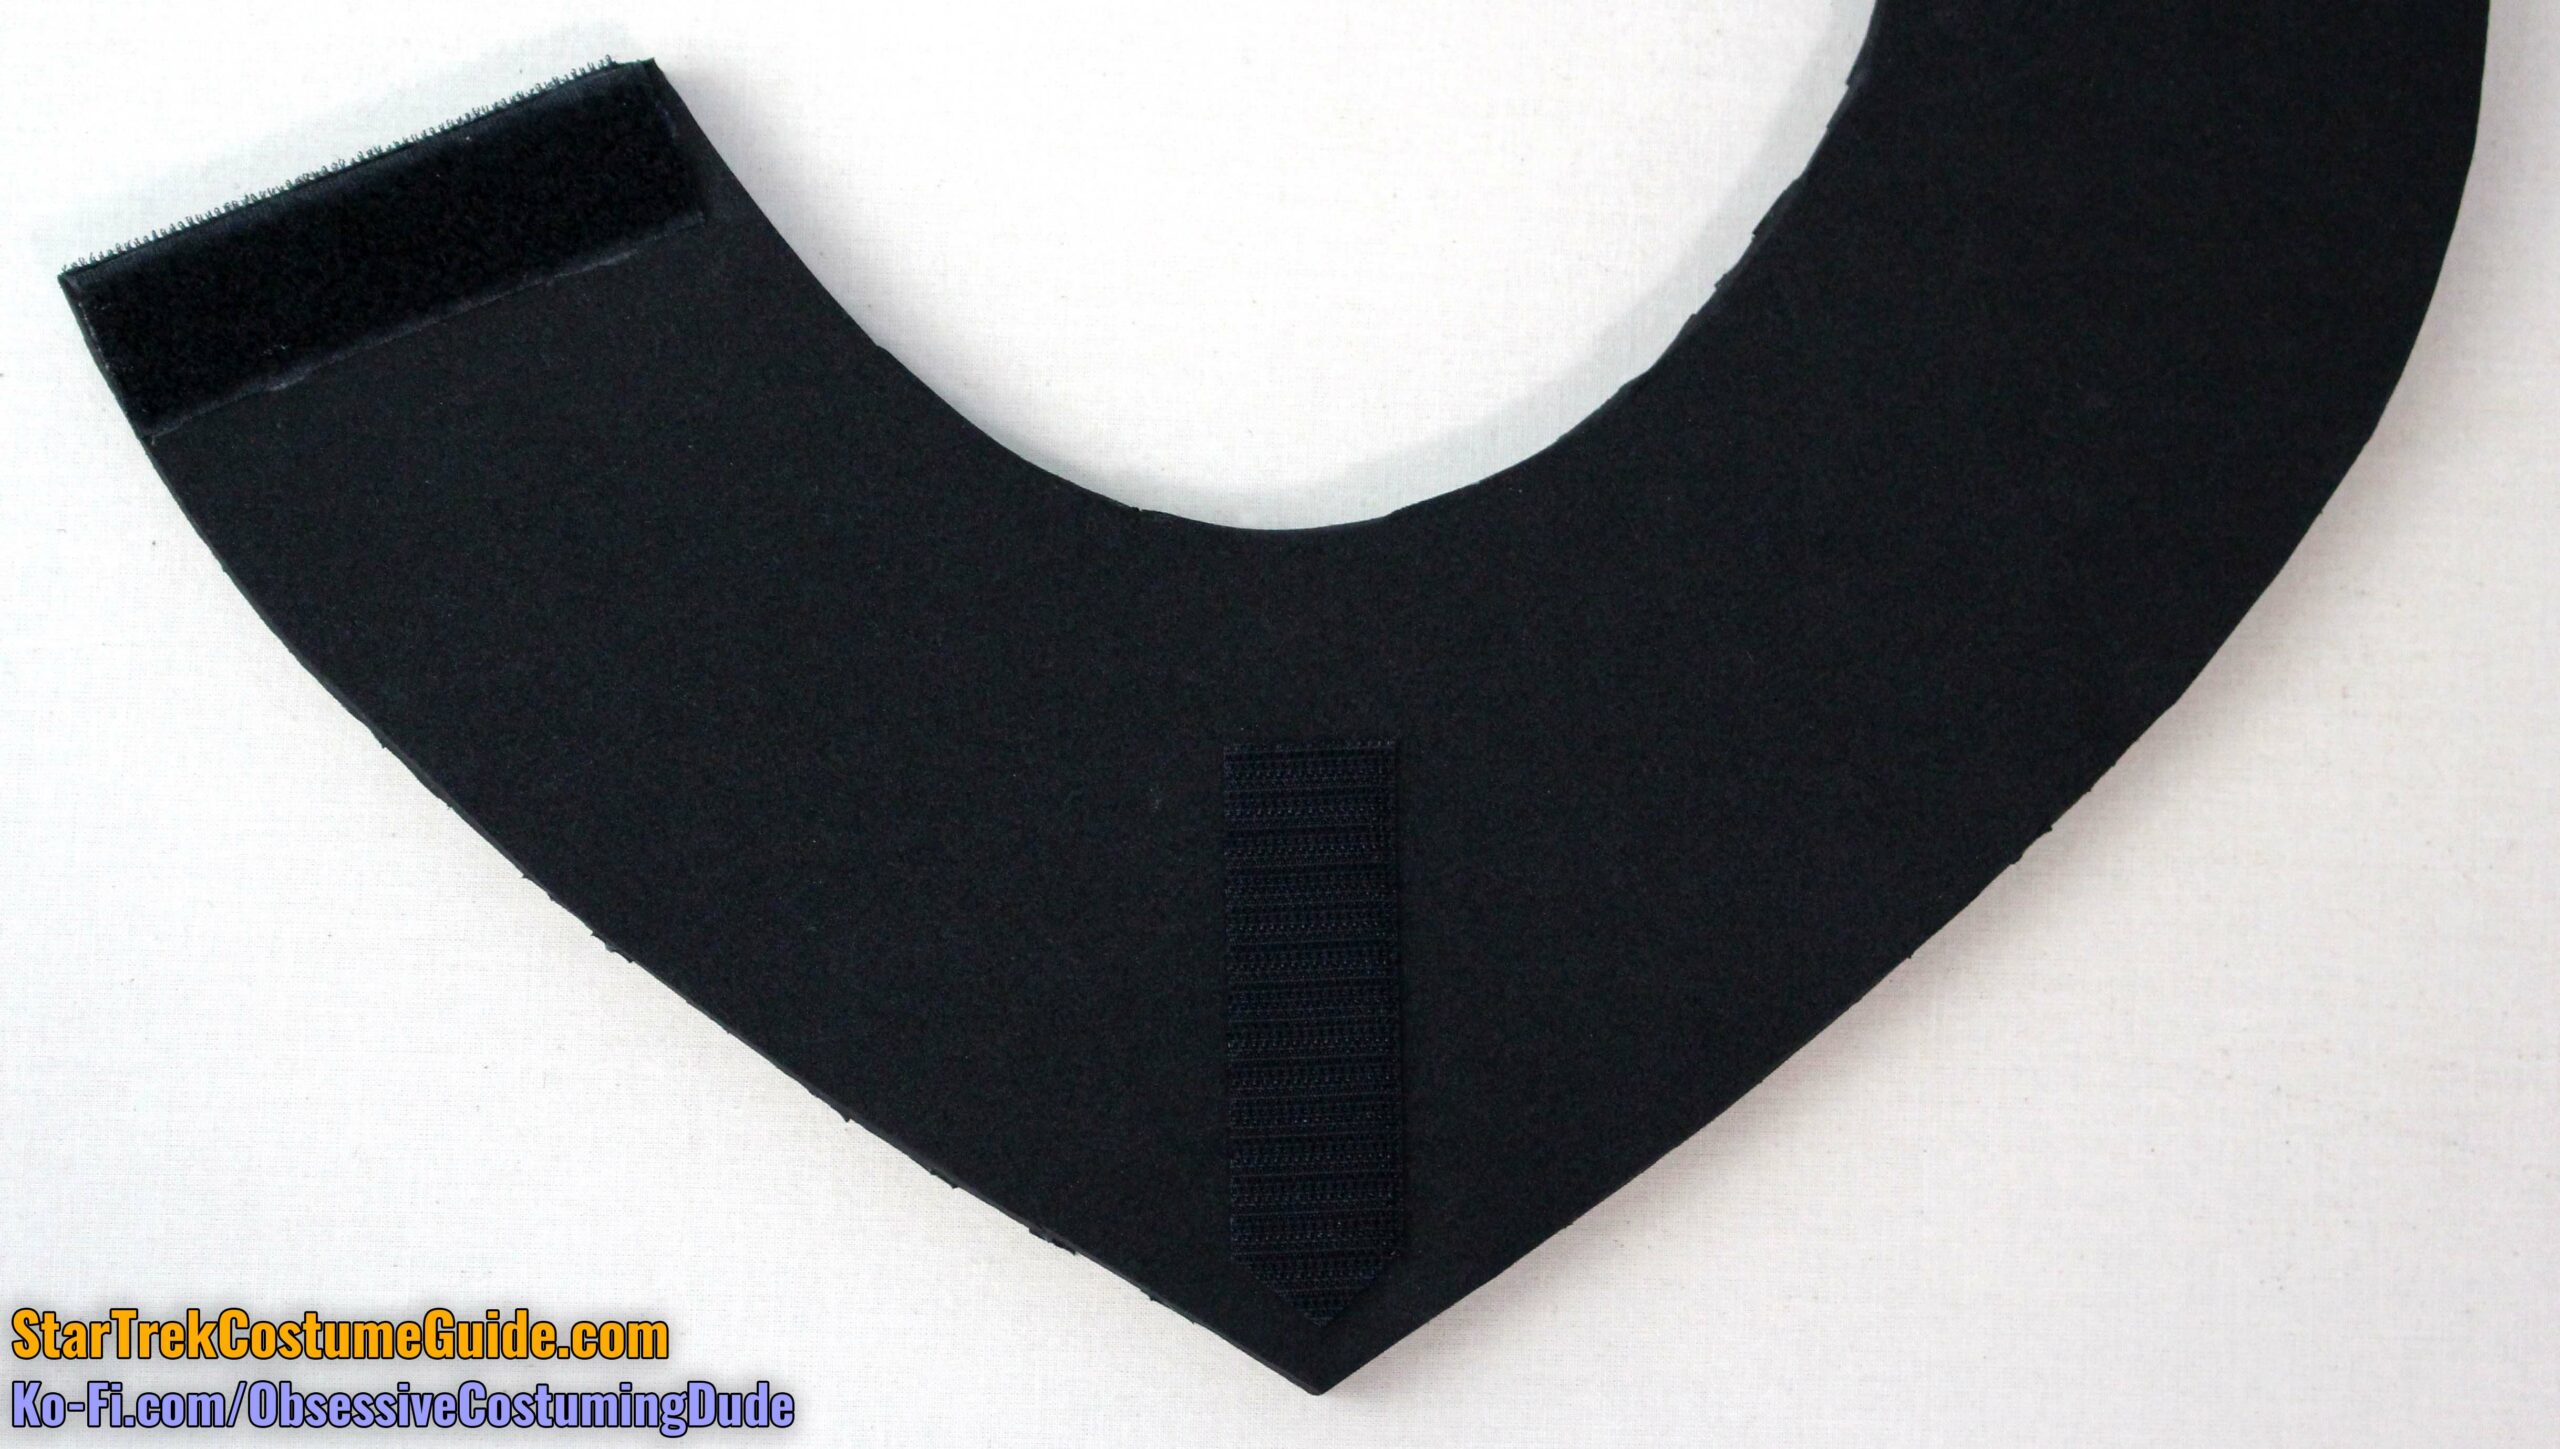
Cut another 3 ½” length of your black “hook” tape and cut the lower edge so it’s slightly pointed.
Then glue this “hook” tape to the underside of the collar at the center front.
This is to fasten the collar to the corresponding “loop” tape on the upper front of the jumpsuit.
For the TMP collar, you’re all finished!
For the TWOK-era officer/enlisted collar, there are a few more steps.
Cut a length of ½” upholstery cord long enough to wrap around the outer neckline of the collar.
TIP: Tape the ends of your cord over the area where you’ll be cutting to prevent it from unraveling.
Cut your collar’s neckline piping channel (piece A3) out of the black lightweight spandex.
Wrap the spandex around your ½” upholstery cord and trim the spandex so it only extends beyond the cord by about an inch on each end.
Pin the spandex snugly around the cord. (I also find it helpful to pin the two layers of the “lip” together.)
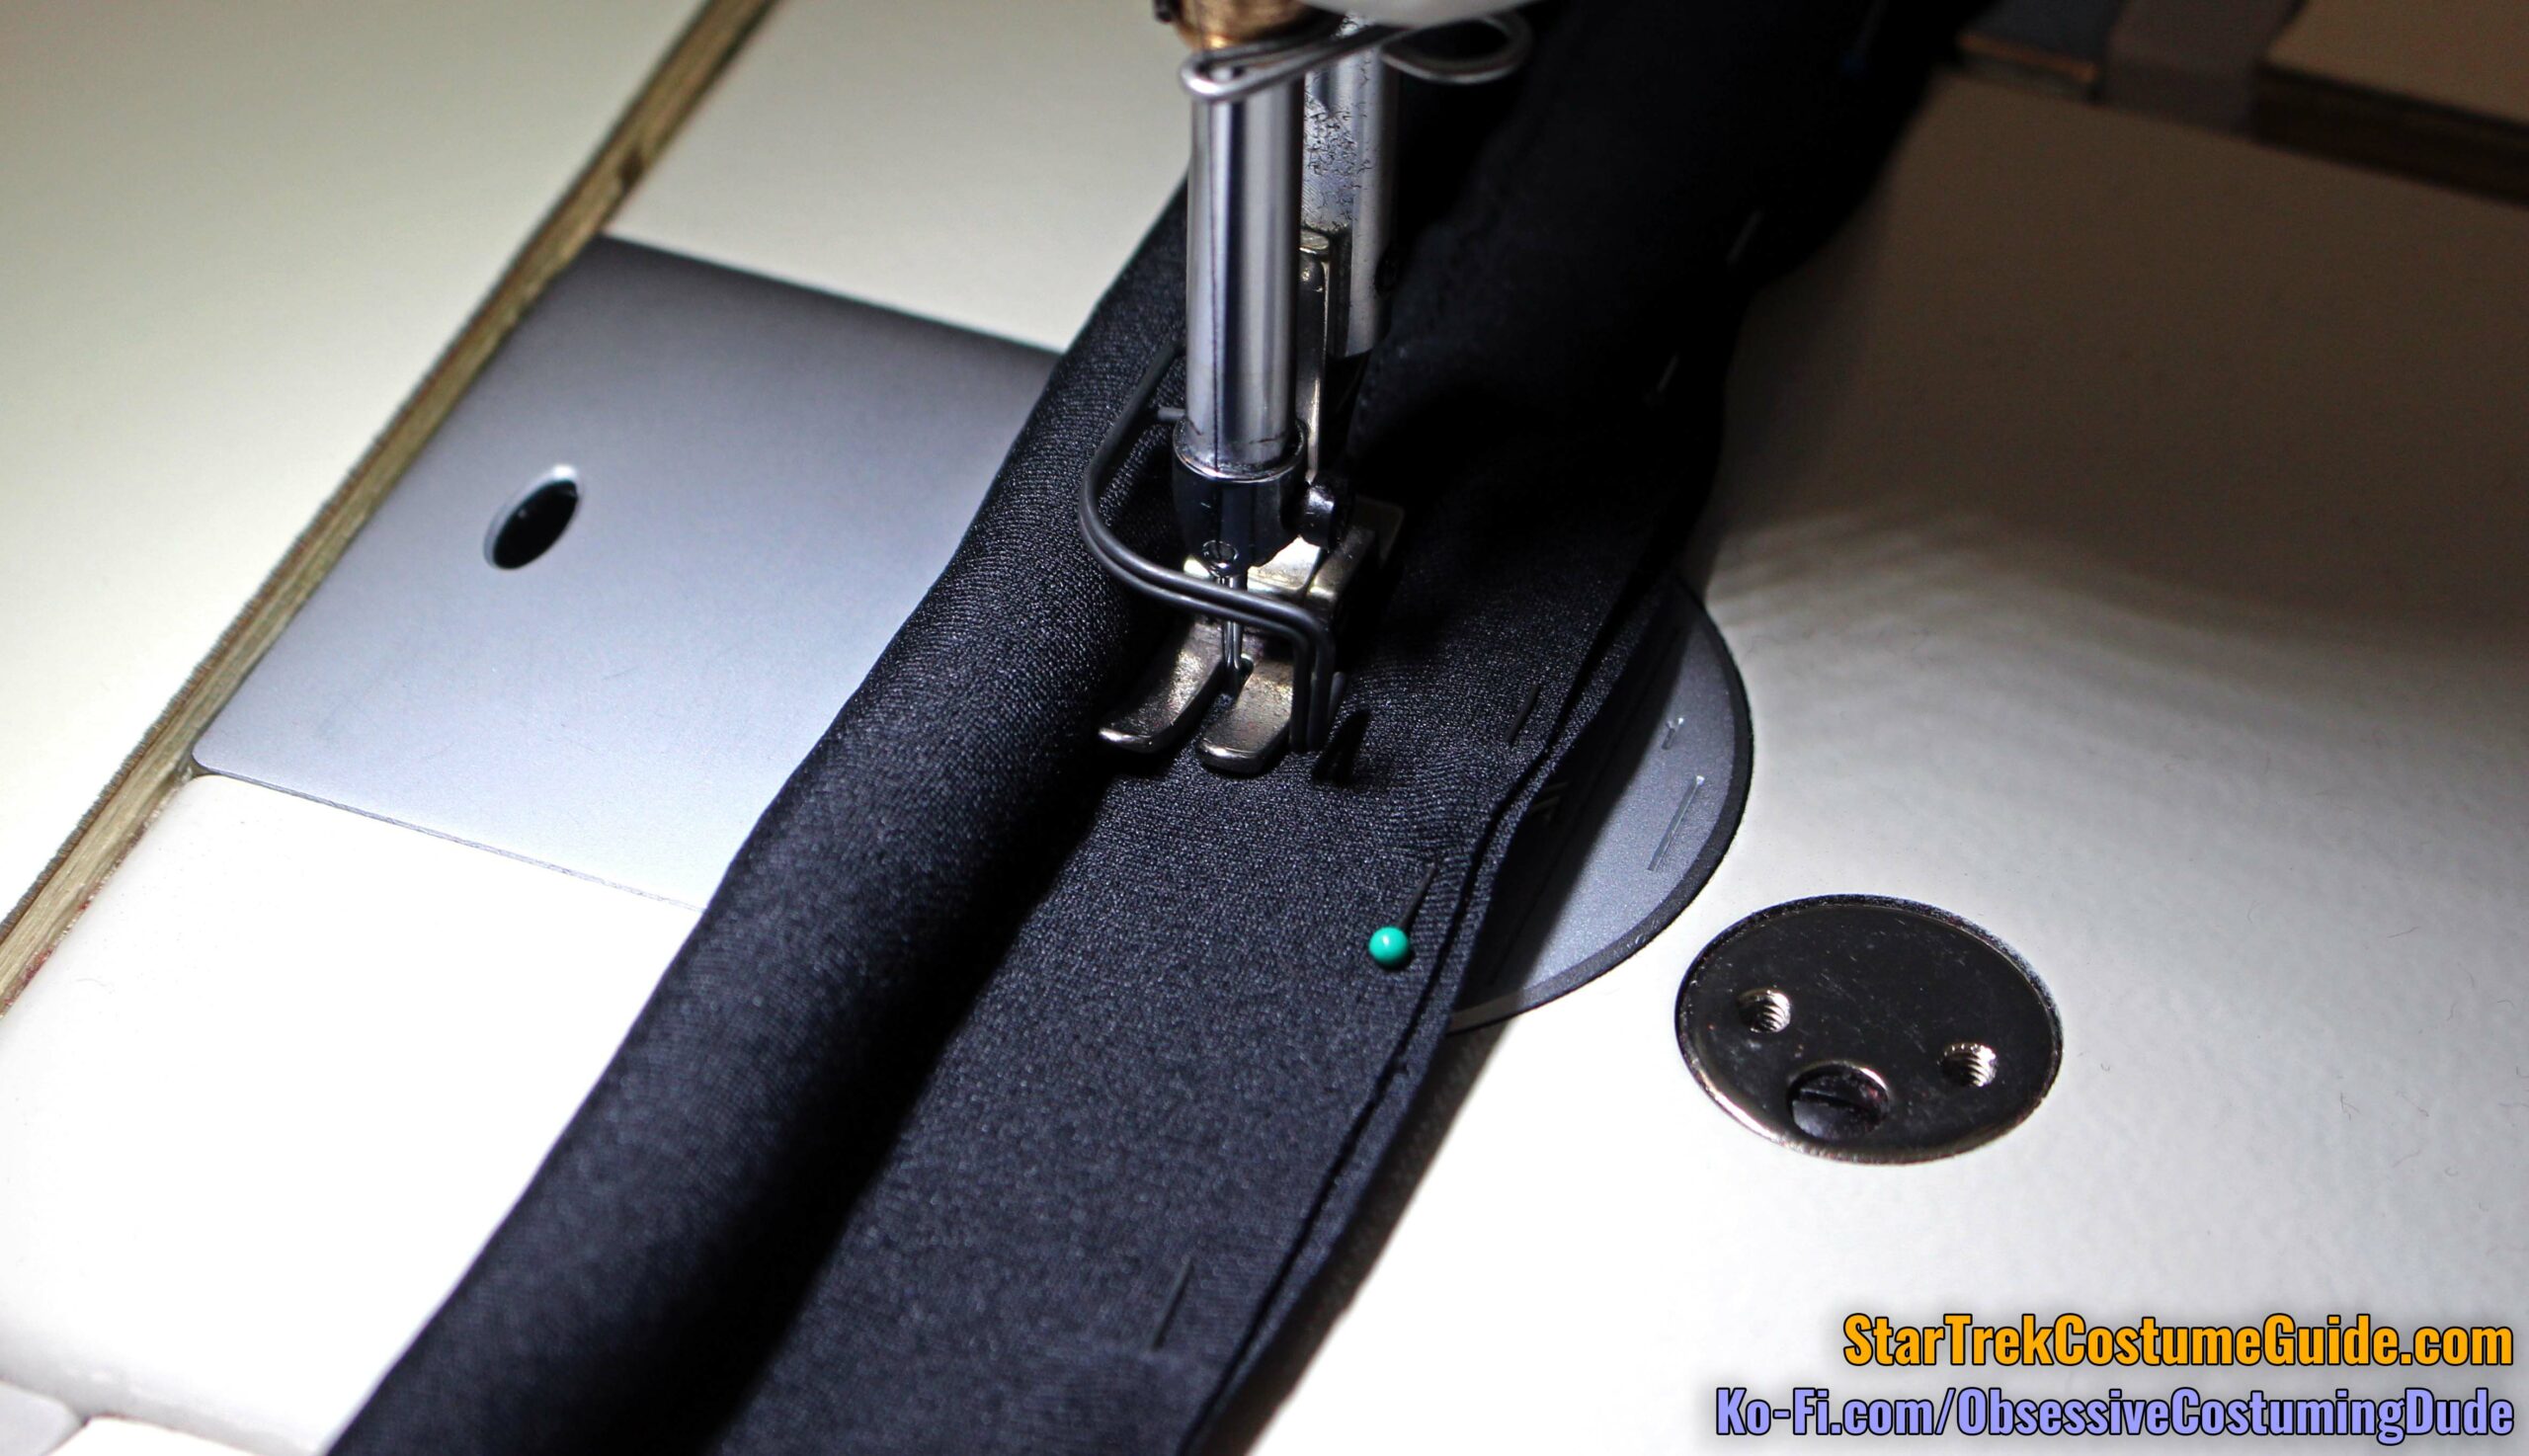
Using your zipper/piping/edging foot and black thread, stitch the spandex layers together close to the edge of the cord.
Stitch the piping channel together along the ends of the cord as well.
I saw no evidence of this on the screen-used collar I examined, but I suggest switching to your all-purpose sewing foot and stitching again ¼” away from the edge of the cord.
Trim one of the “lip” allowances away, close to the second row of stitching.
Turn the ends of the piping allowance under, angling them downward slightly to hide them, and machine stitch them into place outside the cord.
Trim the lower ends of the allowance so they’re flush with the lip, and hand-sew the upper edges of the allowance to the underside of the piping.
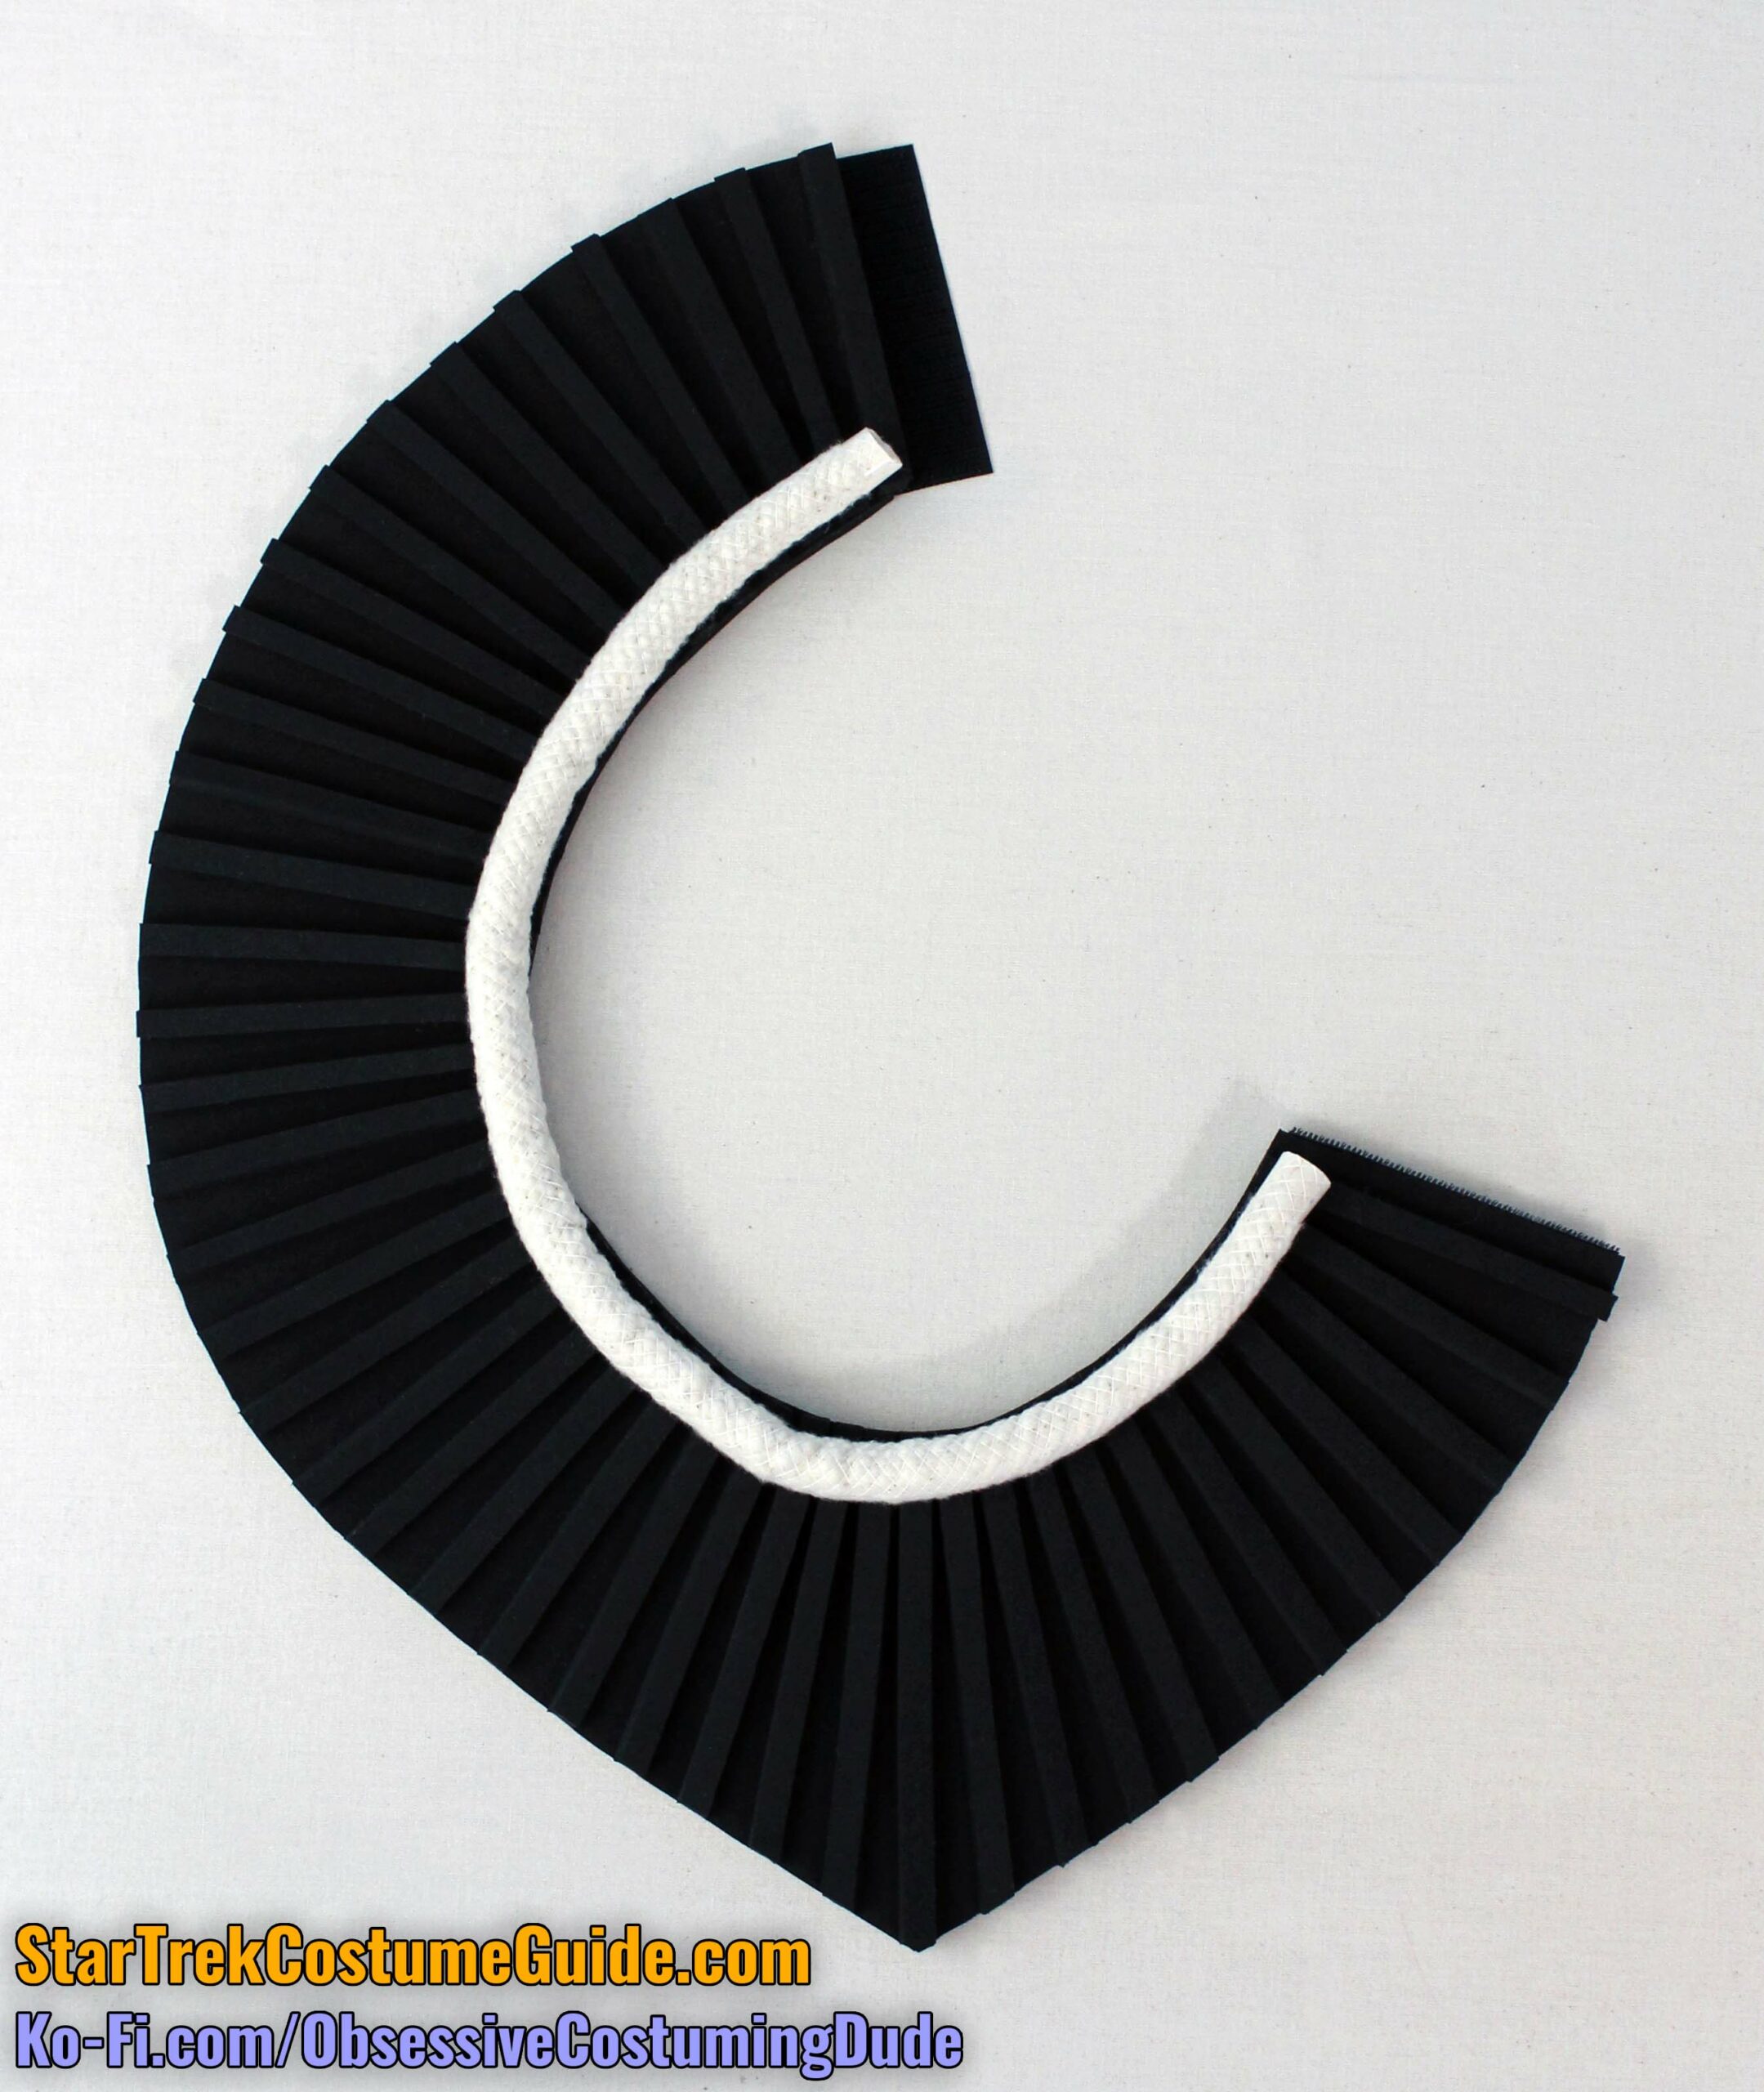
Carefully apply glue along the vertical edge of the neckline and/or the inner lip of the neckline piping (close to the cord), and attach the neckline piping to the collar.
The edge of the cord should be pulled snugly against the surface of the strips on the outside of the collar, obscuring the raw ends of the strips and edge of the collar neckline.
Because the cord (and corresponding spandex) is slightly longer than the edge of the neckline itself, ease the piping in as best you can by hand.
There may be a few minor wrinkles, but they won’t be seen on the outside of the finished collar.
Since you probably have no more than two hands to work with but the entire neckline needs to be firmly mashed together for several minutes while the glue sets, I suggest doing the outermost few inches of each end first, then proceeding incrementally until you’ve done the entire neckline.
Once the glue is dry, turn the piping lip to the underside, trim away the lip over the front “loop” tape overlap, and glue the lip into place.
Side note – another reason I prefer working with the E6000 is because it dries faster than other glues I tried.
My first attempt was with Tacky Glue, which (as I mentioned) made a big mess and forced me to clip additional allowance into the piping lip.
It ultimately doesn’t really matter what the underside looks like since it’ll never be seen on the finished costume (and the screen-used collar I examined wasn’t pretty, either), but at least for this project, the E6000 is an overall superior option.
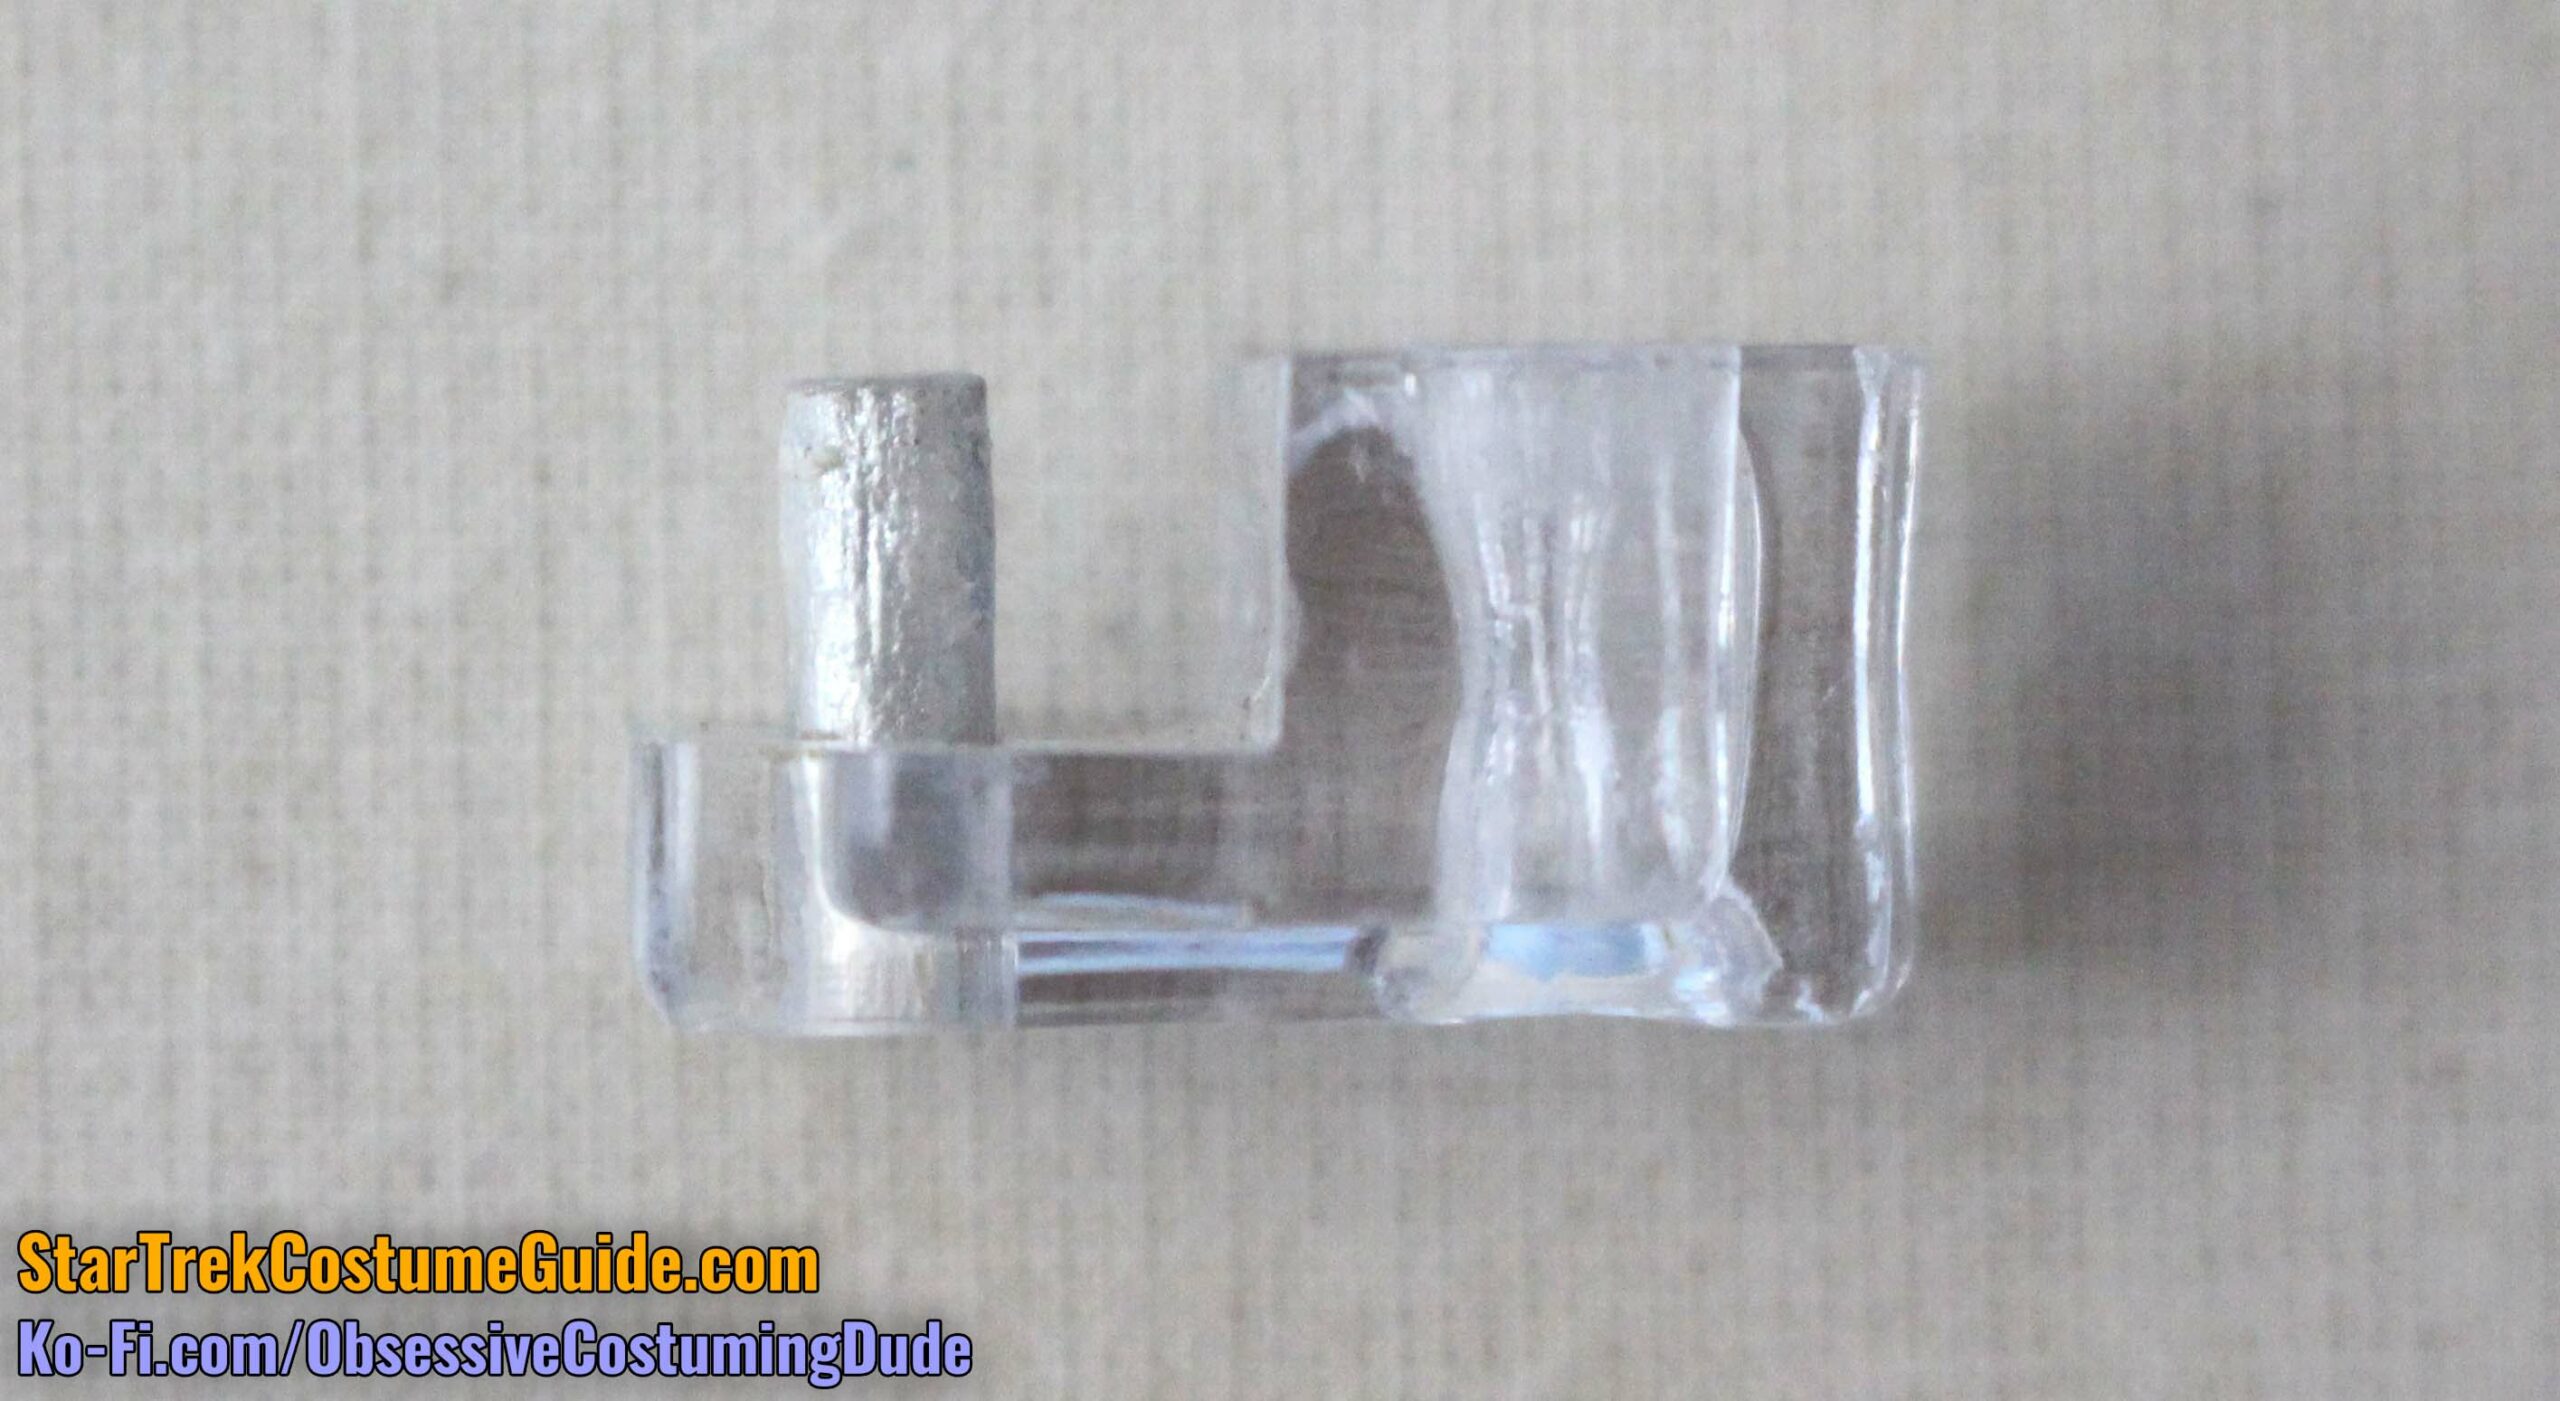
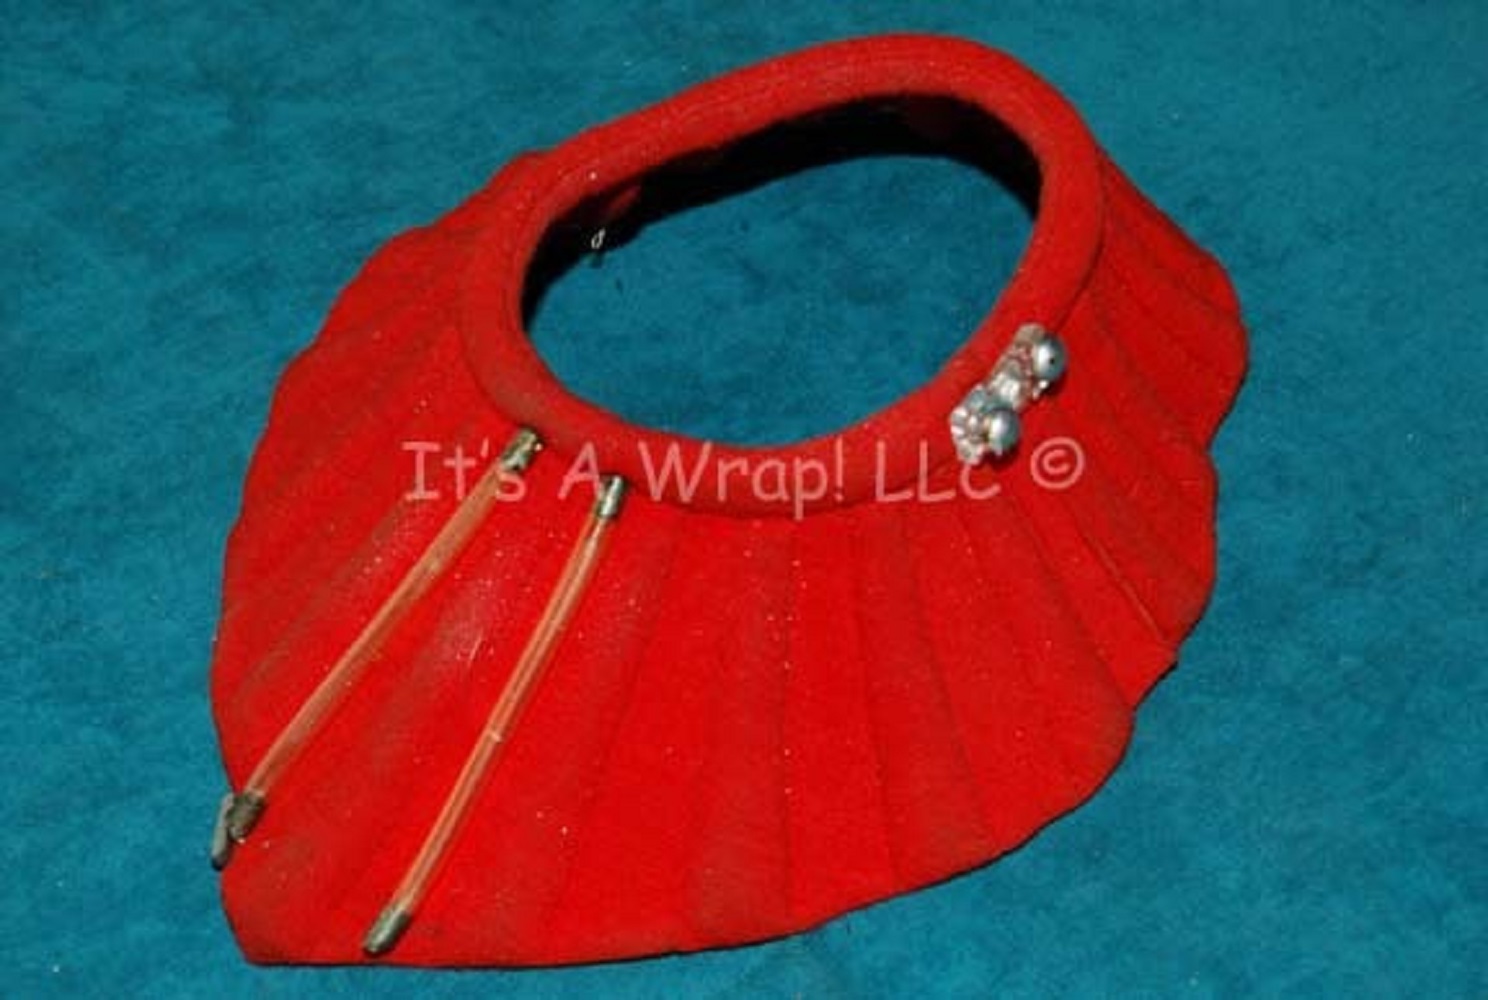
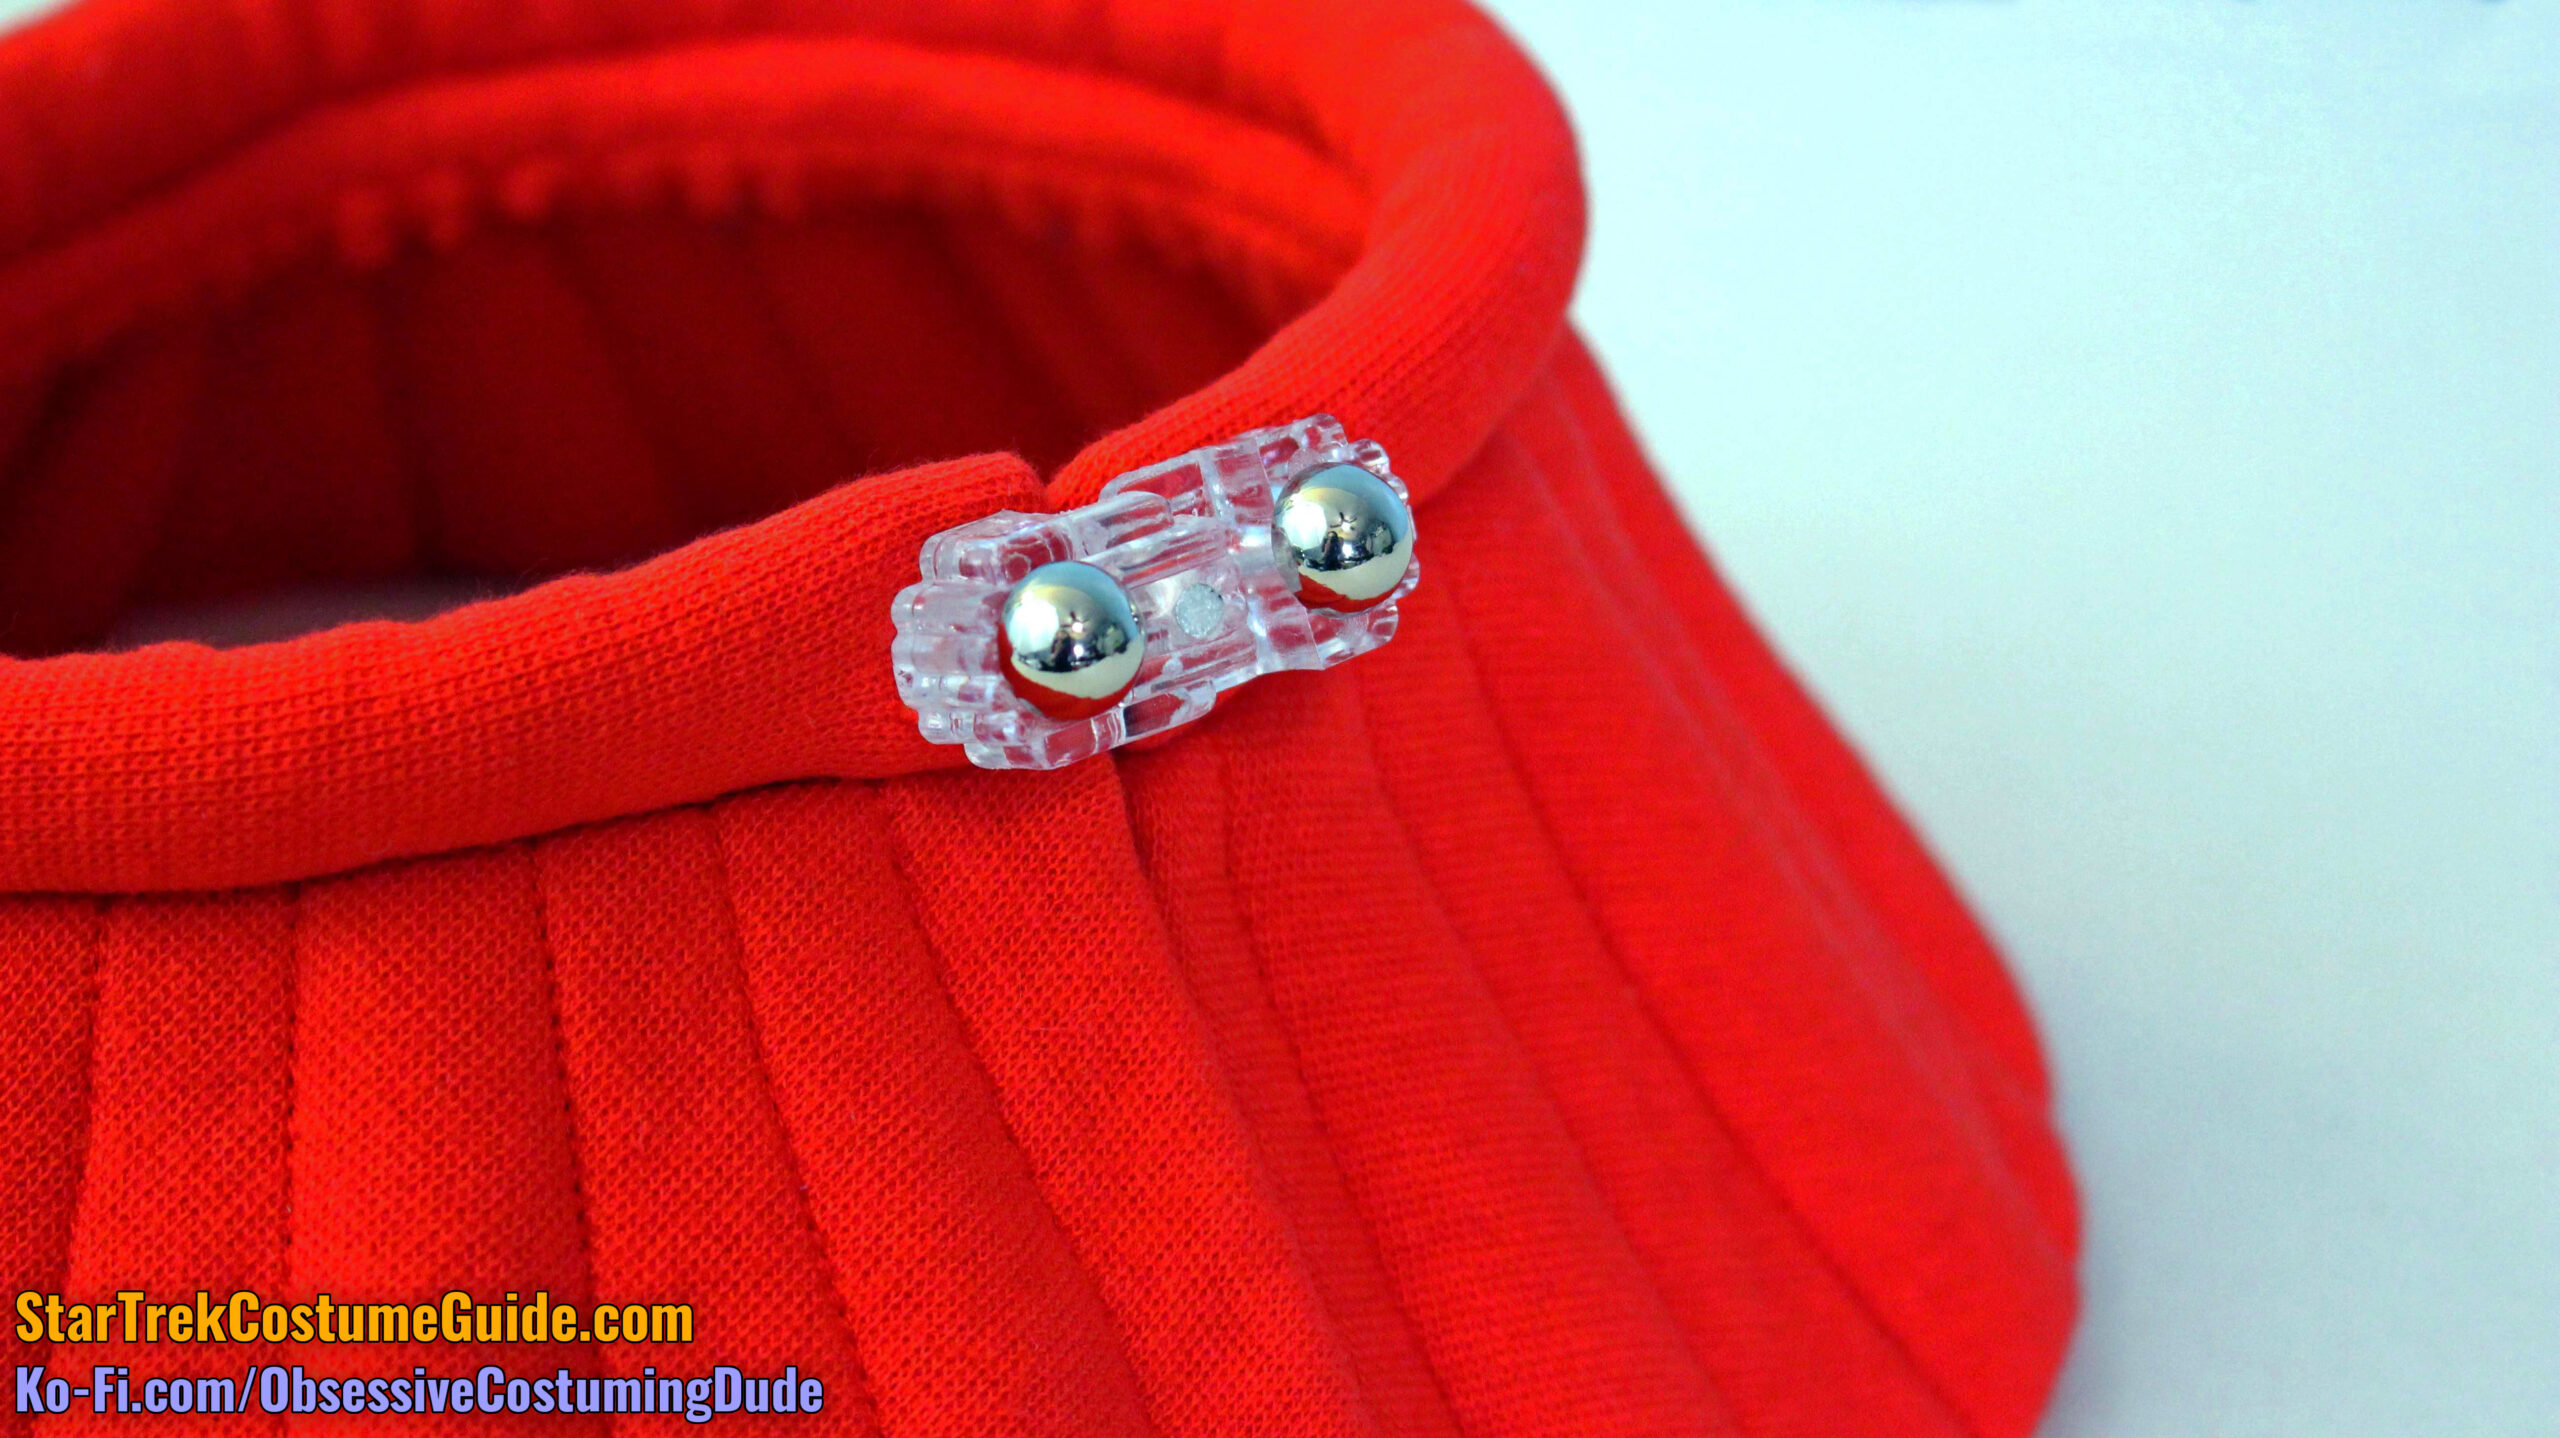
The neckline piping “closures” were a pair of modified clear plastic mirror mounts.
The screen-used mounts had a subtle rectangular pyramid shape along the extension, but I used ones of a slightly different design solely because they were conveniently available from my local hardware store and such a subtle detail is unlikely to ever be noticed on the finished costume.
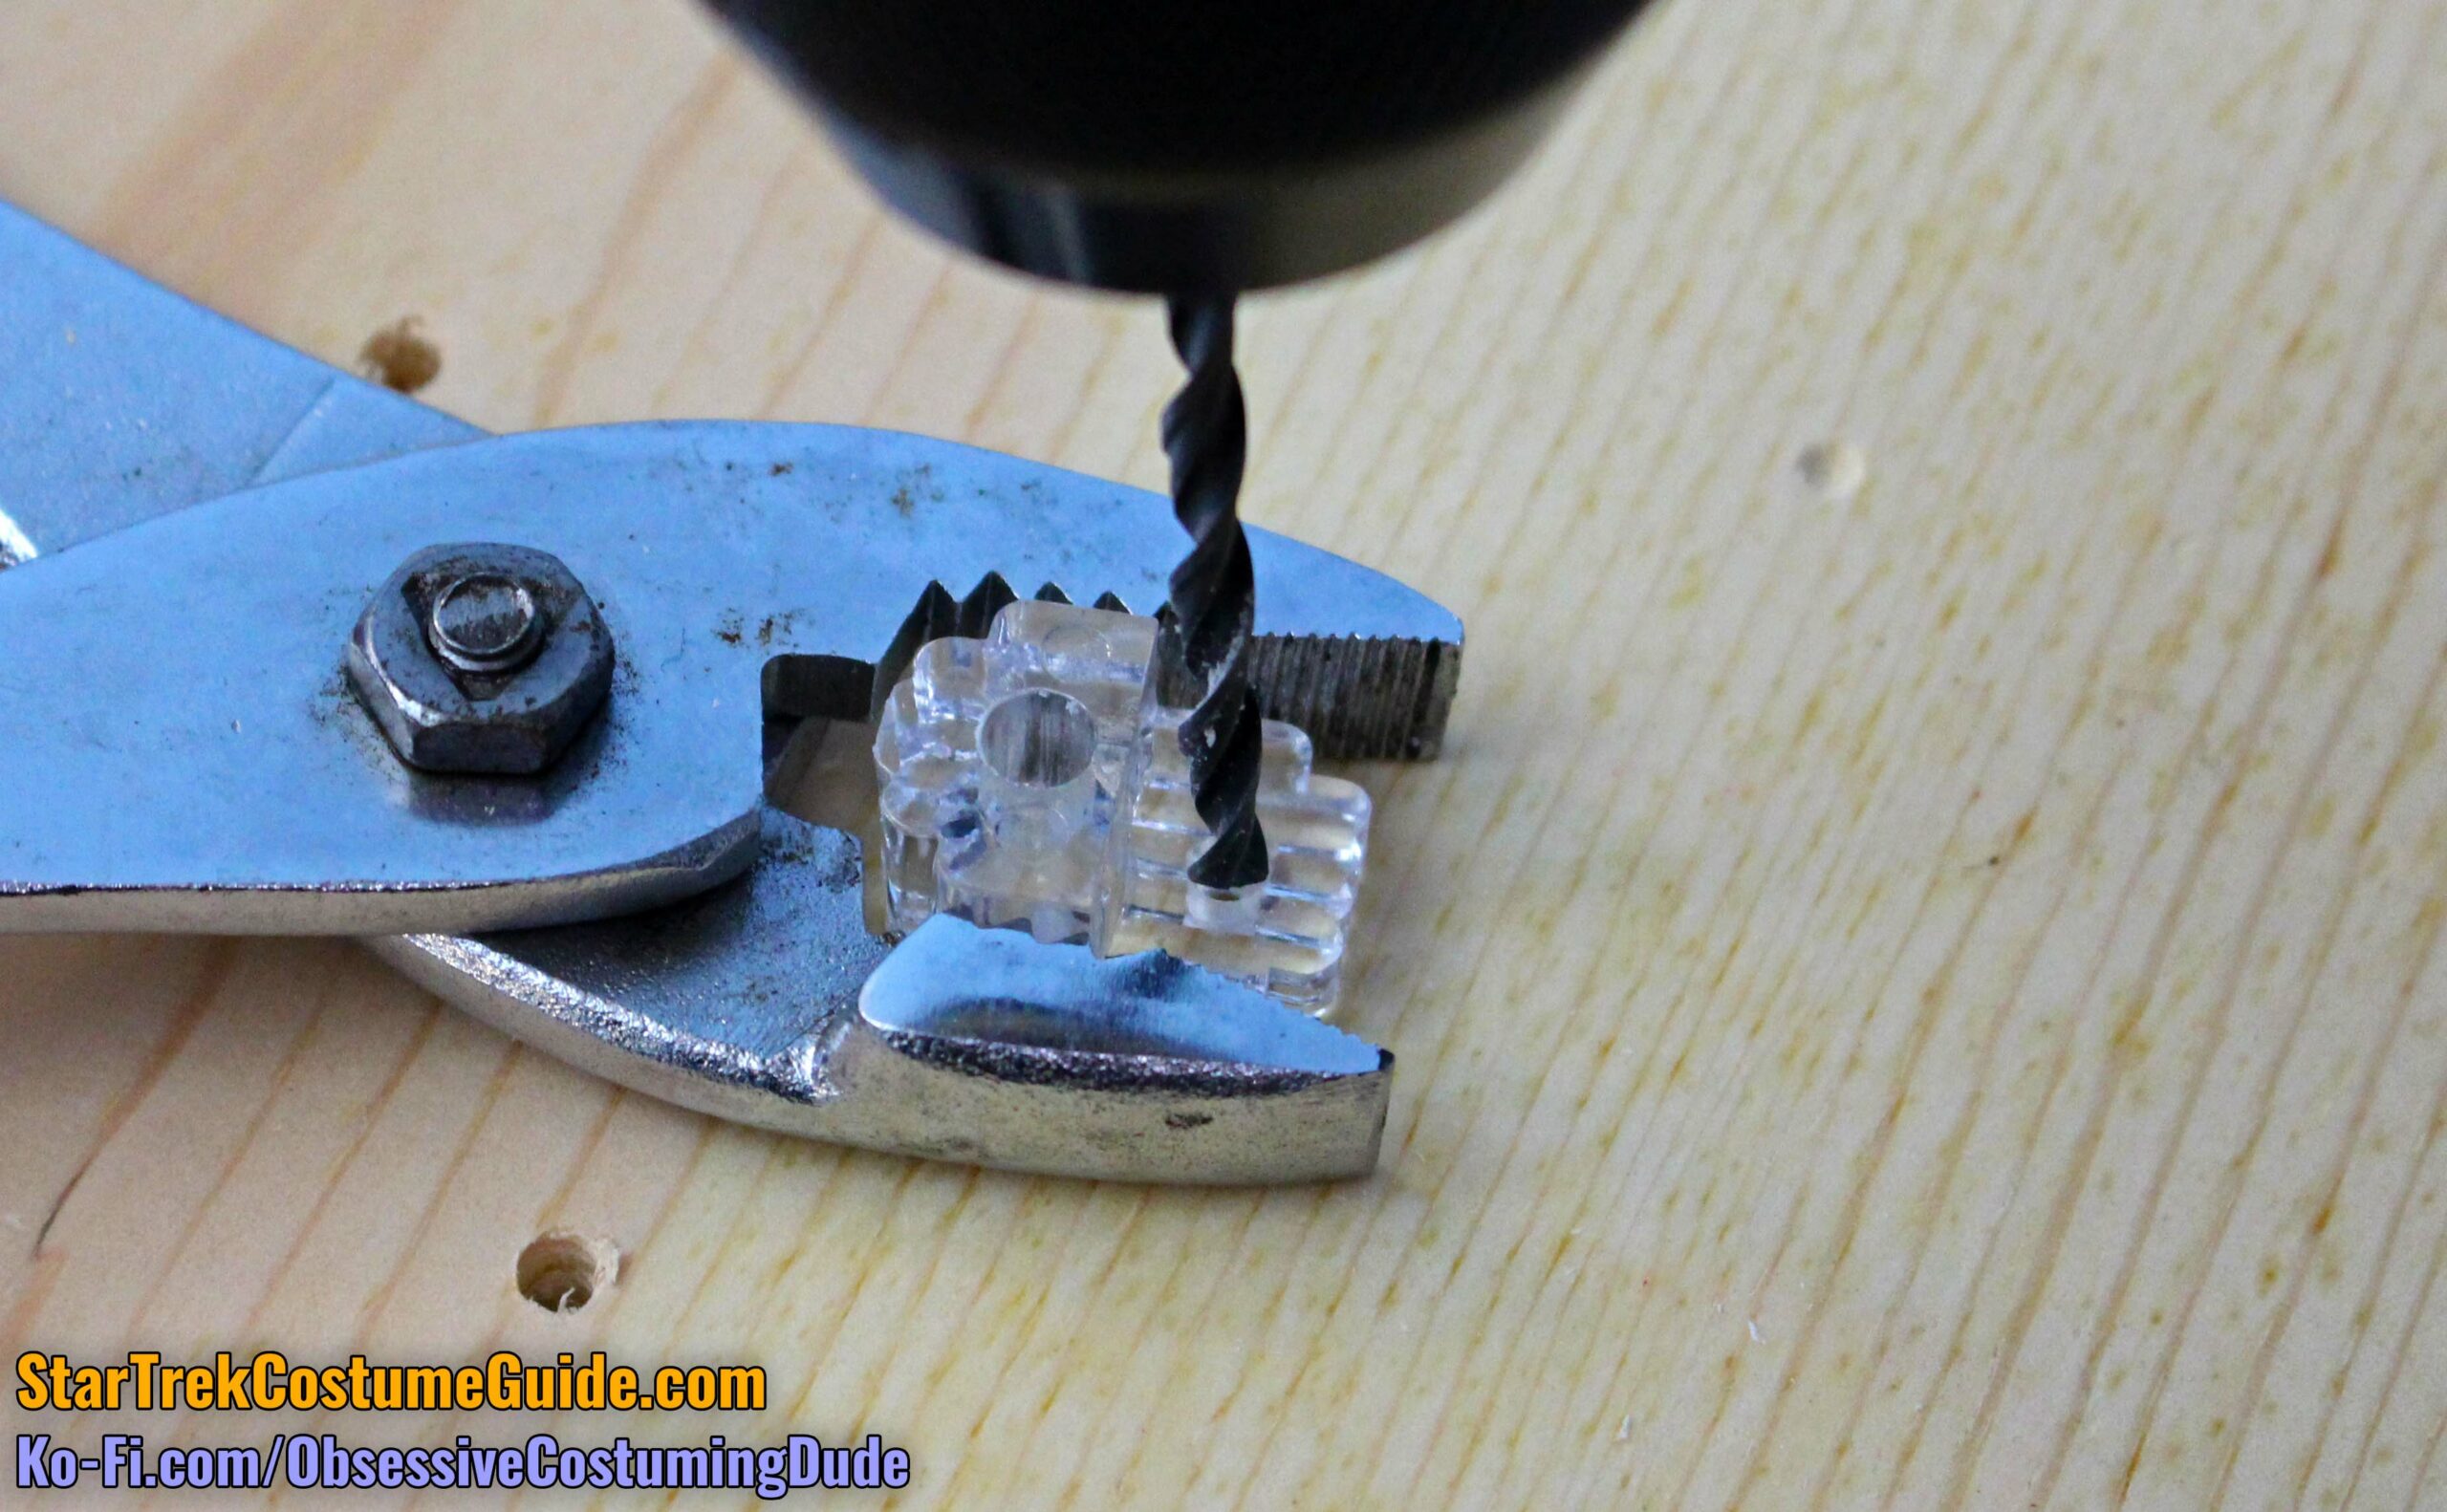
You’ll need to drill a small hole into the extension on each mount for the ⅛” wooden dowel. (Centered or slightly outward from center is best.)
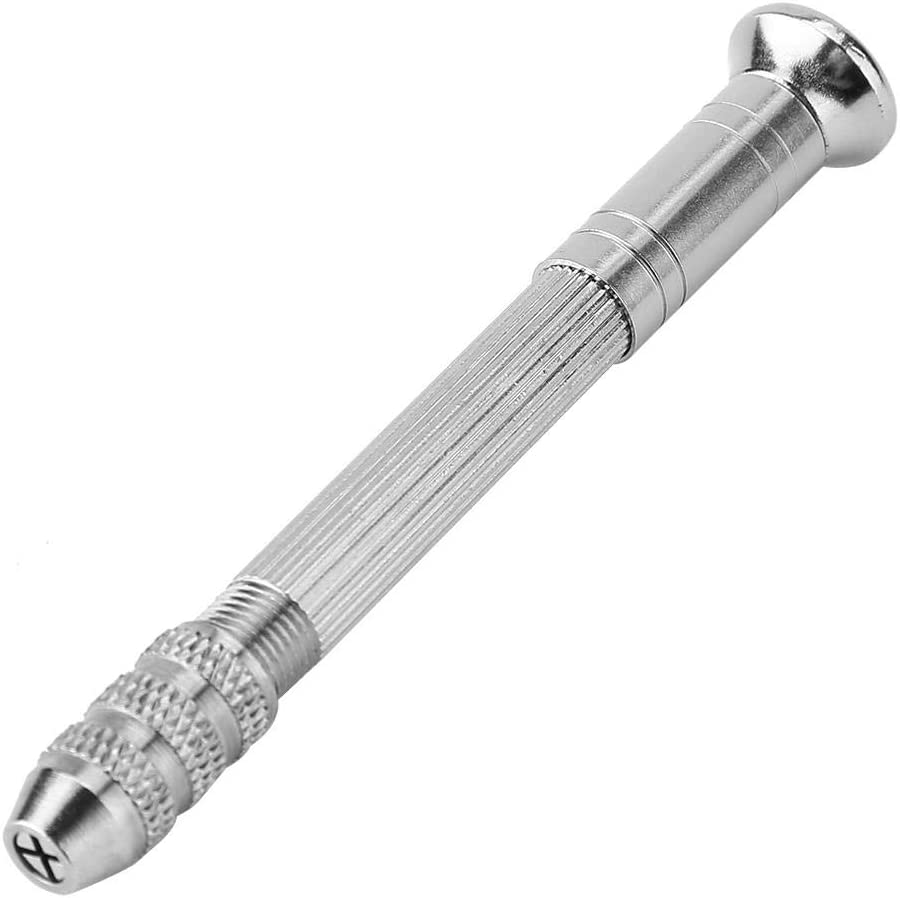
To prevent the plastic from shattering, you may want to make an initial “pilot hole” using a pin vise.
I also suggest firmly bracing the plastic mount with pliers, starting with thinner drill bits and working your way up to ⅛”.
(I actually wound up using a 9/64” drill bit to accommodate the ⅛” wooden dowel.)
With both holes drilled, confirm your two pieces will actually fasten “closed” by inserting your ⅛” dowel through both simultaneously.
Cut a length of the wooden dowel sufficient to extend from the “bottom” of one mount to the “top” of the other – probably about ⅜” long.
(I actually don’t know what was used for the small rod attachment on the screen-used collars, but a ⅛” wooden dowel works great. If you build models, you might be able to simply use a scrap clipping of a clear plastic model tree.)
Paint the small wooden rod in whatever color you think best matches your clear plastic mirror mount; I used Top Notch metallic “Pearl”.
Glue the wooden rod into the hole you drilled on one of the mirror mounts.
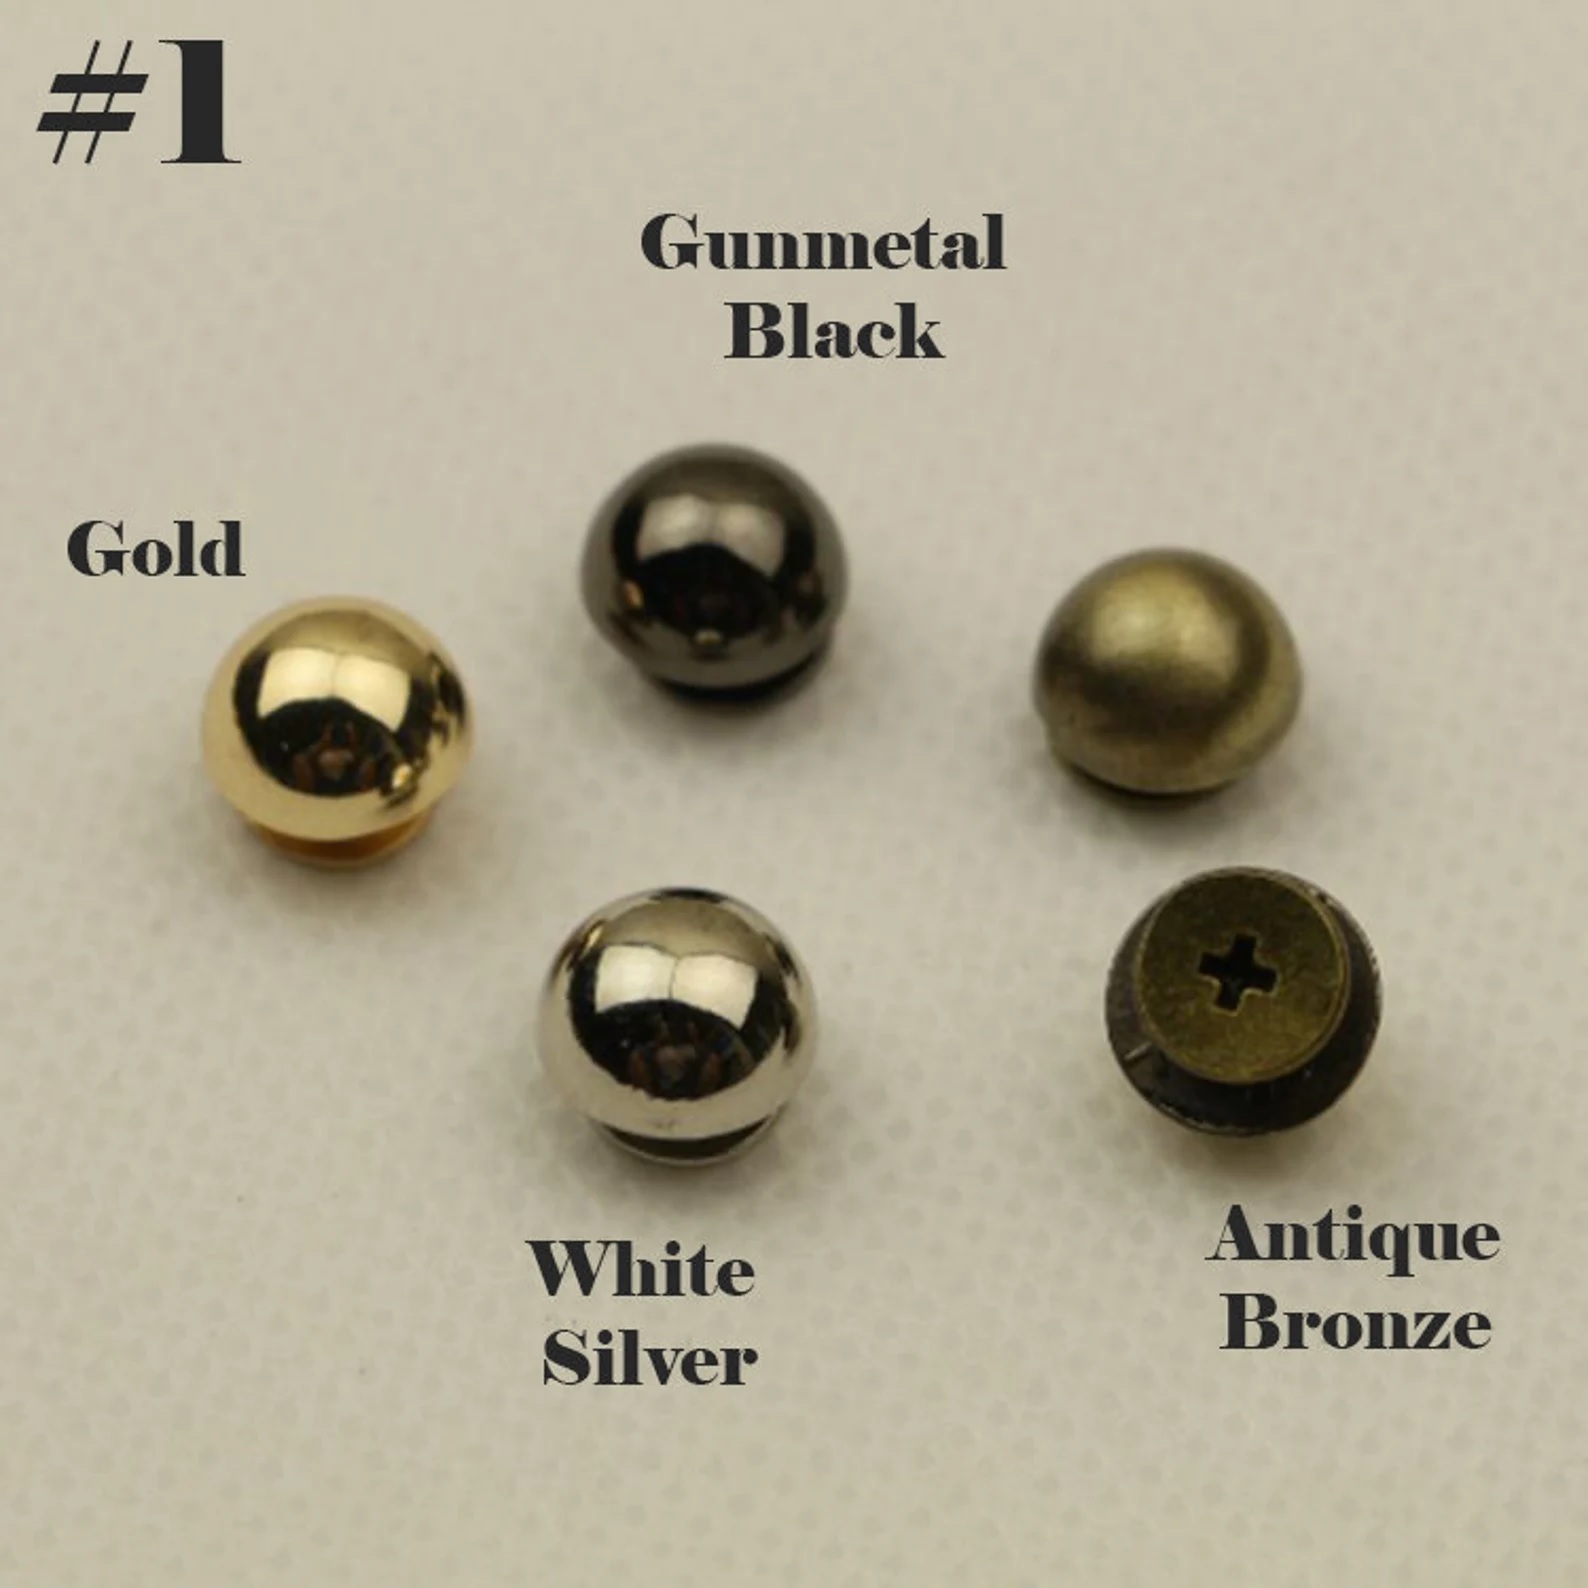
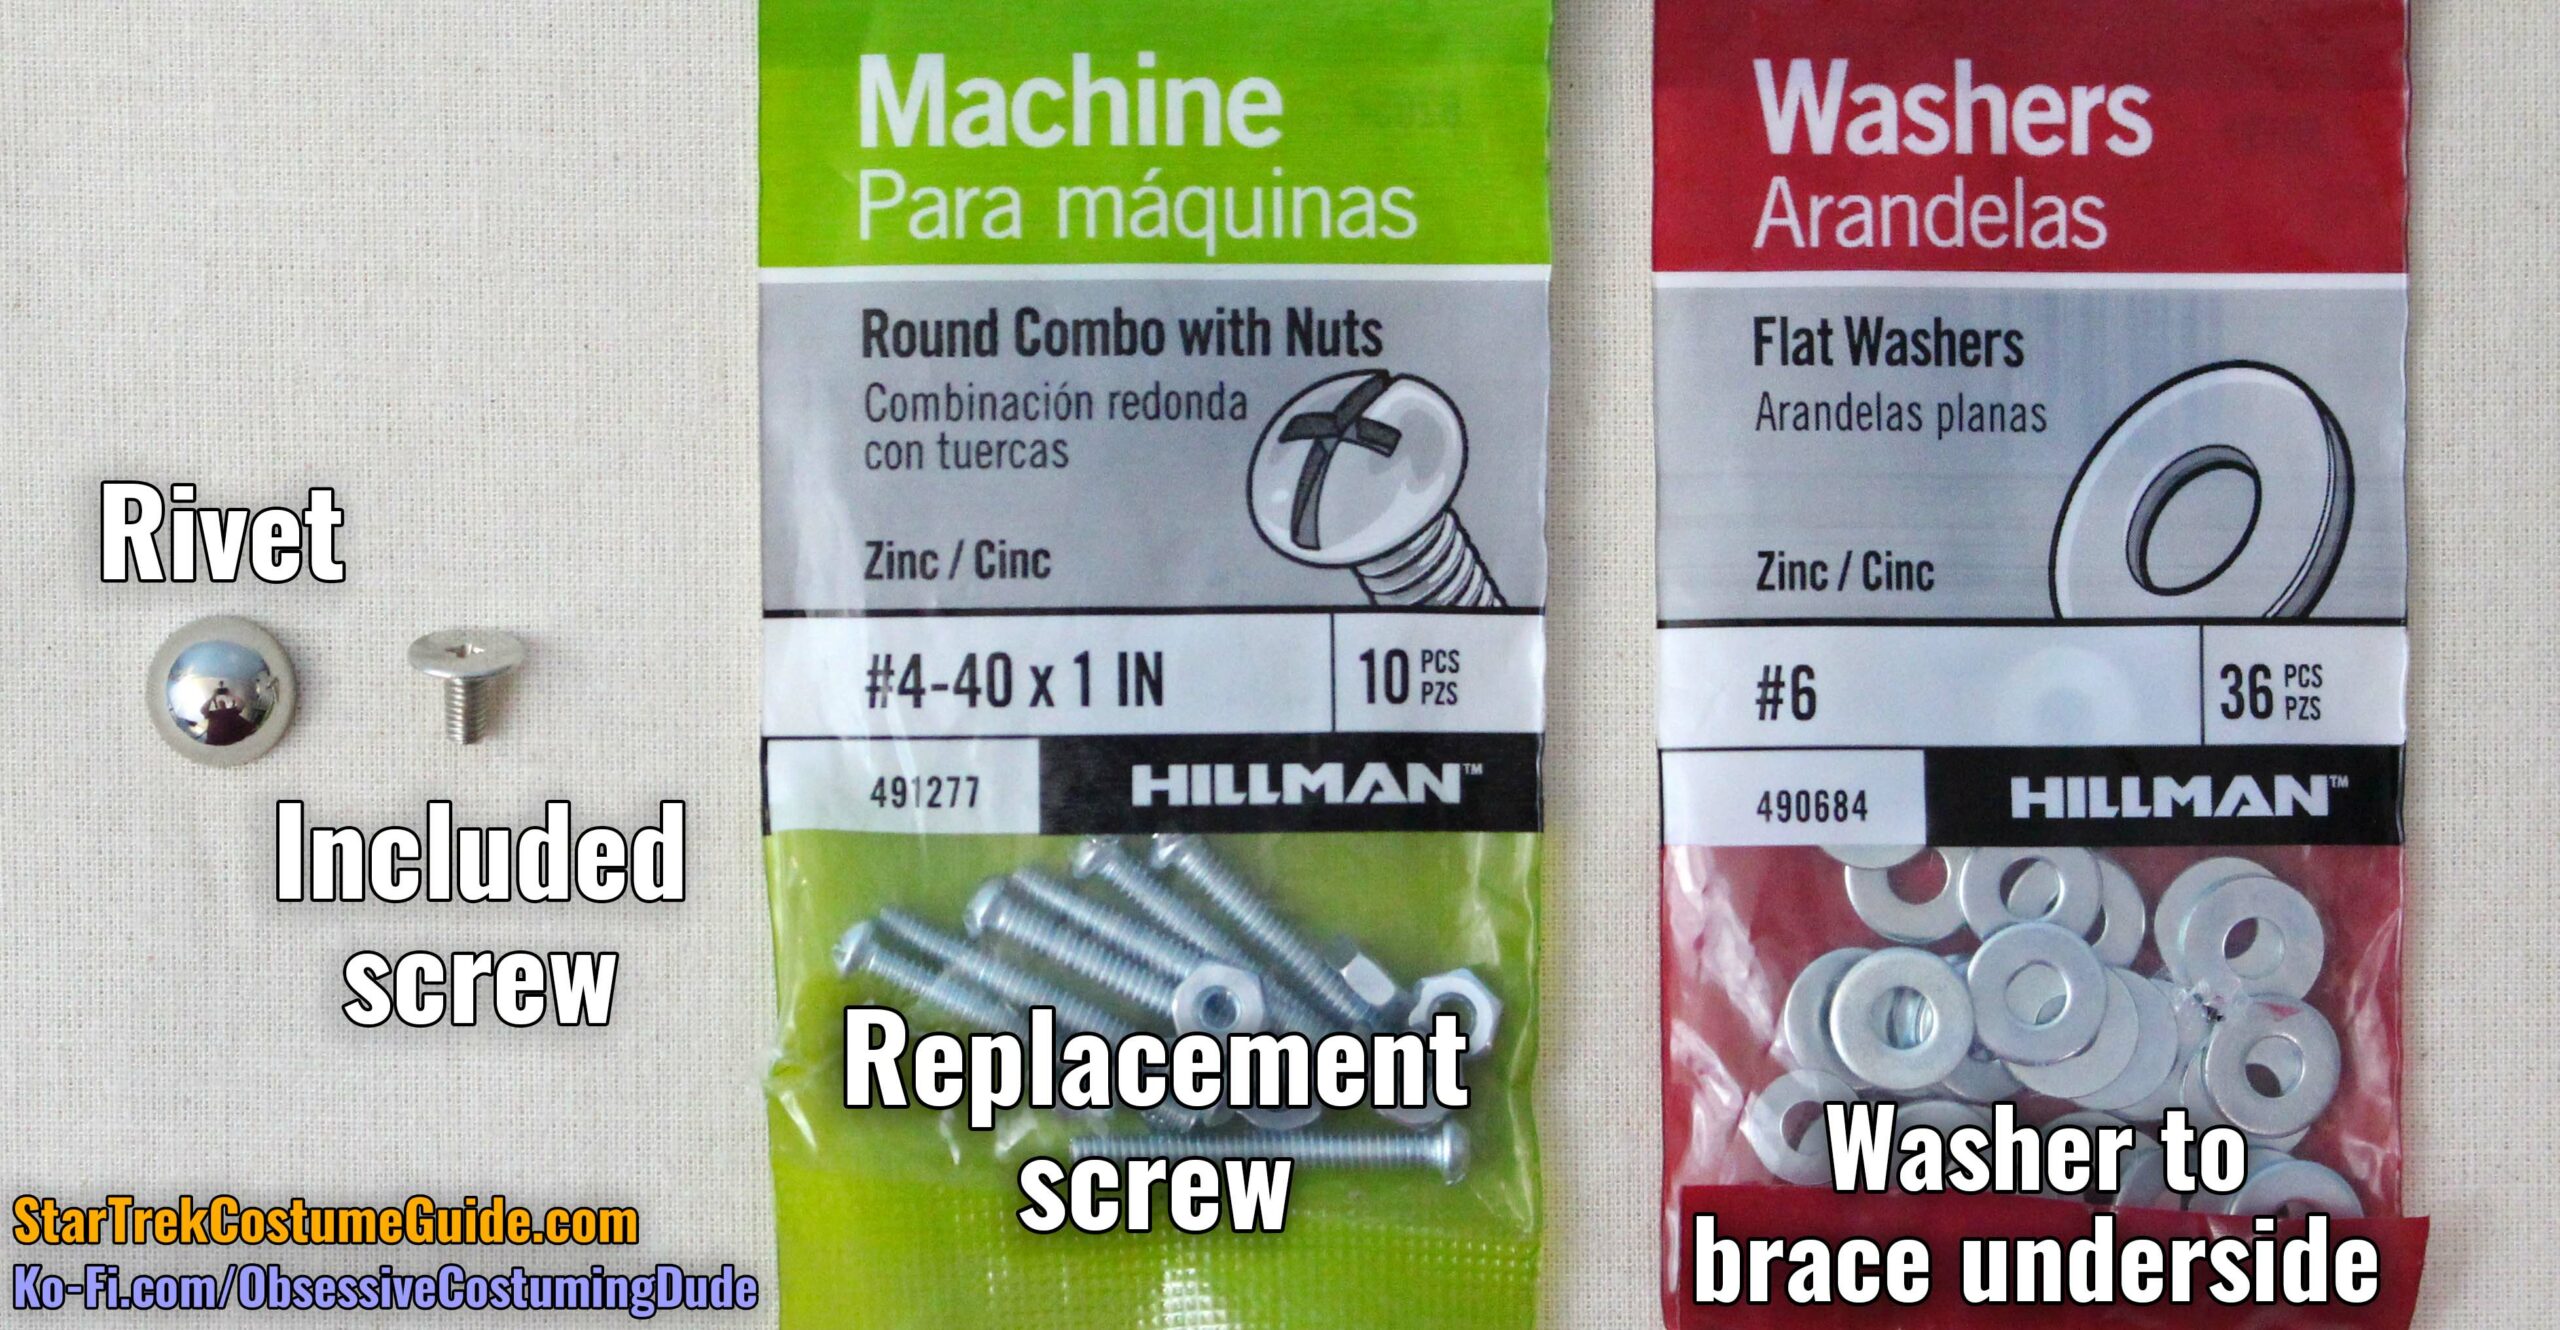
As best I can tell, the small accents on the screen-used closures were “screw-back dome rivets” – a specific kind of upholstery rivet that fastens via a screw into the back.
(They might’ve actually been “double cap dome rivets,” but I was unable to find any in the appropriate size, and the “screw-back dome rivets” work fine. Although my modified process diverges from the screen-used collar construction, the outer appearance of the collar is otherwise identical.)
The screen-used rivets were approximately ⅜” (10mm) in diameter and a sort of matte “nickel” color.
Here are the closest ones I was able to find to the originals:
First, they’re a shiny silver color (as opposed to the matte nickel), but you can paint them if you want.
I didn’t bother painting mine and think they look okay in-person, but obviously it’s up to you. 🙂
Second, it seems that for some reason, the length of the included screw was nearly always equivalent to the diameter of the dome.
In other words, a ⅜” (10mm) rivet typically comes with a ⅜” (10mm) screw.
Since we need the screw to extend through ½” neckline piping and a ⅜” tall mirror mount, we obviously need longer screws that also fit the rivets.
And since there’s nothing to stop the screws from pulling straight through the collar piping, we need to brace the head of the screw on the underside of the collar piping with a washer.
Here’s the exact combination of pieces I used on my collars:
Unfortunately, the 1” screws are a bit too long, ¾” screws are a bit too short, and my store didn’t have screws of the appropriate width/thread count in ⅞” length.
But on the bright side, the screws pictured above also came with small nuts, which can be used to fill the excess distance between the head of the screw and edge of the neckline piping.
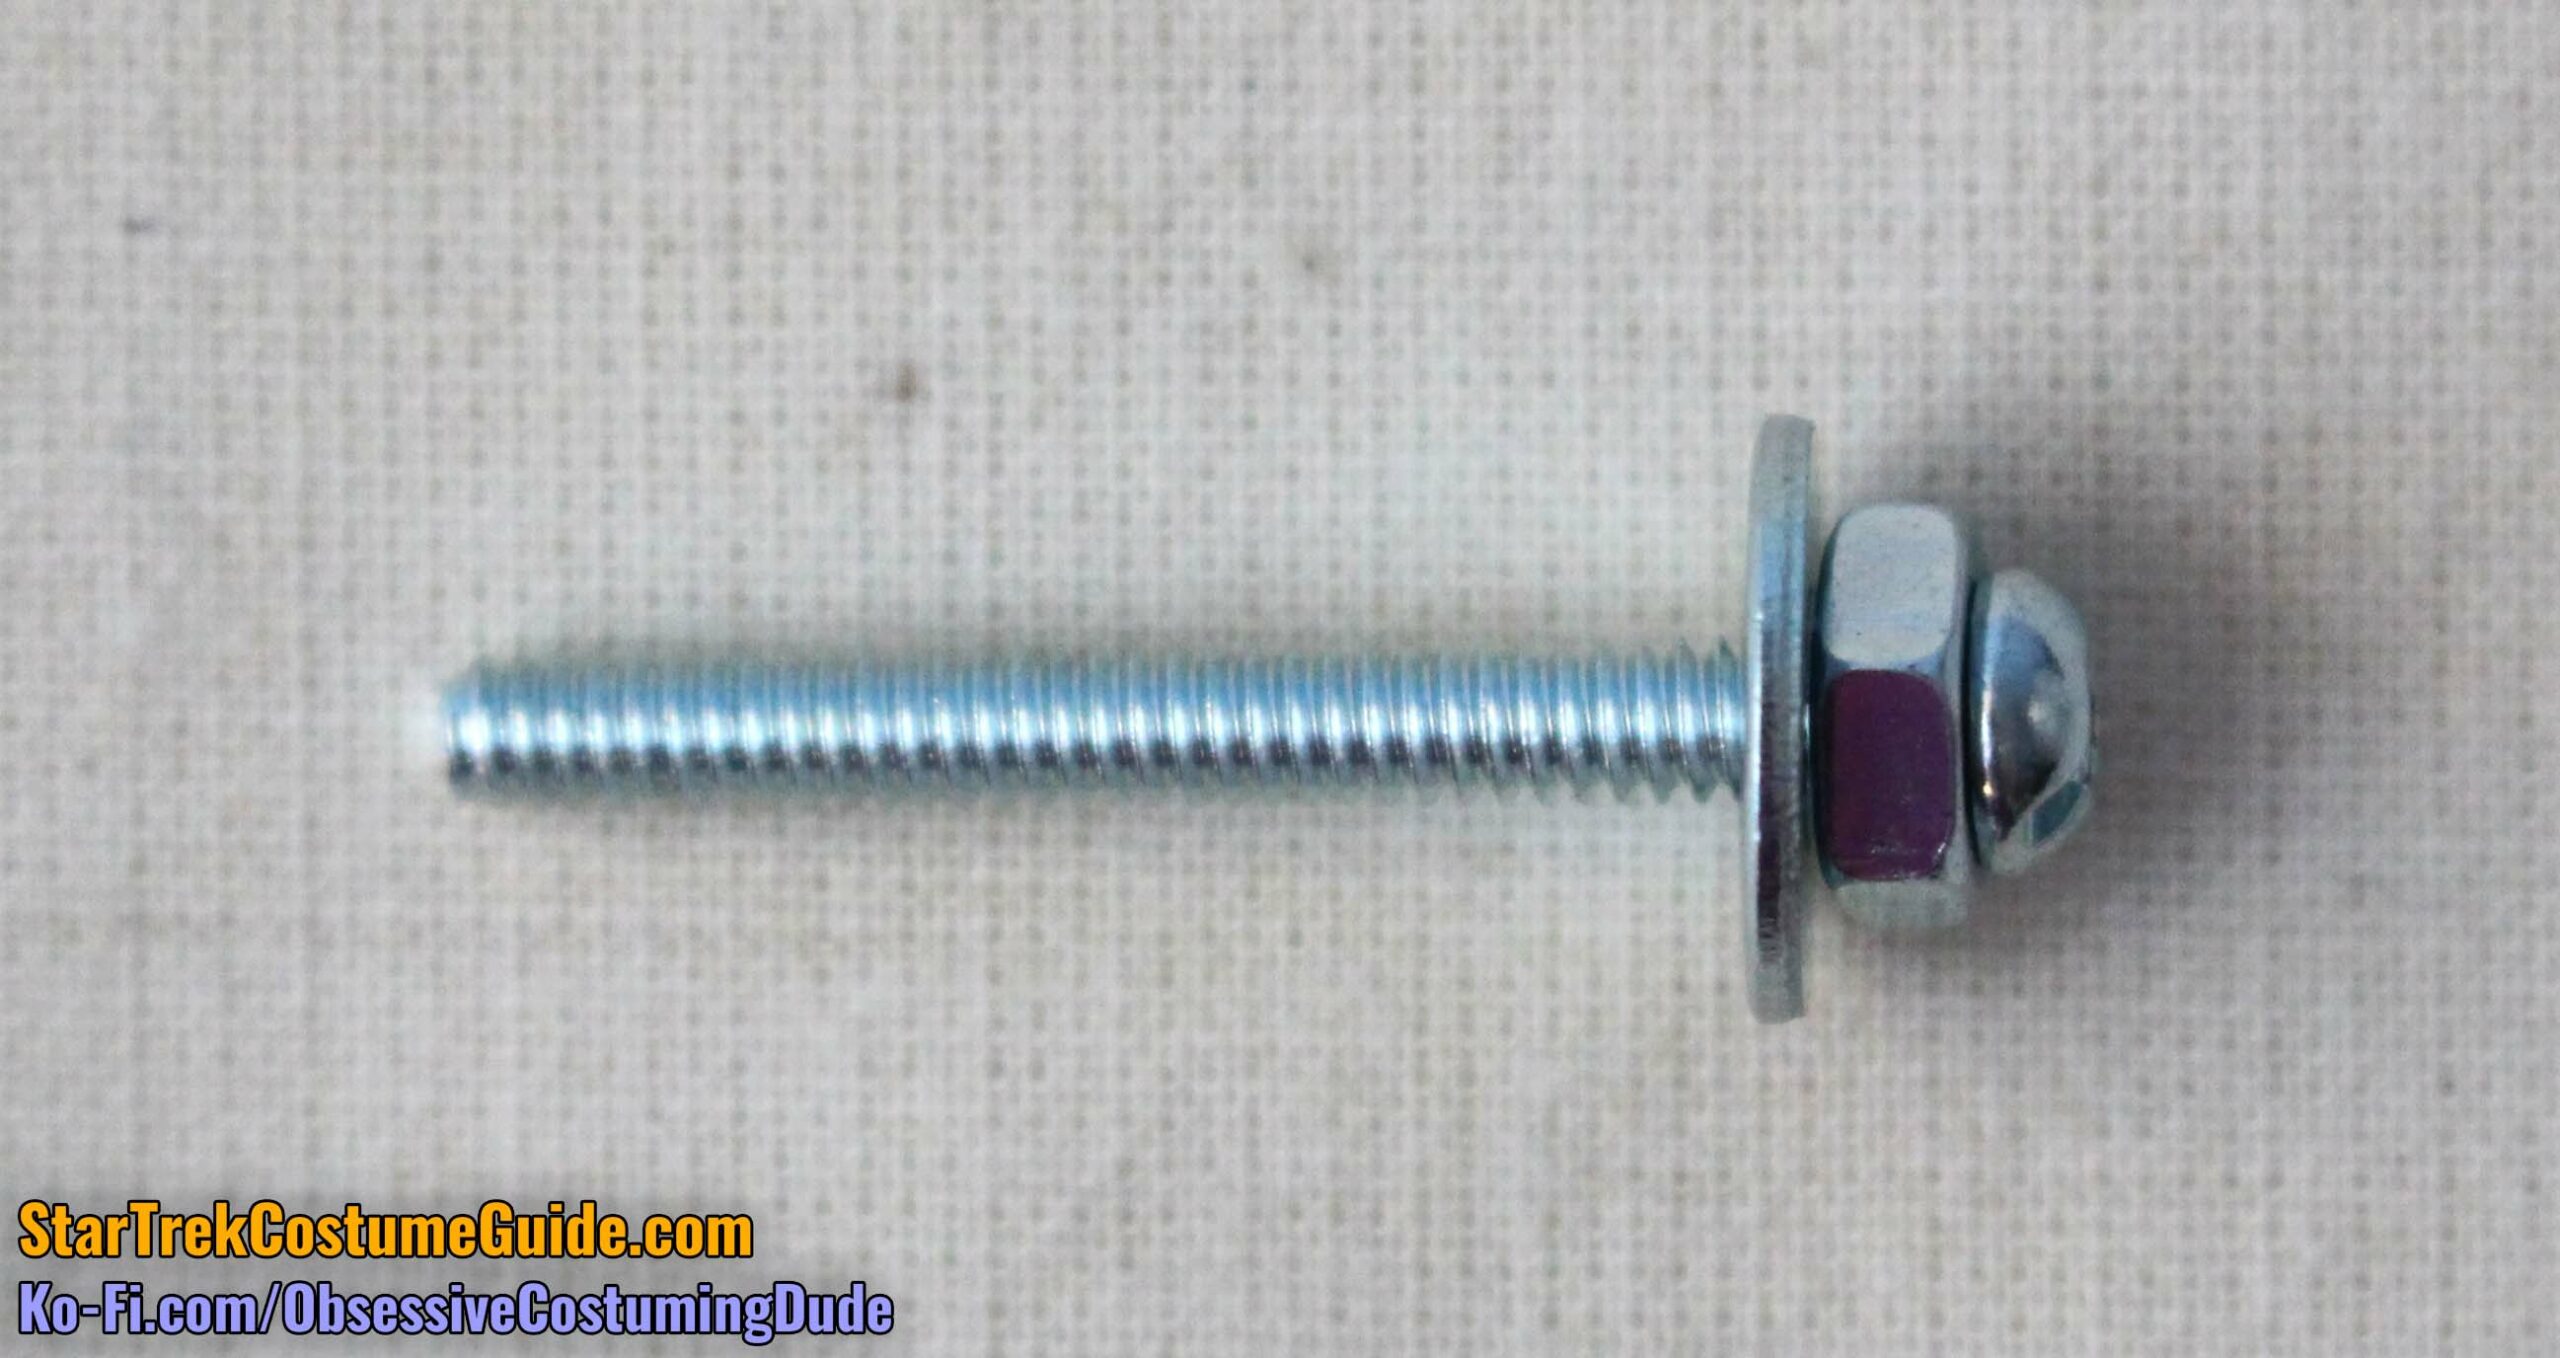
Thread one of the nuts all the way onto the screw, then slide one of the washers all the way to the nut.
Your screw assembly should look like this:
Using your seam ripper, poke a hole all the way through your neckline piping close to the end where side opening is.
Insert small, sharp, fabric scissors and simply slash around until you’ve made a rudimentary hole in the spandex and cord, through which you can slide the screw from the underside.
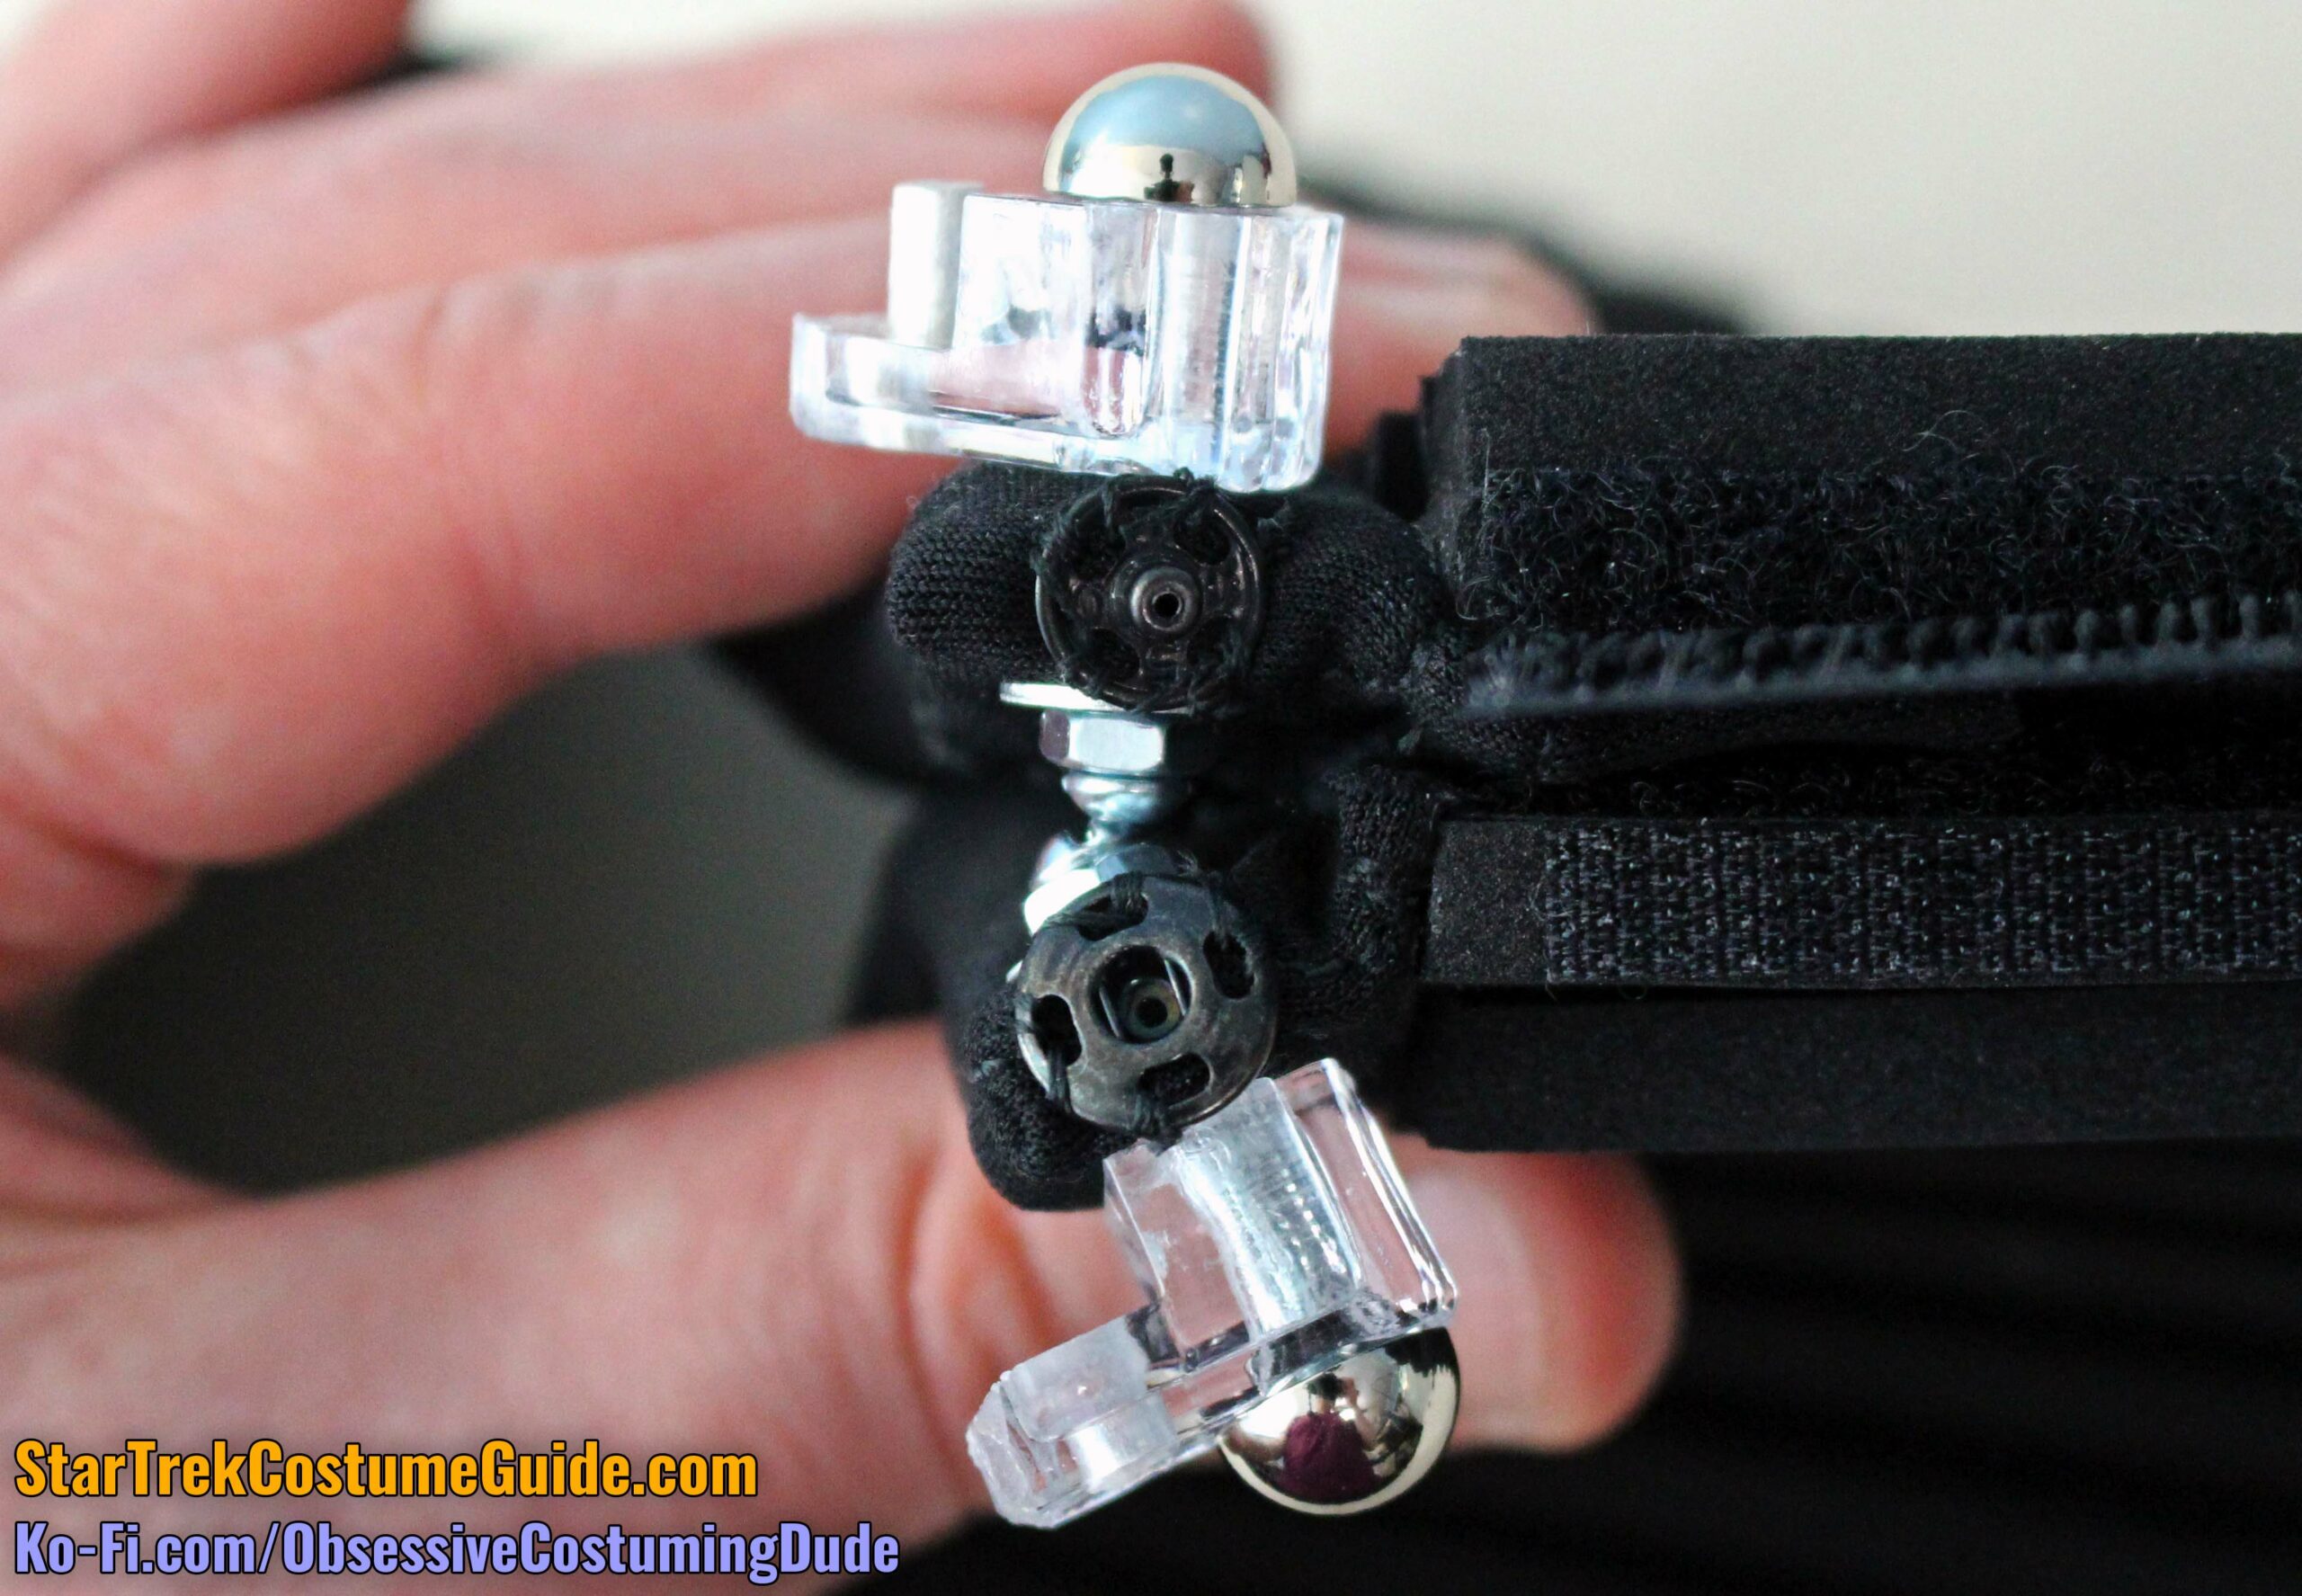
With the screw protruding outward from the neckline piping, lower the mirror mount with the screw going through the factory-made screw hole (where you would normally screw it into the wall).
The “male” mount with the painted wooden rod goes on the back with the rod pointing away from the collar, and the “female” mount (with the corresponding hole) goes on the front.
Place the rivet over the factory-made hole in the mirror mount and tighten it onto the screw.
Repeat for the other plastic mount.
Behind the plastic “closures,” hand-sew a small black snap (size 1) onto the ends of the neckline piping with black thread.
(It doesn’t really matter, but on the screen-used collar I examined, the “male” snap was on the back, and the “female” snap was on the front.)
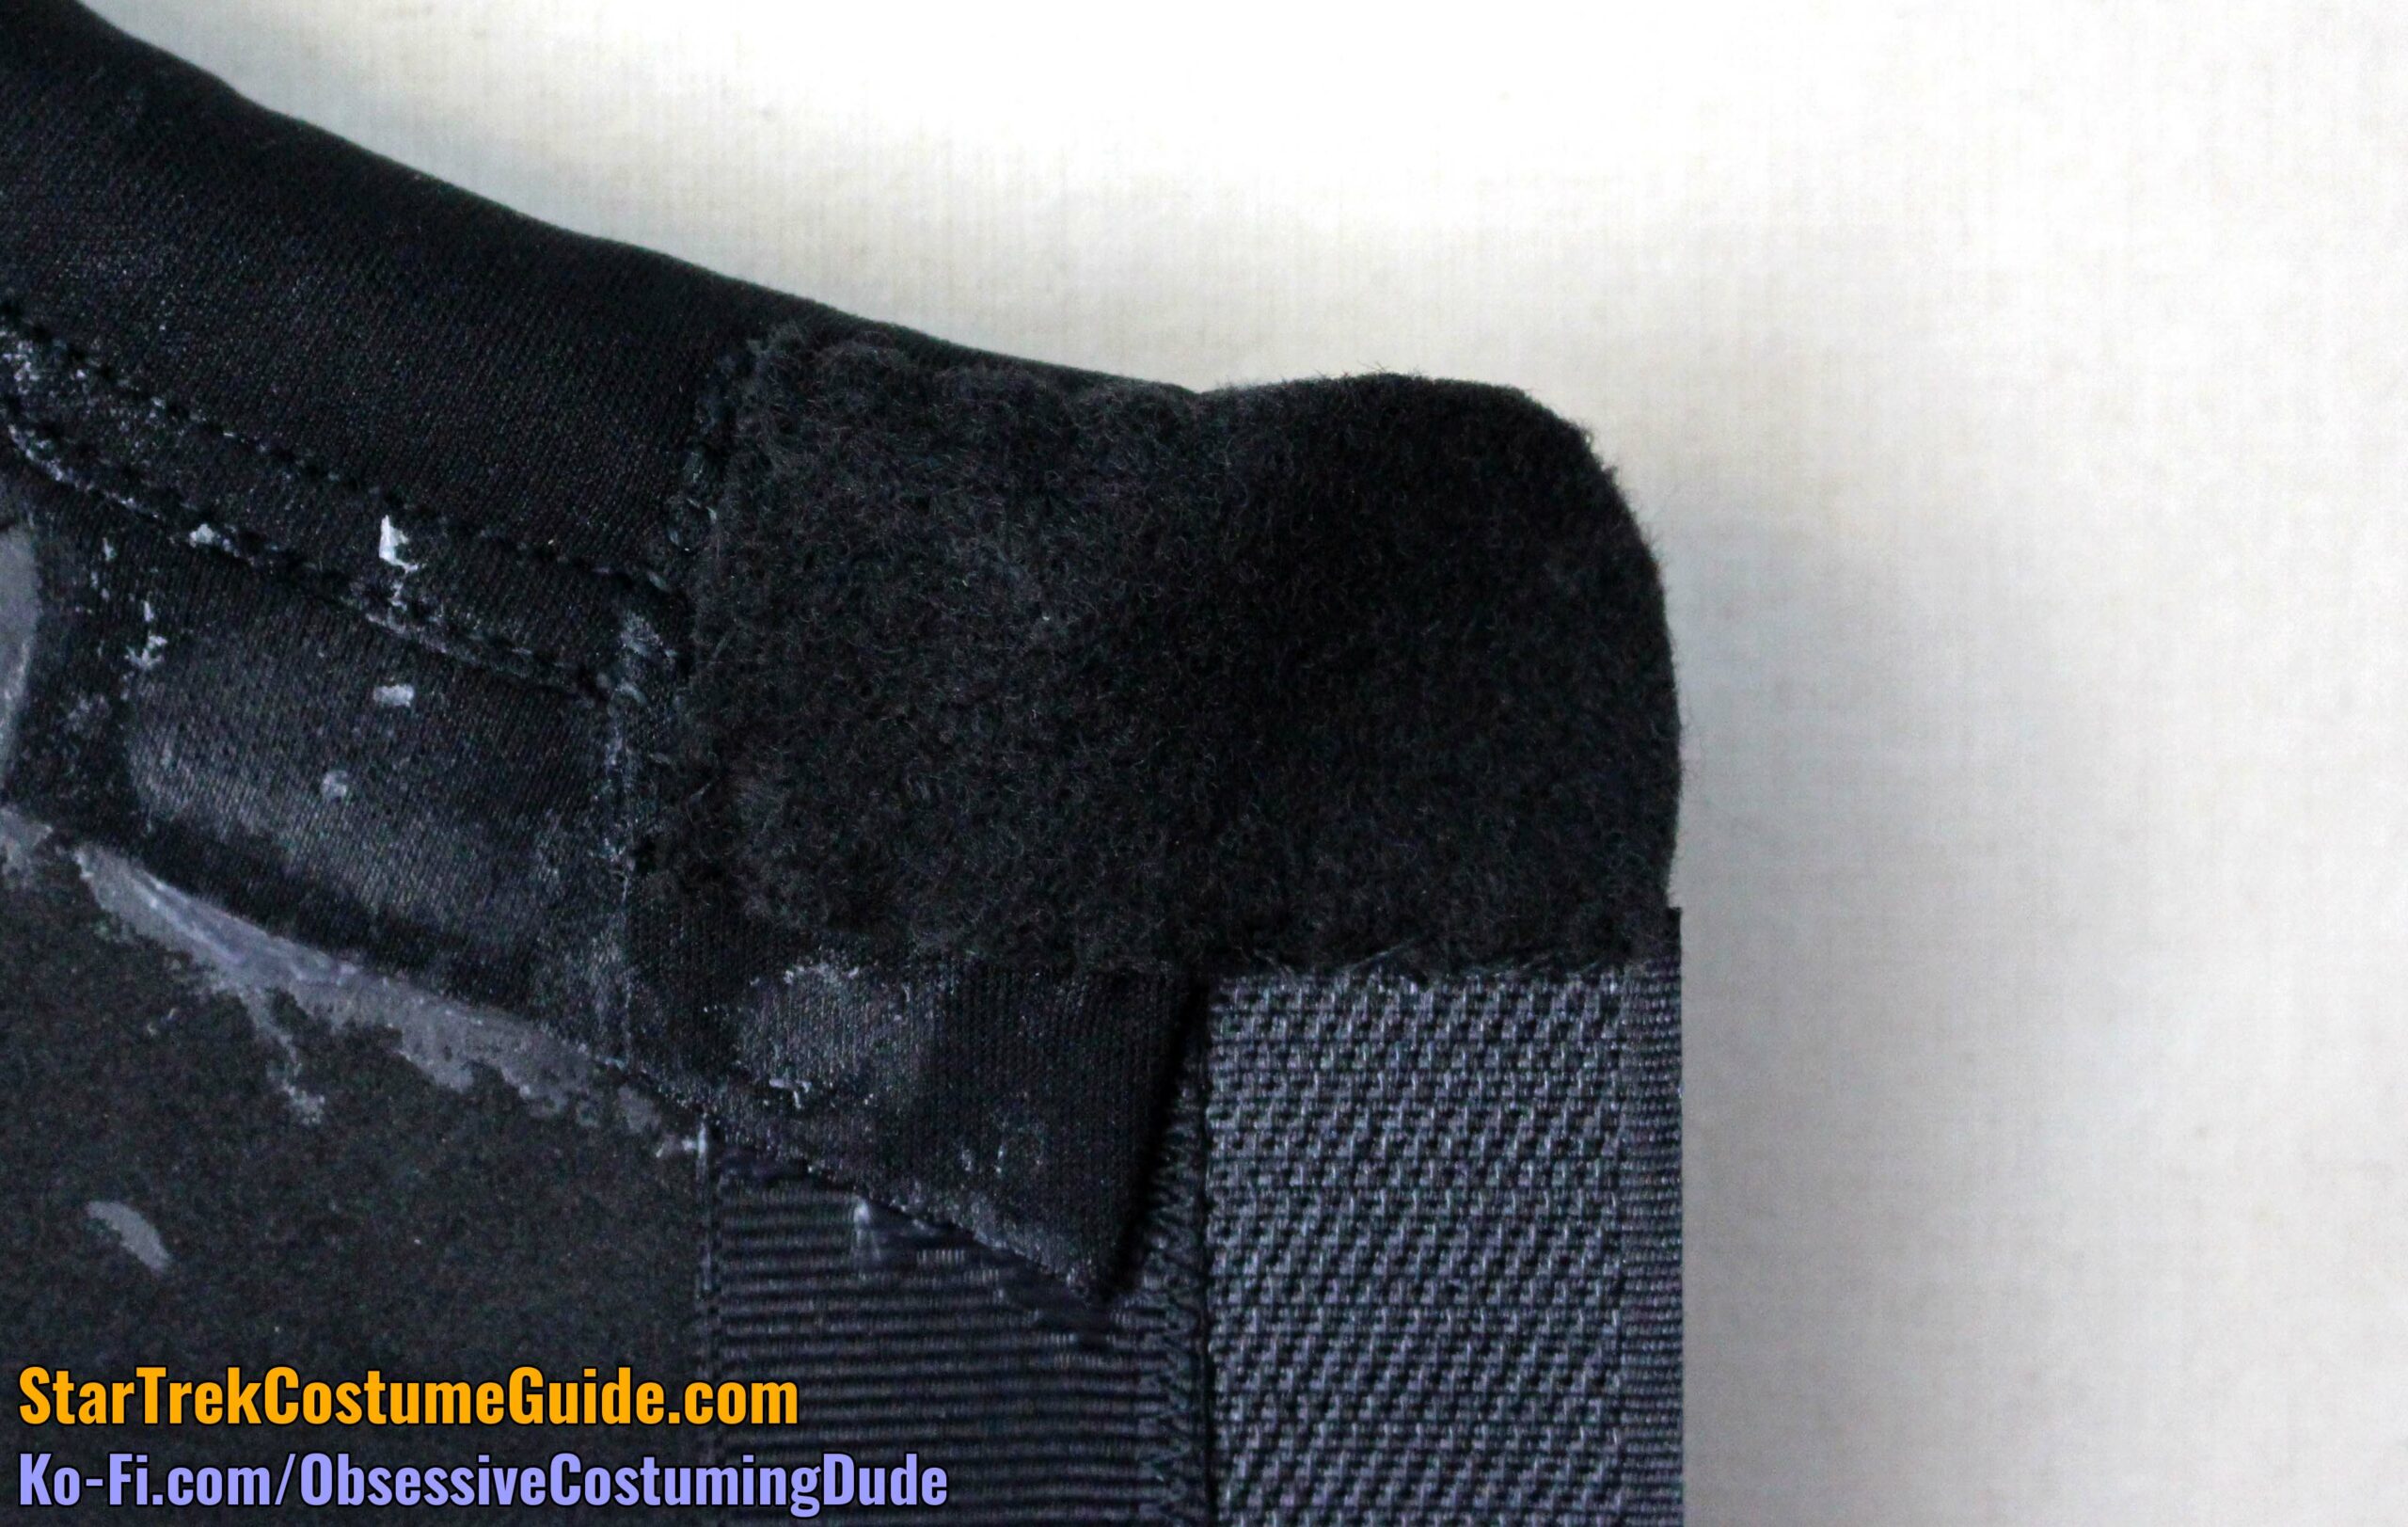
Cut a small rectangle of black felt, approximately 1” x 2”, and slightly round one corner.
Double-check to make sure your screws are fully tightened.
Position the felt on the rear underside of the collar opening so it covers the screw/washer assembly, the frontmost edge is flush with the edge of the “hook” tape, and the tape slightly overlaps the lower edge of the felt.
Hand-sew the felt to the underside of the neckline piping, lip, ribbon, and “hook” tape.
Your collar is now finished! 🙂
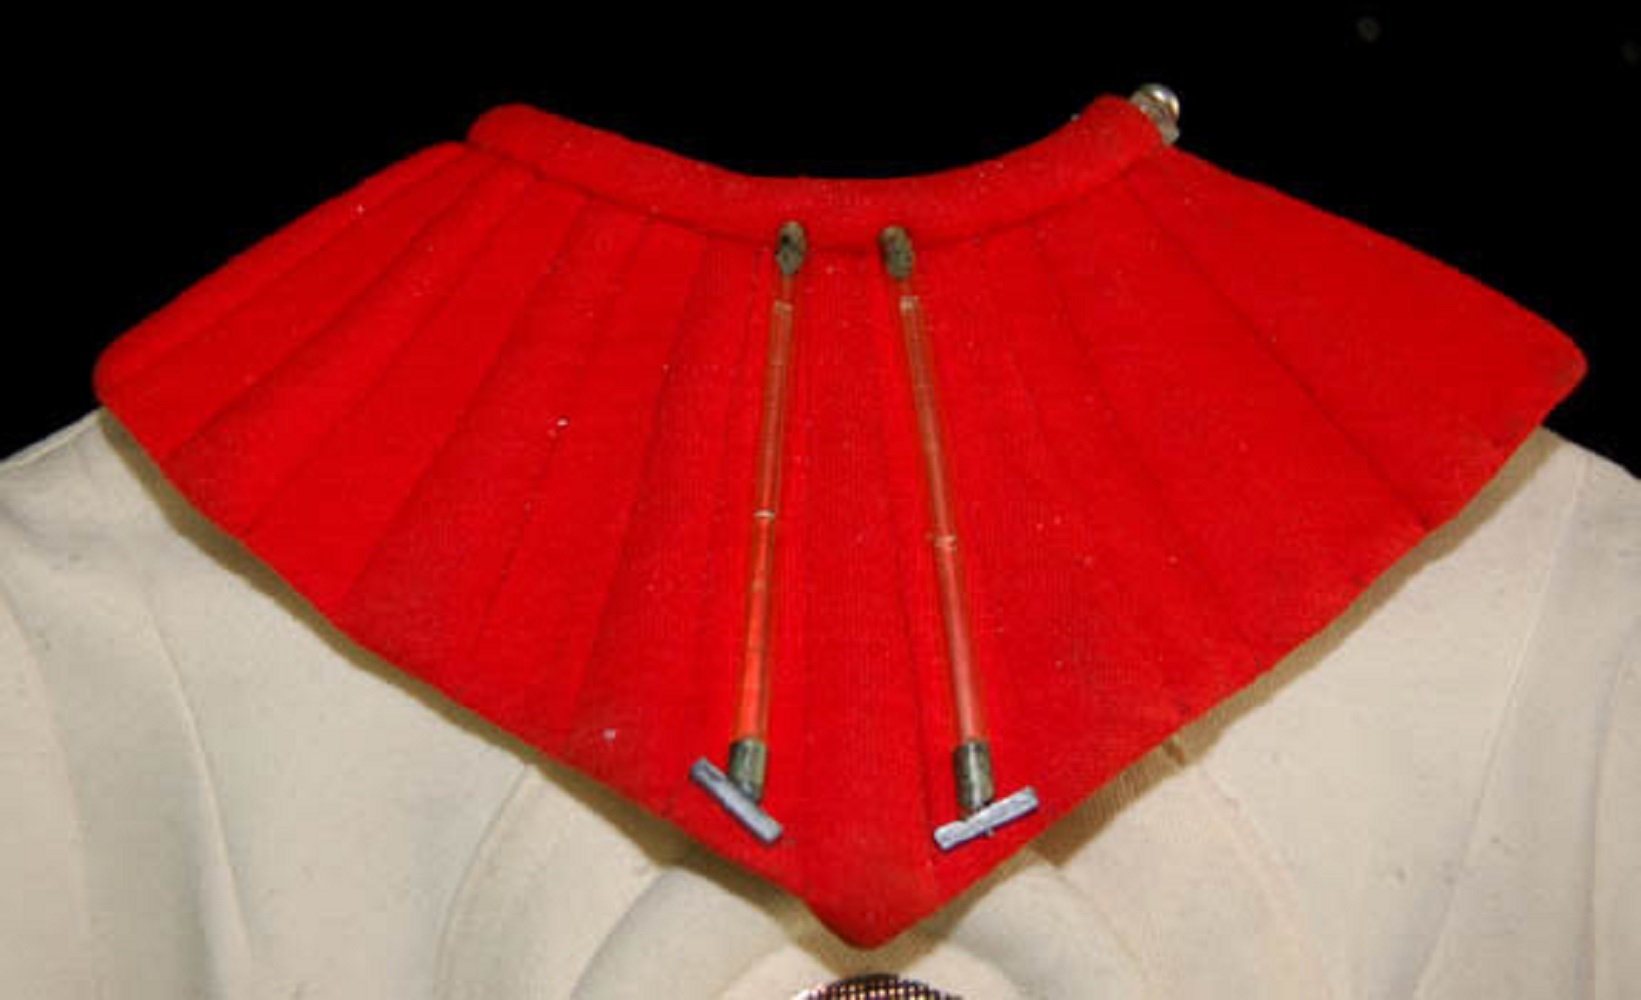
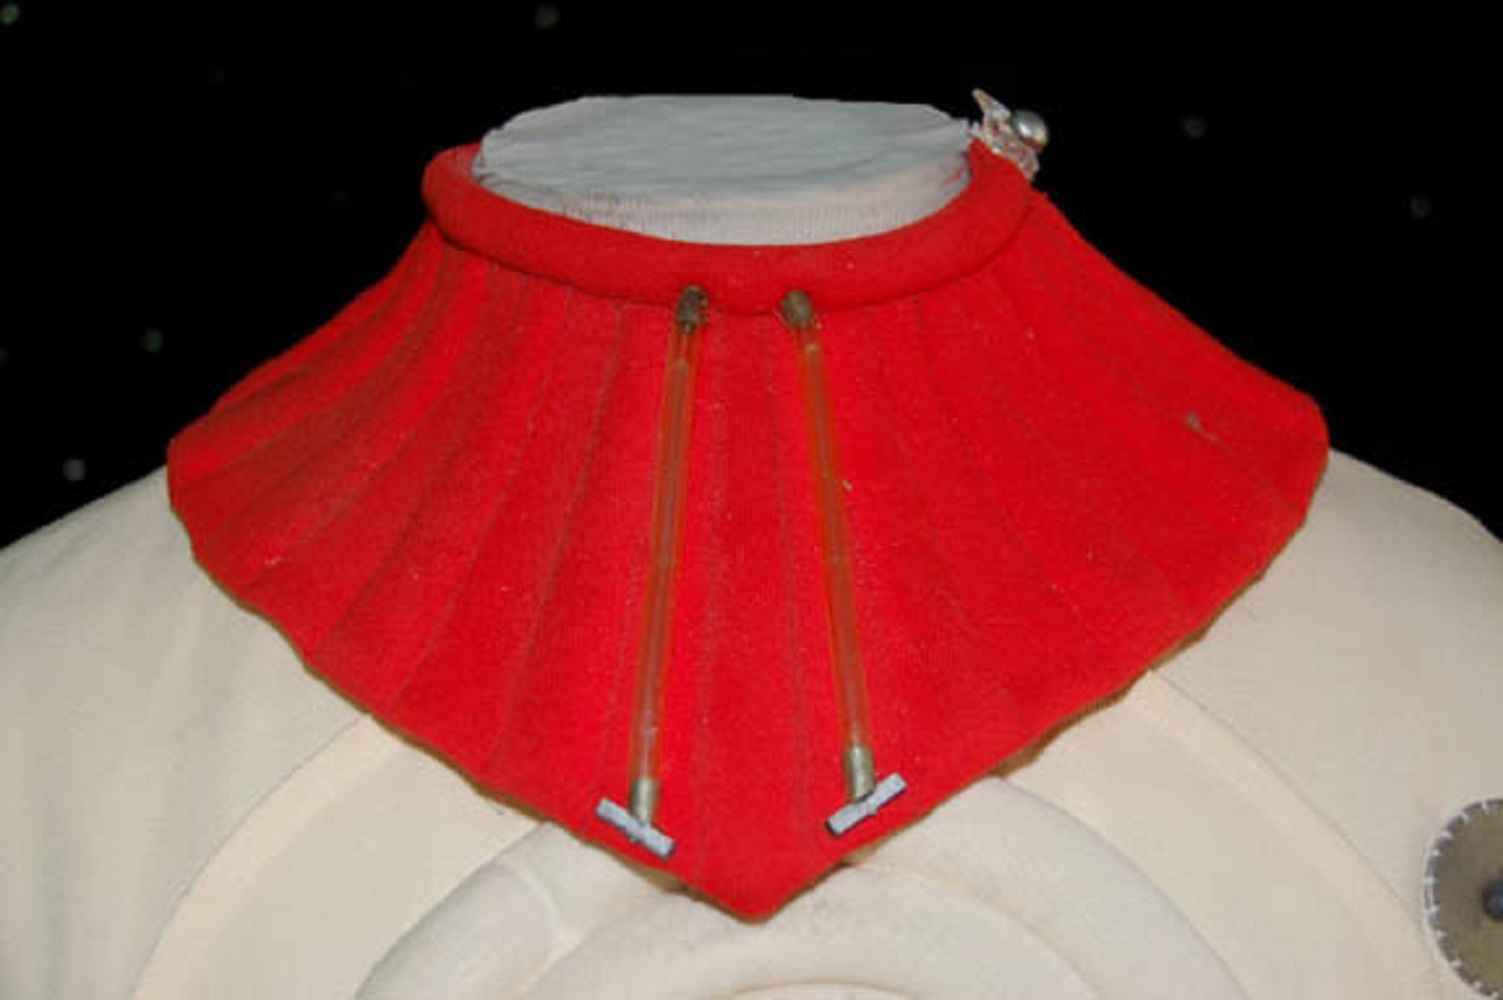
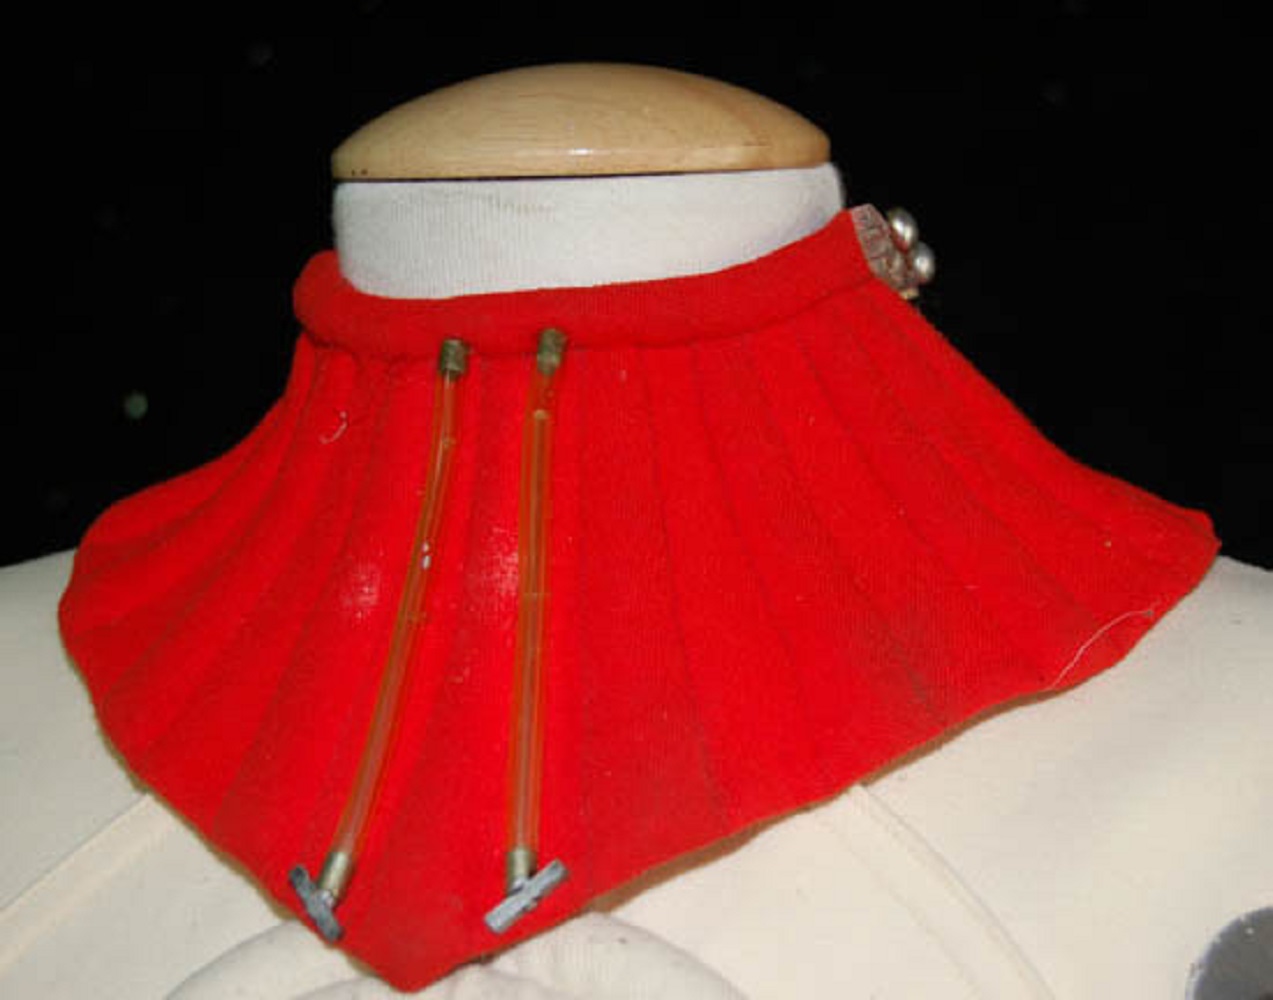
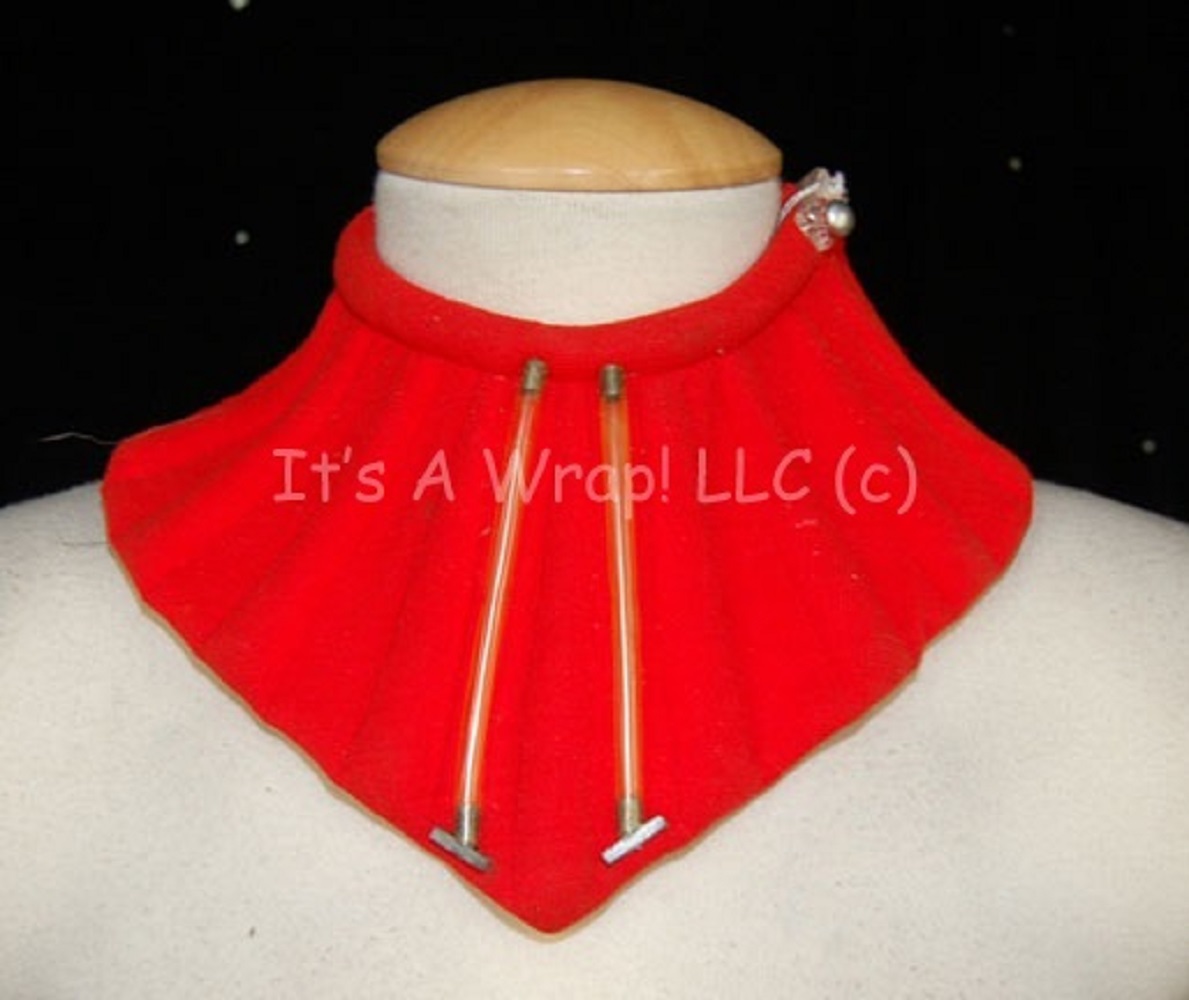
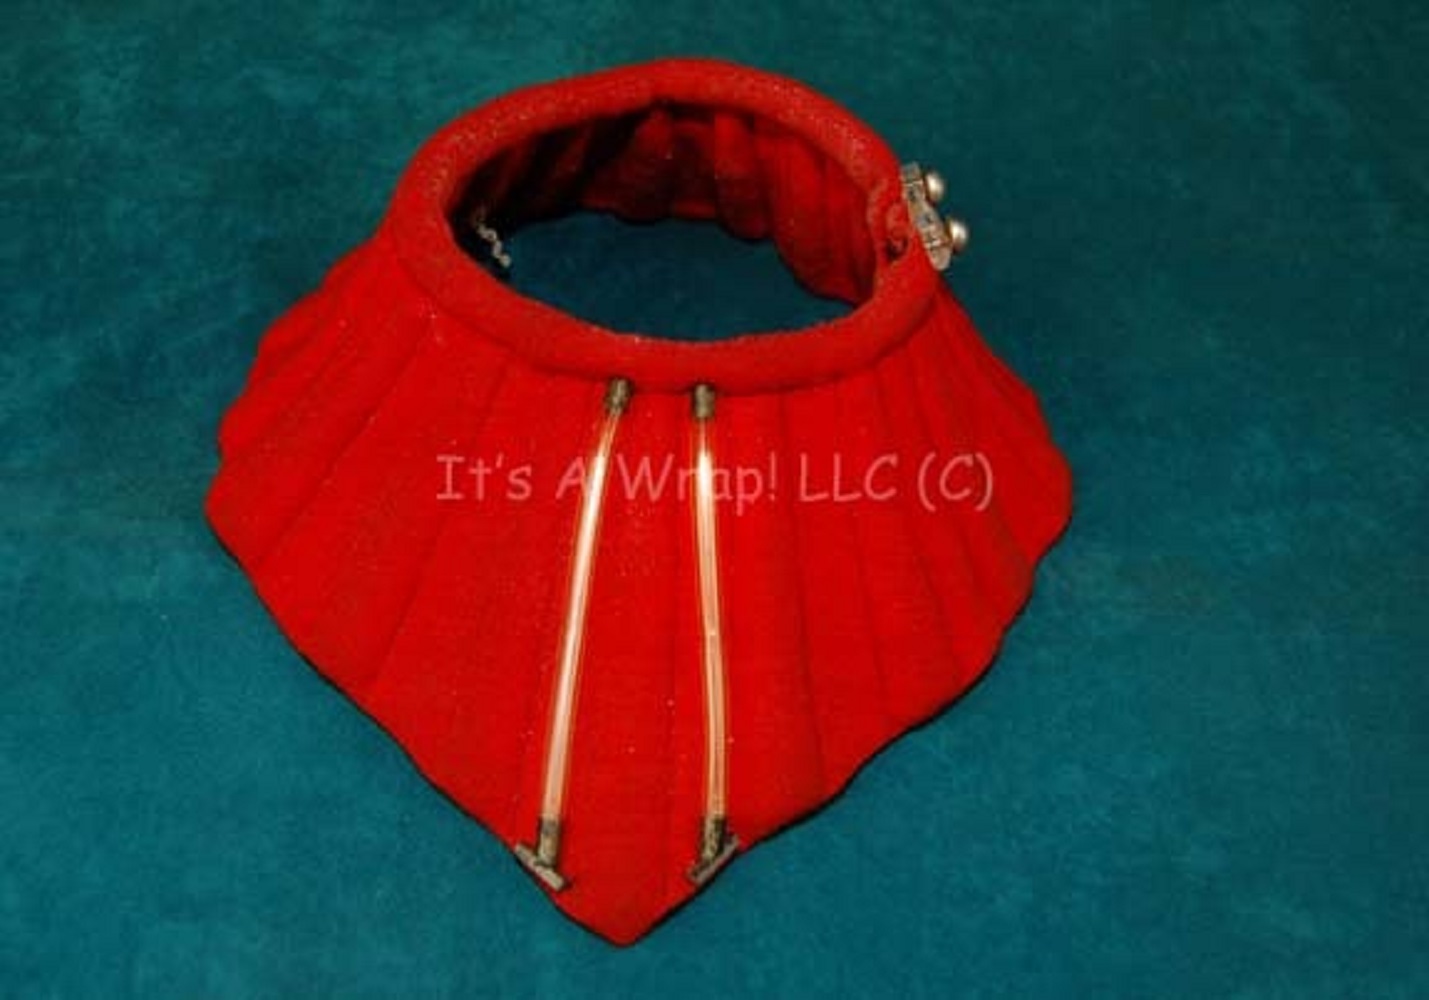
TWOK-era TRAINEE COLLAR
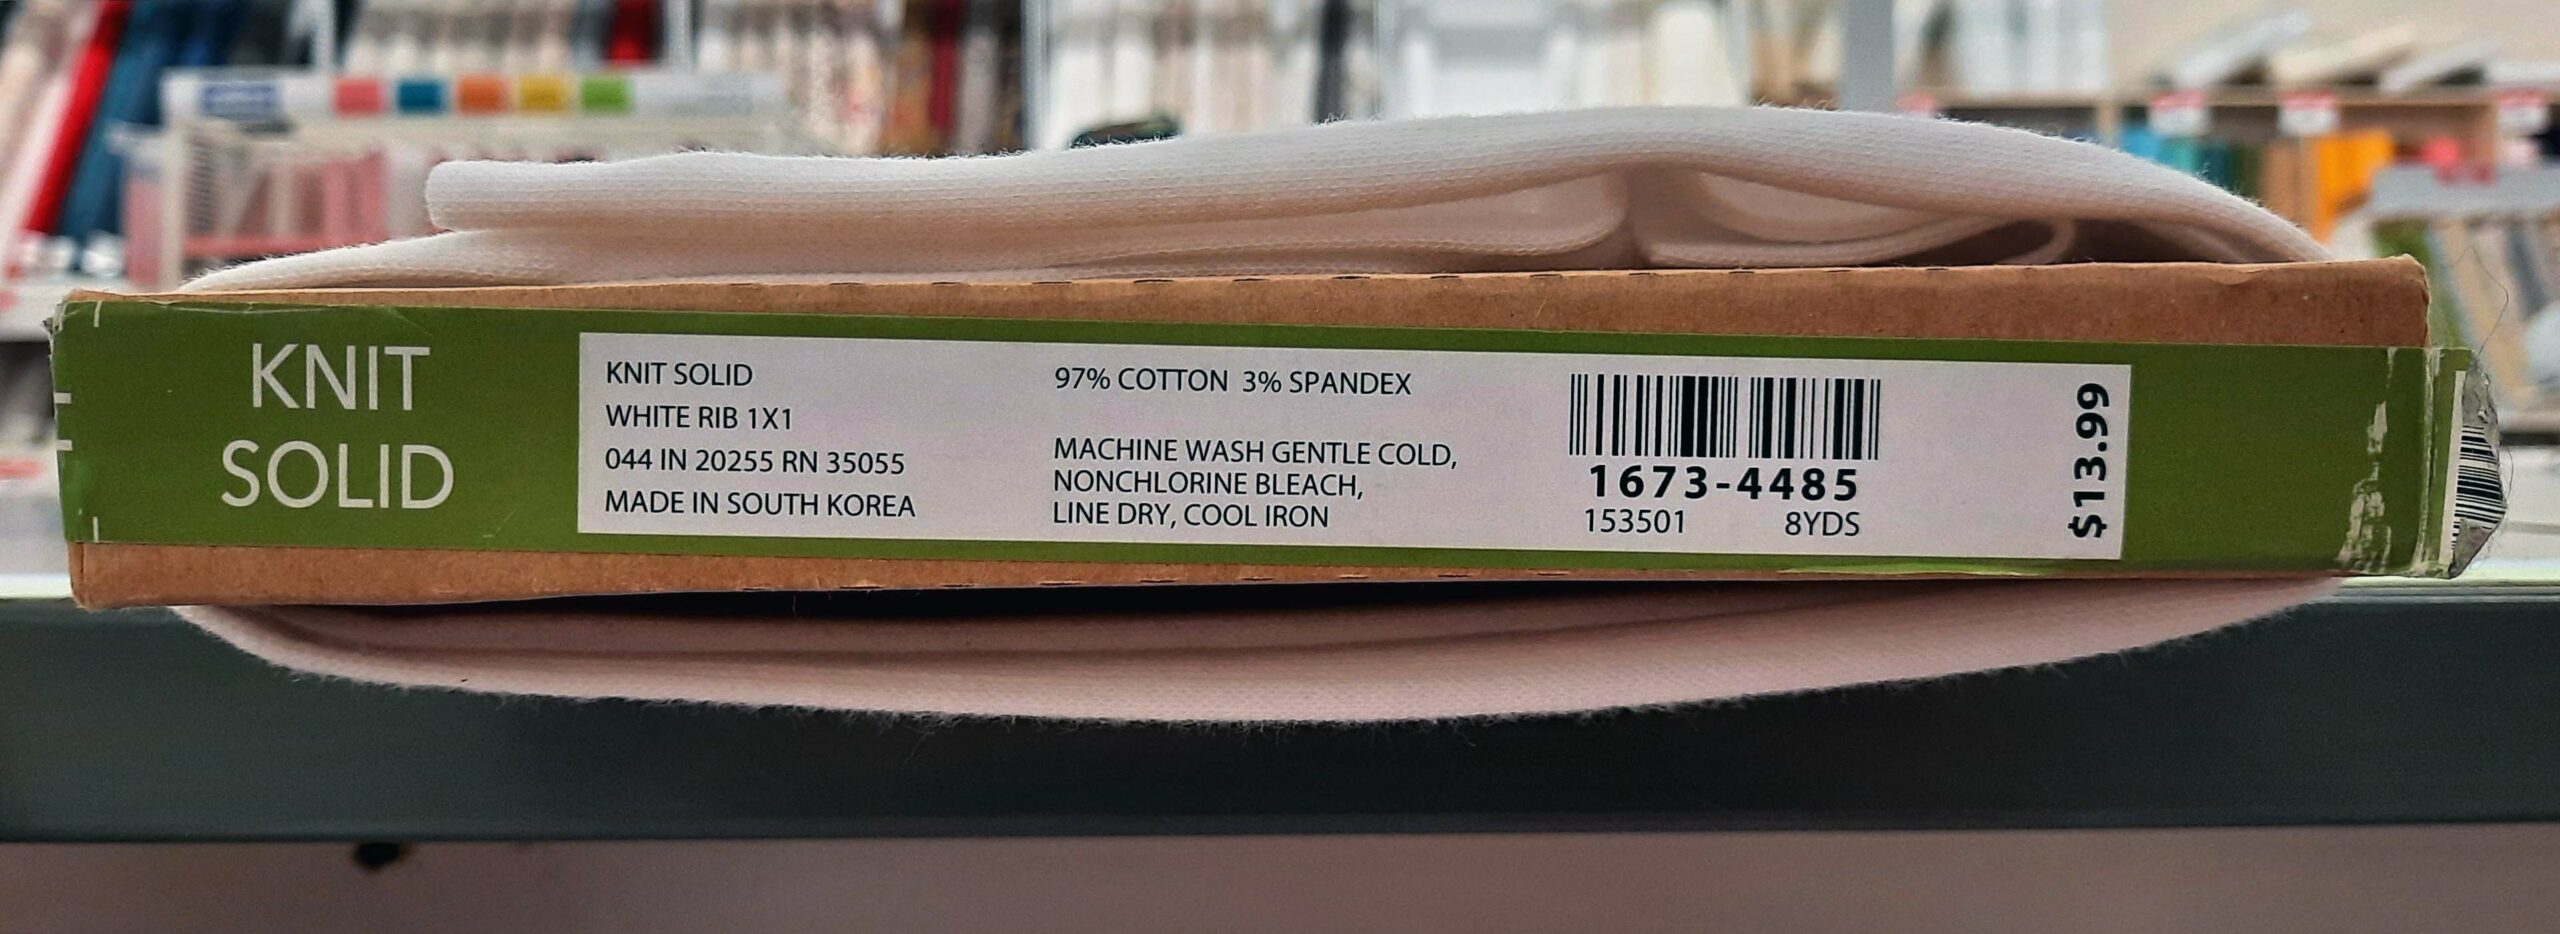
I’m not sure exactly what fabric the screen-used trainee collars were made with, only that it was a knit fabric instead of neoprene.
For this demonstration trainee collar, I used a cotton knit fabric and custom-dyed it orange-y “flame red.”
Being a cotton fiber, it responded favorably to fiber-reactive dye, although not as well as rayon might have.
(In my experience, cotton knits absorb a lot of fiber-reactive dye with the proper leveling and bonding agents, but multiple post-scours bleed much of it right back off the fabric.)
In lieu of matching to a screen-used trainee collar, there’s some room for subjectivity regarding the ideal target color.
In TWOK, these collars looked deep red, but in subsequent films they looked more orange.
Star Trek II: The Wrath of Khan
Star Trek III: The Search for Spock
Star Trek VI: The Undiscovered Country
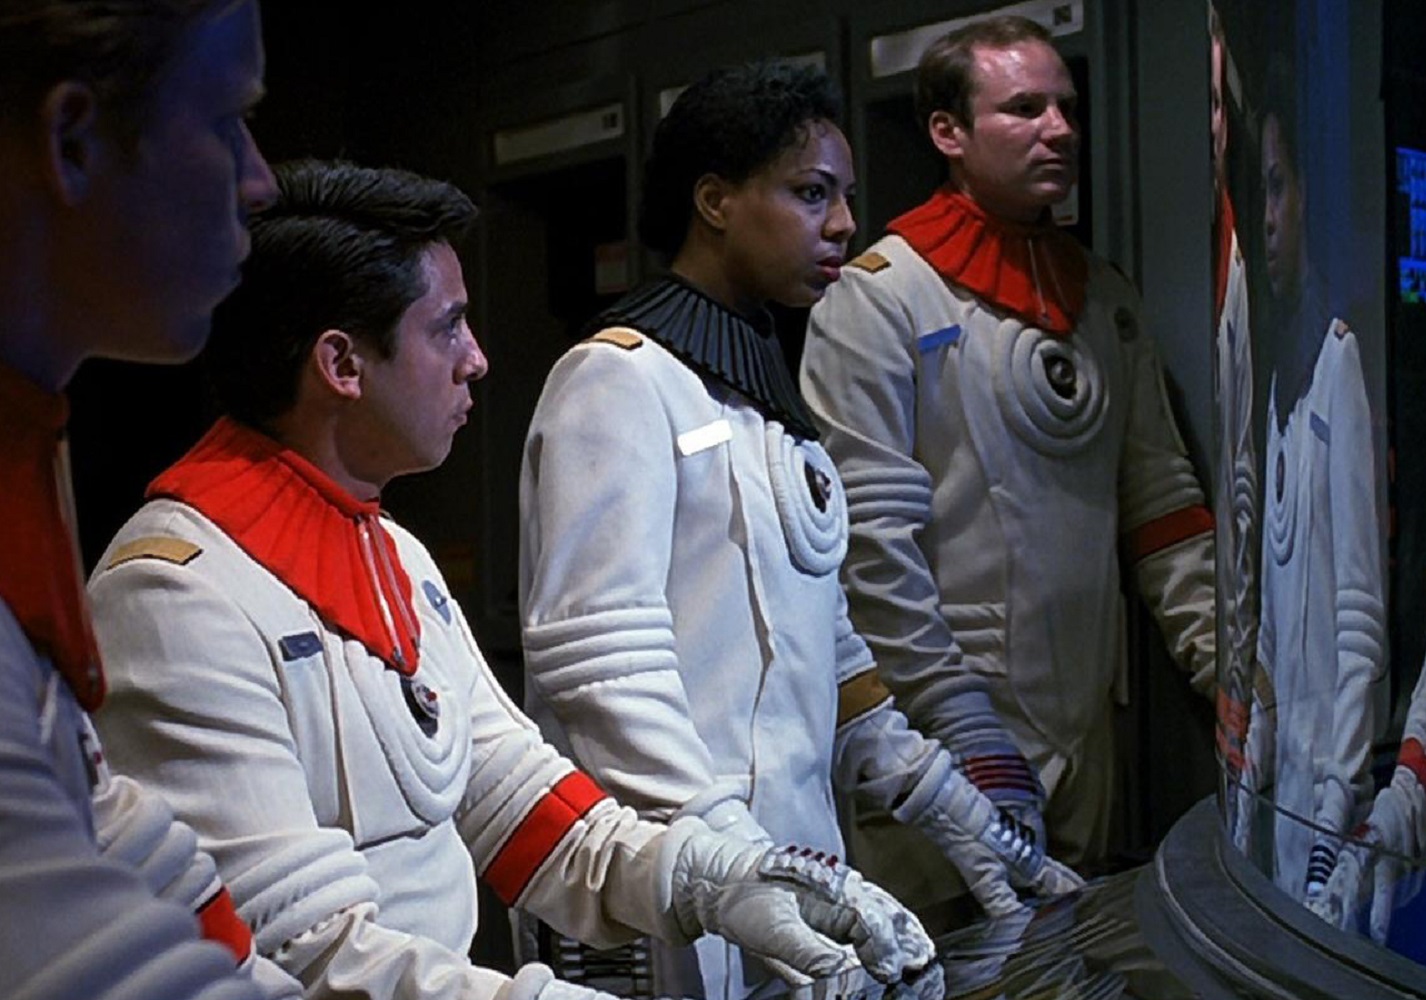
Of course, the same was true for other trainee-specific garments, like the division shirts:
Star Trek II: The Wrath of Khan
Star Trek III: The Search for Spock
Although I do love the look and visual style of The Wrath of Khan, as of the writing of this tutorial, I do think the trainee colors as seen in the subsequent films are probably closer to the actual fabric color.
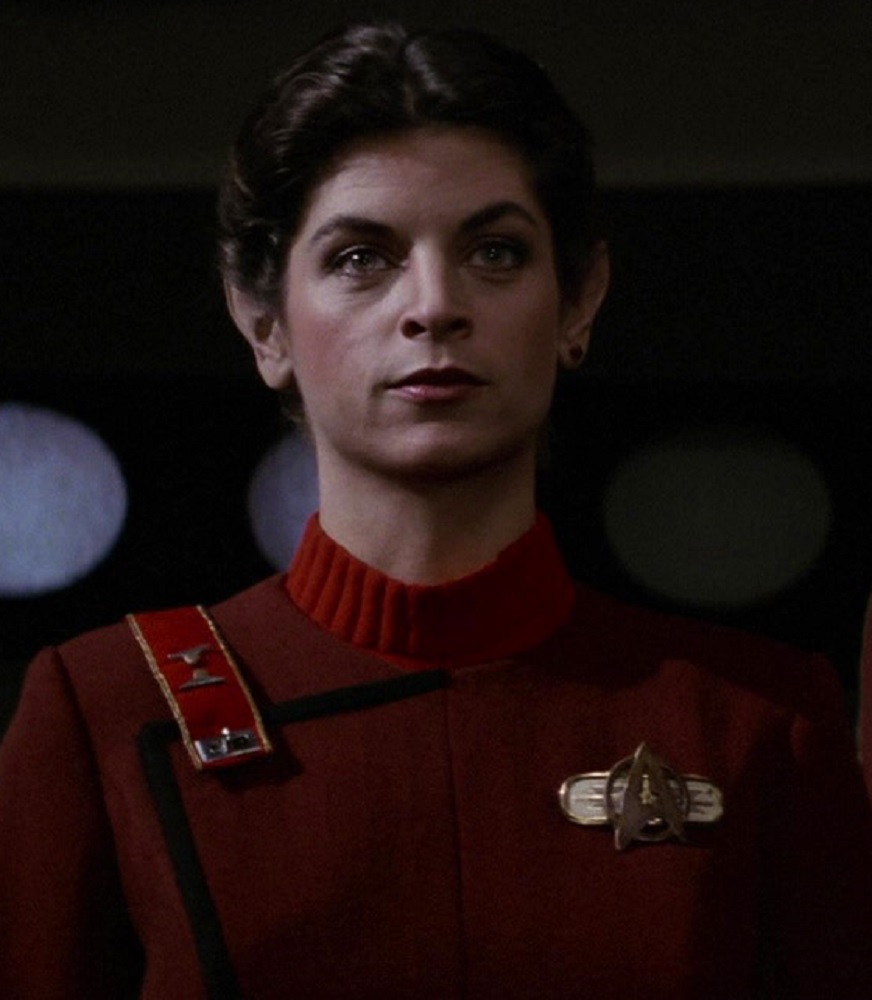
Assuming the trainee radiation suit collars were even close to the other trainee-specific uniform garments, here’s a photo of a screen-used Saavik TWOK uniform from Gerard Gurian’s “Star Trek Props, Costumes, and Auction Authority” blog that appears to support this assertion:
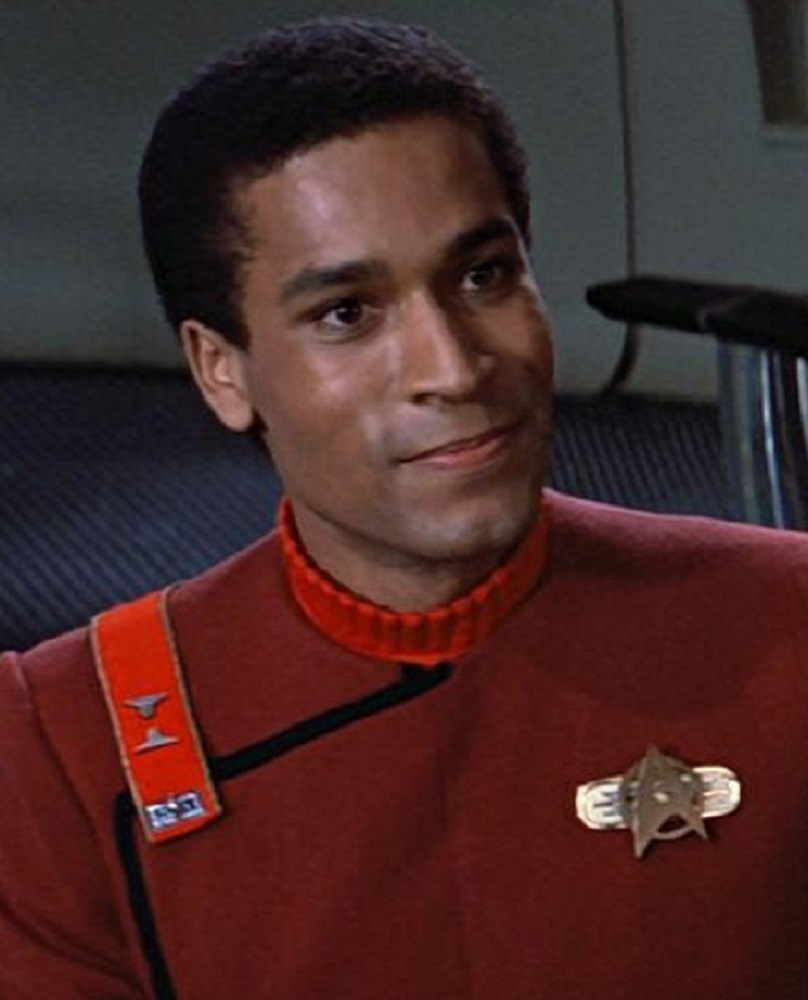
And while I ordinarily believe auction photos to be almost useless for precise color reference, in lieu of anything better, here’s a collection of them in which the trainee collars consistently appear to be an orange-y “flame red”:
… all of which I mention only to emphasize that this is my interpretation of the trainee collar color!
The component colors and custom mix are both standard 1% stock solutions, applied at an 8% depth-of-shade on the aforementioned cotton knit fabric.
If you have no idea what this means but are interested in learning, I am tentatively planning to produce a Tailors Gone Wild fabric-dyeing course, which will be specifically for aspiring costumers and cosplayers.
I suggest subscribing to my “Sewing Wizard Newsletter” for updates. 🙂
Obviously, if you prefer a different target color and/or are working with a different fabric, you’ll want to experiment and adjust your dye recipe accordingly.
(In TMP and ST4, the orange variants were worn with the same black collars as the officers and enlisted crew, but in TWOK, they were worn with matching orange collars that appear to have been made the same way as the trainee collars.)
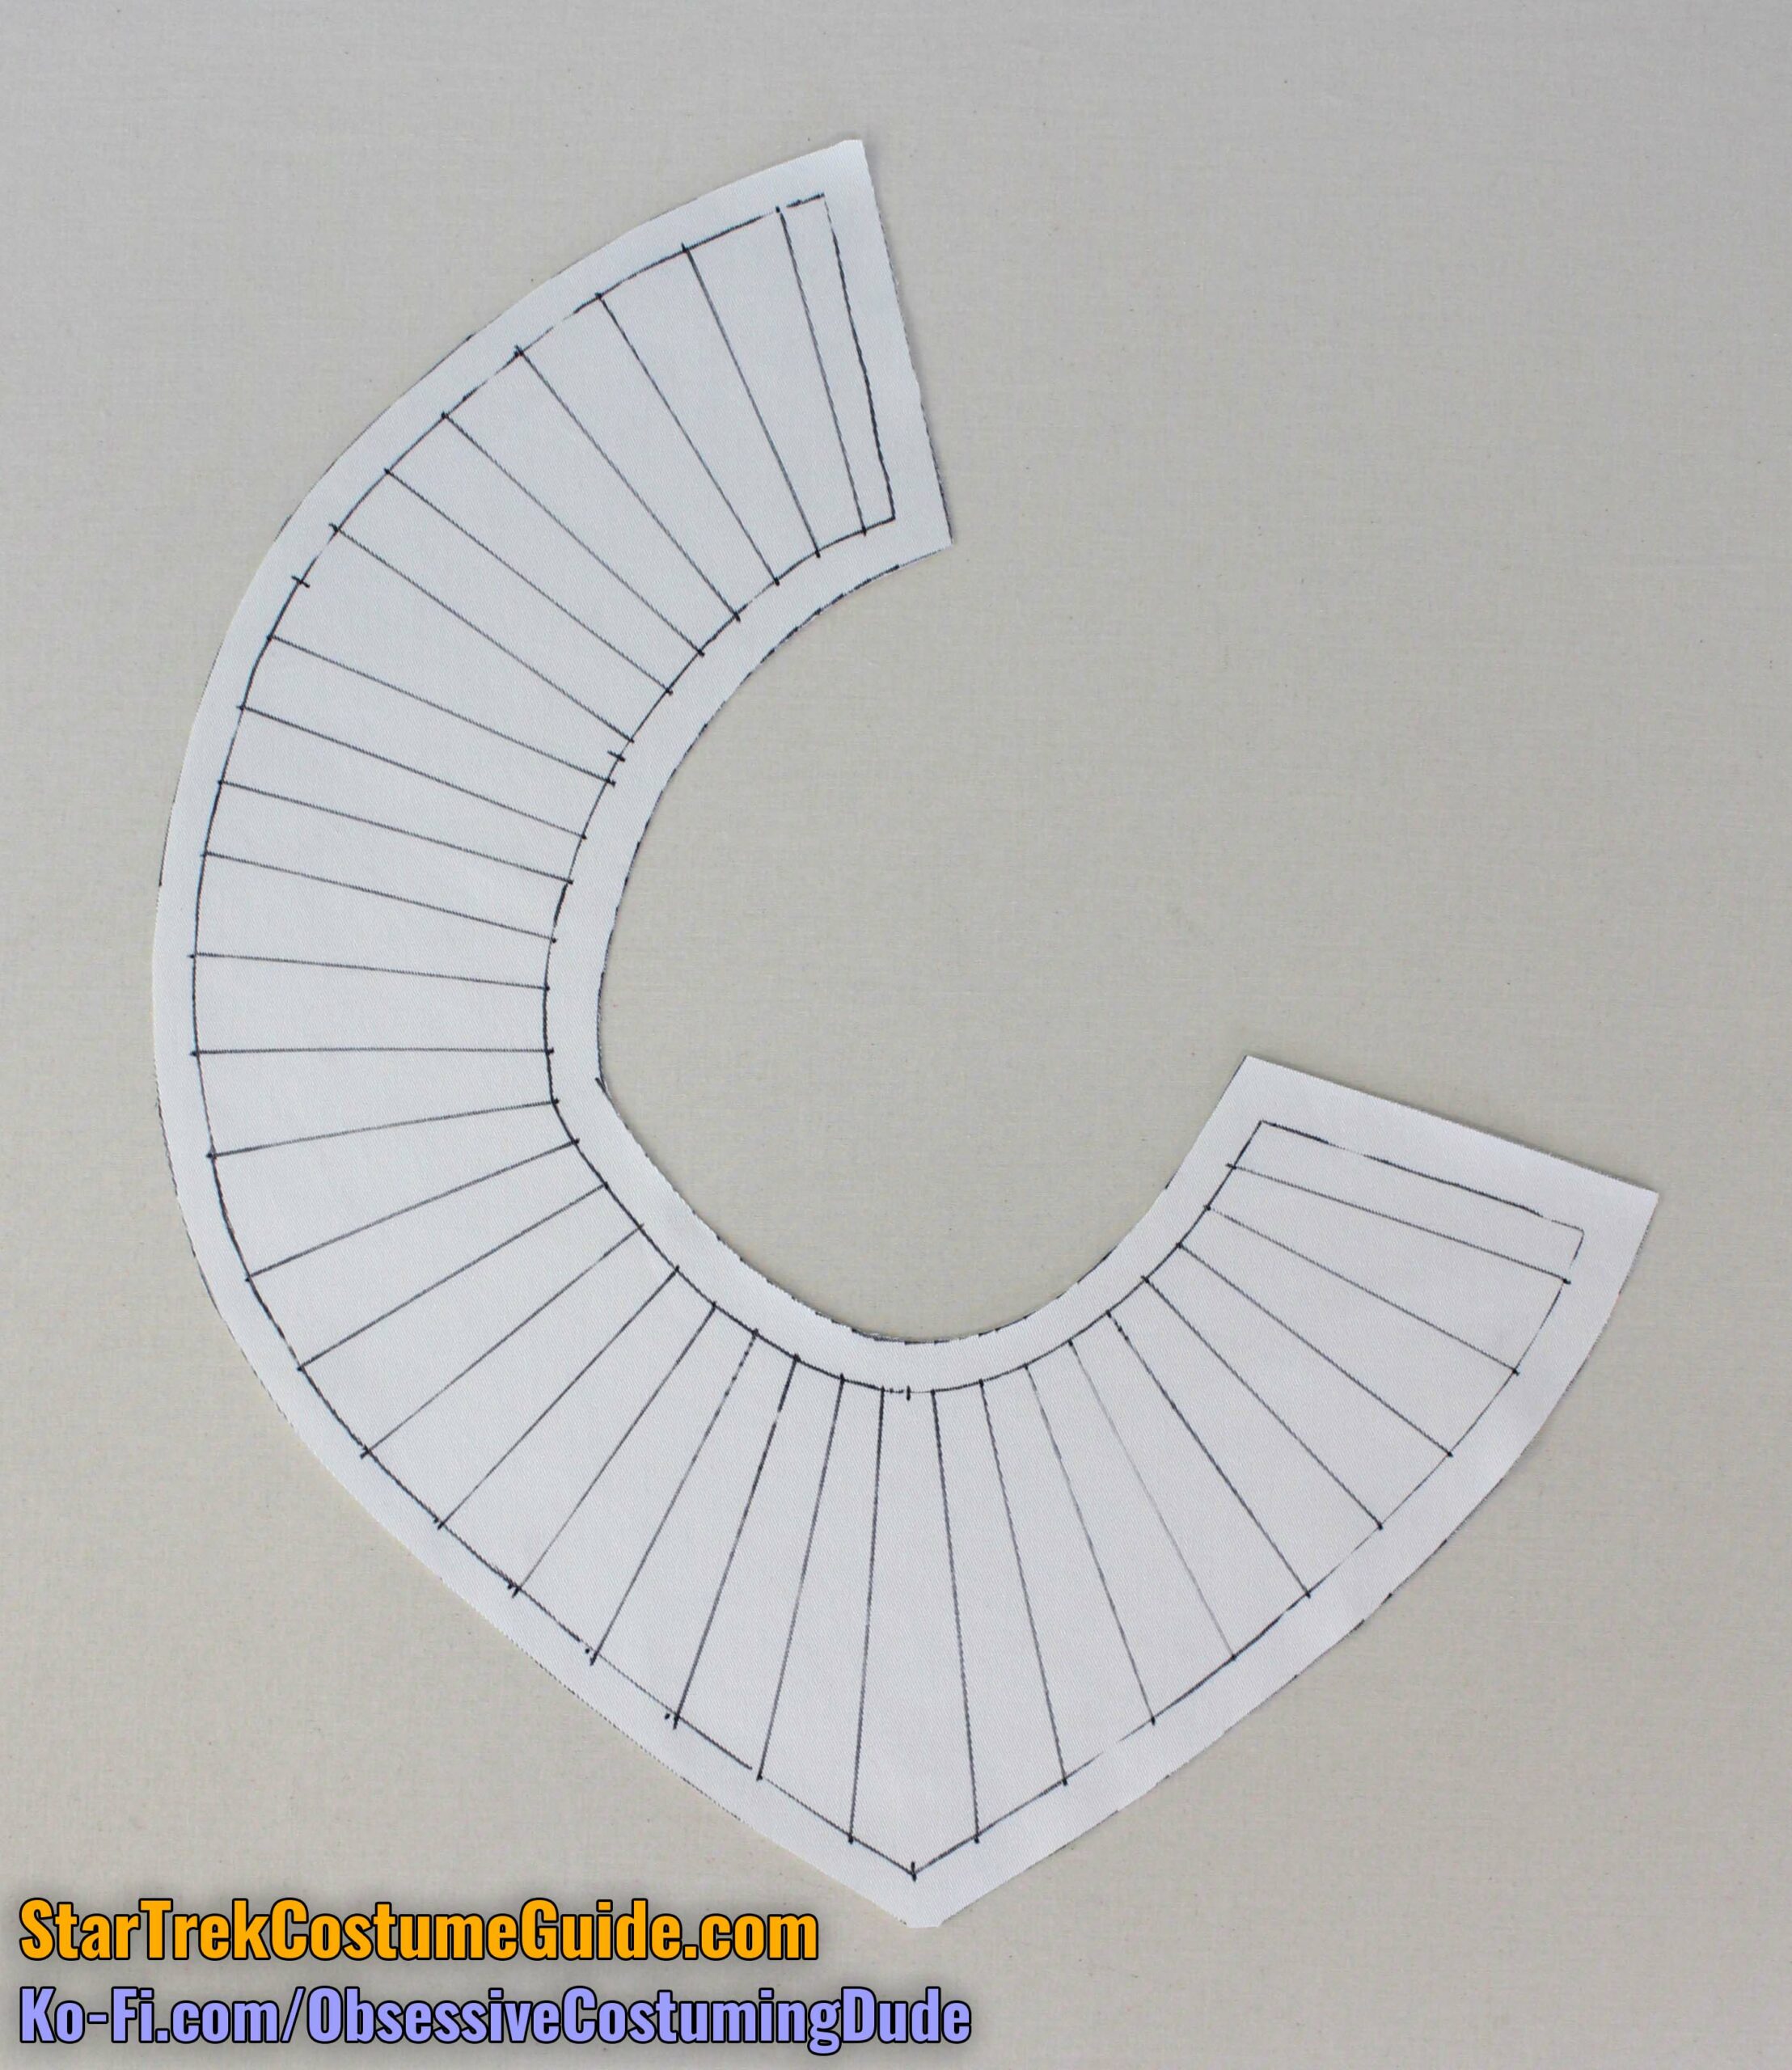
I would’ve liked to include channel guides on the printed patterns, it would’ve simply resulted in far too much clutter on the page, to the point of being incoherent and useless.
Instead, I opted to avoid confusion and allow you to establish the quilted channels wherever you like.
As with the black officer/enlisted collars, there appears to have been some variation among the screen-used collars regarding the positioning and widths of the quilted channels.
And again as with the neoprene collars, the only consistent factor I observed was that the quilted channels were narrower and closer together at the neckline, then widened toward the outer edge of the collar.
Generally speaking, I suggest drafting the top of your channels about ½” wide (and ½” apart) along the neckline, and about 1” wide (and 1” apart) along the outer edge of the collar – with the exceptions being the center front and center back channels, which I suggest widening to 1 ¼”.
The specific number of channels doesn’t seem to matter, but do make sure both your center front and center back channels are quilted.
You may need to “cheat” a bit on the specific dimensions to distribute the channels as evenly as possible, but I suggest staying in the range of ⅜” to ⅝” increments along the neckline and ¾” to 1 ¼” along the lower edge.
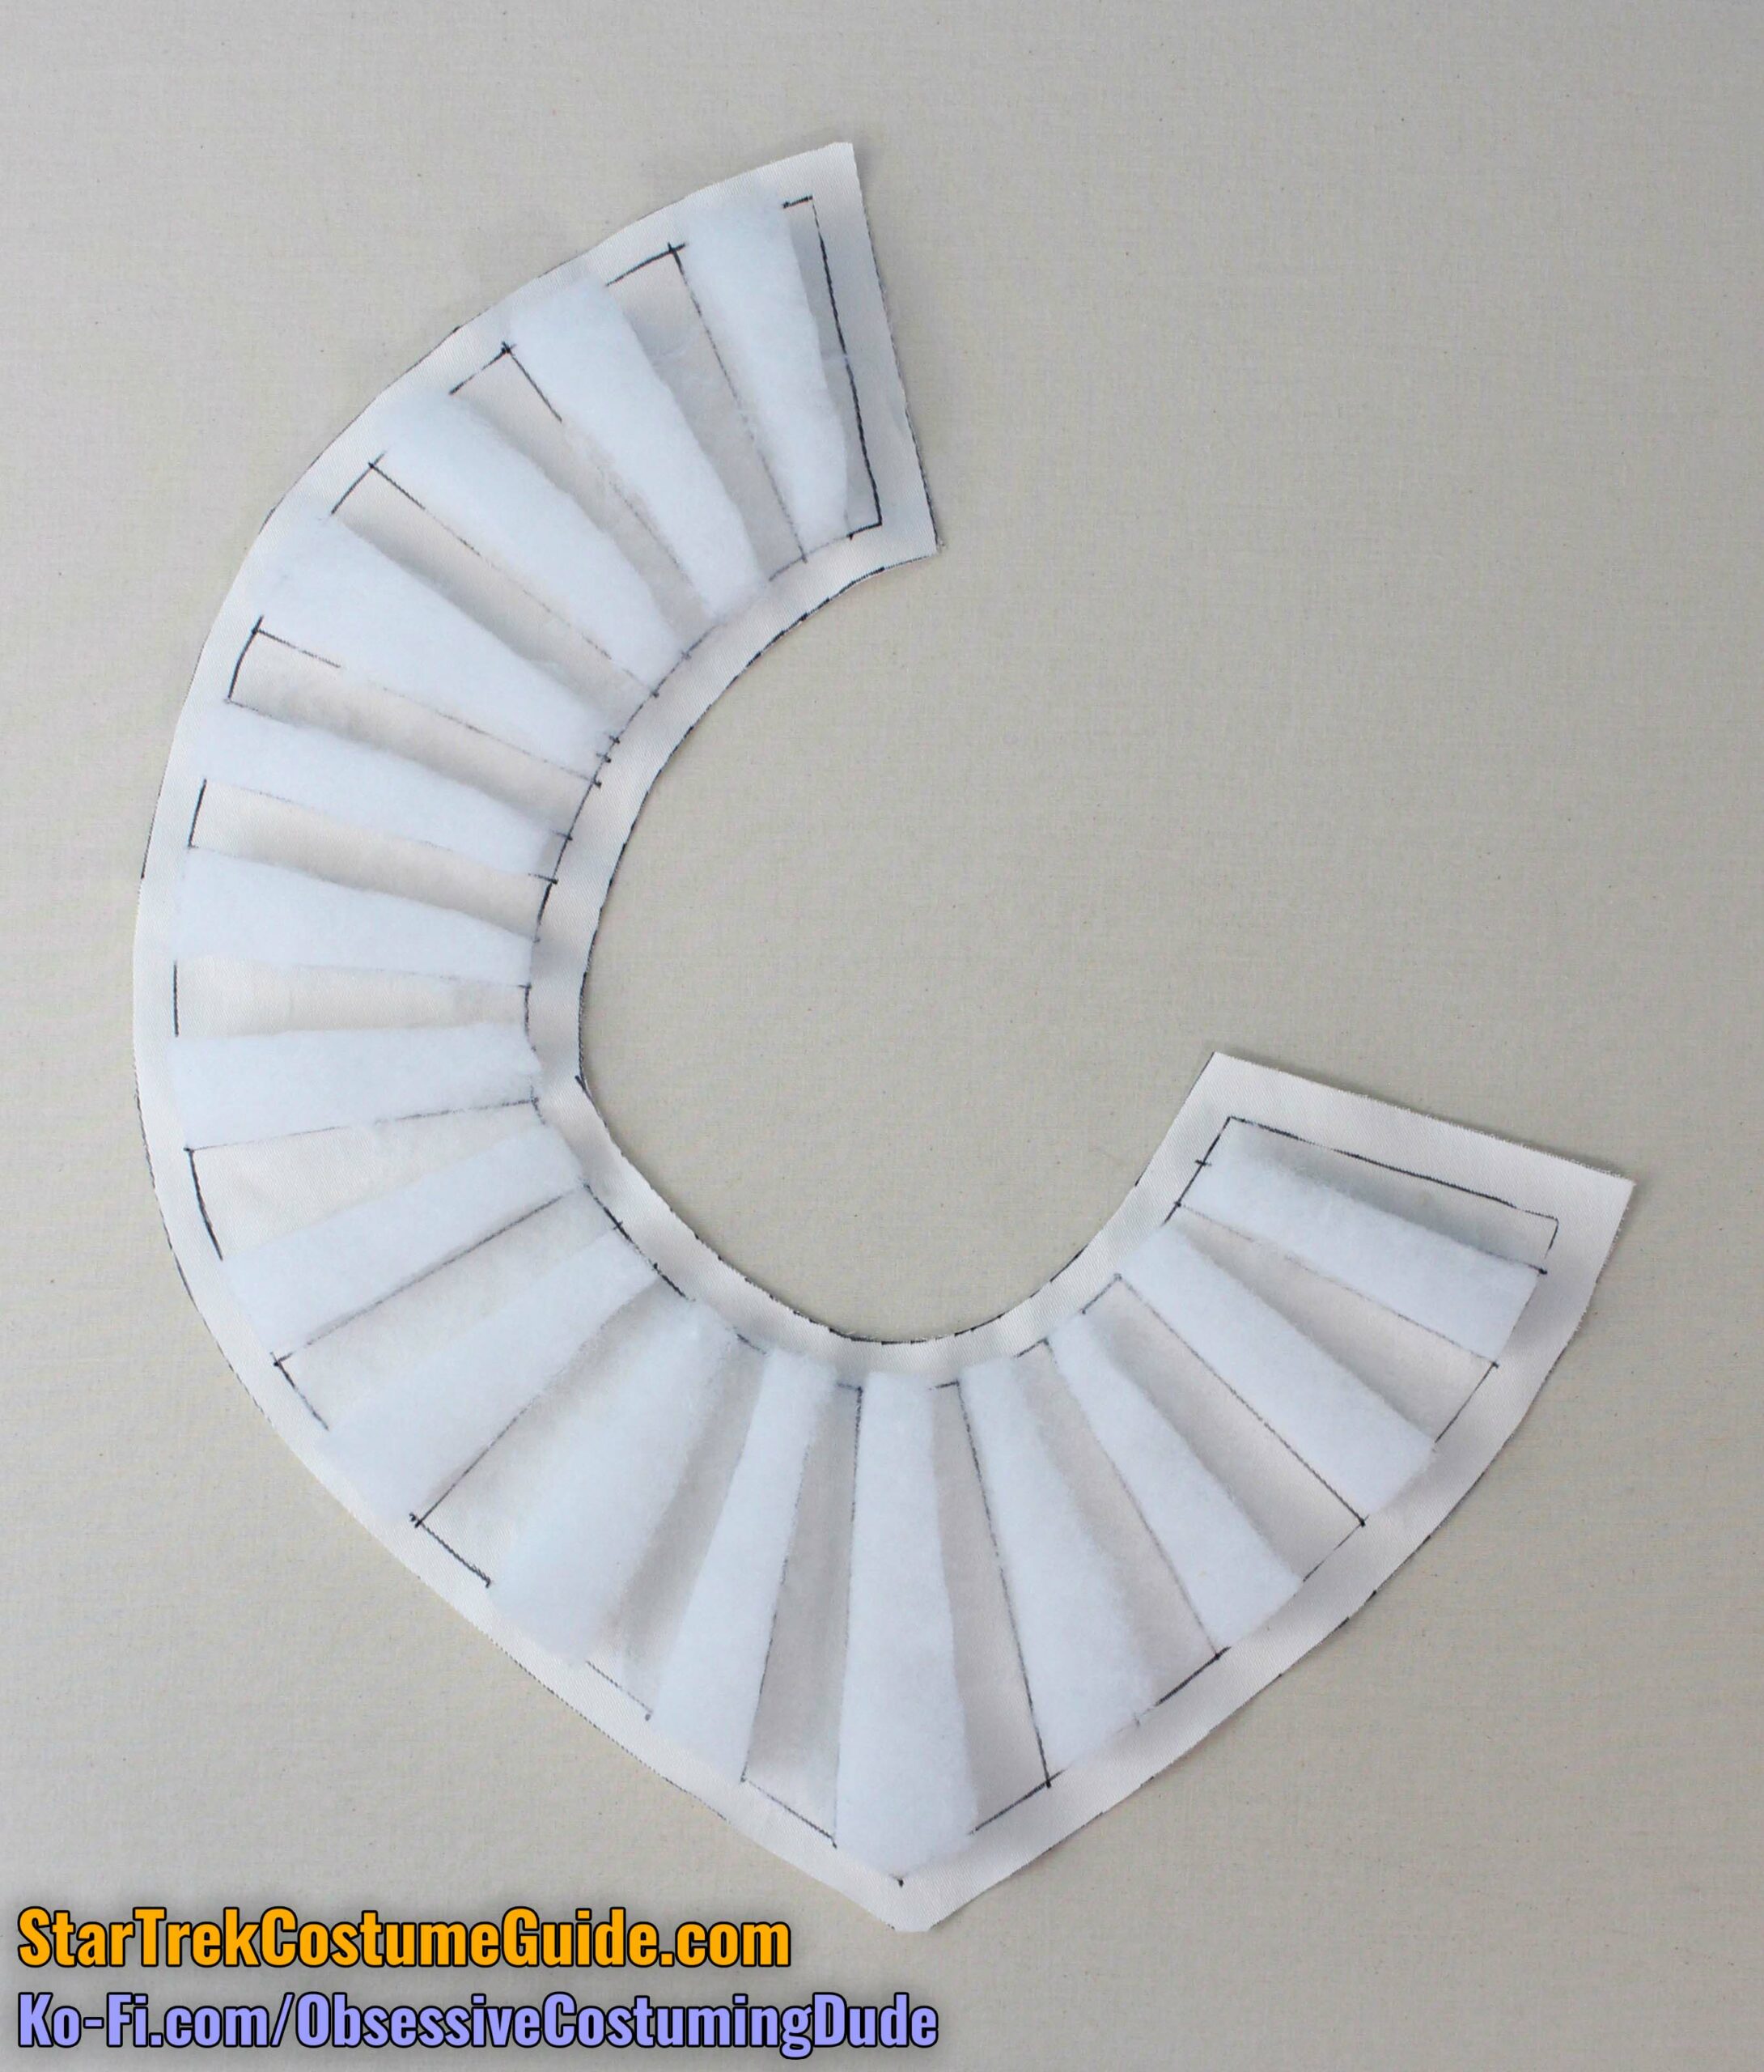
You can use whatever lightweight fabric you like for the backing; I just used a piece of leftover jumpsuit body fabric, but you could use a leftover piece of muslin too.
I literally drew my channel guides onto the backing fabric with a black Sharpie. (This is easy to see while working but will be sewn into the collar interior and never seen anywhere on the finished collar.)
The screen-used trainee collars look like they may have been trapunto-quilted like other uniform garments of the era, but obviously none of us is likely to have a trapunto machine at our disposal …
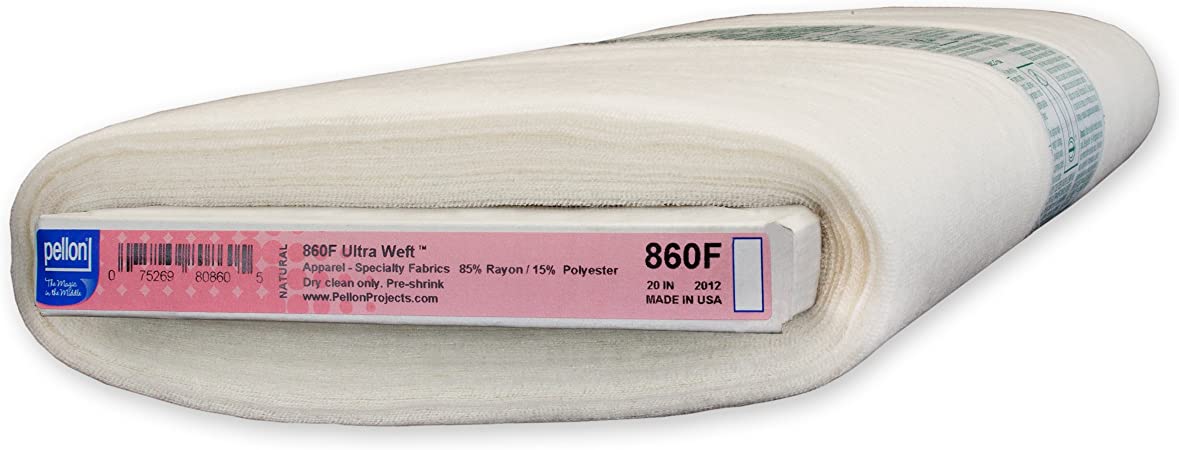
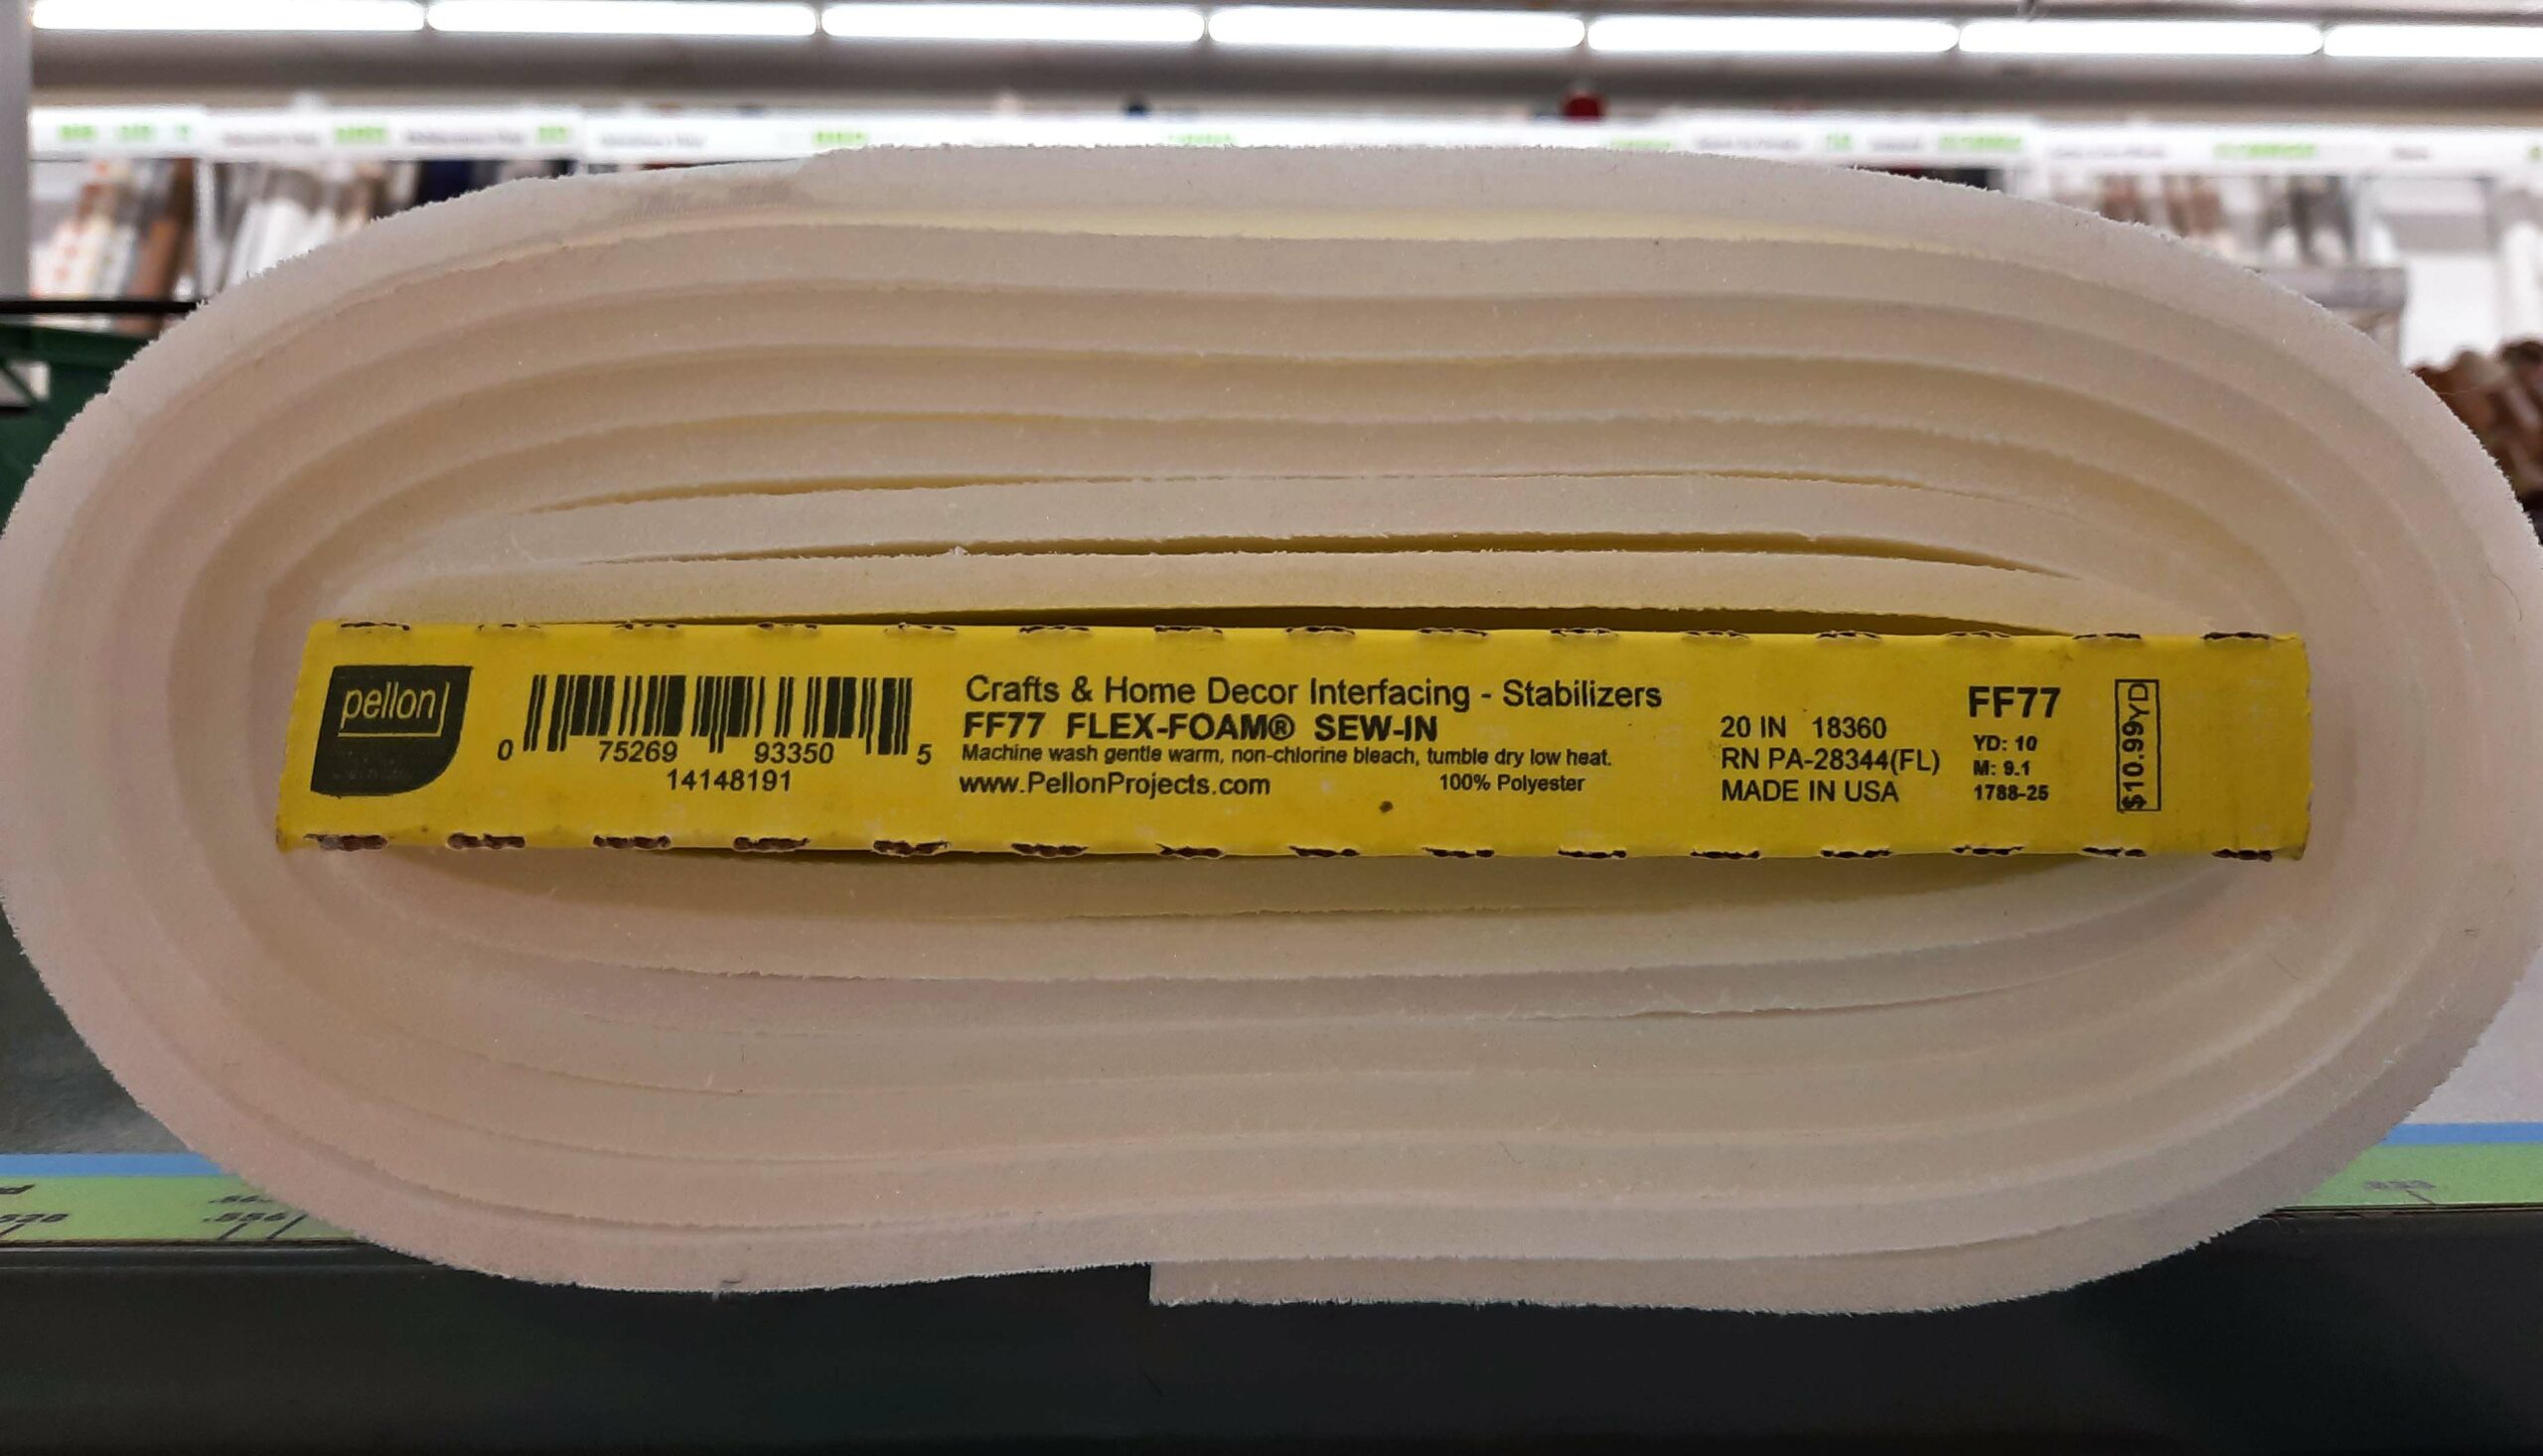
Instead, in this case I suggest using a combination of high-loft quilt batting and thick foam interfacing to achieve a similar effect.
The method I present here isn’t the only way to make the collar; you may wish to adapt or modify it more to your liking, and if so, go for it!
But here’s how I made mine.
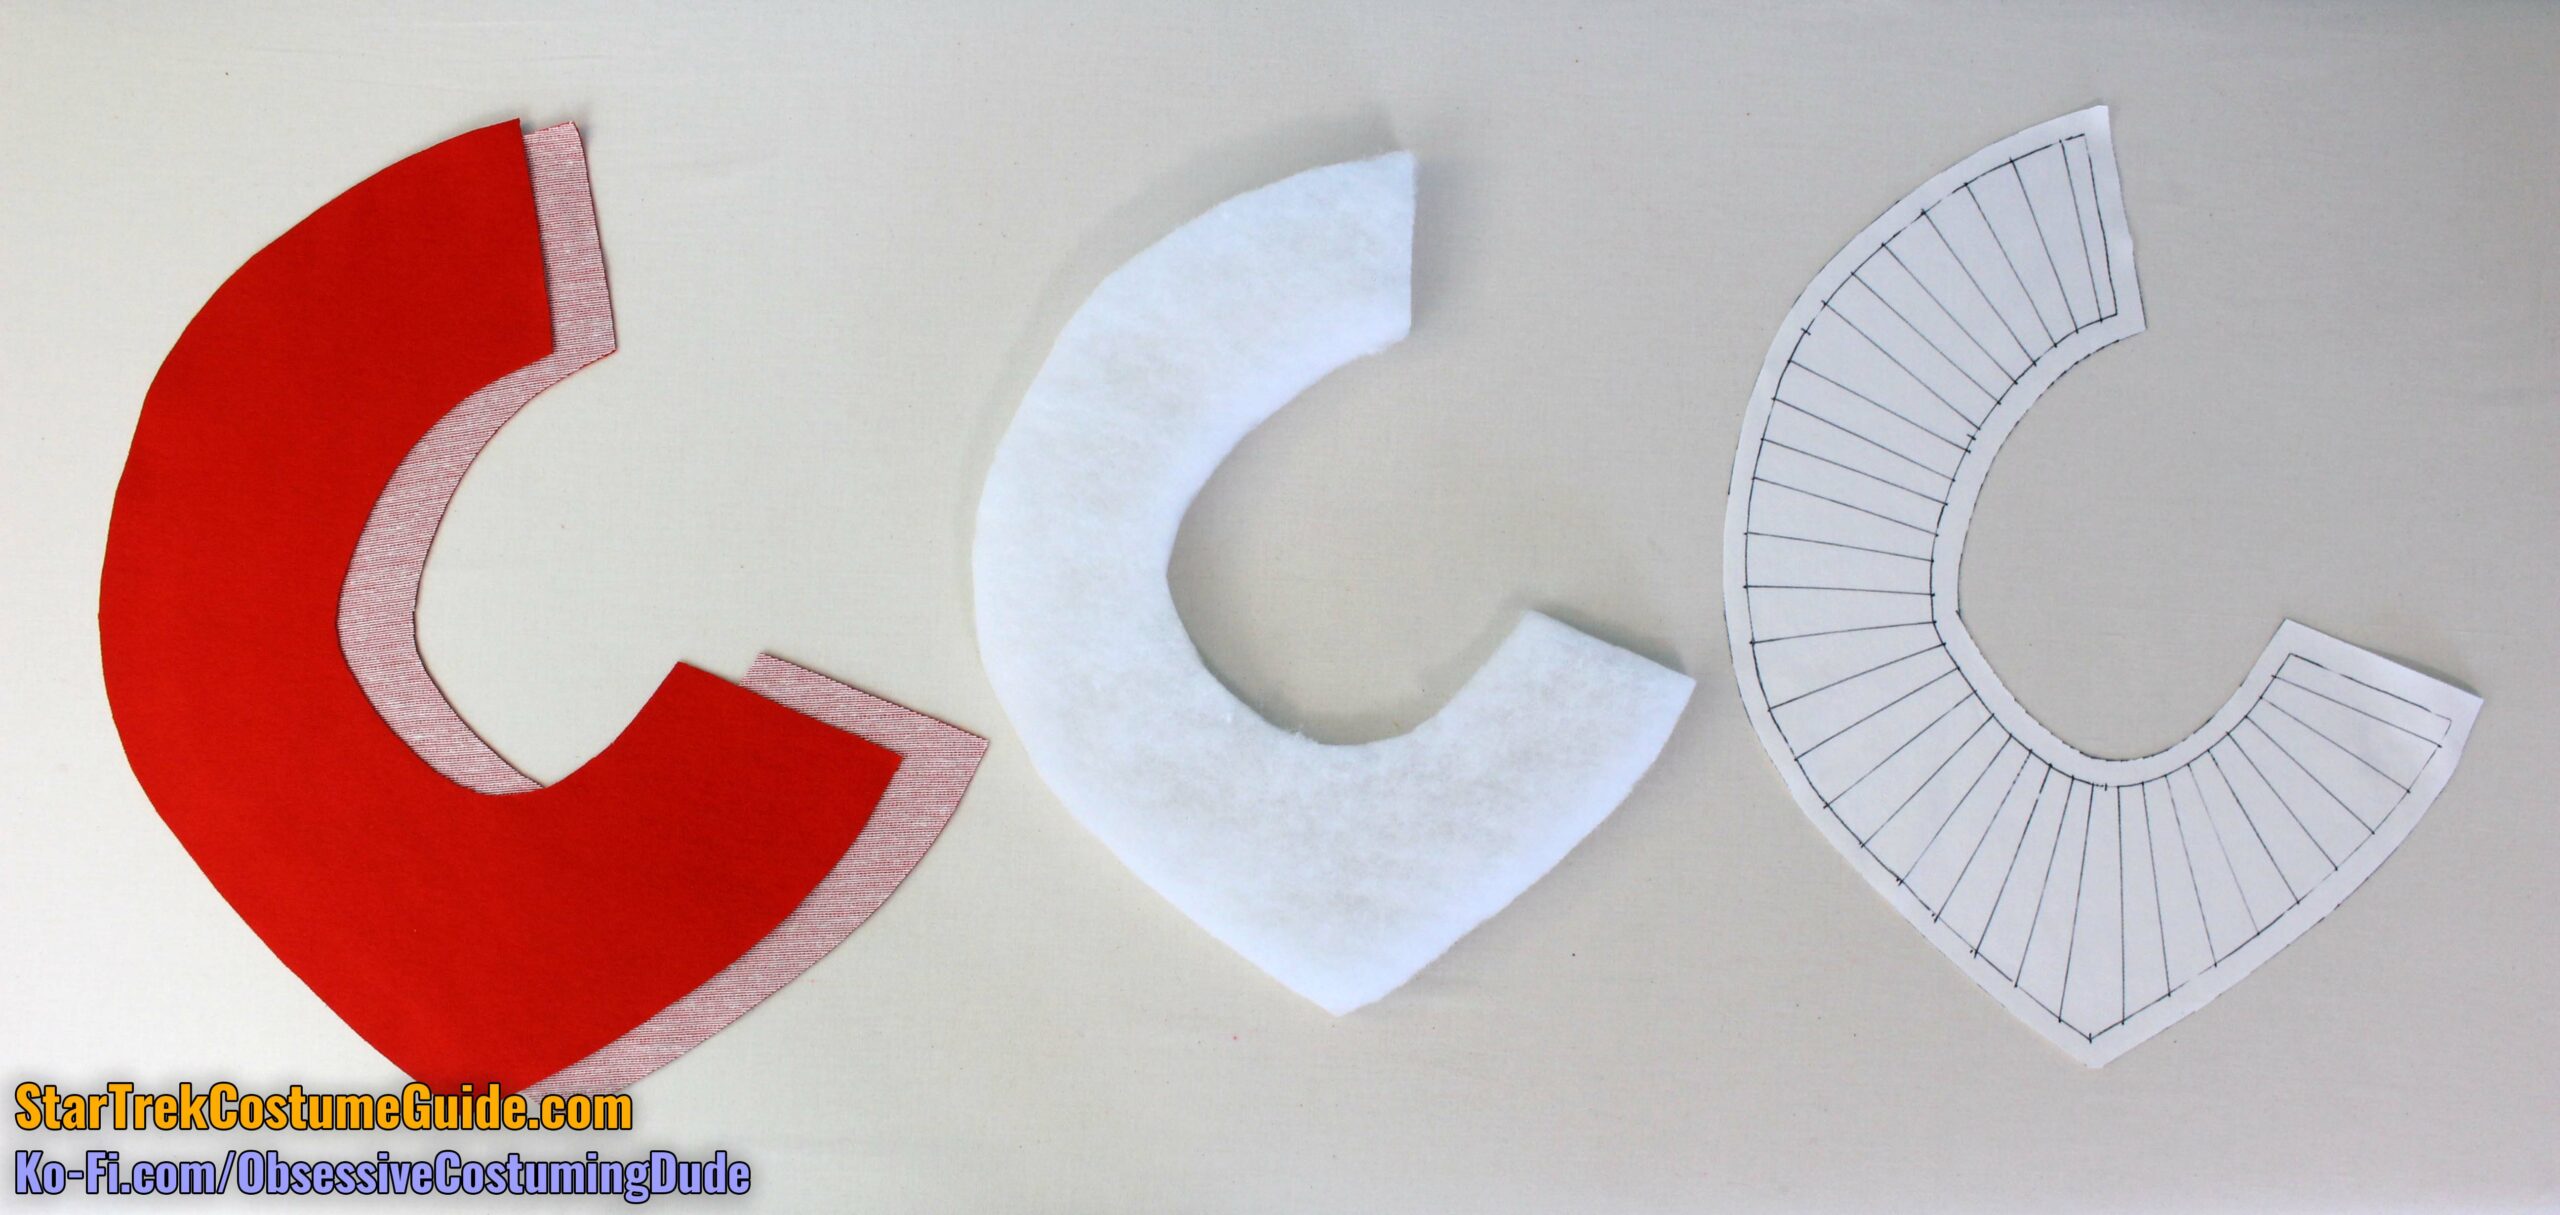
First, I suggest stabilizing your knit fabric with a lightweight woven fusible interfacing on the underside before cutting out your collar layers.
You’ll need two cuts of your fabric (left), one layer of high-loft quilt batting with the seam allowances removed (center), and your backing fabric with the channels marked (right).
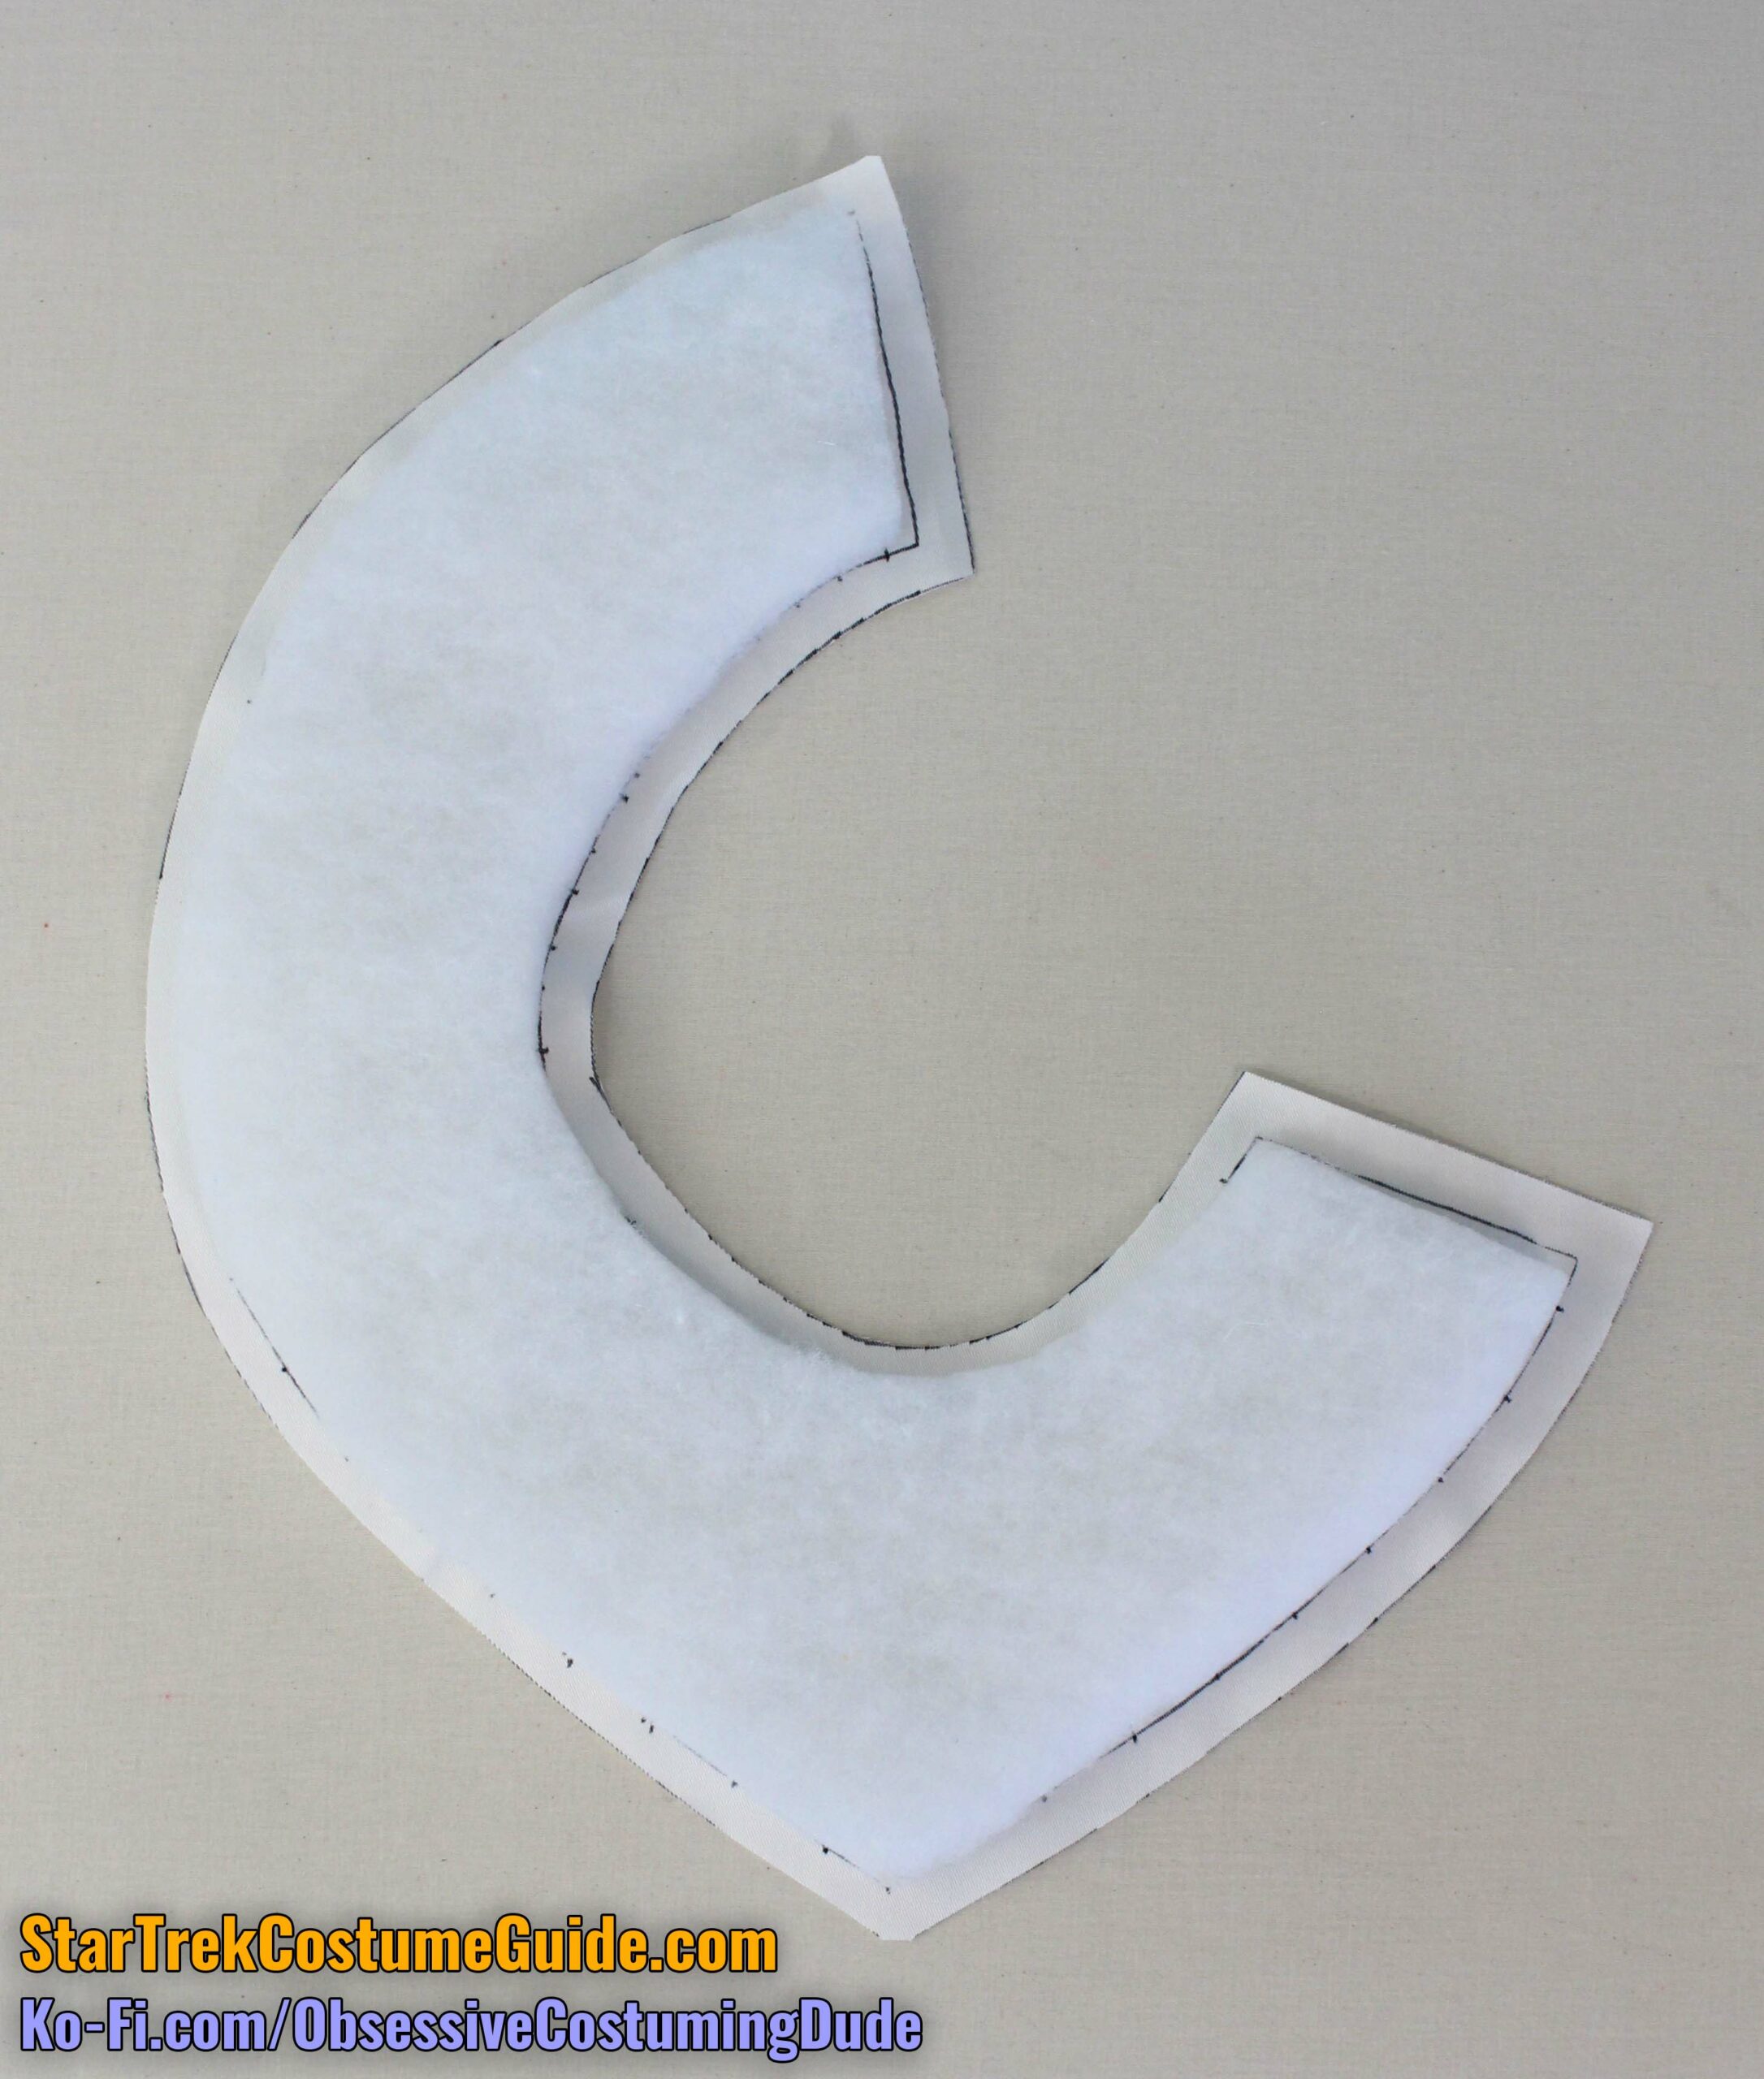
Carefully trim the batting out of every other channel.
Apply some fabric temporary spray adhesive to the underside of your collar fabric, then position it on top of the batting/backing assembly so the batting is “sandwiched” between the collar and backing layers.
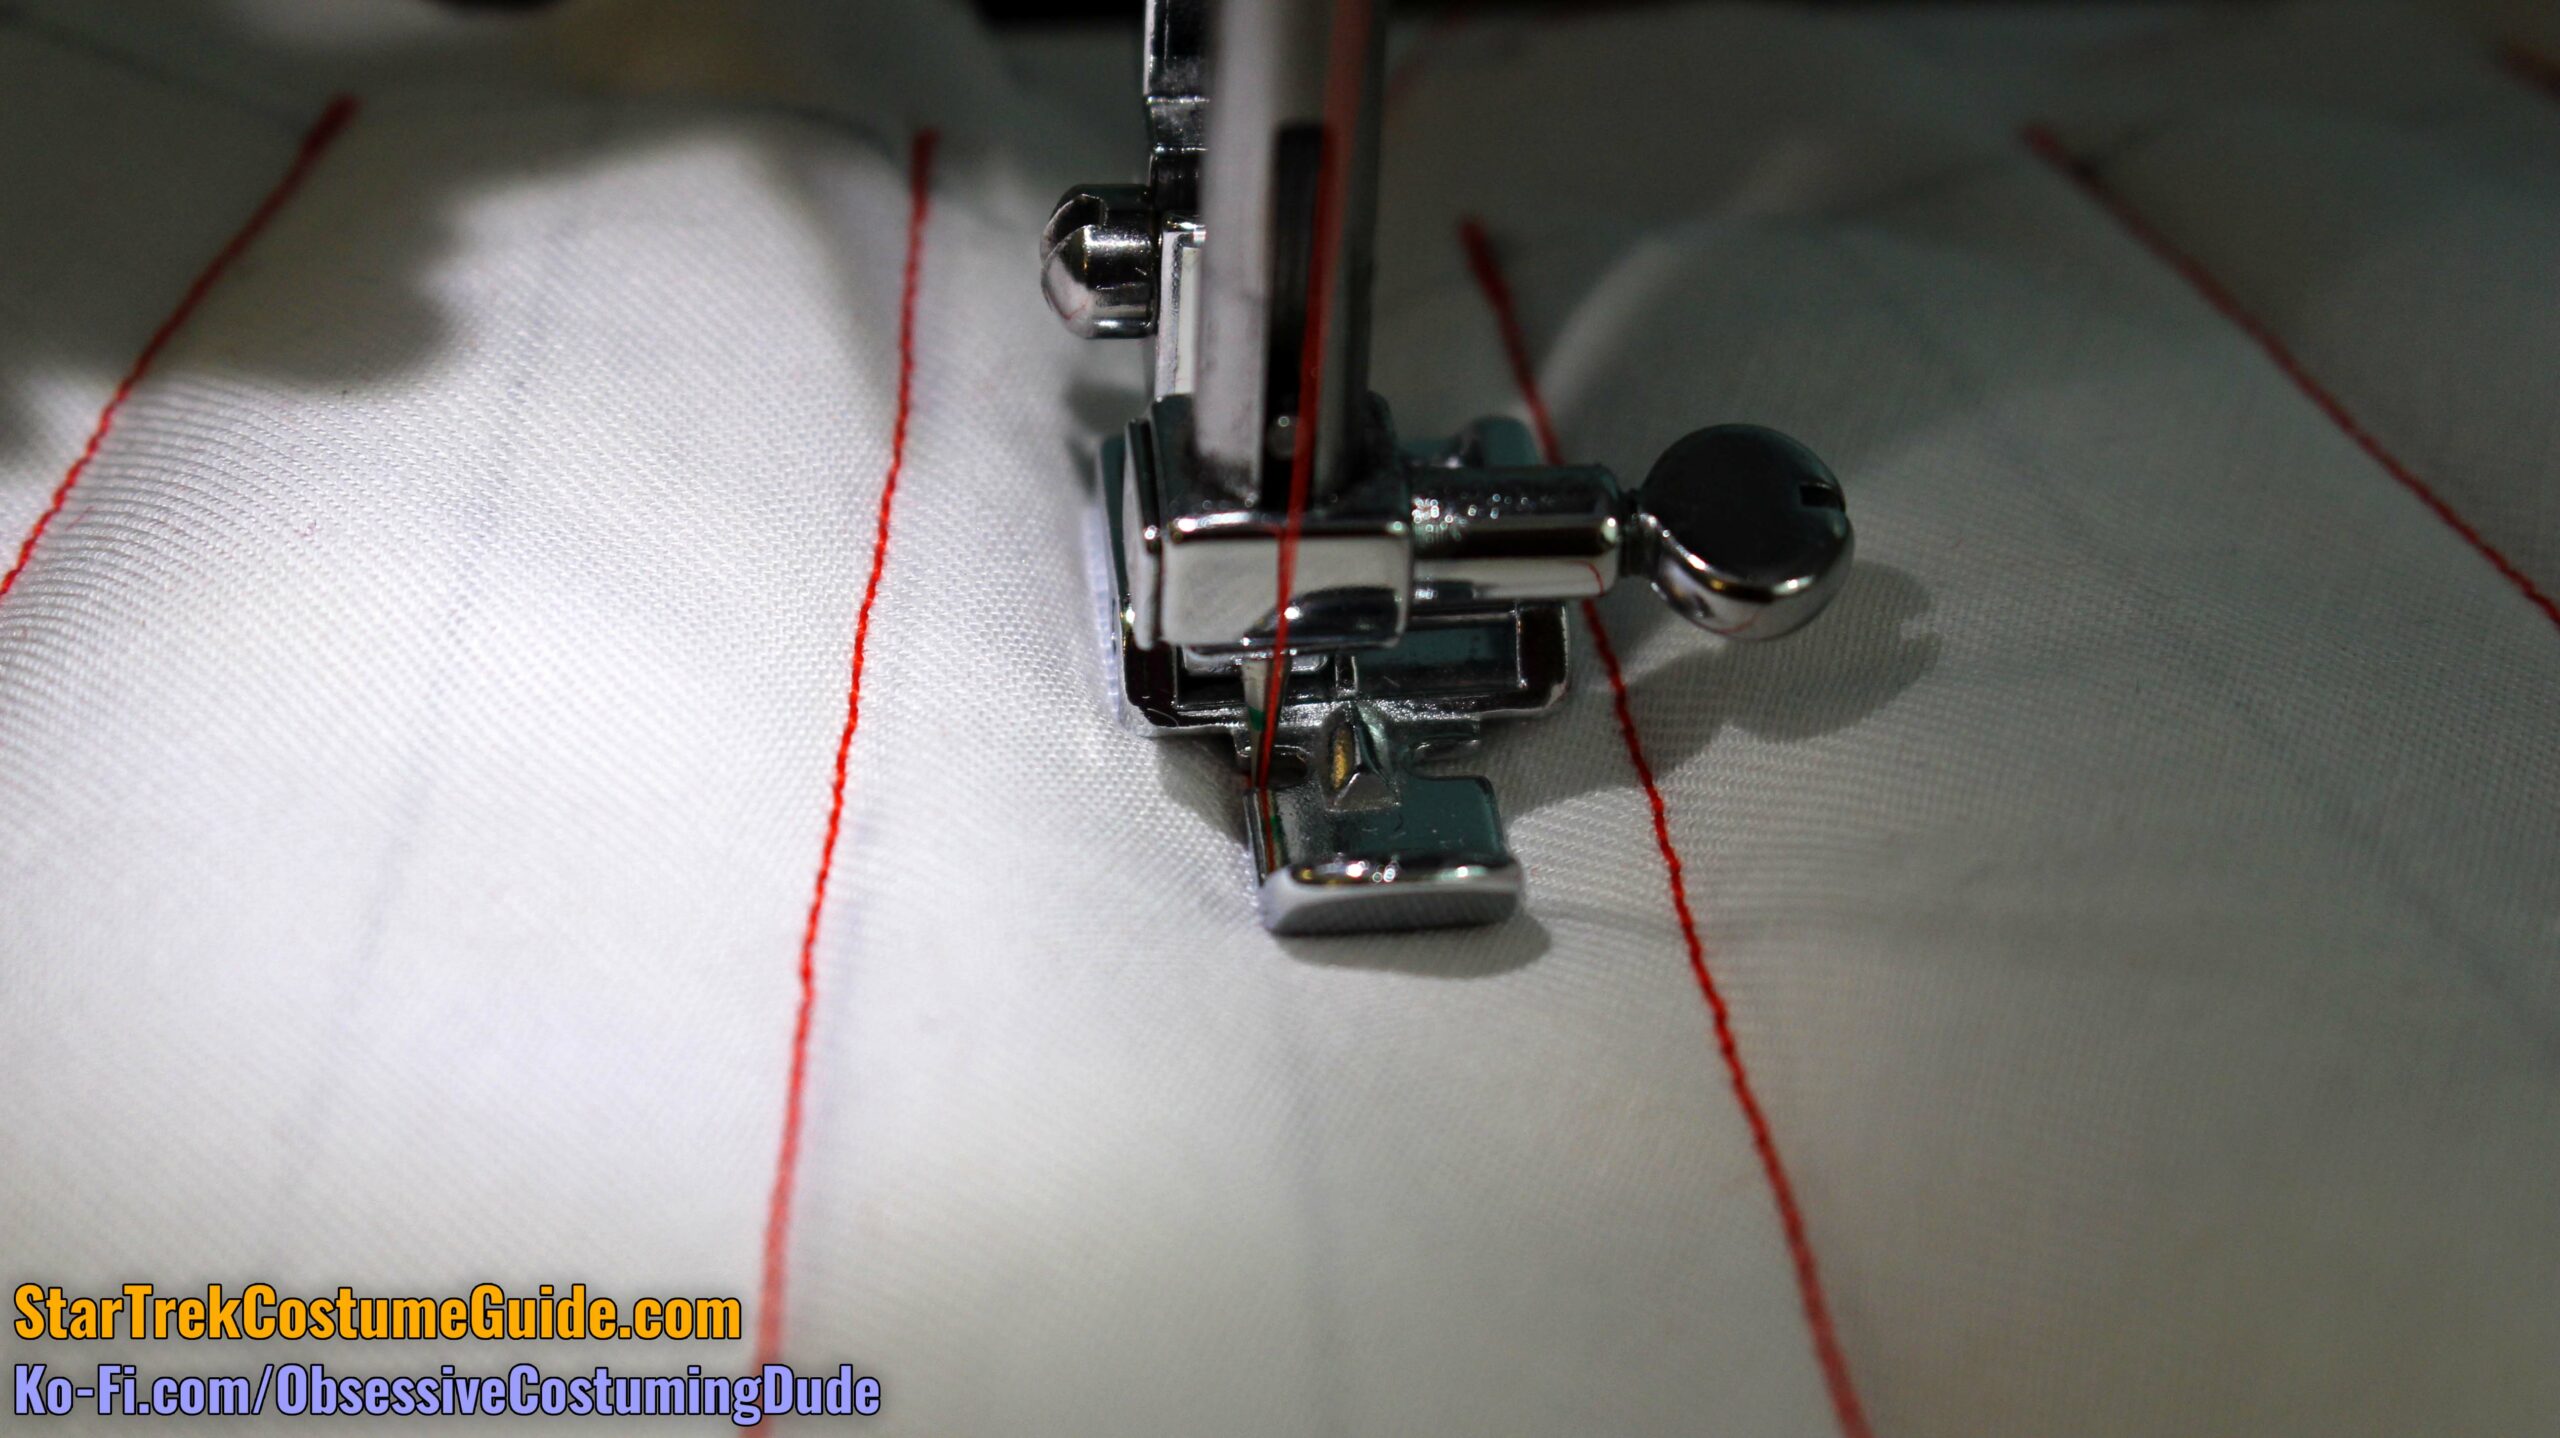
Using matching red thread, stitch along the marked lines from the underside. (The lines should be visible through the backing fabric.) Extend a few stitches into the seam allowances on both ends and backstitch a few times.
Gutermann #405 (appropriately enough named “flame red”) is a good color match for the dye mix I mentioned.
Ordinarily I’d recommend using an even-feed walking foot for quilting purposes, but in this case we’re only quilting every other channel, so I suggest using a zipper/piping foot to stitch along the marker lines against the edge of the batting.
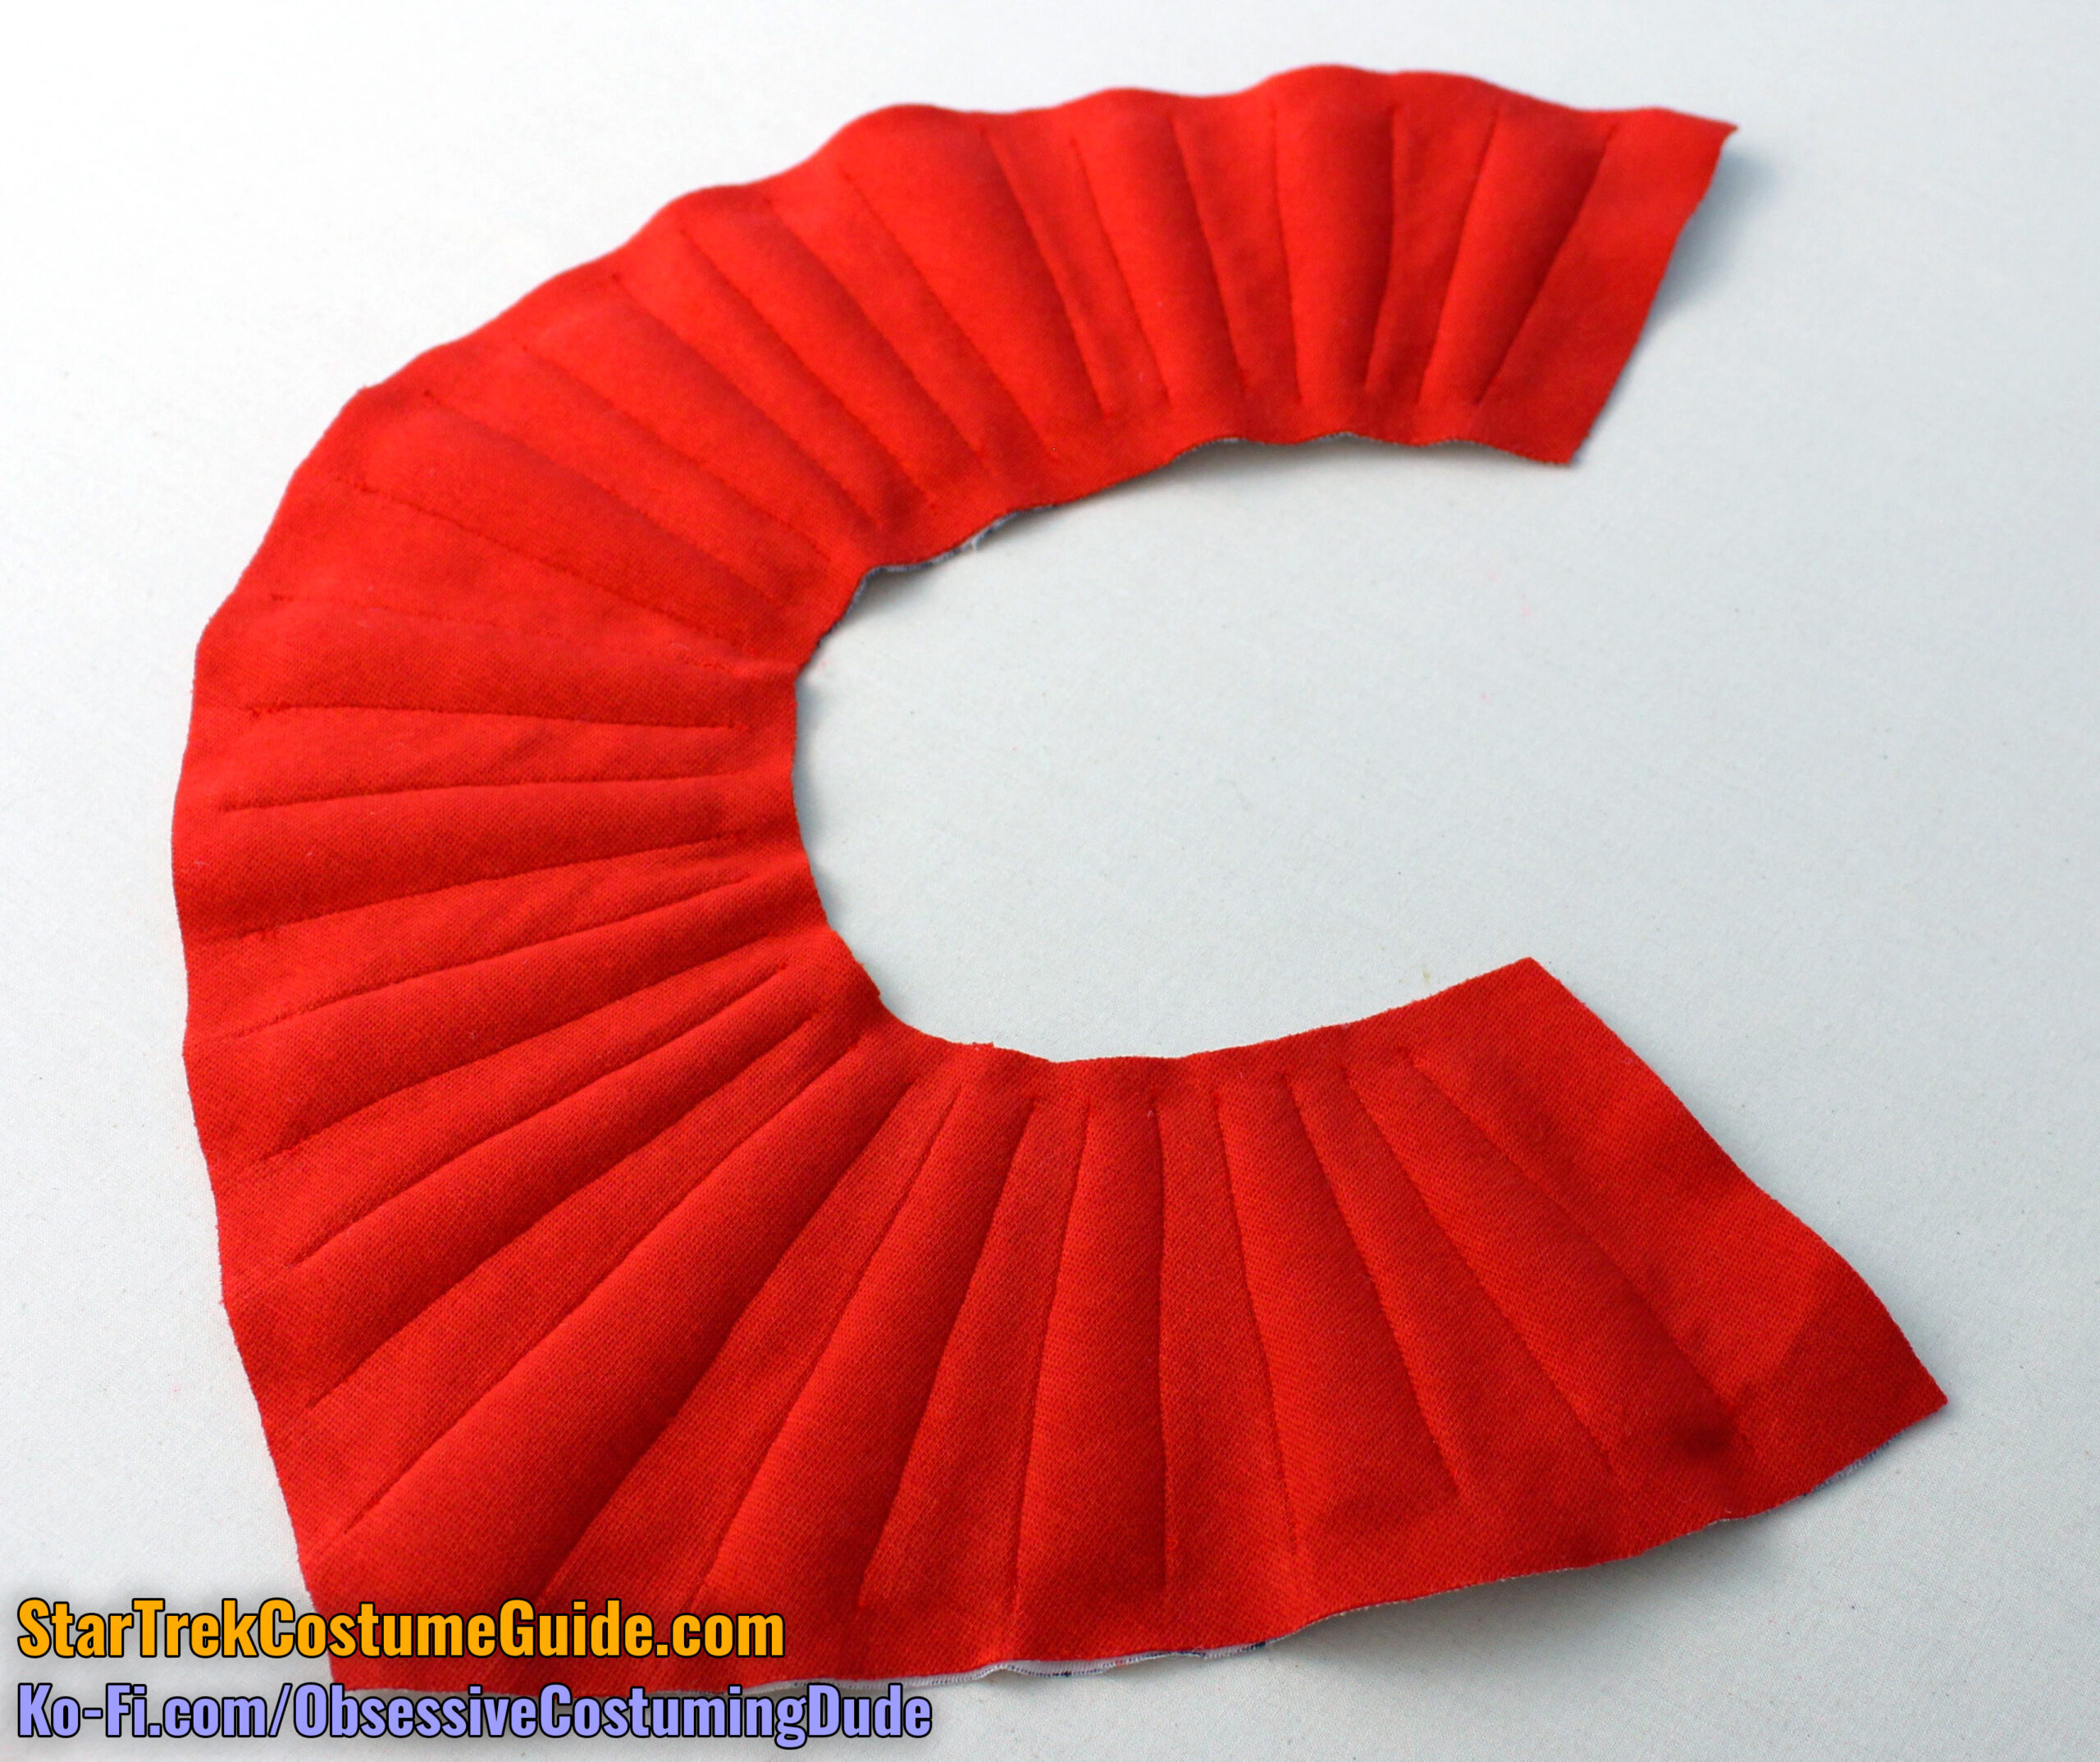
Your collar may contract a bit from all the quilting; compare it against your pattern piece and stretch it back out if necessary.
On the collar facing, position the “loop” tape (the fuzzy side) just inside the seam allowances on the edge of the side front opening.
Machine-stitch the tape into place.
Set the “hook” (scratchy side) of the tape aside for now.
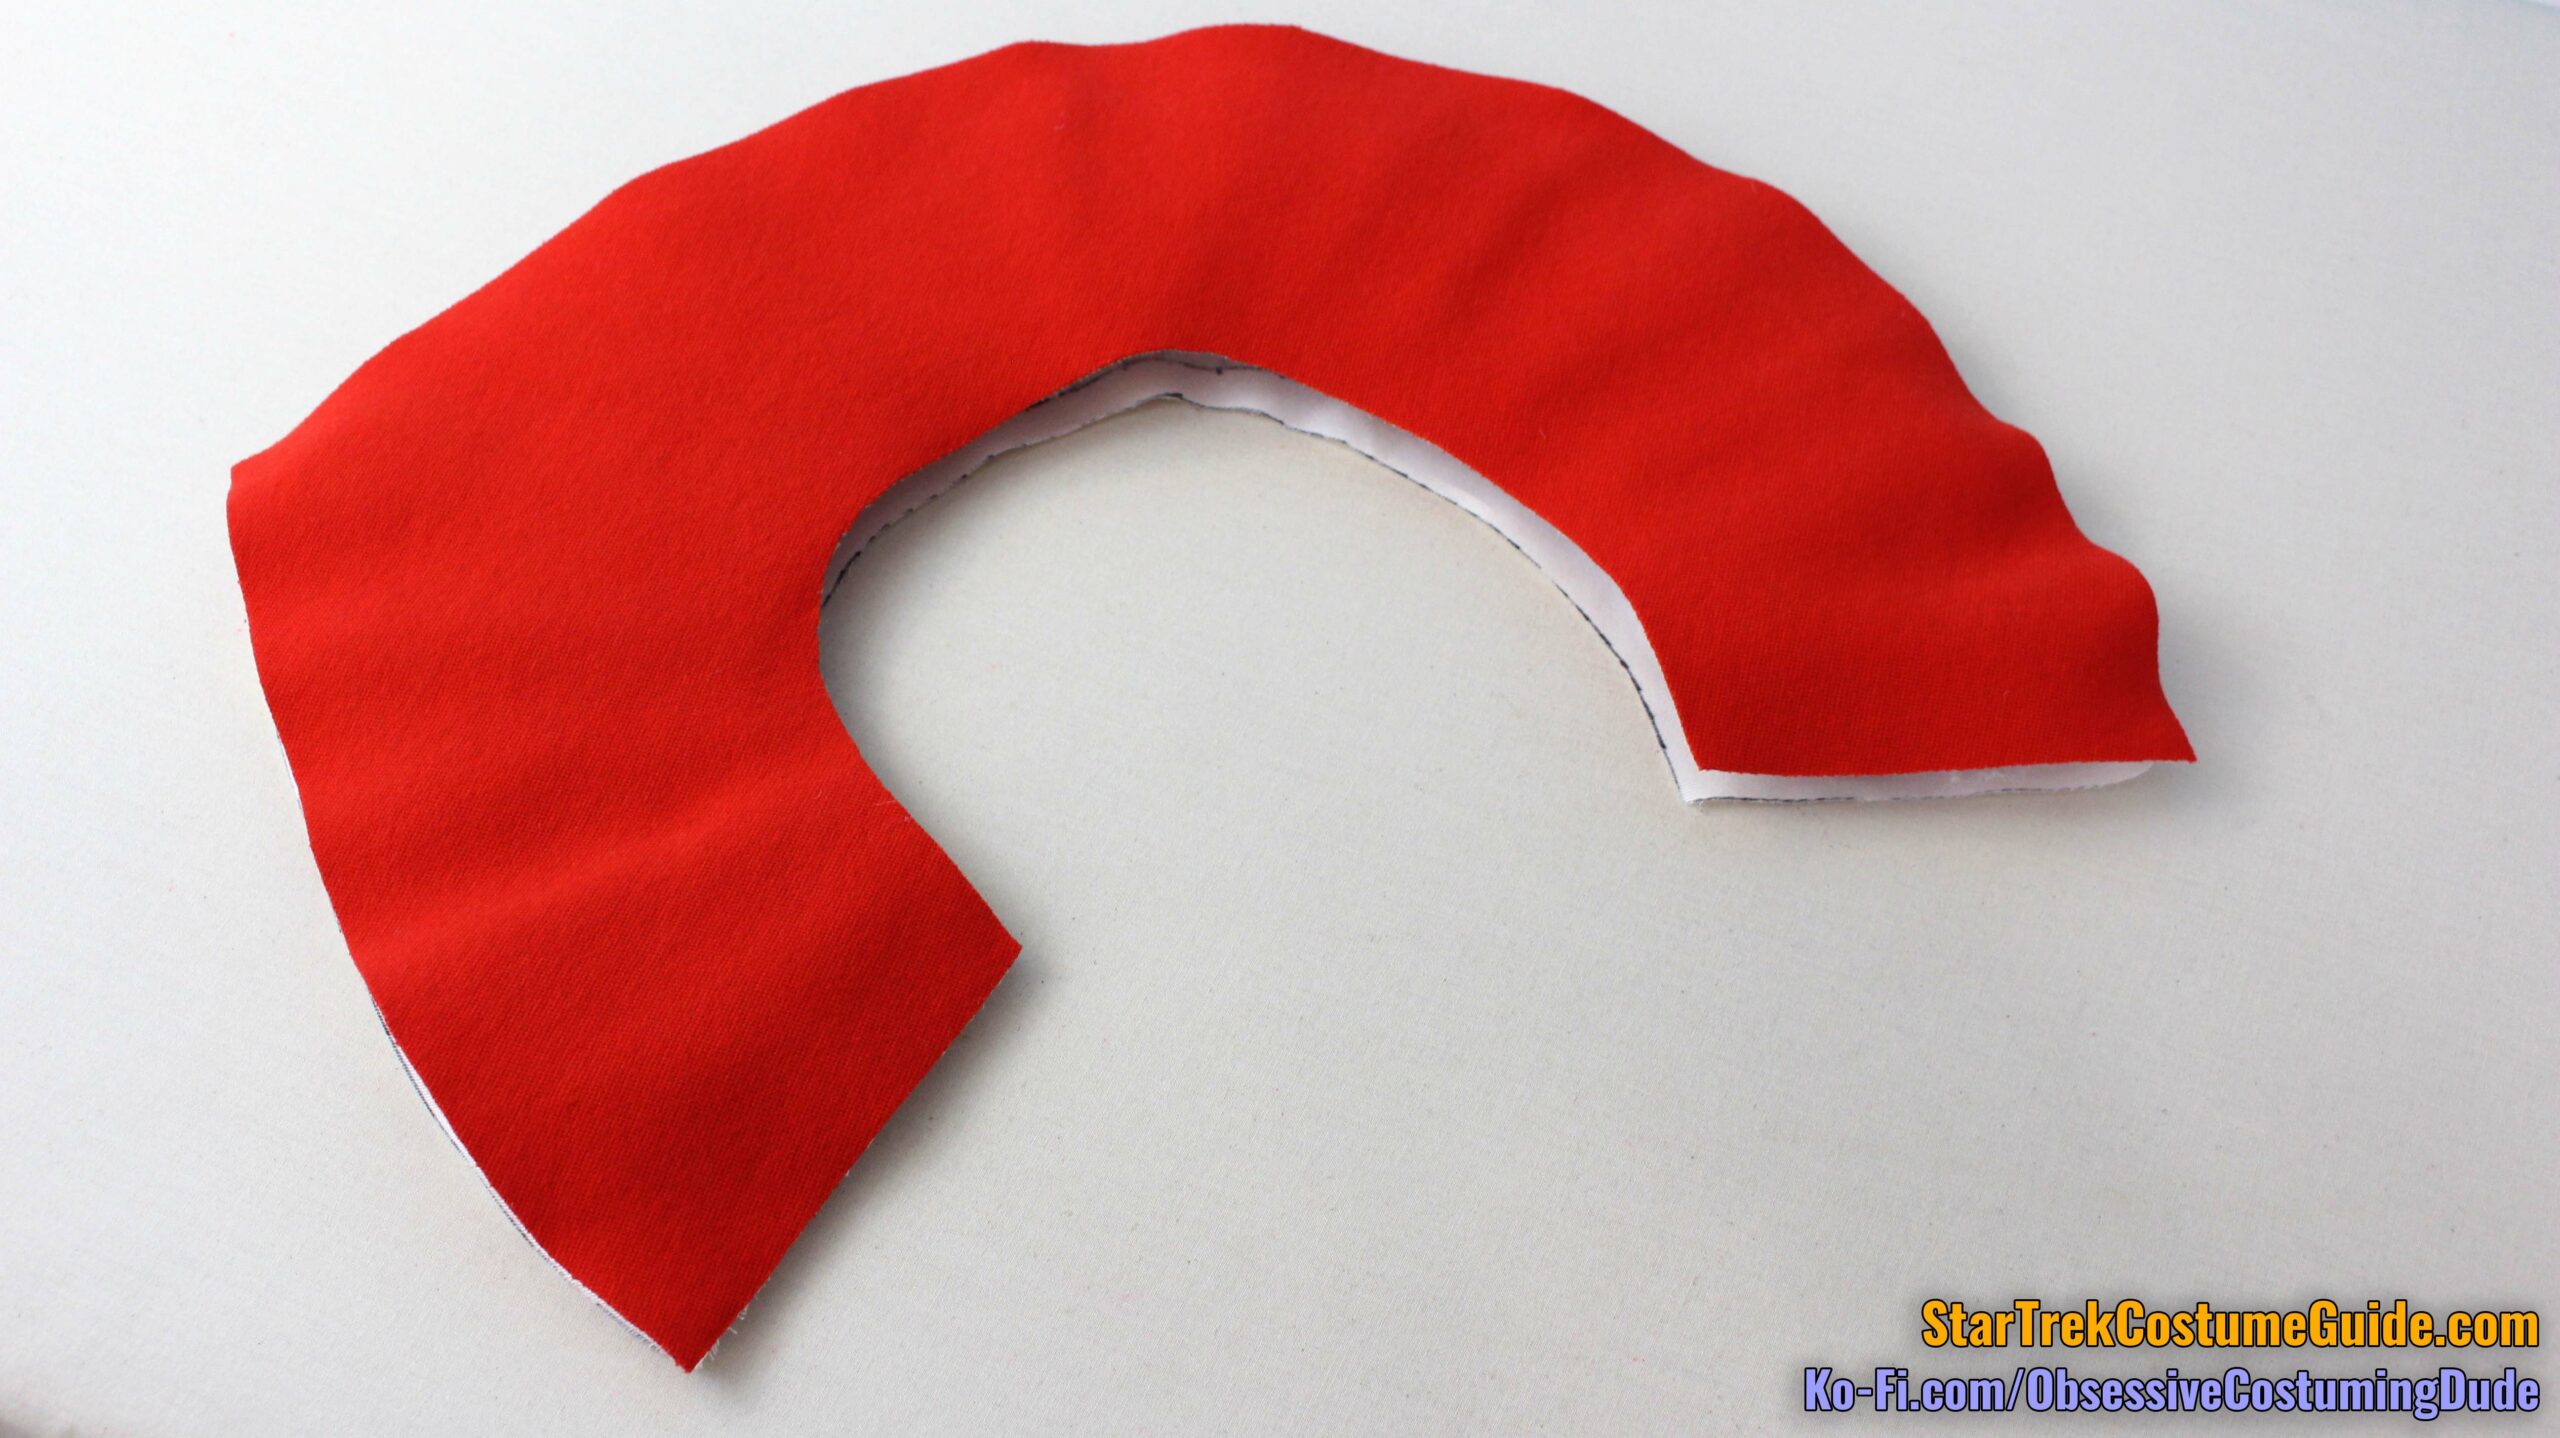
Sew the collar facing to the quilted collar assembly along the side and lower/outer edges with ½” seam allowance, right sides together.
Trim the side and lower/outer seam allowances down to ⅛”, turn the collar assembly right-sides-out, and press the edges flat.
I suggest only pressing the lower/outer edges along the un-quilted channels, to avoid flattening the batting inside the quilted ones.
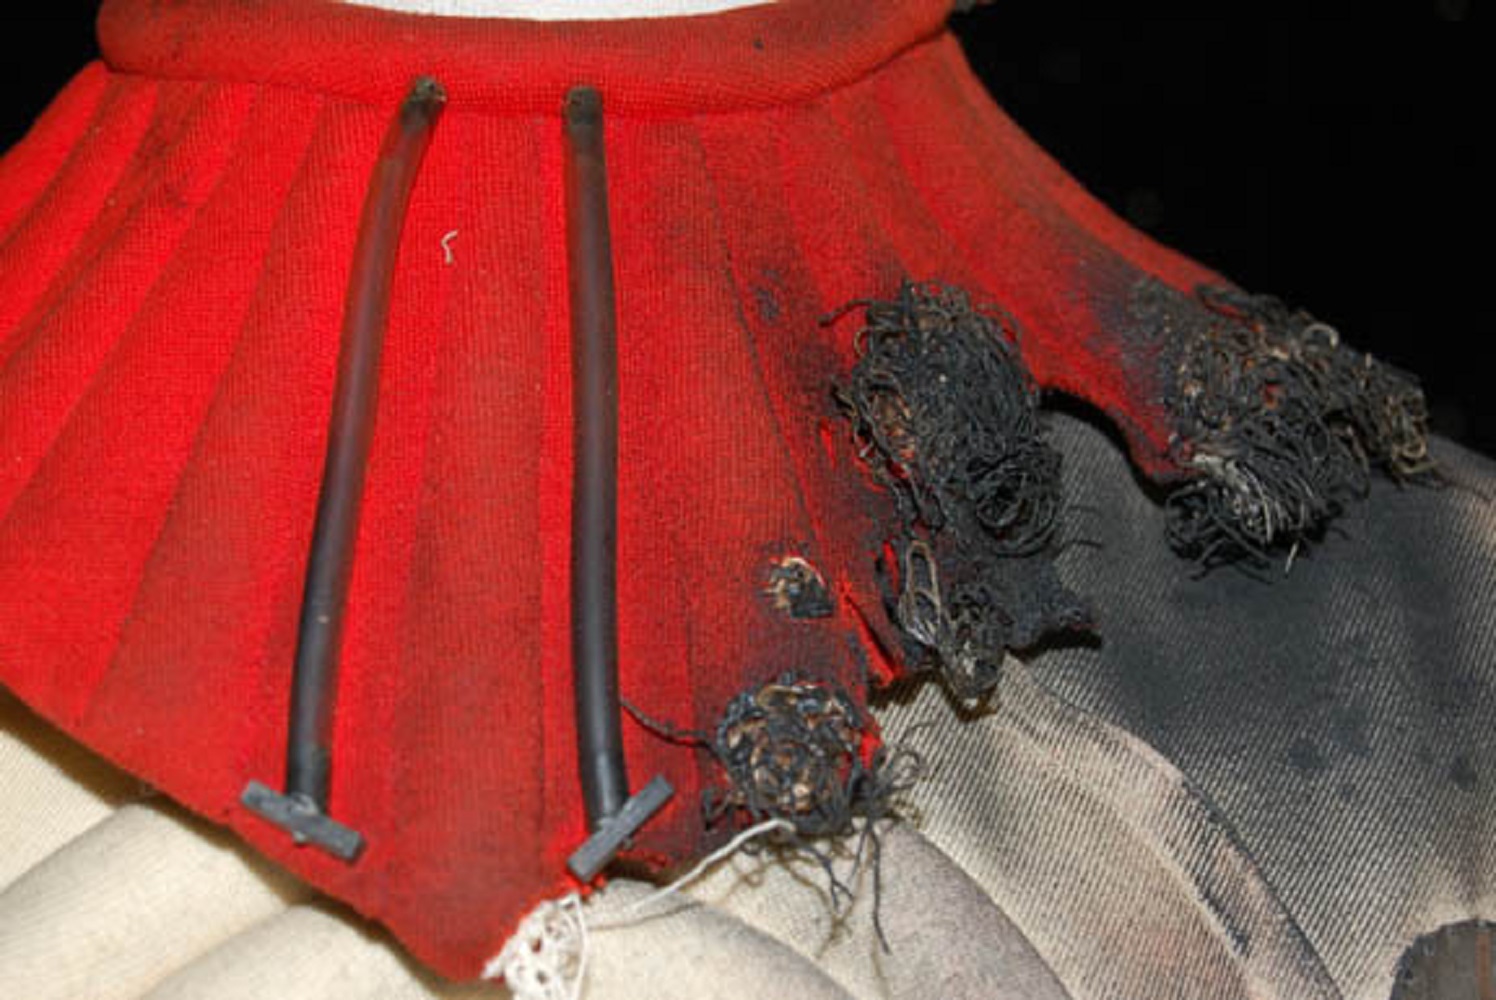
The quilted channels looked okay, but I was dissatisfied with the “poofiness” of even the high-loft batting – at least in comparison to the screen-used collars.
I bolstered up the quilted channels afterward with some thick foam interfacing underneath.
Cut some flared strips of the foam, slightly smaller than the quilted channels on your collar and with no seam allowances.
Insert them into the collar underneath the quilted channels, between the quilted assembly and facing layers, and pin them into place along the stitch lines.
From the outside of the collar, stitch again along the previous stitch lines to secure the foam.
This process is effective and I’m much happier with the finished result, but it’s admittedly a hassle.
You may wish to experiment with multiple layers of high-loft batting, consolidating this process, or a faux-trapunto-quilting technique instead.
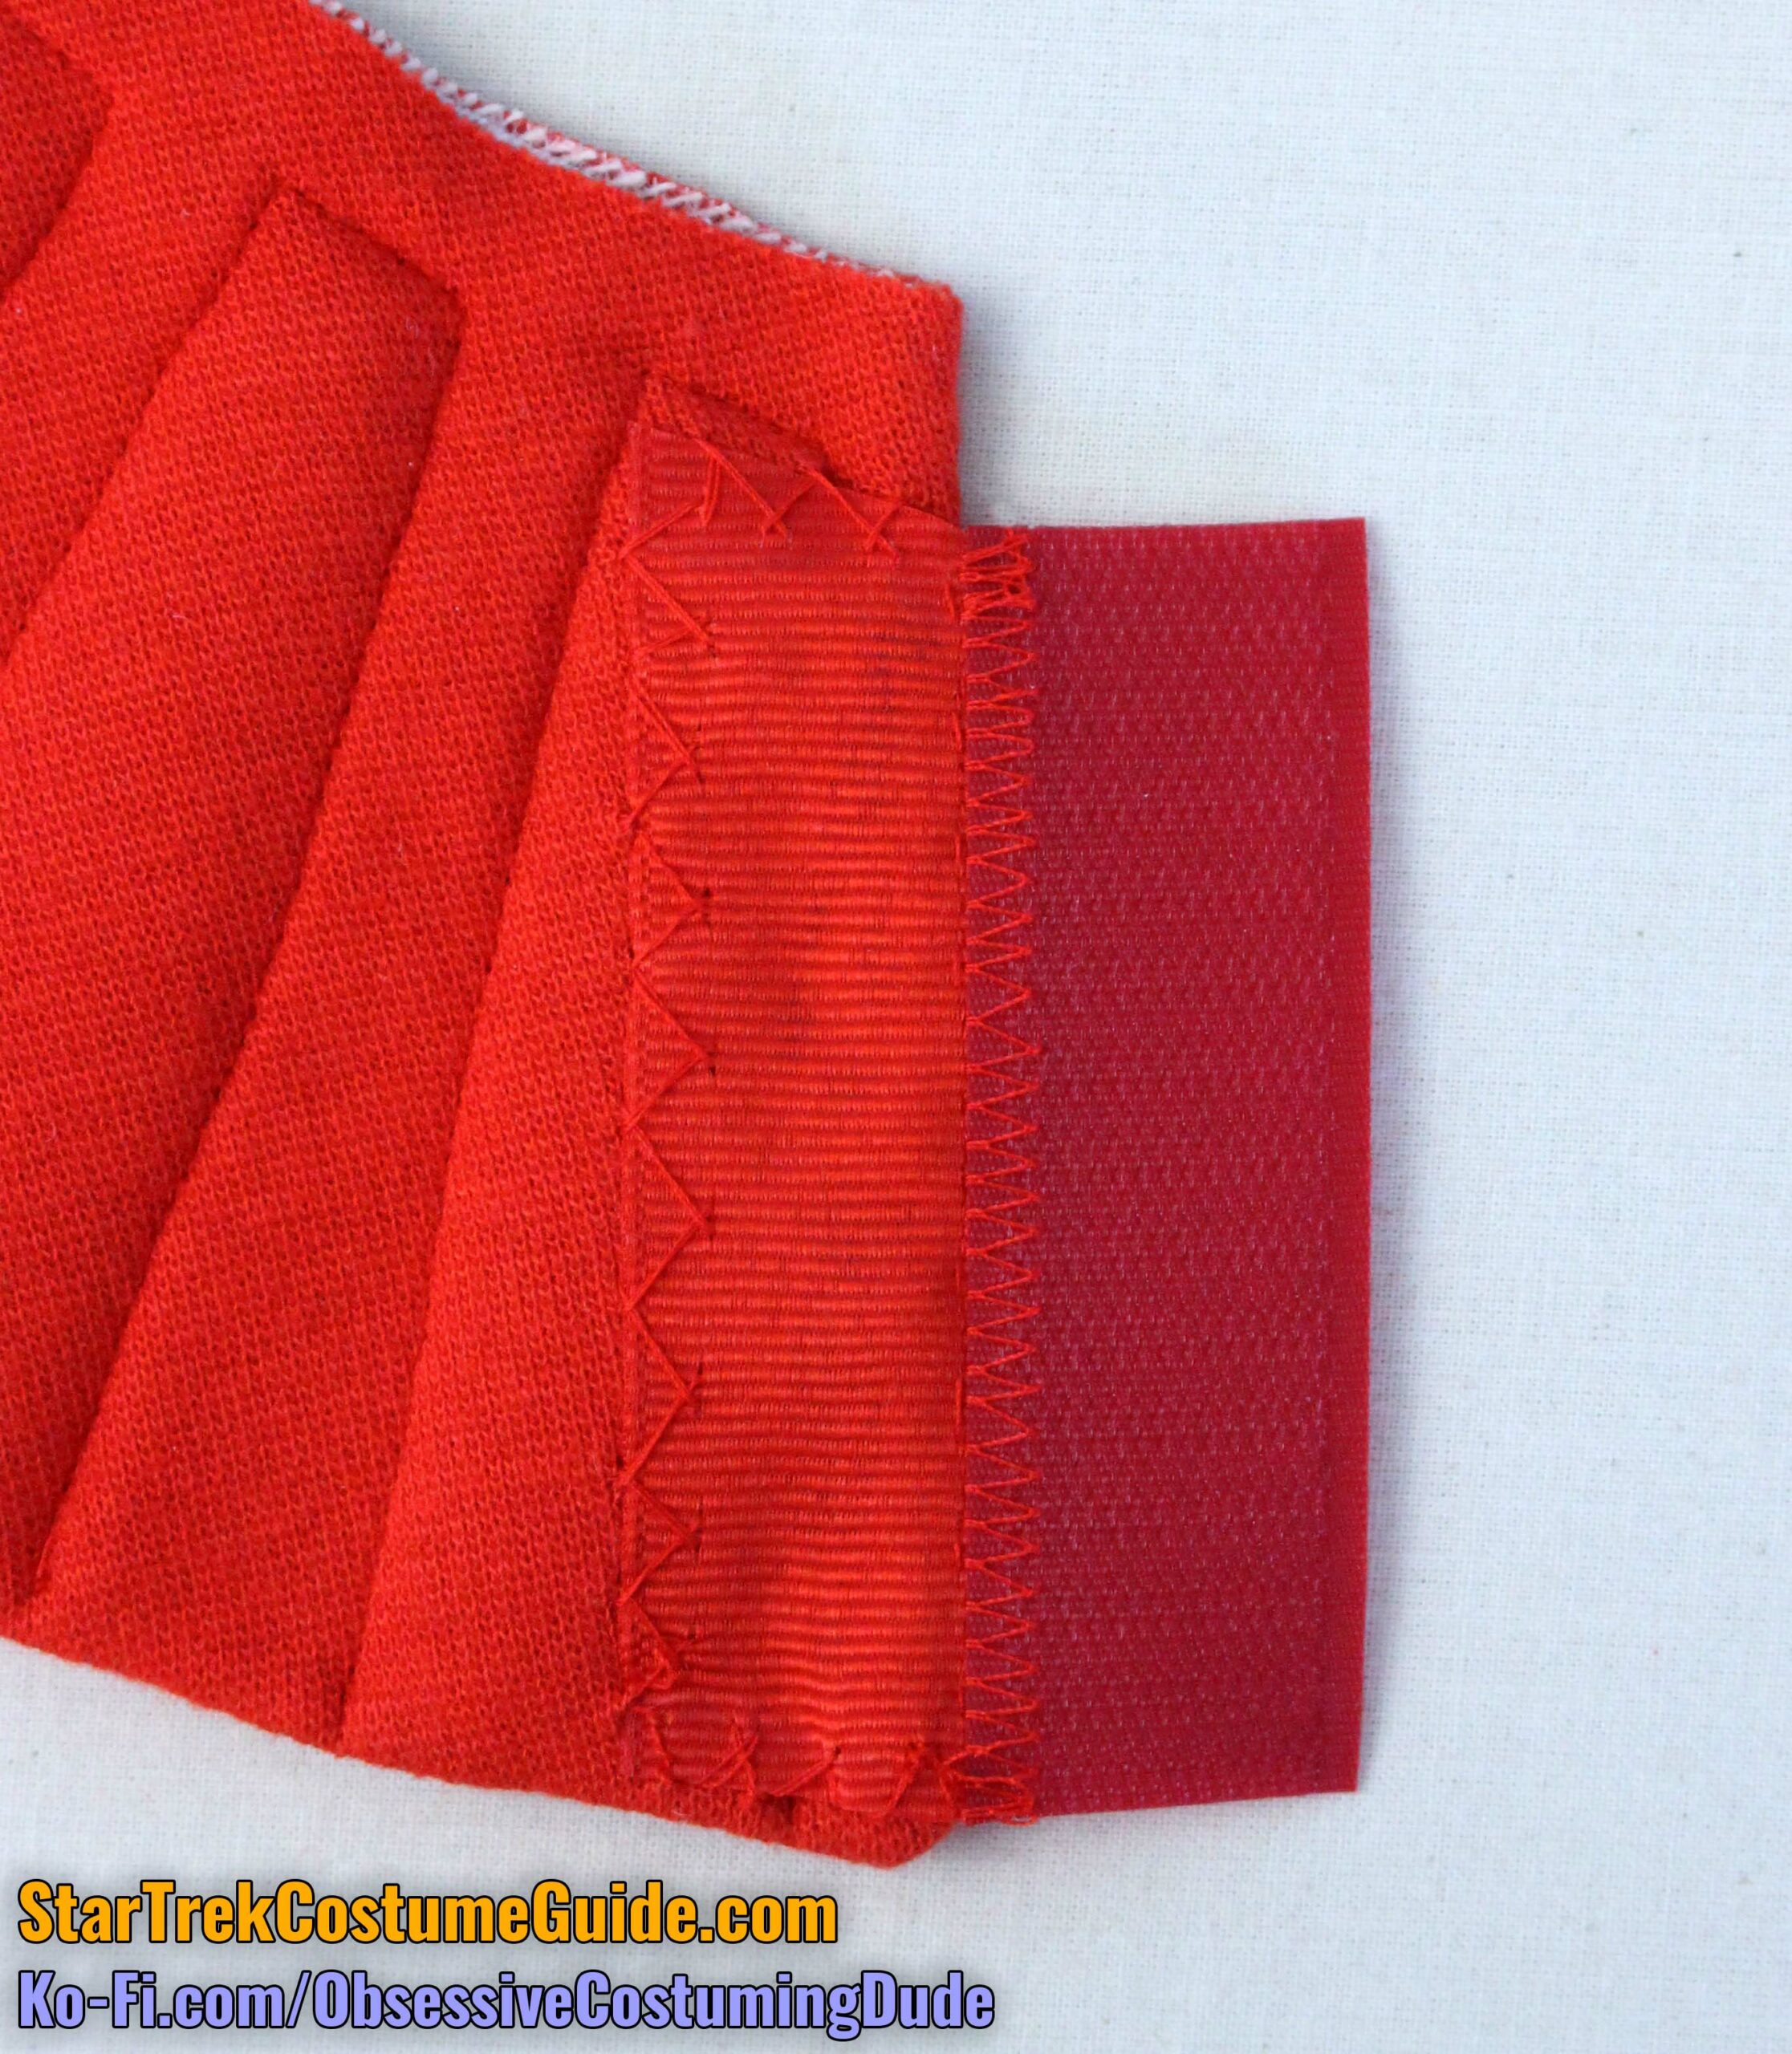
Apply some liquid fray preventer to the ends of the ribbon.
Once the liquid fray preventer is dry, slightly overlap the ribbon and the “hook” (scratchy) side of the hook-and-loop tape along the long ends, and secure the two with a machine zig-zag stitch.
This combined assembly forms the back underlap of the collar closure.
Position the assembly onto the underside of the collar so the hook tape (“Velcro”) extends forward beyond the rear side edge, and trim the edges of the ribbon if necessary so they doesn’t extend into the neckline seam allowance or beyond the bottom of the collar.
You can glue the ribbon to the underside of the collar (using the E6000), you can hand-sew it, or both.
Personally, I suggest doing both for maximum durability.
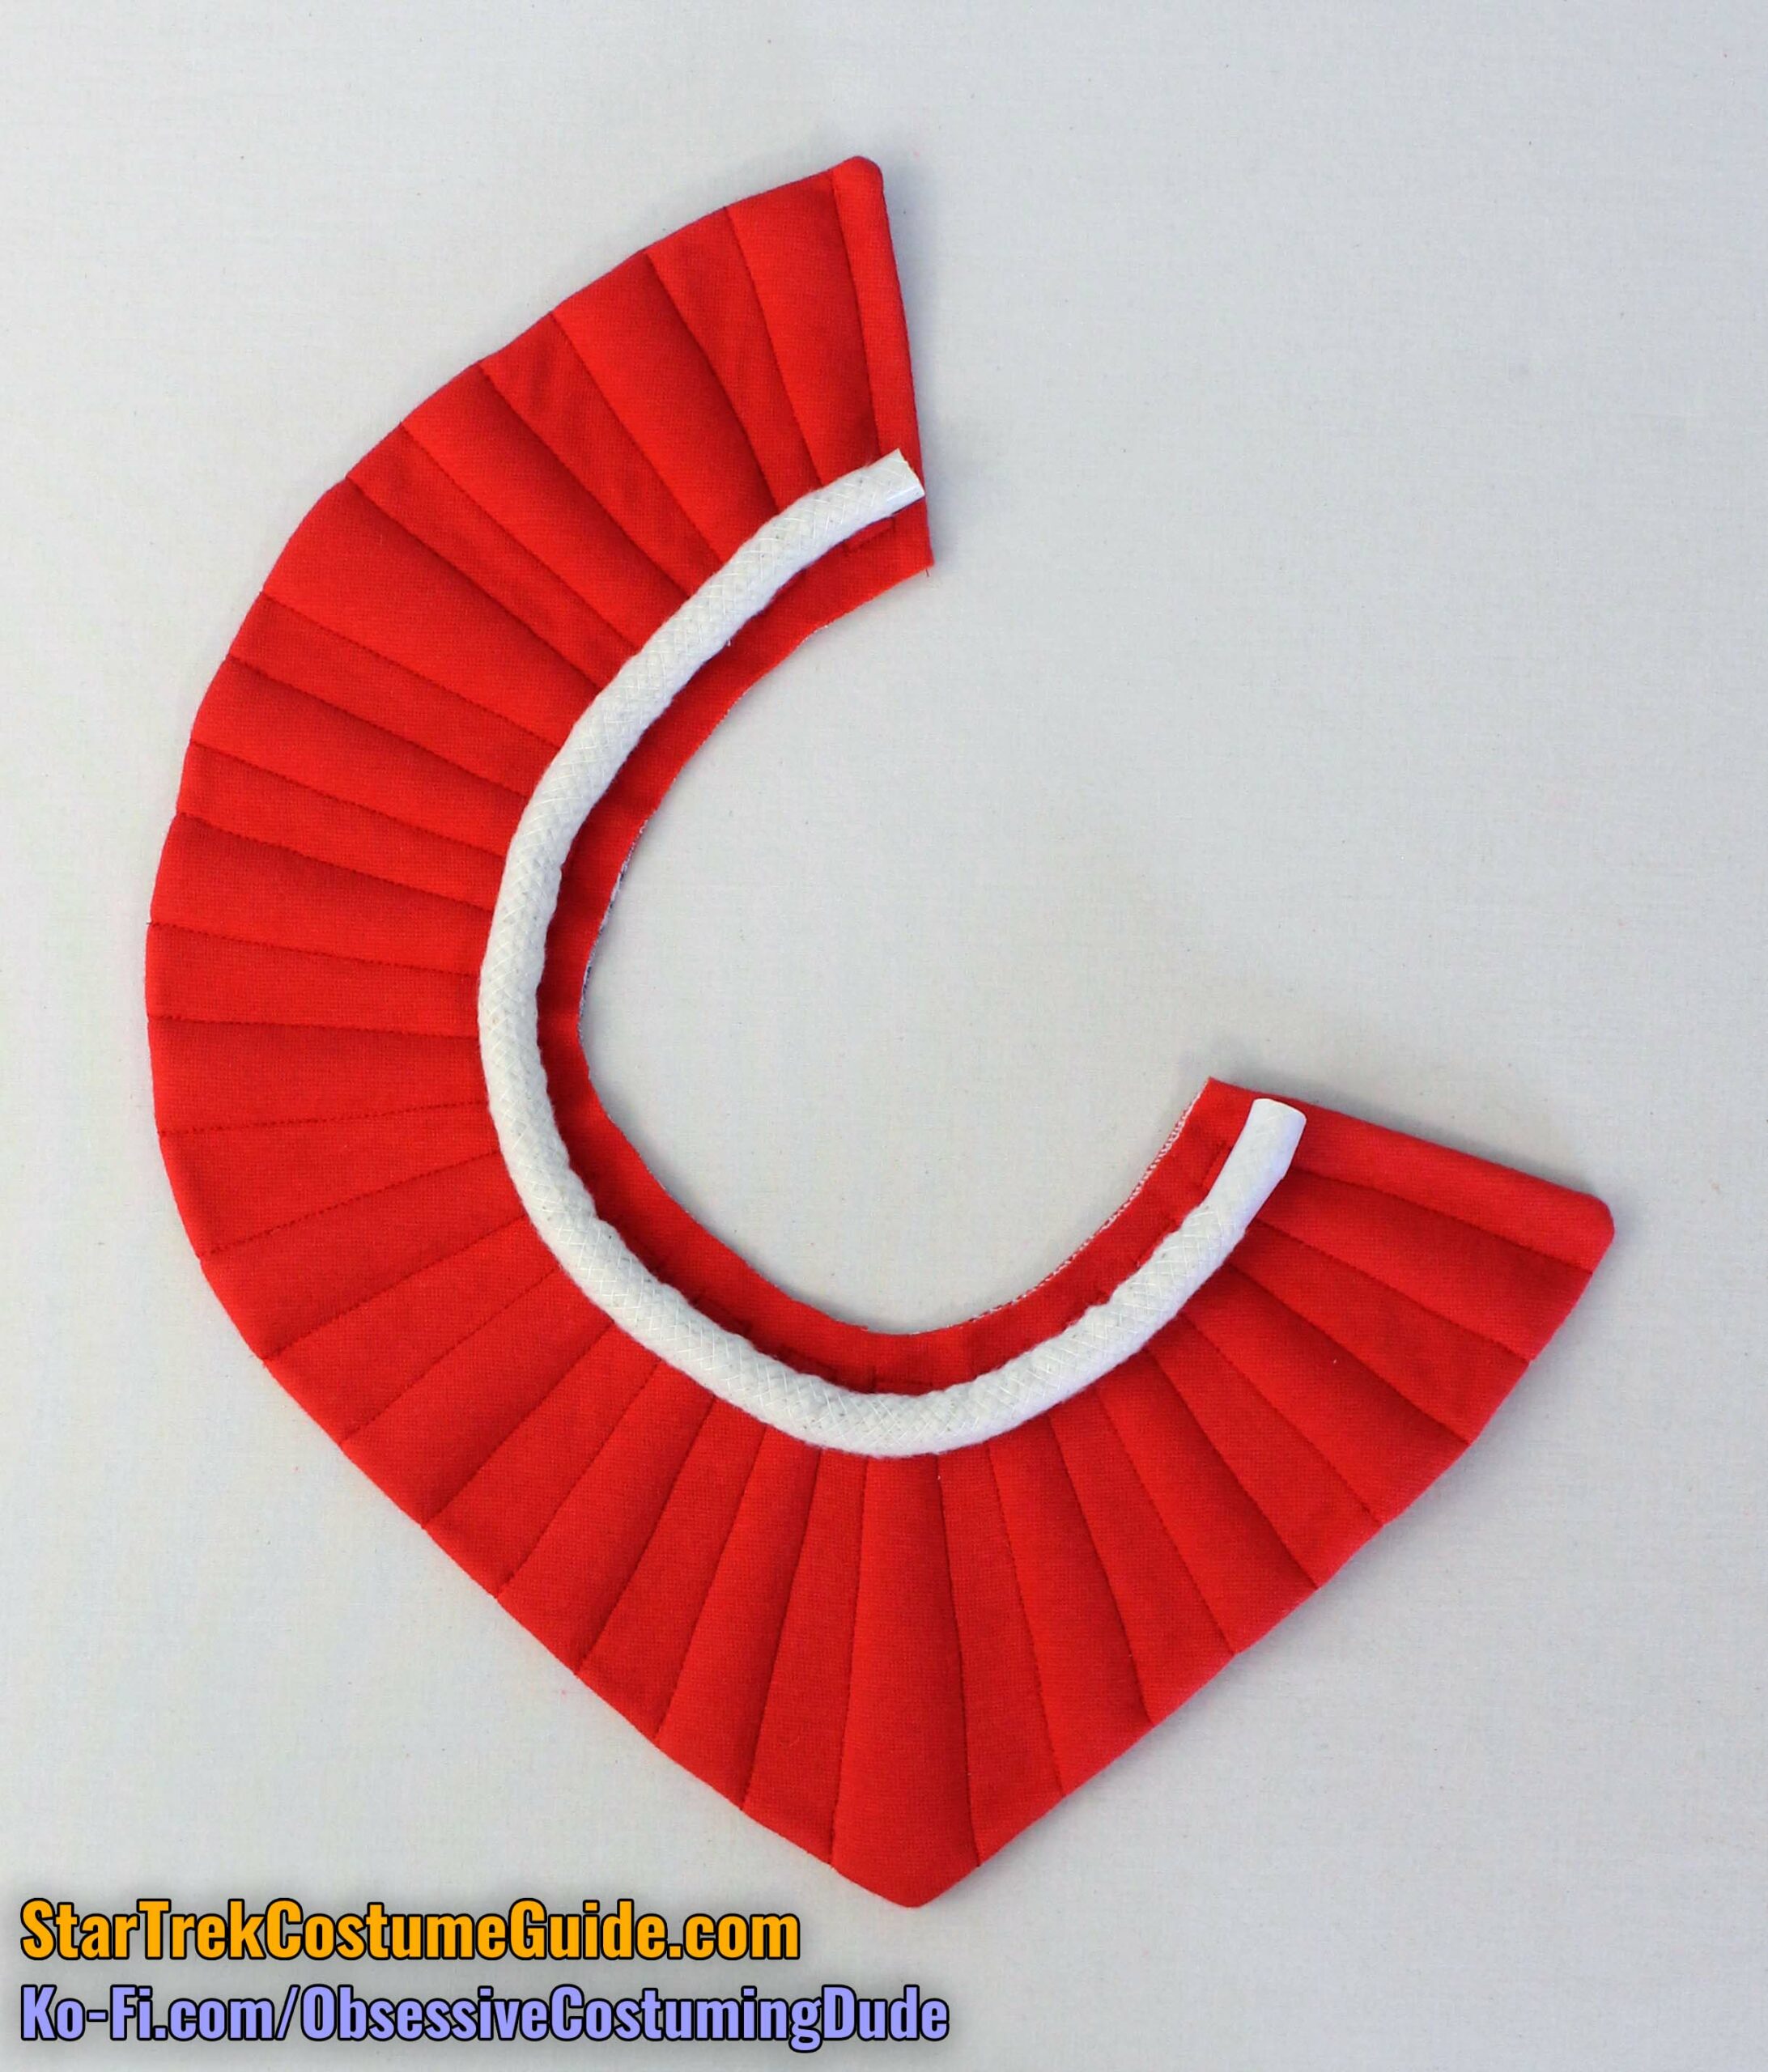
Cut a length of ½” upholstery piping long enough to wrap around the collar neckline, just outside the seam line.
TIP: Tape the ends of your cord over the area where you’ll be cutting to prevent it from unraveling.
Cut your collar’s neckline piping channel (piece A3) out of the same red knit fabric you used for the collar.
Wrap the fabric around your ½” upholstery cord and trim the fabric so it only extends beyond the cord by about an inch on each end.
Pin the fabric snugly around the cord. (I also find it helpful to pin the two layers of the “lip” together.)
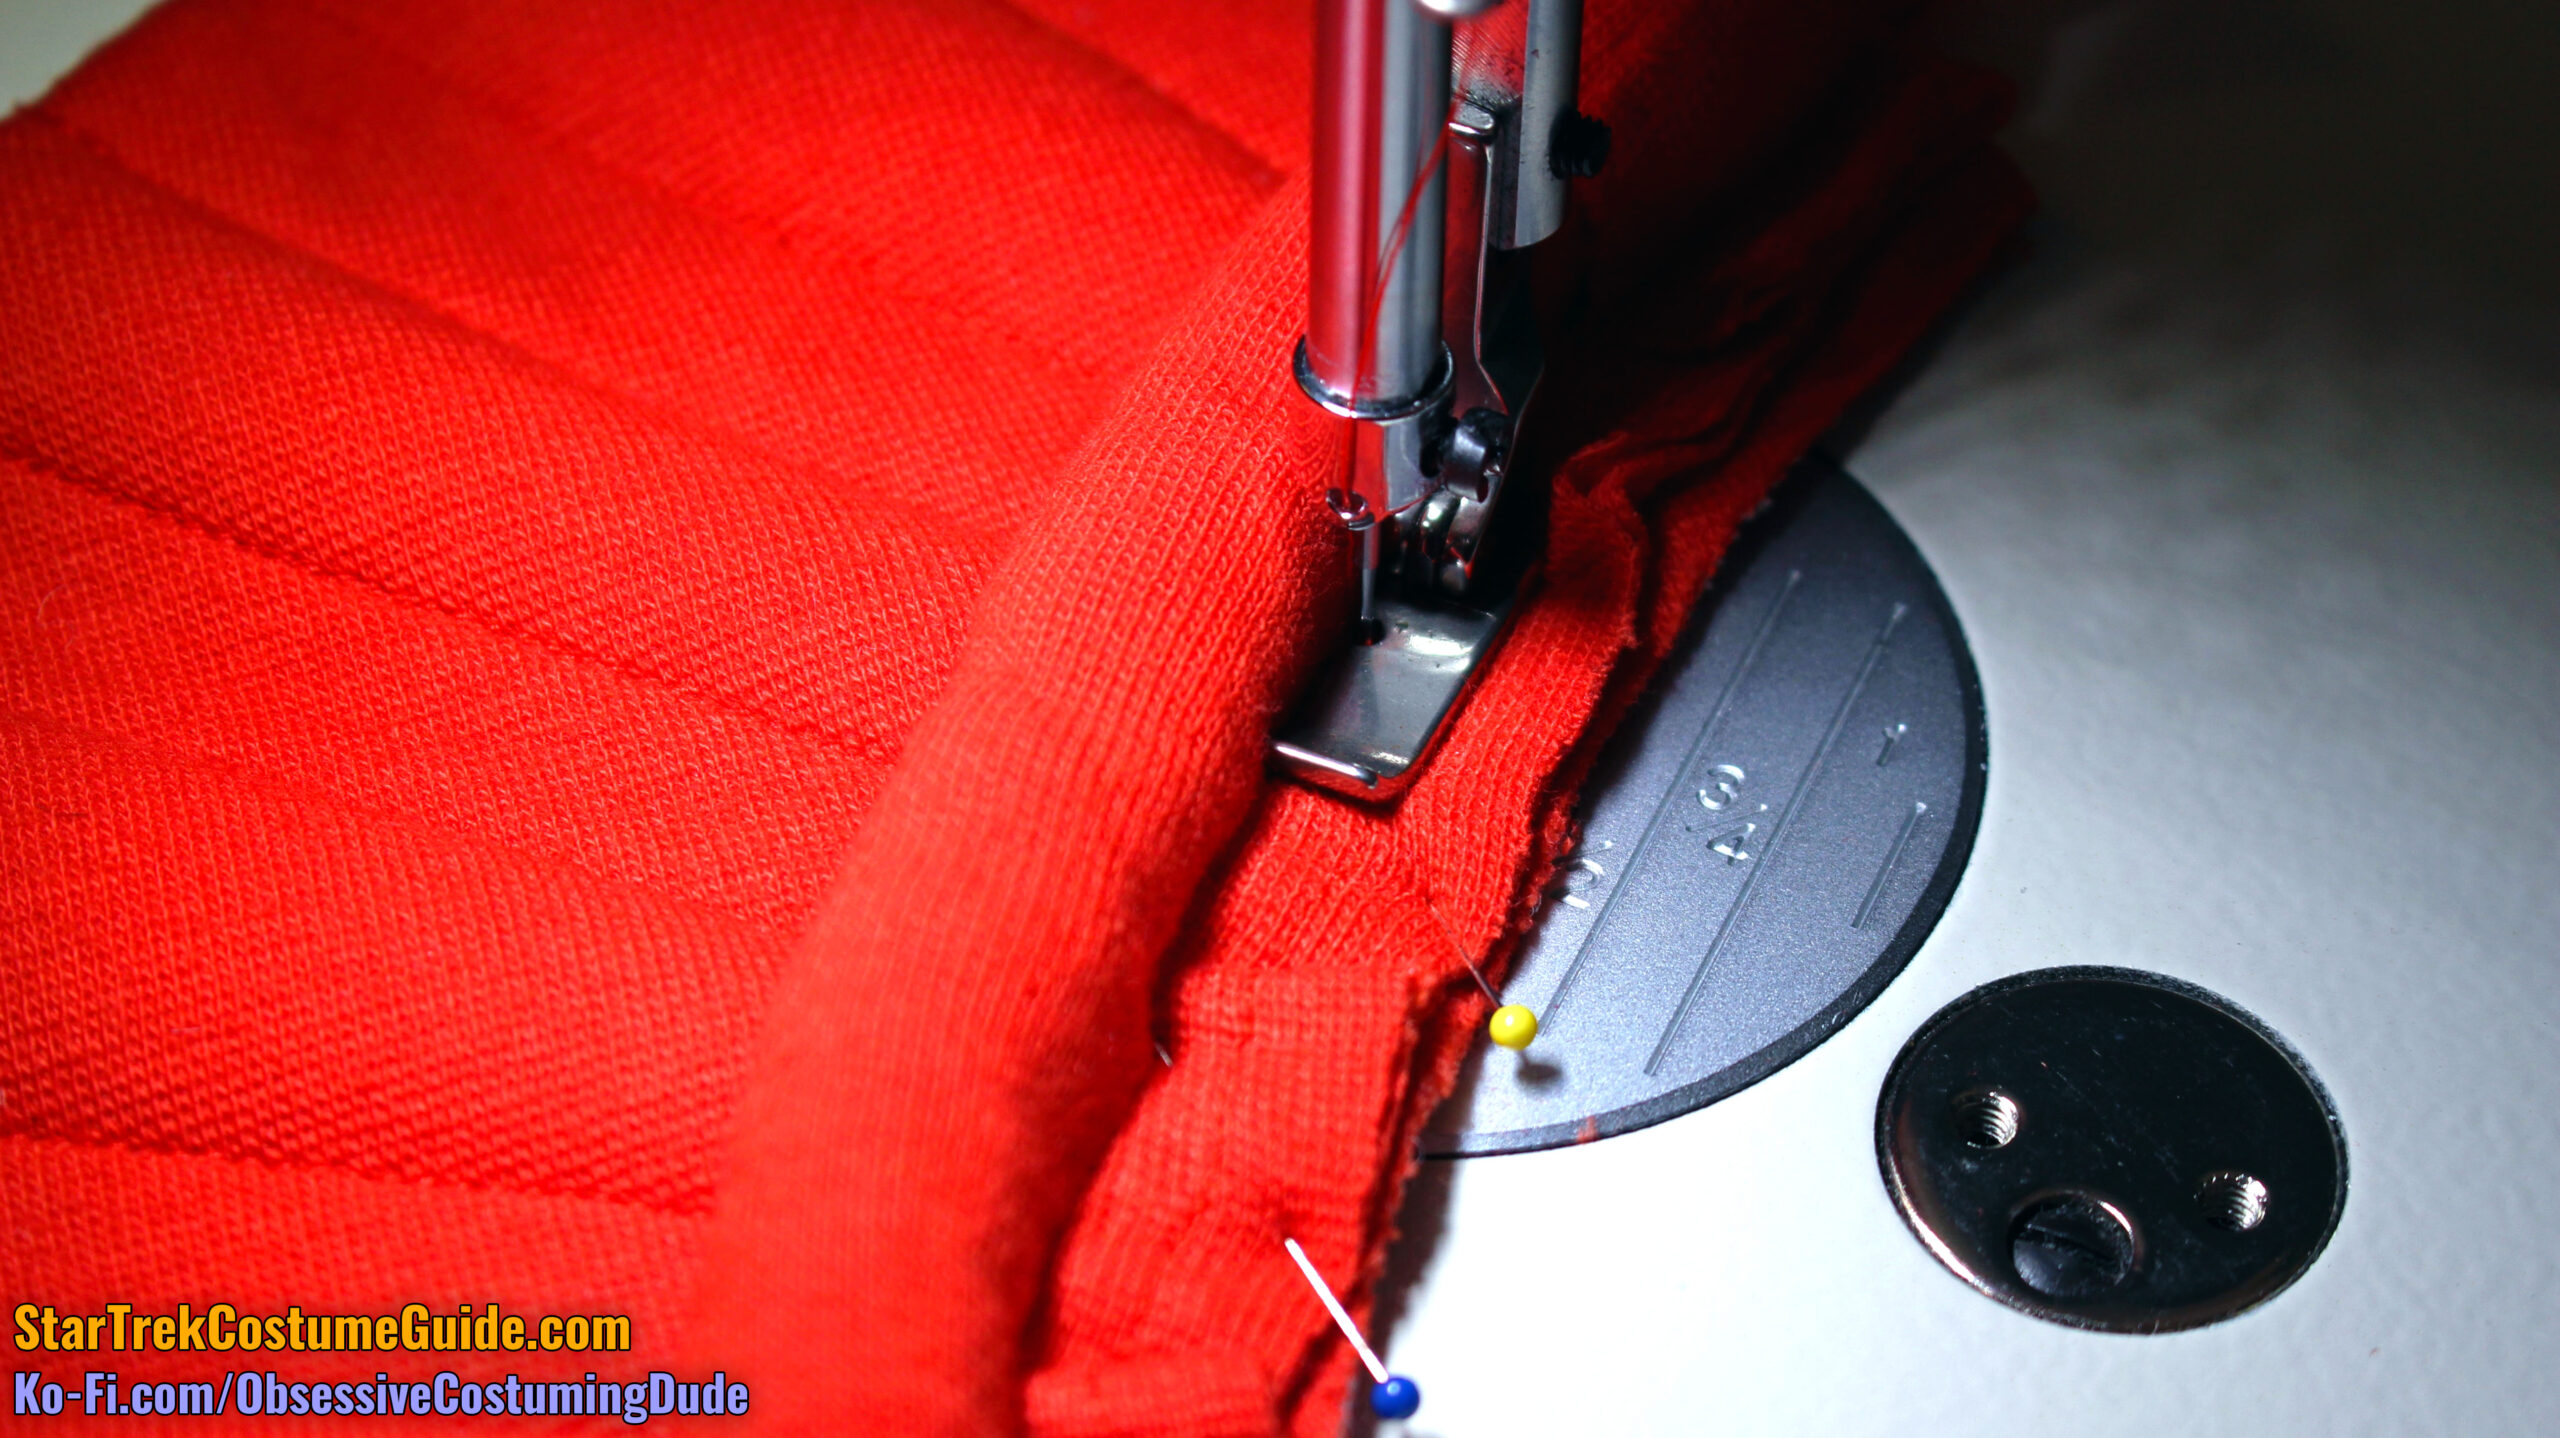
Using your zipper/piping/edging foot and red thread, stitch the fabric layers together close to the edge of the cord.
Stitch the piping channel together along the ends of the cord as well.
I suggest switching to your all-purpose sewing foot and stitching again ¼” away from the edge of the cord.
Turn the ends of the piping allowance under, angling them downward slightly to hide them, and machine stitch them into place outside the cord.
Trim the lower ends of the allowance so they’re flush with the lip, and hand-sew the upper edges of the allowance to the underside of the piping.
Trim the lip of the piping to ½”.
Pin the piping to the collar along the neckline, with the piping ends flush with the edges of the side opening.
Using your zipper/piping foot, sew the piping to the collar with ½” seam allowance.
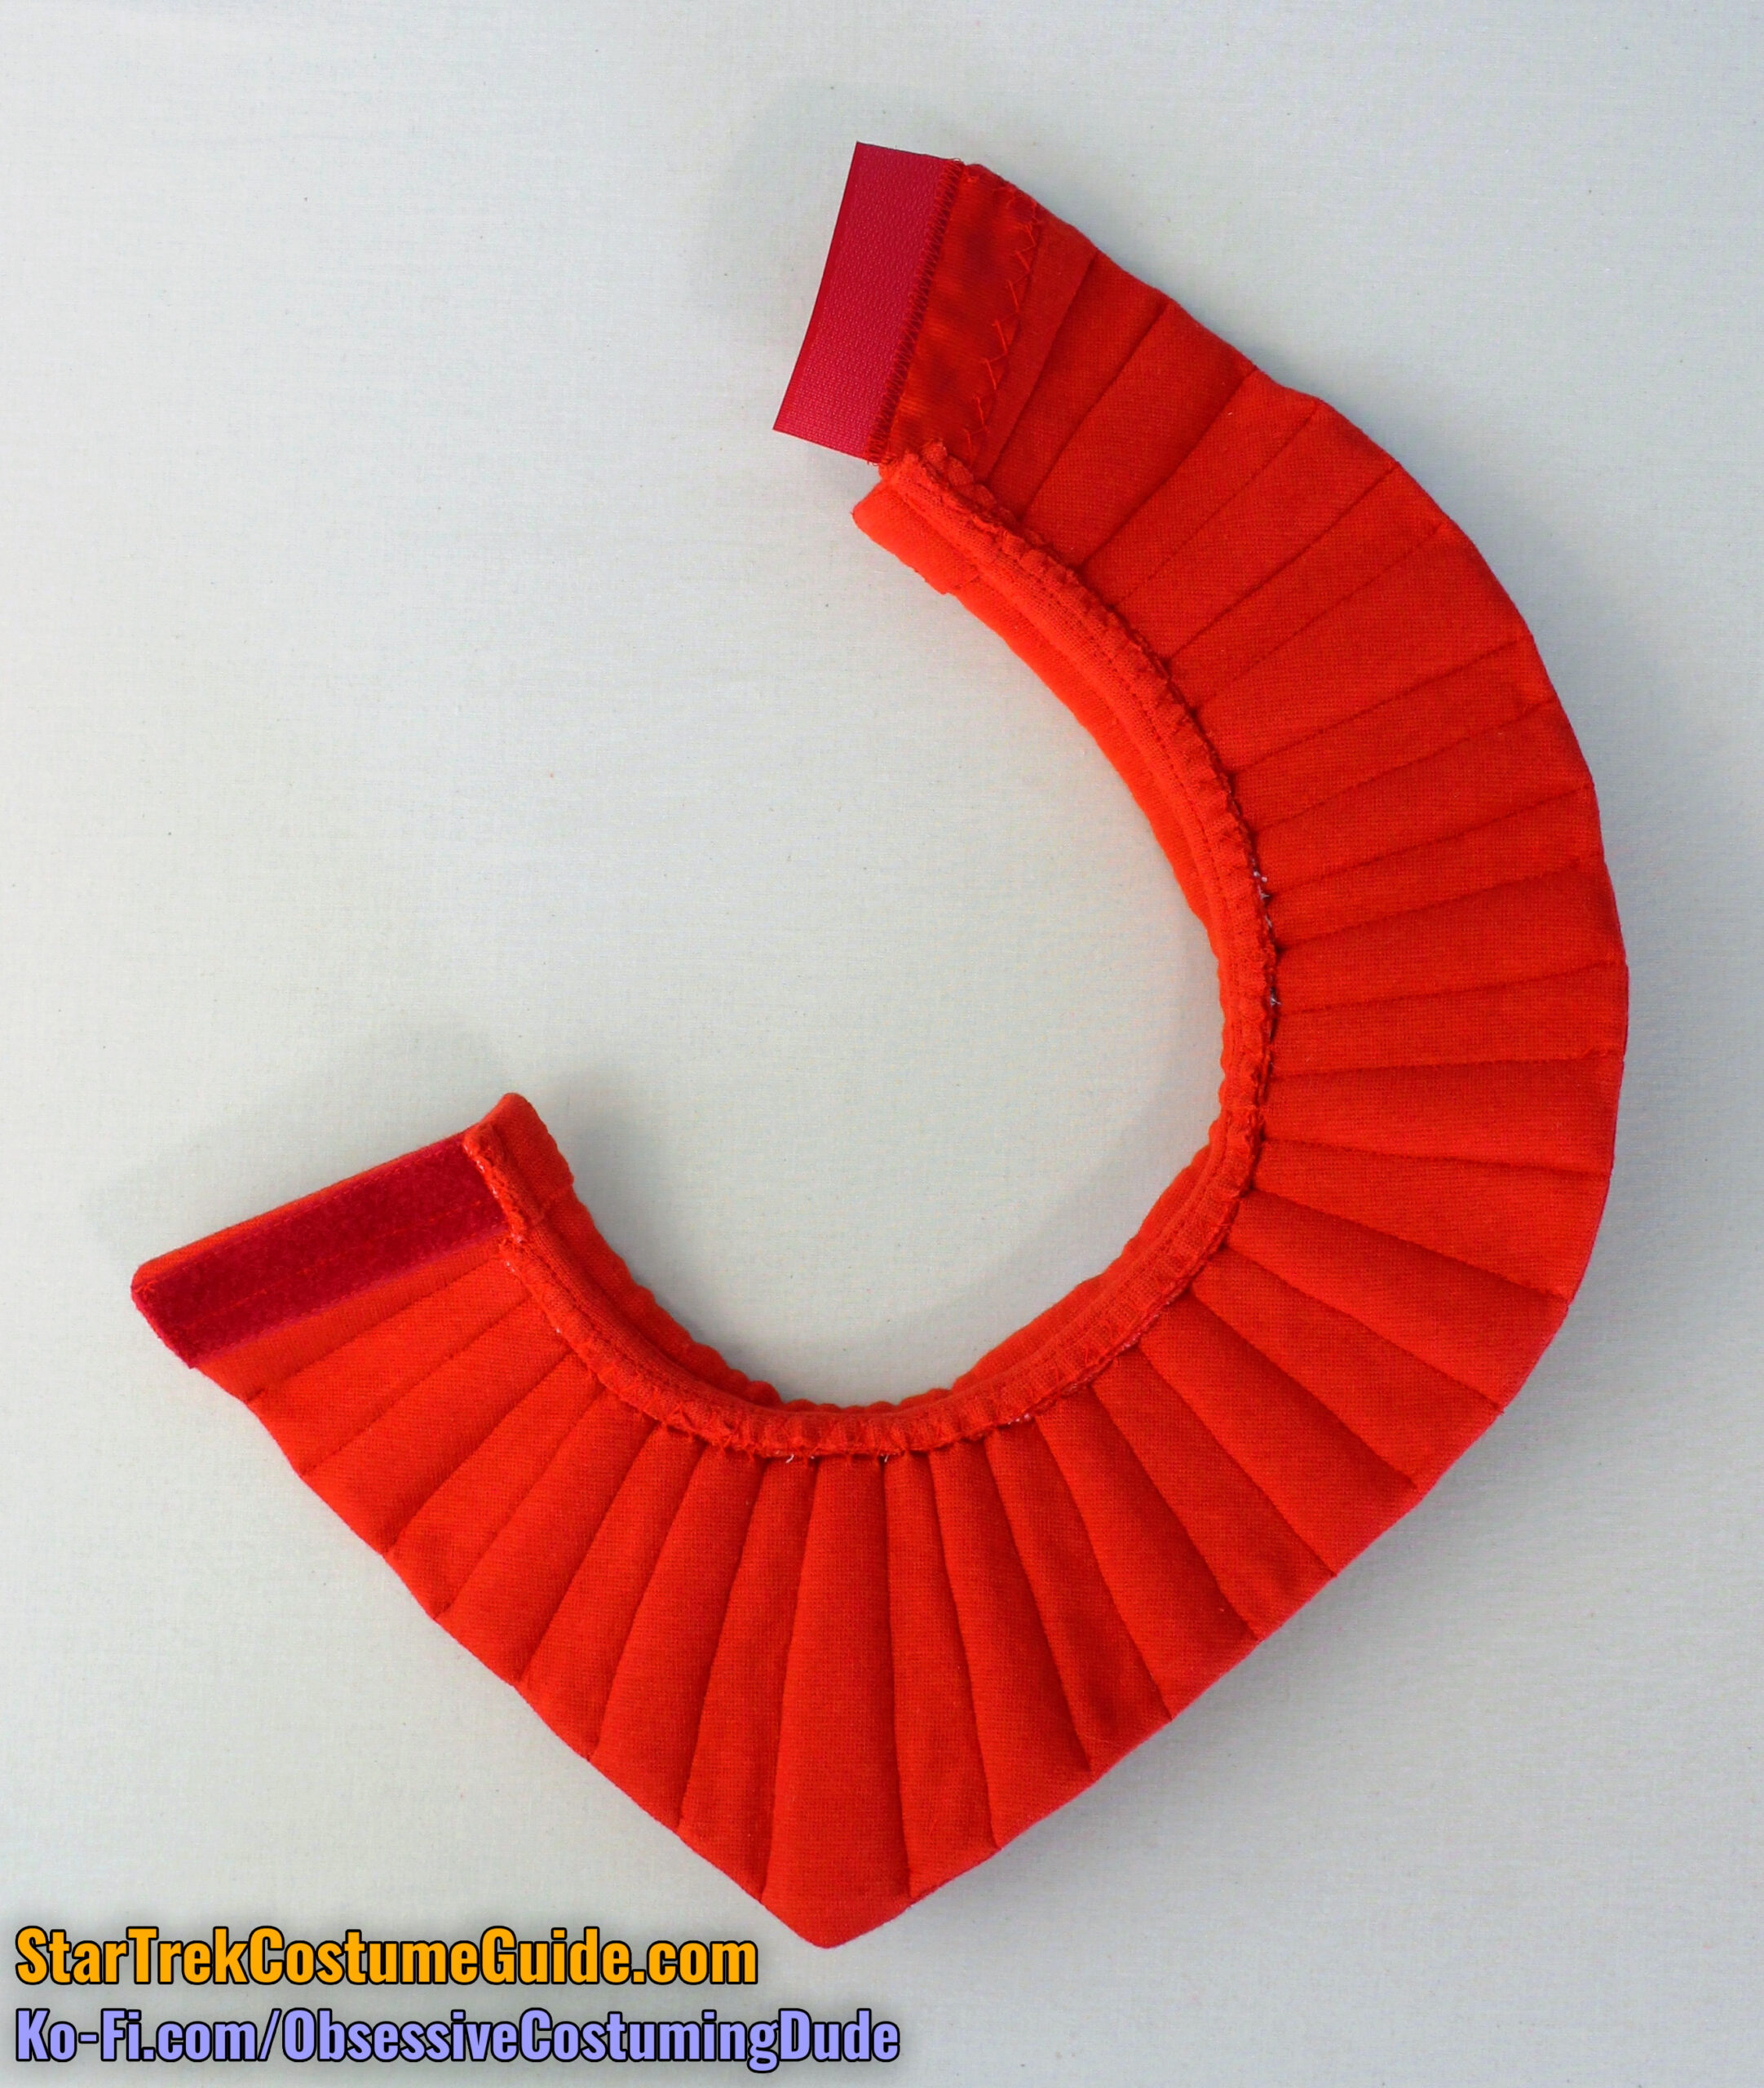
Turn the neckline seam allowance under, and trim away a bit of the front allowance over the “loop” tape.
Hand-sew the neckline seam allowance to the underside of the collar.
(I recommend catch-stitching.)
Cut another 3 ½” length of your red “hook” tape and cut the lower edge so it’s slightly pointed.
Hand-sew this length of “hook” tape to the underside of the collar at the center front.
This is to fasten the collar to the corresponding “loop” tape on the upper front of the jumpsuit.
Make and attach the neckline closures/accents in the same manner described for the officer/enlisted collars.
(See above.)
Cut a small rectangle of red felt, approximately 1” x 2”, and slightly round one corner.
Double-check to make sure your screws are fully tightened.
Position the felt on the rear underside of the collar opening so it covers the screw/washer assembly, the frontmost edge is flush with the edge of the “hook” tape, and the tape slightly overlaps the lower edge of the felt.
Hand-sew the felt to the underside of the neckline piping, lip, ribbon, and “hook” tape.
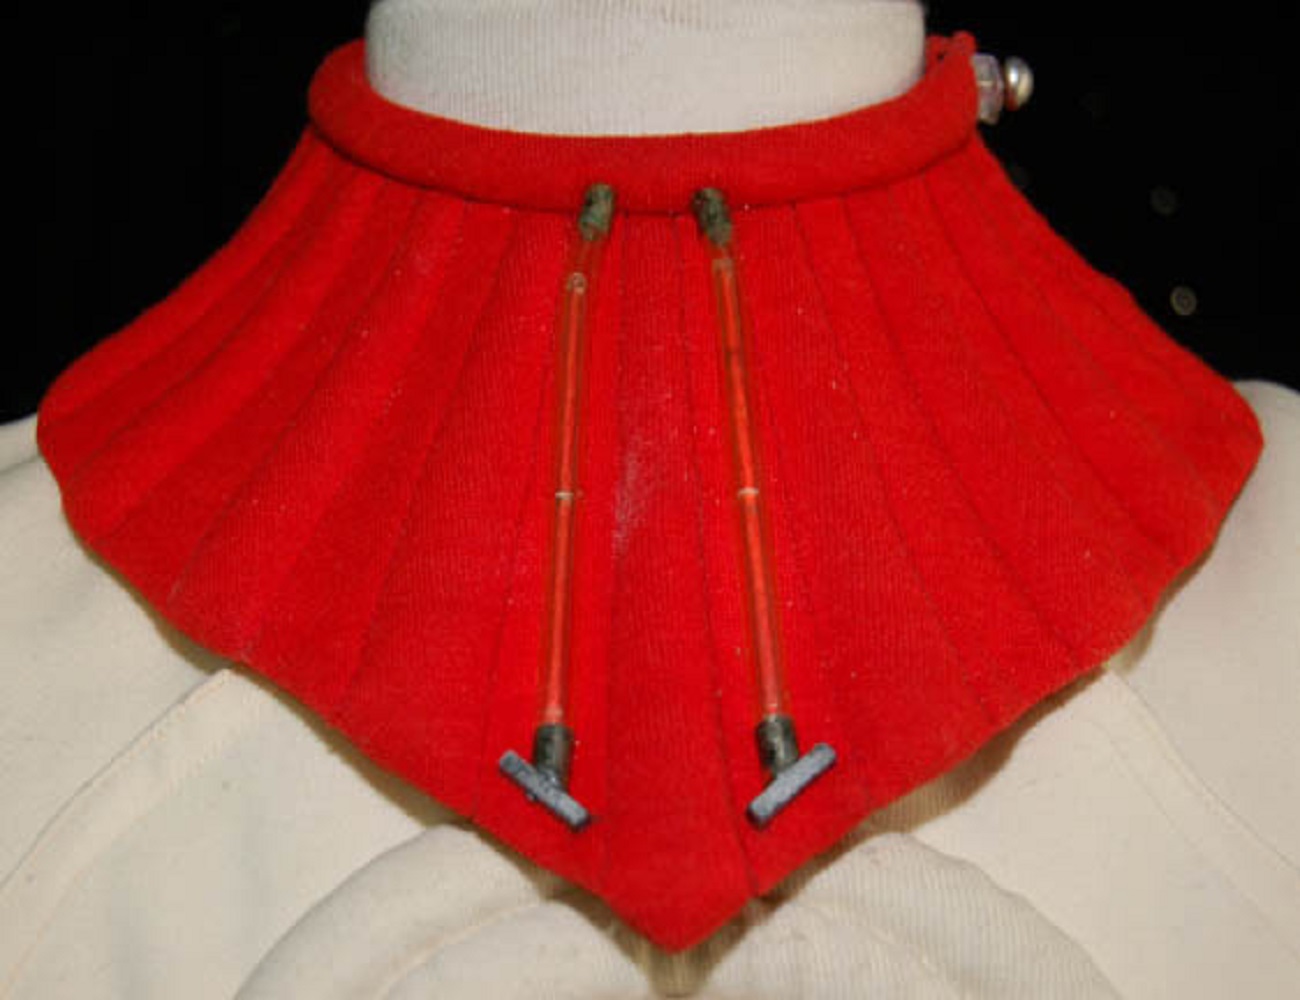
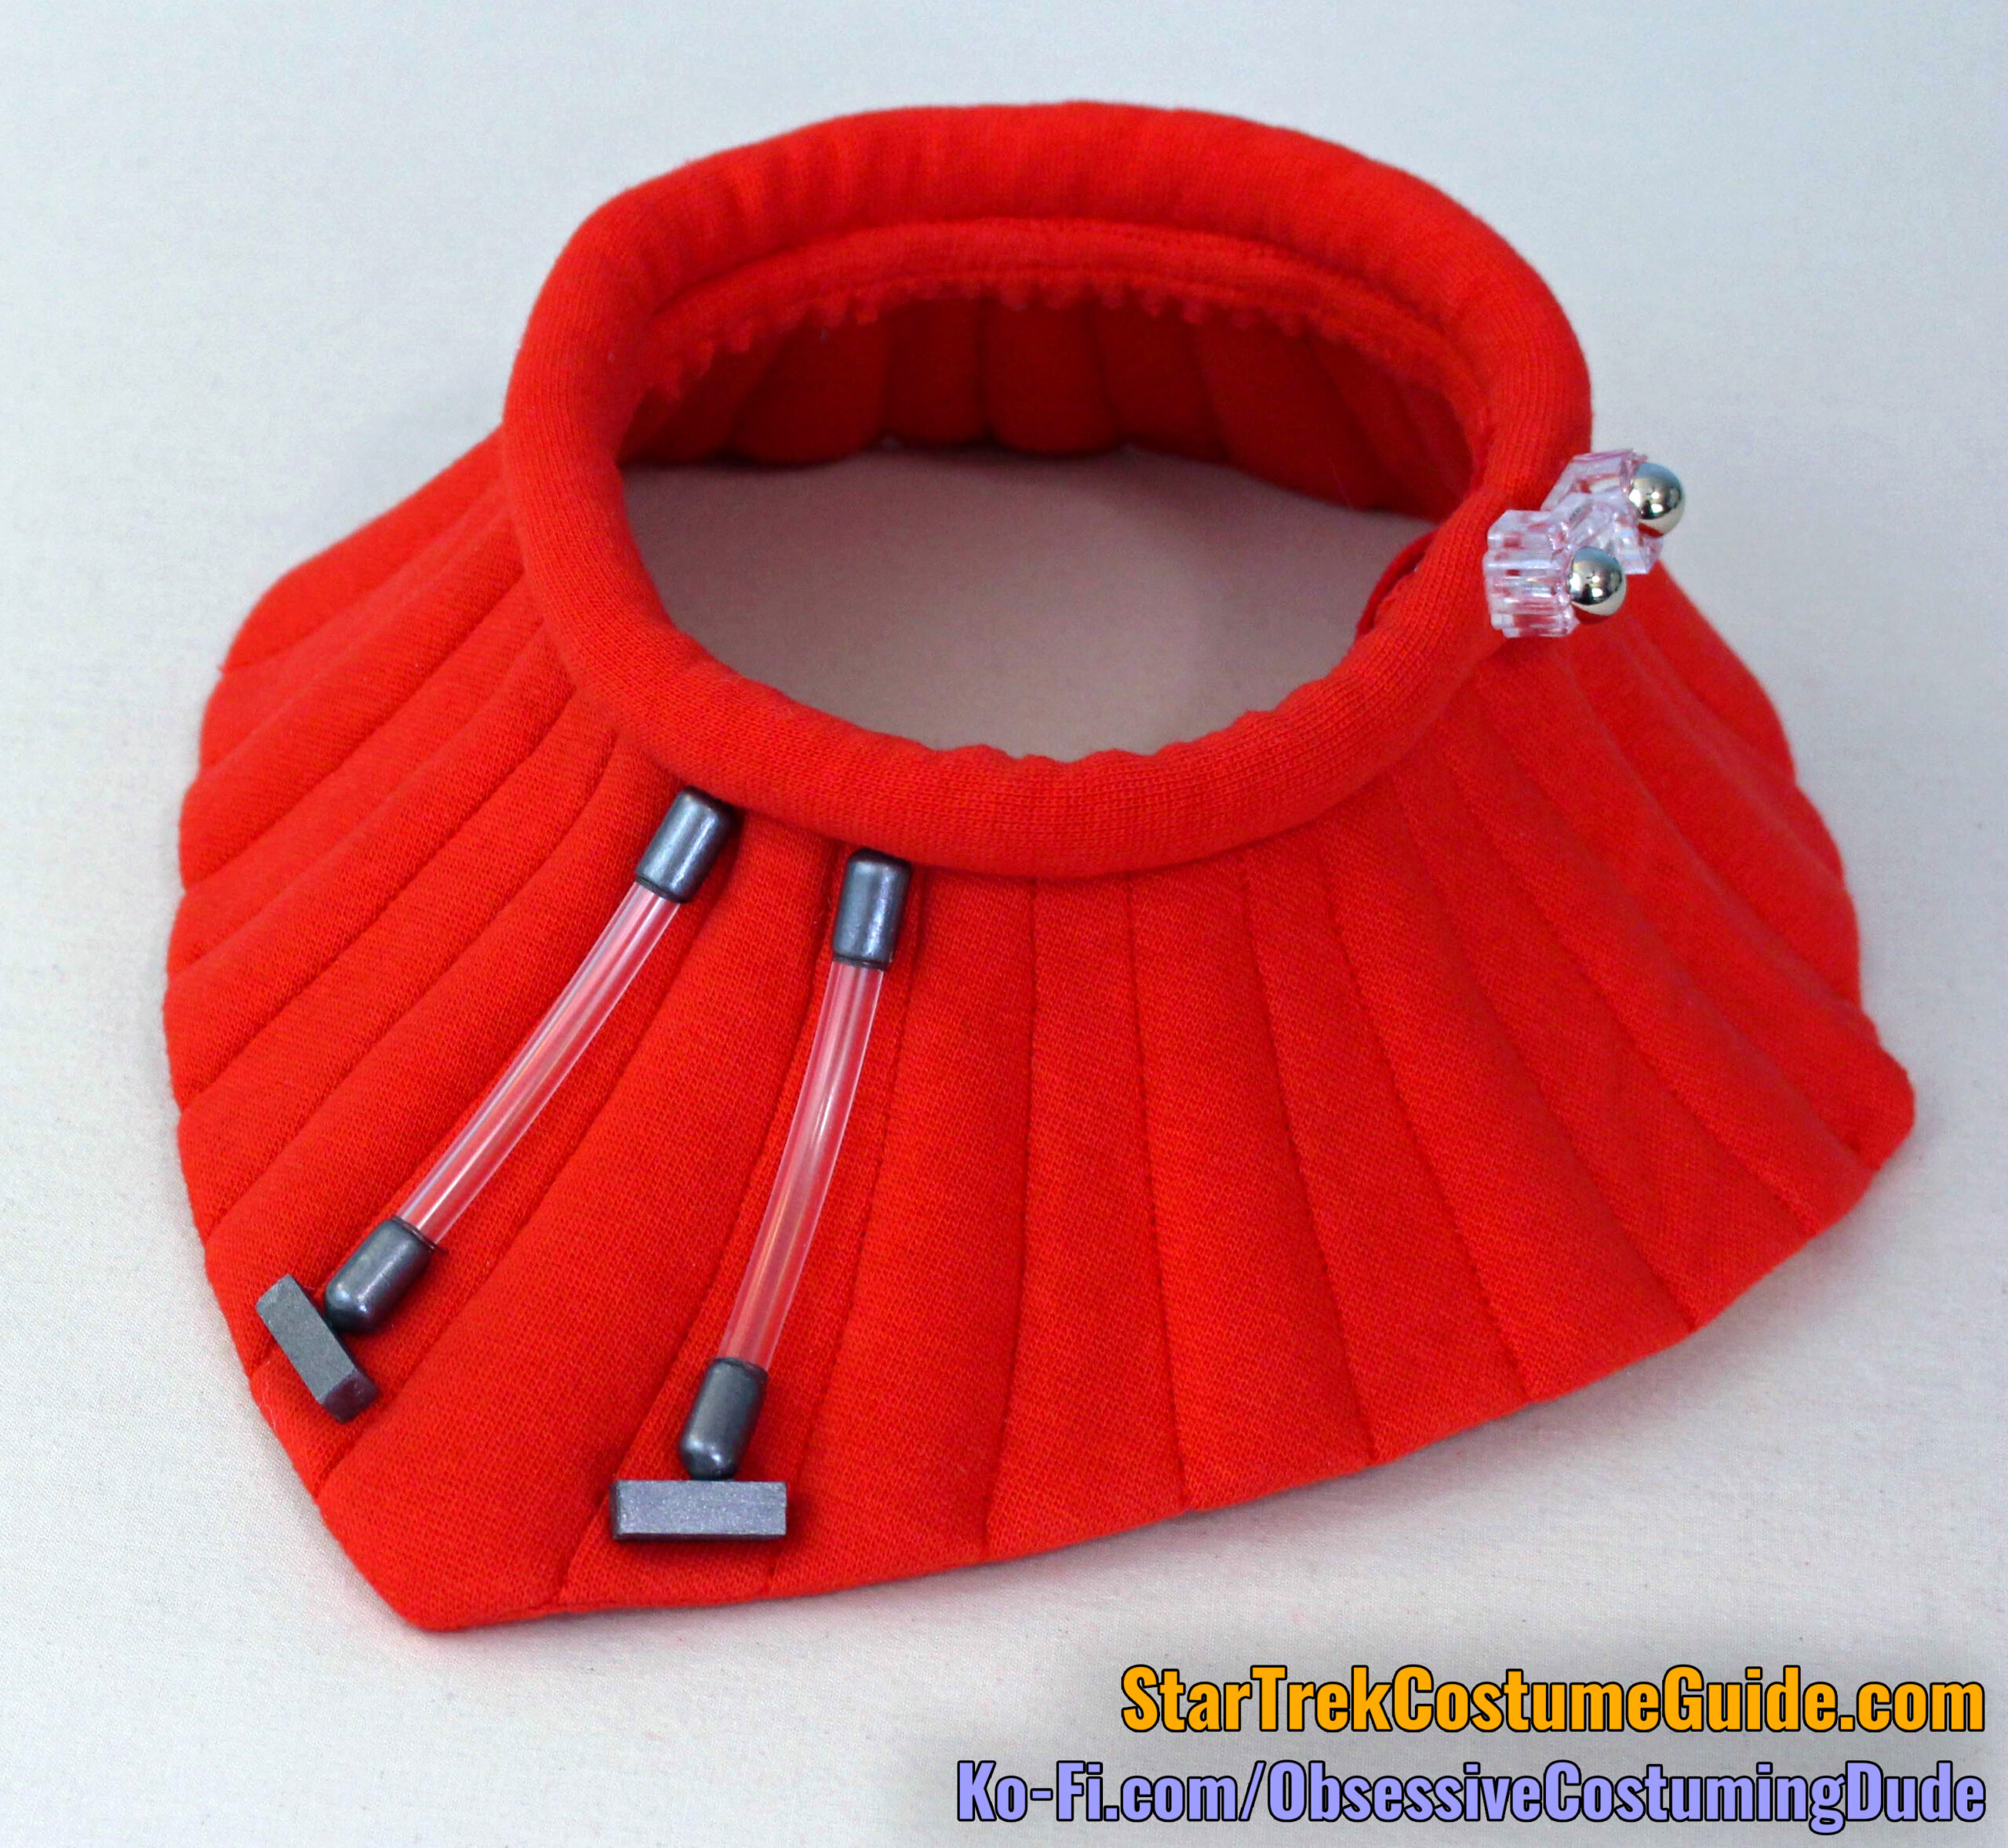
Without having examined a screen-used trainee collar, I’m not sure exactly how the original tubing assemblies on the front were made.
However, I believe the following technique will produce a close facsimile.
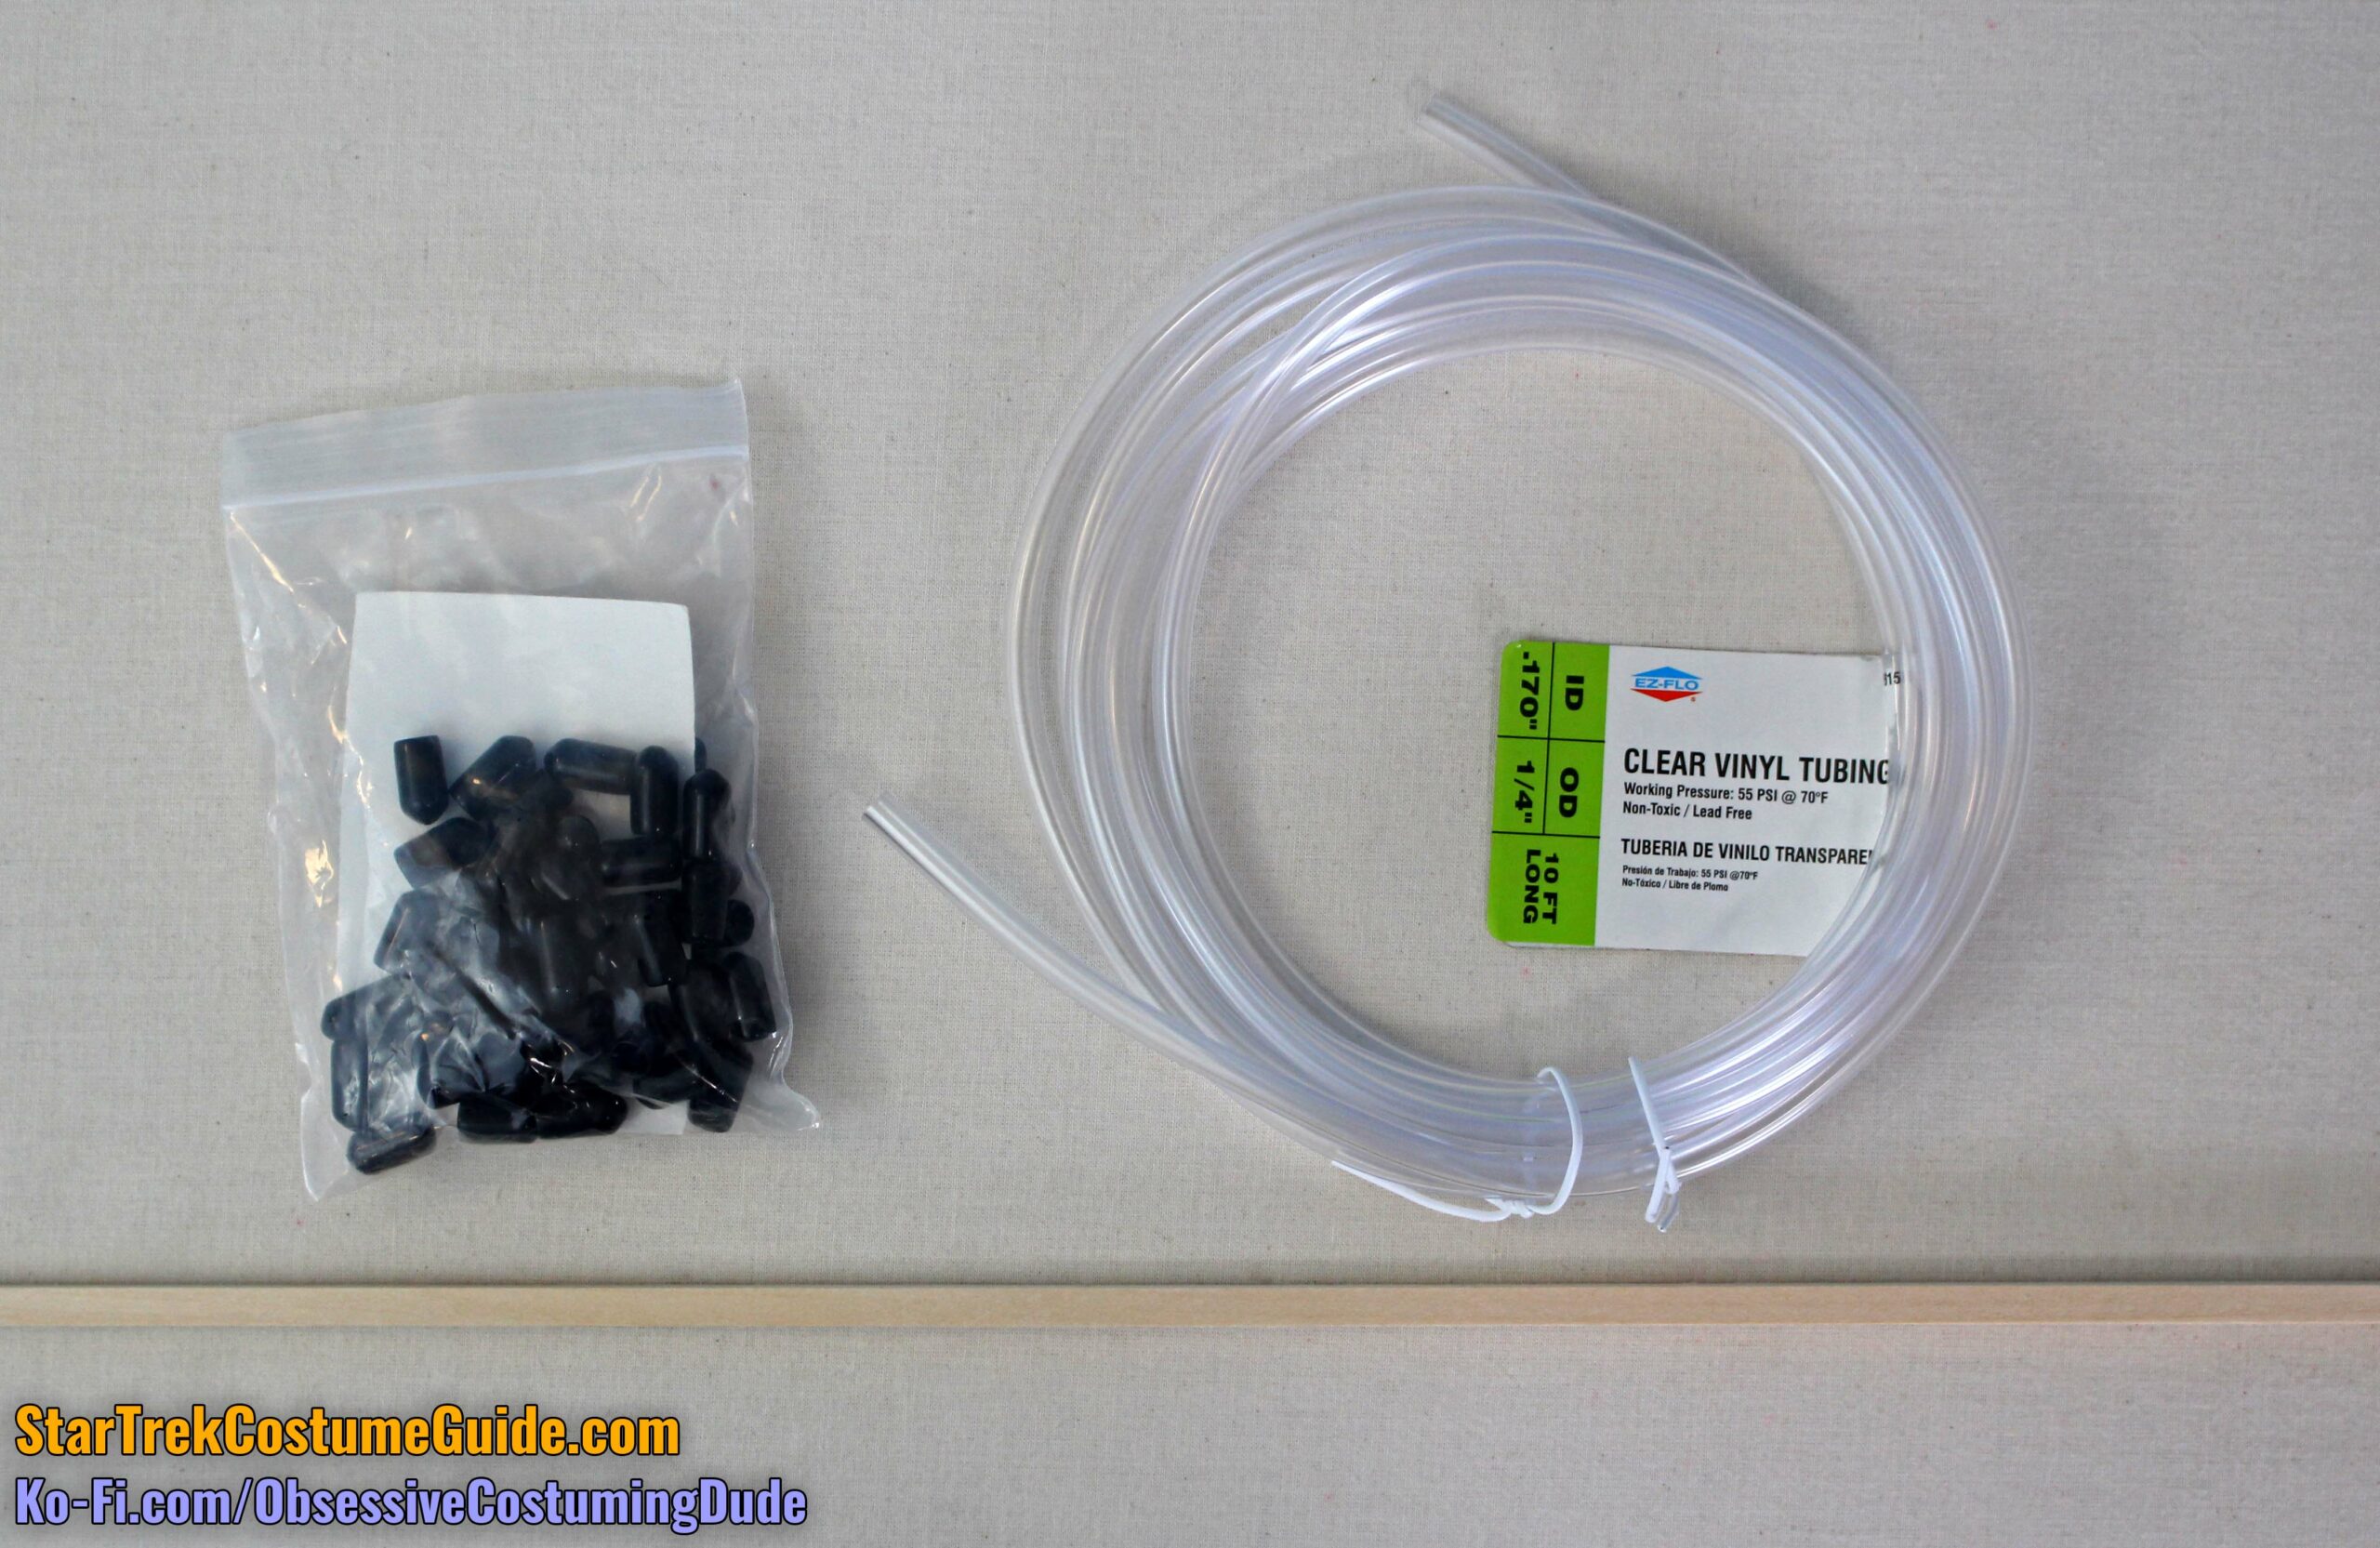
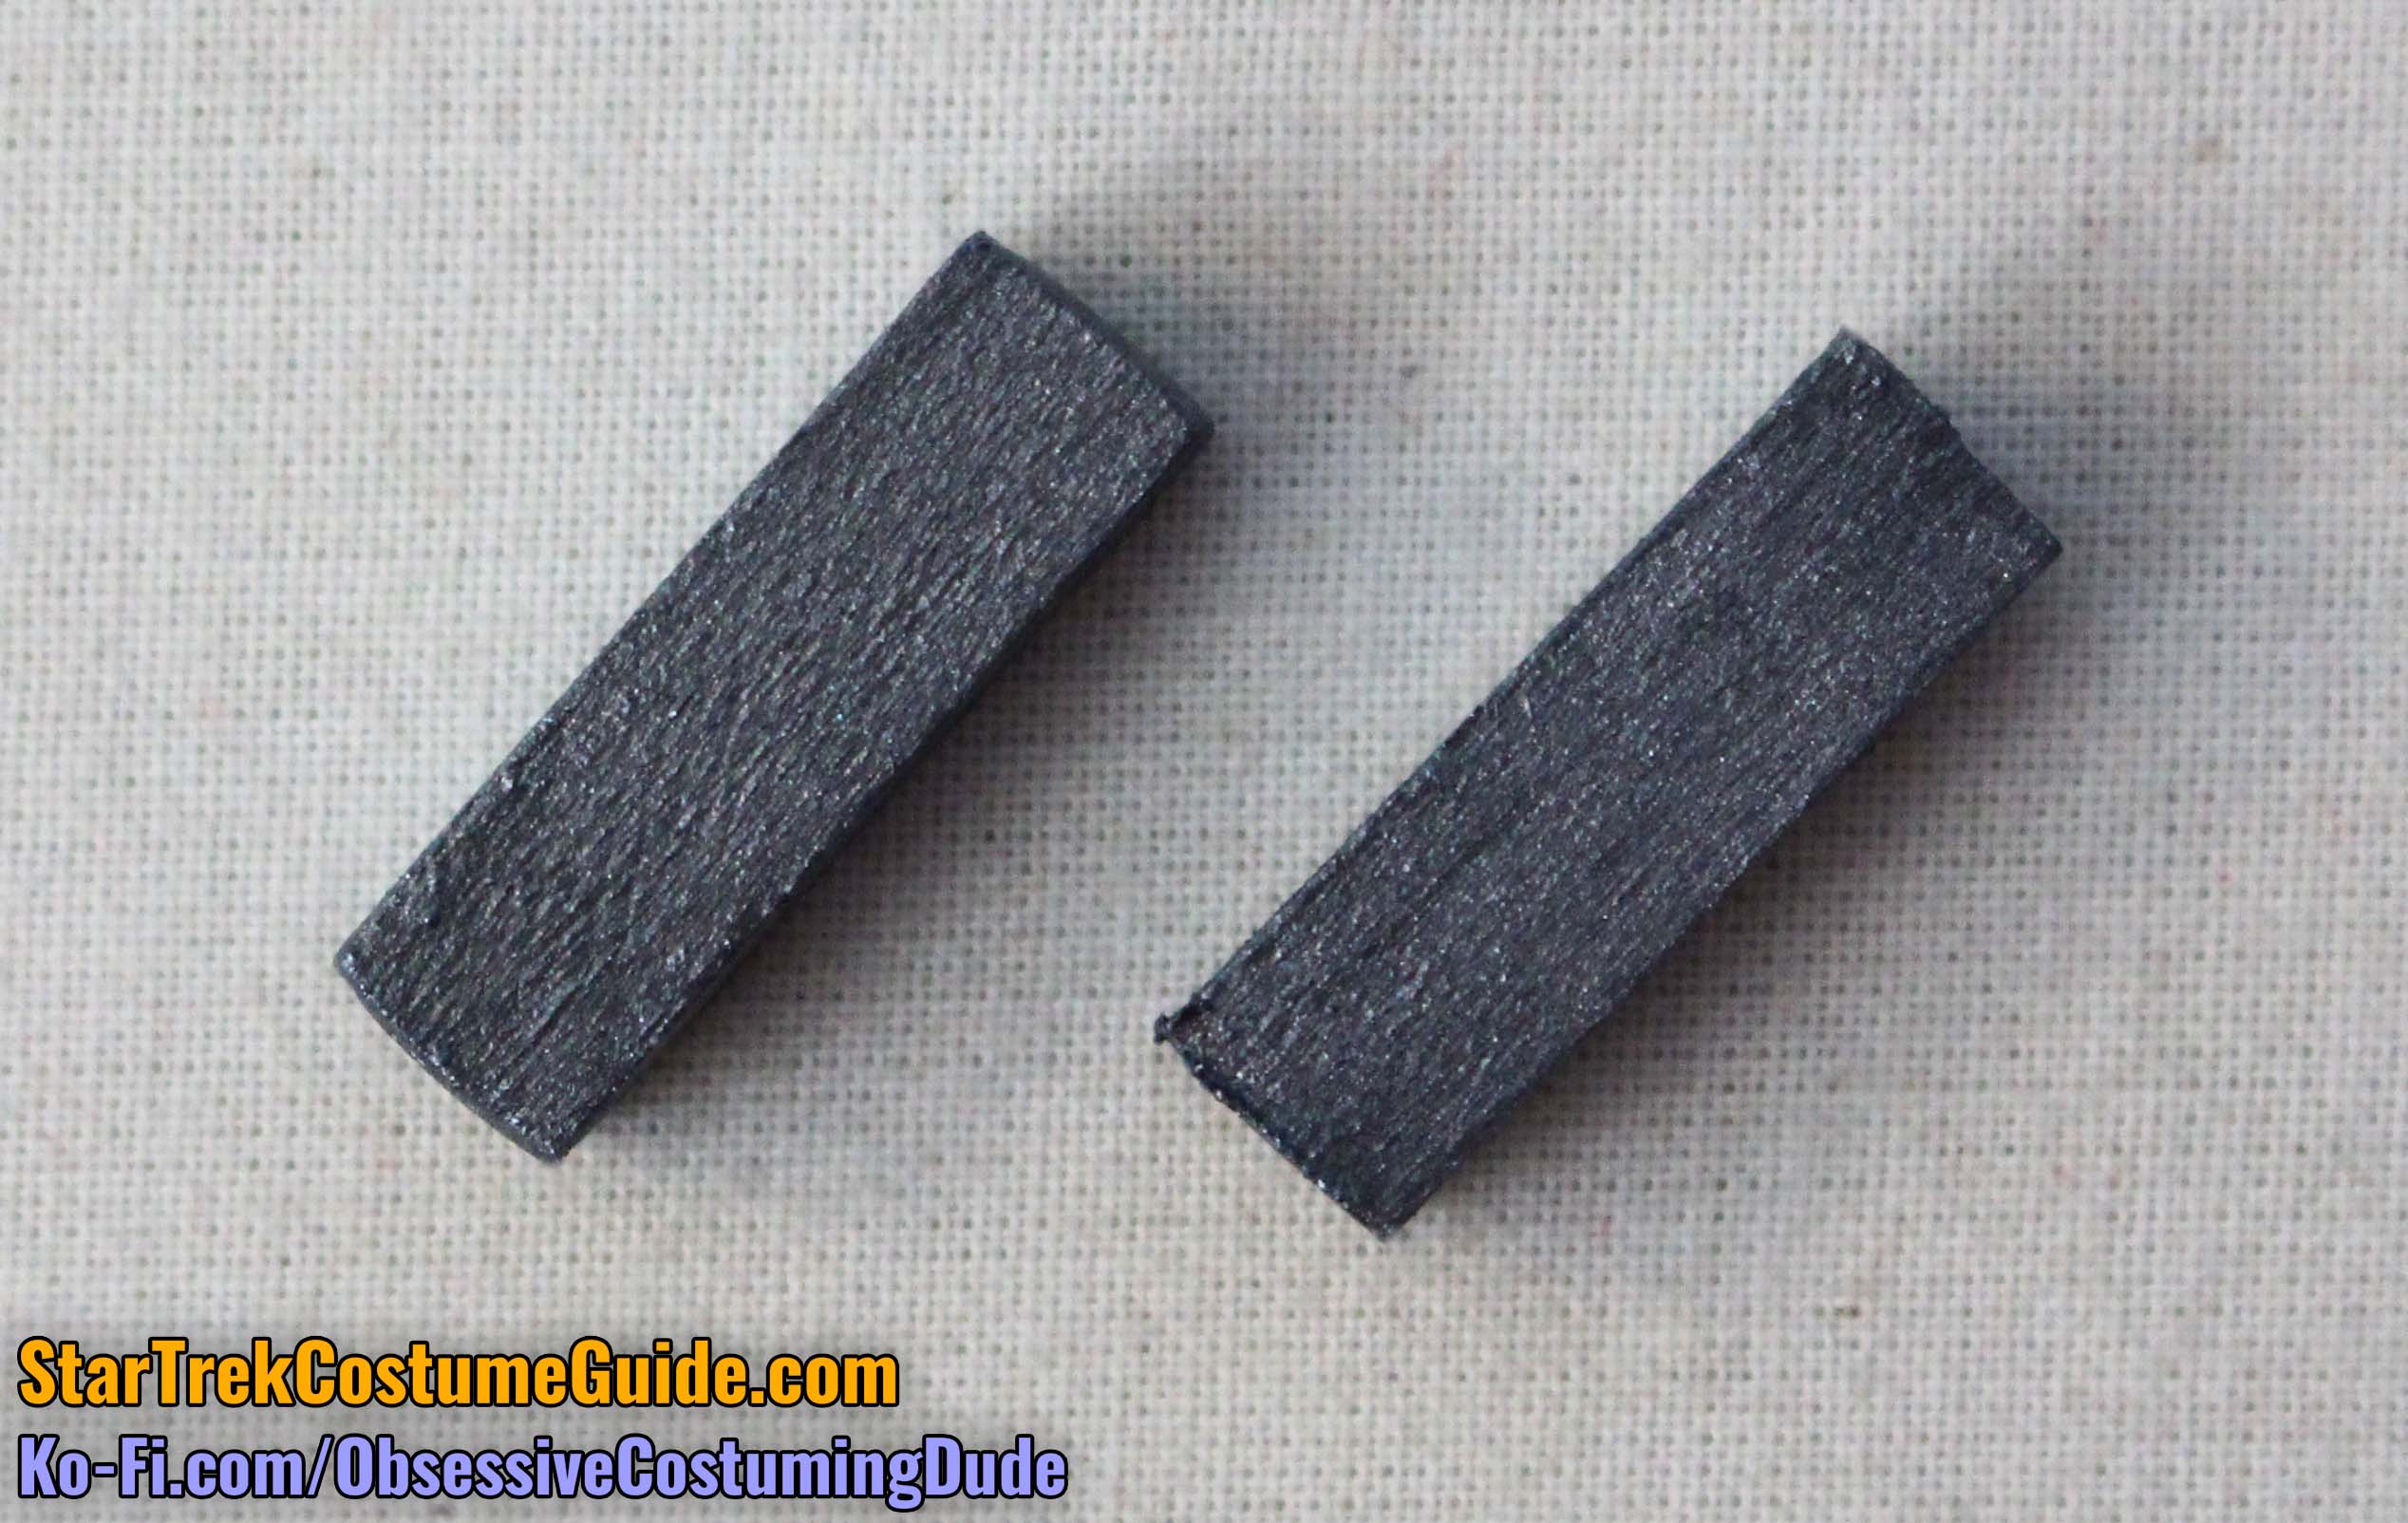
Cut two ⅞” lengths of your rectangular wooden dowel, lightly sand them, and paint them with the same metallic paint you used for the tubing caps.
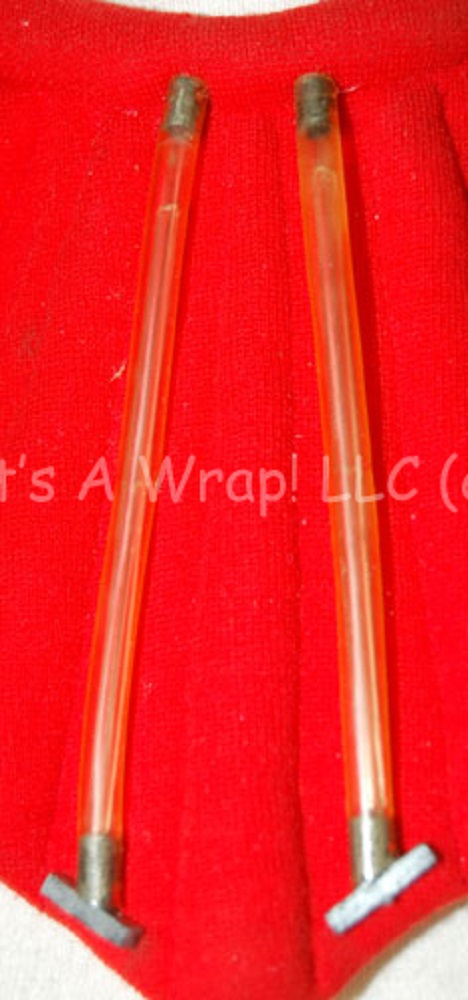
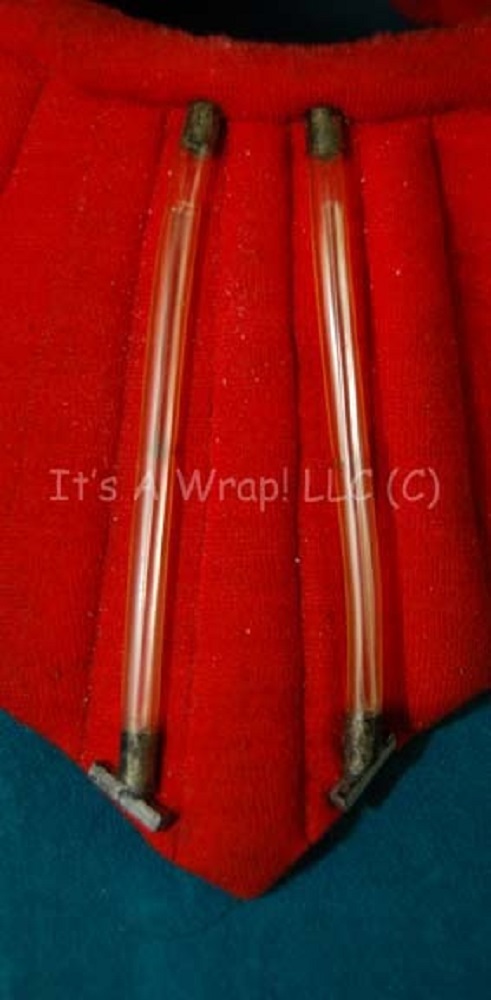
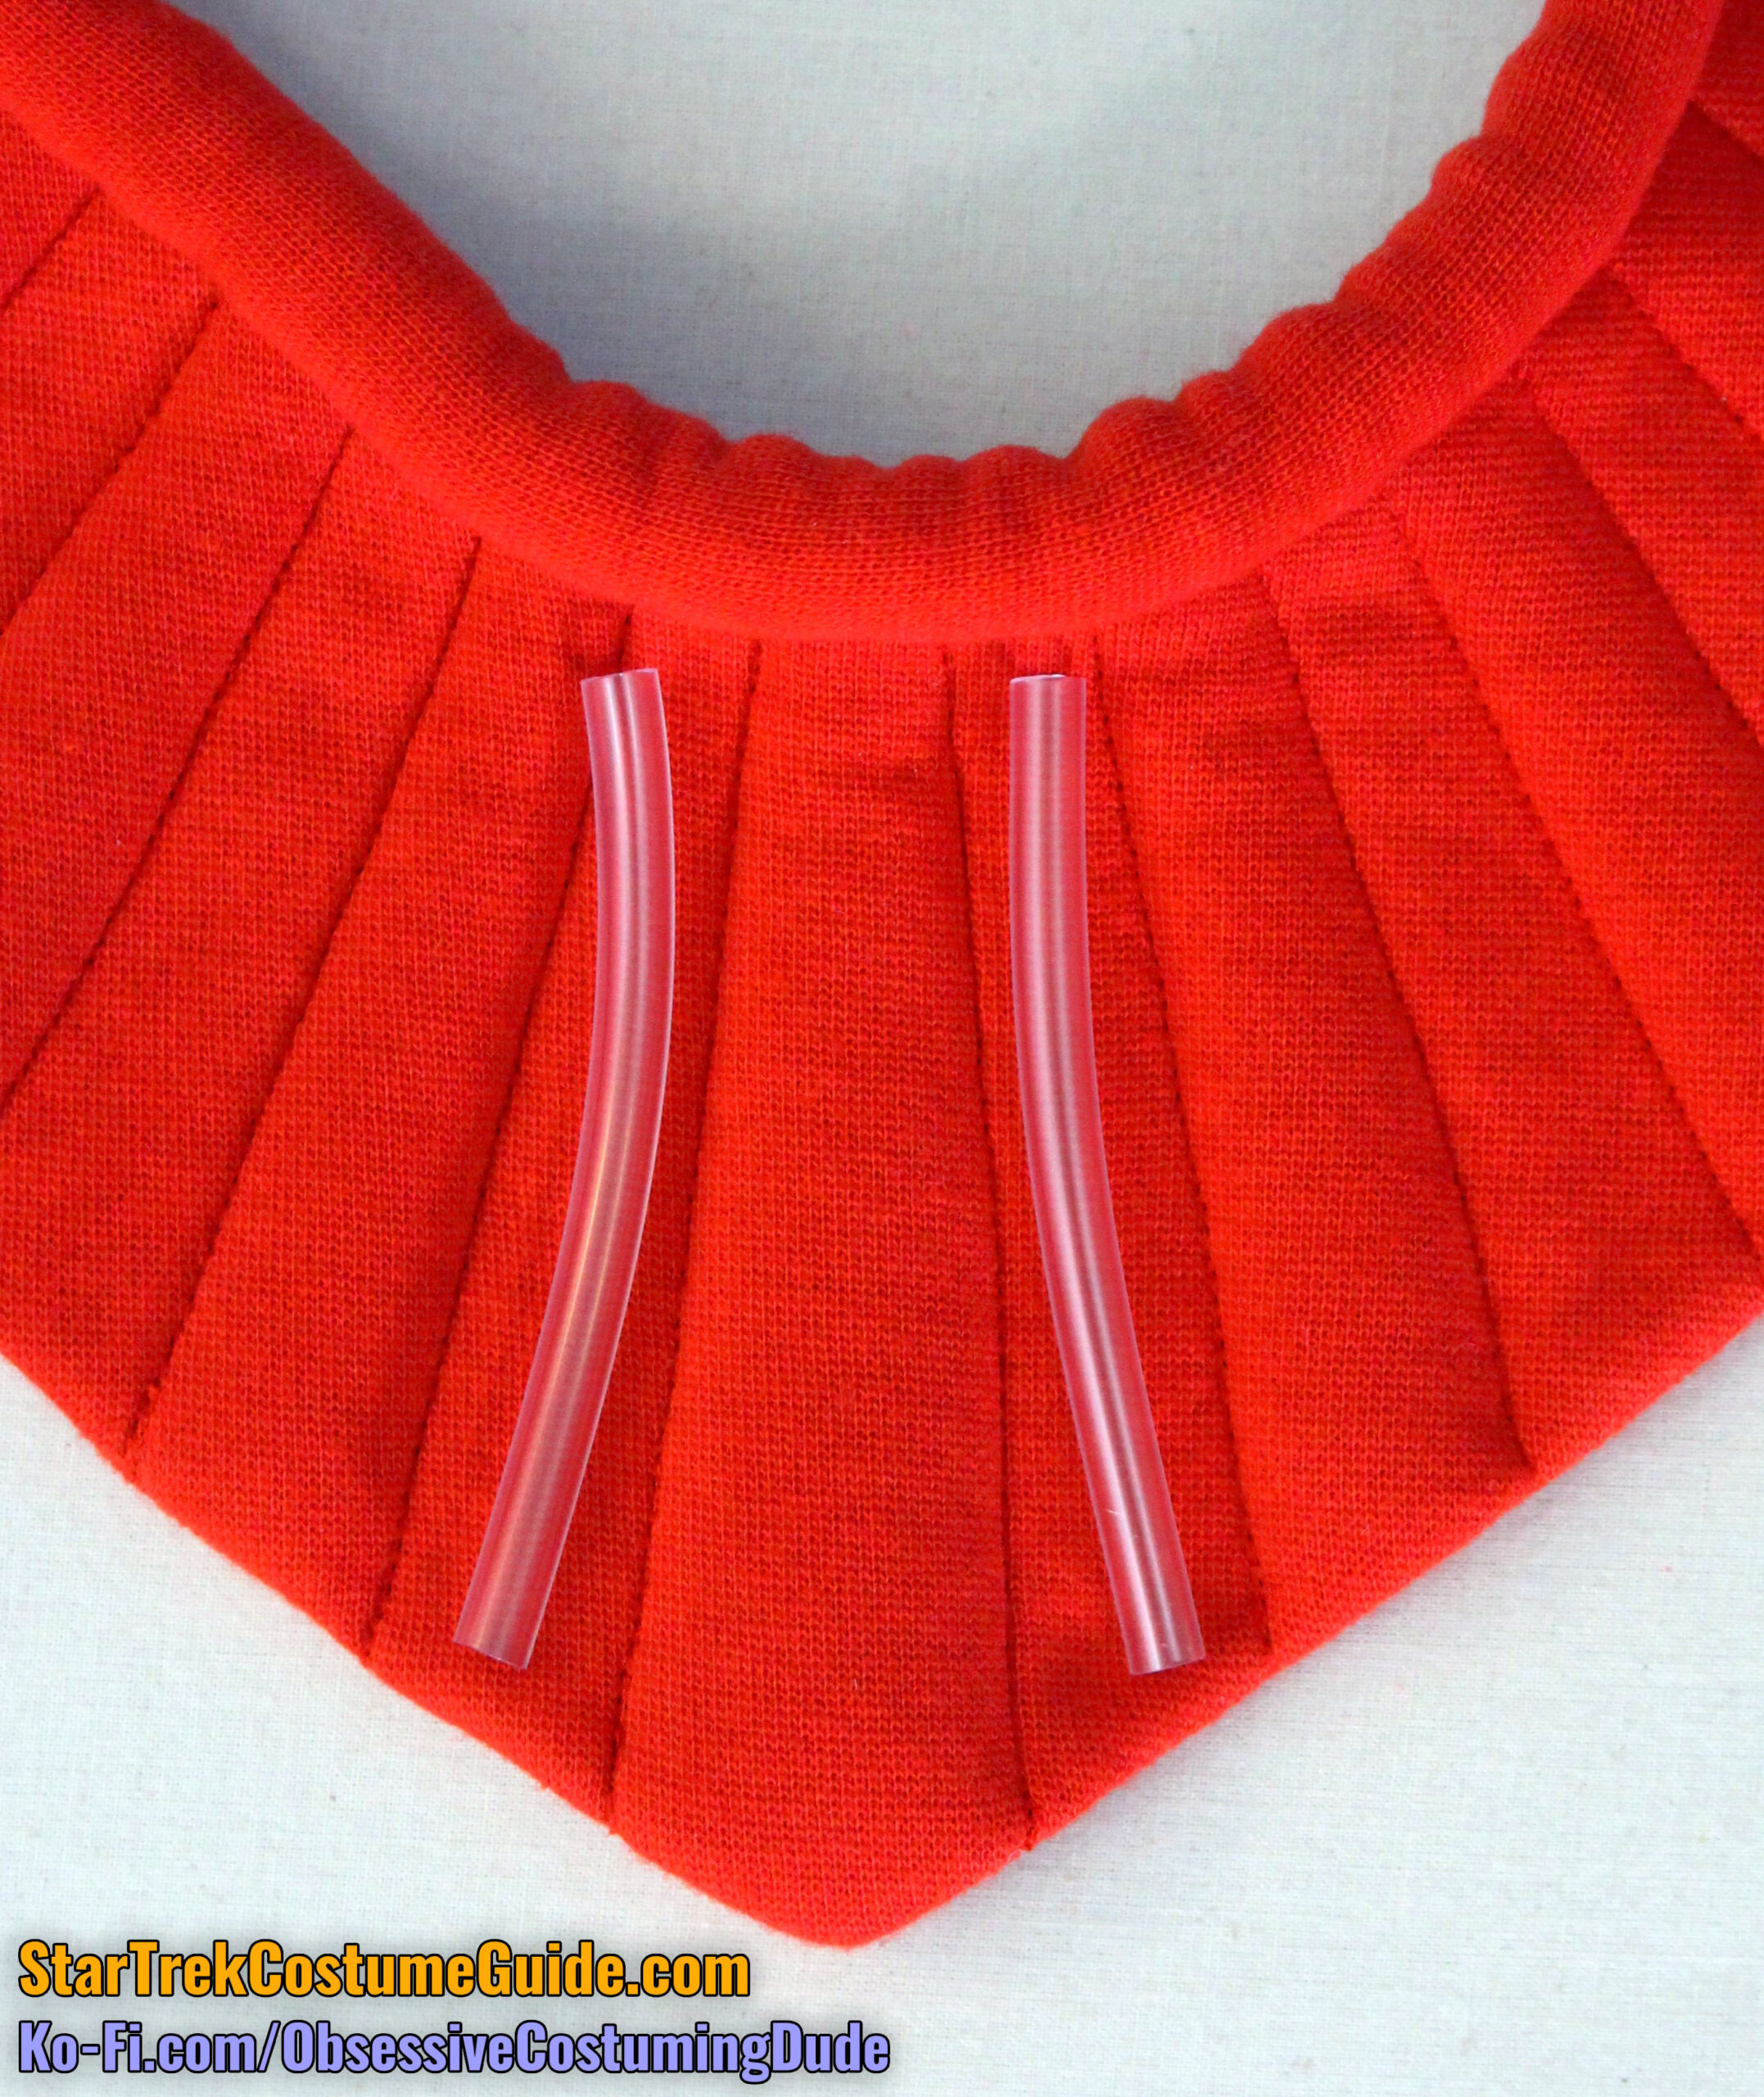
Cut two lengths of your ¼” clear tubing.
When centered between the two non-quilted channels adjacent to the quilted center front channel, the tubing should be long enough to extend from just below the neckline piping to about ⅜” above the lower edges.
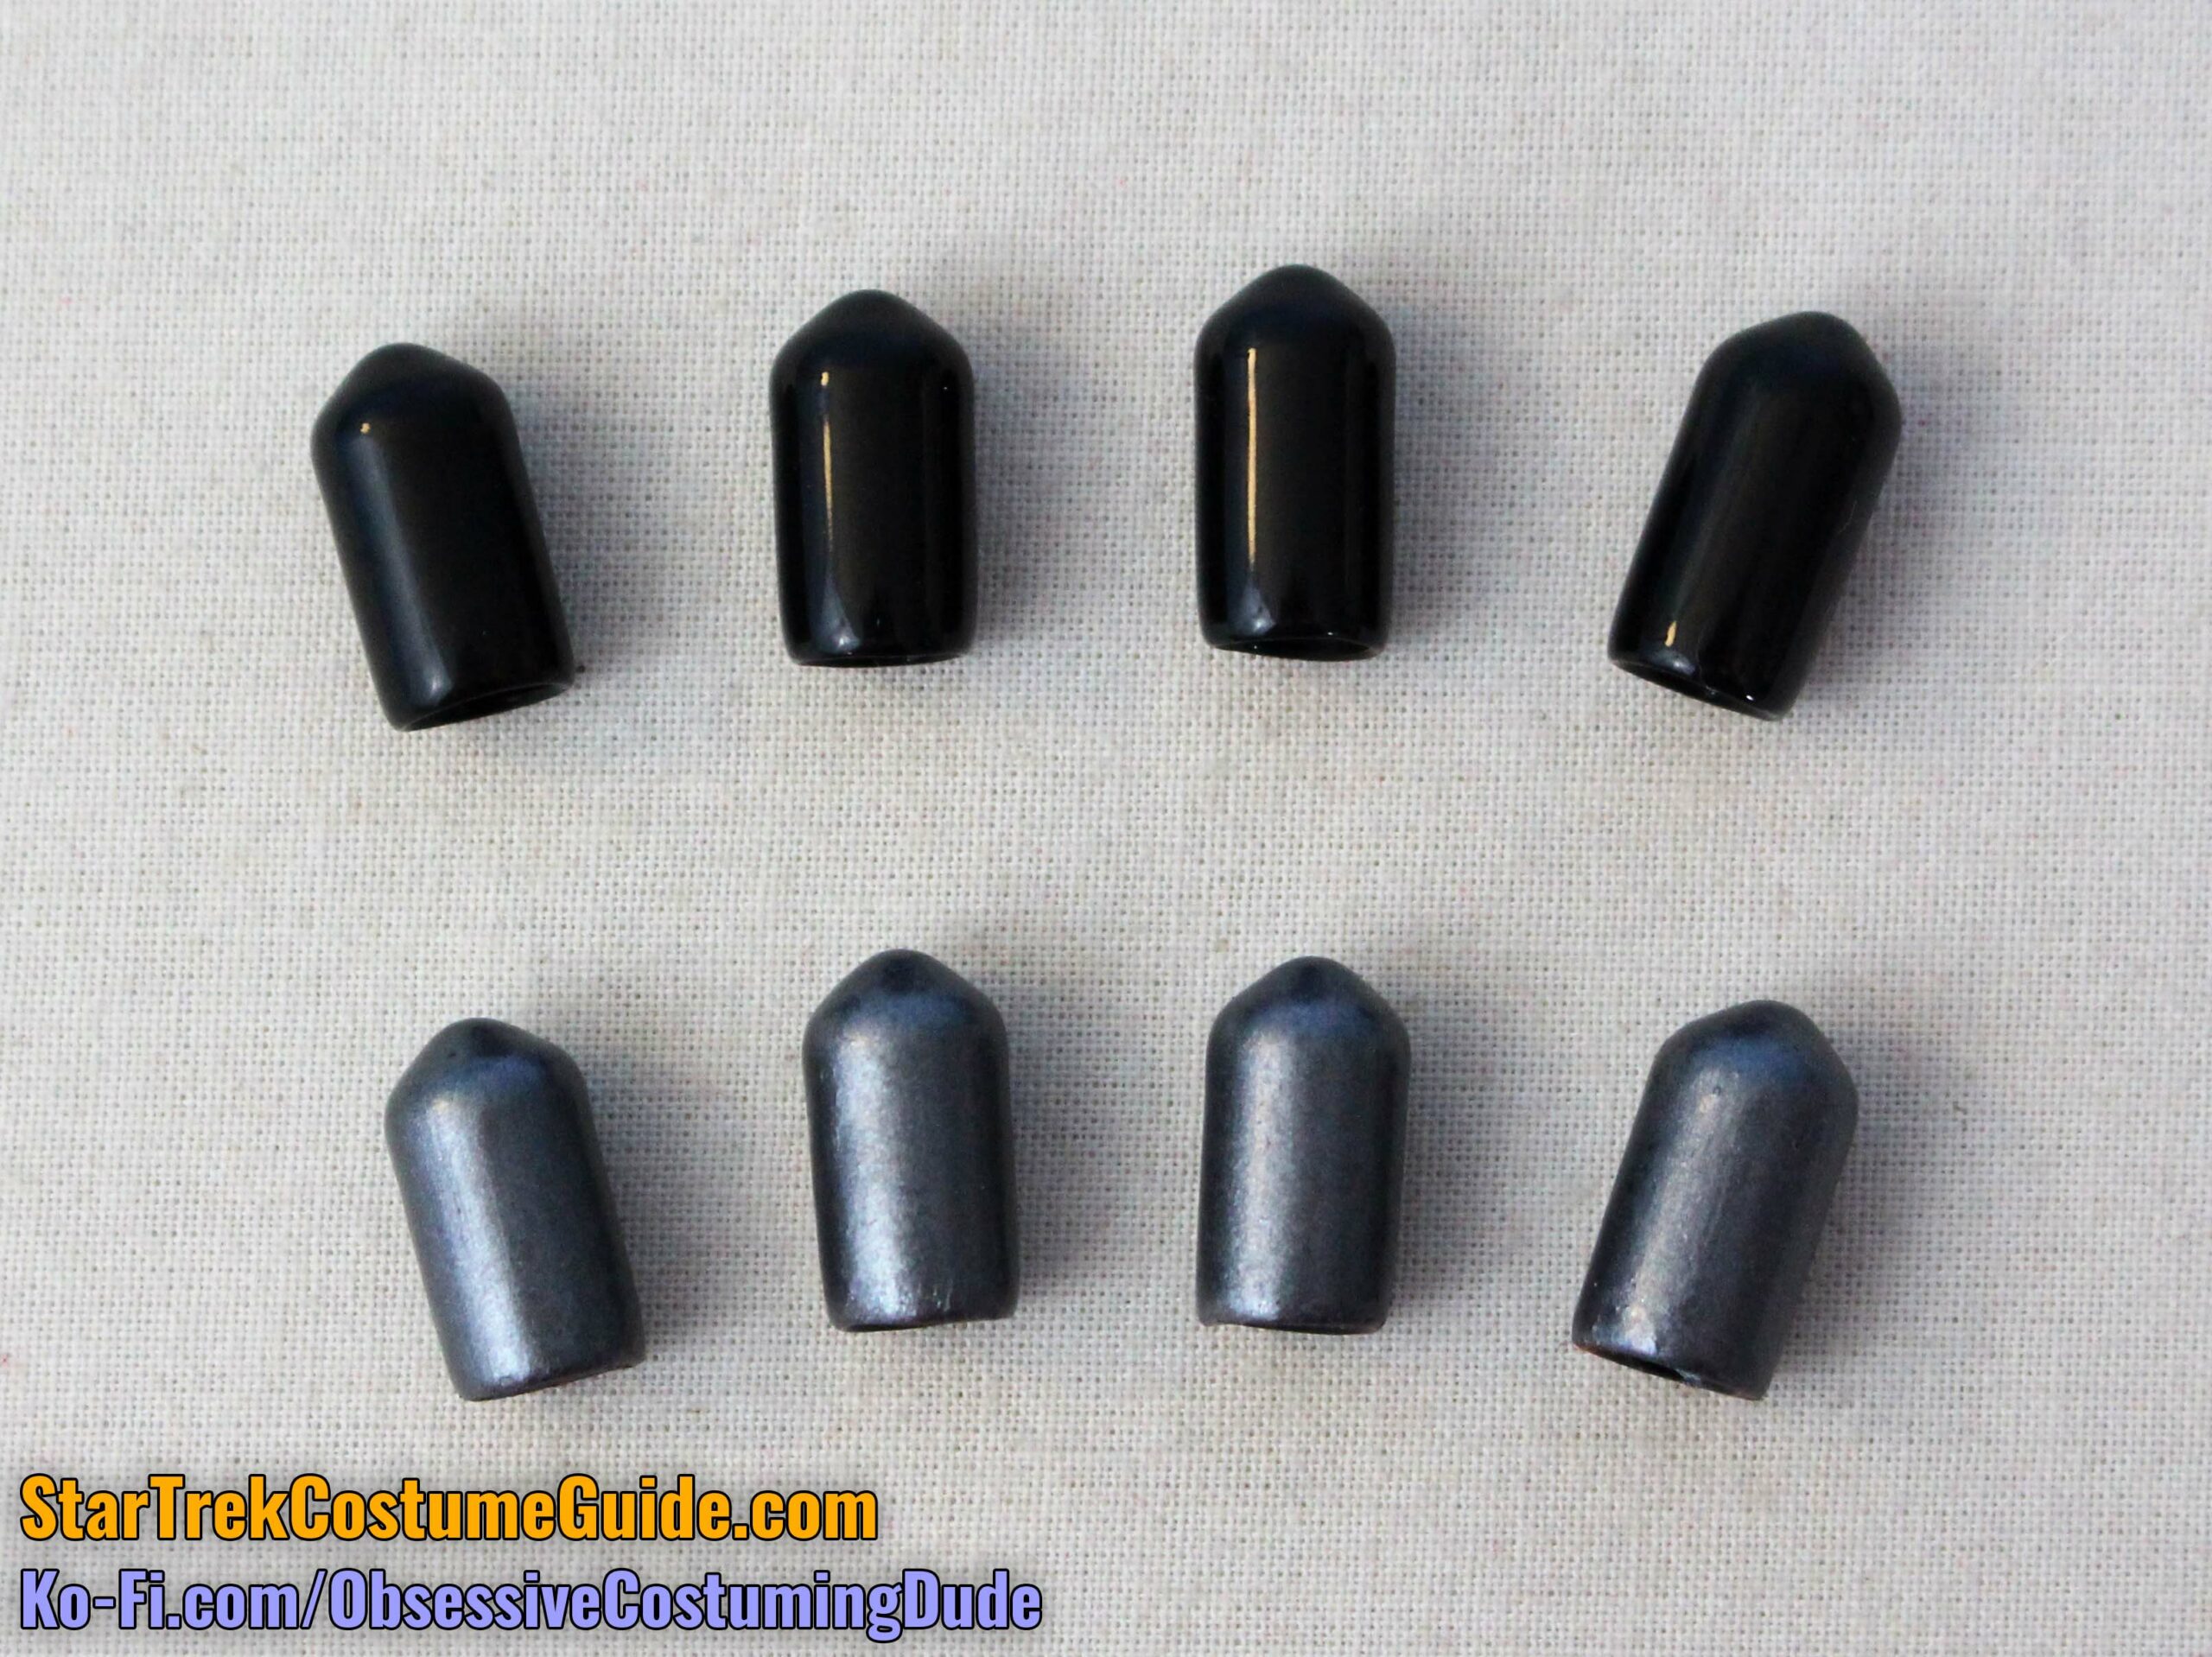
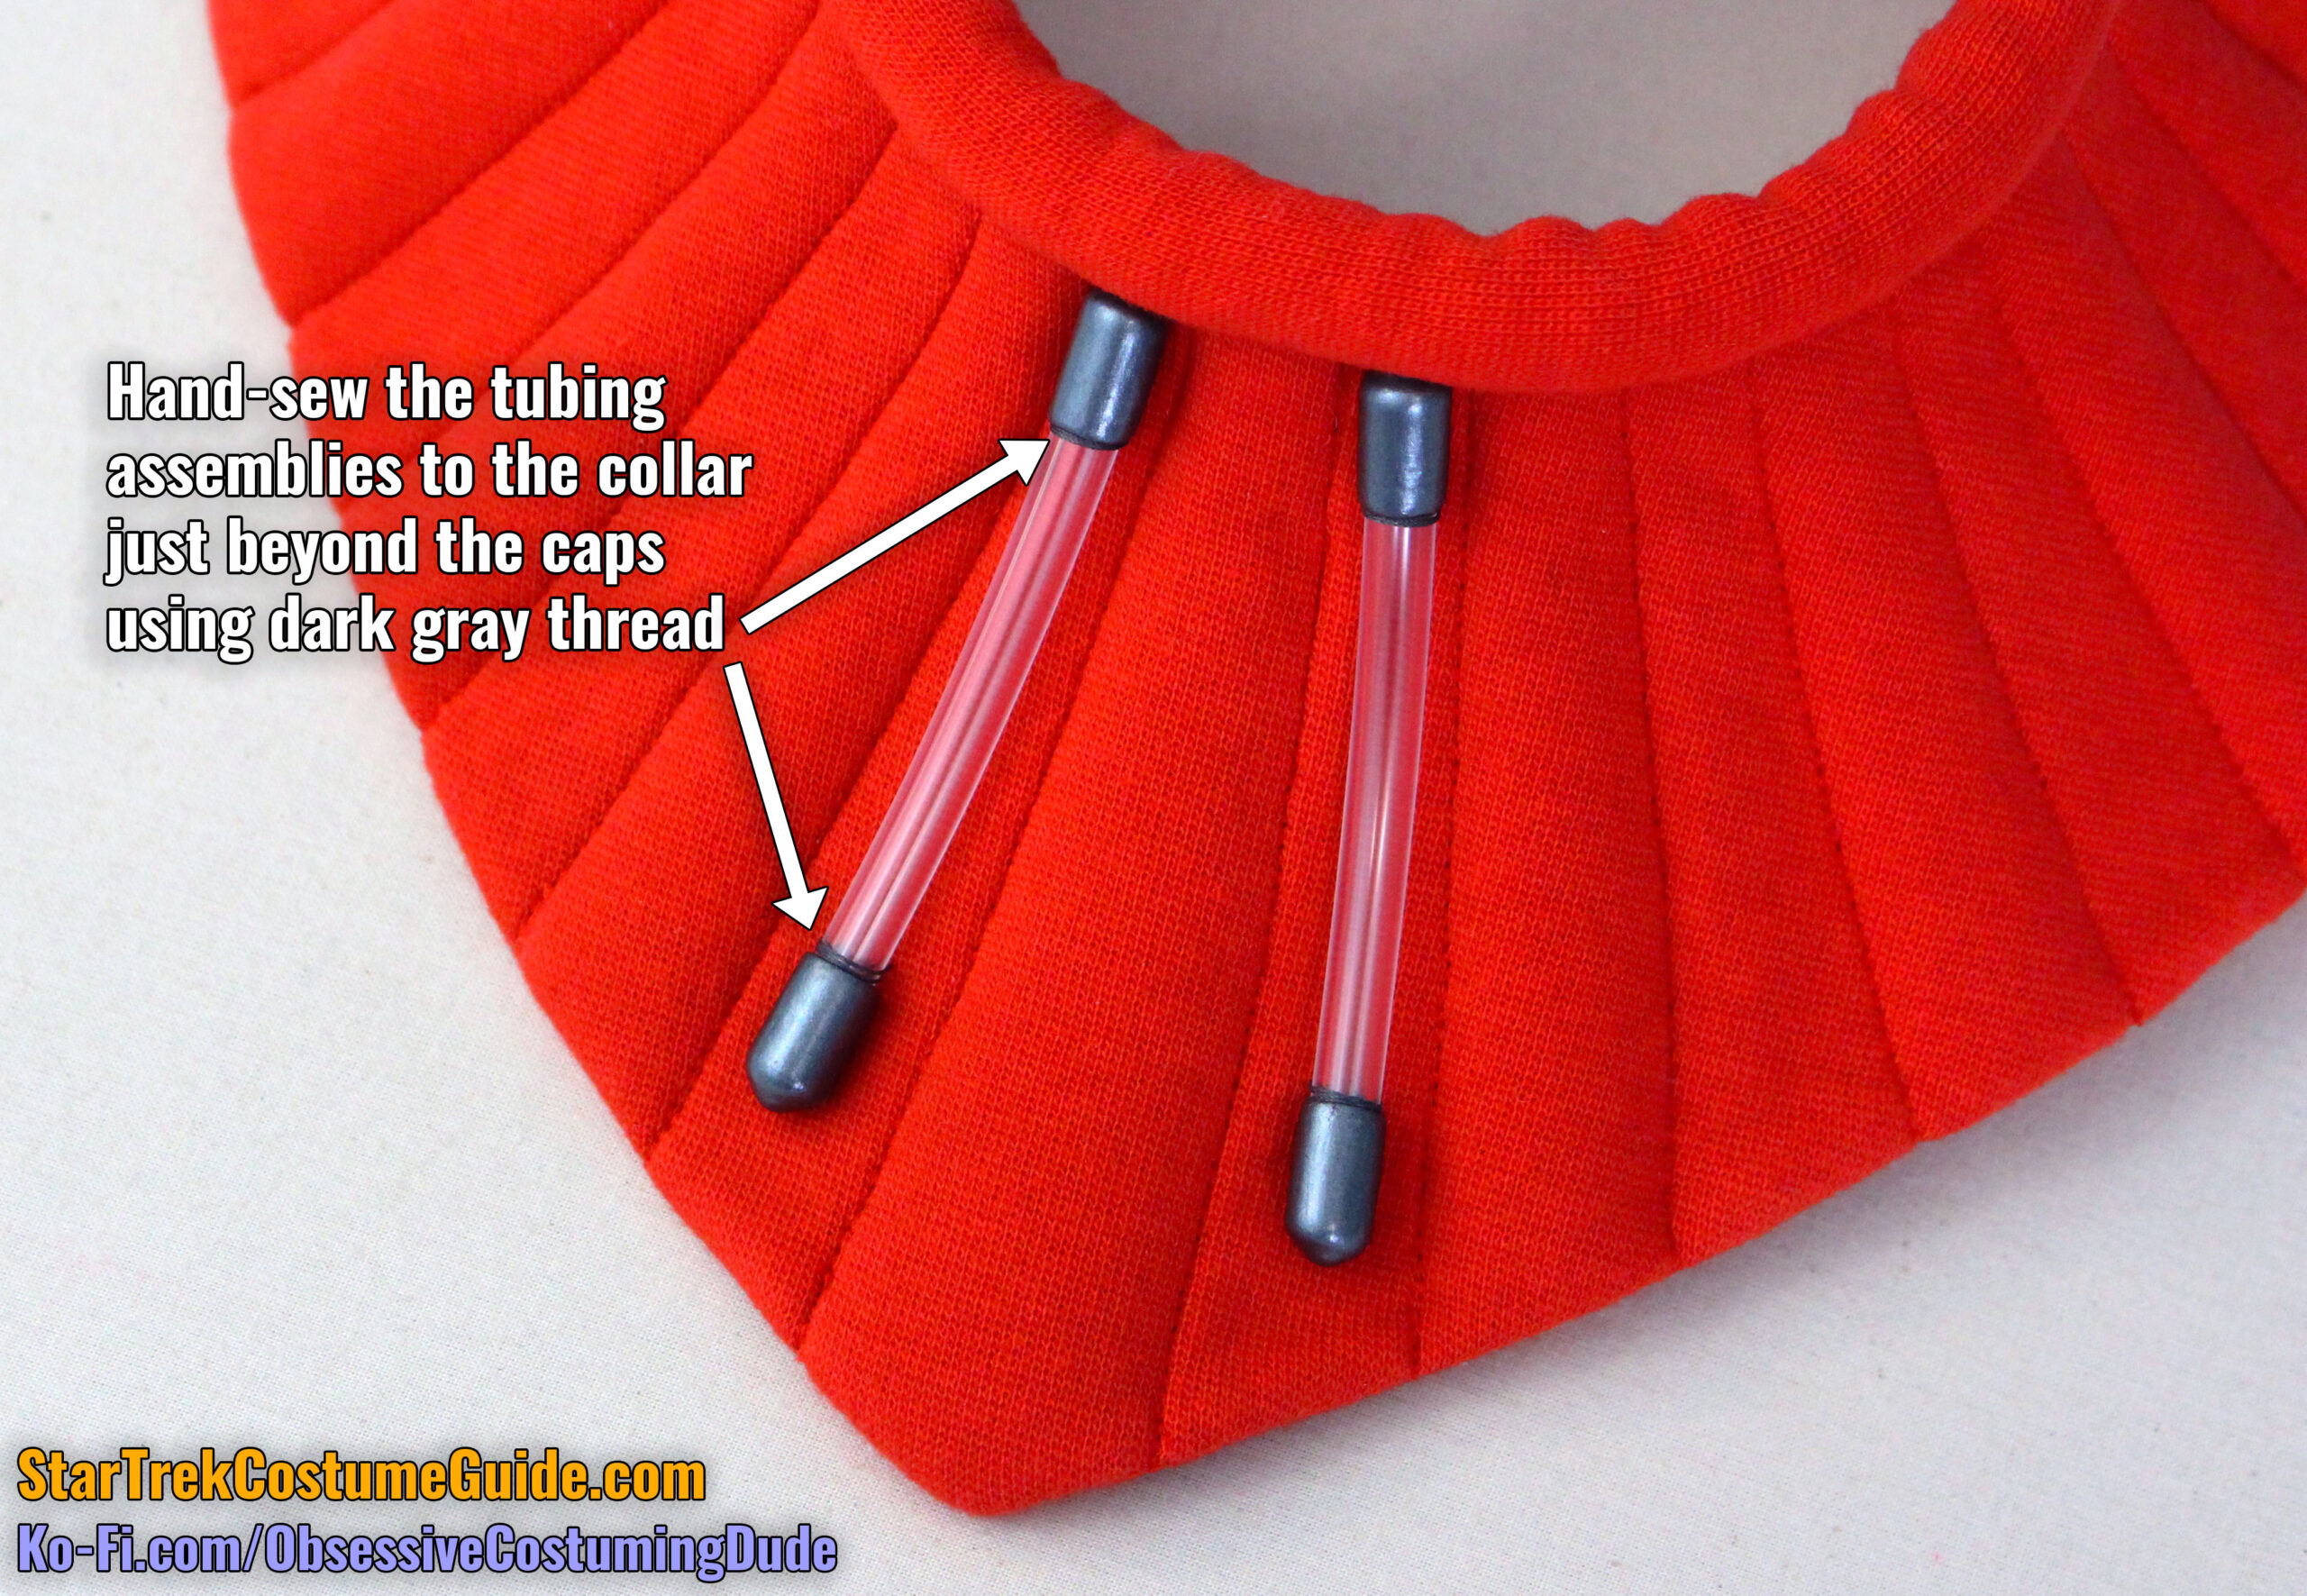
Place the end caps on the tubing, and position the tubing onto the collar so the upper edges just barely touch the neckline piping.
To secure the tubing assemblies to the collar, you can use a small amount of clear E6000 glue, hand-sew the tubes to the collar at the edges of the caps with dark gray thread, or both. (I suggest both.)
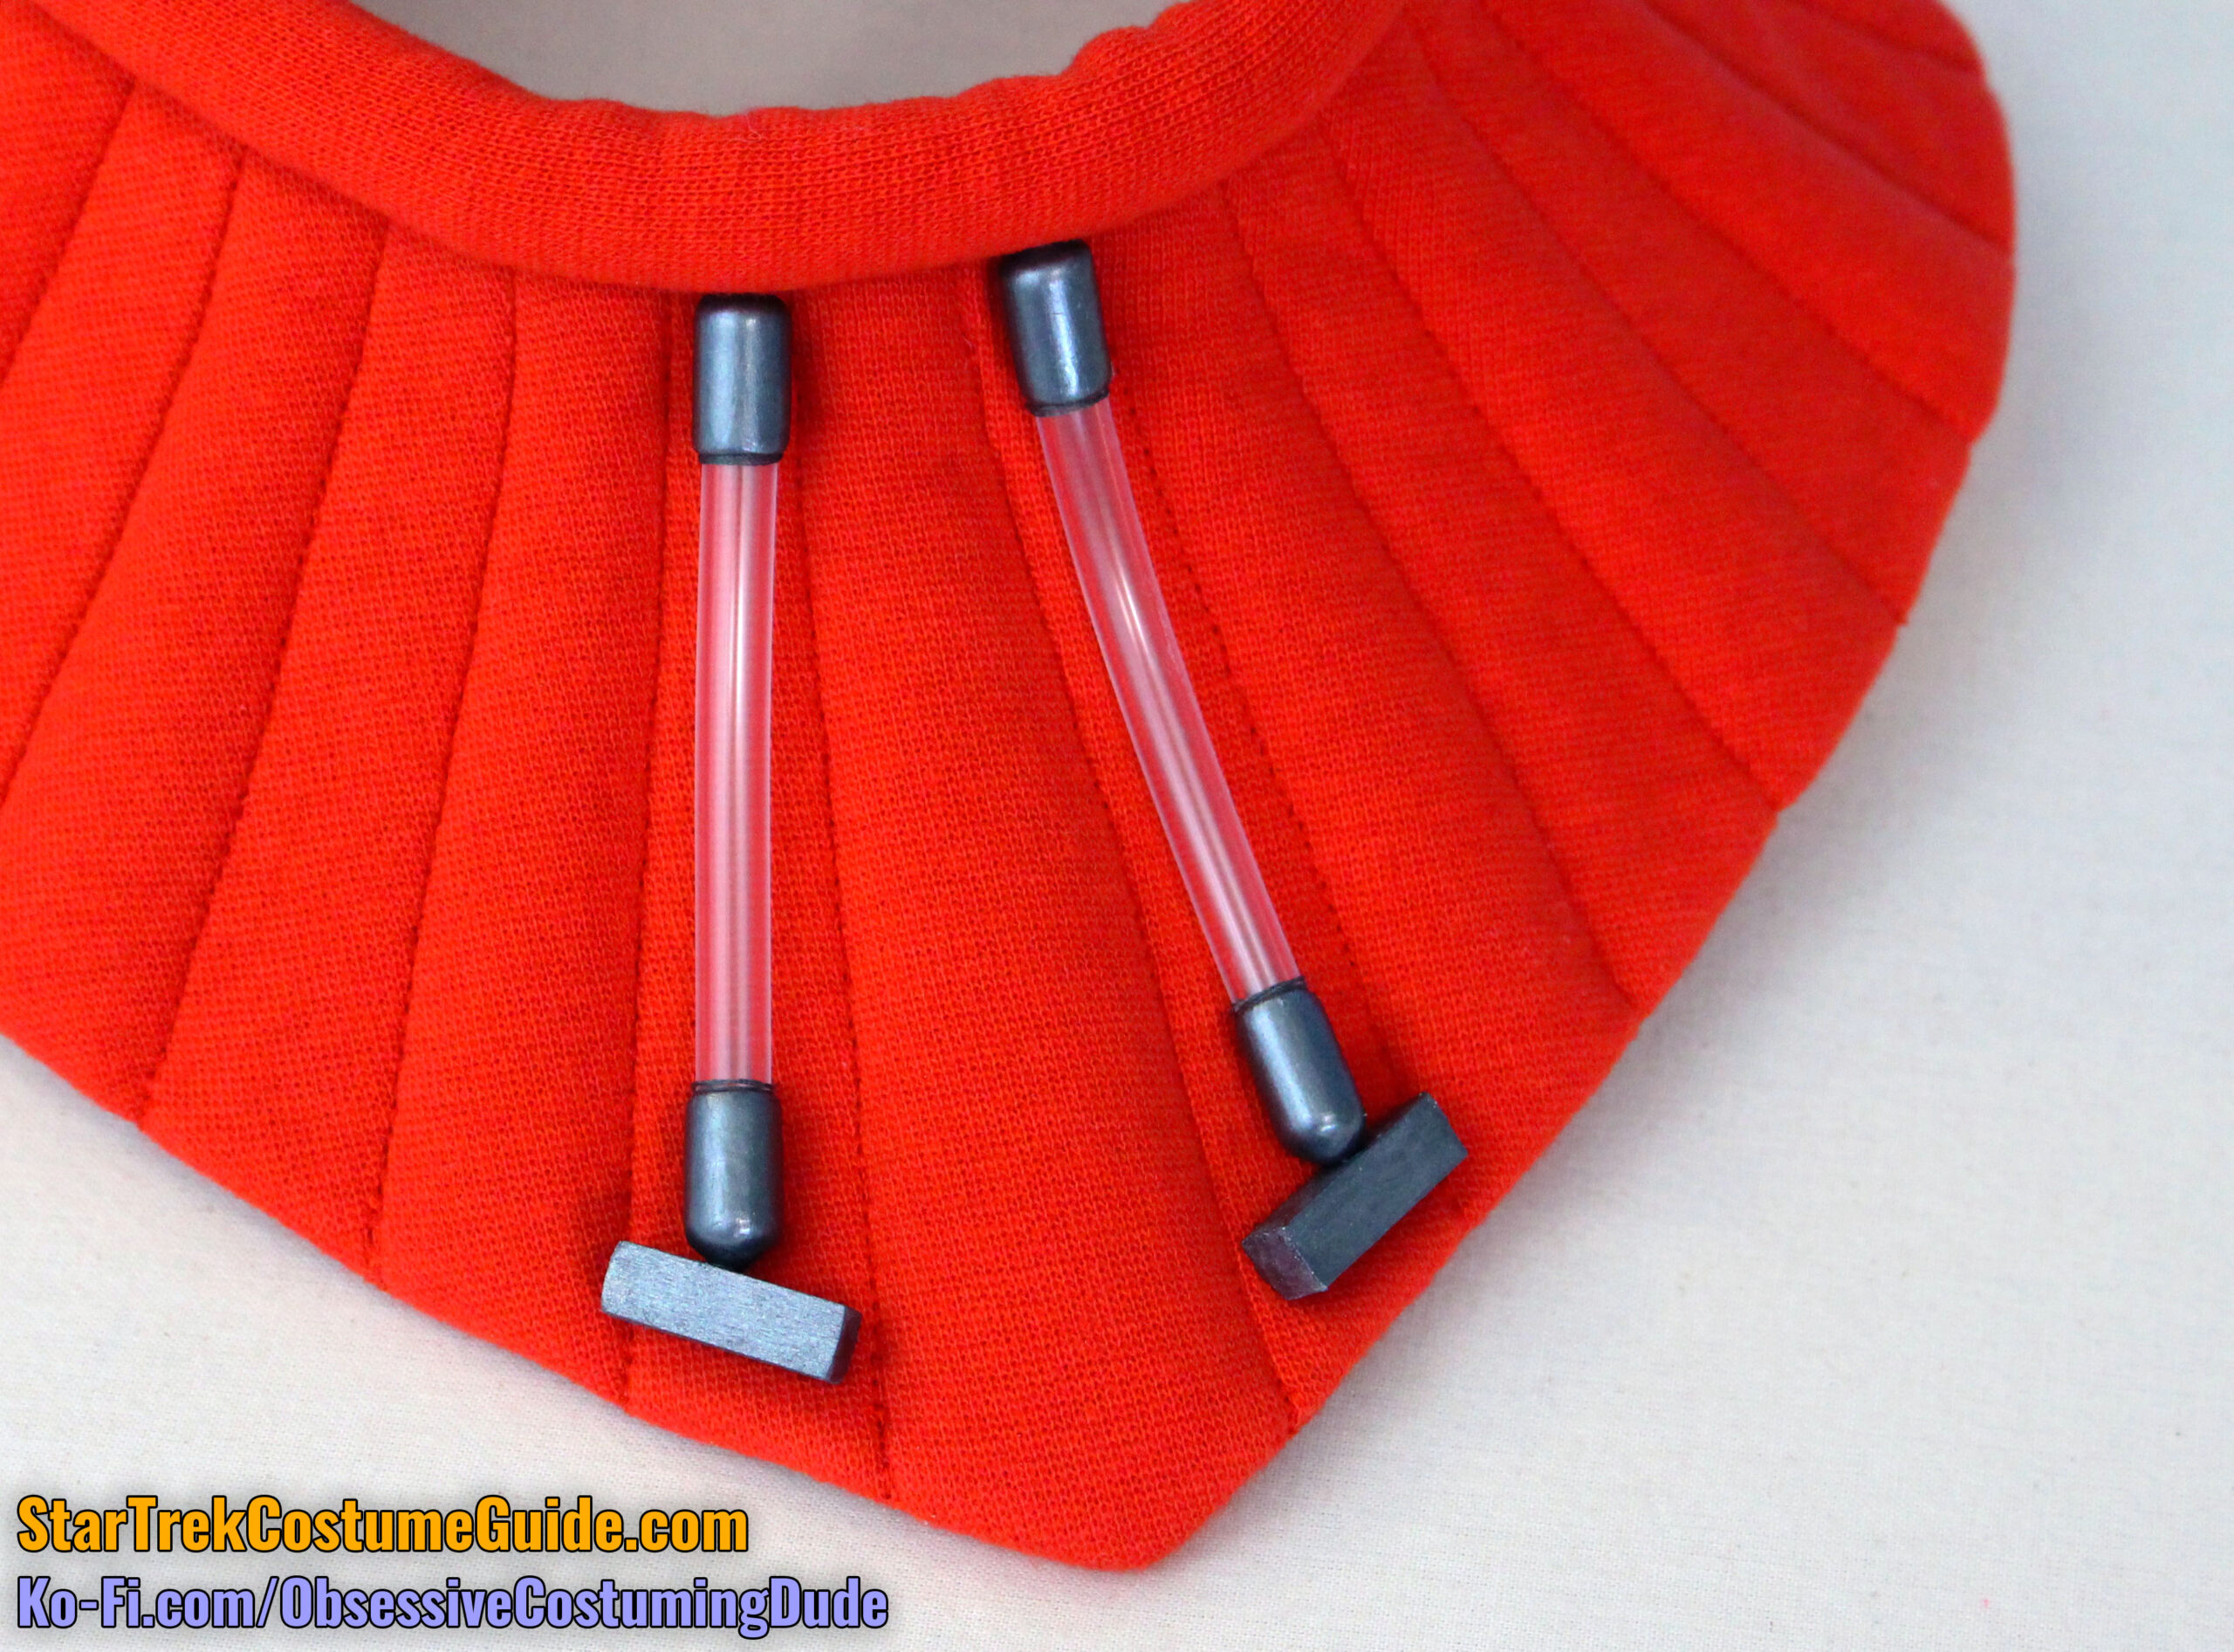
Apply a small dab of clear E6000 glue to the outer bottom area of the lower cap and a thin strip of glue to one side of the rectangular dowel.
Glue the dowel into place on the collar, angled slightly to be parallel (or nearly parallel) to the lower edge, and directly touching the bottom of the end cap so the two will bond together.