Engineering Radiation Suit Tutorial, Part 3 – Accents

As I mentioned at the beginning of the tutorial, there is quite a bit of non-sewing-related DIY for all the accents and attachments on this particular costume.

In some cases, the following materials and techniques aren’t the only way to achieve satisfactory results; I chose the ones I did in an attempt to achieve the best overall balance between:

1 – Authenticity and fidelity to the originals (aka “screen-accuracy”)

2 – Ease and convenience, especially for those with limited access to and/or skill with power tools

3 – Most accessible and least expensive materials

I will occasionally mention some alternate materials and techniques, as well as what I believe their pros and cons to be.

SHOULDER TABS

The division-colored shoulder tabs on the engineering radiation suits were commonly seen on many of the other TMP uniforms, and they continued to be used on their modified TWOK-era successors.

However, the engineering division color was red in The Motion Picture, and it was changed to gold for The Wrath of Khan onward.

Although the TWOK-era trainees wore red with a diagonal gold “slash” on their left sleeve bands, they wore the same gold shoulder tabs as the officers and enlisted crew.

Obviously, you’ll want to use the appropriate division color for whichever version/era of the engineering radiation suit you’re making.

While you’re of course free to use whatever fabric you like, if a satisfactory retail color eludes you, you may be interested in dyeing your own.

Also, as a budget-friendly alternative to wool gabardine, I suggest using cotton twill for the division-colored fabric on the shoulder tabs.

As of the writing of this tutorial, I haven’t examined a screen-used TMP-era uniform with the engineering red shoulder tabs (yet?), so as with the trainee collar, the ideal target color is open to a degree of interpretation.

After a series of experiments for both acid dyes (for wool) and fiber-reactive dyes (for cotton), I suggest using the following dye recipes.

(And please remember that this is my current interpretation of the TMP red division color! It’s my best informed, educated guess for the time being, but I’m hardly infallible.)

Spock make guess GIF

For the TWOK-era engineering gold, I did have the opportunity to closely match the division color of the screen-used engineering radiation suit I examined, on both wool and cotton twill.

With the exception of the acid “Golden Yellow”, the aforementioned dyes are all from Dharma Trading Company. “Golden Yellow” is from Pro Chemical and Dye.

Here are the dye recipes I established:

The component colors and custom mixes are both standard 1% stock solutions, with the acid dye powder dissolved in boiling water.

If you have no idea what this means but are interested in learning, I am tentatively planning to produce a Tailors Gone Wild fabric-dyeing course, which will be specifically for aspiring costumers and cosplayers.

I suggest subscribing to my “Sewing Wizard Newsletter” for updates. 🙂

In the meantime, I again recommend Linda Knutson’s comprehensive book on the topic, Synthetic Dyes for Natural Fibers.

The aforementioned fabrics are also available from their respective web sites, but while you can use ProChem’s wool for the shoulder tabs (and TWOK-era sleeve band) if you want to, I suggest adapting the dye recipe as-needed for whatever wool gabardine you prefer.

The shoulder tabs are comprised of two layers: a base layer of black felt (piece K1), and a slightly larger layer of division-colored fabric (piece K2).

The felt base should be 1” wide, and the division-colored fabric should be 1 ⅜” wide.

The division-colored fabric (piece K2) includes ¼” allowance along each edge.

I suggest stitching ¼” from the edges with black thread to establish a guide for pressing under the allowances.

Press the ¼” allowances under along the stitching lines.

Center the division-colored fabric over the black felt base. (There should be 1/16” of black felt showing along each edge of the tab assembly.)

Using matching red or gold thread, hand-sew the division-colored fabric to the felt base.

Hand-sew the shoulder tabs to the jumpsuit using black thread.

I suggest centering the tabs over the shoulder seams and horizontally positioning them about ⅛” away from the armscye/sleeve seams.

TIP: At first I experimented with more advanced hand-sewing stitches like whip-stitching and fell-stitching, but I actually achieved my best results with a basic running stitch along the felt. The black felt is so dark that the black thread is all but invisible anyway.

LEFT CHEST ACCENT

This accent was only on the TWOK-era engineering radiation suits, so skip this step if you’re making a TMP-era version of the costume.

The base is a circle 1 ¾” in diameter.

Although the original was metal, for this you can also use a small circle of thin craft wood or cut one yourself out of 2mm craft/EVA foam. (I suggest using wood.)

My local JoAnn carries this packaged selection of assorted craft wood circles, including a few which were exactly 1 ¾” in diameter.

Drill a hole in the center wide enough for your automotive grease fitting to fit through – probably about ¼”.

Also drill 21-23 small holes (about 1/16” wide) close to the edge around the perimeter.

The left chest accent on the screen-used engineering radiation suit I examined had 23 holes, but others only had 21 or 22 holes.

Although not strictly “accurate,” I made 20 purely for convenient math; spacing the holes about ¼” apart resulted in 20 evenly-spaced holes around the perimeter of the circle.

Below left is a craft wood circle (from the JoAnn package I mentioned), and below right is a circle cut with 2mm craft foam.

Painting your left chest accent is another subjective issue.

The original appears to have been steel, although it didn’t seem to be anywhere near pristine. I think it may have either tarnished a bit with age, or perhaps it was intentionally dulled so it would be less shiny on-screen.

I tried several different paints but didn’t find a metallic steel paint color I liked, so I used a mix of FolkArt metallic “Gunmetal Gray” and FolkArt metallic “Silver Sterling.”

You can add little faux-scorch marks outside the center hole if you want to mimic the appearance of the screen-used piece, but I see those as a by-product of the soldering/welding process rather than an intentional, desirable effect.

You may also wish to apply a high gloss or semi-gloss clear protective coat (or two) to the painted base.

Several of this costume’s accents, and their components, can probably be found at your local hardware store – probably in the “specialty” section (which are organized by drawers at my local Lowe’s).

I have no idea if the organization system is standard across the multitude of Lowe’s stores, but at mine, the automotive grease fitting was in drawer J9/14.

Here is the exact piece I used.

(It’s actually a steel color; I don’t know why brass is pictured.)

There is one problem to address: the long screw extends well beyond the back of the chest circle.

On the screen-used piece, the excess screw length appears to have been sawed off, and the screw soldered (or spot-welded?) into place on the underside.

If you’re using a metal base for your chest circle and have a metal-cutting tool, then this is probably the best option for you.

But if you’re using wood or foam for your base and/or don’t have access to a metal-cutting tool, we need to work around that extra screw length on the underside.

Depending on the length of the screw and width of your base, one option is to back your base with a metal washer and solder your automotive grease fitting to that instead.

Although this is a viable option, the extra bulk on the underside of the circular base may cause some slight pulling on your jumpsuit fabric, so I only recommend this if your screw and washer are otherwise very flat against the back of the base.

My preferred option is to fasten the automotive grease fitting to the circular base with a small nut on the underside.

Be sure to use a nut the same size and thread count as your grease fitting (size ¼” – 28, in my case).

Of course, this creates a great deal of bulk on the underside, which we’ll deal with momentarily.

Paint the little dome “tip” at the top of the automotive grease fitting black, and your left chest accent assembly is complete.

On the left is the screen-used piece, and on the right is the replica:

If you fastened your automotive grease fitting to the base with a nut like I did, I suggest making a small buttonhole on the upper left front of the jumpsuit where the accent will be positioned.

Note that all the other era-specific elements of the costume are interchangeable – you could theoretically swap out various components for a TMP, TWOK officer/enlisted, and/or TWOK trainee version – but by making this buttonhole you’re committing to one of the TWOK-era versions, unless you don’t mind a TMP jumpsuit with an inappropriate buttonhole. 🙂

Remove the washer and nut from the back of the assembly.

Insert the back of the automotive grease fitting through the buttonhole, slide the washer over the fitting on the underside of the jumpsuit, and then screw the nut onto the back of the fitting.

If you made your circular base out of foam, be careful not to twist the nut too tight; doing so will draw the grease fitting closer, squeezing it into the soft foam and contorting it.

Using off-white thread, hand-sew the accent to the jumpsuit through the small holes along the outer edge.

"BULLSEYE" ASSEMBLY

The “bullseye” assembly is the small circular accent at the center of the chest circles.

This assembly is comprised of seven smaller components.

Pictured left-to-right:

1 – 2 ¼” circular base

2 – Black mesh fabric/screen

3 – Cylindrical extension

4 – 1 ⅜” second layer

5 – Black mesh fabric/screen

6 – 1” metal washer

7 – ¼” round dowel

As with the left chest accent, the two primarily layers of the “bullseye” assembly can be made with thin craft wood or 2mm craft/EVA foam.

Although I definitely recommend using wood for the left chest accent, in this case either option will produce a good result.

Below to the left is a wooden circle, to the right is a foam circle, and in the center is the actual “bullseye” assembly from the screen-used engineering radiation suit I examined.

Paint your base and second layer.

DecoArt metallic “Rose Gold” is a close match to the color of the original base and second layer.

I recommend also applying a clear protective gloss coat to the painted base.

Cut a small, 3” x 3” square (or any shape larger than your “bullseye” base) of your black mesh fabric/screen.

Ideally, I suggest using one with a thick circular pattern like the originals, but in lieu of that, here is the one from my local JoAnn that I used:

Apply a generous amount of E6000 clear spray glue to your black mesh fabric/screen and place it on top of your “bullseye” base.

Mash the layers together, wash your hands thoroughly afterward, and let it dry for at least several hours. (It dries much more slowly than the E6000 tube glues.)

Once the glue is dry, carefully trim the black mesh from the underside so it’s flush with the edges of the base.

For the cylindrical extension, you can really use whatever you like – wood, craft foam, metal, or anything else you can find that’s 1” in diameter and ½” tall.

You can also stack multiple layers to achieve the desired height.

One of the easiest options is to use three layers of 6mm craft/EVA foam glued together.

I found these handy “flat head plugs” at my local Lowe’s, which I used for this.

The problem is that one of them isn’t quite tall enough, but two of them stacked together are too tall.

So for mine, I used one “flat head plug” and one thin circle of 1” craft wood, which I glued together with Gorilla Wood Glue. This brought the cylindrical extension up to about the proper height.

Whatever you use, paint the outer surface black and drill a hole in the middle for the center dowel.

On the second layer of your “bullseye” assembly, paint a black circle just under 1” in diameter.

Drill a hole through the middle of the second layer as well, for the center dowel.

Cut another small, 2” x 2” square of your black mesh fabric/screen.

Paint the middle area golden yellow. It may take several coats and I ultimately just had to cake it on there so the paint was very thick and clogged the holes in the mesh.

I used Top Notch “Champagne” for this and it turned out okay, but the original was definitely more of a lighter yellow color.

Paint a small silver circle in the middle, about ⅜” to ½” in diameter. I used Top Notch metallic “Silver” for this.

After the paint dries, poke out the holes with the implement of your choice. (I used a large hand-sewing needle. A seam ripper would work, too.)

If that doesn’t work, just draw or paint little black circles where the holes should be. (I used a black Sharpie.)

Trim your mesh into a circle just under 1” in diameter, and trim out a ¼” circular hole in the middle for the dowel.

Apply some E6000 spray glue to the underside of the painted mesh, then glue it onto the second “bullseye” layer over the black area, matching center holes. 

I’m honestly not sure what the center rod was made out of on the originals, but a ¼” wooden dowel works fine.

On the screen-used engineering radiation suit I examined, the dowel extended past the second layer about ⅜”, although this seems to have varied.

This fellow’s, for instance, appears to have been a bit longer. (See right.)

And some of them didn’t have dowels/rods at all, although I believe these to have been erroneous omissions rather than intentional design choices.

Personally, I like the proportions of the screen-used “bullseye” assembly I examined; if you do too, cut a ⅞” segment of your ¼” wooden dowel.

Painting the shaft with Top Notch metallic “Pearl” and the tip DecoArt Gloss Enamels “Red” produces a very similar result as the screen-used rod.

As you might recall, some were all “white” and didn’t have the red tips – most notably Scotty in The Wrath of Khan – so feel free to omit the red if you prefer that look.

The silver washer on the second layer is apparently a specialized piece, and I wasn’t able to find one like it at my local hardware stores.

It’s 1” in diameter with a large ¾” hole, and about ⅛” deep/tall.

The closest thing I found was called a “machine bushing,” which closely matched two of the three dimensions …

The problem, though, is that it was too flat.

One option is to glue a couple of these washers together to form a taller washer assembly that looks the part.

Another option is to use one of the “flat head plugs” that I mentioned earlier, although these are obviously way too tall.

For my silver “washer,” I glued two 1” craft circles together.

Two of these craft wood circles are roughly equivalent in height to the original silver washer.

Carefully drill out a ¾” hole in the middle with a large ¾” drill bit and lightly sand the “washer assembly.”

Paint the washer silver. (I used FolkArt metallic “Silver Sterling” for this.)

Apply a thin strand of E6000 glue to the underside of the washer, and glue it to the second layer so it just barely covers the edges of the painted mesh.

Apply a bit of the E6000 glue (or Gorilla Wood Glue) to the top of the black cylinder extension and to the shaft of the painted wooden dowel, then insert the dowel through both pieces simultaneously to glue the layers together.

I recommend applying a clear protective gloss coat to this sub-assembly.

And finally, apply some E6000 glue to the underside of the black cylindrical extension and glue the sub-assembly to the base.

Here’s a comparison between the screen-used “bullseye” assembly (left) and this replica assembly (right):

Although the “bullseye” assembly is now finished, I recommend waiting until the end of the entire construction process to attach it to the jumpsuit.

BUCKLES

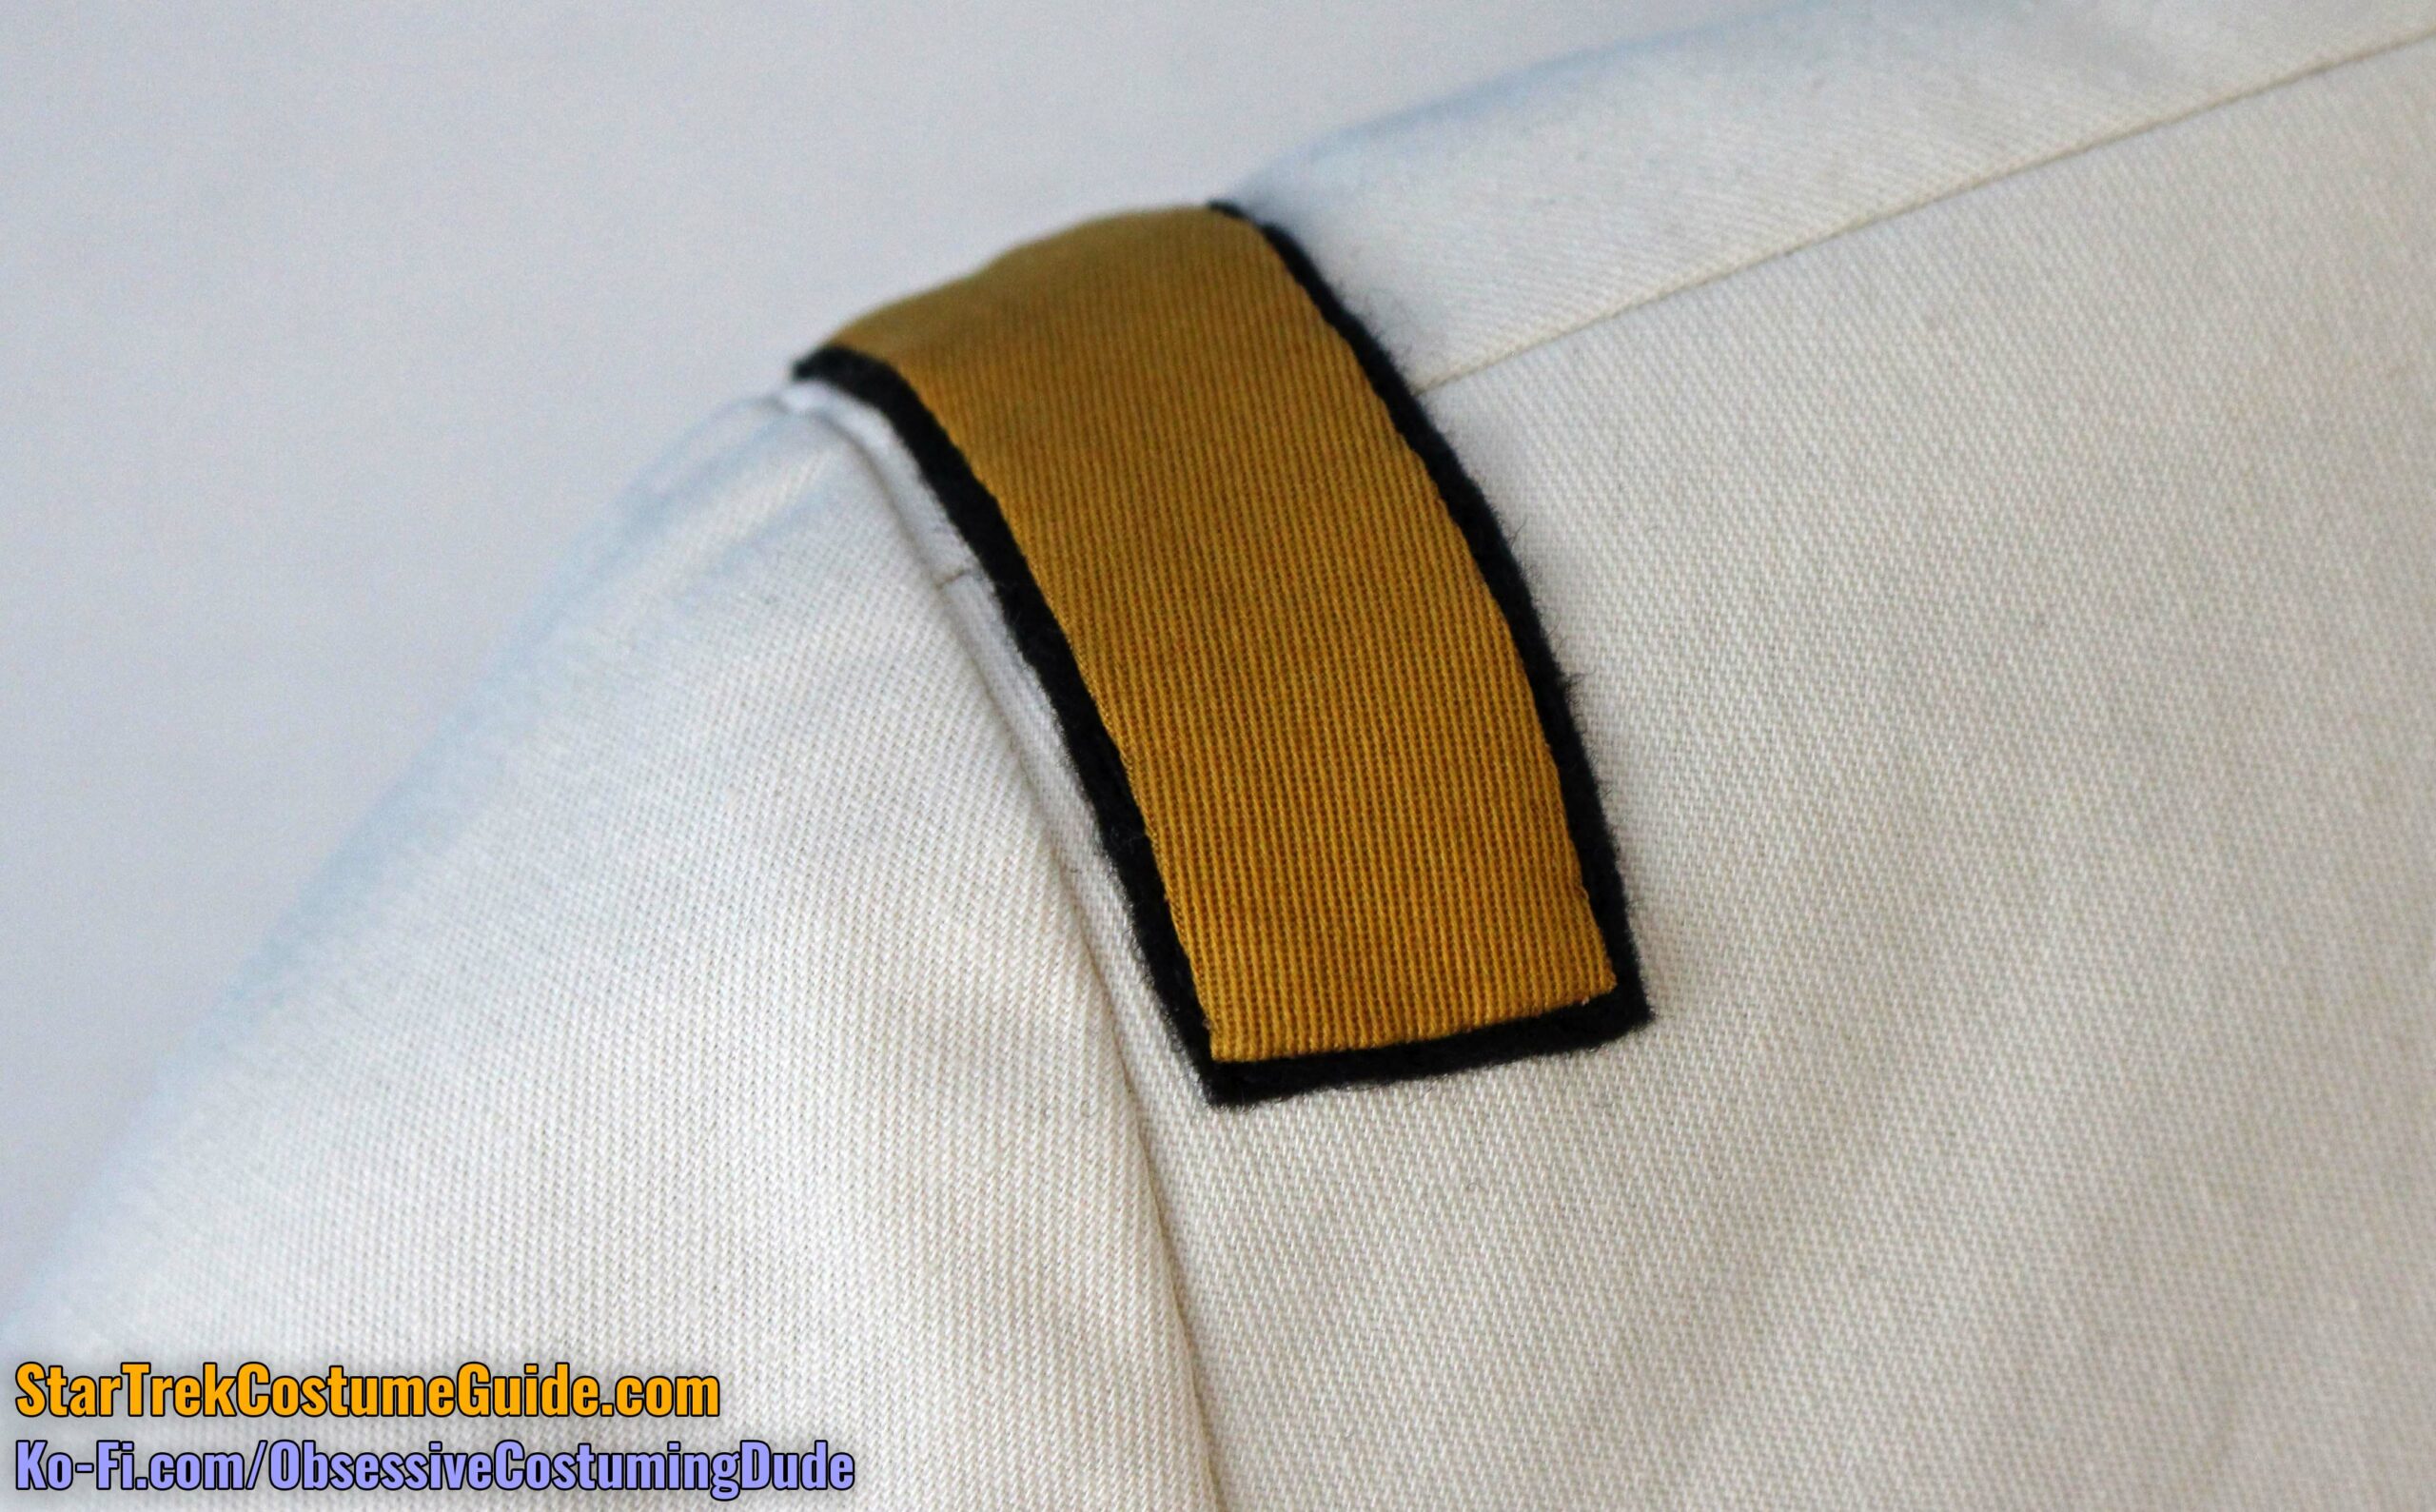
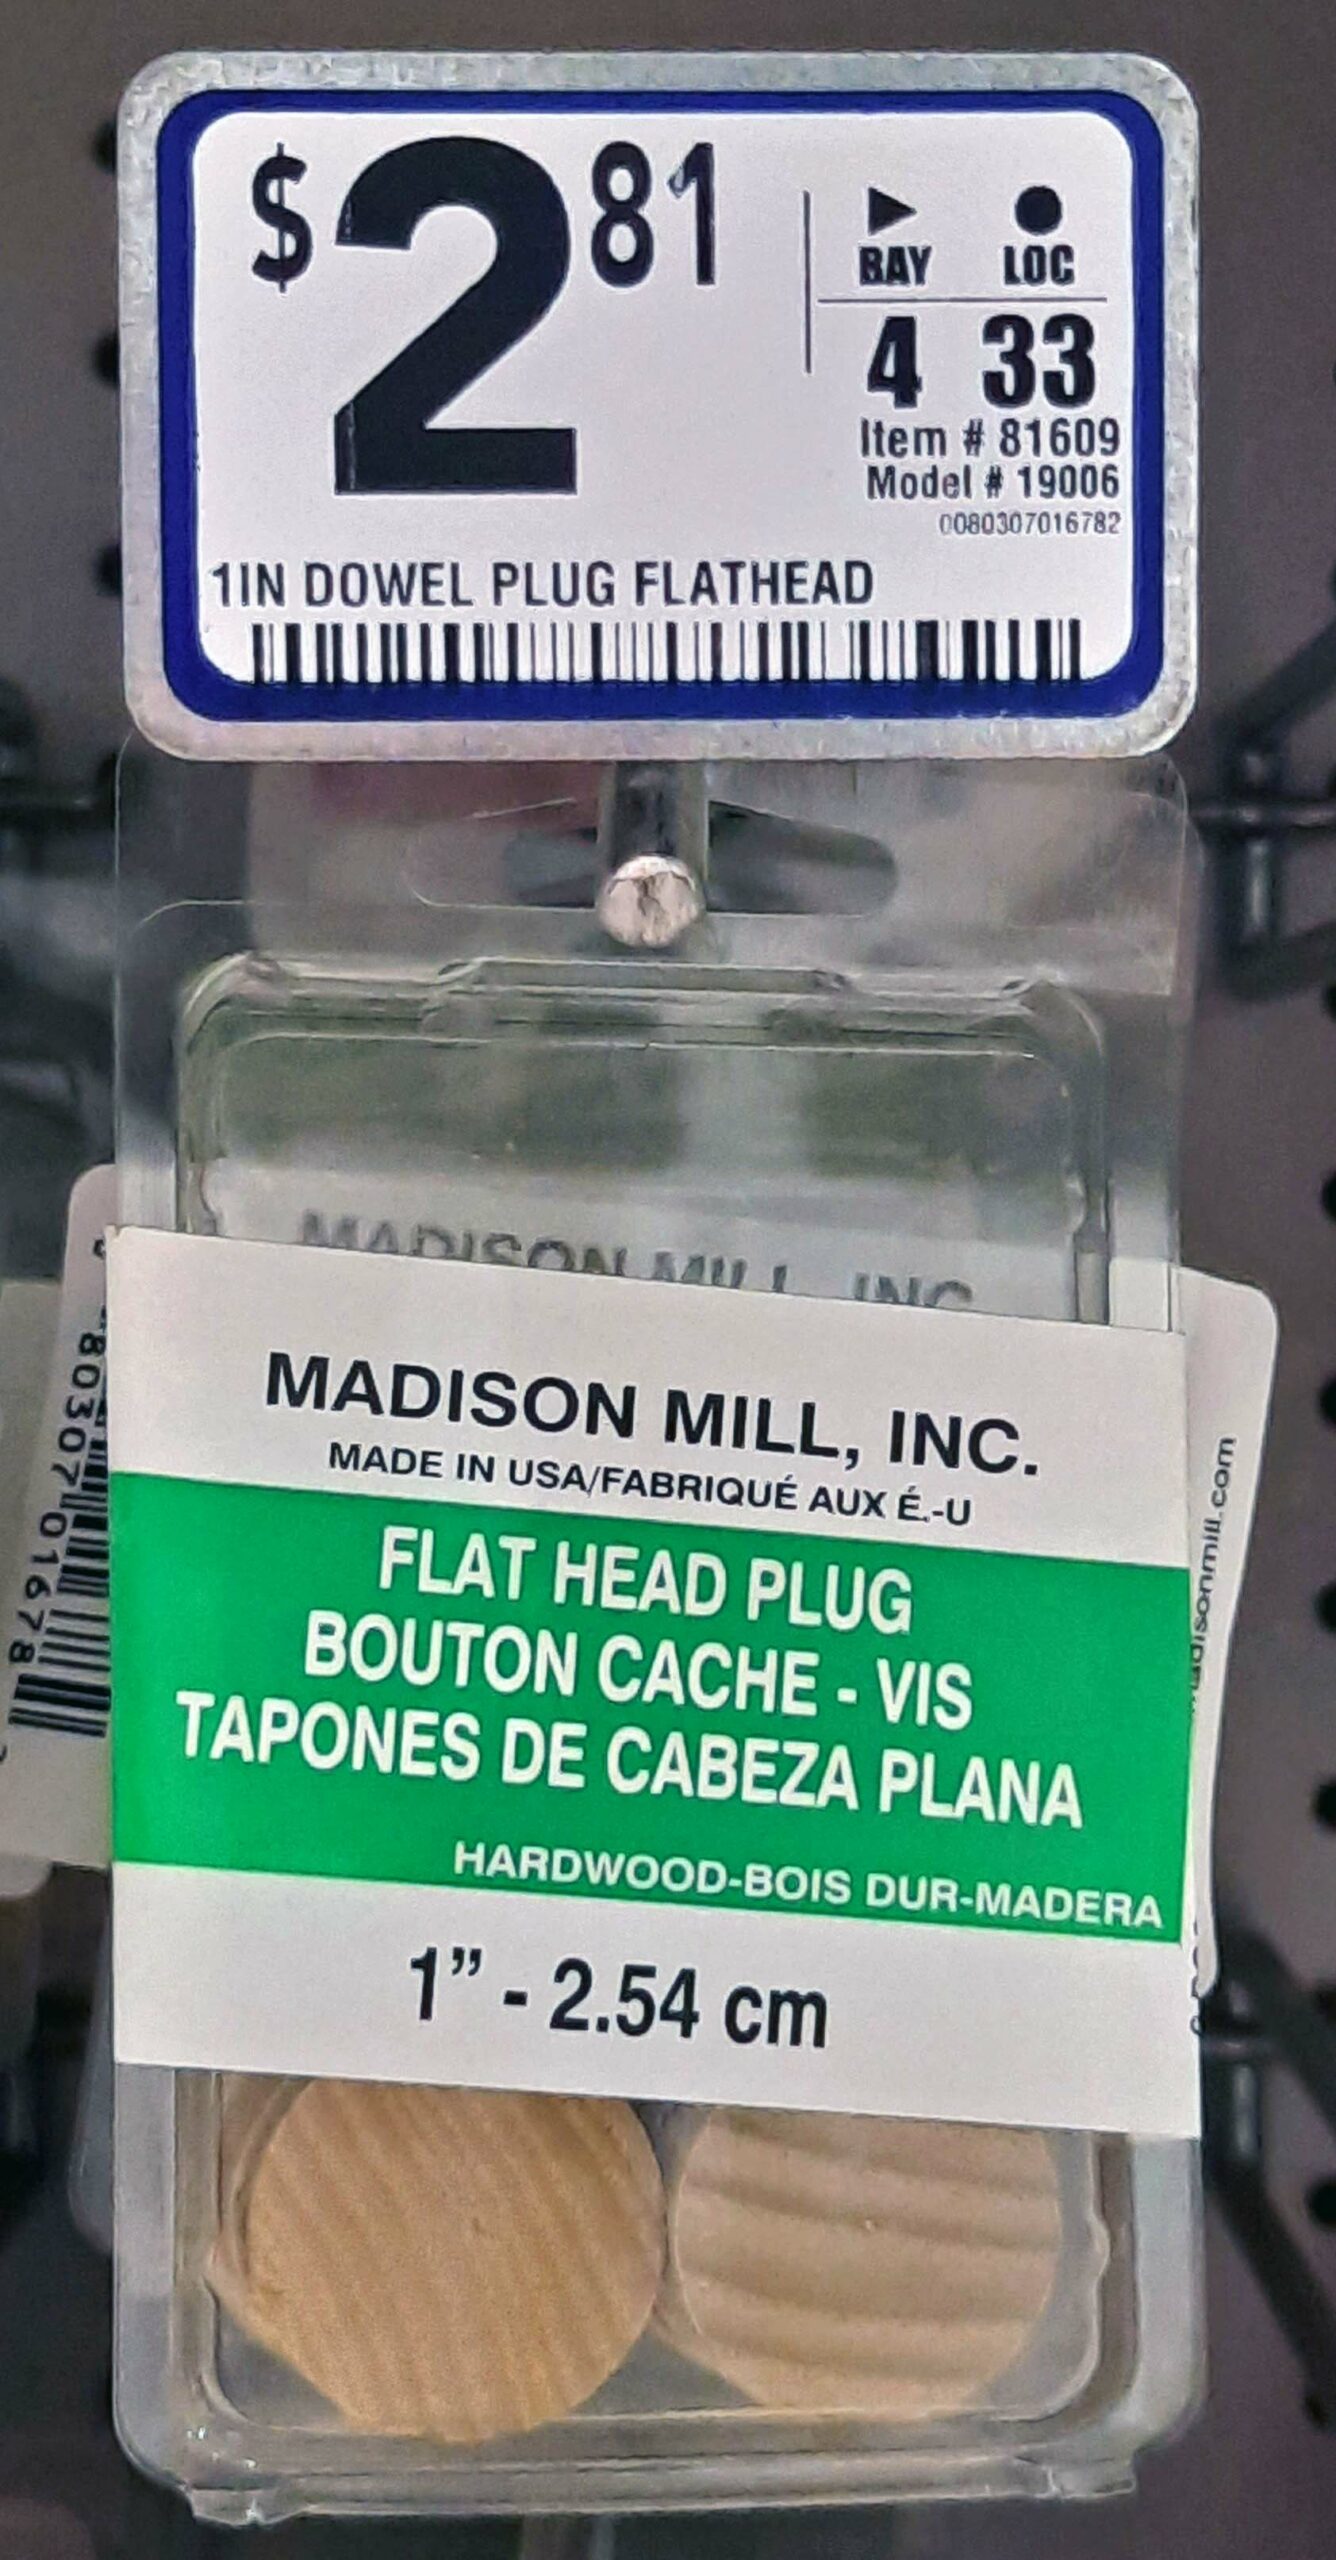
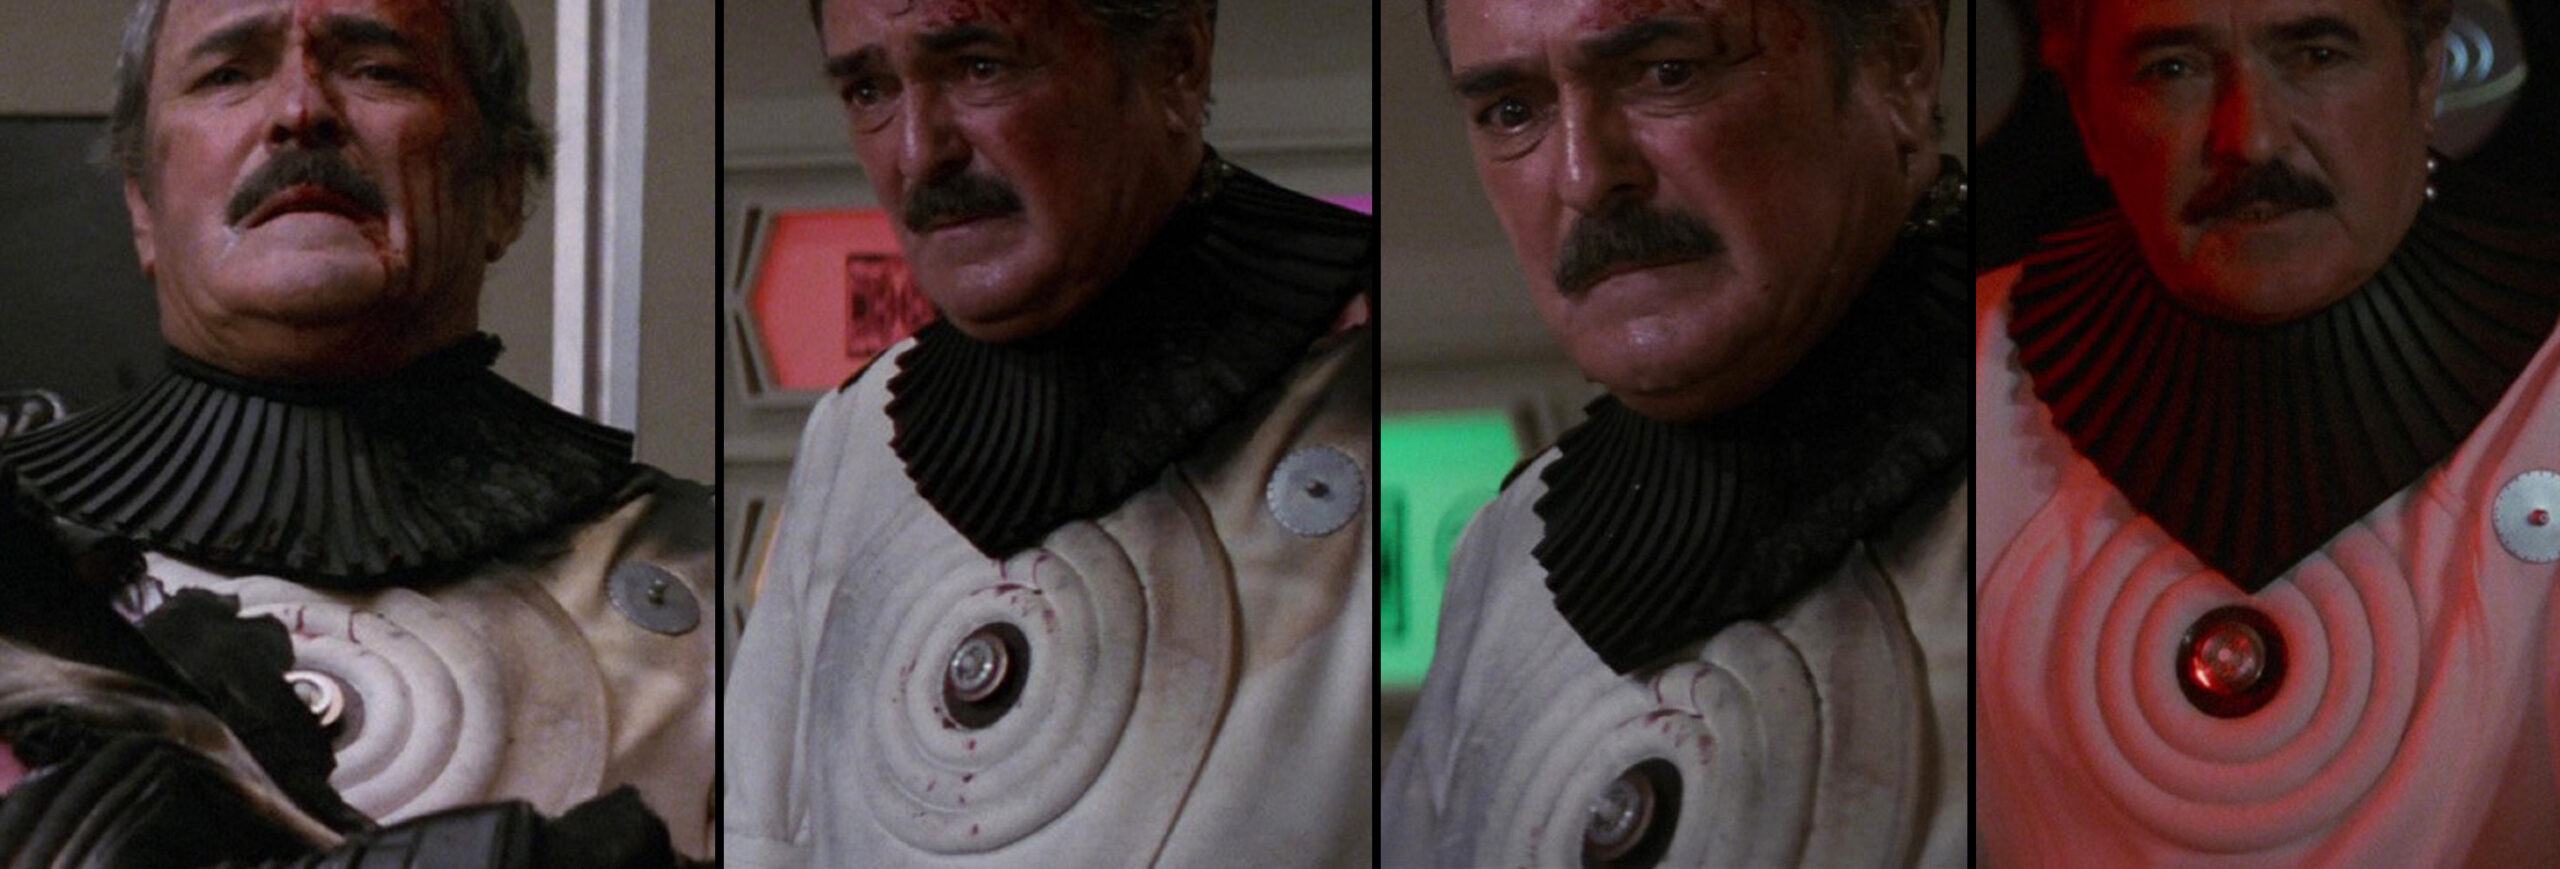
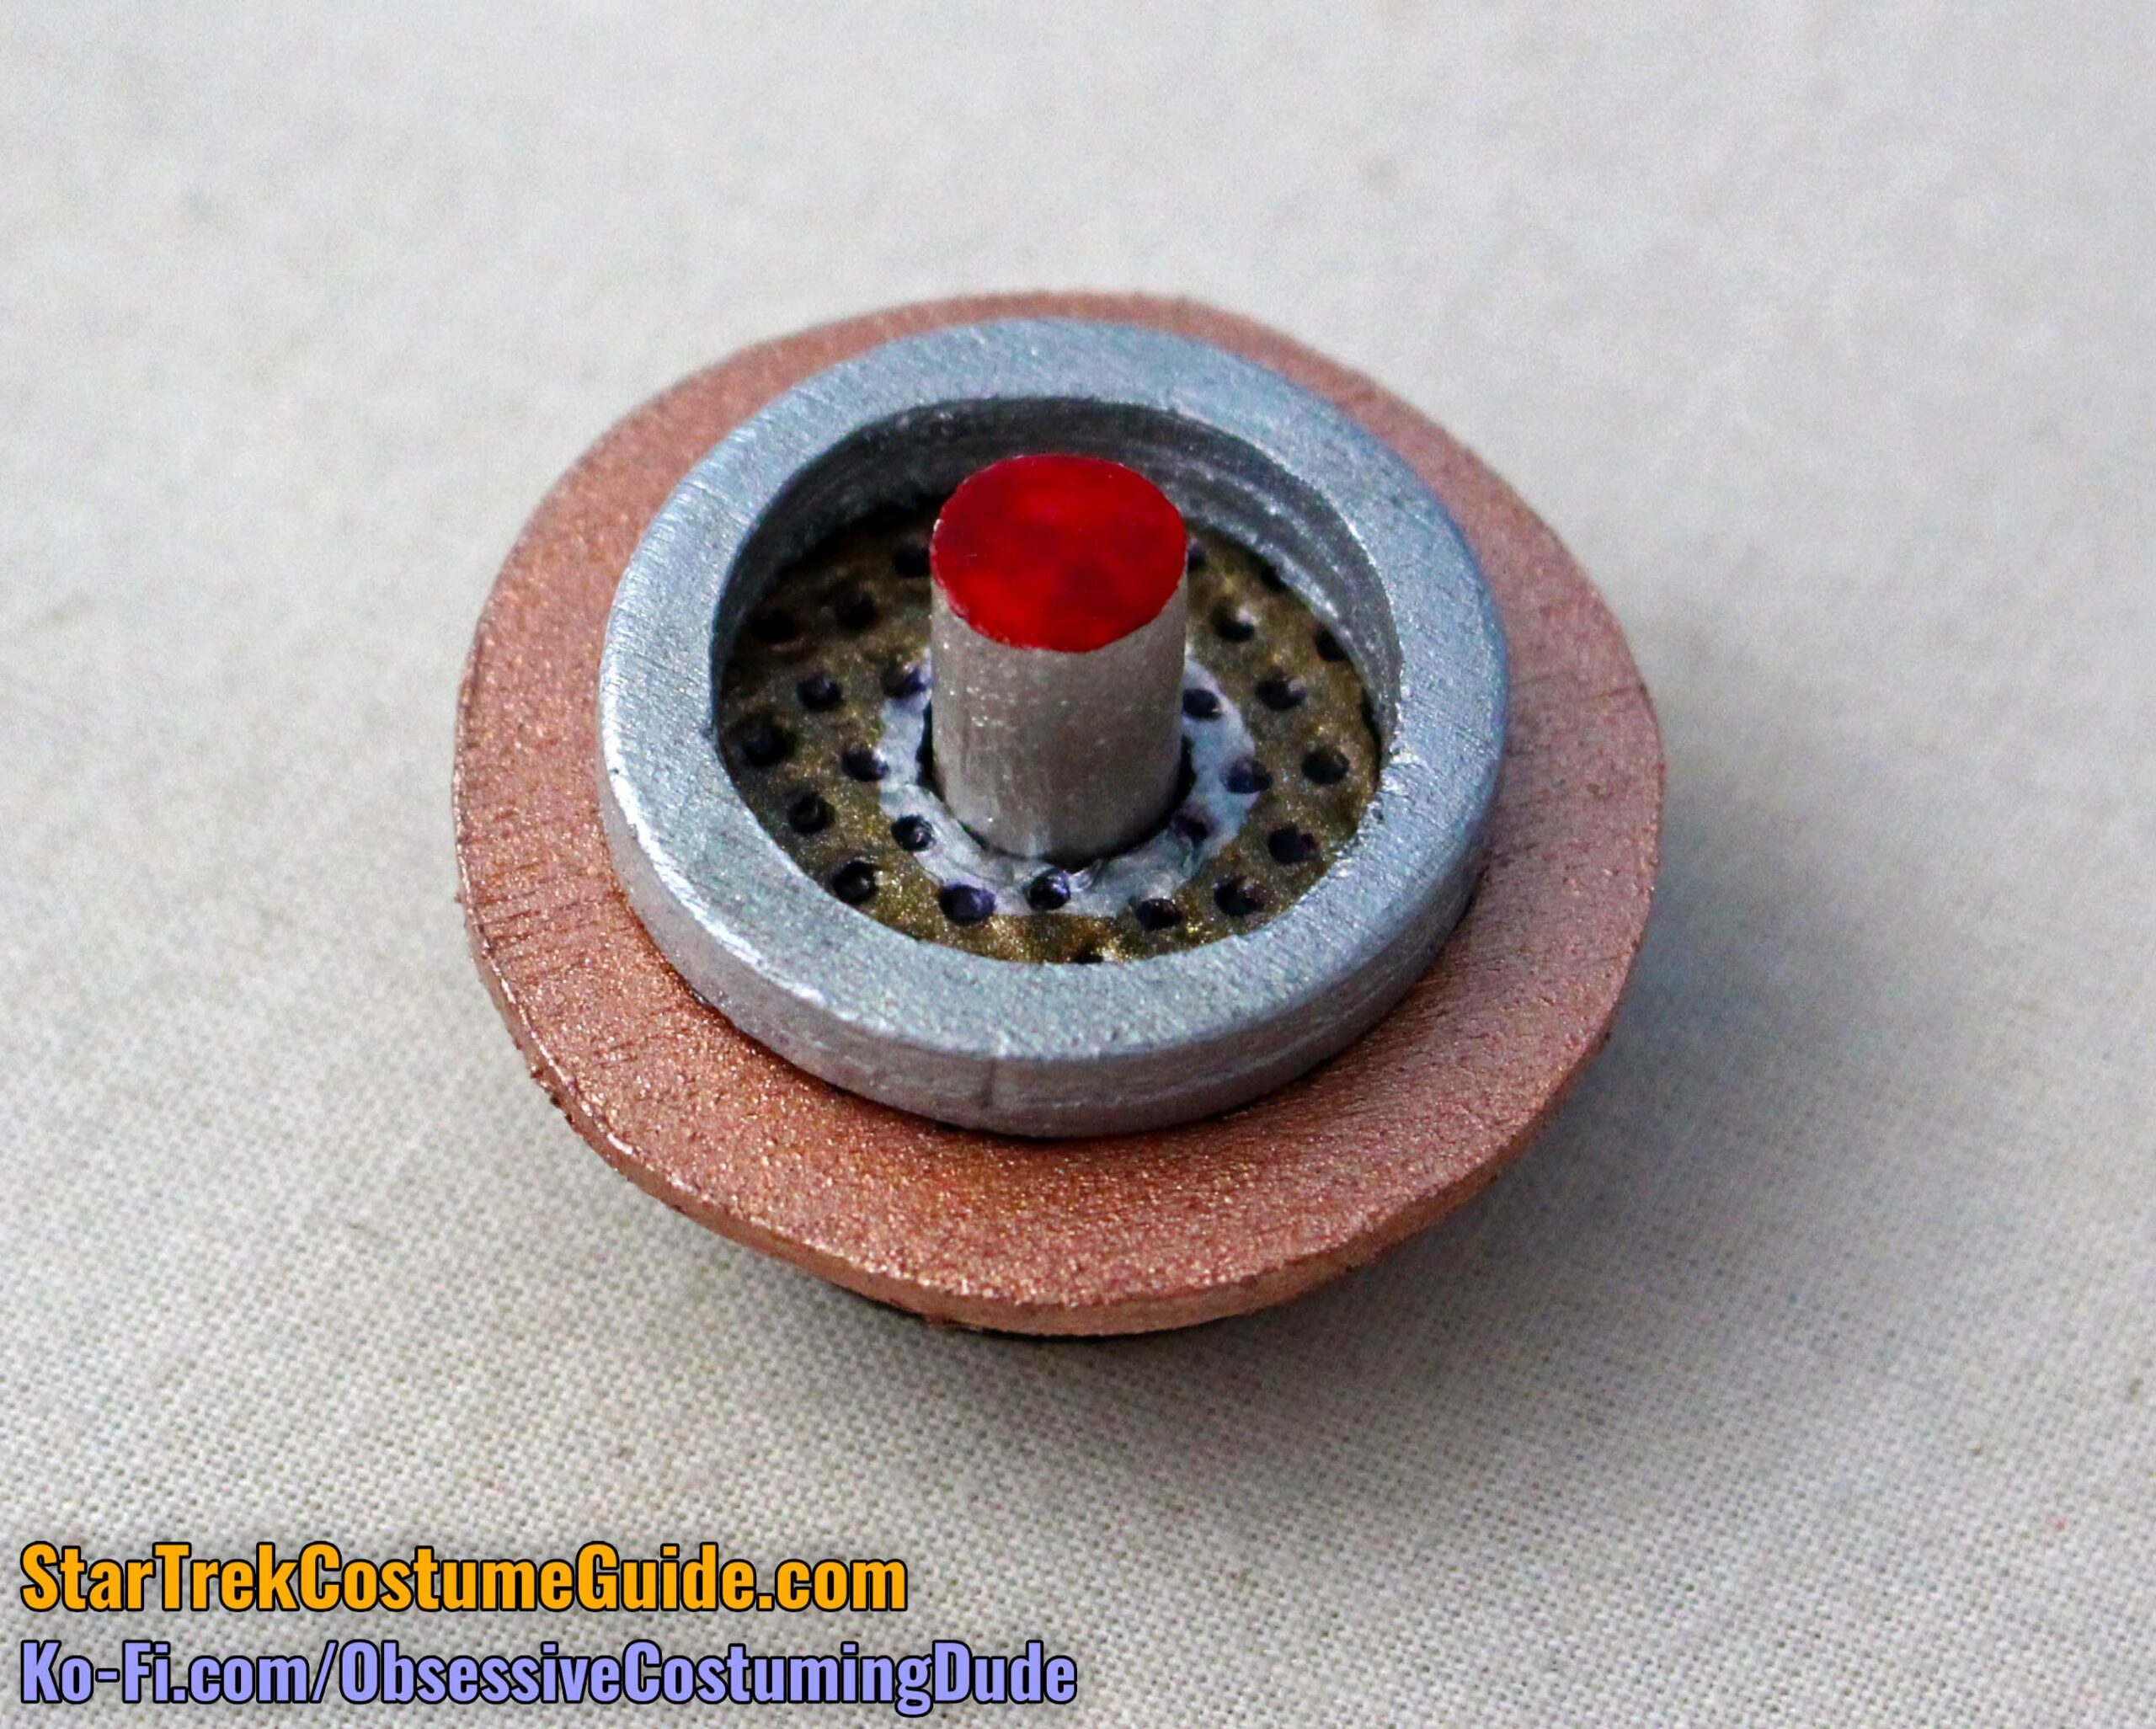
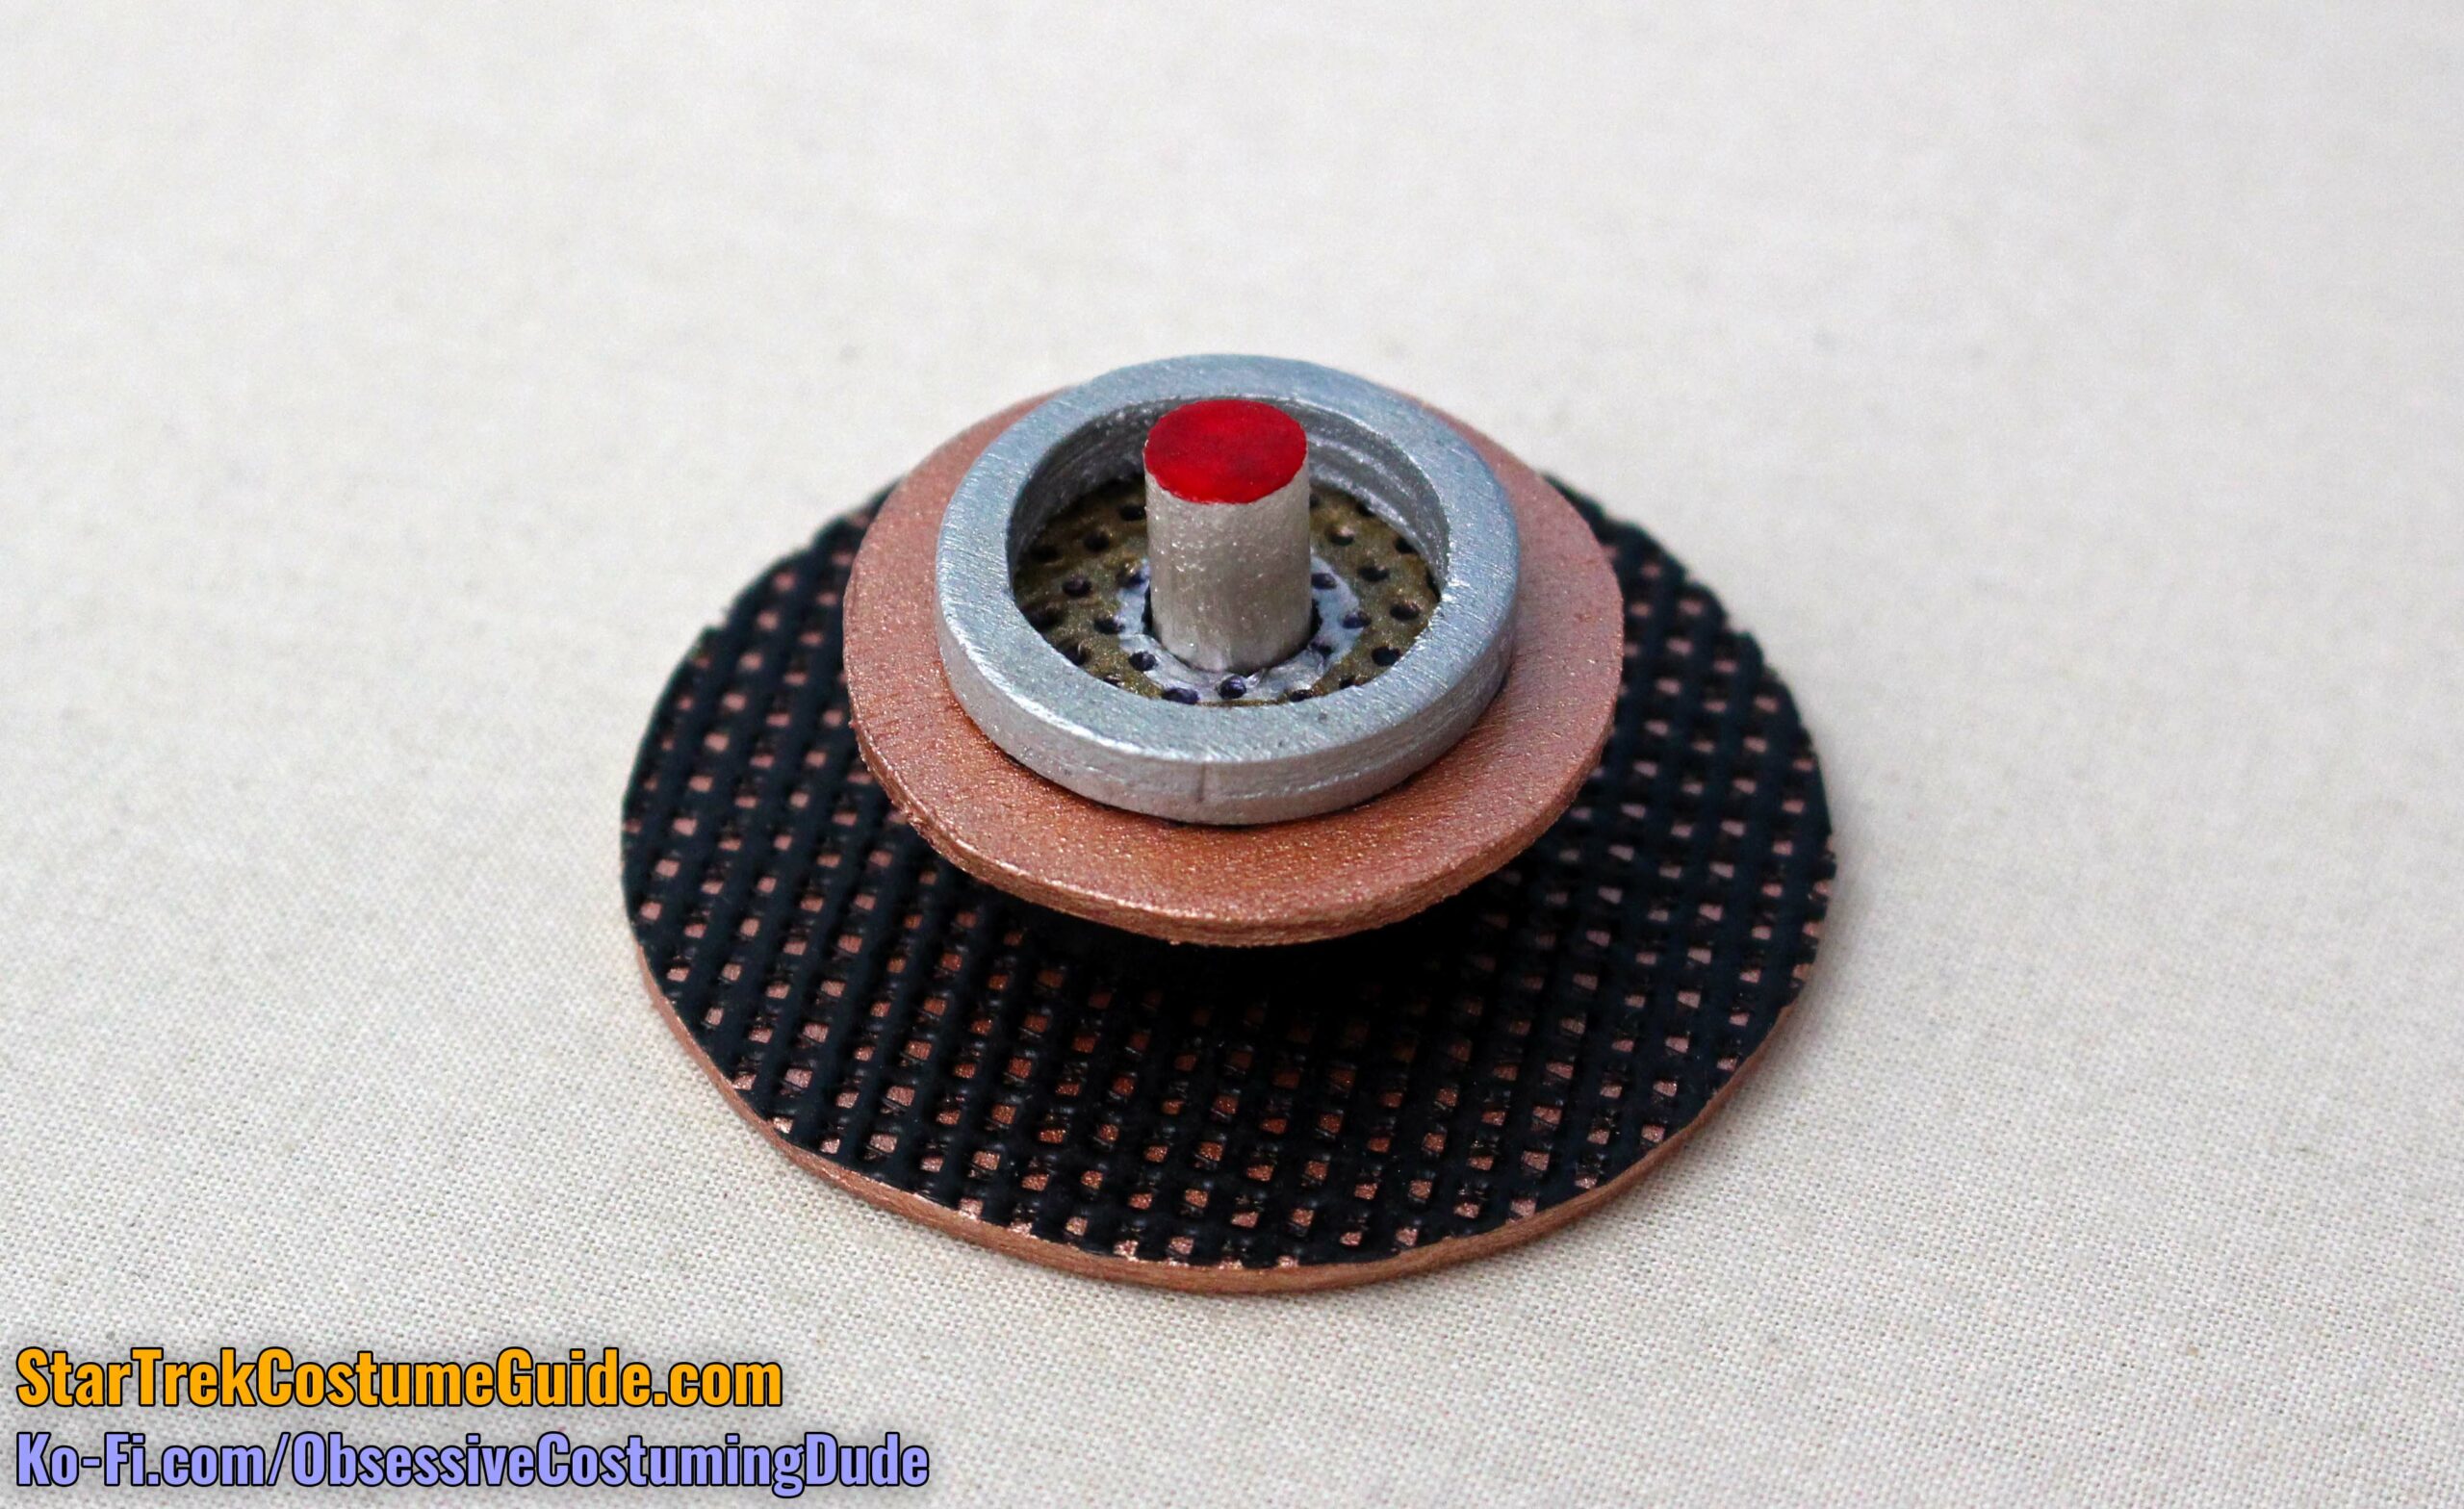
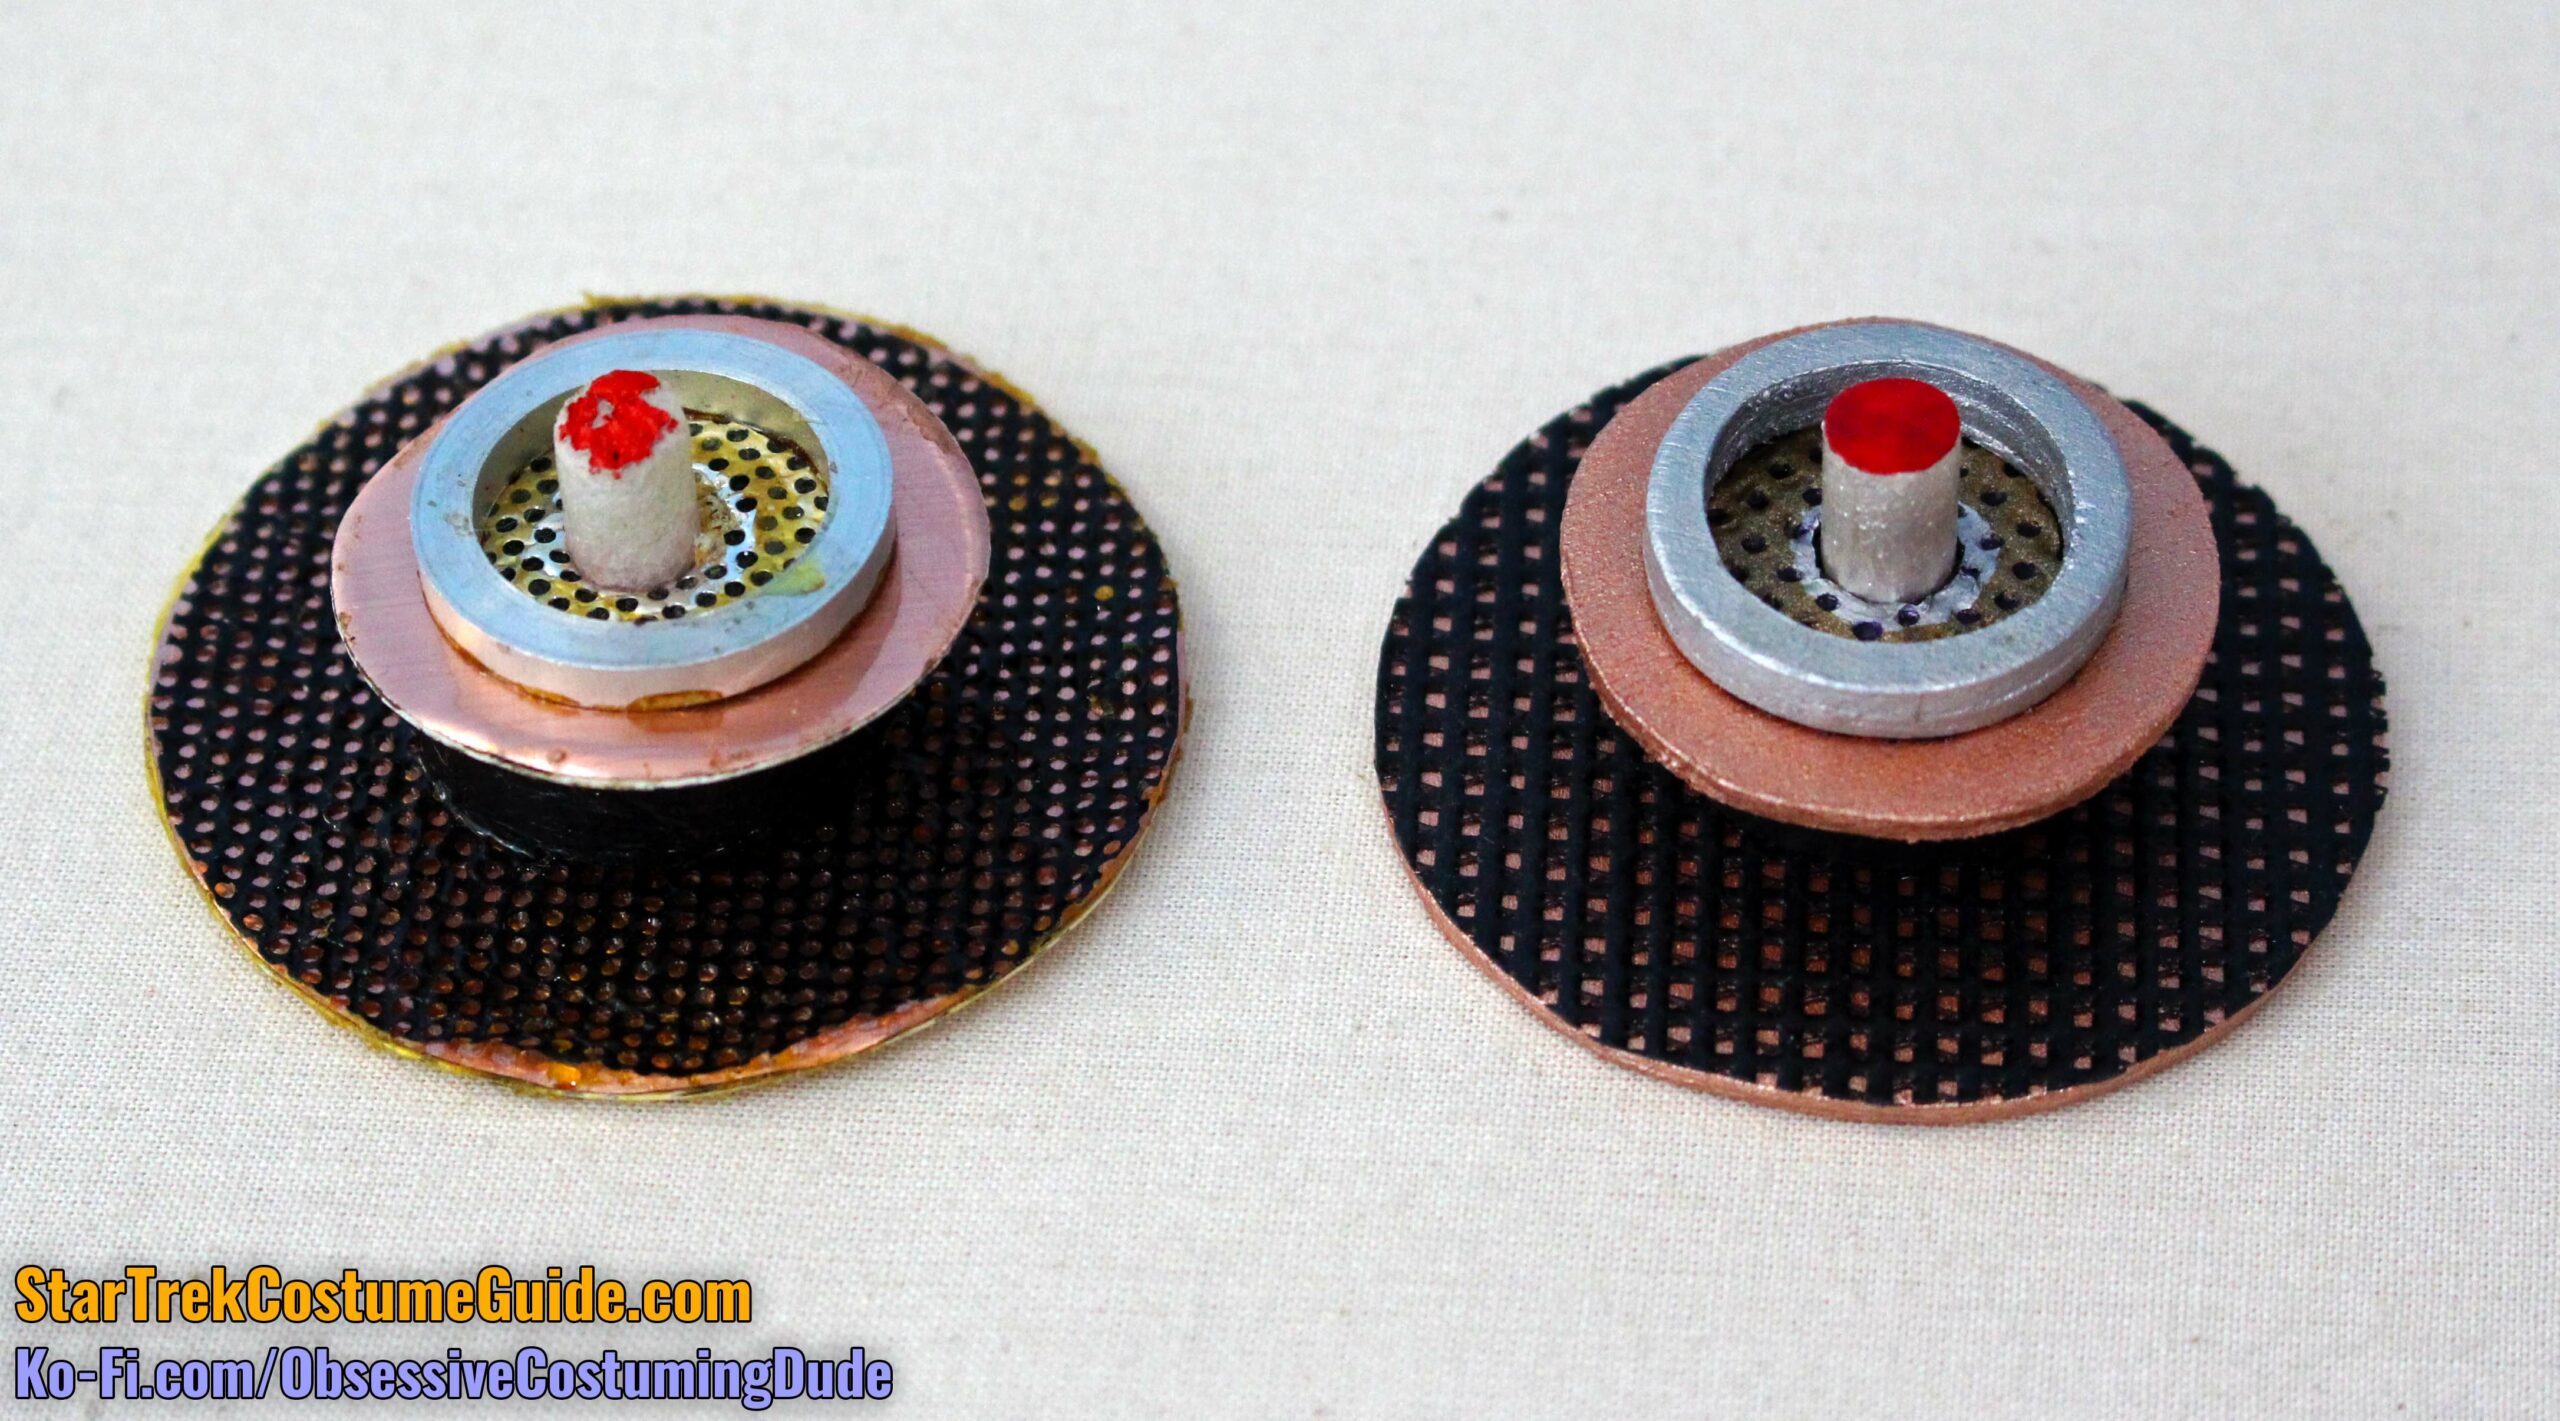
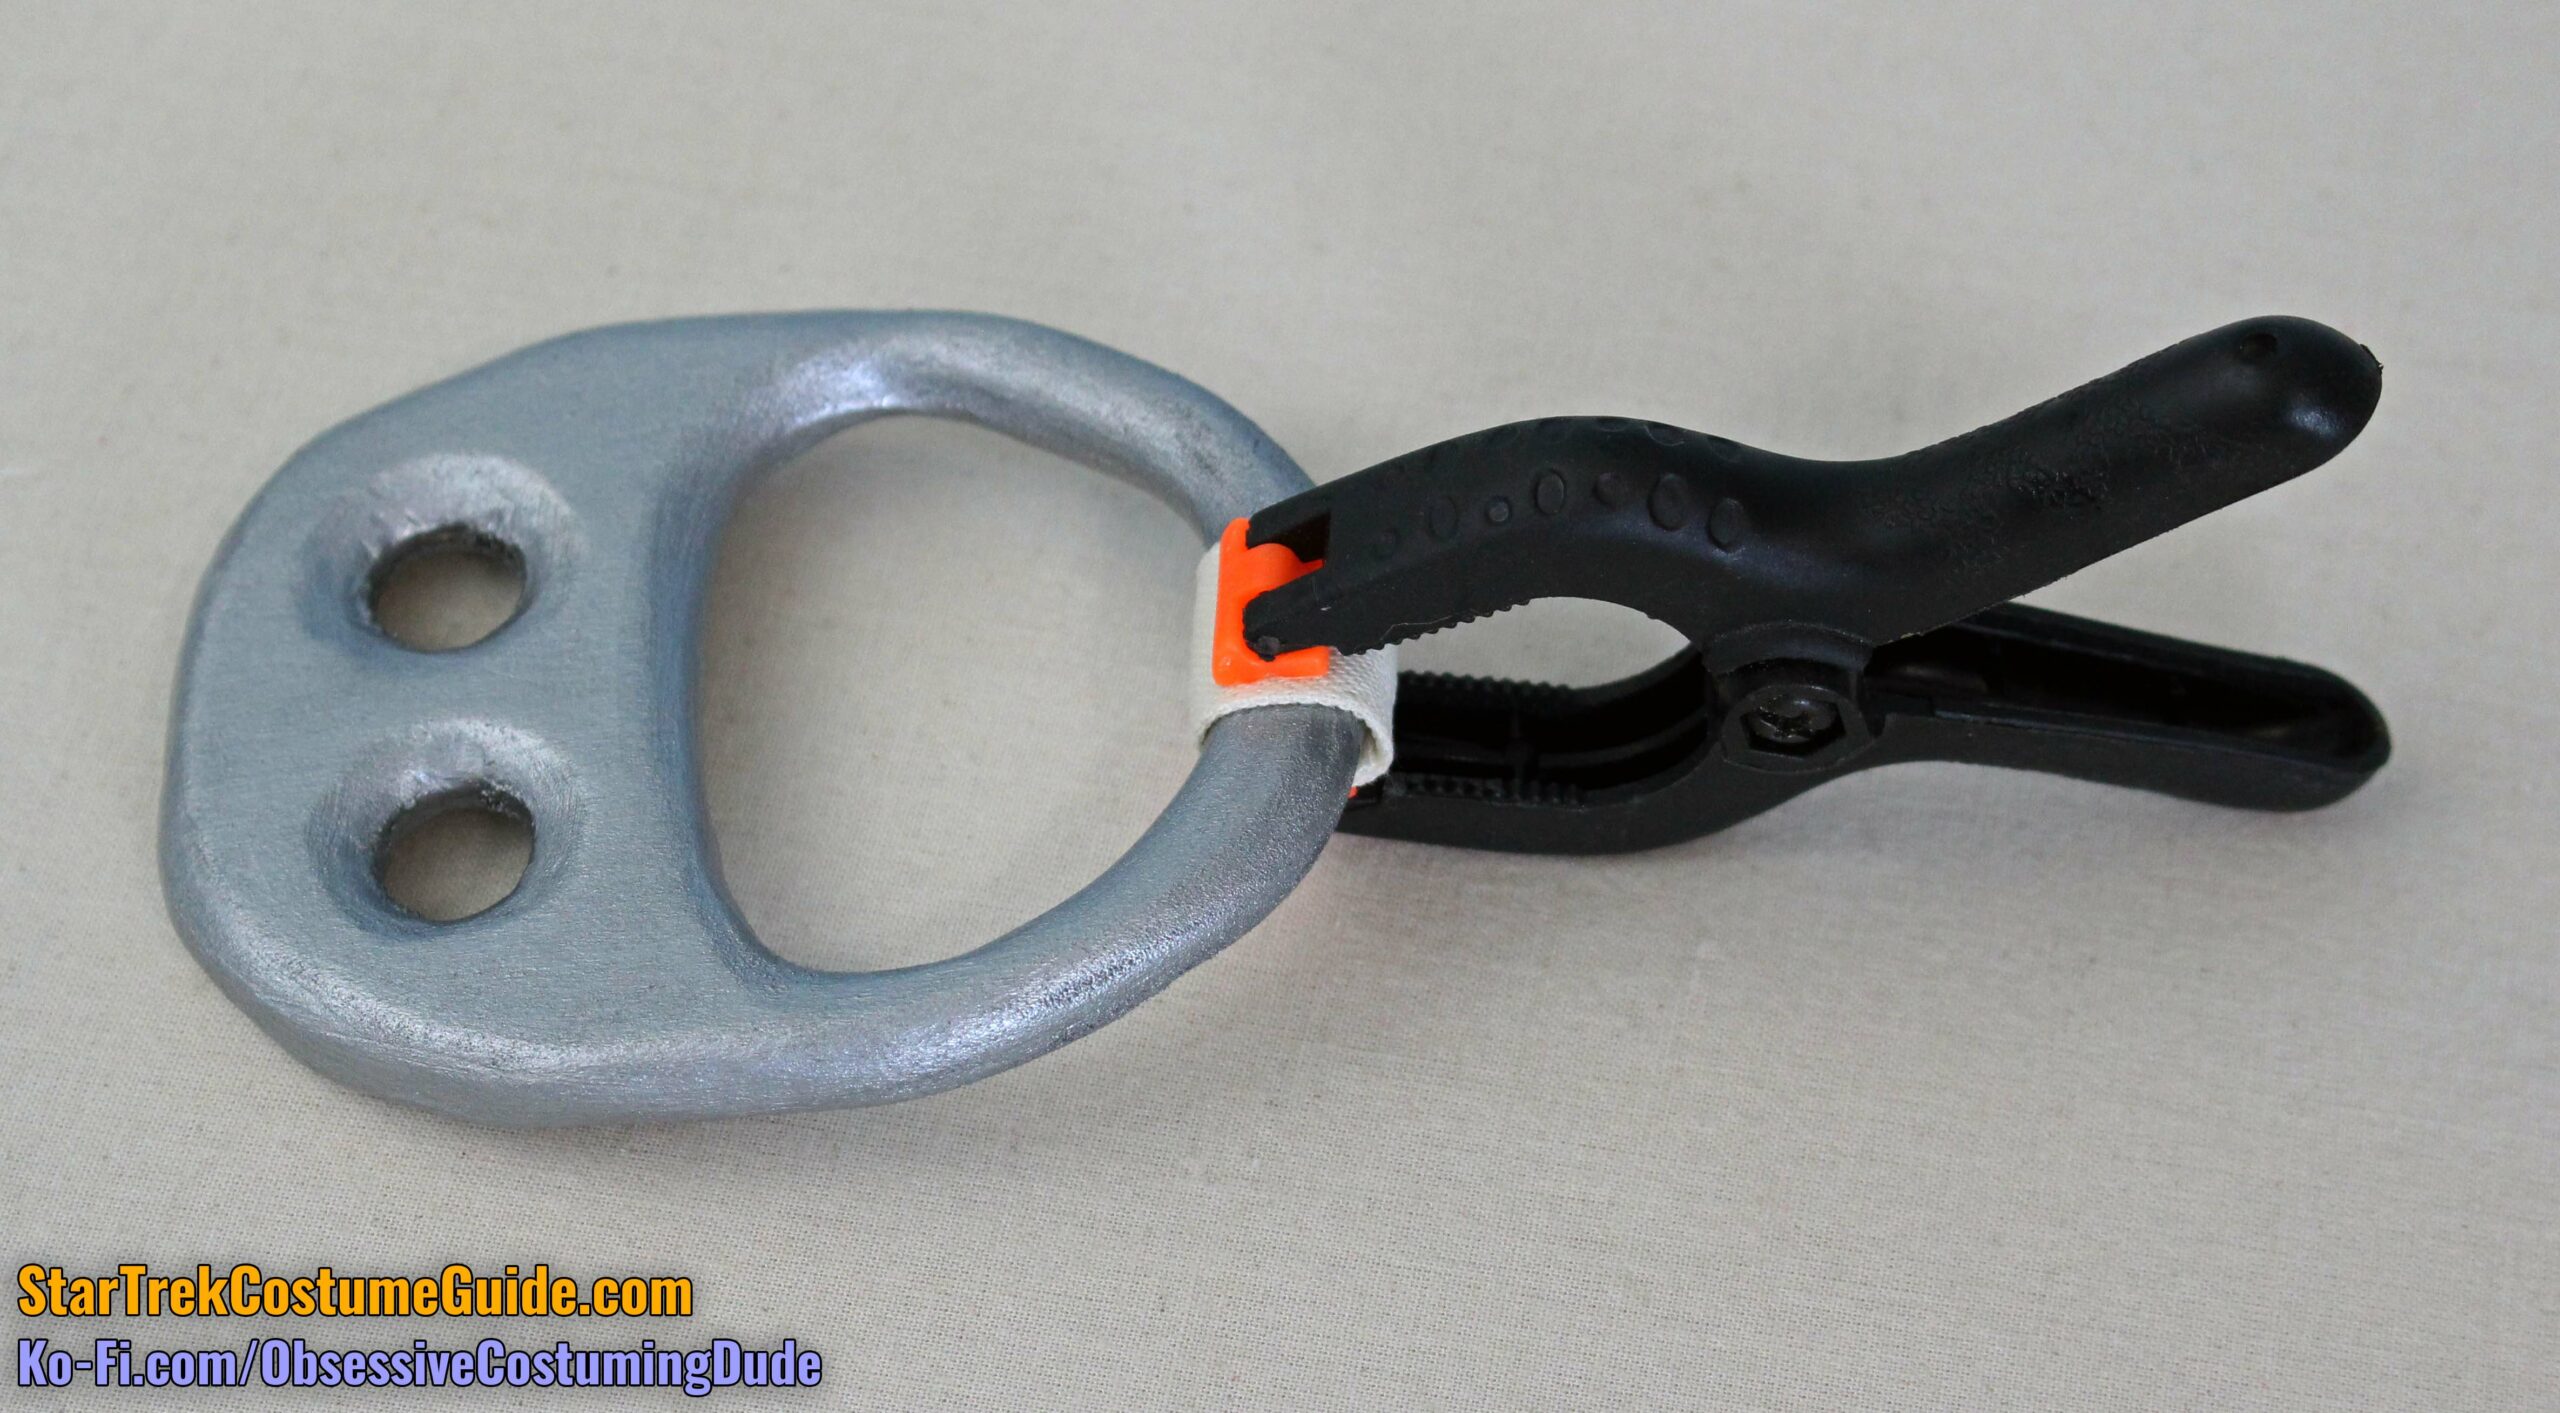
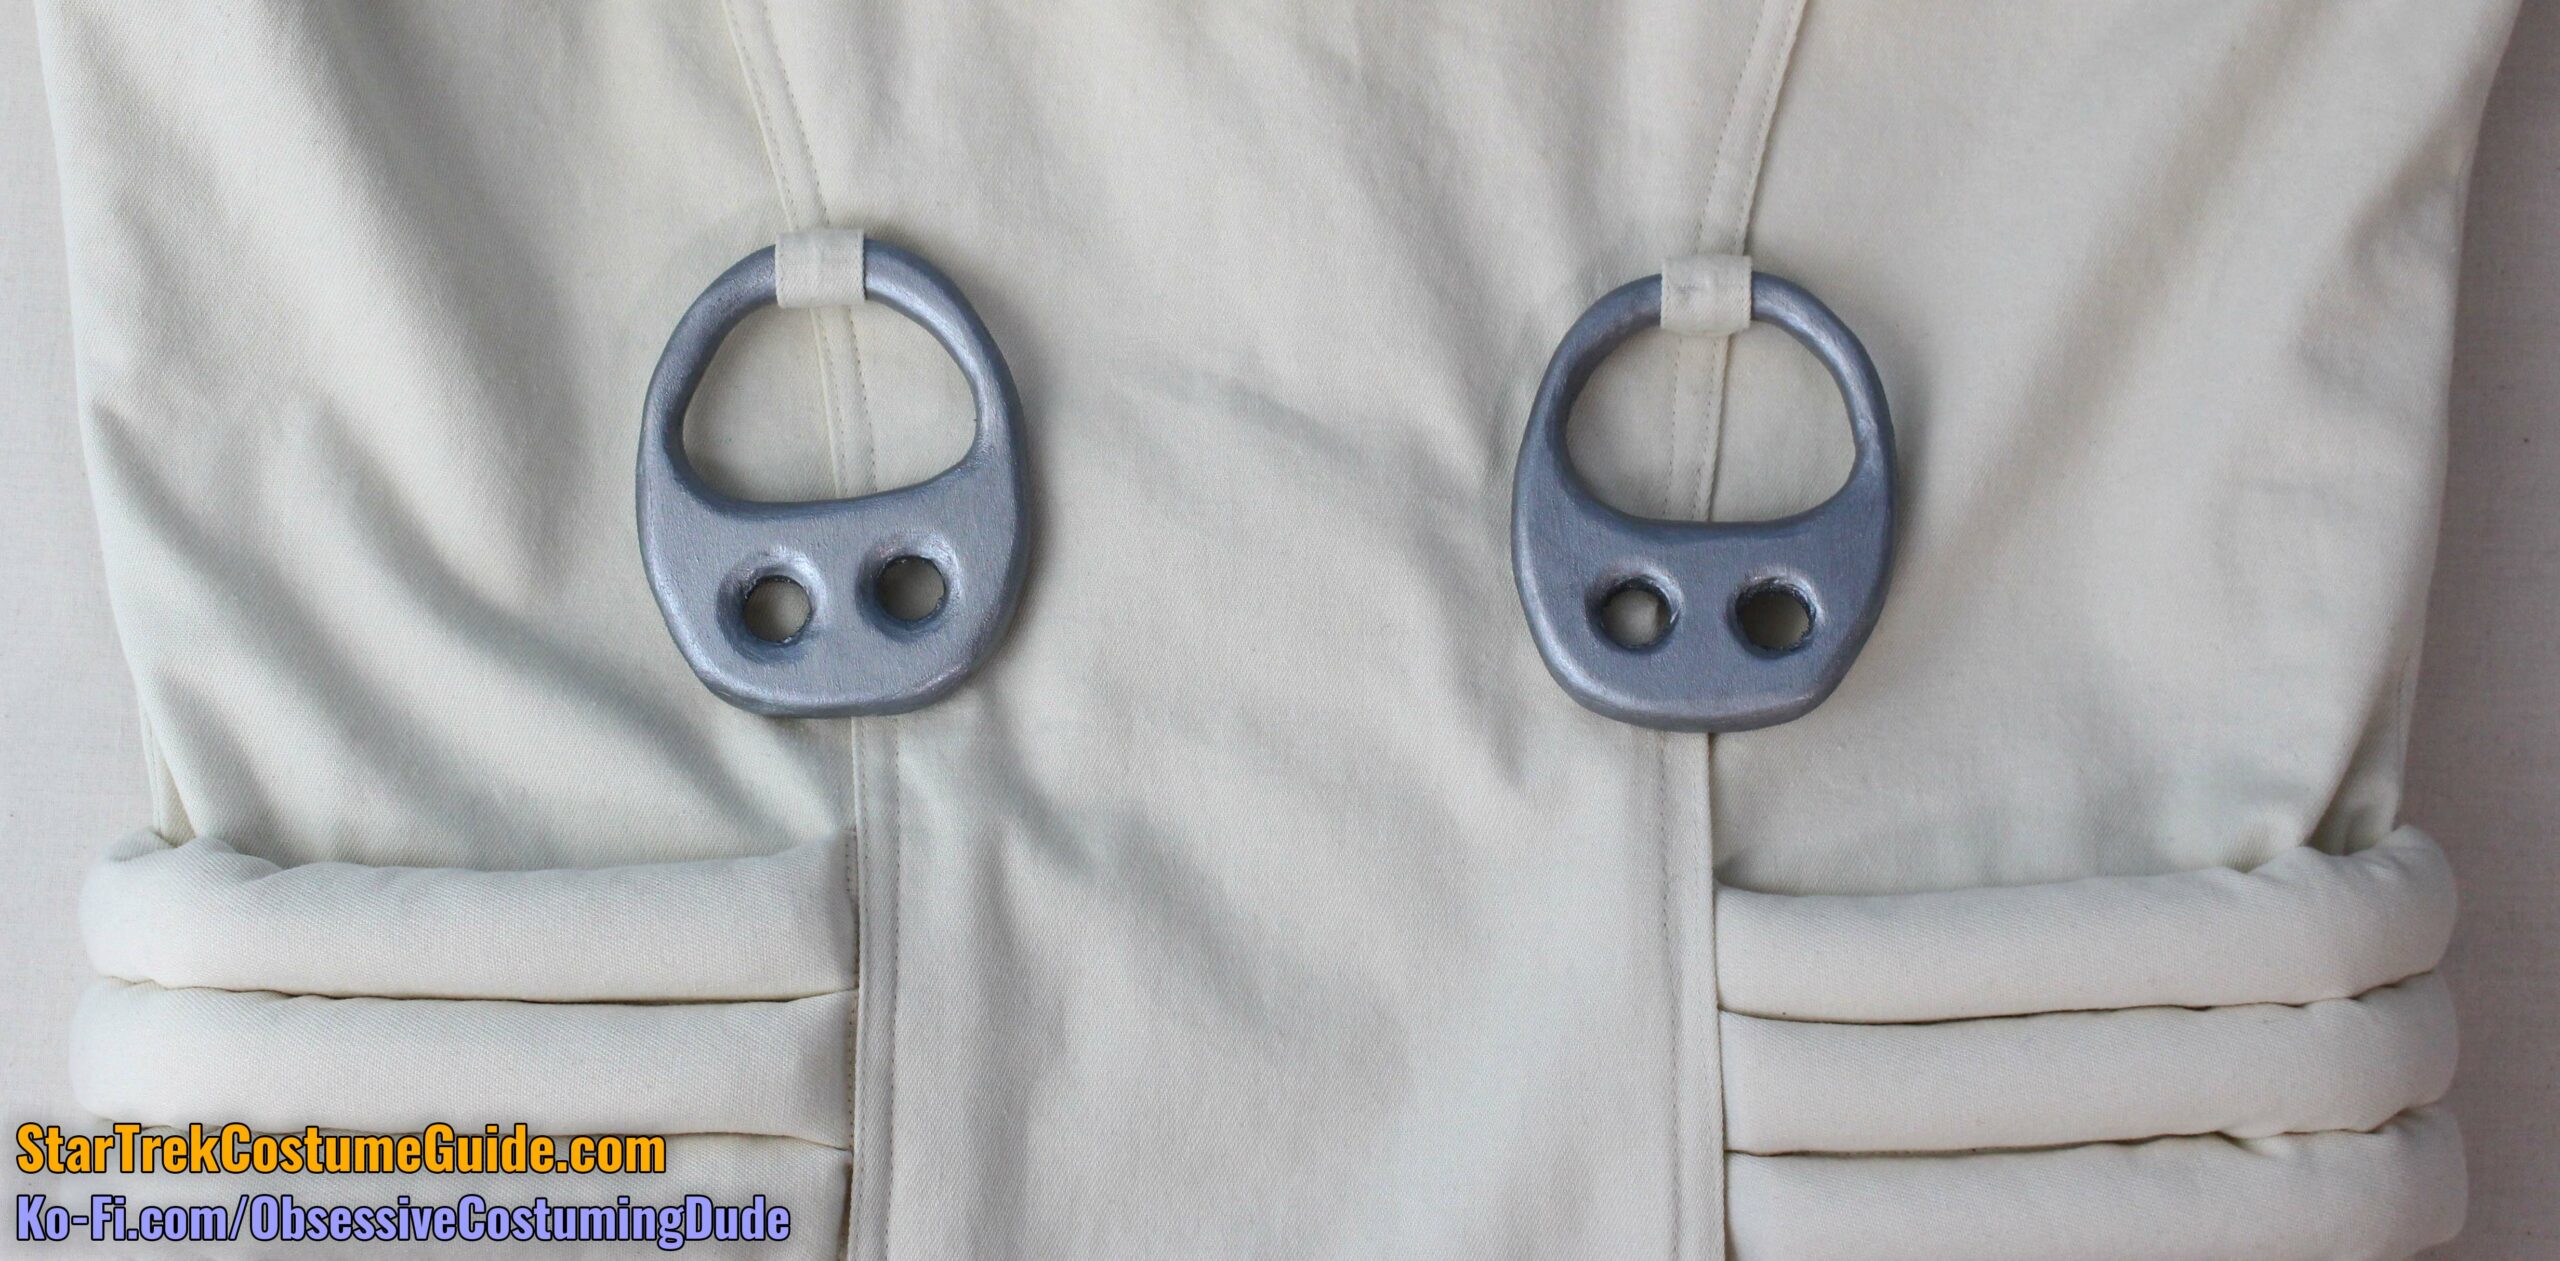
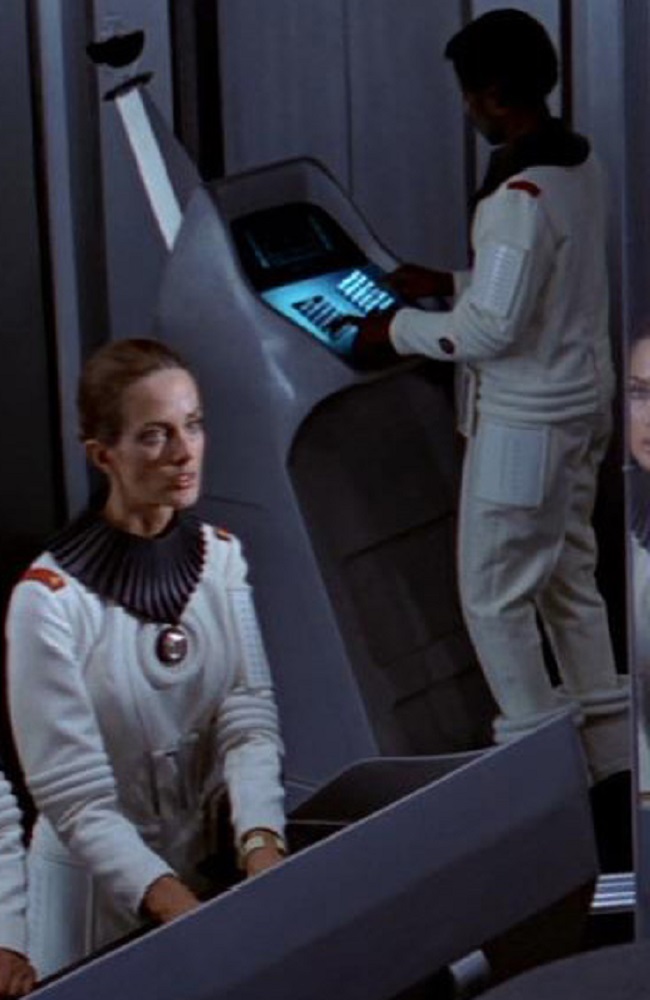
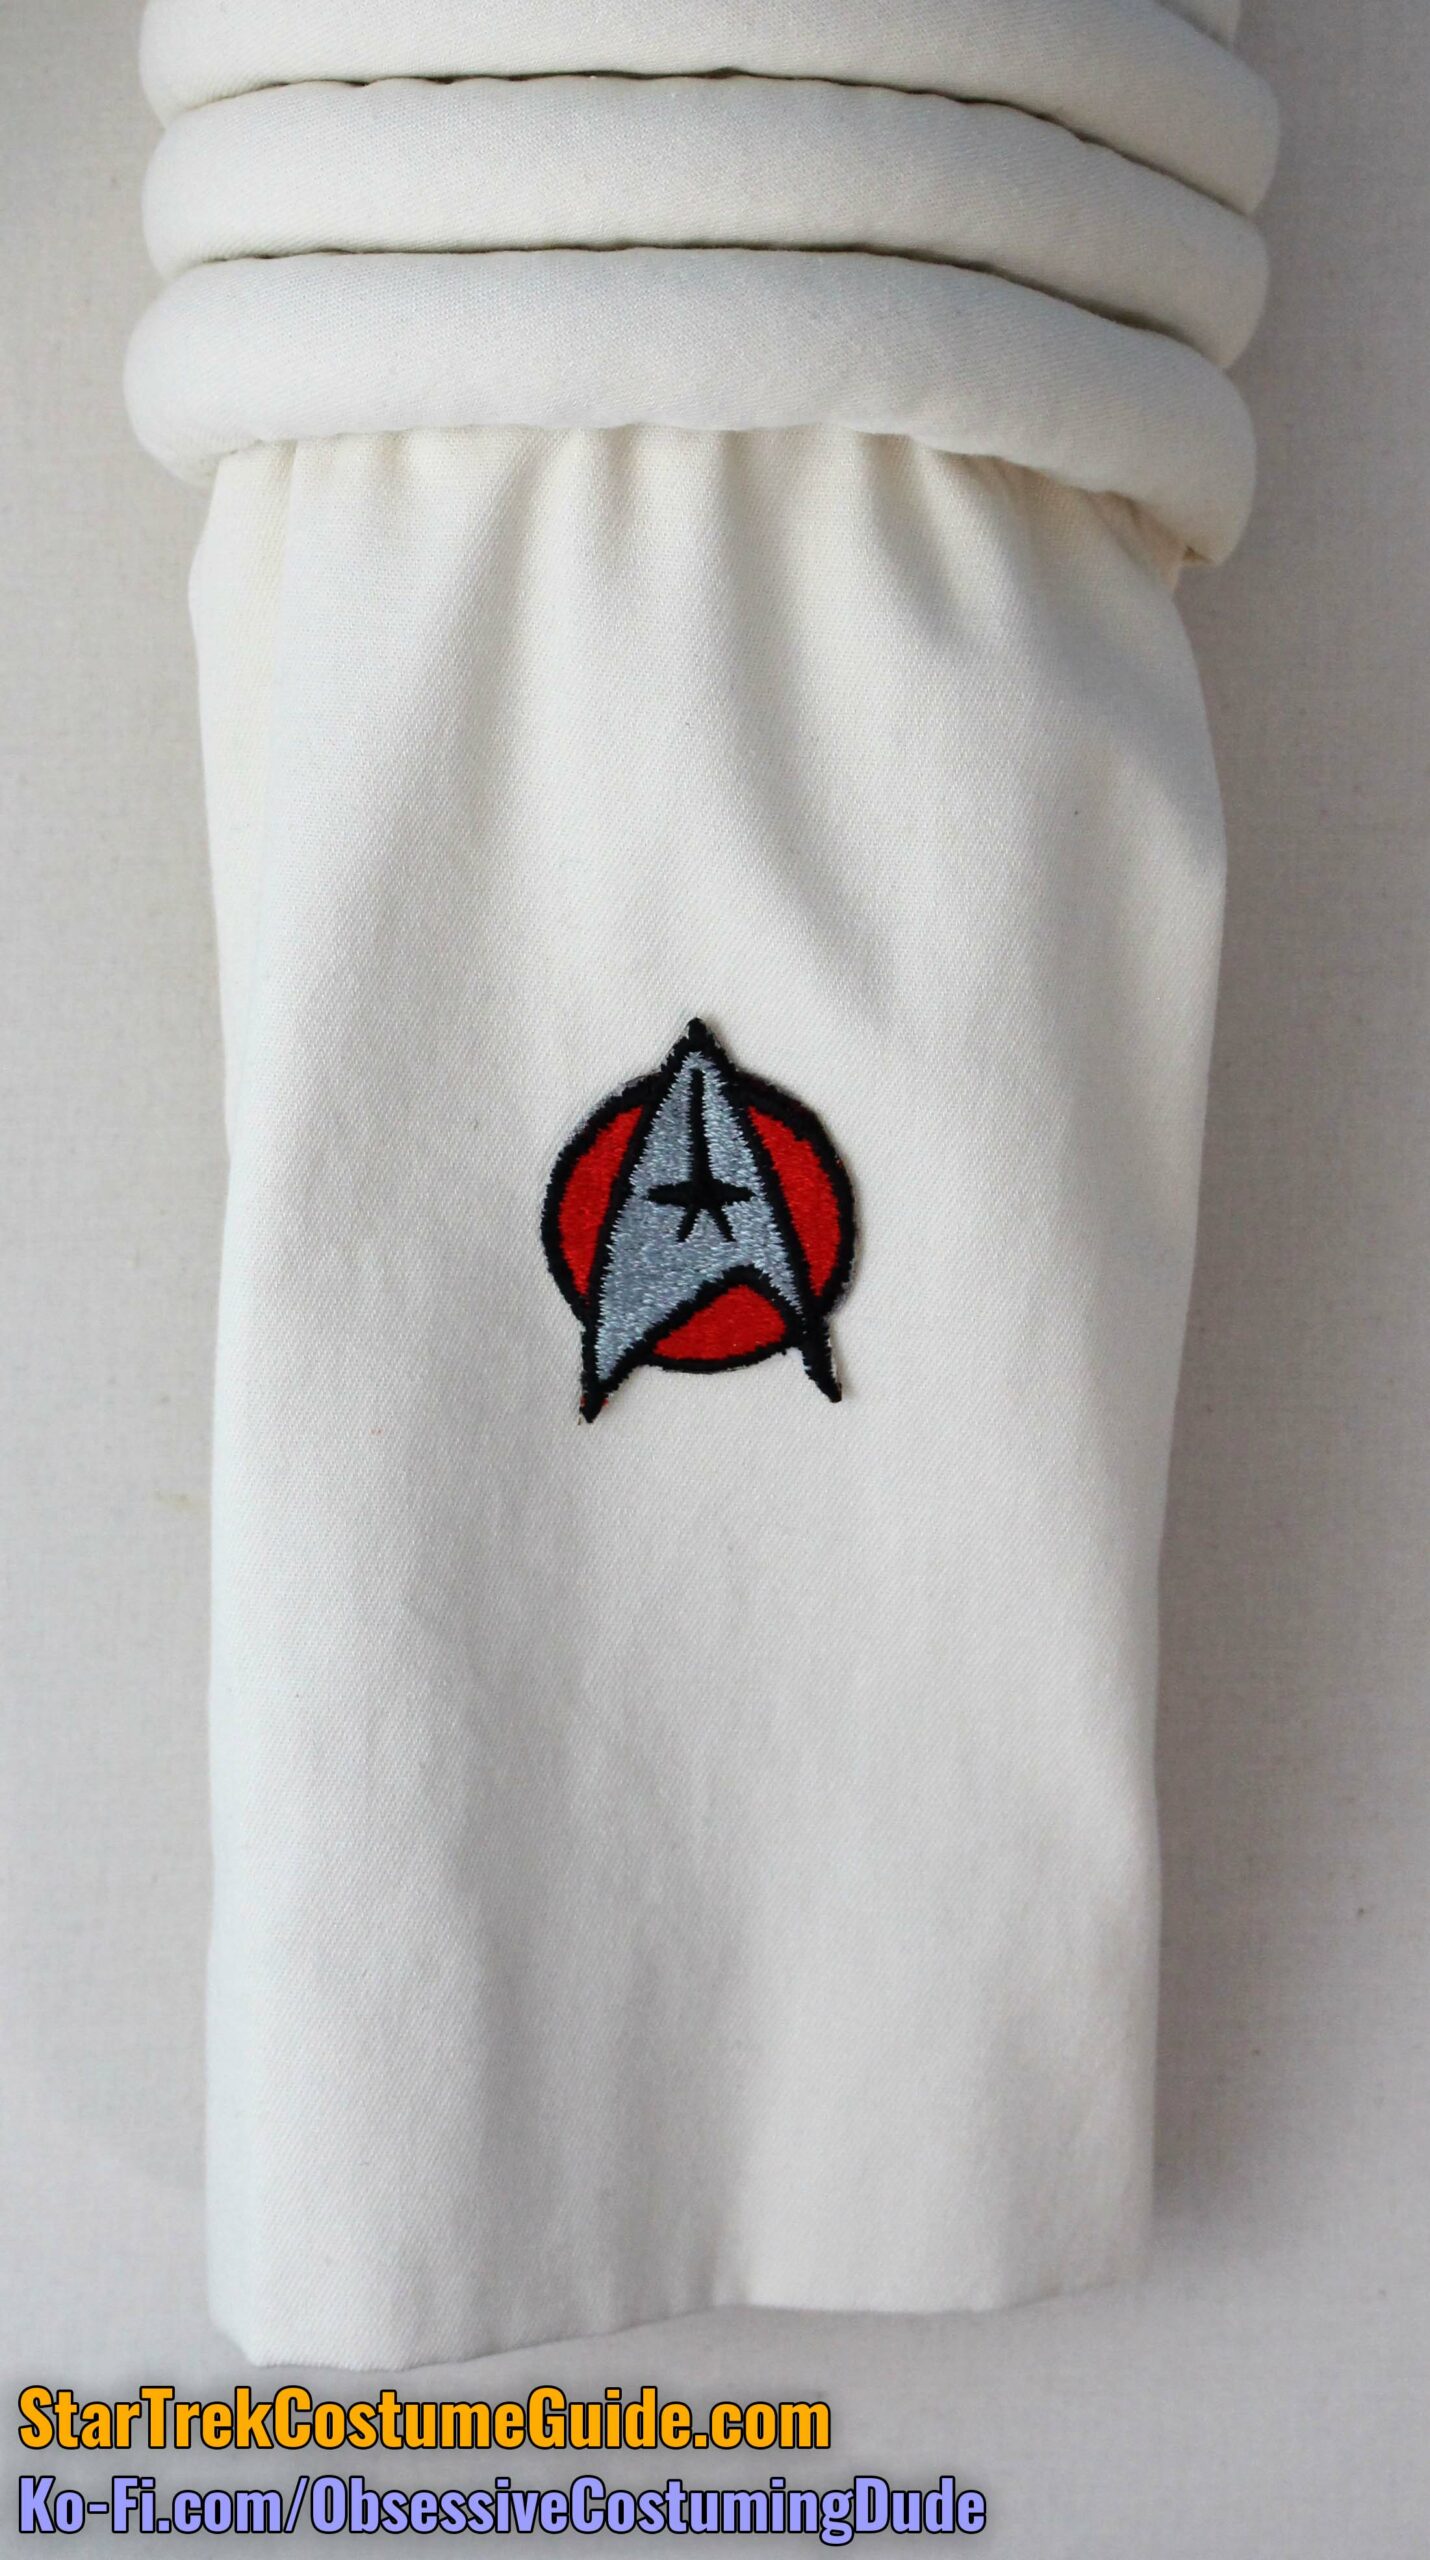
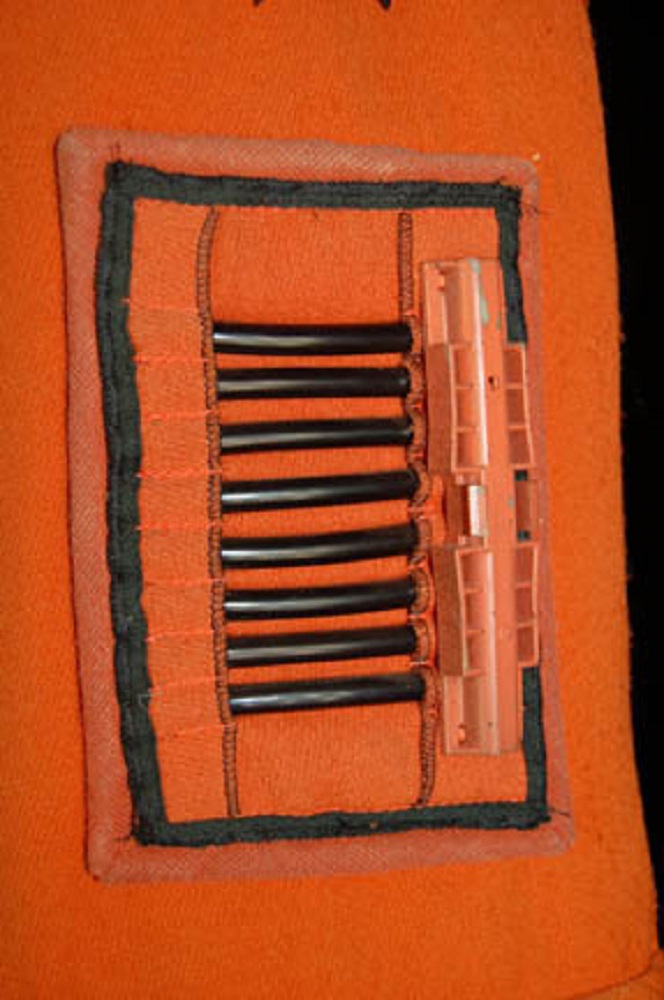
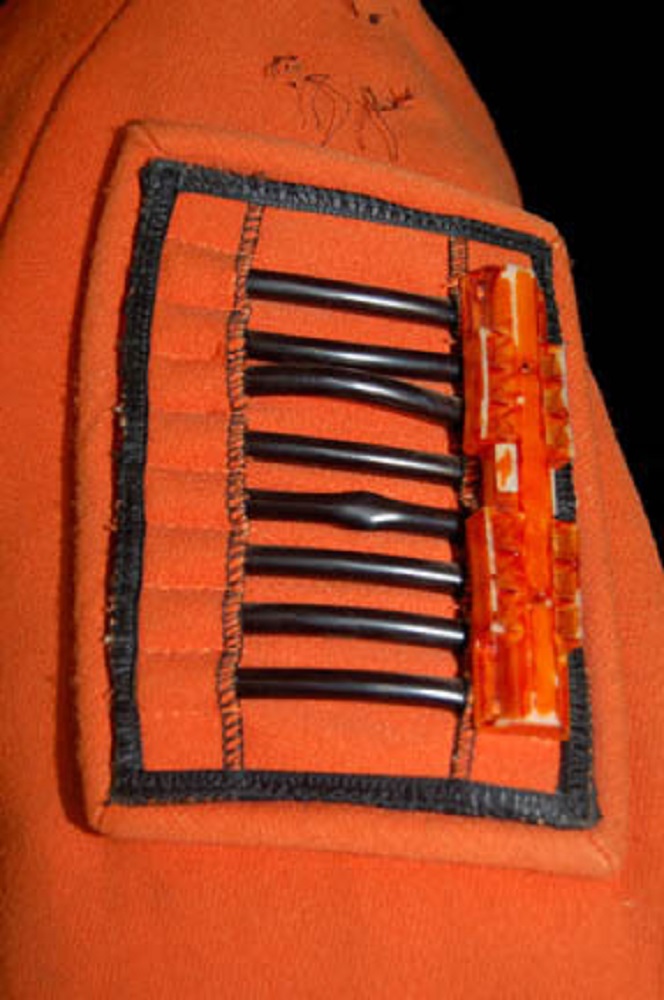
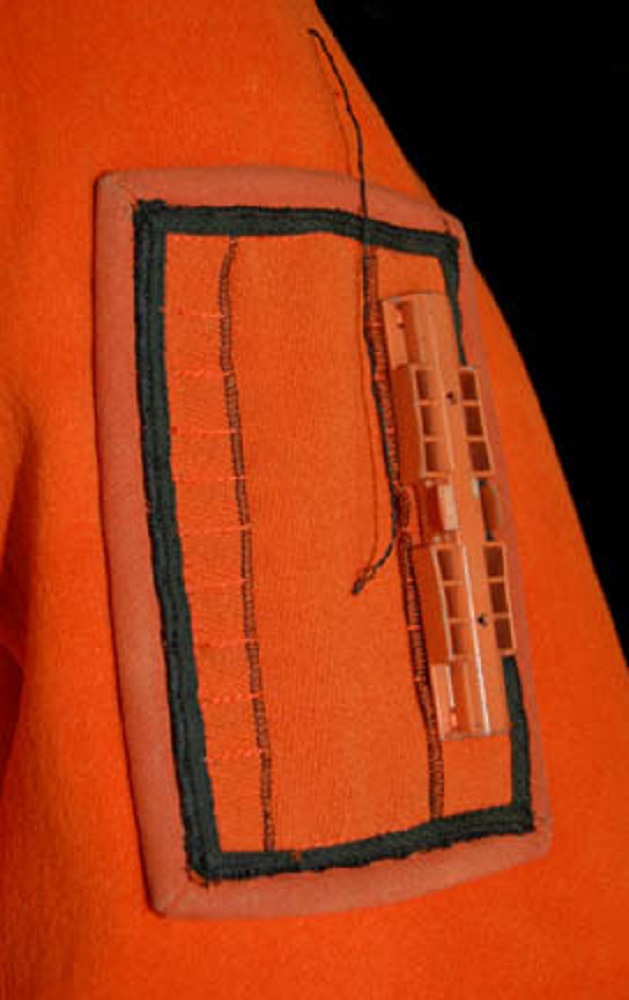
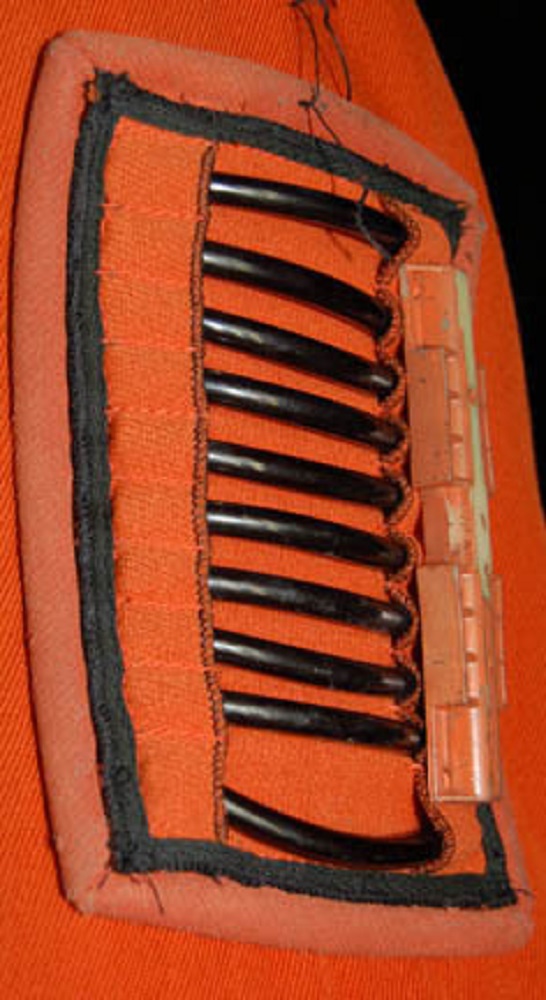
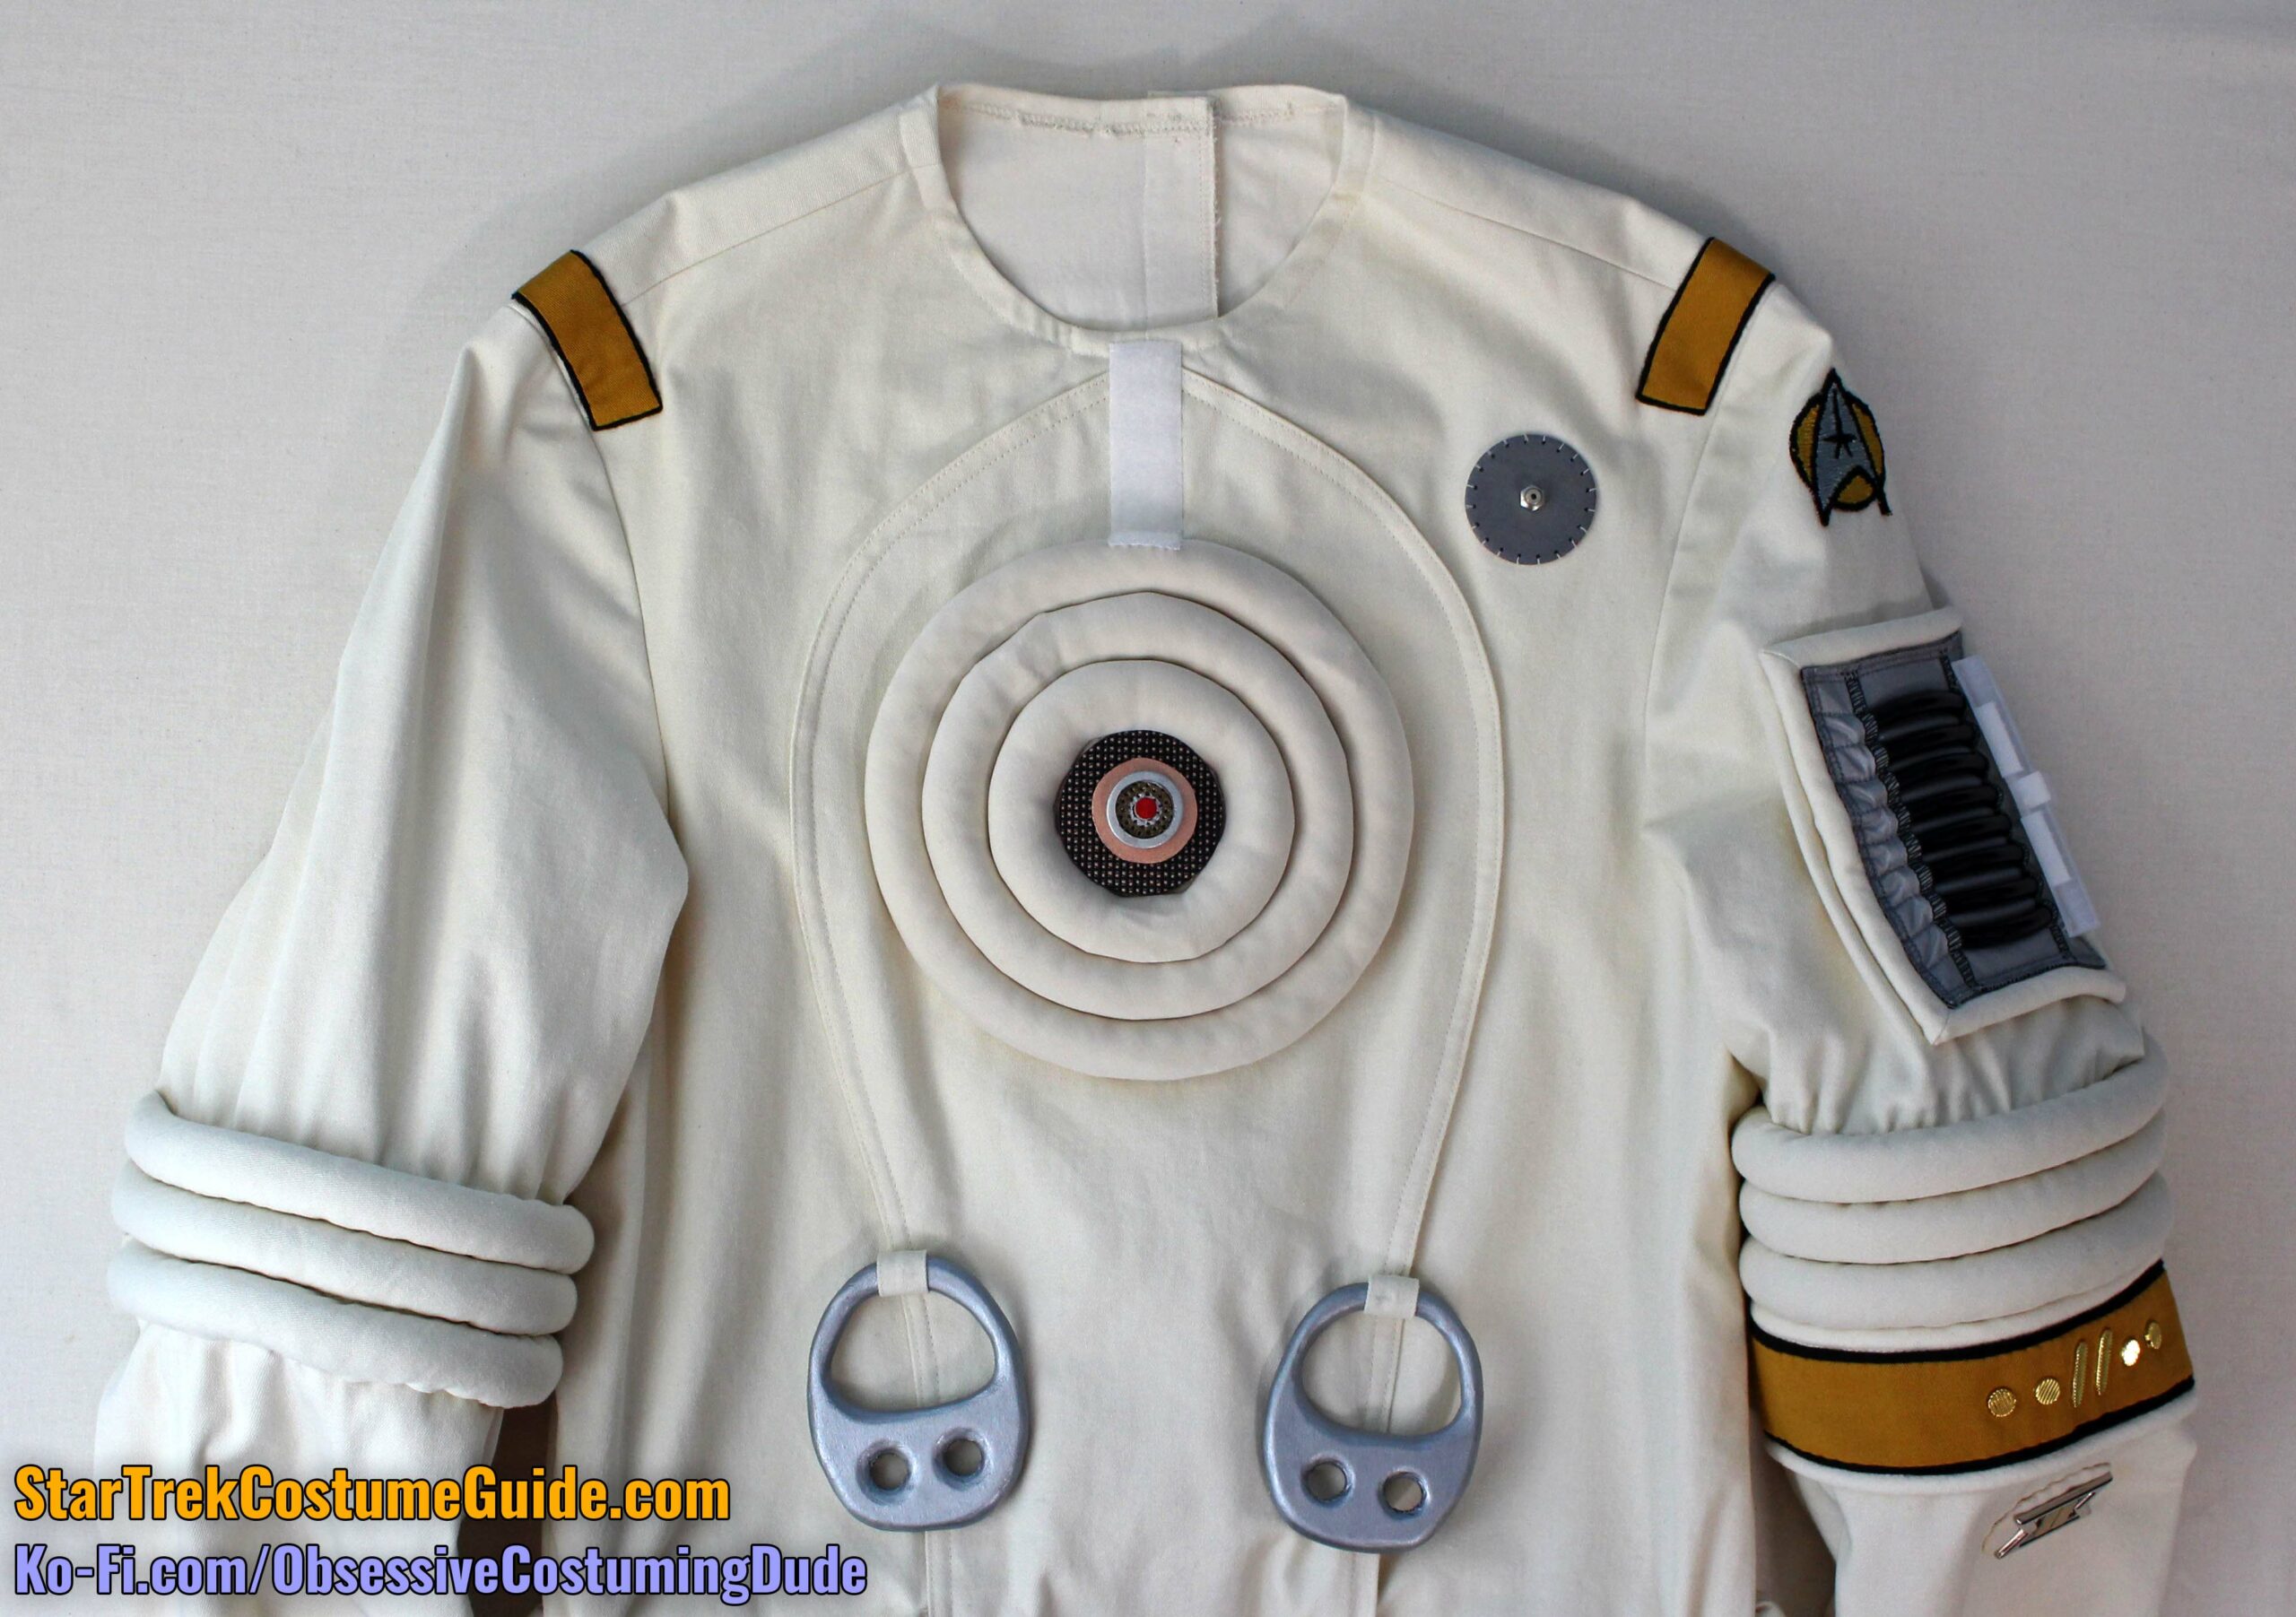
As I’ve mentioned previously, the original Edelrid climbing buckles used on the TWOK-era jumpsuits seem to no longer be available, but you have several options for replicating them.

Eric Olds (aka “Felgacarb”) offers 3D printed buckles on Shapeways:

https://www.shapeways.com/product/7ES9FZTSN/replica-edelrid-mountian-climbing-ring

SellGeek also recently began offering metal replica buckles, too.

https://sellgeek.com/

As of the writing of this tutorial, I haven’t used either of these or seen them in-person, but they both look fantastic. If you can afford them, both seem like great-looking and most convenient options.

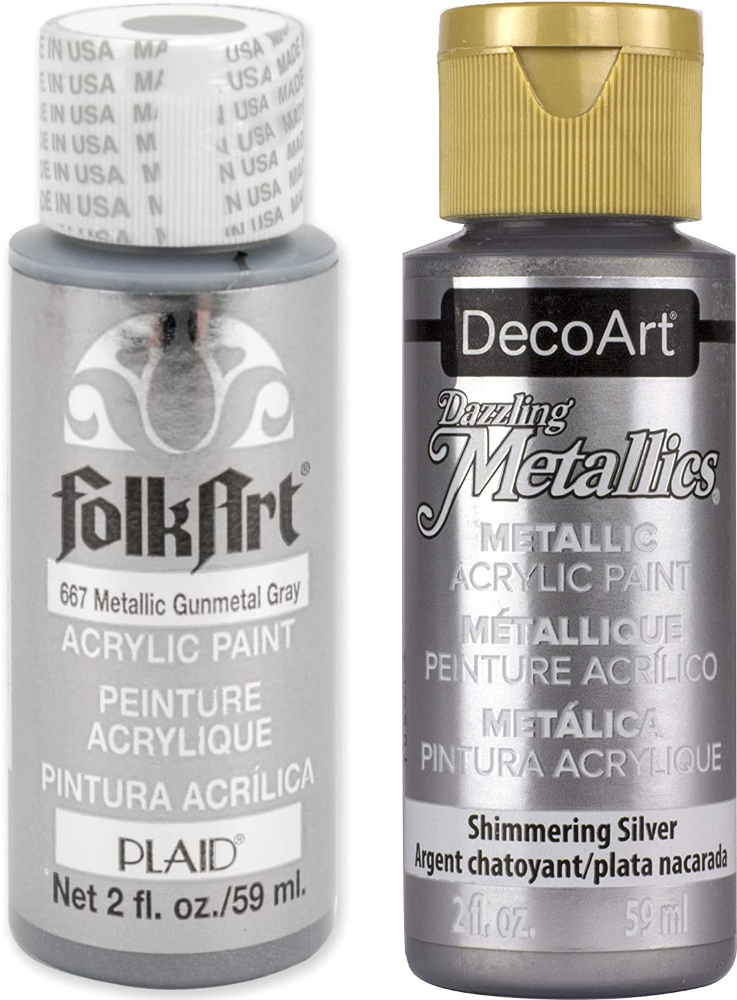
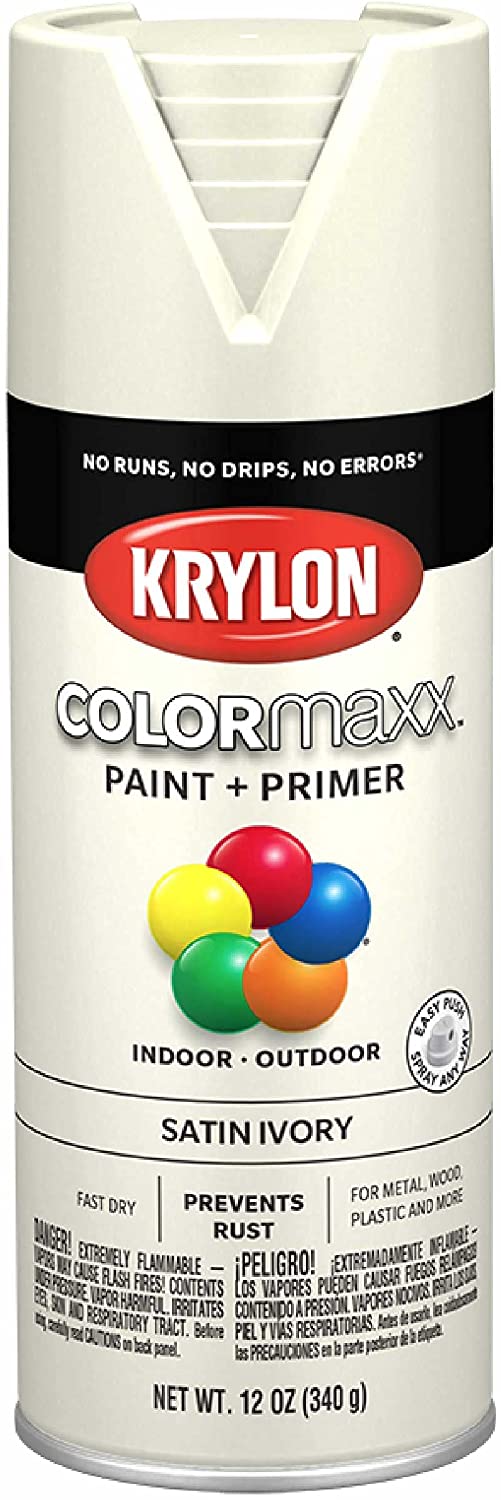
However, they are expensive (currently $71.90 and $60 per pair, respectively) so if that’s beyond your current costume budget, you might consider making replicas out of wood or craft foam.

(It’s easy to replace the buckles later, if you ever decide you want to upgrade to the 3D printed ones when you have the inclination and/or means to do so.)

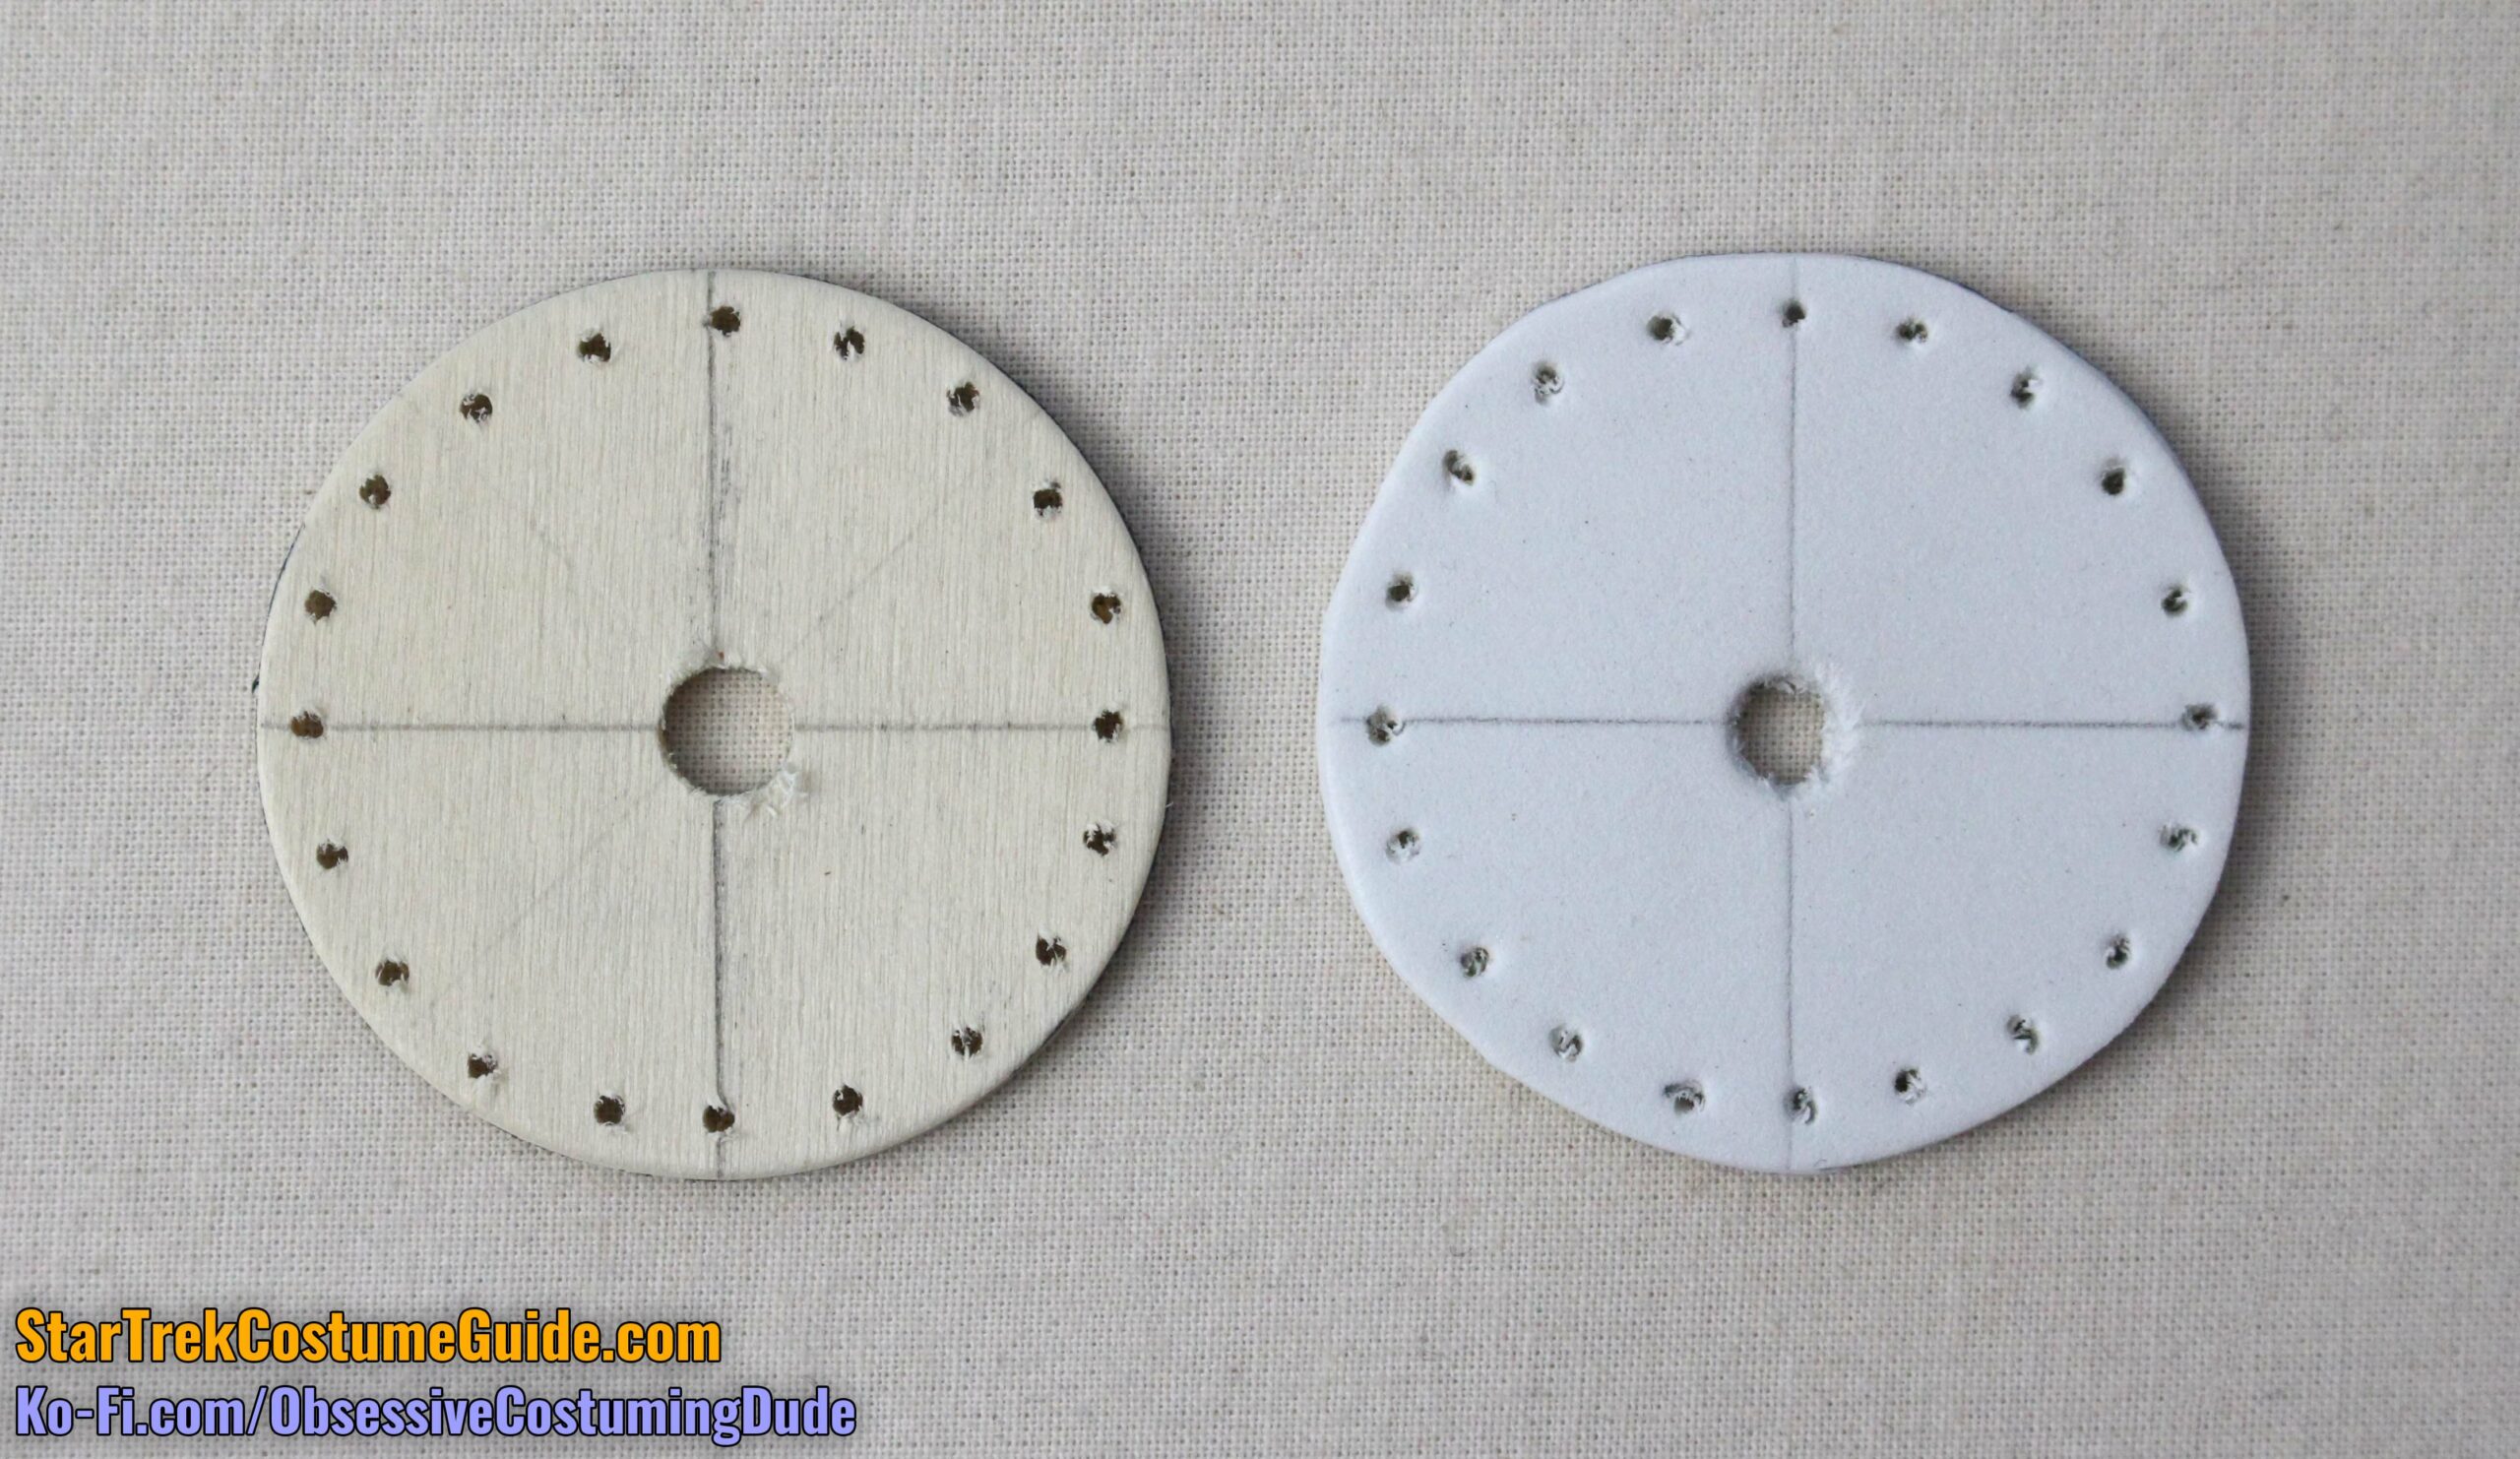
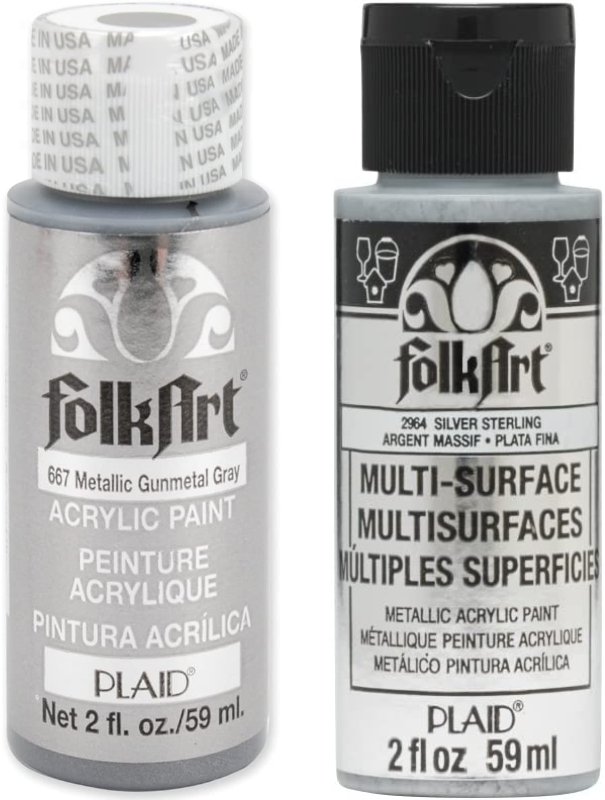
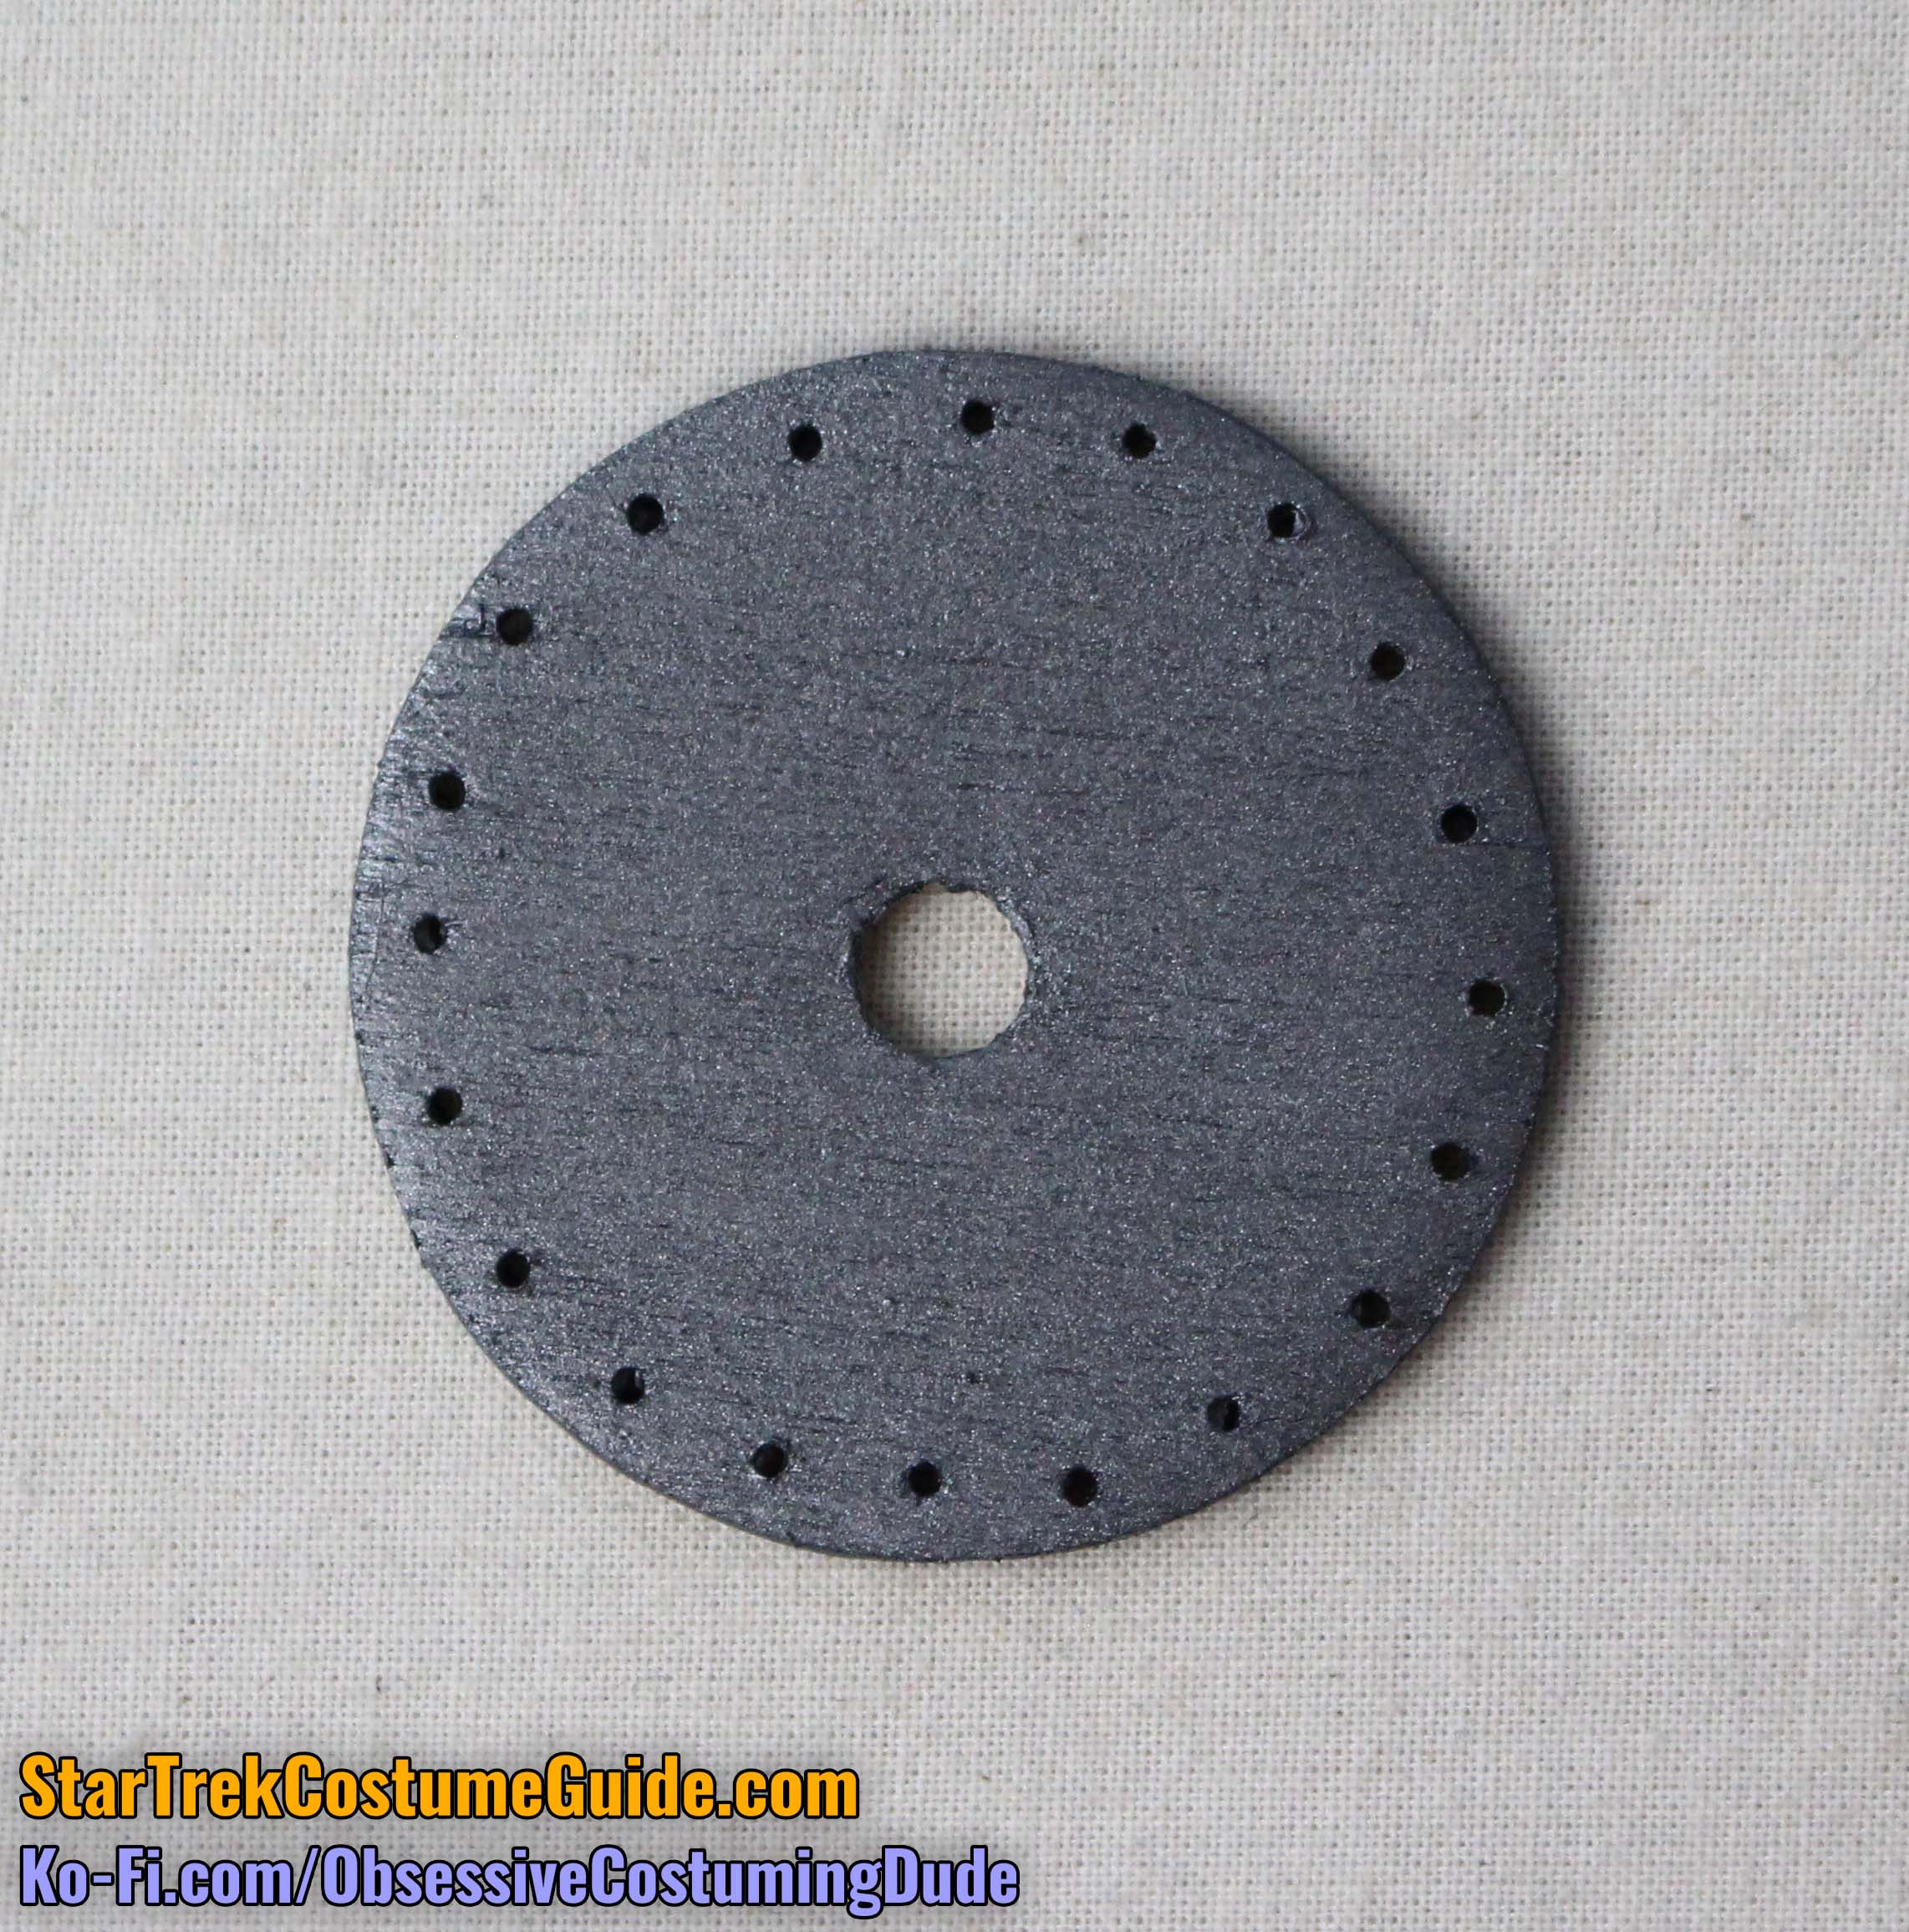
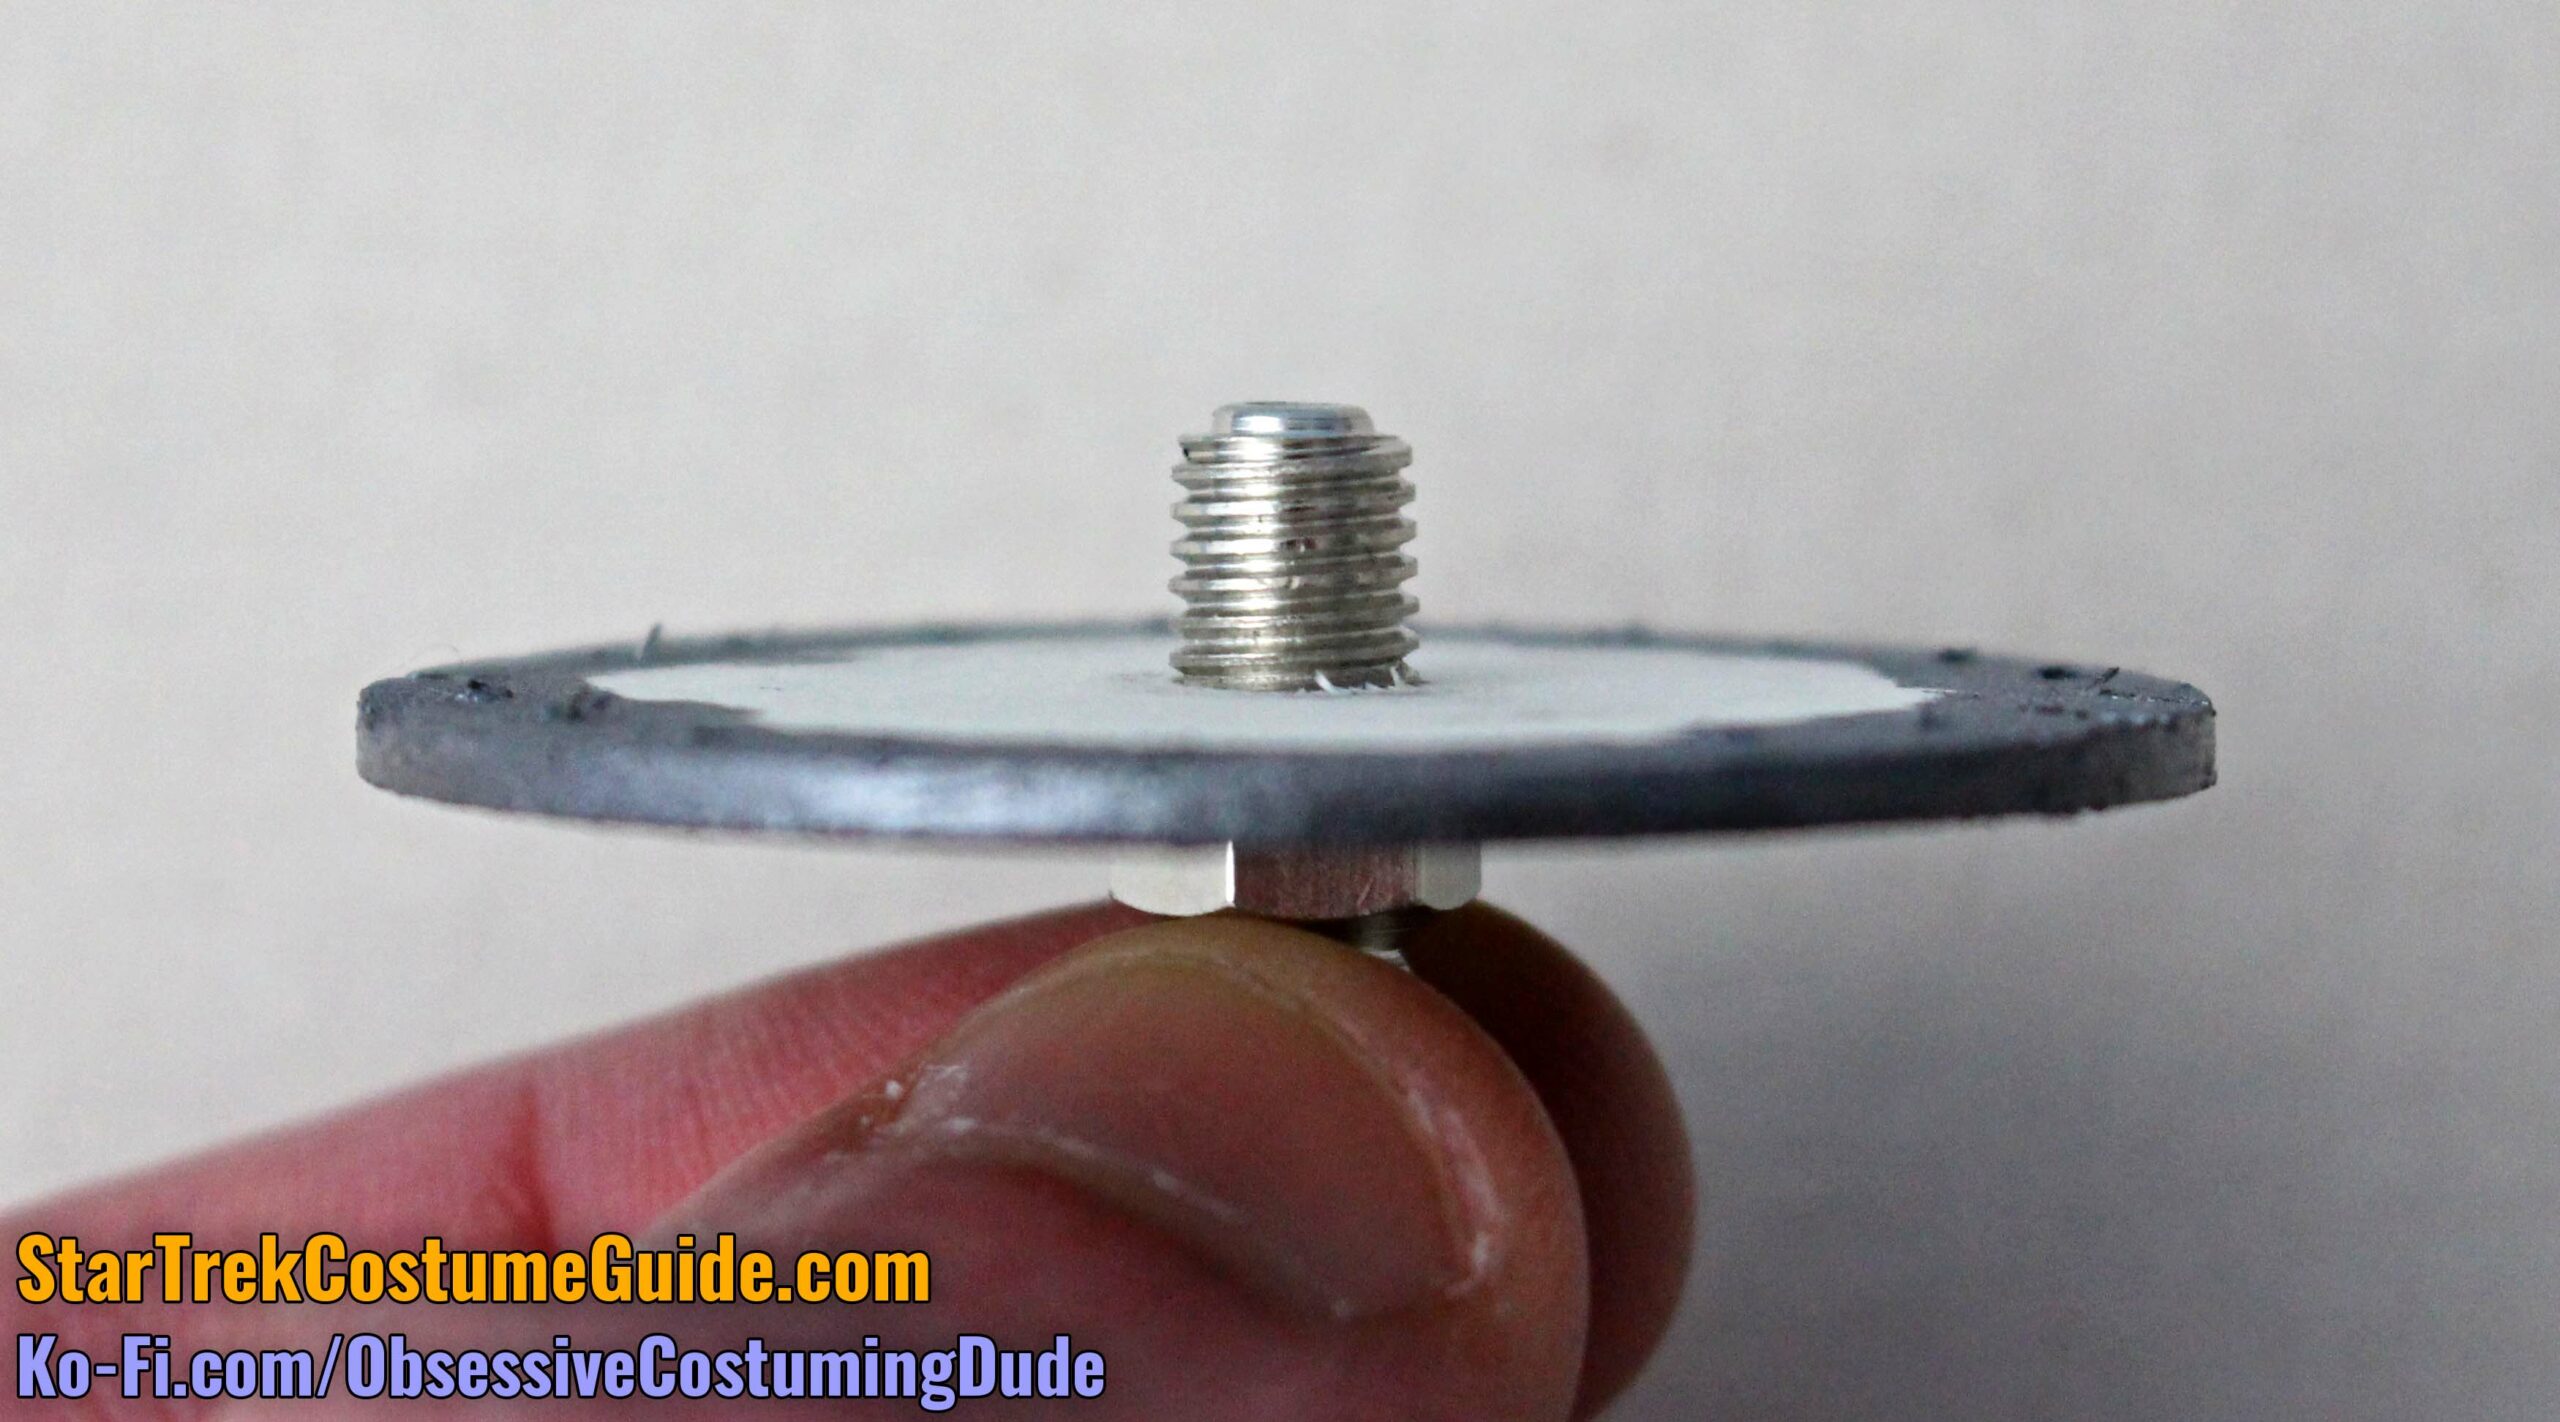
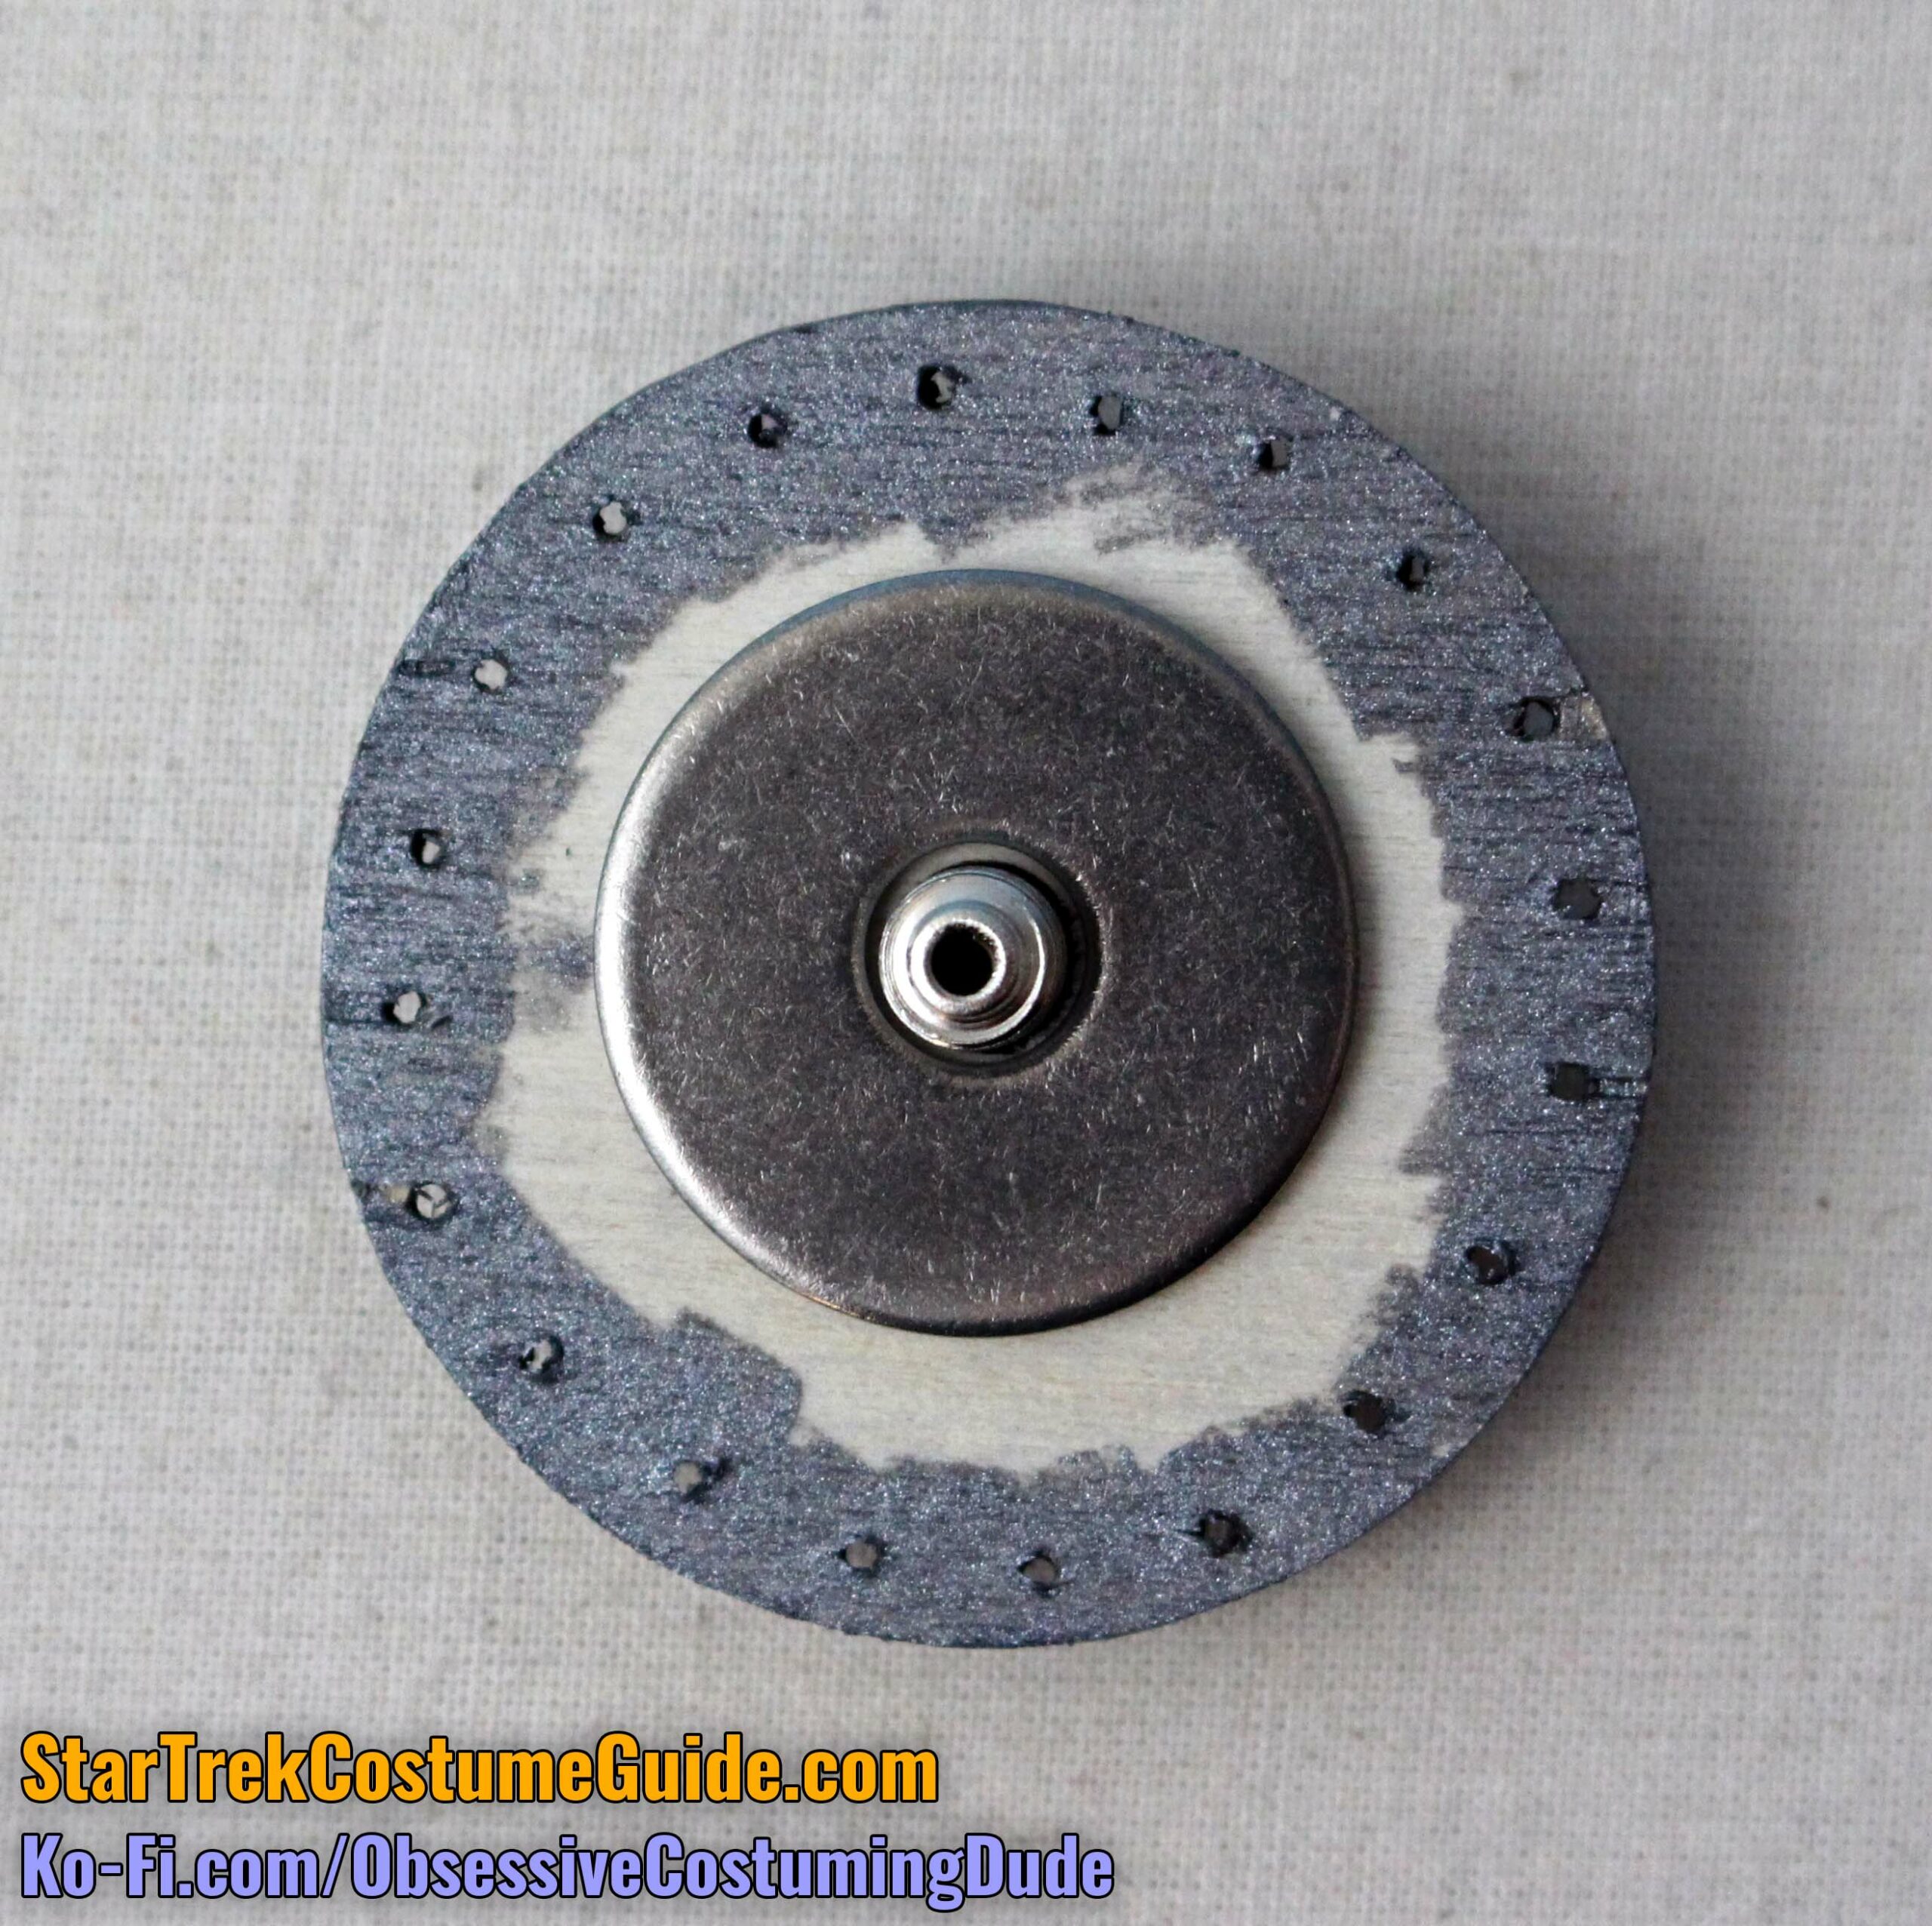
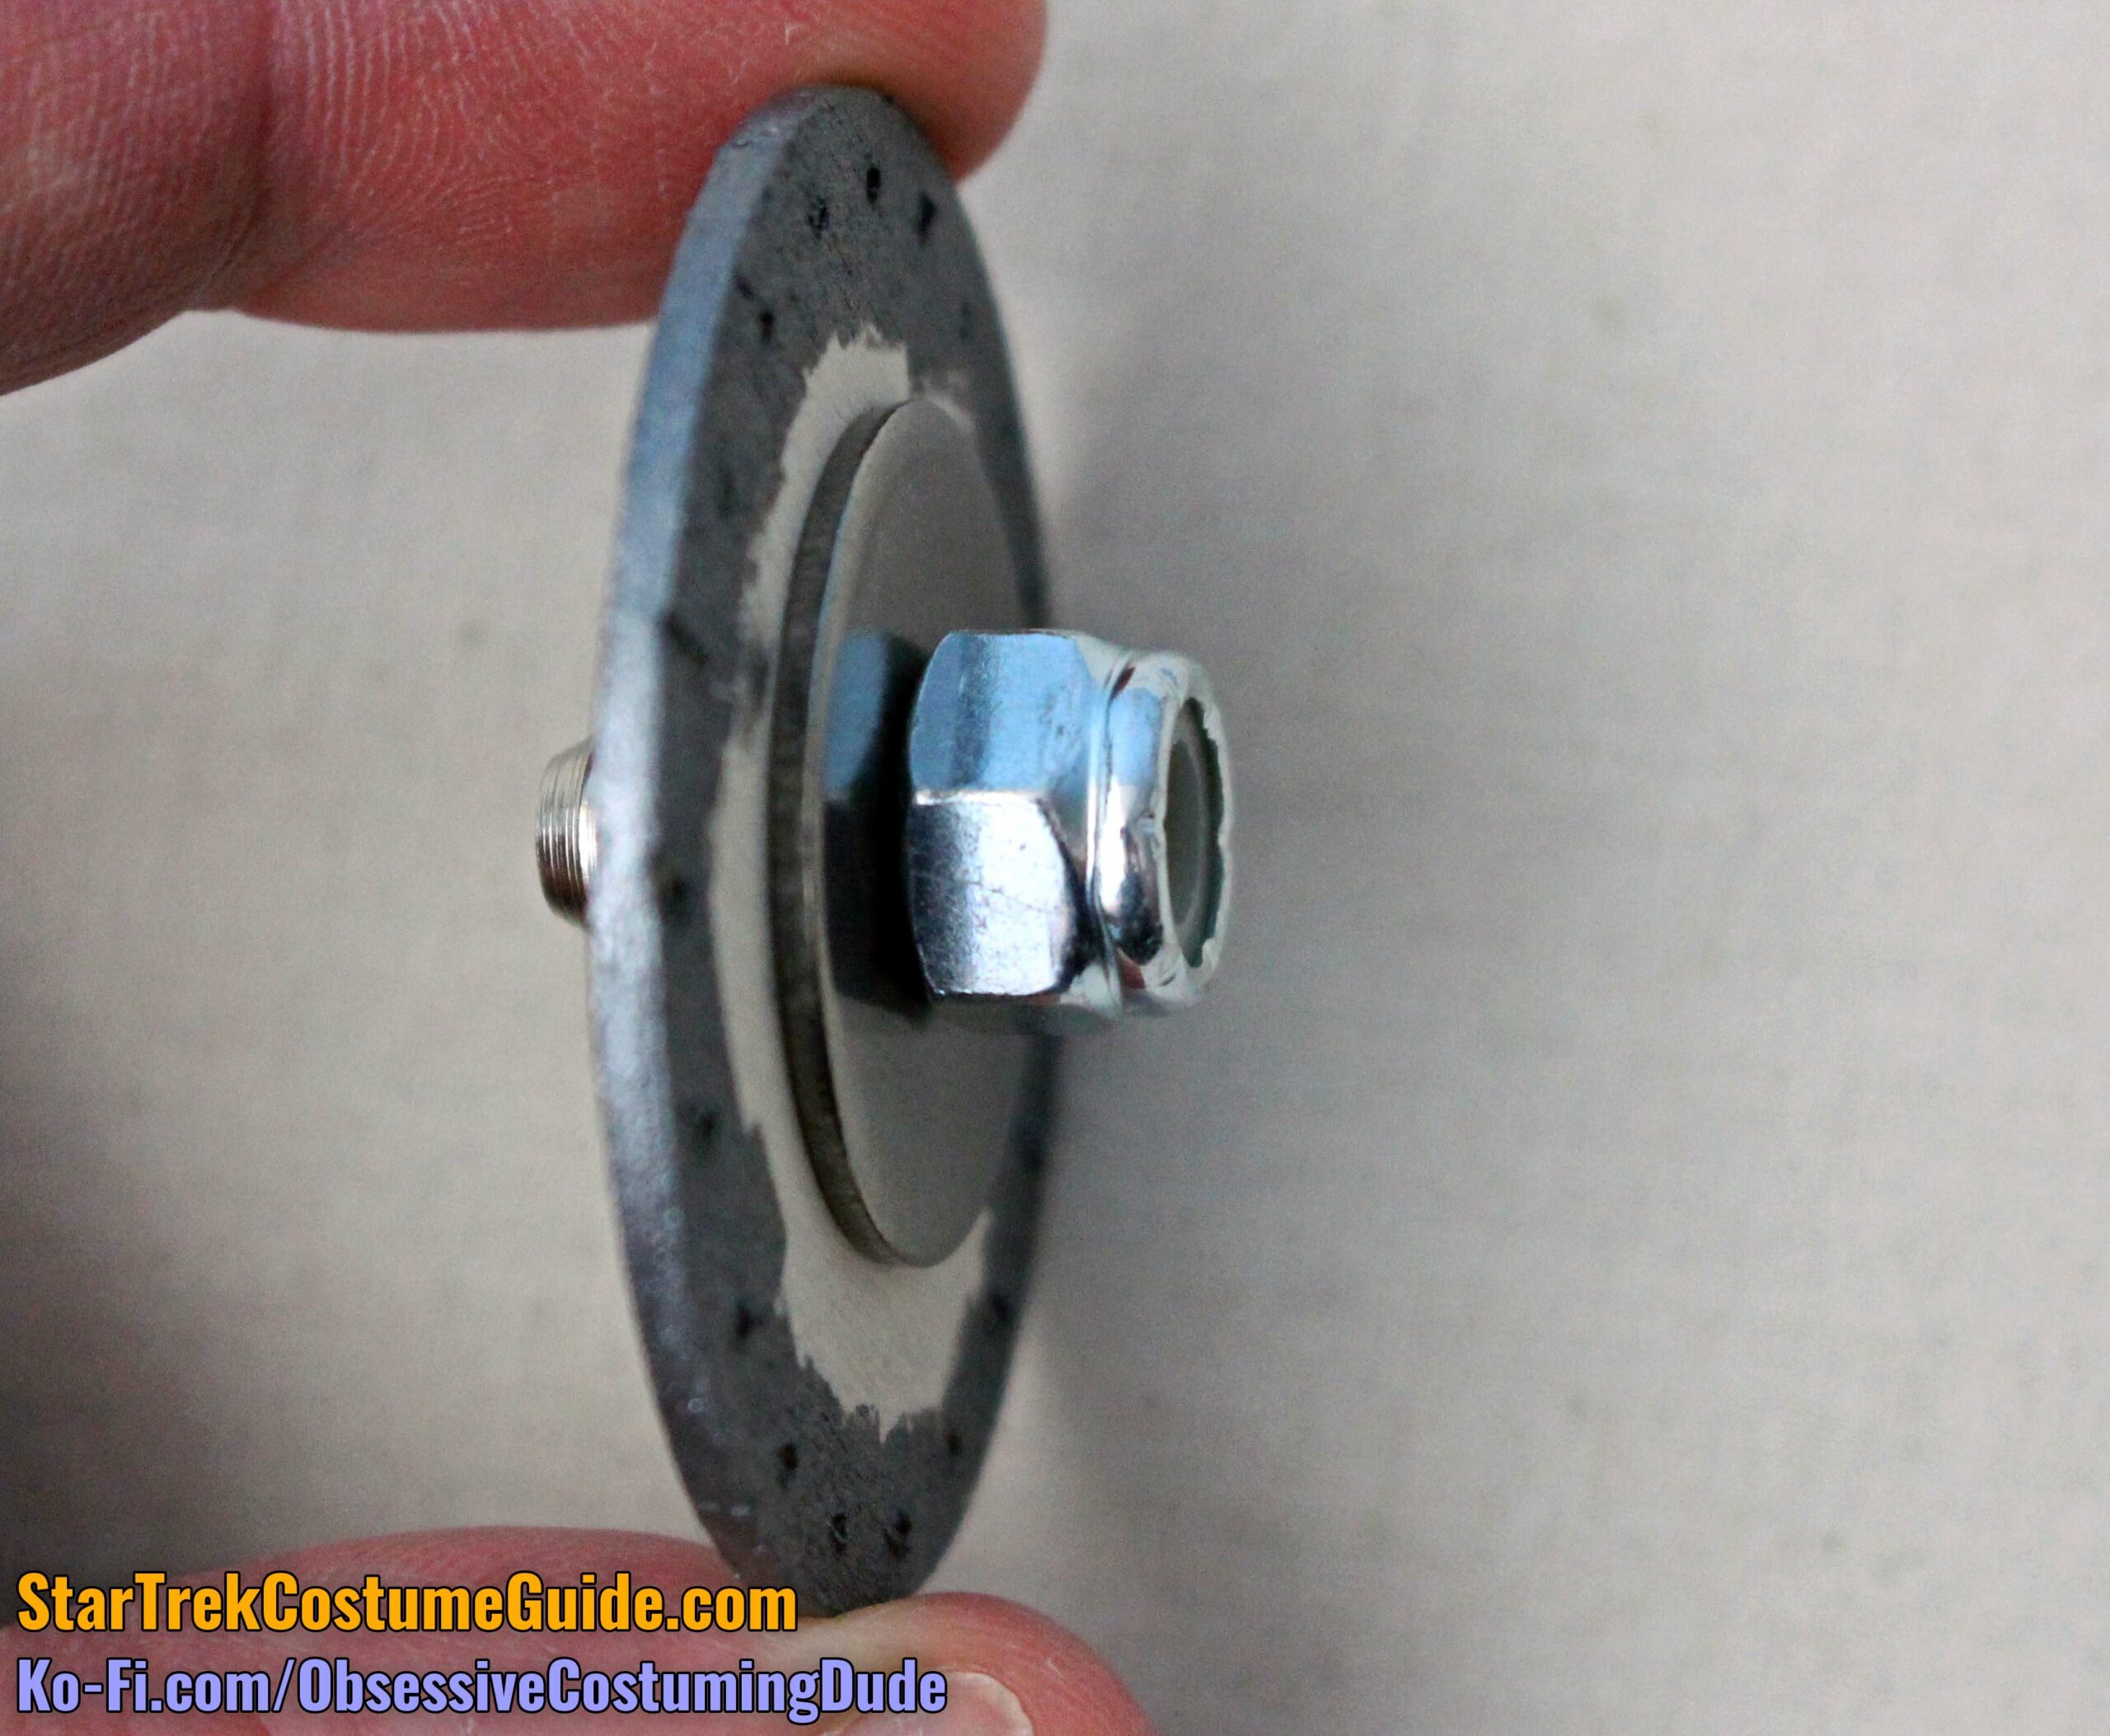
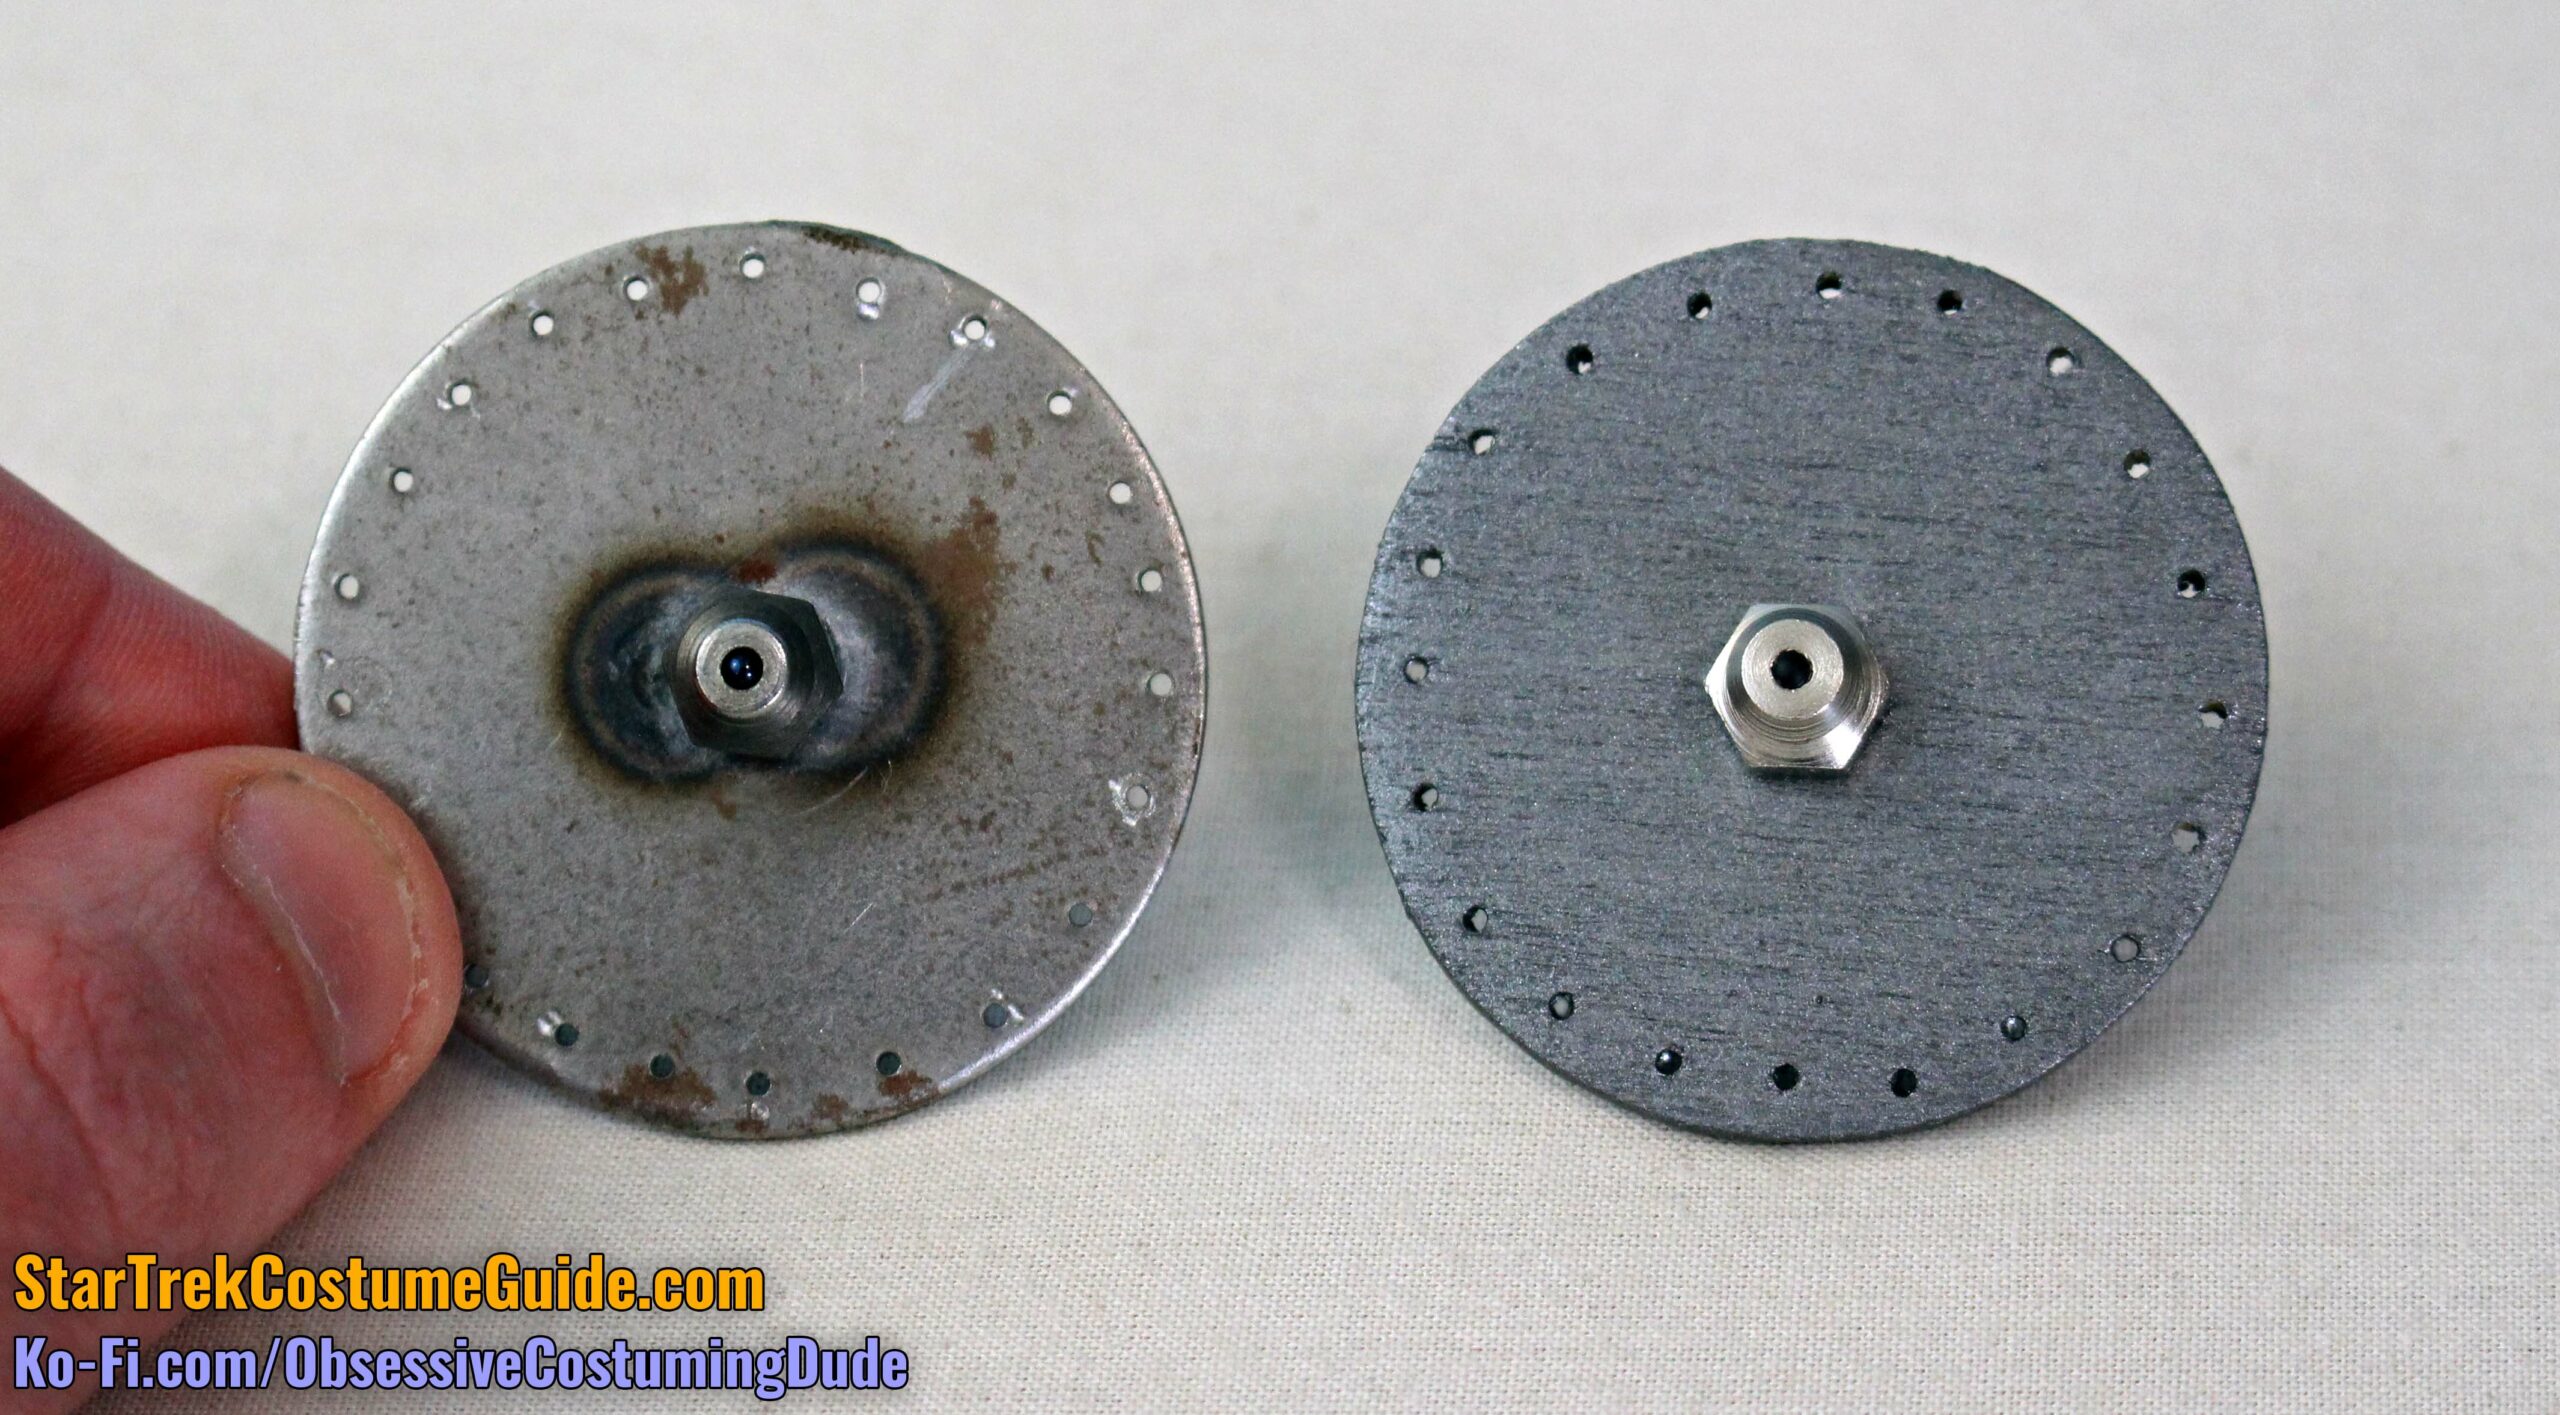
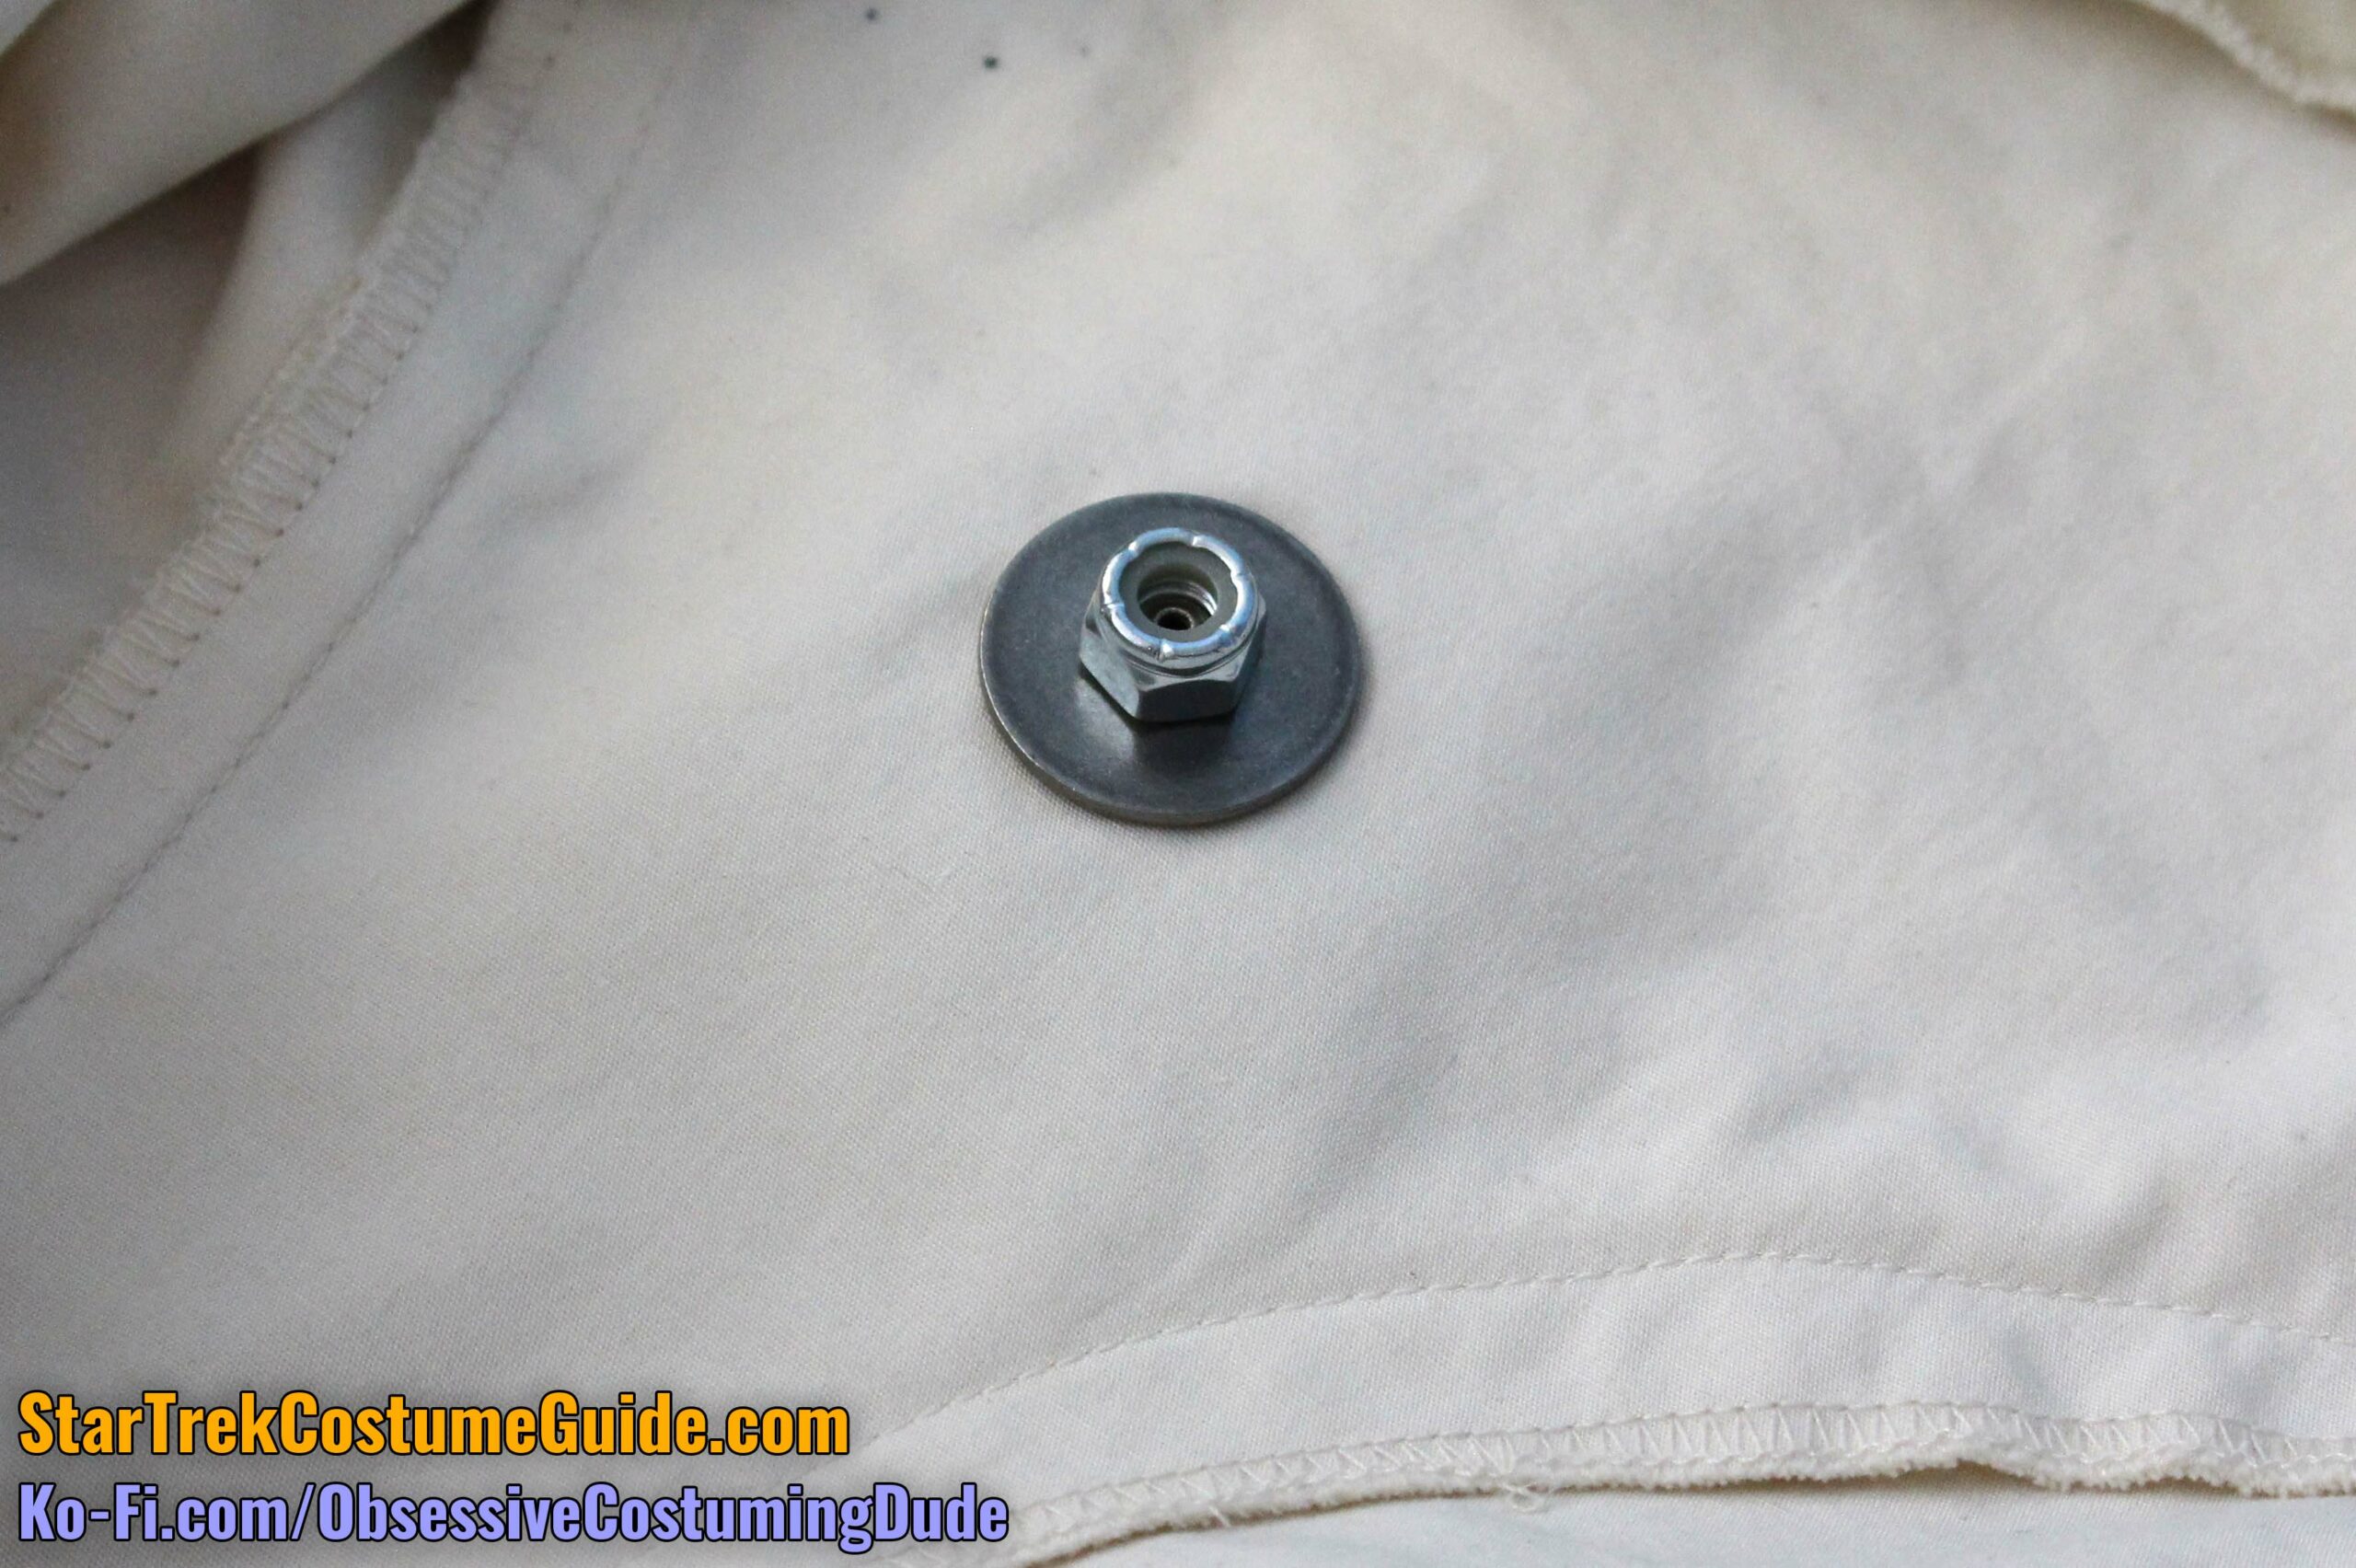
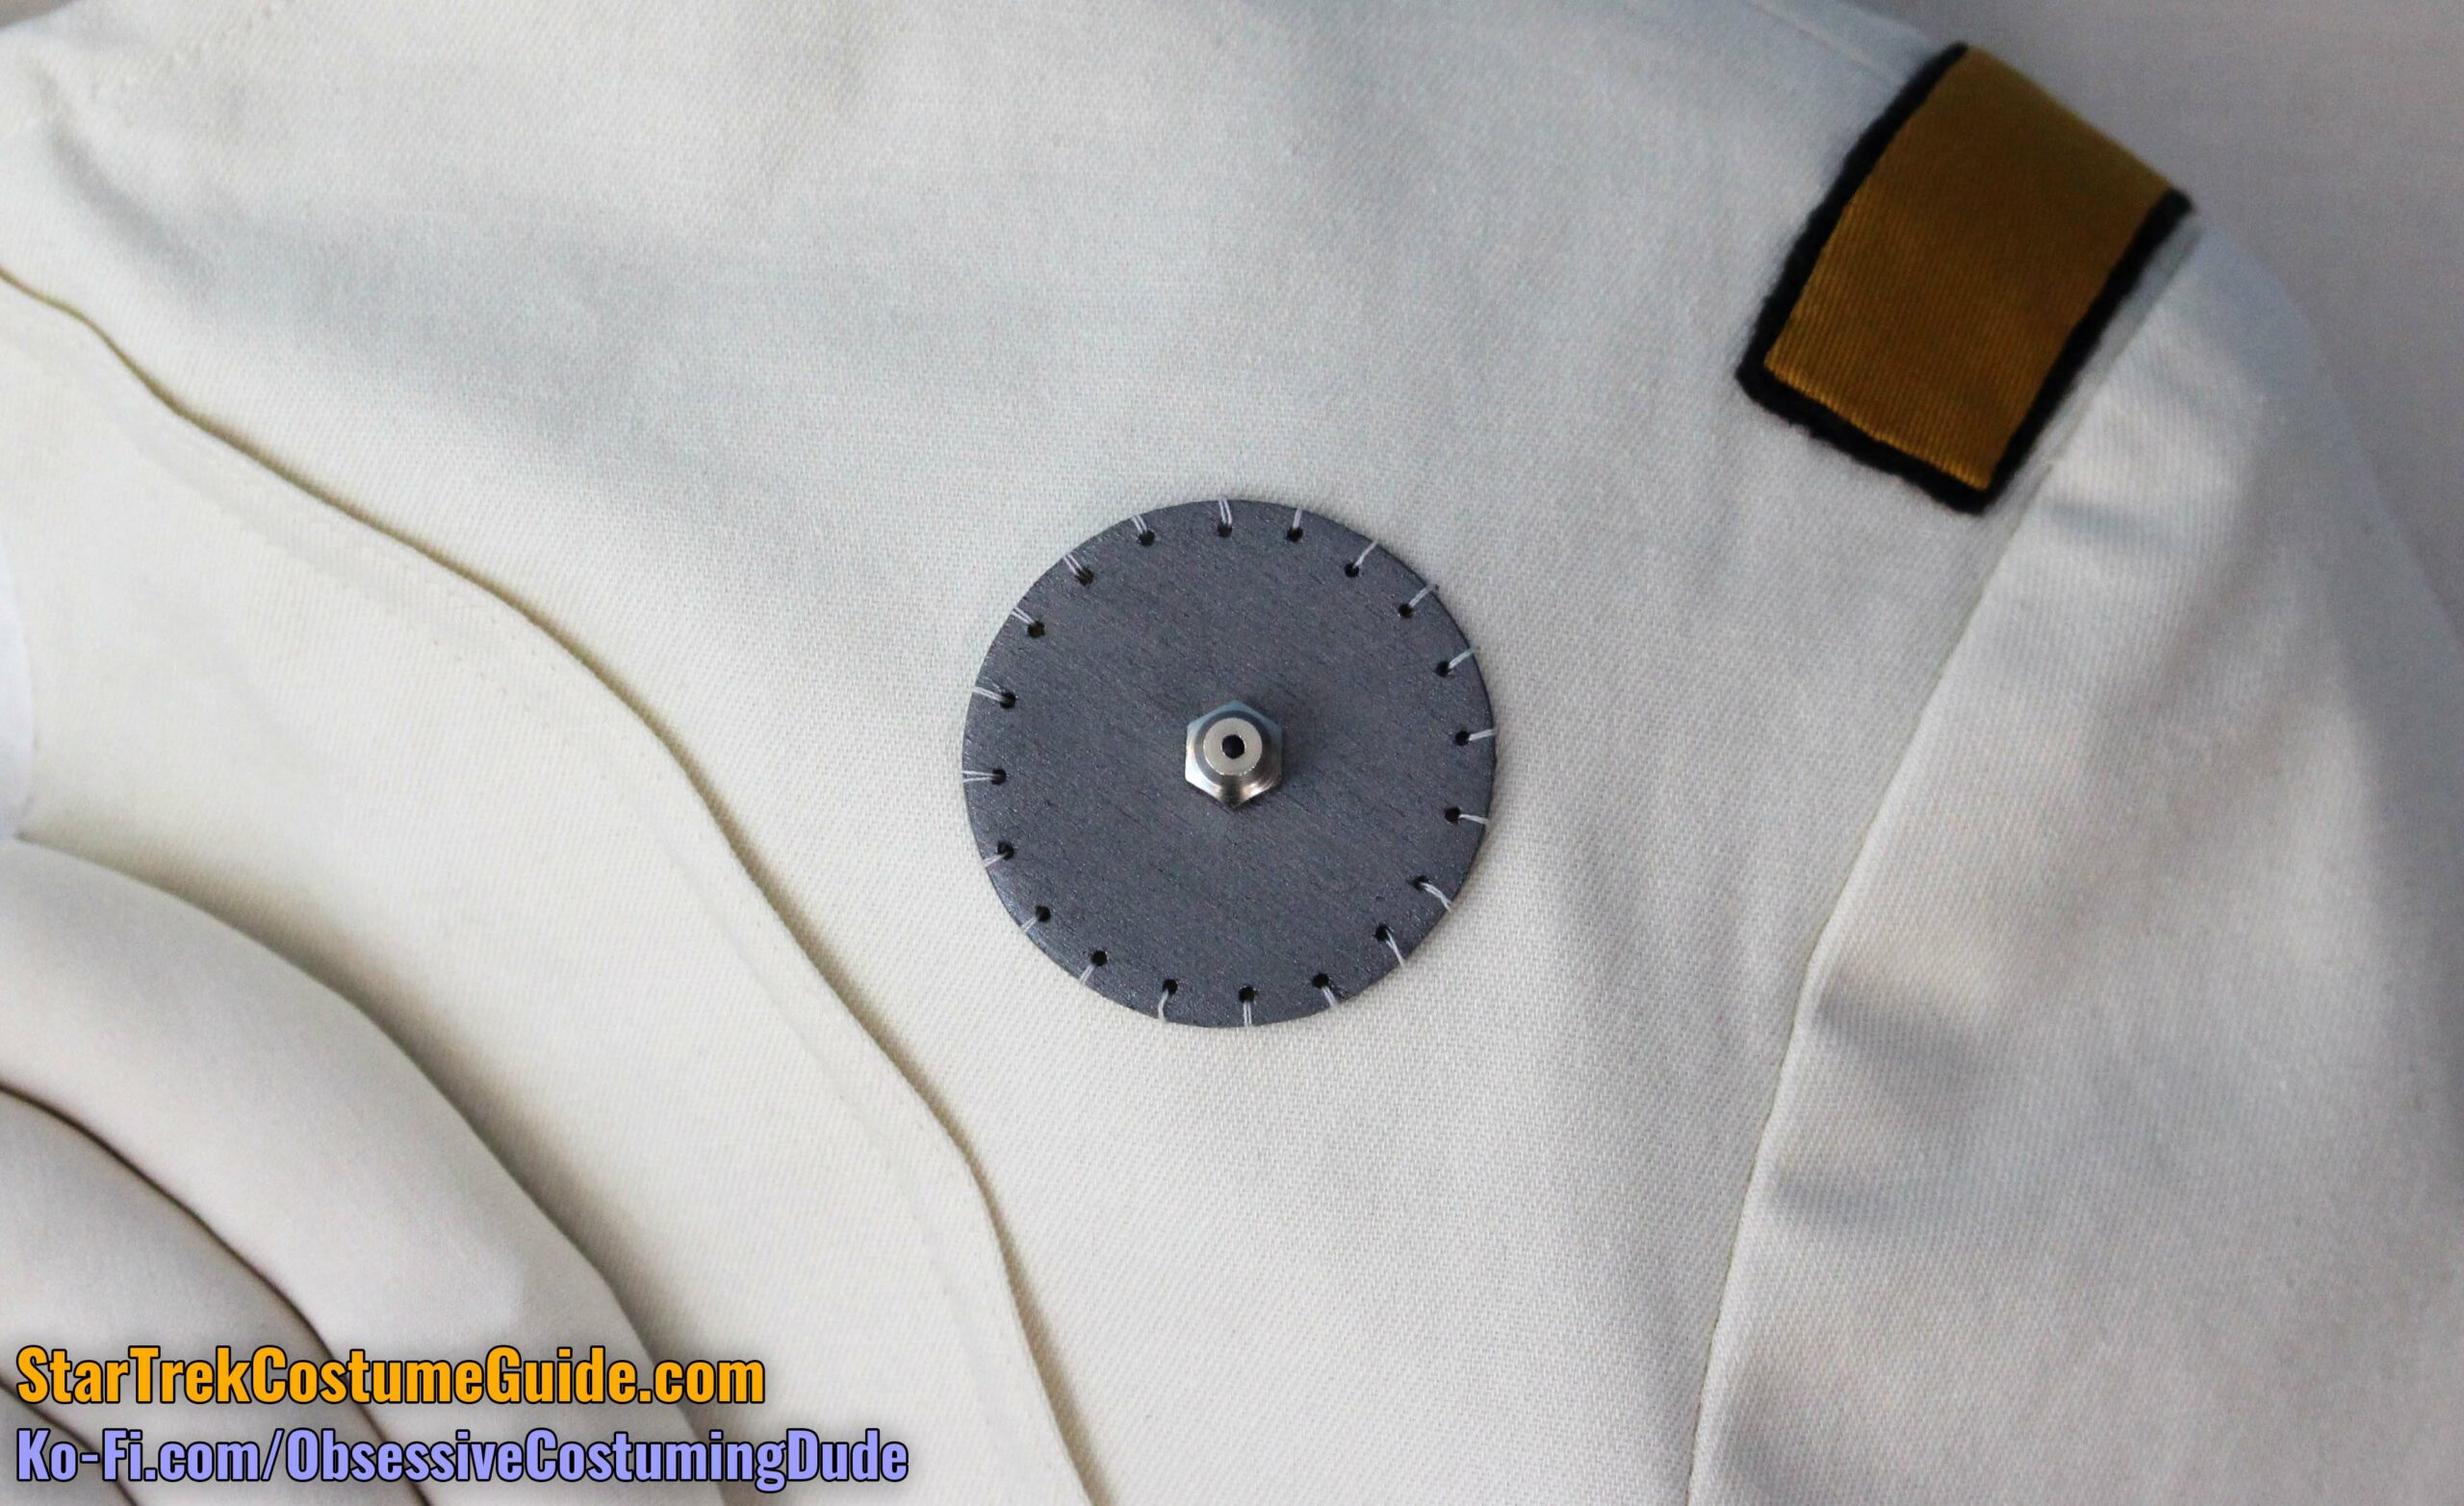
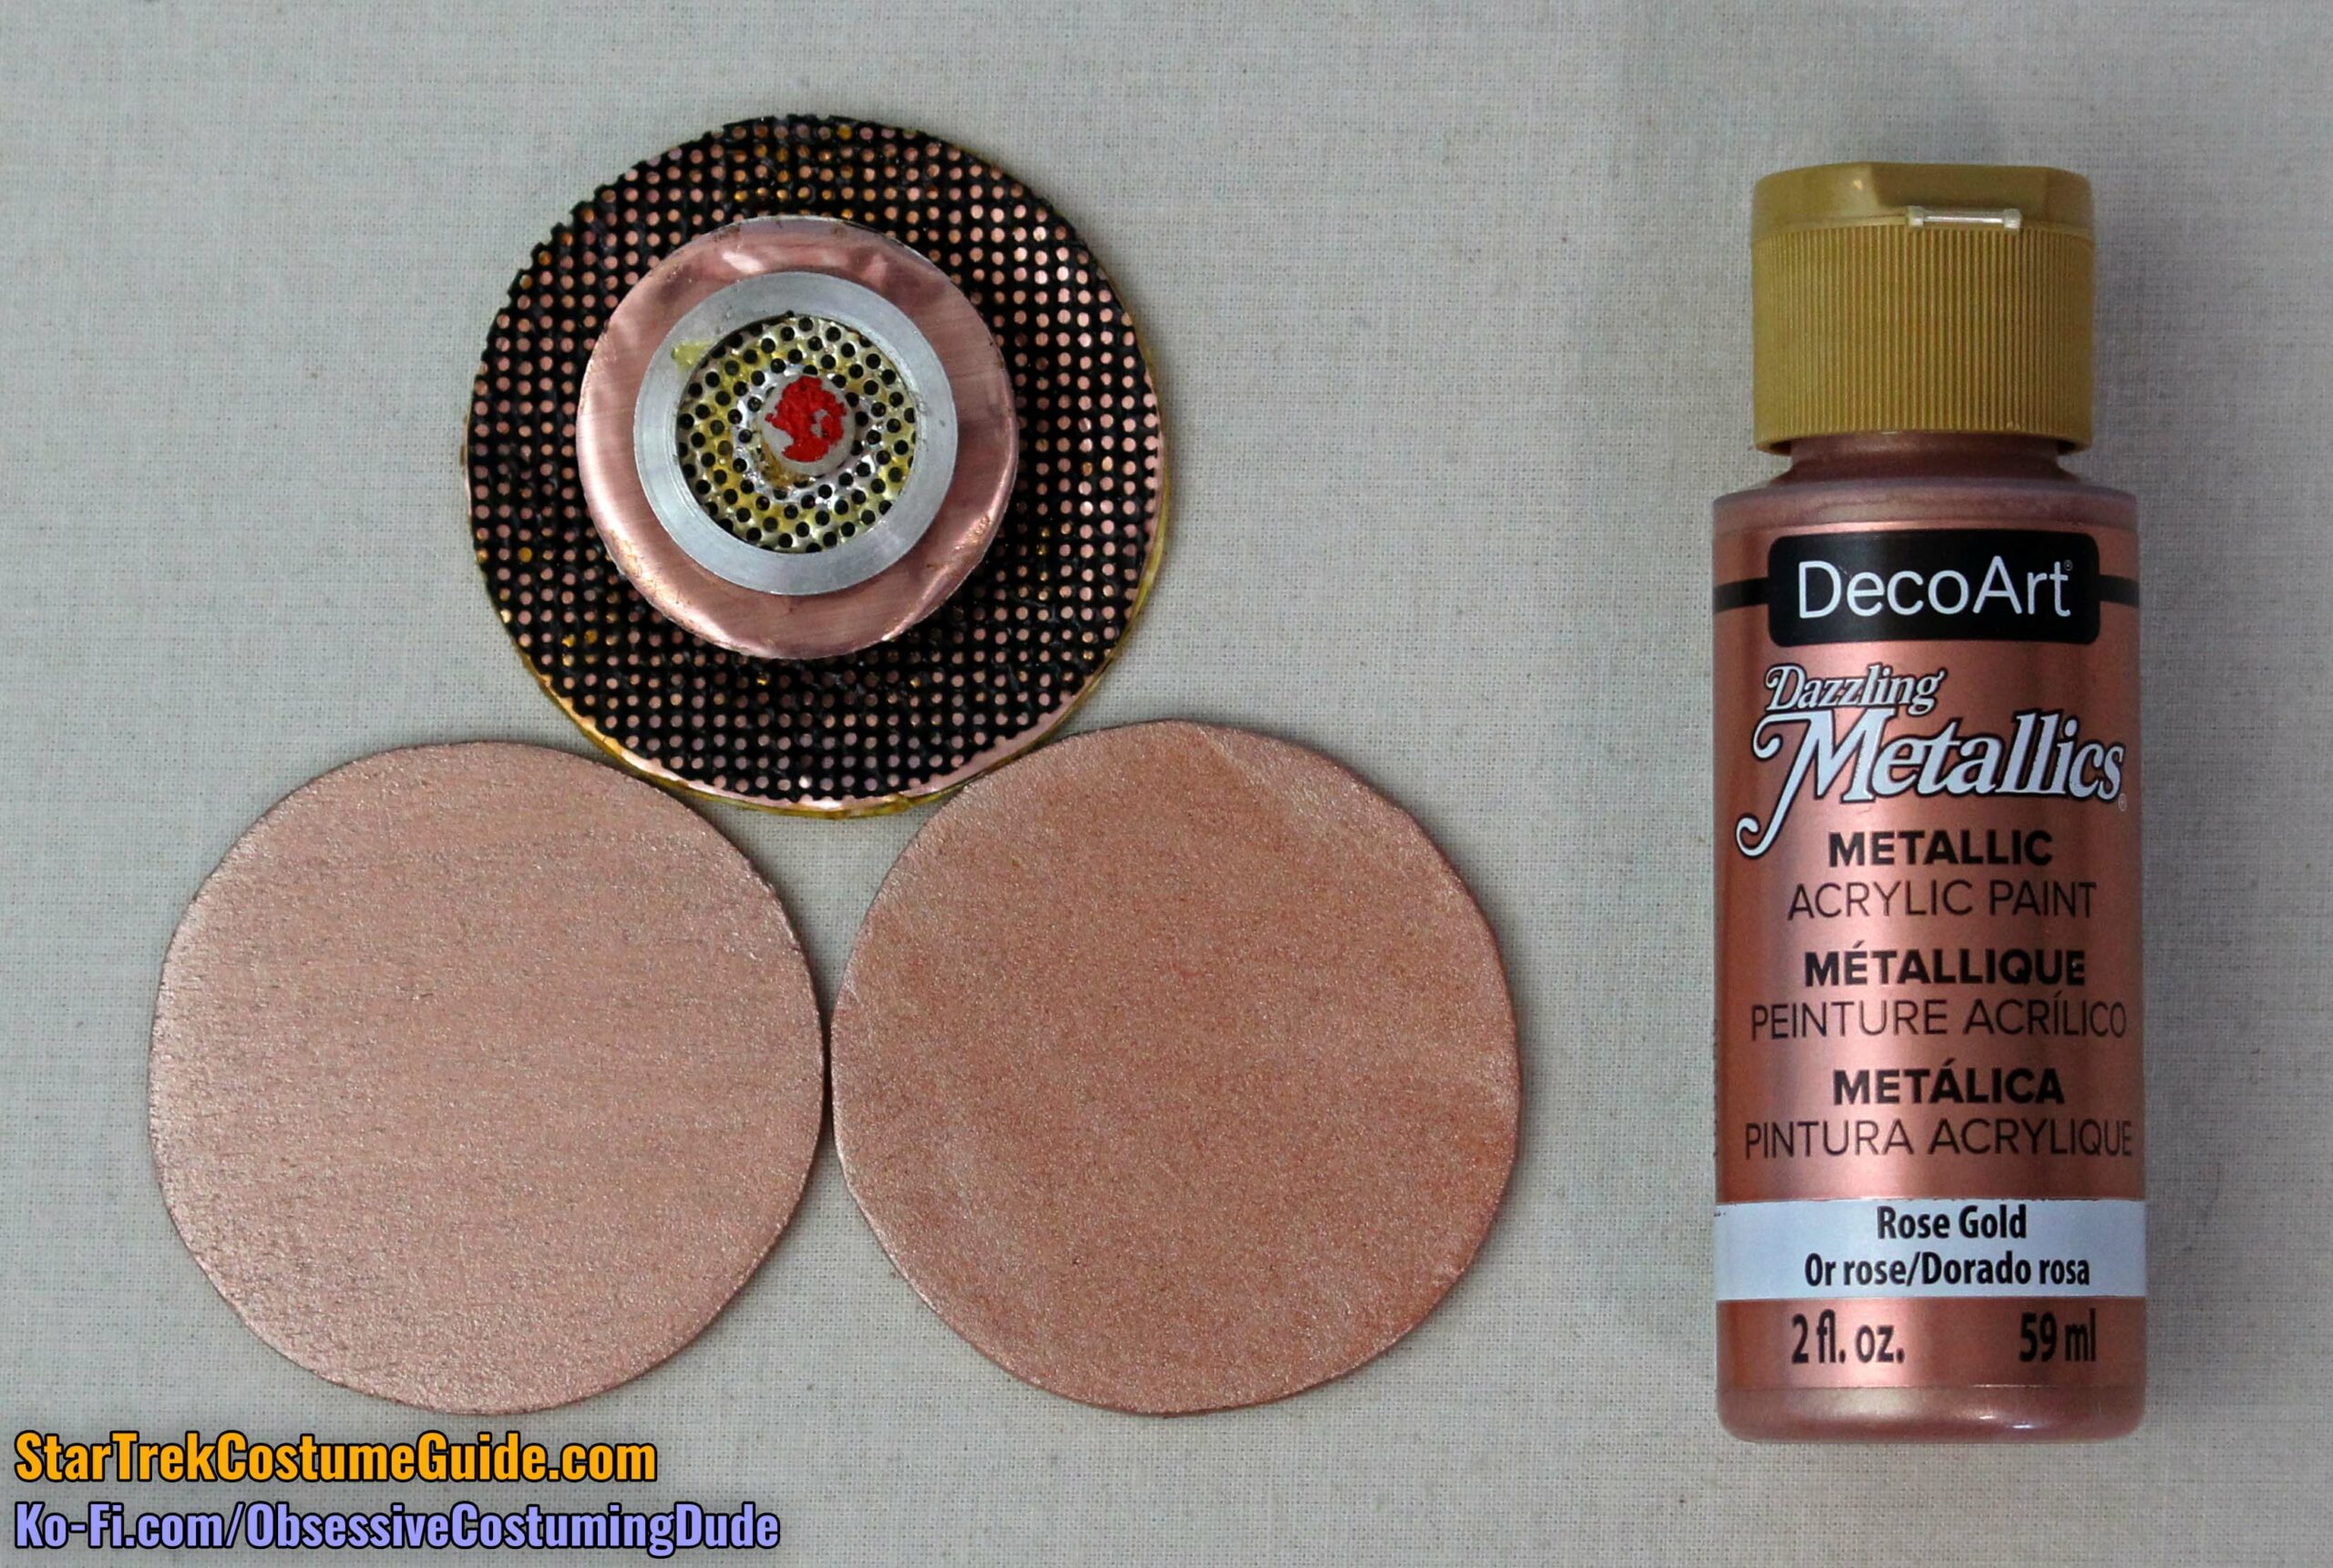
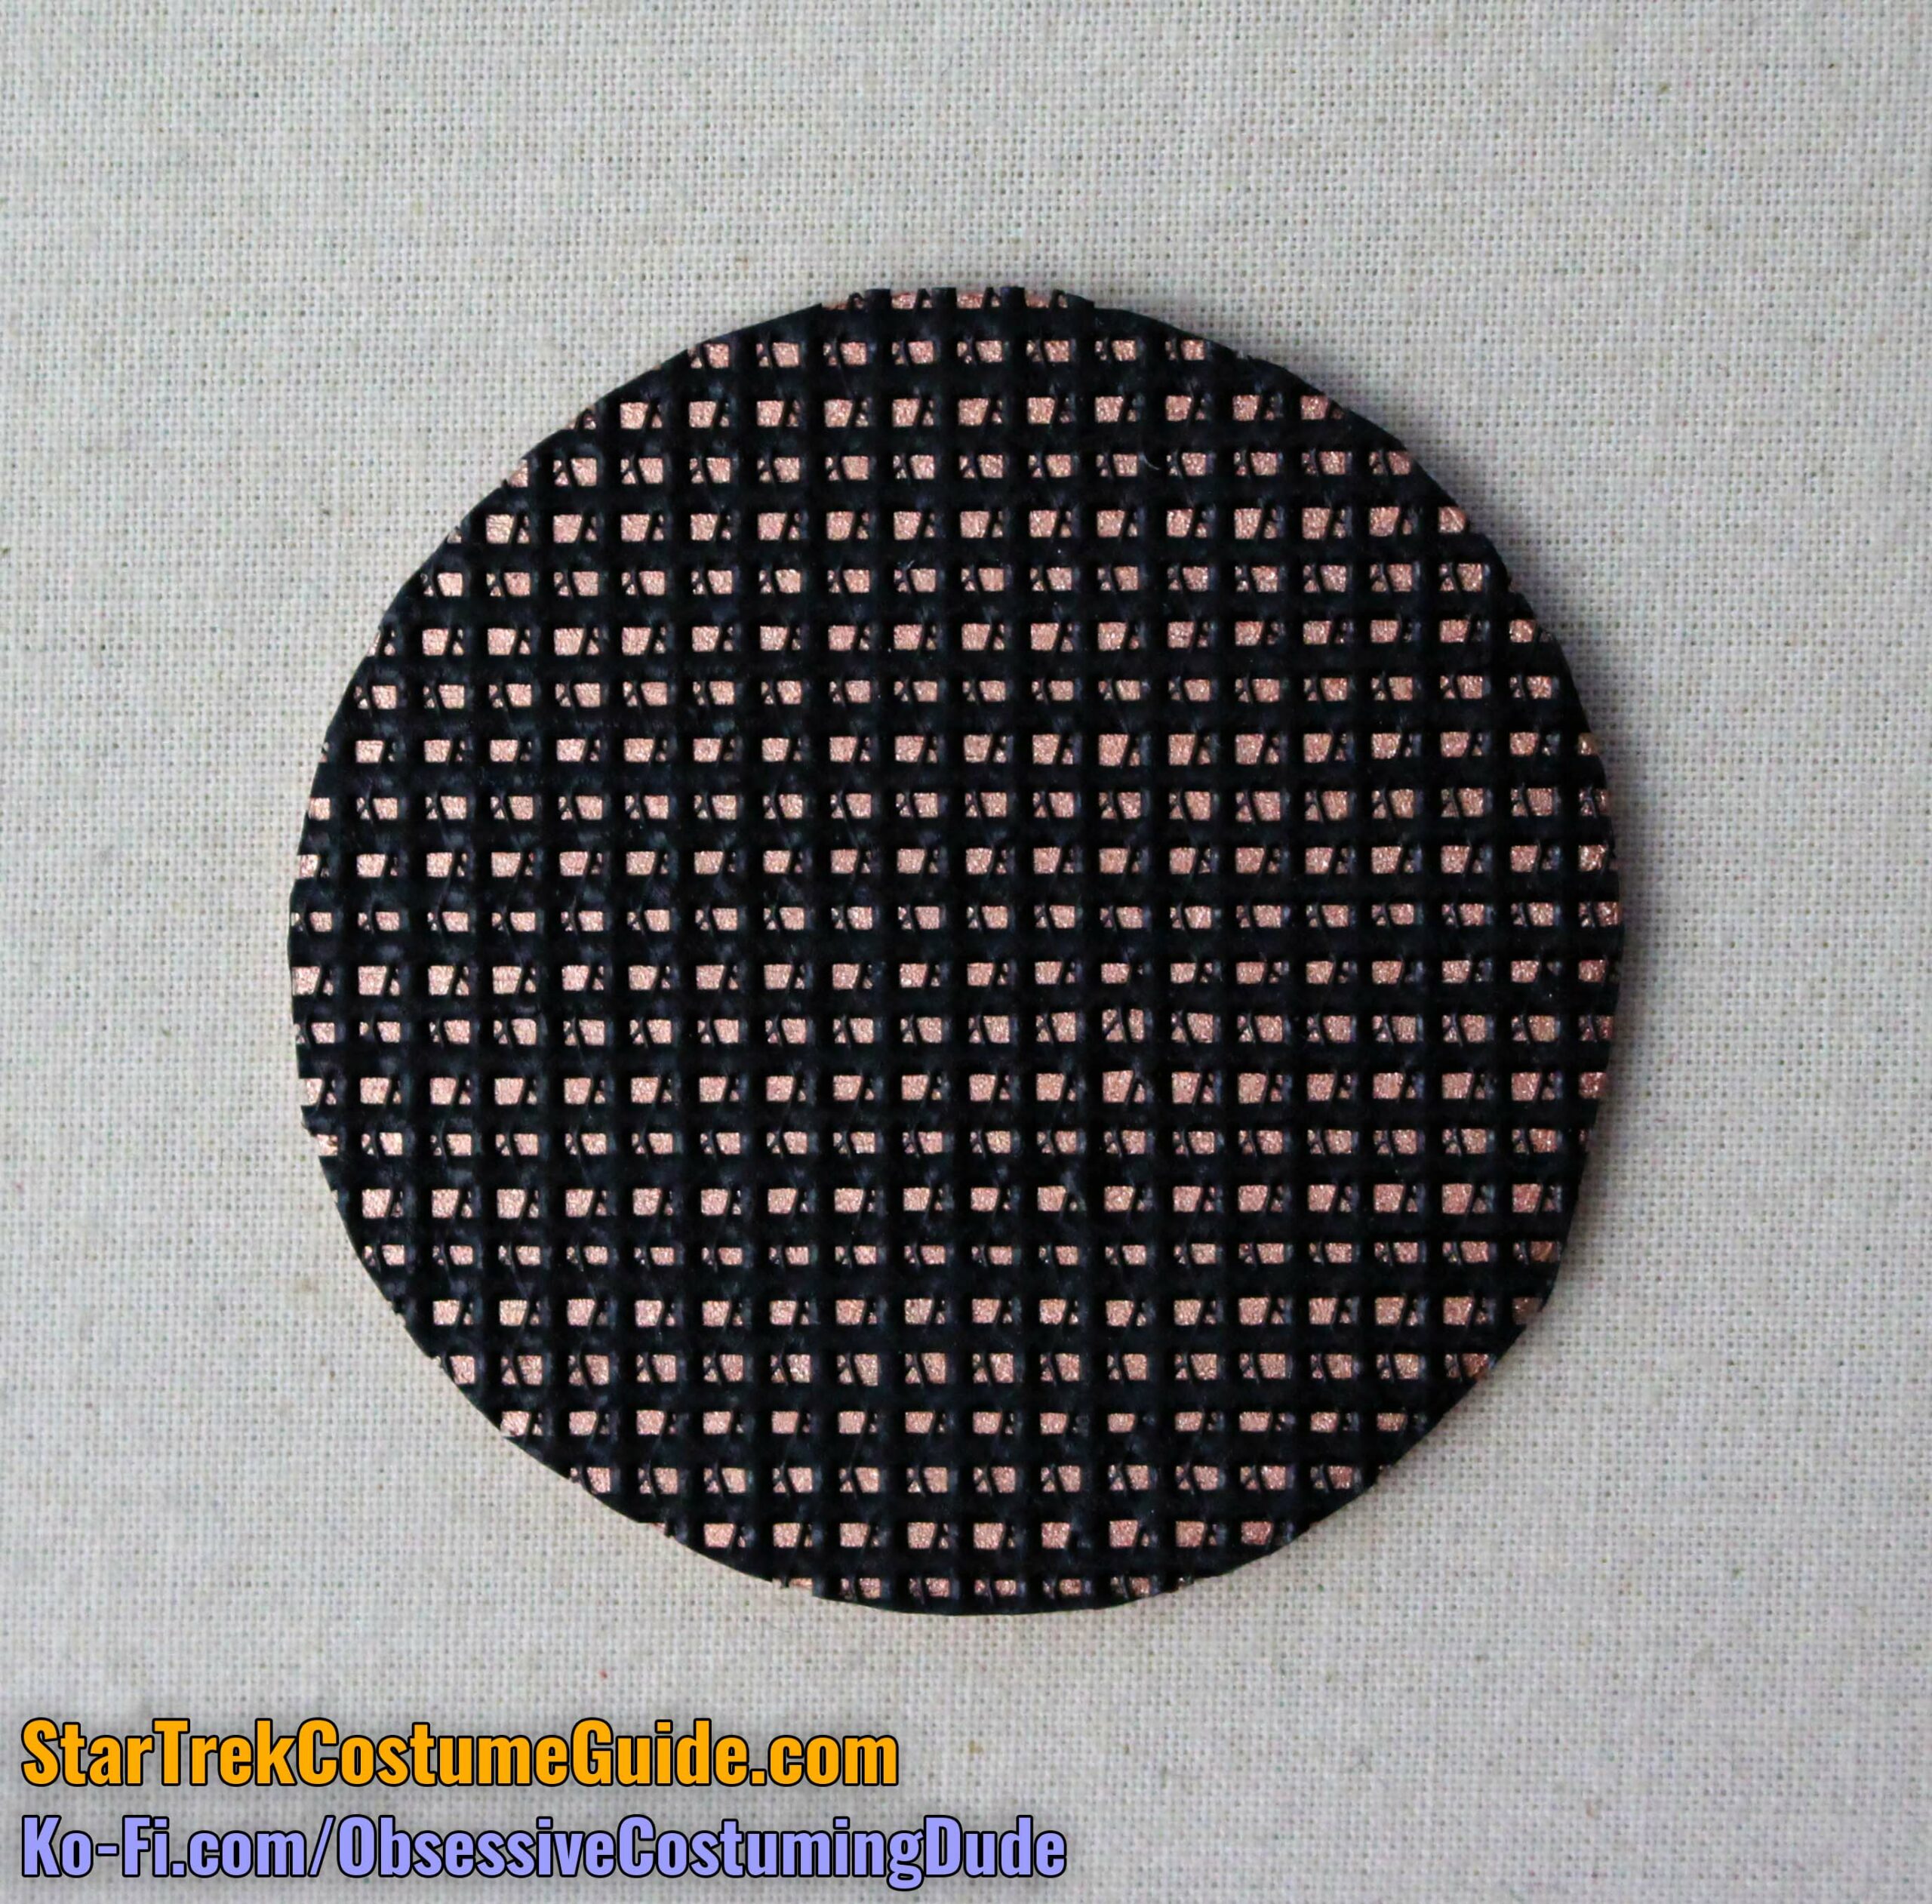
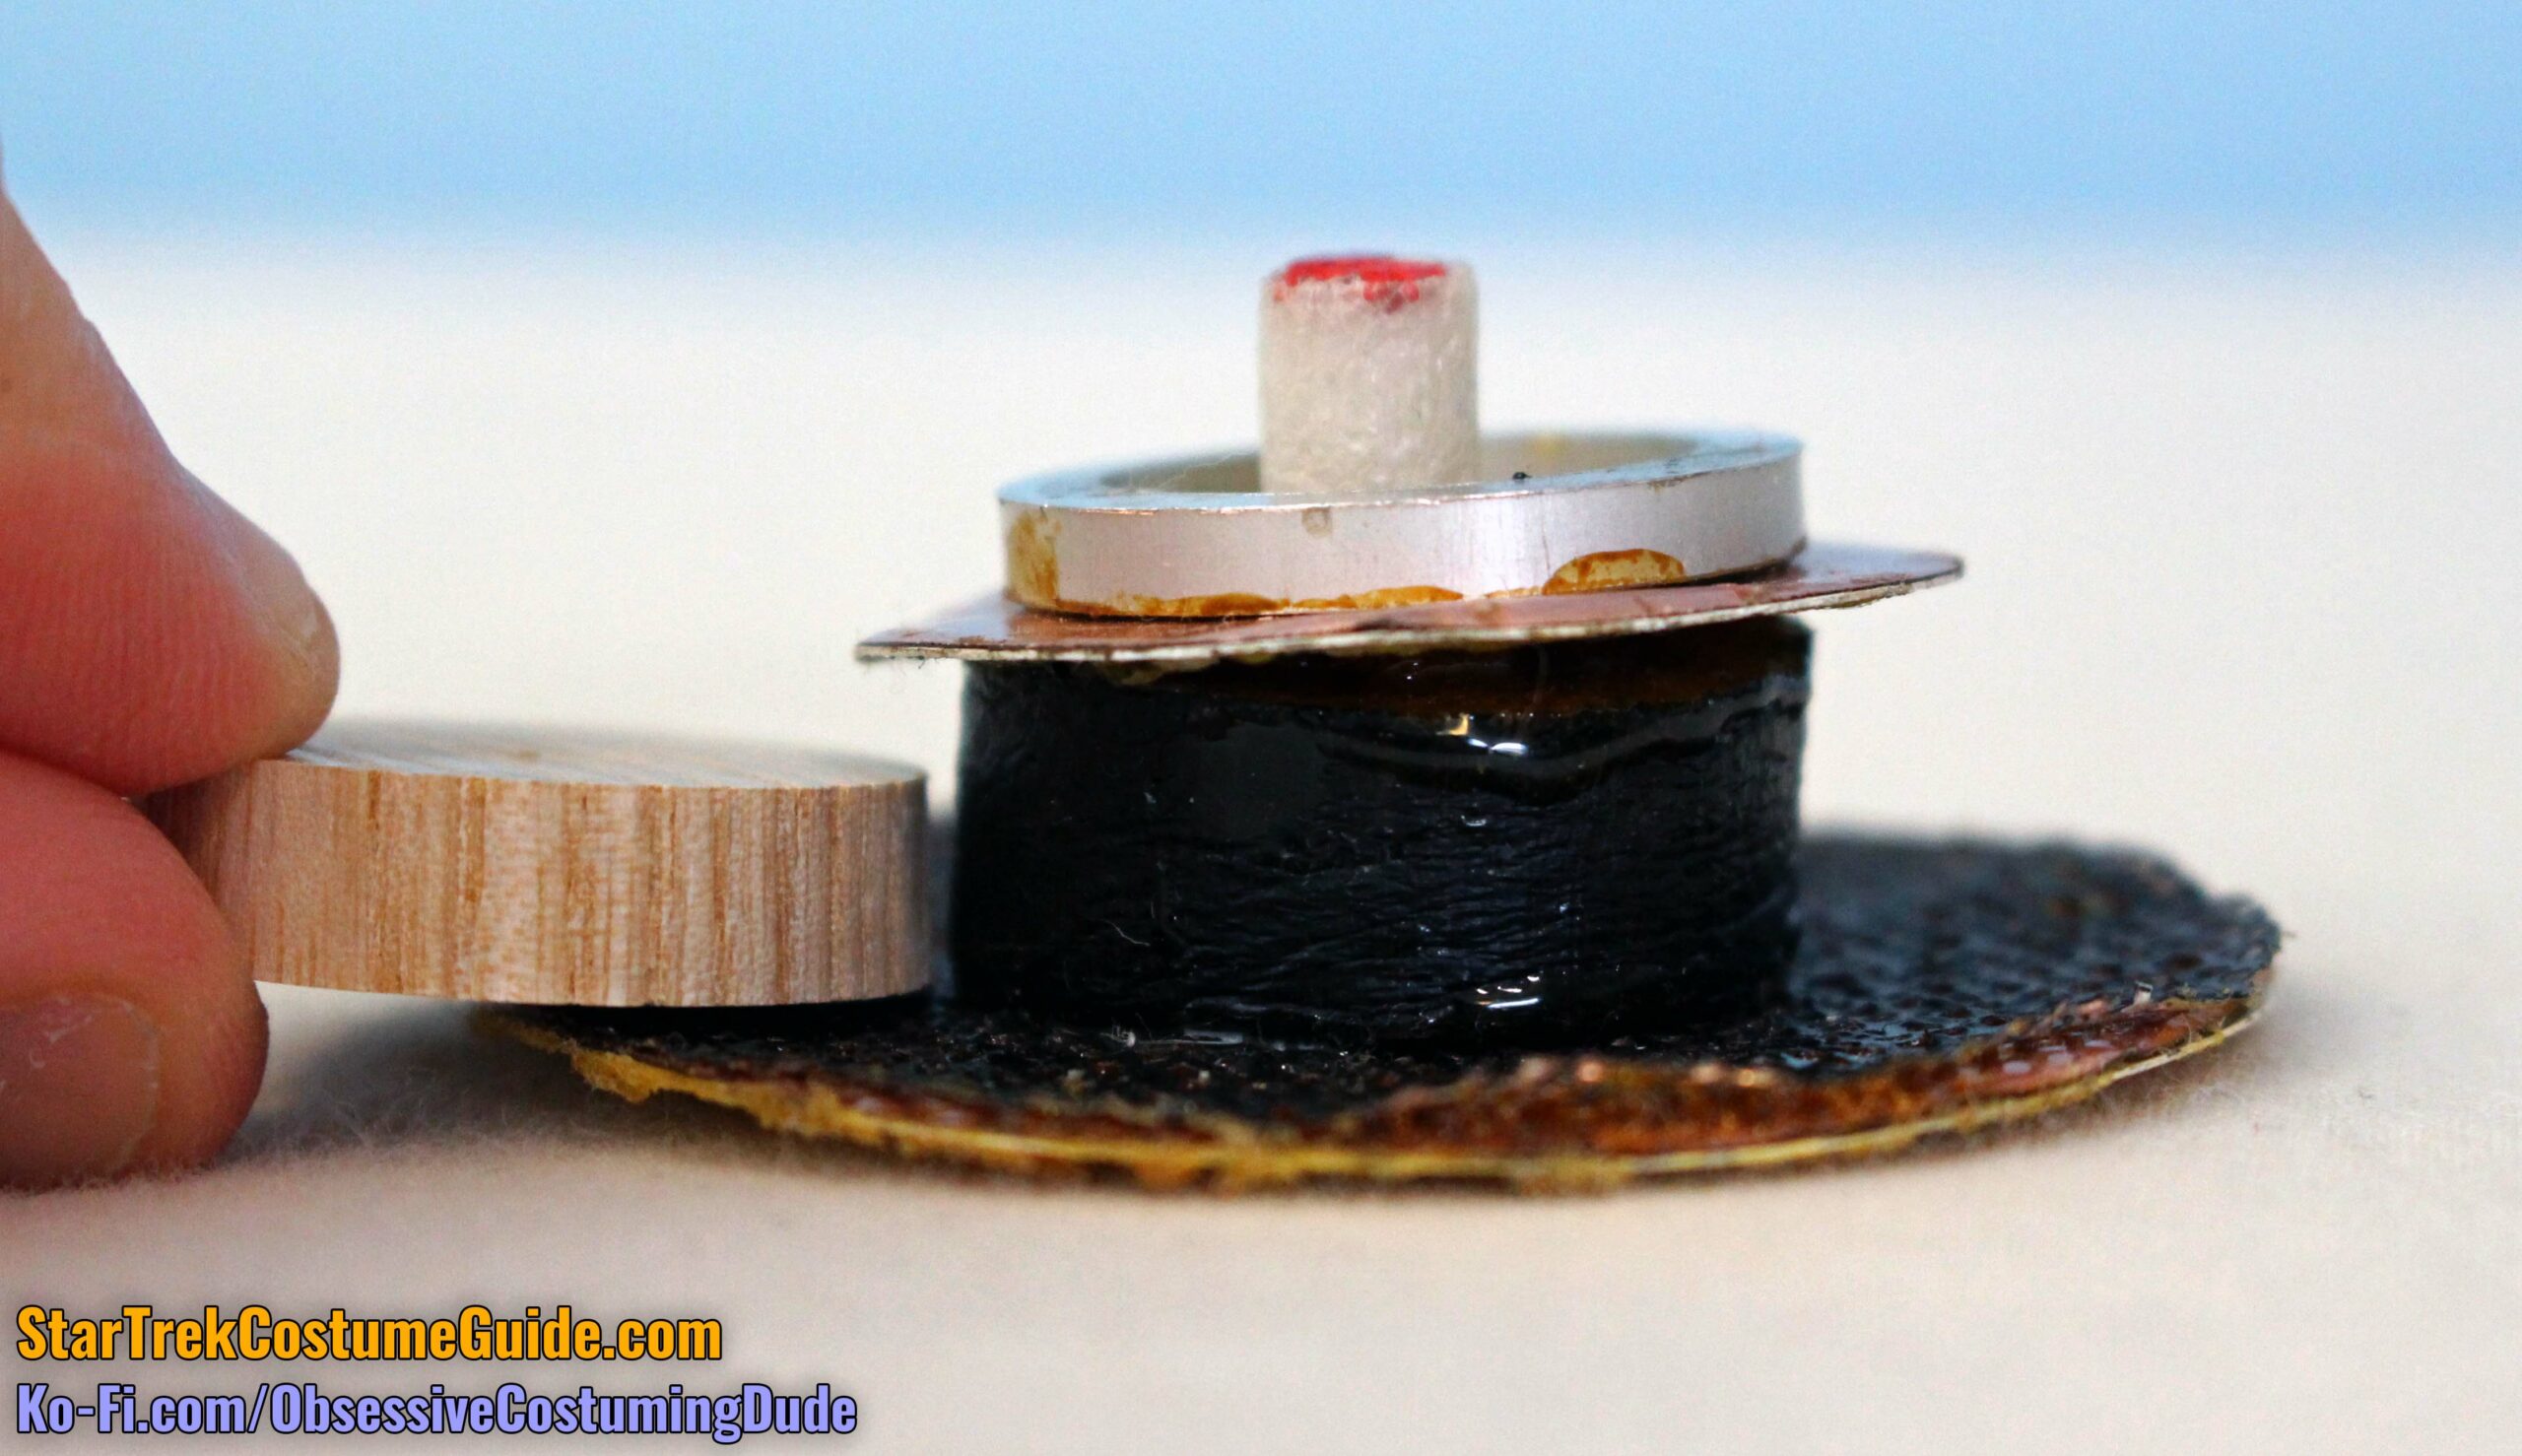
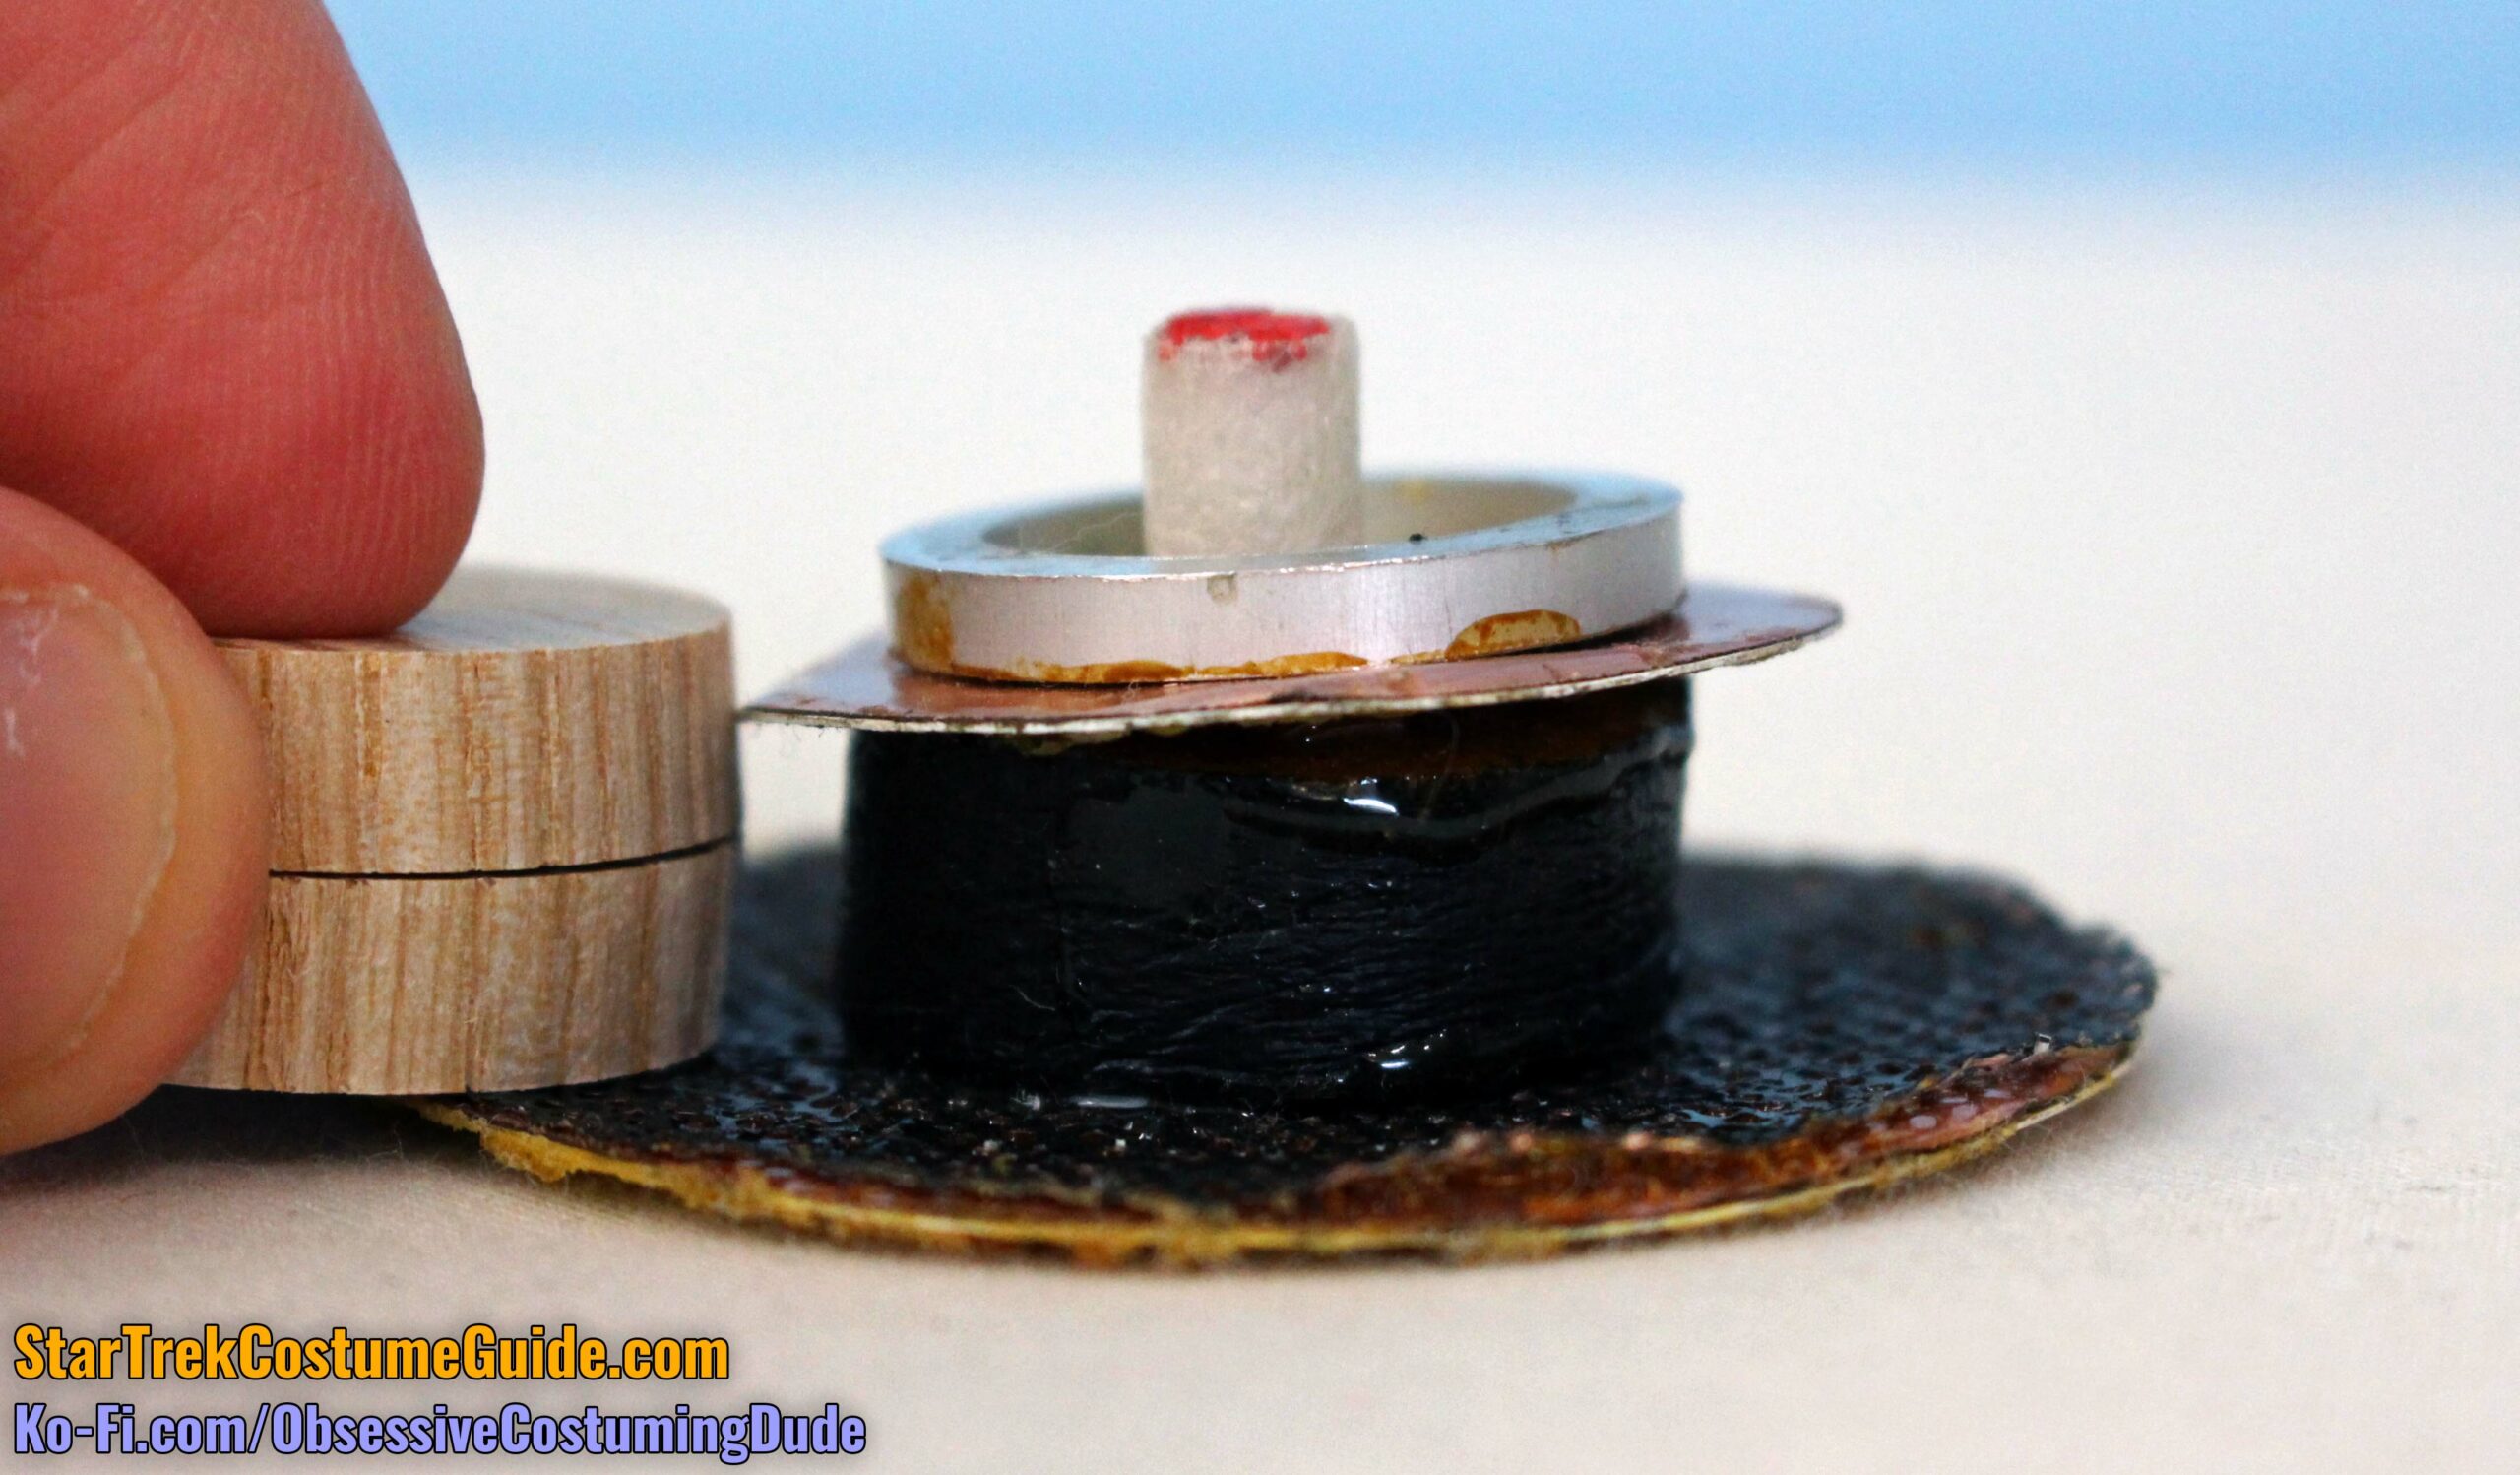
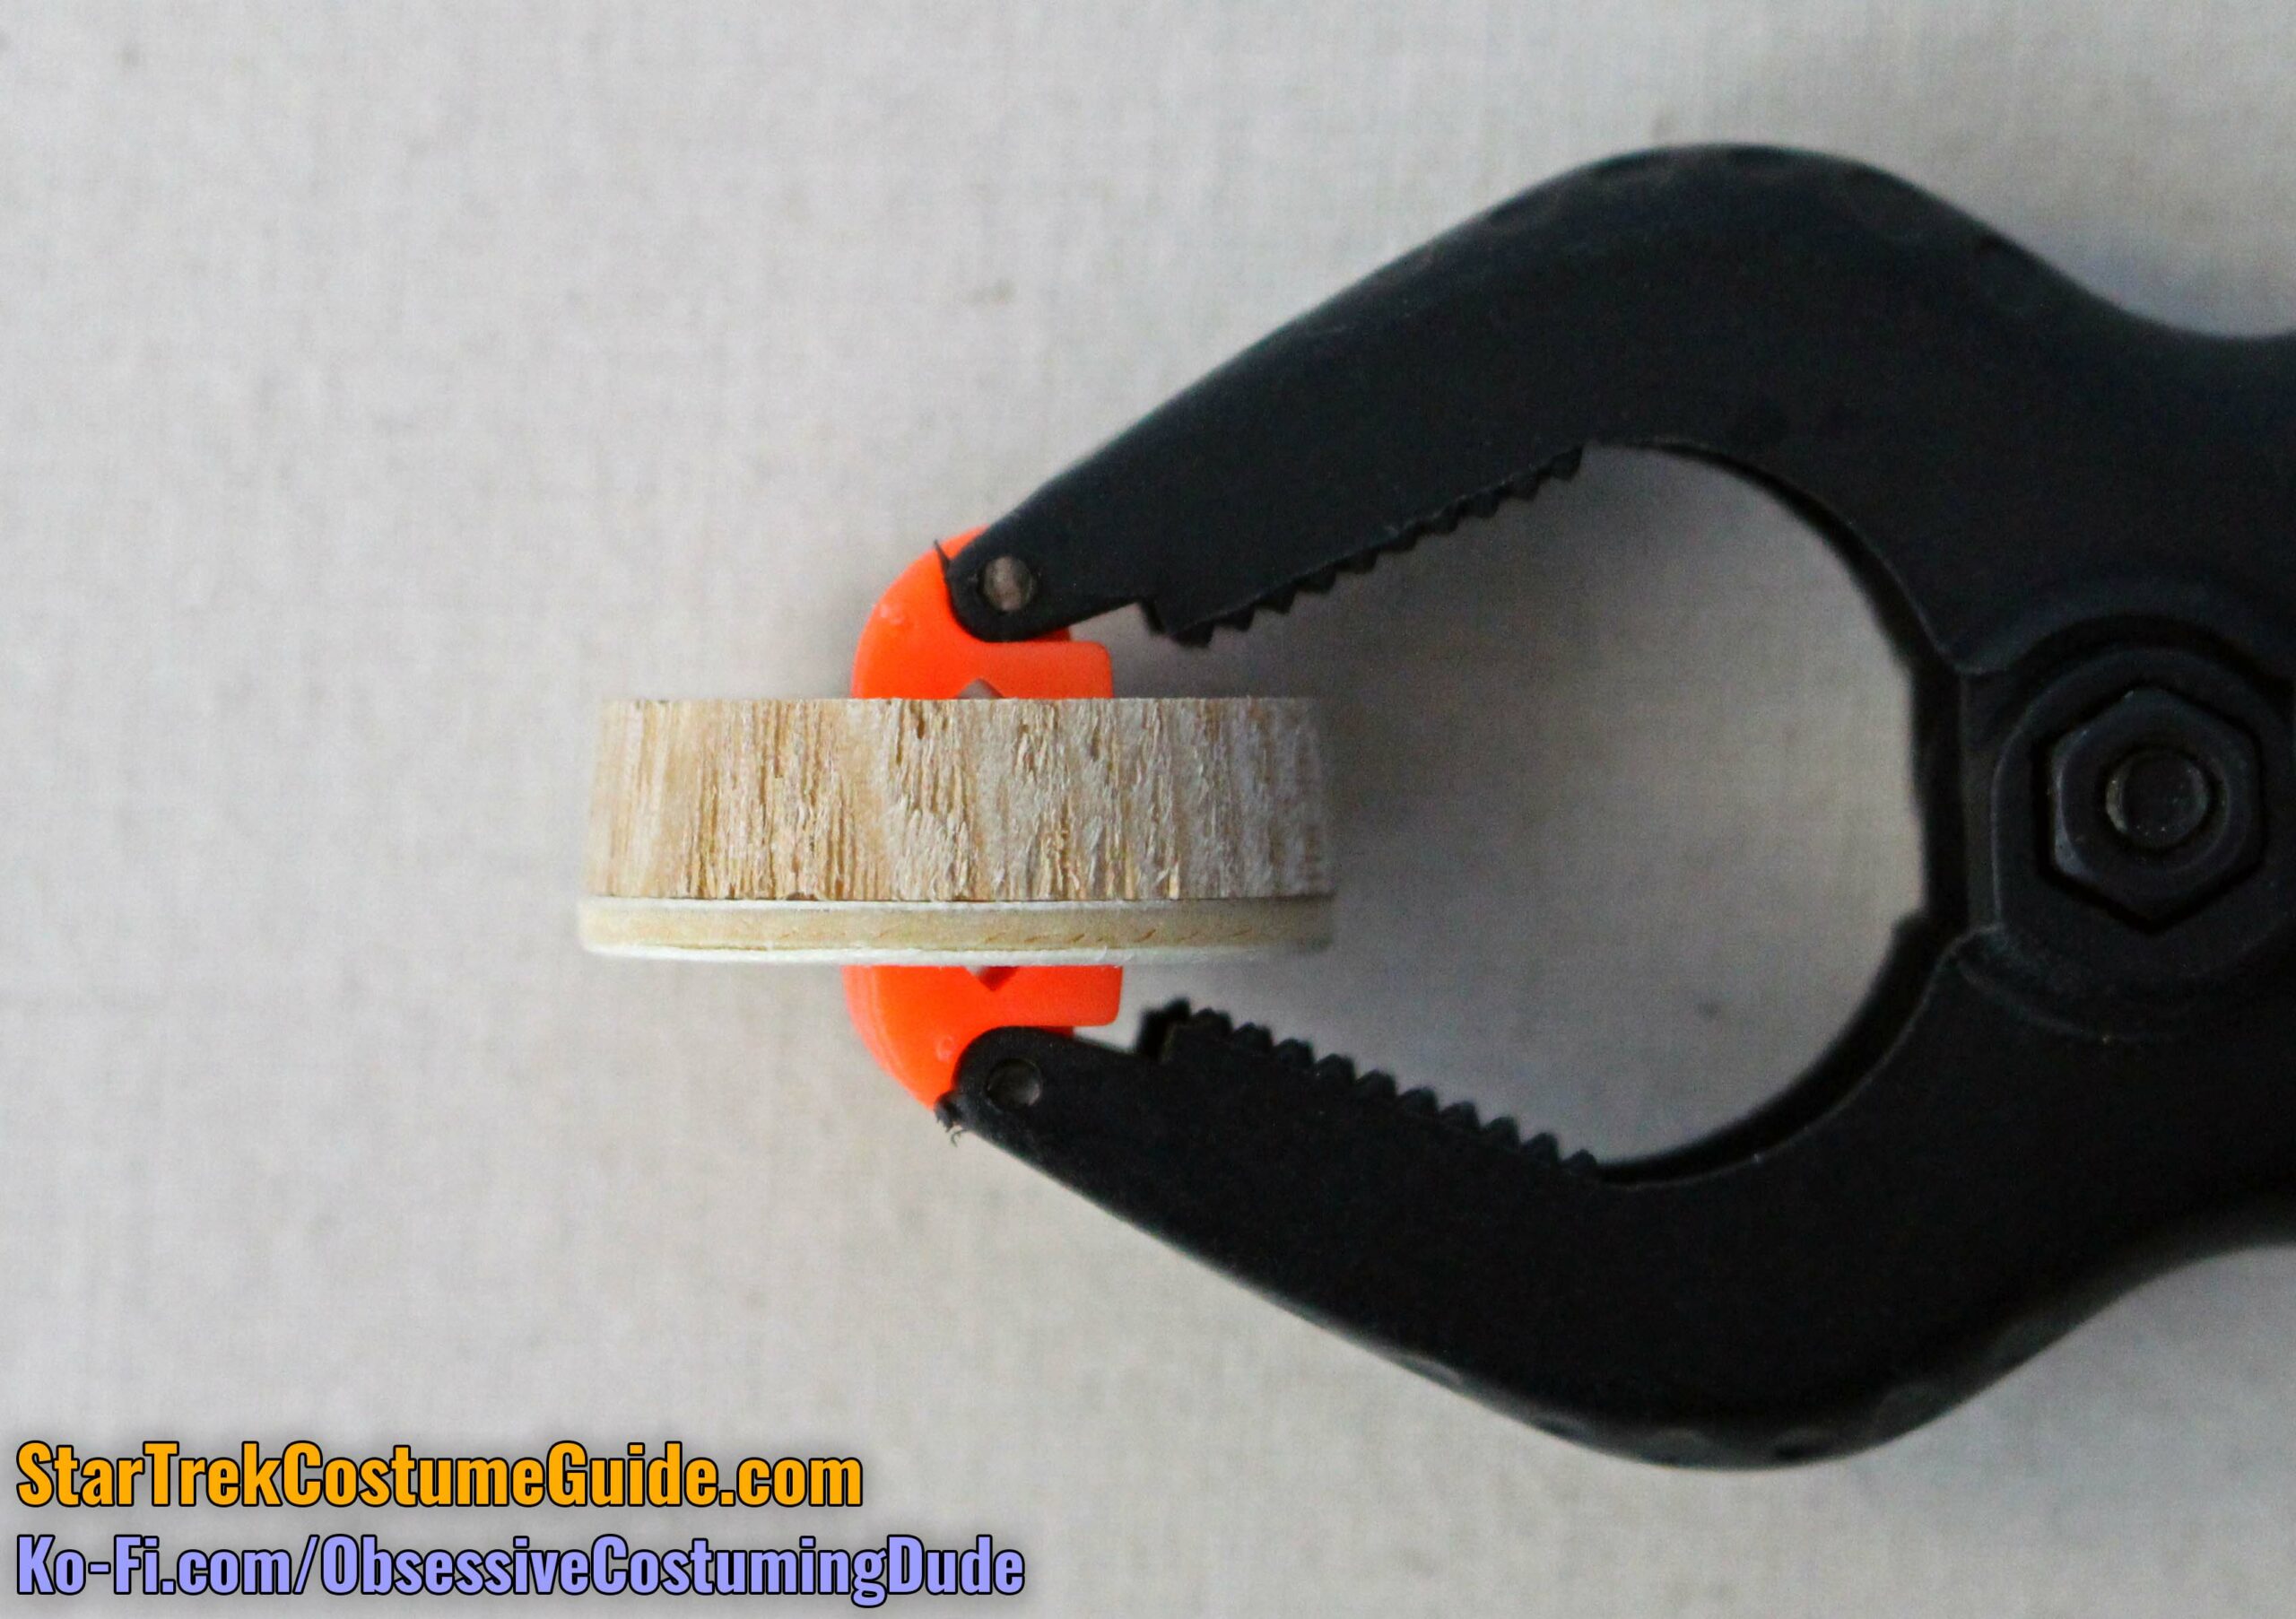
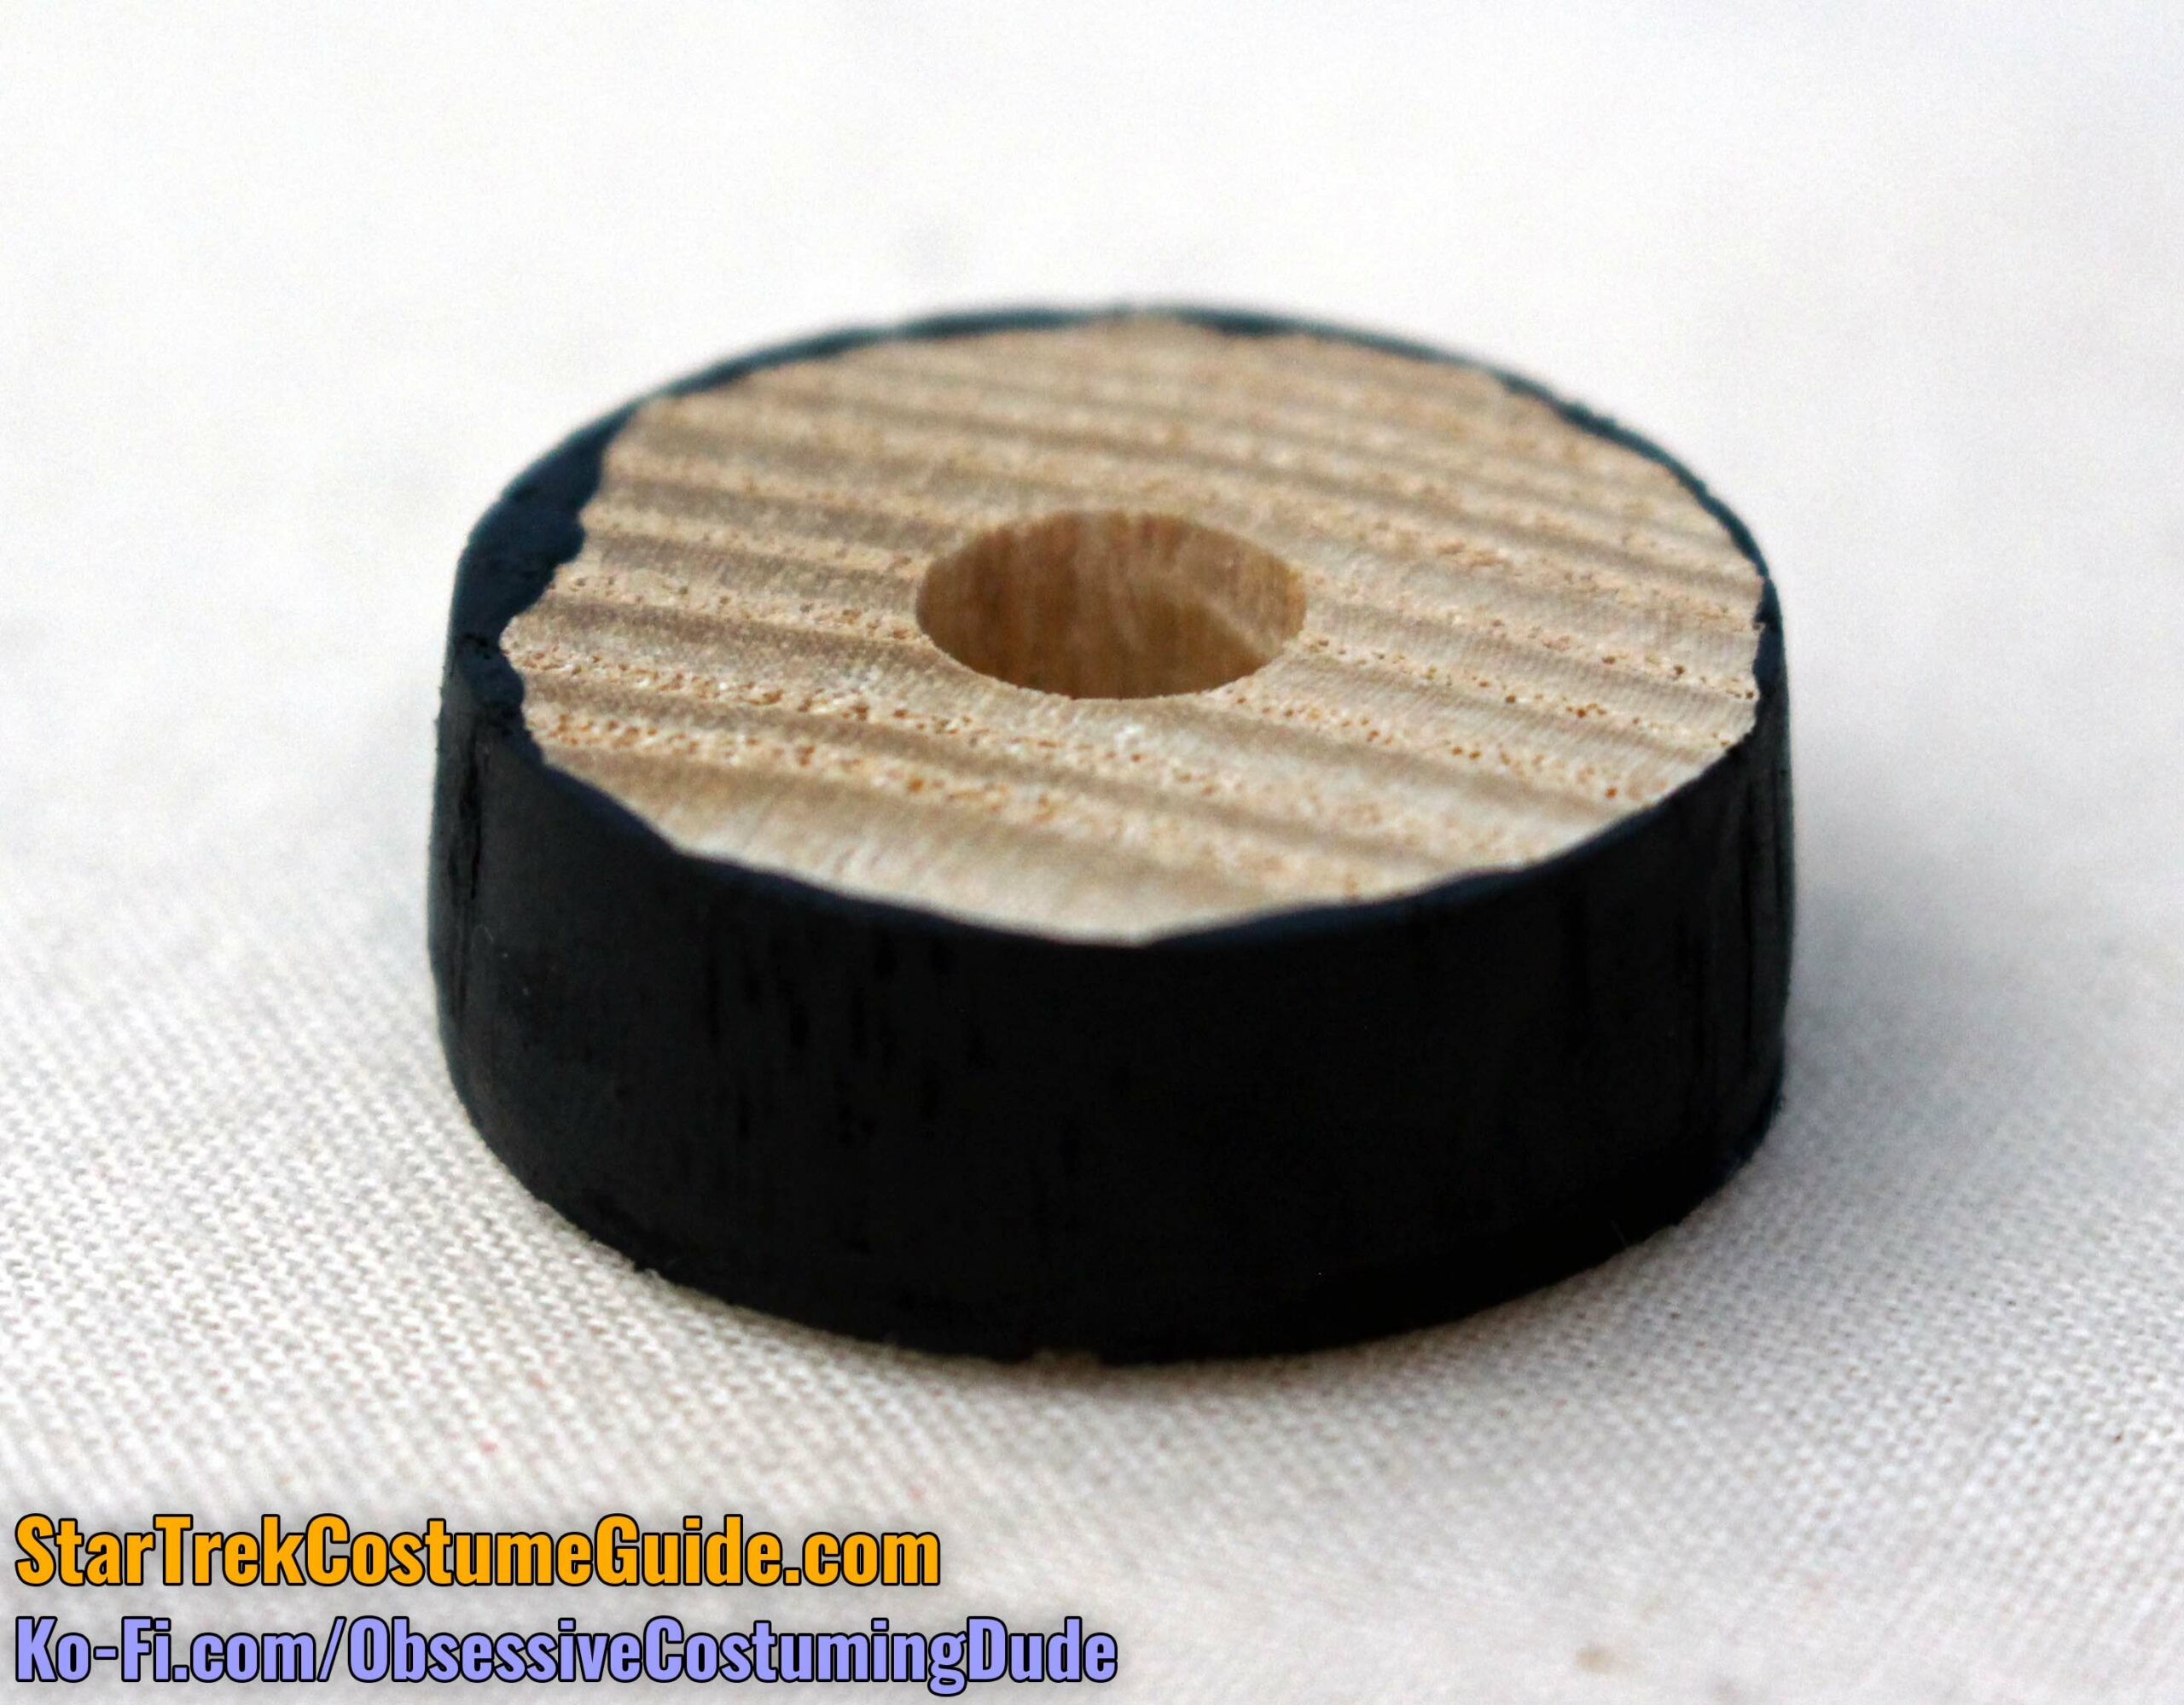
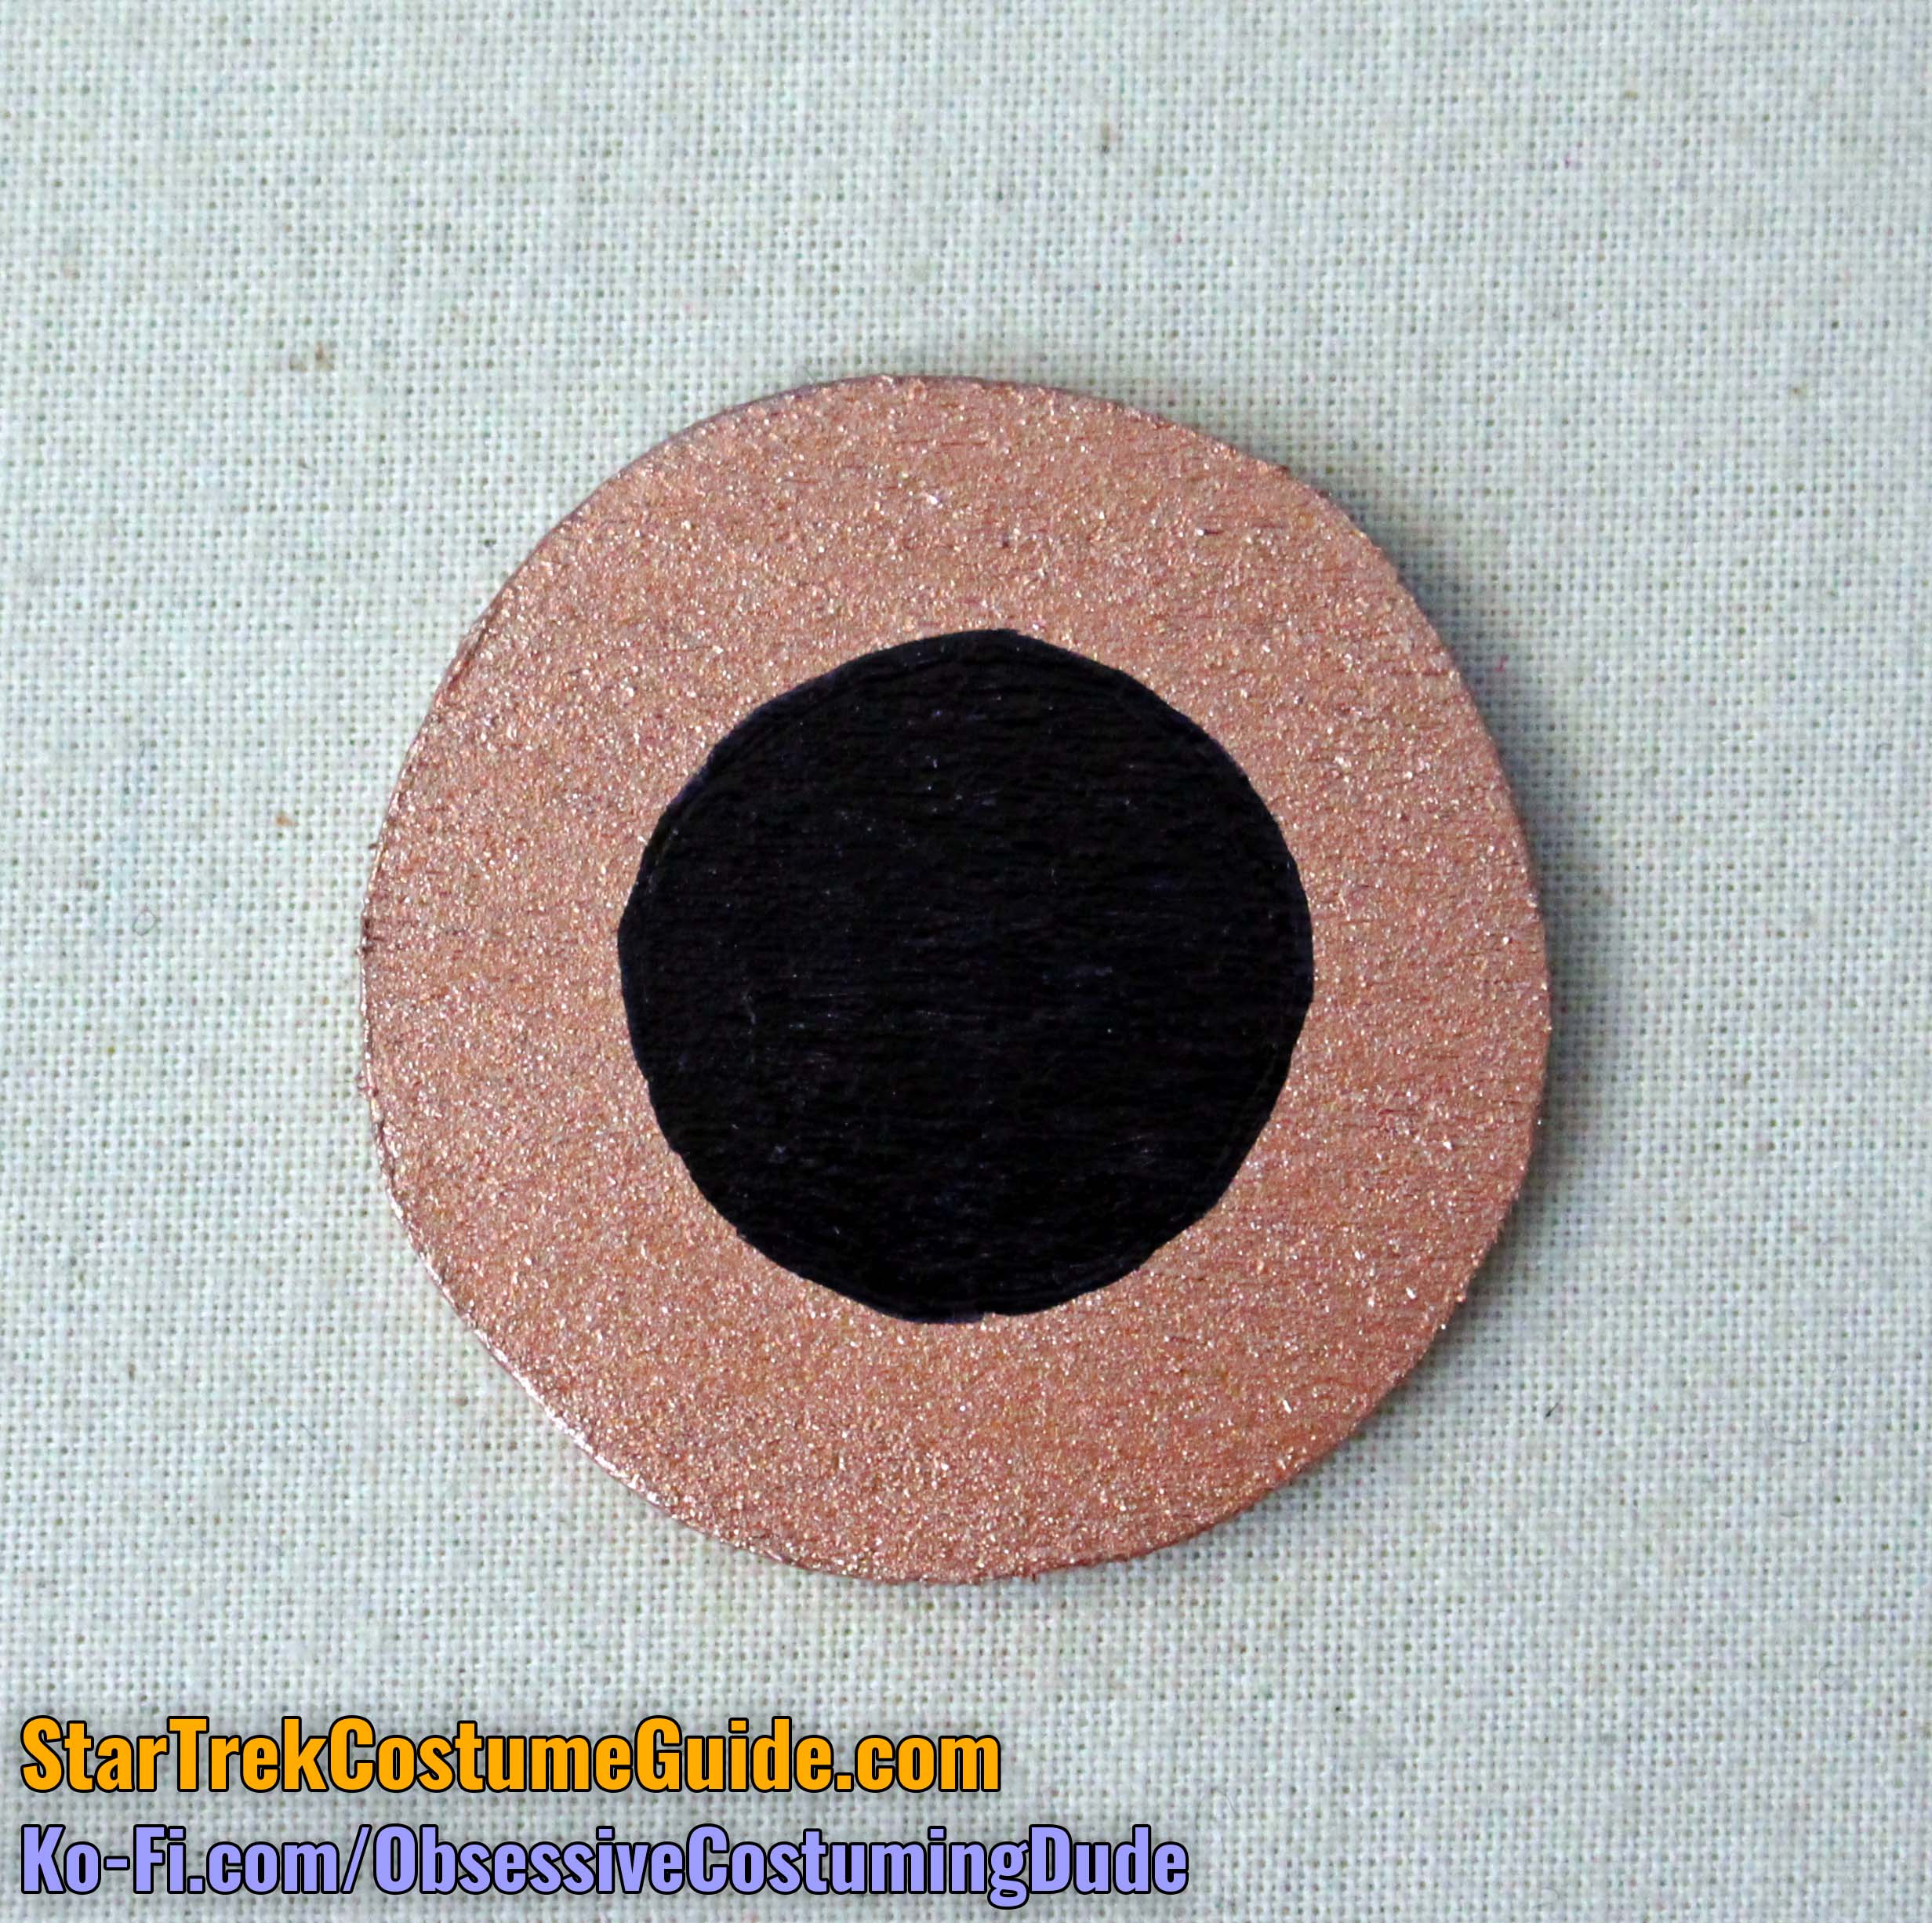
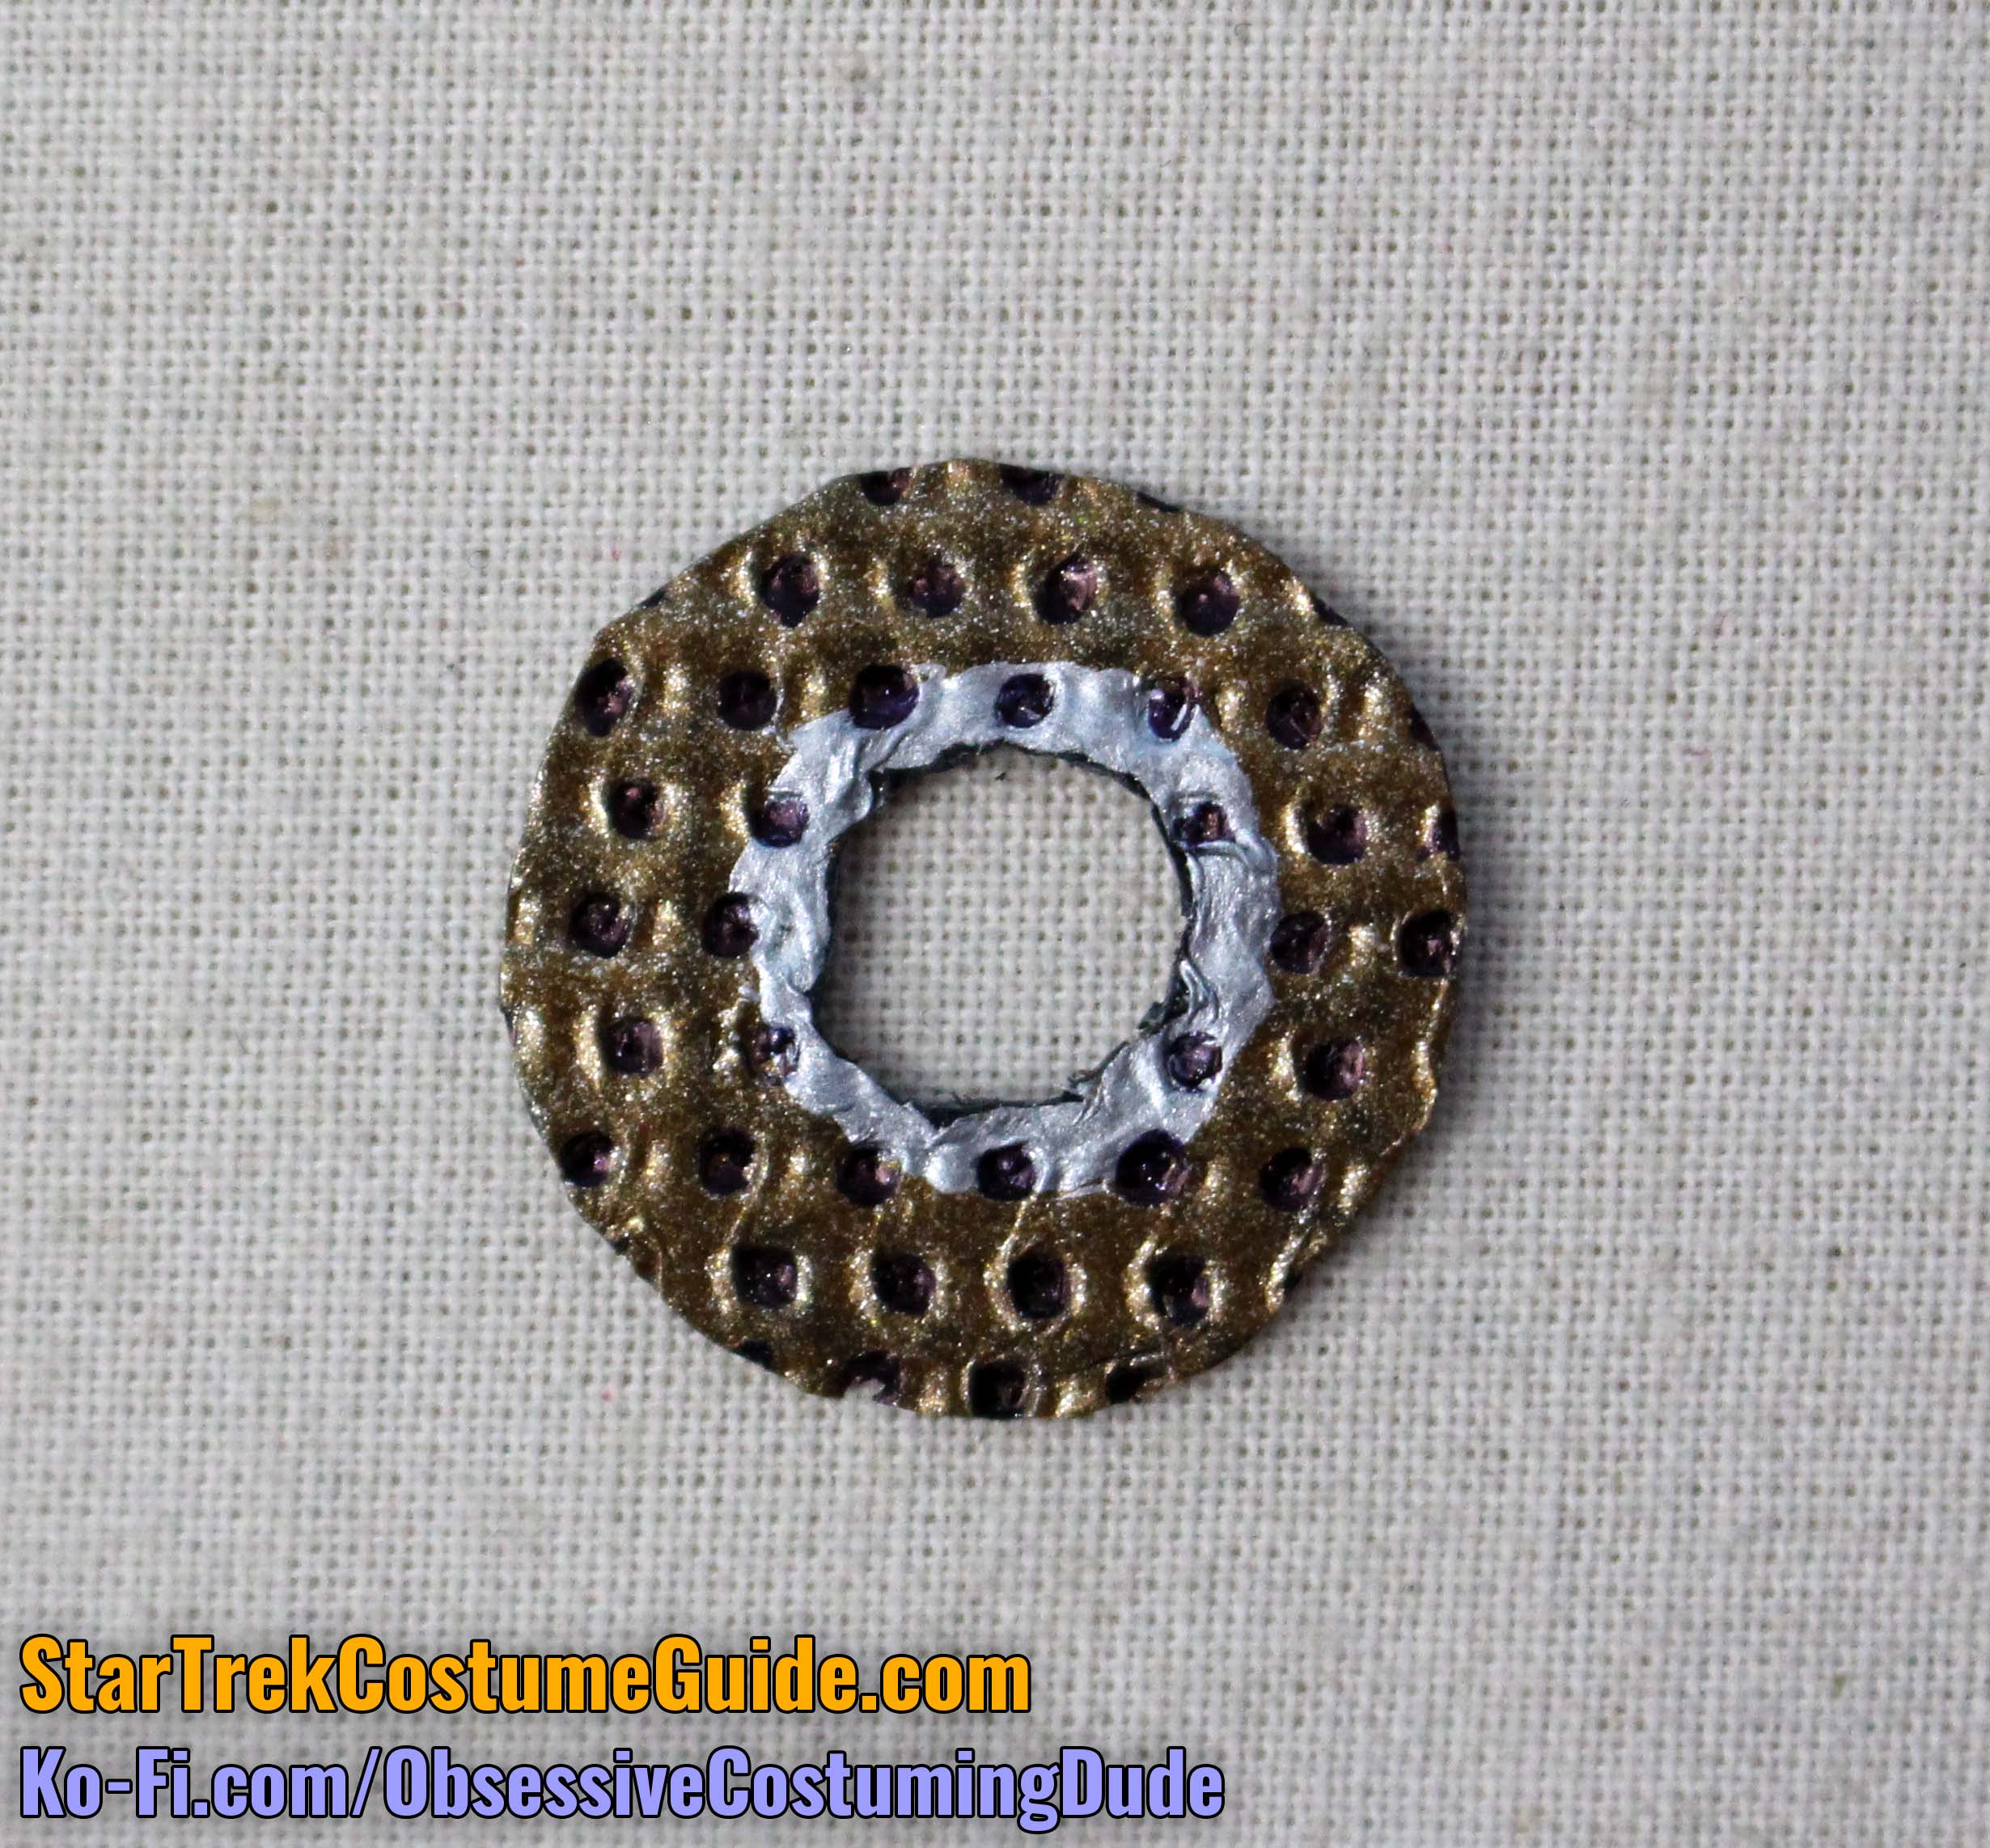
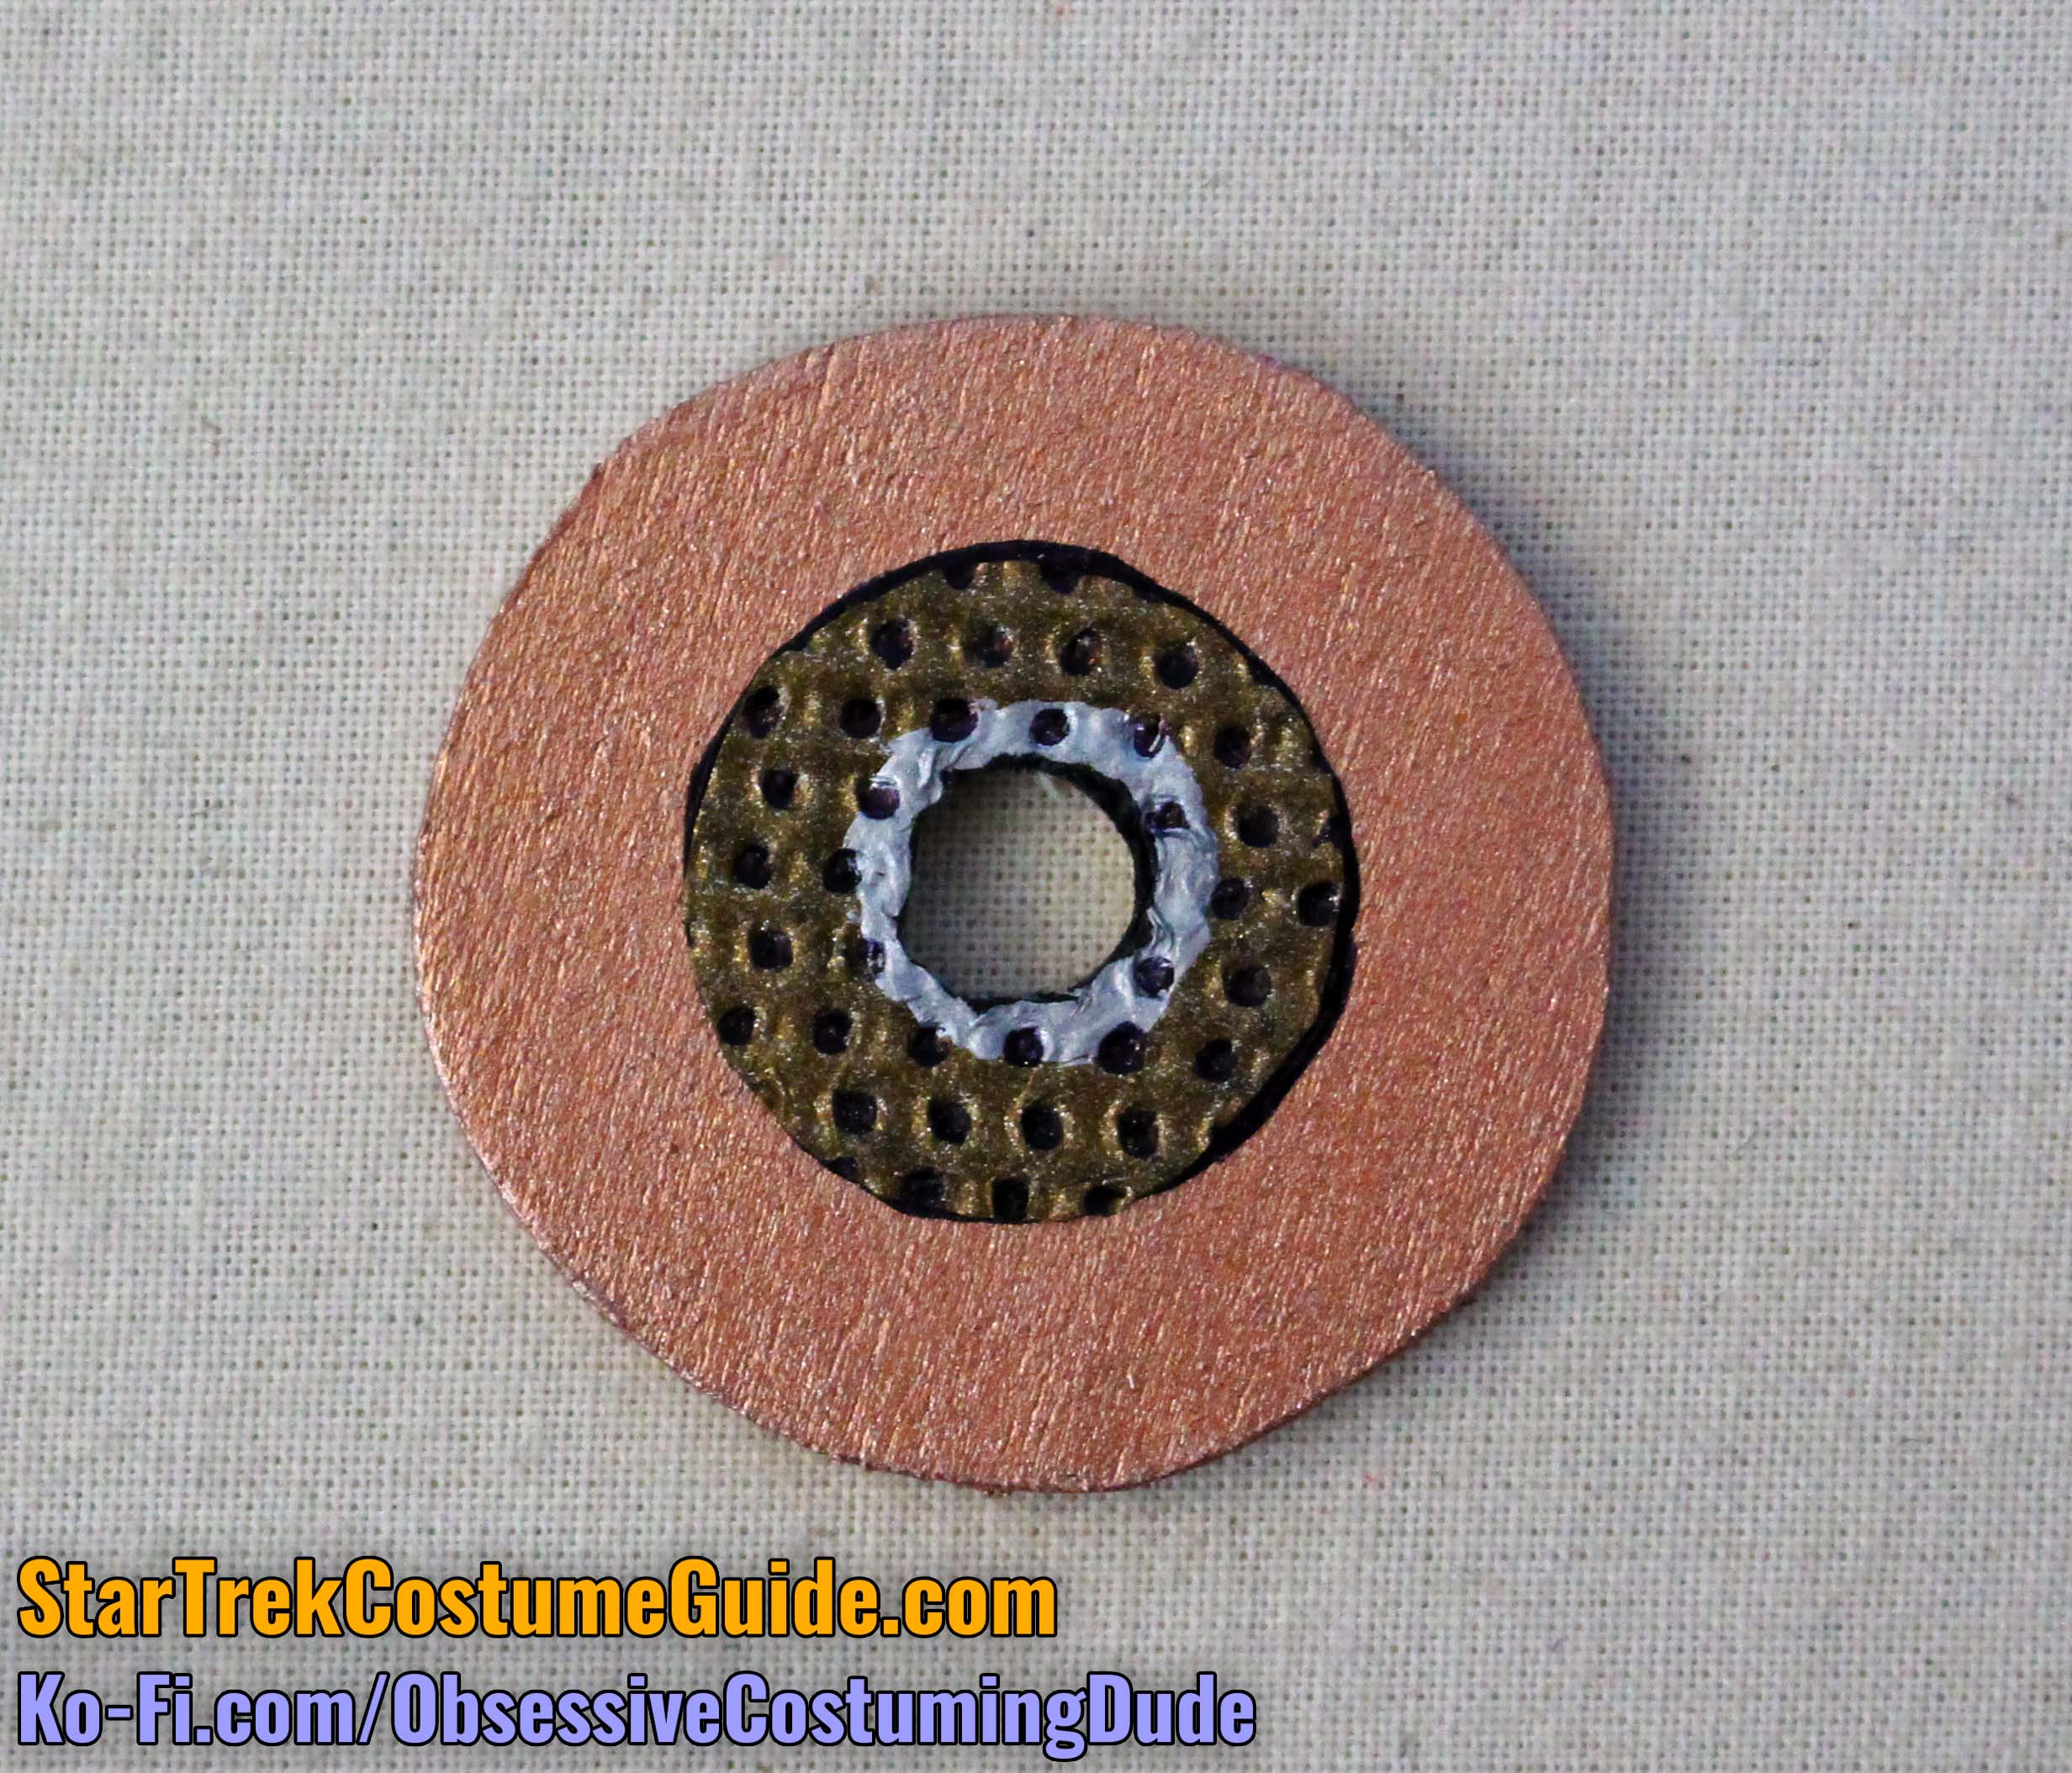
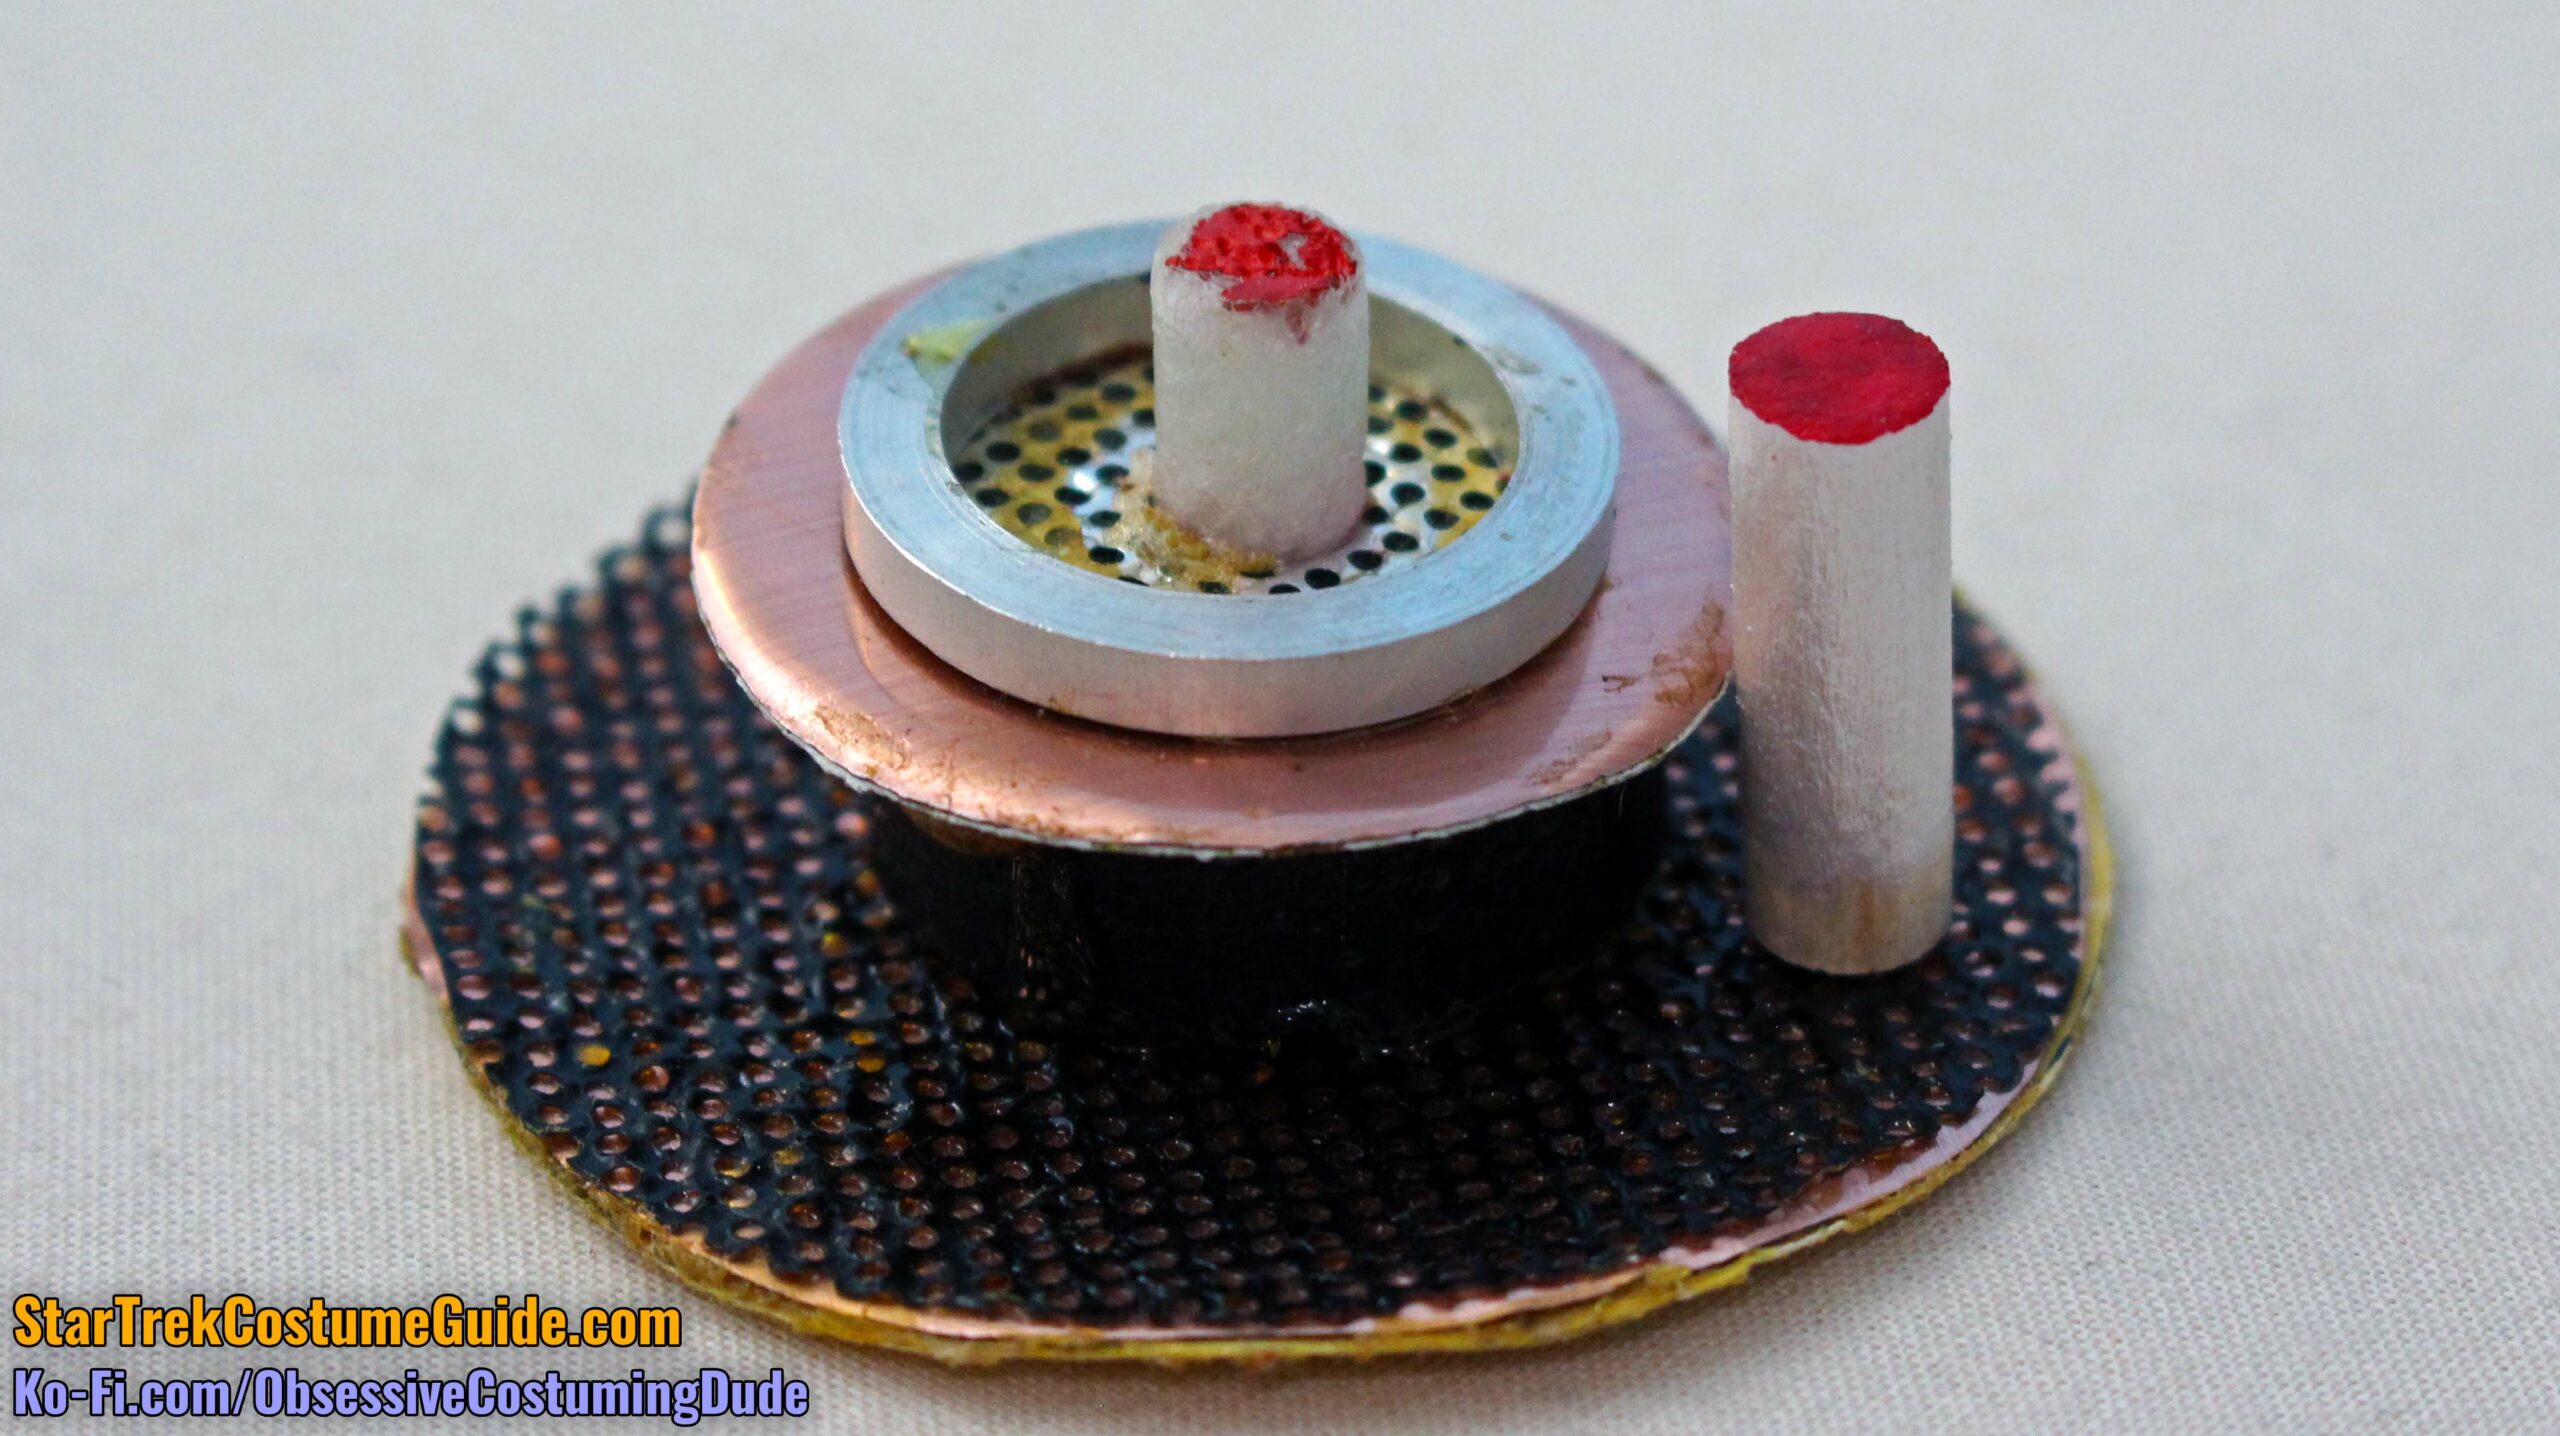
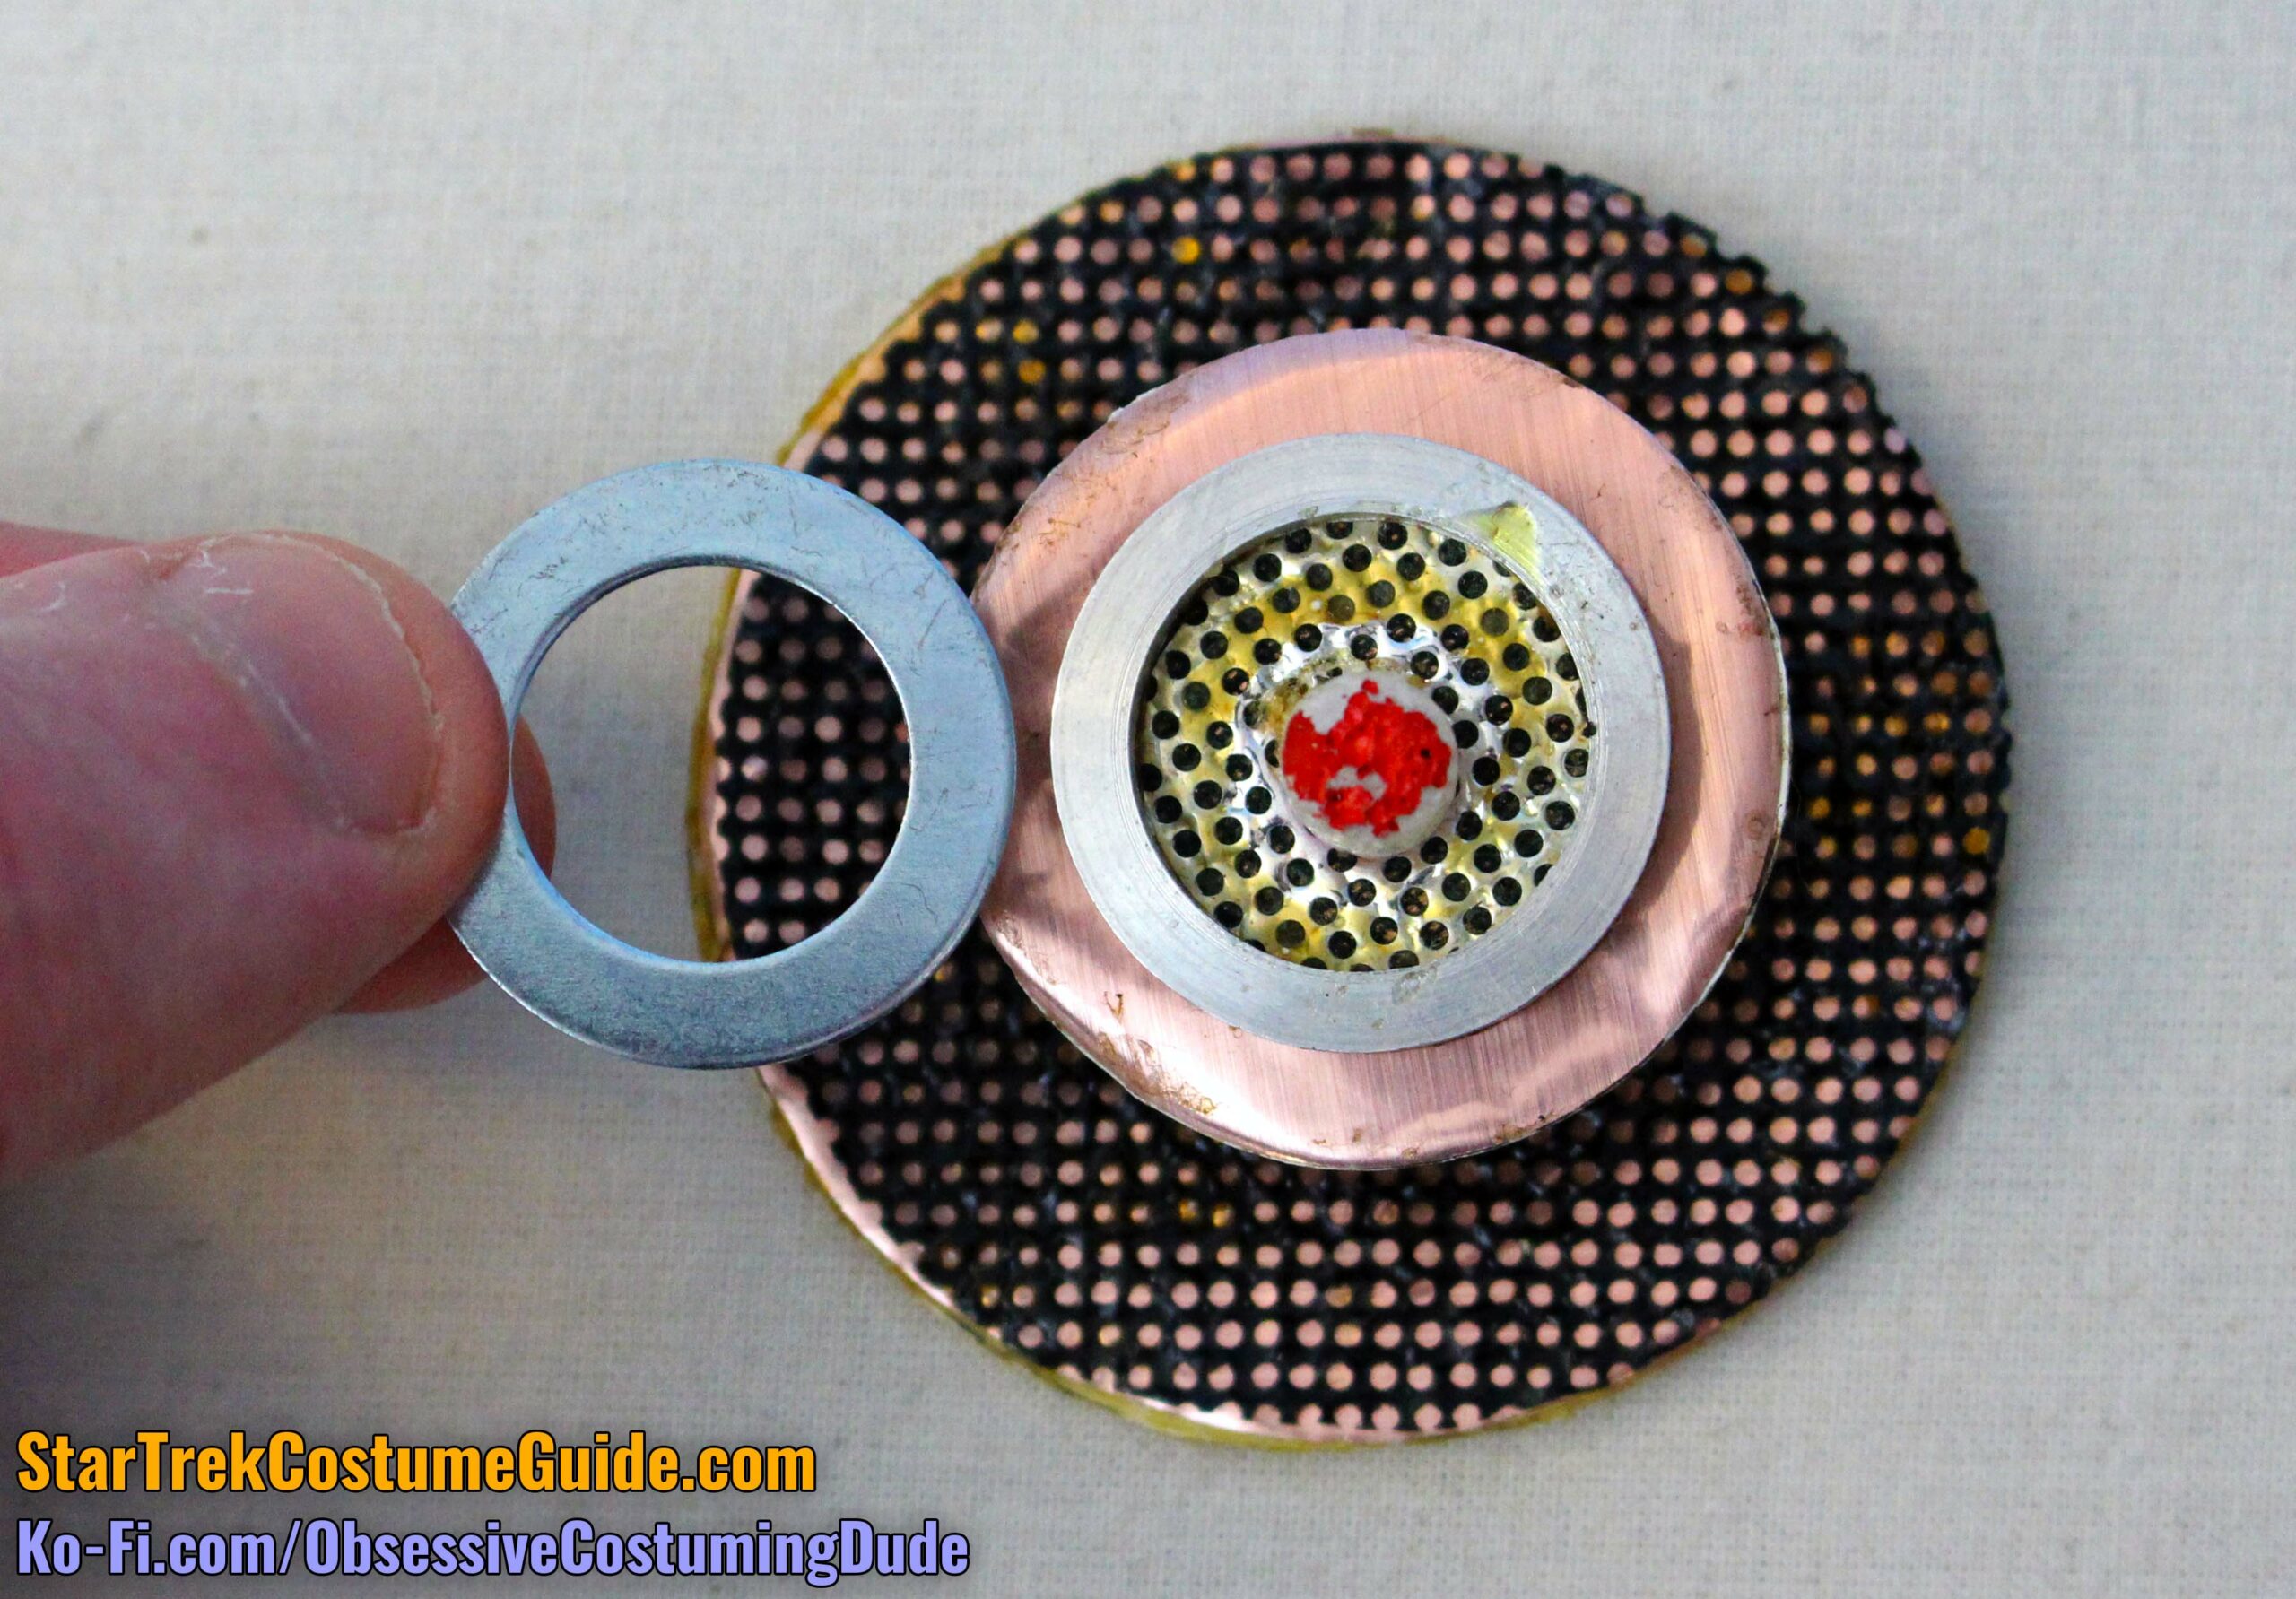
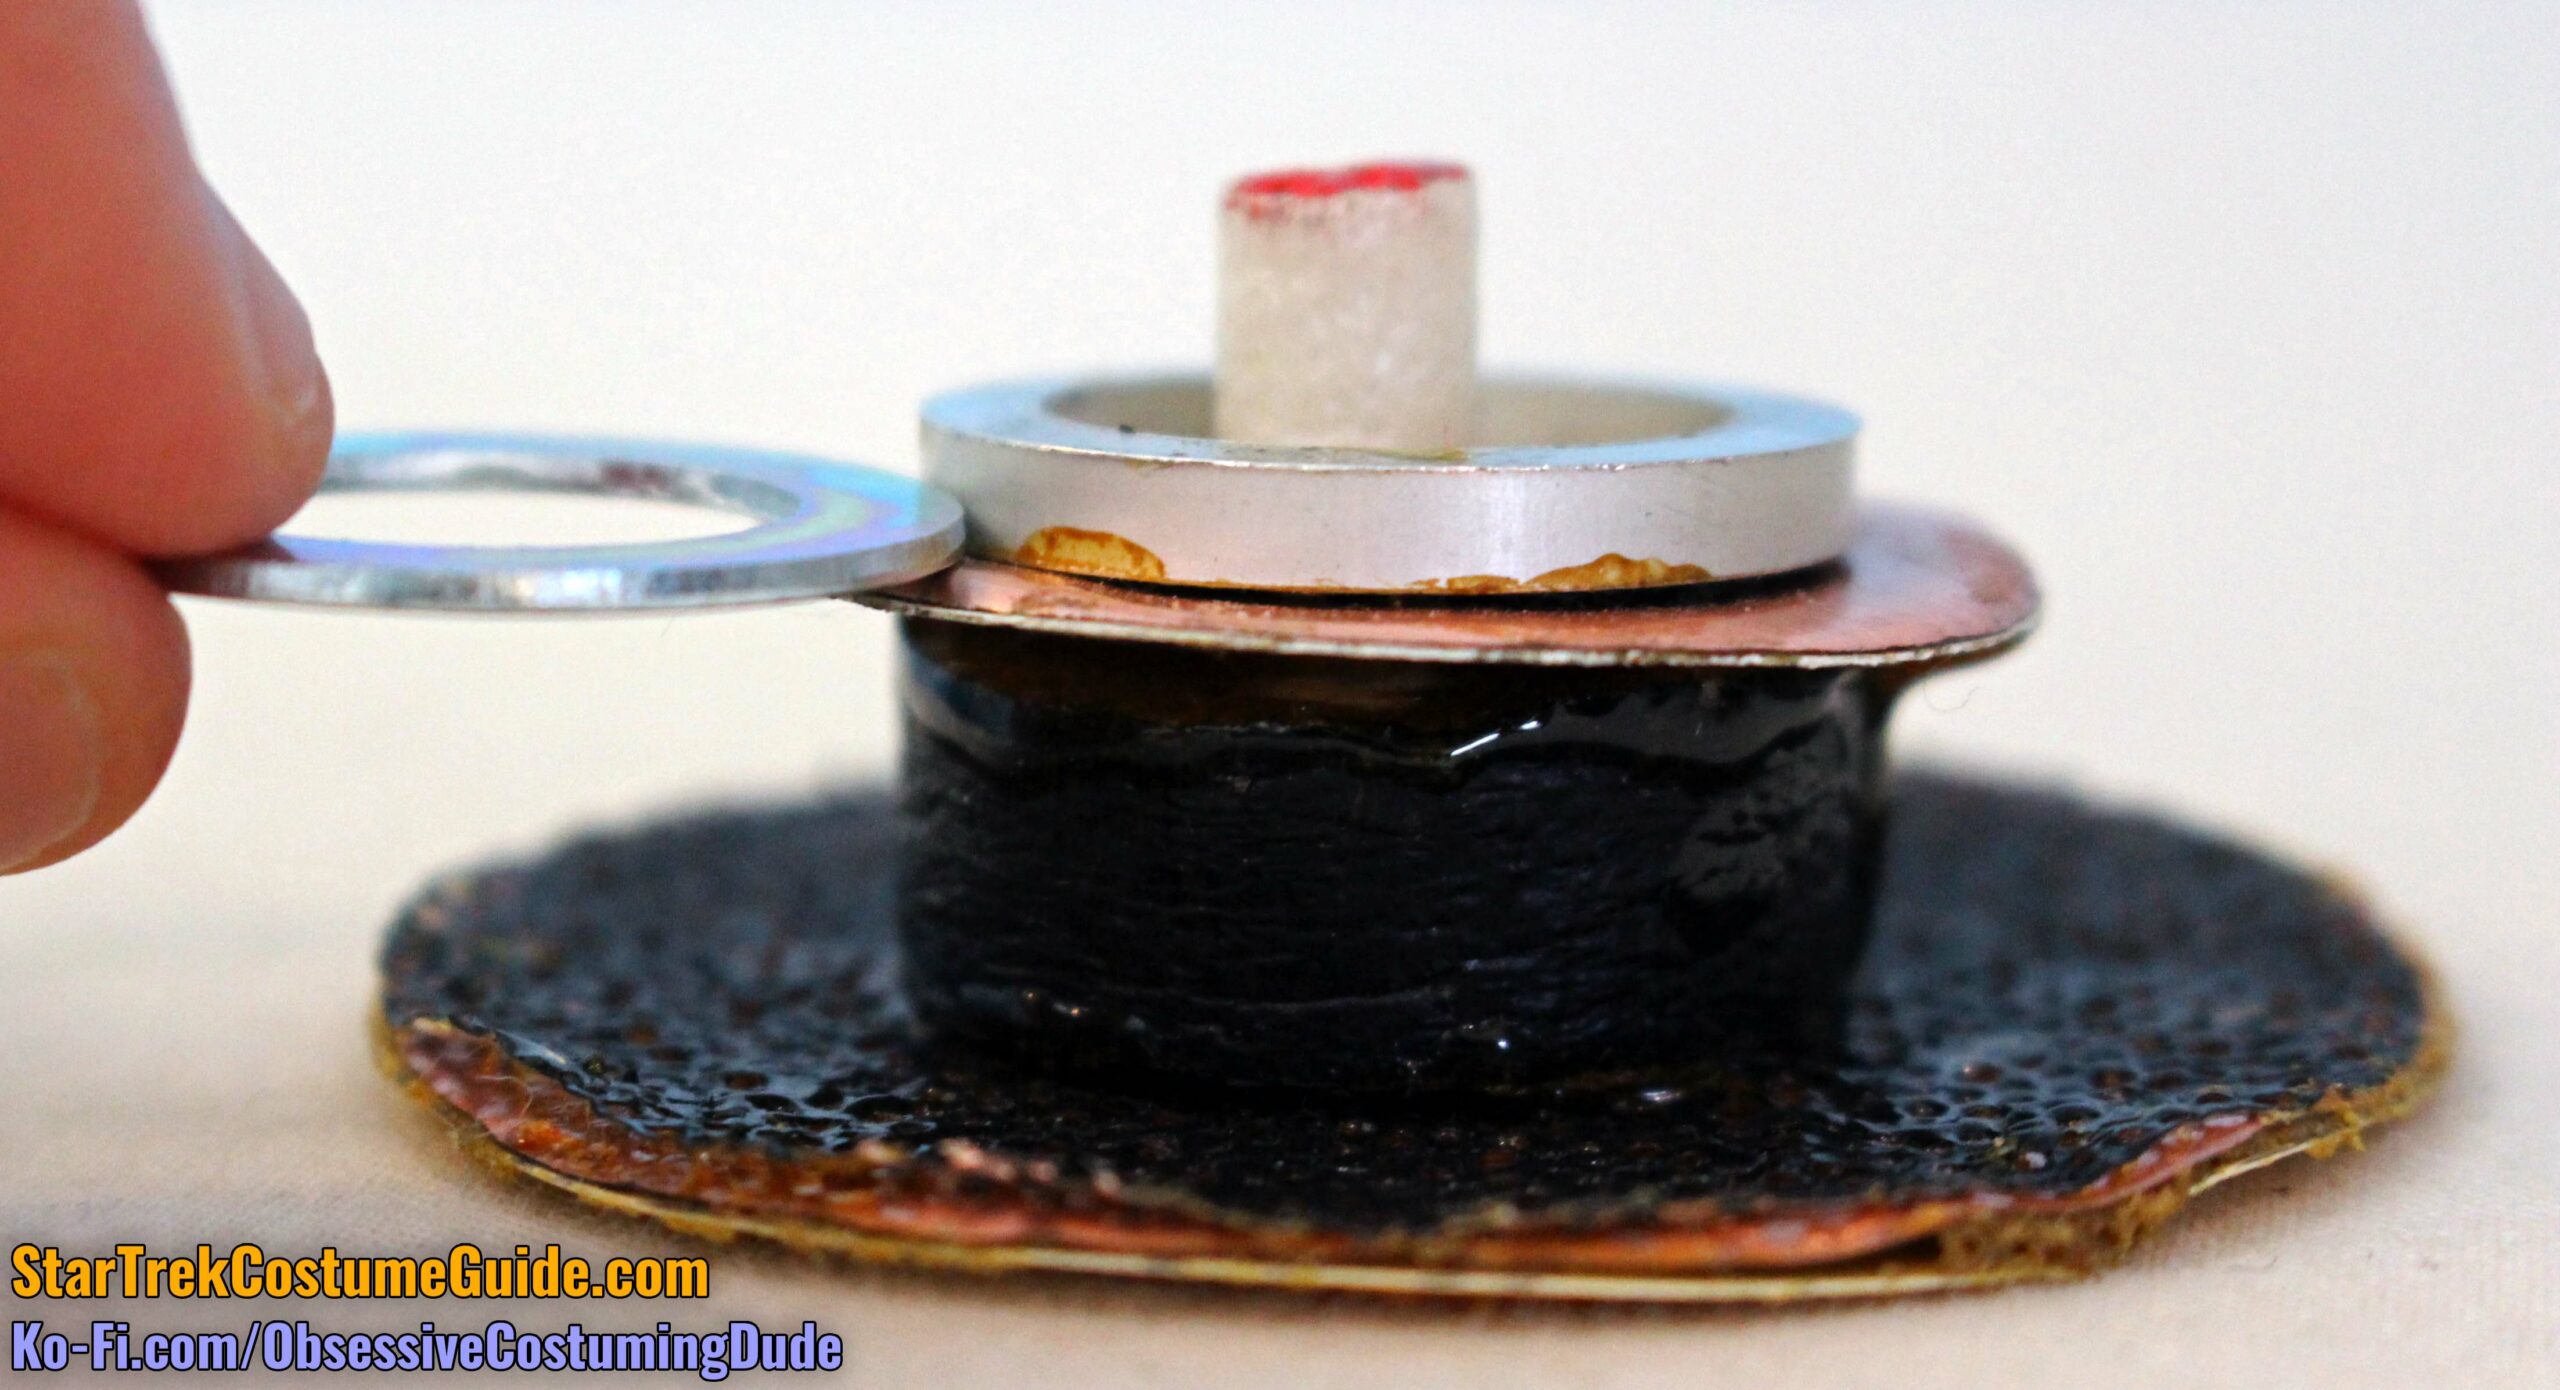
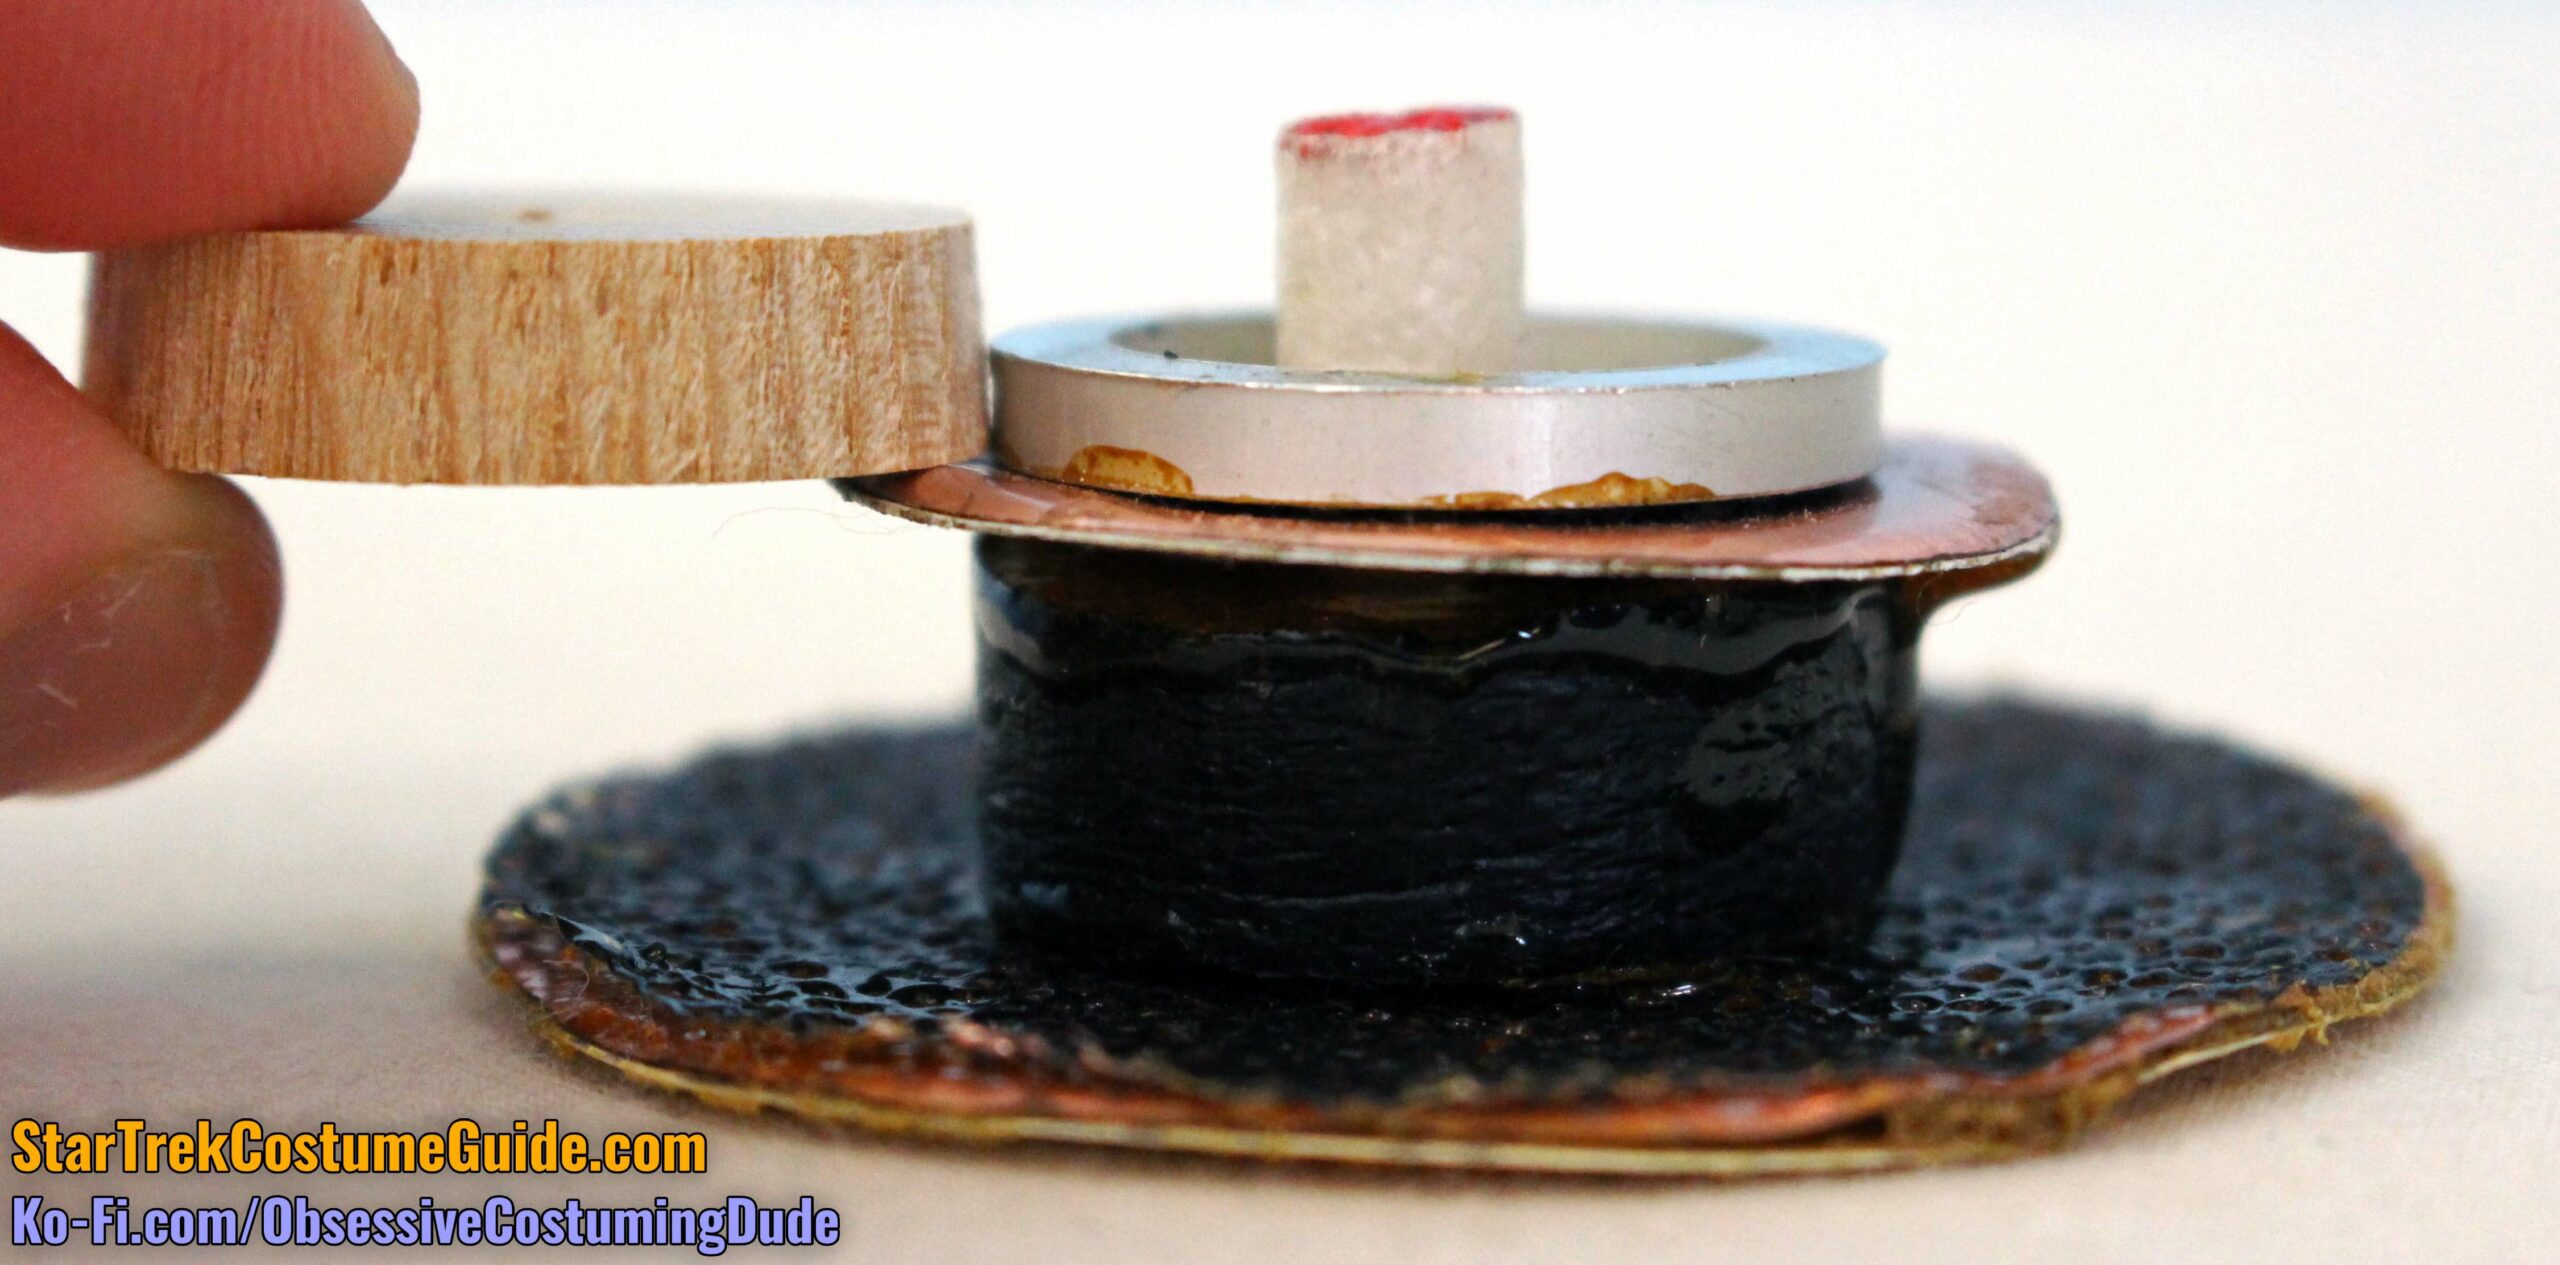
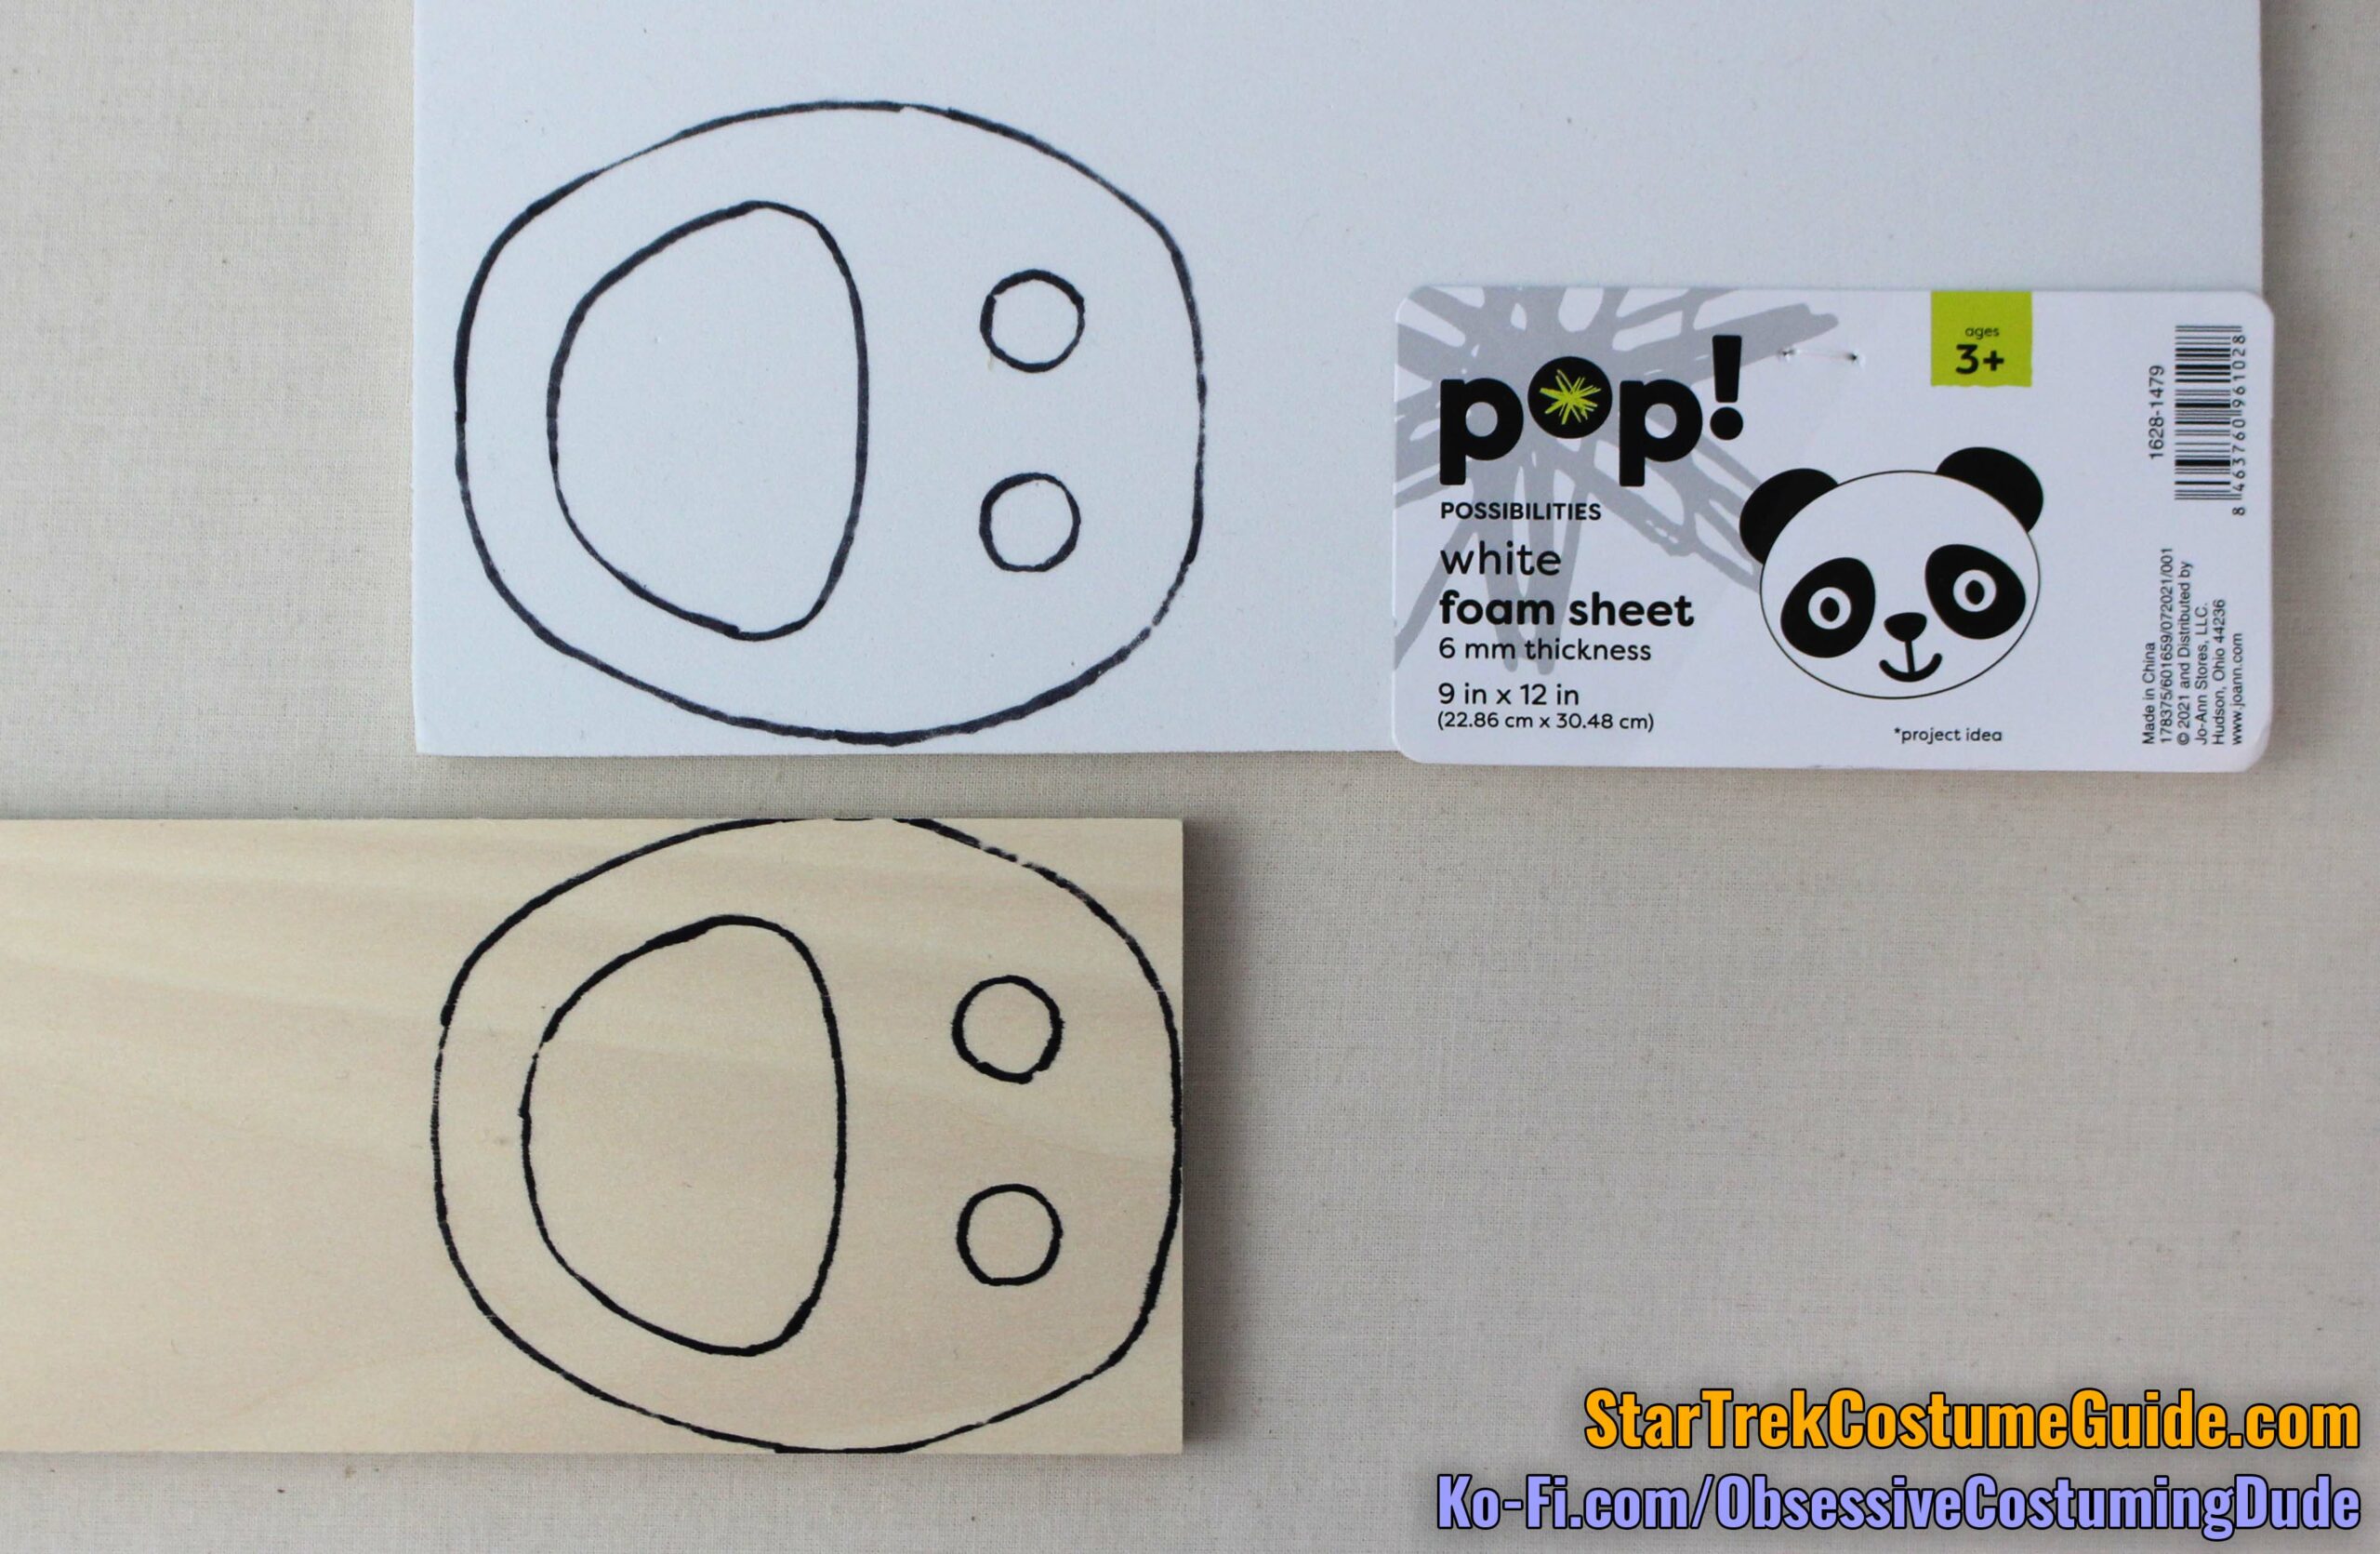
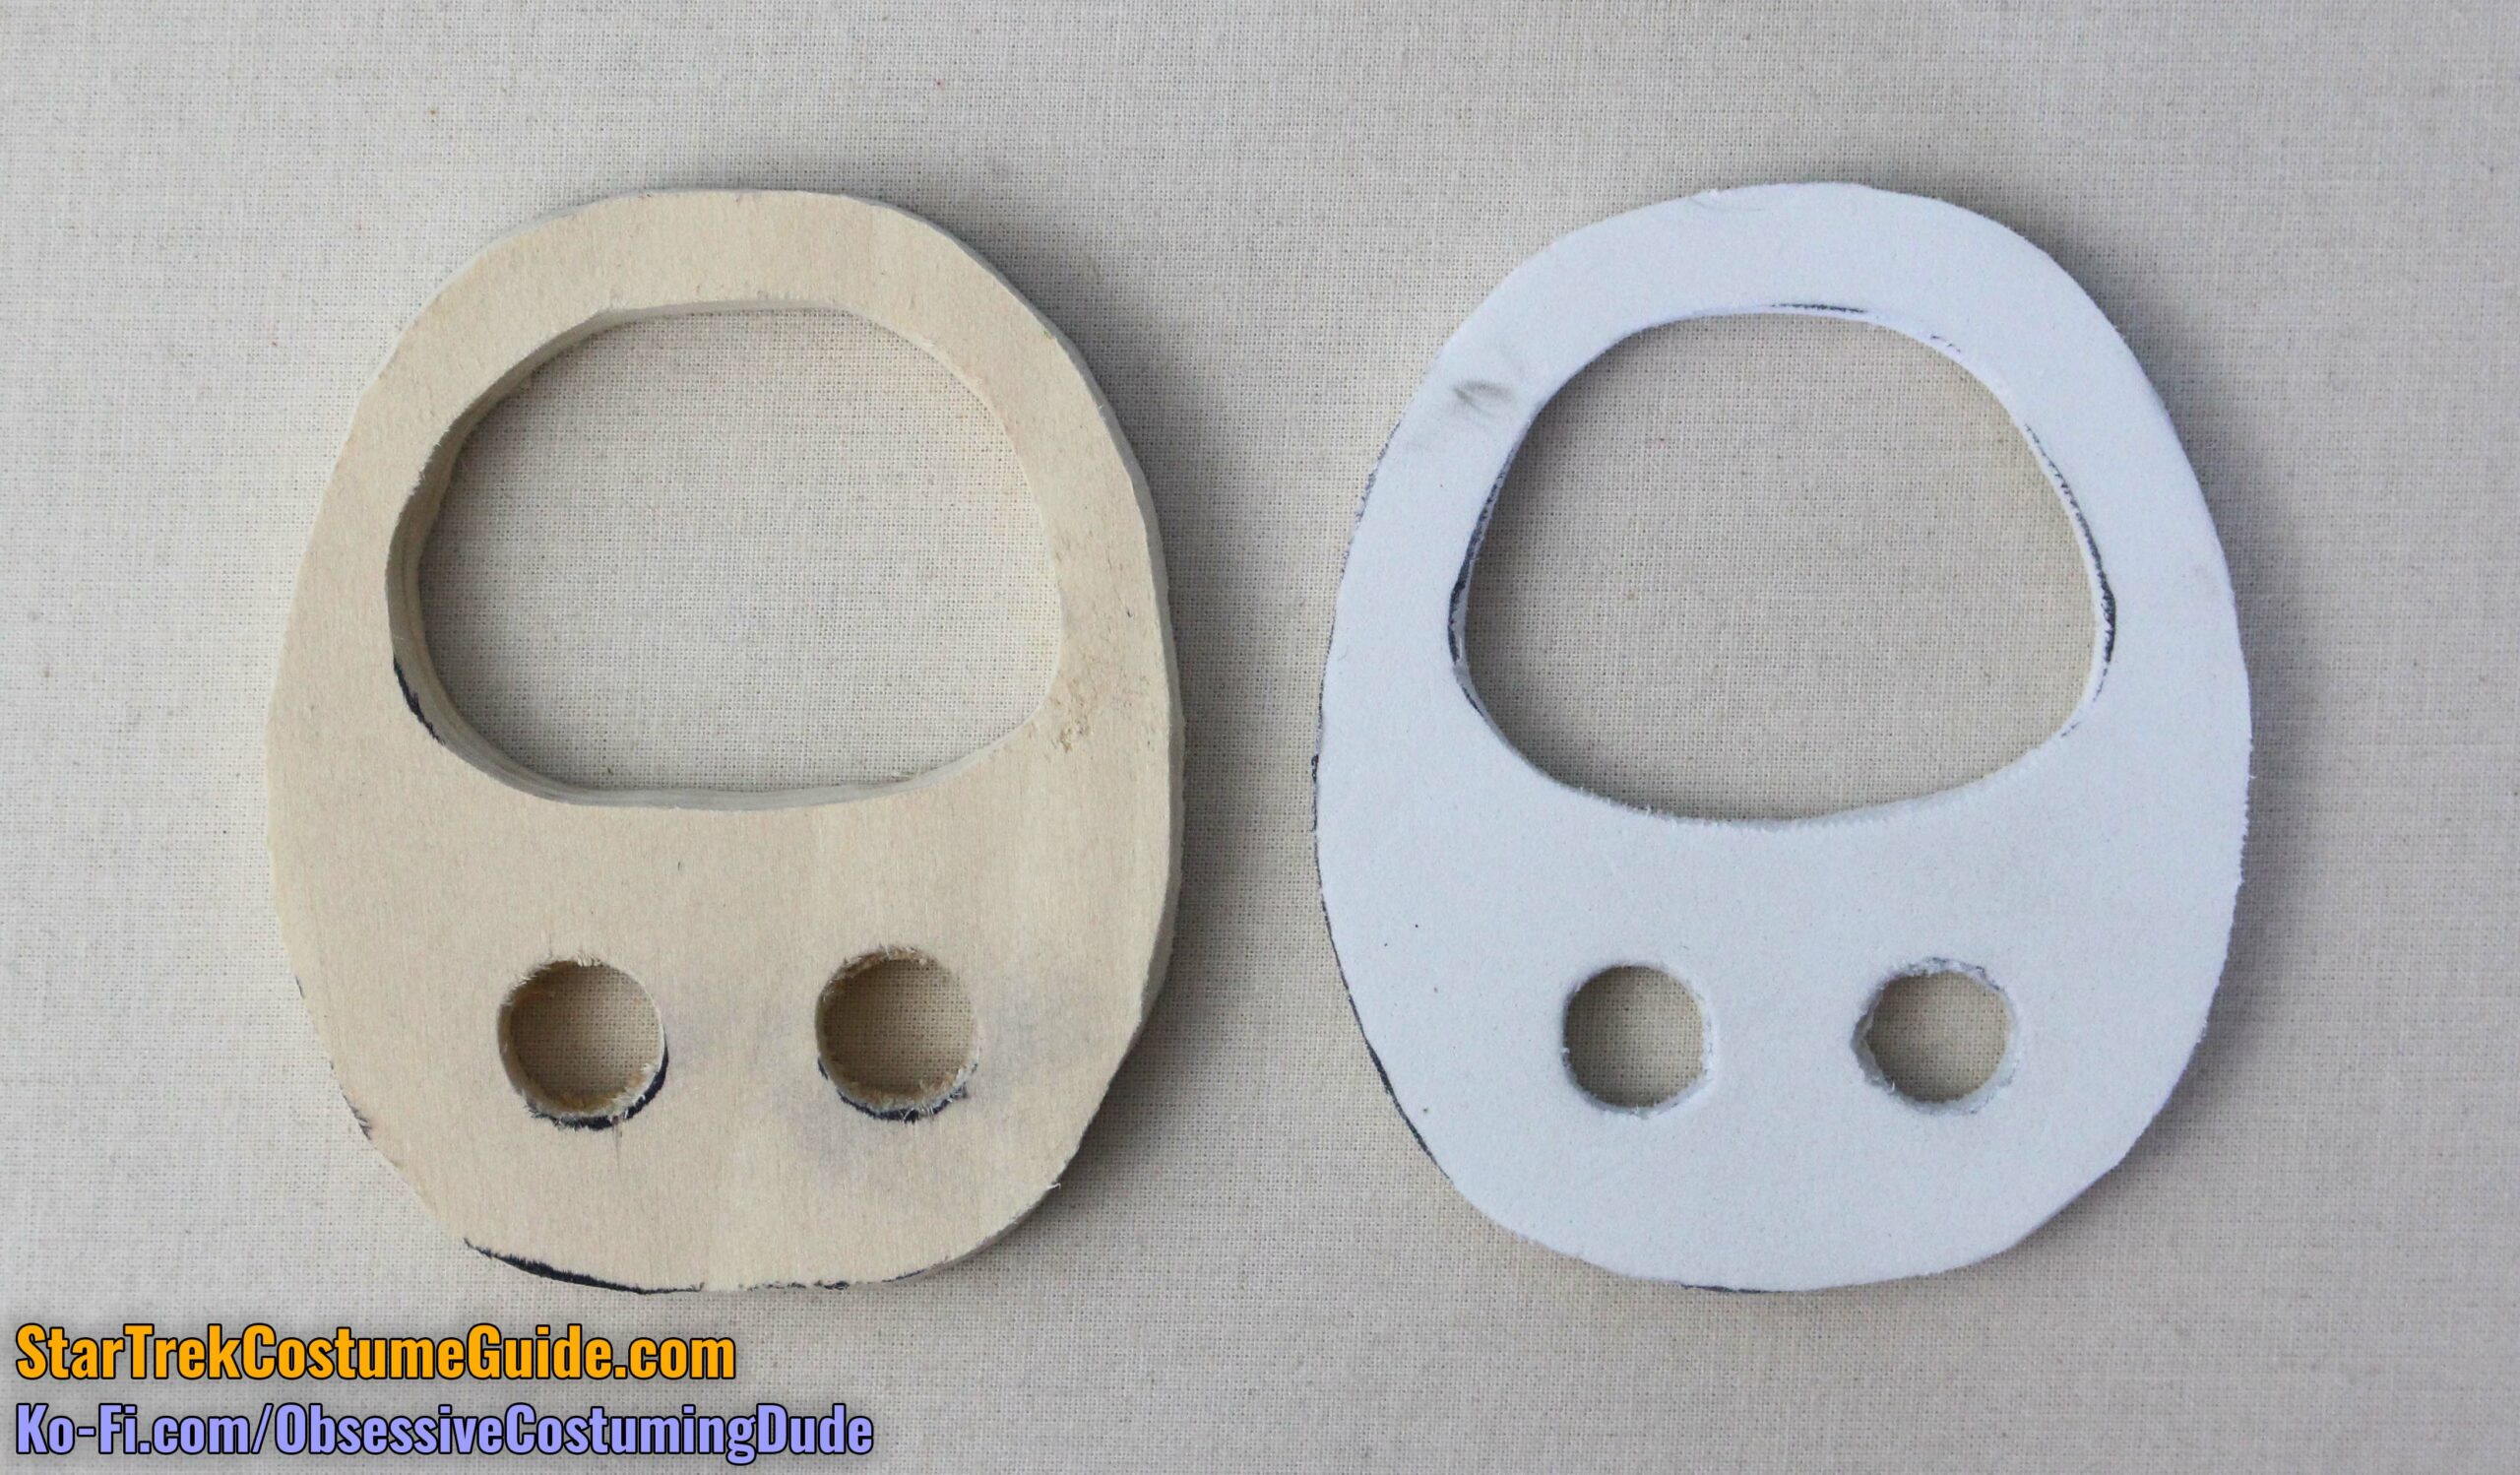
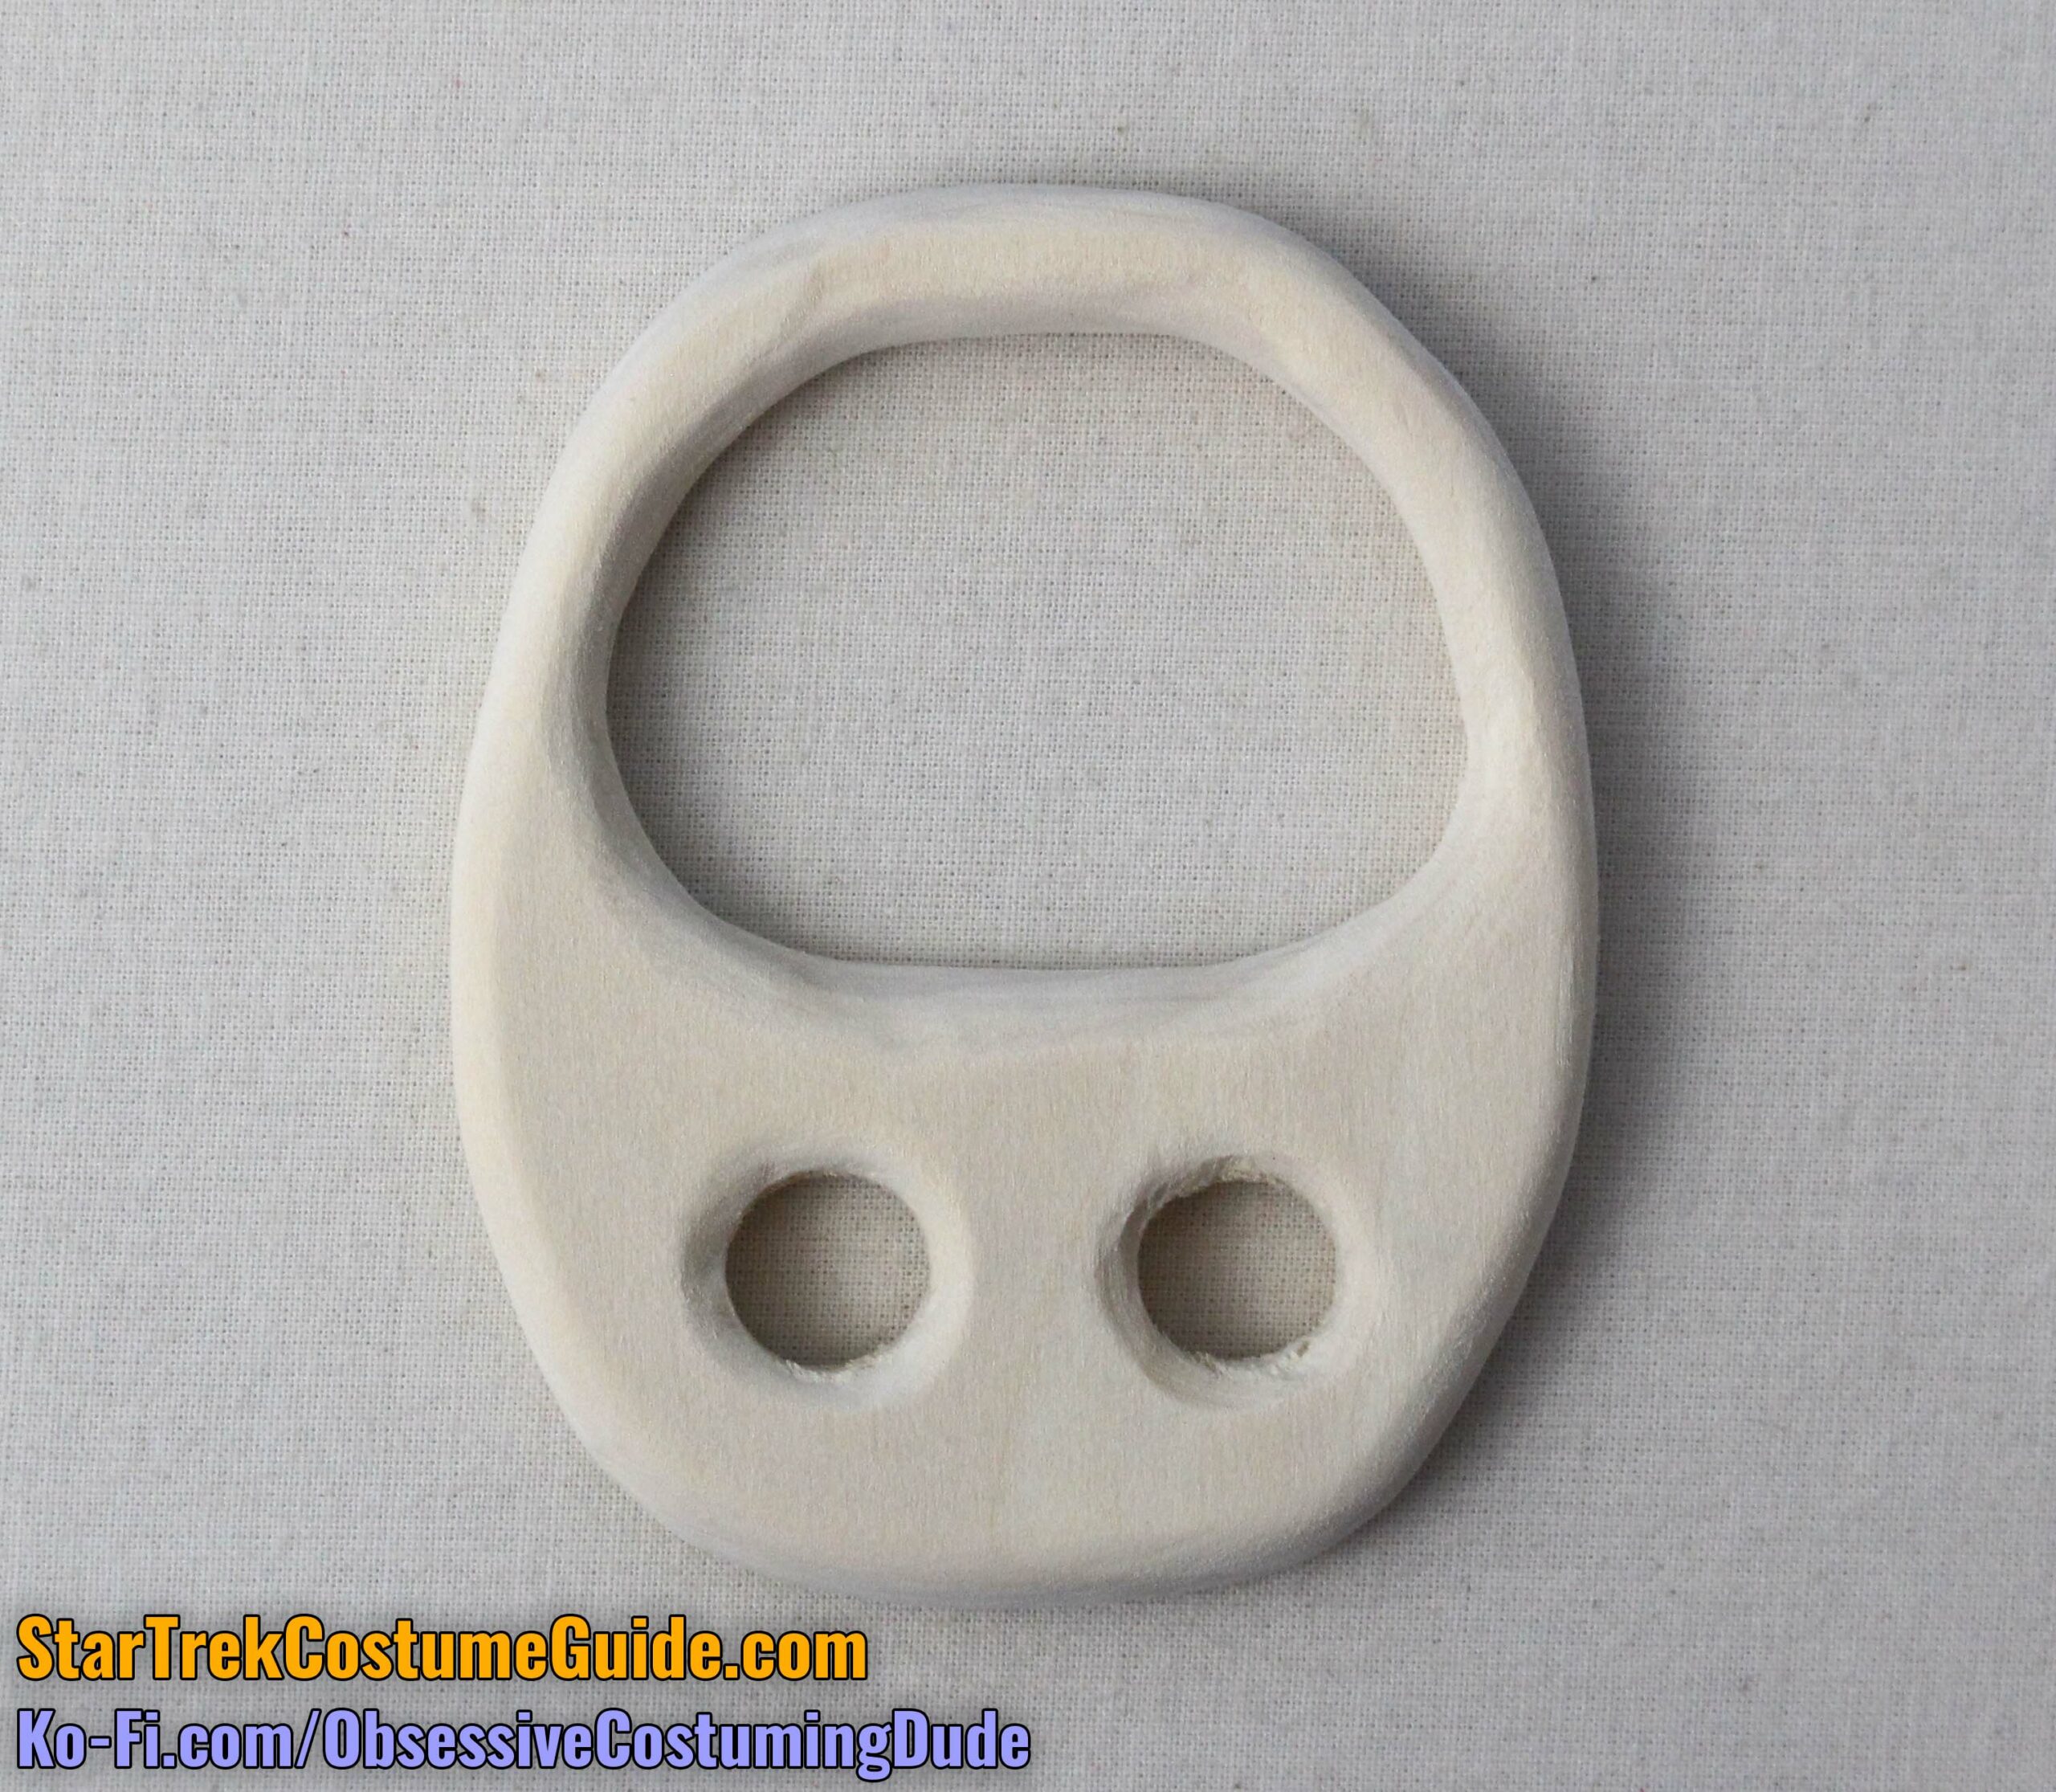
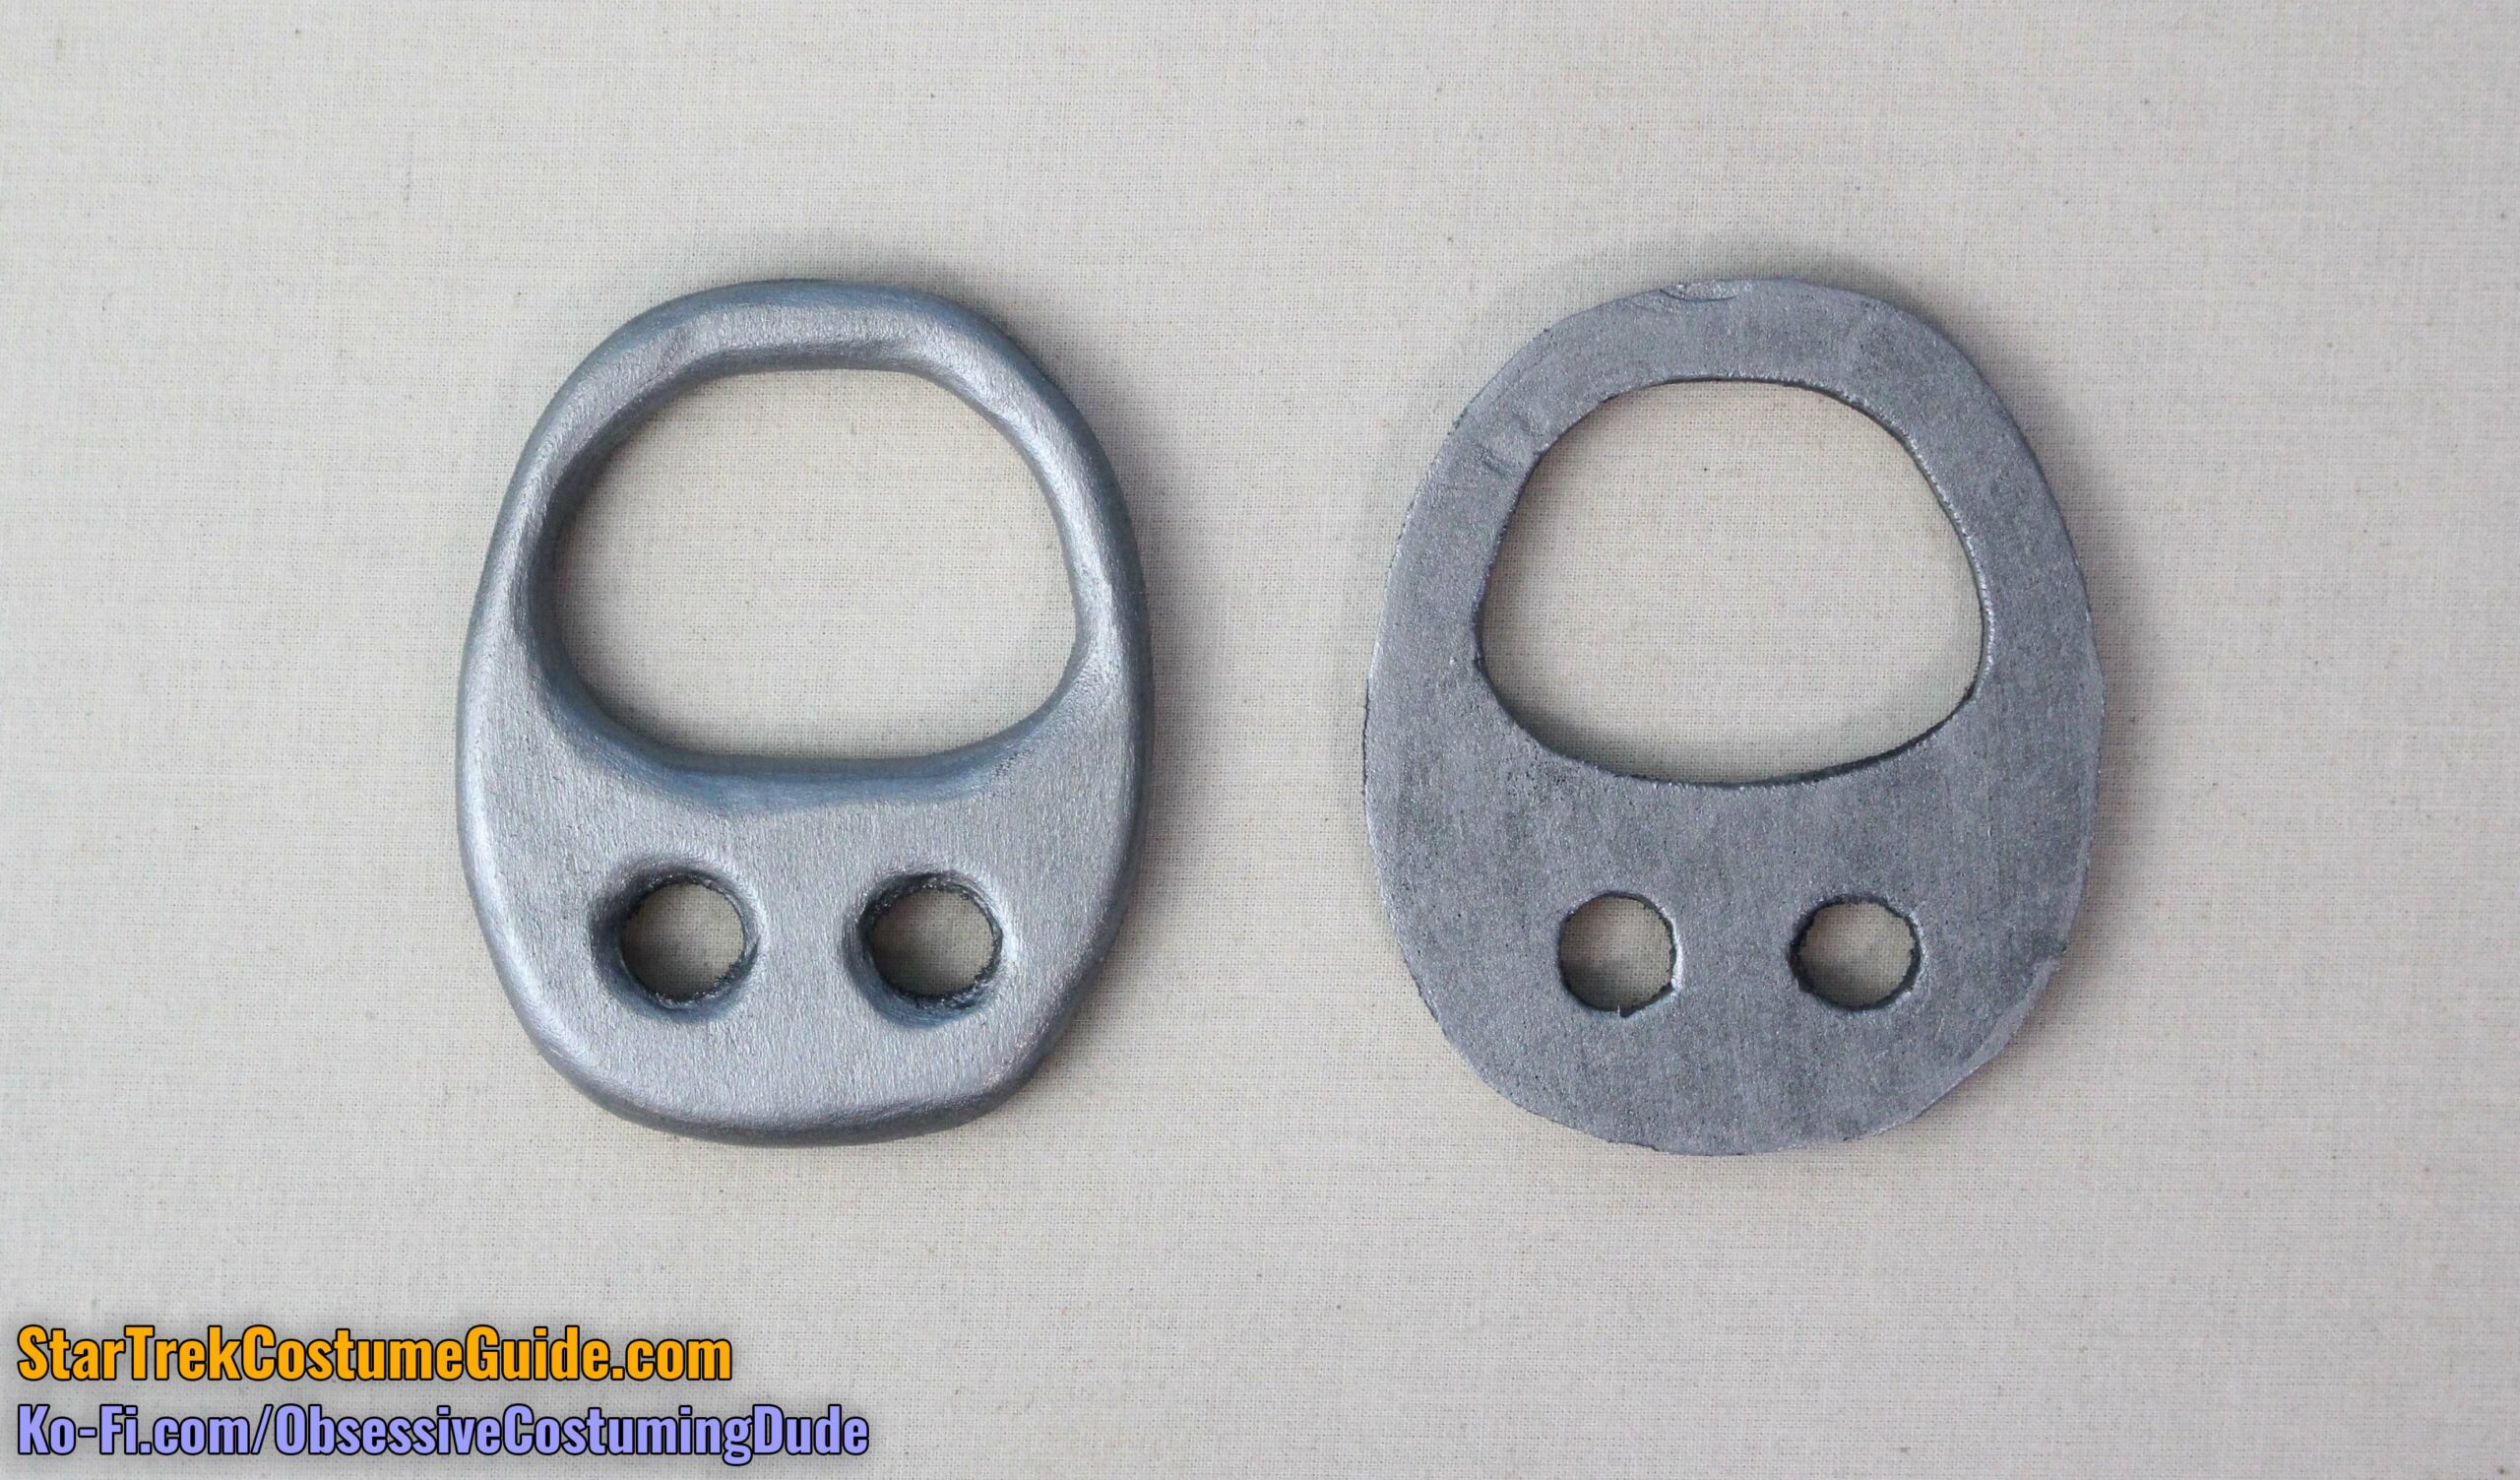
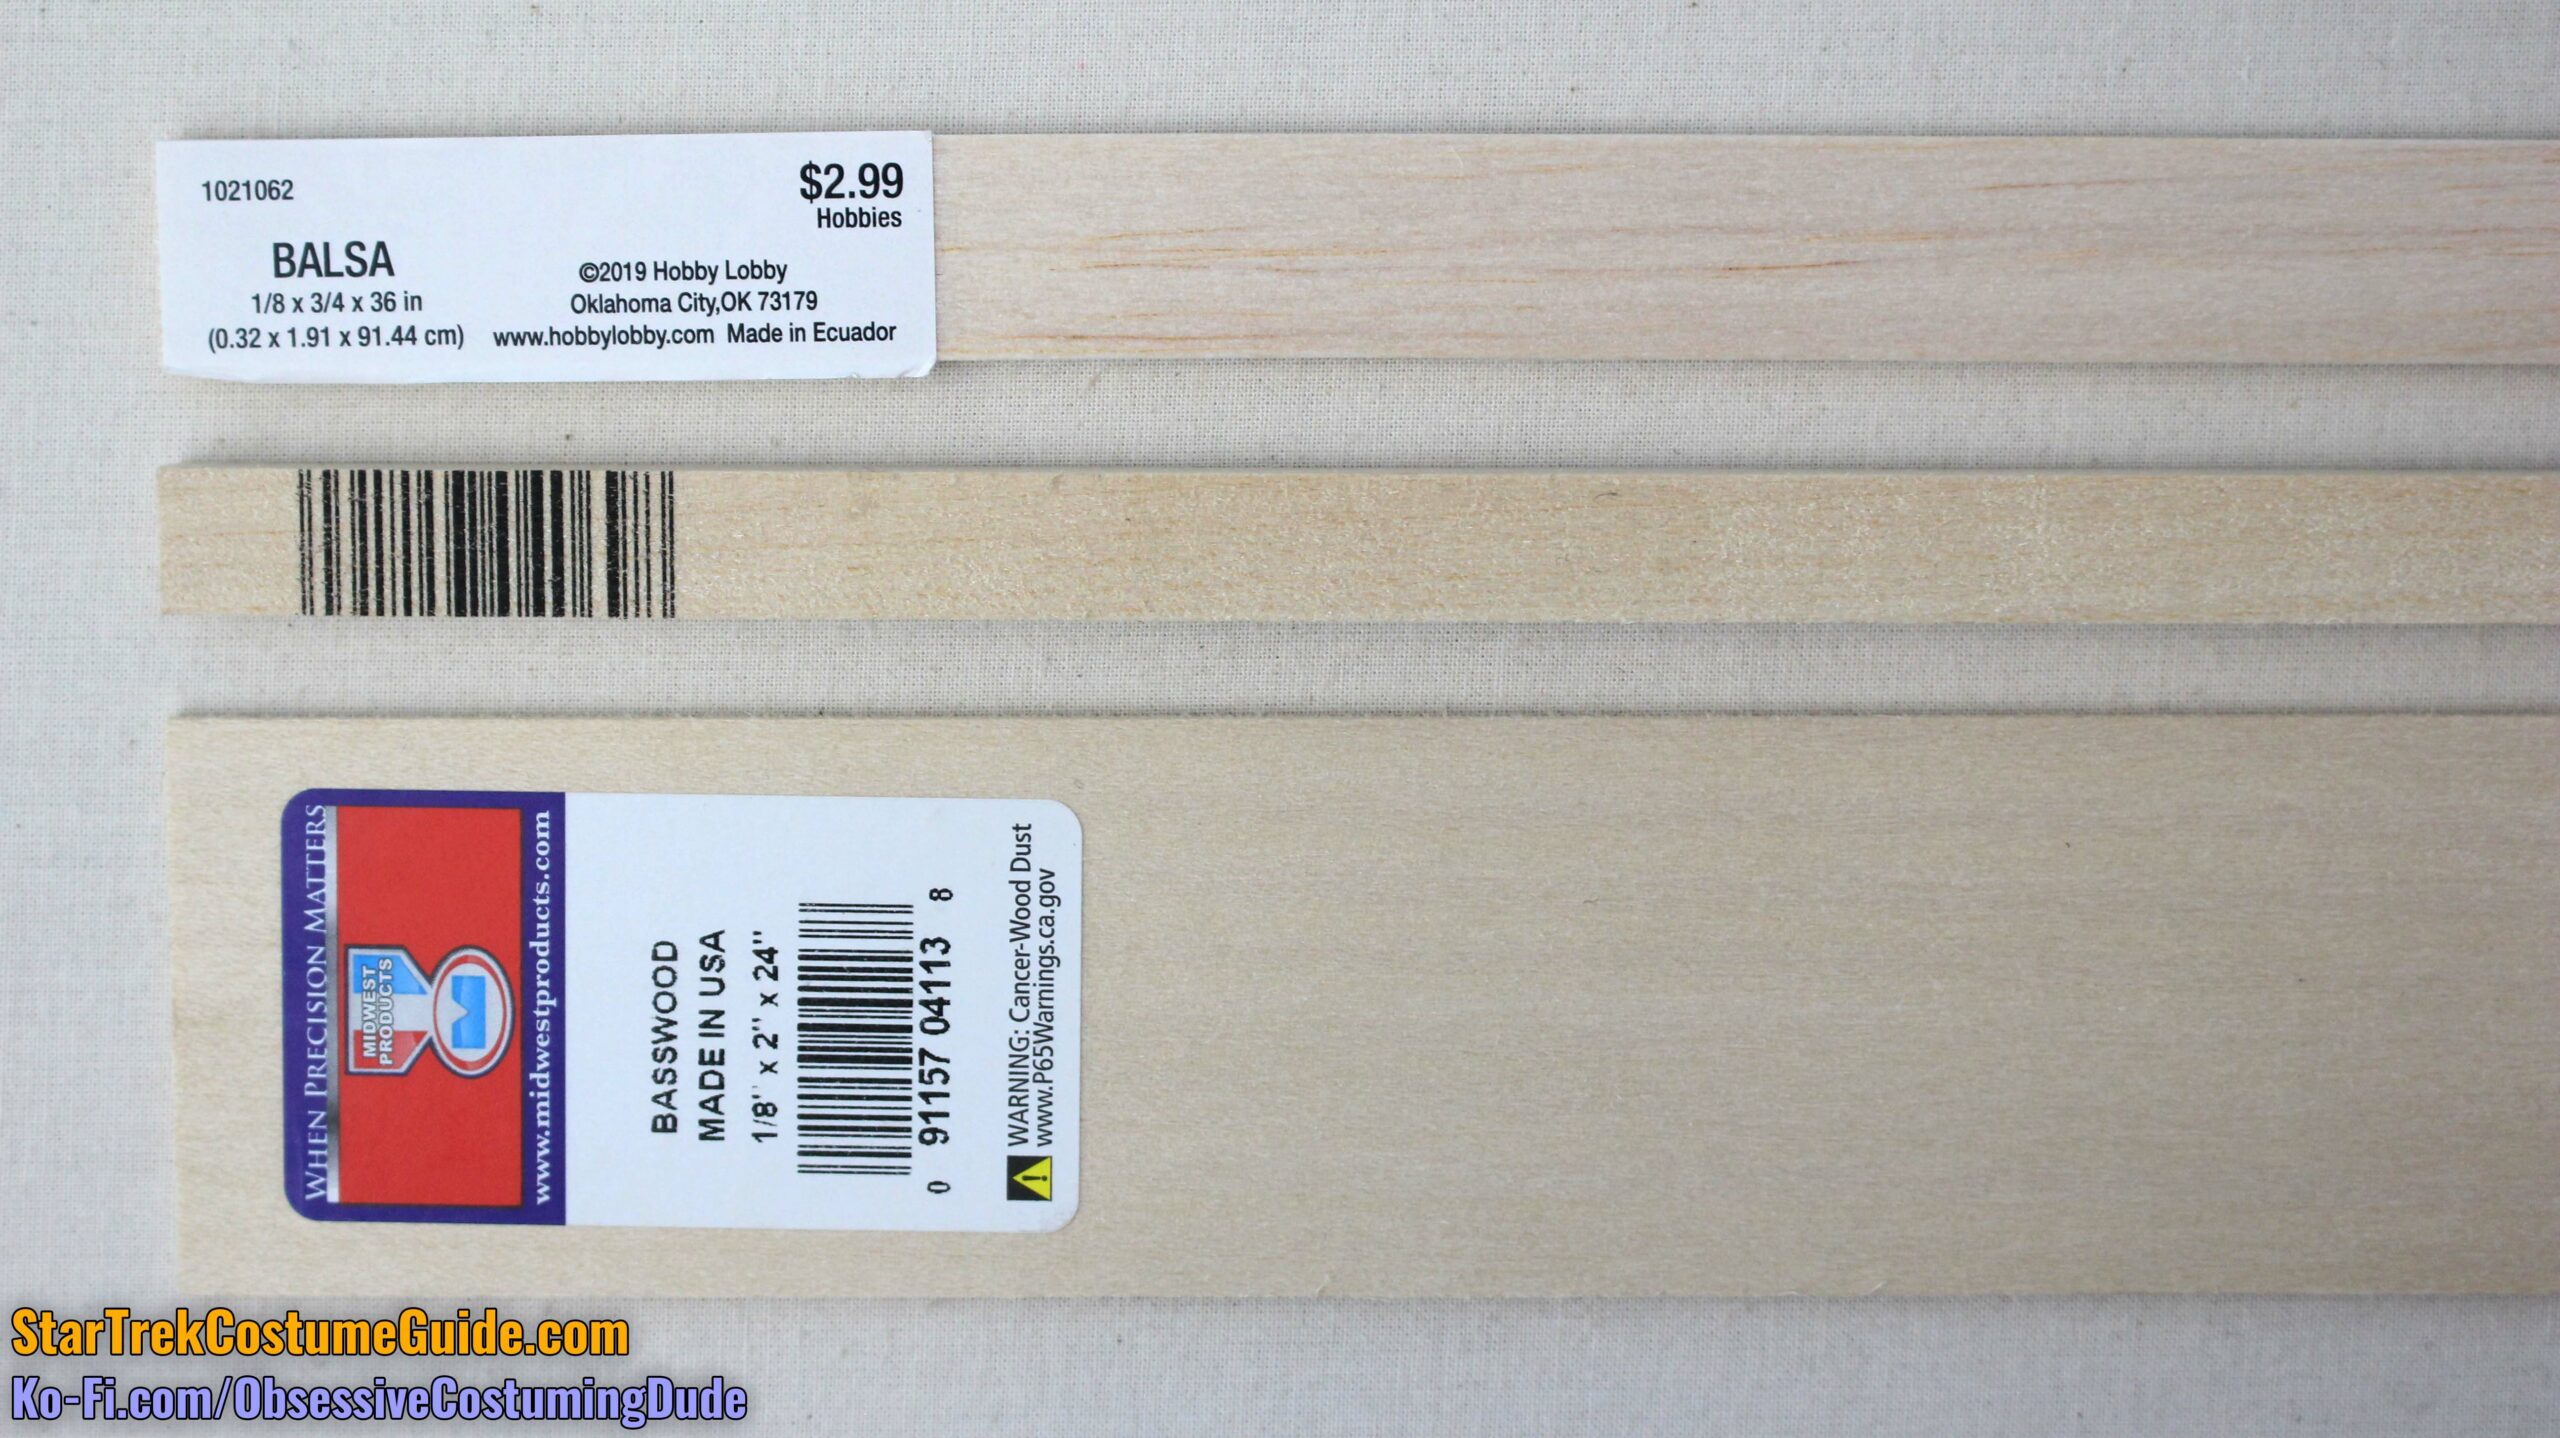
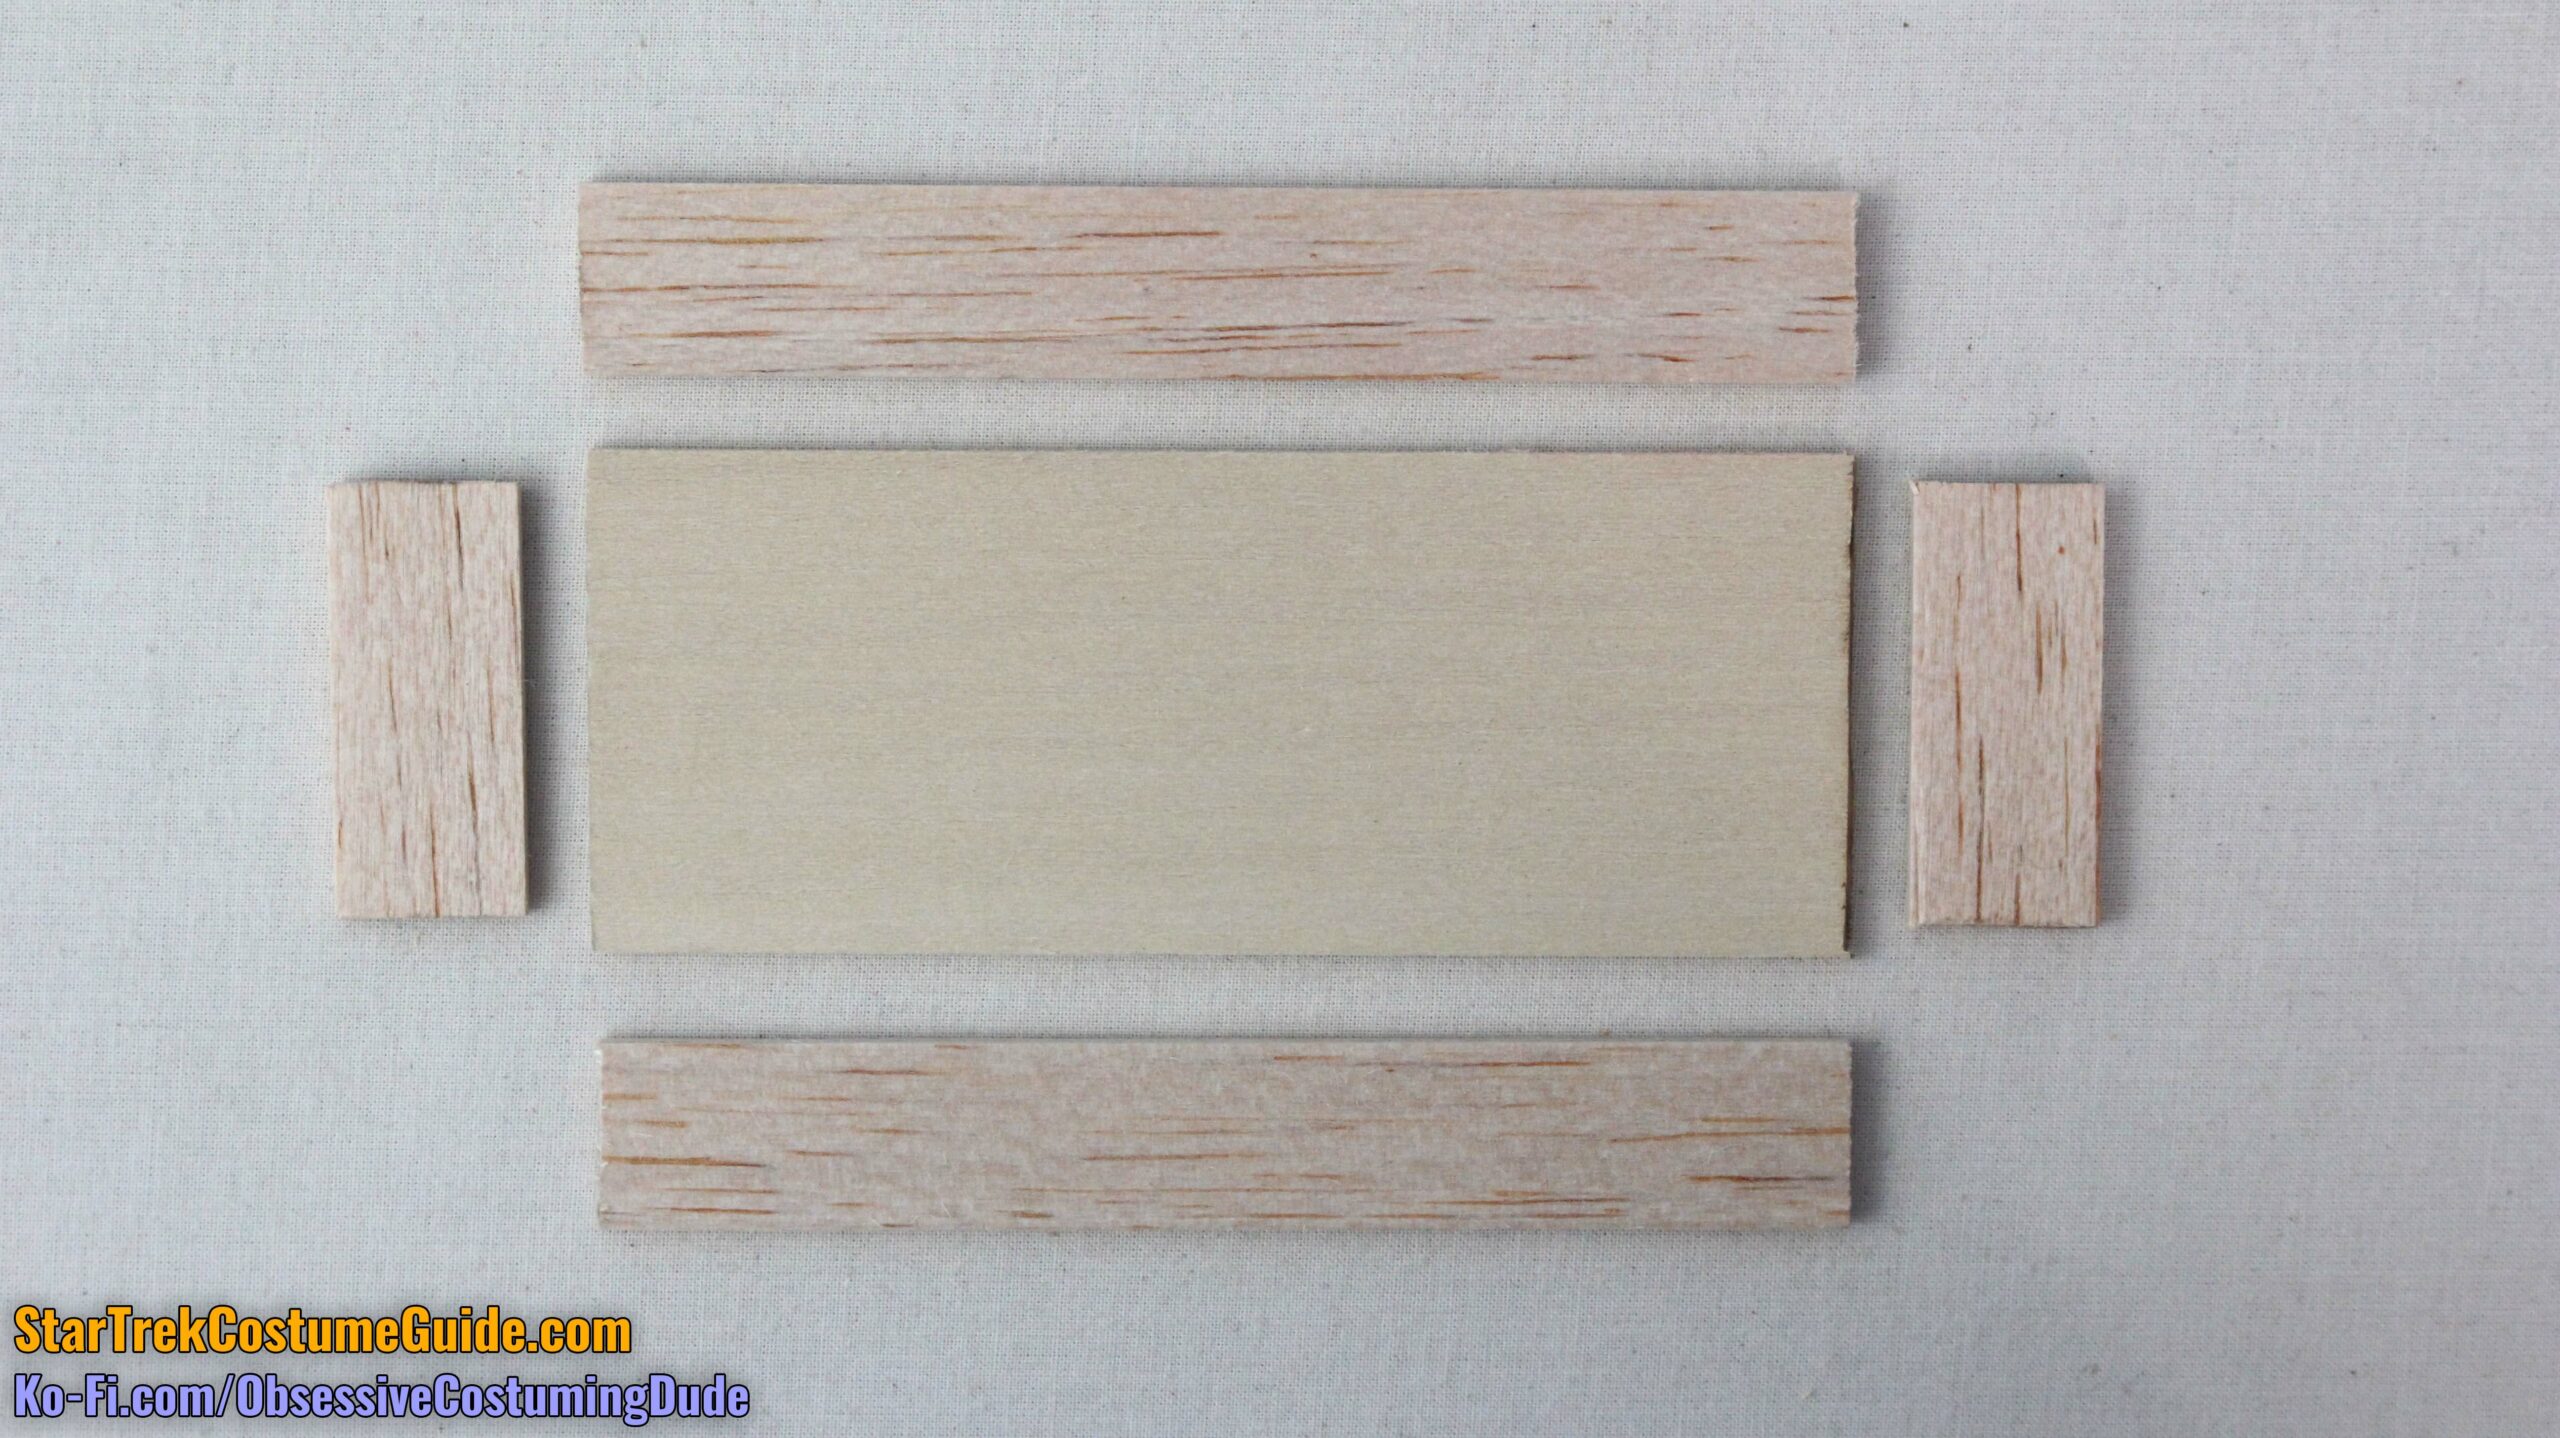
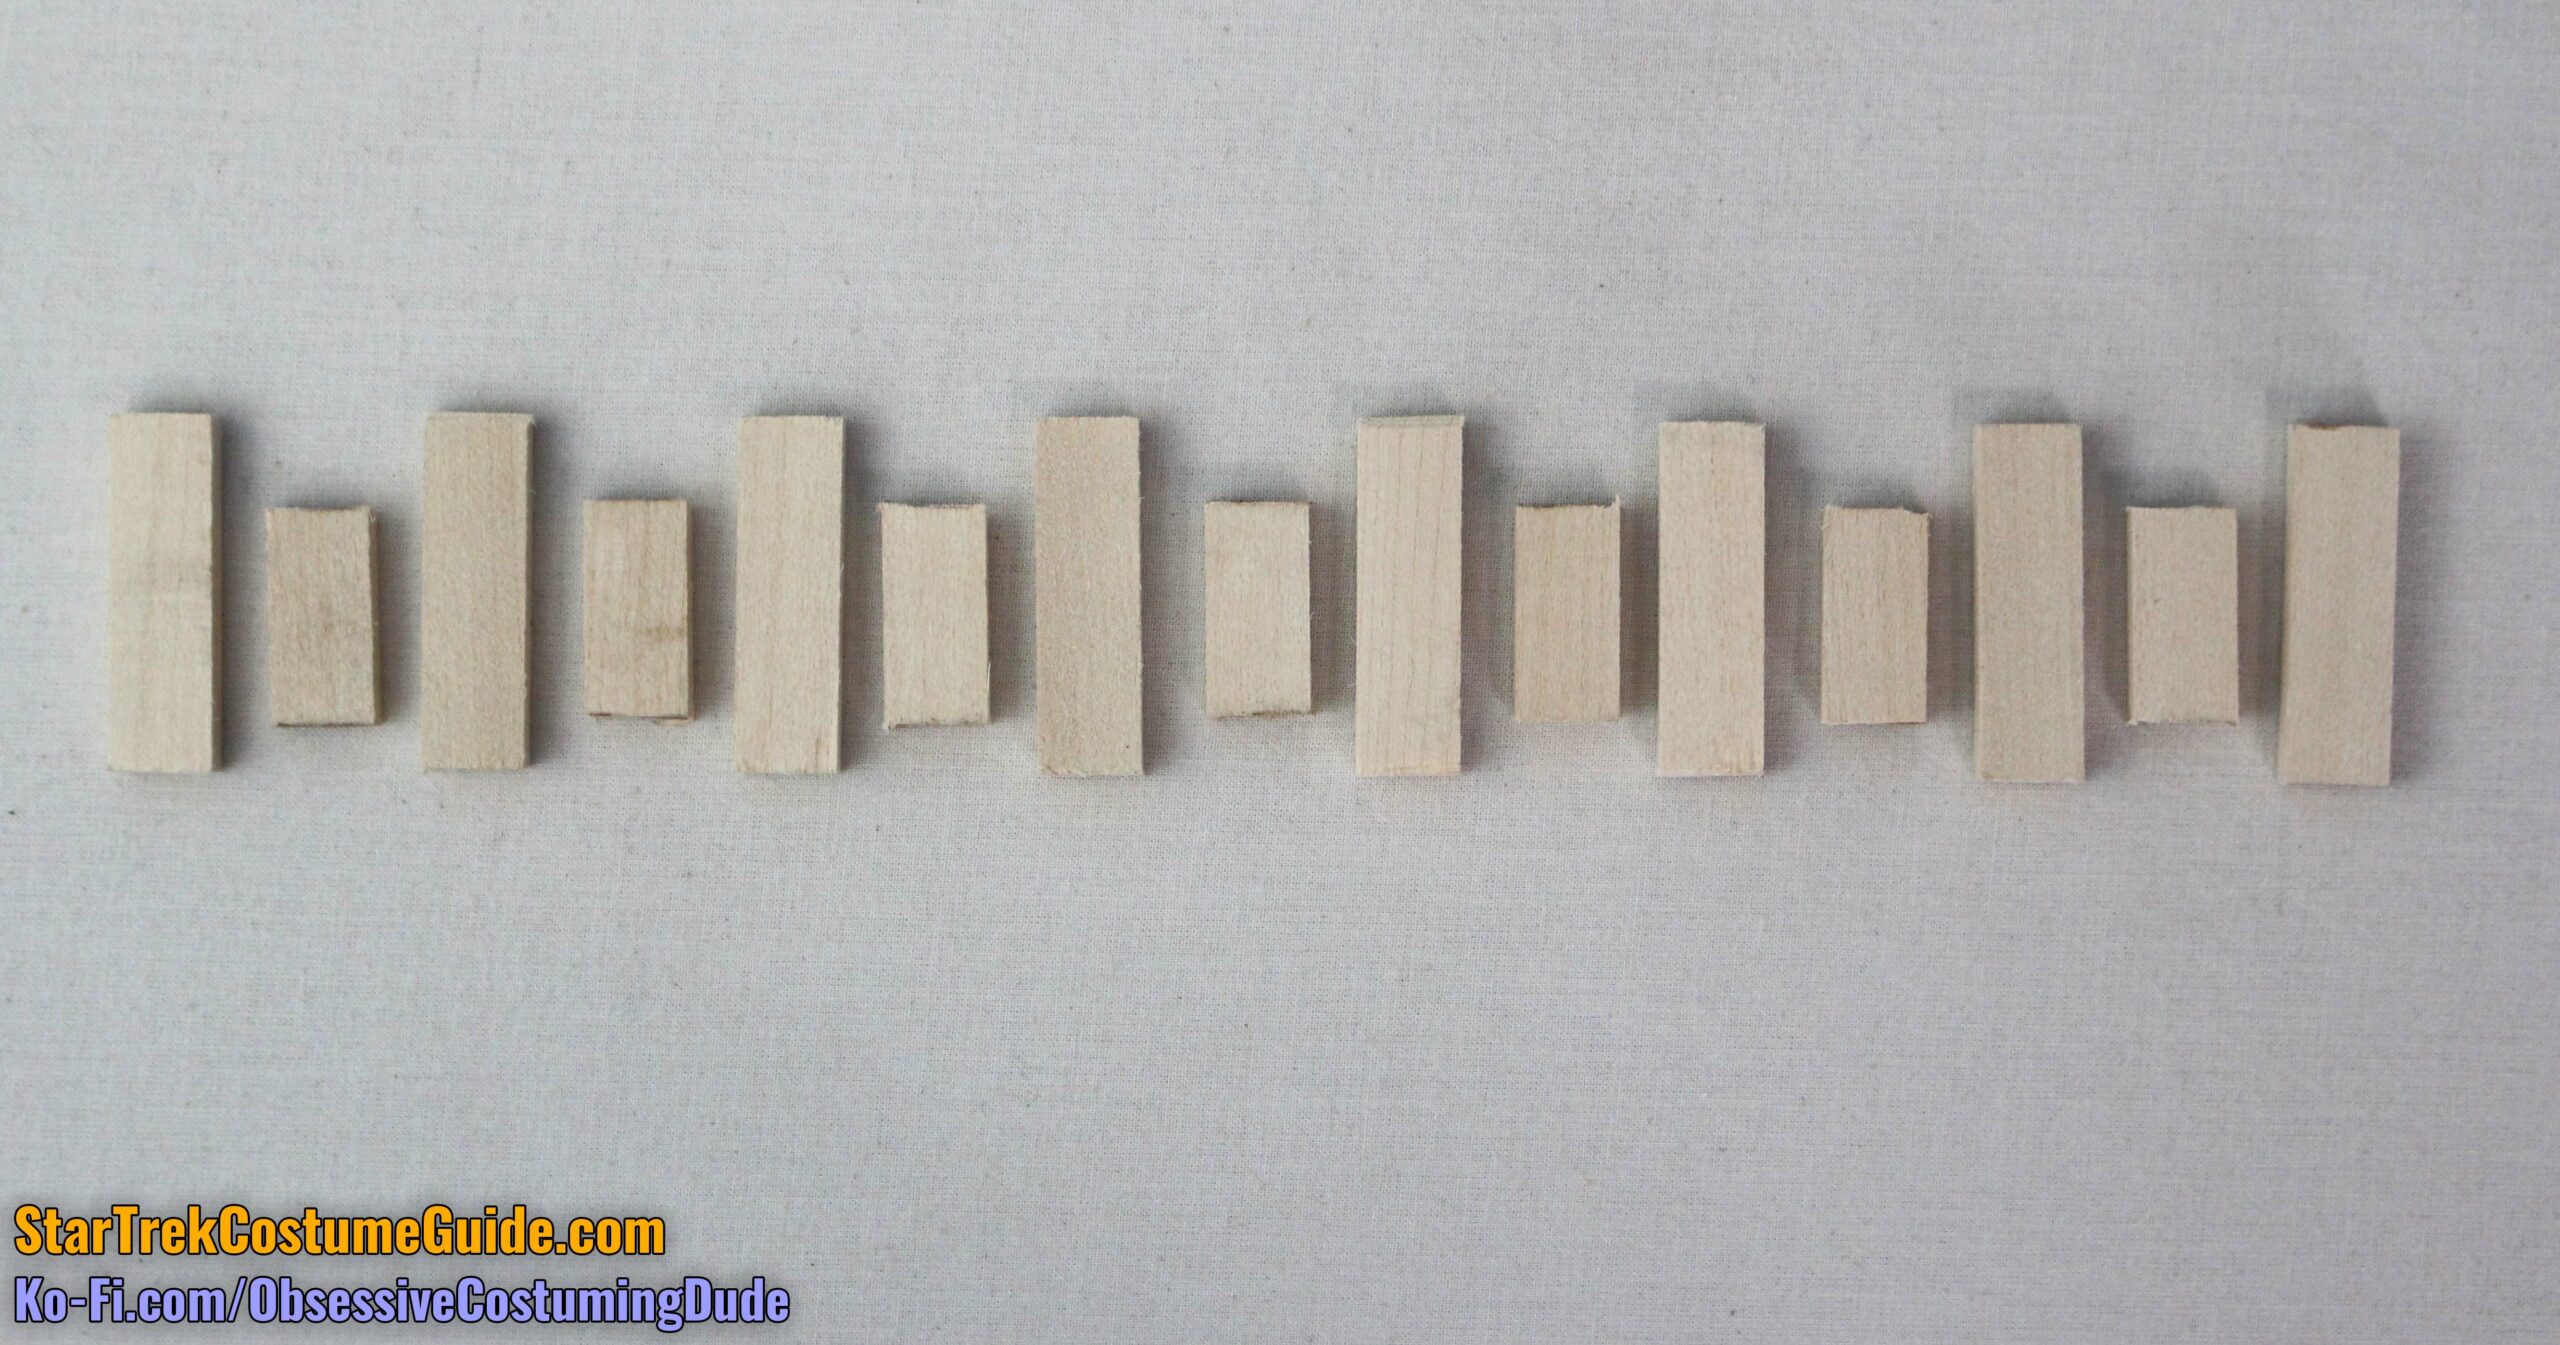
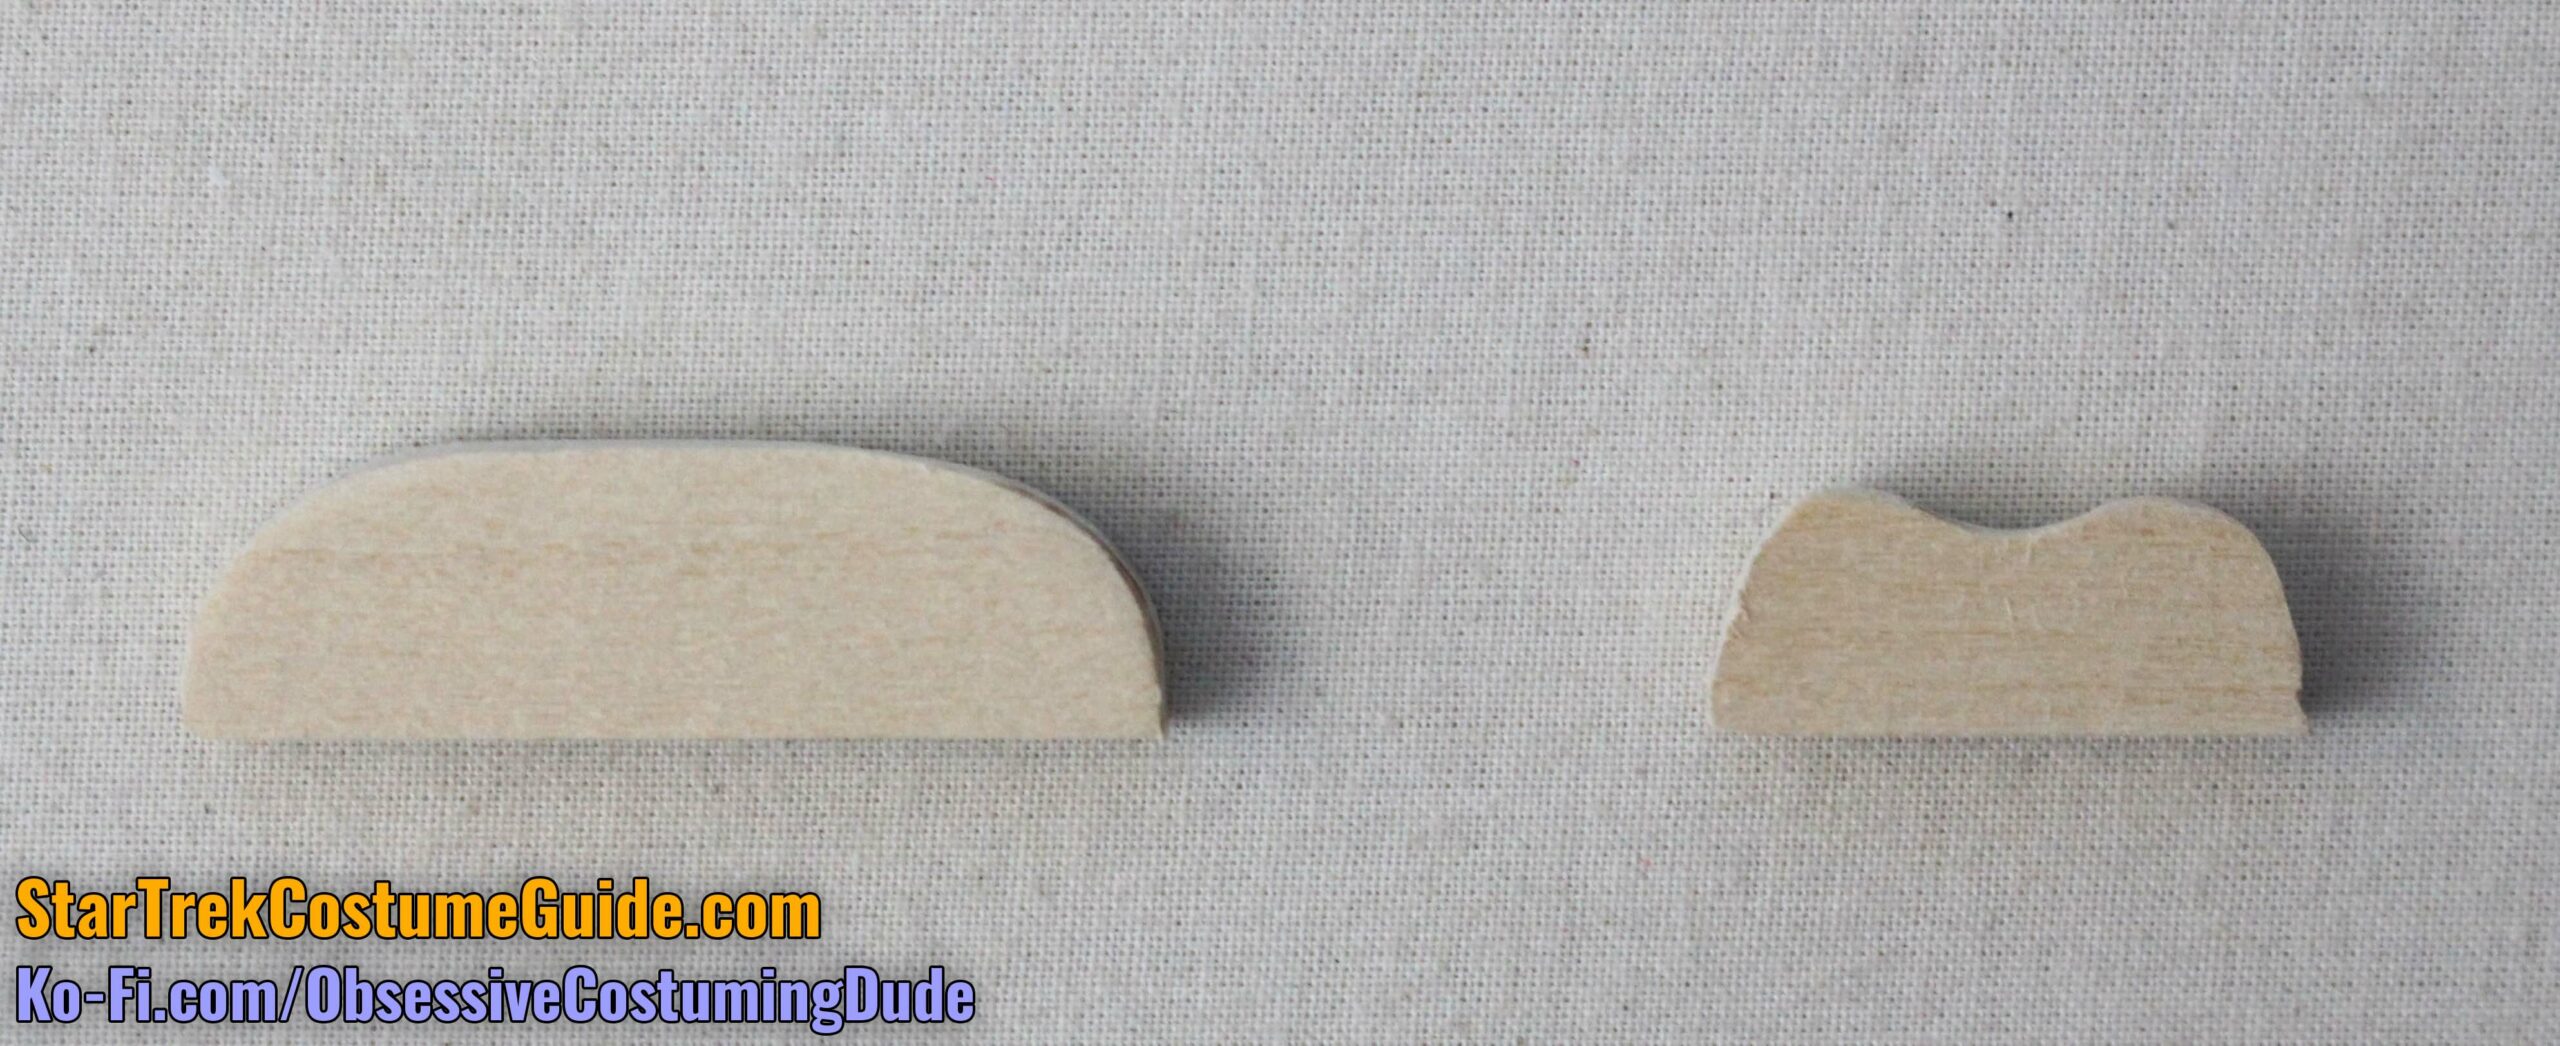
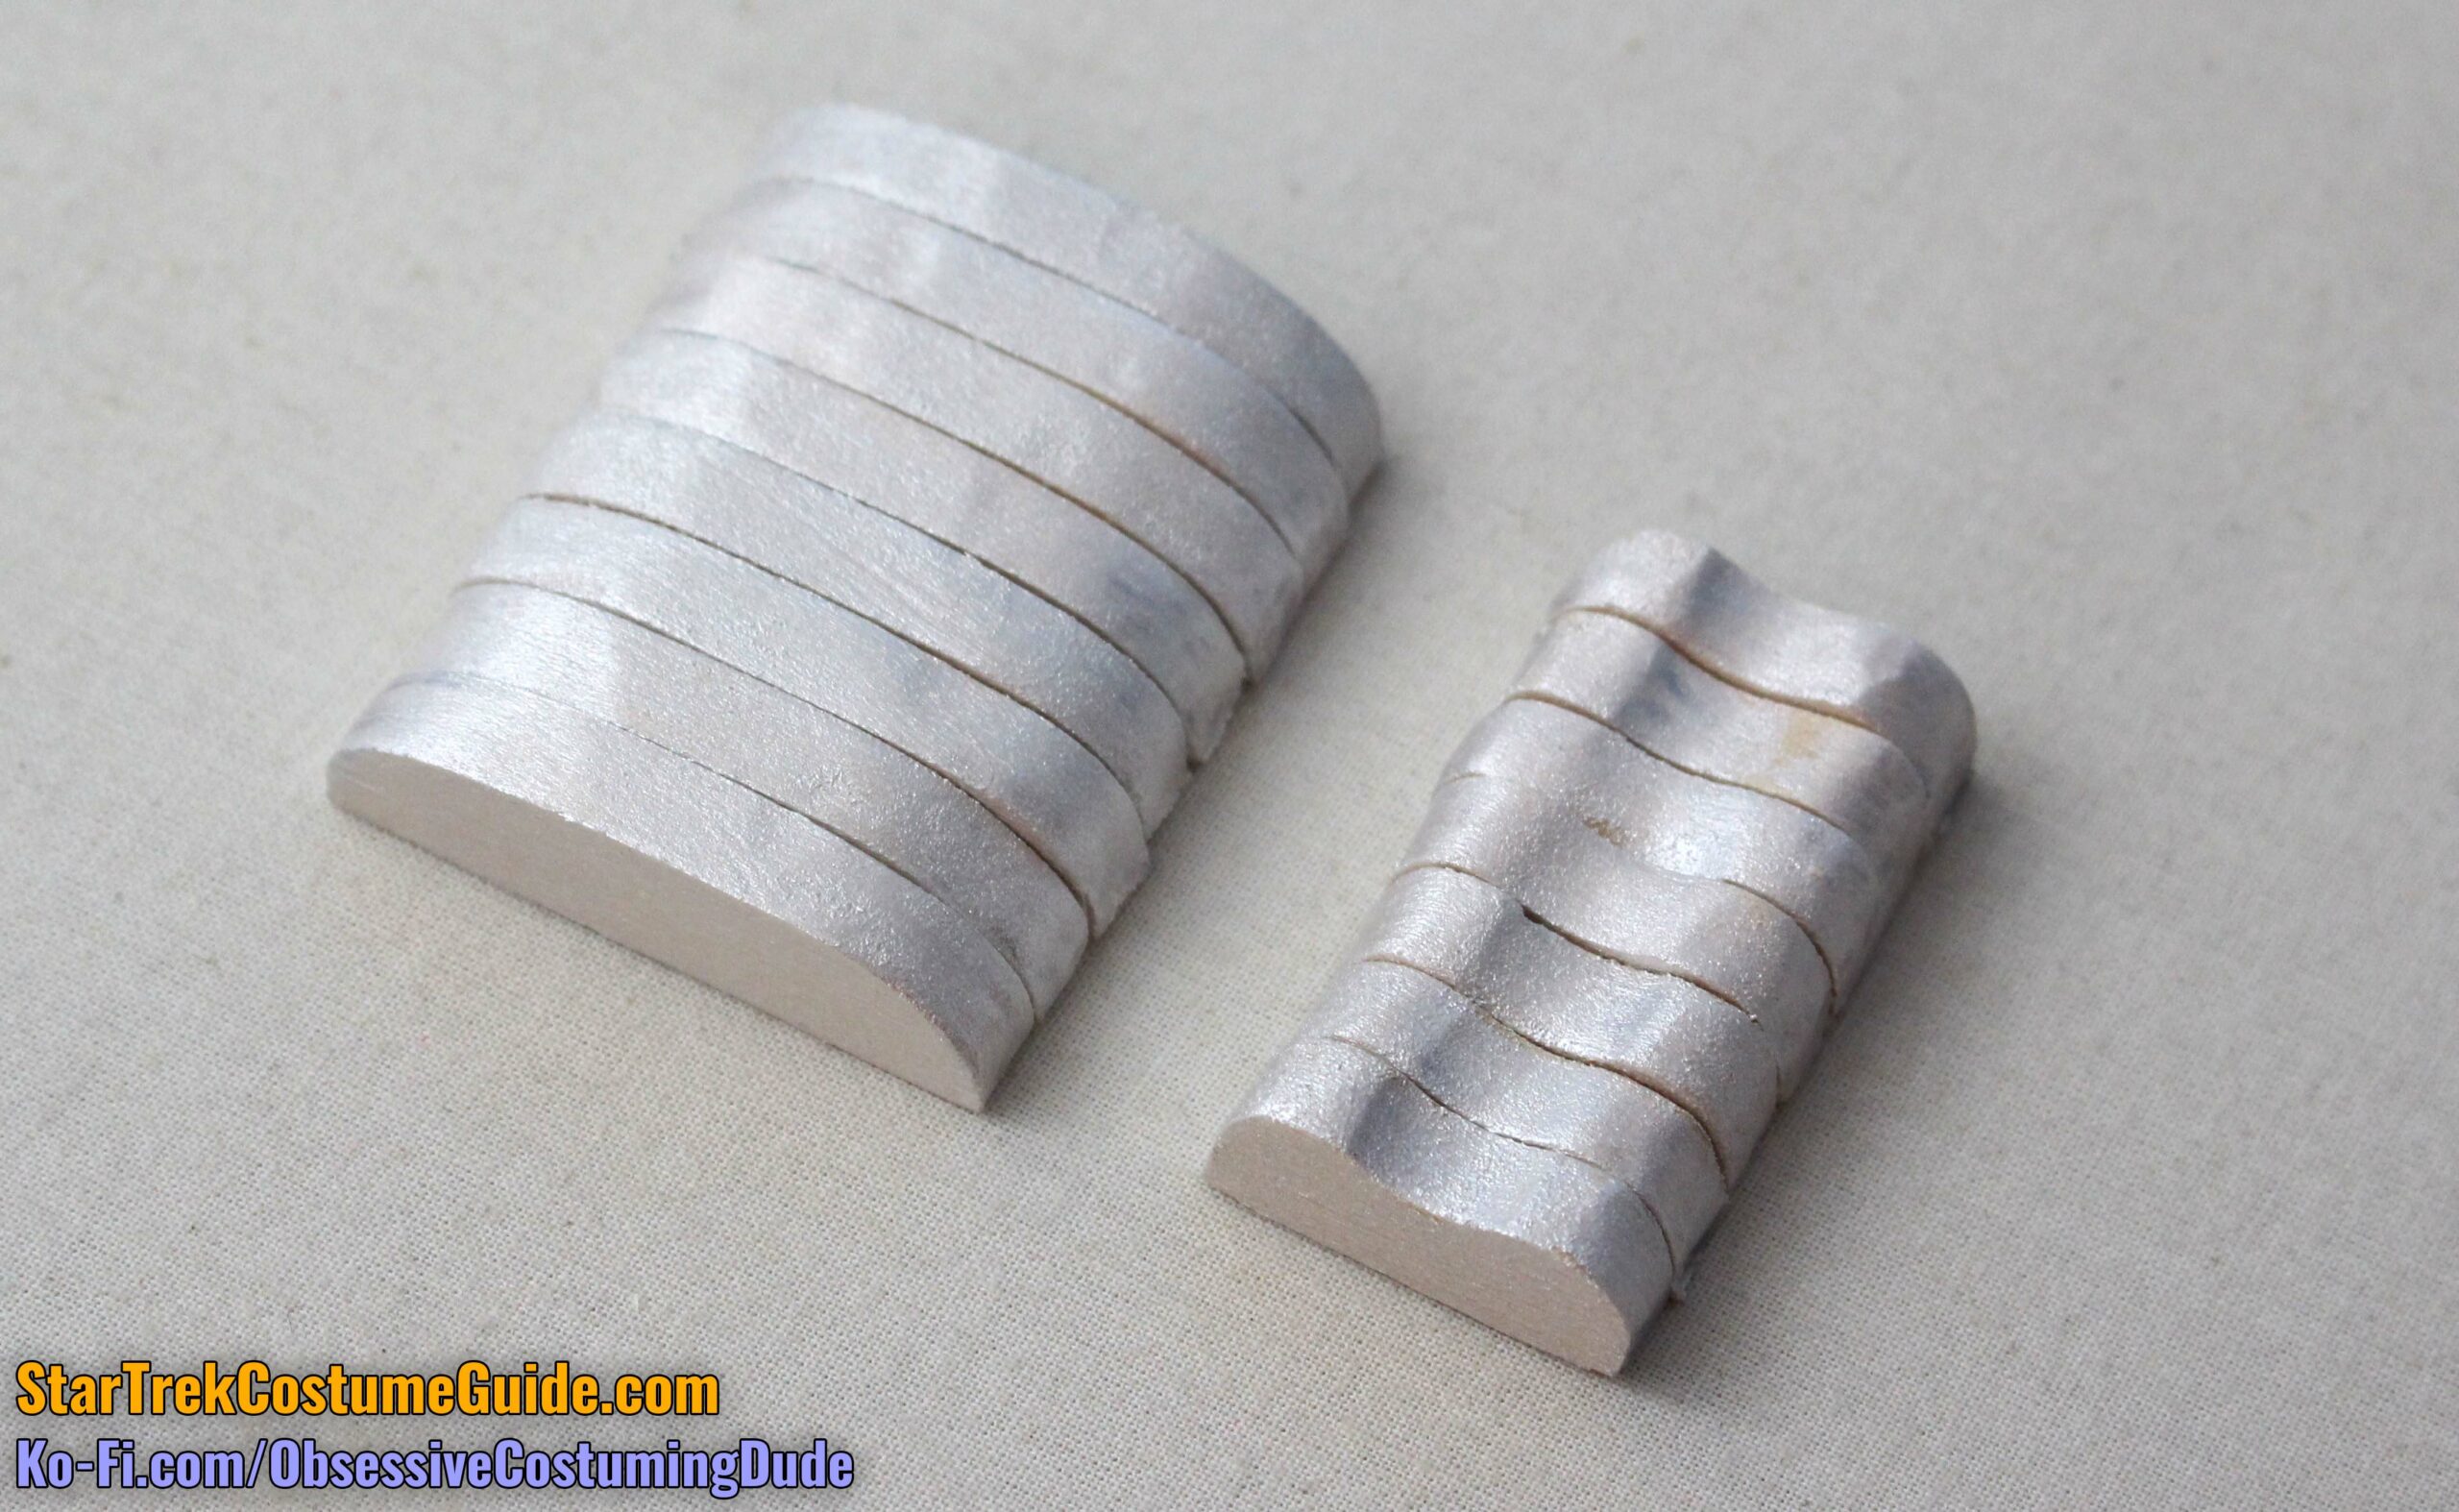
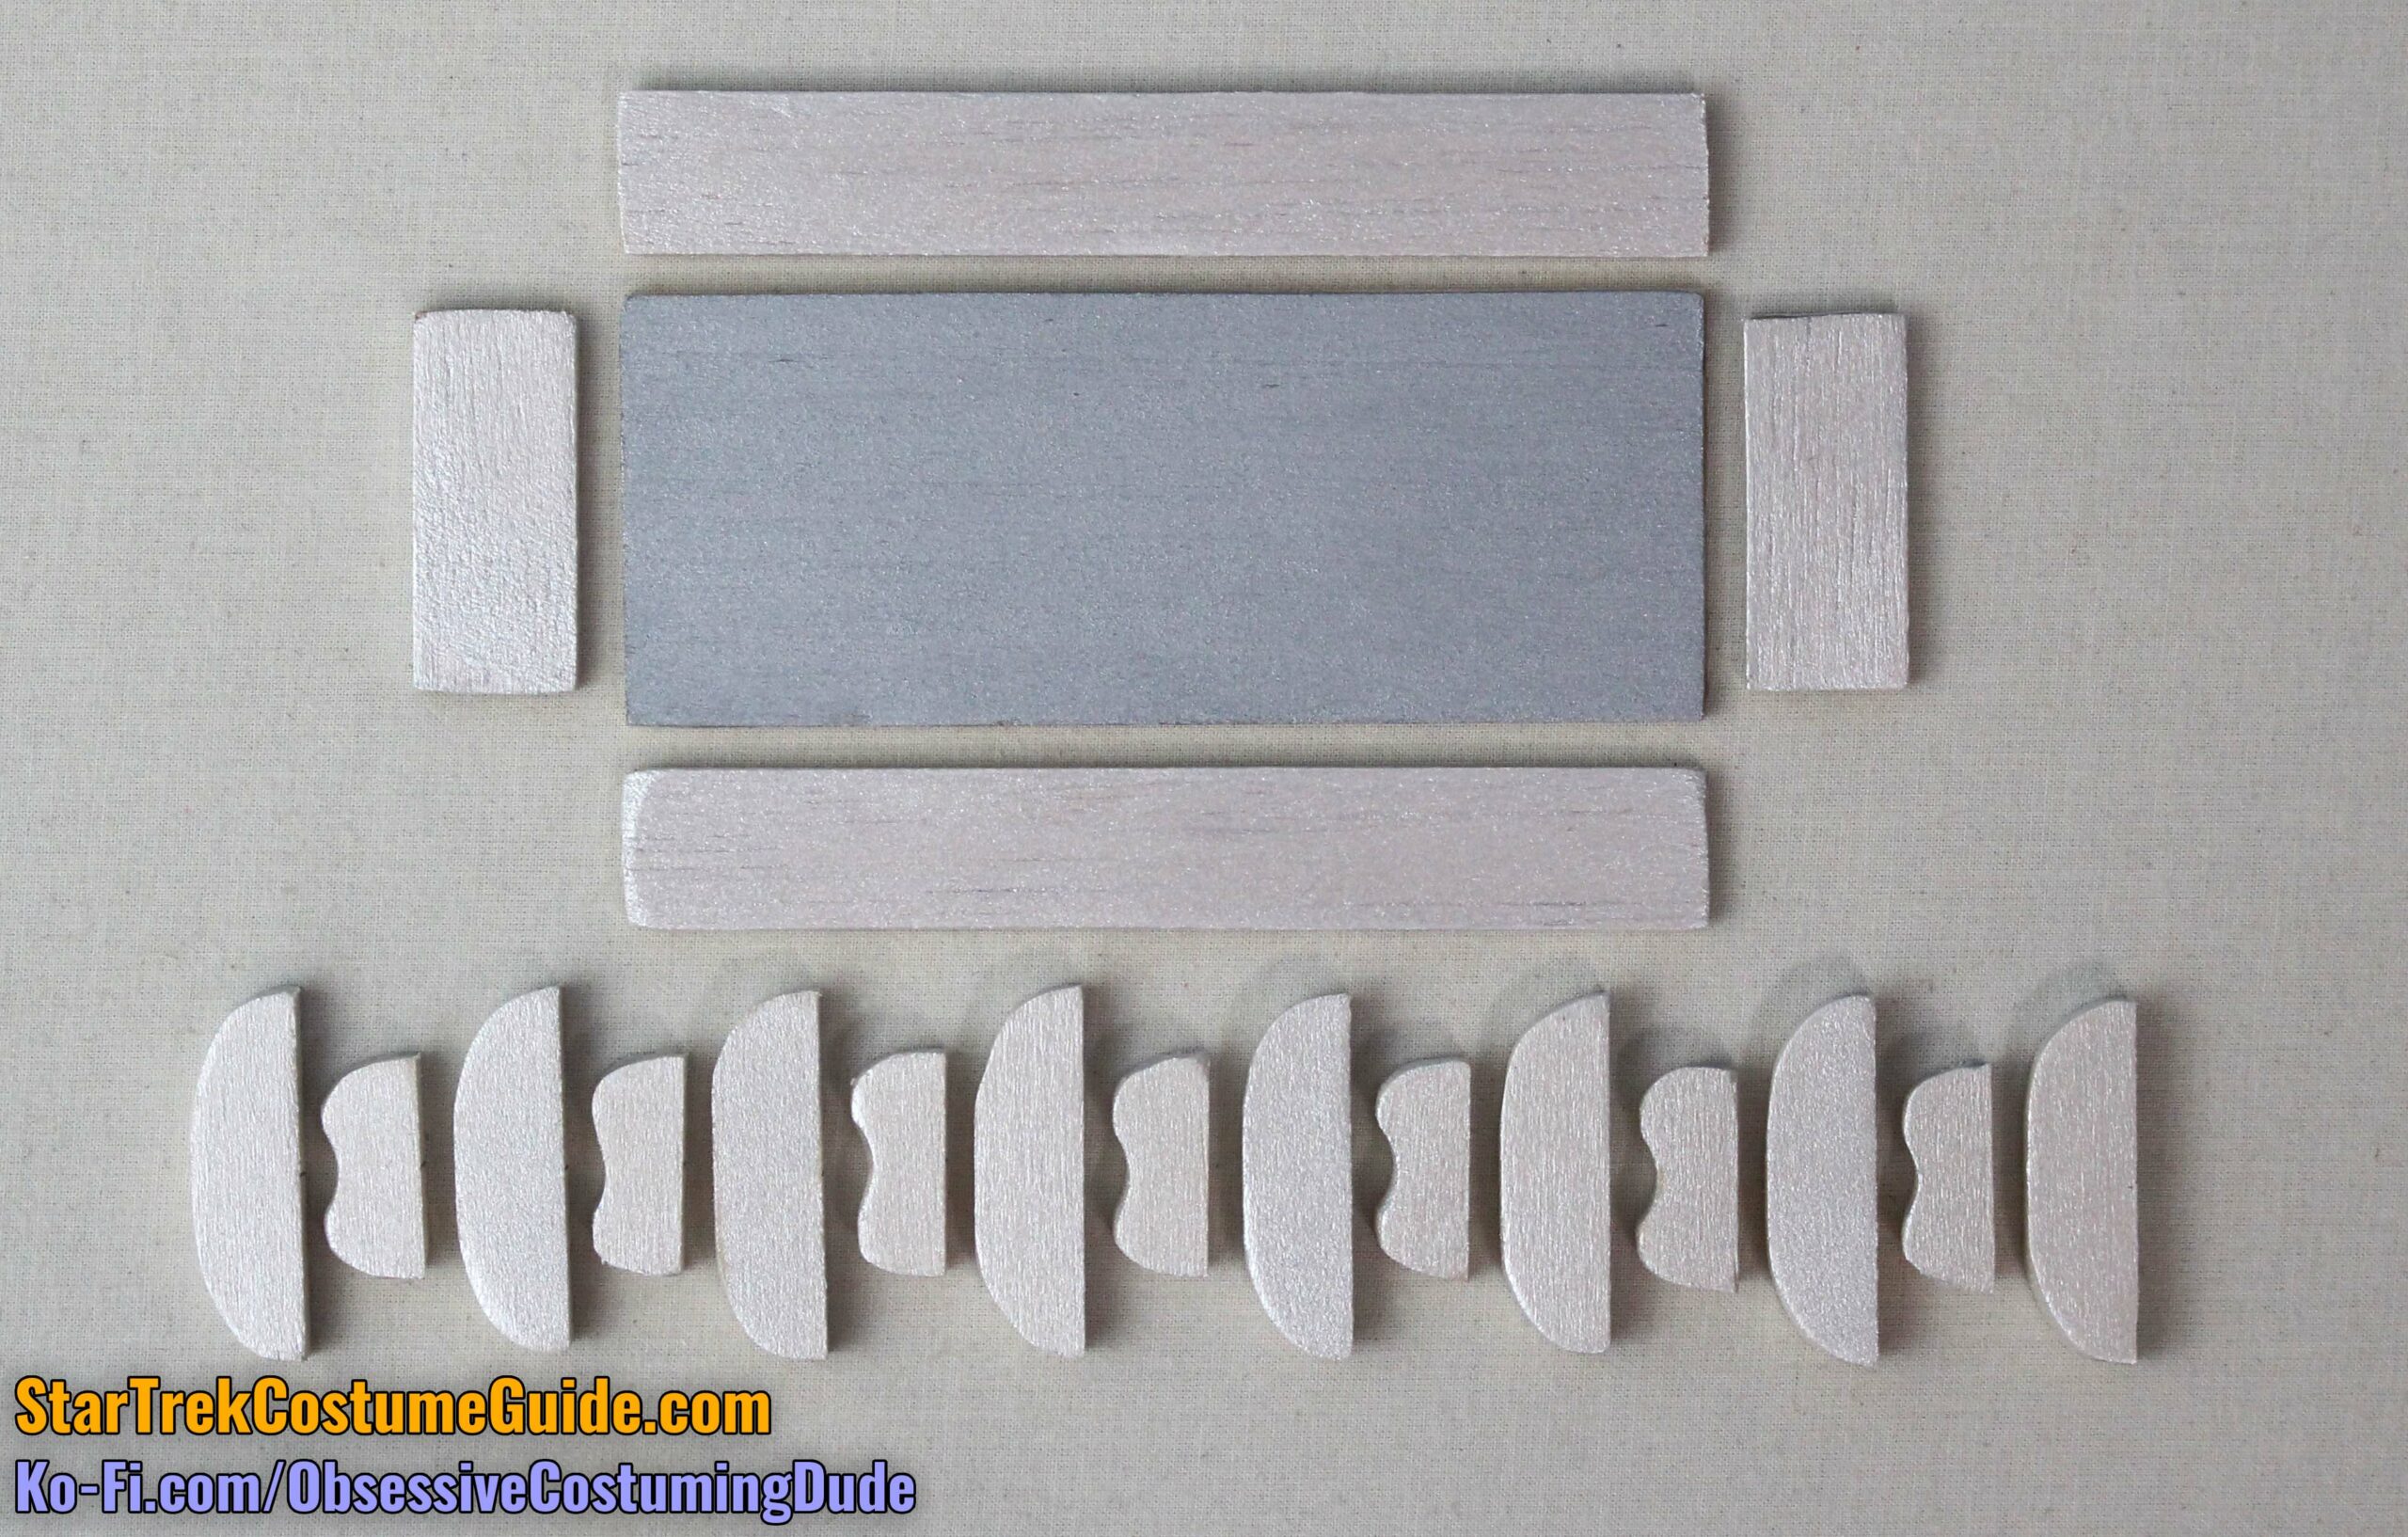
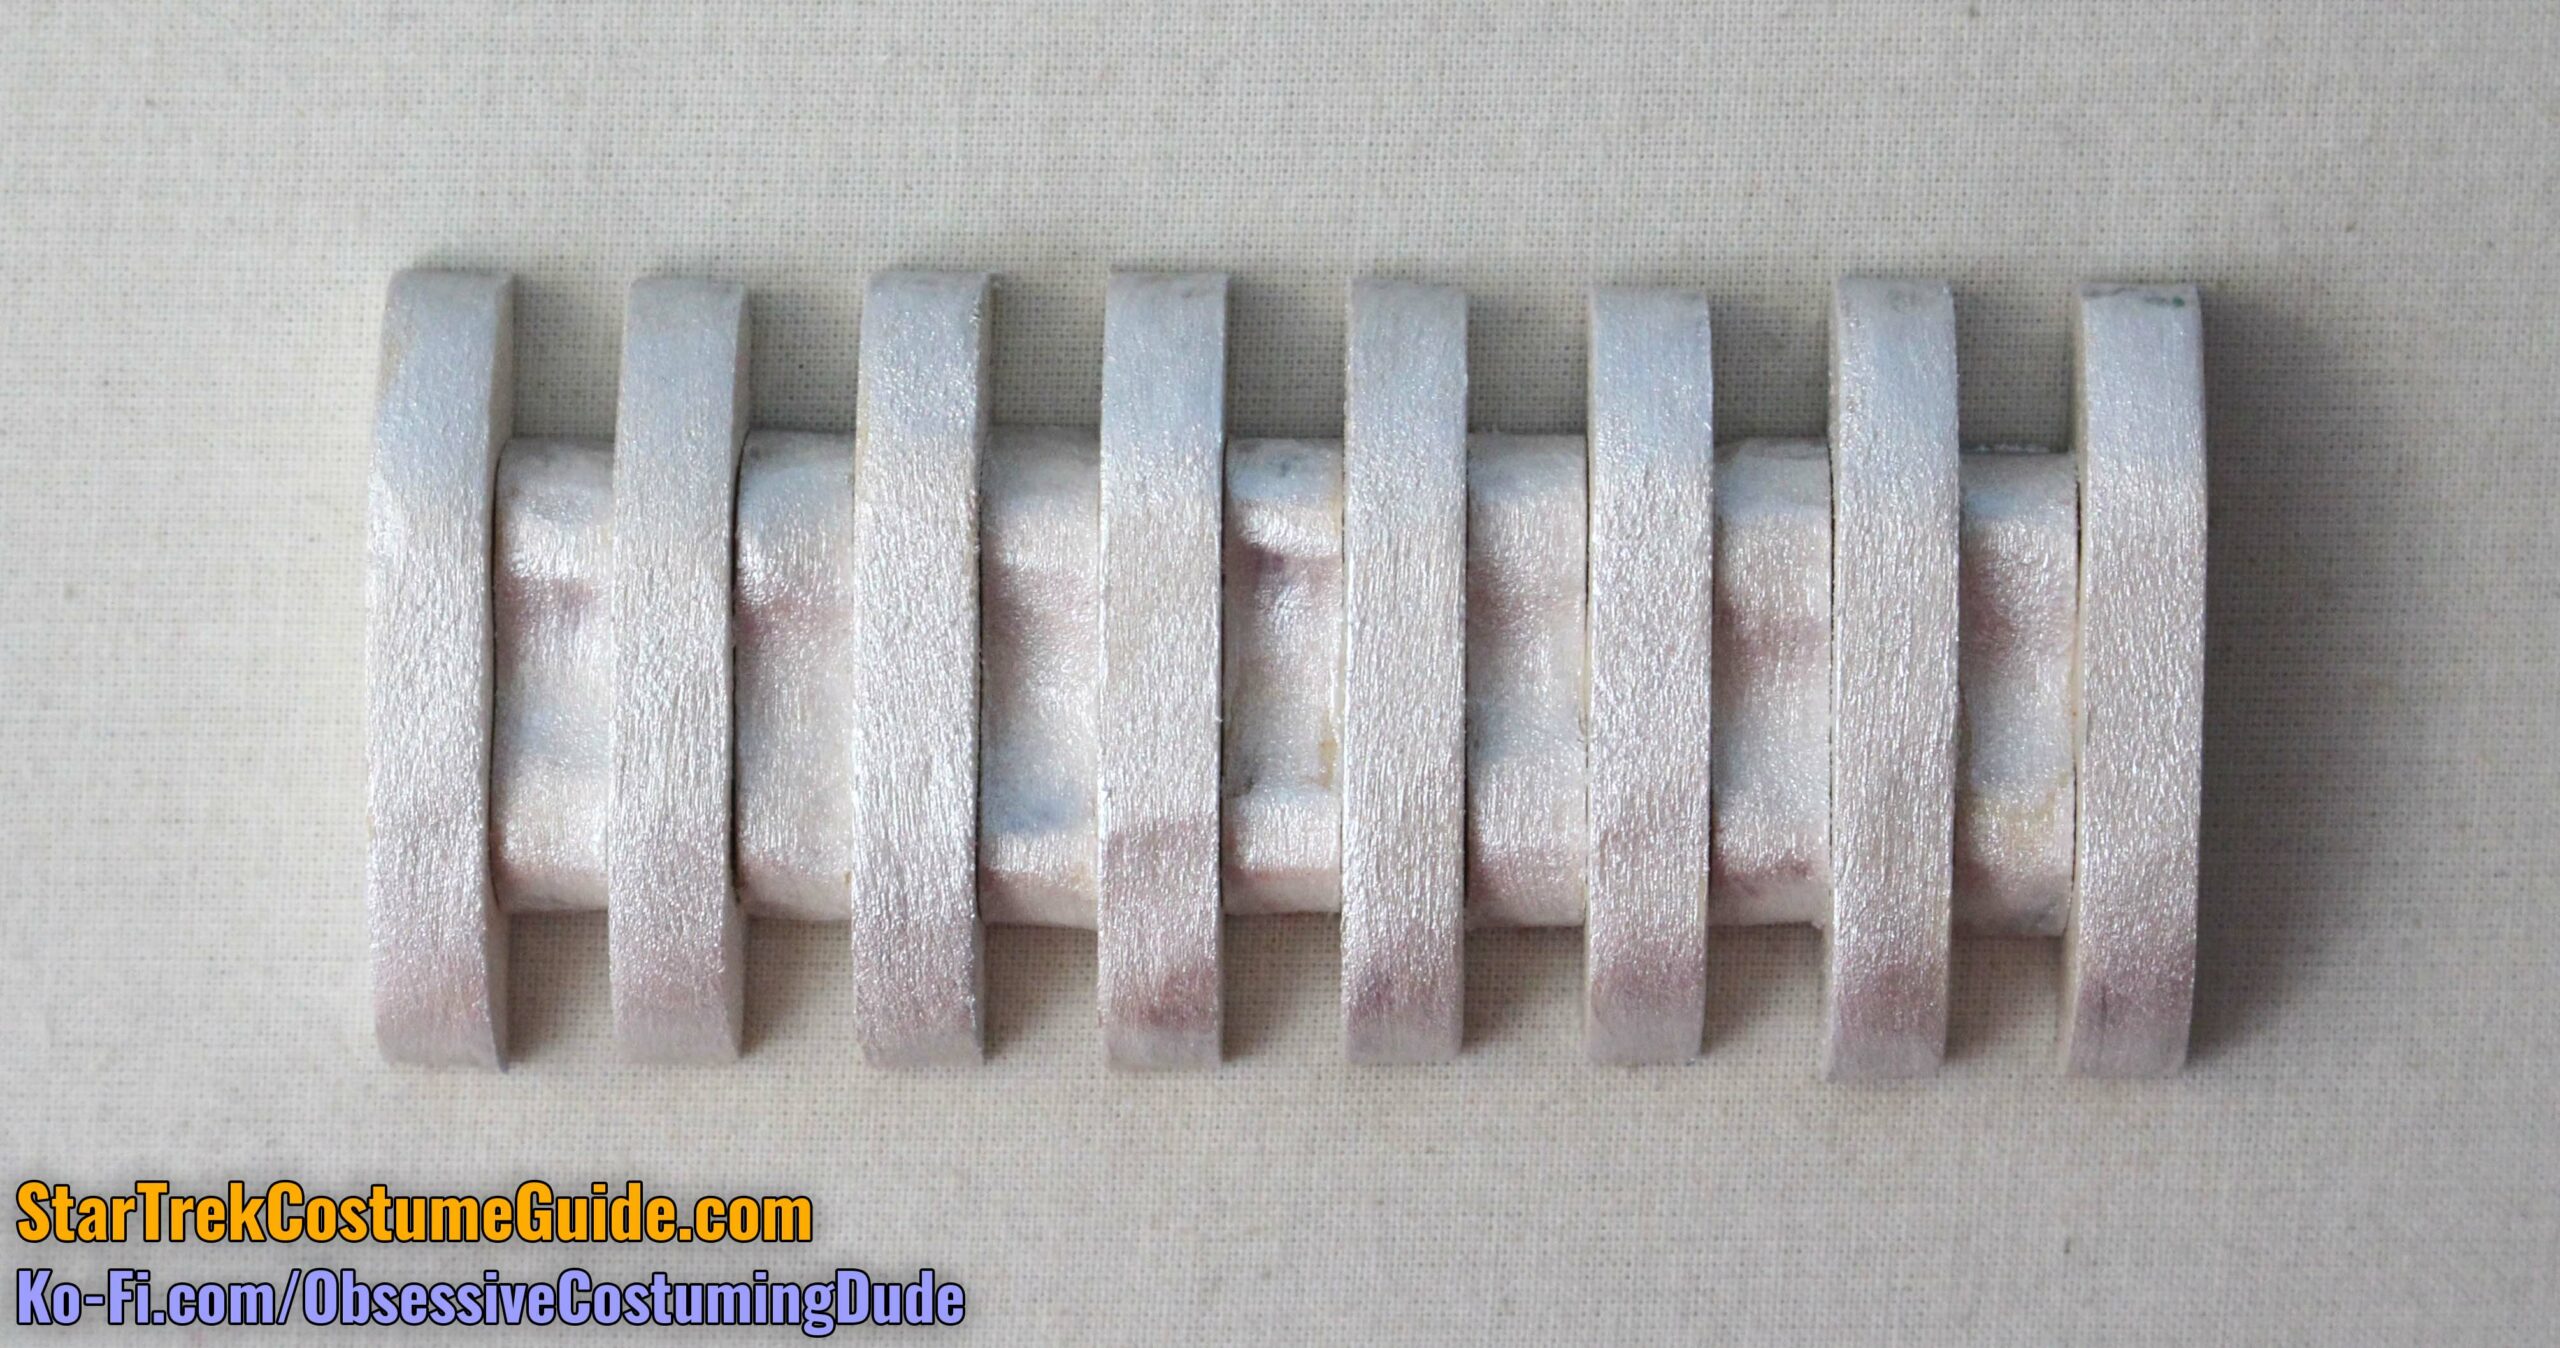
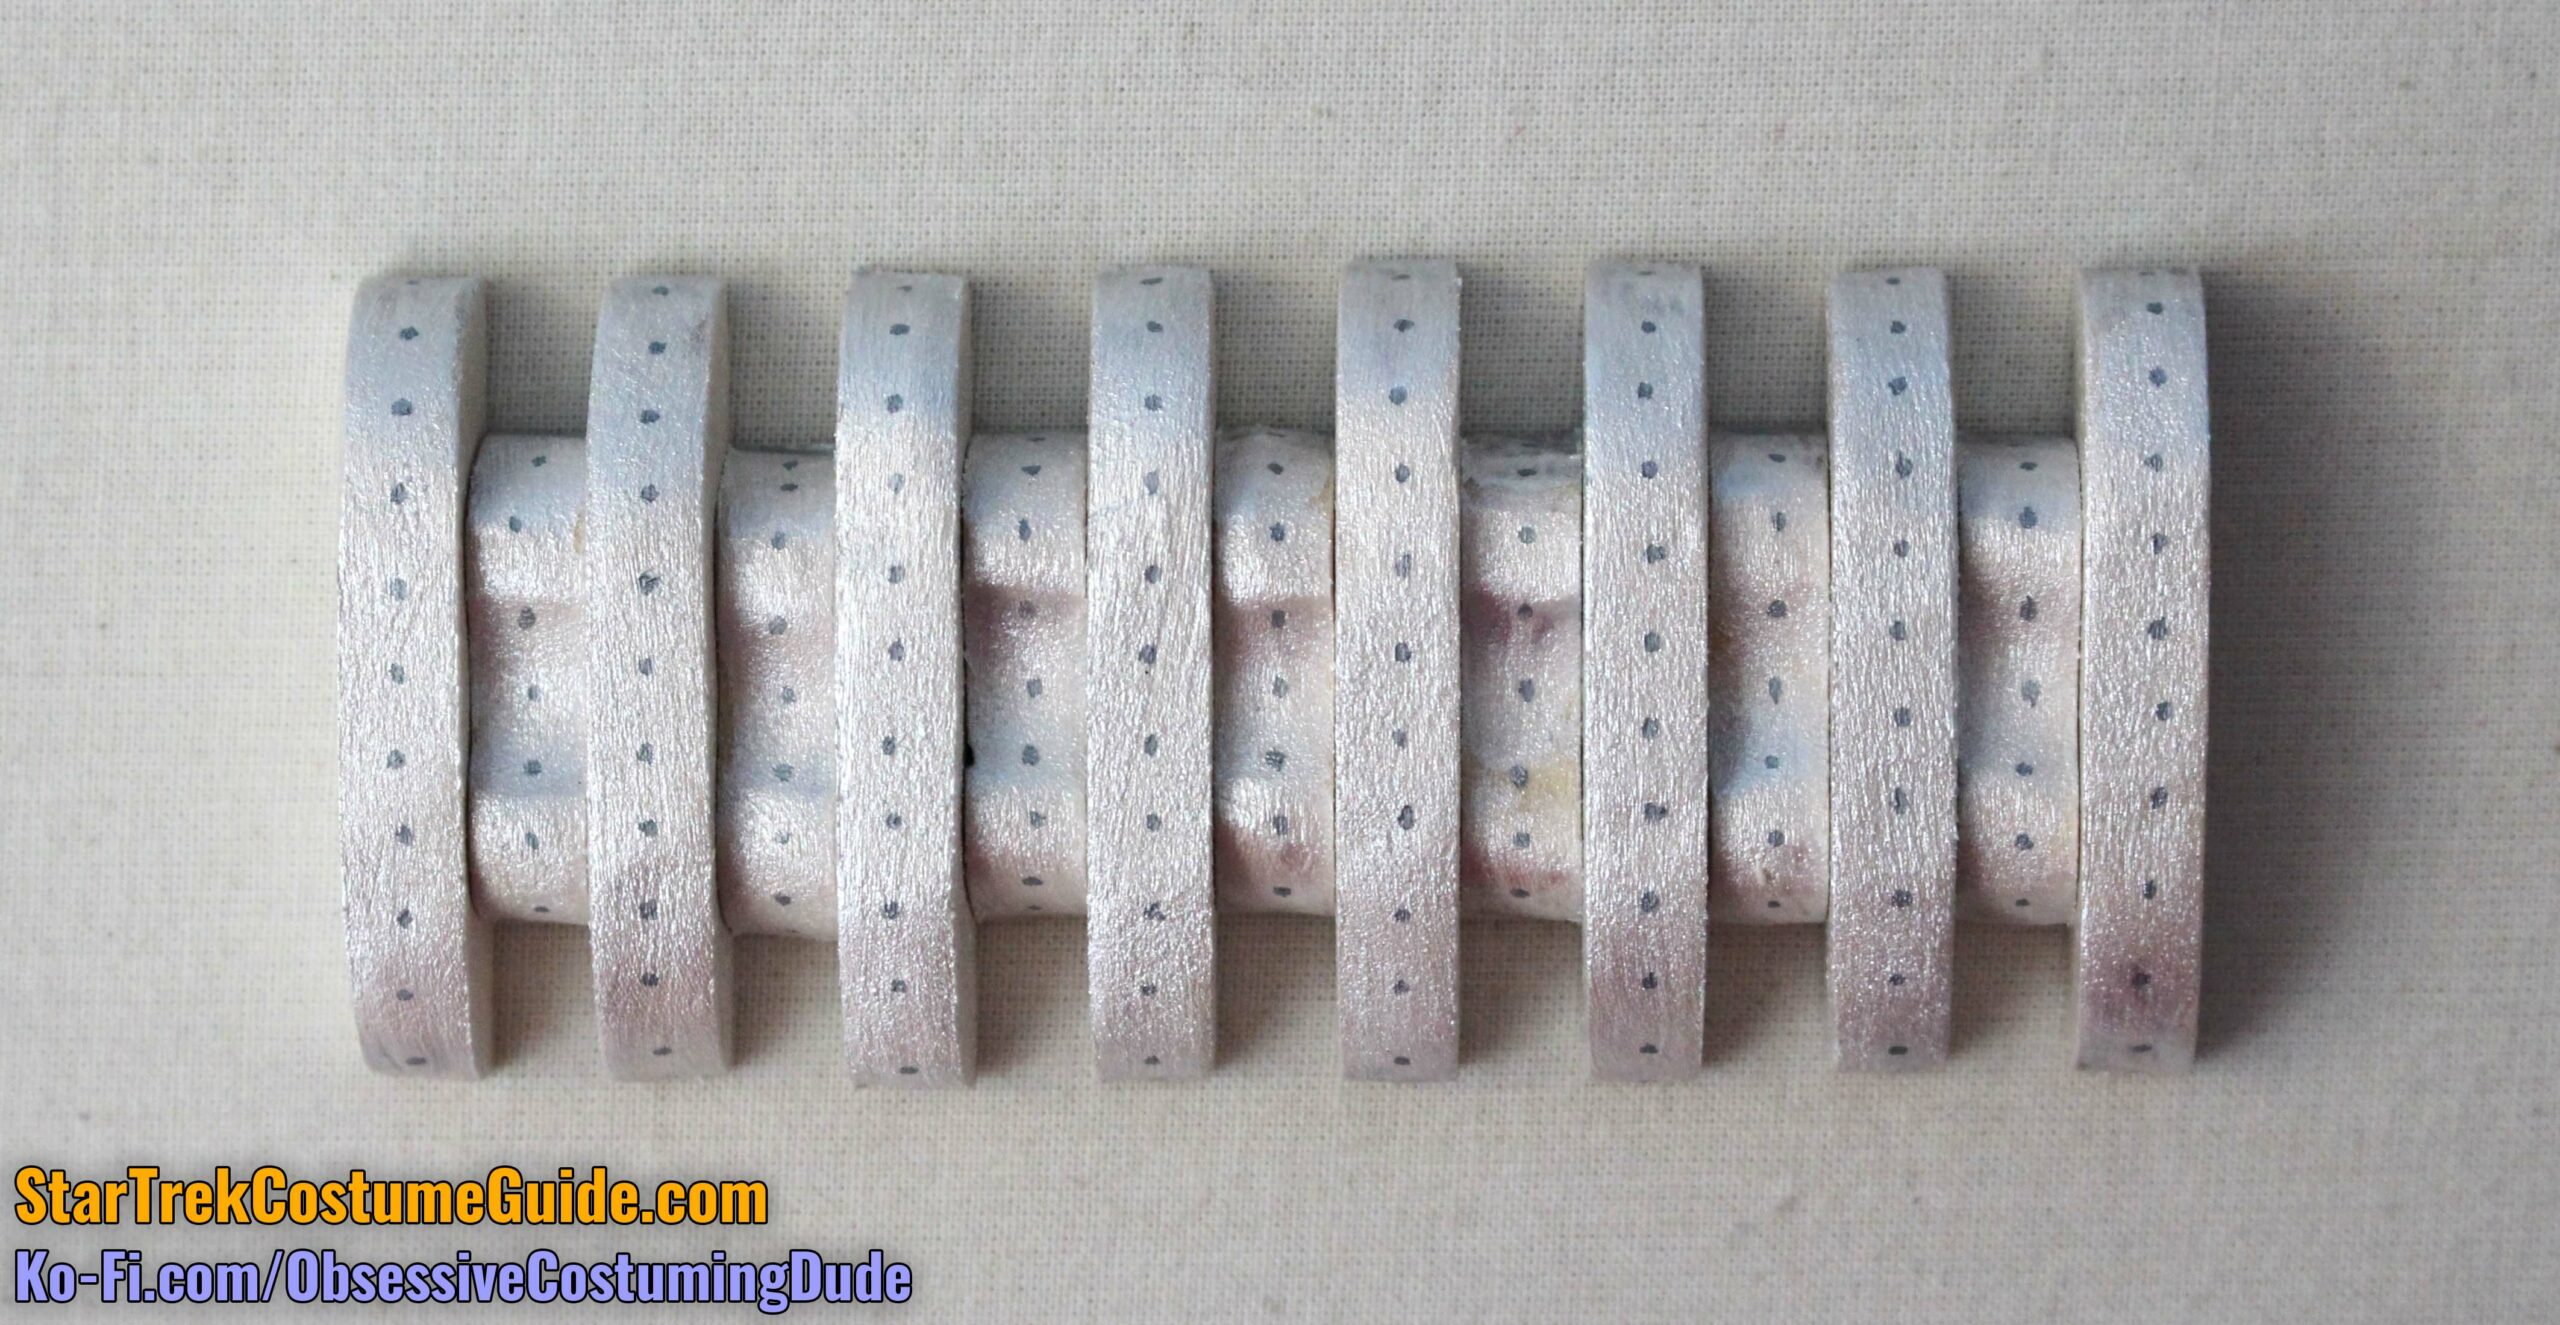
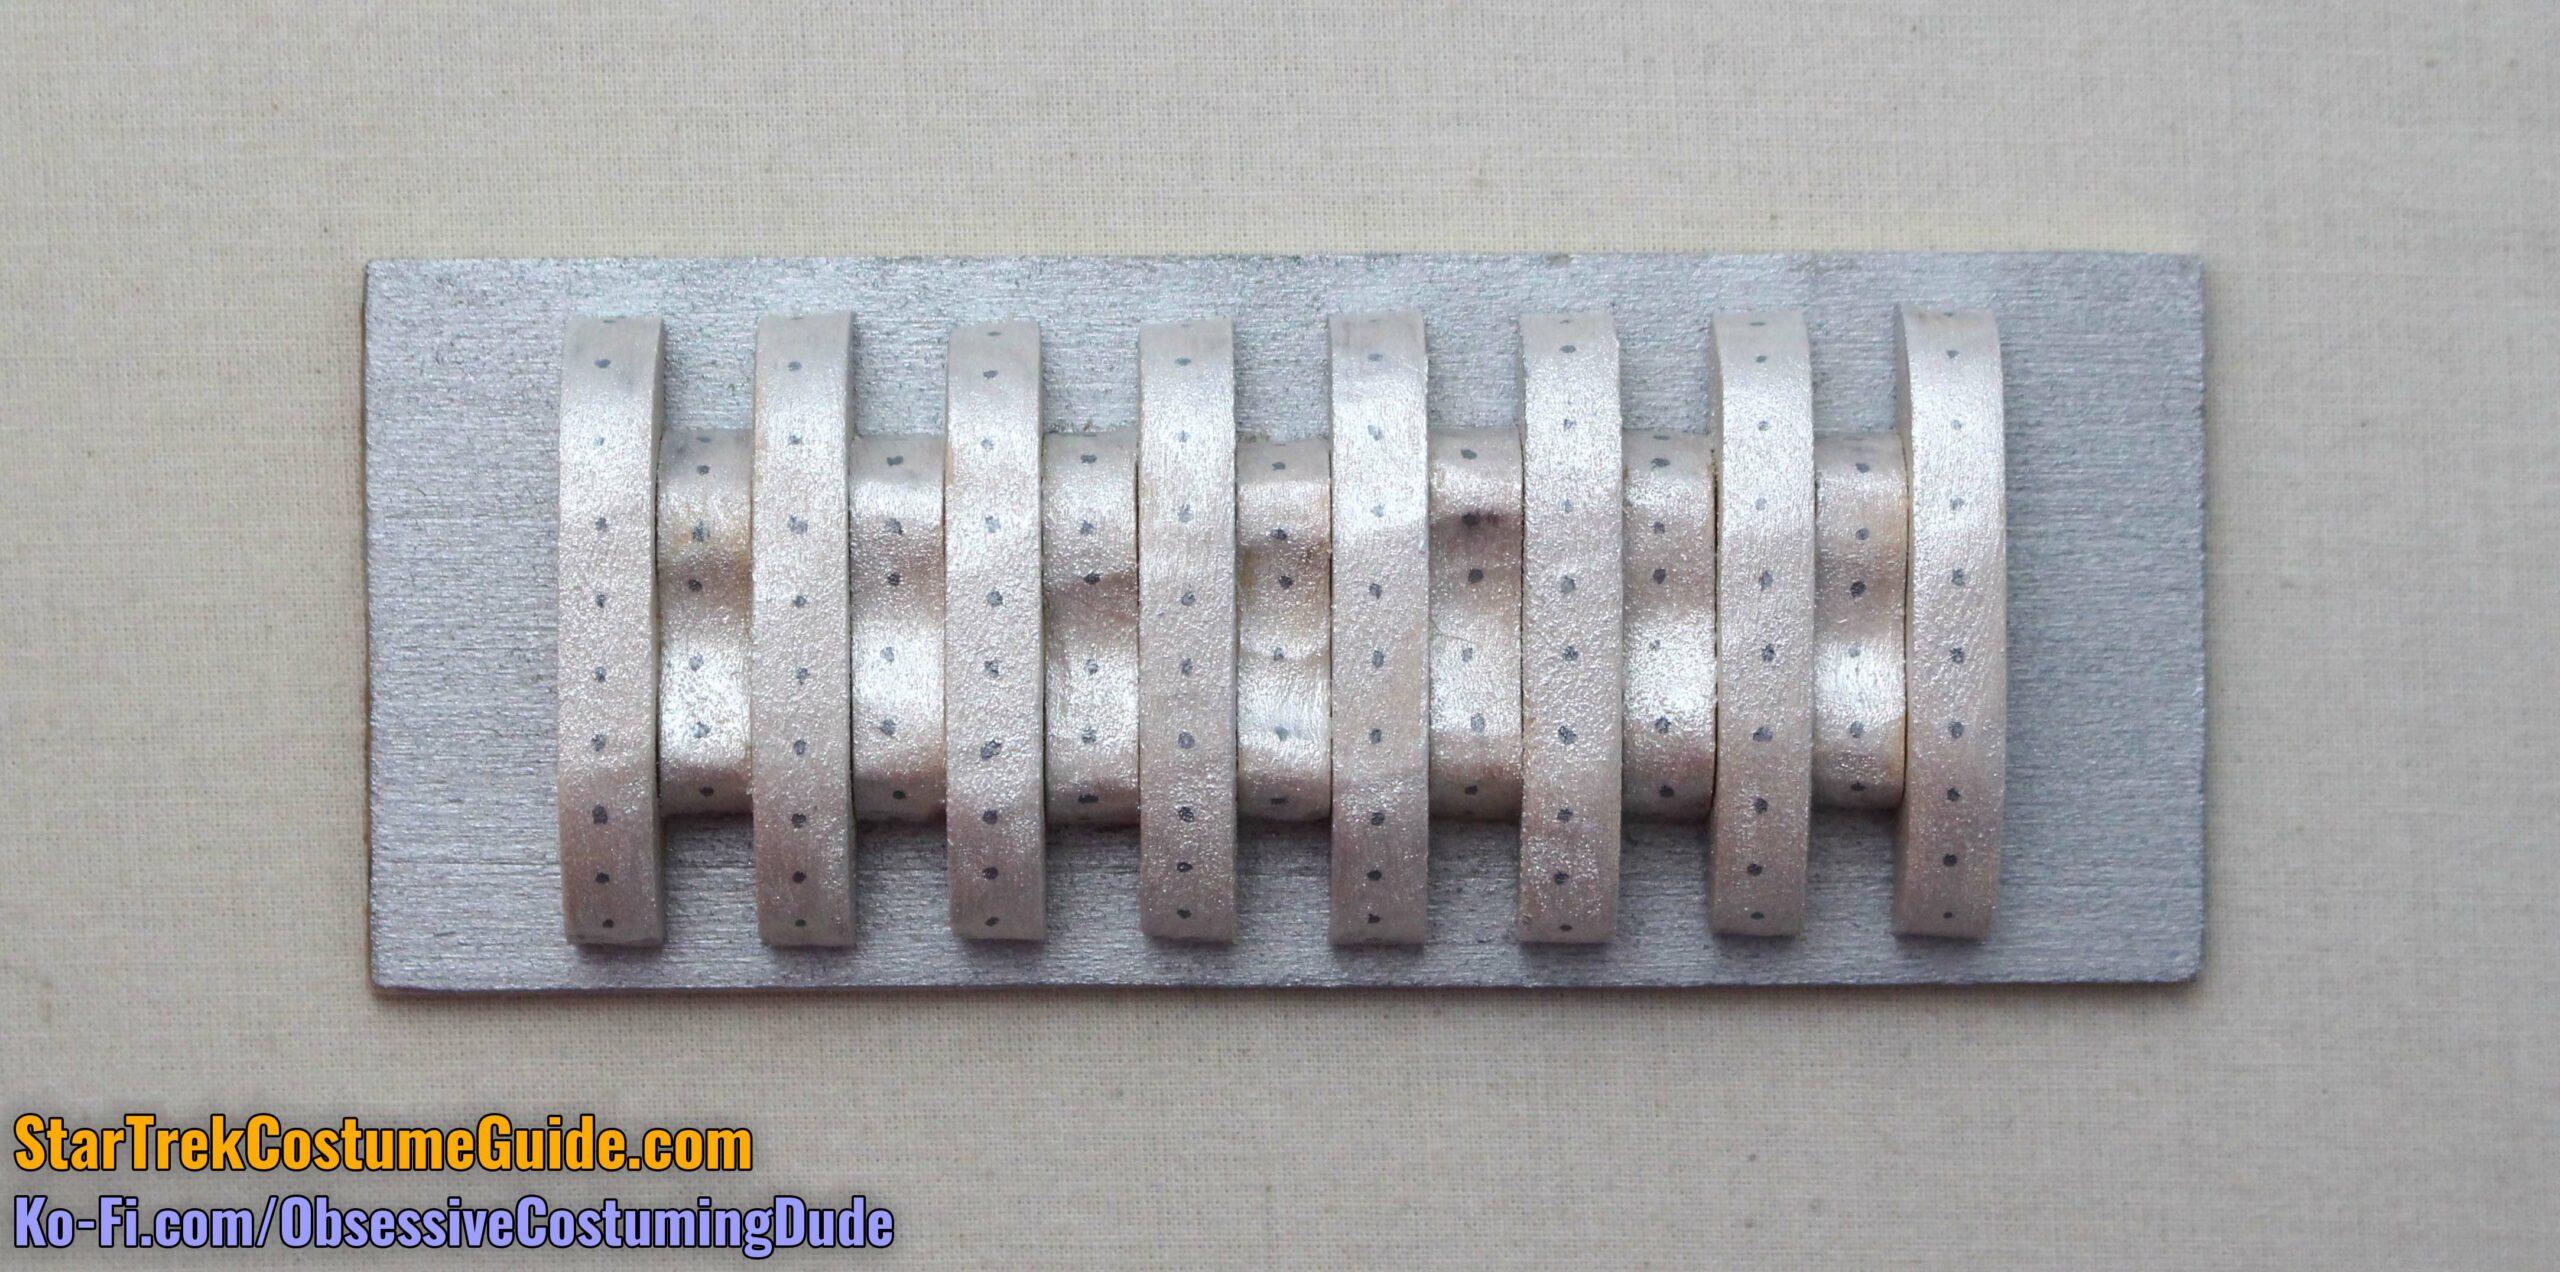
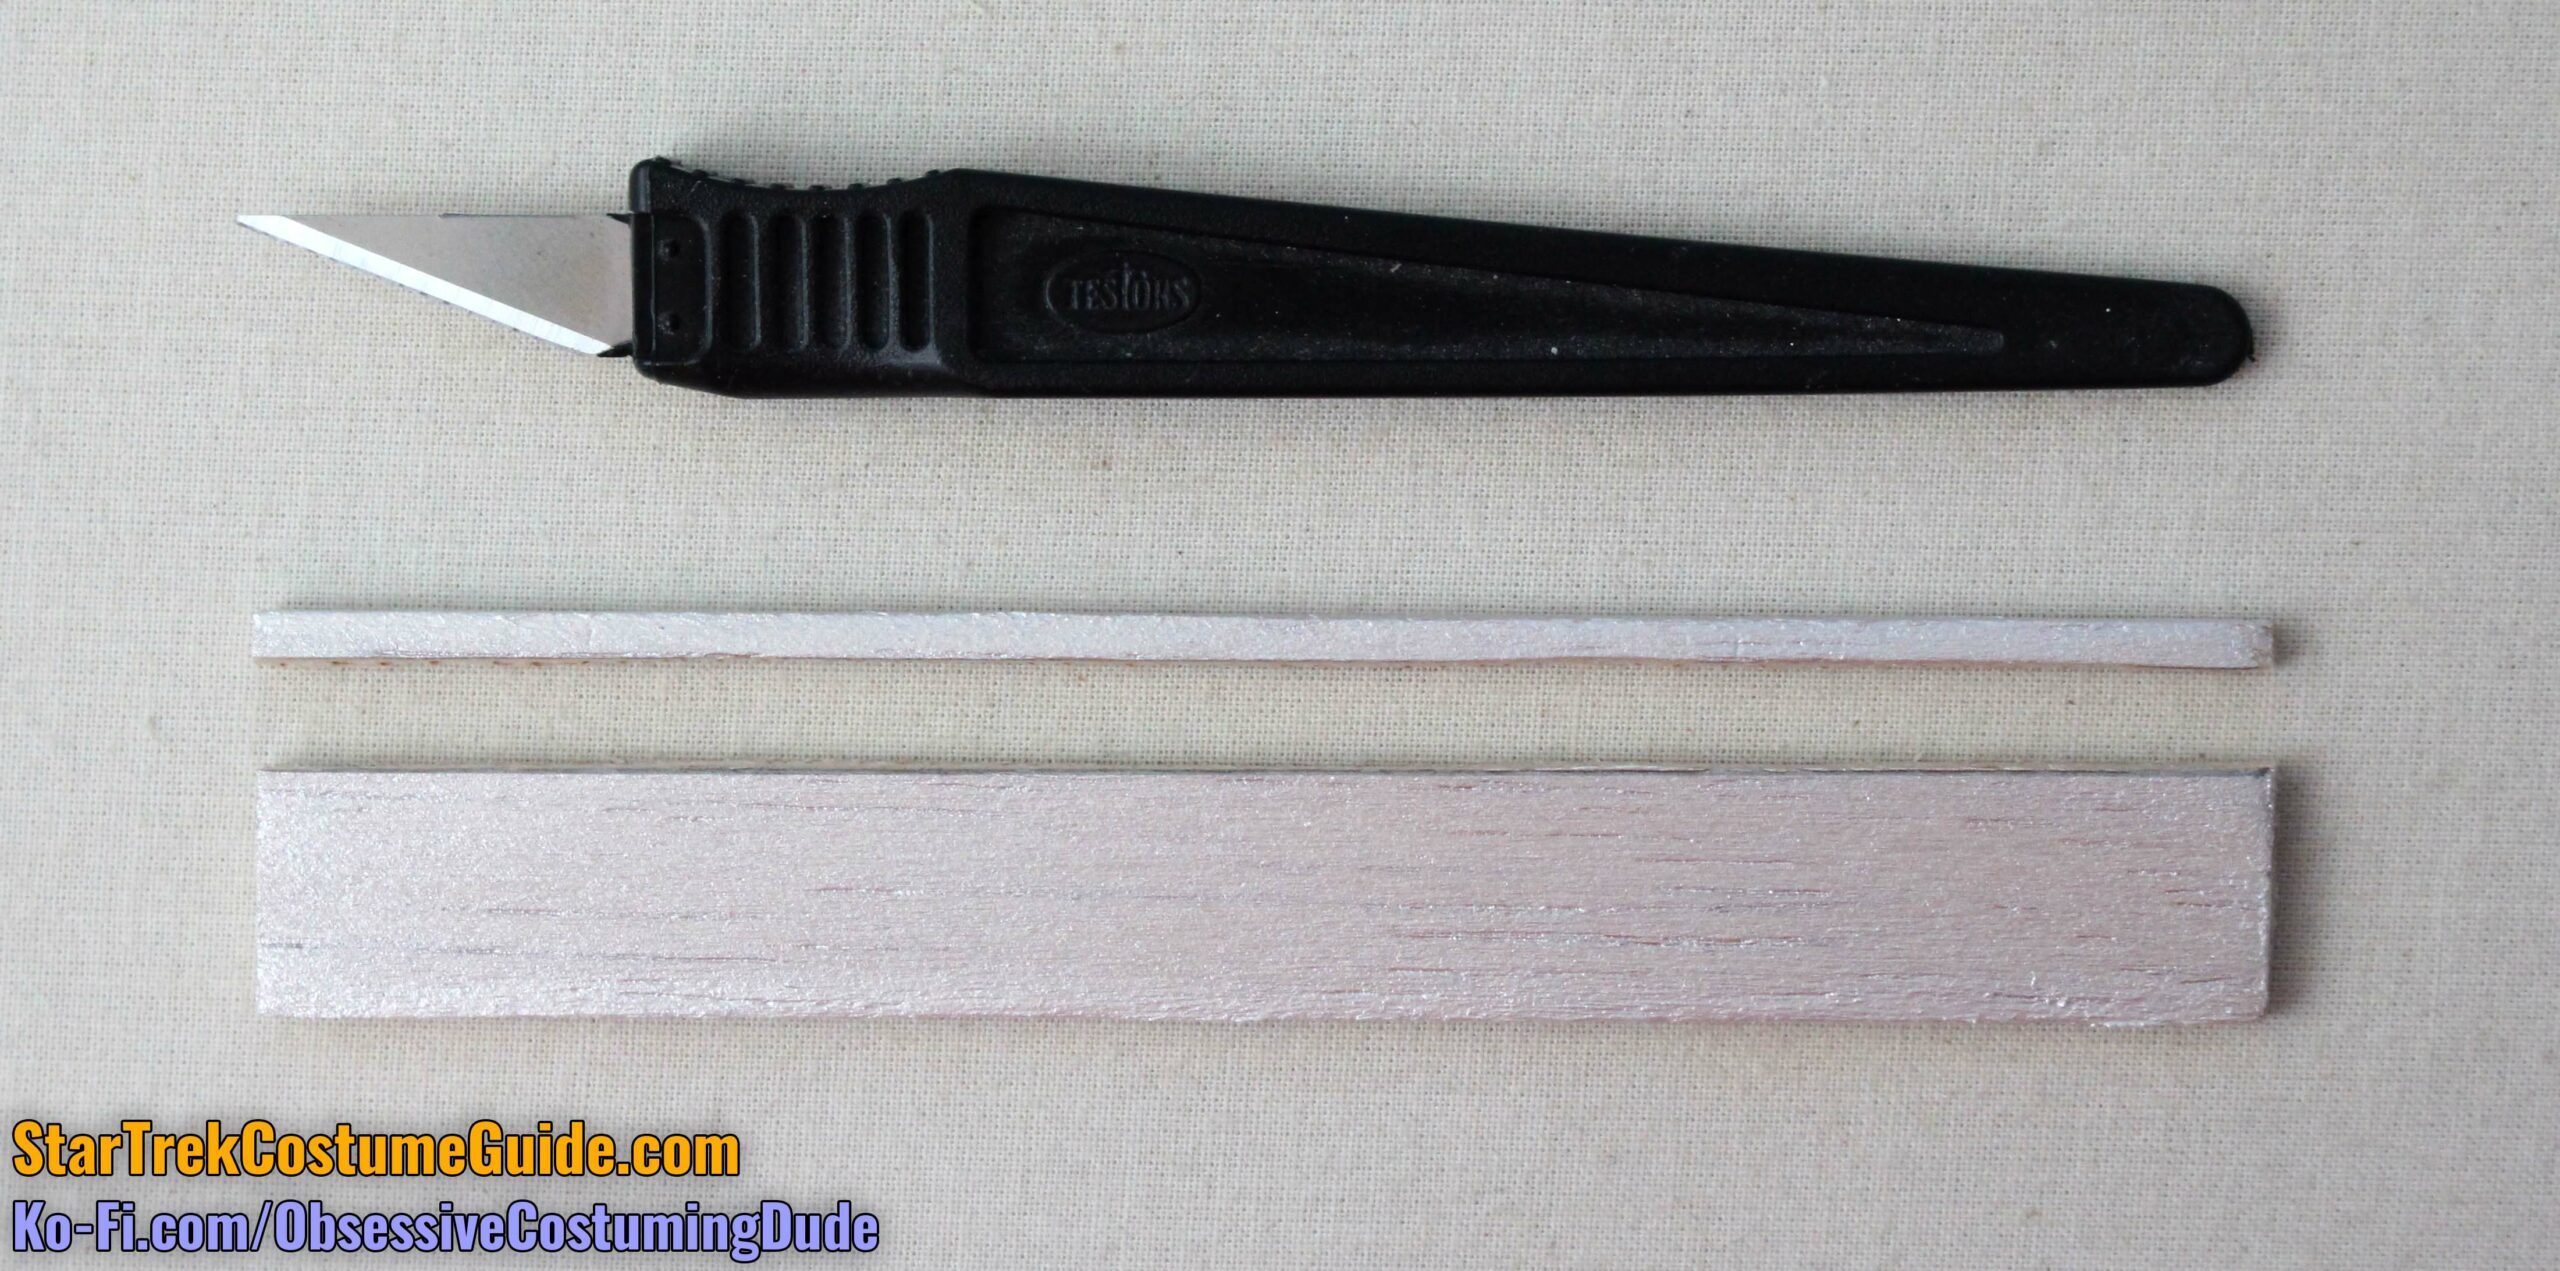
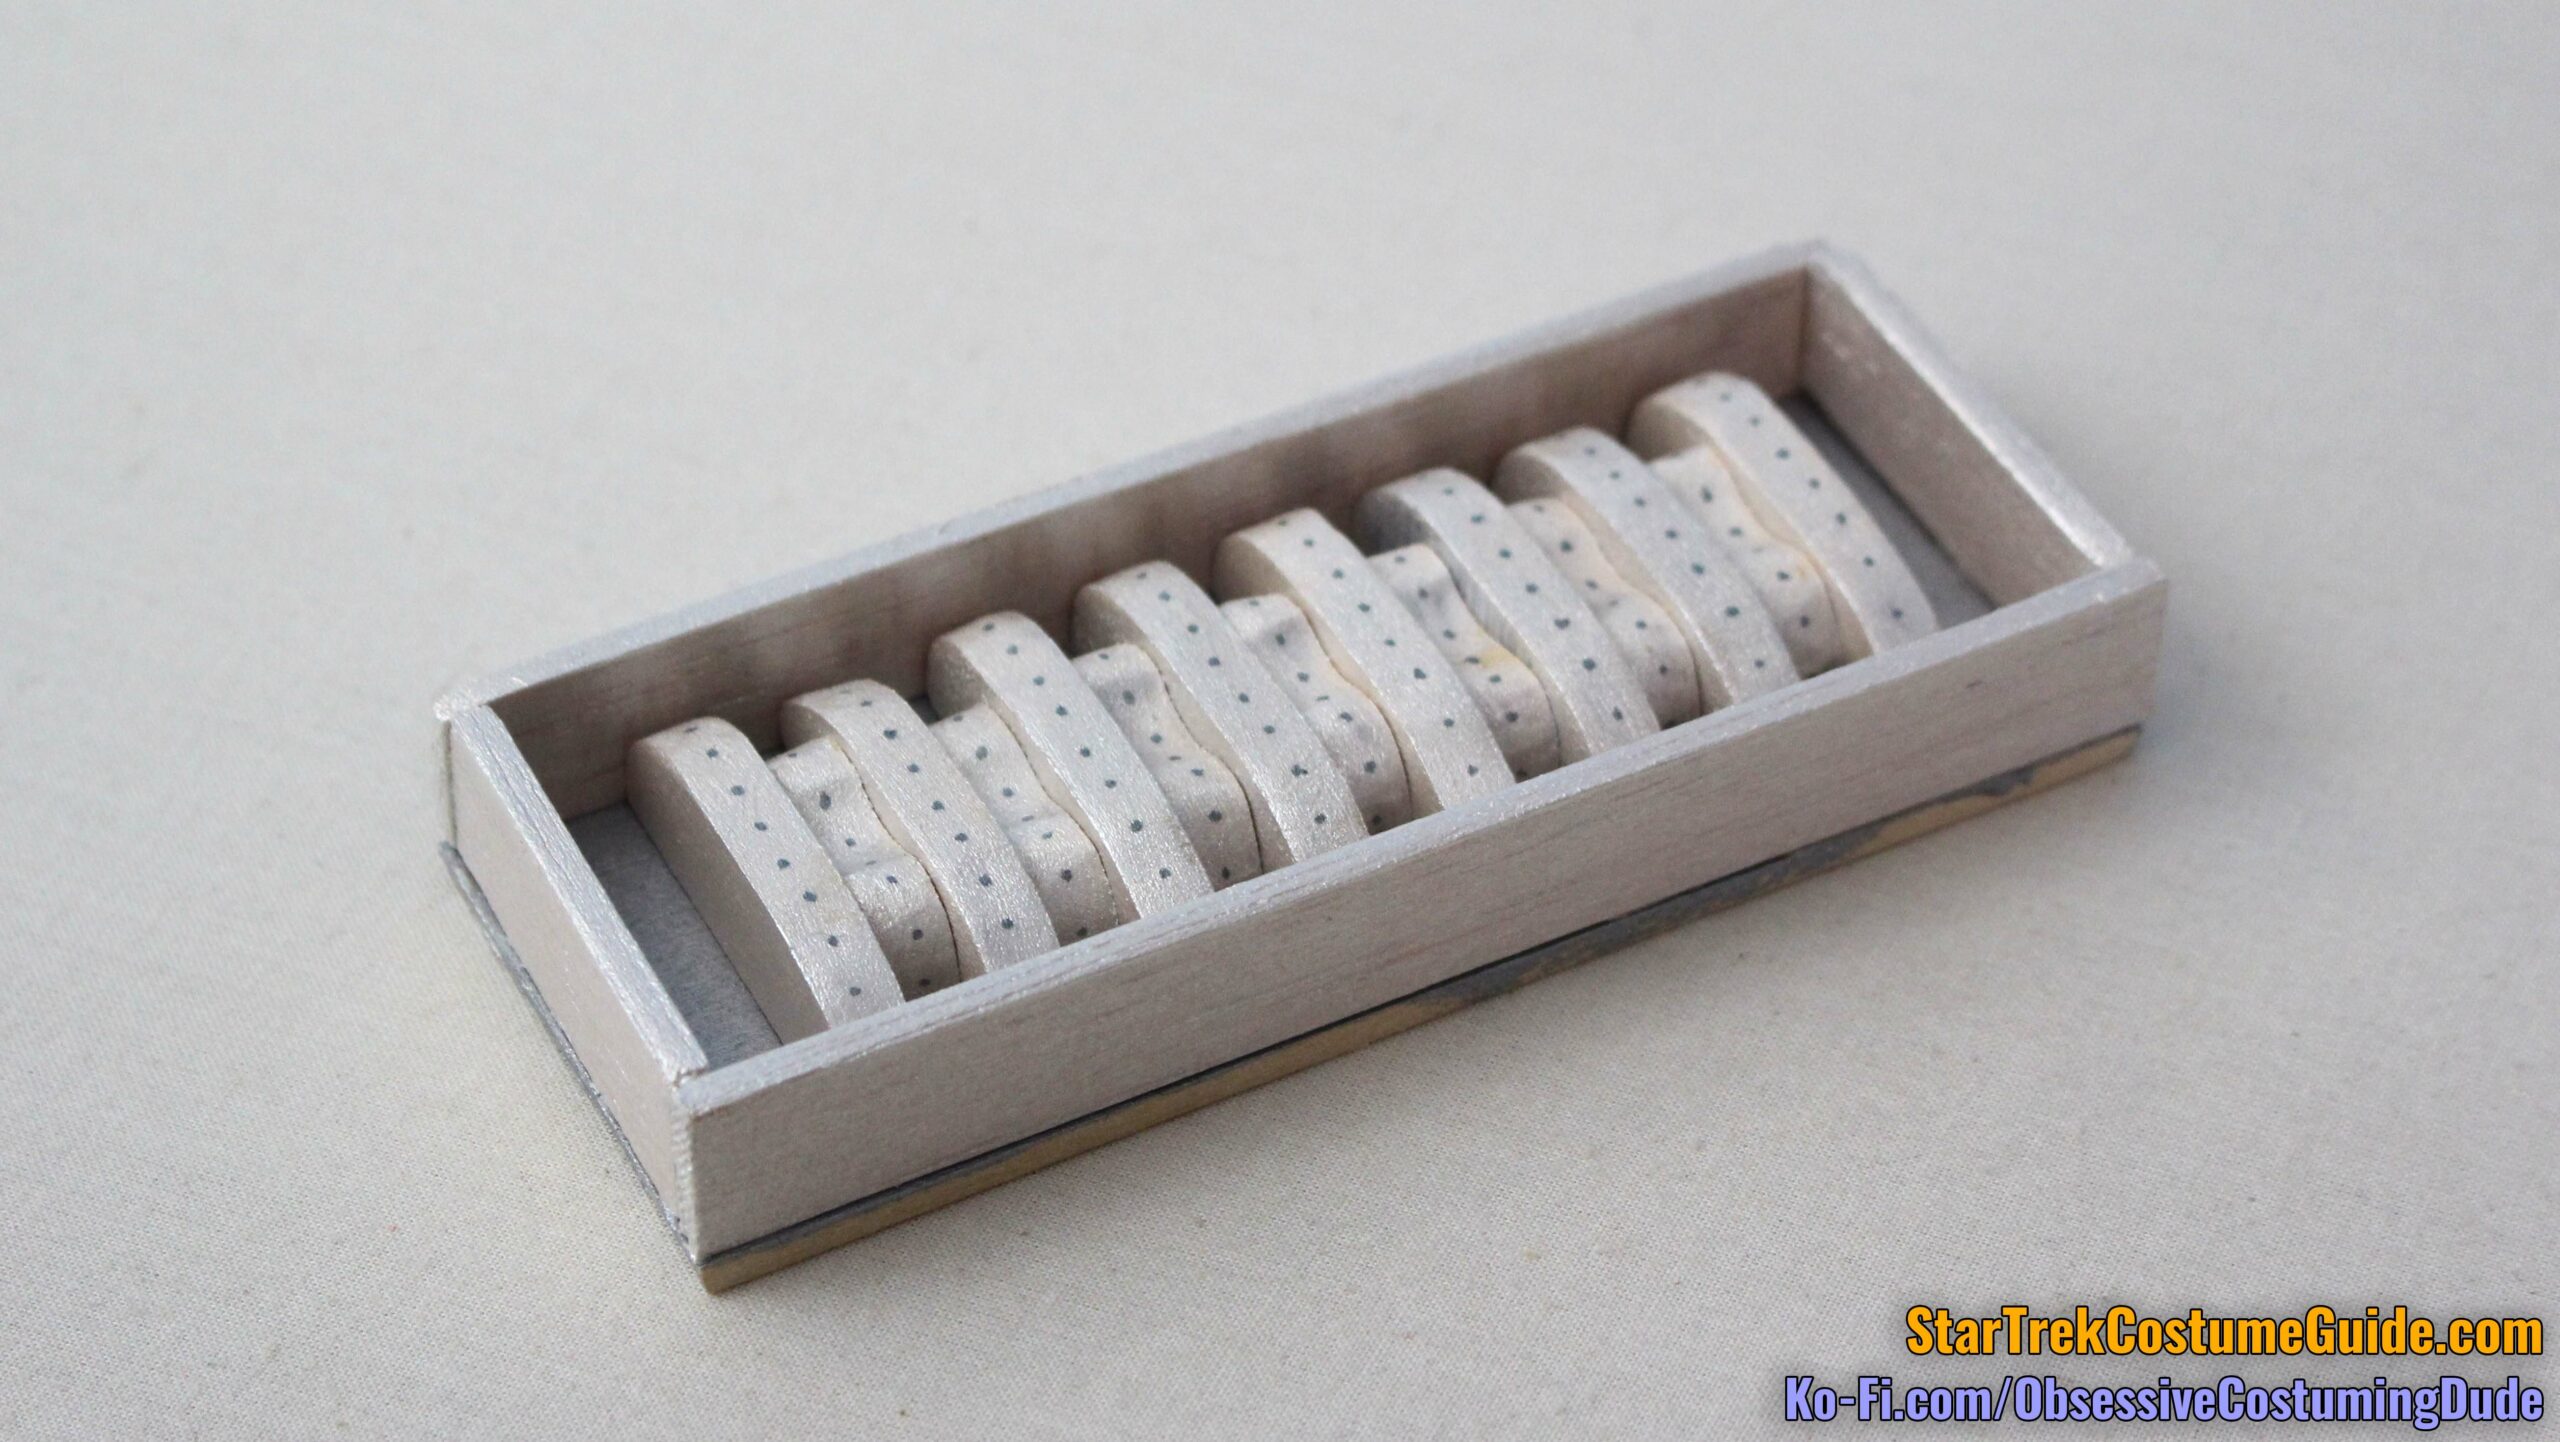
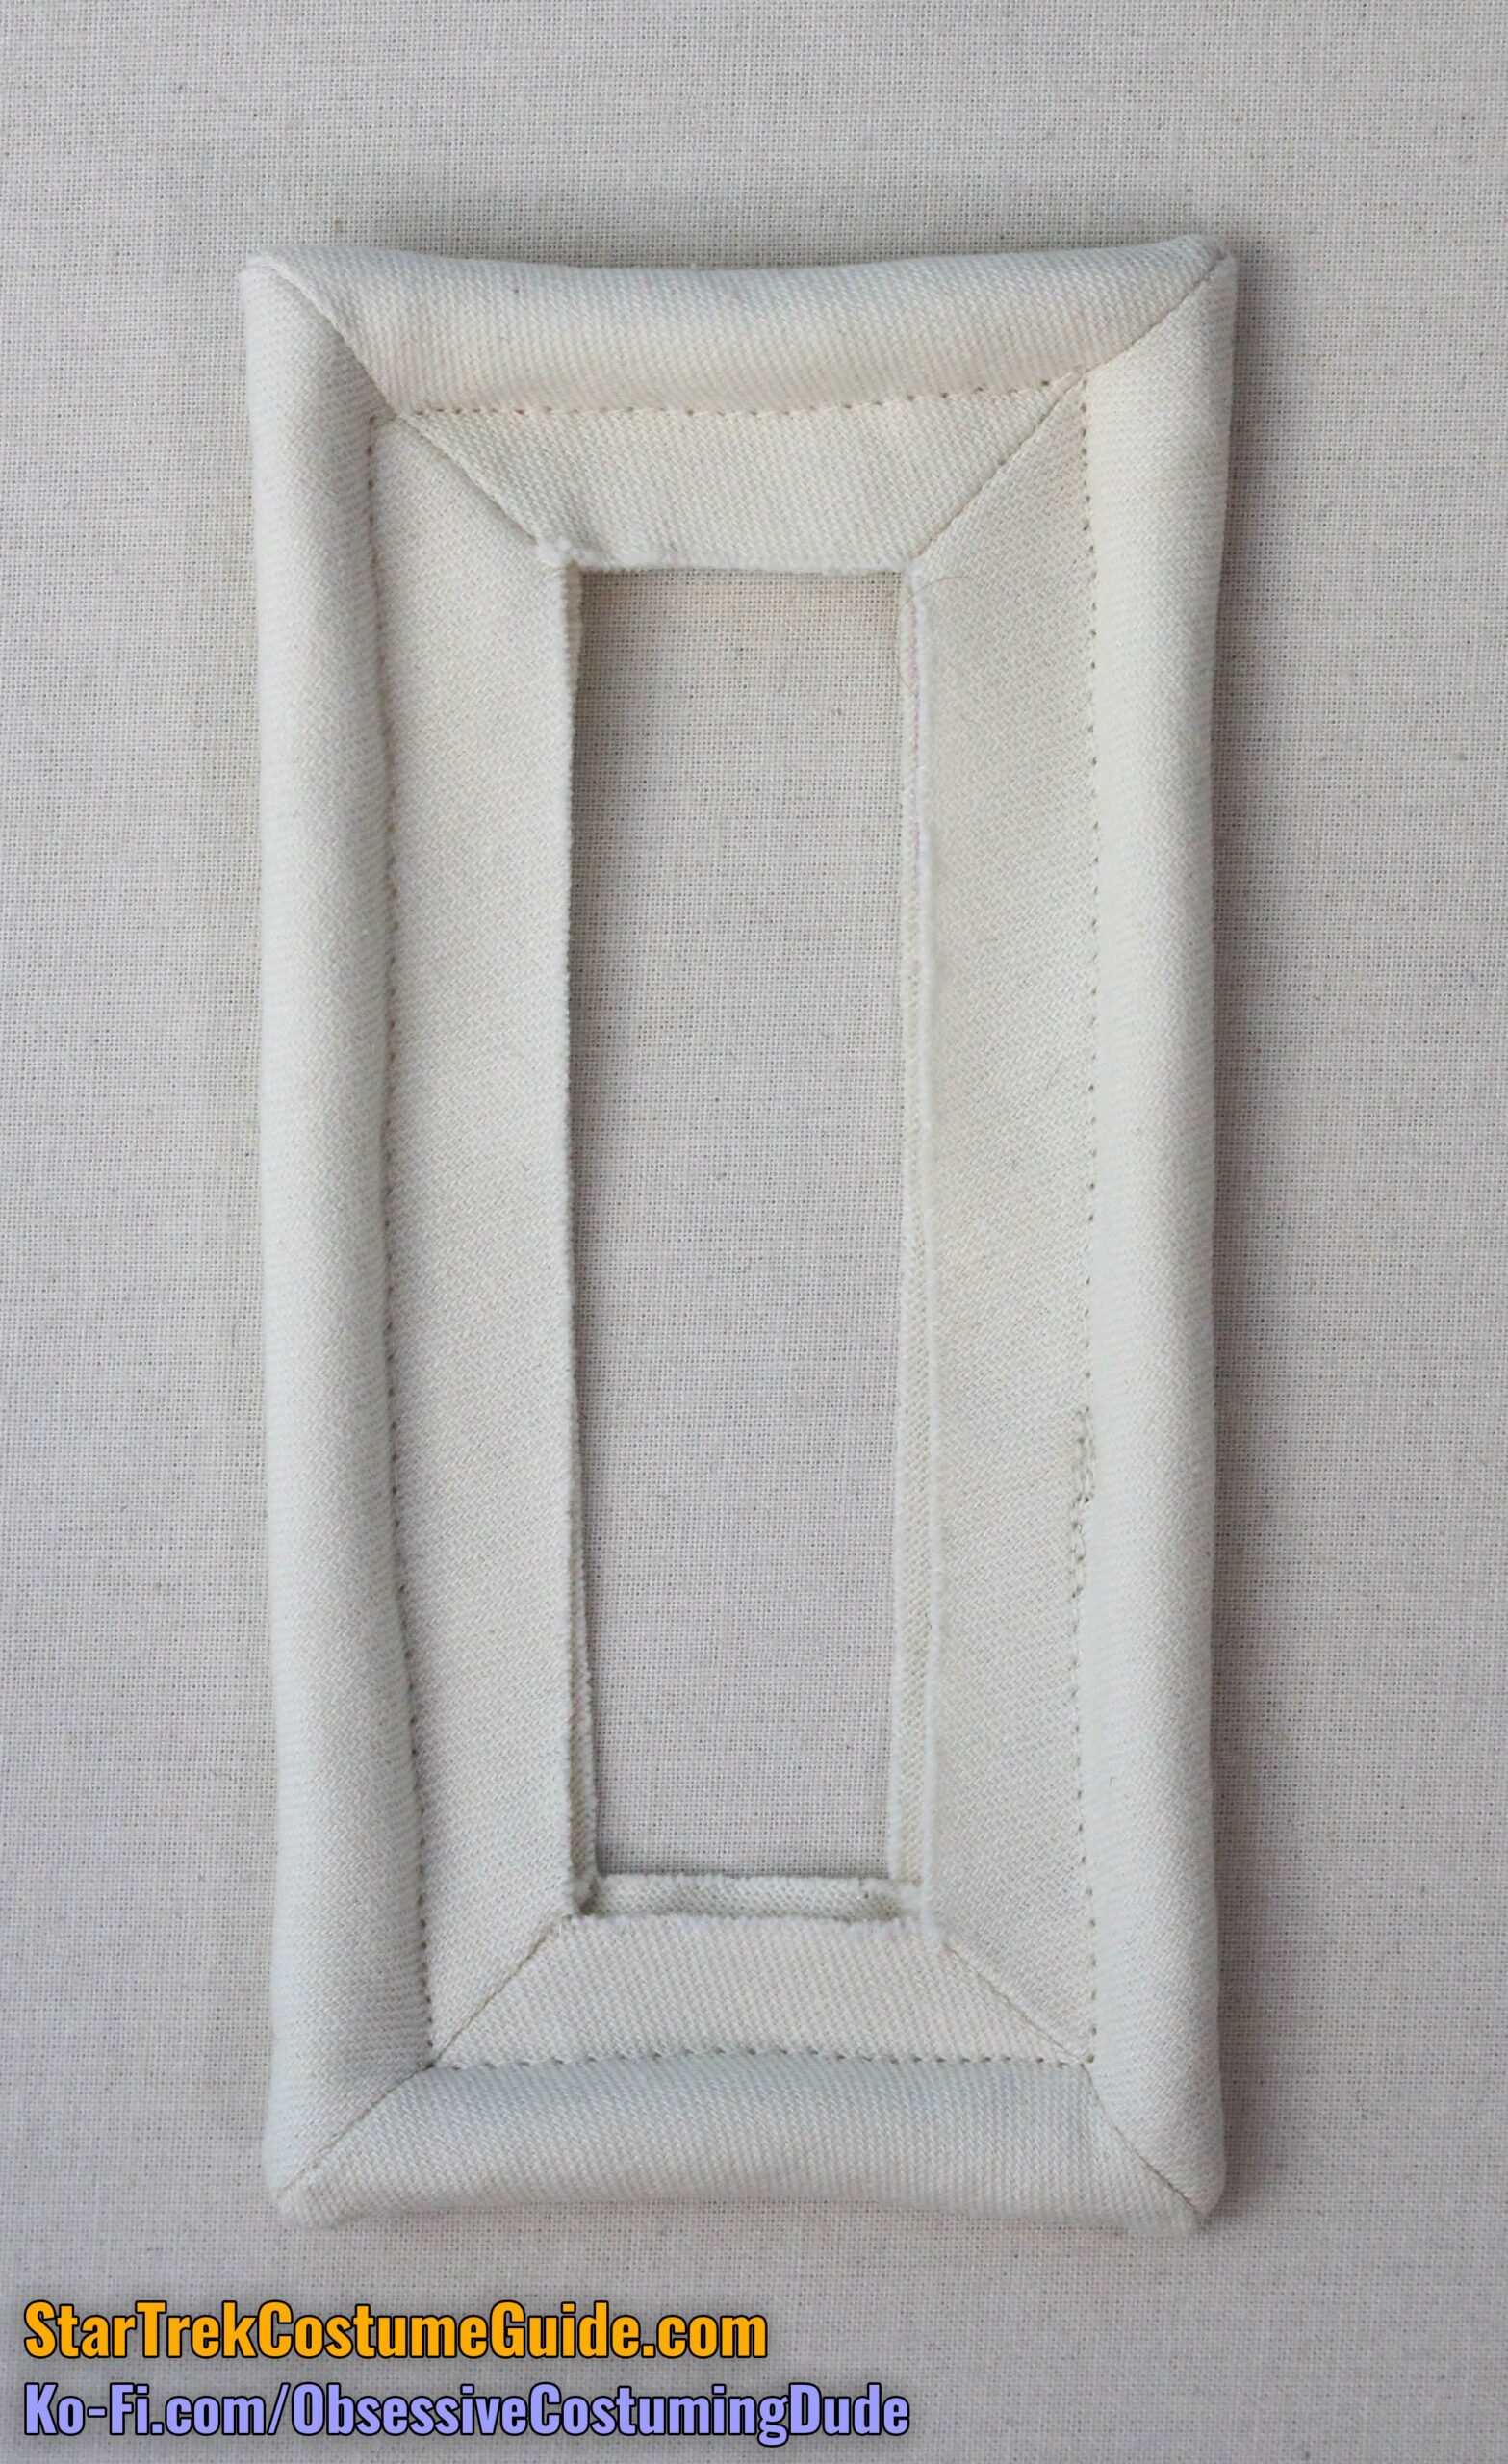
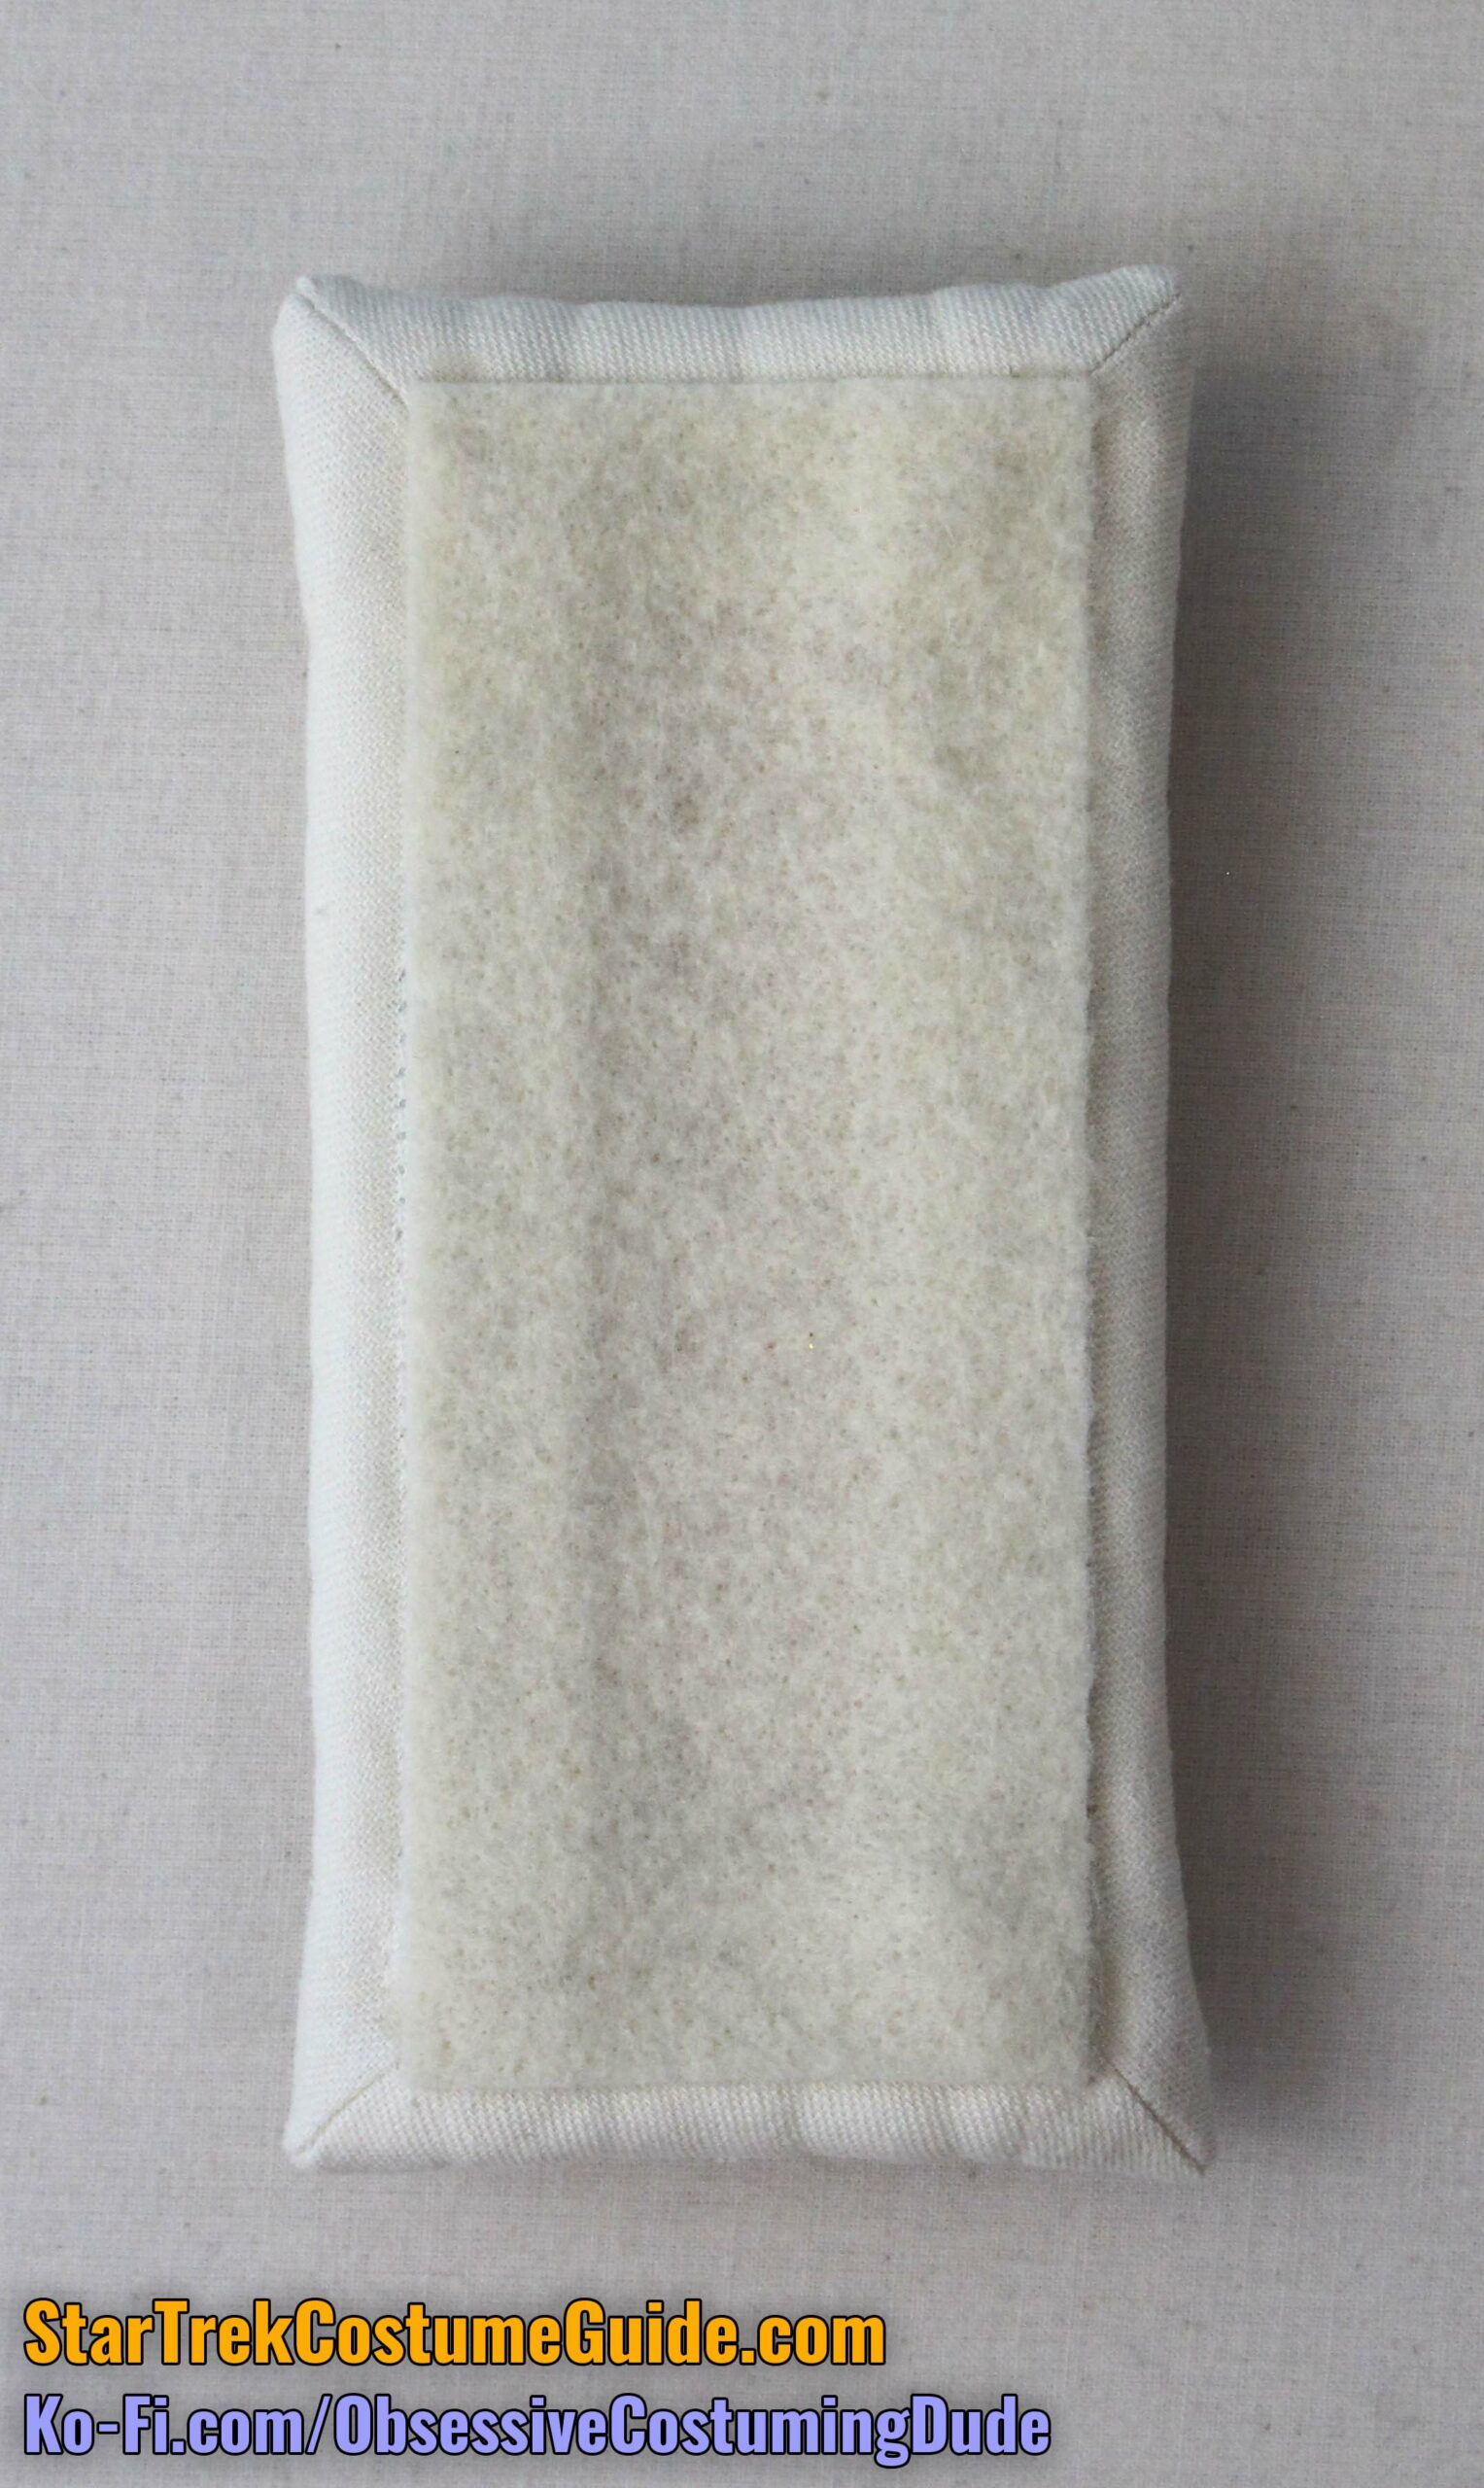
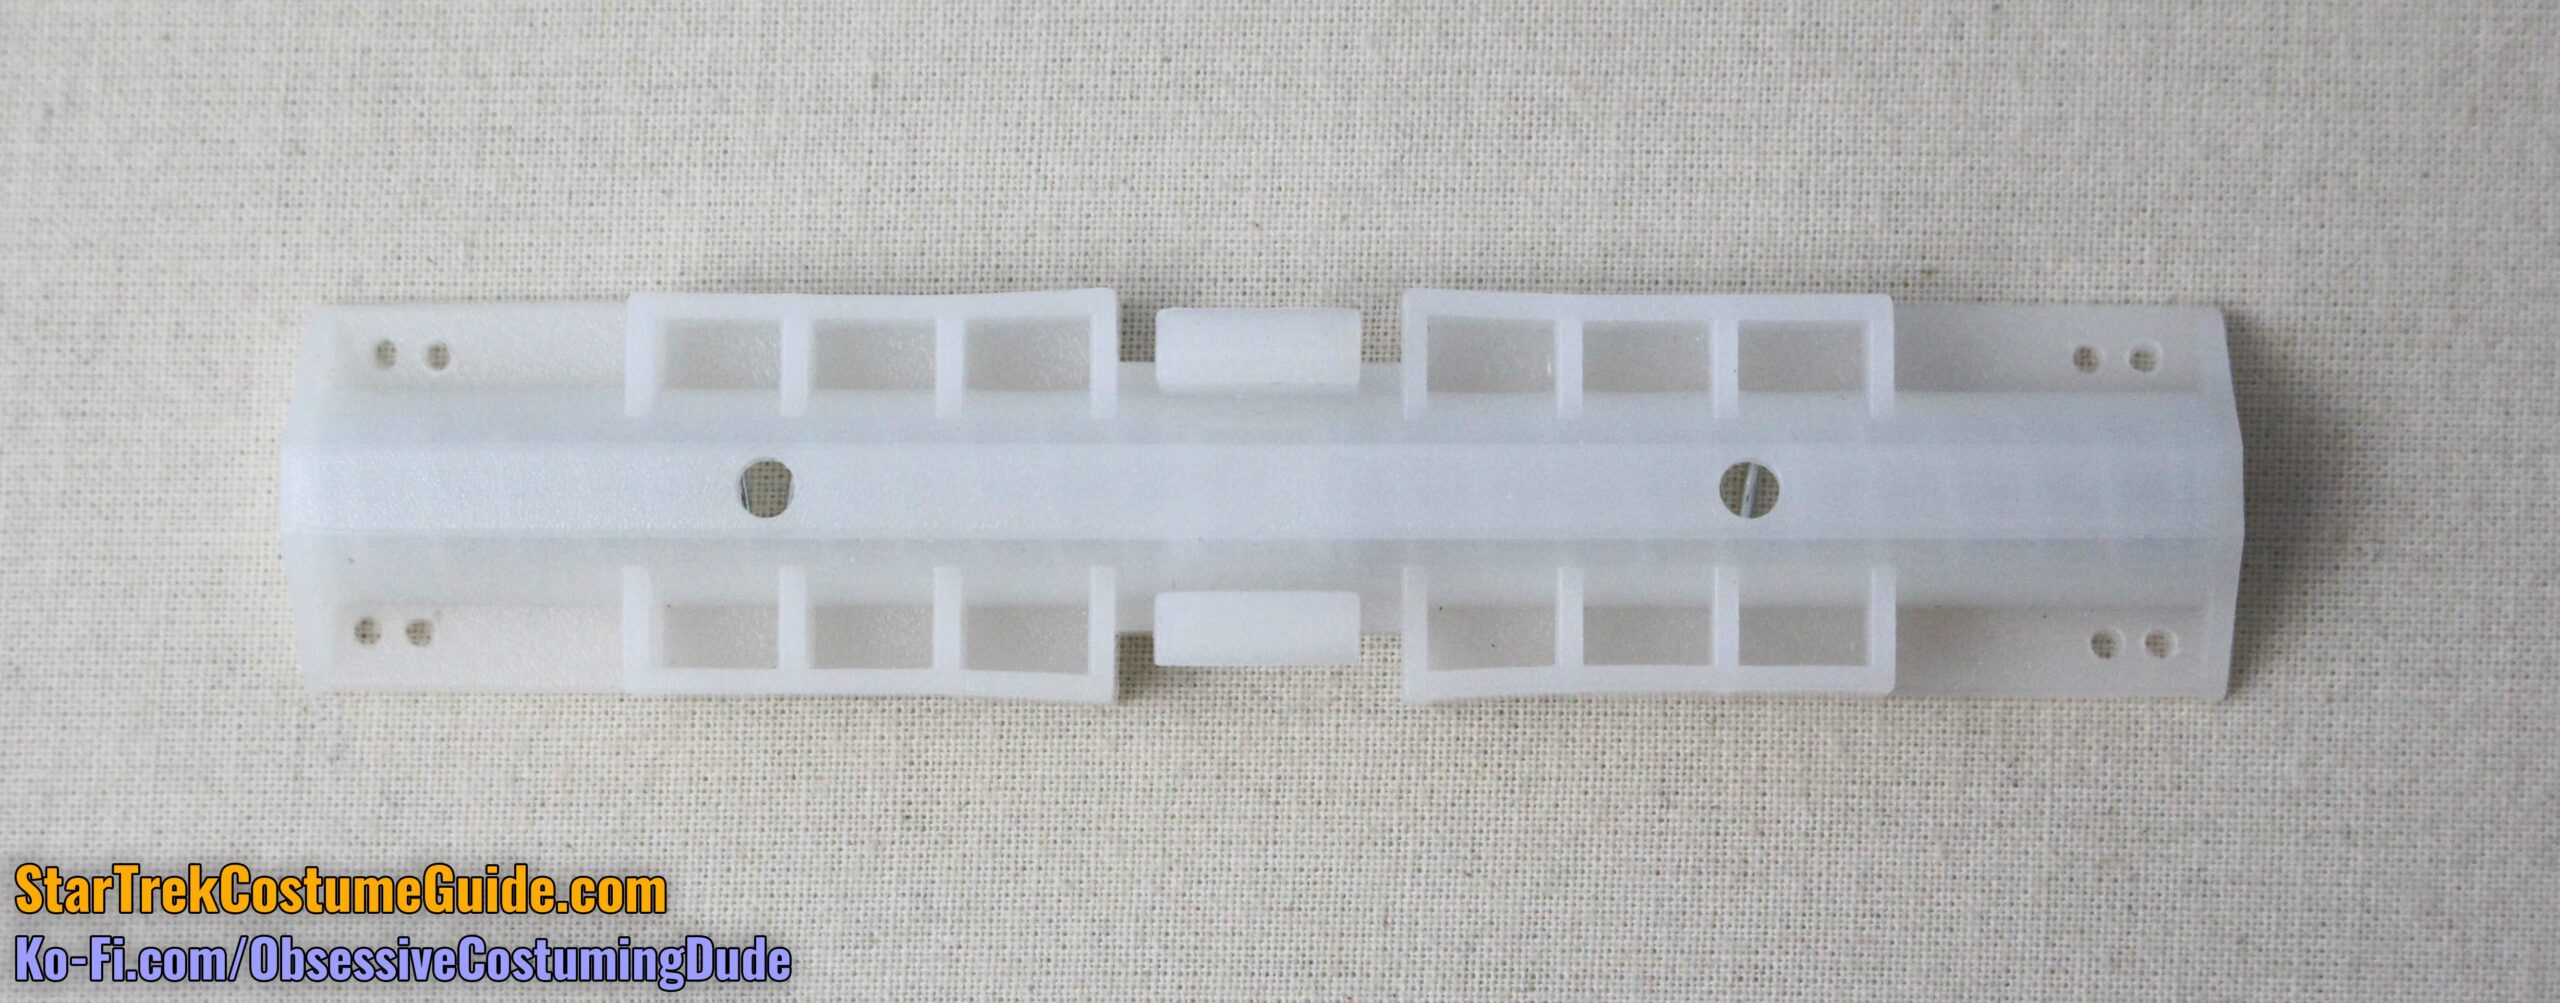
When shaped, sanded, and painted well, wood looks much better than craft foam, but obviously you need the appropriate tools (specifically a drill, and a rotary saw with a sanding bit) to work with it.

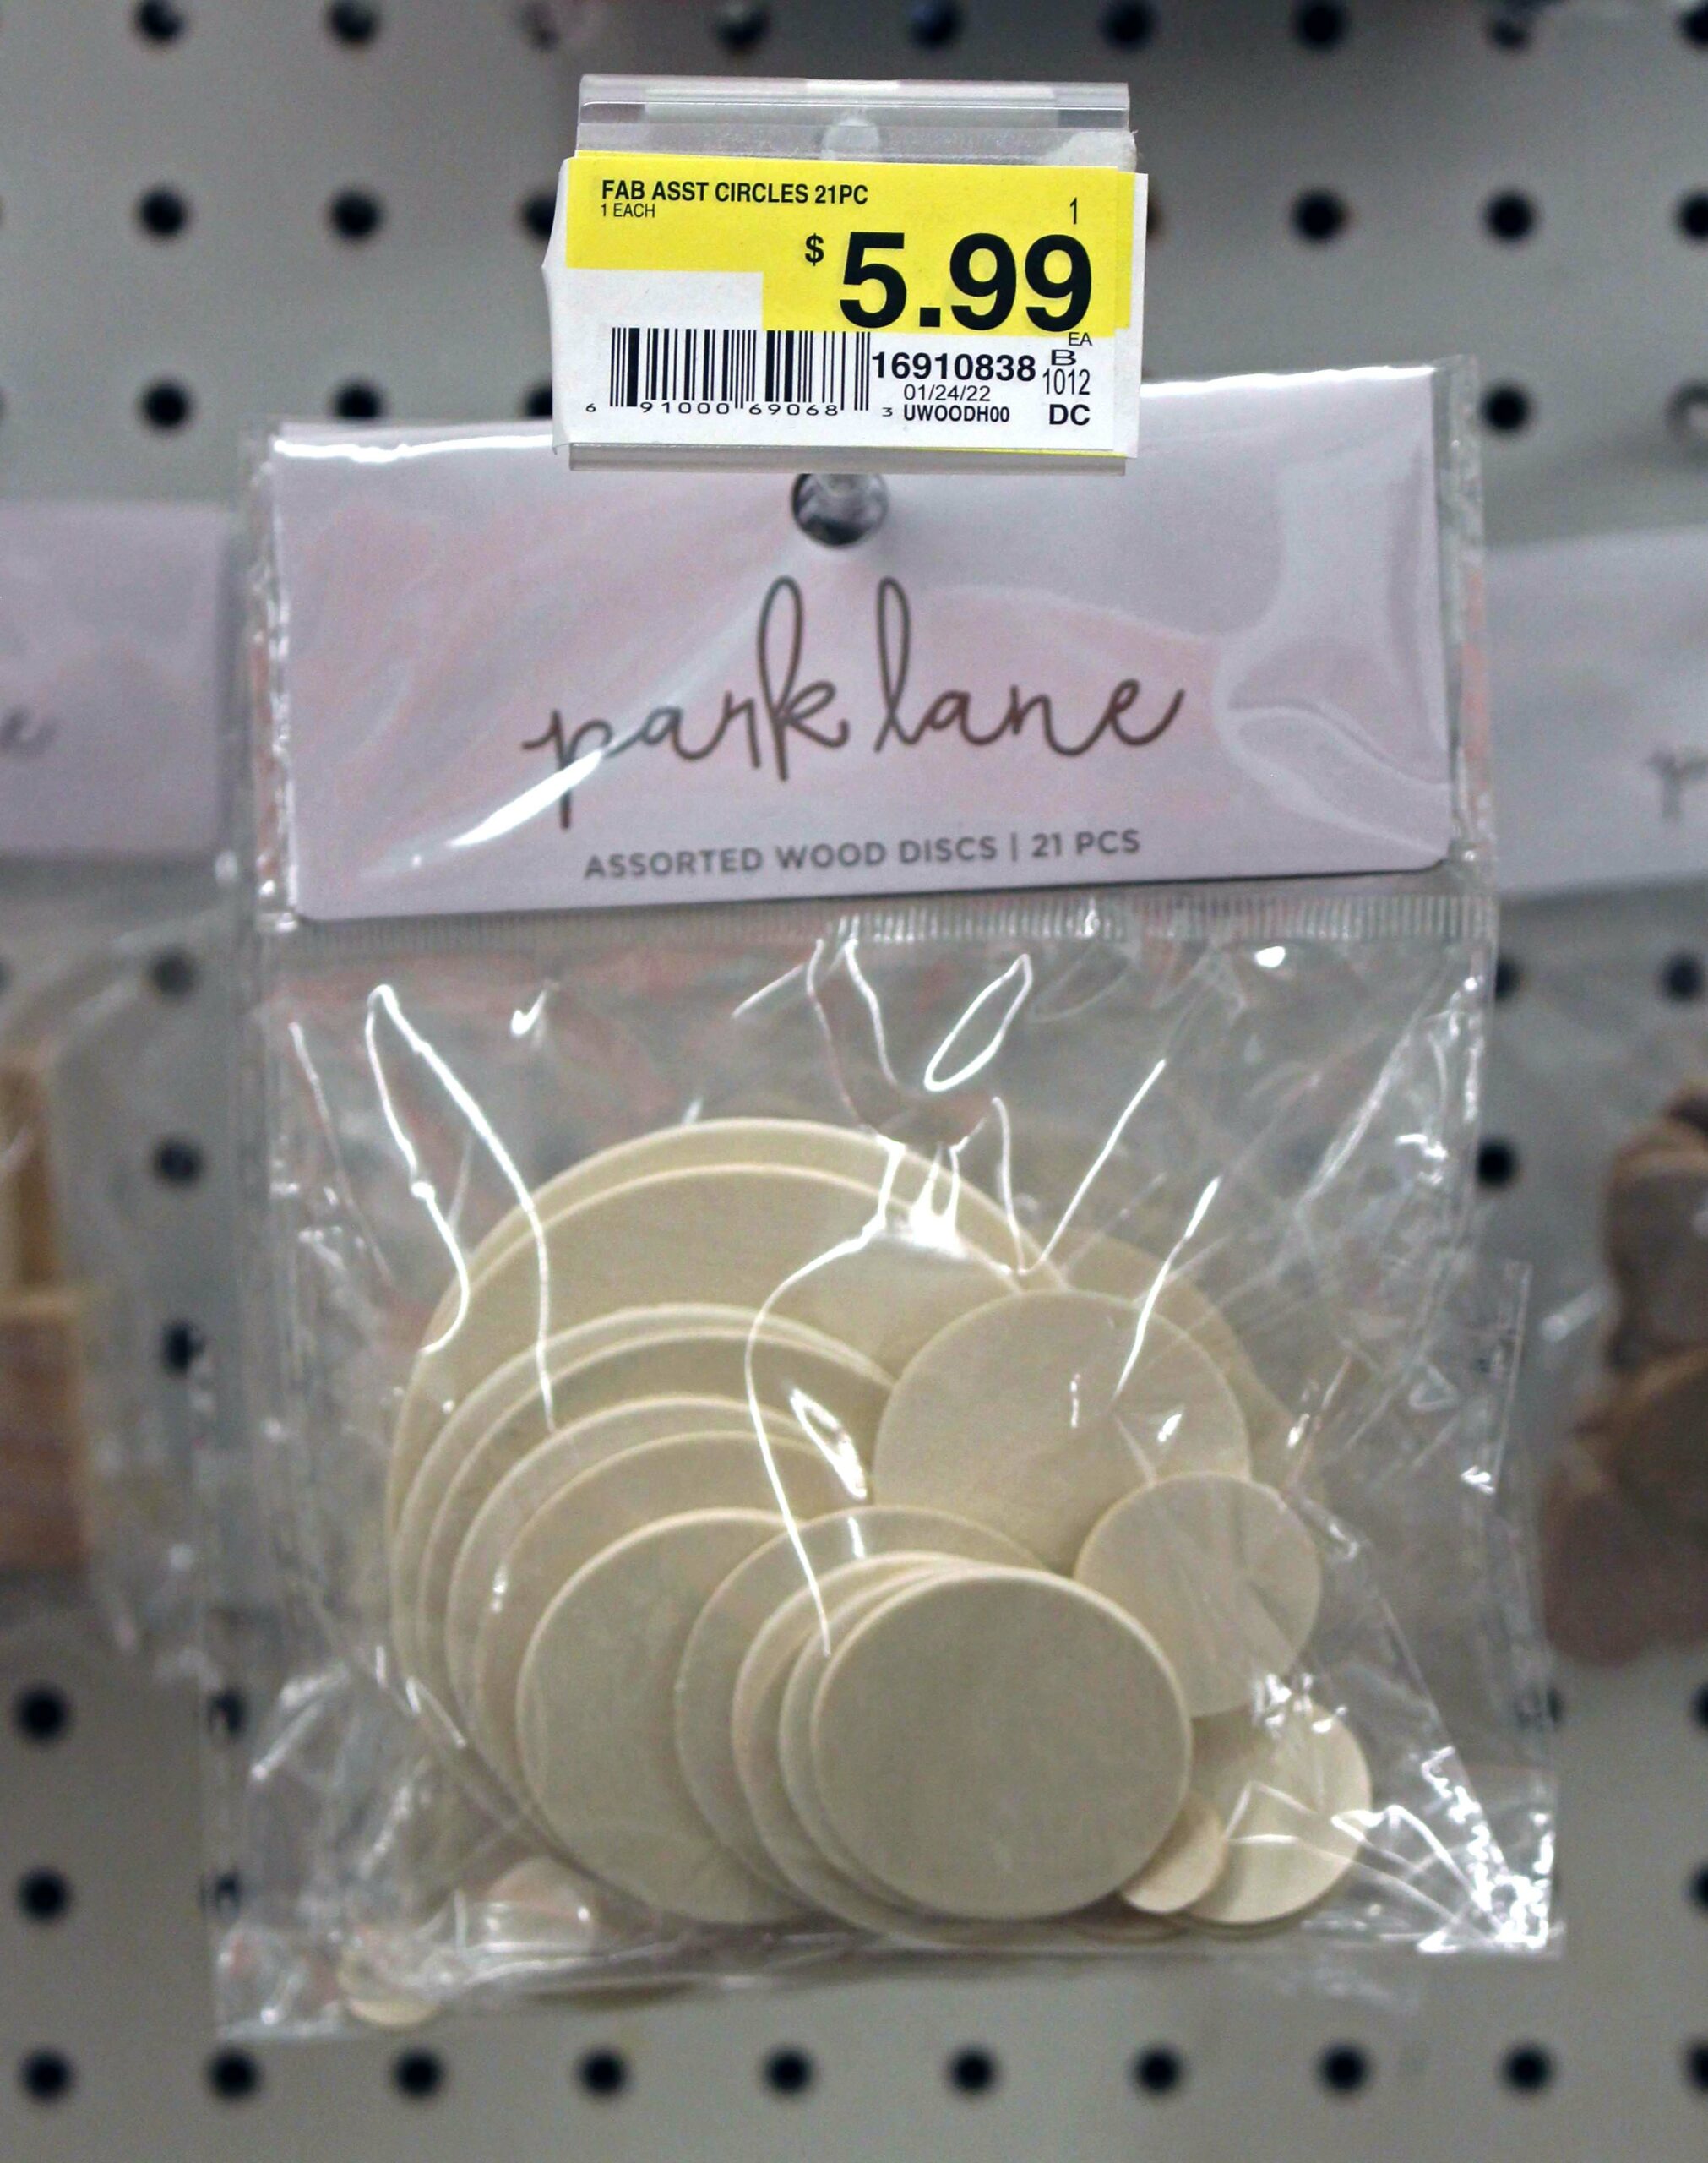
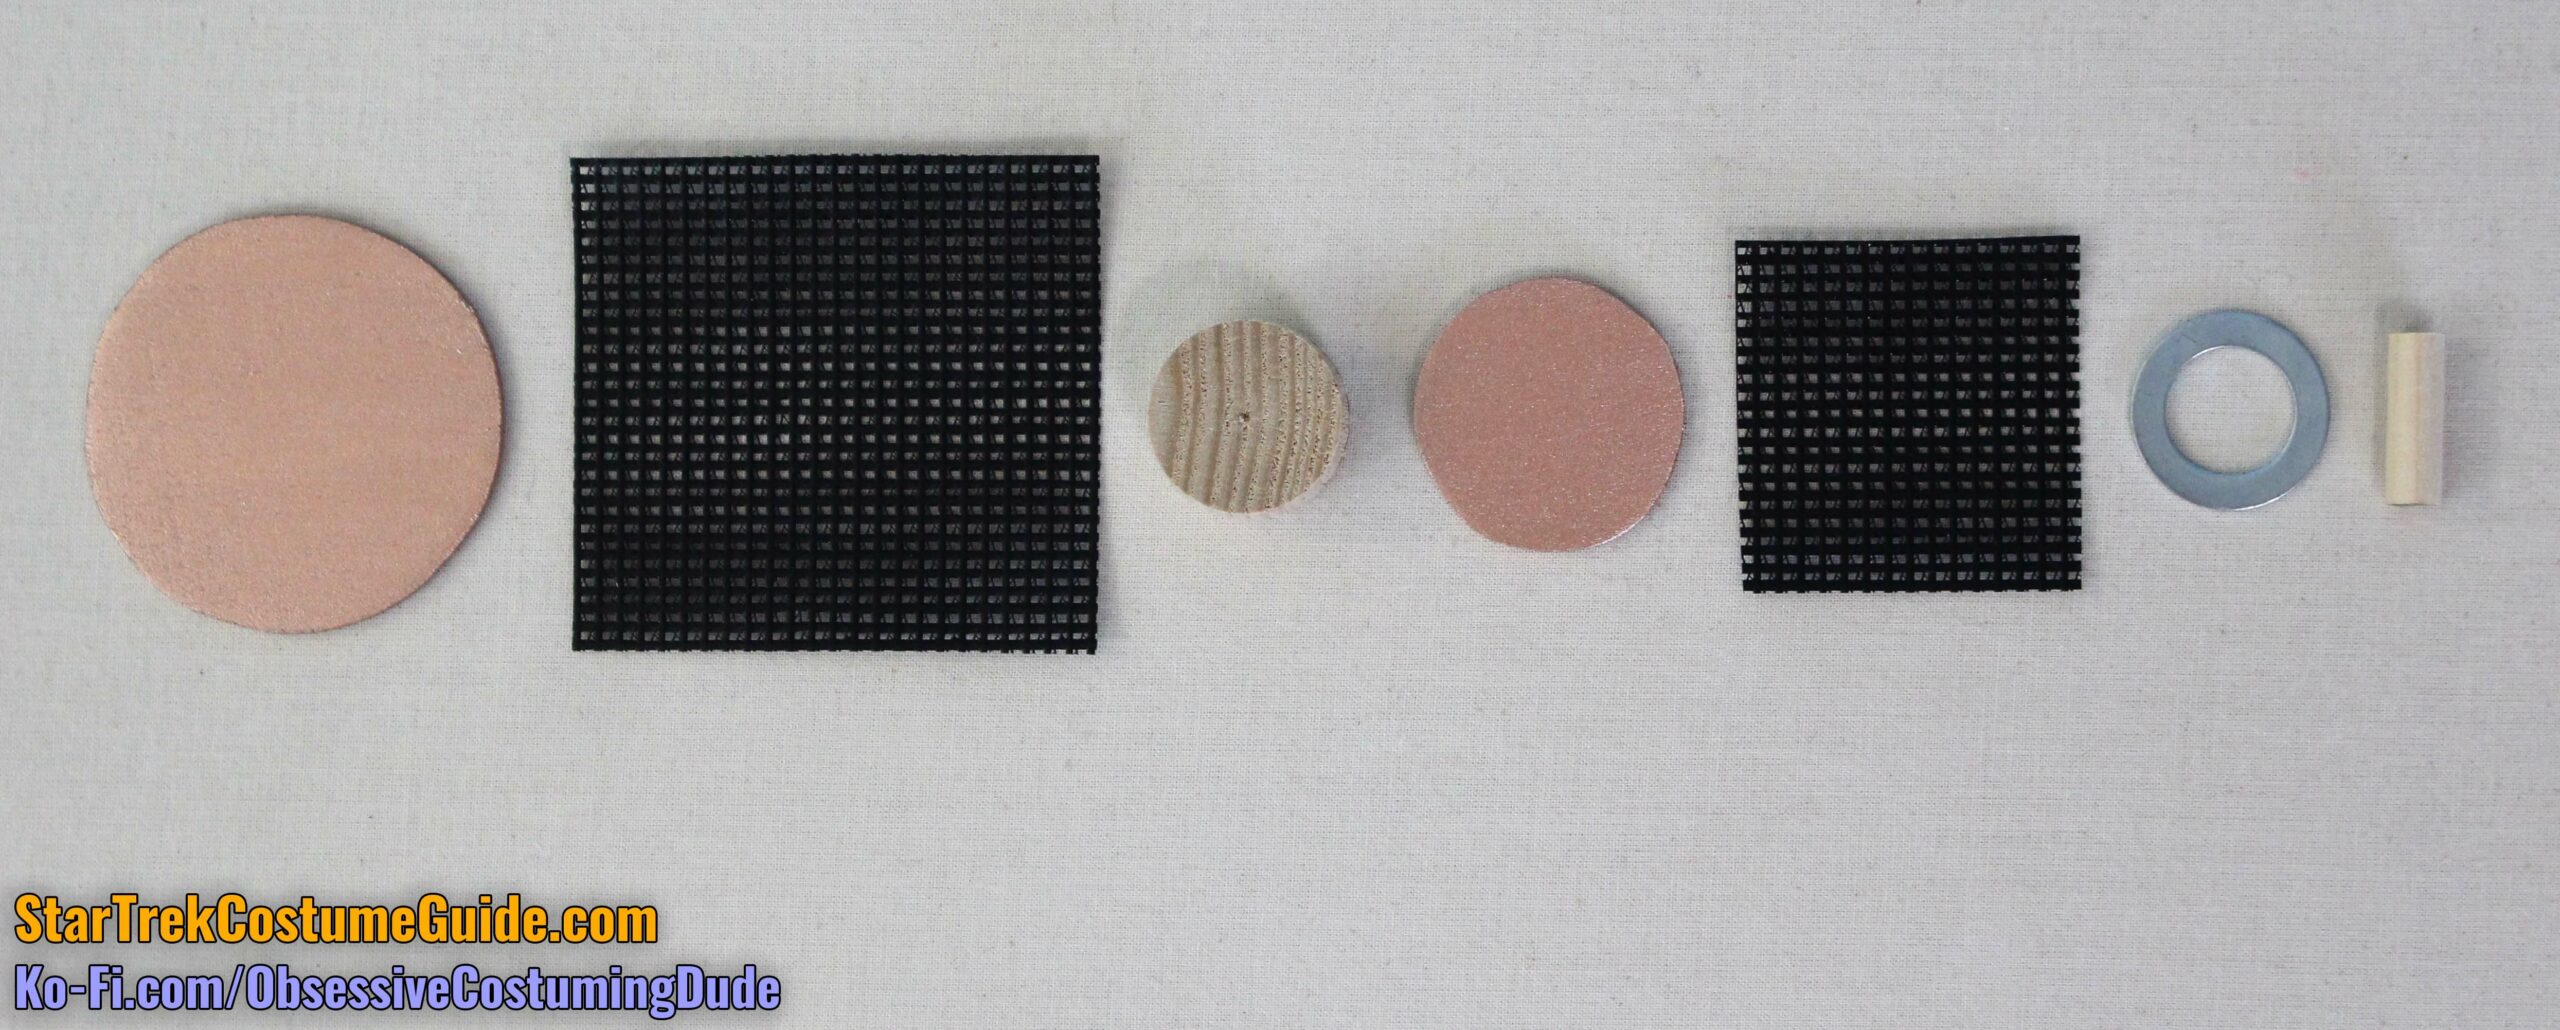
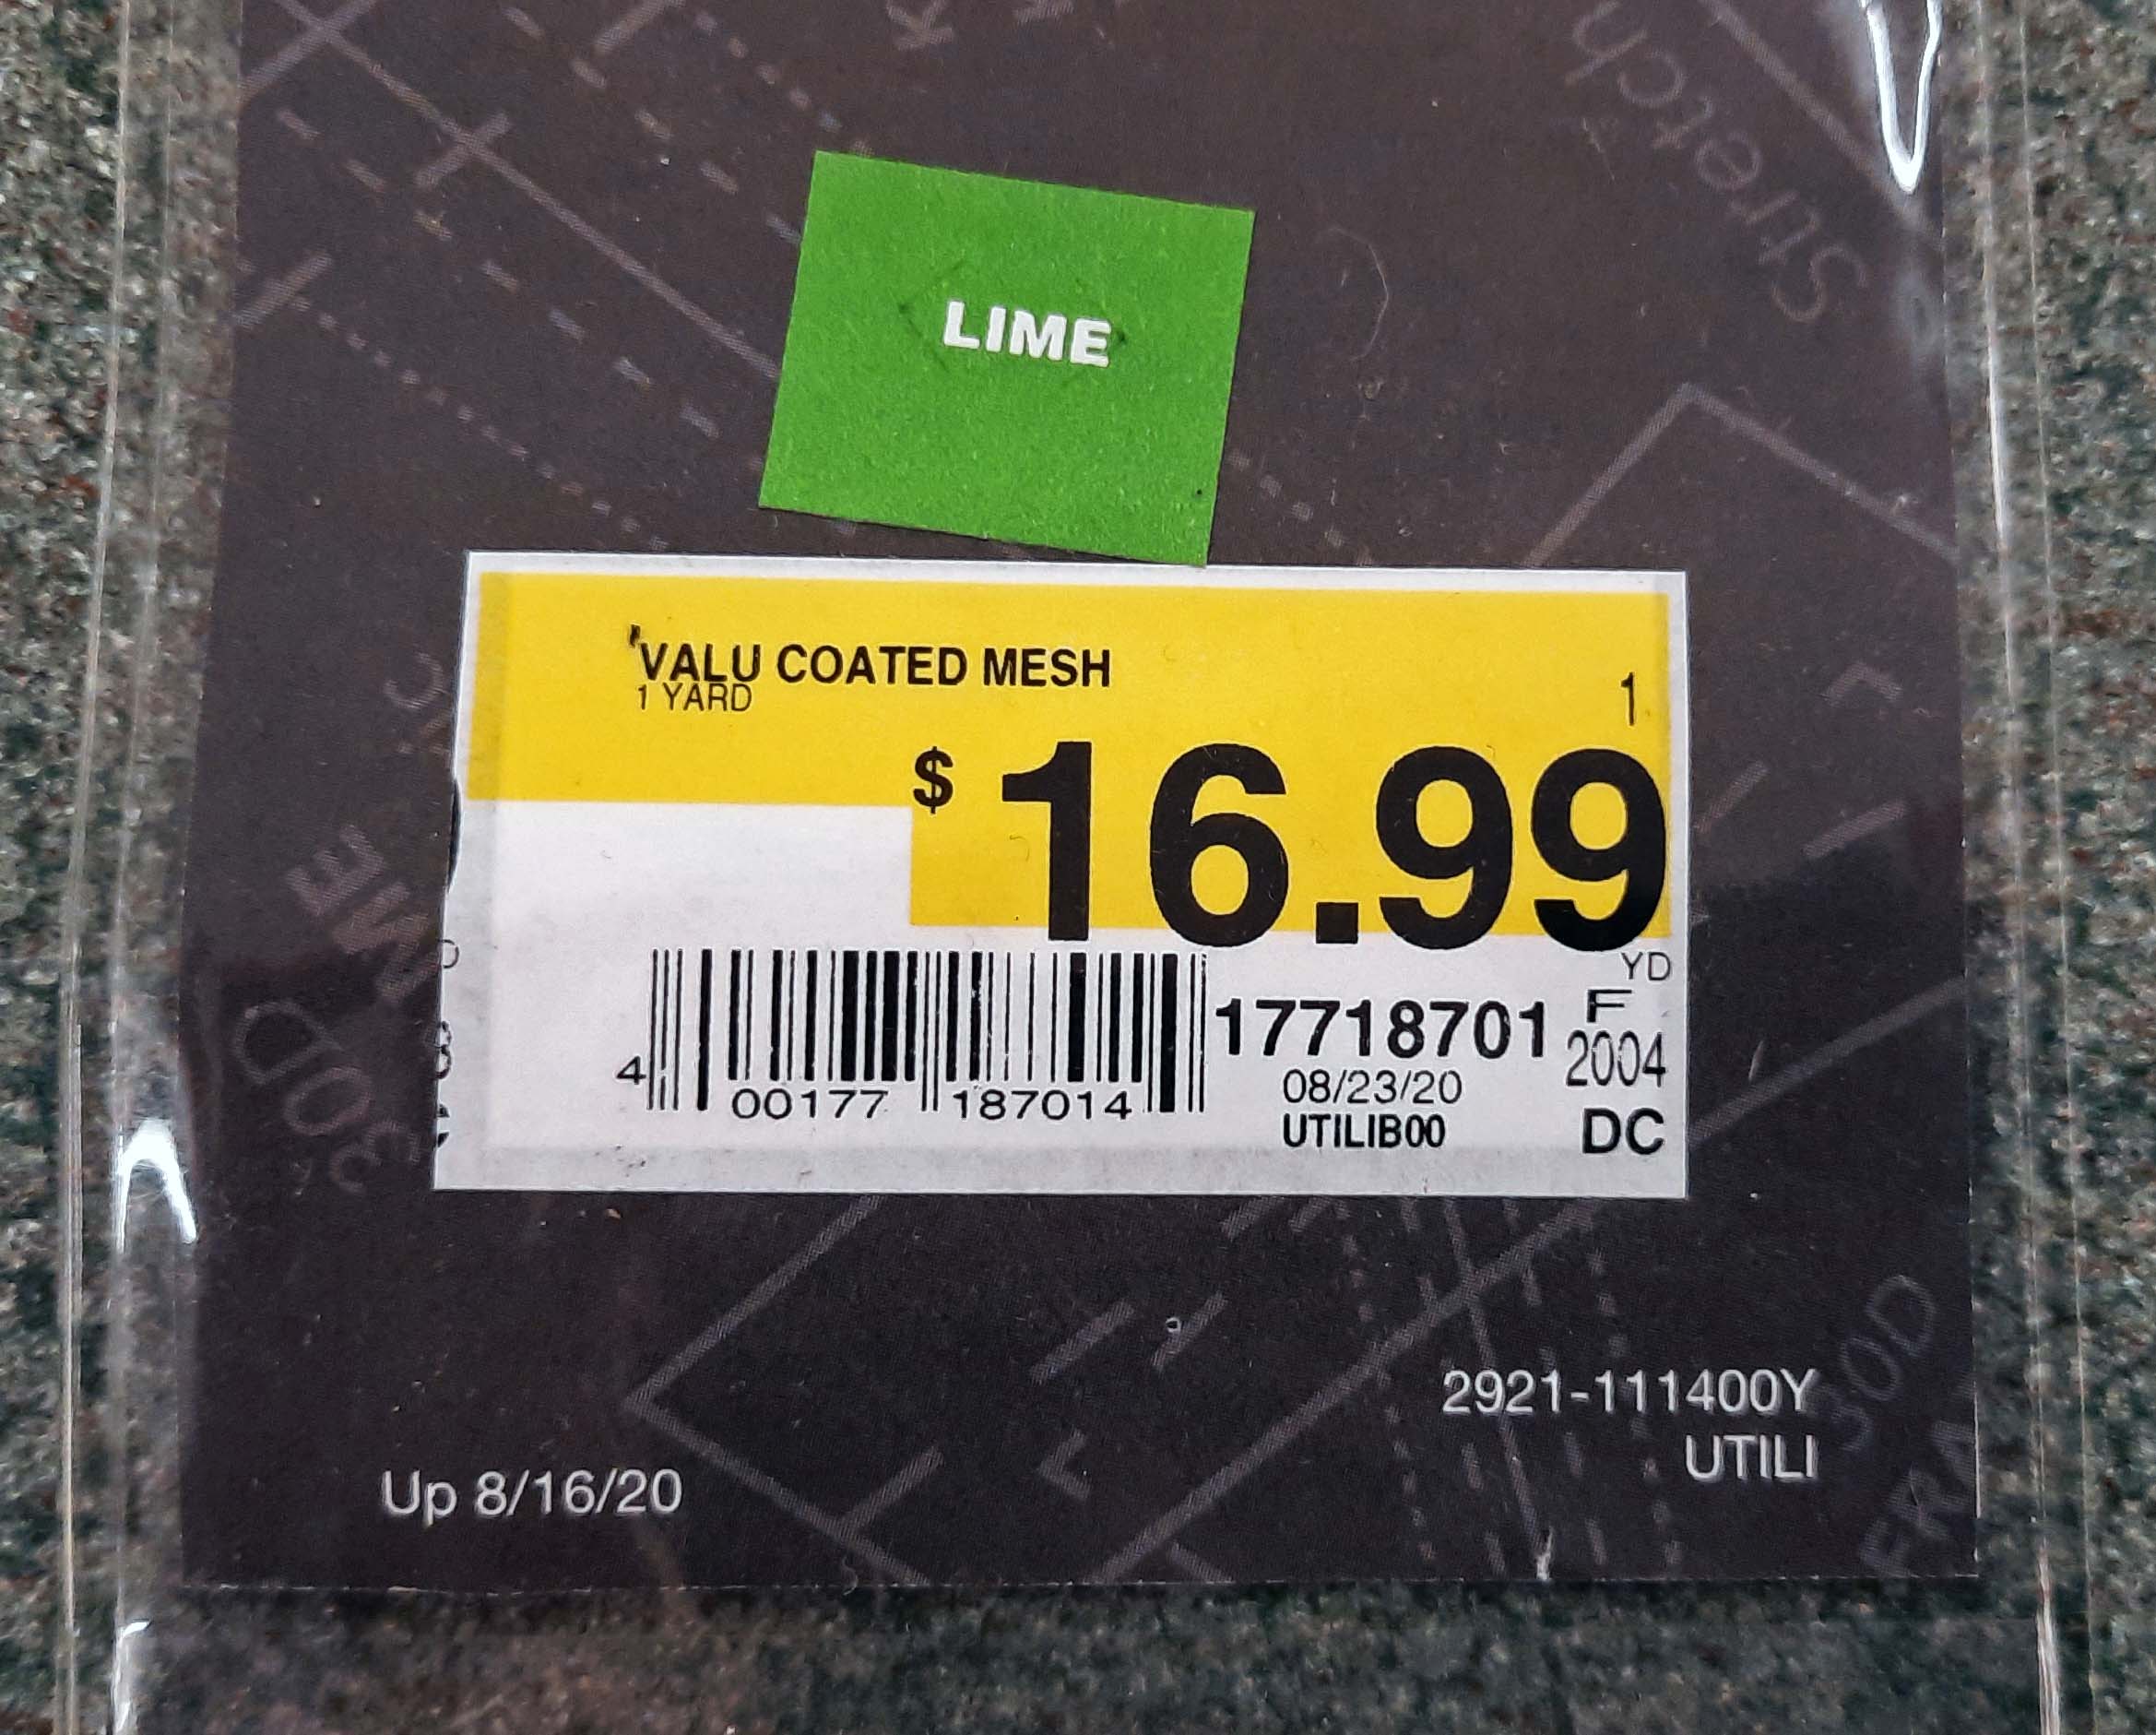
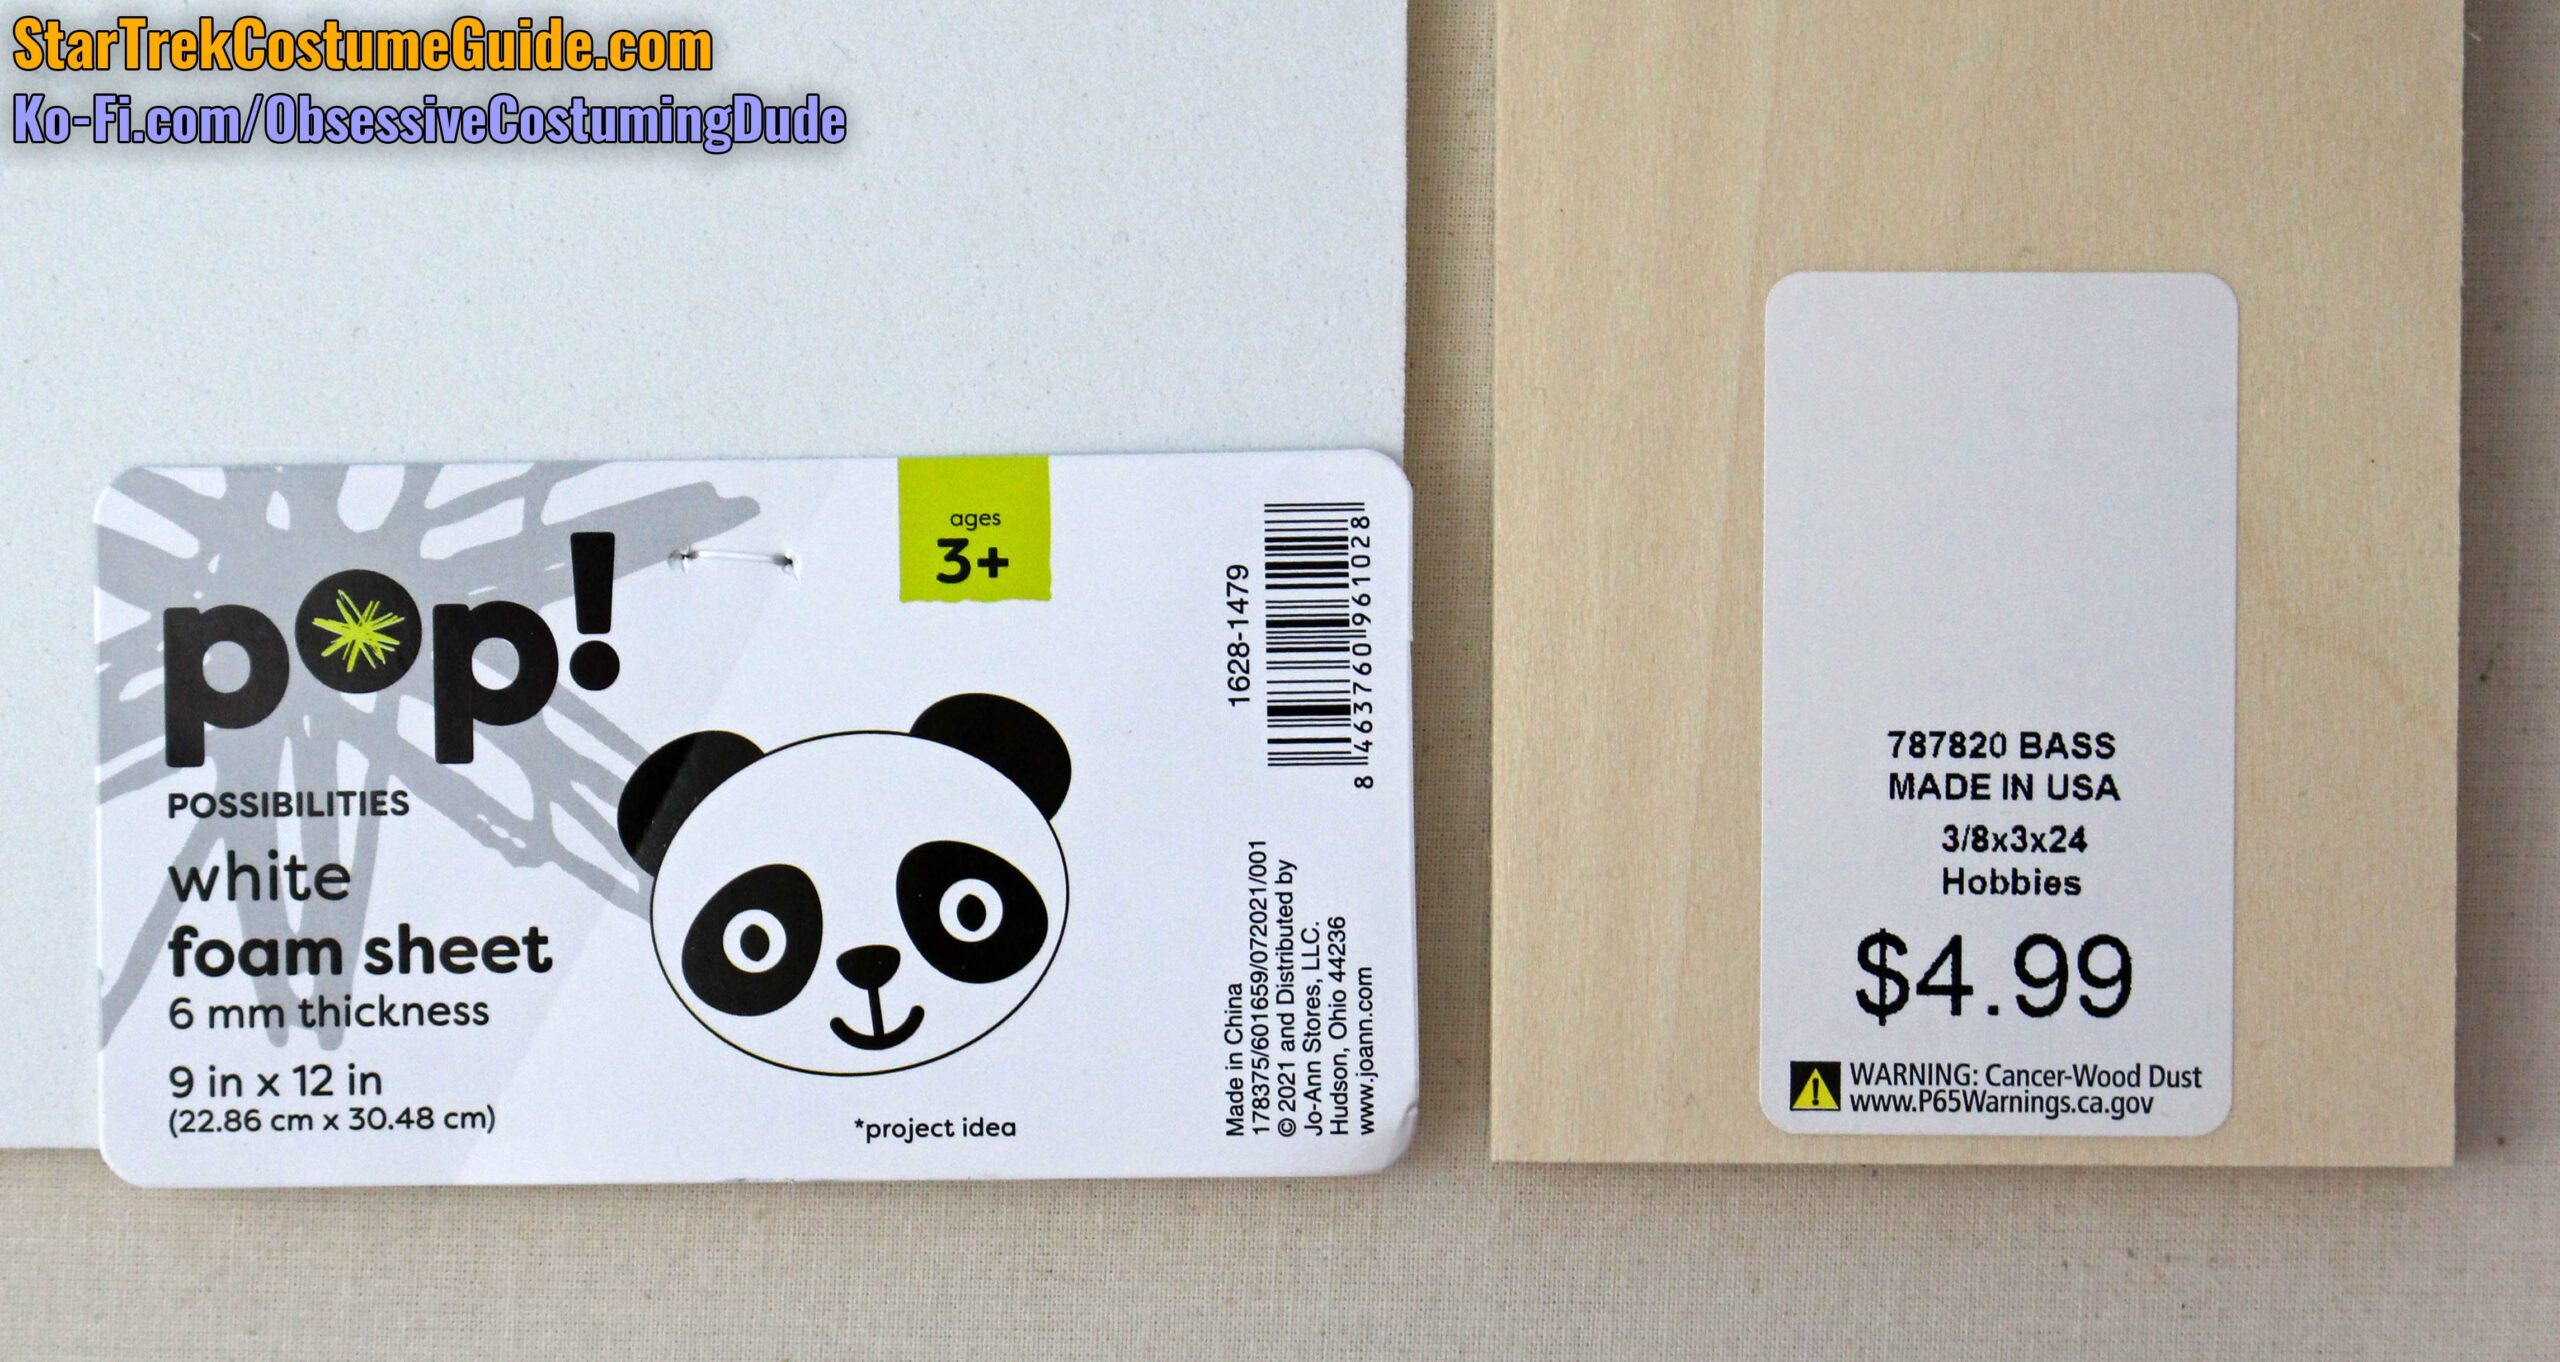
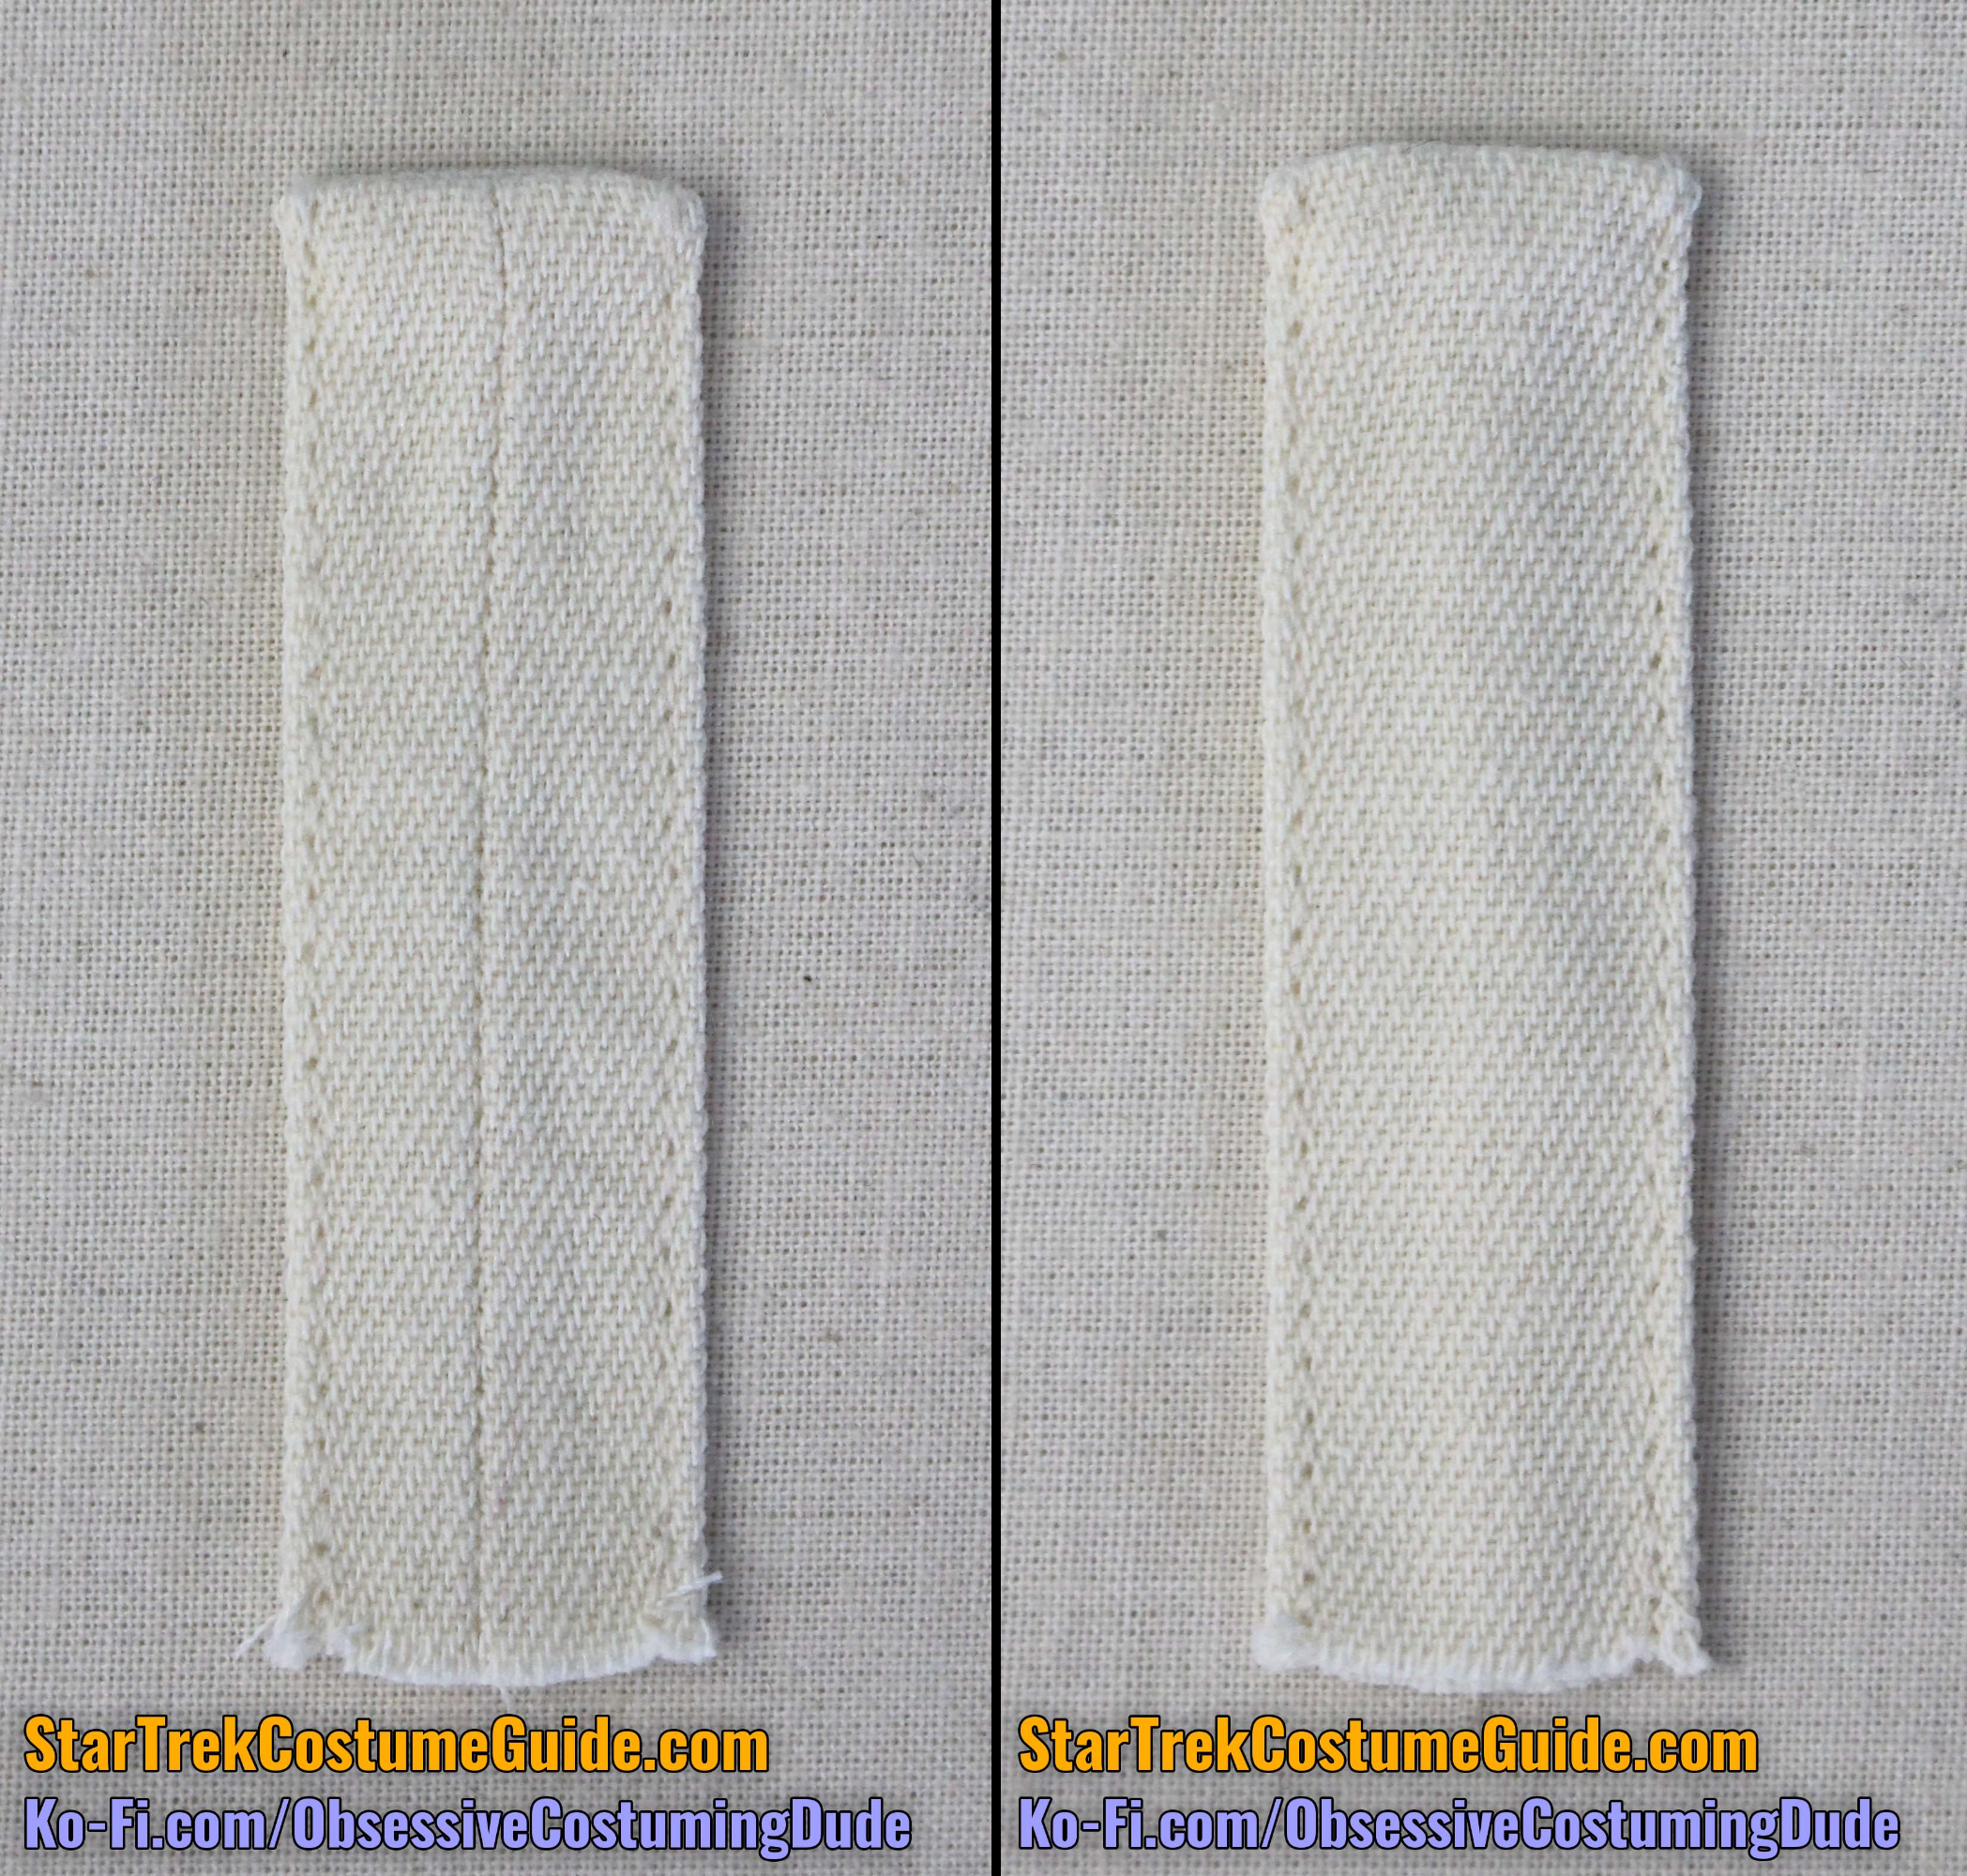
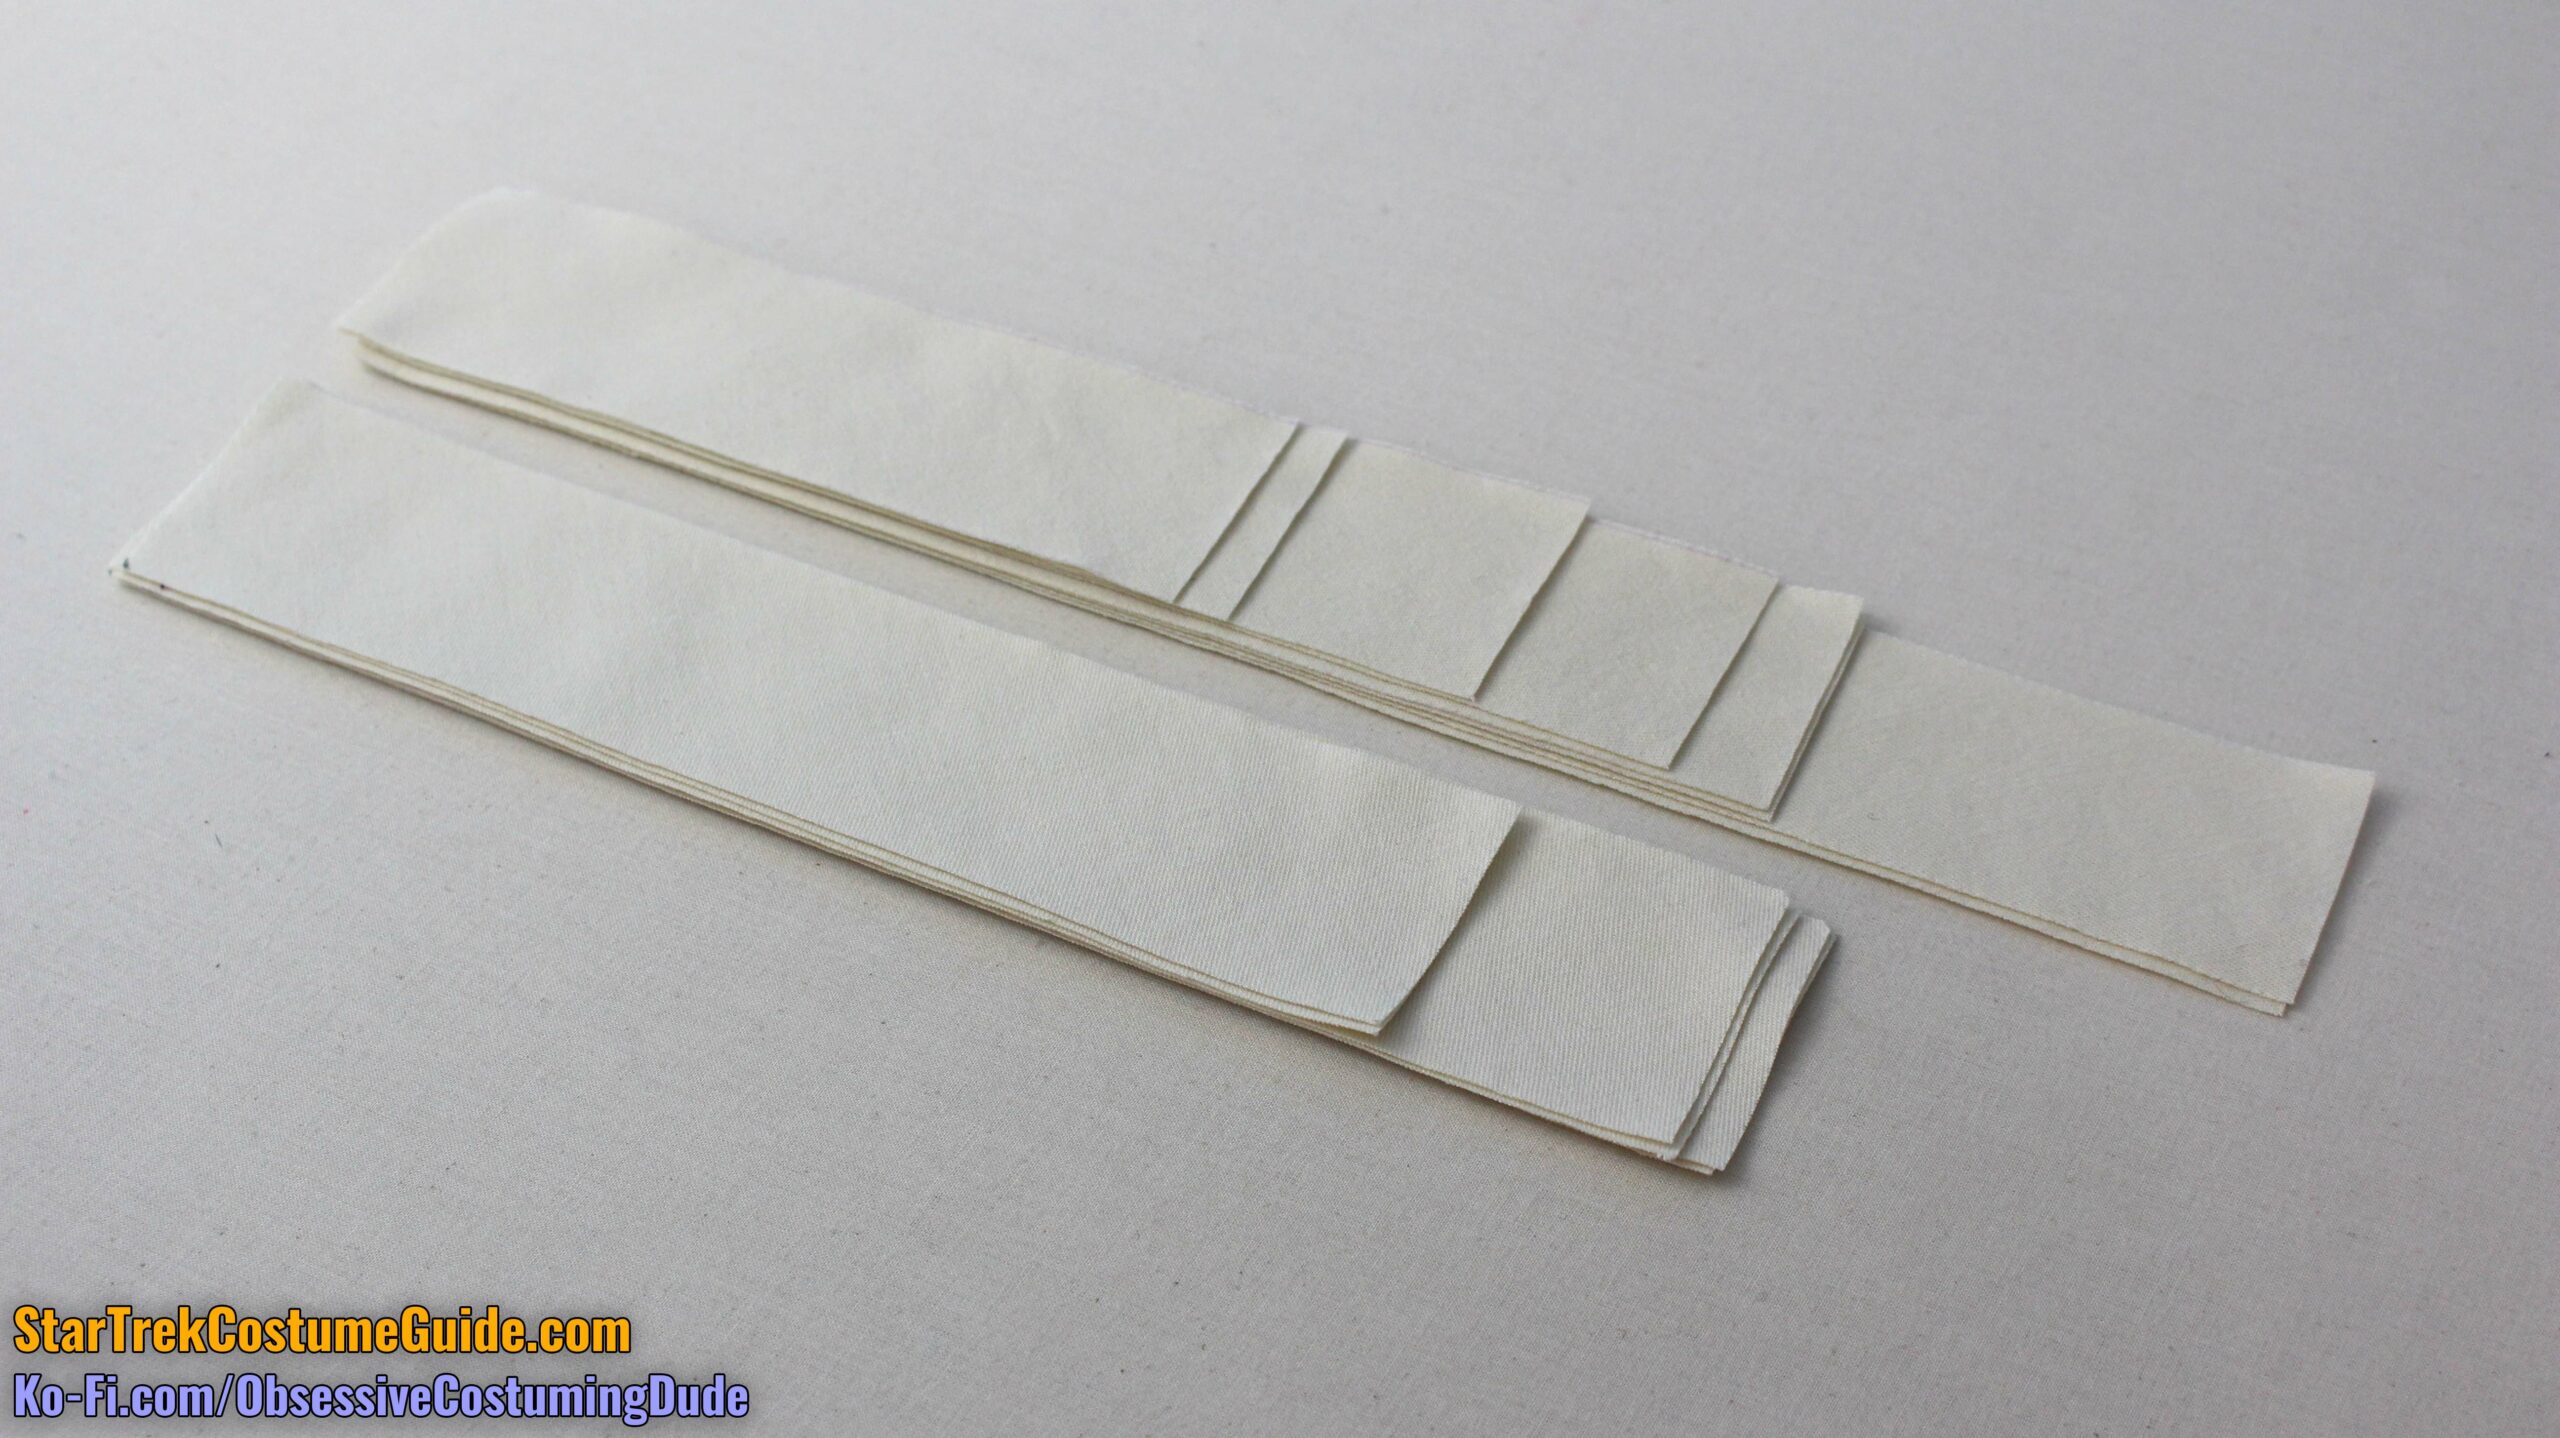
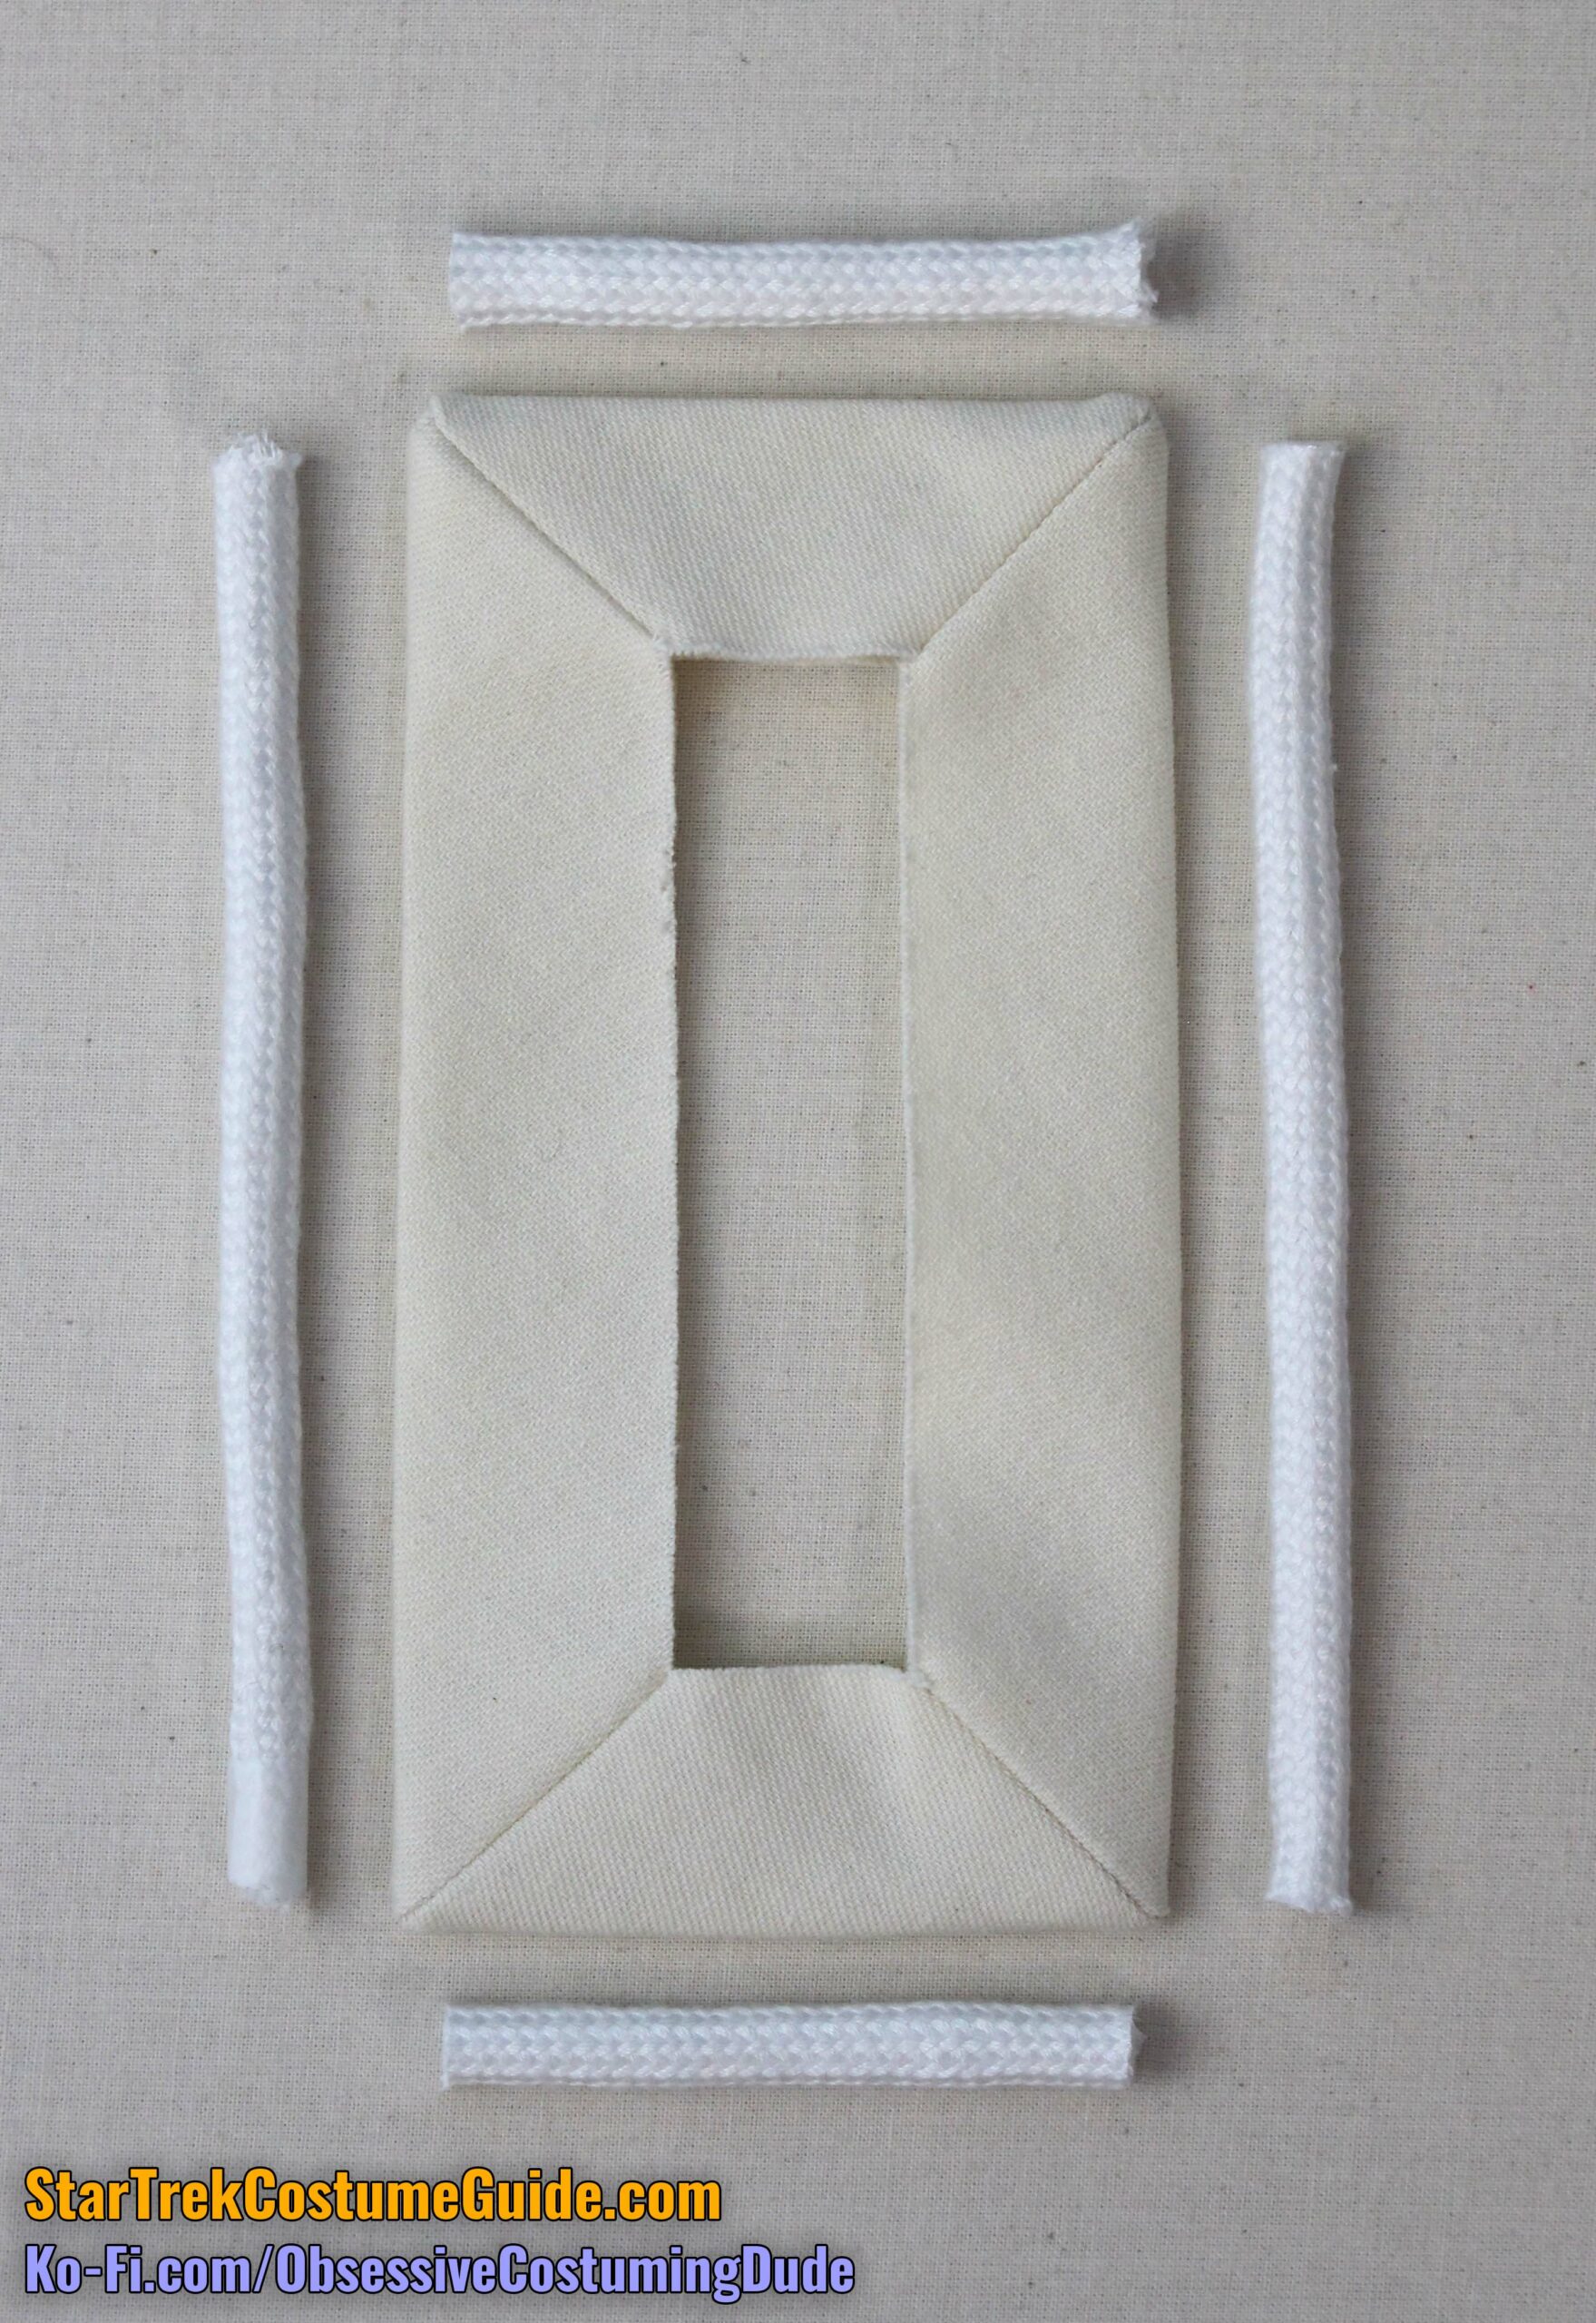
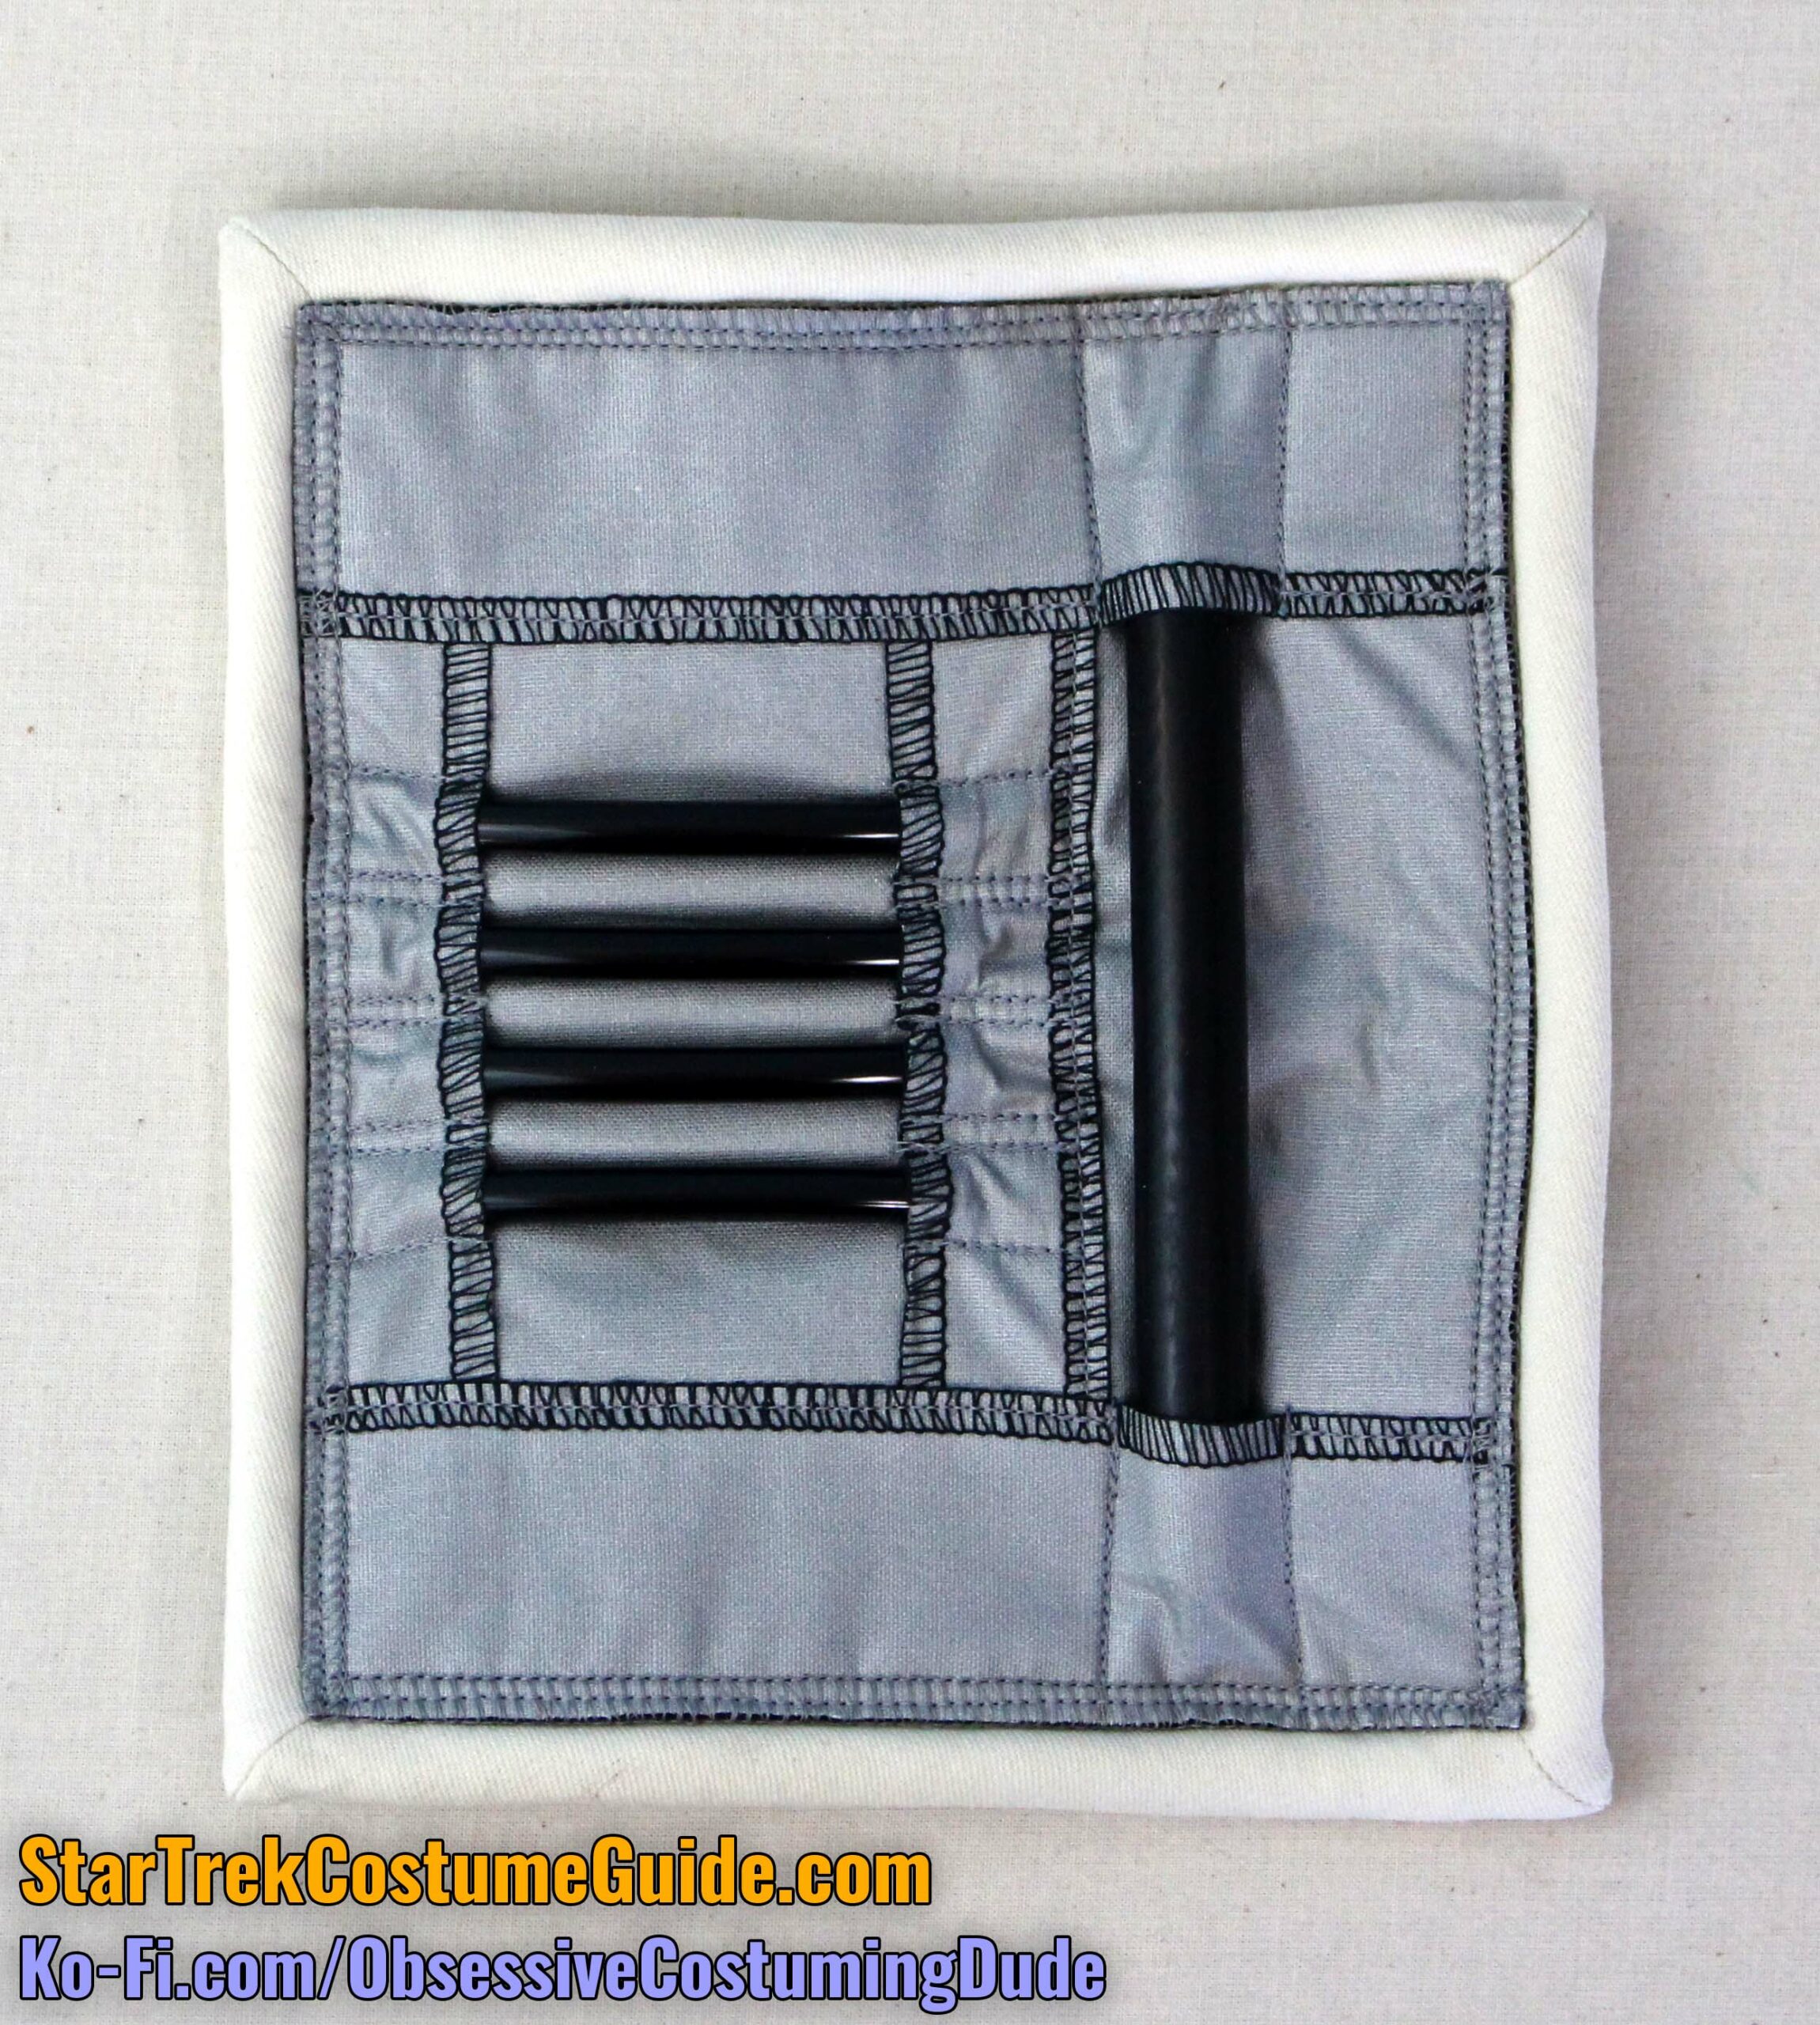
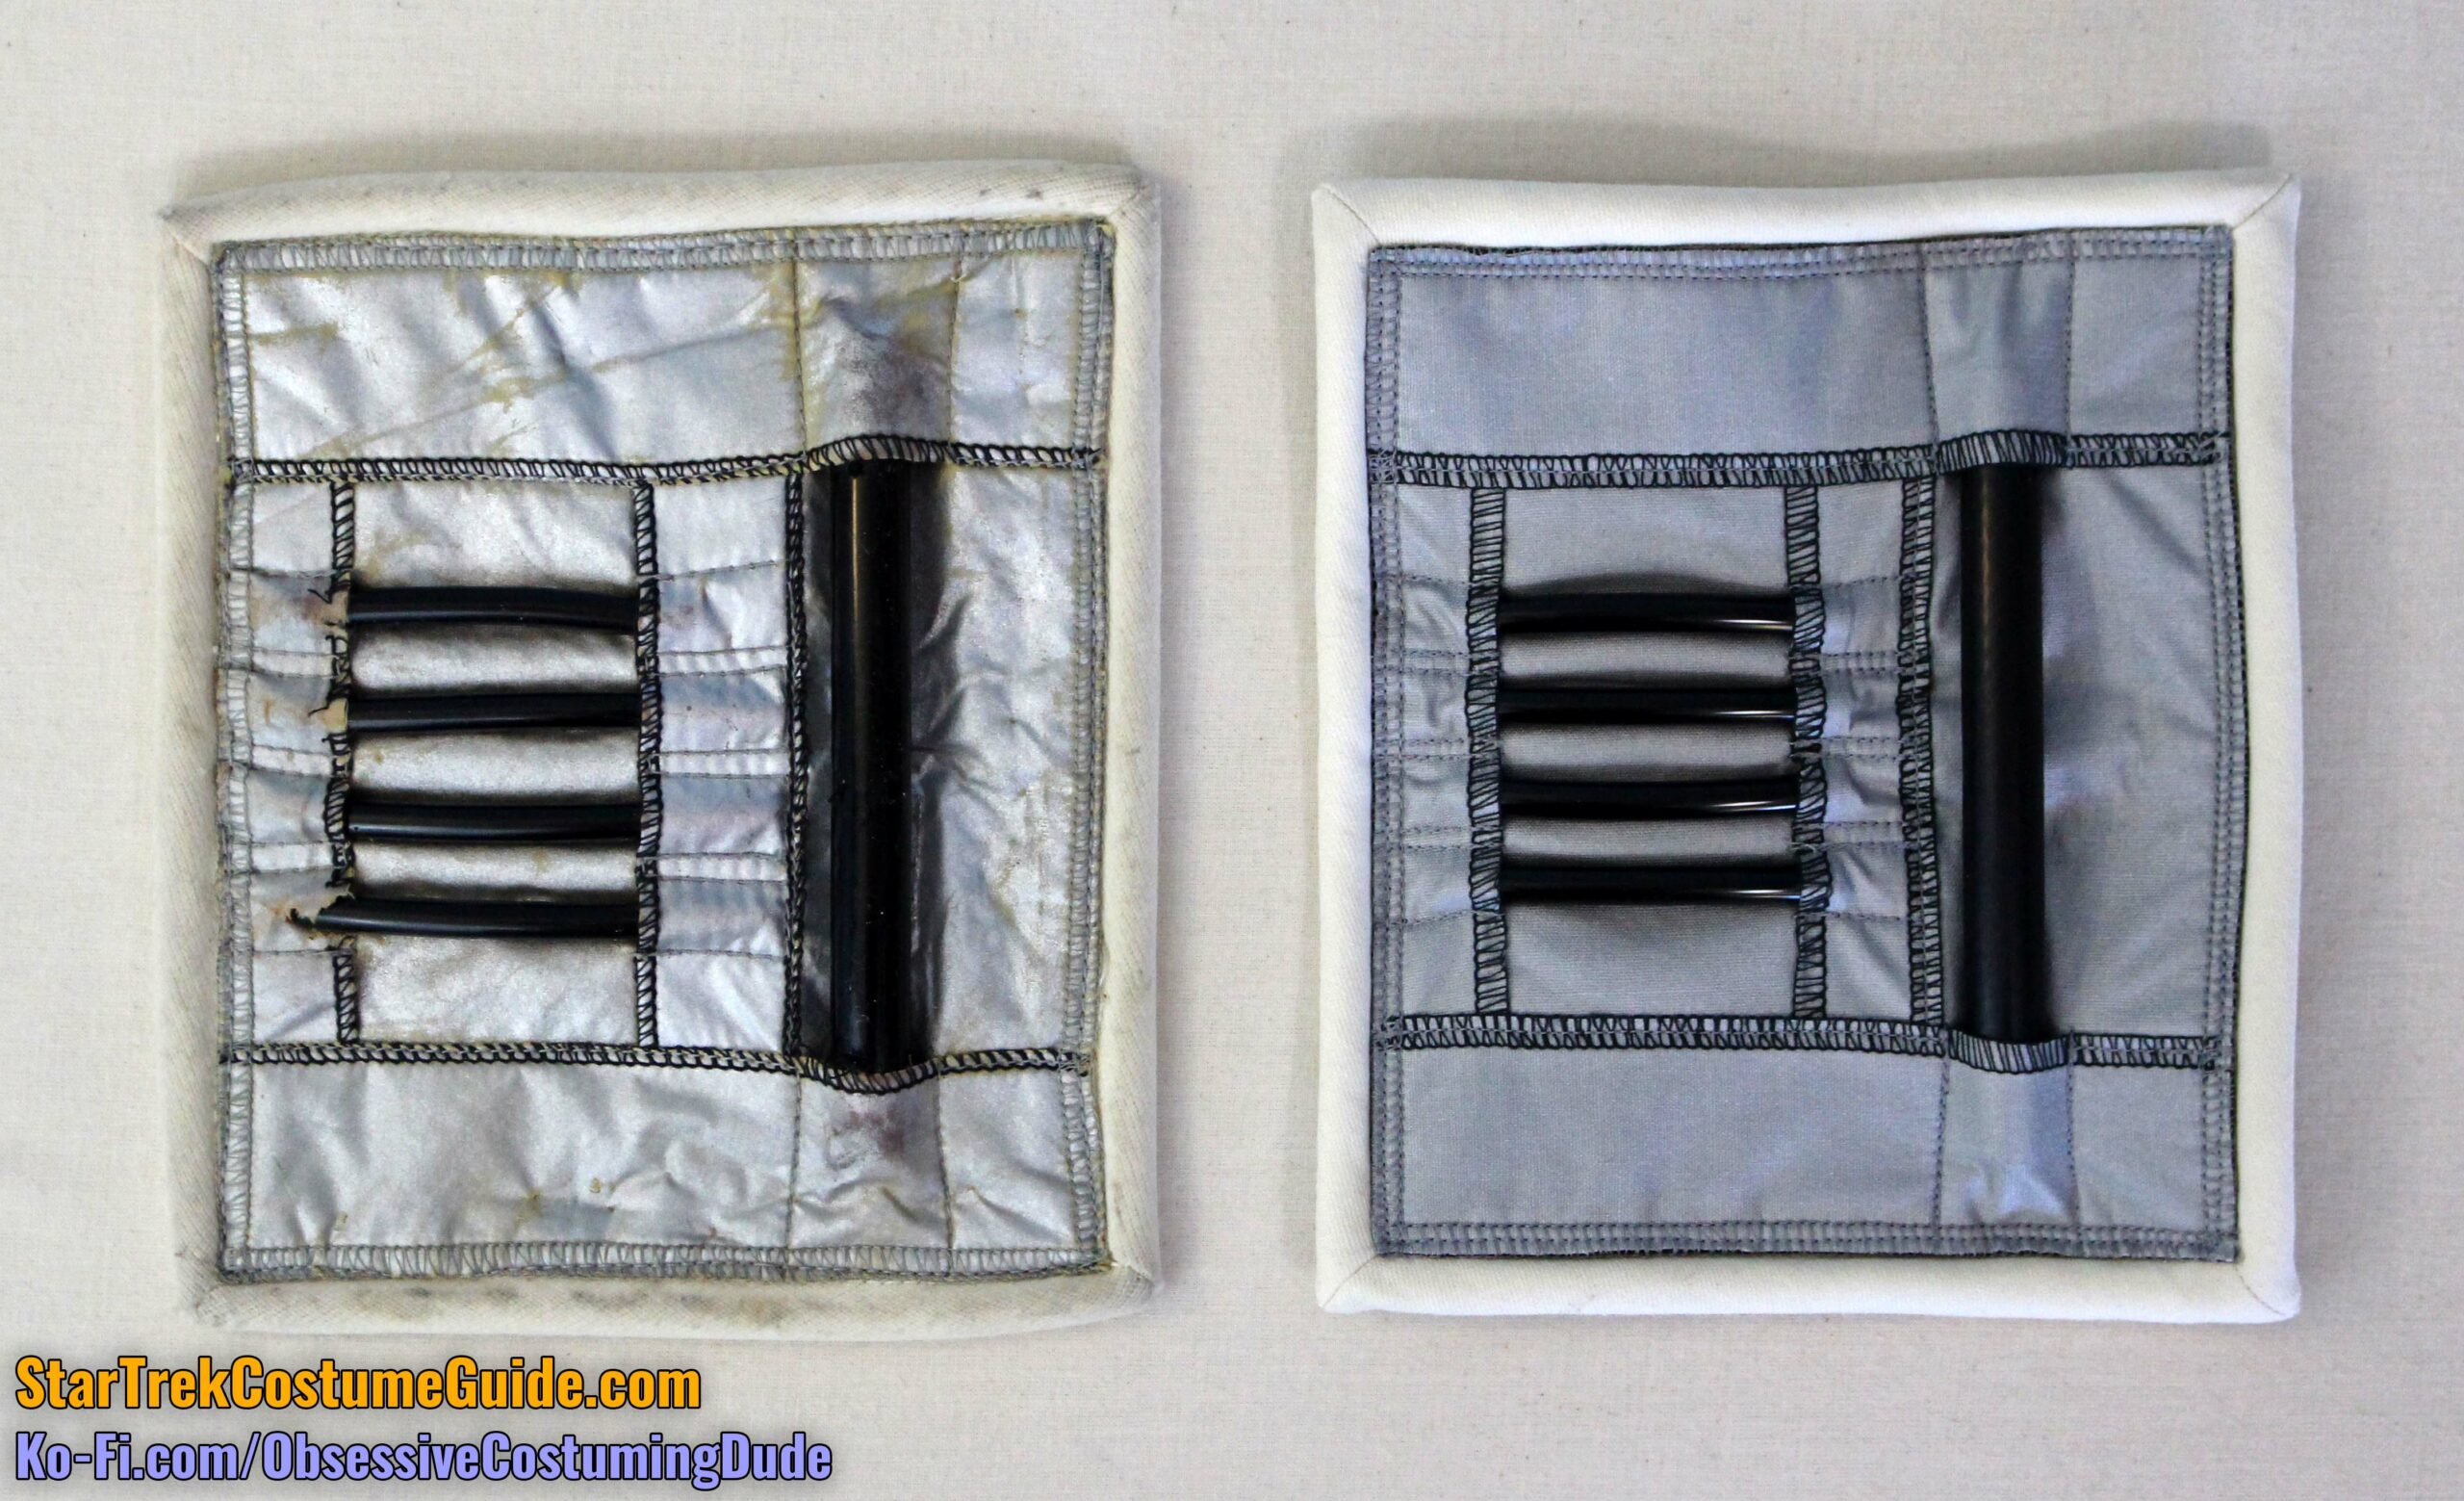
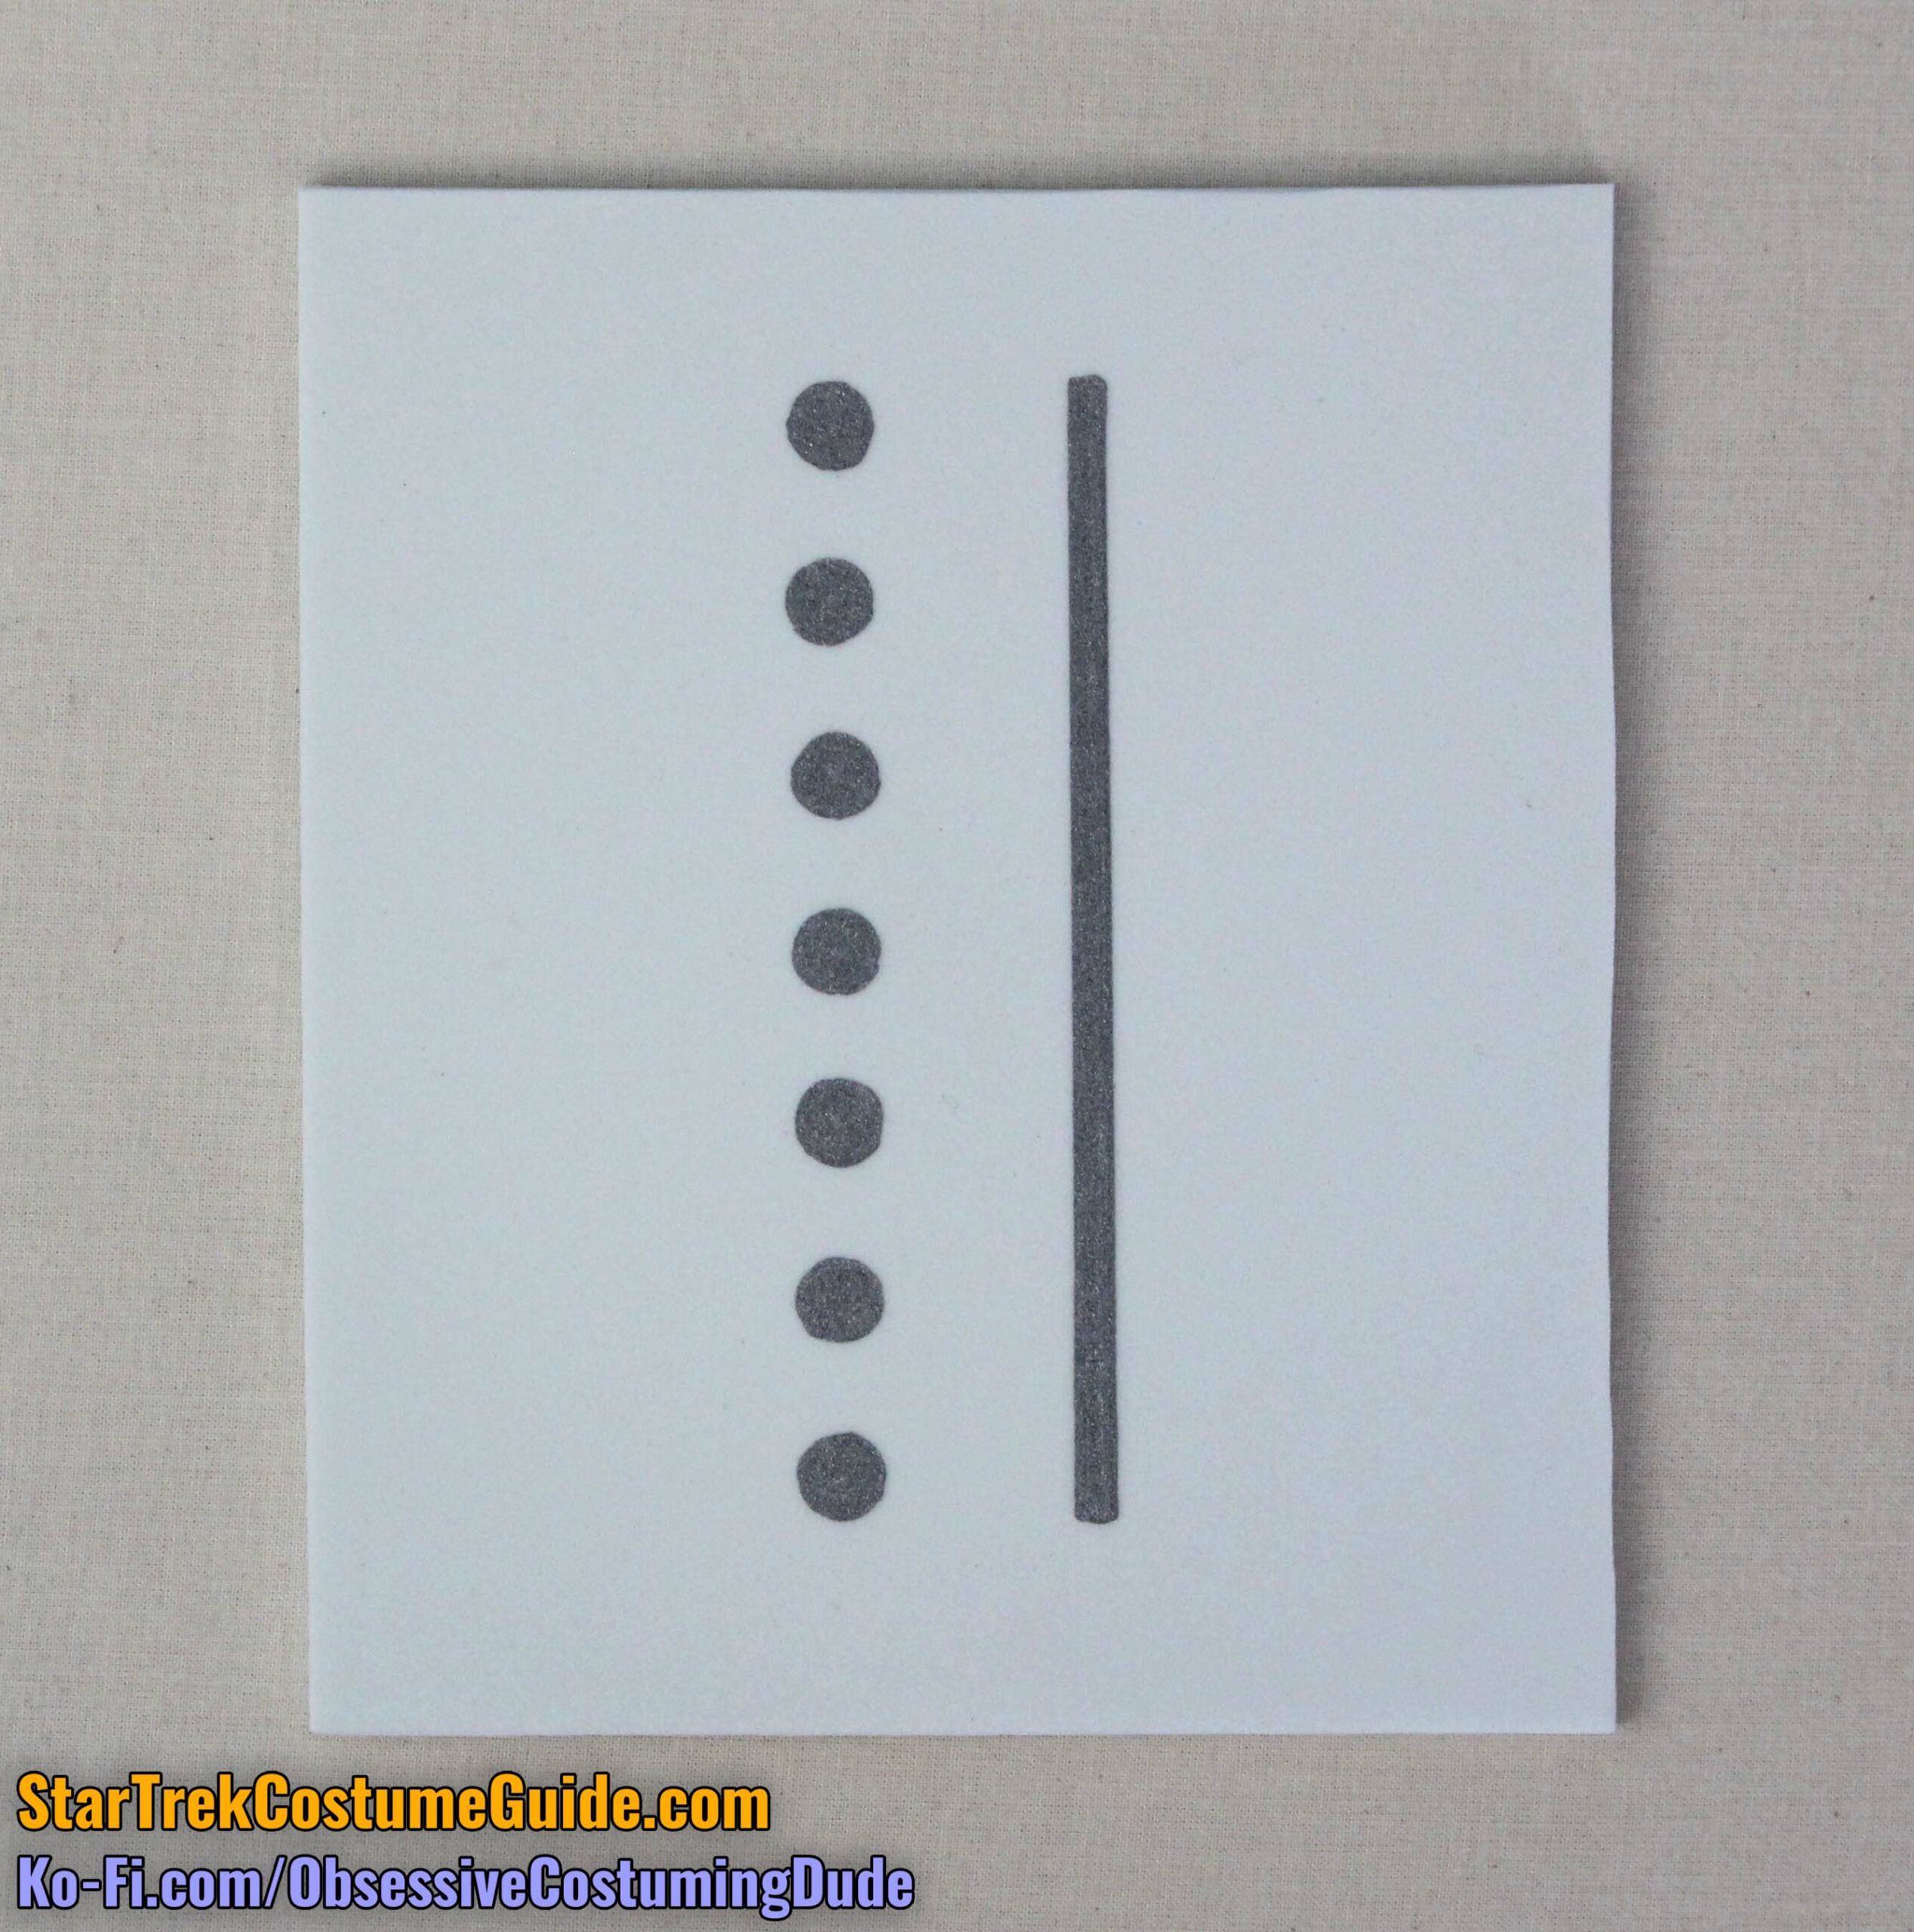
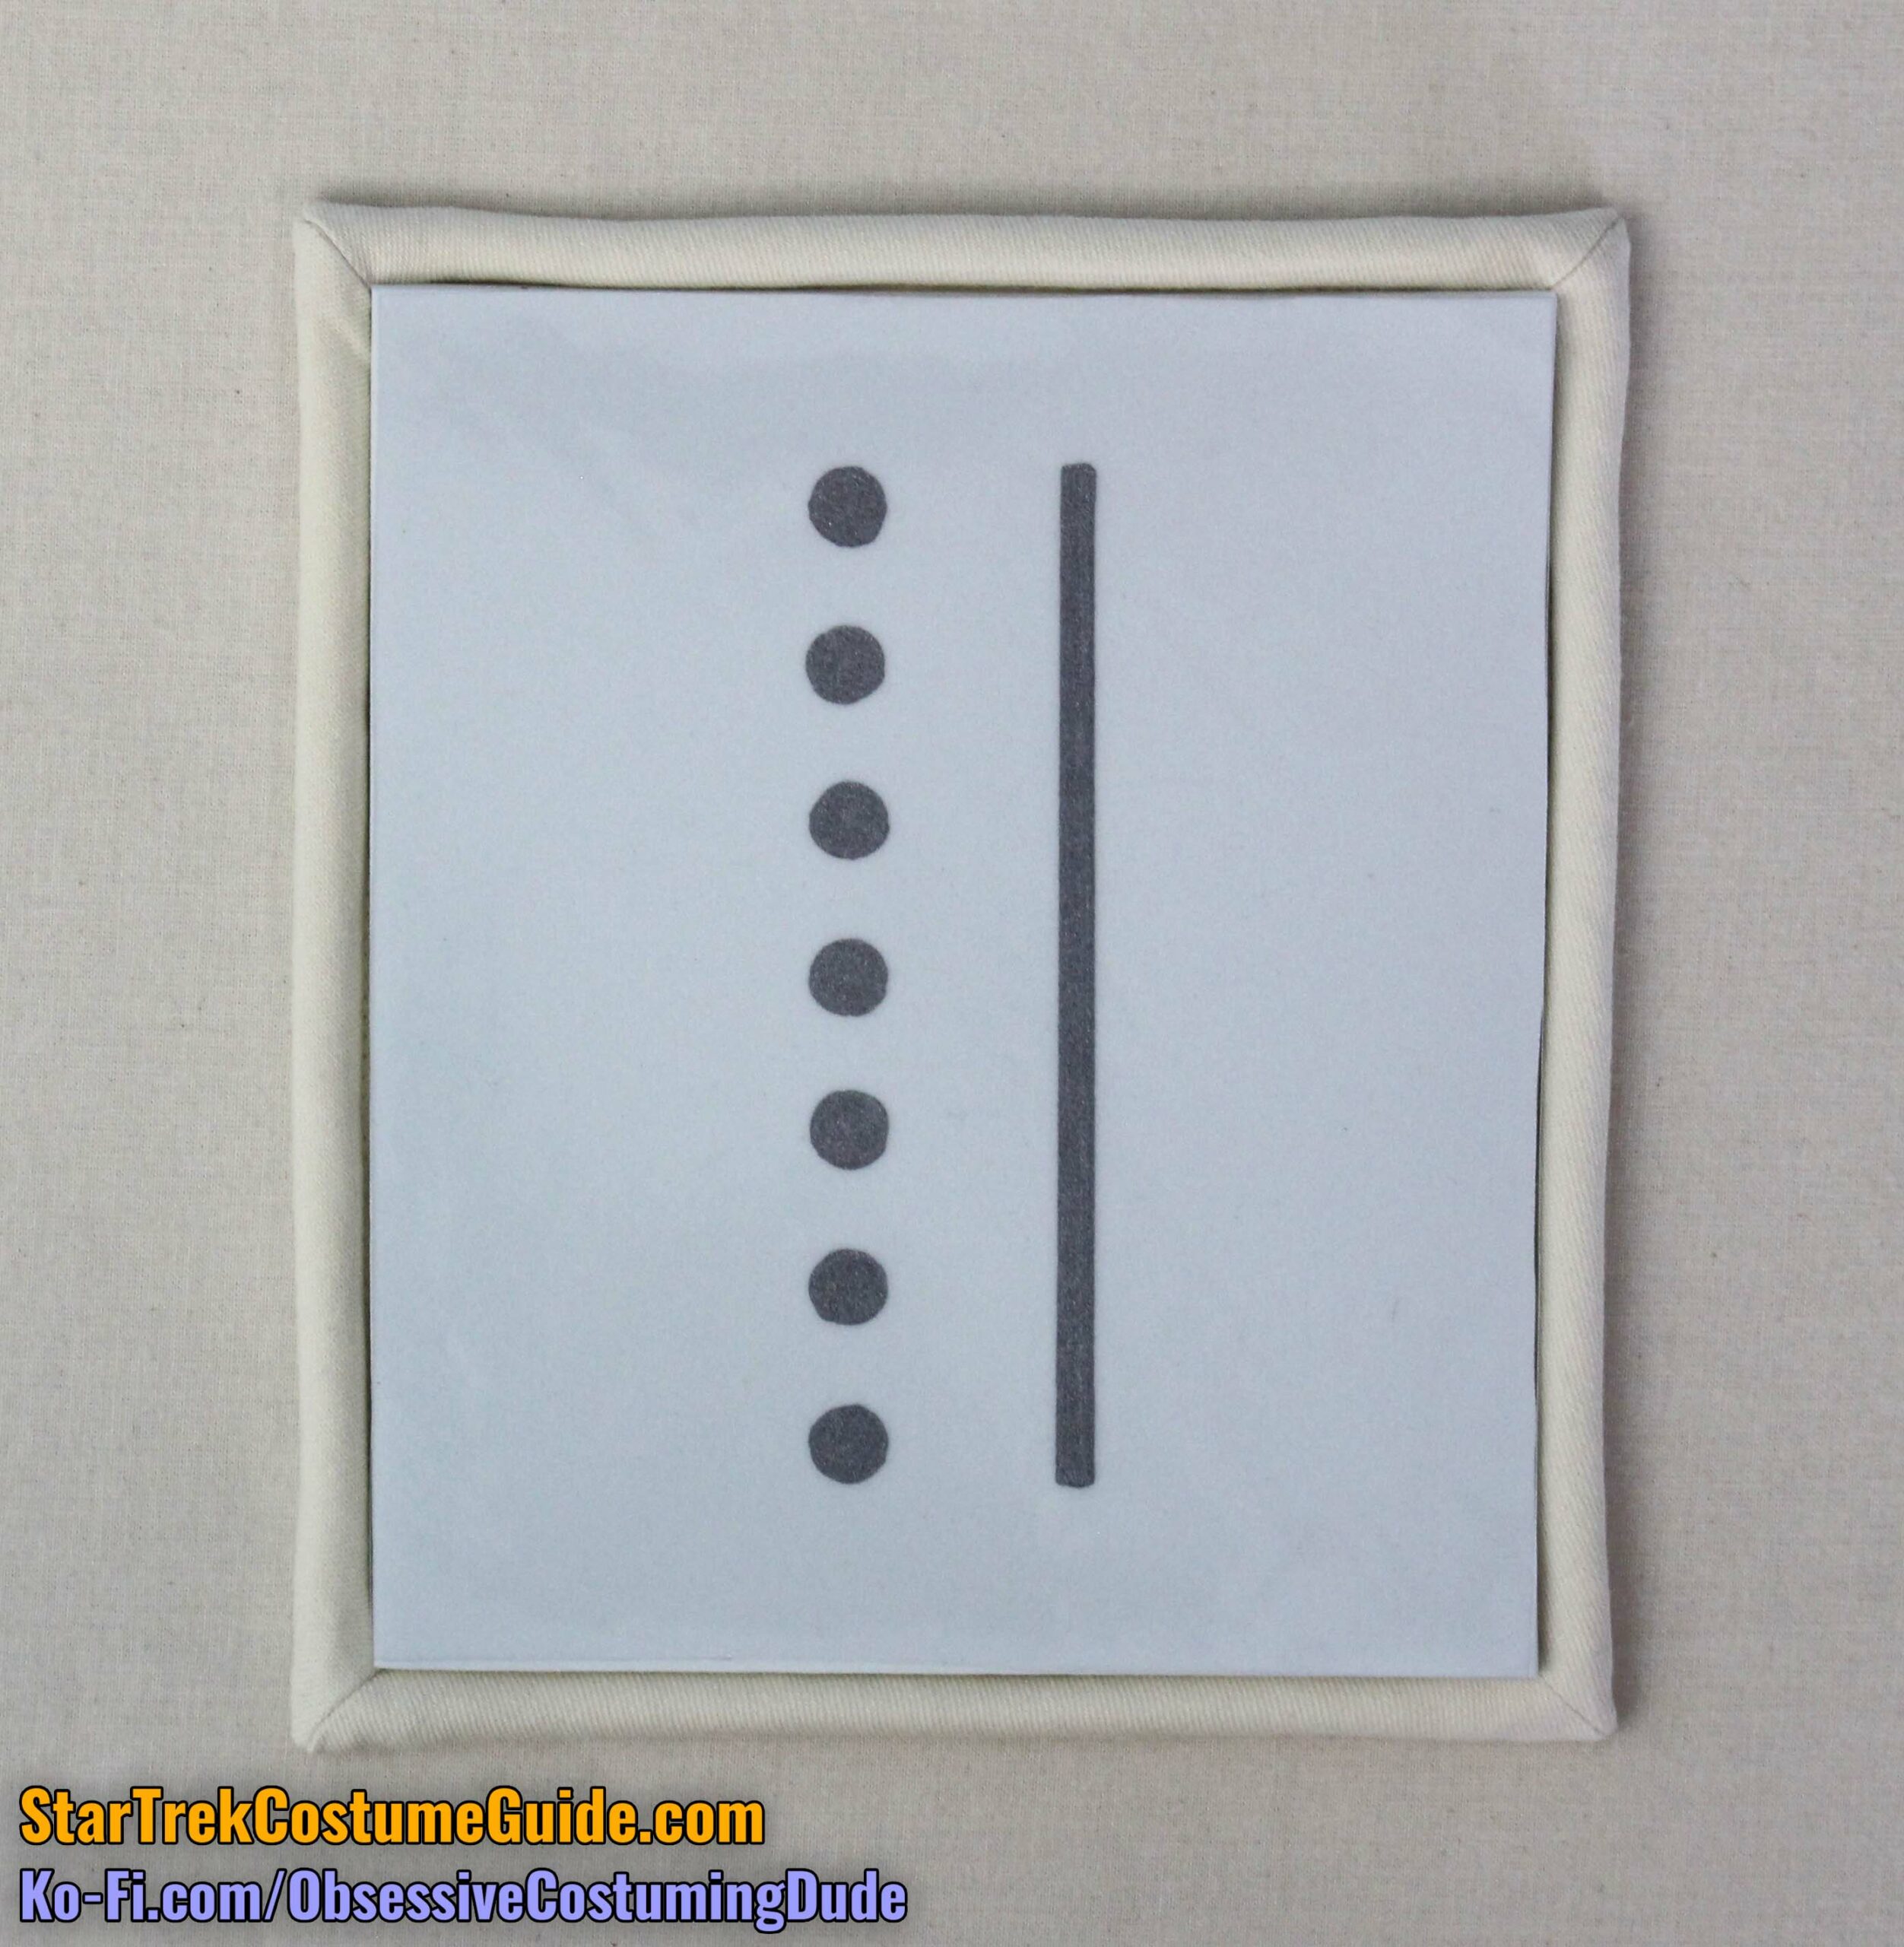
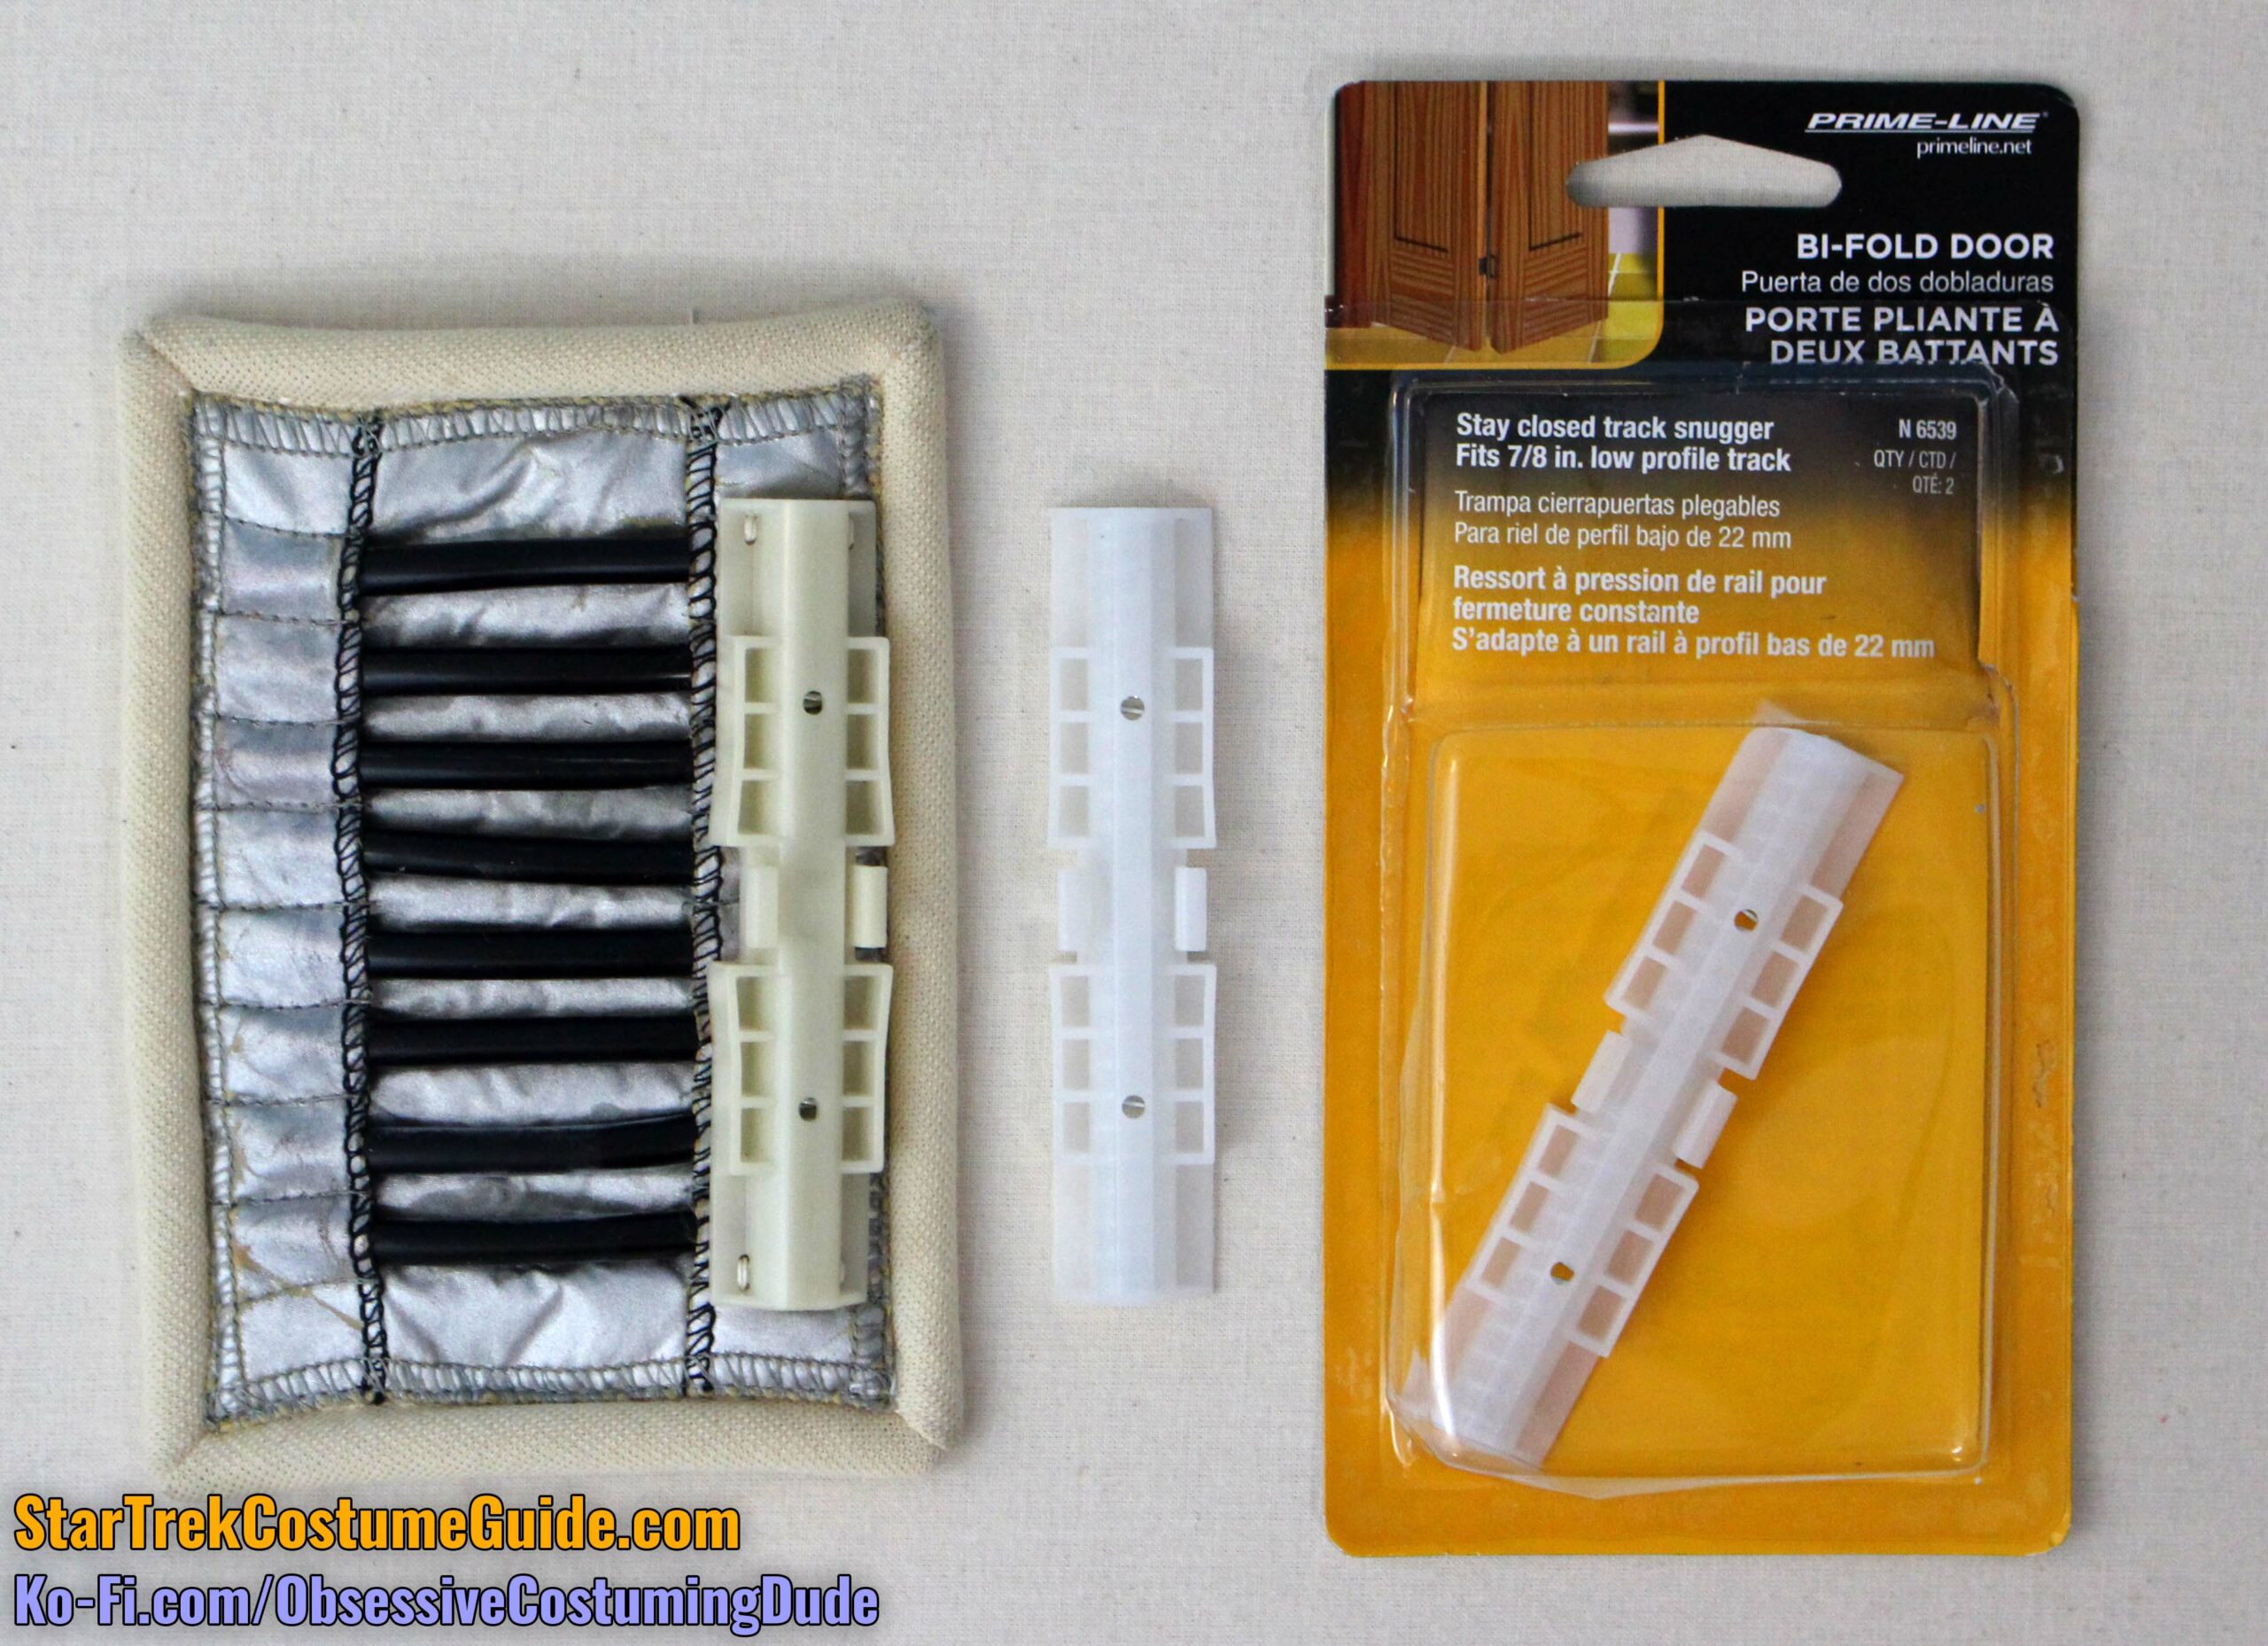
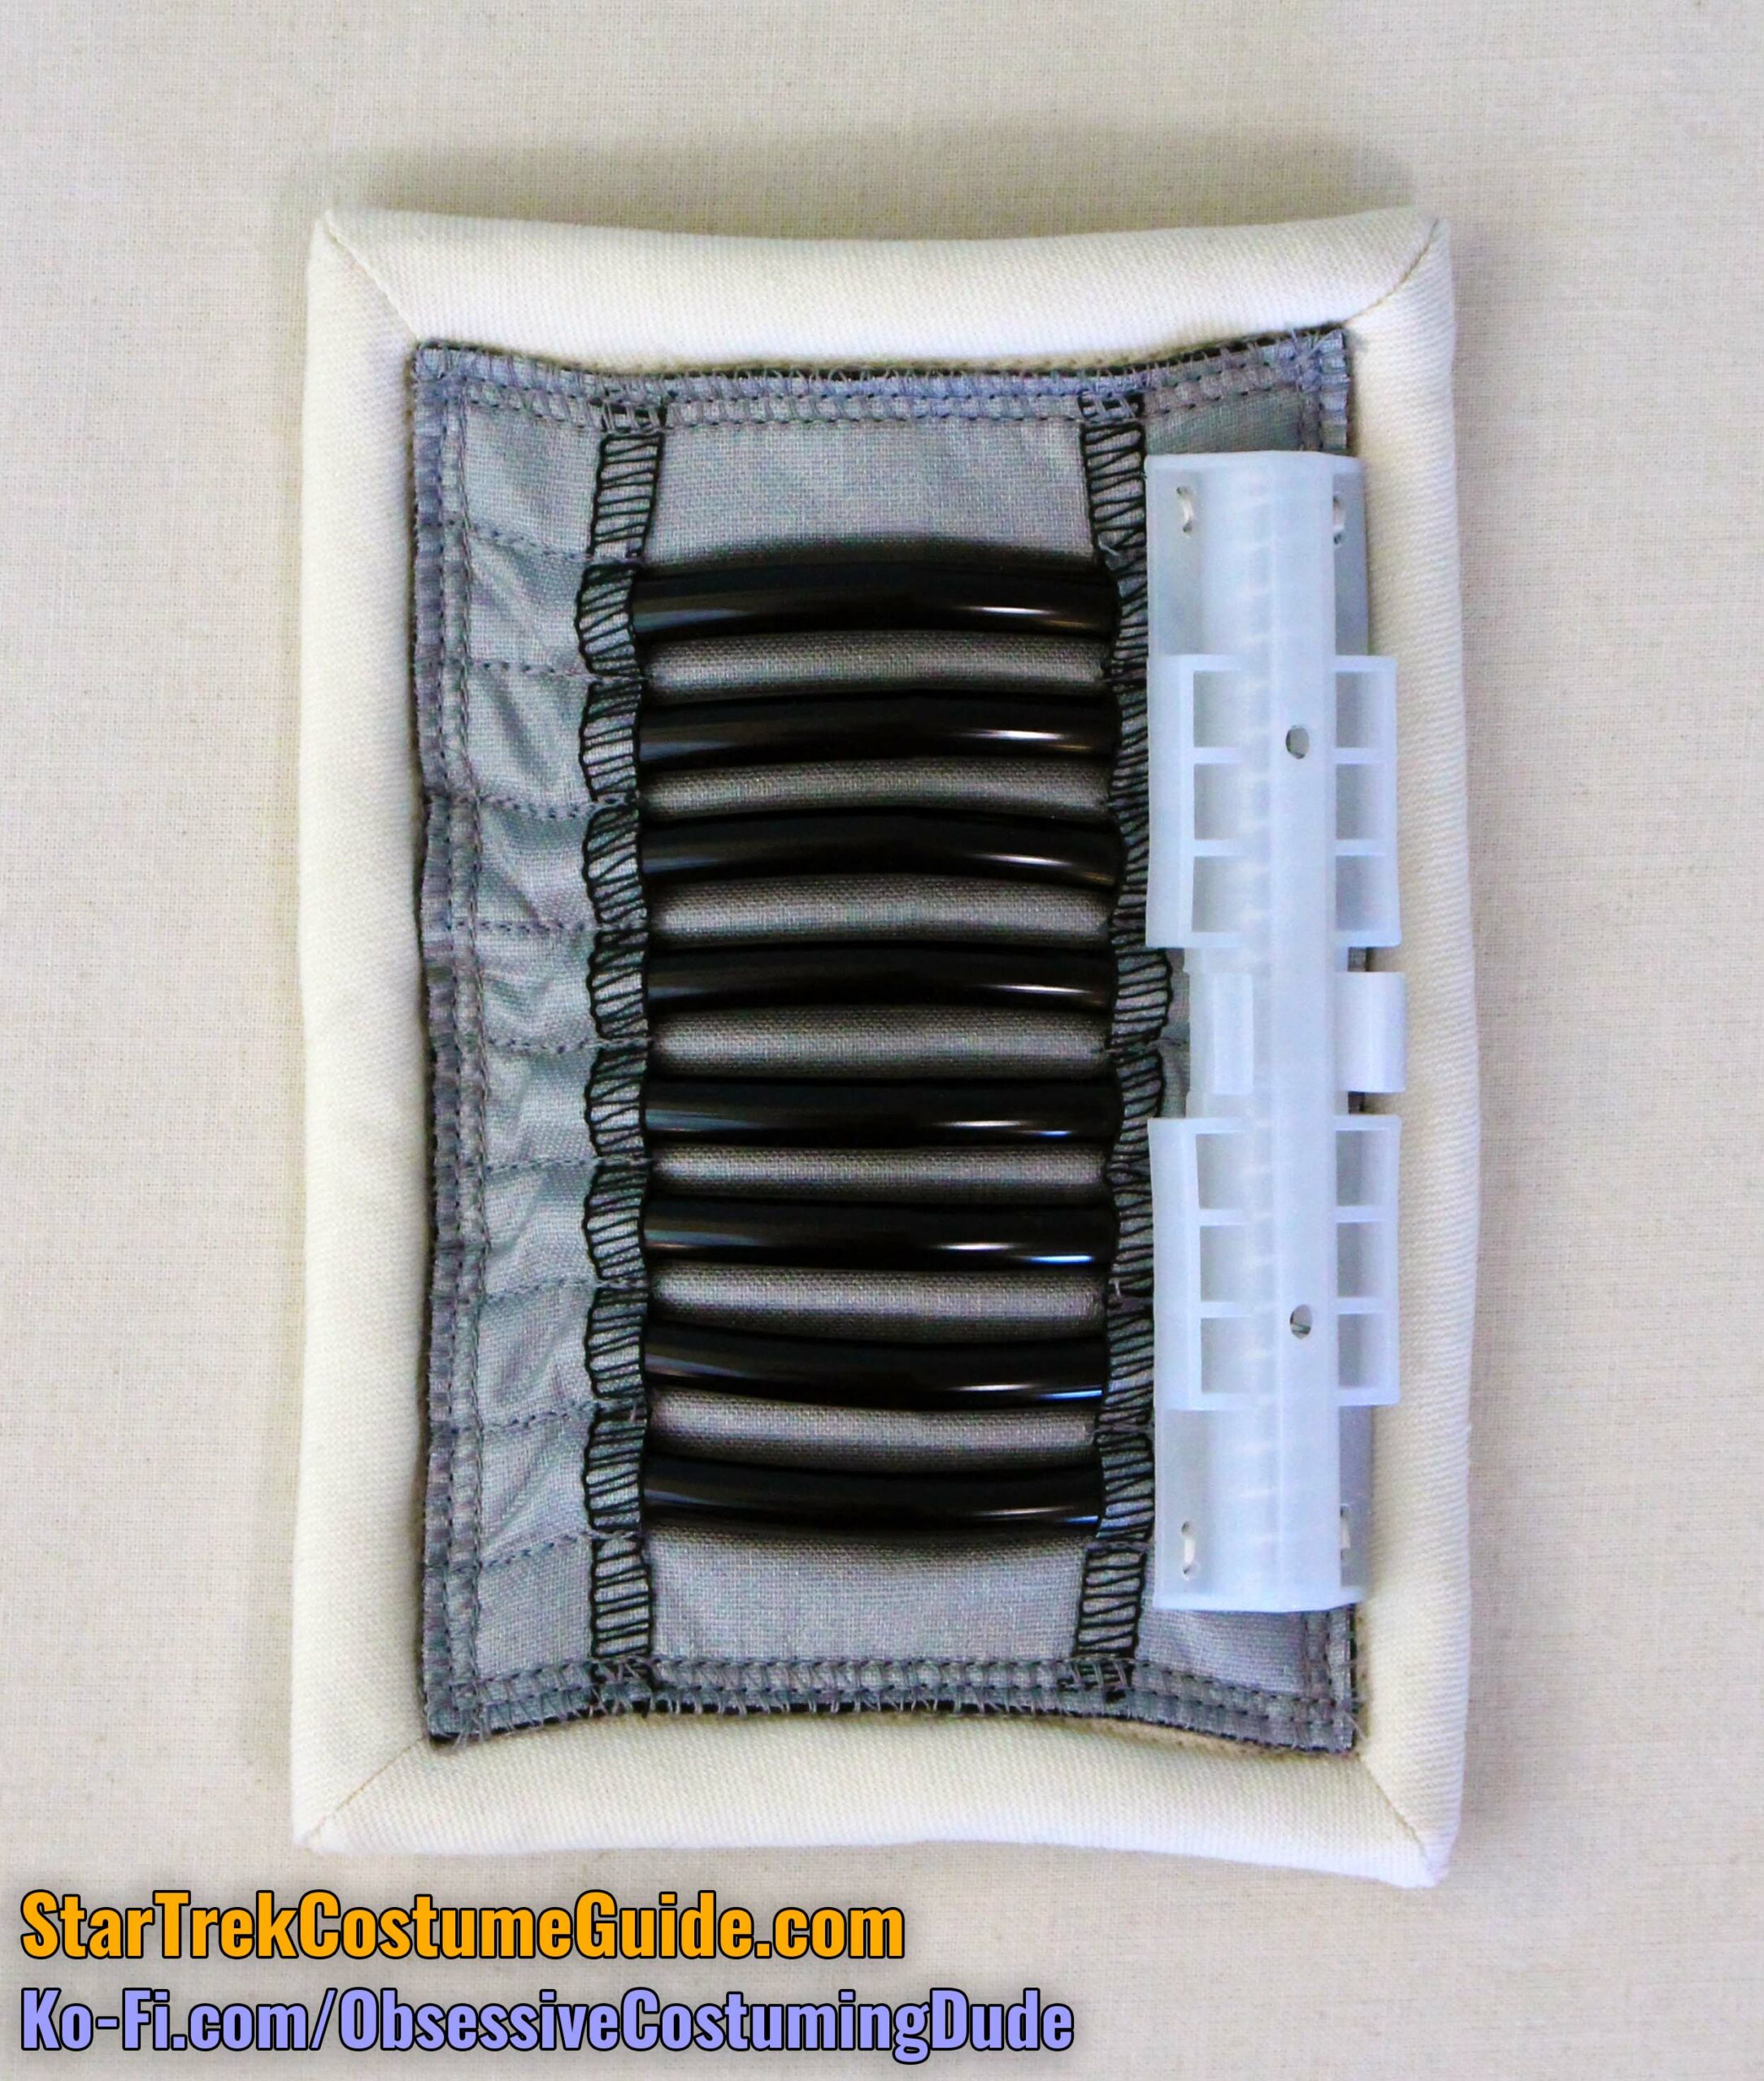
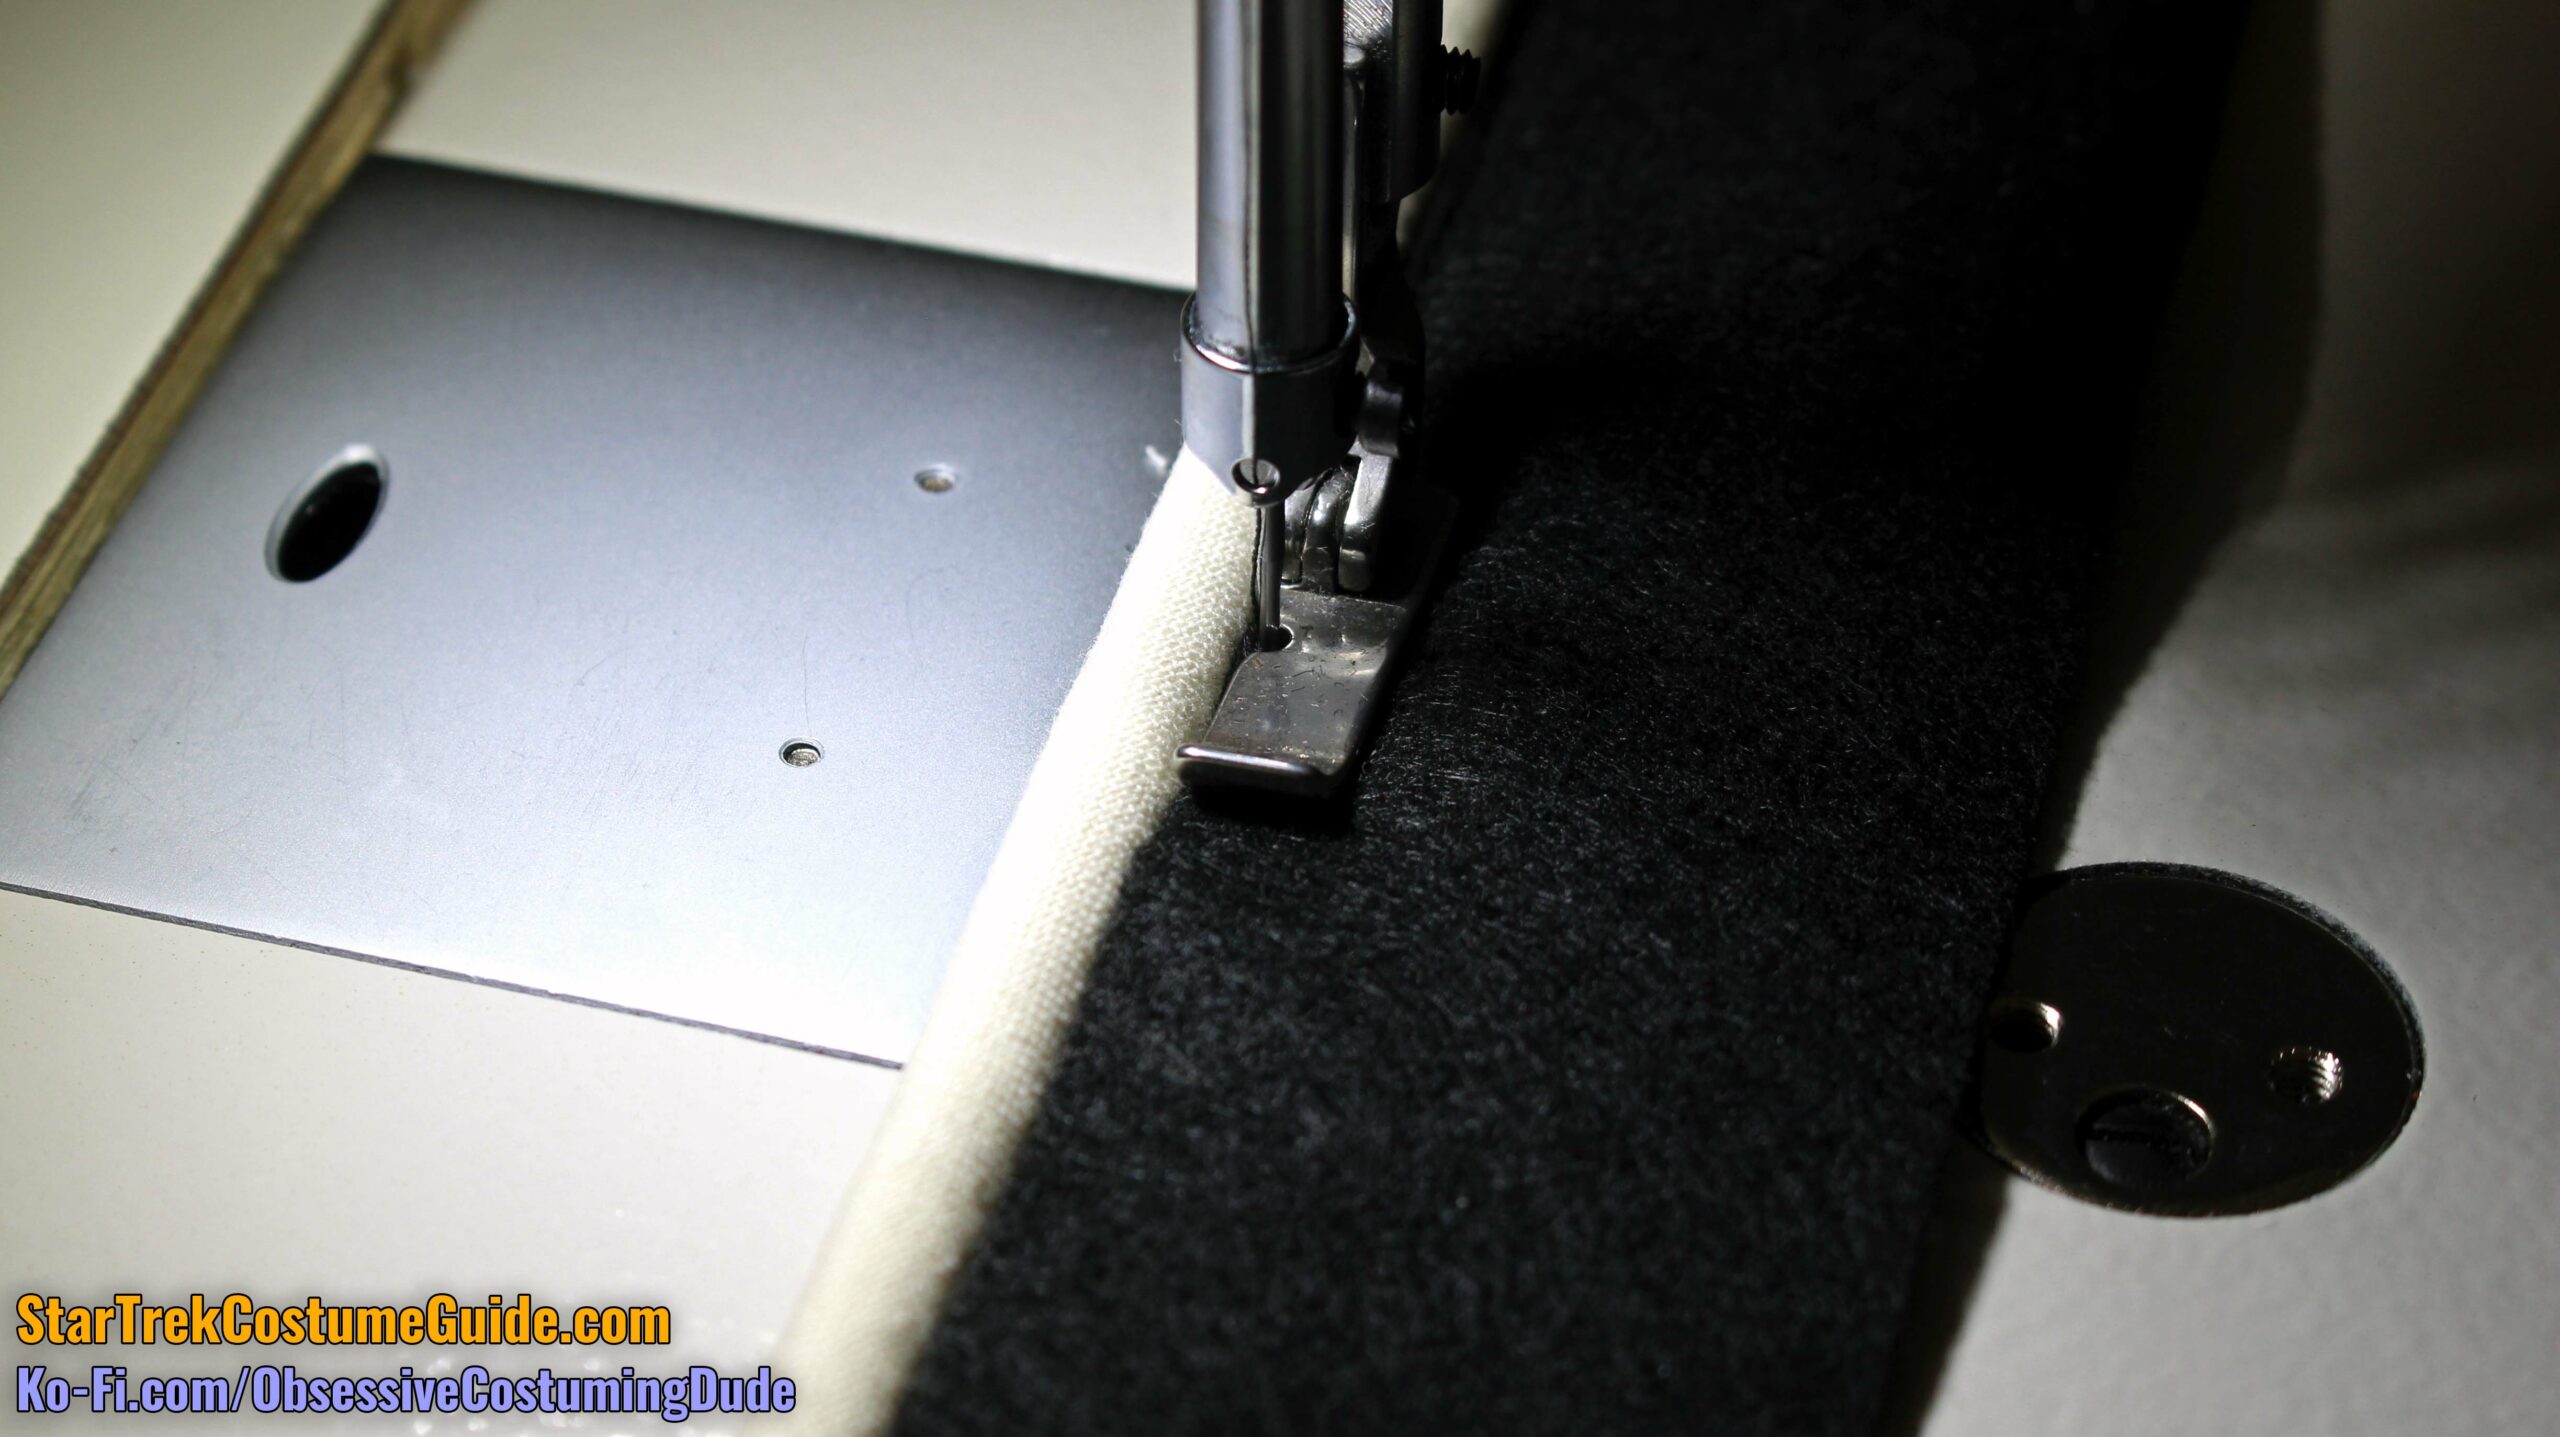
I used a beam of craft wood 3” wide and ⅜” thick.

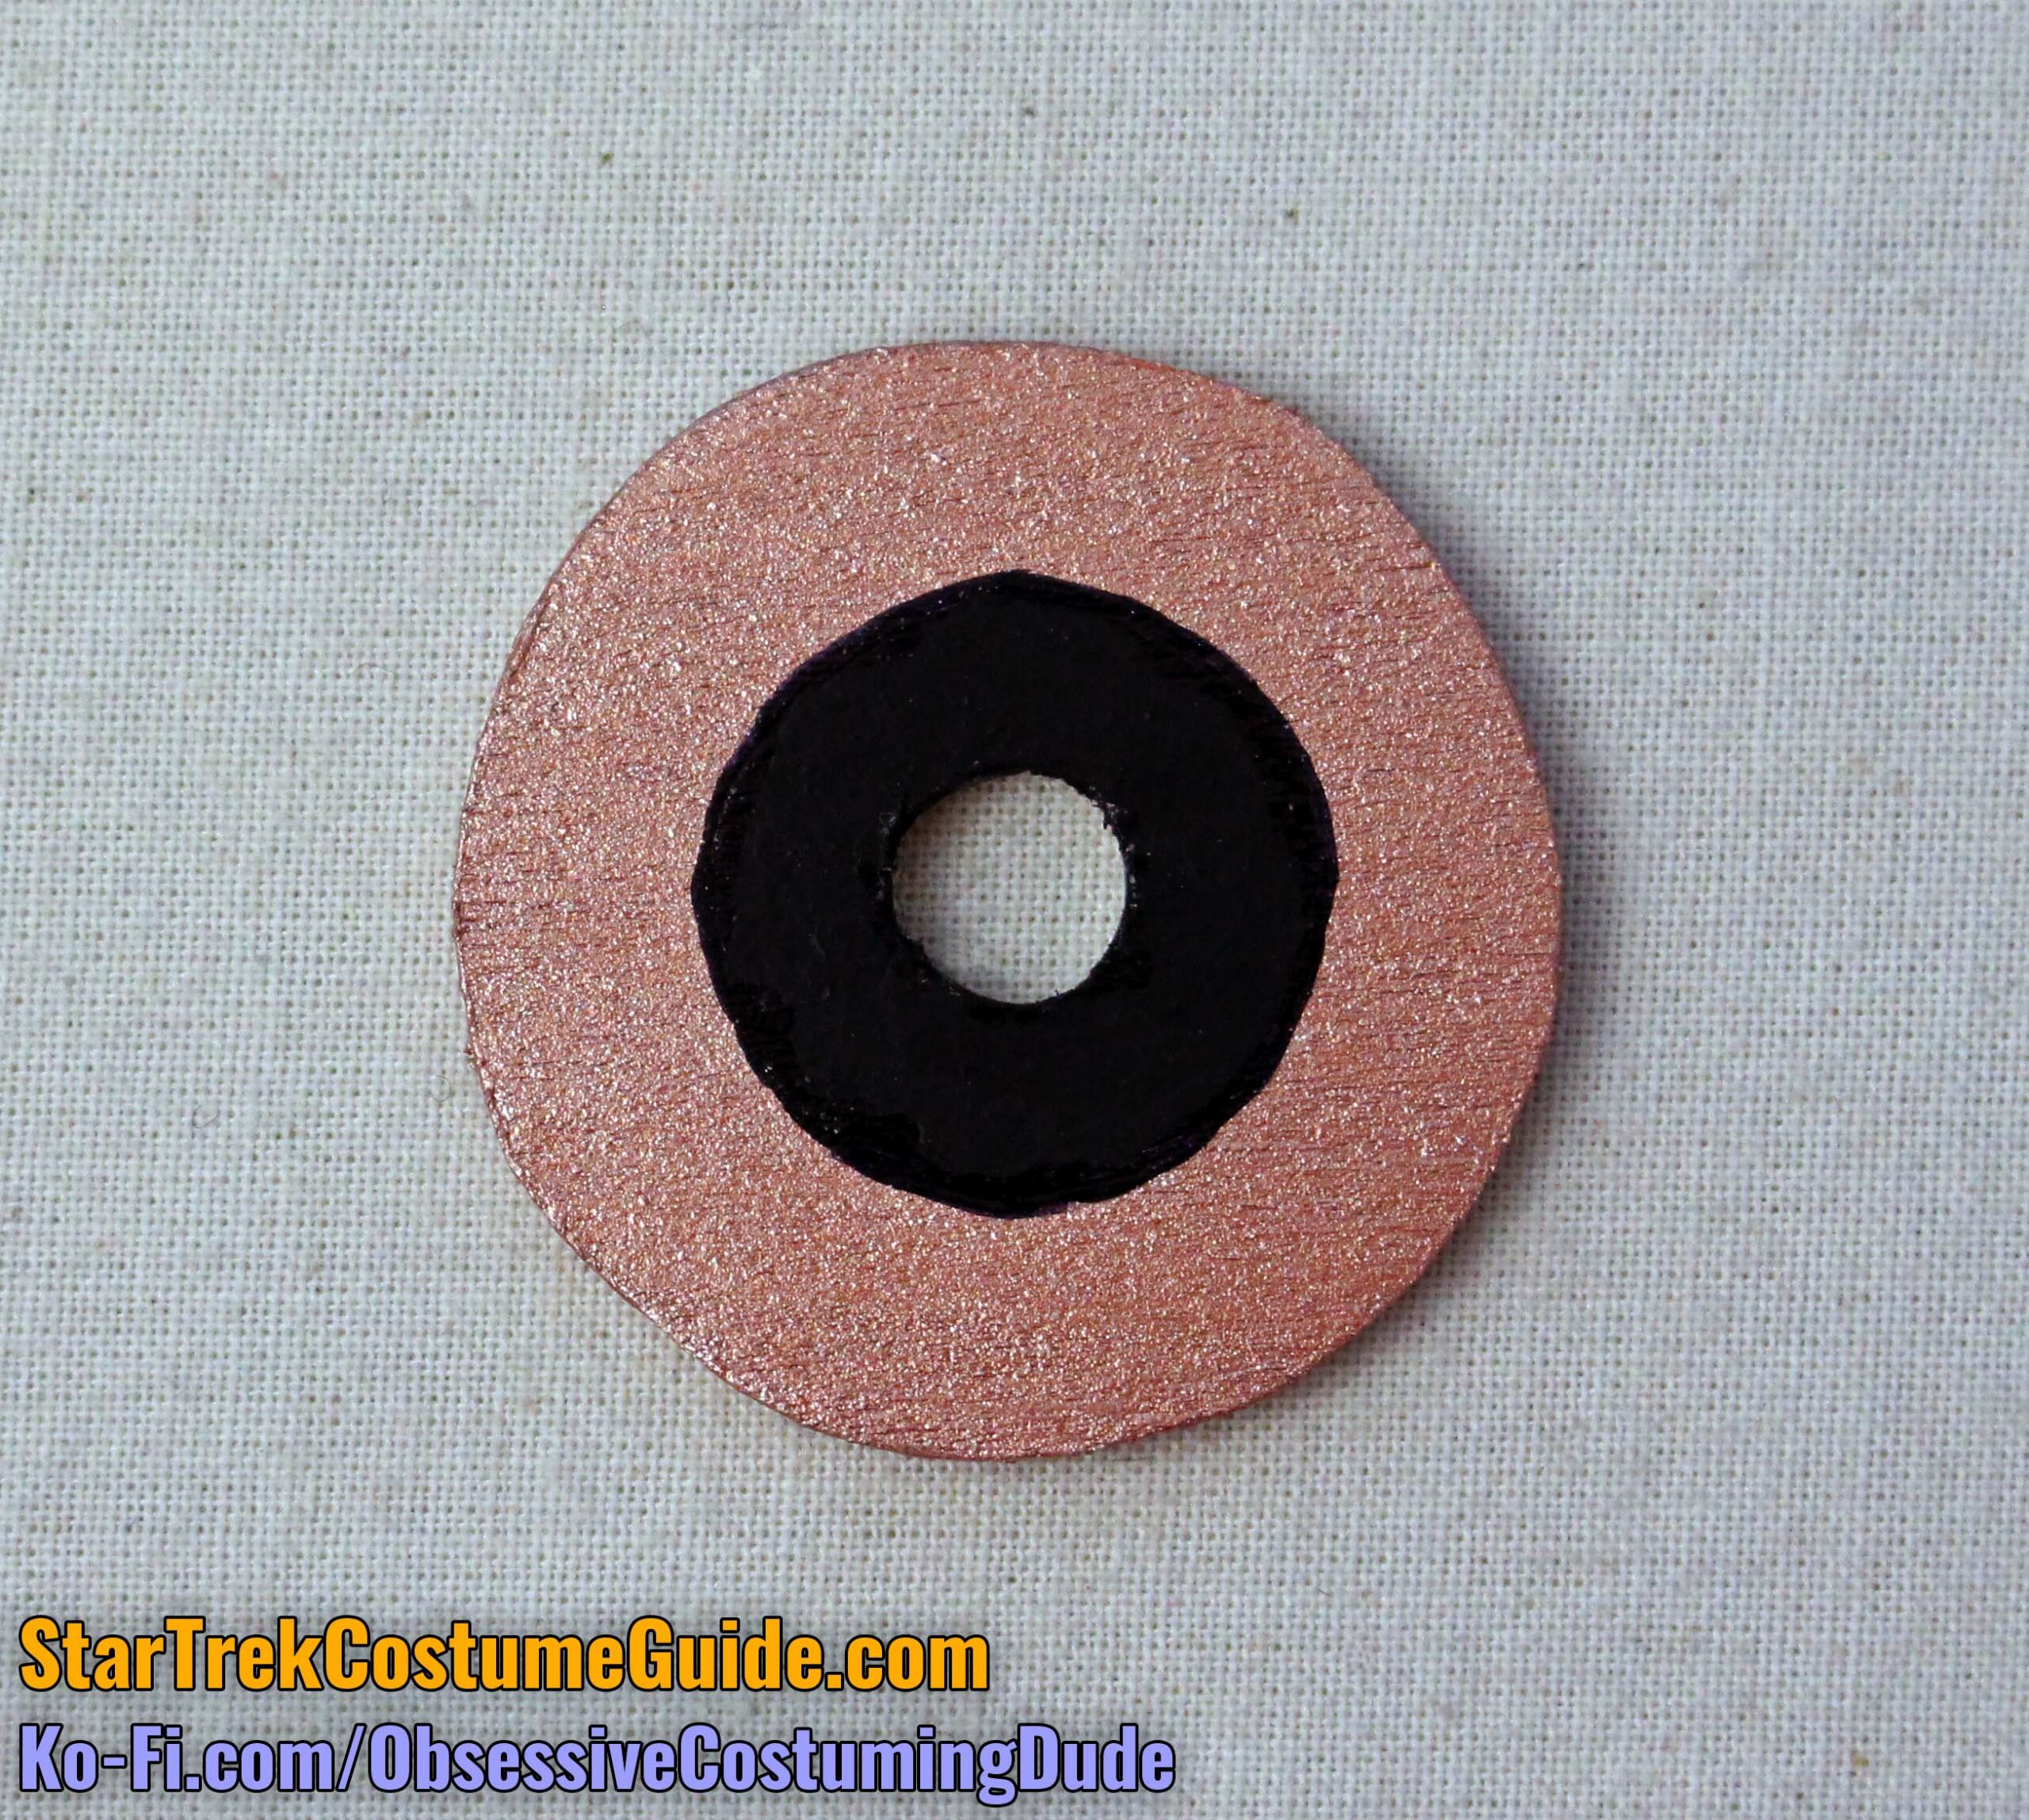
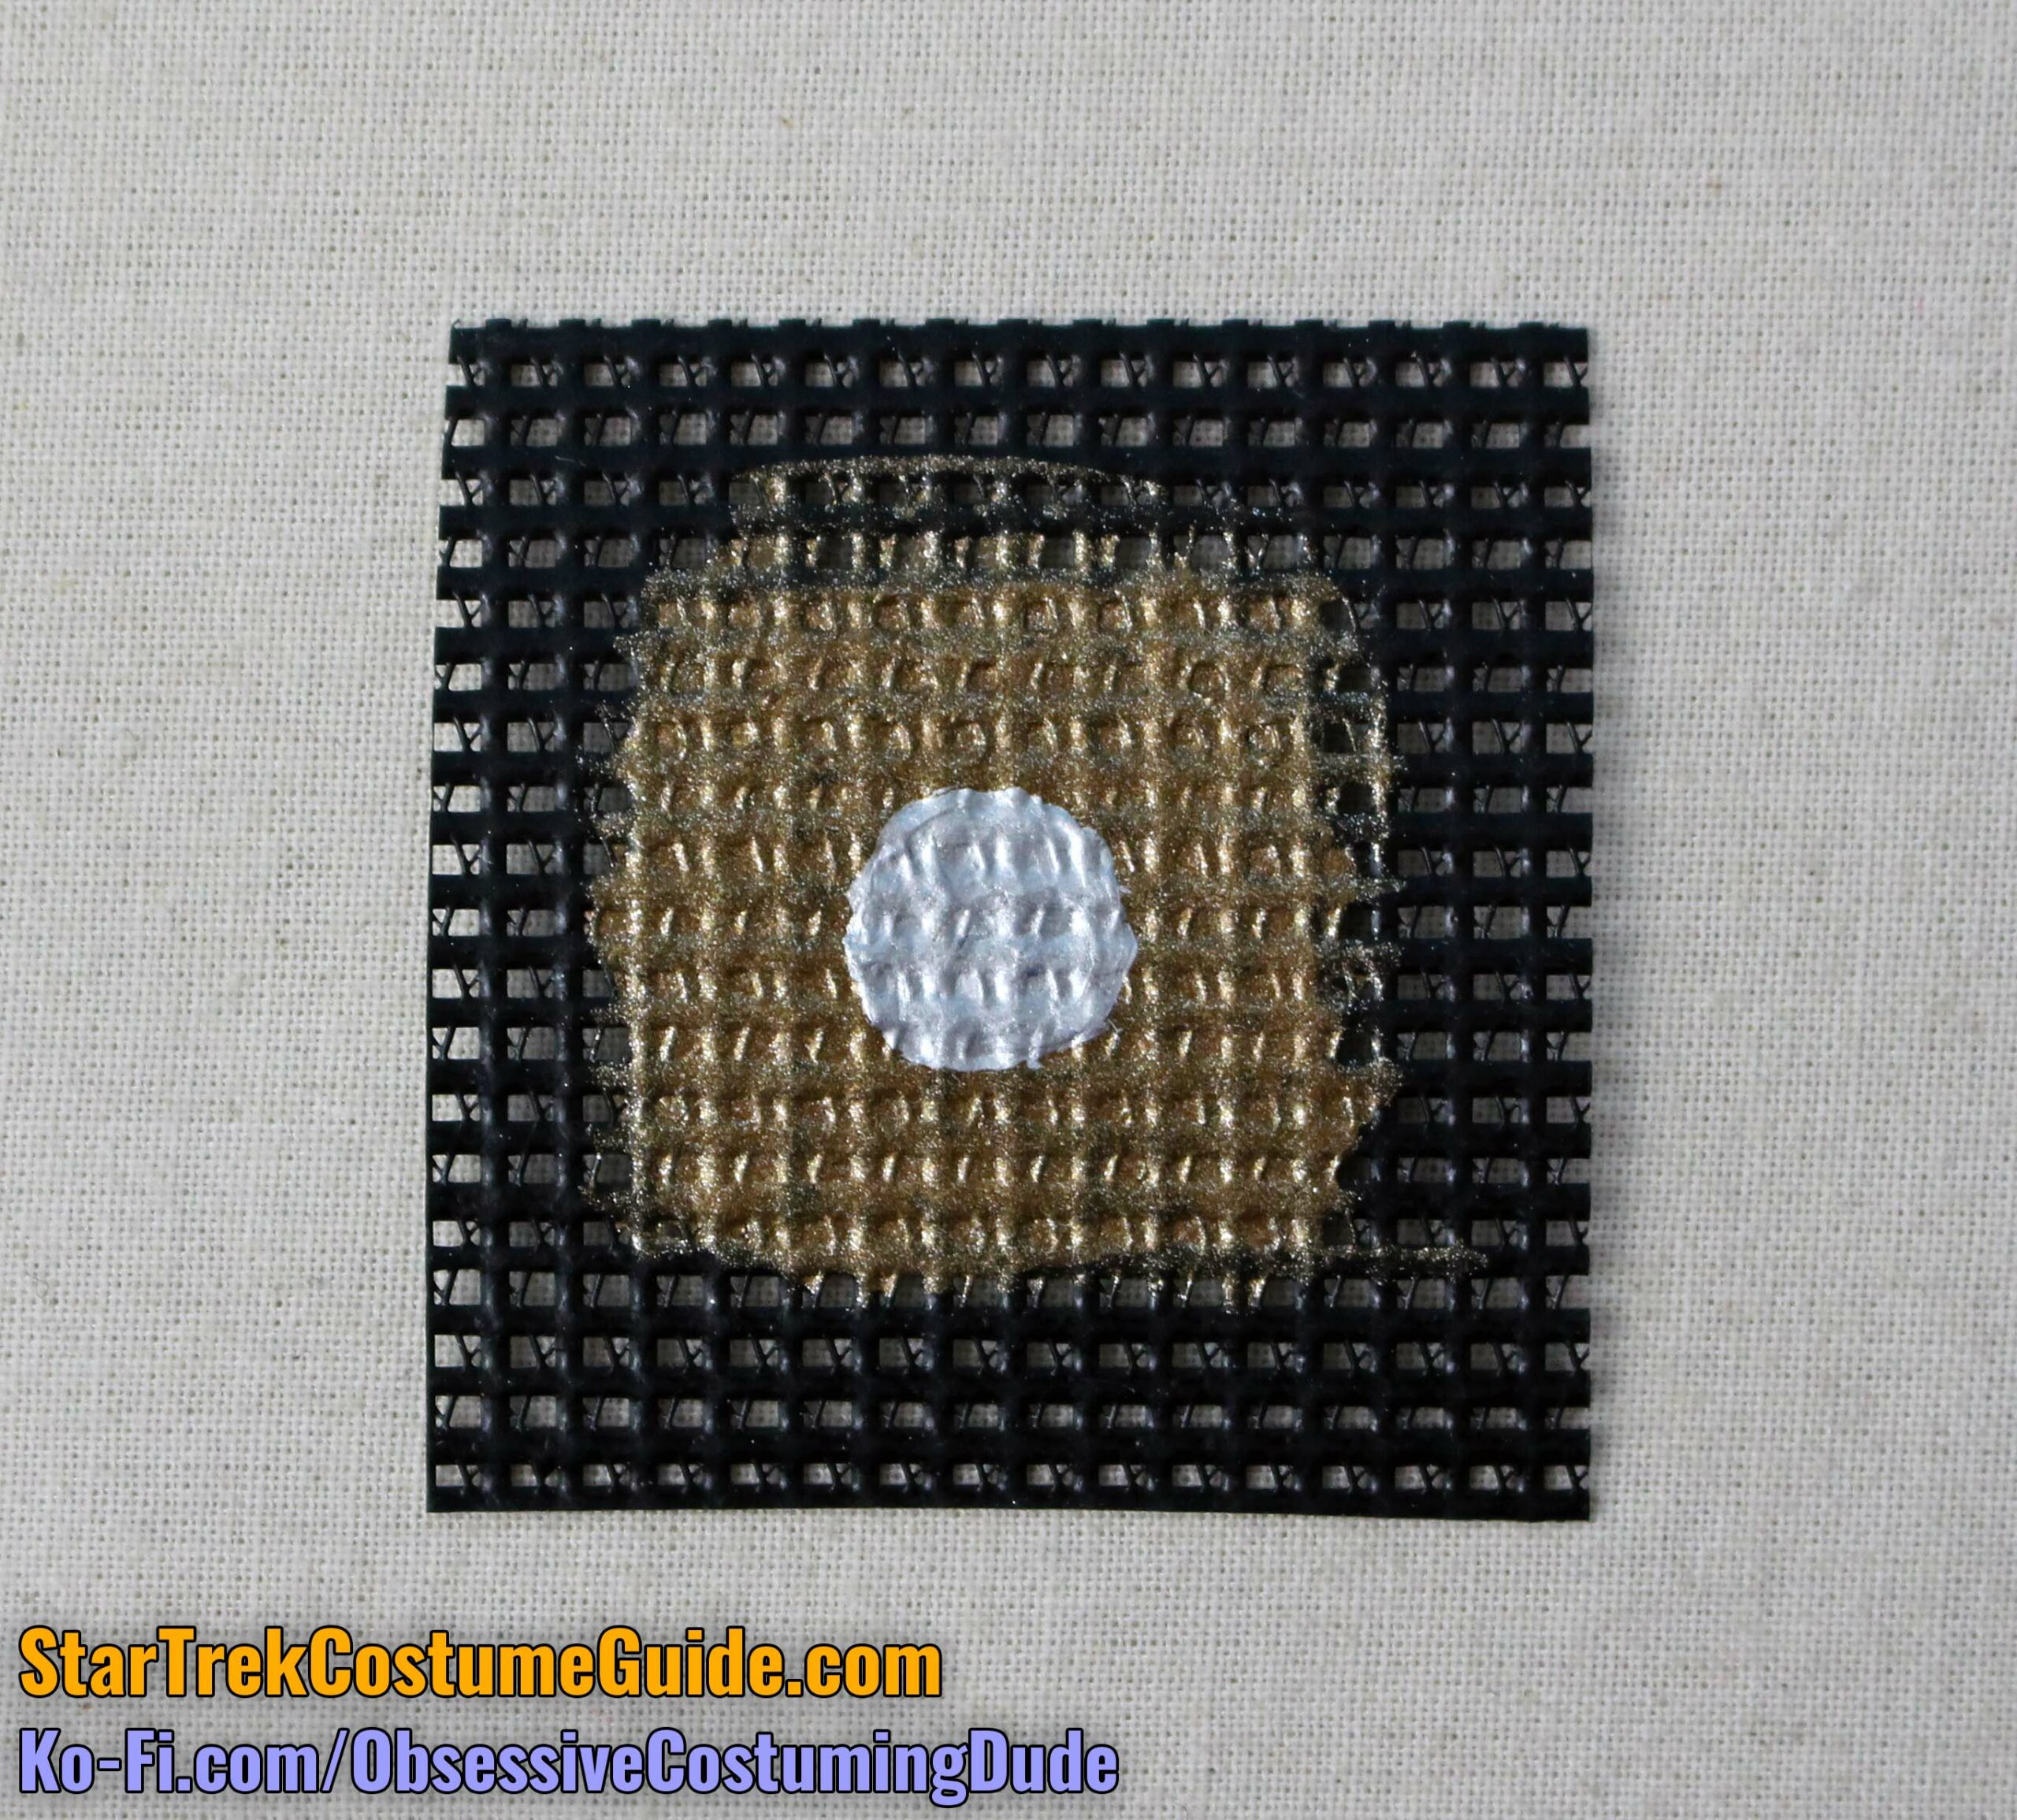
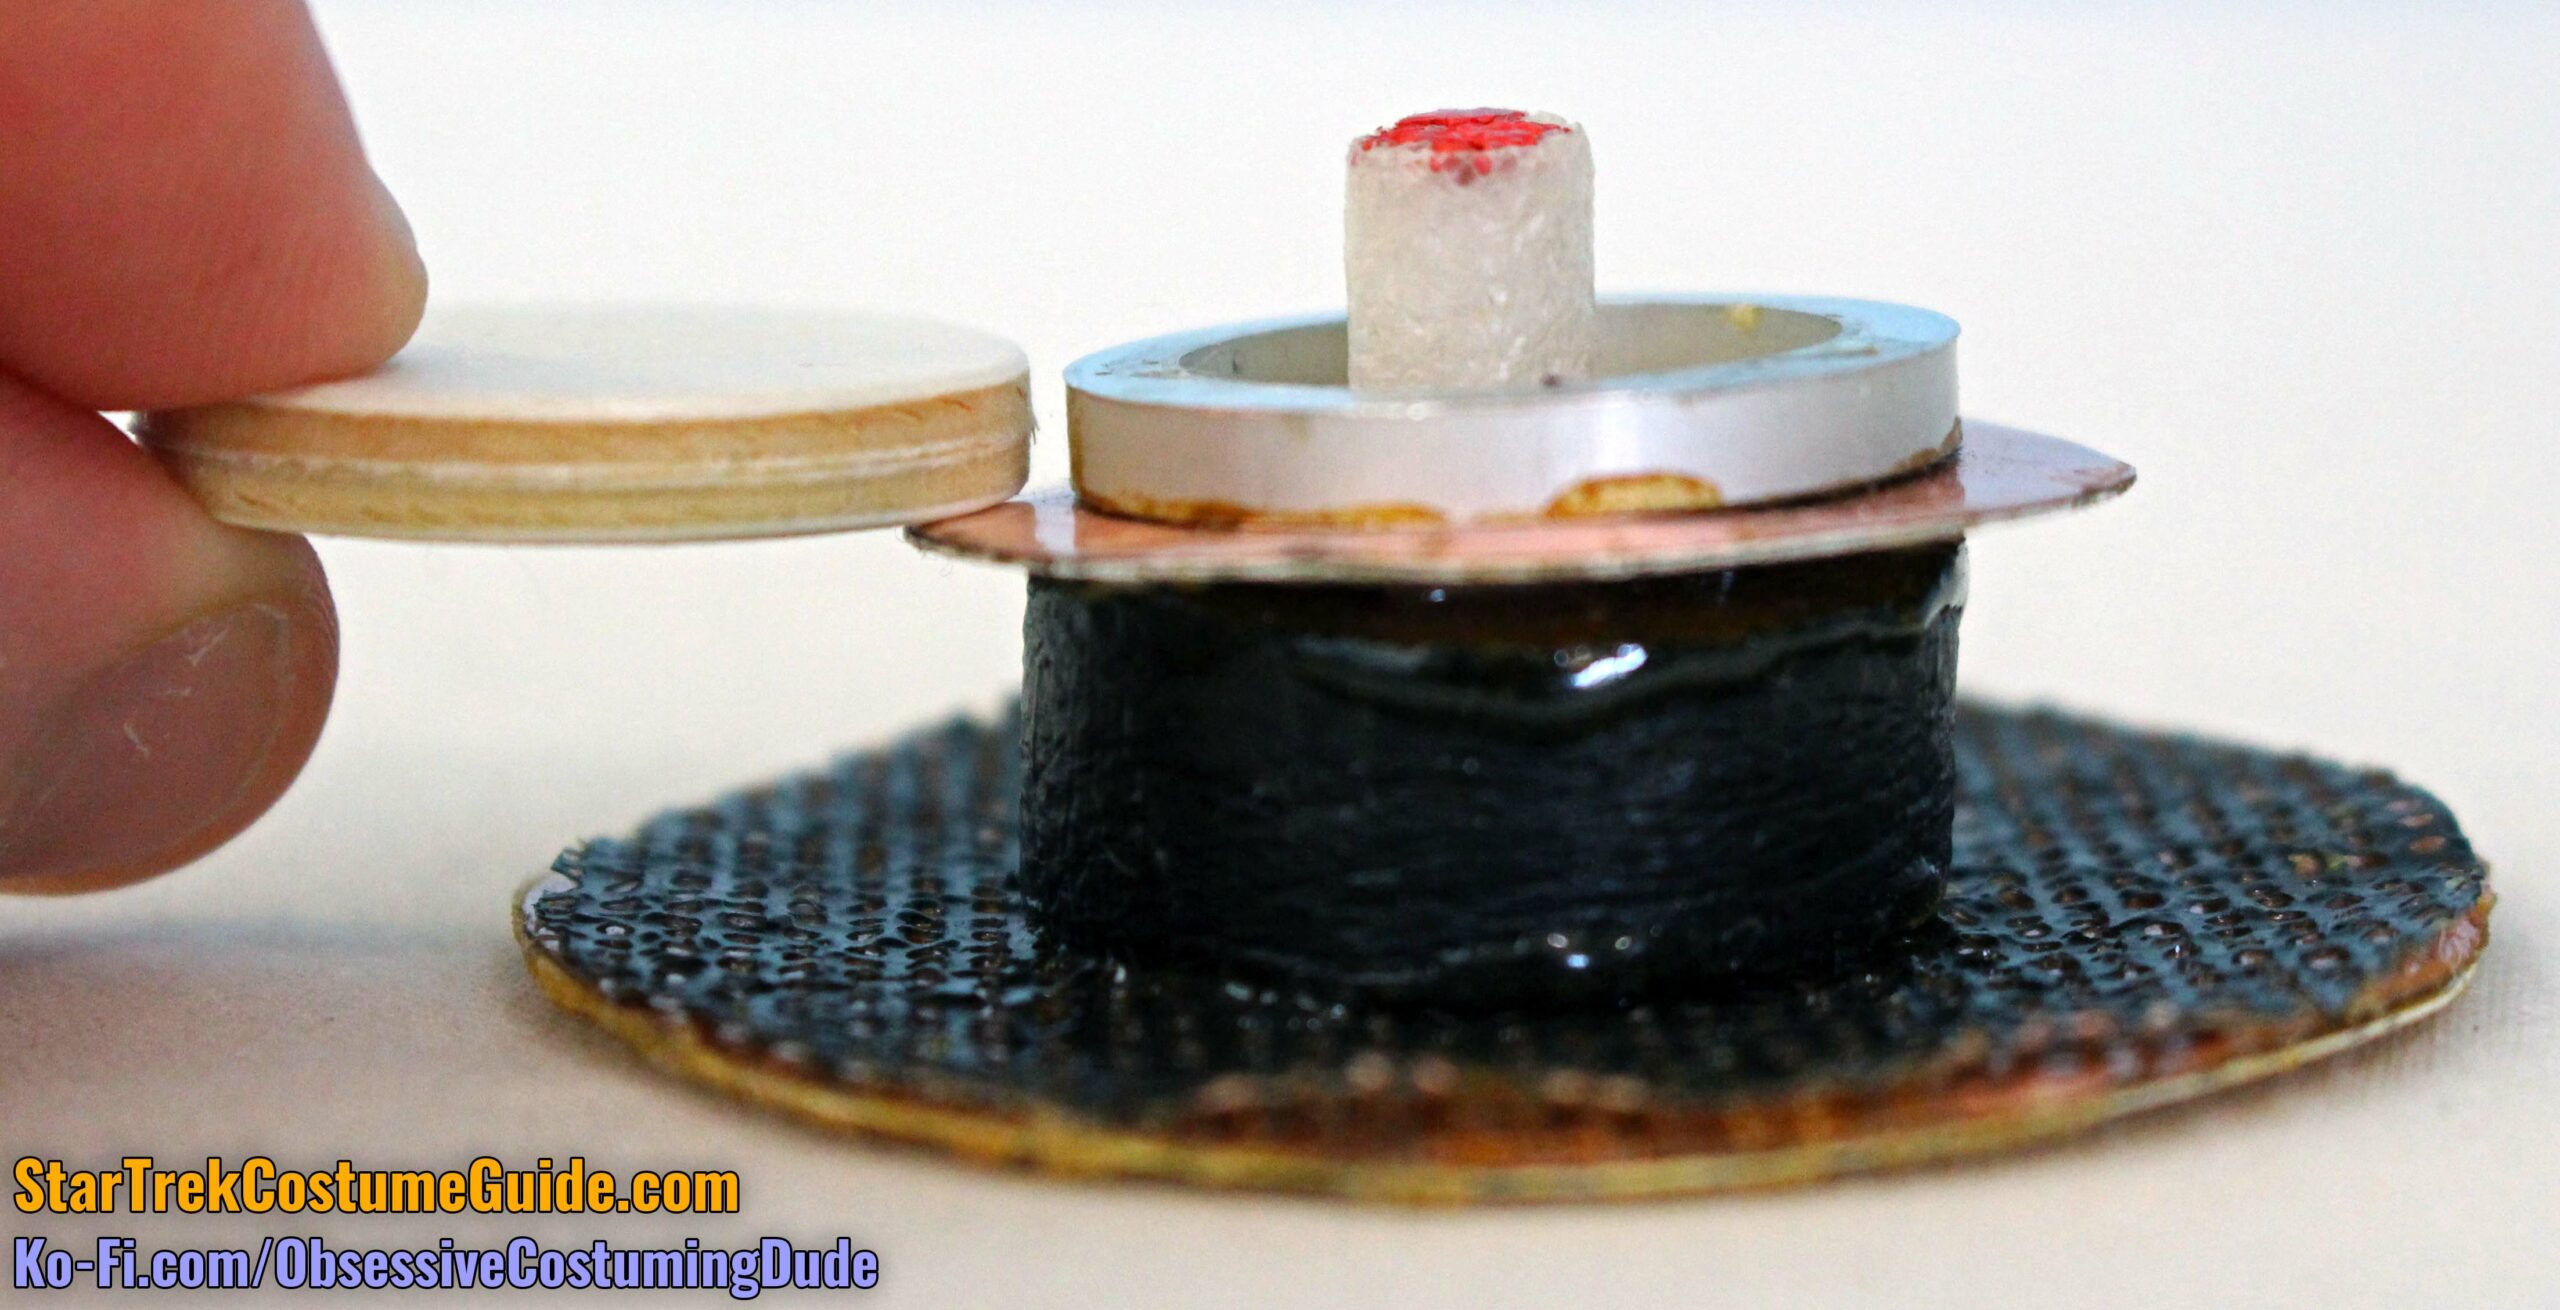
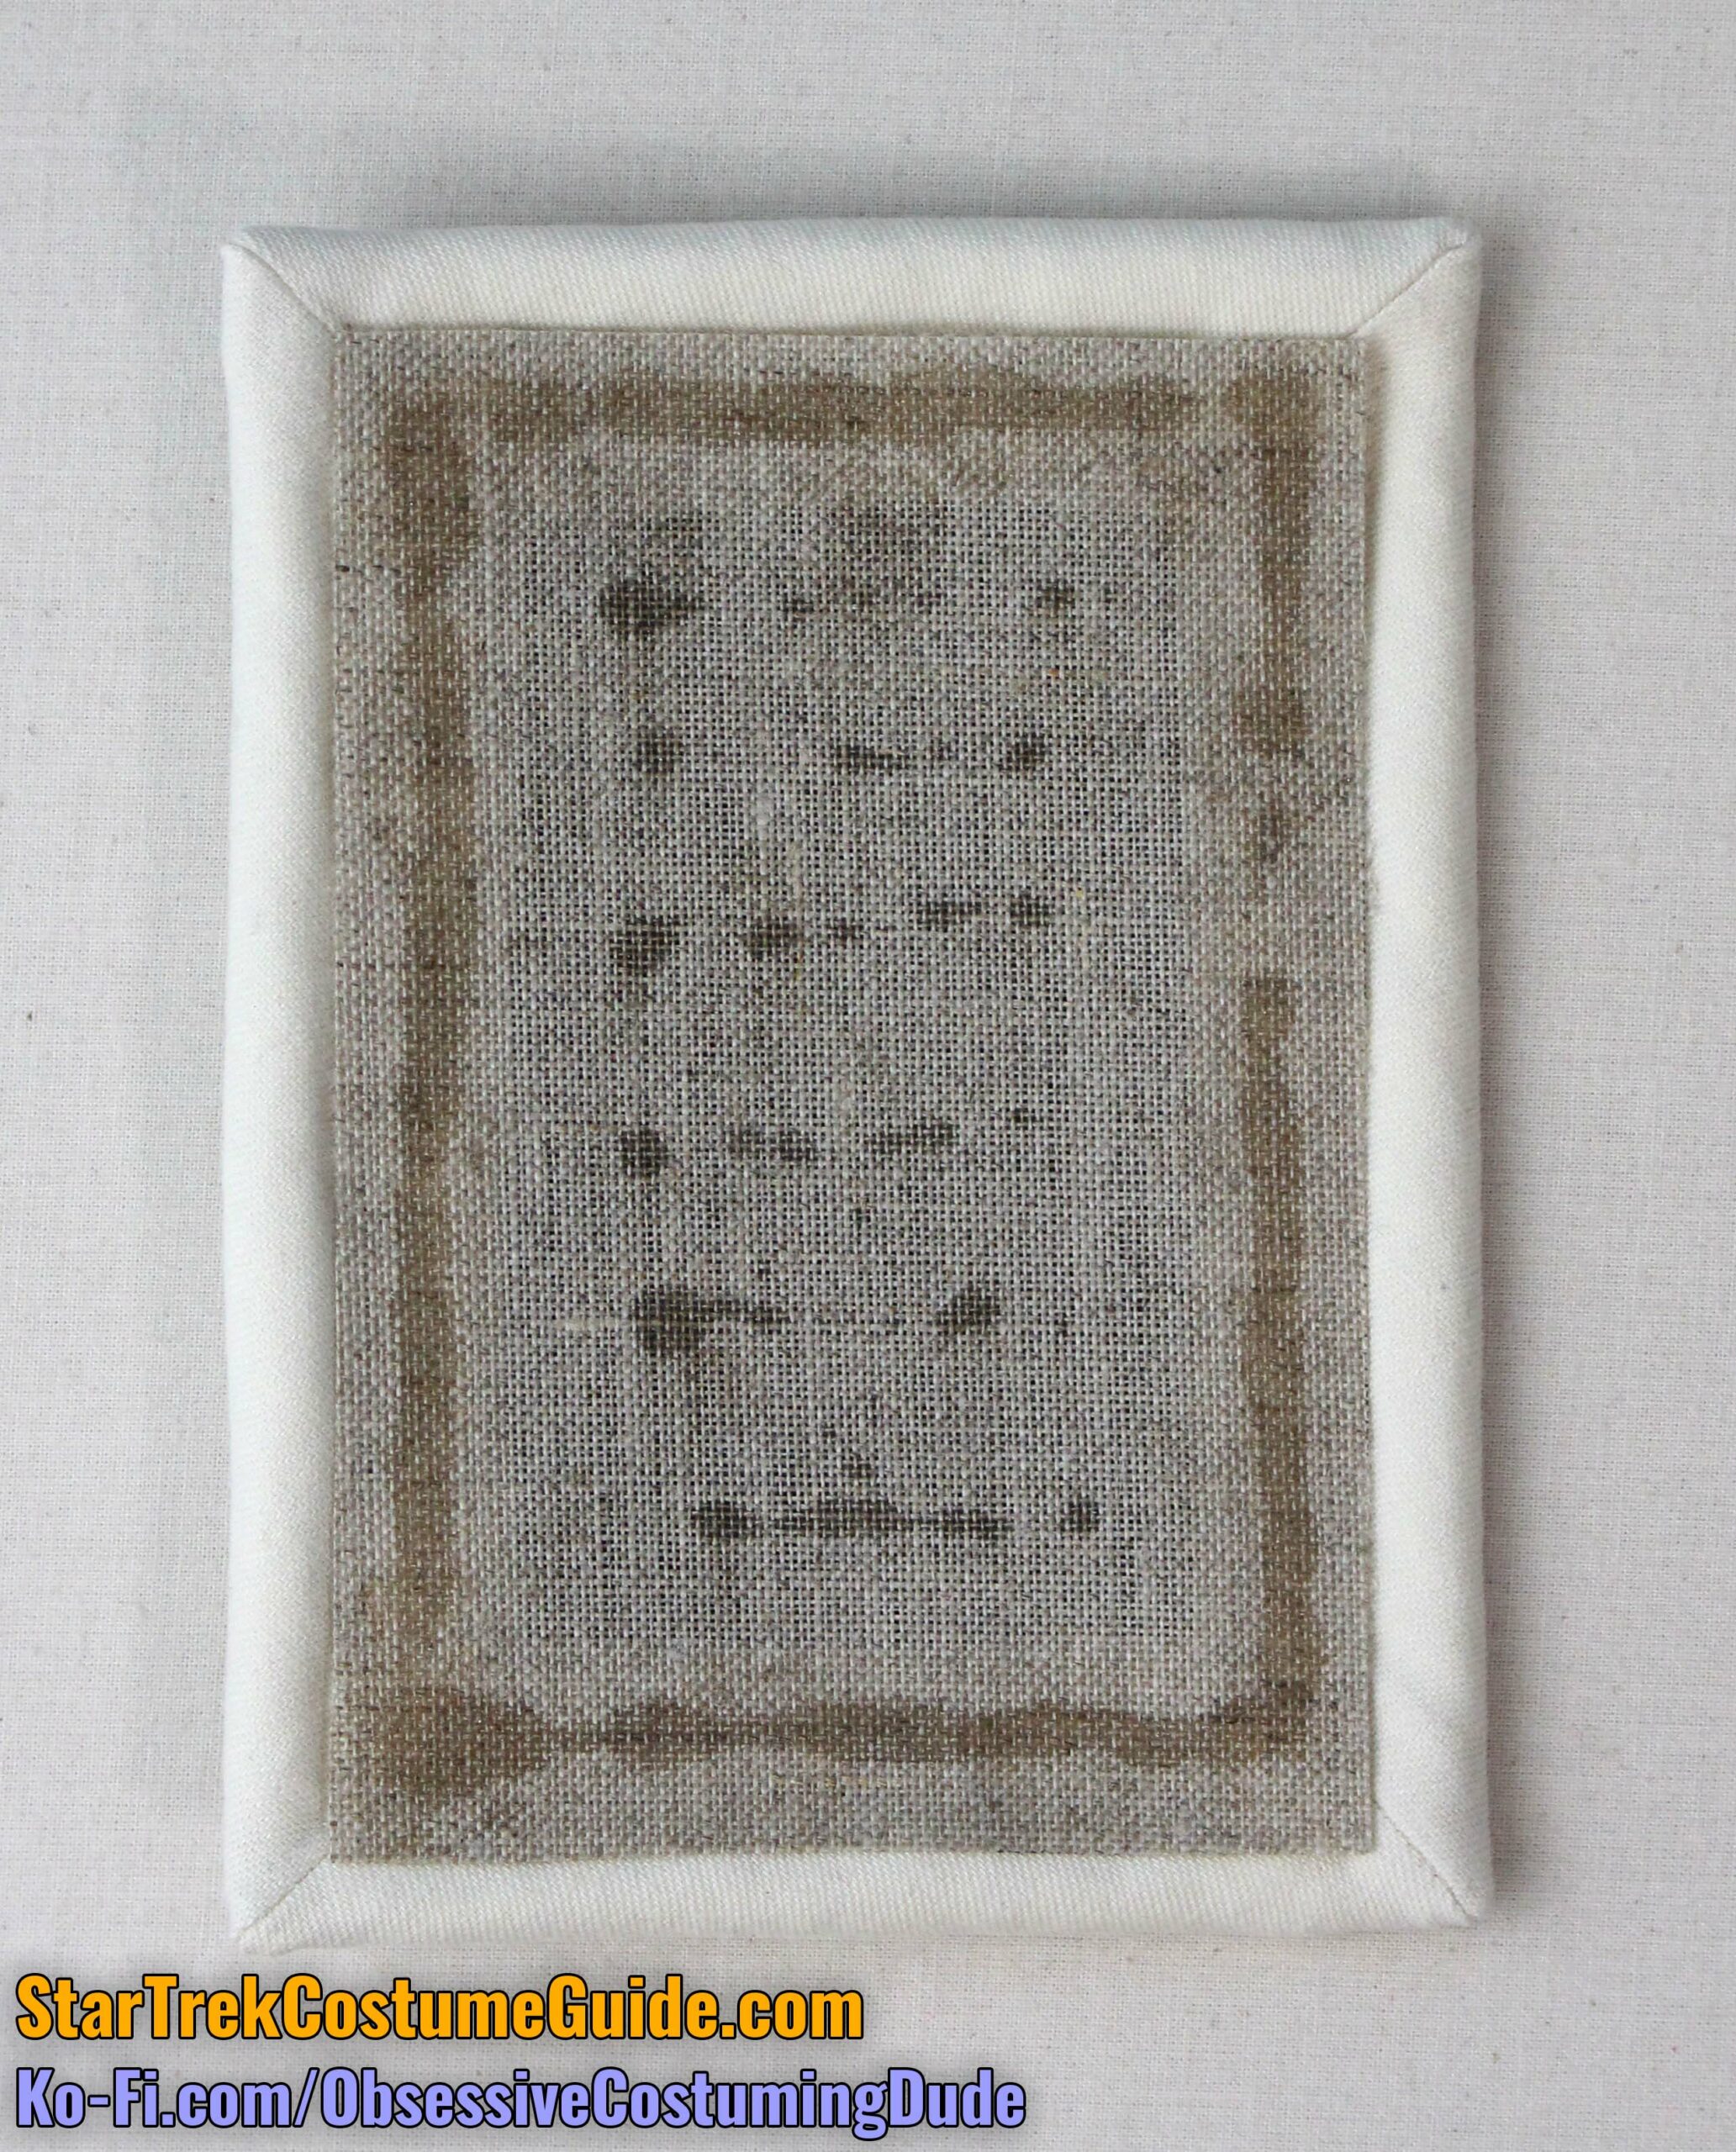
Foam sheets are cheaper, plus both faster and easier to work with … but in my opinion the final result doesn’t look nearly as good.

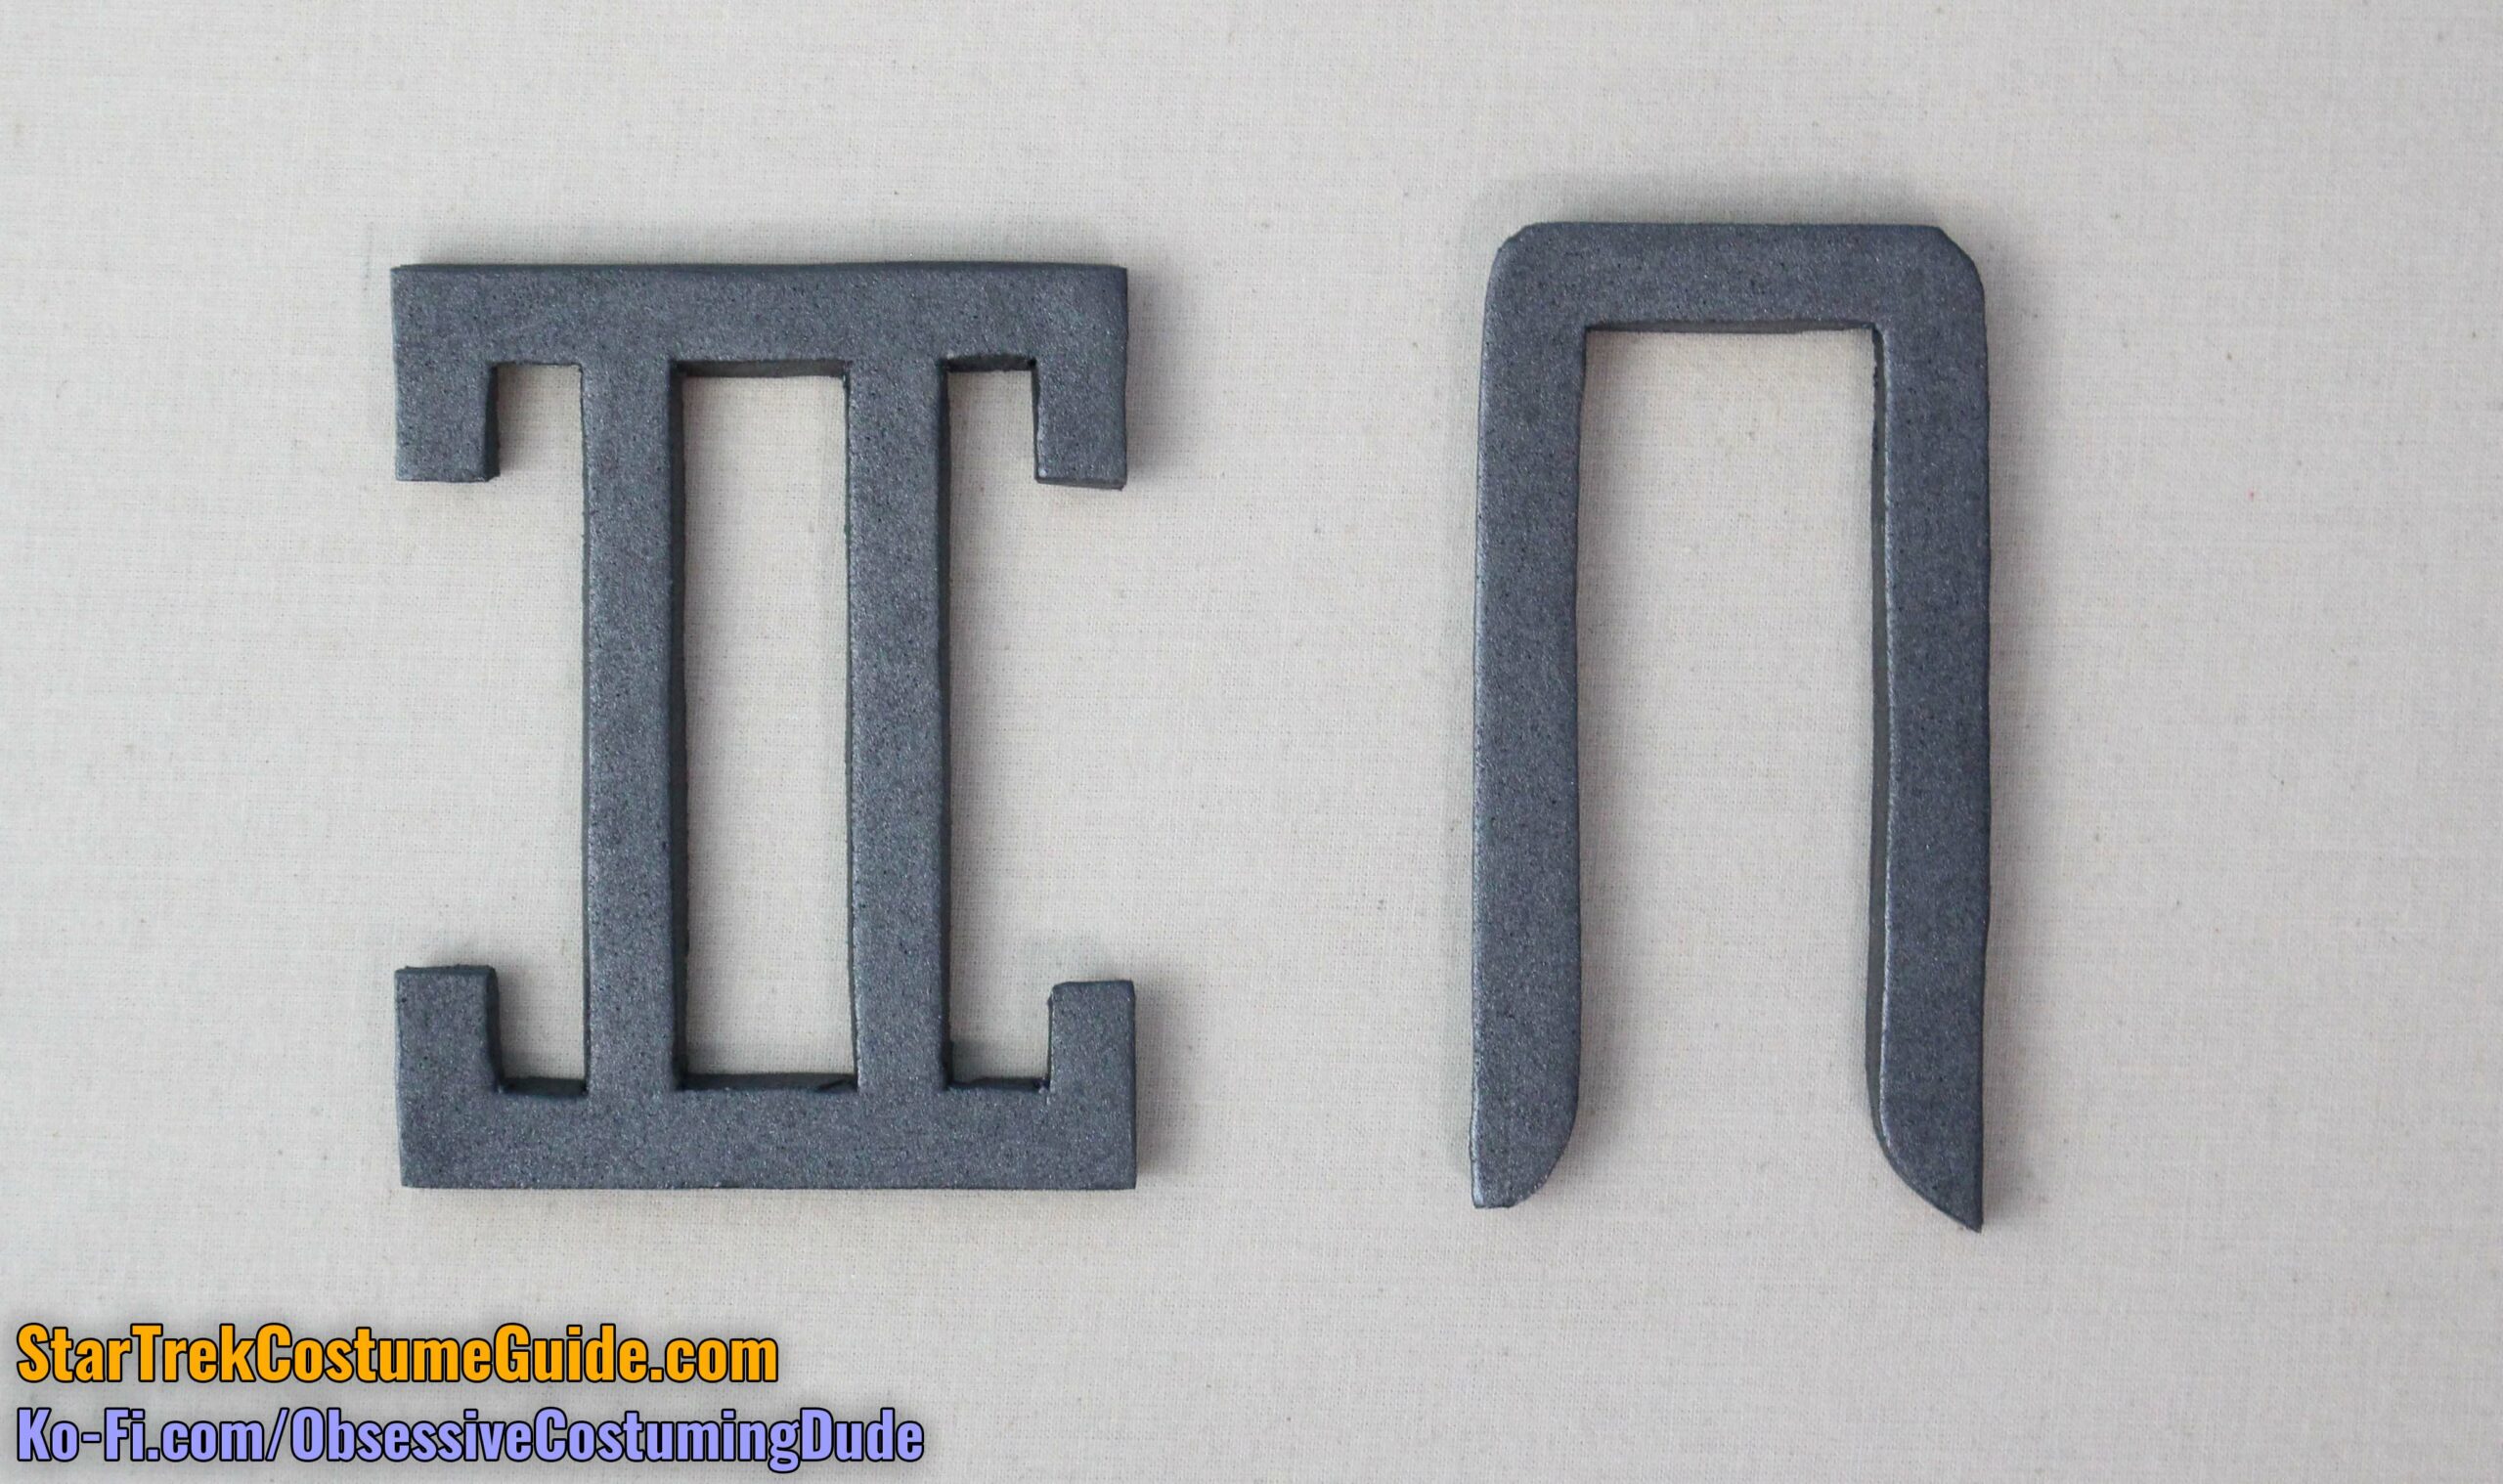
Should you decide to use foam, I suggest using some at least 6mm thick. 

For both TMP-era buckle styles, though, the 6mm craft foam works great.

For those of you who are interested in making the buckles yourself, my Tailors Gone Wild engineering radiation suit patterns include (2D) patterns for both TMP buckle styles, and a close approximation of the TWOK-era Edelrid buckles.

If you have experience and skill working with wood and/or craft foam, then obviously make them using whatever tool(s) and method(s) you prefer.

Personally, I have limited “skills” in this area, so I began by simply tracing the paper buckle pattern (piece N3) onto the wood or foam with a marker.

The foam can be easily cut with a sharp X-acto knife or scissors.

I cut the general outline of the buckle with a jigsaw, then rounded the edges with my rotary saw/sanding bit.

For the upper hole, I first drilled out several holes, then chiseled out the bulk of it and sanded the interior edges into the appropriate curve.

For both options, drill out the lower holes with a ½” drill bit.

At this point the disadvantage of using foam – at least as a novice like myself – becomes obvious; the cornered edges don’t look nearly as good as the rounded ones on the original metal buckles.

But with wood, one can sand all the cornered edges into gently rounded ones.

As with the circular left chest accent, I didn’t find a metallic “steel” paint that I liked, although there are doubtless many other options I didn’t try.

To paint these buckles, I applied a couple base coats of FolkArt metallic “Gunmetal Gray”, then a couple more coats of DecoArt metallic “Shimmering Silver.”

(There are probably metallic silver rattle cans that produce faster, easier, and superior results, but I haven’t tried any.)

I recommend applying a clear protective gloss coat to the buckles.

Below is a comparison between a finished wood buckle (left) and a foam buckle (right):

As you can see, the wood buckle looks much better.

I really only recommend the foam buckles as a last resort, unless your craft/EVA foam skills far surpass mine (which isn’t much of a stretch since as I said, I’m a complete novice with foam).

The TMP-style buckles (pieces N1 and N2) look fine when made from craft foam, though.

For the TMP foam buckles, I applied a couple coats of the aforementioned FolkArt metallic “Gunmetal Gray”.

The buckles were attached to the jumpsuit with narrow loops of the jumpsuit fabric.

Cut one strip of jumpsuit fabric for the loops (piece N4).

Fold the strip in half, vertically (the “long” way) and sew the strip closed with a short stitch length and ¼” seam allowance.

At this point, there are a couple different ways you can produce the individual loops.

The first technique is to turn the strips out and roll the seam to the underside.

You may wish to try something like the Dritz Clip ‘N Turn (see right), but I’ve always found that to be frustratingly difficult.

Men in Black break this thing GIF - Star Trek Costume Guide

I prefer to trim the seam allowances down to ⅛”, roll the seam to the underside, and press the allowances open.

Trim the strip down into two lengths of 2 ½” each.

Sew the loops closed across the top with a short stitch length.

Then I use a little miracle gadget called the Dritz Quick Turn (see right) to turn the closed loops right-sides-out. It’s much easier!

Press the loops flat, then edge-stitch the loops along both sides.

Trim the loops down to 2 ¼” long.

On the screen-used engineering radiation suit I examined, the loops were actually glued to the buckles.

Apply some E6000 glue to the underside of your loop and wrap it around the top of the buckle, beginning with the raw end of the loop (so it will be covered) and ending with the top end of the loop on the underside.

Once the glue is dry, hand-sew your buckle loops to the jumpsuit along the side edges of the front panel.

(Remember that these buckles were omitted for the ST6 costumes, as well as the orange variants.)

HIP REFLECTOR BOX

As you might recall from my screen-used engineering radiation suit examination, I believe the left hip accent to have been a reflector box, like one might see on a tractor trailer.

Unfortunately, if this is true, they seem to be have been a brand and/or model no longer available – which I suppose isn’t very surprising since these costumes were originally made over 40 years ago.

The closest retail product I was able to find was from Lowe’s, but it was still a far cry from the screen-used piece:

After fruitlessly searching for something even superficially similar in a comparable size, I ultimately decided to make my own replica reflector box.

Should you wish to as well, I’ll describe my process here for you.

The materials and methods I used are again not the only way, but I’m pleased with the final results. Feel free to adapt and/or modify any part of this process as you wish.

For my replica hip reflector box, I used a piece of wood 2” wide and ⅛” thick for the base.

I used a piece of wood ¾” wide and ⅛” thick for the “walls.”

I used a piece of wood ⅝” wide and ¼” thick for the interior “strips.”

The original box was approximately 4 ⅞” x 1 ⅞”, but I made mine slightly larger – an even 5” x 2”, just for easy math, and because the craft wood I used for the base was 2” wide.

Cut a 5” length of your 2” base, cut two 5” lengths of your ¾” wood for the longer “walls,” and cut two 1 ¾” lengths of your ¾” wood for the narrower “walls.”

To mimic the angled interior “strips” on the original piece, I used the length of craft wood ¼” wide and ⅝” tall.

Cut eight 1 ¾” lengths and seven 1” lengths of this wood.

Sand the upper/outer corners of the longer wood strips so they’re gently rounded.

Sand the upper/outer corners of the shorter strips so they’re less-gently rounded, and sand a little “divot” into the upper center.

(I used a rotary saw with a sanding bit for all this.)

Paint all these little pieces with the light, shiny paint of your preference.

I used several coats of Top Notch metallic “Pearl”, which I believe nicely mimics the effect of the original piece.

Paint the base and “walls” of the box as well.

(I used DecoArt metallic “Shimmering Silver” for the base, purely to provide some visual contrast.)

Center the thinner strips between the wider ones, alternating between them with the wider strips on the ends.

Glue the strips together, using either the E6000 clear glue or Gorilla Wood Glue.

I also used a finetip metallic silver Sharpie to add some small dots for subtle detailing.

Center the “strip assembly” and glue it onto the base.

The original piece was ¾” tall, so I suggest trimming ⅛” off your wooden “walls.”

If you’re using balsa wood, you can just use a sharp X-acto knife.

Glue the walls to the base, and each other.

I recommend applying multiple clear, high-gloss coats to the box interior.

Cut a 5” x 2” rectangle of clear heavy vinyl.

(22-gauge was the heaviest available at my local JoAnn, but I think something even heavier might work better.)

Apply a thin strand of E6000 to the top edge of the “walls” and glue the vinyl to the outside of the box.

My Tailors Gone Wild engineering radiation suit patterns include pattern pieces for the piping frame (pieces O1 and O2 in this case), but you don’t necessarily need them. They’re just 2” wide bias strips, cut to length and cornered.

I cut a bunch of 2” bias strips in advance from my fabric scraps to have handy for this, the thigh panels, and the left sleeve panel.

On all the edges of the aforementioned pieces (reflector box, thigh panels, and left sleeve panel), the piping fabric cuts are the length of the corresponding edge, plus two inches, and cornered.

In this case, the vertical lengths are 7” long (corner to corner) and the horizontal ones are 4” long (corner to corner).

Sew one short length of piping (piece O2) to one longer one (piece O3) along one cornered end, right sides together and with a short stitch length.

To help establish the sharp corner, first press the allowances under on one side.

Then do the same on the opposite side.

Turn out this portion of the piping frame assembly.

(I find it helpful to tightly pinch one pair of allowances together at the corner using tweezers when turning out the layers.)

Repeat for the opposite two edges, then join the two smaller assemblies together to form the whole frame.

Cut four lengths of ¼” cord, each about ¼” shorter than their corresponding edges of the fabric.

Insert the cords into the fabric frame as tightly as you can, then pin the fabric layers into place close to the cord.

Using your zipper/piping foot, stitch the fabric layers together along the edges of the cord.

Apply a generous amount of E6000 glue to the piping lip/allowance, and along the lower edge of the box.

Join the box and piping assembly.

I suggest using multiple rubber bands to fasten everything snugly into place while the glue dries.

Cut a 5” x 2” rectangle of off-white felt, and glue it to the underside of the assembly.

Here’s a comparison between the screen-used piece (top) and the finished replica (bottom):

While obviously not perfect, in my opinion it “looks the part” just fine on a finished costume ensemble.

Hand-sew the box assembly to the front left of the jumpsuit’s waist tubing.

THIGH PANEL ASSEMBLIES

As with the piping assemblies, there are pattern pieces for the various fabric strips used for these panels, as well as the sleeve’s and gloves’ (pieces P2, P3, and P4 in this case), but you don’t actually need them.

I just cut some long strips of ironing table fabric ⅞” wide, 1” wide, and 1 ½” wide in advance, to have ready.

The TWOK-era thigh panel assembly is comprised of multiple pieces and layers:

  • A base layer of ironing table fabric (piece P1)
  • A backing layer of felt or flannel (also piece P1)
  • An interfacing layer of heavy French canvas (also piece P1)
  • An outer channel strip of ironing table fabric (piece P2)
  • A middle channel strip of ironing table fabric (piece P3)
  • Two upper/lower channel strips of ironing table fabric (piece P4)

(And, of course, your fabric piping frame – pieces P5 and P6.)

For the orange costume variants, substitute ironing table fabric for a closely-matching orange fabric.

Using black thread, serge one long edge of the outer channel strip (piece P2), both long edges of the middle channel strip (piece P3), one long edge of the upper channel strip (piece P4), and one long edge of the lower channel strip (piece P4).

Apply some fabric temporary spray adhesive to your backing felt or flannel, and join it to the underside of your panel base (piece P1).

Position the outer channel strip with the serged edge toward the middle of the panel and the other edges flush.

Using gray thread, stitch the four horizontal tubing channels, reinforcing your stitching several times. (The channels are centered, ½” wide, and spaced ⅛” apart.)

Edge-stitch the upper, lower, and outer edges to the panel base.

Position the middle channel strip so the closer end is 1 ¾” away from the serged edge of the outer channel strip.

Topstitch the middle channel strip to the base along the opposite edge.

Stitch the four horizontal tubing channels onto the middle channel strip, reinforcing your stitching several times.

Position the lower channel strip onto the base with the serged edge toward the middle and other edges flush.

Stitch the vertical tubing channel into place, reinforcing your stitching several times.

Also topstitch along the upper edge, ending your stitches at the channel stitching so the channel remains open.

Repeat for the upper channel strip.

Serge all four edges of panel assembly with gray thread.

Note that the thigh panels on the orange costume variants appear to have been covered with black (twill?) tape, rather than overlocked.

Engineering radiation suit tutorial - Star Trek Costume Guide
Screen-used engineering radiation suit auction photos

Prepare the piping frame assembly as described previously for the hip reflector box.

Position the panel assembly onto the piping frame so the panel edges are flush with the edges of the cord.

Using a zipper/piping foot and gray thread, topstitch the panel assembly to the piping frame ⅛” from the outer edges and cord.

Apply a generous amount of E6000 glue to the underside of the panel assembly, and glue your heavy French canvas to the underside.

For officers and enlisted crew, you’ll need some ¼” and ½” black drainage tubing or fuel lines.

However, there are a couple important factors to consider when choosing your tubing.

First, the smaller tubing should be exactly ¼” in diameter.

Anything even 1/16” off will be noticeably too big or large, and the stitched tubing channels will not accommodate any tubing larger than ¼”. (Even 5/16” won’t fit.)

Tubing products typically list both their inner diameter (“ID”) and outer diameter (“OD”), and for costuming purposes here I’m only referring to the outer diameter.

In my hunt for appropriately-sized materials, I found that some product listing titles/descriptions varied up to 1/16” in either direction – in other words, one tubing labeled “¼” OD” was actually 3/16” in diameter, and (paradoxically) another was actually 5/16”.

Ideally, you can bring your ruler or seam gauge to your local hardware store and measure the tubing/fuel lines there before buying.

Mislabeled/mismeasured products are particularly problematic online, since you’re not able to verify them yourself before ordering. And even if the vendor offers free returns, you still lose the transit time while working on your costume.

For your convenience, here is the exact ¼” tubing I used and have confirmed to be the correct size:

And here is some ½” black tubing:

The second thing to watch out for is lettering on the tubing; if your tubing product has any, be sure to cut your strips around it.

Cut a 4 ½” length of the ½” (wider) tubing, and four 2 ½” lengths of the ¼” (thinner) tubing.

Carefully insert the lengths of tubing into their corresponding channels. (I found it helpful to hold the channel open with tweezers, using them like a shoe horn.)

Here’s a comparison between the screen-used thigh panel assembly (left) and this replica panel (right):

For the TWOK-era trainee version, you’ll want to use translucent red tubing instead of black.

Black, clear, and orange tubing are easy to find (see right), but unfortunately red is more difficult. (I don’t know if red translucent red tubing was more common back in the early 80s, subsequently replaced with orange, or if the tubing on the original costumes was just painted red.)

The relatively few translucent red tubing products I managed to find online either had poor reviews (one was described as actually being light pink!) or were only available in only one of the two sizes (thus risking a color mismatch).

I did find an amazing company named Canal Plastics Center that sells dark red acrylic rods in both sizes:

Unfortunately, this tubing is rigid and doesn’t bend like the nylon or vinyl drainage tubing does. This makes it more difficult to insert into the tubing channels, and more difficult to get the panel assembly to lie flat.

It also needs to be cut with a saw and the ends sanded afterward, rather than being able to be cut with scissors.

The color is also a bit darker, more of a “blood red” that often photographs even darker than it actually is.

In lieu of transparent red drainage tubing, this may still be the best option for TWOK-era trainees. The only real issue its inflexibility.

The product itself is inexpensive, and they shipped my tubes literally 35 minutes after I placed my order!

If this doesn’t work for you, though, you might experiment with painting some clear drainage tubing/micro fuel line to achieve the translucent red color.

Here’s a three-way comparison between the screen-used panel (left), the aforementioned officer/enlisted replica panel (center), and a panel with this trainee tubing (right – I’ve also lightened the red color a bit in Photoshop):

Hand-sew the thigh panel assembly to the jumpsuit, directly underneath the waist tubing and slightly outside the hip reflector box, with the ½” (thicker) tubing toward the side/rear.

Repeat for the other side.

The TMP-era thigh panels were never clearly visible in any version of the film, although the remastered Blu-Ray theatrical cut and 4k director’s cut did offer the best, most tantalizing hints.

We did get a close look at the corresponding left sleeve panel (which we’ll focus on shortly), and I believe the thigh panels were at least vaguely analogous to that.

As best I could tell, the TMP-era thigh panels probably looked something like this:

Obviously, there’s some room for interpretation here, so feel free to modify and/or discard mine if you see things differently. 🙂

For the TMP-era thigh and left sleeve panels, I simply used 6mm white craft foam and a fine-tip metallic silver Sharpie. (If you’re using off-white fabric for your jumpsuit, you may wish to use off-white foam that more closely matches your fabric instead.)

Cut a layer of heavy clear vinyl and glue it to the outside of the foam panel with clear E6000 spray glue.

Then glue the foam/vinyl assembly to your piping frame assembly with regular E6000 glue.

SLEEVE PATCH

For the TWOK-era engineering radiation suits, the sleeve patch is positioned at the top of the left sleeve, near the cap.

As you might recall from my screen-used engineering radiation suit examination, I believe the TMP yellow patches were repurposed for the TWOK-era radiation suits, to complement the updated gold shoulder tabs and sleeve band.

The TMP yellow patch from “poptoys” on eBay is an excellent match to the screen-used:

There are similar patches available from other vendors, but I haven’t seen or compared any of them in-person.

That said, the ones from “Entertainment Earth” would be my second choice:

As of the writing of this tutorial, I haven’t compared the “poptoys” TMP red patch to a screen-used so I can’t attest to its accuracy, but it does look great to me in-person.

In both cases, position the patch accordingly and hand-sew it to the left sleeve with black thread.

LEFT SLEEVE PANEL

On the upper left sleeve is a panel assembly generally analogous to those on the thighs, but with different detailing.

The TWOK-era left sleeve panel assembly is comprised of multiple pieces and layers:

  • A base layer of ironing table fabric (piece Q1)
  • A backing layer of felt or flannel (also piece Q1)
  • An interfacing layer of heavy French canvas (also piece Q1)
  • A front channel strip of ironing table fabric (piece Q2)
  • A back channel strip of ironing table fabric (piece Q3)

Using black thread, serge one long edge of your front channel strip (piece Q2) and one long edge of your back channel strip (piece Q3).

Apply some fabric temporary spray adhesive to your backing felt or flannel, and join it to the underside of your panel base (piece Q1).

Position the front and back channel strips with the serged edges toward the middle of the panel and the other edges flush.

Using gray thread, stitch the eight horizontal tubing channels, reinforcing your stitching several times.

(The channels are ½” wide, with the top and bottom channels ⅝” from the panel edges.)

Serge all four edges of panel assembly with gray thread.

Using gray thread, stitch the eight horizontal tubing channels, reinforcing your stitching several times.

(The channels are ½” wide, with the top and bottom channels ⅝” from the panel edges.)

Note that like the thigh panels, the left sleeve panels on the orange costume variants appear to have been covered with black (twill?) tape, rather than overlocked.

Prepare the piping frame assembly as described previously for the hip reflector box.

Position the panel assembly onto the piping frame so the panel edges are flush with the edges of the cord.

Using a zipper/piping foot and gray thread, topstitch the panel assembly to the piping frame ⅛” from the outer edges and cord.

Cut eight 2” lengths of your ¼” tubing and insert them into the tubing channels.

Again, here is the exact ¼” tubing I used for the TWOK-era officers and enlisted crew:

Over the back tubing channel is a decorative piece of plastic hardware: a bi-folding door slide guide (N-6539) with two small holes drilled in each corner.

Credit to “tim,” “Flagwaver,” and of course “Felgacarb” on the RPF for correctly identifying this piece over a decade ago!

https://www.therpf.com/forums/threads/star-trek-ii-engineering-radiation-suit-complete.139040/

Drill two small holes in each corner of your door slide guide. (I used a 1/16” drill bit.)

If you’re using actual (bleached) white fabric for your jumpsuit, you can just use the piece as-is.

But if you’re using off-white/cream fabric for your jumpsuit, you may want to paint the piece a color that’s a close match to your fabric.

I used Krylon COLORmaxx “Satin Ivory” for my gloves and boots, and the color is a close match to the screen-used door slide guide.

If you’re making an orange costume variant, paint your door slide guide a closely-matching orange color. (See above.)

Apply a generous amount of E6000 glue to the underside of the panel assembly, and glue your heavy French canvas to the underside.

Using off-white thread, hand-sew the door slide guide to the panel assembly over the back tubing channel through the pairs of holes you drilled.

Here’s a comparison between the screen-used panel (left) and this replica (right):

(Paradoxically, both the black tubing and channels are the same size, but the tubing looks wider on my replica for some reason. I did try 3/16” tubing but that was noticeably too small.)

Obviously for TWOK-era trainees, use the translucent red tubing instead of black.

Hand-sew the panel assembly to the left sleeve of the jumpsuit.

For the TMP-era left sleeve panel, I simply used 6mm white craft foam and a fine-tip metallic silver Sharpie.

(If you’re using off-white fabric for your jumpsuit, you may wish to use off-white foam that more closely matches your fabric instead.)

The dimensions are probably the same as the TWOK-era left sleeve panel, but sometimes it looks to me like the TMP sleeve panel is slightly (¼”?) wider … it could just be an optical illusion, though.

Cut a layer of heavy clear vinyl and glue it to the outside of the foam panel with clear E6000 spray glue.

Then glue the foam/vinyl assembly to your piping frame assembly with regular E6000 glue.

DIVISION SLEEVE BAND

On the left sleeve of the TWOK-era engineering radiation suit was a division-colored sleeve band, generally analogous to those on the other TWOK-era uniforms.

(The TMP-era engineering radiation suits didn’t have these sleeve bands.)

Engineering trainees wore red with a diagonal gold stripe, while officers and enlisted personnel wore solid gold.

The officer/enlisted crew sleeve band assembly is comprised of the following pieces:

(My dye recipe for the TWOK-era engineering gold sleeve band is the same as the shoulder tabs – see above.)

The trainee sleeve band assembly has a couple more pieces, because of the stripe:

As of the writing of this tutorial, I haven’t examined a screen-used TWOK-era trainee uniform, so as with the trainee collar, the ideal target color is open to a degree of interpretation.

My trainee division color dye recipe is my current interpretation of the color, not matched to a screen-used uniform or elements. It’s simply my best informed, educated guess as of the writing of this tutorial.

Spock make guess GIF

With the exception of the acid “Golden Yellow”, the aforementioned dyes are all from Dharma Trading Company. “Golden Yellow” is from Pro Chemical and Dye.

SPECULATIVE acid dye recipe

(on ProChem’s pure virgin wool)

60% “Fire Engine Red” (Acid red 266)

40% “Golden Yellow” (Acid yellow 199, ProChem)

Dyed @ 0.8% depth-of-shade

SPECULATIVE fiber-reactive dye recipe

(on Dharma’s French cotton twill)

60% “Deep Yellow” (Orange 86, MX-3R)

40% “Light Red” (Red 2, MX-5B)

Dyed @ 6% depth-of-shade

The component colors and custom mixes are both standard 1% stock solutions, with the acid dye powder dissolved in boiling water.

The aforementioned fabrics are also available from their respective web sites, but while you can use ProChem’s wool for the sleeve band if you want to, I suggest adapting the dye recipe as-needed for whatever wool gabardine you prefer.

If you have no idea what this means but are interested in learning, I’ll again mention that I’m tentatively planning to produce a Tailors Gone Wild fabric-dyeing course.

I suggest subscribing to my “Sewing Wizard Newsletter” for updates. 🙂

For both versions, cut two lengths of 3/16” cord to the same length as the rest of your sleeve band.

Wrap your piping fabric (piece R5) around the 3/16” cord.

Using off-white thread and a zipper/piping foot, sew the piping closed close to the cord.

Repeat for the other length of piping.

Position the black felt base (piece R1) over the lip of the piping so its edge is flush with the cord.

Using black thread and a zipper/piping foot, edge-stitch the felt to the piping close to the cord.

Repeat for the opposite edge.

For officers and enlisted crew, sew your band of gold fabric (piece R2) closed along the longer edges with ¼” seam allowance.

Roll the seam to the underside and press the seam allowances open.

Turn the fabric band outward and press it flat.

For the trainee version, sew the larger red bands (piece R3) to the diagonal gold stripe (piece R4) with ⅝” seam allowance and using red thread.

Press the seam allowances toward the center (over the gold band), and trim away the excess corners of allowance along the upper and lower edges.

Sew the band closed with ¼” seam allowance.

Roll the seam to the underside and press the seam allowances open.

Turn the fabric band outward and press it flat.

For both versions, vertically center the division-colored fabric band over the black felt and hand-sew it into place. (I suggest slip-stitching, and be careful not to pull your stitches too tight.)

Here’s a comparison between the screen-used sleeve band (top), this officer/enlisted replica (center), and my interpretative replica of the trainee version (bottom):

Wrap the sleeve band assembly around the sleeve of the jumpsuit to determine the appropriate allowance on the ends, and mark the seam line in the manner of your choice.

Sew the sleeve band closed and press the allowances open. (Feel free to trim the allowances smaller if you find them unwieldy and have no plans to alter your jumpsuit and/or repurpose the sleeve band later.)

Hand-sew the sleeve band assembly to the left sleeve of the jumpsuit directly beneath the sleeve tubing.

Attach the “pips and squeaks” of your choice to the band. 🙂

RANK MOUNT

Also on the left sleeve of the TWOK-era engineering radiation suit was a small rank mount (or “bed”), again analogous to those on the other TWOK-era uniforms

(The TMP-era engineering radiation suits didn’t have these rank mounts.)

The rank mounts generally conformed to the shape of the actual rank insignia; trainees, enlisted crew, ensigns, and admirals all had rank mounts that were circular.

Officers from lieutenant and captain rank had mounts that were more ovular, to accommodate the longer rank pins.

These rank mounts were composed of two layers: a piece of jumpsuit fabric (piece S2 or S4) and a smaller felt fabric backing (piece S1 or S3).

Center your felt backing onto the underside of the jumpsuit shell fabric.

Carefully turn the shell fabric allowance under a little at a time along the edge of the felt backing; pleats will form along the curve, so distribute them as evenly as possible to keep the edge smoothly rounded (forming no corners).

Tack the shell fabric allowance to the felt backing by hand, taking care to only stitch through the felt (so the stitches don’t show on the outside of the rank mount).

Hand-sew the rank mount to the left sleeve of the jumpsuit, about ¾” to 1” beneath the lower edge of the division sleeve band.

Attach the rank insignia of your choice. 🙂

AND FINALLY ...

As I mentioned earlier, I suggest waiting until the jumpsuit is otherwise finished to attach the “bullseye” assembly to the jumpsuit.

Apply a generous amount of E6000 glue to the underside of the “bullseye” assembly, and insert it between the chest circle(s) on the upper front of the jumpsuit.

Your jumpsuit is now finished!

Share on facebook
Share on pinterest
Share on tumblr
Share on linkedin
Share on twitter

Leave a Reply