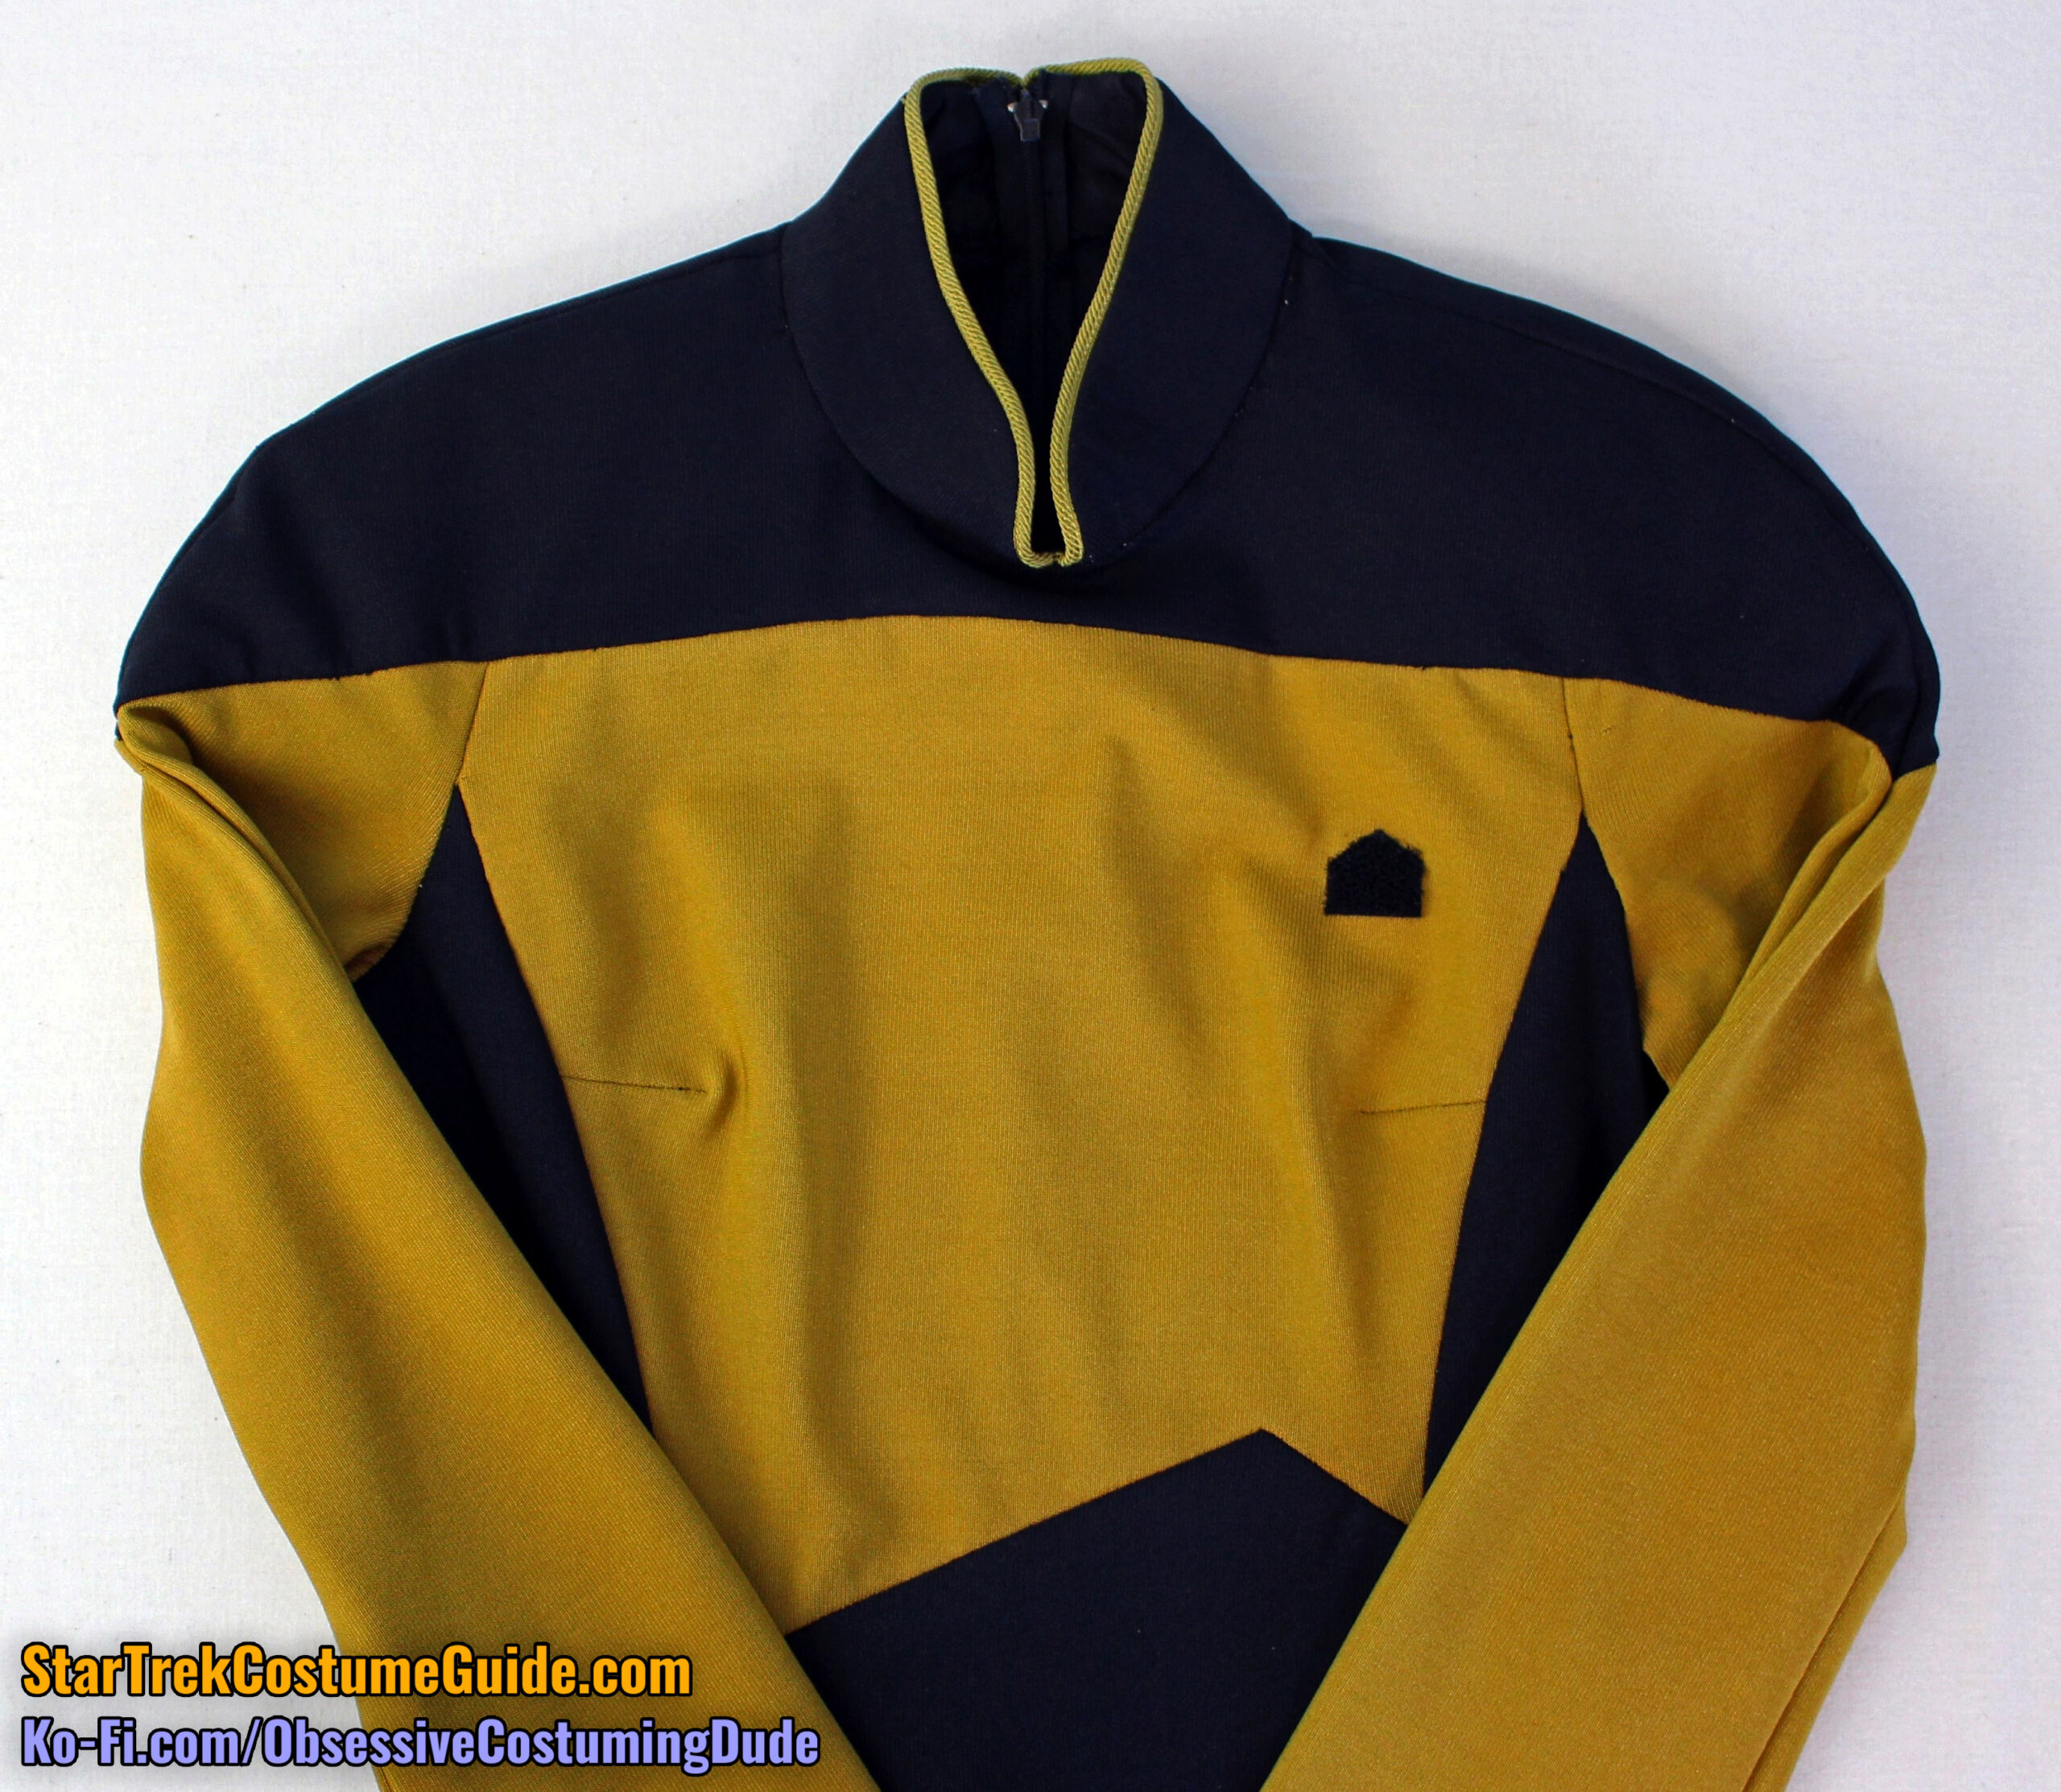
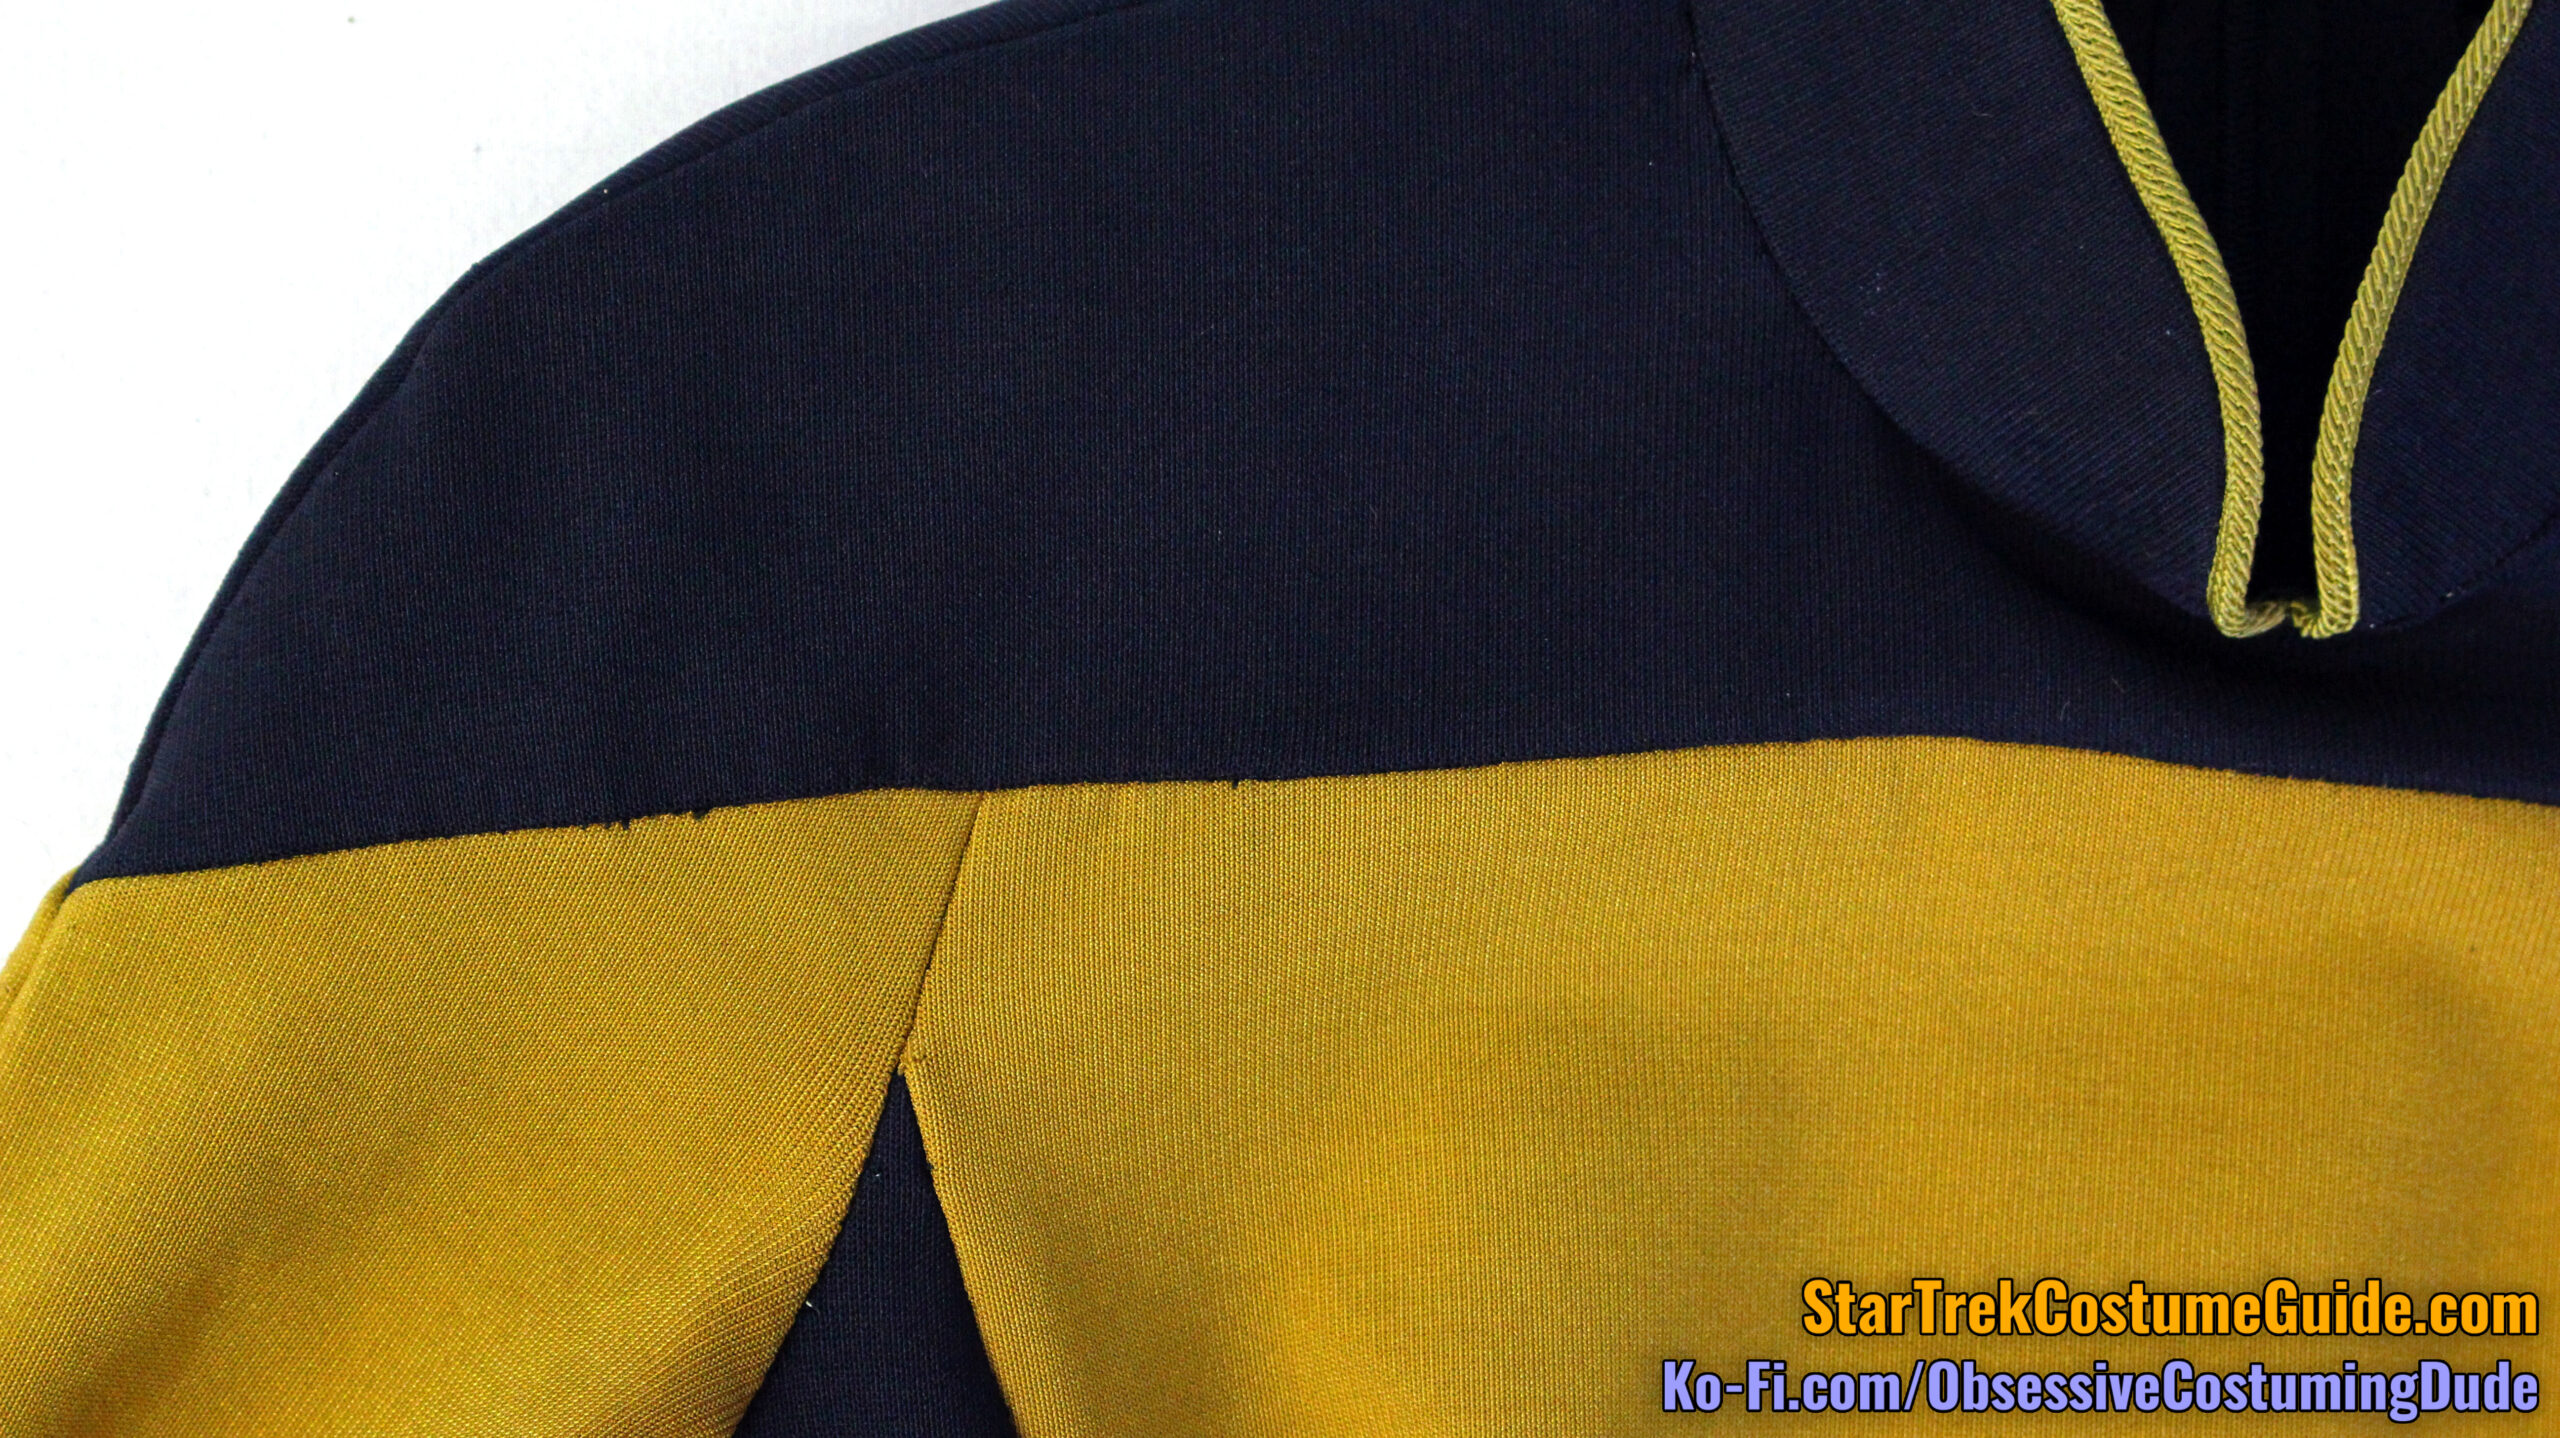
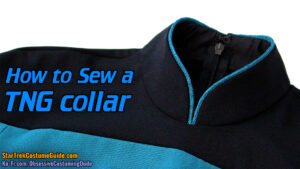
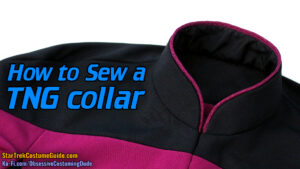
Next in our lineup of screen-used TNG jumpsuit examinations is this Ensign Sito Jaxa uniform from the excellent season 7 episode, “Lower Decks.”
Obviously this is a later-style uniform, updated from William Ware Theiss’ original design by costume designer Robert Blackman. (You can read more about the different uniform styles in my broader TNG jumpsuit analysis.)
Aside from being a lovely costume in its own right, there are quite a few interesting differences to the screen-used Tasha Yar TNG jumpsuit I examined, which go far beyond the obvious and casual observations.
In this corresponding video, I discuss some of the highlights from the following post:
Very special thanks to Angelo Cifaldi (owner of this costume) and to my Ko-Fi supporters for helping make this possible.

FABRIC COLOR and GRAIN
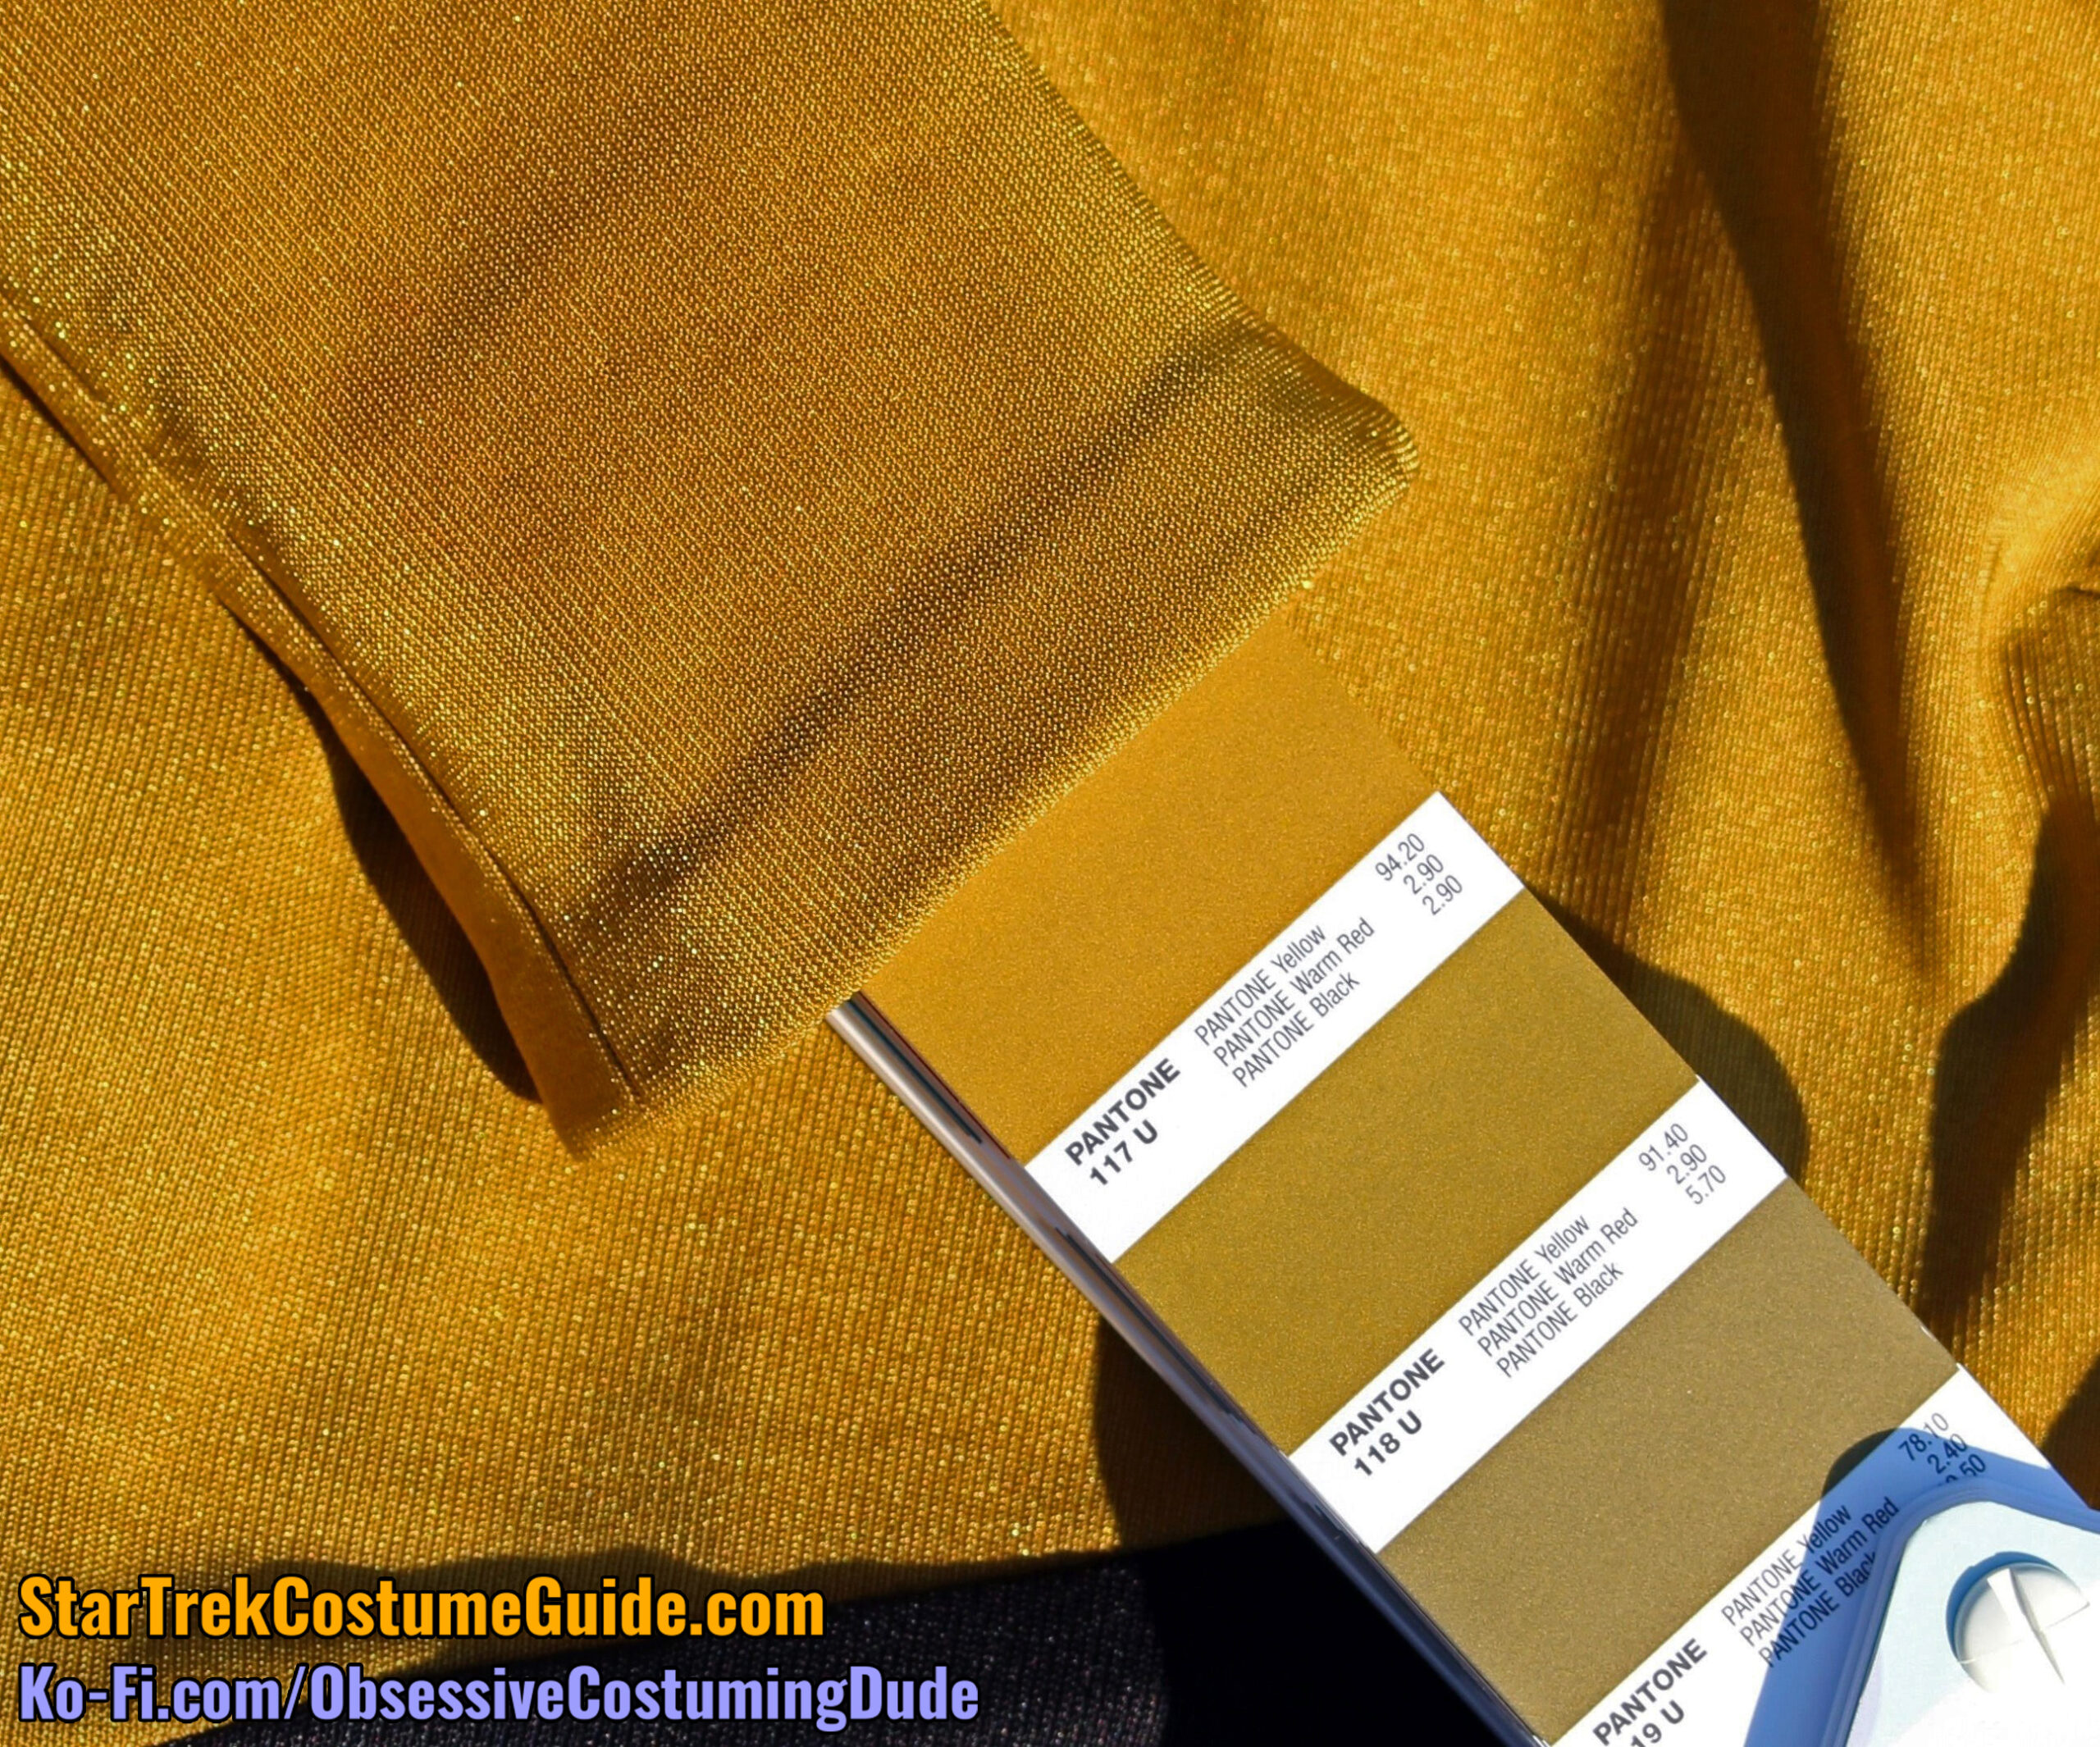
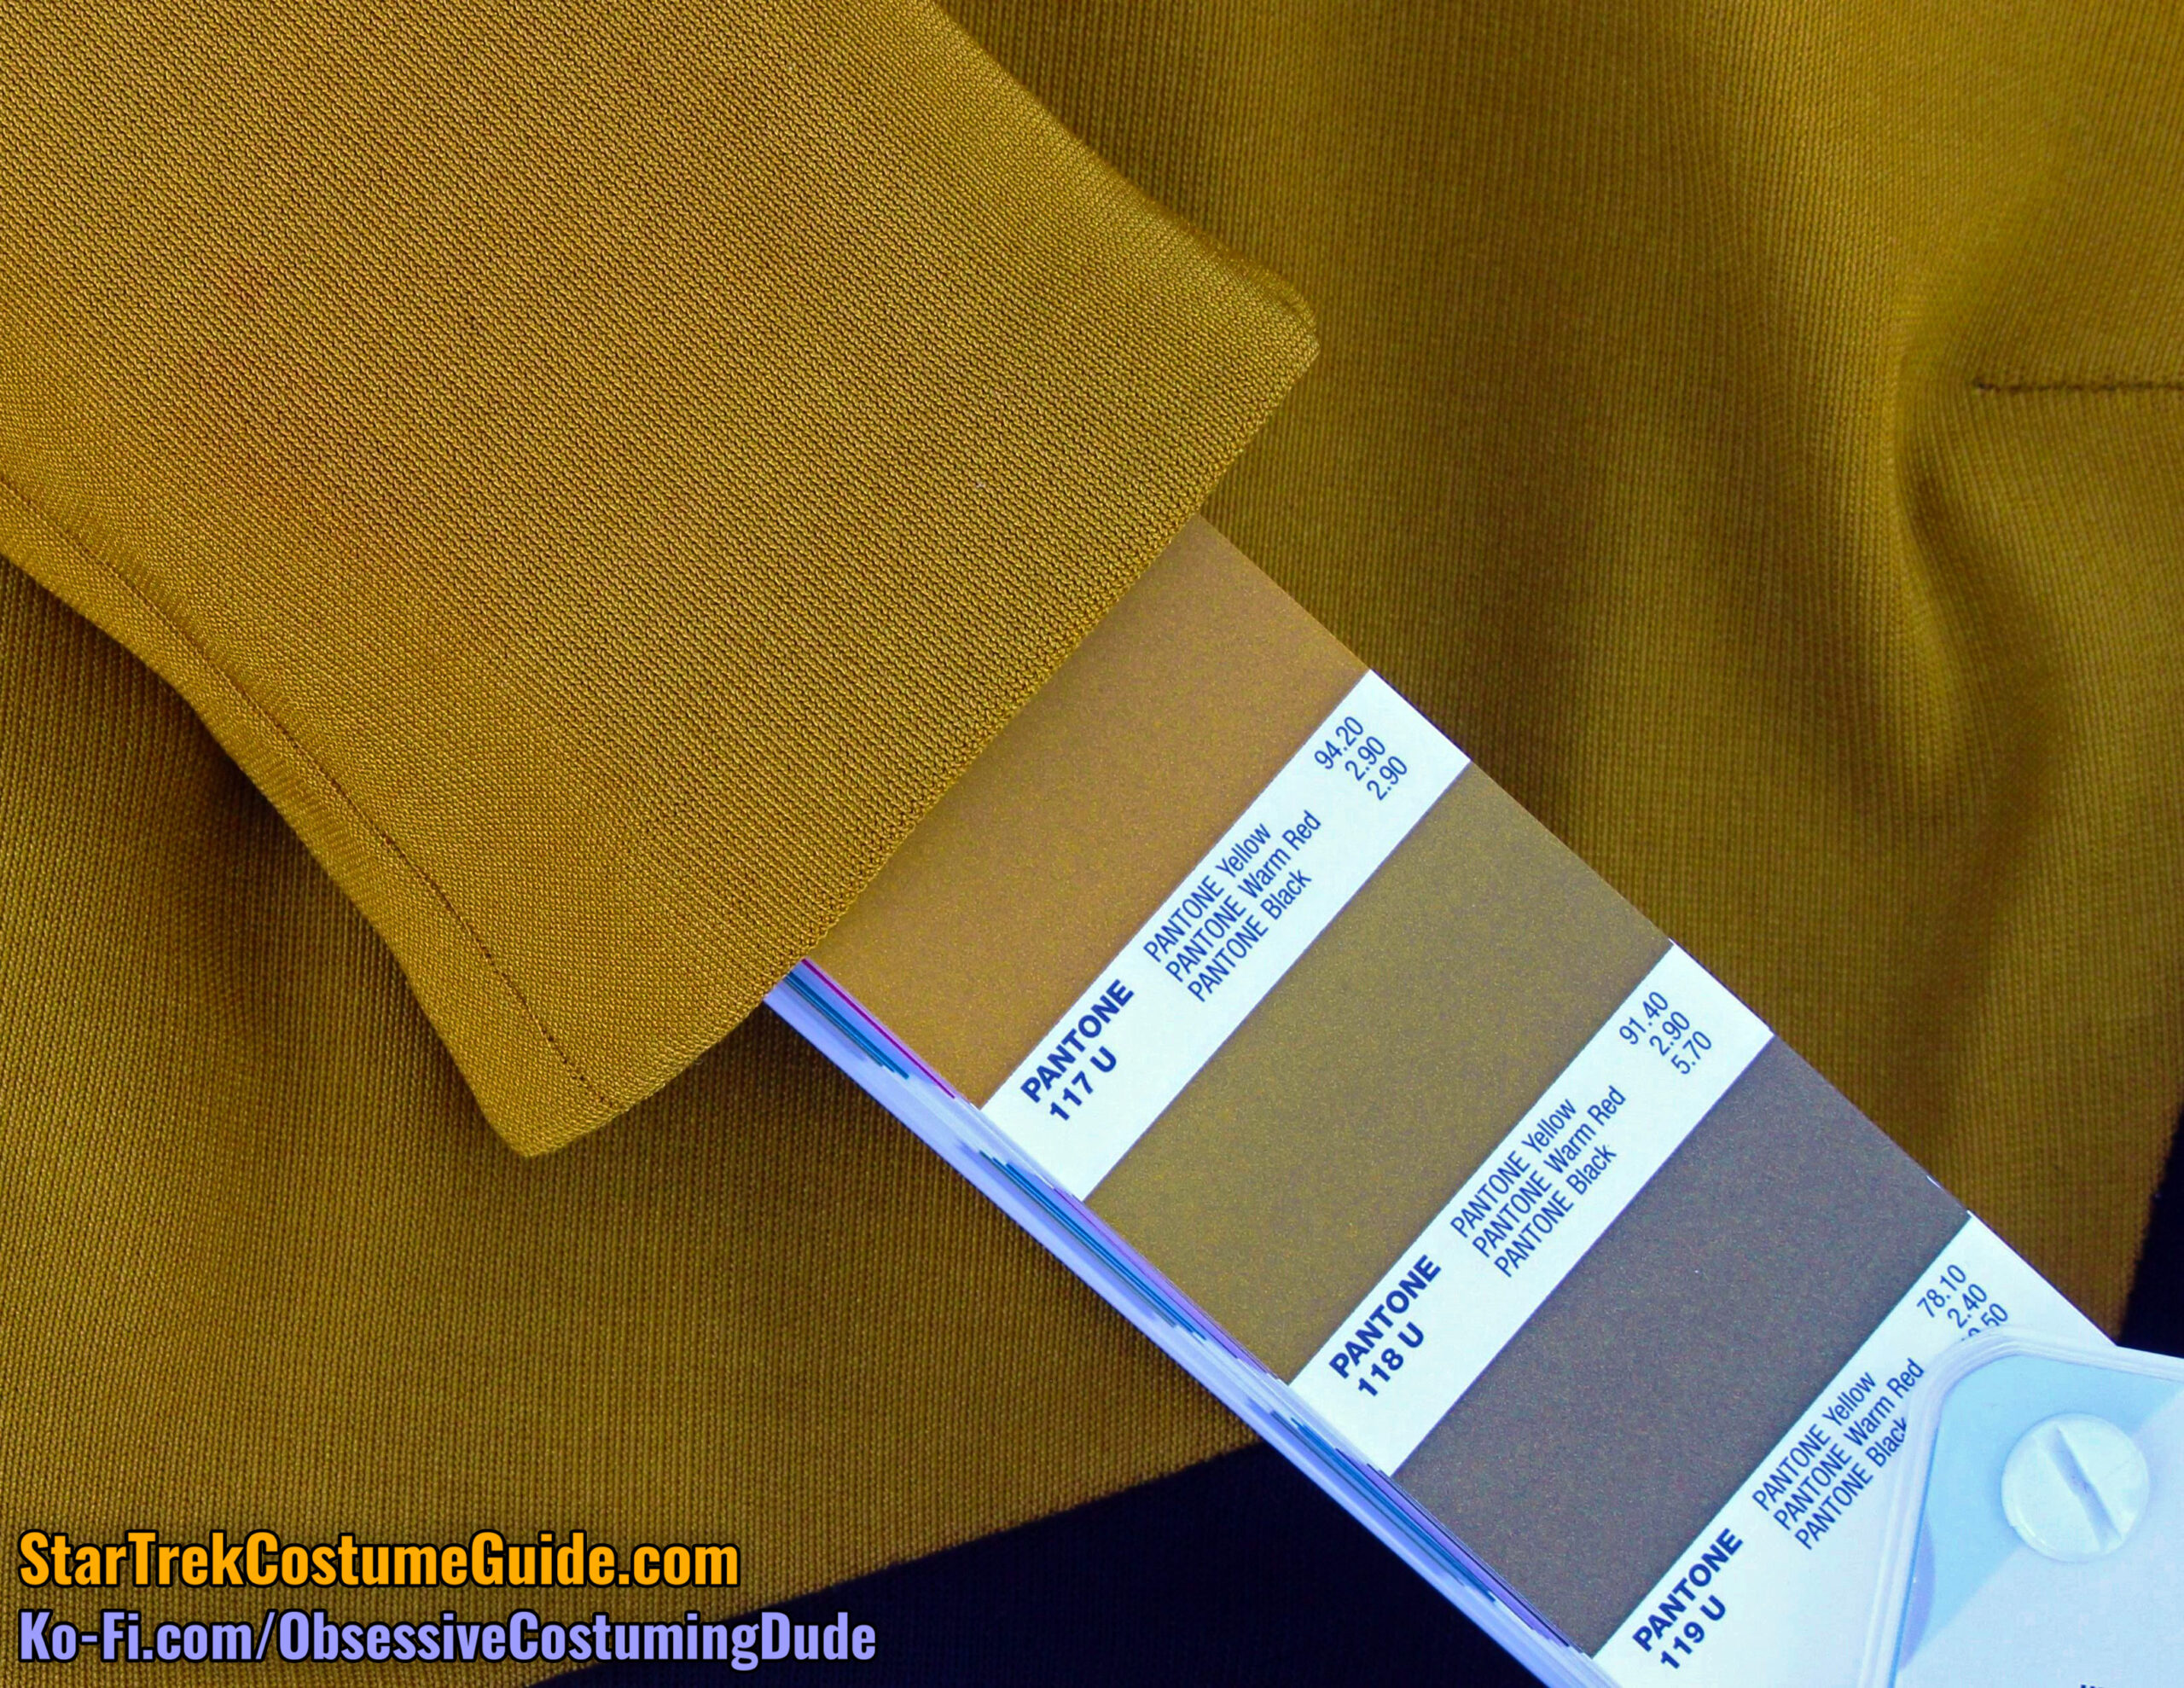
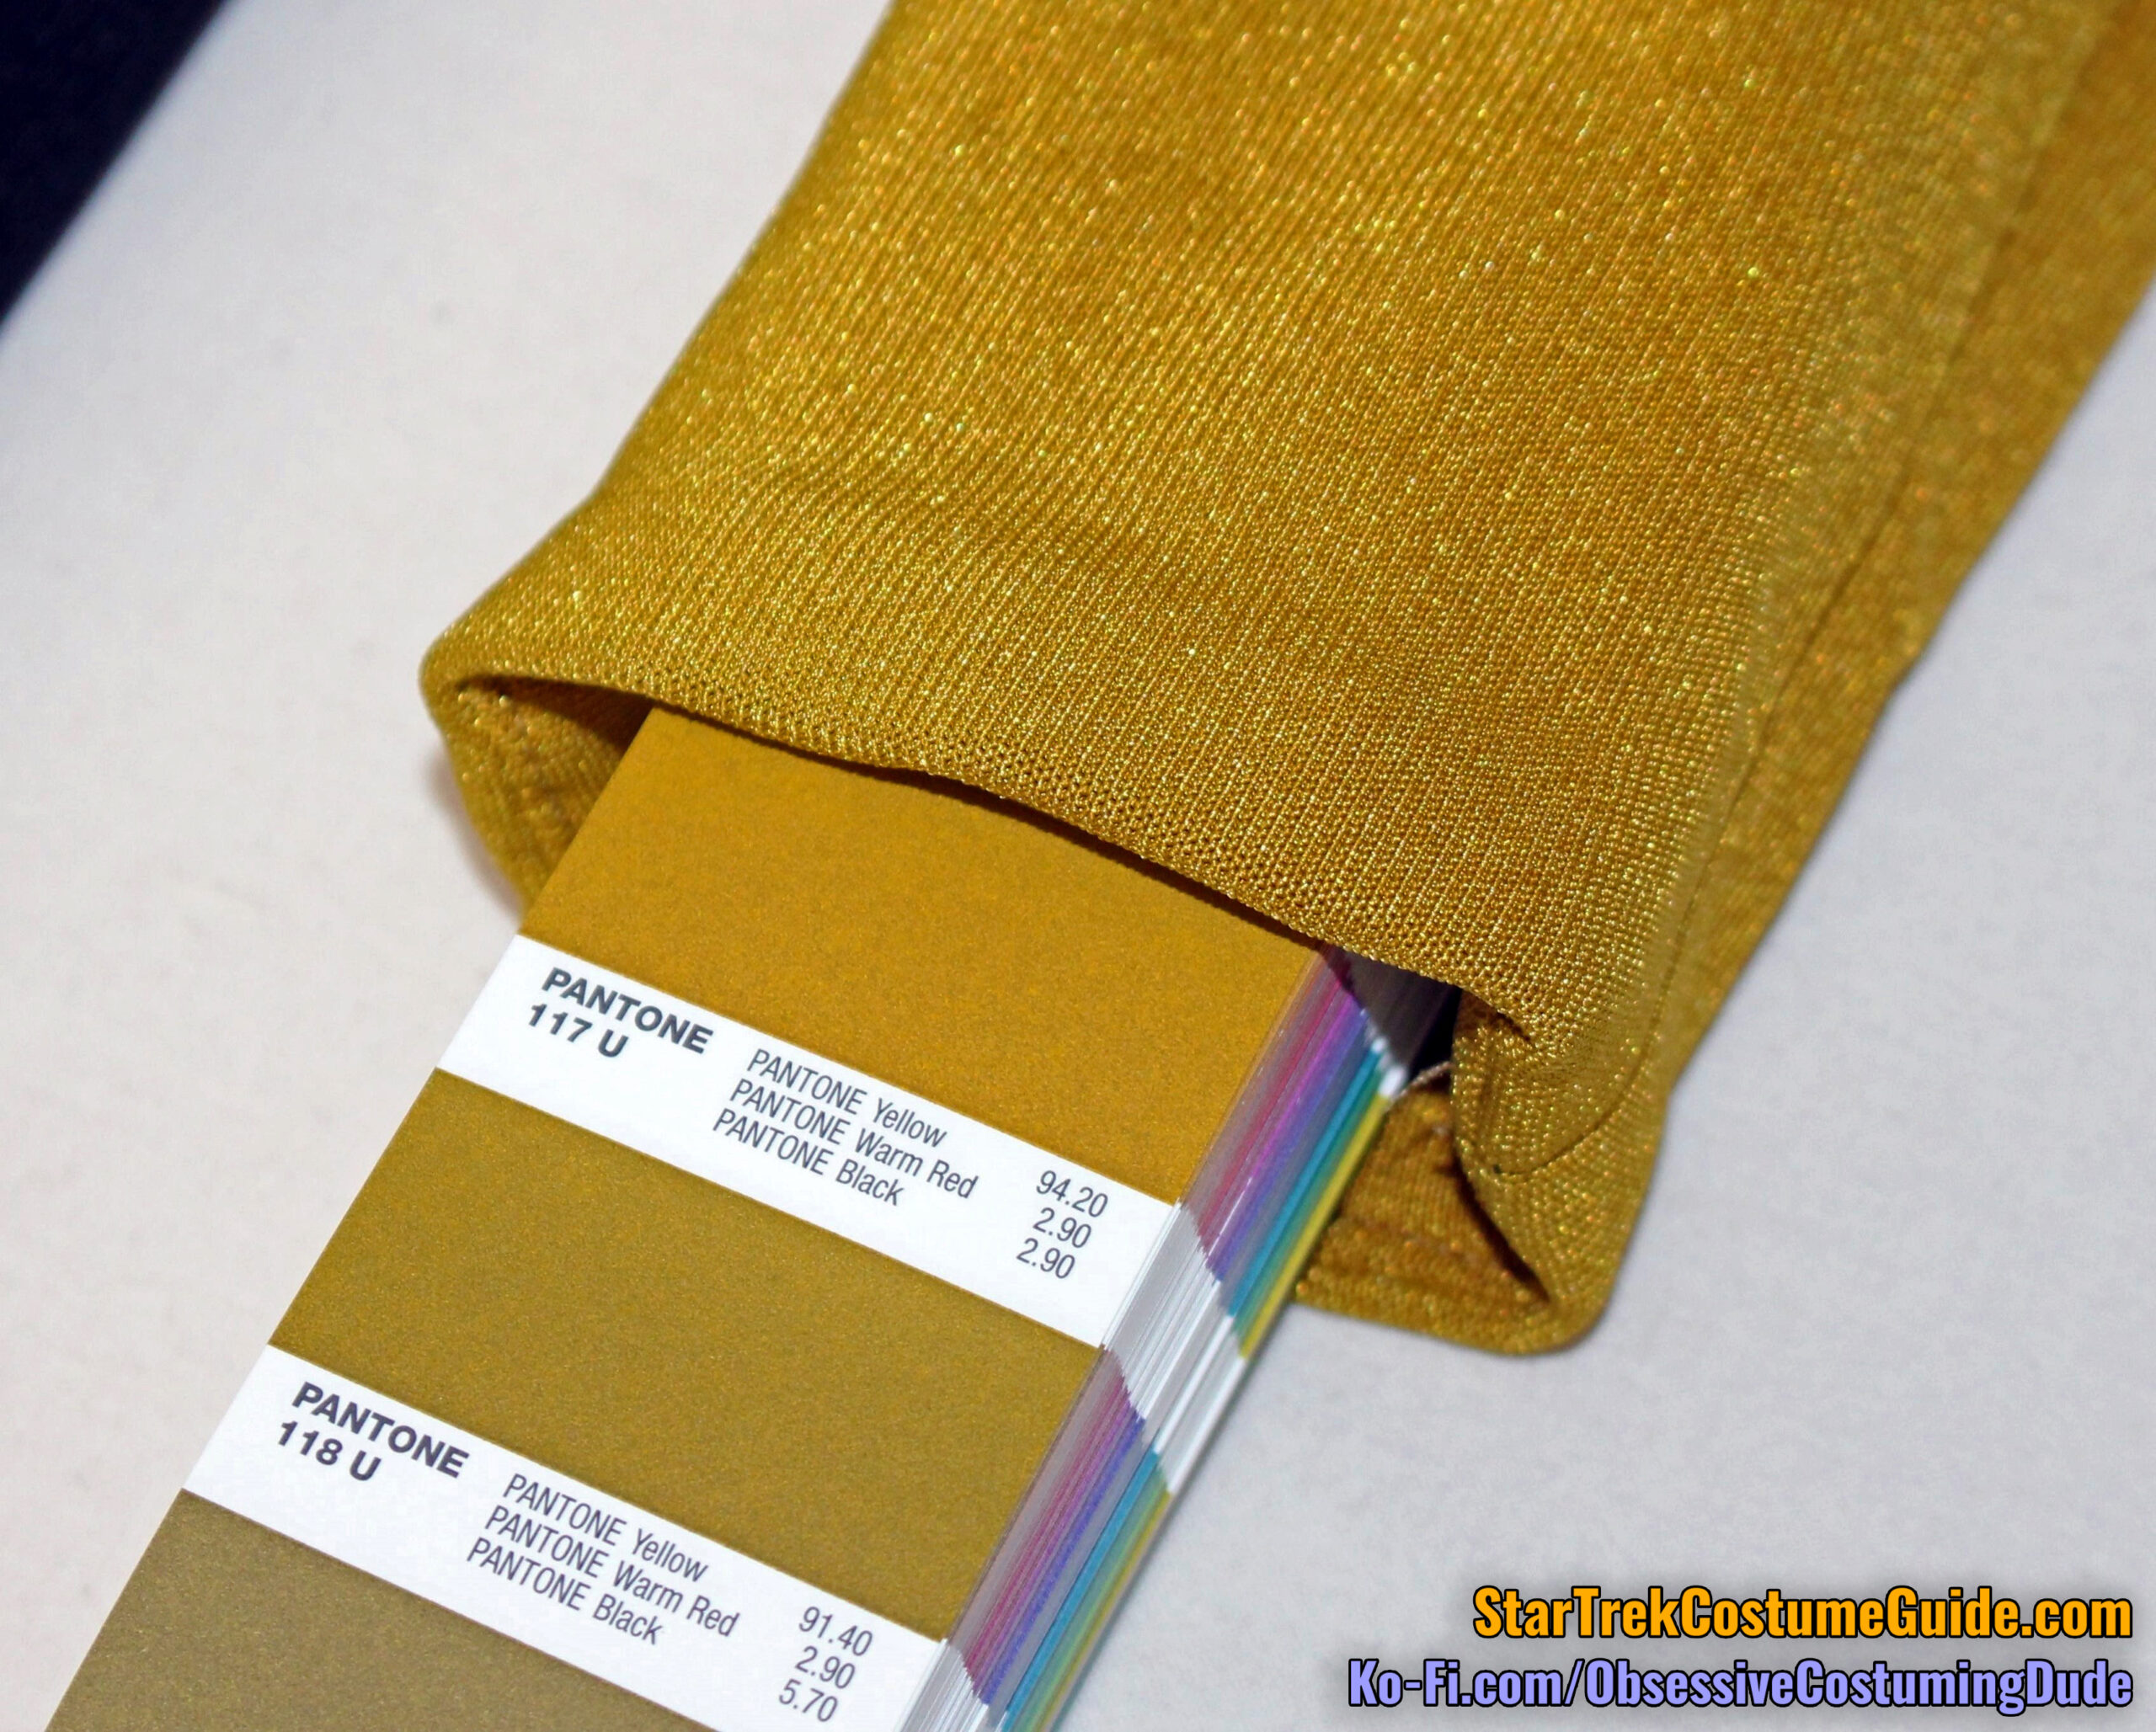
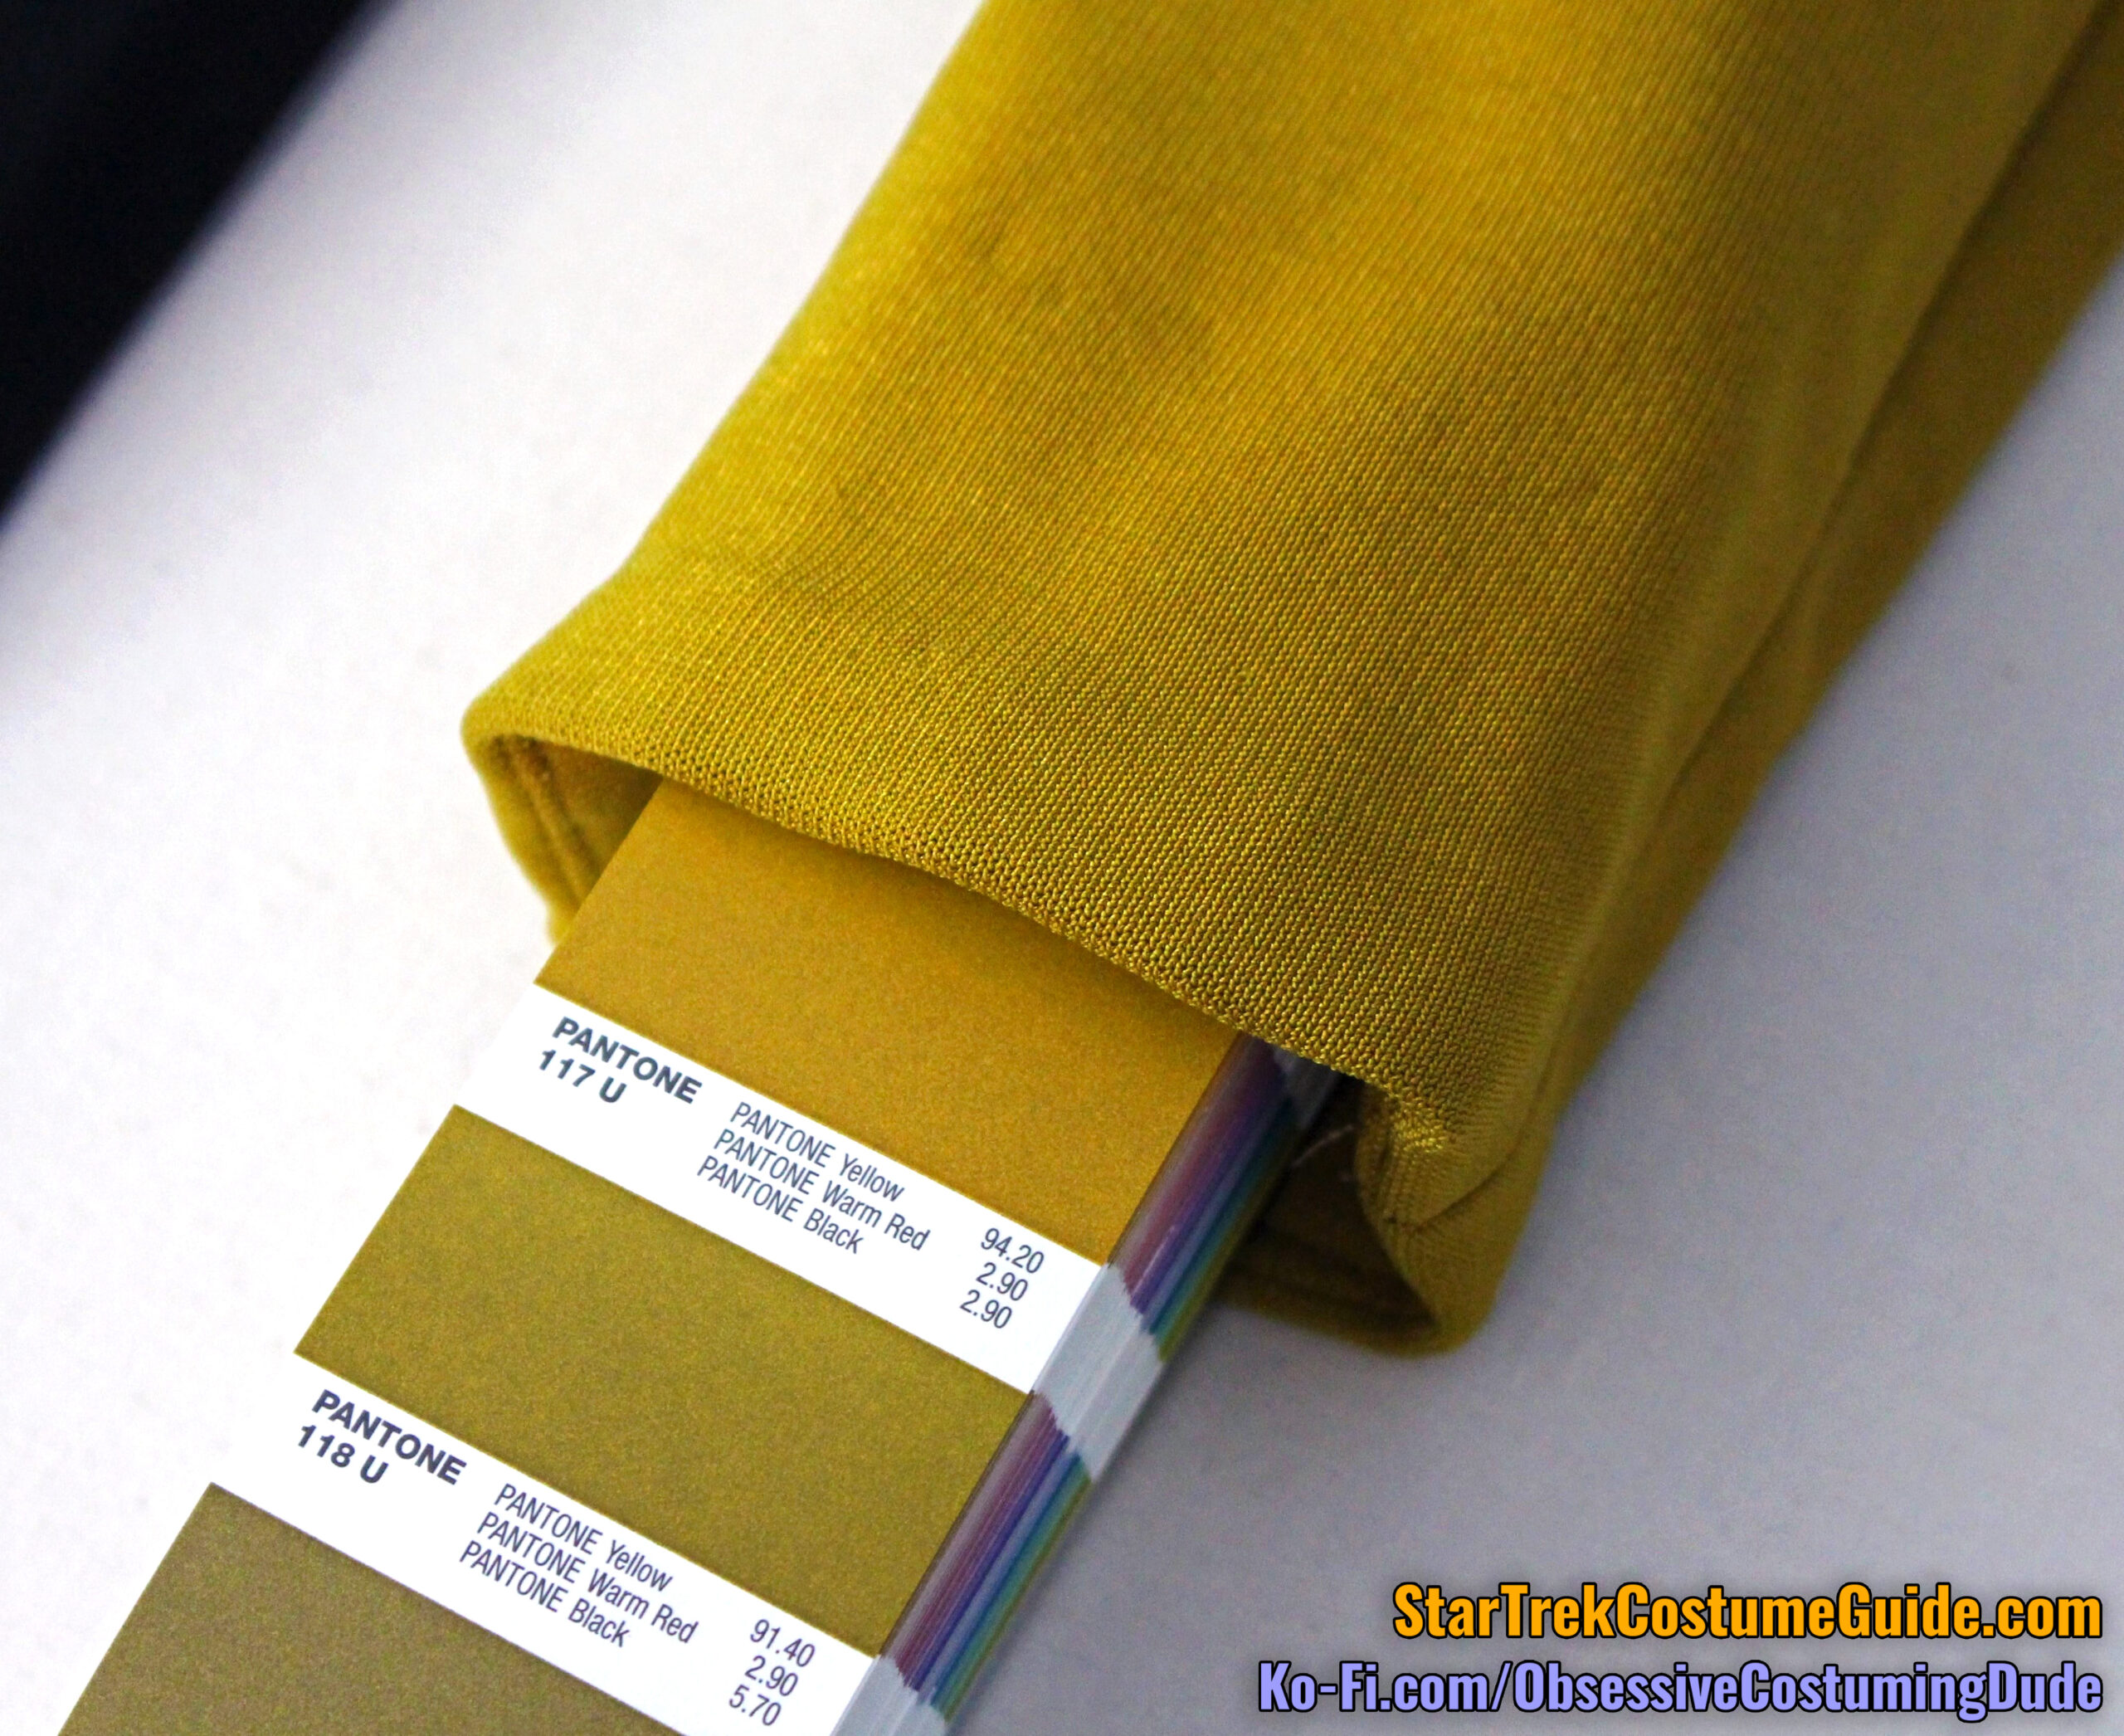
Stylistic design differences notwithstanding, the first thing that struck me about this Ensign Sito uniform was the color …
Specifically, it was a noticeably different gold color than the aforementioned Tasha Yar jumpsuit!
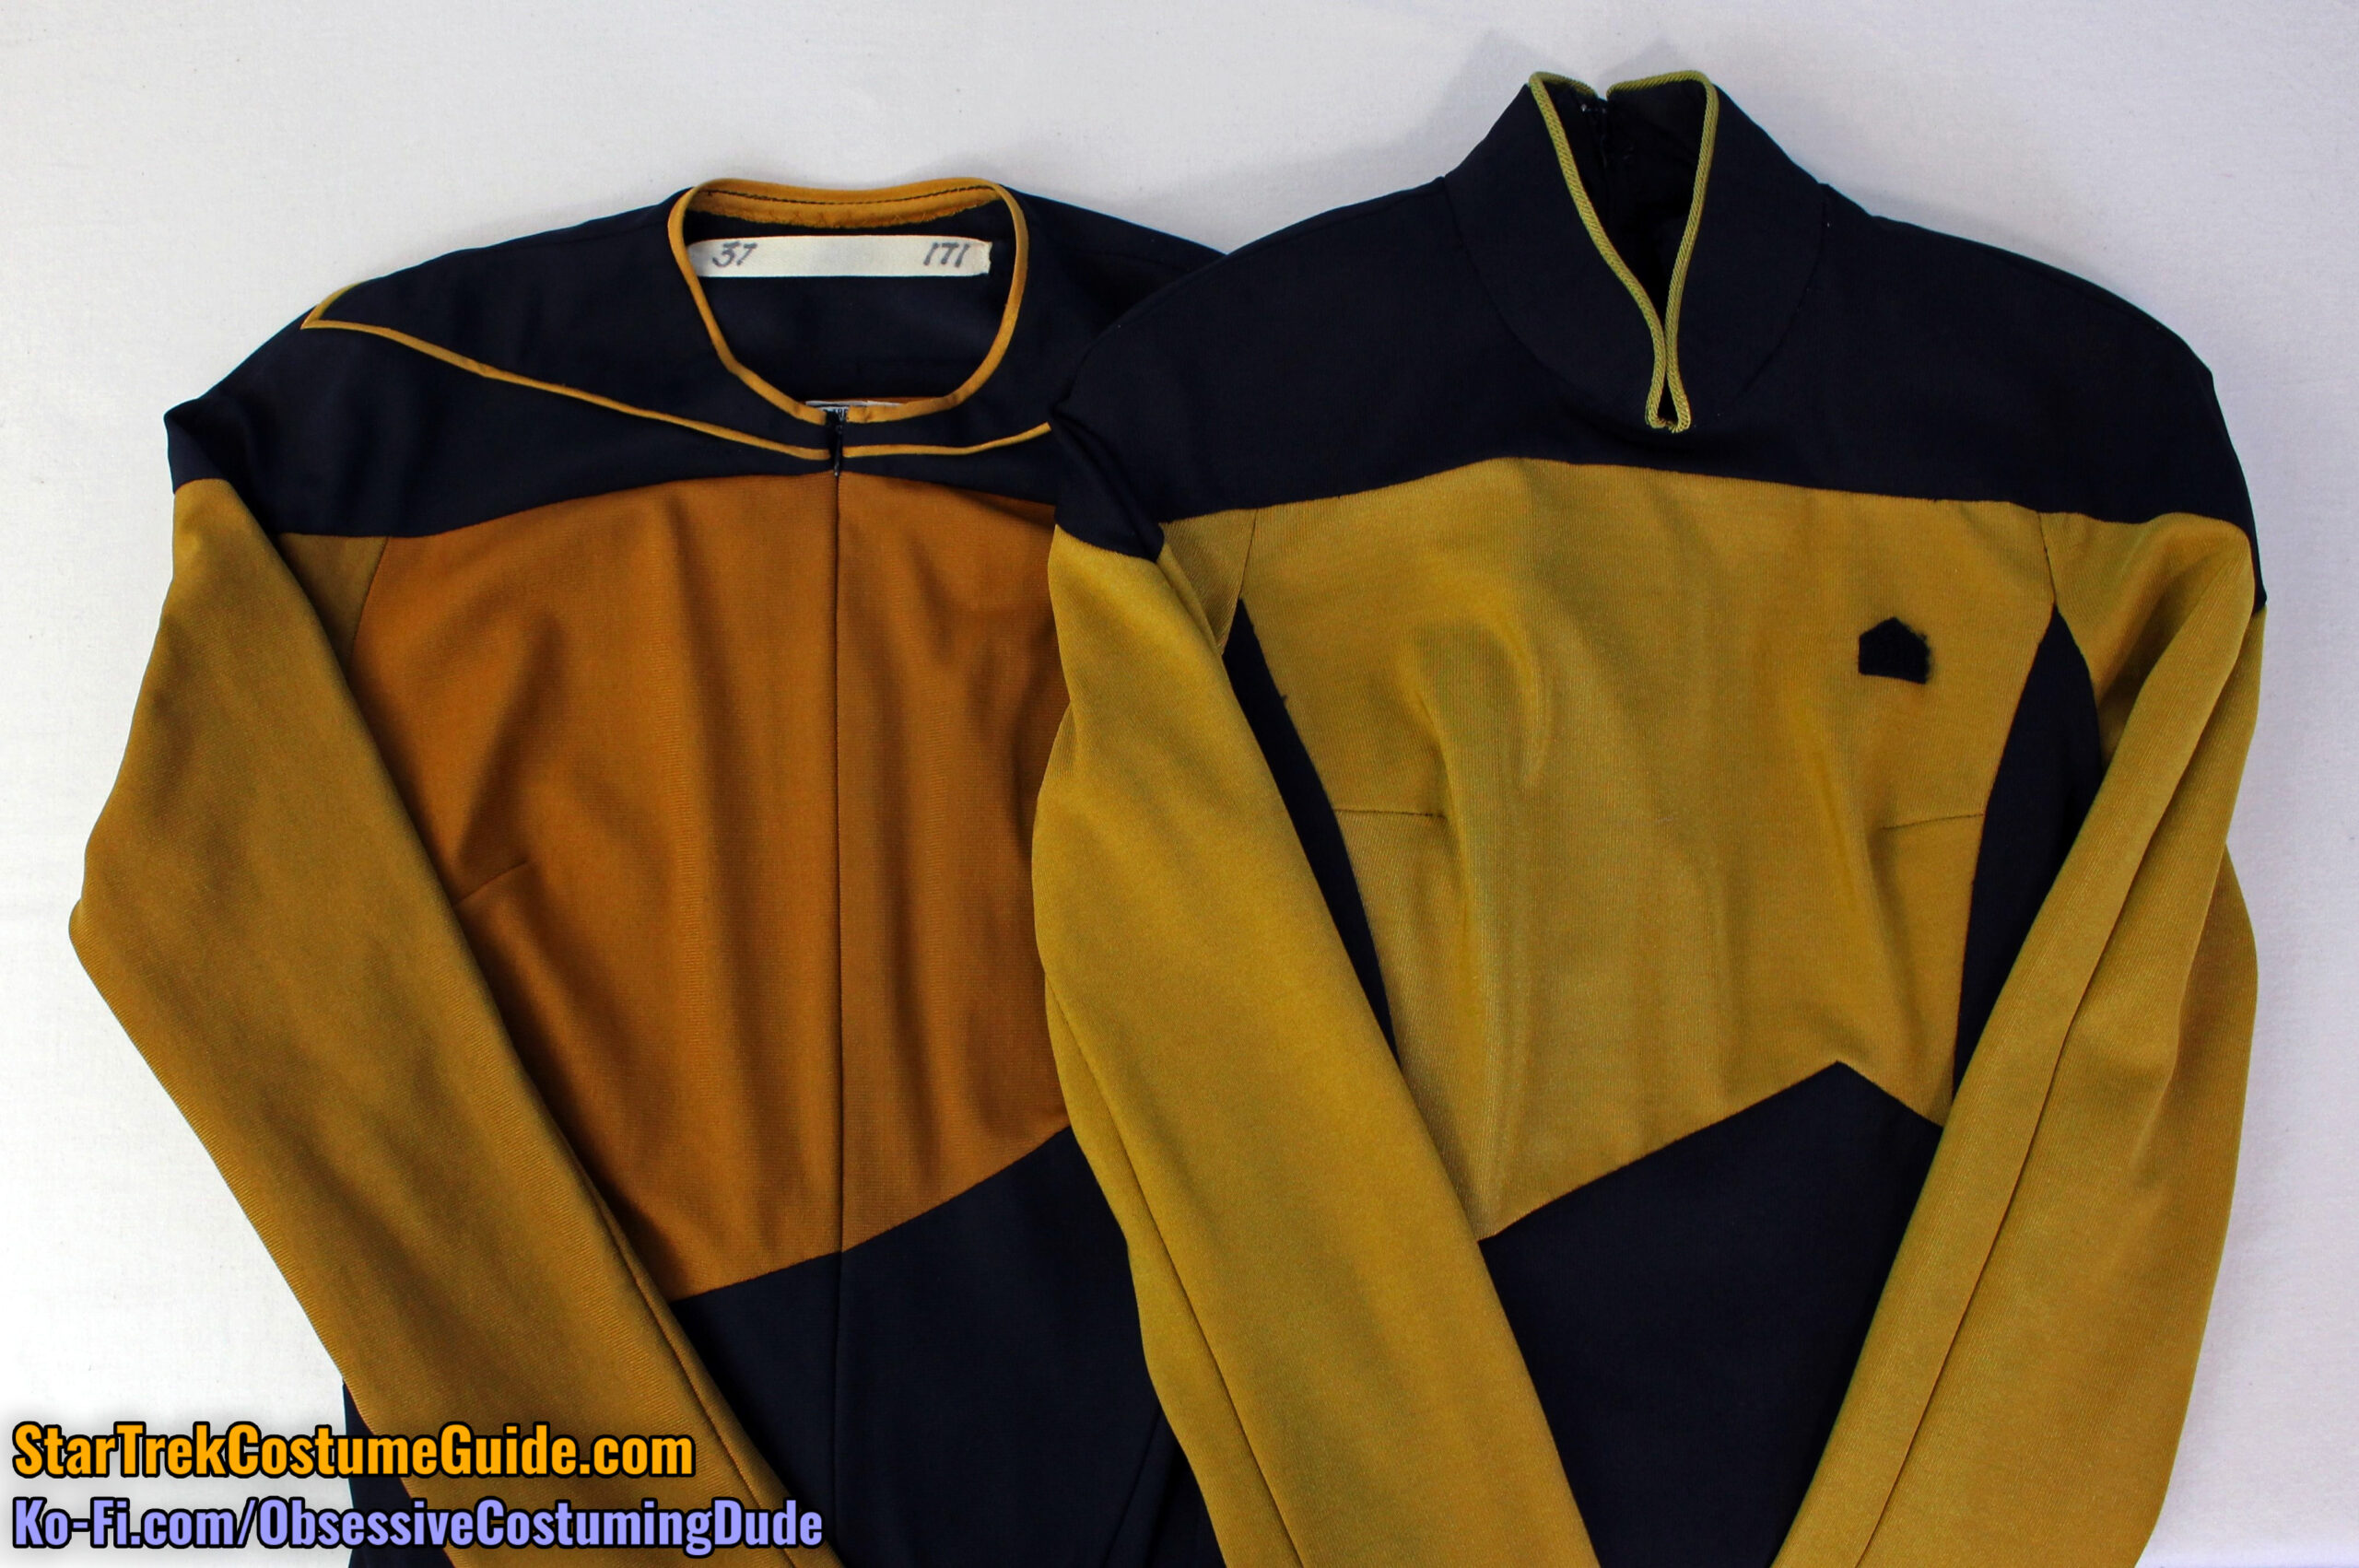
Whereas I would describe Tasha’s jumpsuit as a “burnt orange” color, Ensign Sito’s uniform looked much closer, in-person, to how it appeared in the show.
It was more of a cooler, greener gold than the warmer gold we’re used to seeing, but it wasn’t nearly as shocking as the Tasha gold (orange) color.
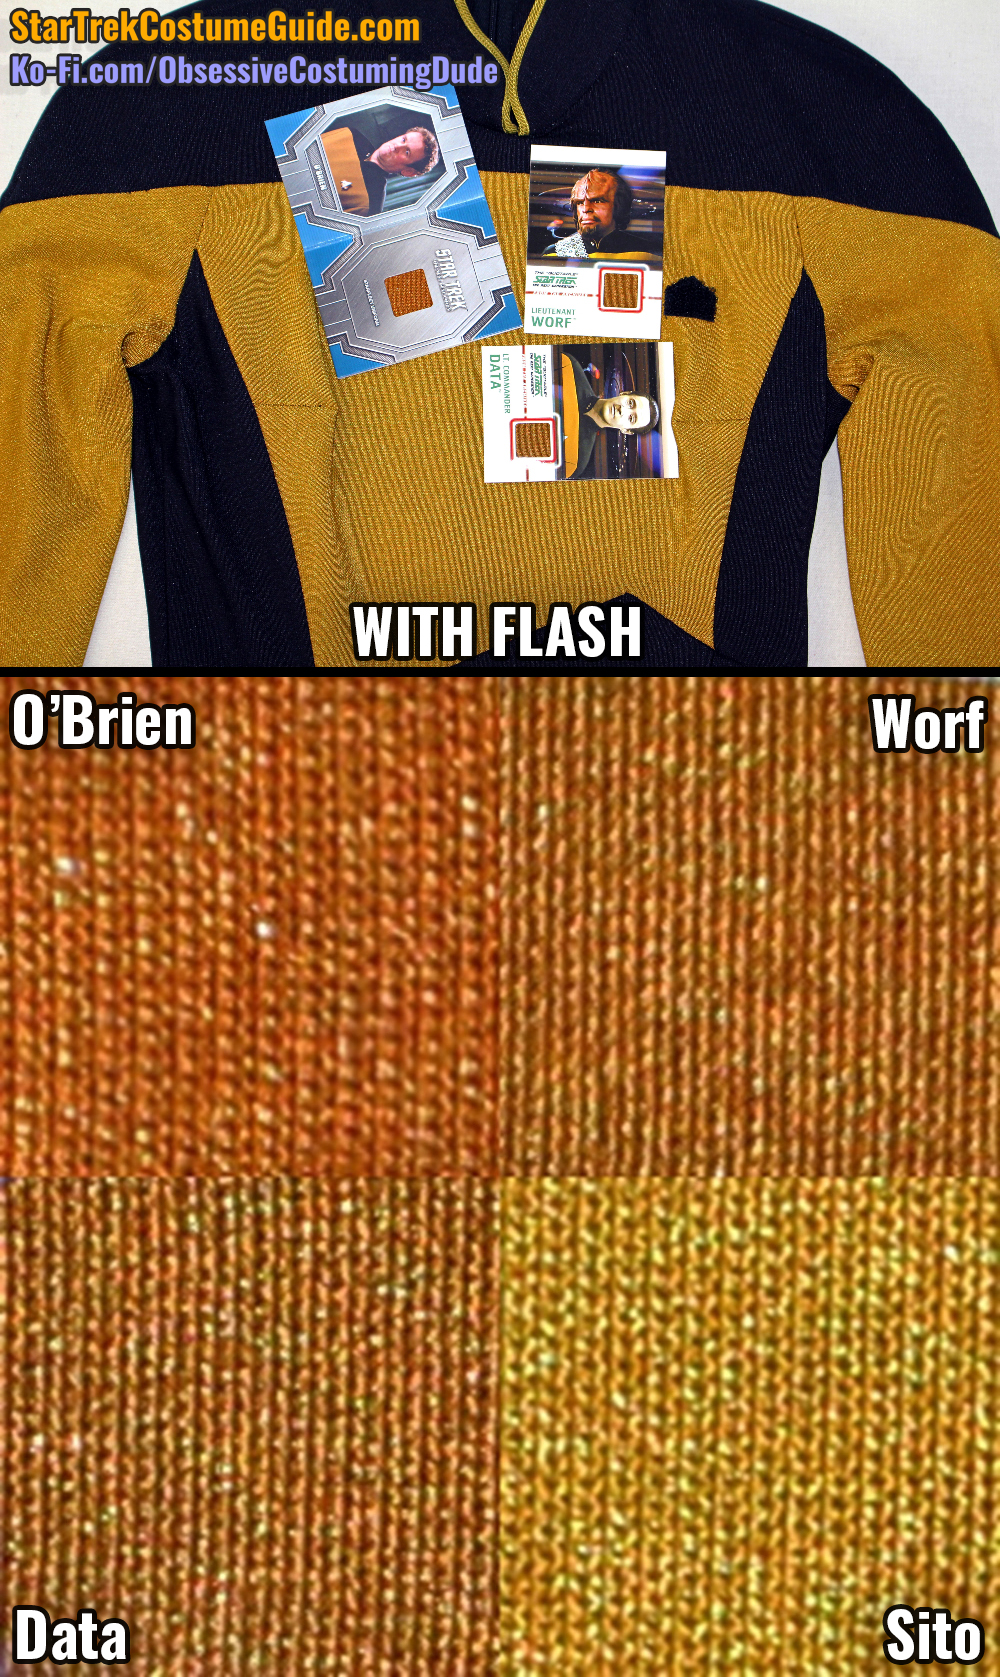
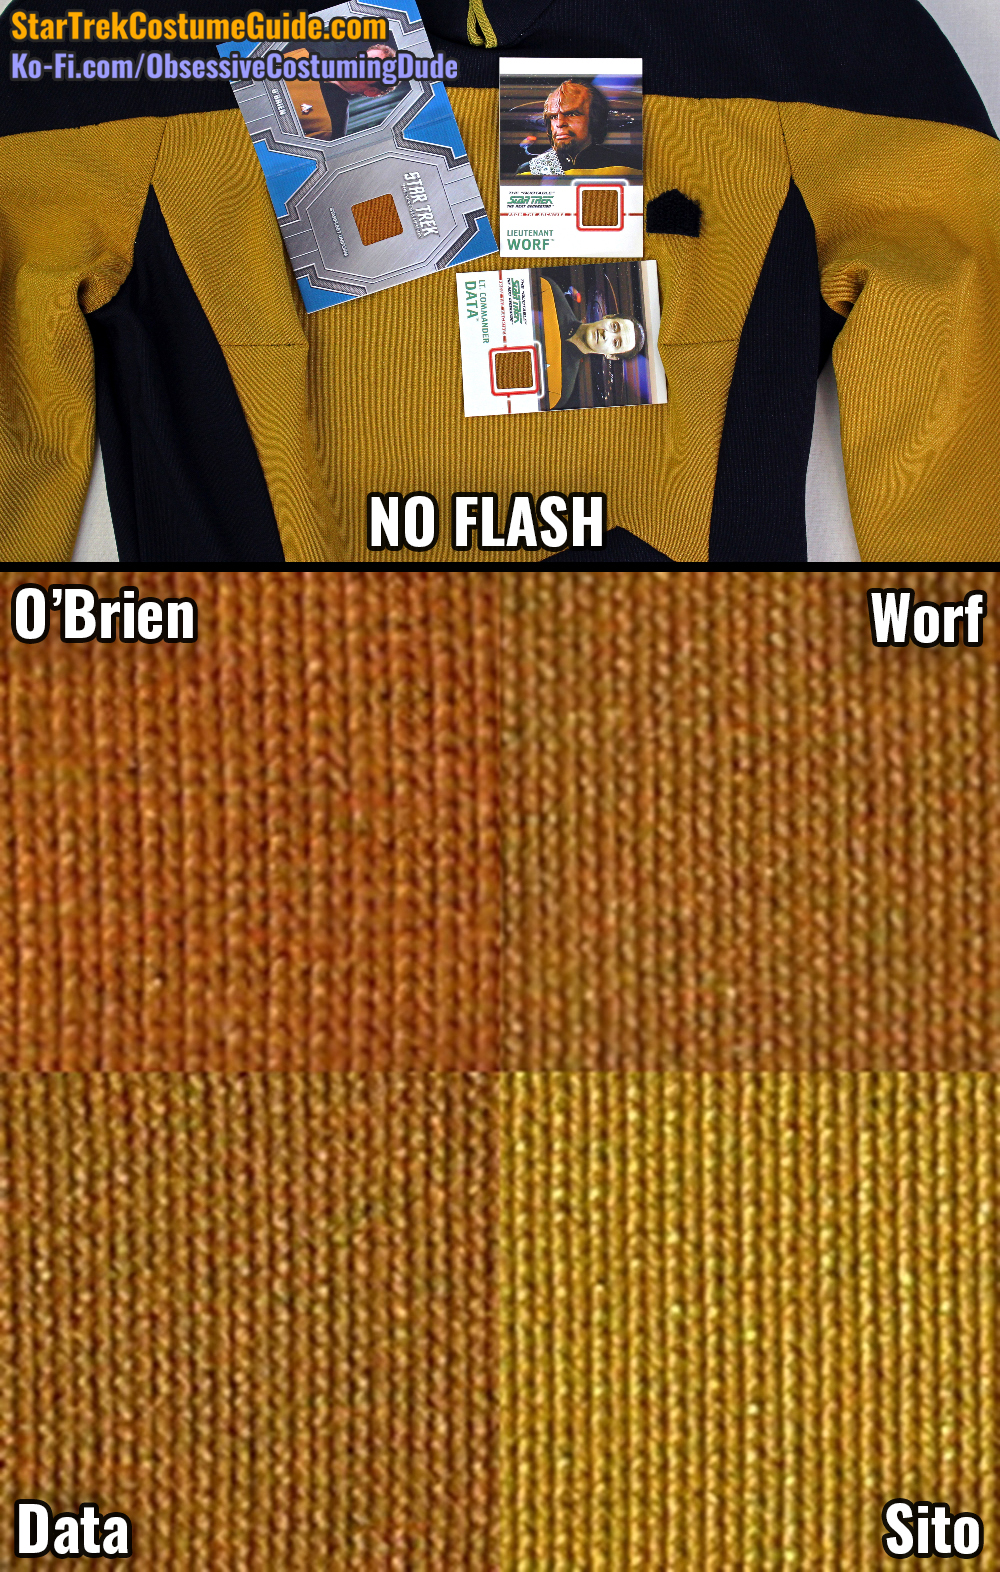
Just for kicks, here’s a color comparison between some gold fabric samples from the first two seasons, and this Ensign Sito uniform from season seven:
As you can see, the gold fabric color evolved considerably over the course of the series.
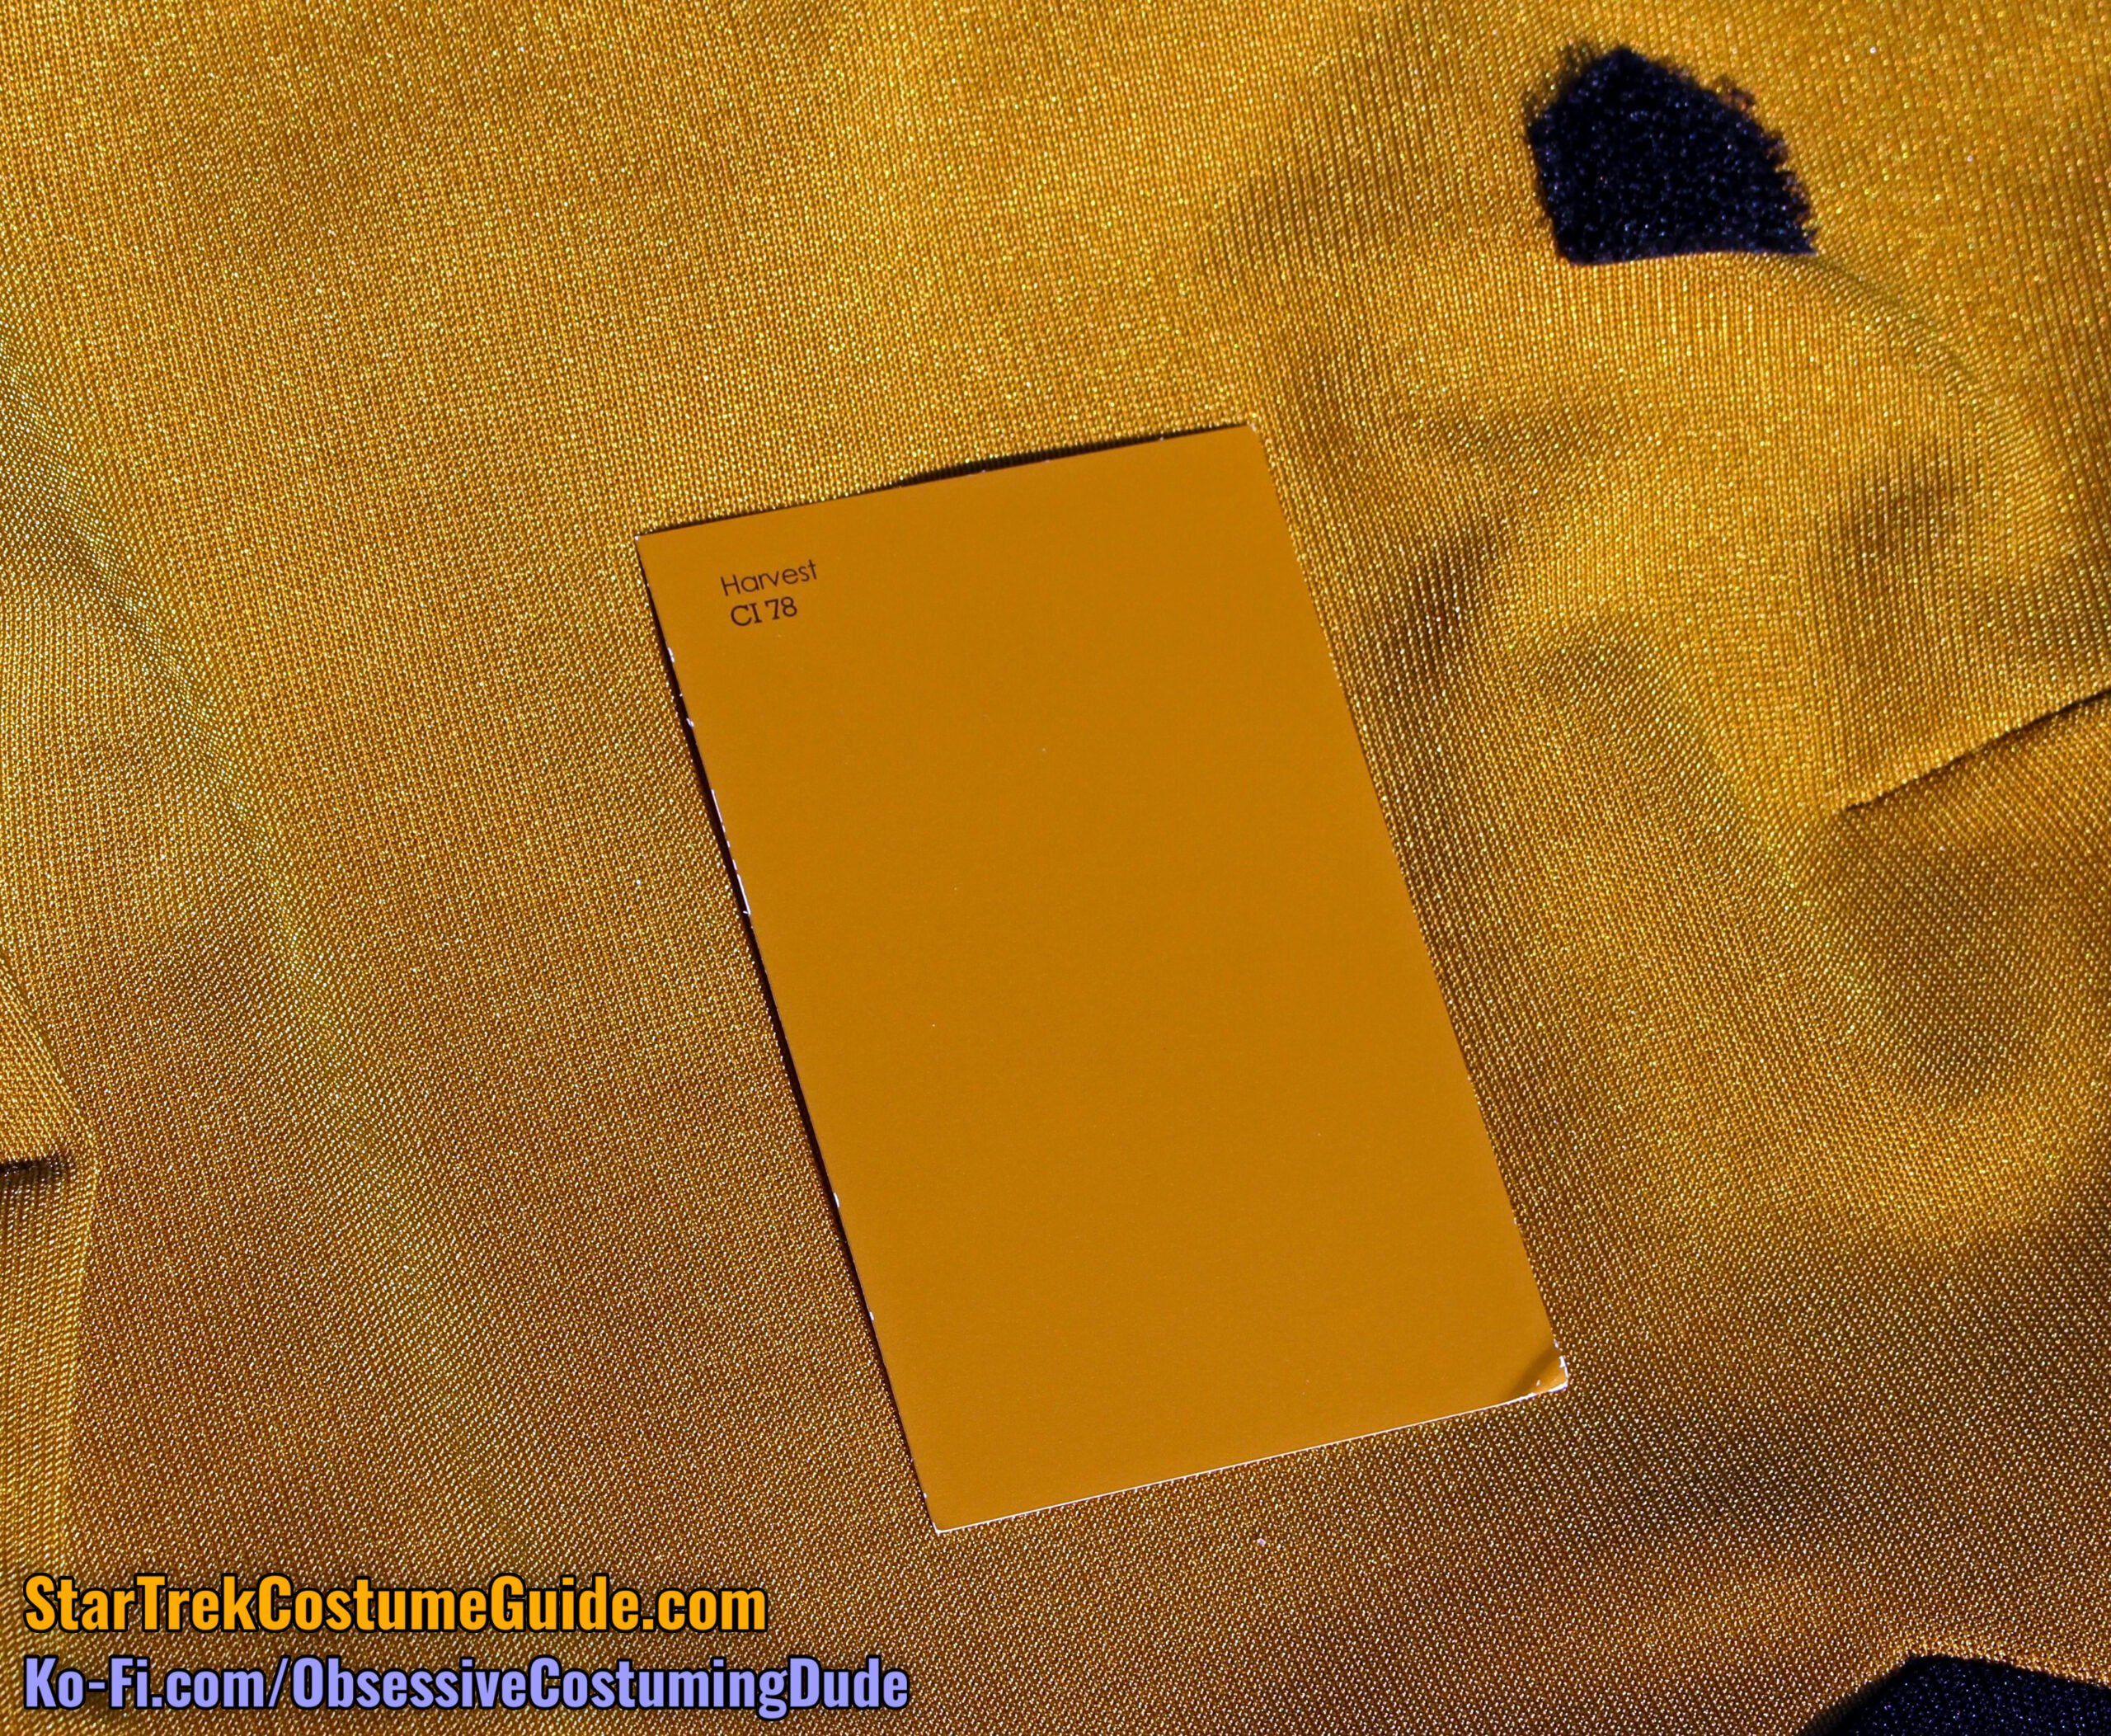
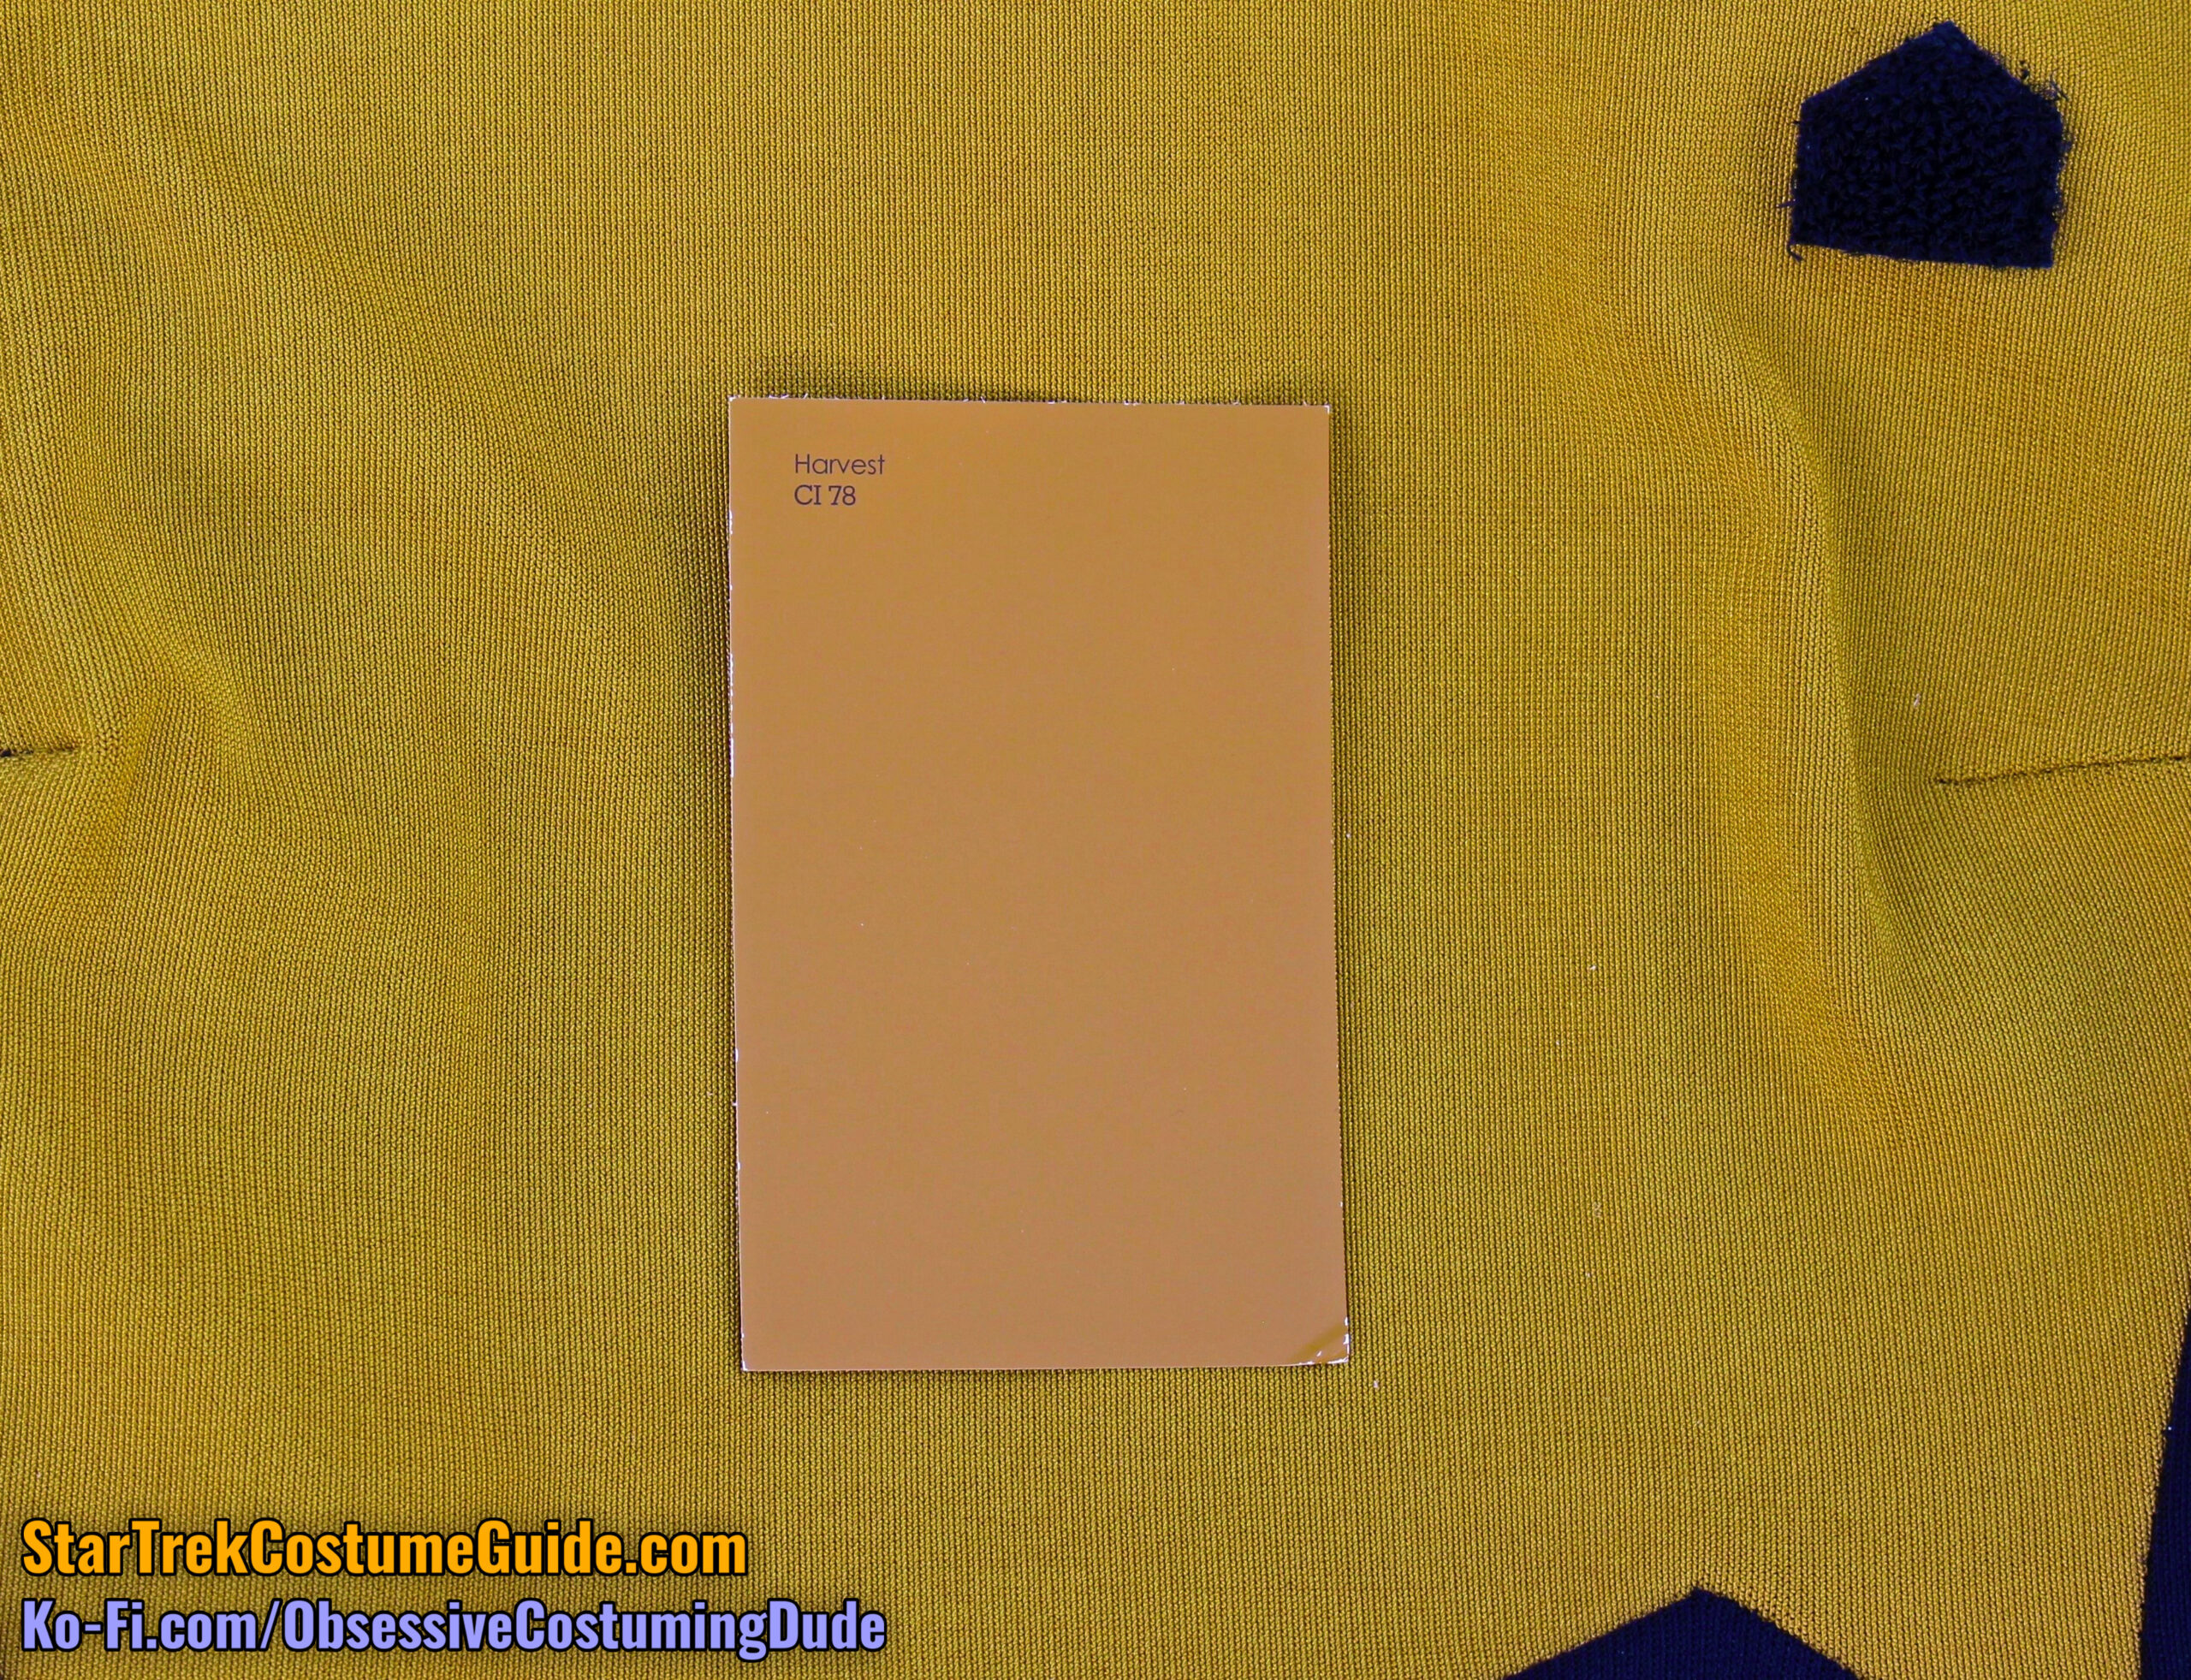
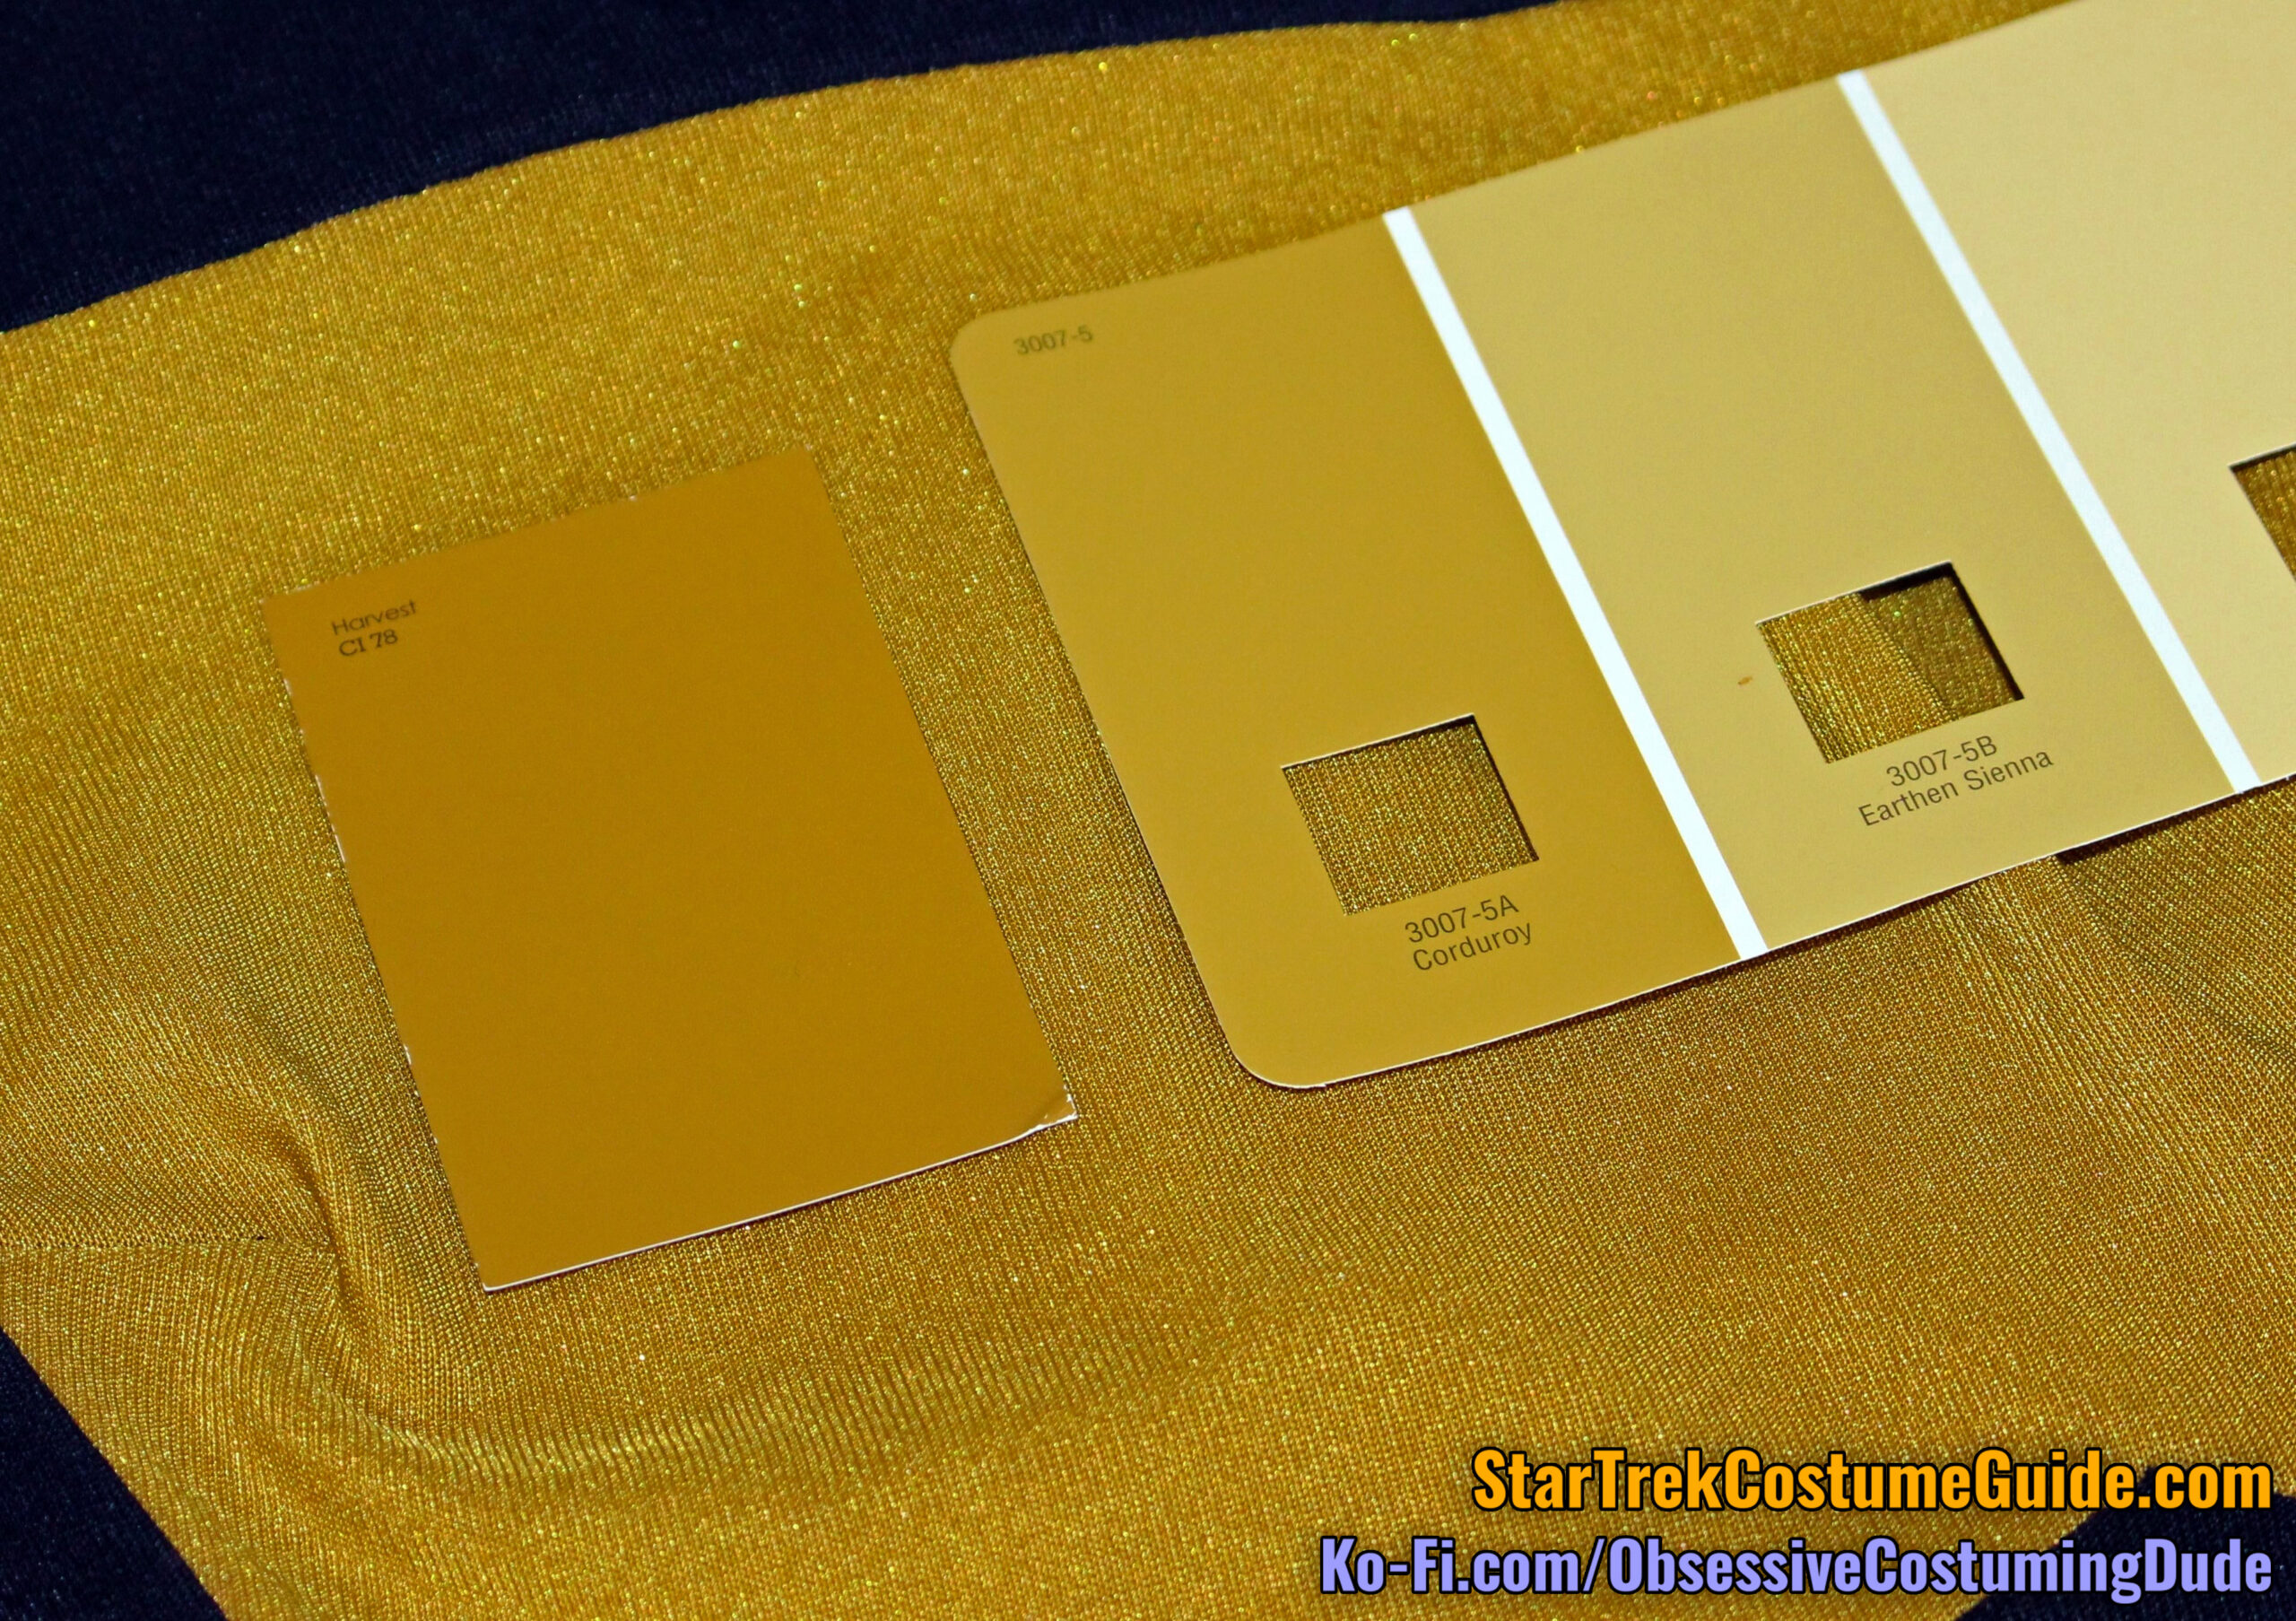
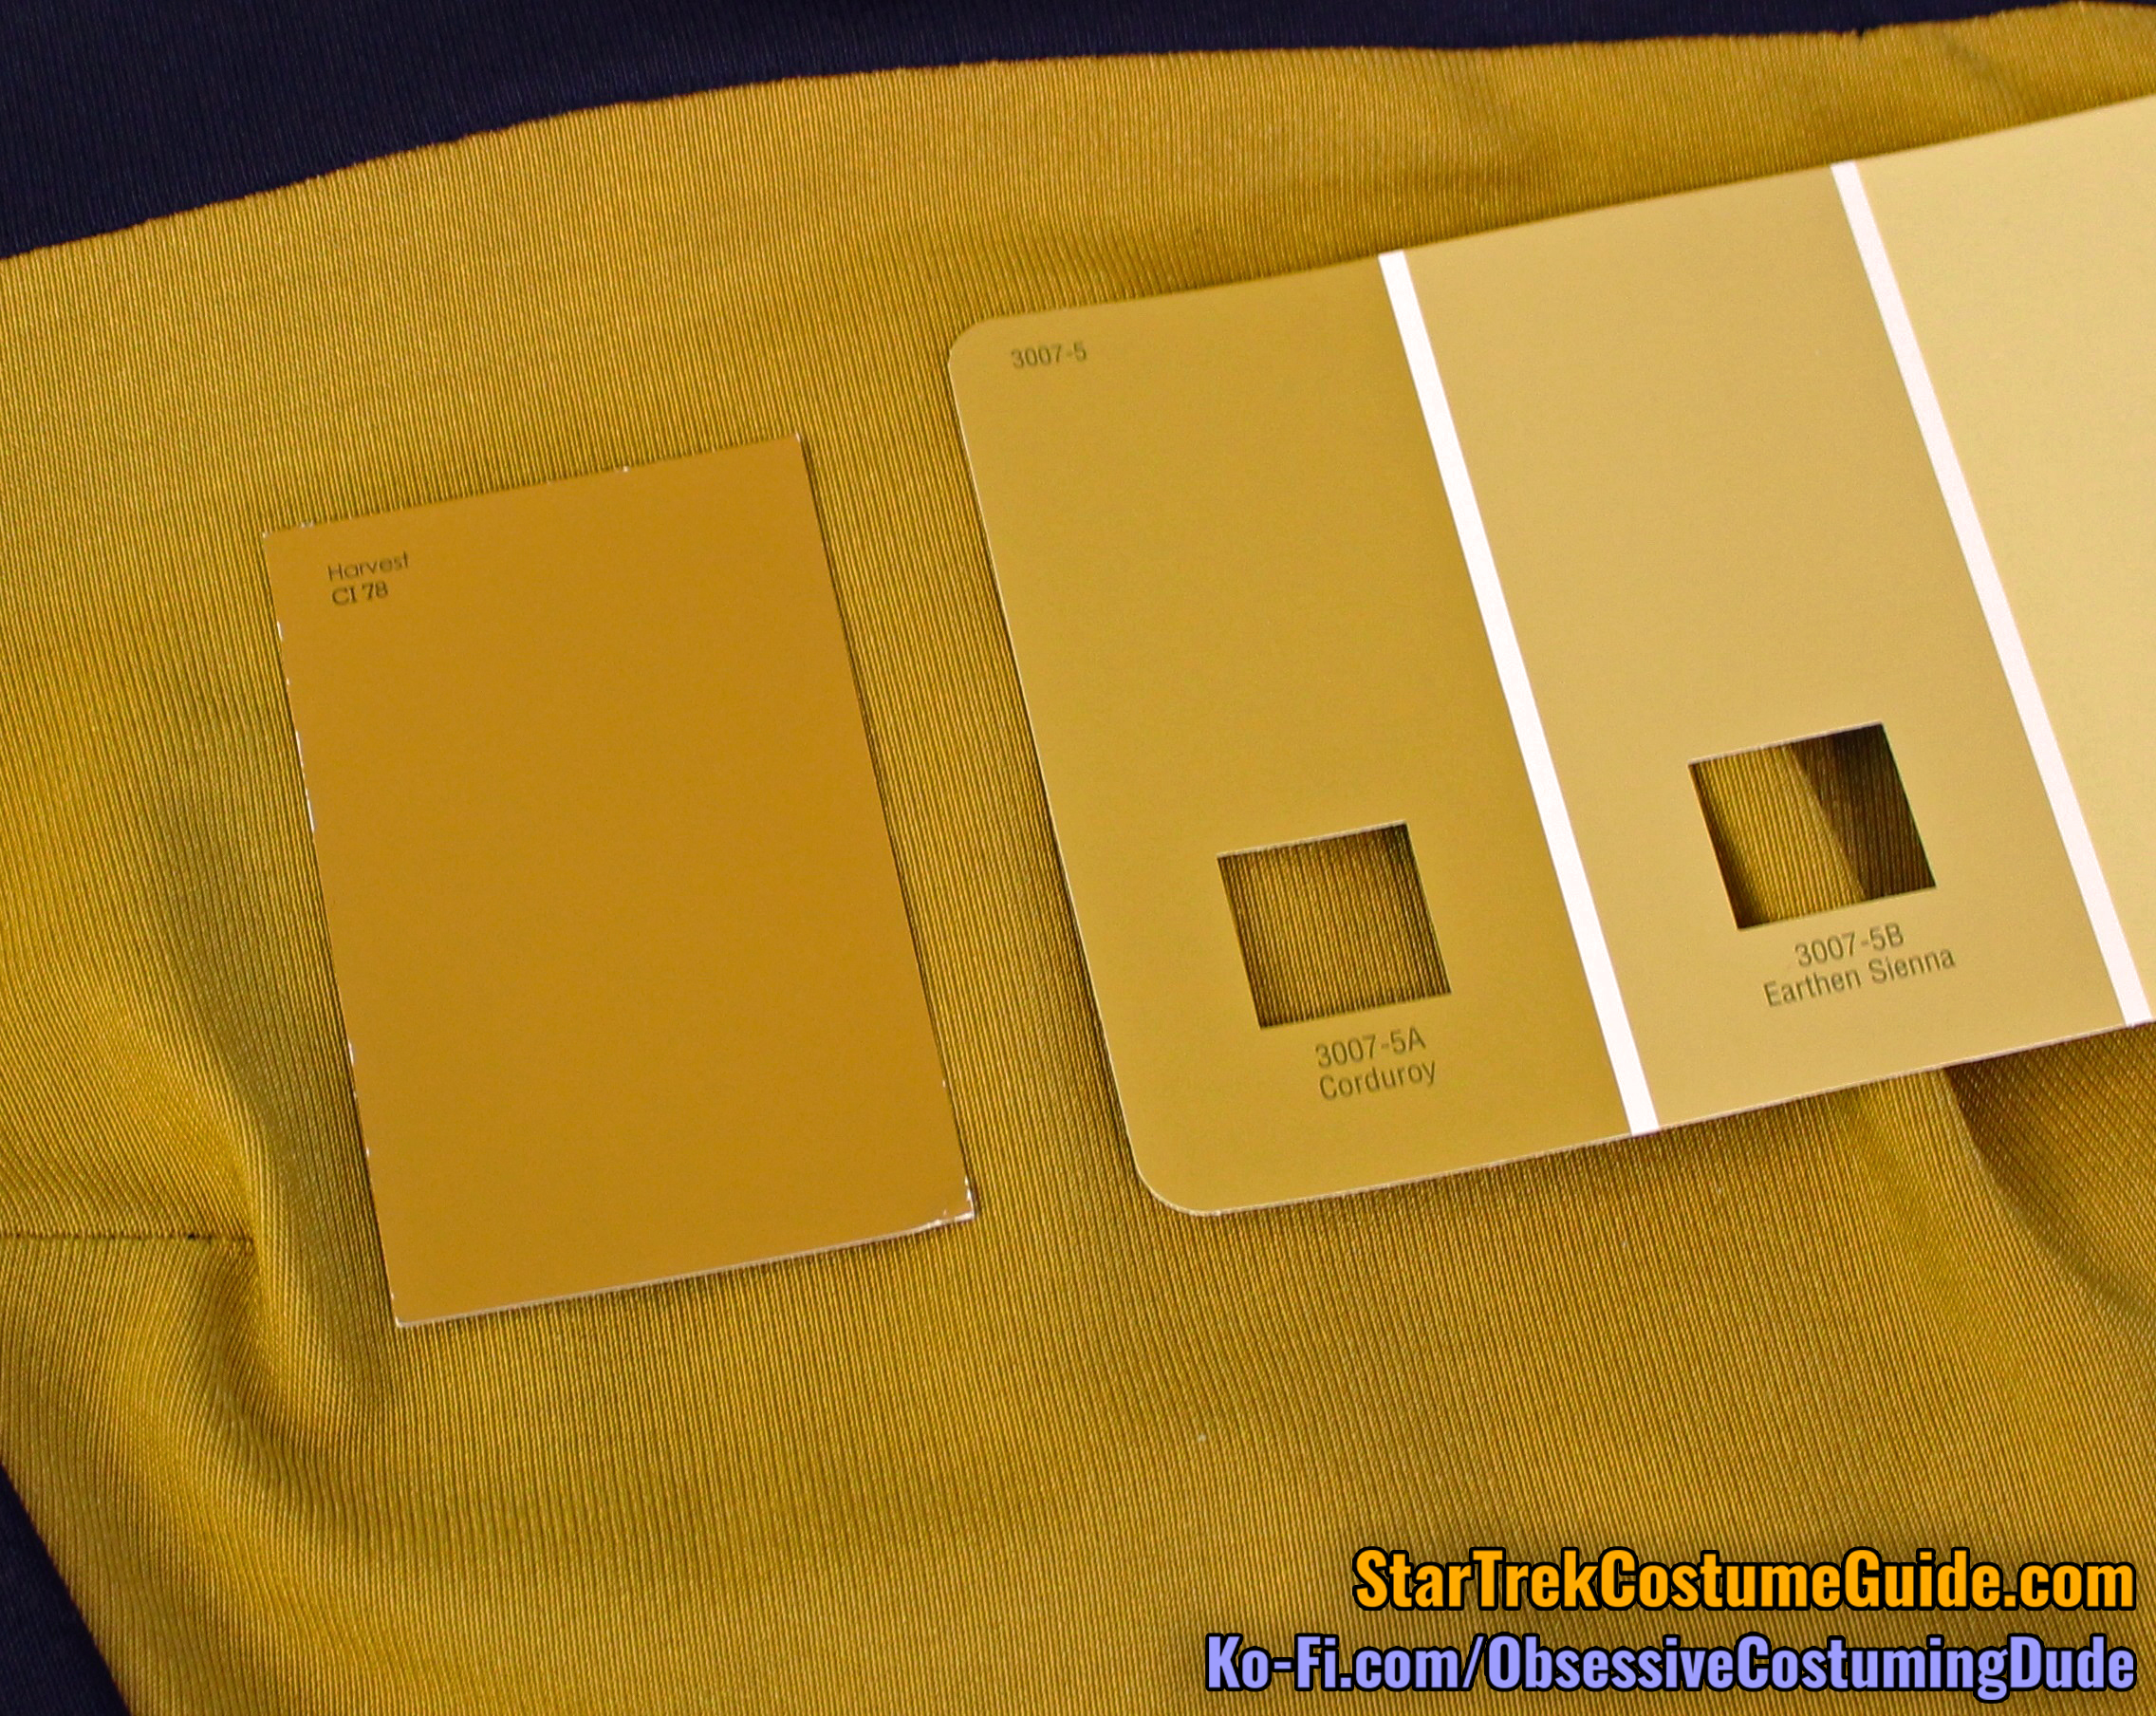
For those of you who have access to a Pantone book, color #117 U (pictured below in a variety of lighting conditions) is a close representation of the screen-used fabric color.
Alternatively, you can pick up the Valspar paint chip #CI 78, “Harvest” from your local hardware store as a reference for the original fabric color.
In the two indoor photos, the left color on card #3007-5 (3007-5A, “Corduroy”) is also a close match, and the actual fabric color is somewhere between the two of them.
They were difficult to photograph properly – at least, at my current photography skill level (which is amatuerish at best). But they do look reasonably close in-person.
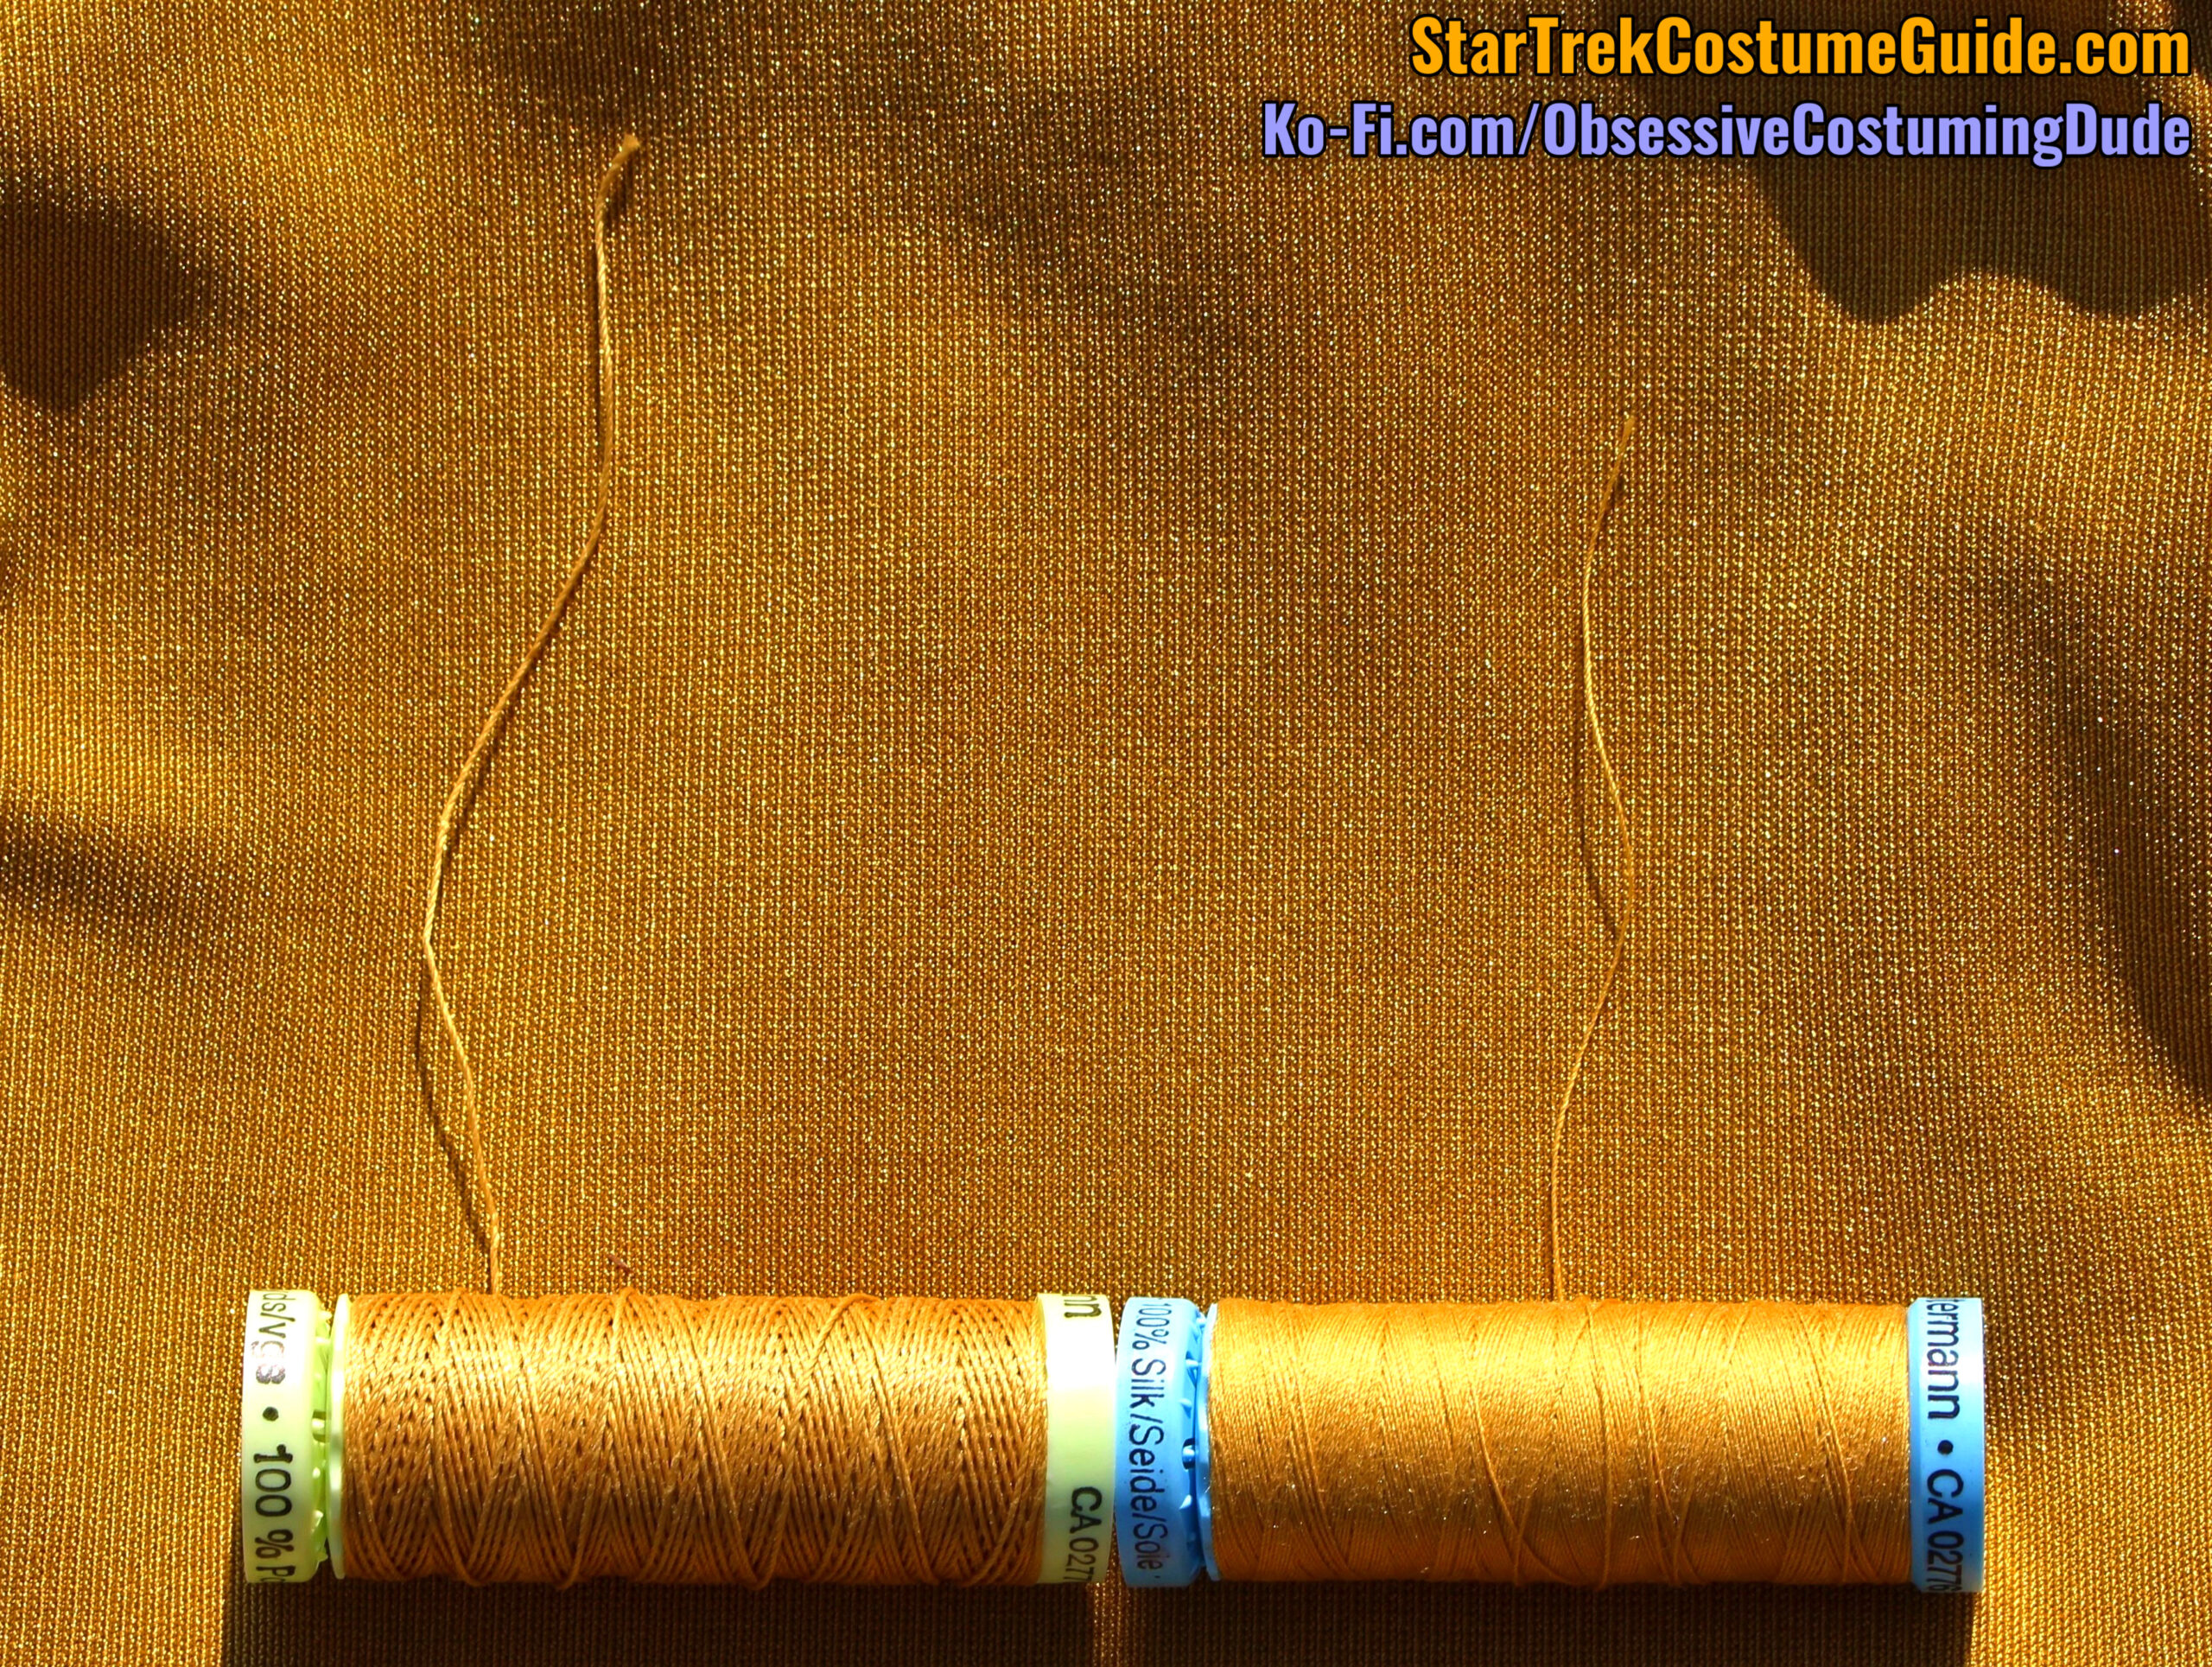
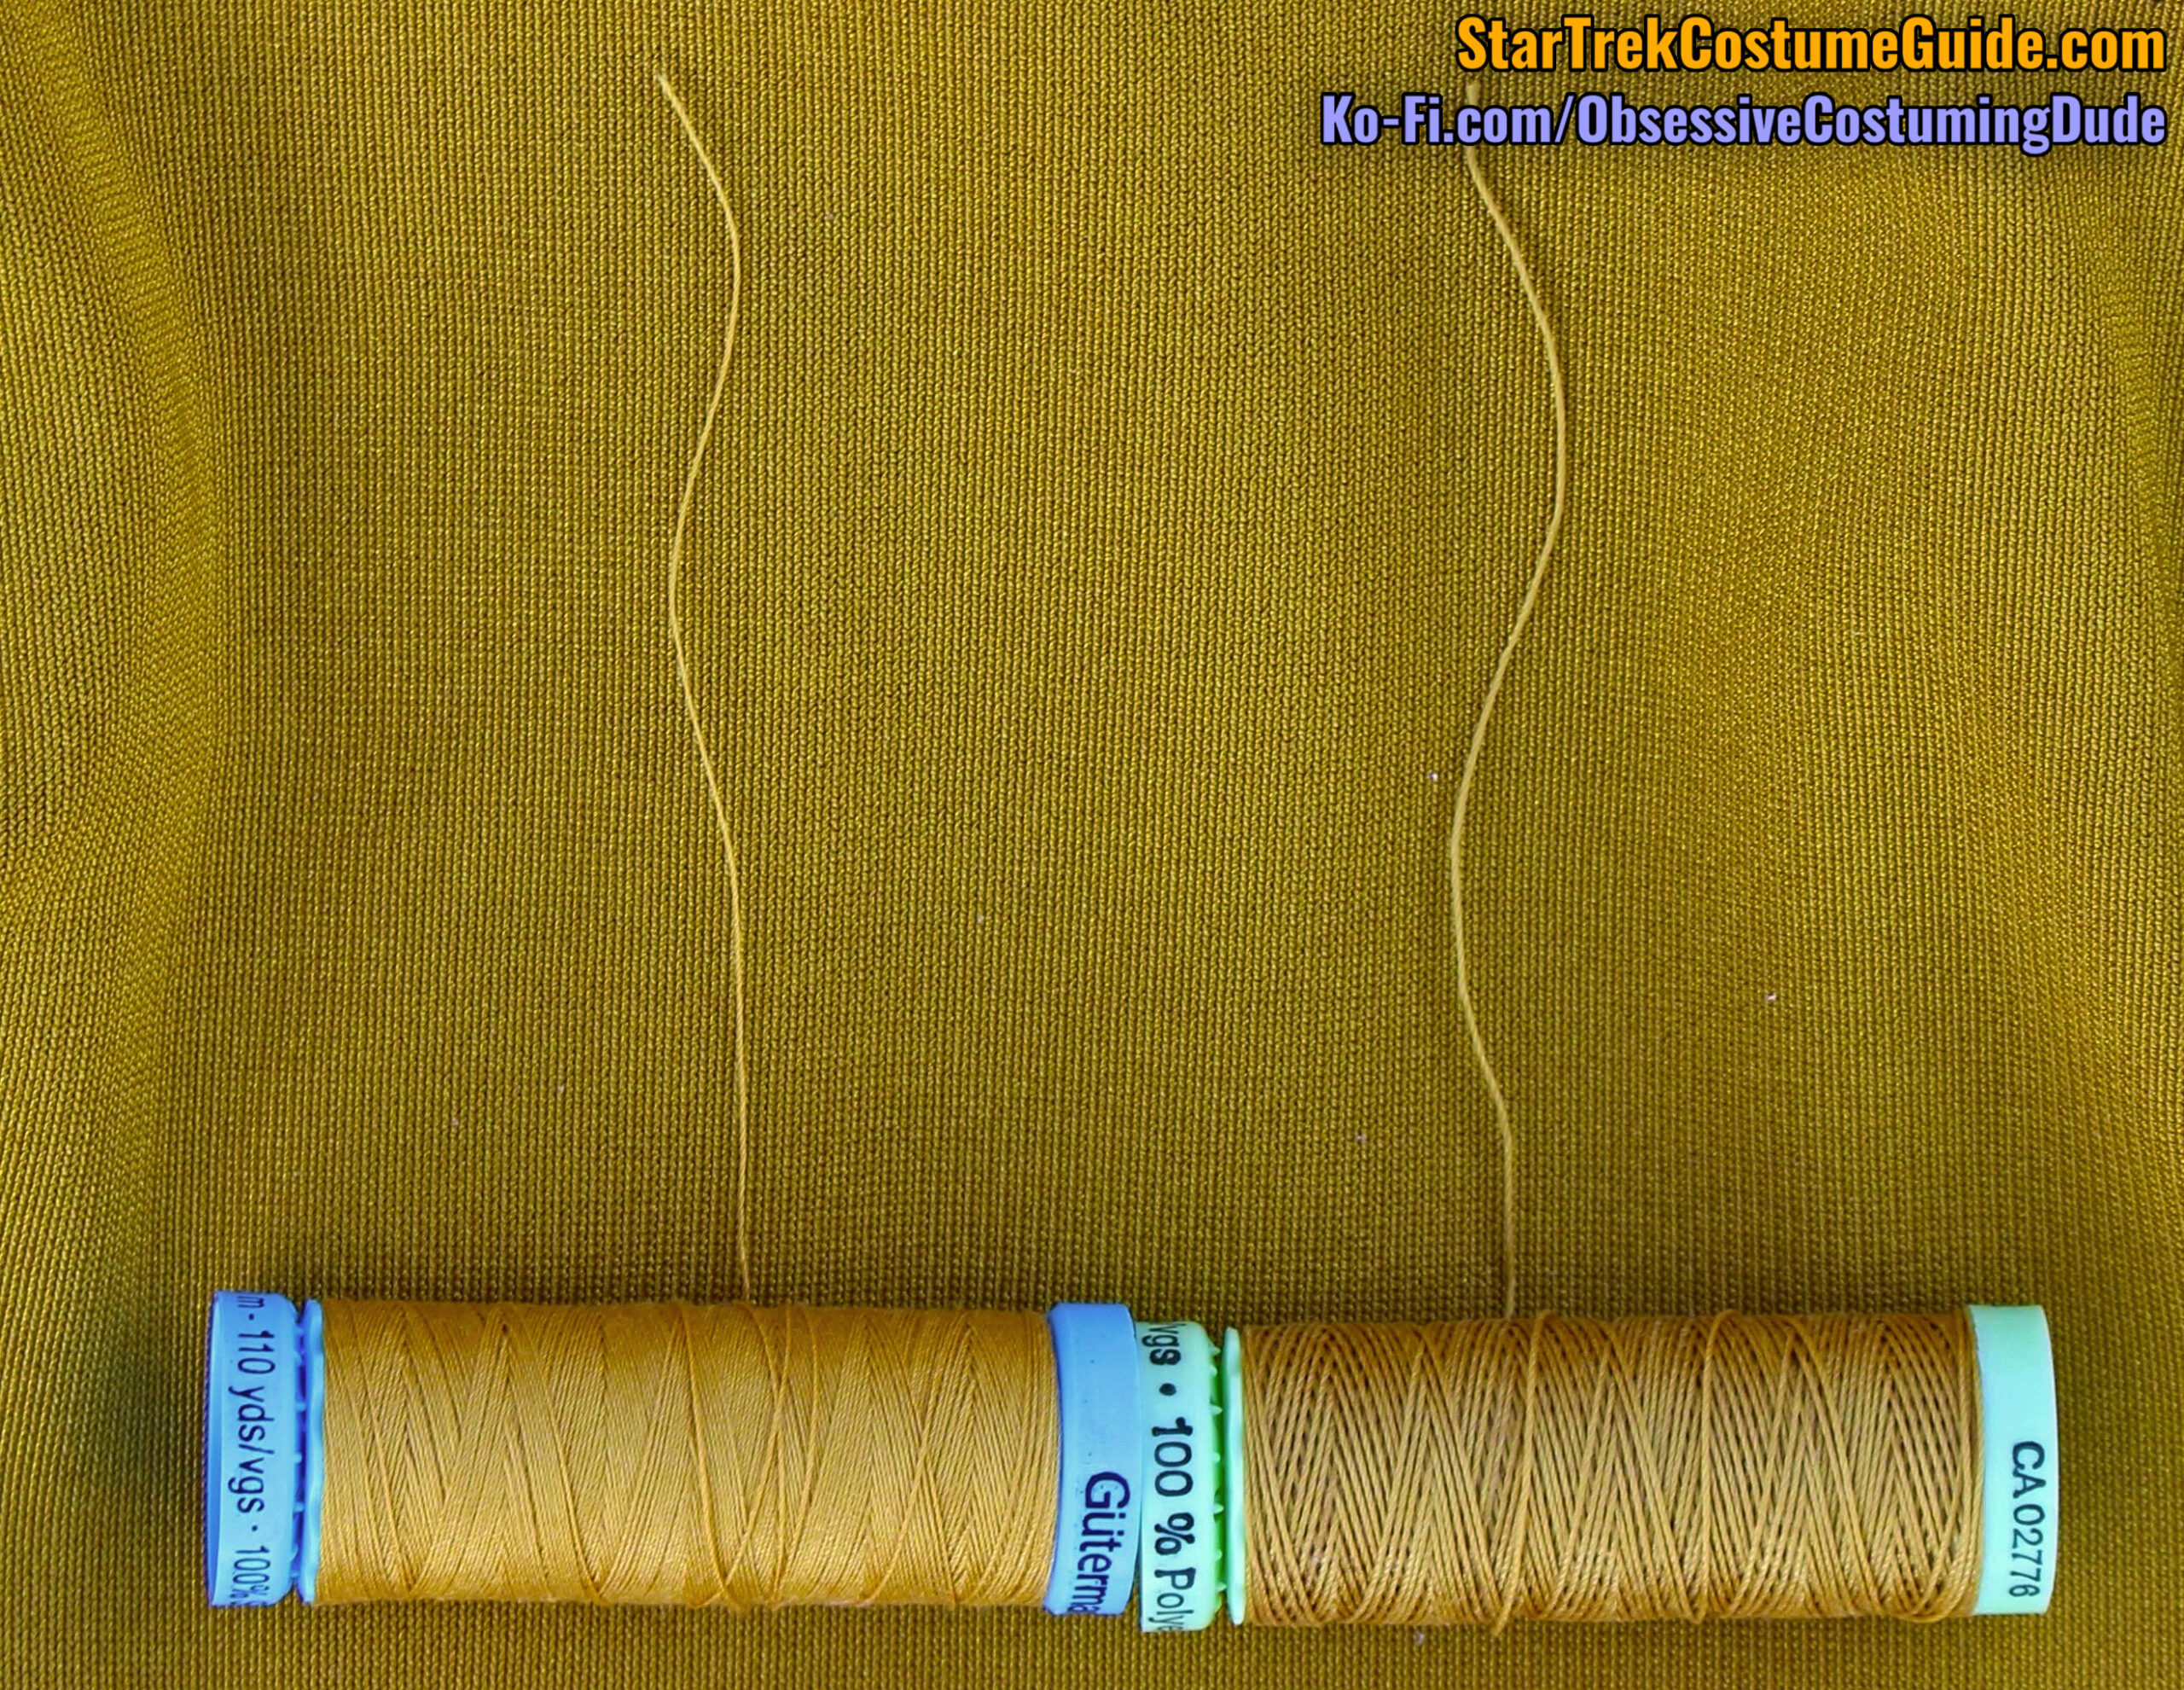
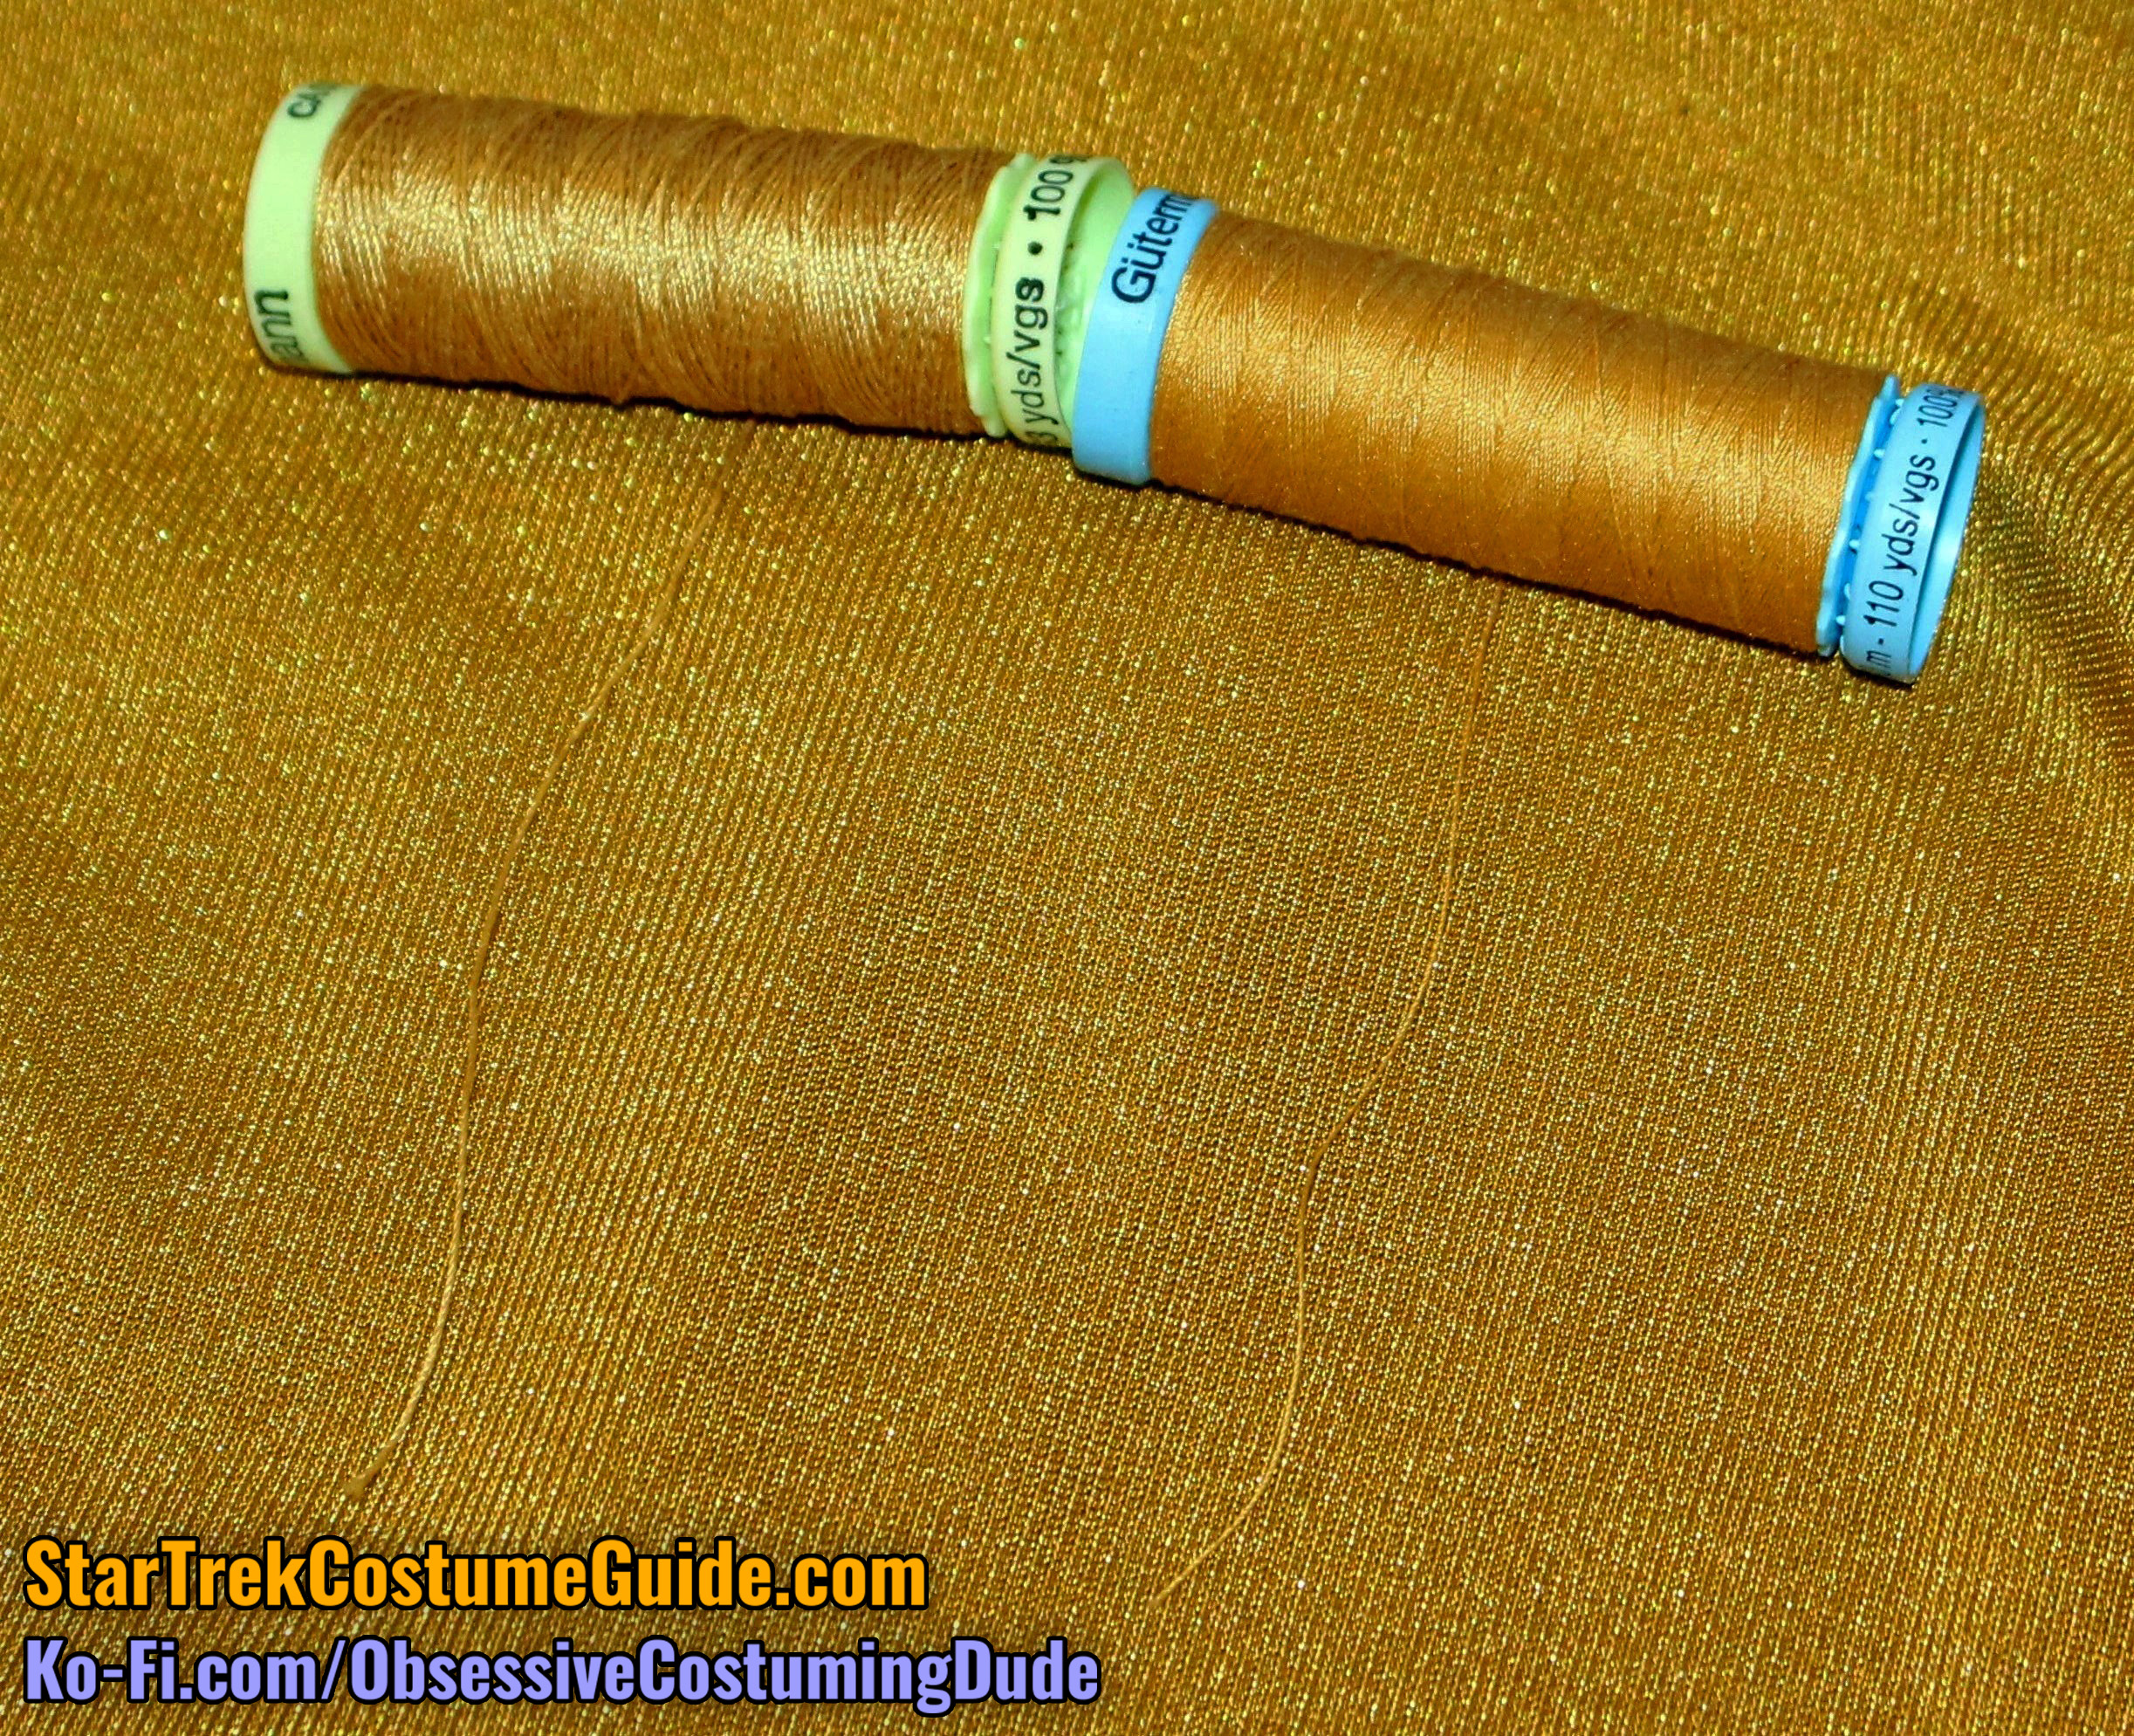
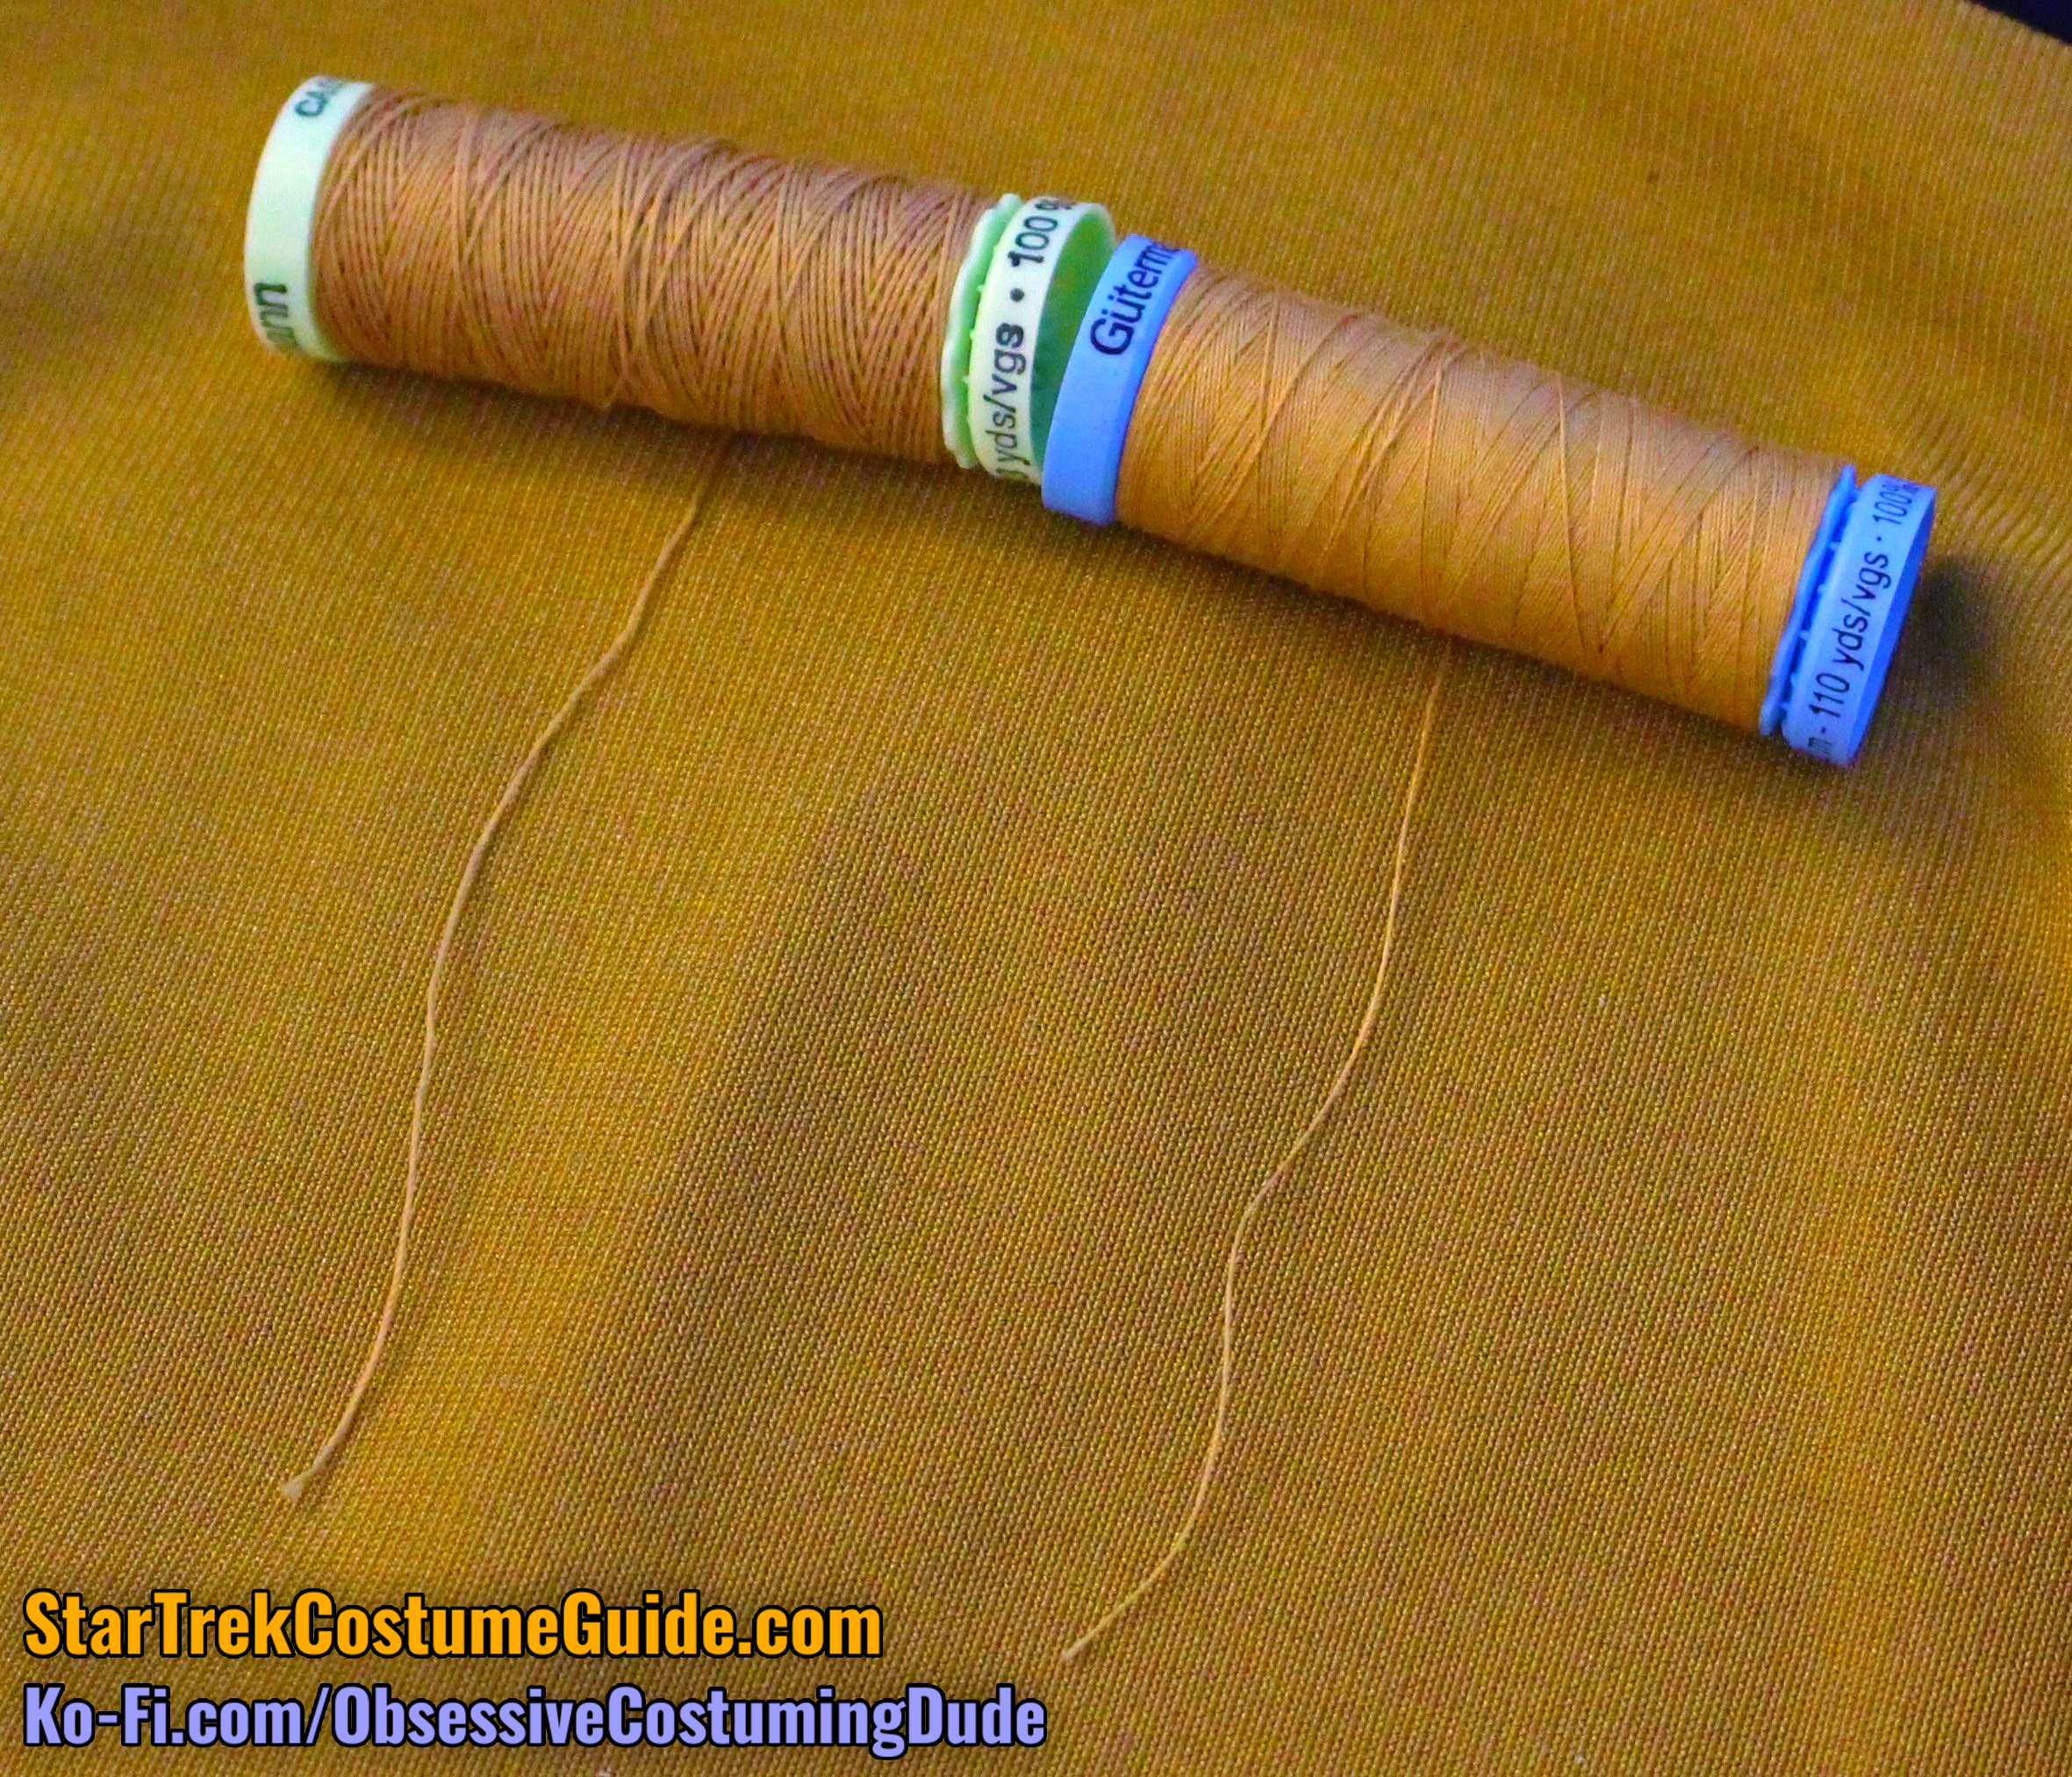
And finally, two thread colors which were close matches were Gutermann #968 (blue spool) and #865 (green spool).
Those should help give you a good idea of the actual fabric color. 🙂
Interestingly – and unlike the majority of TNG jumpsuits – Ensign Sito’s entire uniform was cut with the jumbo spandex “weave” oriented vertically, and the stretch actually wrapping around the wearer’s body (like one would naturally assume it would be).
As you may recall from my TNG jumpsuit analysis, these jumpsuits were notoriously tight-fitting, and the costume department experimented with a variety of grain directions in different areas – probably in an attempt to make the actors more comfortable while keeping them looking sharp.
EXTERIOR DIMENSIONS and CONSTRUCTION
After making these initial observations about the fabric color and grain, I grabbed my seam gauge and measuring tape to document the jumpsuit’s dimensions and construction, generally working from the top down; front, then back; outside, then inside.
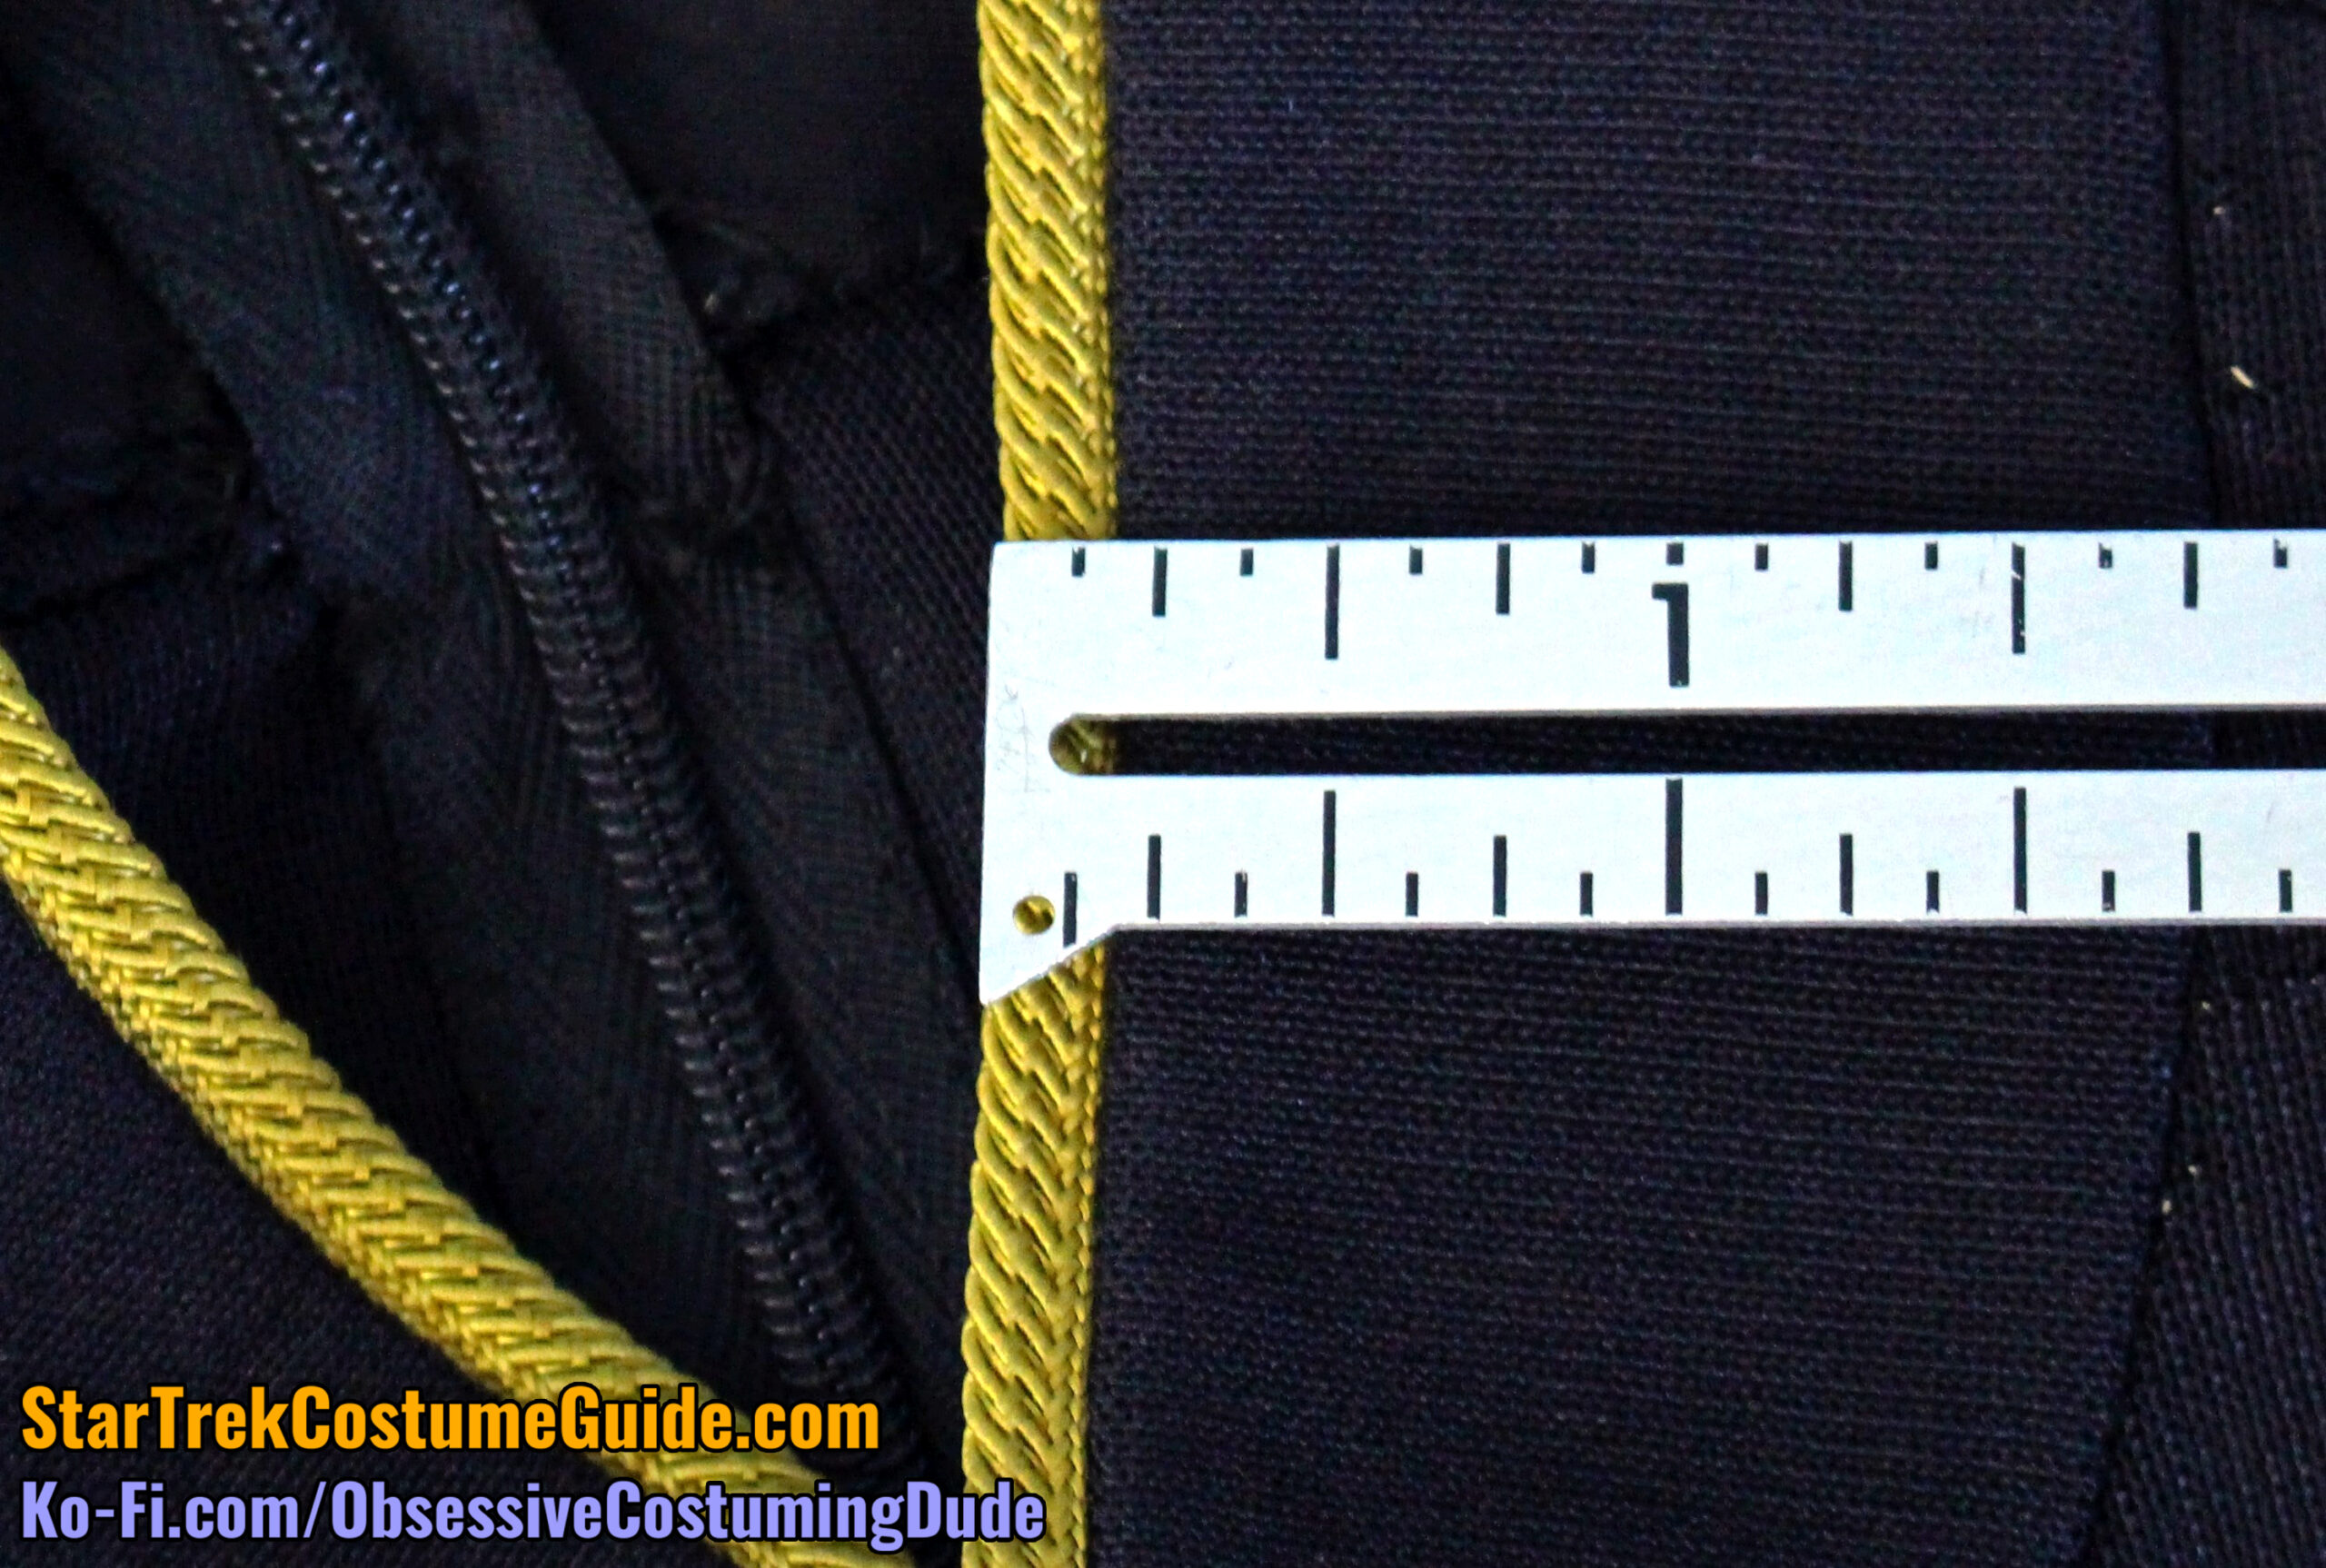
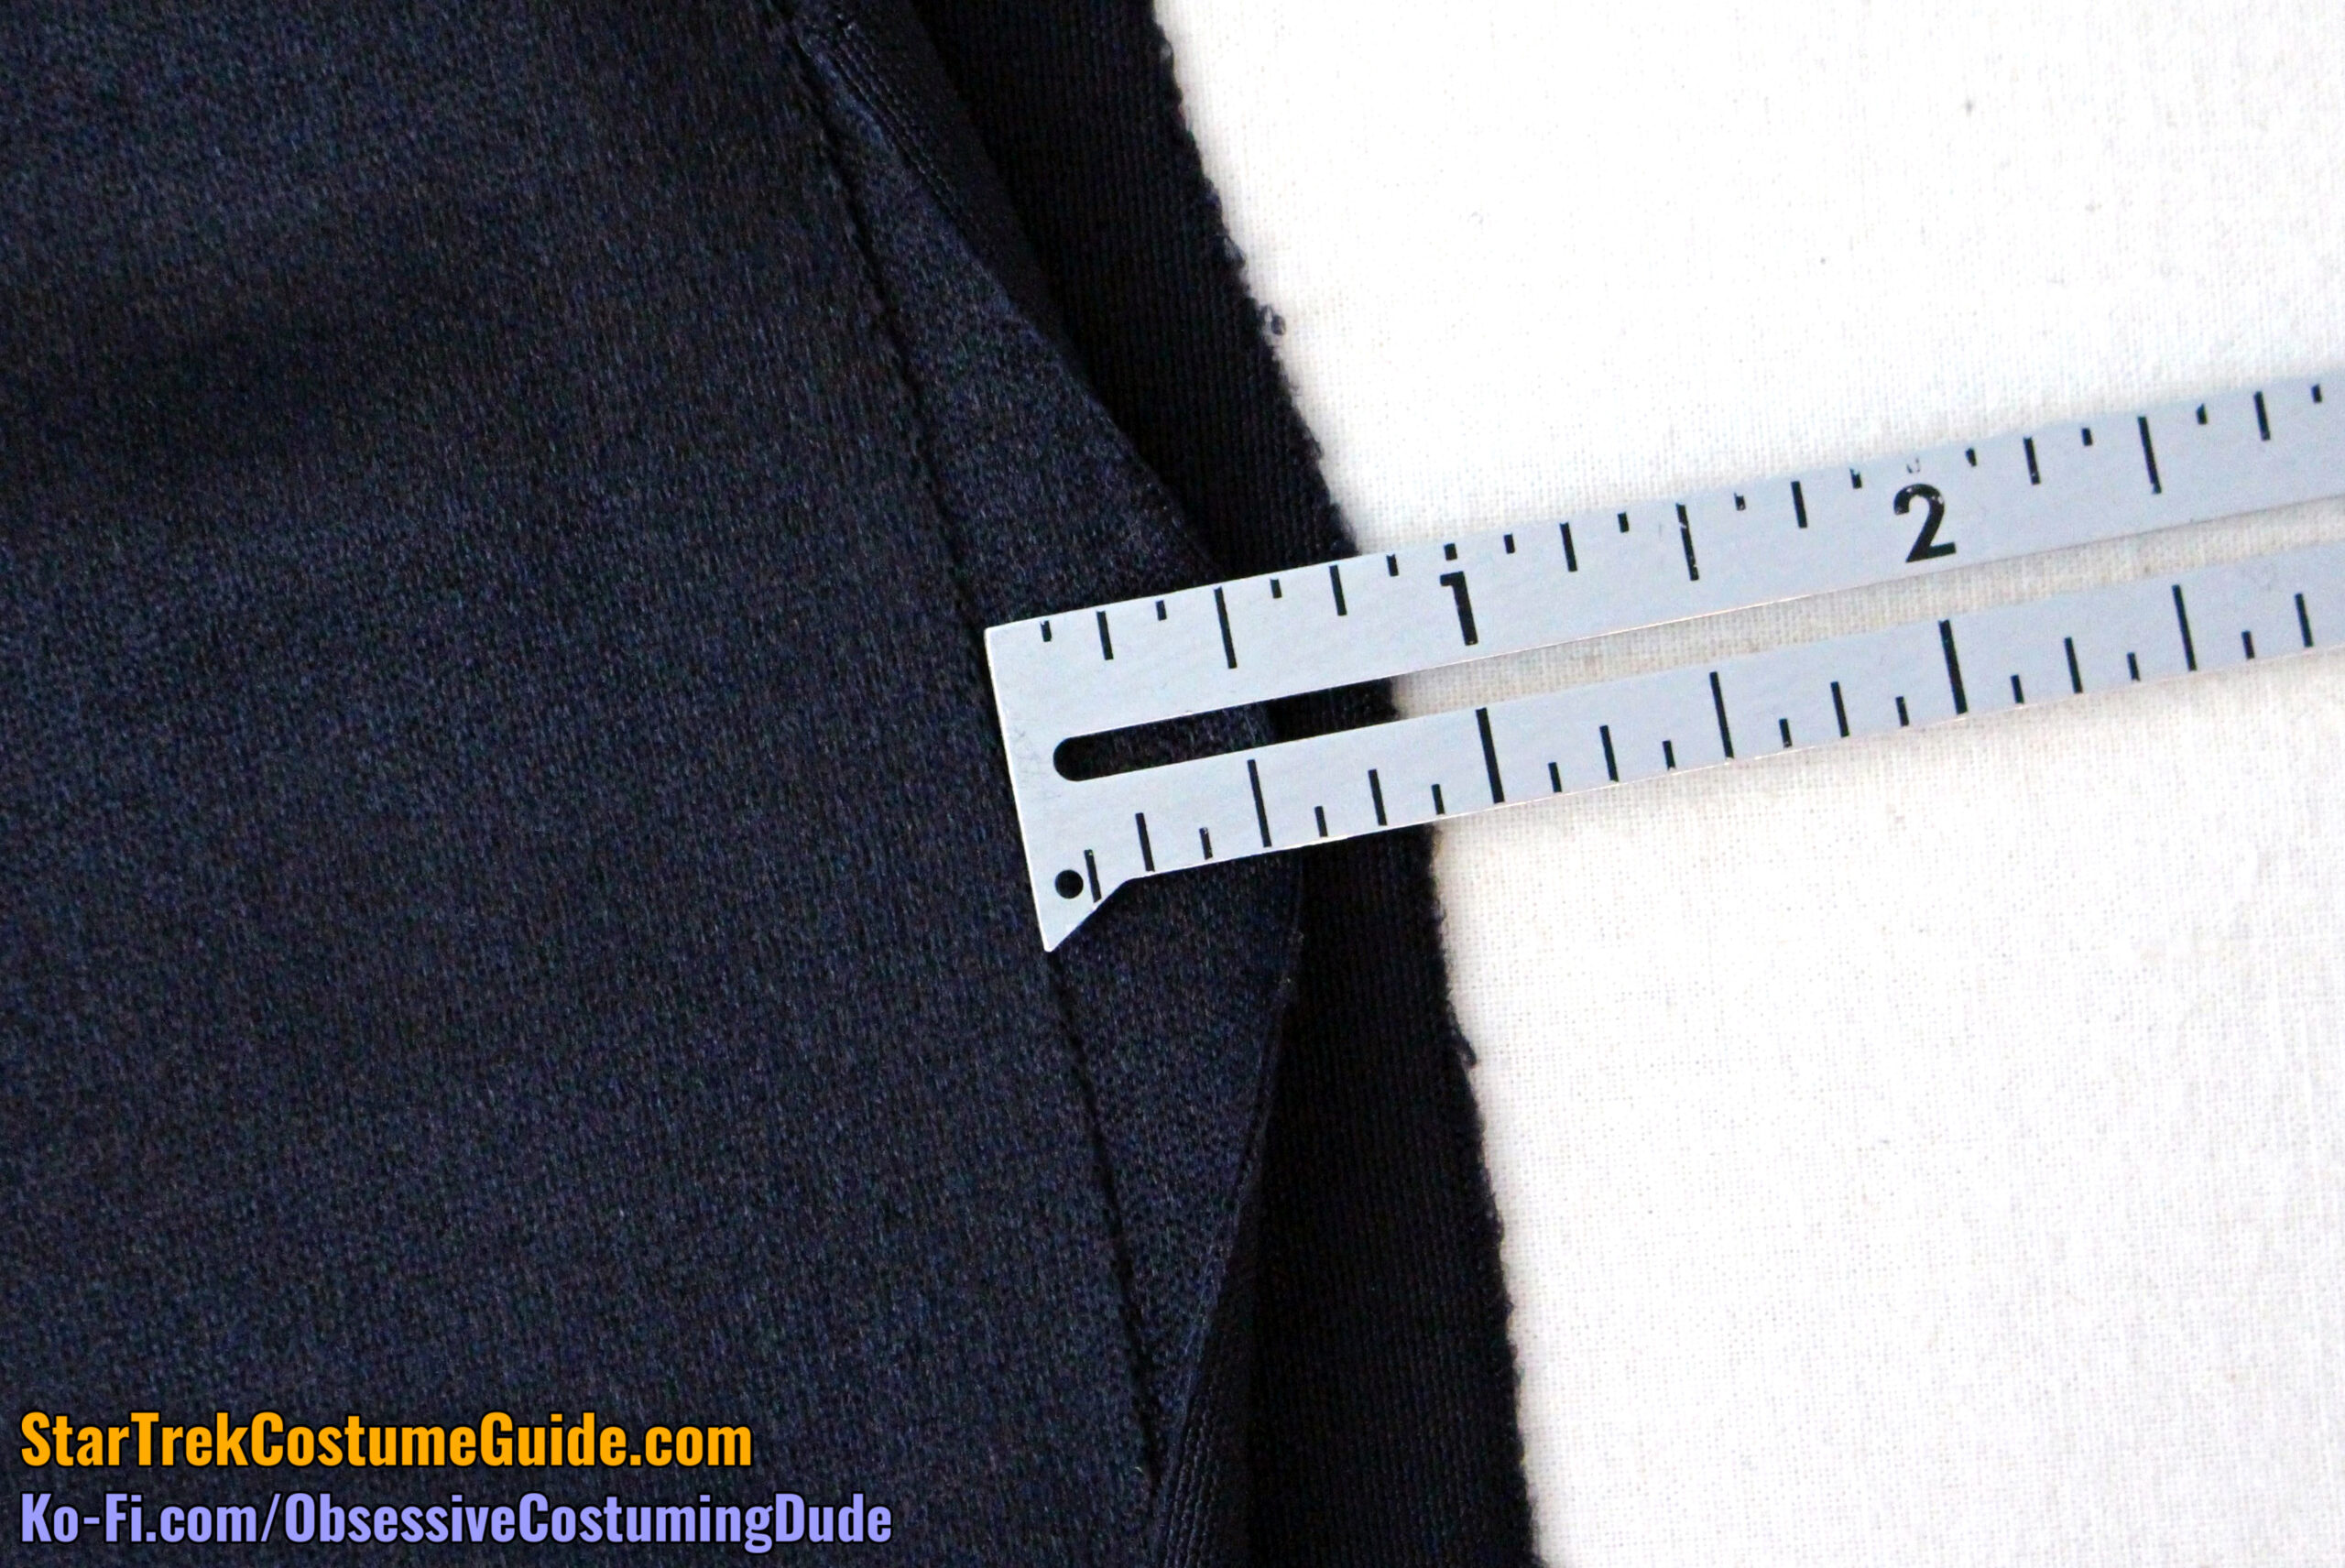
As you may also recall from my TNG jumpsuit analysis, the collar piping was usually ⅛”, but toward the end of the series, a small number of jumpsuits had collar piping that was actually slightly wider – closer to 3/16”.
One such example is this Ensign Sito uniform.
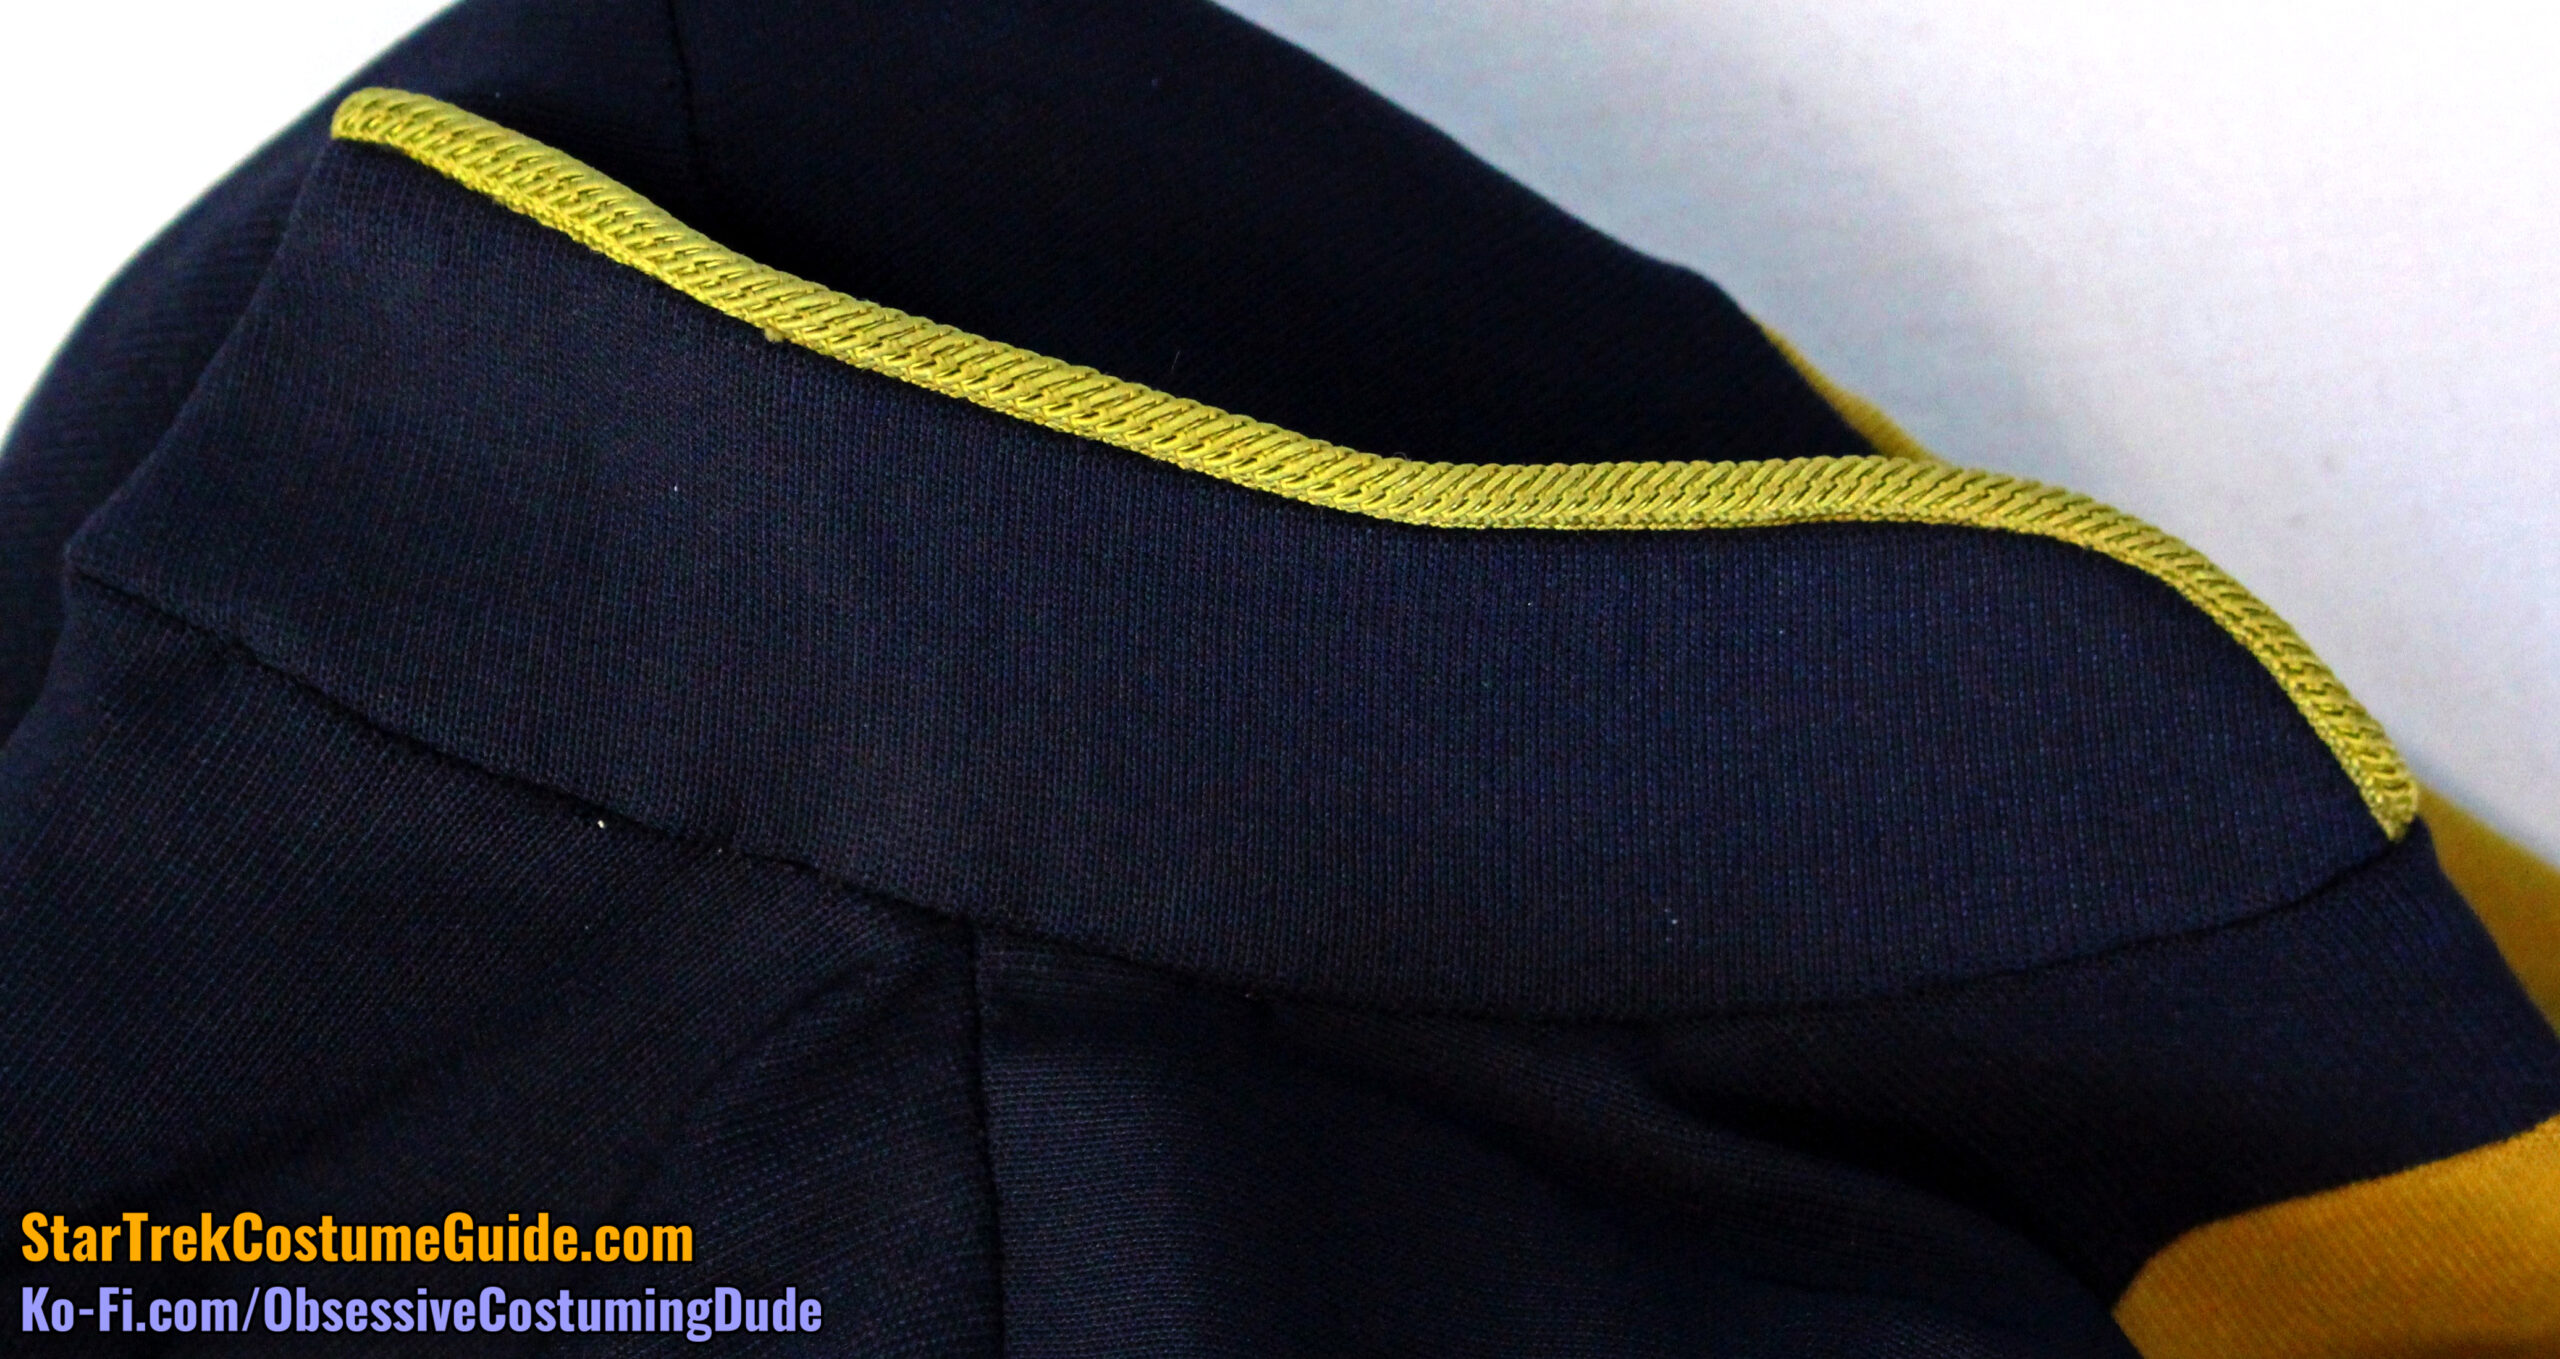
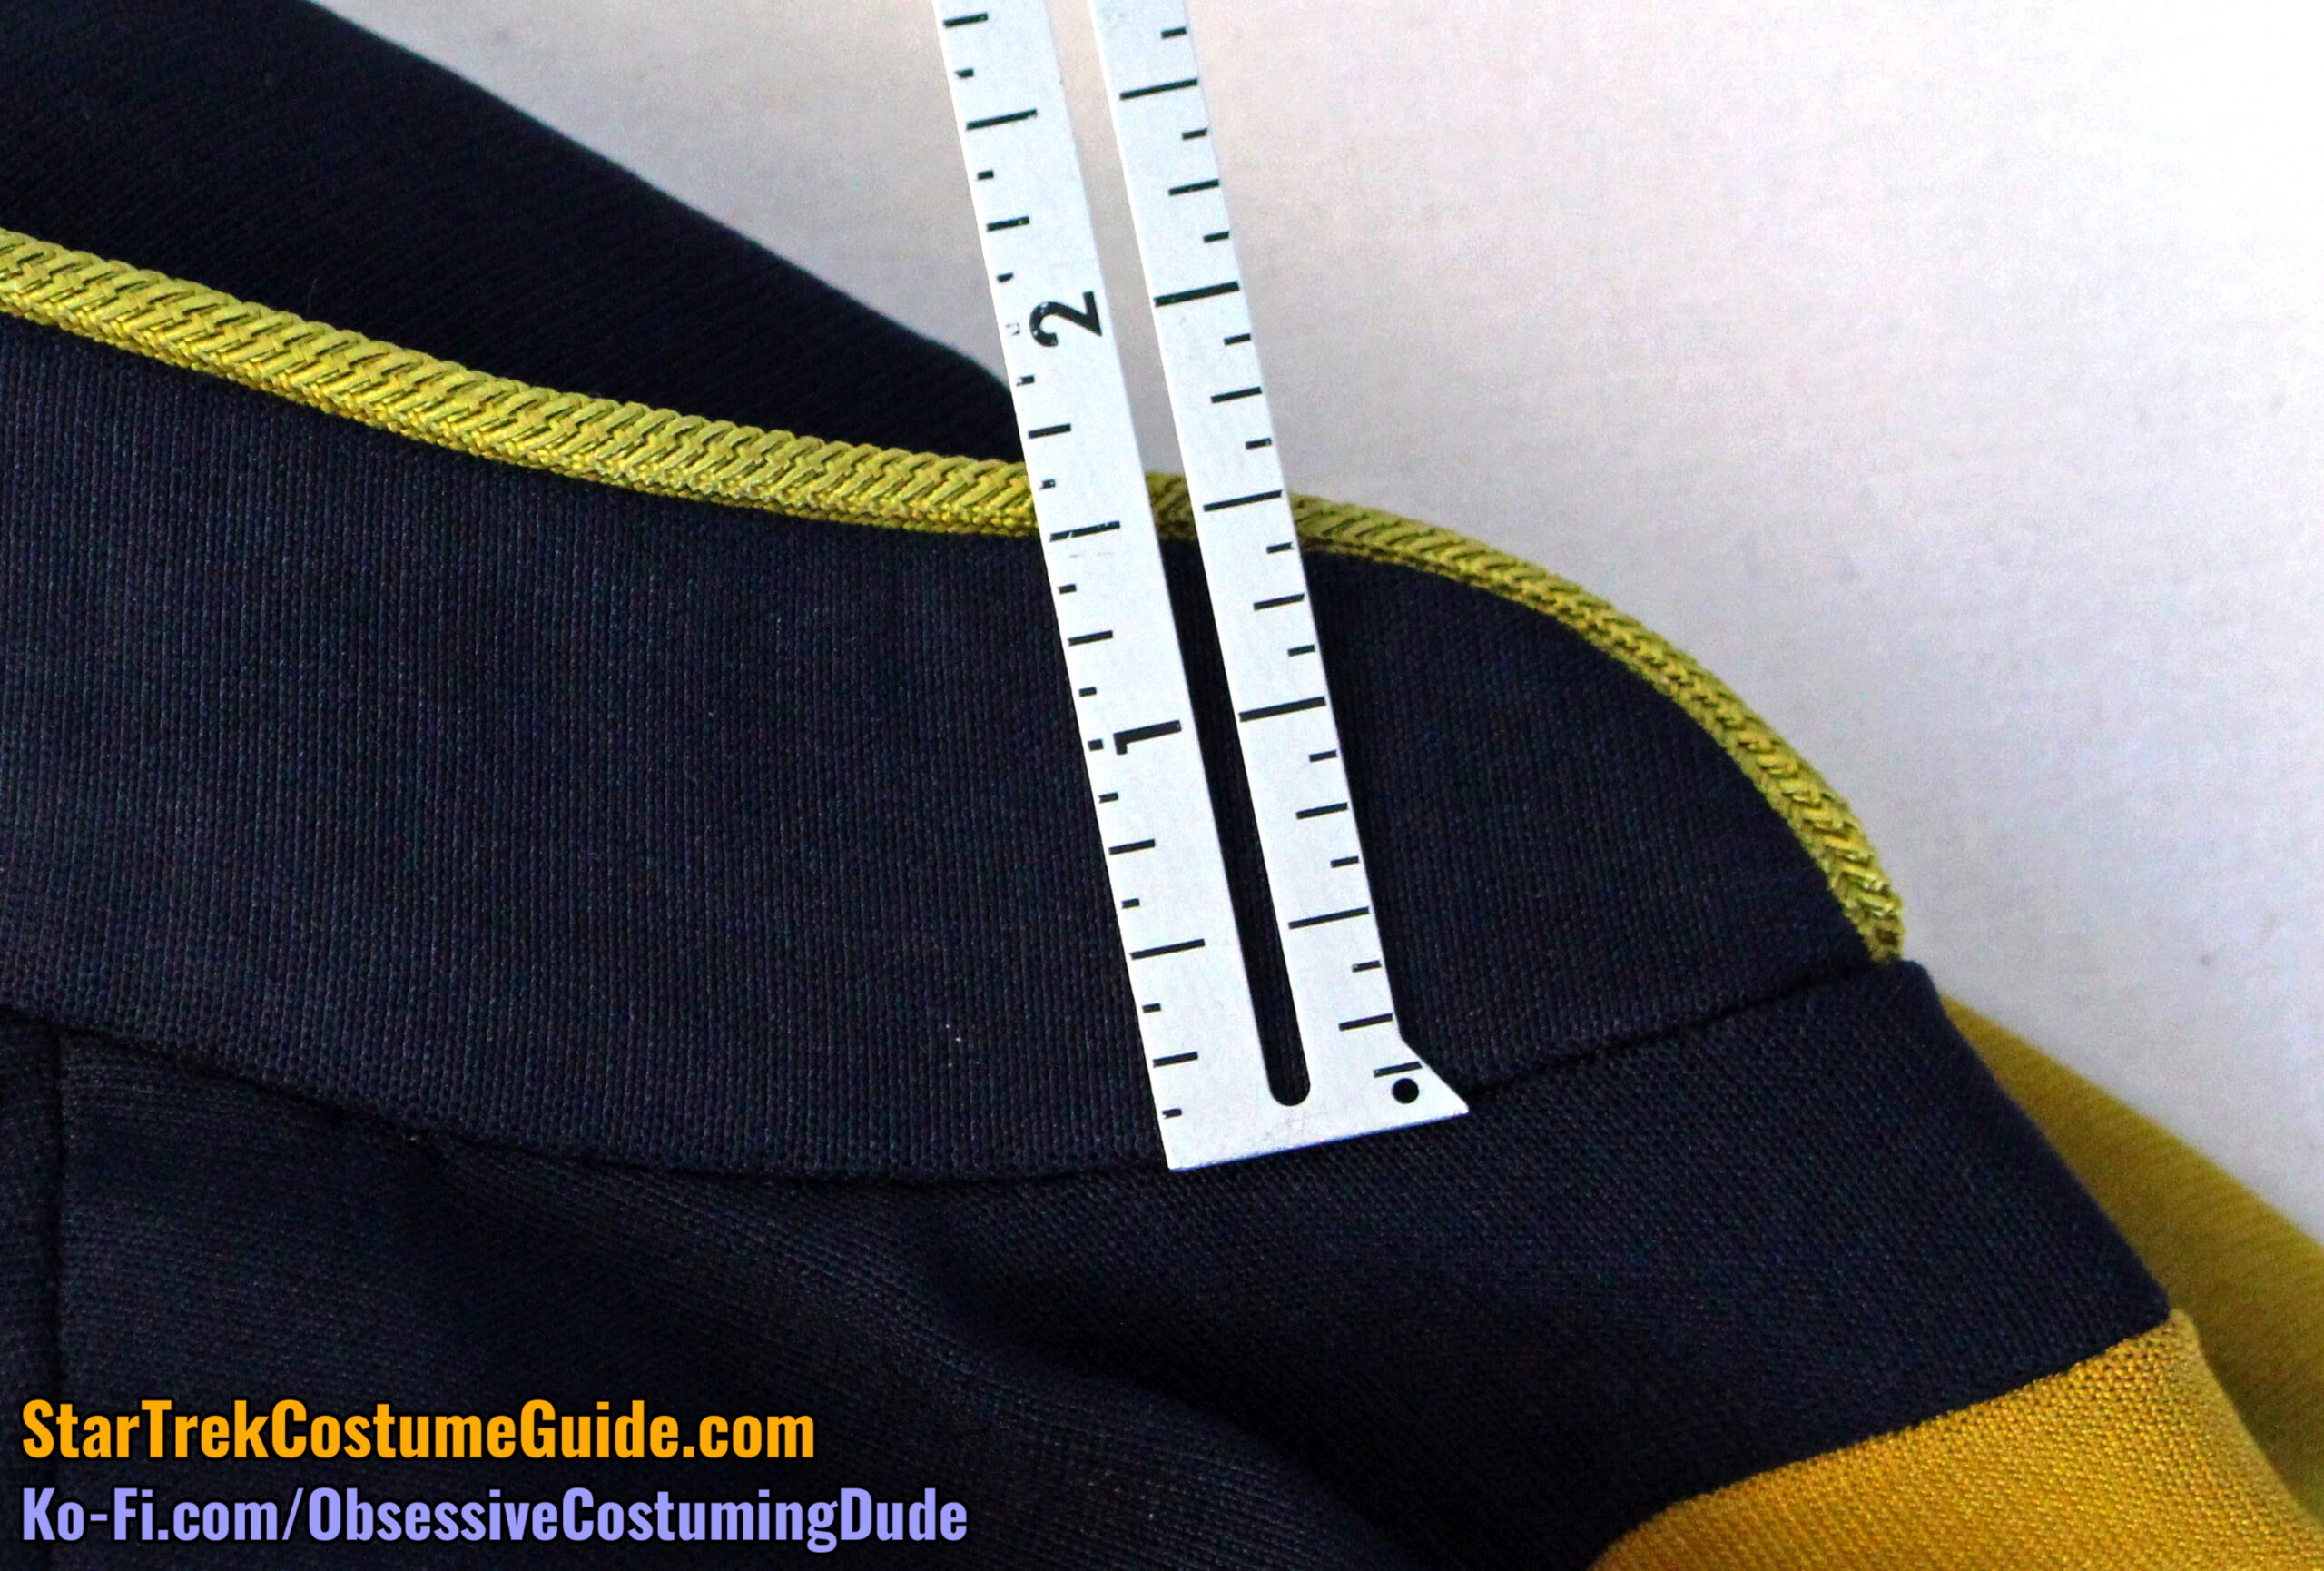
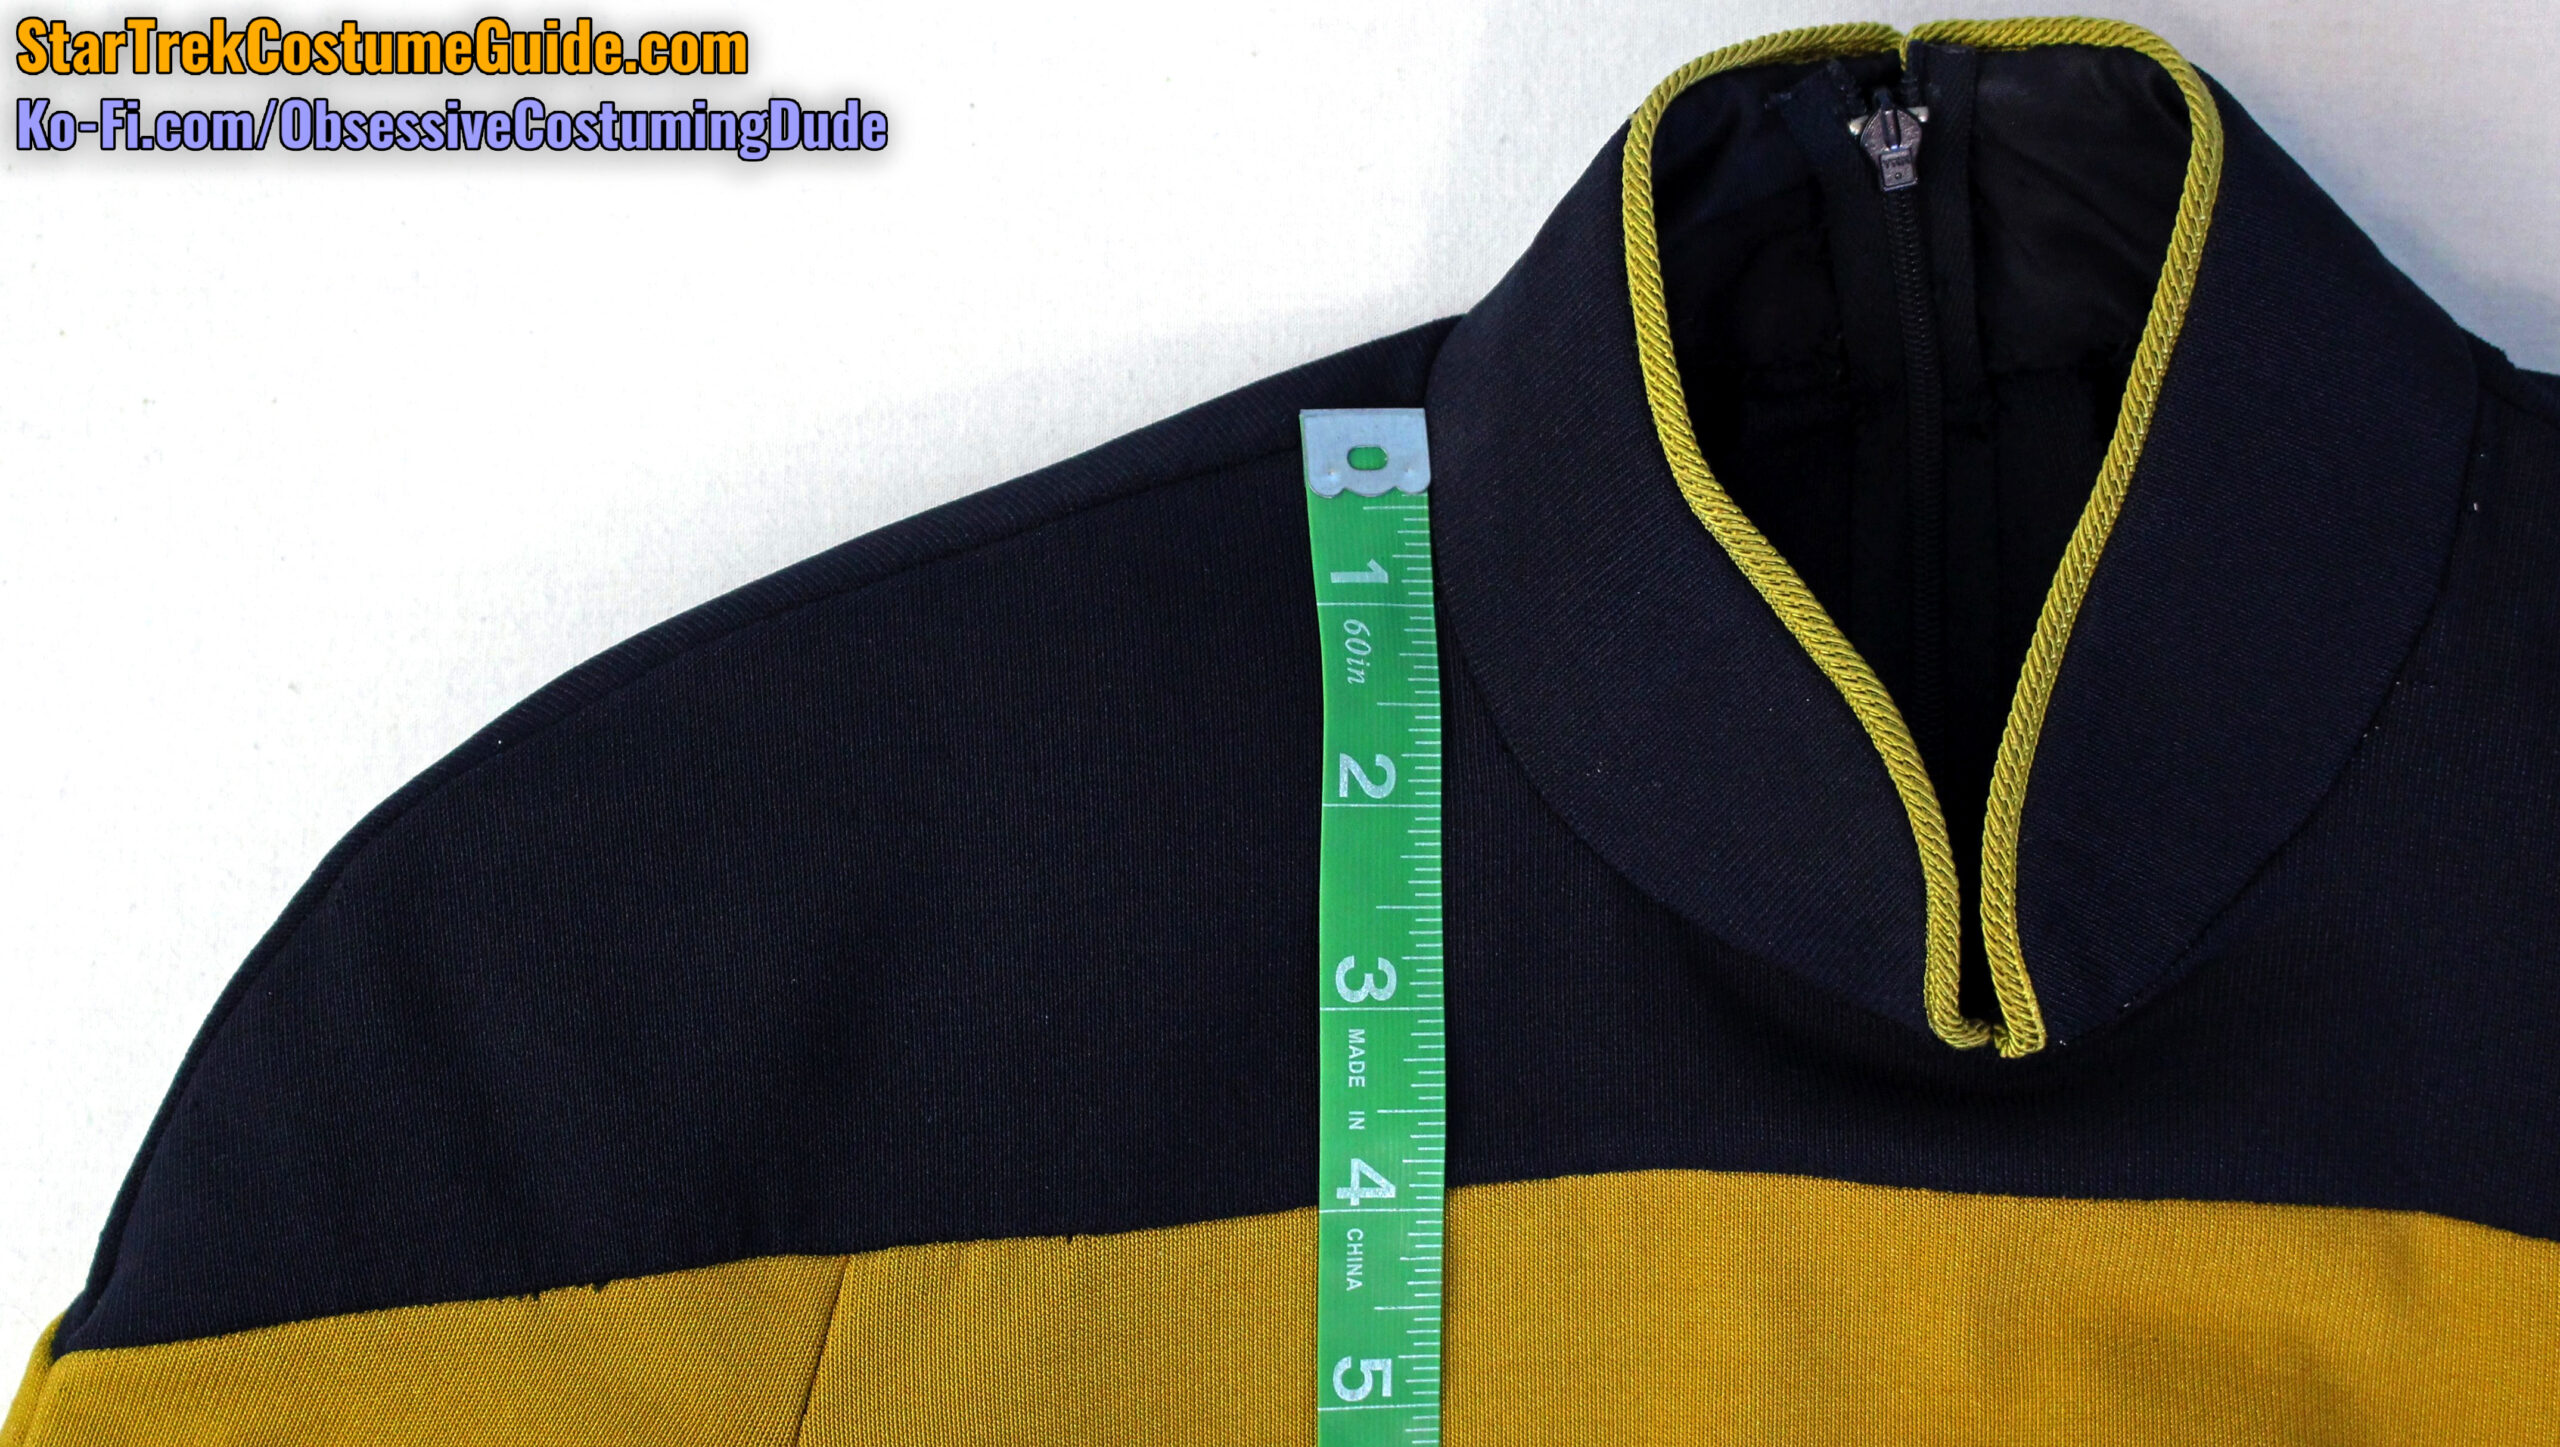
Here you can see the overall shape of the collar, slightly curved along the neckline to help it taper toward the wearer’s neck.
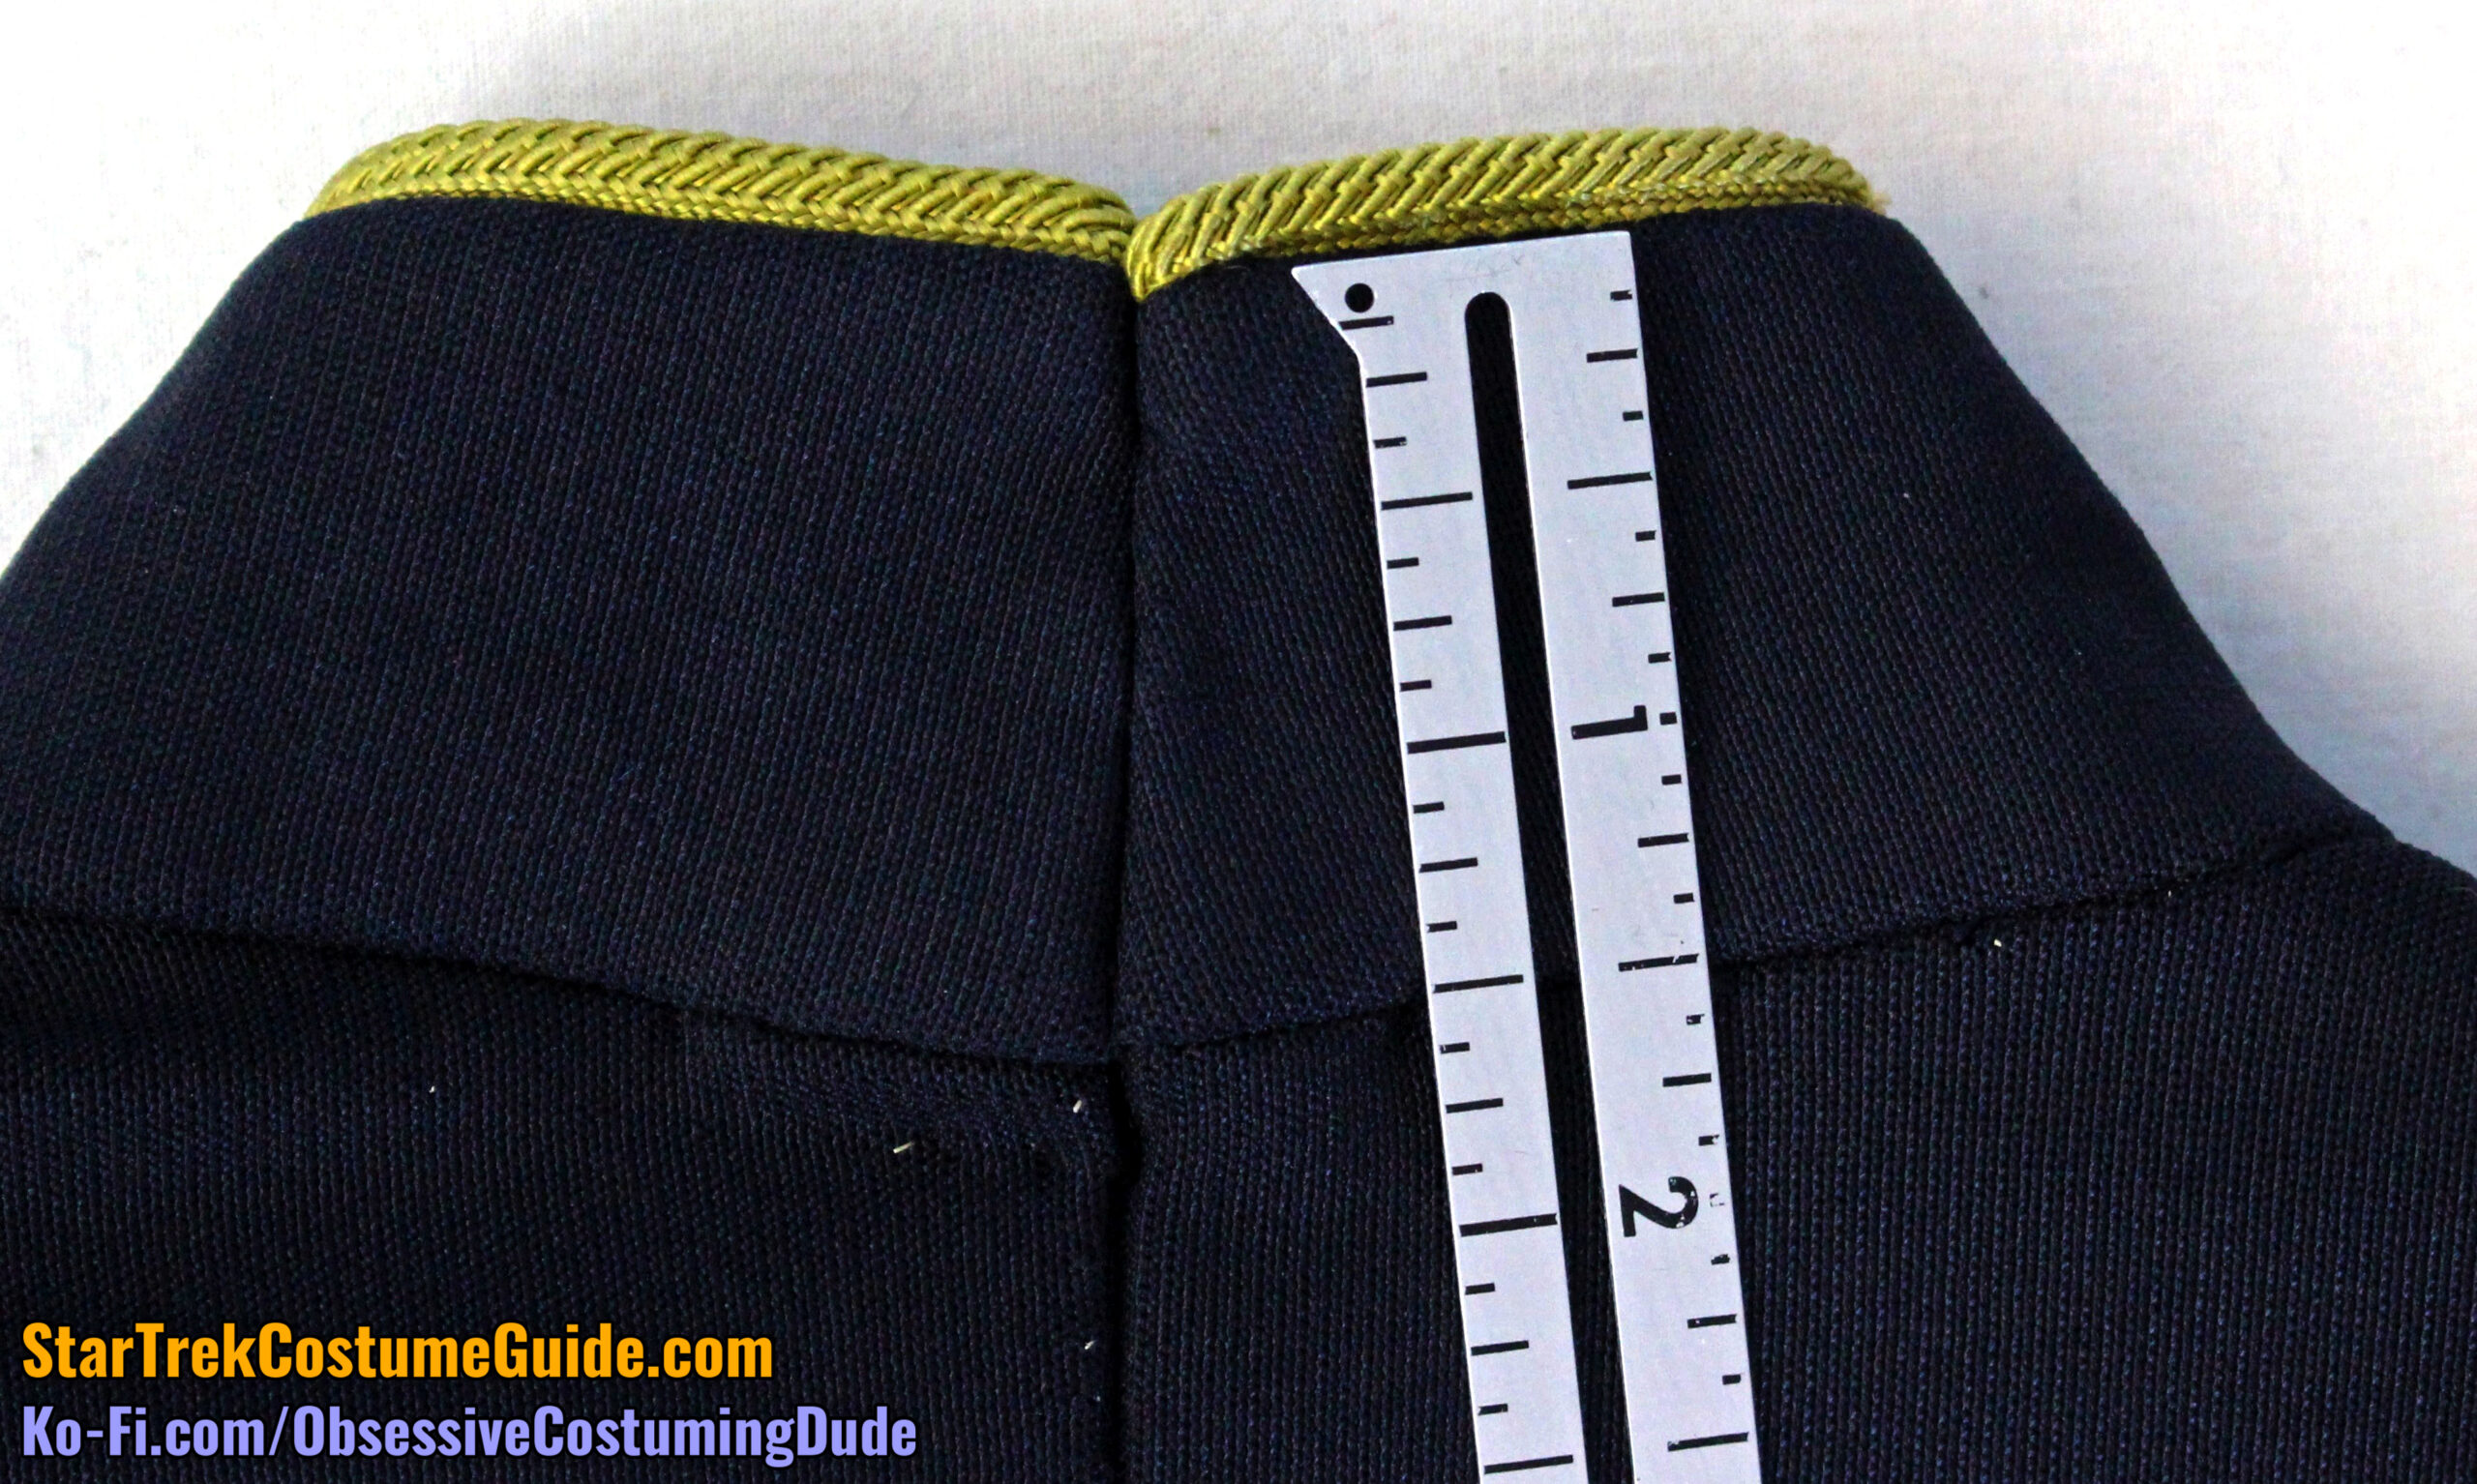
The collar itself was consistently 1 ½” tall all the way around, except for the mandarin-style center front (of course).
To my surprise, the collar itself wasn’t heavily interfaced.
I’d previously believed the collars were stiffened considerably with something akin to French canvas or heavy collar interfacing, but this collar was barely interfaced at all. (Neither was the male extra’s jumpsuit that I studied, although both TNG jackets I studied did have heavily-interfaced collars.)
The collar was quite “squishy,” although it didn’t stretch at all and felt a bit thicker than the rest of the jumpsuit; I believe it to have simply been stabilized with a midweight fusible interfacing.
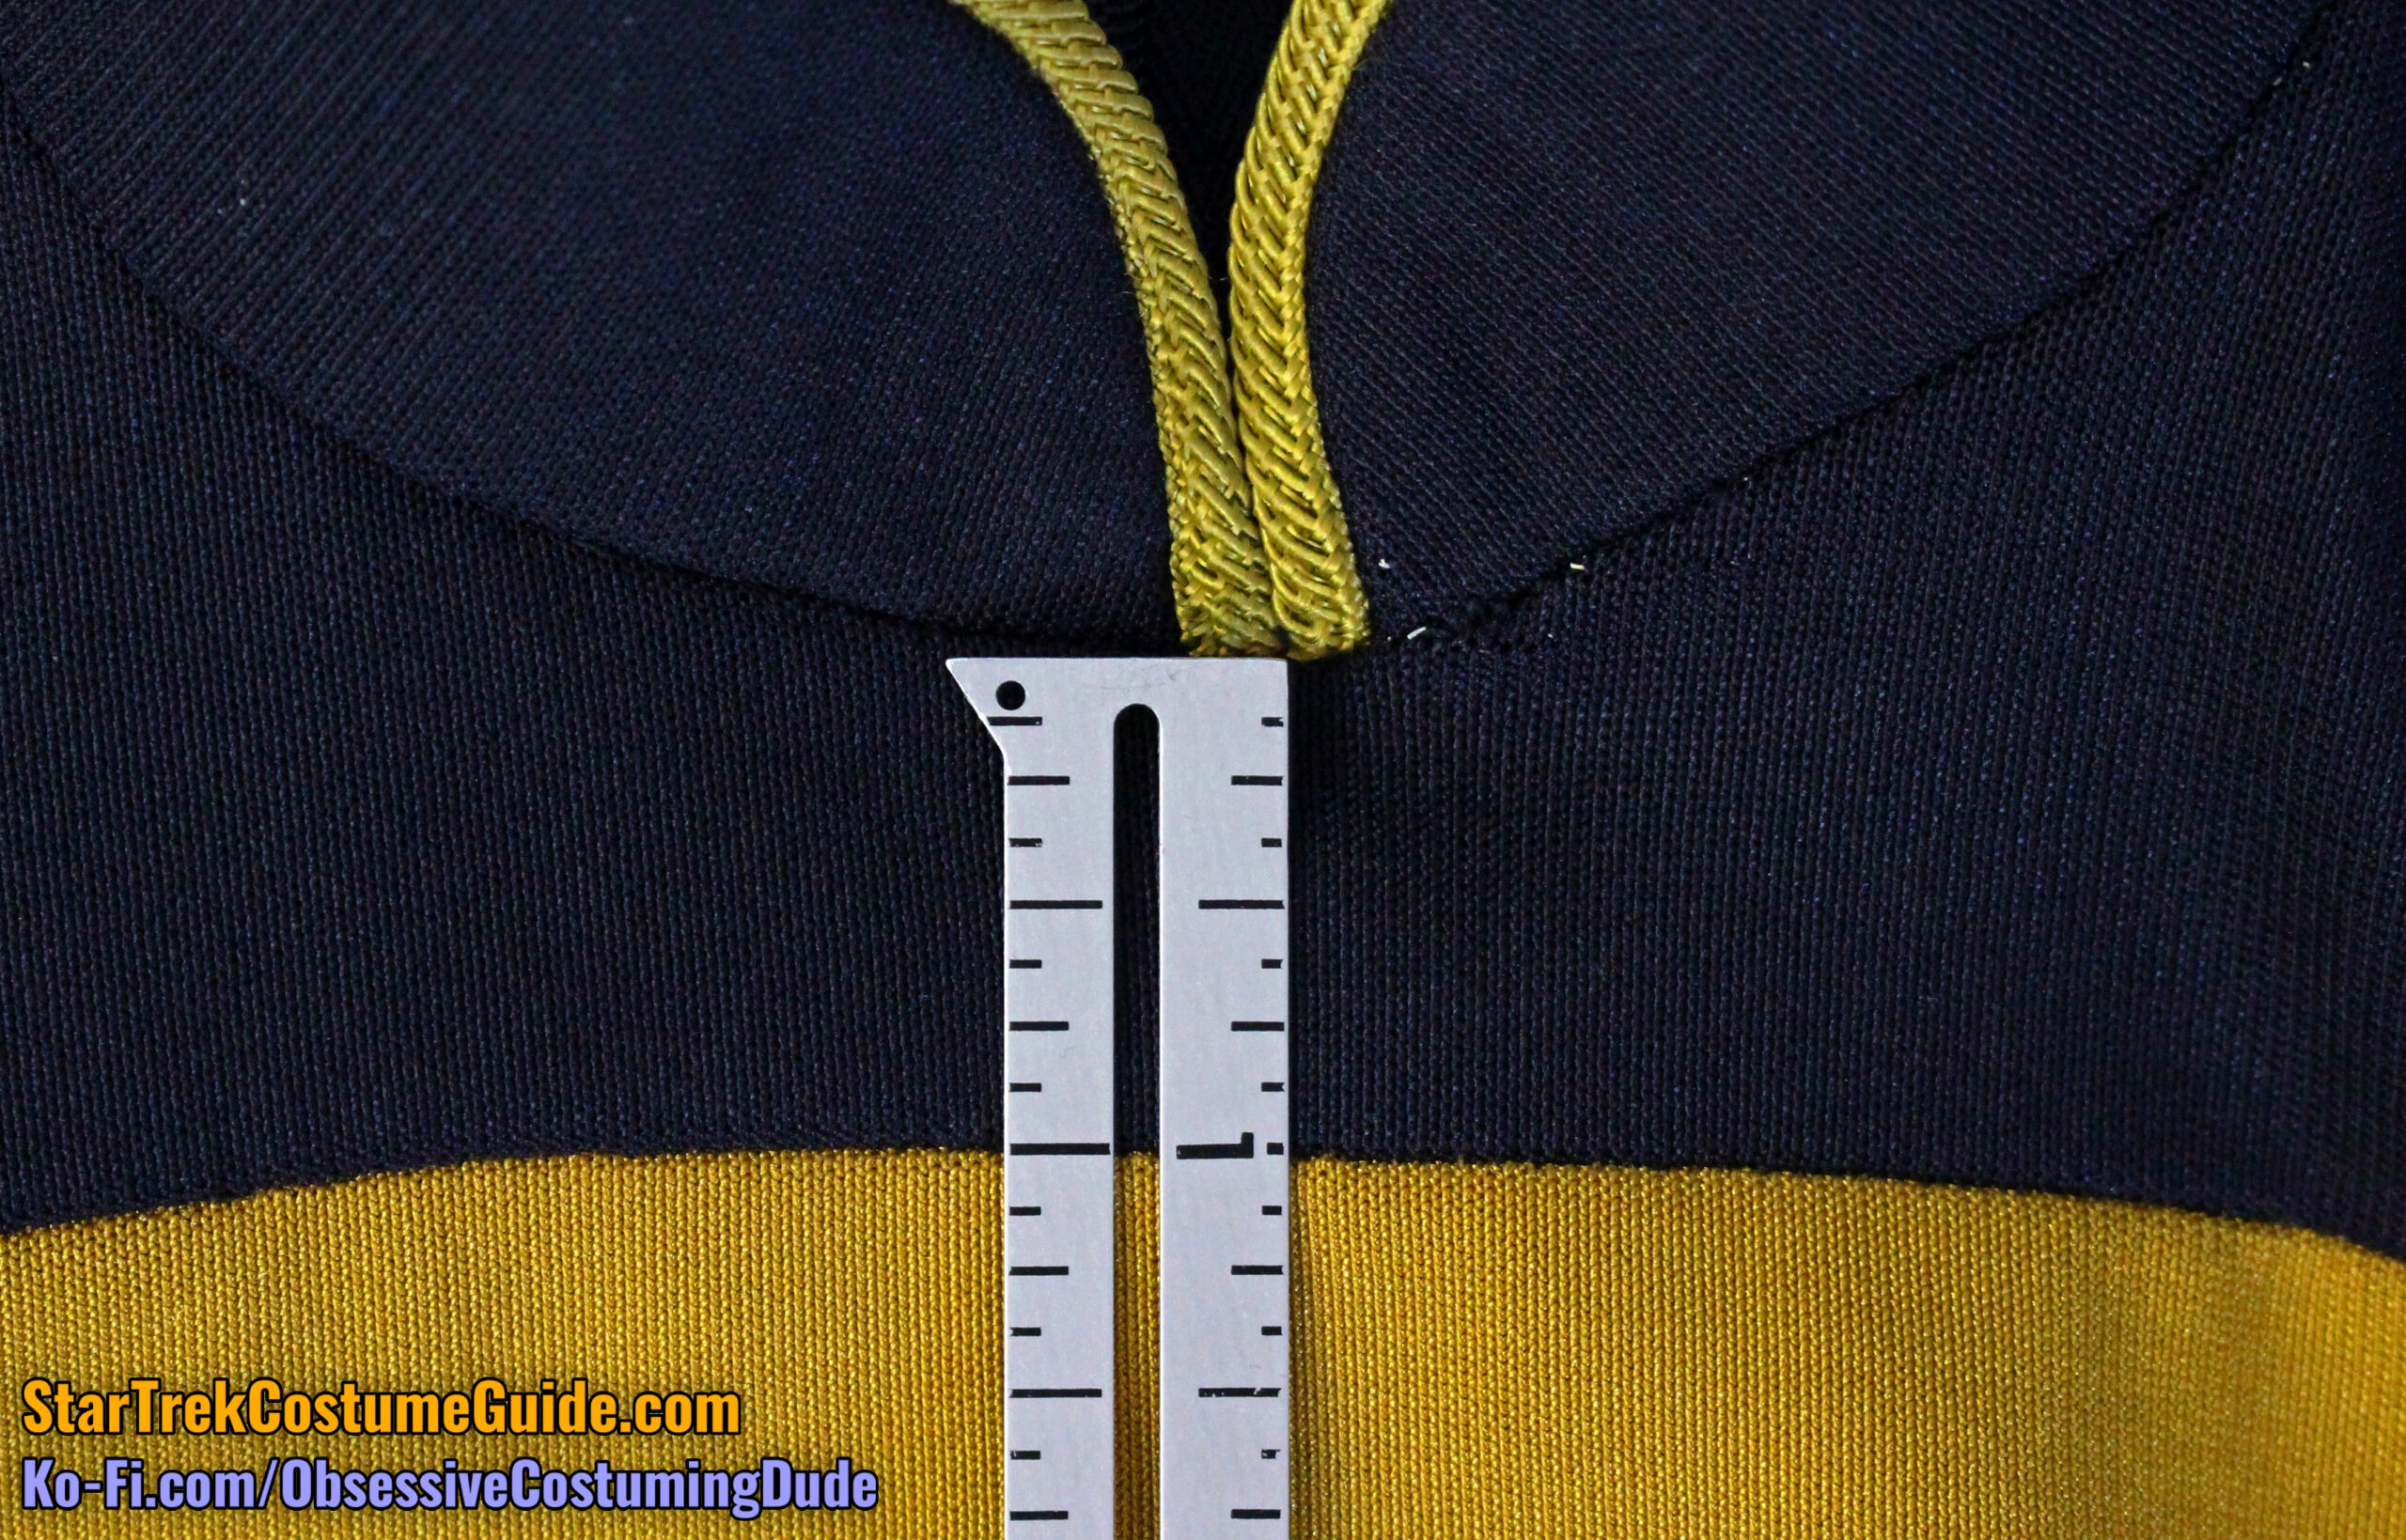
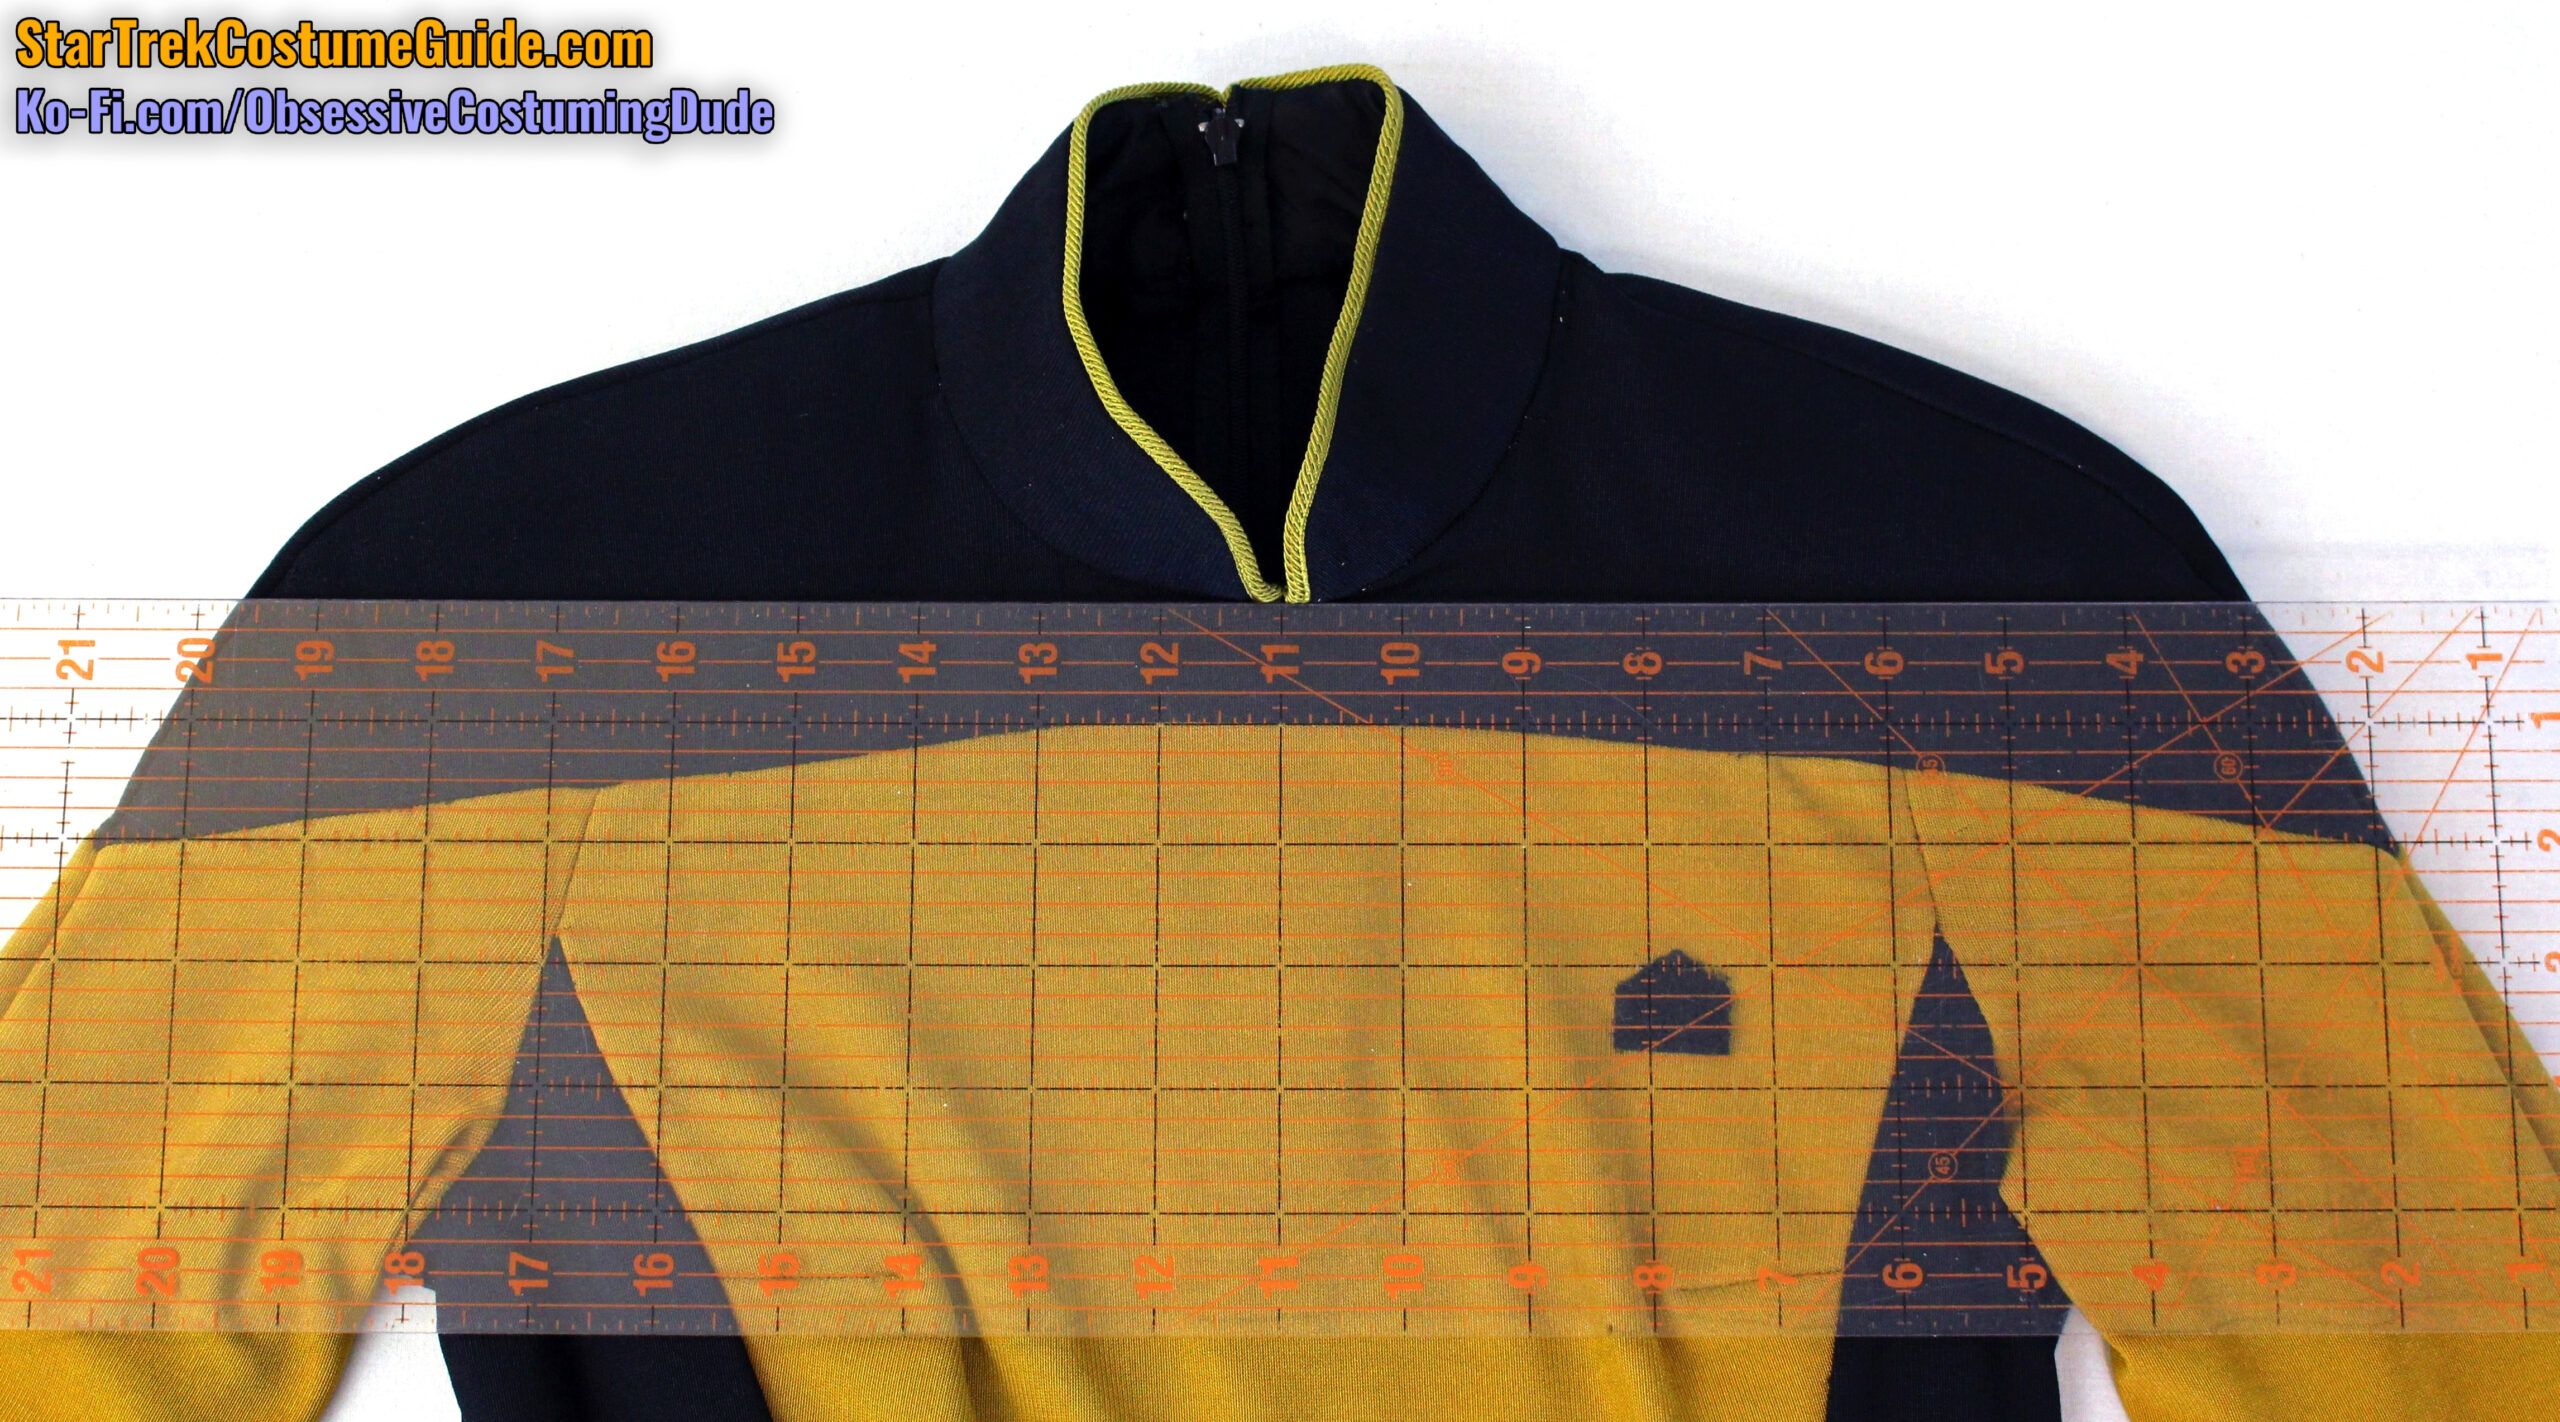
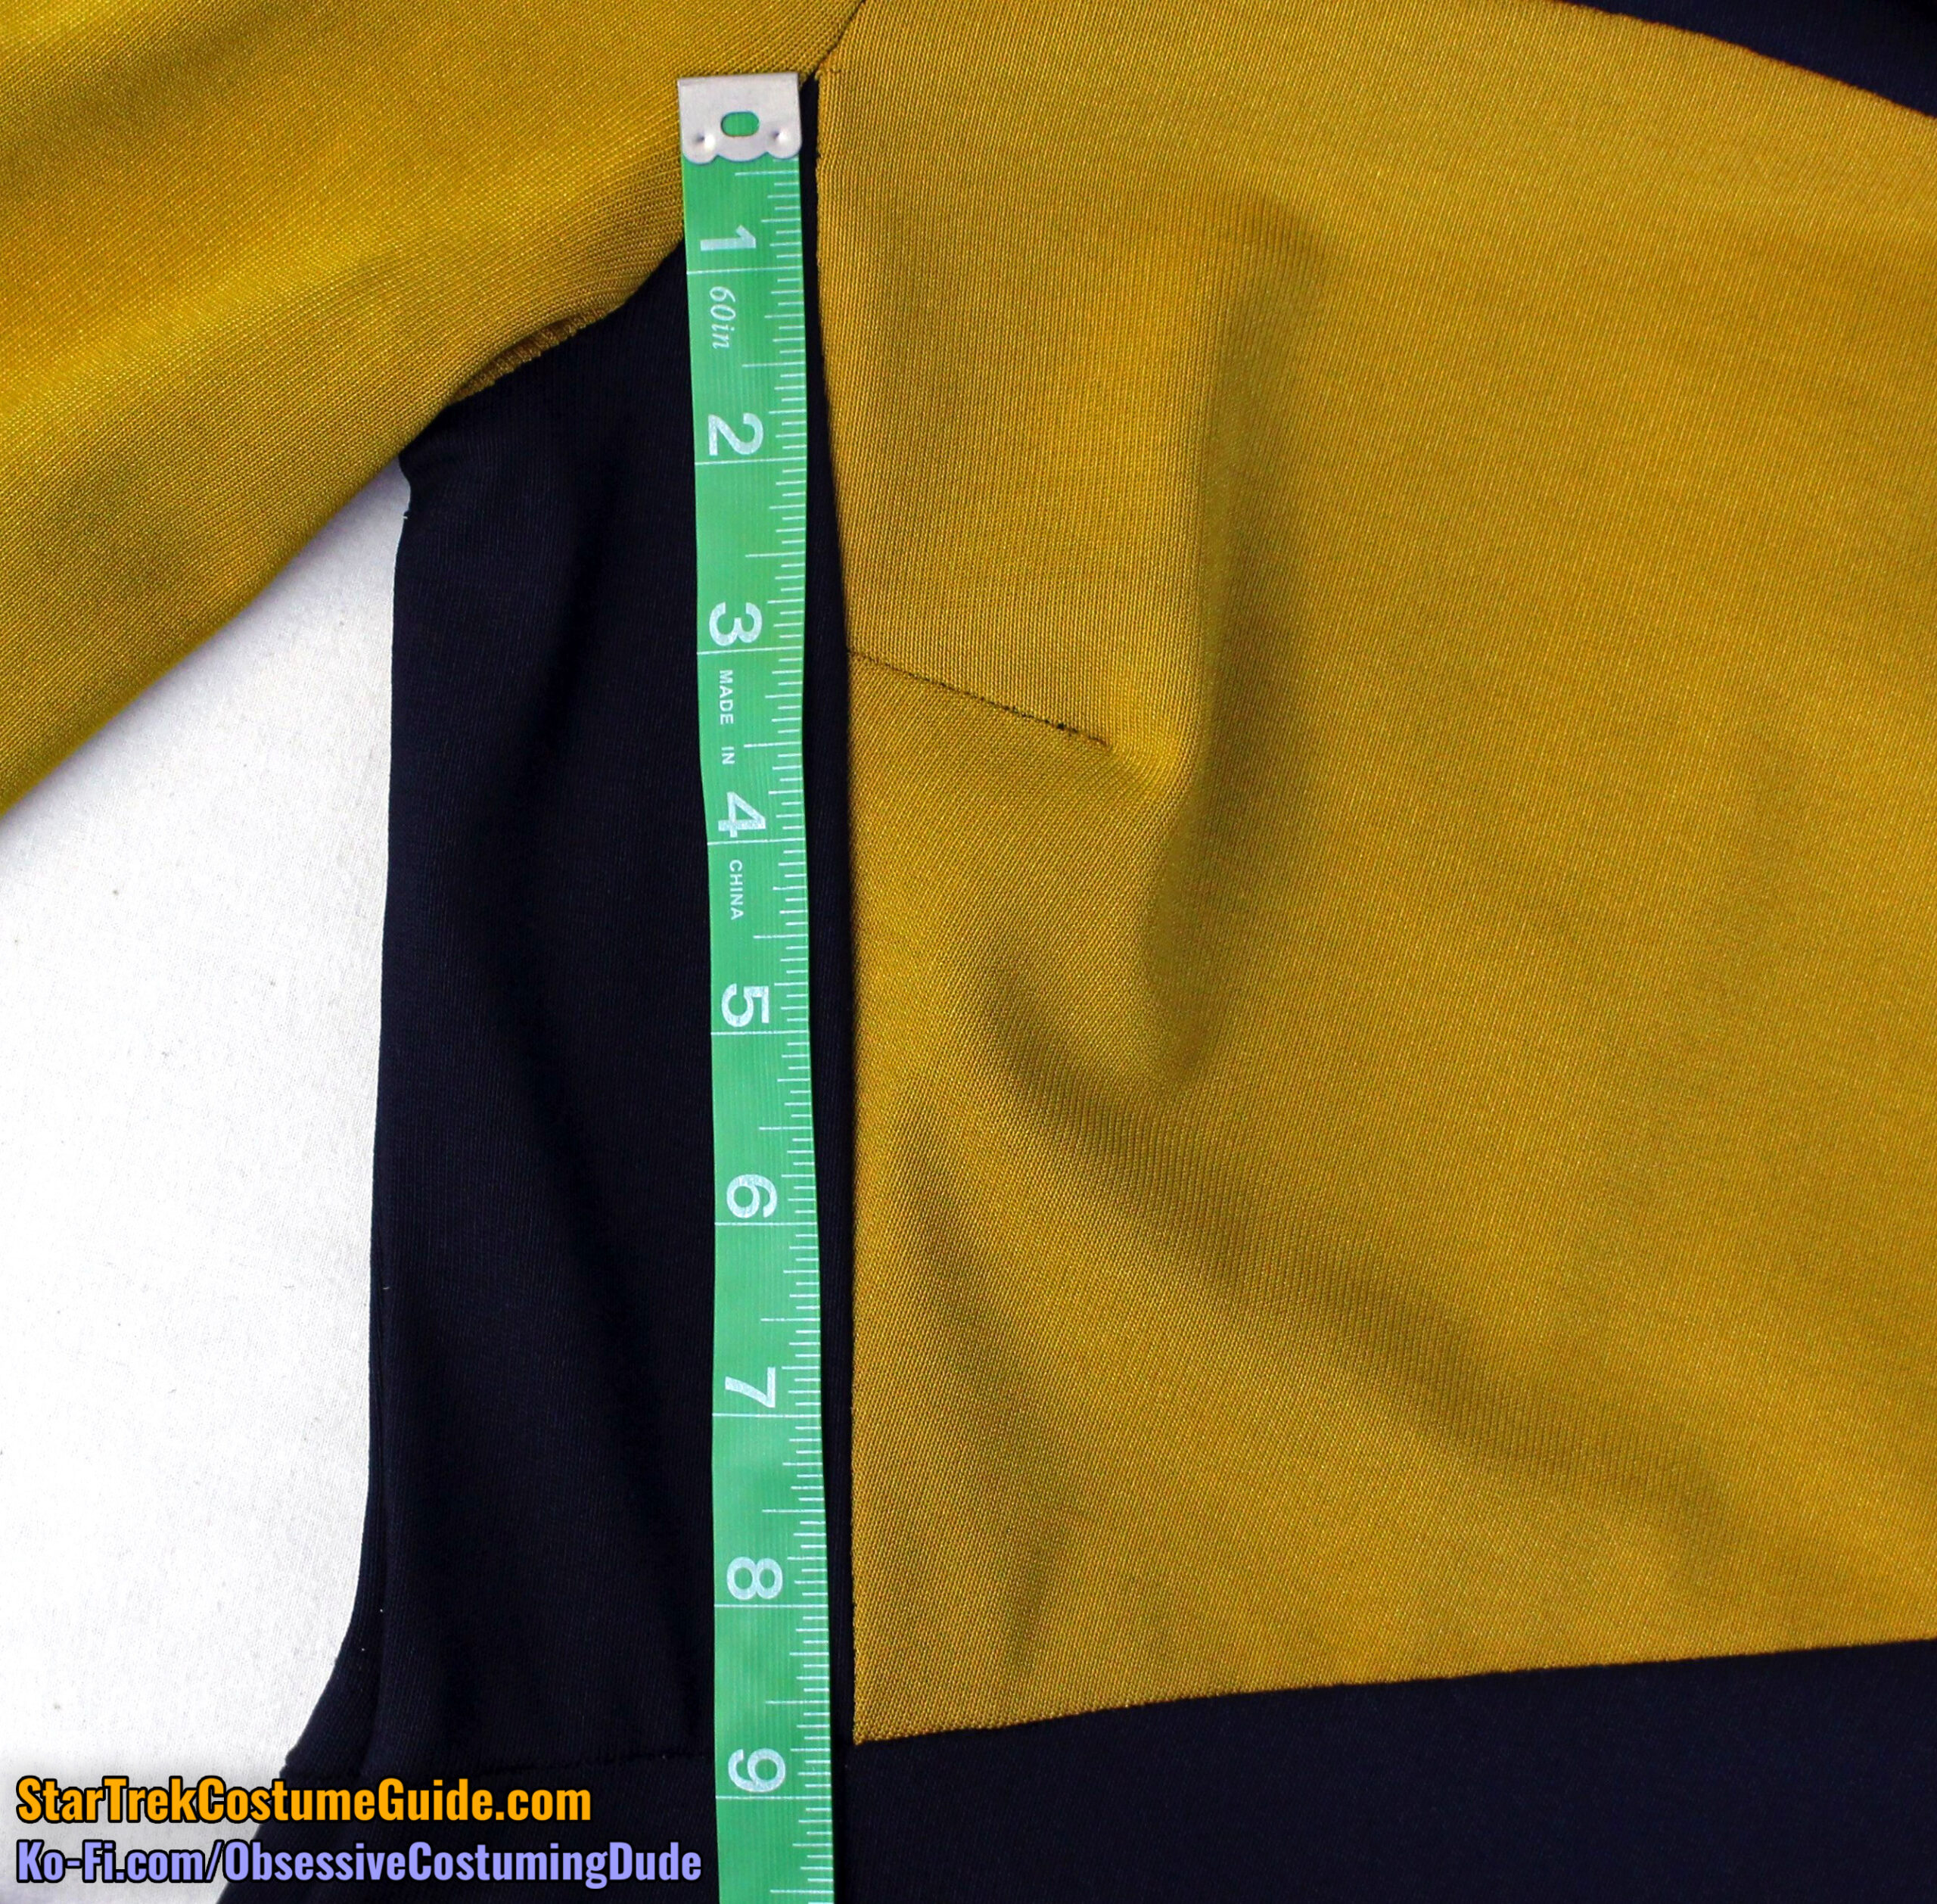
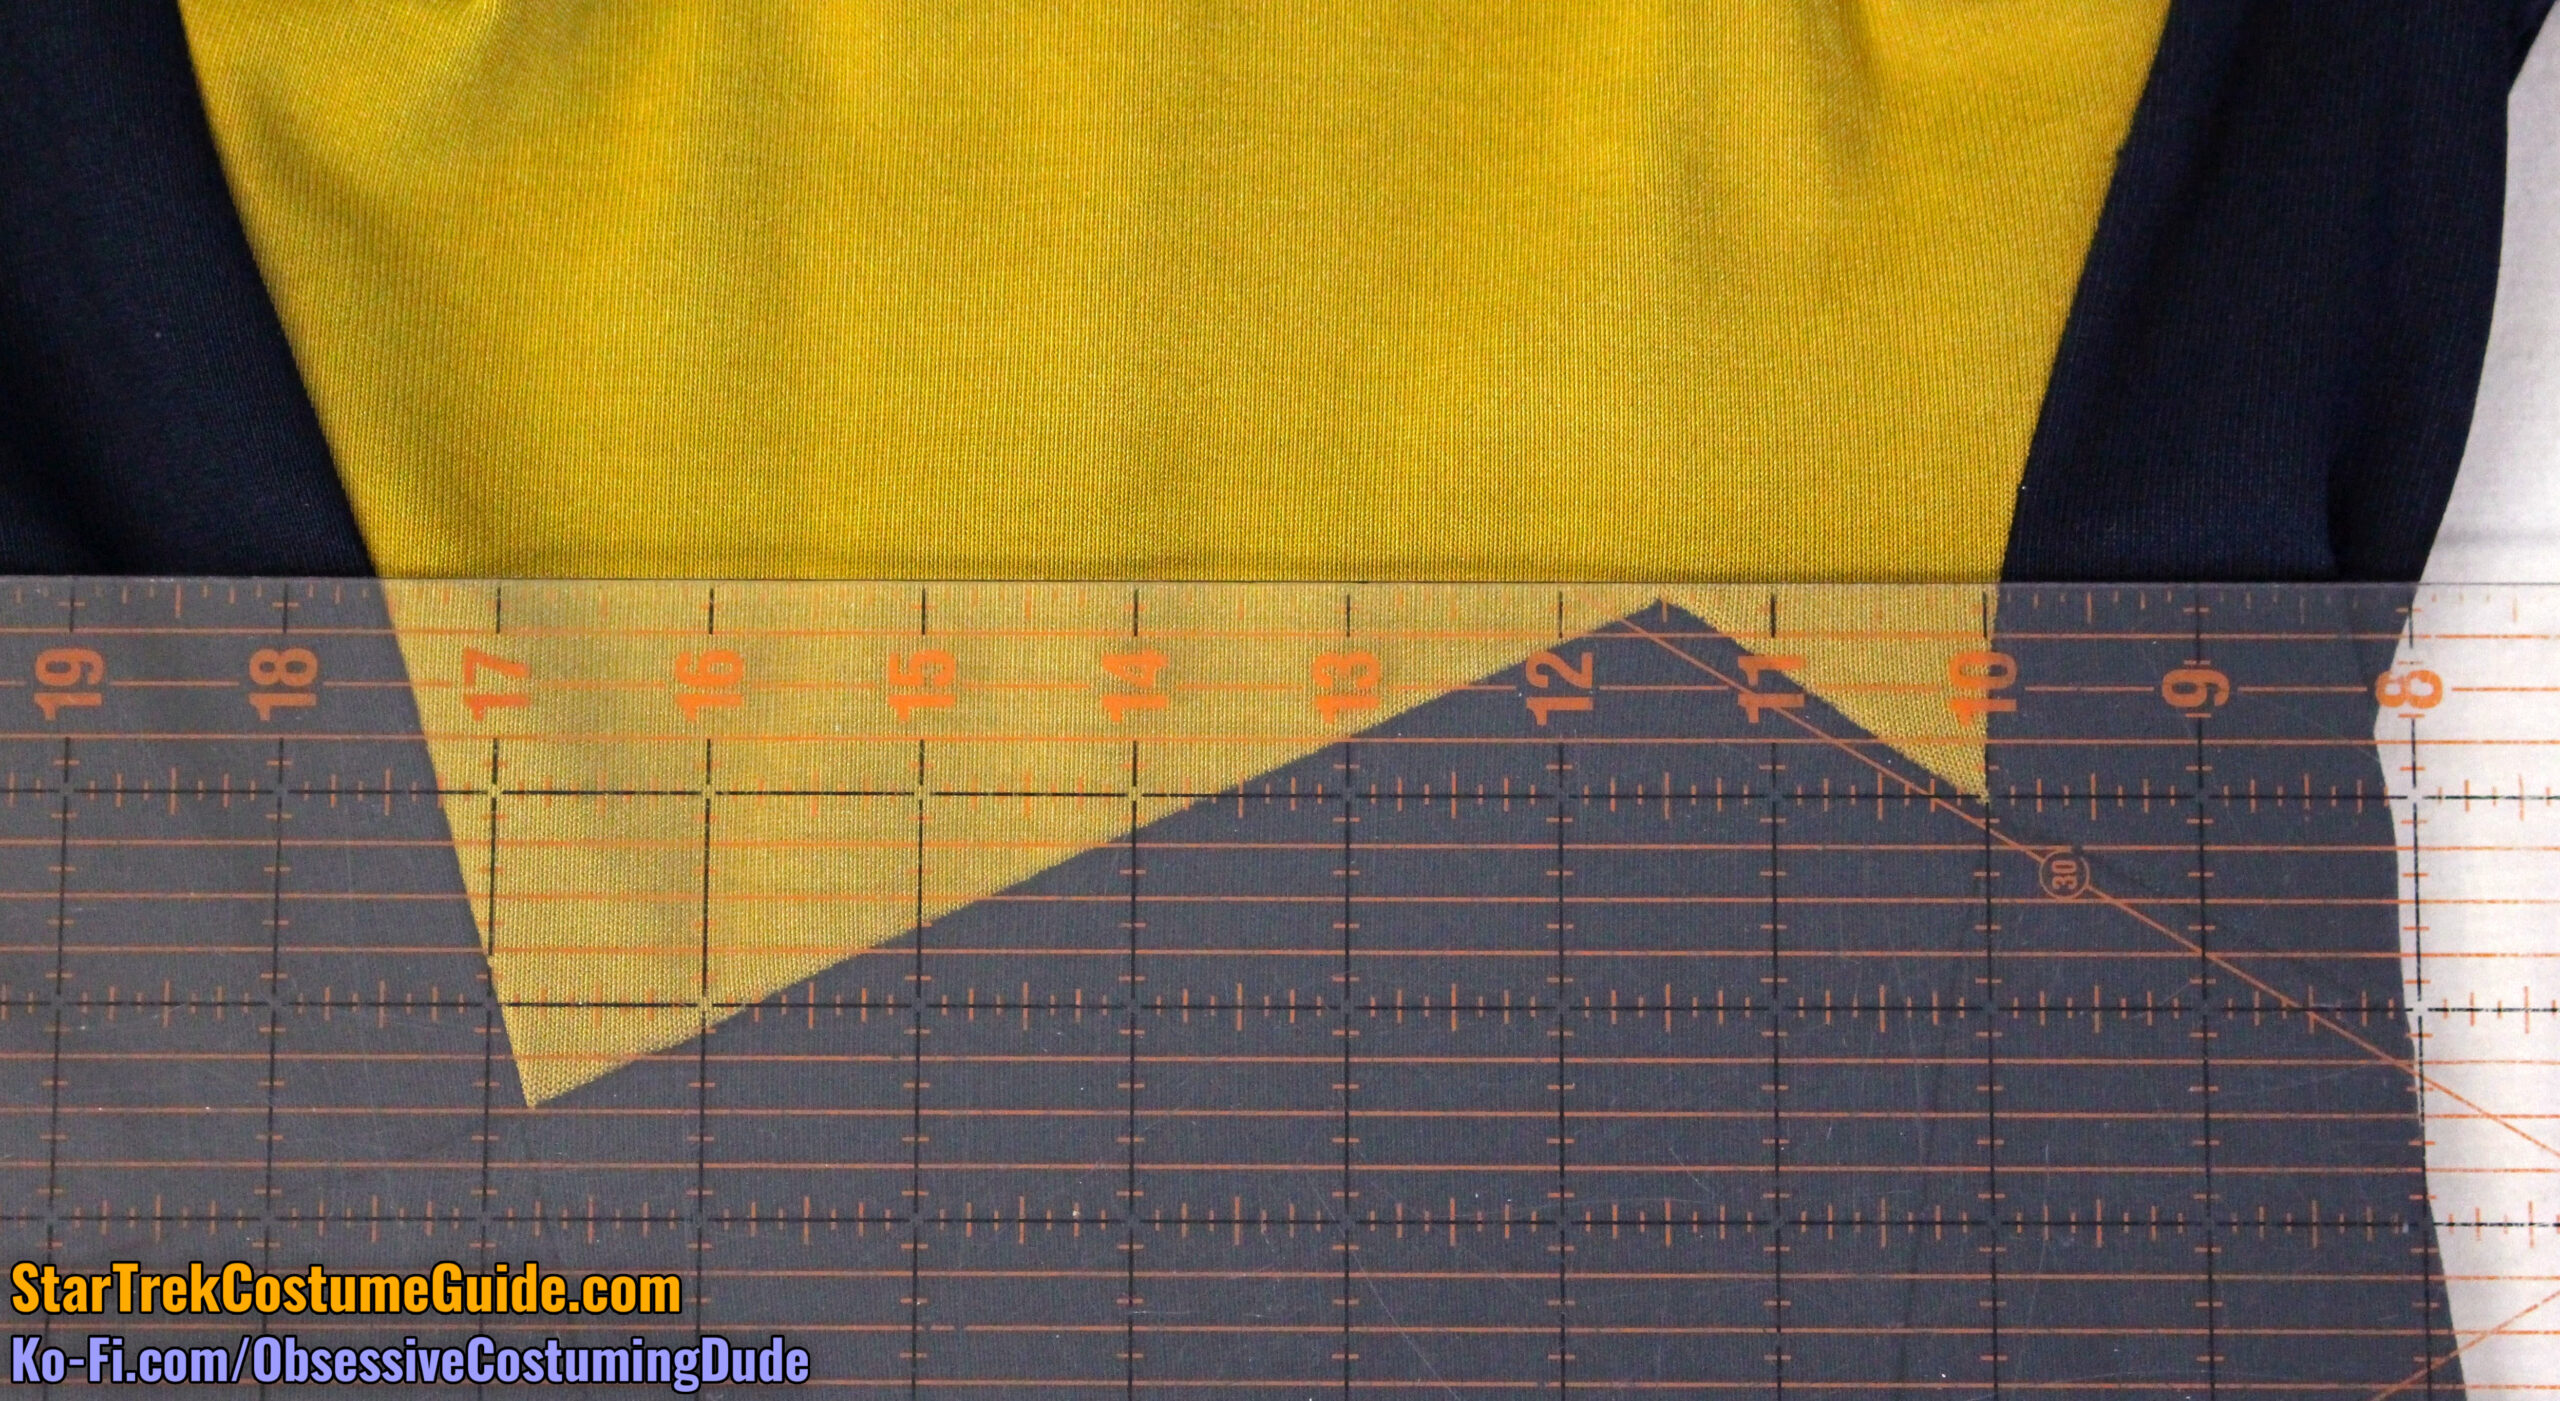
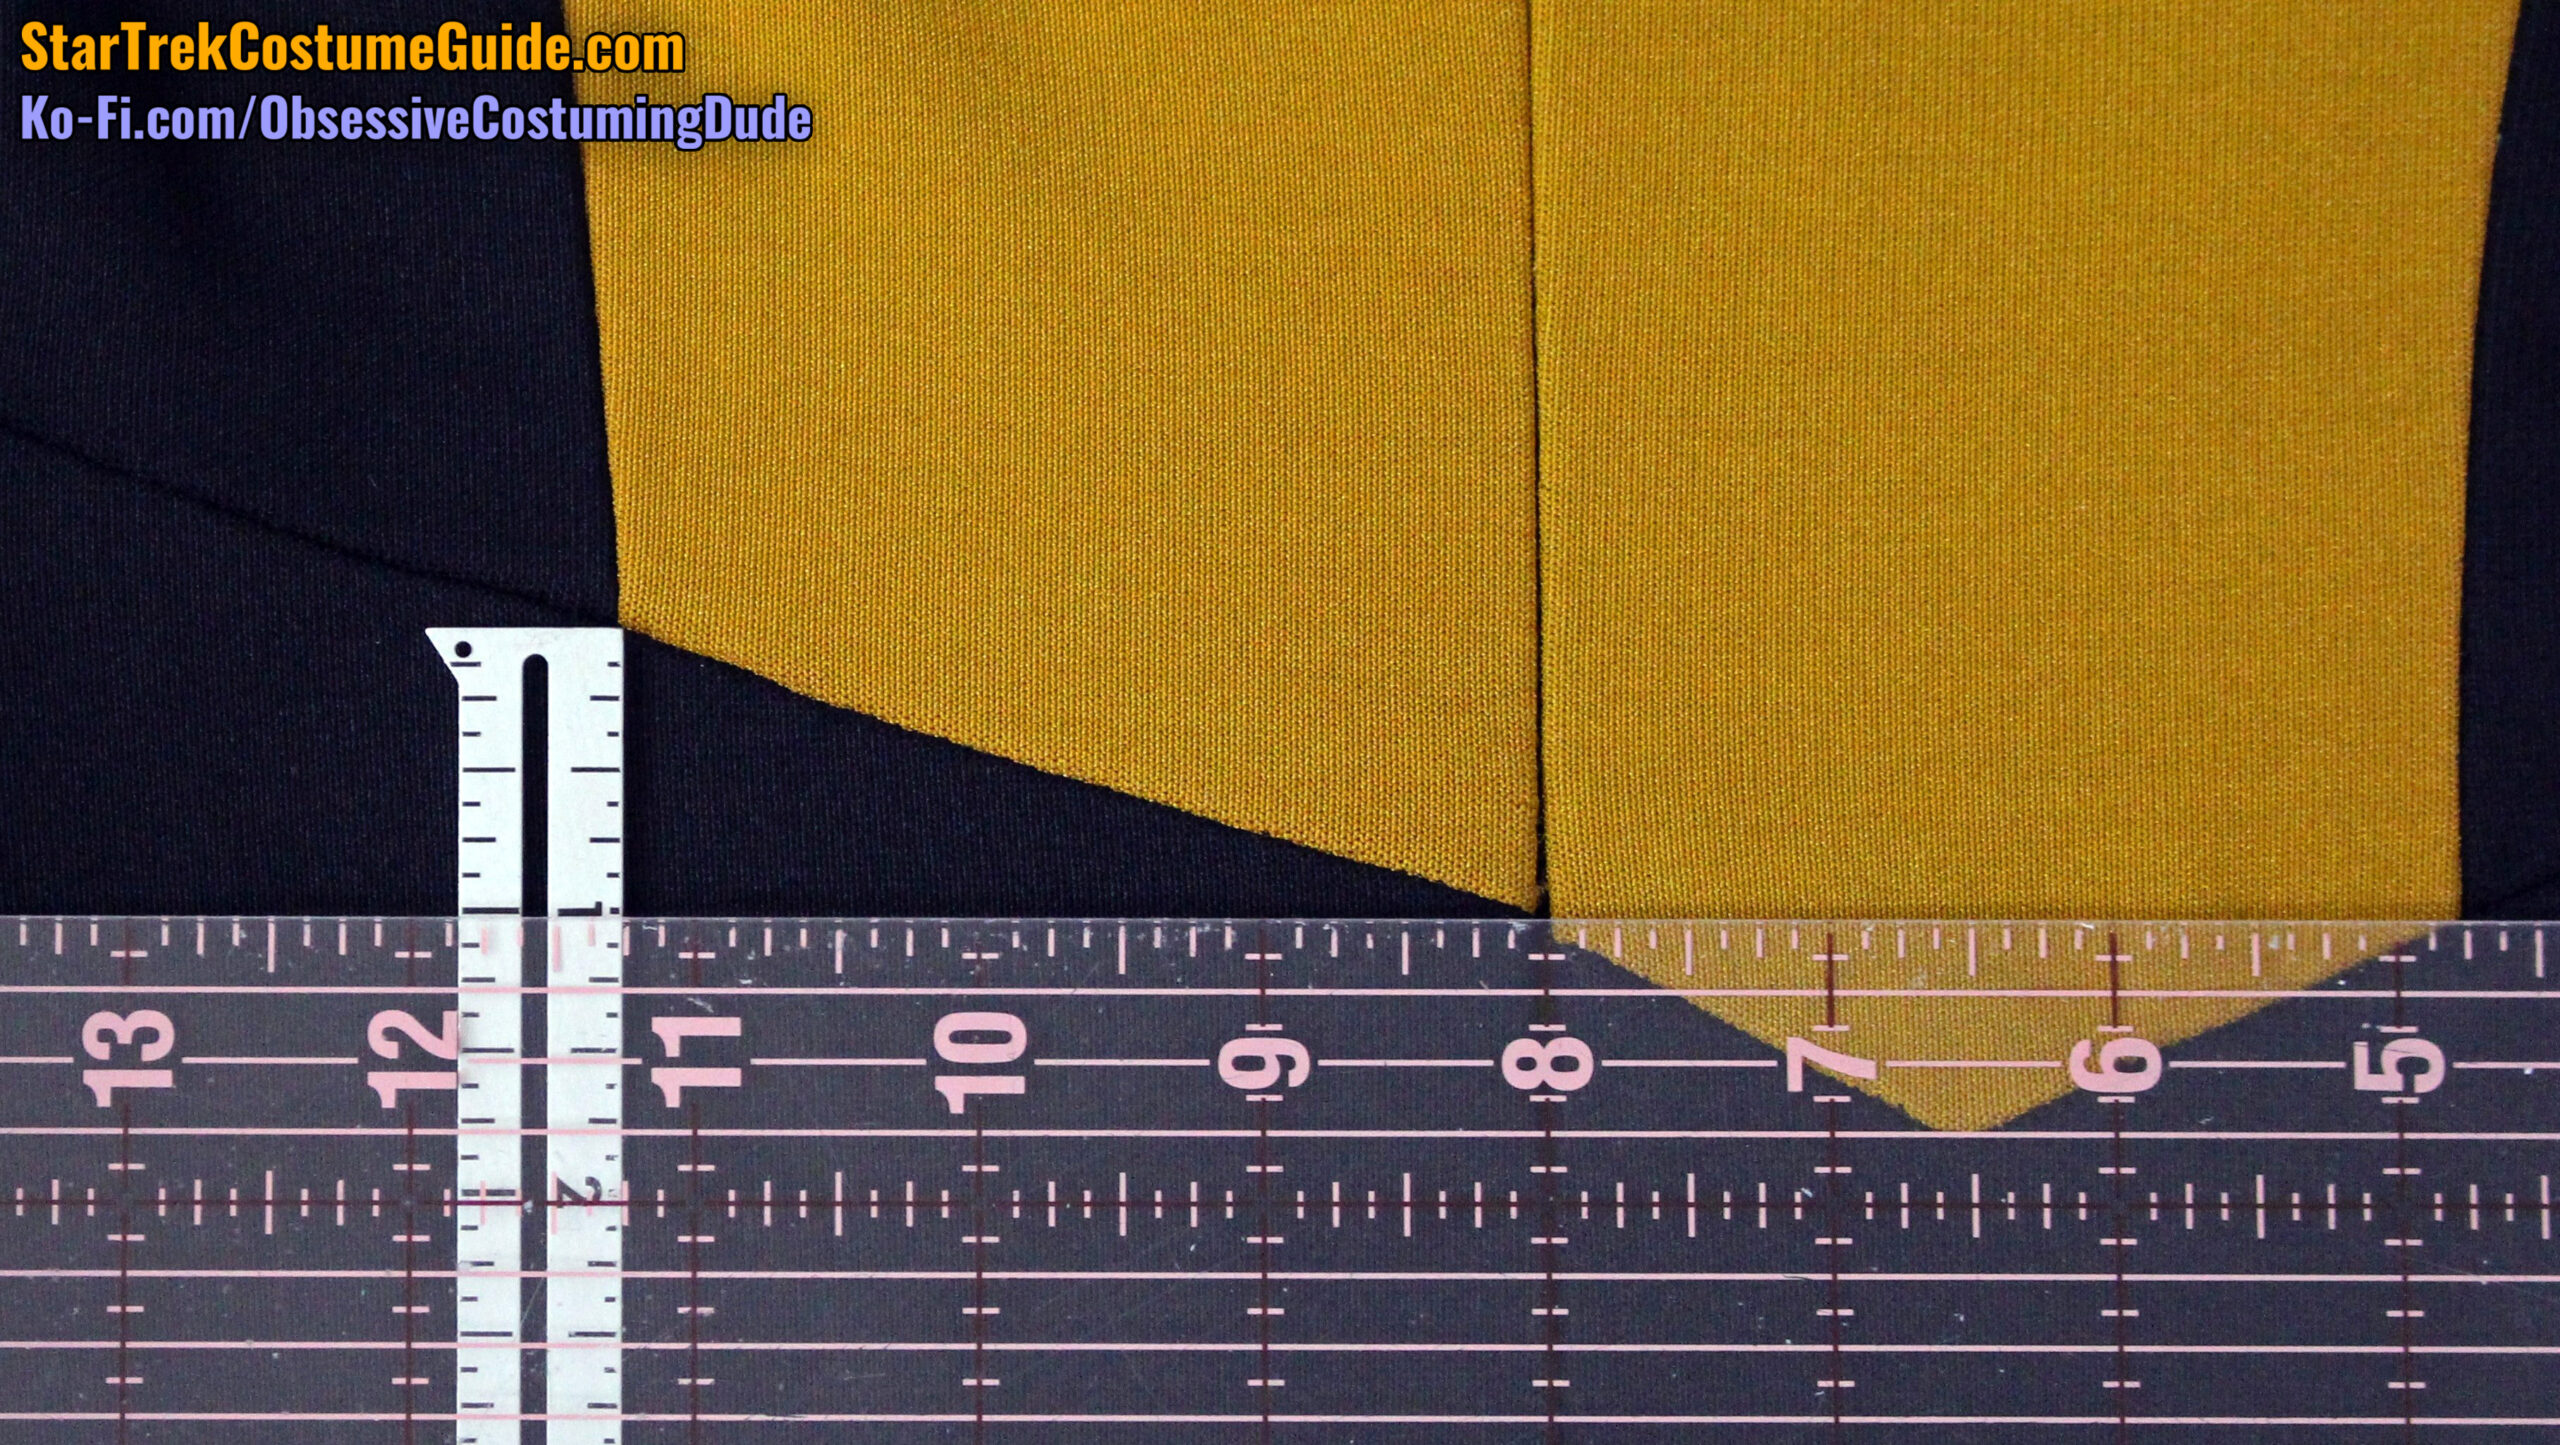
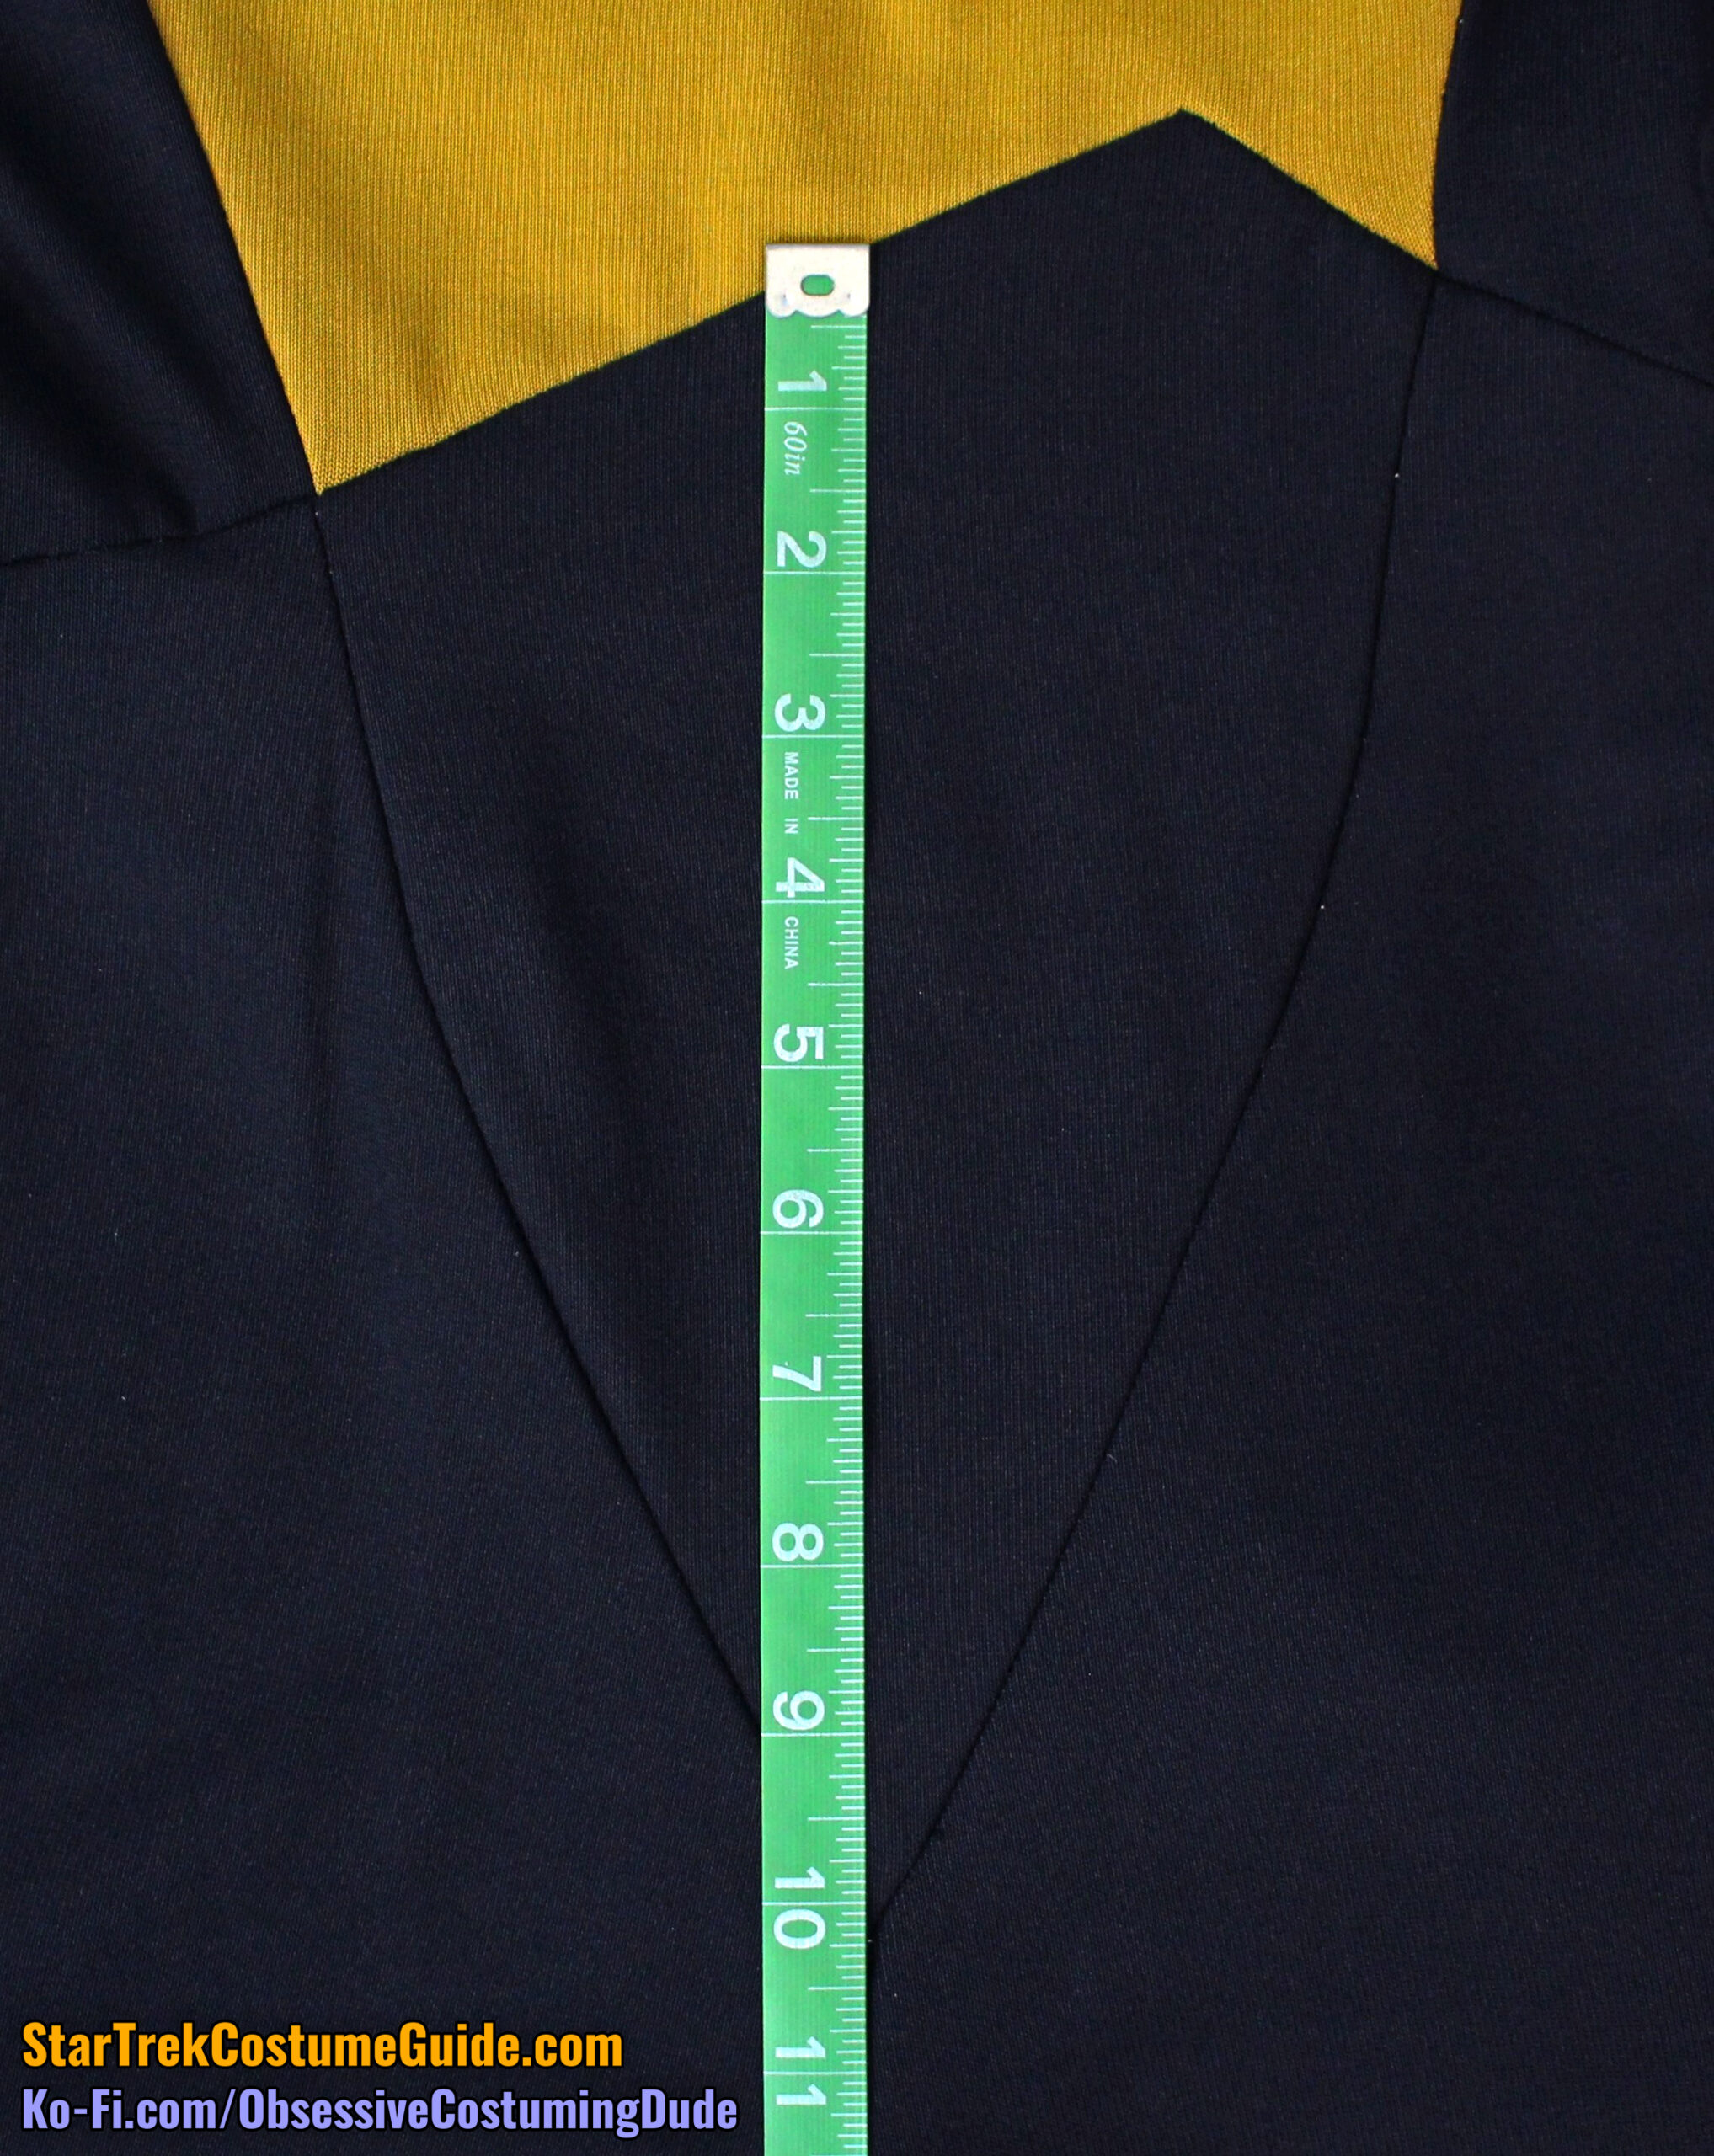
The jumpsuit yoke was exactly 1” deep at the center front.
The front yoke was 3 ⅞” deep at both shoulder seams.
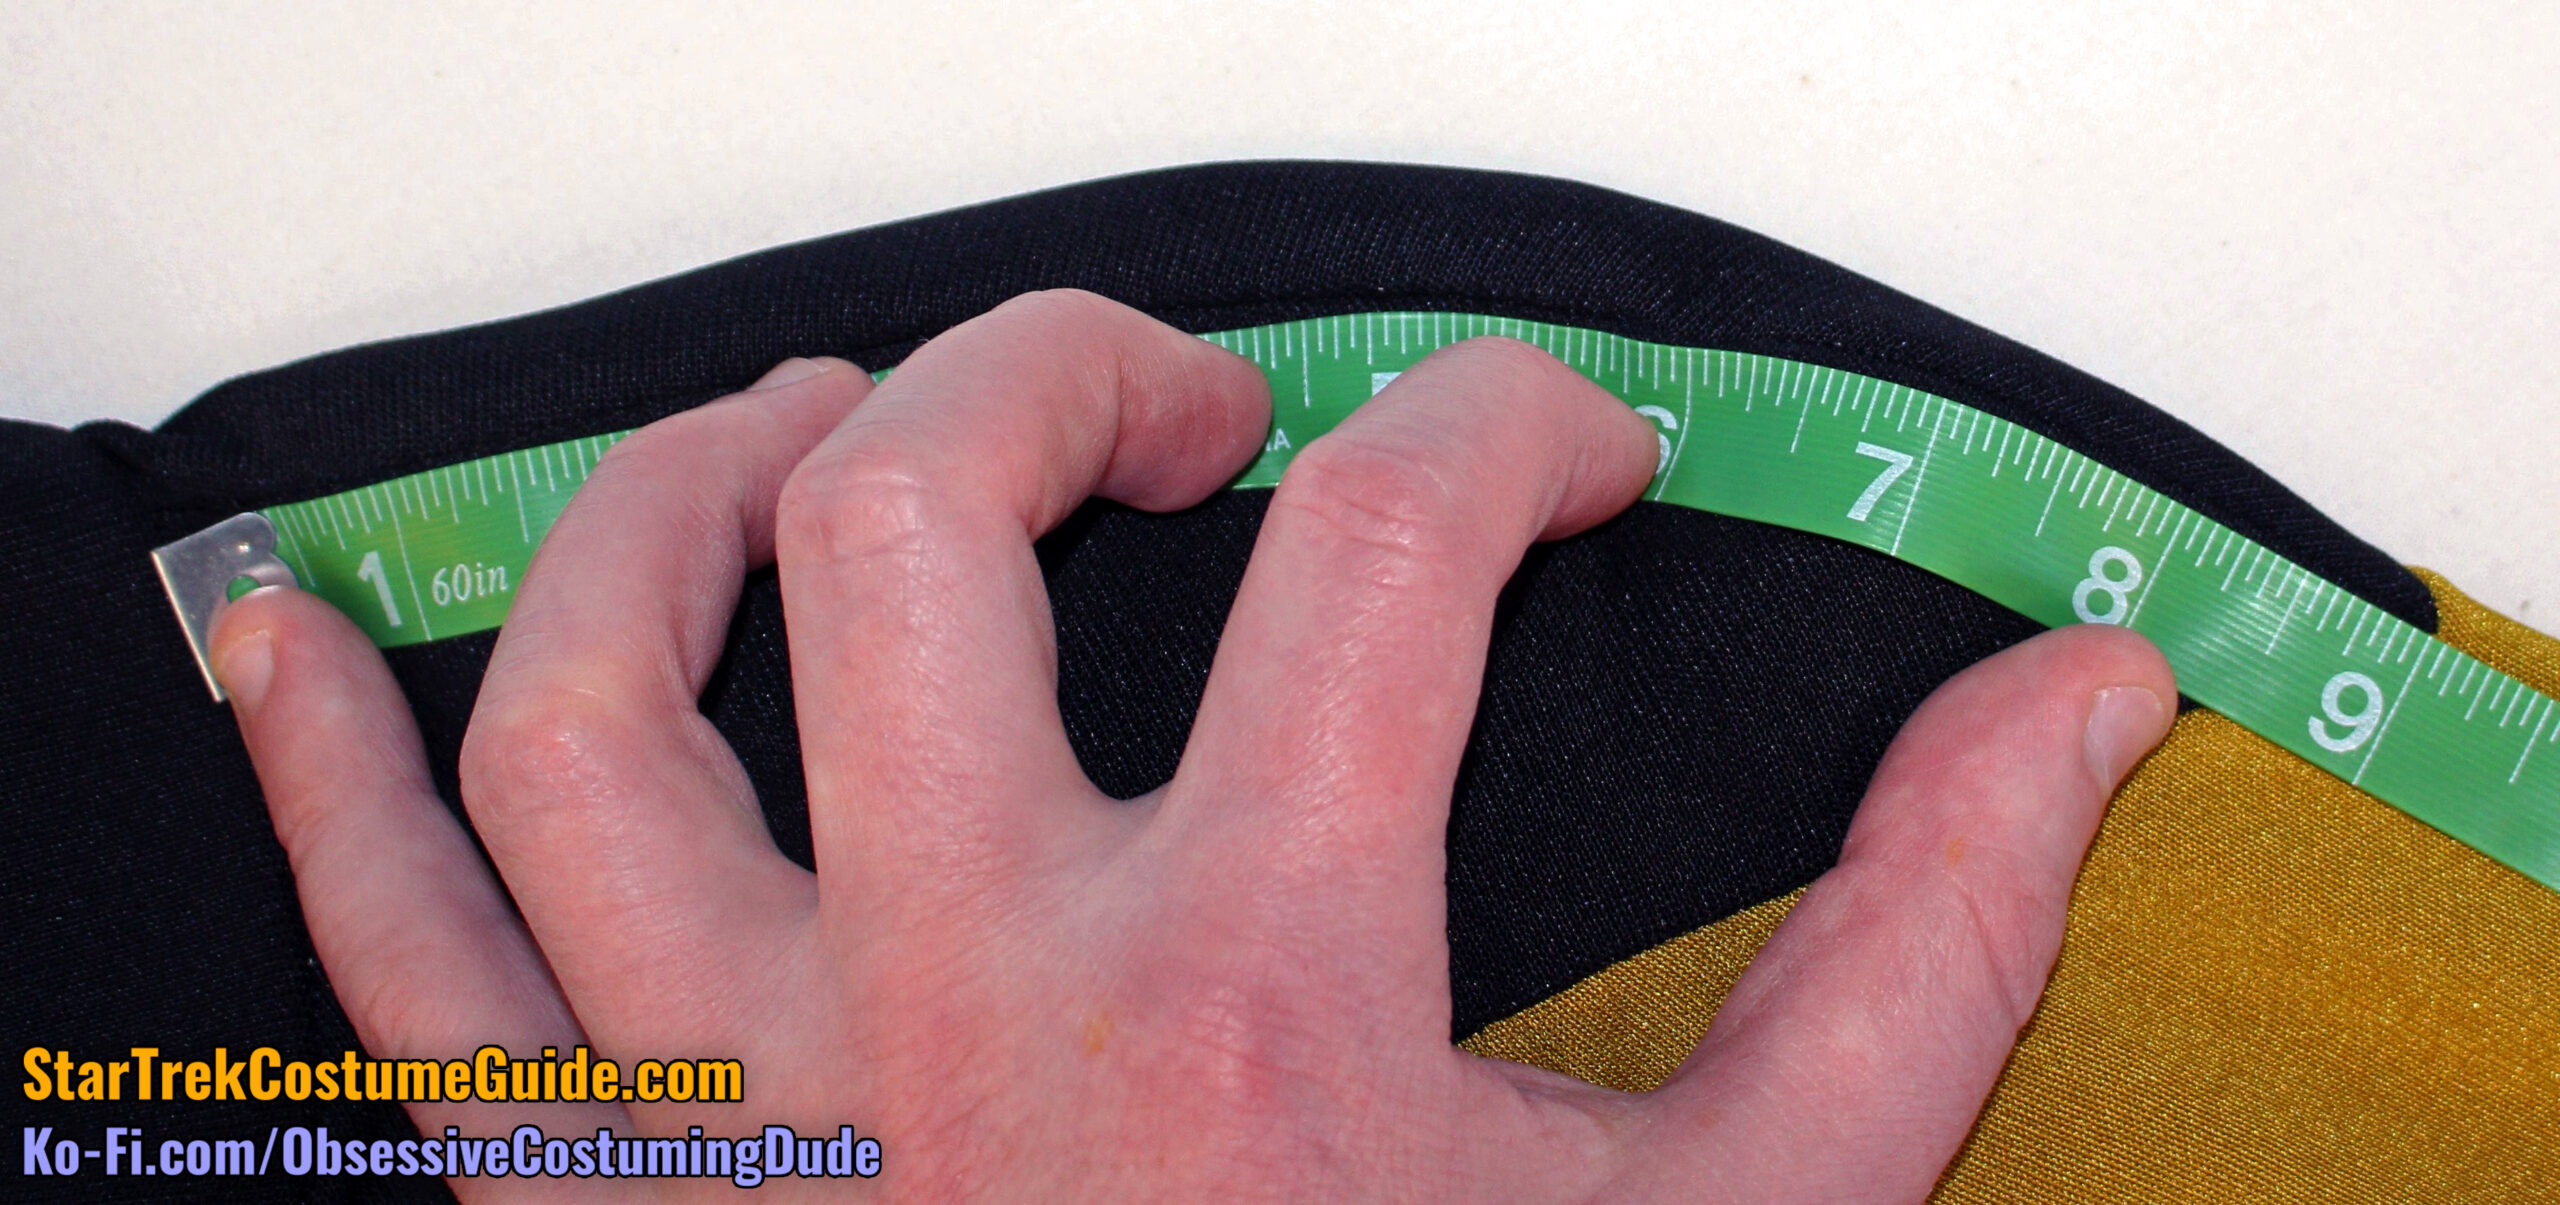
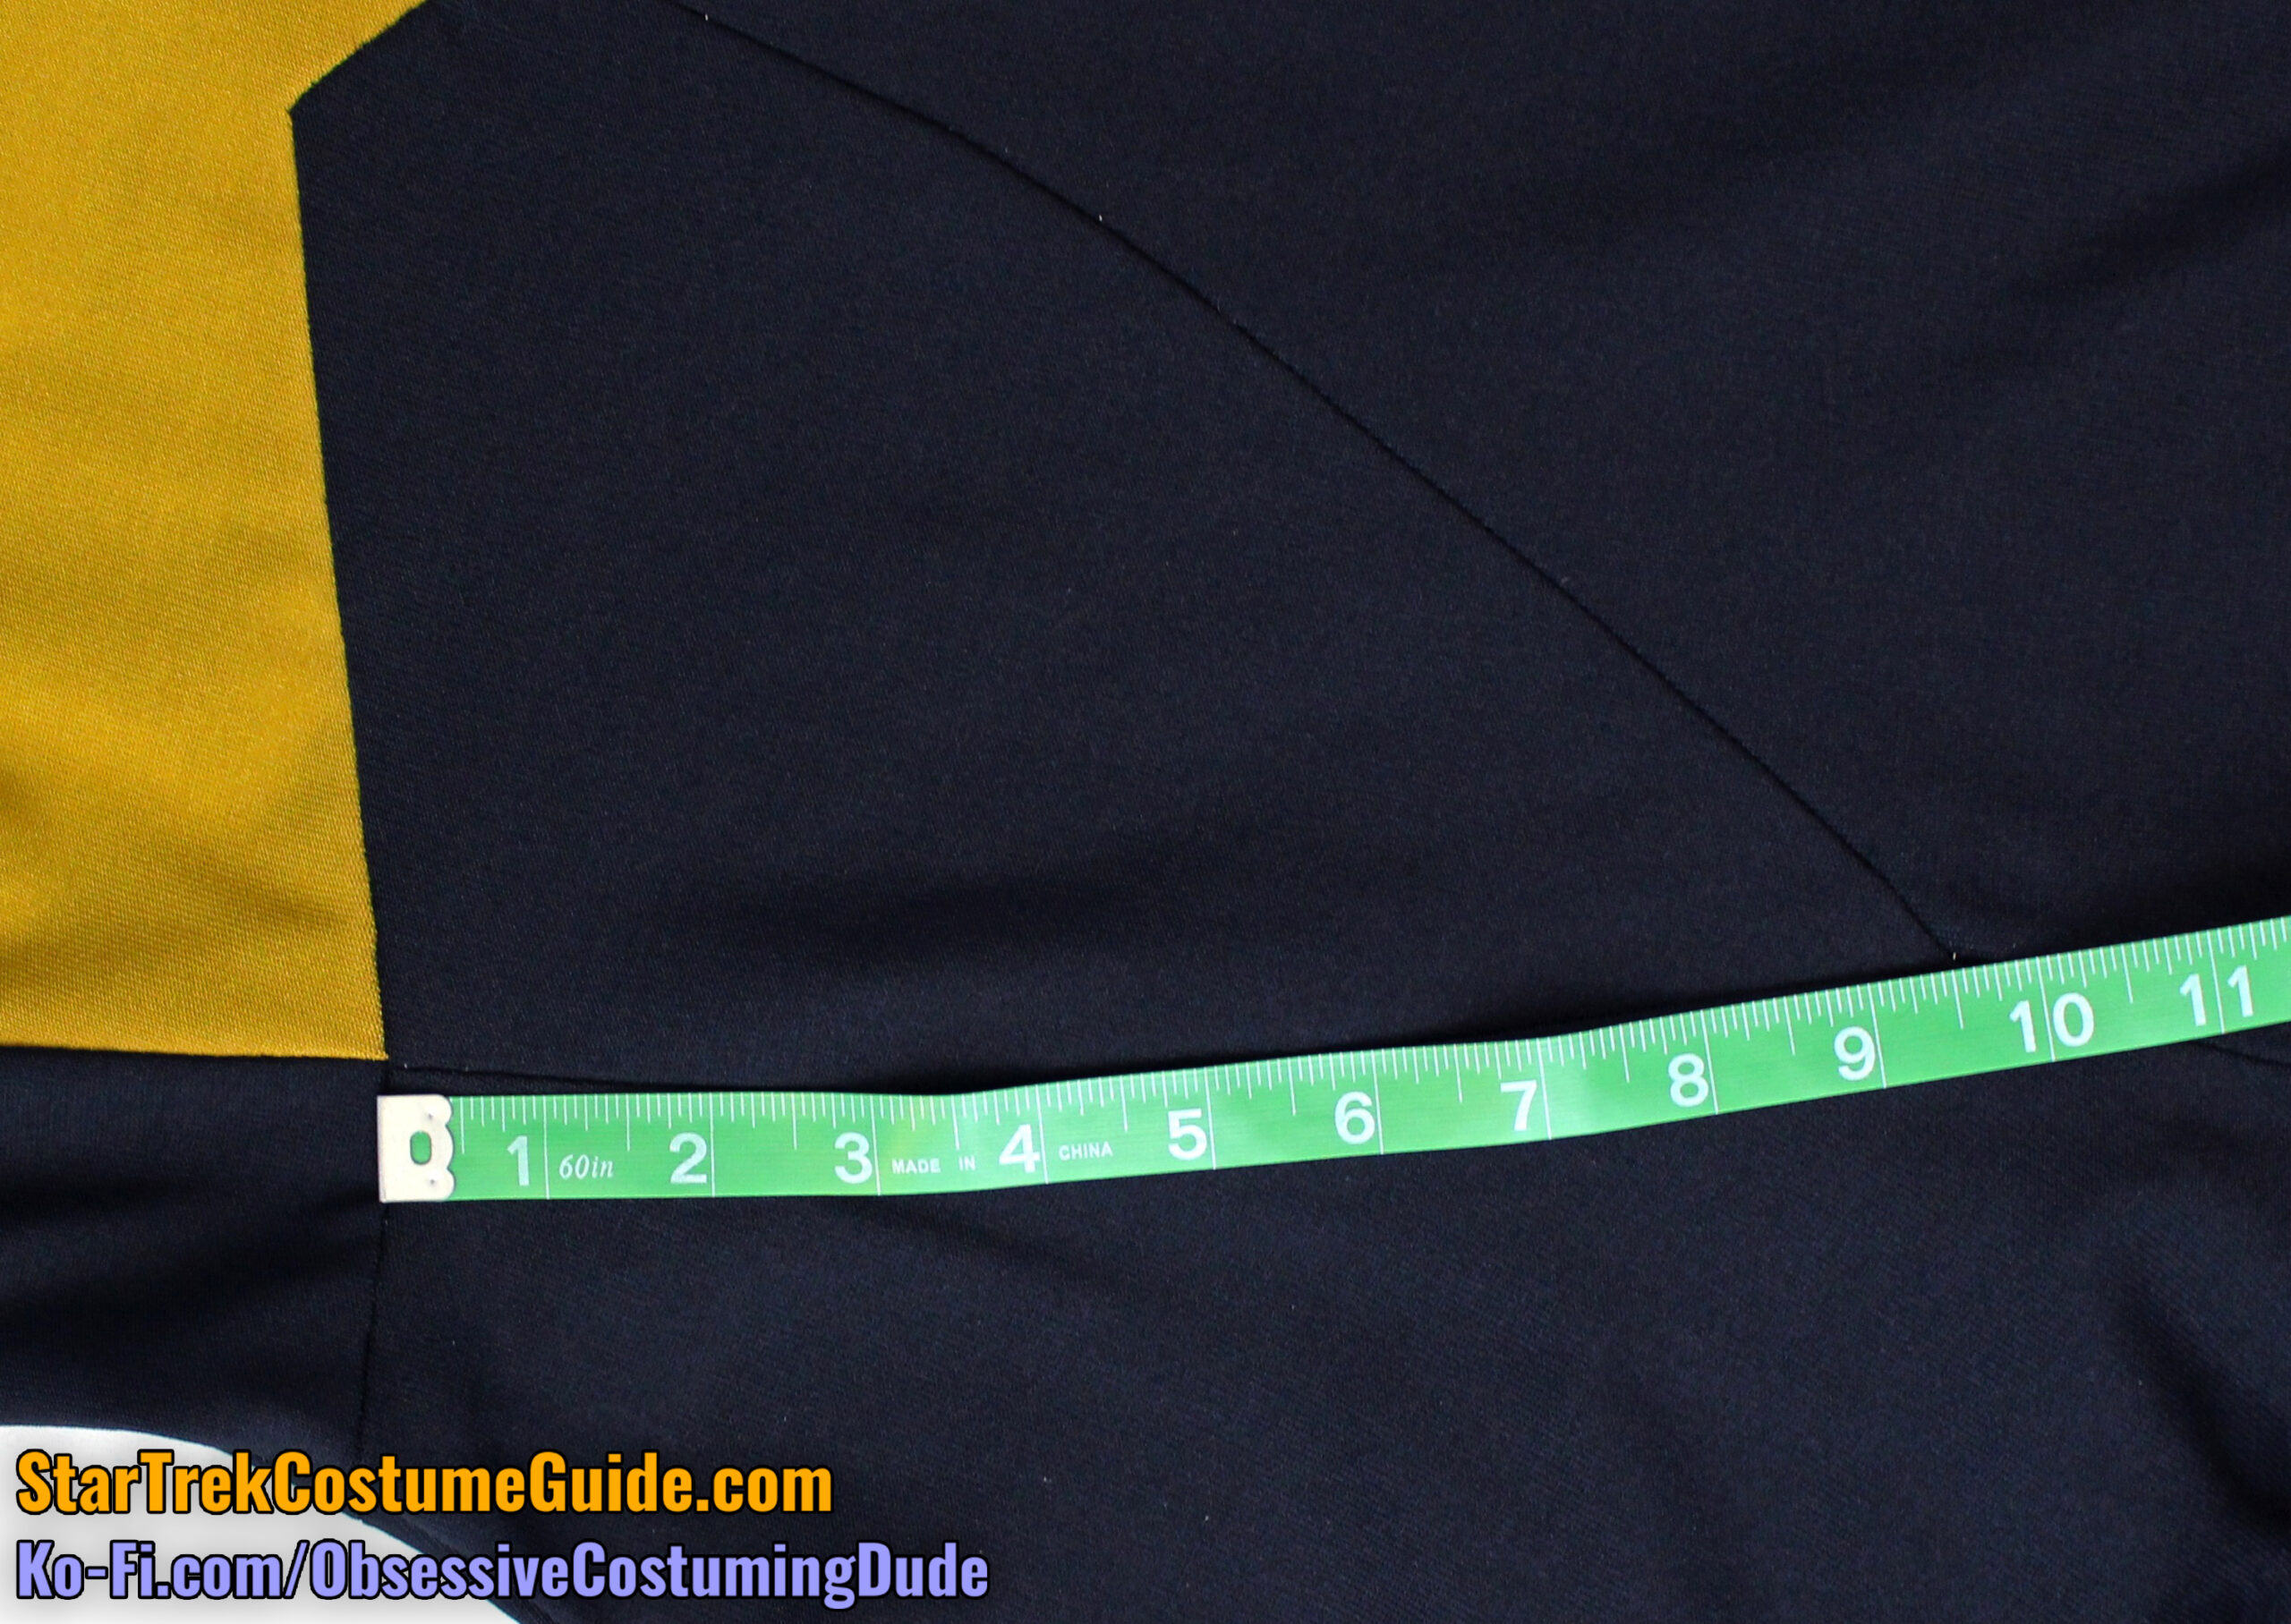
The shoulder seams were both 9”, measured from the neckline/collar seam to the lower/outer corners of the yoke.
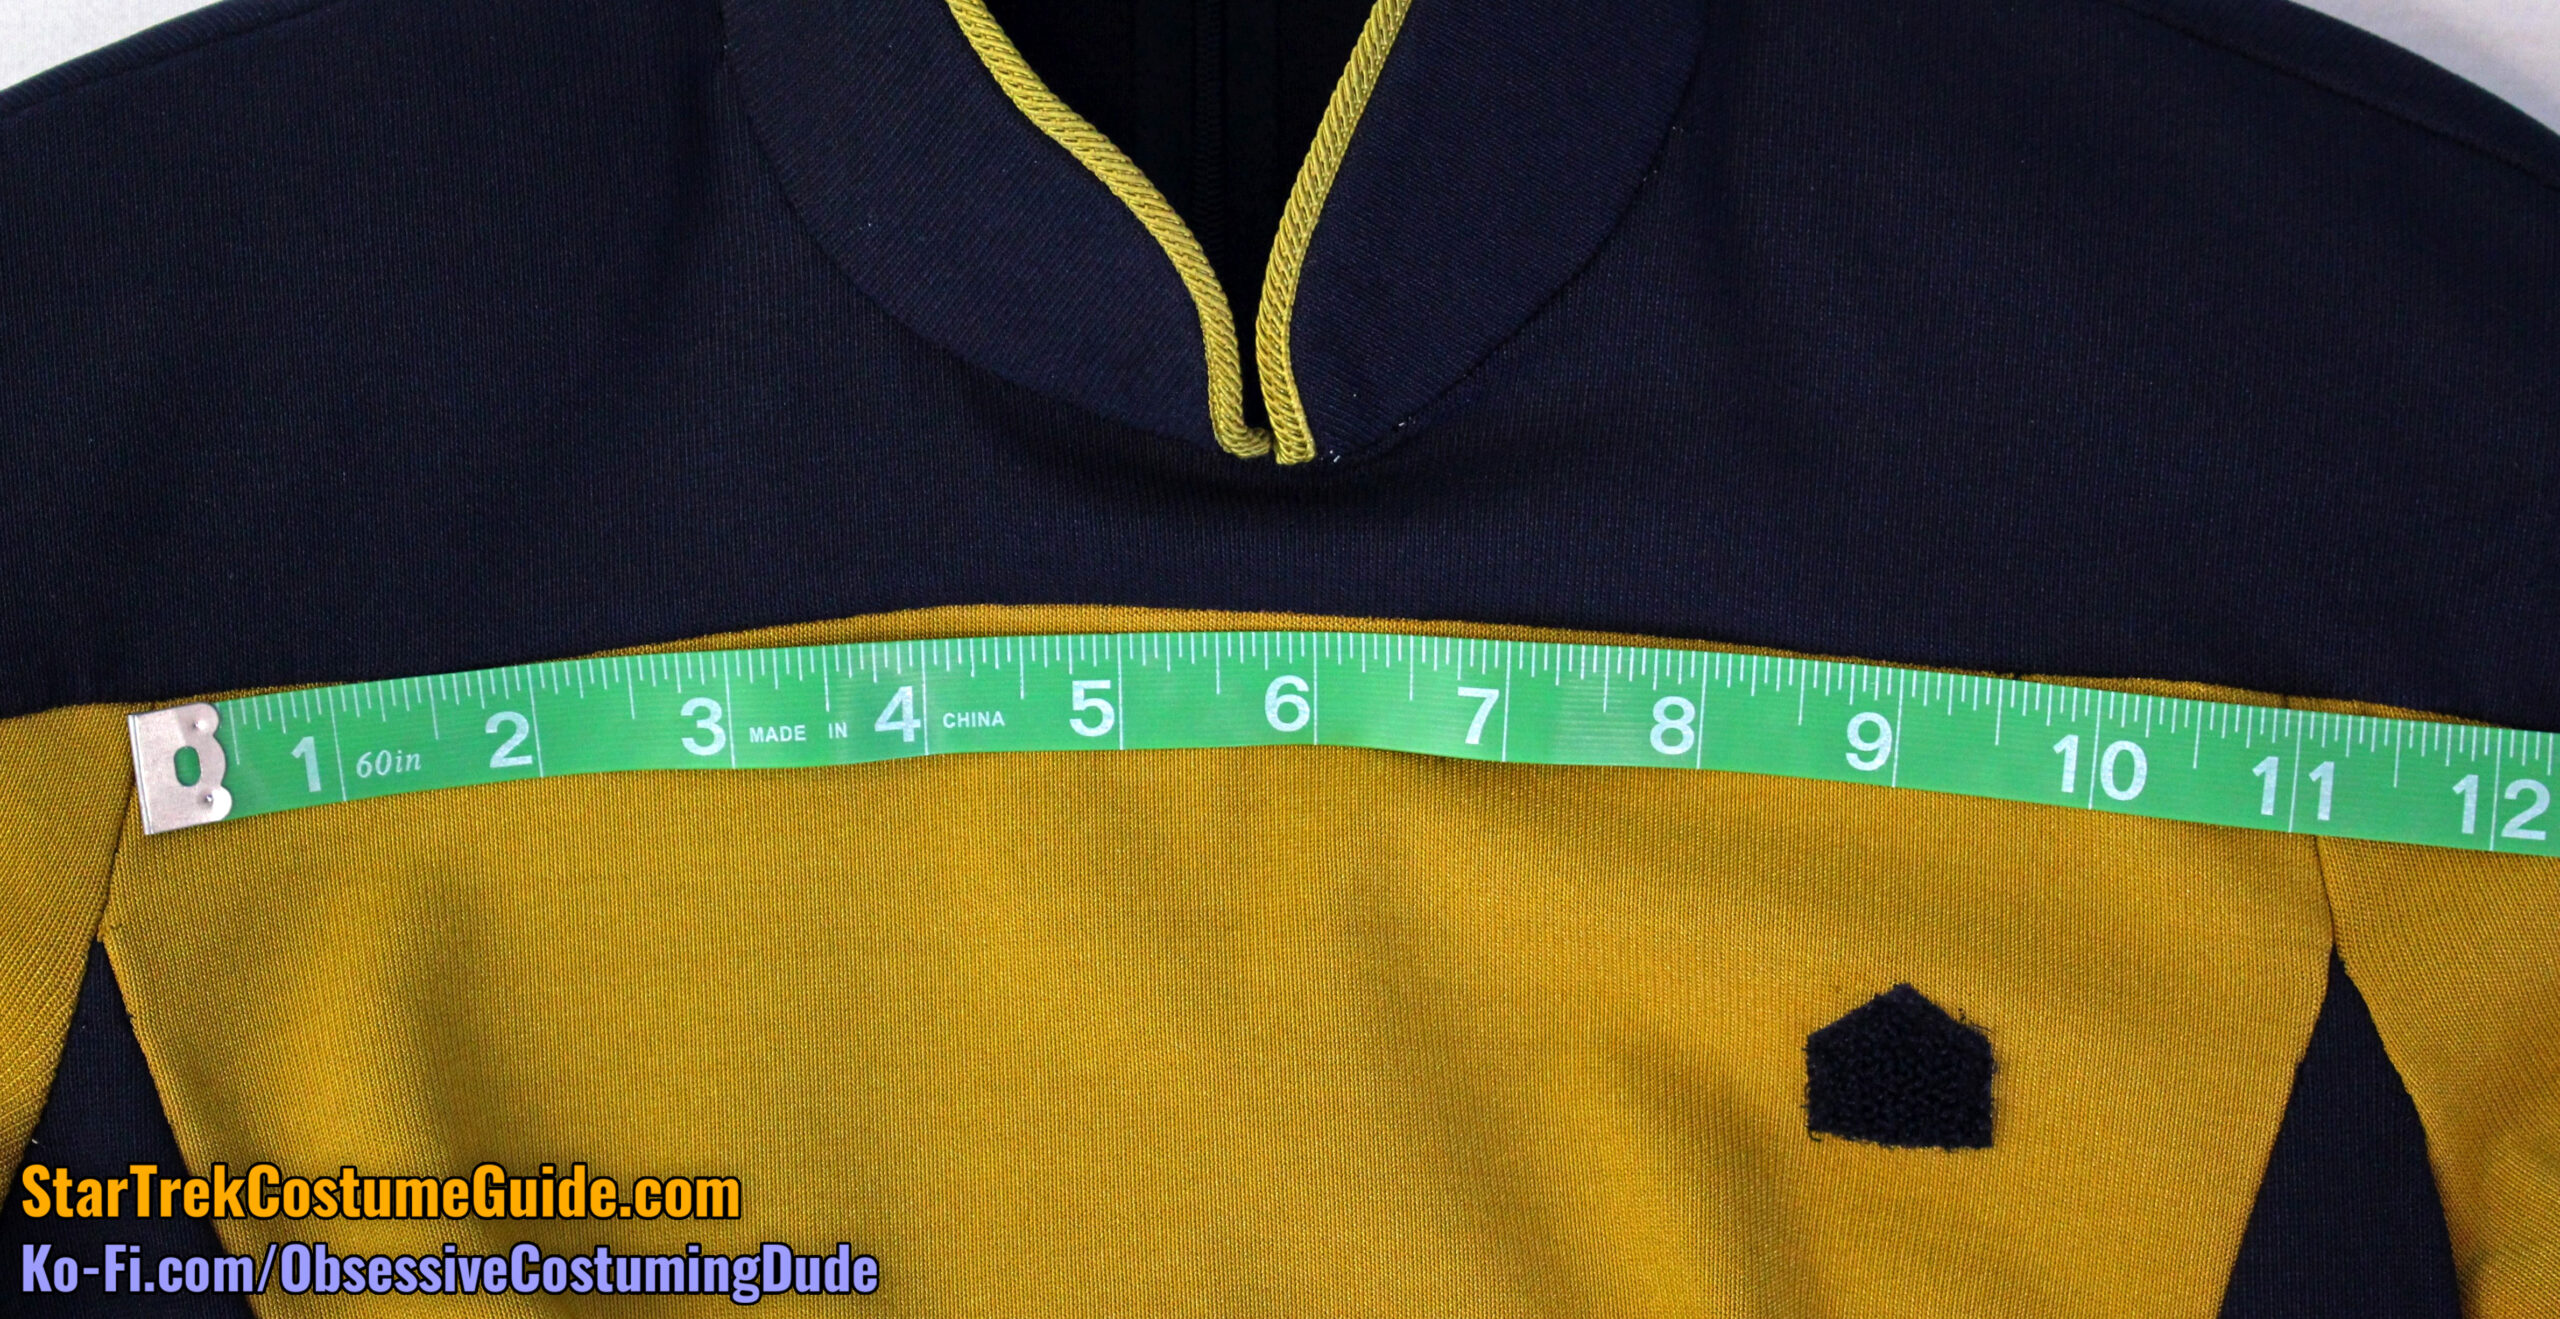
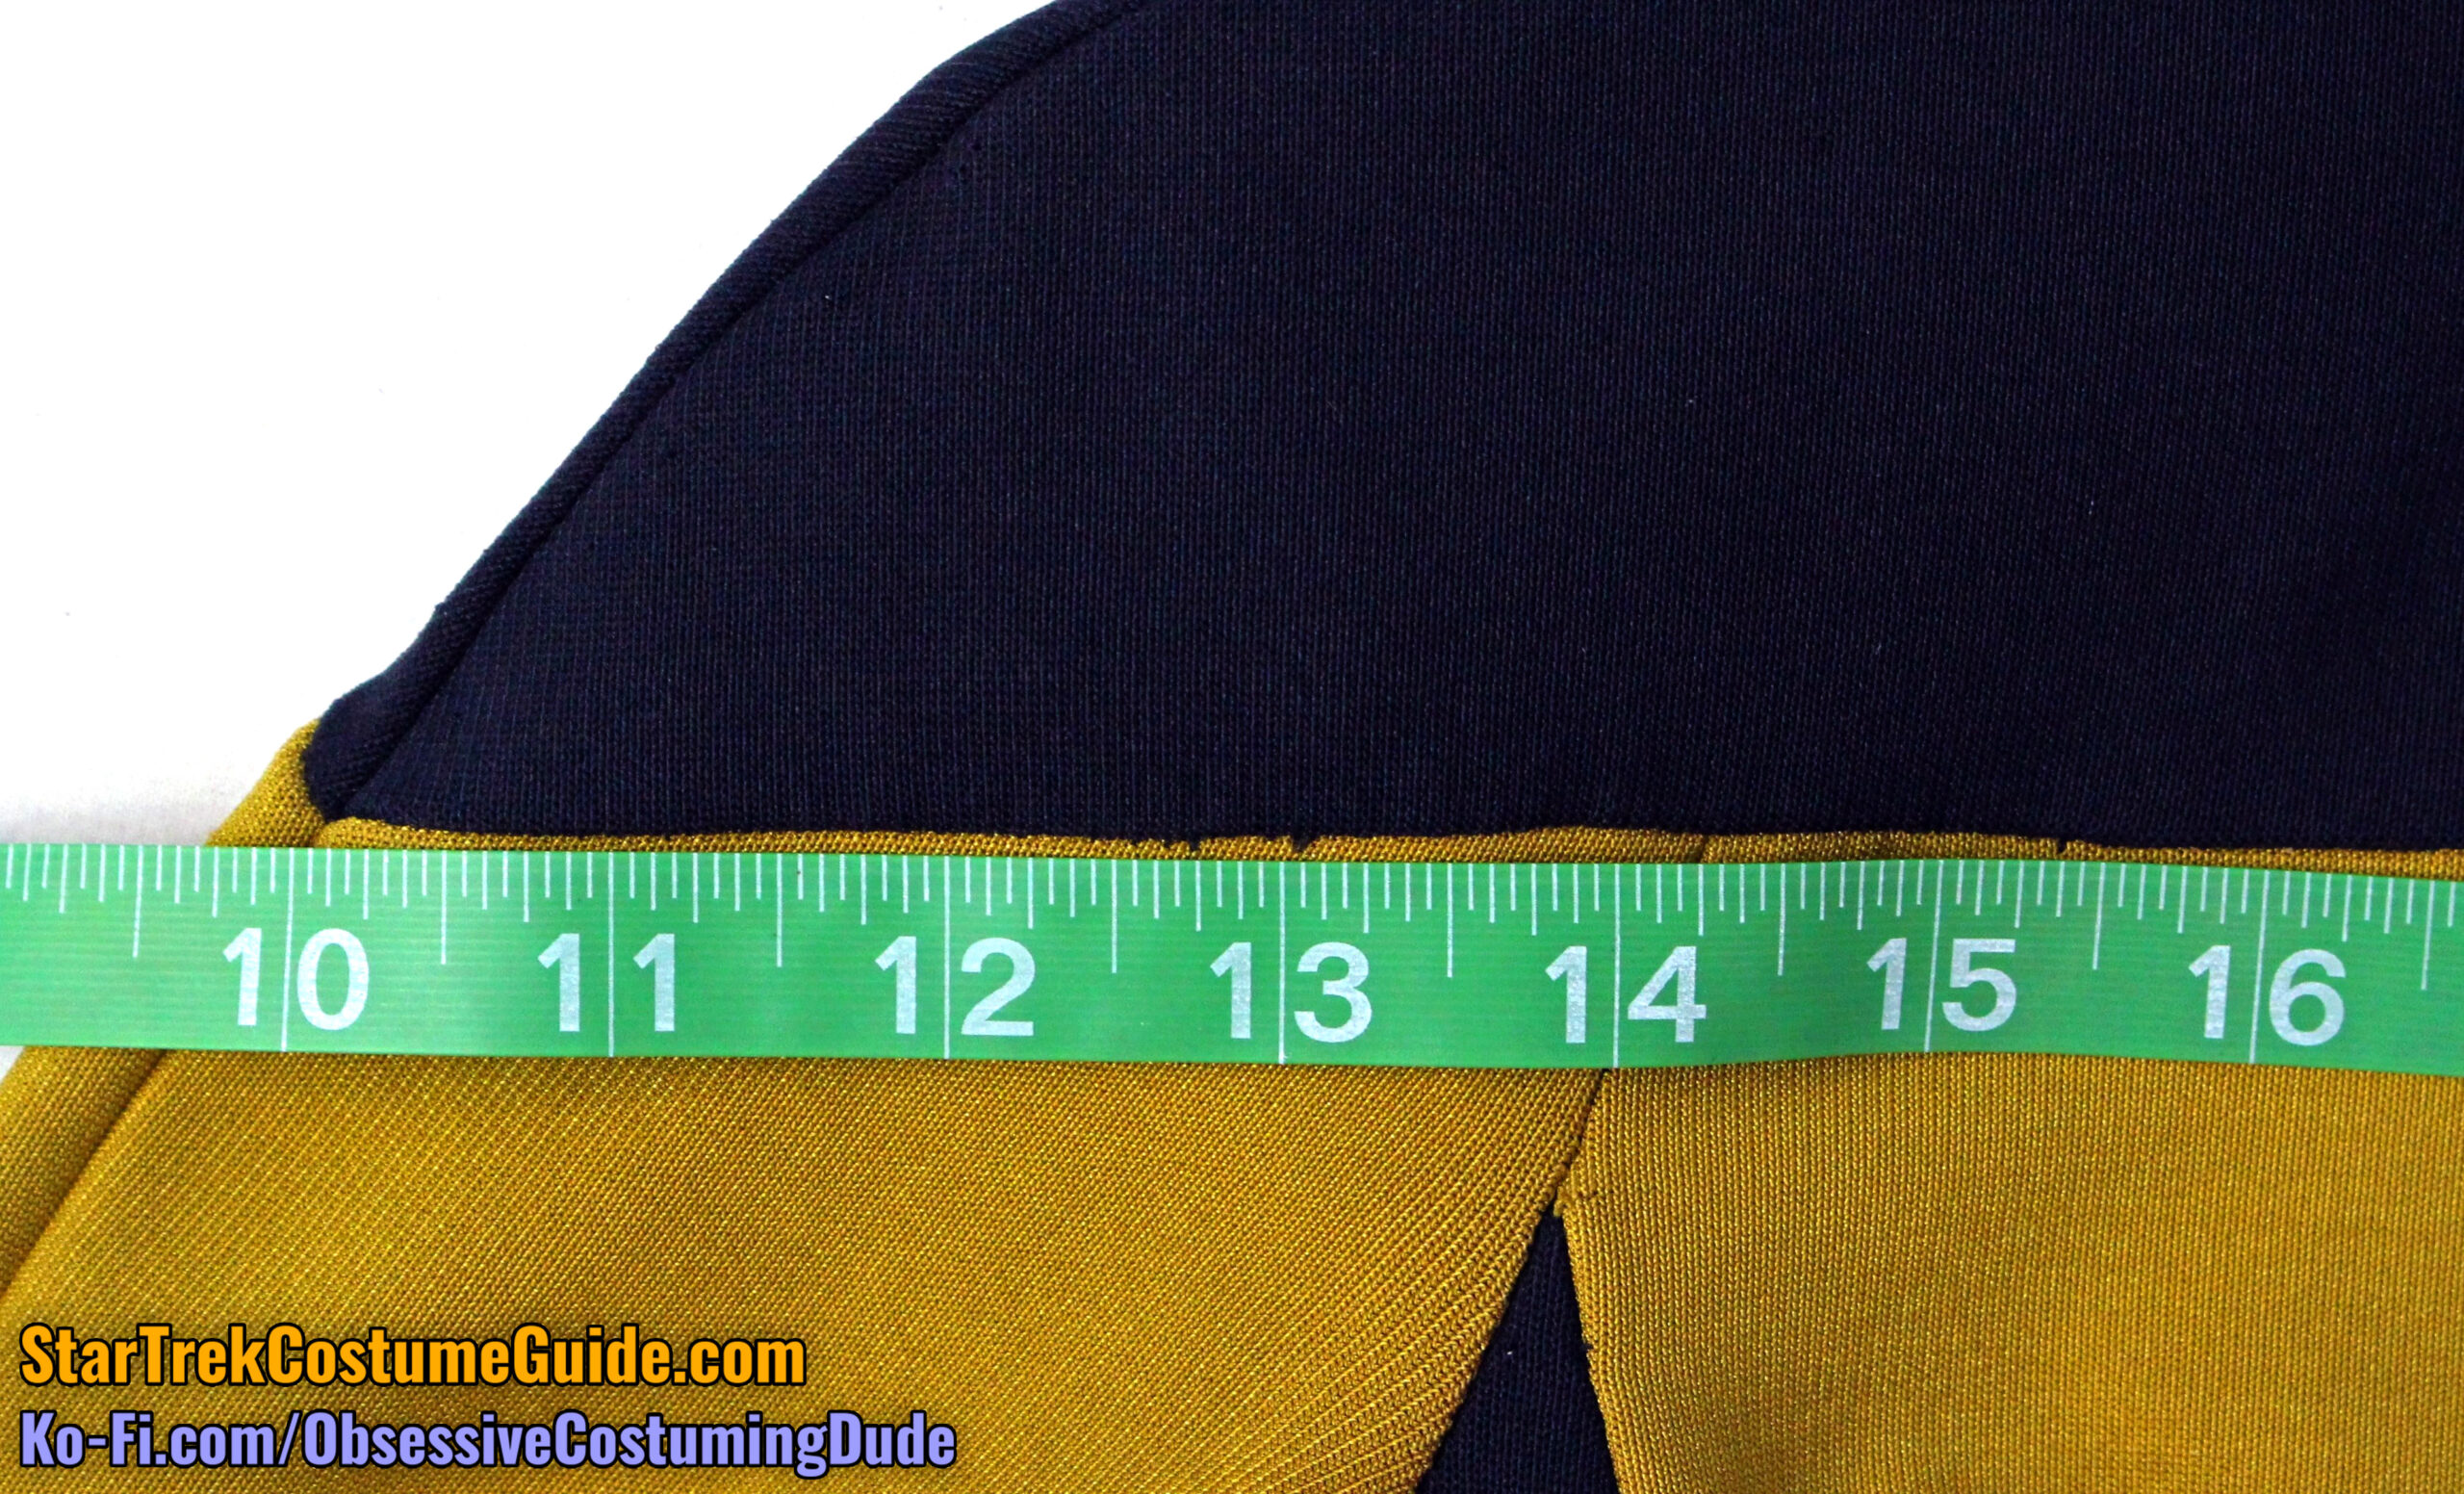
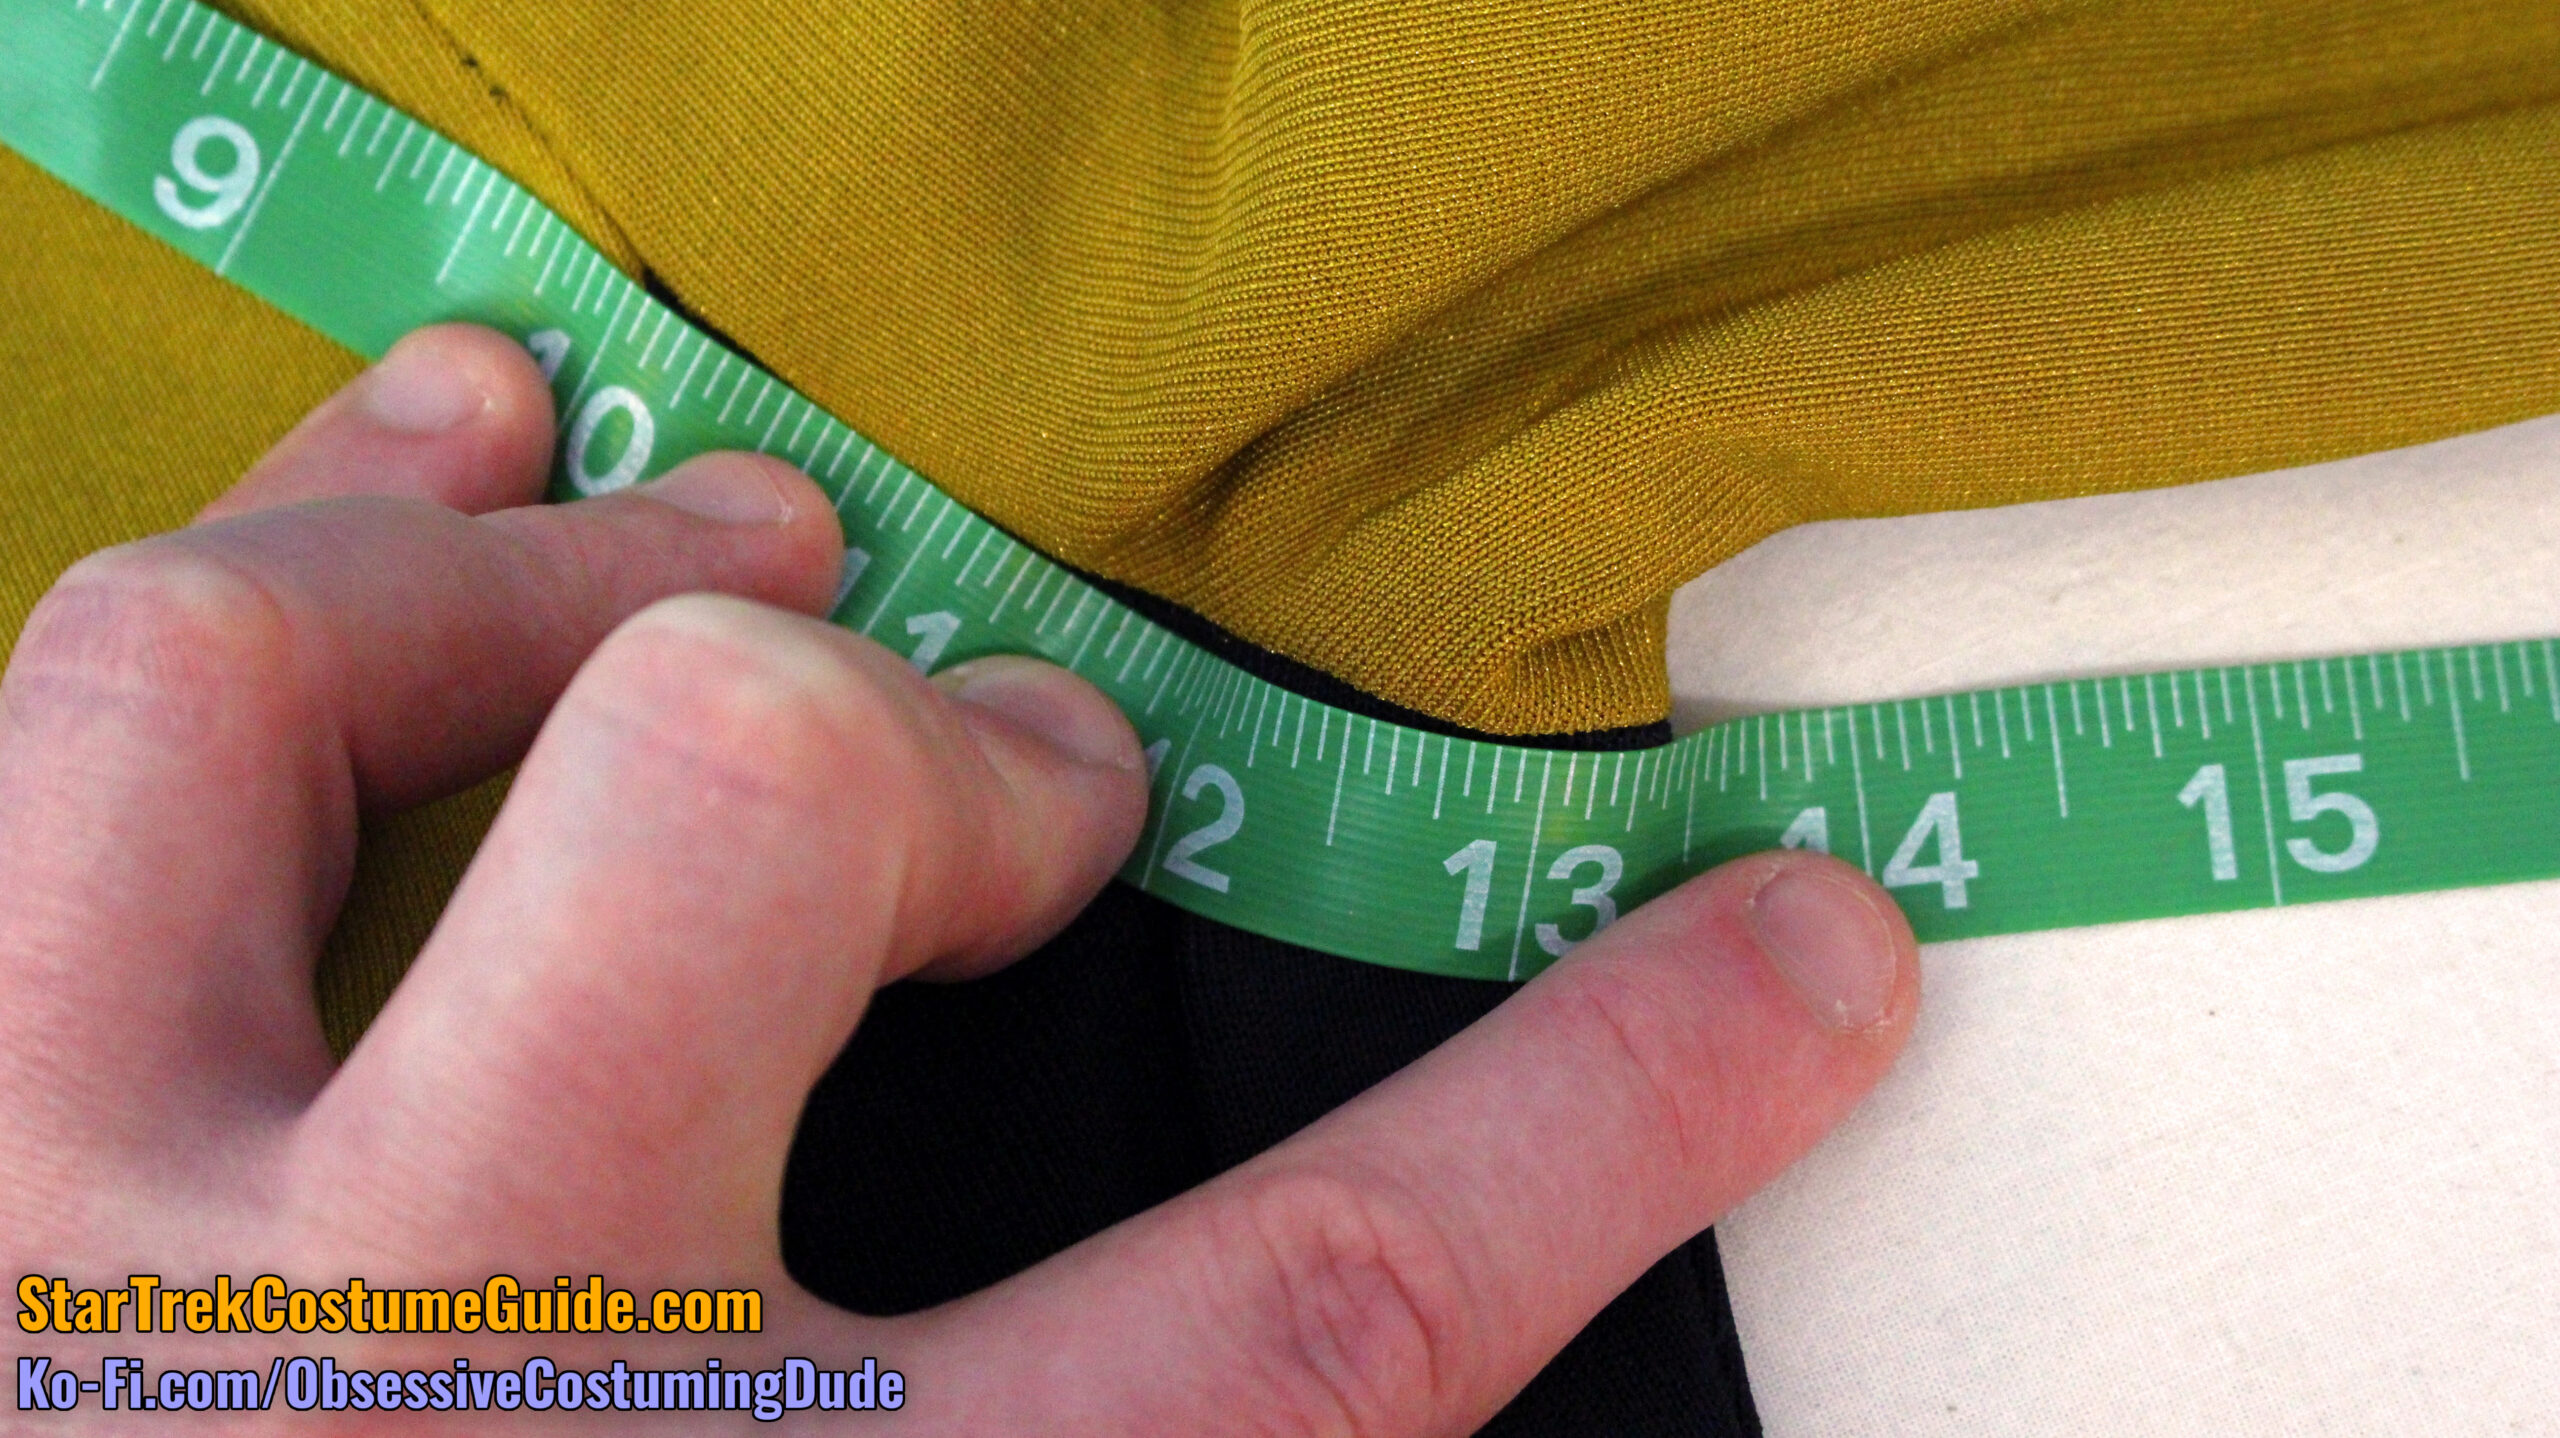
The front yoke/body seam line was 11”, measured from armscye to armscye.
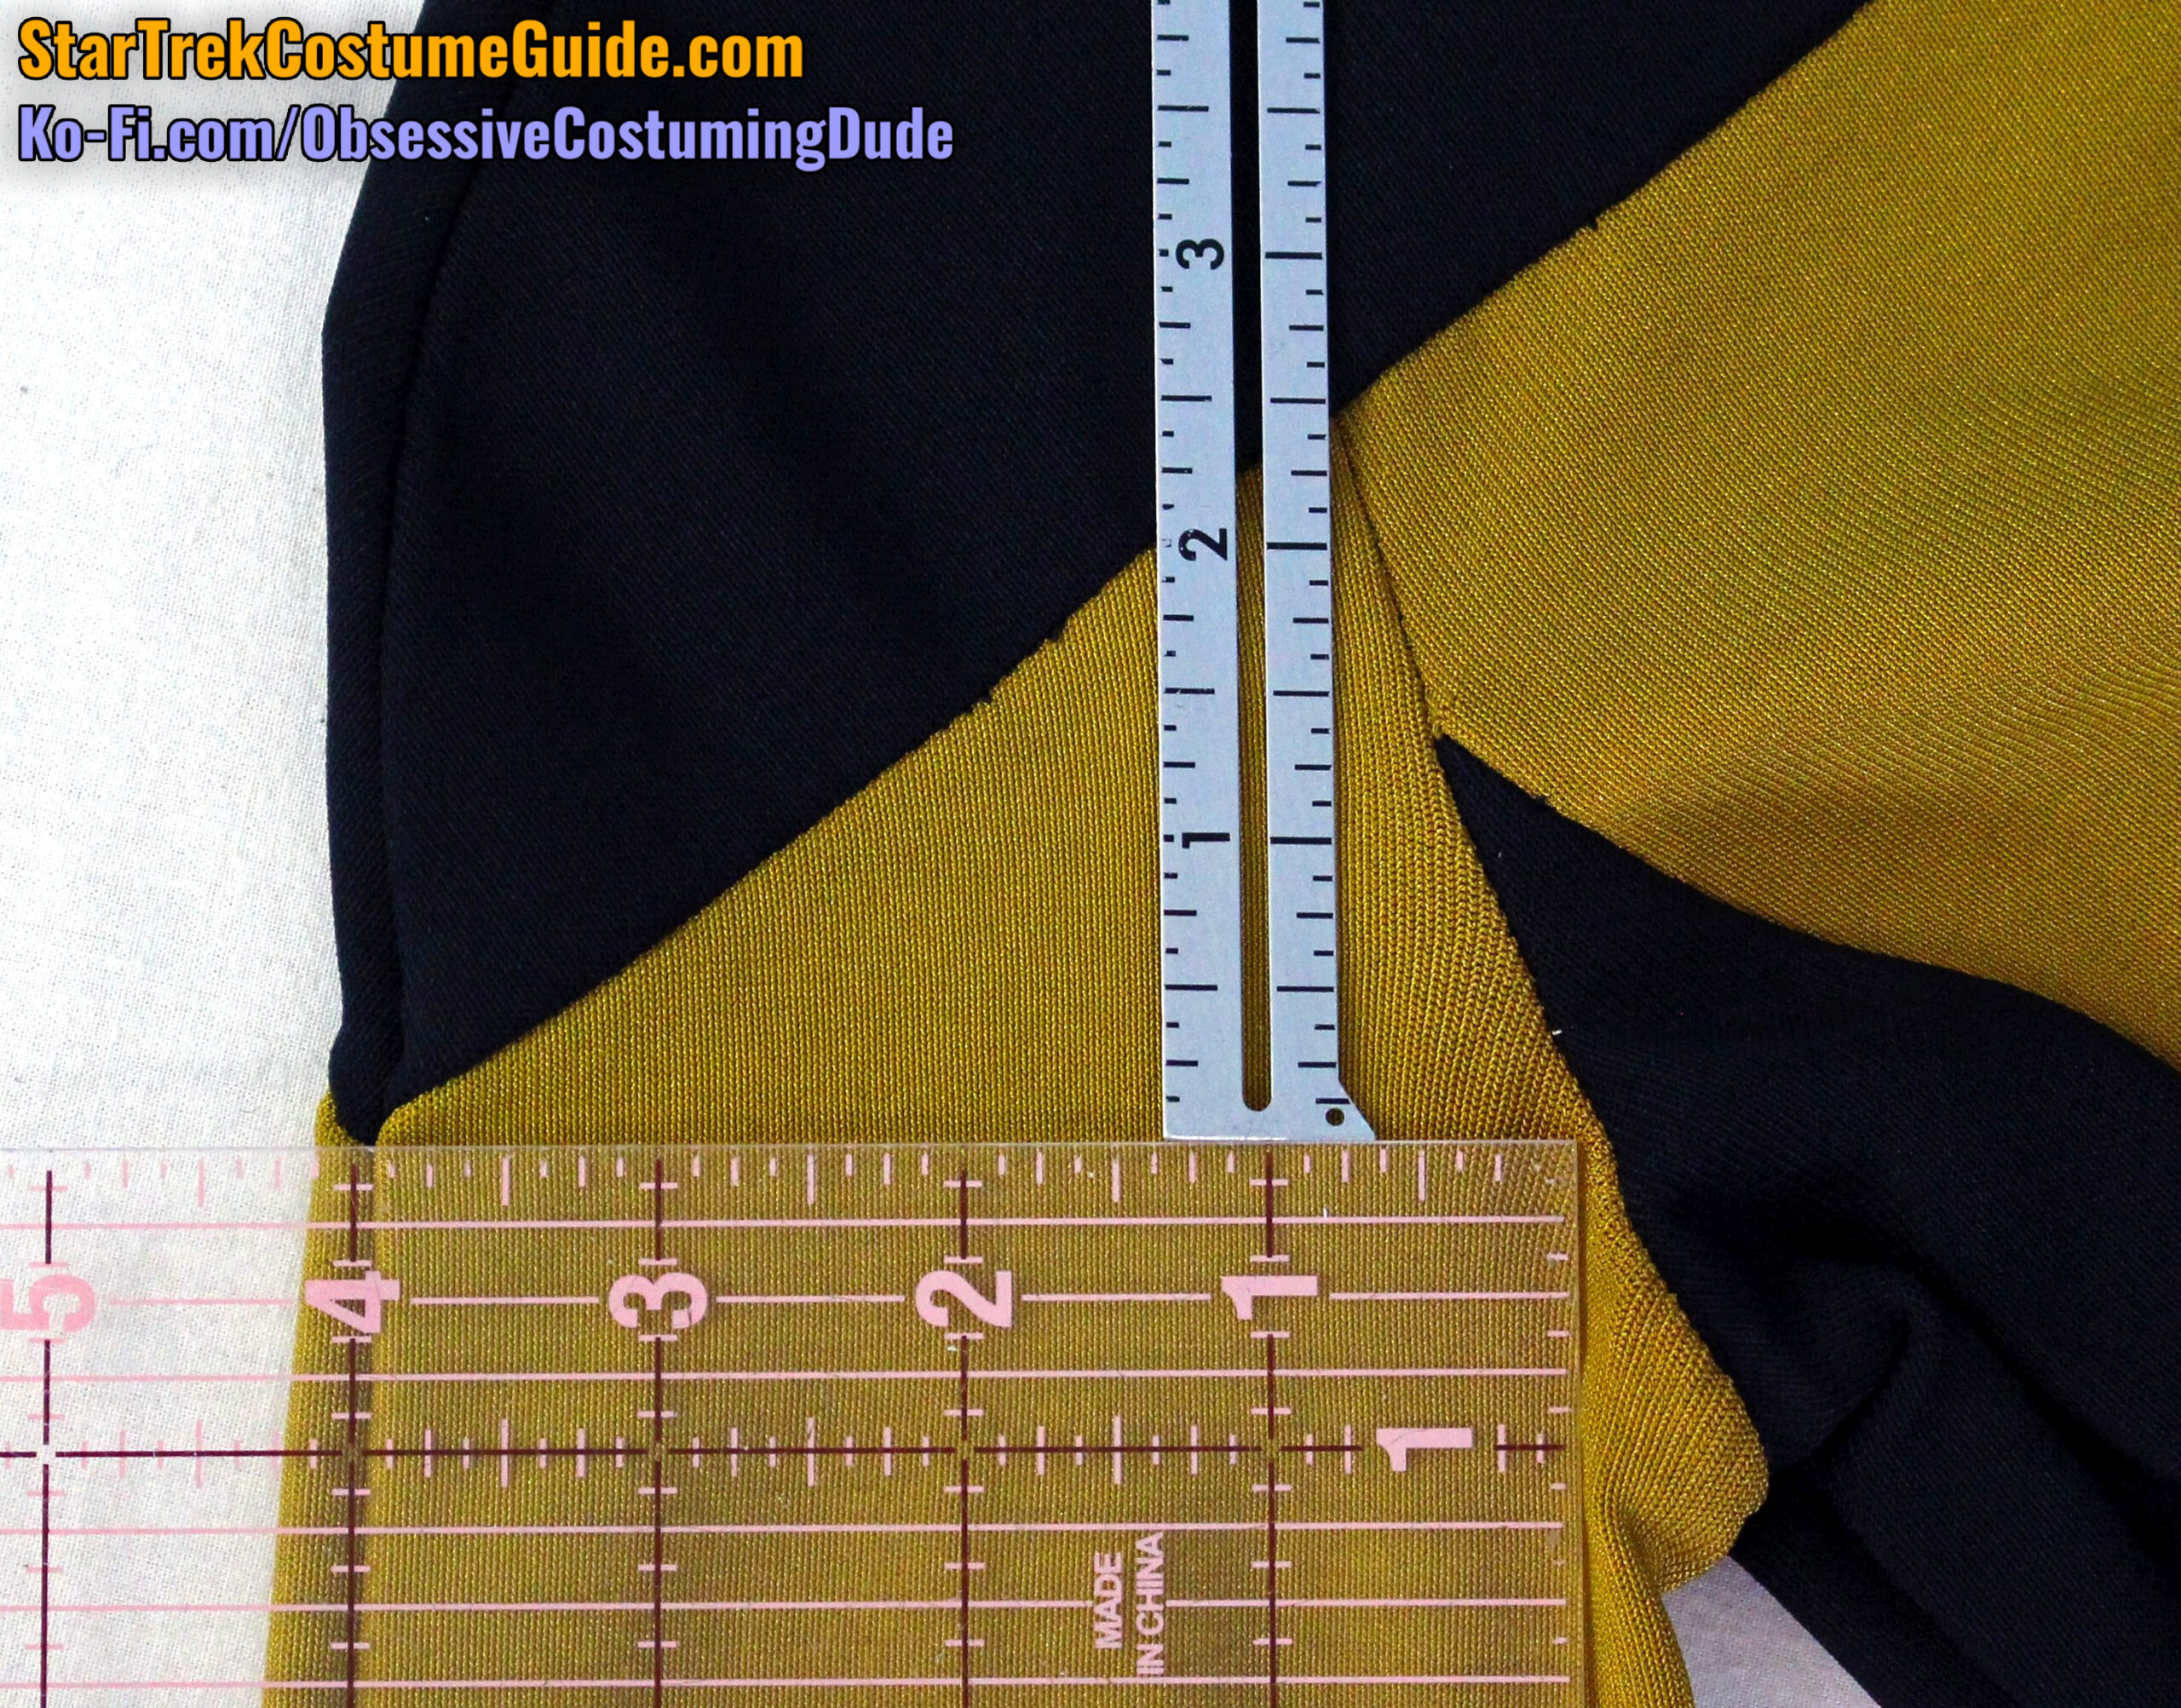
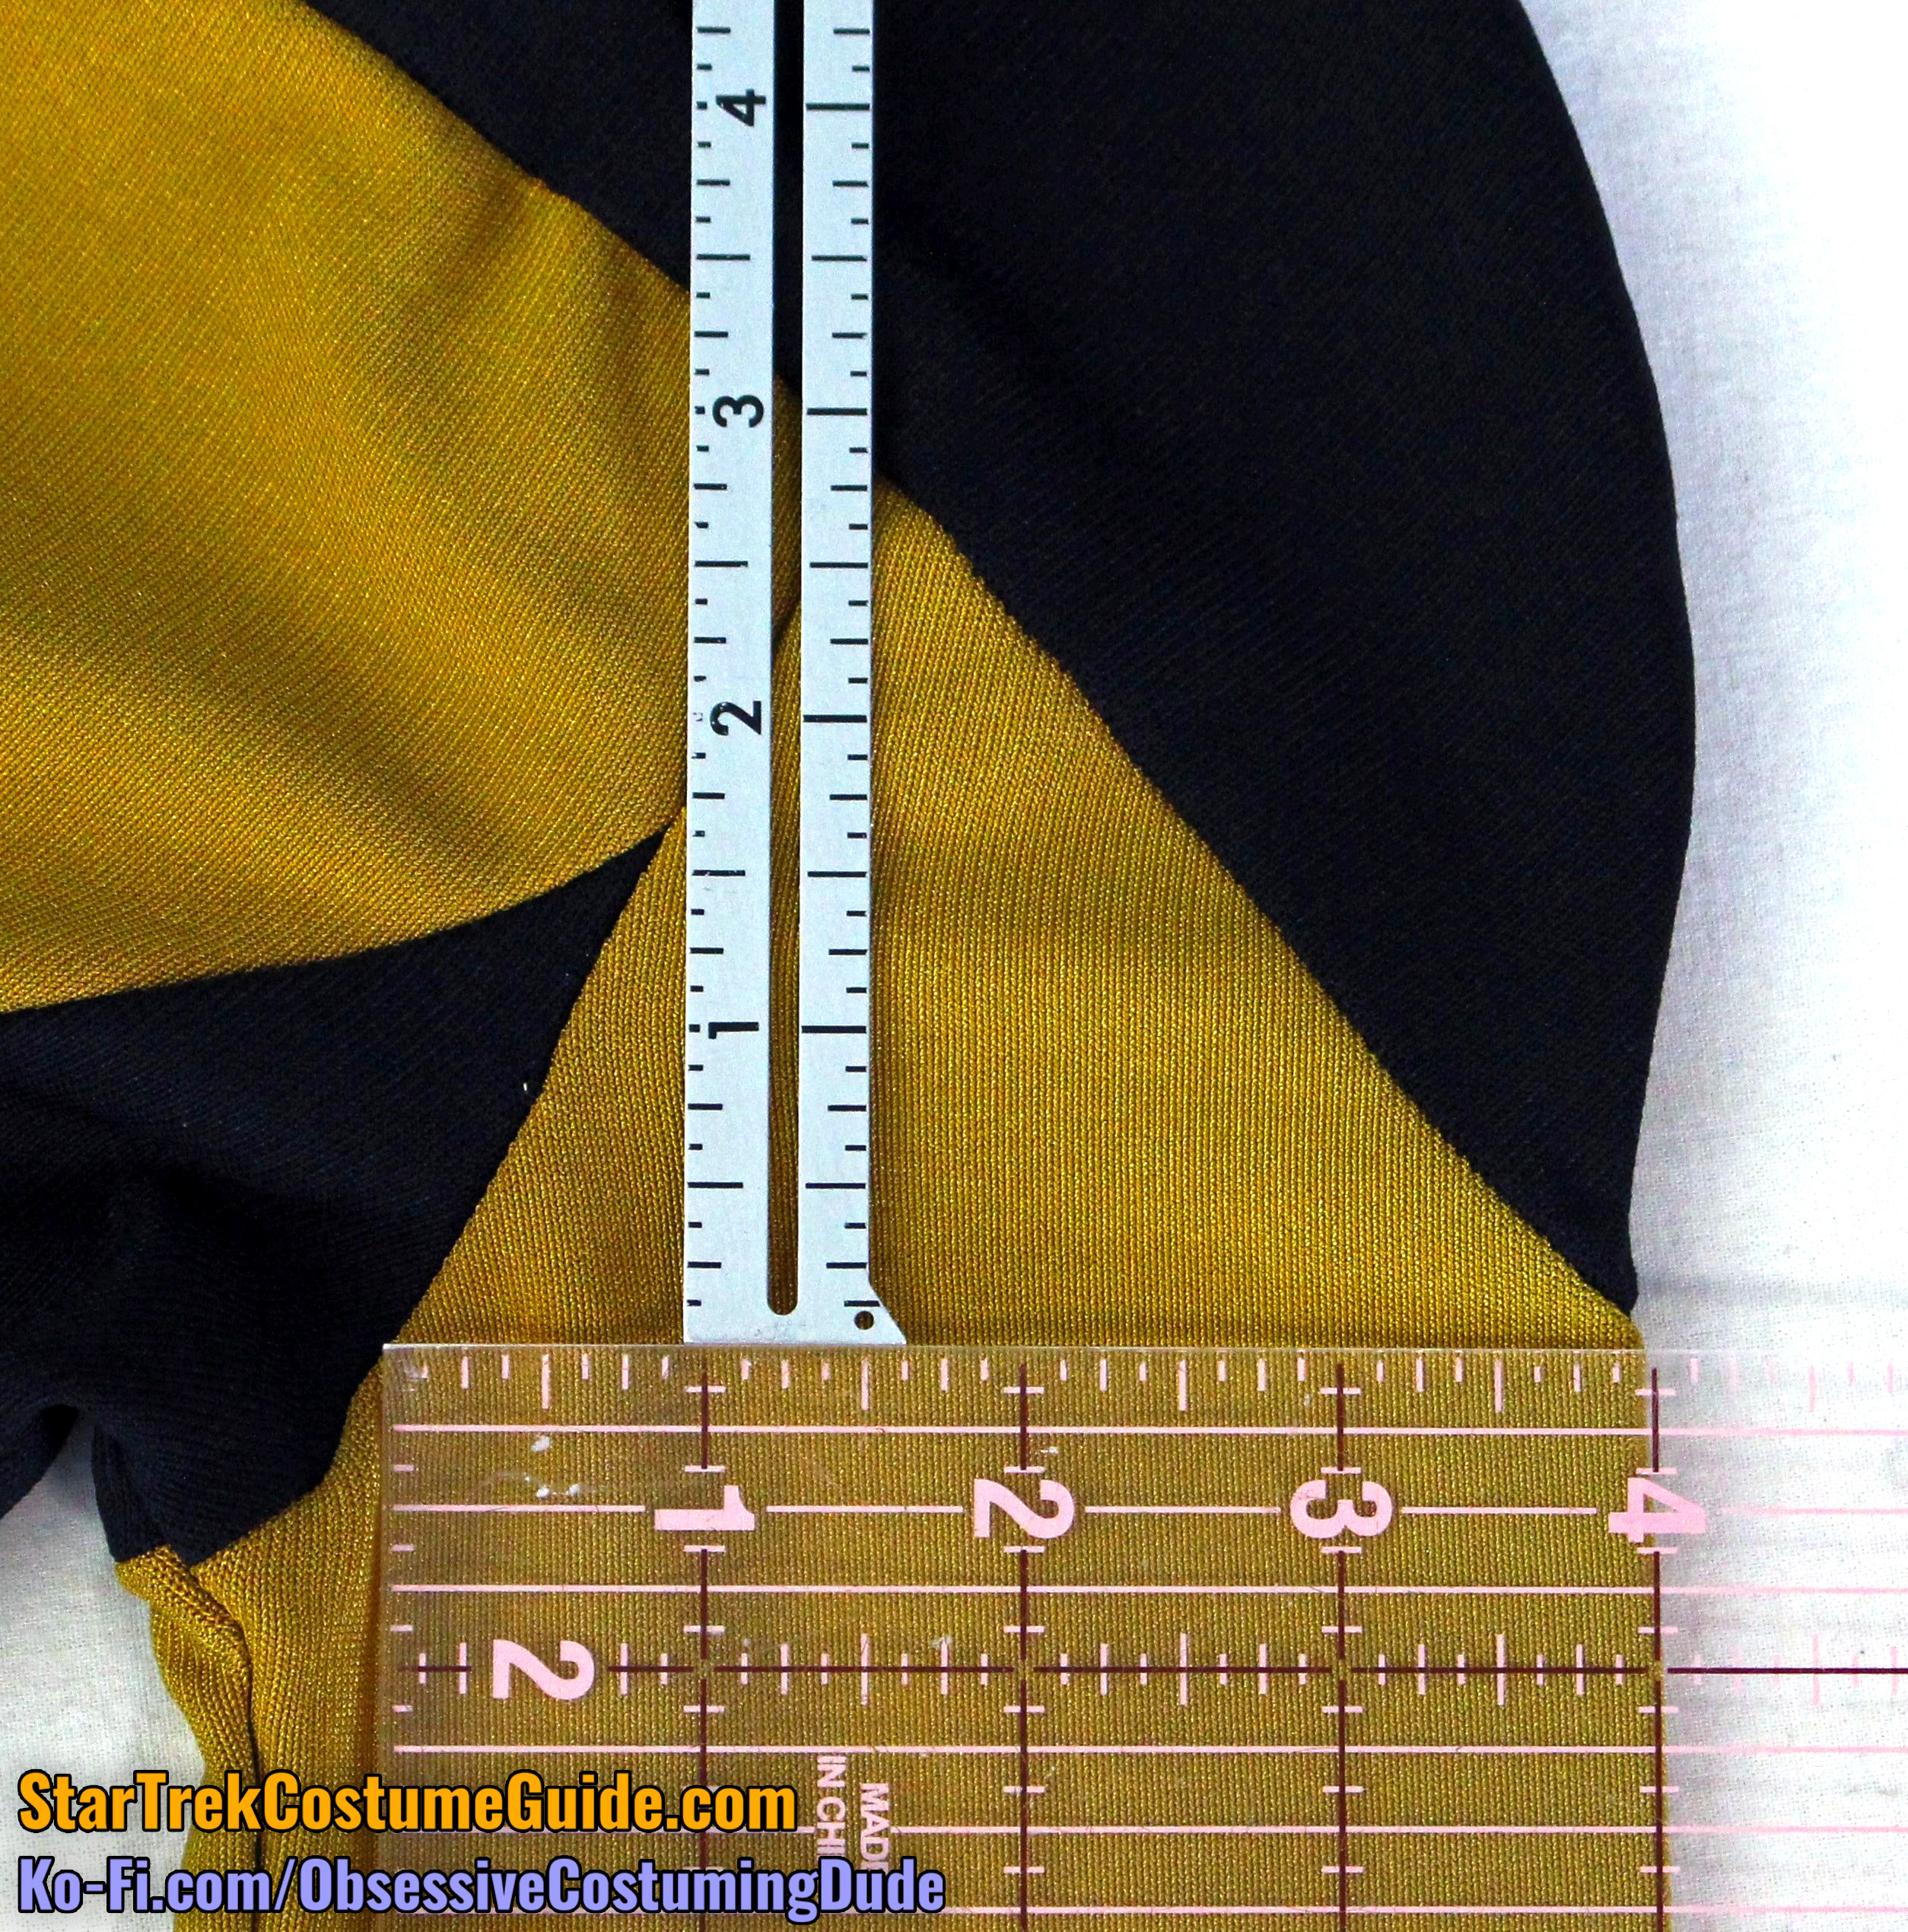
The front yoke extended 4 ¼” onto each front sleeve.
The lower edge of the front yoke curved downward 1” from center front to the lower/outer corners at the sleeves.
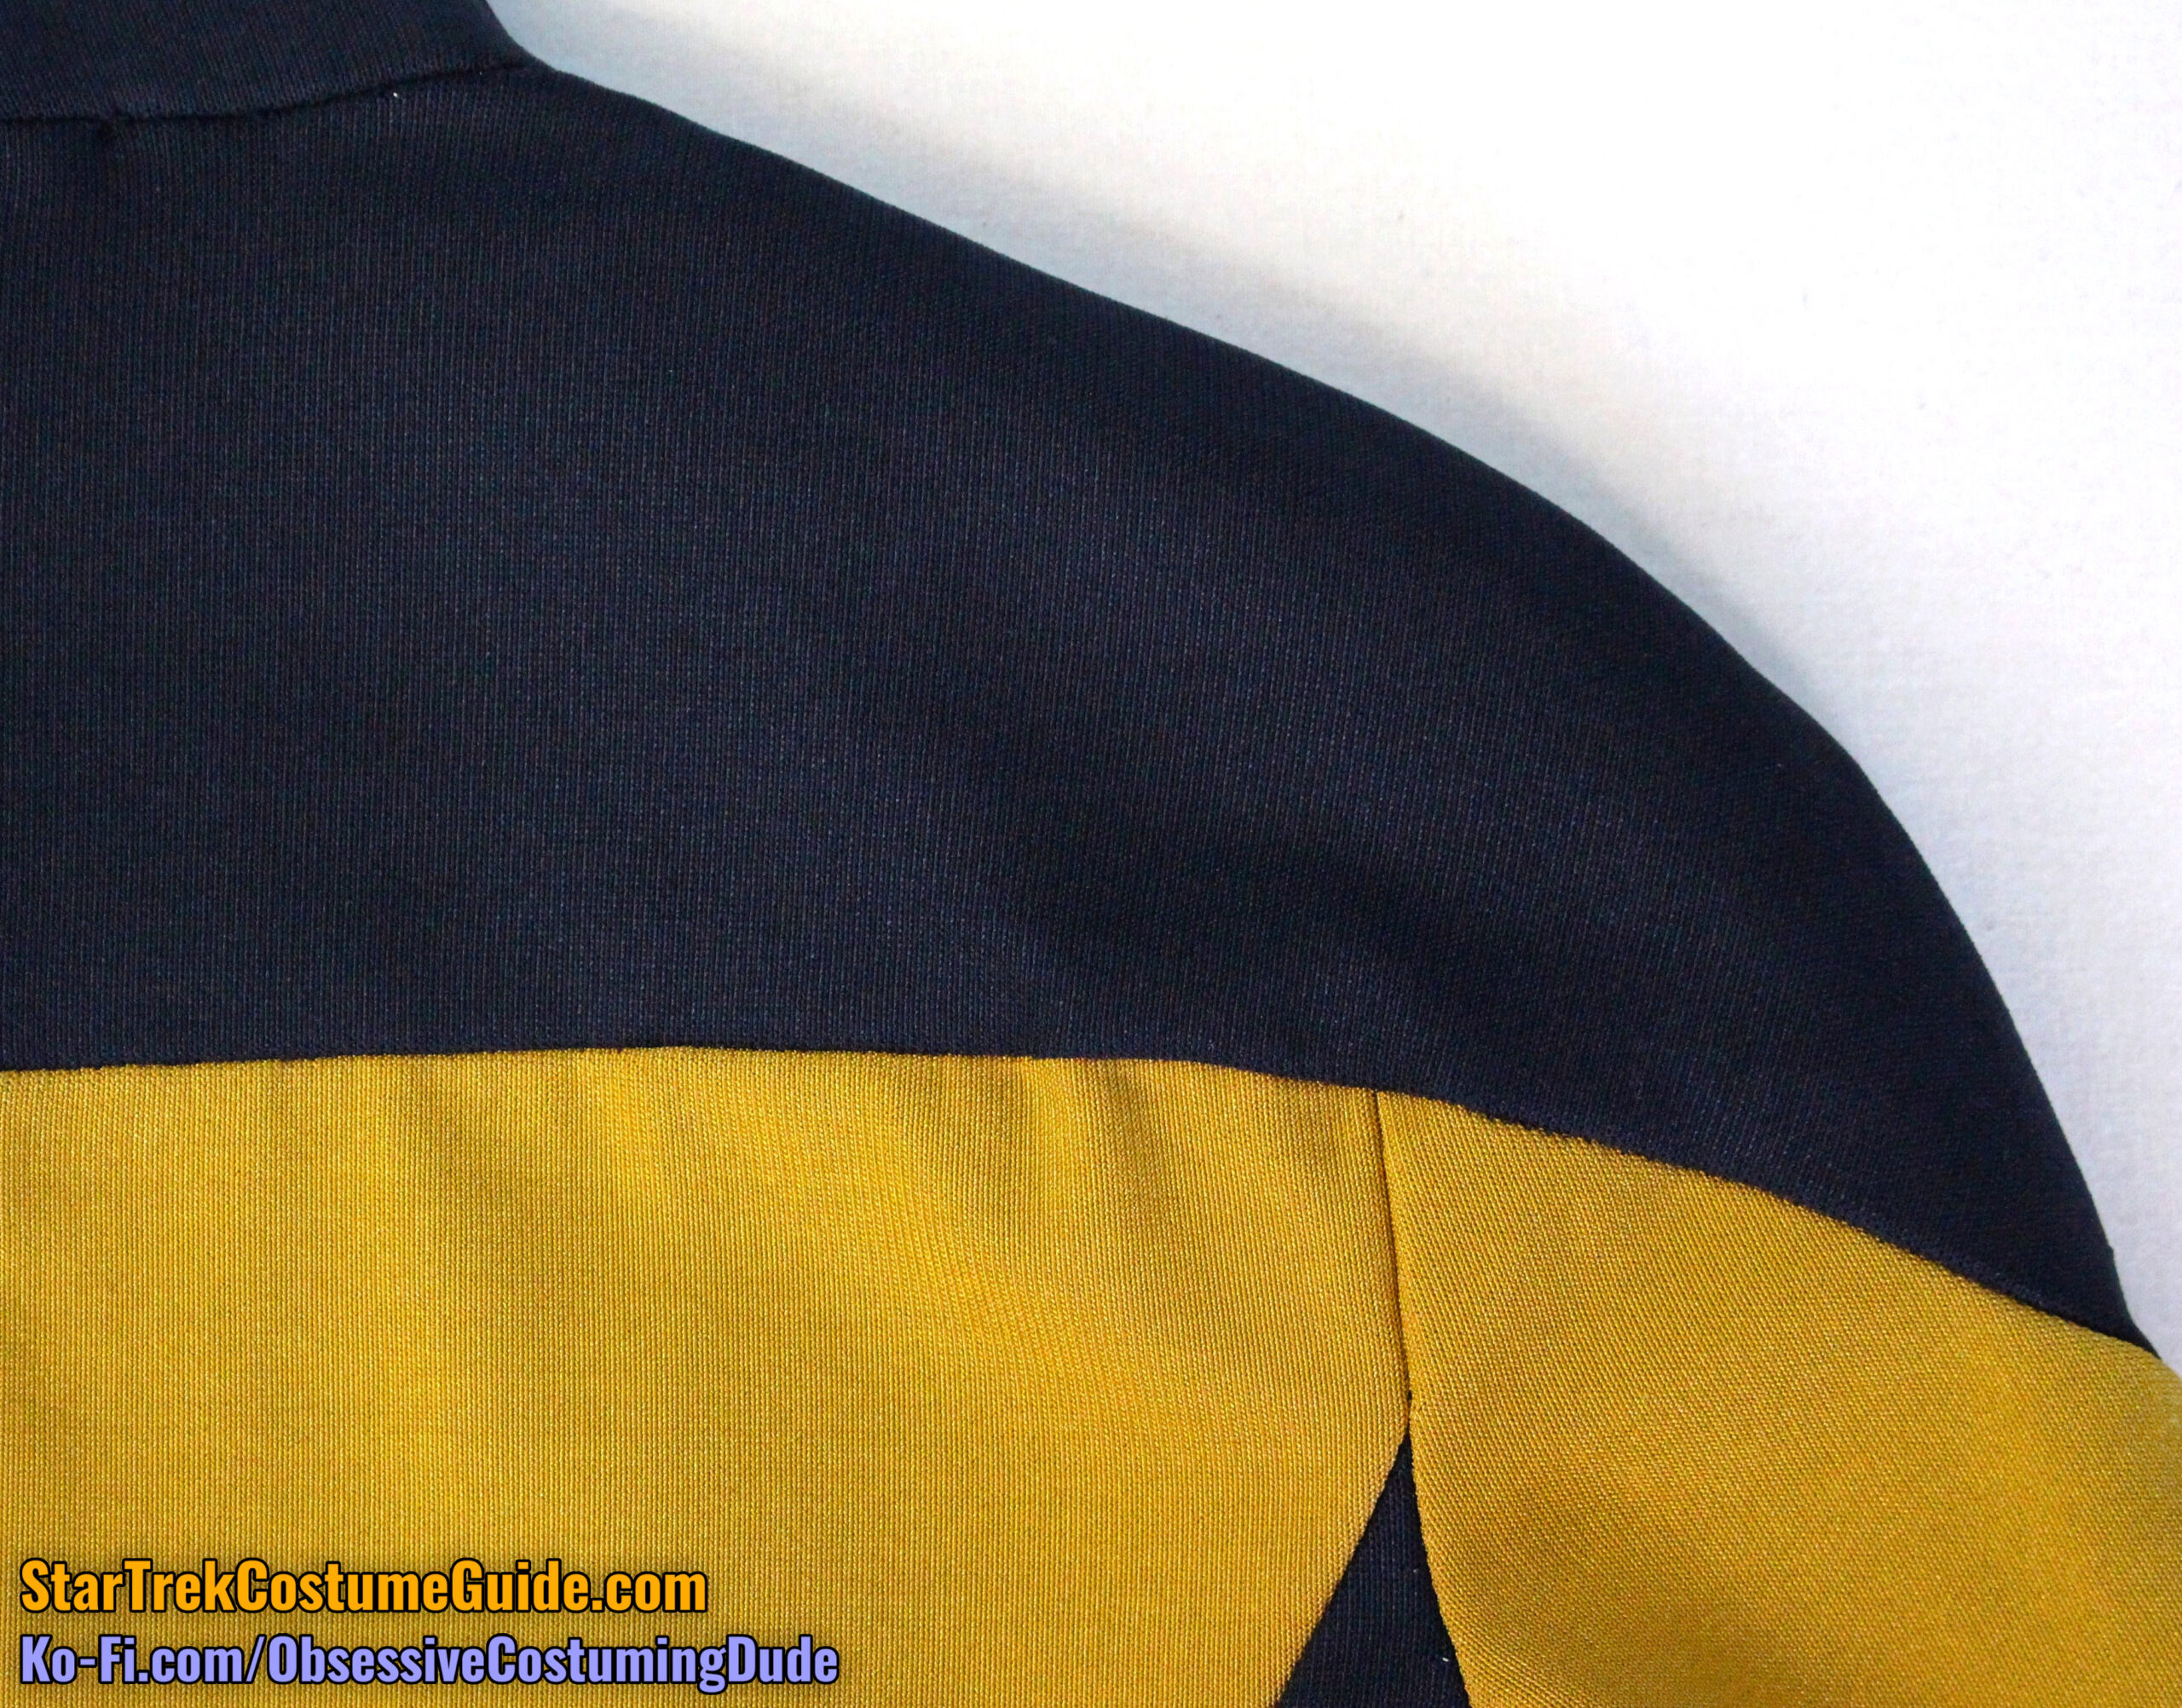
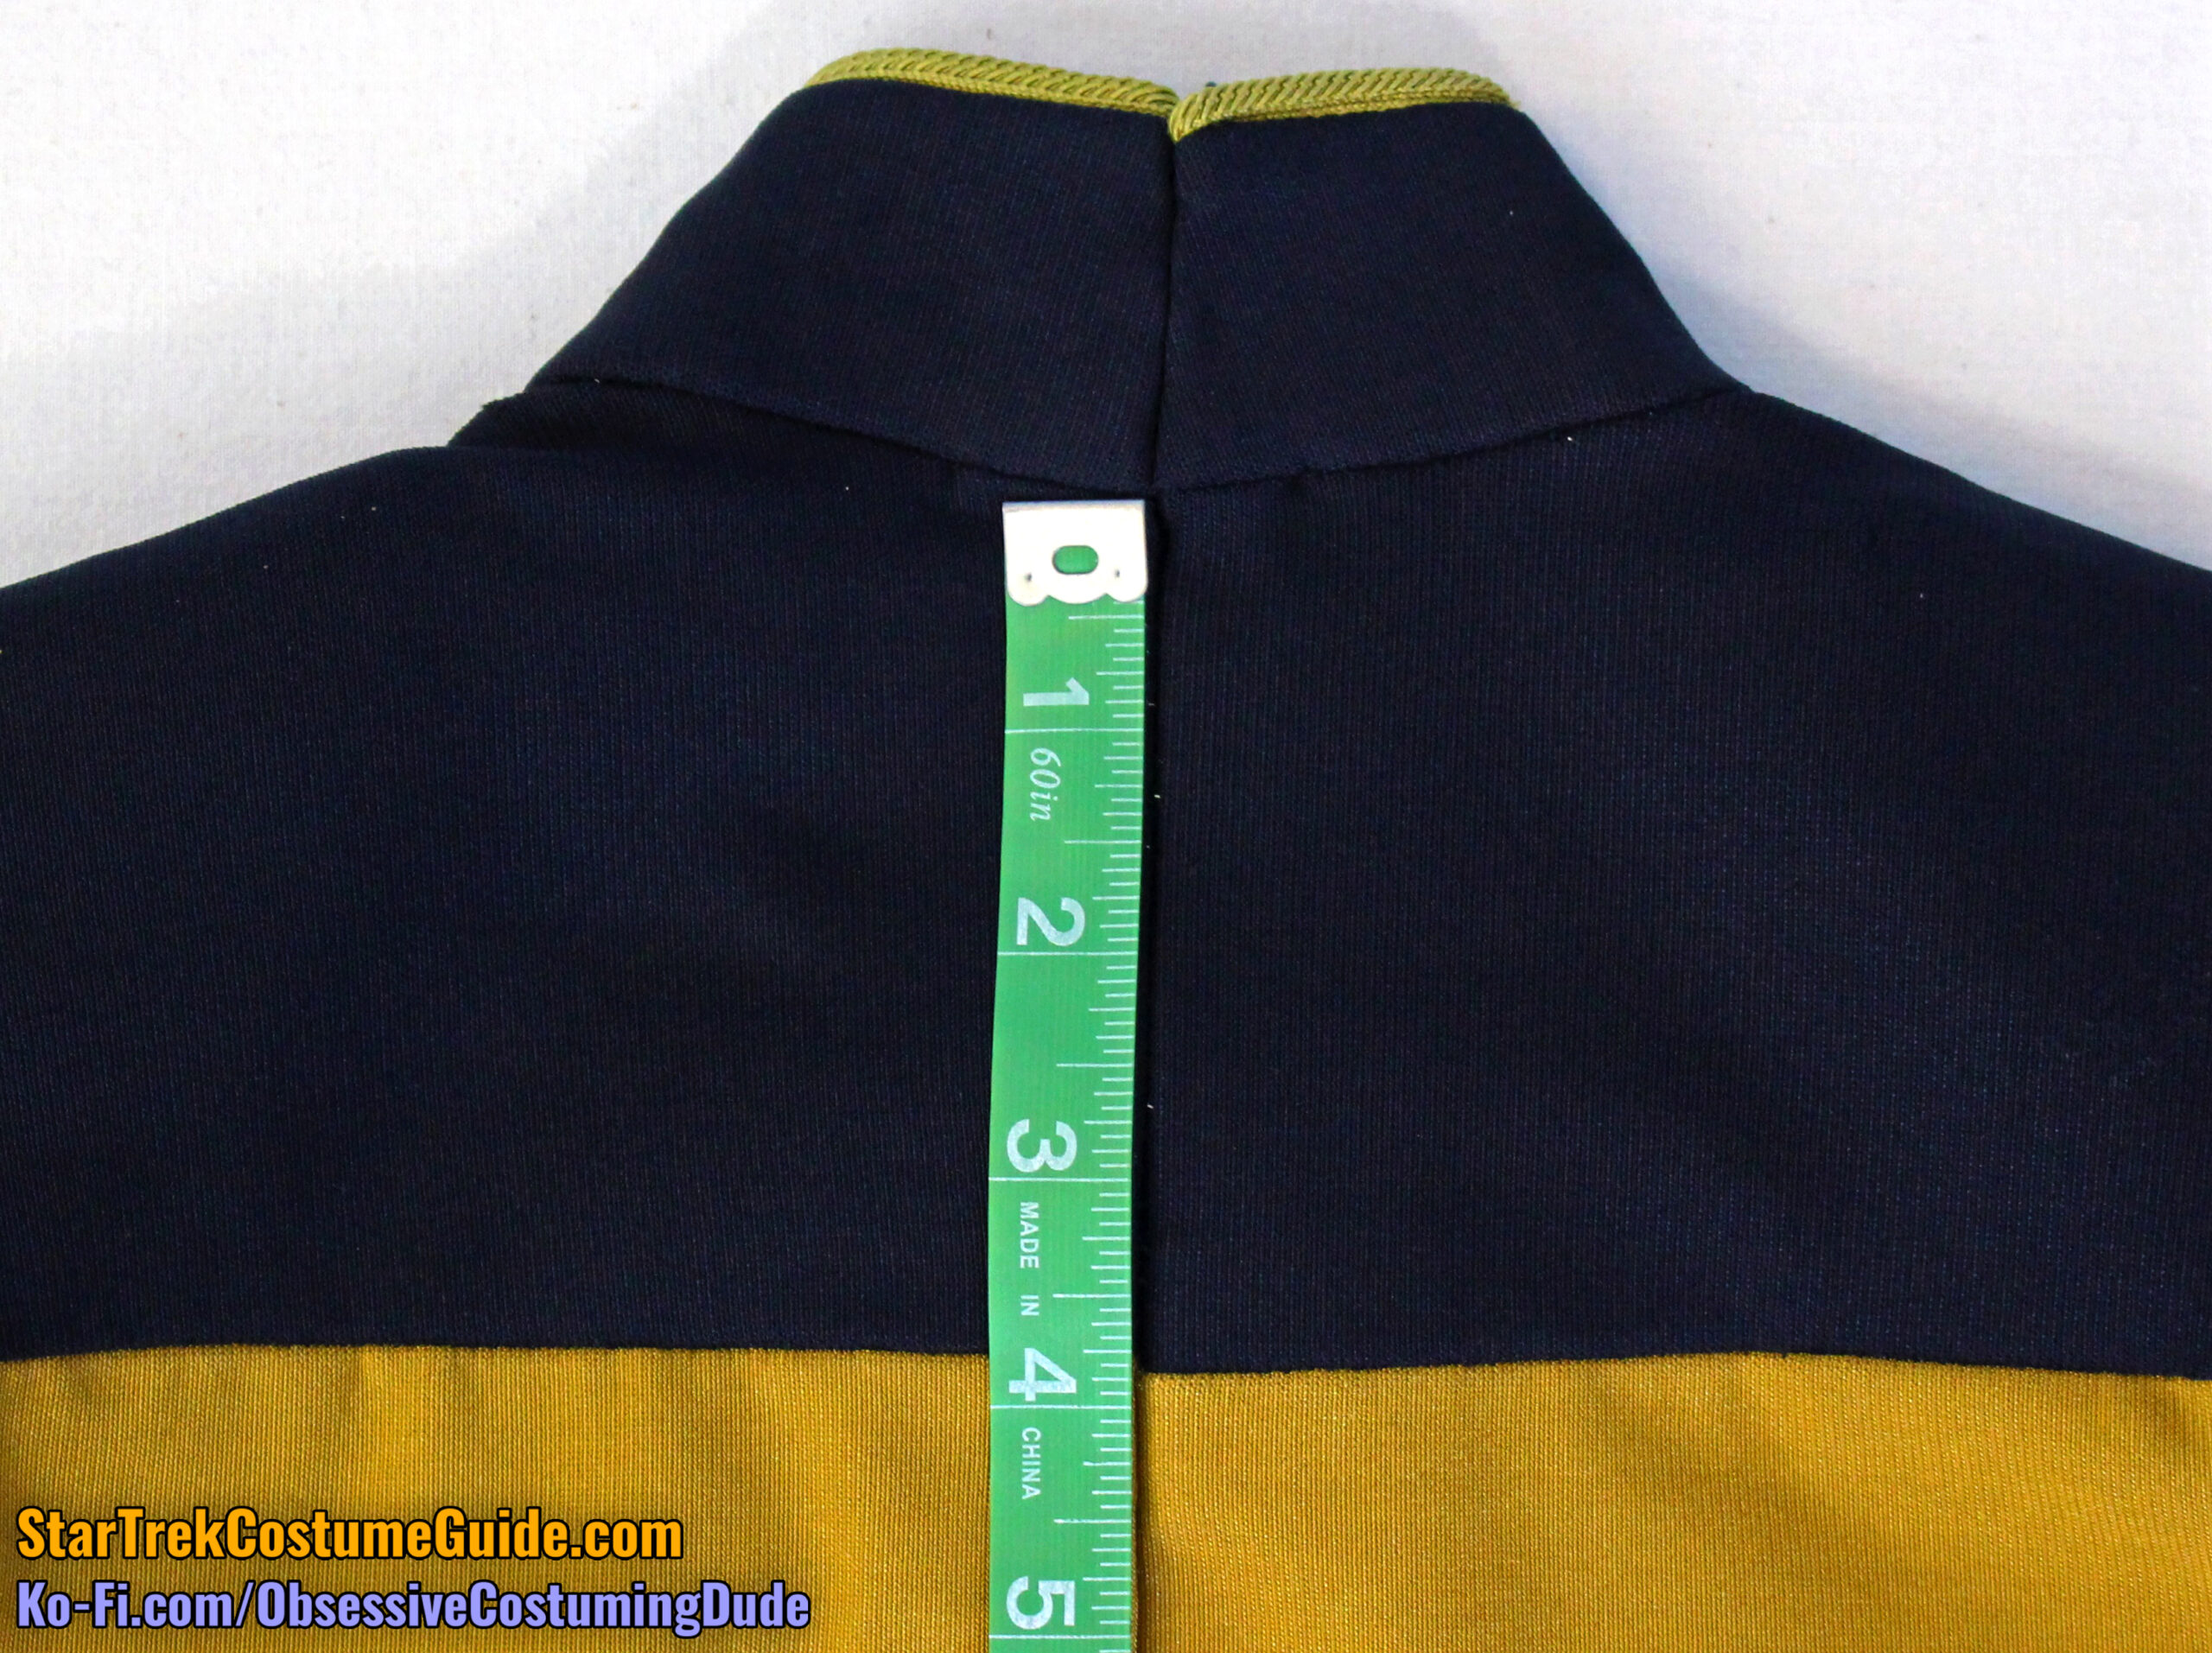
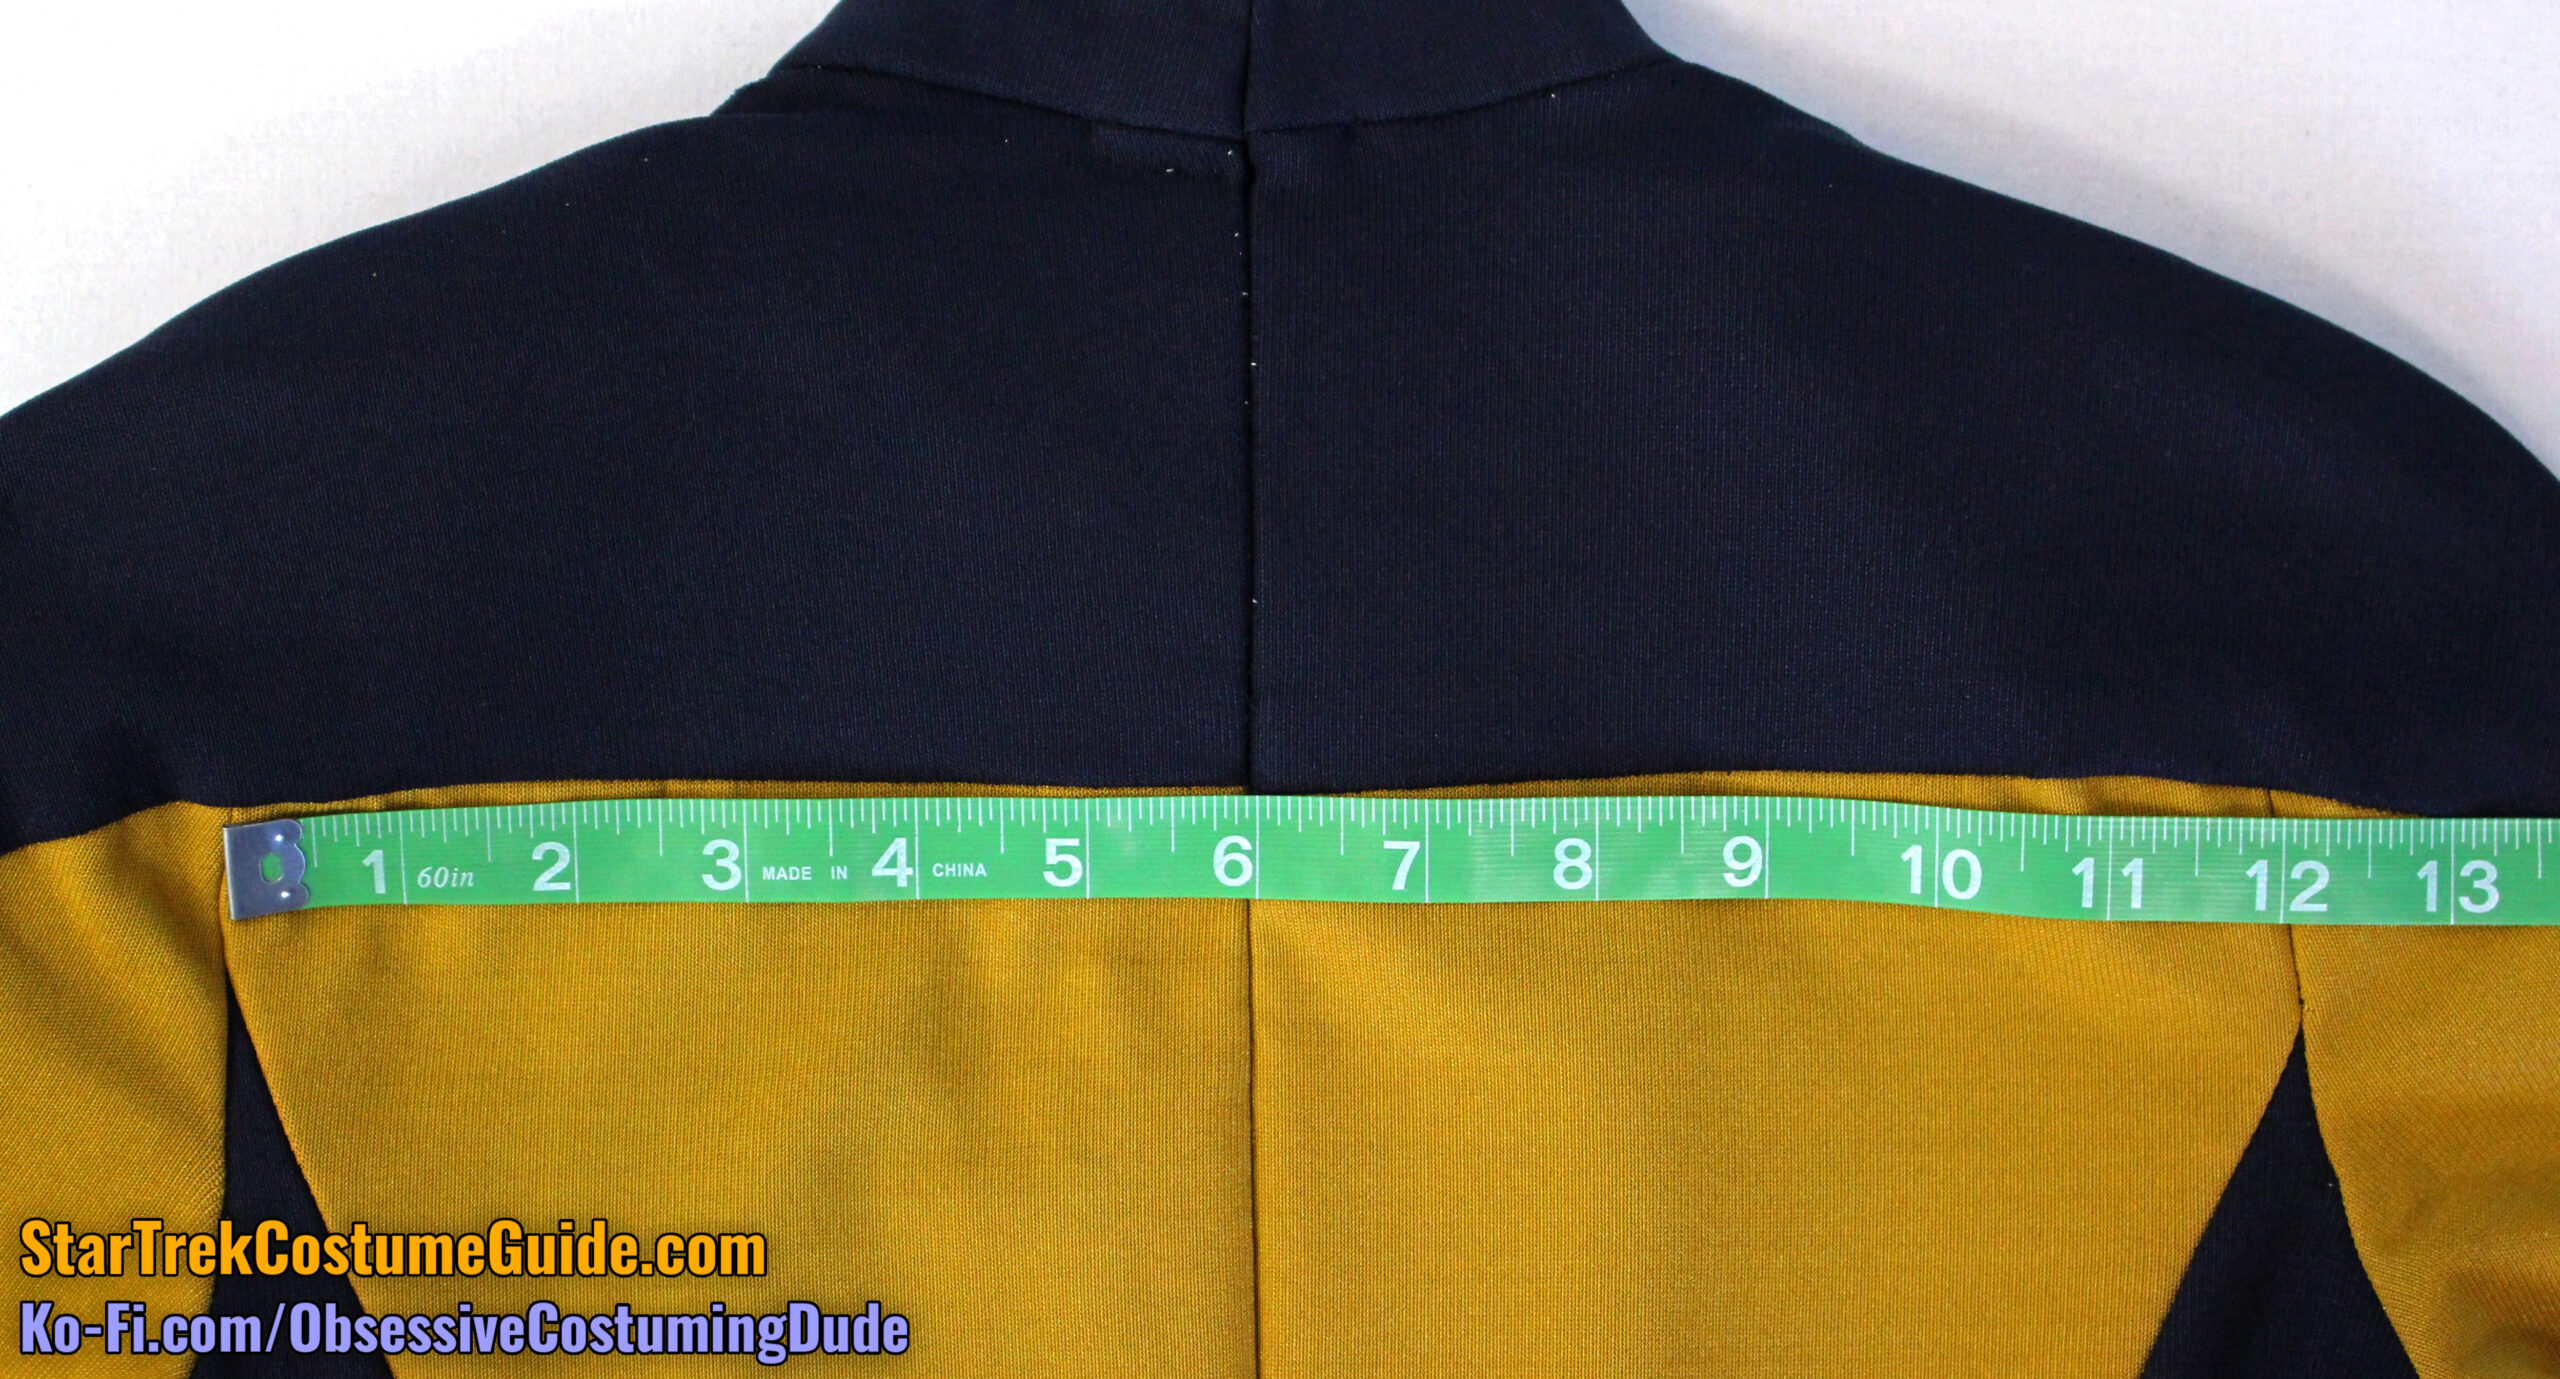
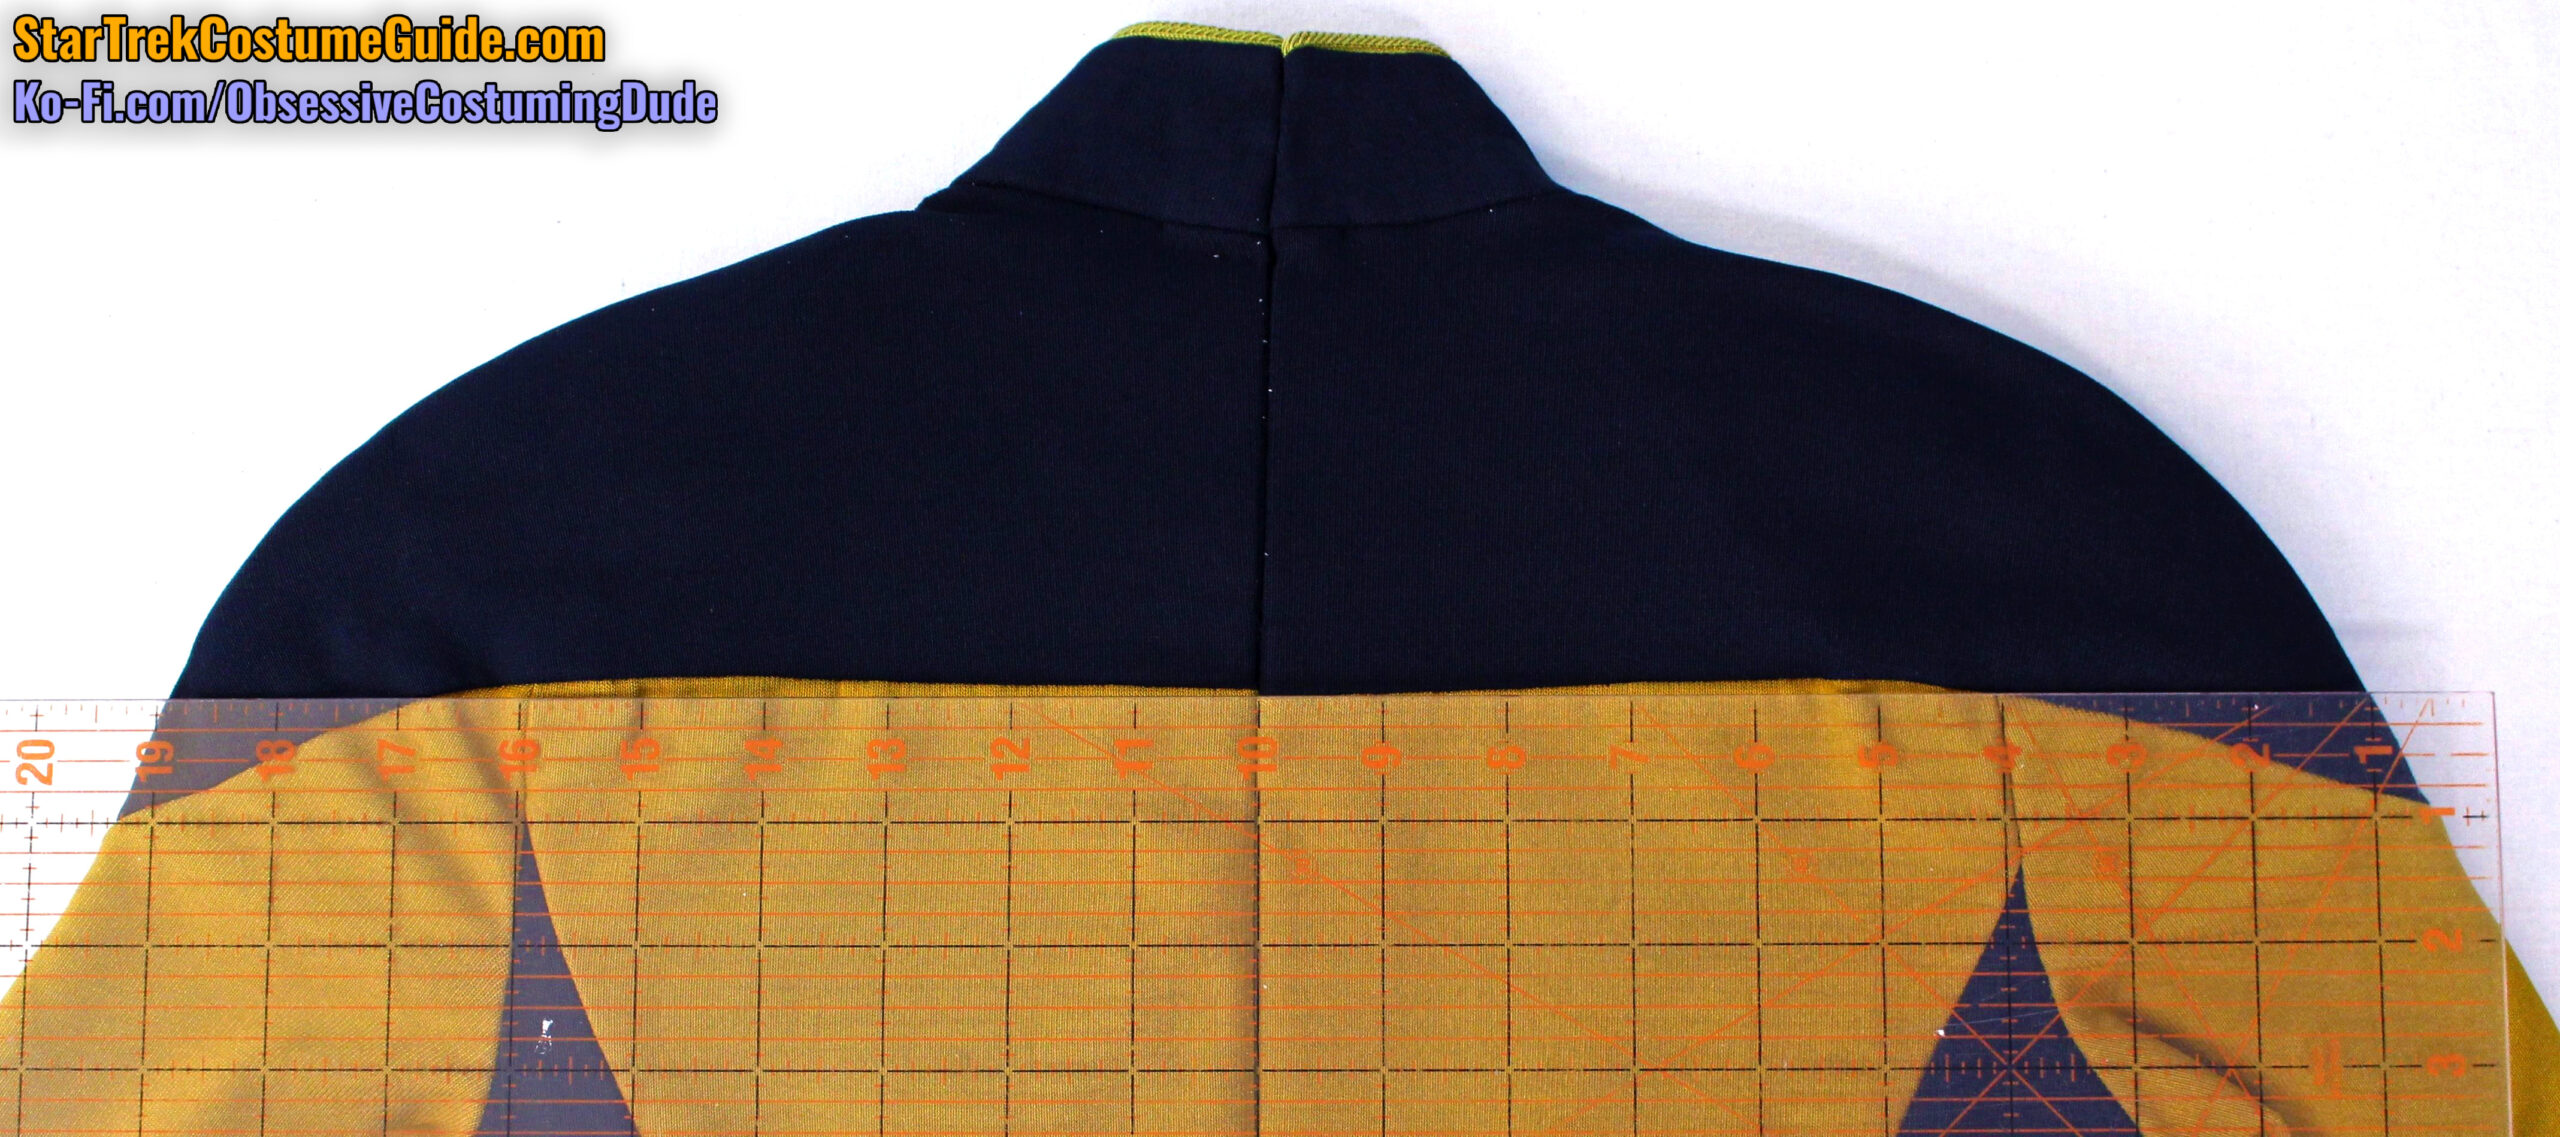
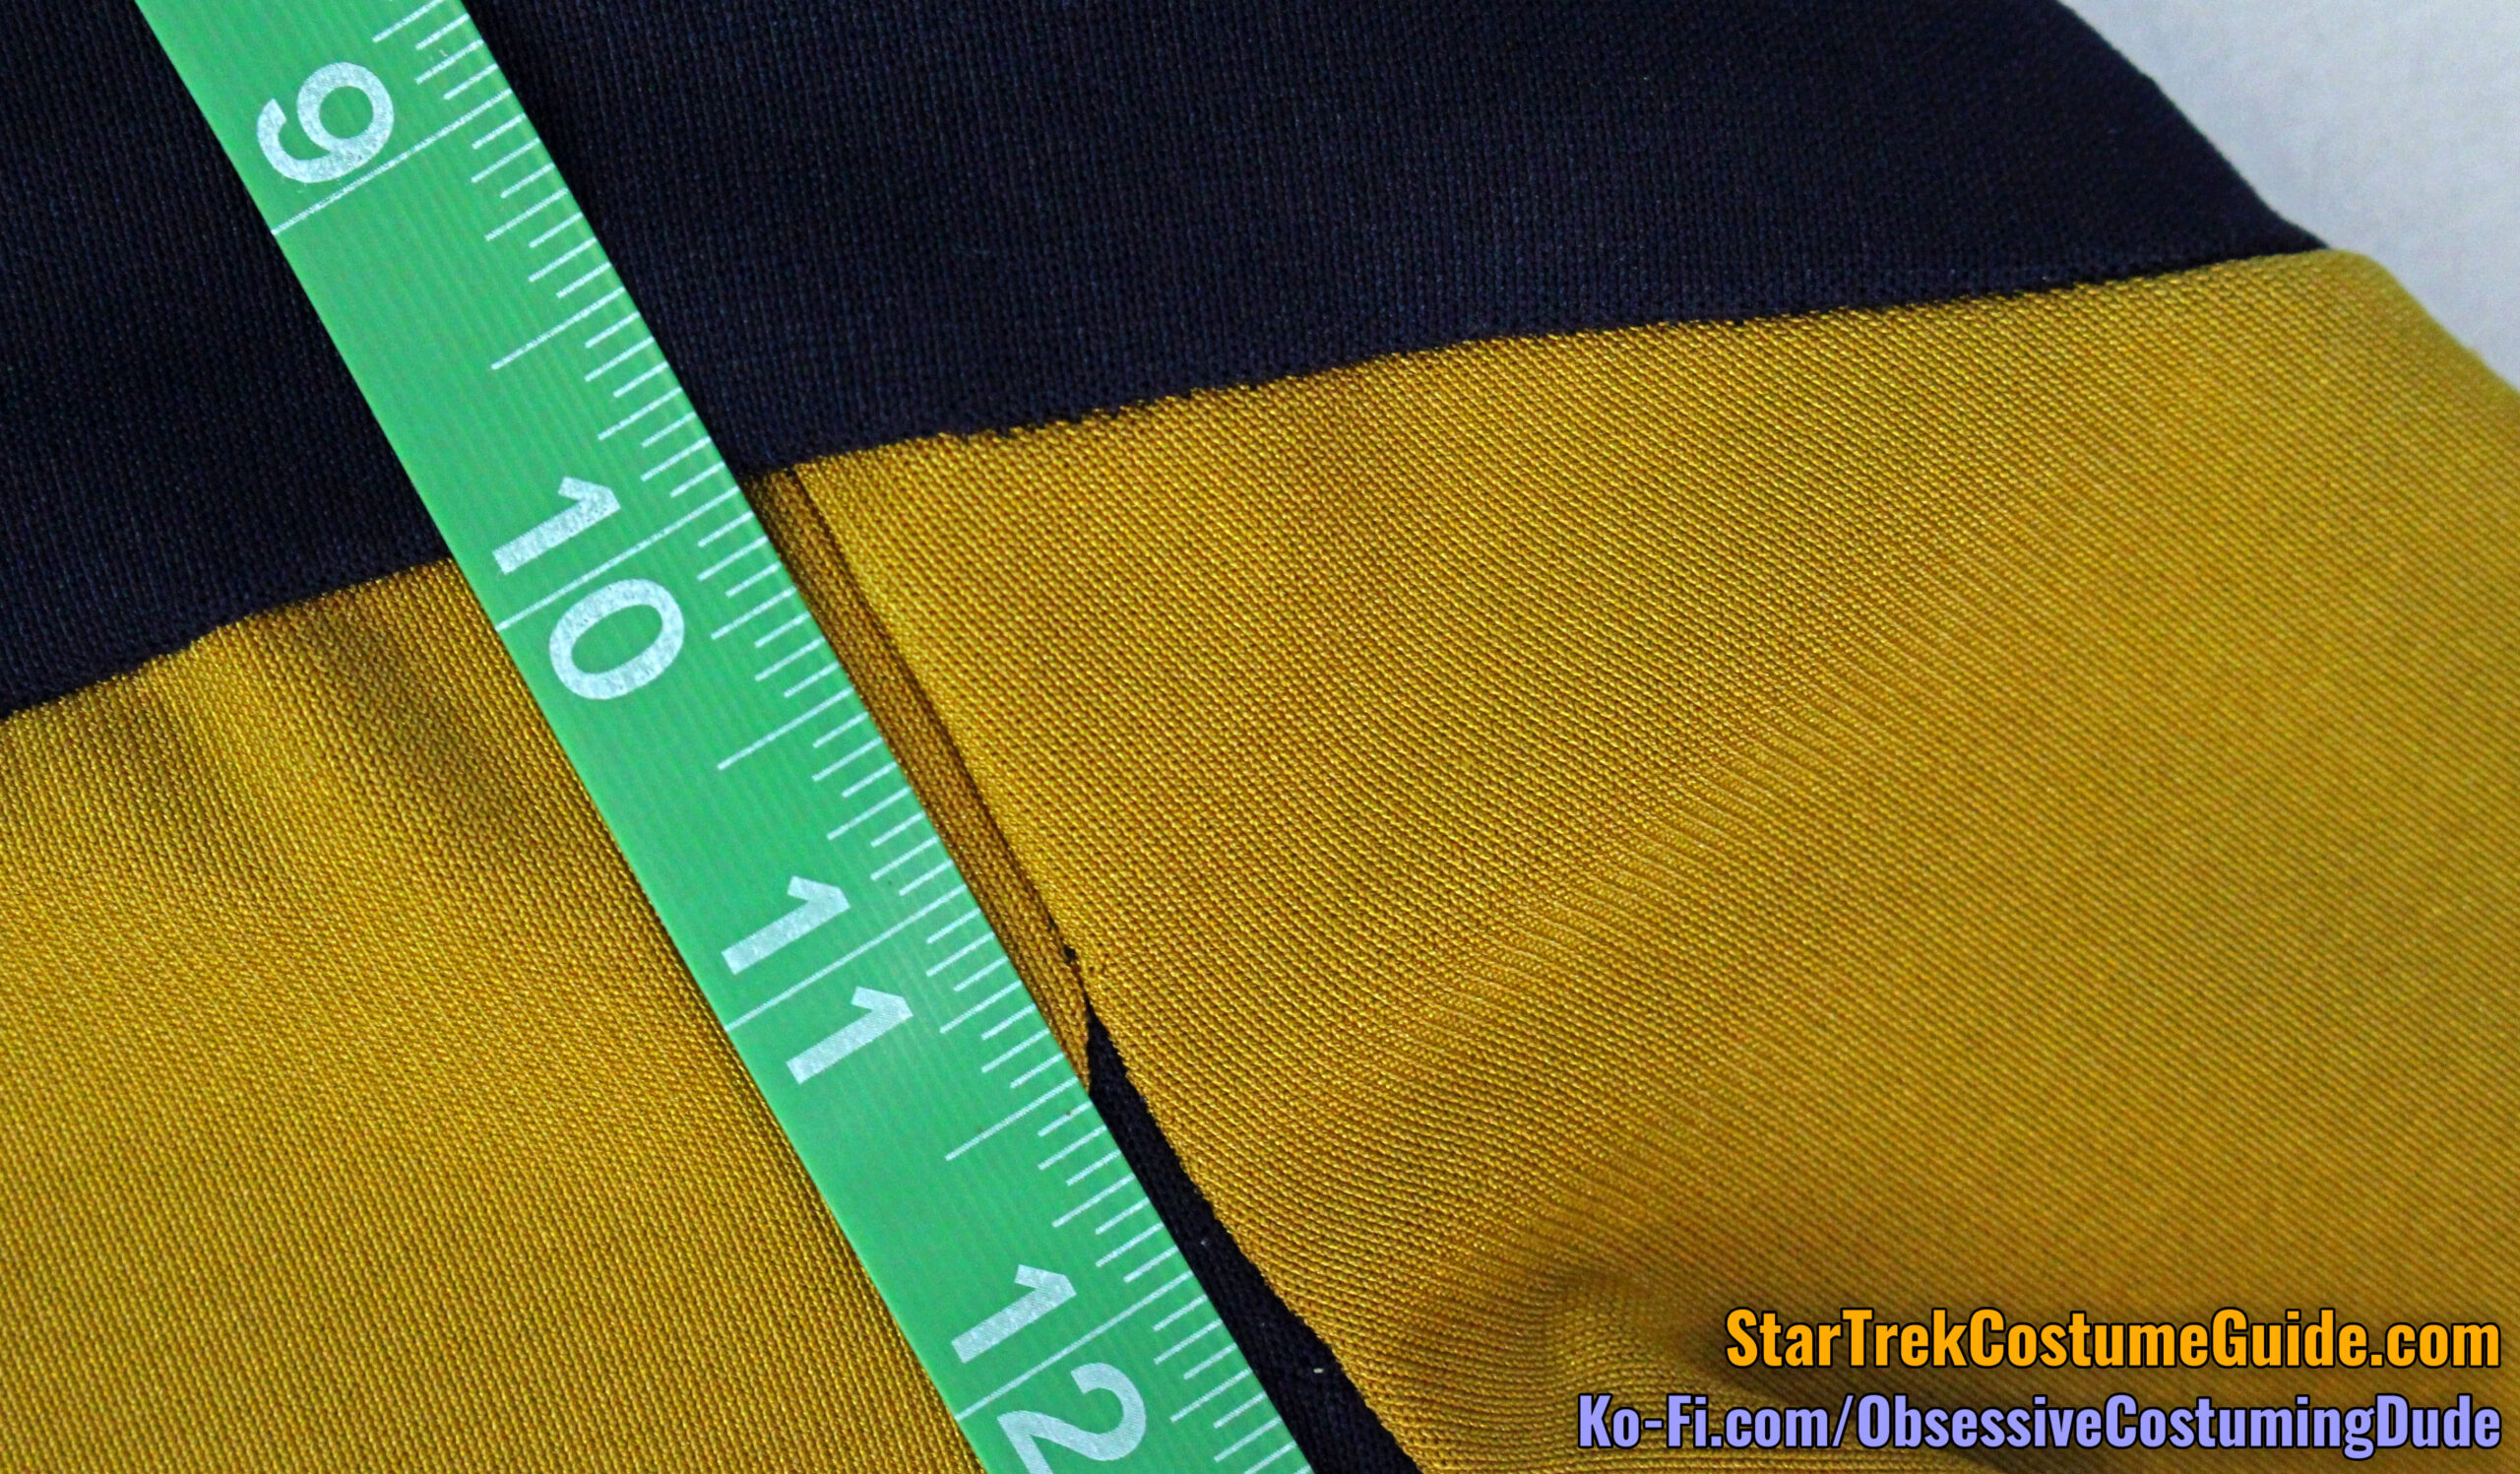
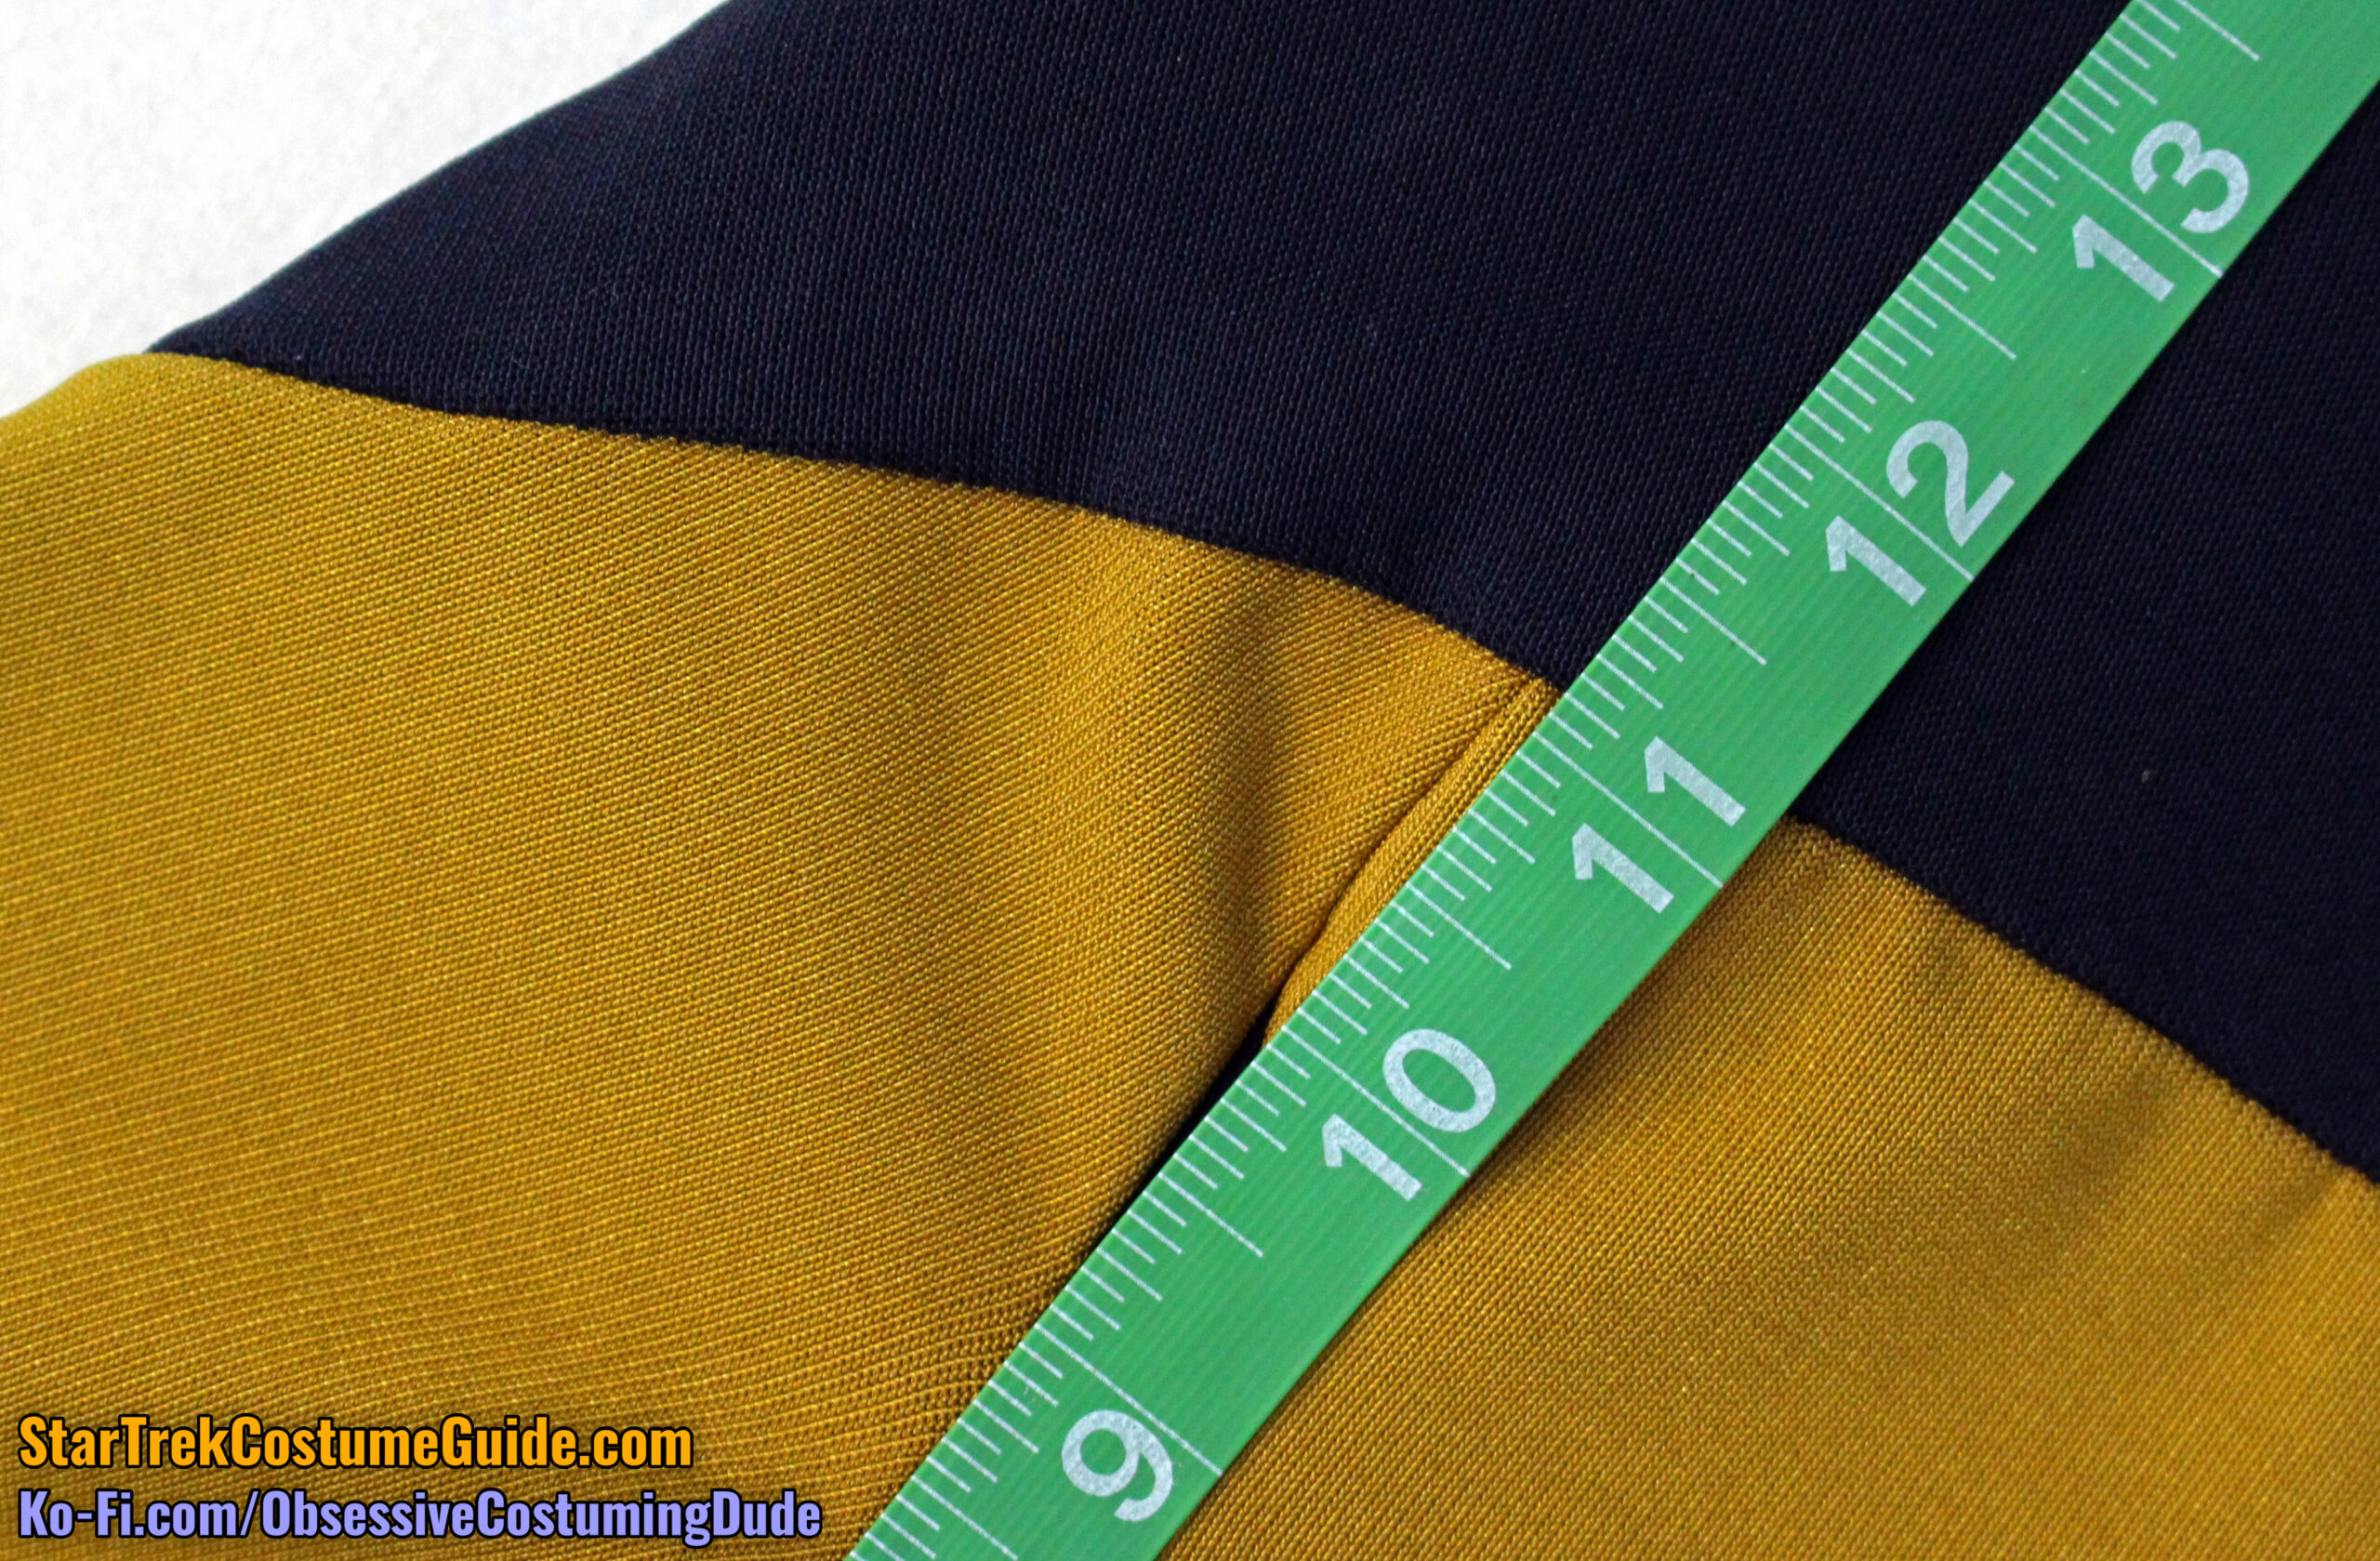
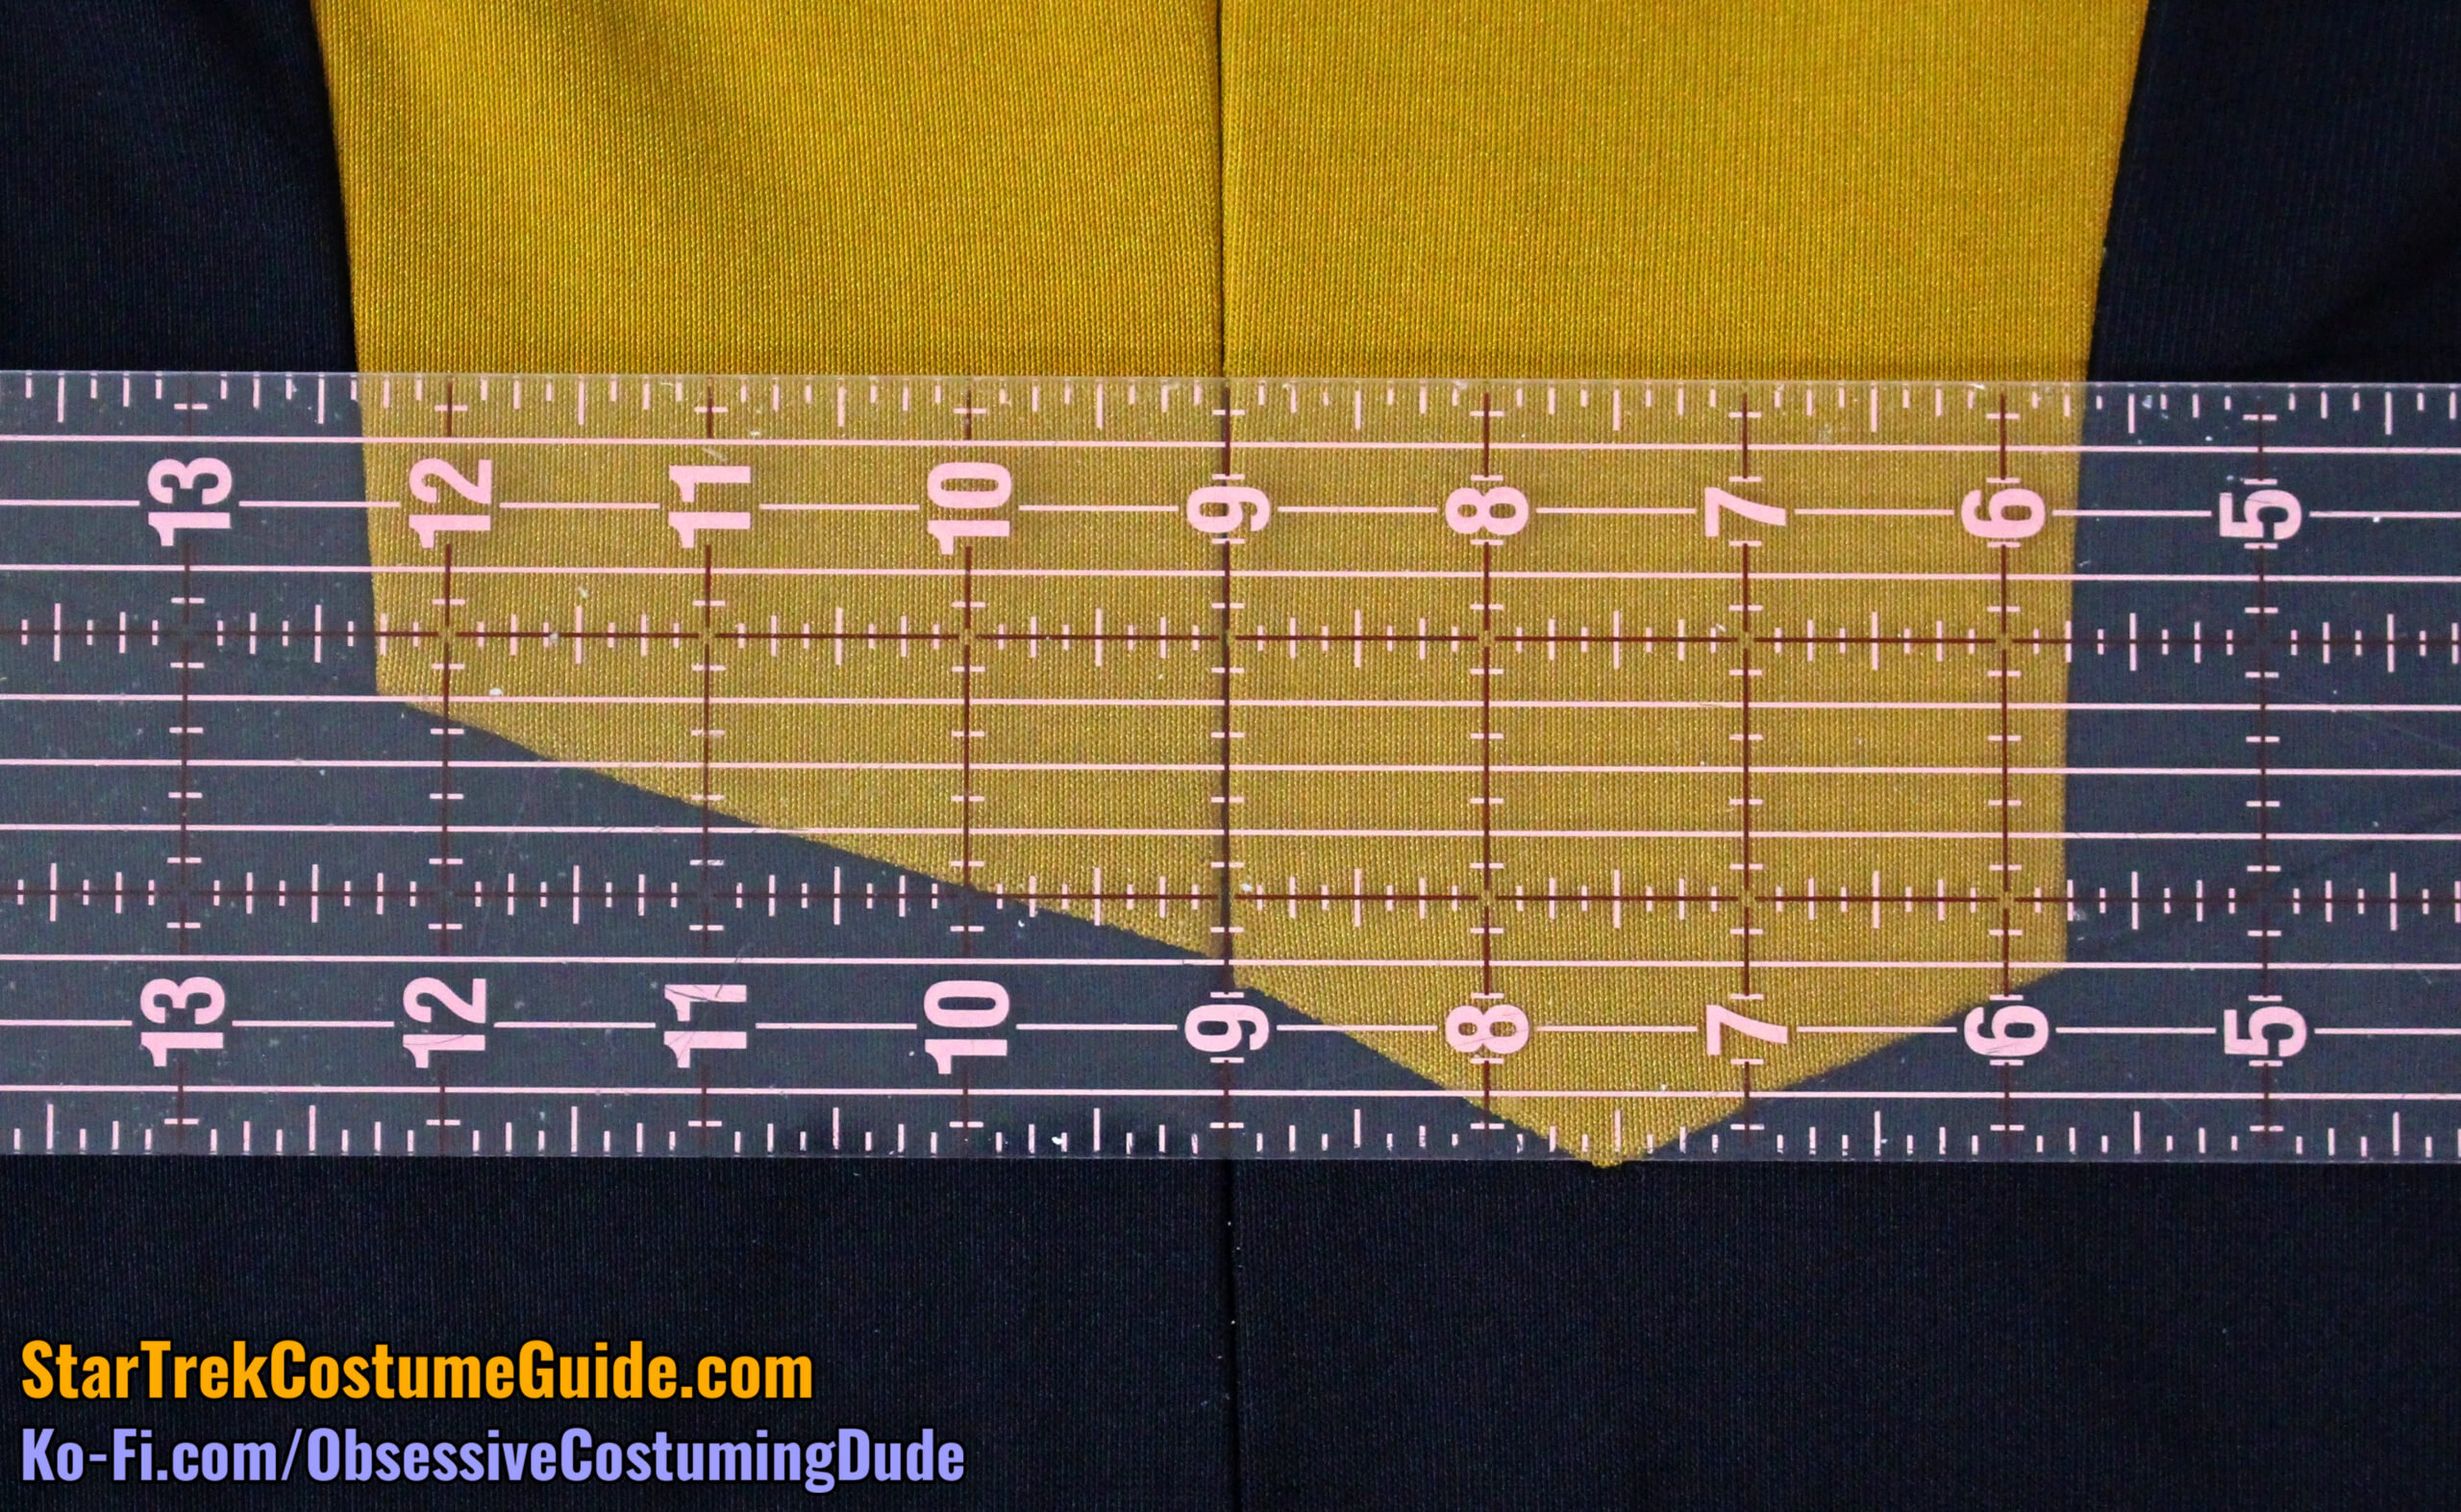
The back yoke was 3 ⅞” deep at the center back.
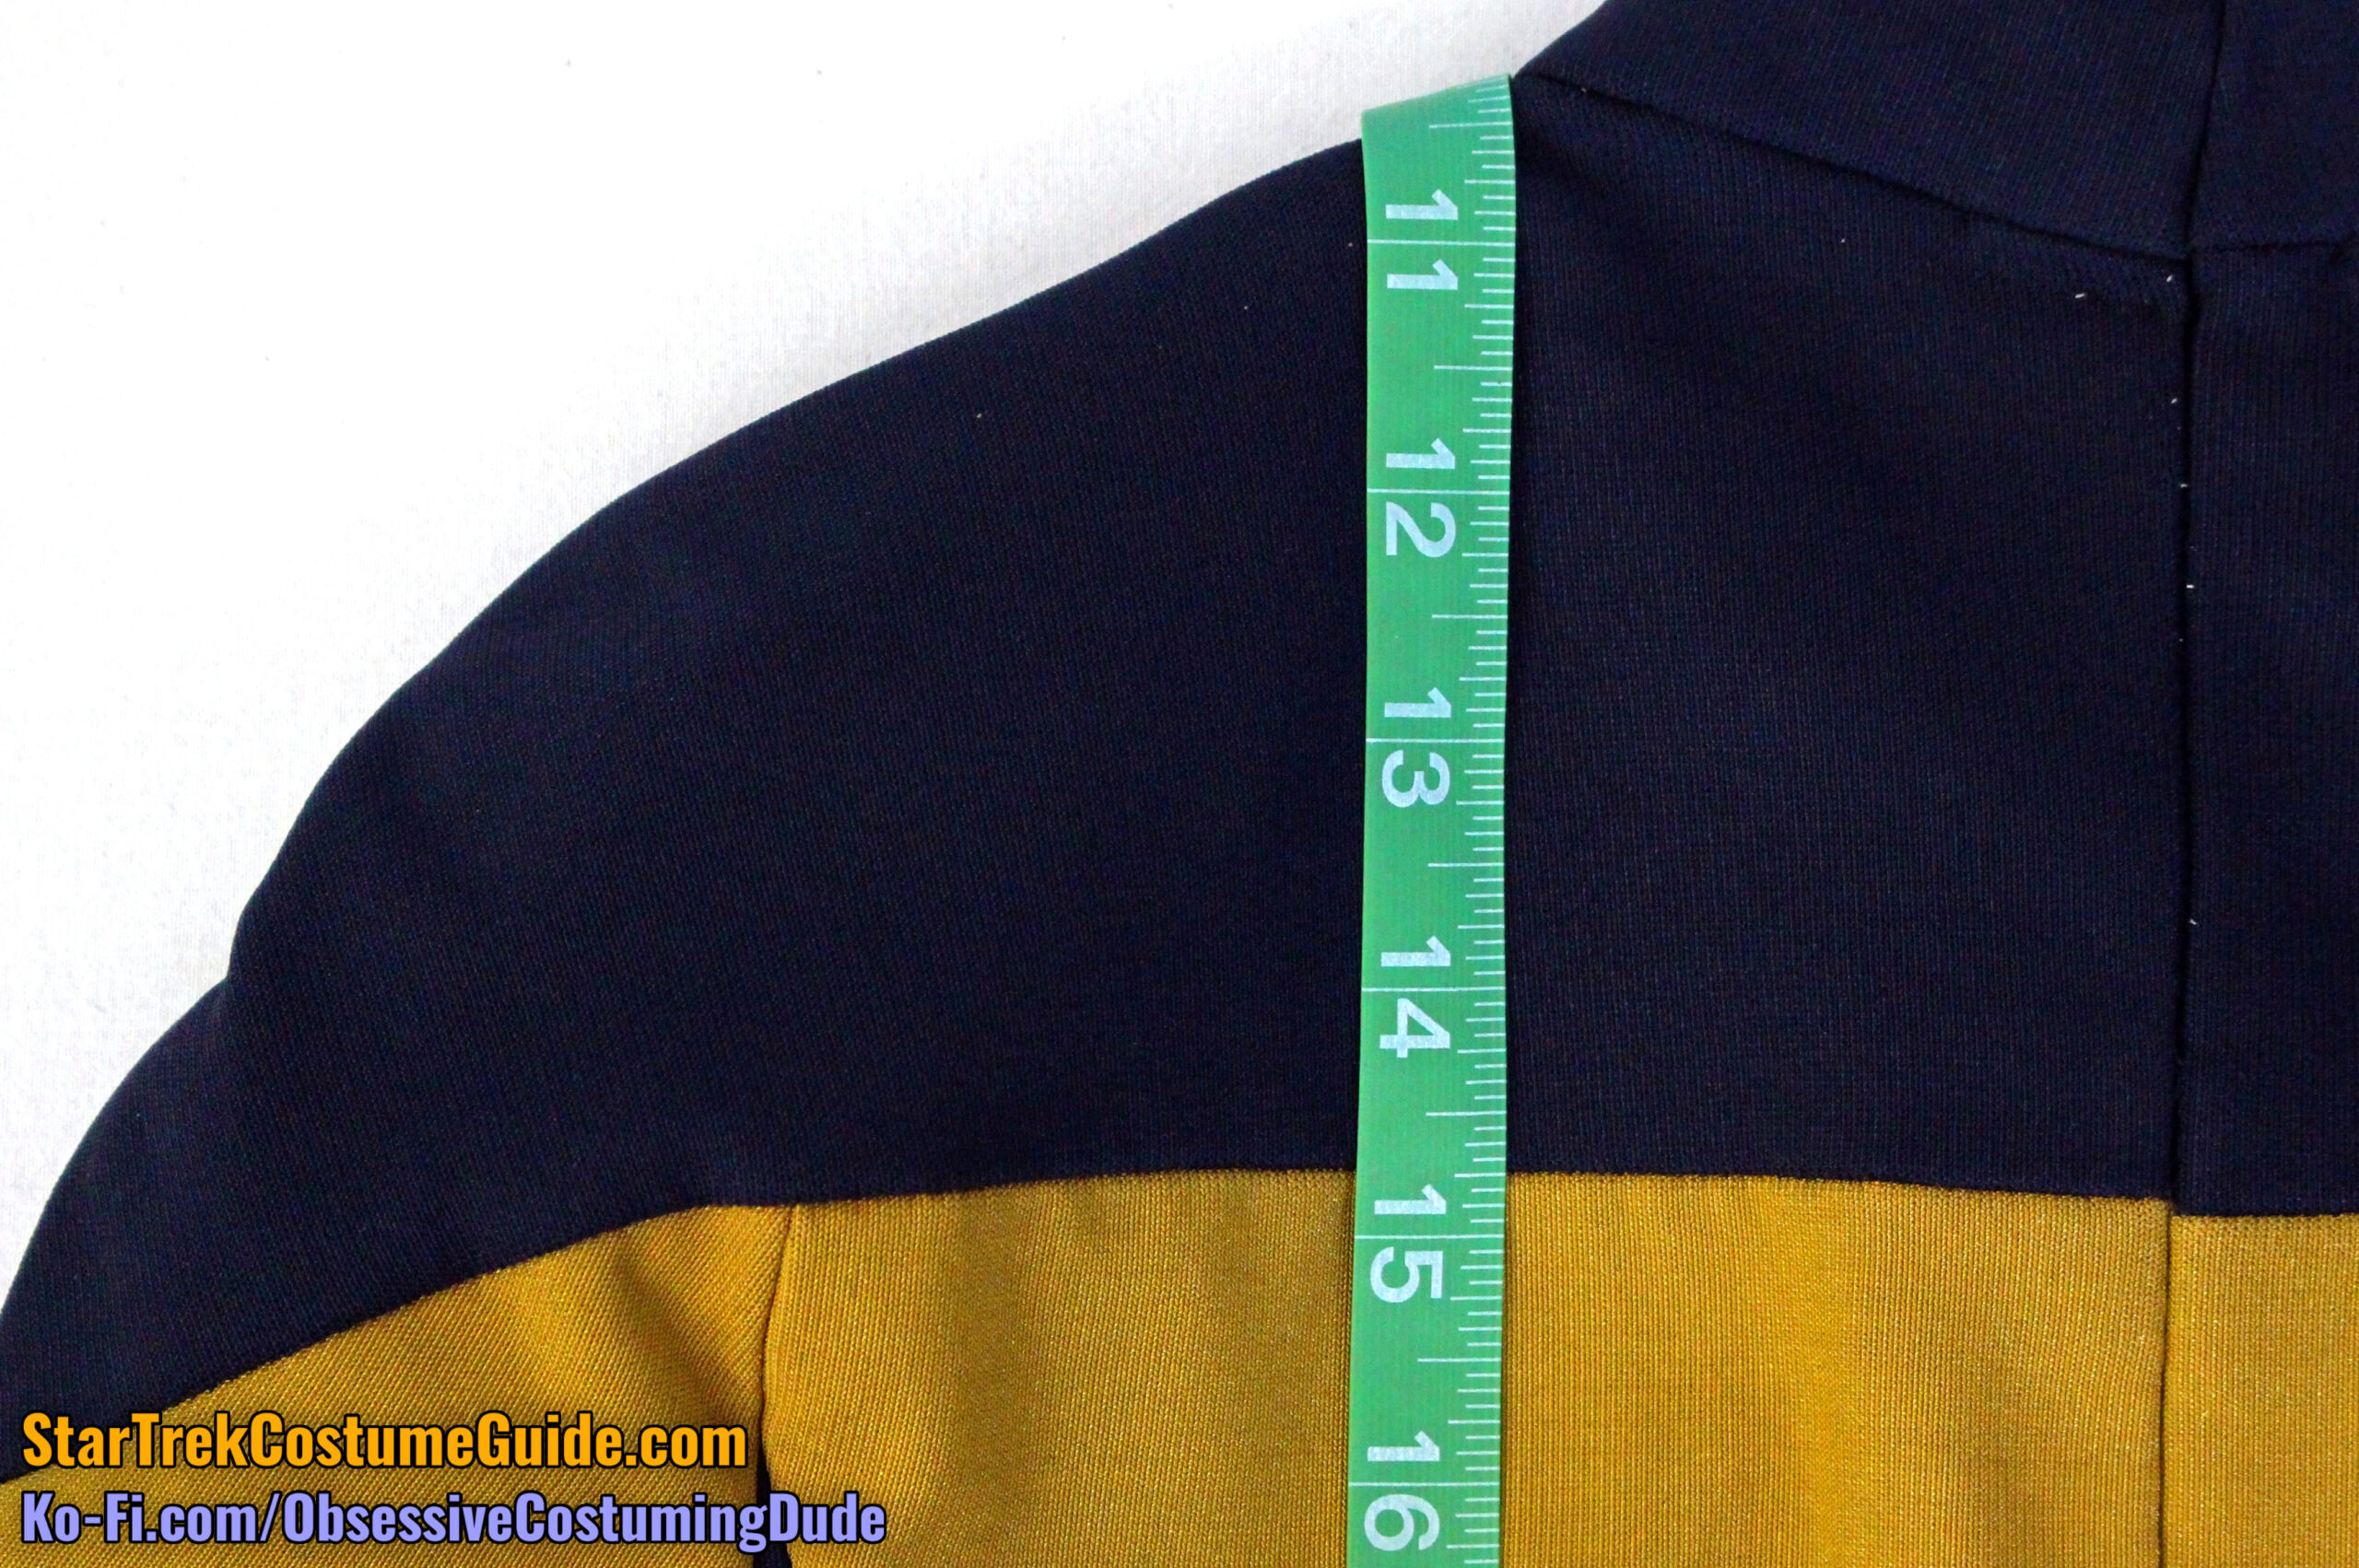
The back yoke was 4 ¾” deep at both of the shoulder seams.
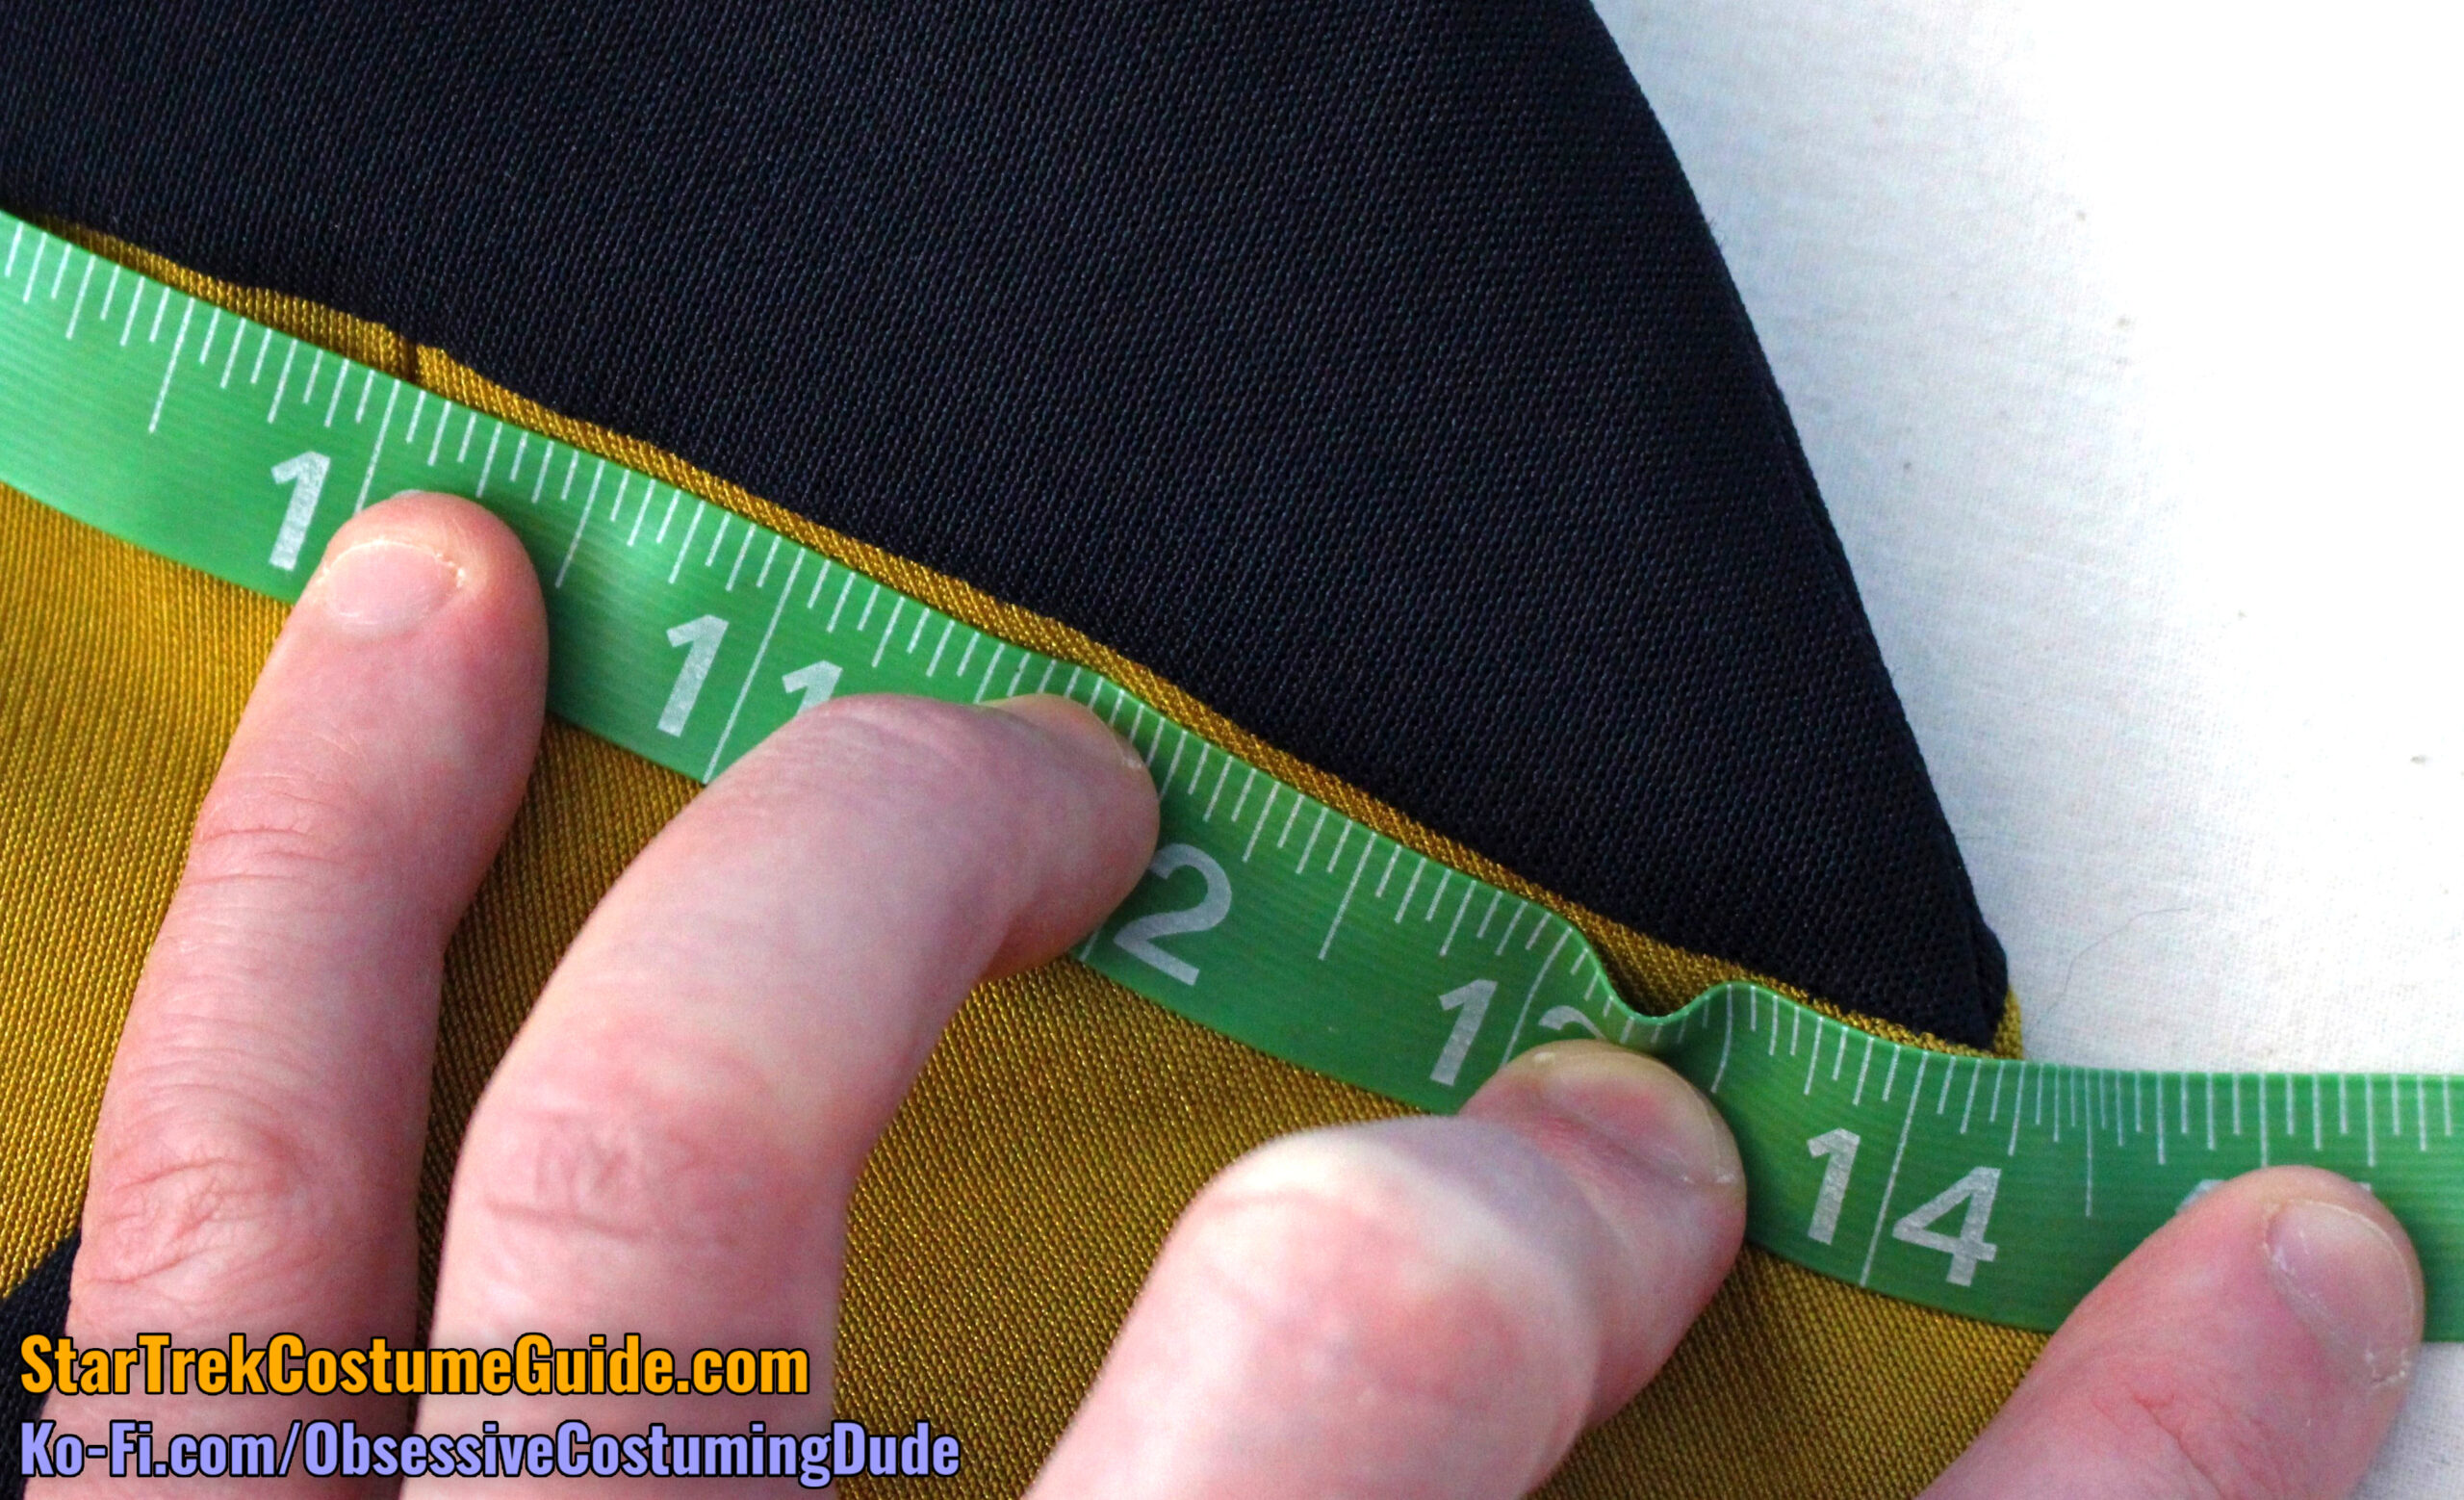
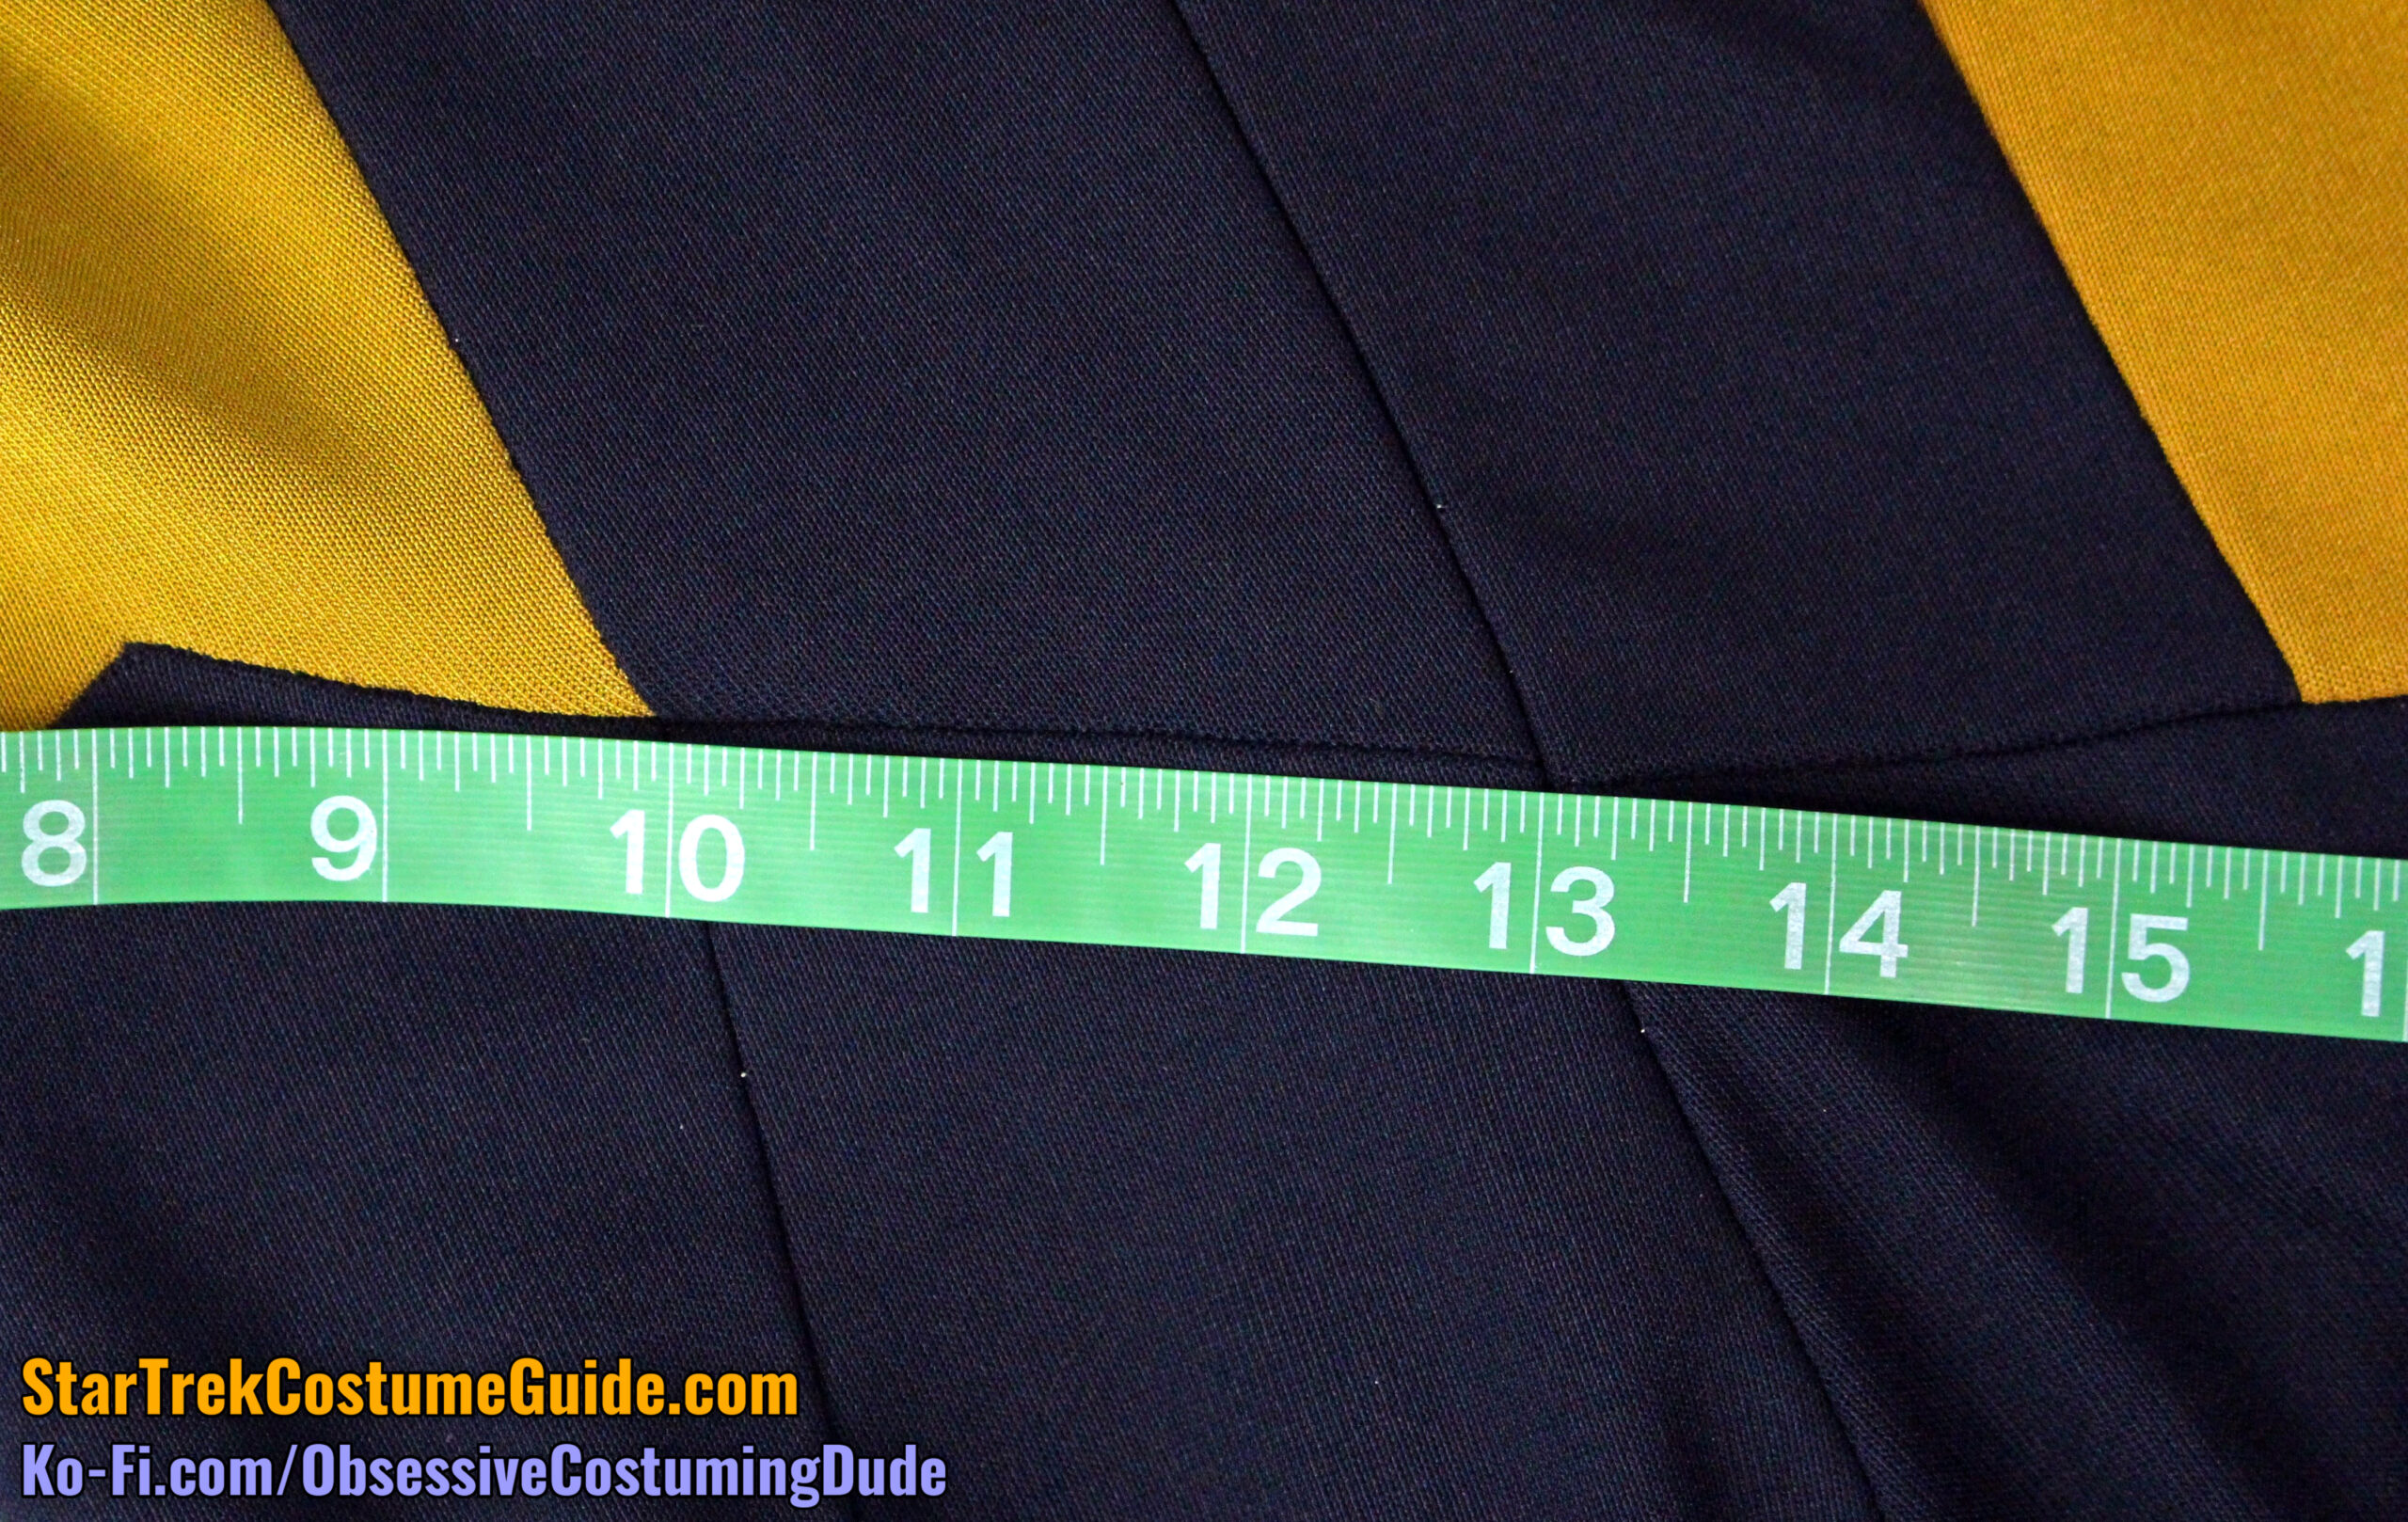
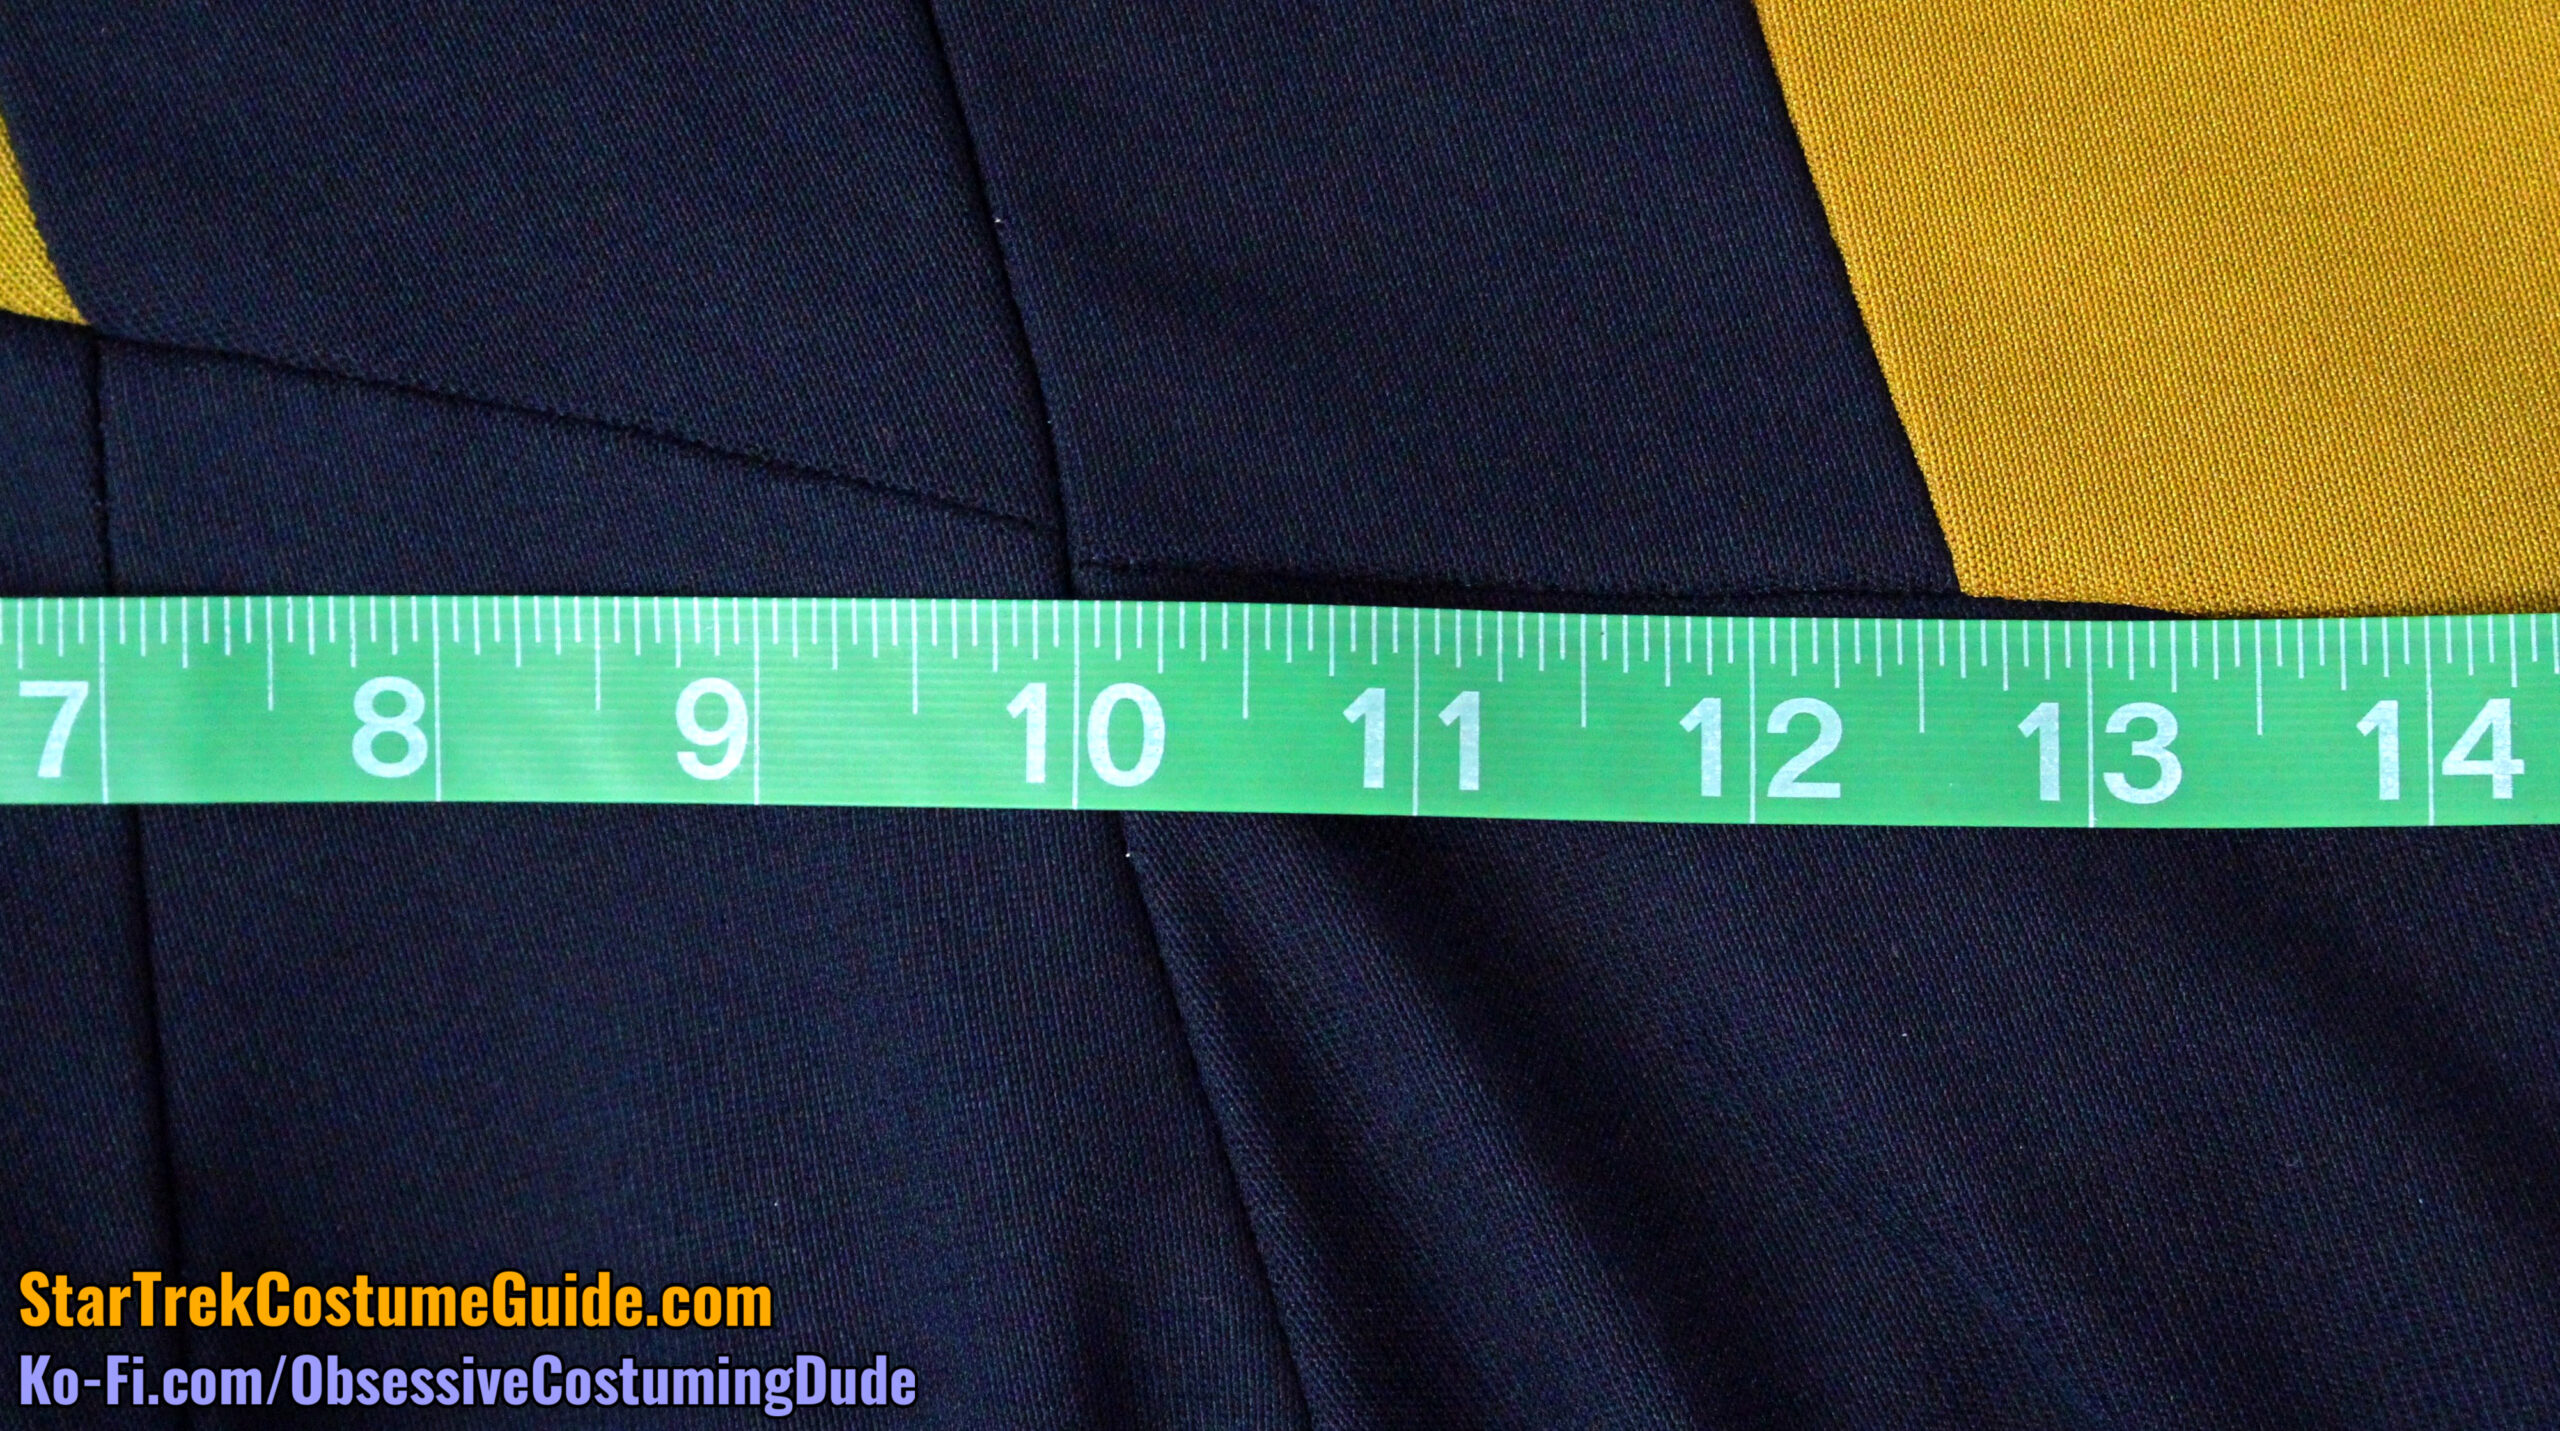
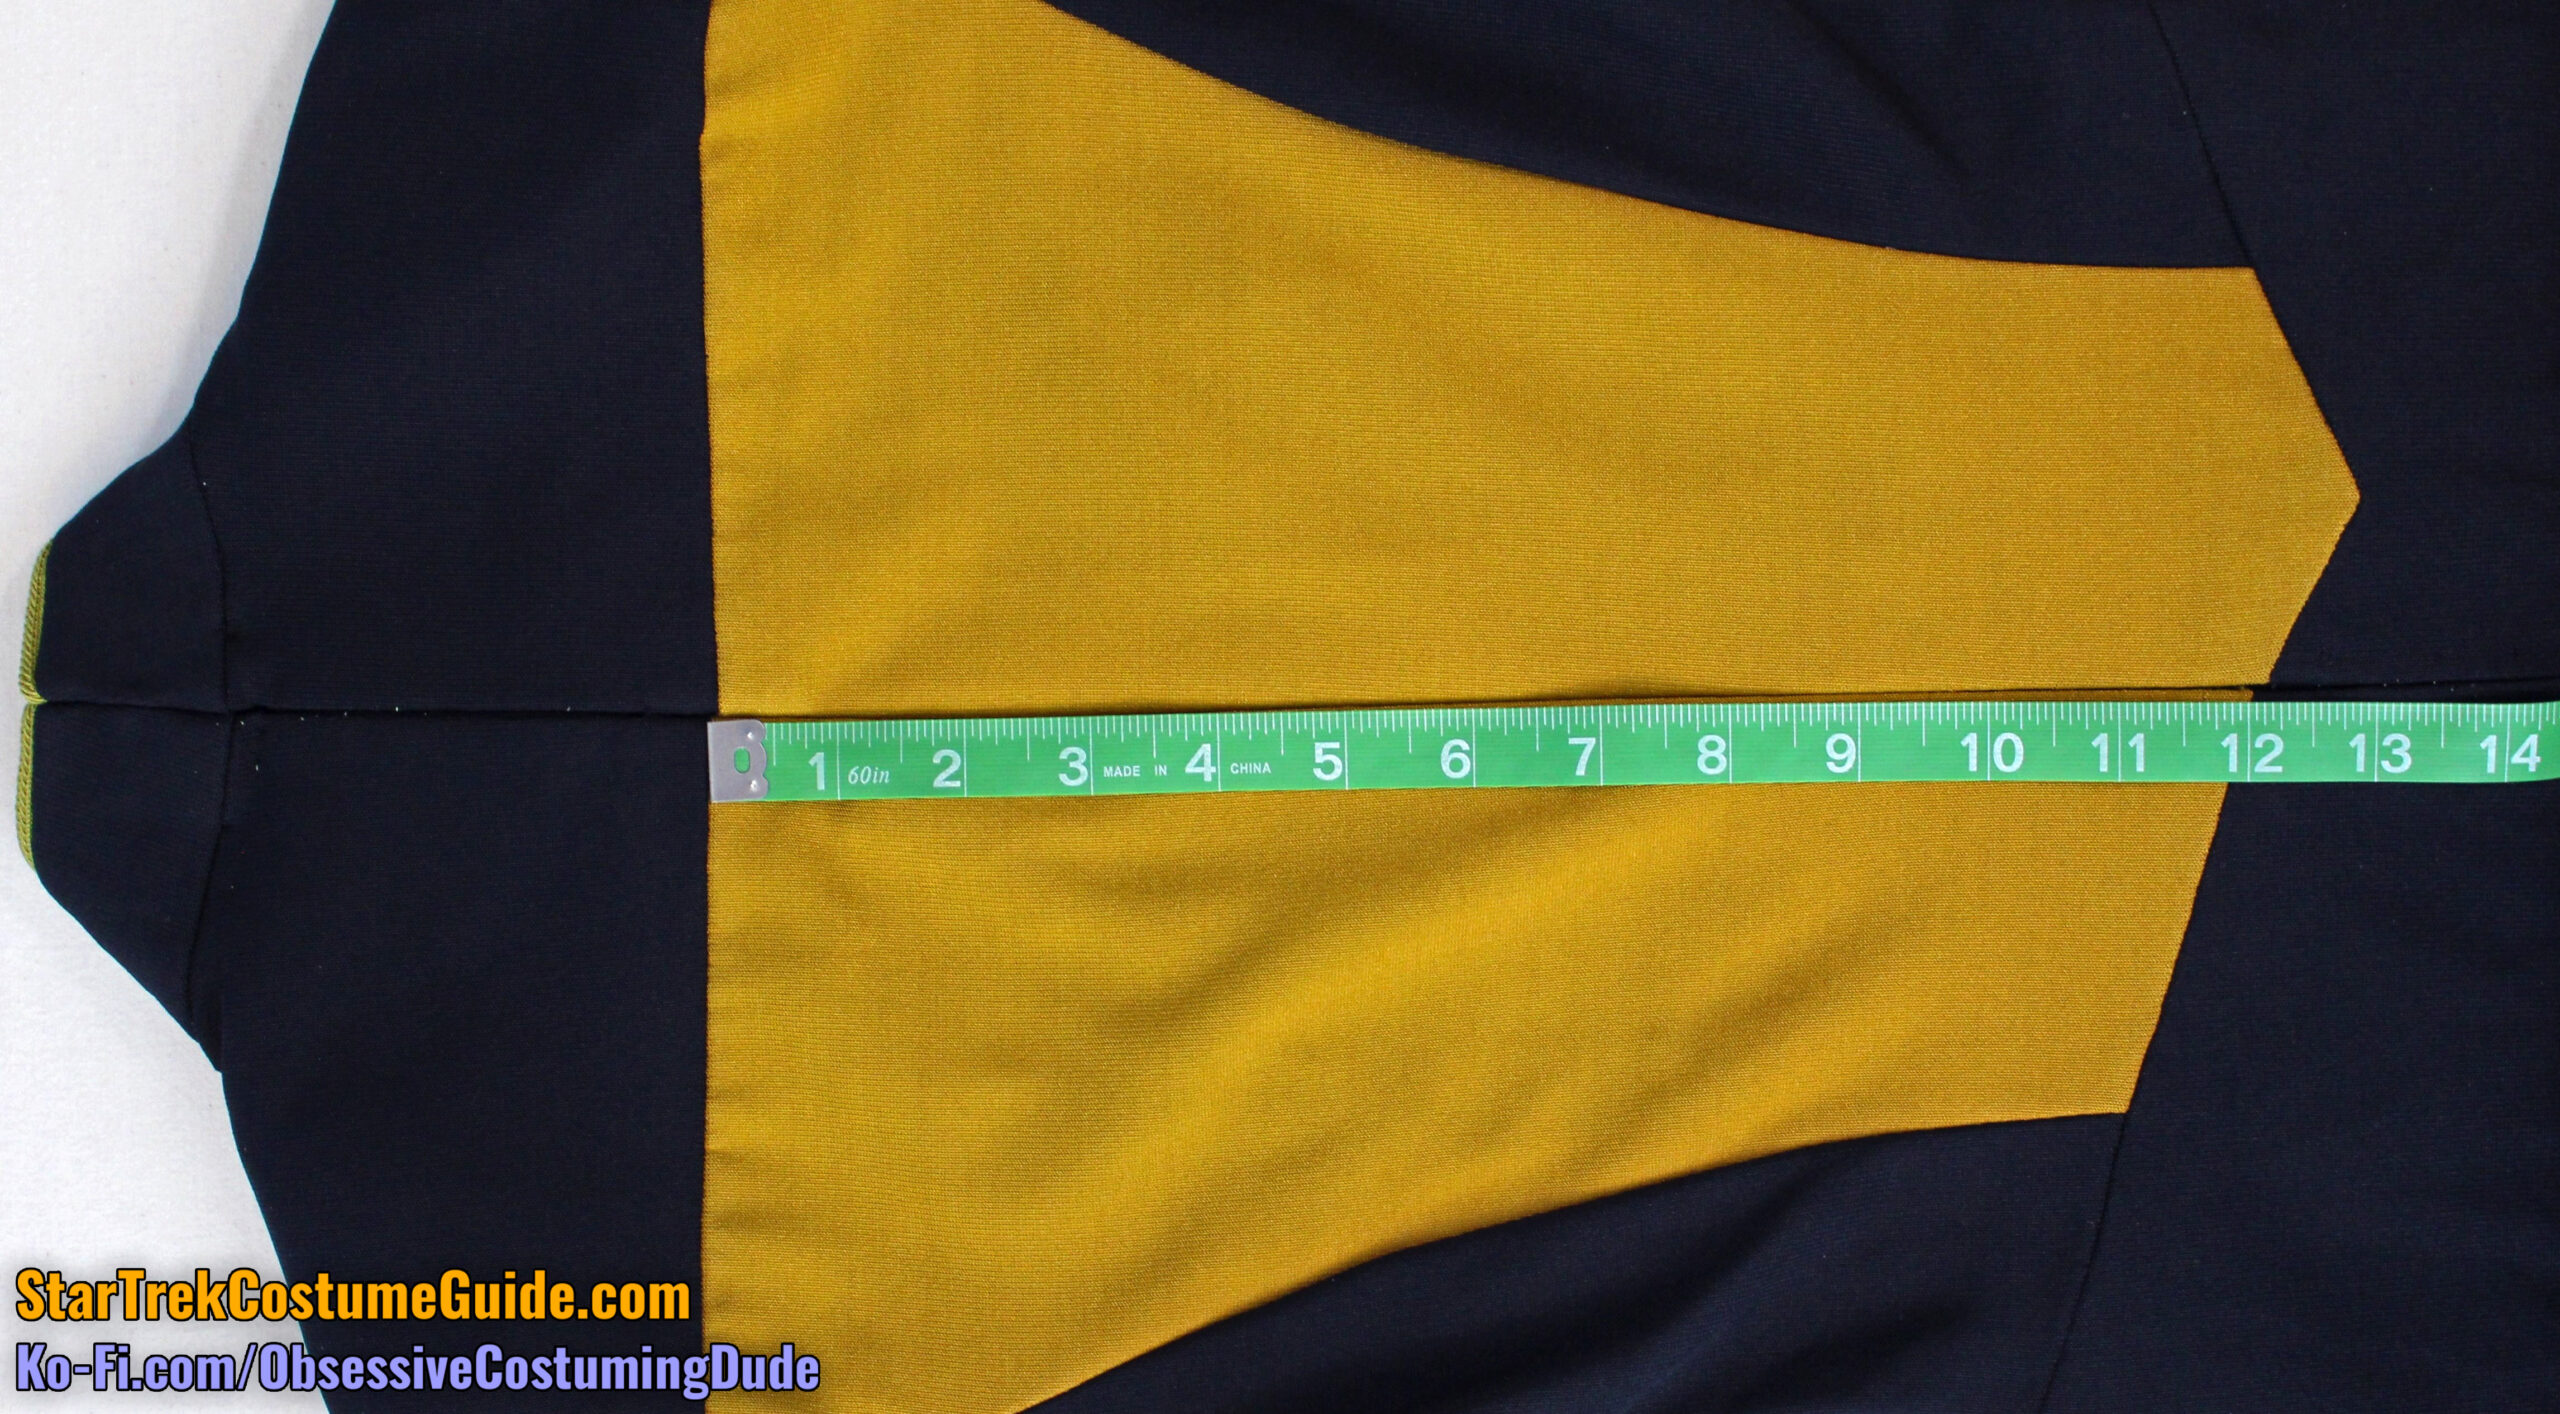
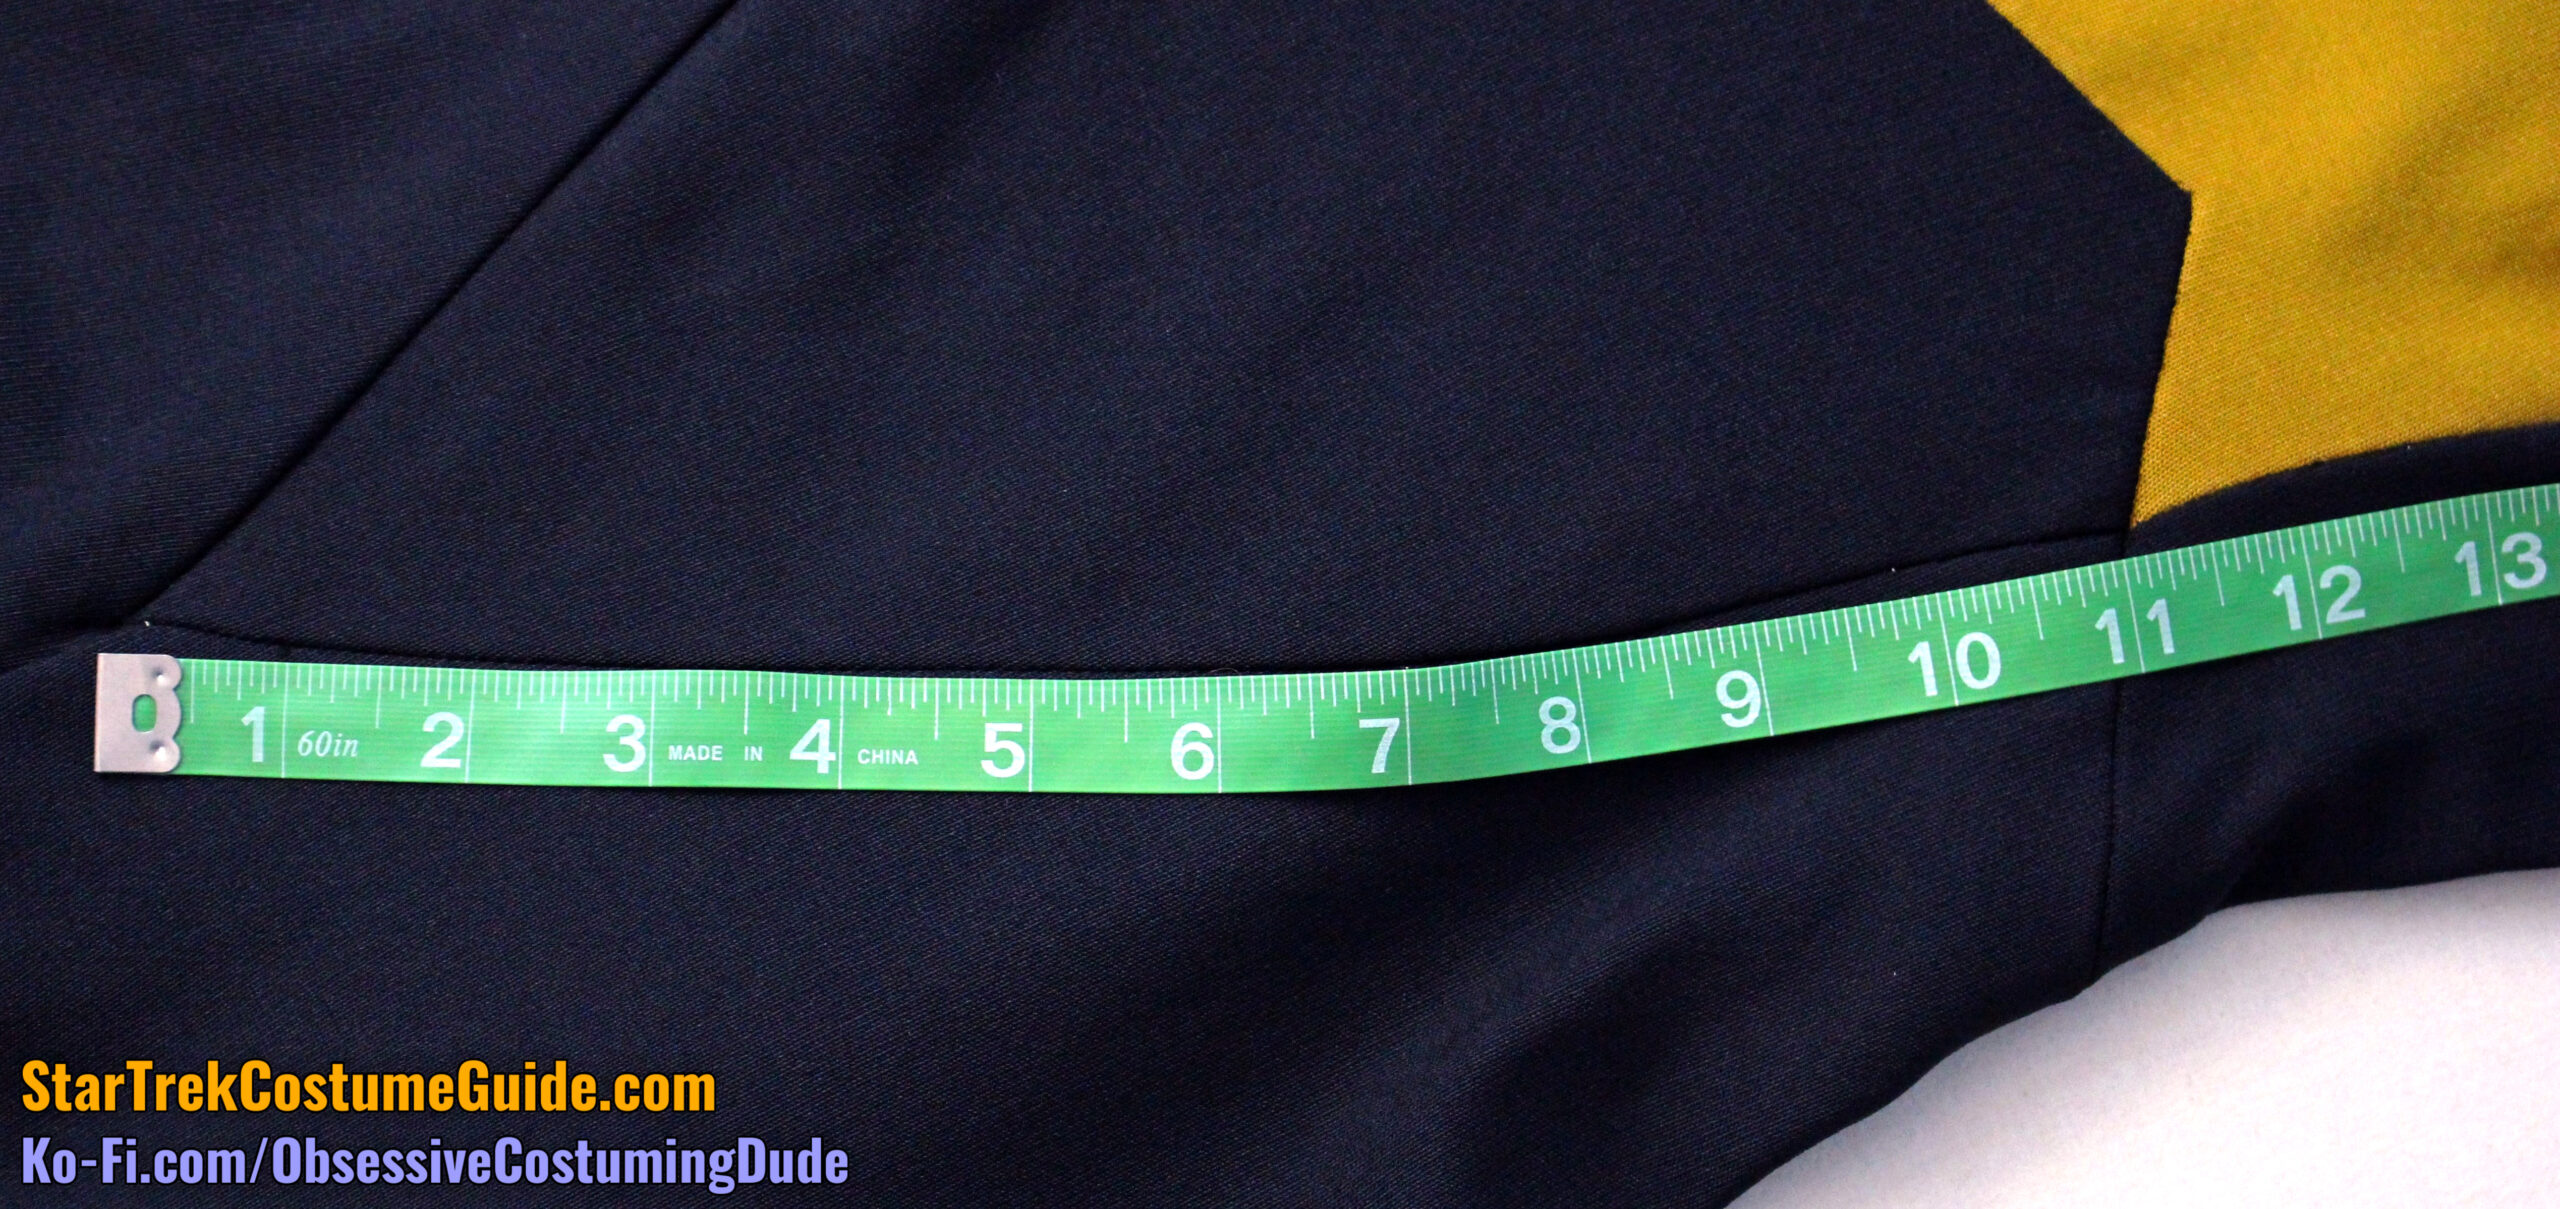
The back yoke/body seam line was 12” total, measured from armscye to armscye.
(Each aforementioned seam was 6”, measured from center back to armscye.)
The back yoke extended 4 ¼” onto each sleeve.
Overall, the lower edge of the back yoke curved downward 1” from center back to the lower/outer corners at the sleeves.
However, most of this curve was concentrated on the sleeve itself, rather than more evenly allocated like the front yoke’s lower curve was.
In fact, you can see that there was actually a (very) slight UPWARD curve from the center back to the armscyes, where it “dipped” downward again toward the sleeves.
(The tapered center back/zipper seam pulled the upper, outer edges of the back panels downward toward the armscye, effectively accomplishing the same effect as the curved edges of the front-zipping jumpsuits.)
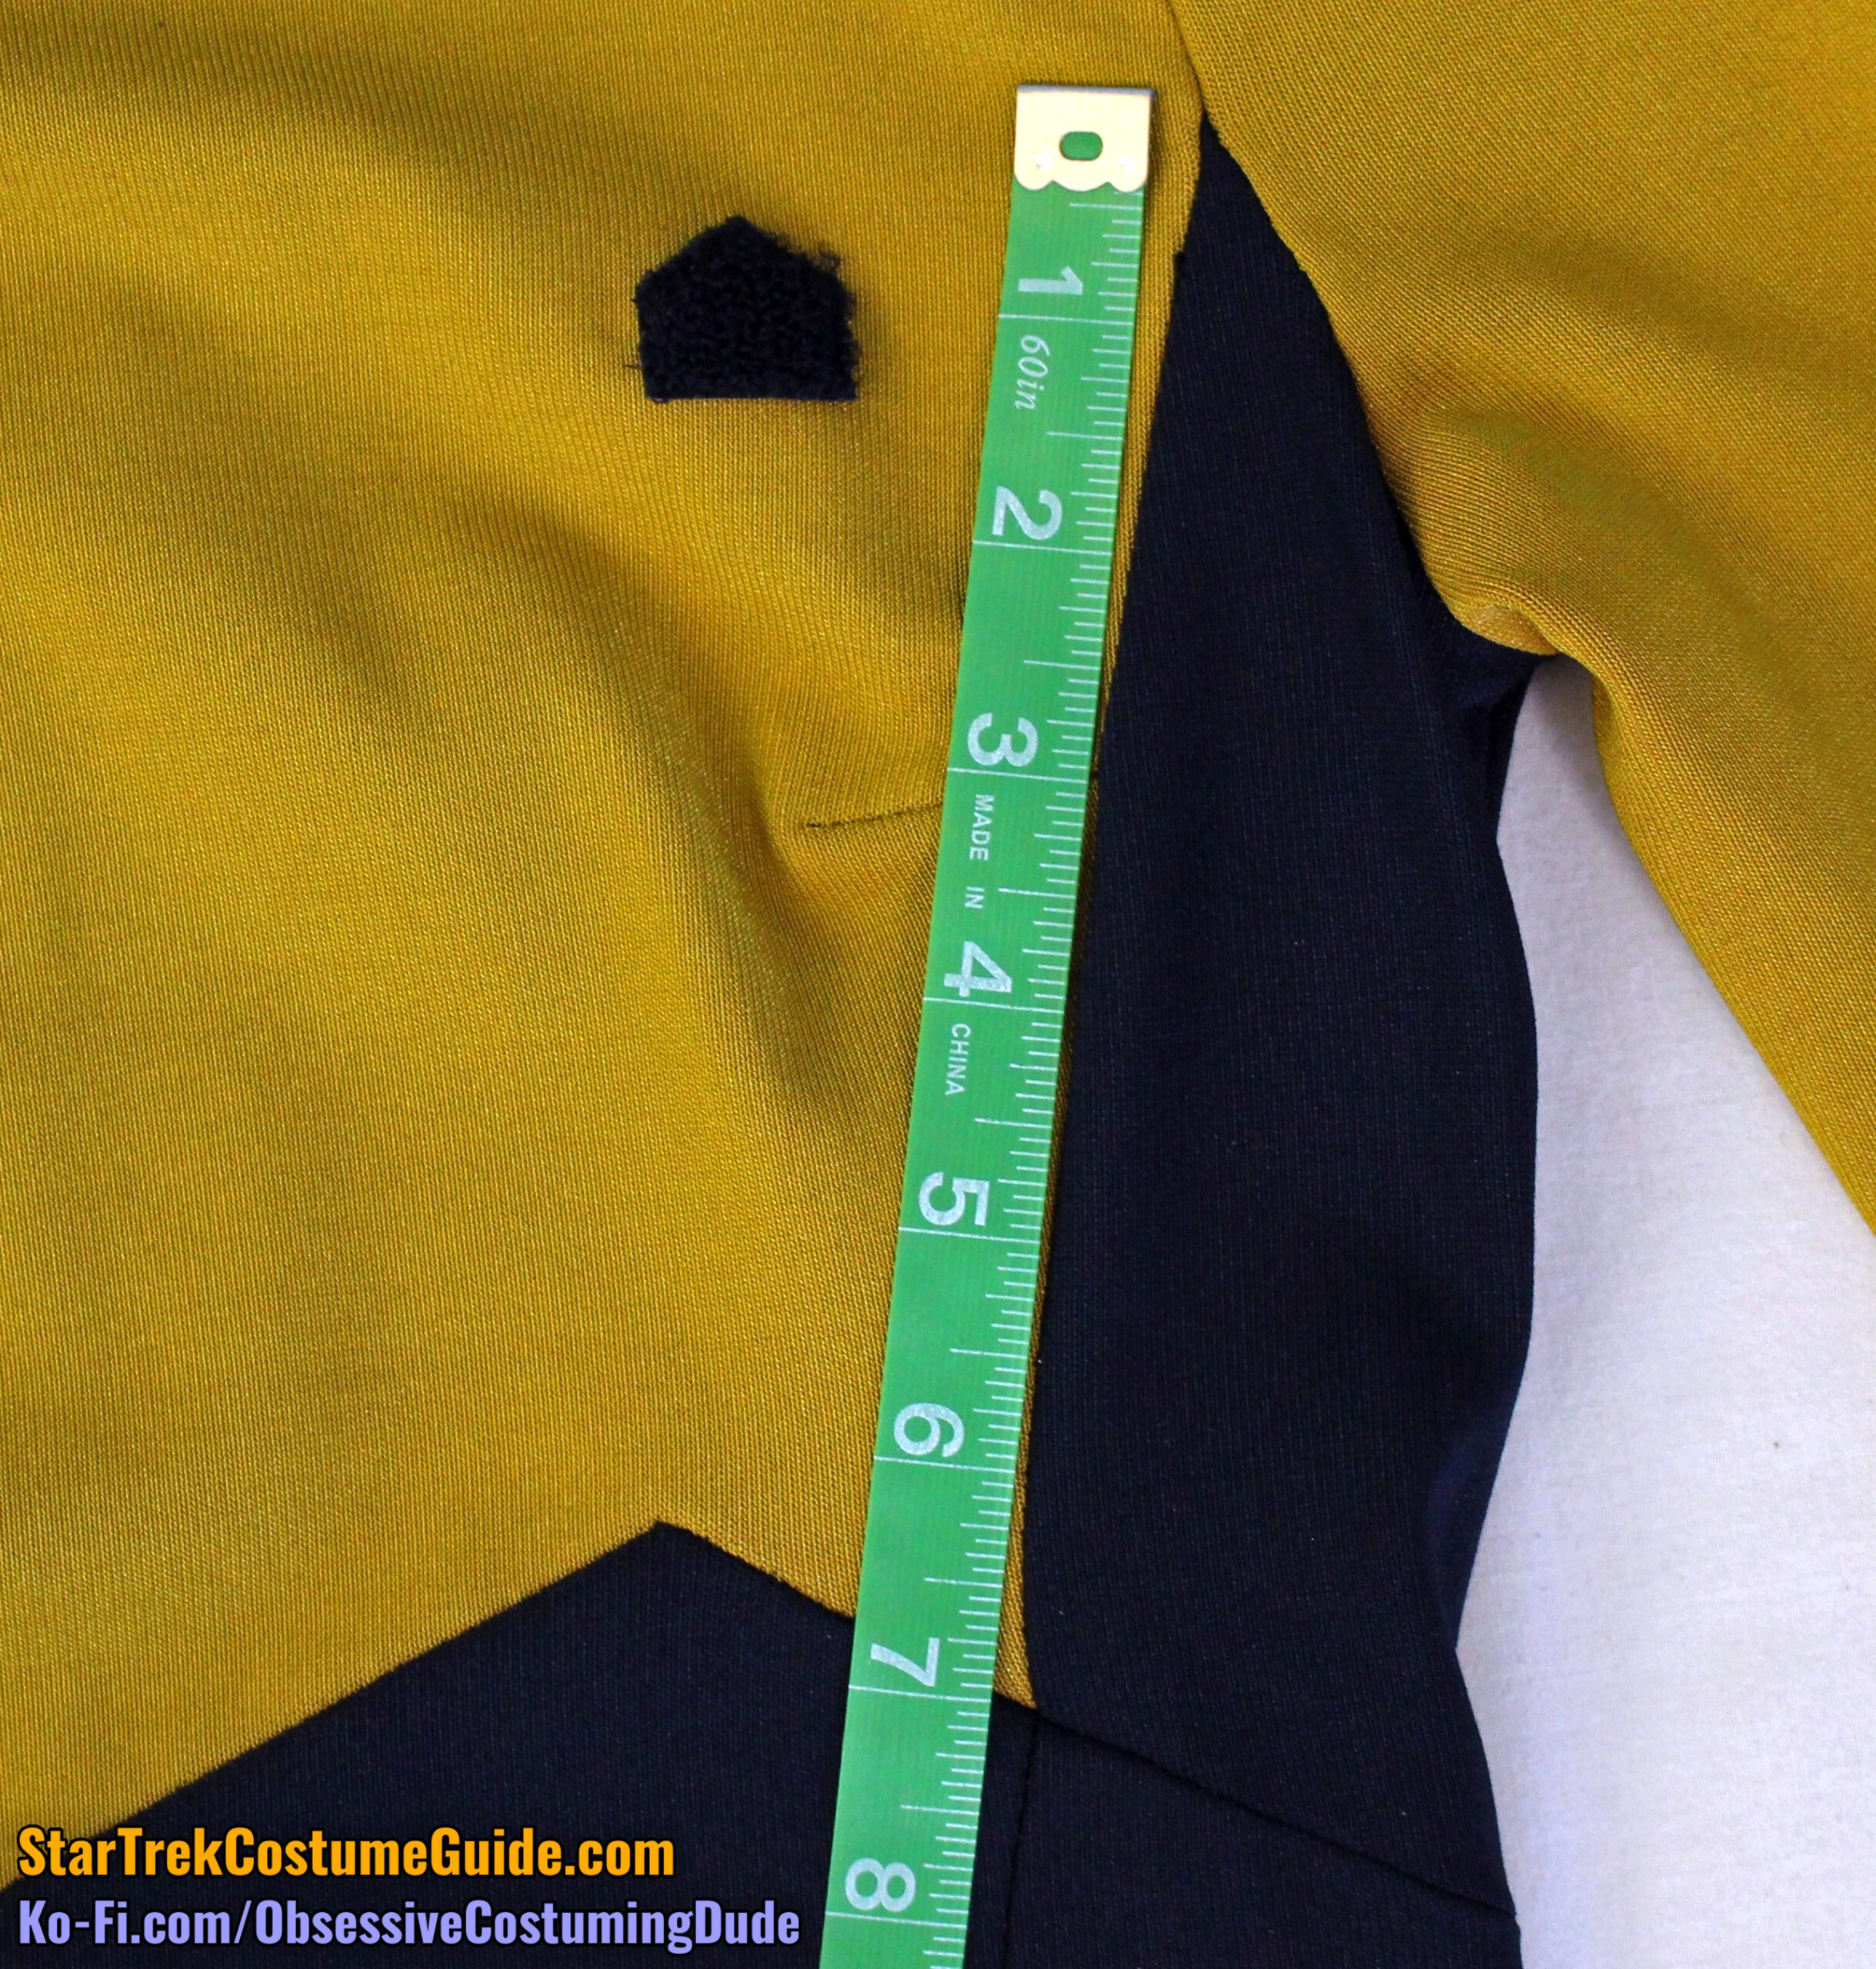
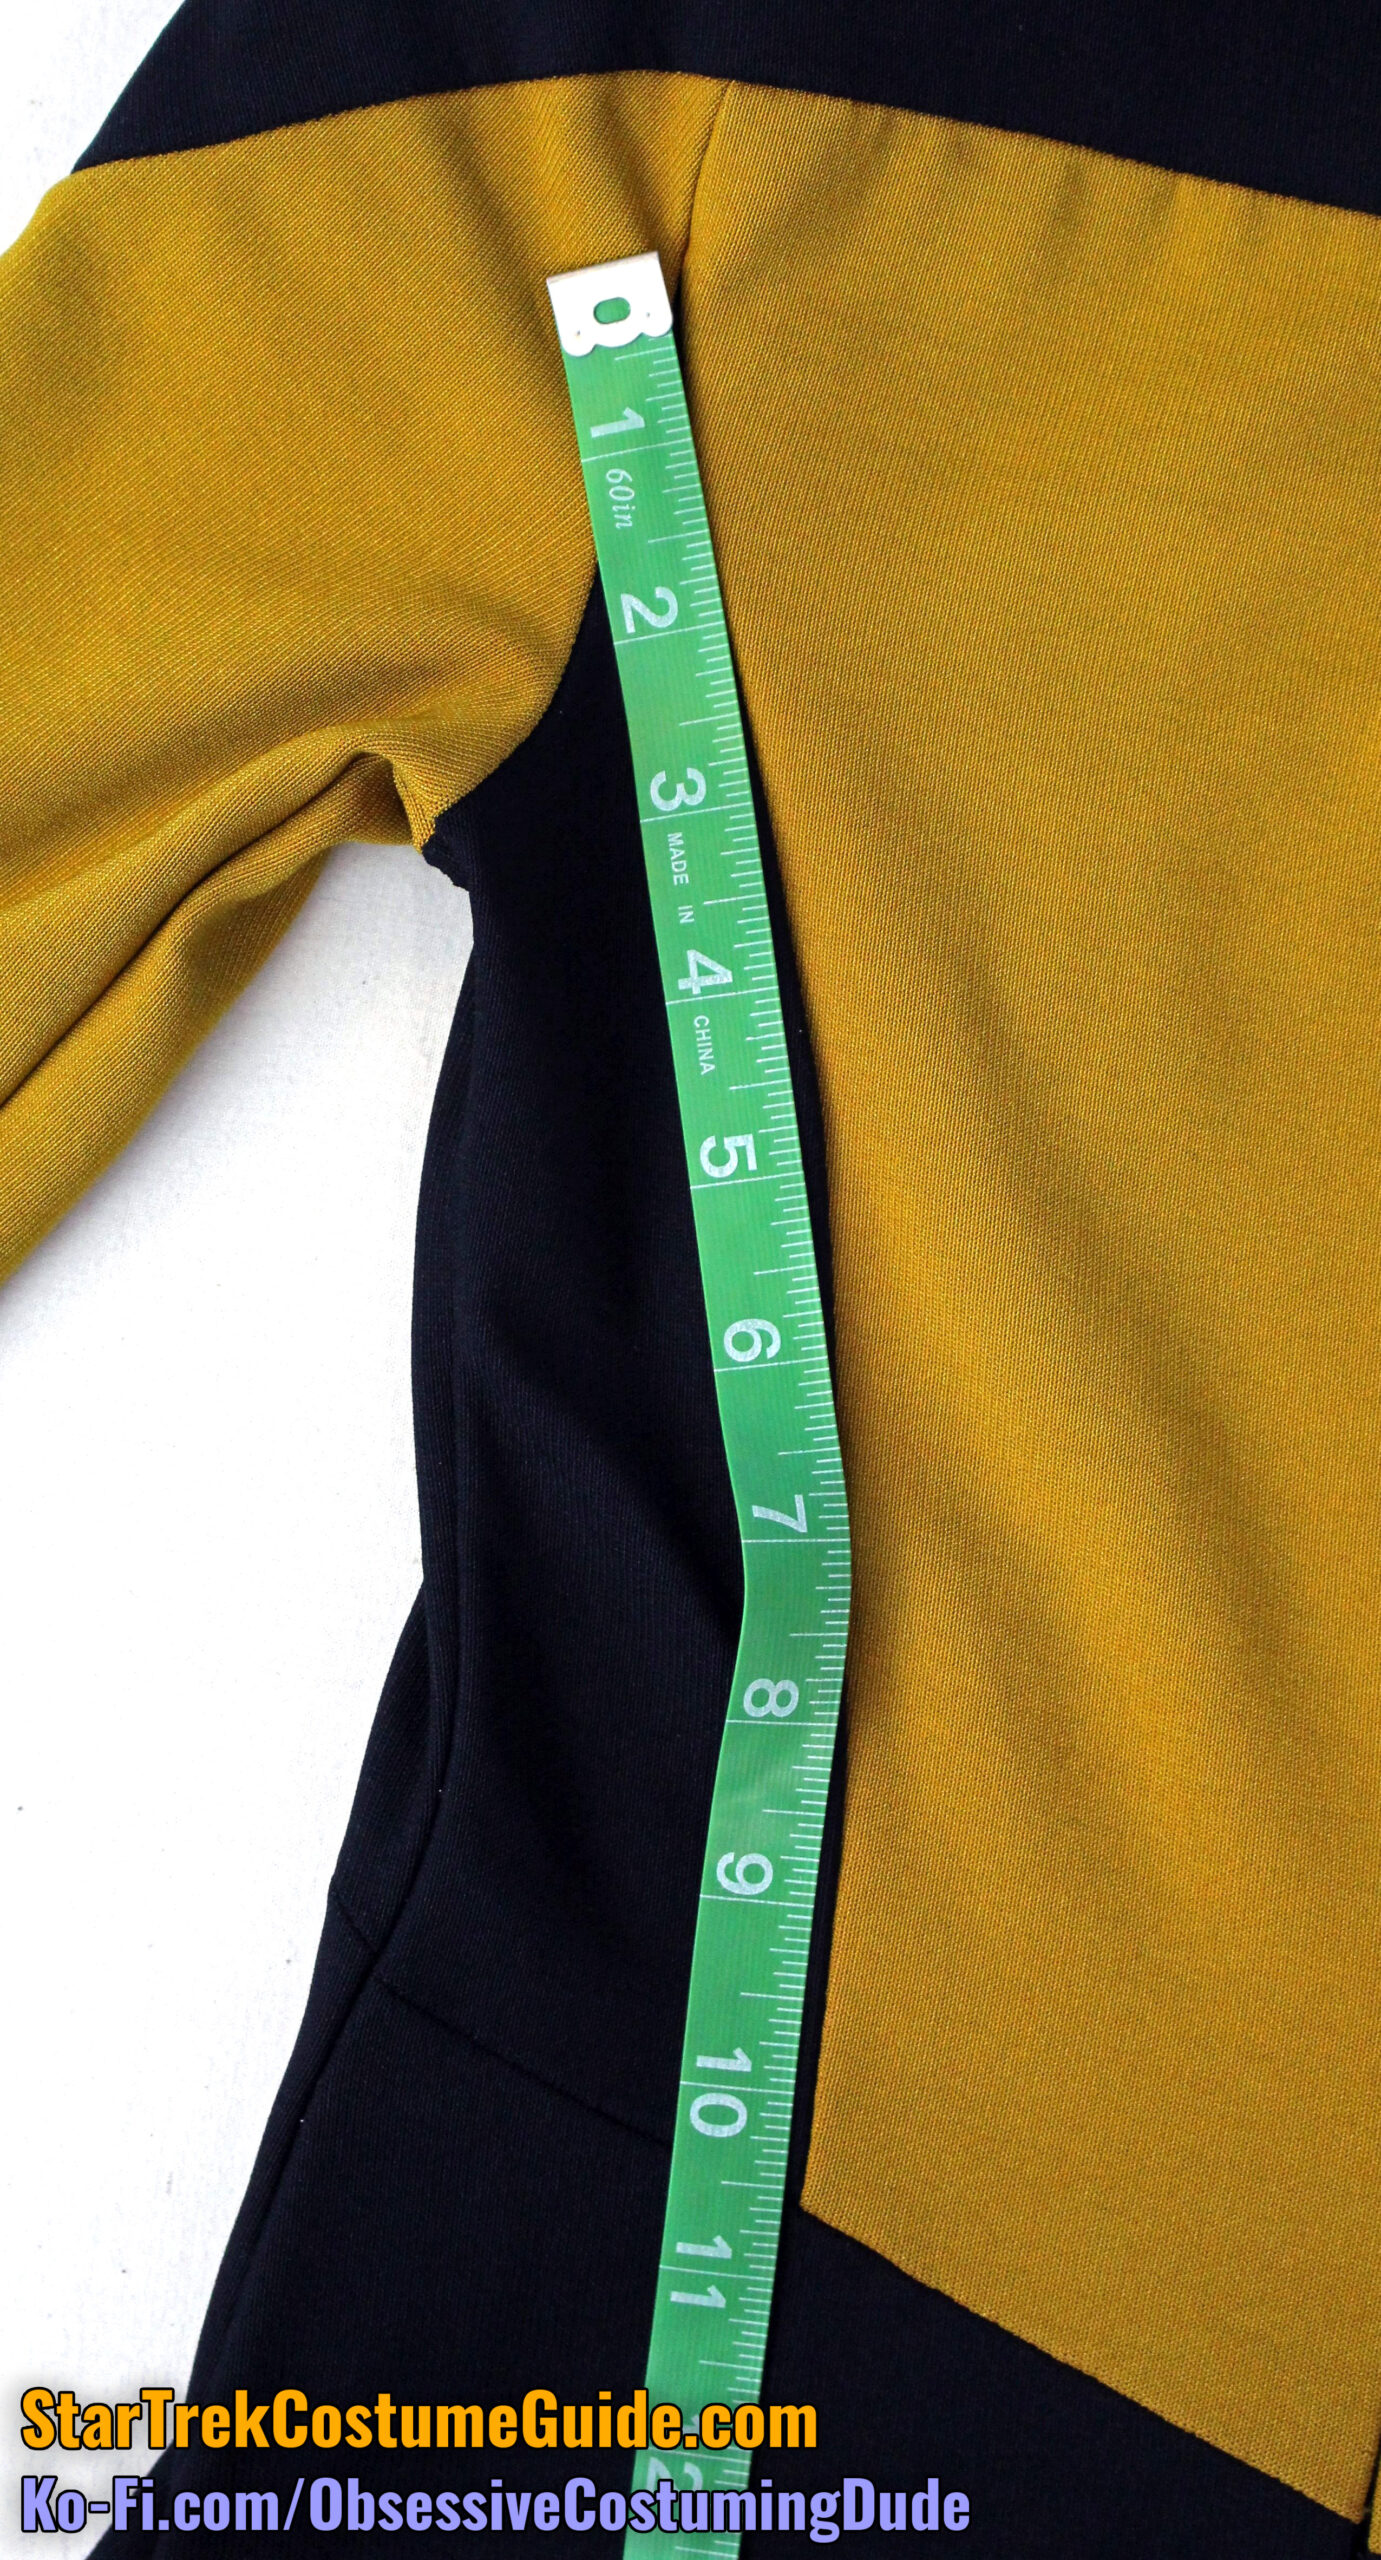
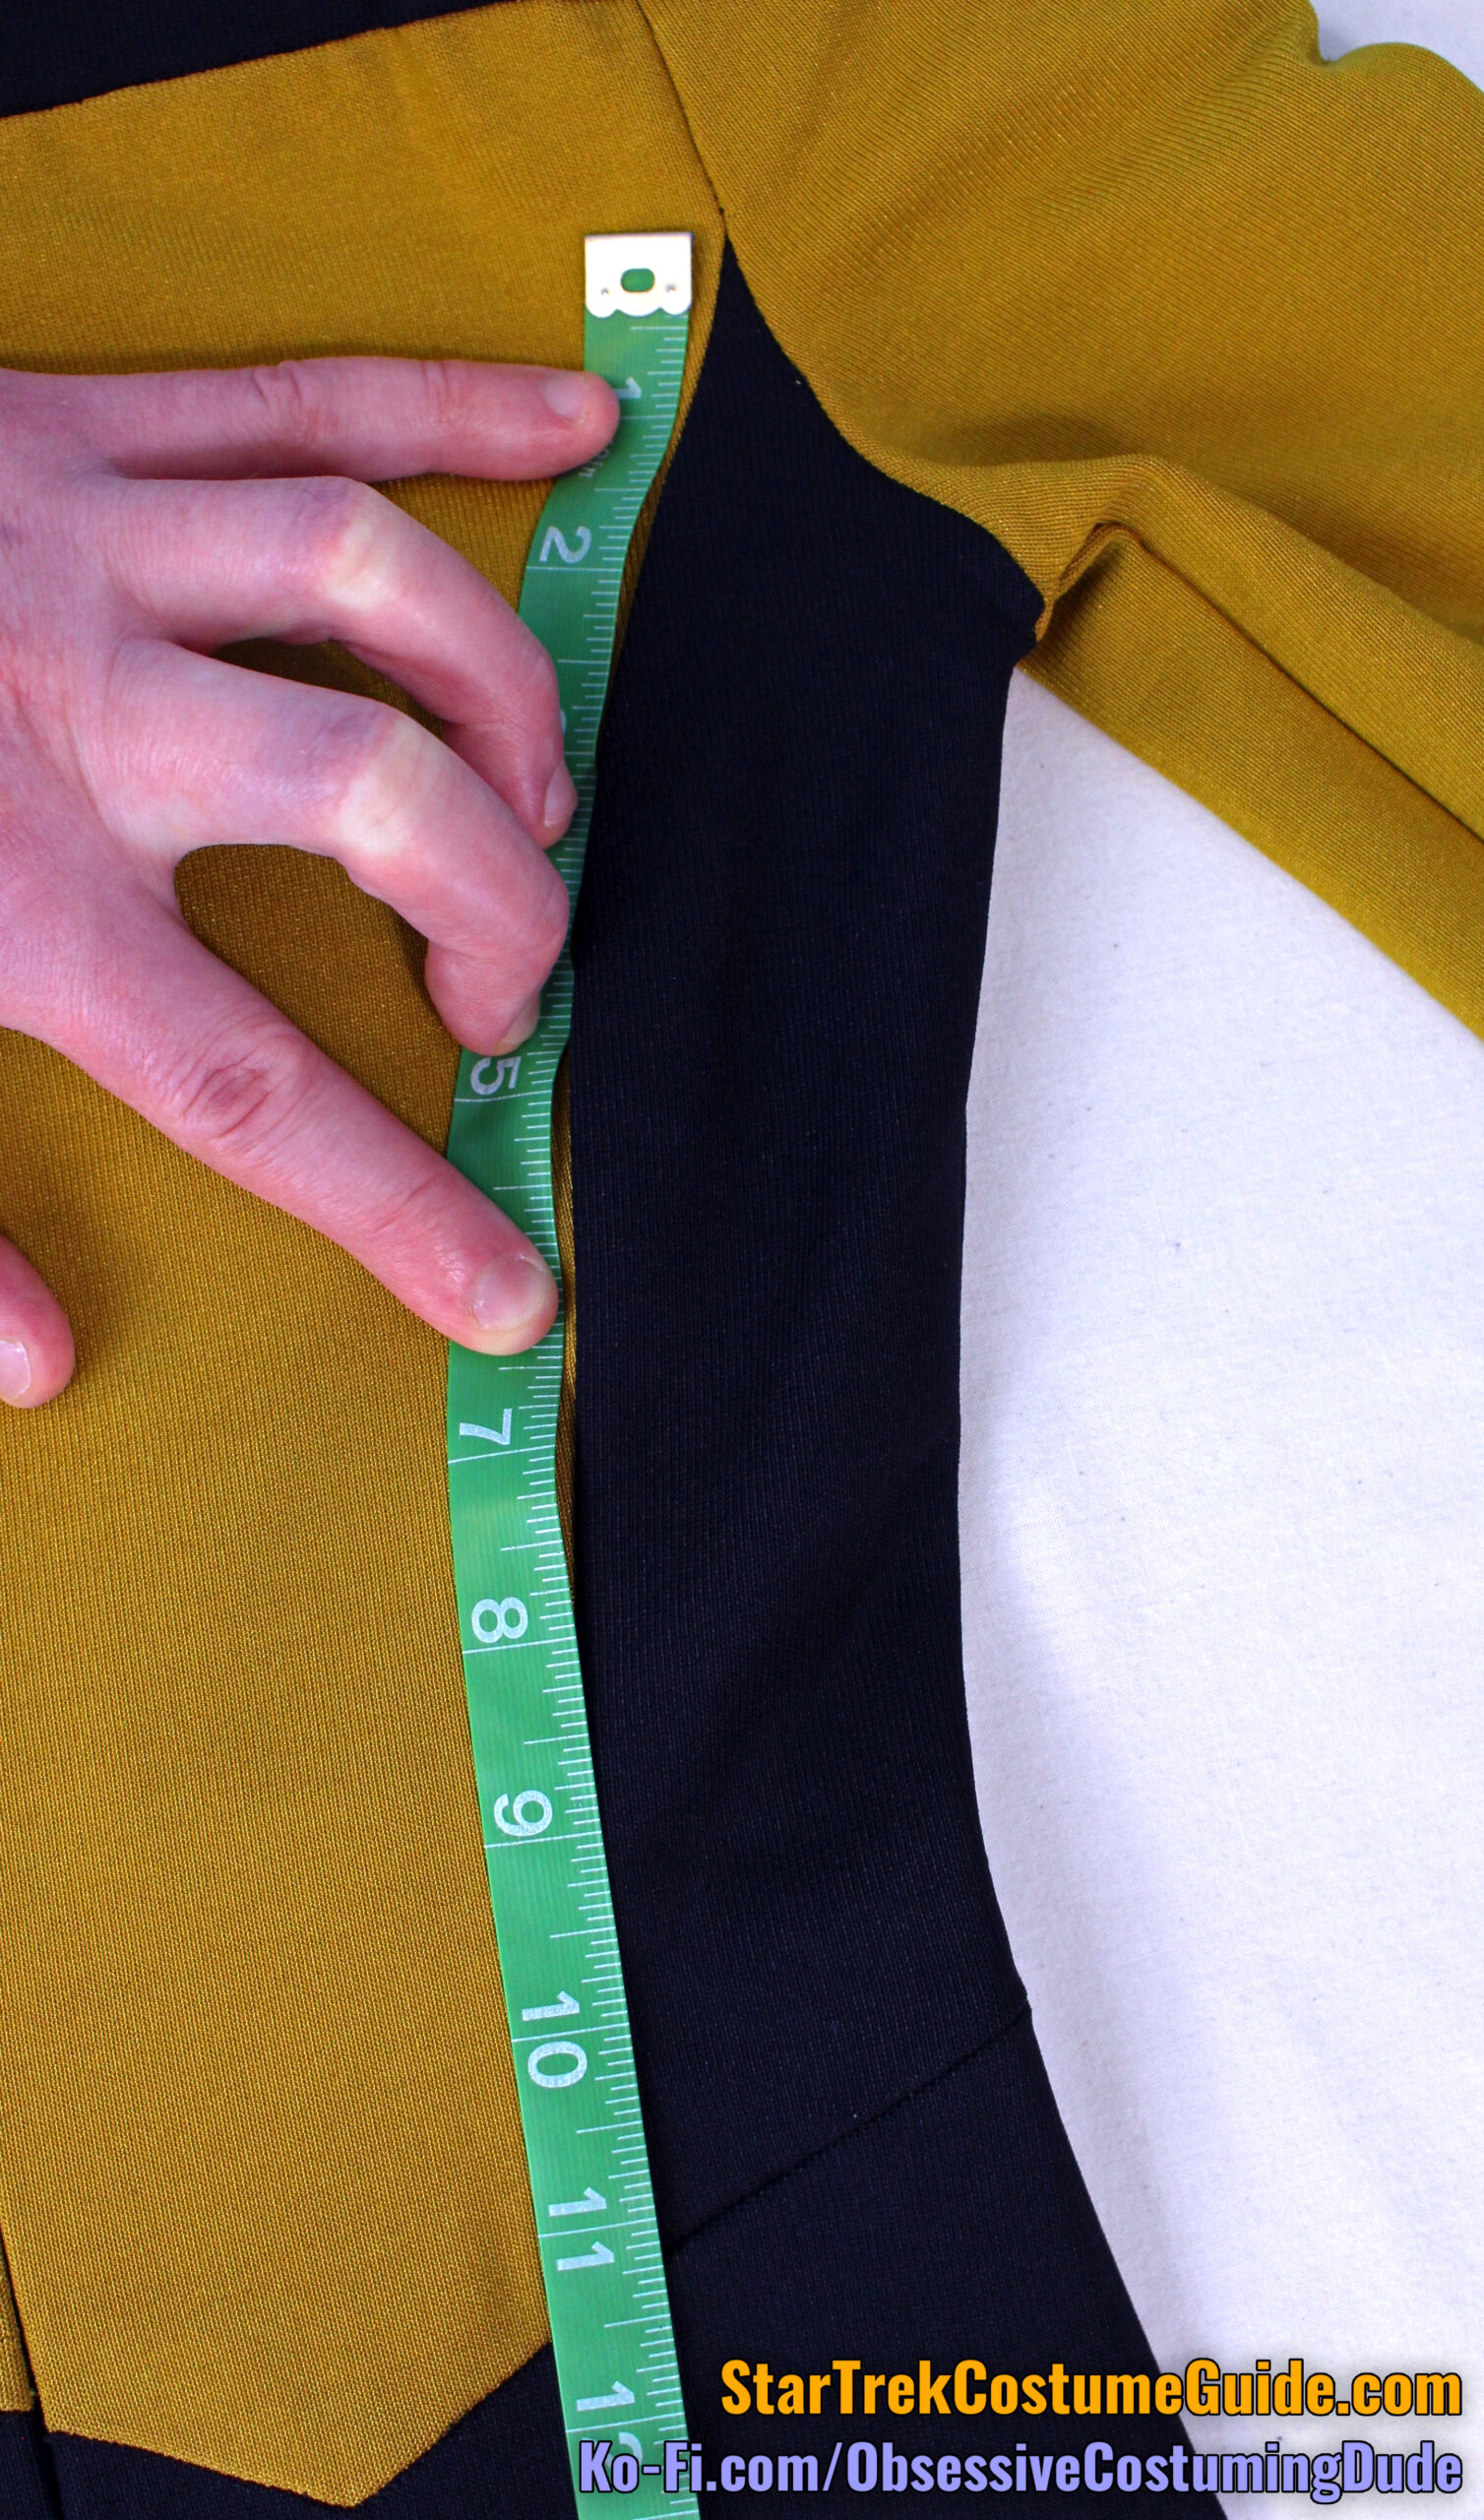
The side front seams were both 1 ¼” below the yoke at the armscye.
The right side front seam was 8 ¾”.
The left side front seam was an even 7”.
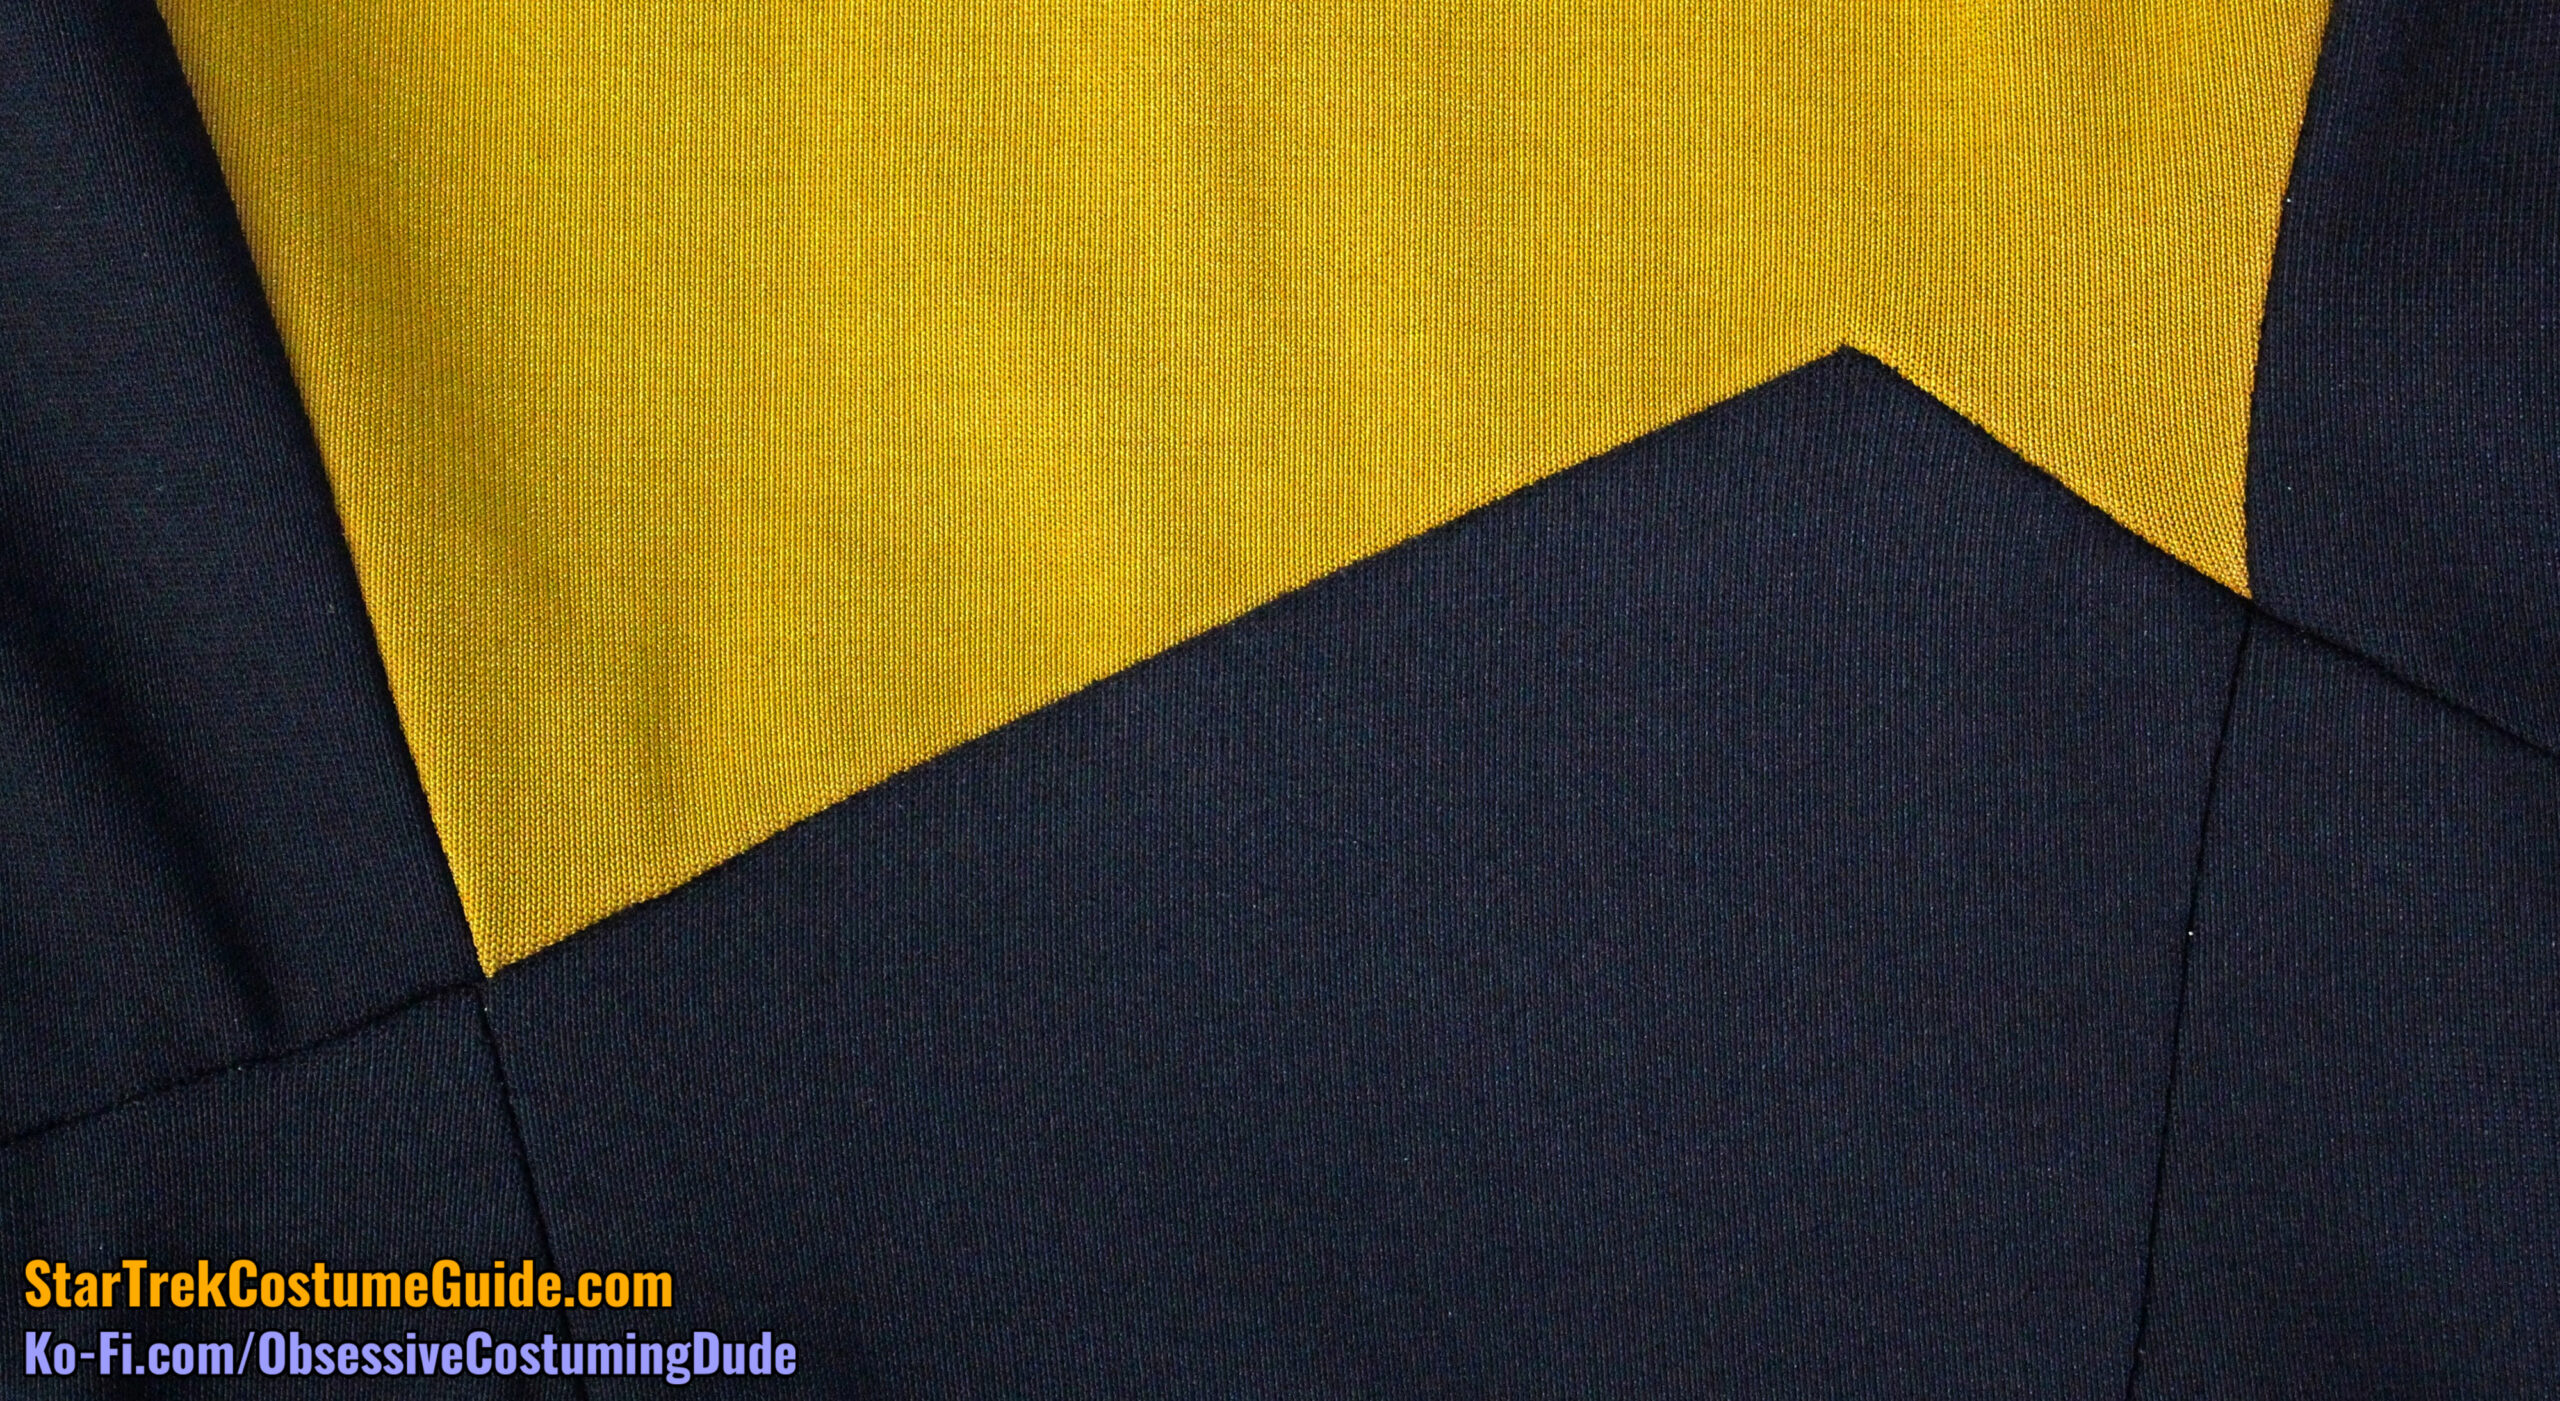
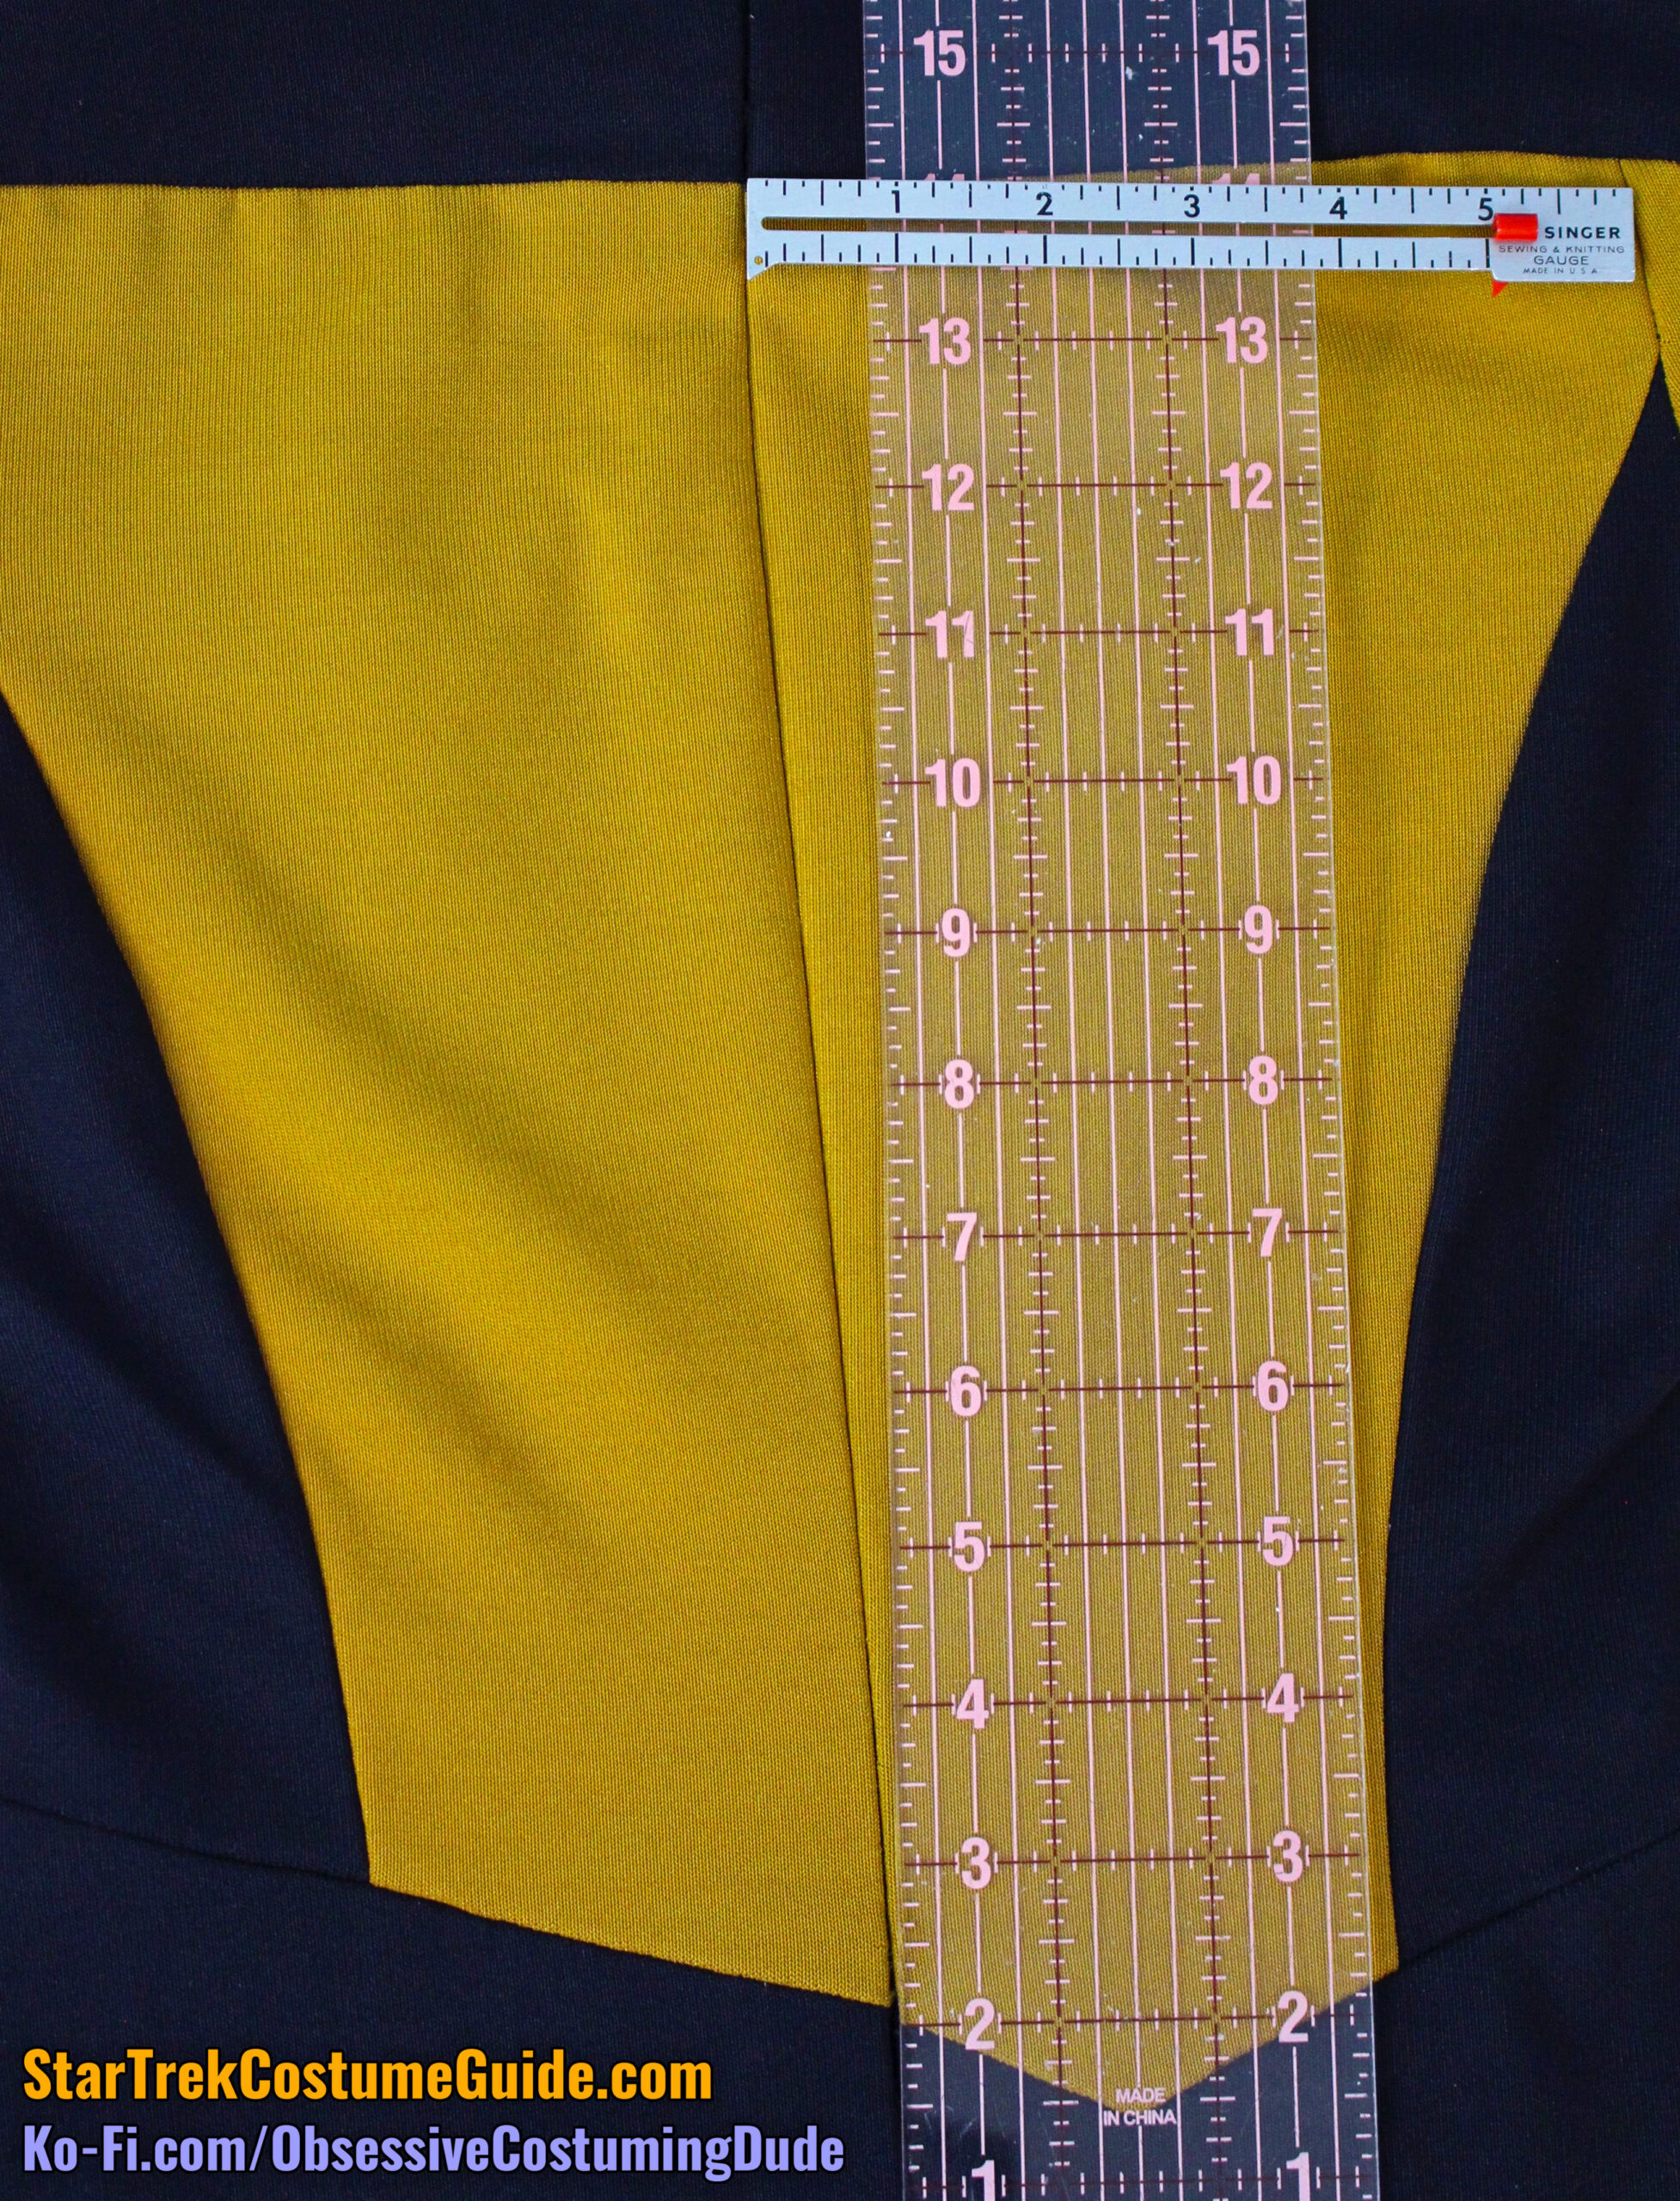
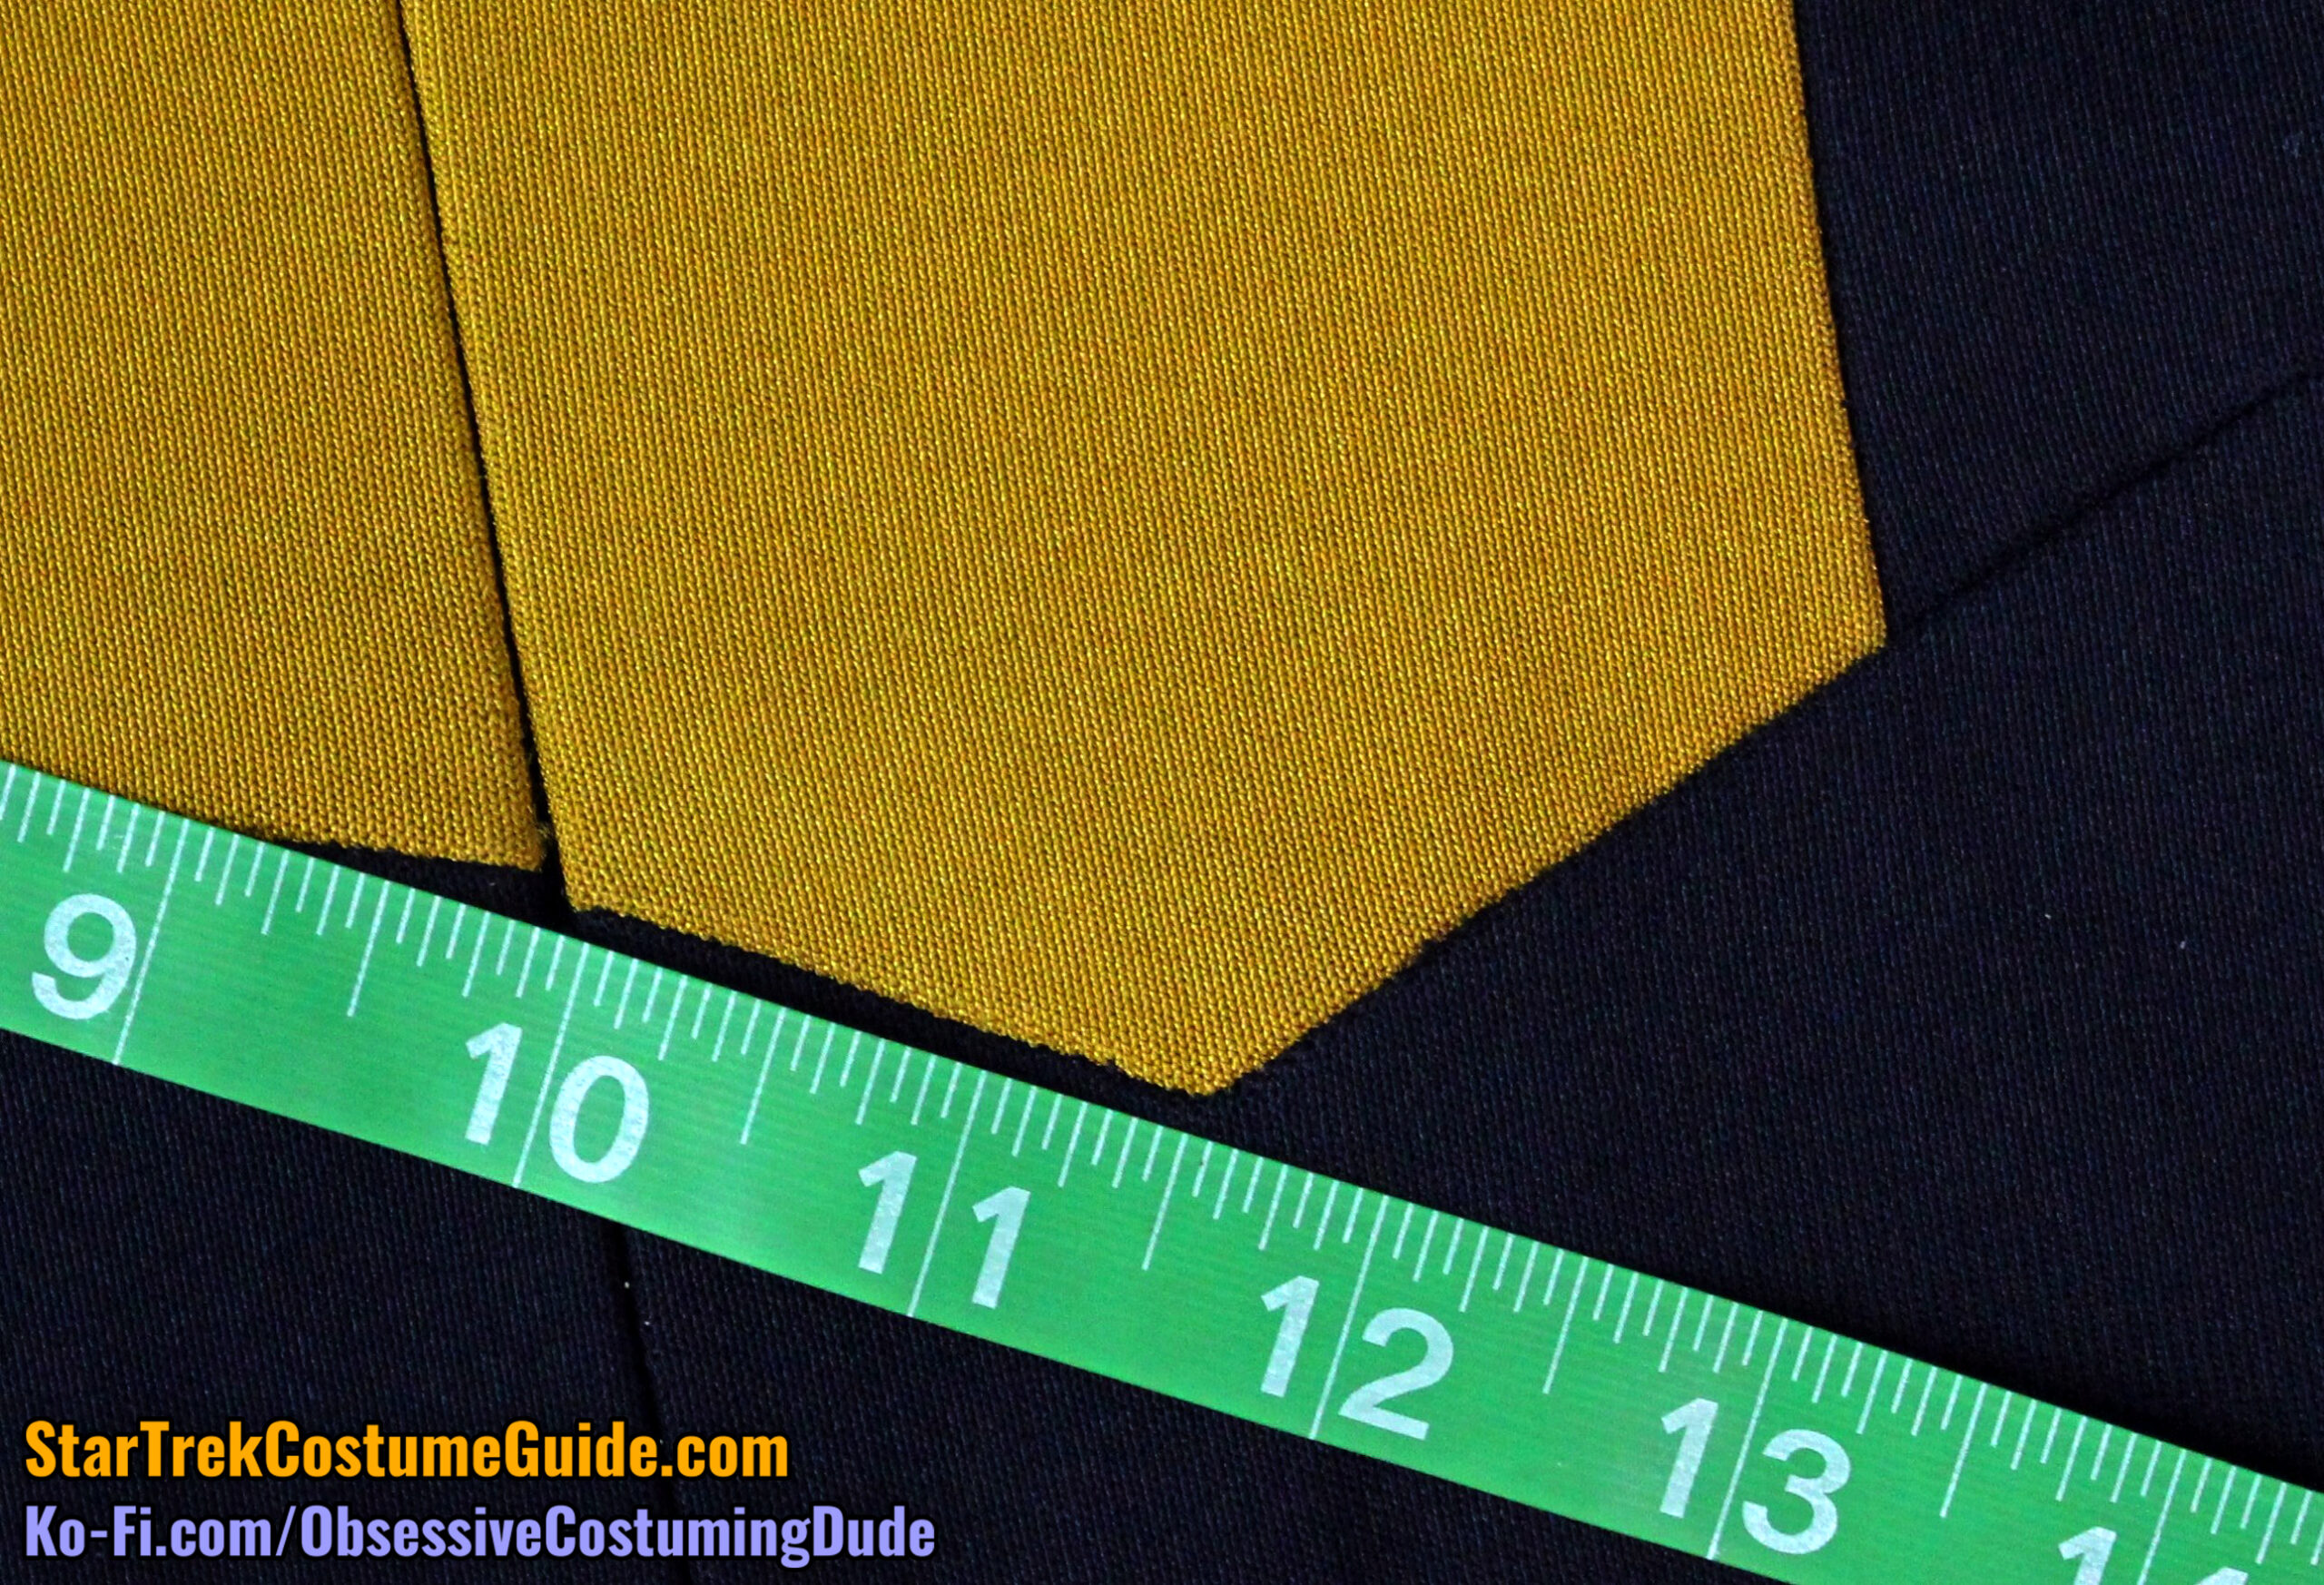
The edges of the lower front asymmetrical insert were 5 ⅞” (upward) and 1 ⅞” (downward).
Here’s a look at the overall dimensions/proportions of the front asymmetrical design.
The longer edge had a 2 ½” upward slant, and the shorter edge had a 1” downward slant.
The right side front seam was 1 ⅜” below the yoke at the armscye.
However, the left side back seam was a little higher – 1 ⅛” below the yoke at the armscye.
The lower right front armscye was 3 ⅝”.
However, the lower left front armscye was a tiny bit shorter, 3 ½”.
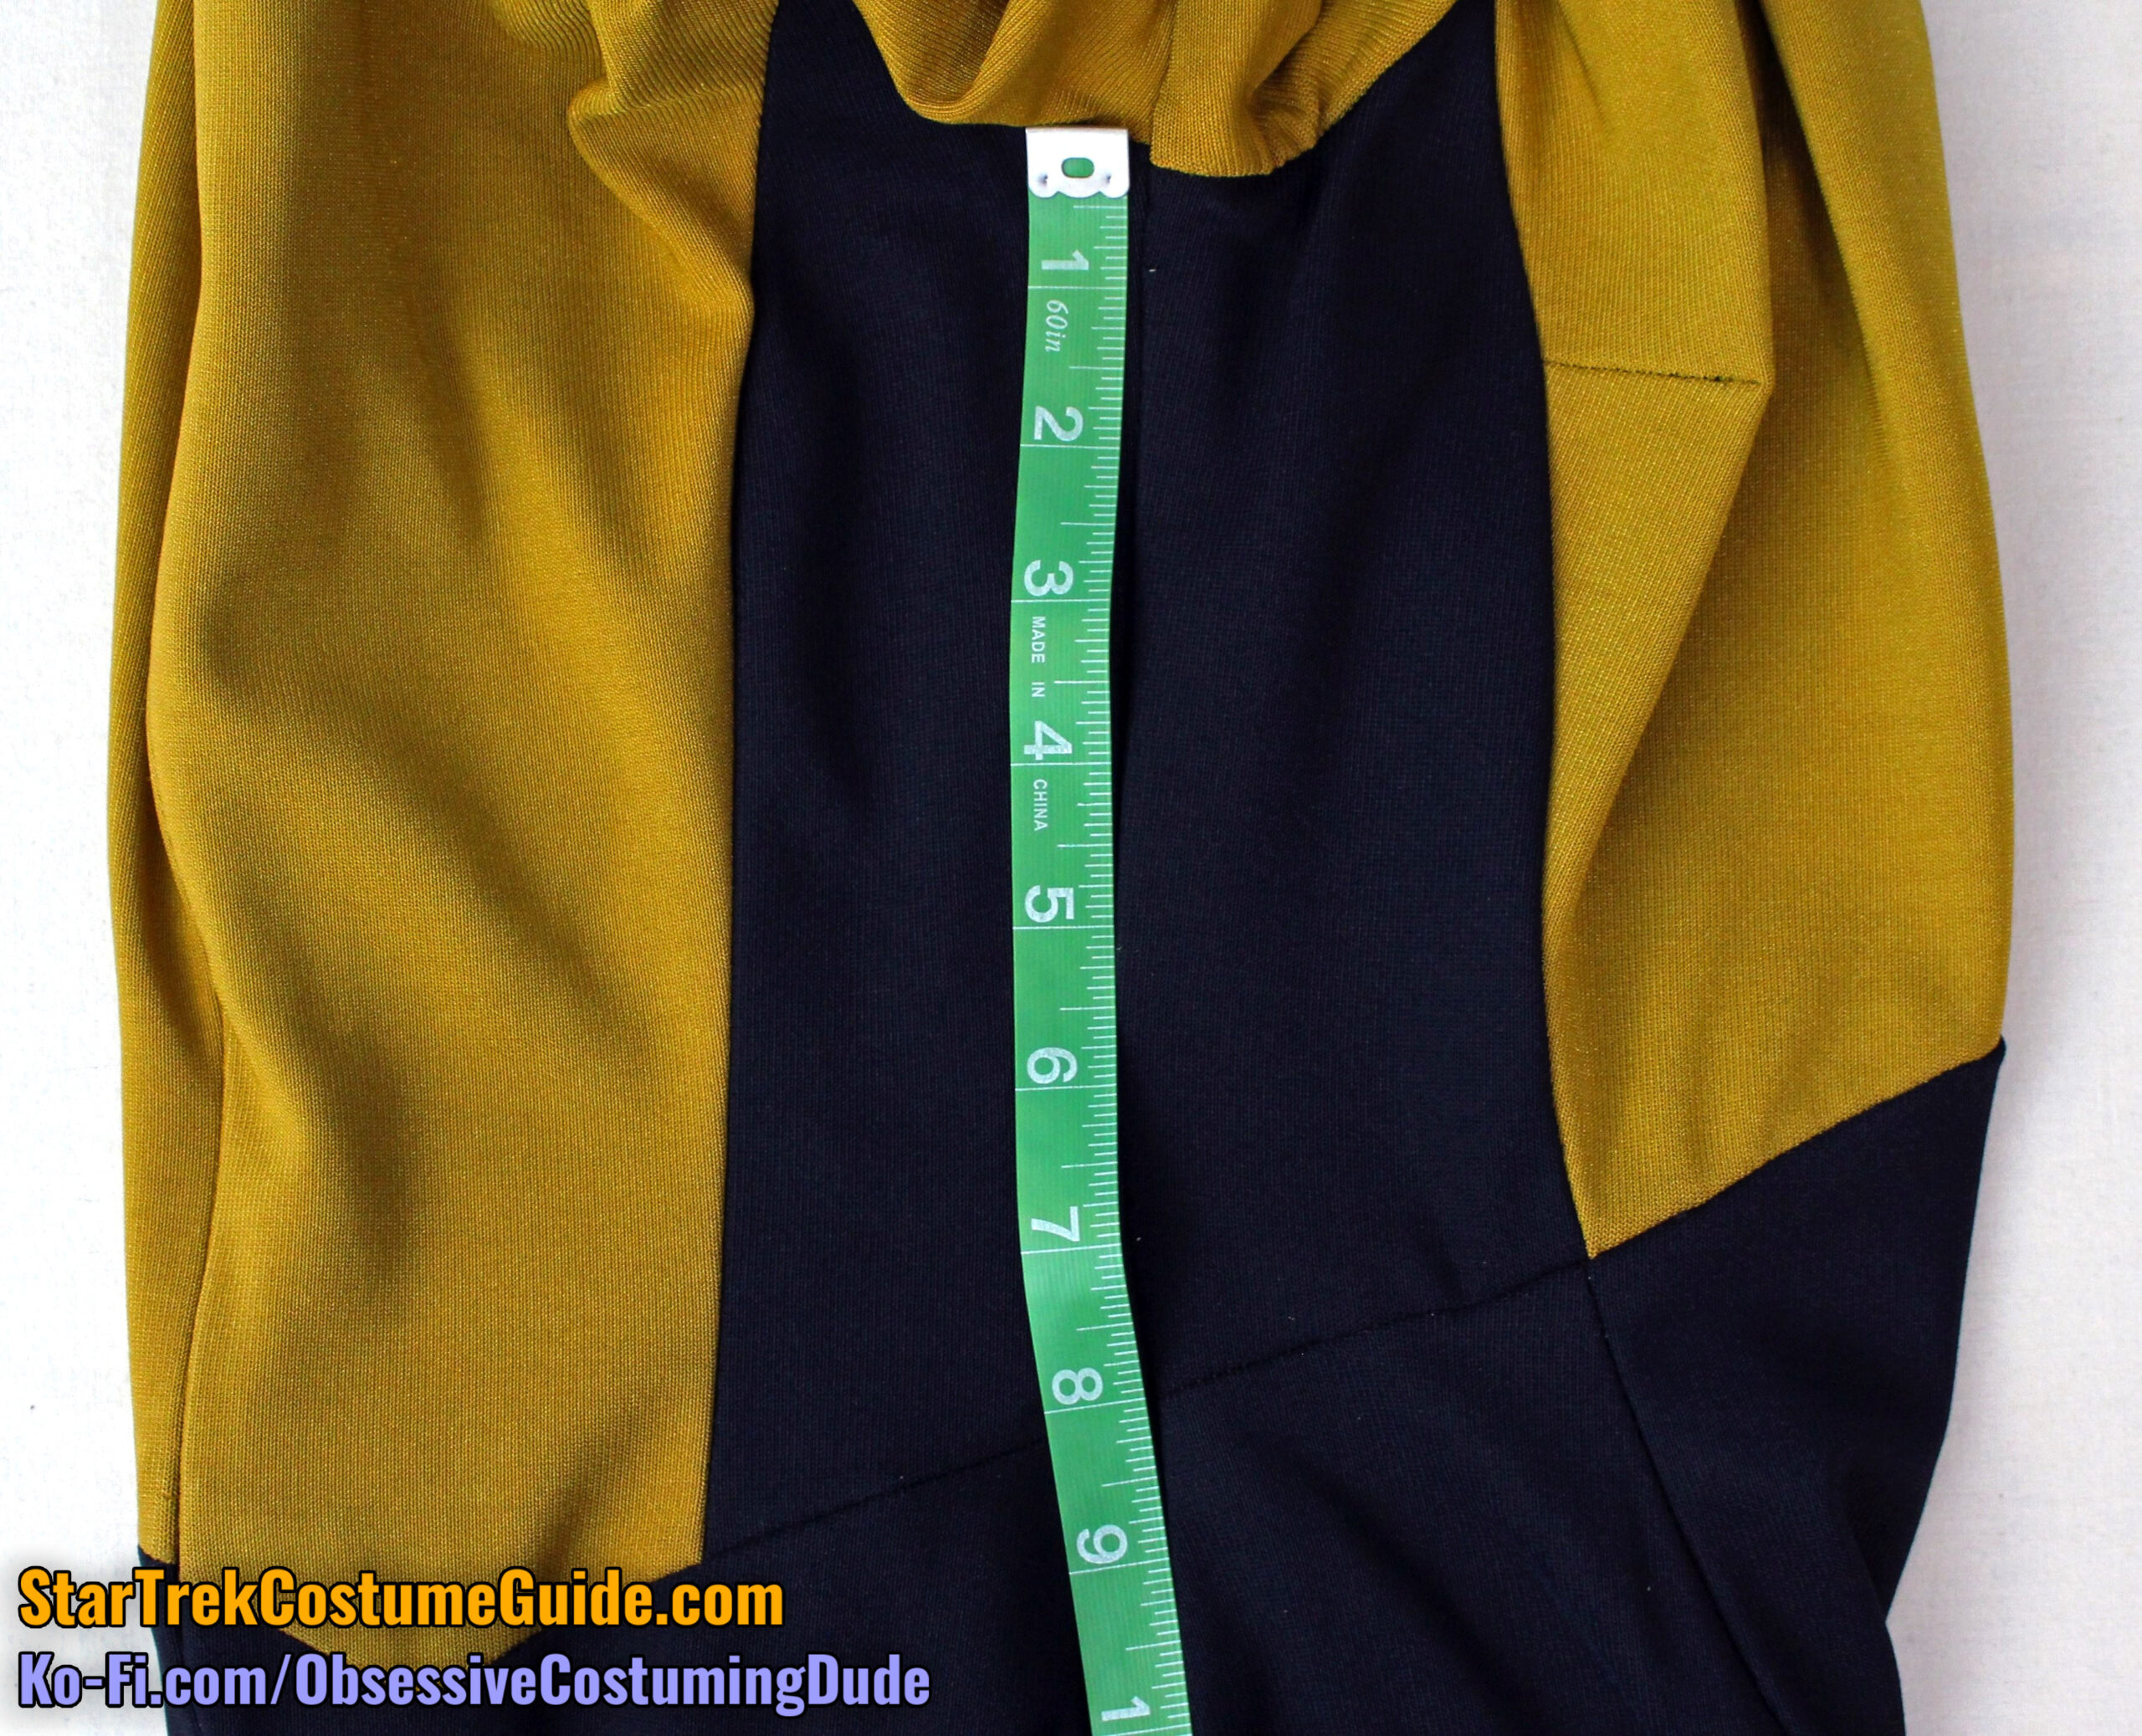
The right side seam was 8”, measured from the lower armscye (underarm) to the diagonal waist seams.
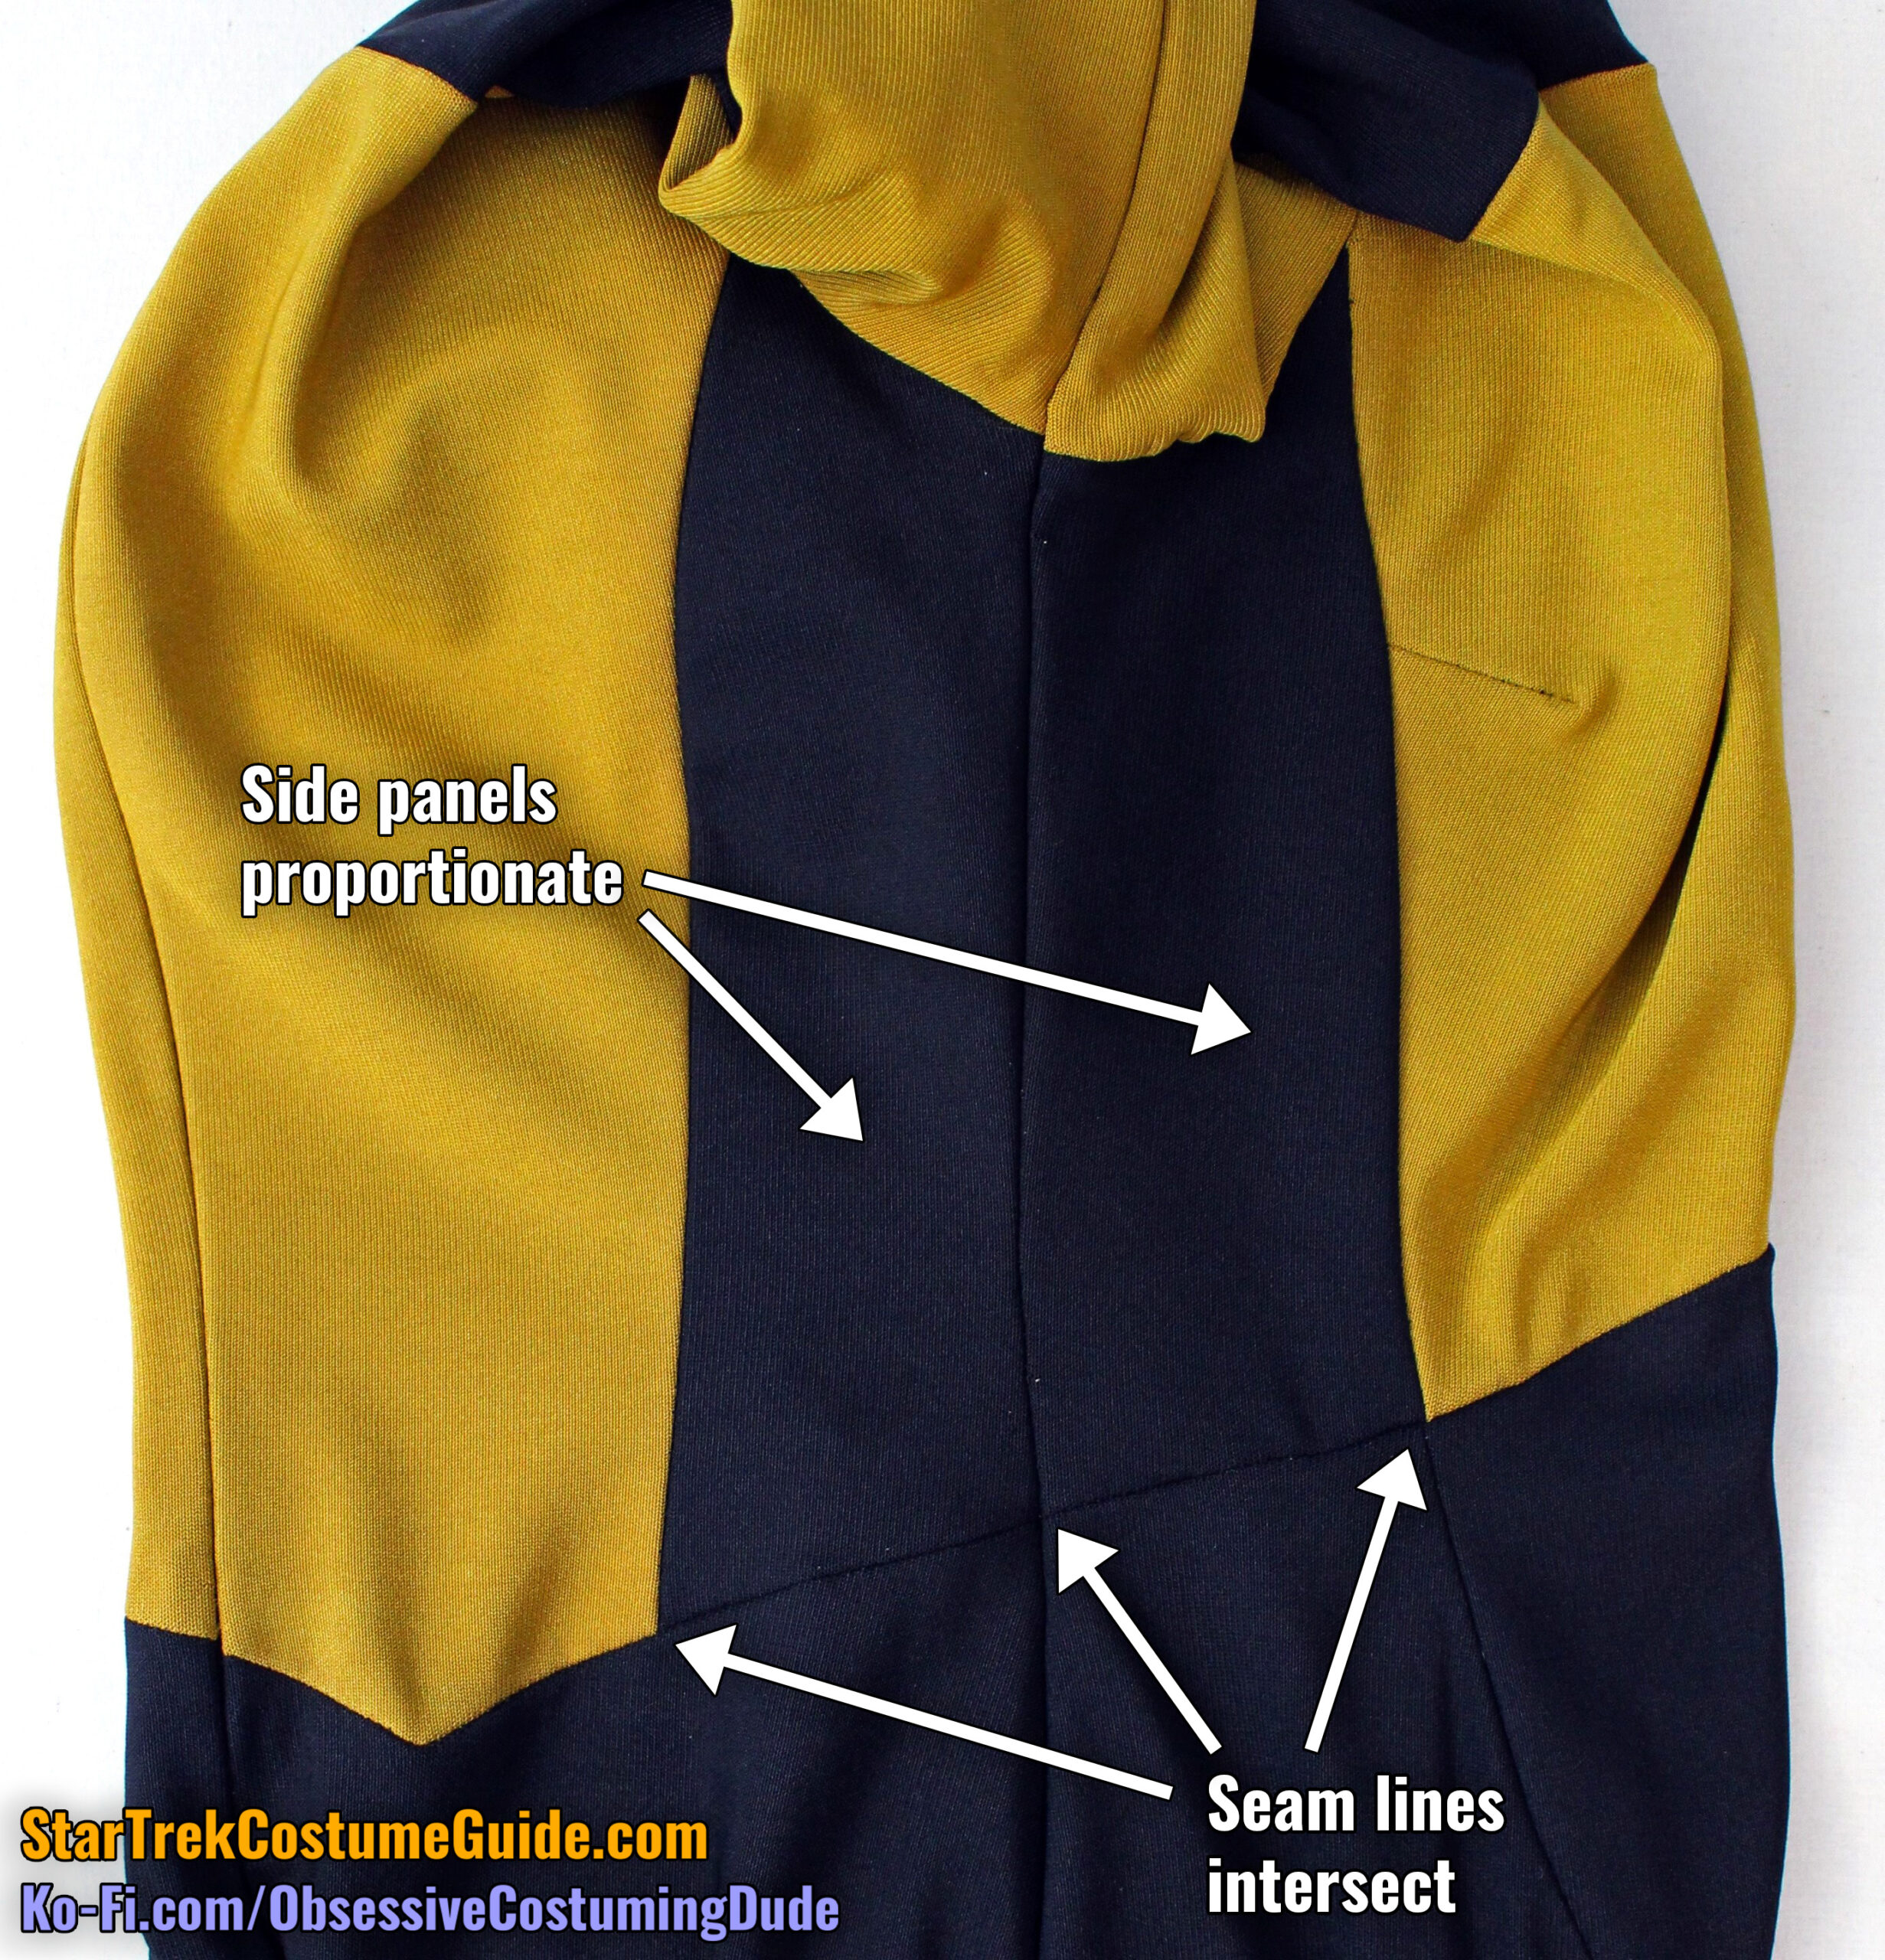
Also, just look at how beautifully proportionate those side panels were to each other, and how the diagonal waist seams properly intersected at the side seams (unlike the screen-used Tasha Yar TNG jumpsuit I recently posted about).
Both the right side front and right side back lower seams were 2 ⅞”.

The left side of the jumpsuit wasn’t quite as agreeable in that regard; the side panels were close but not directly proportionate to each other, and the diagonal waist seams didn’t quite align at the side seam.
The left side seam was approximately 6 ½”, measured from the lower armscye to the diagonal waist seams.
The left side front lower seam was 3”, but the left side back seam was only 2 ⅝”.
The back right lower armscye was 3 ¼”, measured from the top of the side back seam to the side seam.
However, the back left lower armscye was ¾” longer, measuring 4”.
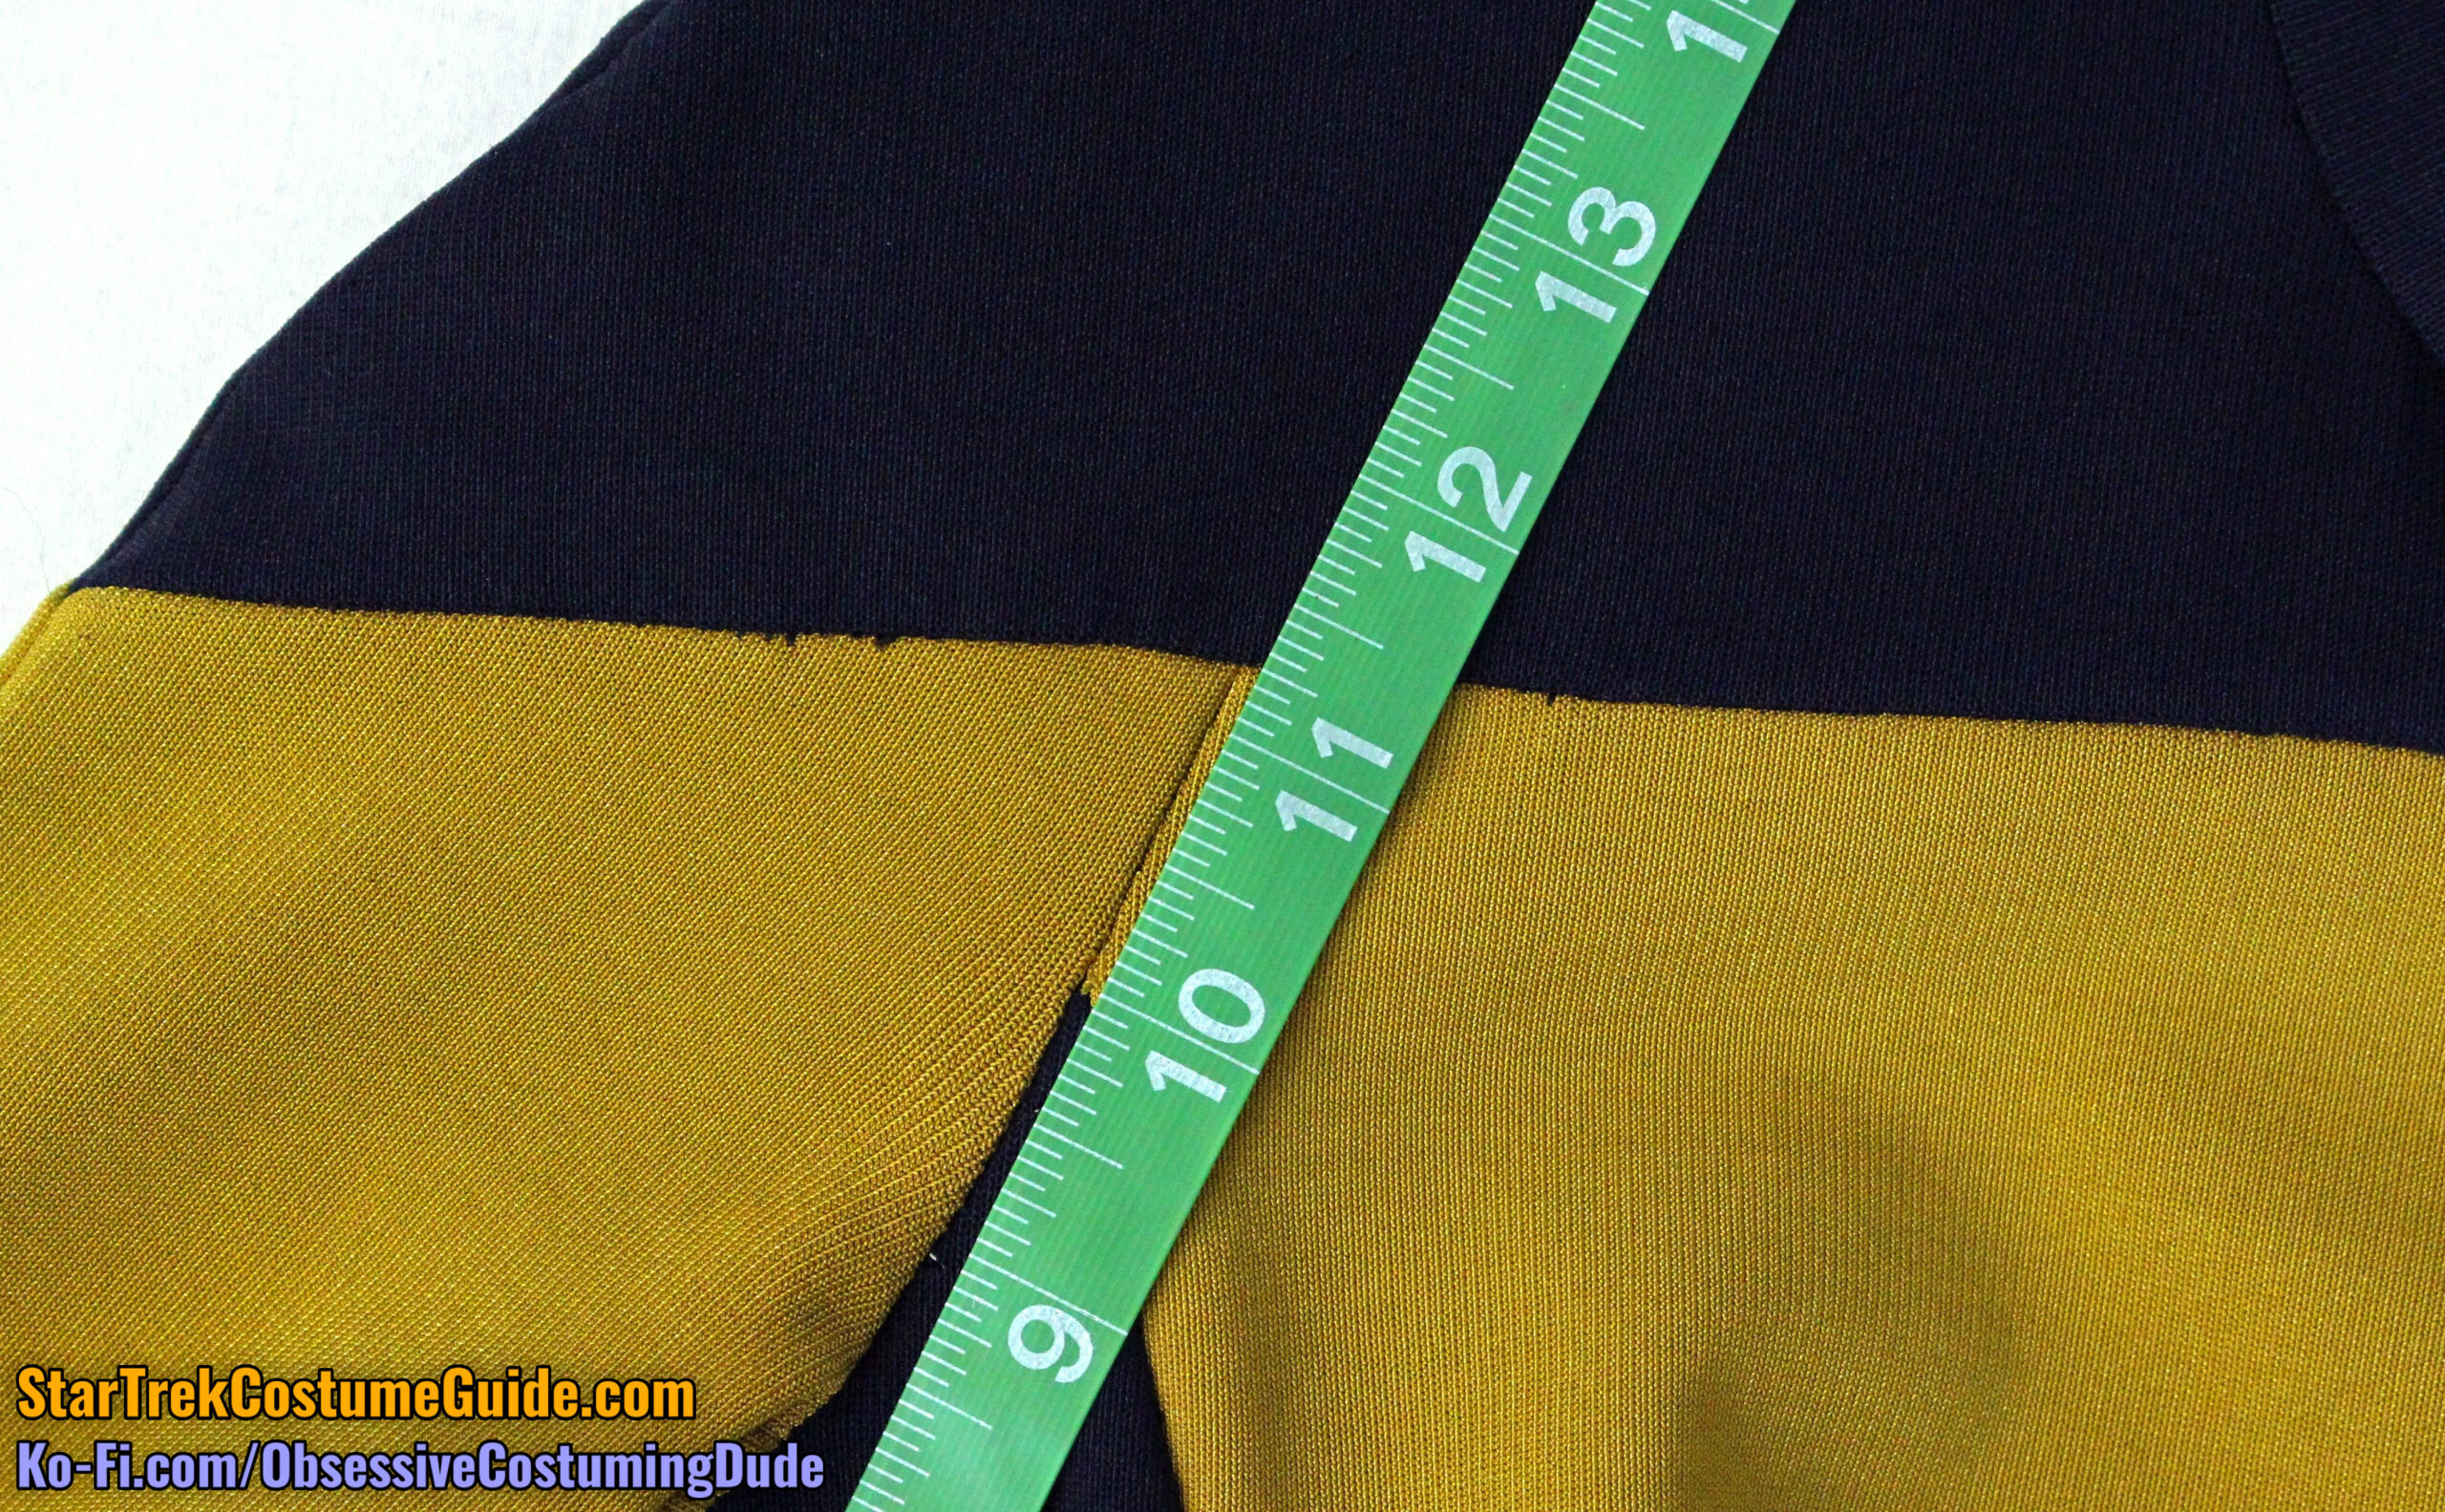
The right side back seam was 11 ¼”, and the left side back seam was 10 ½”.
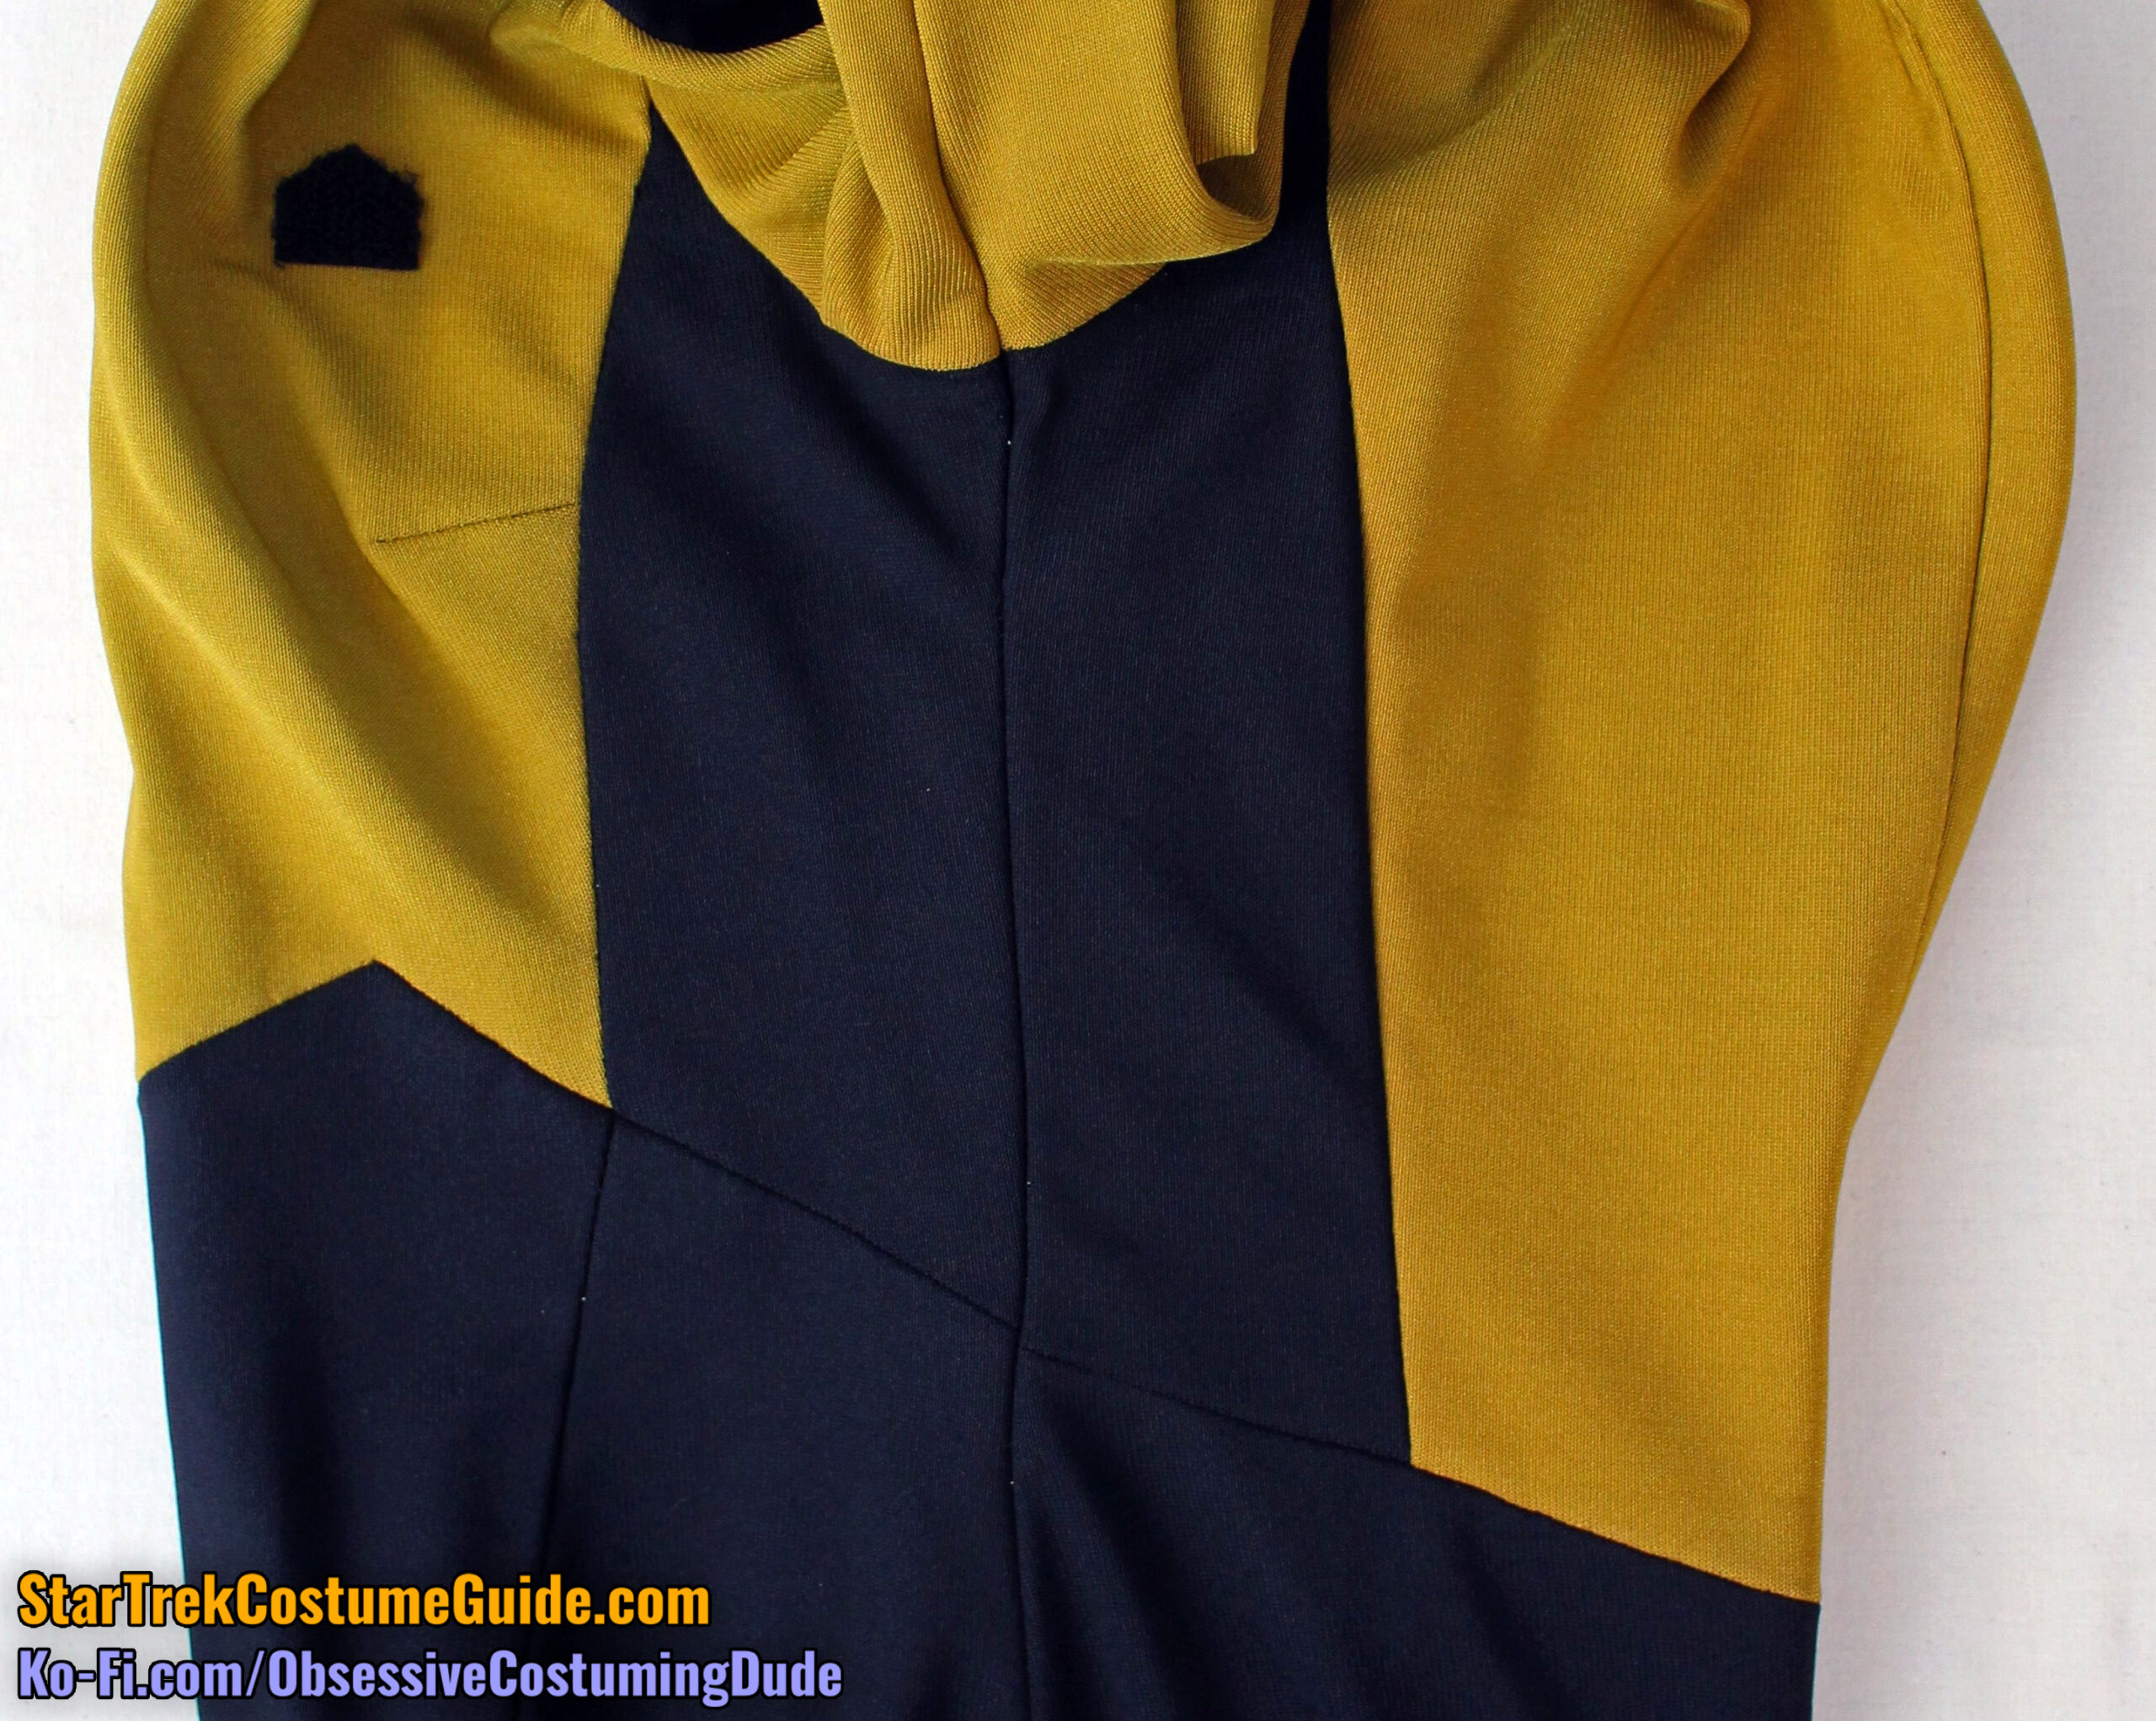
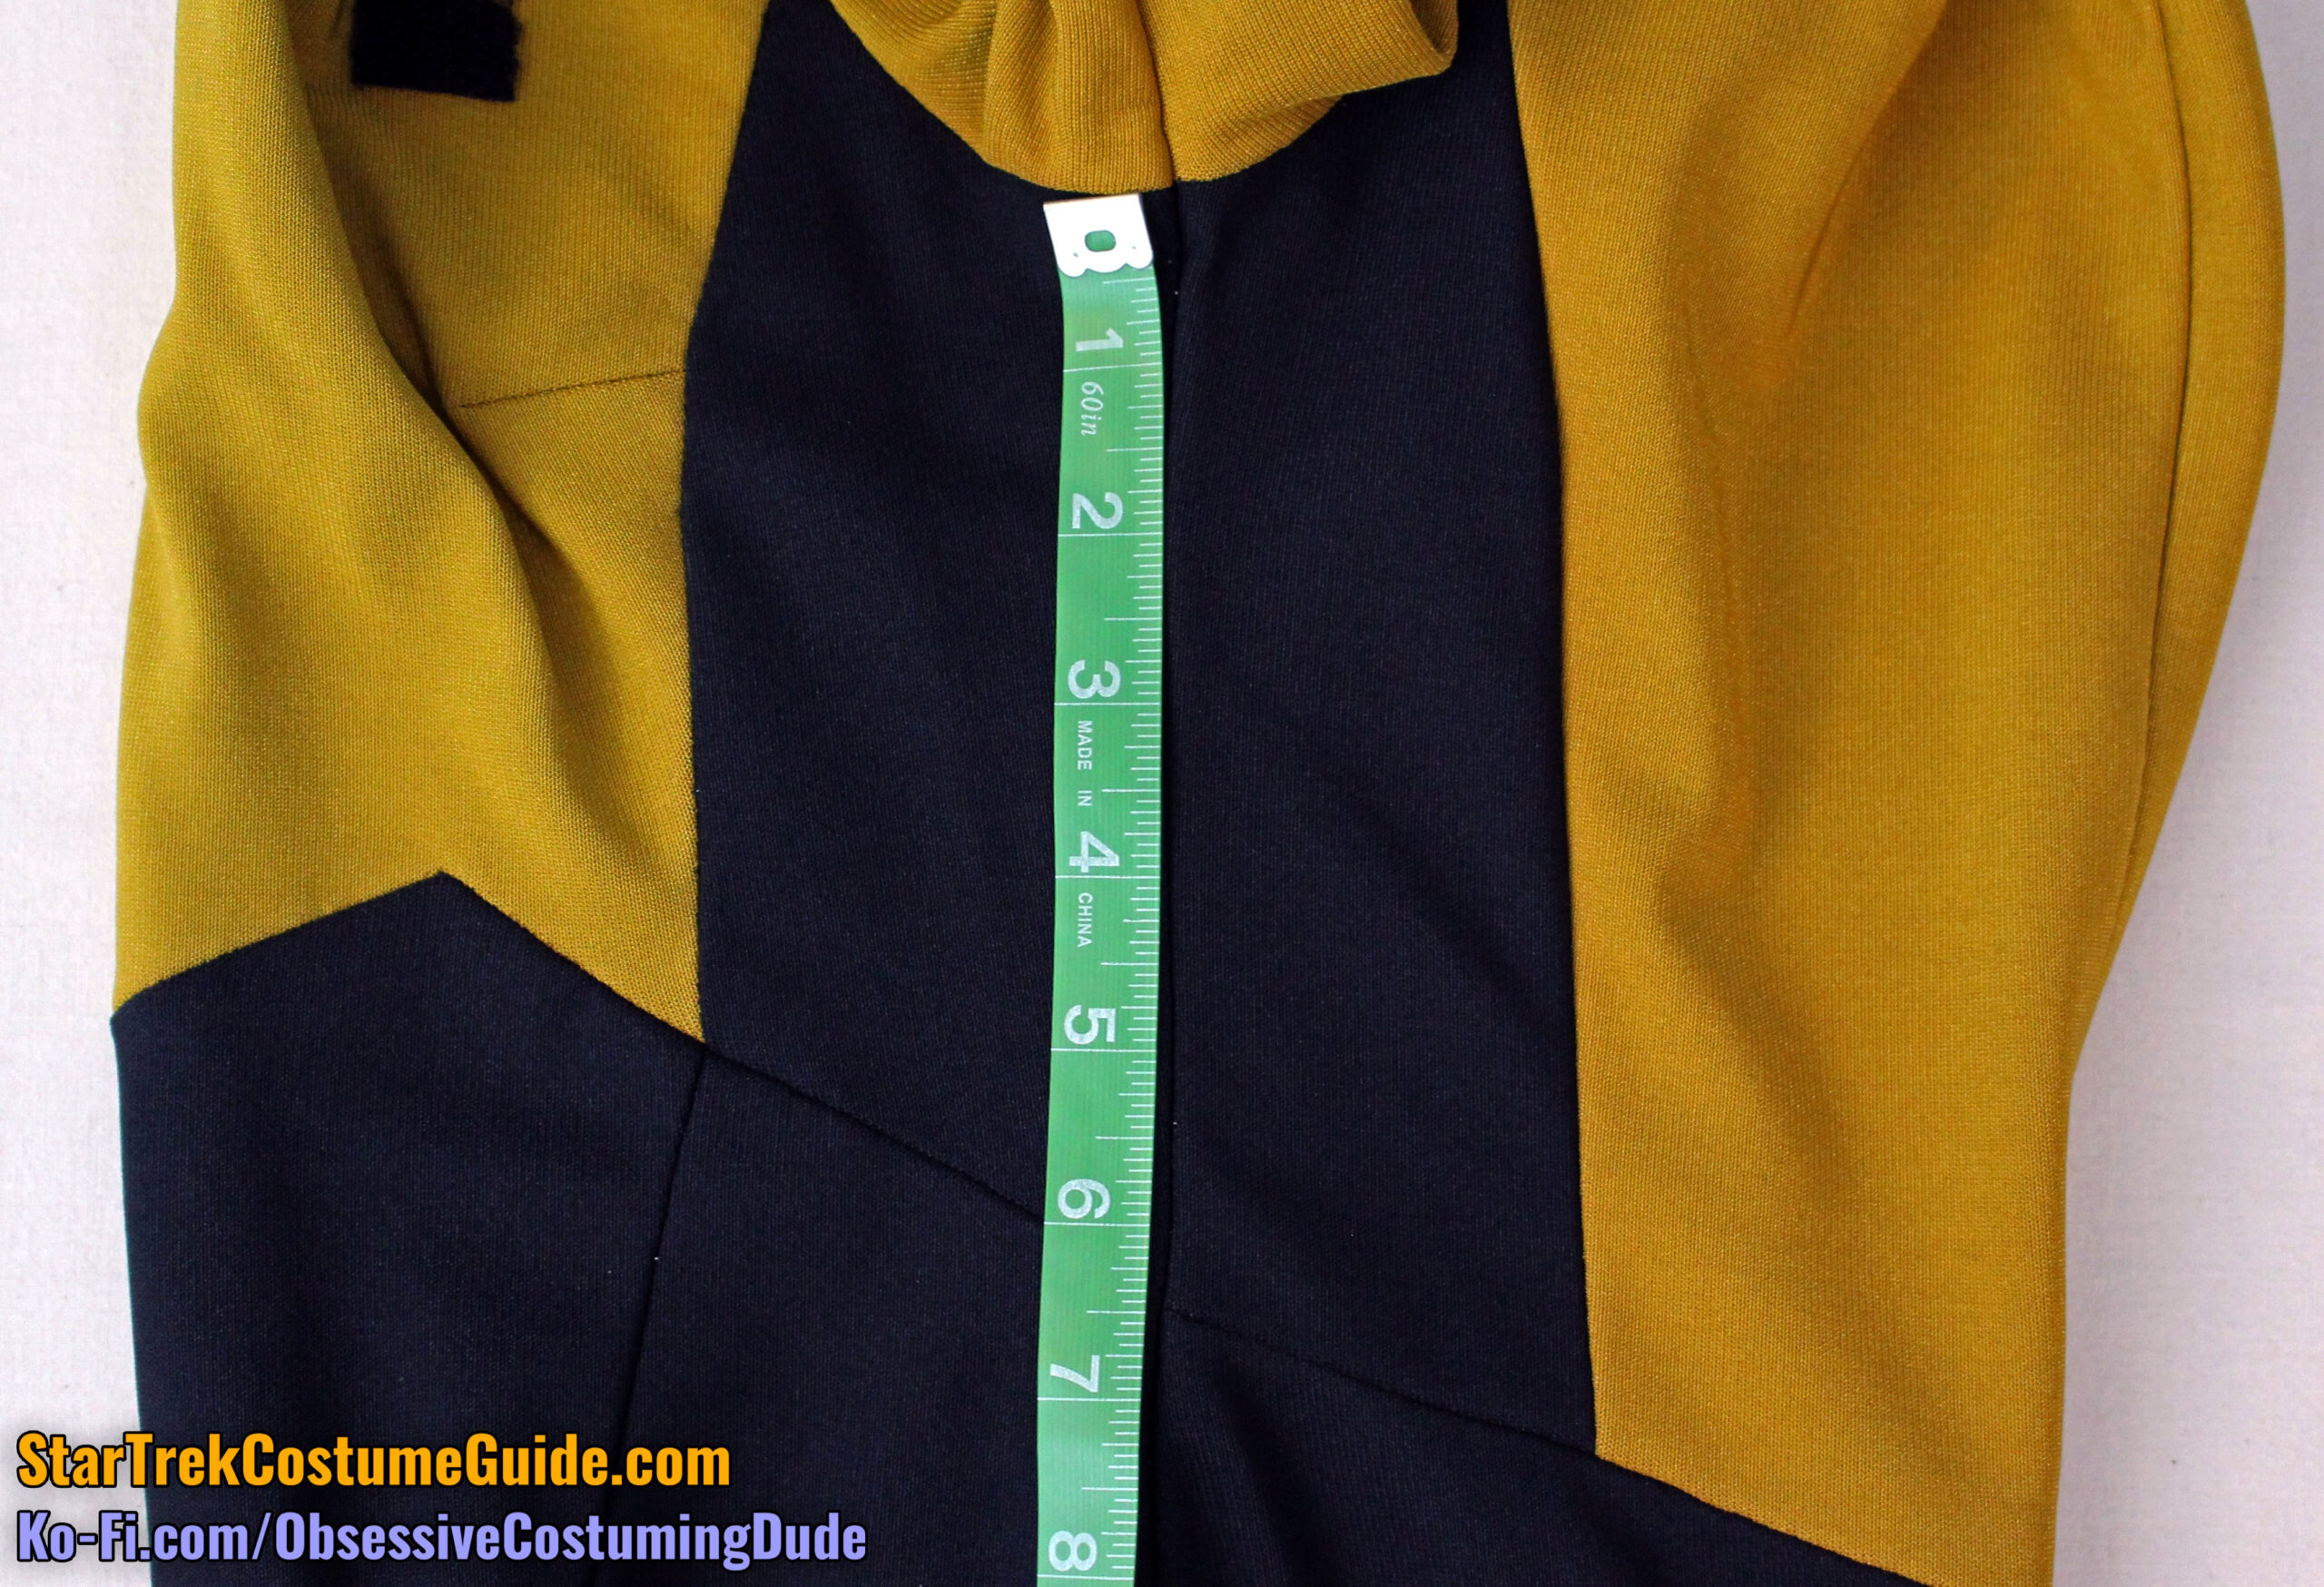
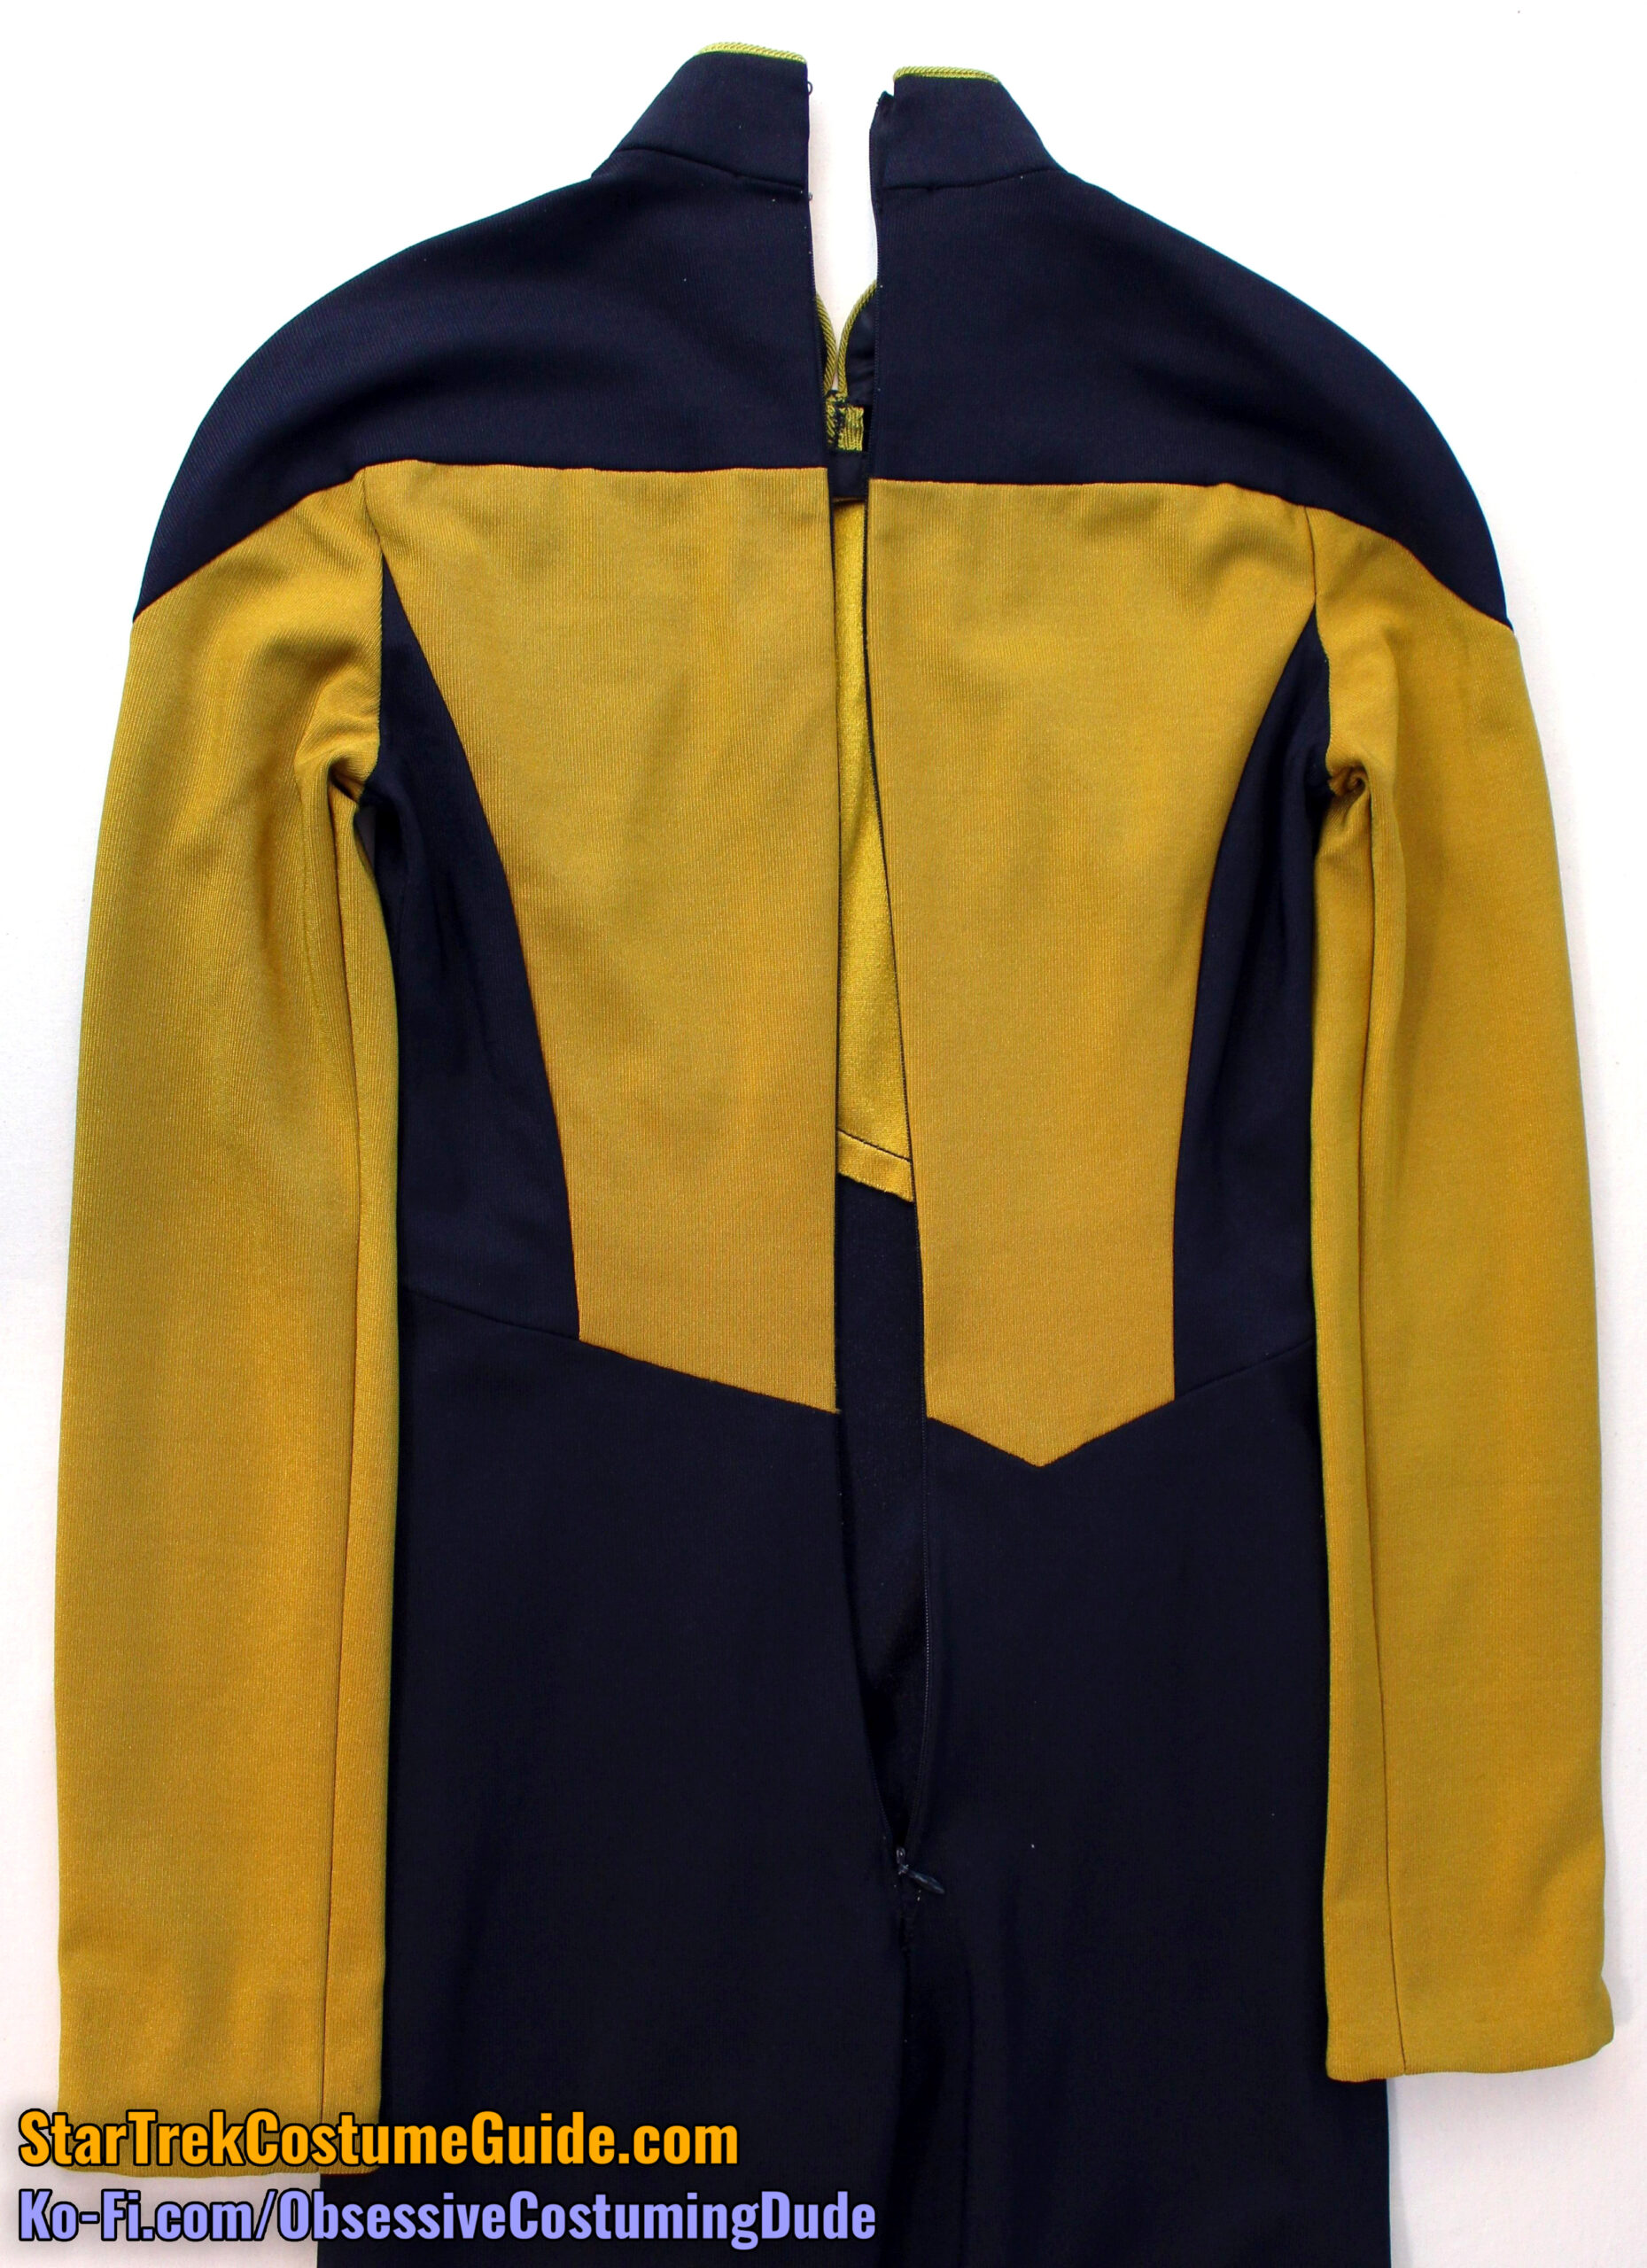
The center back seam was 12”, measured from the yoke/body seam to the asymmetrical waist seam.
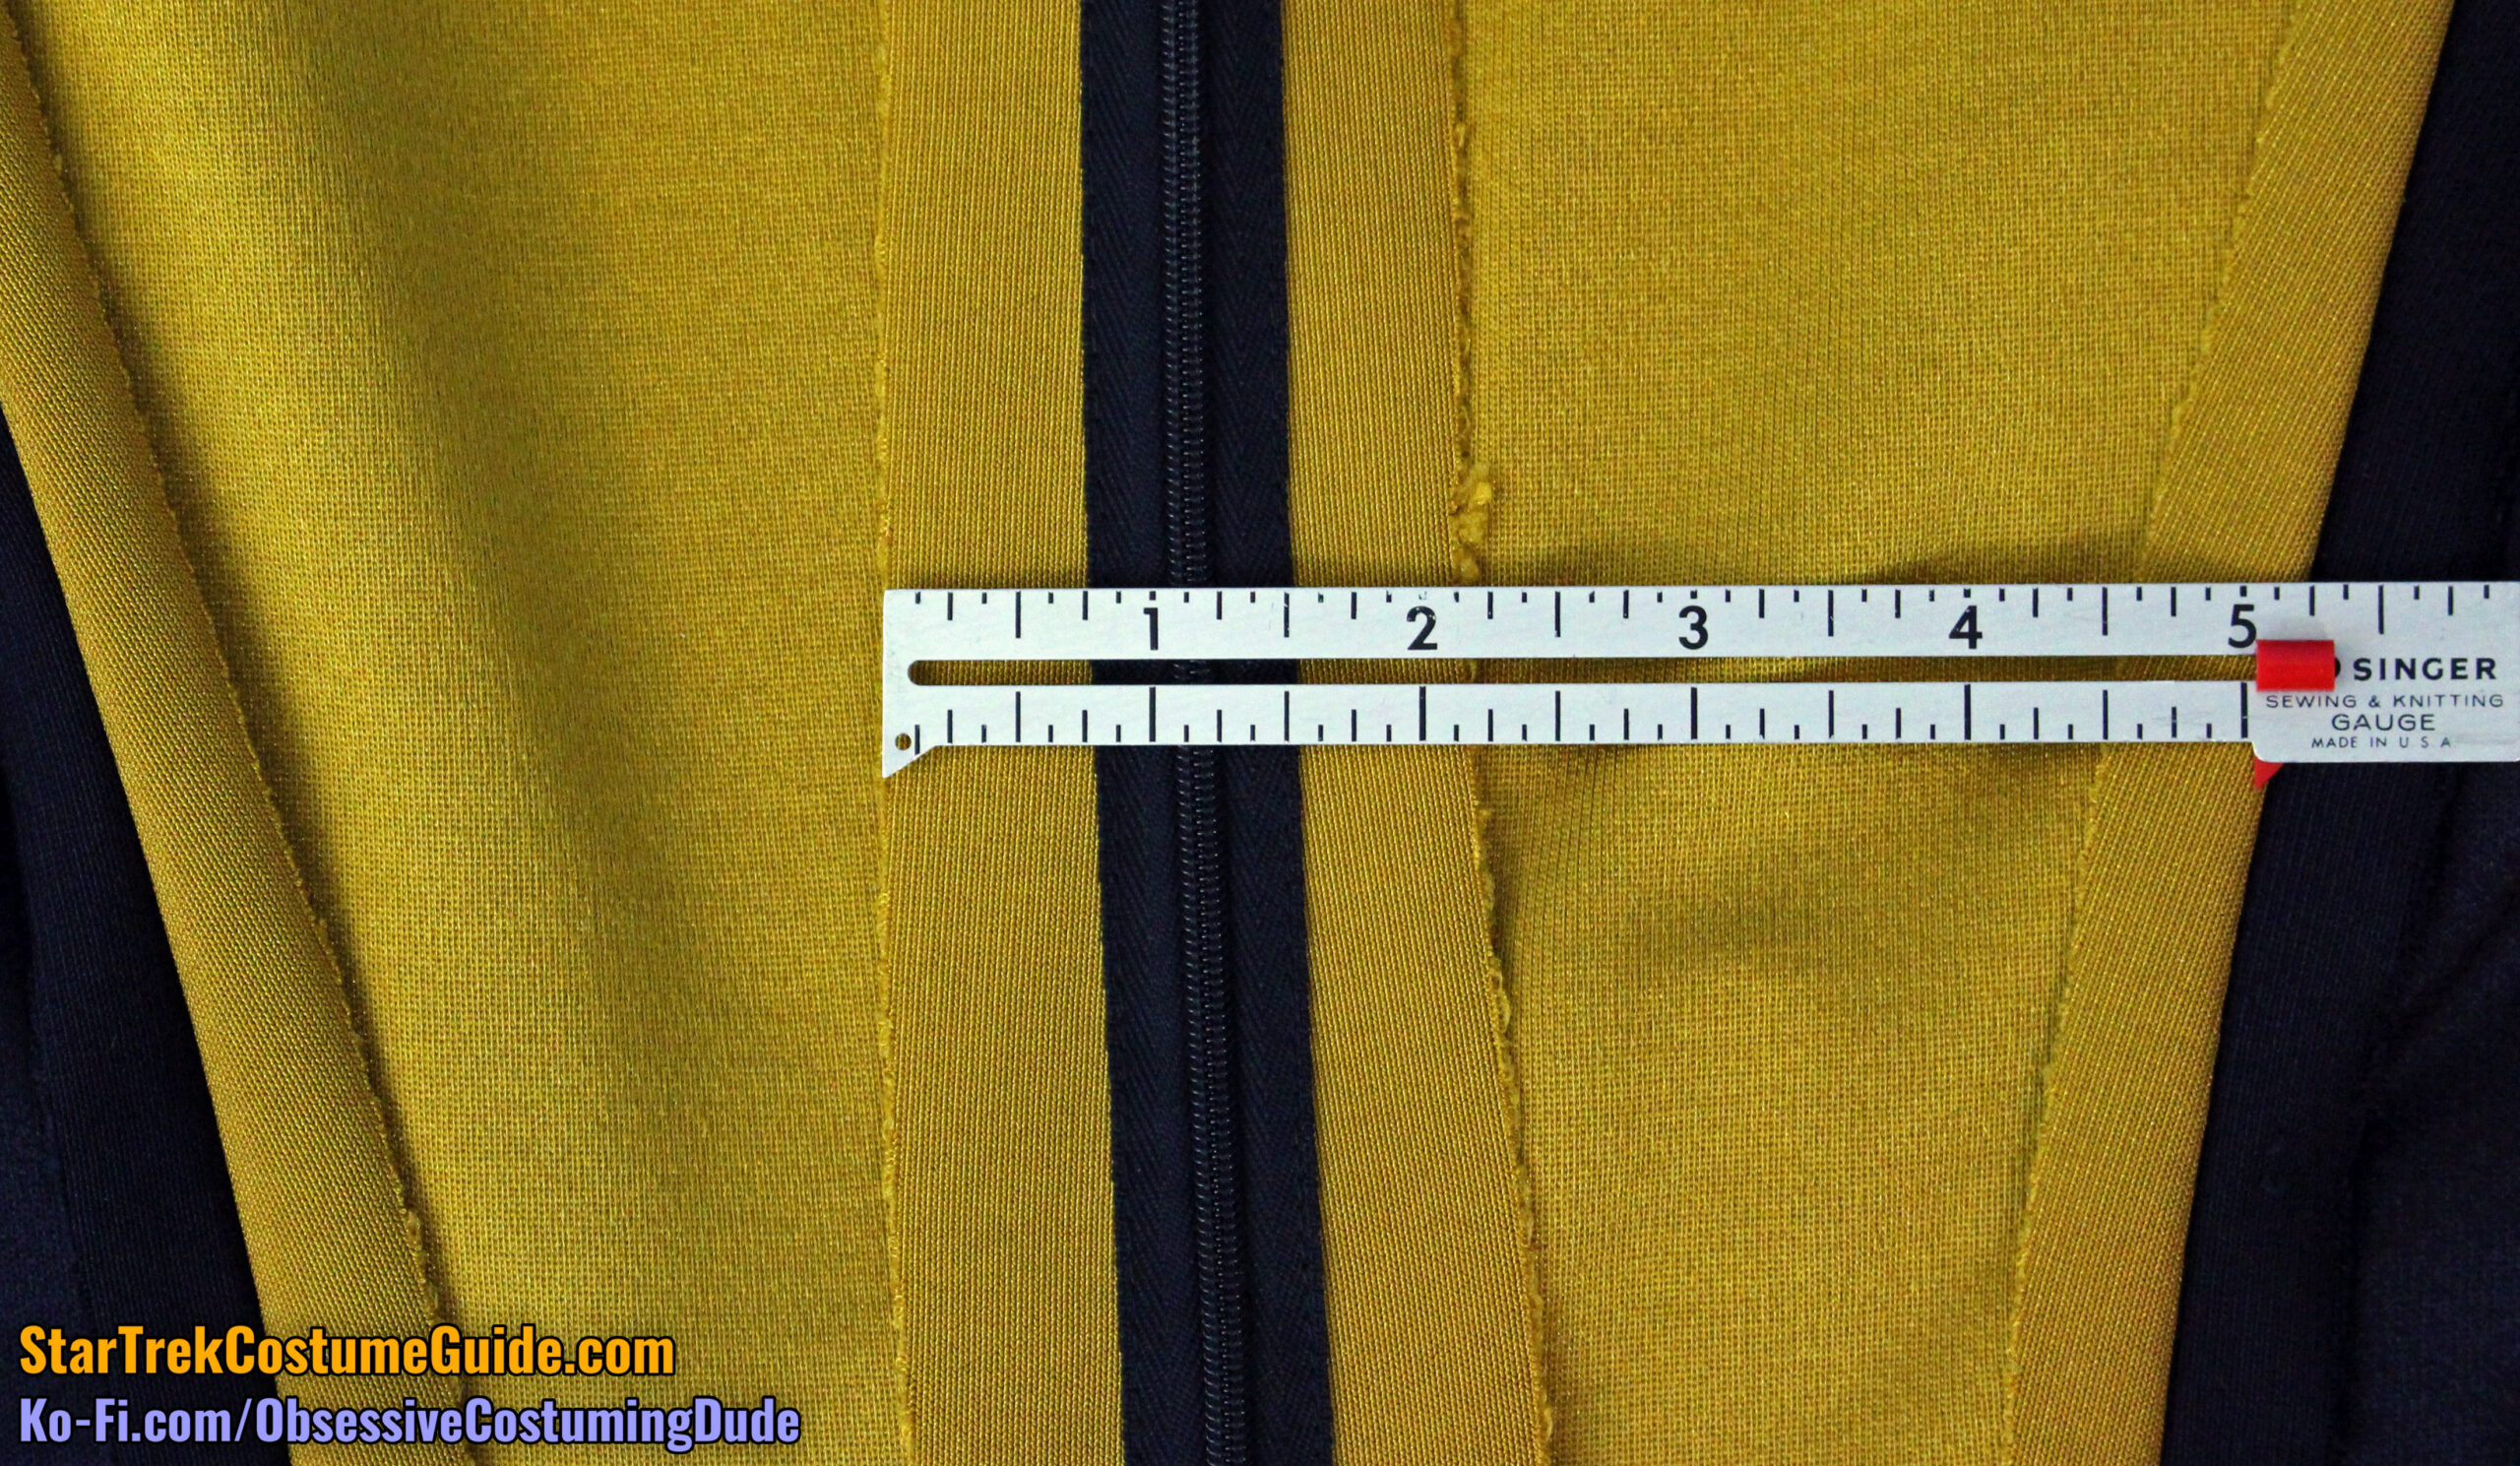
Using the vertical “weave” of the jumbo spandex as a visual reference, we can see that the center back was tapered a bit down from the shoulders to the waist.
Specifically, the back seam was tapered ¾” on each side, or 1 ½” total.
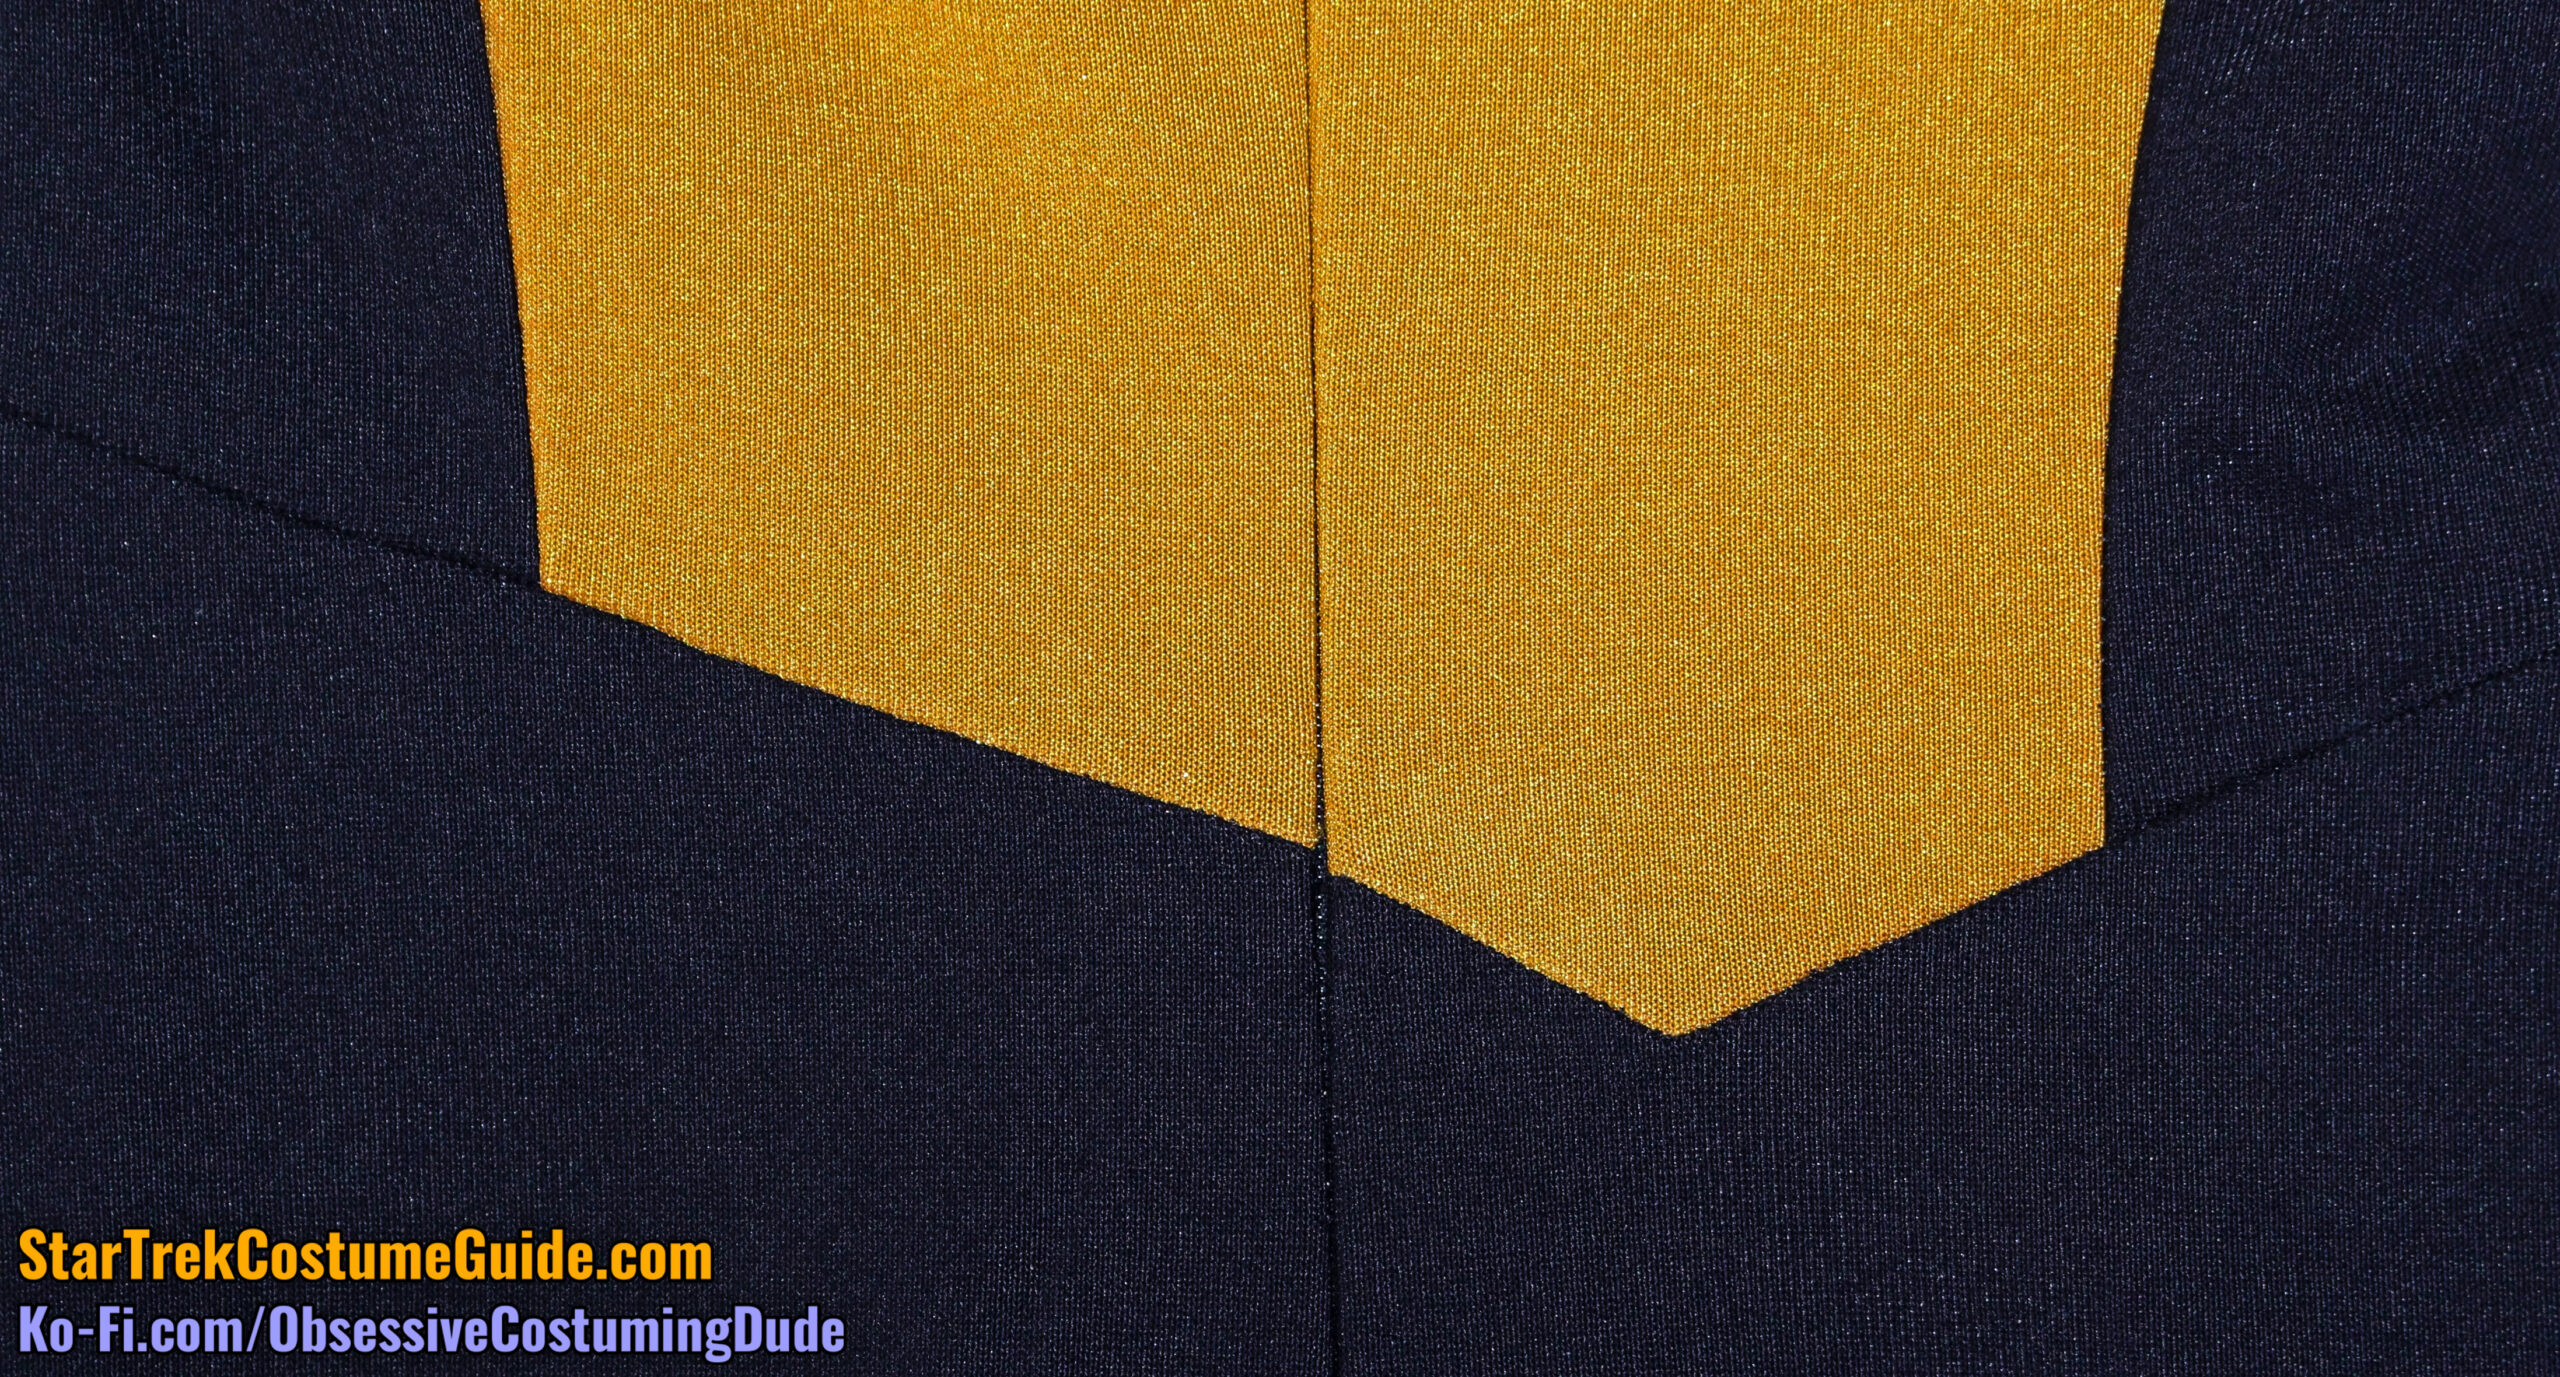
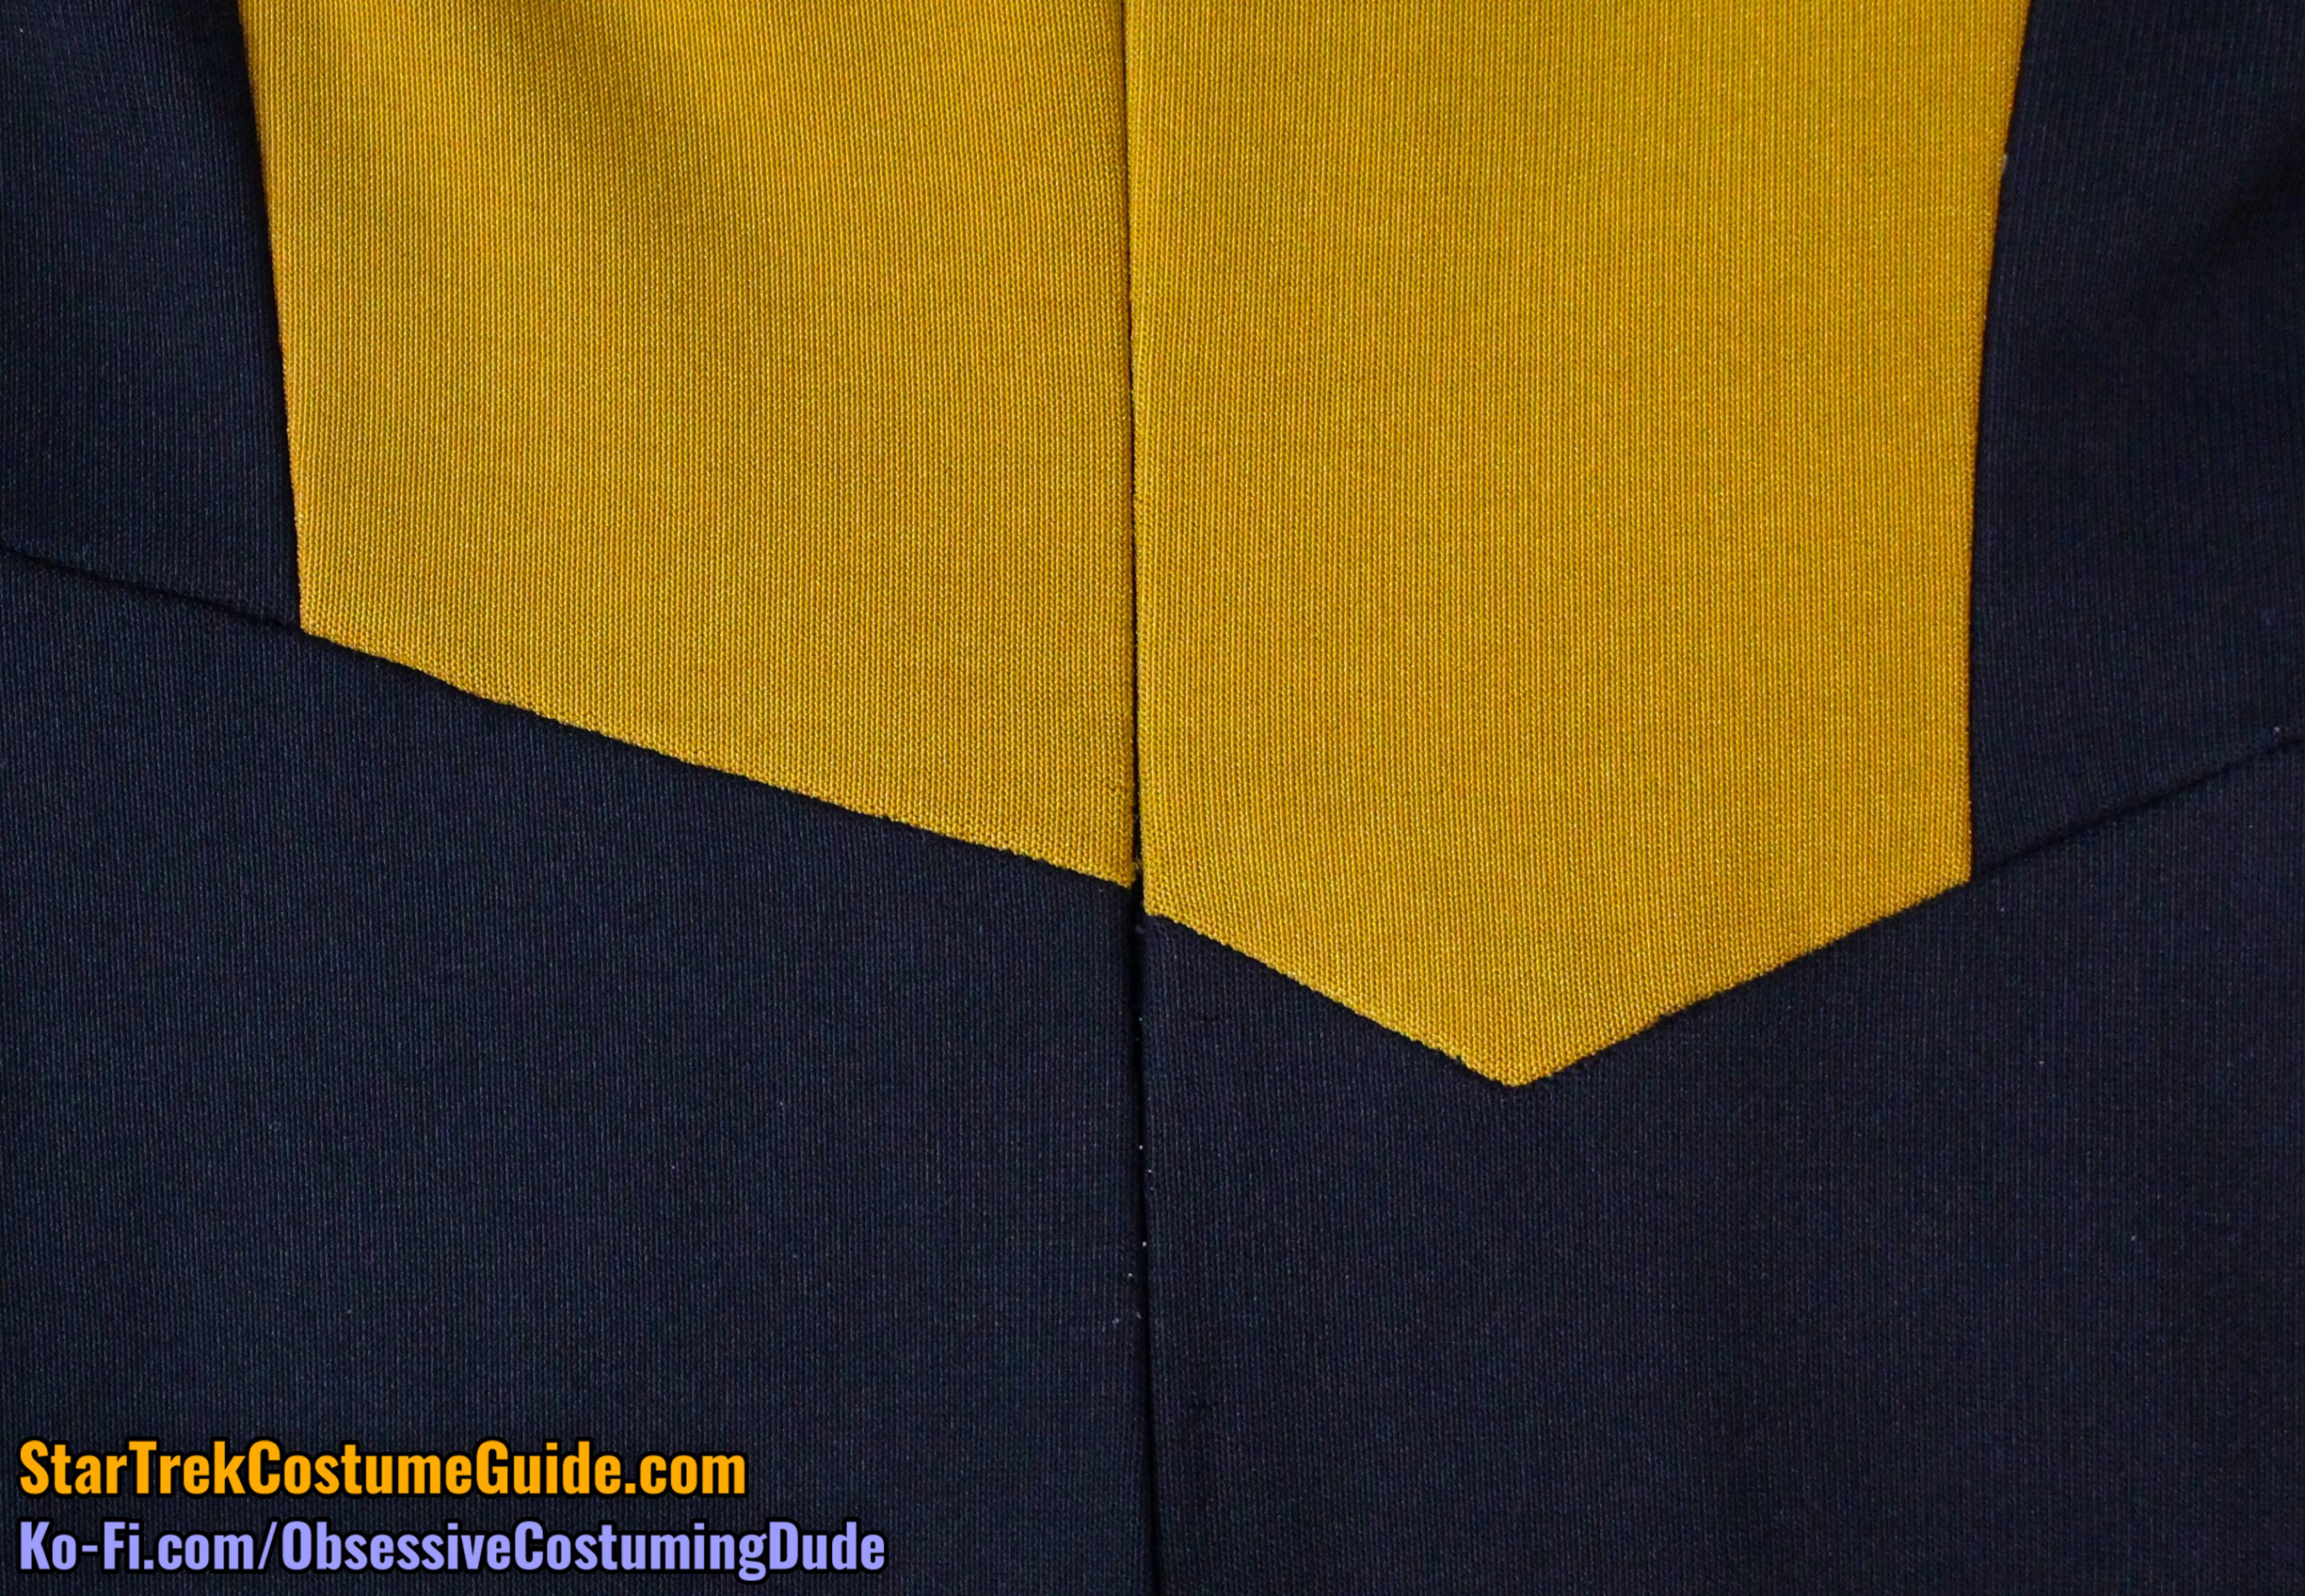
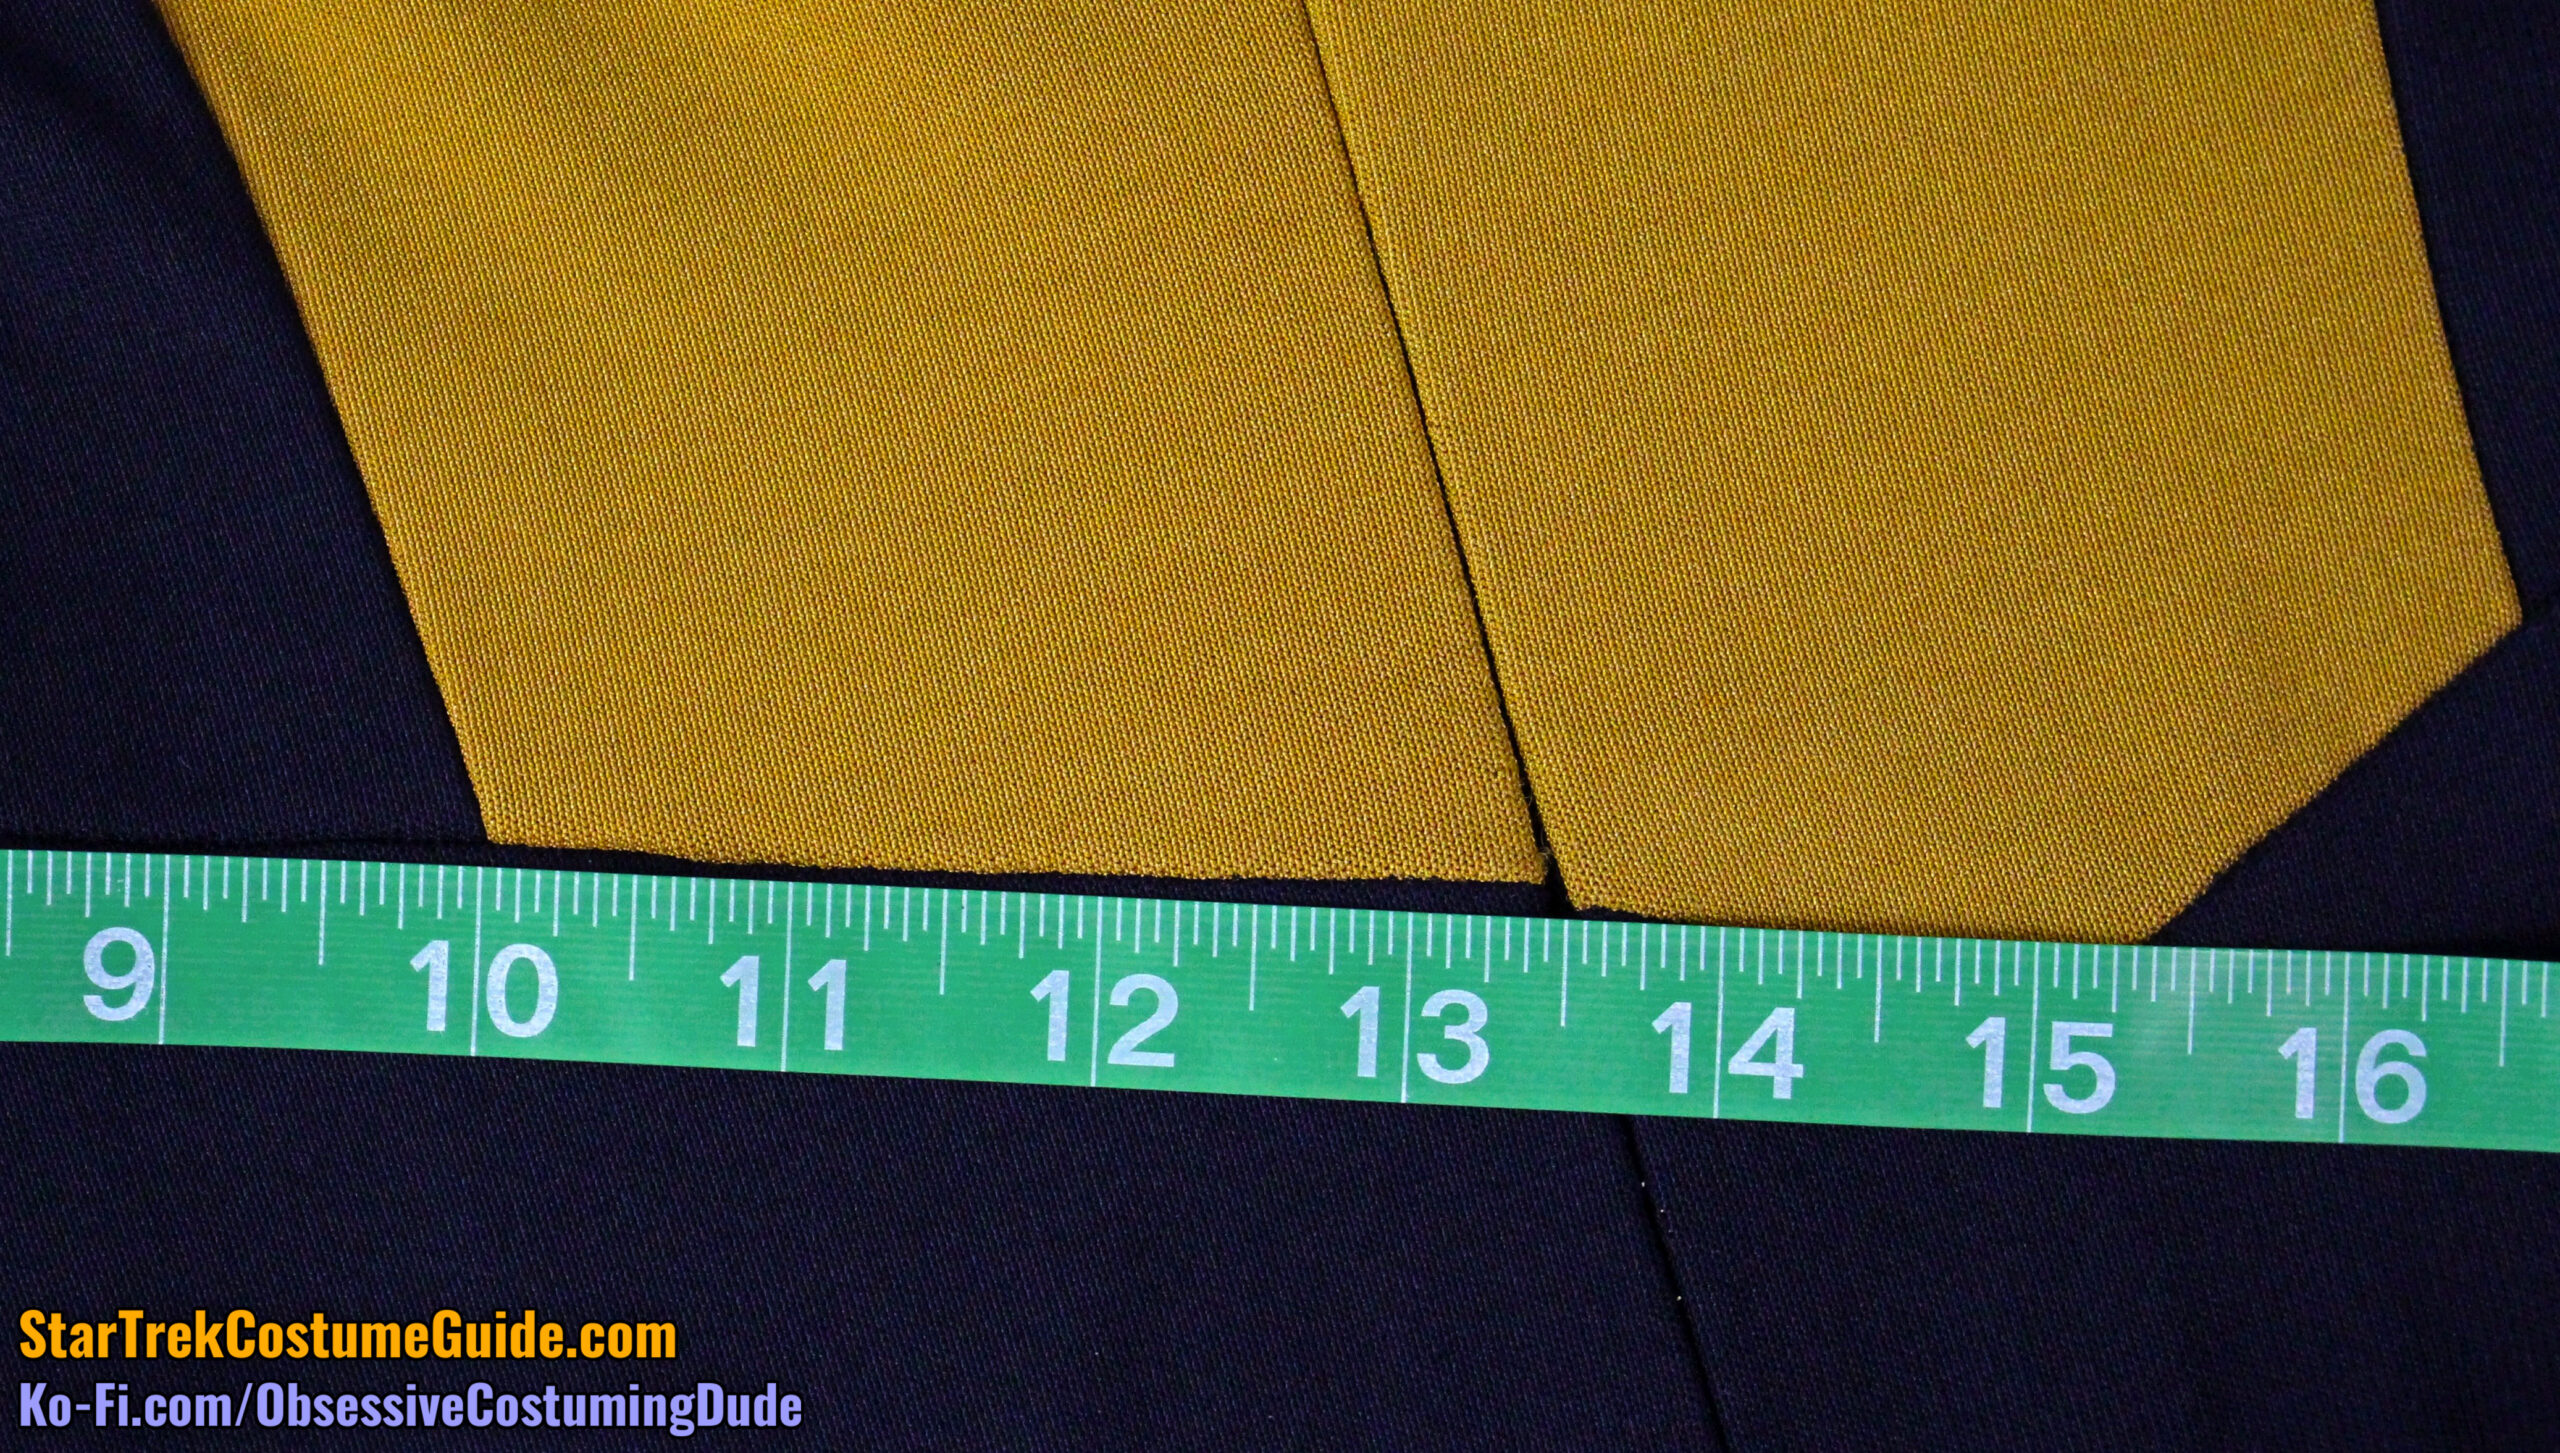
Also note that the asymmetrical seam lines didn’t quite align properly across the center back zipper/seam.
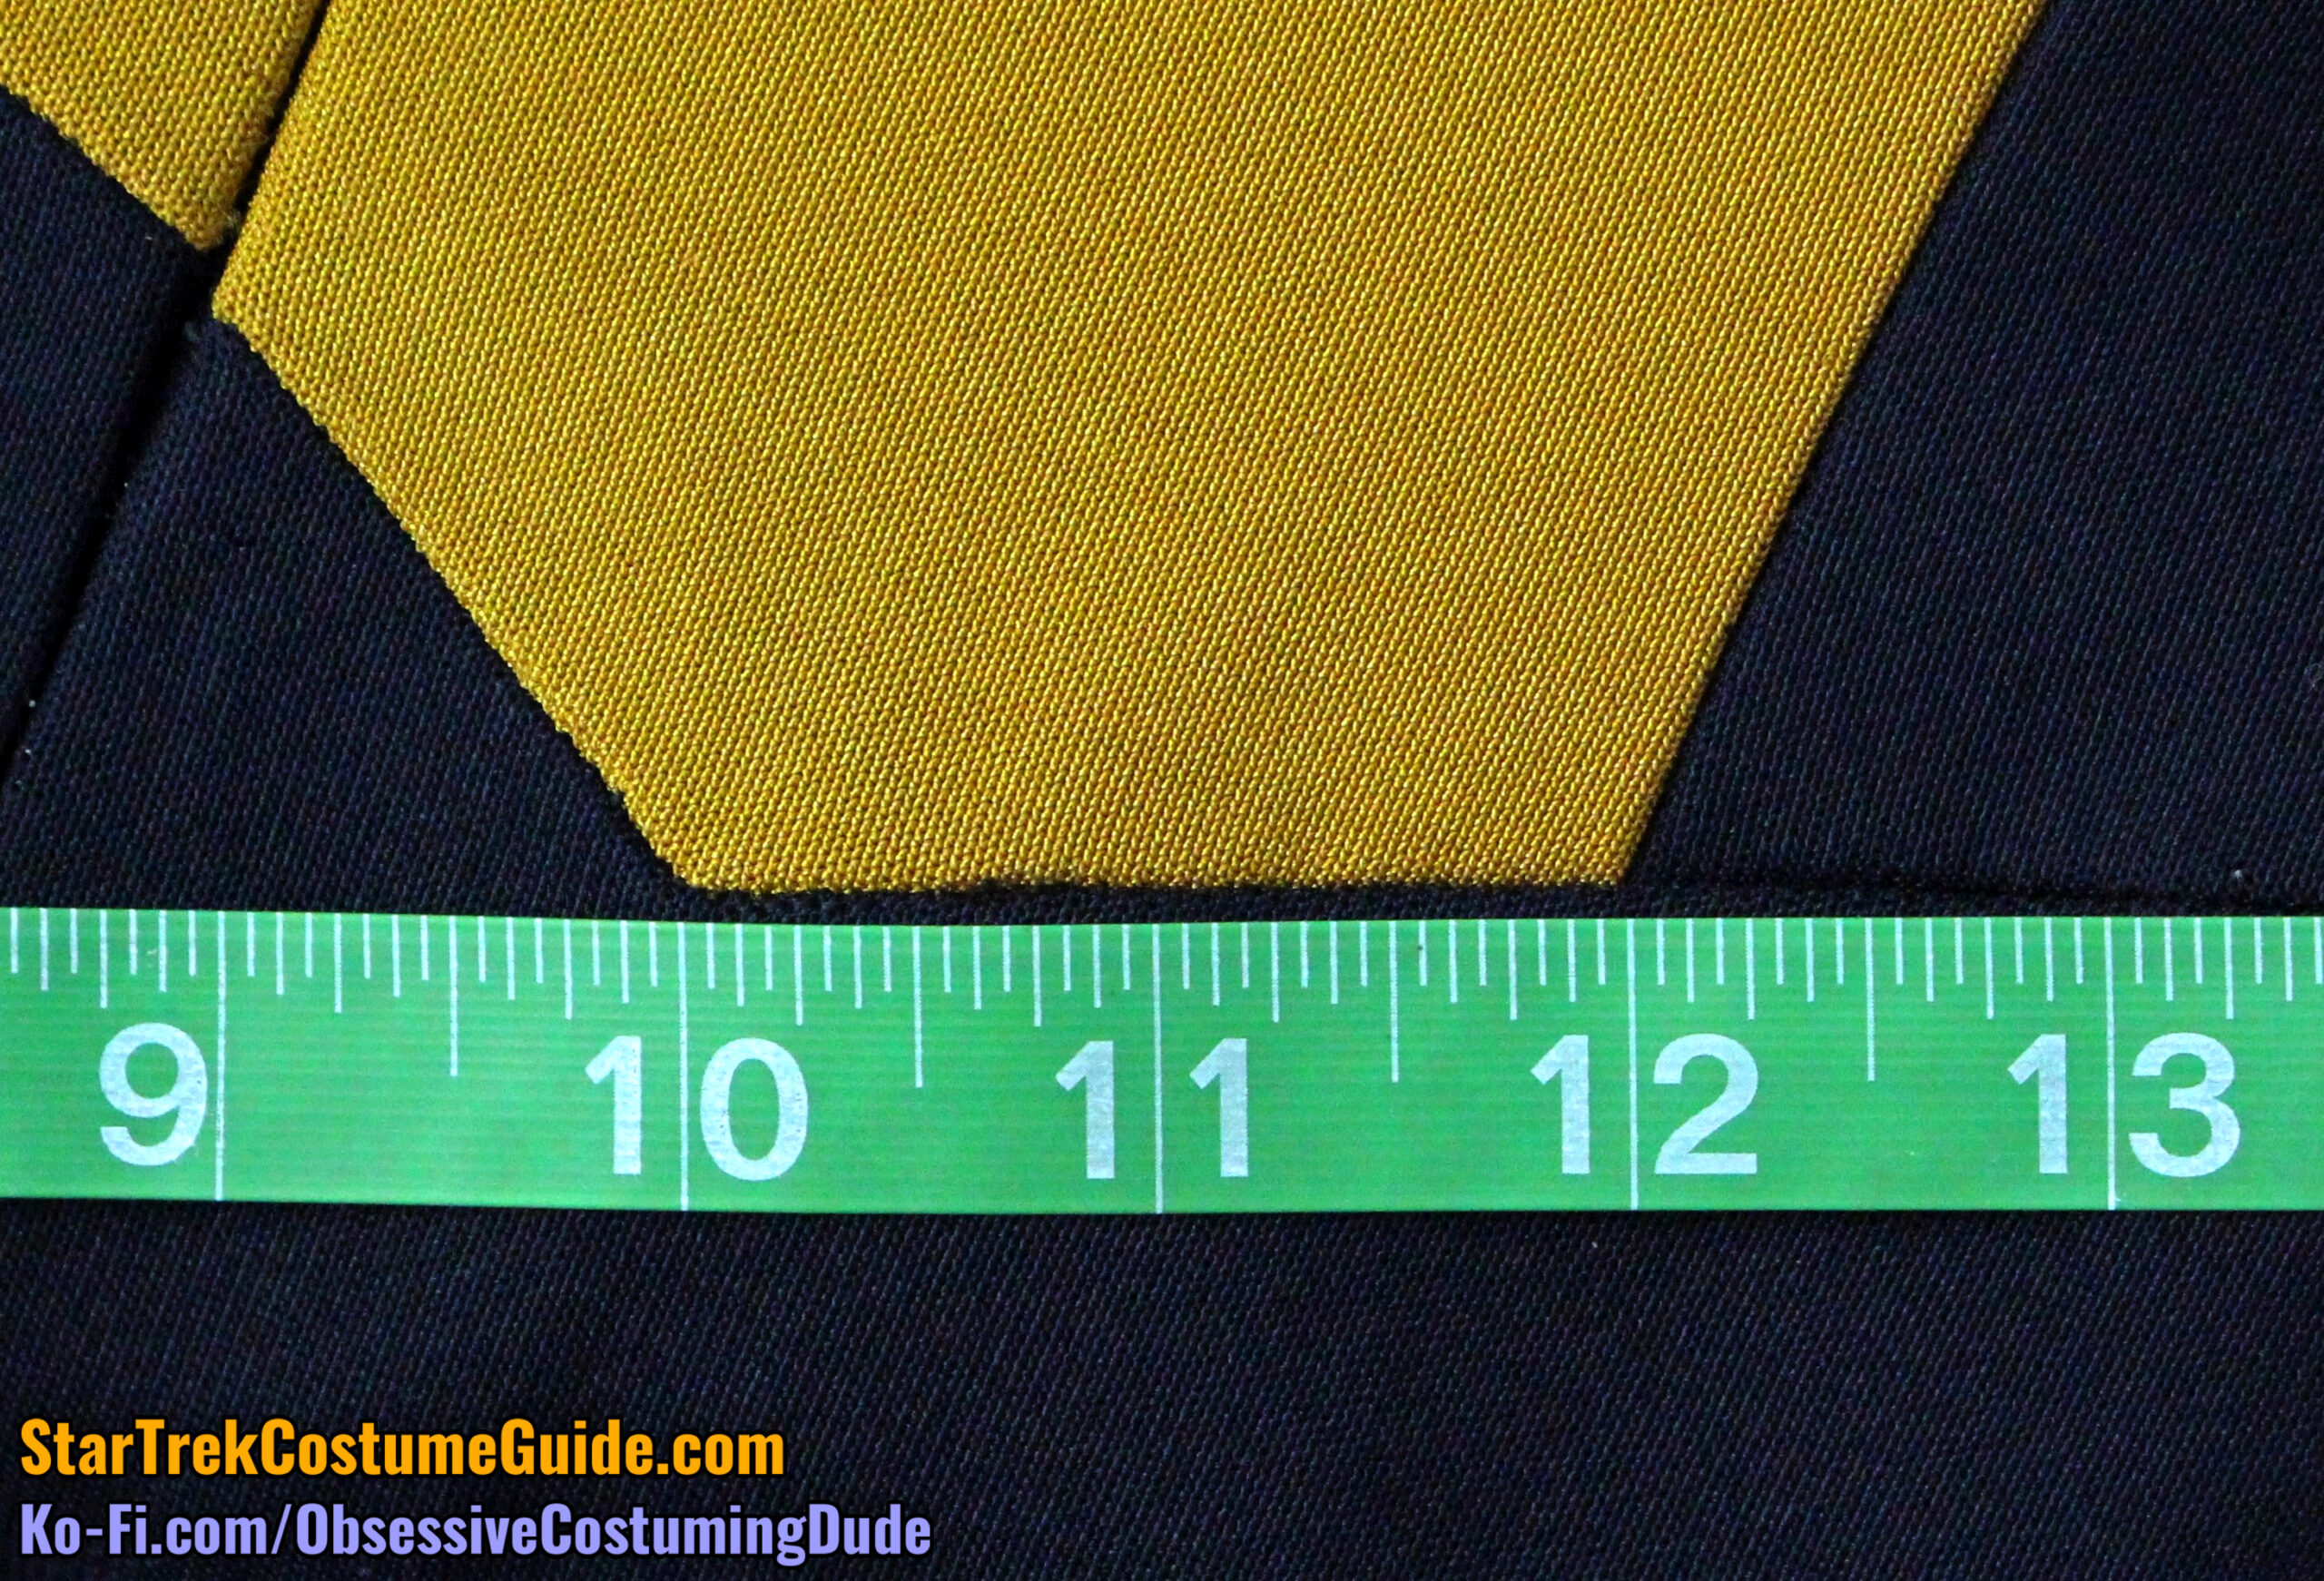
The left back lower seam line was 3 ½” (measured from the left side back seam to the center back/zipper seam), and had a 1” downward slant.
The centermost back right lower seam was 1 ½”, and the outer seam was 2”.
Keeping in mind that the center back seam was fitted so the jumpsuit didn’t want to lie flat, here are the overall dimensions/proportions of the back asymmetrical detail.
Overall, the longer edge slanted downward 1 ¾” (1” from side back to center back, and another ¾” from center back to the lower corner), then ascended back up again ¾”.
Because this was a back-zipping jumpsuit, there was no center front lower seam; the lower front body panel was all one piece.
The lower front body panel was 10 ¼” tall at the center front, measured from the asymmetrical waist seam to the lower corner of the panel at the crotch seam.
The lower right seam line was 9 ½”.
The lower left seam line was 11”.
As on the screen-used Tasha Yar jumpsuit I examined, both of these lower front seams were cinched in from the hips upward to the waist, although these were taken in more than on Tasha’s uniform since there was no center front seam.
The lower front crotch seam was 3 ½”, measured from the bottom corner of the lower front panel to the inseam.
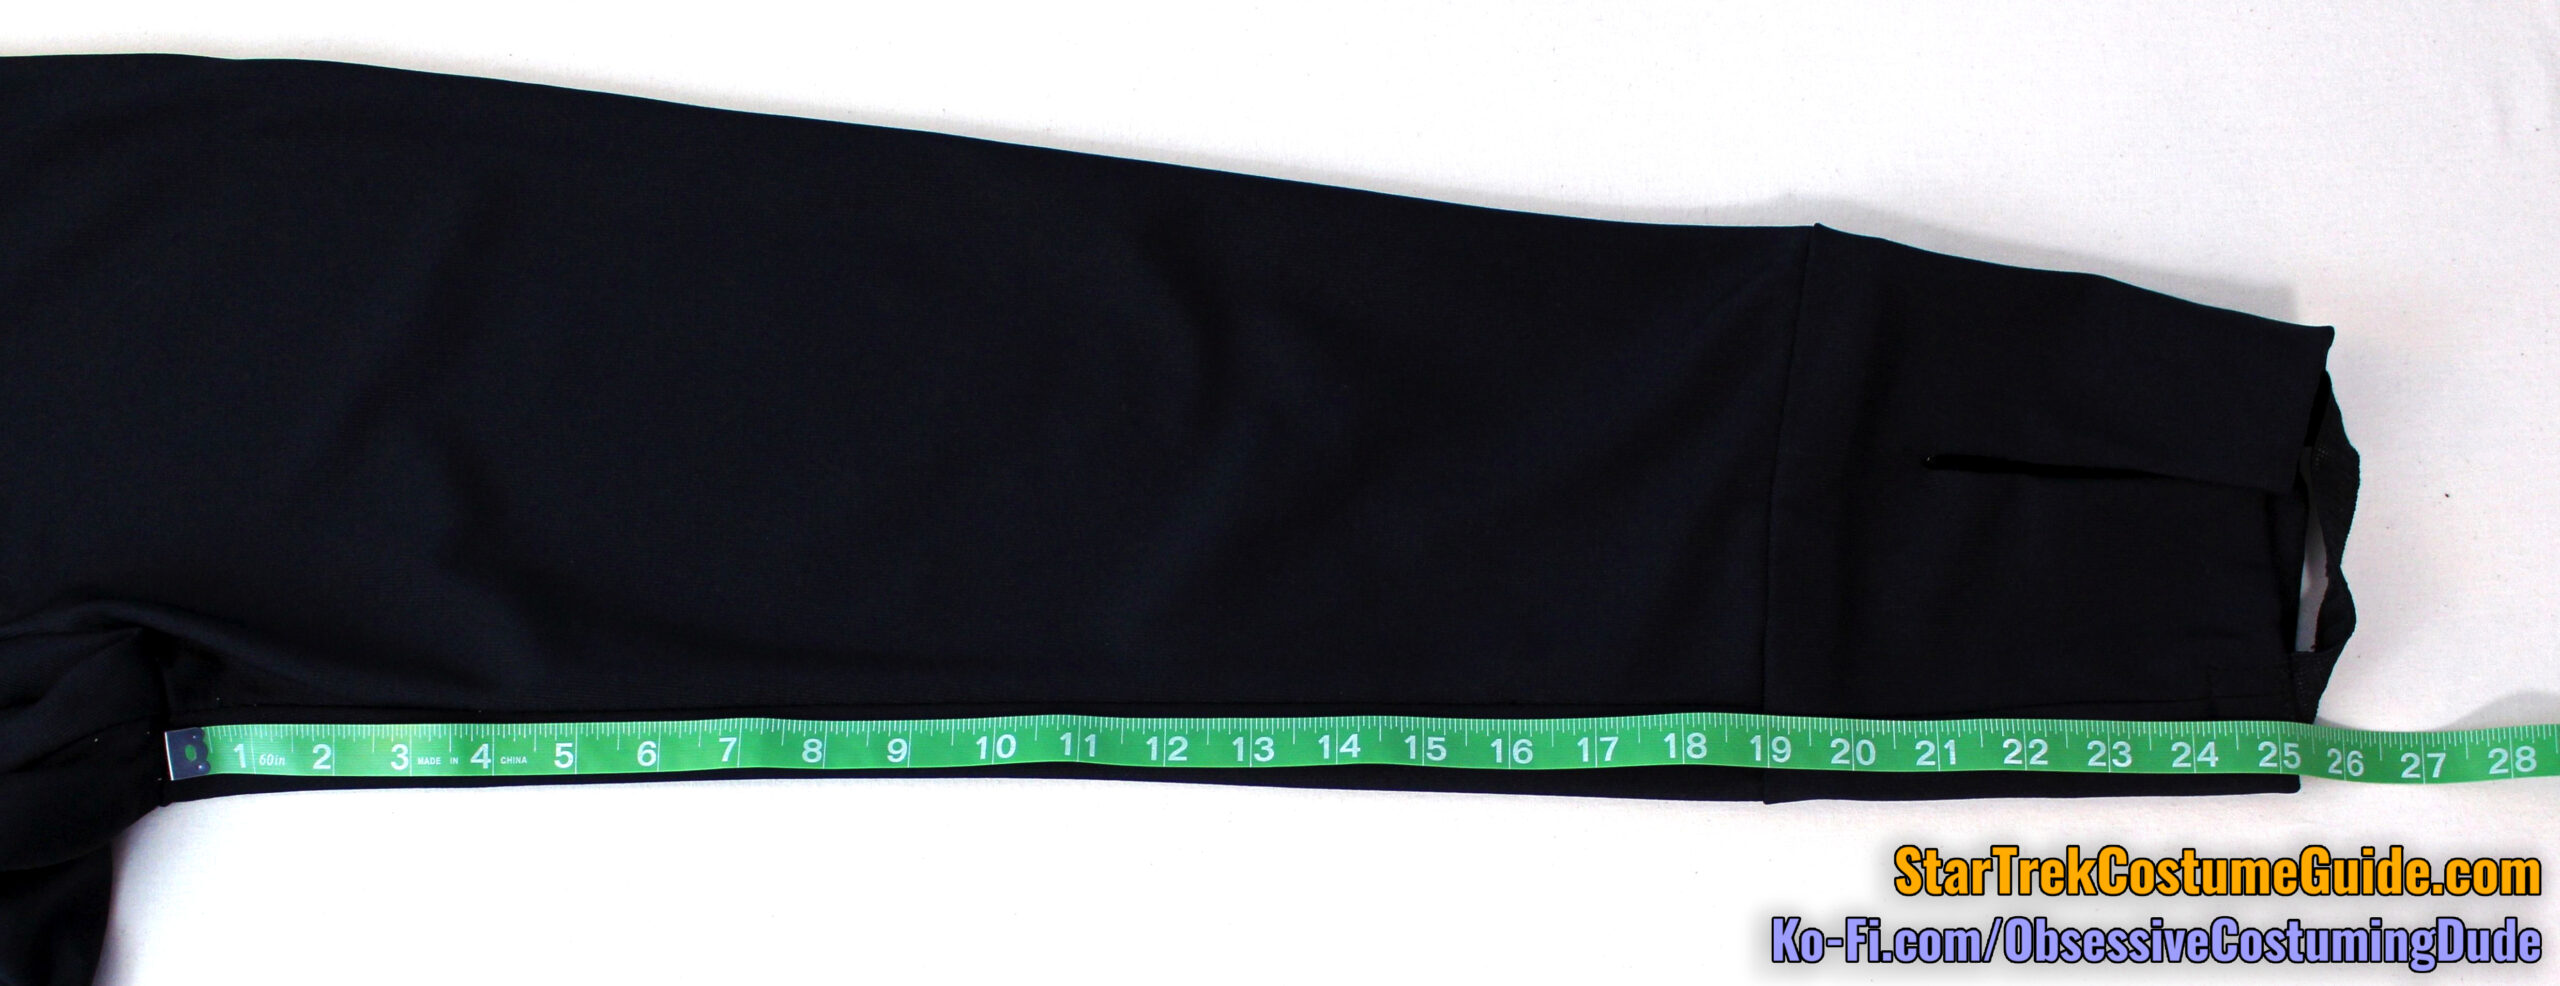
The inseam was a mere 25 ¼”.
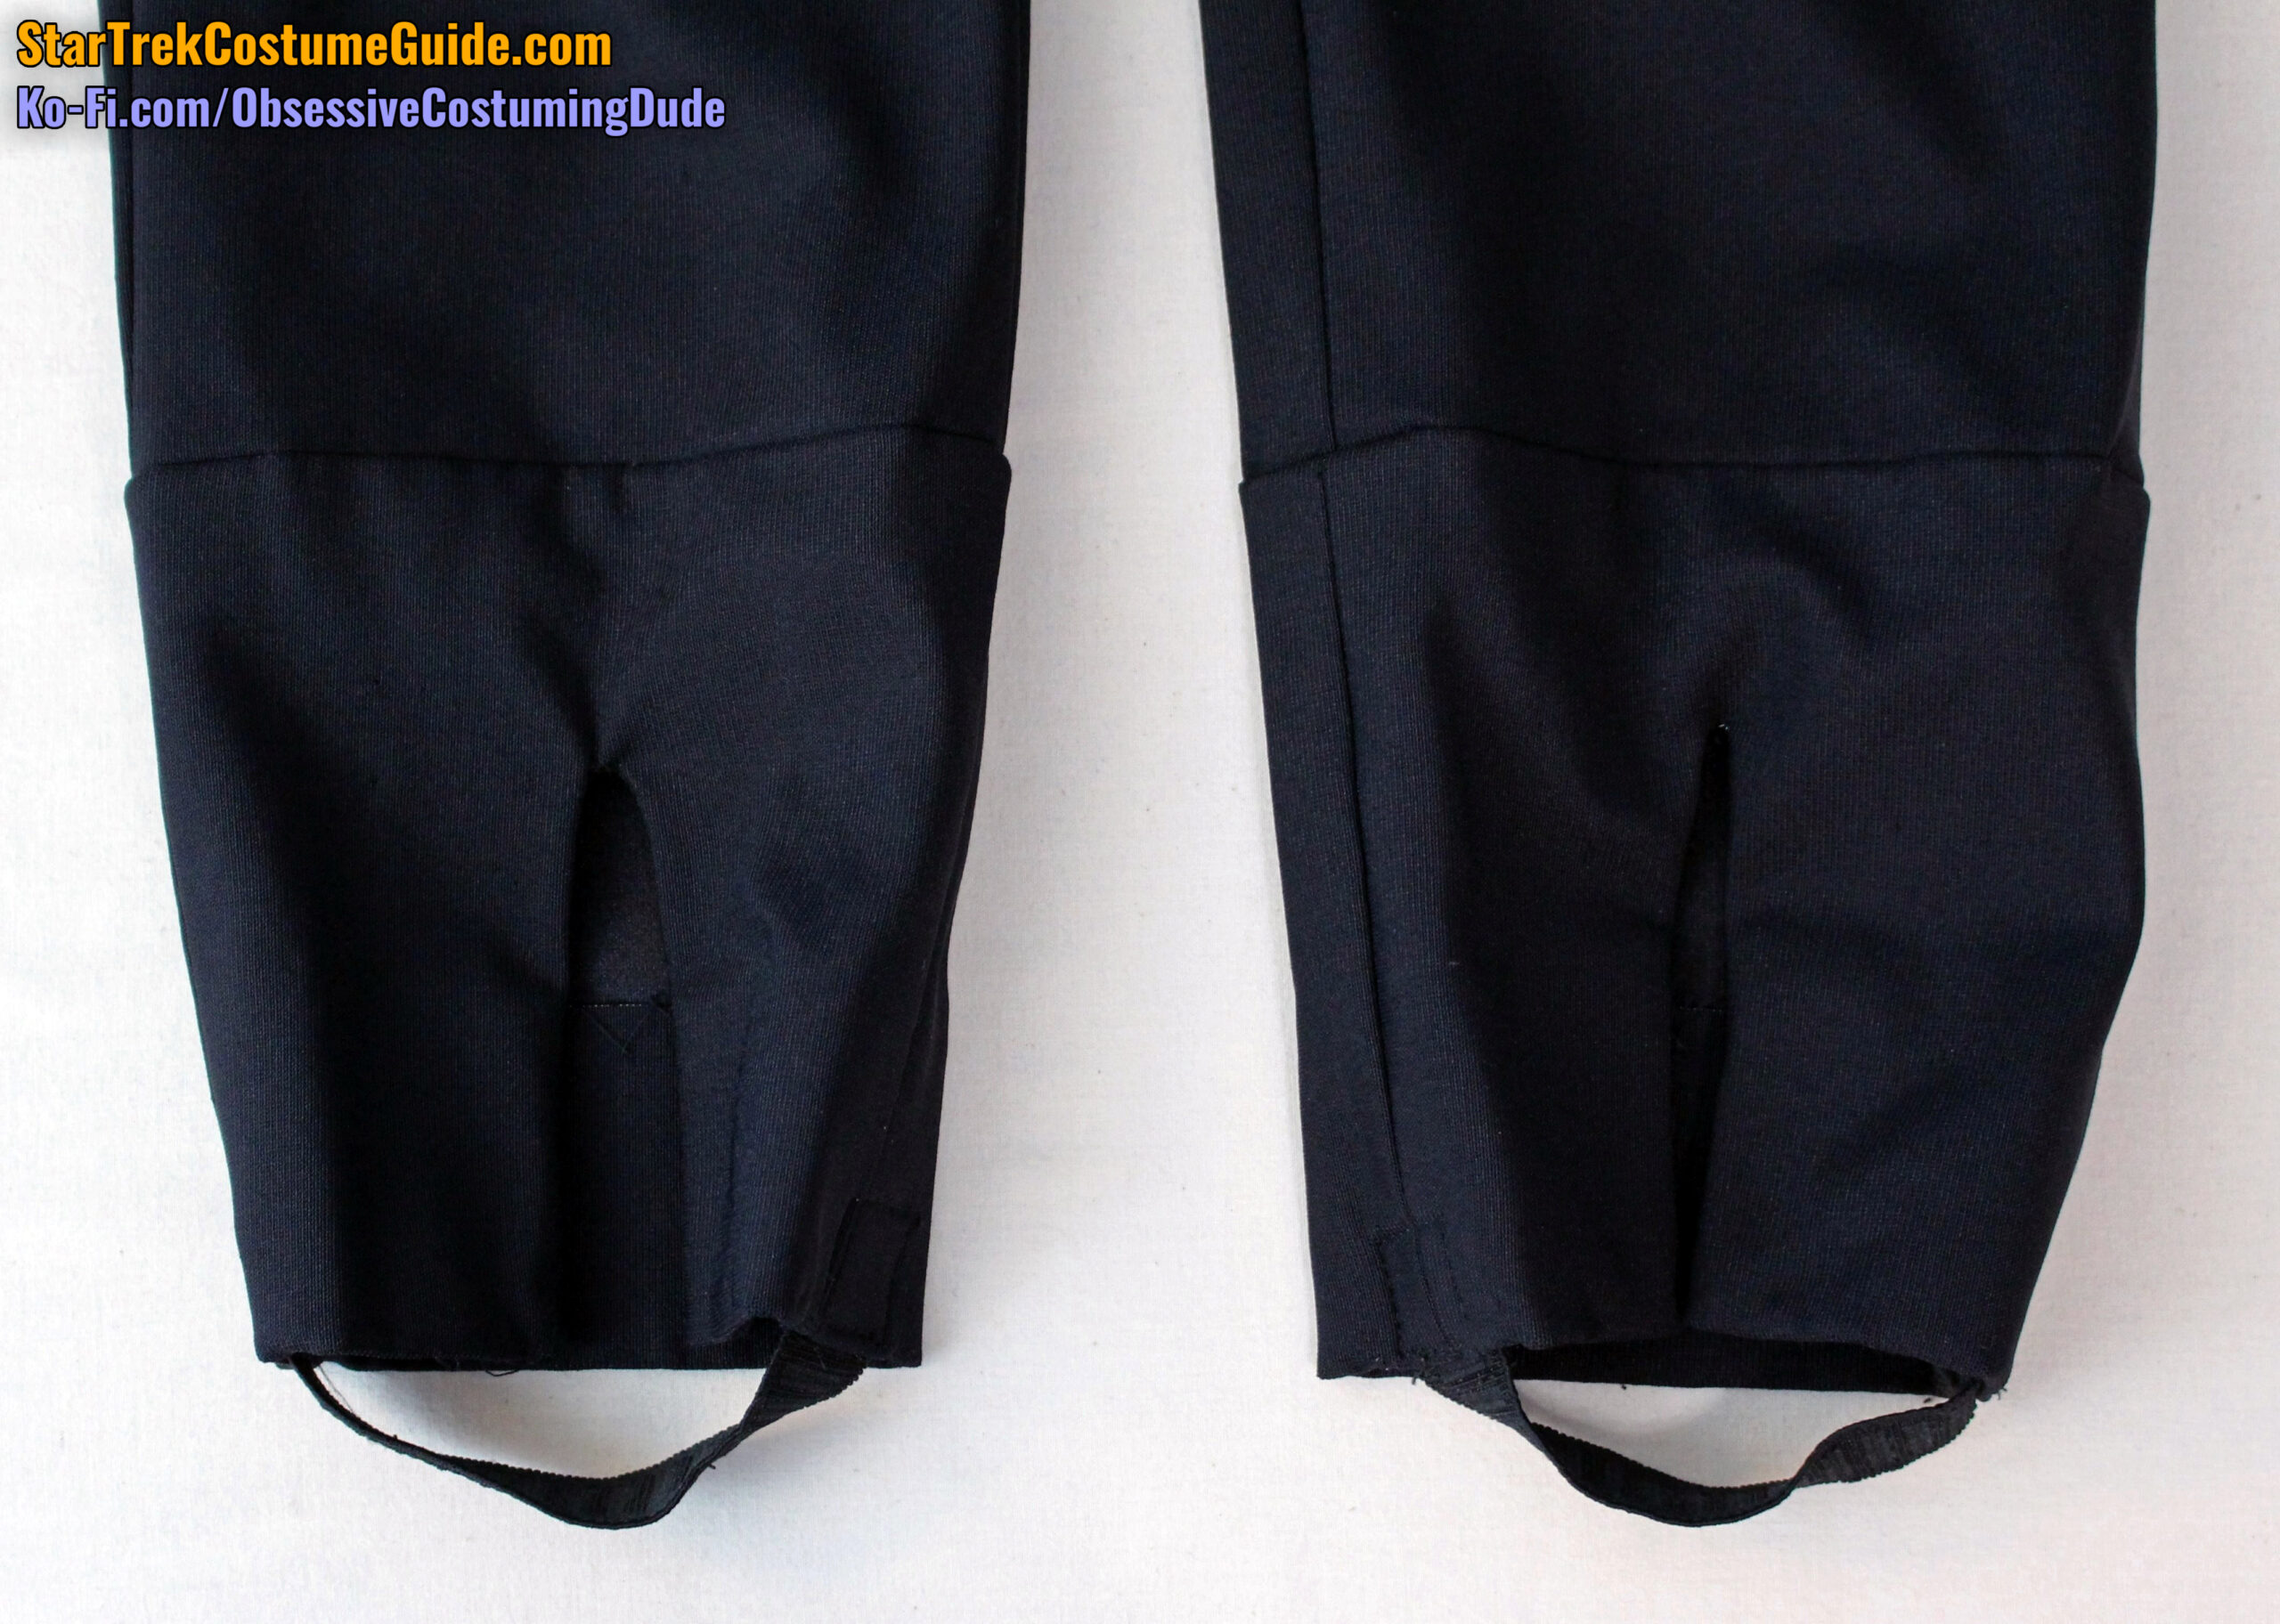
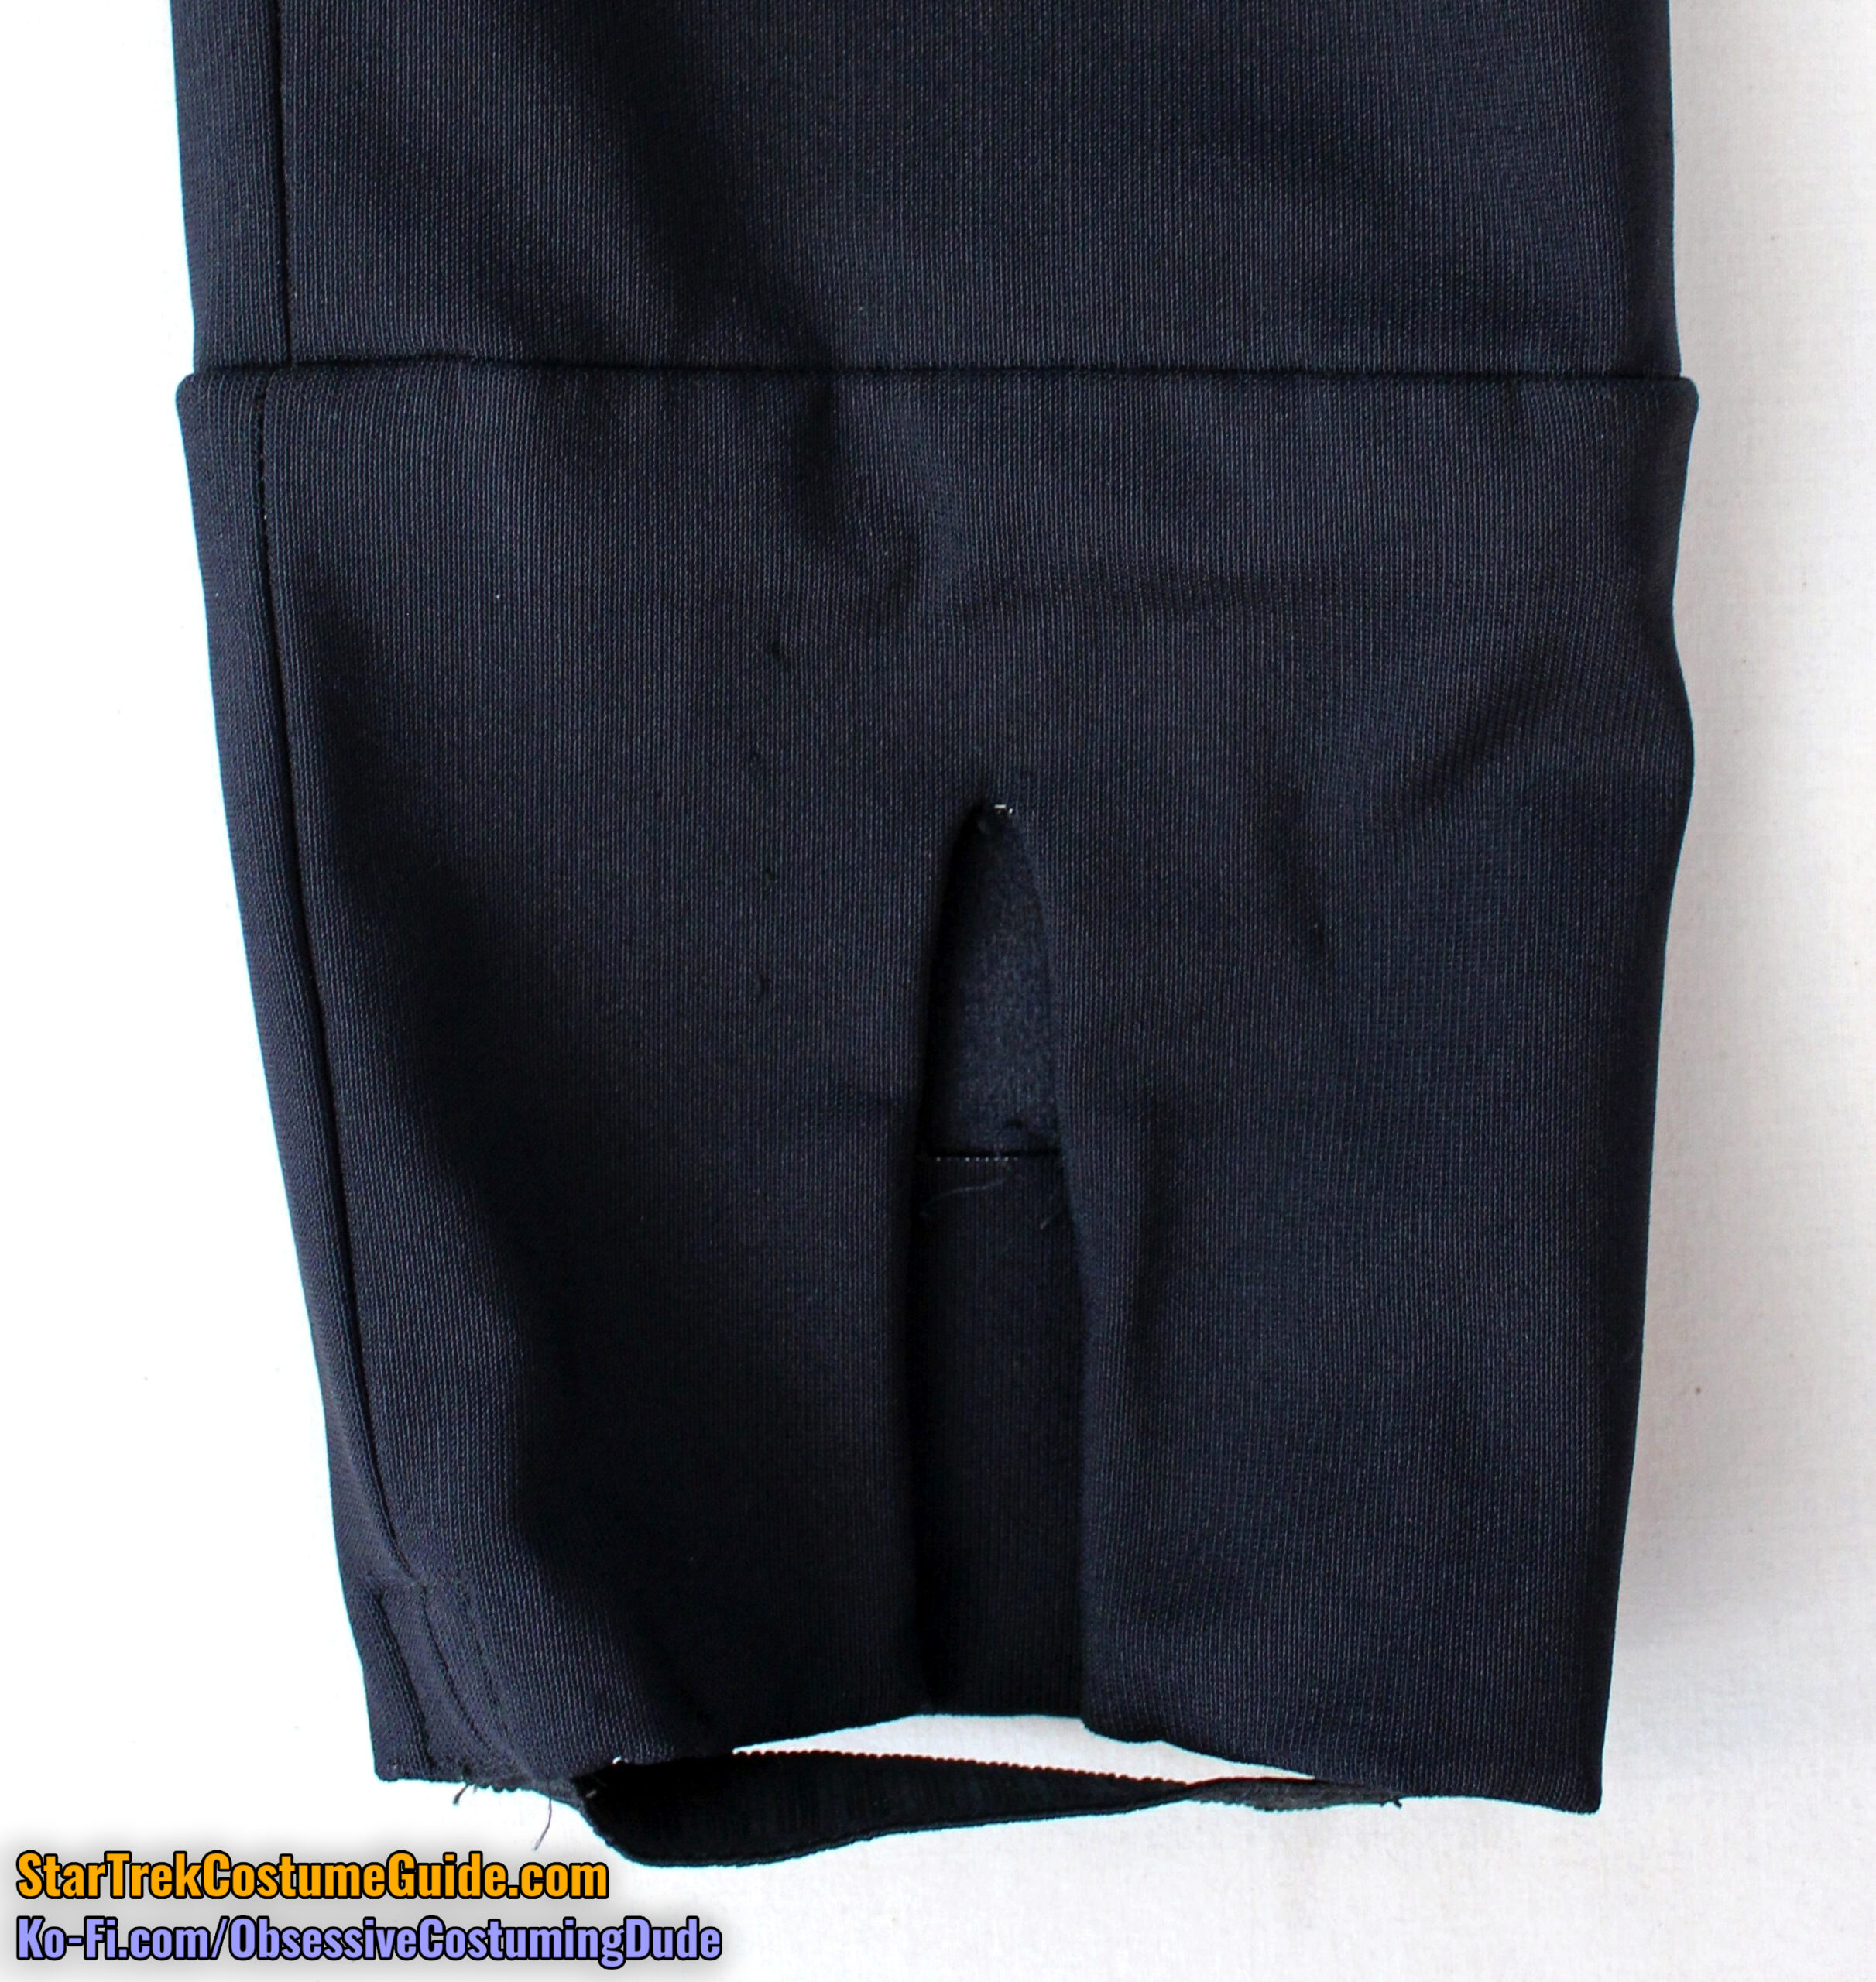
A curiosity I had previously observed on quite a few uniforms (via auction photos) was the presence of what appeared to be “cuffs” at the bottom of the pant legs.
But I’ll get to those shortly. 🙂

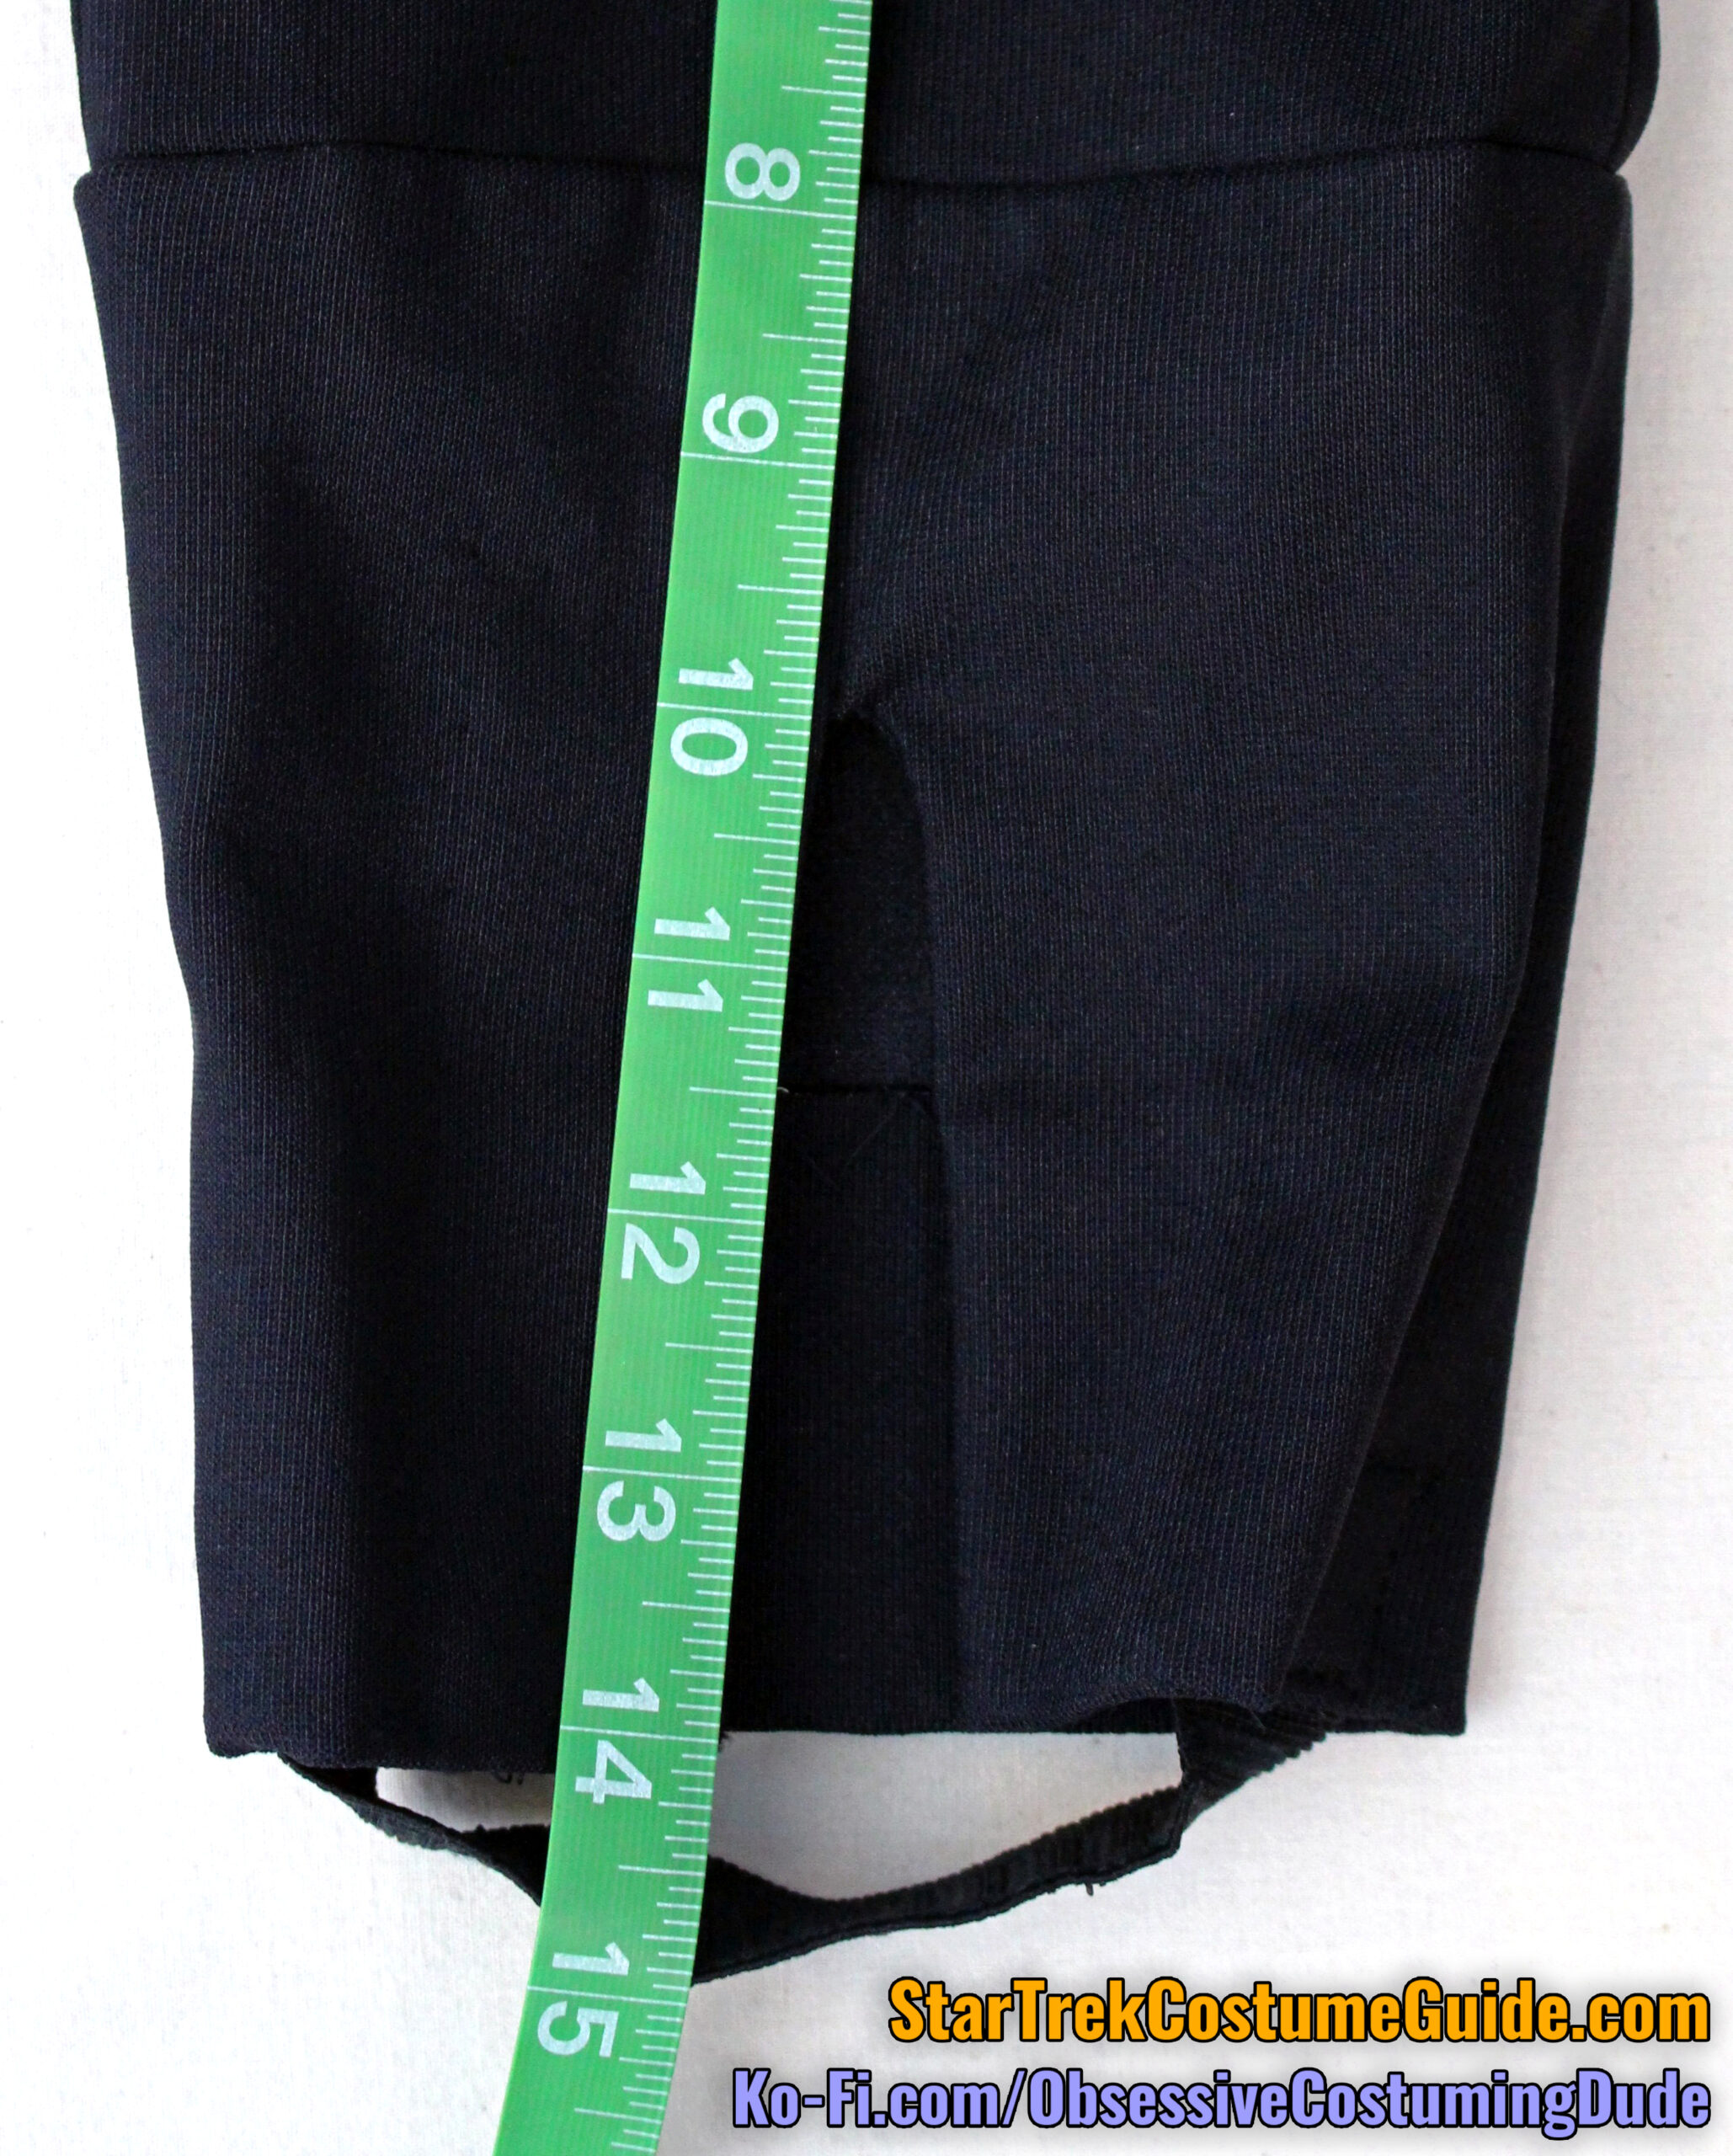
The slits in the lower front pant legs were quite short – a mere 4”.
(For what it’s worth, I believe they may have originally been a bit longer, but the pant legs were too long on the actress and when they were hemmed shorter, this decreased the height of the slit as well. But that’s just my theory!)
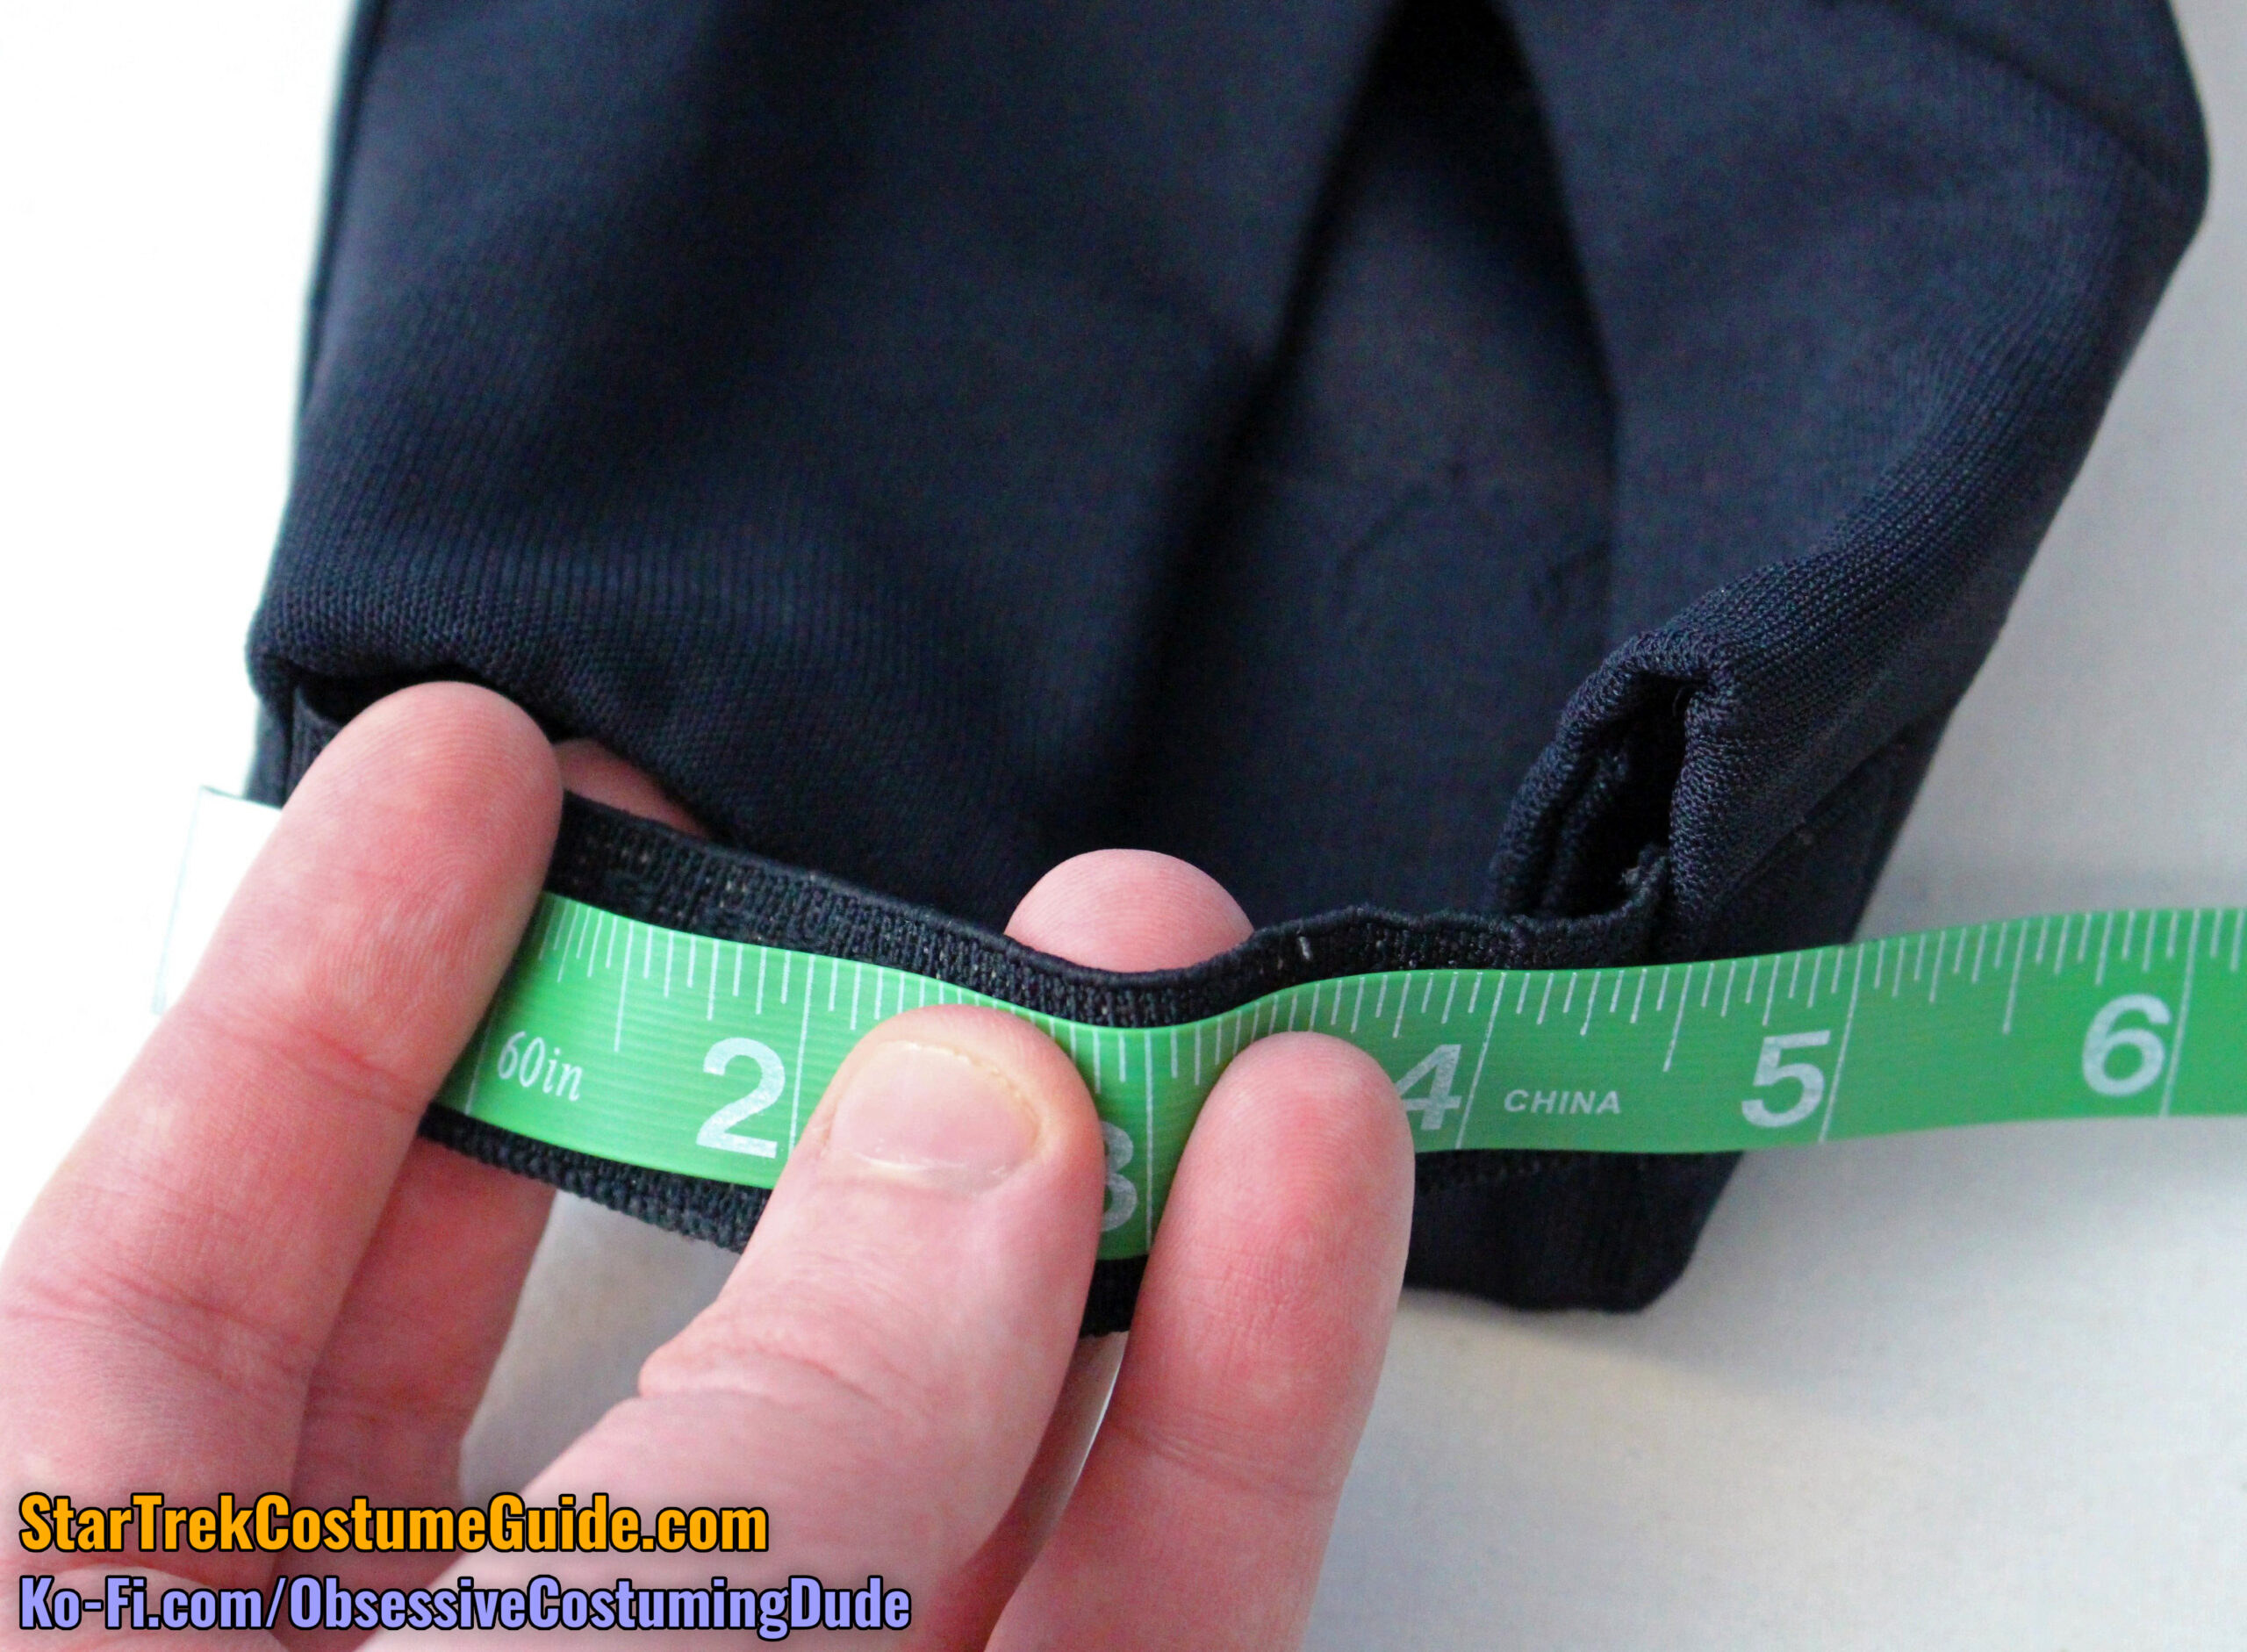
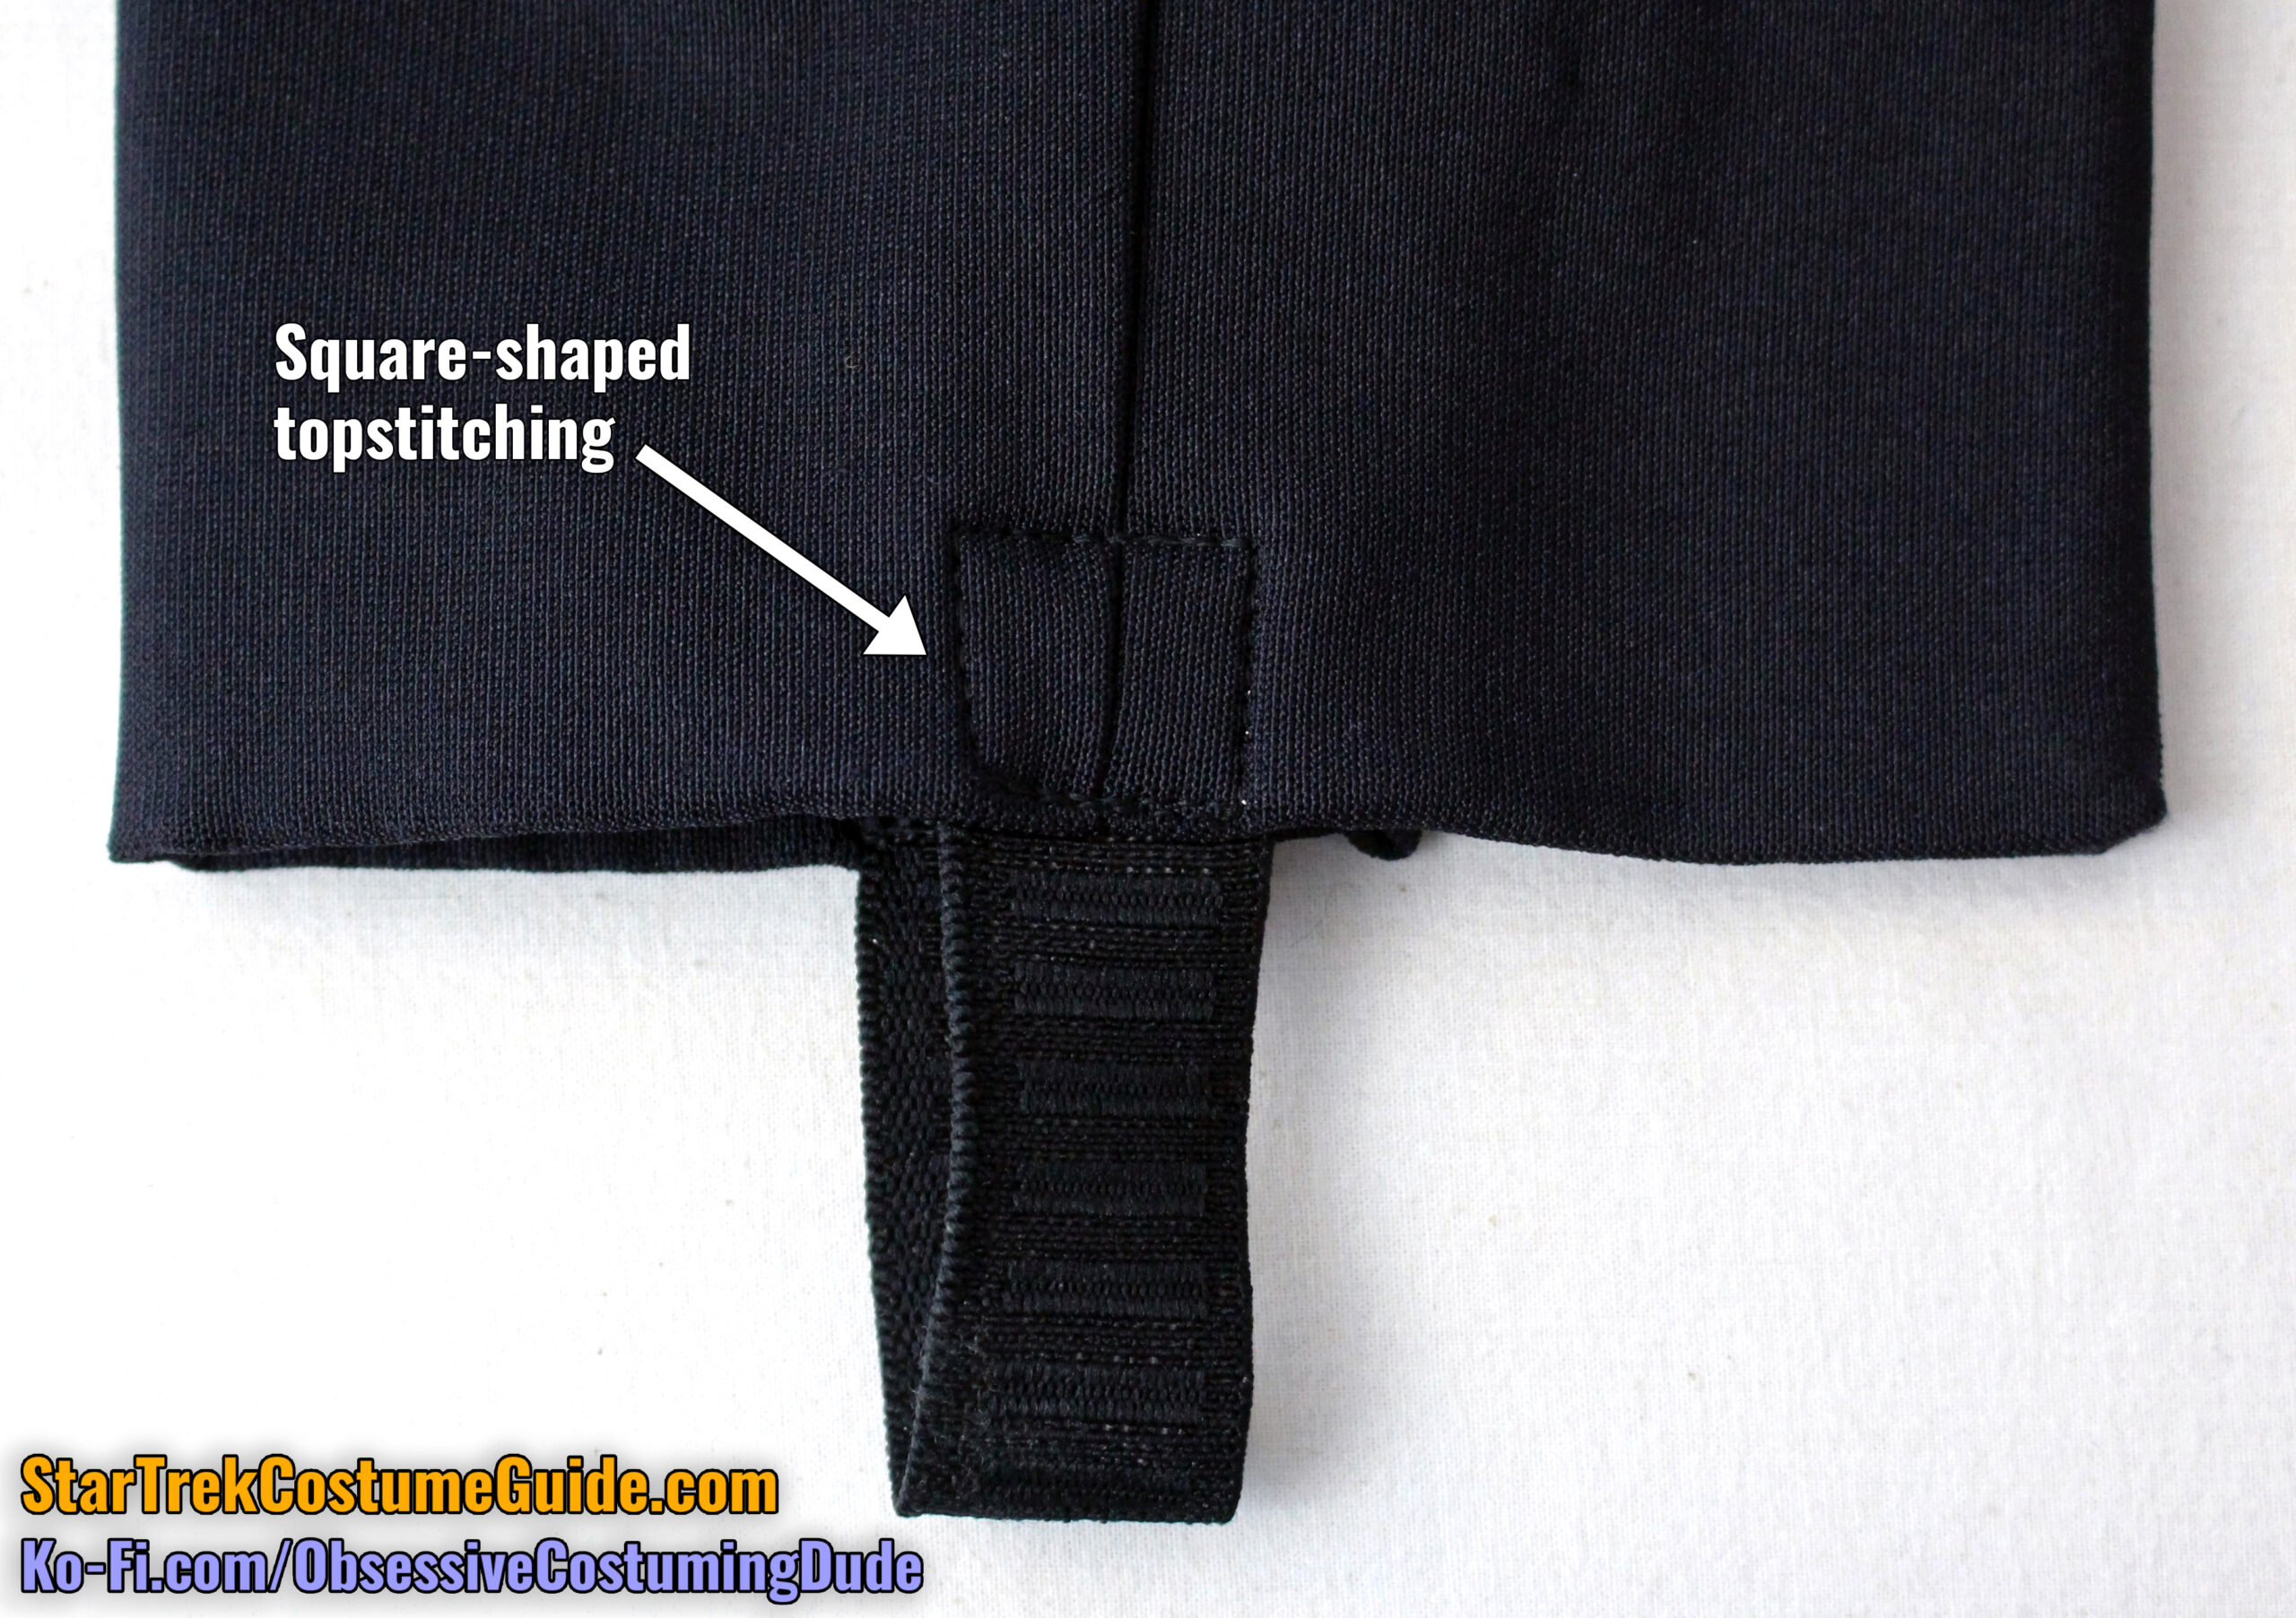
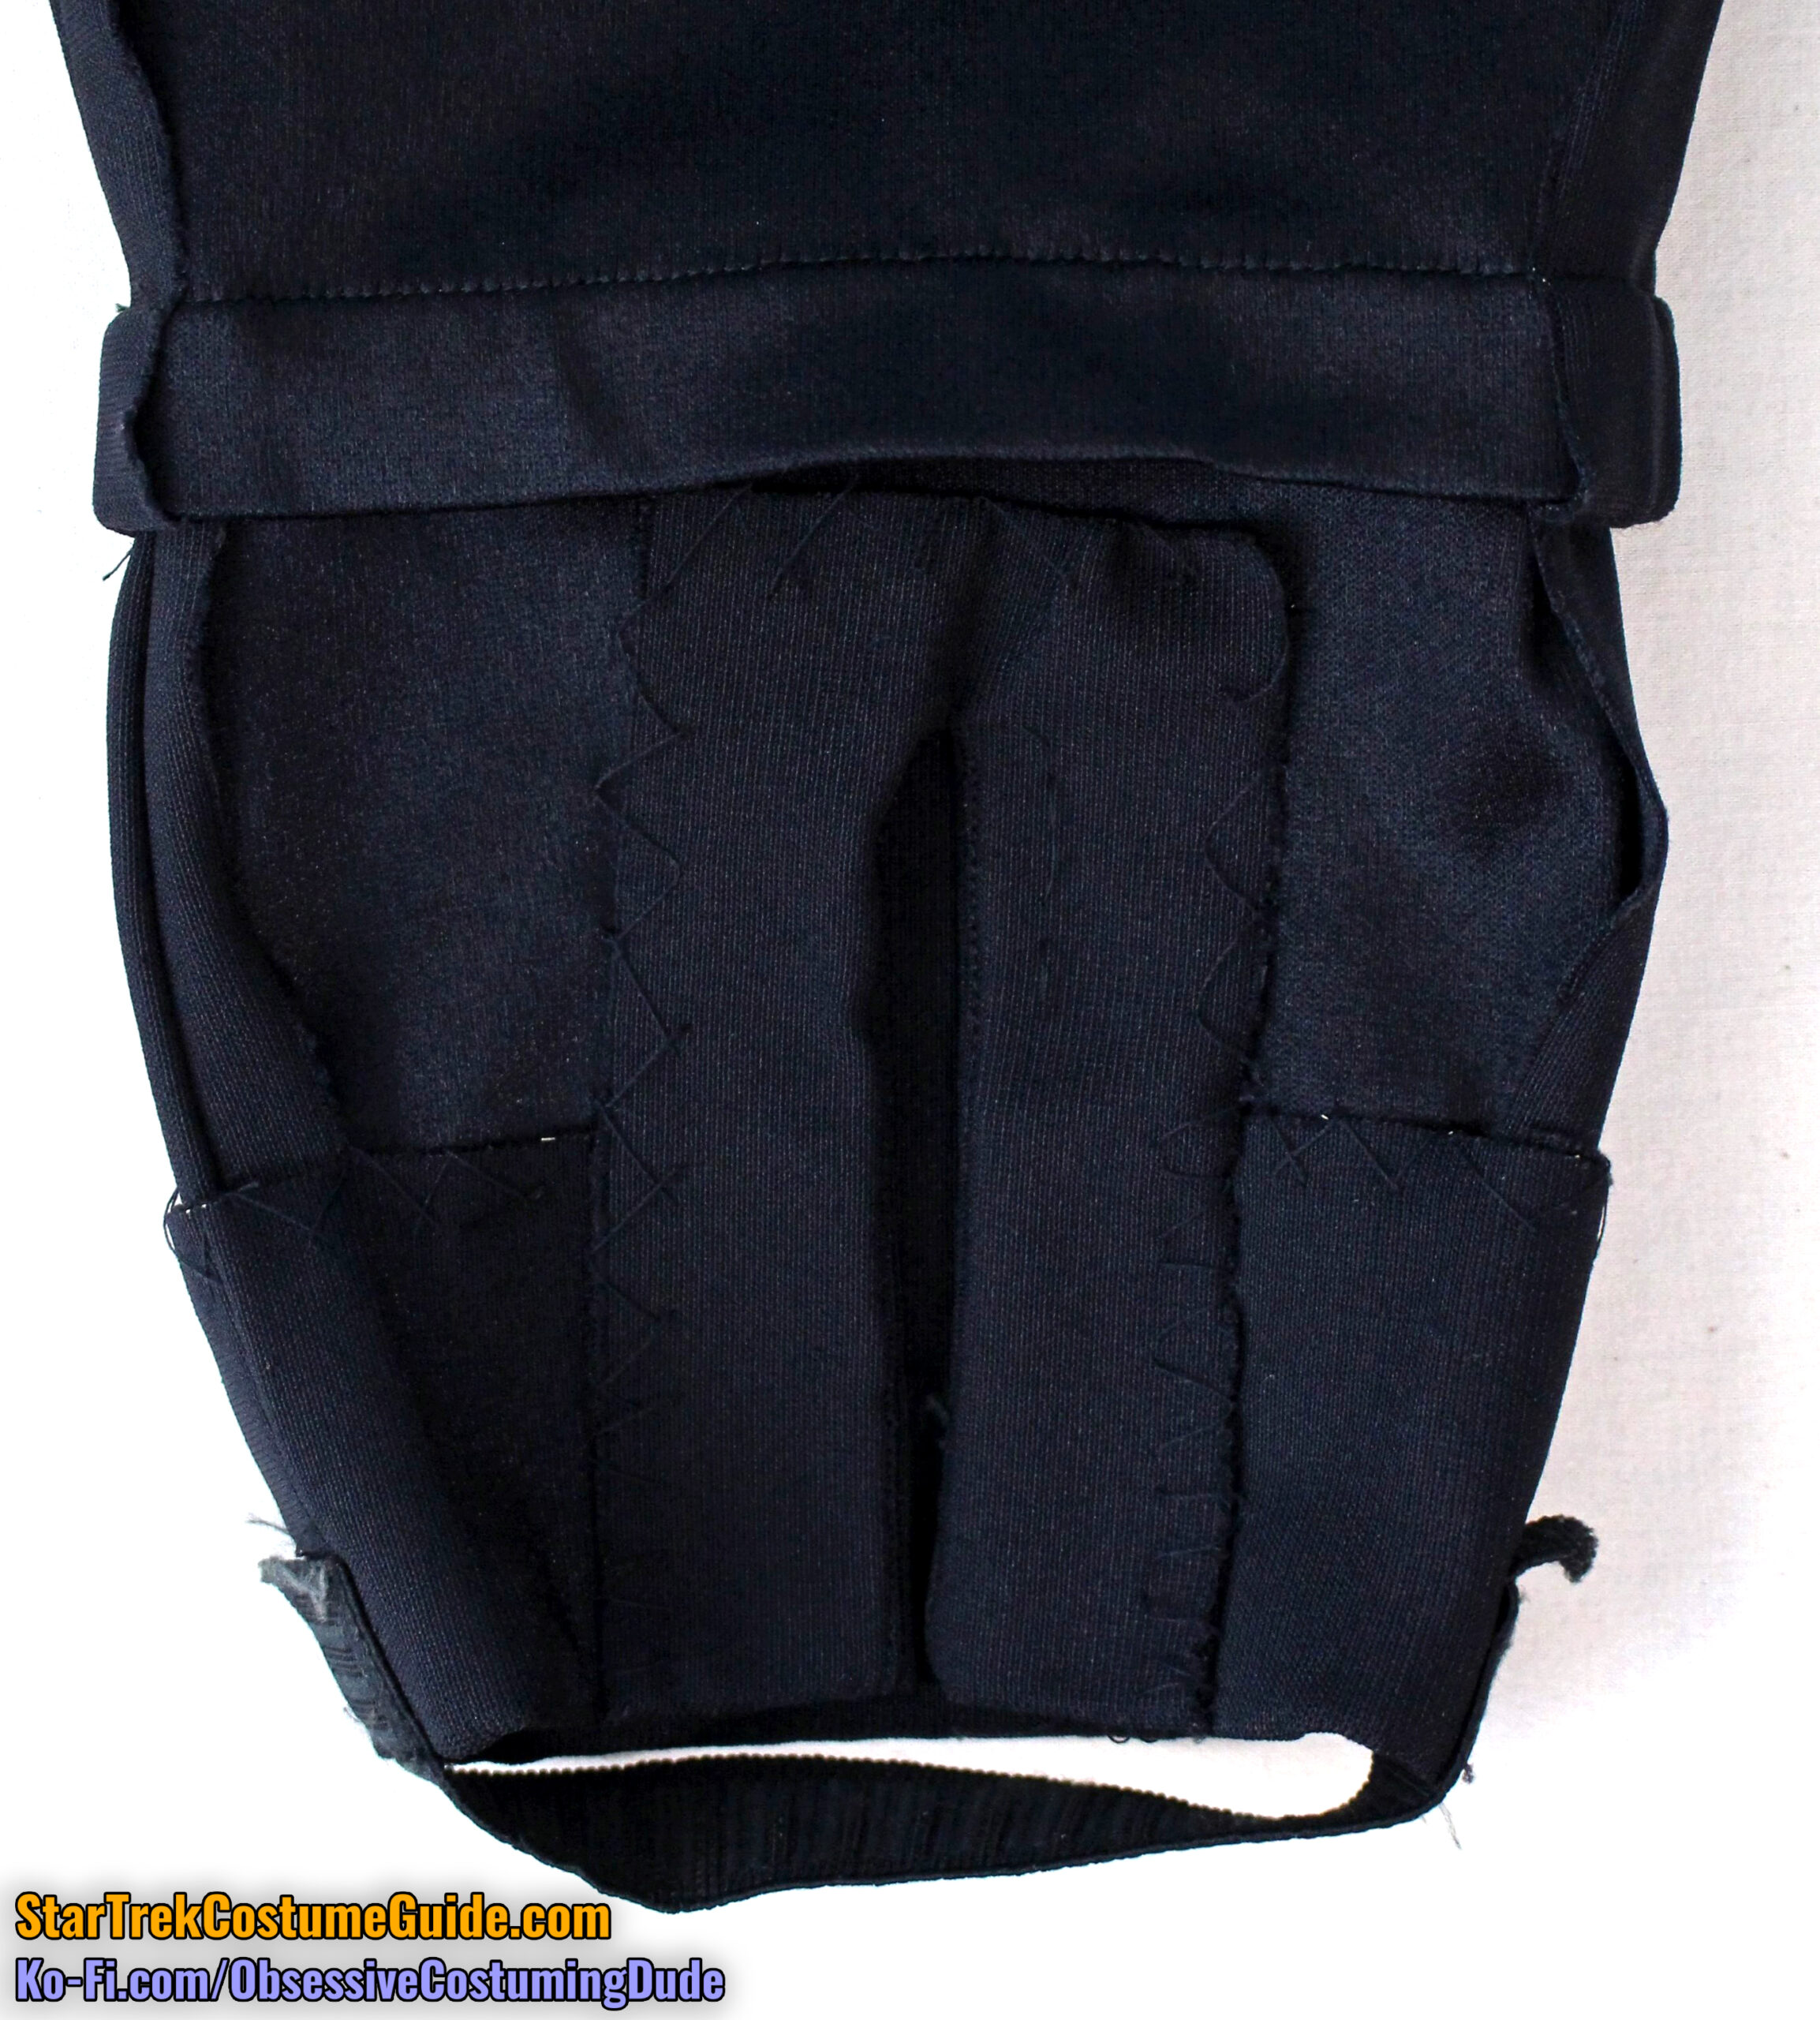
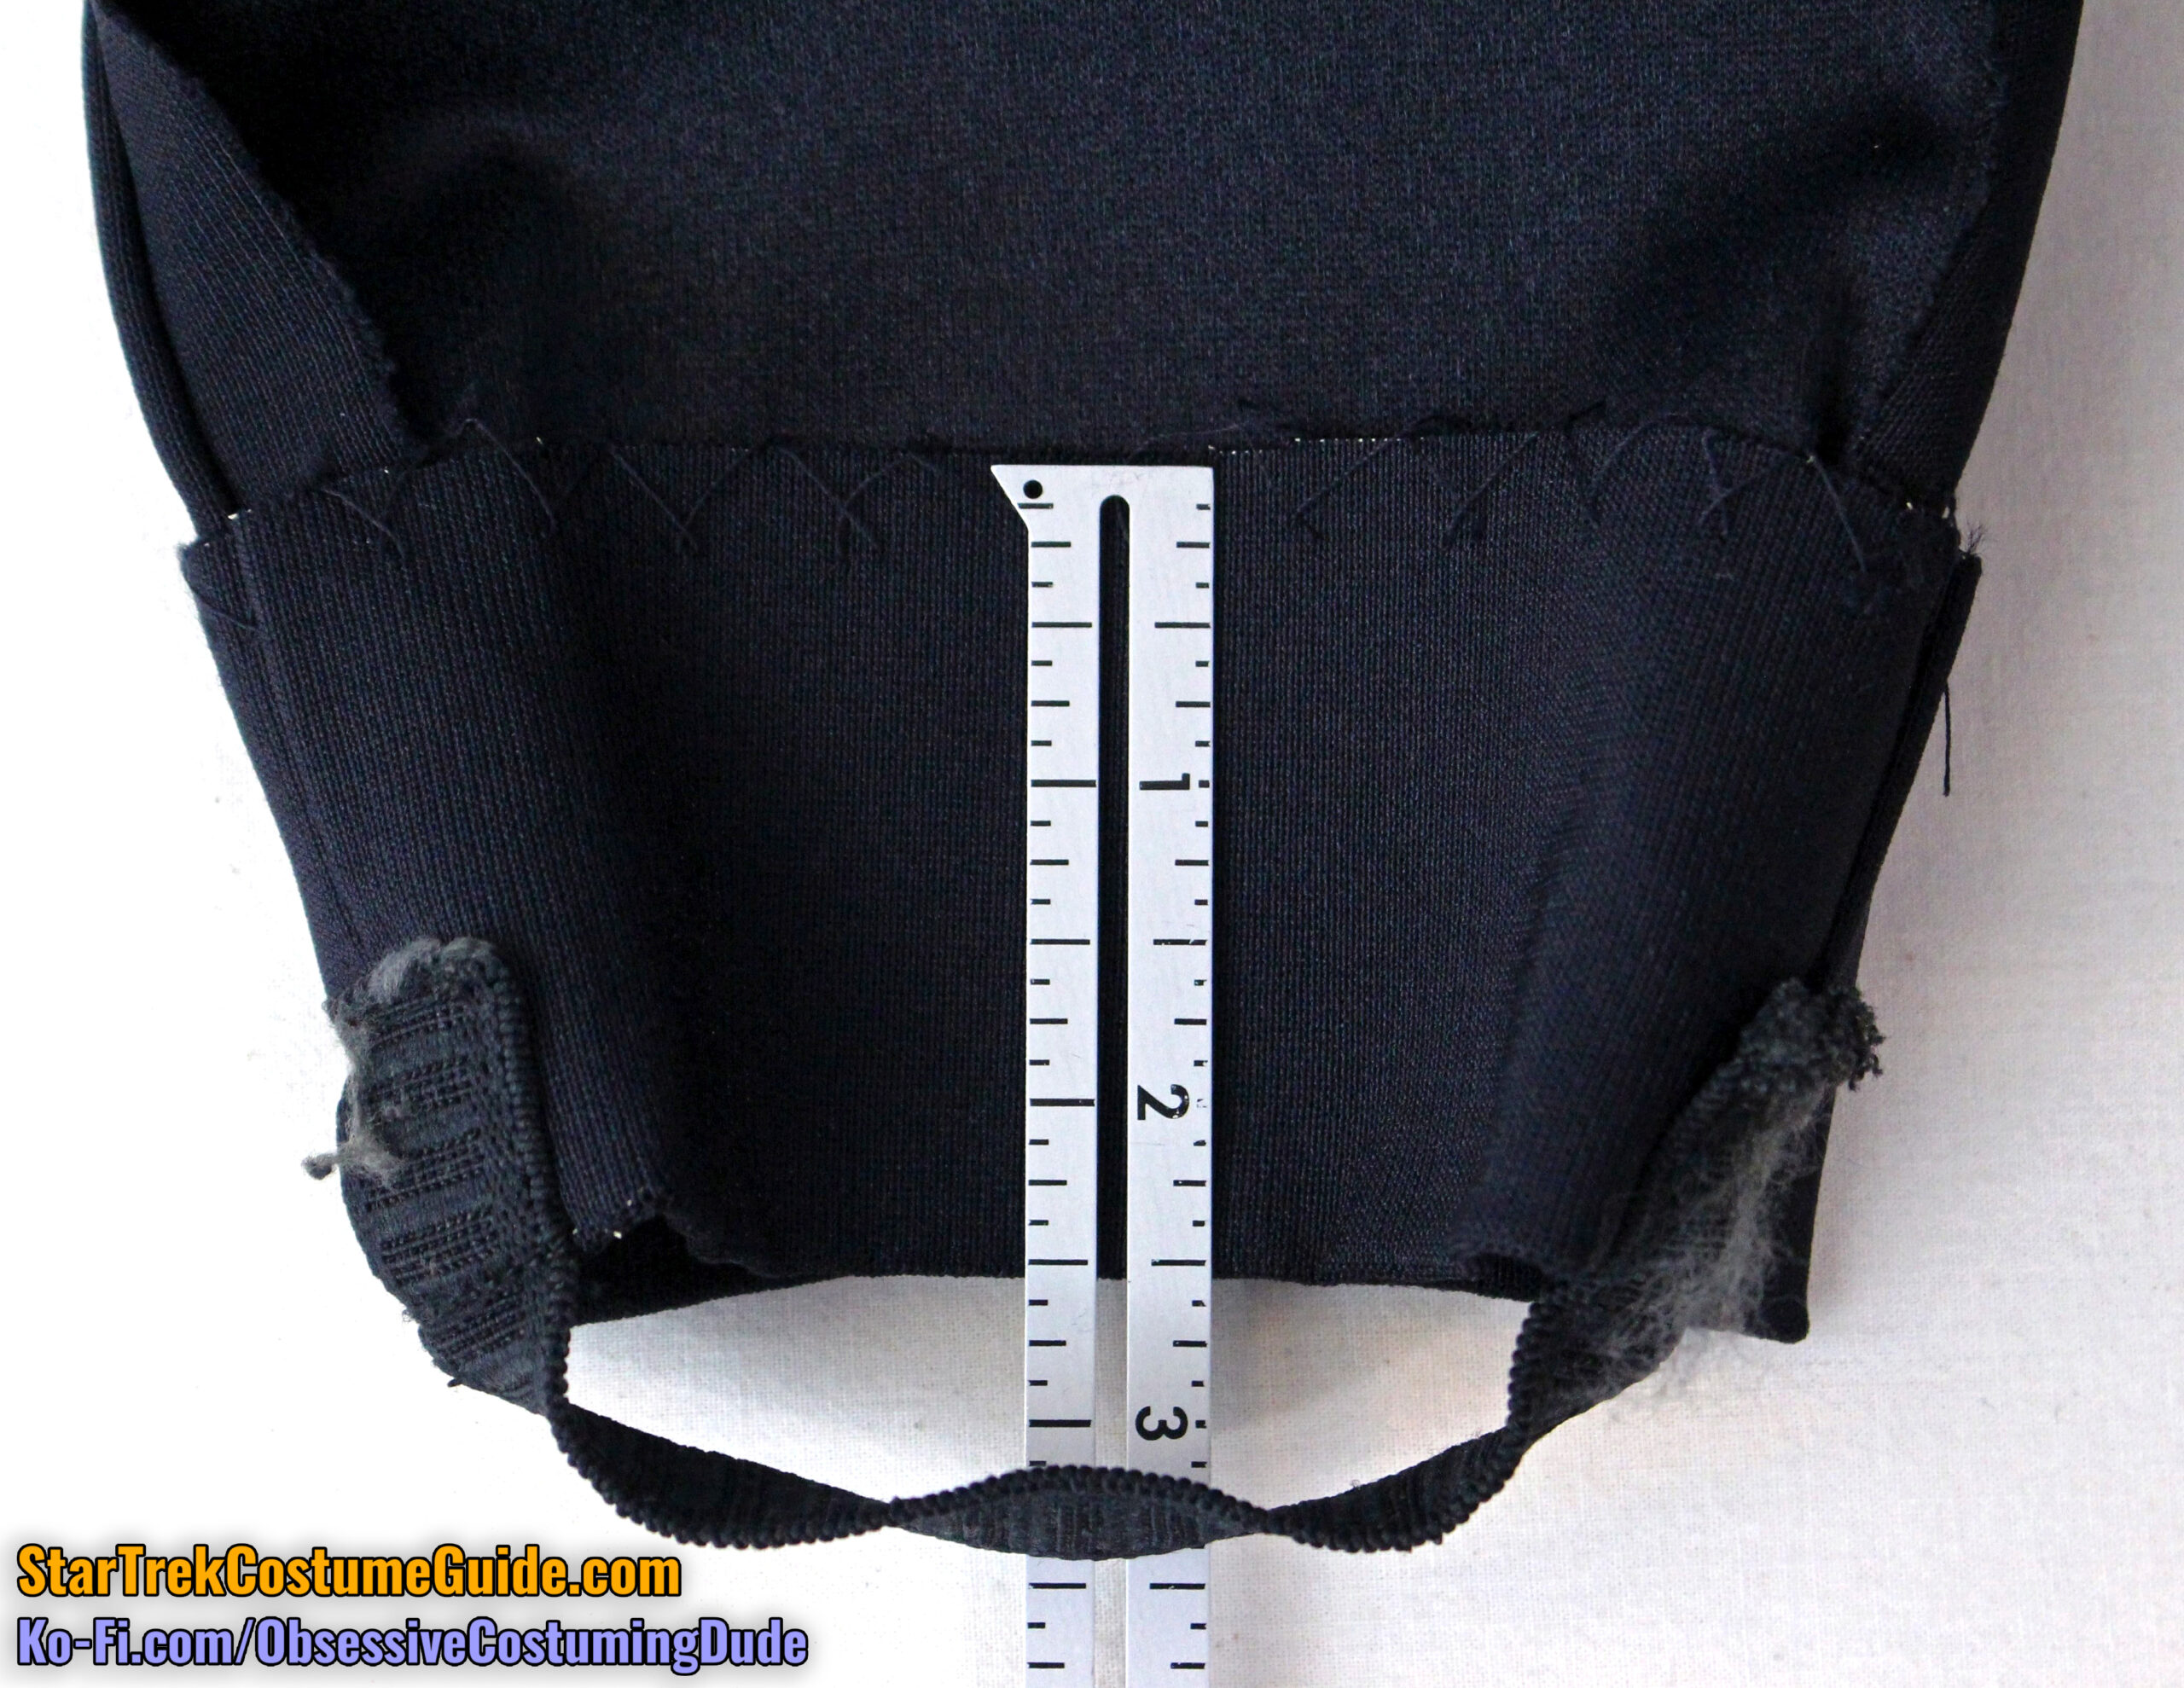
The elastic stirrups were 4 ½” long, plus allowances.
Like on the screen-used Tasha Yar jumpsuit I examined, the elastic stirrups were topstitched into place at the bottom of the pant leg.
However, in this case, they were secured with square-shaped topstitching (instead of triangular).
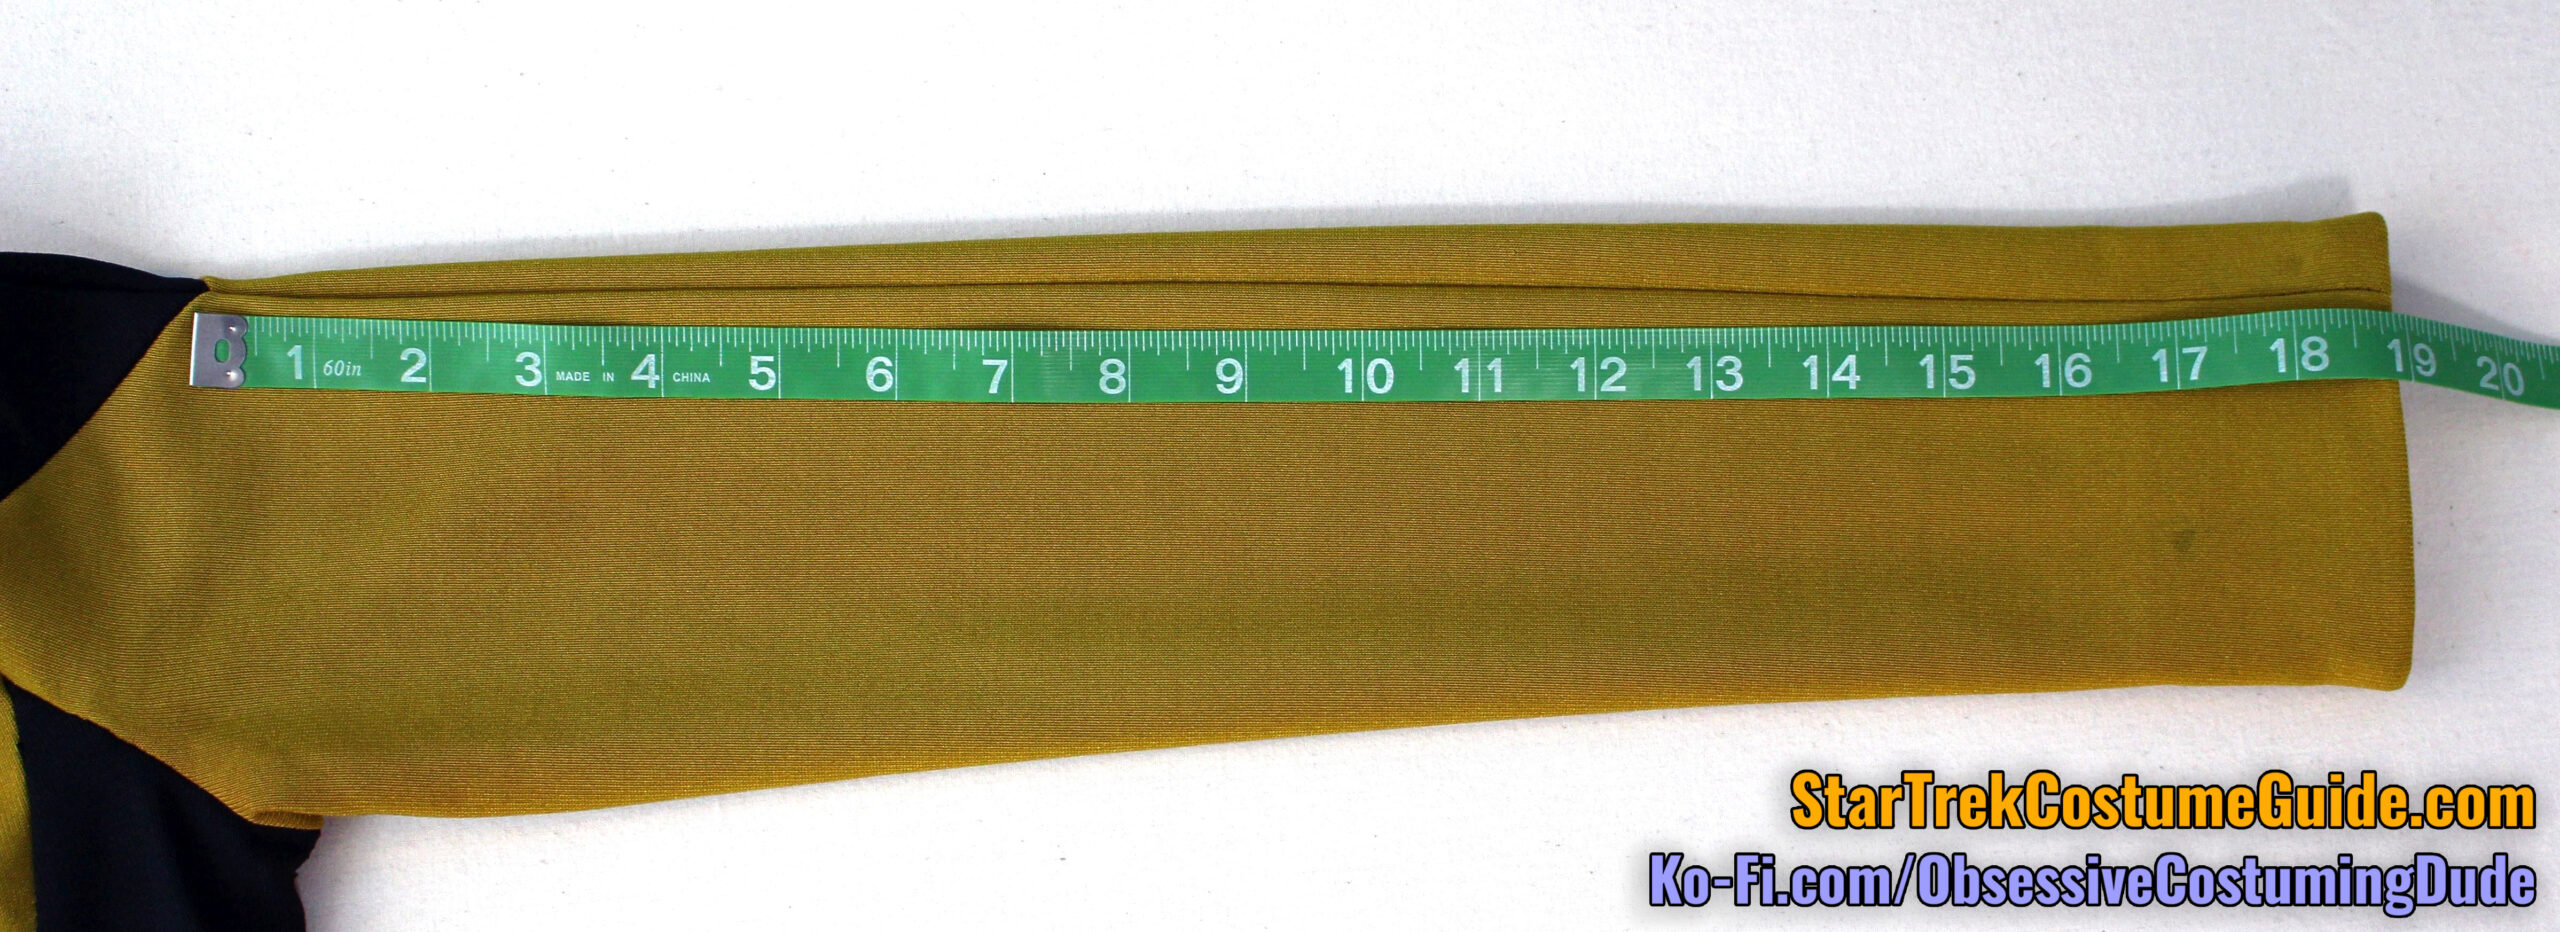
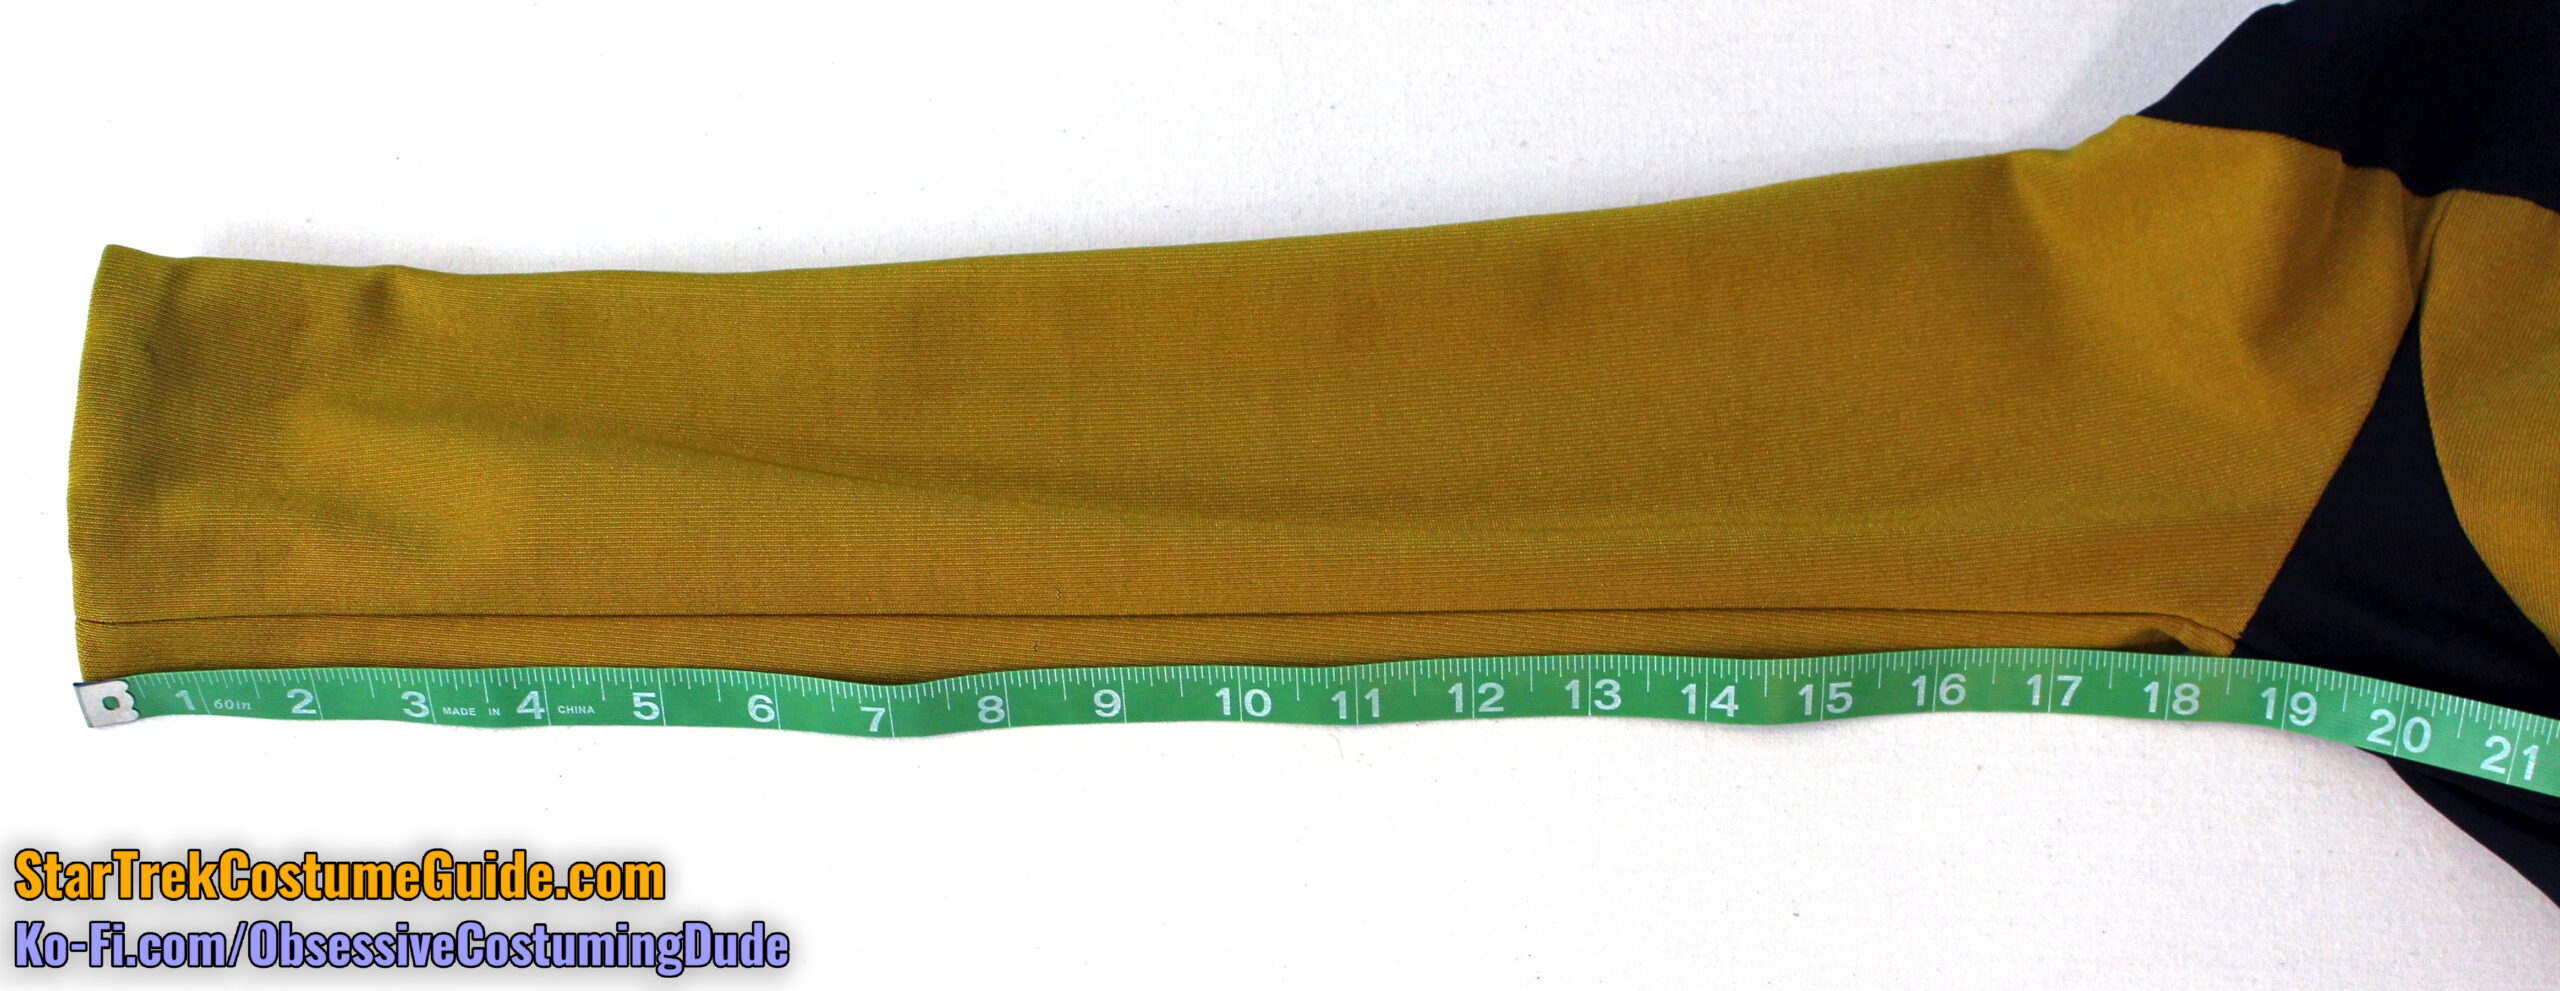
The outer sleeve seams were approximately 19” long.
The inner sleeve seams were 18 ½” long.
Again using the “weave” of the jumbo spandex as a visual reference (albeit perpendicular in this case), we can see that the front sleeve insert was 2 ½” tall, and the back sleeve insert was 2 ¾”” tall (both relative to the outer sleeve seam).
The side seams were rolled slightly to the back (making it difficult to accurately photograph some of the measurements).
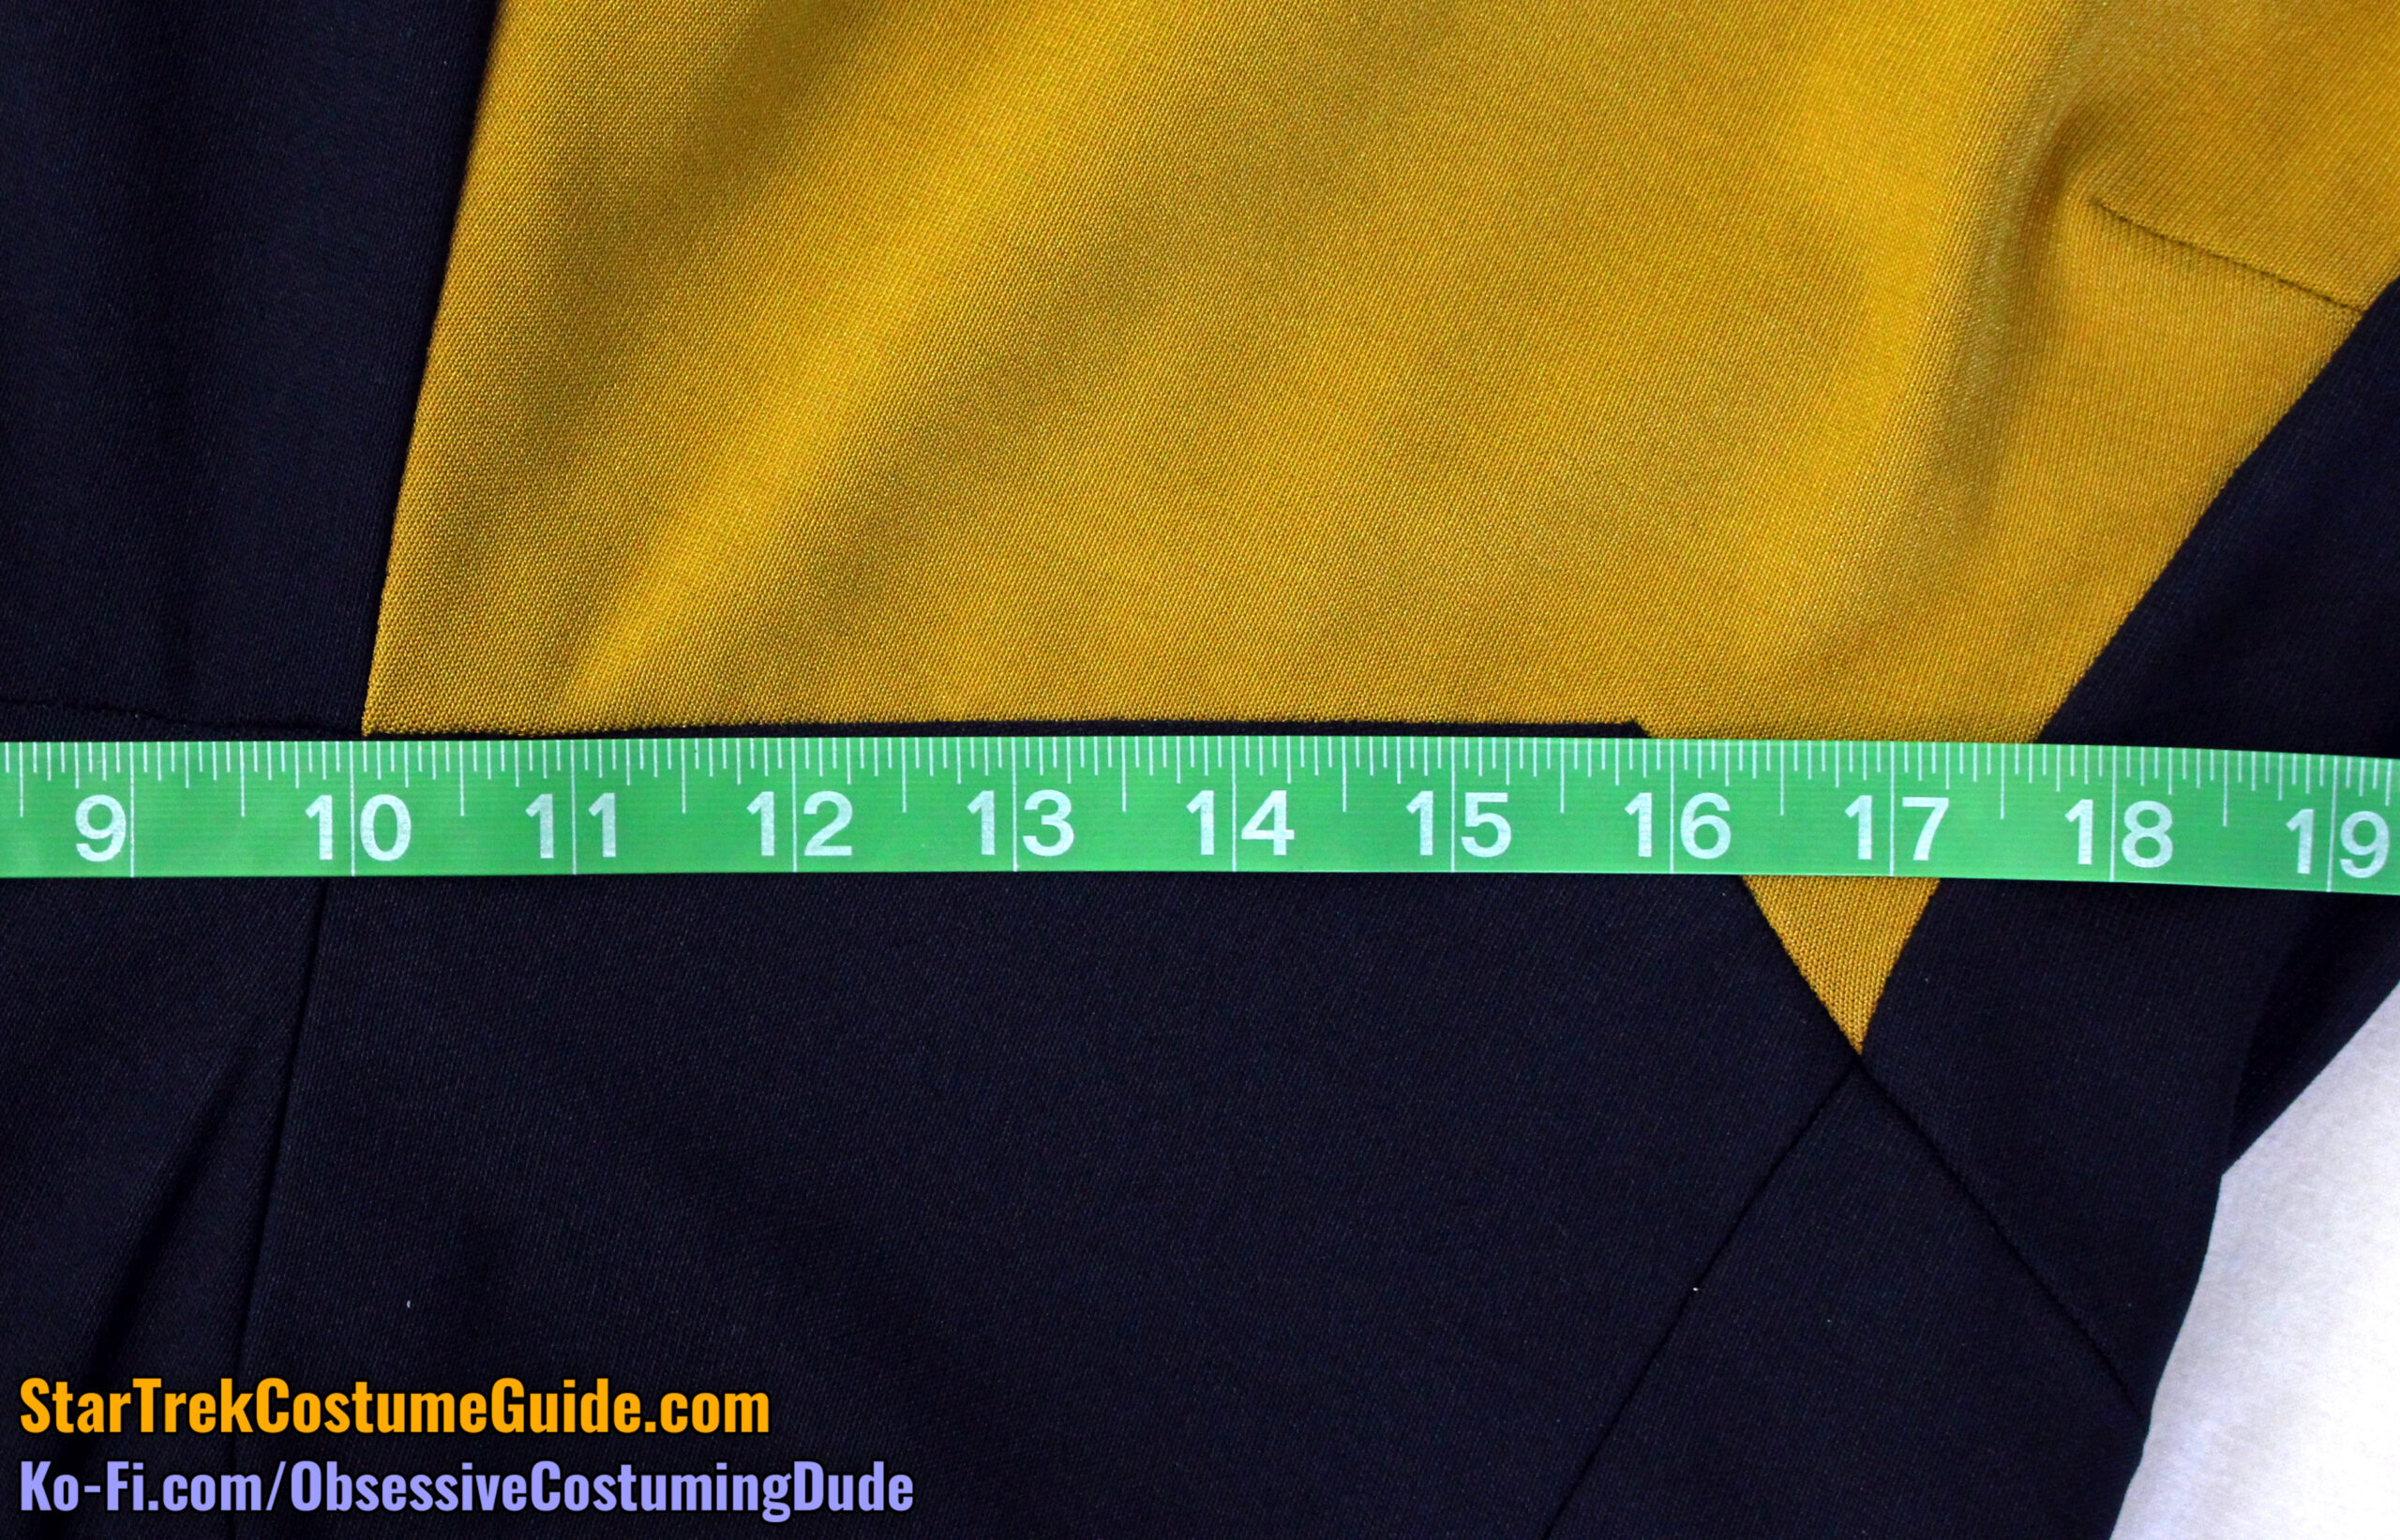
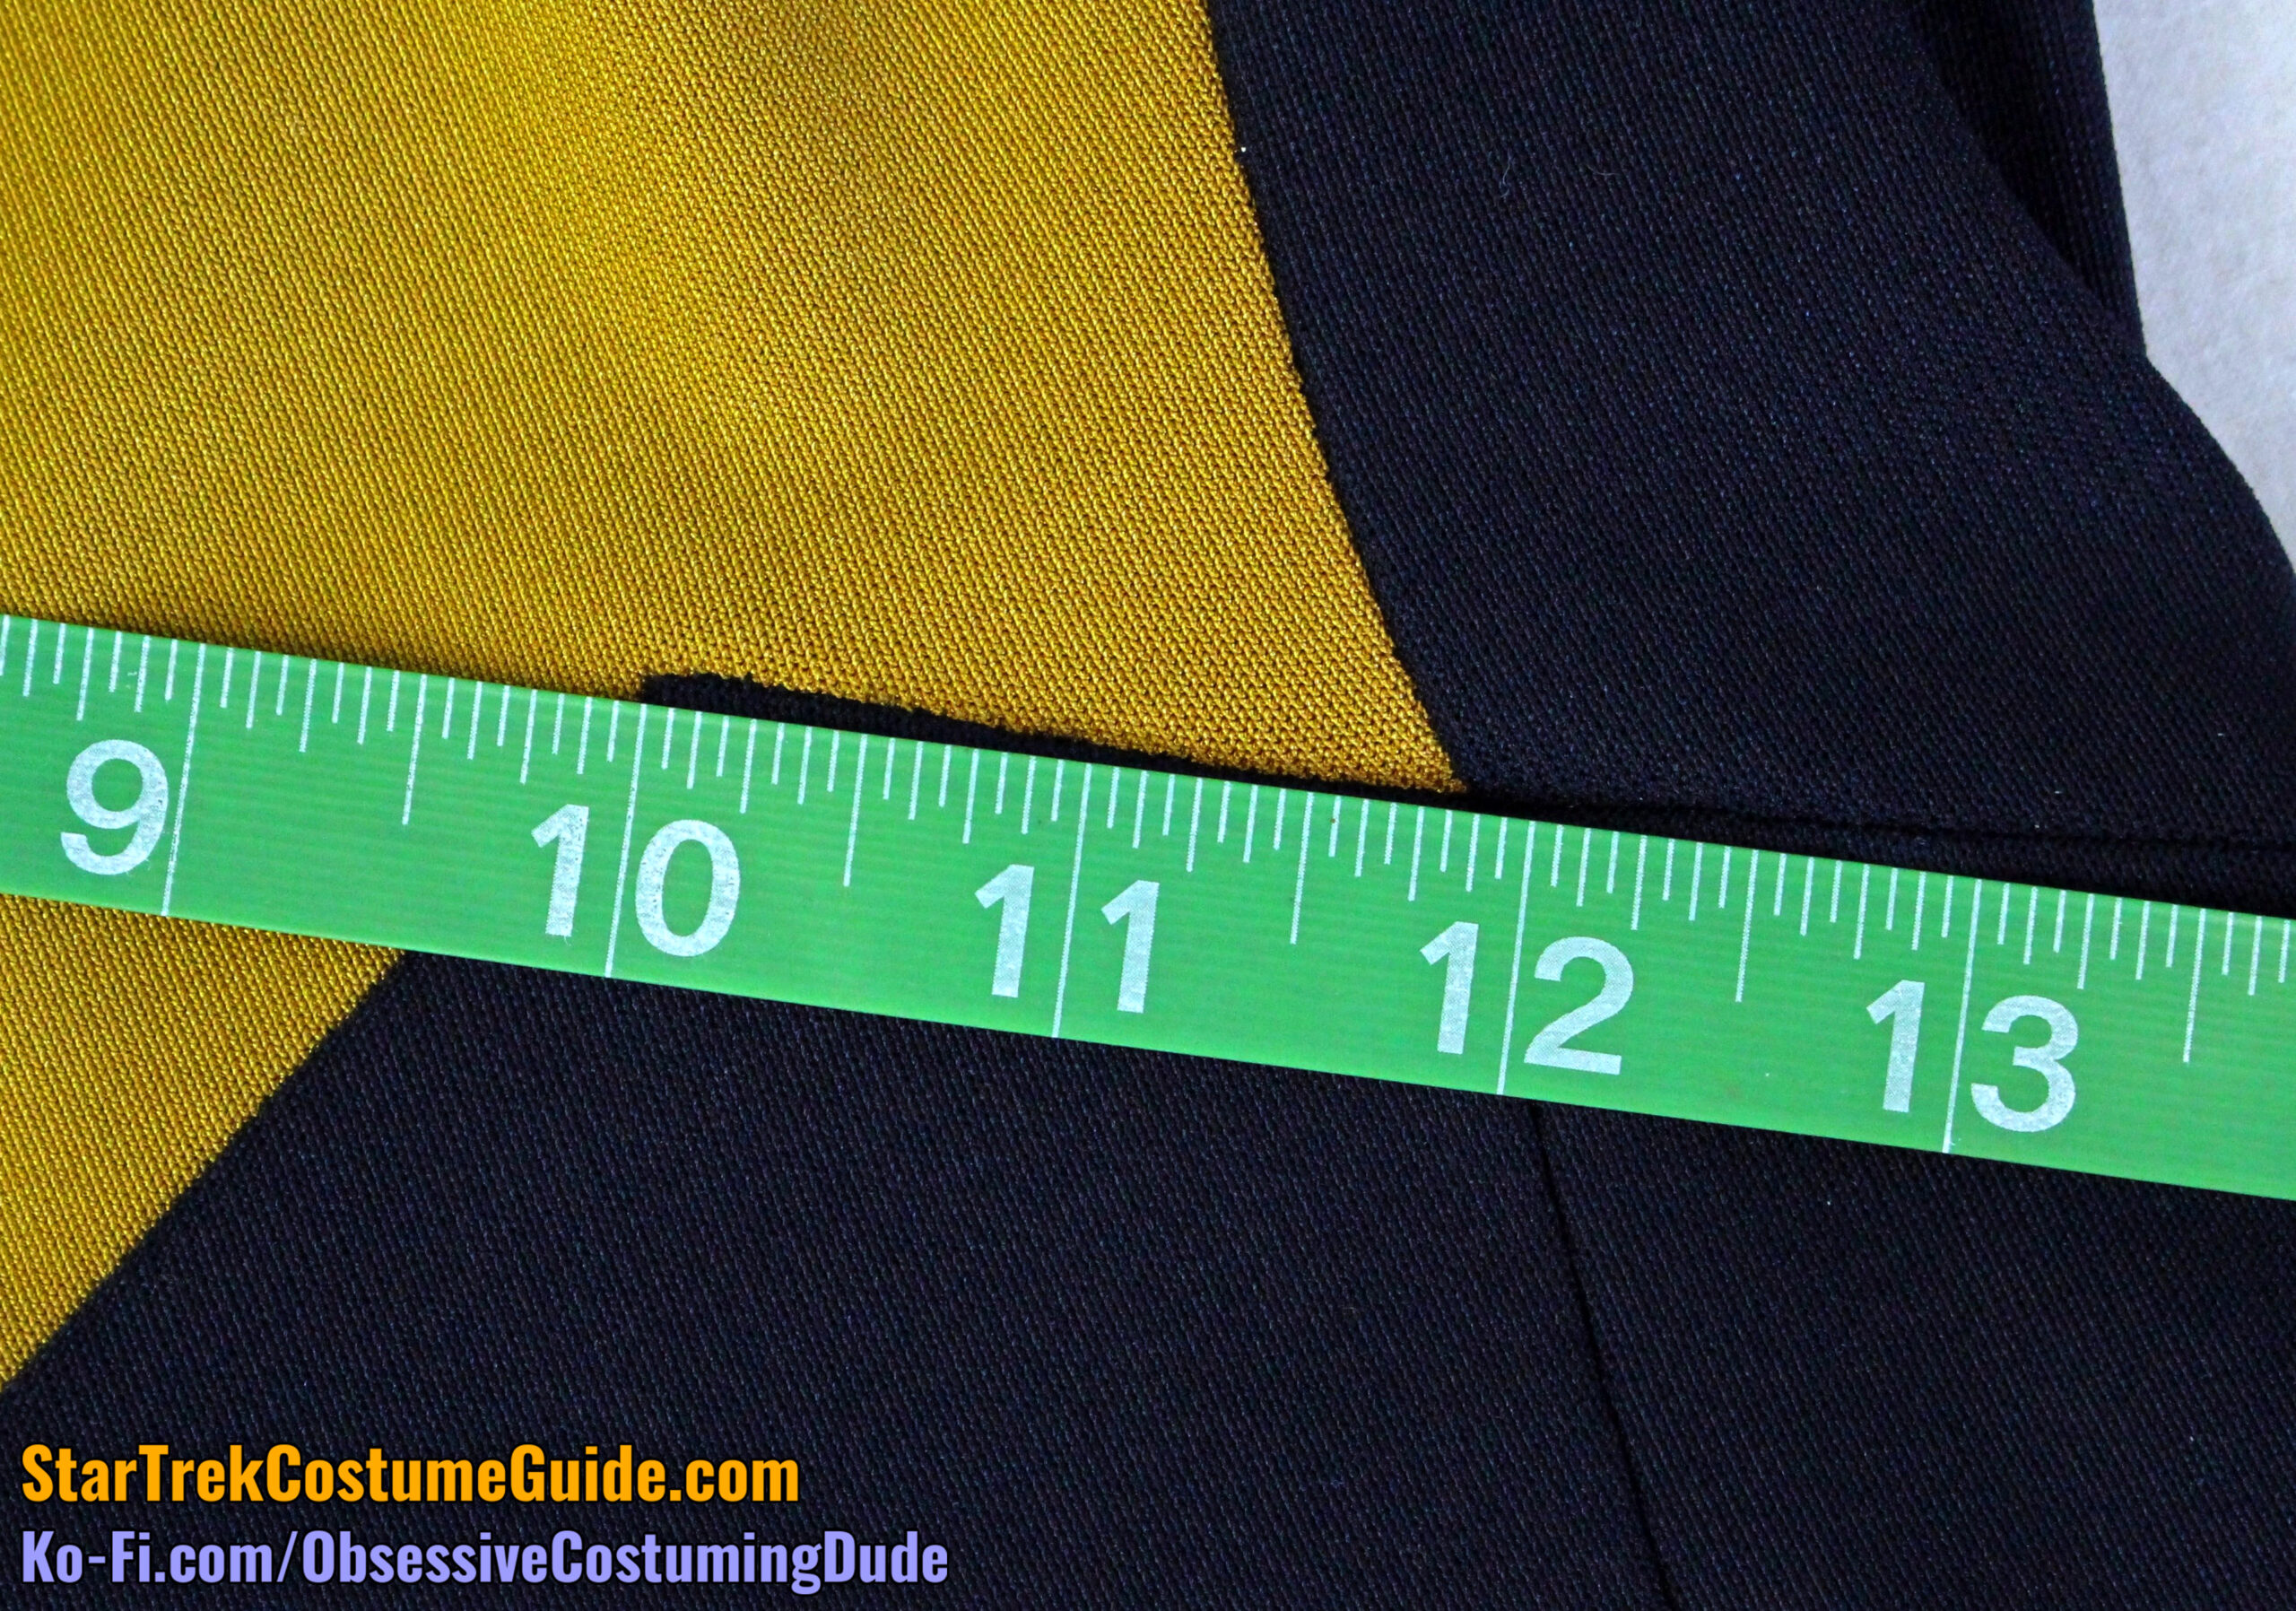
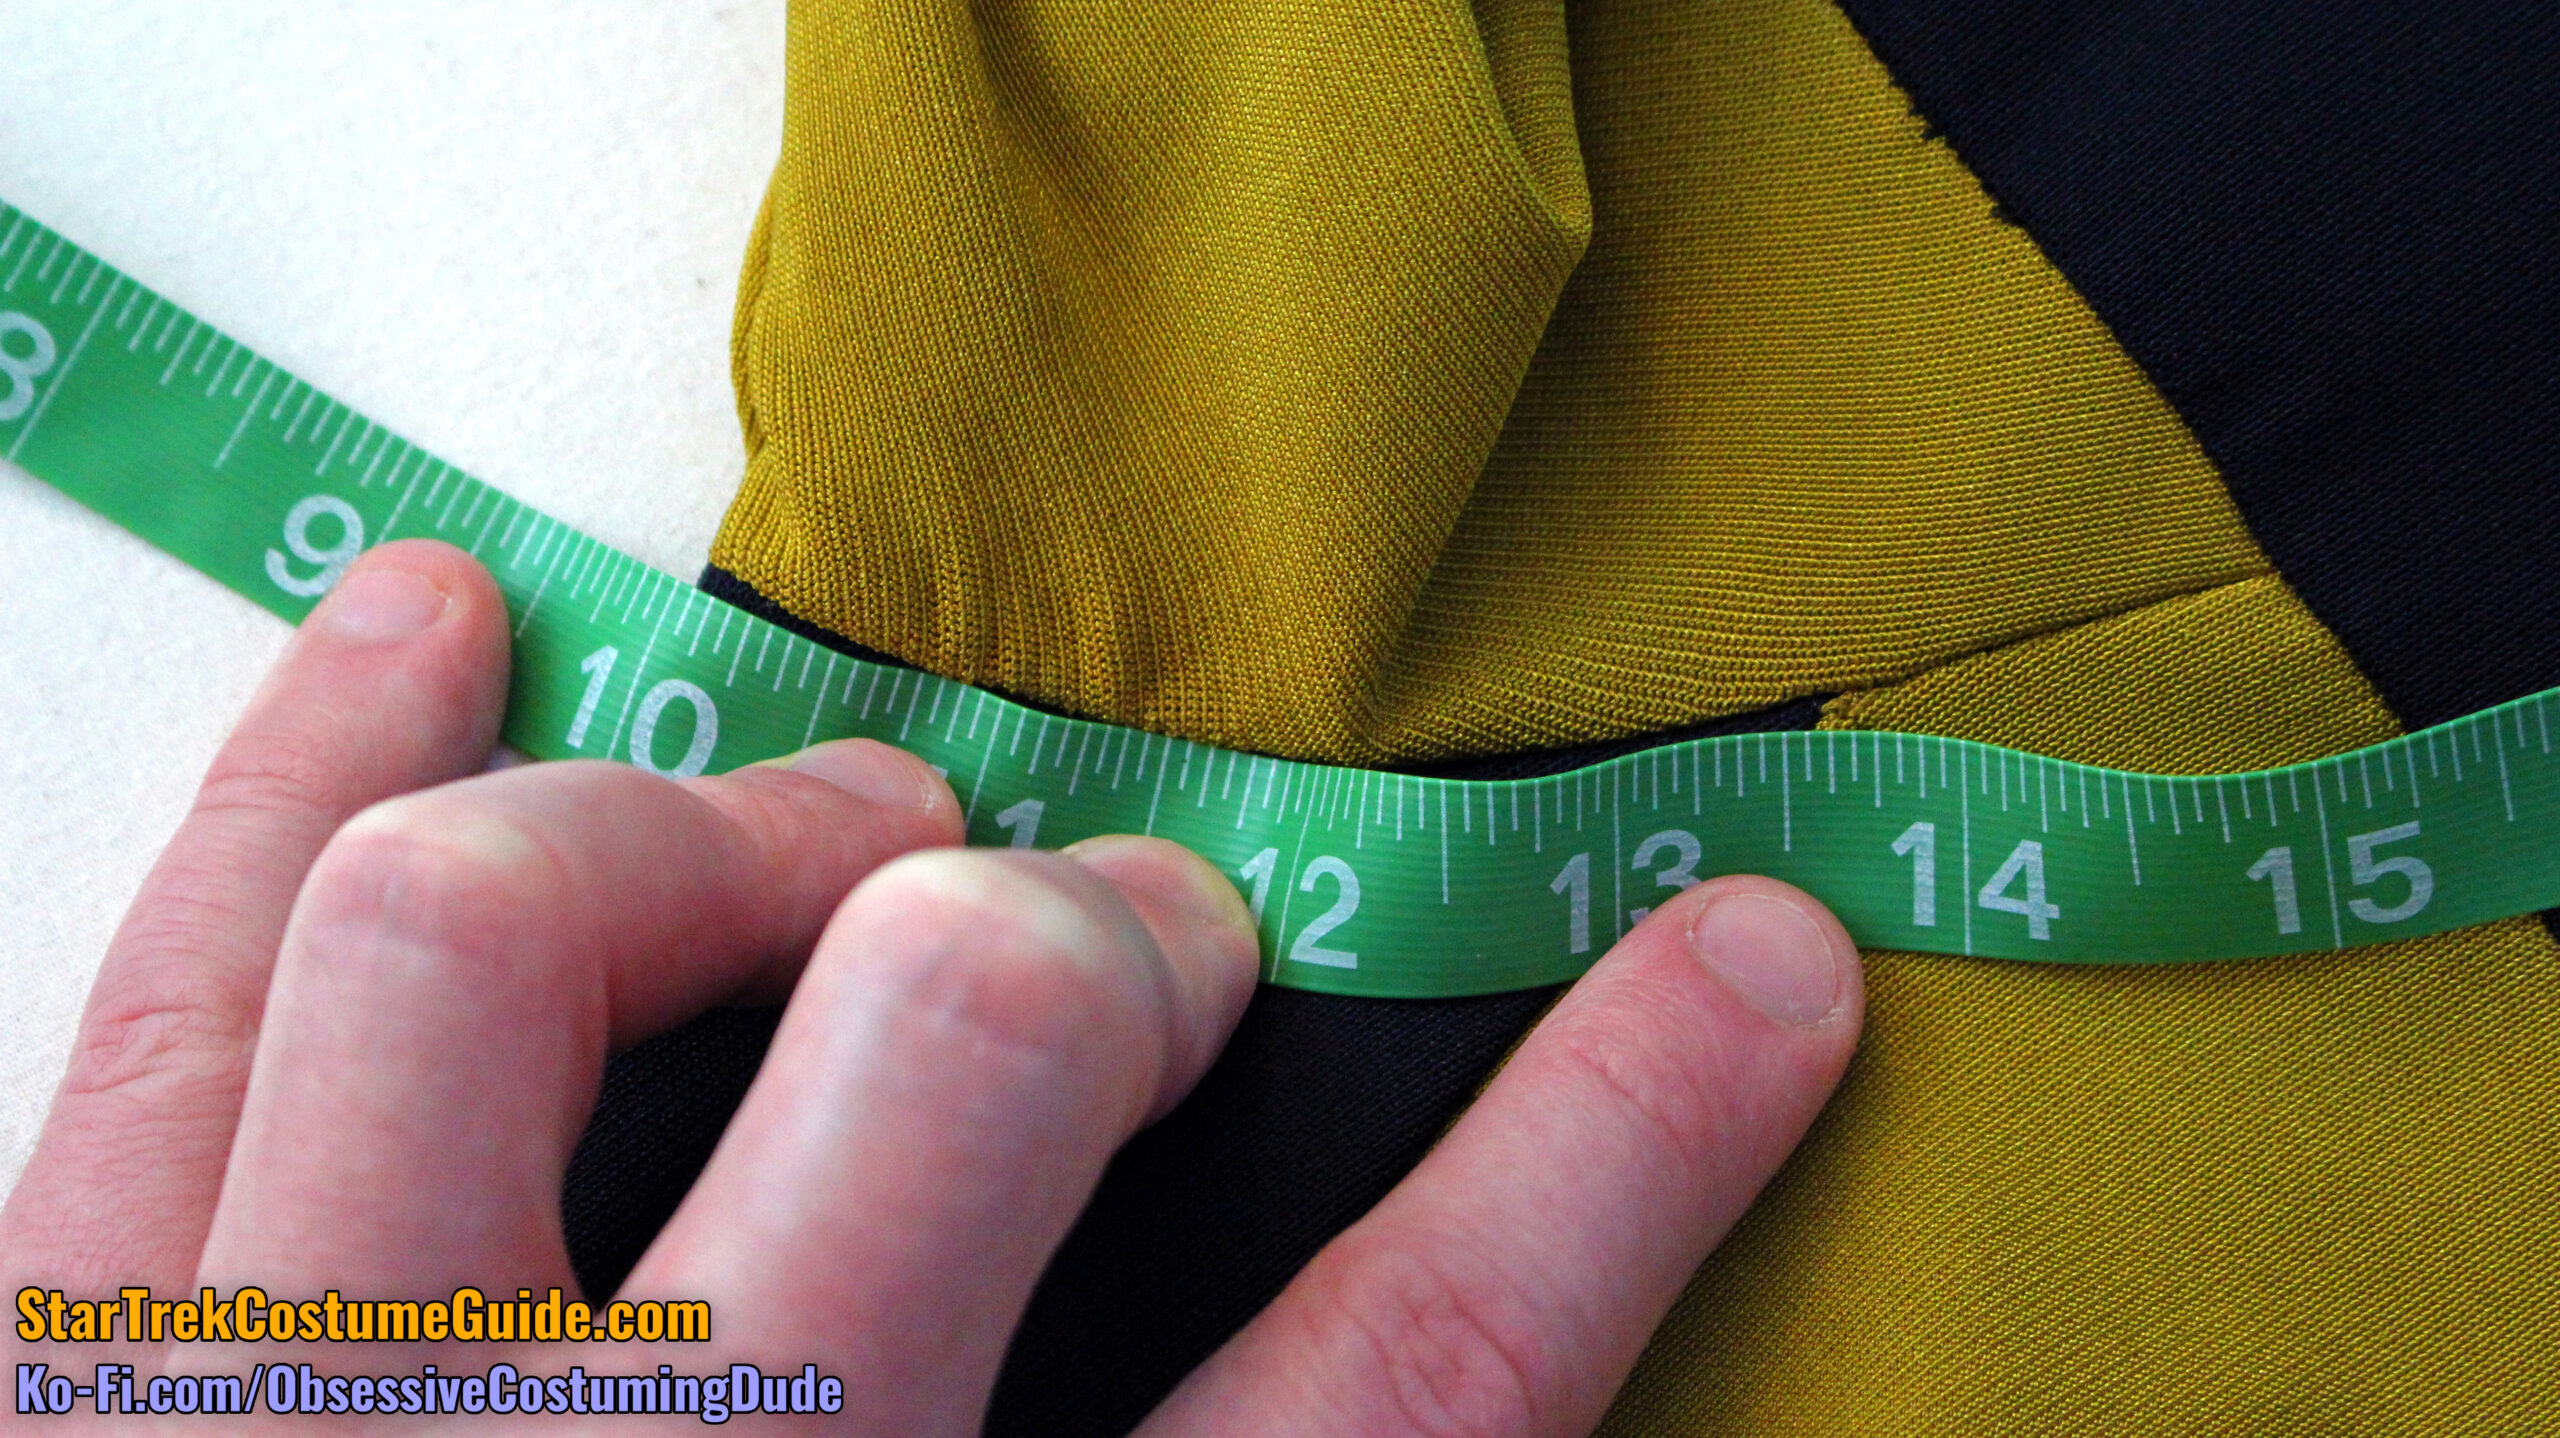
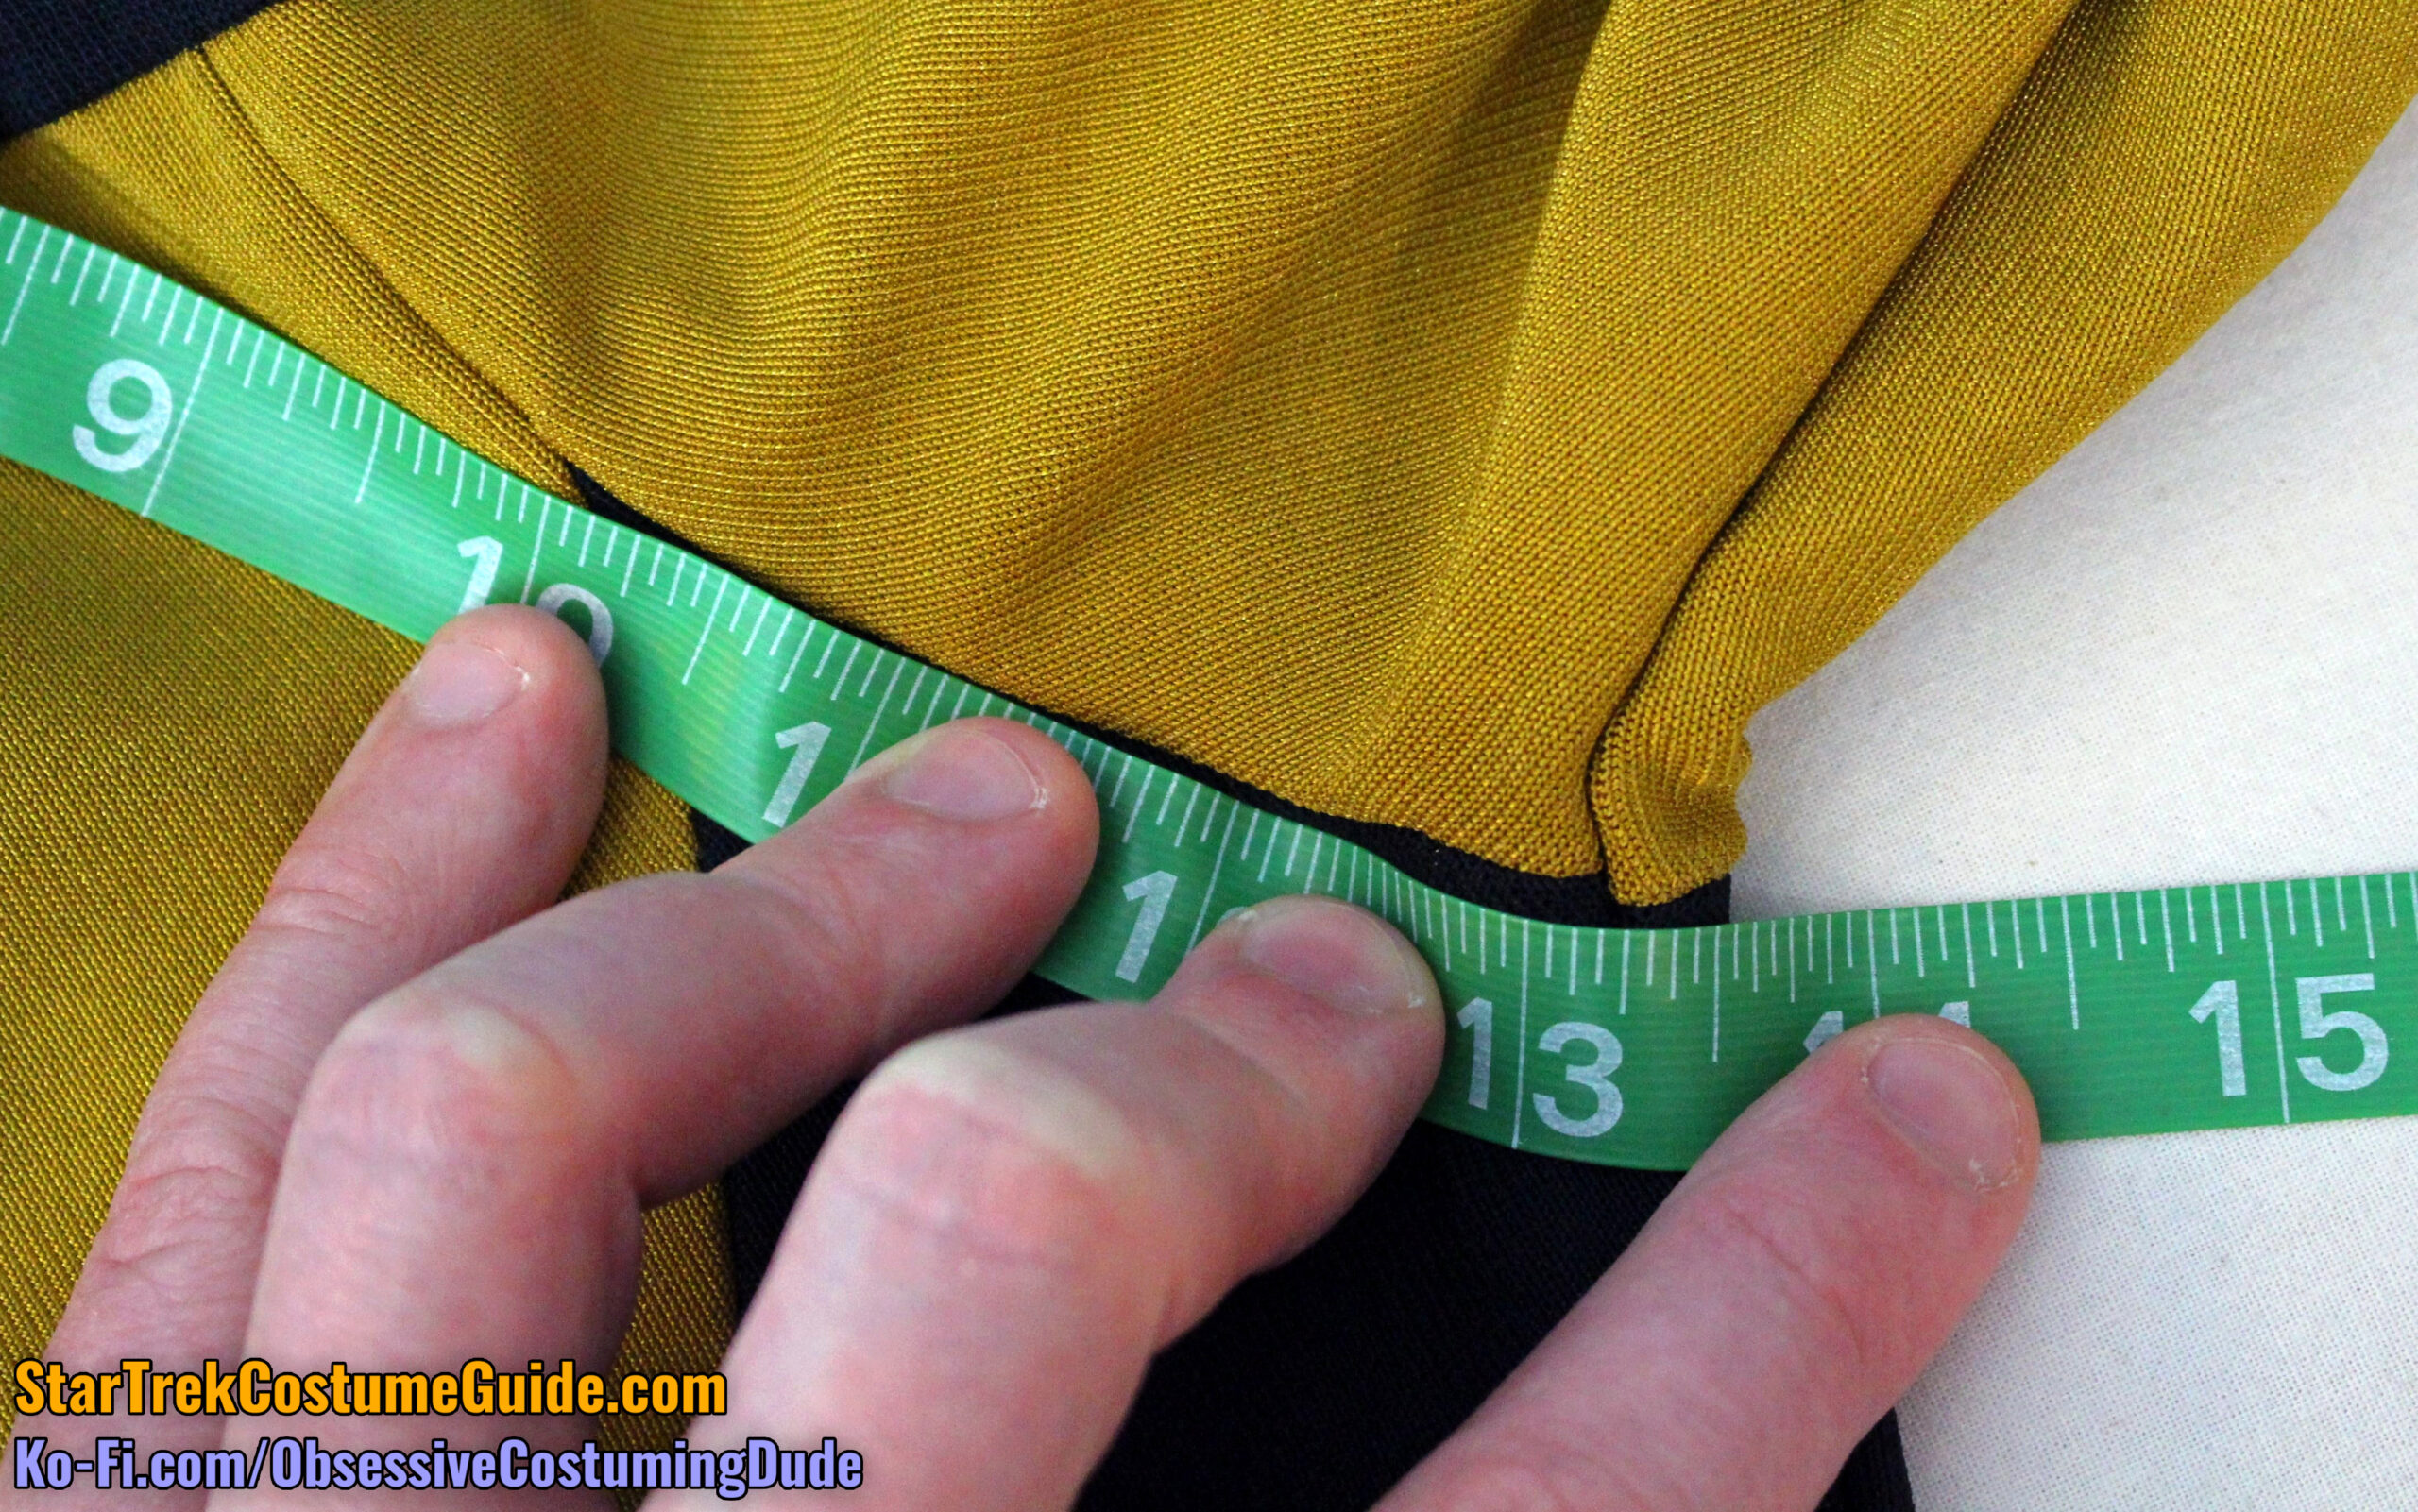
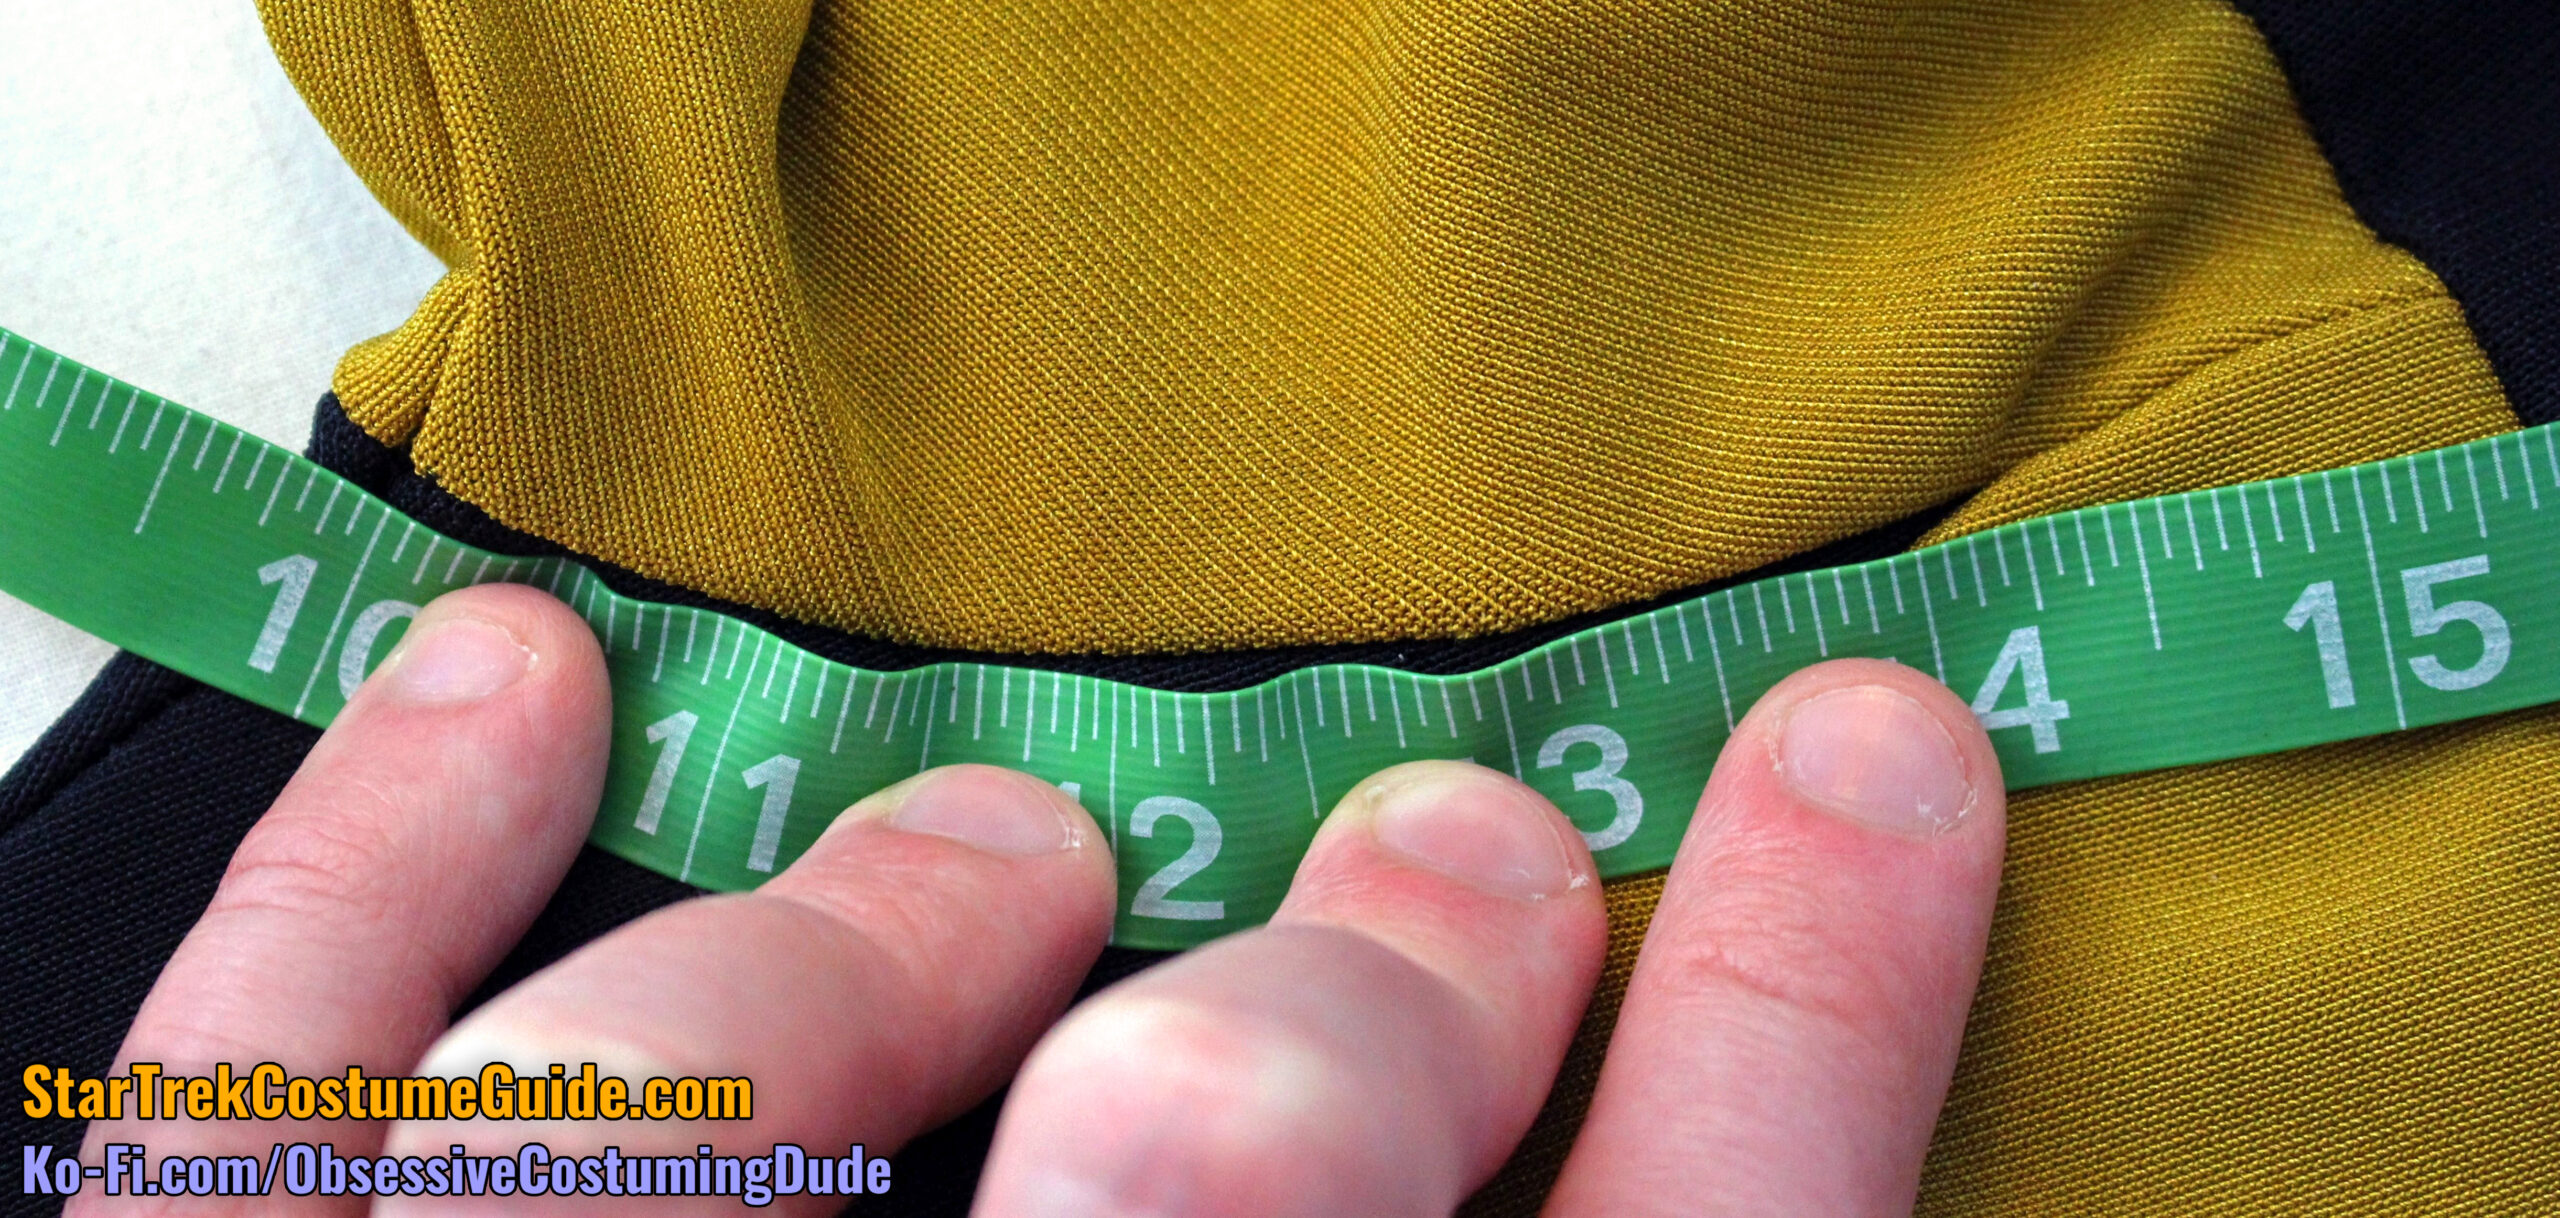
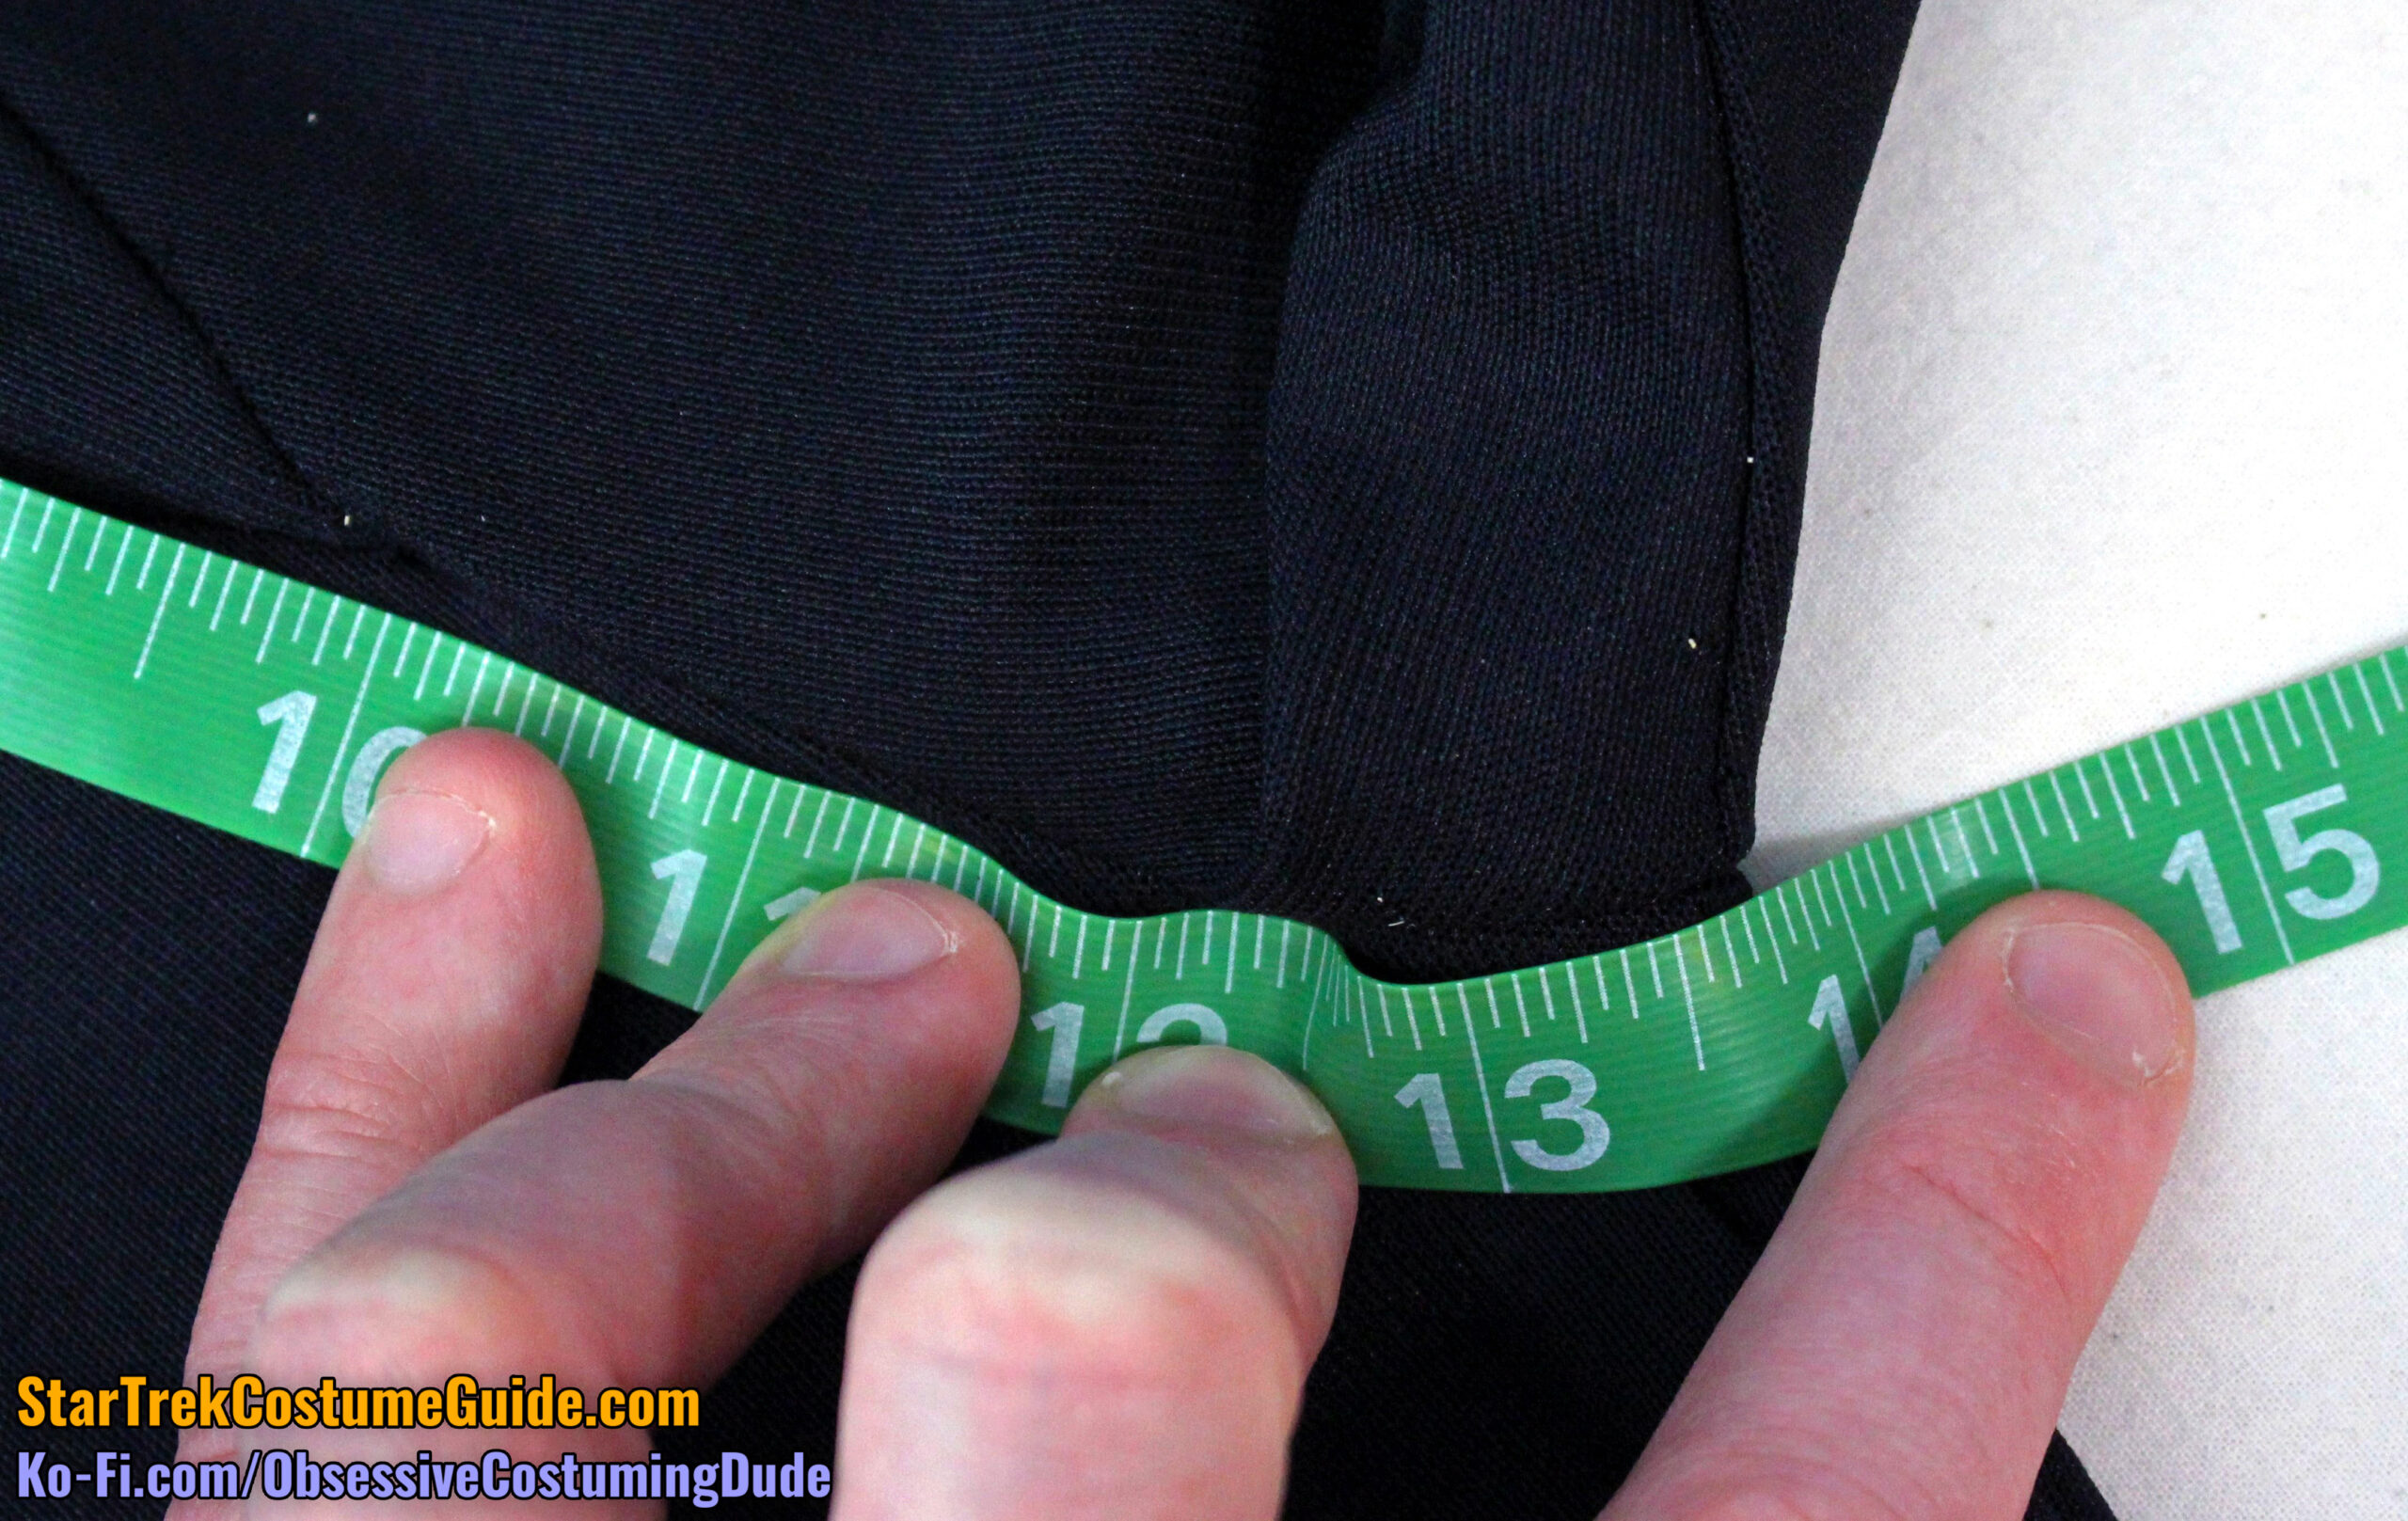
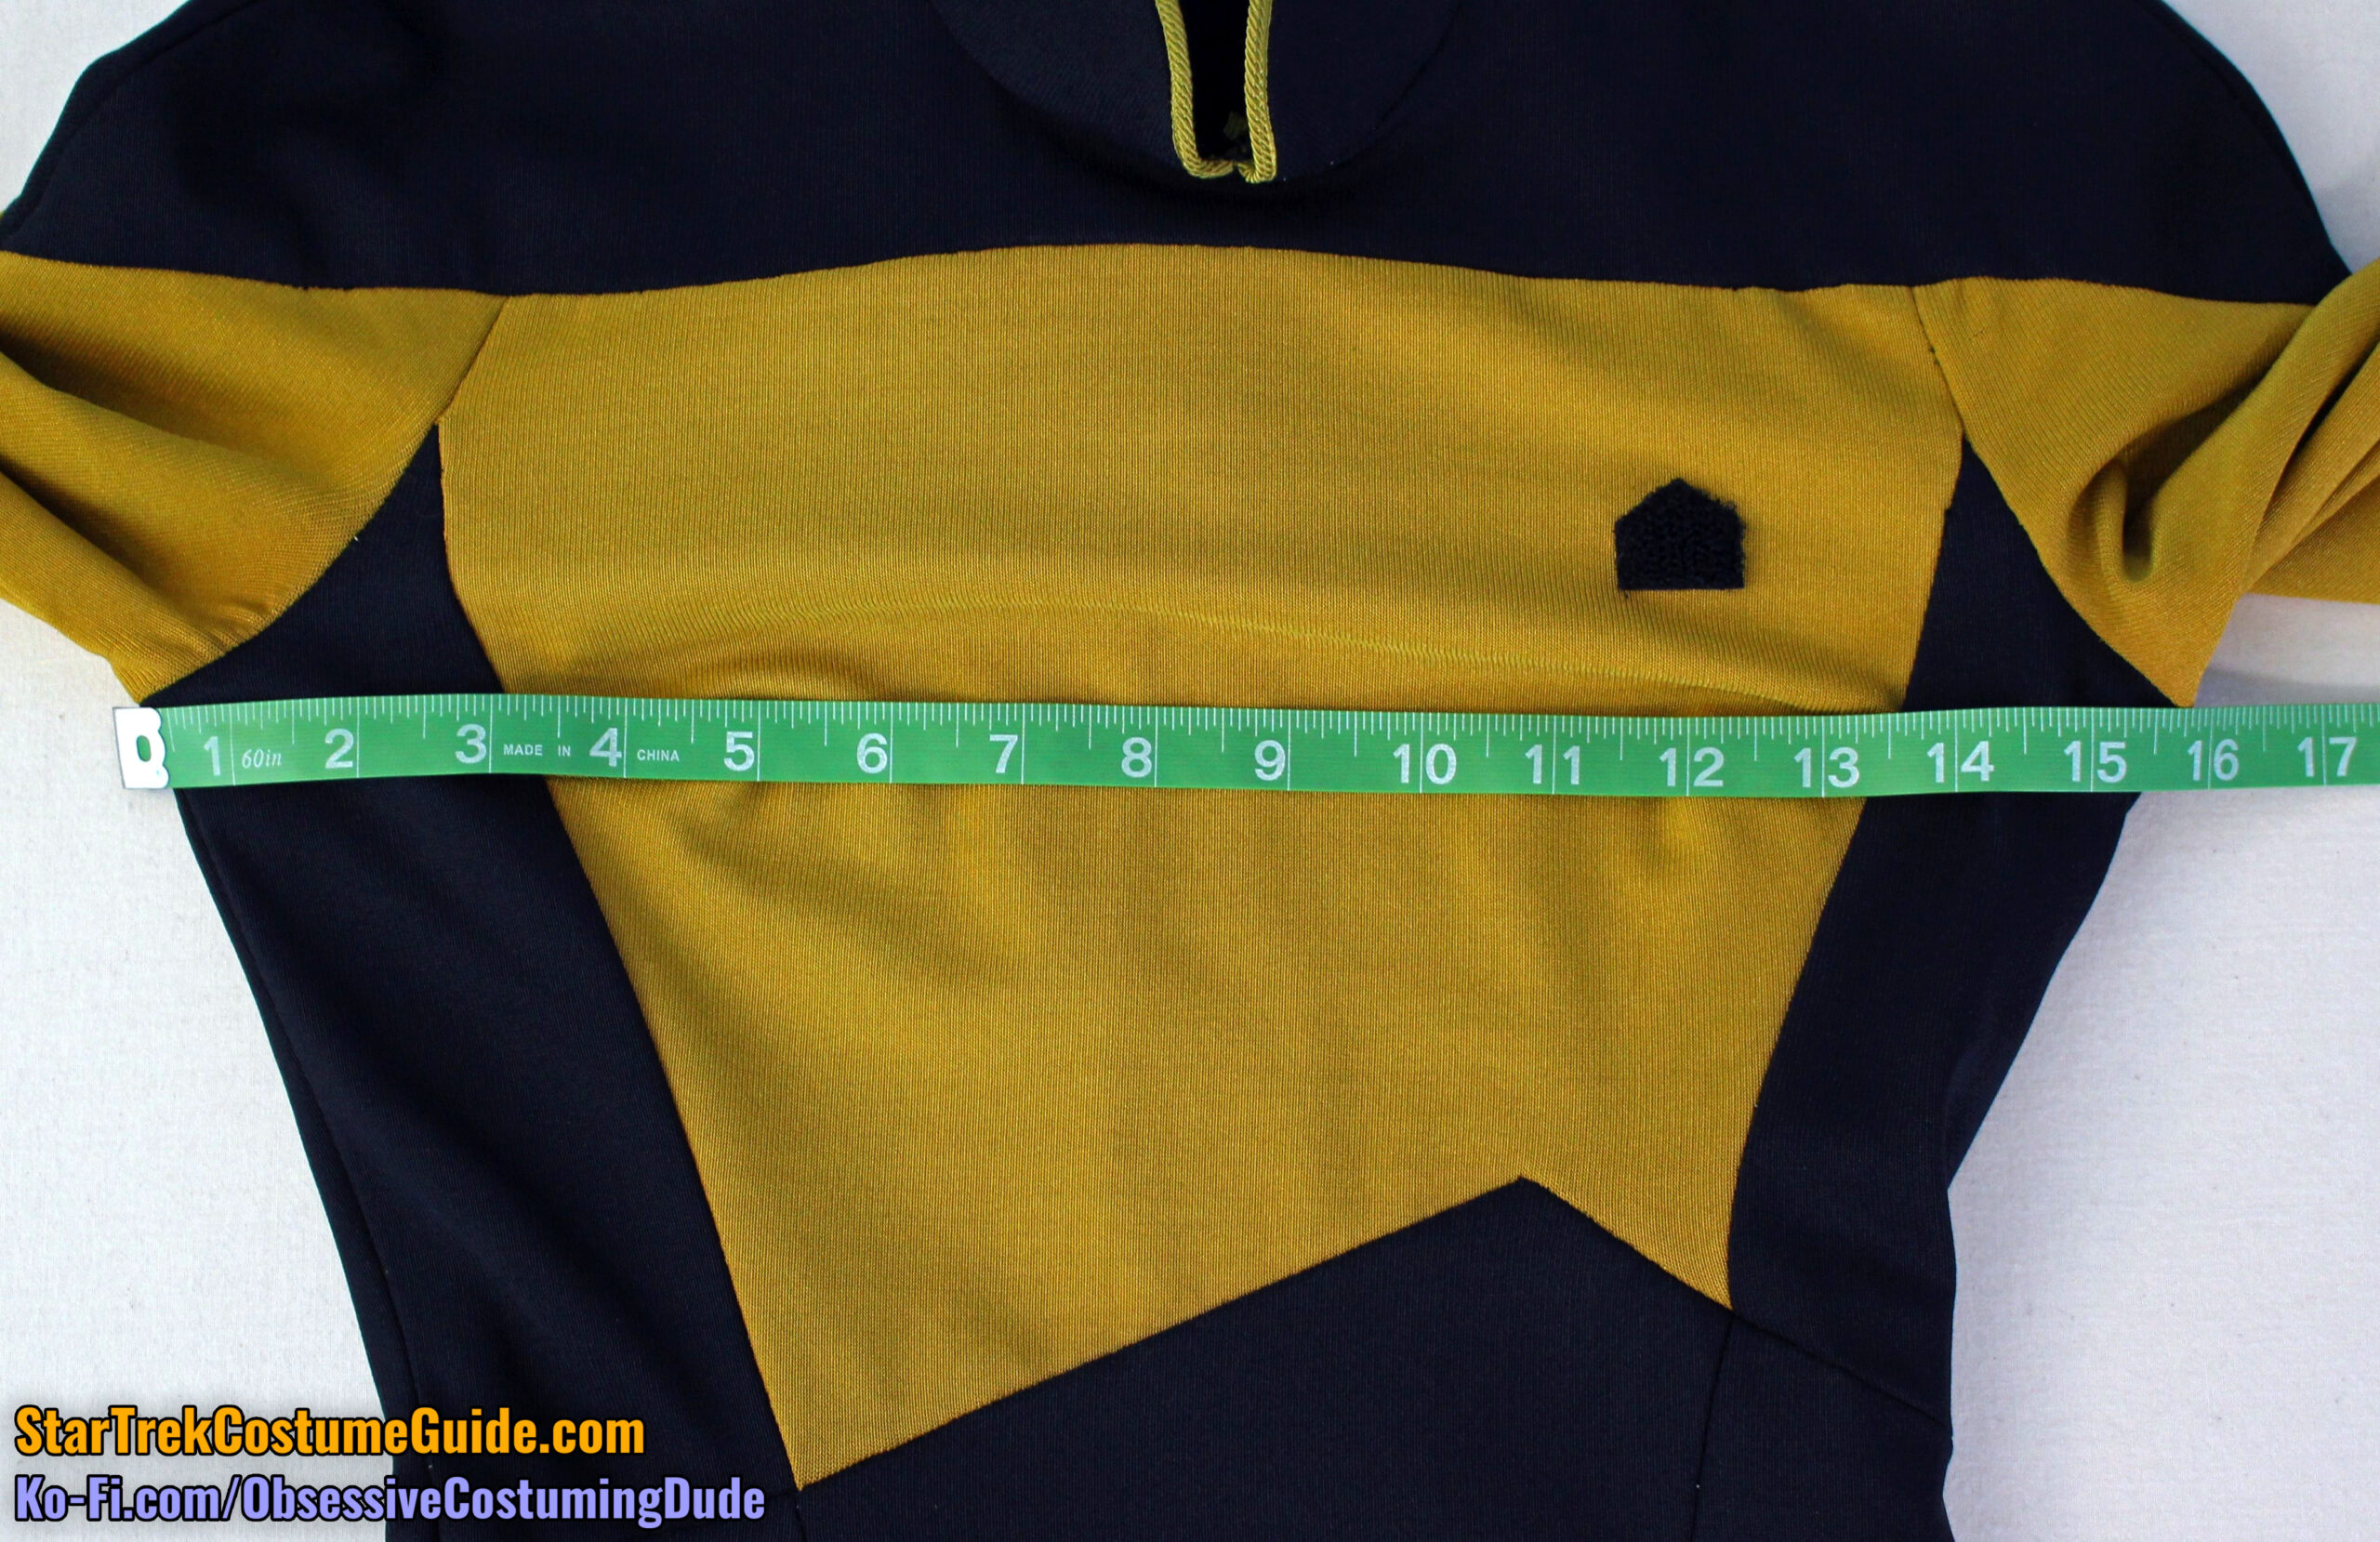
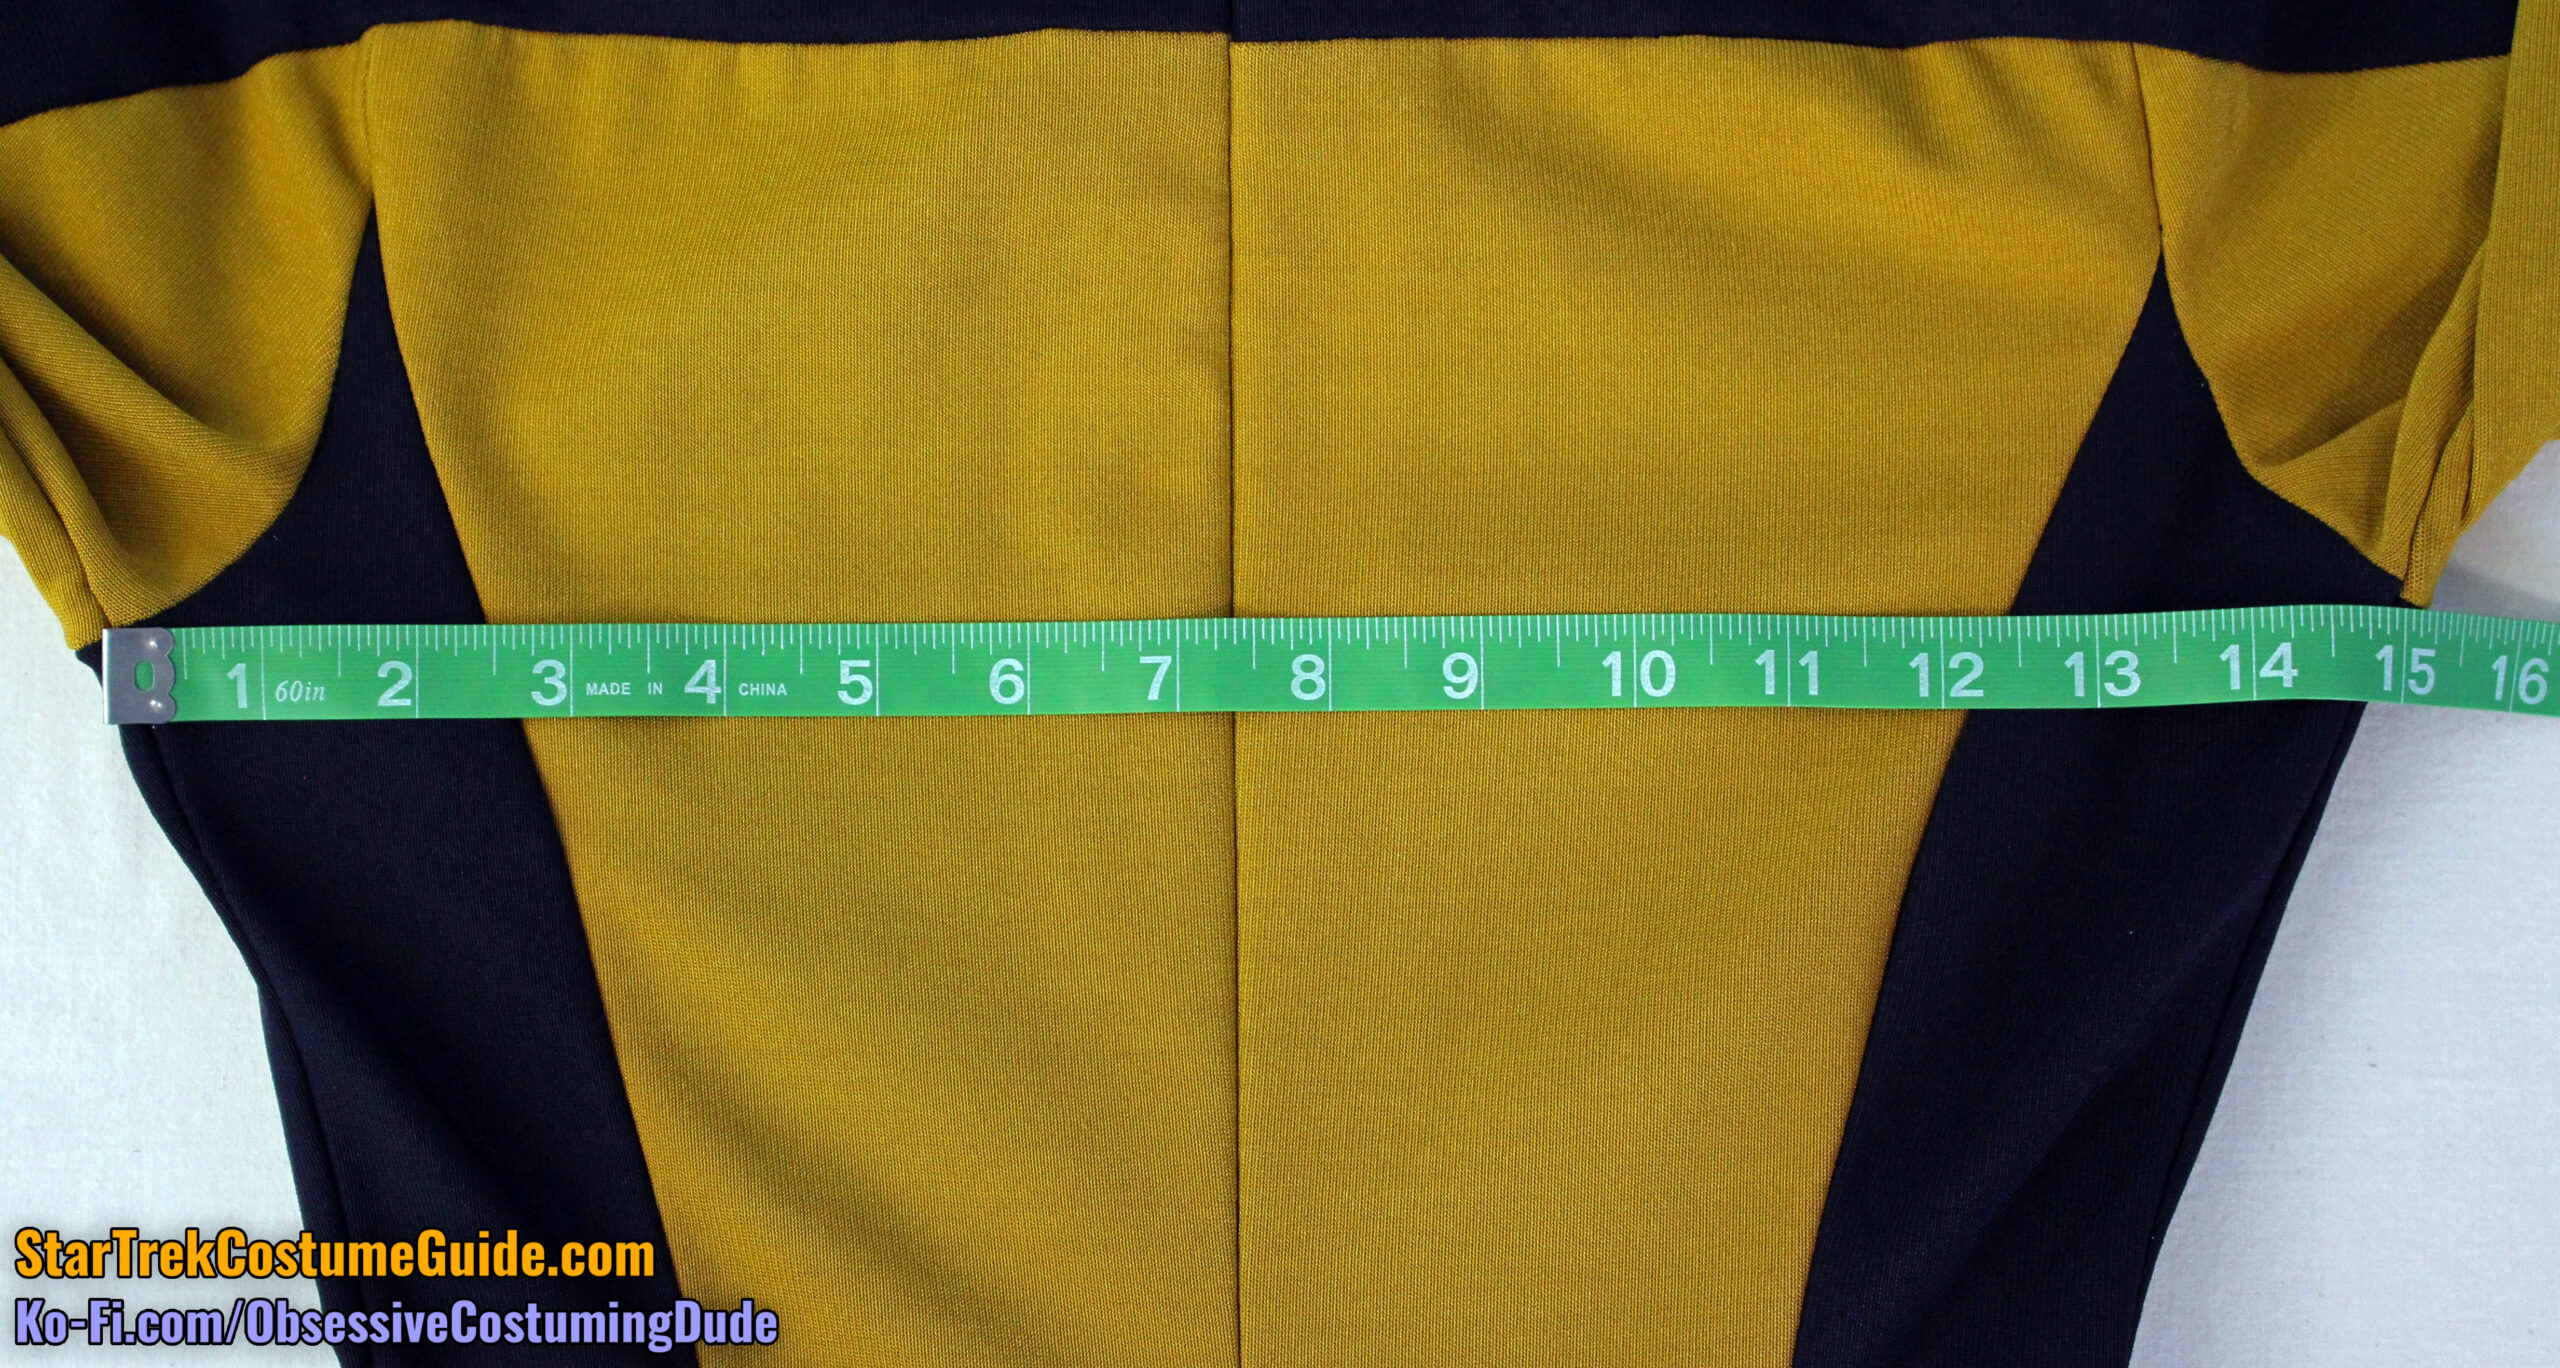
Nevertheless, the jumpsuit chest/bust measured approximately 16” across the front at the lower armscye (underarm), and 15” across the back, for a total chest/bust measurement of 31”.
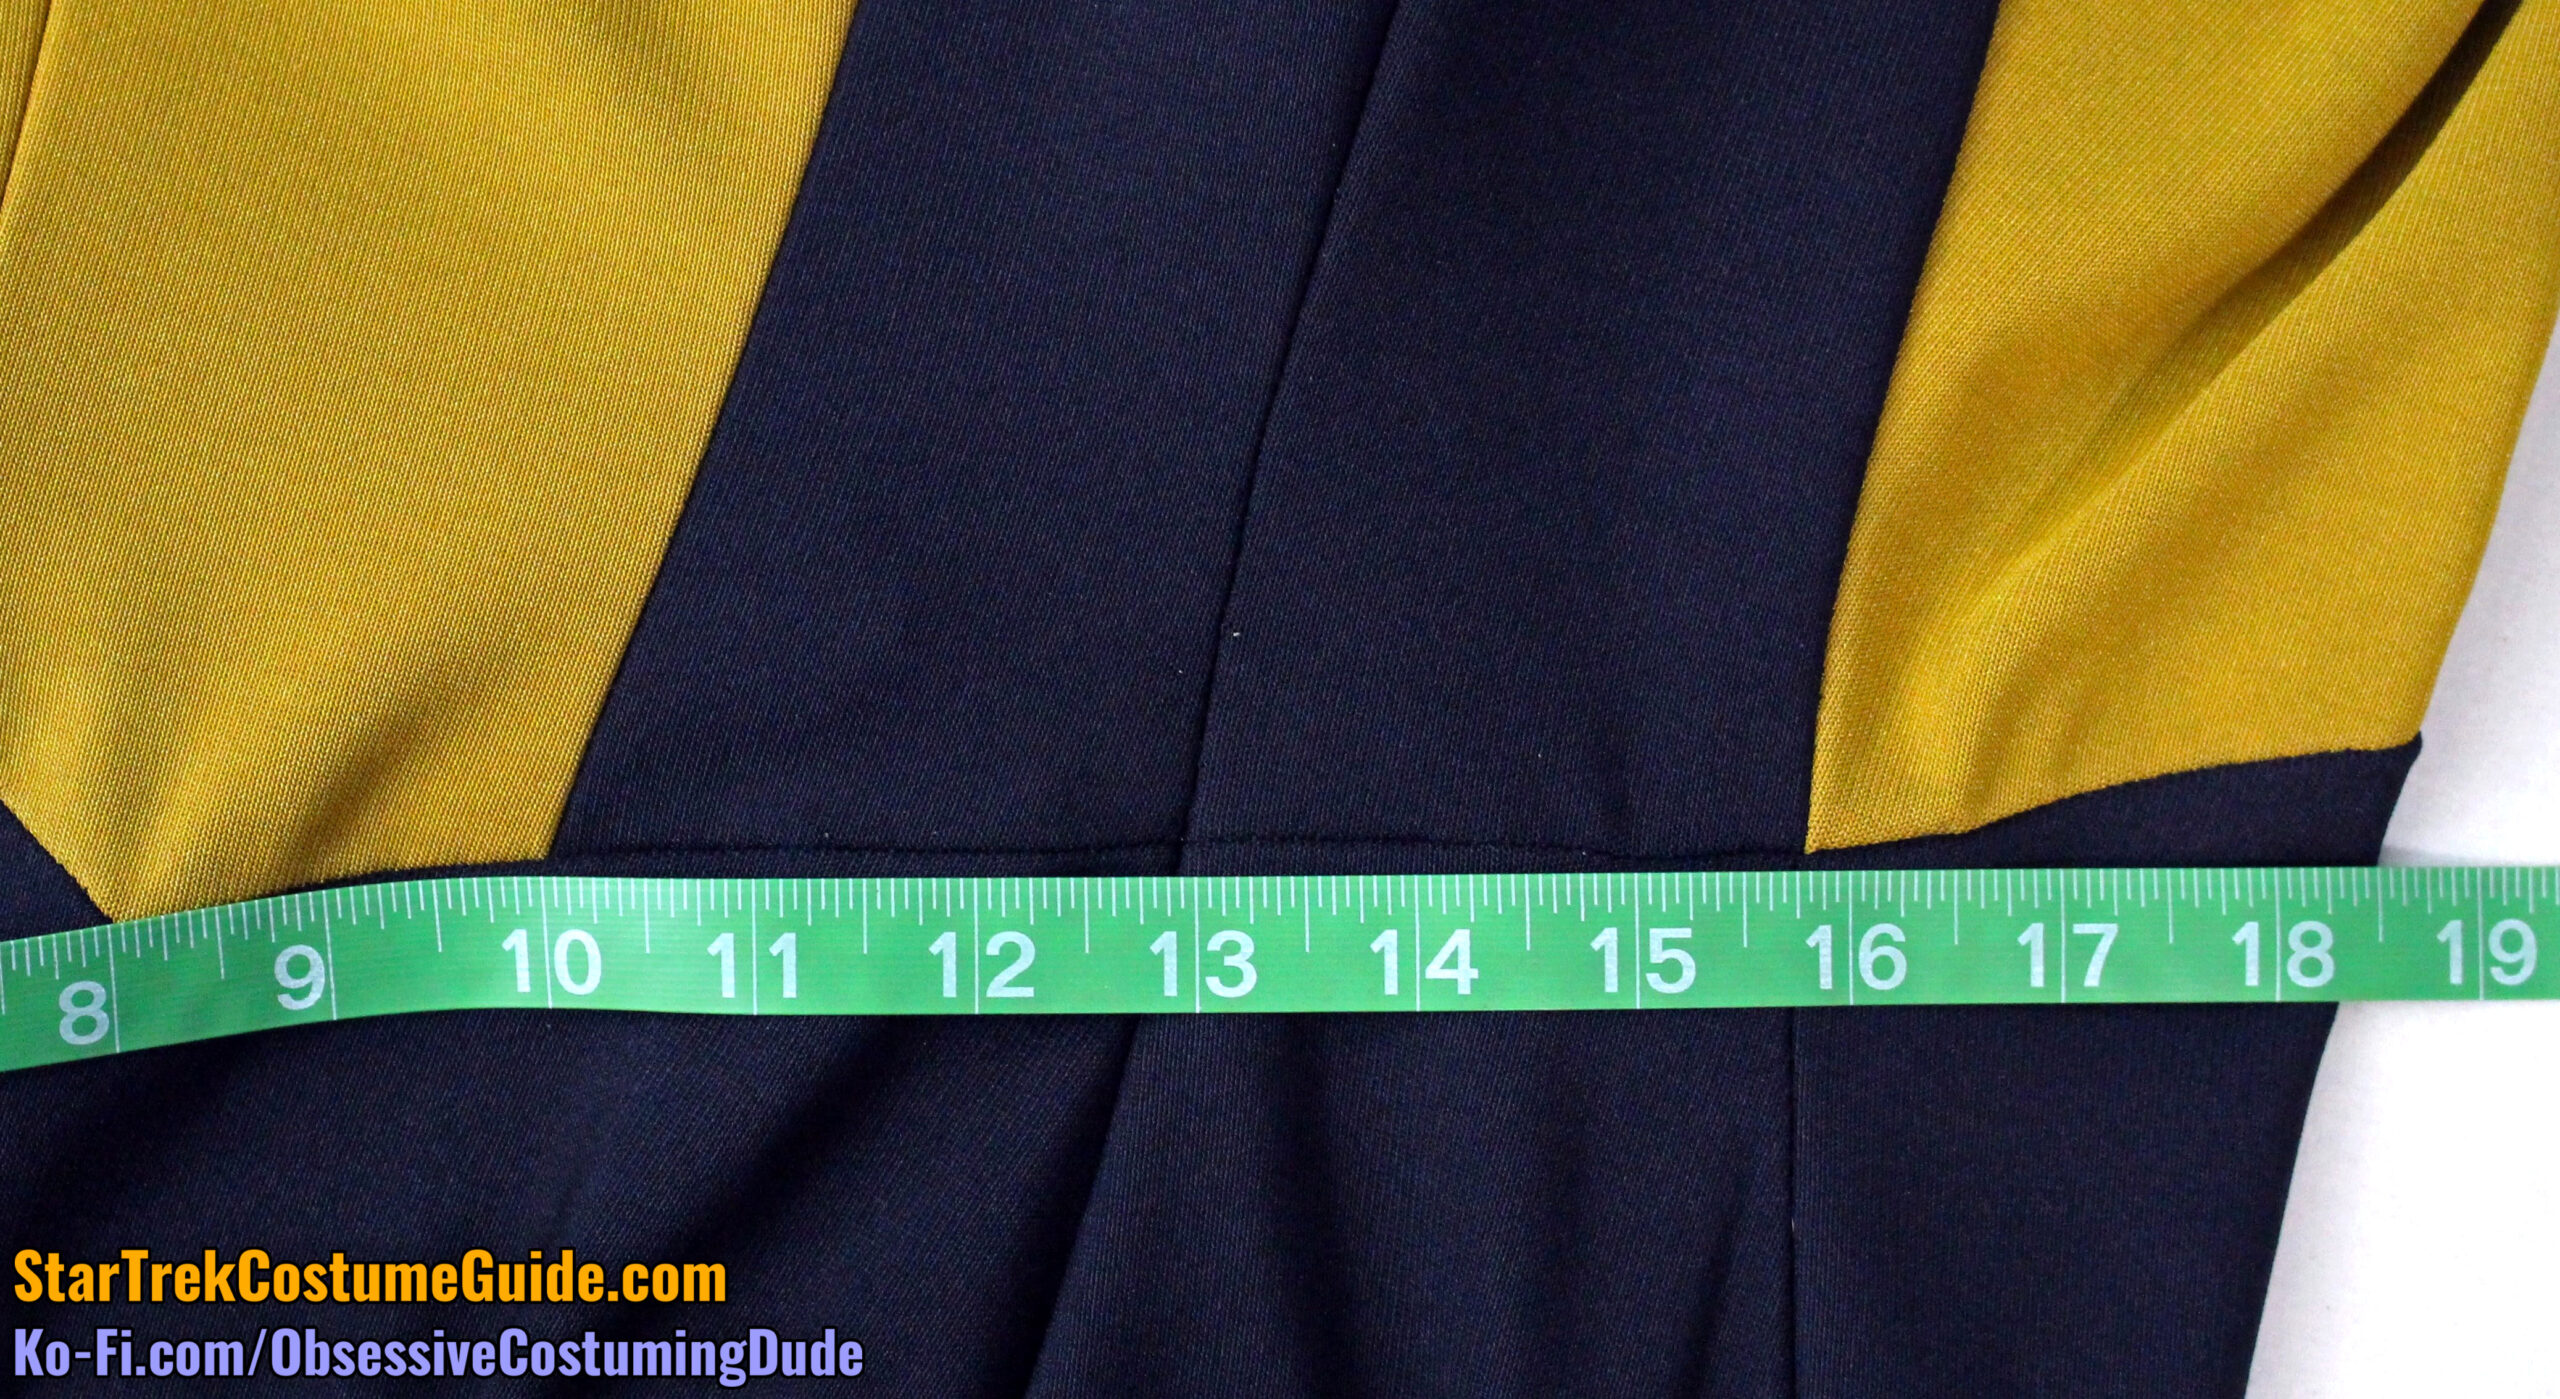
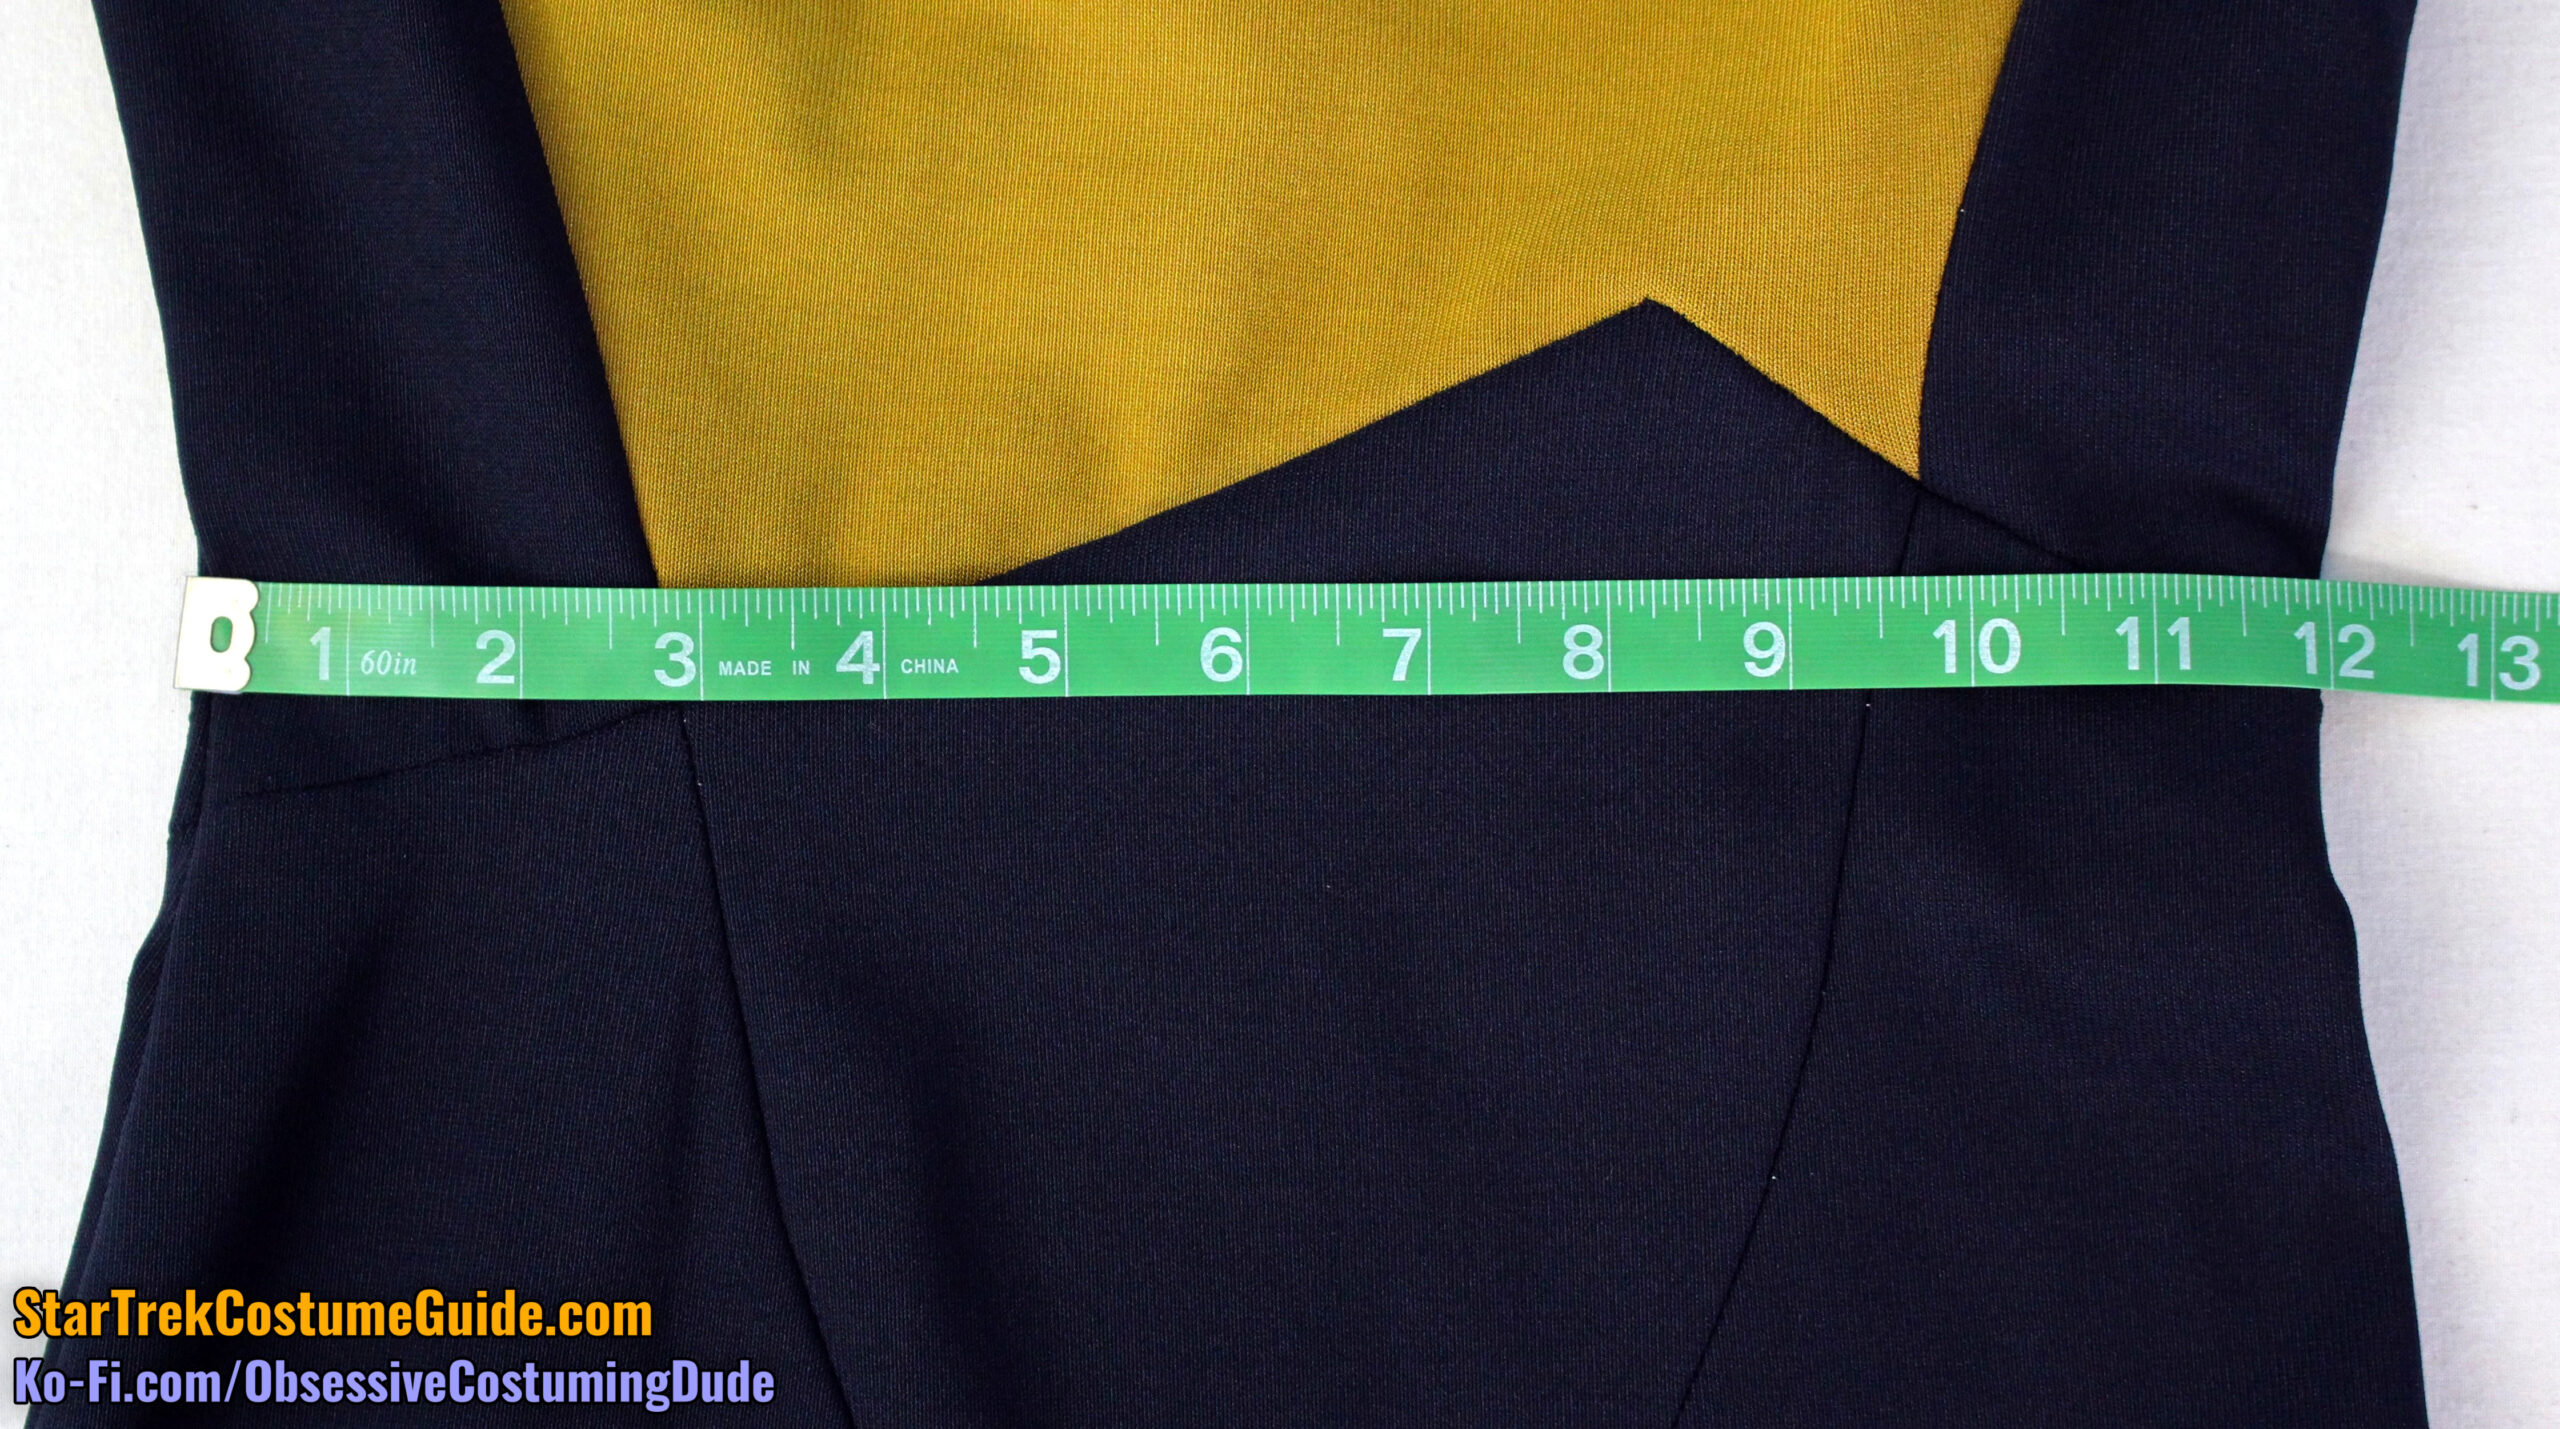
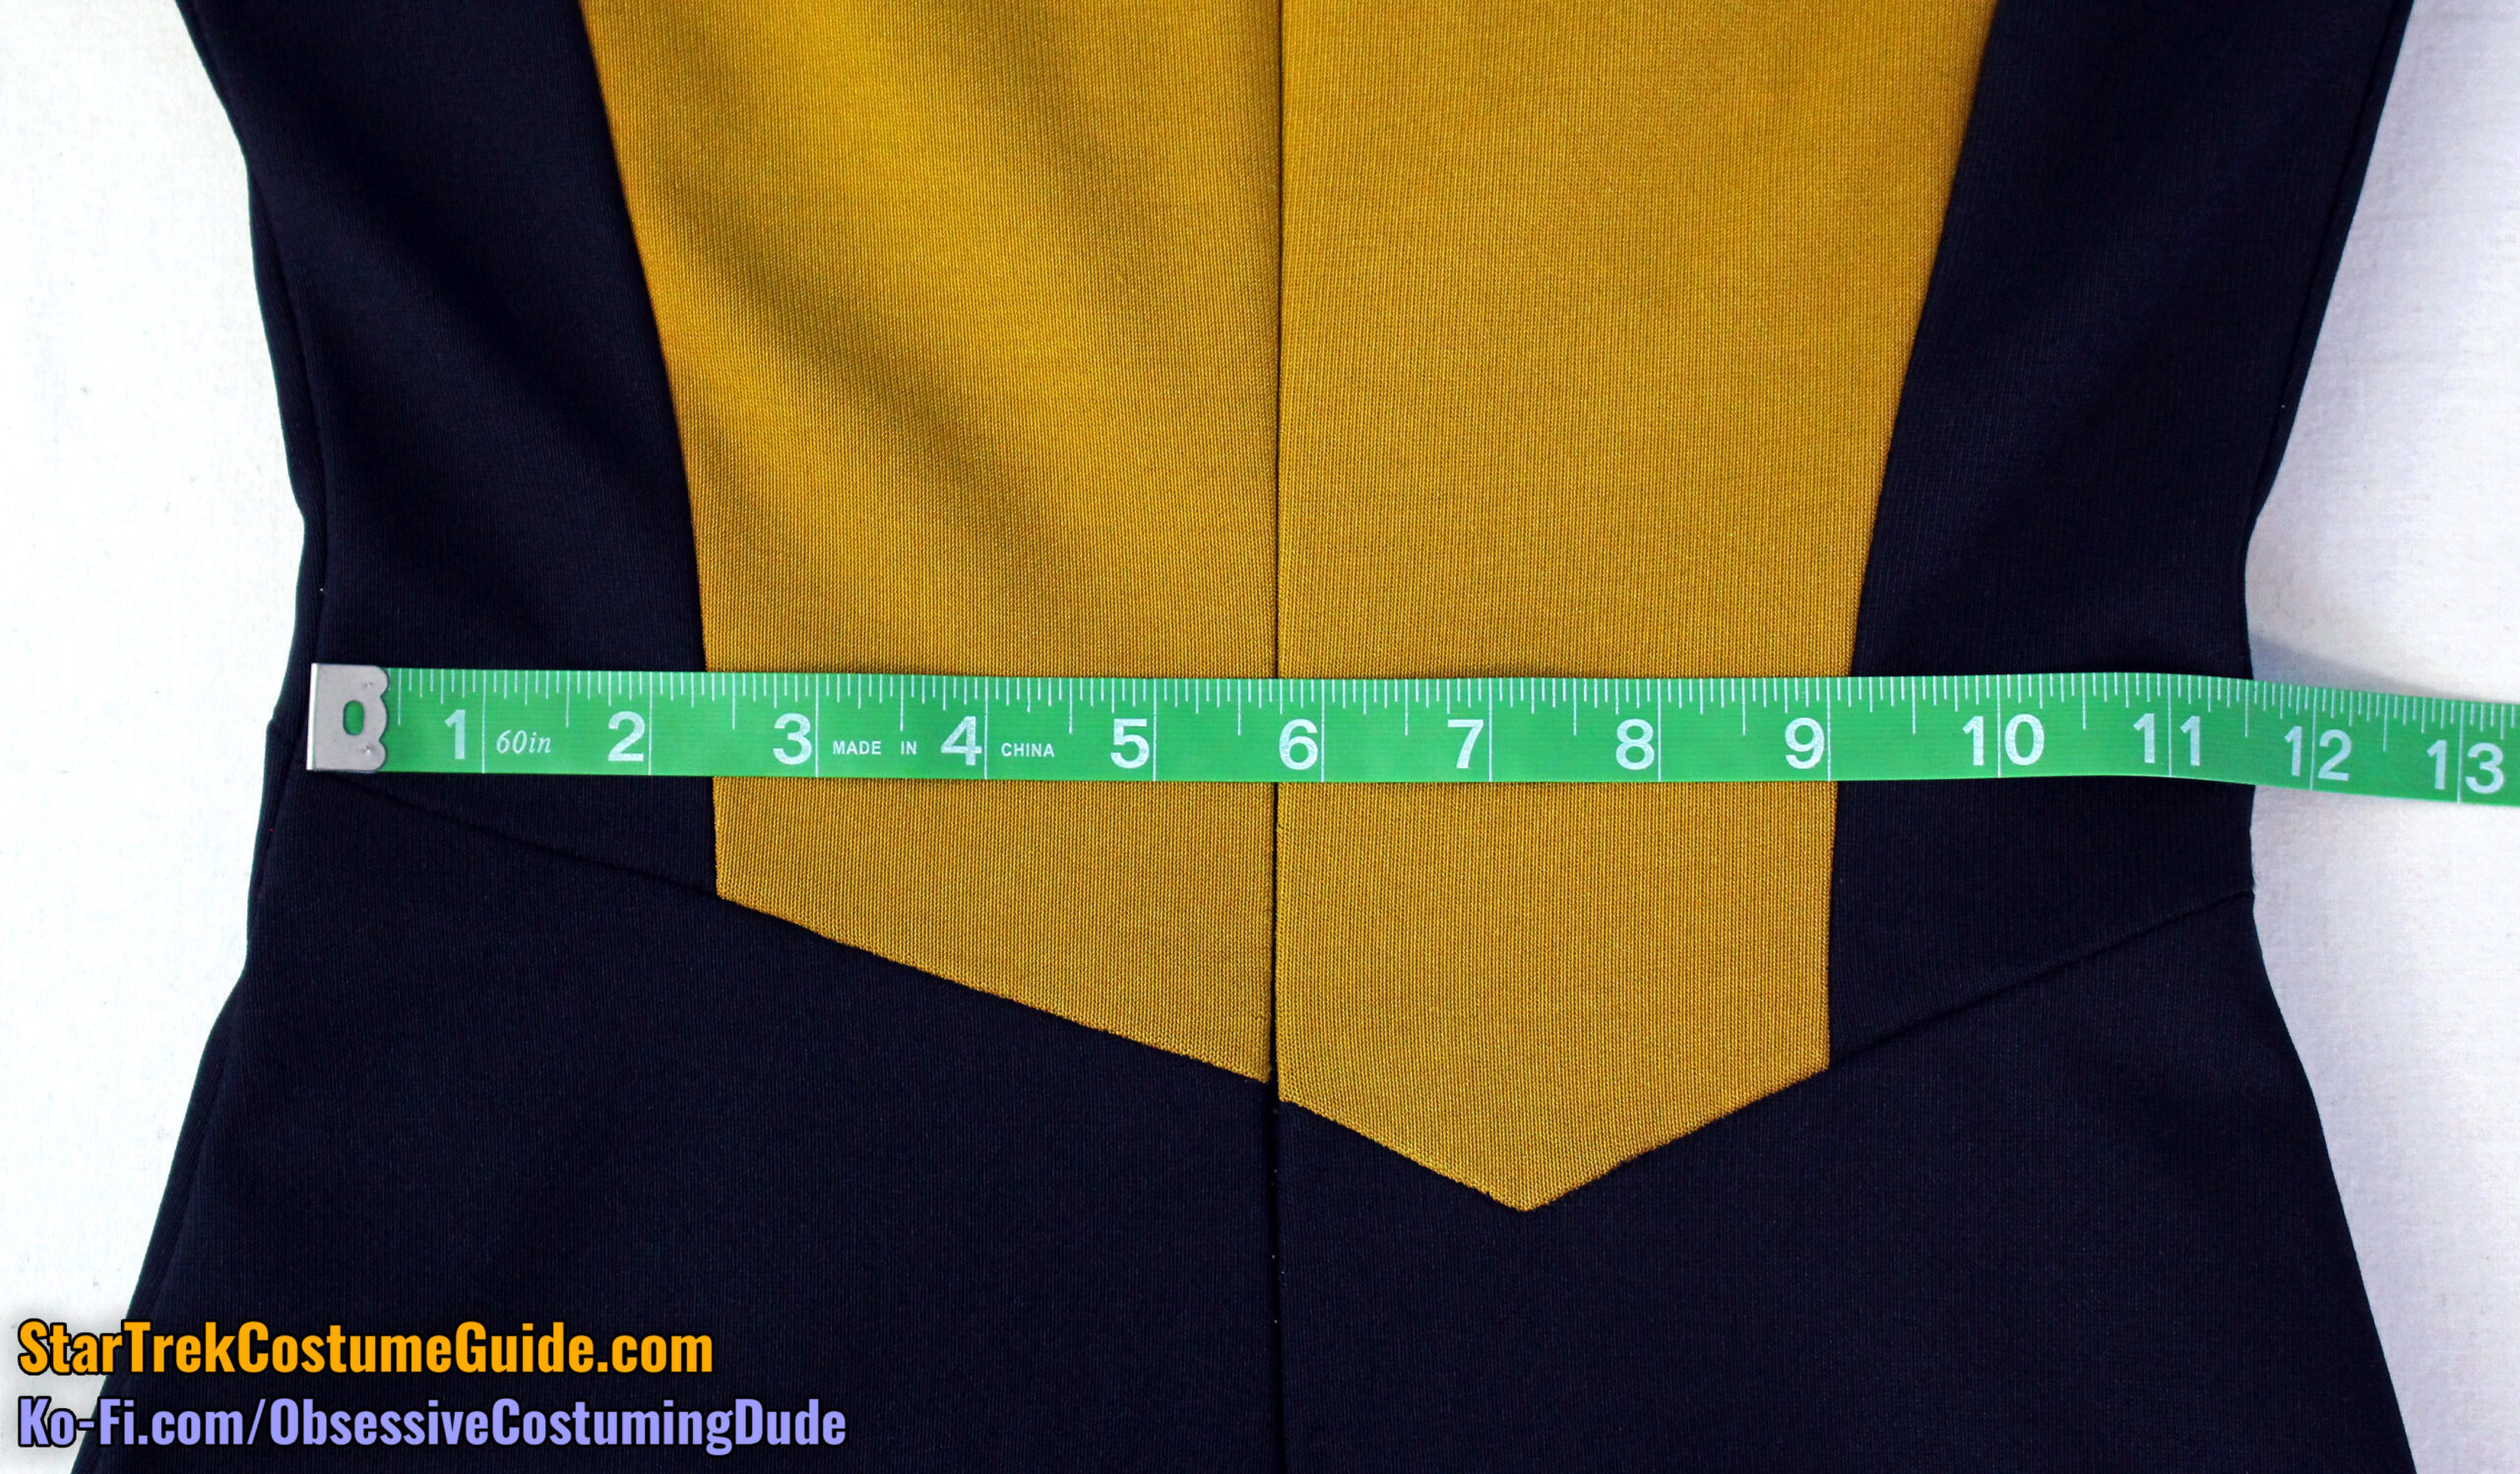
The front waist measured 12” and the back waist measured 11 ½”, for a total waist measurement of approximately 23 ½”.
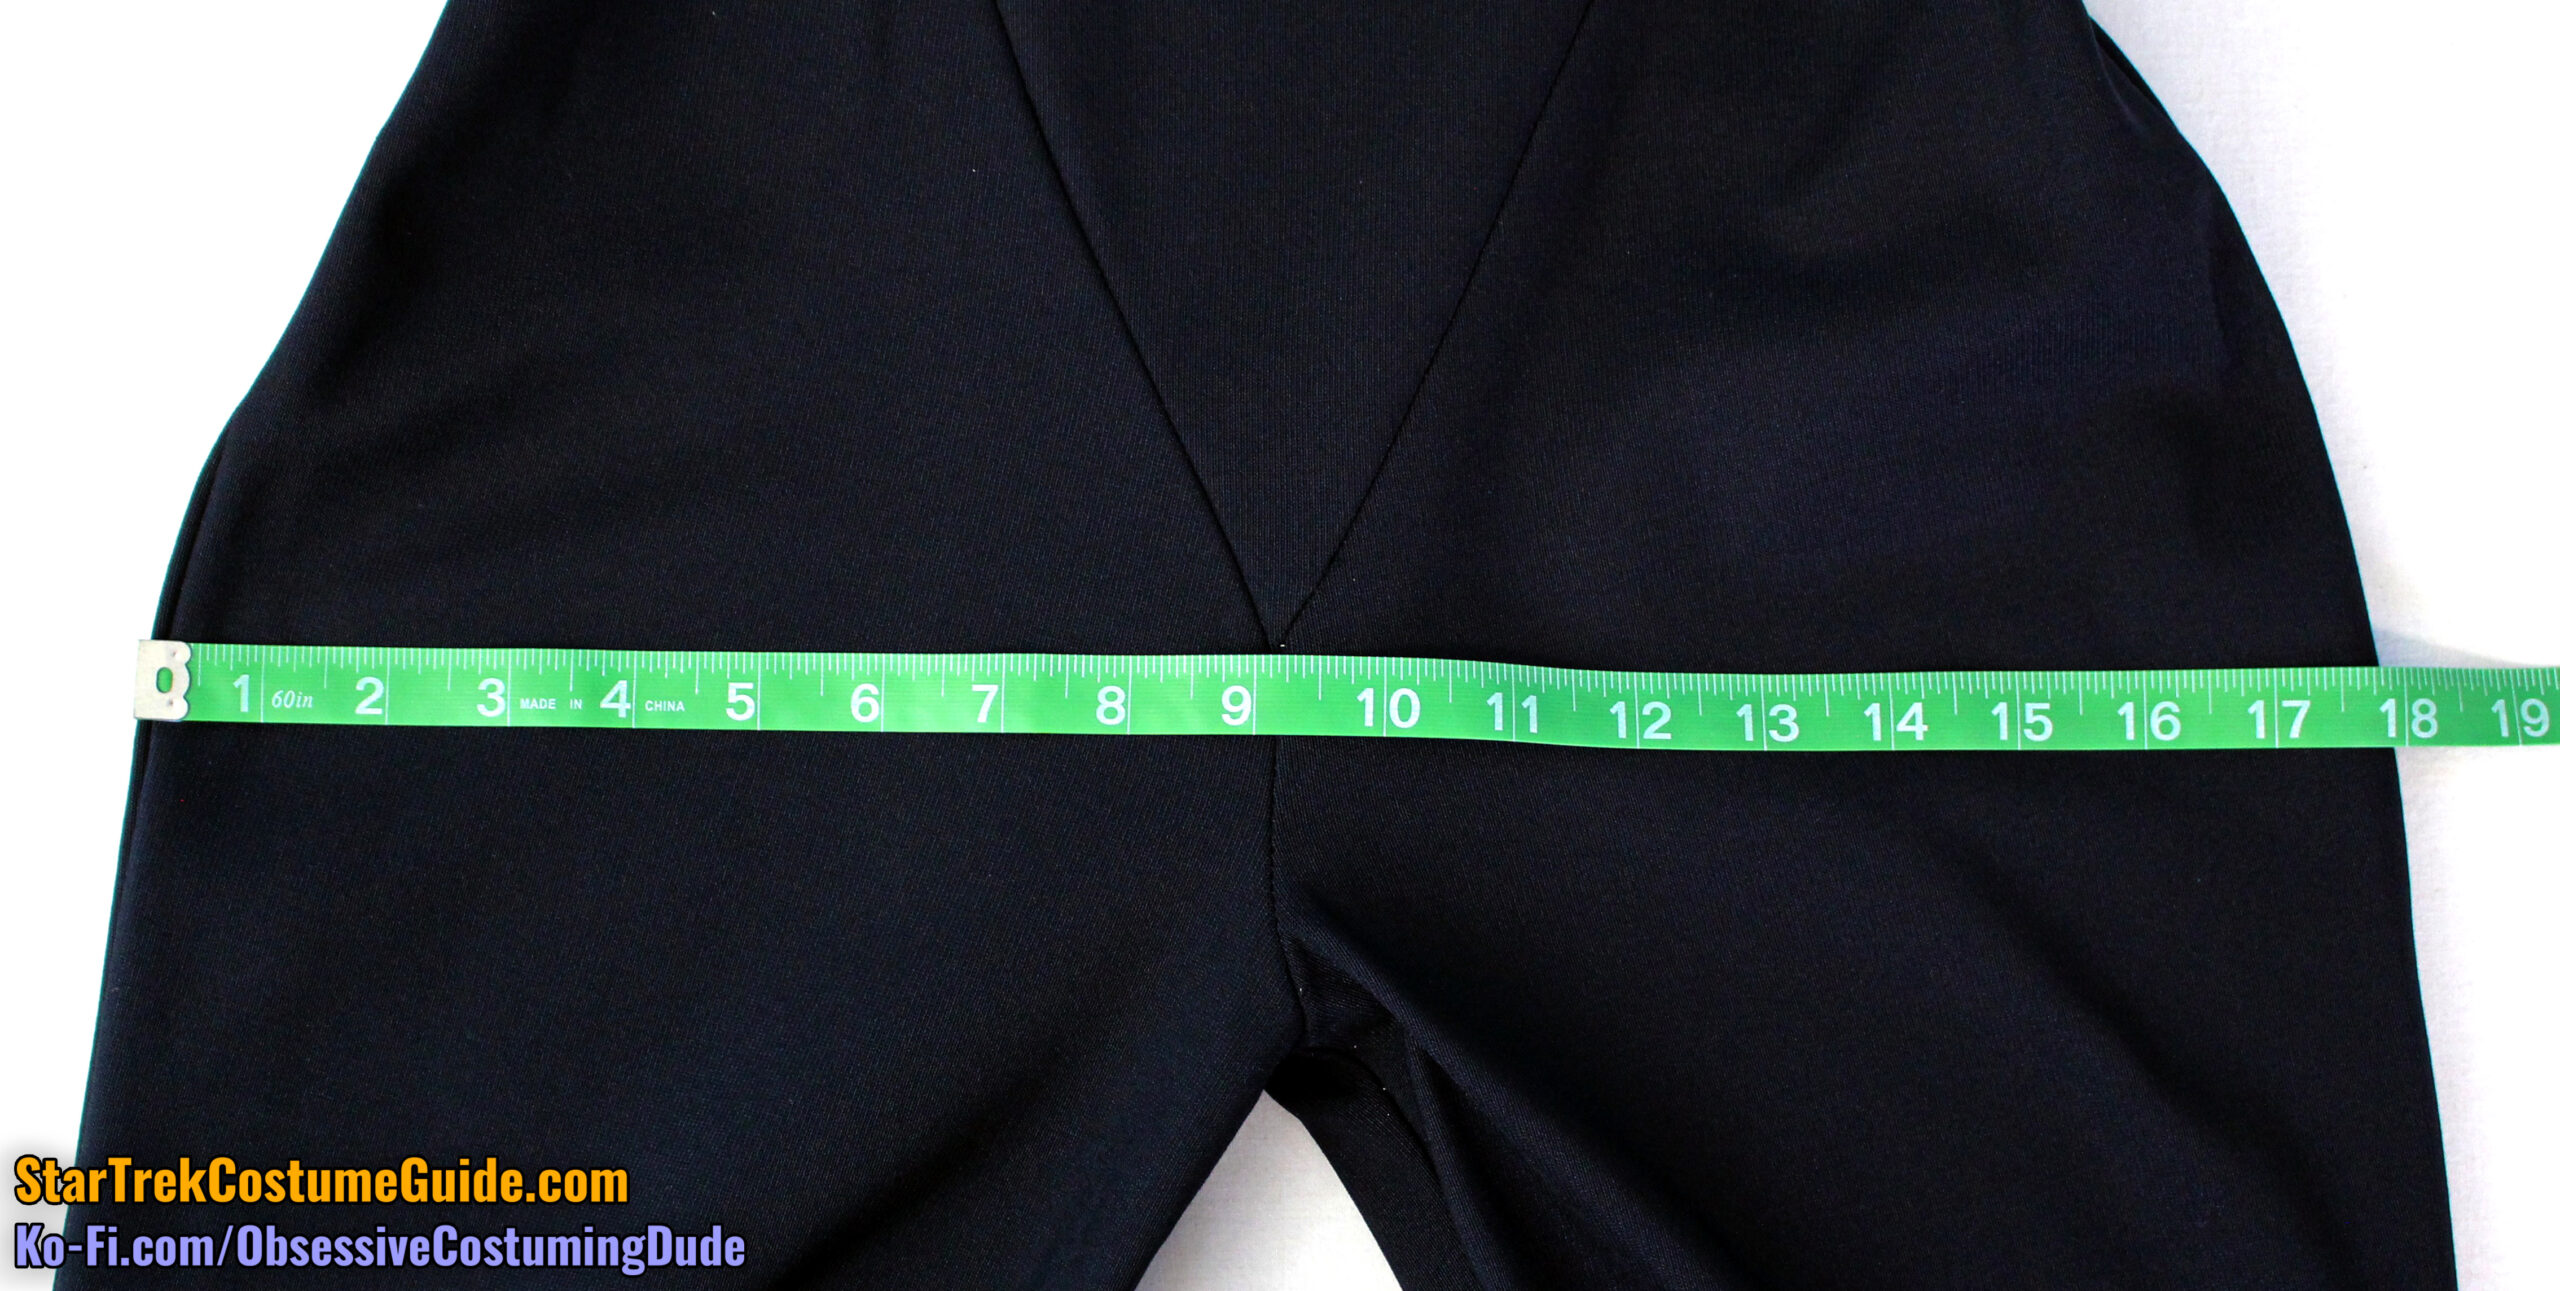
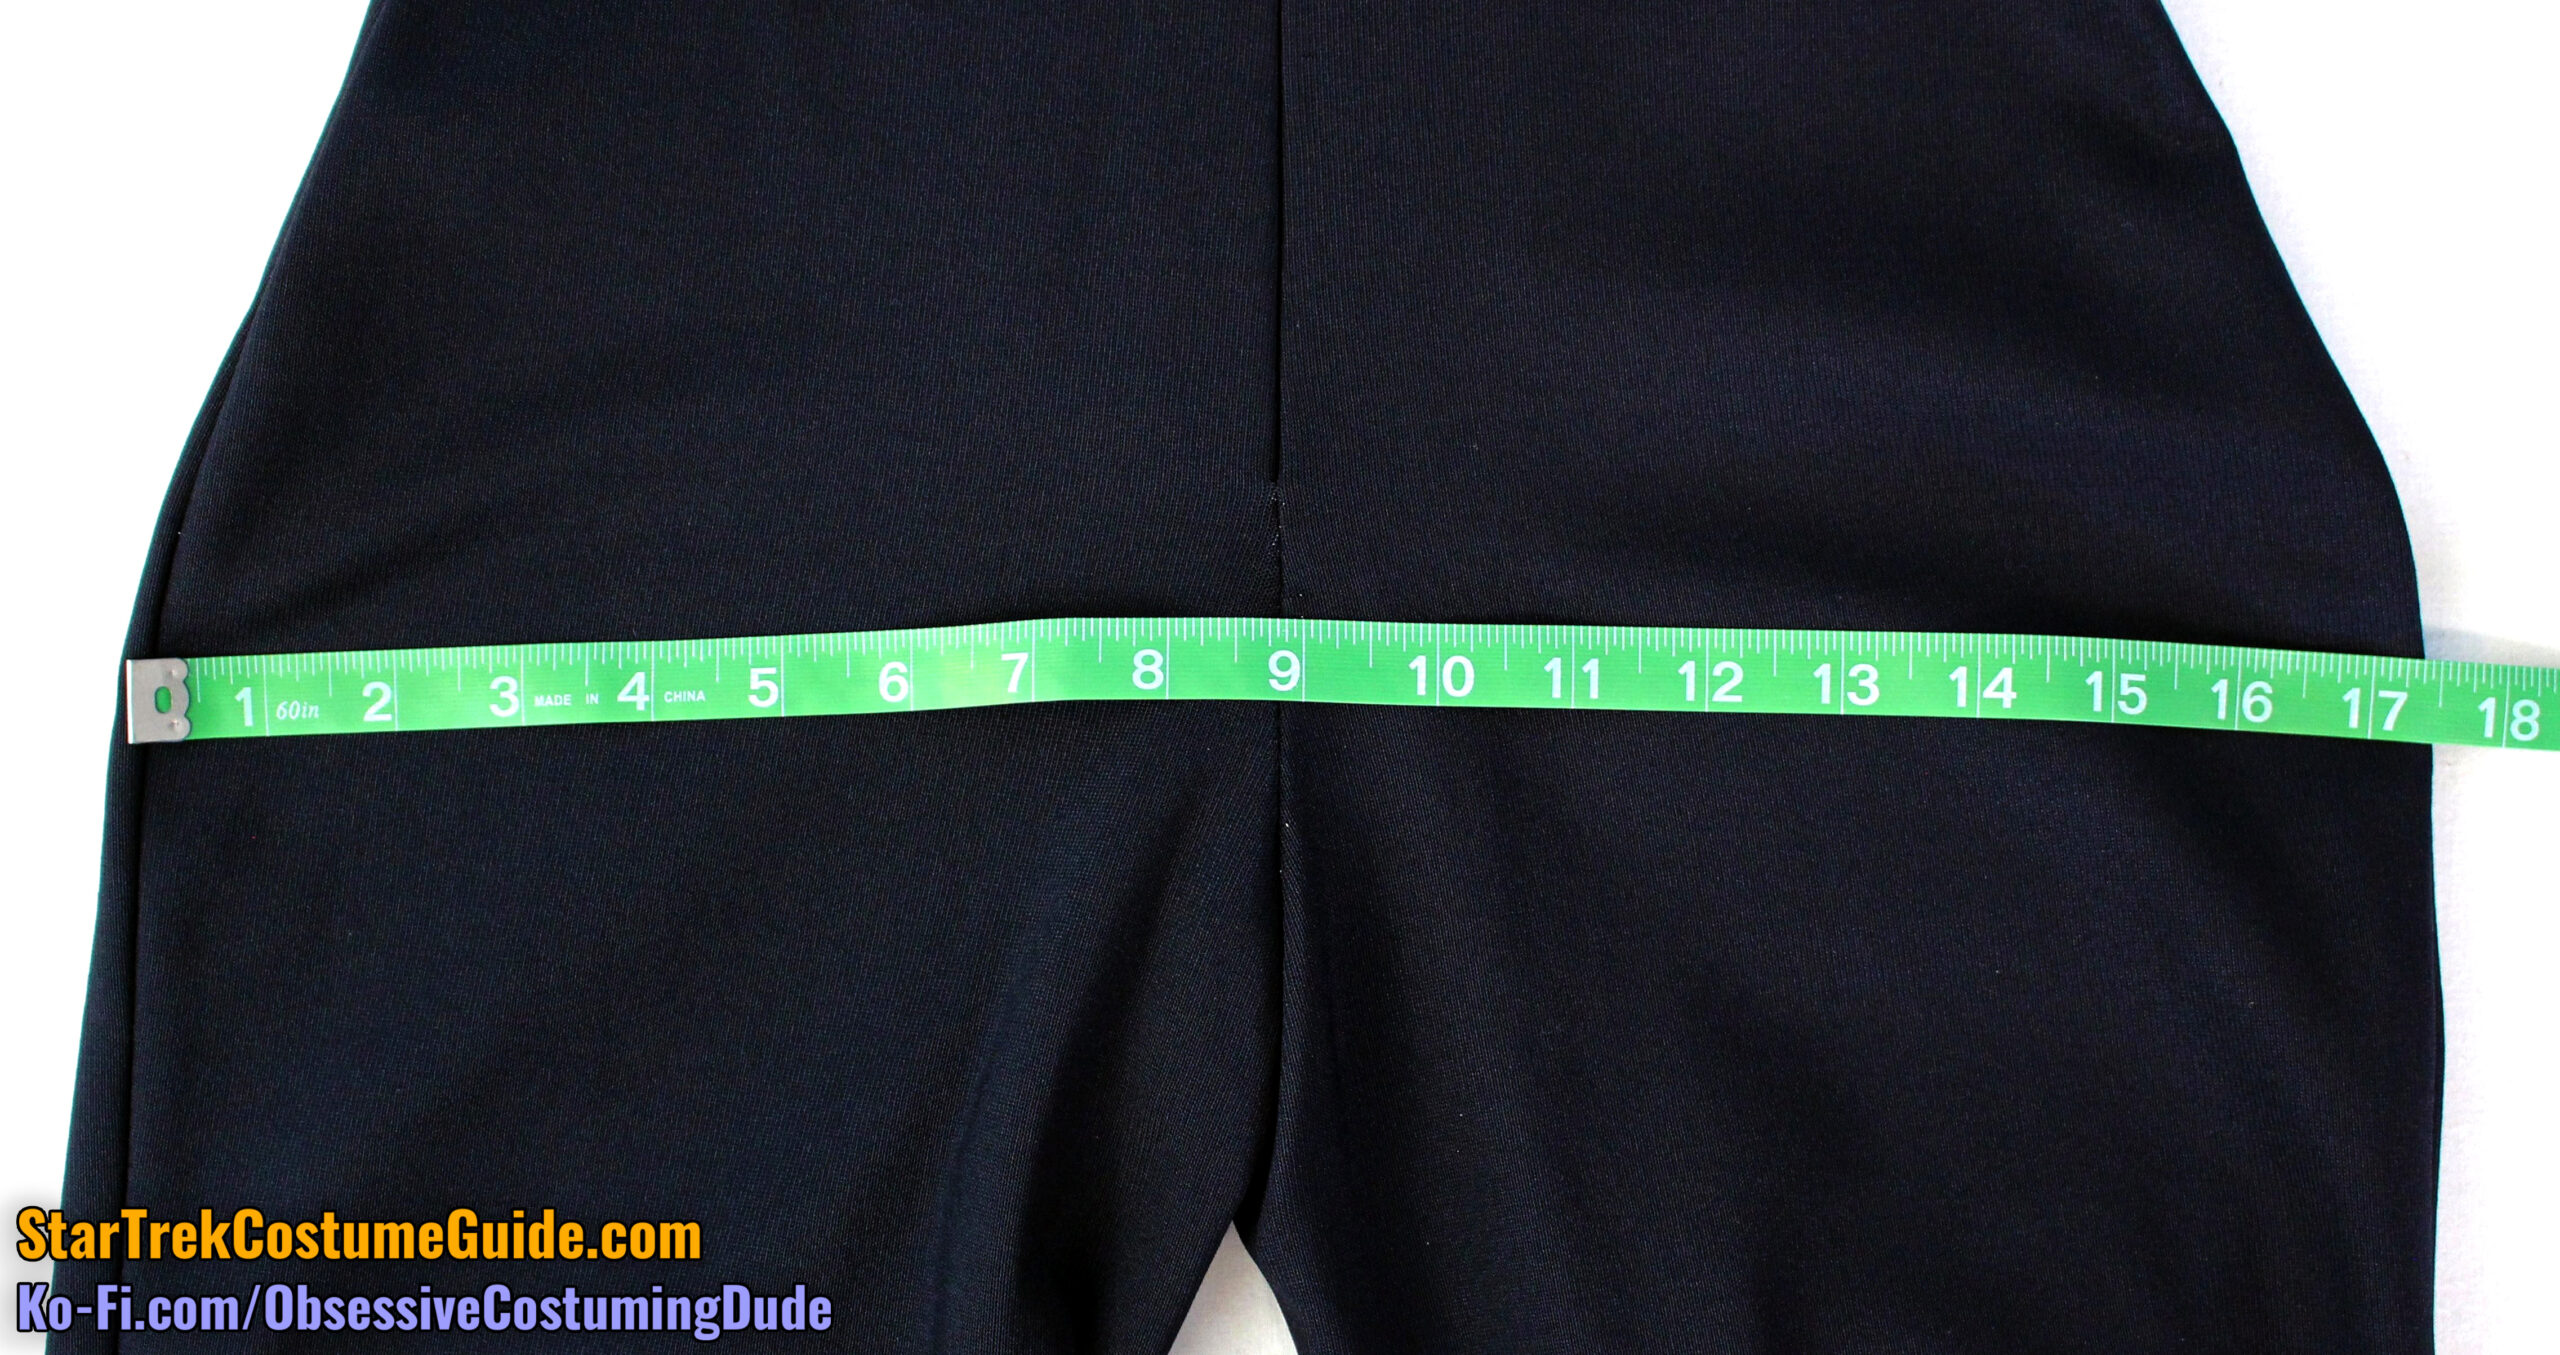
The front hips measured approximately 18” and the back hips measured approximately 17 ½”, for a total hip measurement of approximately 35 ½”.
CLOSURE SYSTEM
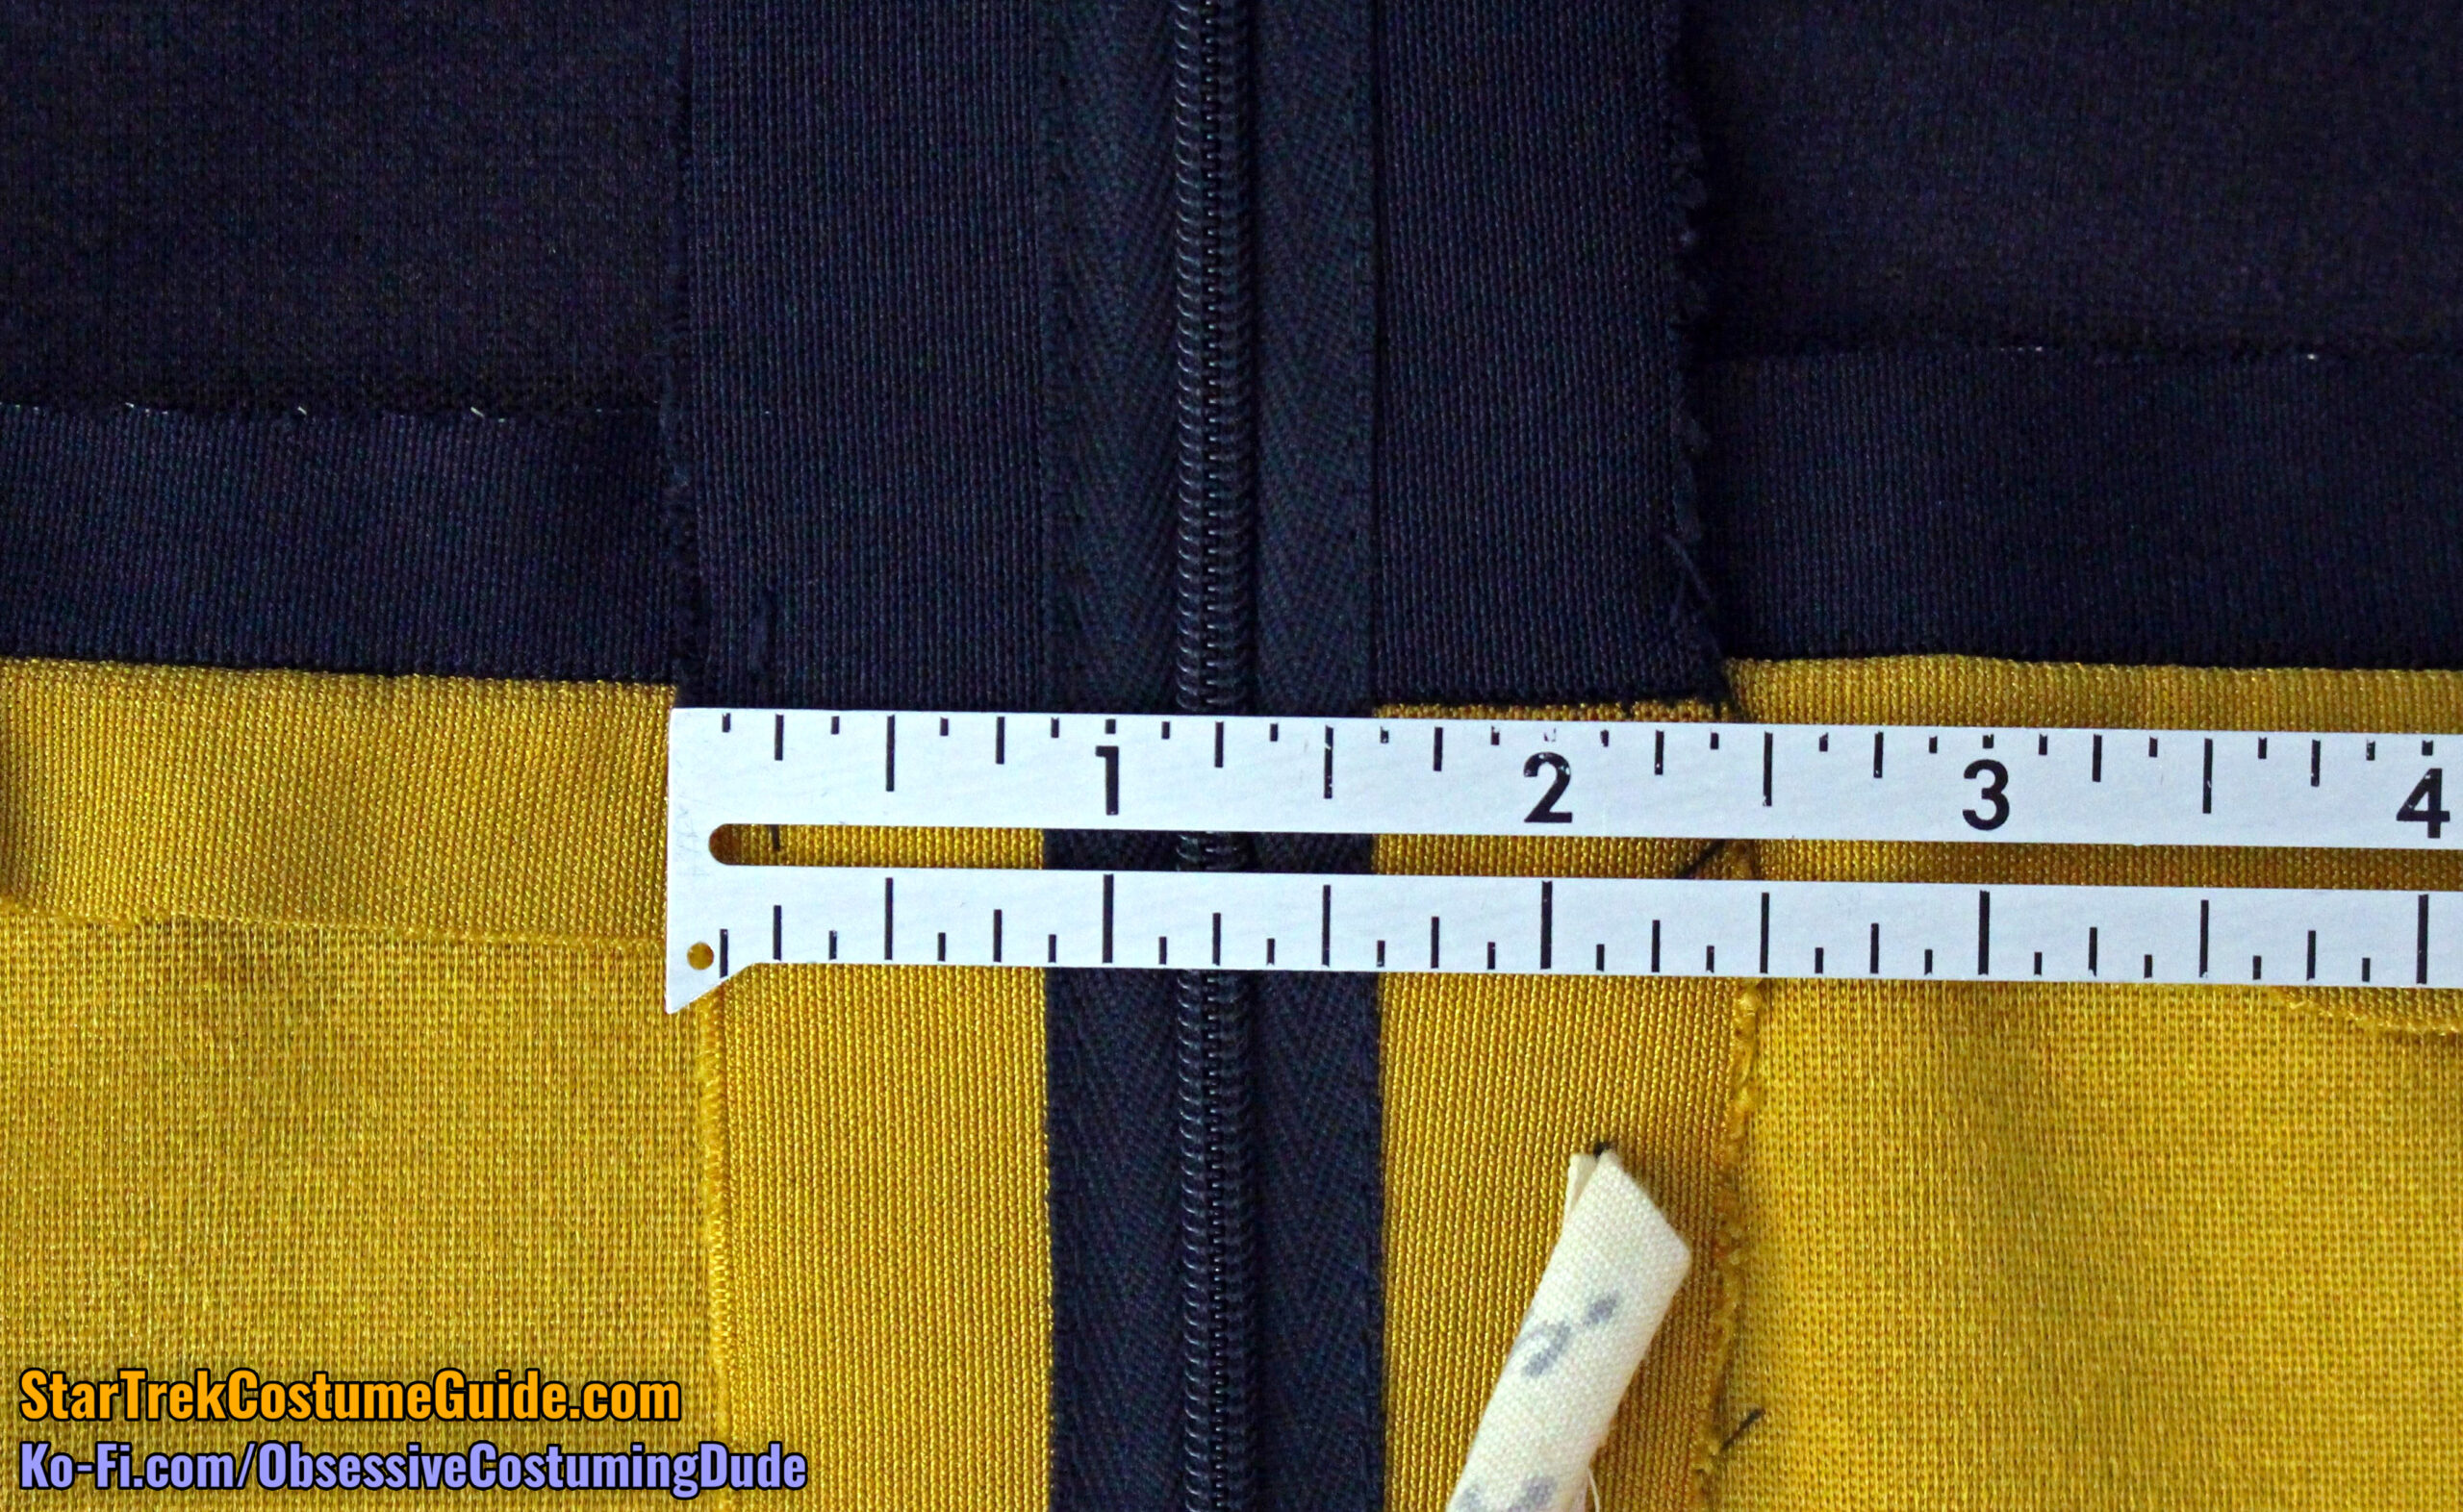
As I mentioned earlier (and you probably already noticed), this jumpsuit style zipped up the back via an invisible zipper.
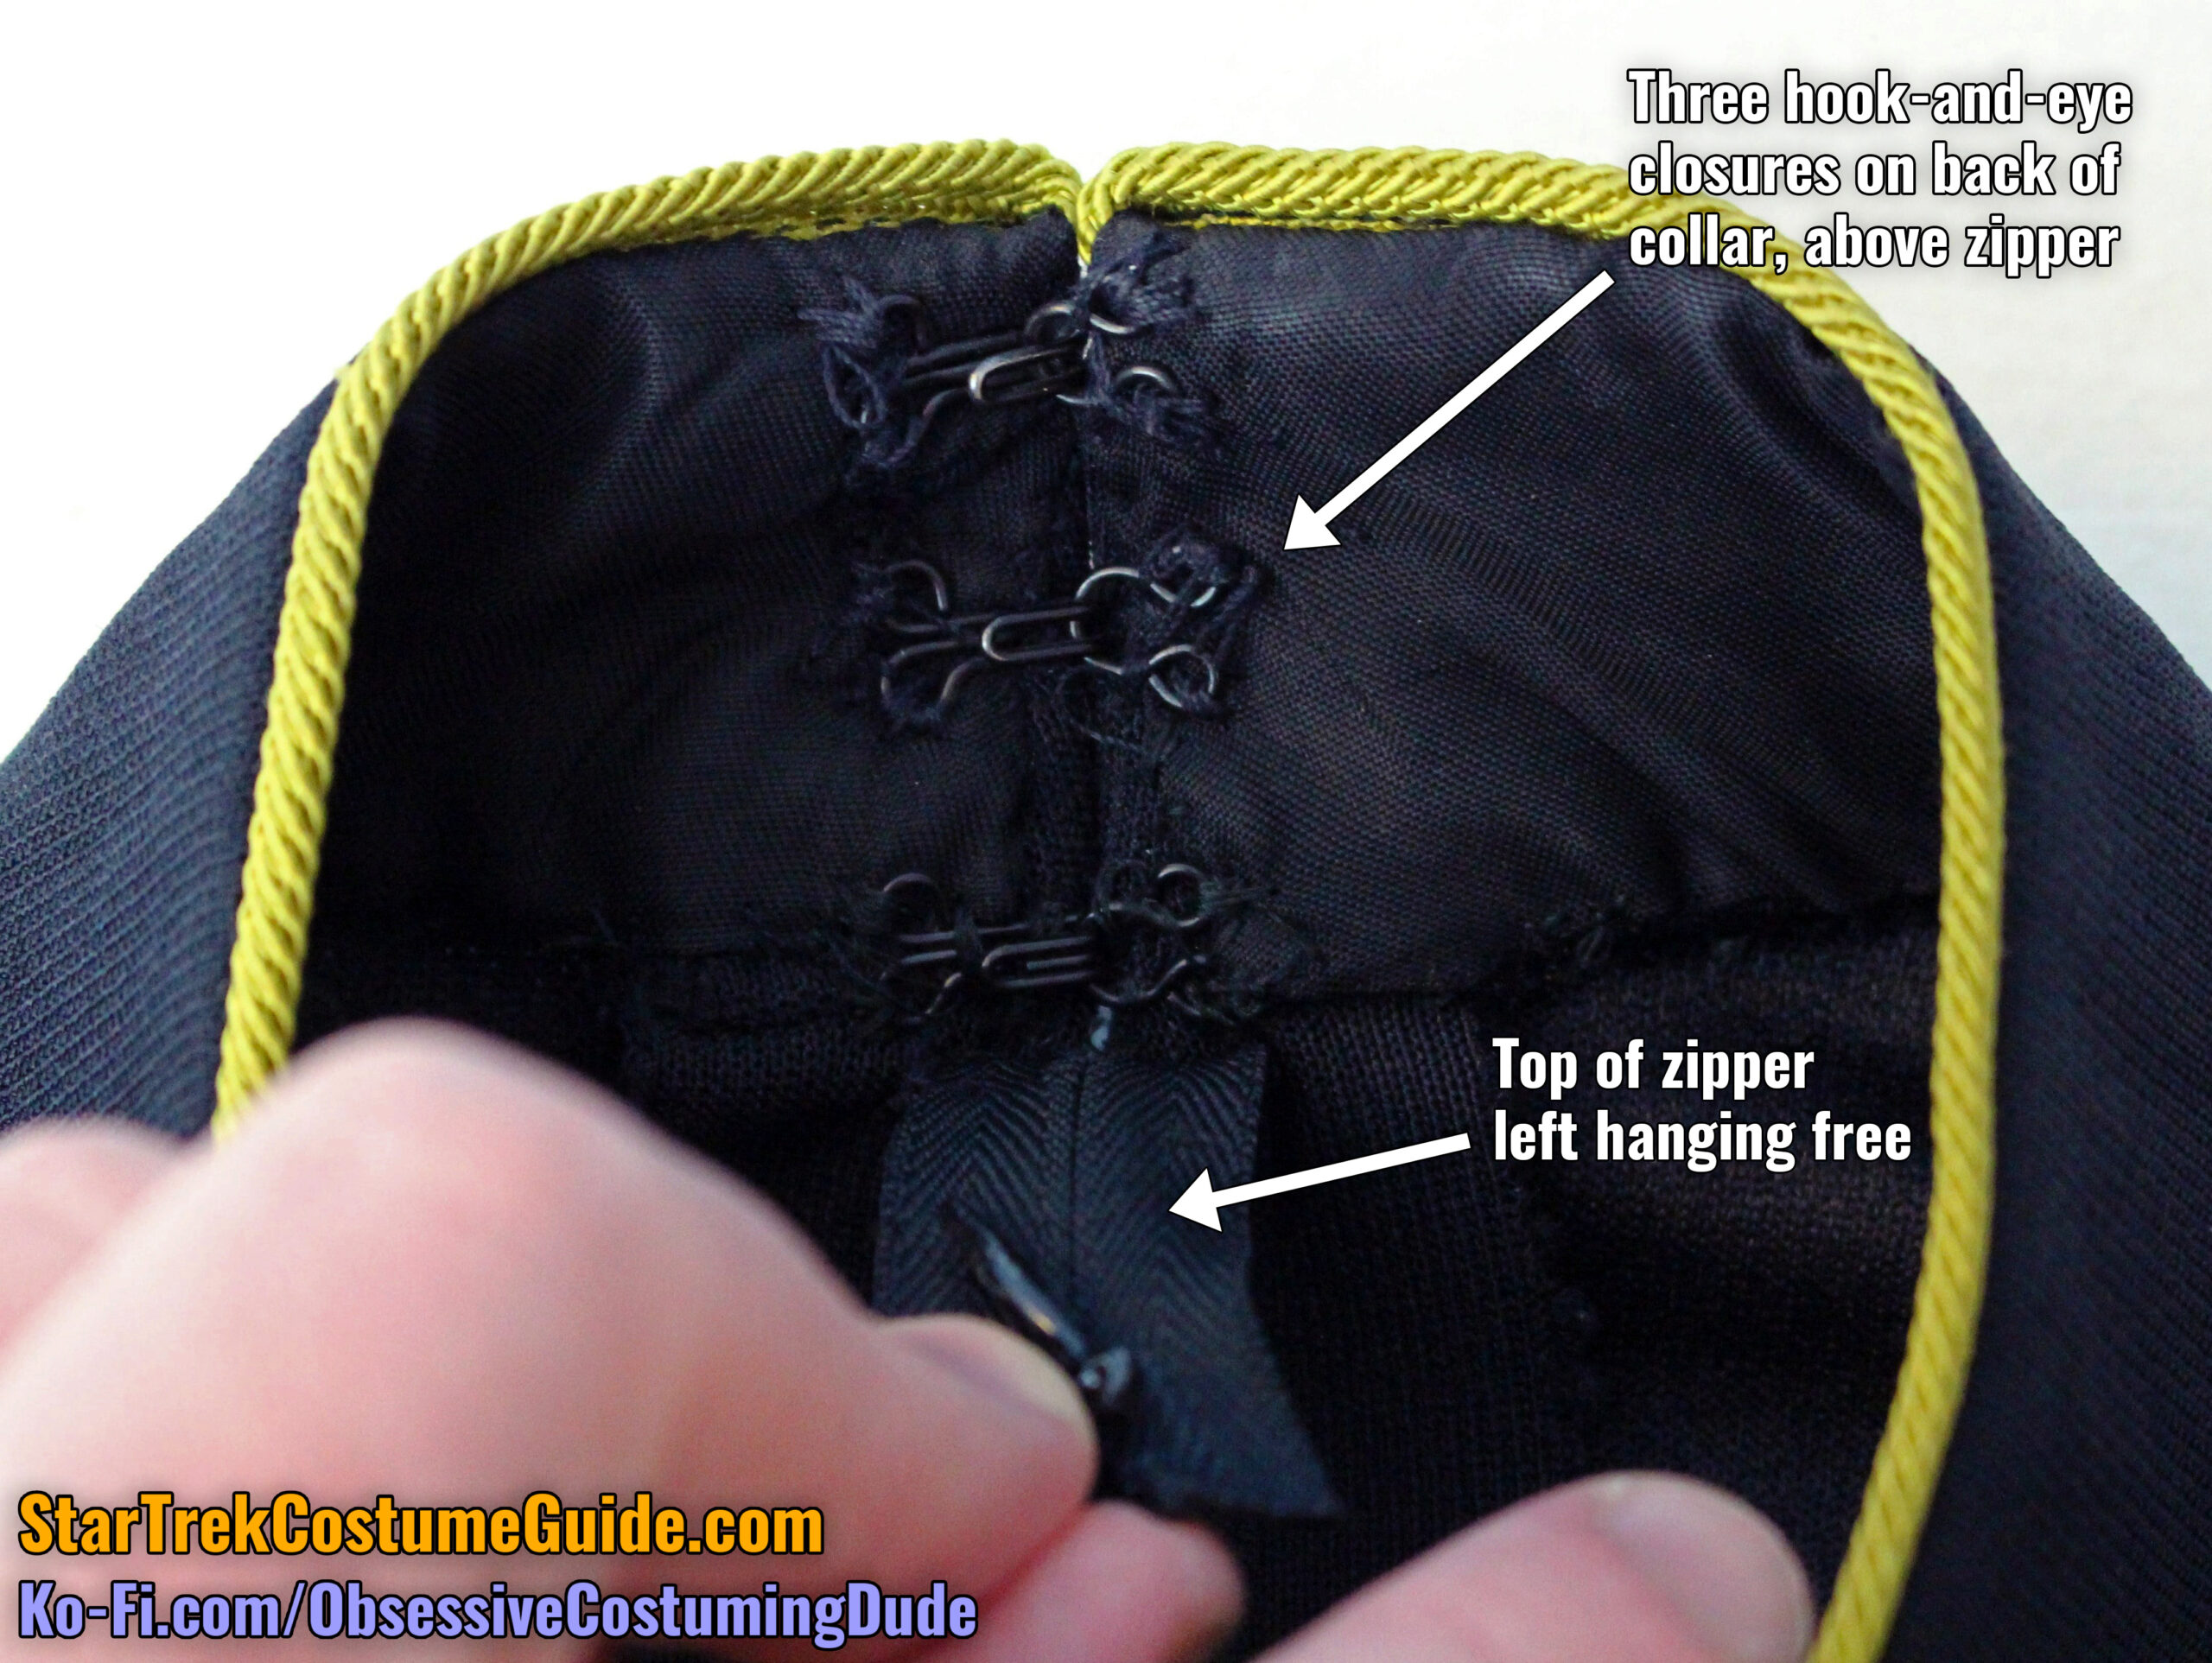
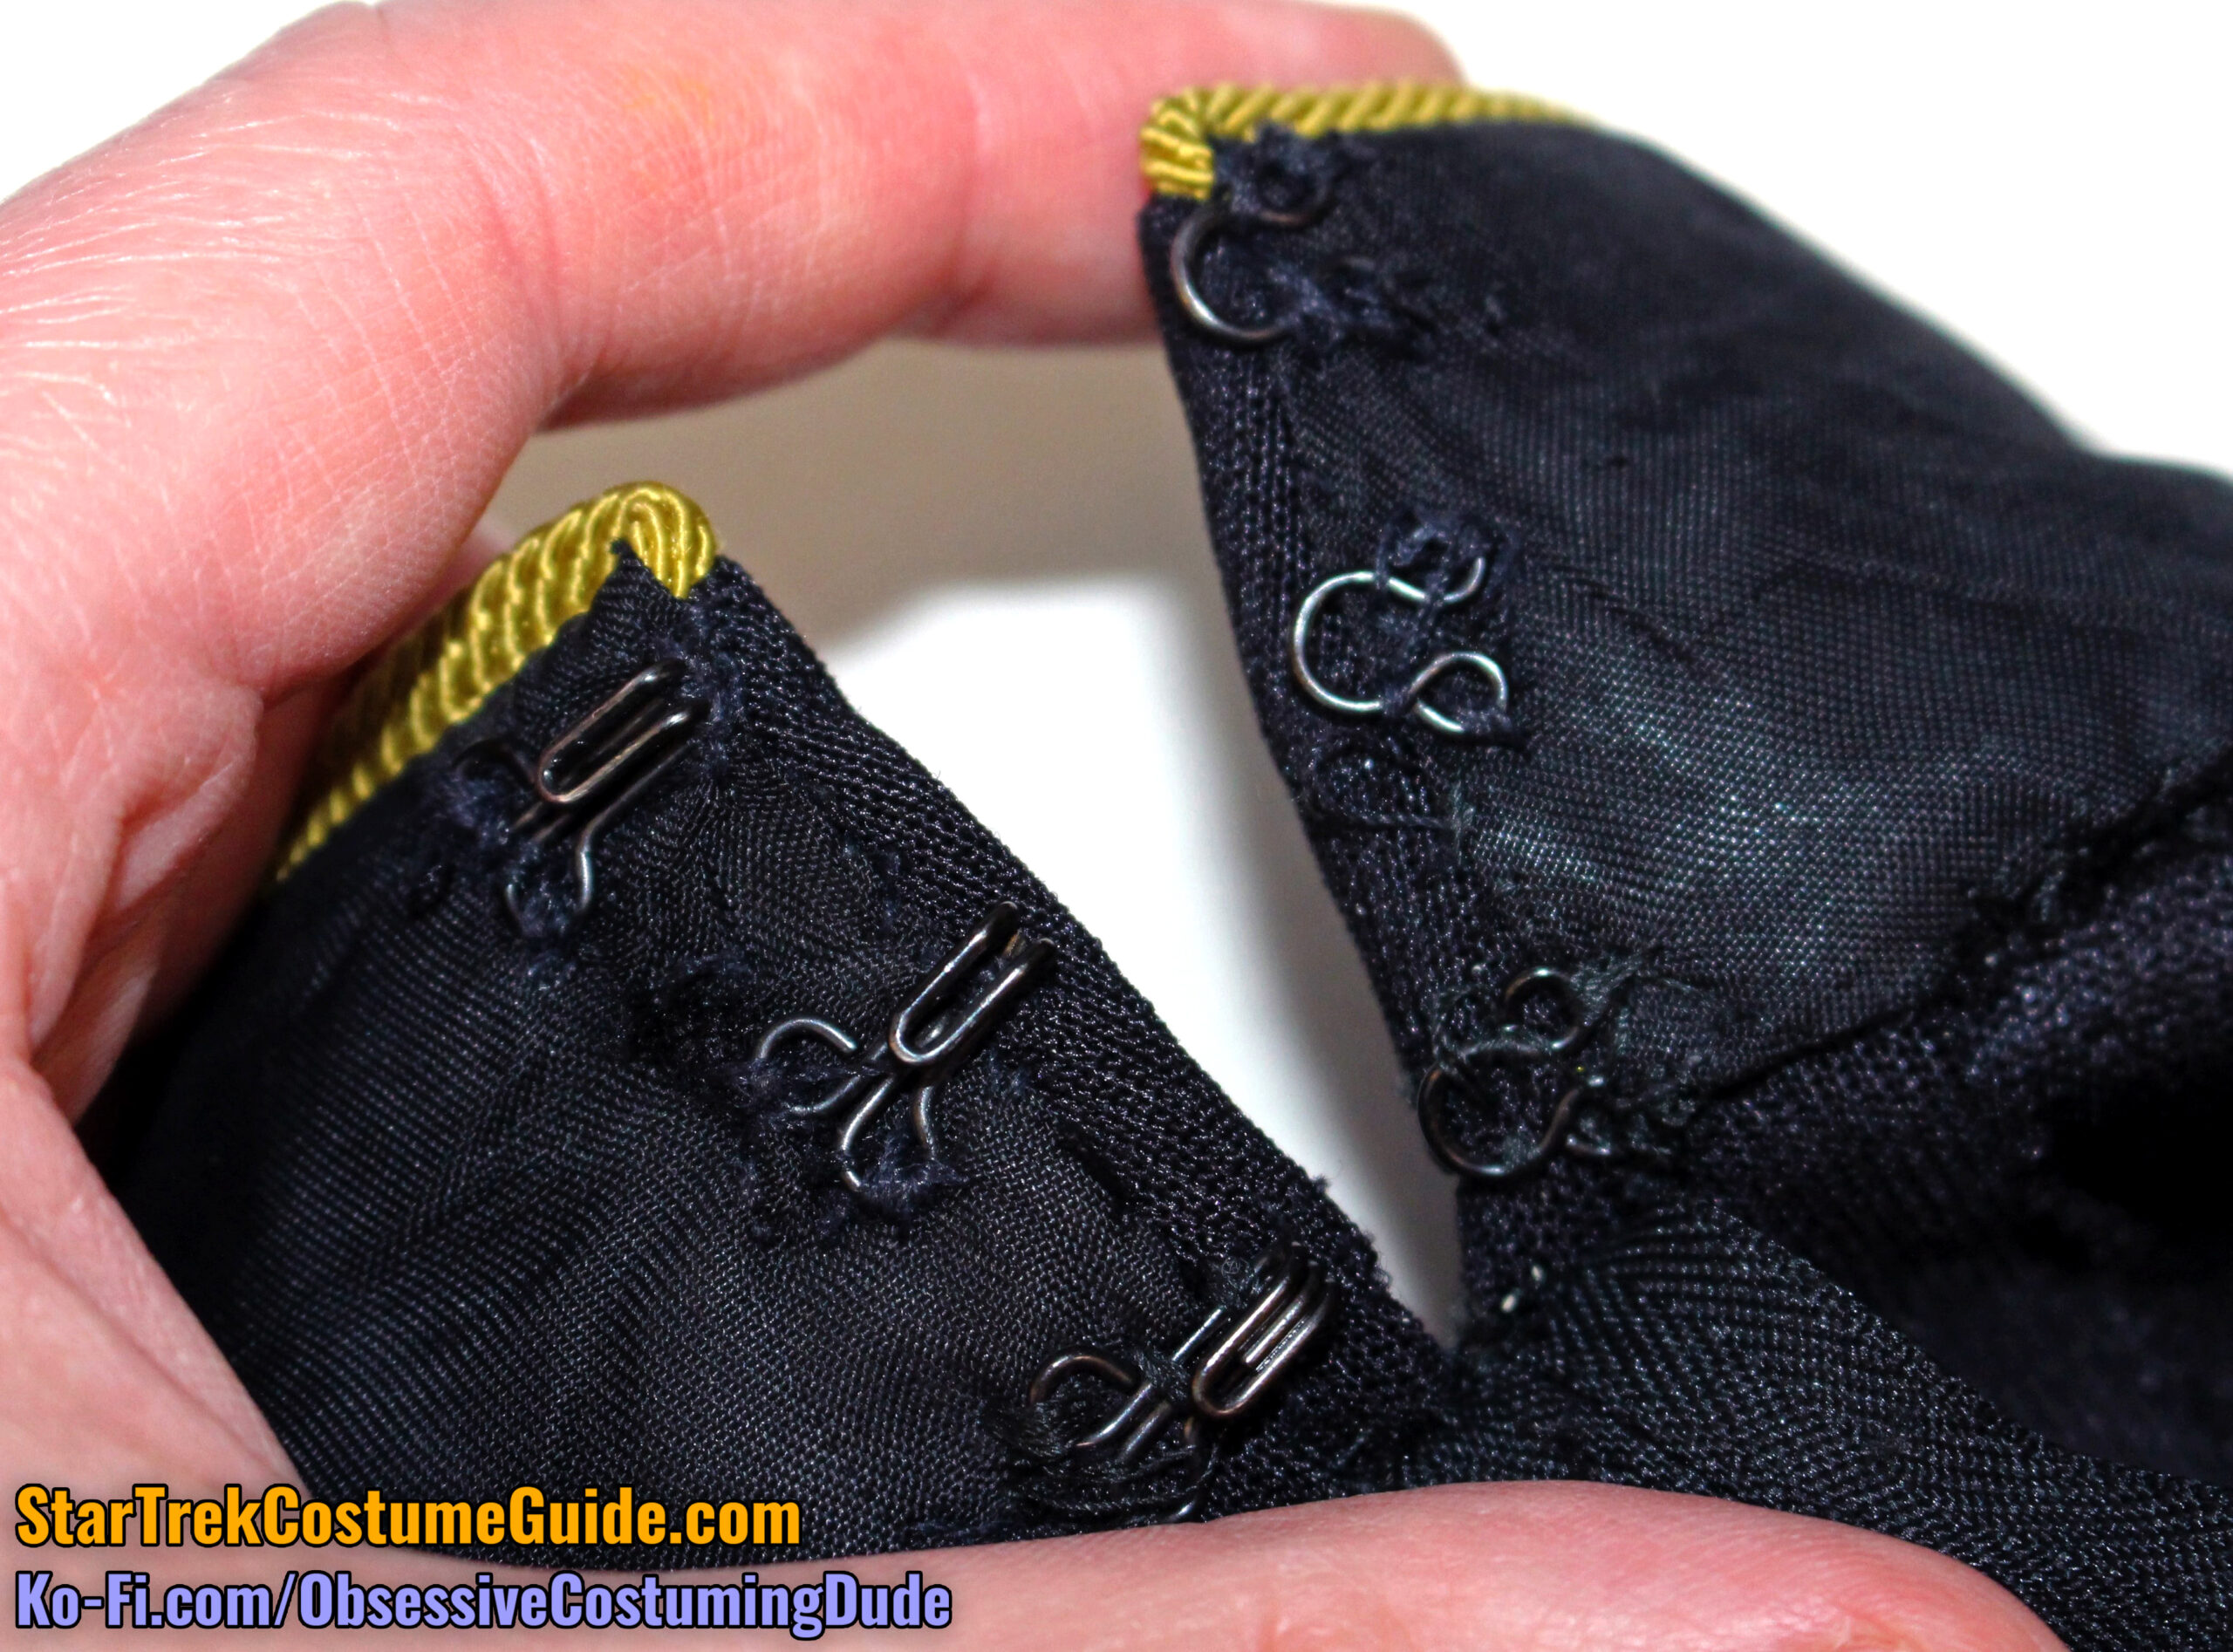
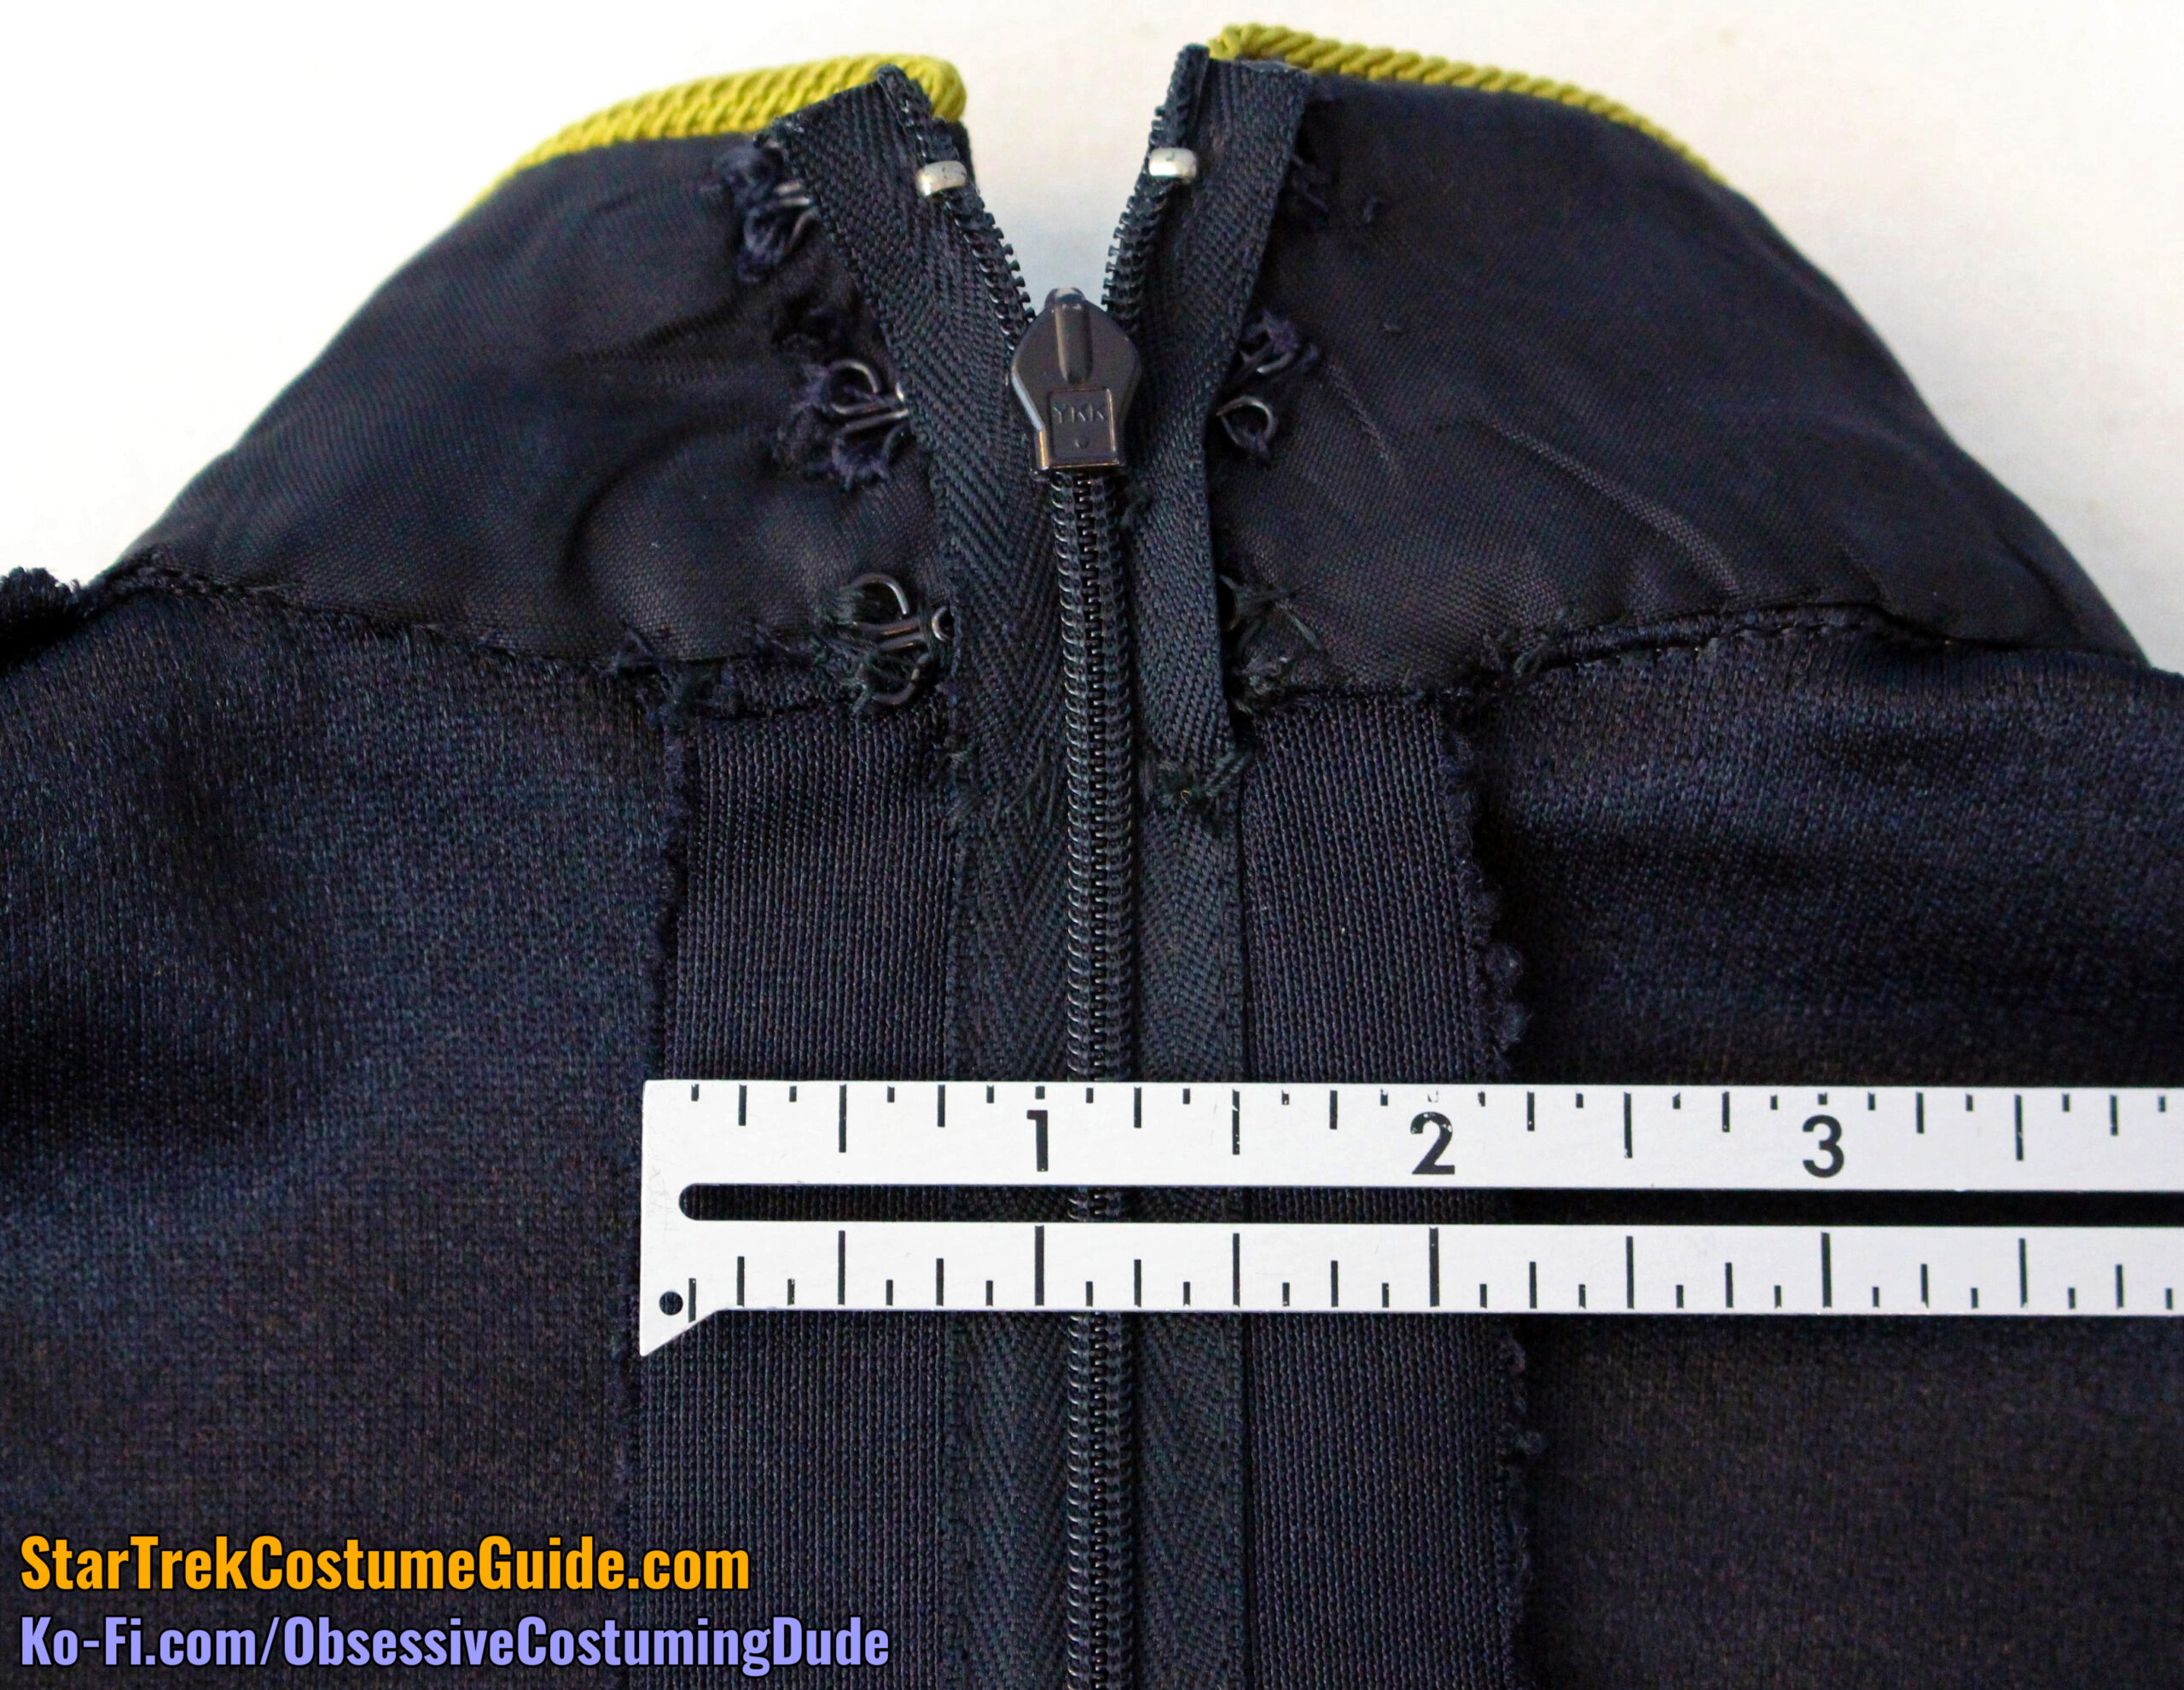
And as usual, the top of the zipper was left hanging free; in this case there were three black hook-and-eye closures on the back of the collar to complete the closure.
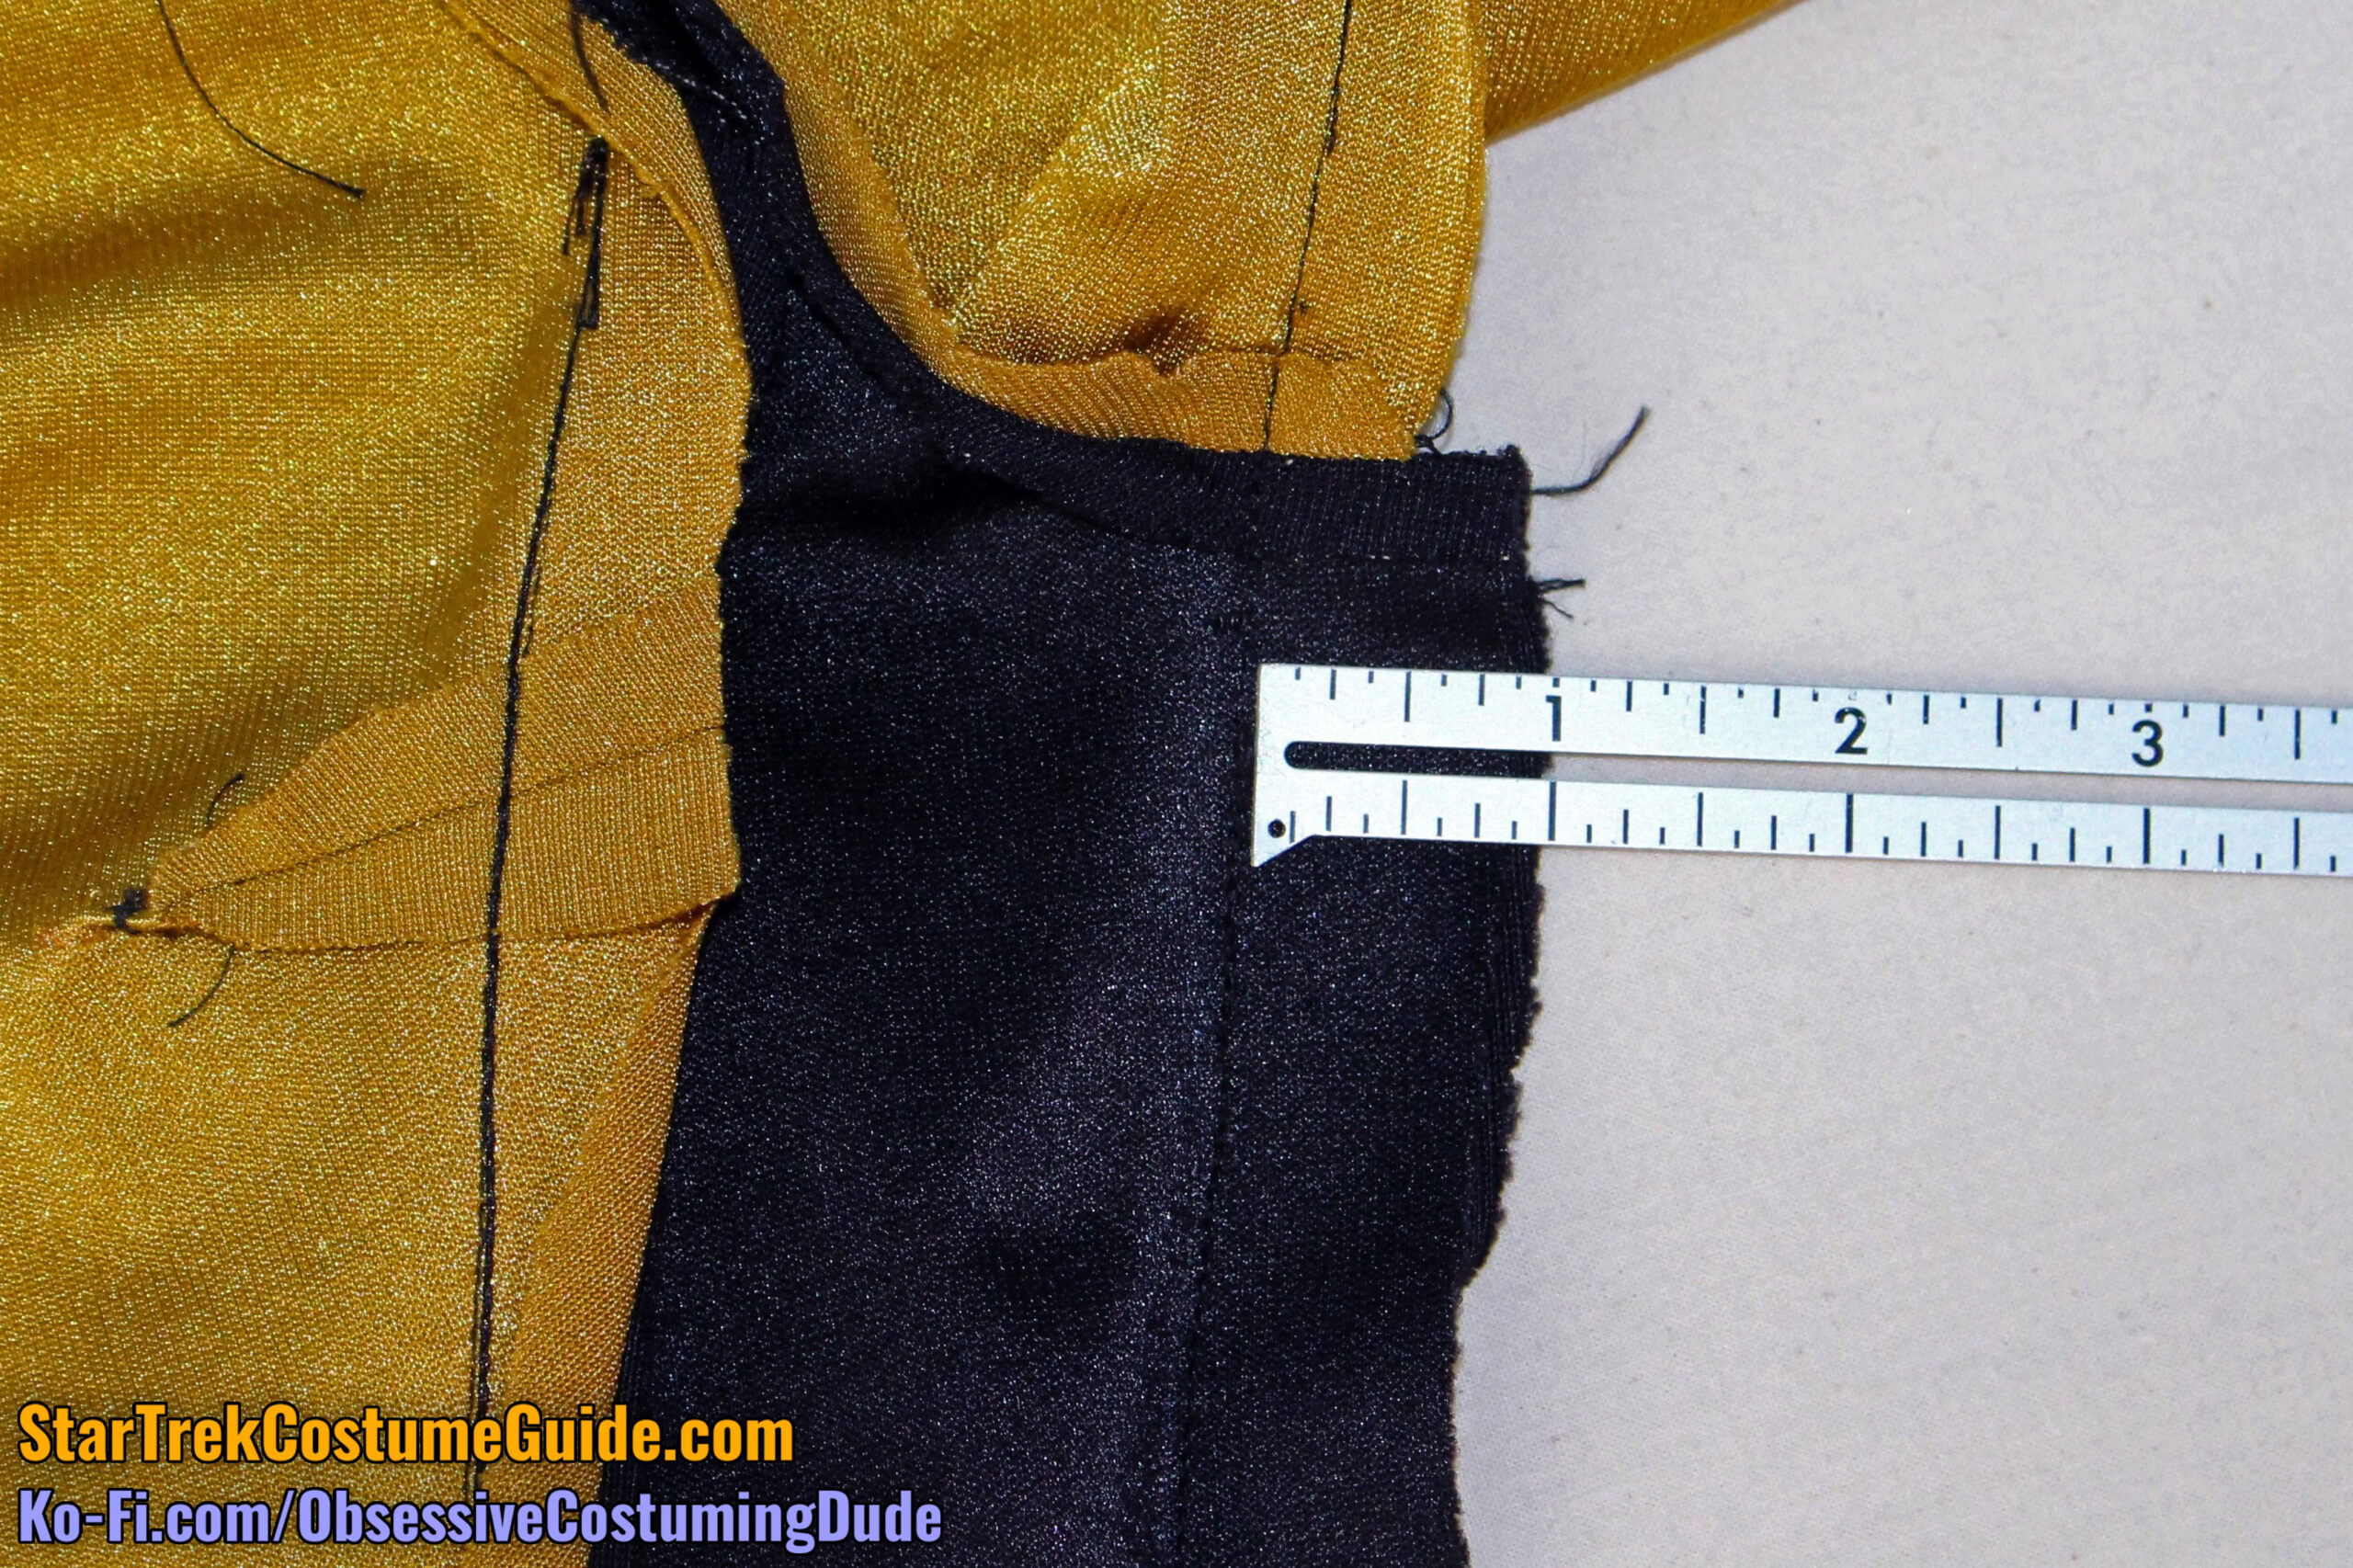
The seam allowances on the back of the collar were not simply turned under and tacked down; the collar lining enveloped and protected the collar’s back seam allowances (and the raw ends of the collar piping), leaving no seam allowances exposed.
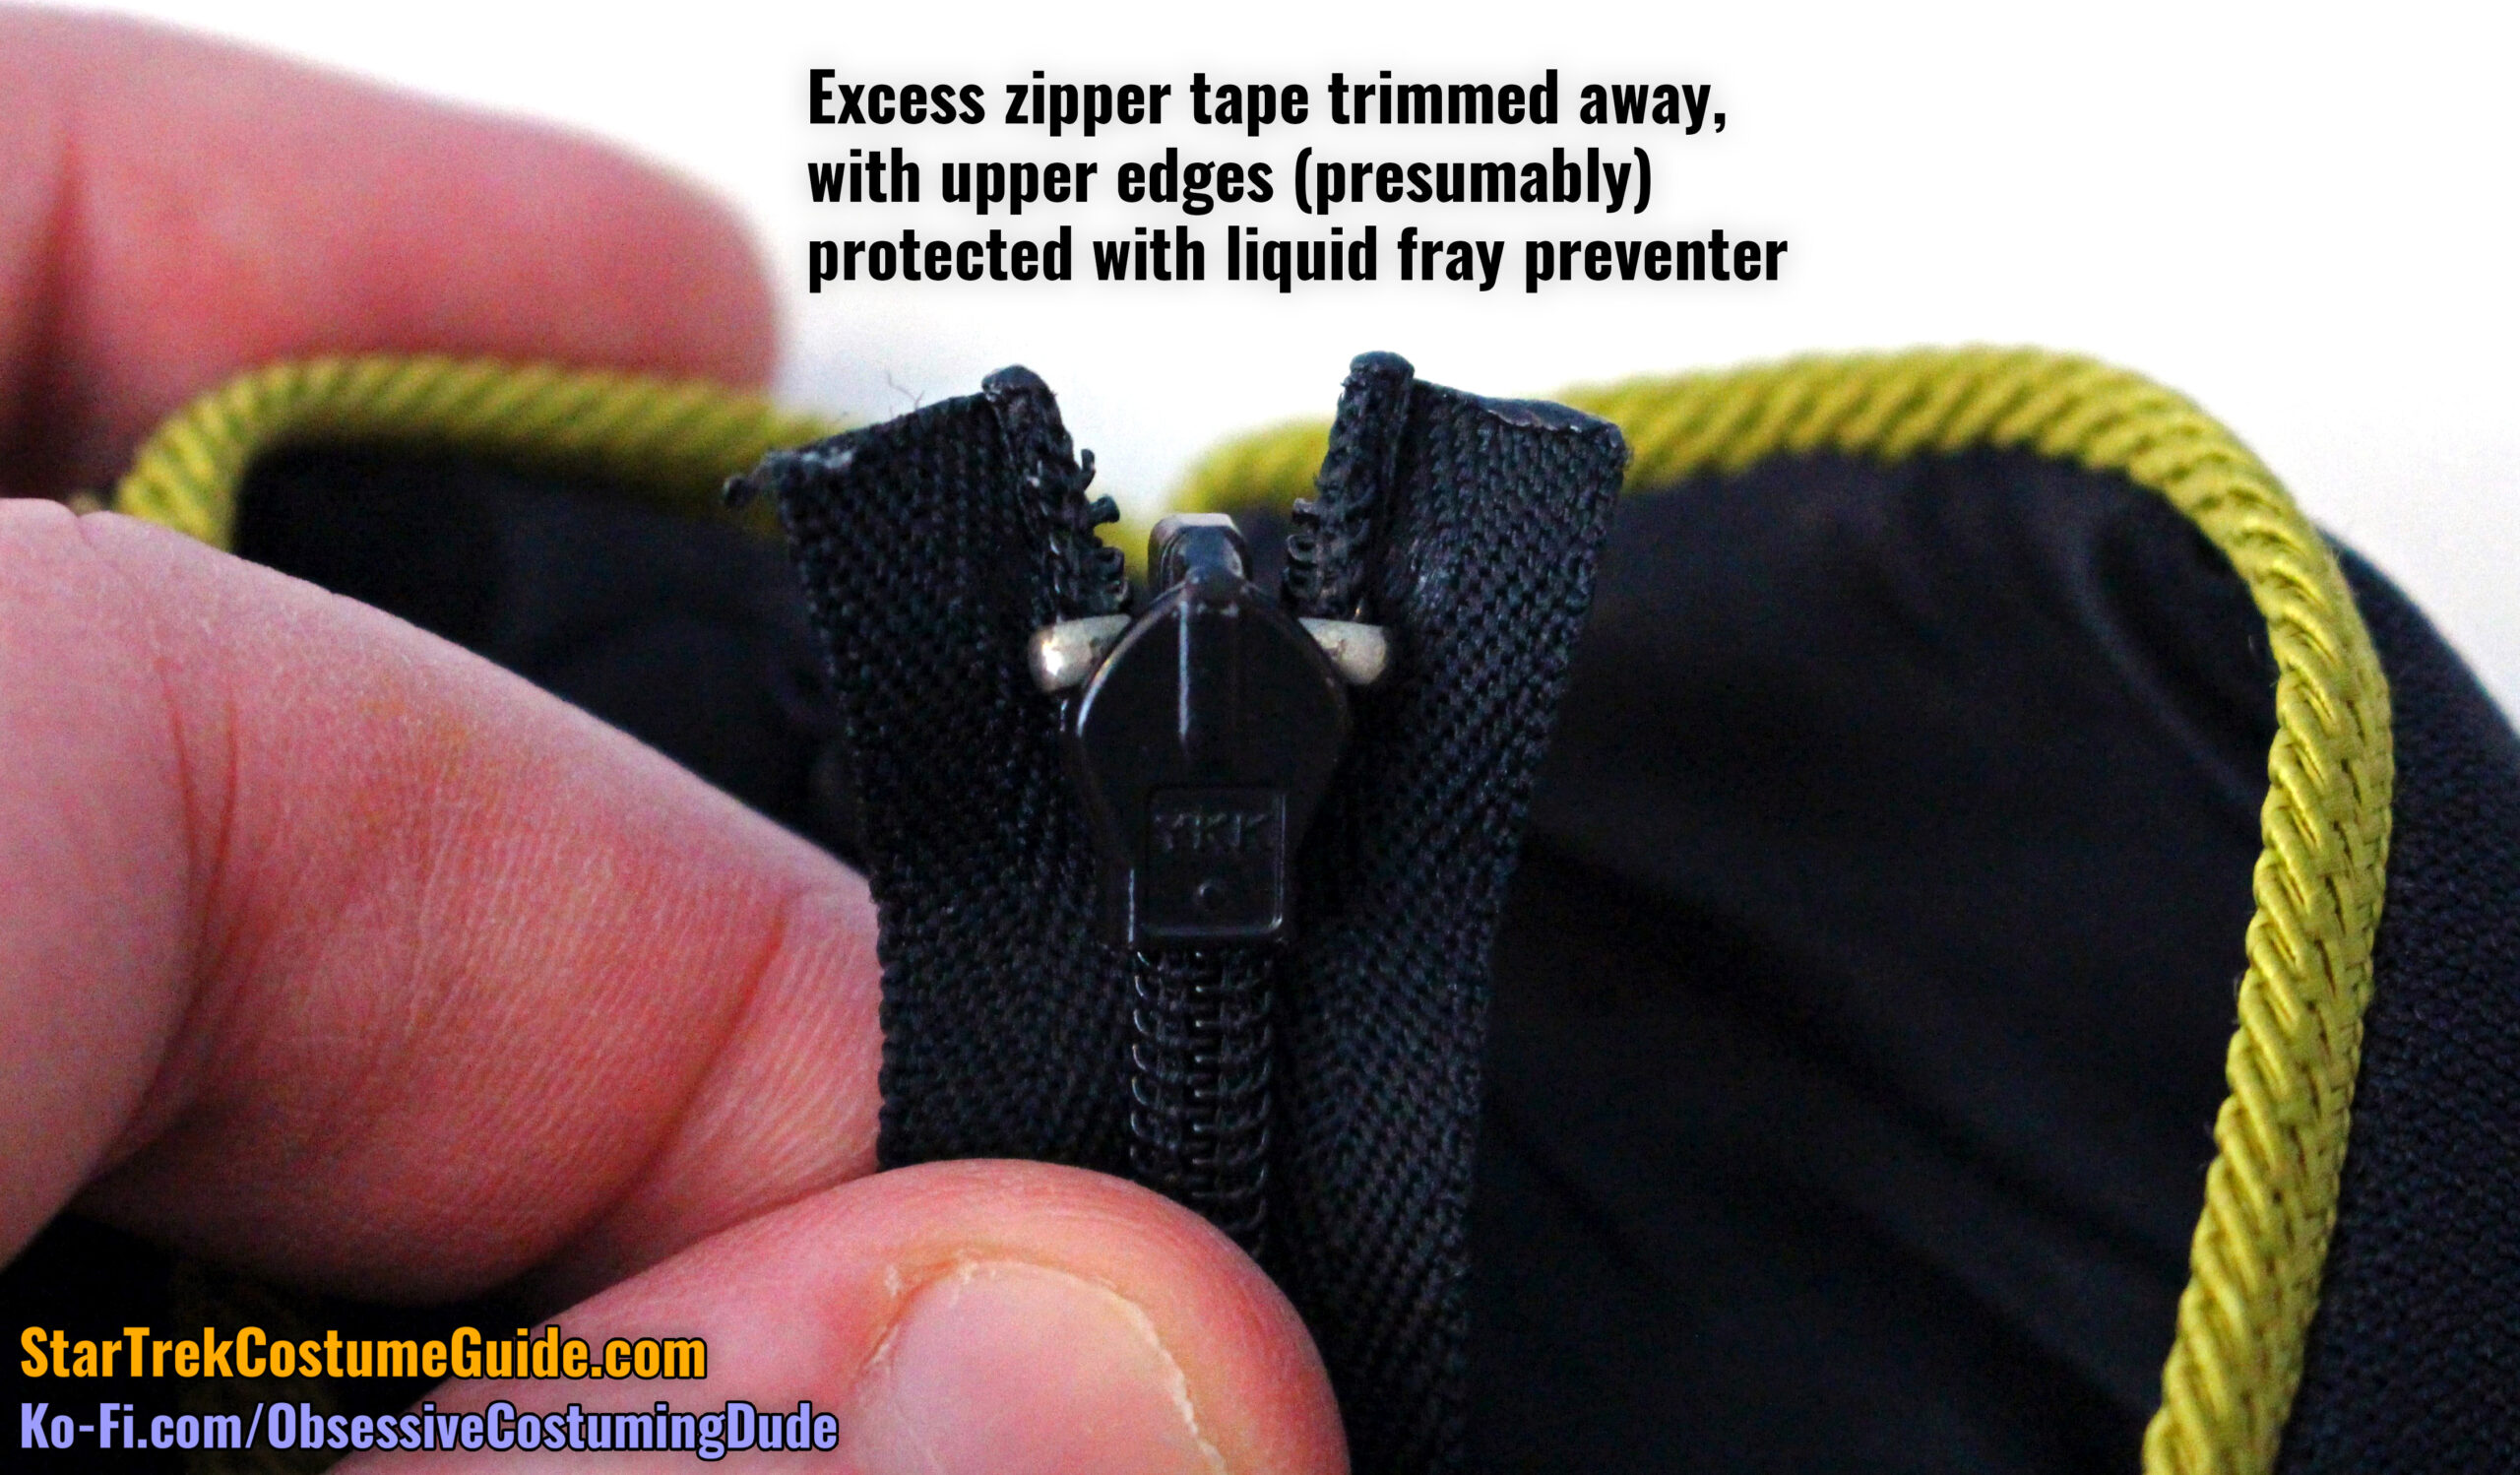
The excess zipper tape at the top of the zippers was handled different ways on different uniforms; on this particular jumpsuit, it was simply trimmed away, with the edges presumably protected by liquid fray preventer.
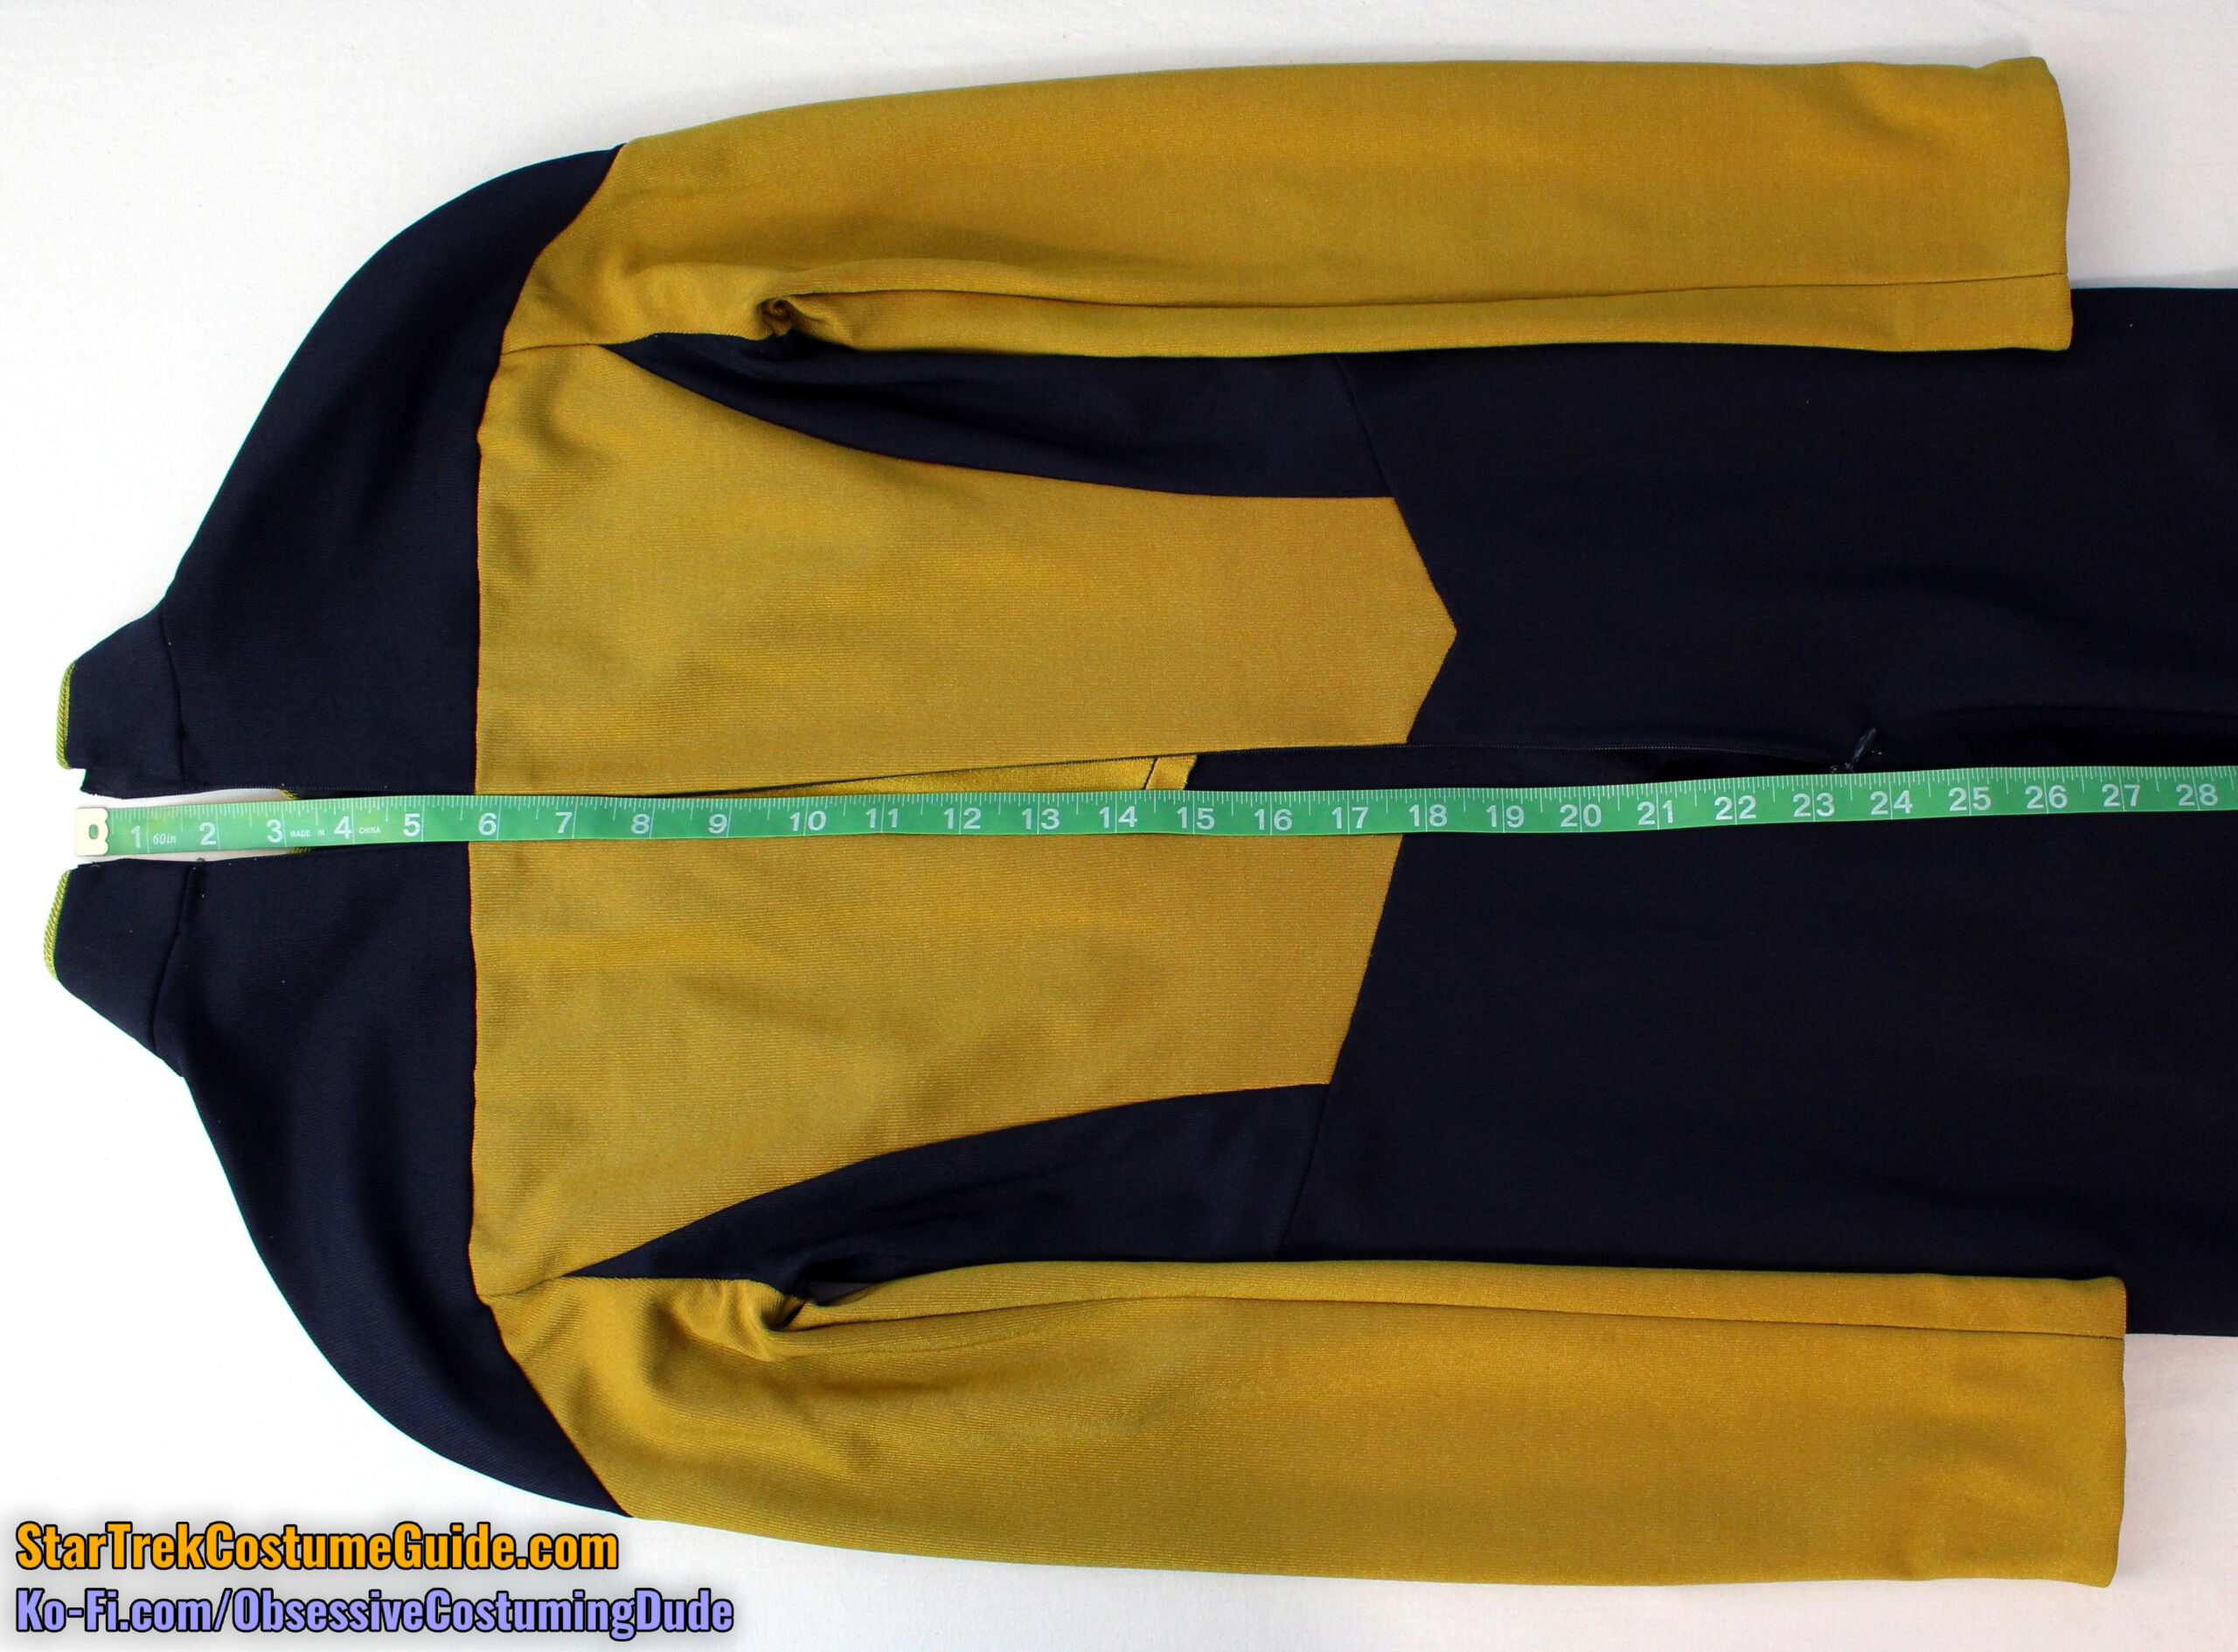
Here is the jumpsuit completely unzipped.
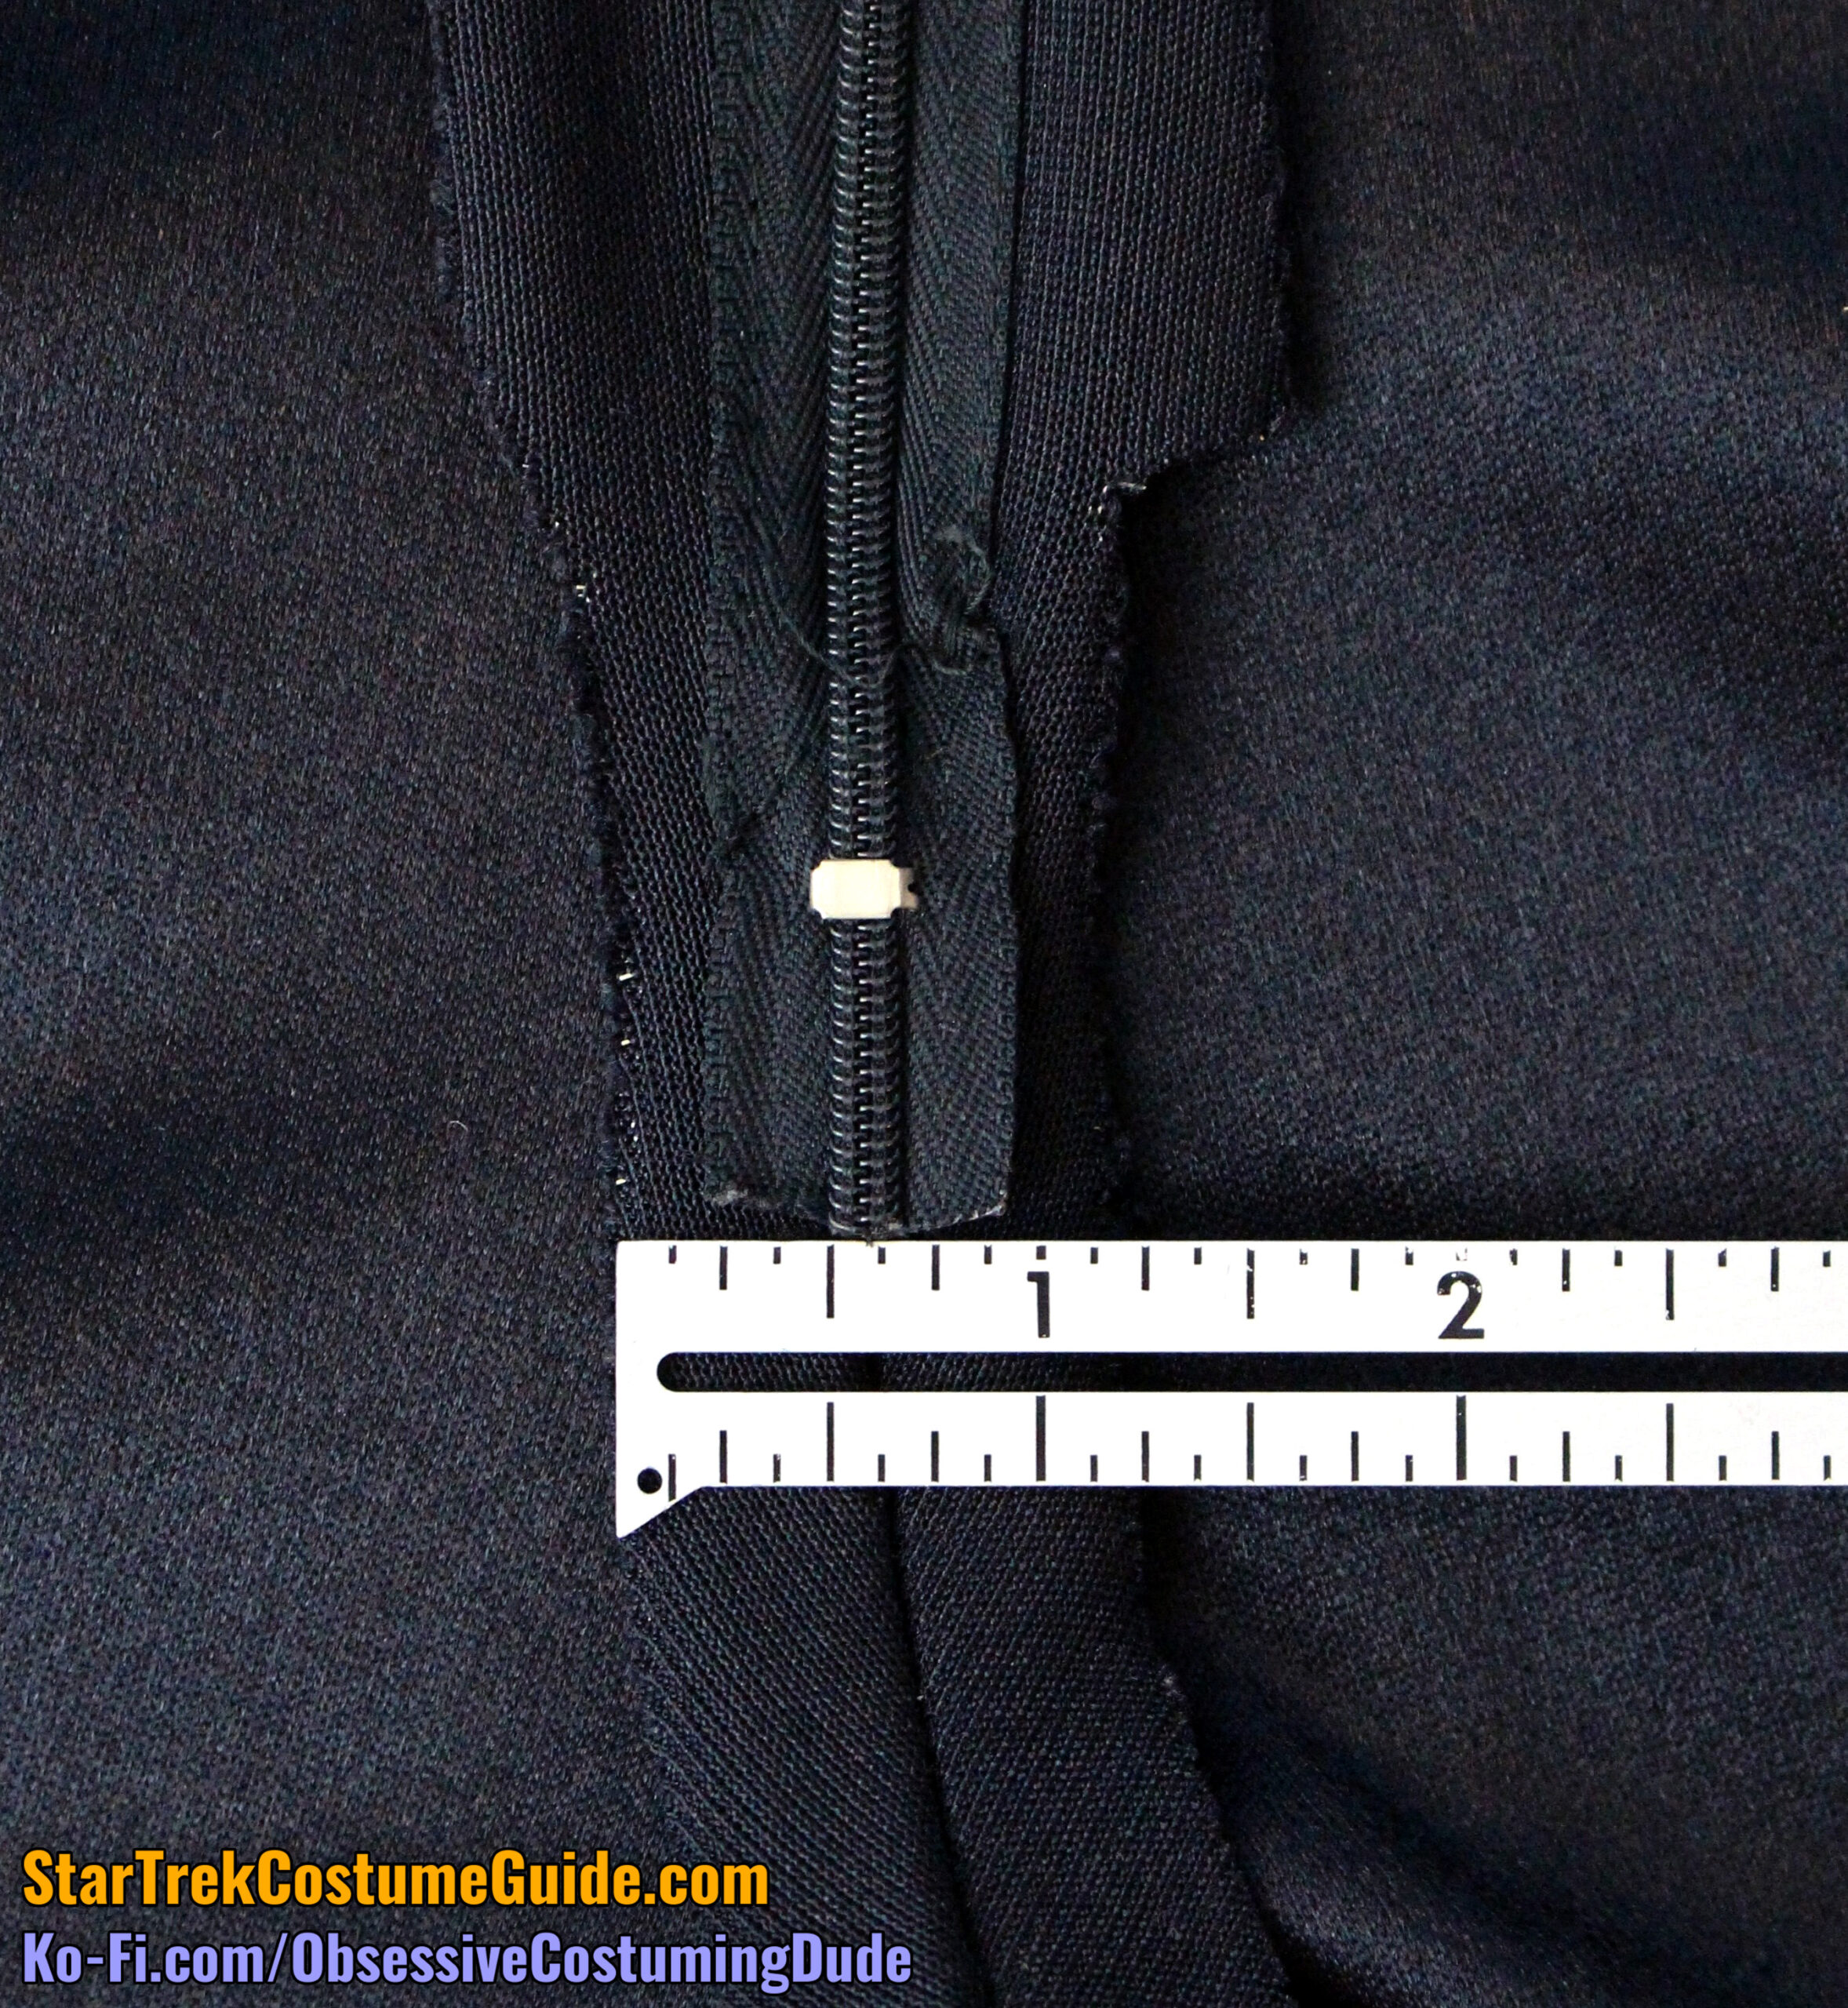
The zipper was 23 ½” long, plus excess underneath.
This, along with the “raw” zipper bottom, indicates that it was probably a custom invisible zipper (as opposed to the standard 22” retail zippers on most of the other screen-used TNG jumpsuits I examined).
INTERIOR CONSTRUCTION
As I mentioned in my screen-used Tasha Yar jumpsuit examination, like so many other William Ware Theiss costume designs, the longer you stare at the interior of a TNG jumpsuit, the weirder they seem to get.
Despite being Robert Blackman’s updated design and this Ensign Sito uniform looking clean and presentable on the outside, the interior was every bit as perturbing as Tasha’s was.

Also, whoever made this costume definitely preferred to leave several inches of thread tails at the beginning and ending of every seam! They dangled everywhere inside.
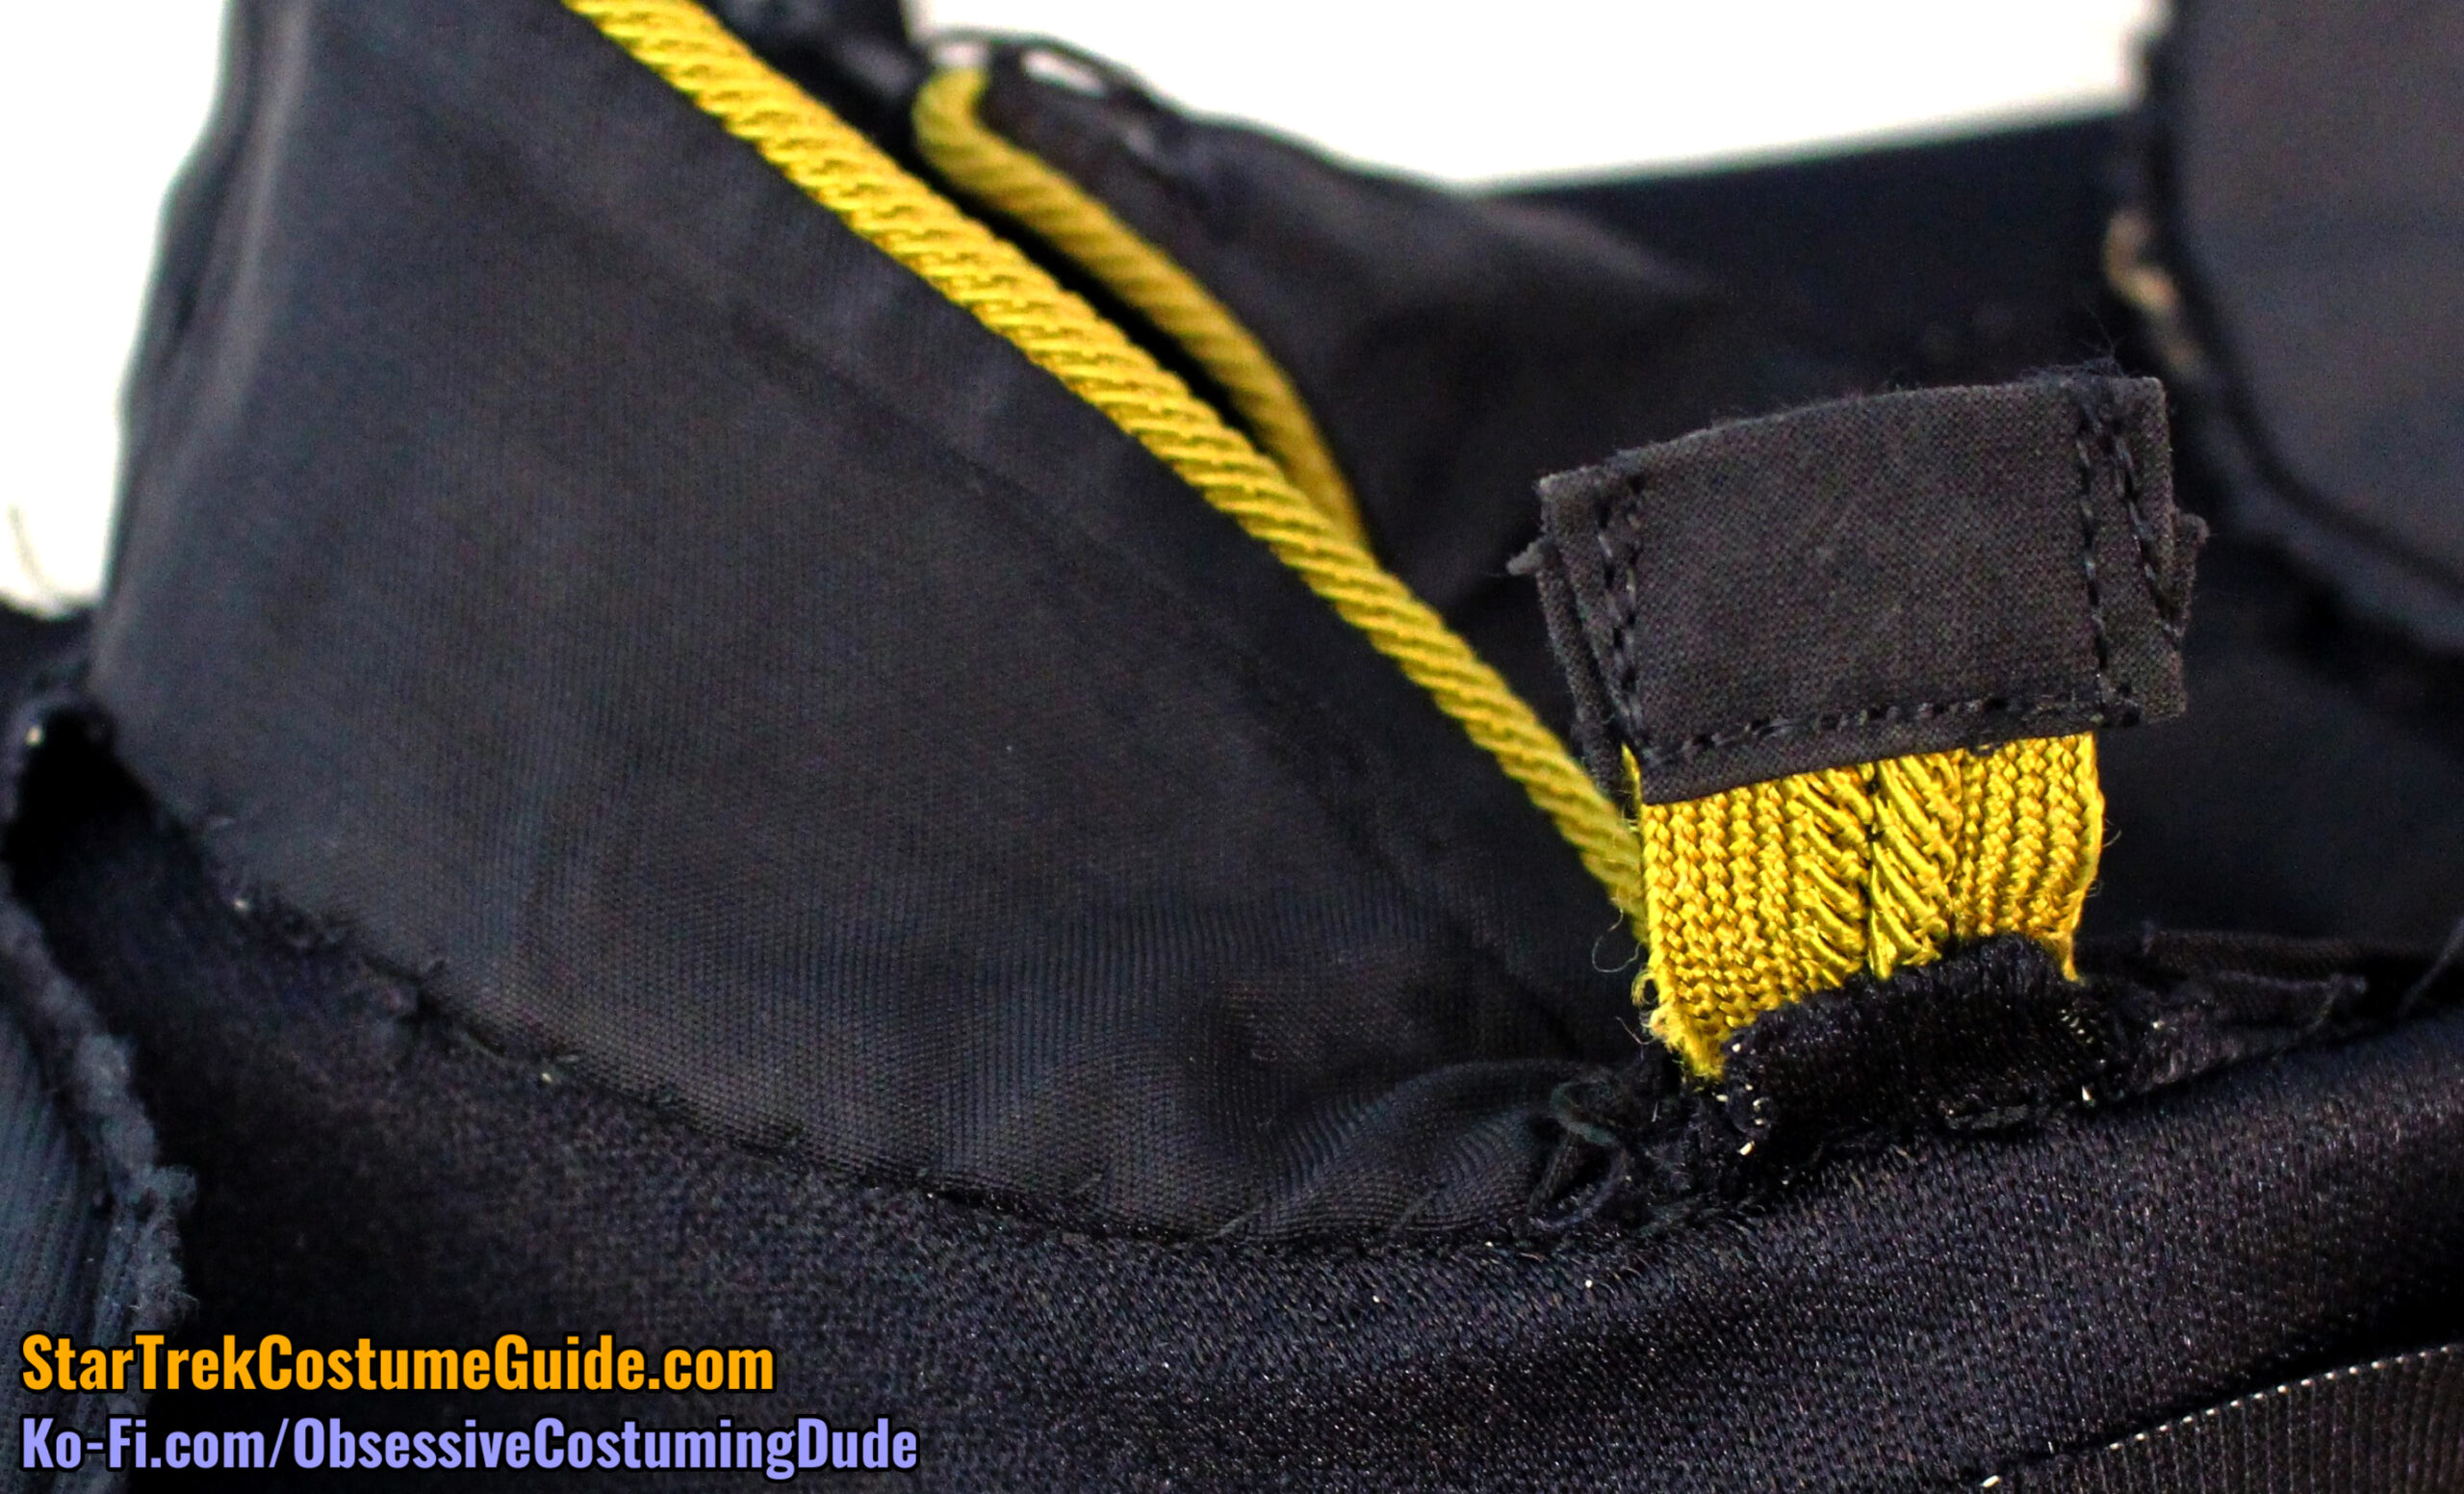
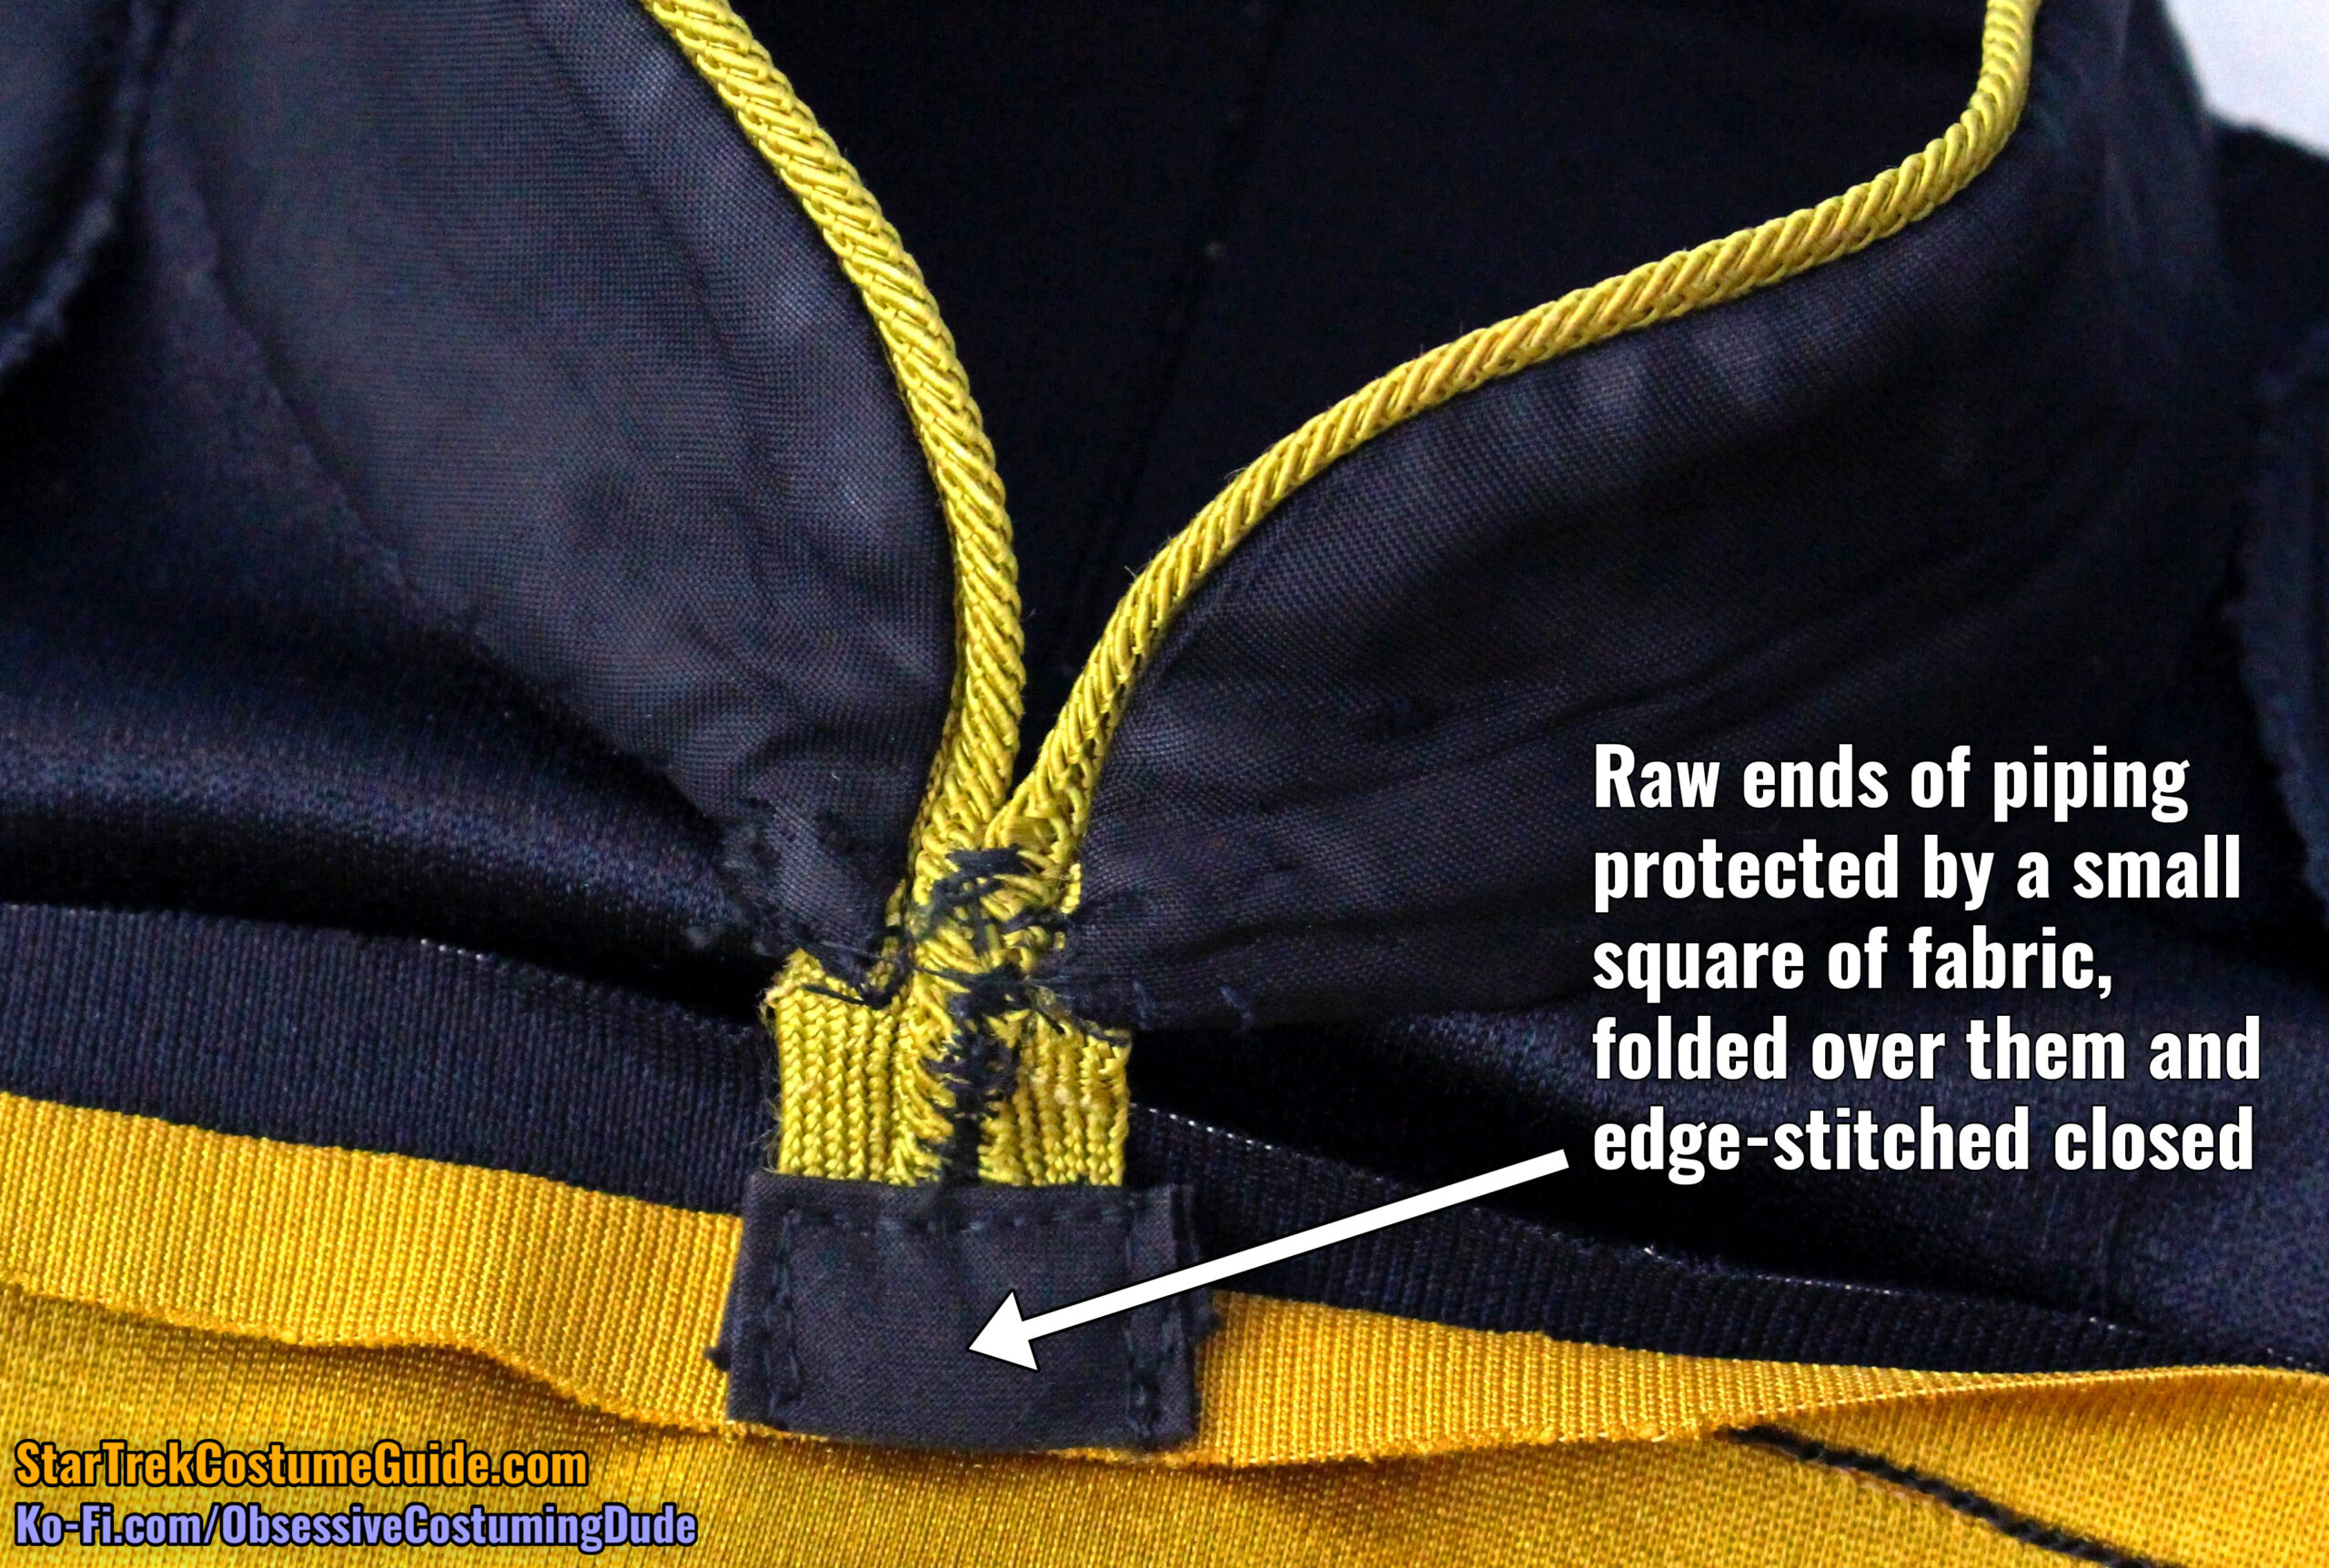
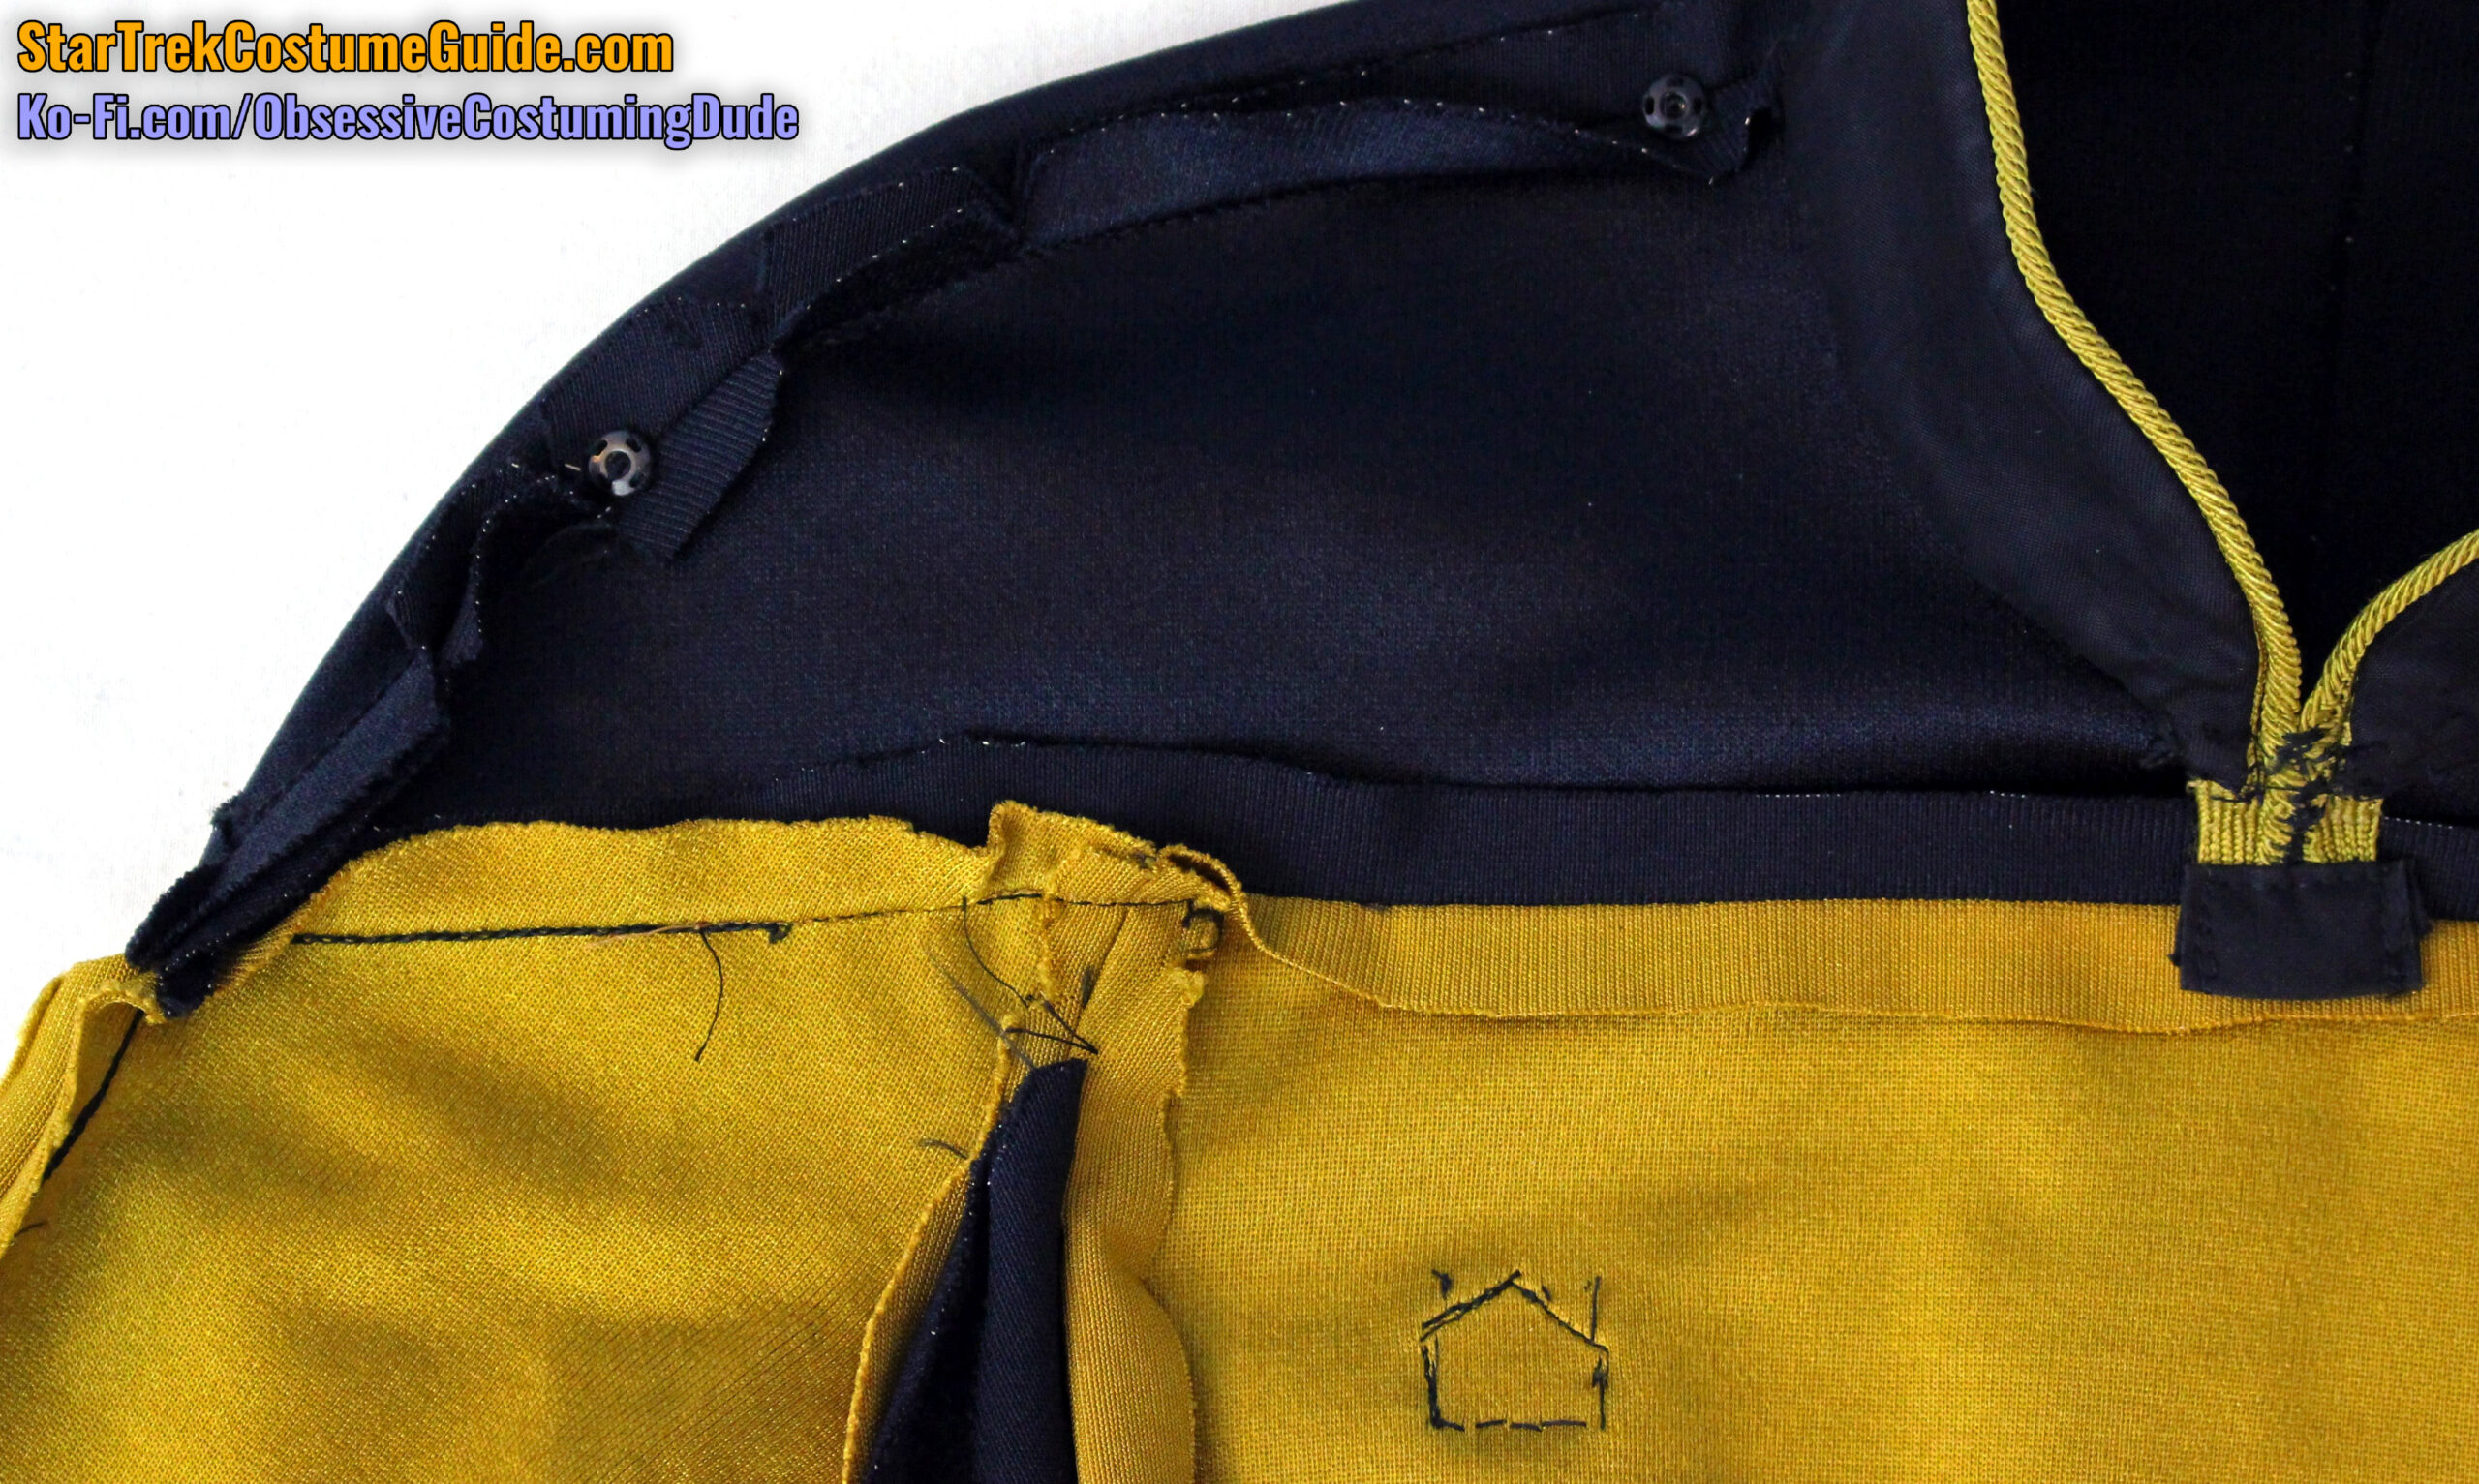
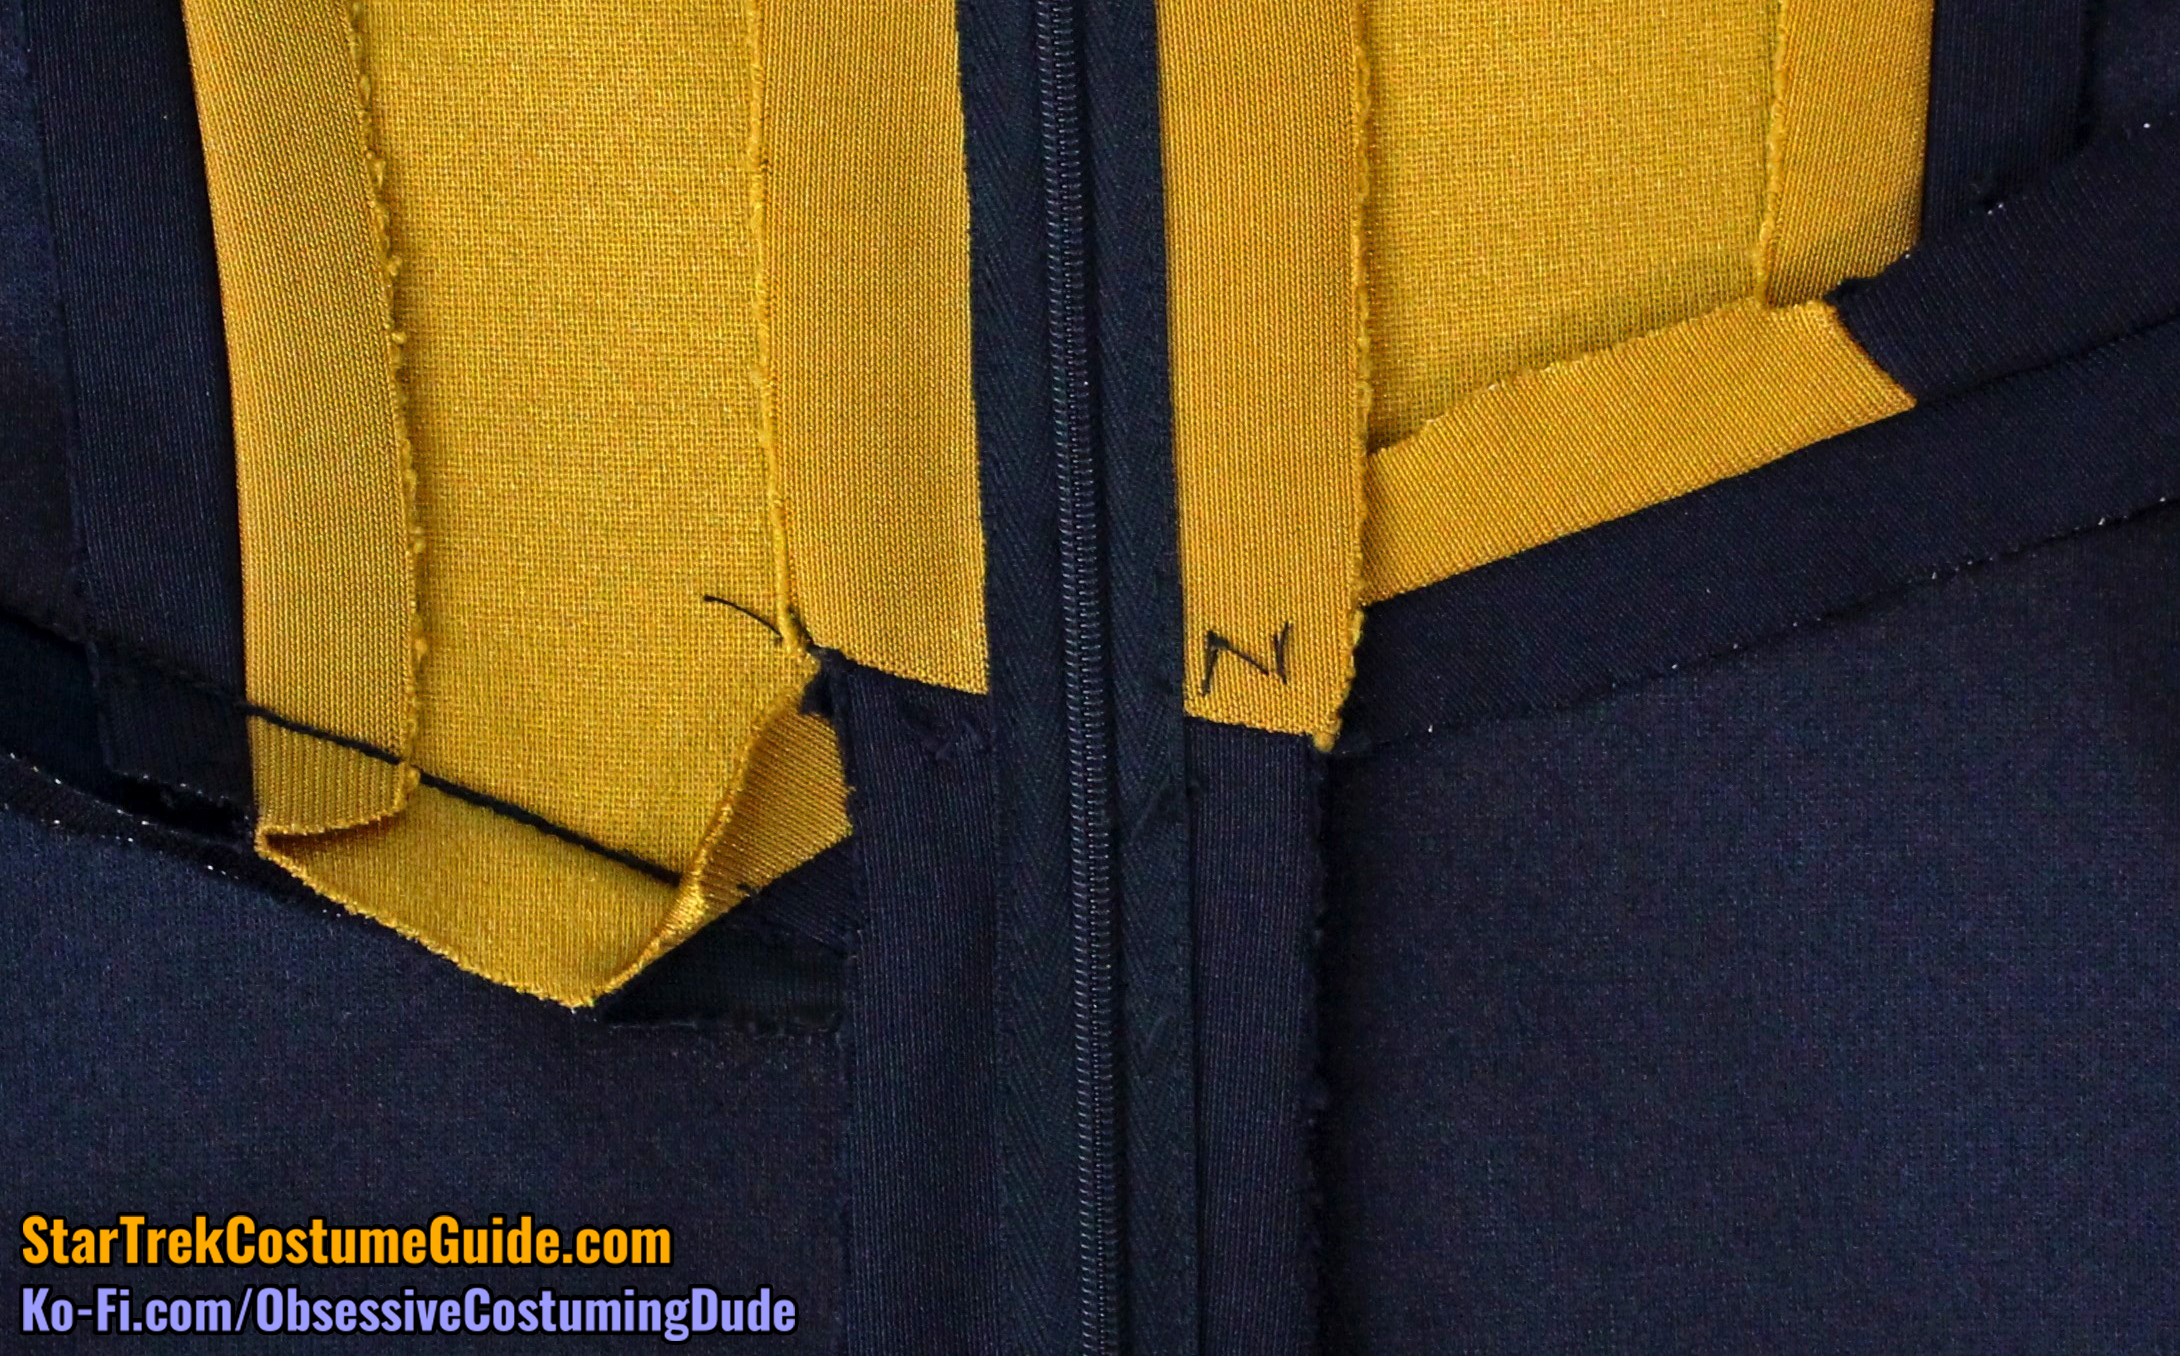
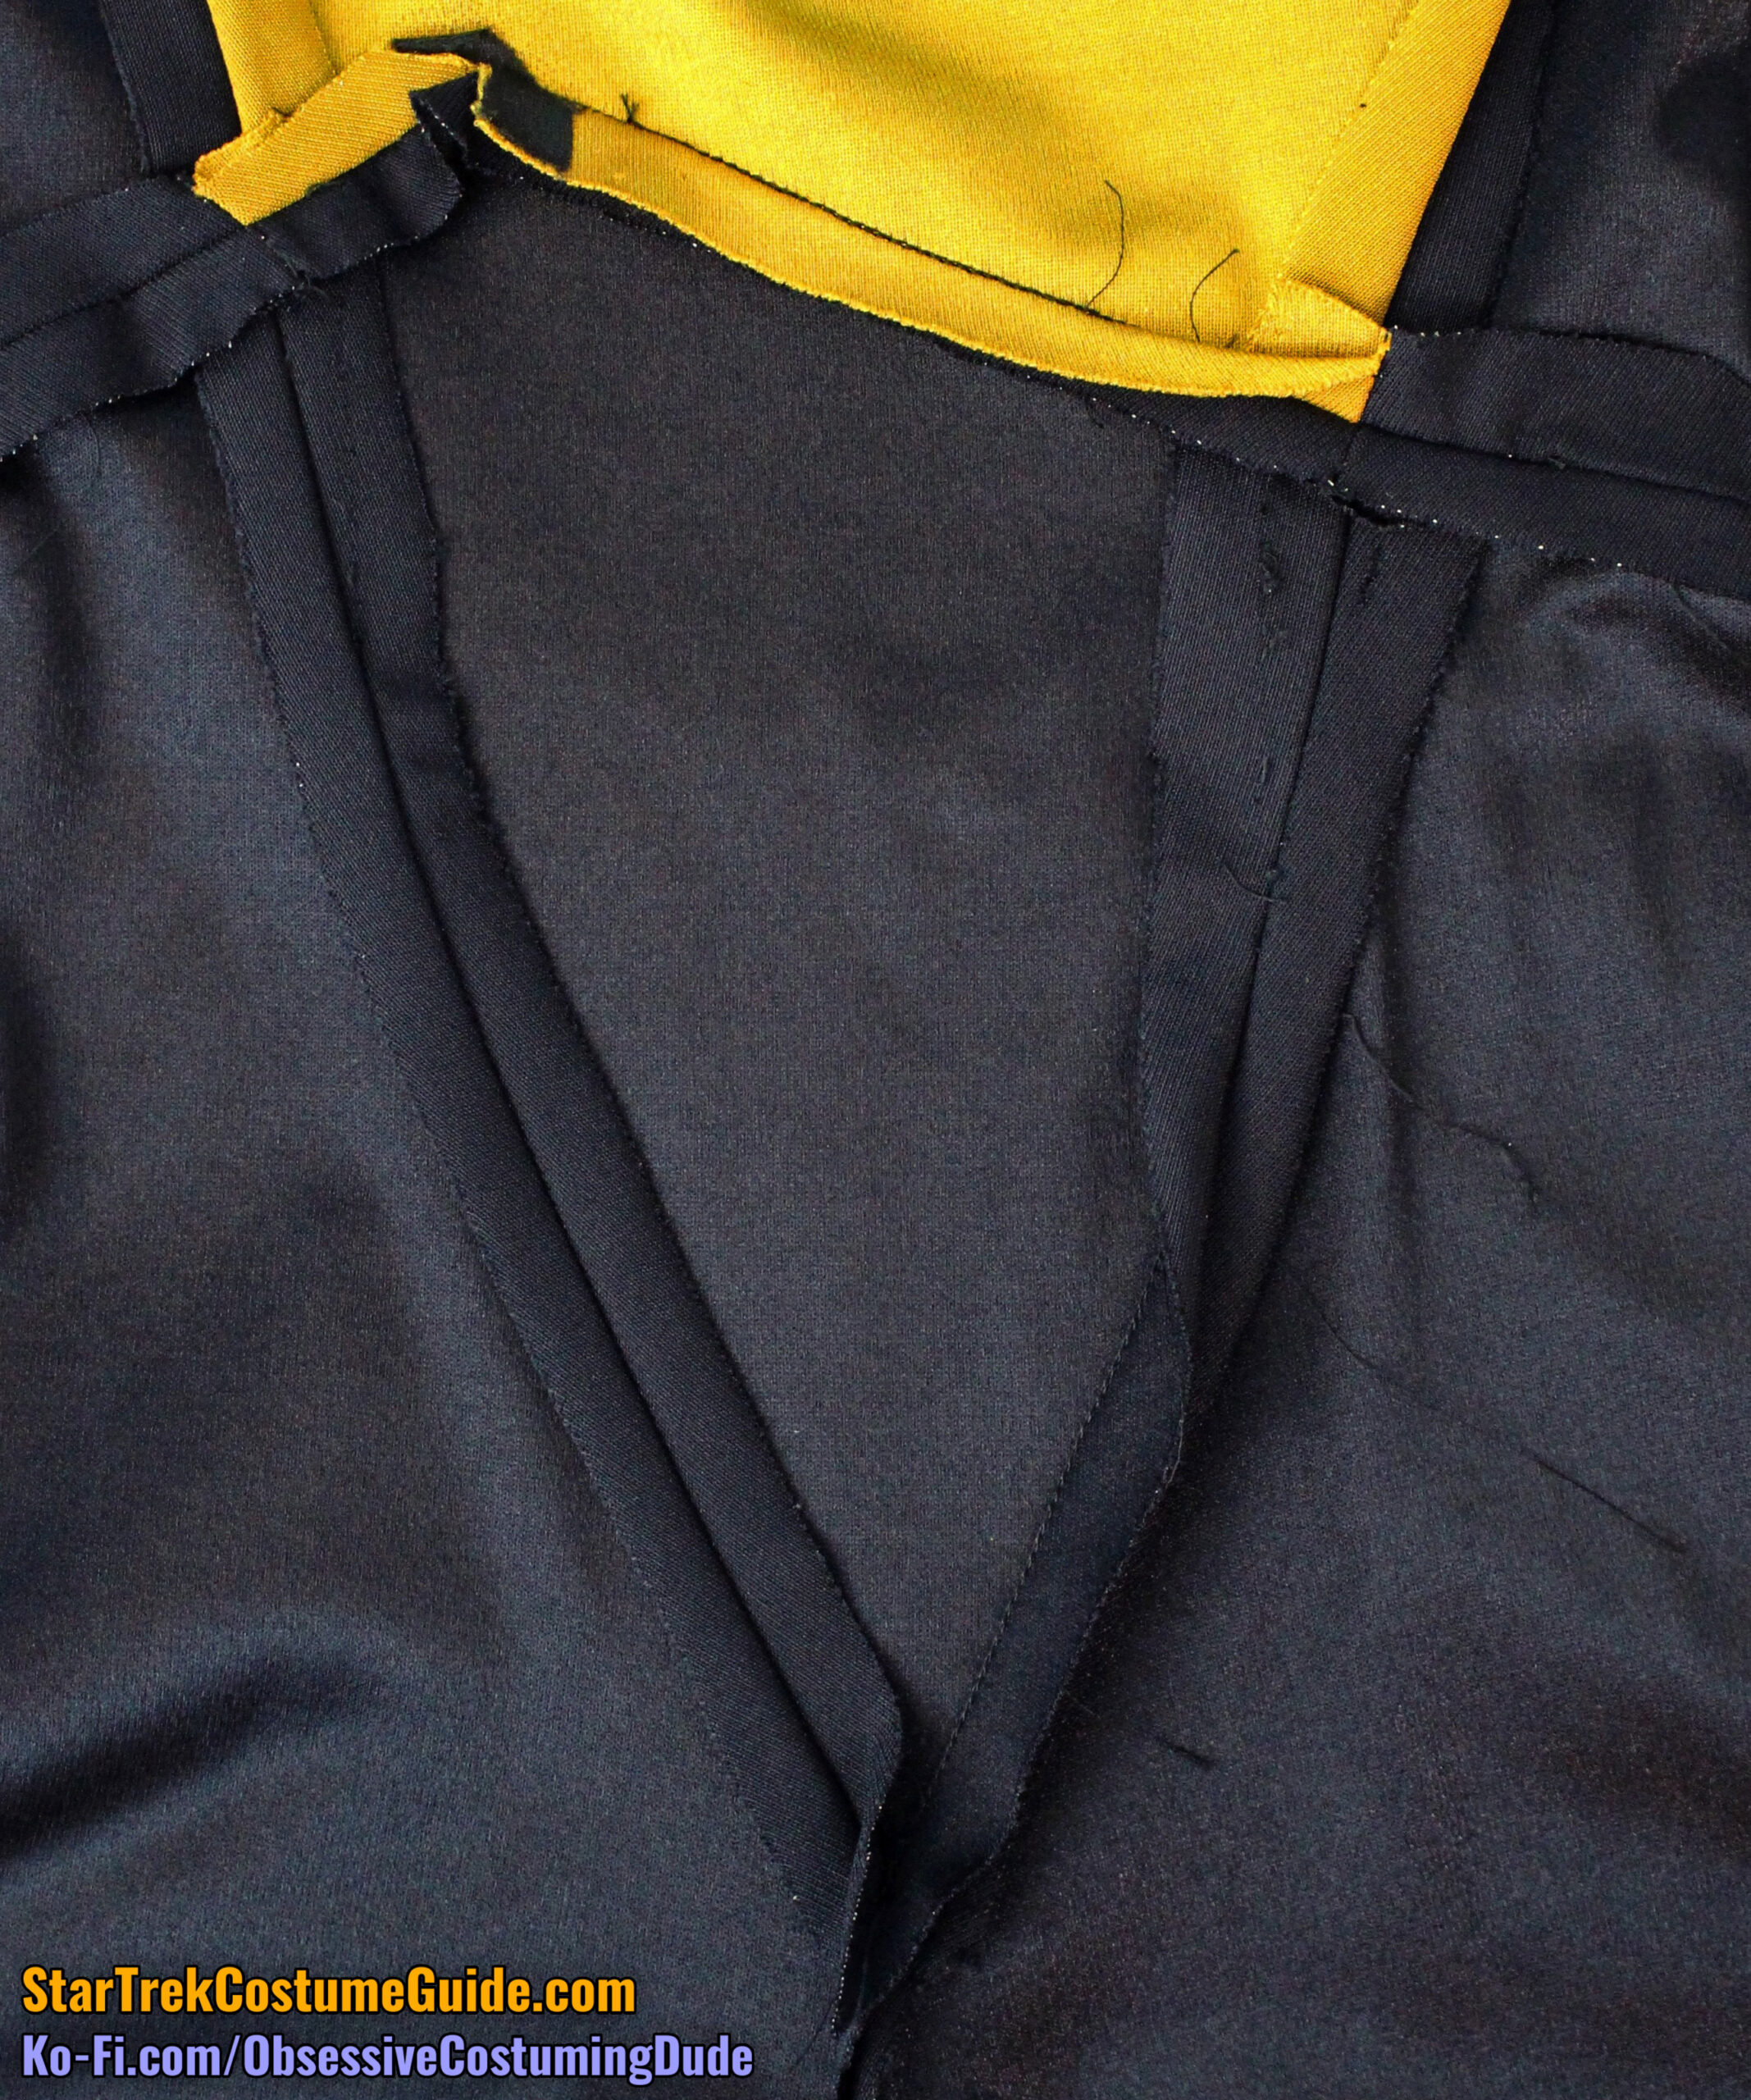
The neckline/collar seam allowances were pressed upward into the collar except for the center front, where they were clipped and pressed downward to accommodate the division-colored piping.
At the center front, the piping was thoroughly secured with either zig-zag stitching or hand-sewing (it’s tough to tell which), and the lower edges were protected with a small square of fabric folded over them and edge-stitched closed.
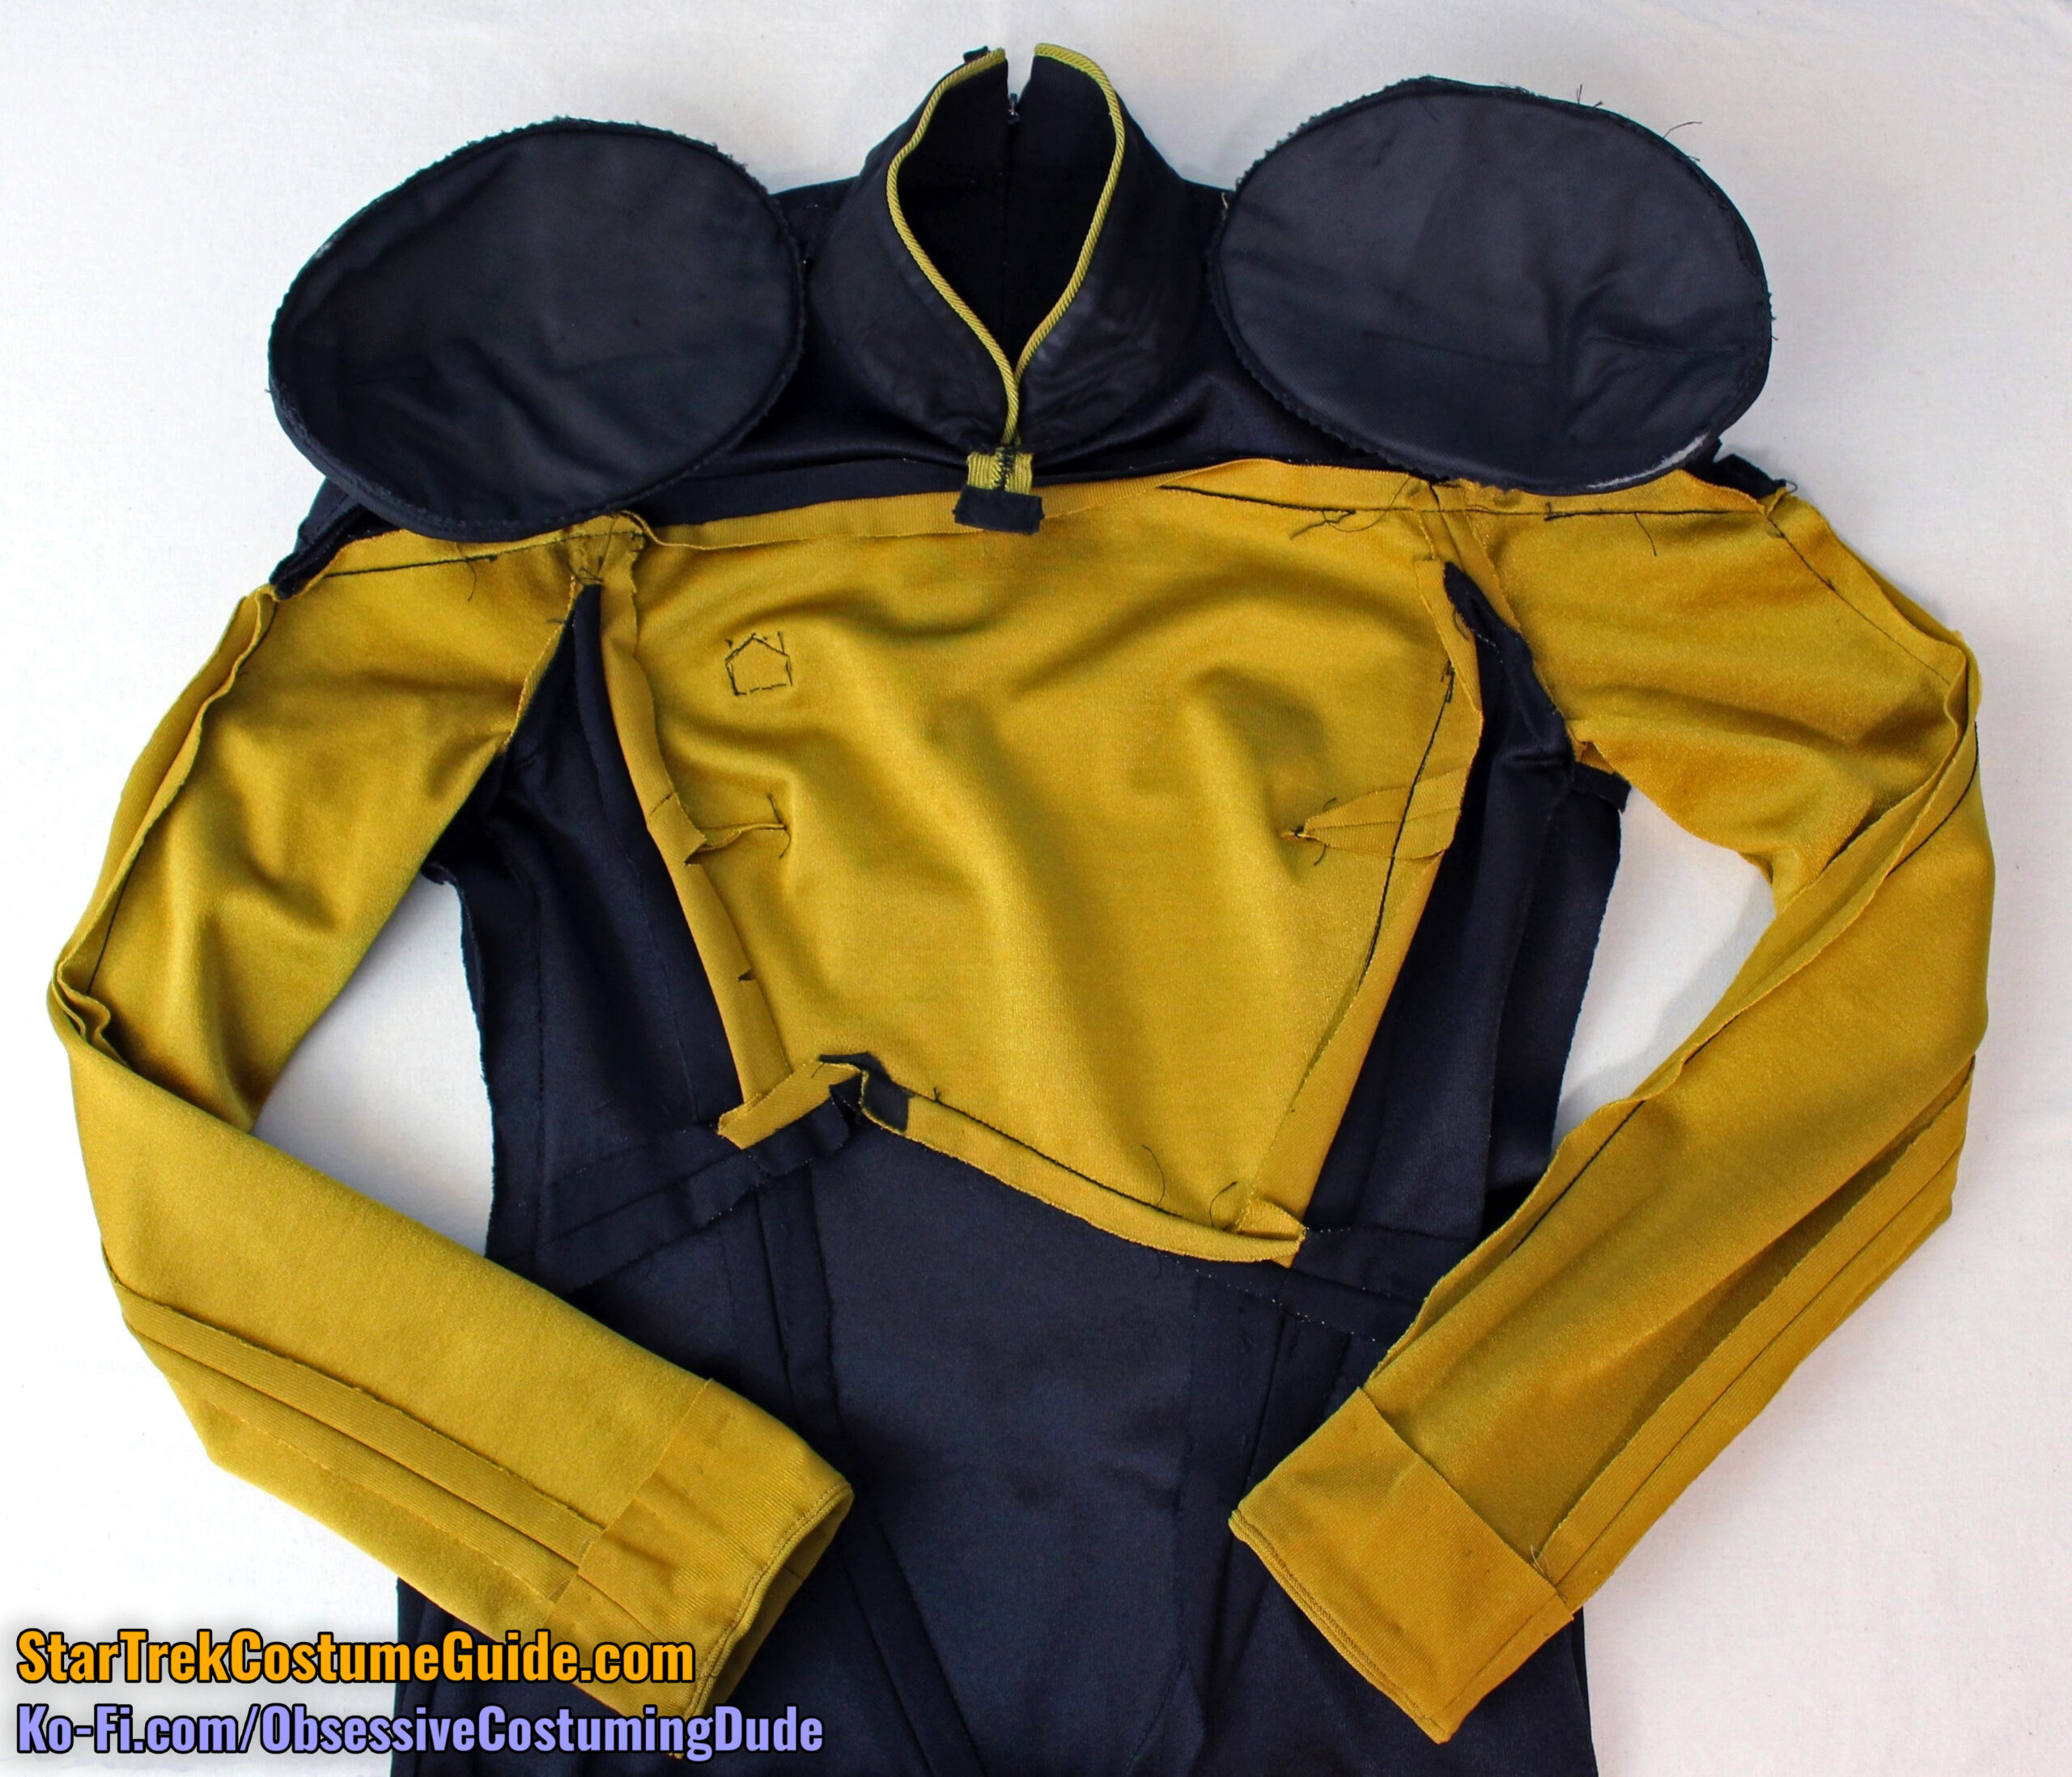
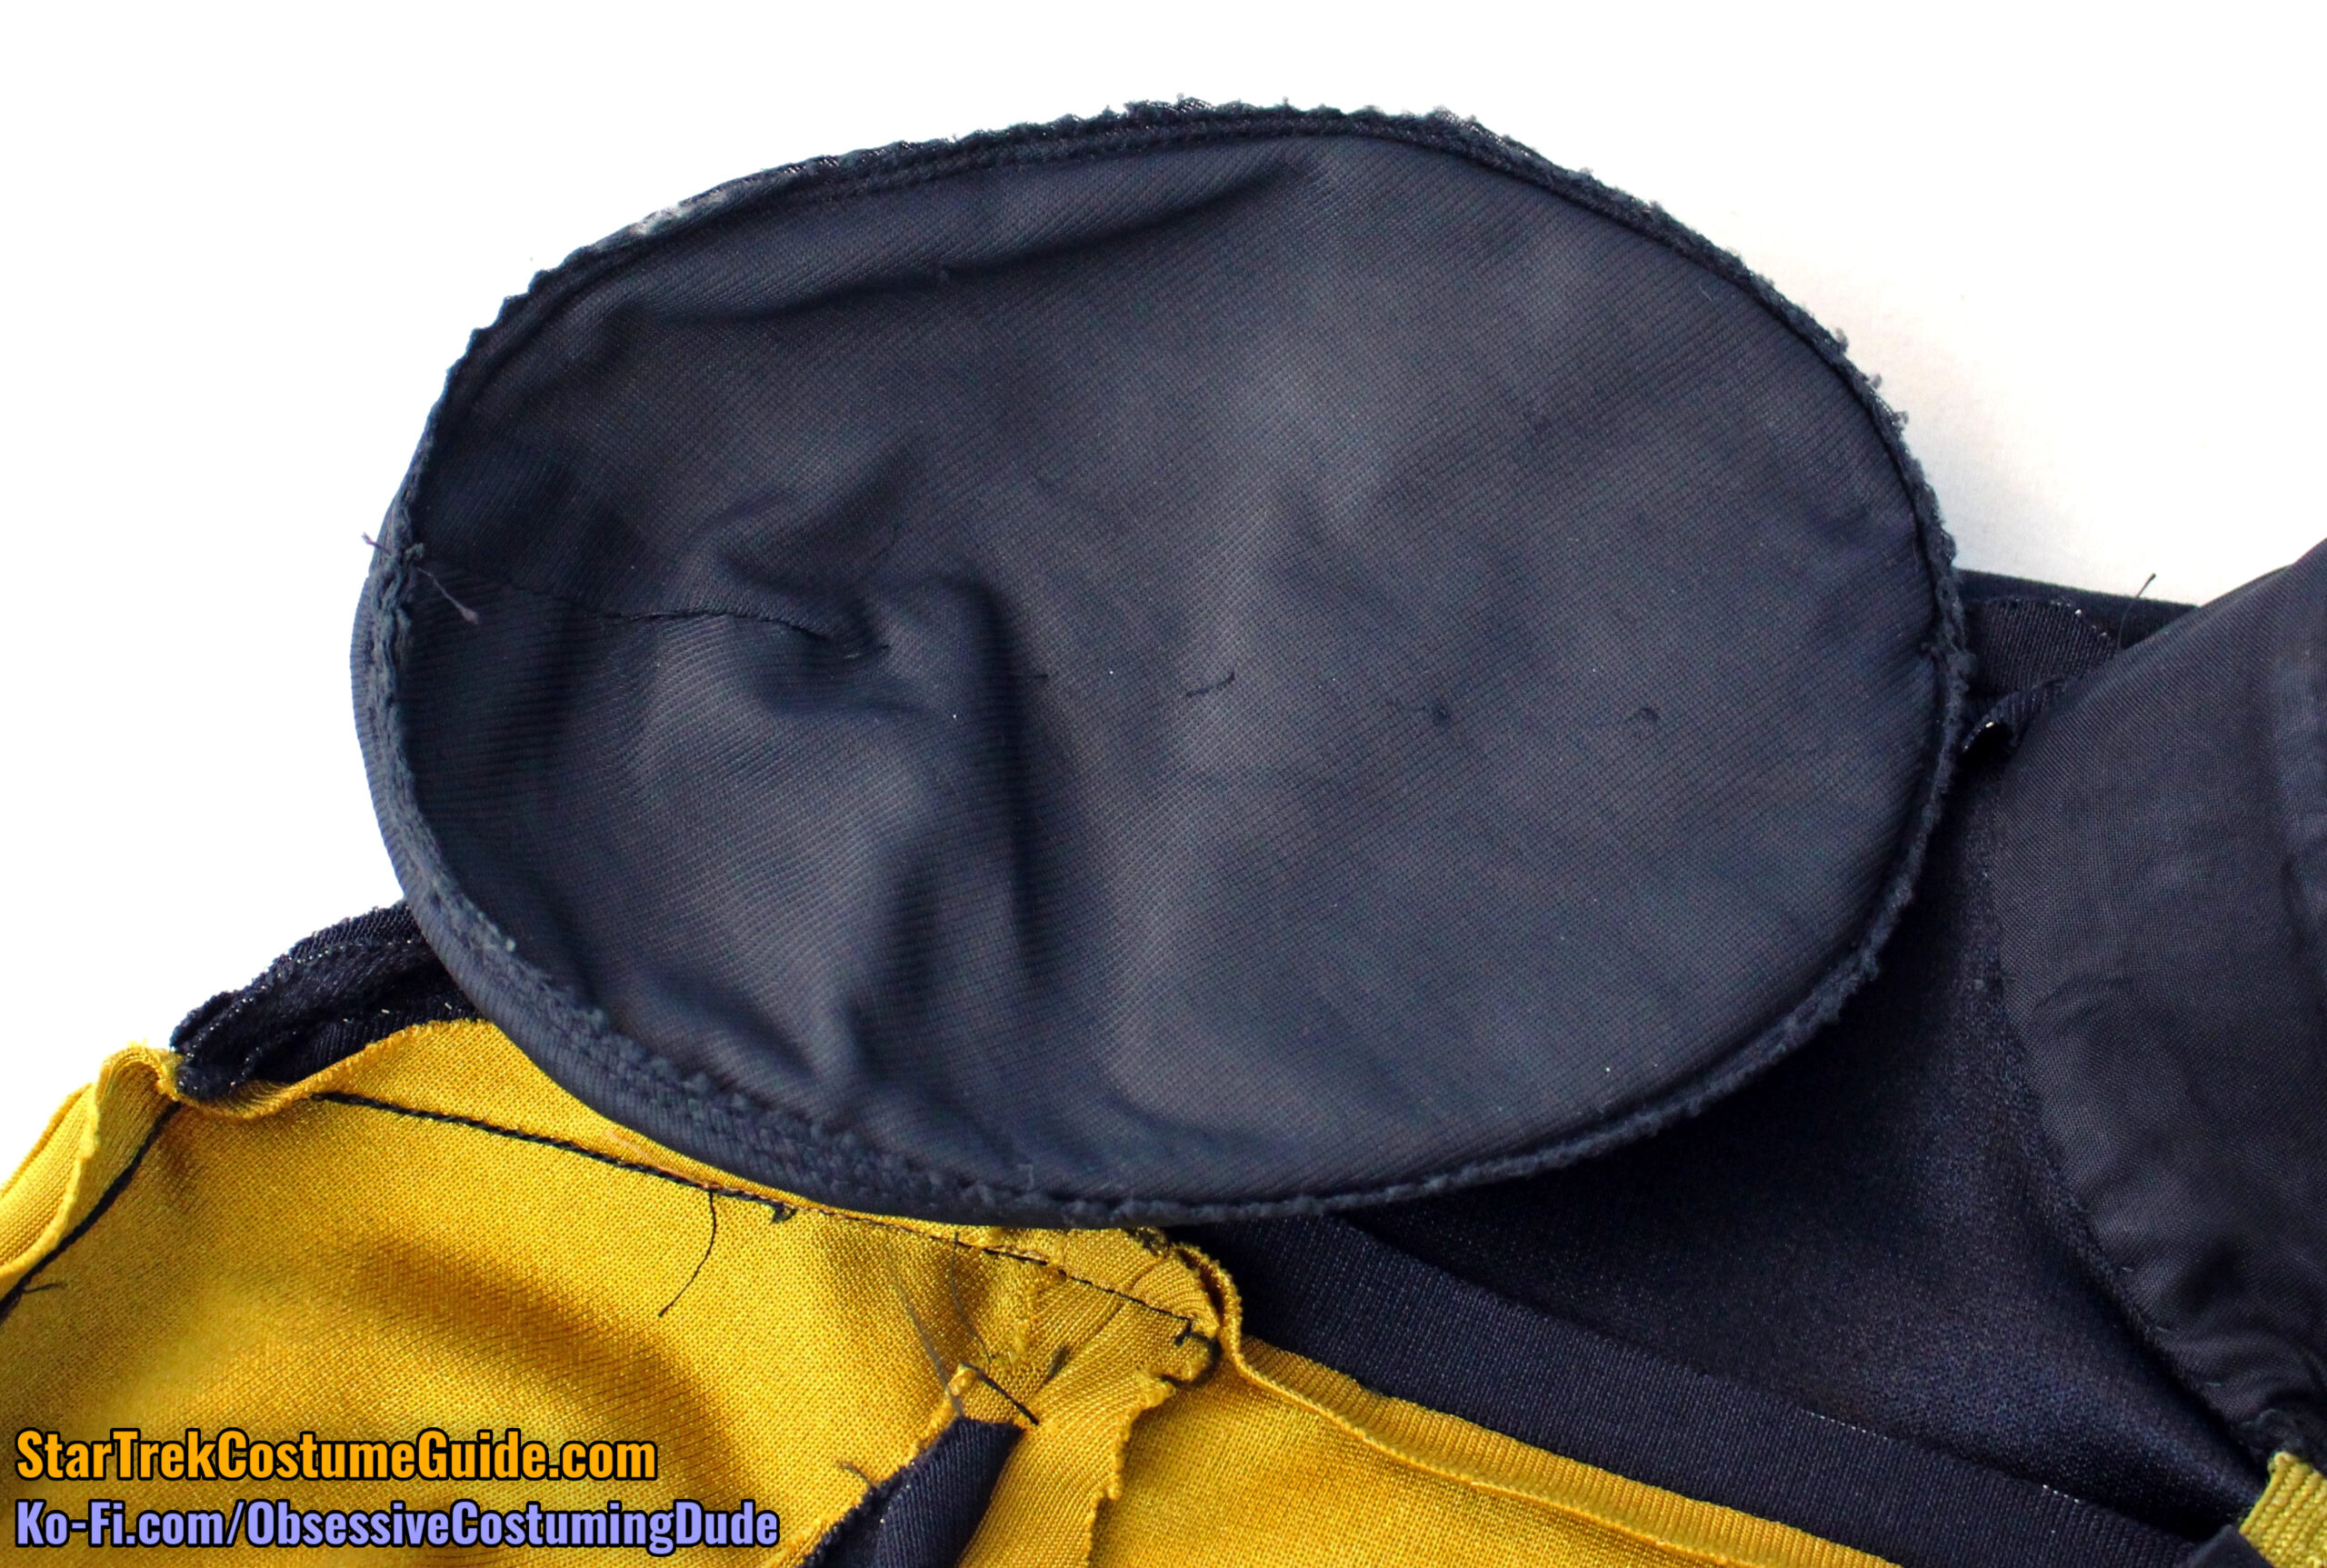
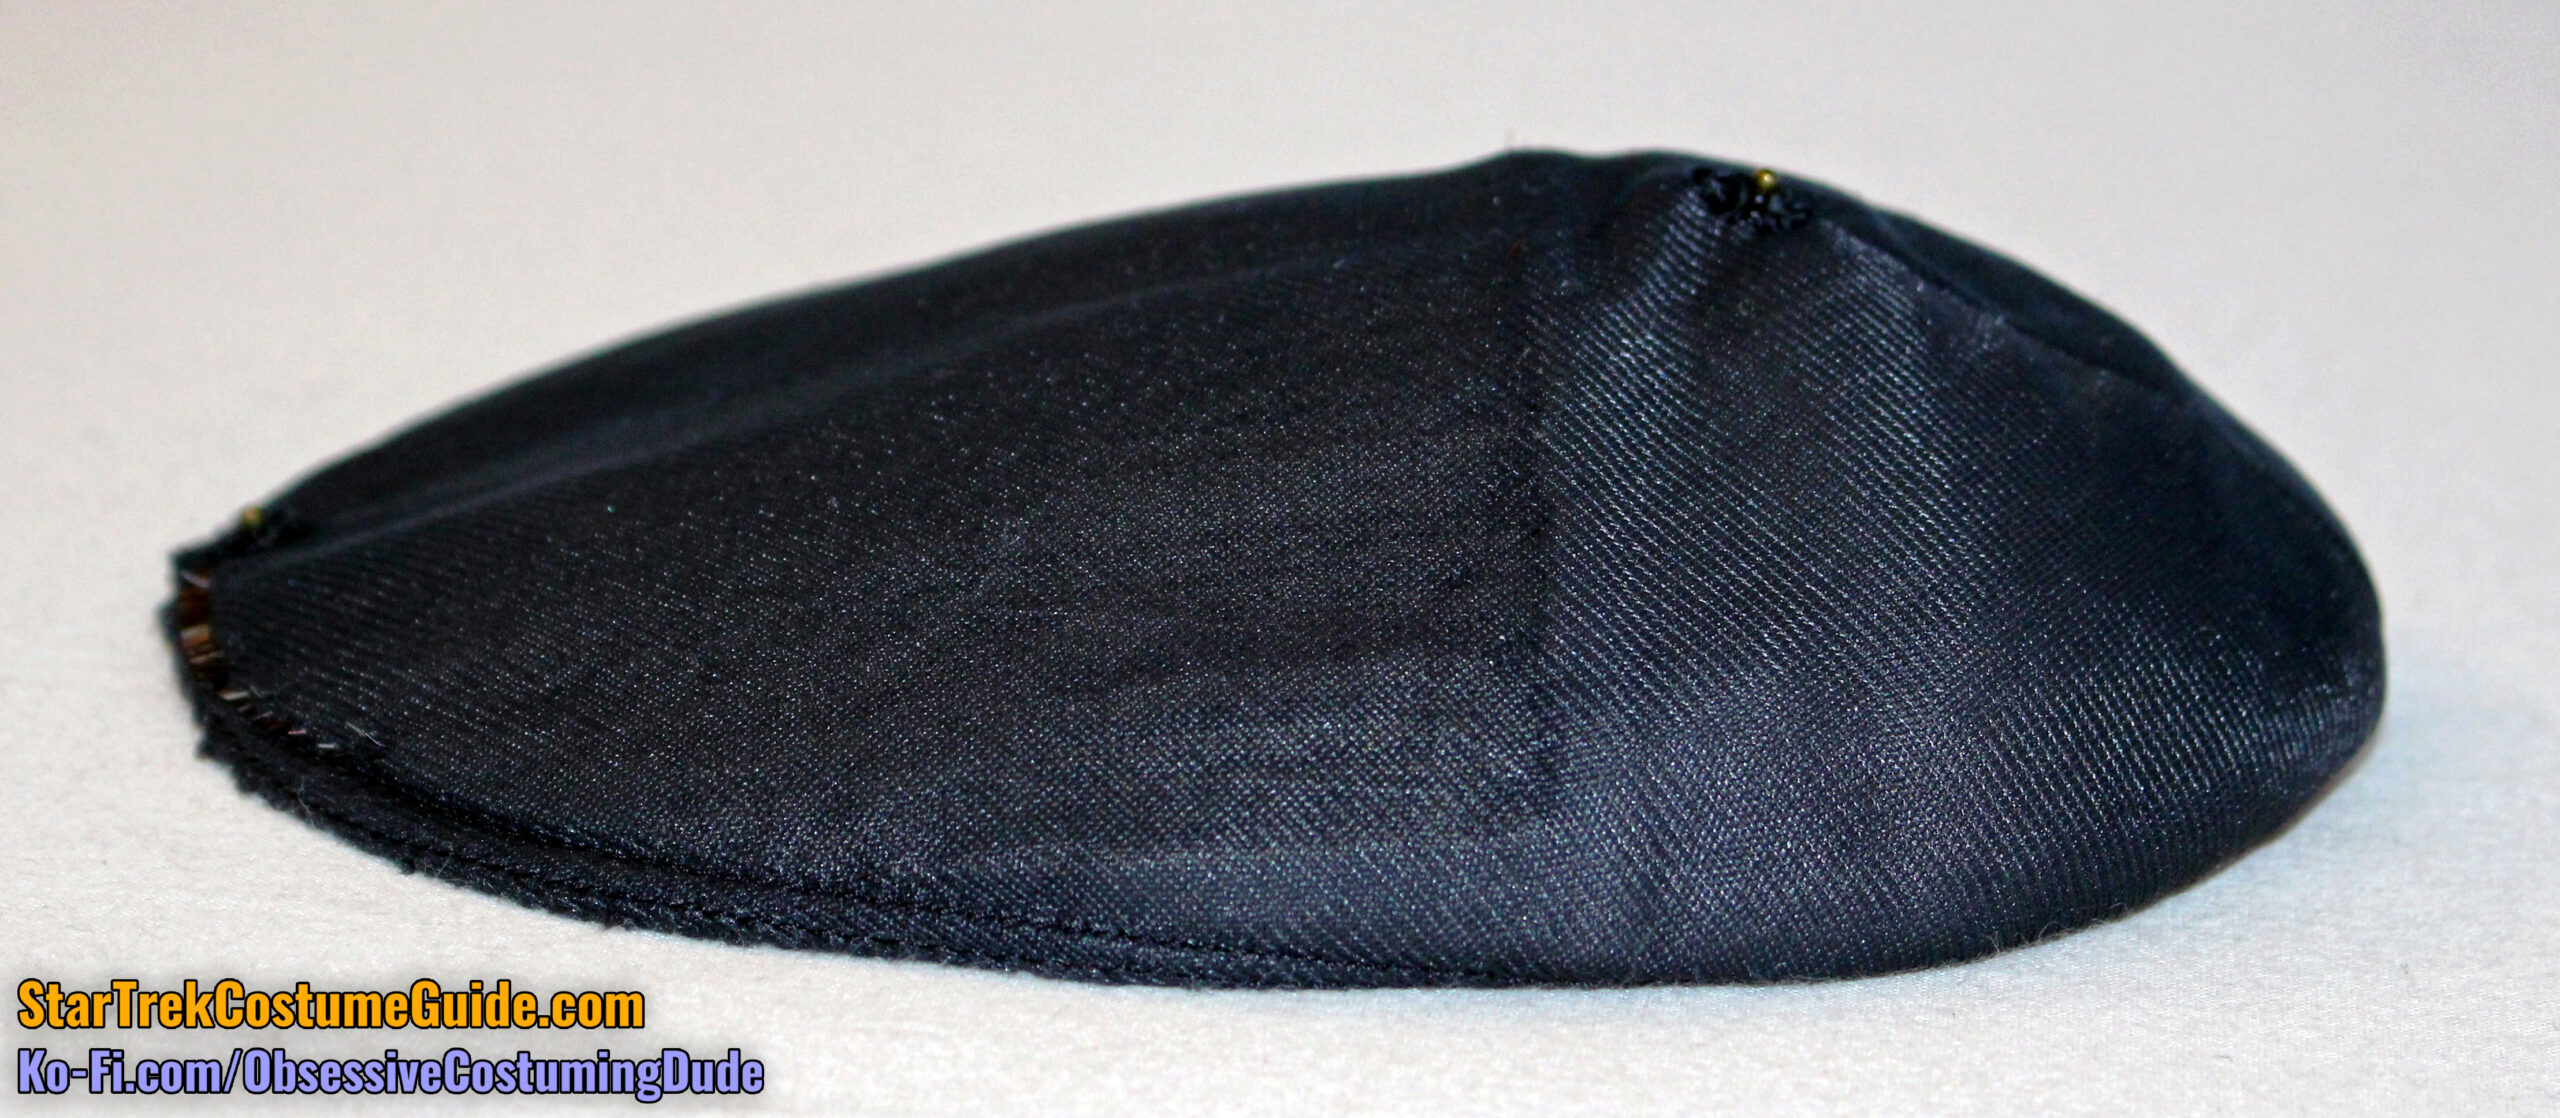
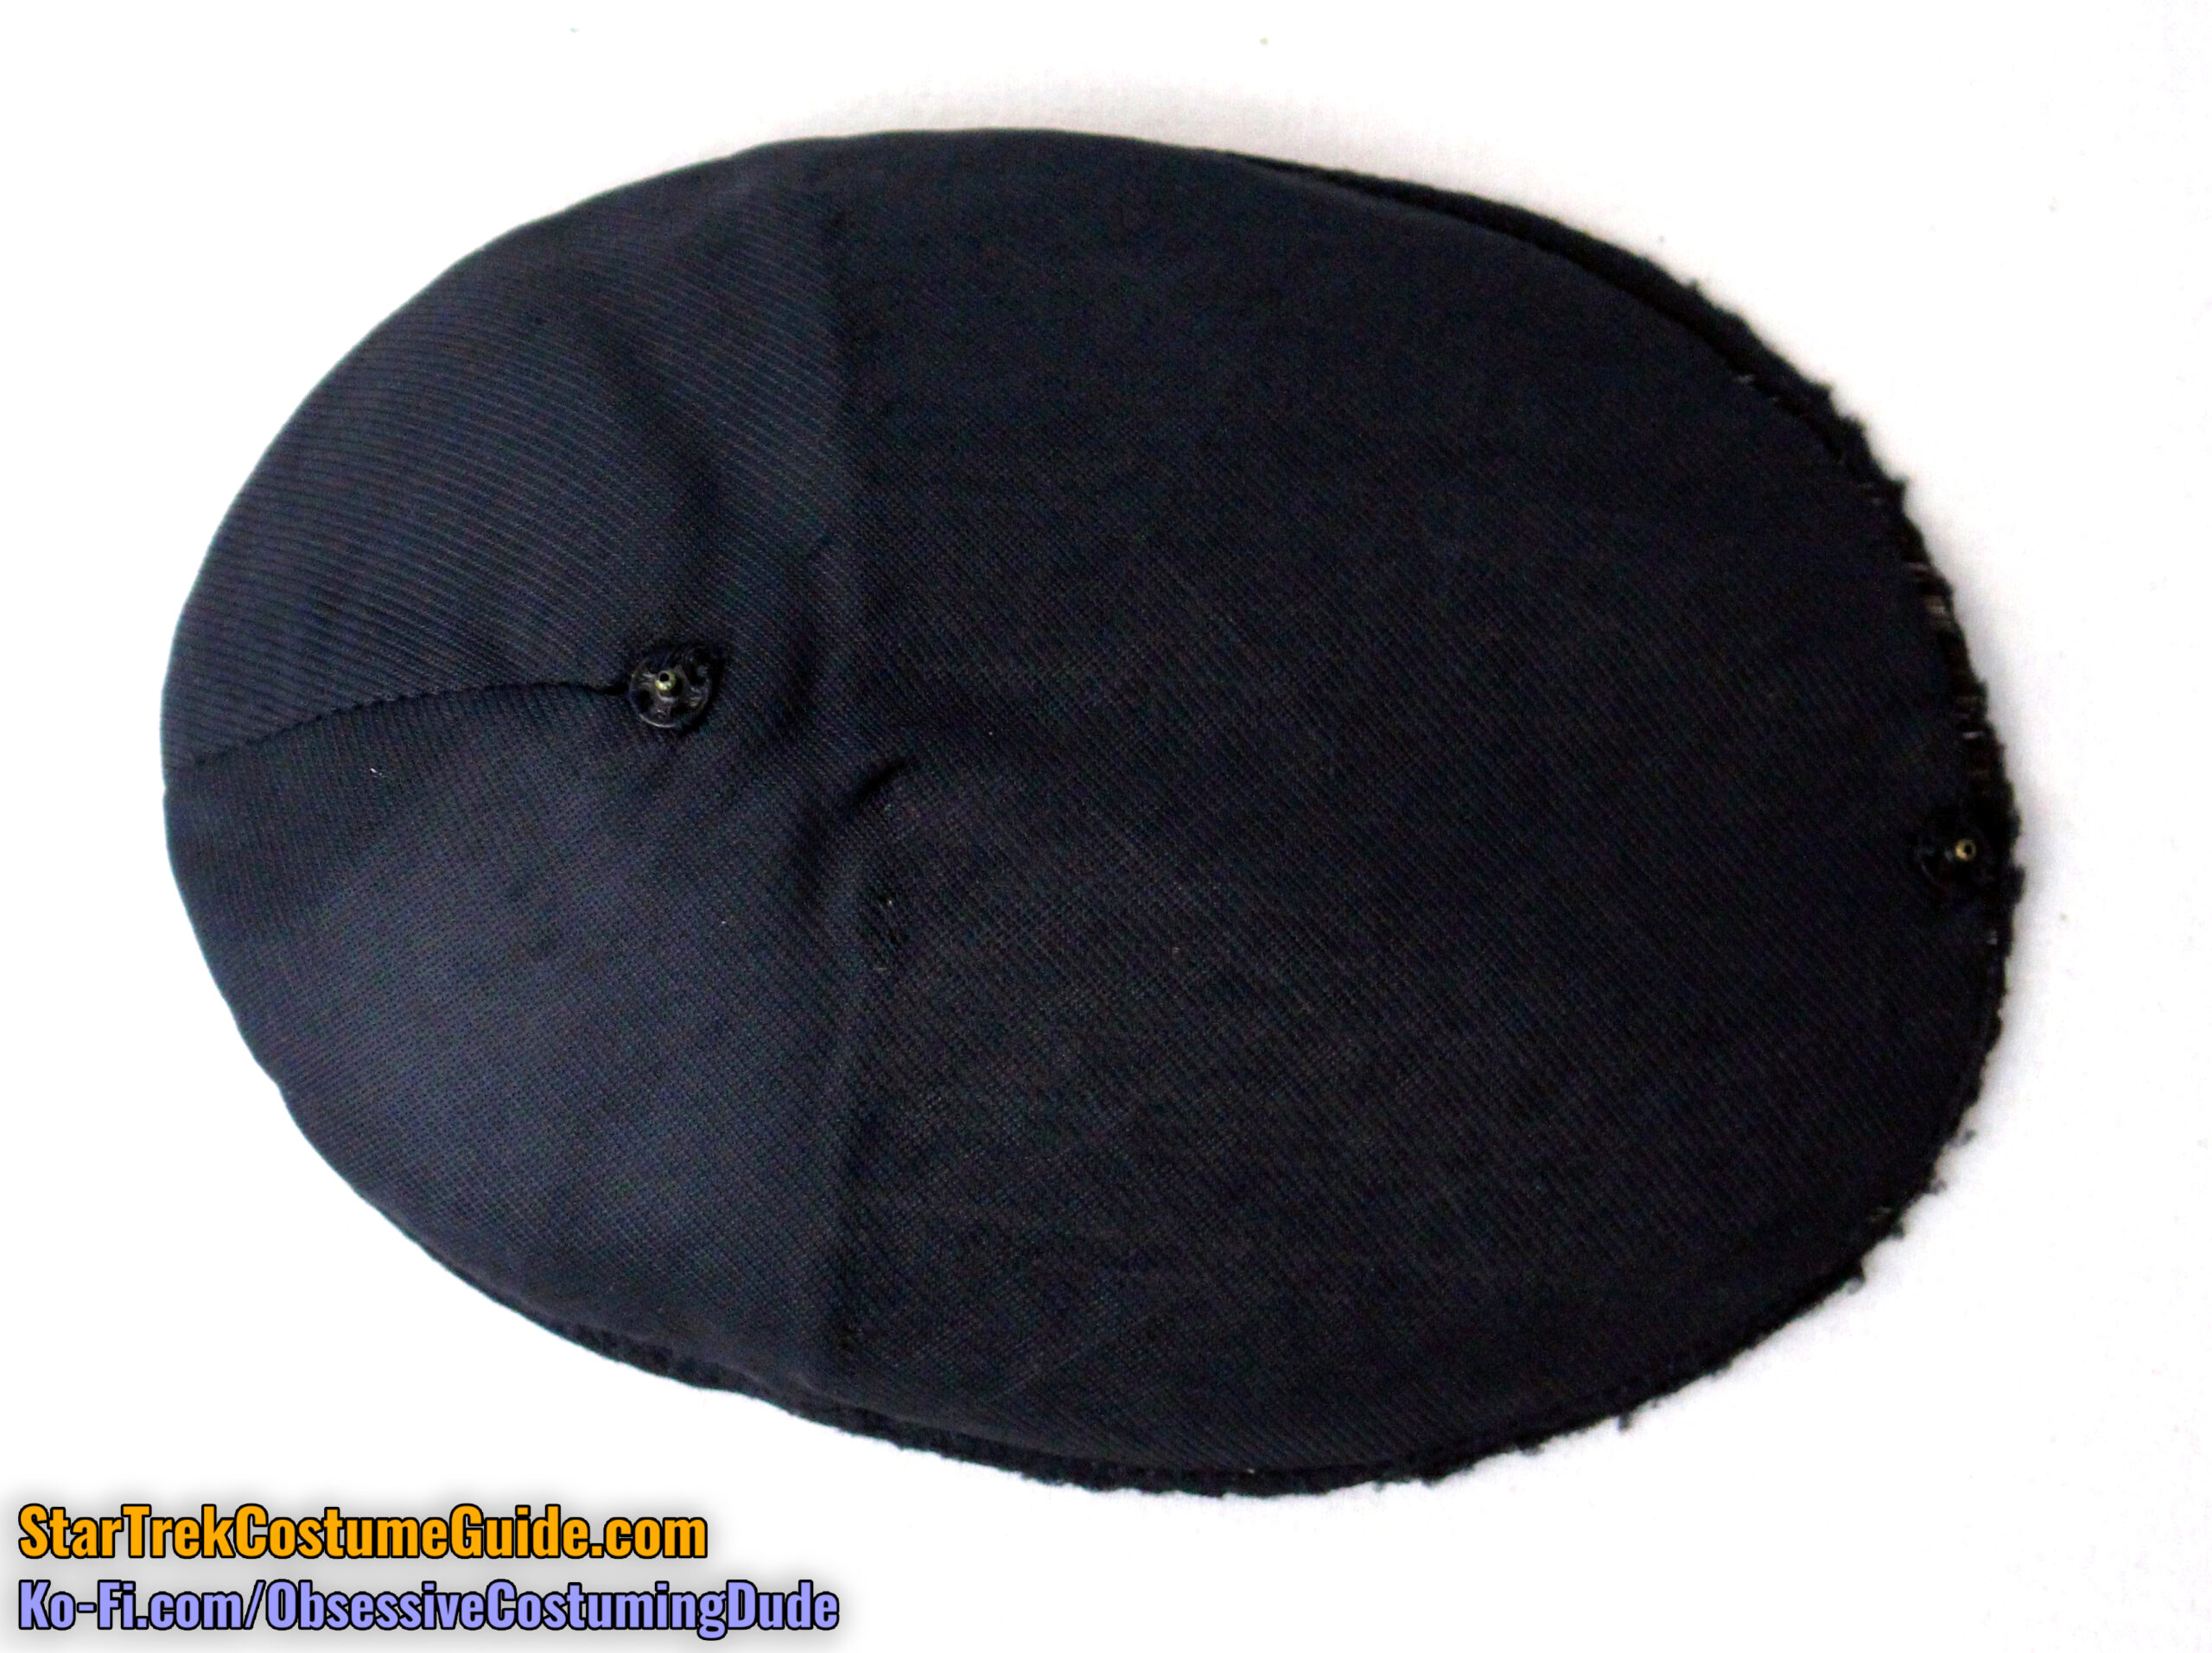
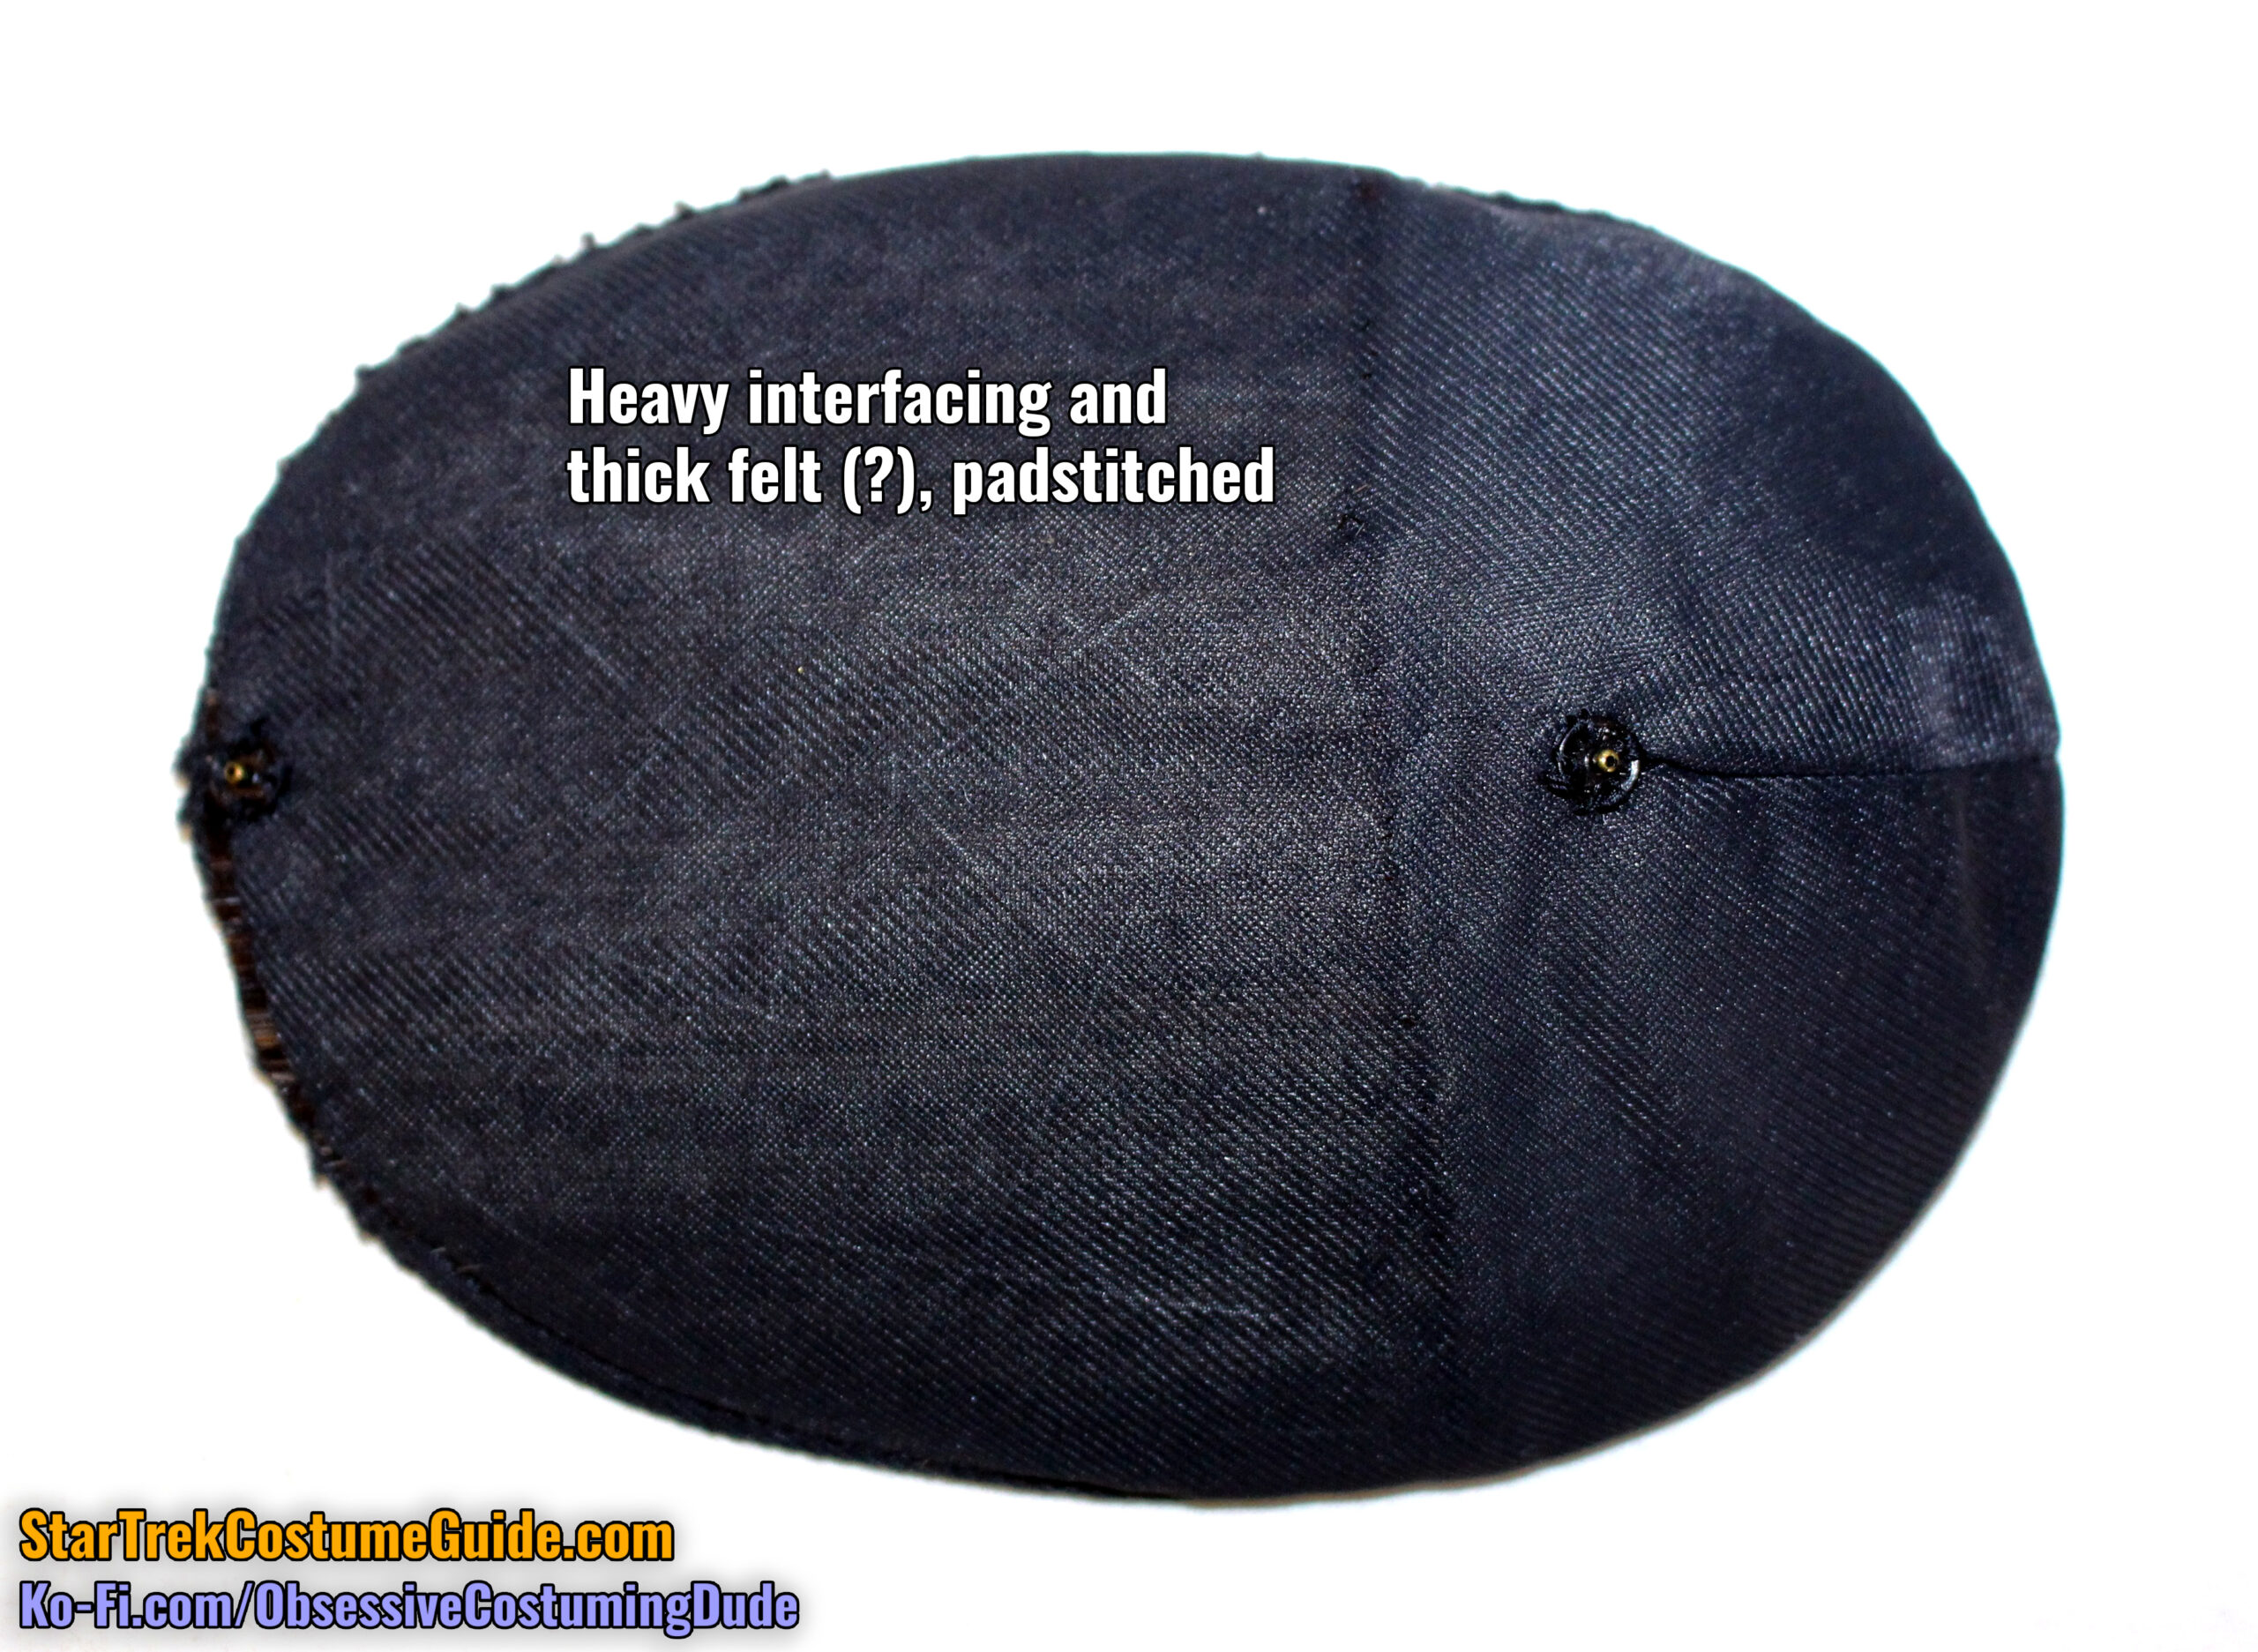
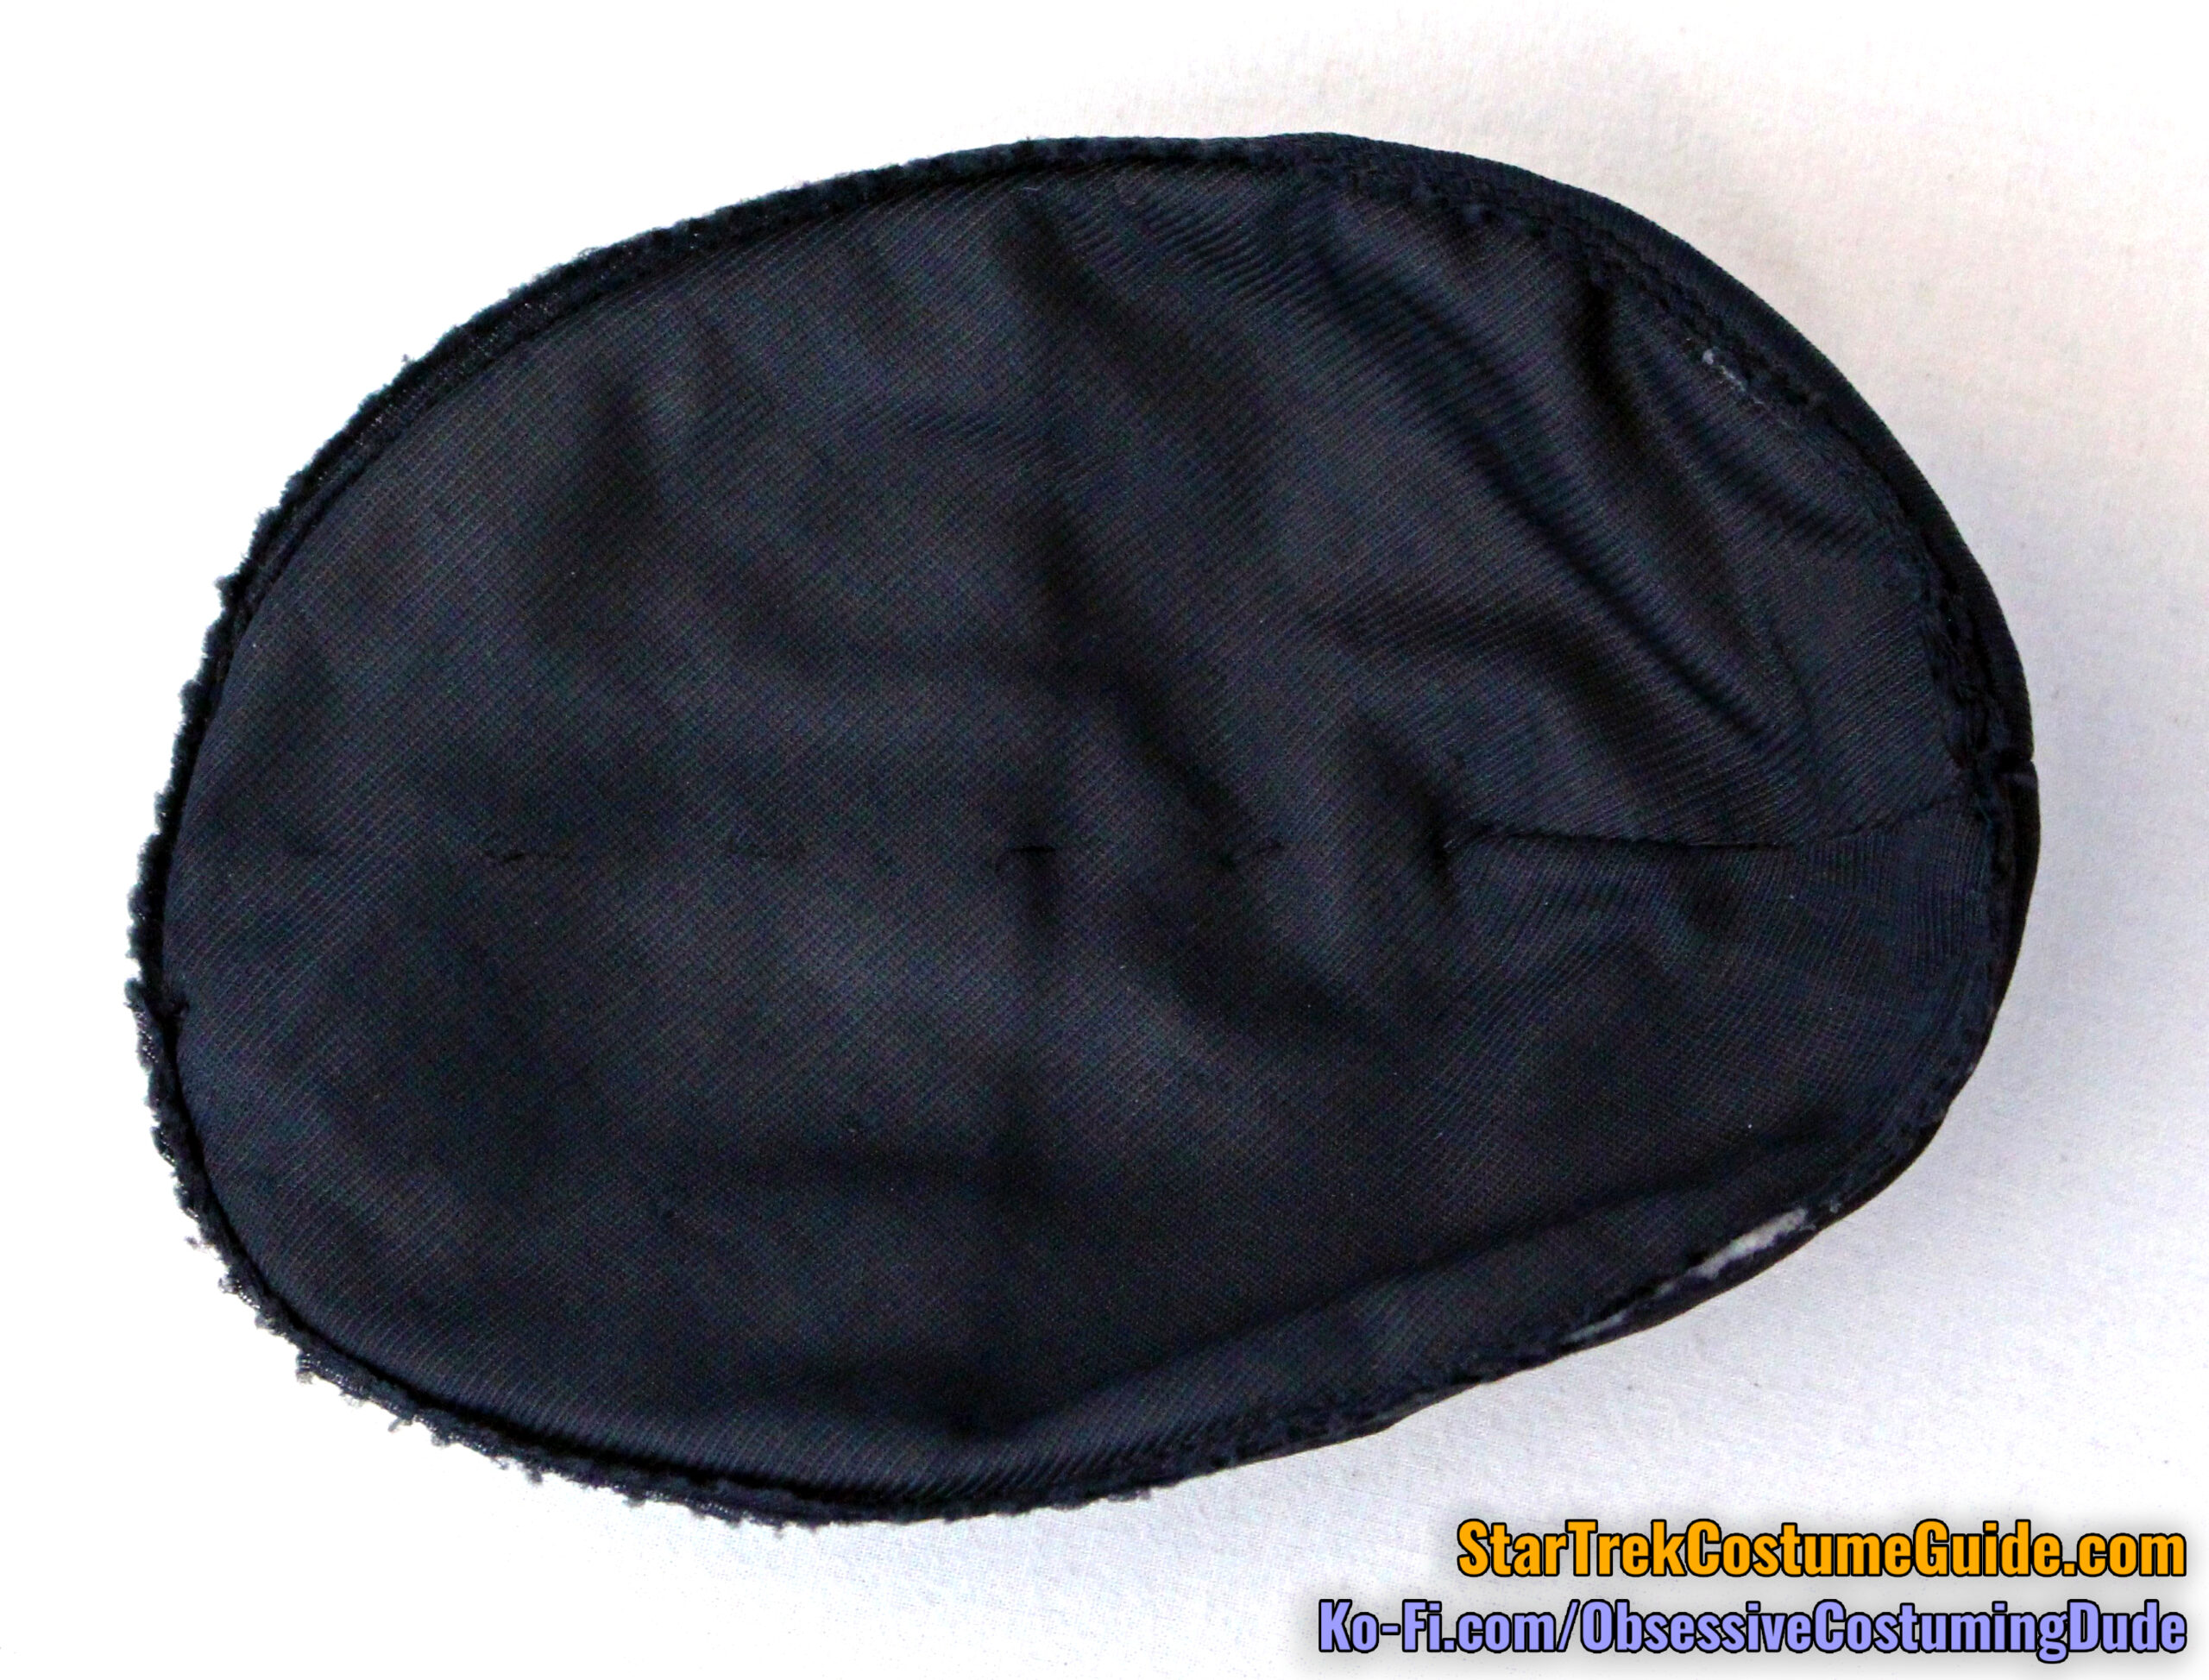
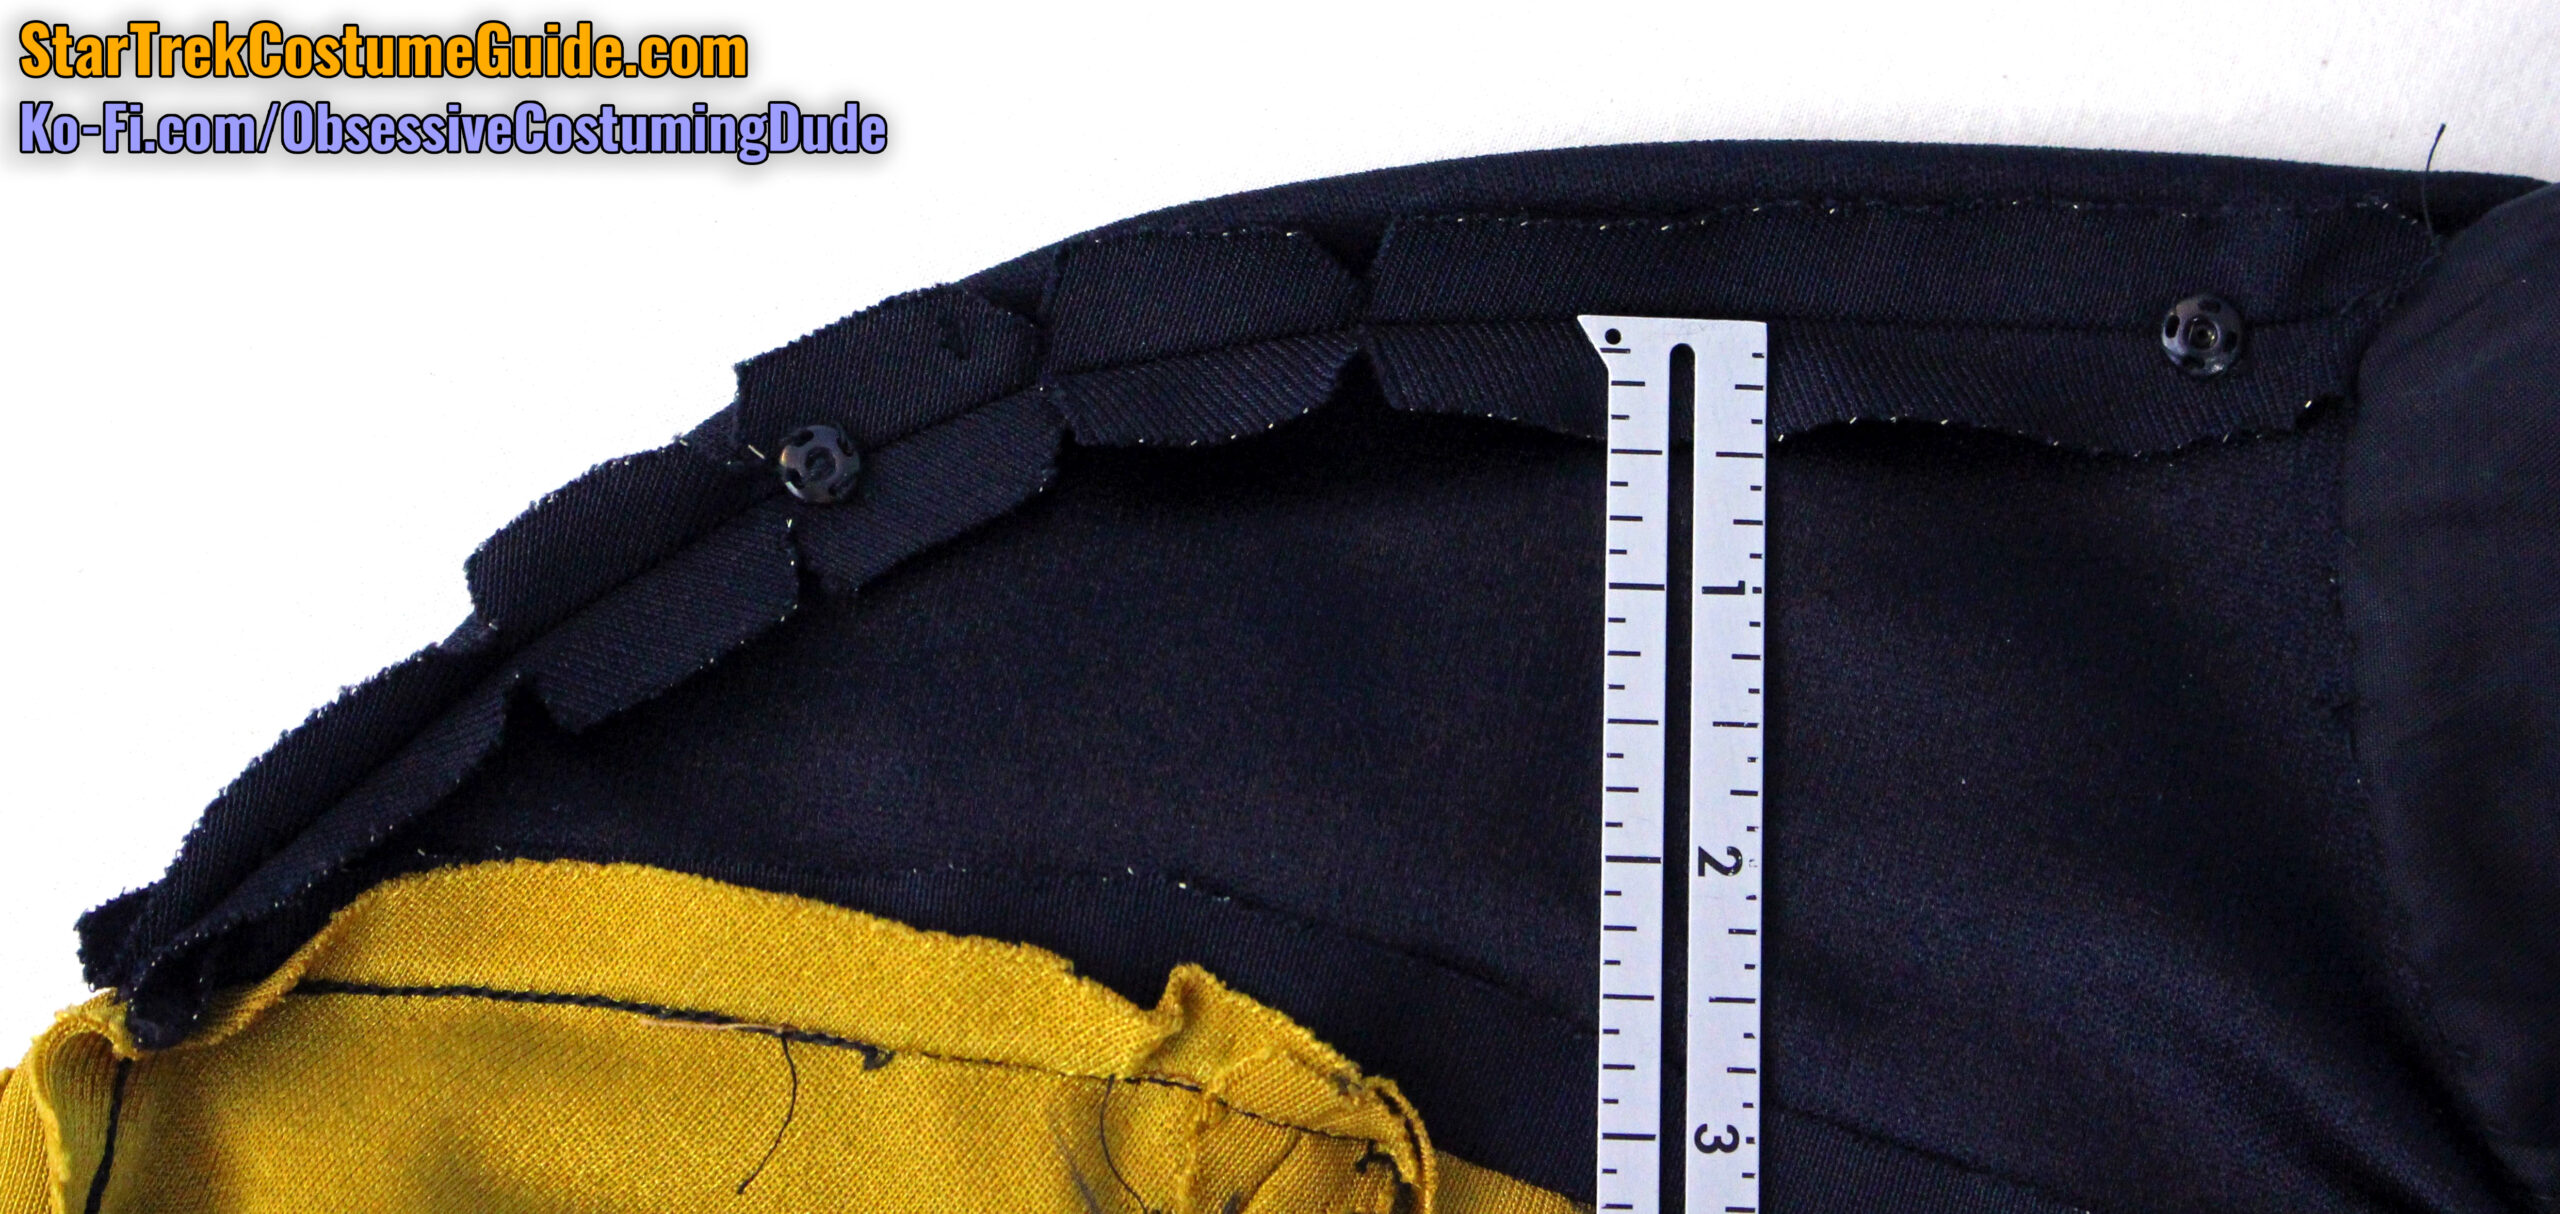
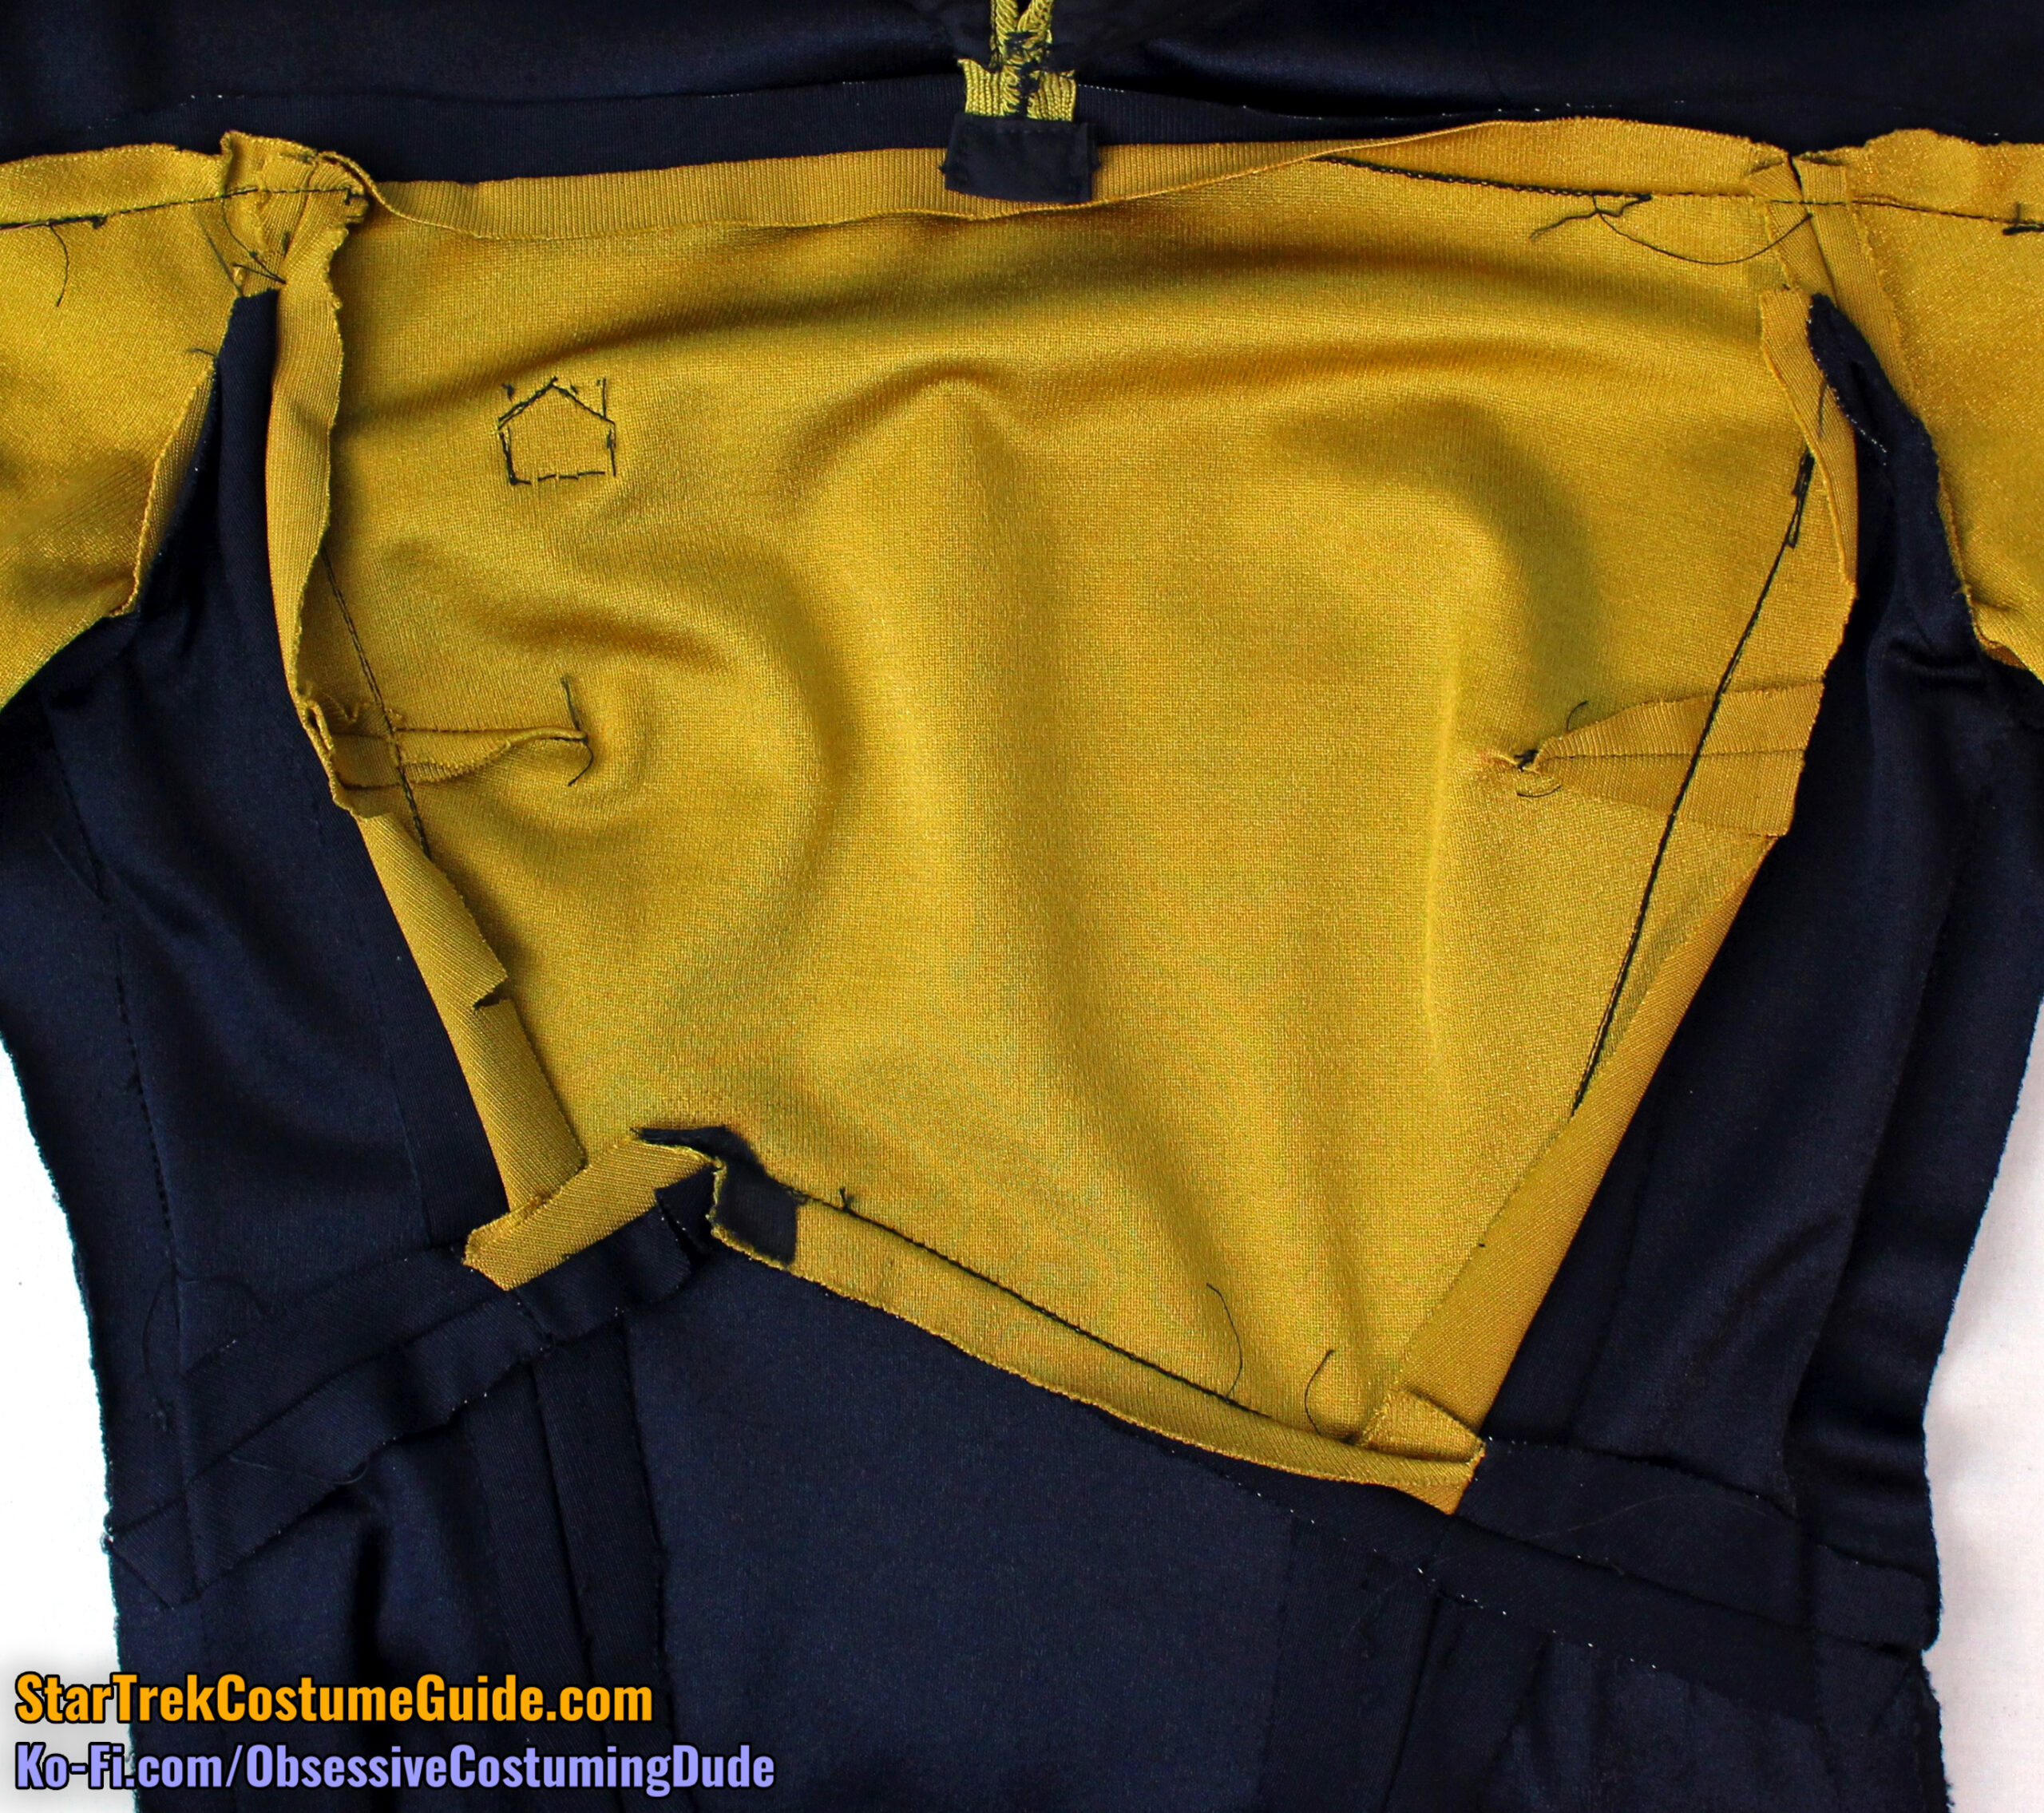
As you probably noticed in the first interior photo, the Ensign Sito jumpsuit also included the original shoulder pads, which were quite large and extended underneath the majority of the yoke at the shoulders.
These shoulder pads were similar in style to those from the other TNG-era uniforms I examined – specifically, the screen-used TNG skant and screen-used TNG season 1 admiral.
However, these pads were made with a more durable fabric (possibly polyester gabardine?) and more heavily structured, with a very heavy interfacing partially extending across the top. (The outermost few inches were not interfaced.)
Also observe the padstitching inside the shoulder pad, to help give it its shape.
I’m not sure exactly what the interfacing was; it was significantly stiffer and heavier than even heavyweight French canvas.
Little strands of the interfacing poked out from the outer stitching, which as you can see, actually appeared metallic!
The strands were very sharp and would be thoroughly uncomfortable against the skin, but they were only on the upper side of the pad and trimmed short enough to (hopefully) be a non-issue for the wearer.
In addition to the interfacing and padding, the centermost few inches of the bottom of the pad was also structured with what seemed like thick felt.
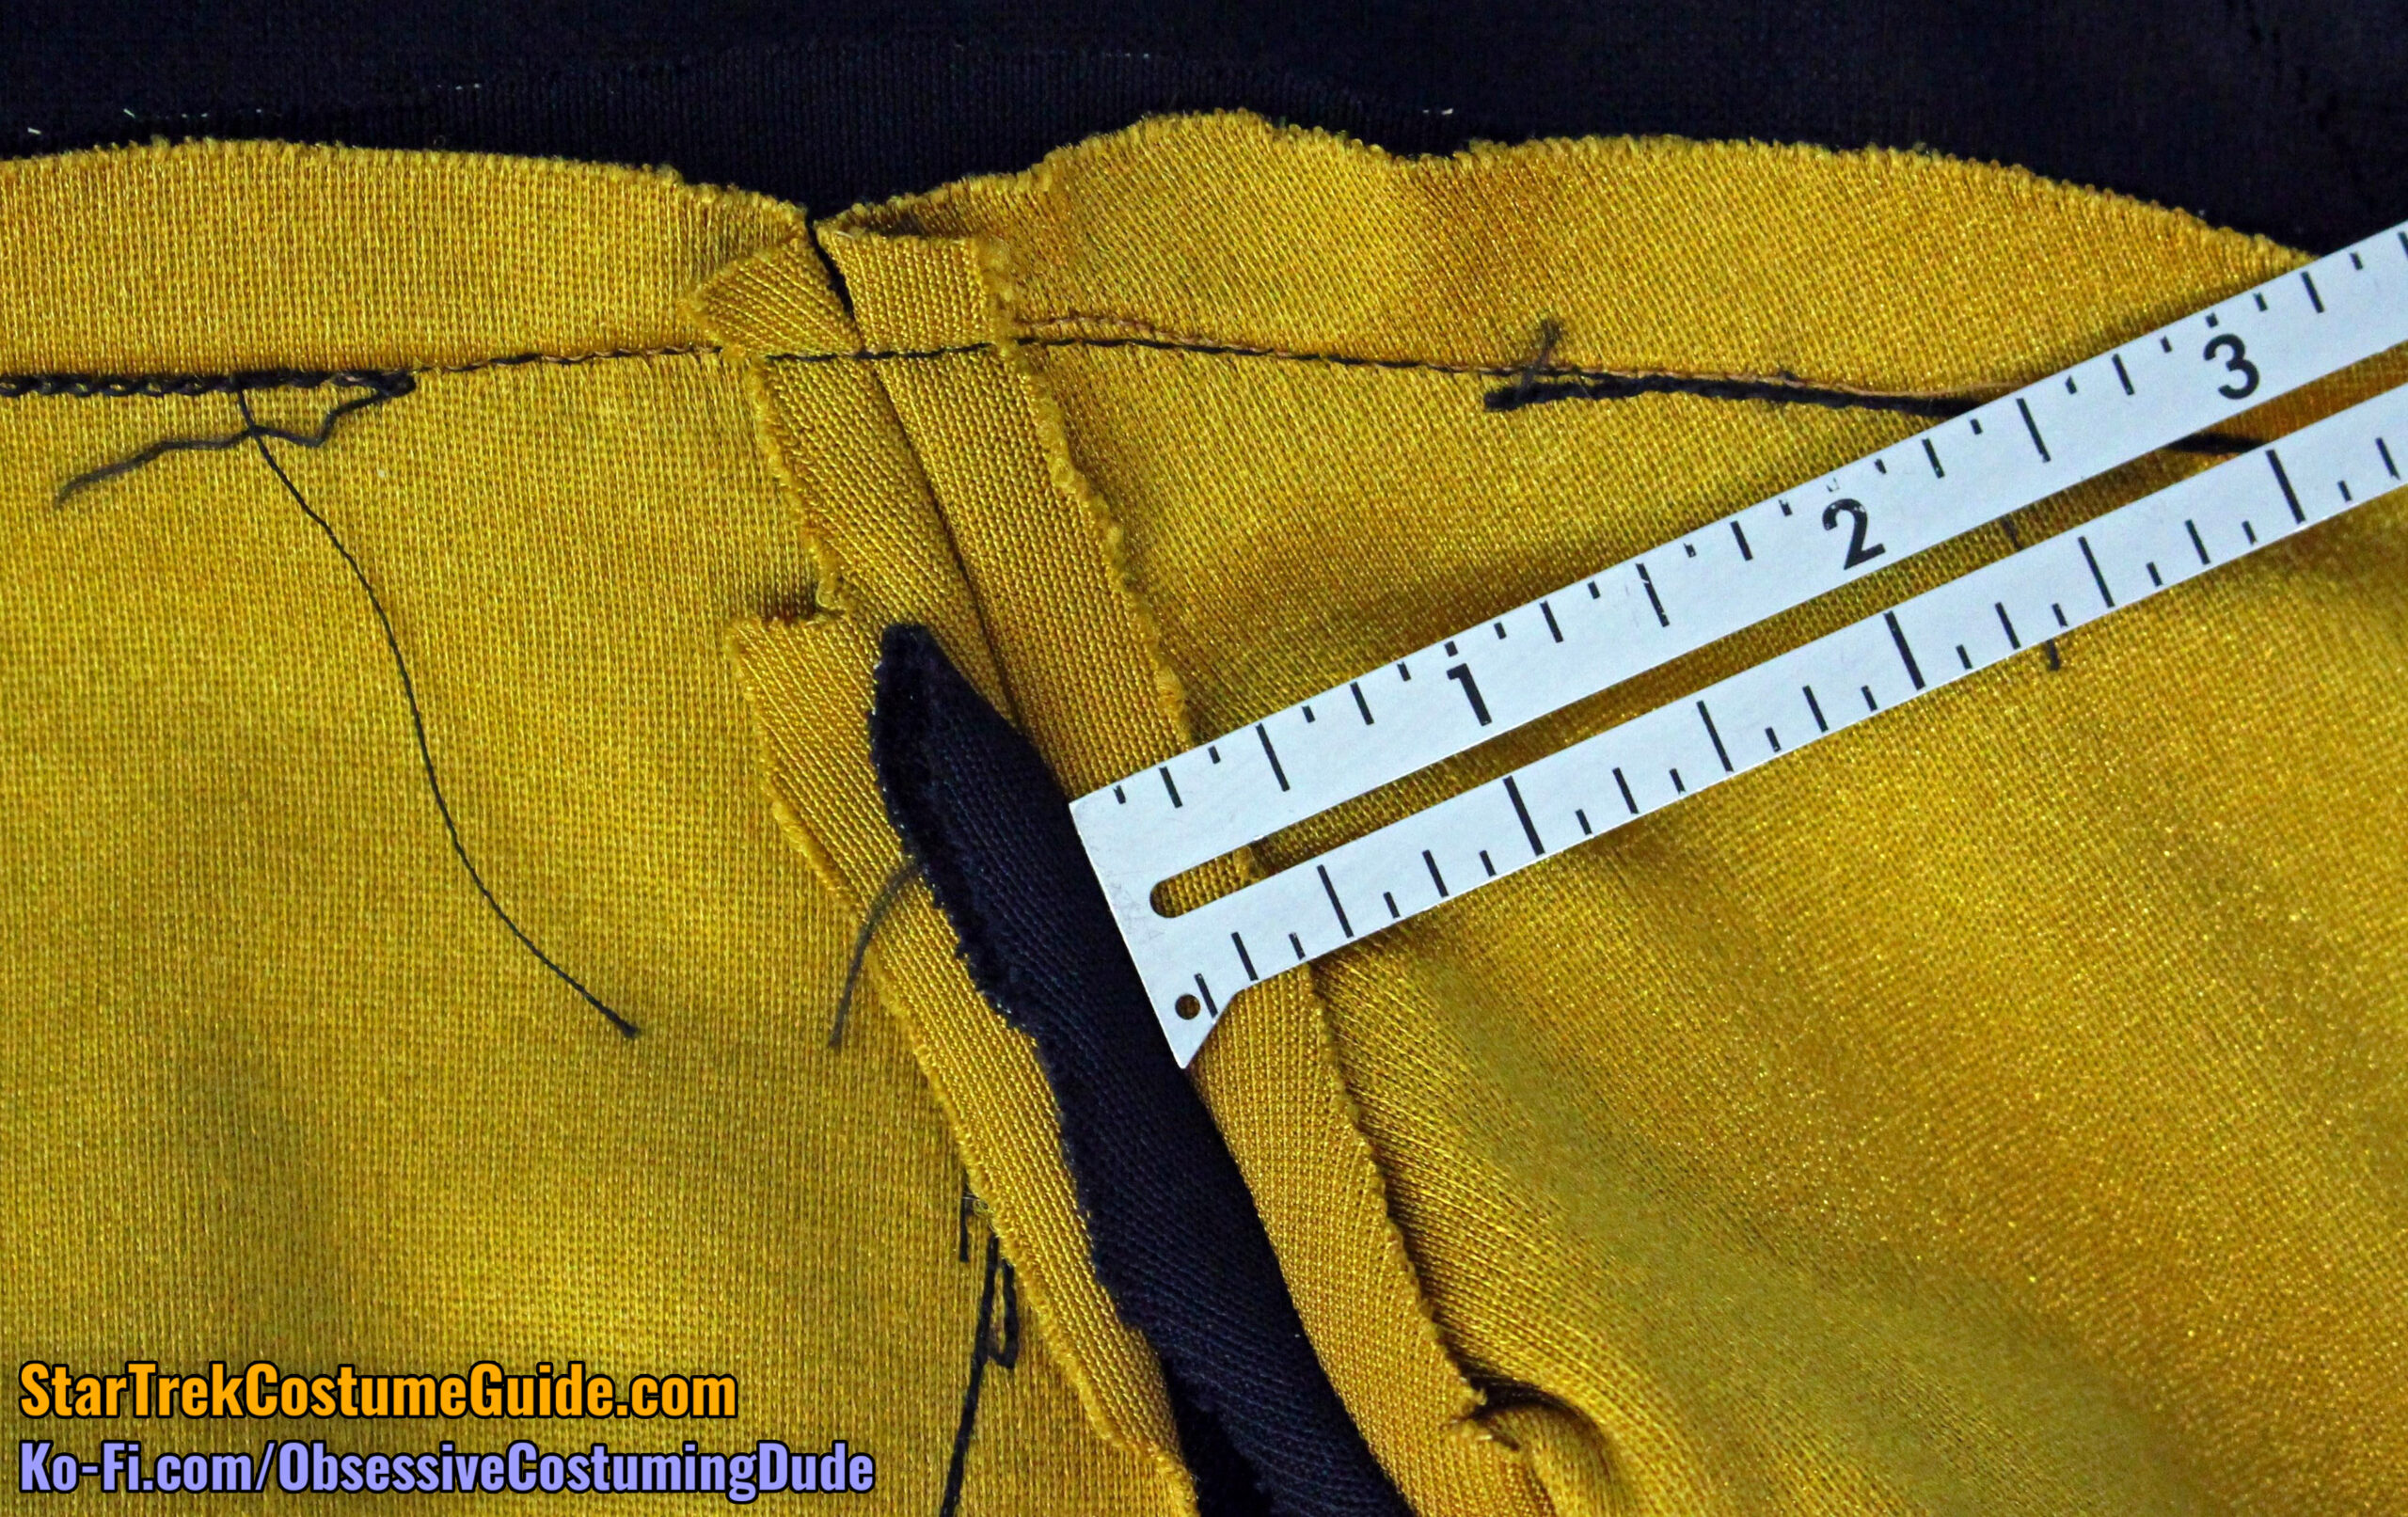
The shoulder seam allowances were ½” and were notched along the outer curve of the yoke, doubtless to help them lie flatter after having been pressed open.
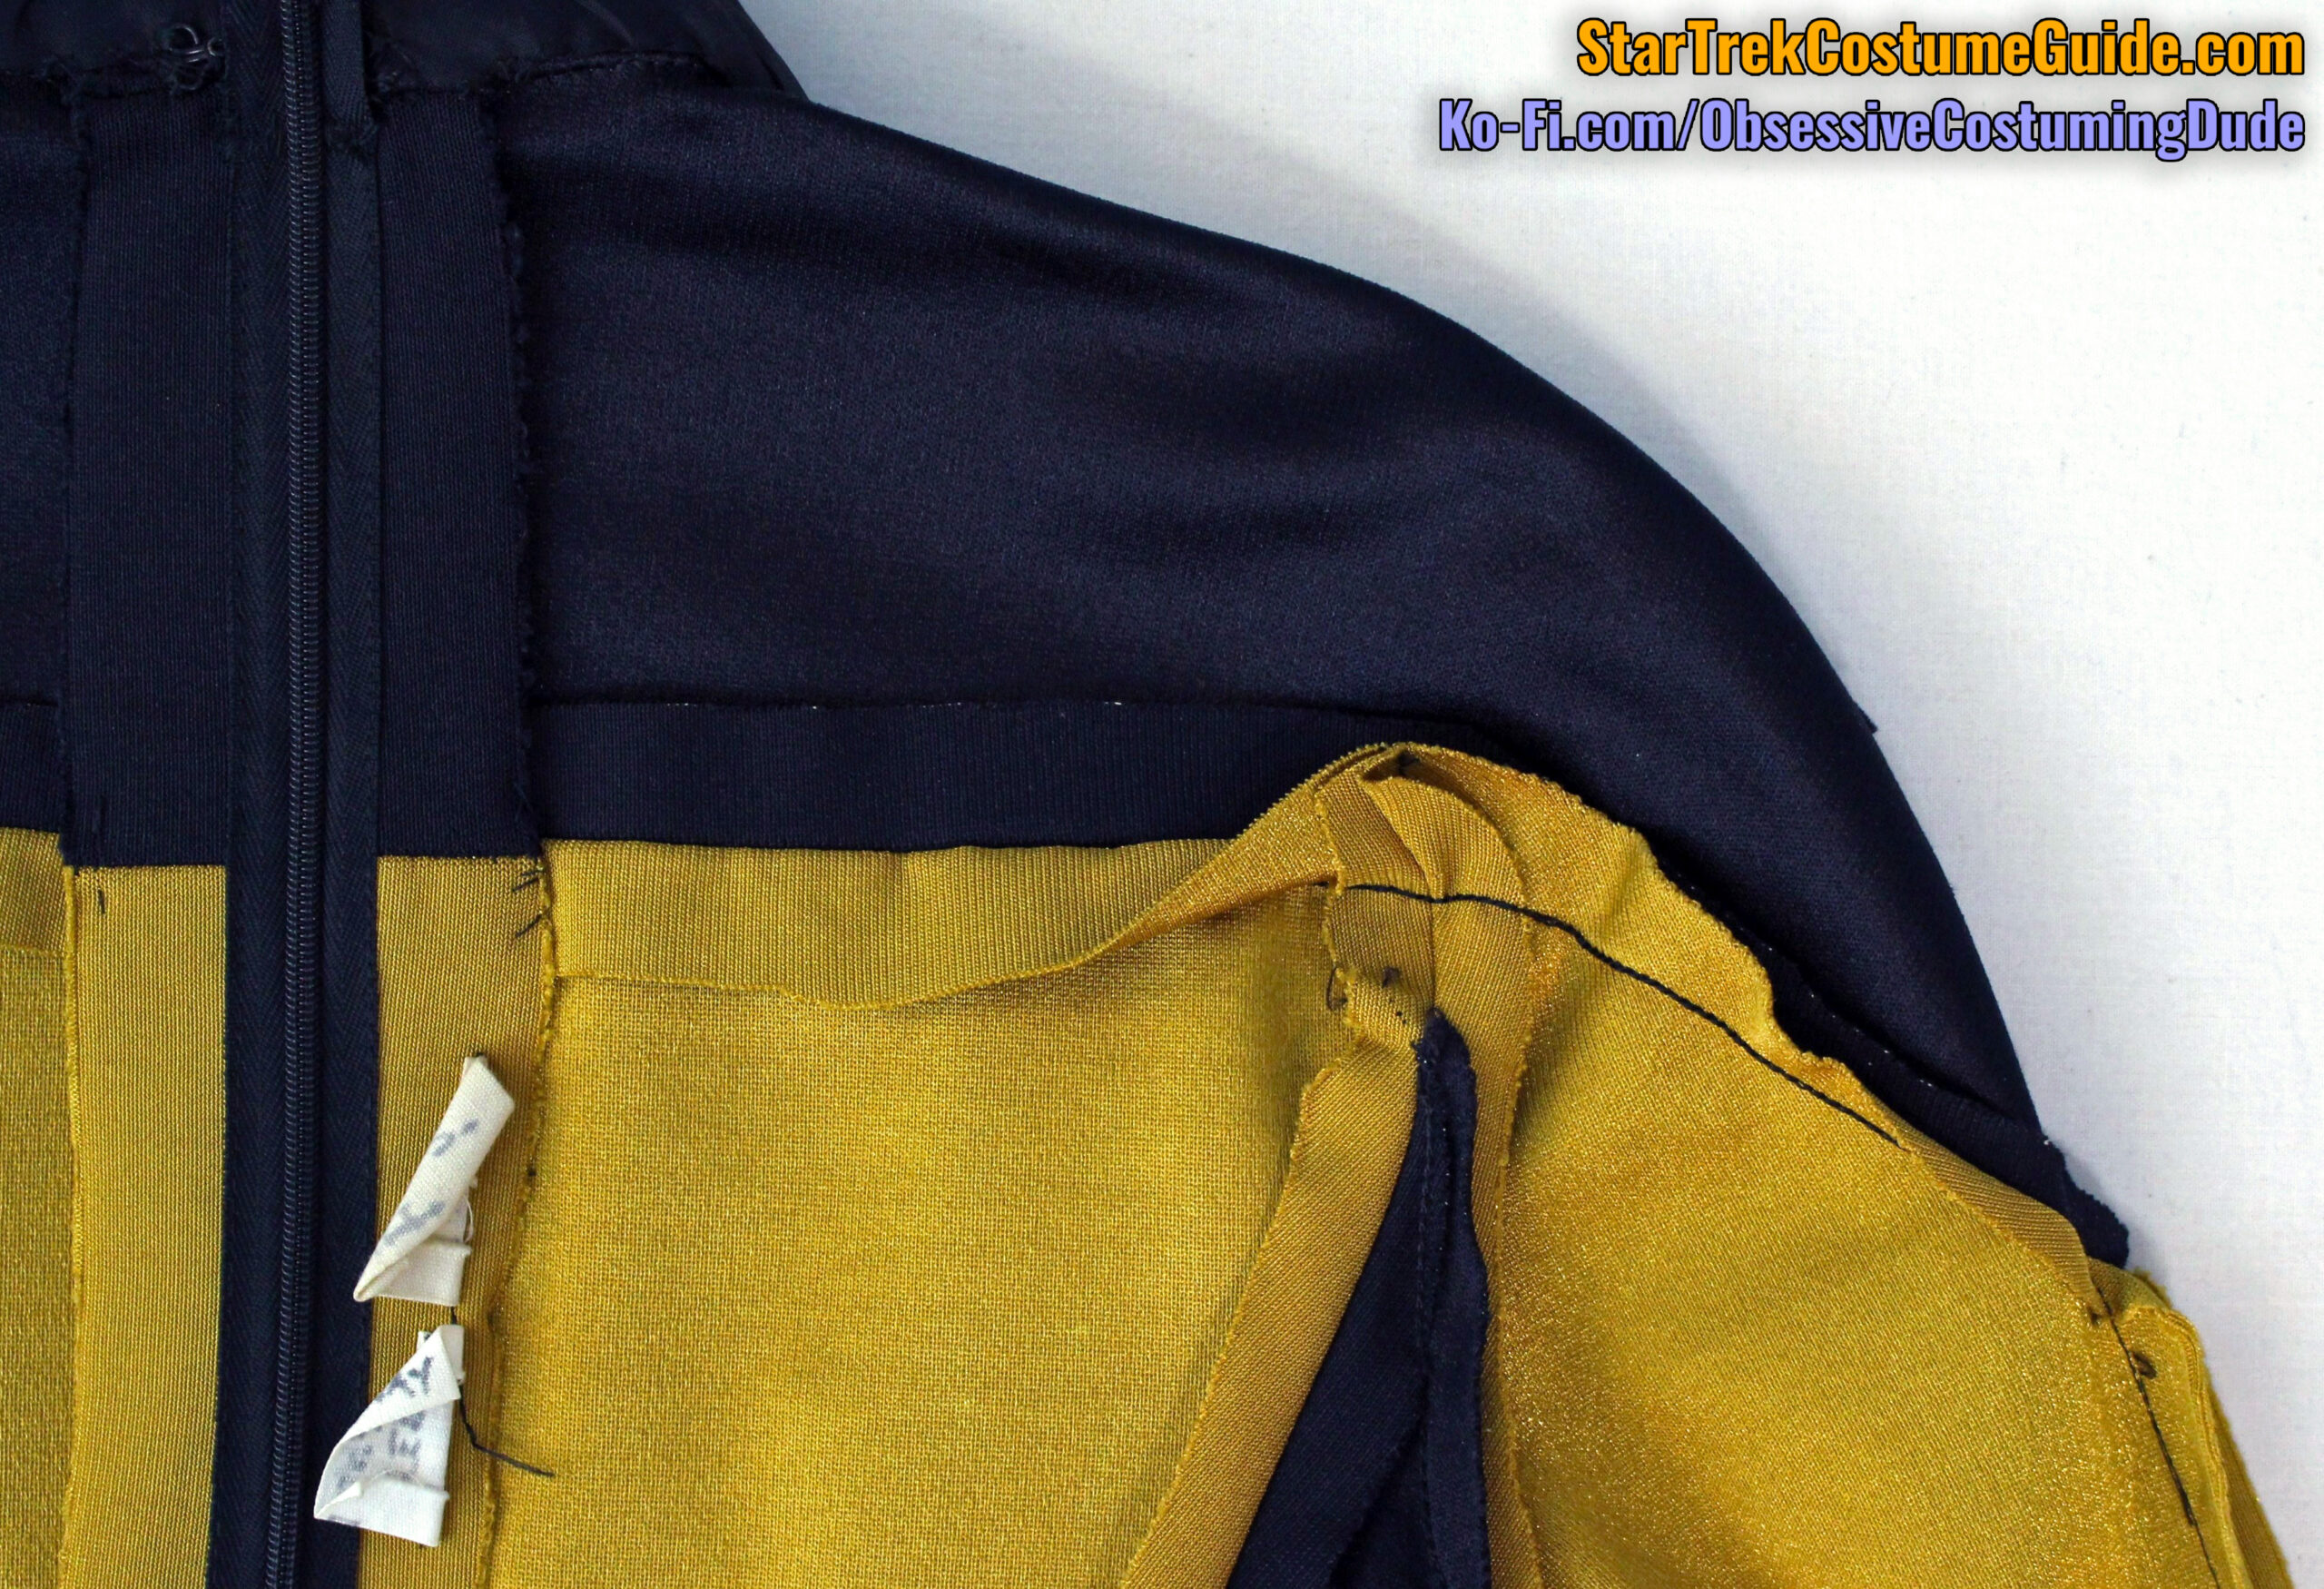
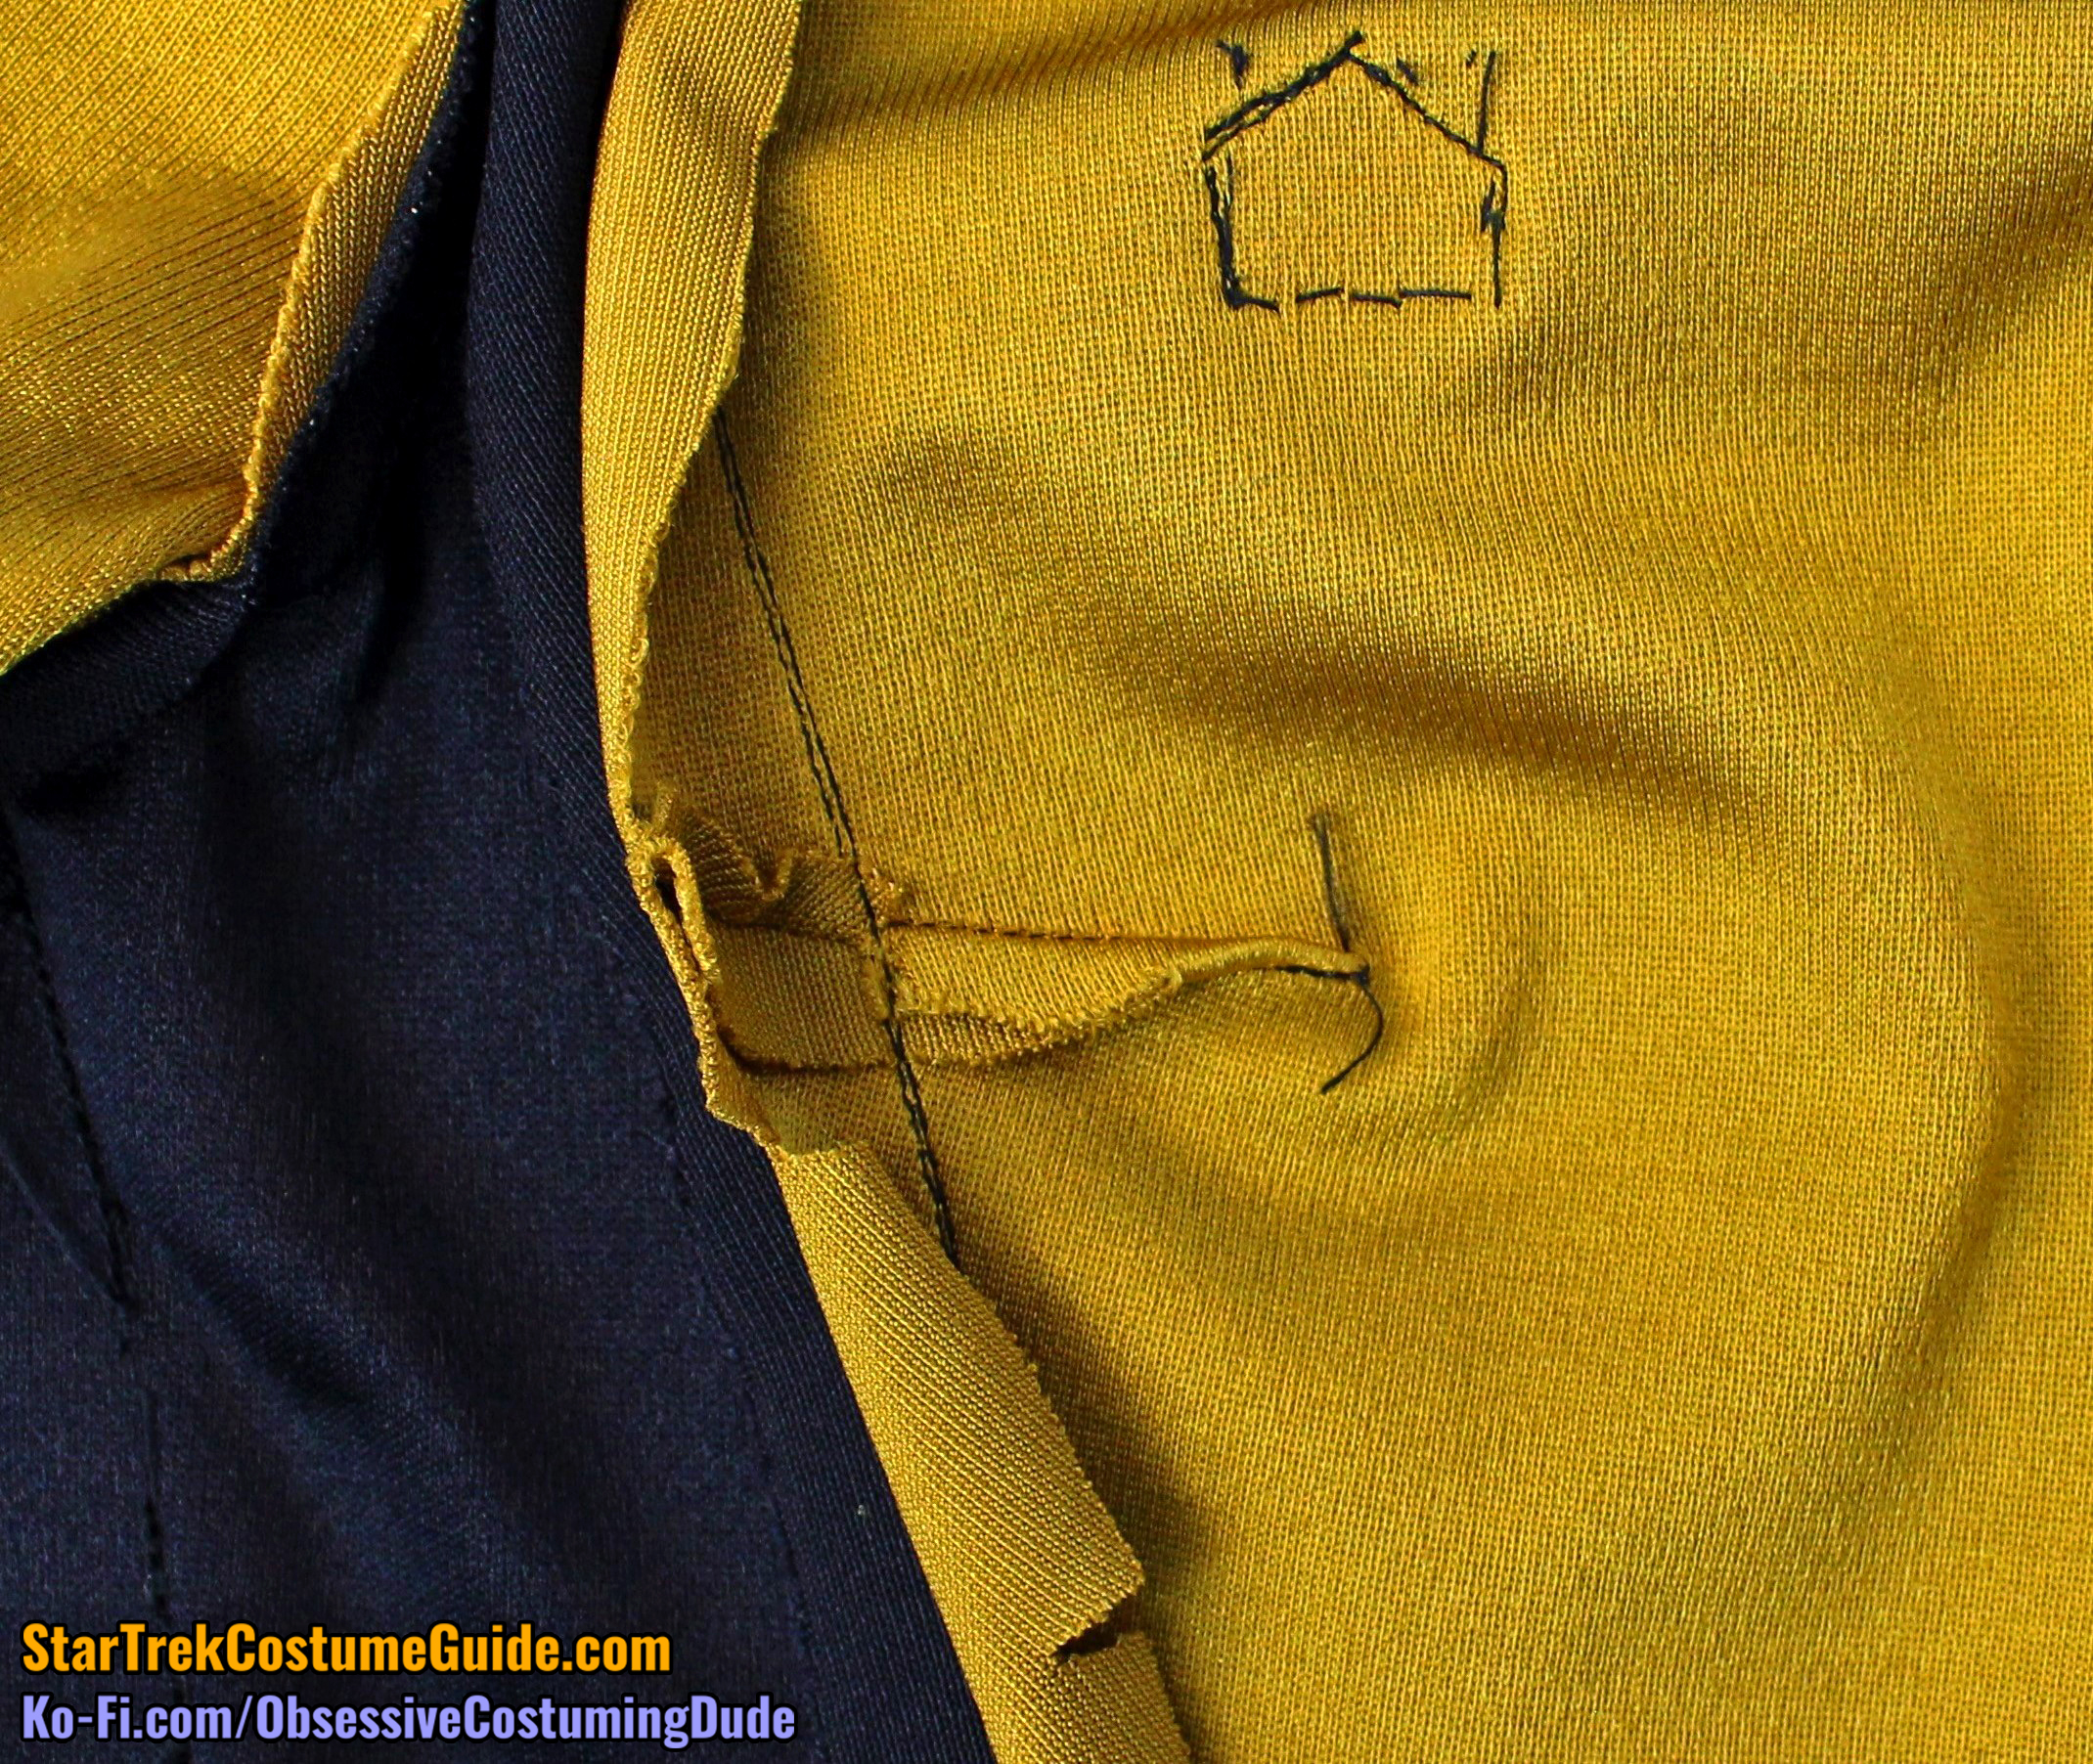
Like on the screen-used Tasha Yar jumpsuit I examined, the upper front seam allowances changed direction.
They were pressed open along the center front, but the lower body/sleeve seam allowance reversed toward the armscye seam and both seam allowances were pressed (and sewn in) upward at the sleeve seam.
The same was (almost) true for the upper back seam allowances; they were pressed open at the center back but the lower body/sleeve seam allowance reversed toward the armscye seam so both were upward along the sleeve.
However, on the back, the allowances were actually sewn into the outer sleeve seams opened.
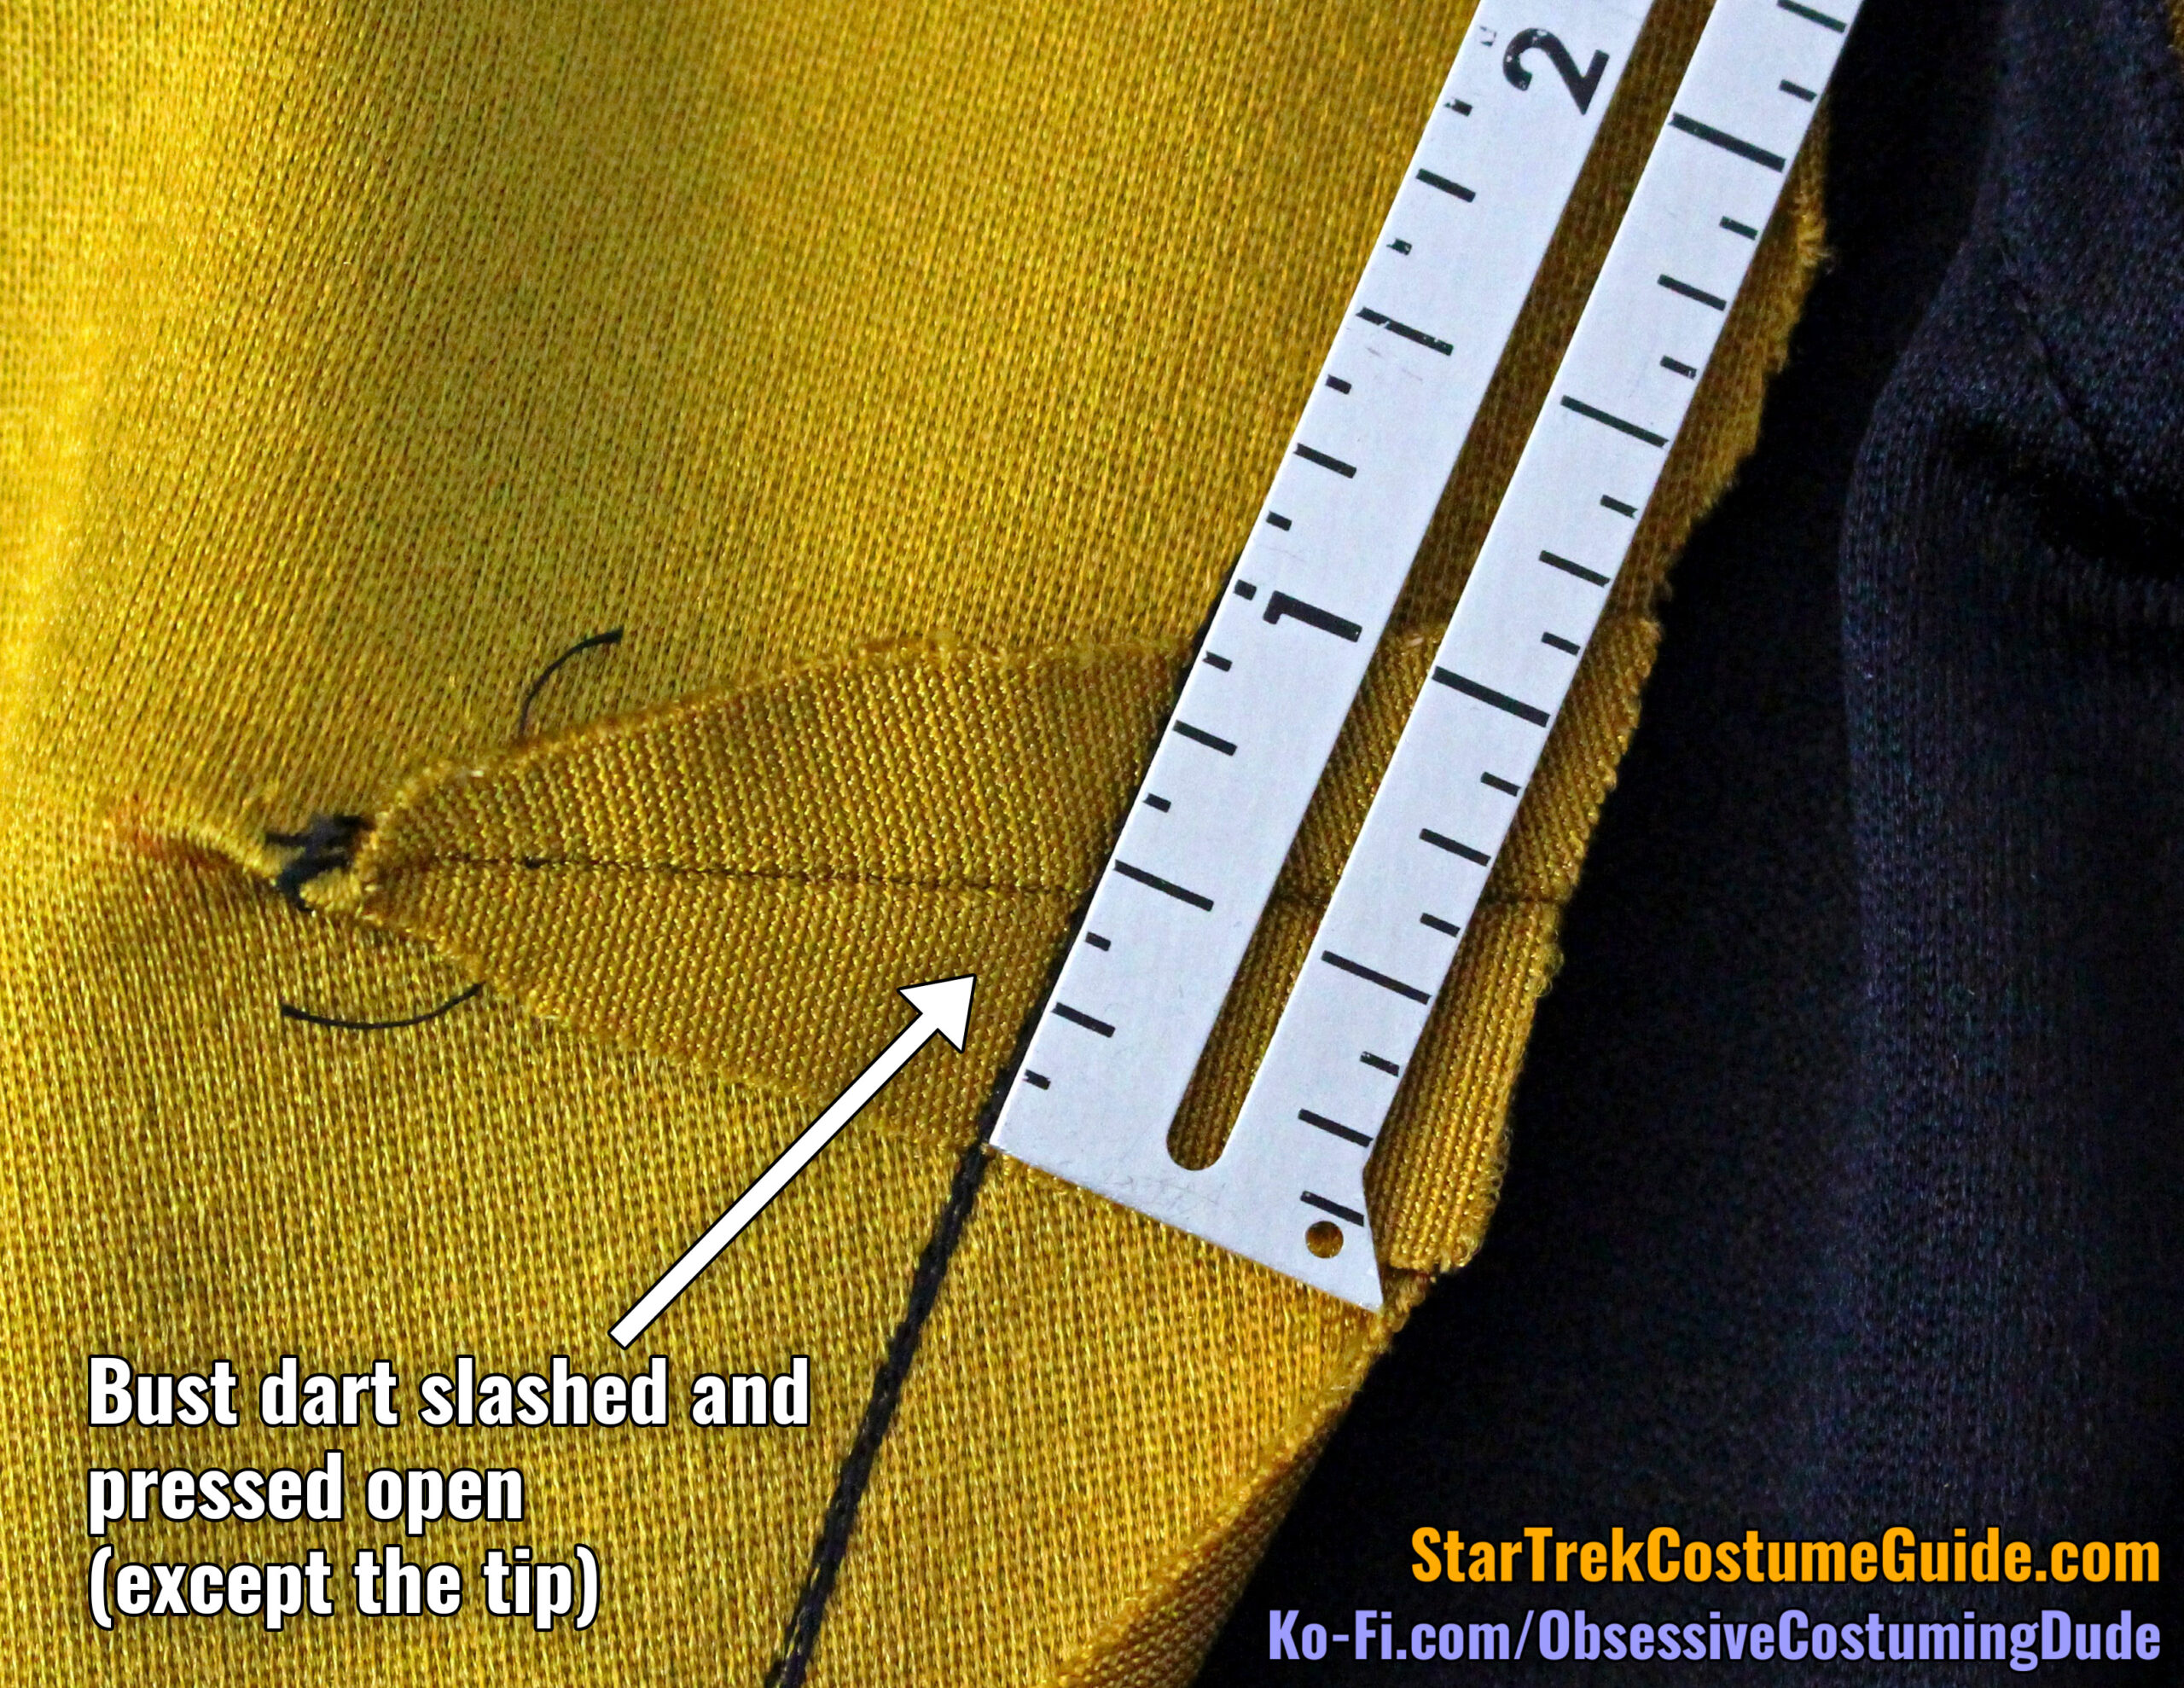
Unlike the bust darts on the screen-used Tasha Yar jumpsuit I examined, the bust darts on the Ensign Sito jumpsuit were ⅞” and slashed open (except for the tip) … on the right side, at least!
It looks like the left bust dart was intended to be executed this way, but it was accidentally sewn into the left side front seam with both layers downward.
In lieu of undoing and redoing the seam, the original sewer/costumer just clipped the dart at the seam line and stitched again over the area, catching the dart layers open the second time.

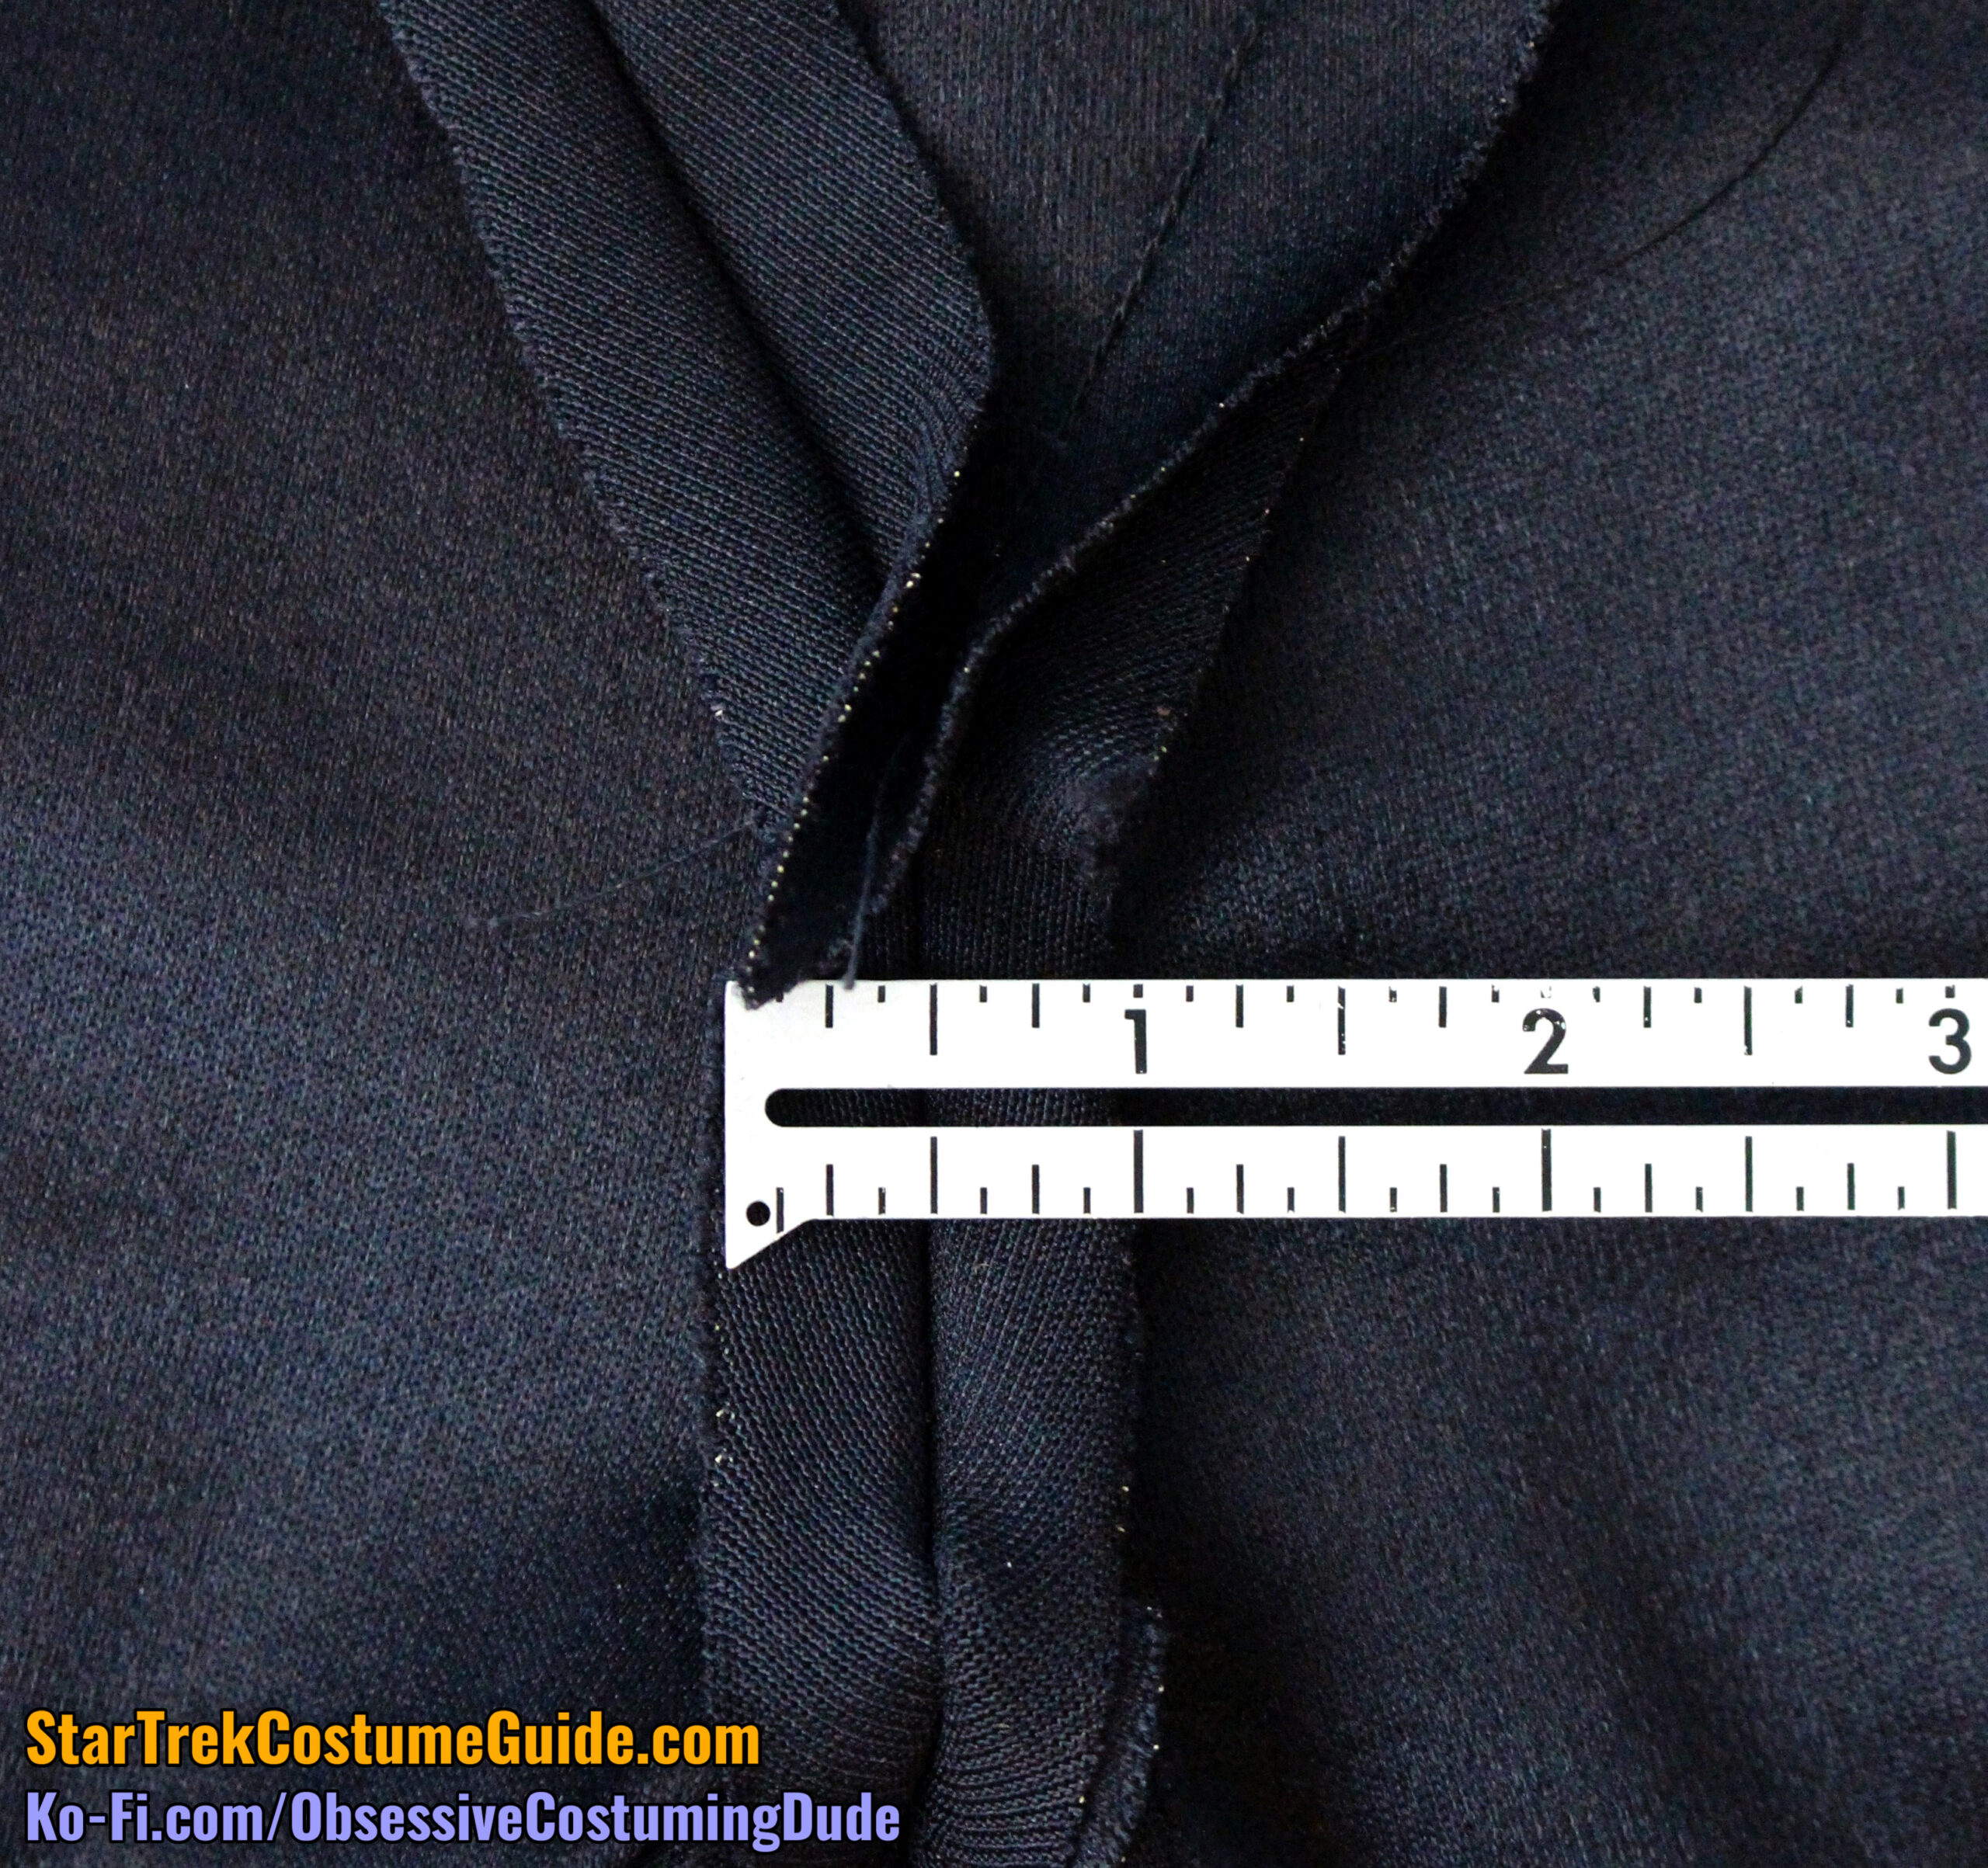
The side front seam allowances were mostly pressed open … except for the bust dart areas, where they were pressed outward toward the side front panels.
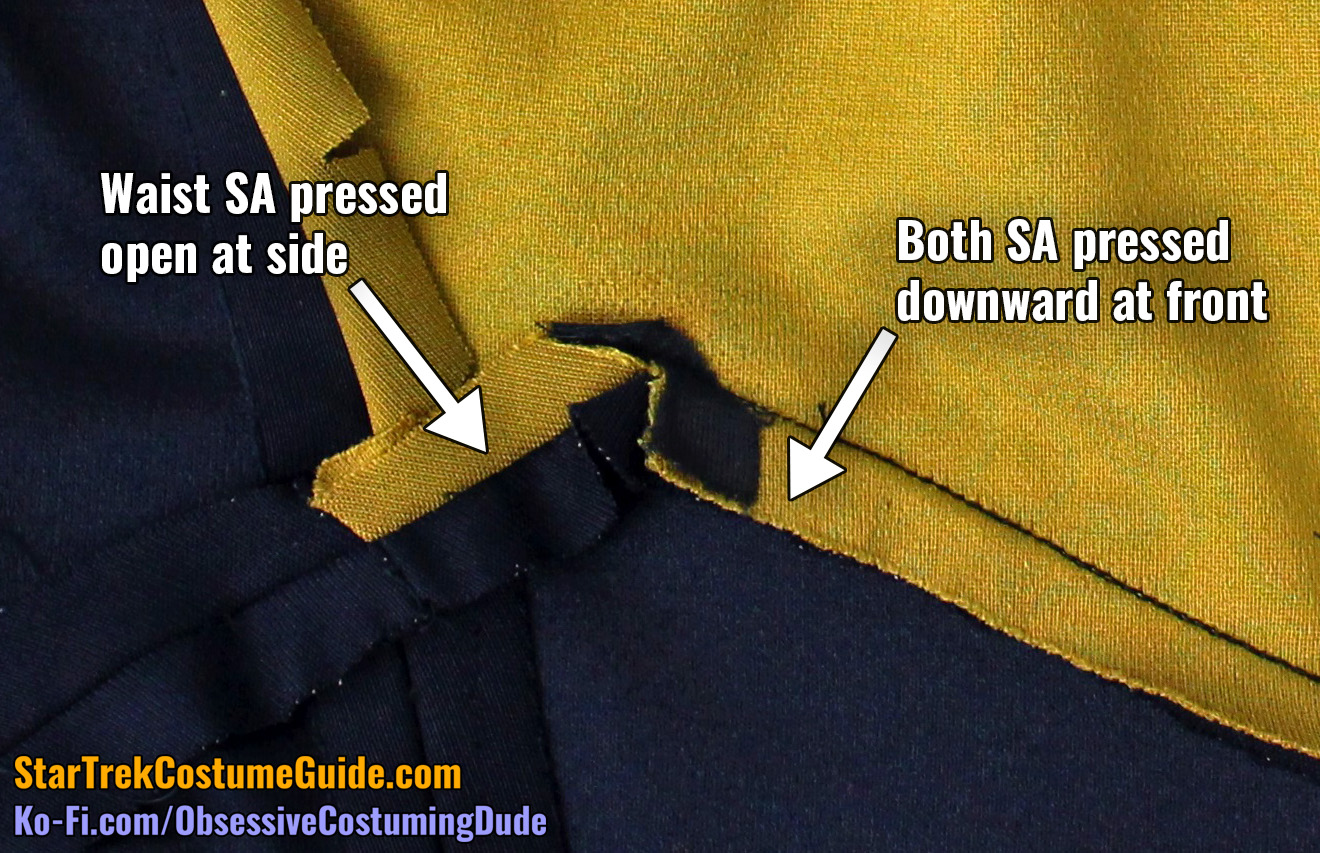
The waist seam allowances were also handled differently than on the screen-used Tasha Yar jumpsuit.
(As I mentioned in my TNG jumpsuit analysis, they were handled differently on nearly all of the screen-used TNG jumpsuits I examined.)
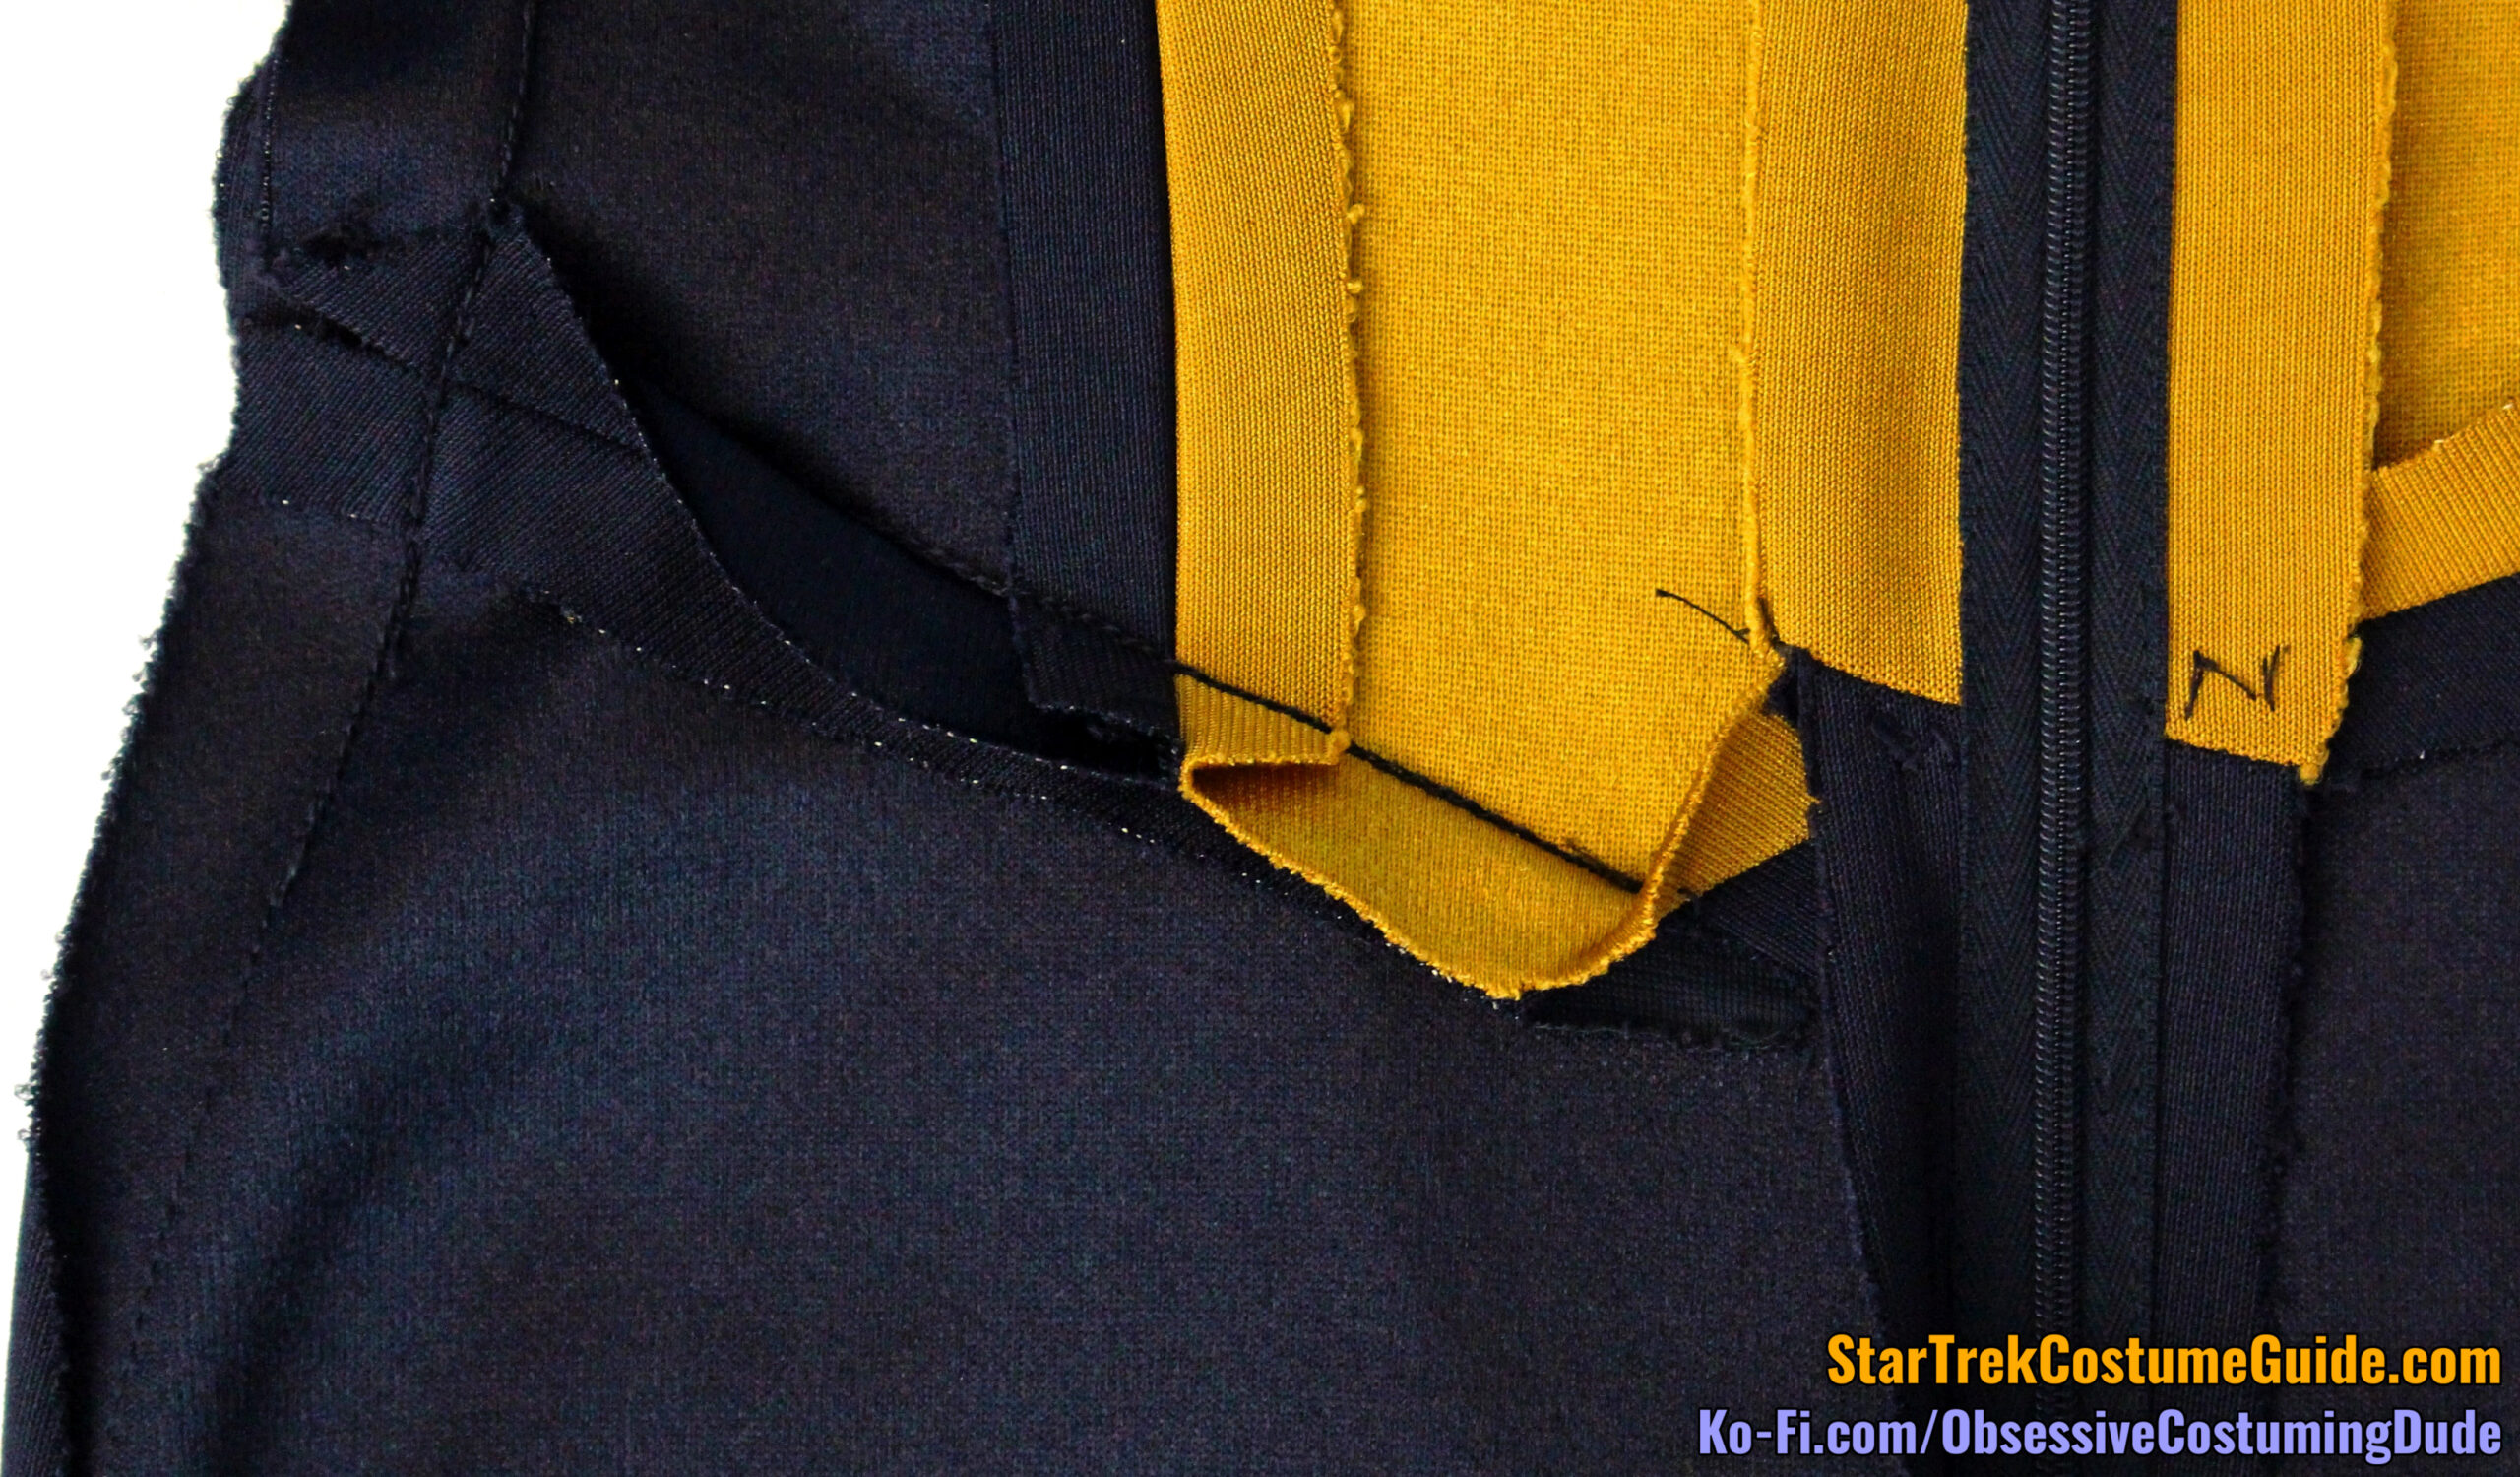
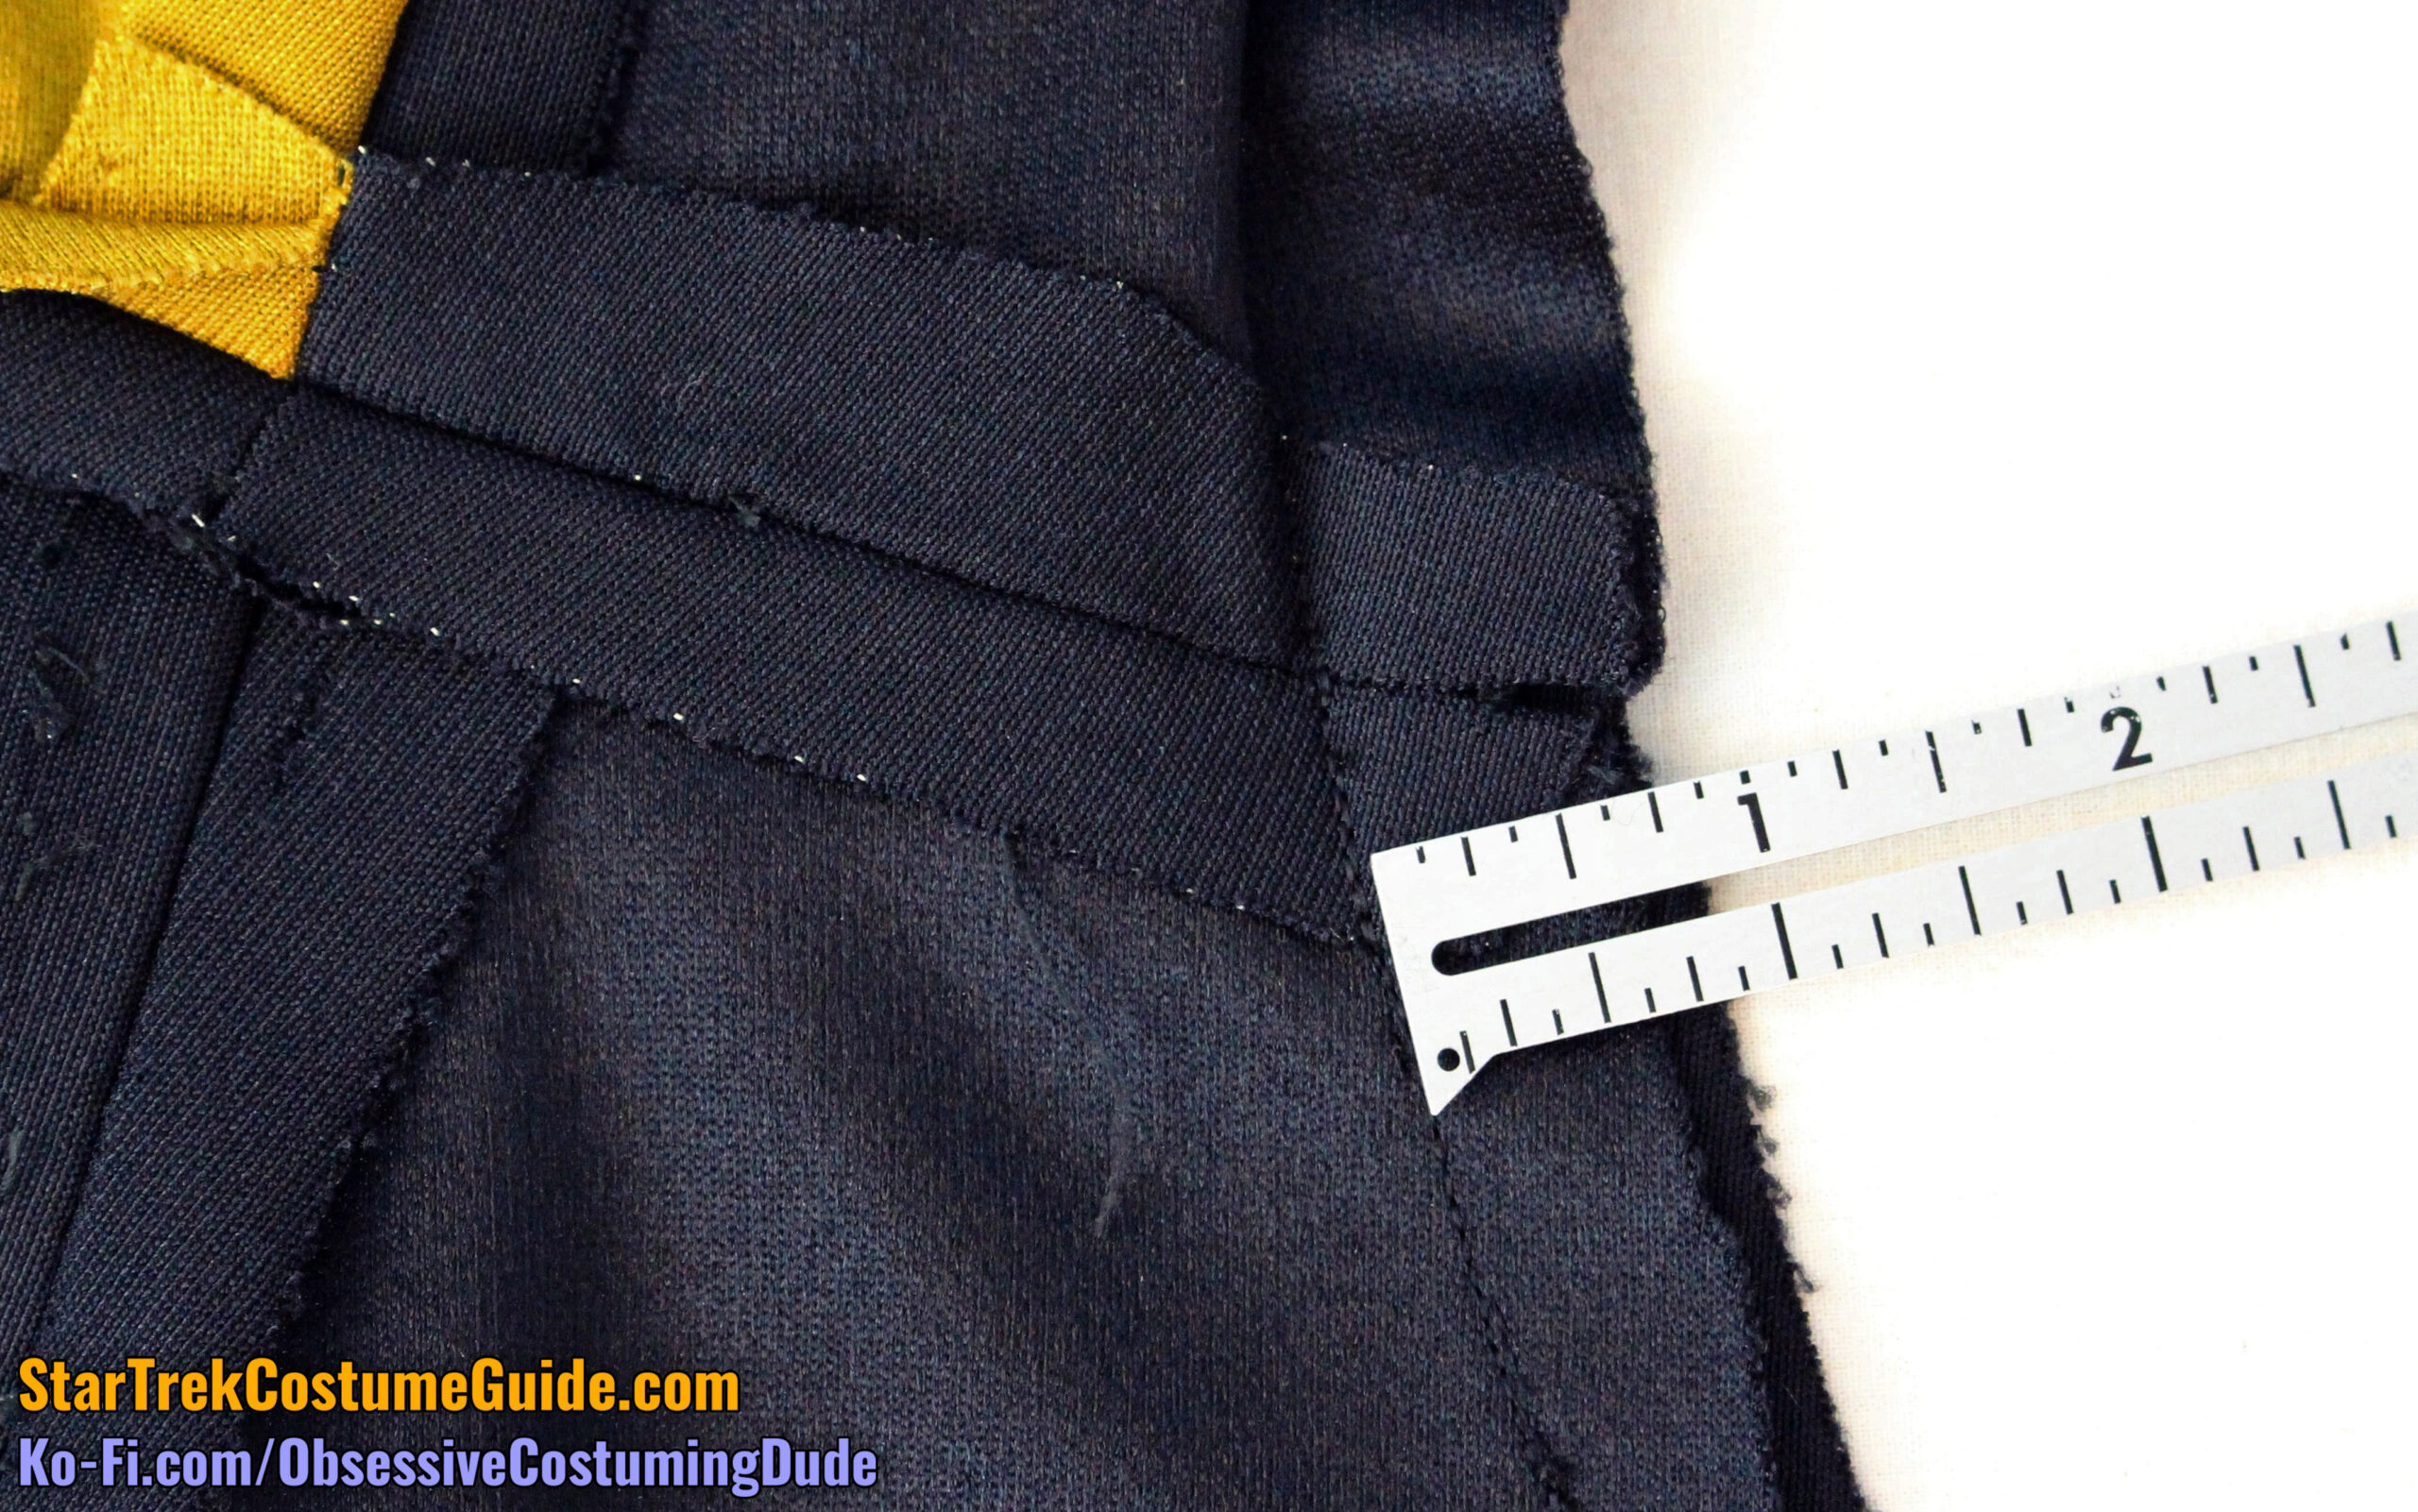
You can observe in the photo above that on this Ensign Sito jumpsuit, they were pressed open along the outer front, except in the middle toward the corner area, where they were pressed downward.
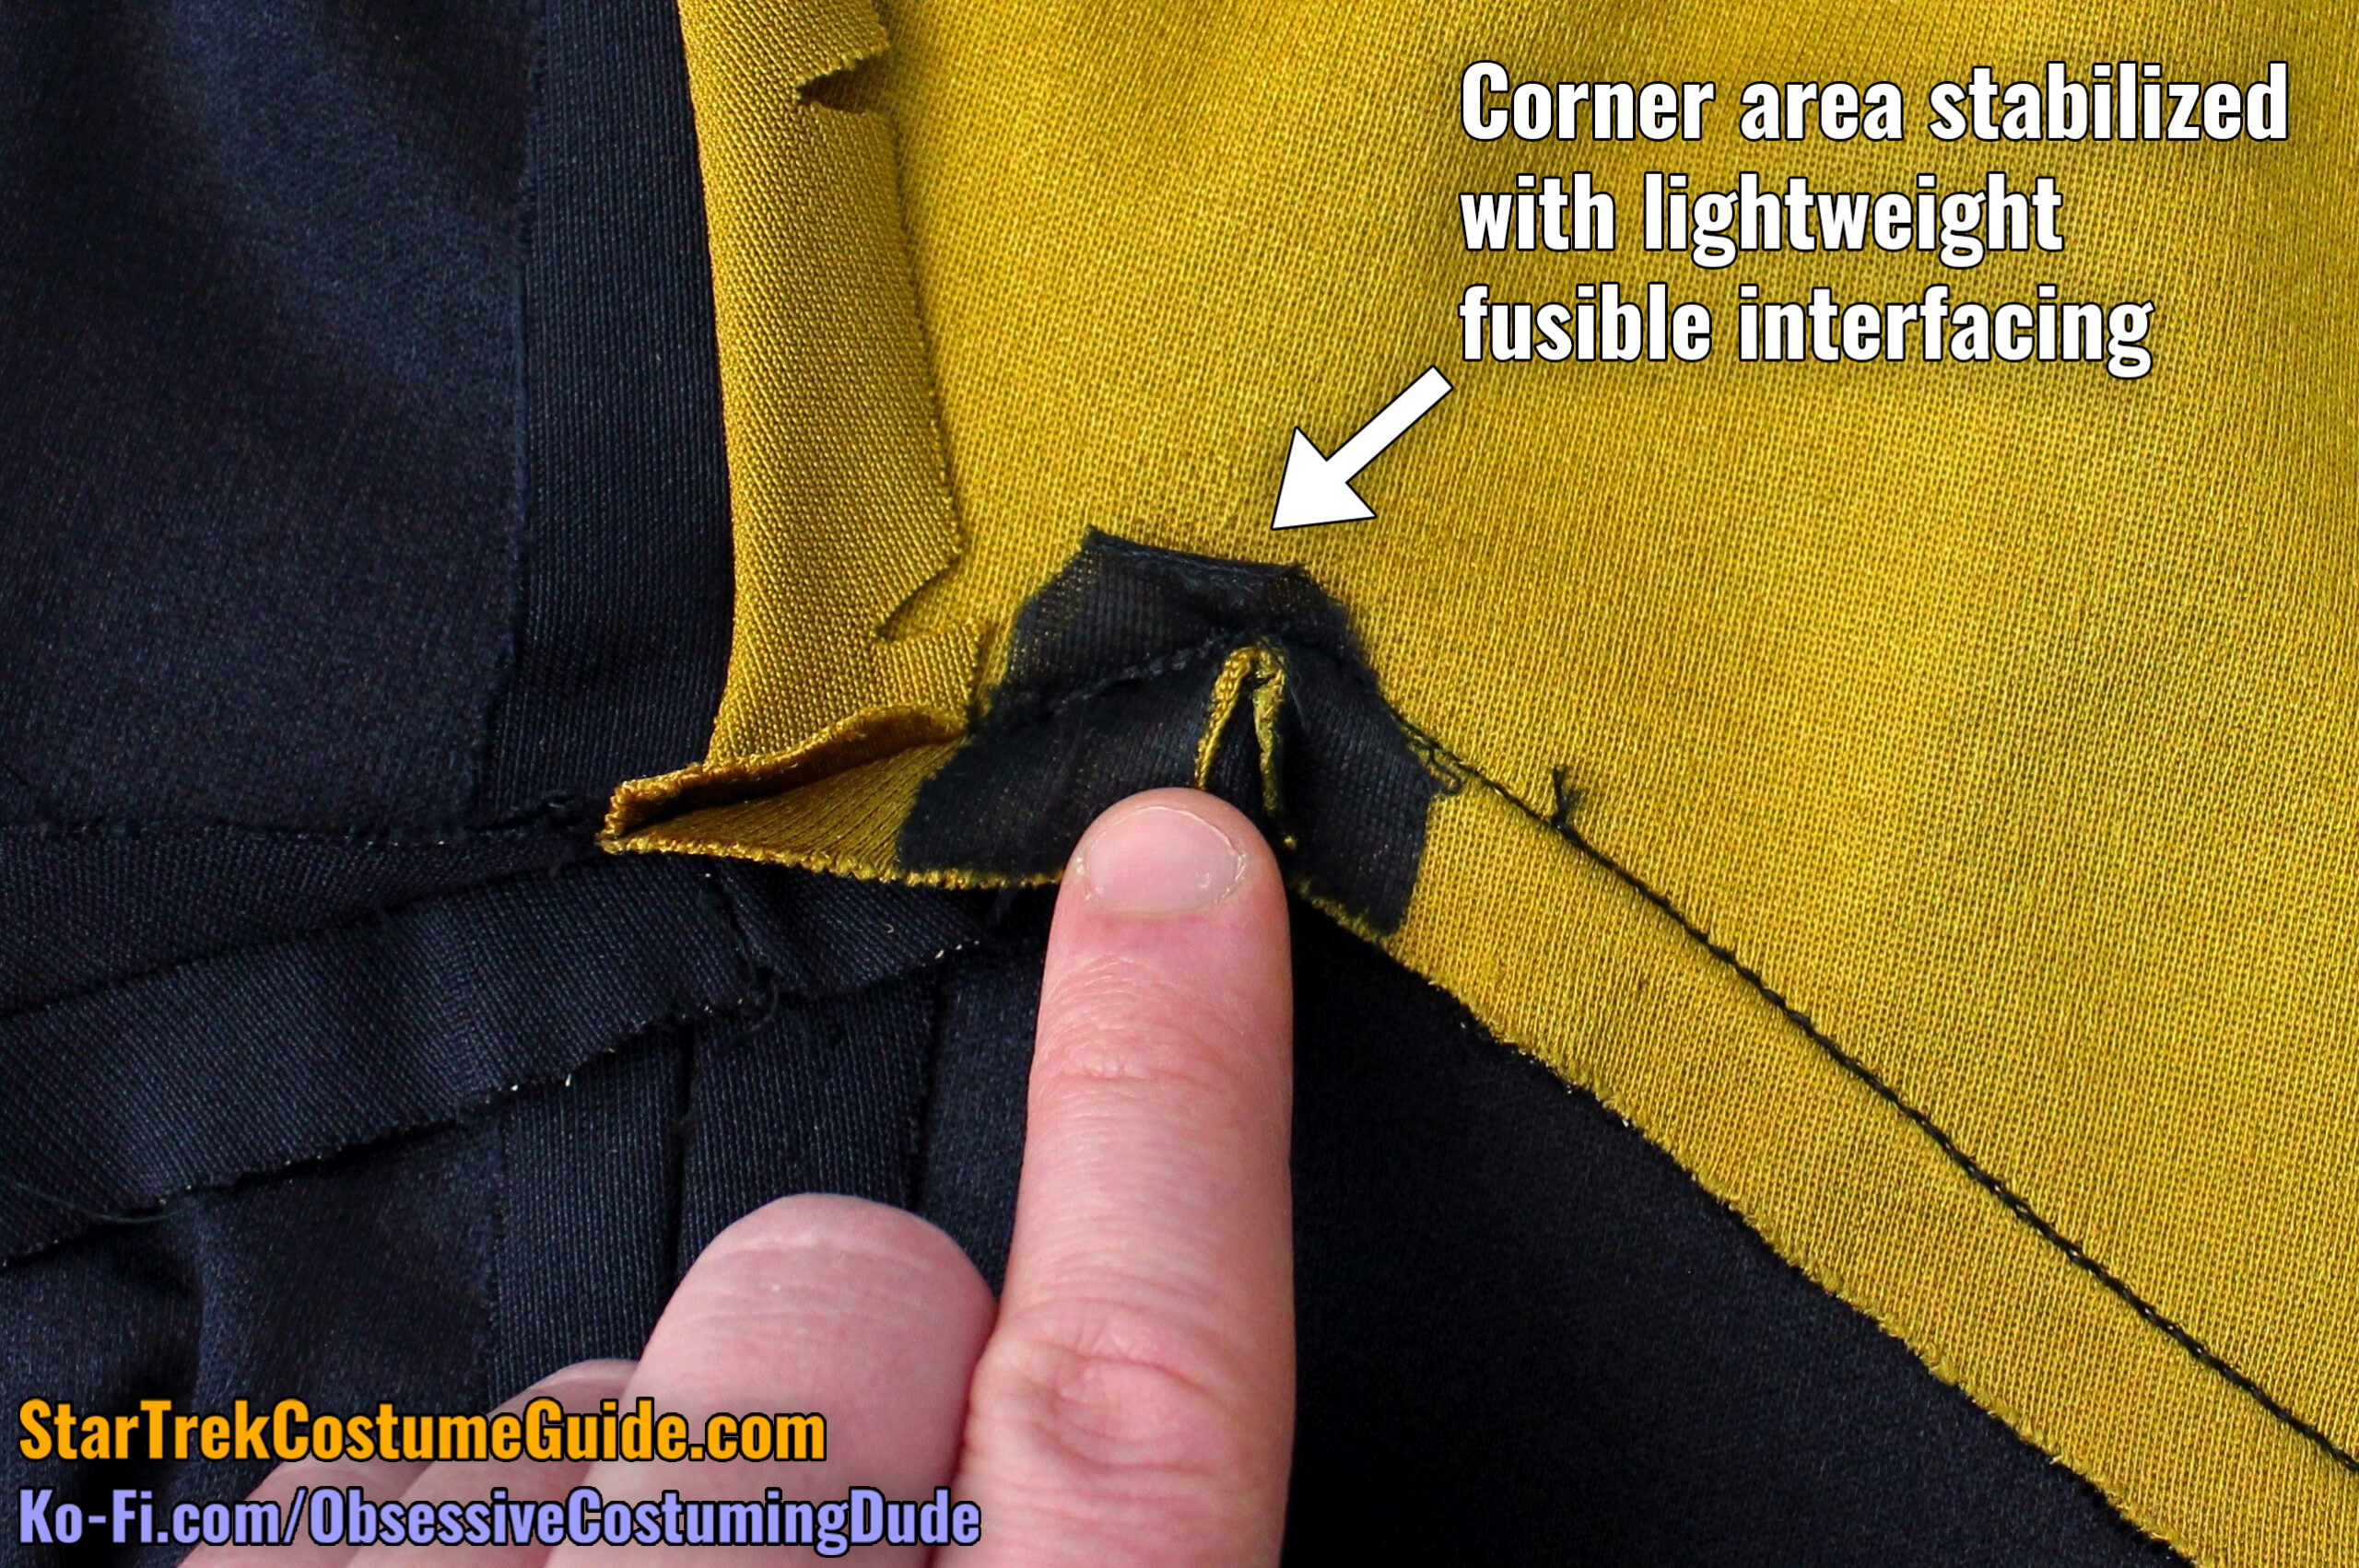
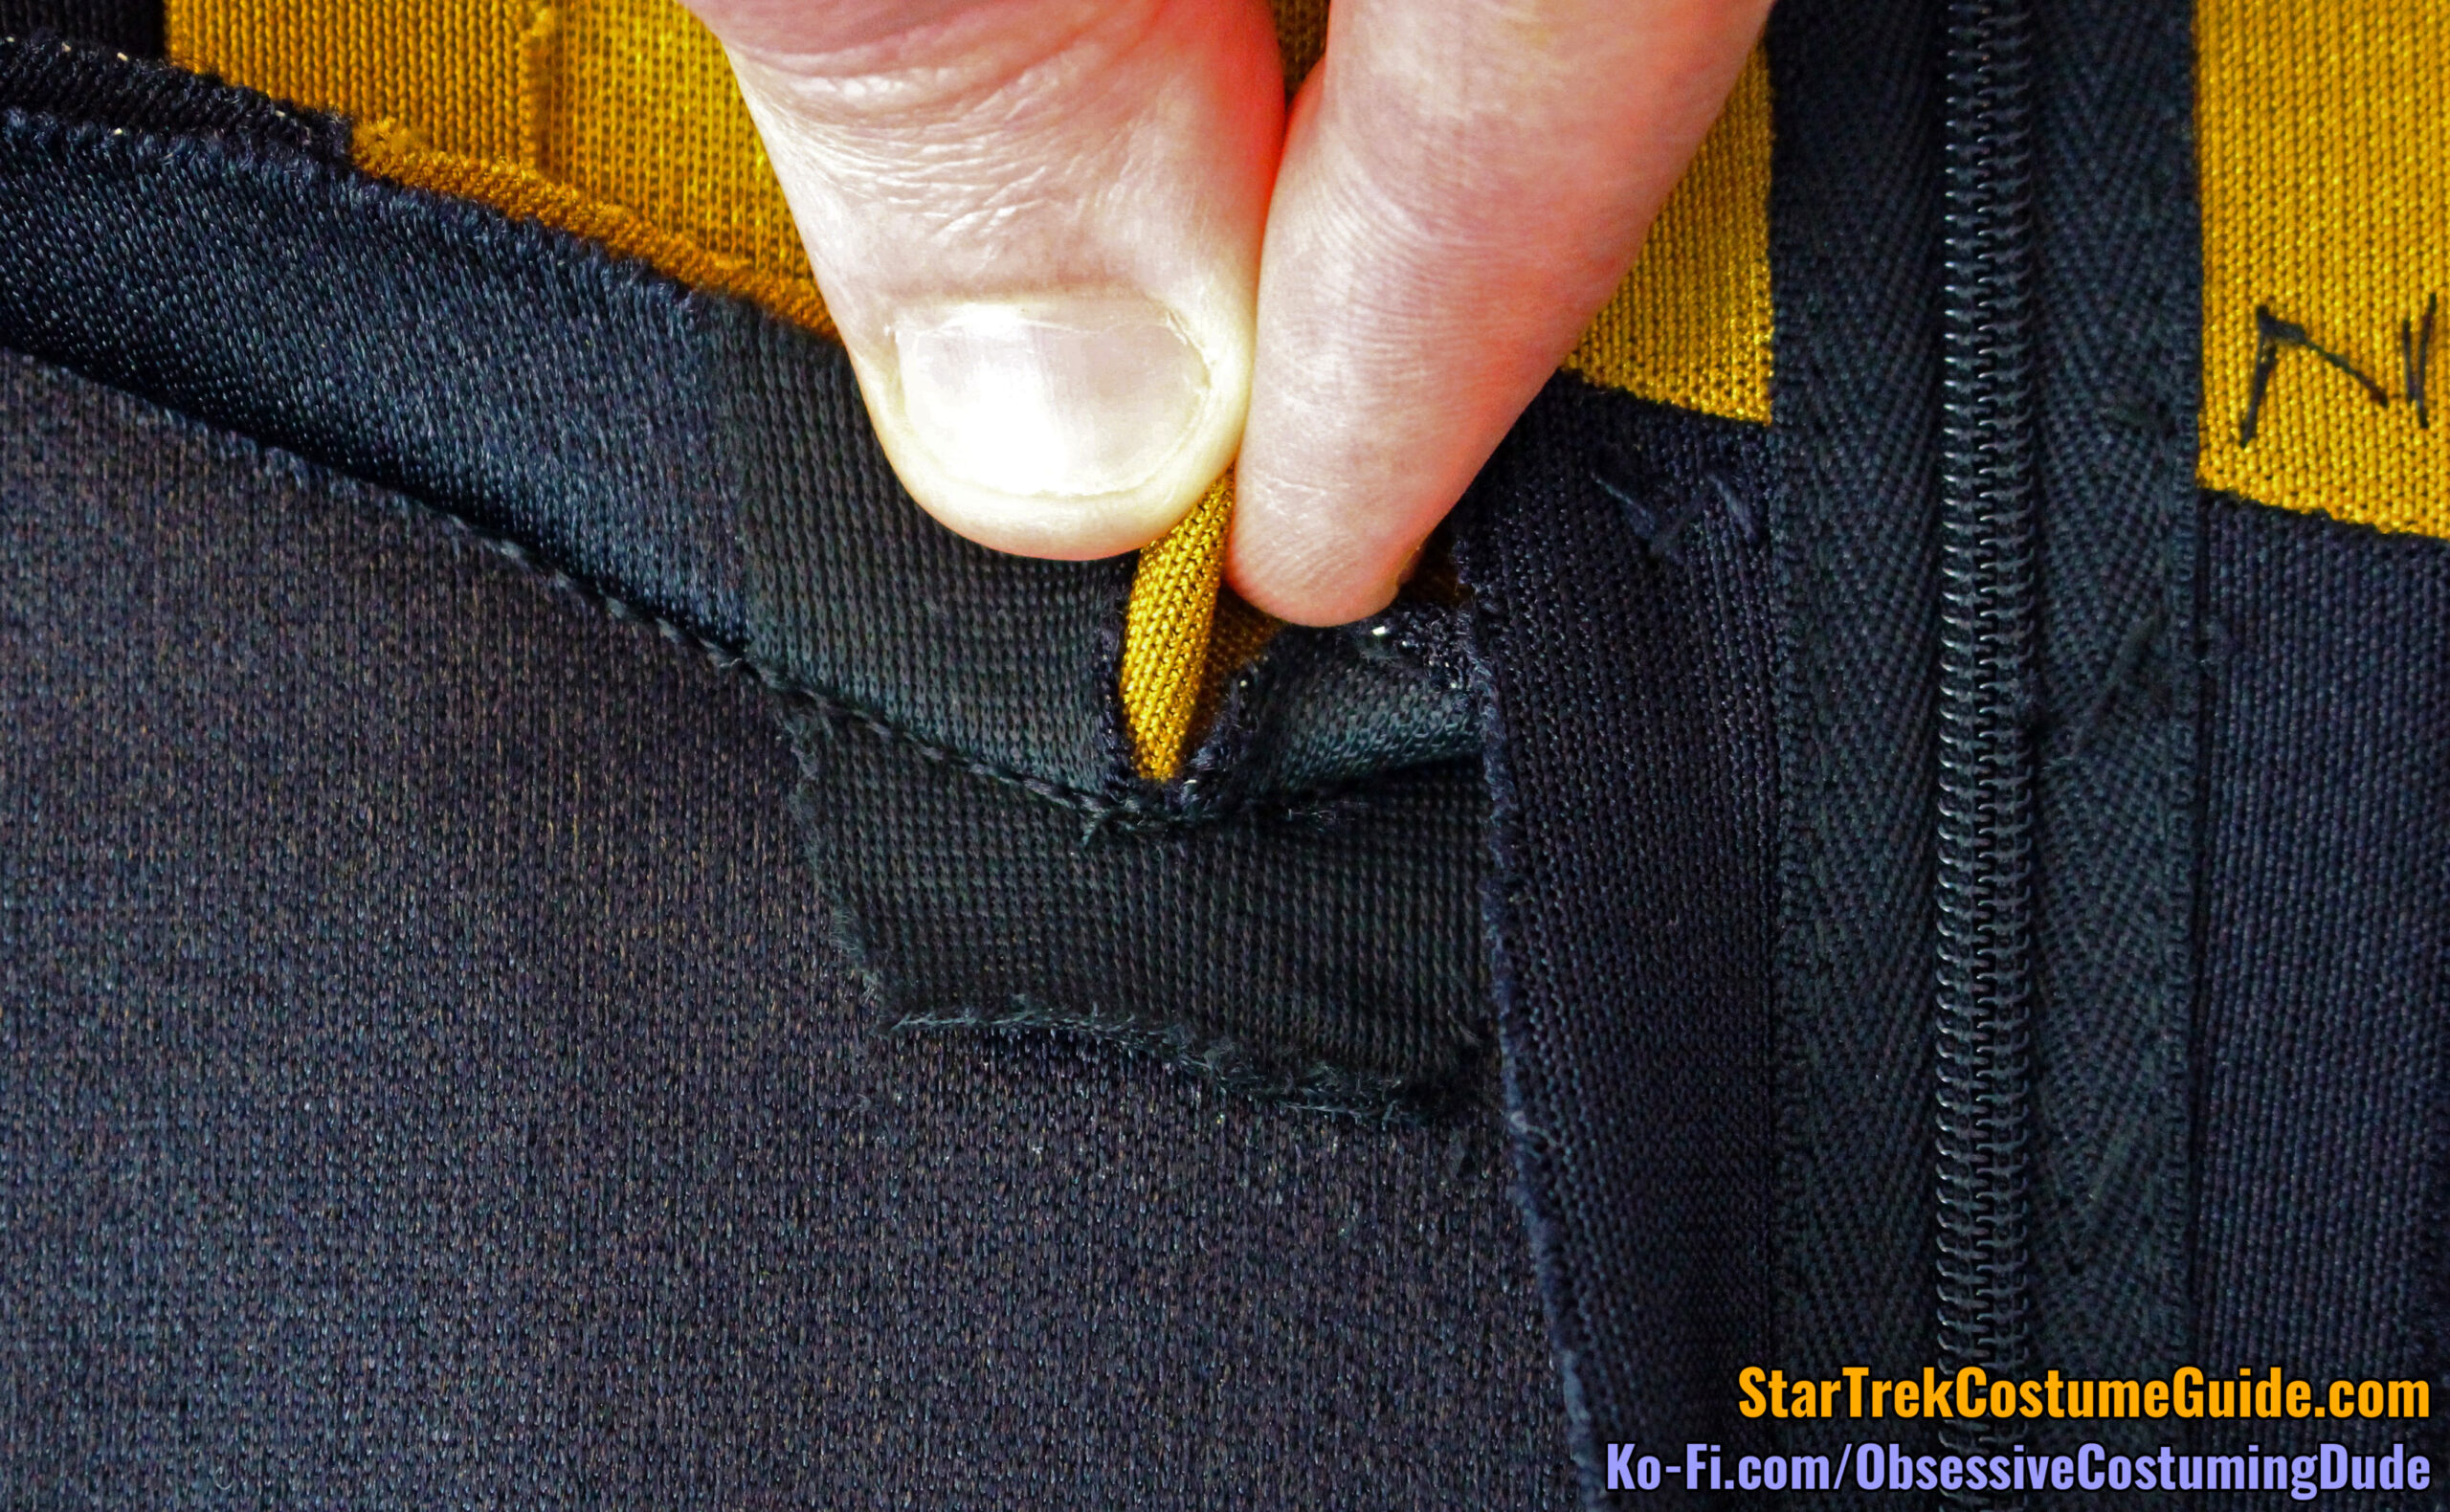
The corner area was stabilized with a lightweight fusible interfacing prior to assembling the body panels, presumably to help keep the jumbo spandex from stretching out of place while turning the corner on the sewing machine.
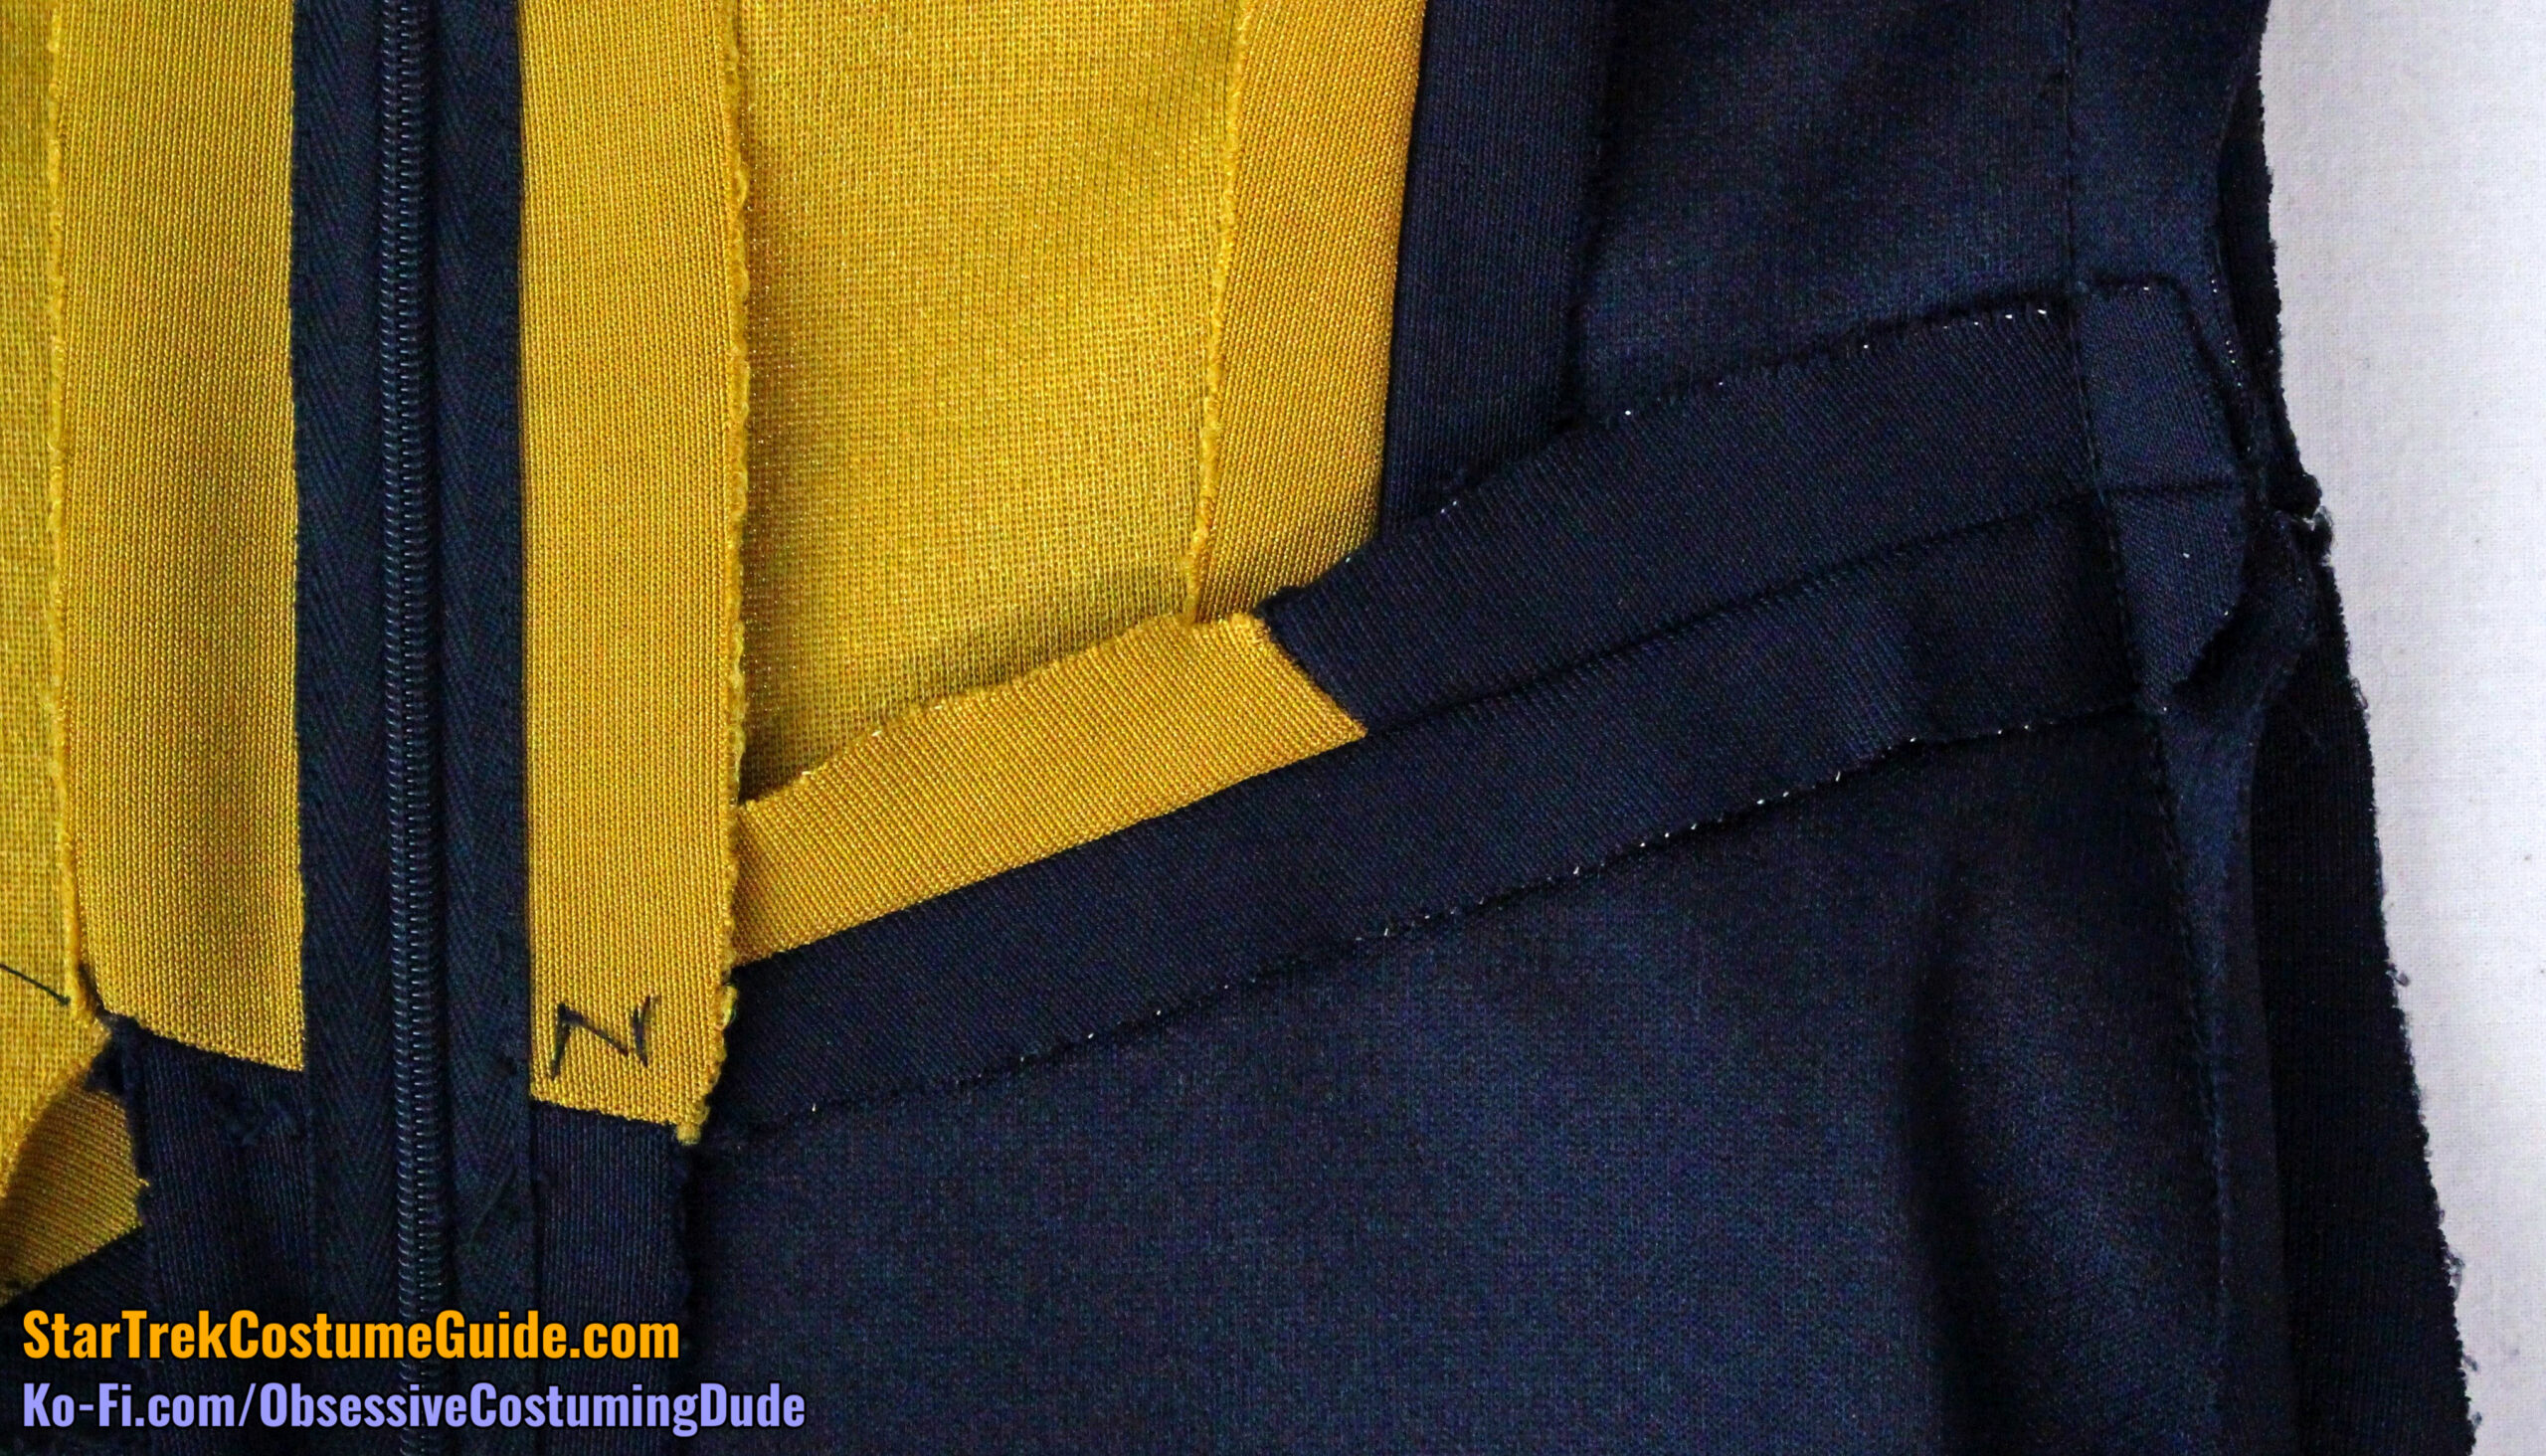
The lower back corner area was also stabilized with a lightweight fusible interfacing.
The back waist seam allowances were also mostly pressed open, except toward the lower corner area, where they were pressed downward.
(These various methods were all probably attempts to avoid making a “divot” above the corner on the outside of the garment.)
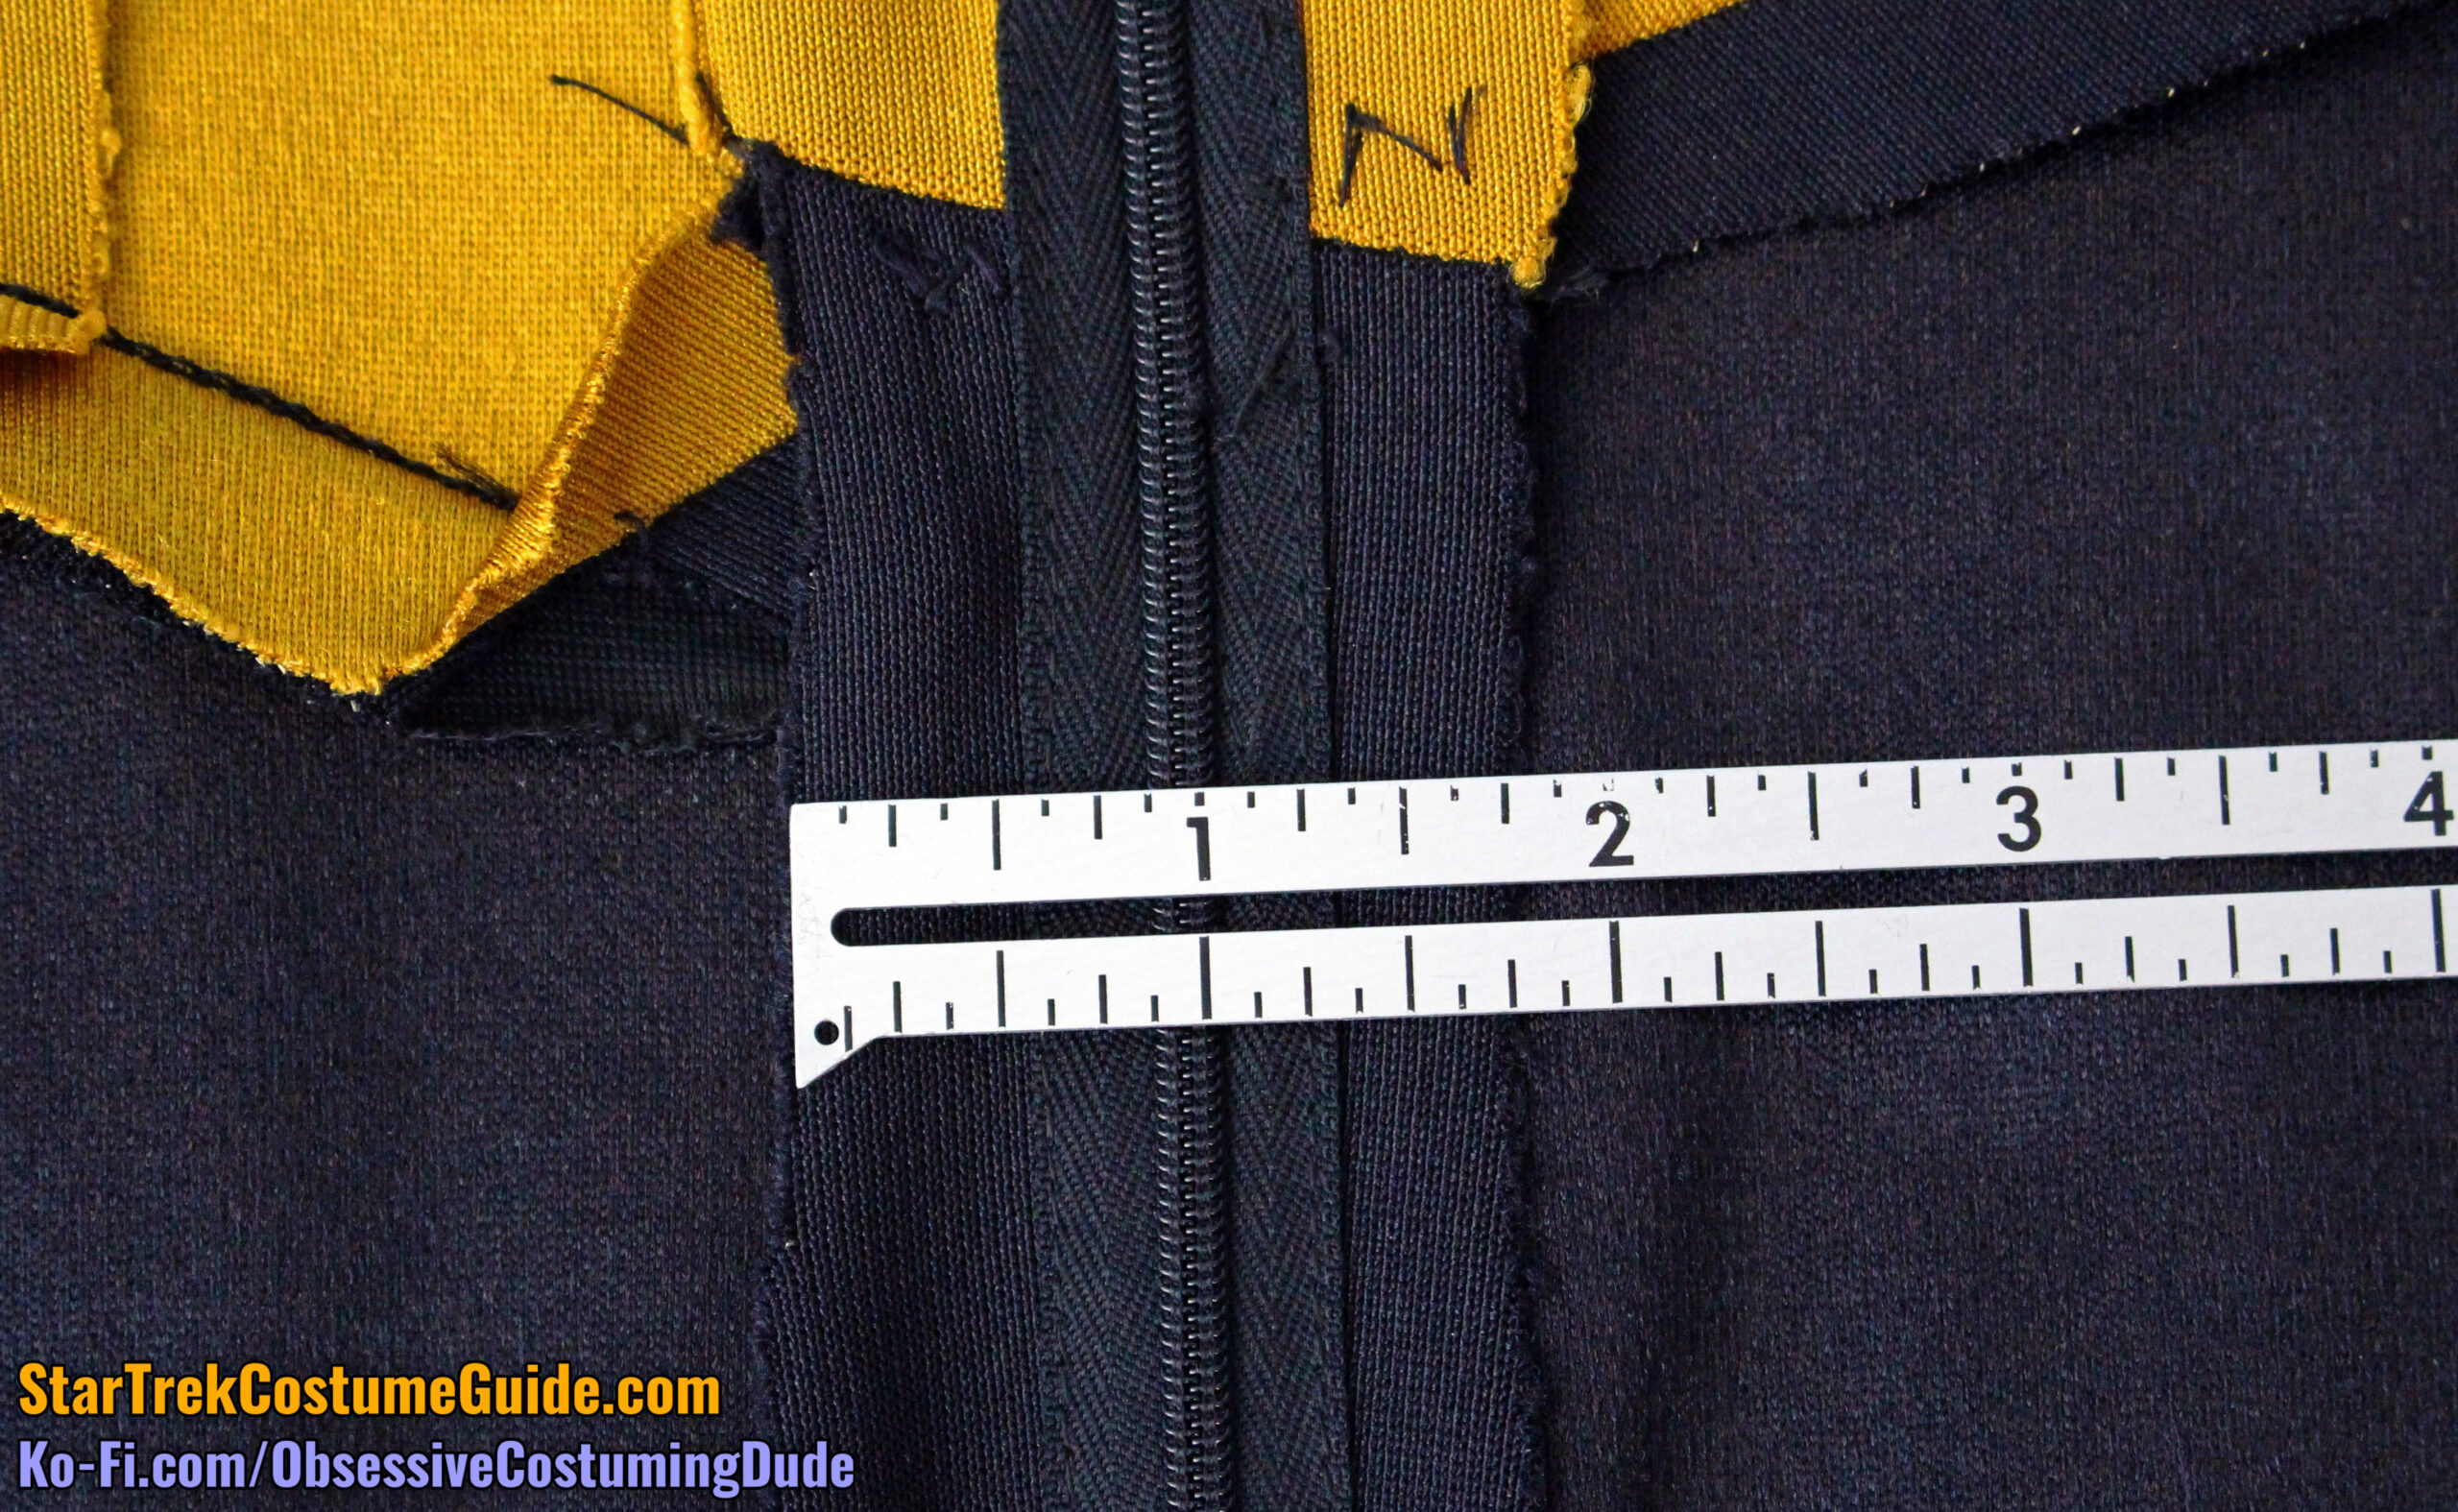
The center back/zipper seam allowance varied from about ⅞” to 1 ¼” on each side.
(I believe the original seam allowance to have been an even 1”, but that the specific seam line was altered a bit as-needed during a test fitting with the actress.)
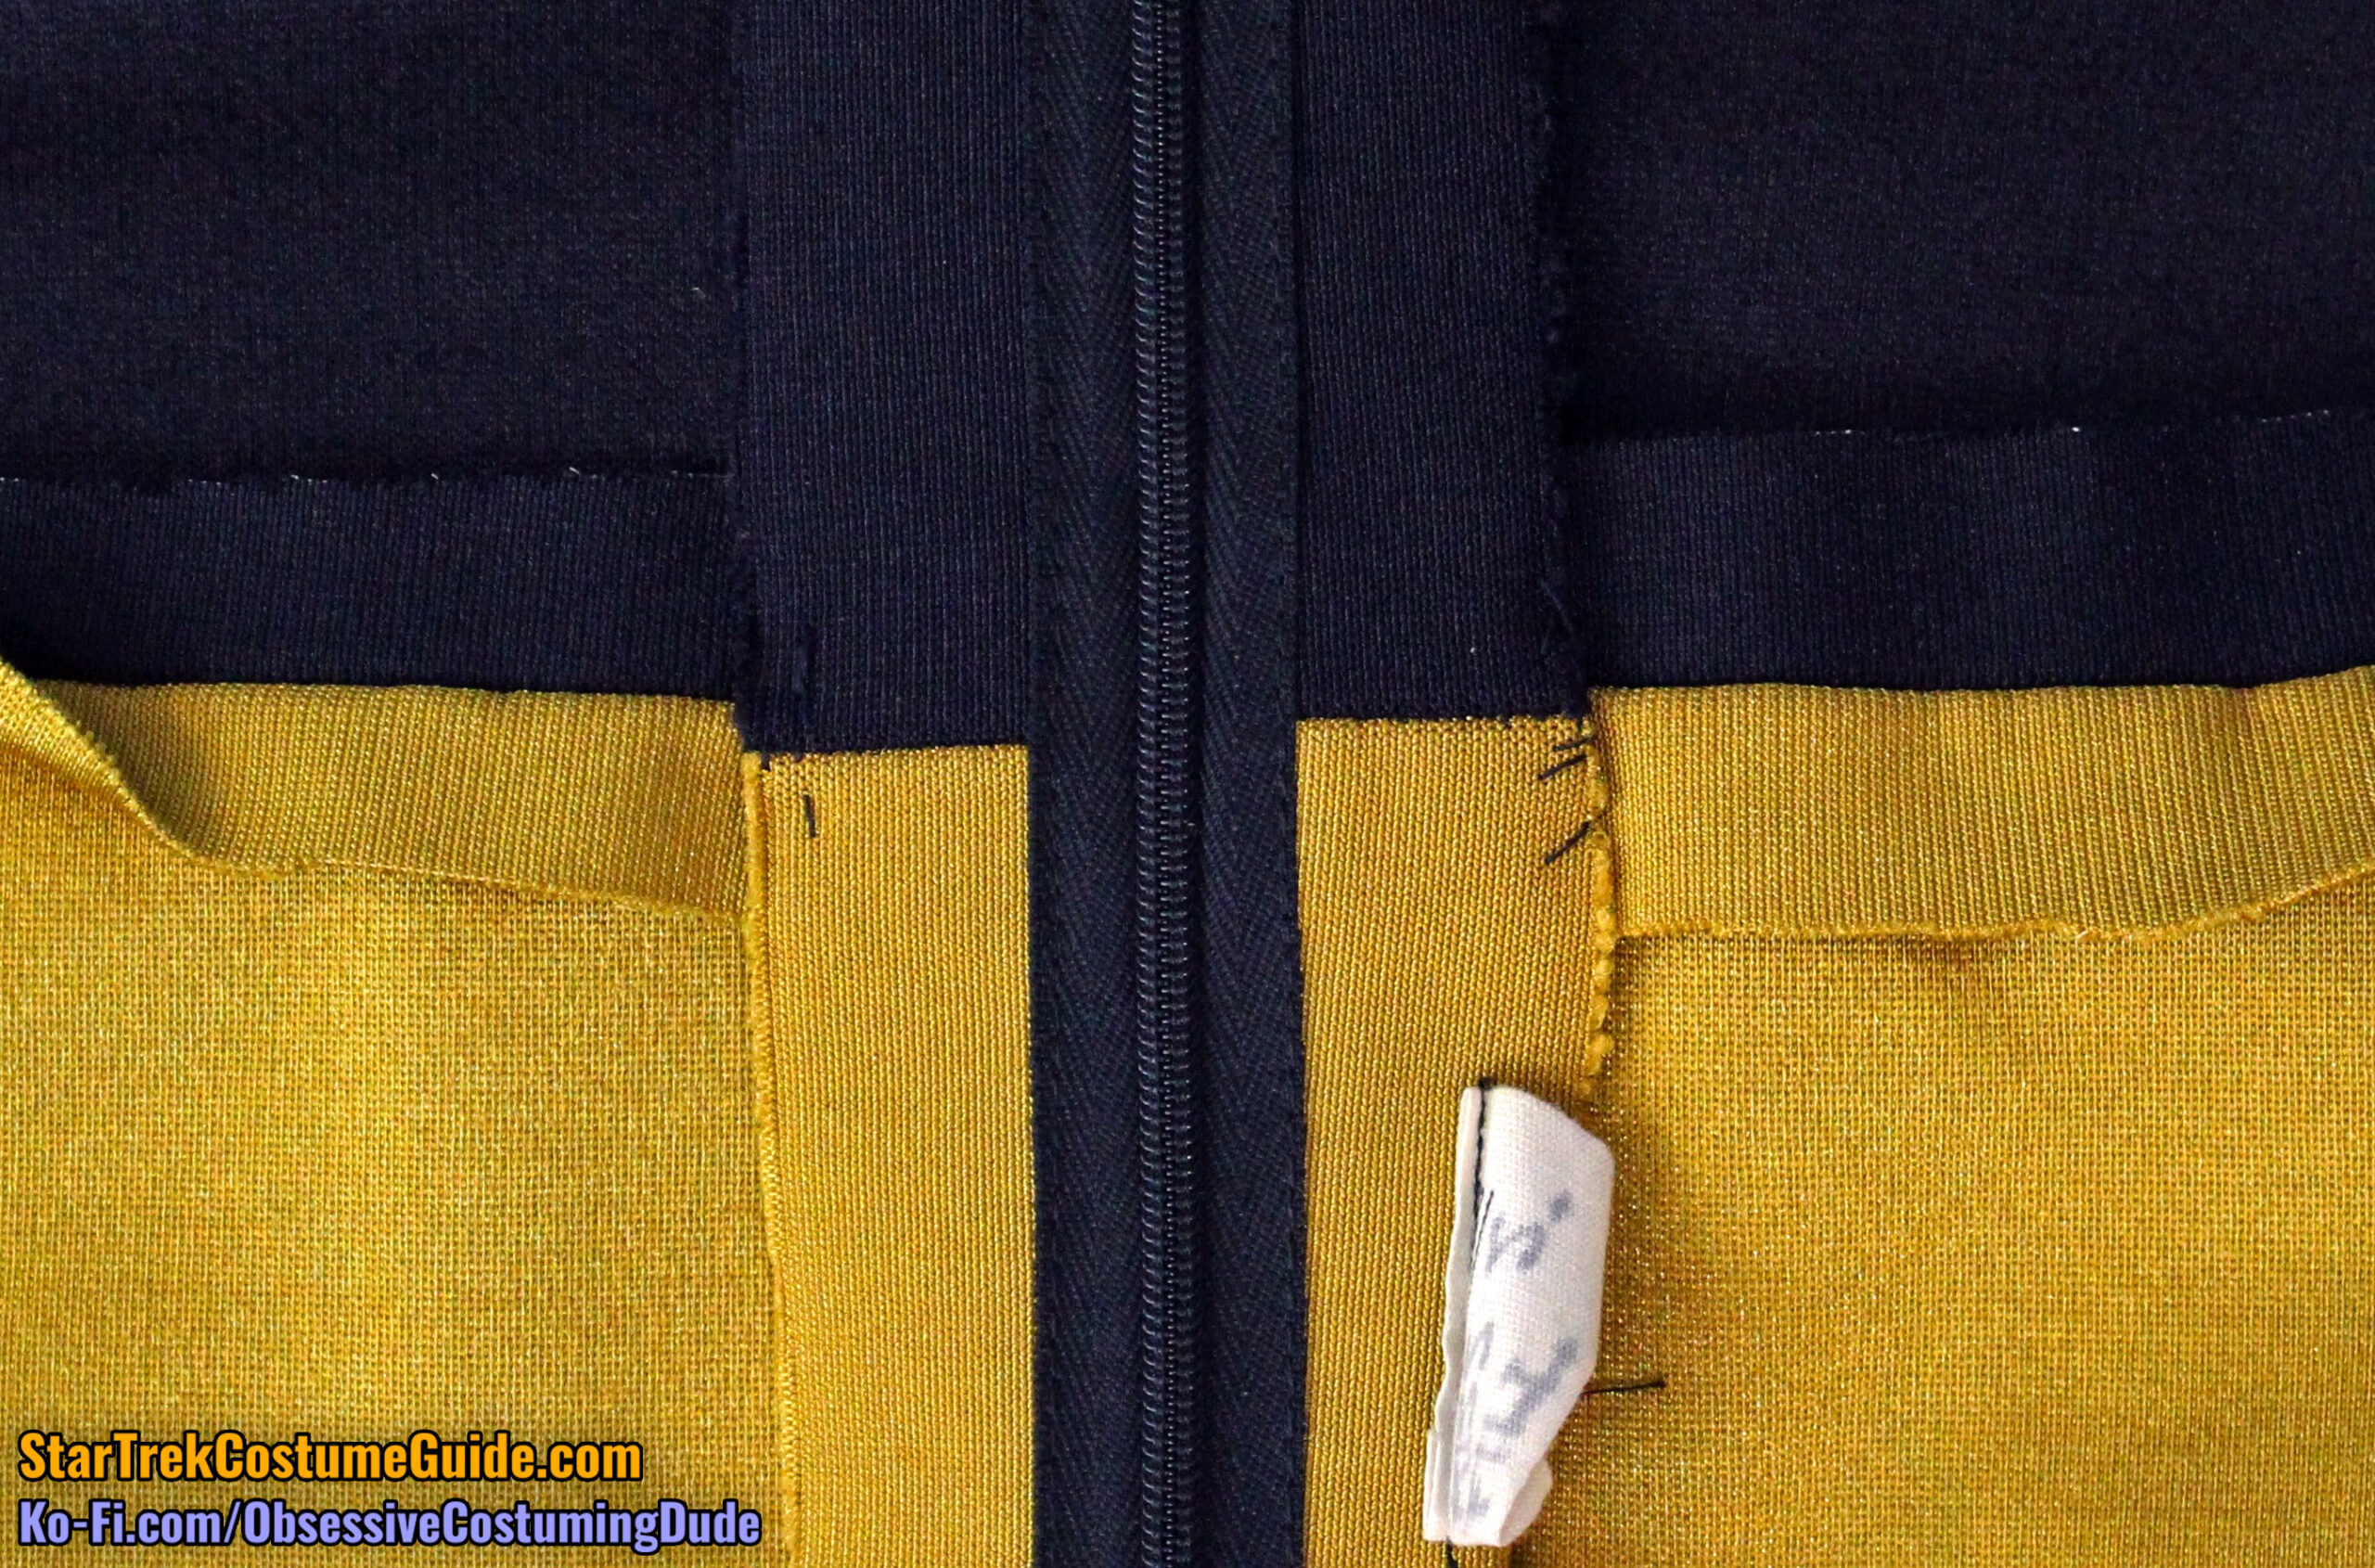
The seam allowances were tacked down by hand at the yoke/body and asymmetrical waist seam lines.
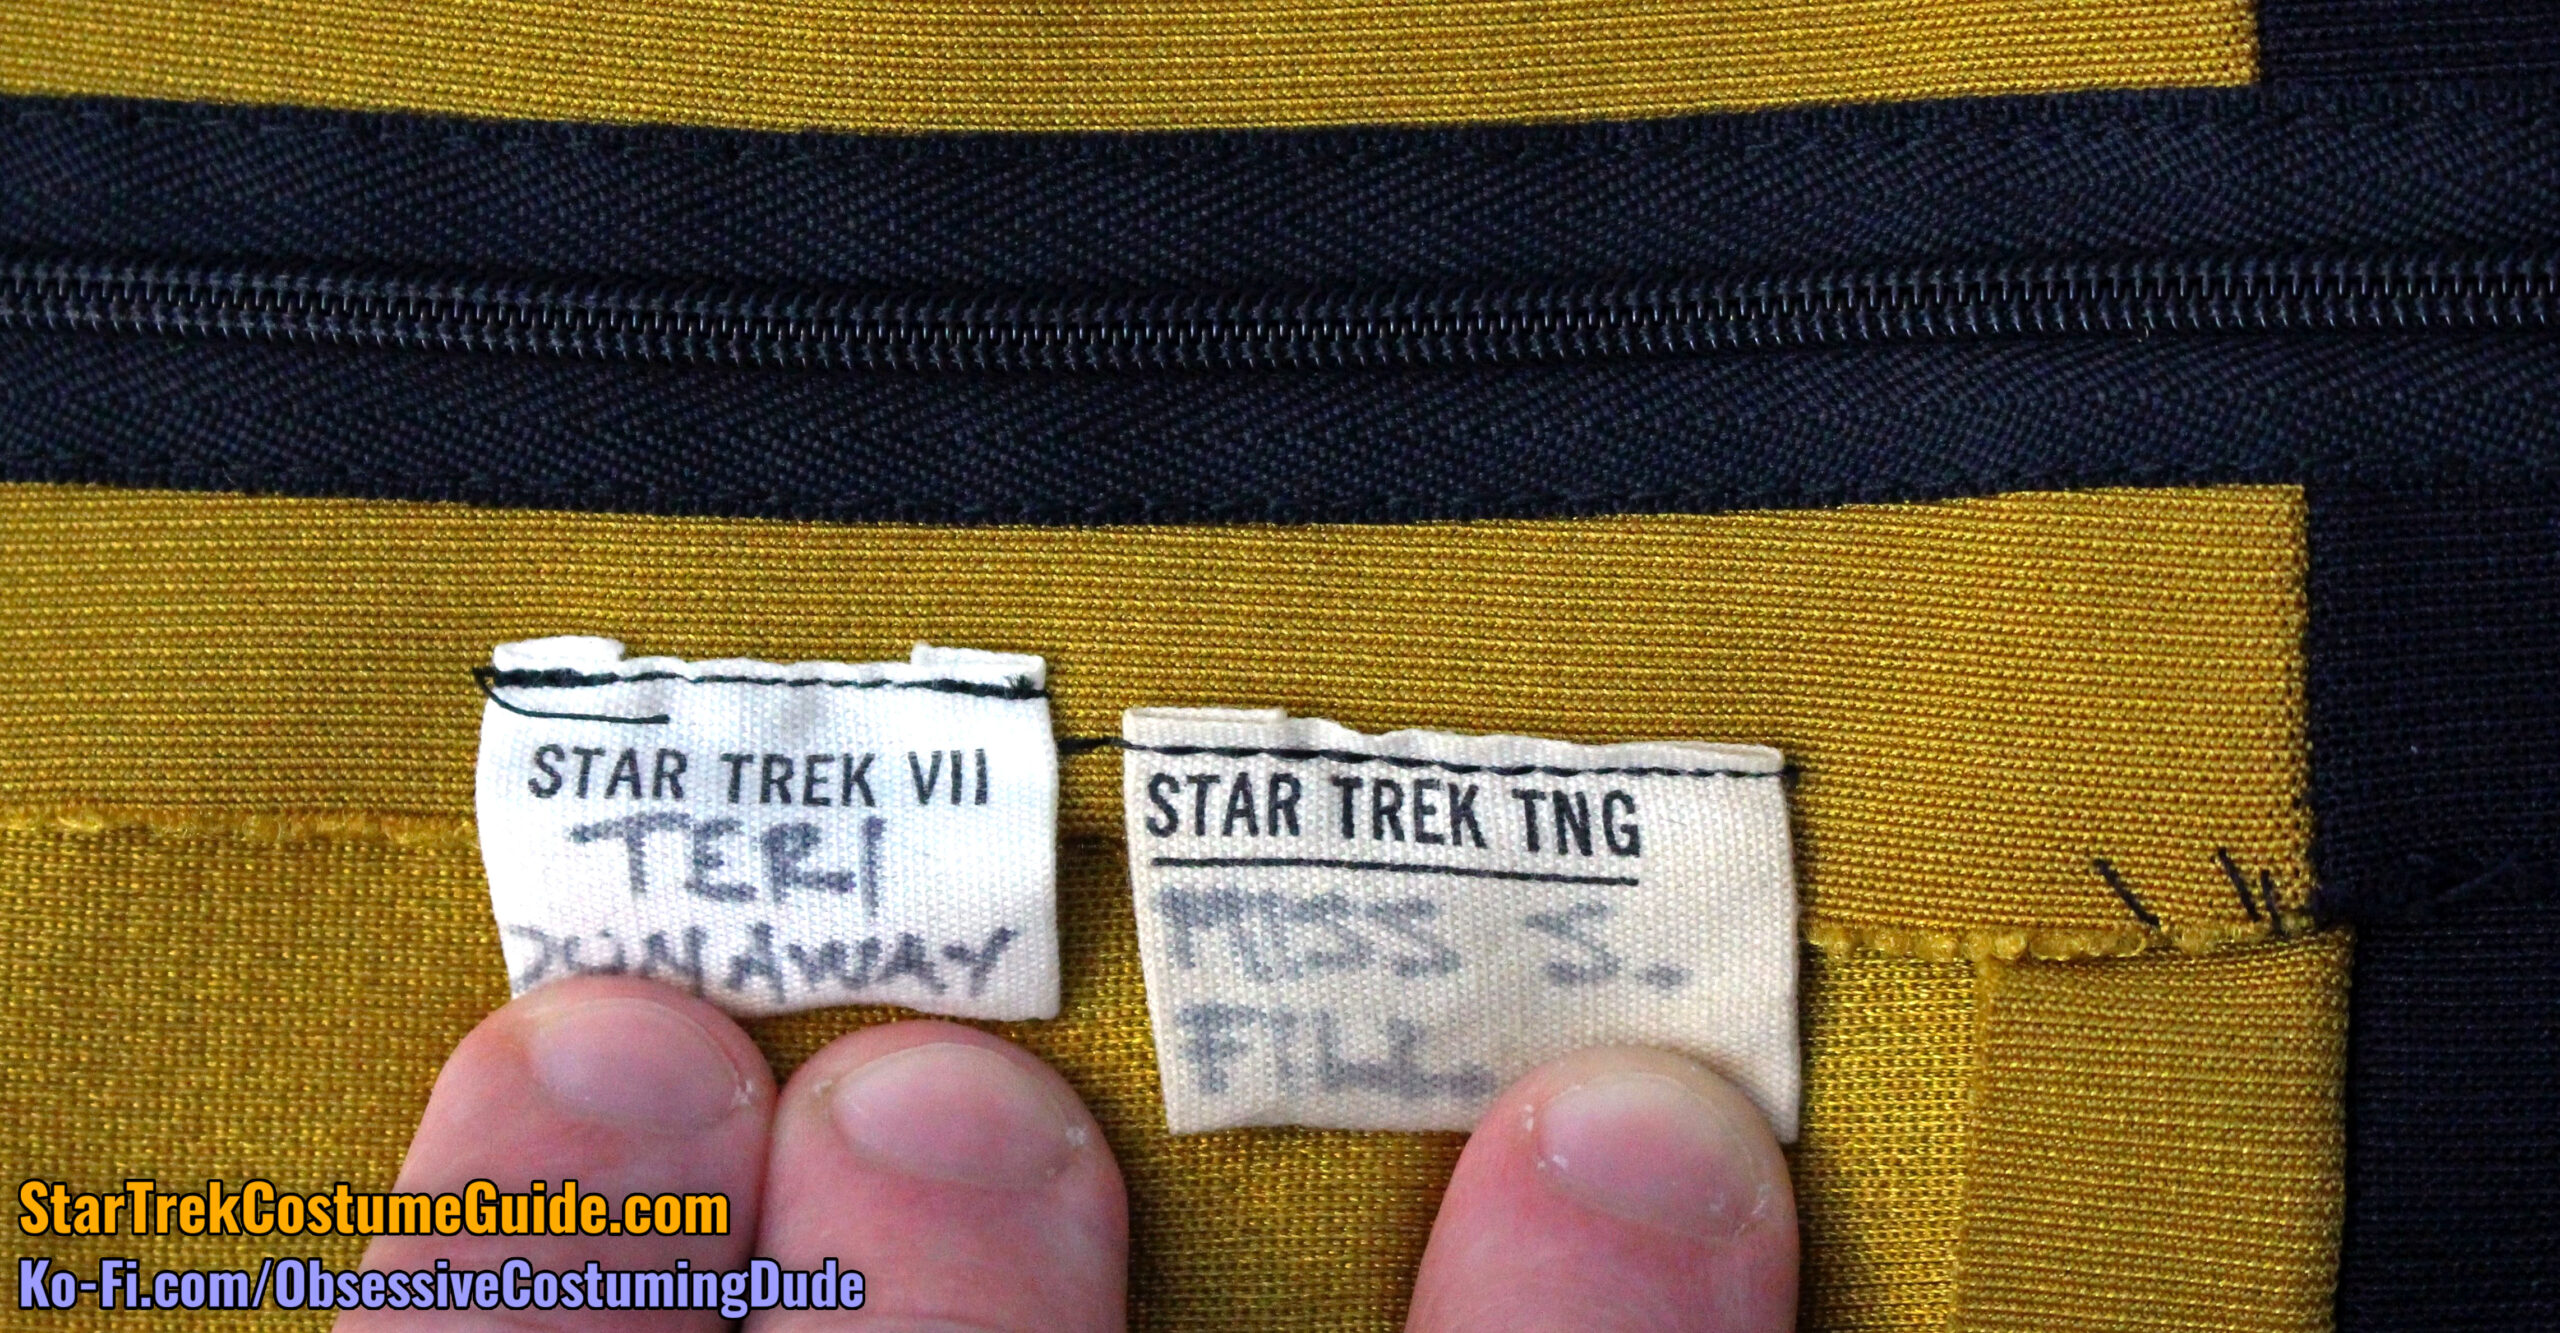
There were two production tags inside the jumpsuit, sewn to the left back/zipper seam allowance.
One was a TNG tag labeled “Miss S. Fill,” doubtless indicating actress Shannon Fill, who excellently portrayed the character of Ensign Sito.
The other was a Generations (“Star Trek VII”) tag labeled “Teri Dunaway,” presumably indicating that this uniform was recycled for an extra in that movie.
Beneath the zipper, the lower back seam allowances were ⅝”.
Both the front and back armscye seam allowances were ⅜”.
The lower front seam allowances varied and changed directions (because of course they did).
The lower left front allowances were more consistent and pressed open.
However, the lower right allowances were wider and pressed open at the top of the panel, but they narrowed and changed directions toward the bottom.
Beneath the lower front panel, the lower front (crotch) seam allowances were ½”.
The side seam allowances varied quite a bit as well; they were almost a full inch at the chest, about ¾” at the waist, then between ½” and ¾” at the hips.
… which brings us back to what I mentioned earlier, about the “cuffs” not being what they seemed.
Prior to examining the screen-used Ensign Sito jumpsuit, I had observed the “cuffs” at the bottom of several others in auction photos and (incorrectly) assumed that they were cut separately and attached later for some reason – possibly as an alternative to removing the division-colored trim from the lower pant legs while “converting” early jumpsuits to the later style.
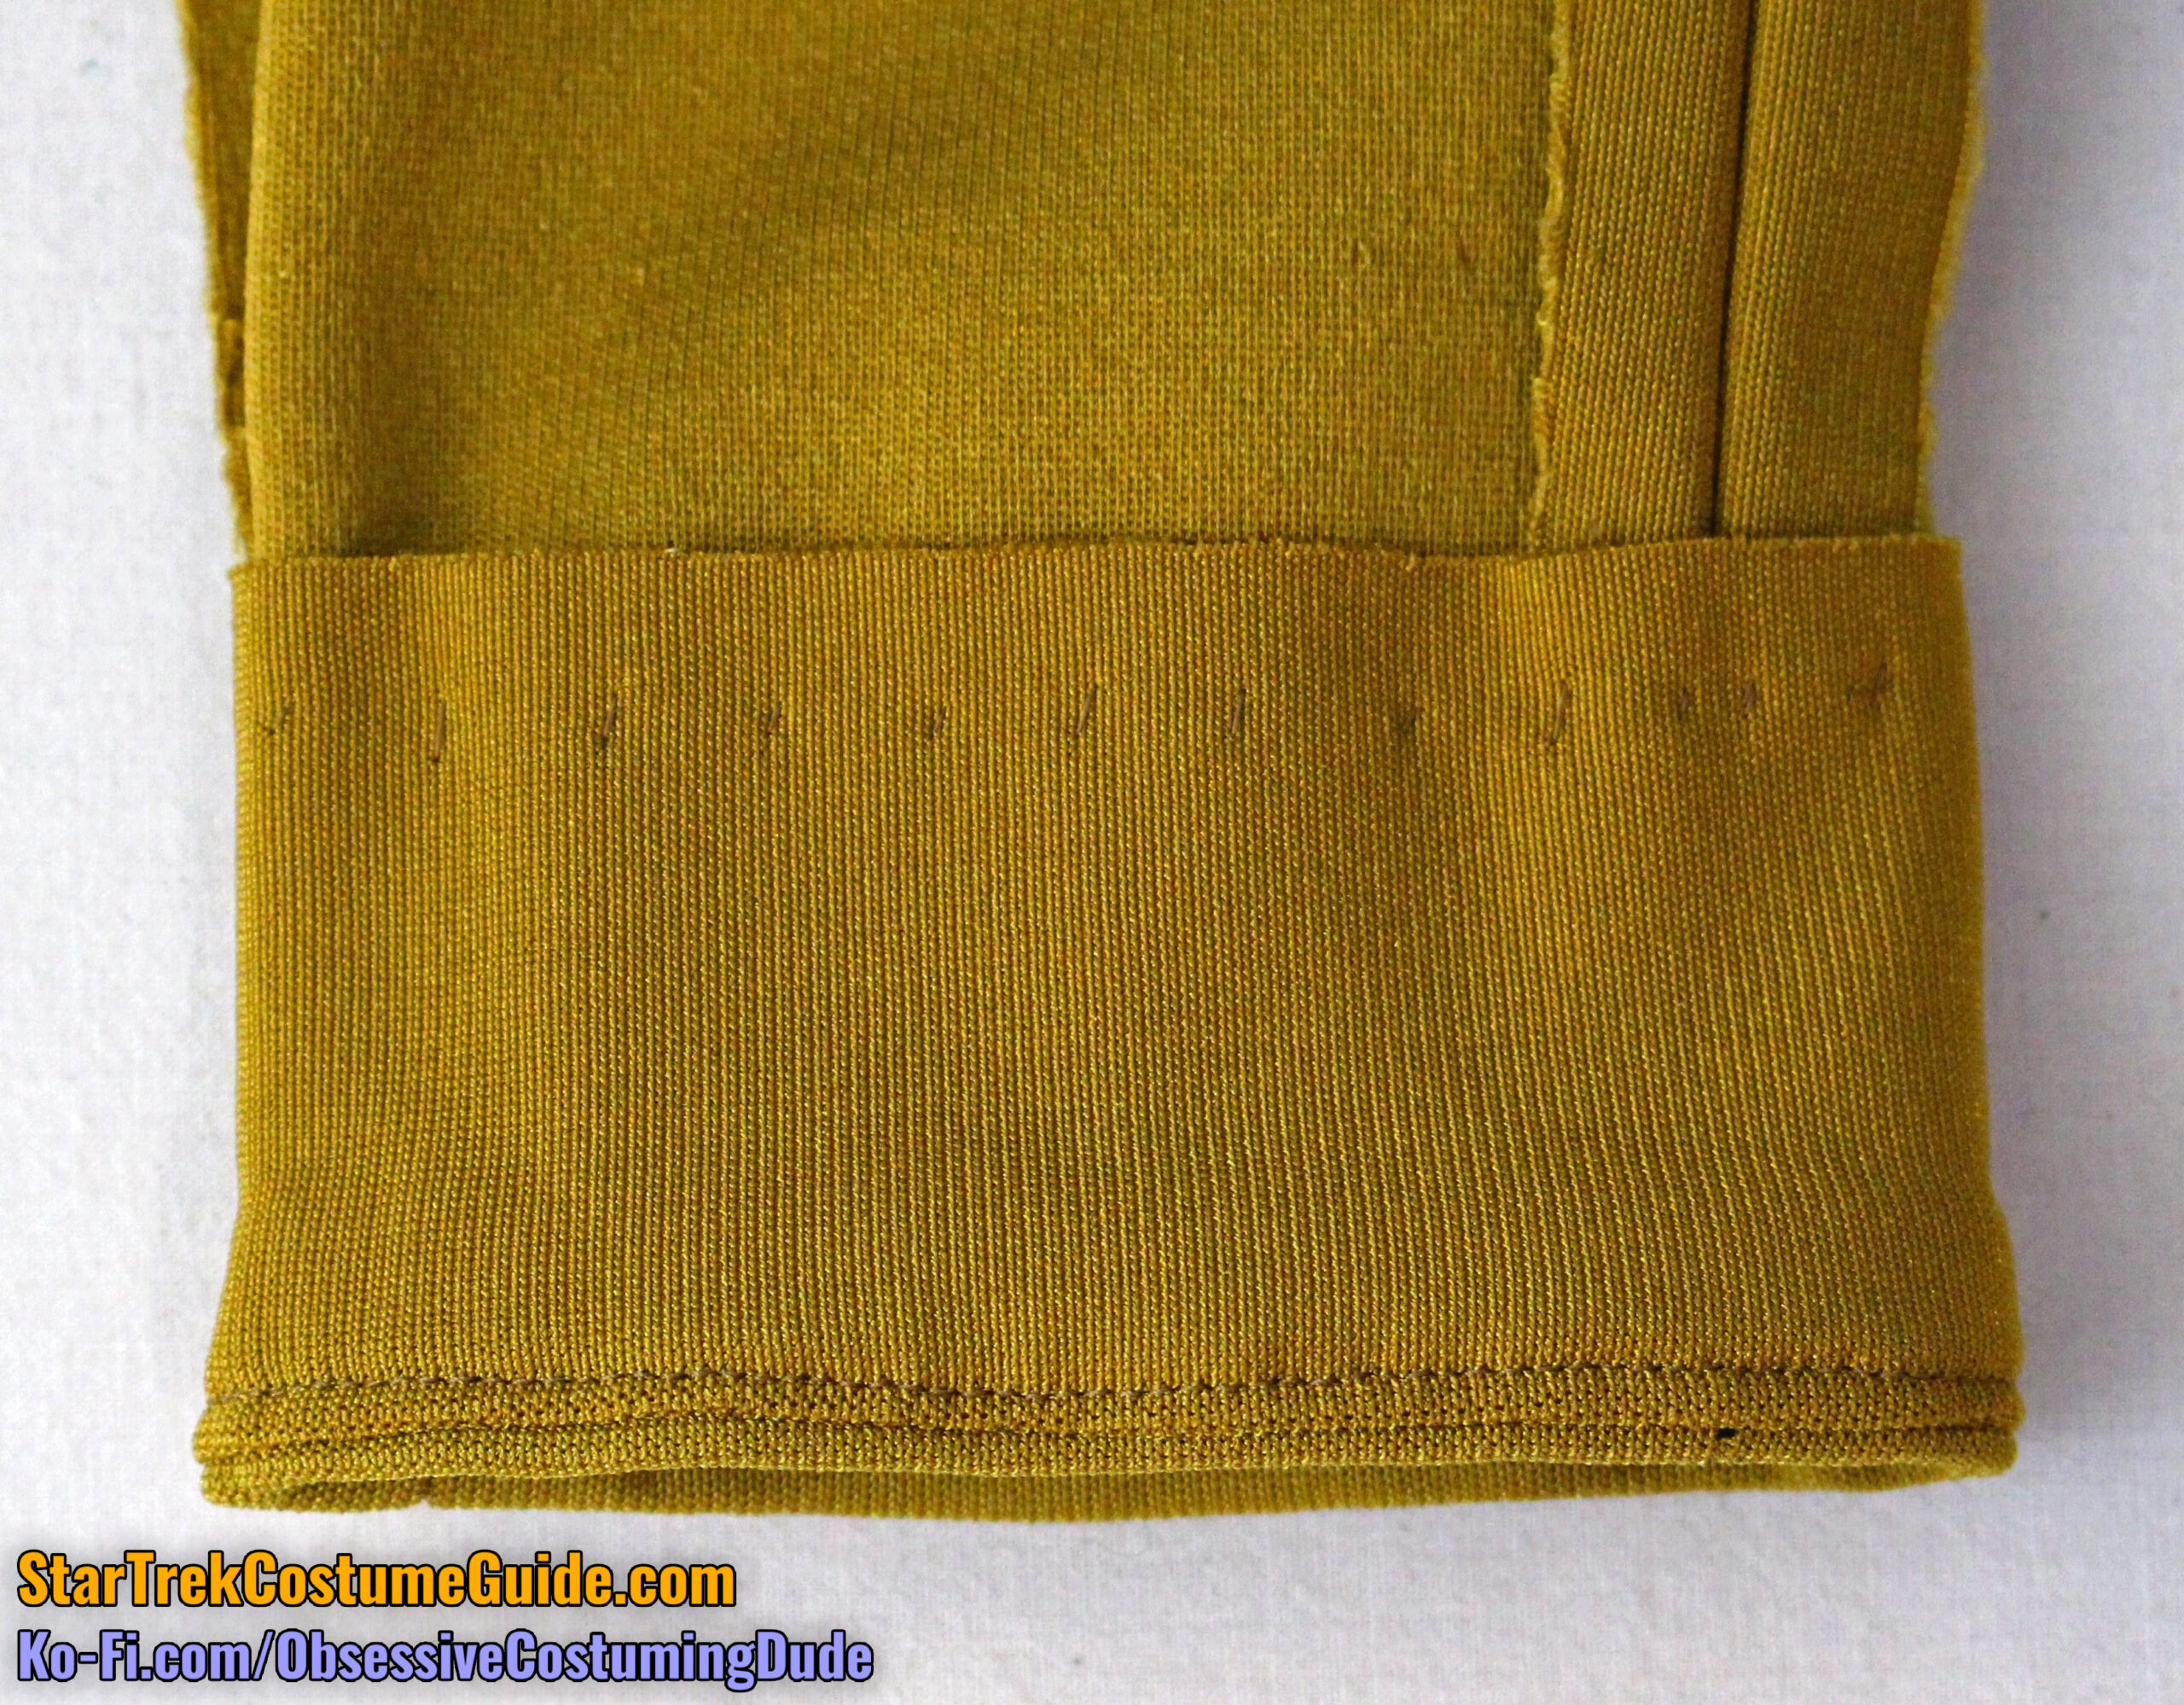
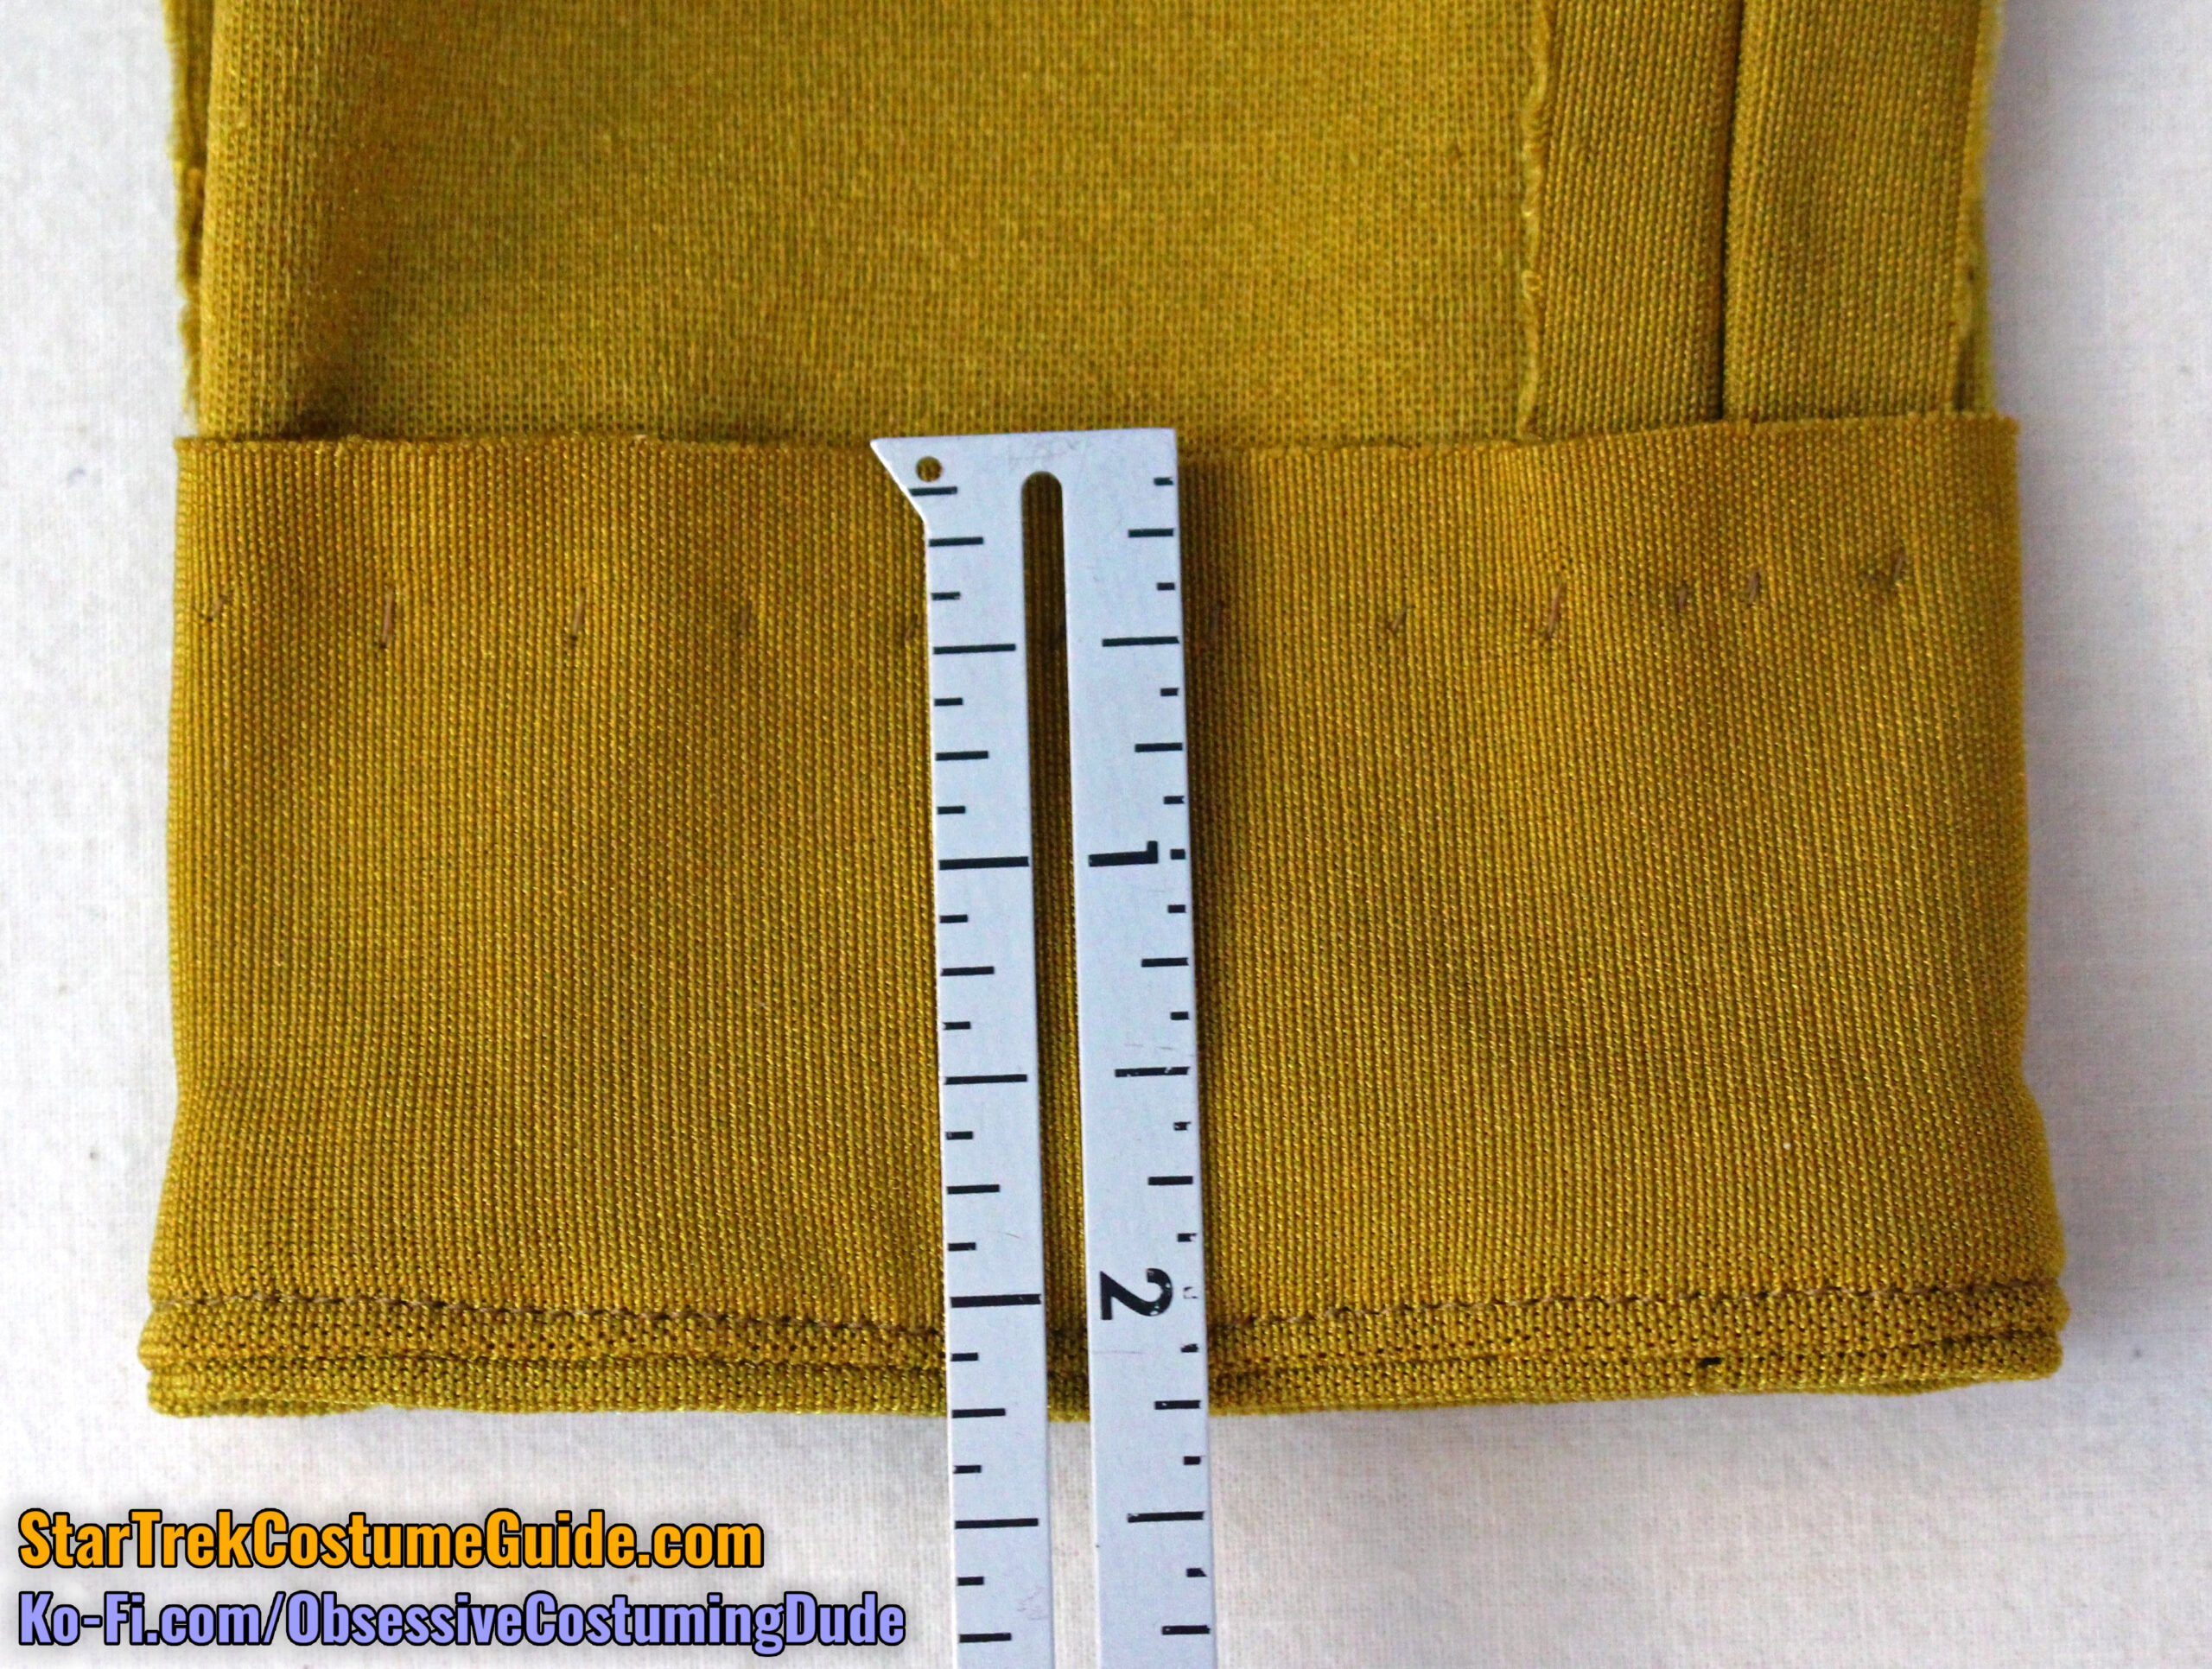
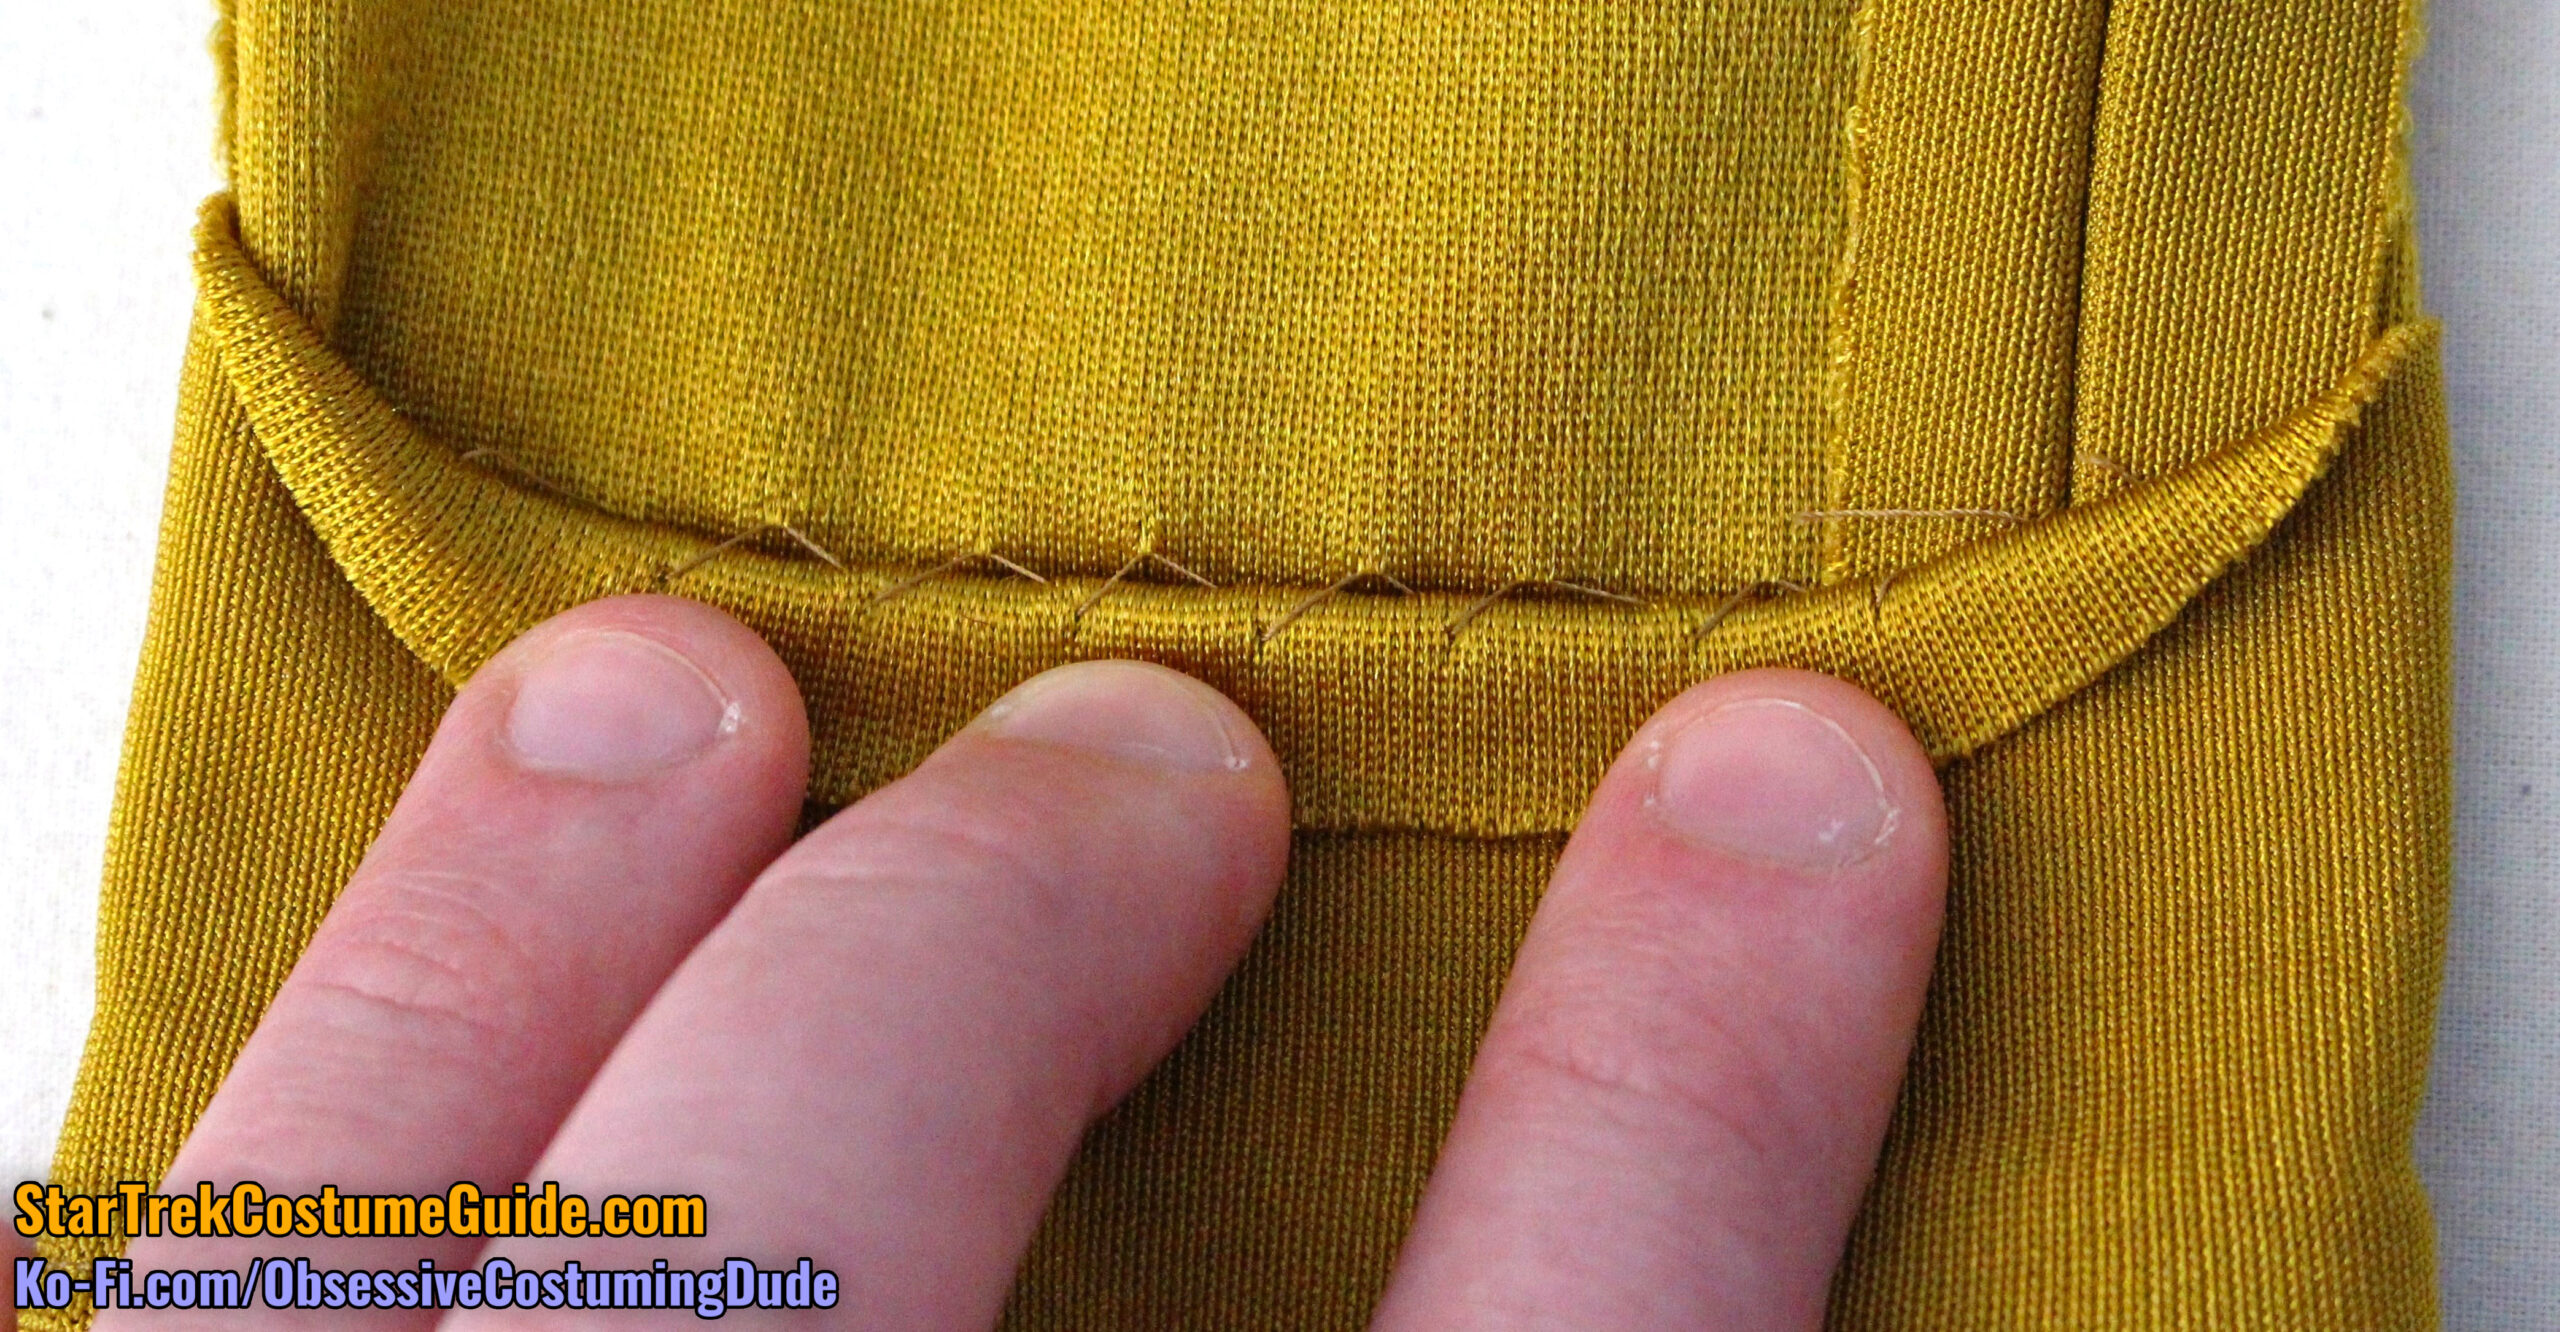
However, in actuality these “cuffs” were formed as a result of shortening the pant legs!
The problem is that when shortening the pant leg by simply increasing the hem allowance, one also shortens the lower front opening … and to do so entails removing the elastic stirrups, undoing the facing stitching, undoing the hem stitching, re-hemming the pants, re-securing the facing, and reattaching the stirrups. Whew!
Instead, one simply folds the bottom of the pant leg upward, stitches the pant leg together half the total amount the pant leg is to be shortened, then presses the bottom of the pant leg back down.
This quickly shortens the pant leg, and the resulting horizontal seam was apparently deemed an acceptable “by-product” for the convenience of the alteration.
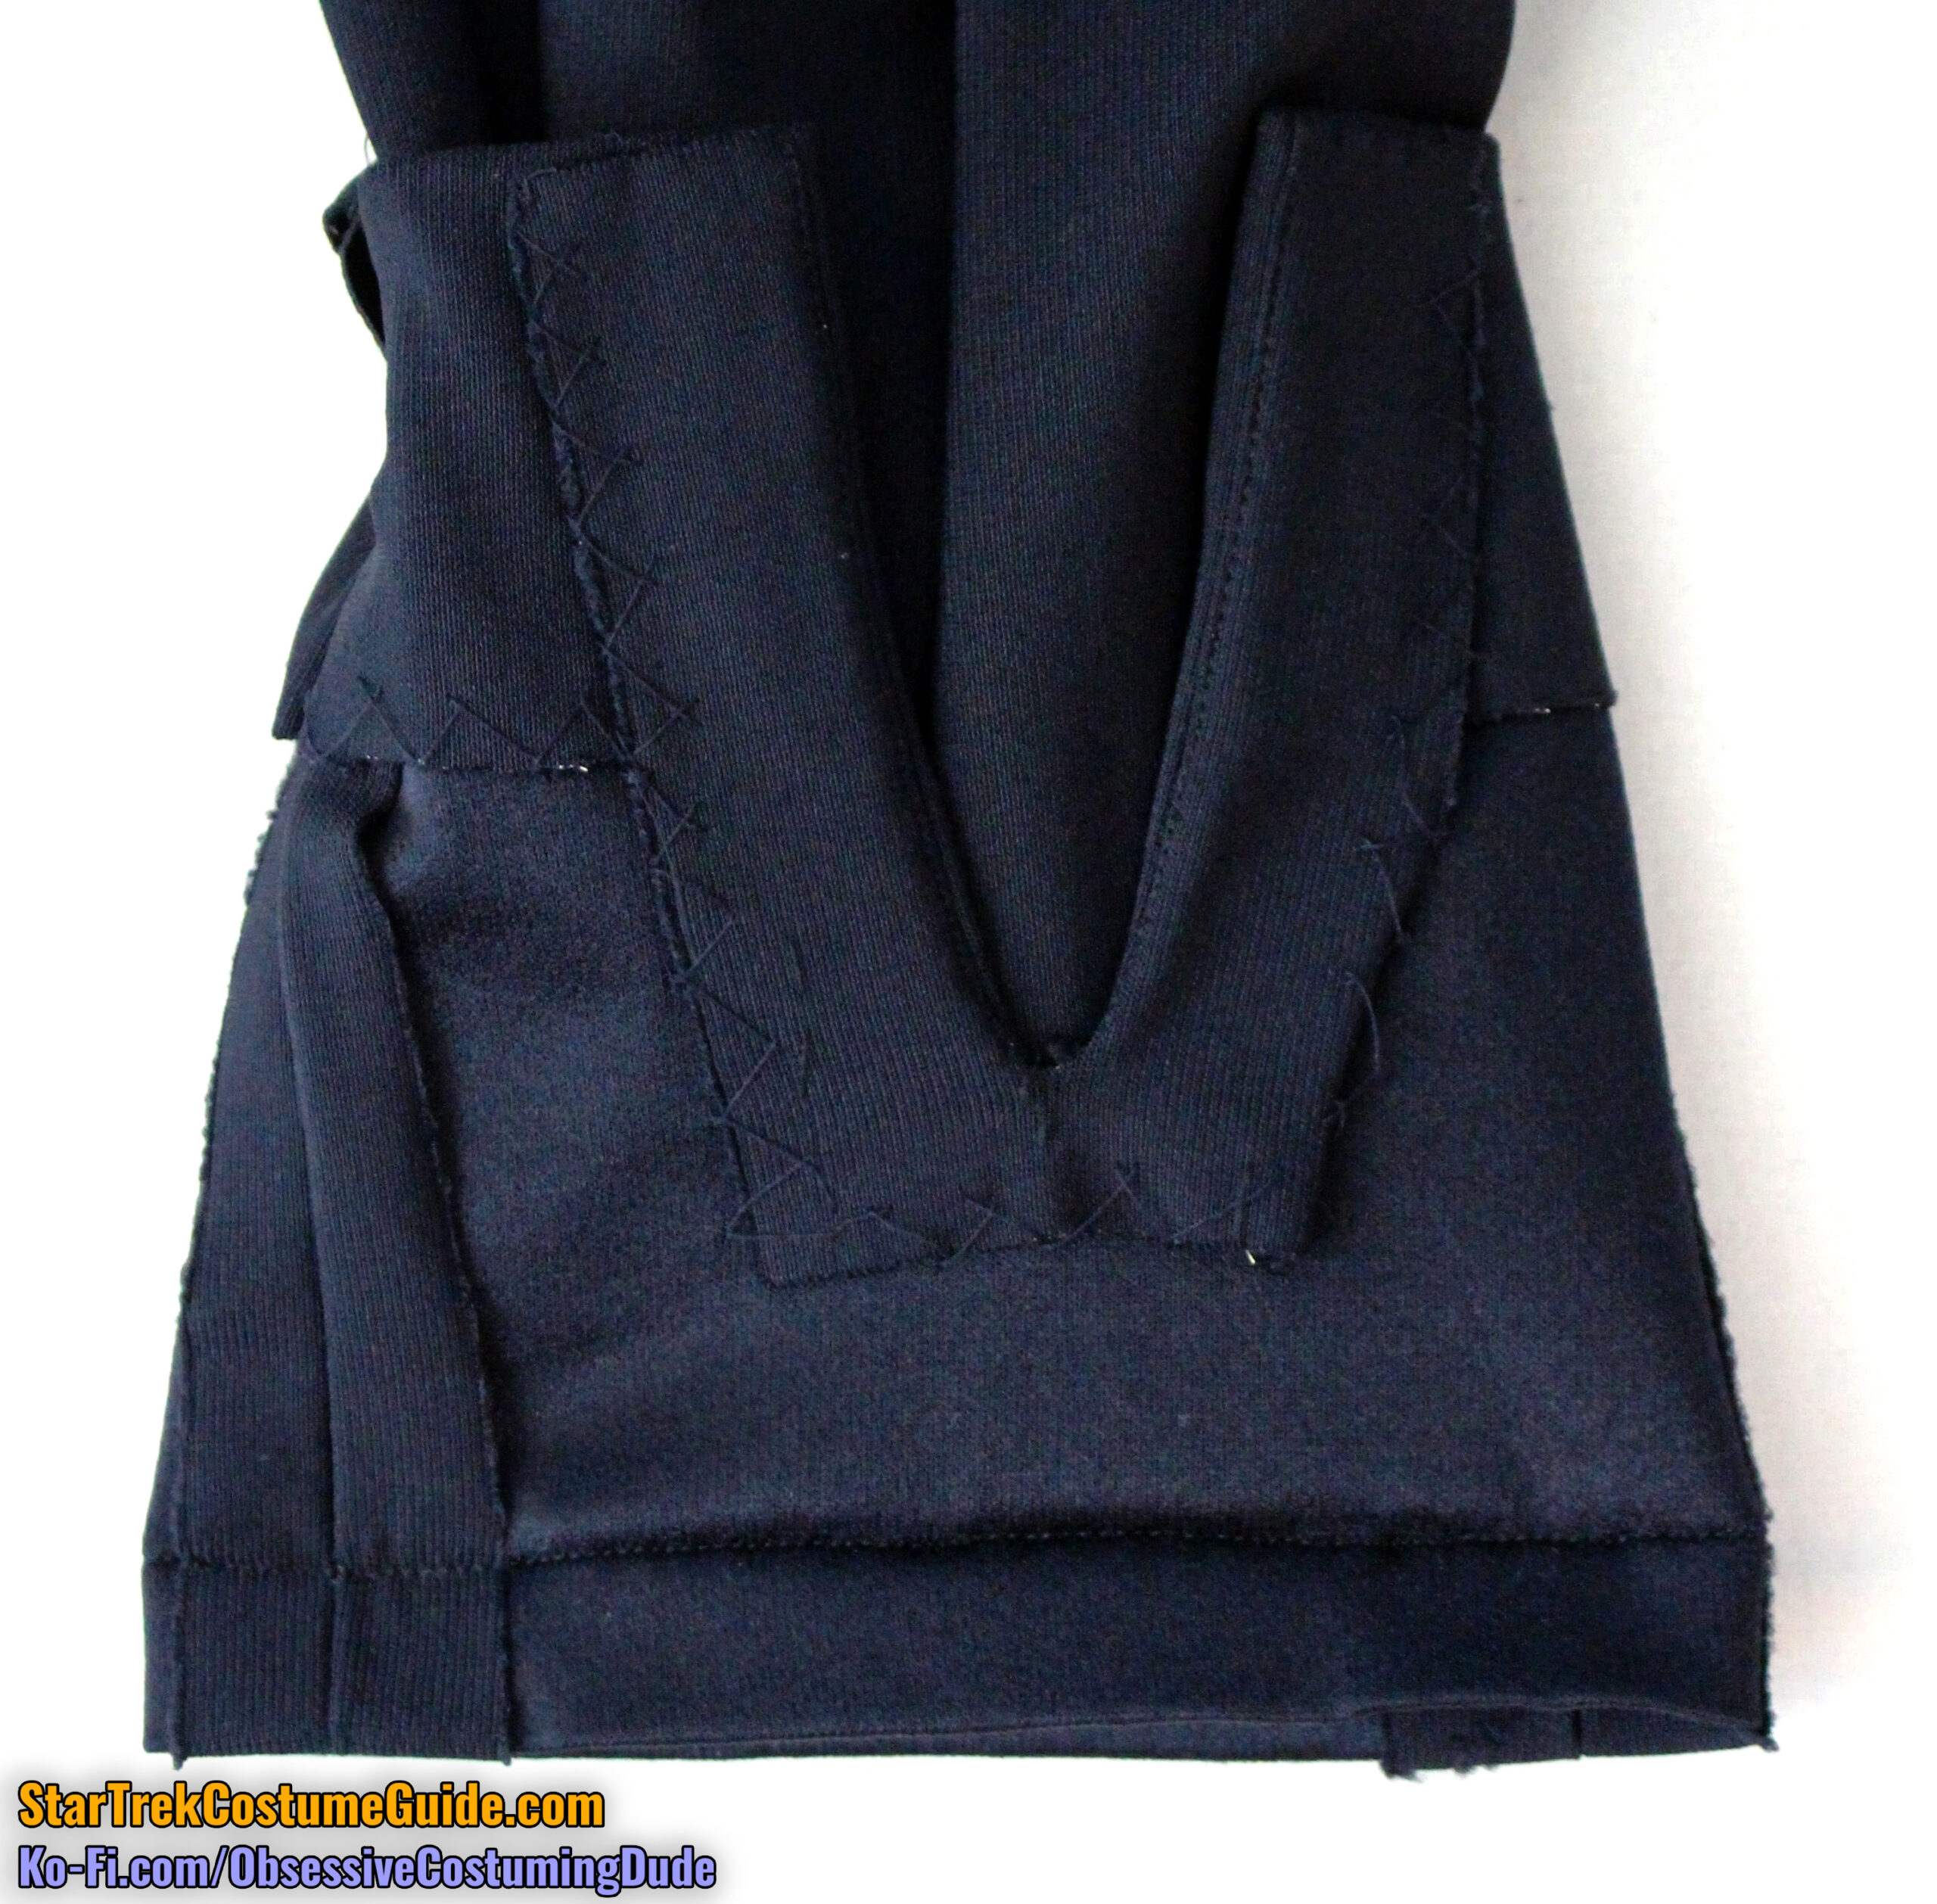
Although this is obviously a later-style TNG jumpsuit, the construction of the lower pant legs is basically the same as the early jumpsuits’, but with a smaller facing and no division-color trim accents.
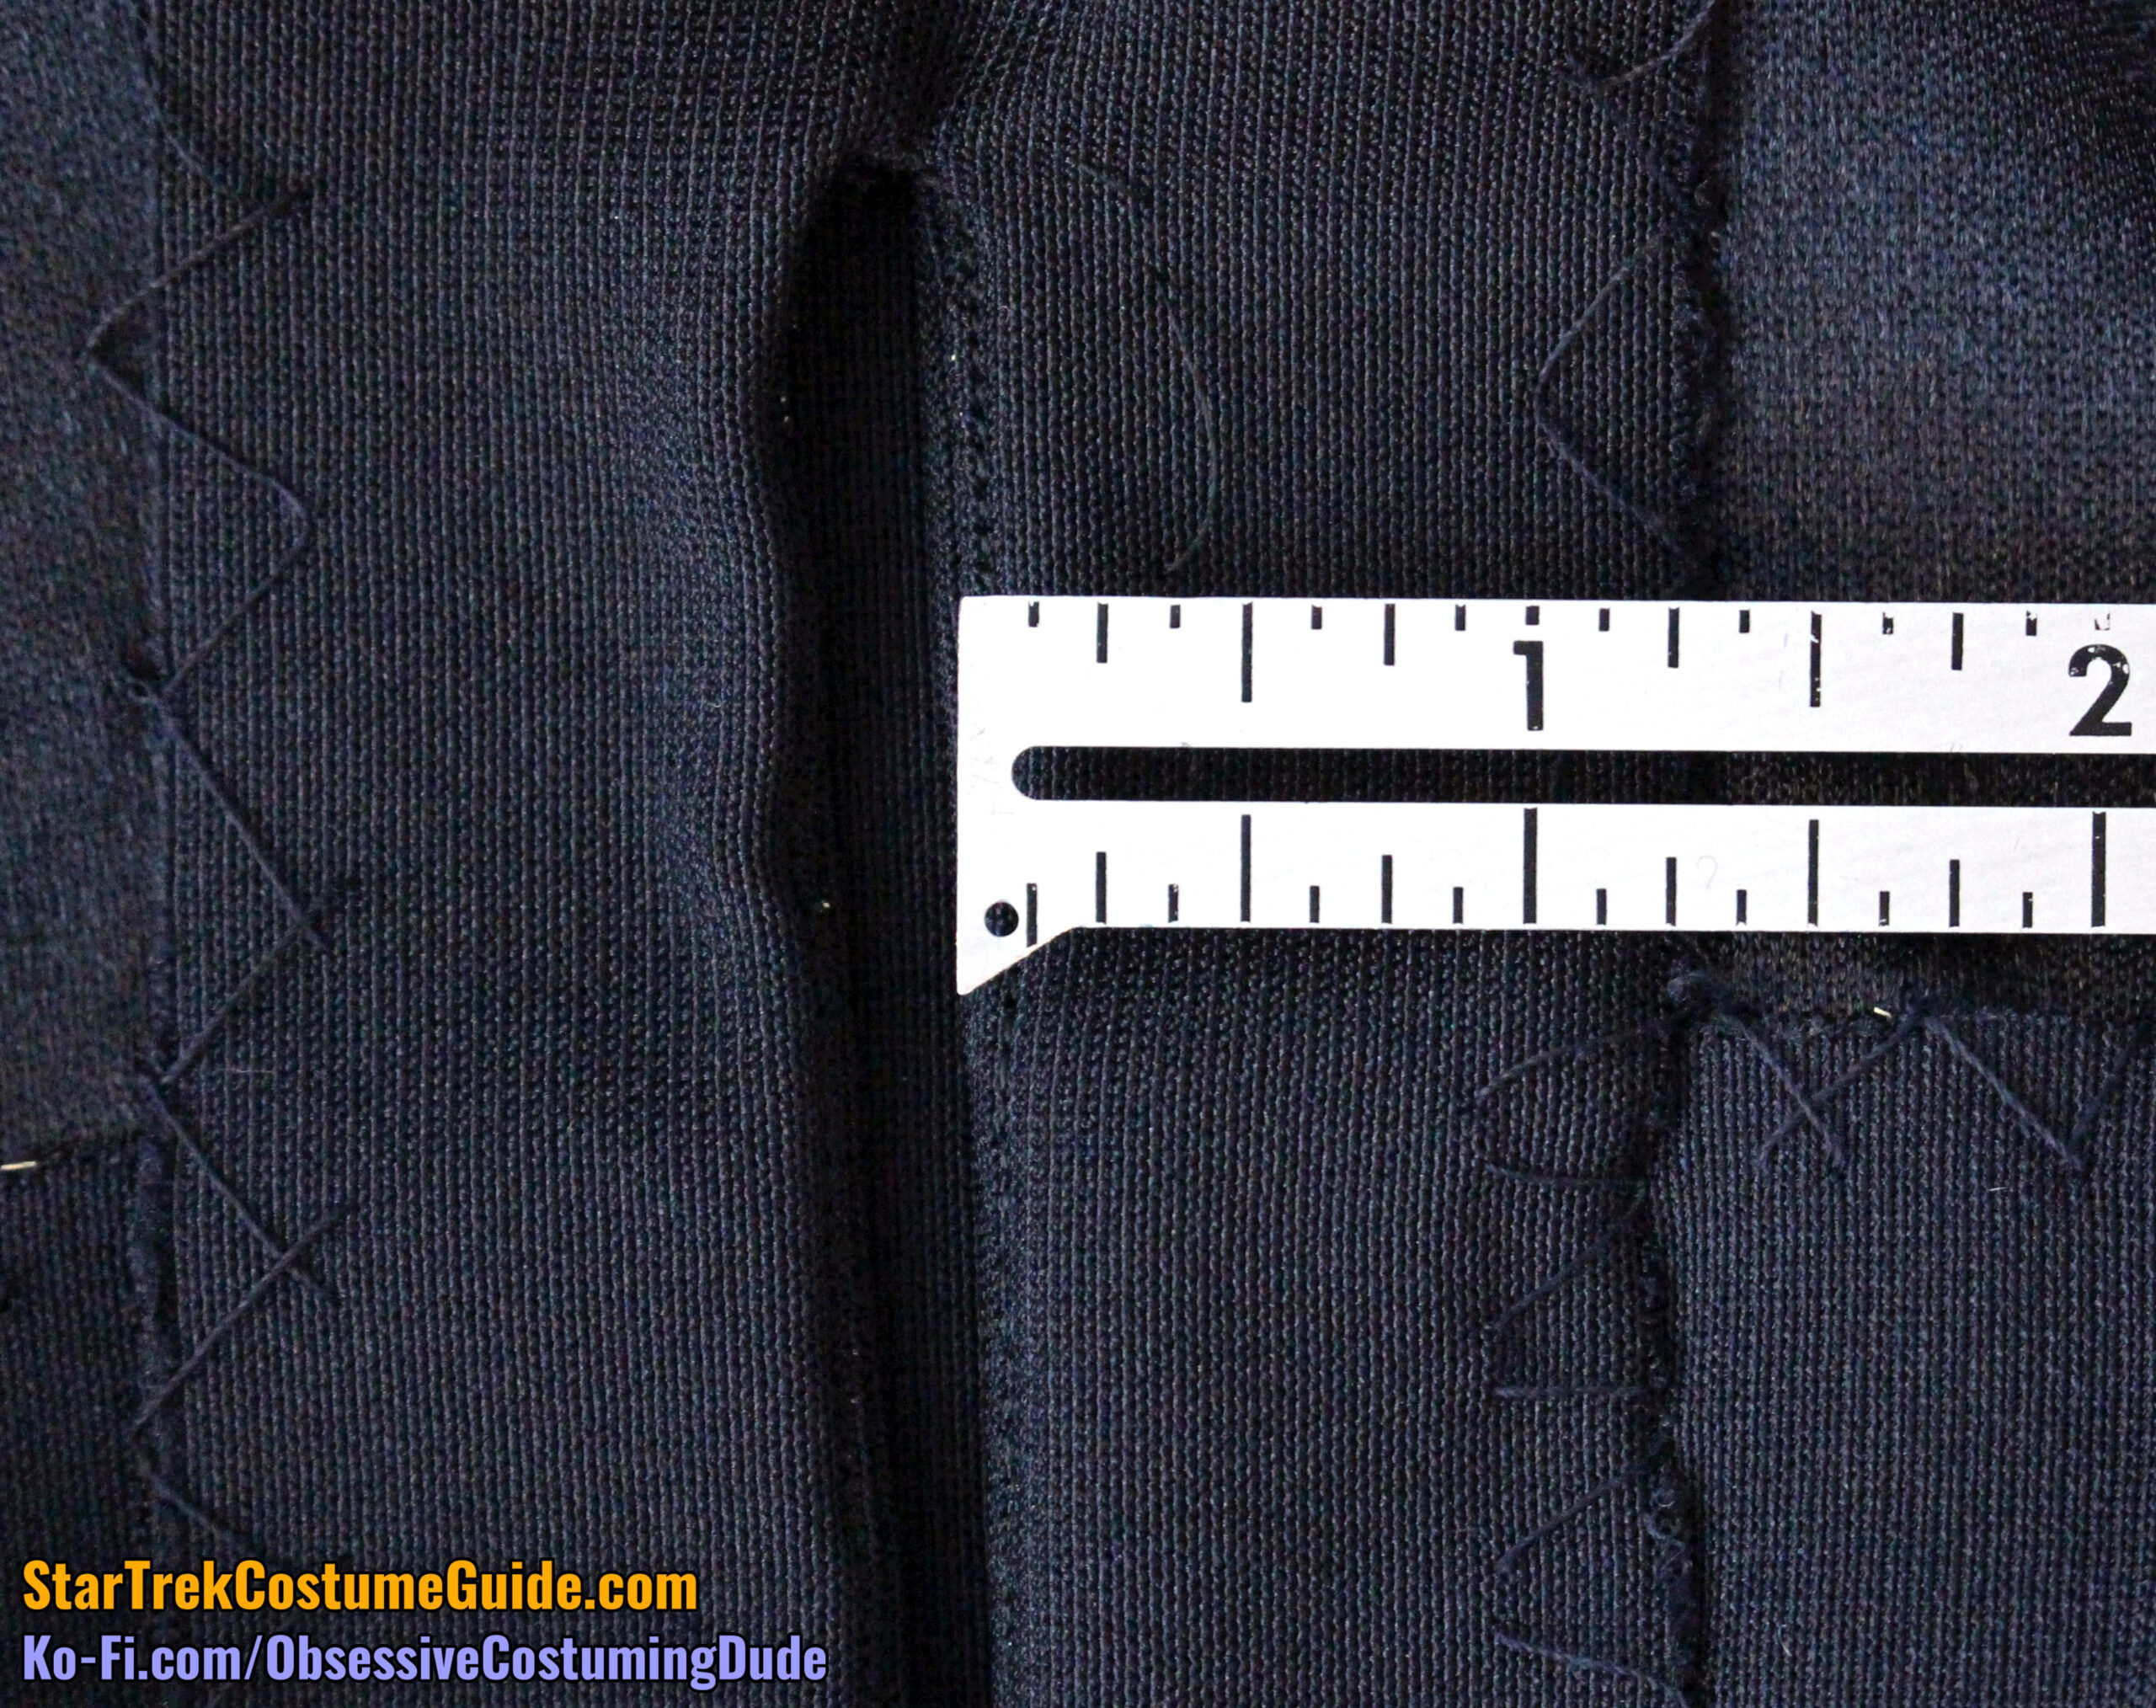
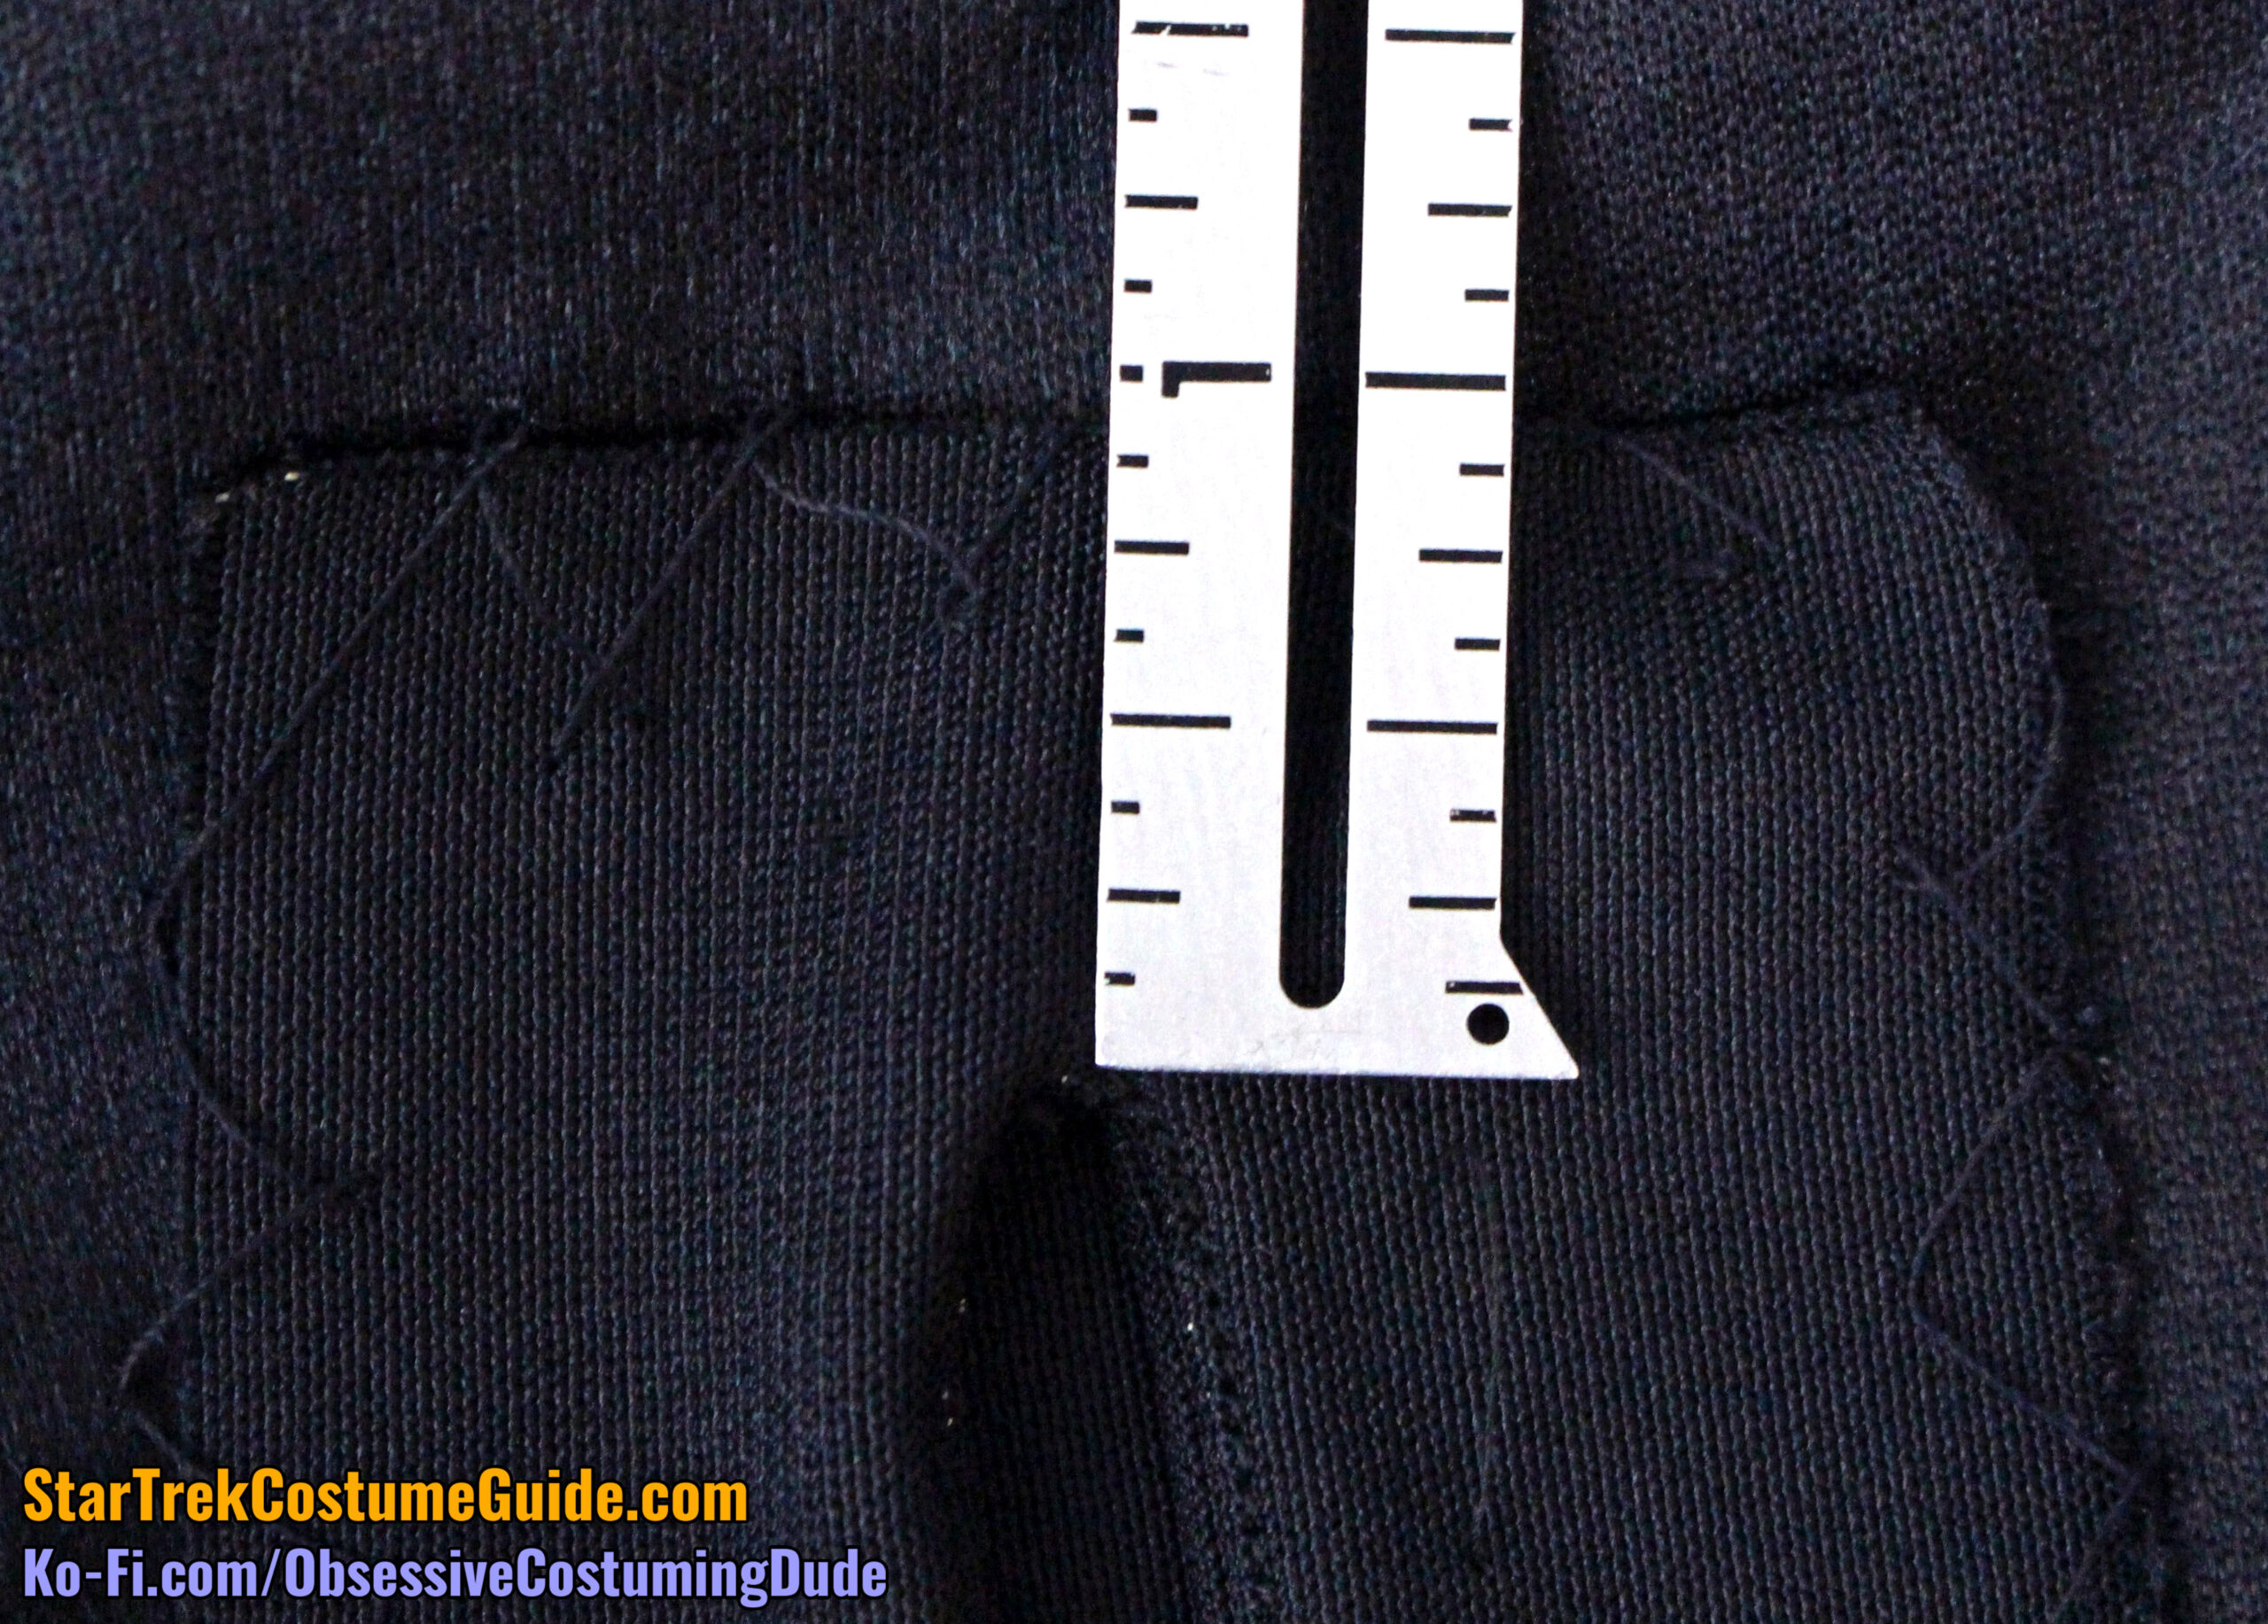
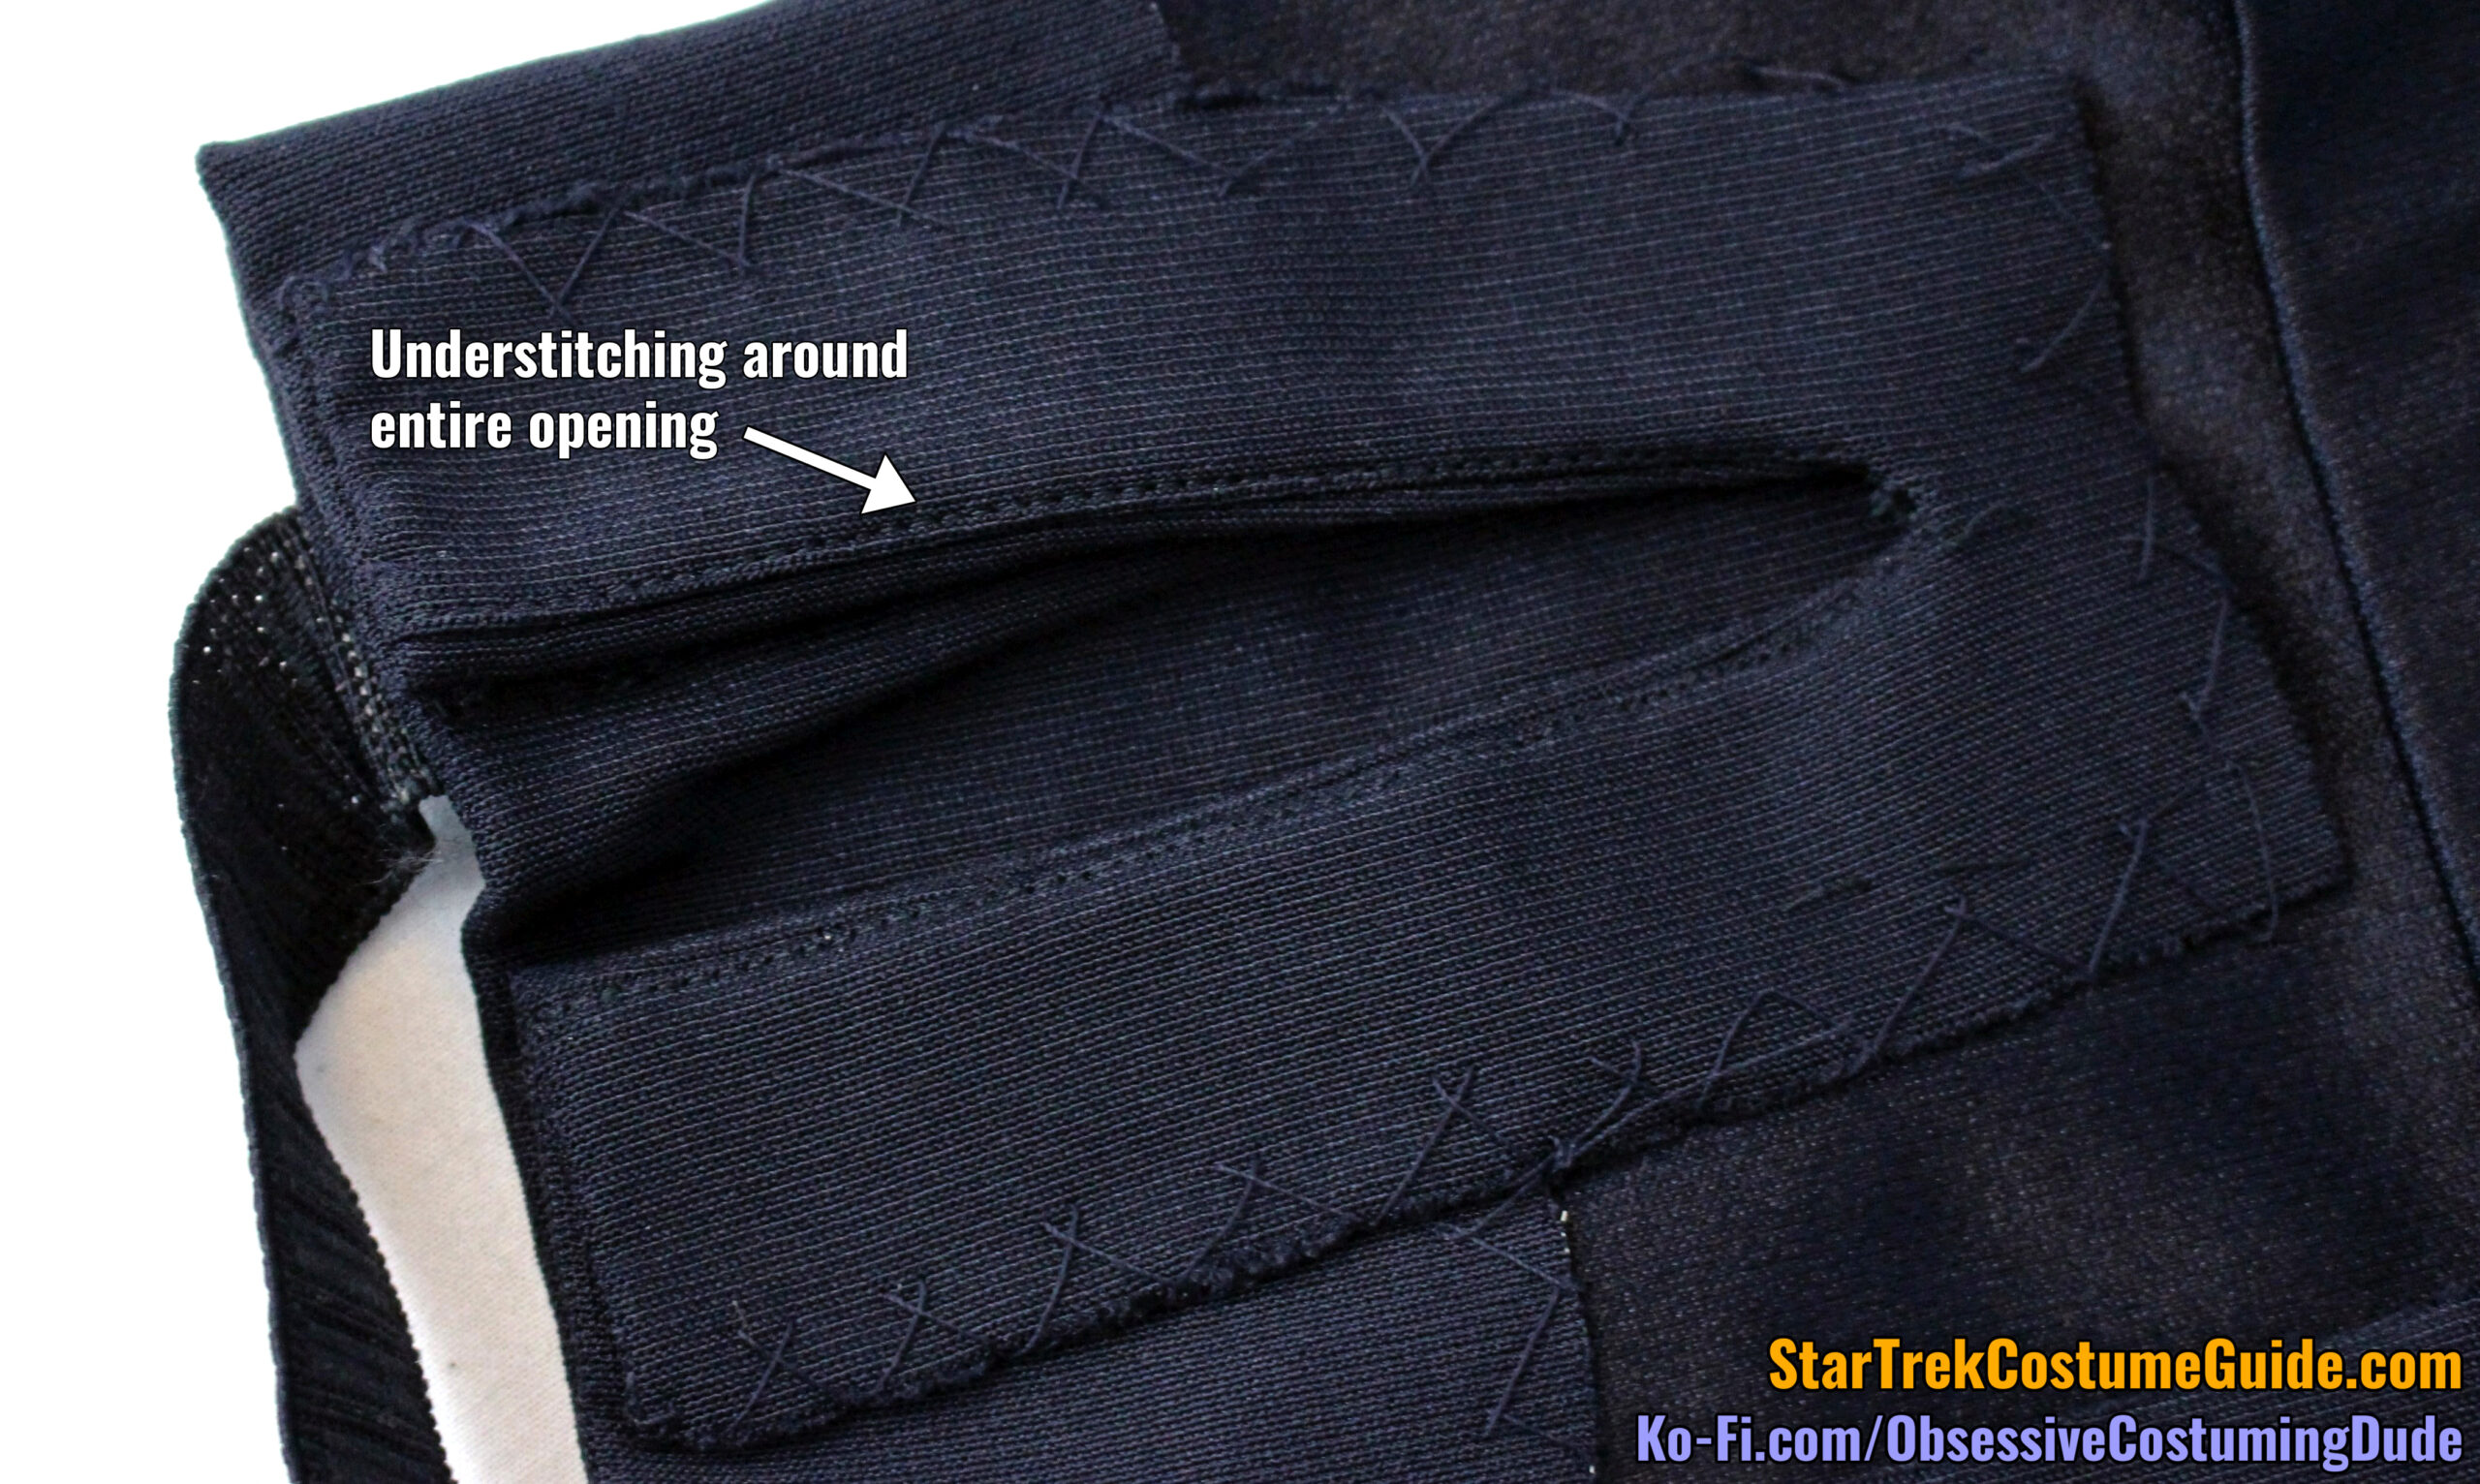
The facing extended approximately 1 ¼” to each side of and 1” above the opening.
The facing was also understitched all the way around the opening.
Interestingly, the hems on this Ensign Sito uniform were an exact opposite situation as with the screen-used Tasha Yar jumpsuit I examined.
As you may recall, on the Tasha jumpsuit the sleeves were hemmed “normally” via hem allowance folded upward, but the pant legs had a separate, sewn-on hem facing.
However, on this Ensign Sito jumpsuit, the pant legs were hemmed with the allowance folded upward … and the hem allowance was actually on the tall side, at 2 ½”.
However, the sleeves were hemmed via a separate, sewn-on hem facing – like I said, the opposite as with the Tasha Yar jumpsuit!
The lower seam line was rolled slightly inside the sleeve and understitched.
The sleeve hem facing was cut on the same grain as the rest of the jumpsuit and was approximately 2 ⅛” tall (plus another ⅛” for the rolled seam).
(As I mentioned in my Intermediate Sewing course, hem facings can be a means of extending sleeves and pant legs when there isn’t enough patterned allowance.)
The sleeve hem facing was secured not with catch-stitching like we usually see on these uniforms, but with more conventional hem stitching.
IN CONCLUSION
I’d like to again thank Angelo Cifaldi for the opportunity to study this screen-used Ensign Sito TNG jumpsuit and share my research with you.
I learned a great deal from the experience, and I hope you did as well!

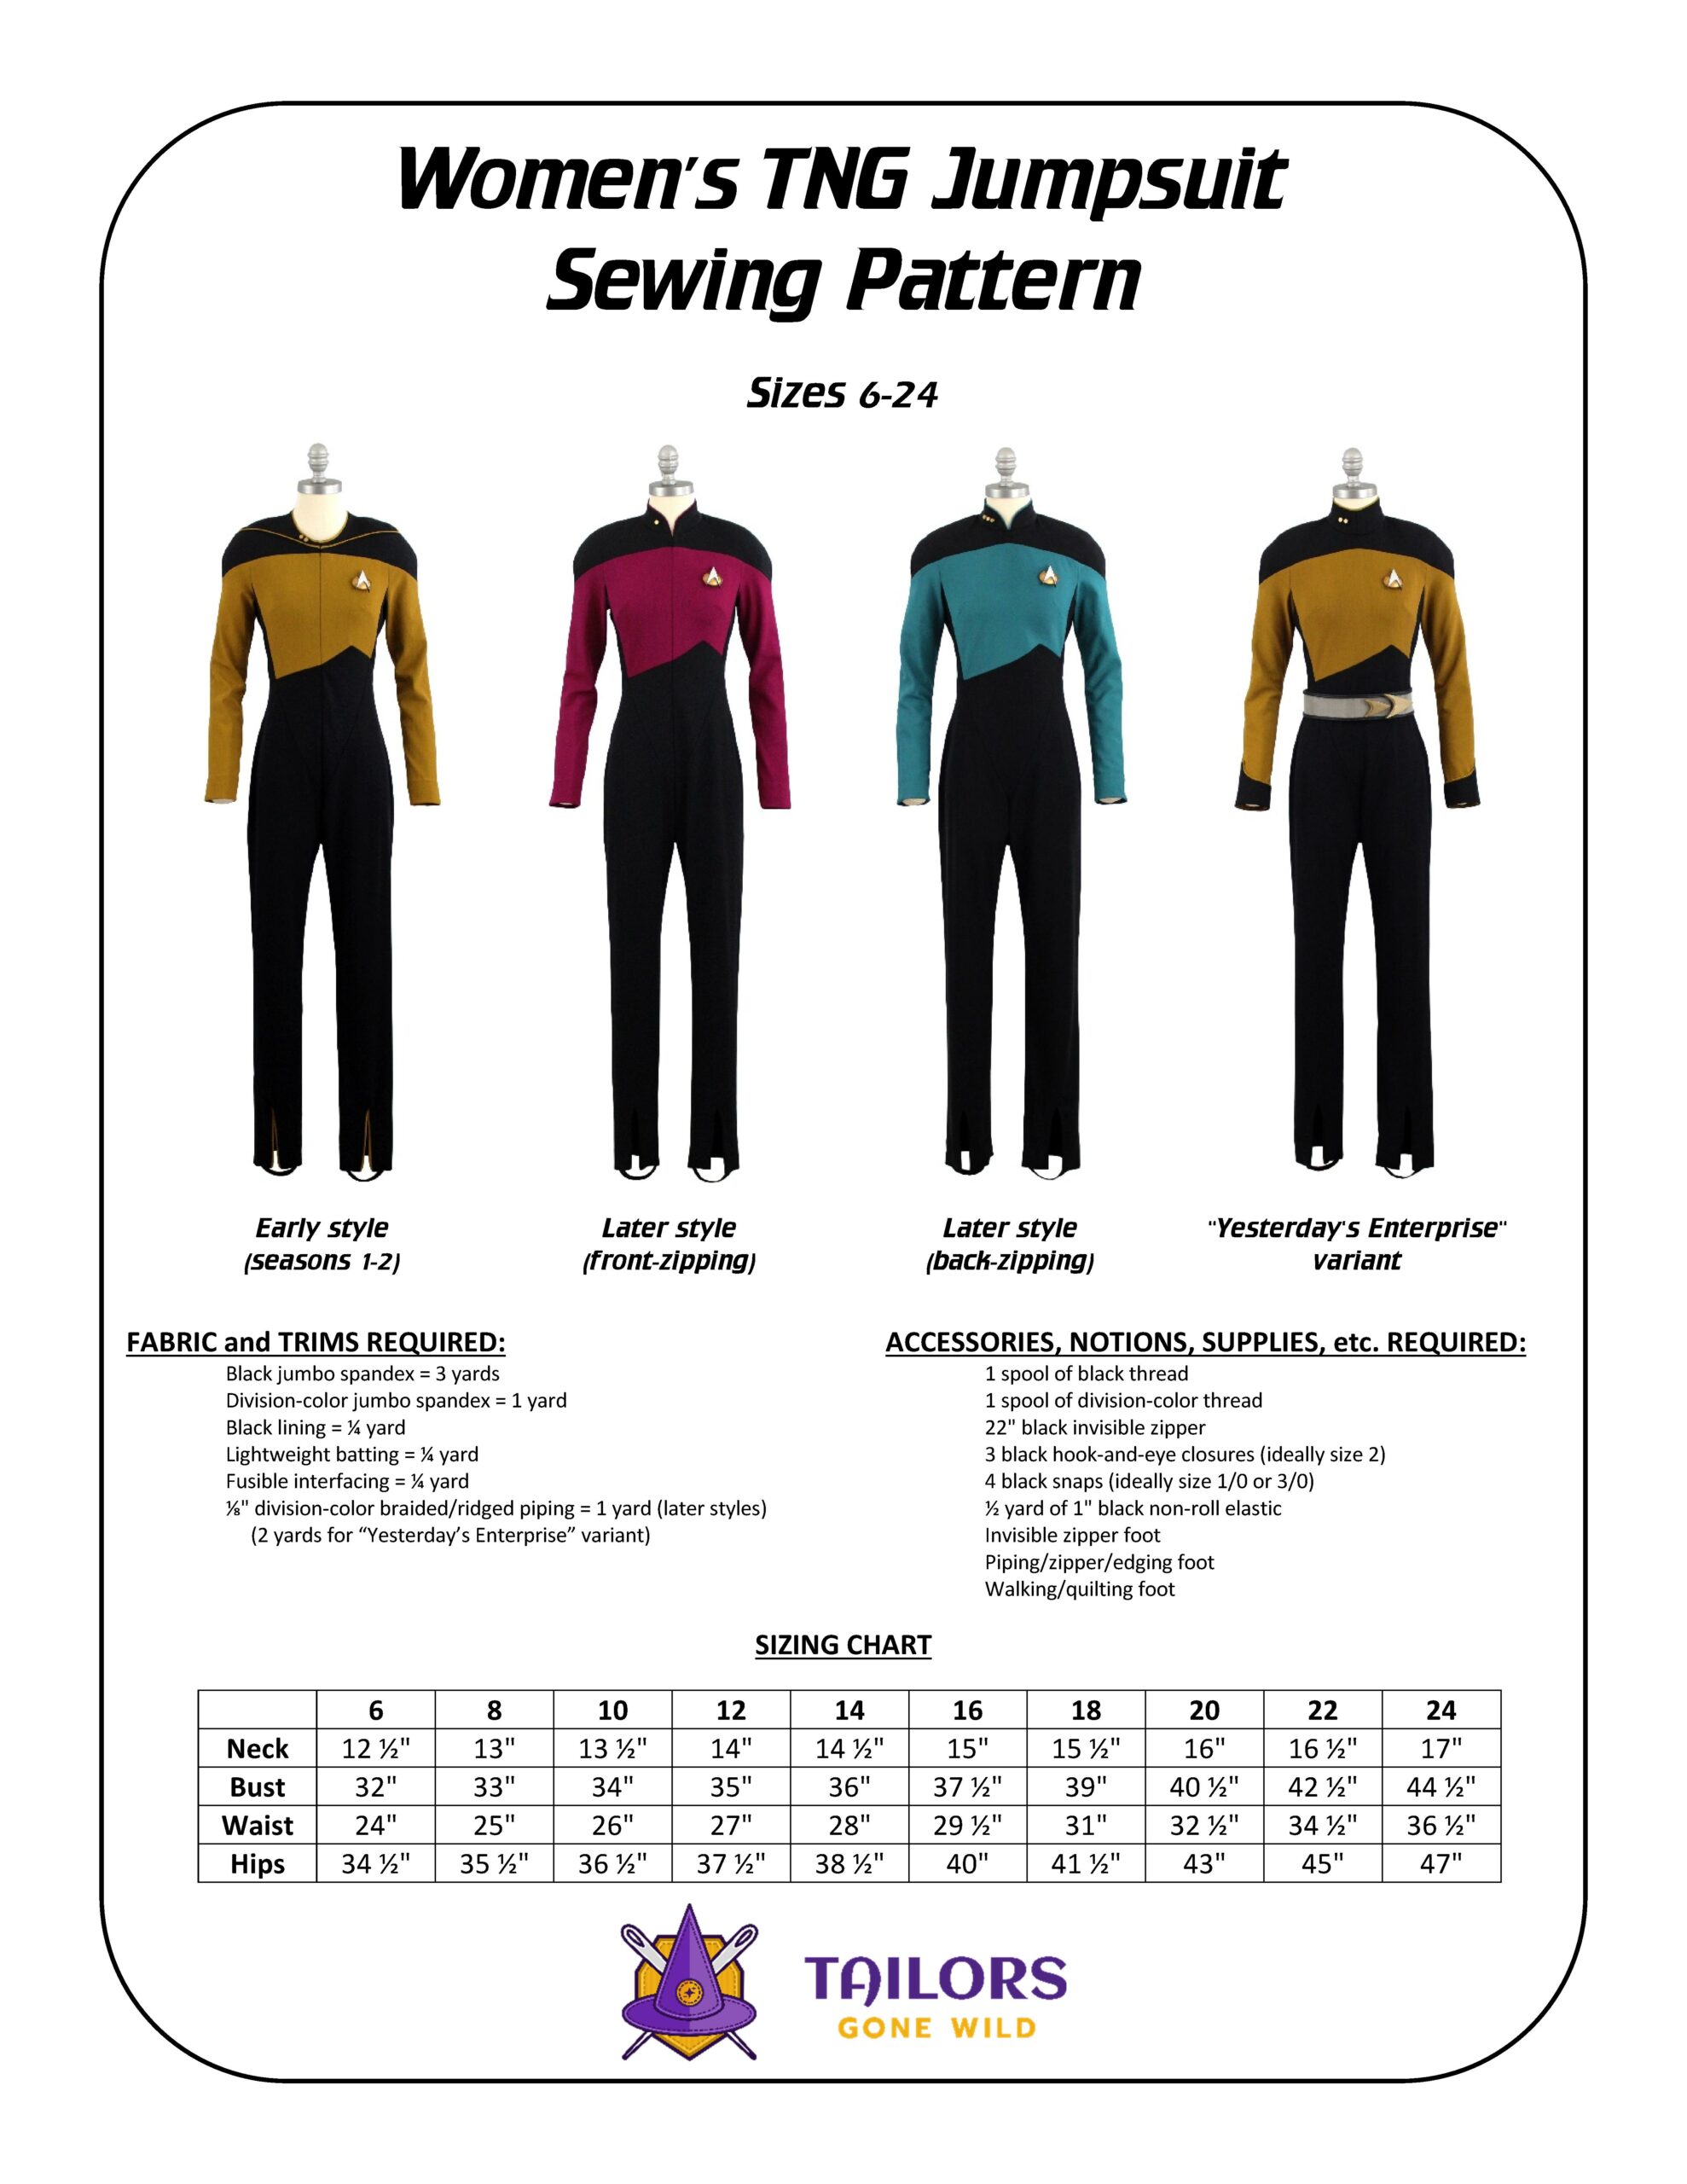
FYI, this Ensign Sito uniform was one of the primary bases I used for my Tailors Gone Wild women’s TNG jumpsuit pattern.
If you enjoyed this blog post, please support my costume research on Ko-Fi.
Every bar of gold-pressed latinum goes toward producing more sewing and costuming resources like this, for everyone interested in Star Trek costumes. 🙂

