As I mentioned in my TNG season 1 admiral costume analysis, a while back I had the opportunity to examine a screen-used Admiral Jameson uniform jacket, courtesy of Angelo Cifaldi.
As a supplement to the broader costume analysis, in this blog post we’ll be taking a closer, more detailed look at this specific Admiral Jameson uniform from the season 1 episode, “Too Short a Season.”
(This was a very early video of mine – almost 4 years ago now – so please pardon its shortcomings. The information is still solid, though.)
Very special thanks to Angelo Cifaldi for the privilege of examining this uniform and sharing my research with you, and to my Ko-Fi supporters for helping make this happen. 🙂
FABRIC and COLOR
Like the other TNG-era uniforms William Ware Theiss designed, the season 1 admiral jacket was made of jumbo spandex, with the dull side as the “right” side, and the shiny side as the “wrong” side.
I also noticed that the jumbo spandex used on this particular jacket seems to have been made with 4-way stretch, rather than the 2-way stretch that I’ve seen on every other TNG-era uniform I’ve examined to date (including the ones I’ll be posting about soon).
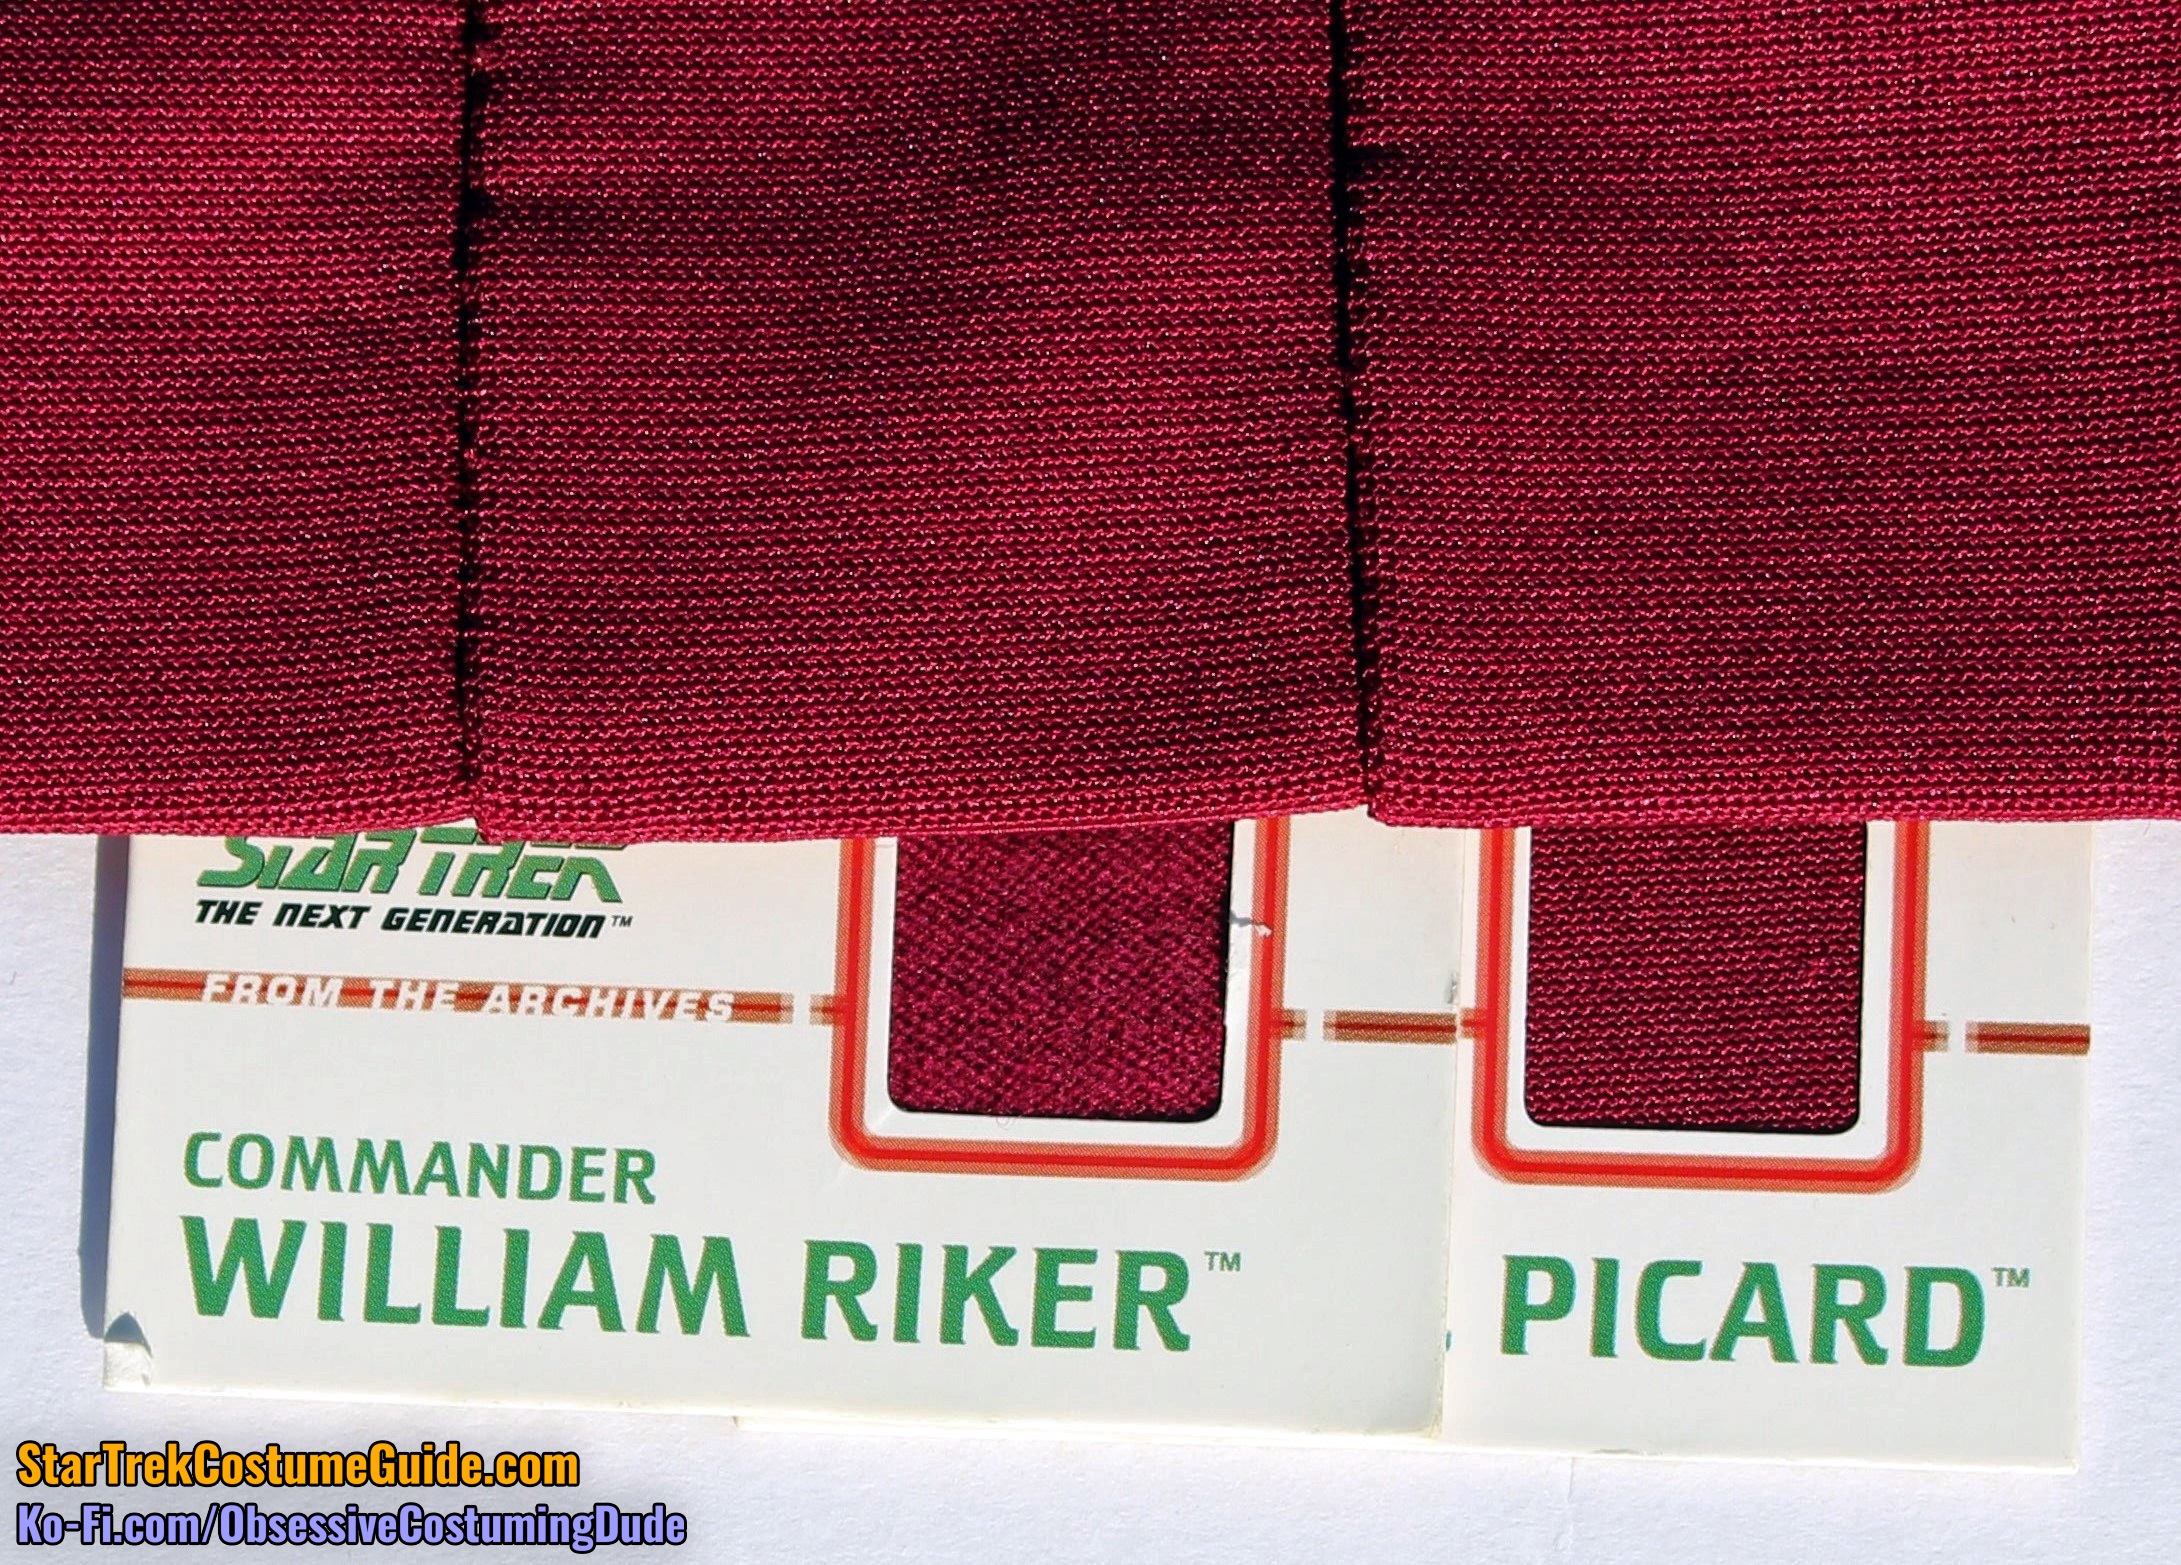
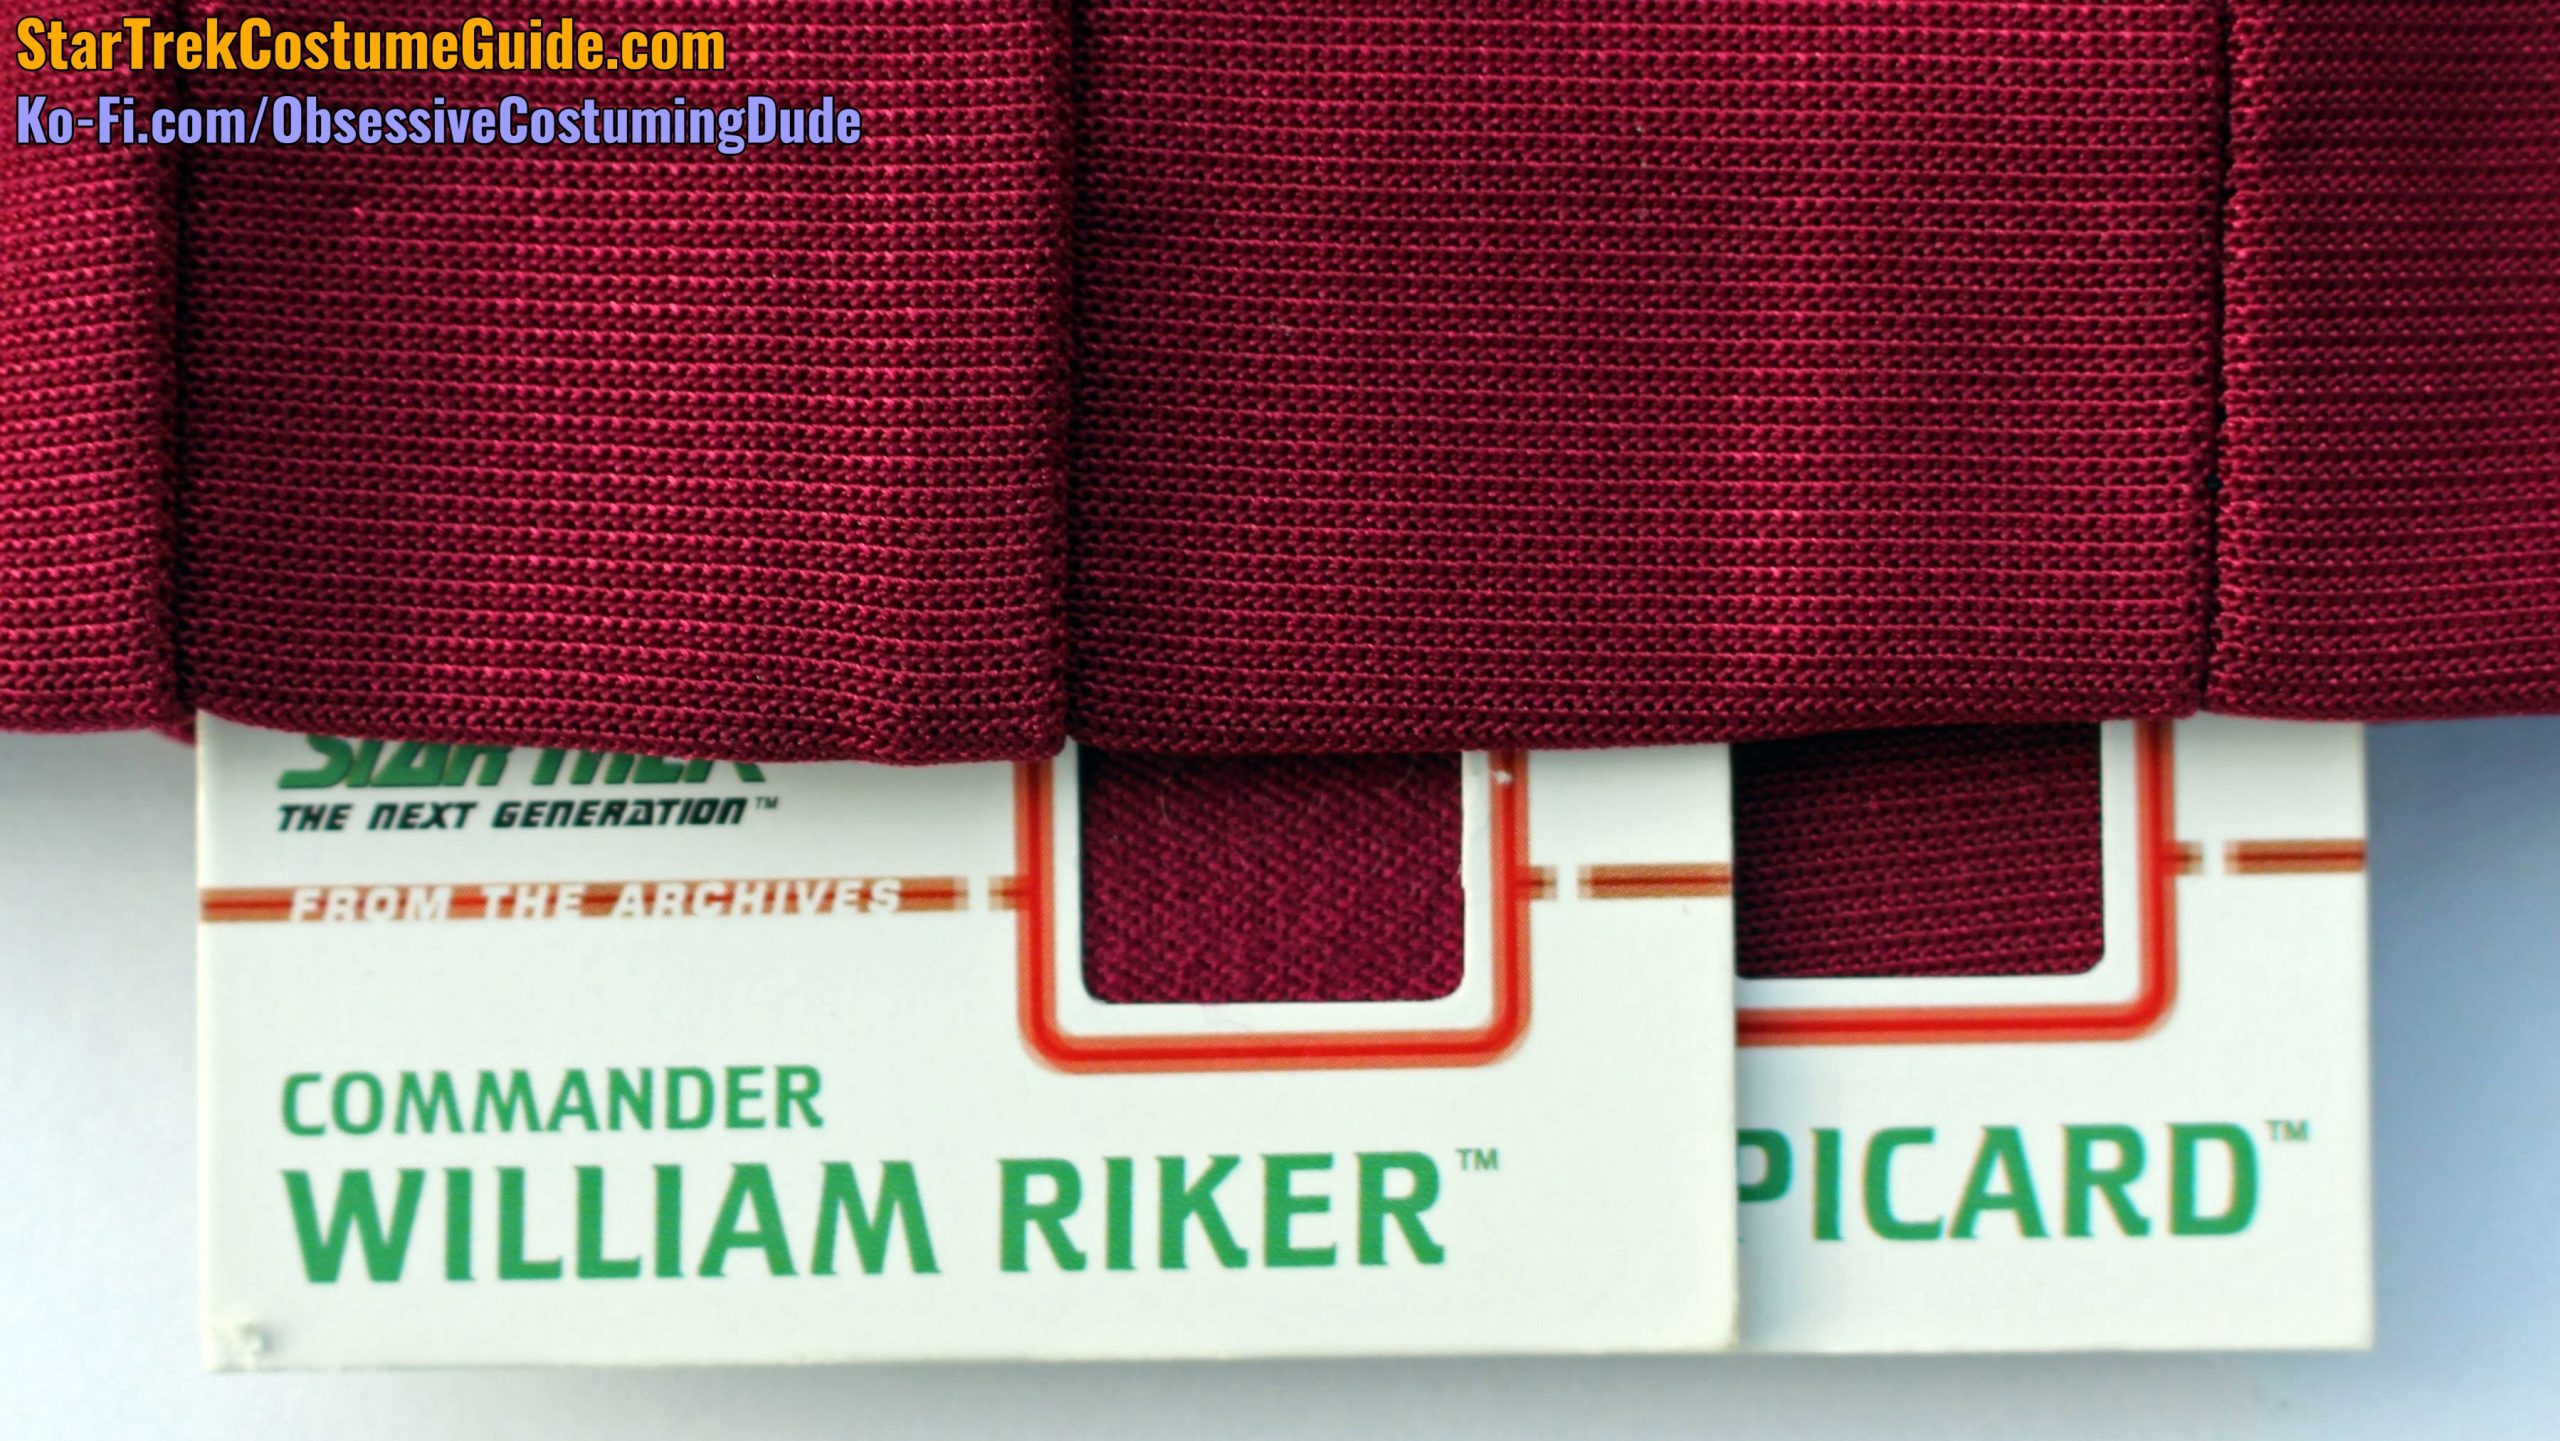
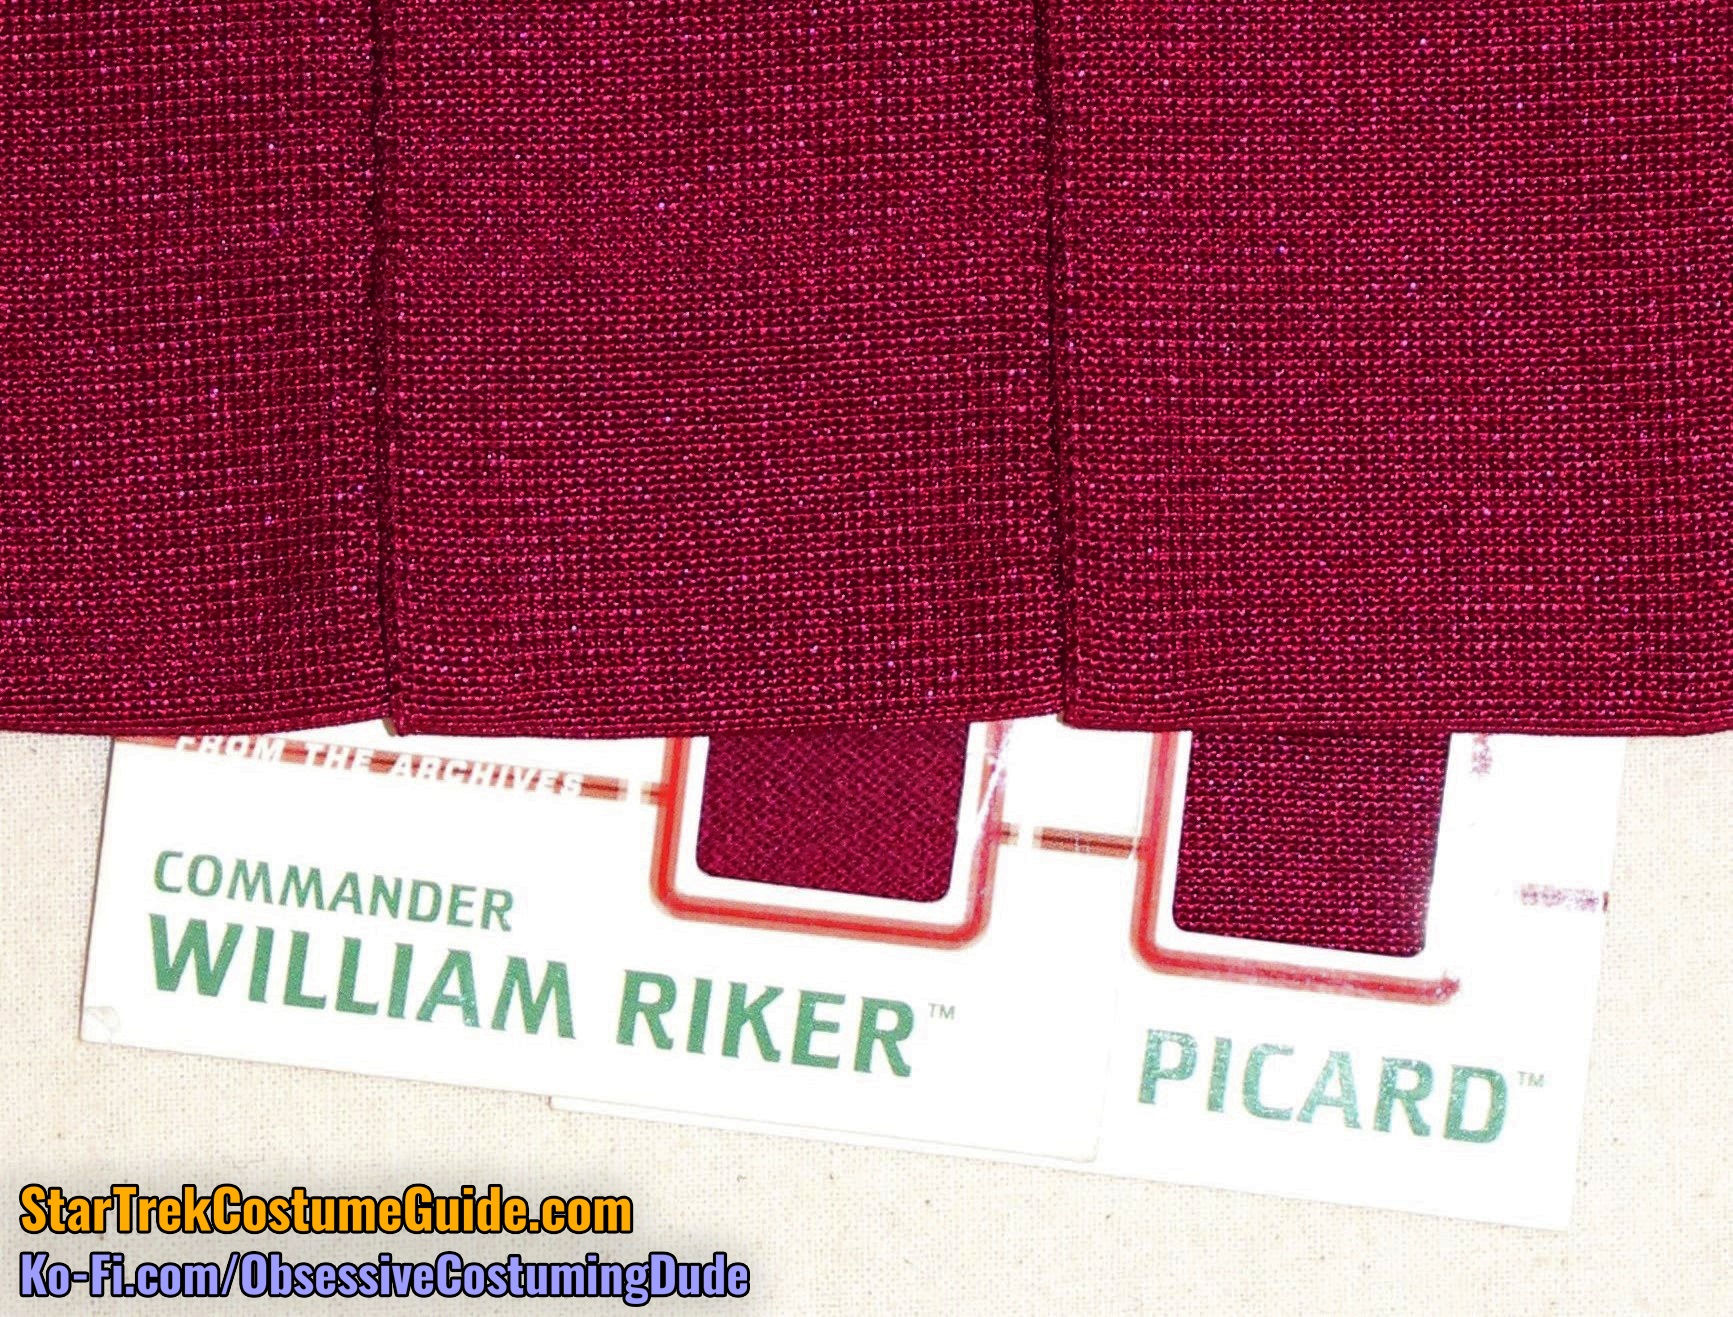
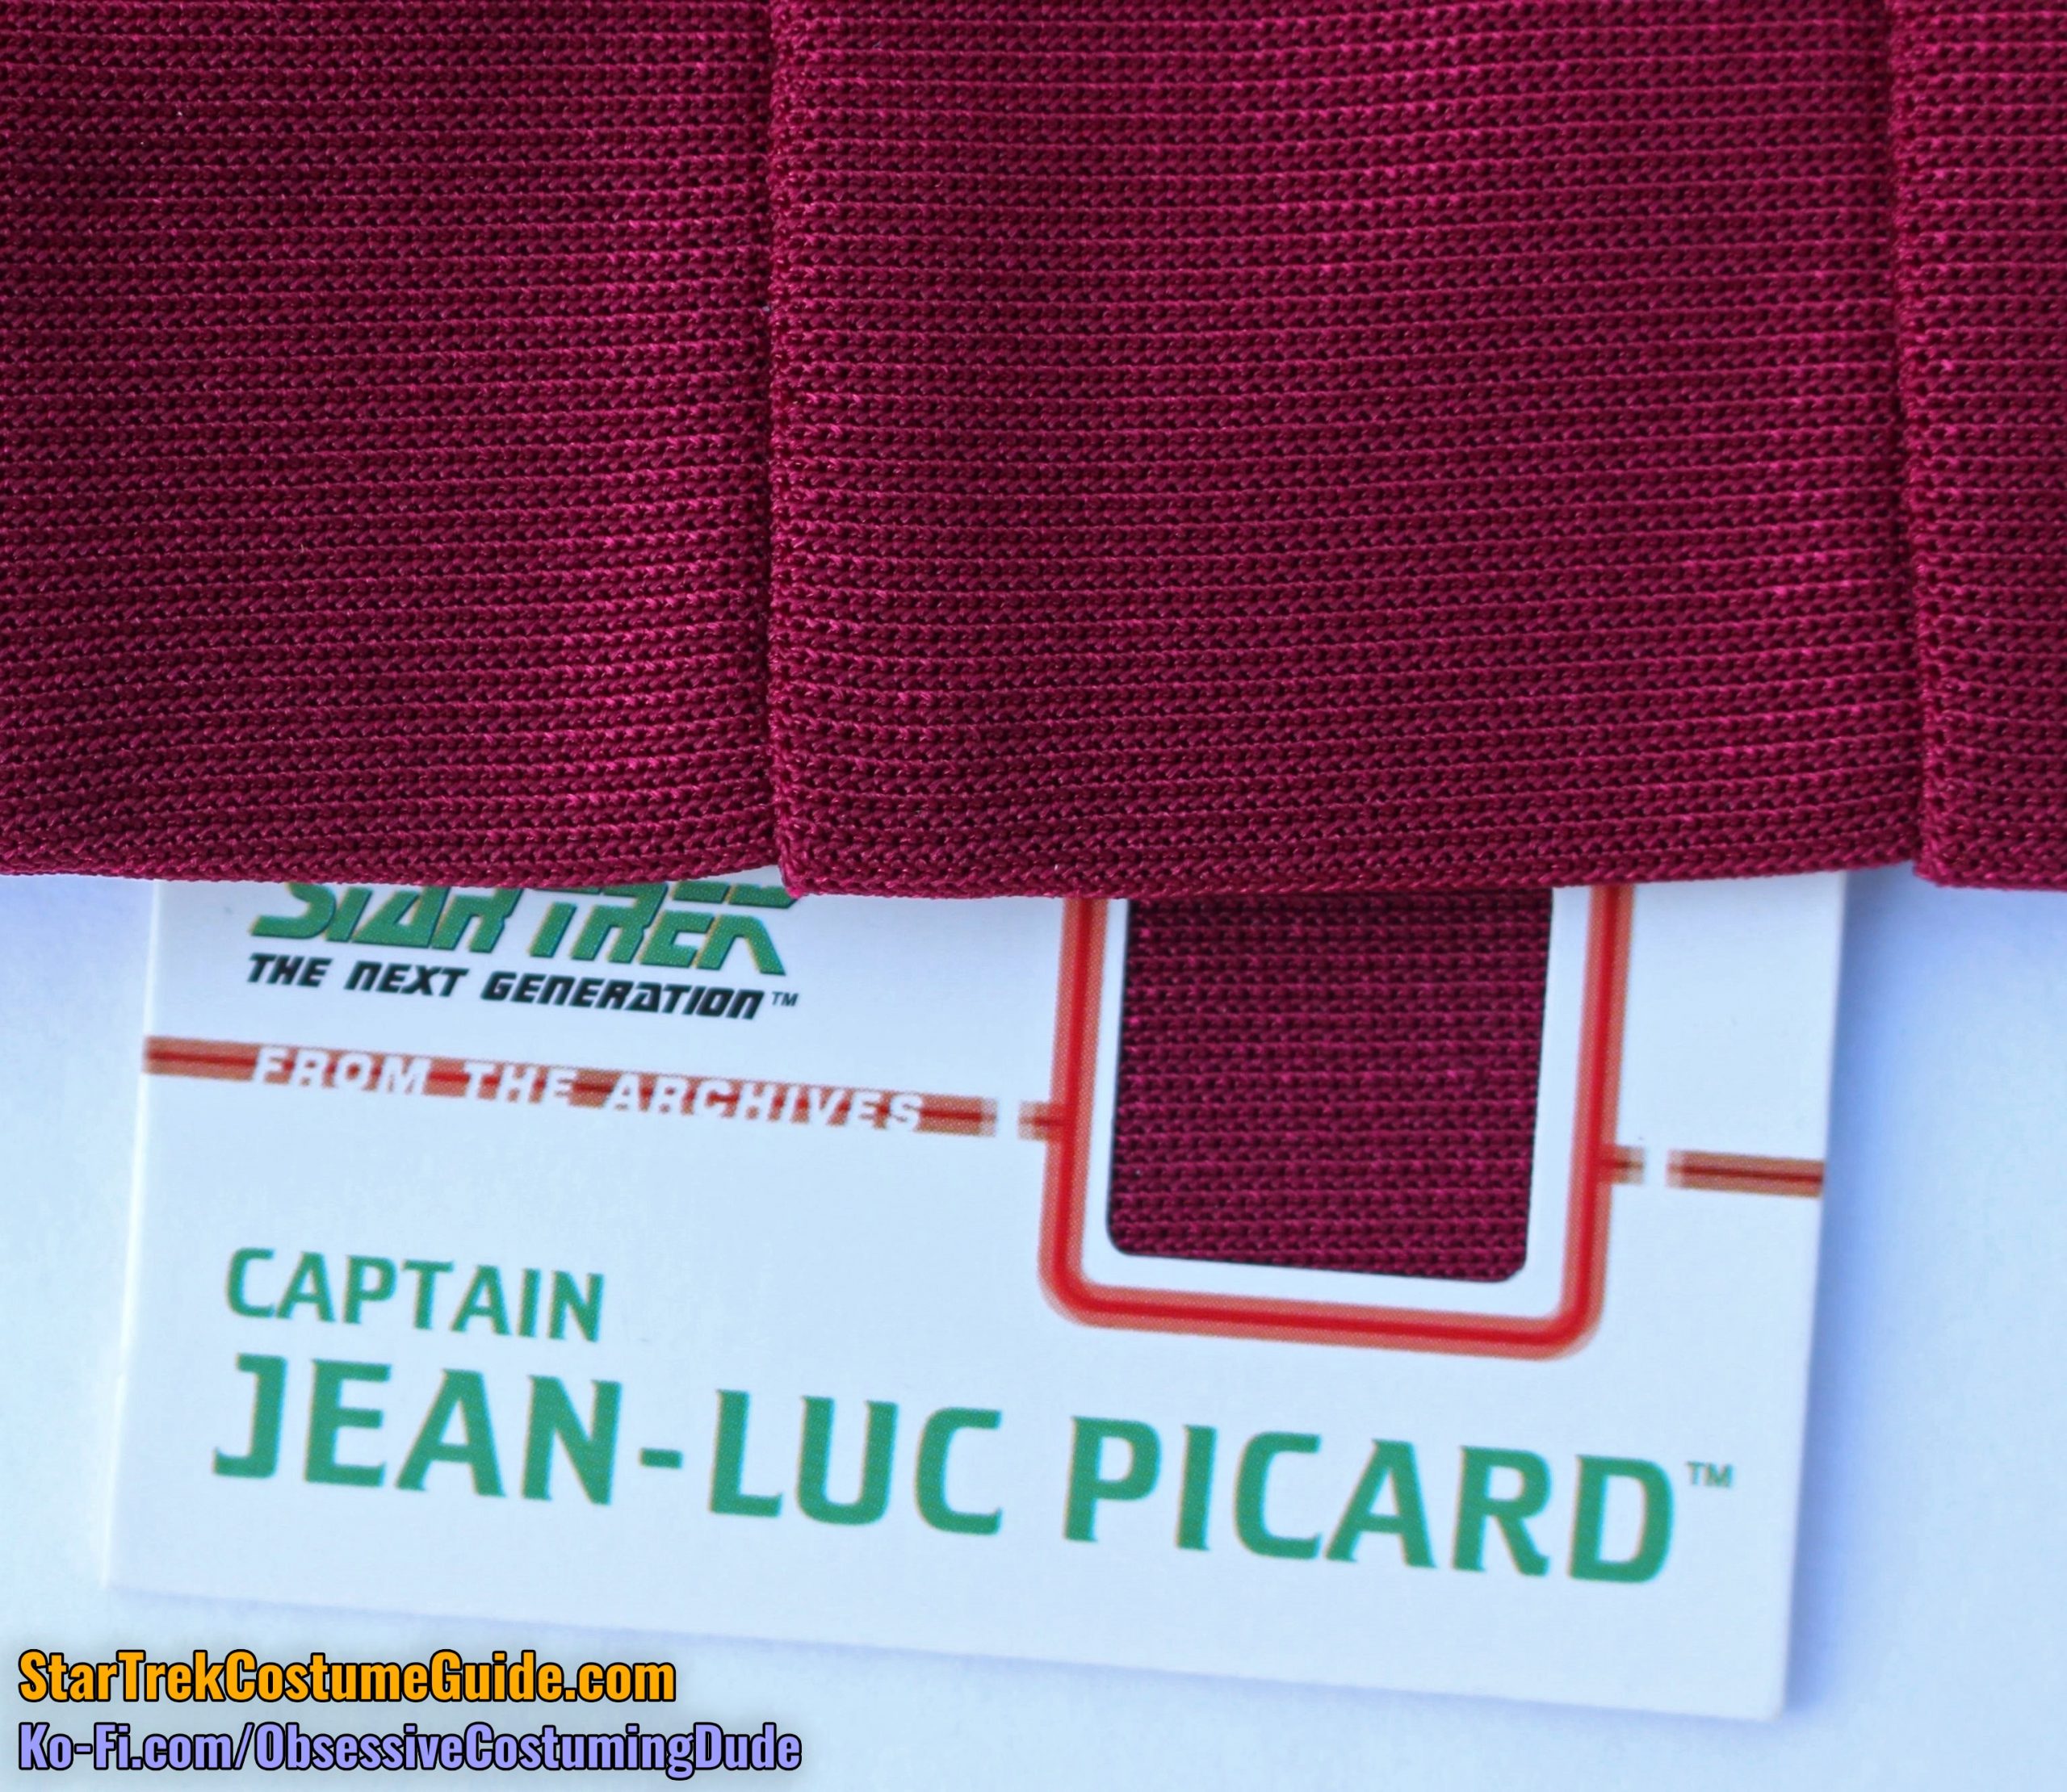
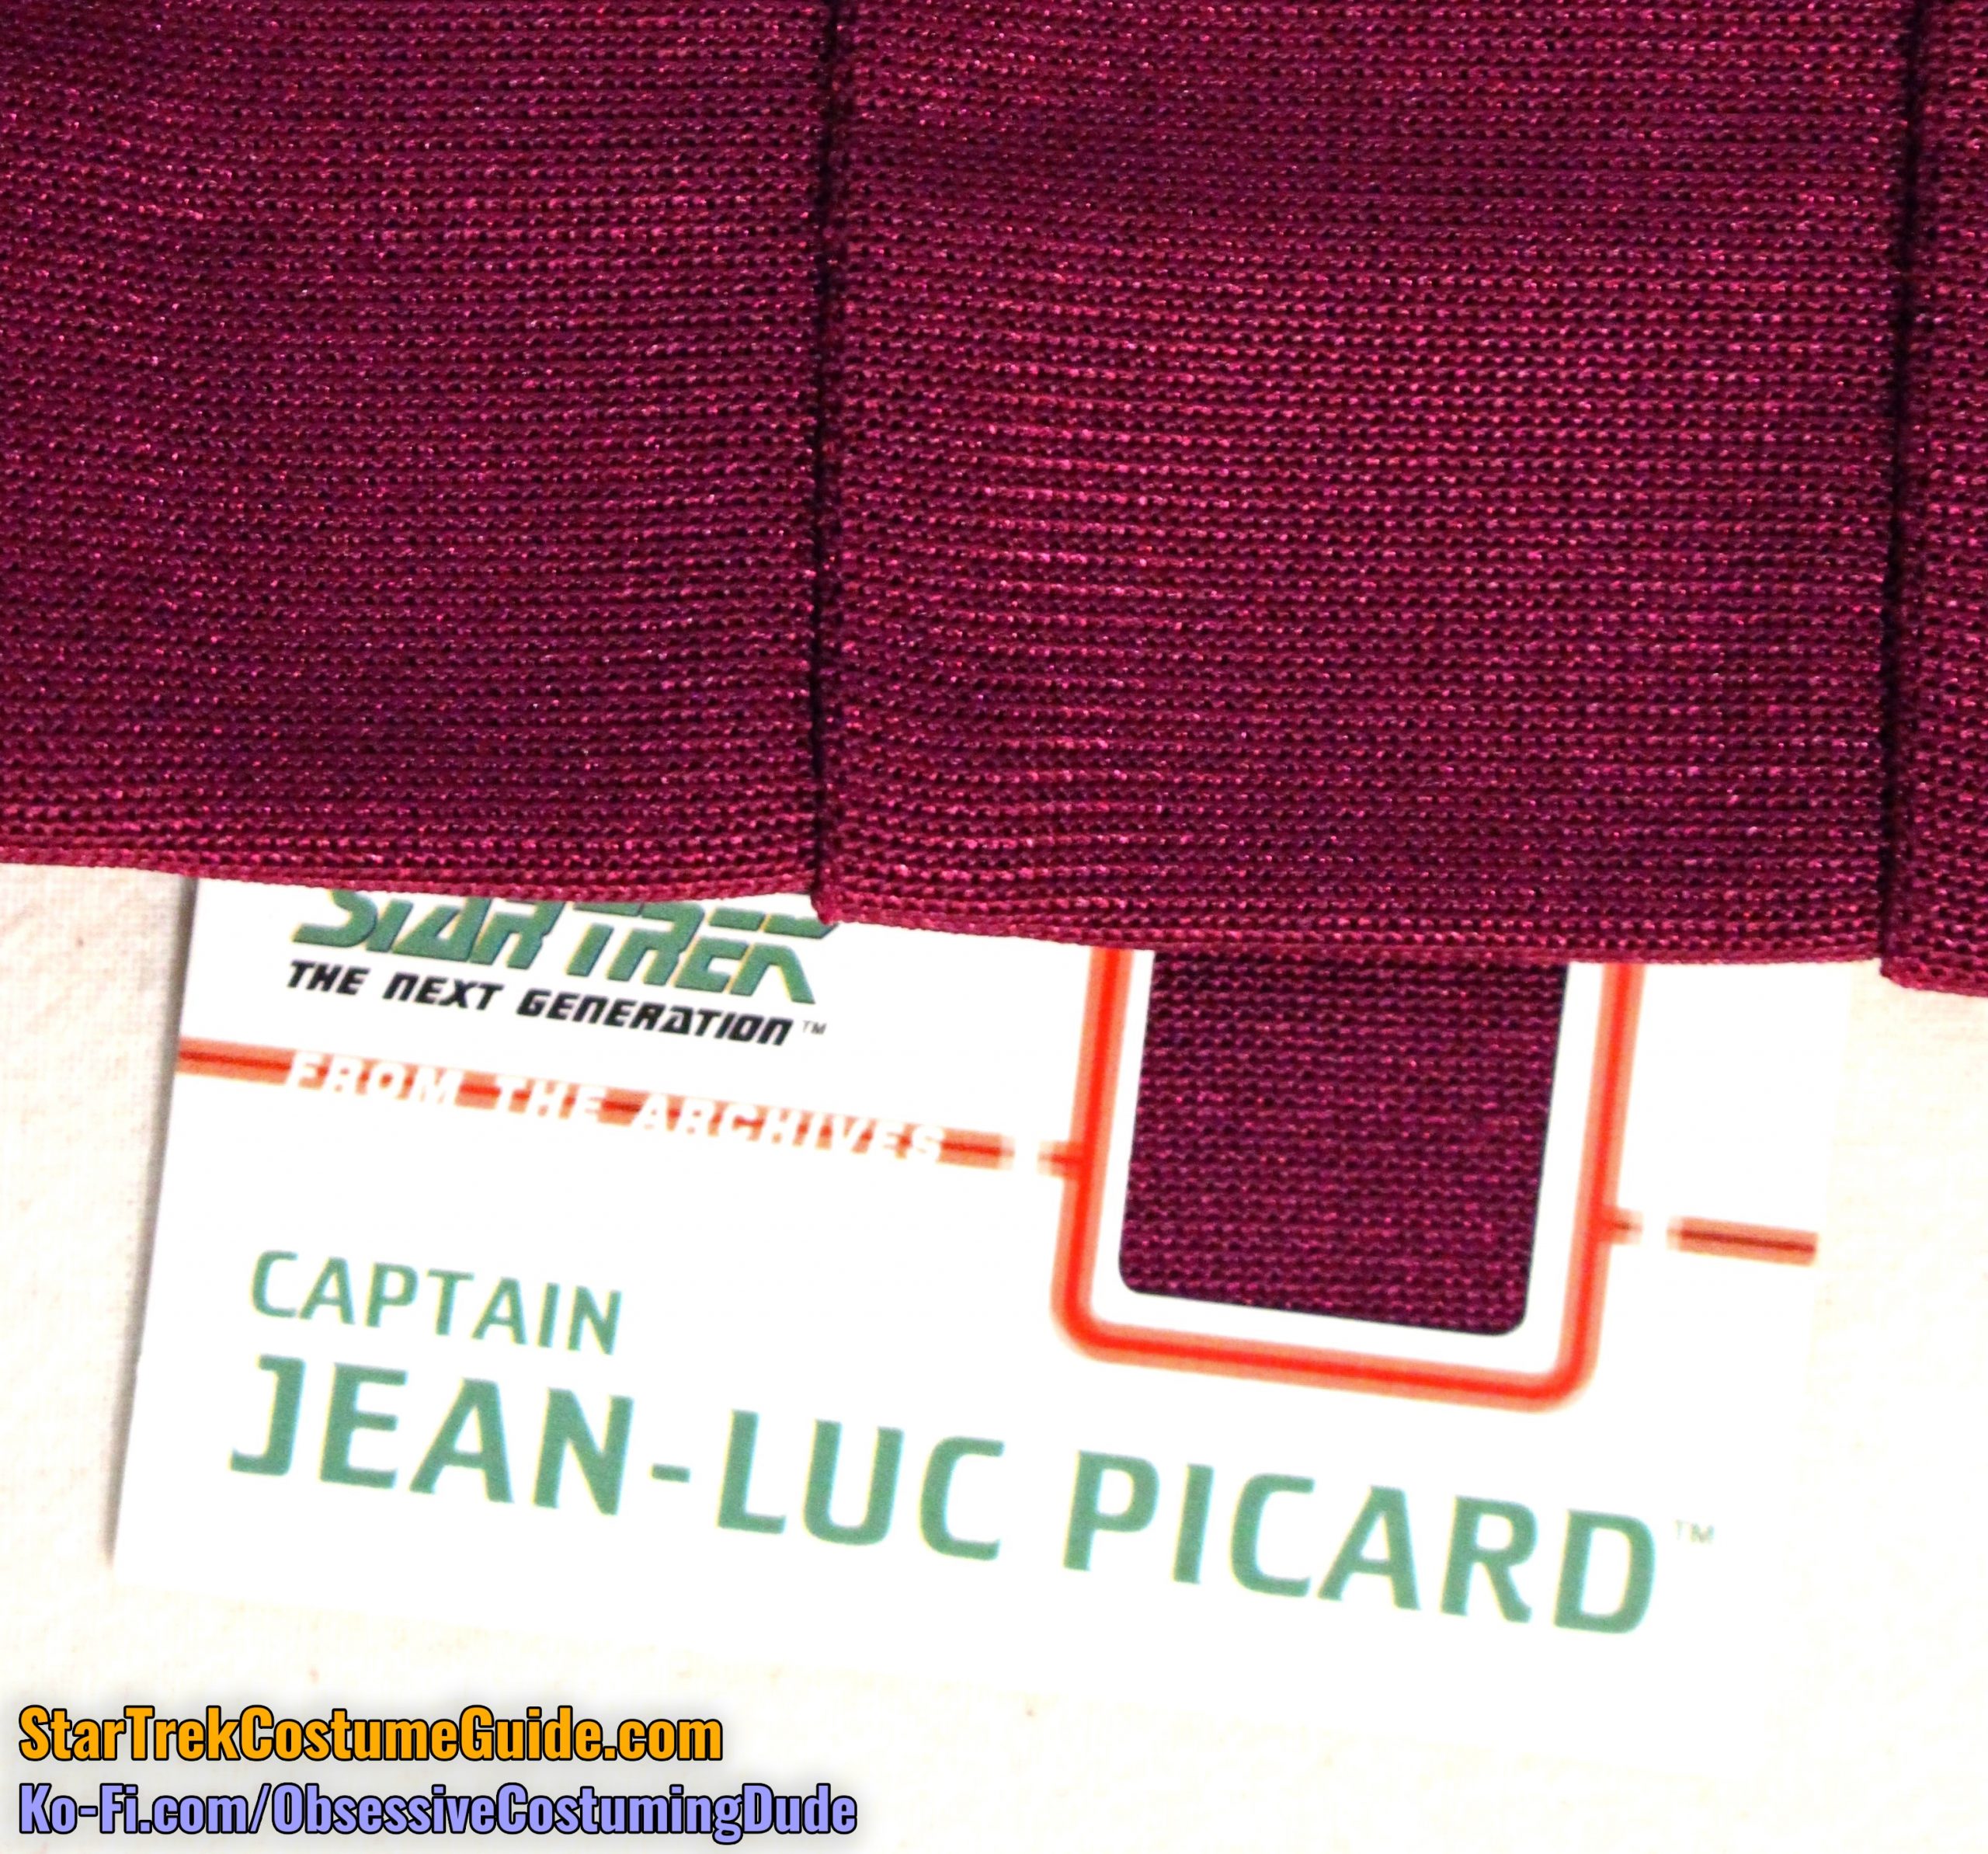
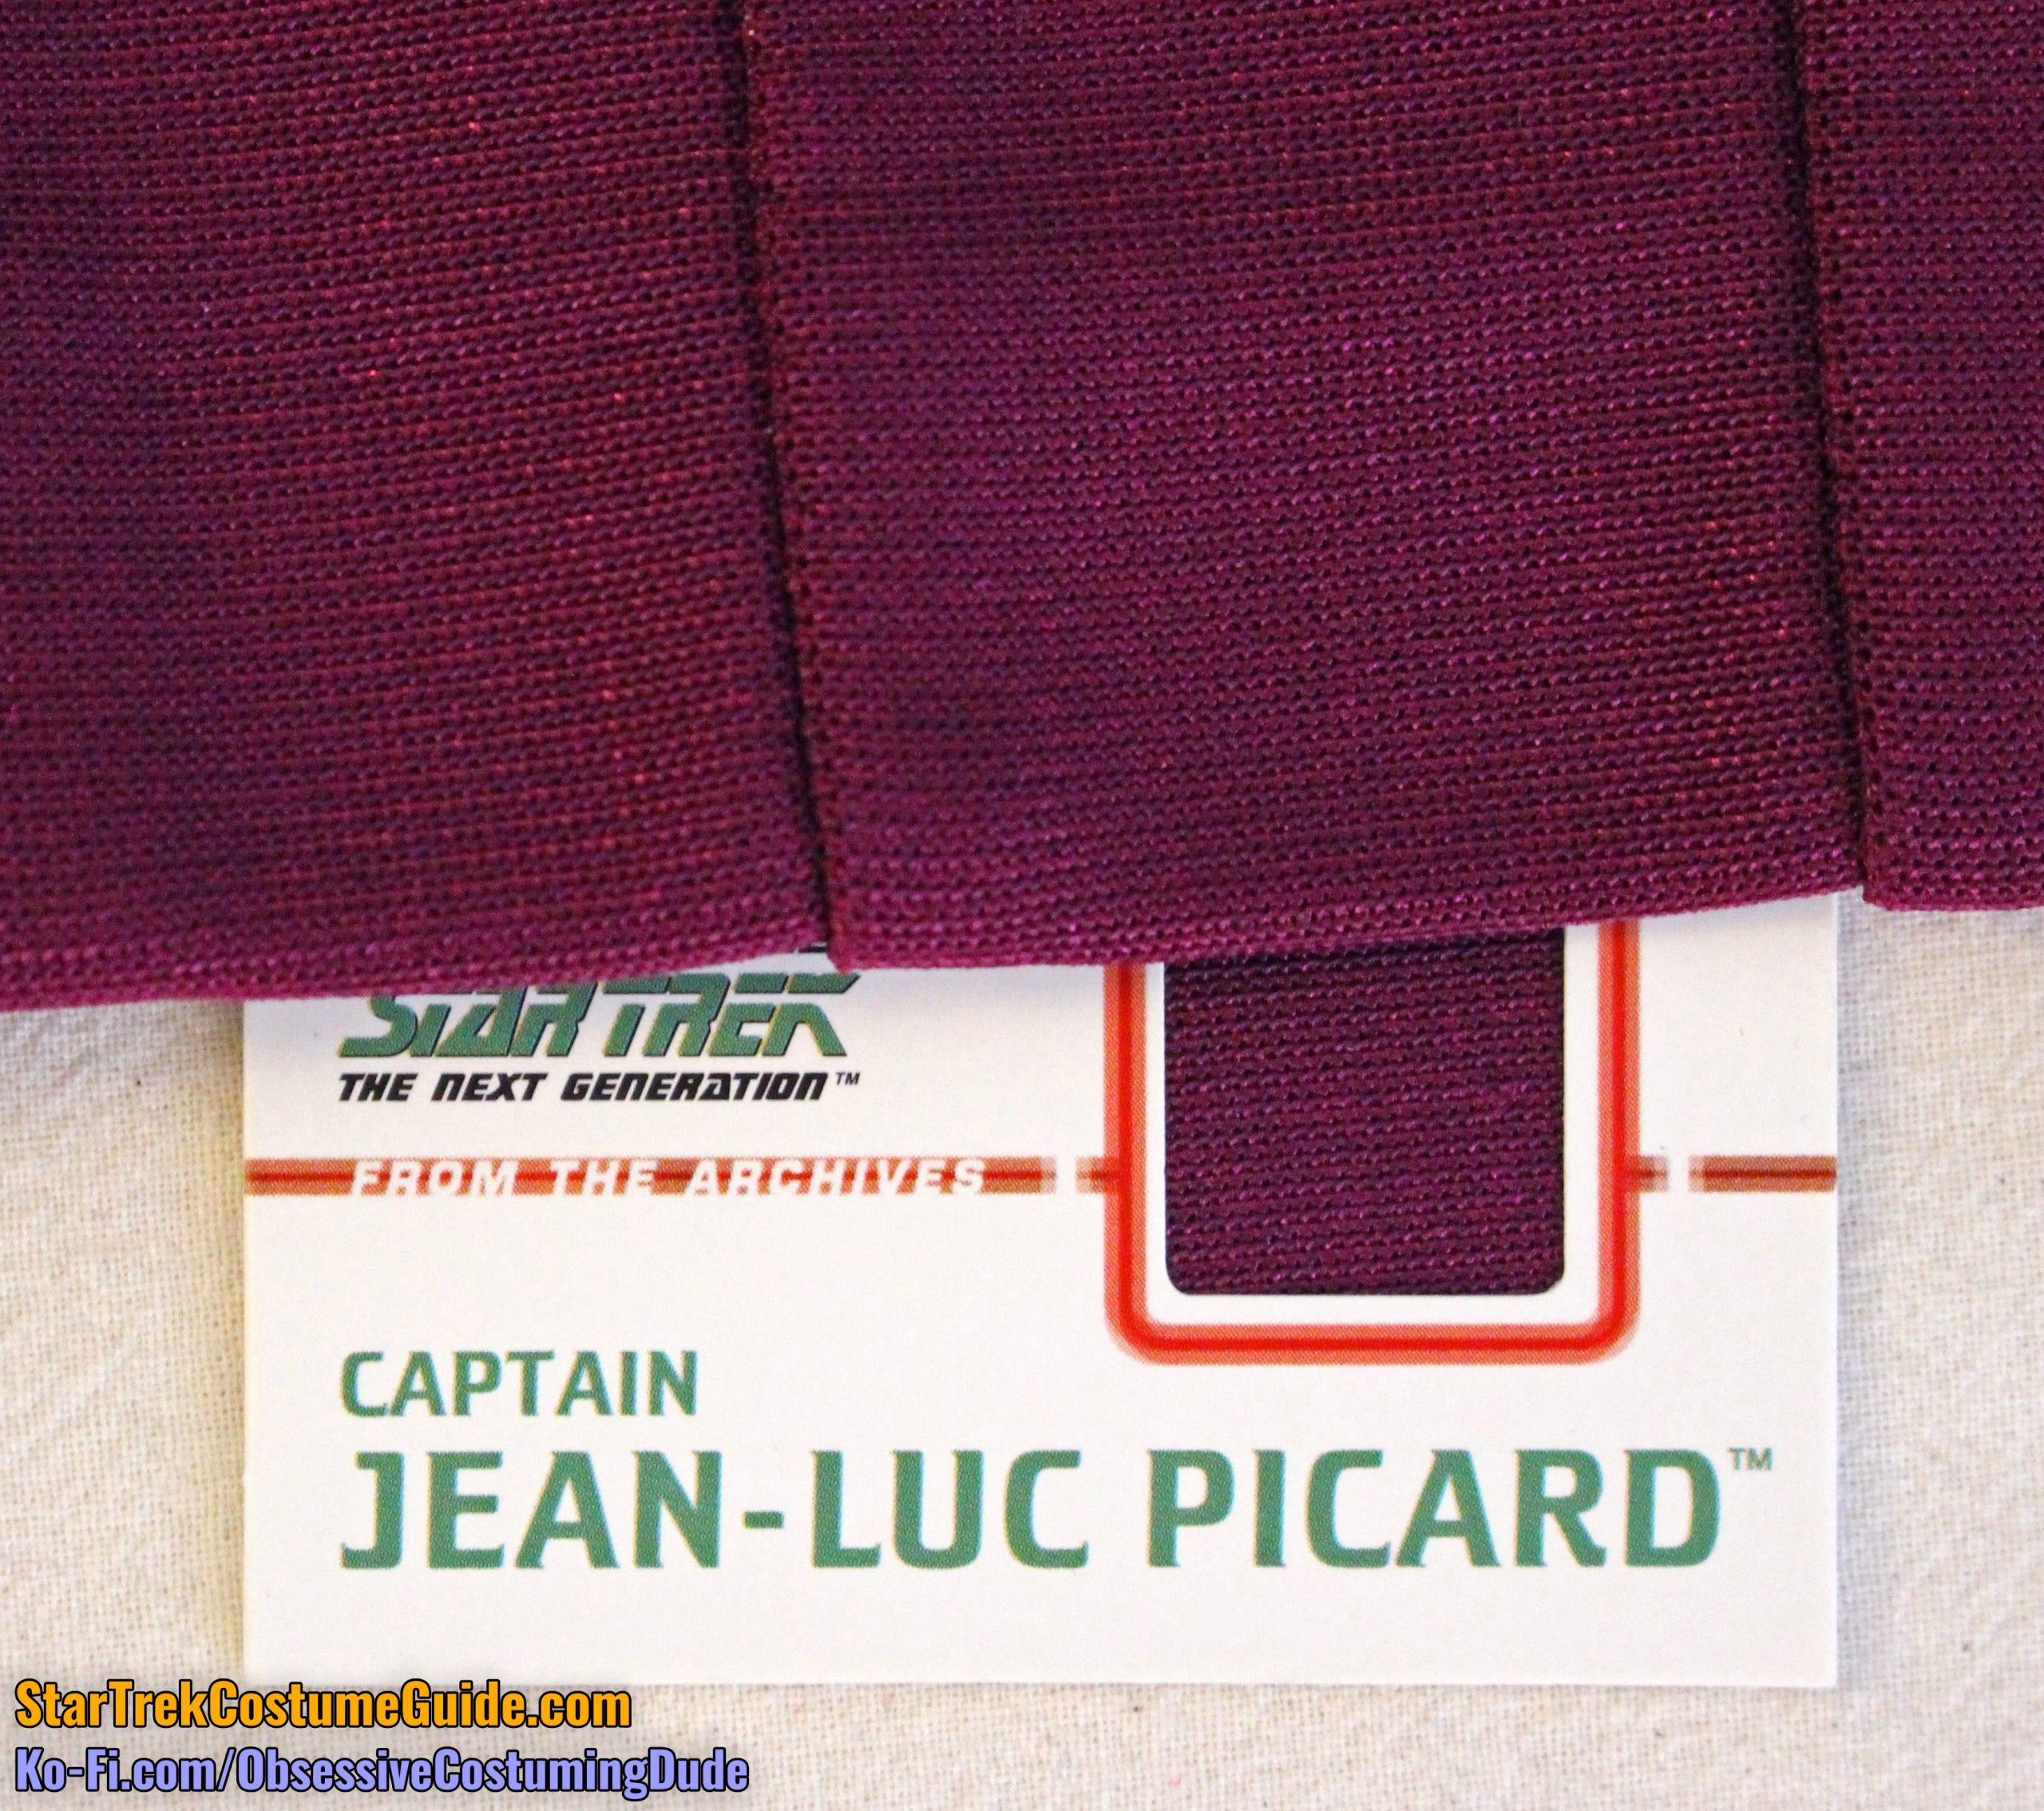
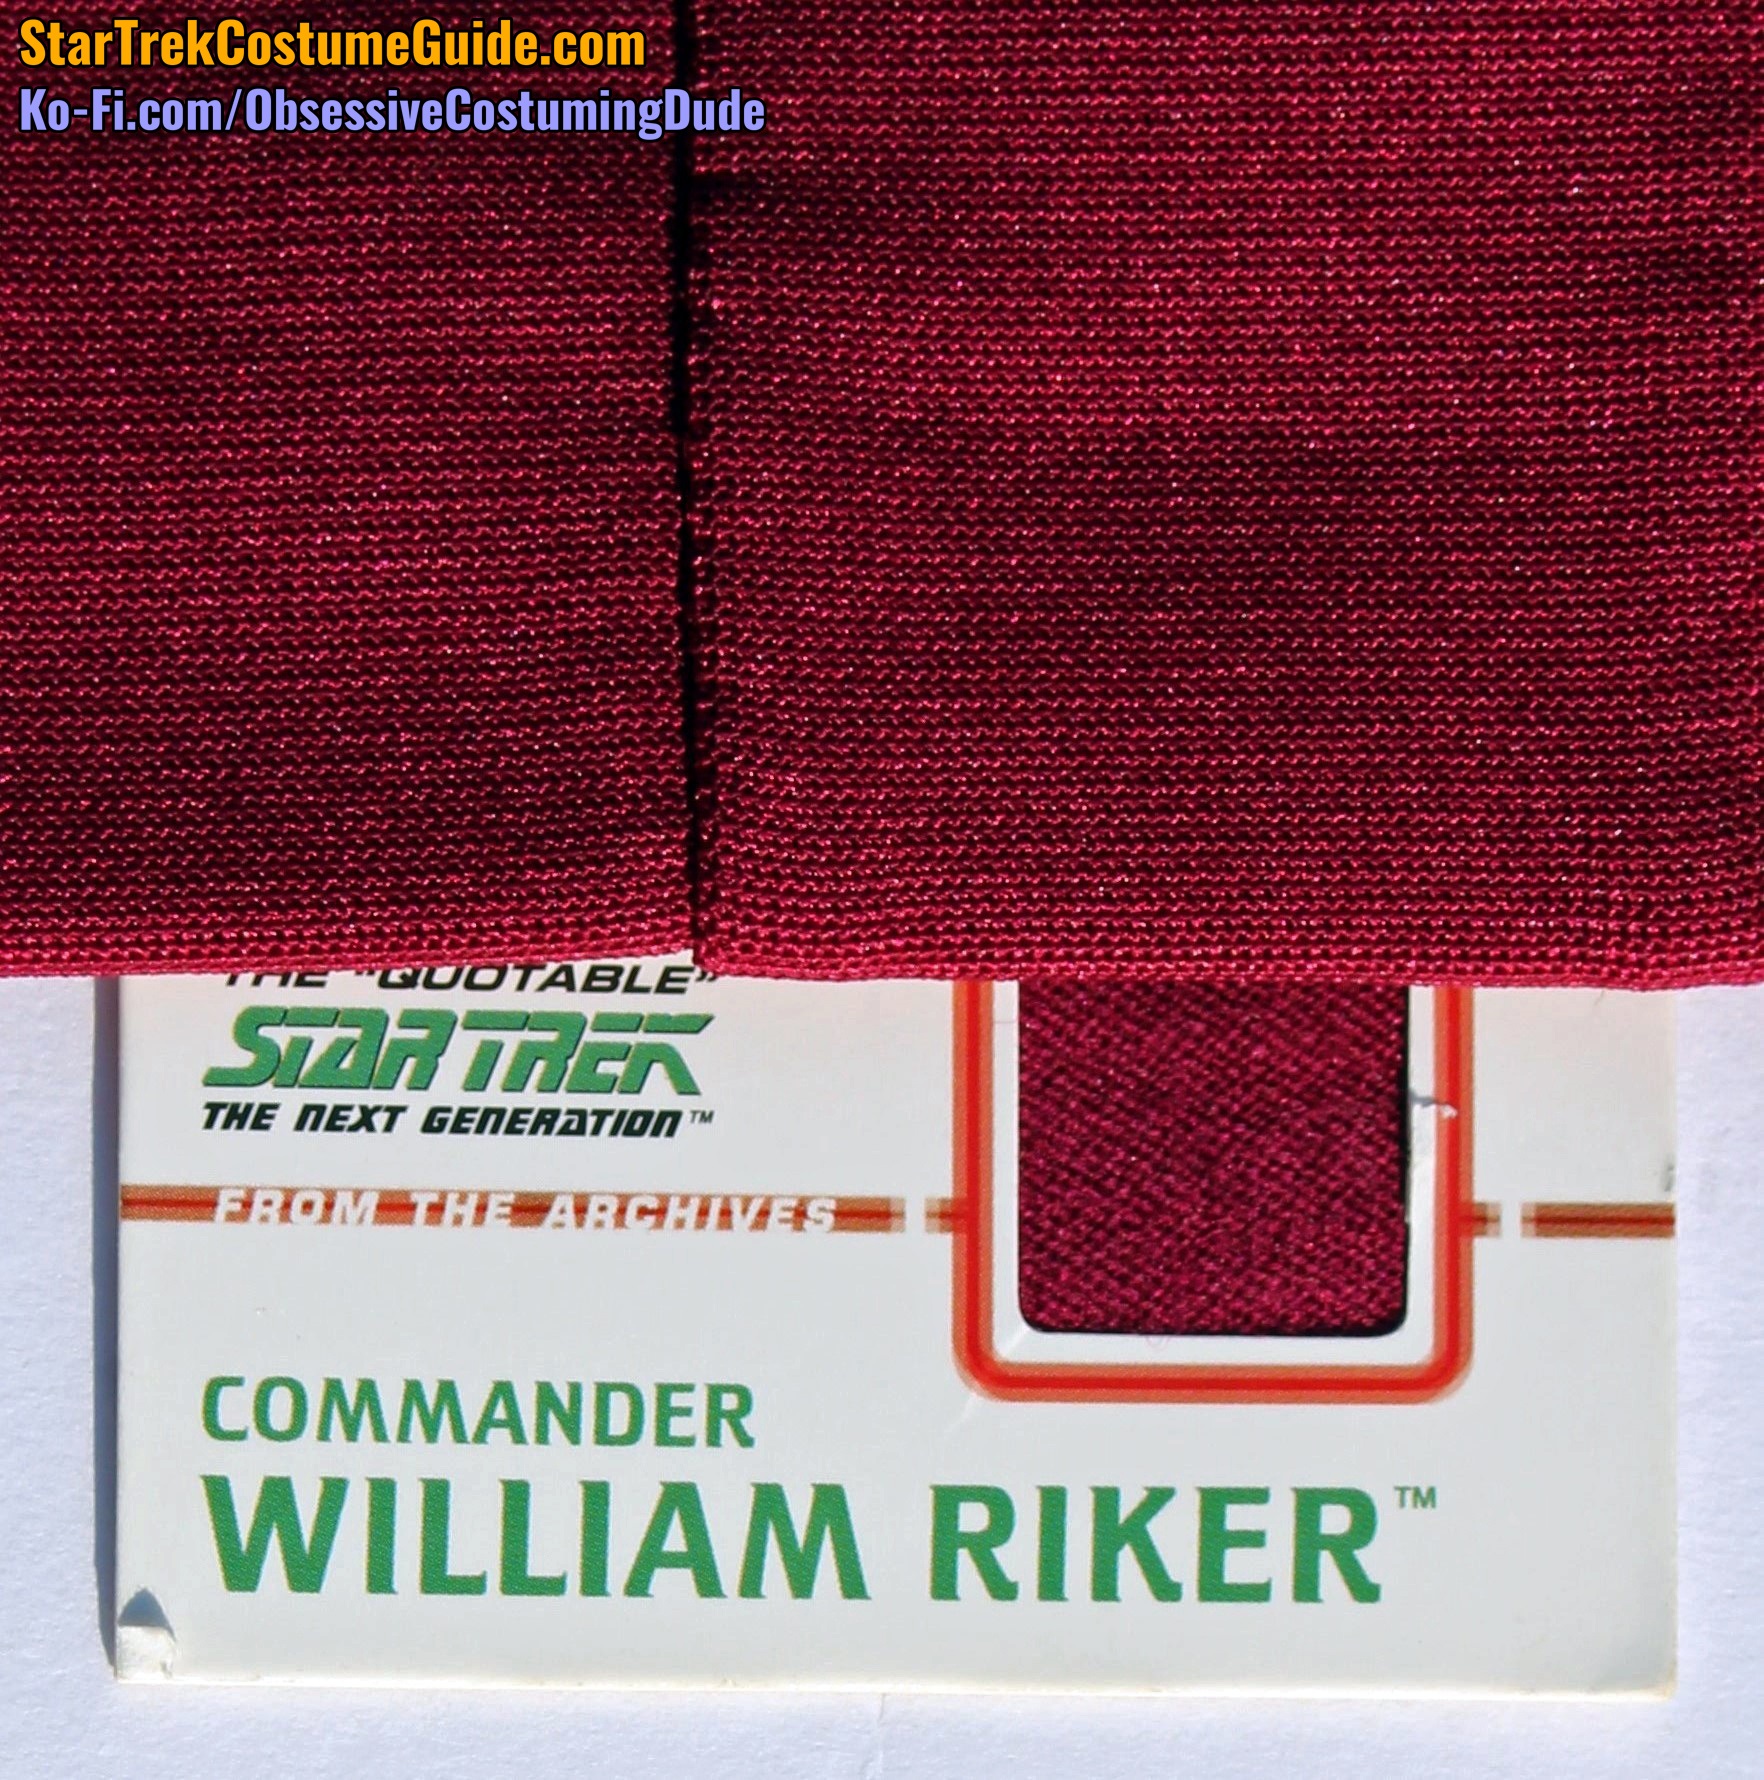
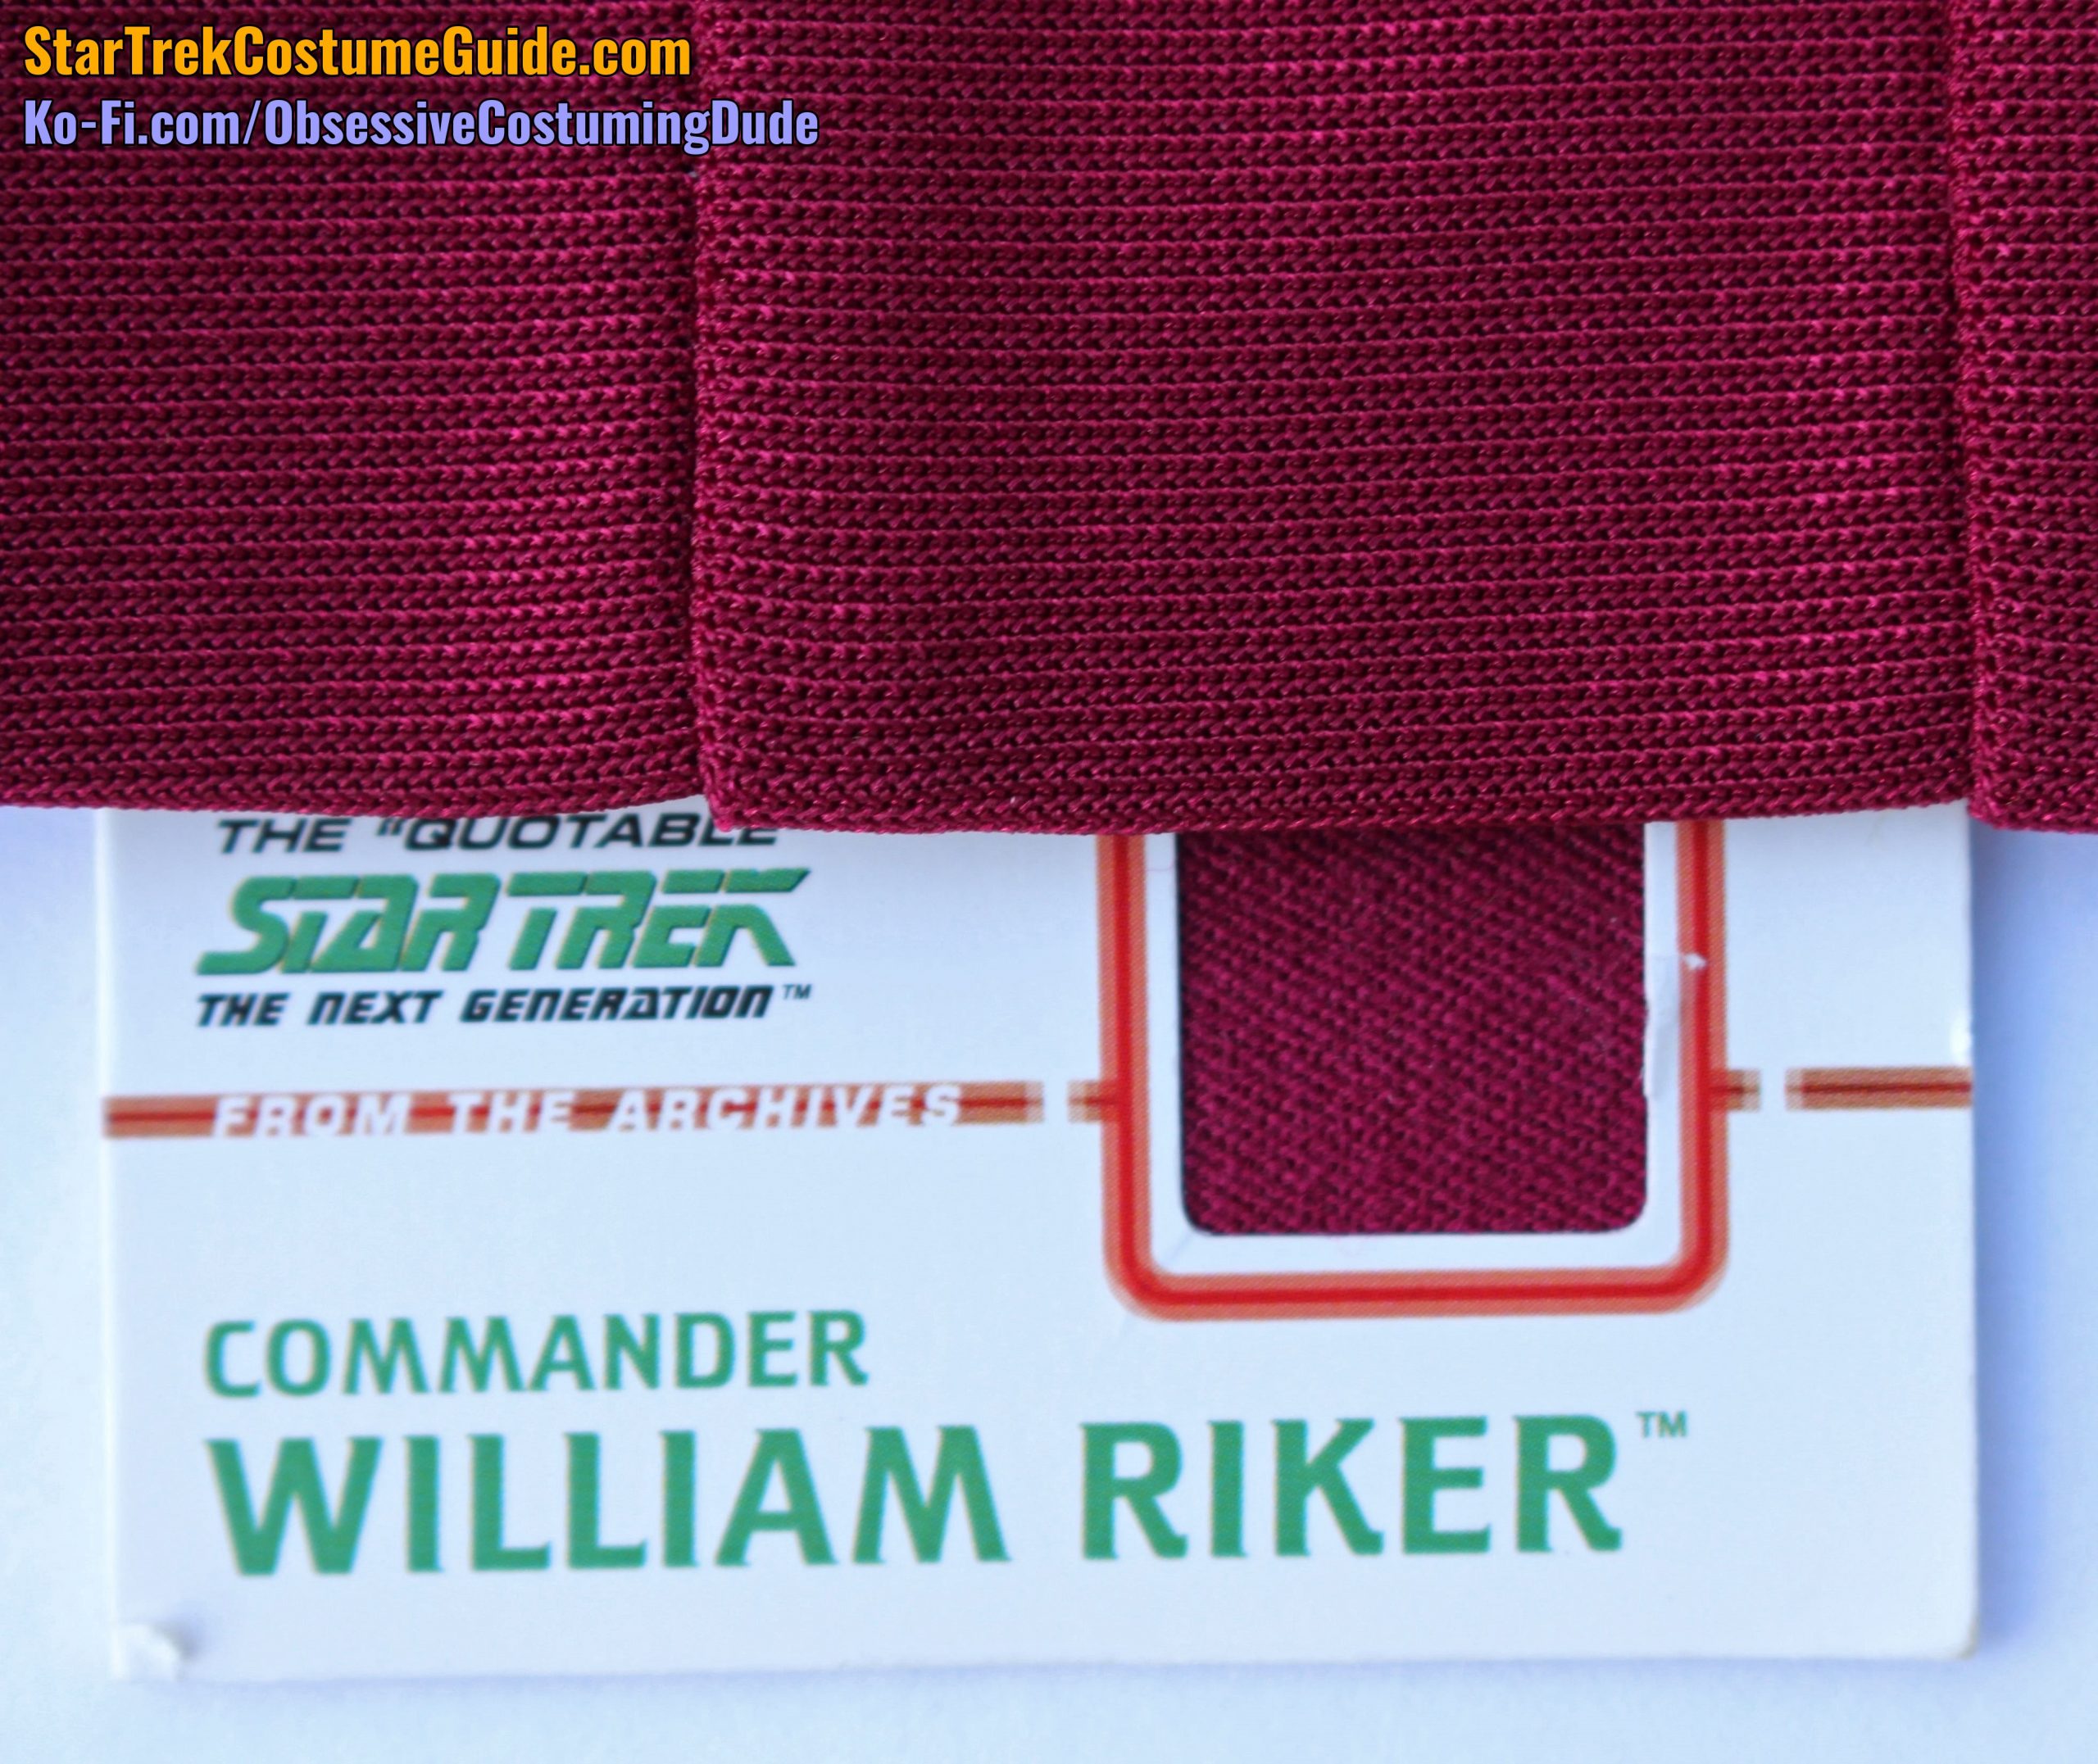
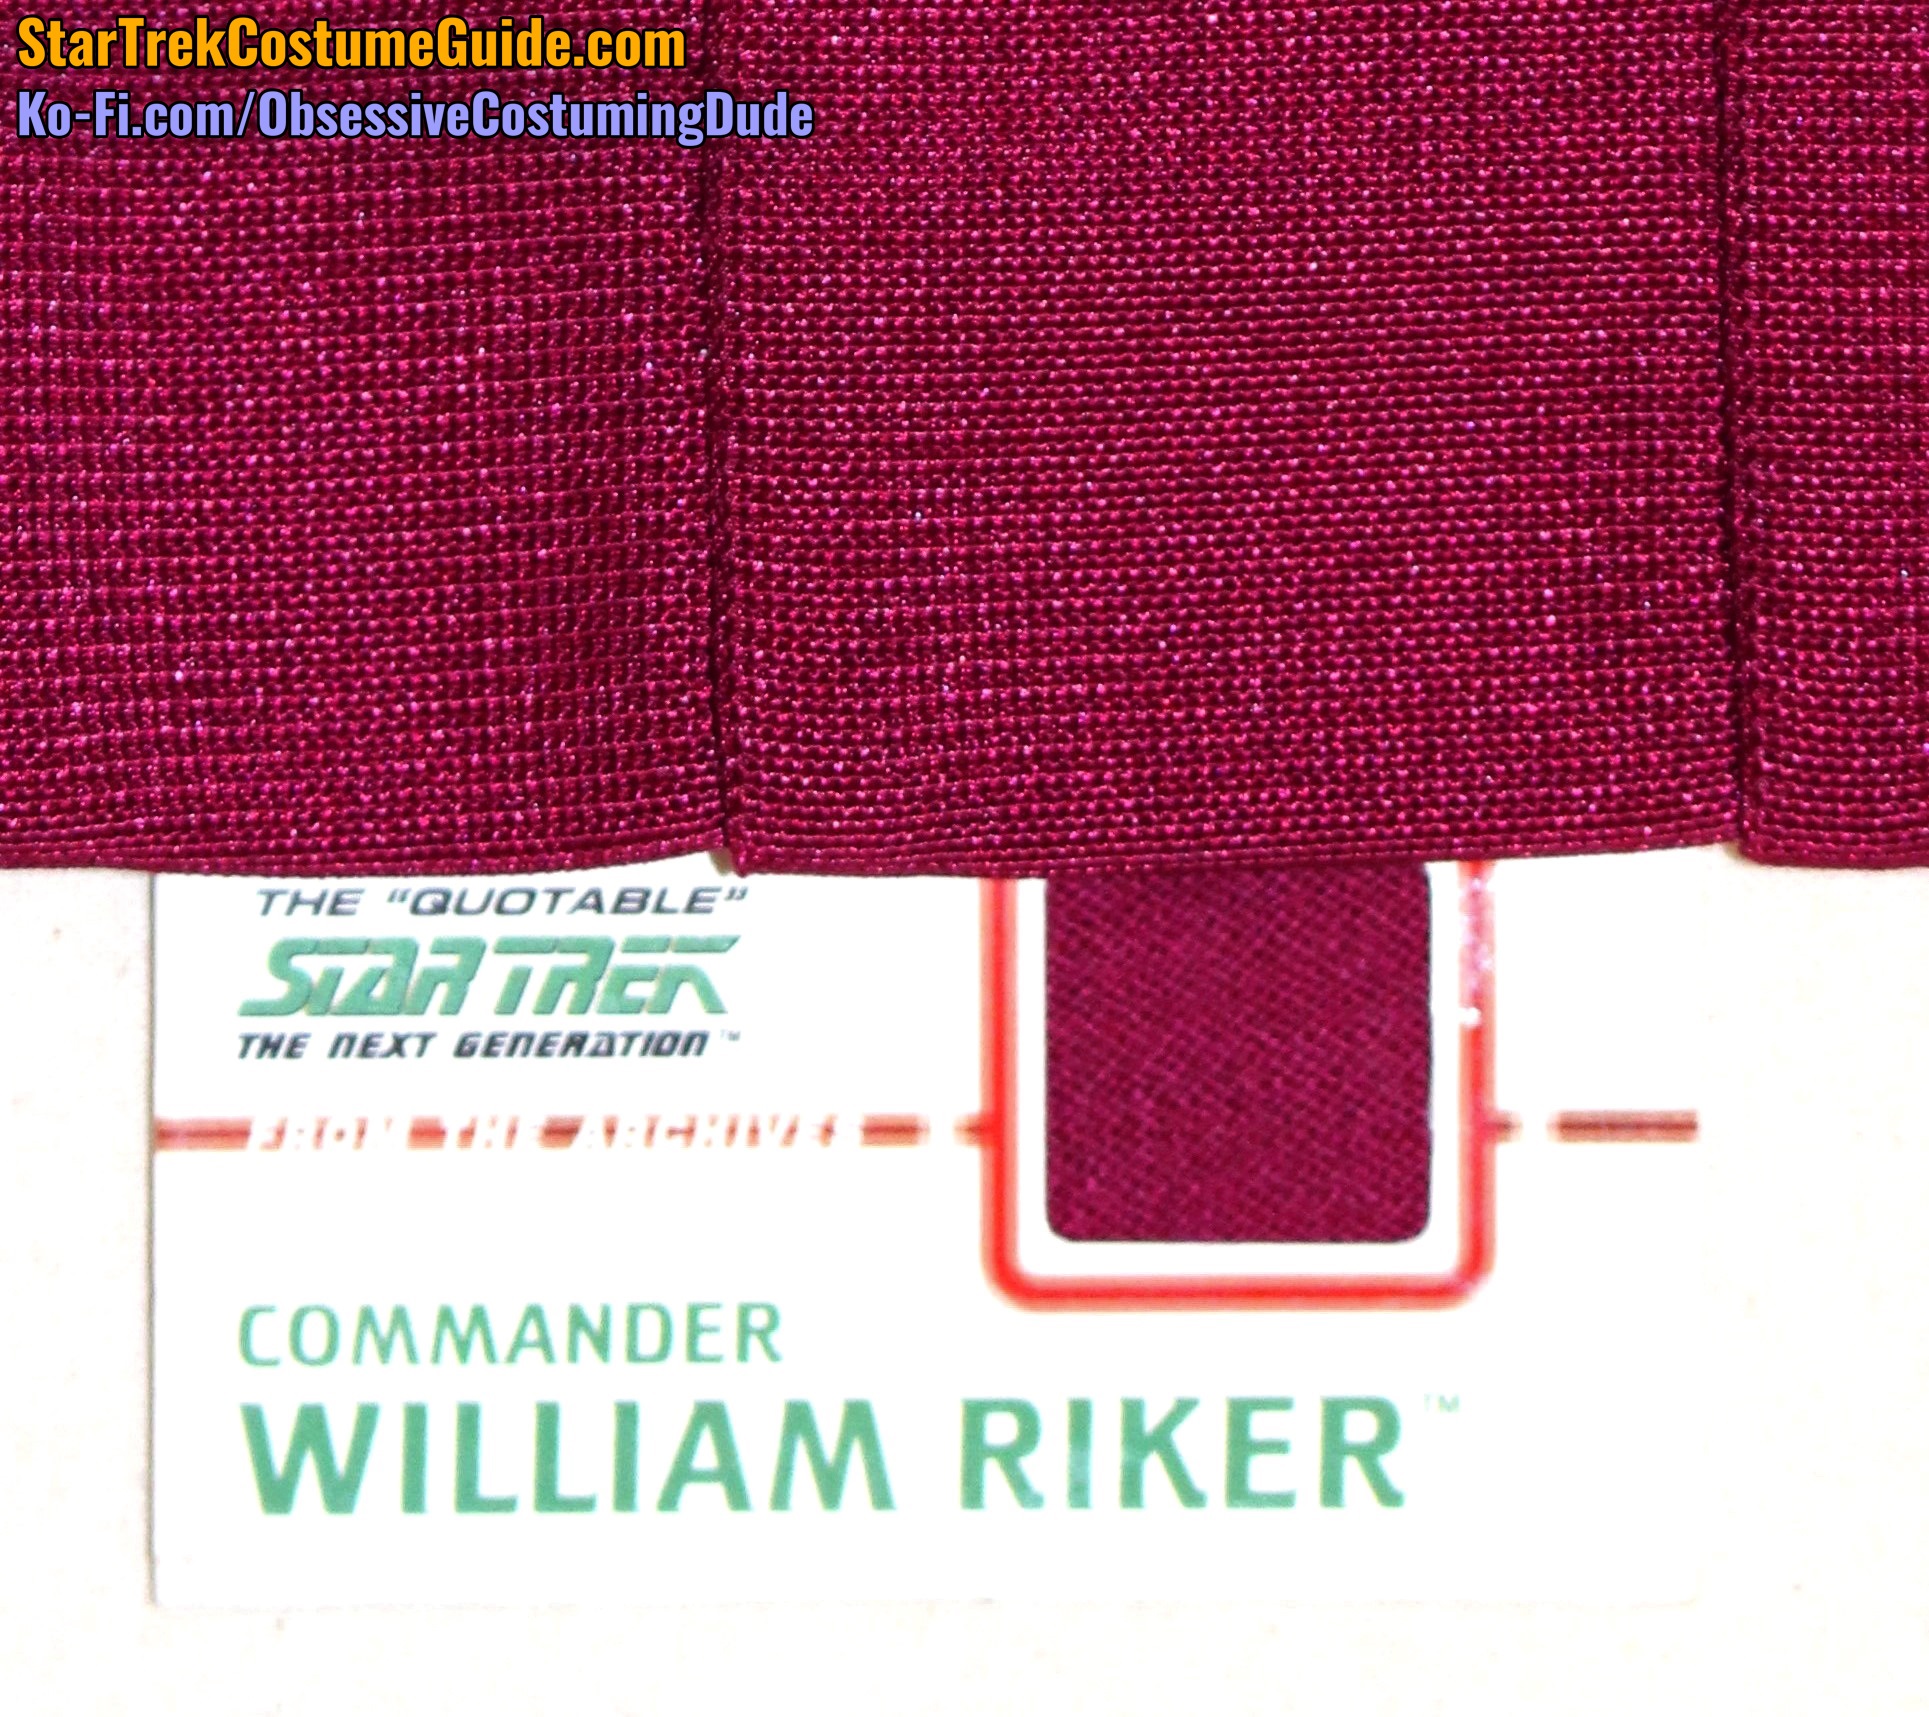
At the time I examined this jacket (mid 2018), I hadn’t yet begun collecting costume cards with swatches of screen-used uniform fabric, but my friend Michael Cowart had a couple and kindly loaned them to me for a color comparison.
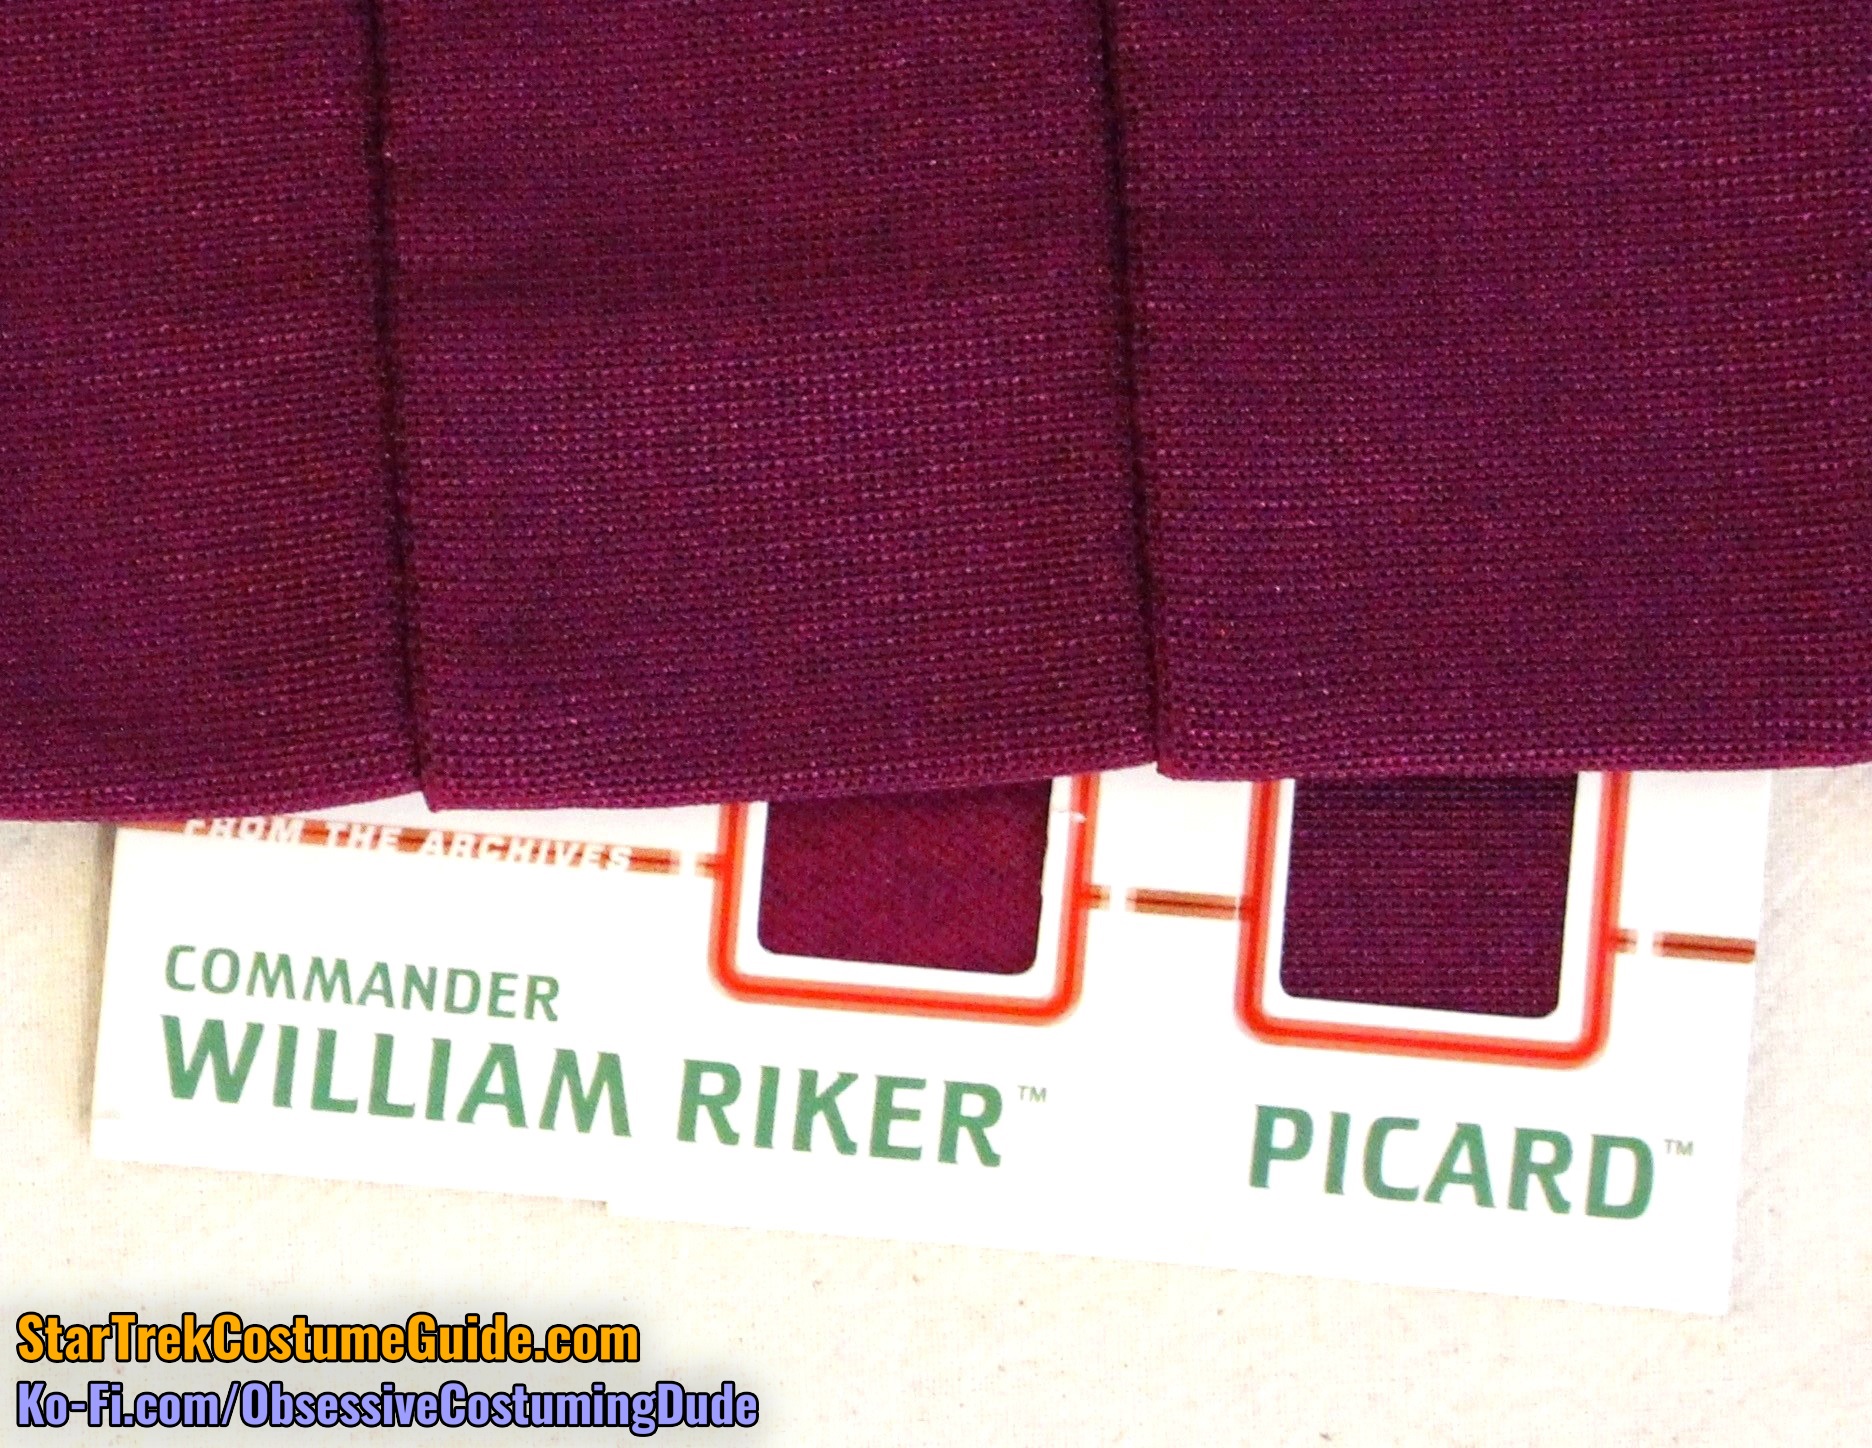
The Picard swatch is jumbo spandex (presumably from one of his seasons 1-2 TNG jumpsuits), and the Riker swatch is wool (presumably from one of his seasons 3+ TNG jackets).
Both of the swatch colors were fairly close to the color of the Admiral Jameson jacket.
Sunlight and flash both had something of an “evening effect” over the three colors (at least with my camera), but here’s a three-way color comparison in various lighting situations:
Outside, sunlight
Outside, shade
Indoors, with flash
Indoors, no flash
The Captain Picard swatch was noticeably darker, and a bit bluer (resulting in a slightly more purple color).
Outside, sunlight
Outside, shade
Indoors, with flash
Indoors, no flash
And here are some comparison photos with the Riker wool:
Outside, sunlight
Outside, shade
Indoors, with flash
Indoors, no flash
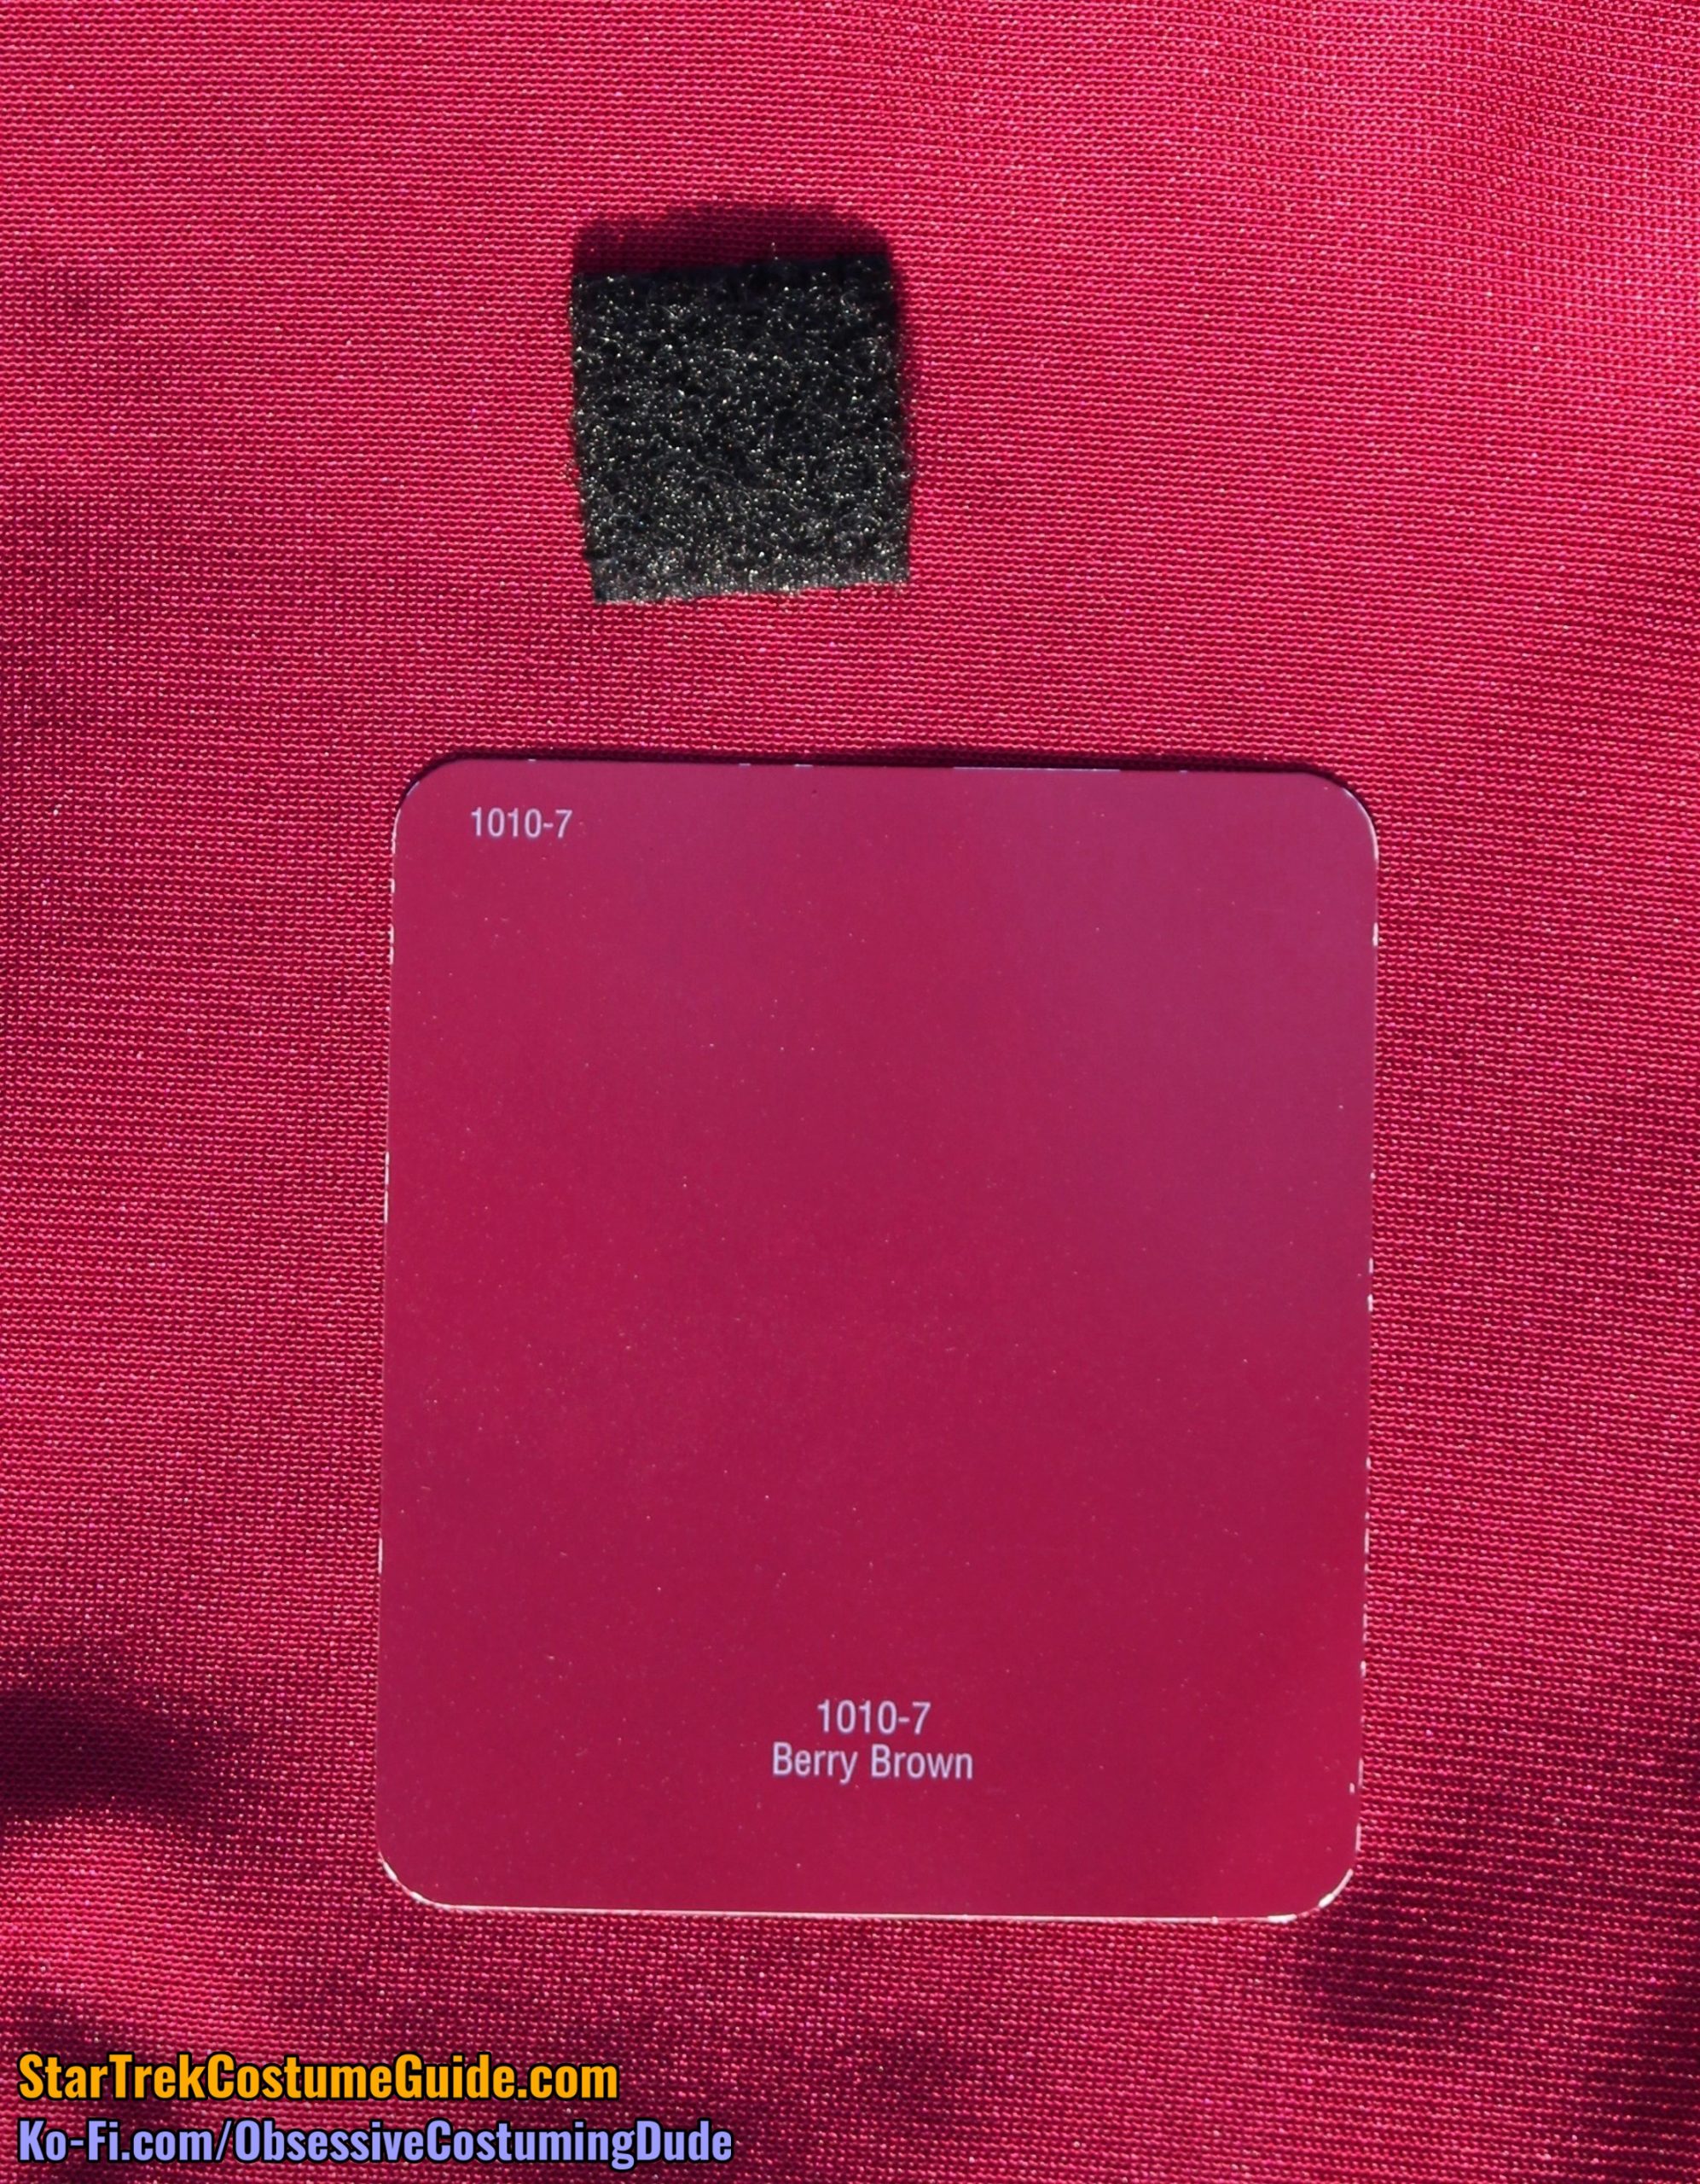
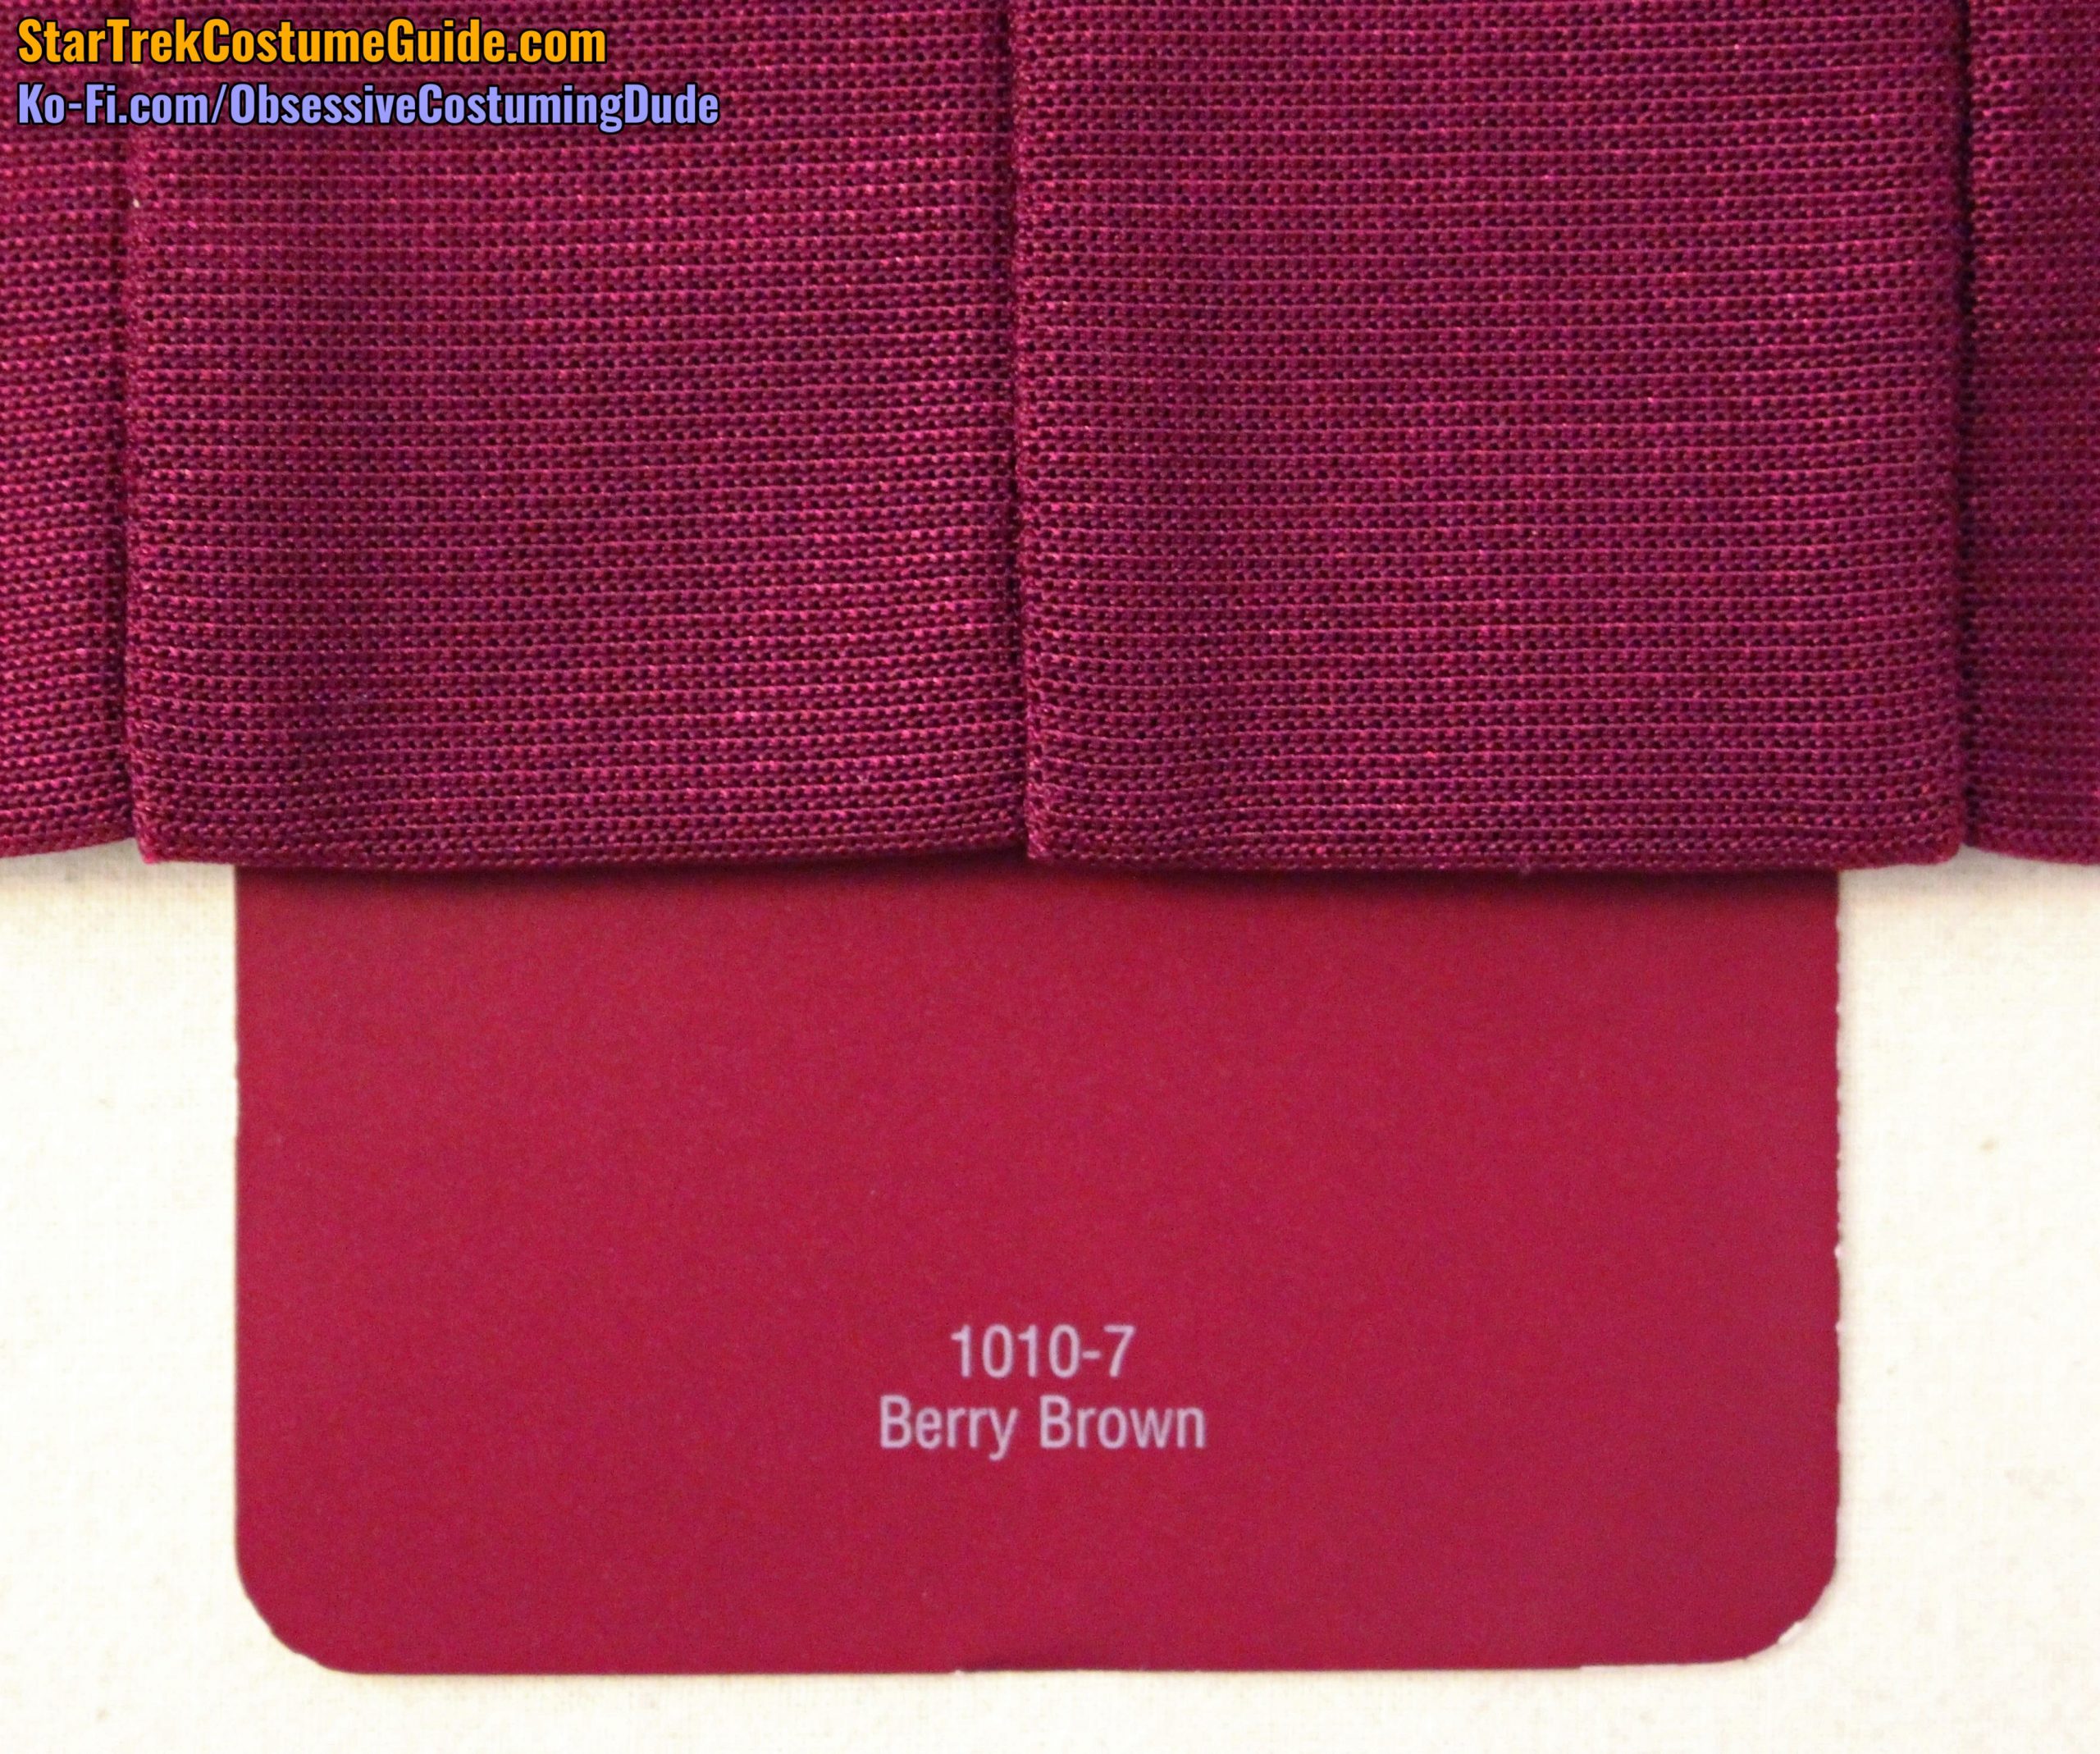
Unfortunately, at the time I examined this costume I didn’t have a Pantone book yet, but in my subsequent experience Pantones are surprisingly useless for matching the TNG-era “reds” because they’re so dark and saturated.
However, I did do my best to color-match the fabric with some paint chips from my local home improvement store.
The closest I found was Valspar #1010-7, “Berry Brown.”
It’s difficult to properly compare, not only because it’s paper to fabric, but because of the glossy sheen on the paper; sometimes it looked really, really close.
Outside, sunlight
Outside, shade
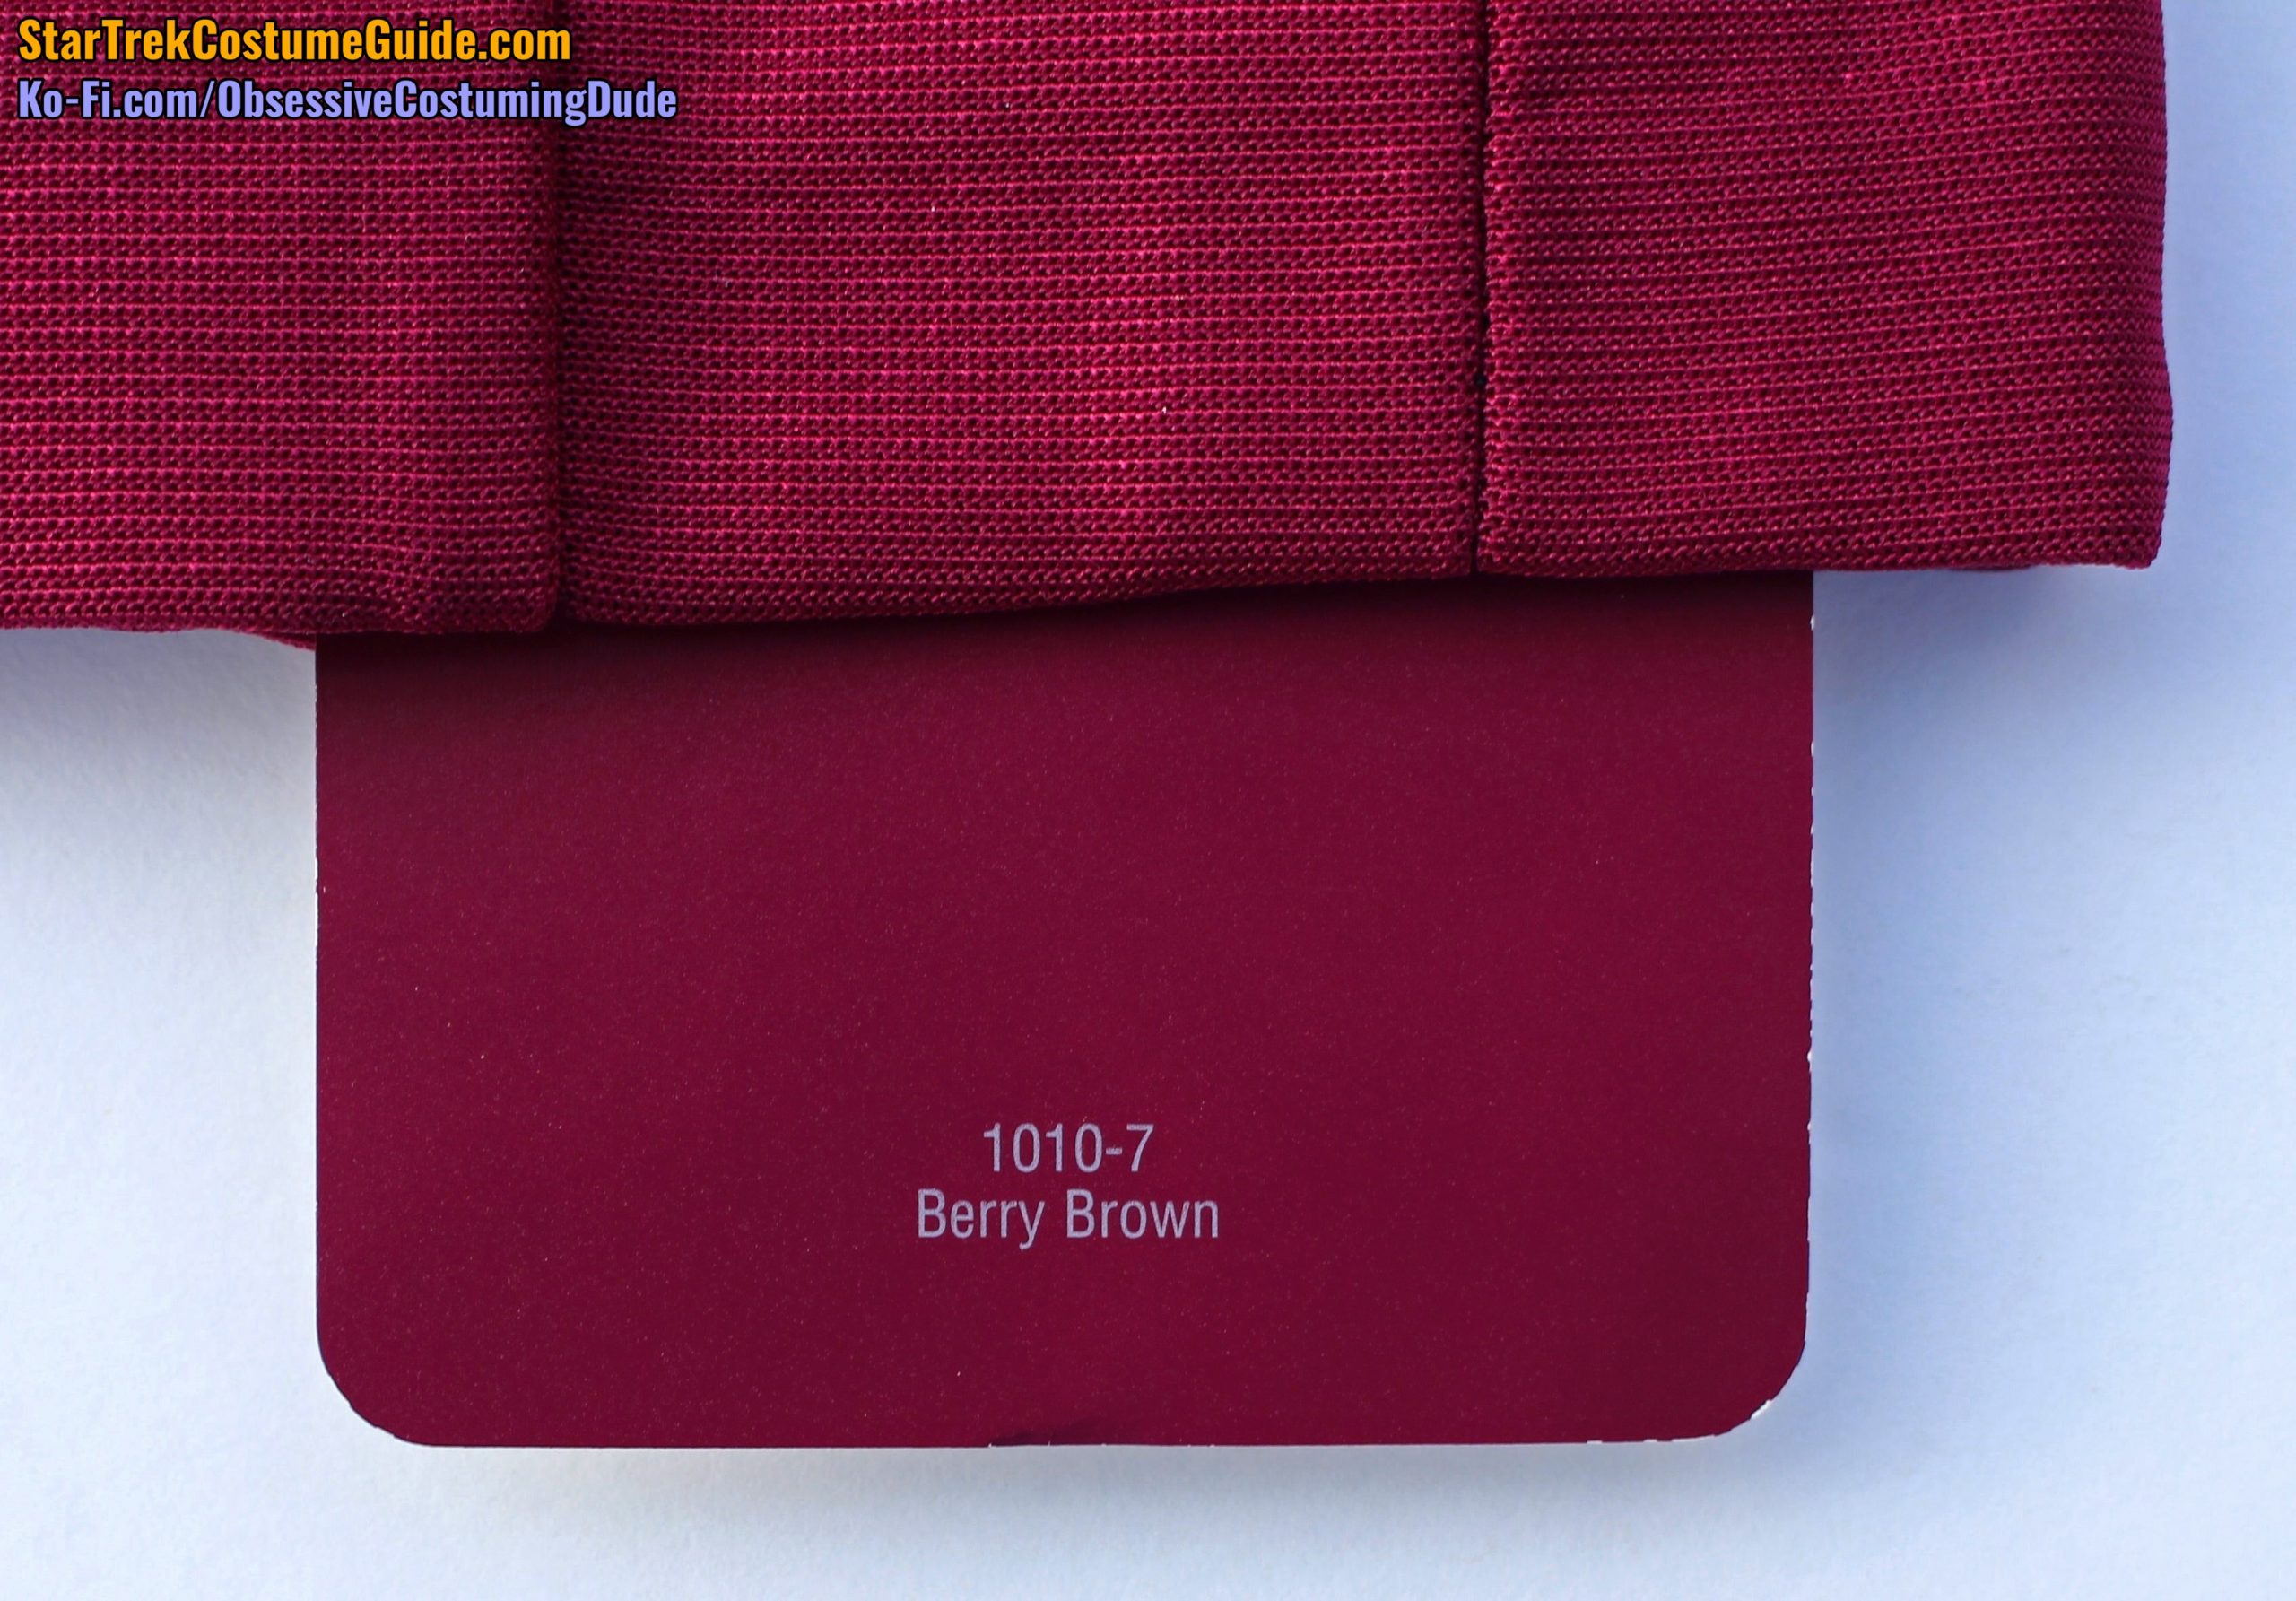
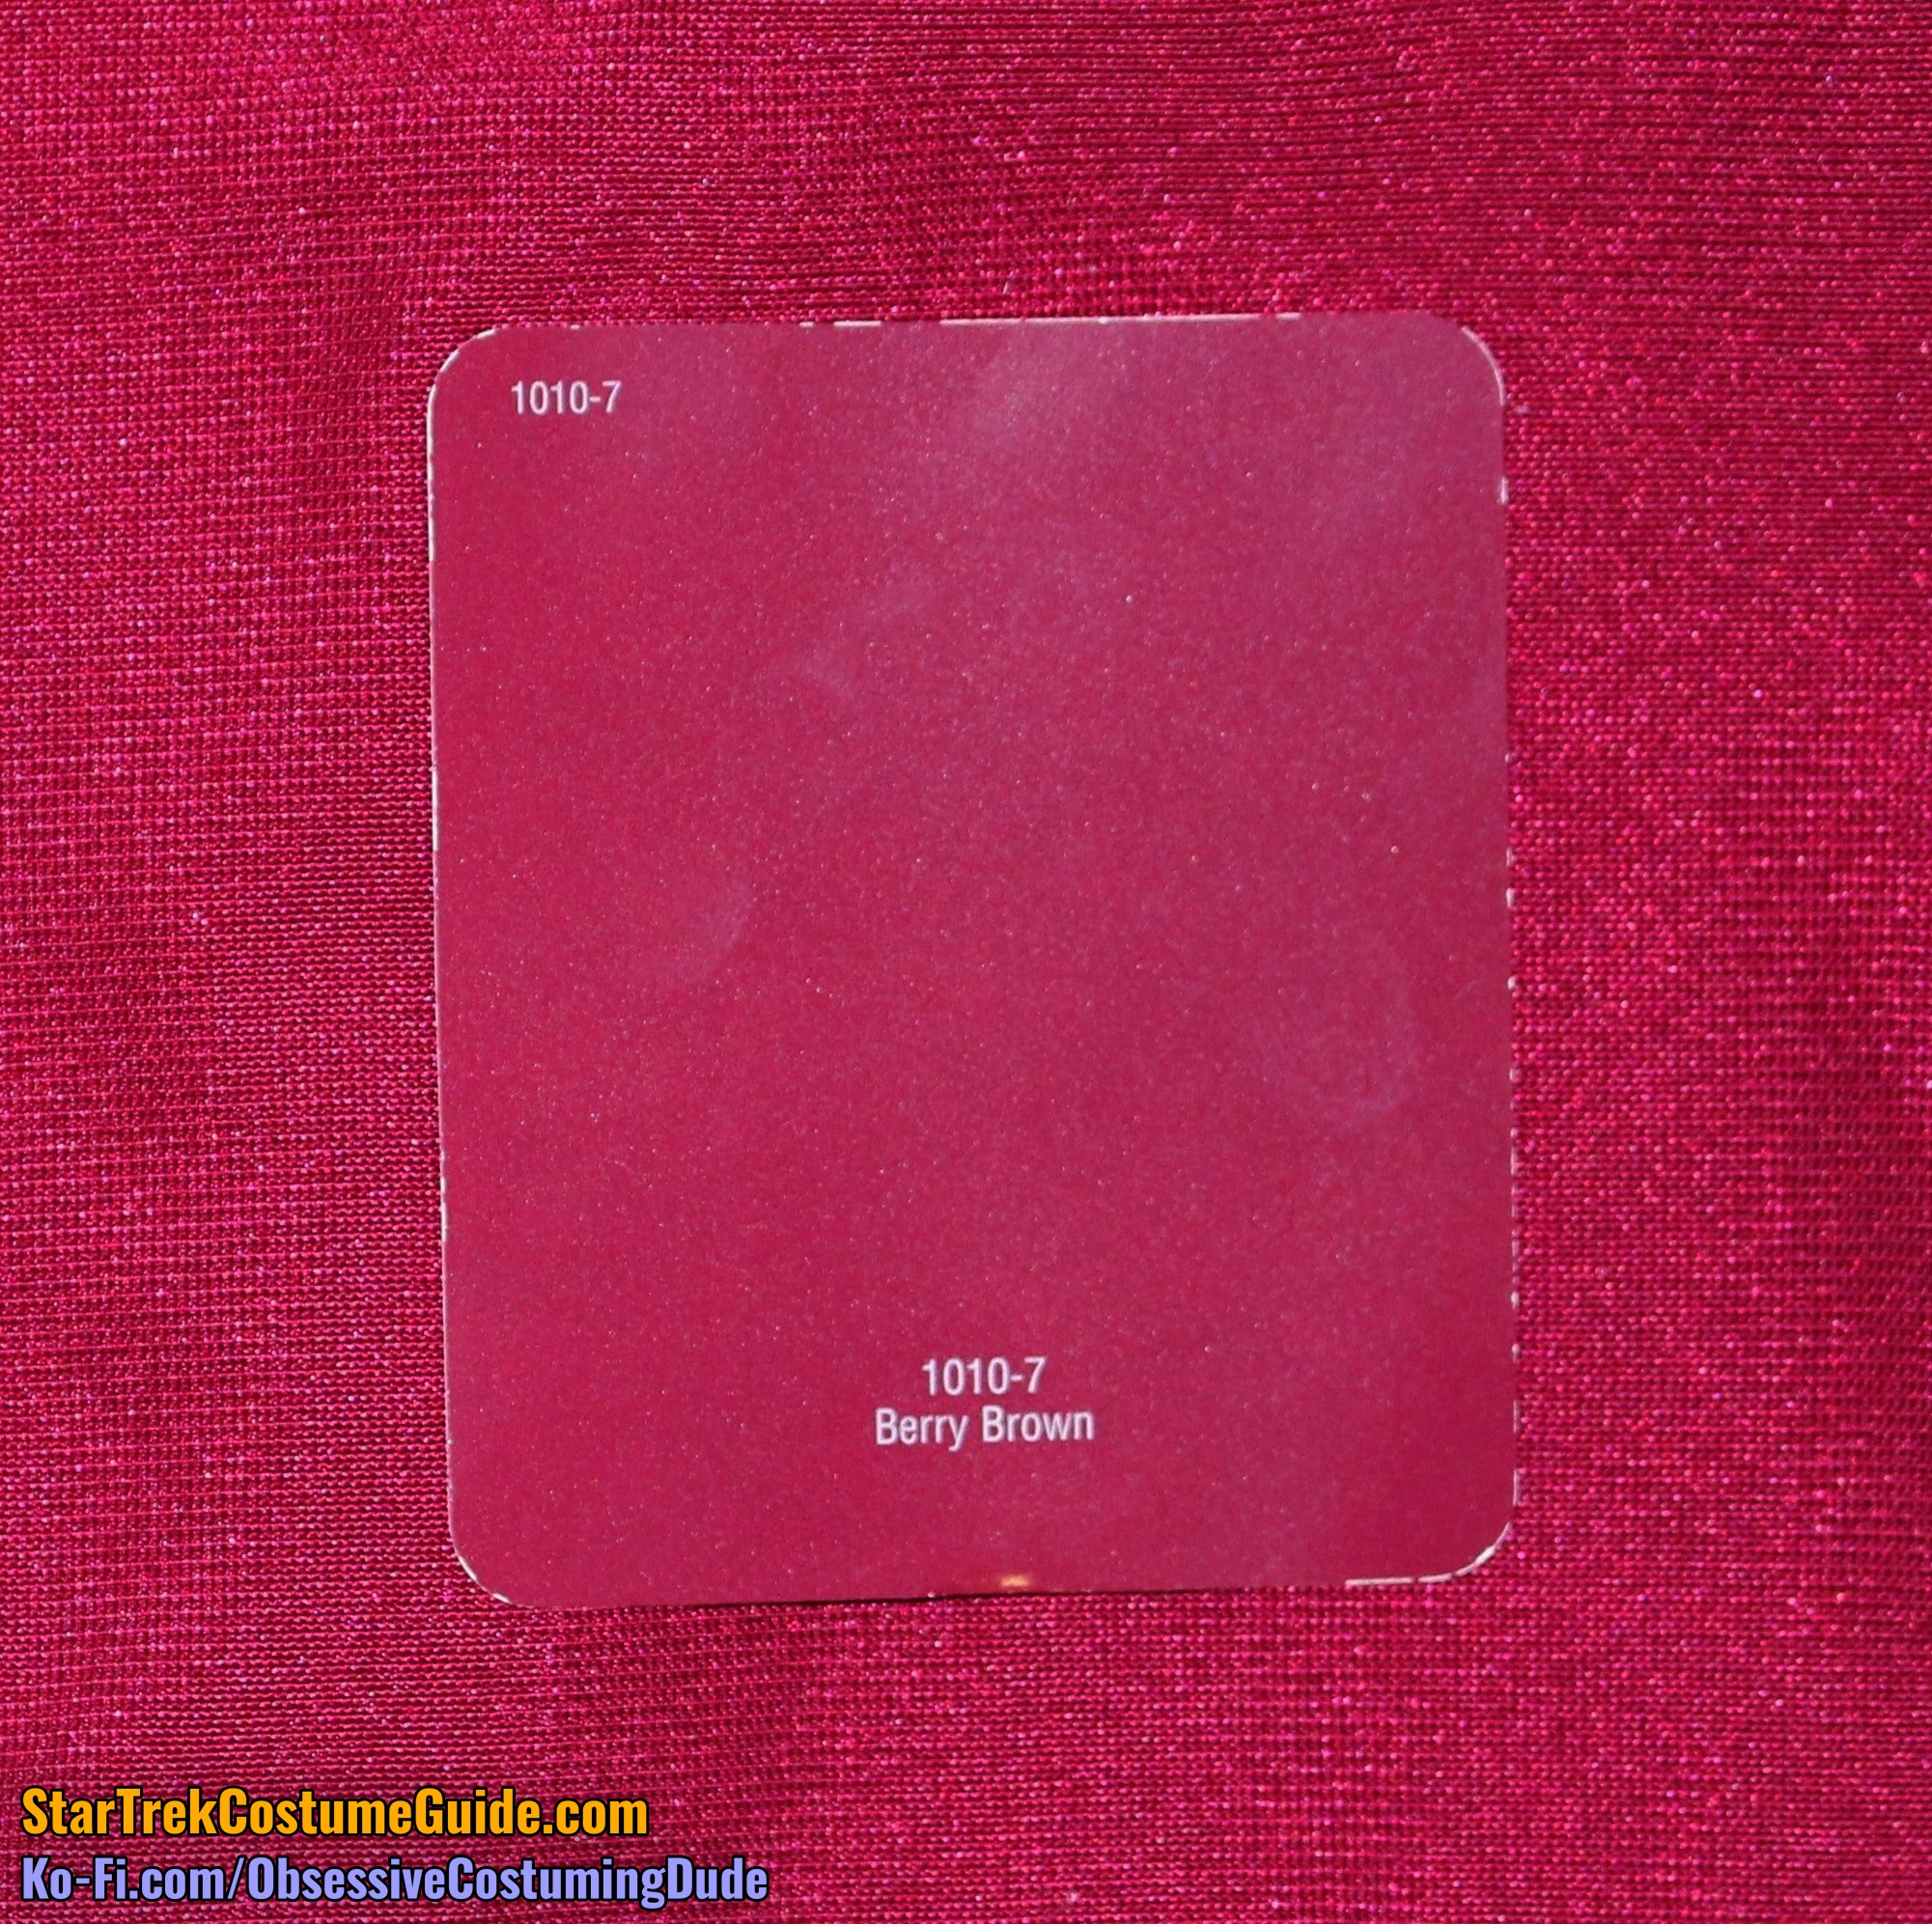
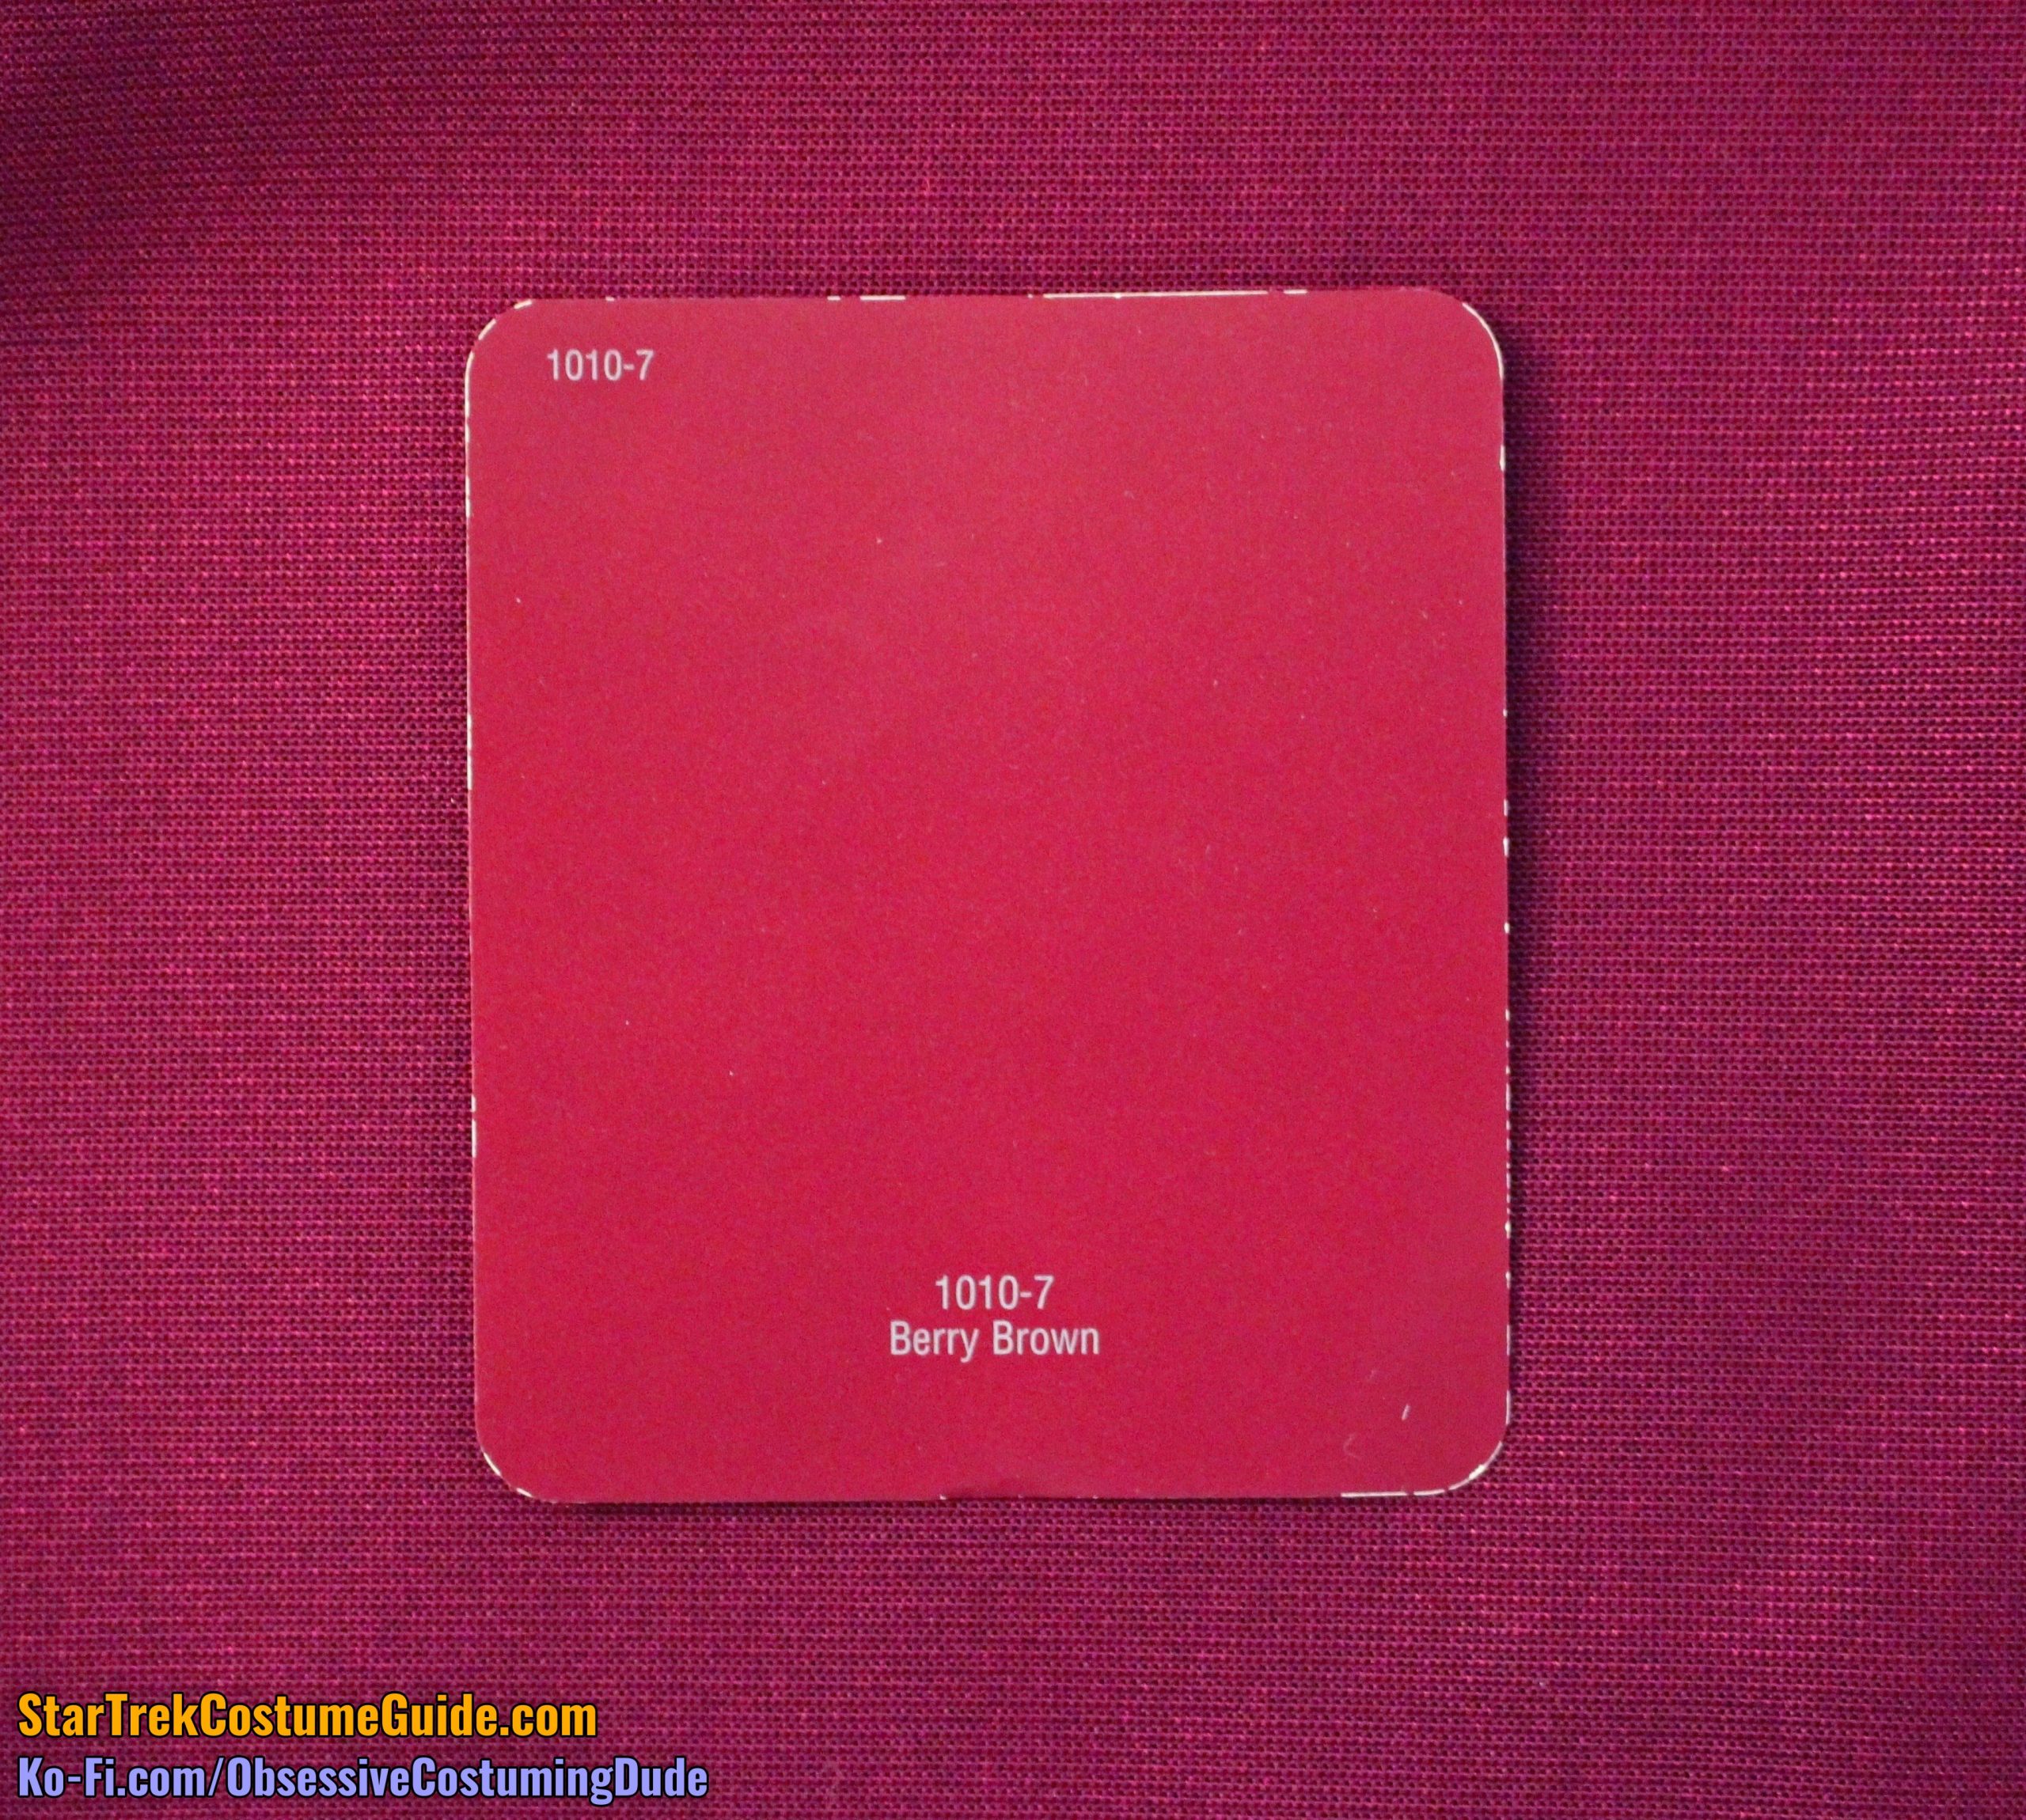
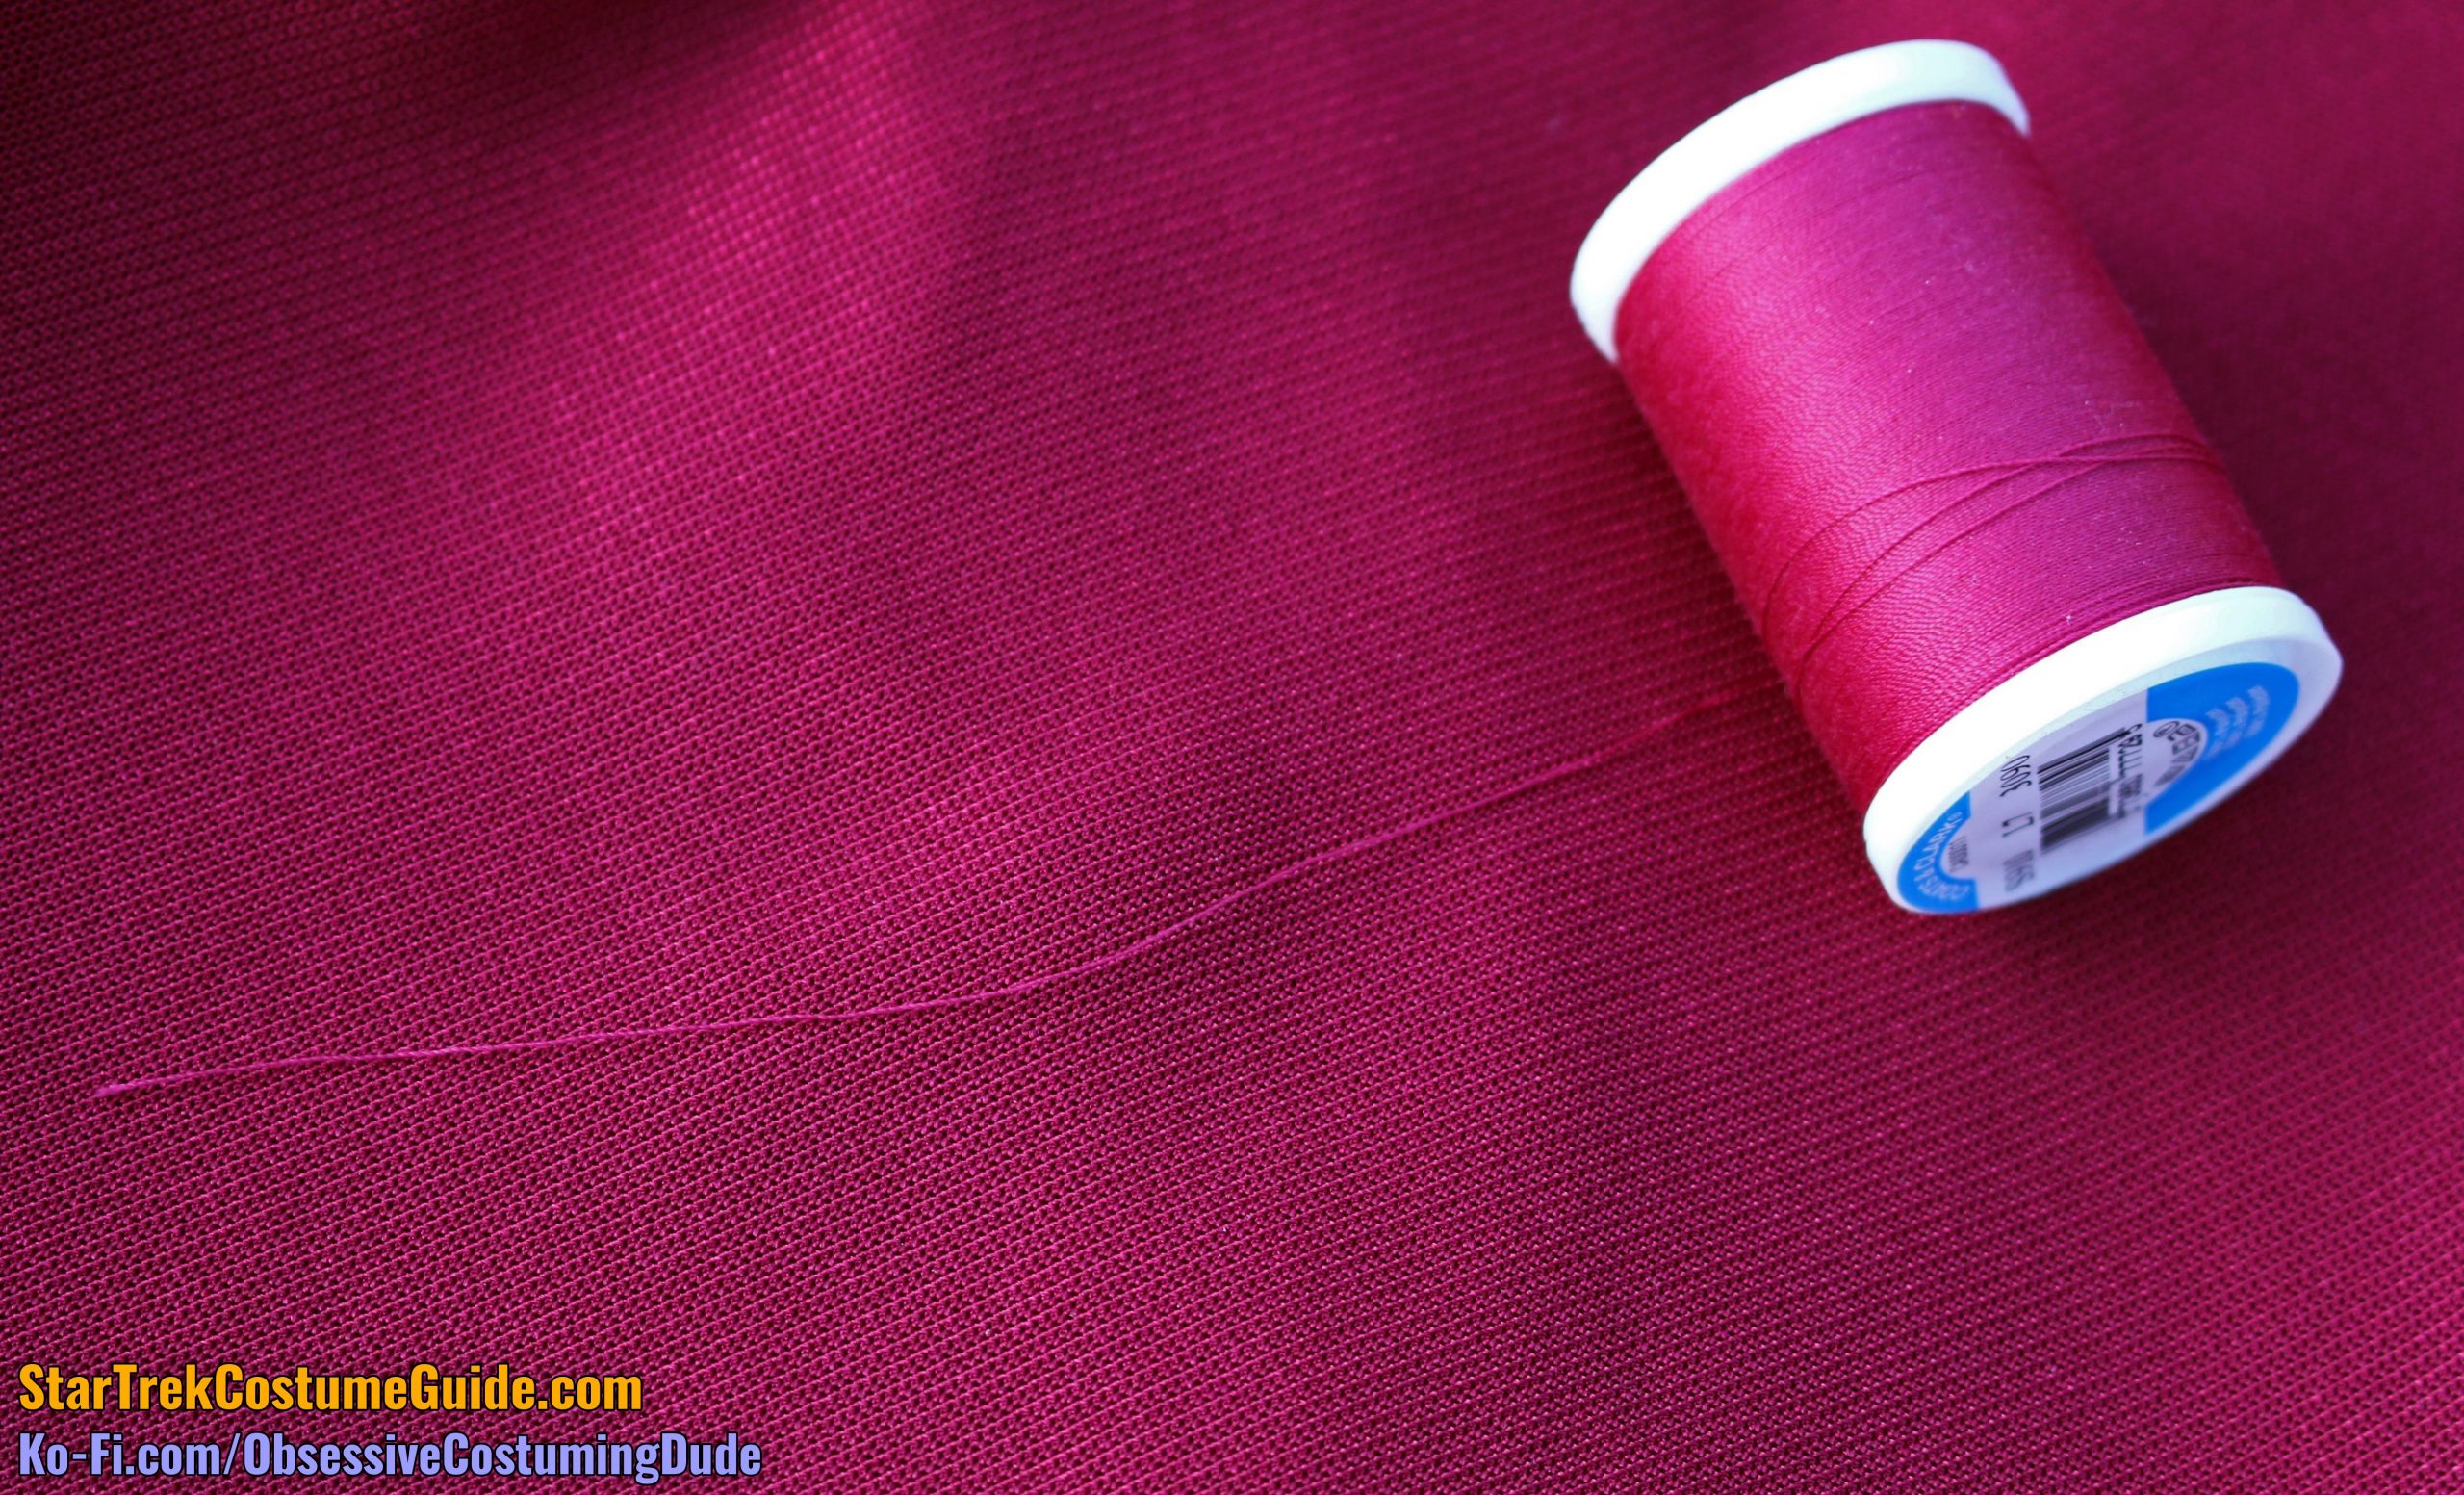
Lighting was certainly a factor; observe below how under flash, the paint chip looked like an excellent match, but when photographed in normal interior lighting (“warm” lighting, without flash), it looked terrible.
Indoors, with flash
Indoors, no flash
Indoors, with flash
Indoors, no flash
Being generally ignorant about photography and lighting, my theory is that the slightly golden/yellow-ish interior lighting affected the paint chip more than the fabric, making it appear more orange – at least, that’s how it seemed to register on my camera.
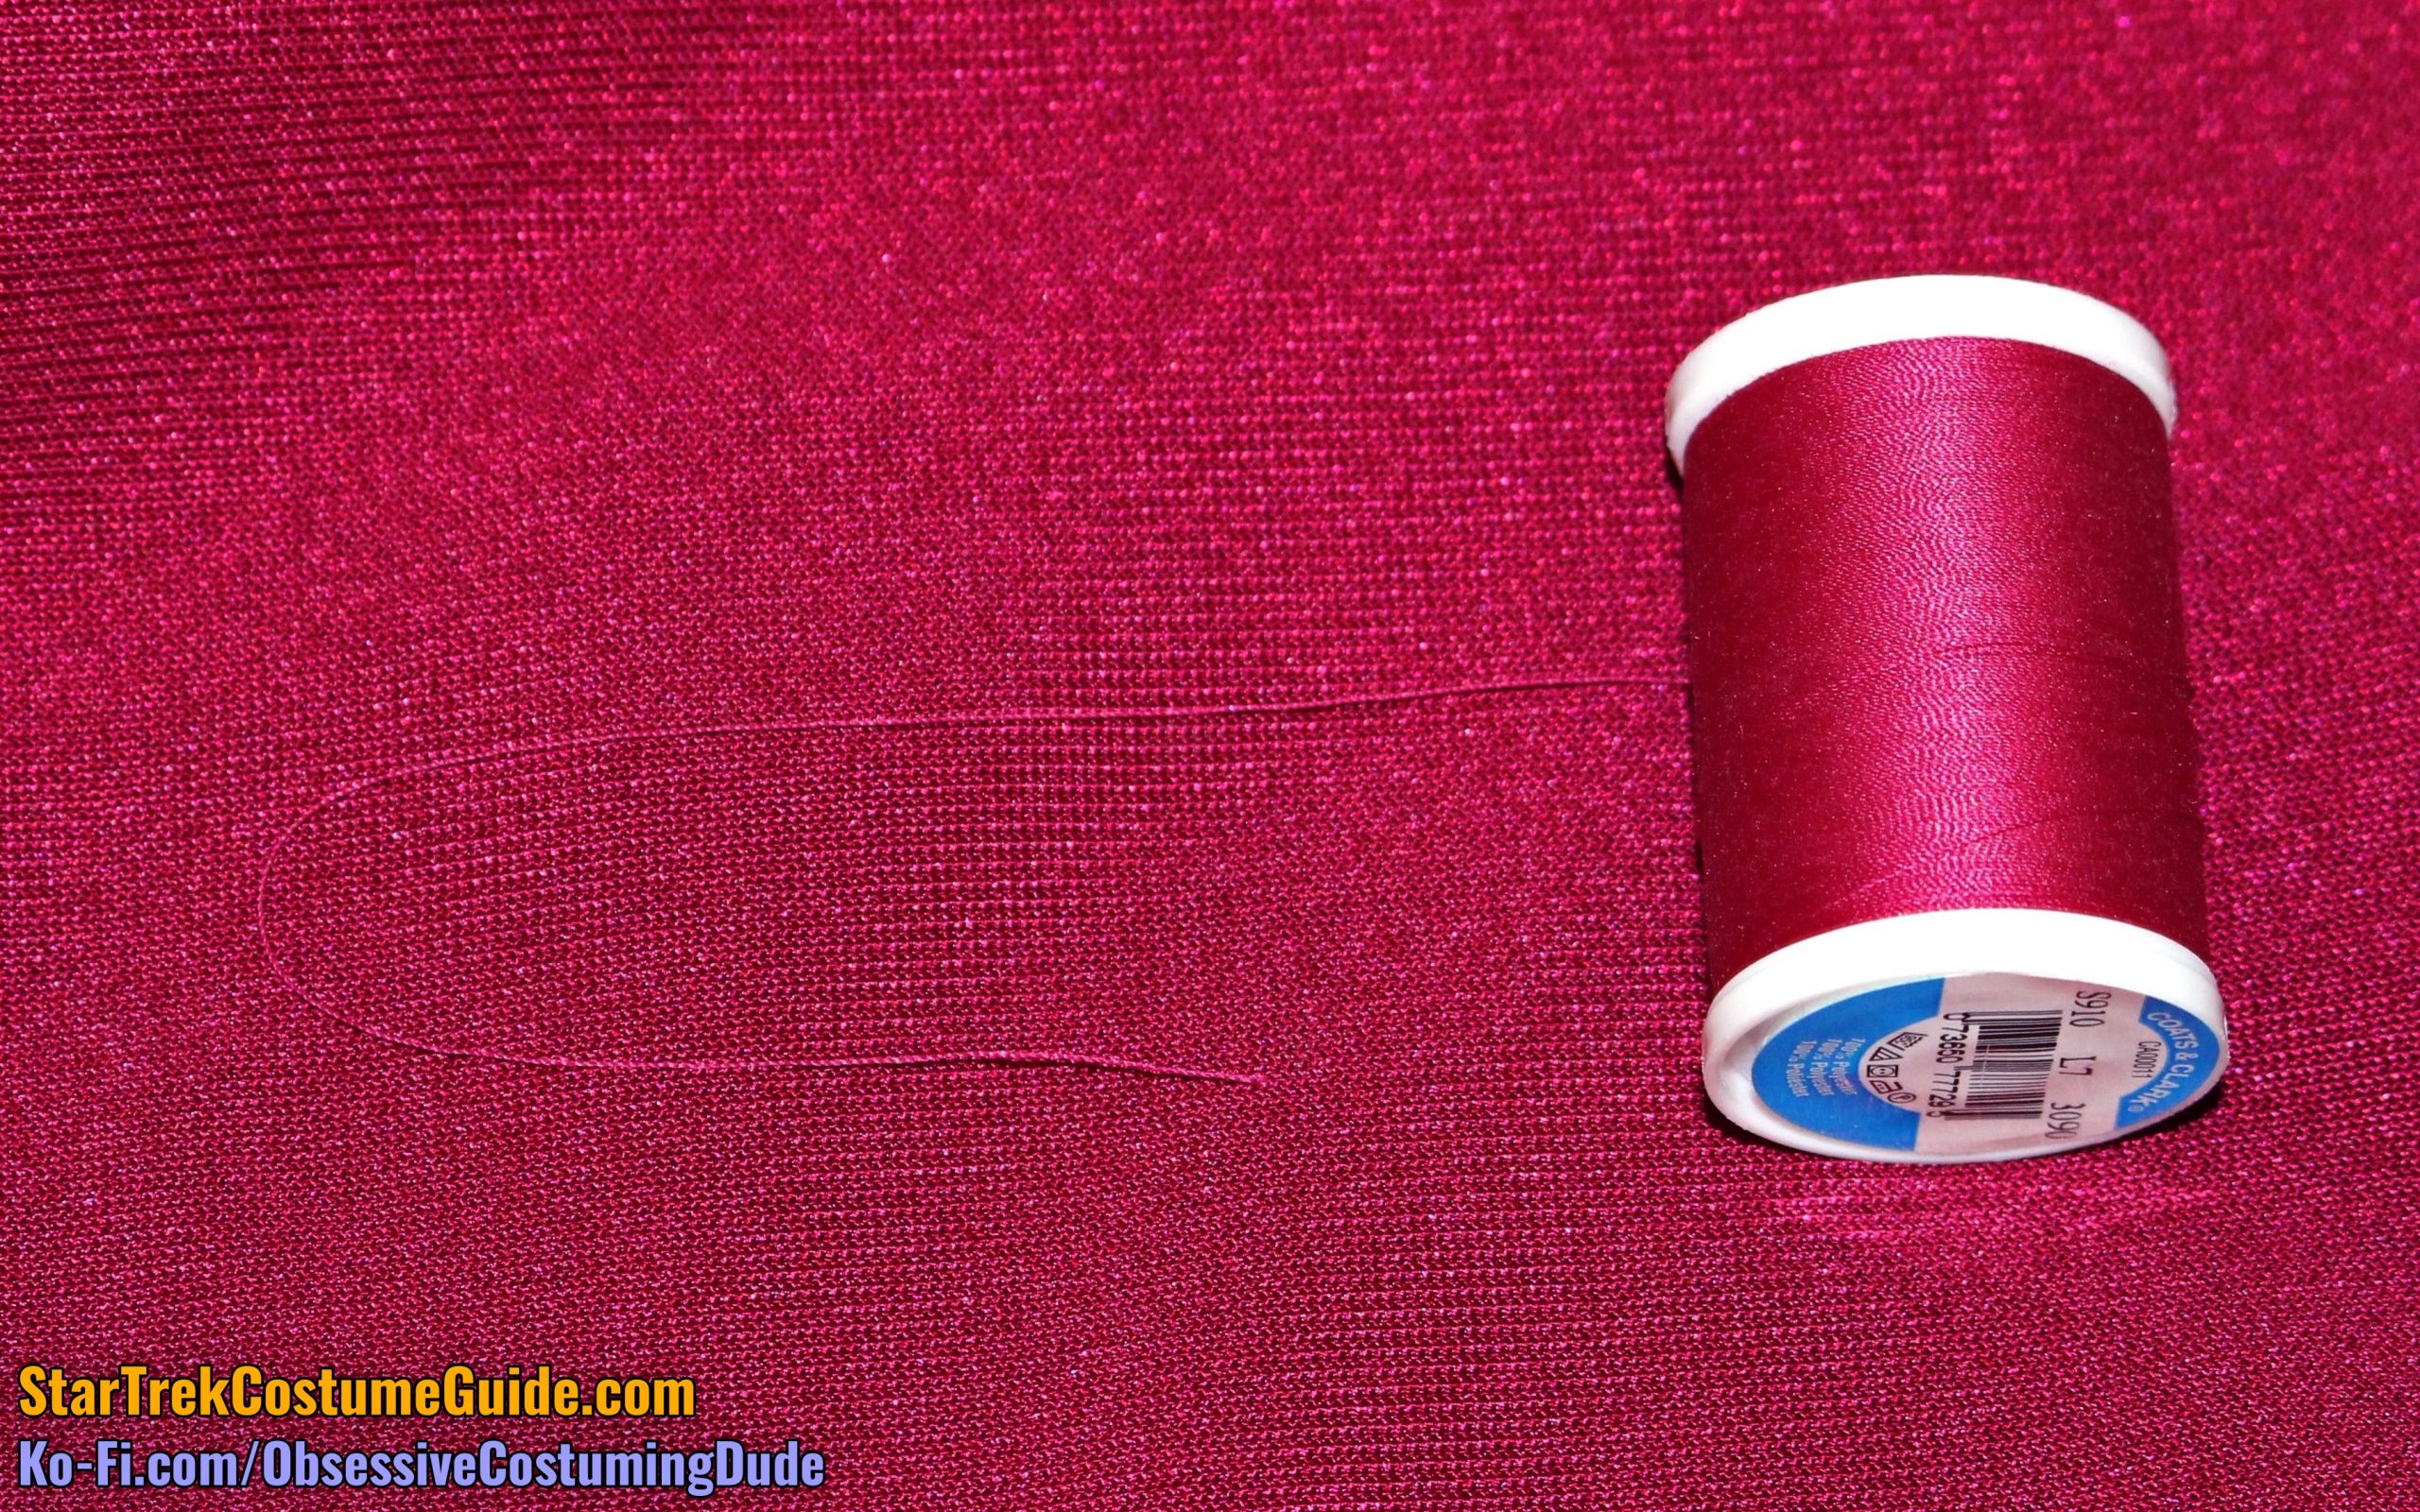
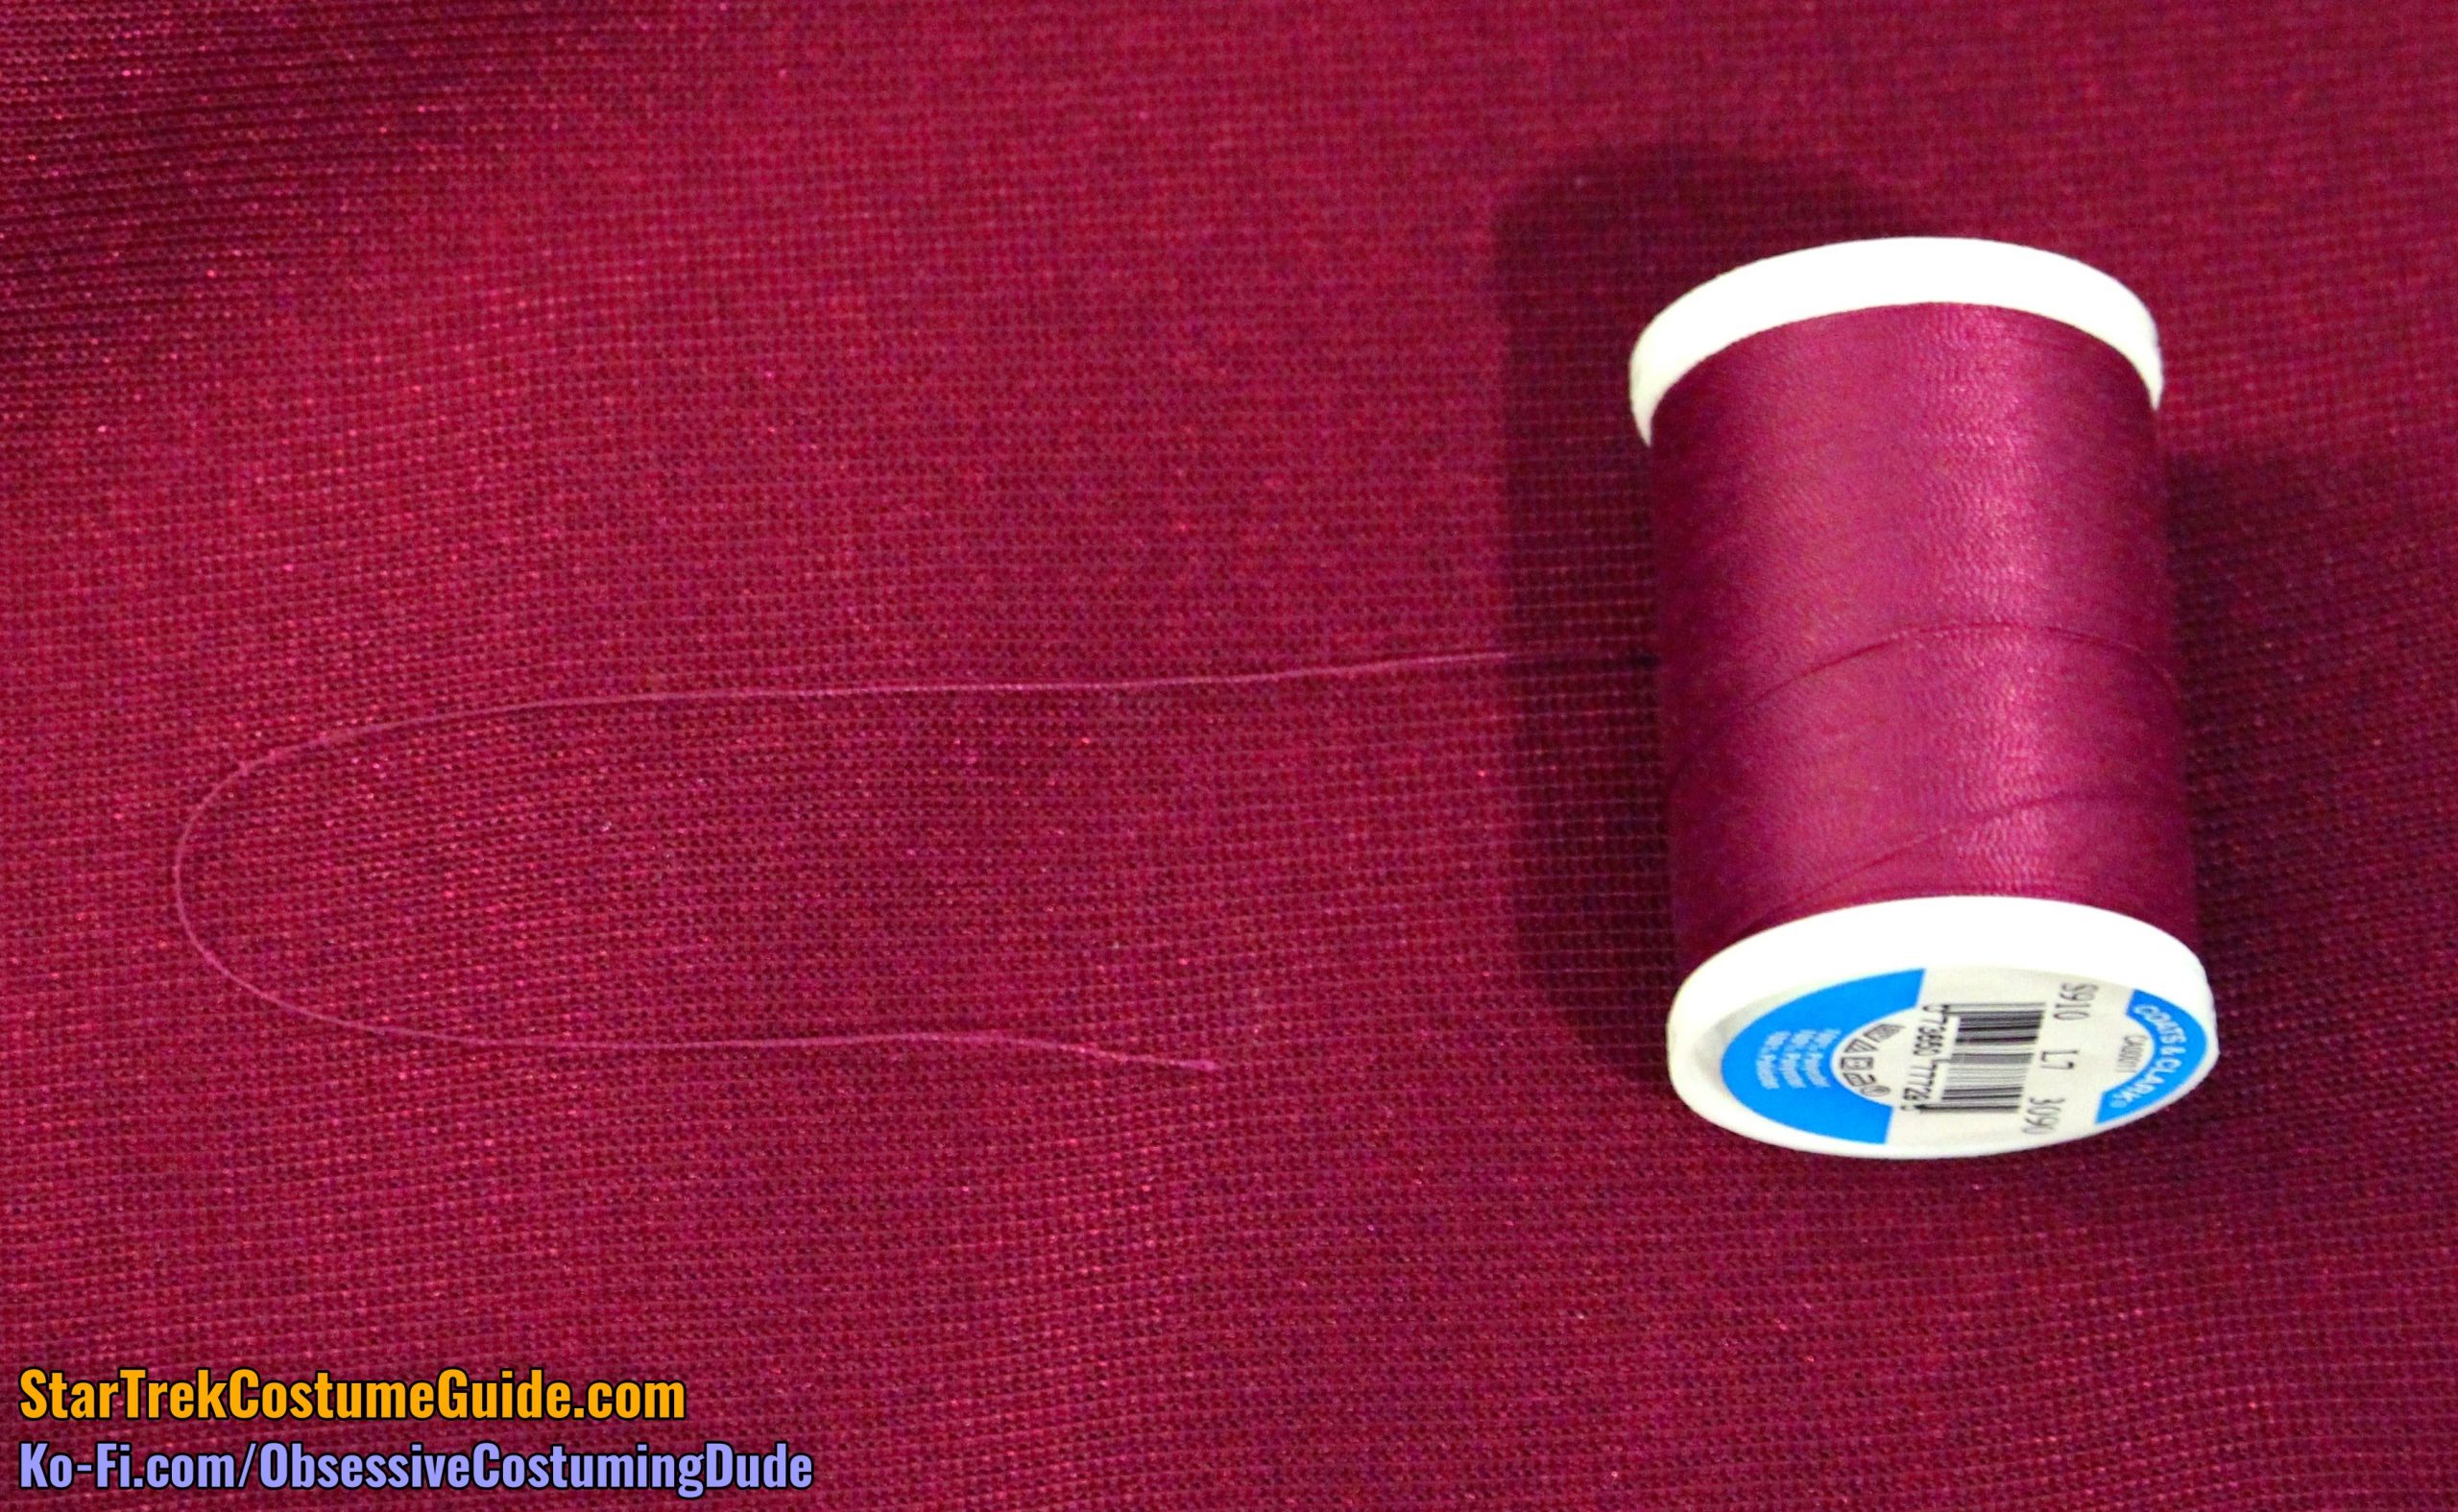
I also did my best to color-match some thread to the fabric.
Coats & Clark #3090 “Red Plum” was the closest I found, although it’s not quite dark enough.
Outside, sunlight
Indoors, with flash
Indoors, no flash
Basically, something in the neighborhood of Valspar’s #1010-7 “Berry Brown” and “Coats & Clark #3090 “Red Plum” thread and is about the color of the original fabric.
EXTERIOR DIMENSIONS and CONSTRUCTION
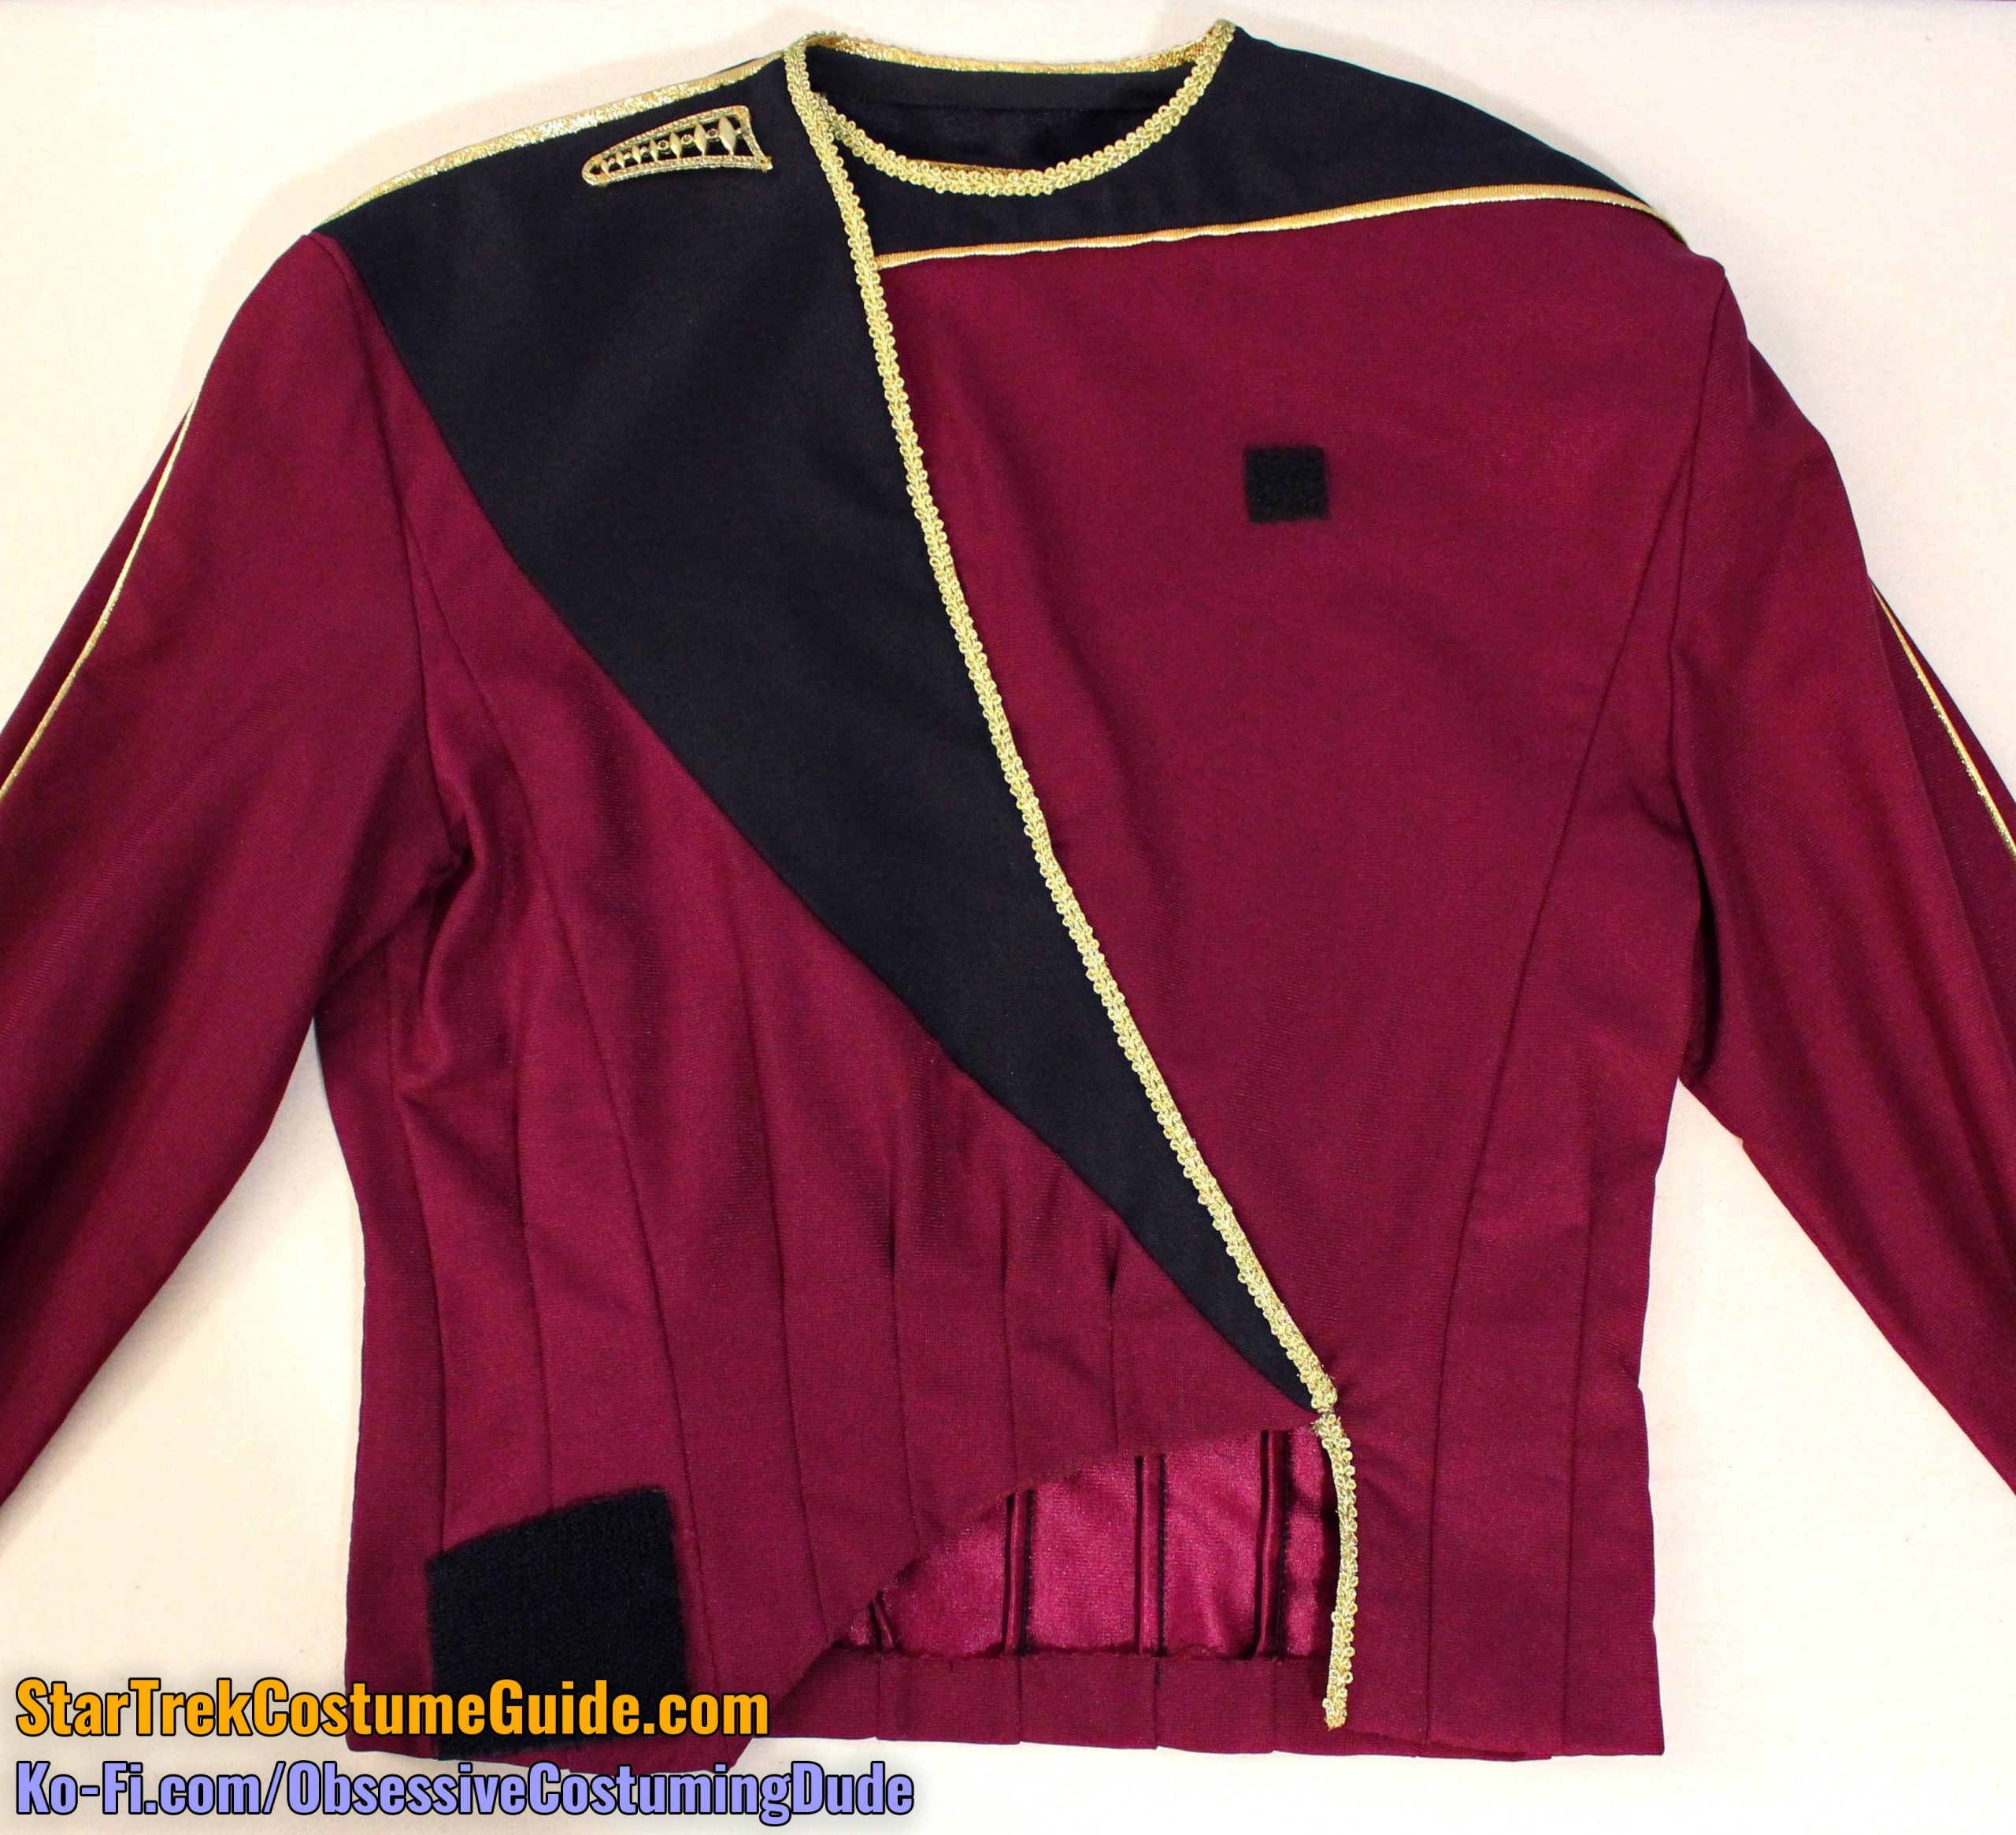
After documenting the color as best I could, I grabbed my measuring tape and began the process of documenting the jacket’s dimensions and construction, generally working from the top down; front, then back; outside, then inside.
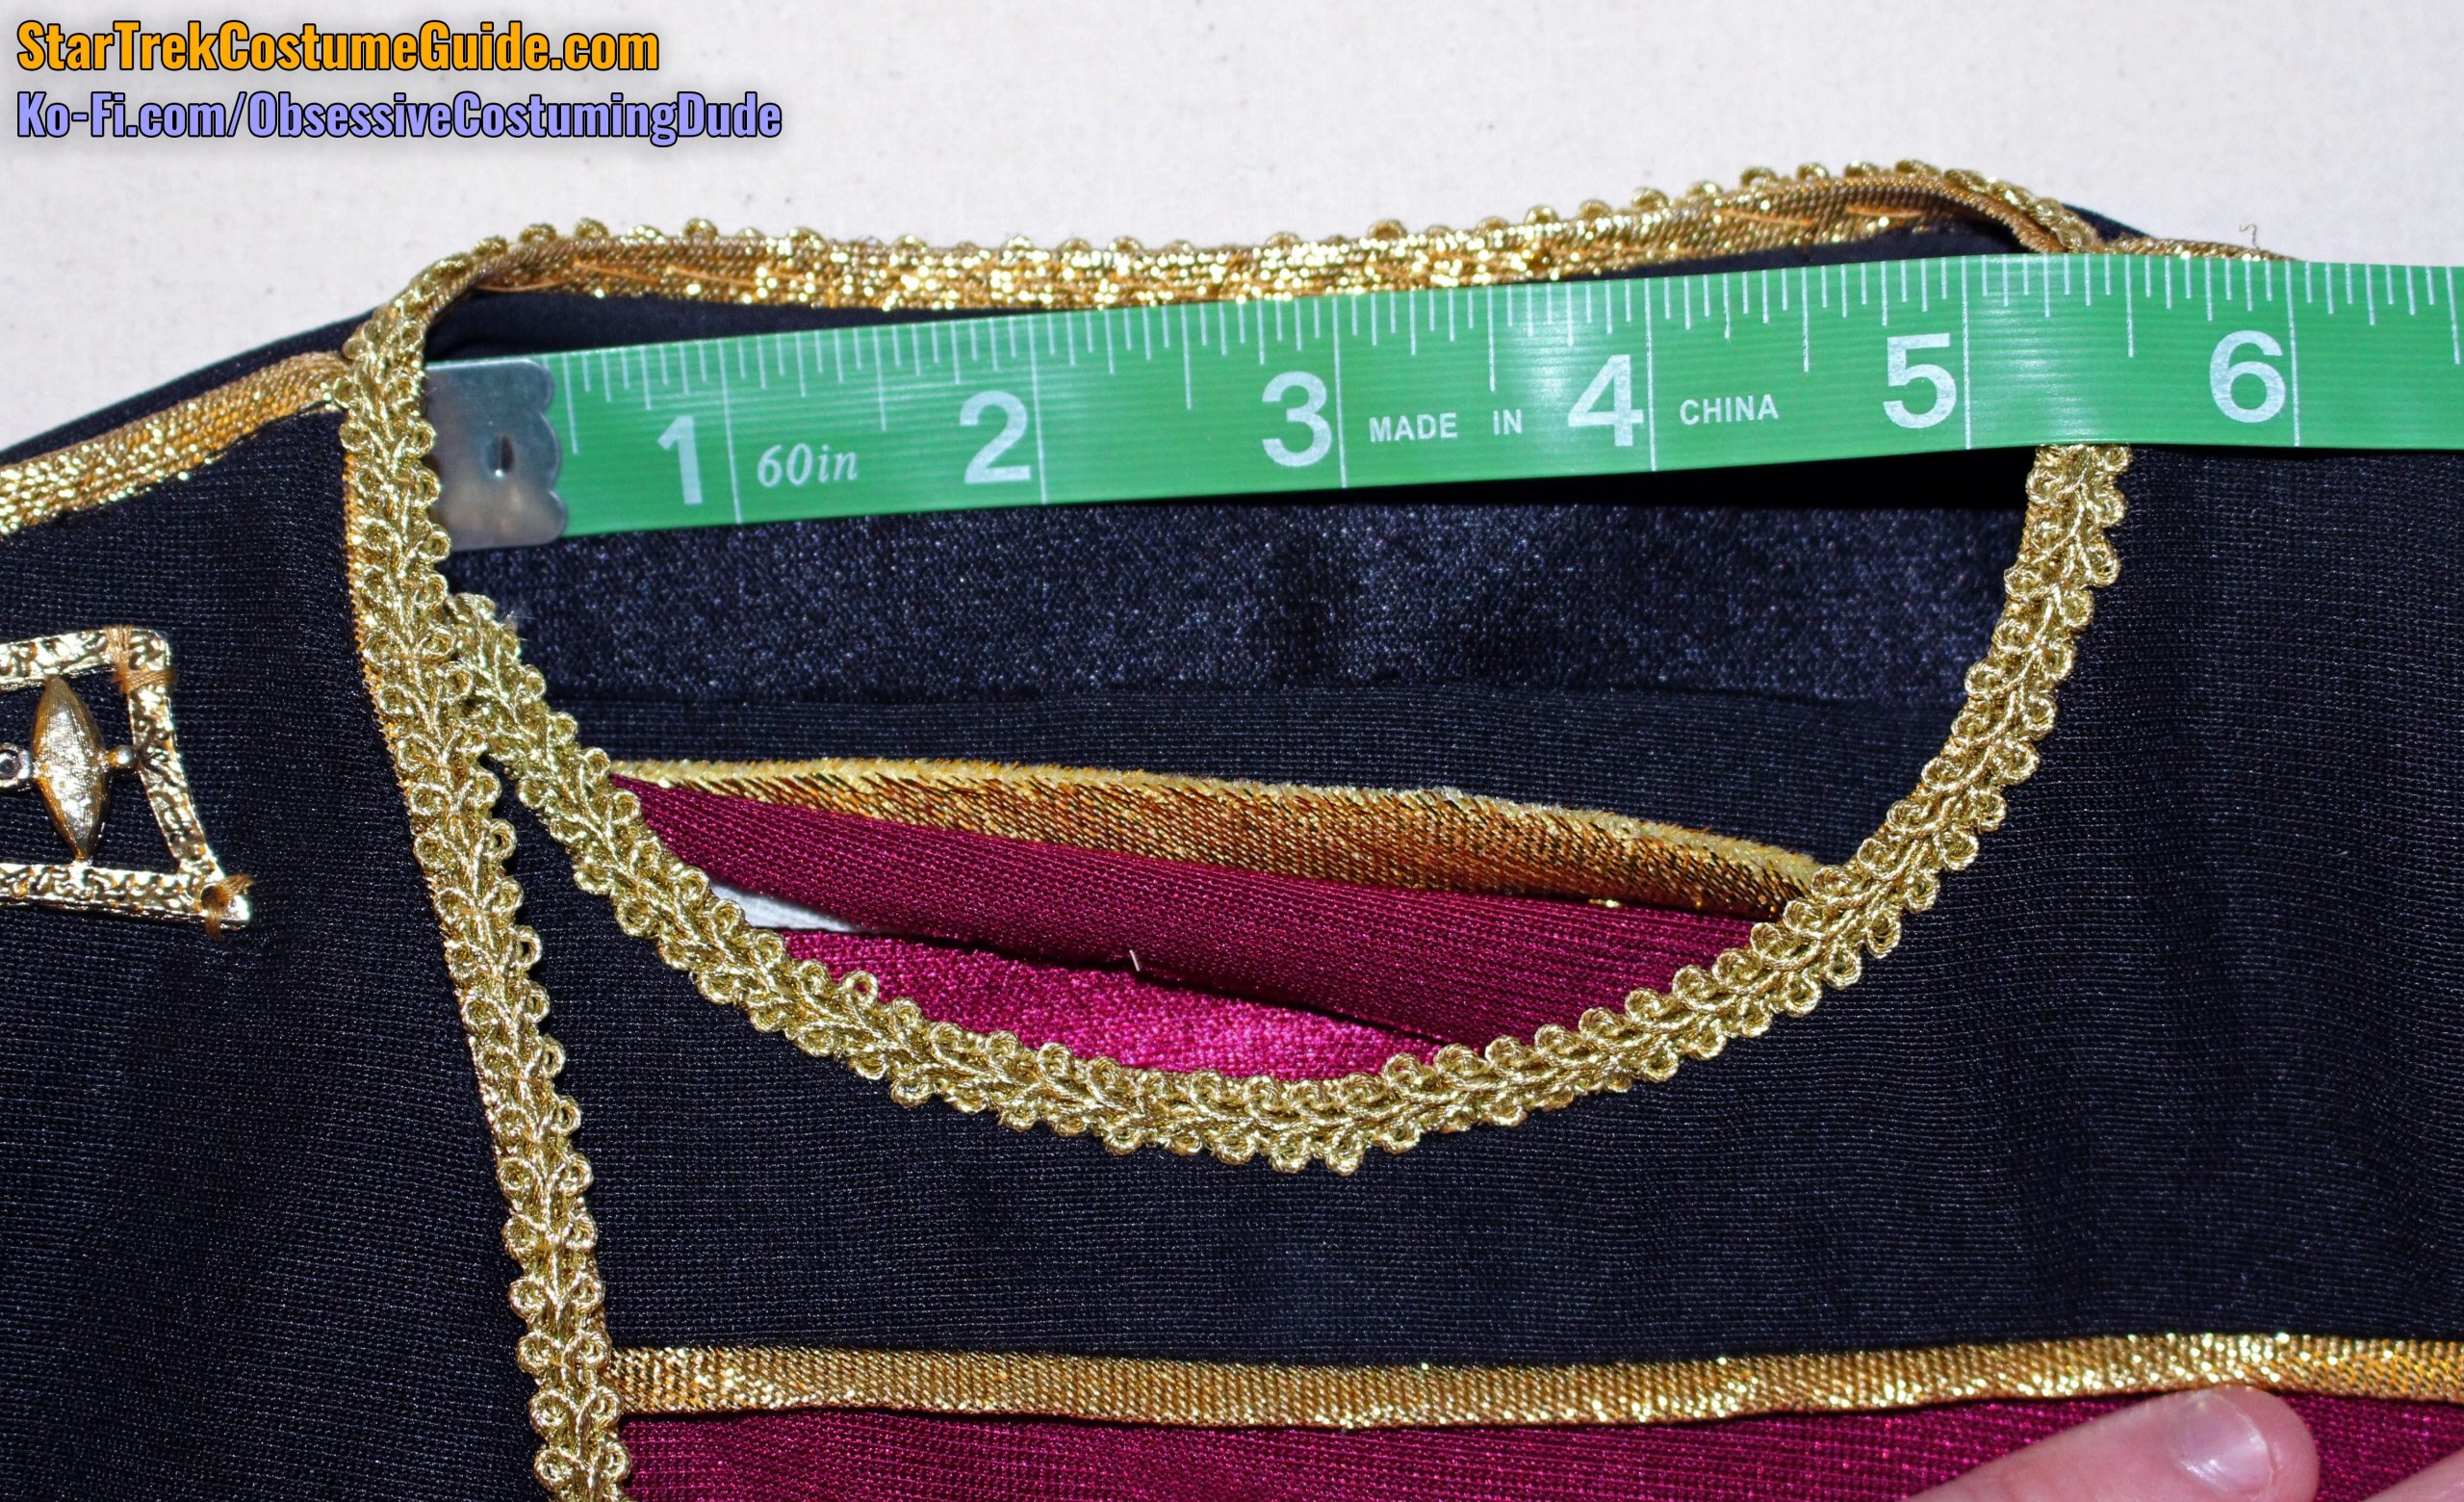
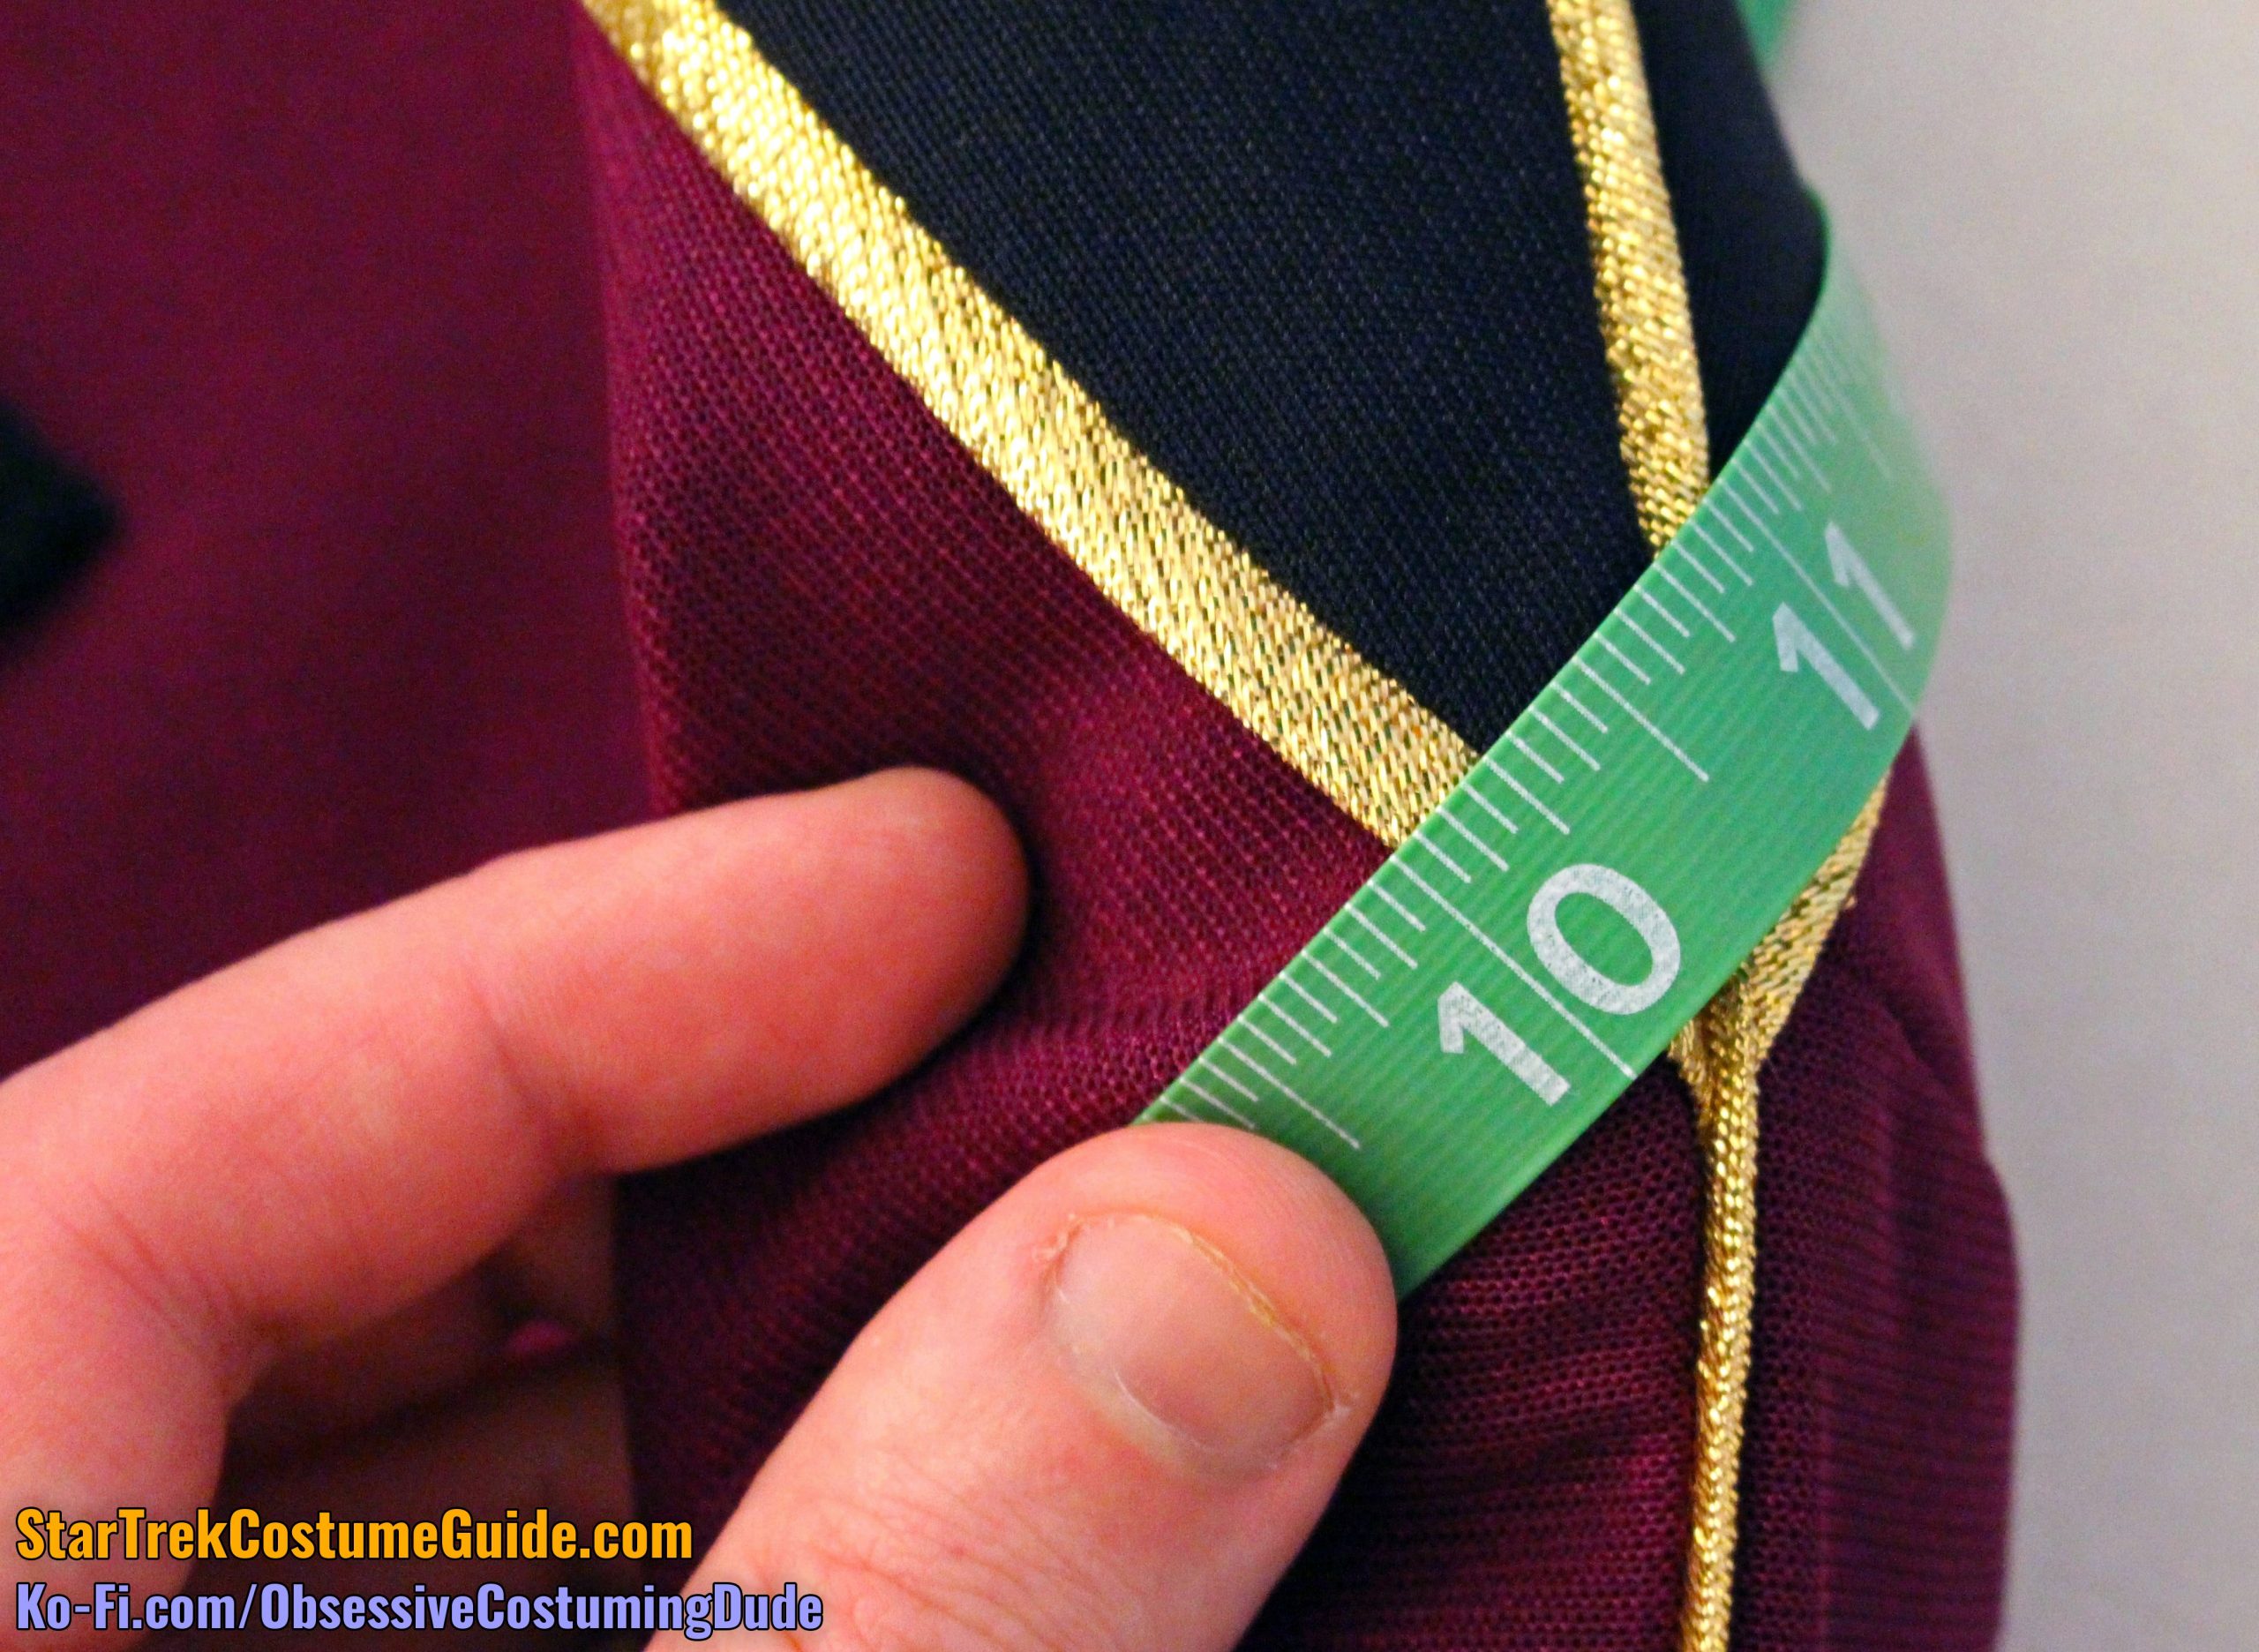
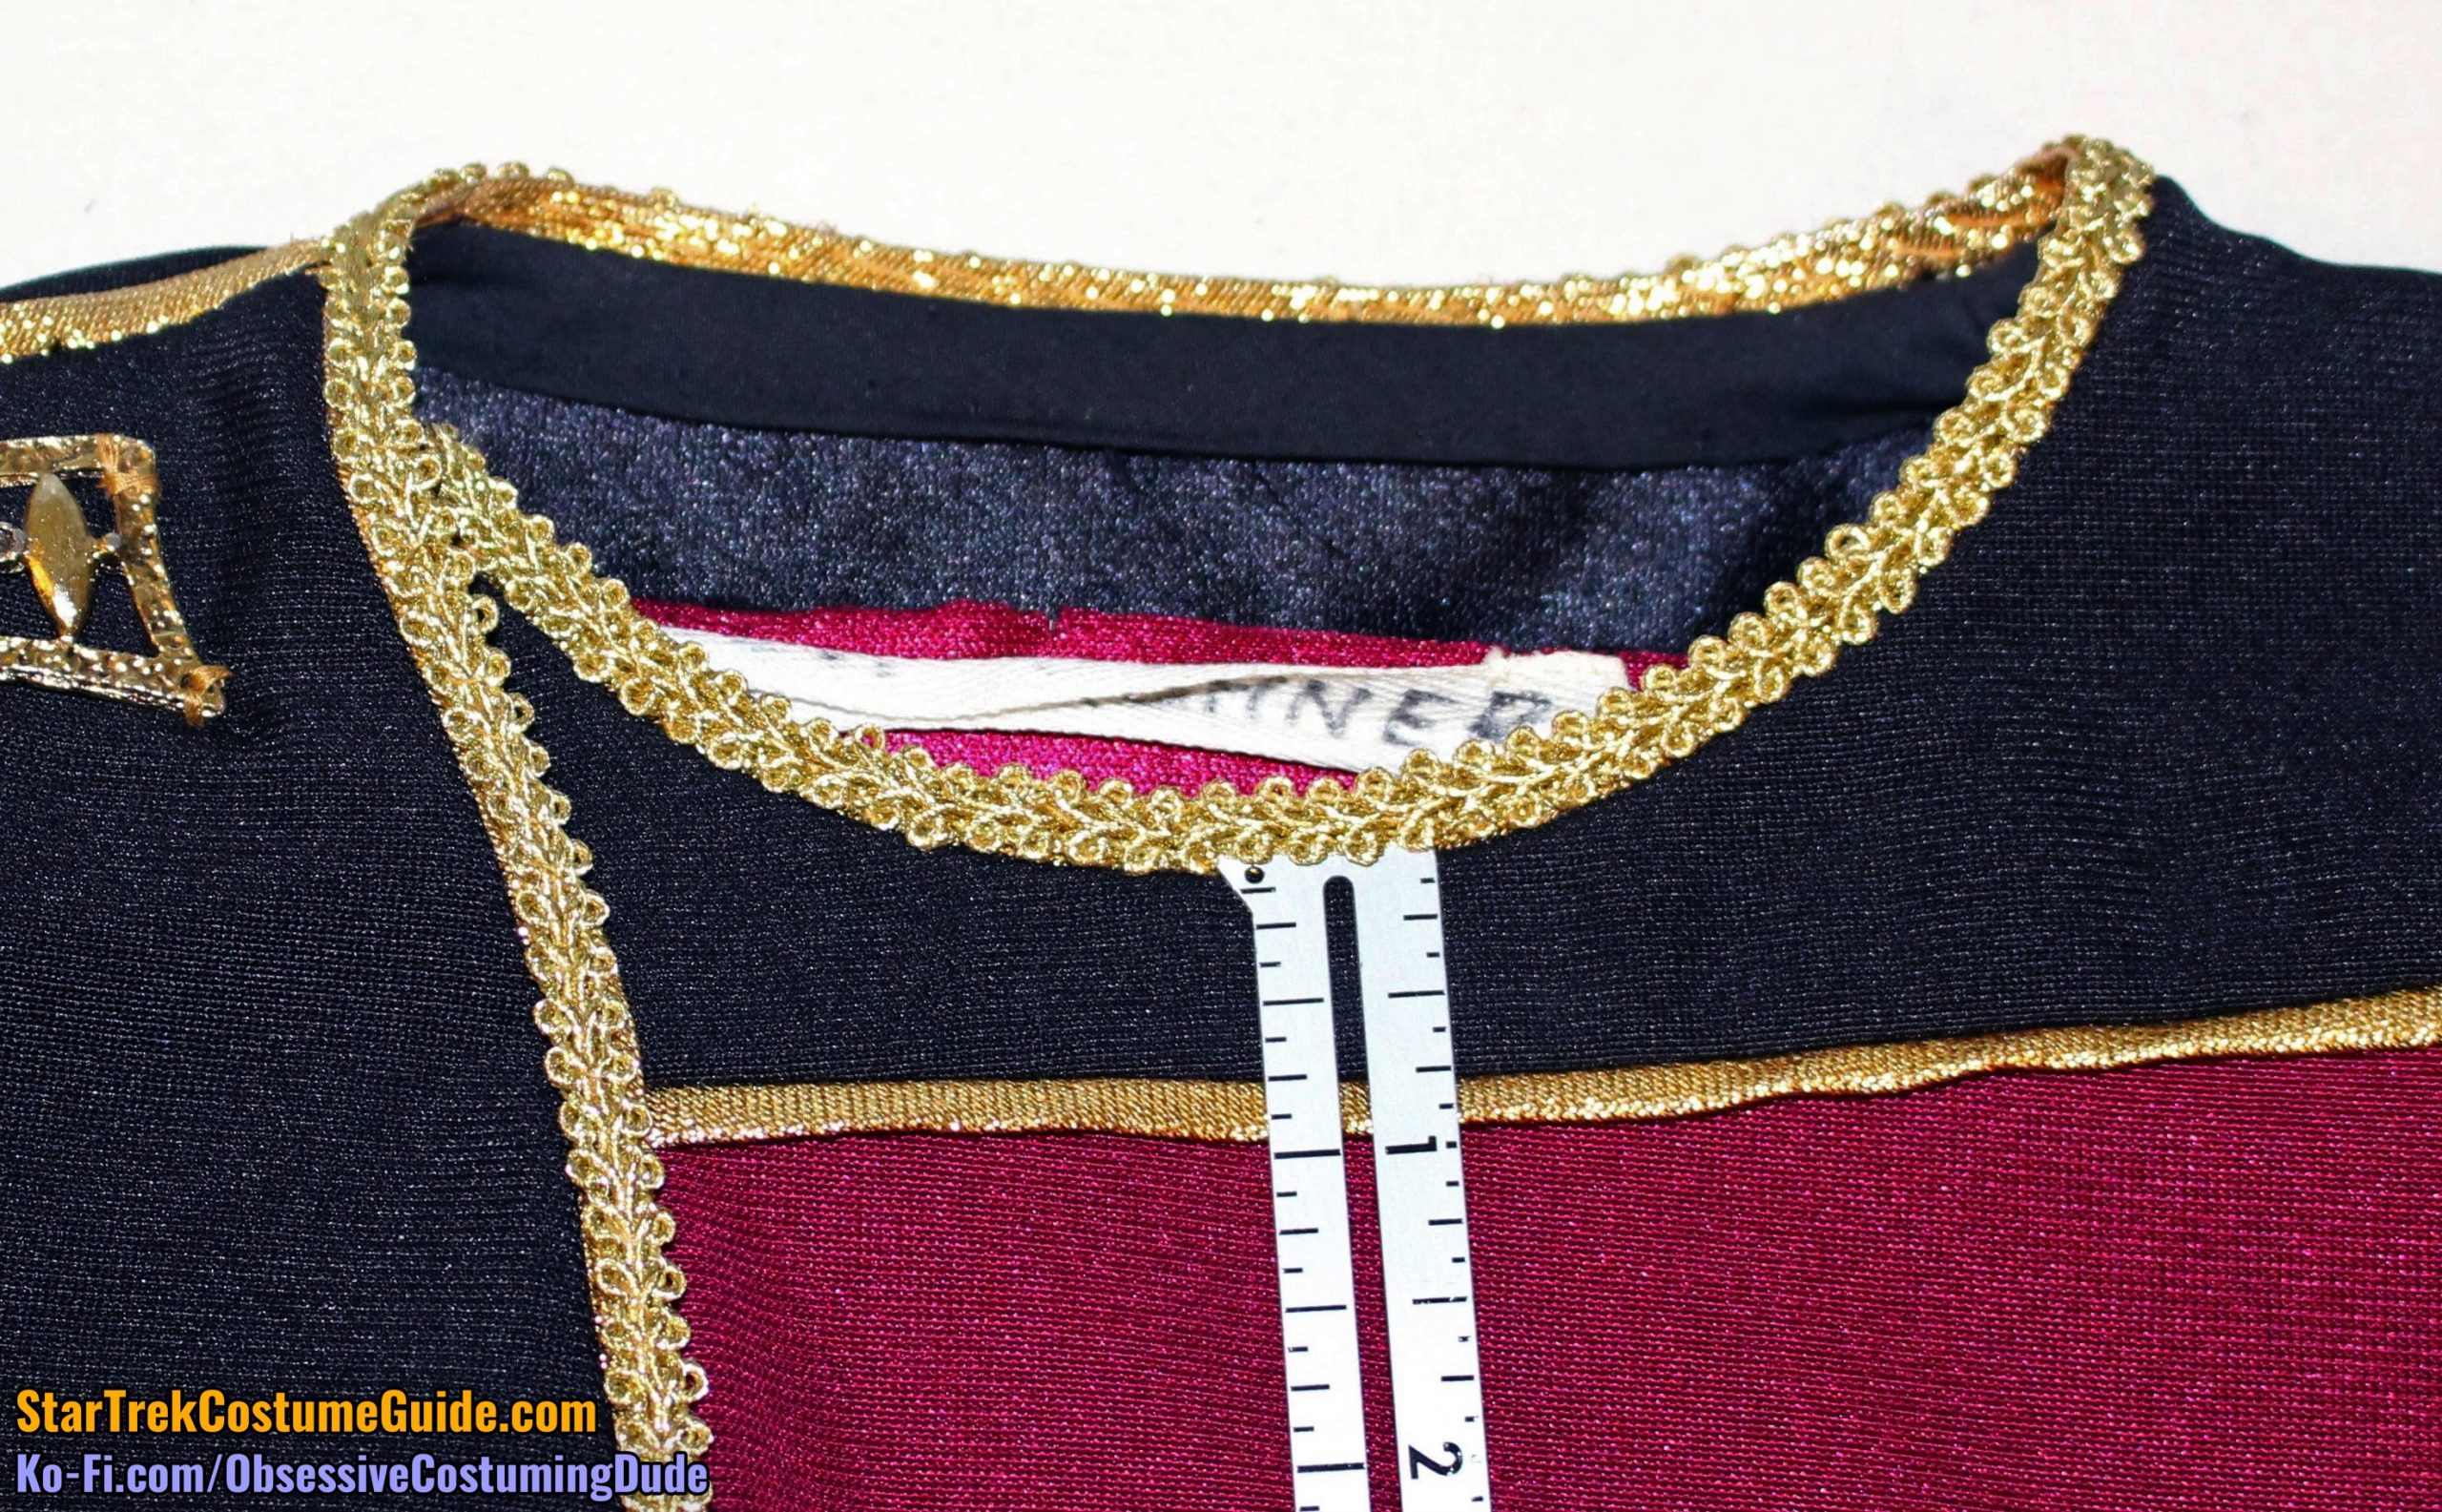
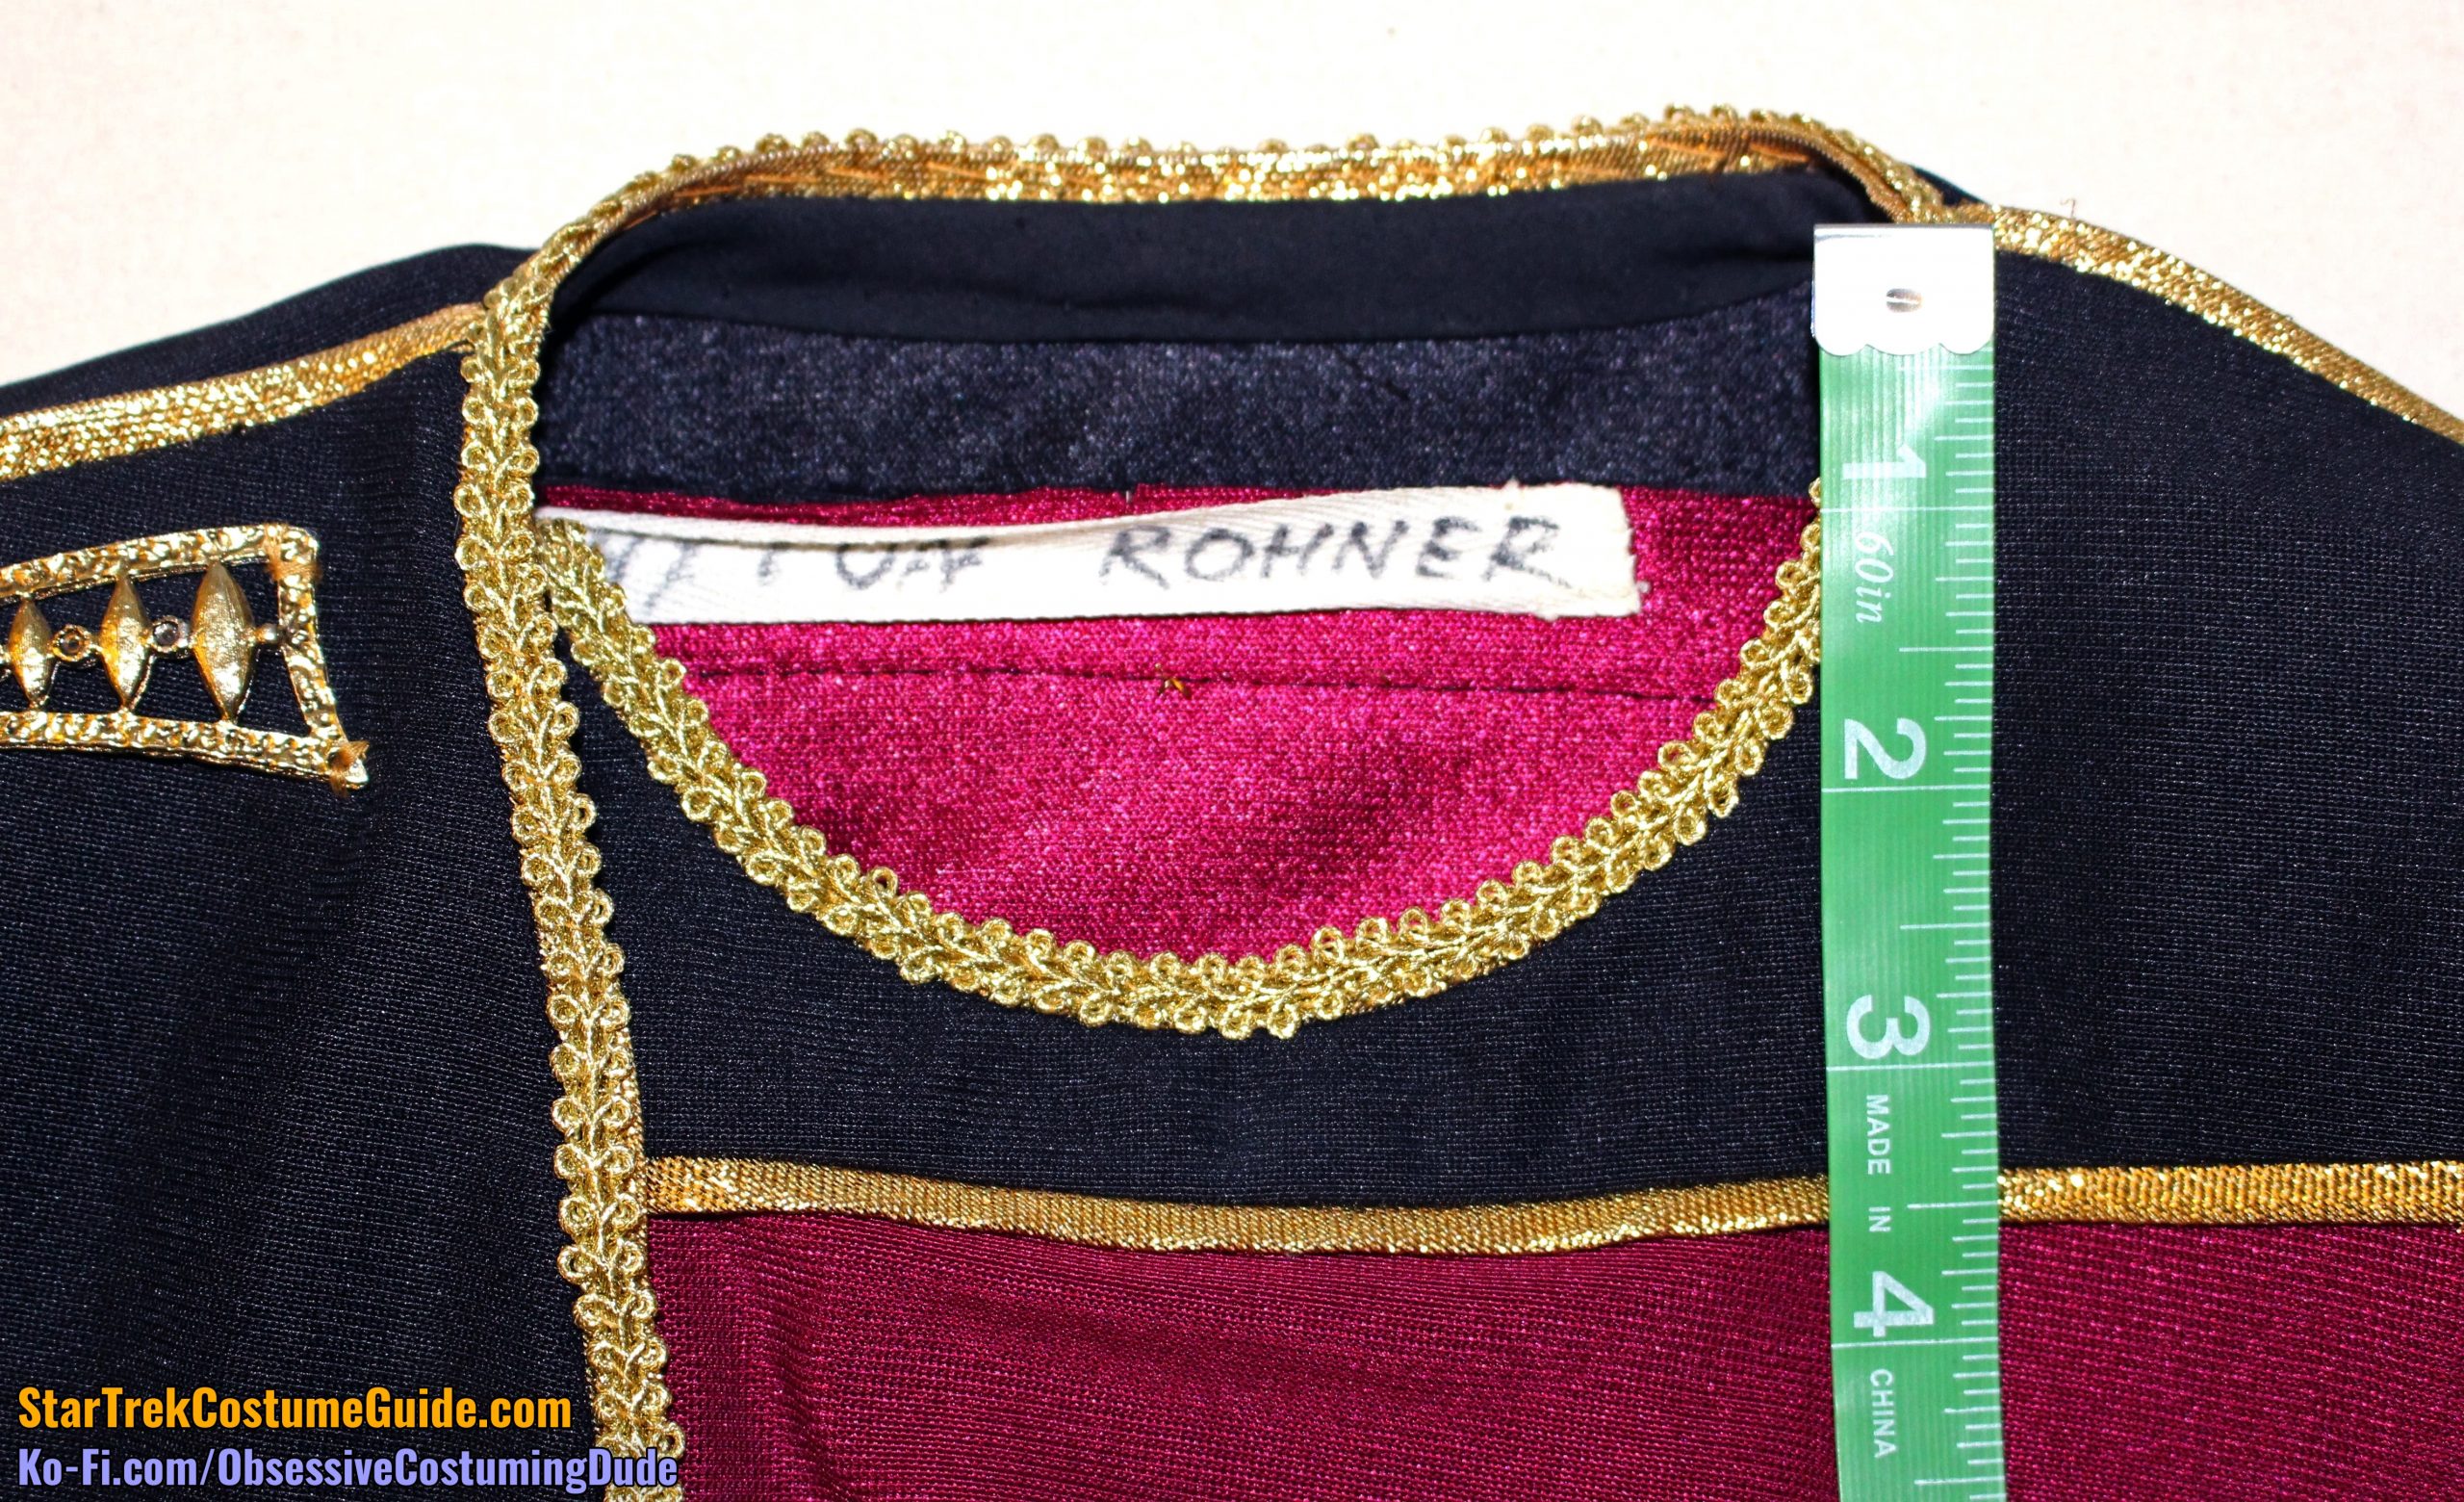
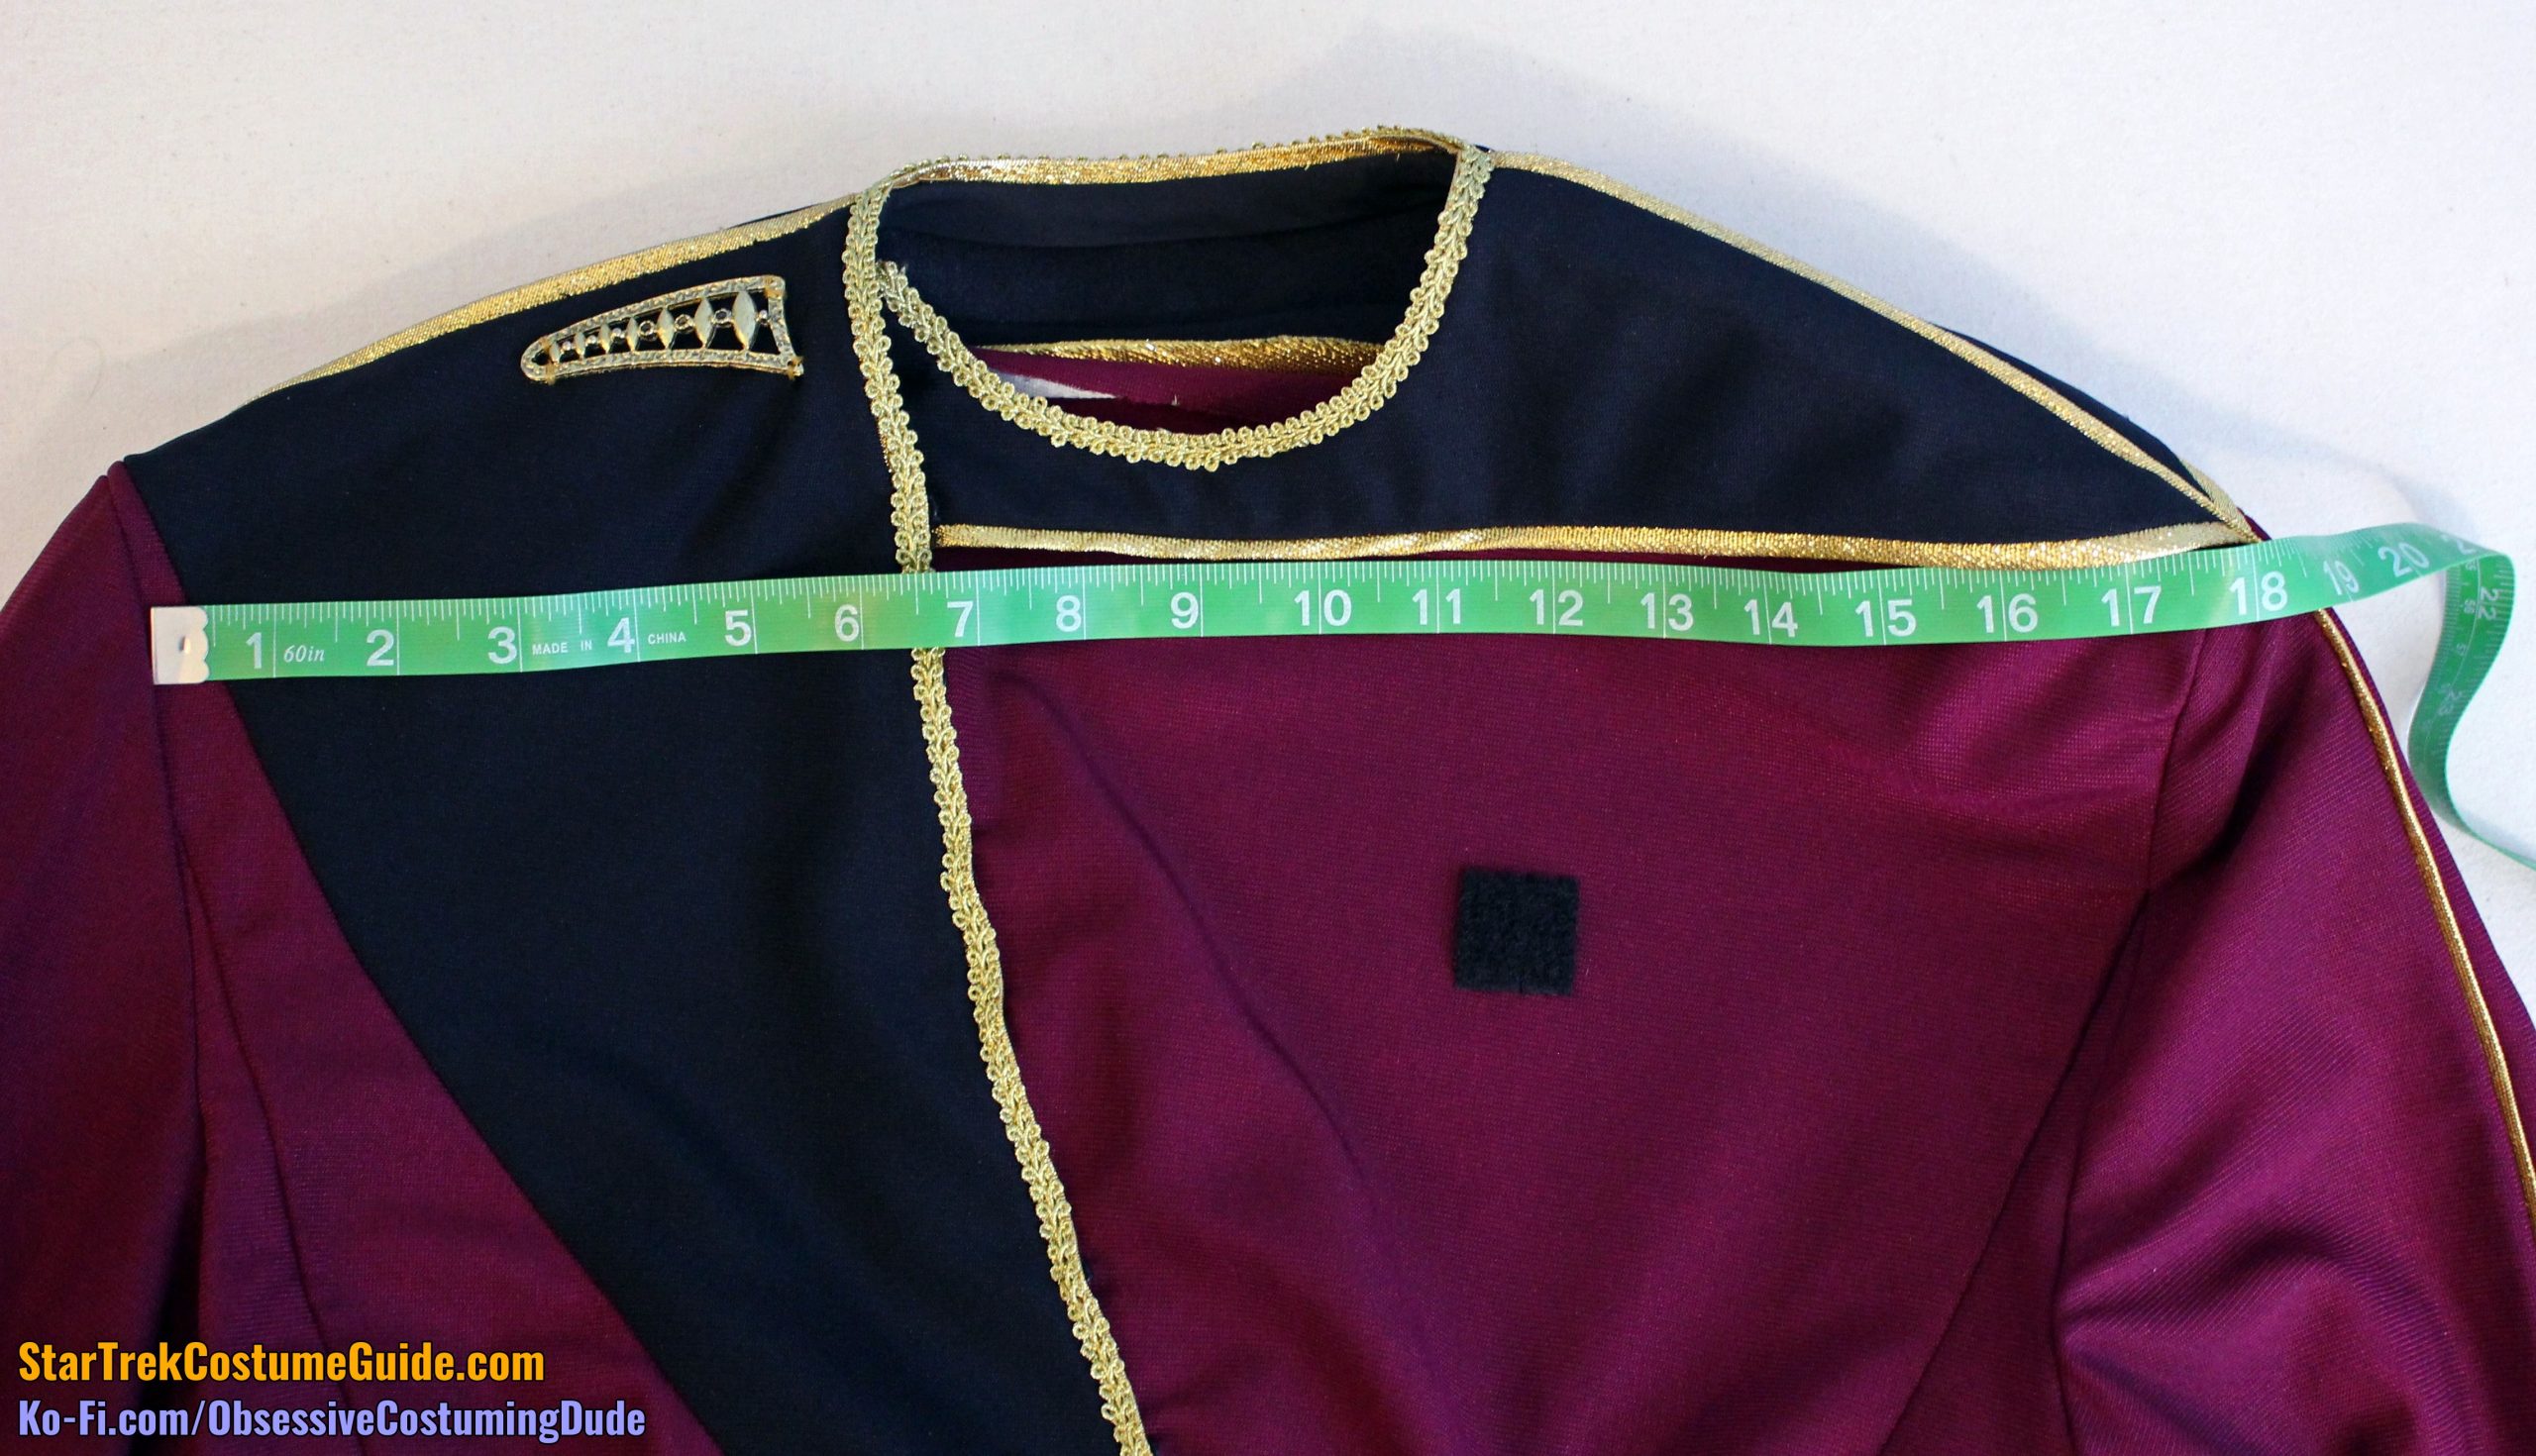
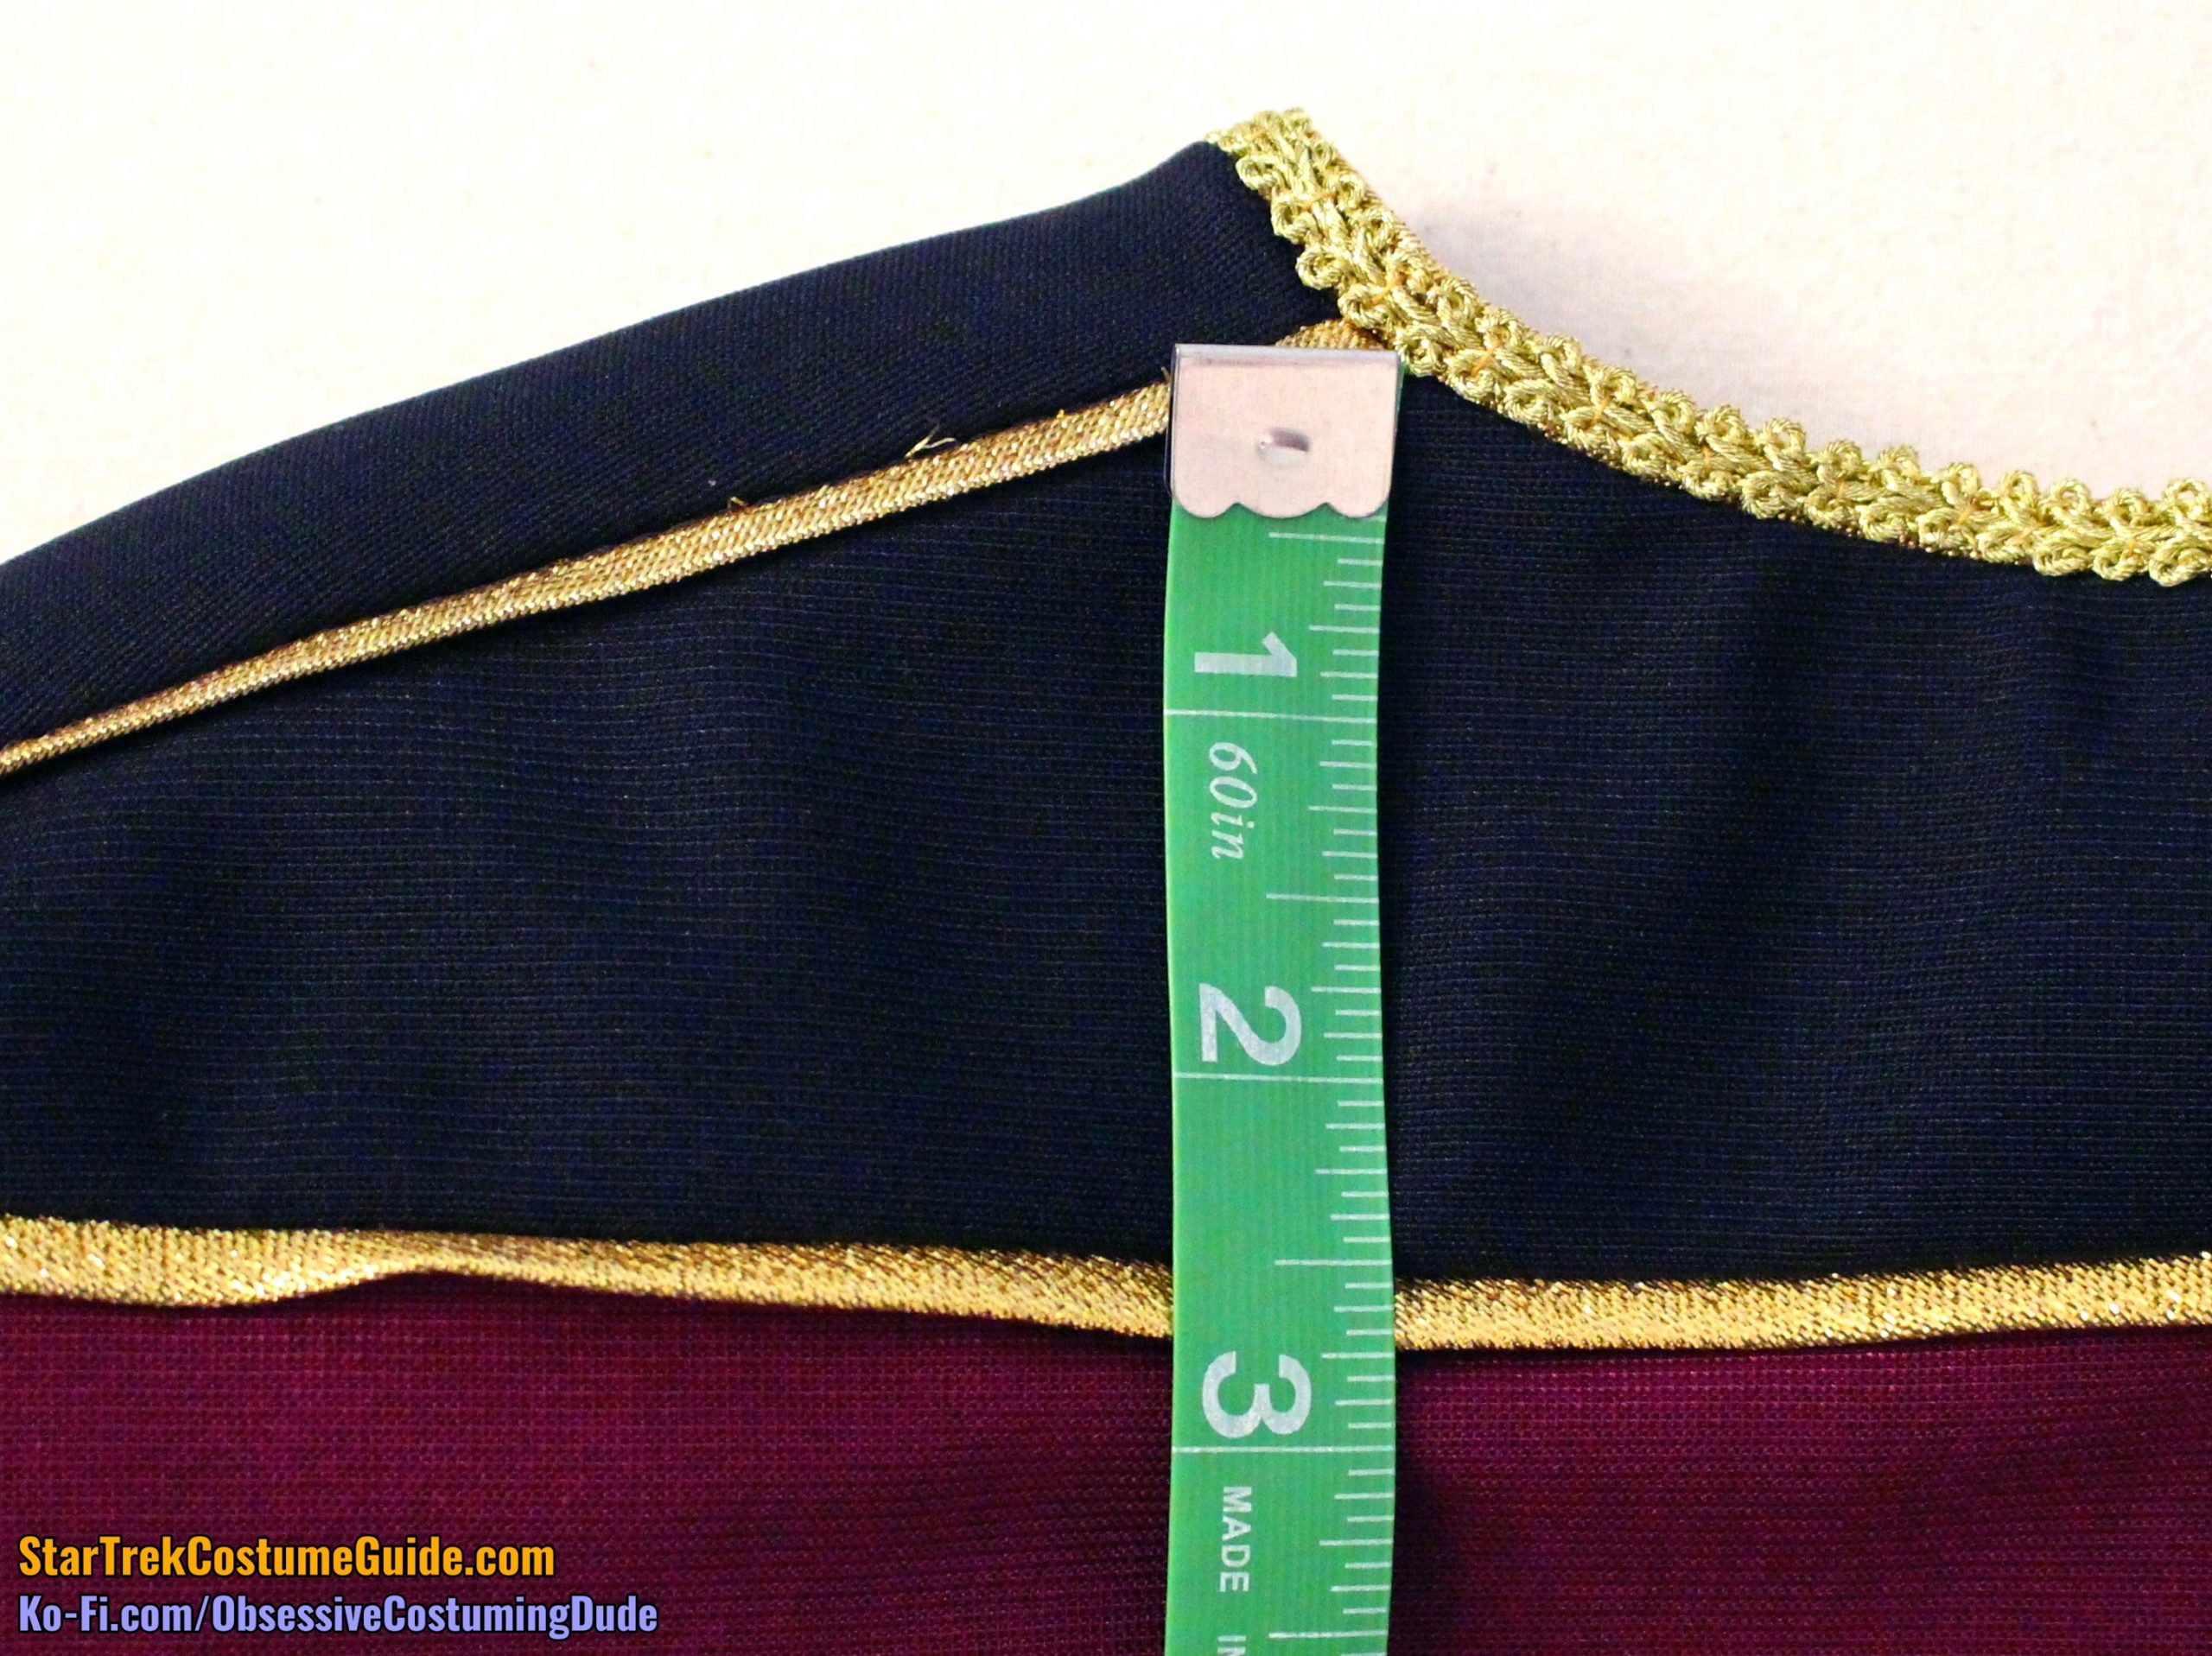
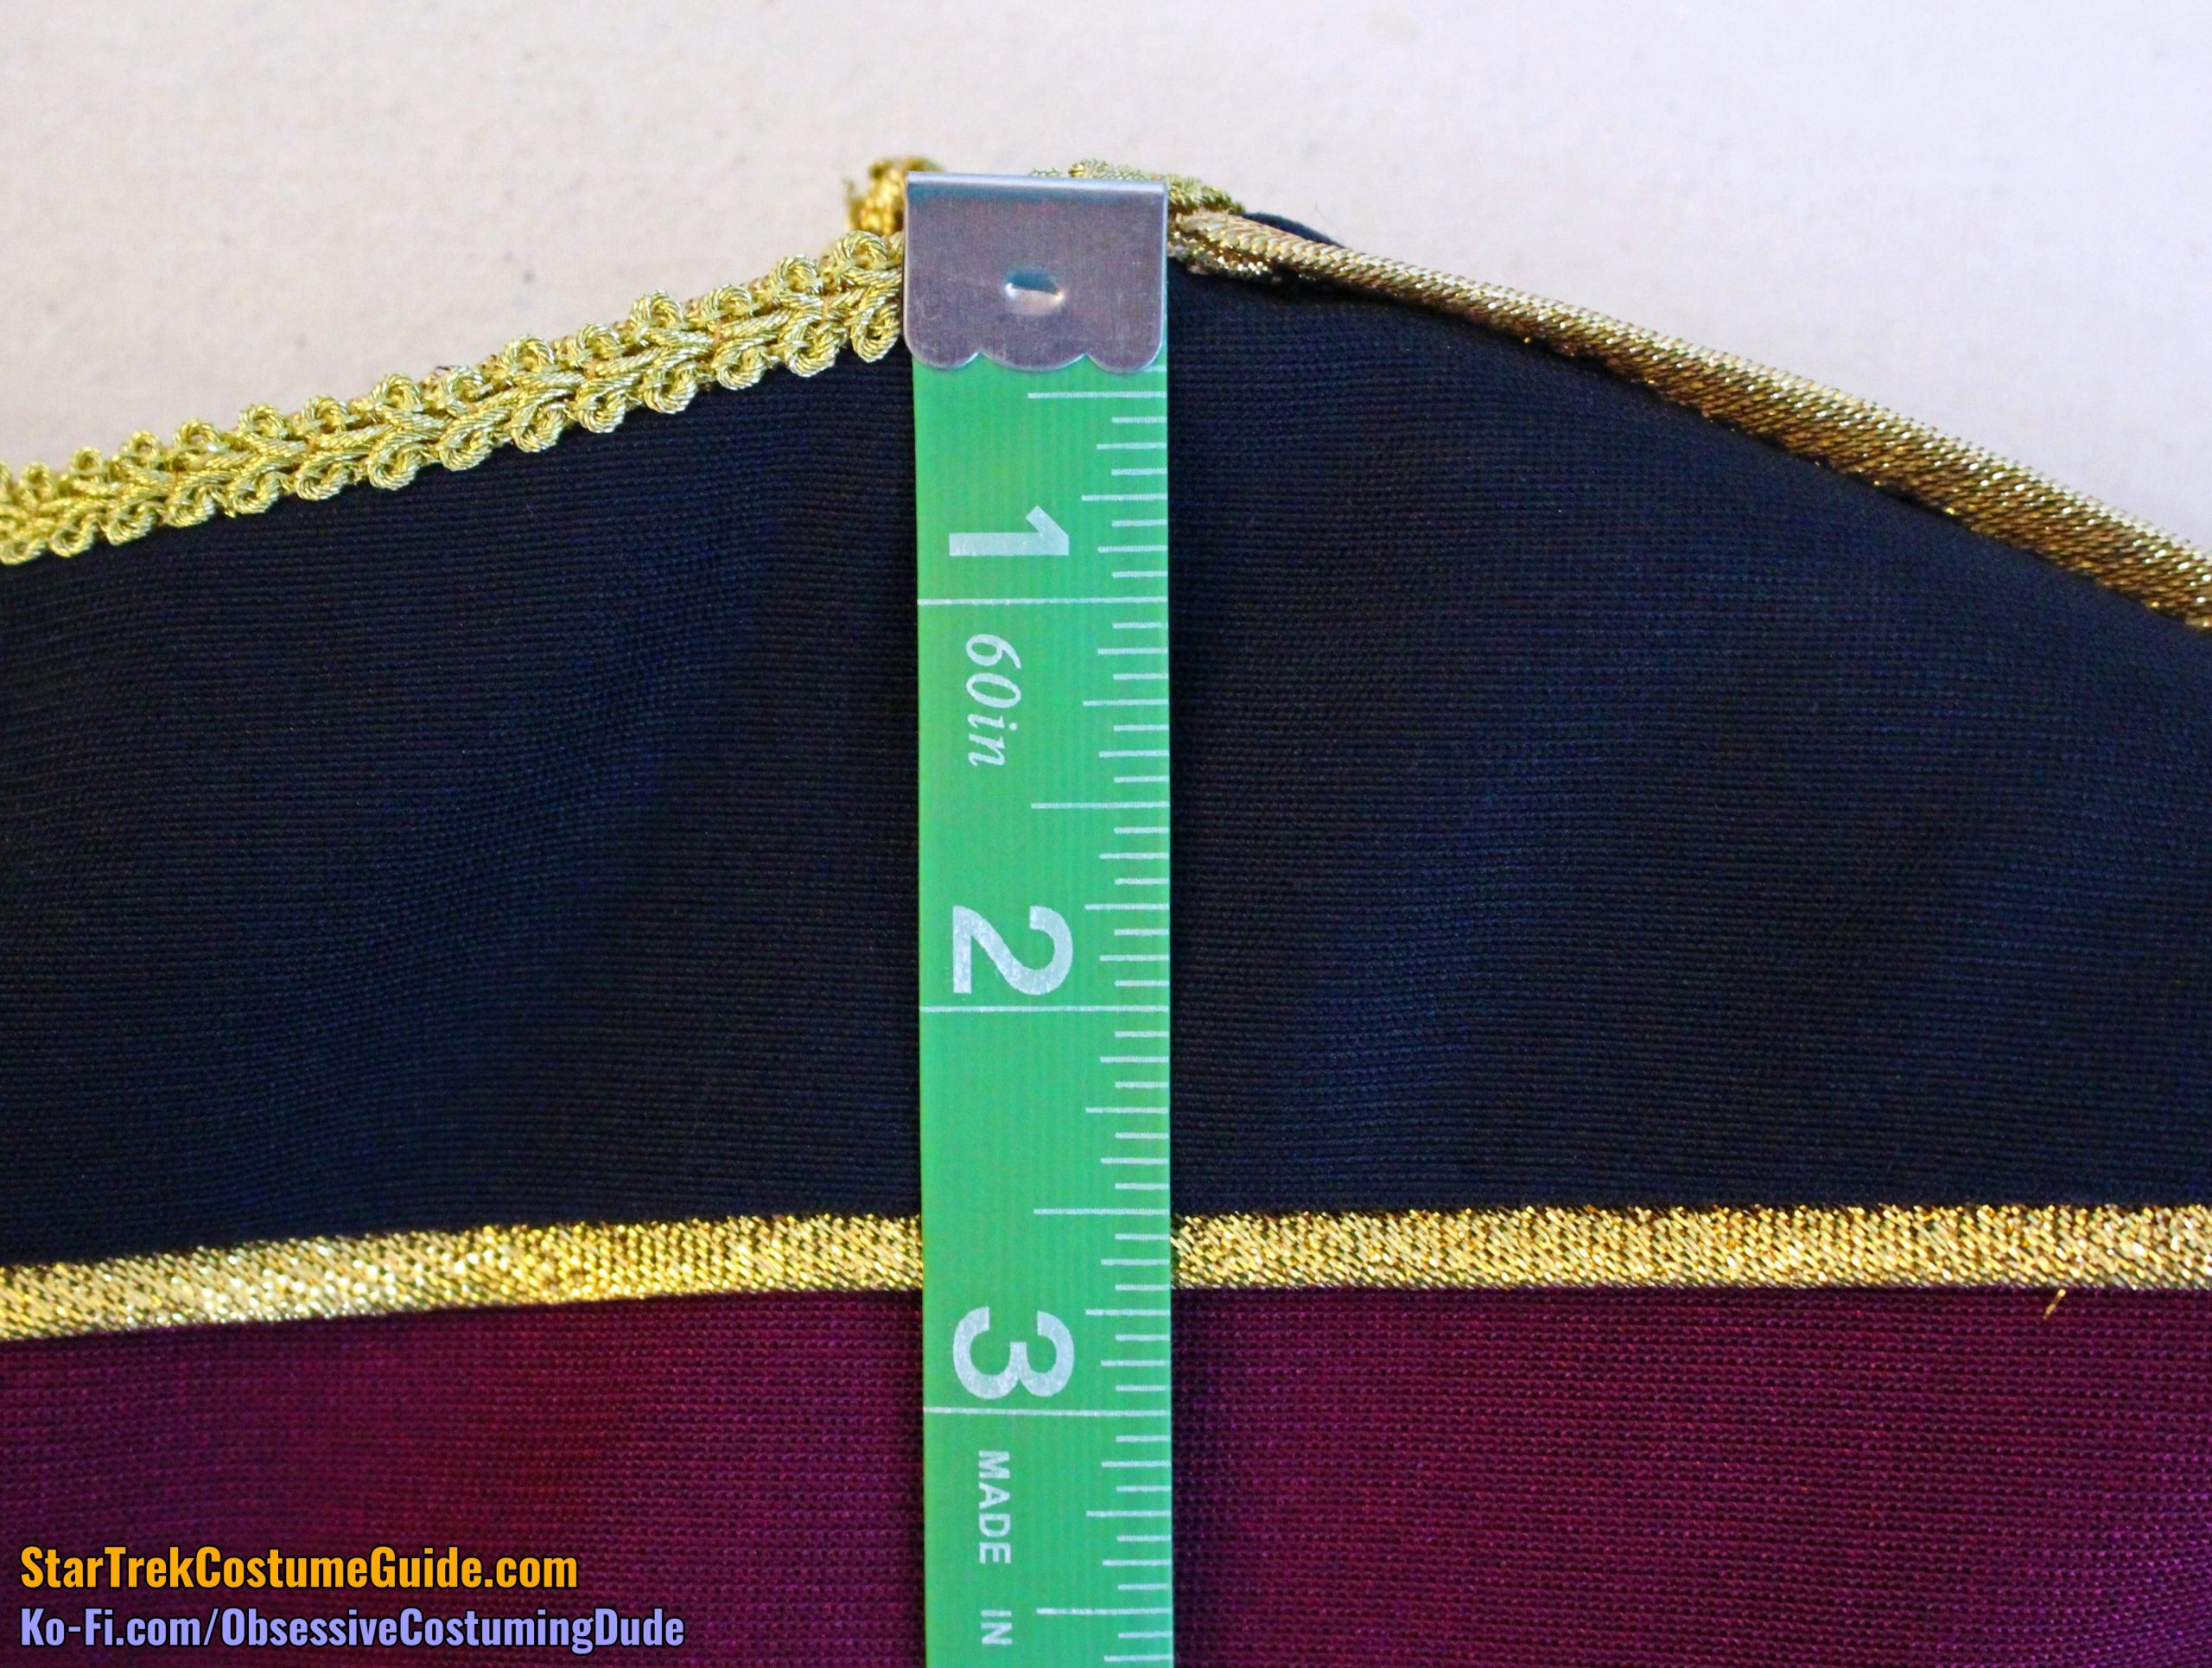
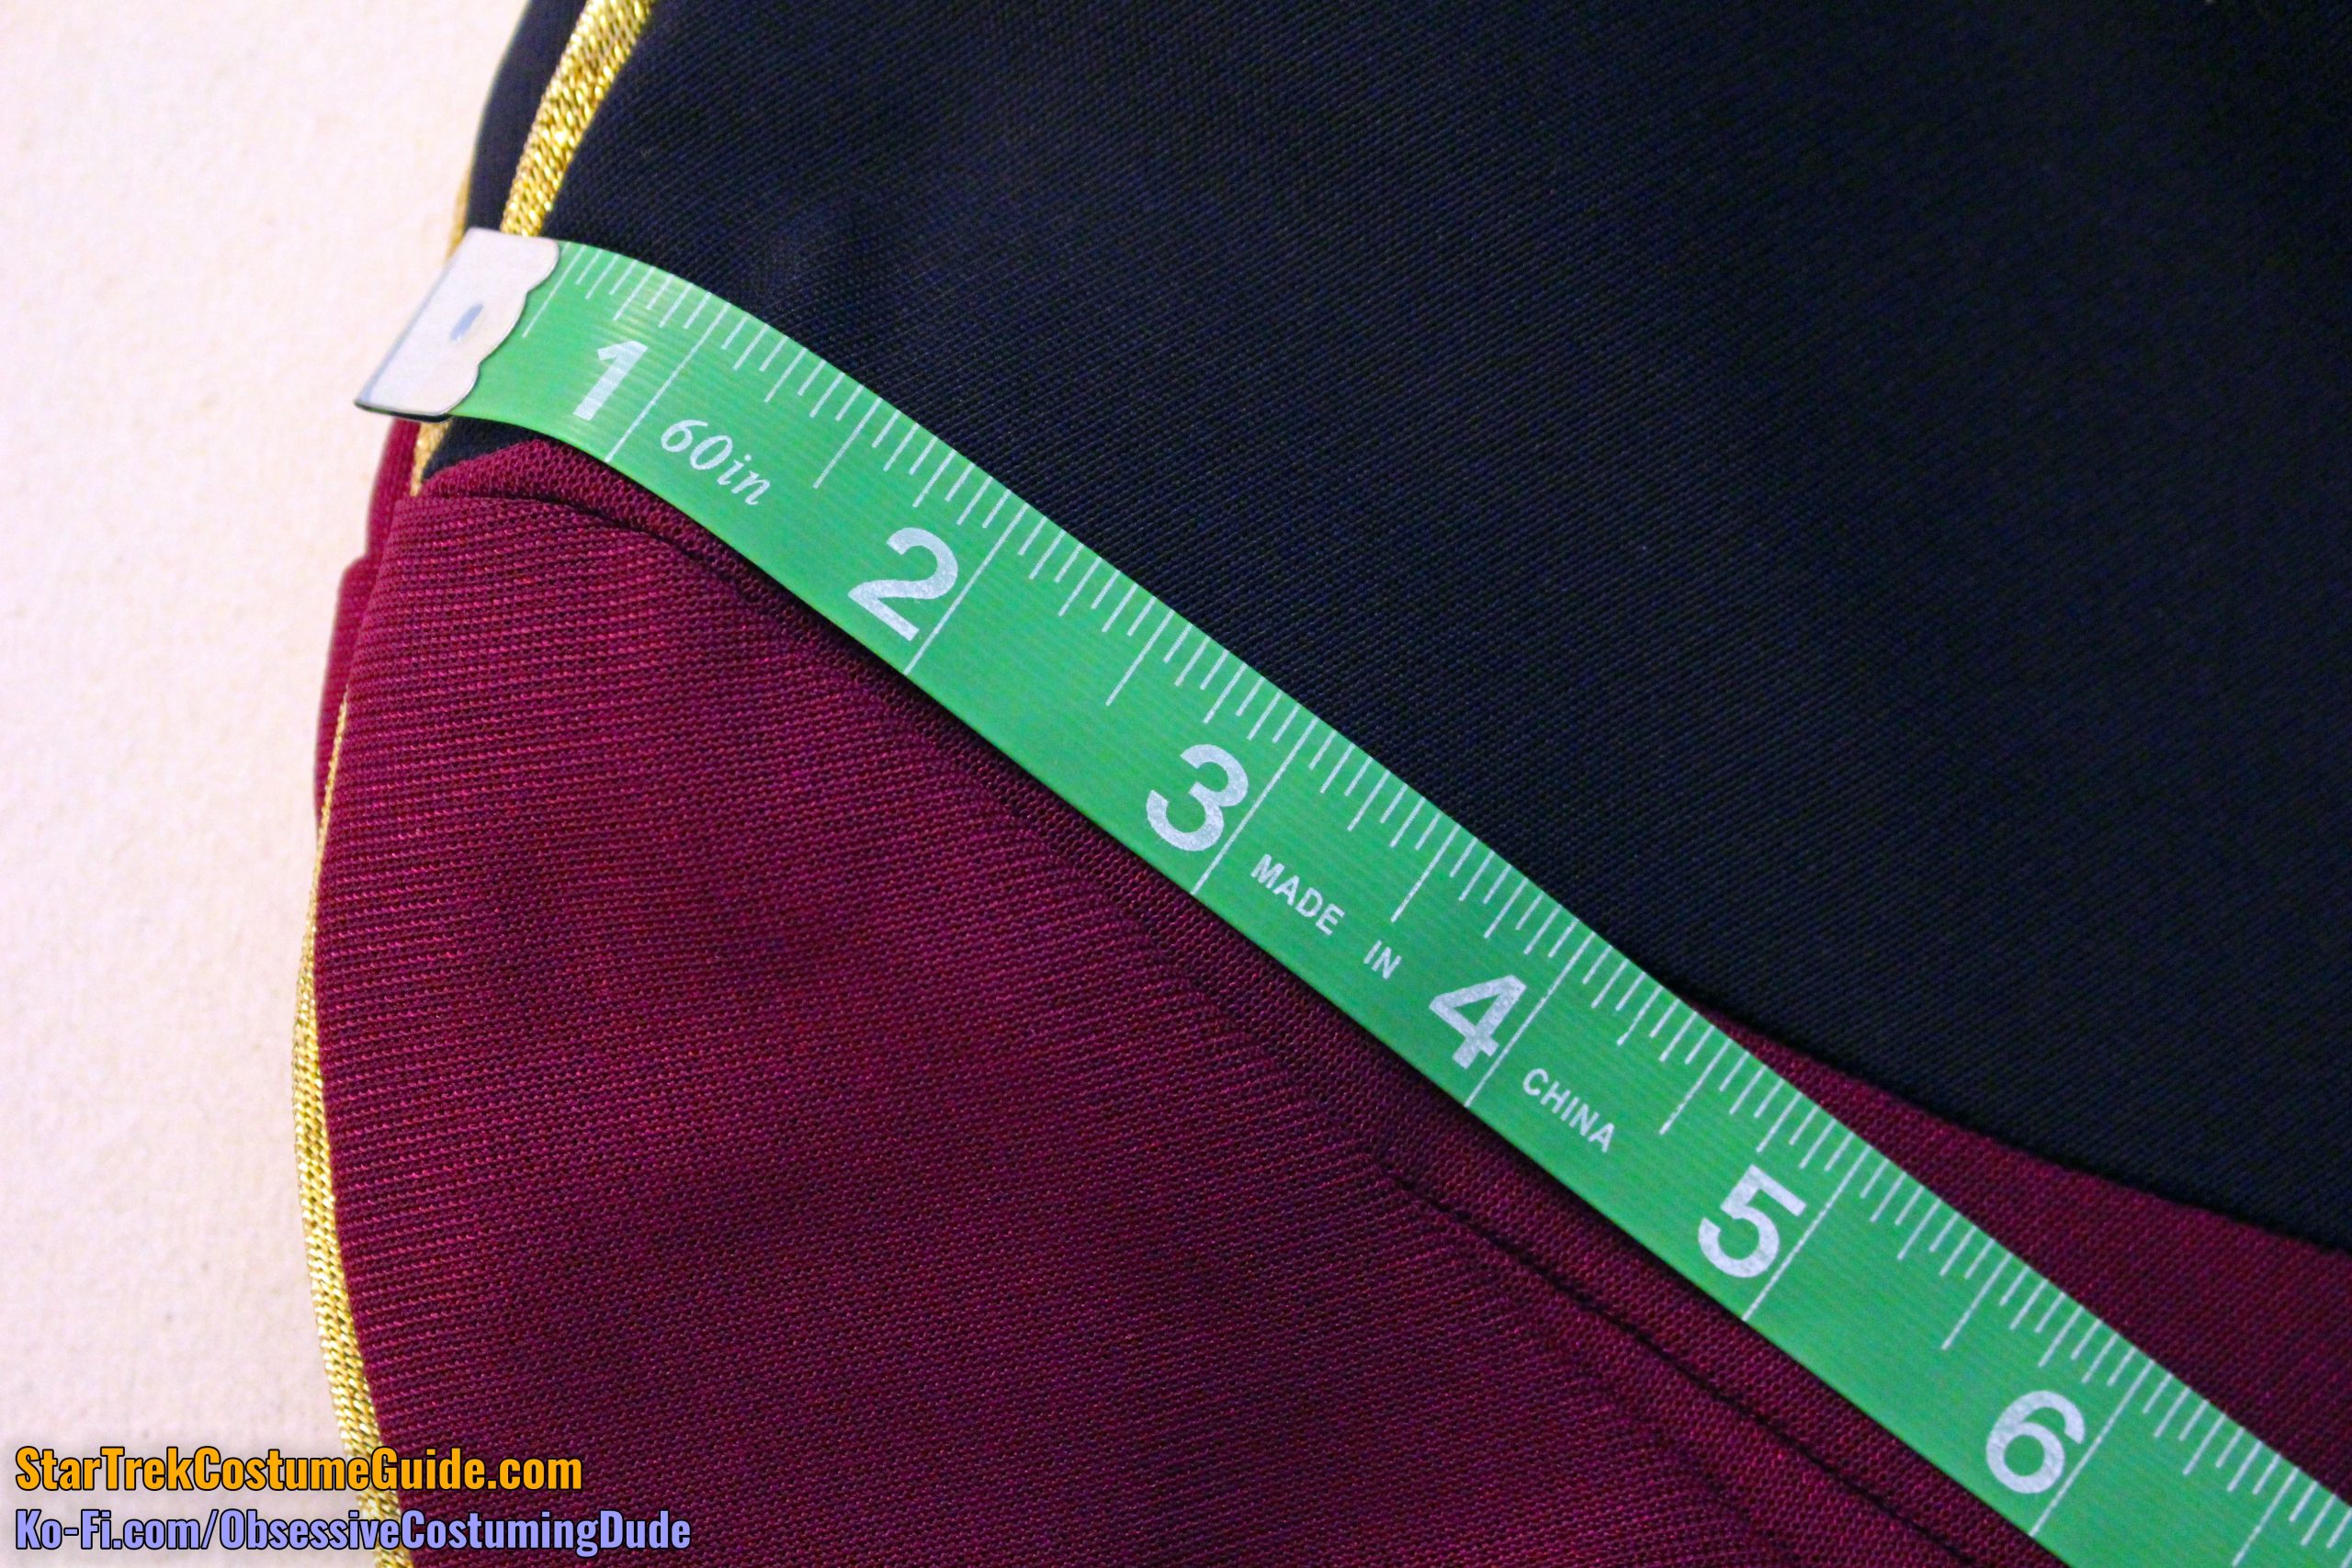
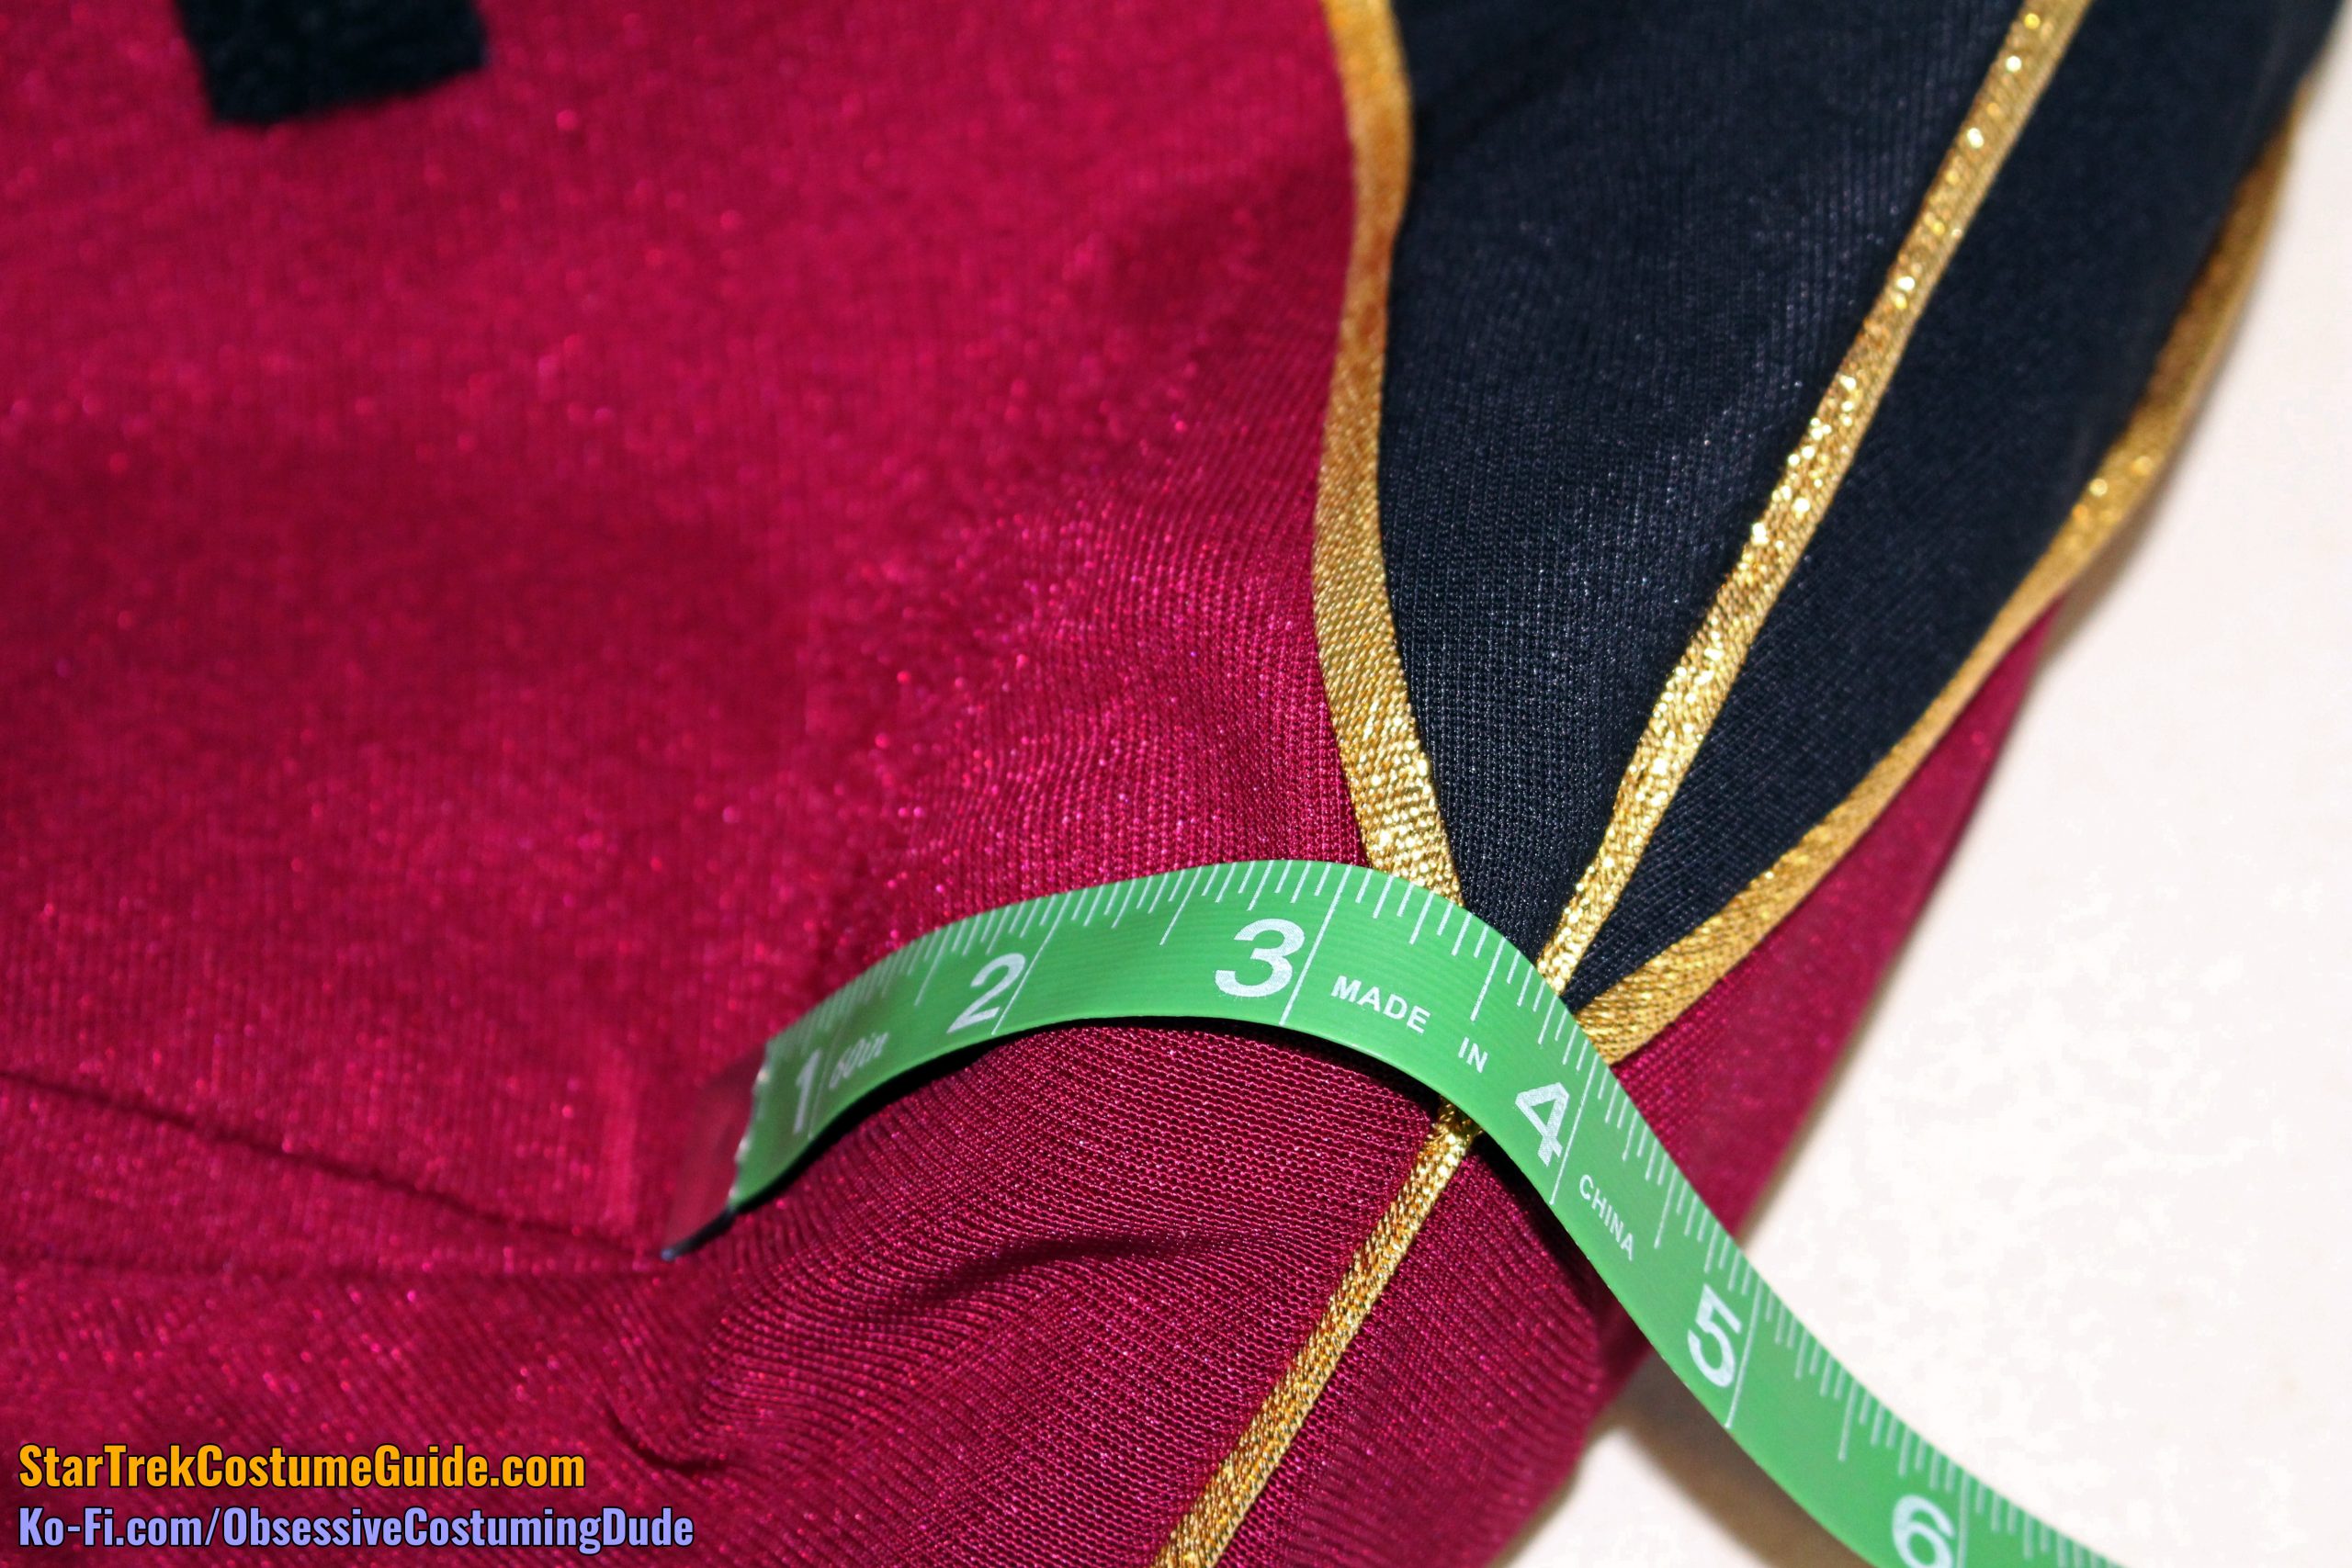
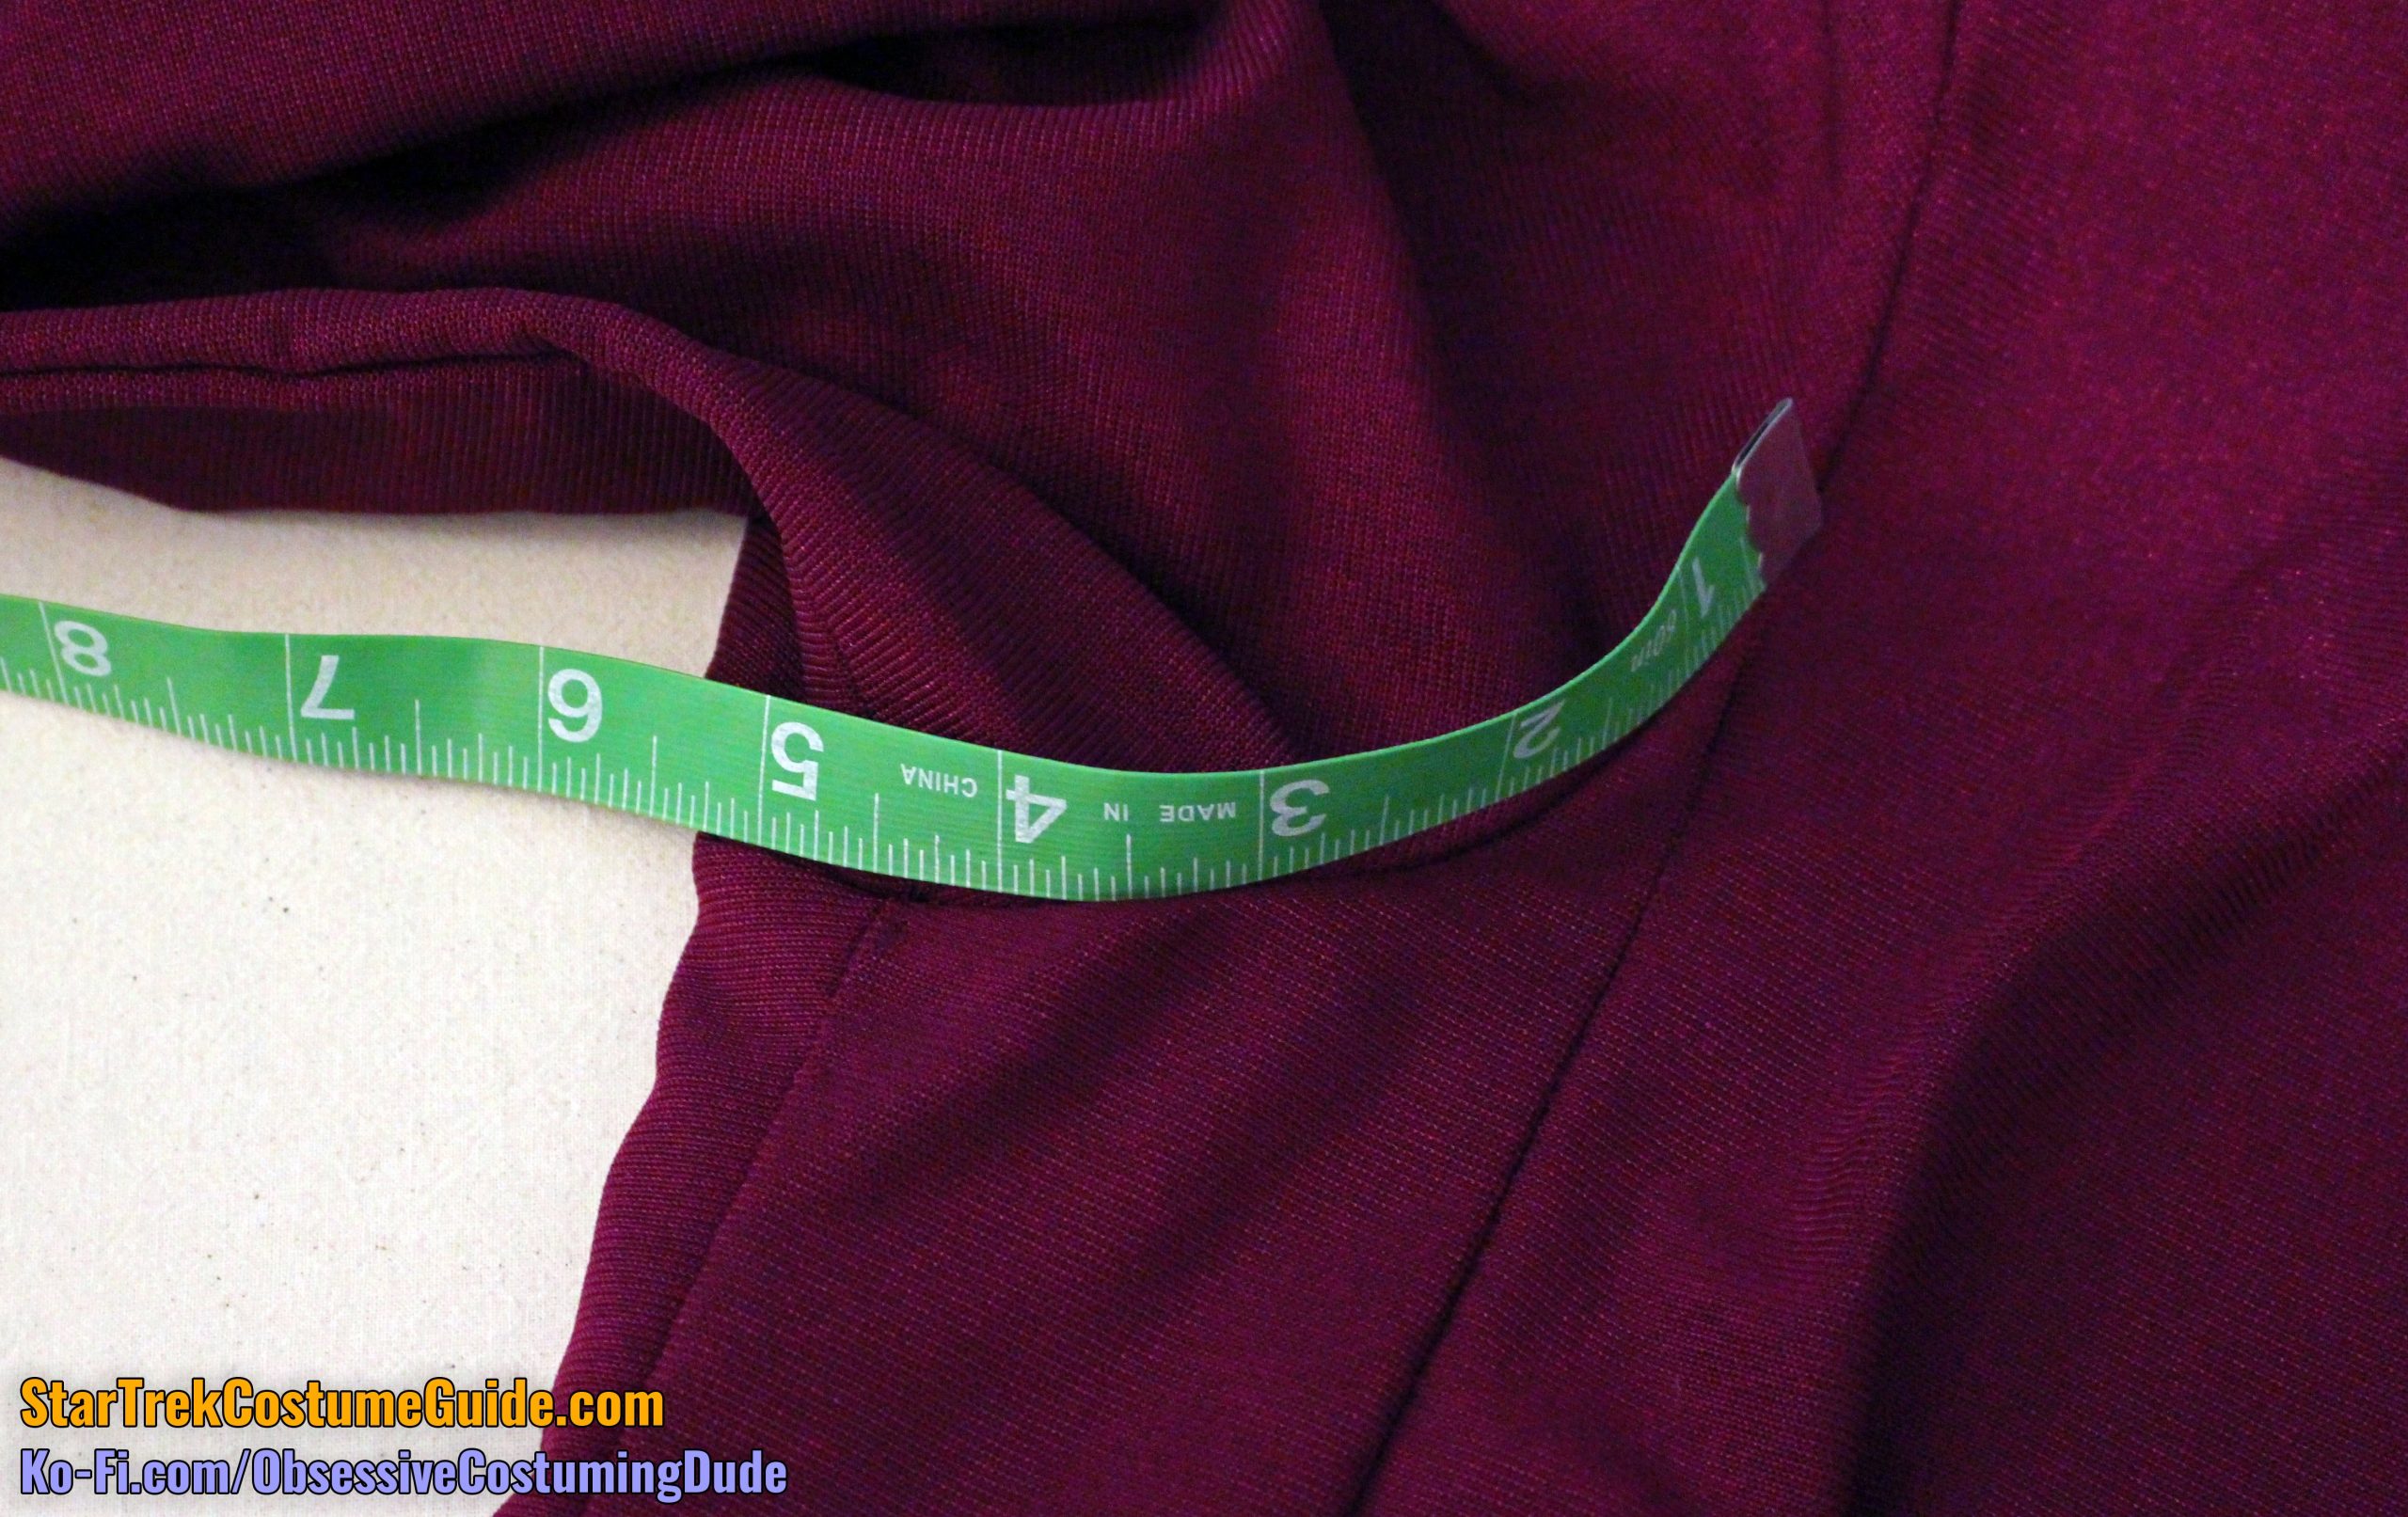
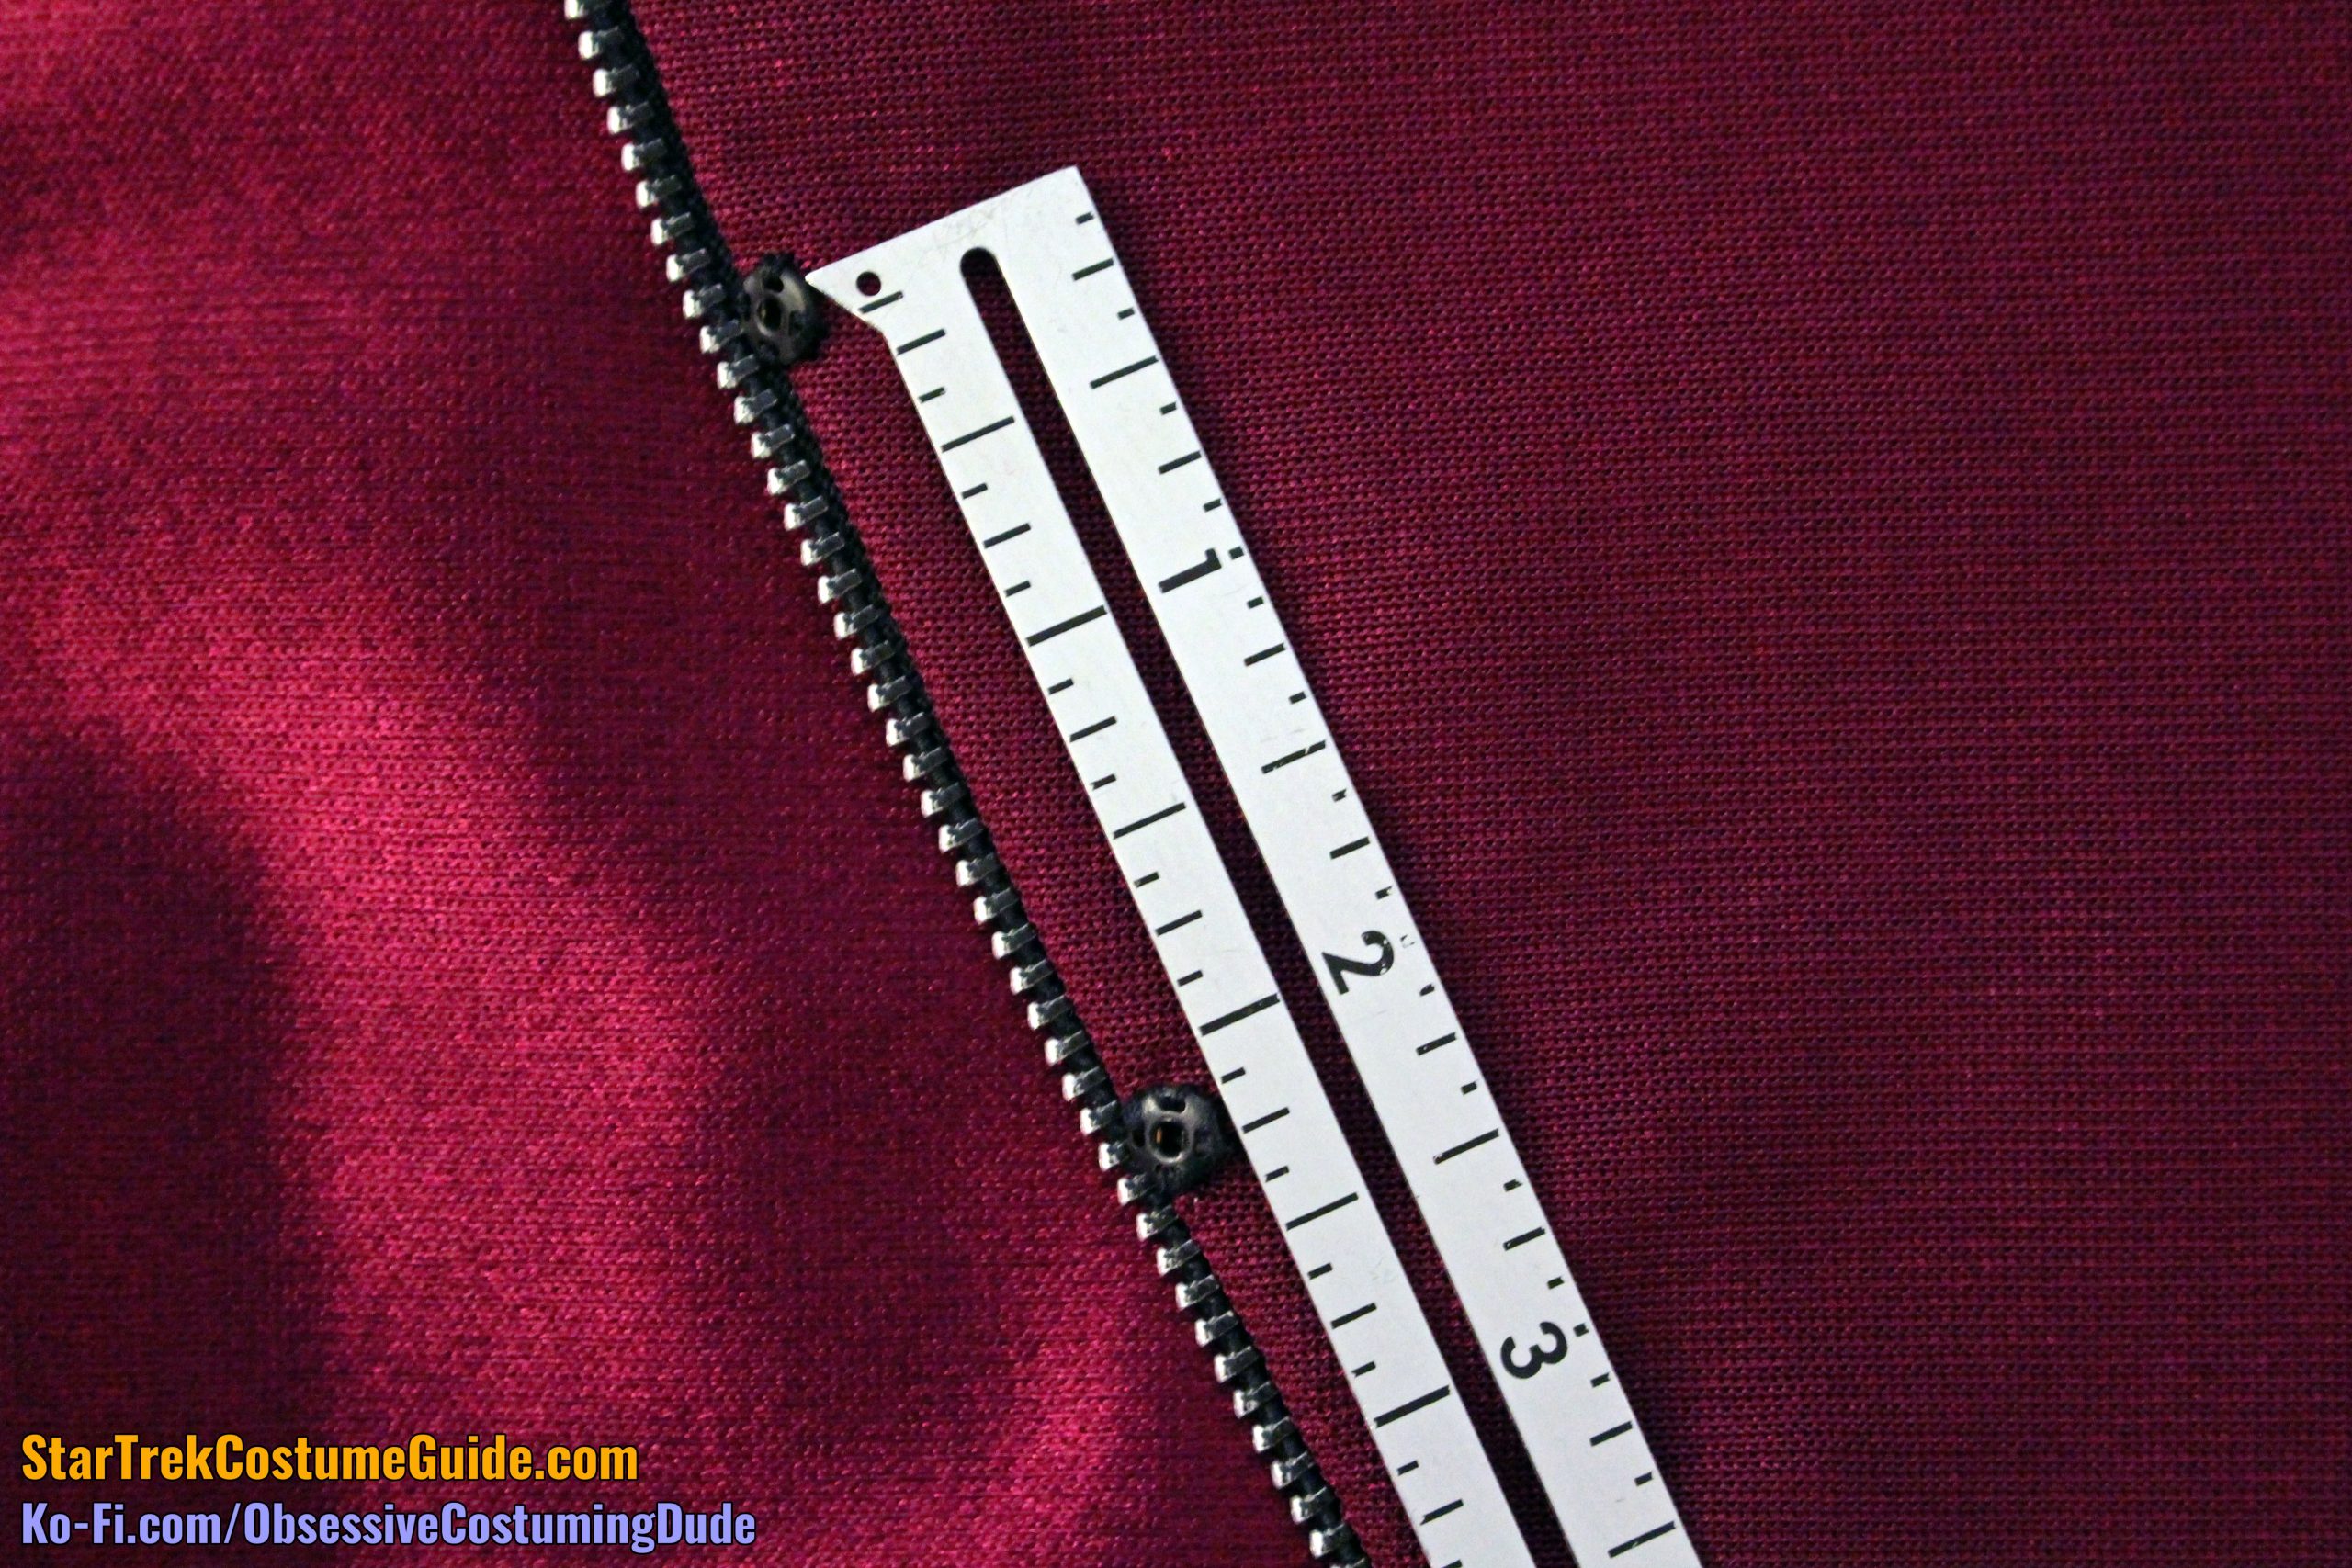
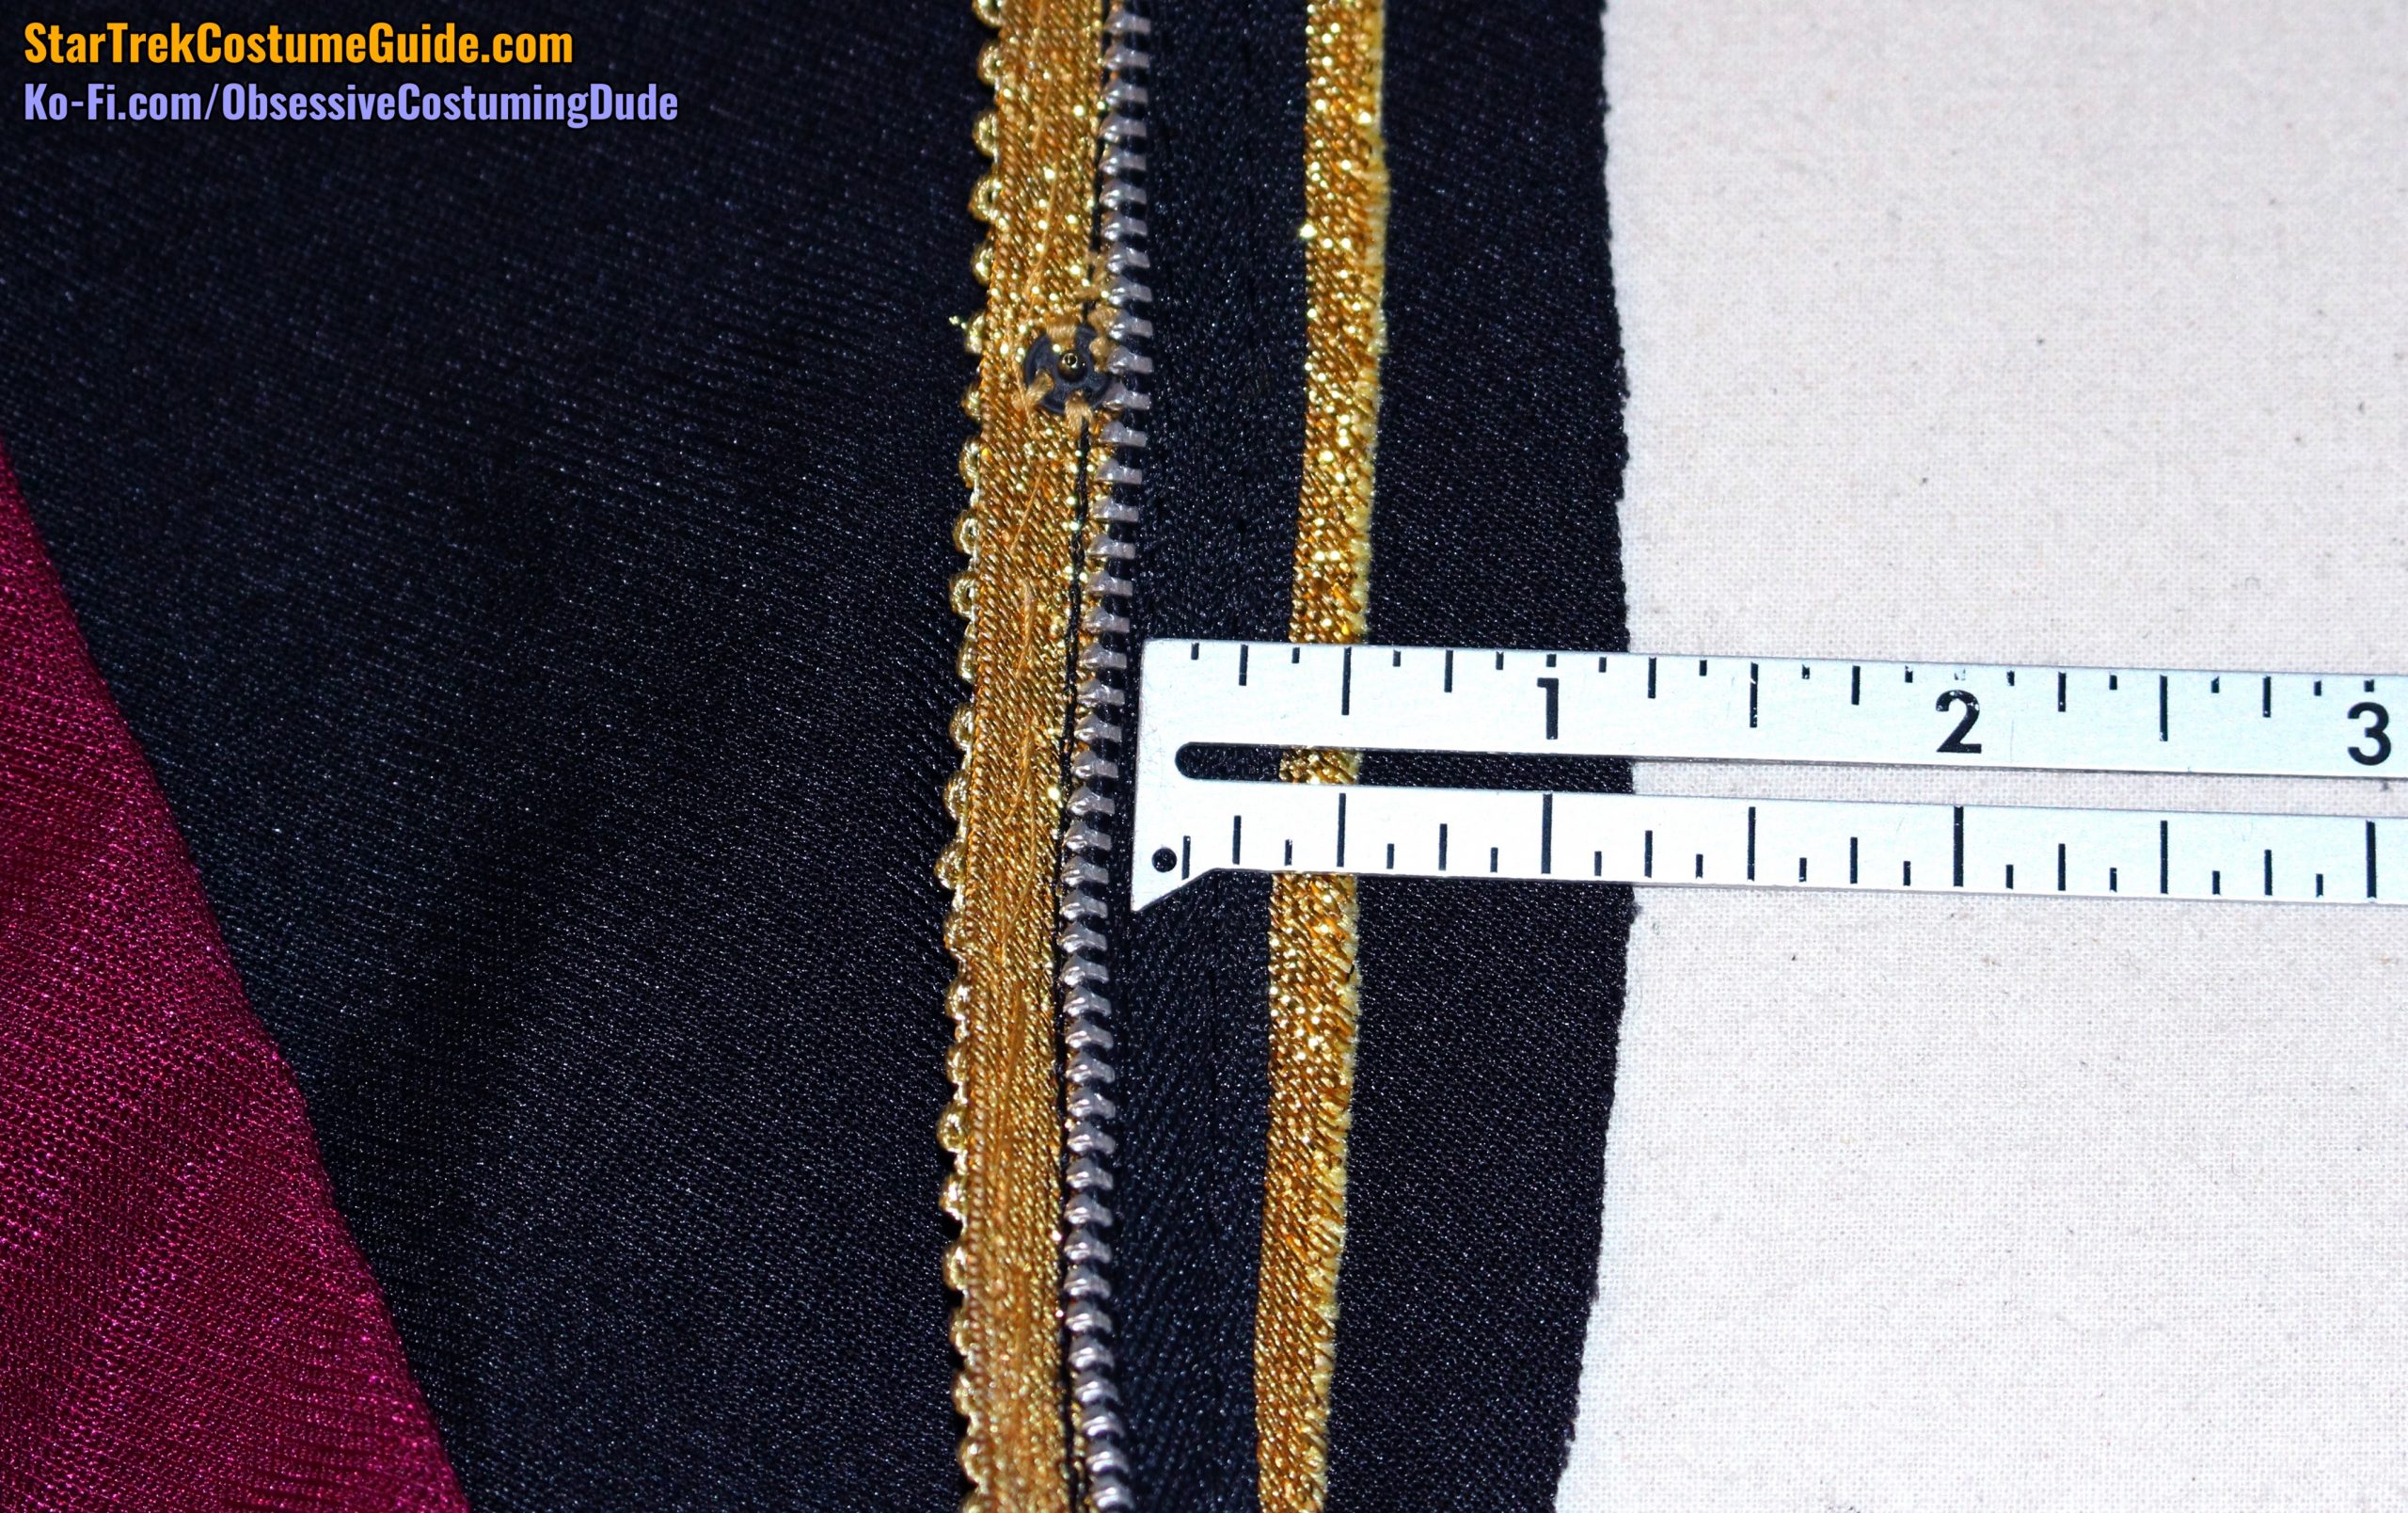
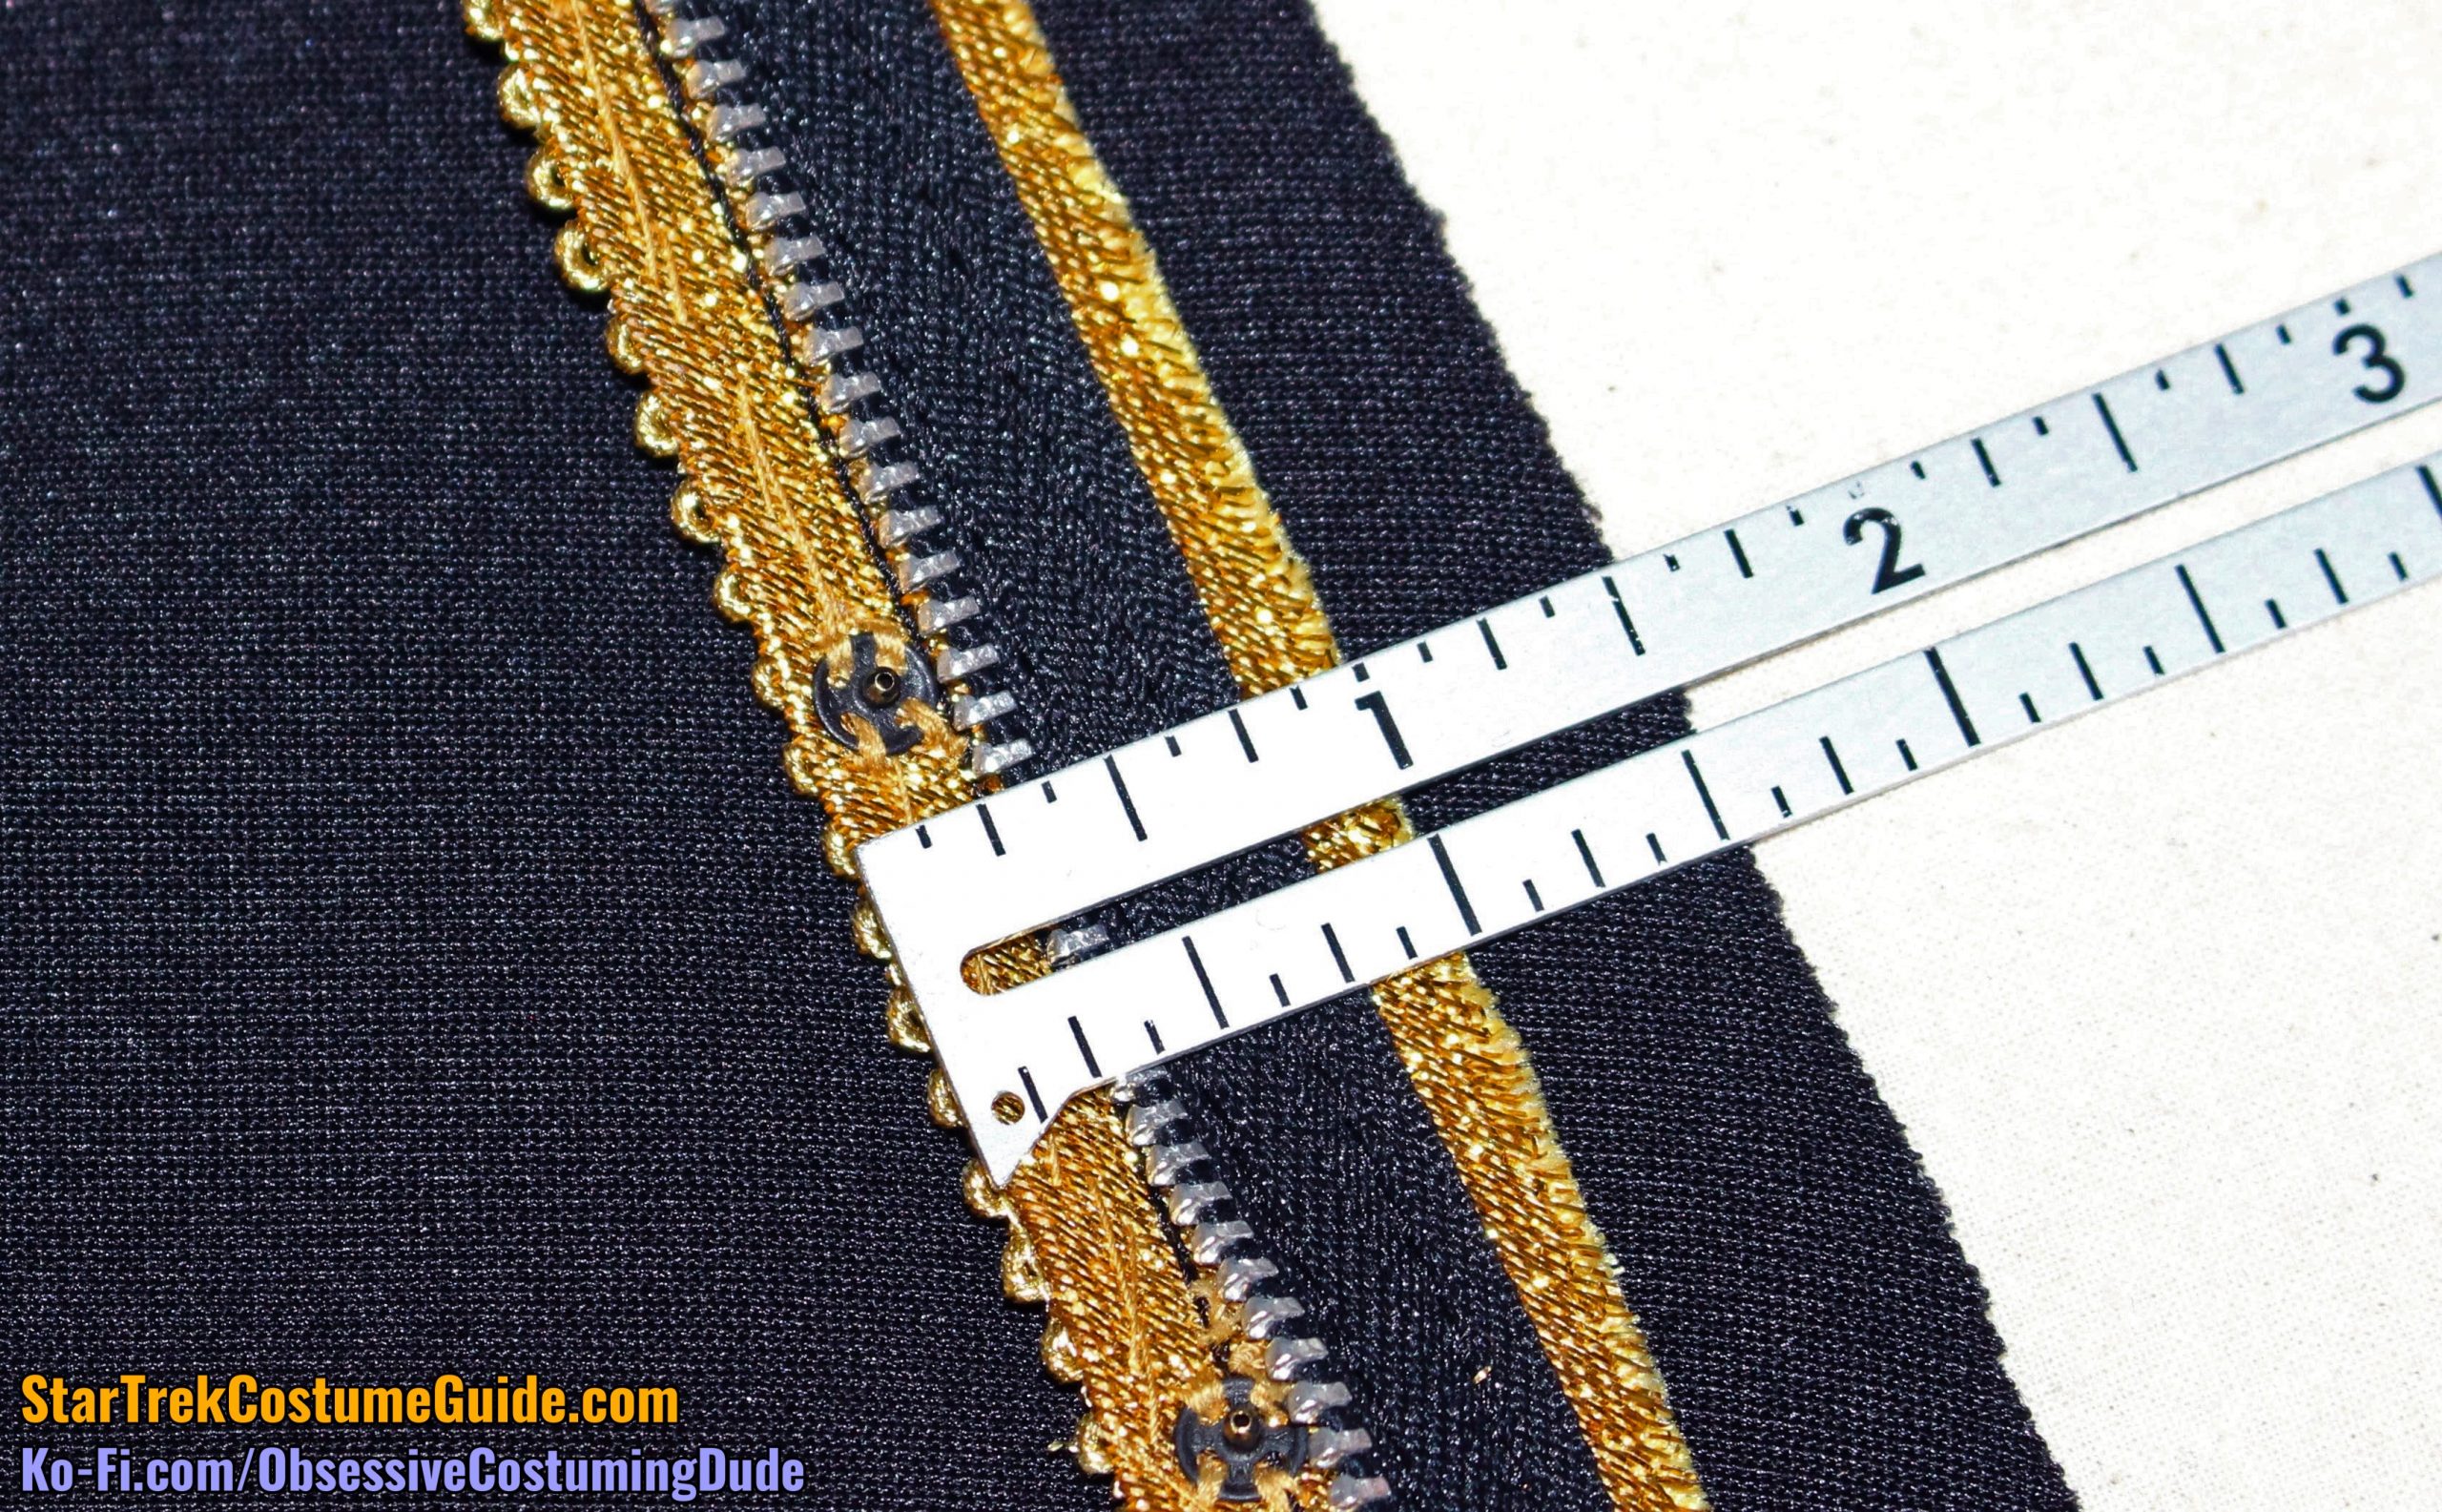
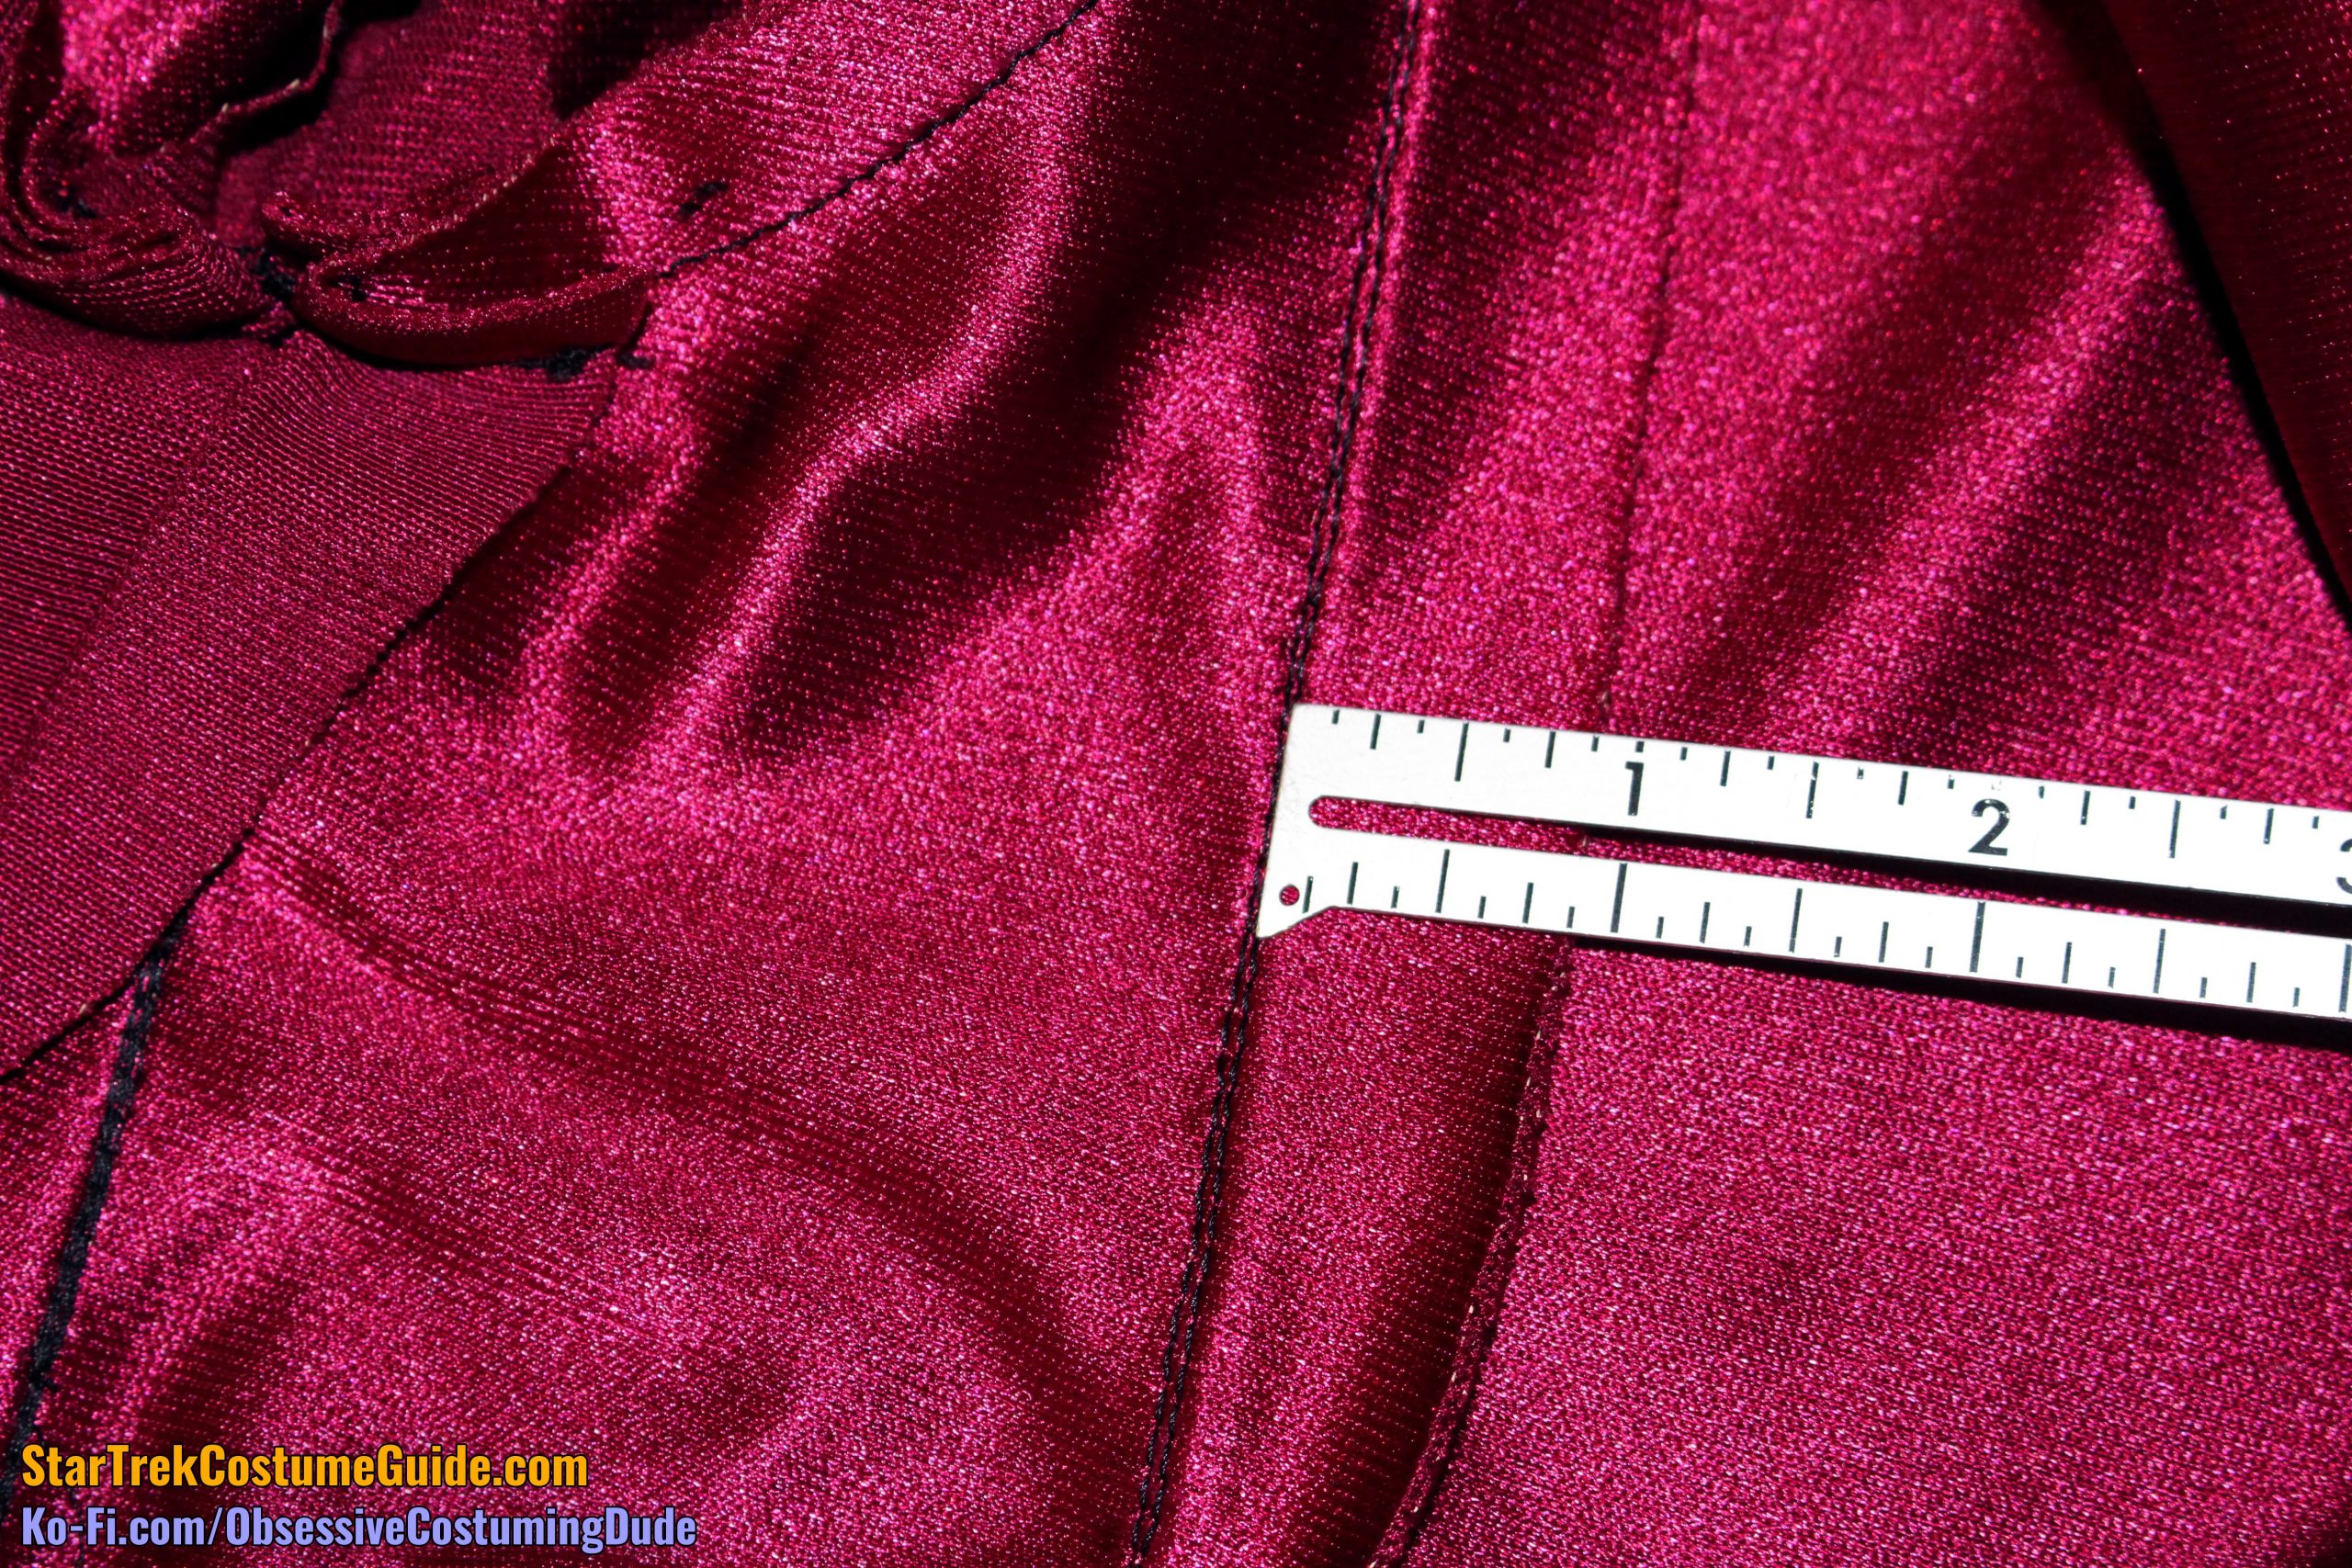
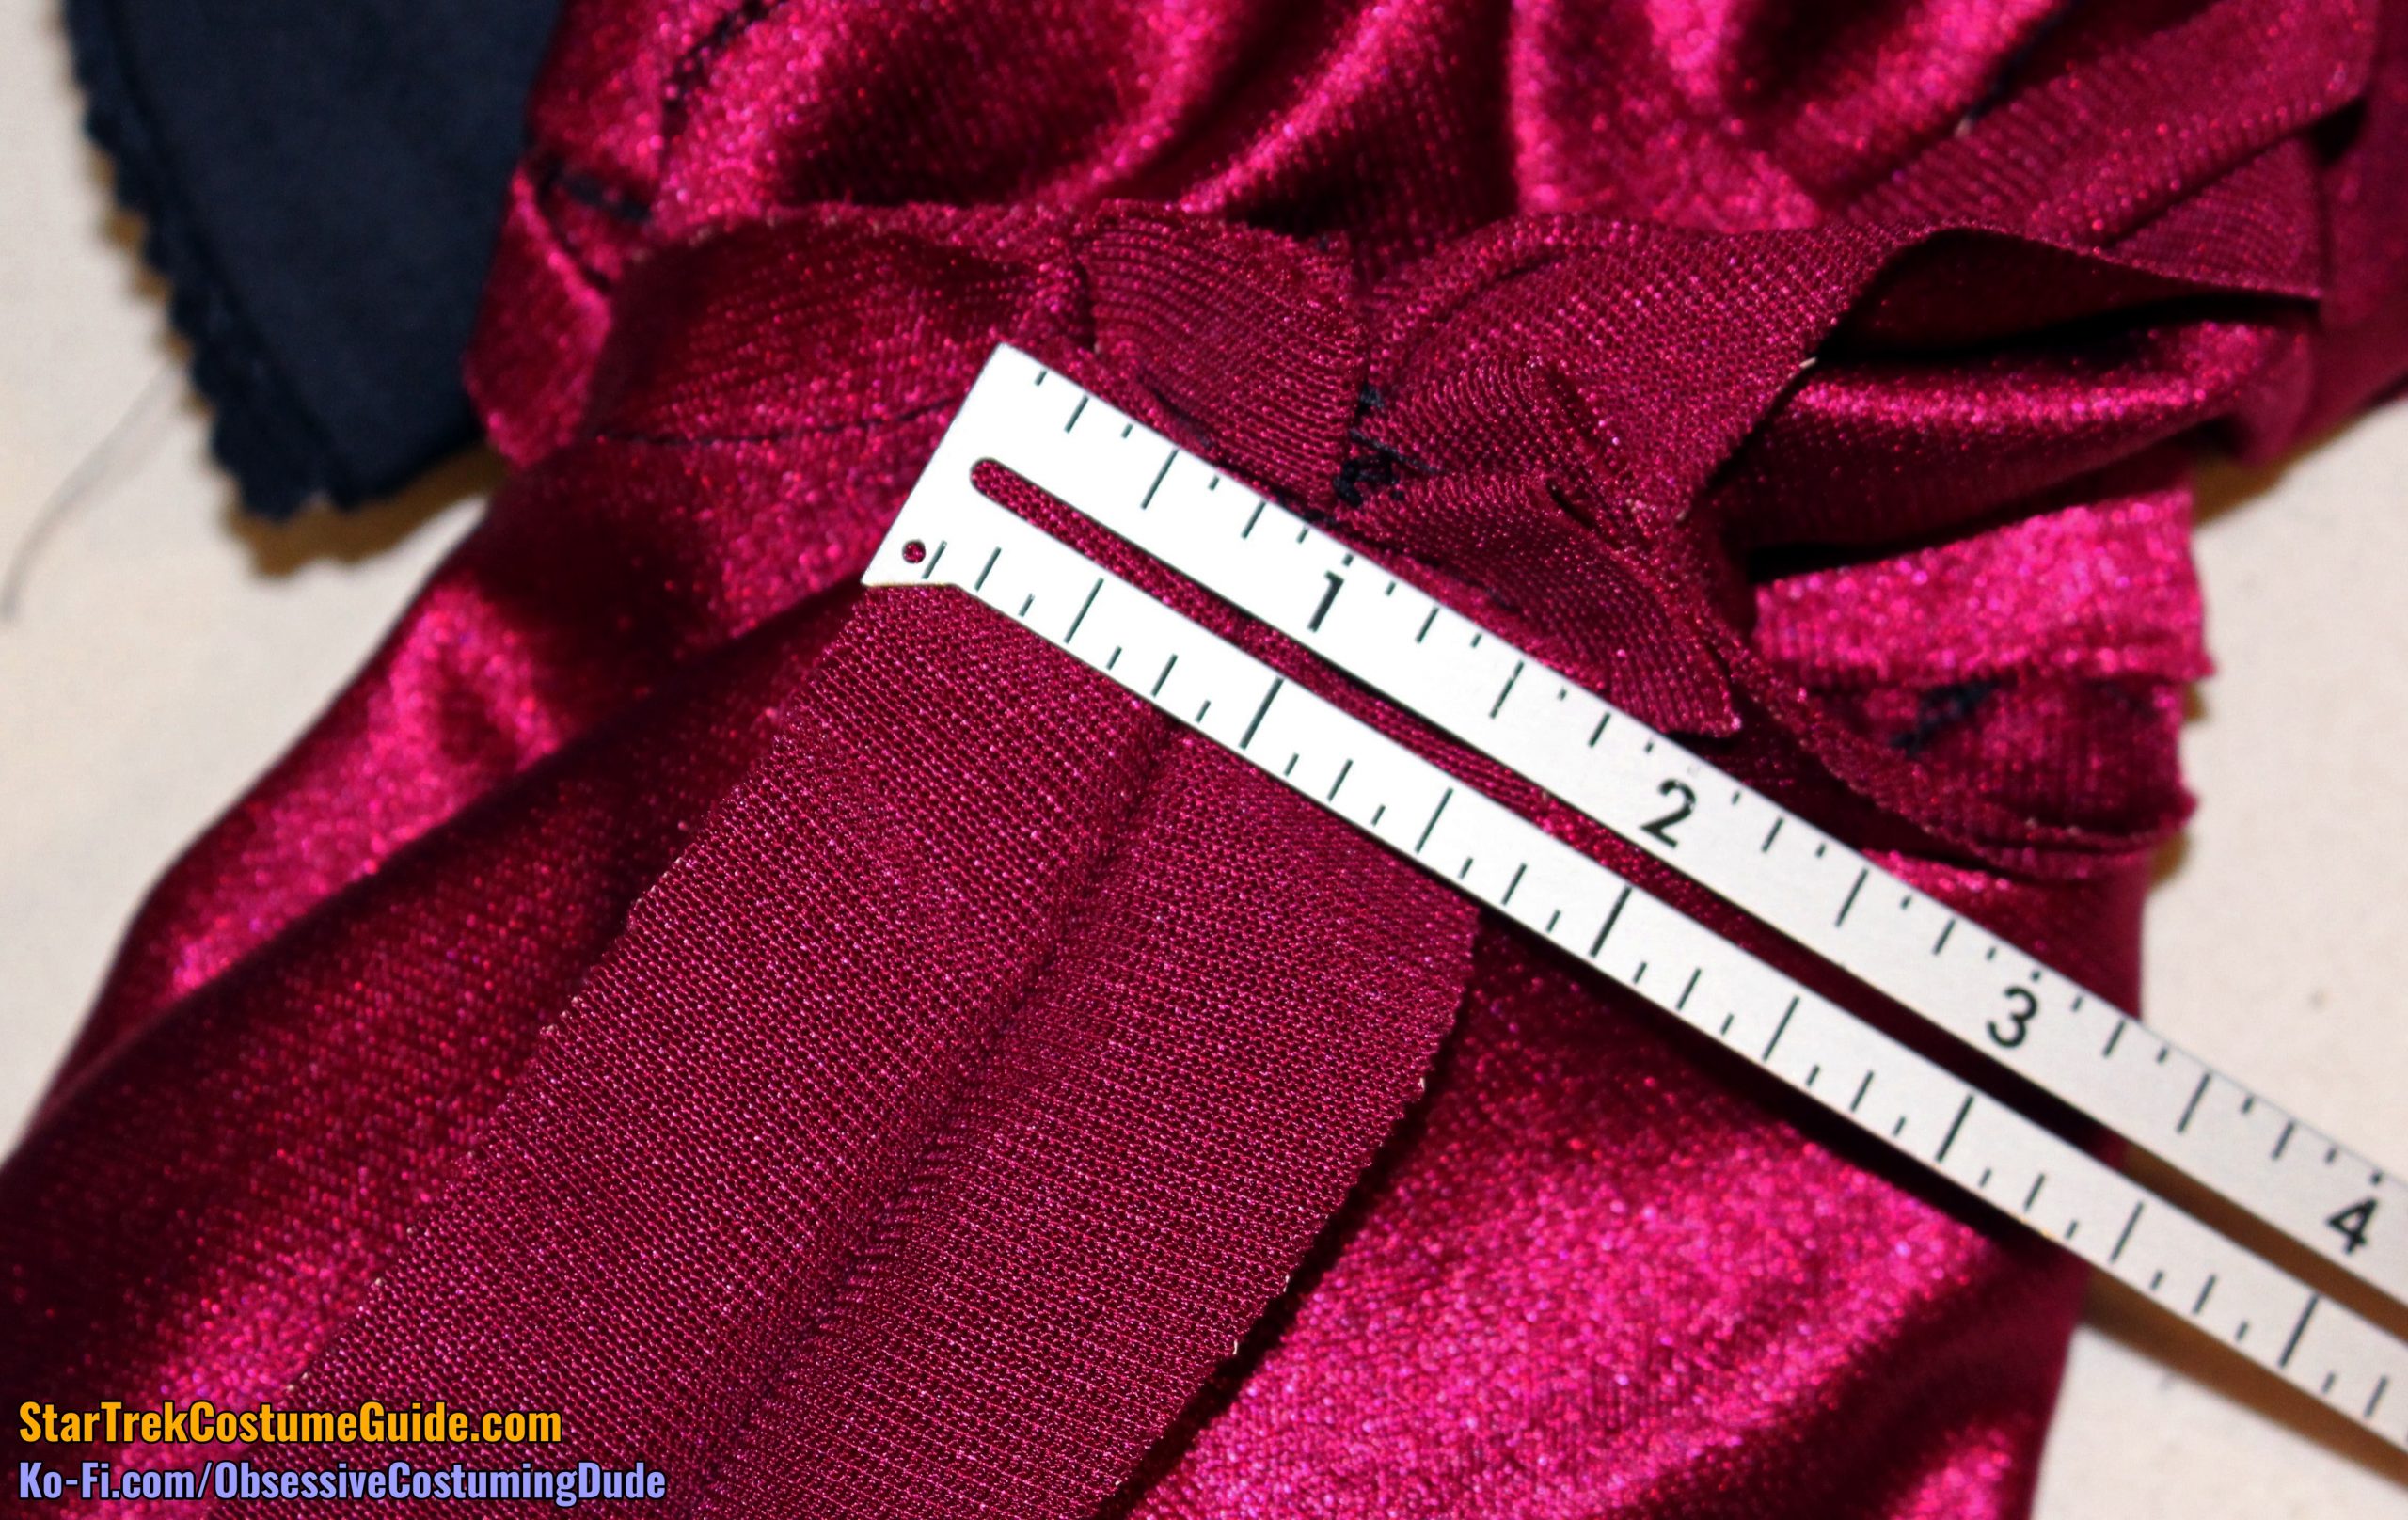
The neckline was only about 5 ¼” at its widest, measured from the edges of the trim.
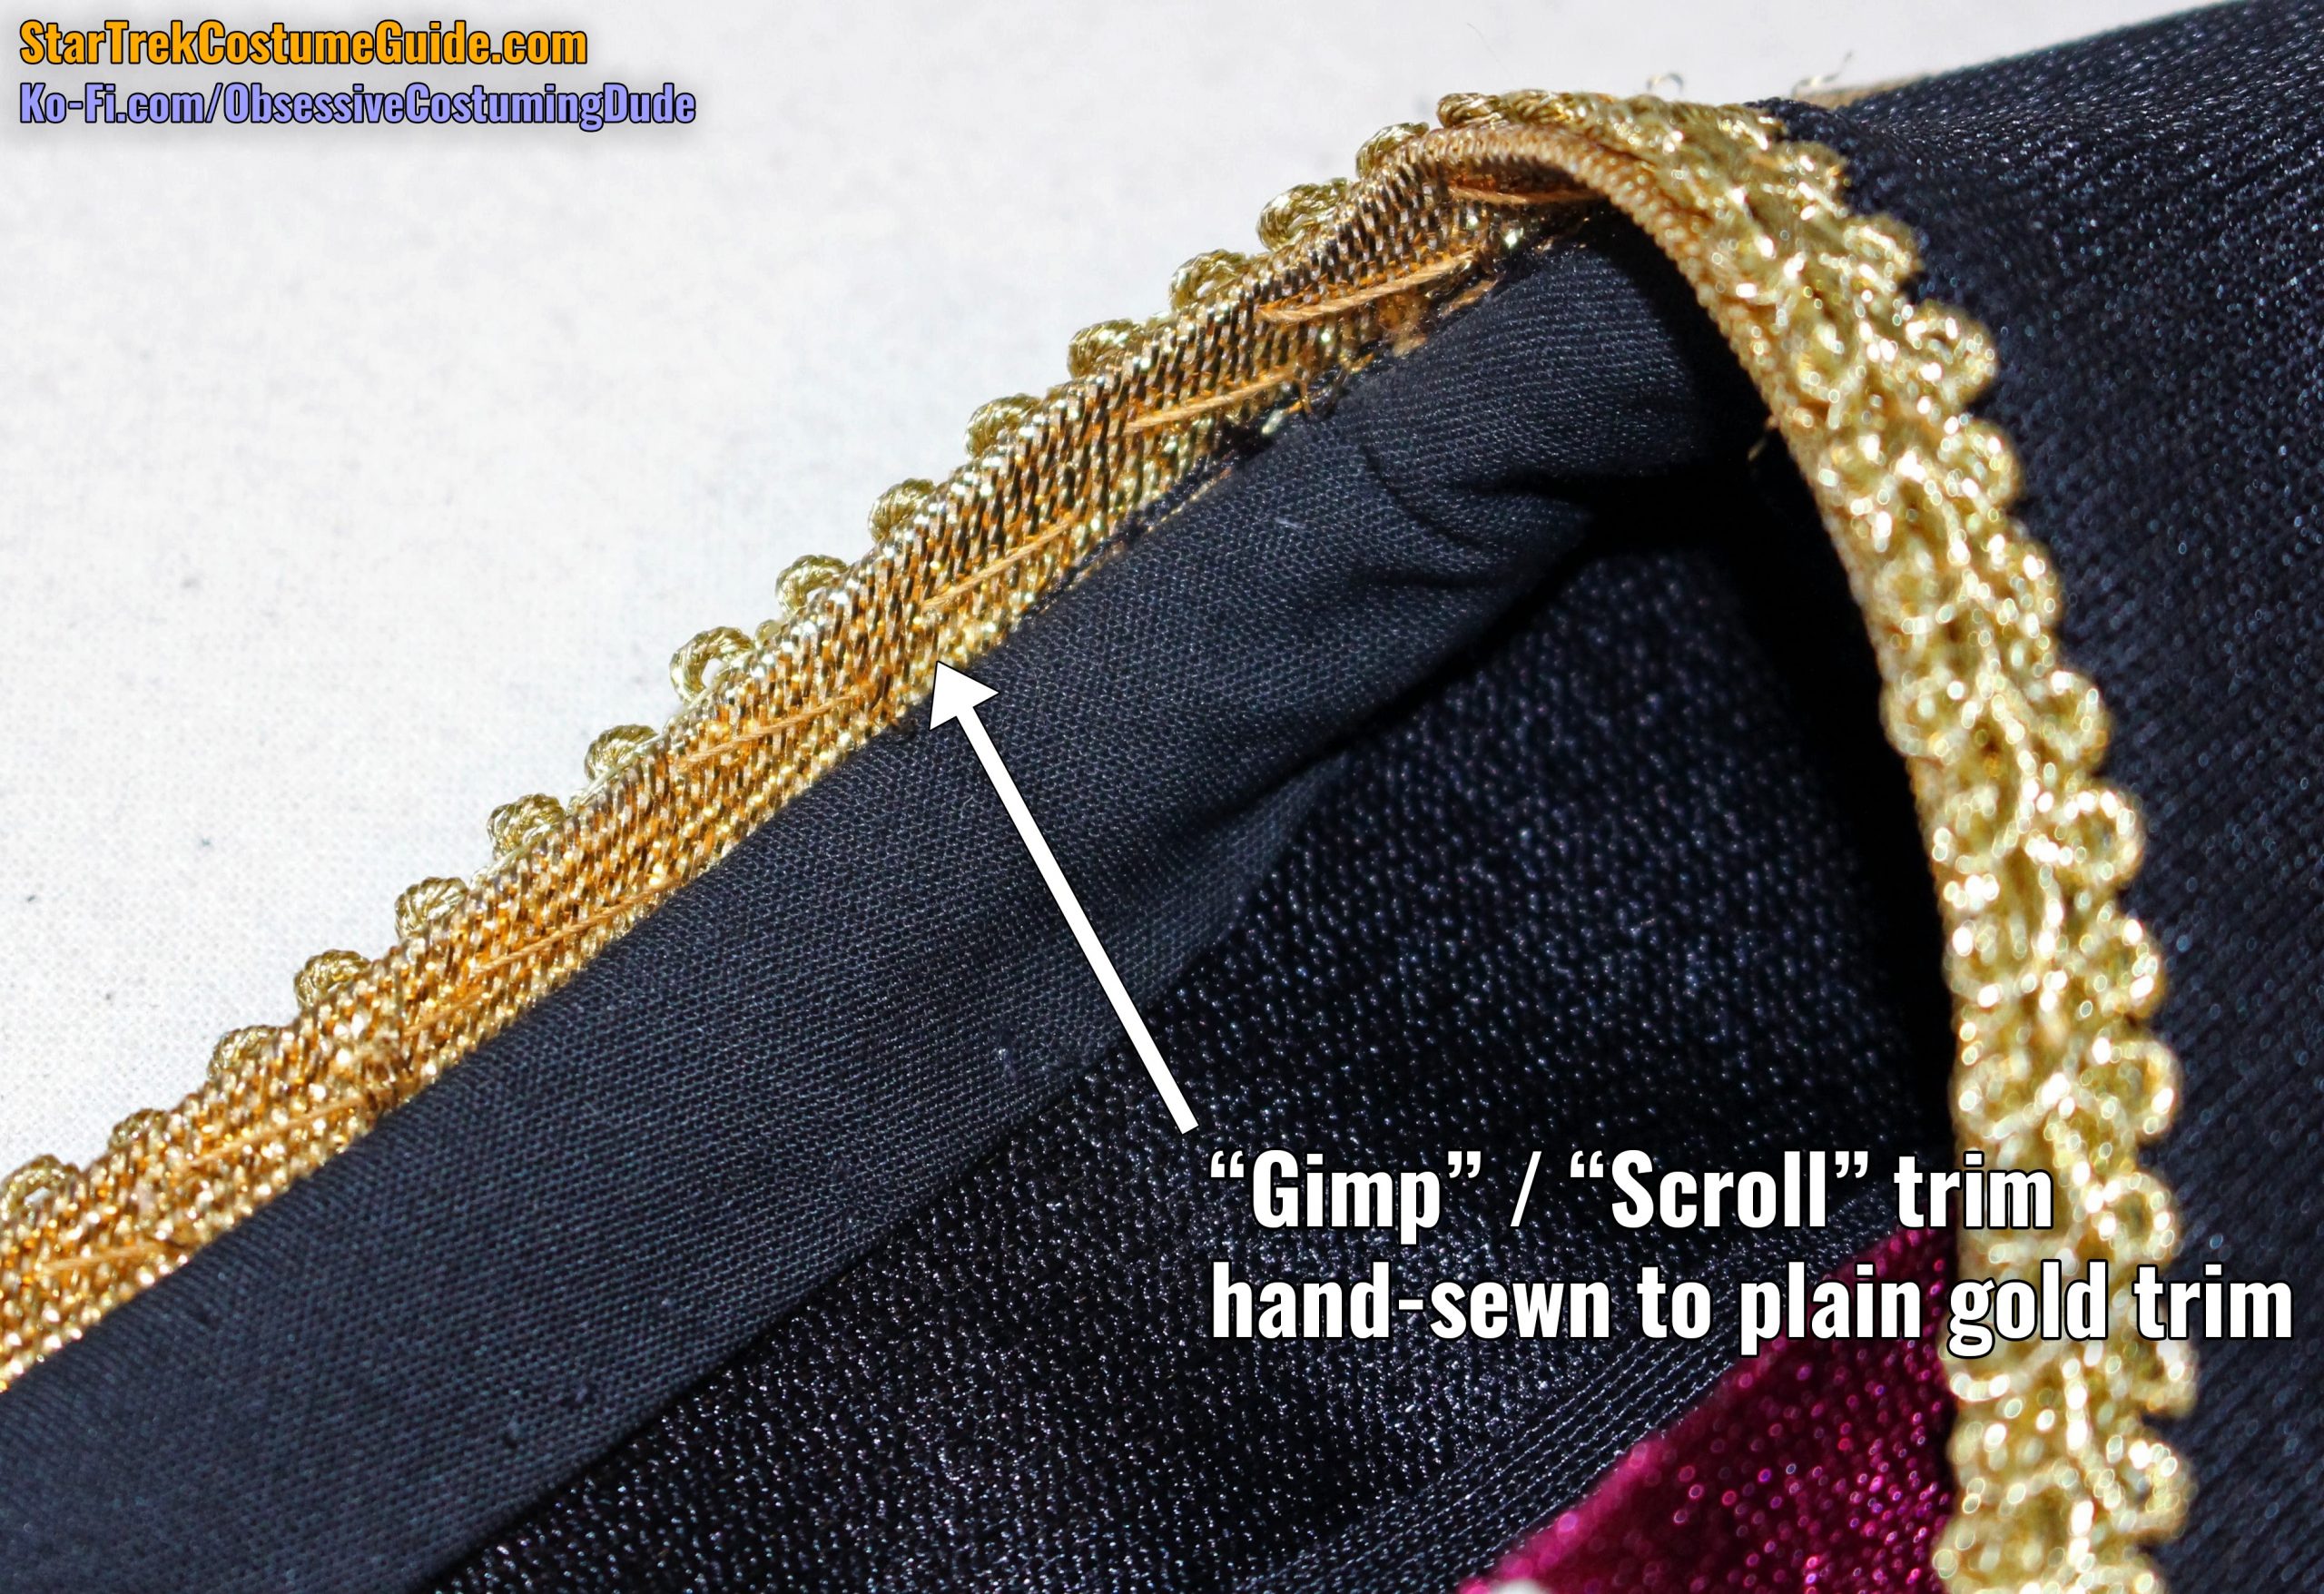
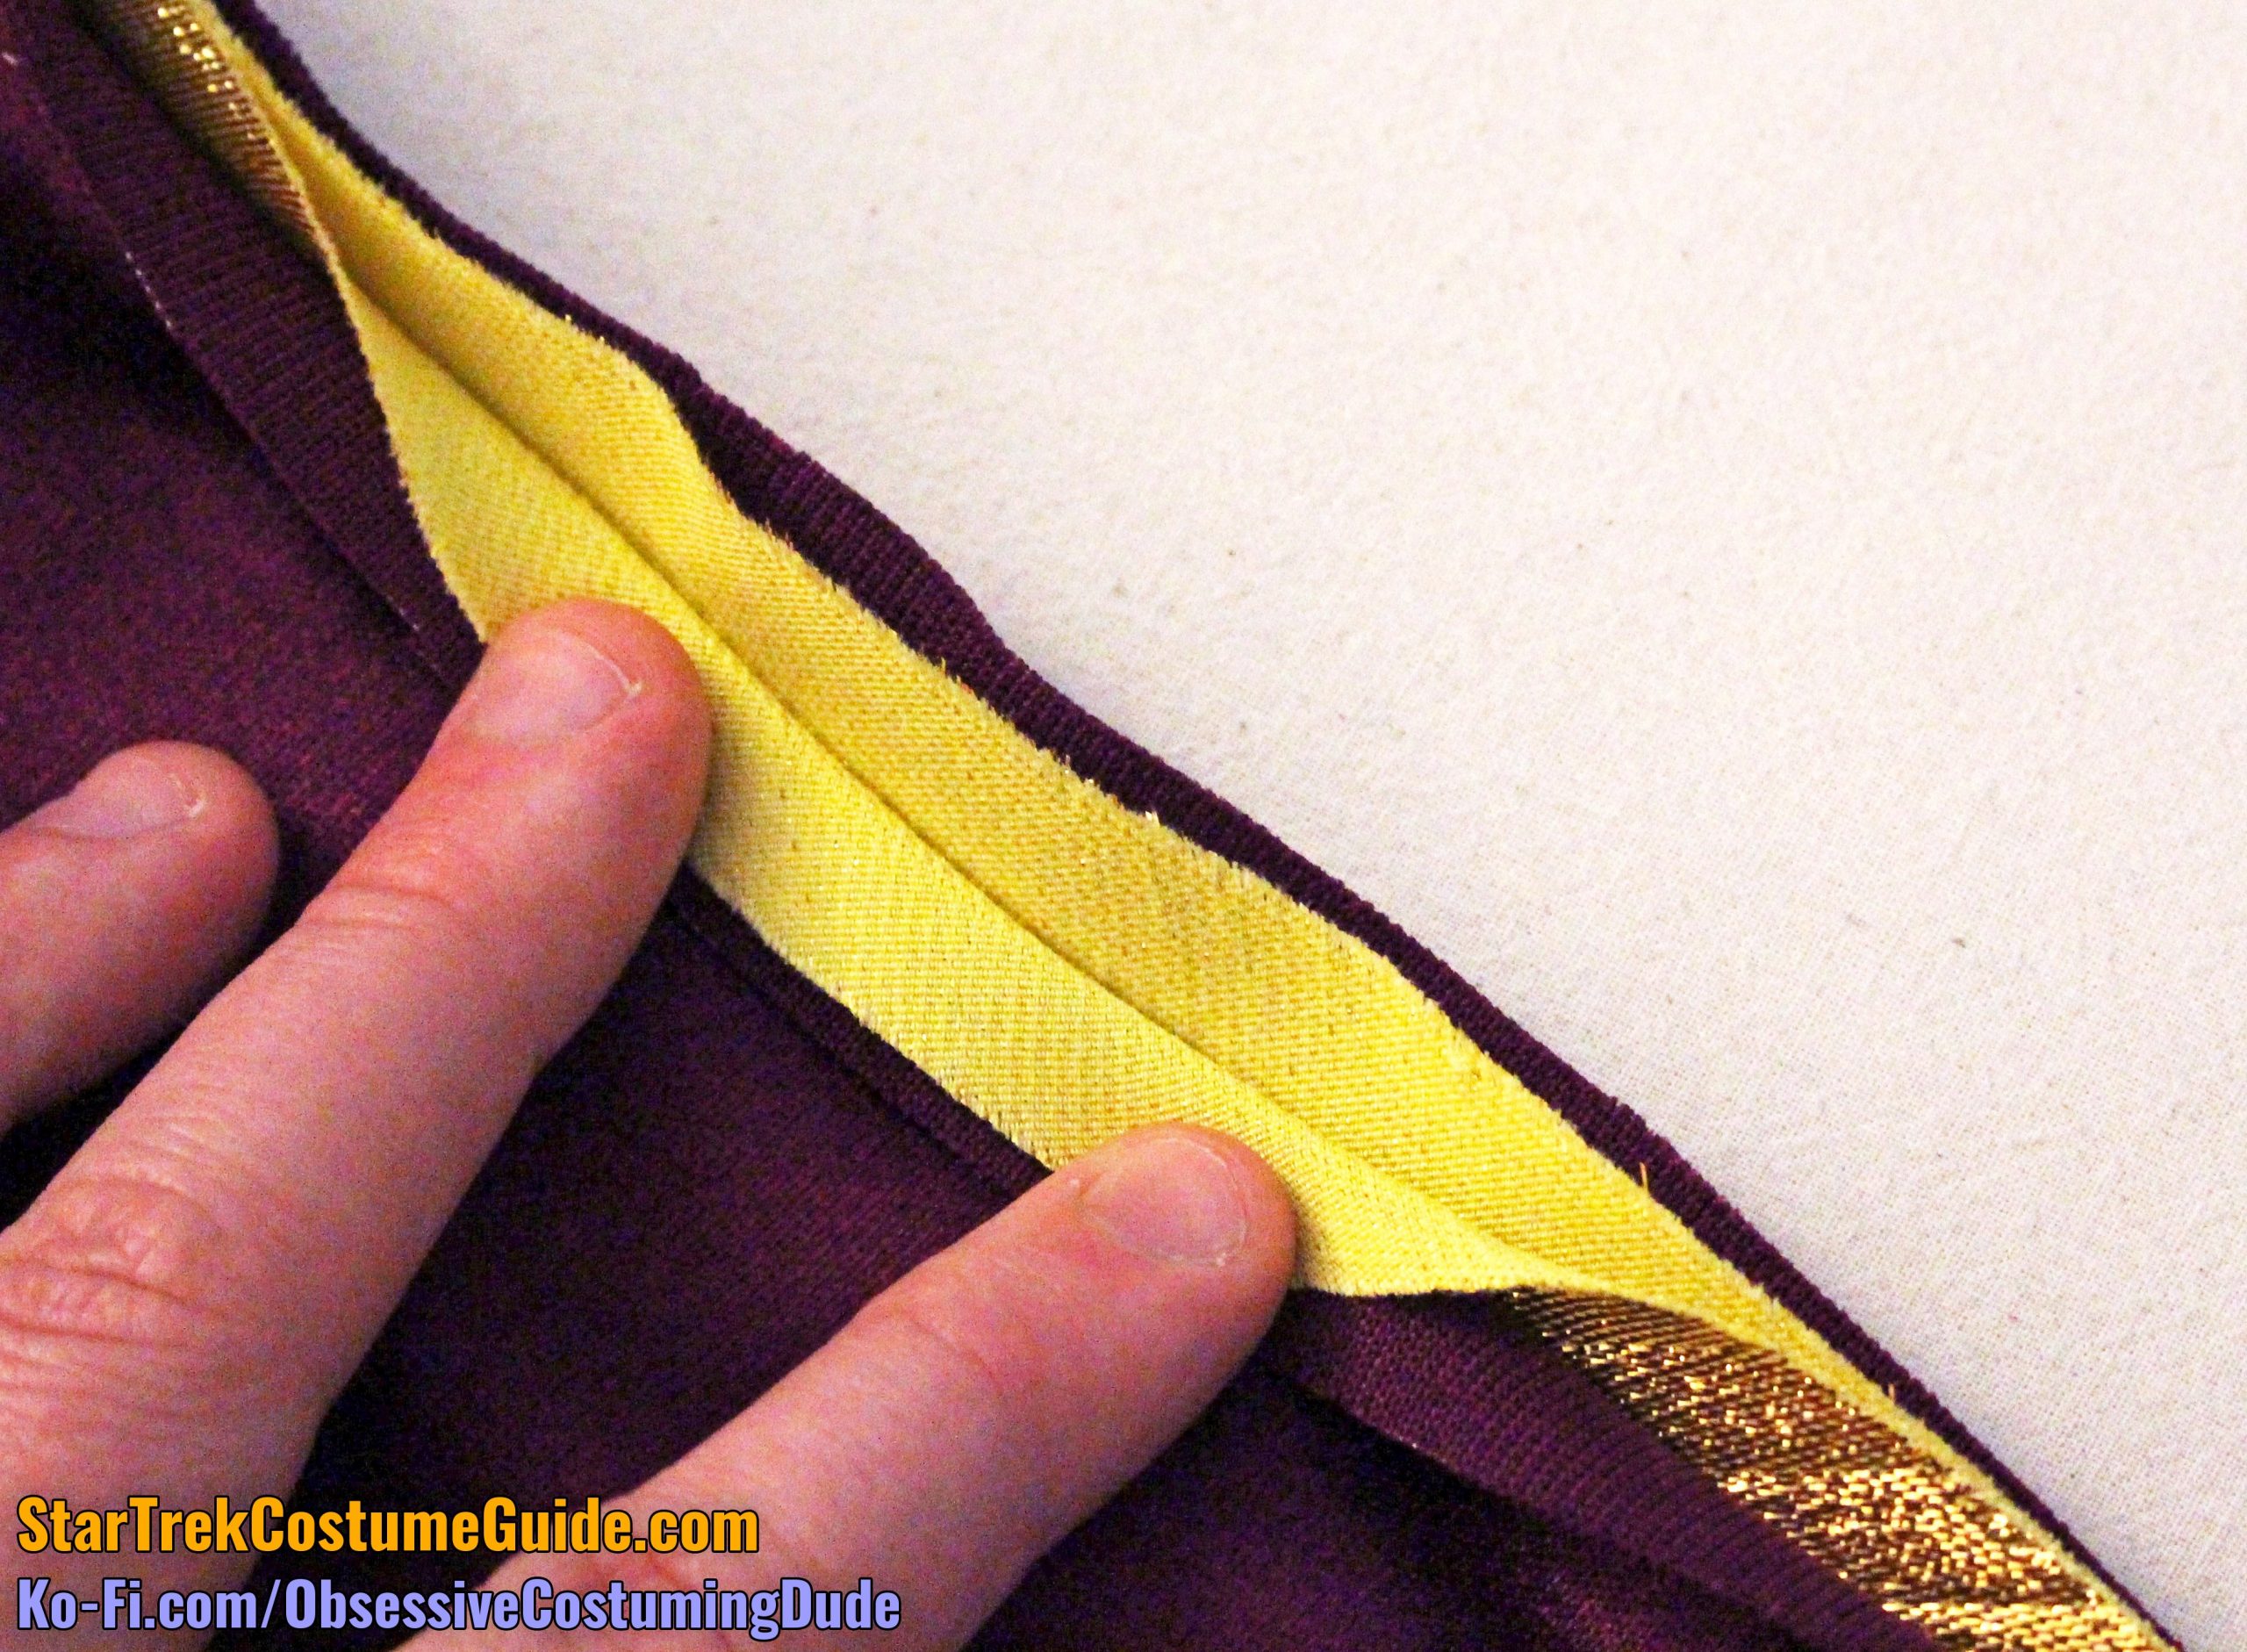
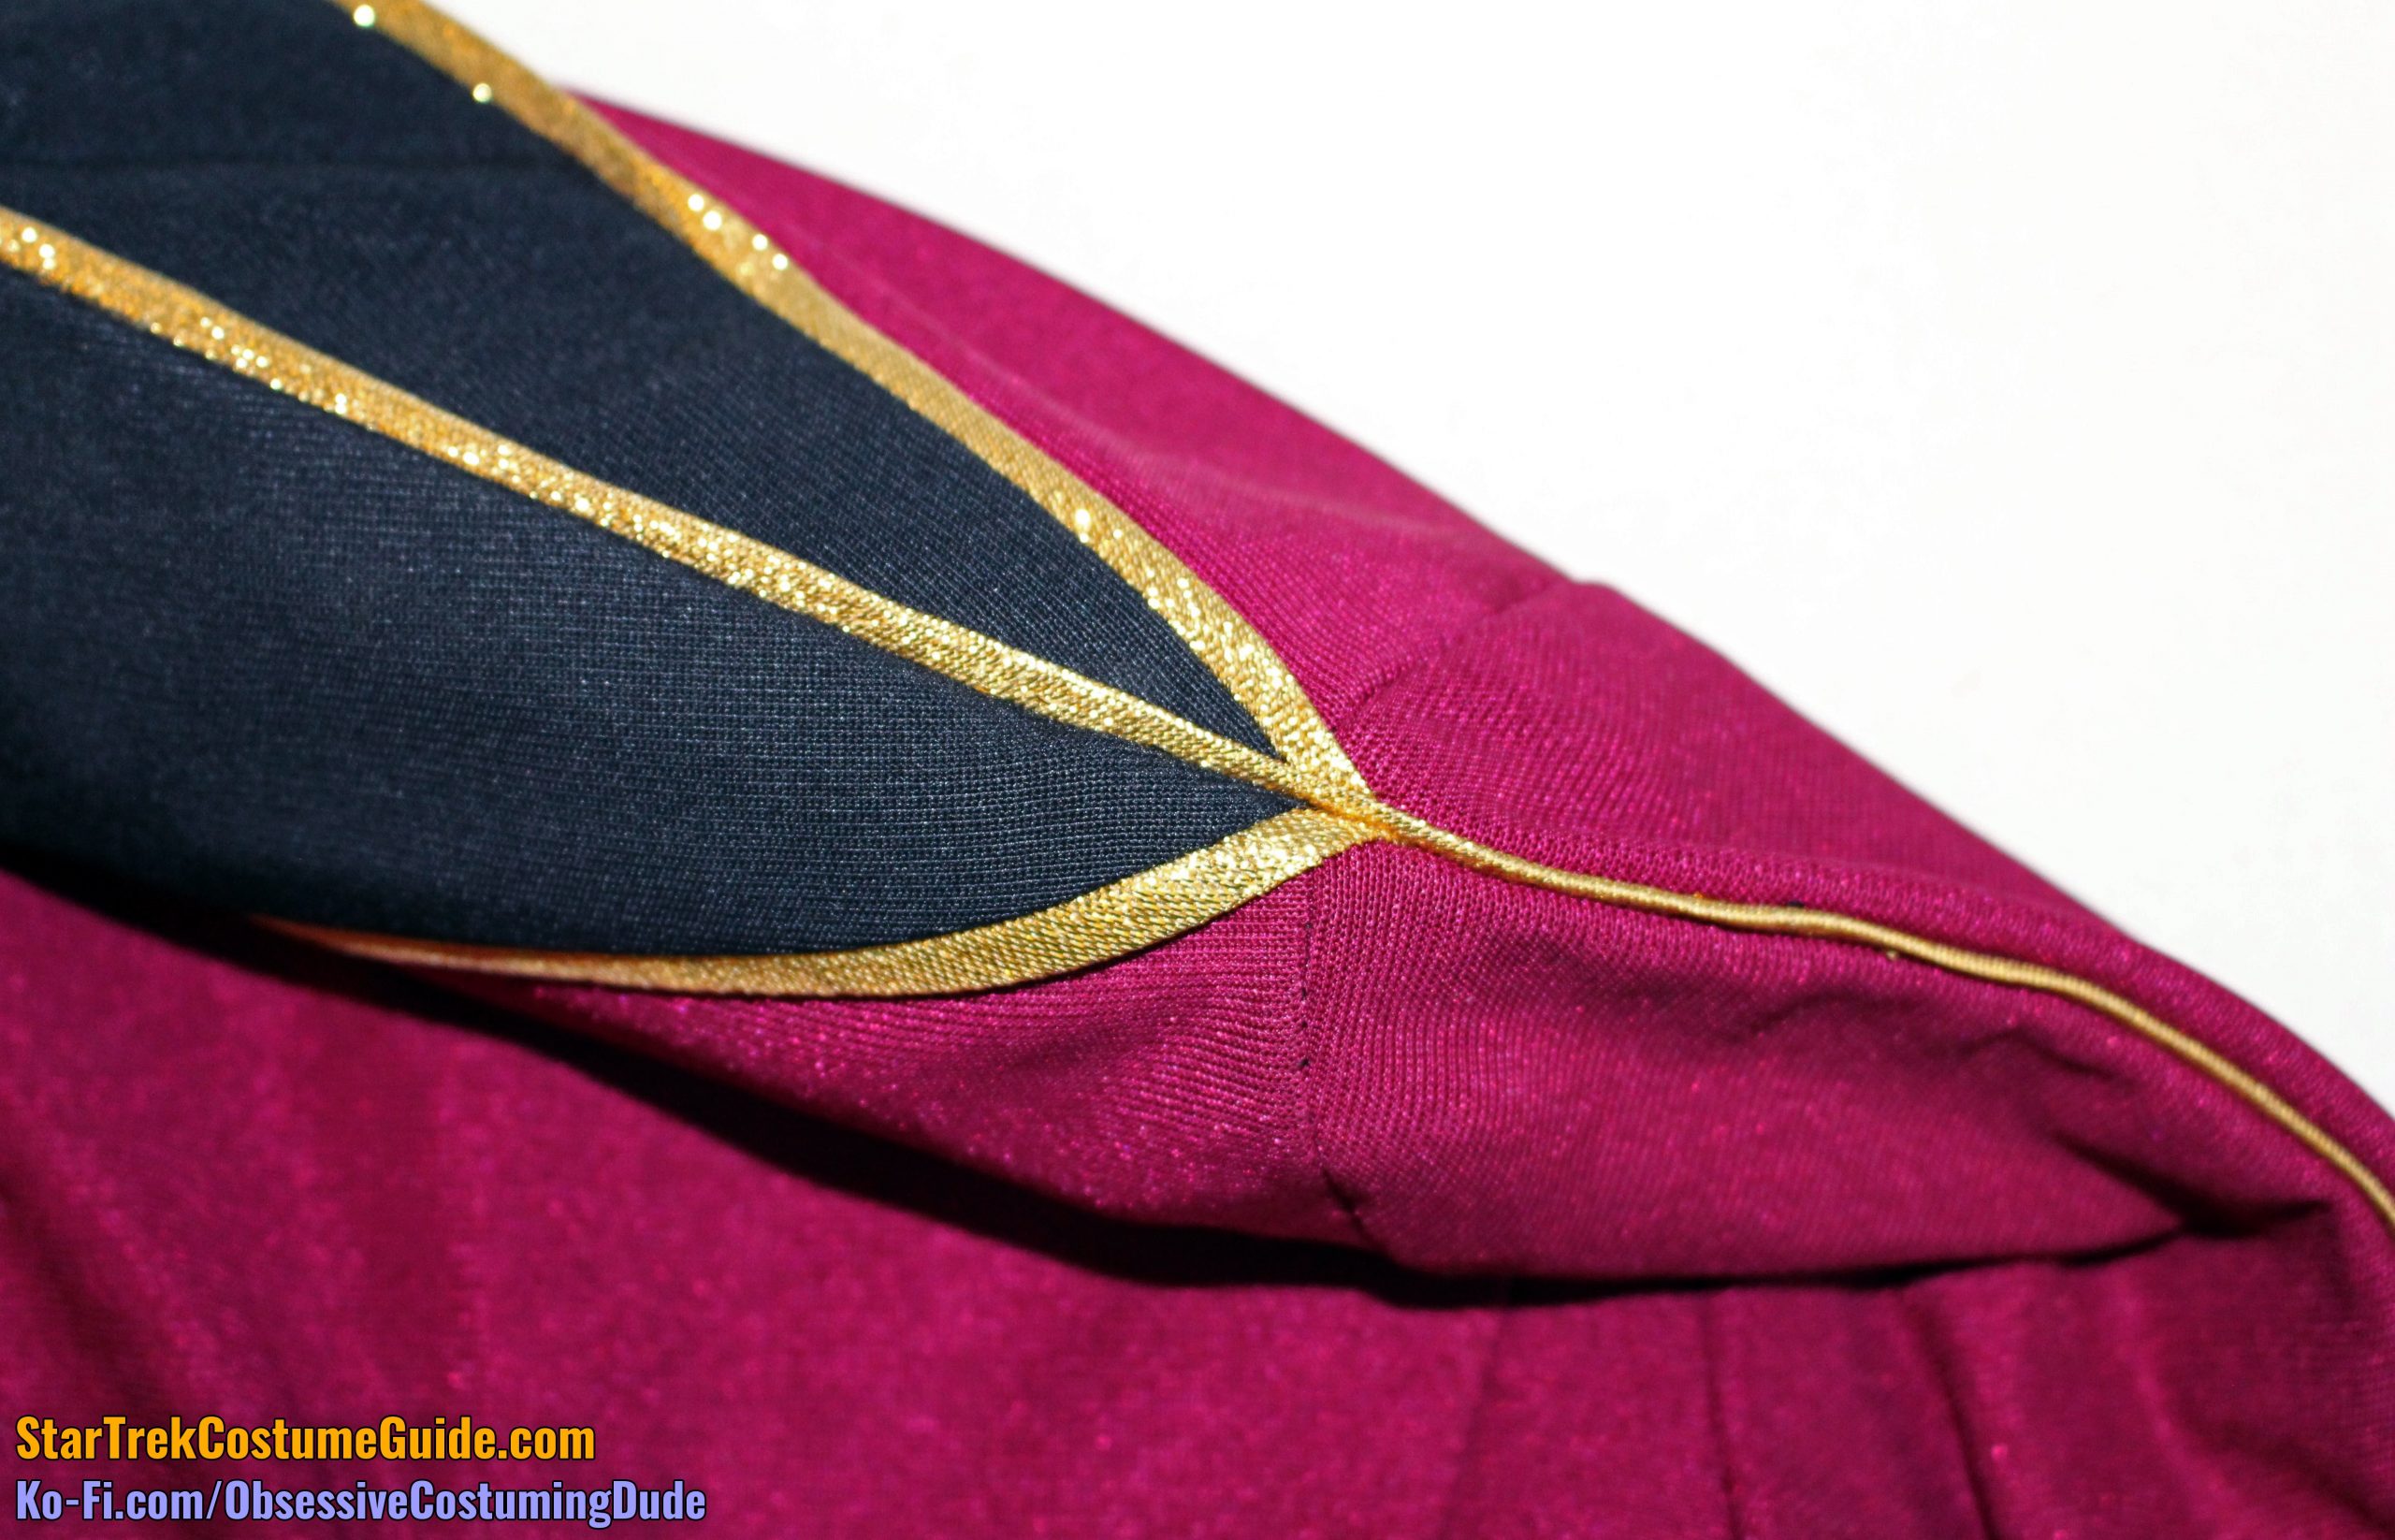
The gold trim extended all the way around the neckline and down the front edge of the diagonal panel … thing.
The neckline/front trim was approximately ¼” wide.
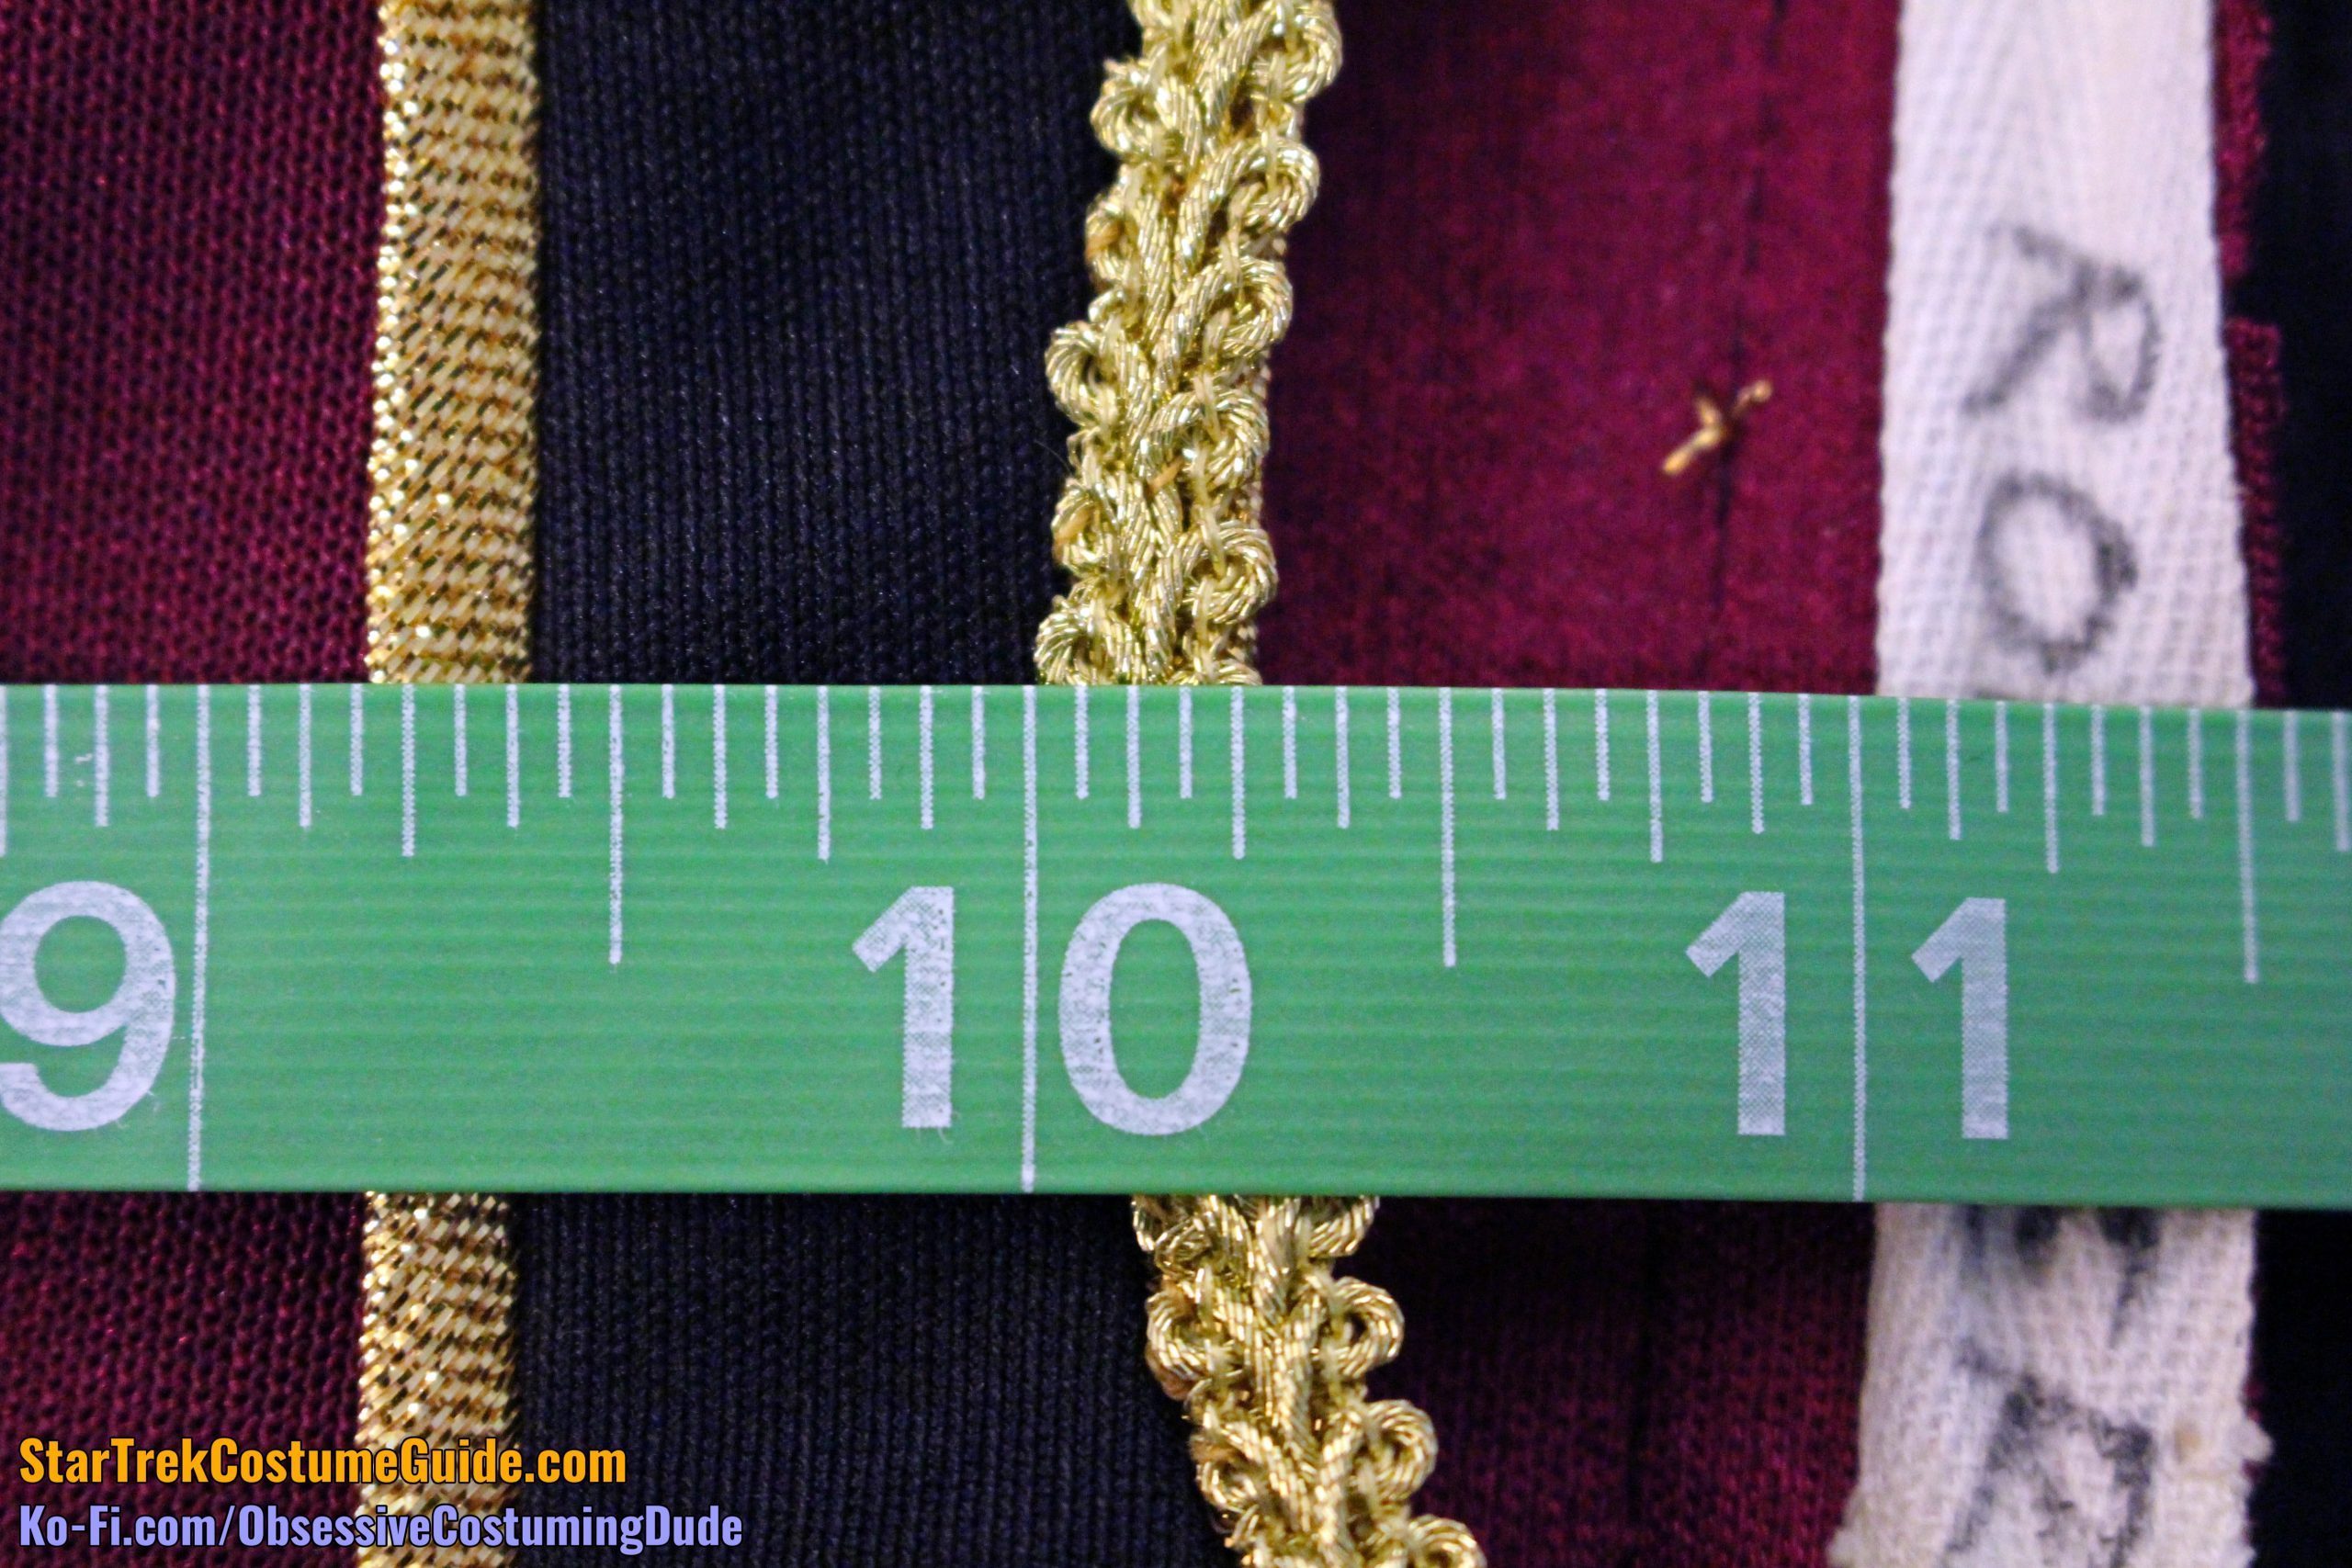
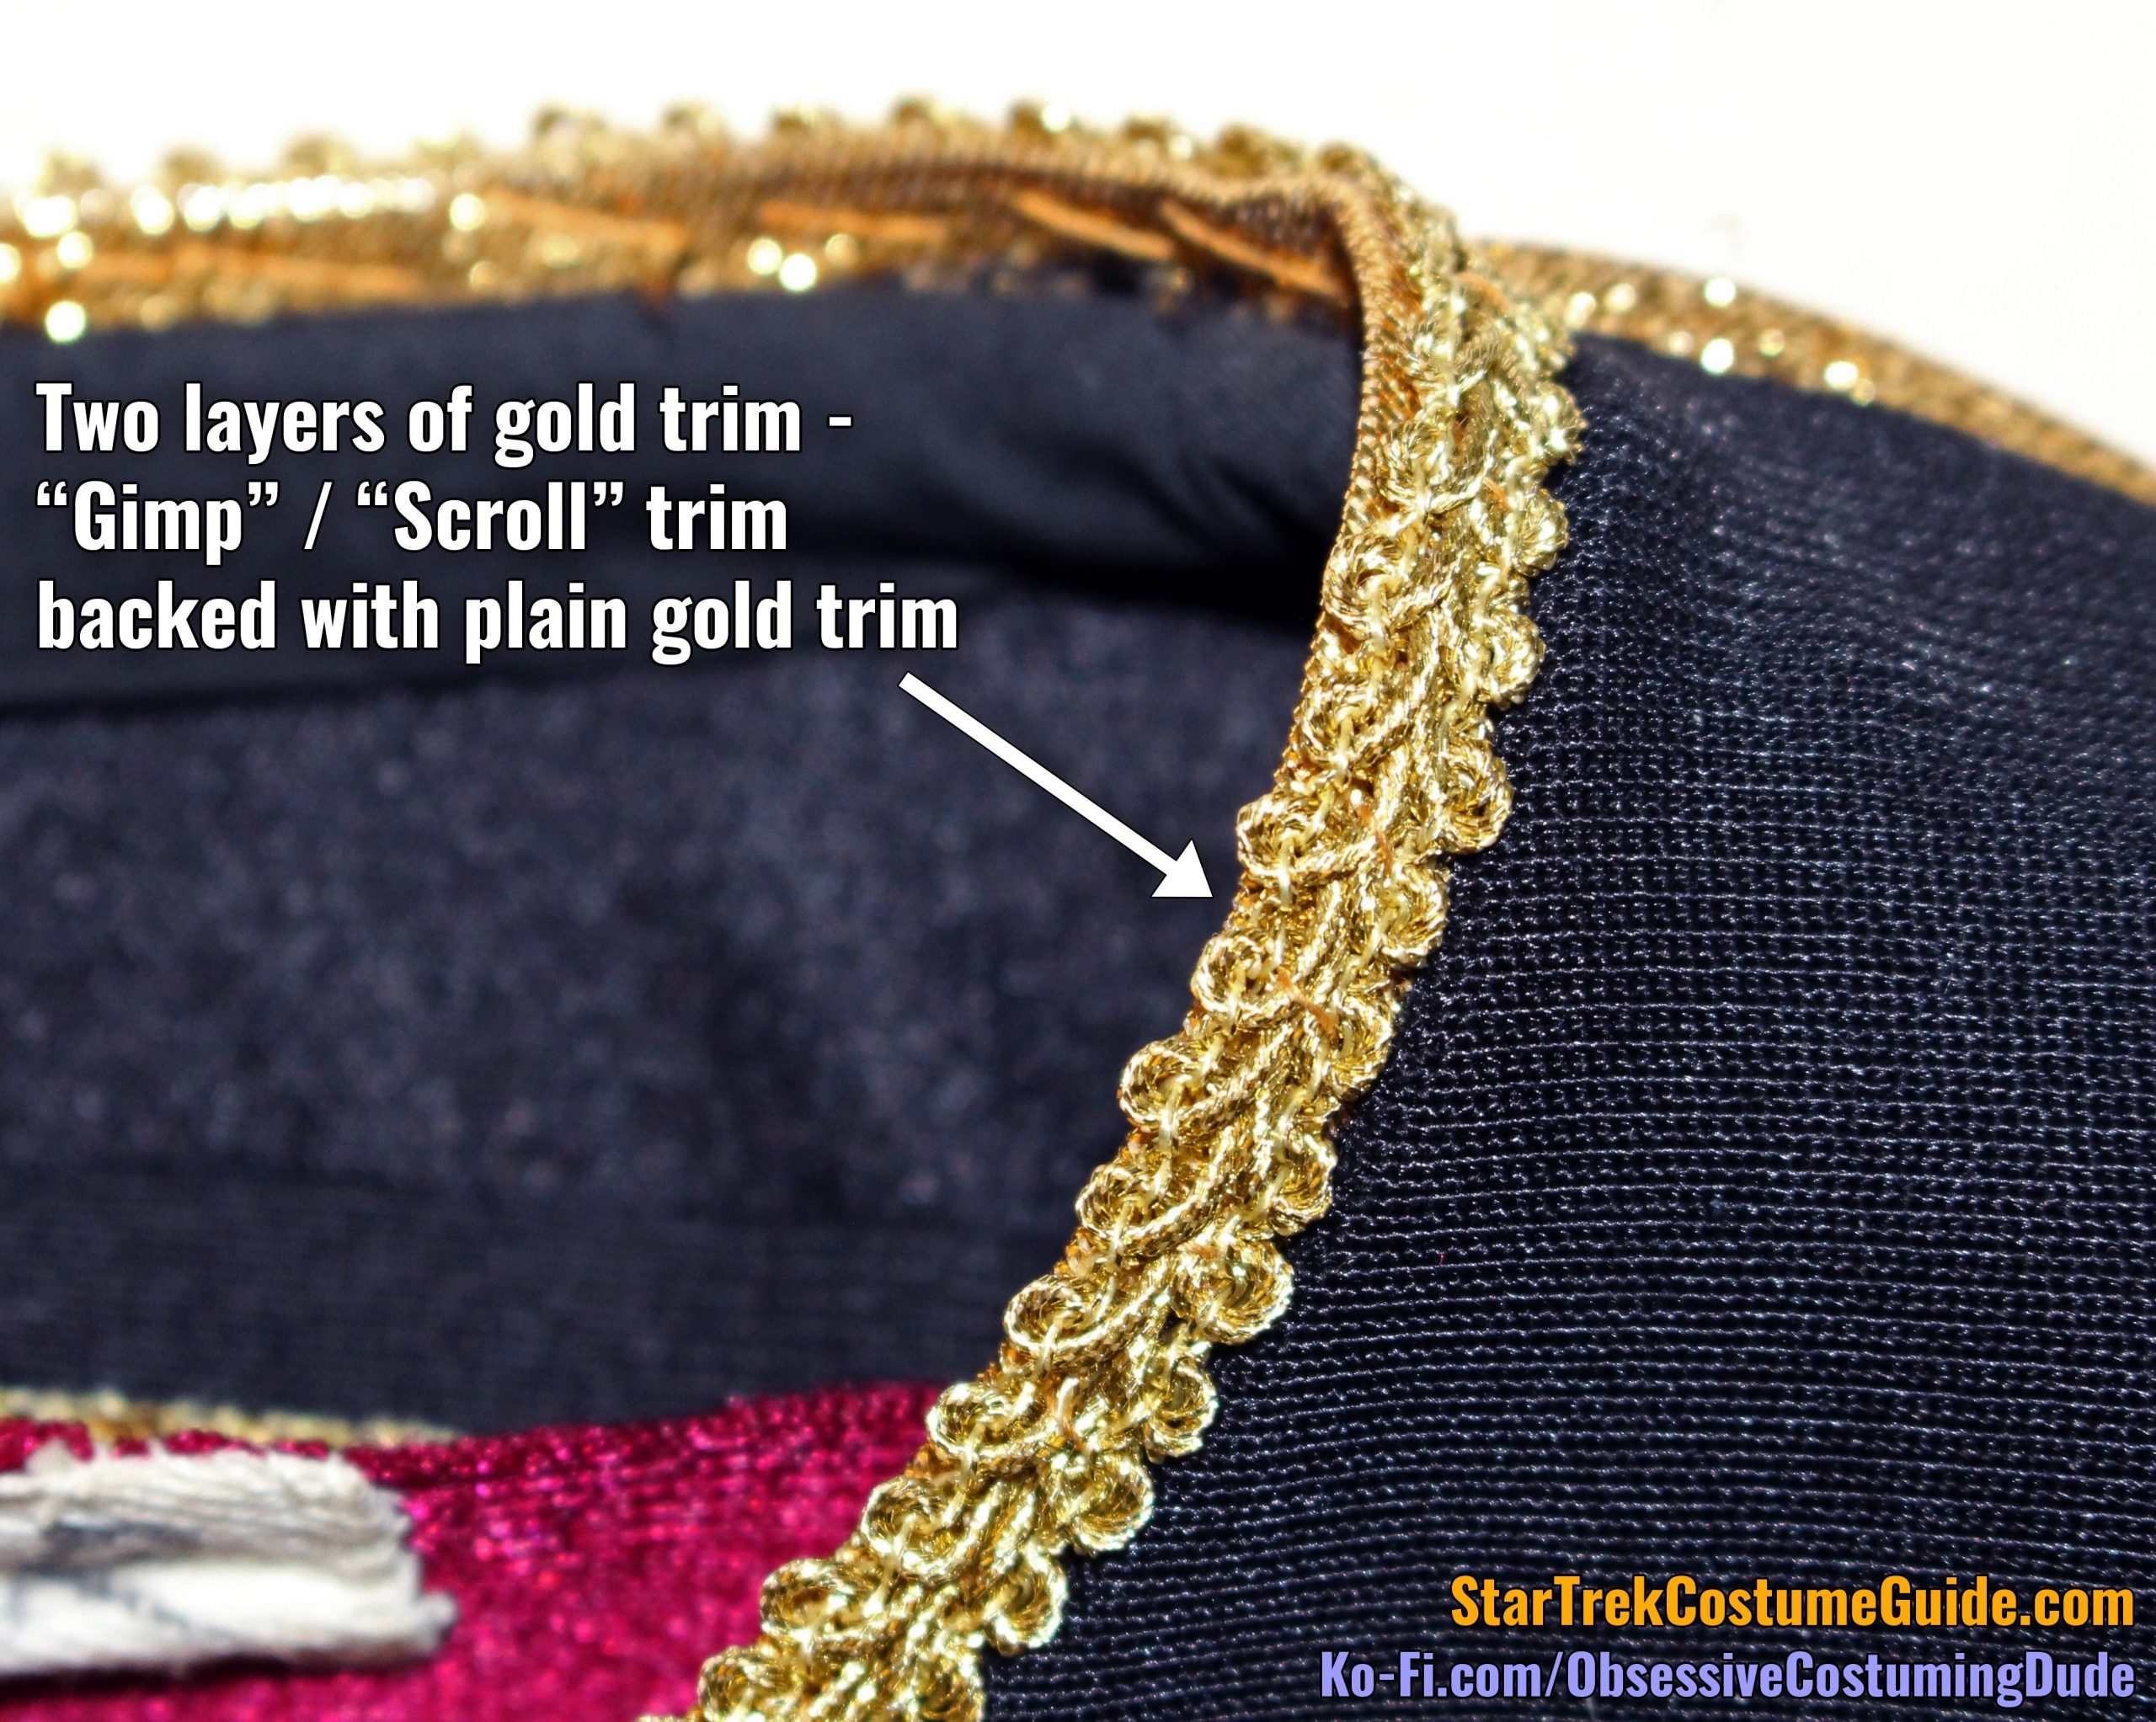
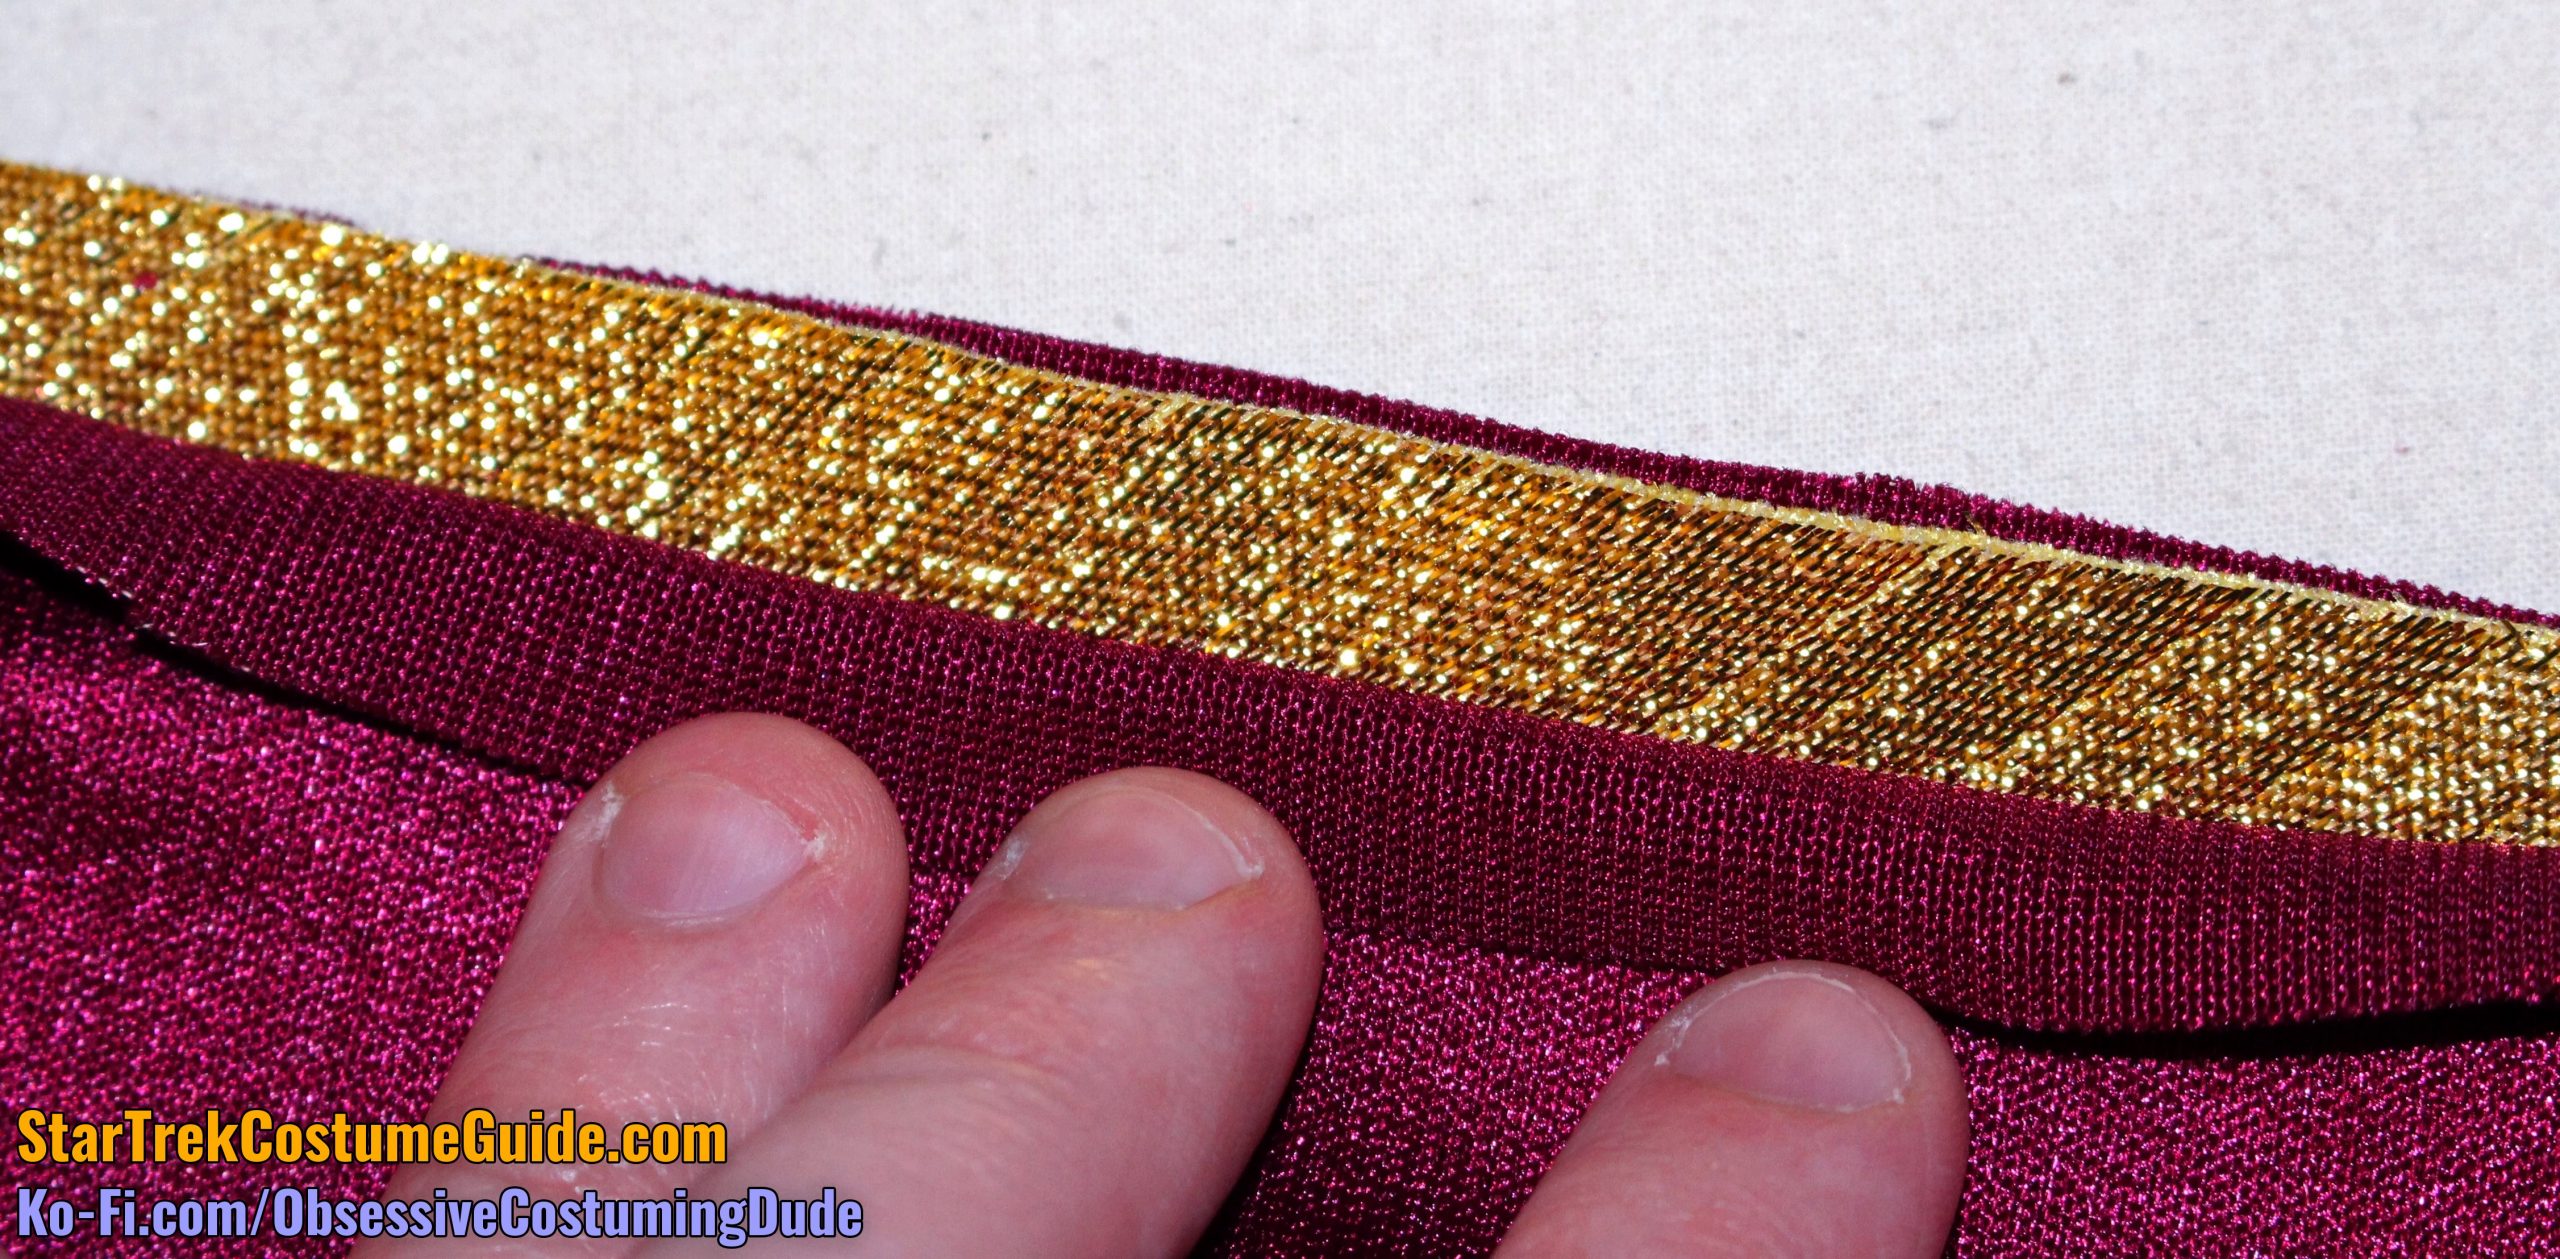
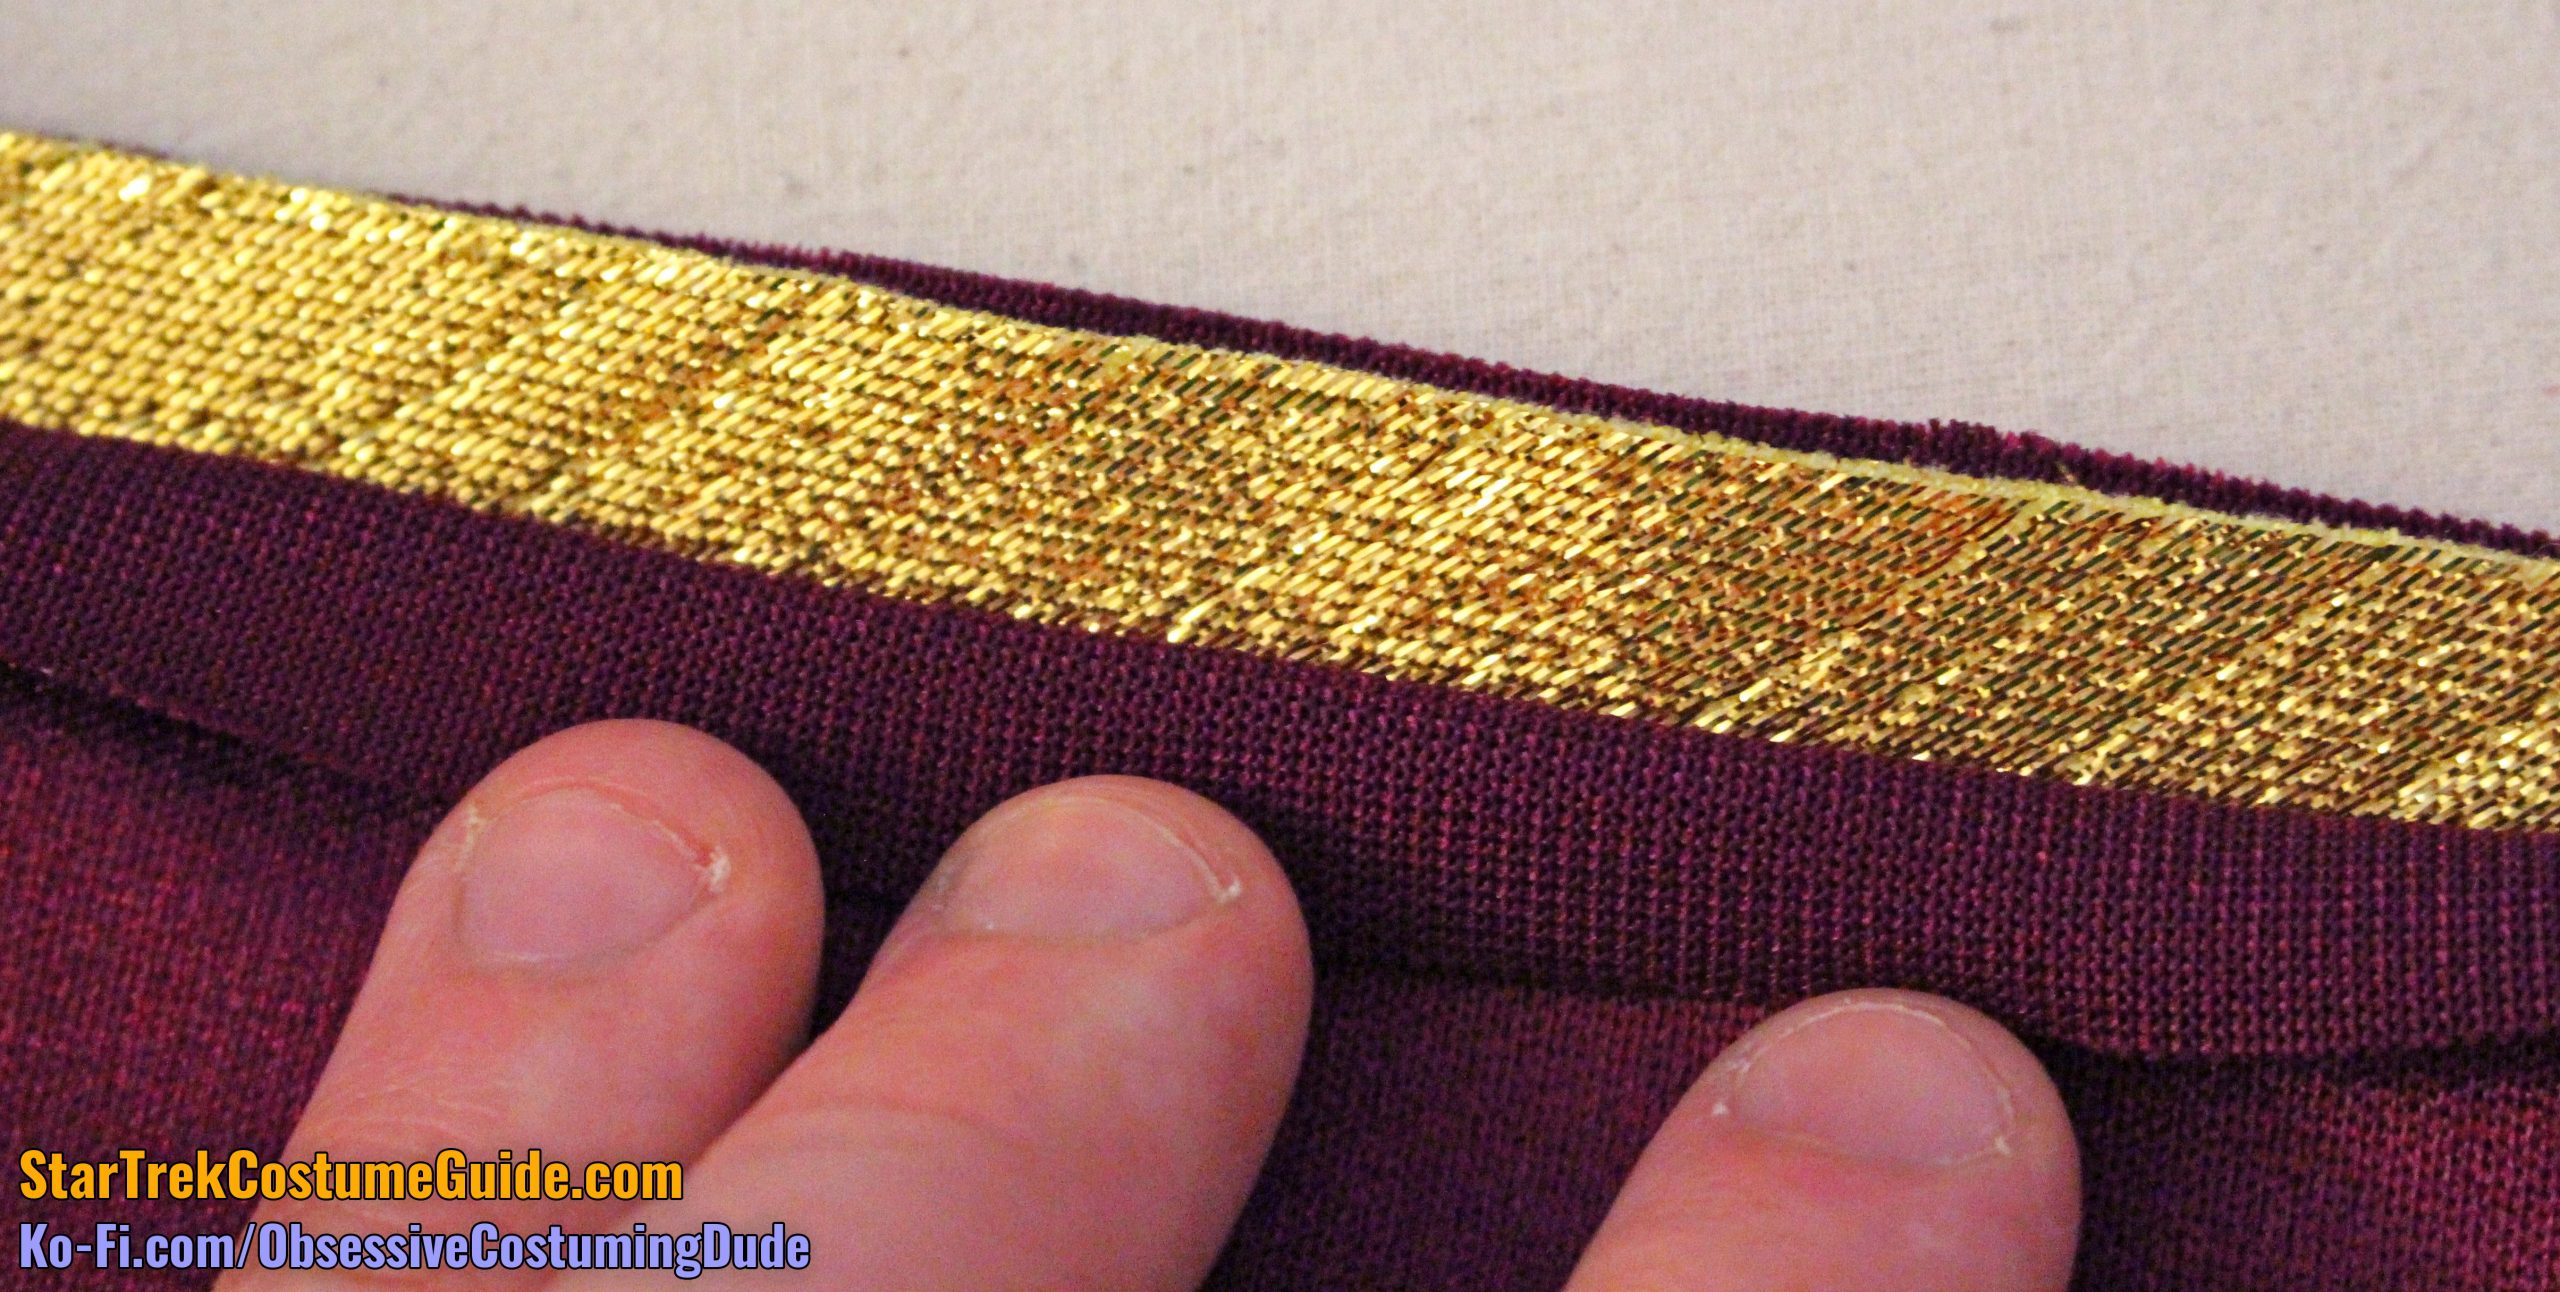
The trim is basically standard metallic gold “scroll”/“gimp” trim, which is a standard retail trim still available today.
In fact, the neckline/front trim was actually two separate trims, with the “curly” one hand-sewn down onto a gold braid underneath.
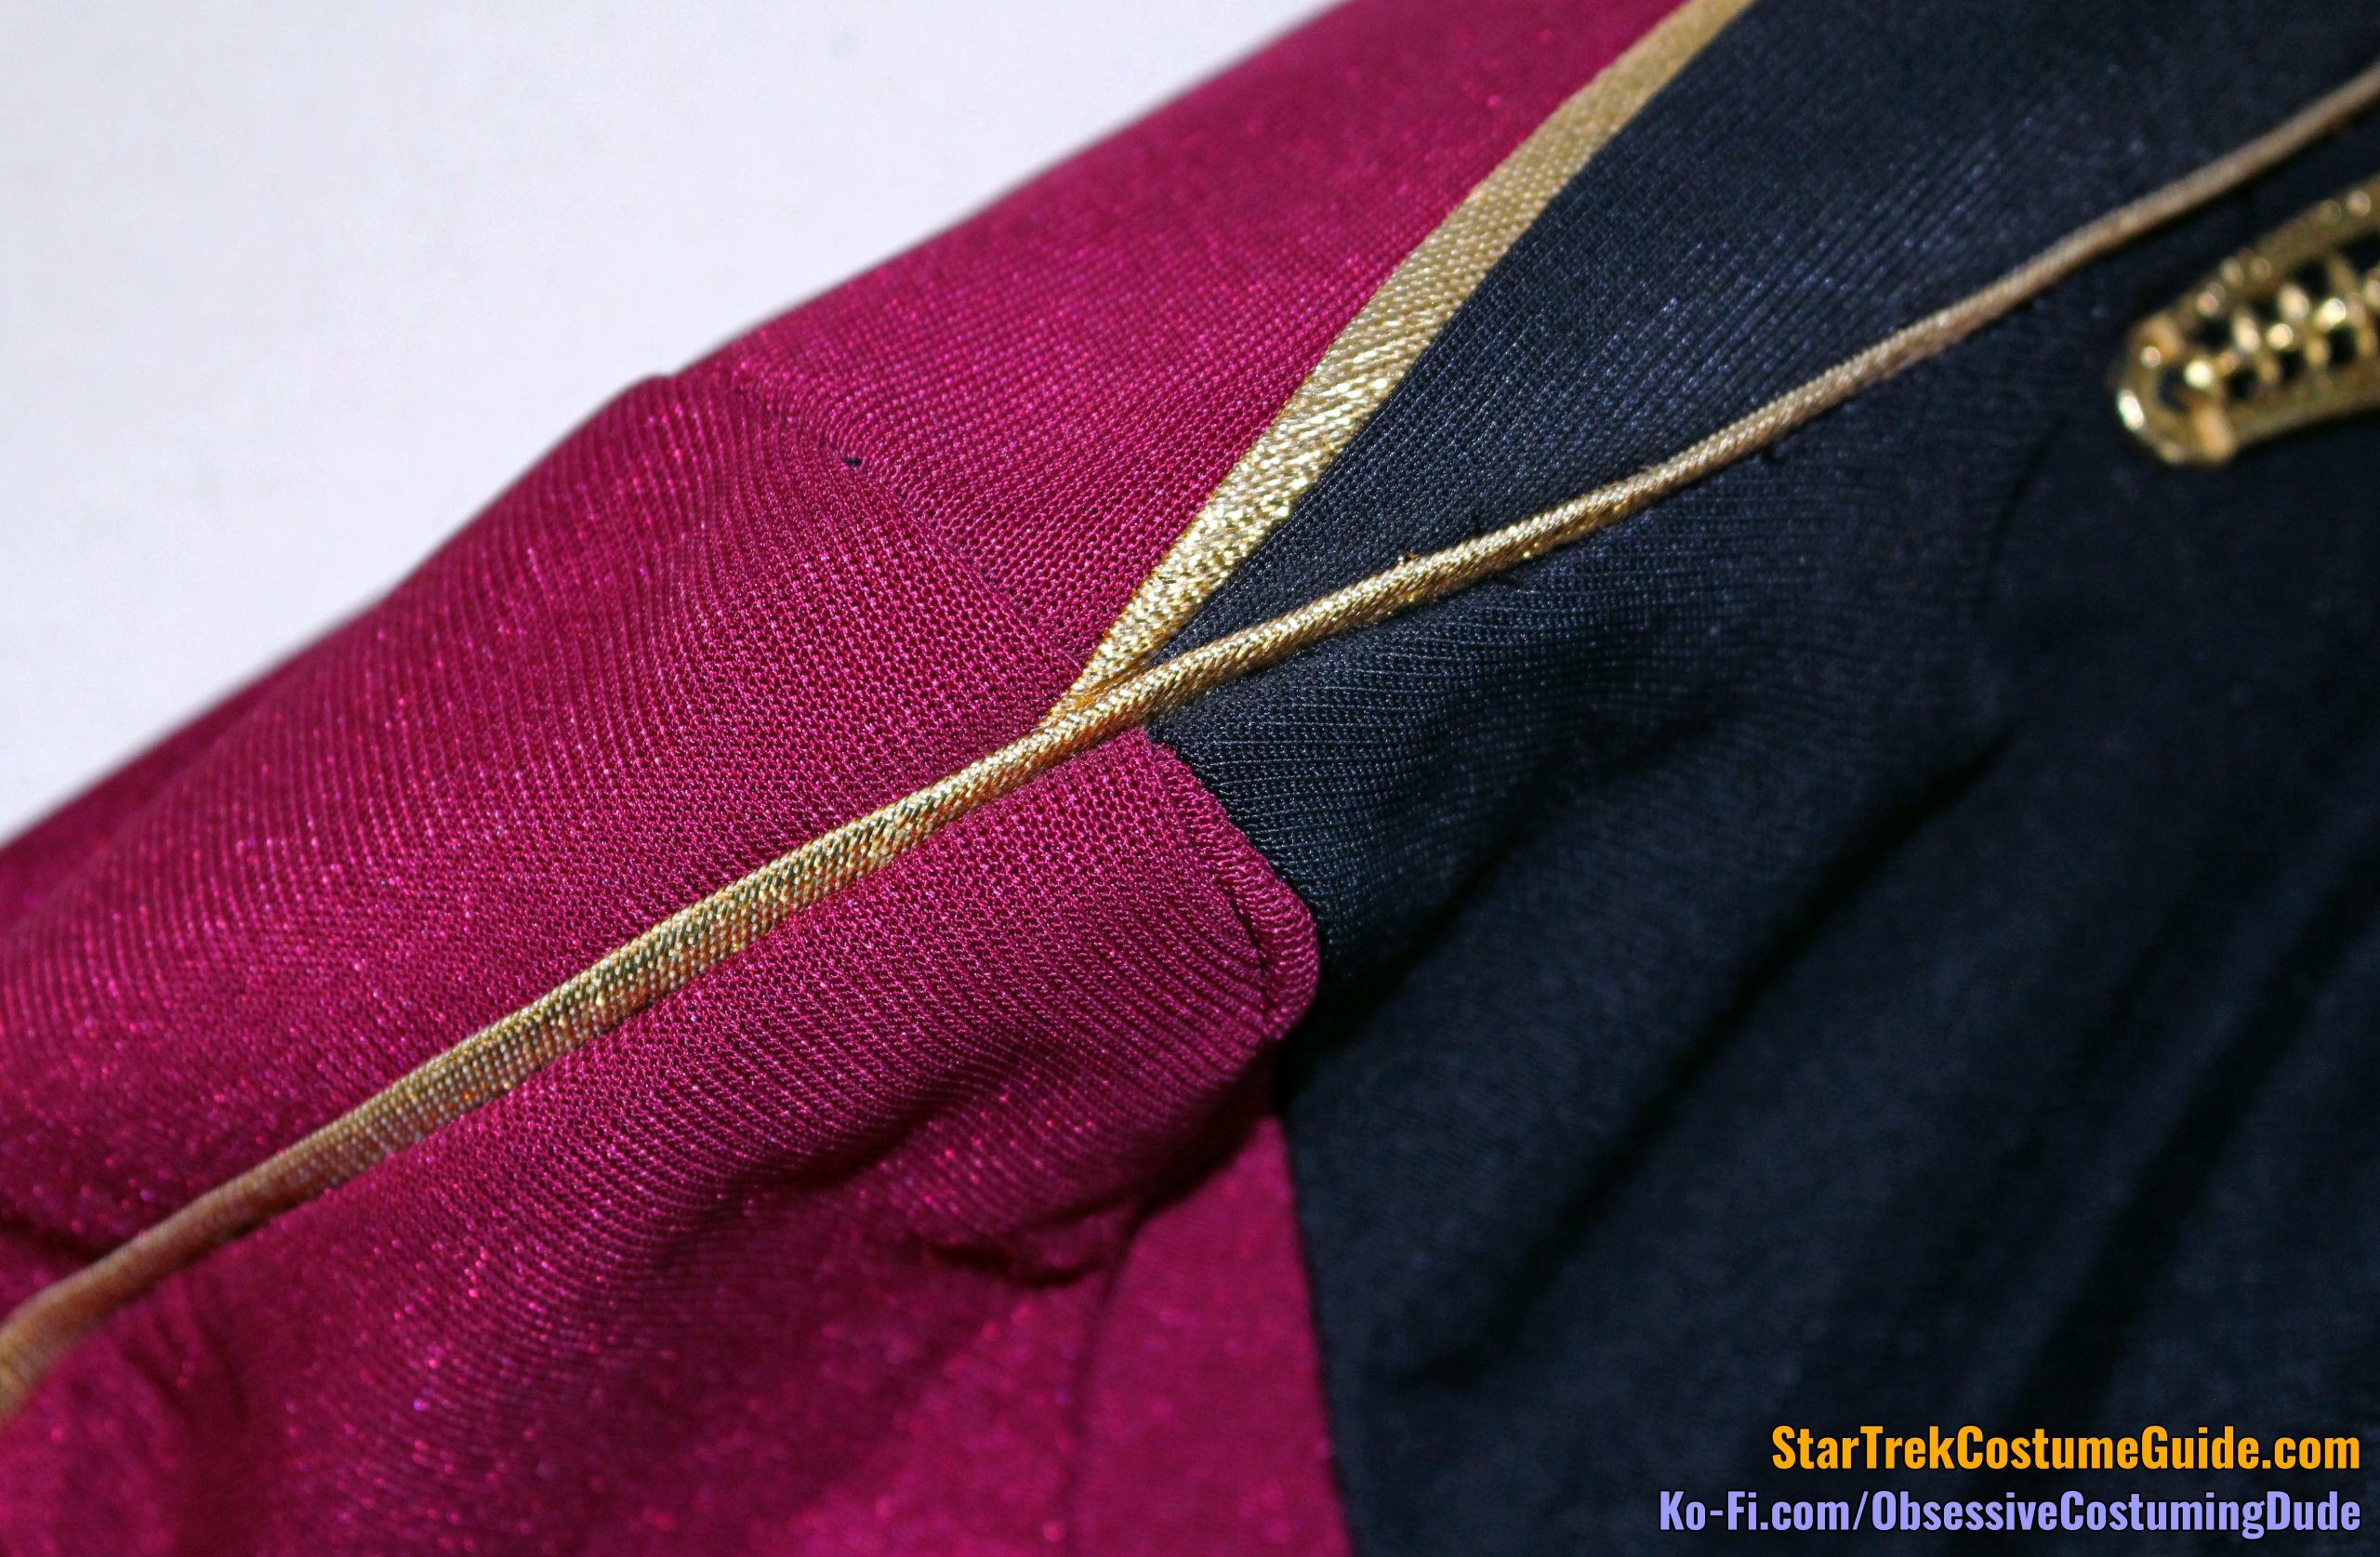
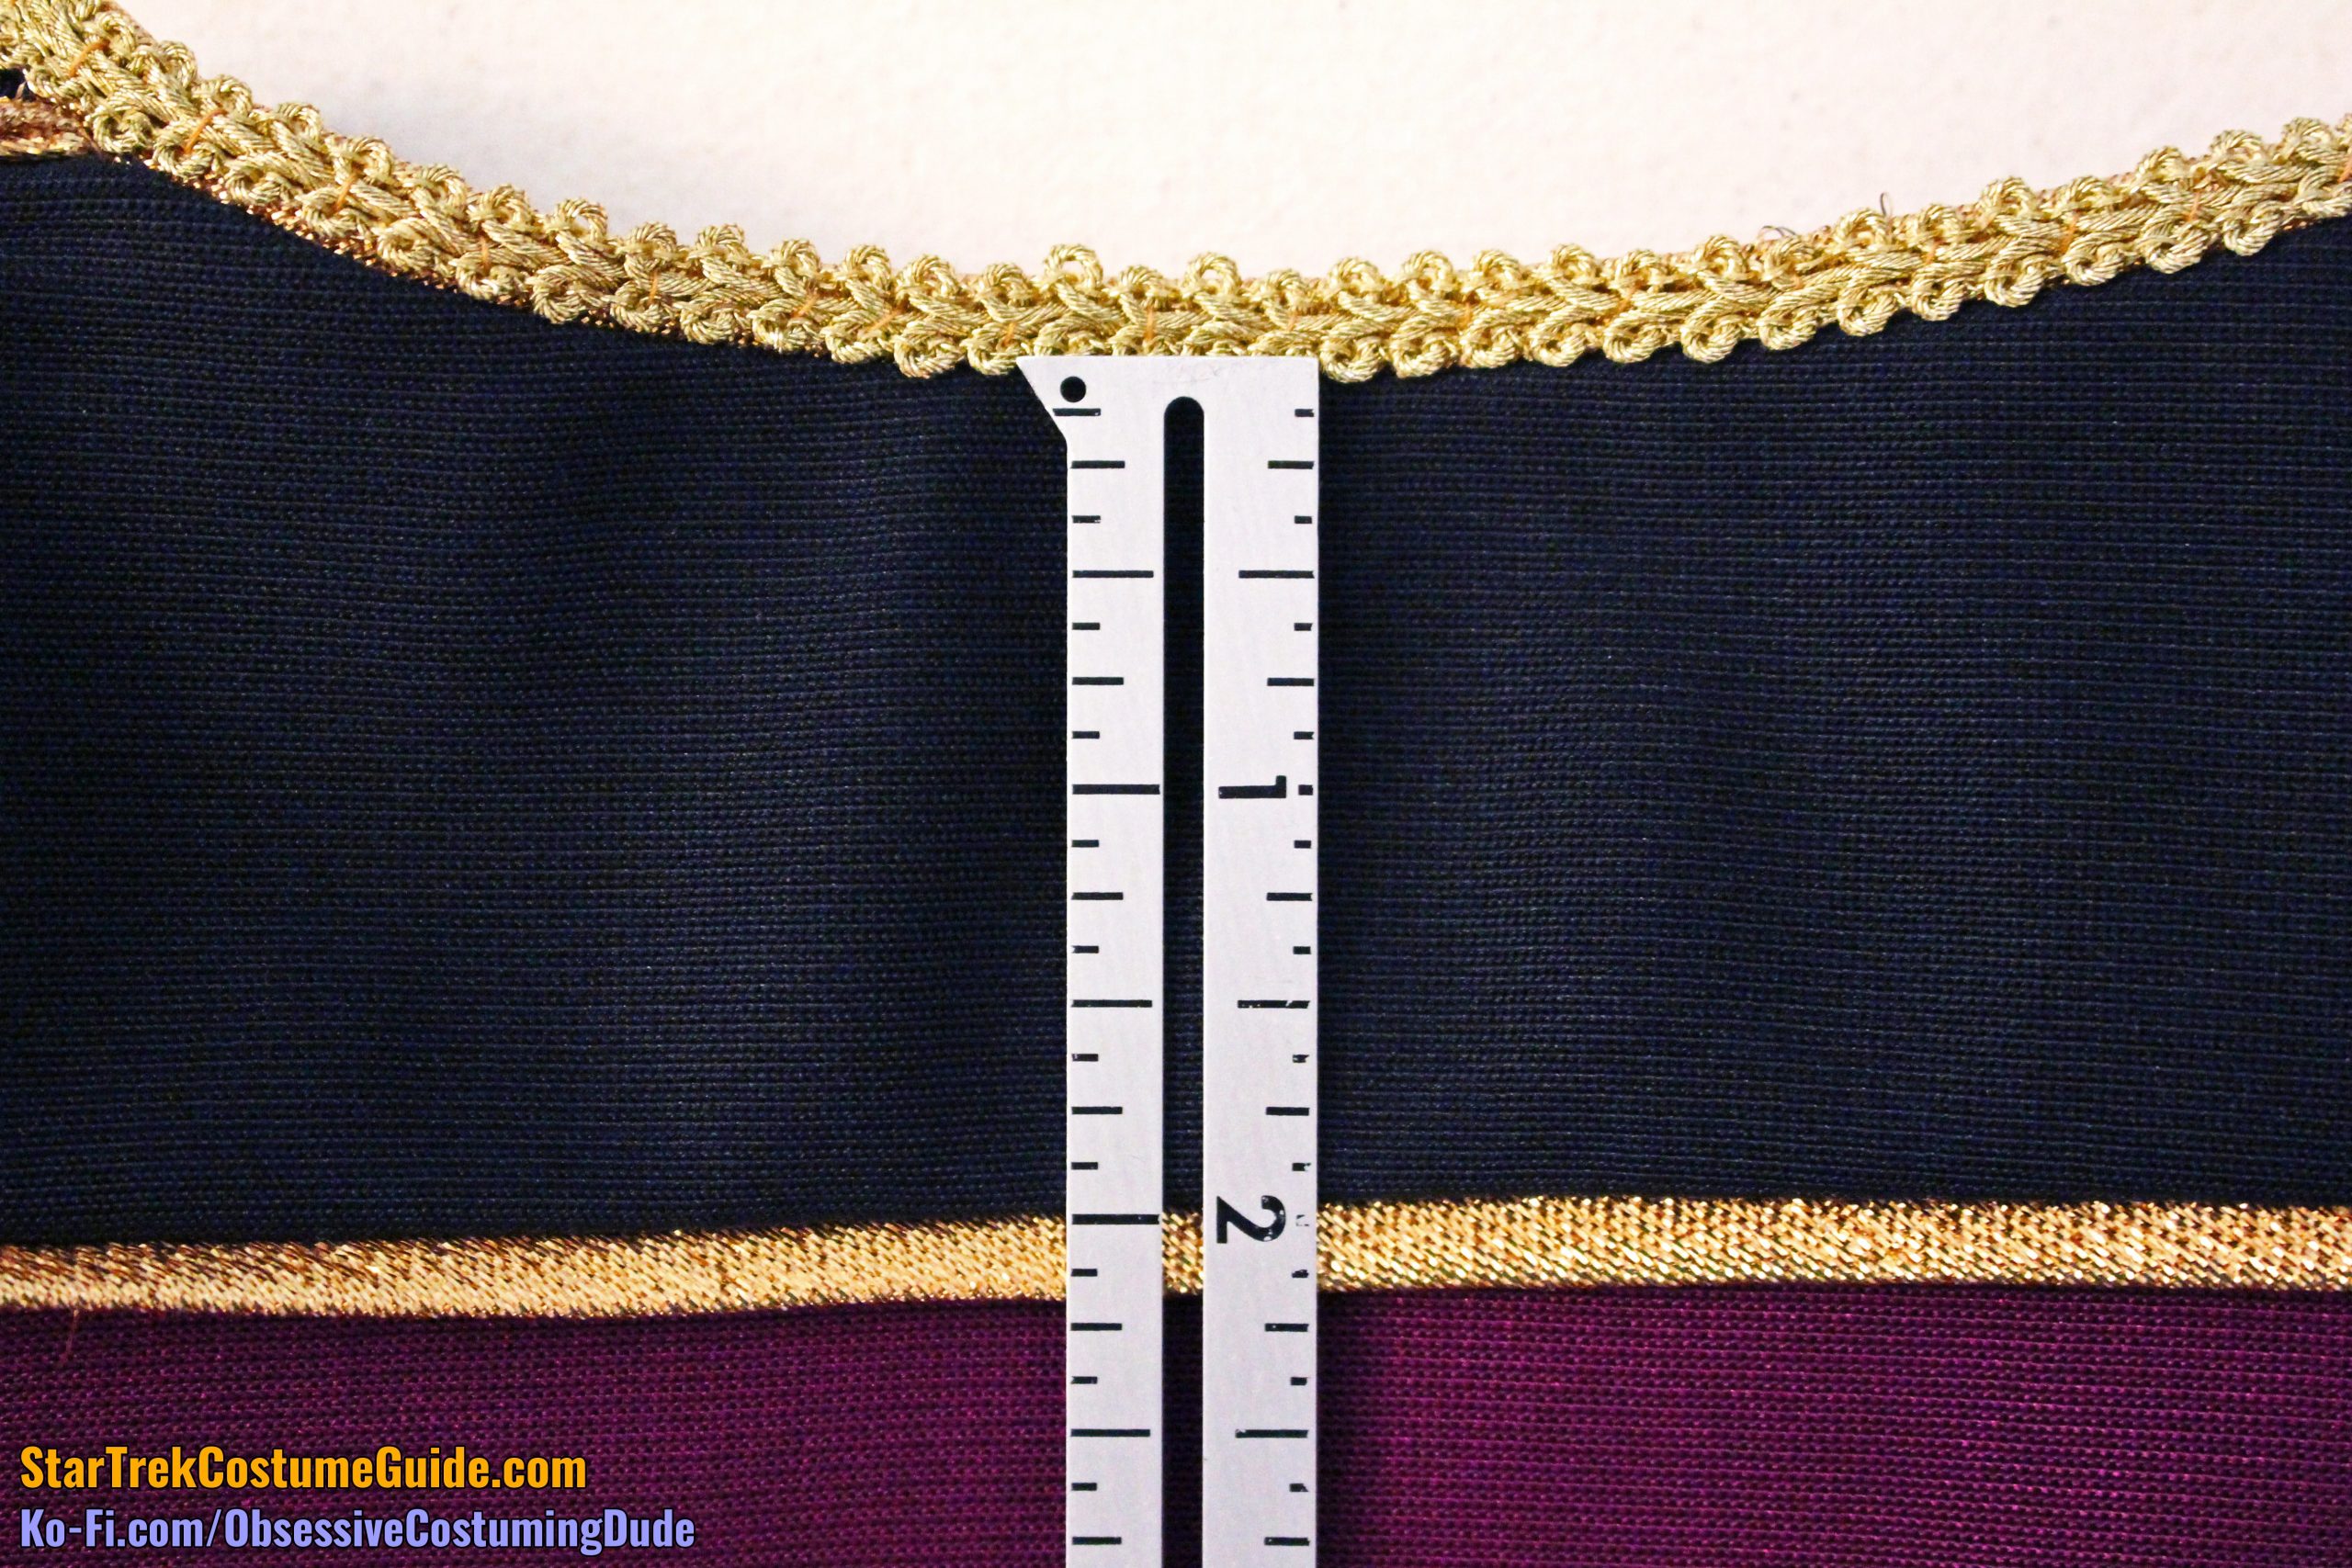
The gold trim underneath appears to have been the same trim used in the shoulder/outer sleeve seams, lower yoke seams, and lower sleeve accents.
It was tough to get a read on the width of the neckline trim; sometimes it appeared to be 3/16” (like the TNG skant I examined), but it also sometimes looked closer to a full ¼” side.
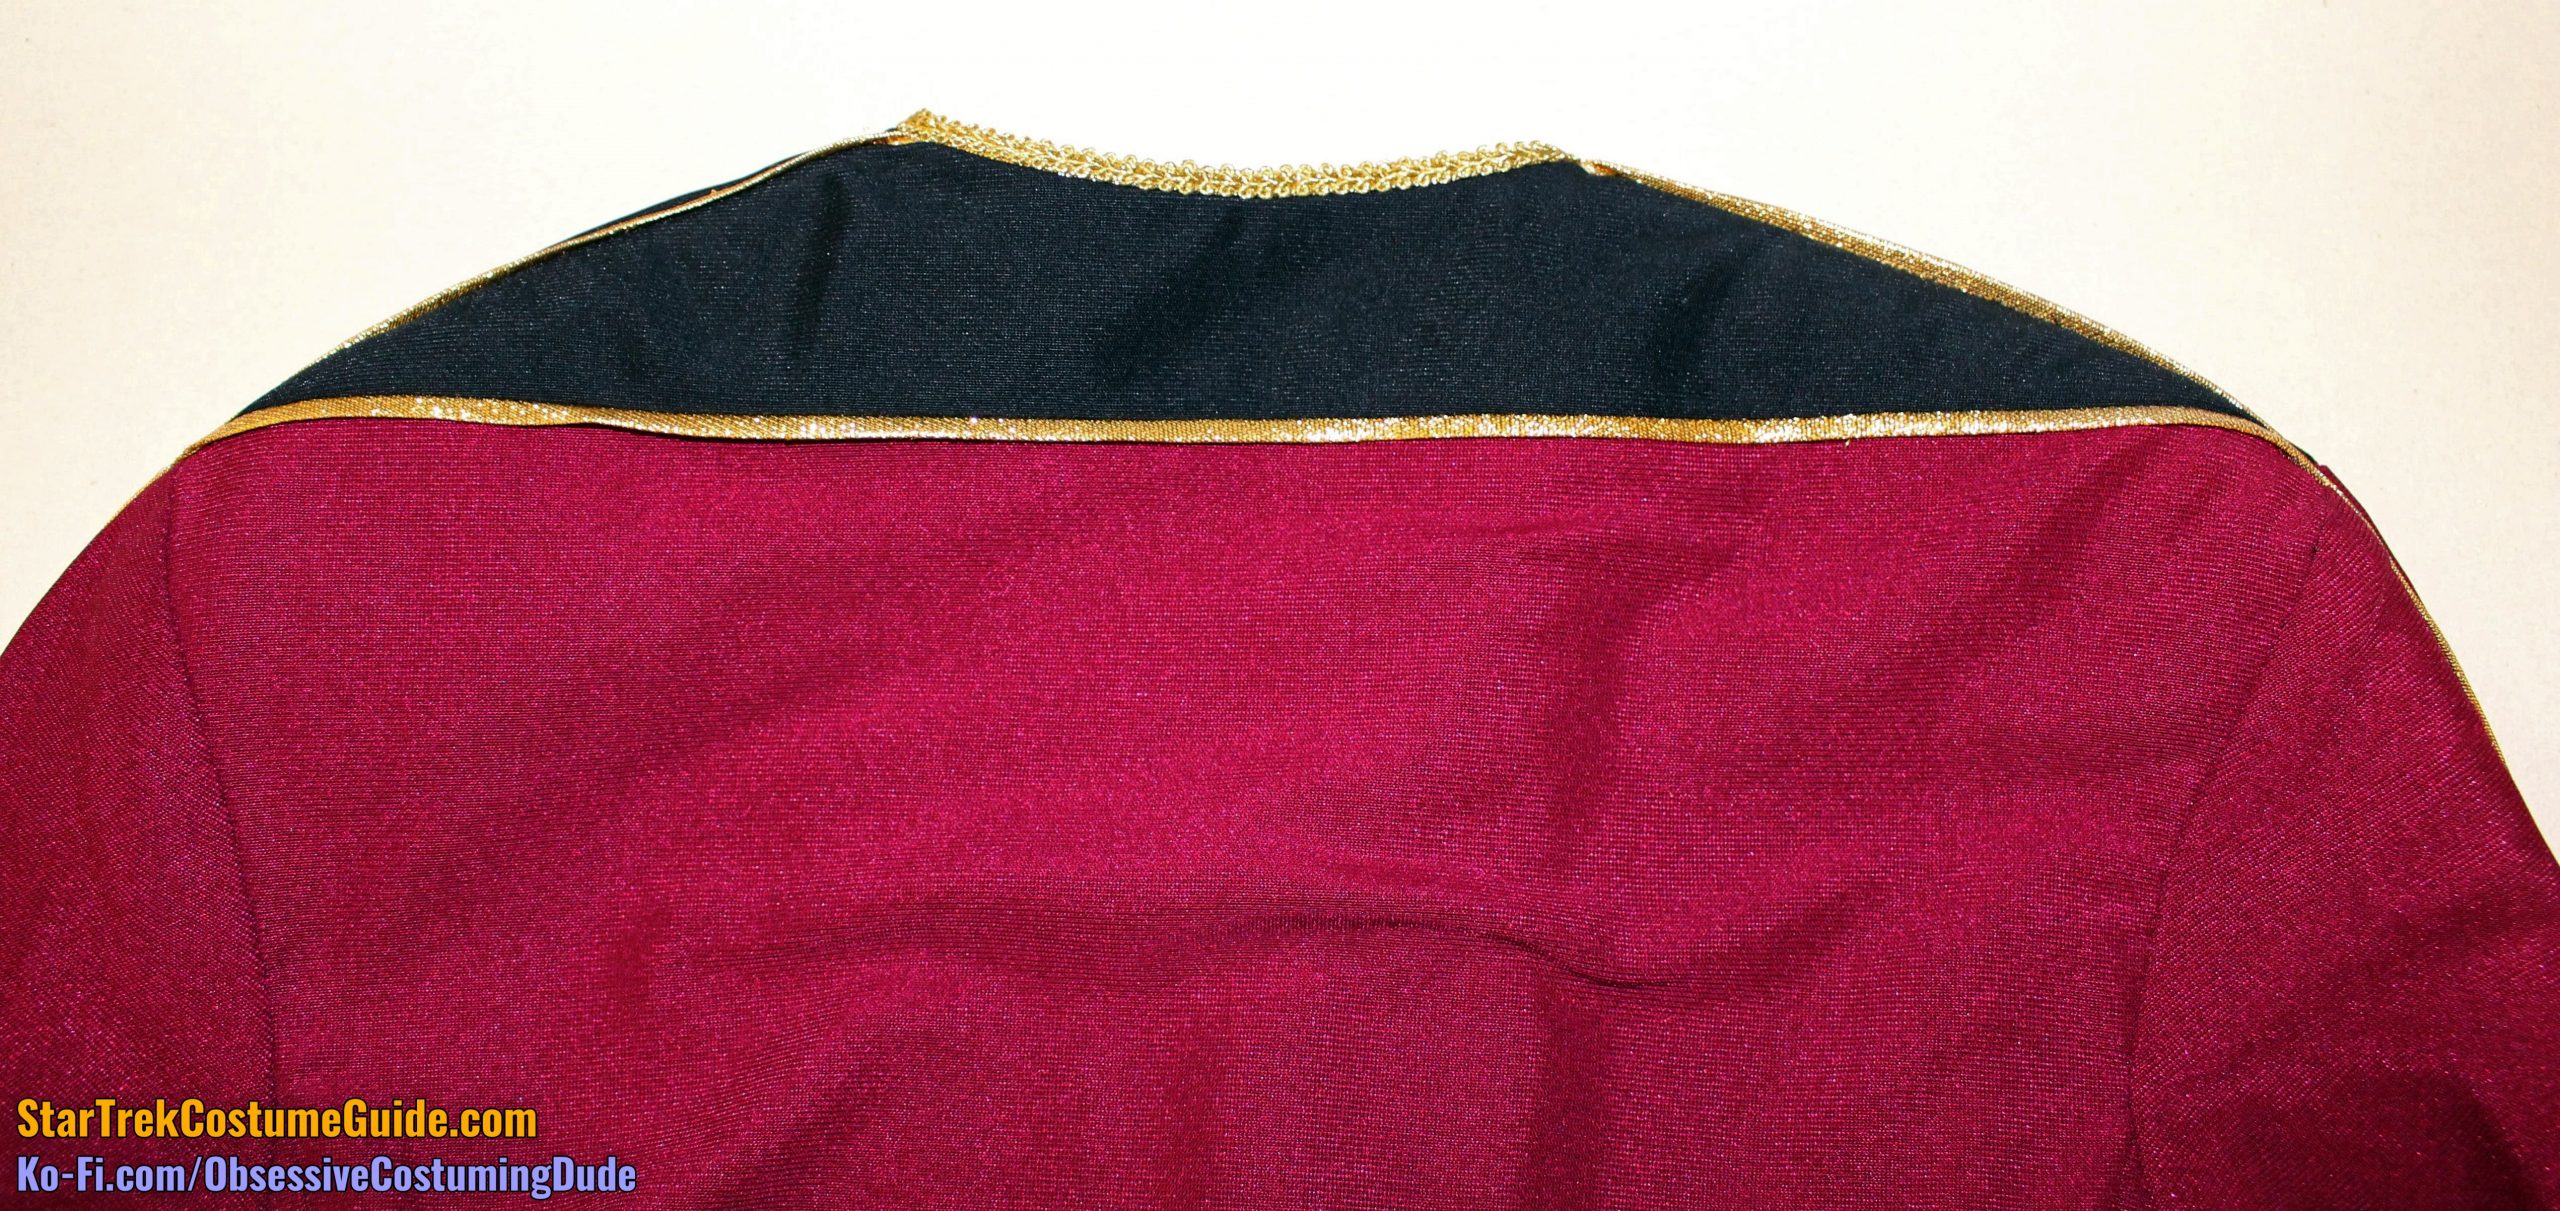
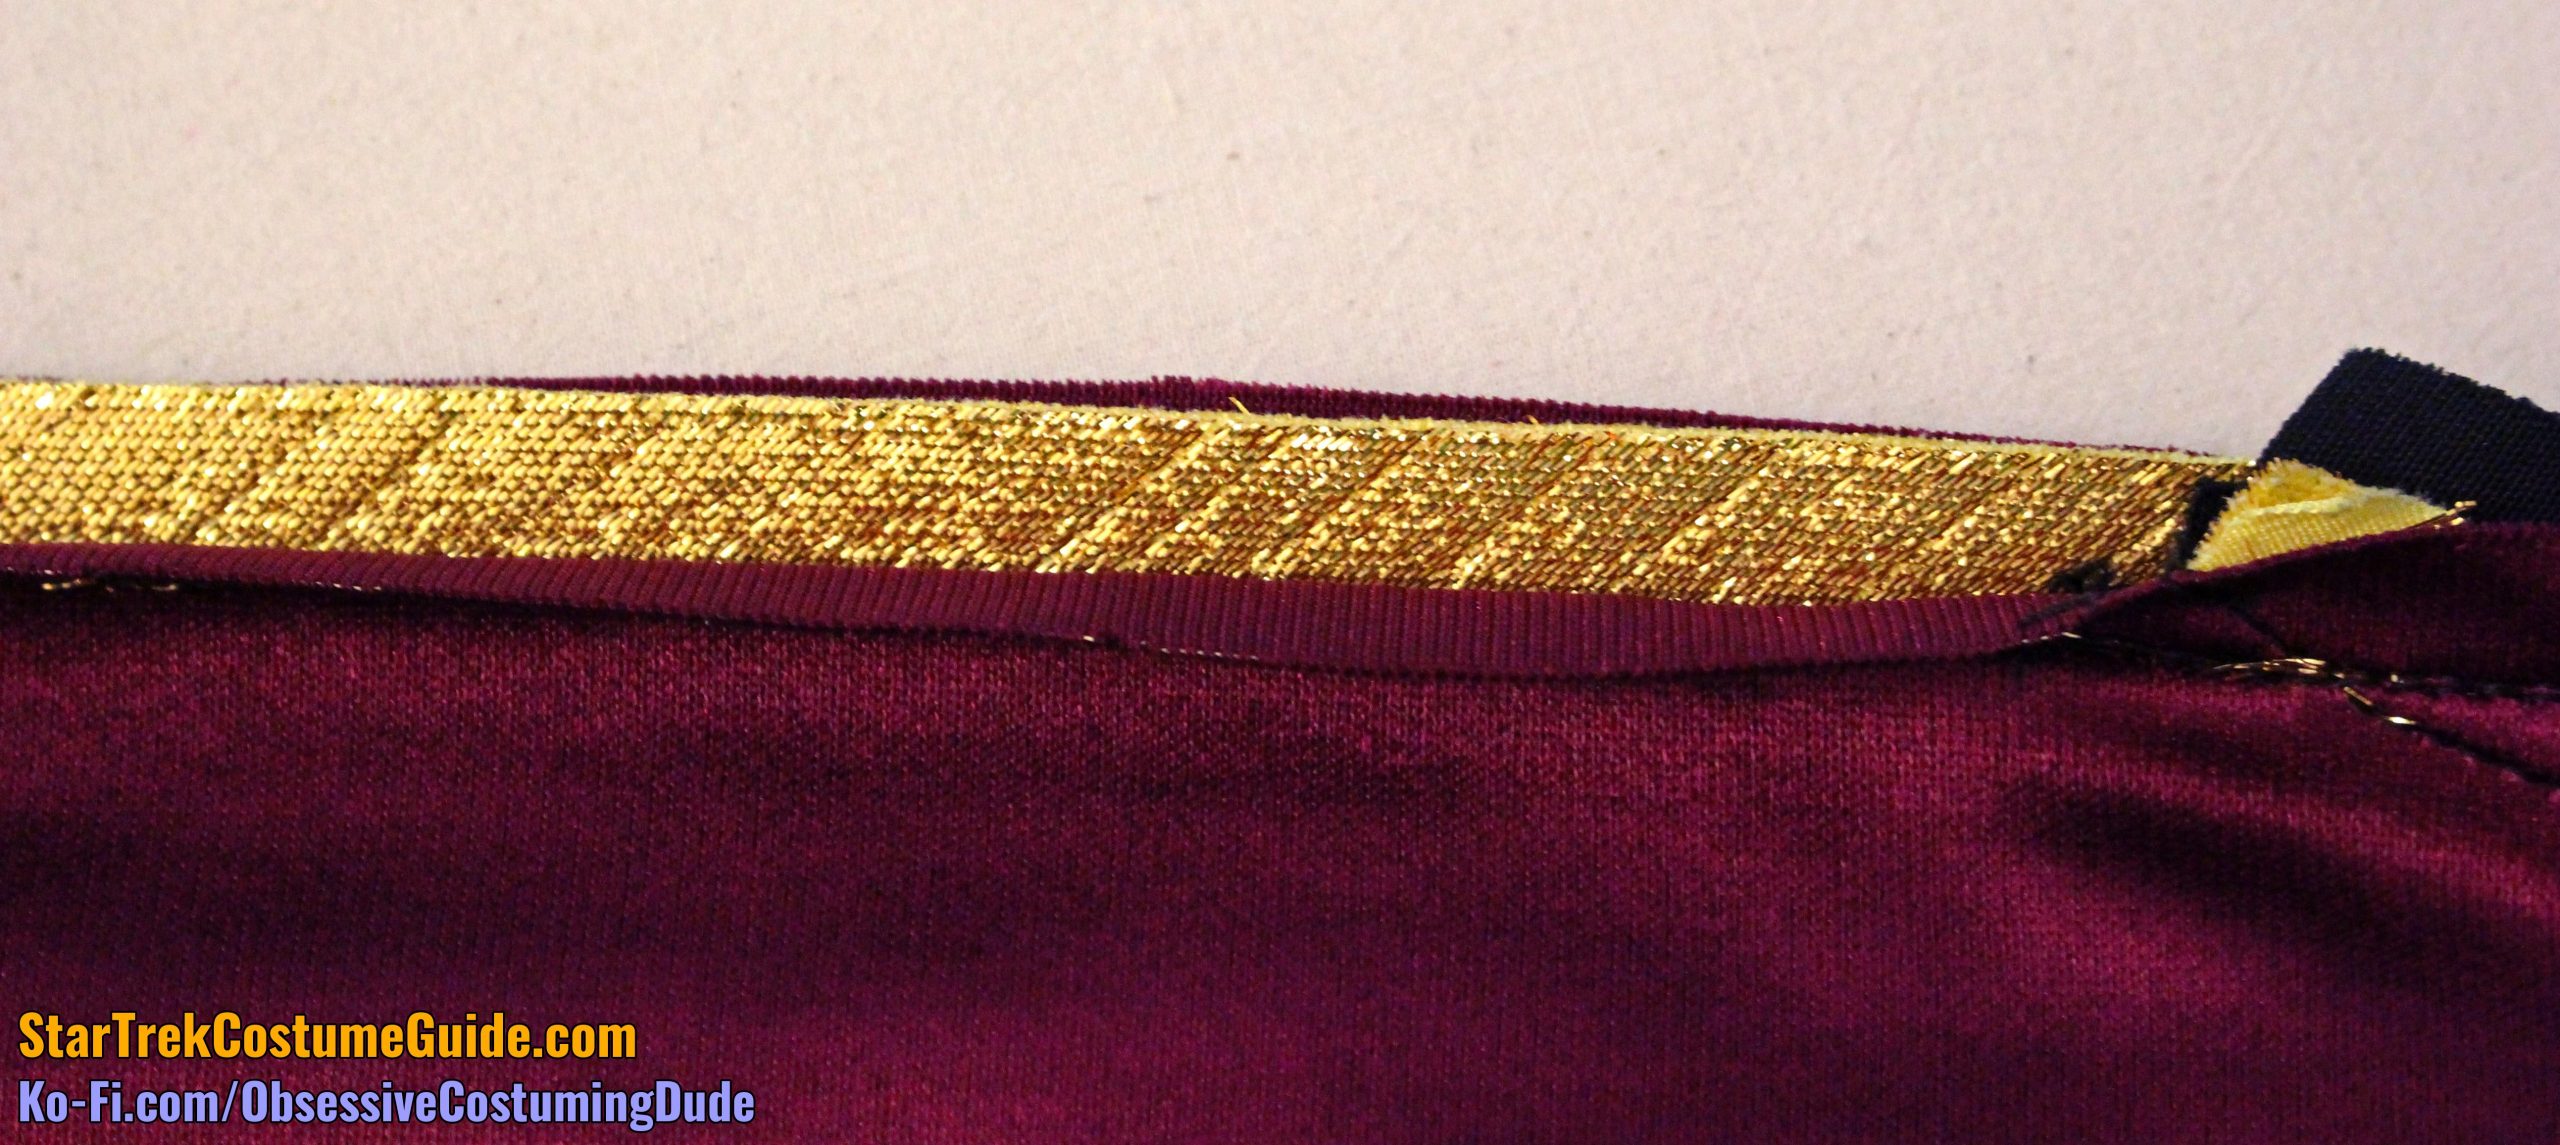
The trim extended across the bottom of the back yoke, as well.
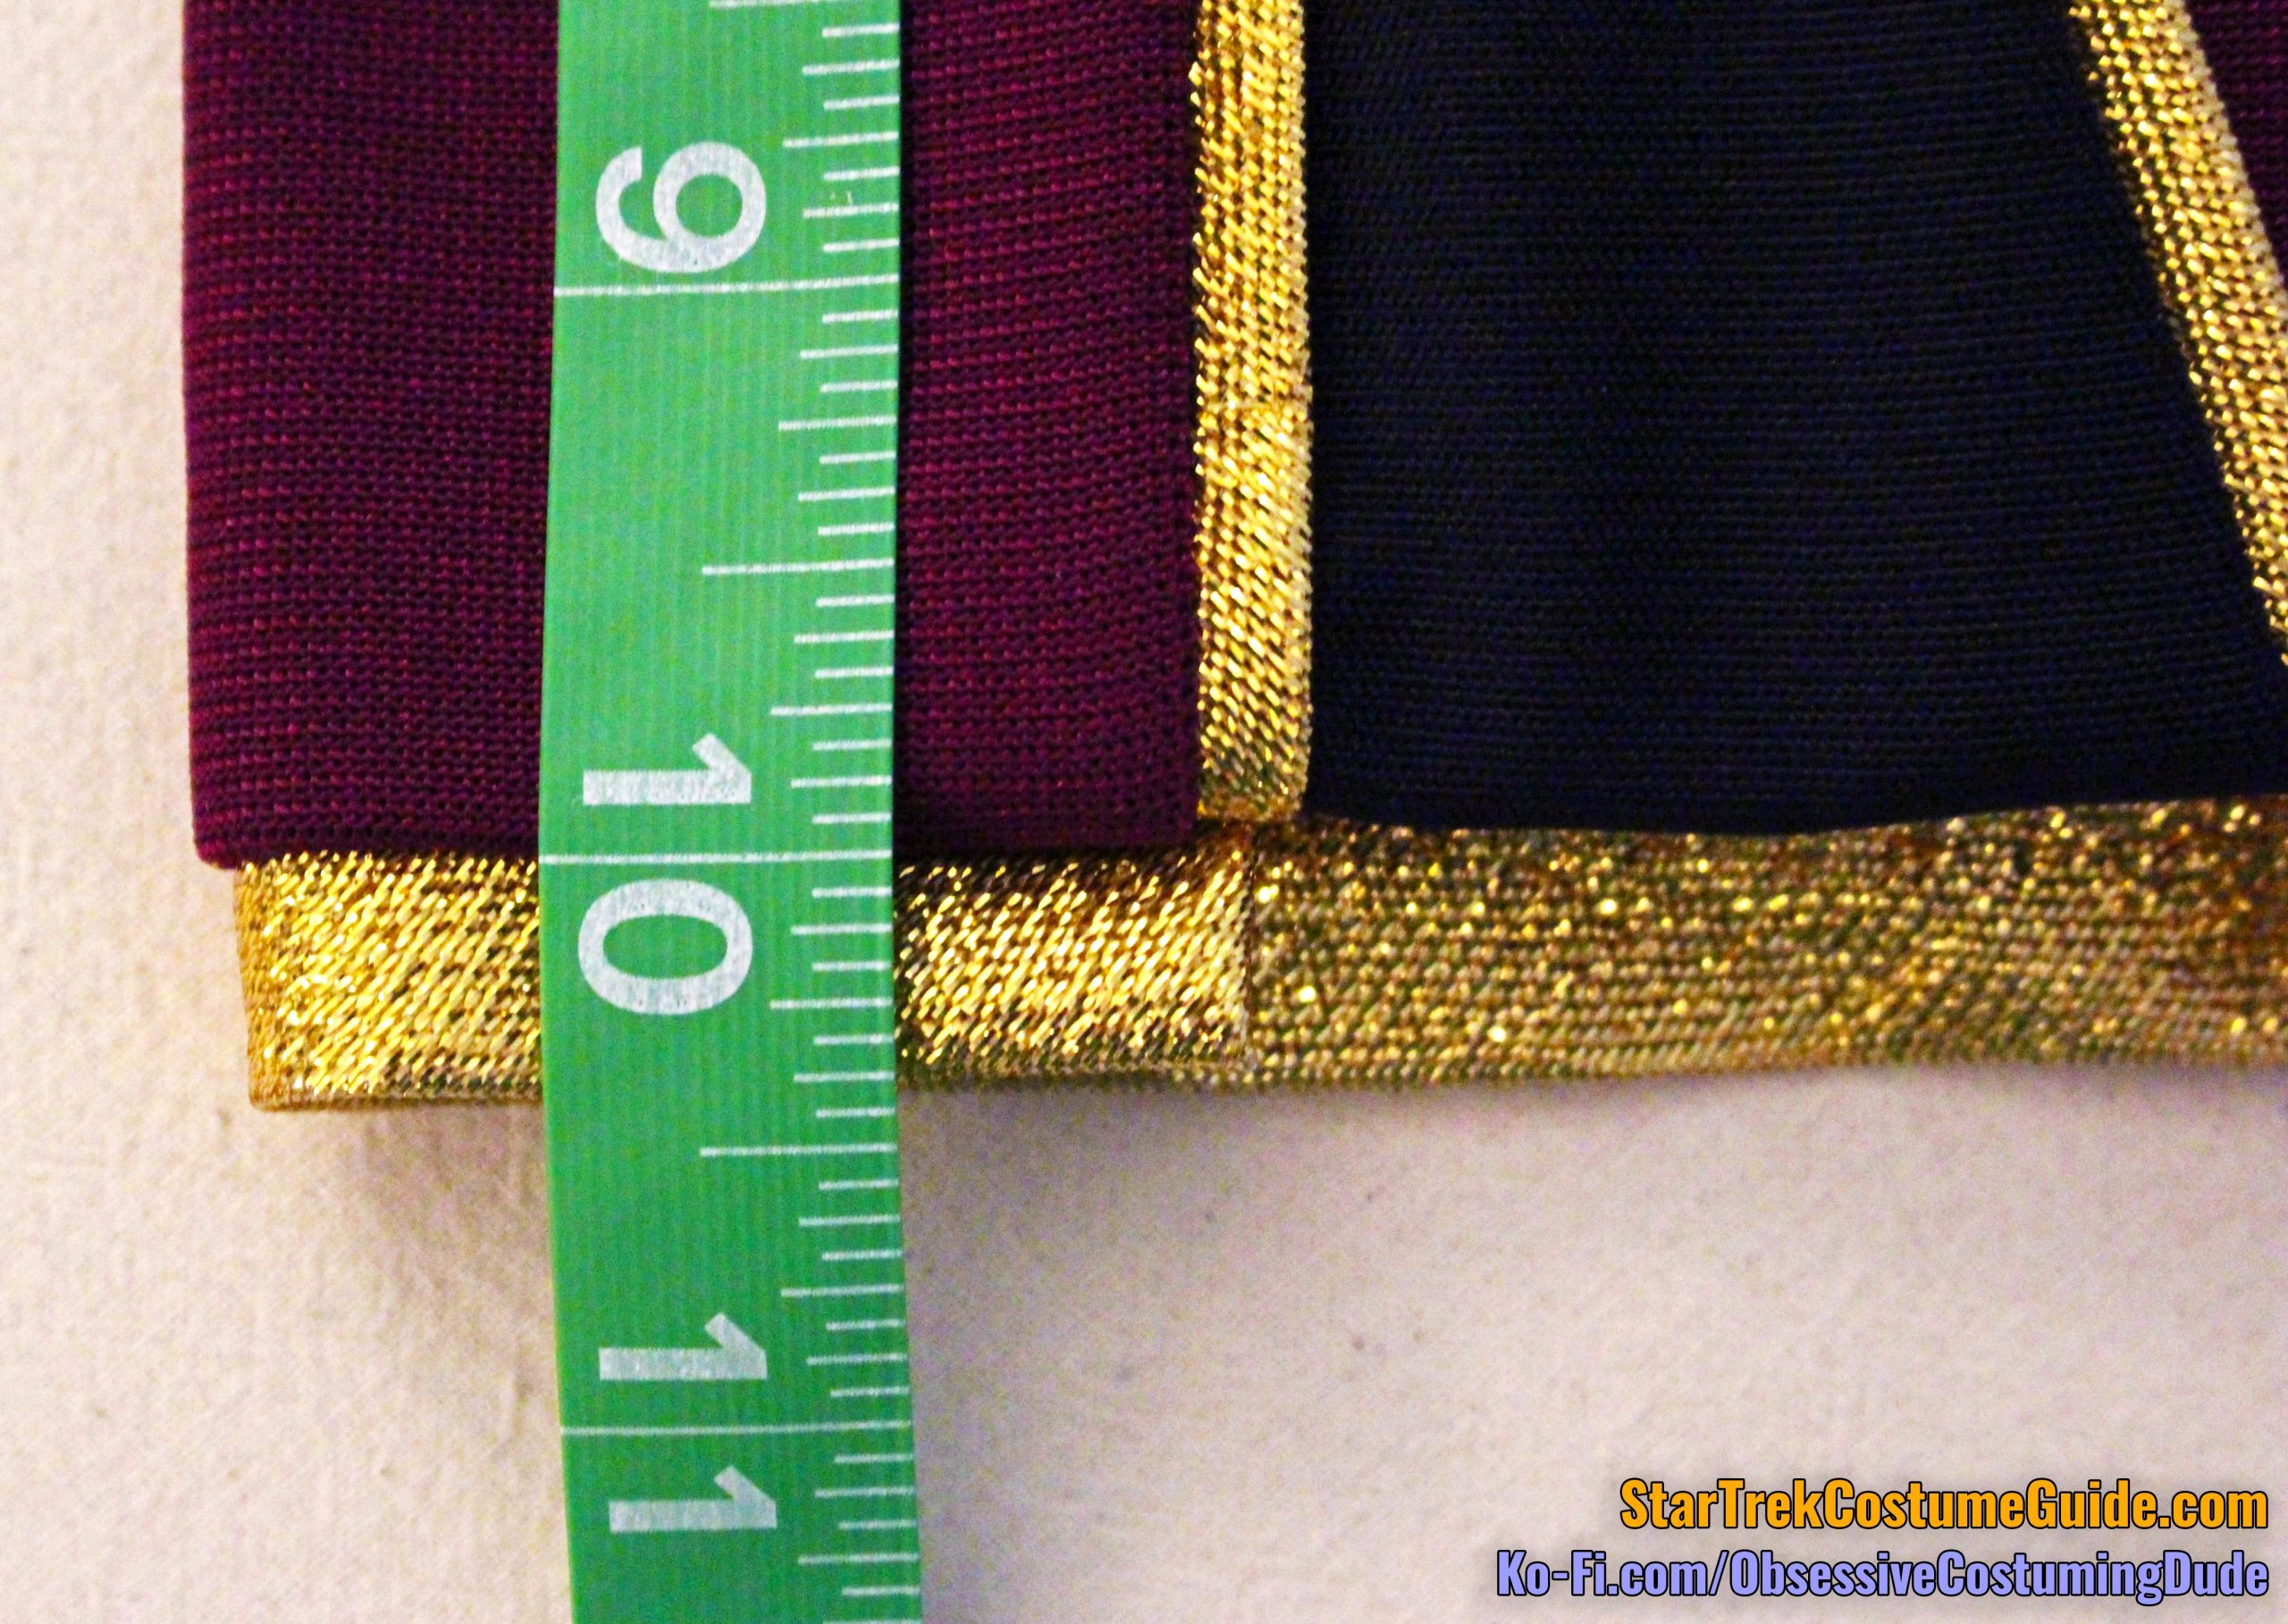
The original trim appears to have been 2” wide; it was simply folded in half and sewn into the seams with however much protruding outward was desired.
In fact, considering the underside of the trim slightly fraying along the edges, and subtle diagonal lines across it, I believe this “trim” may have originally been some bizarre metallic gold fabric that was cut into 2” diagonal strips.
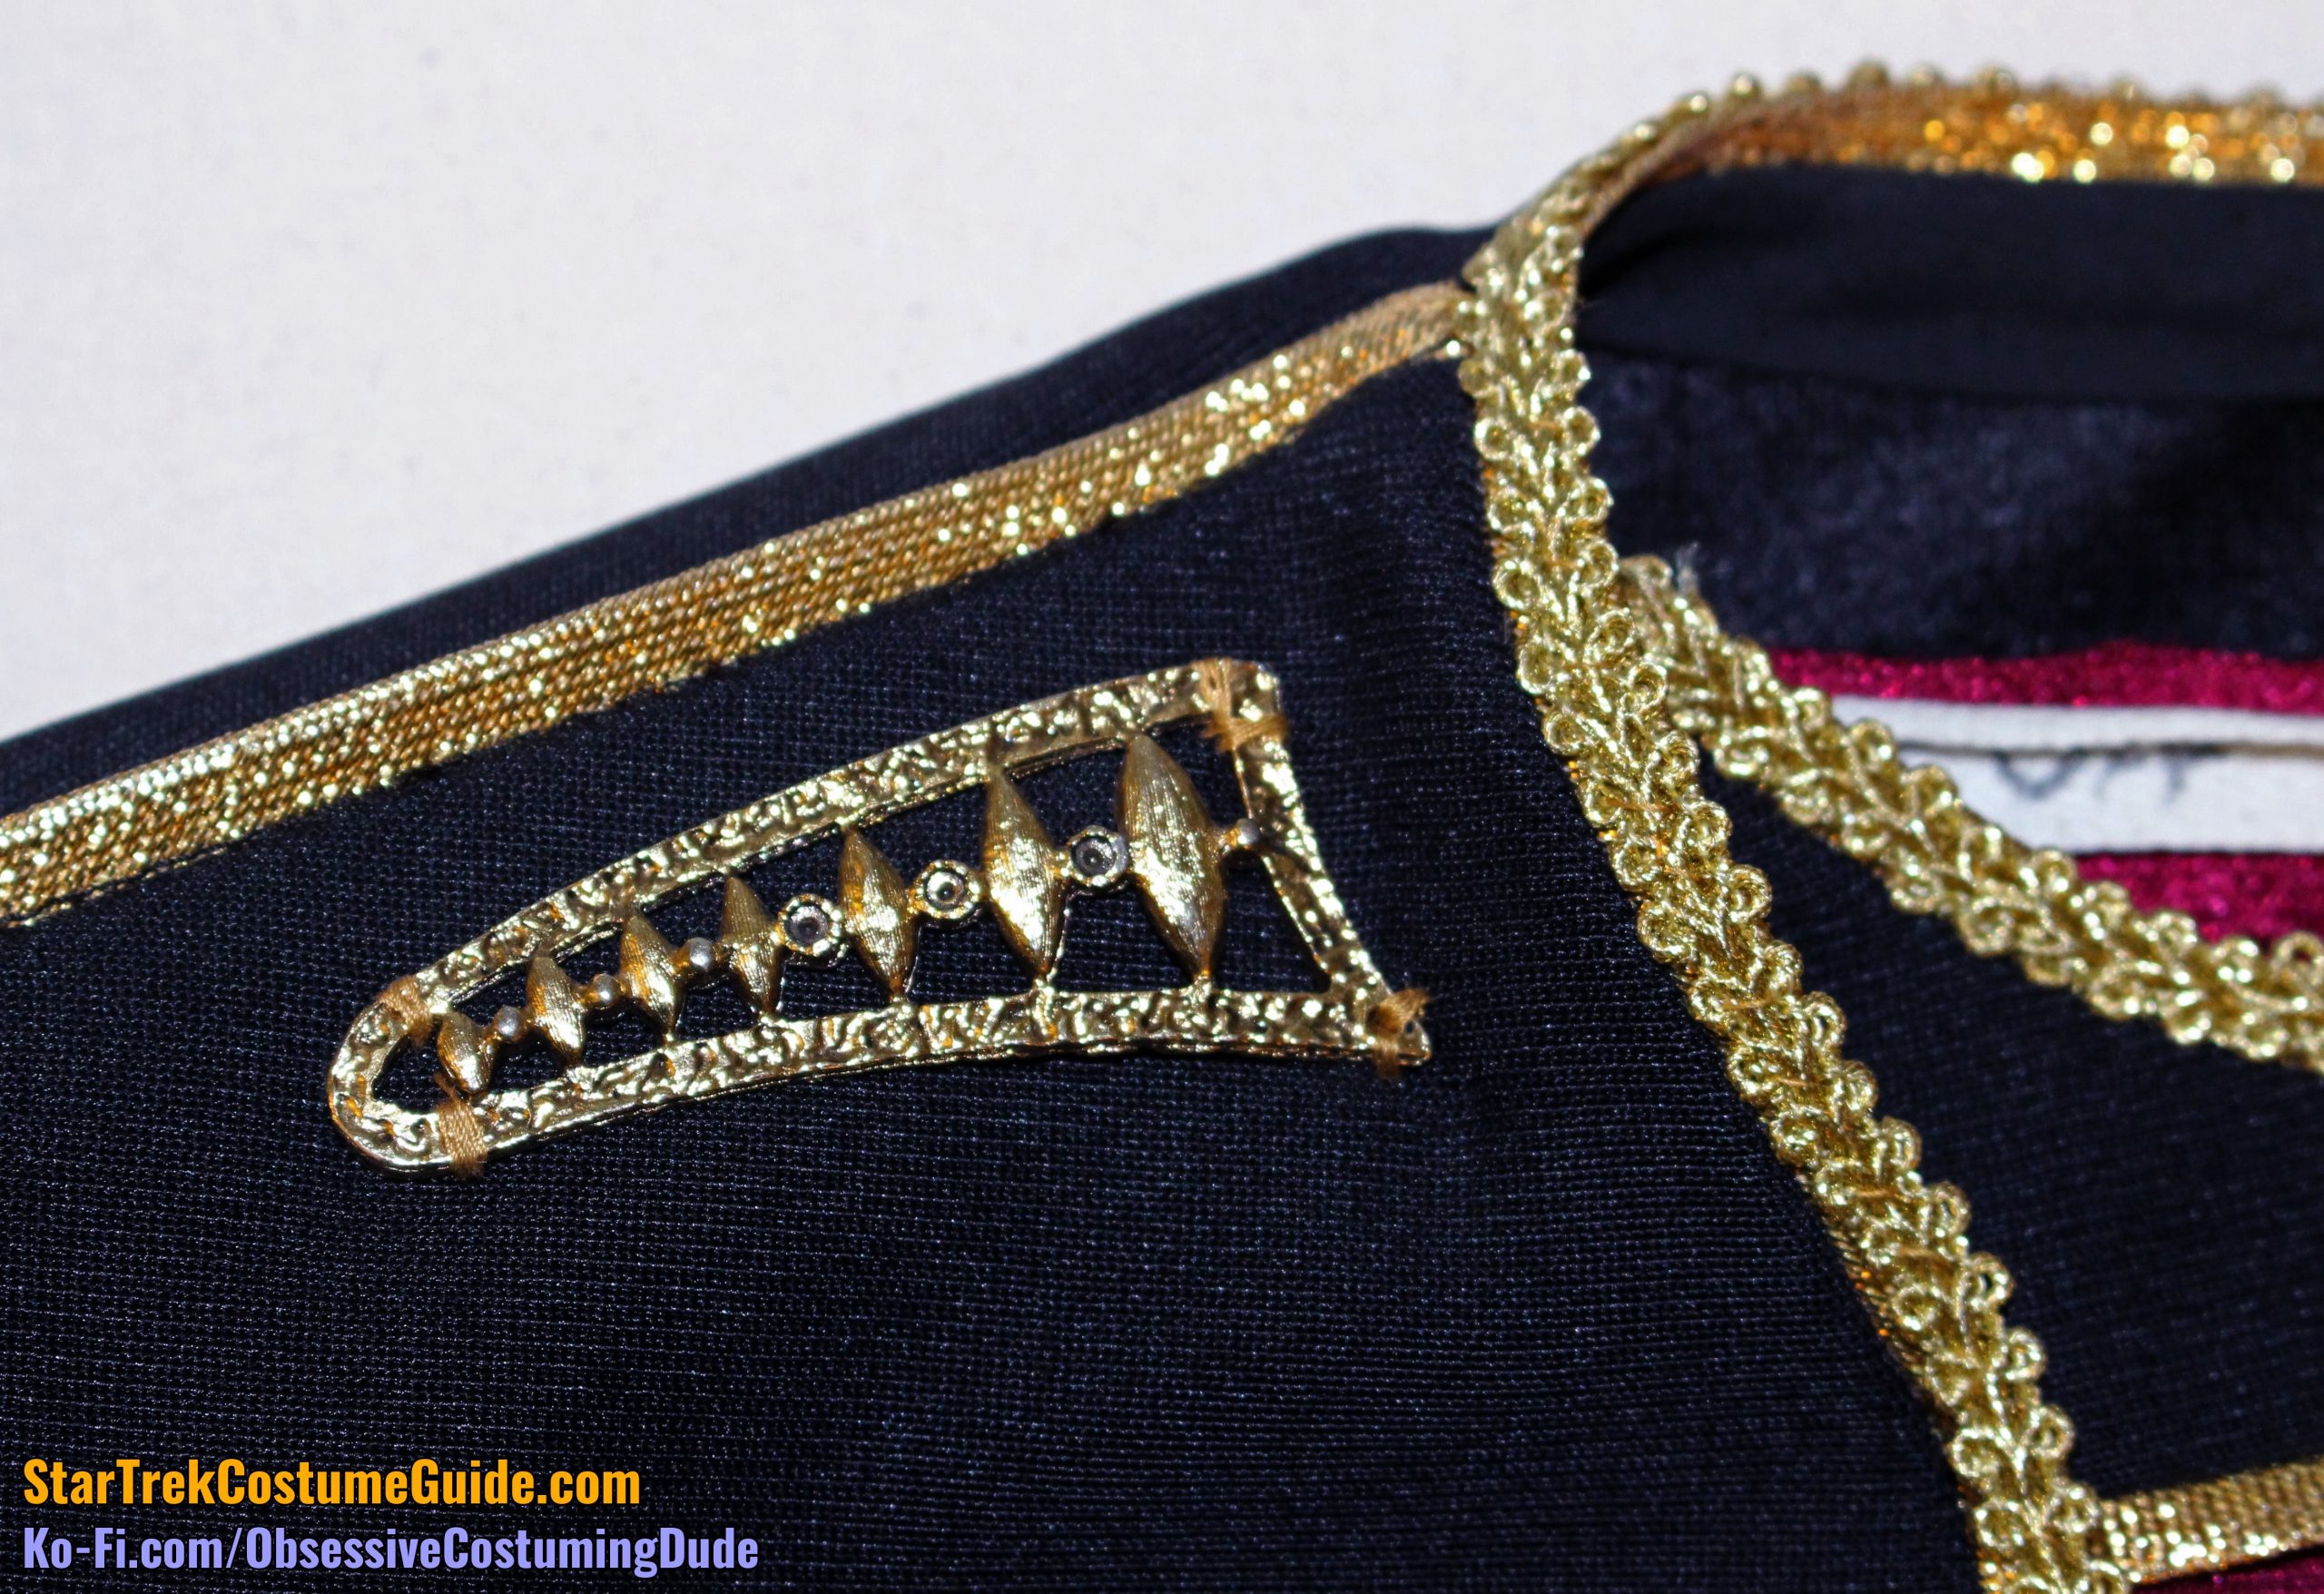
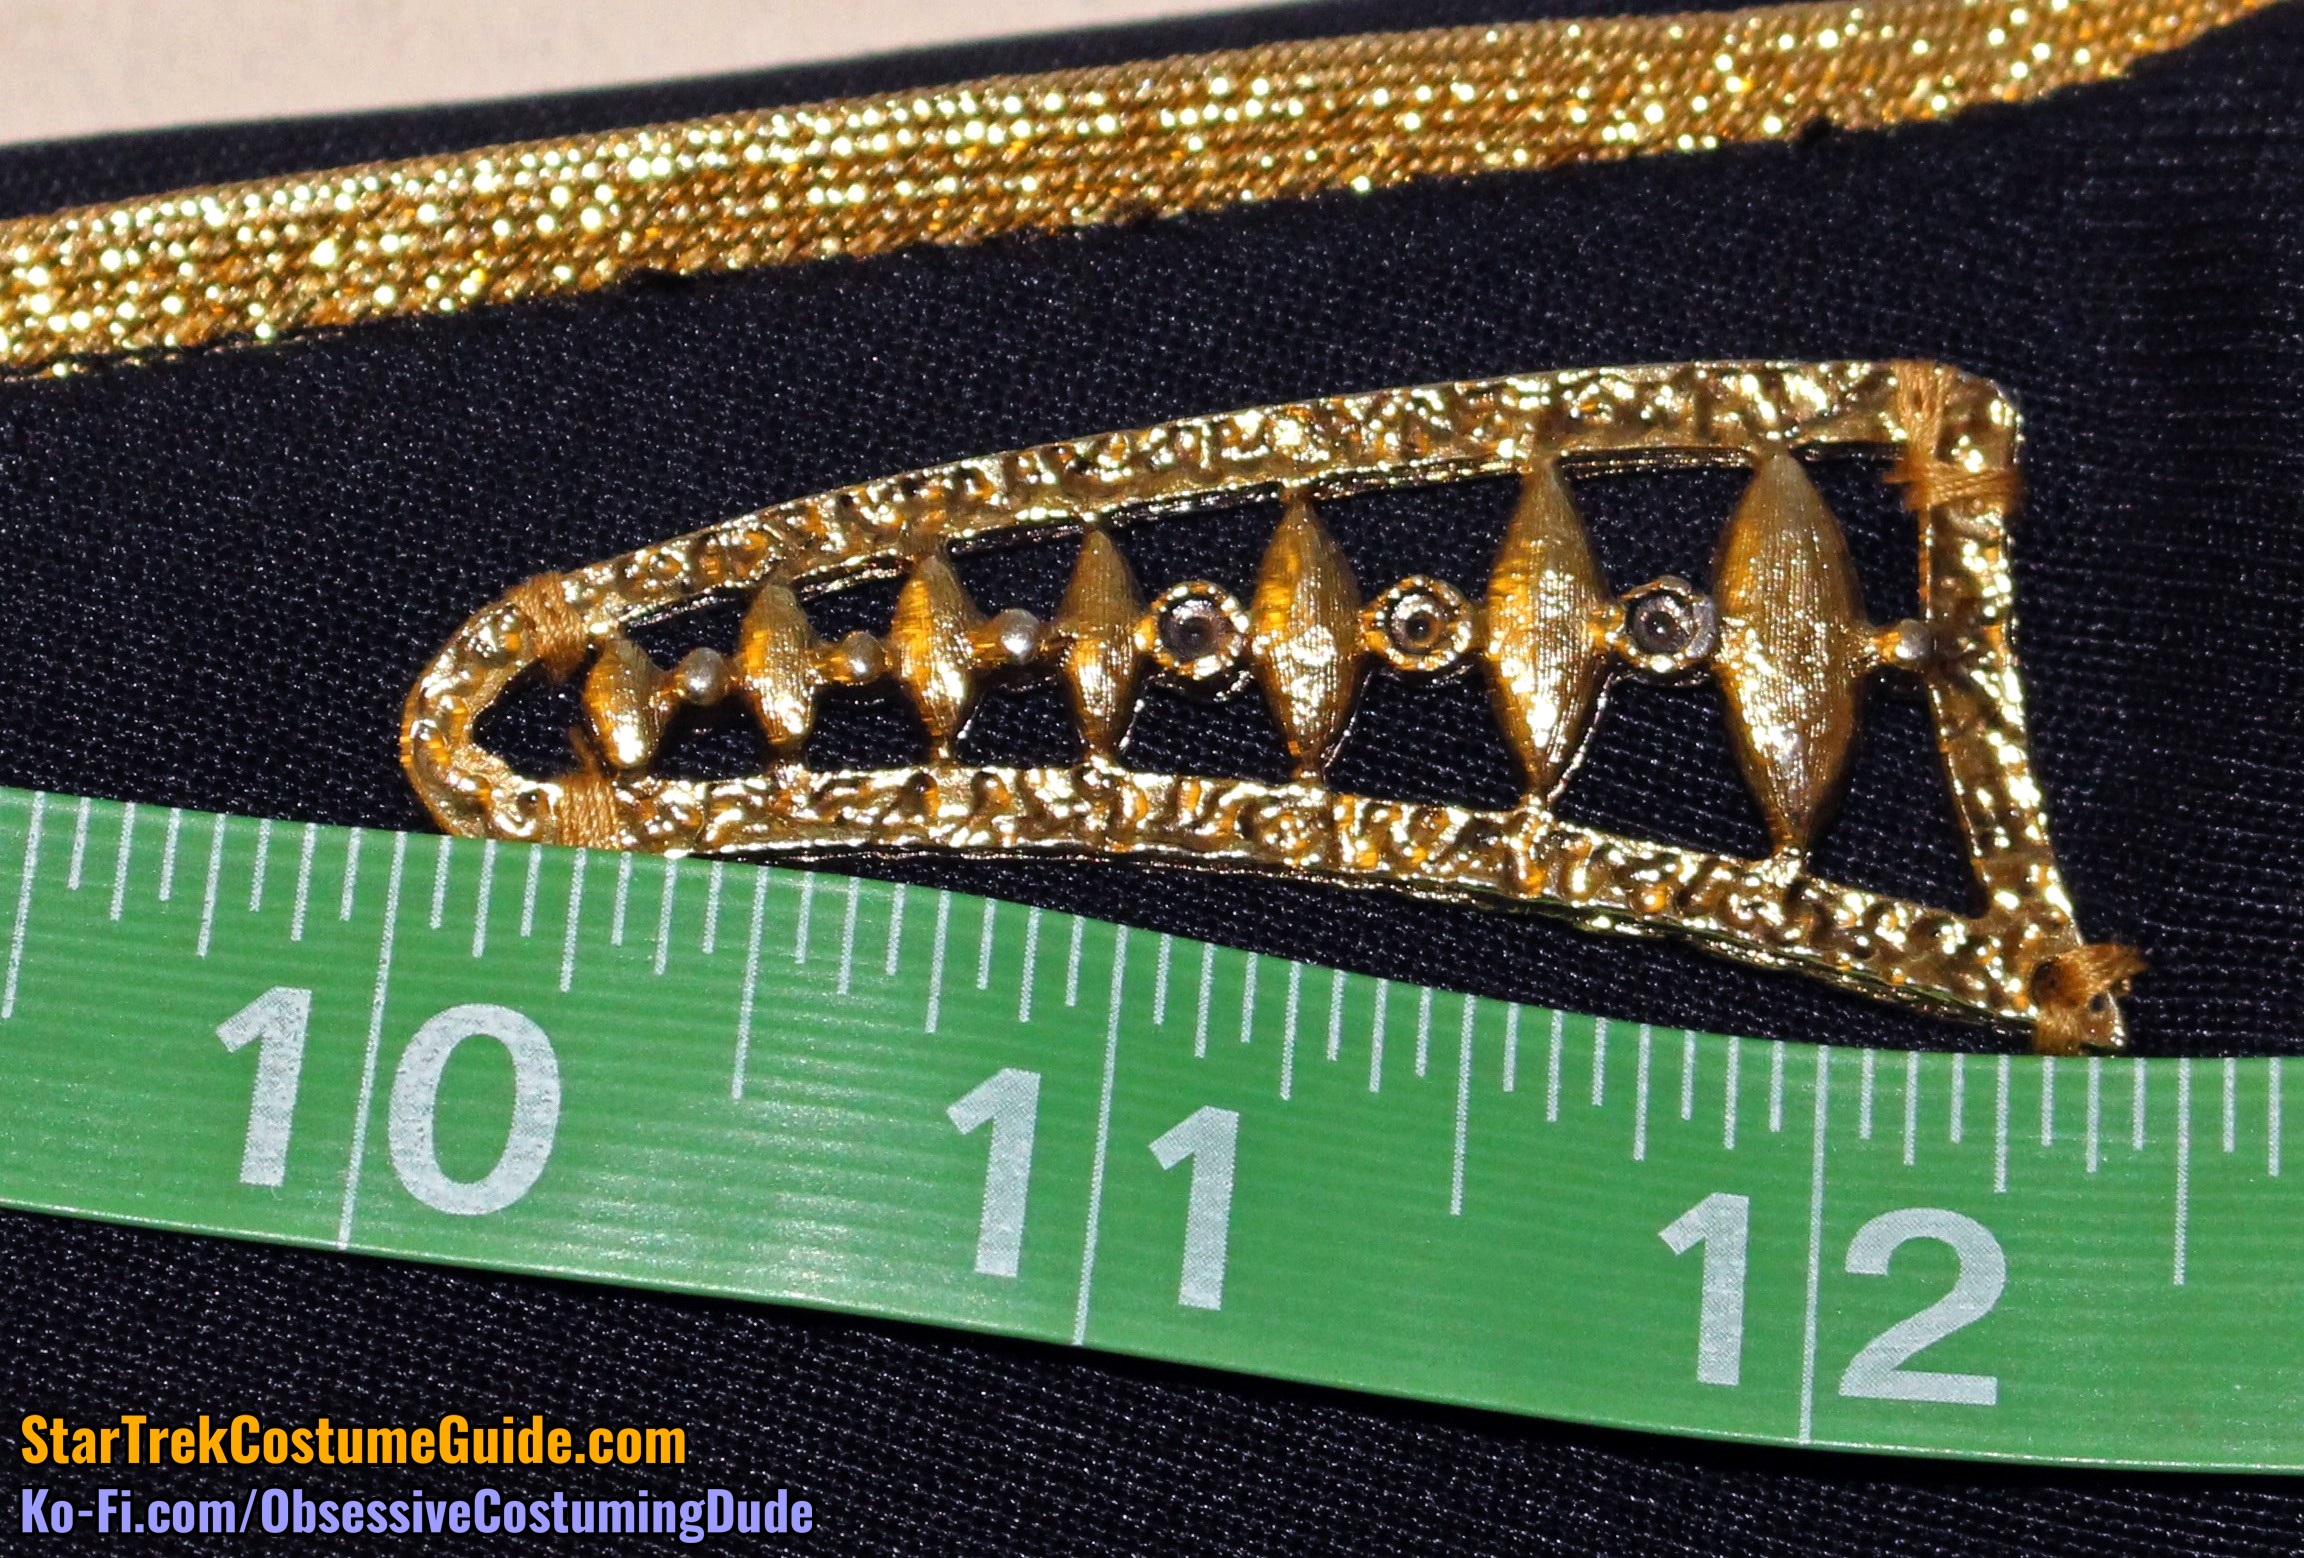
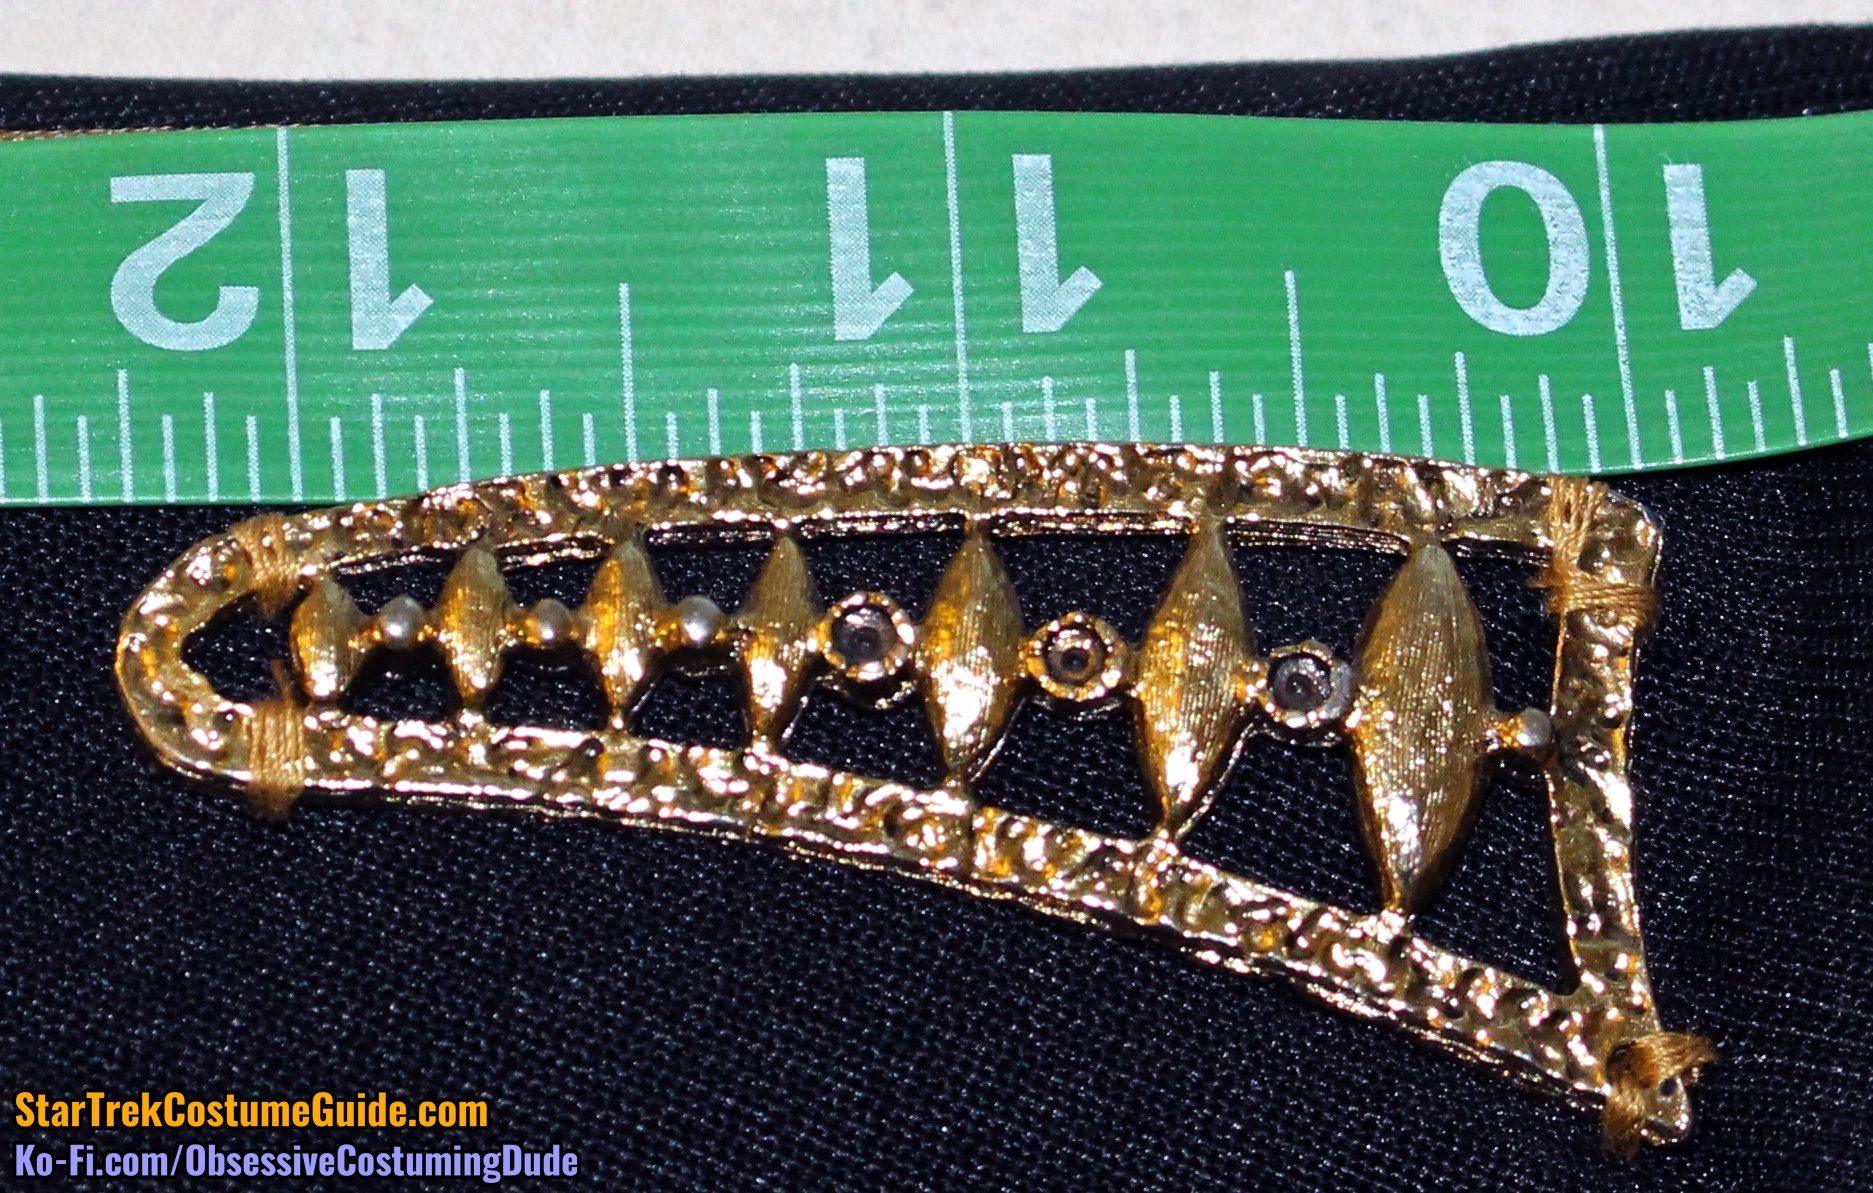
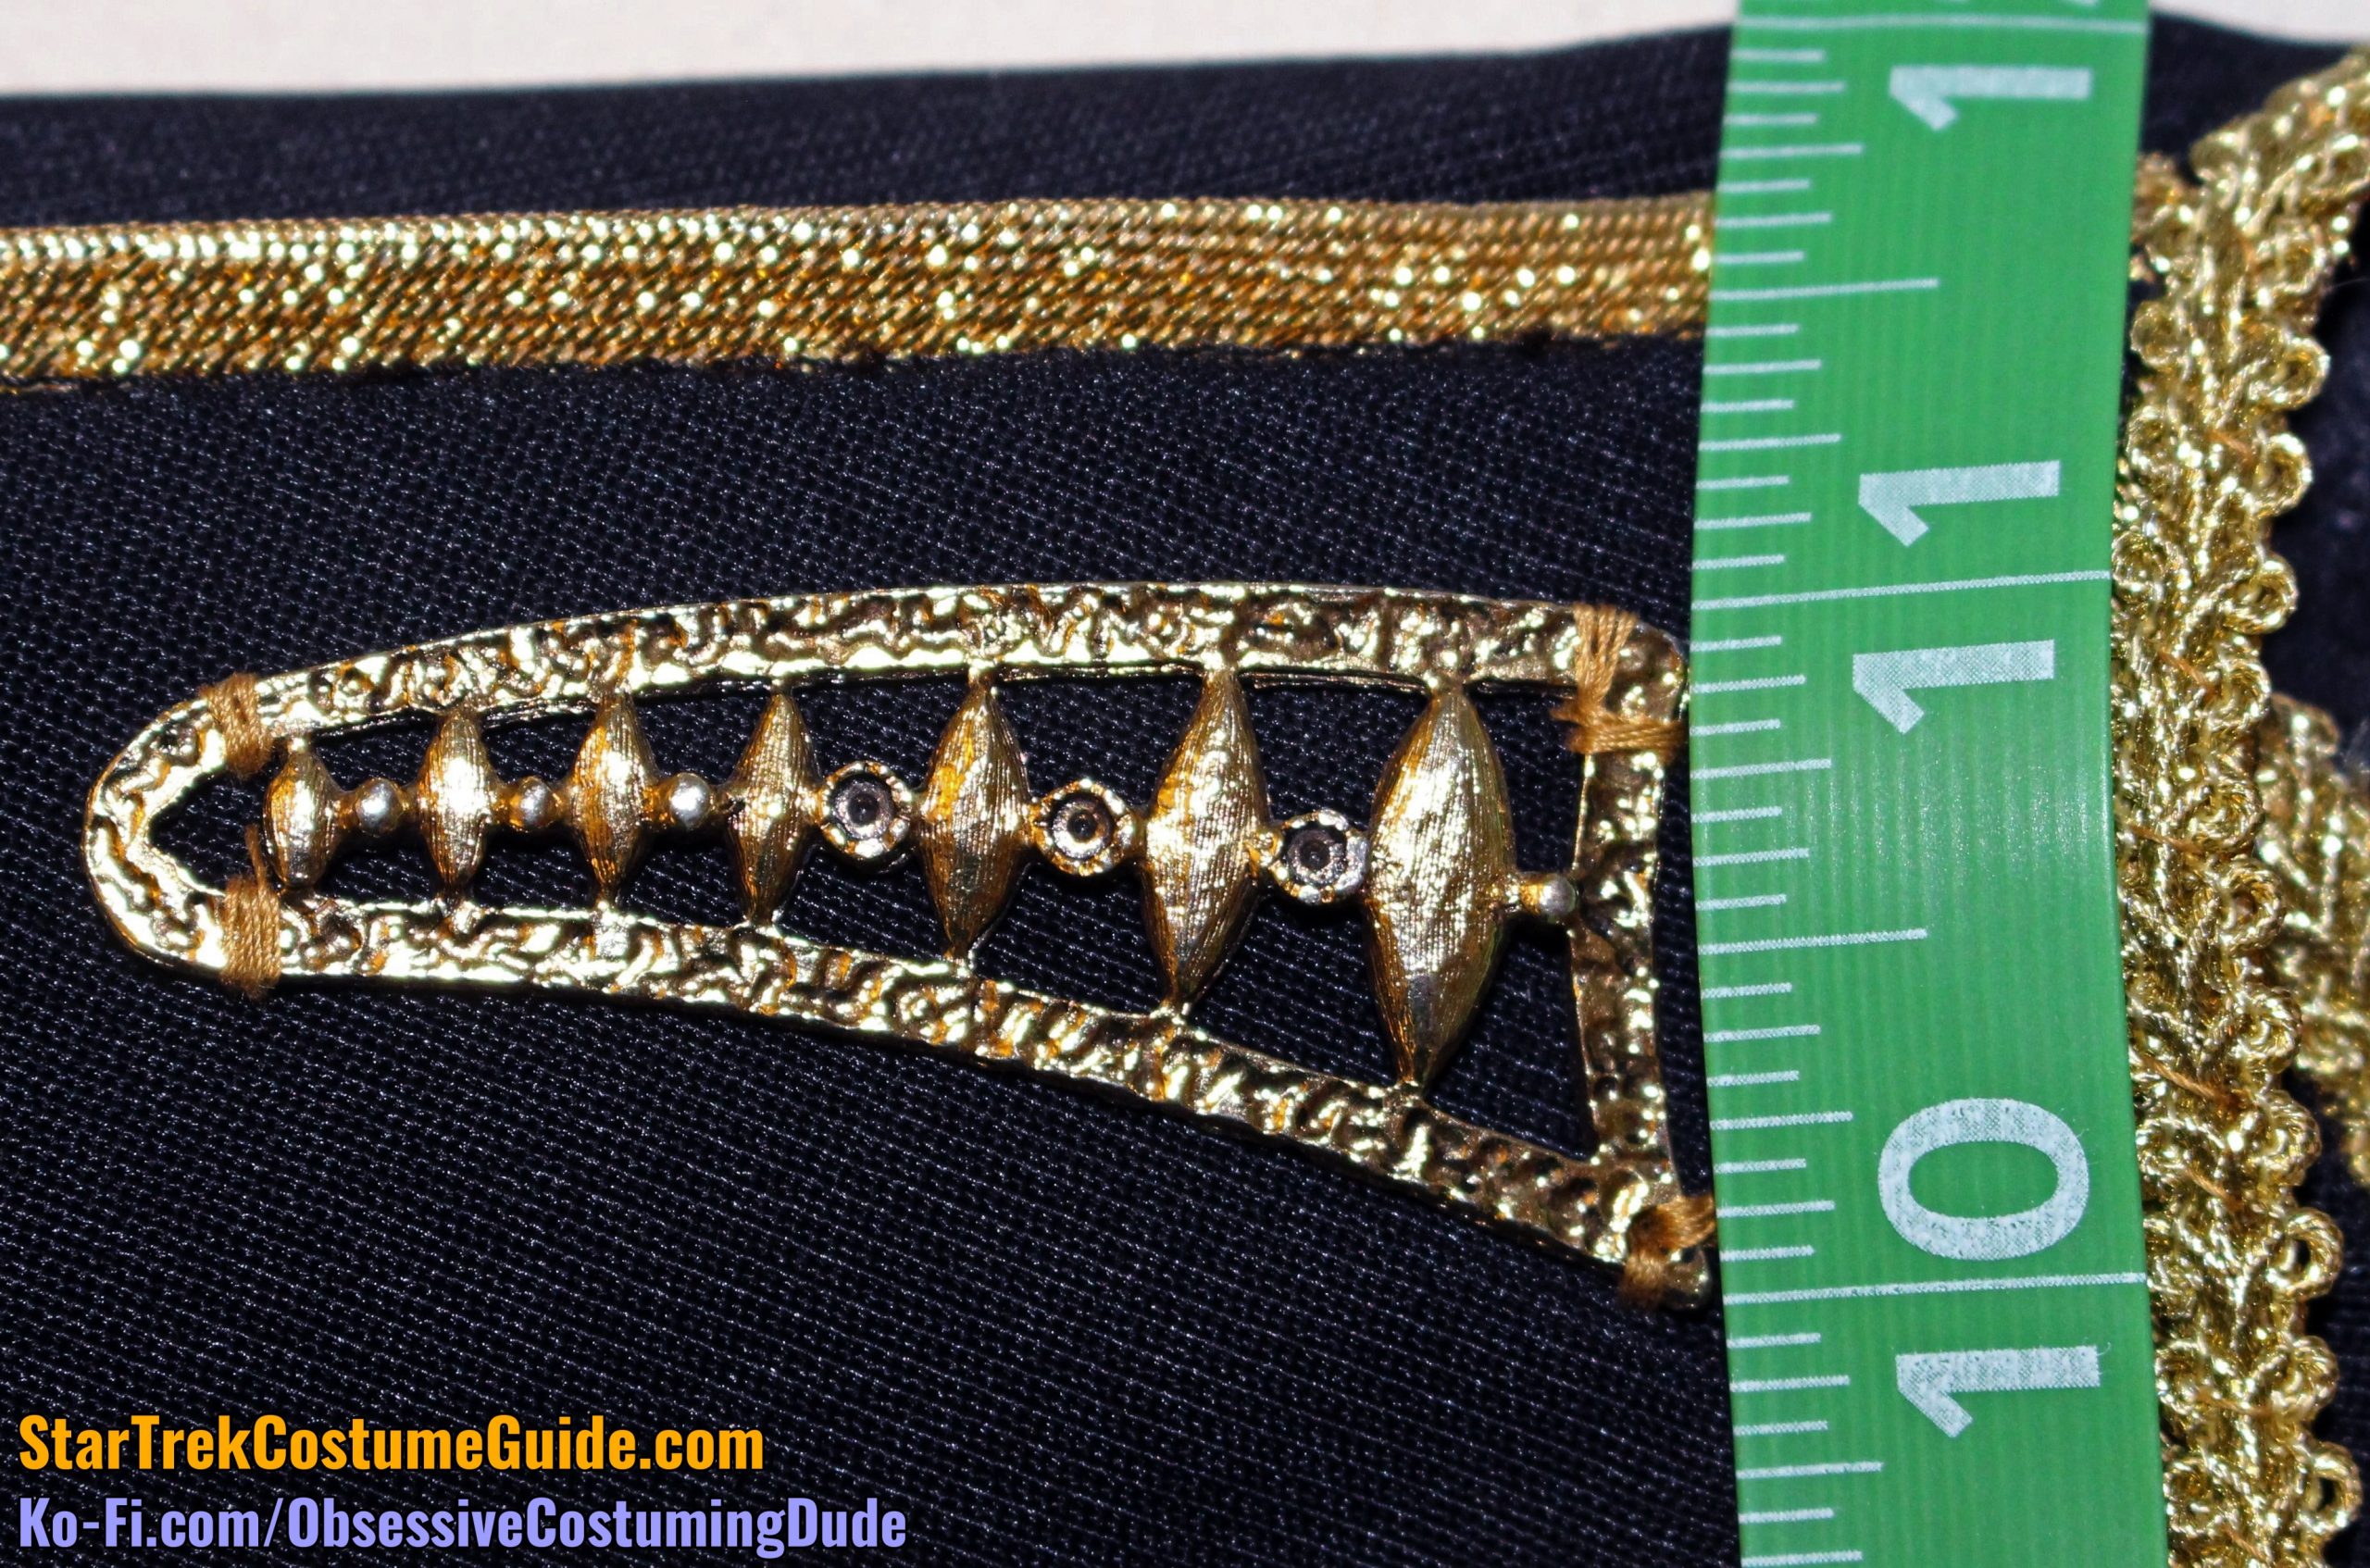
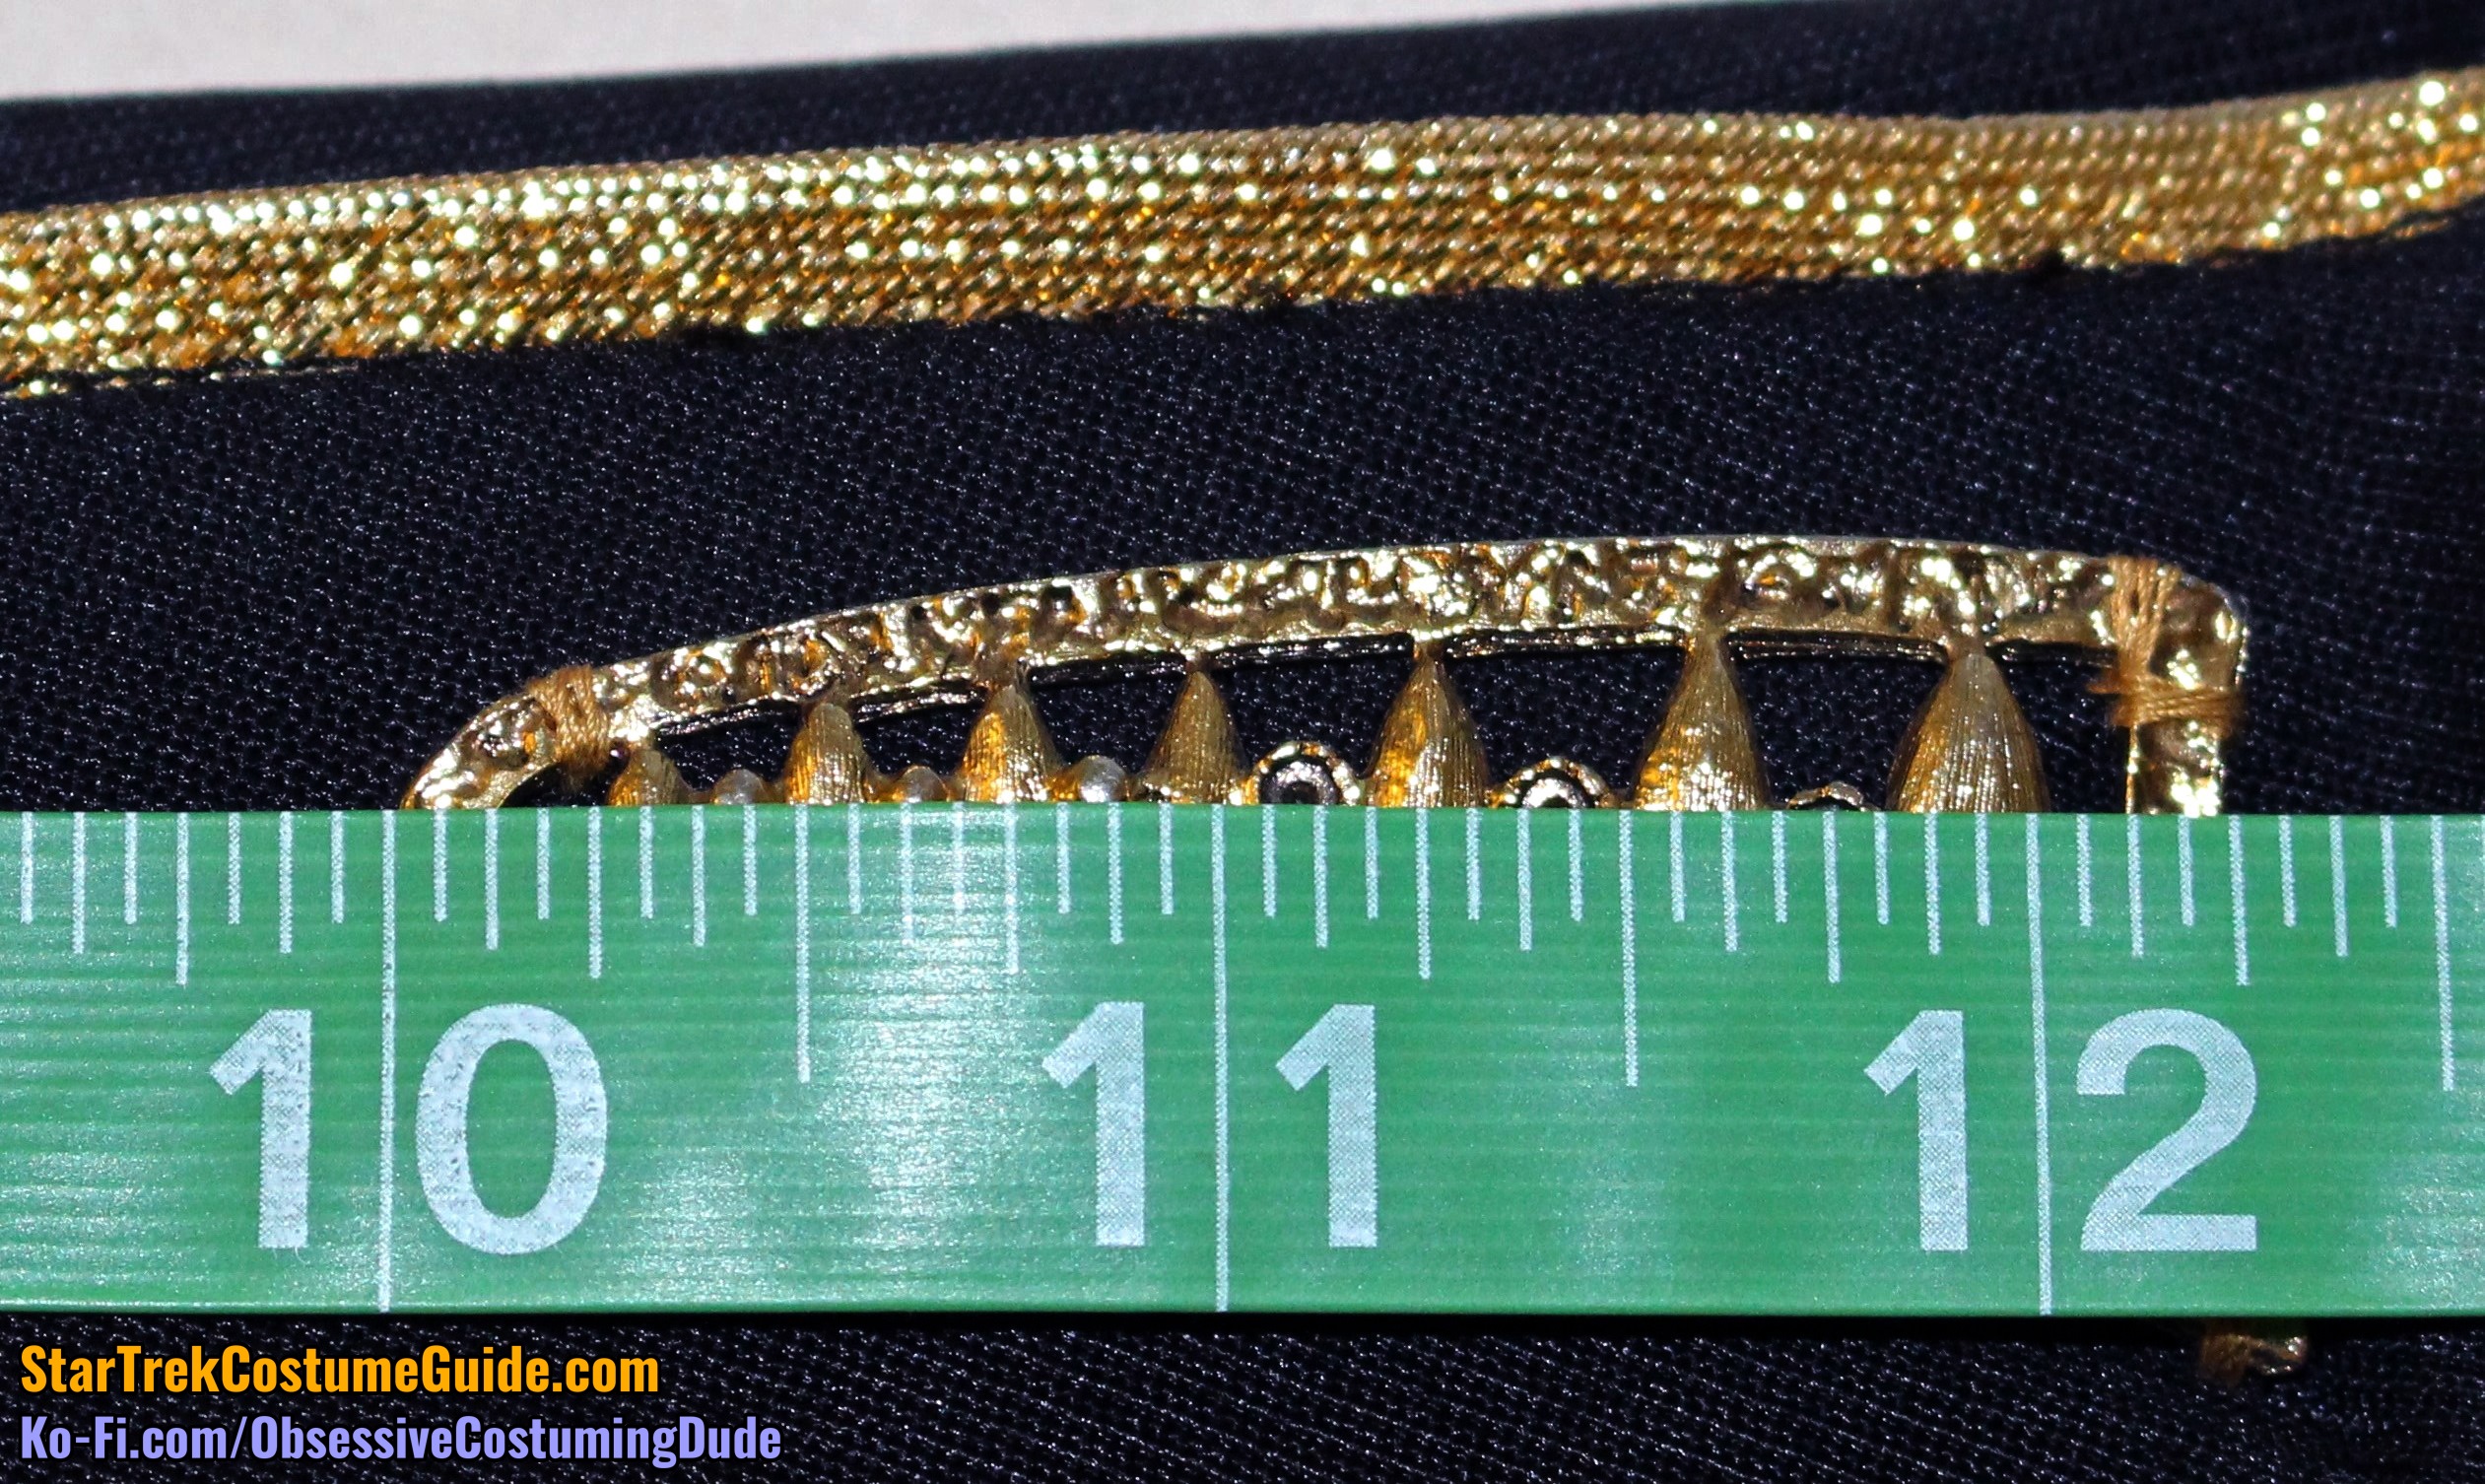
Of course, a thorough examination of season 1 admiral jacket would be incomplete without a look at the infamous brooch worn on the upper right shoulder area.
Here are some photos of the brooch with my measuring tape, for sizing reference.
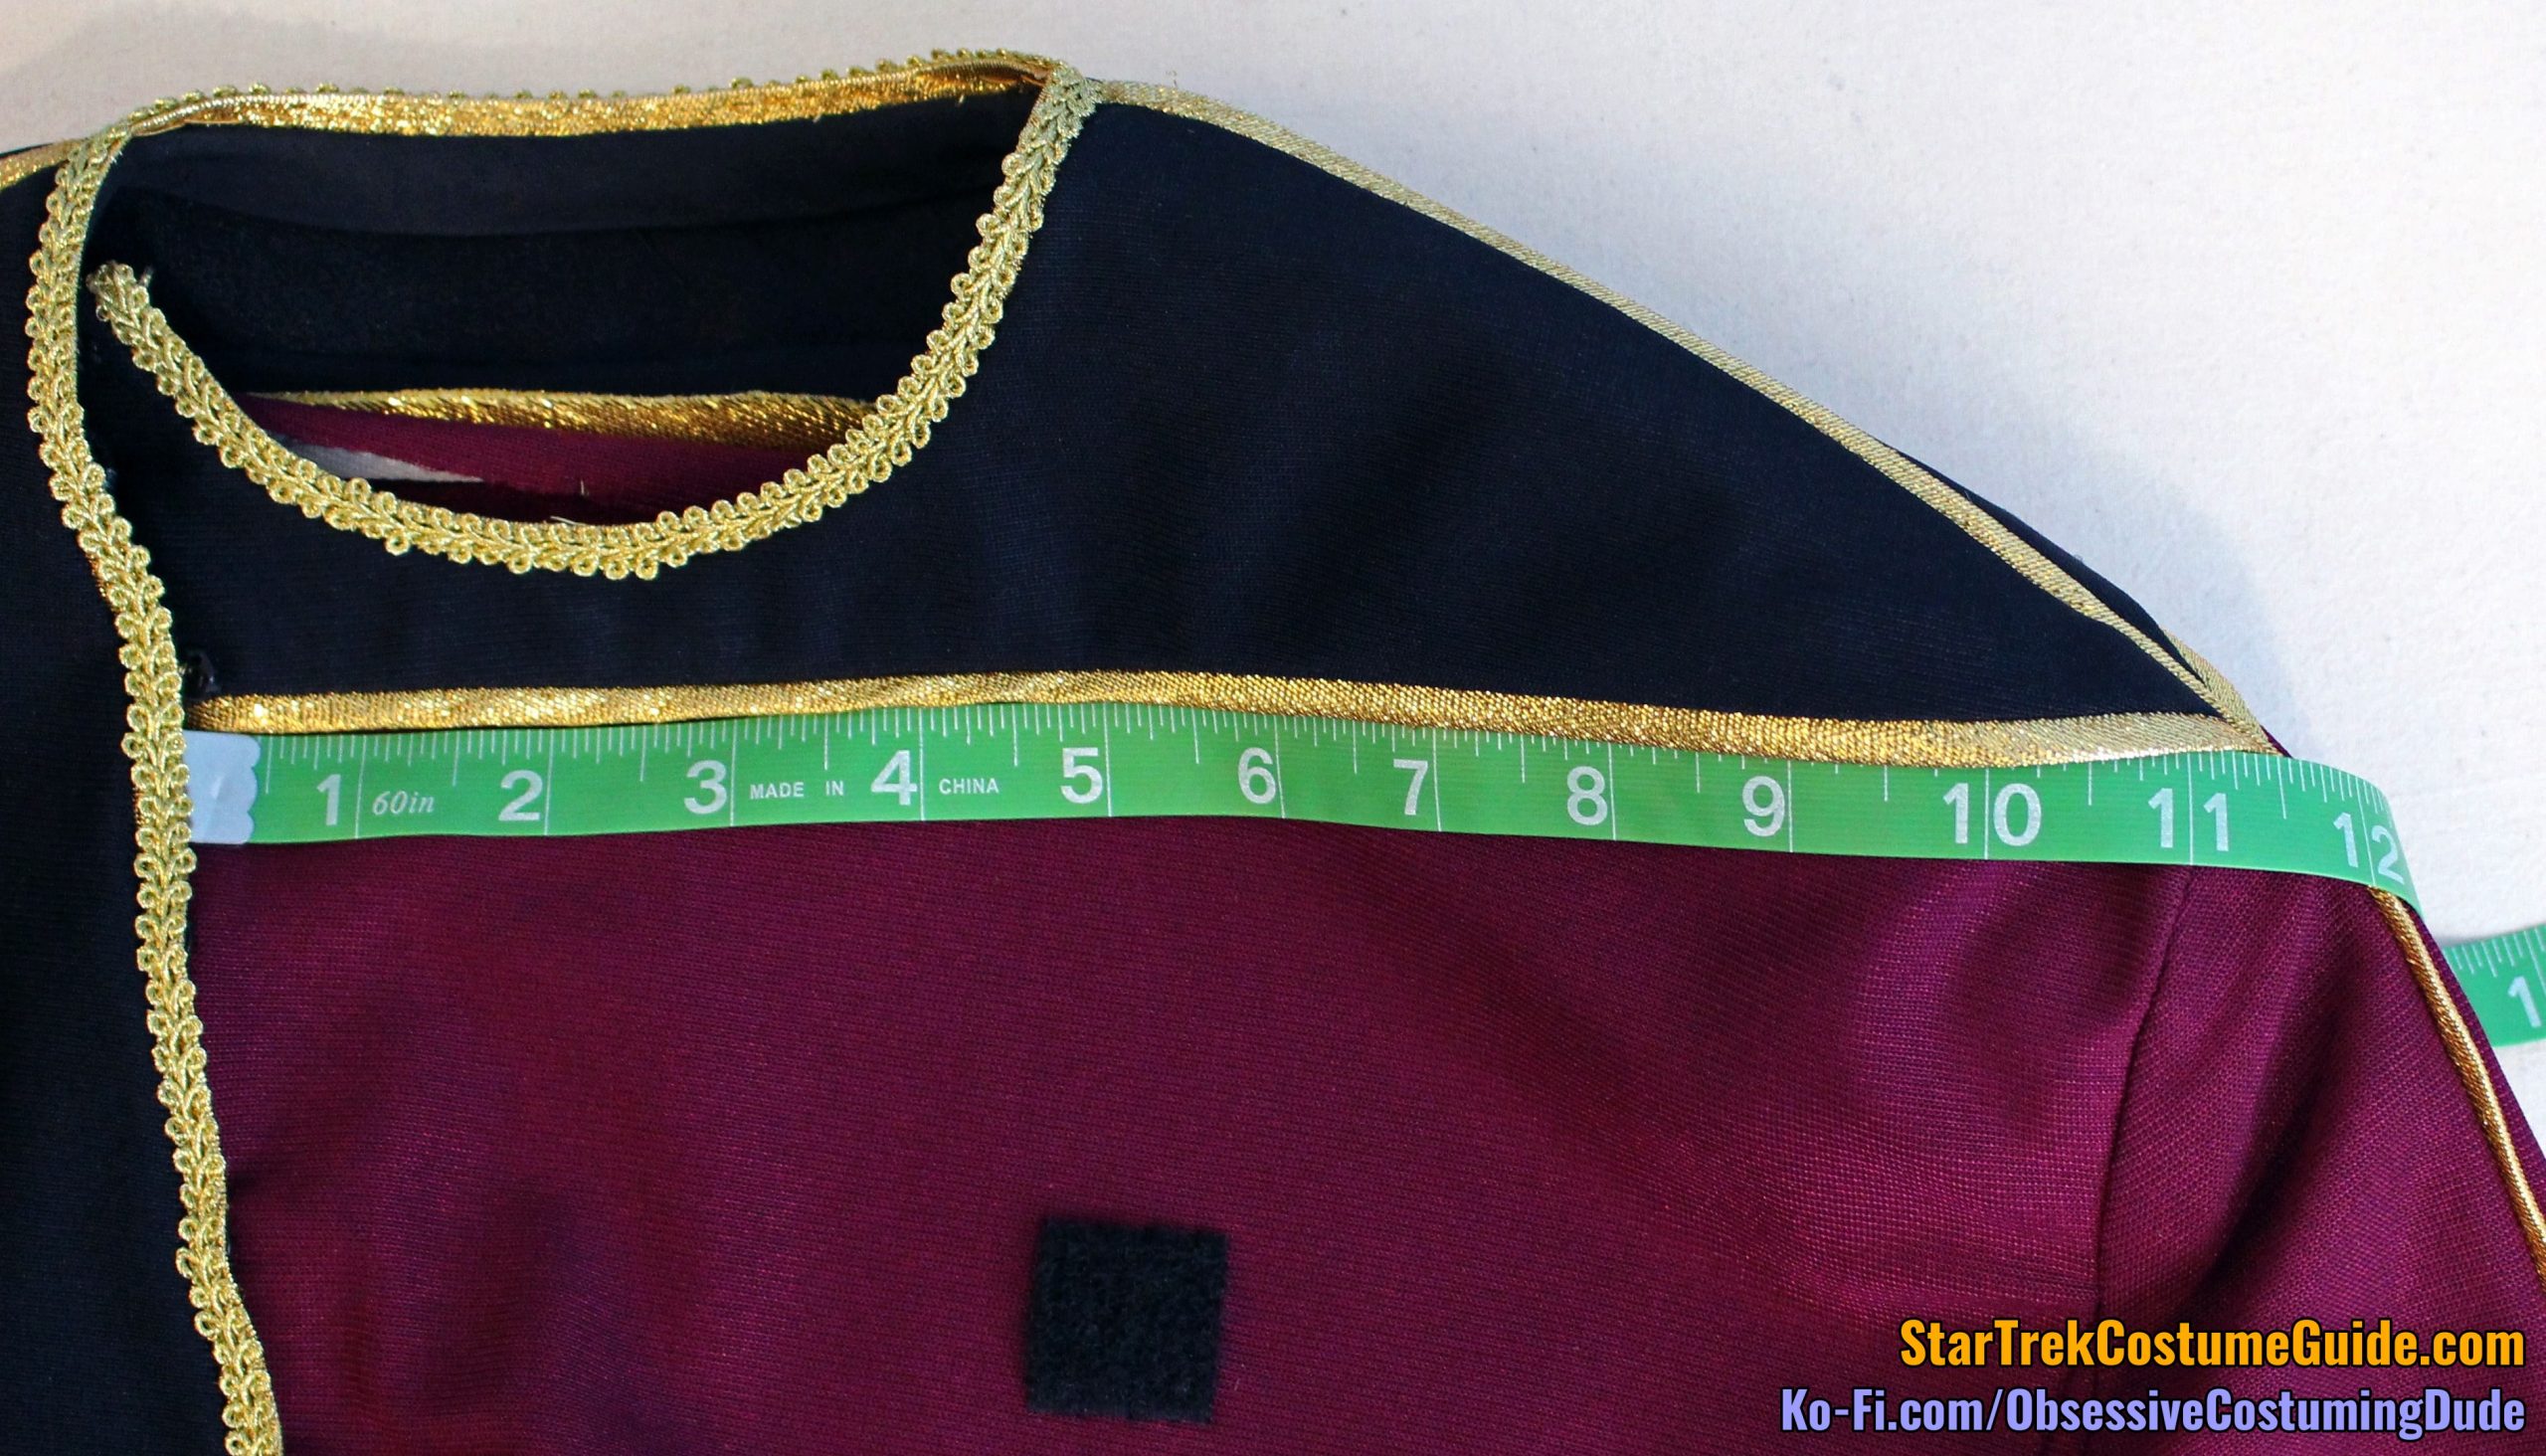
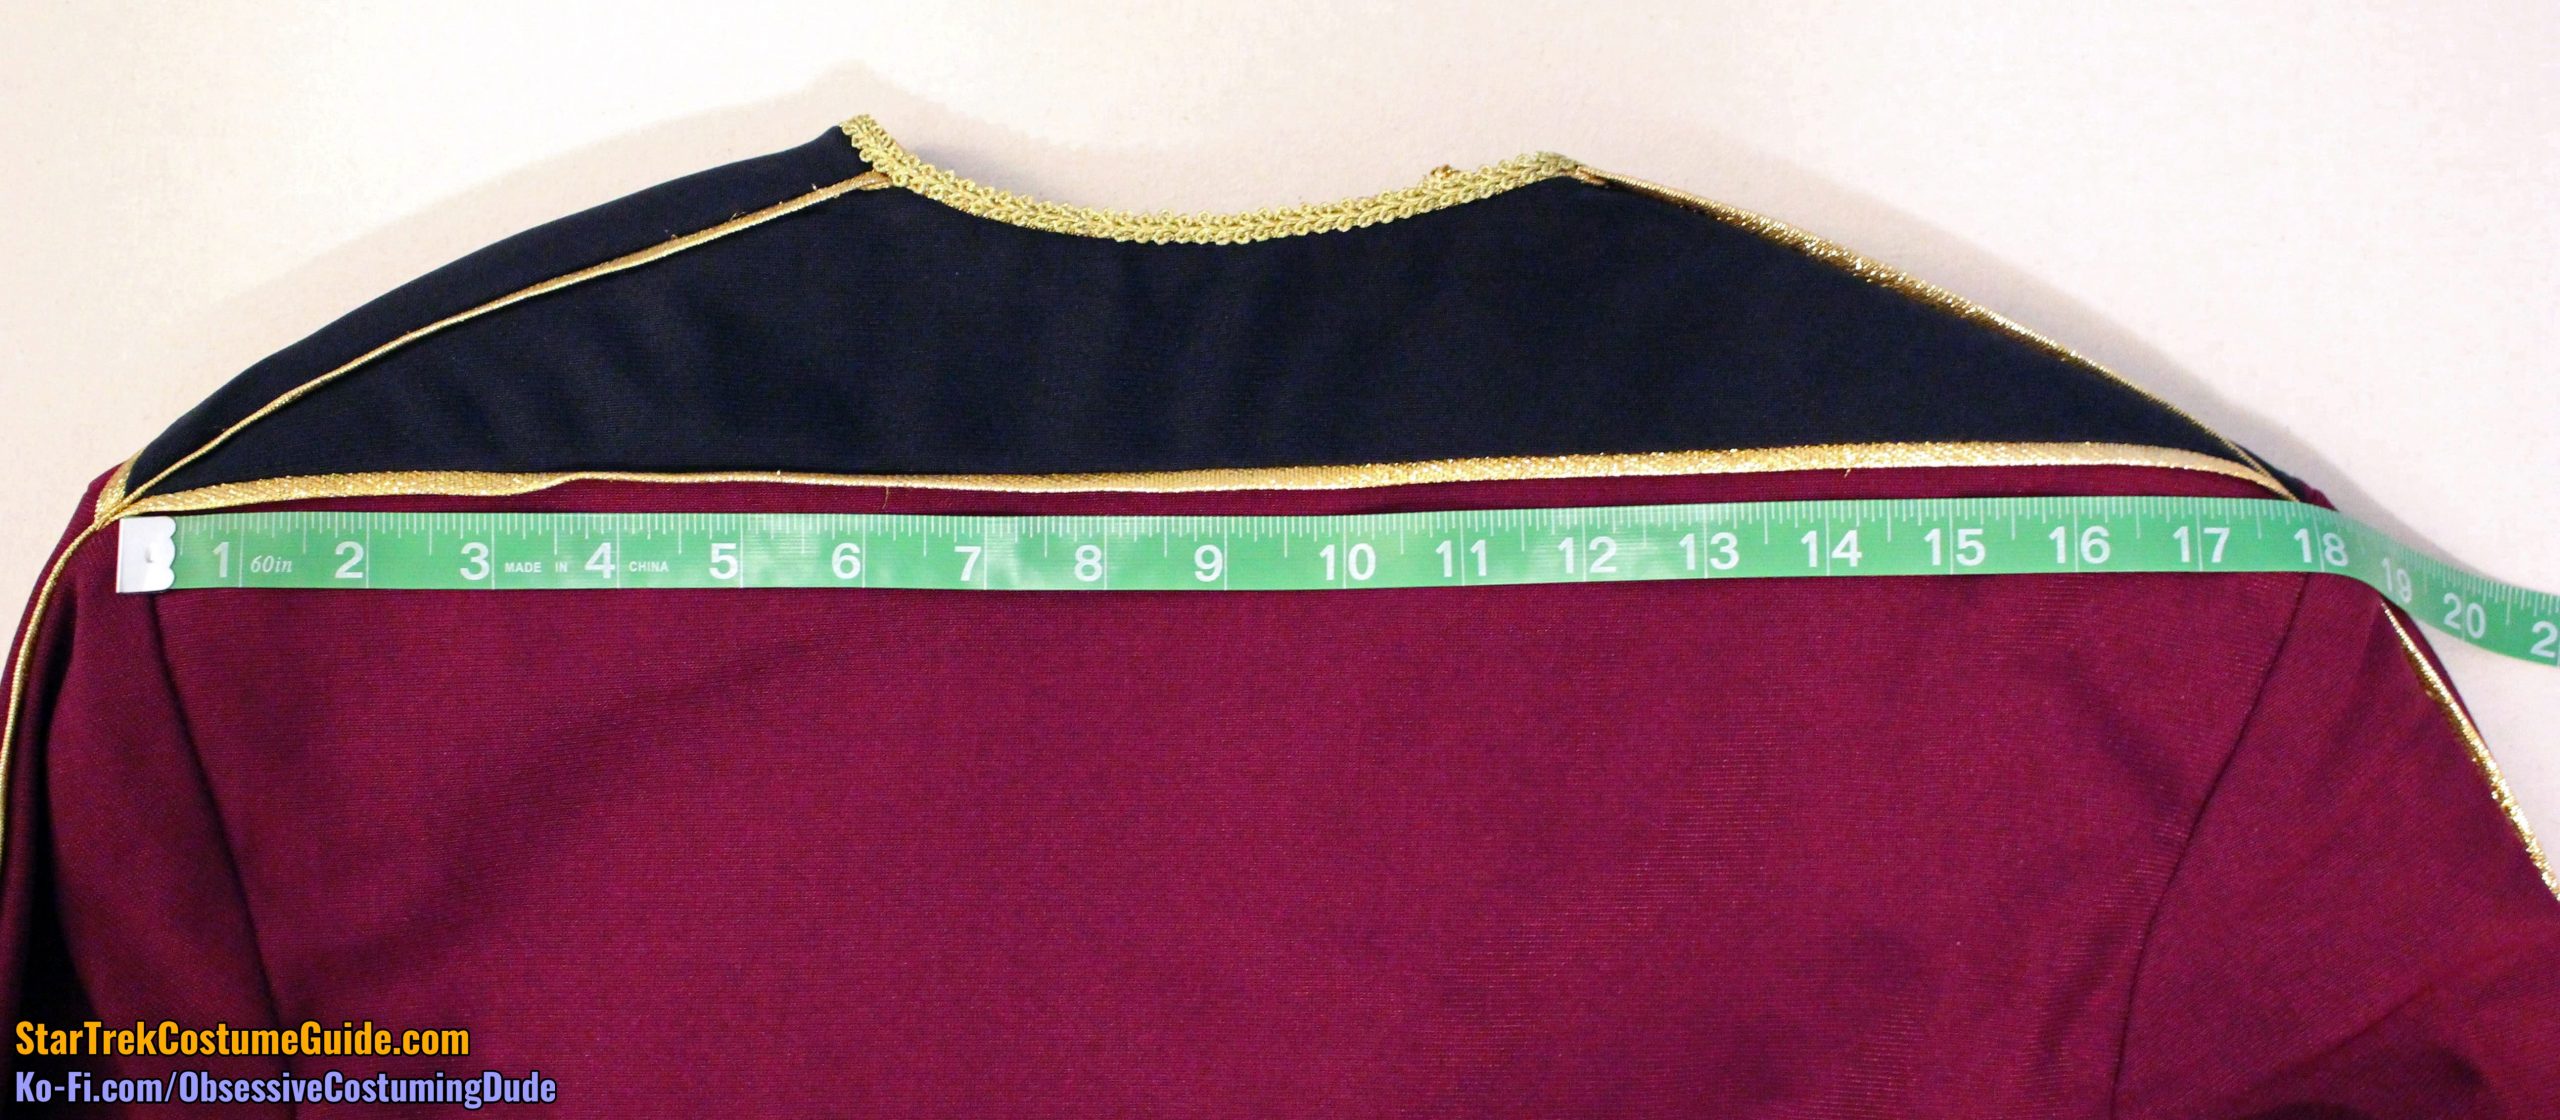
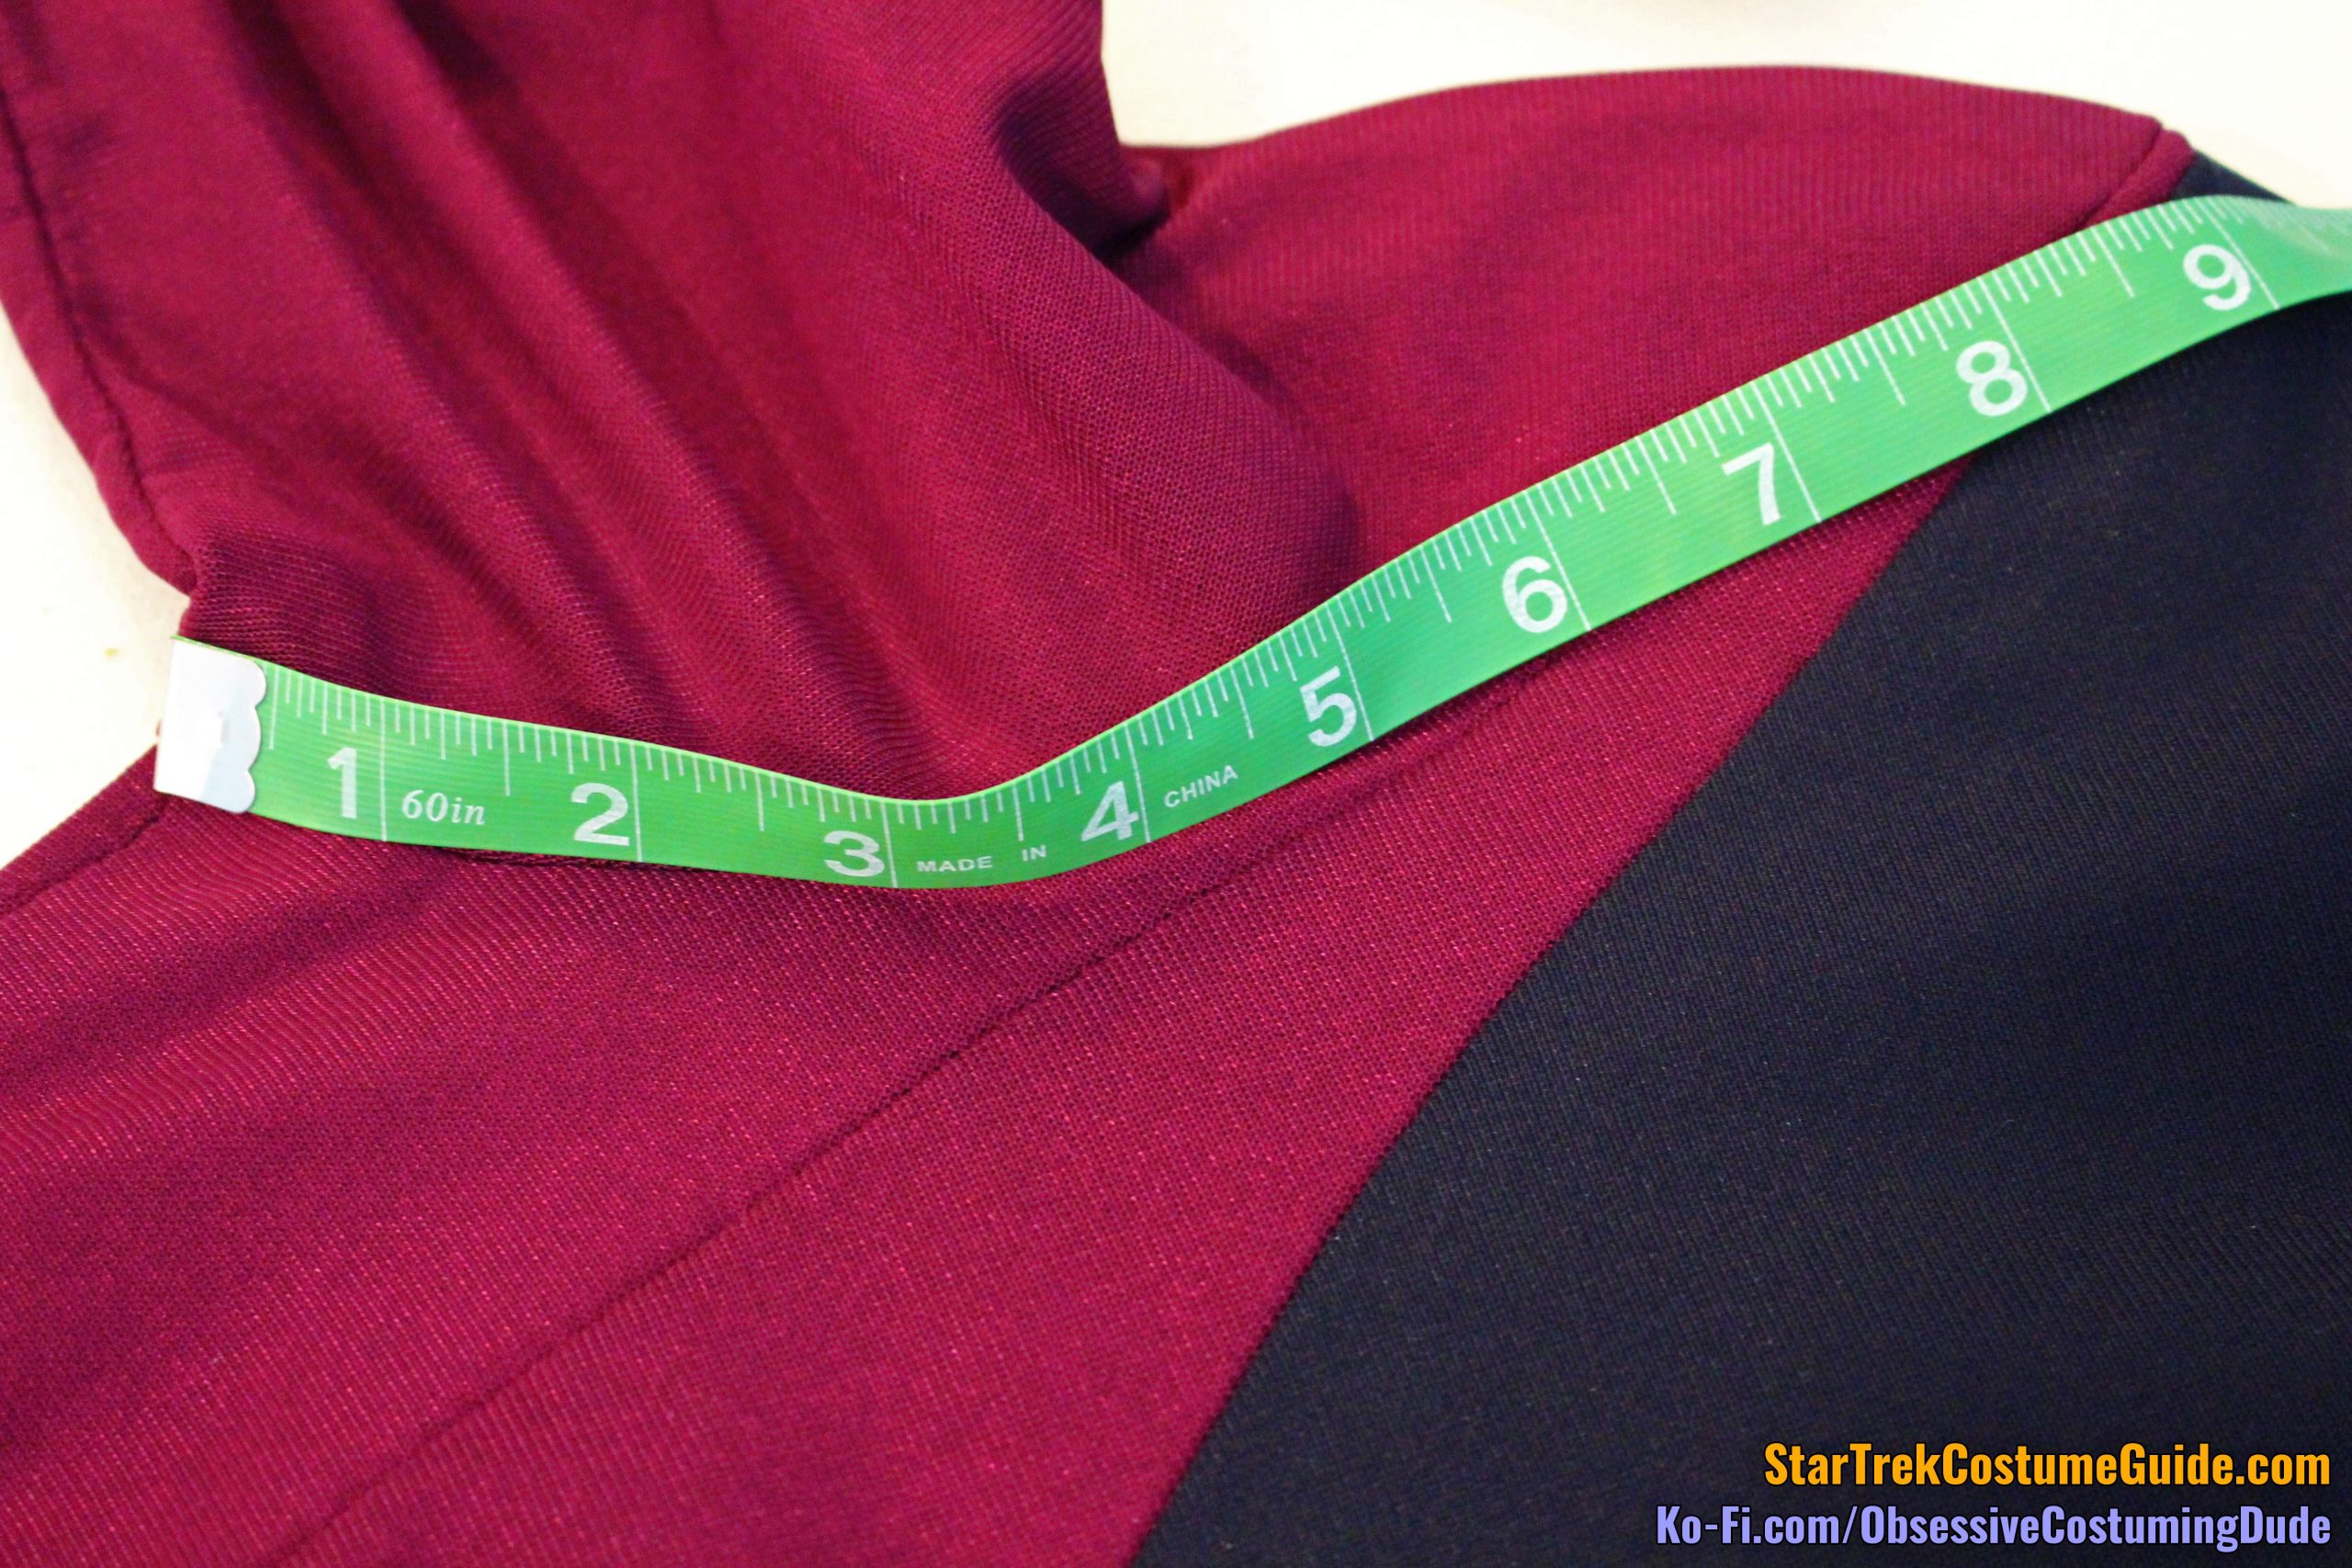
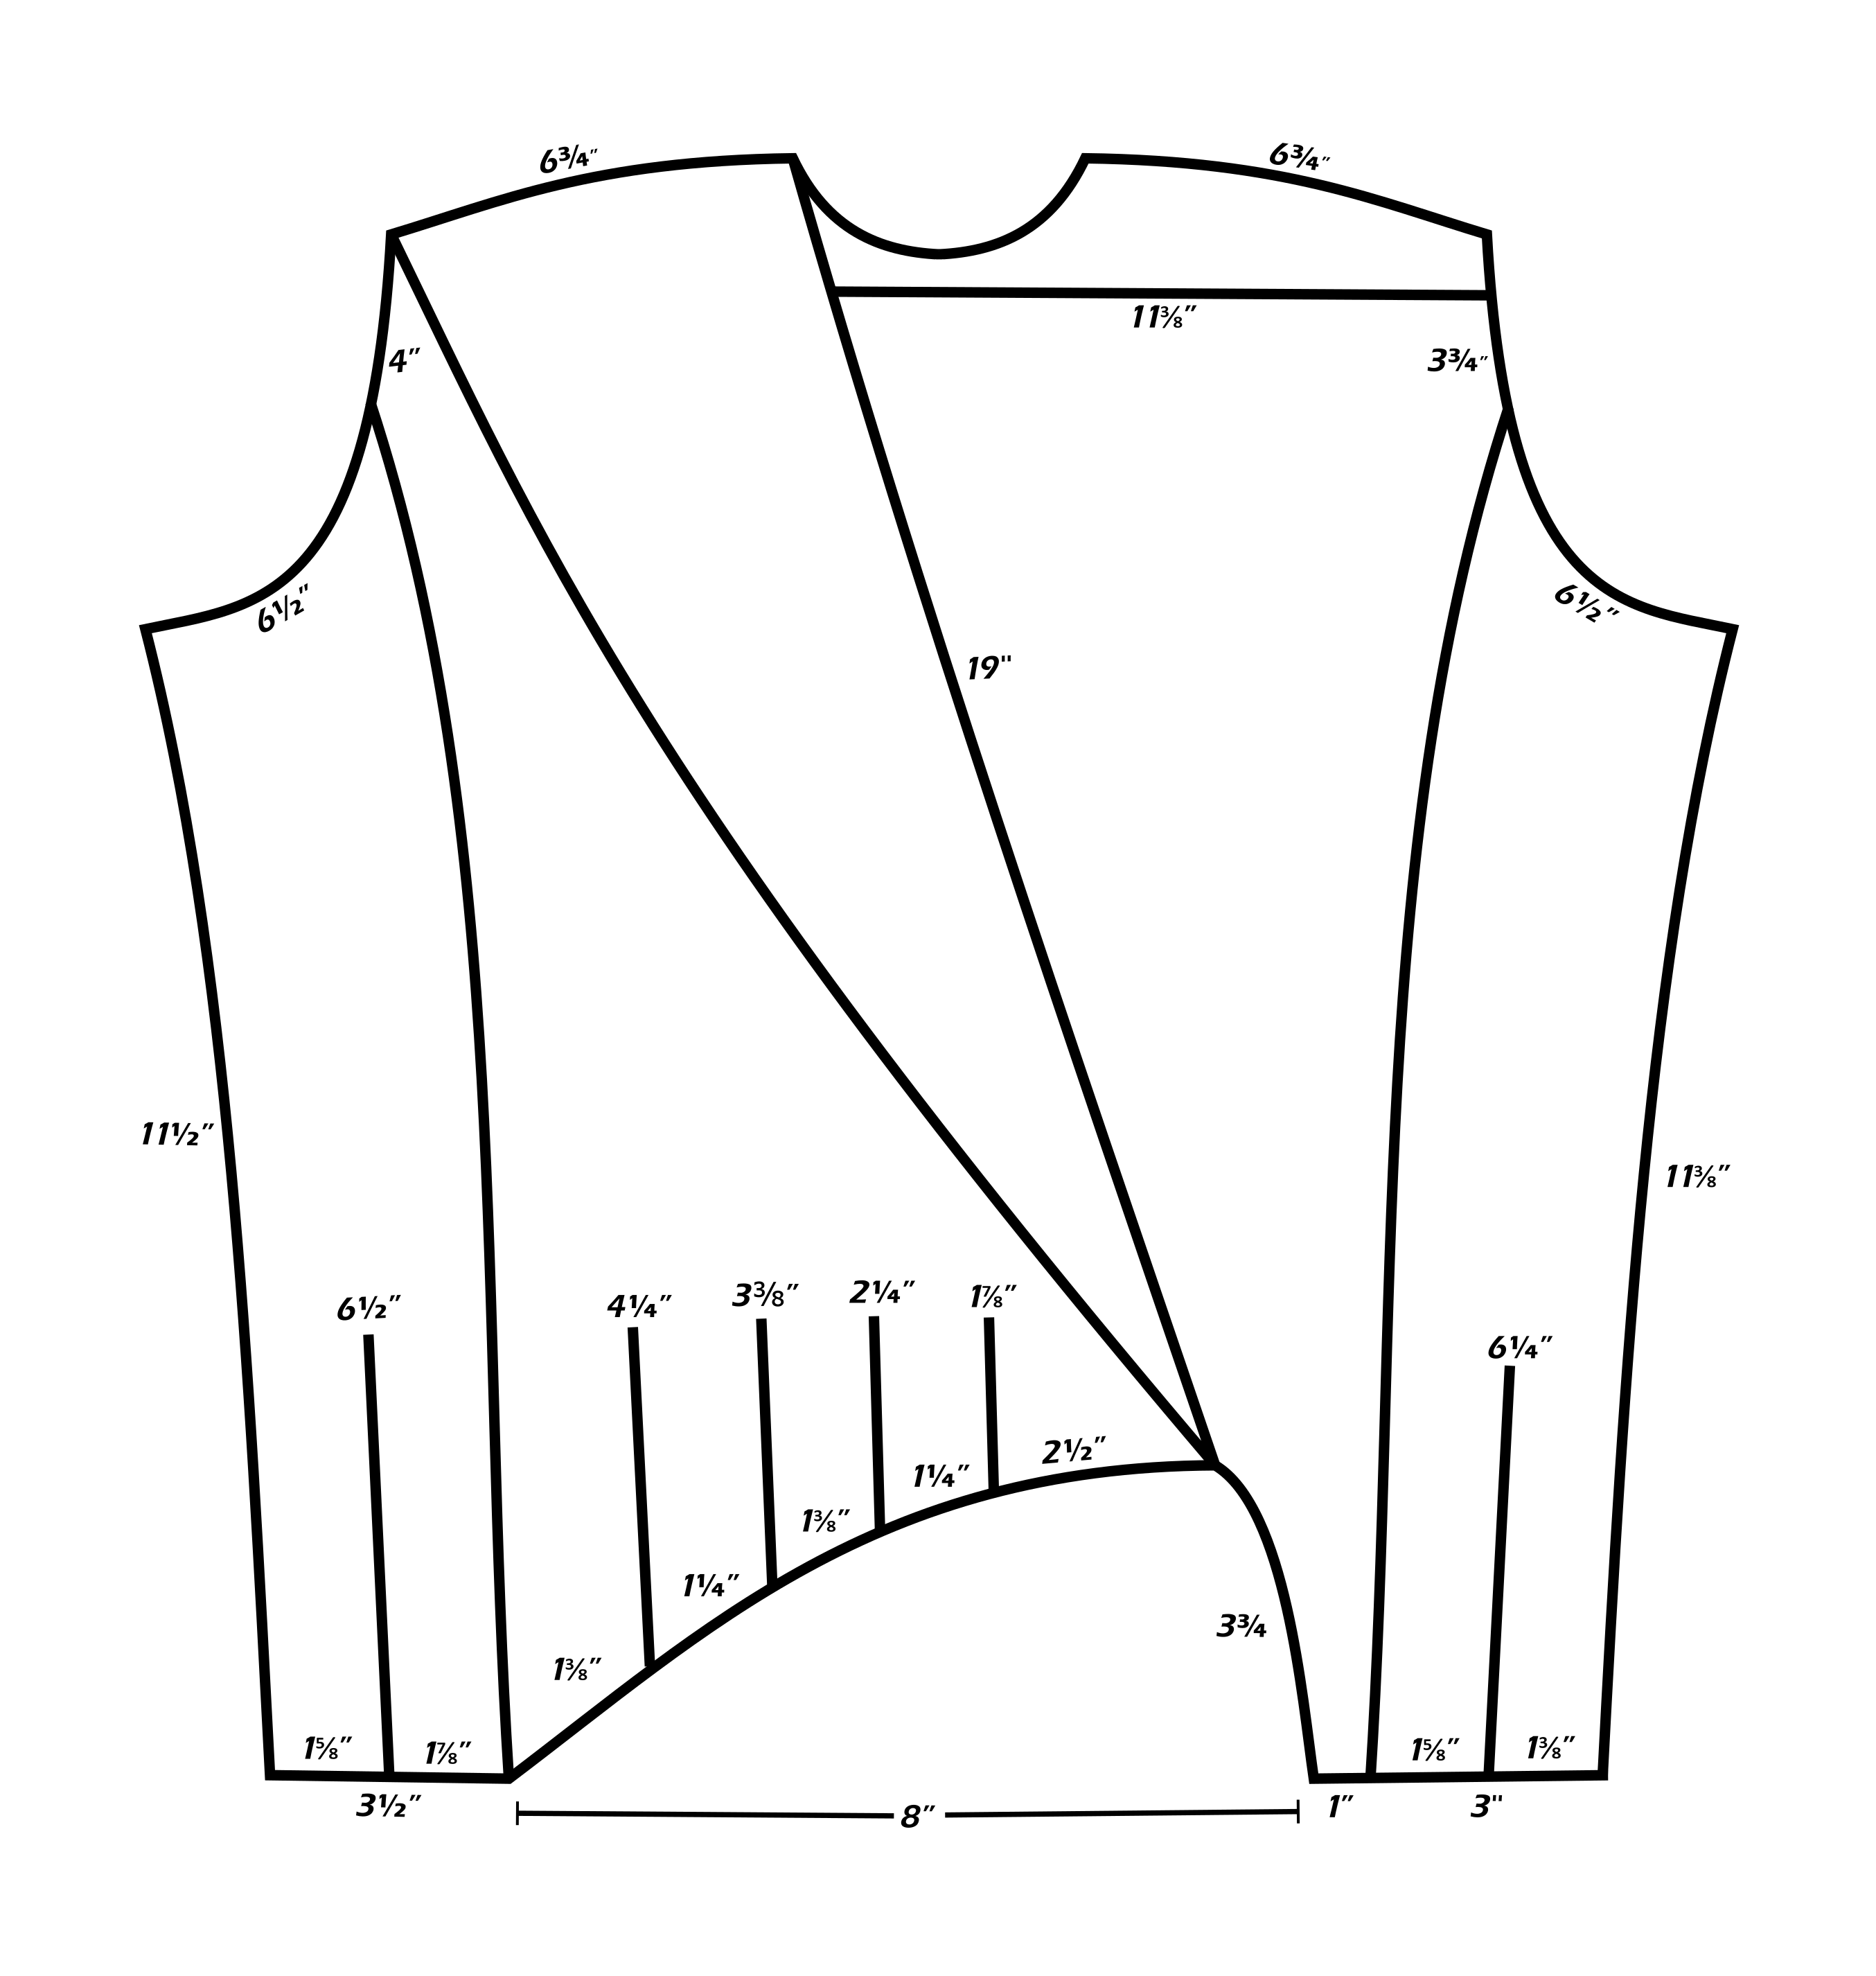
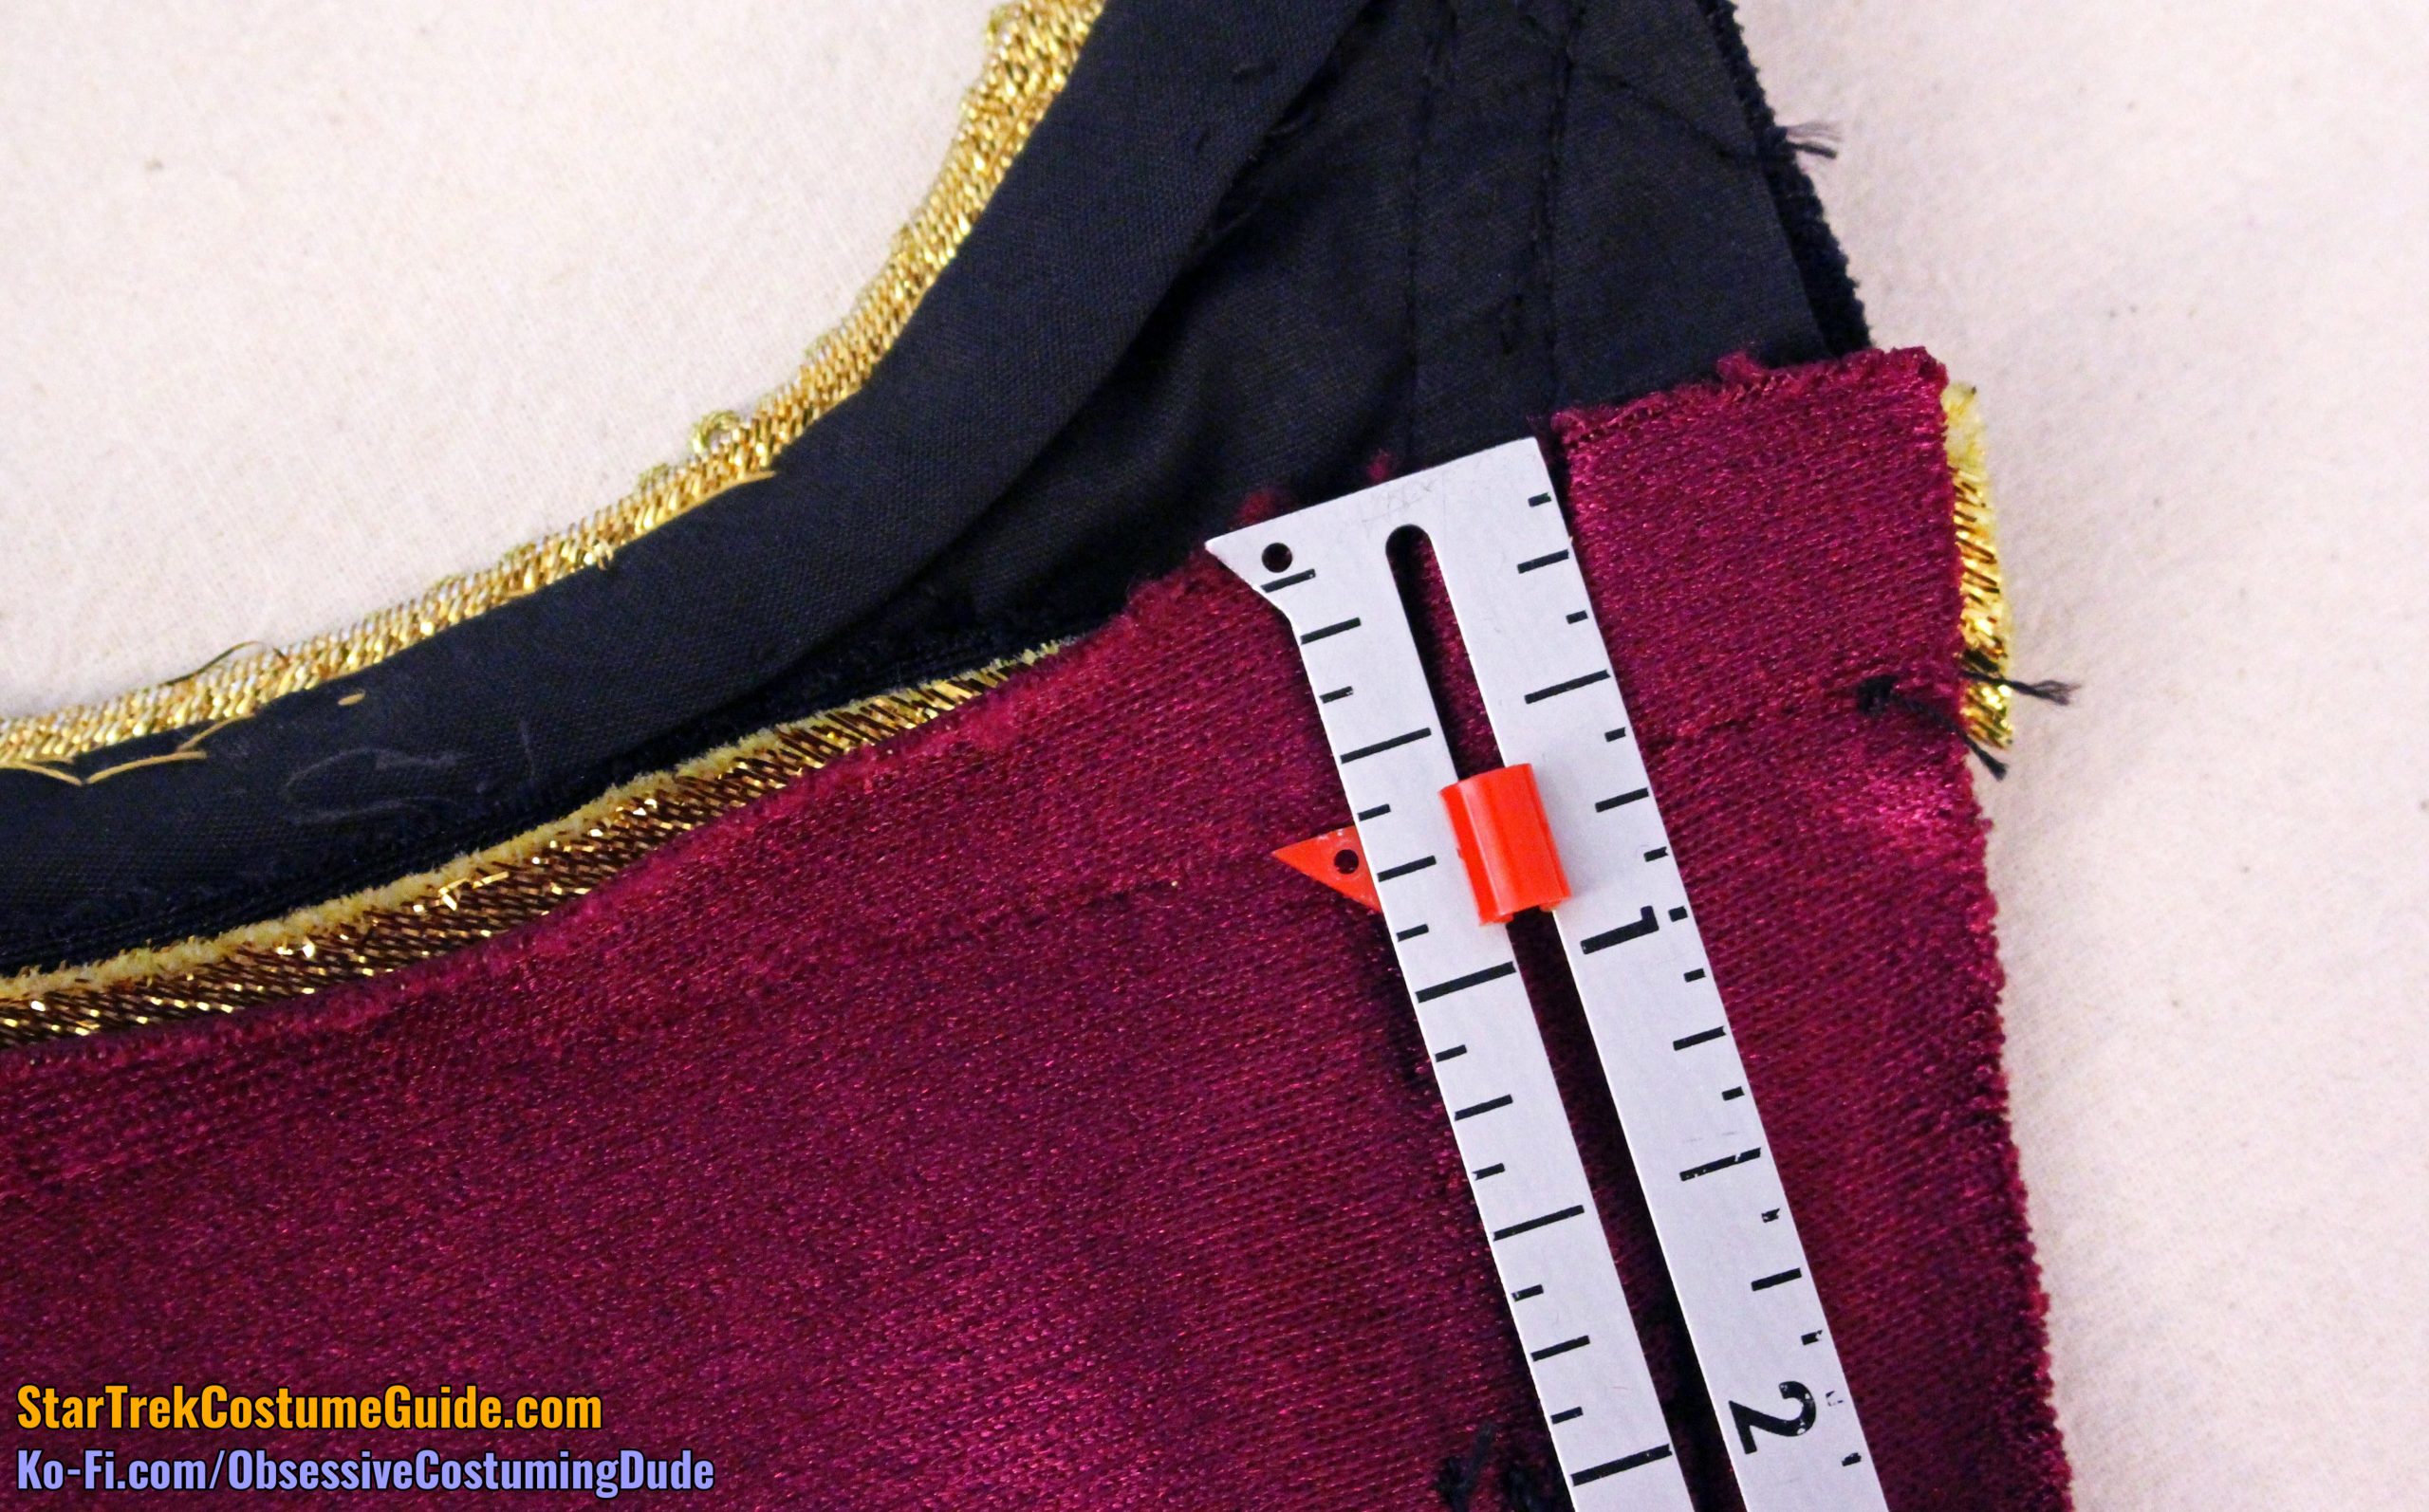
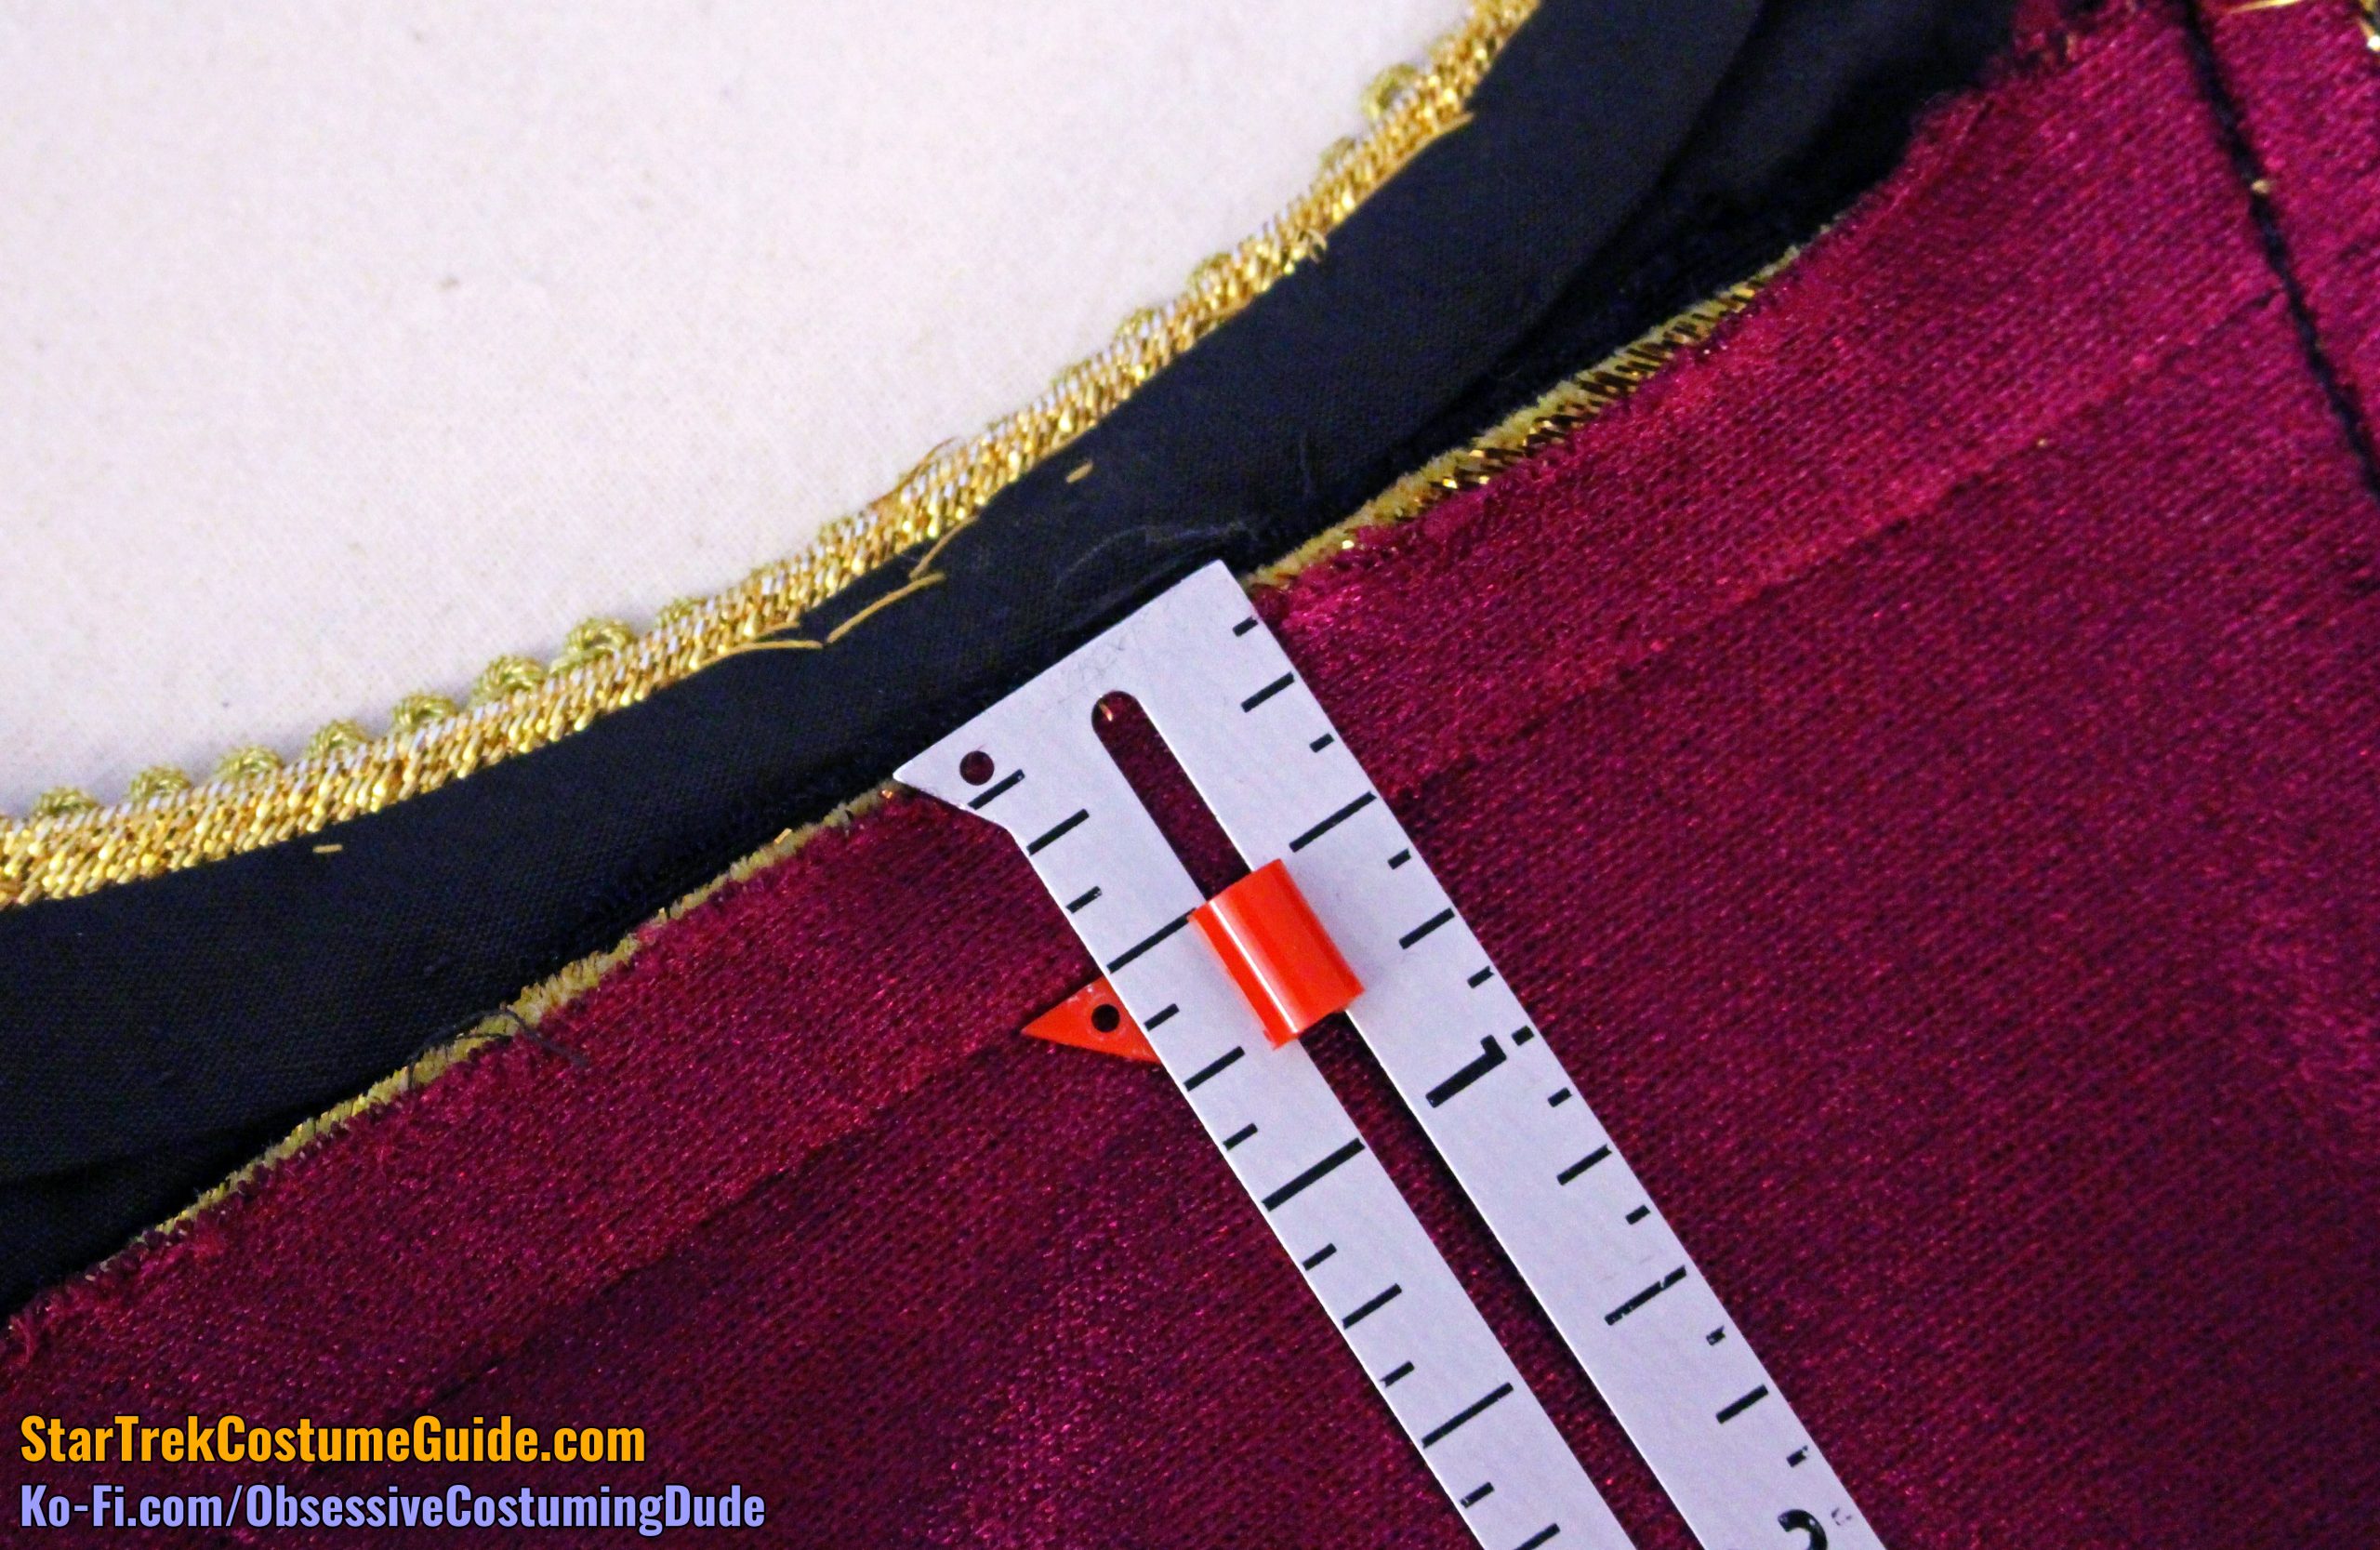
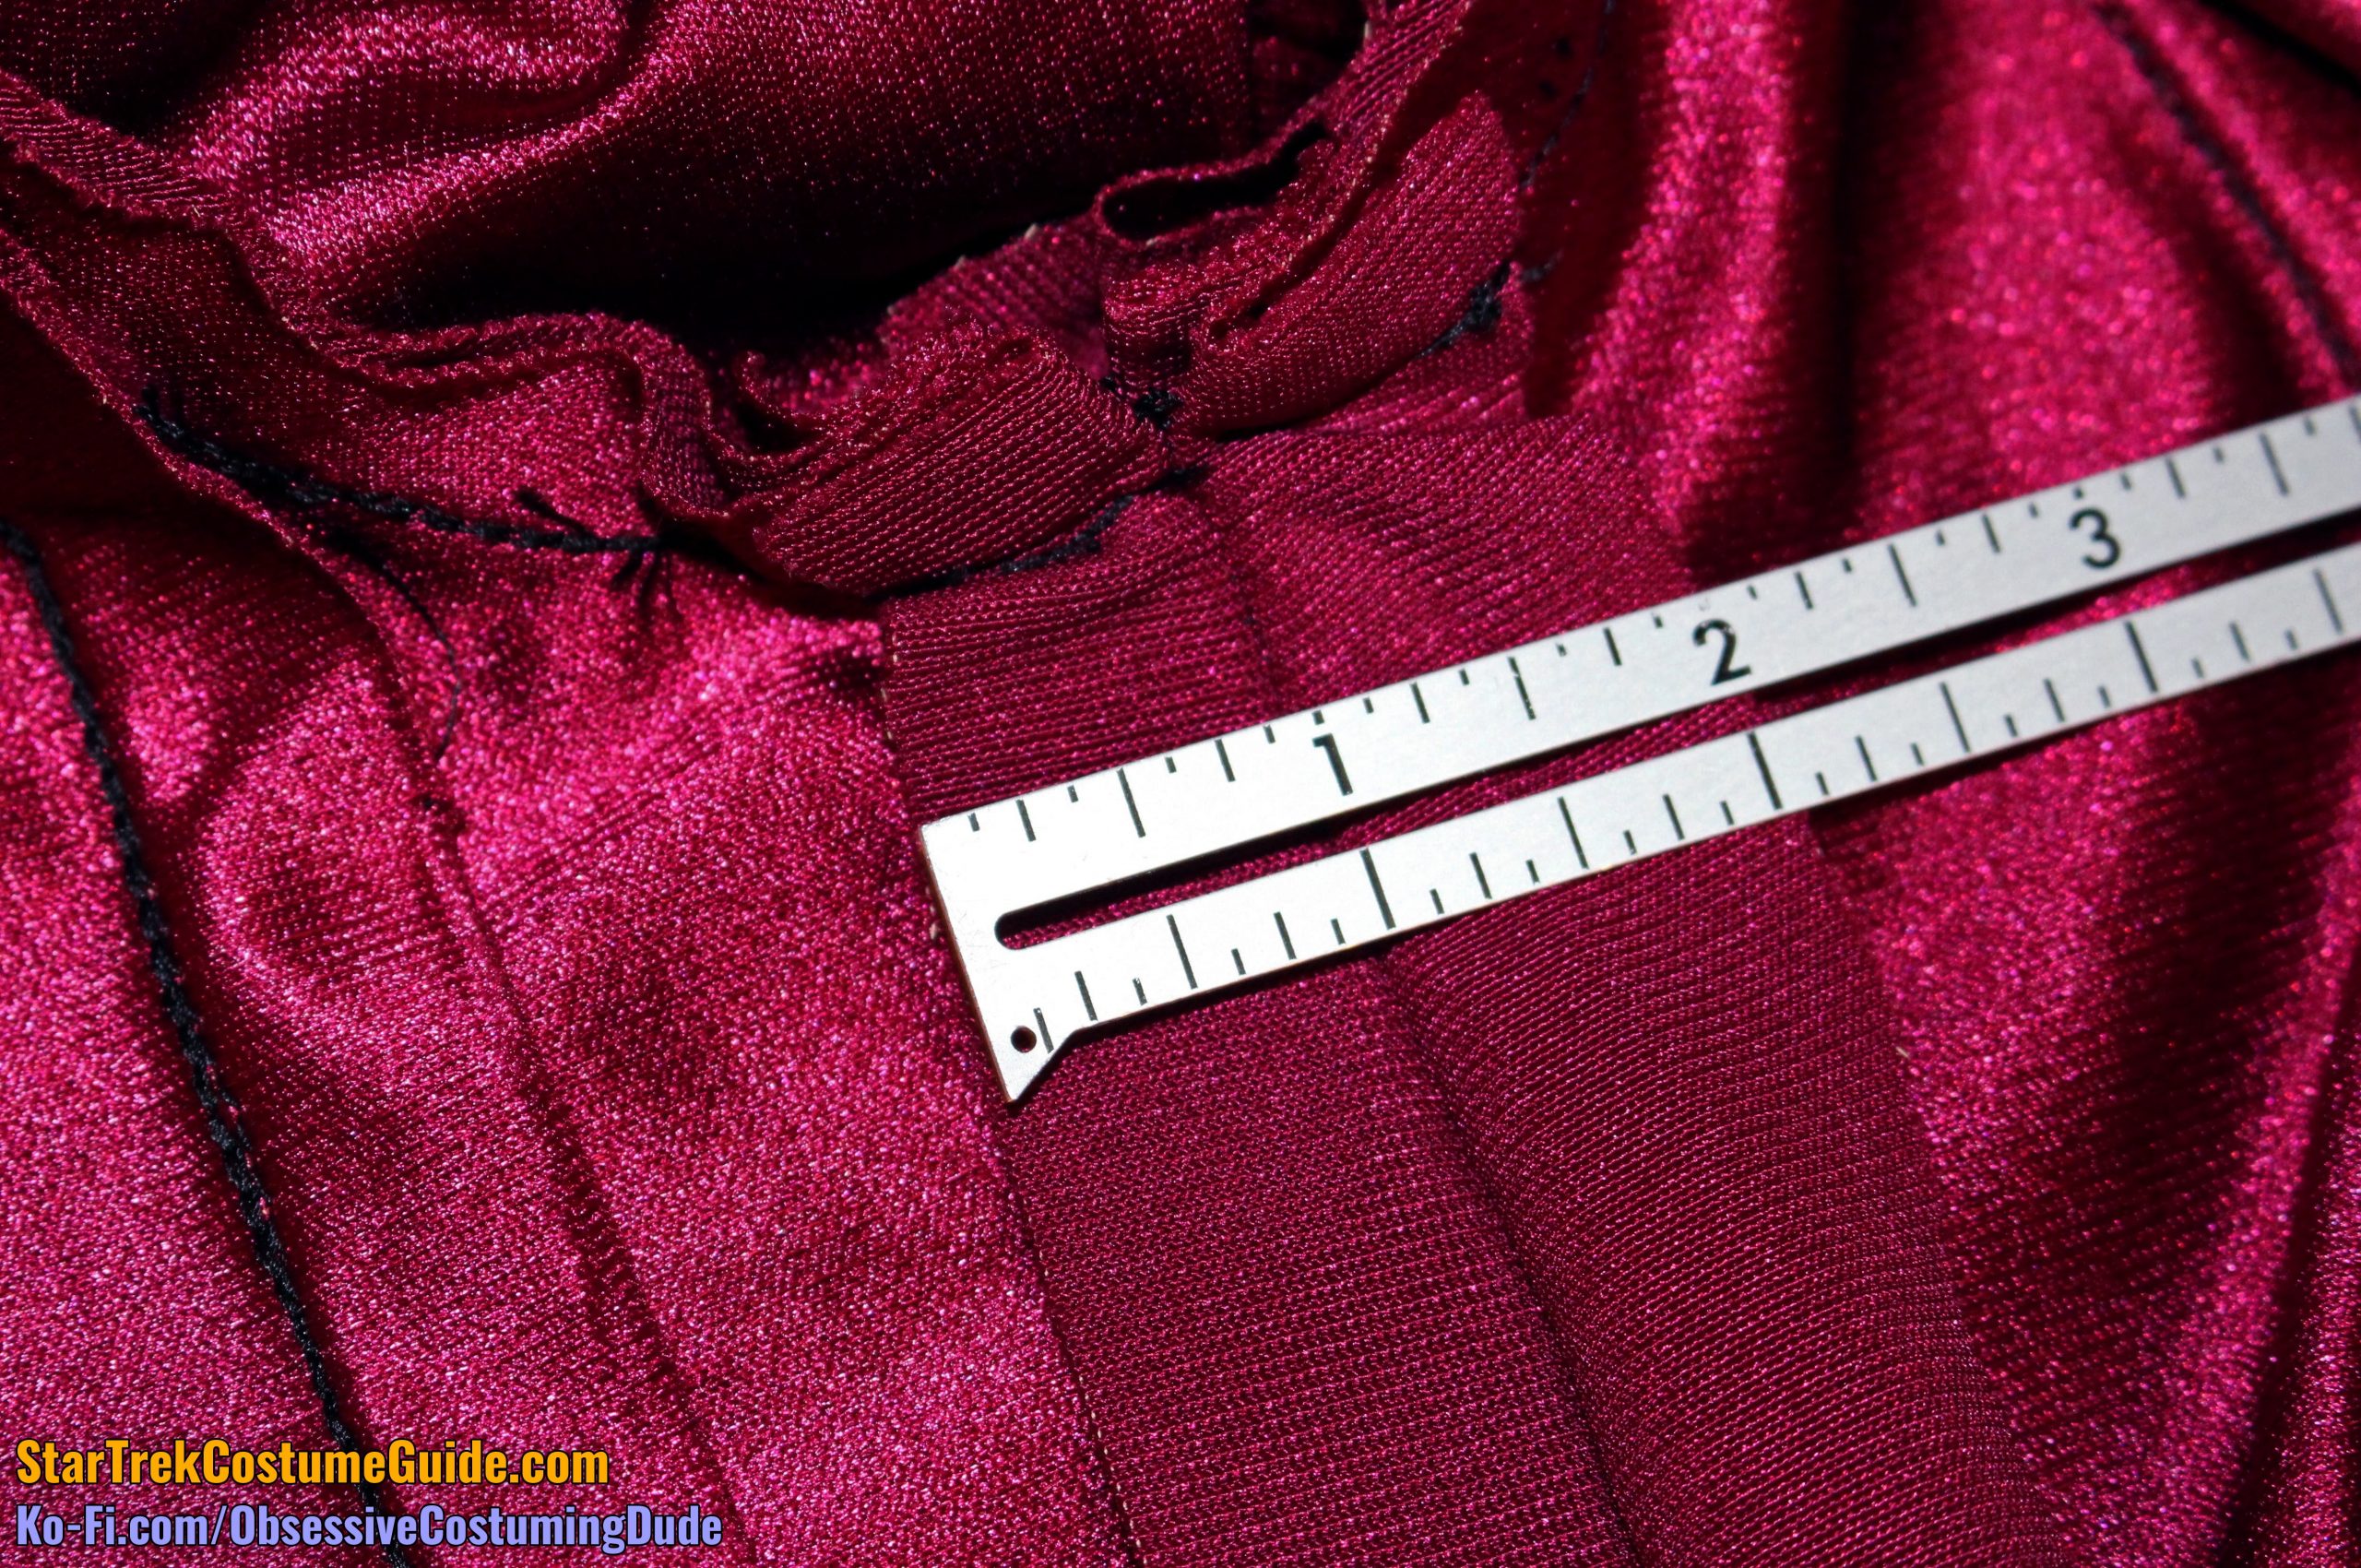
The front yoke was ¾” deep at the center front, measured from the bottom of the trim.
The front yoke measured 3 ⅜” deep at the shoulder seam.
The front yoke, back yoke, front sleeve, and back sleeve all formed a nice intersection of seams at the top of the sleeve.
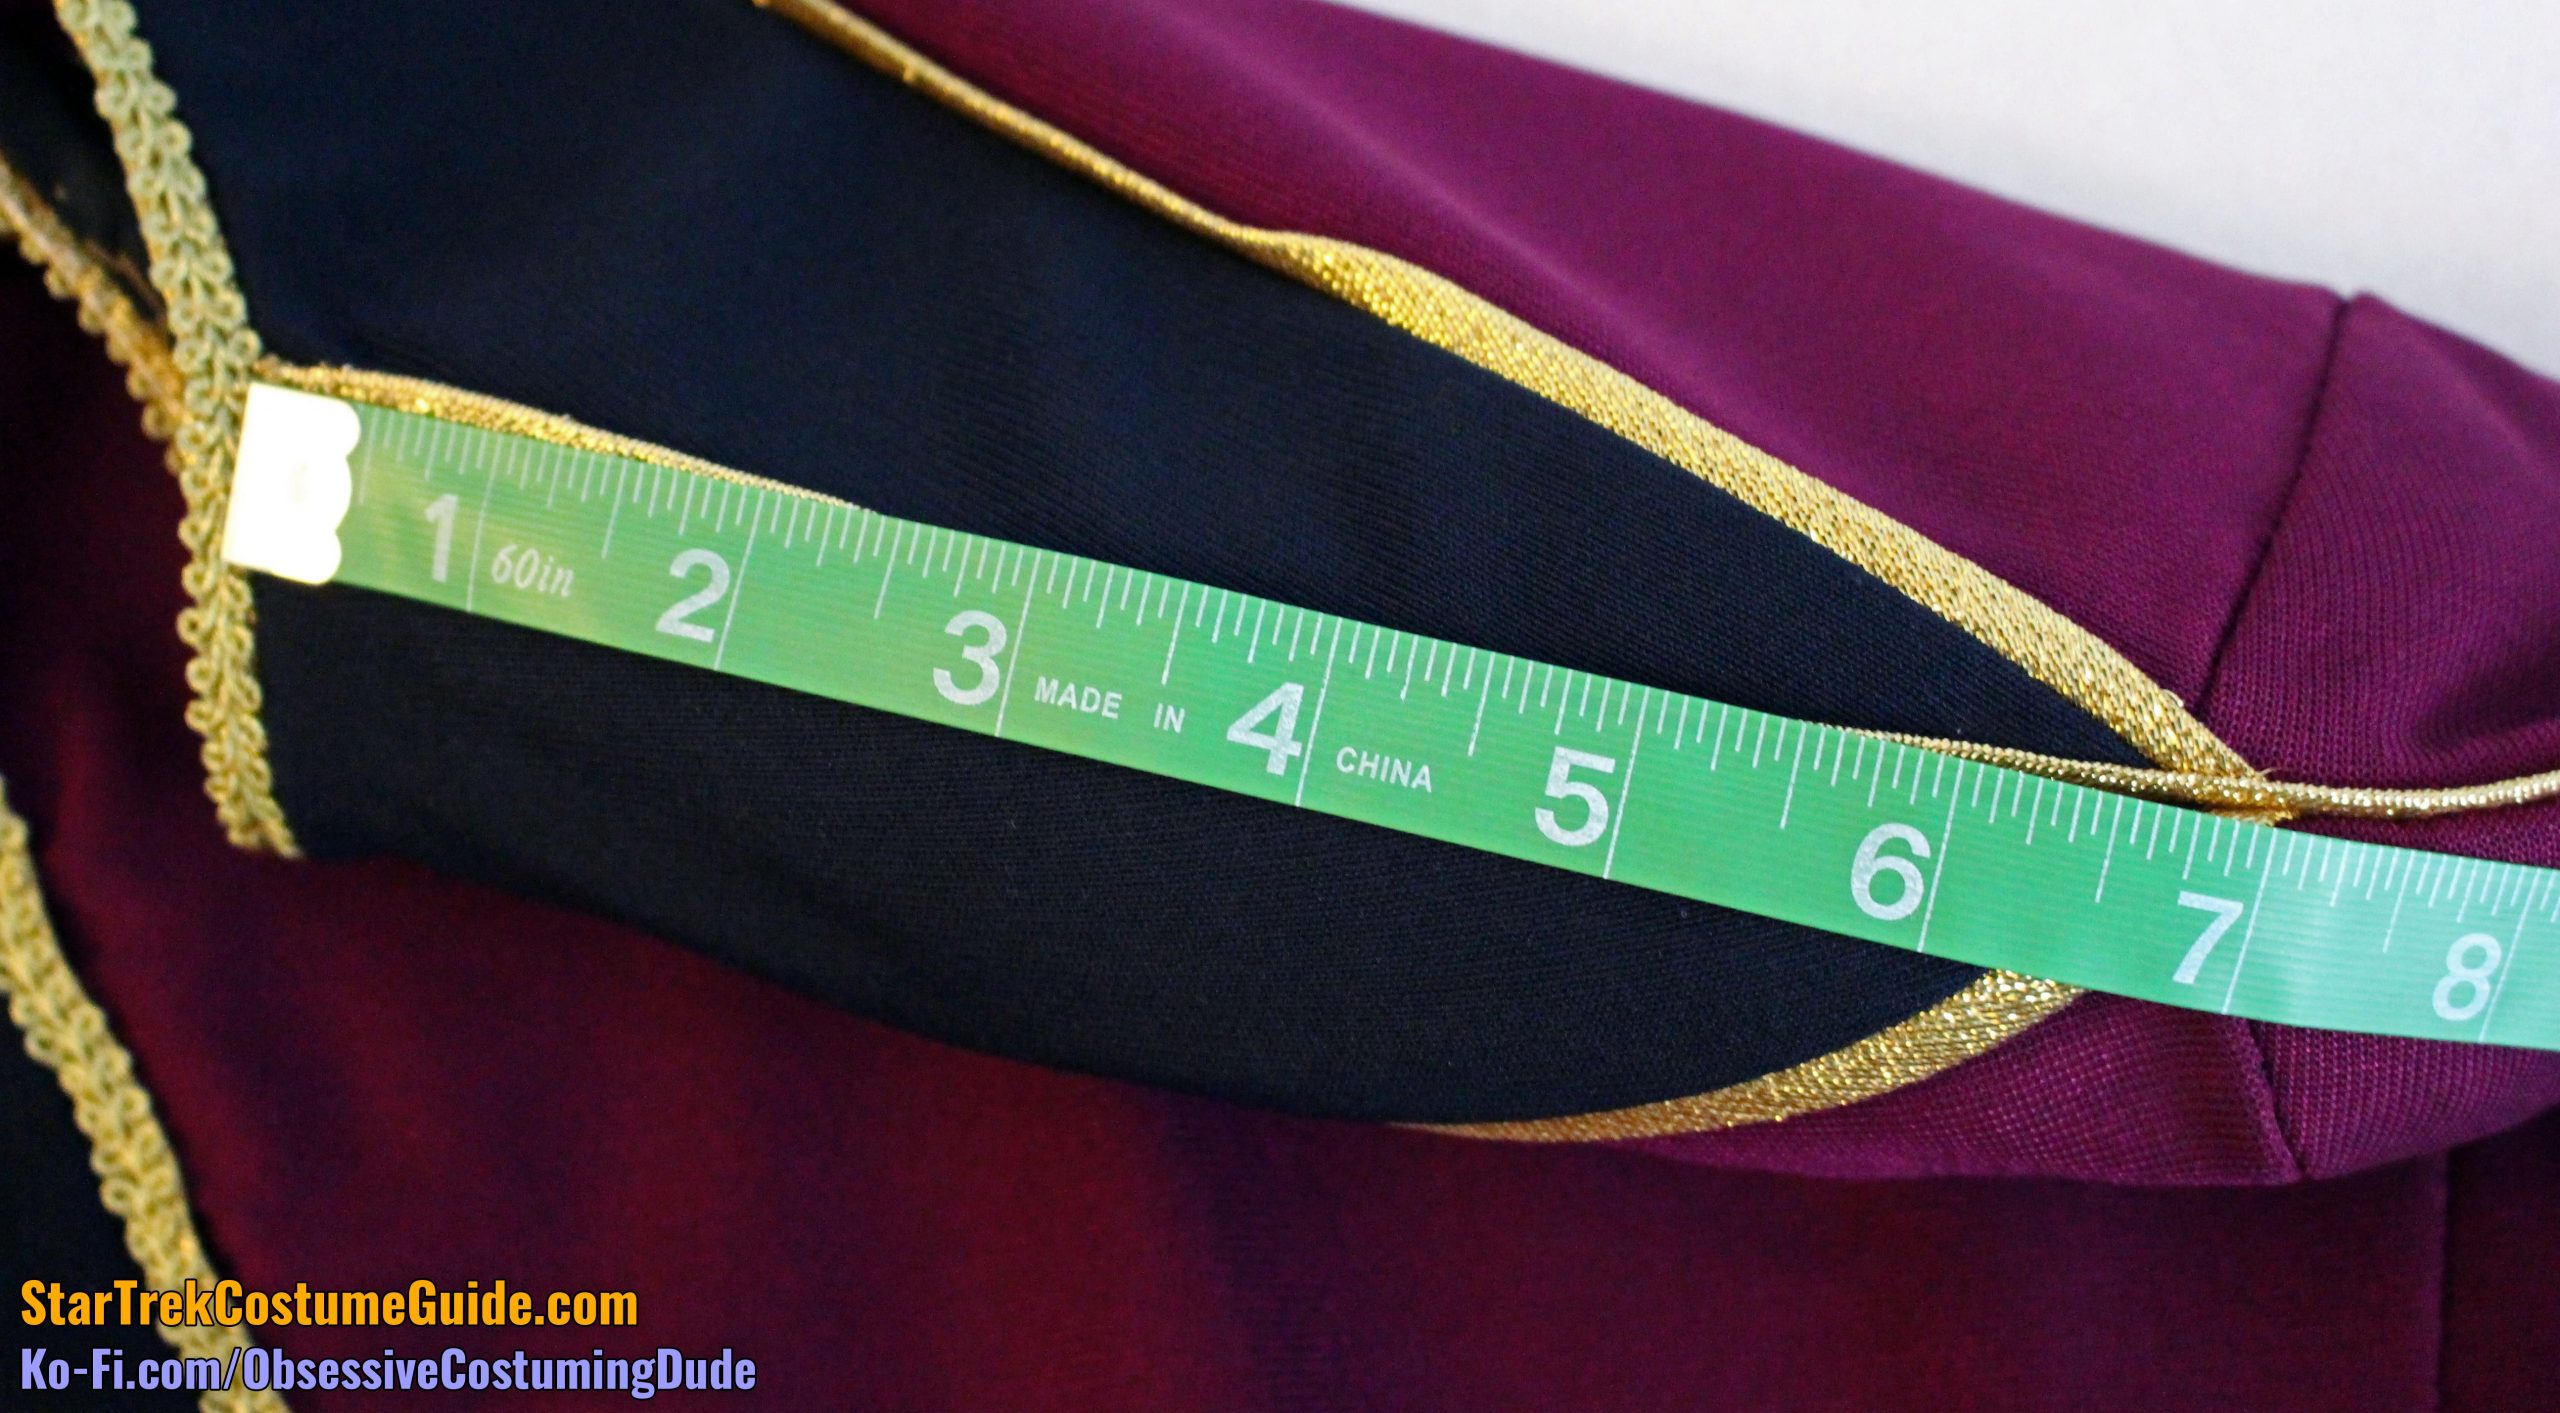
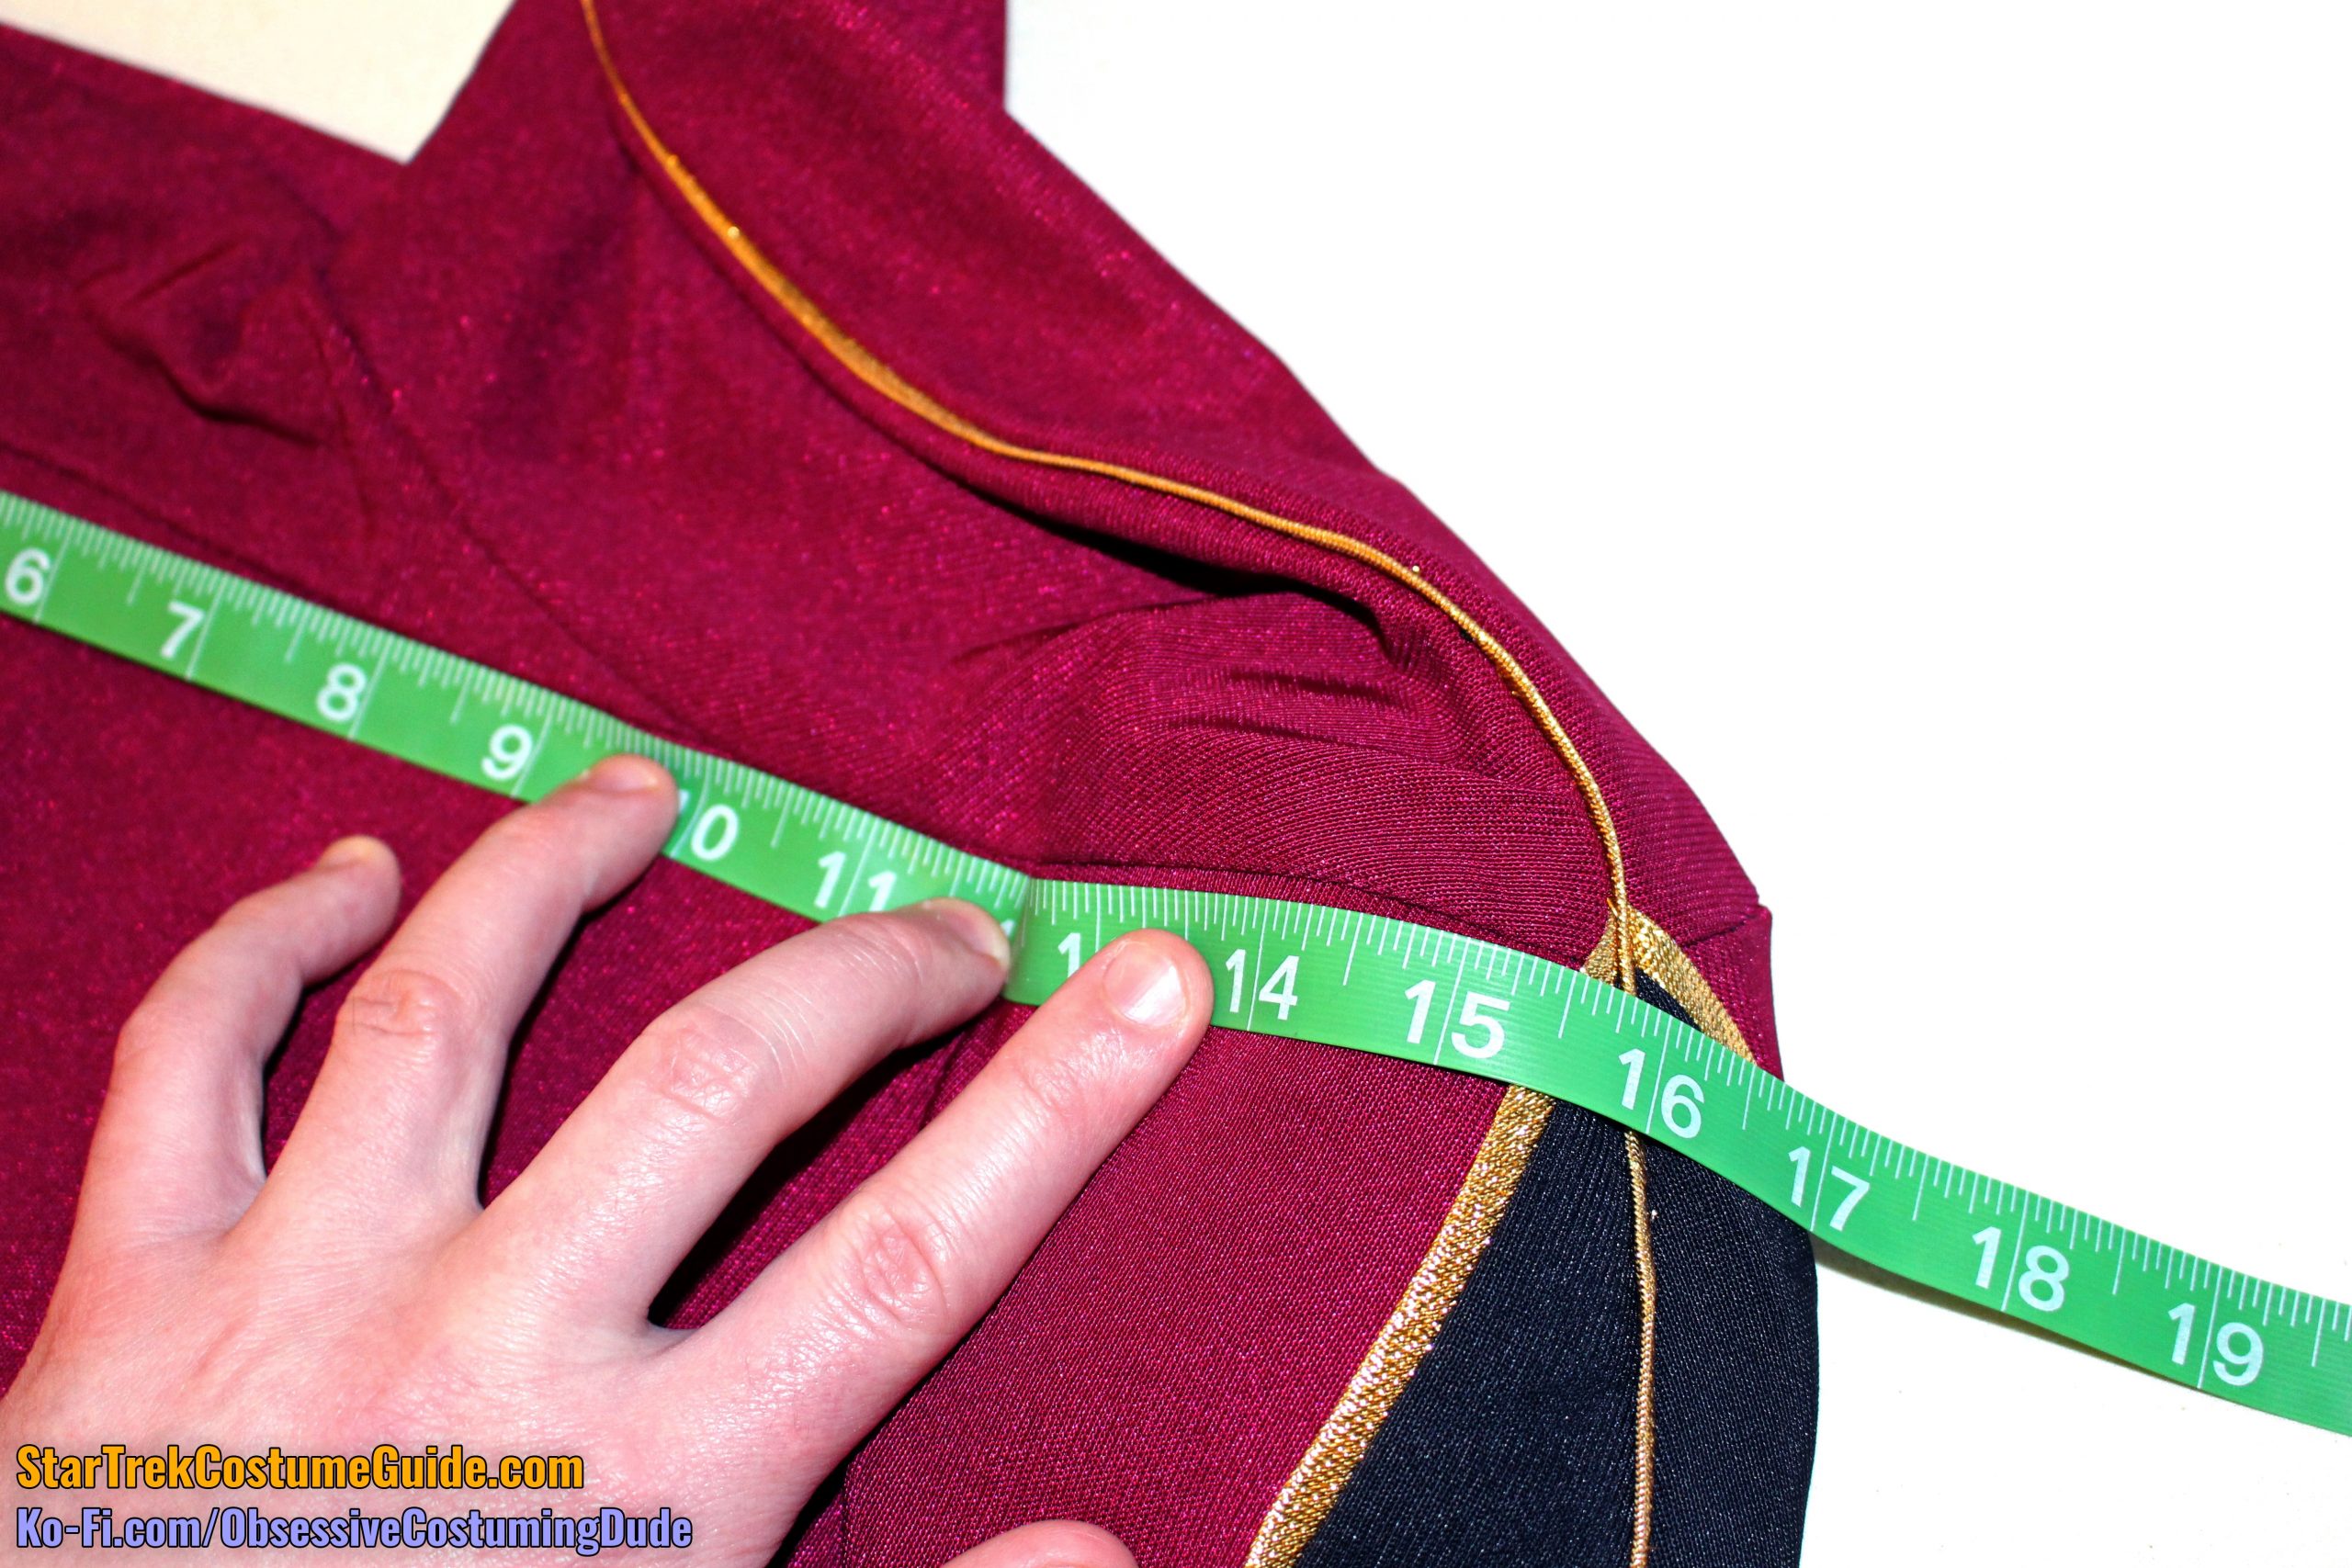
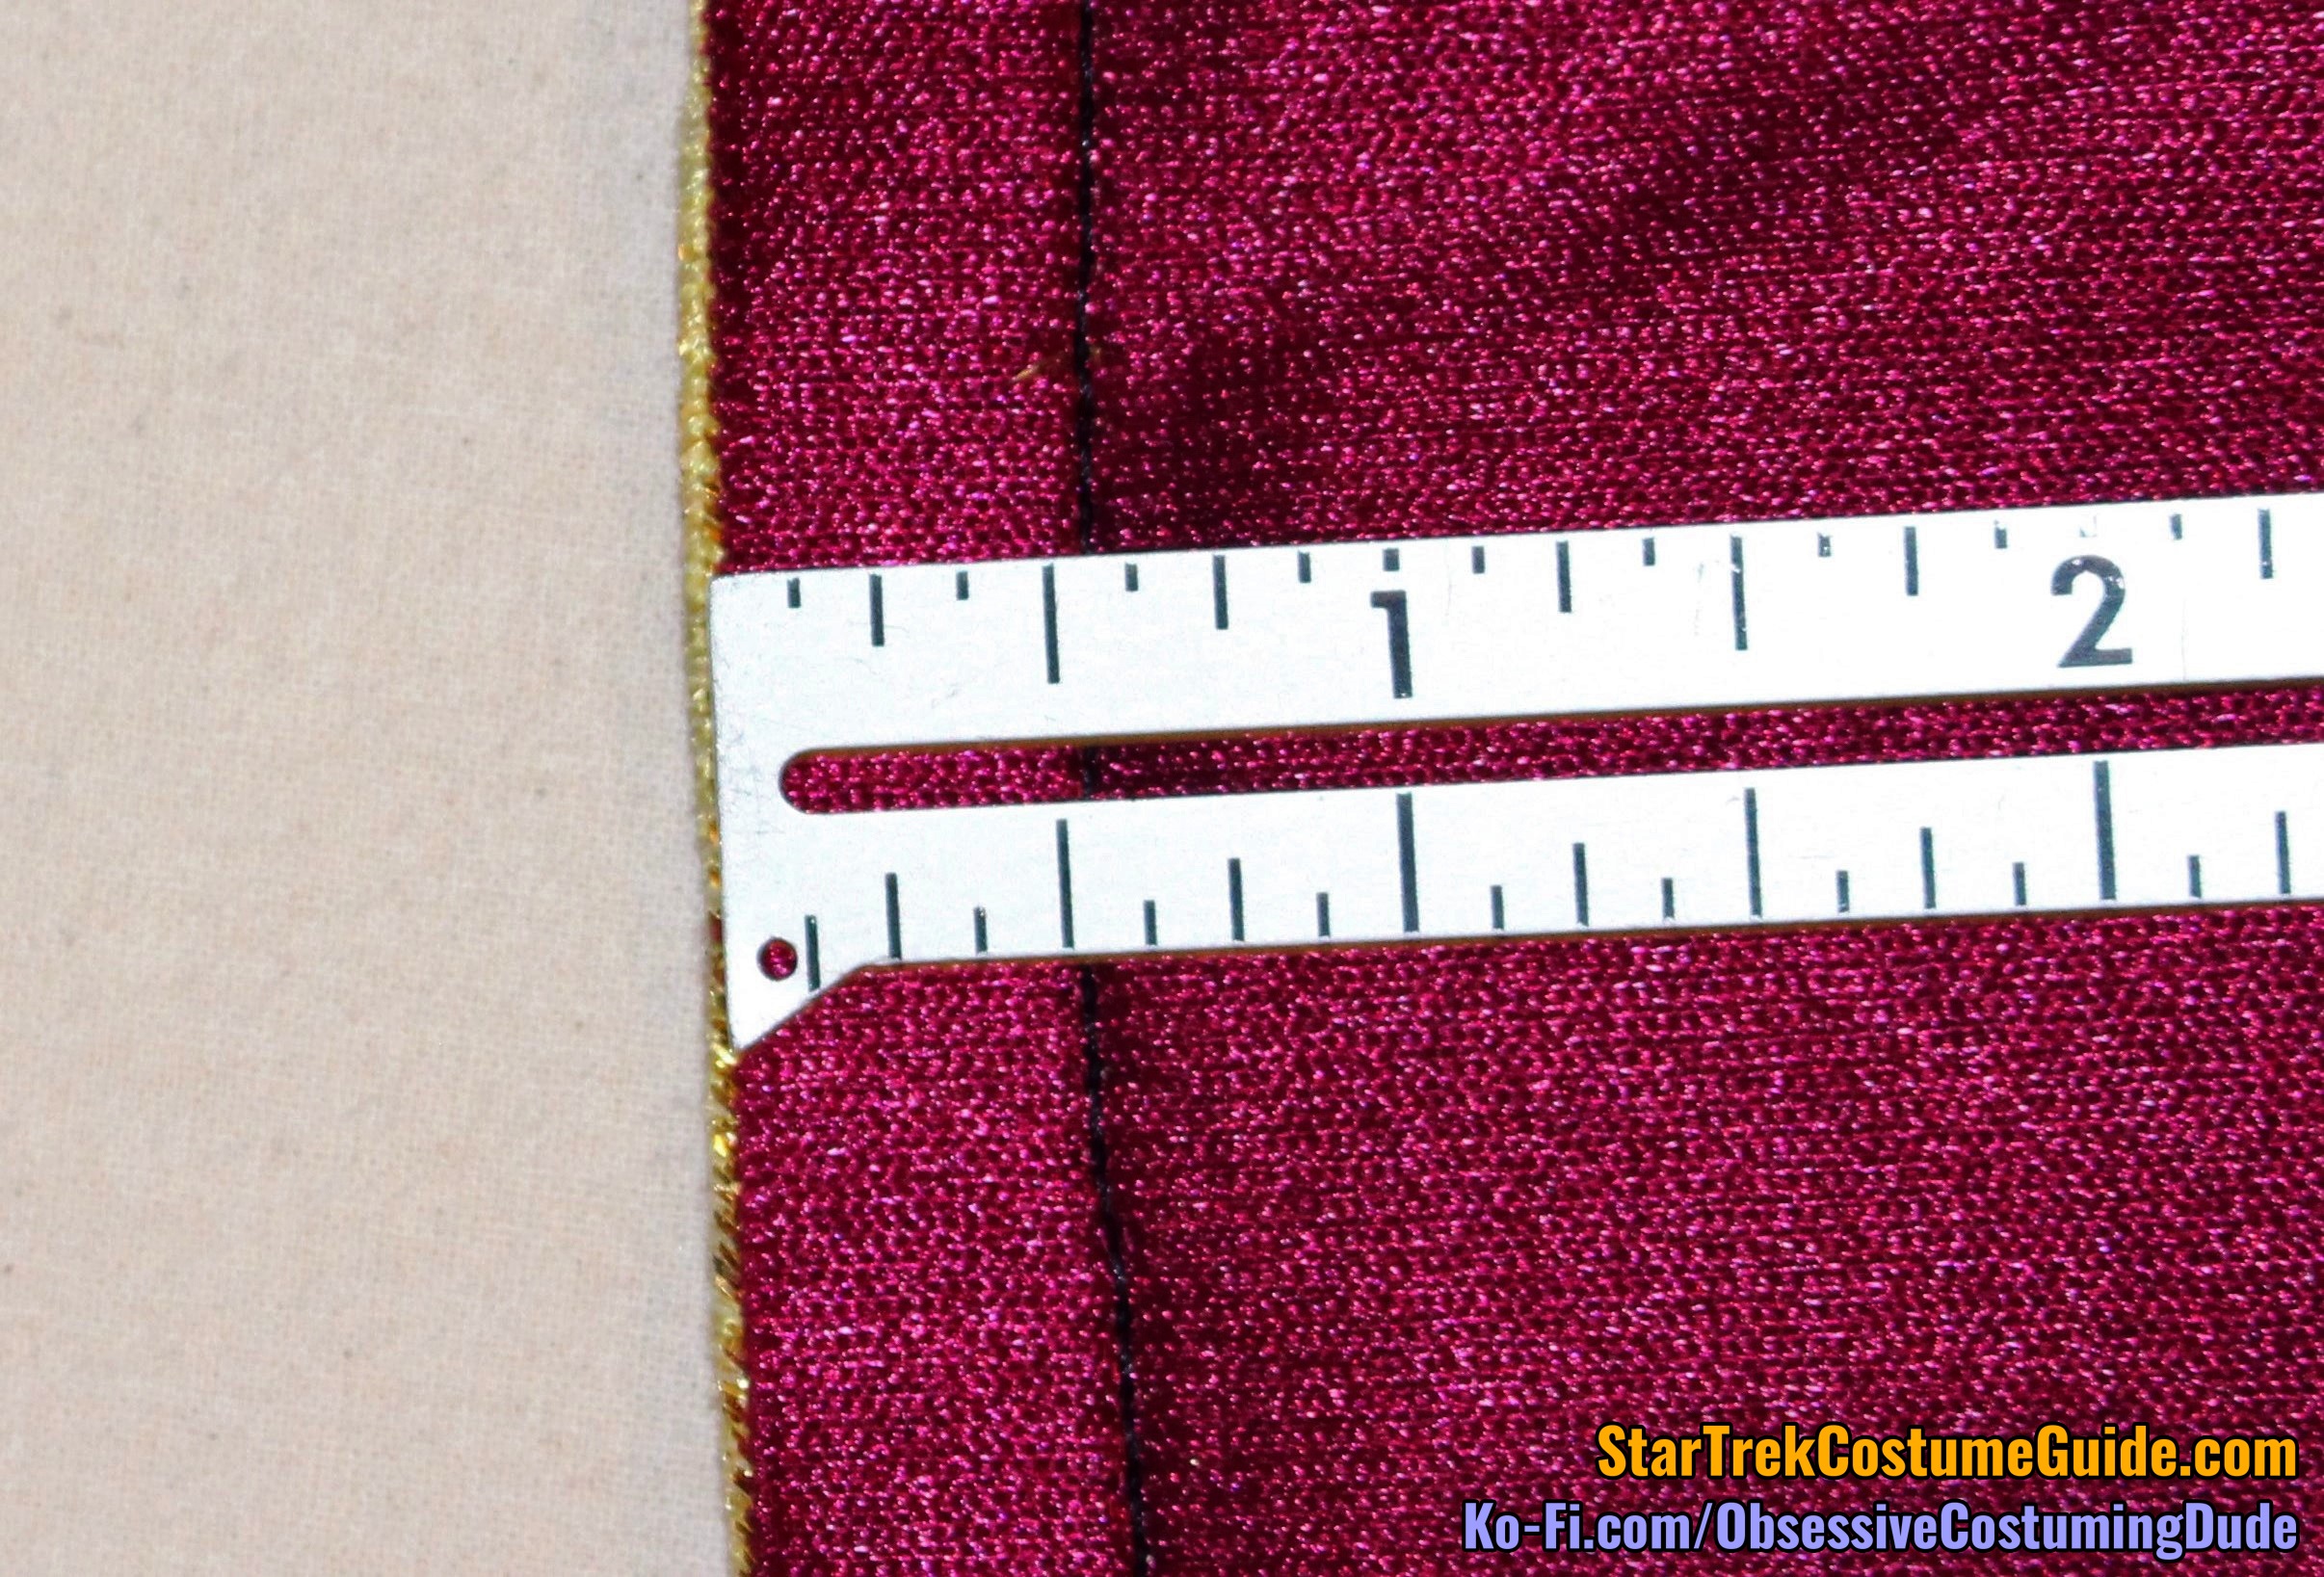
The shoulder seams were approximately 6 ¾” long, measured from the edges of the trim.
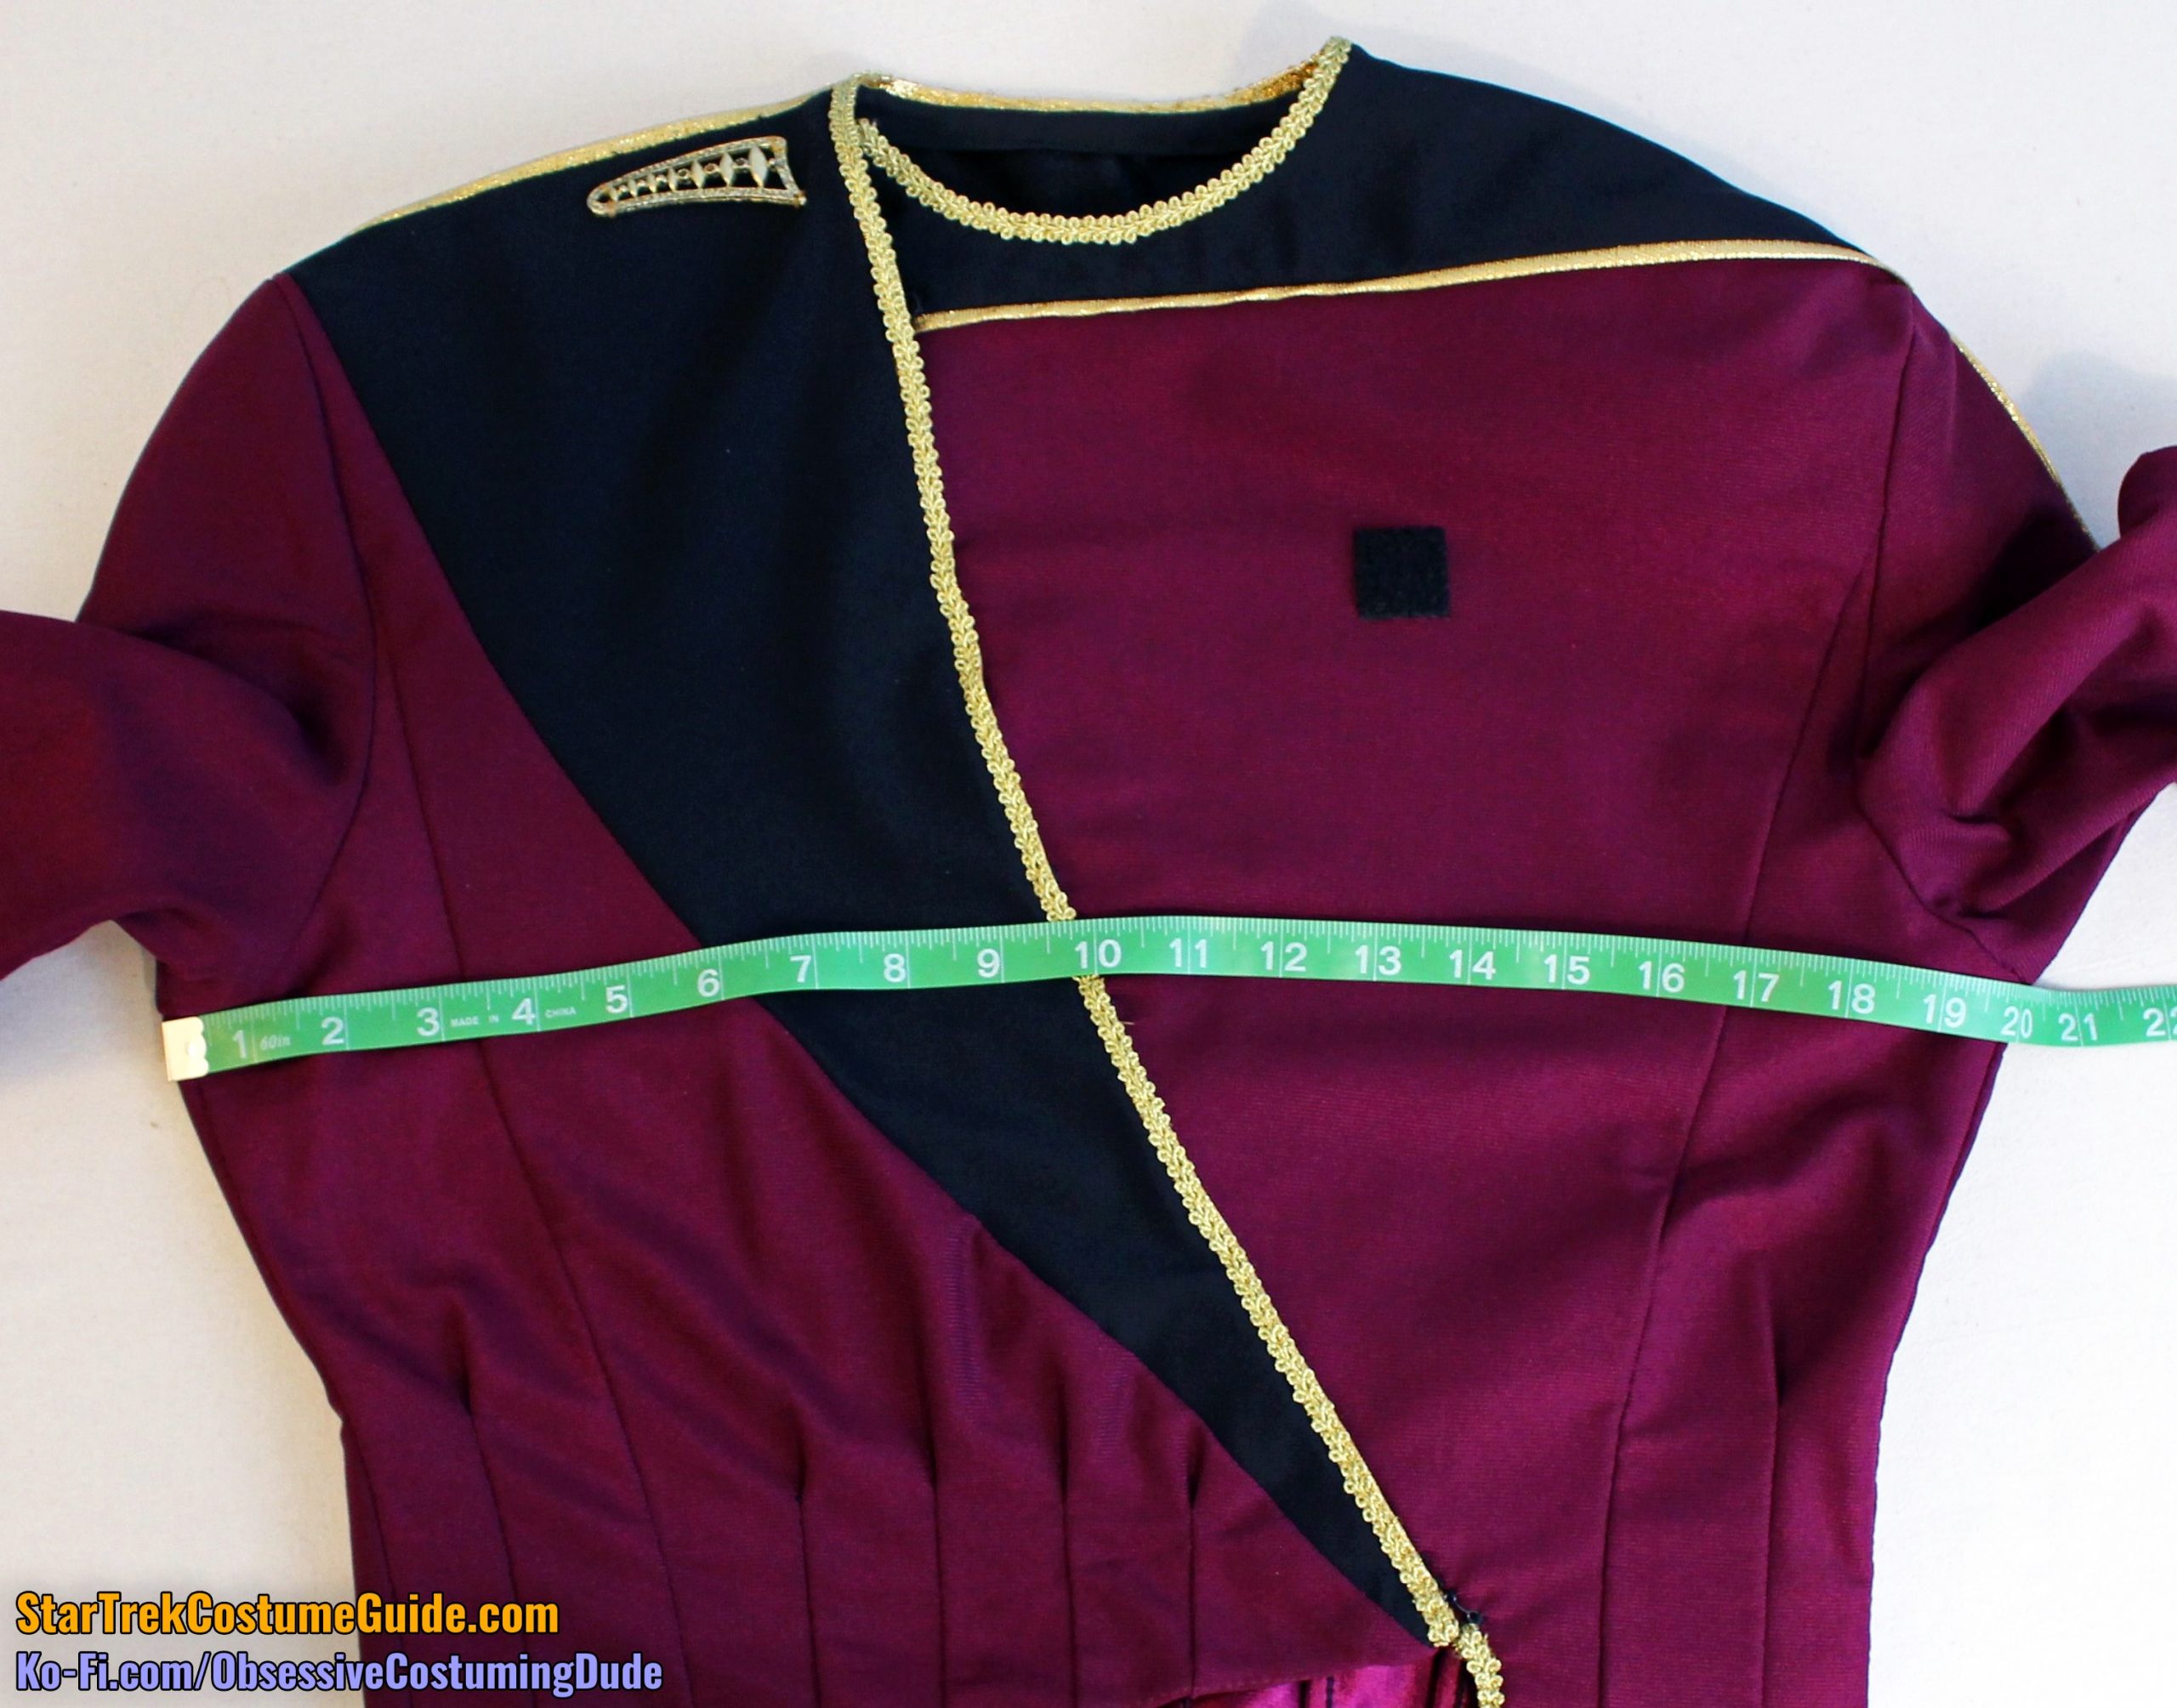
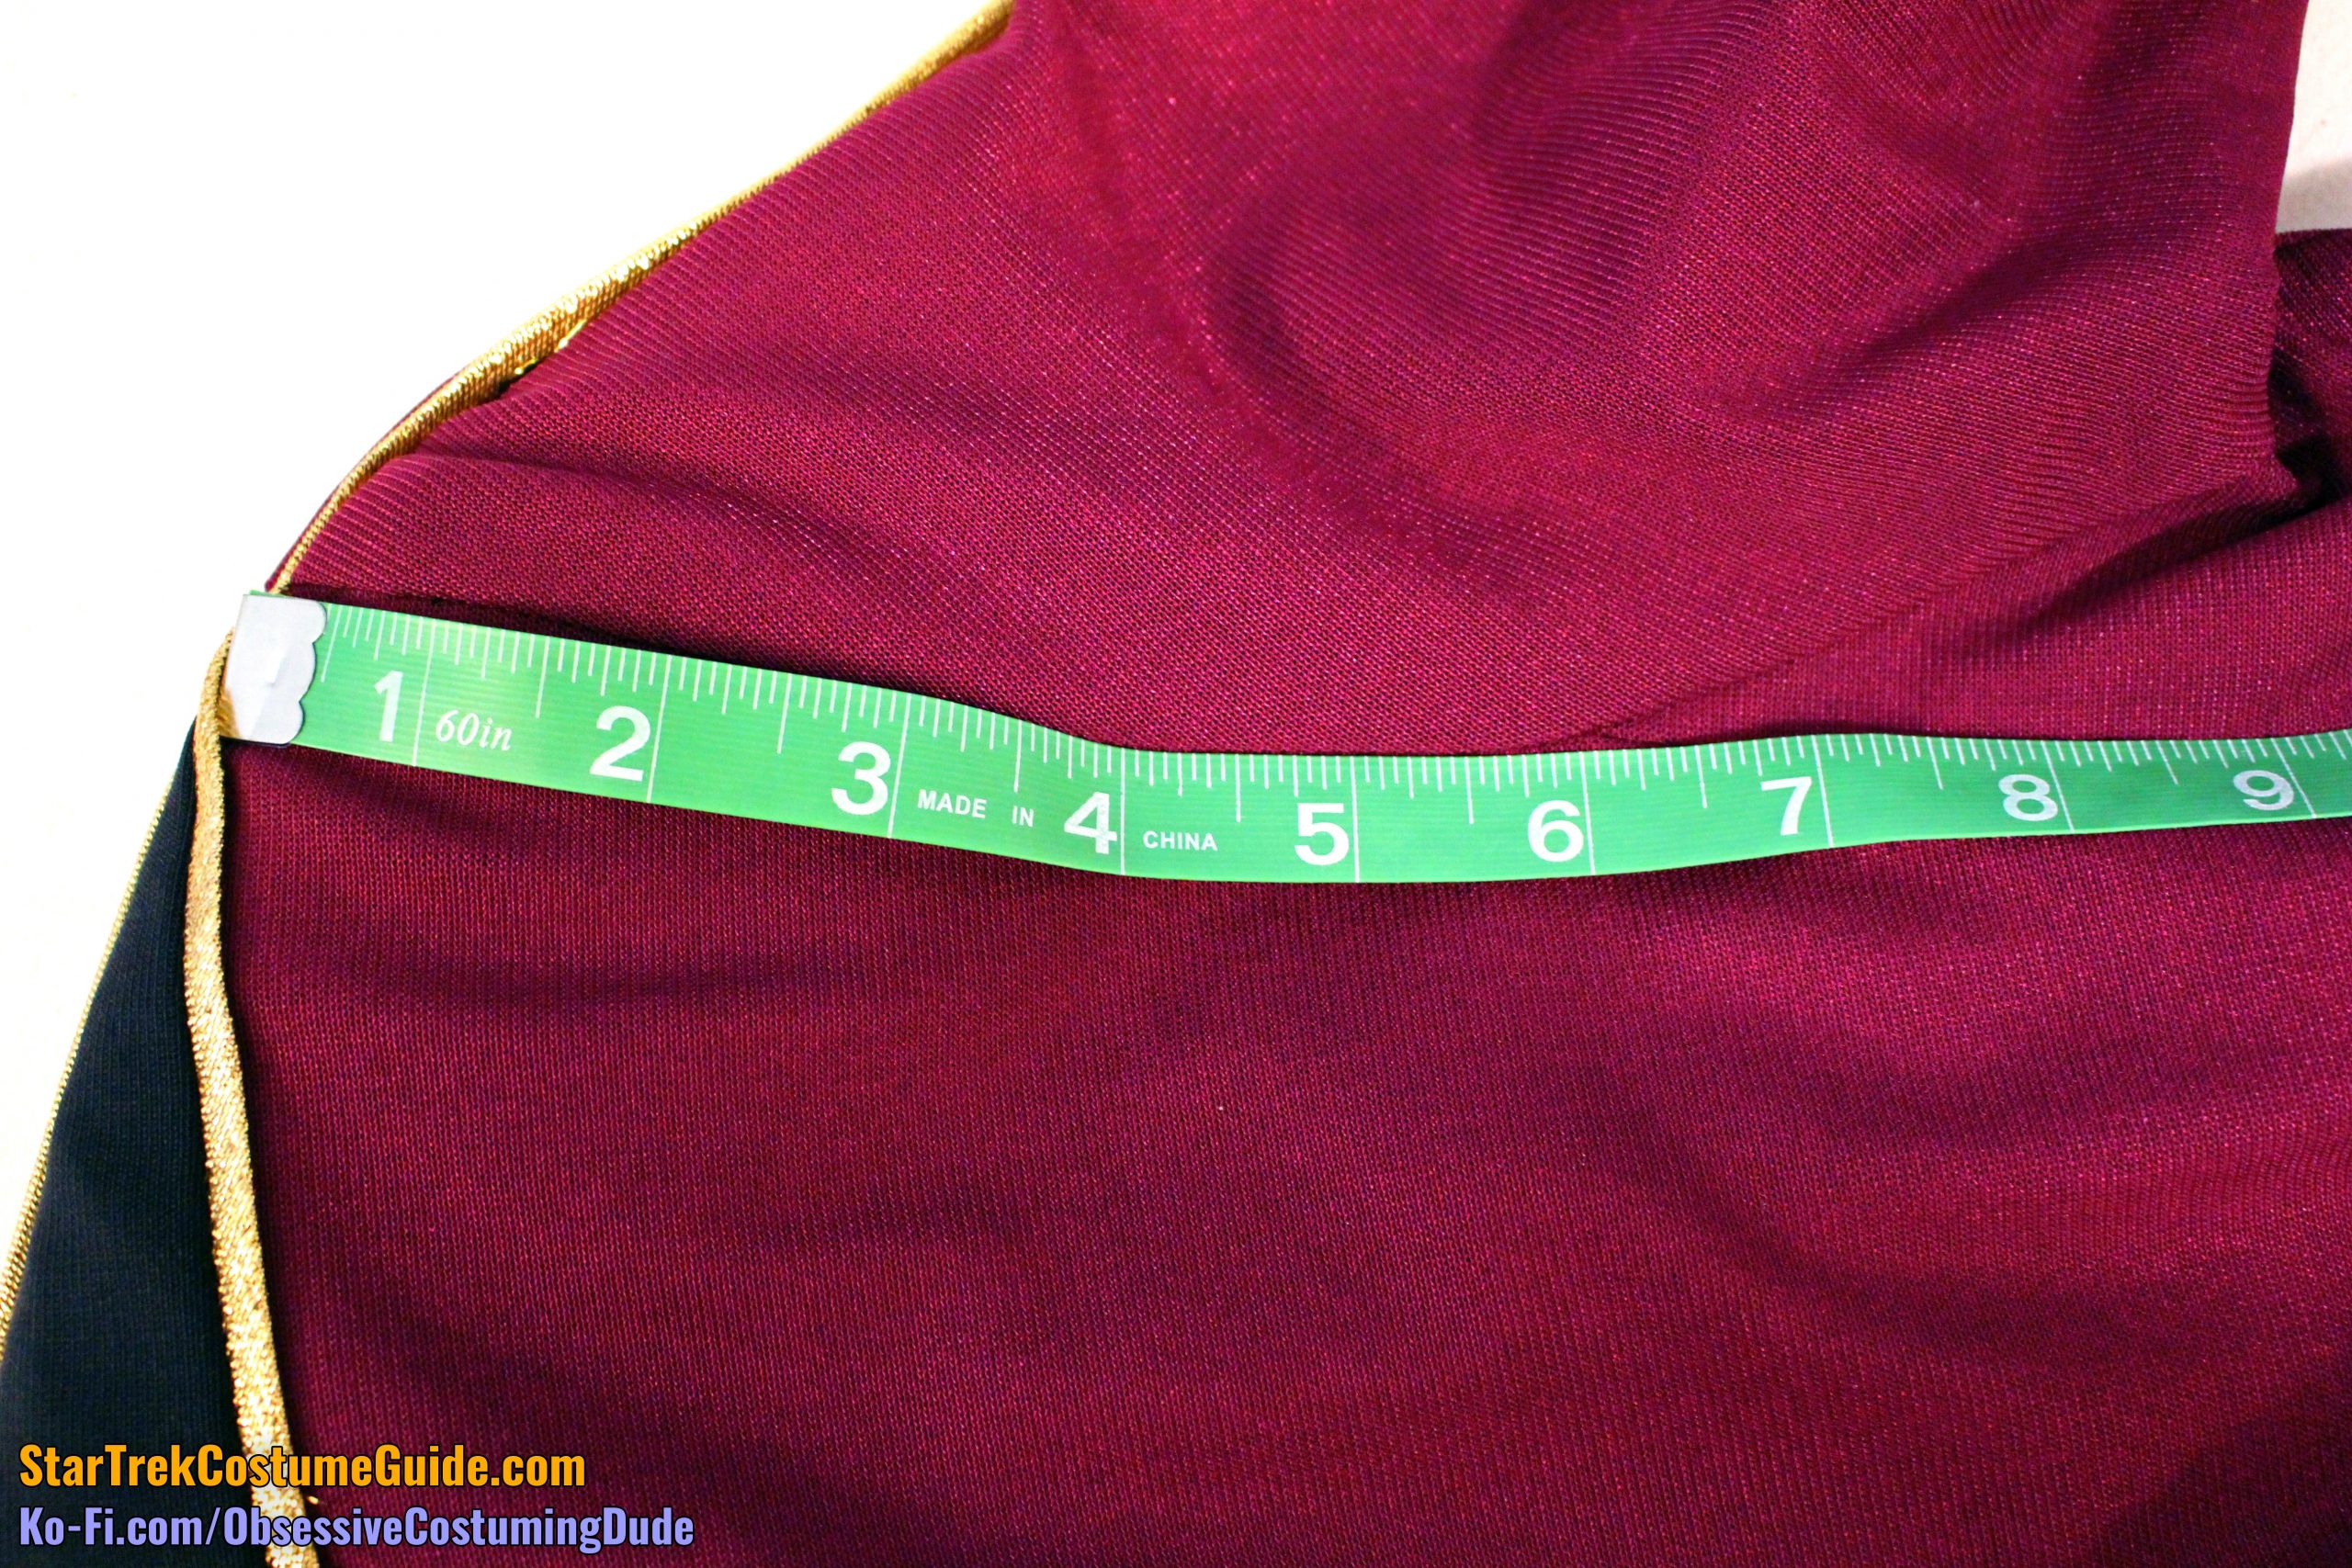
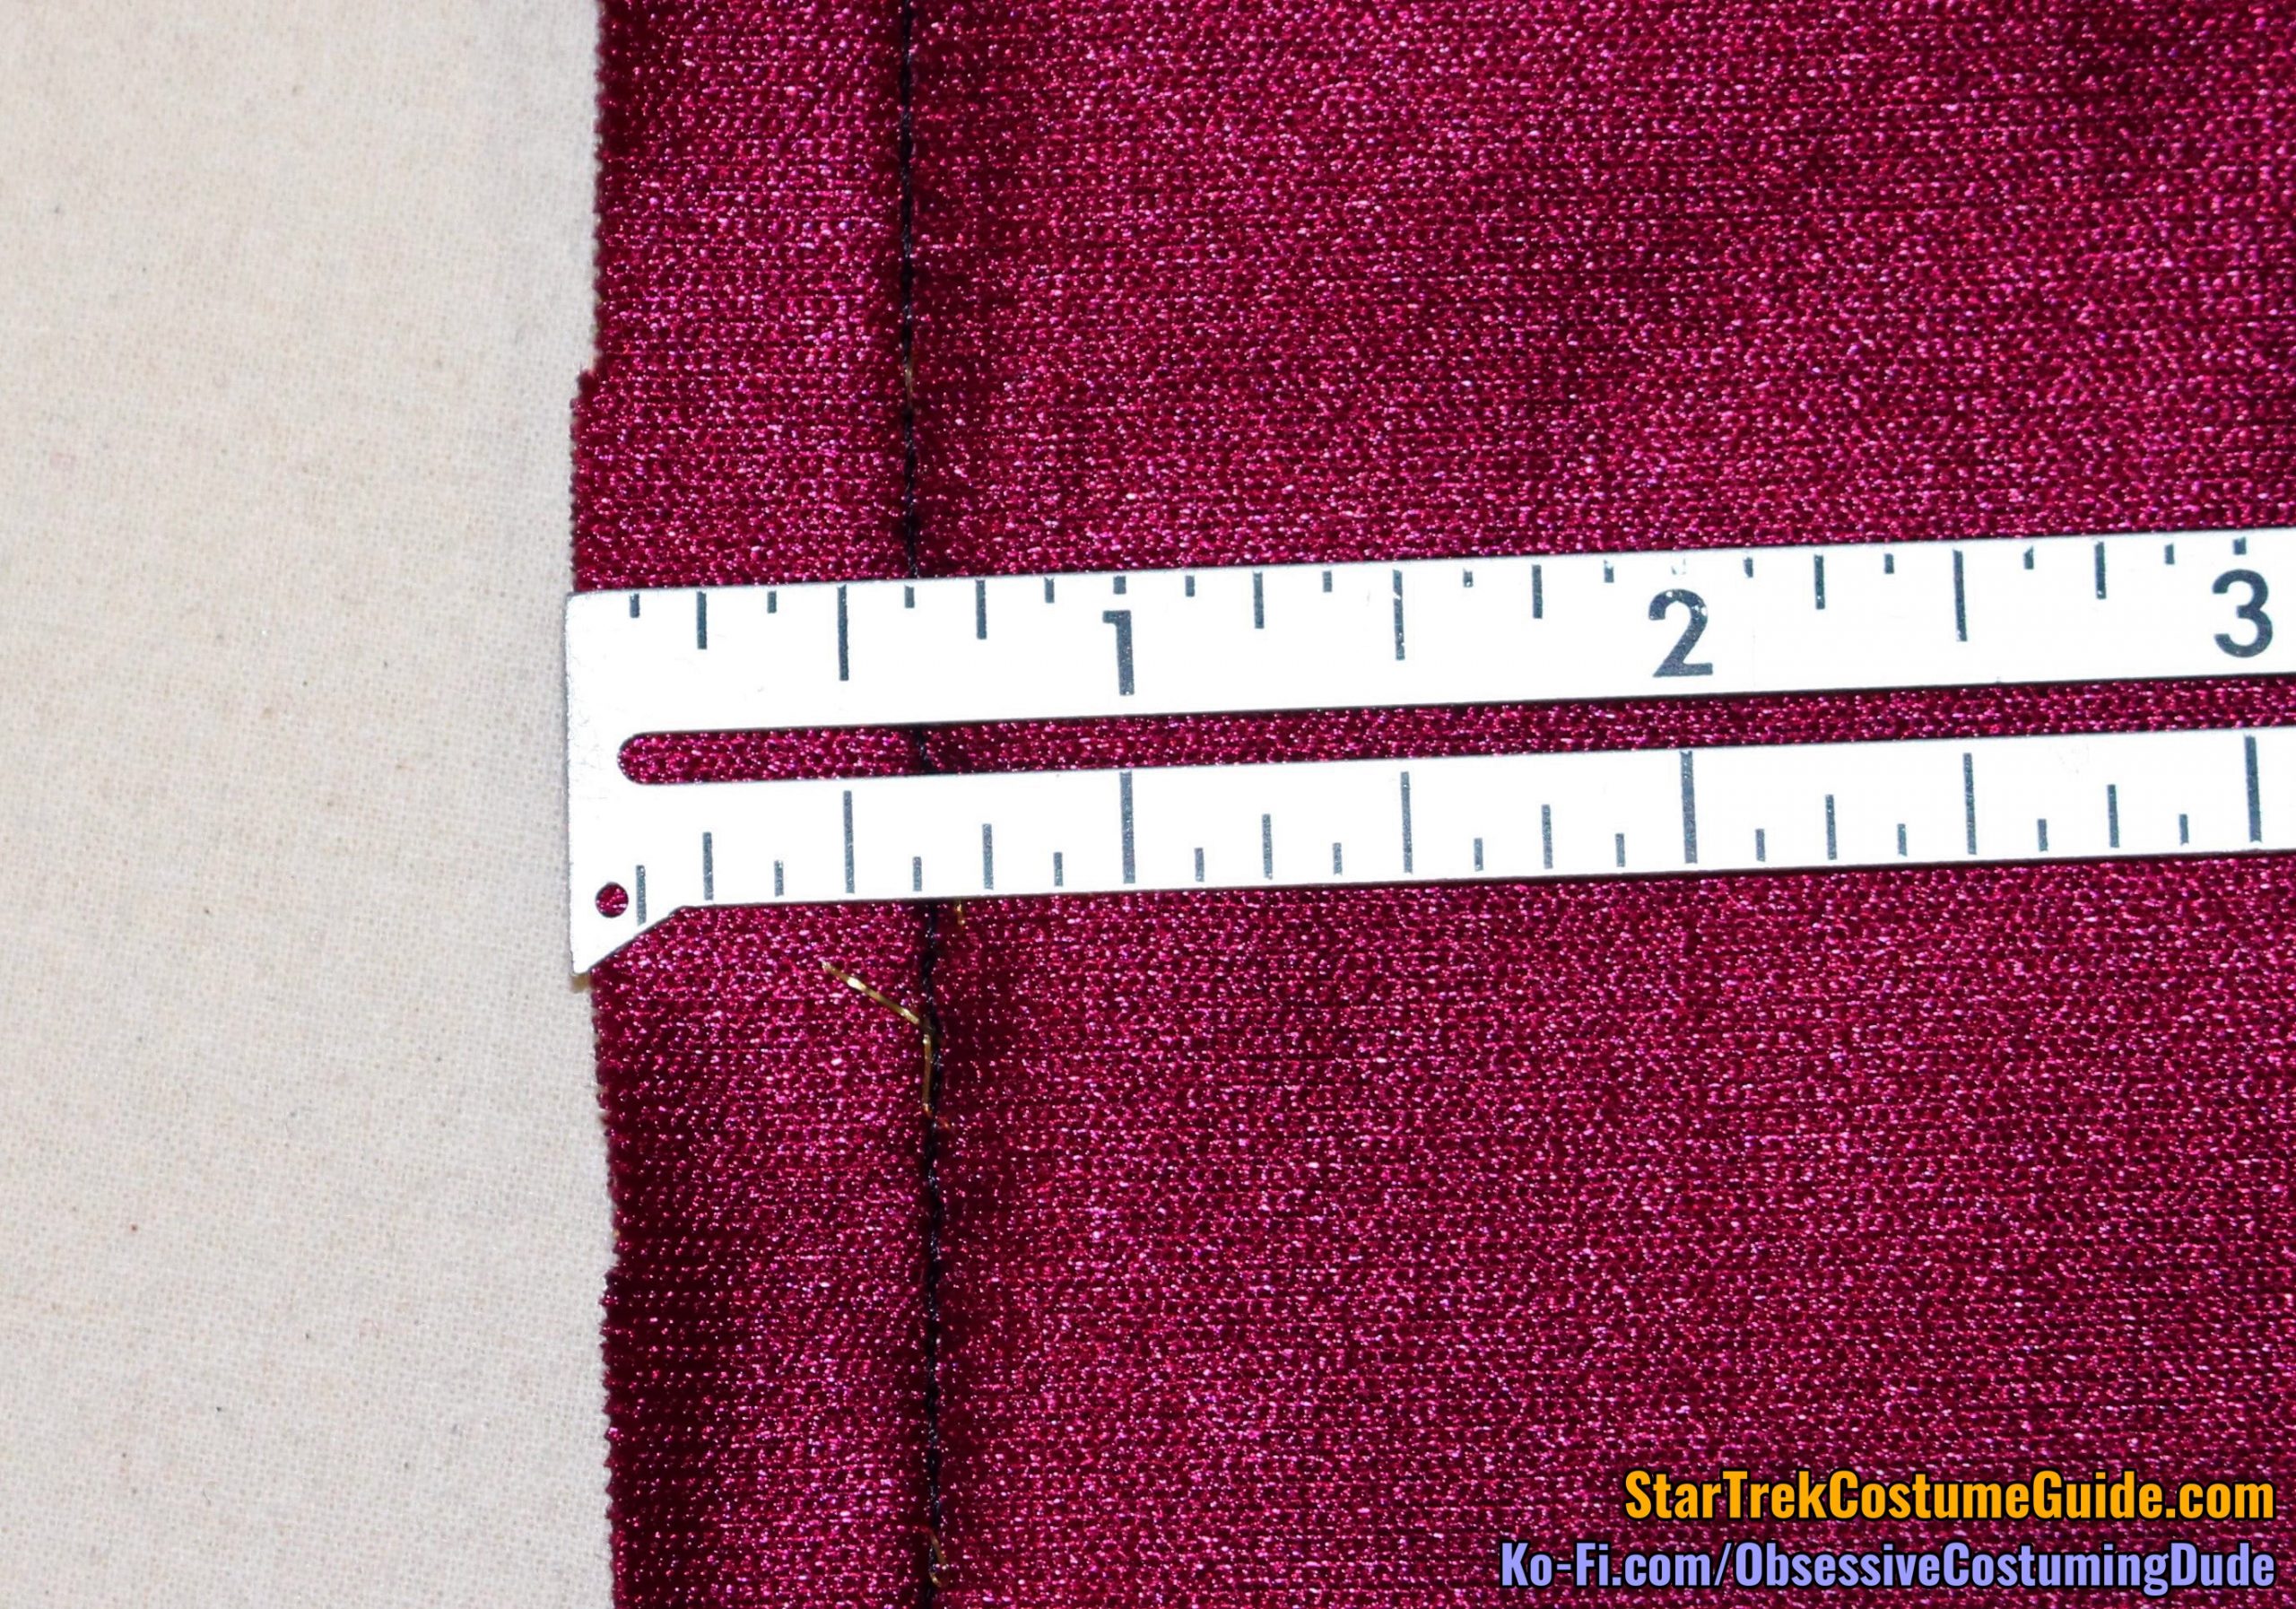
The lower front yoke (and front diagonal panel, extrapolating for where the yoke would be) measured about 18”, from armscye to armscye.
Just the yoke portion was 11 ⅜” wide, measured from the edge of the front zipper.
The back yoke was rather shallow, compared to the TNG jumpsuits and TNG skants; it was only 2” deep at the center back, measured from the edges of the trim.
The back yoke was about 2 ½” deep, measured from the shoulder seam.
Like the front yoke, the back yoke also measured approximately 18” across the bottom, from armscye to armscye.
The jacket was about 16” long at the center front, measured from the lower edge of the trim to the wedge-shaped hem line.
Were it flat across the bottom, it would probably have measured about 19 ½”.
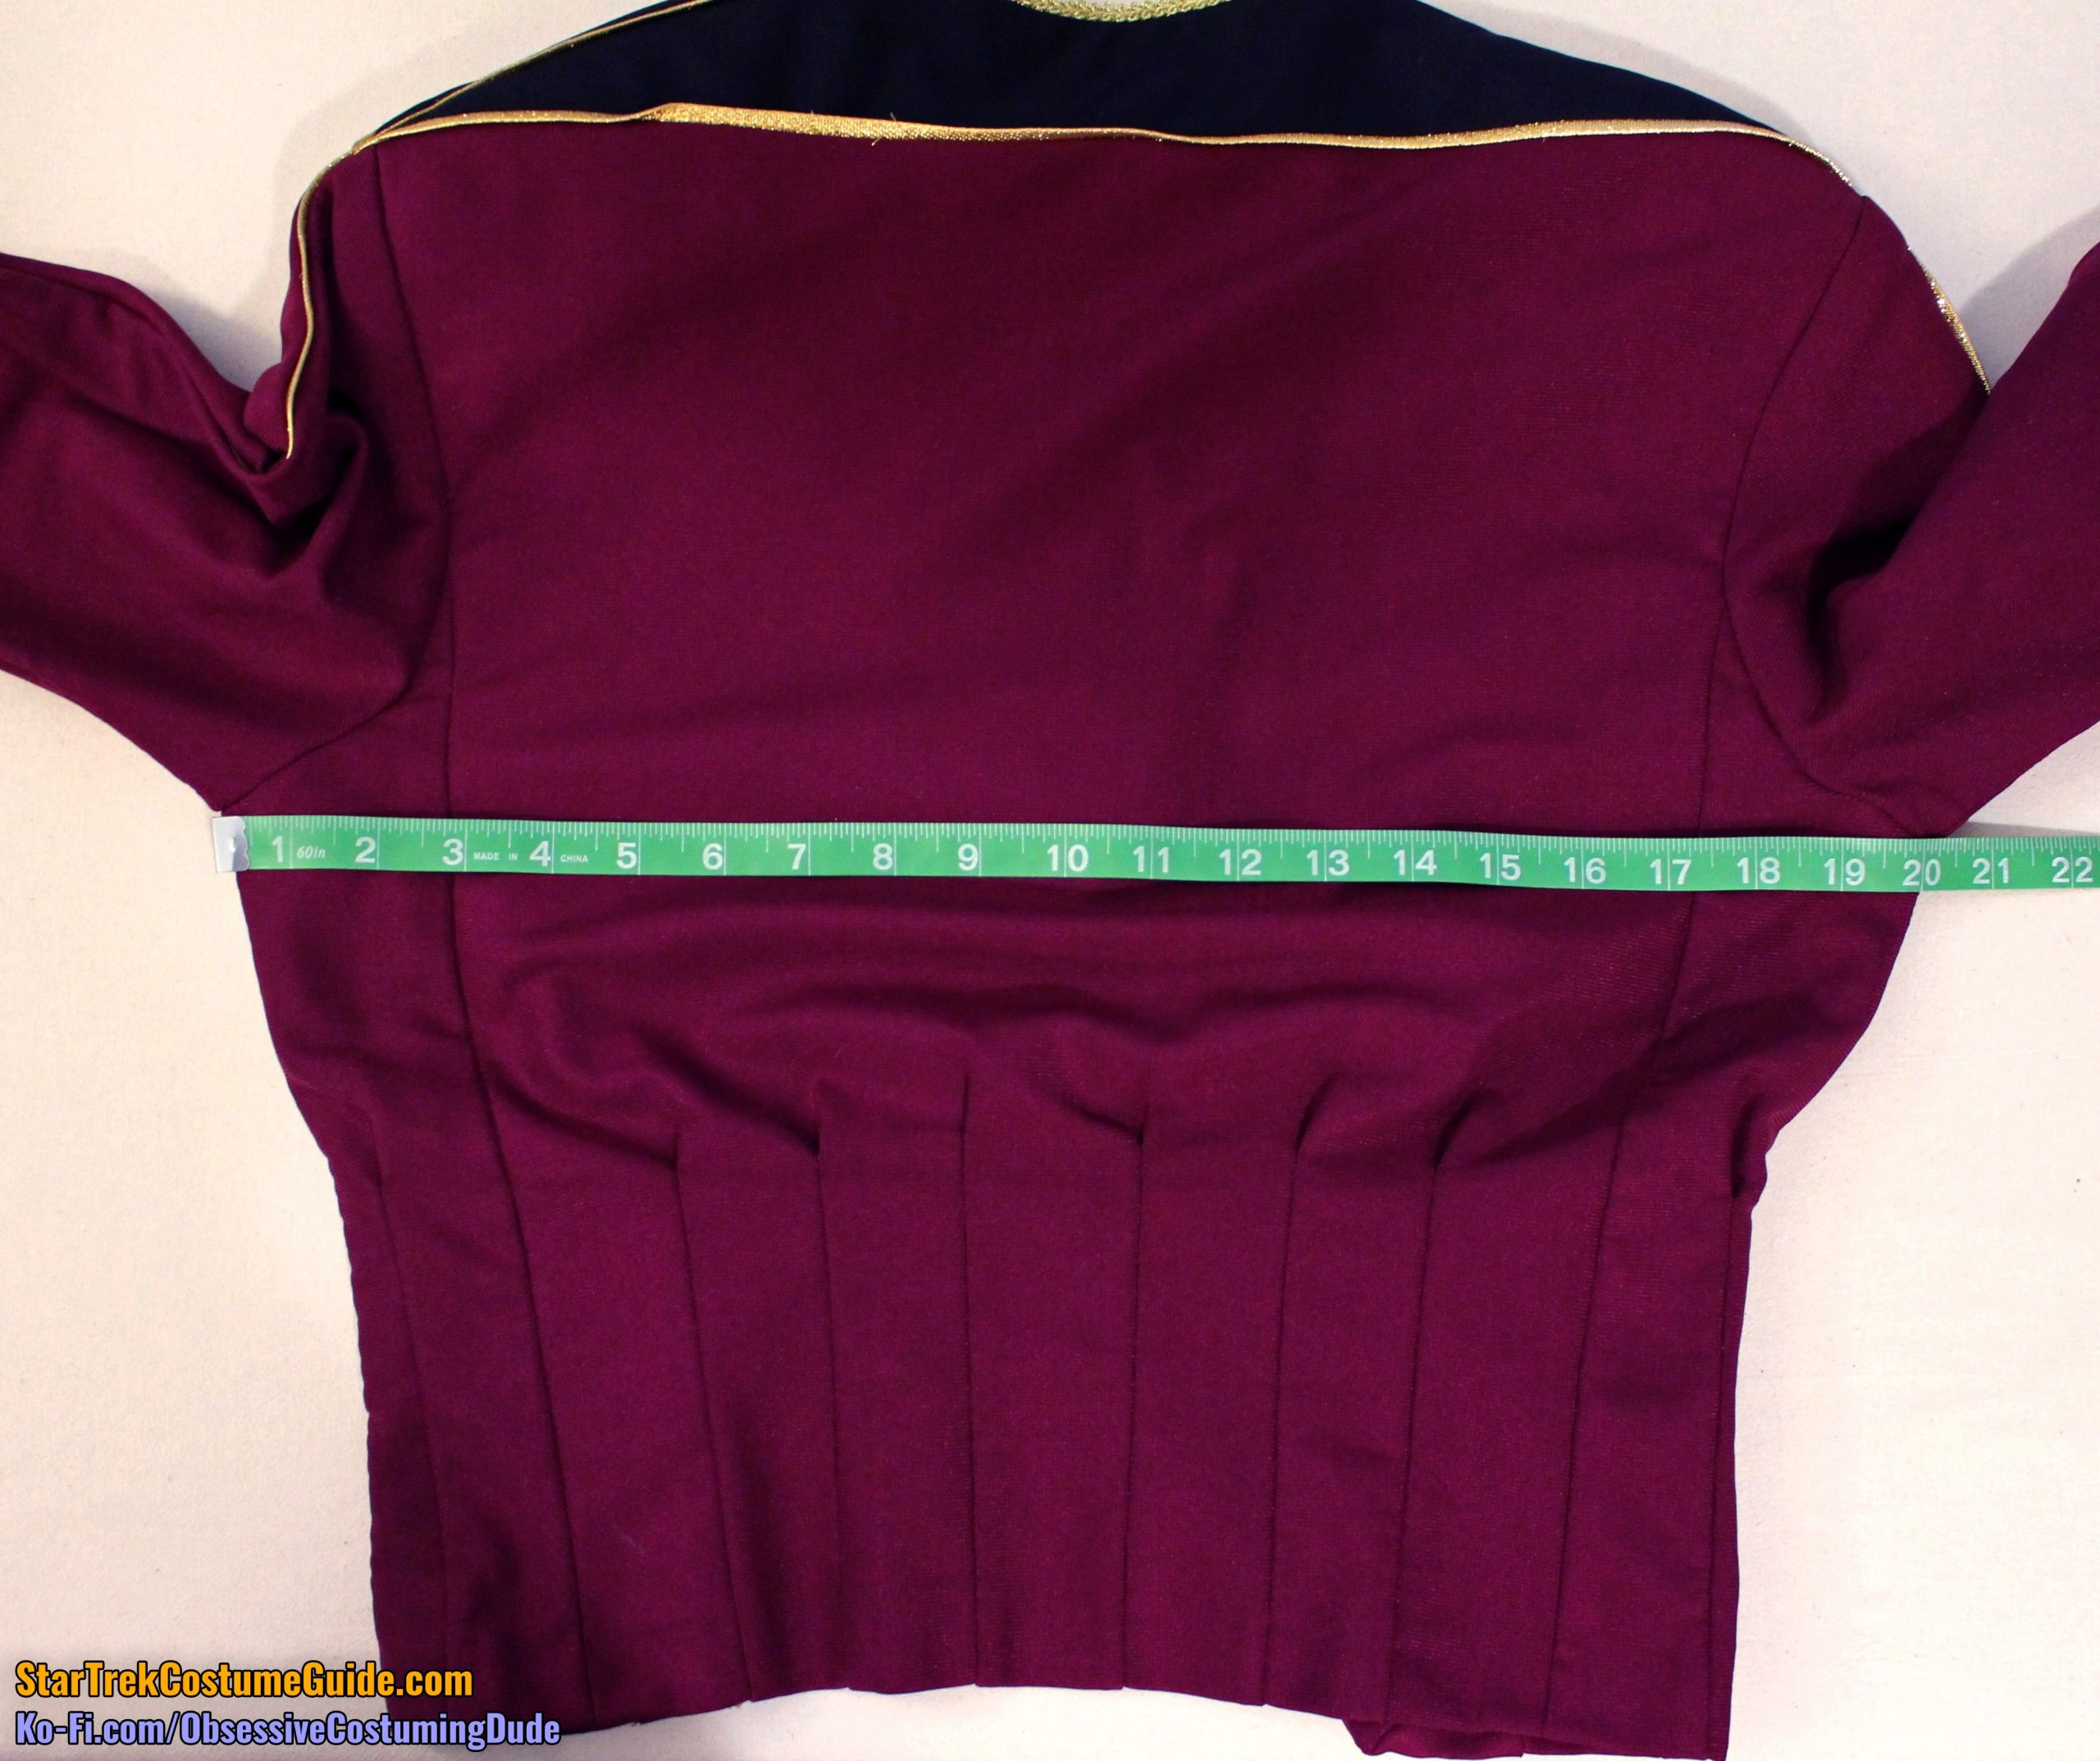
The jacket was about 21 ½” long at the center back, measured from the lower edge of the trim to the hem line.
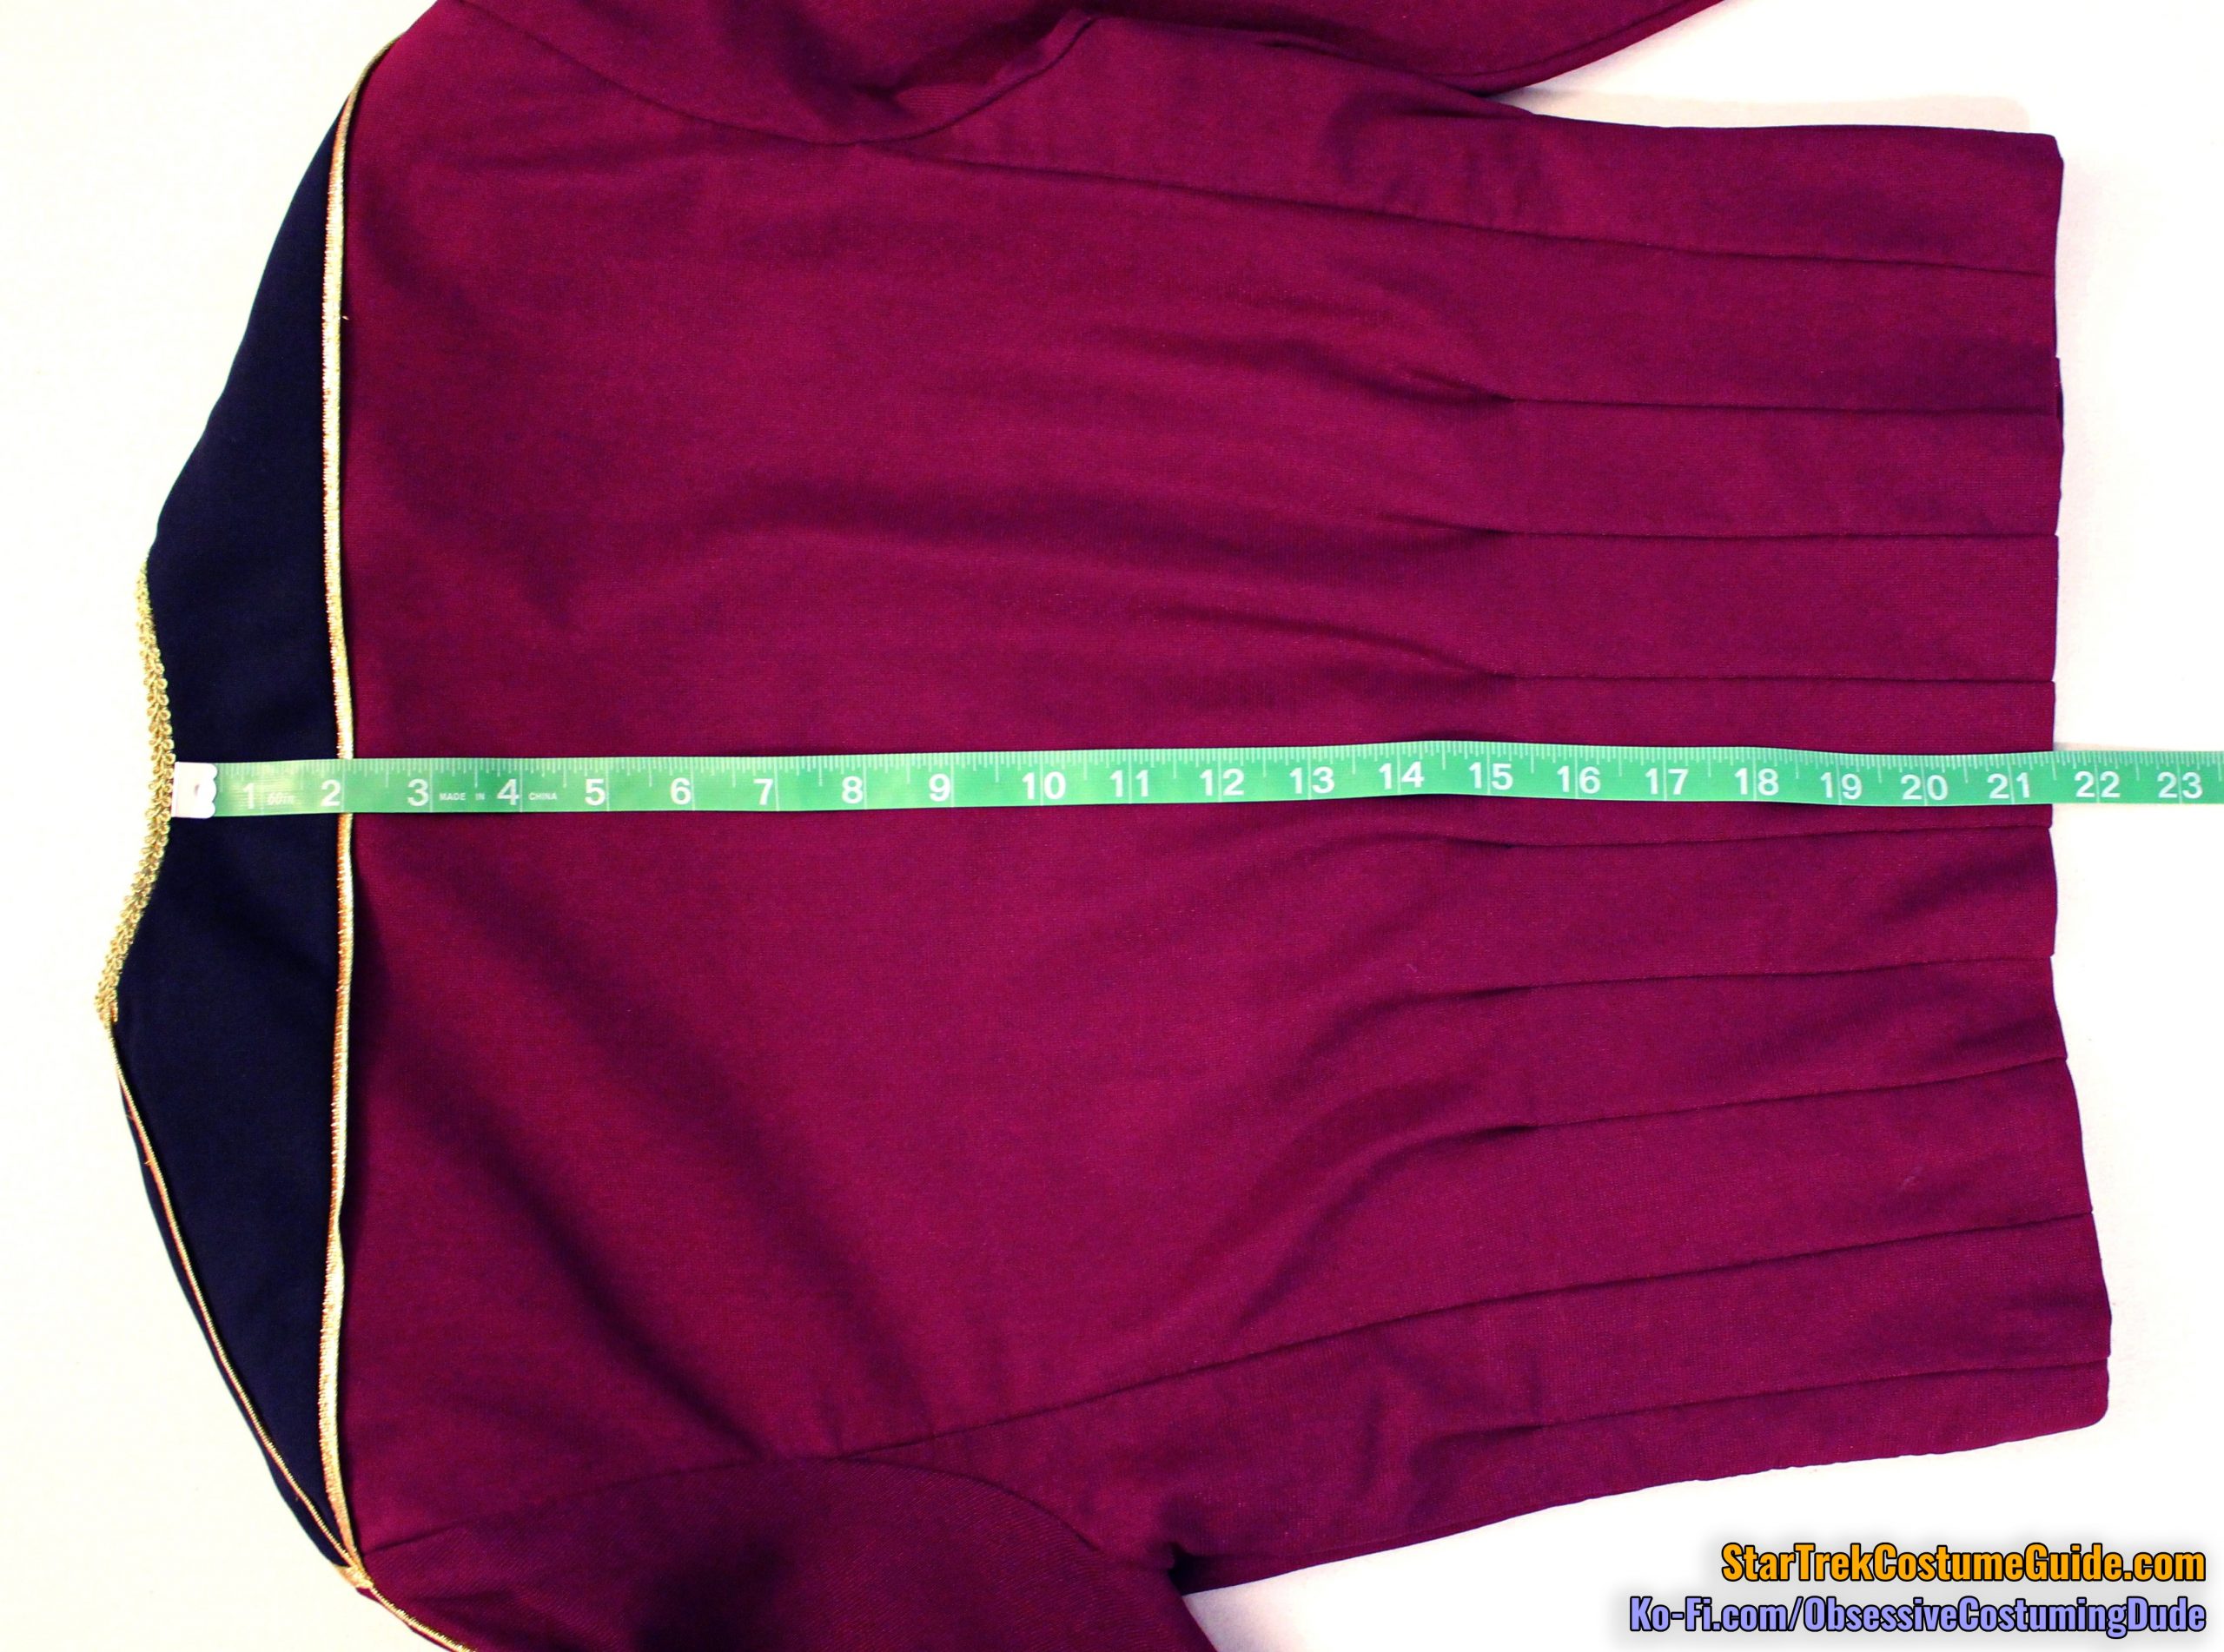
Both the front and back of the jacket measured about 20” across the chest, from side seam to side seam, for a total measurement of about 40” around the chest.
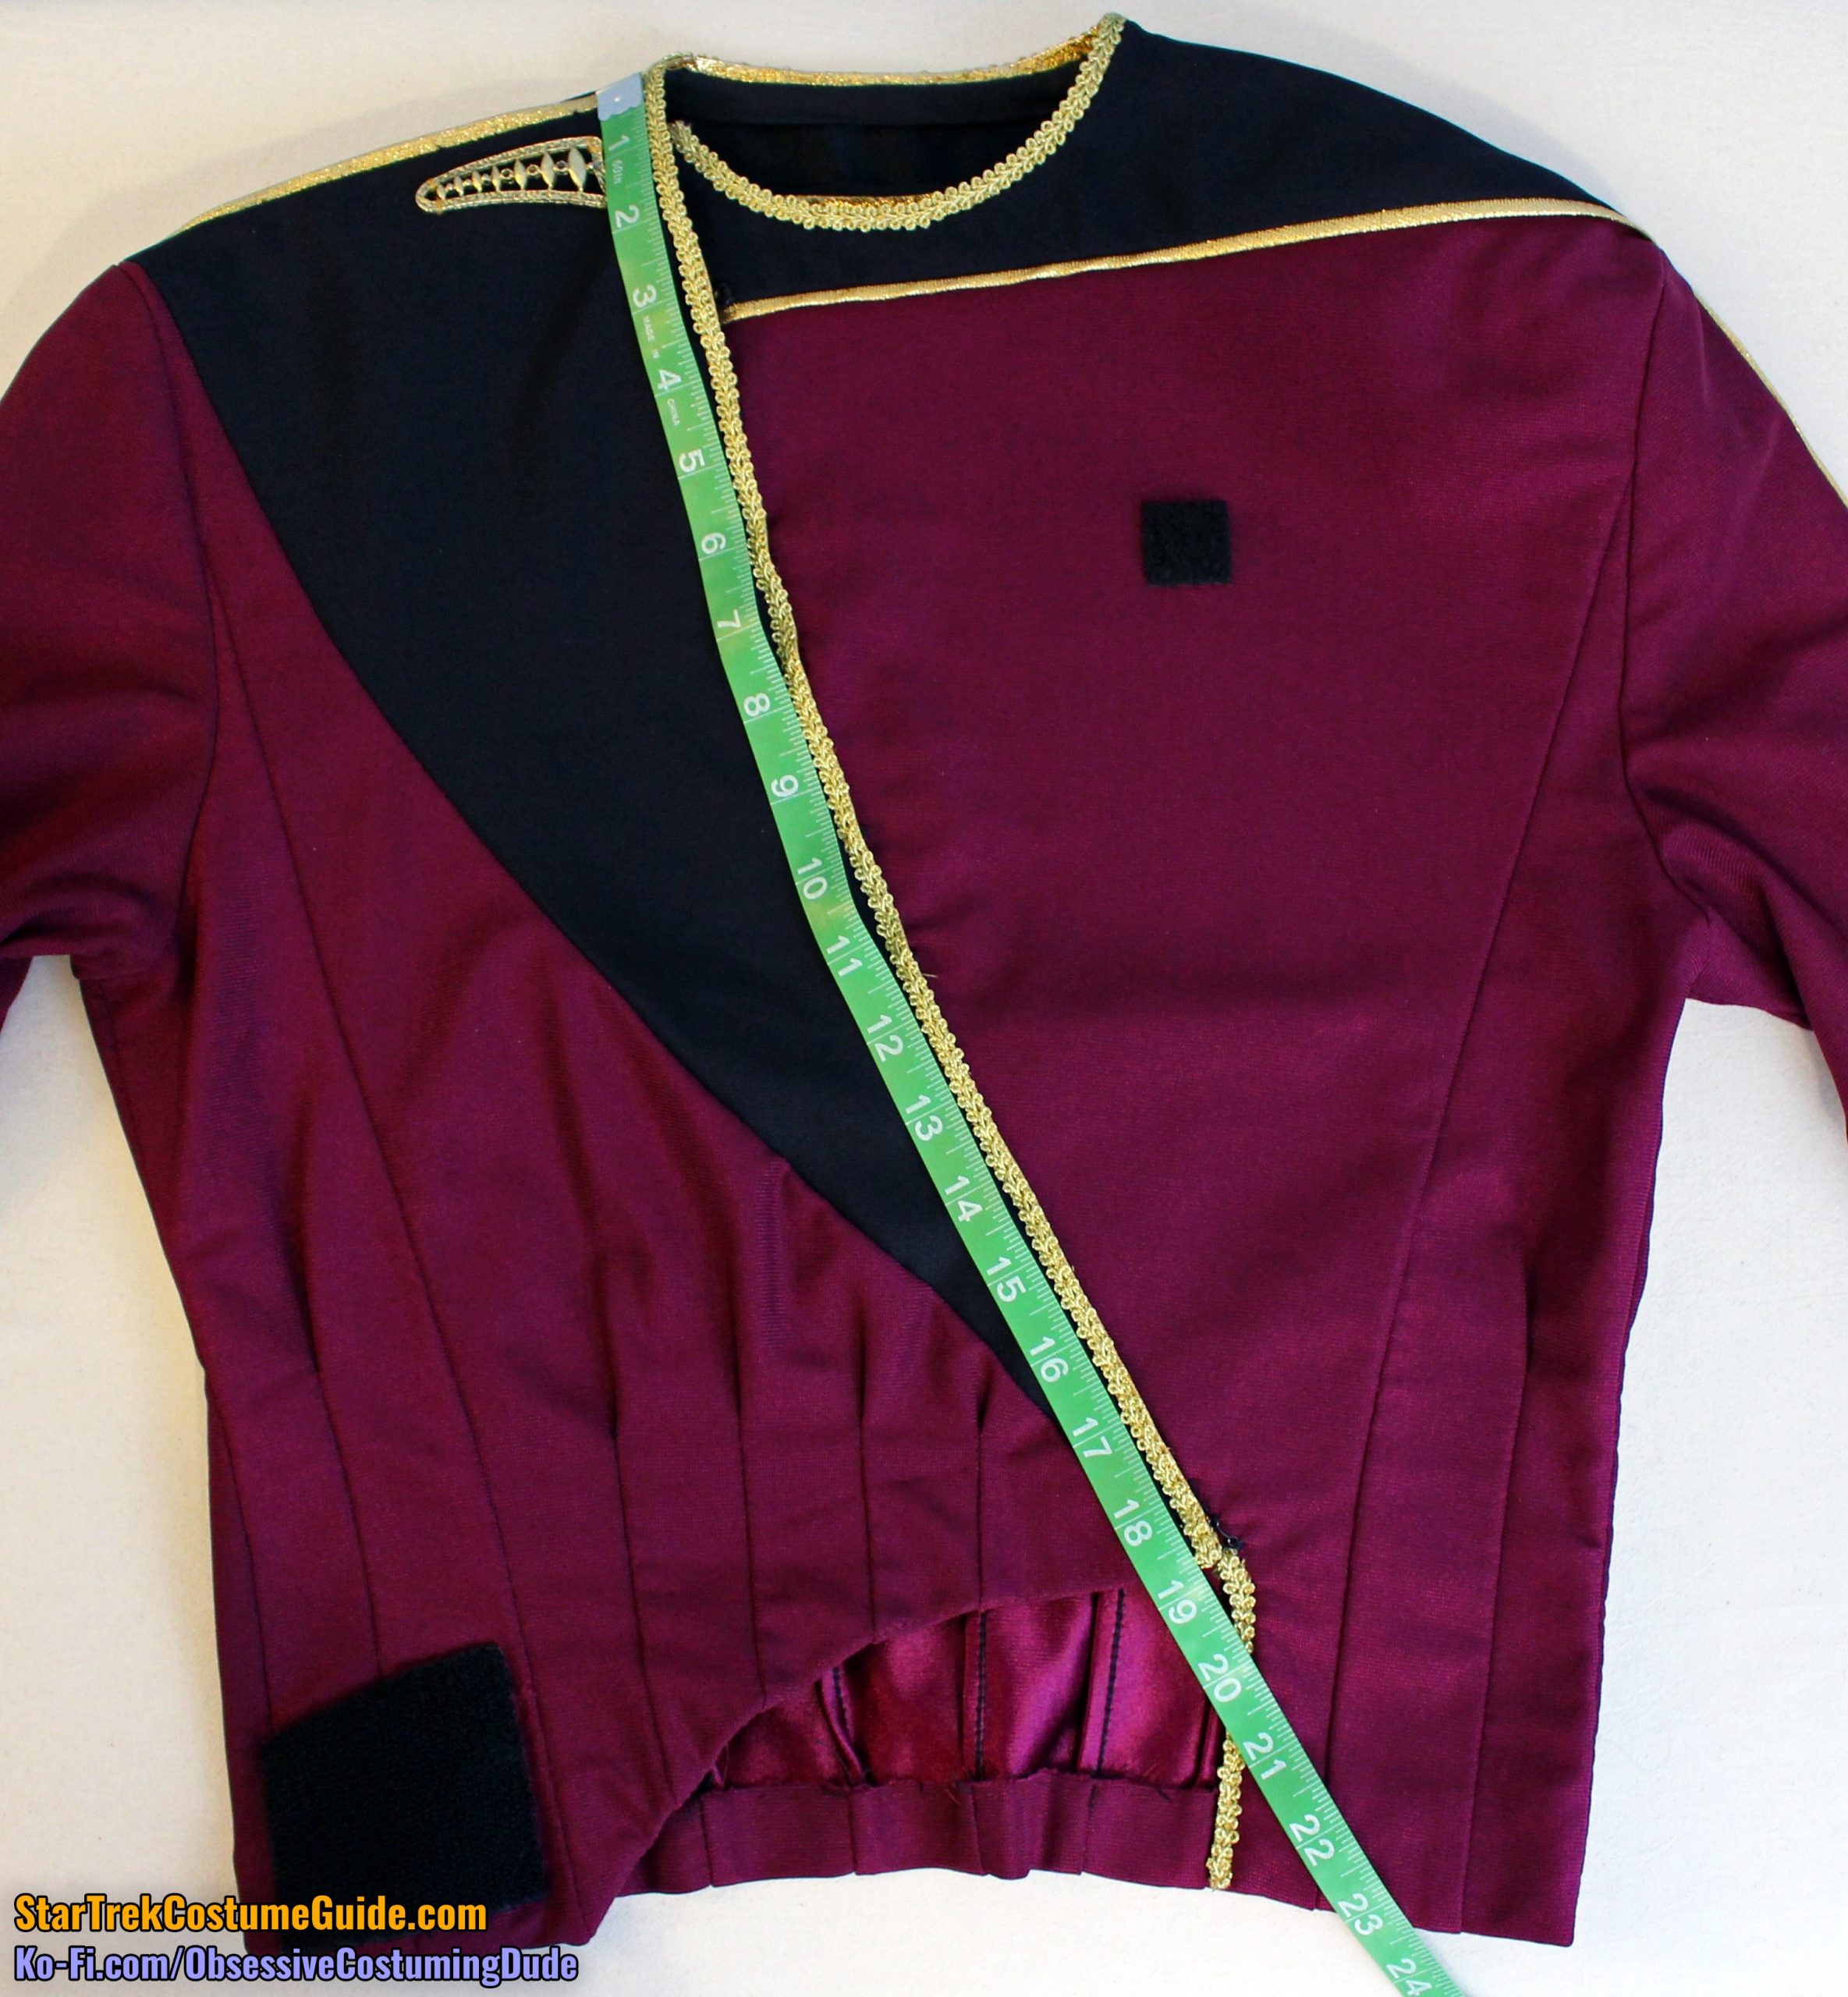
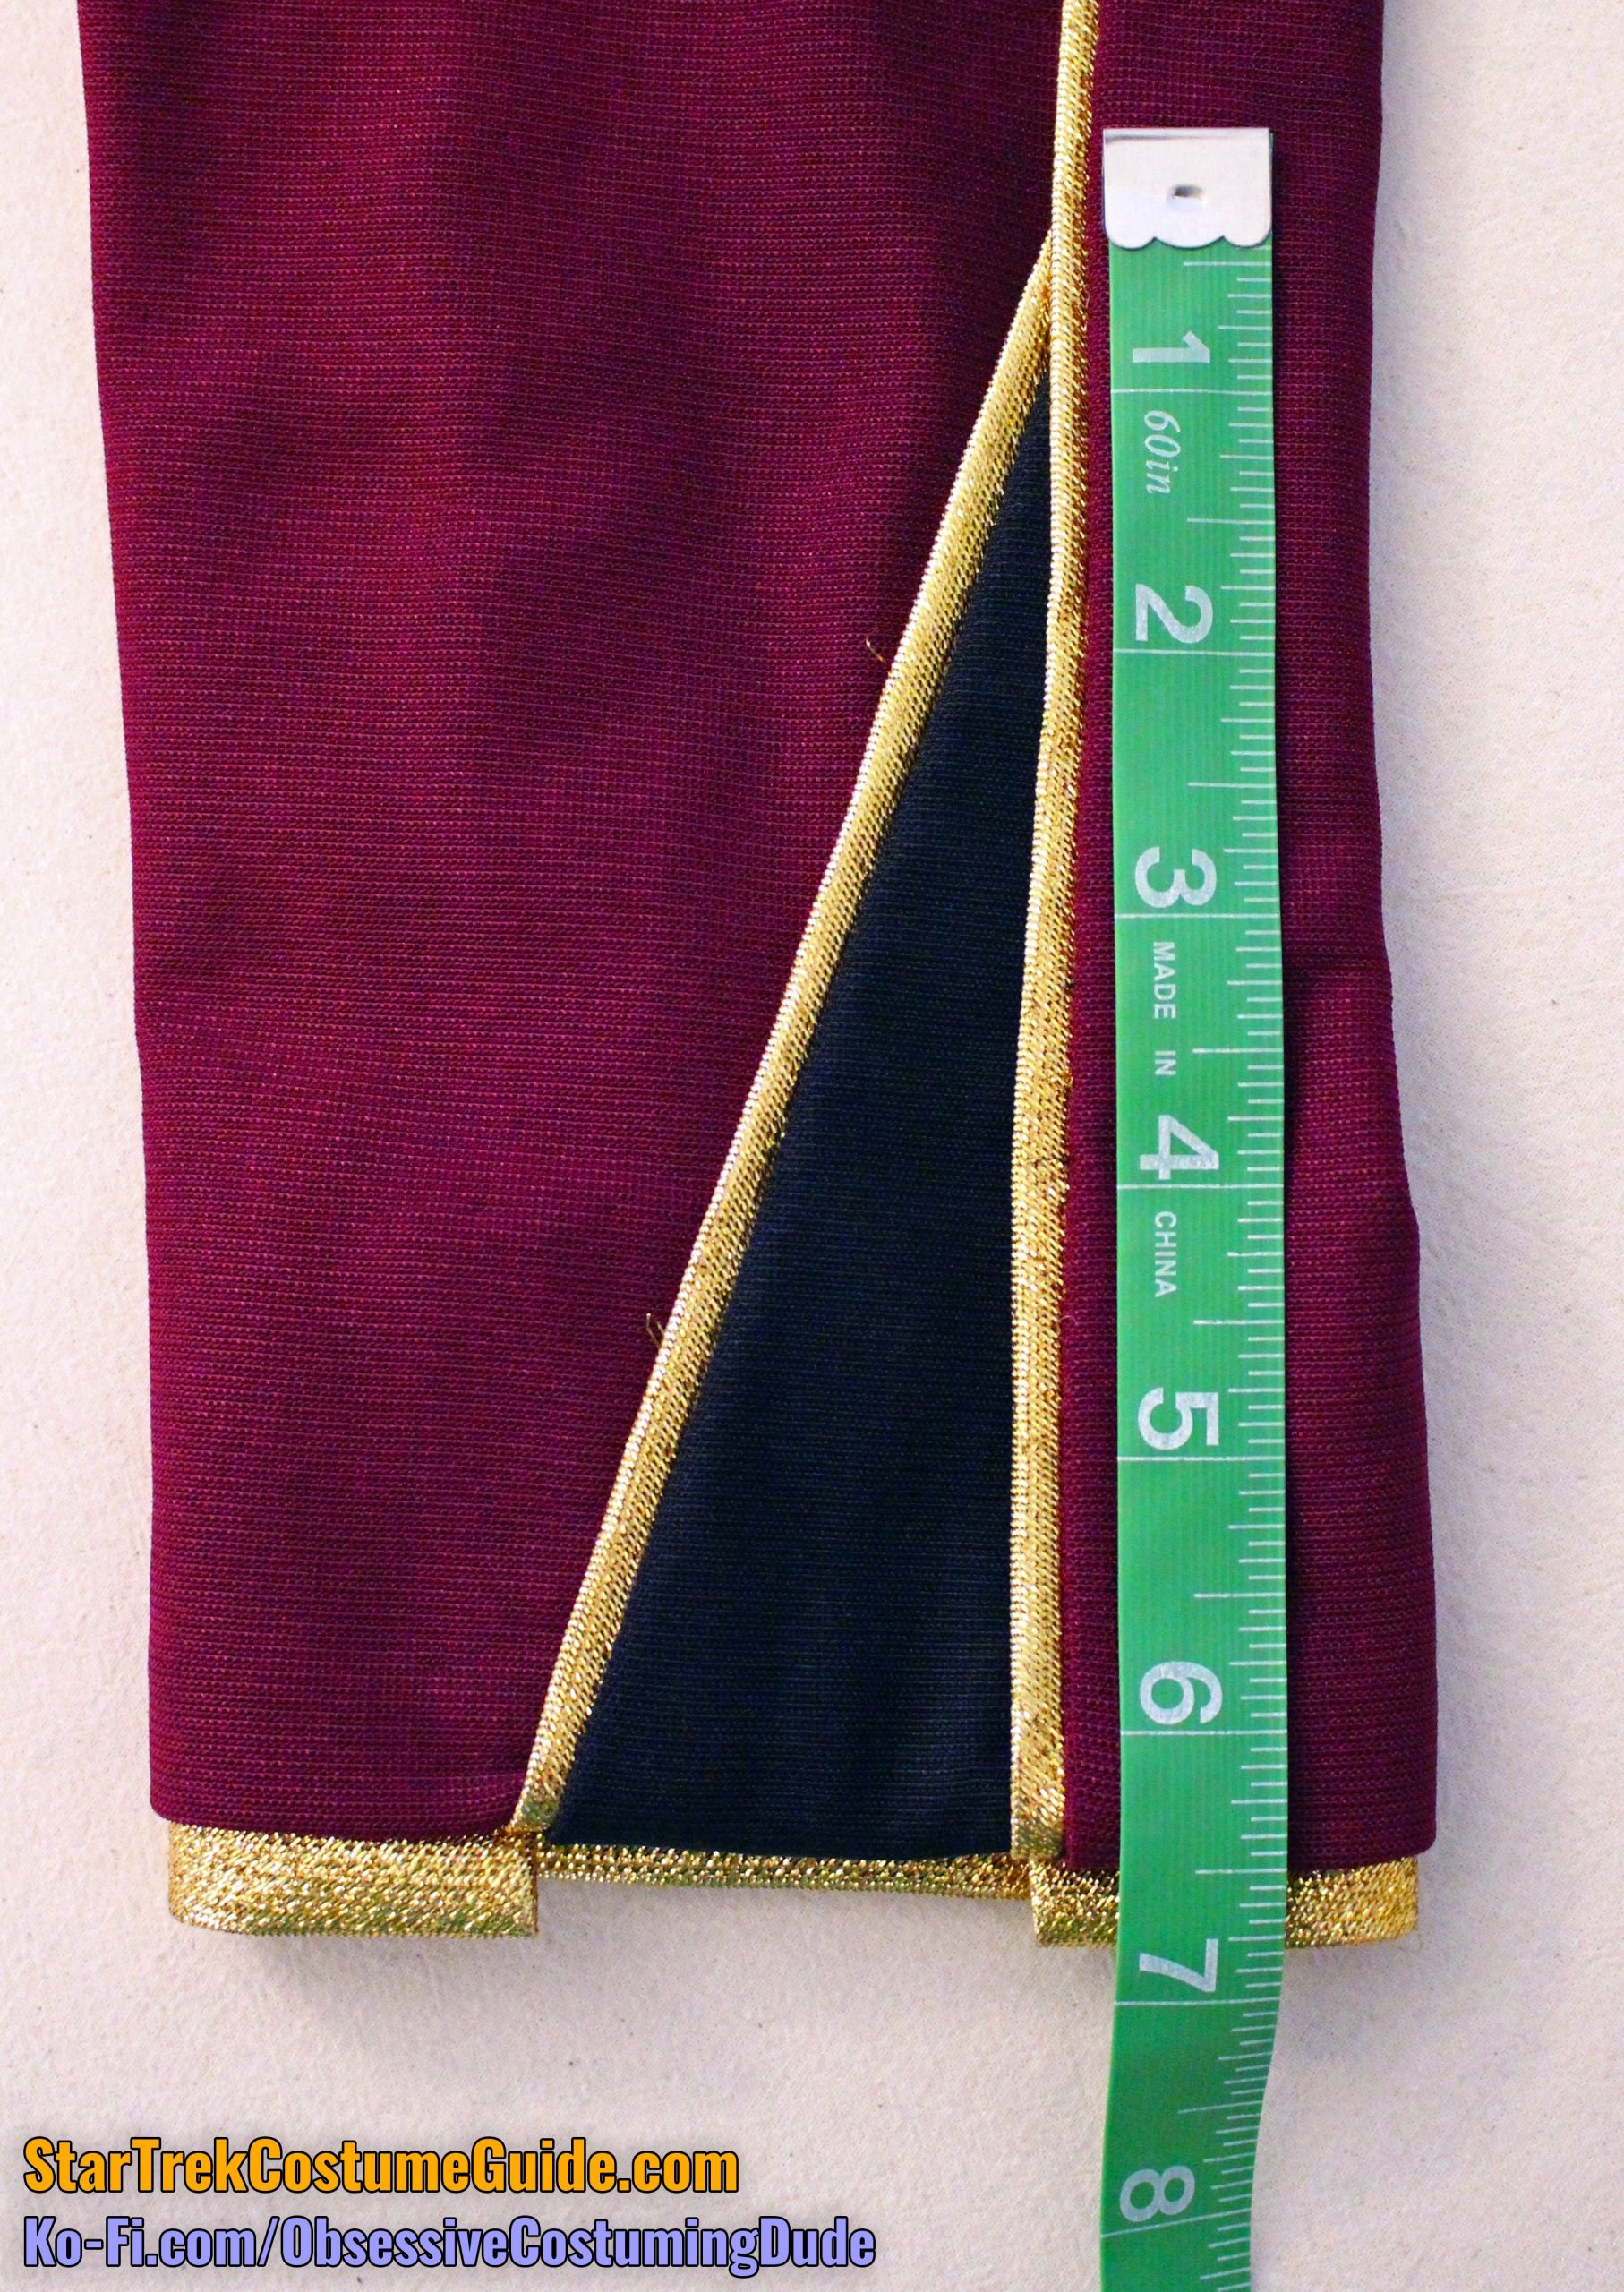
The front edge of the diagonal front panel was about 19” long, measured from the shoulder seam.
The jacket had two side panels underneath the arm on each side, analogous to those on many of the other TNG-era uniforms. (I refer to these panels as “side front” and “side back,” respectively.)
The top of the right side front seam was about 4” beneath the shoulder seam at the armscye, but the top of the left side front seam was about 3 ¾” beneath the shoulder seam.
The lower front armscye (from the side seam to the top of the side front seam) was about 6 ½” on both sides, though.
On the back, the top of the right side back seam was about 6” below the shoulder seam at the armscye, but the top of the left side back seam was again slightly higher – about 5 ¾” below the shoulder seam.
The lower back armscye (measured from the side seam to the top of the side back seam) was about 4 ½” on both sides, though.
The right side seam measured 11 ½”, but the left side seam was a little bit shorter – about 11 ⅜”.
The jacket measured approximately 15” wide across the lower front, and 18” wide across the lower back (measured from side seam to side seam), for a total waist measurement of about 33”.
Now we’ll take a detailed look at each individual body panel.
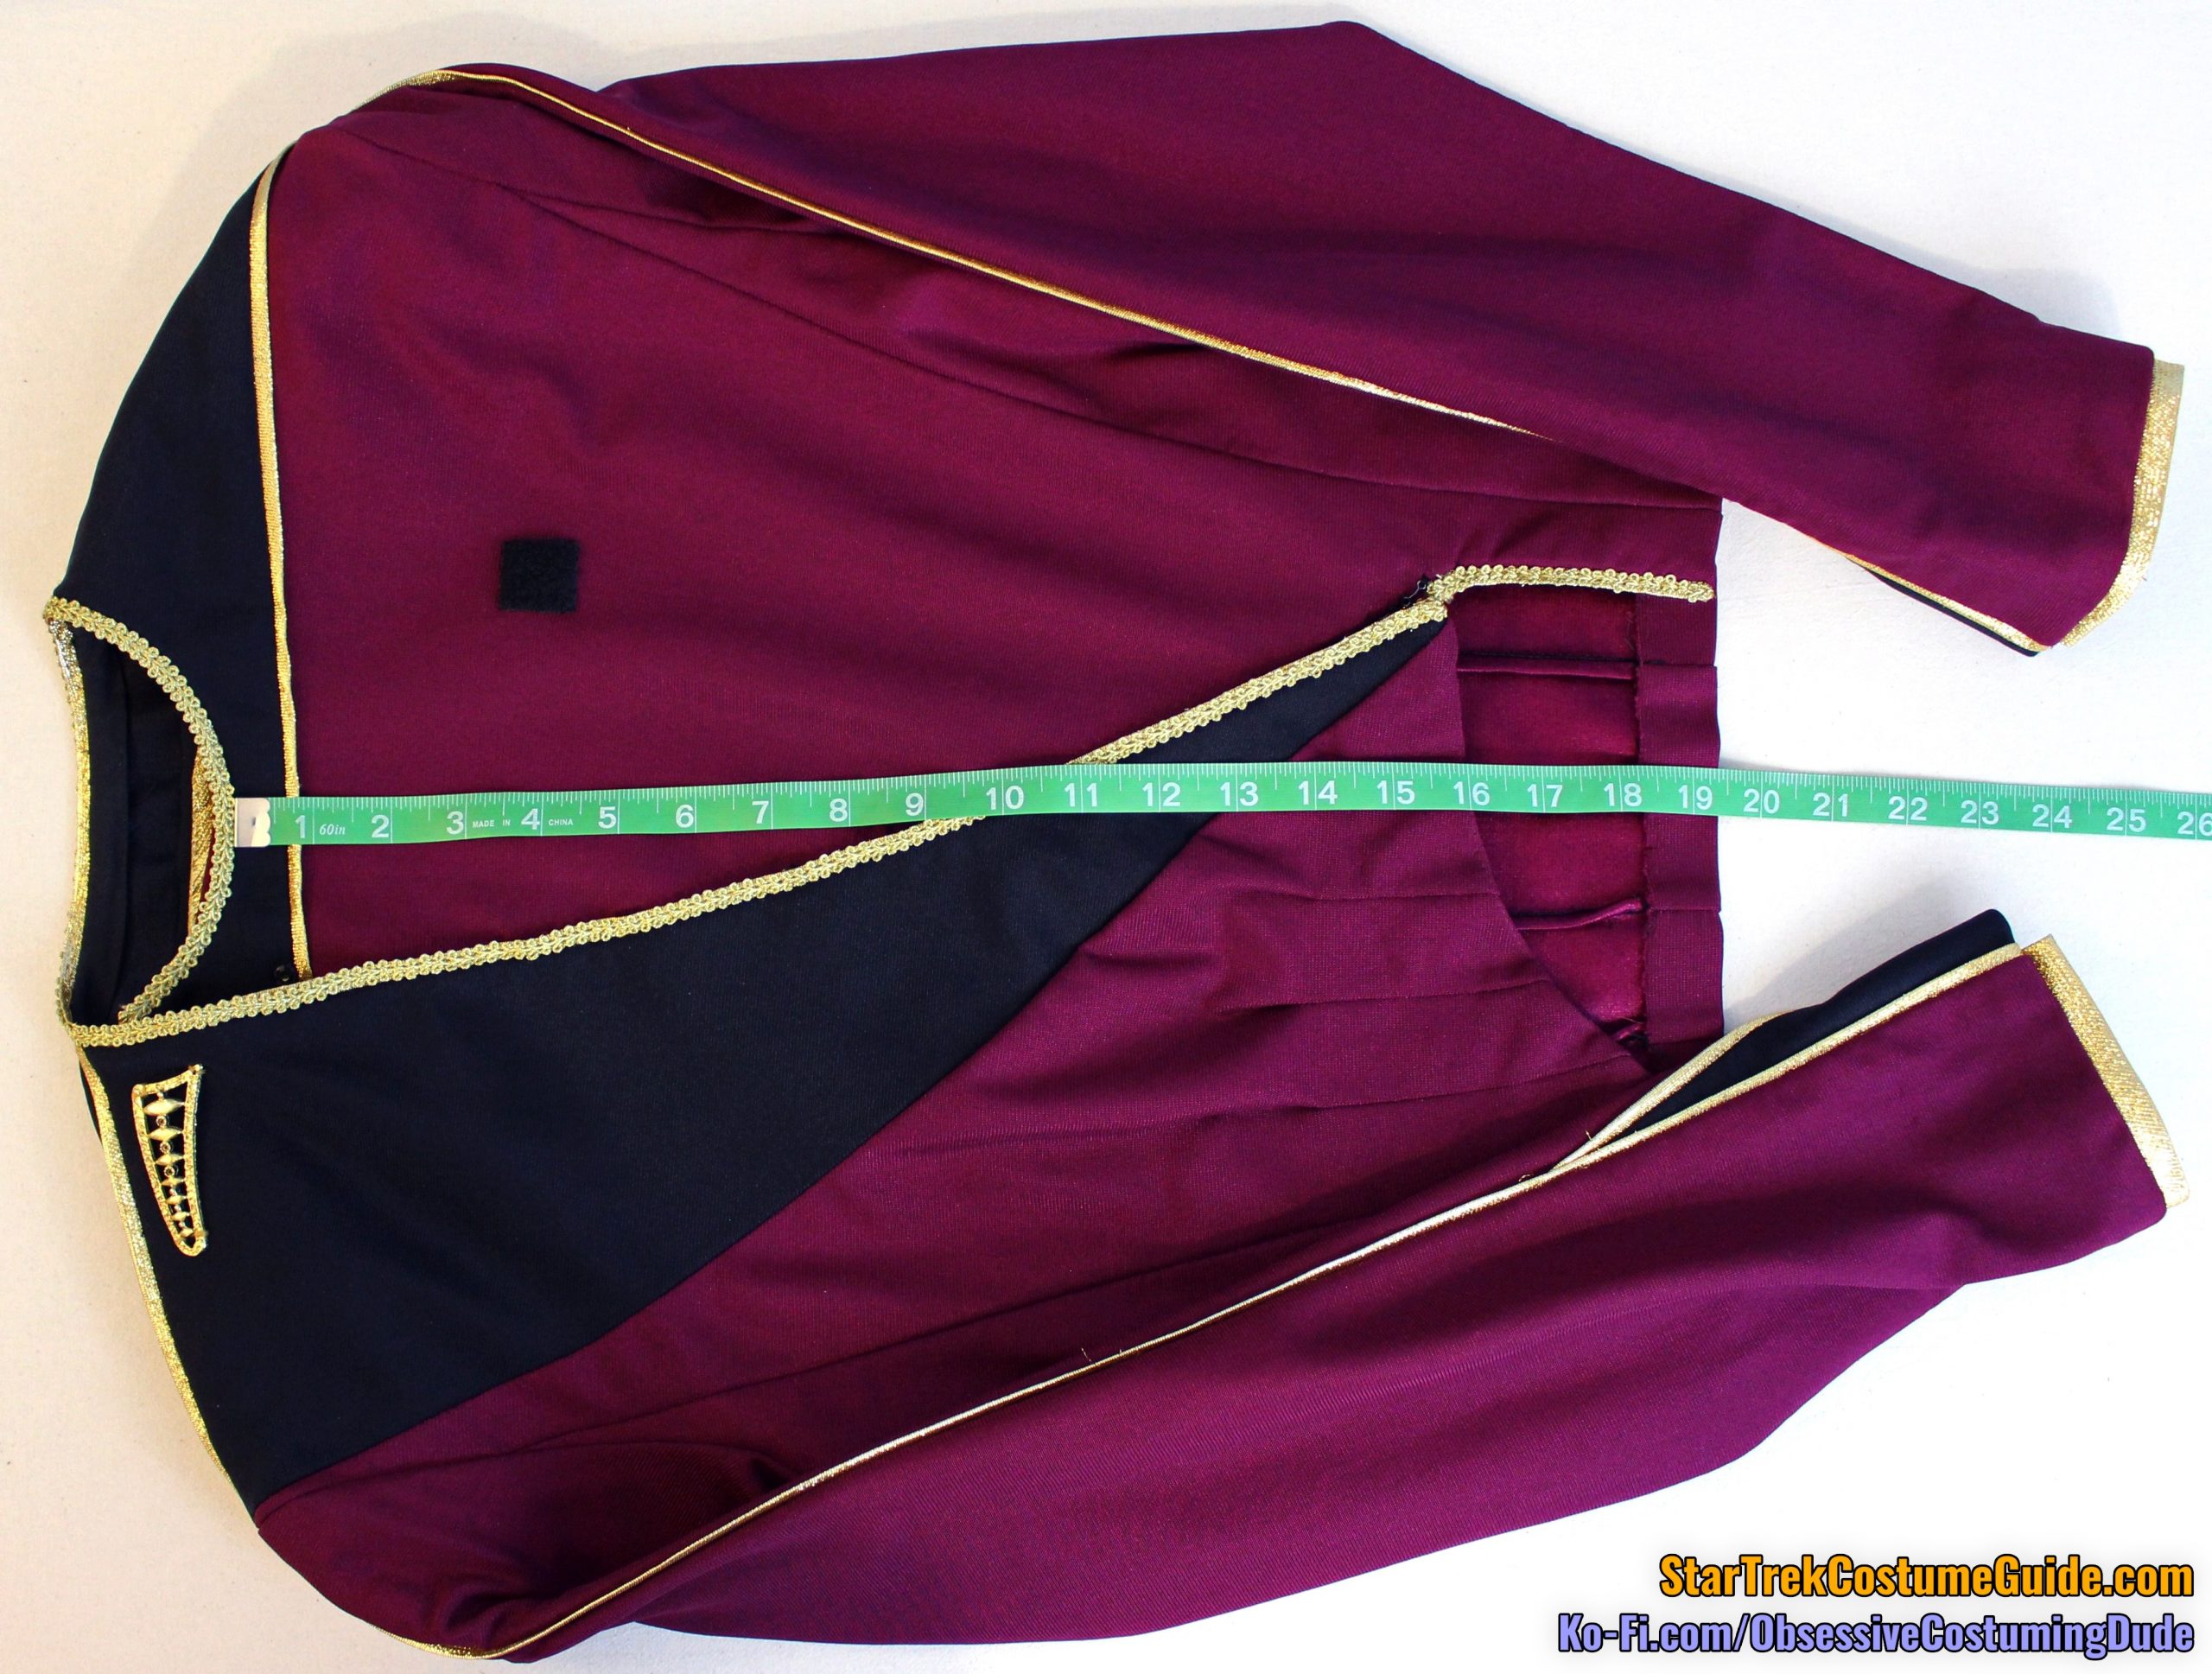
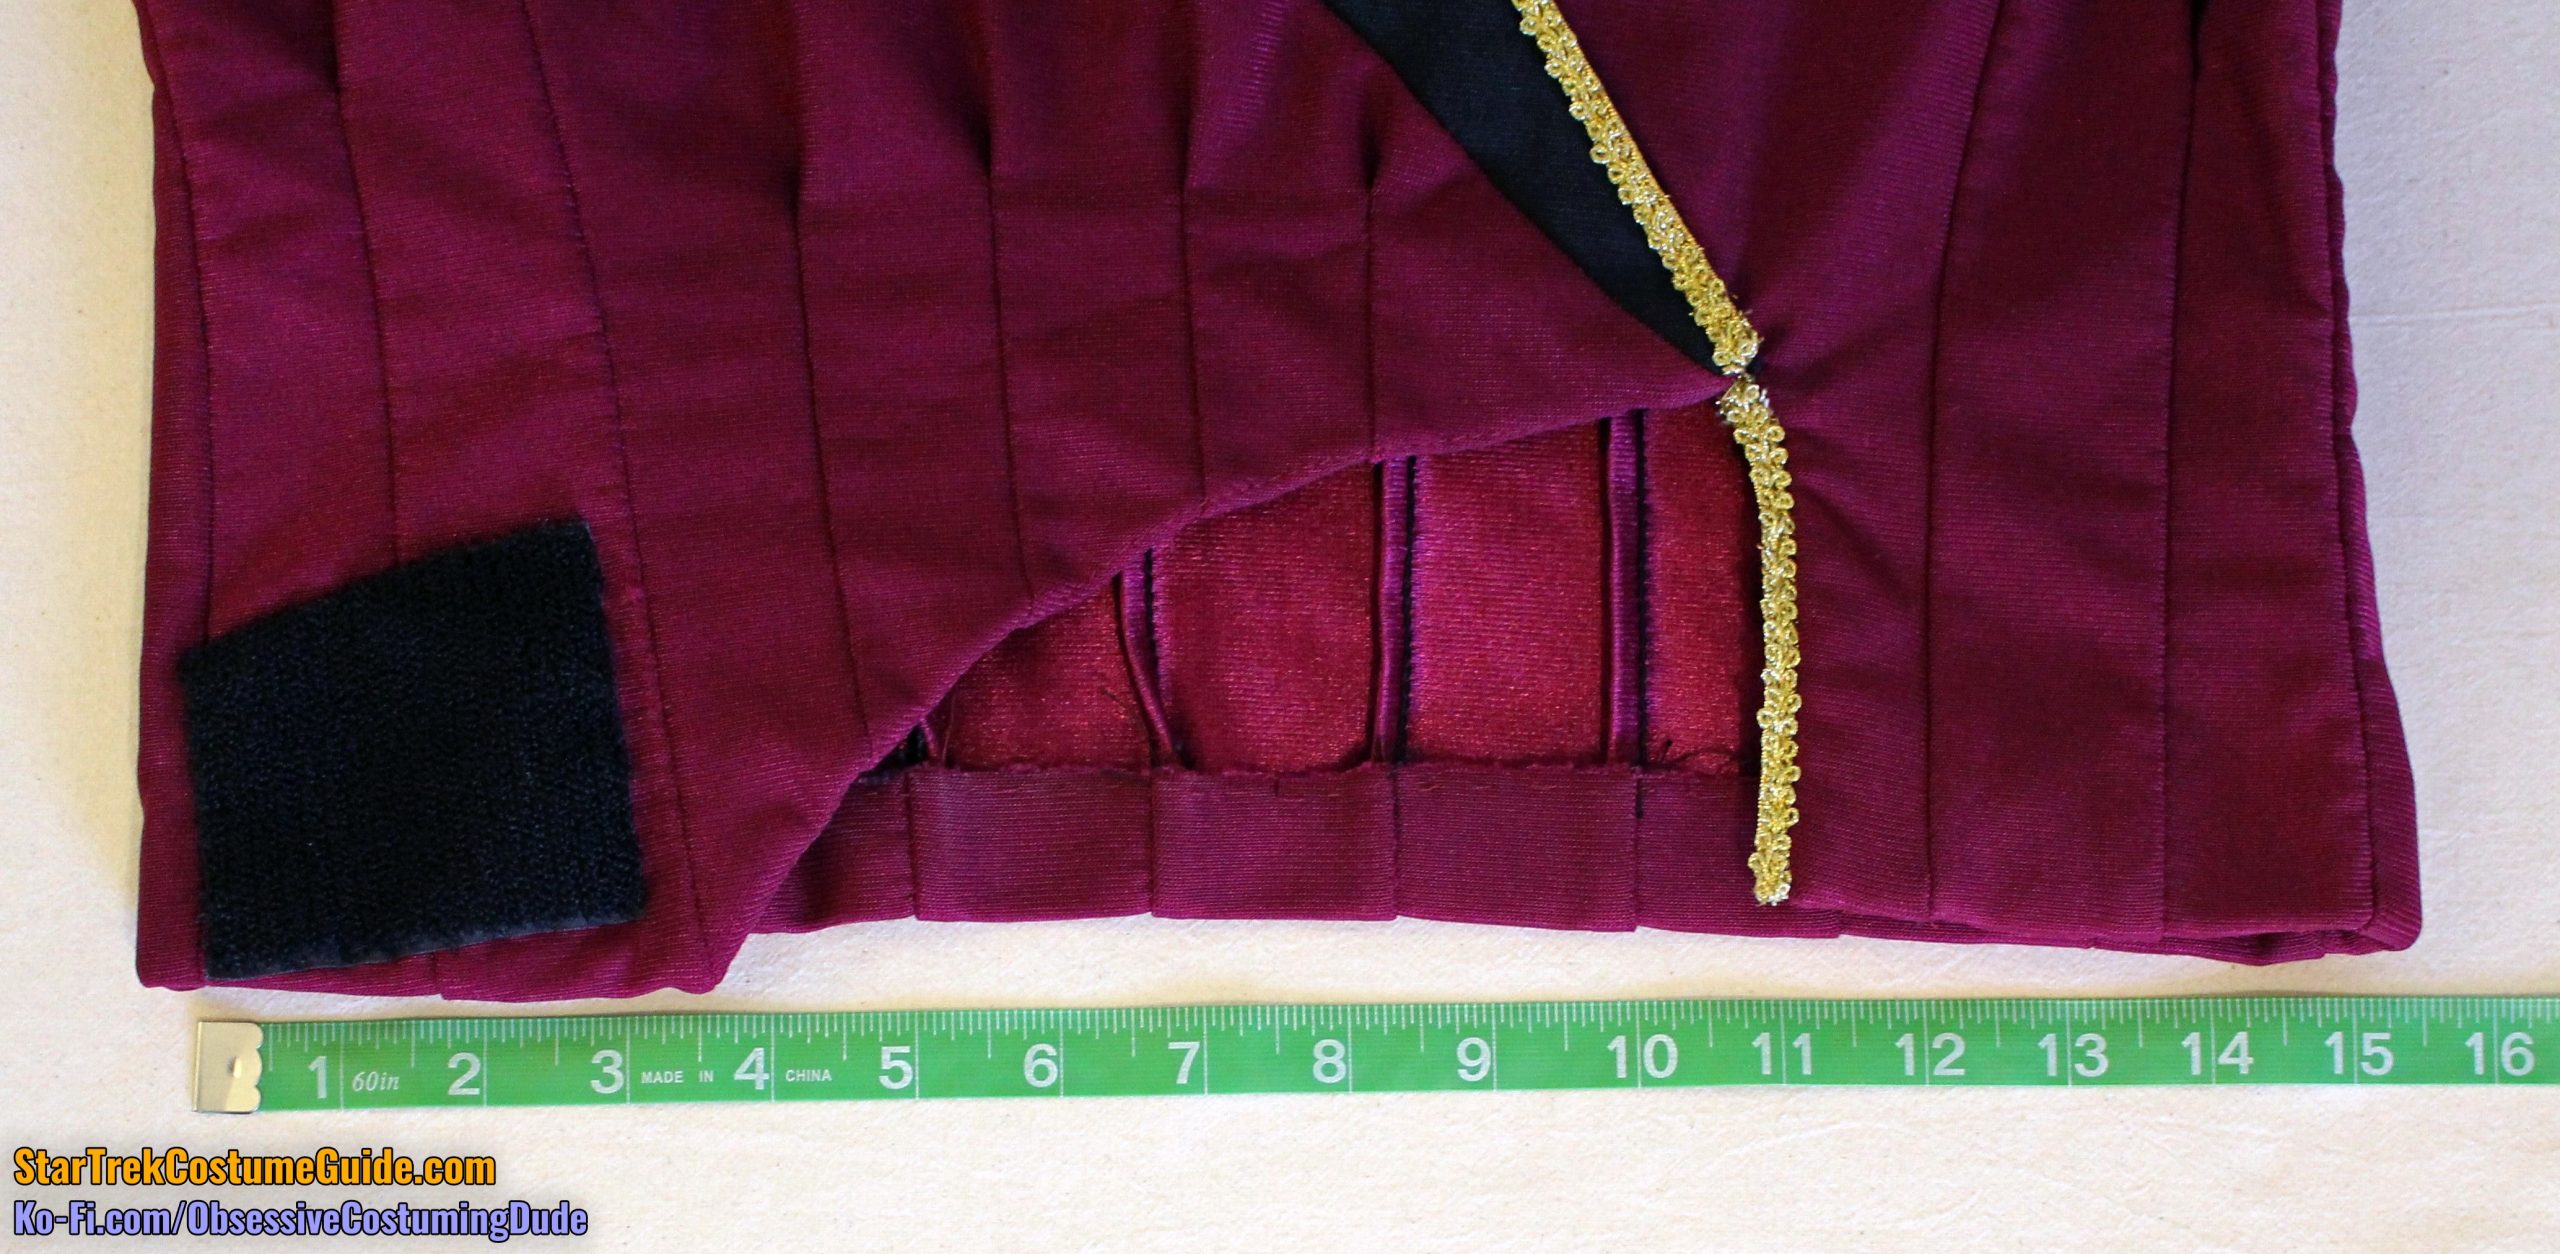
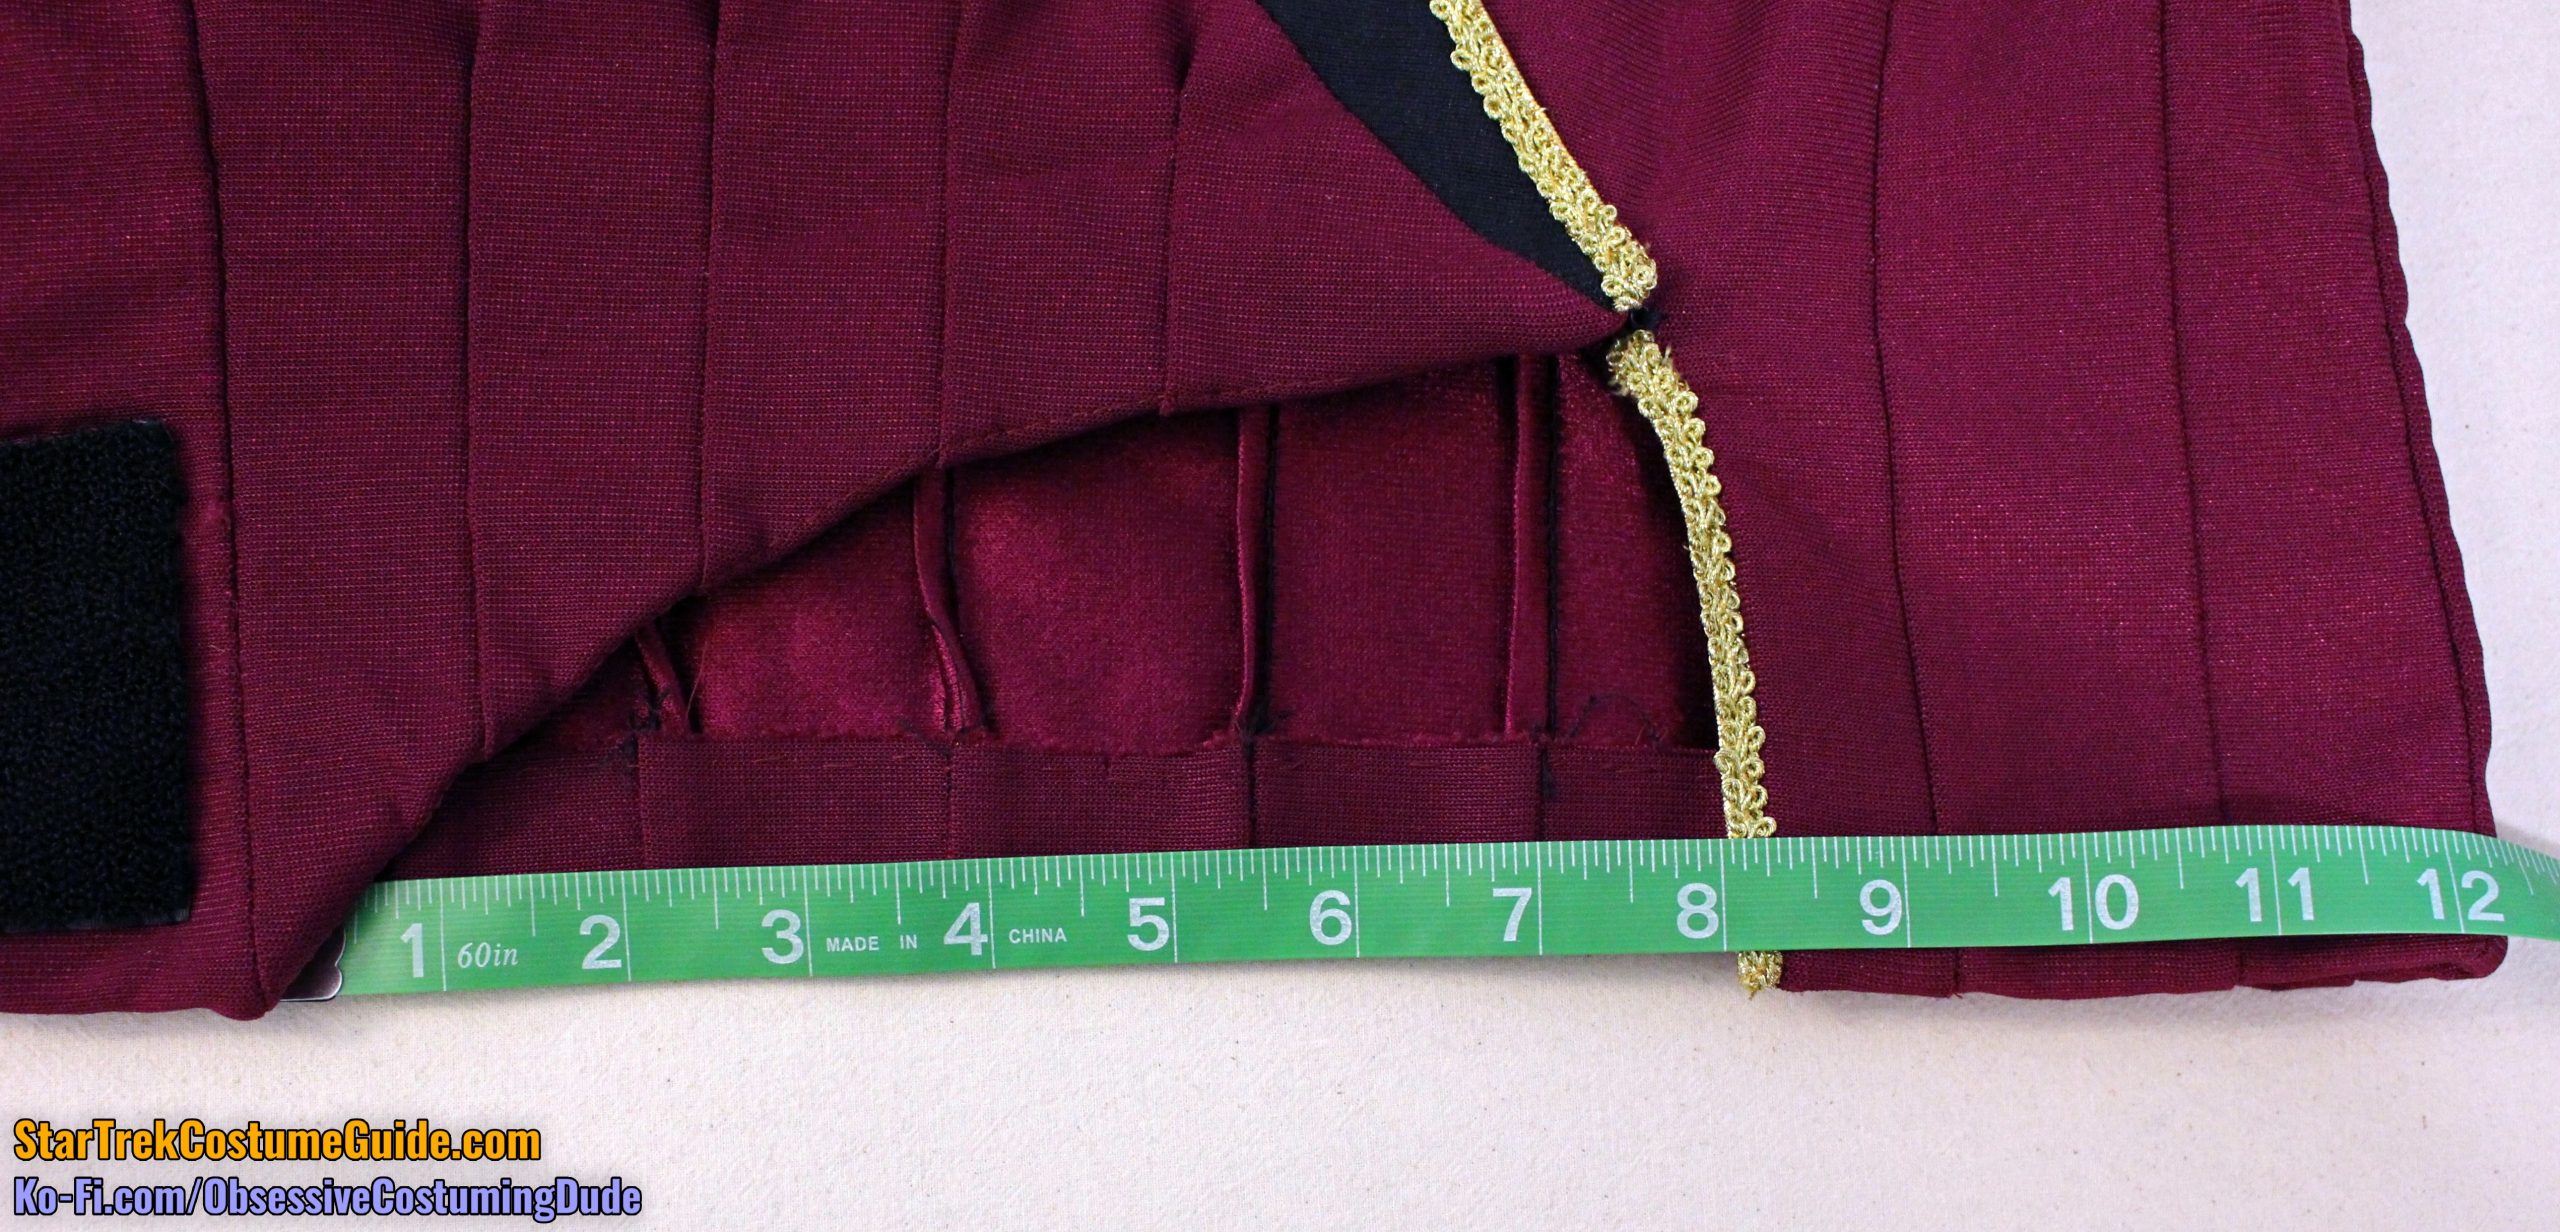
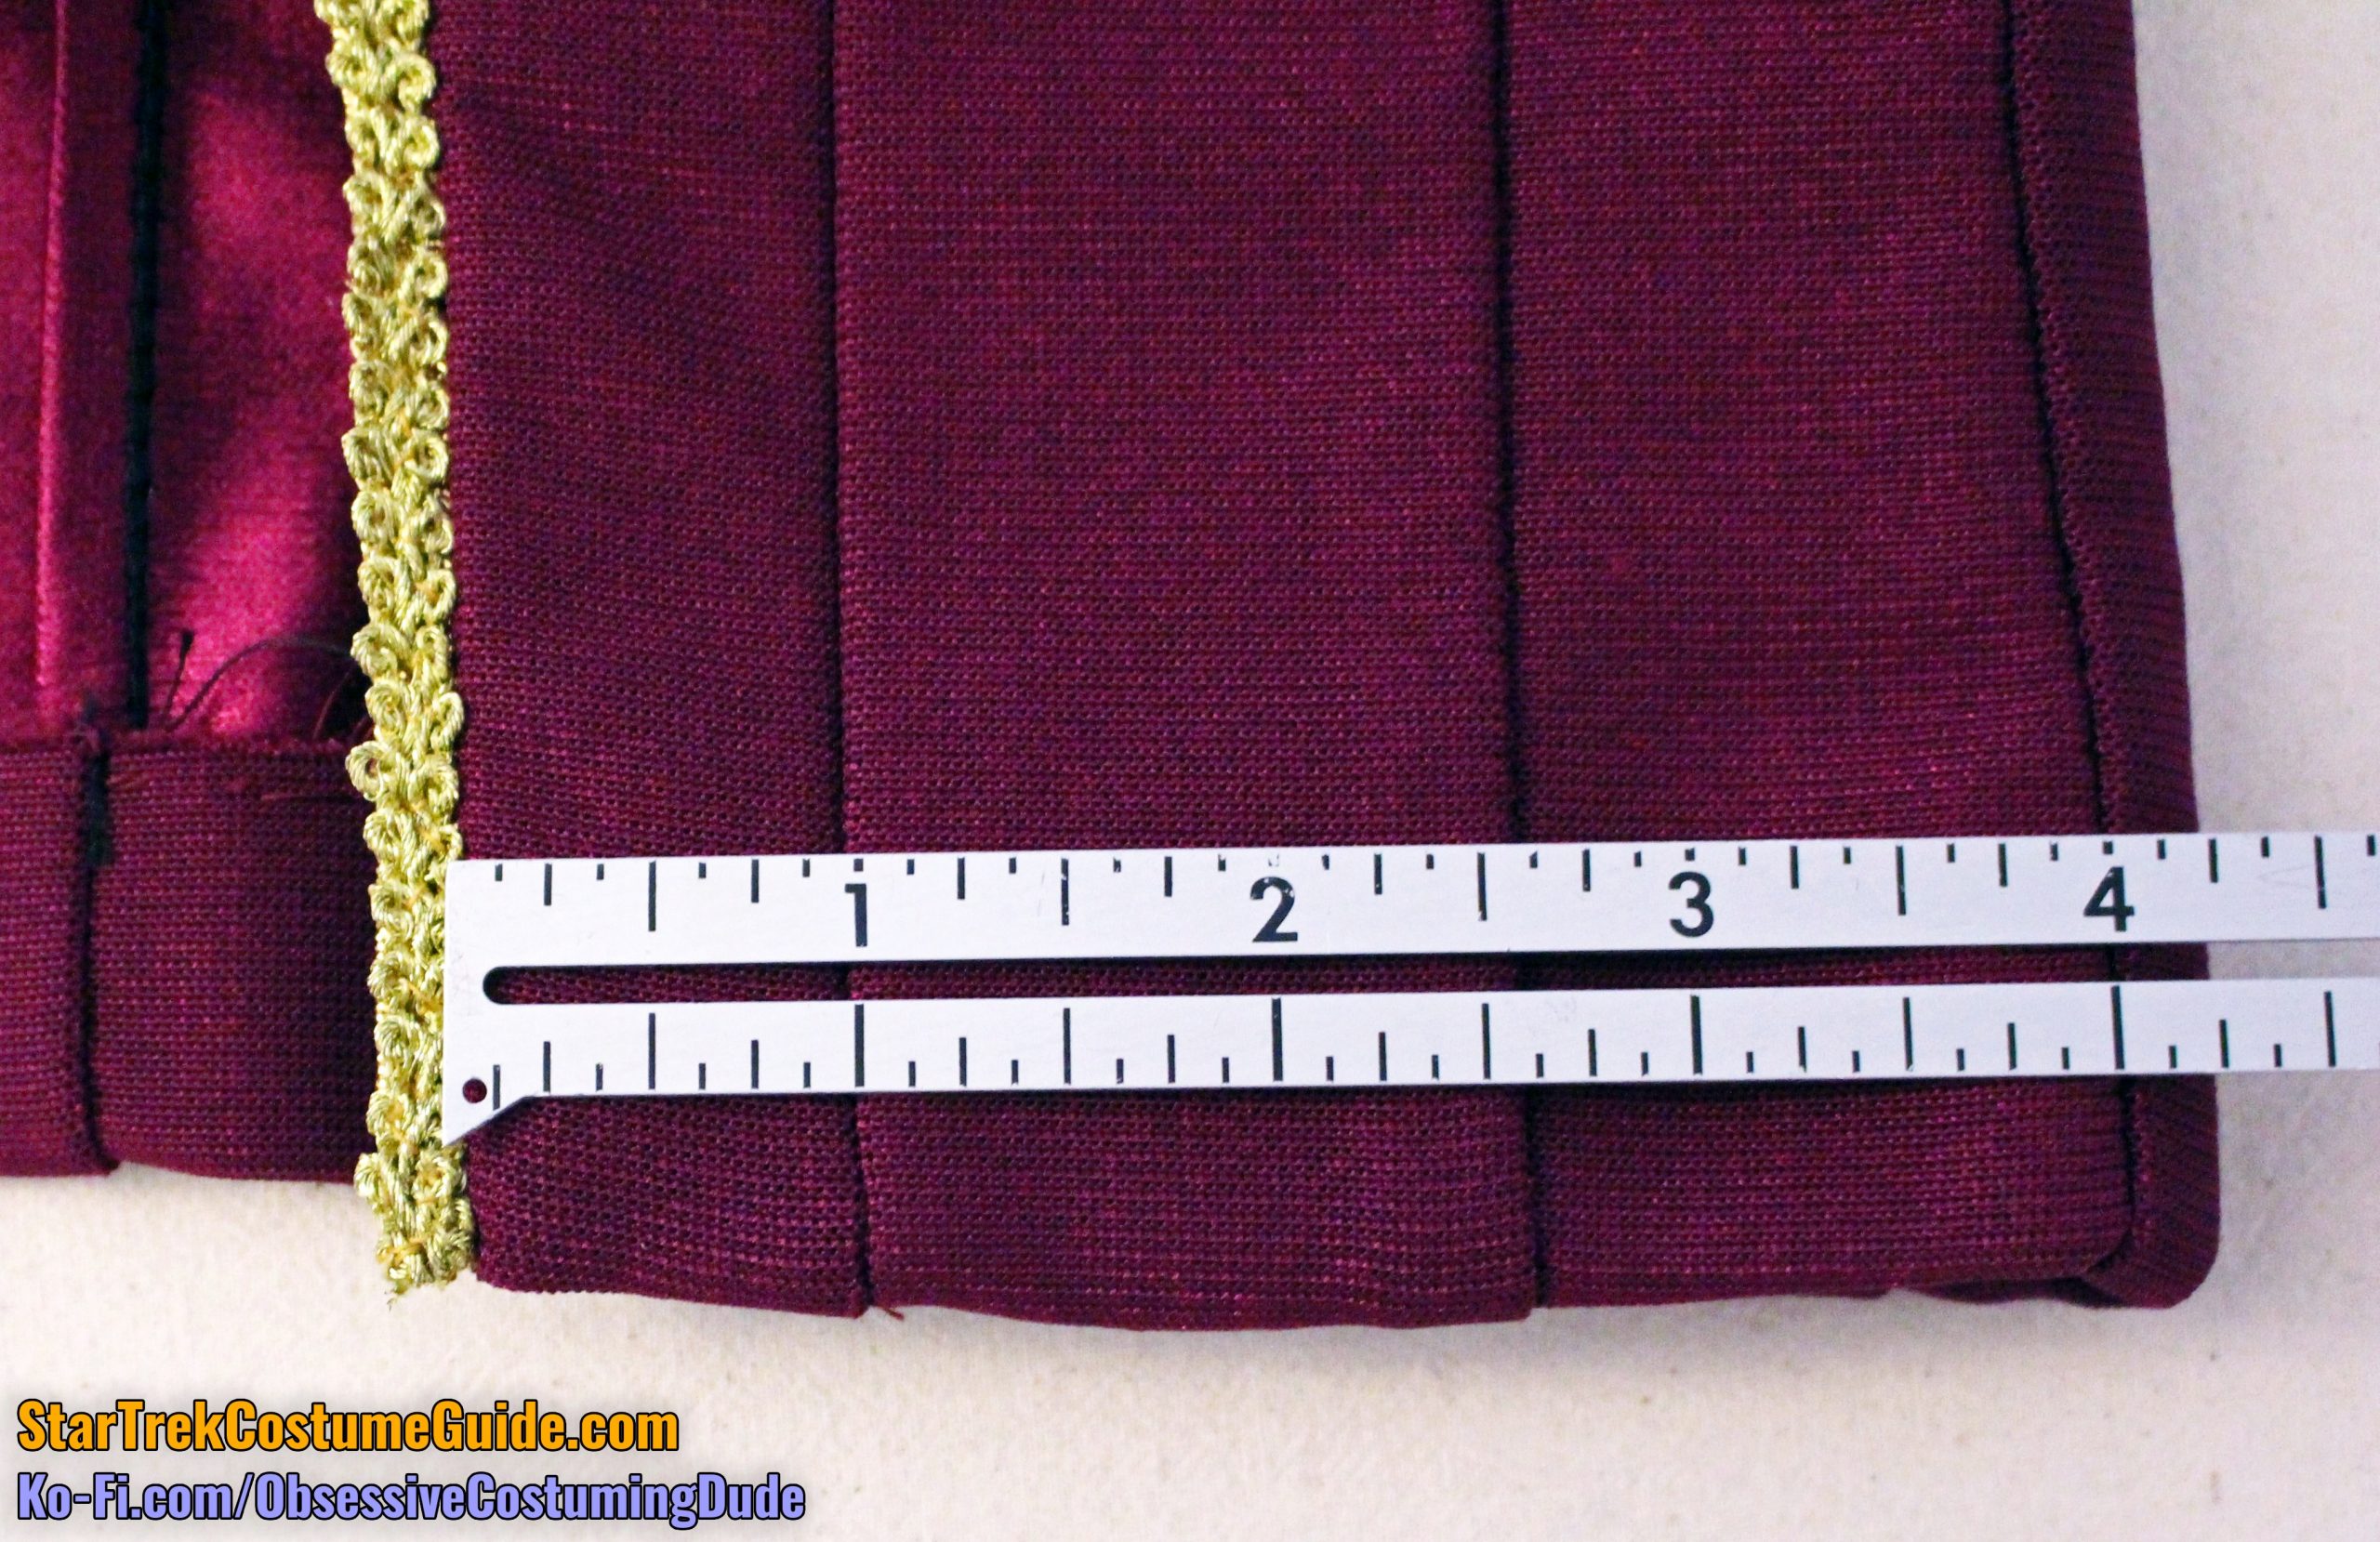
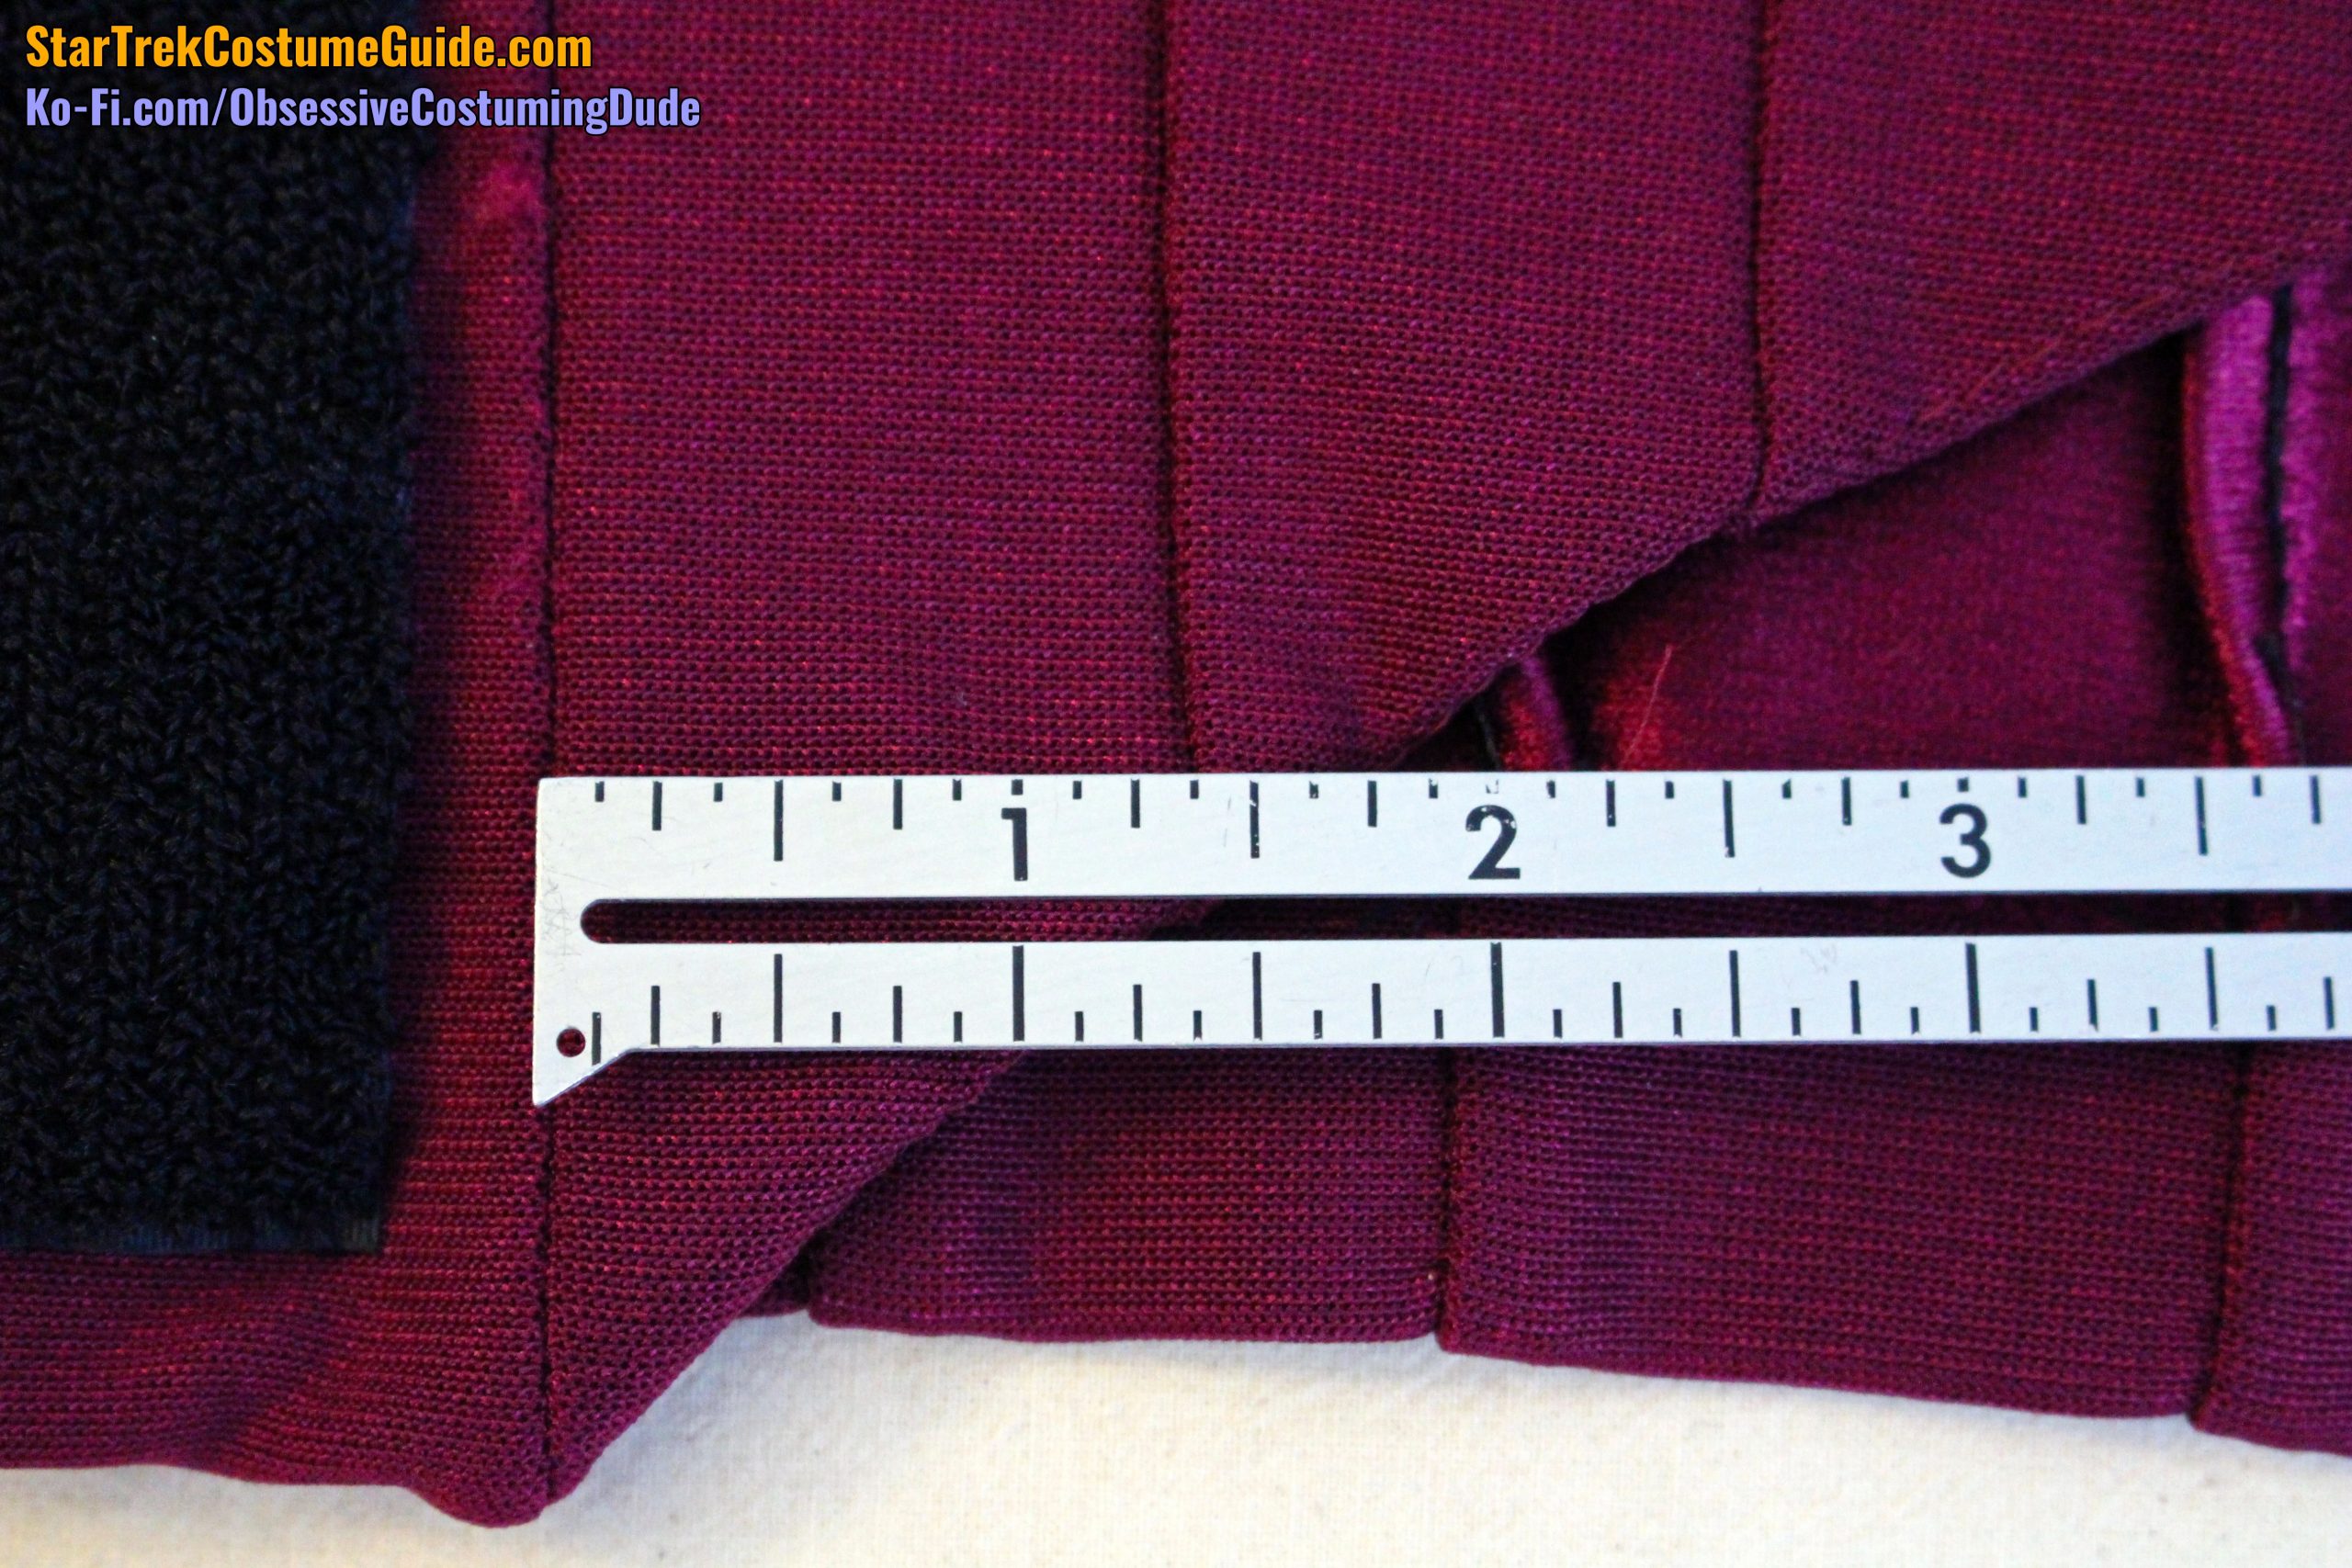
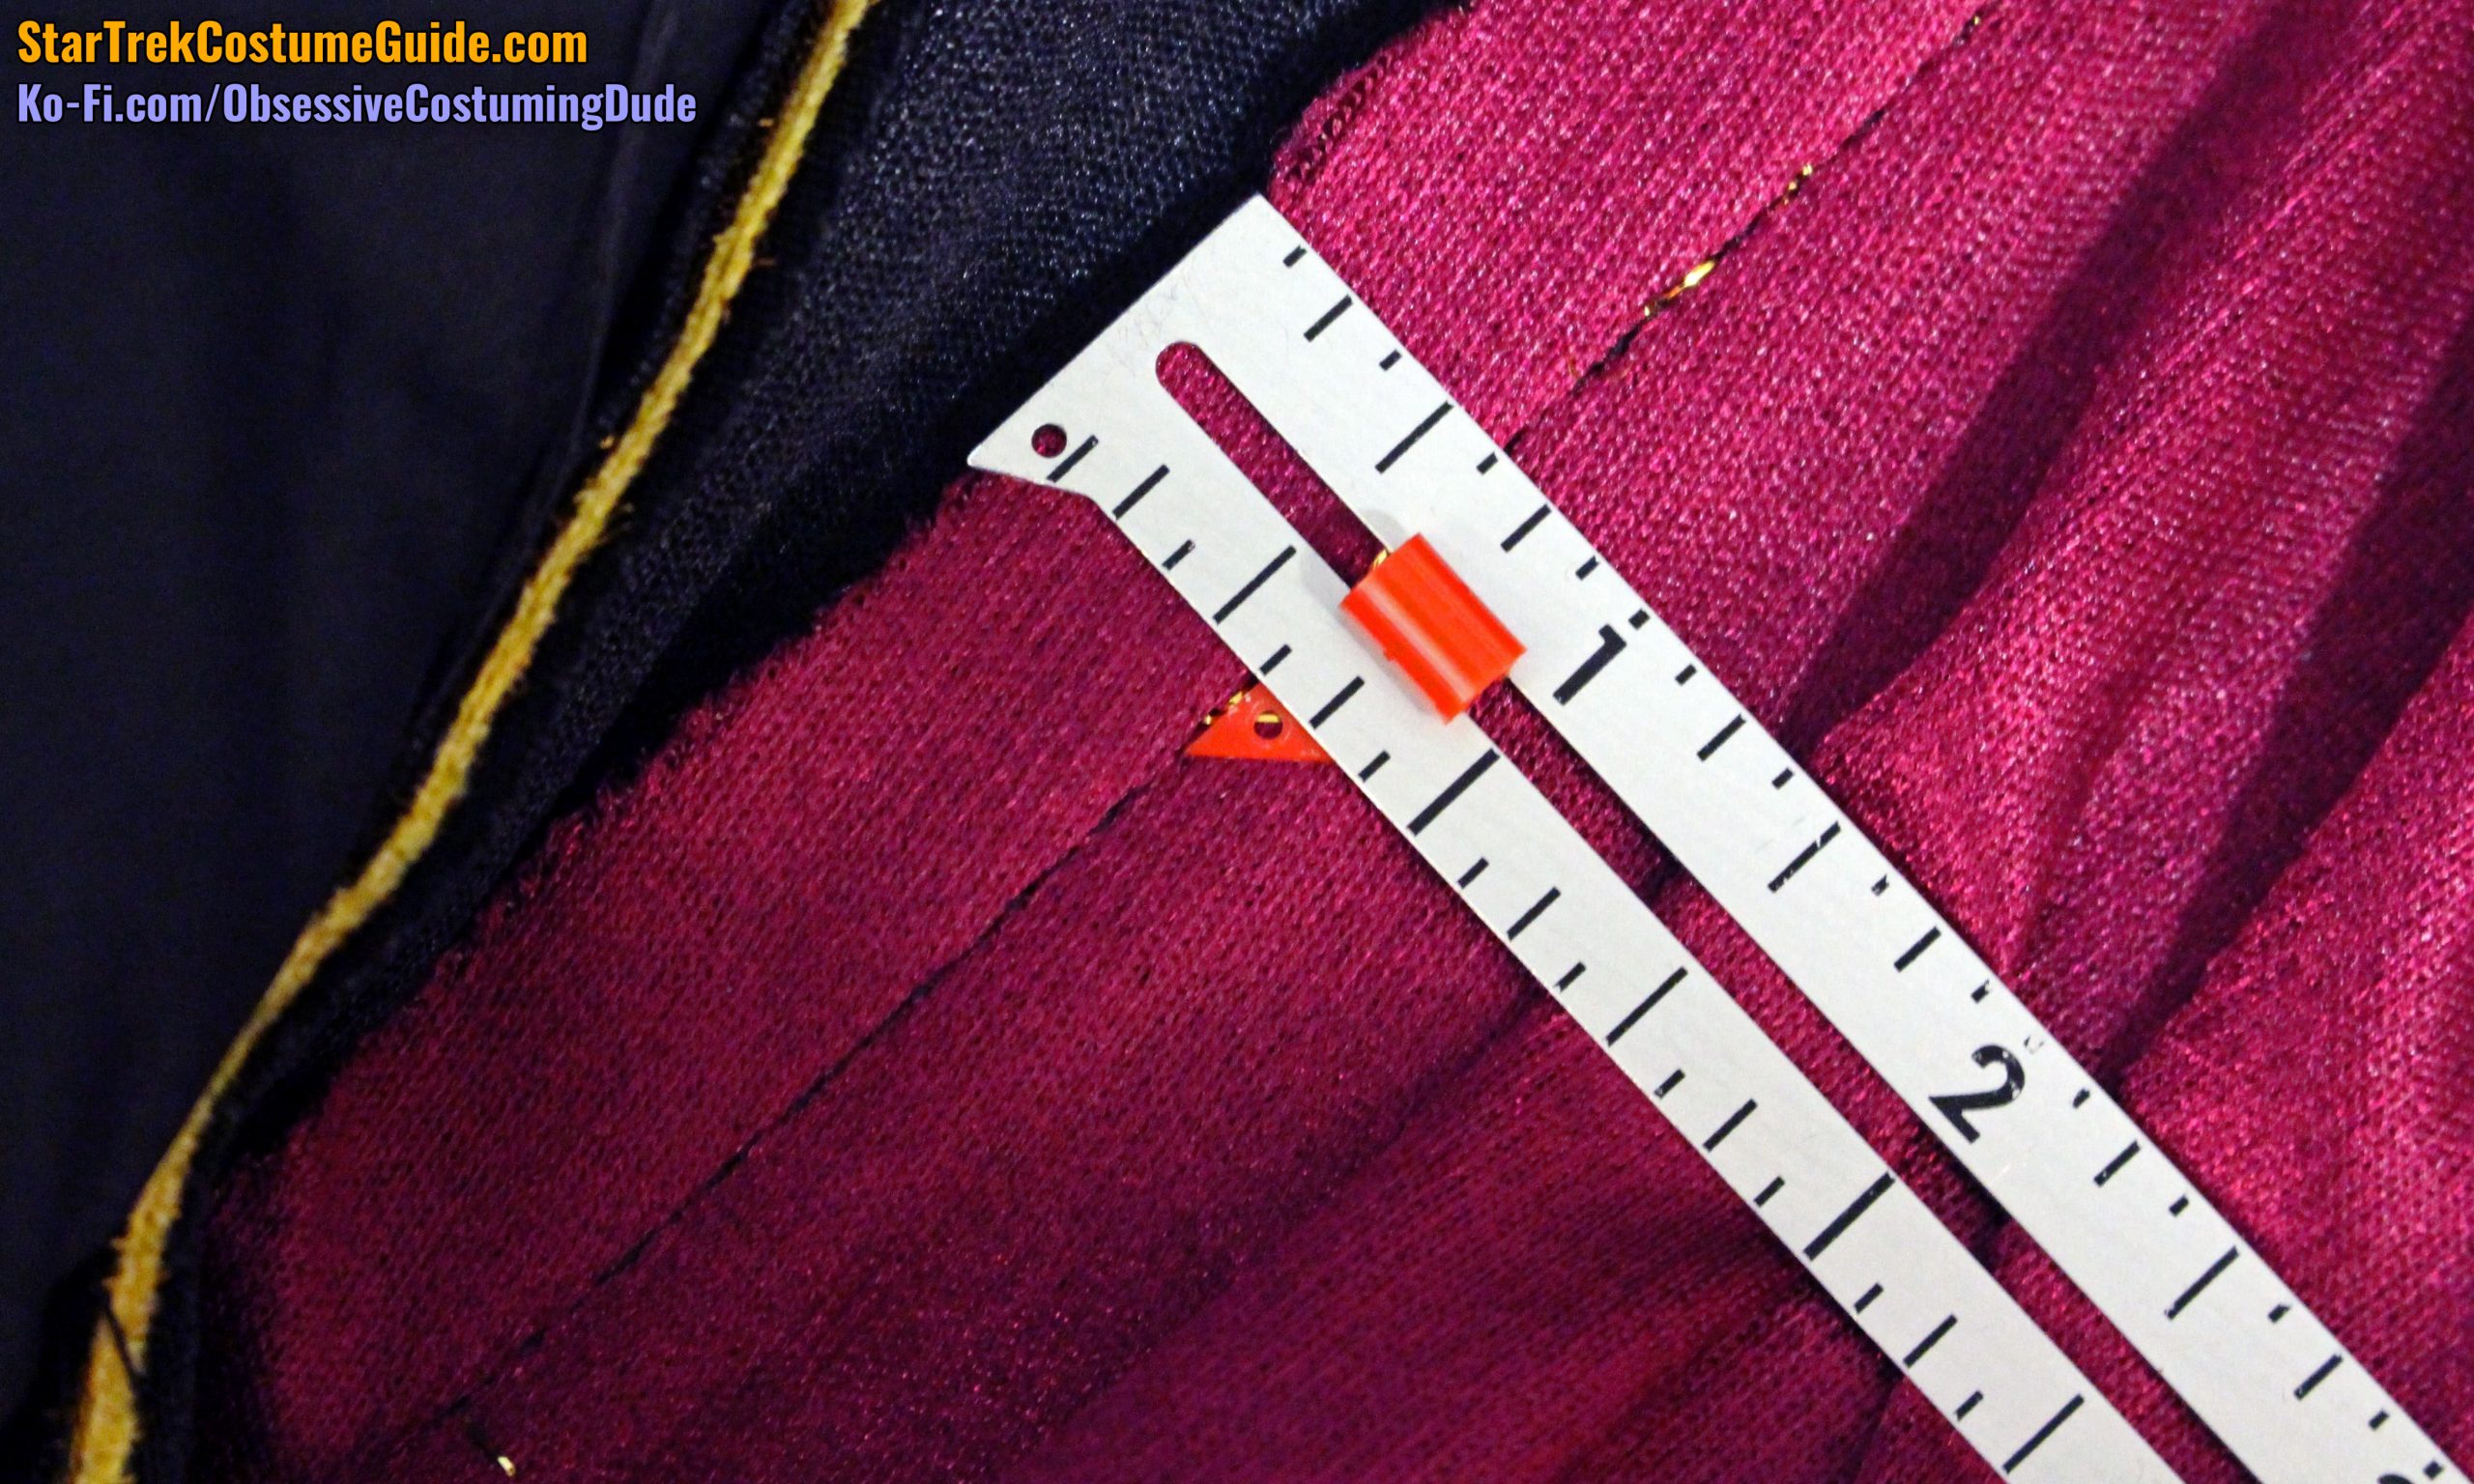
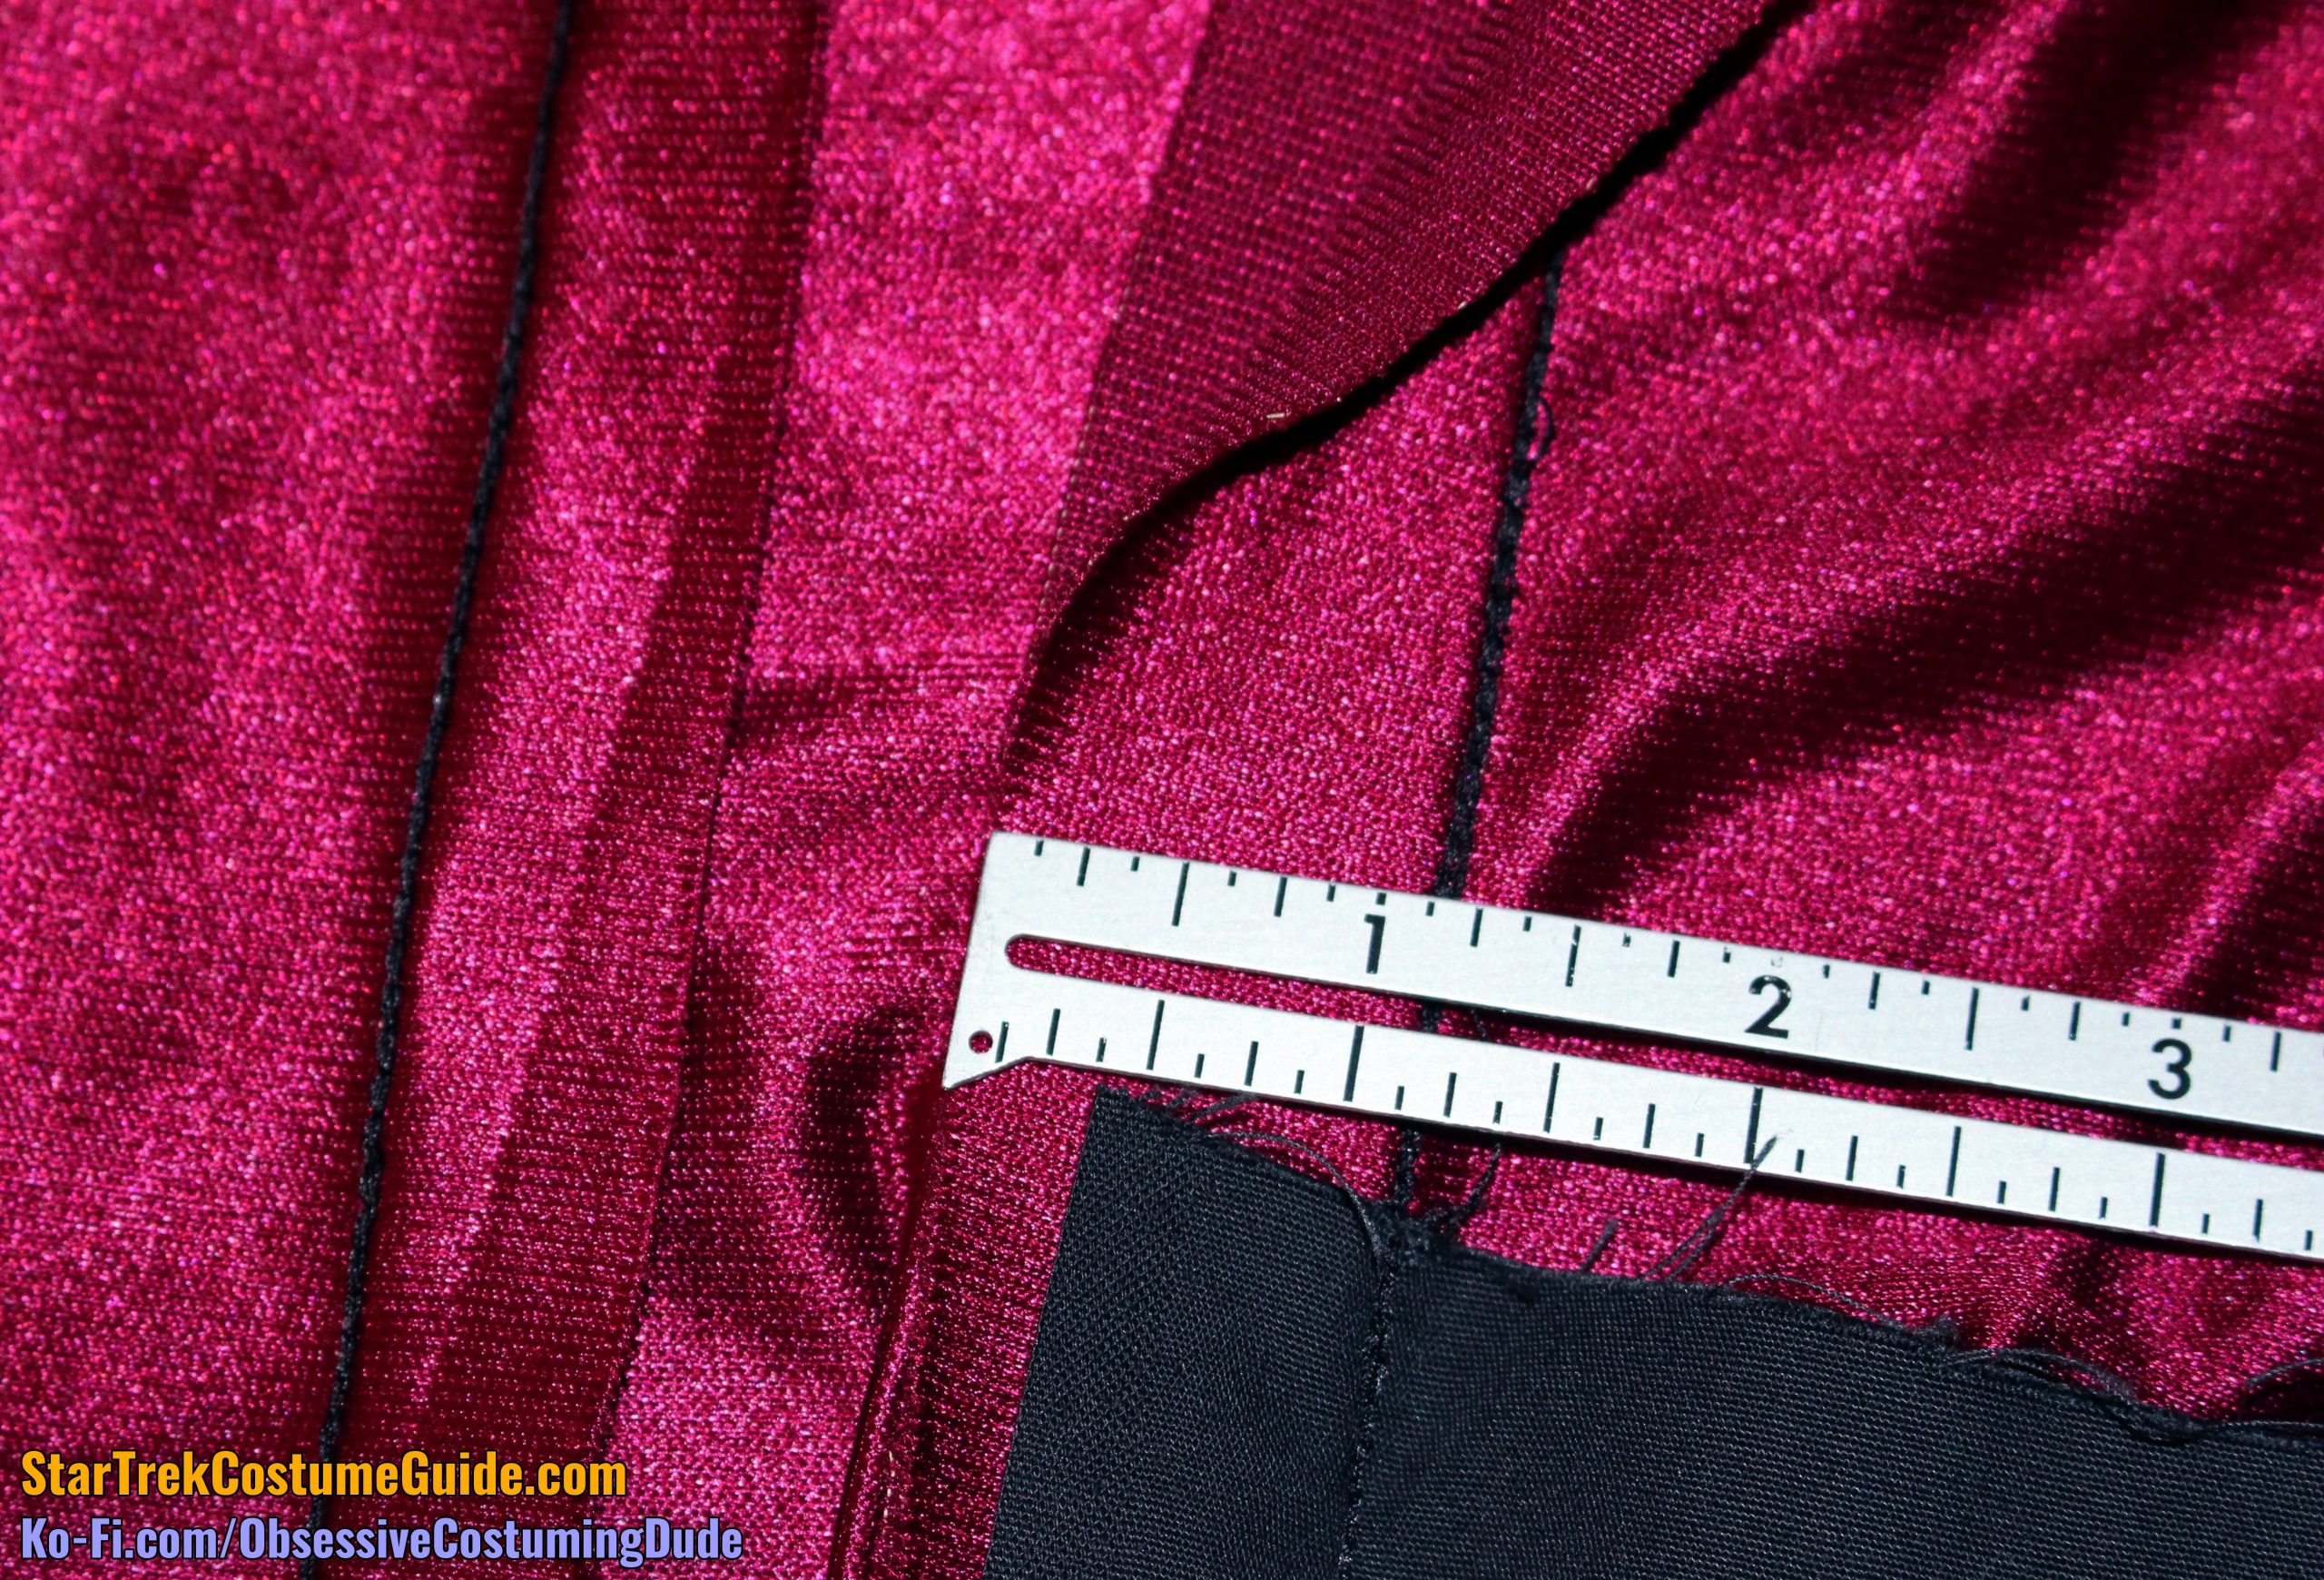
The right side front was 3 ½” wide across the bottom, although the left side front was only 3” wide.
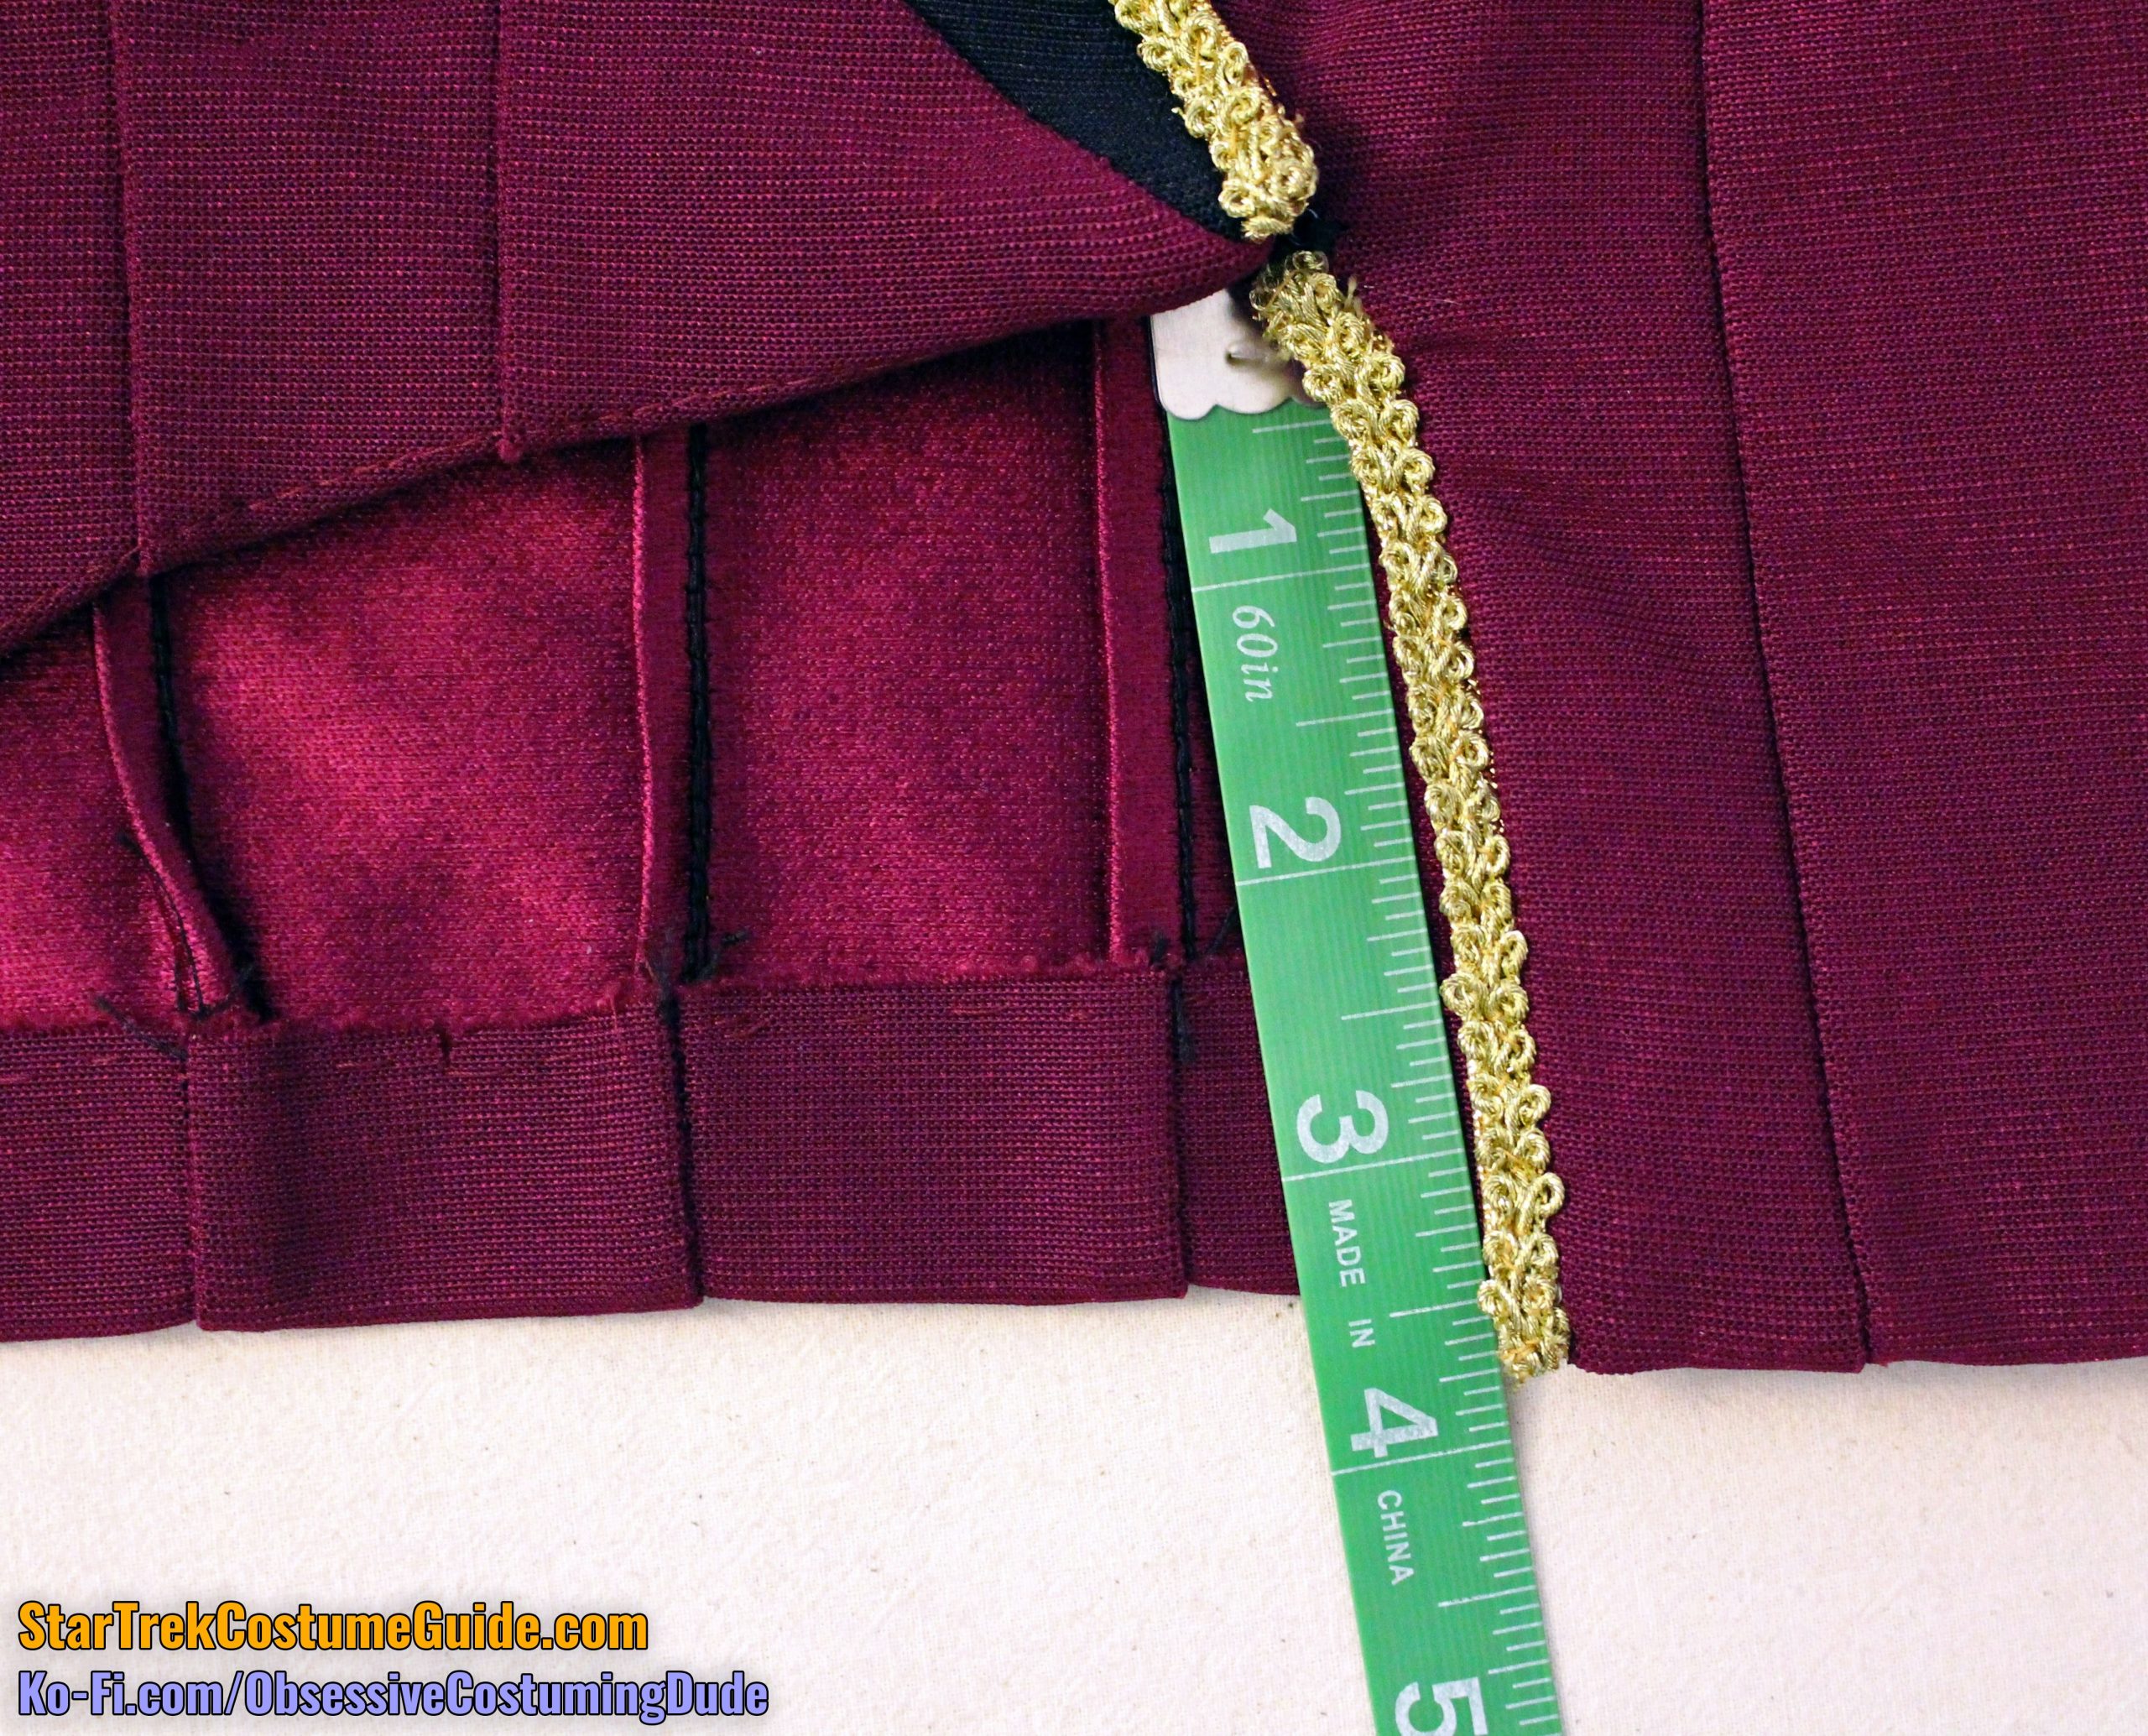
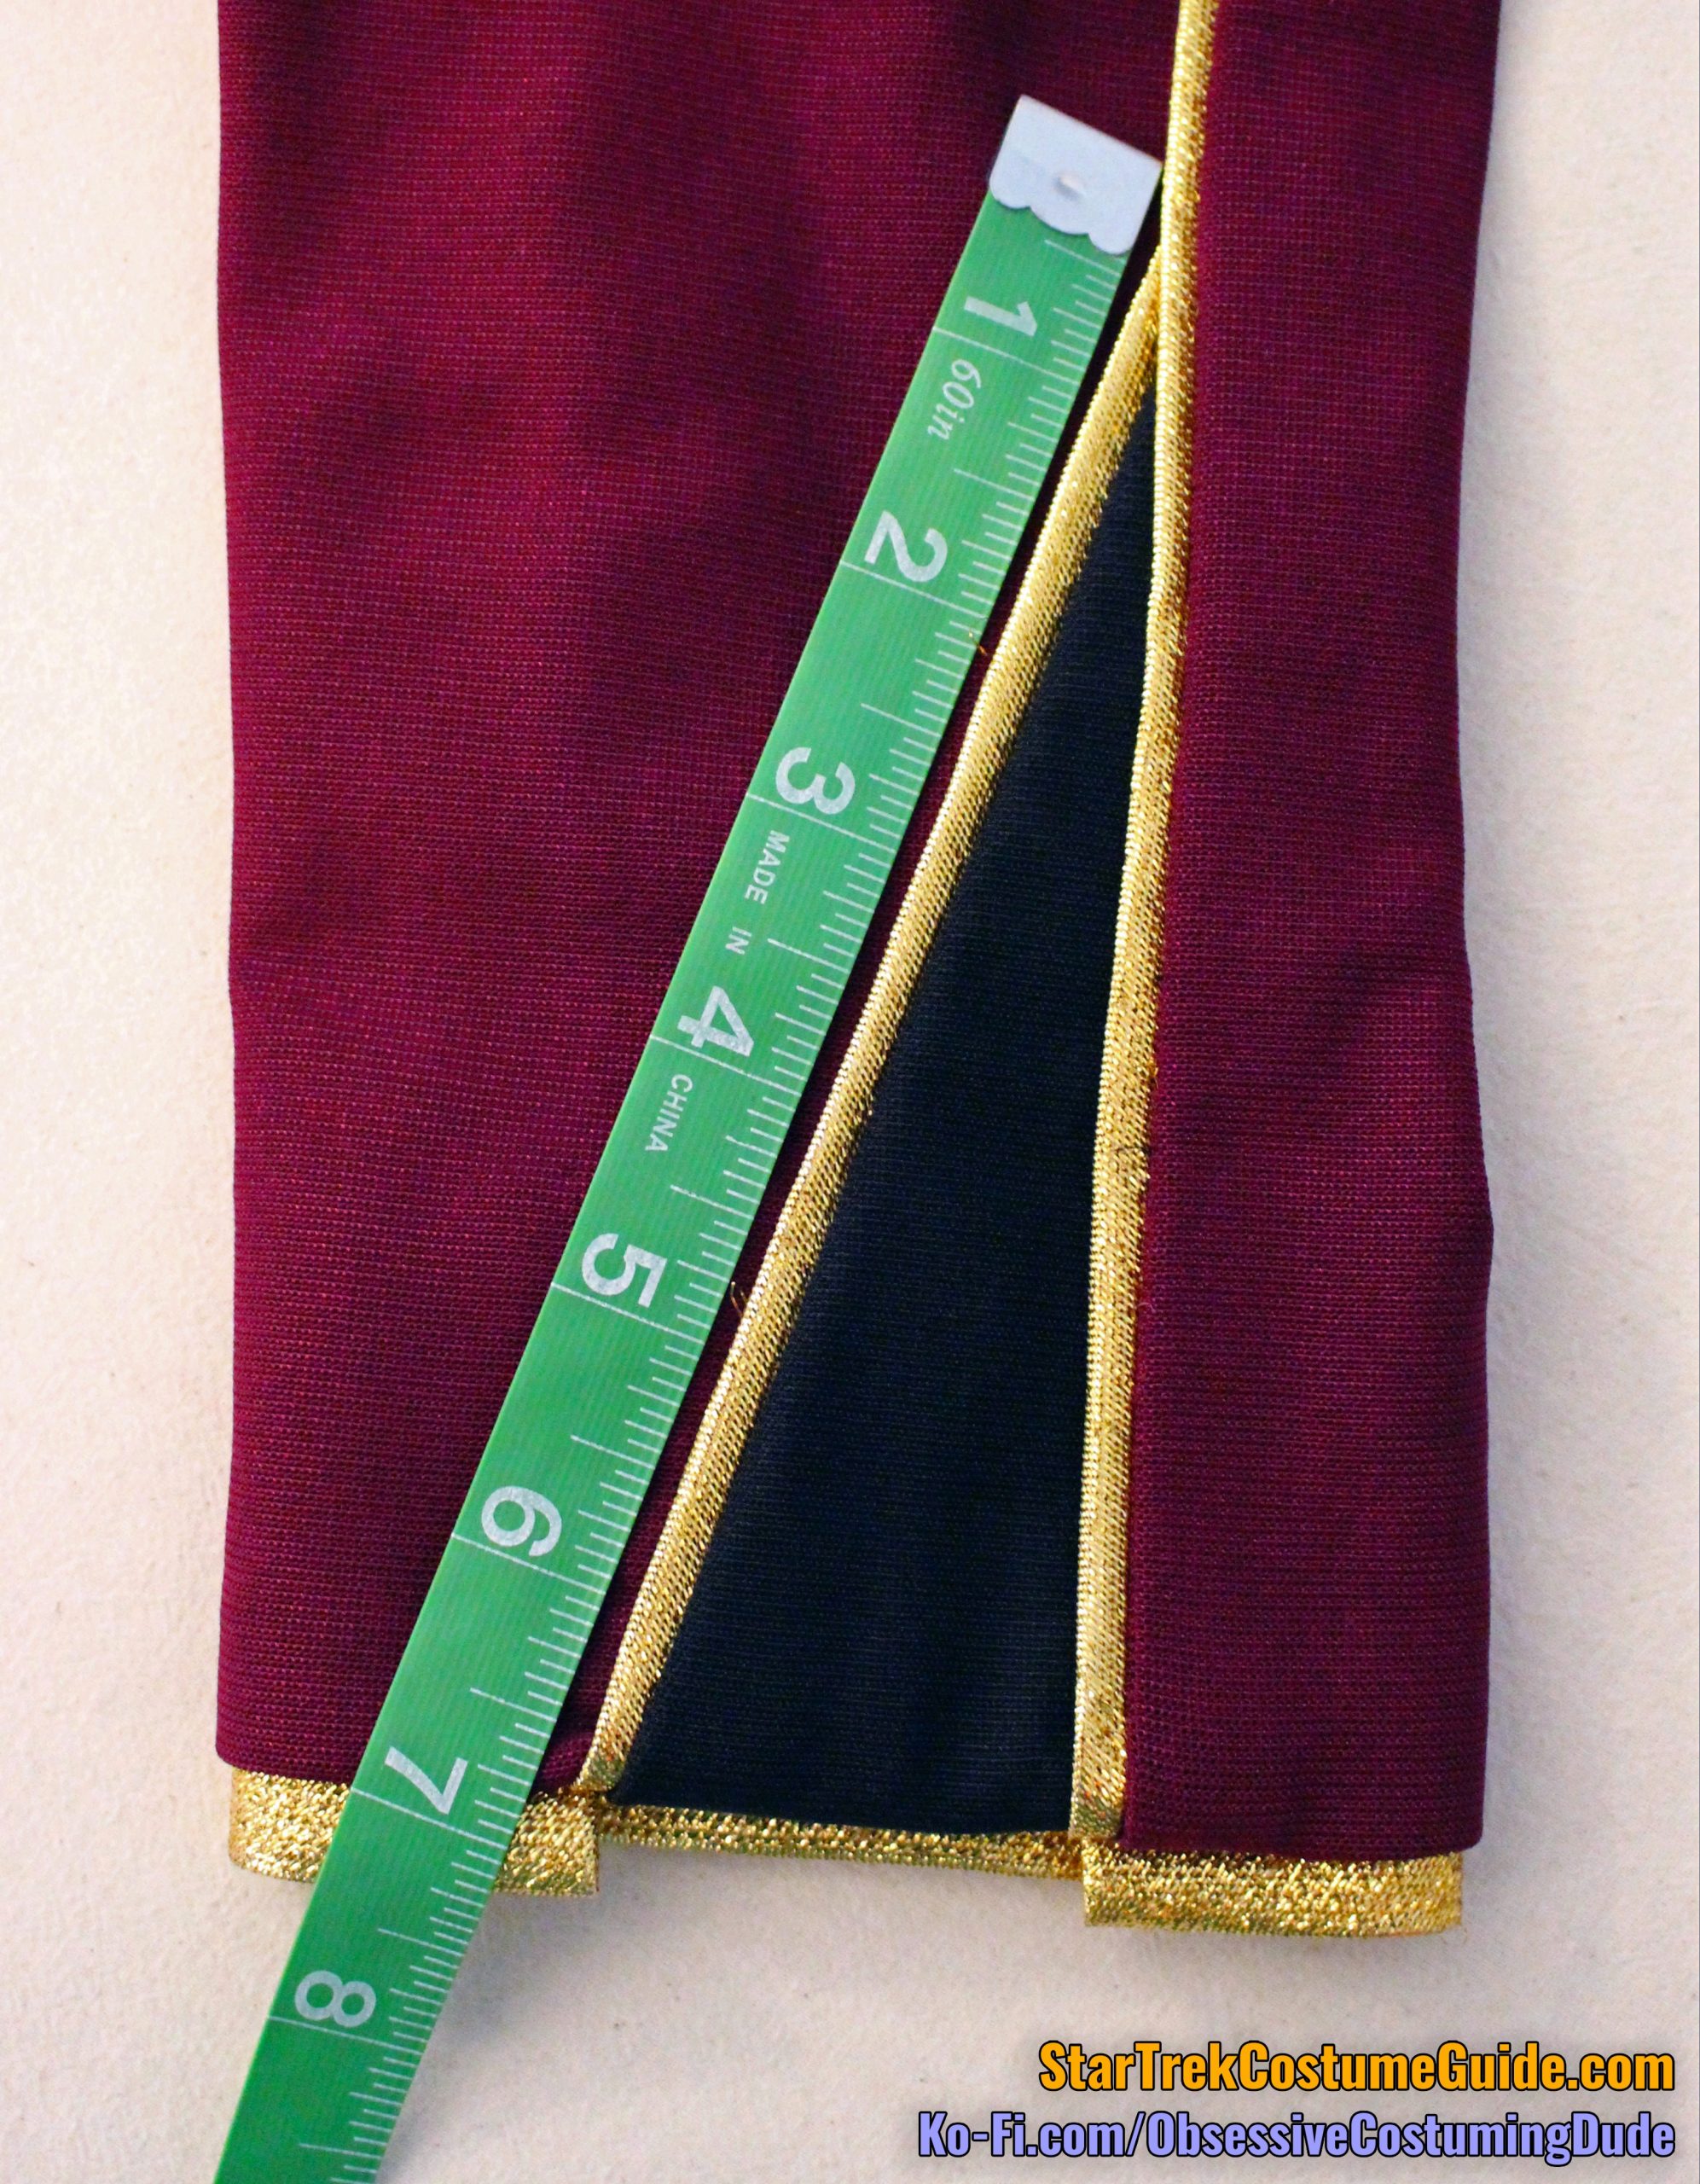
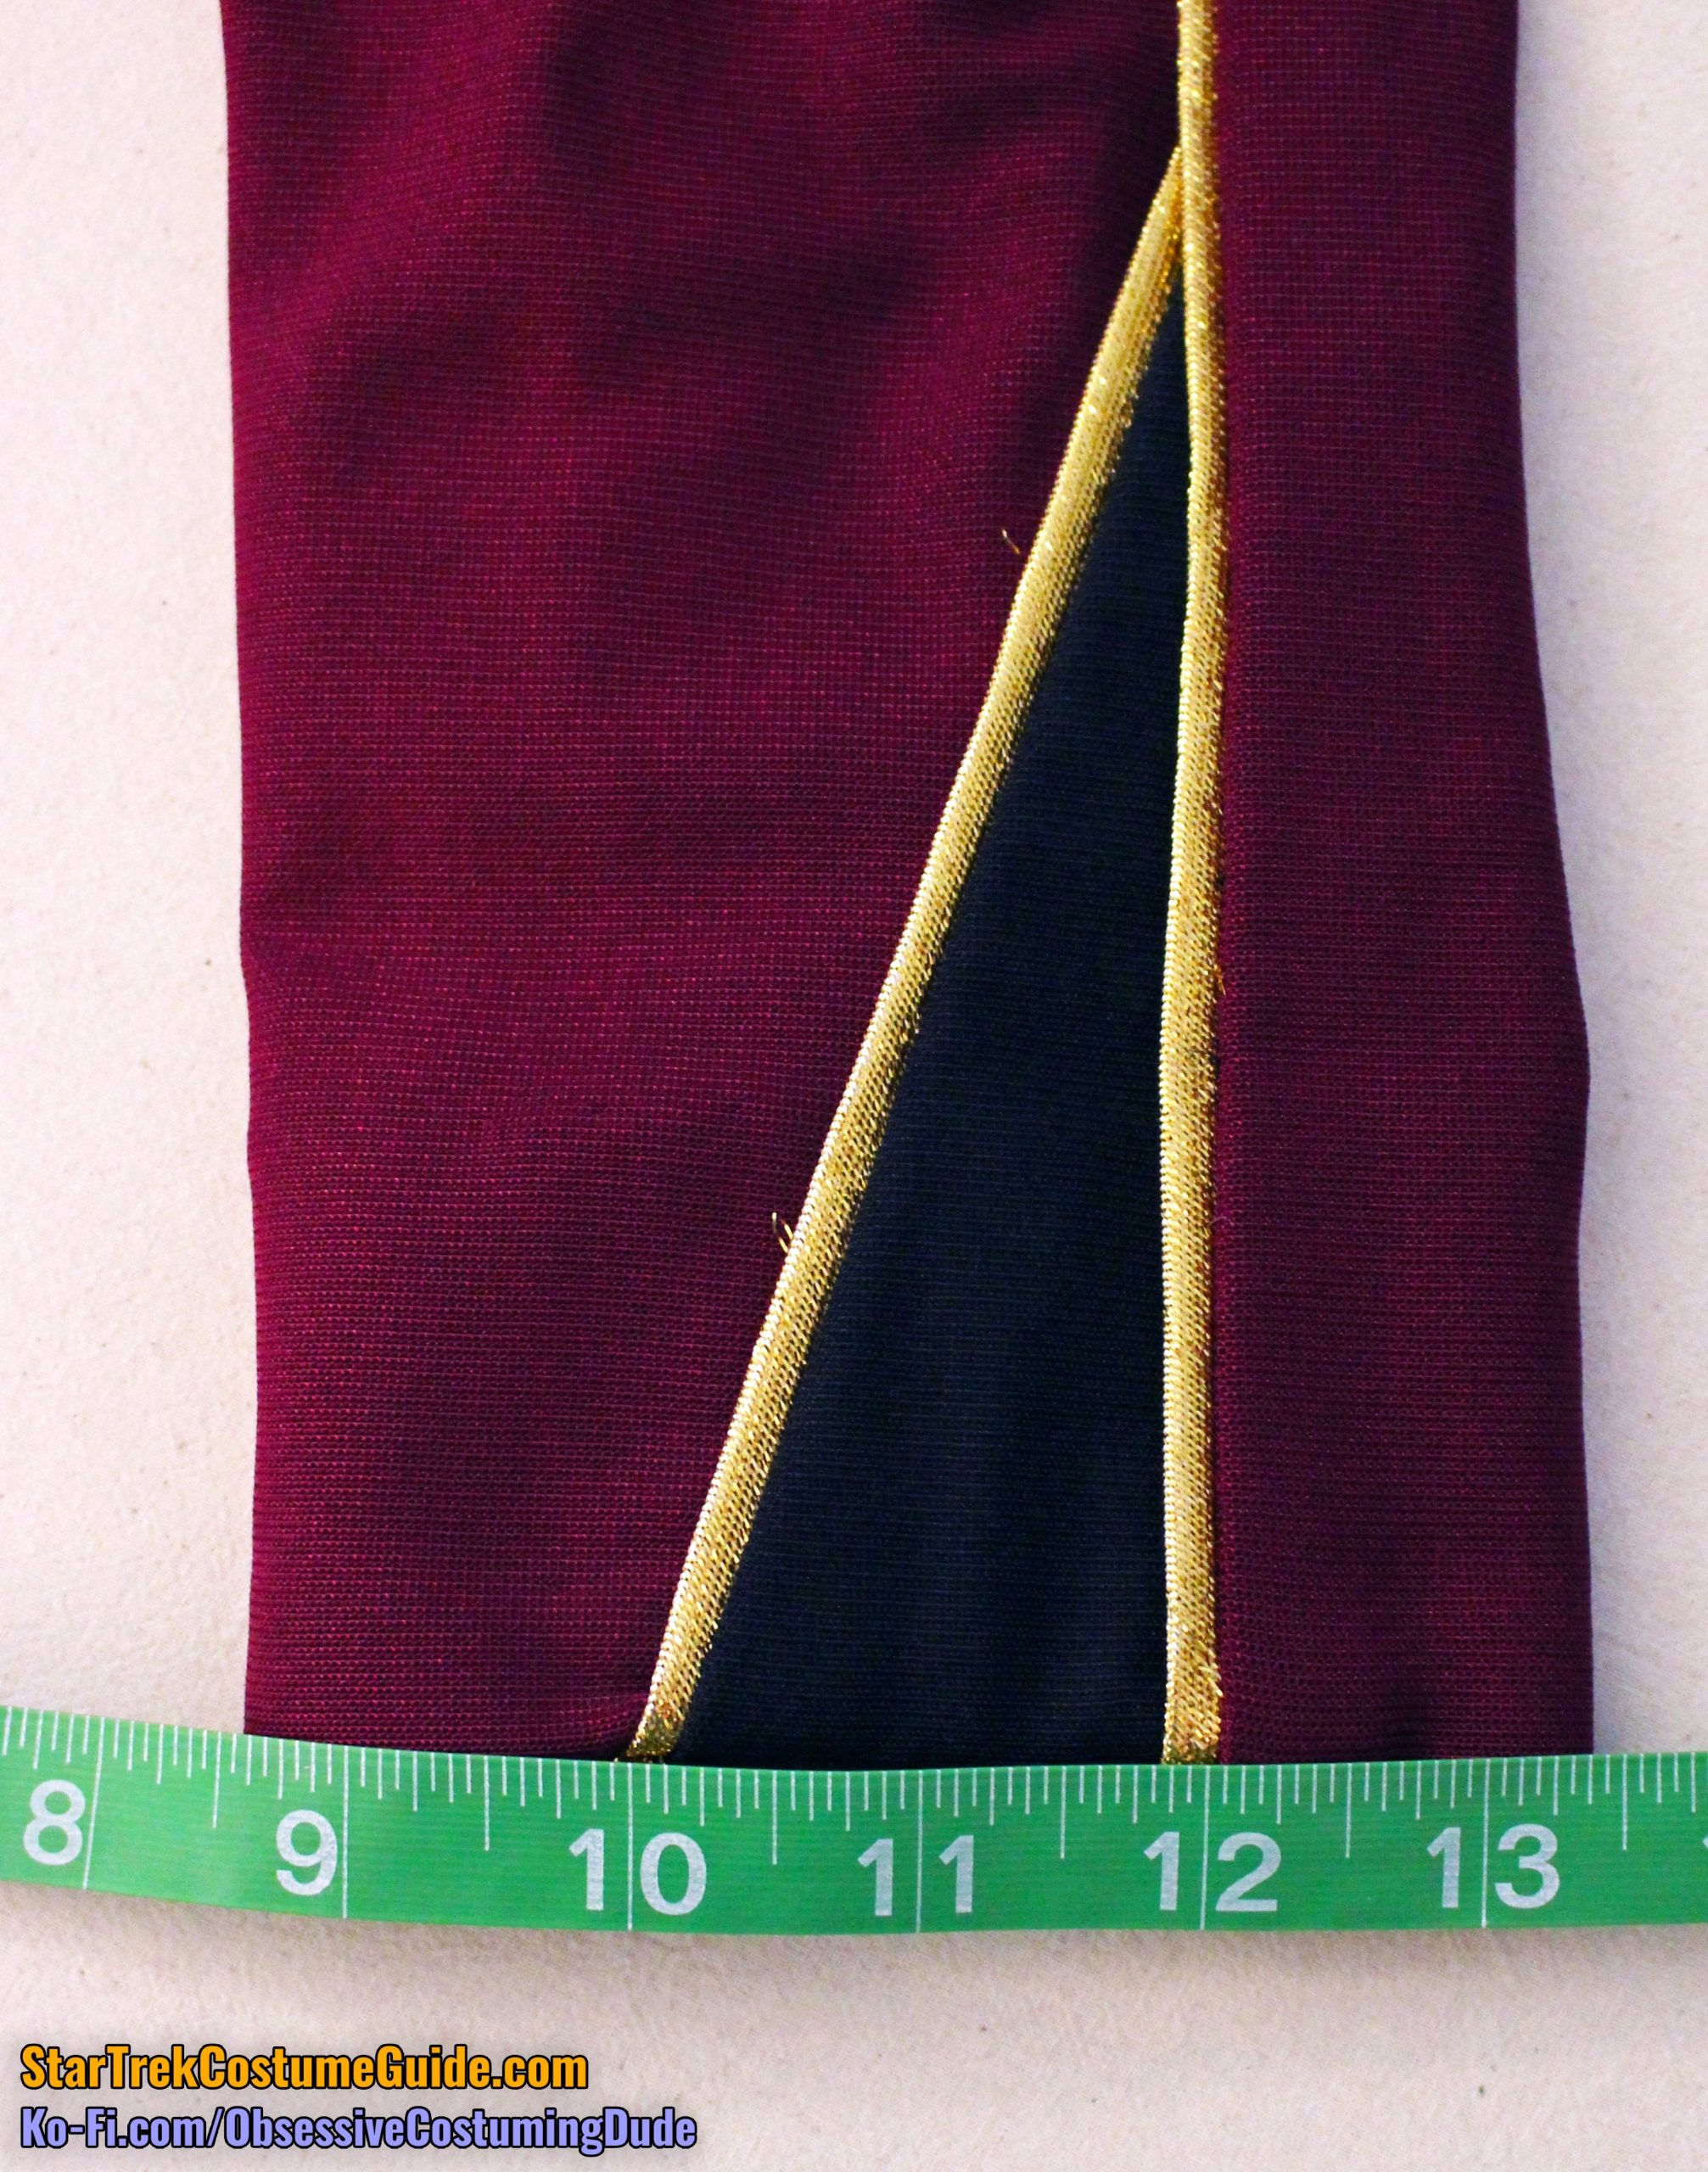
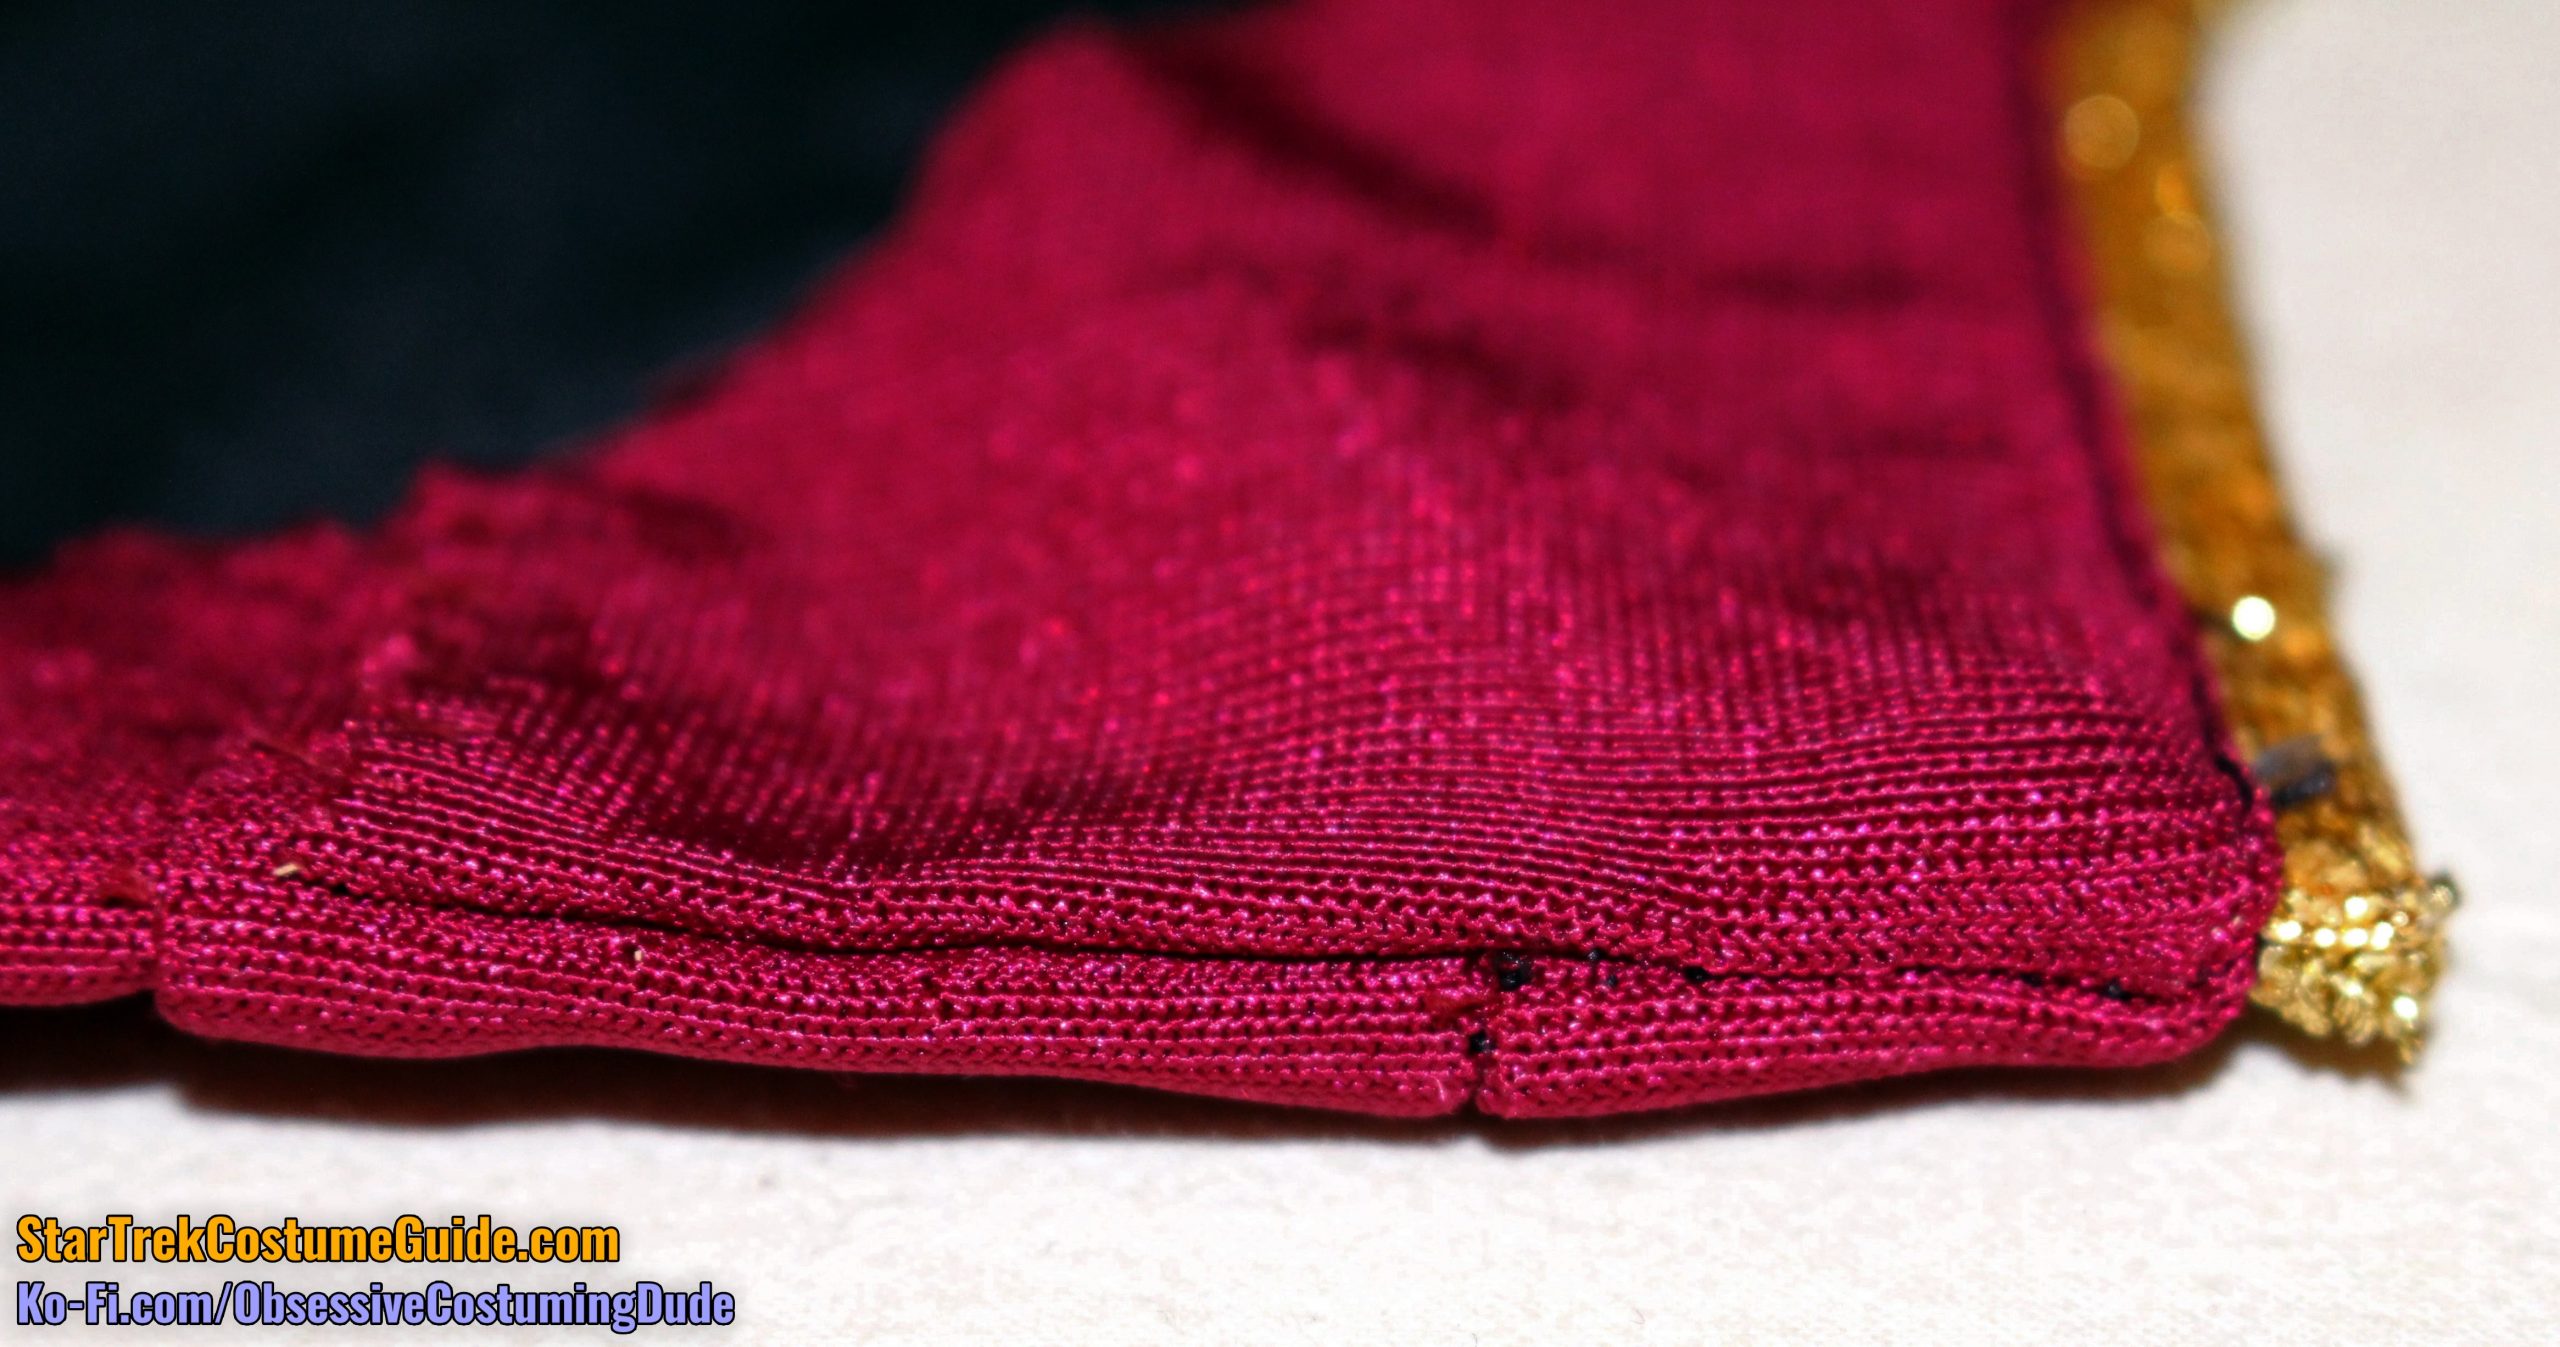
The wedge-shaped lower front opening was about 8” wide, measured from the right side front seam to the frontmost edge of the trim.
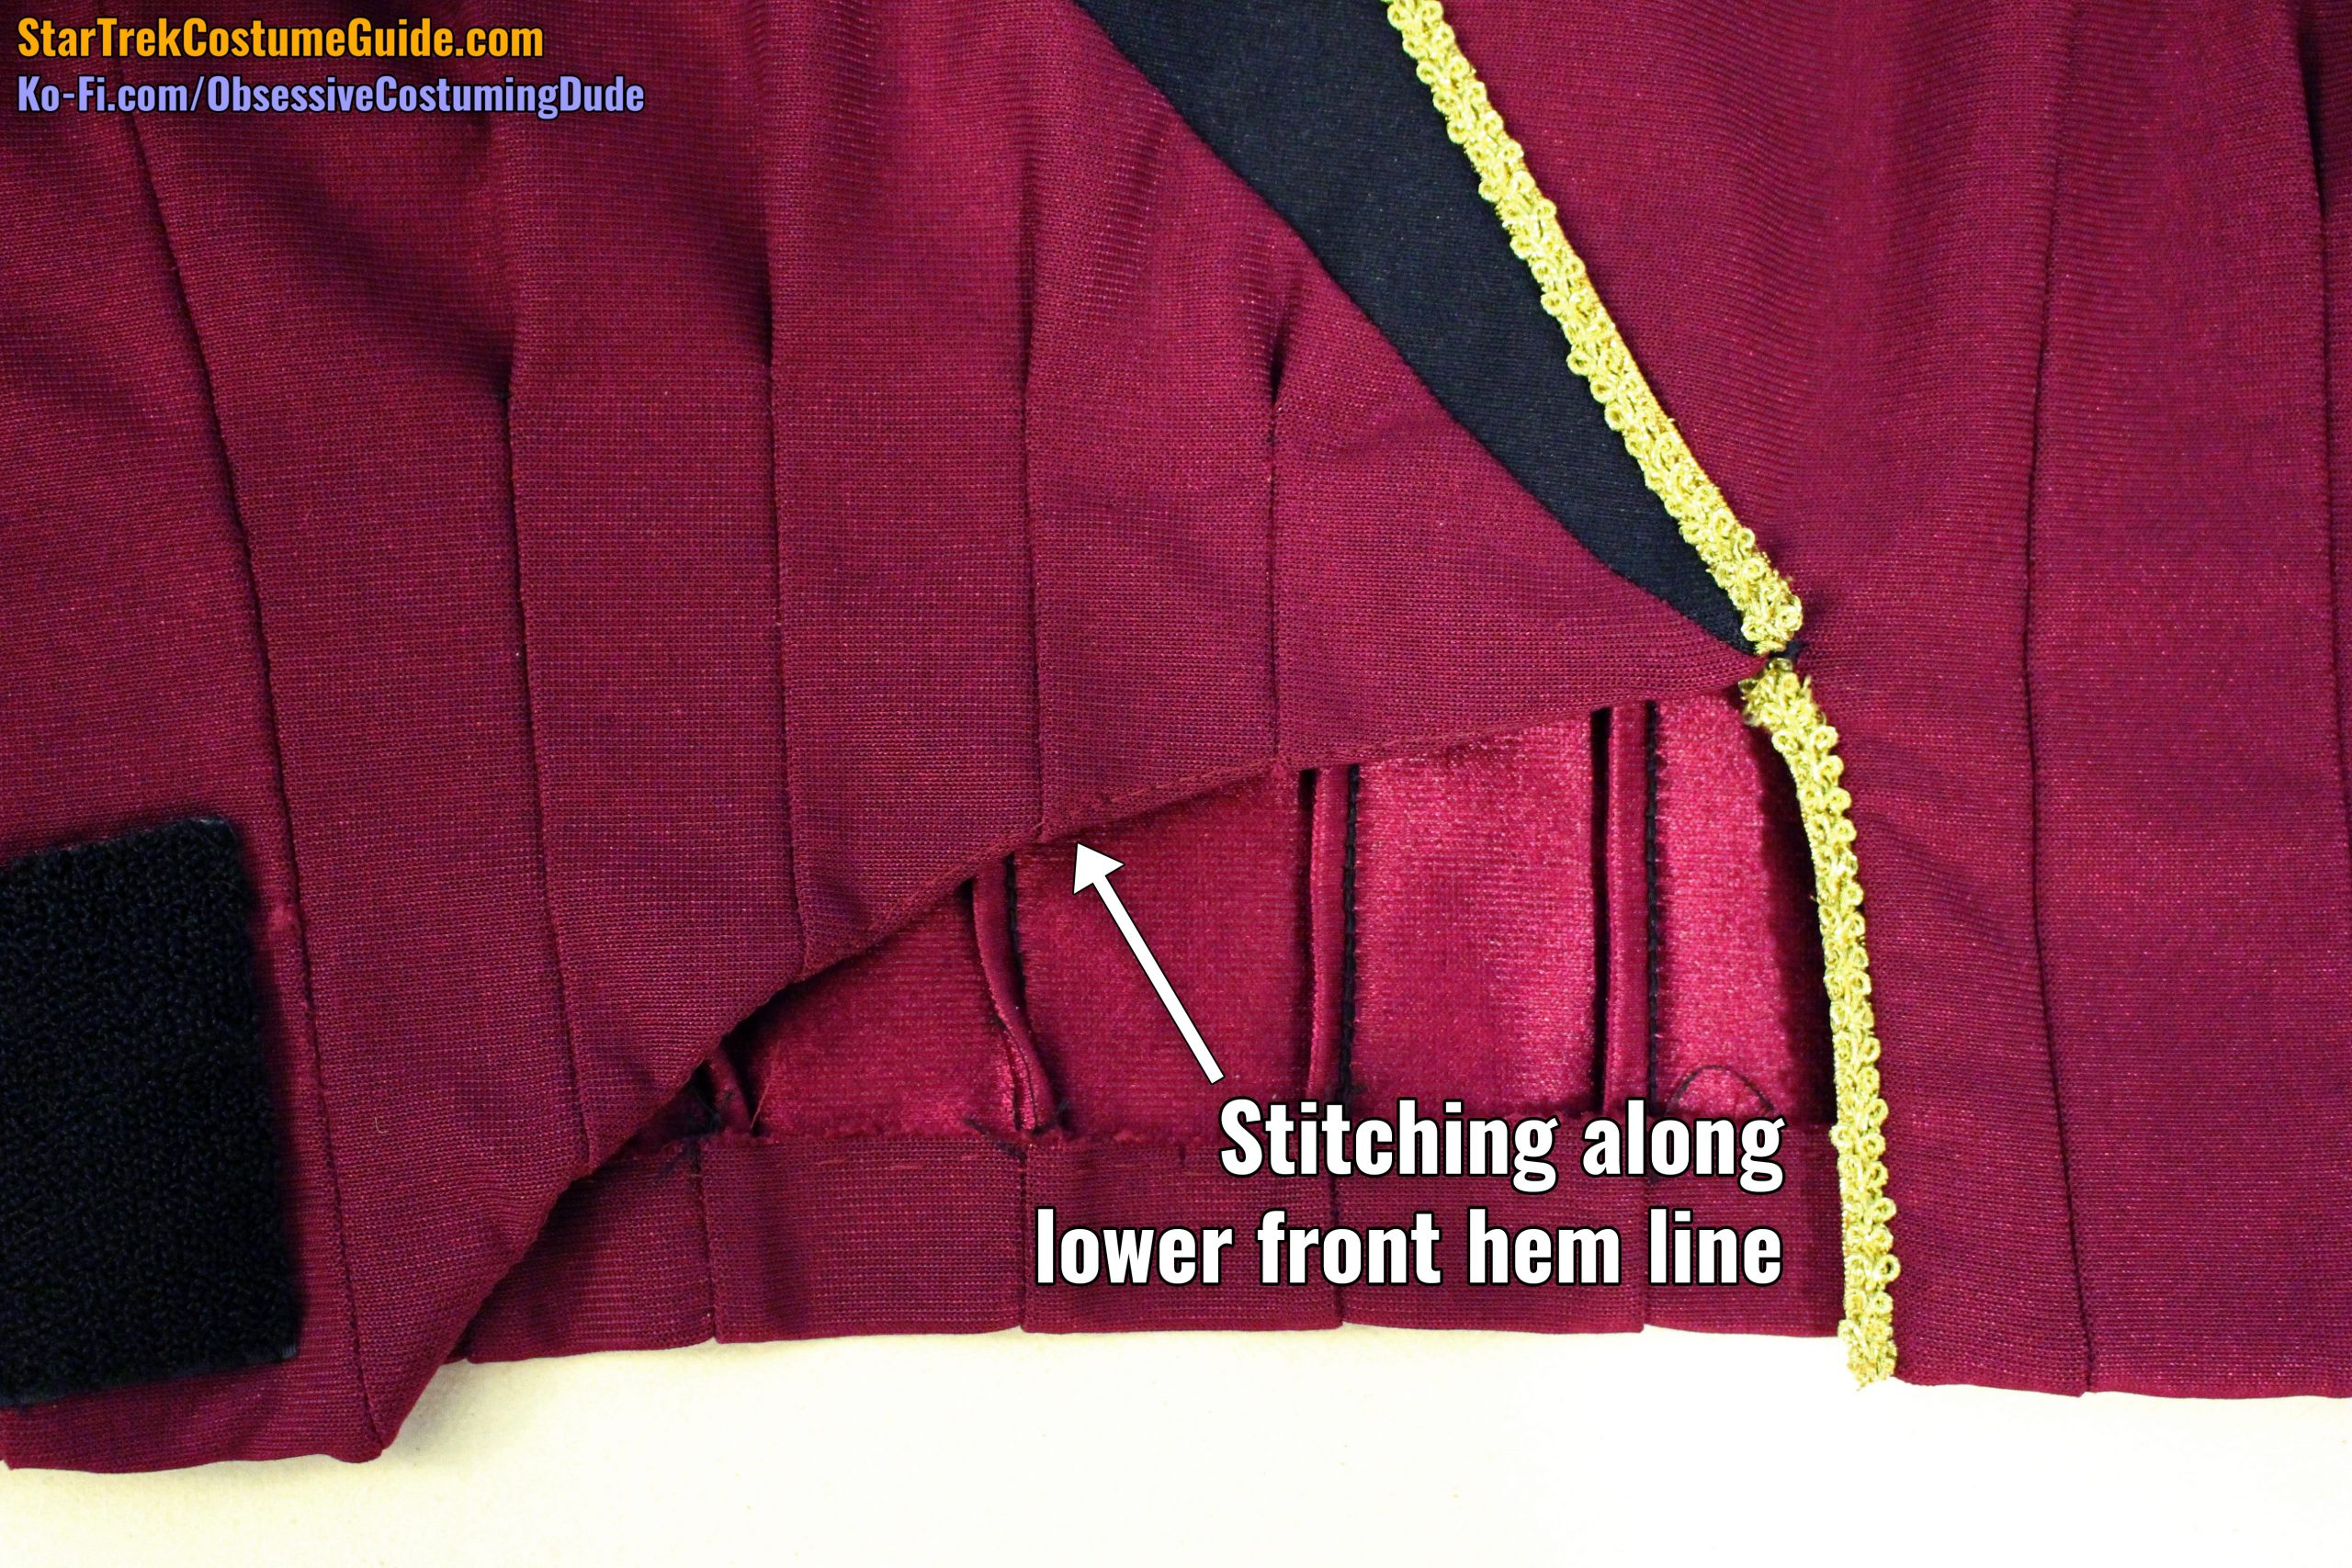
Also, the hem along the lower front opening wasn’t a straight line; it curved upward slightly.
And if you look closely, you can see that there’s actually a row of stitching visible along the hem line that didn’t quite get turned under.
The front left (vertical-ish) edge of the lower front opening was 3 ¾” tall.
Also, the lower front opening didn’t extend all the way to the left side front panel; this seam line was about 1” away from the edge of the gold trim.
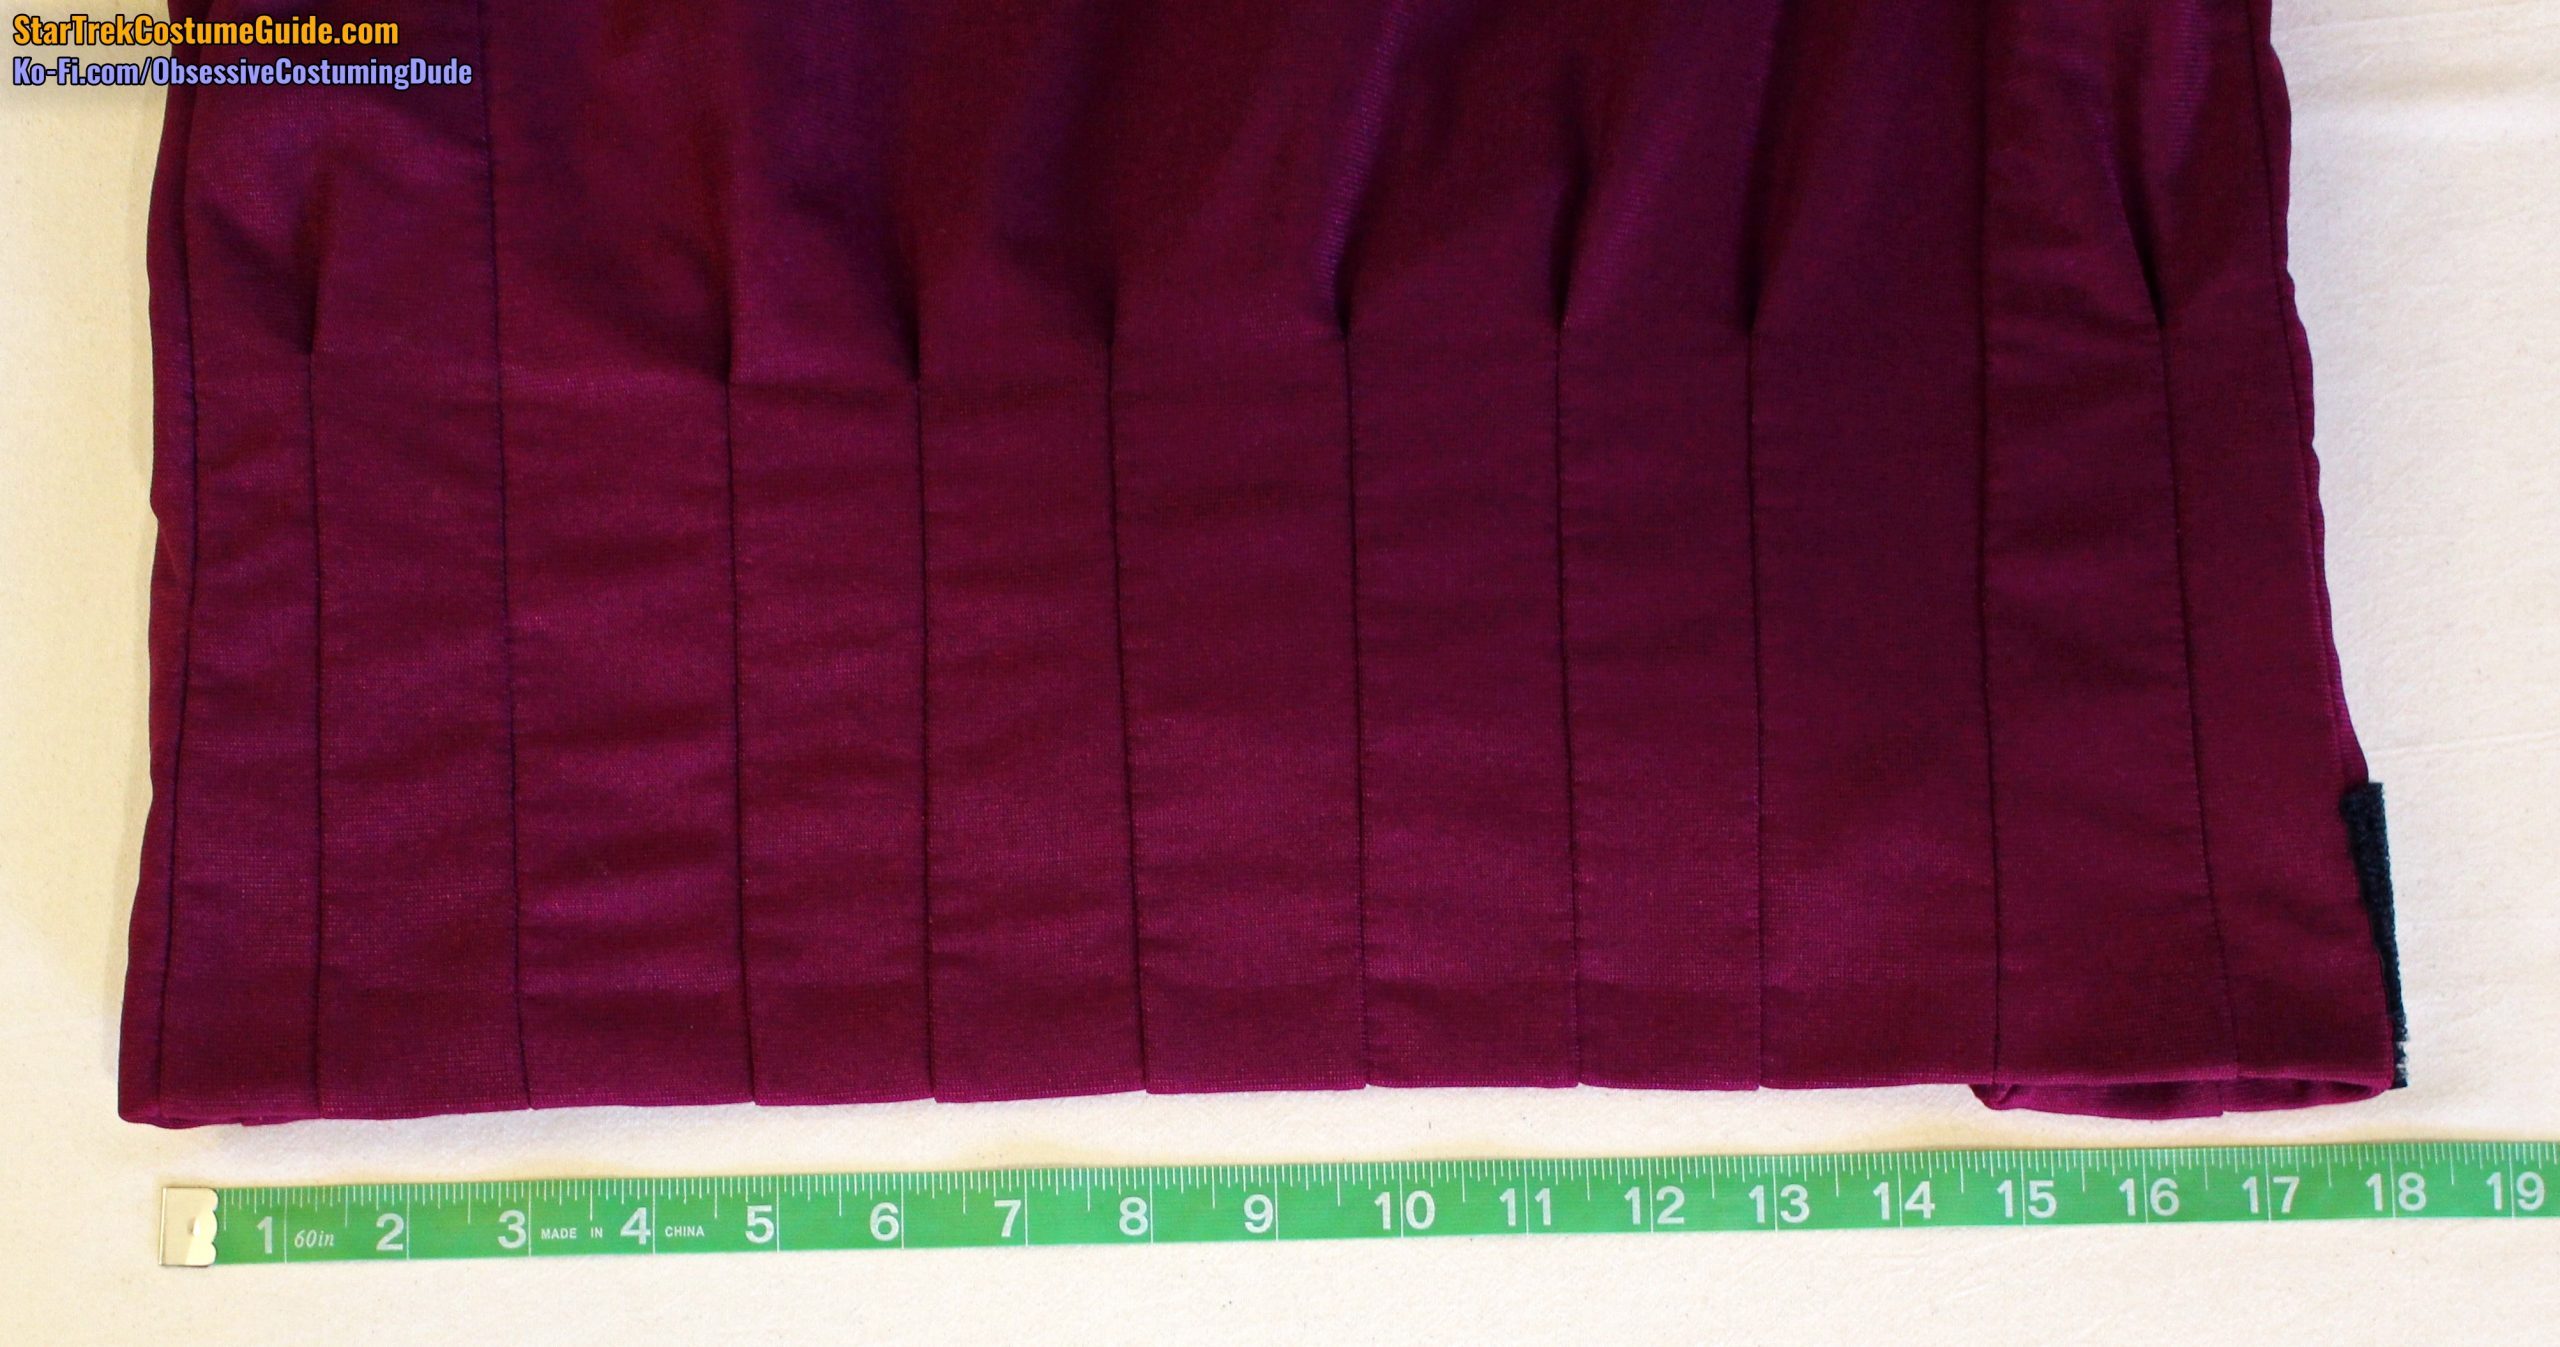
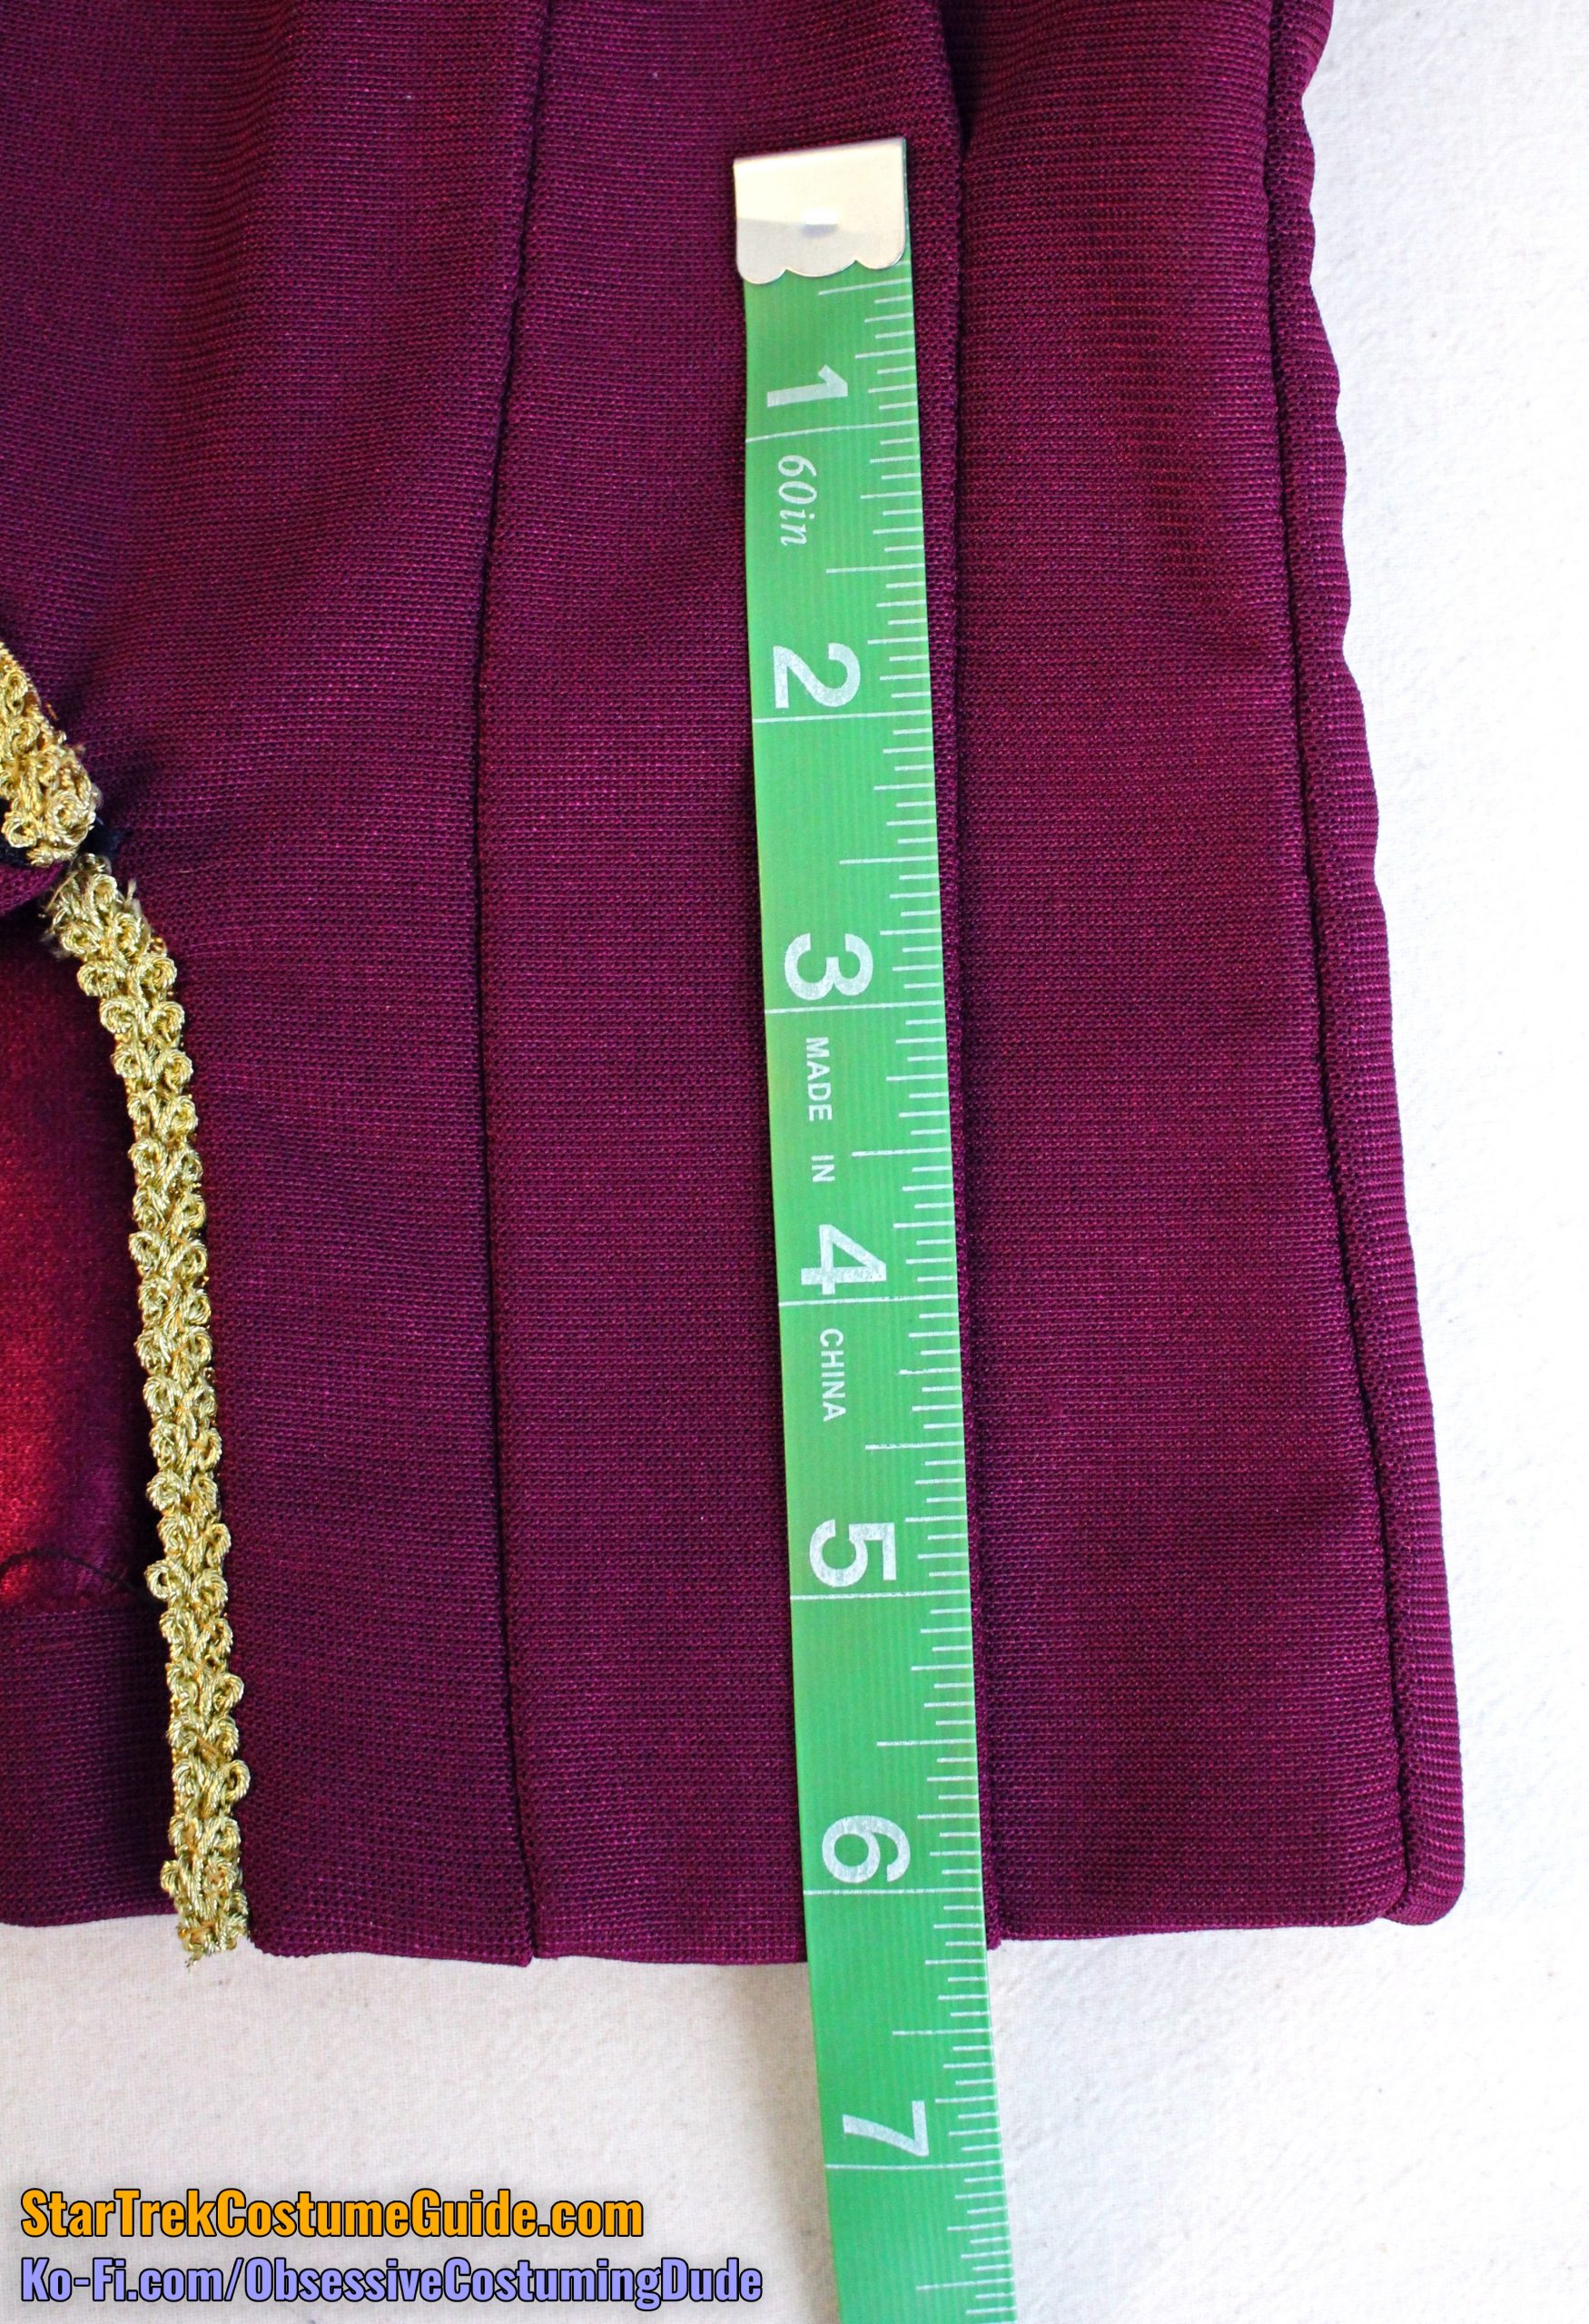
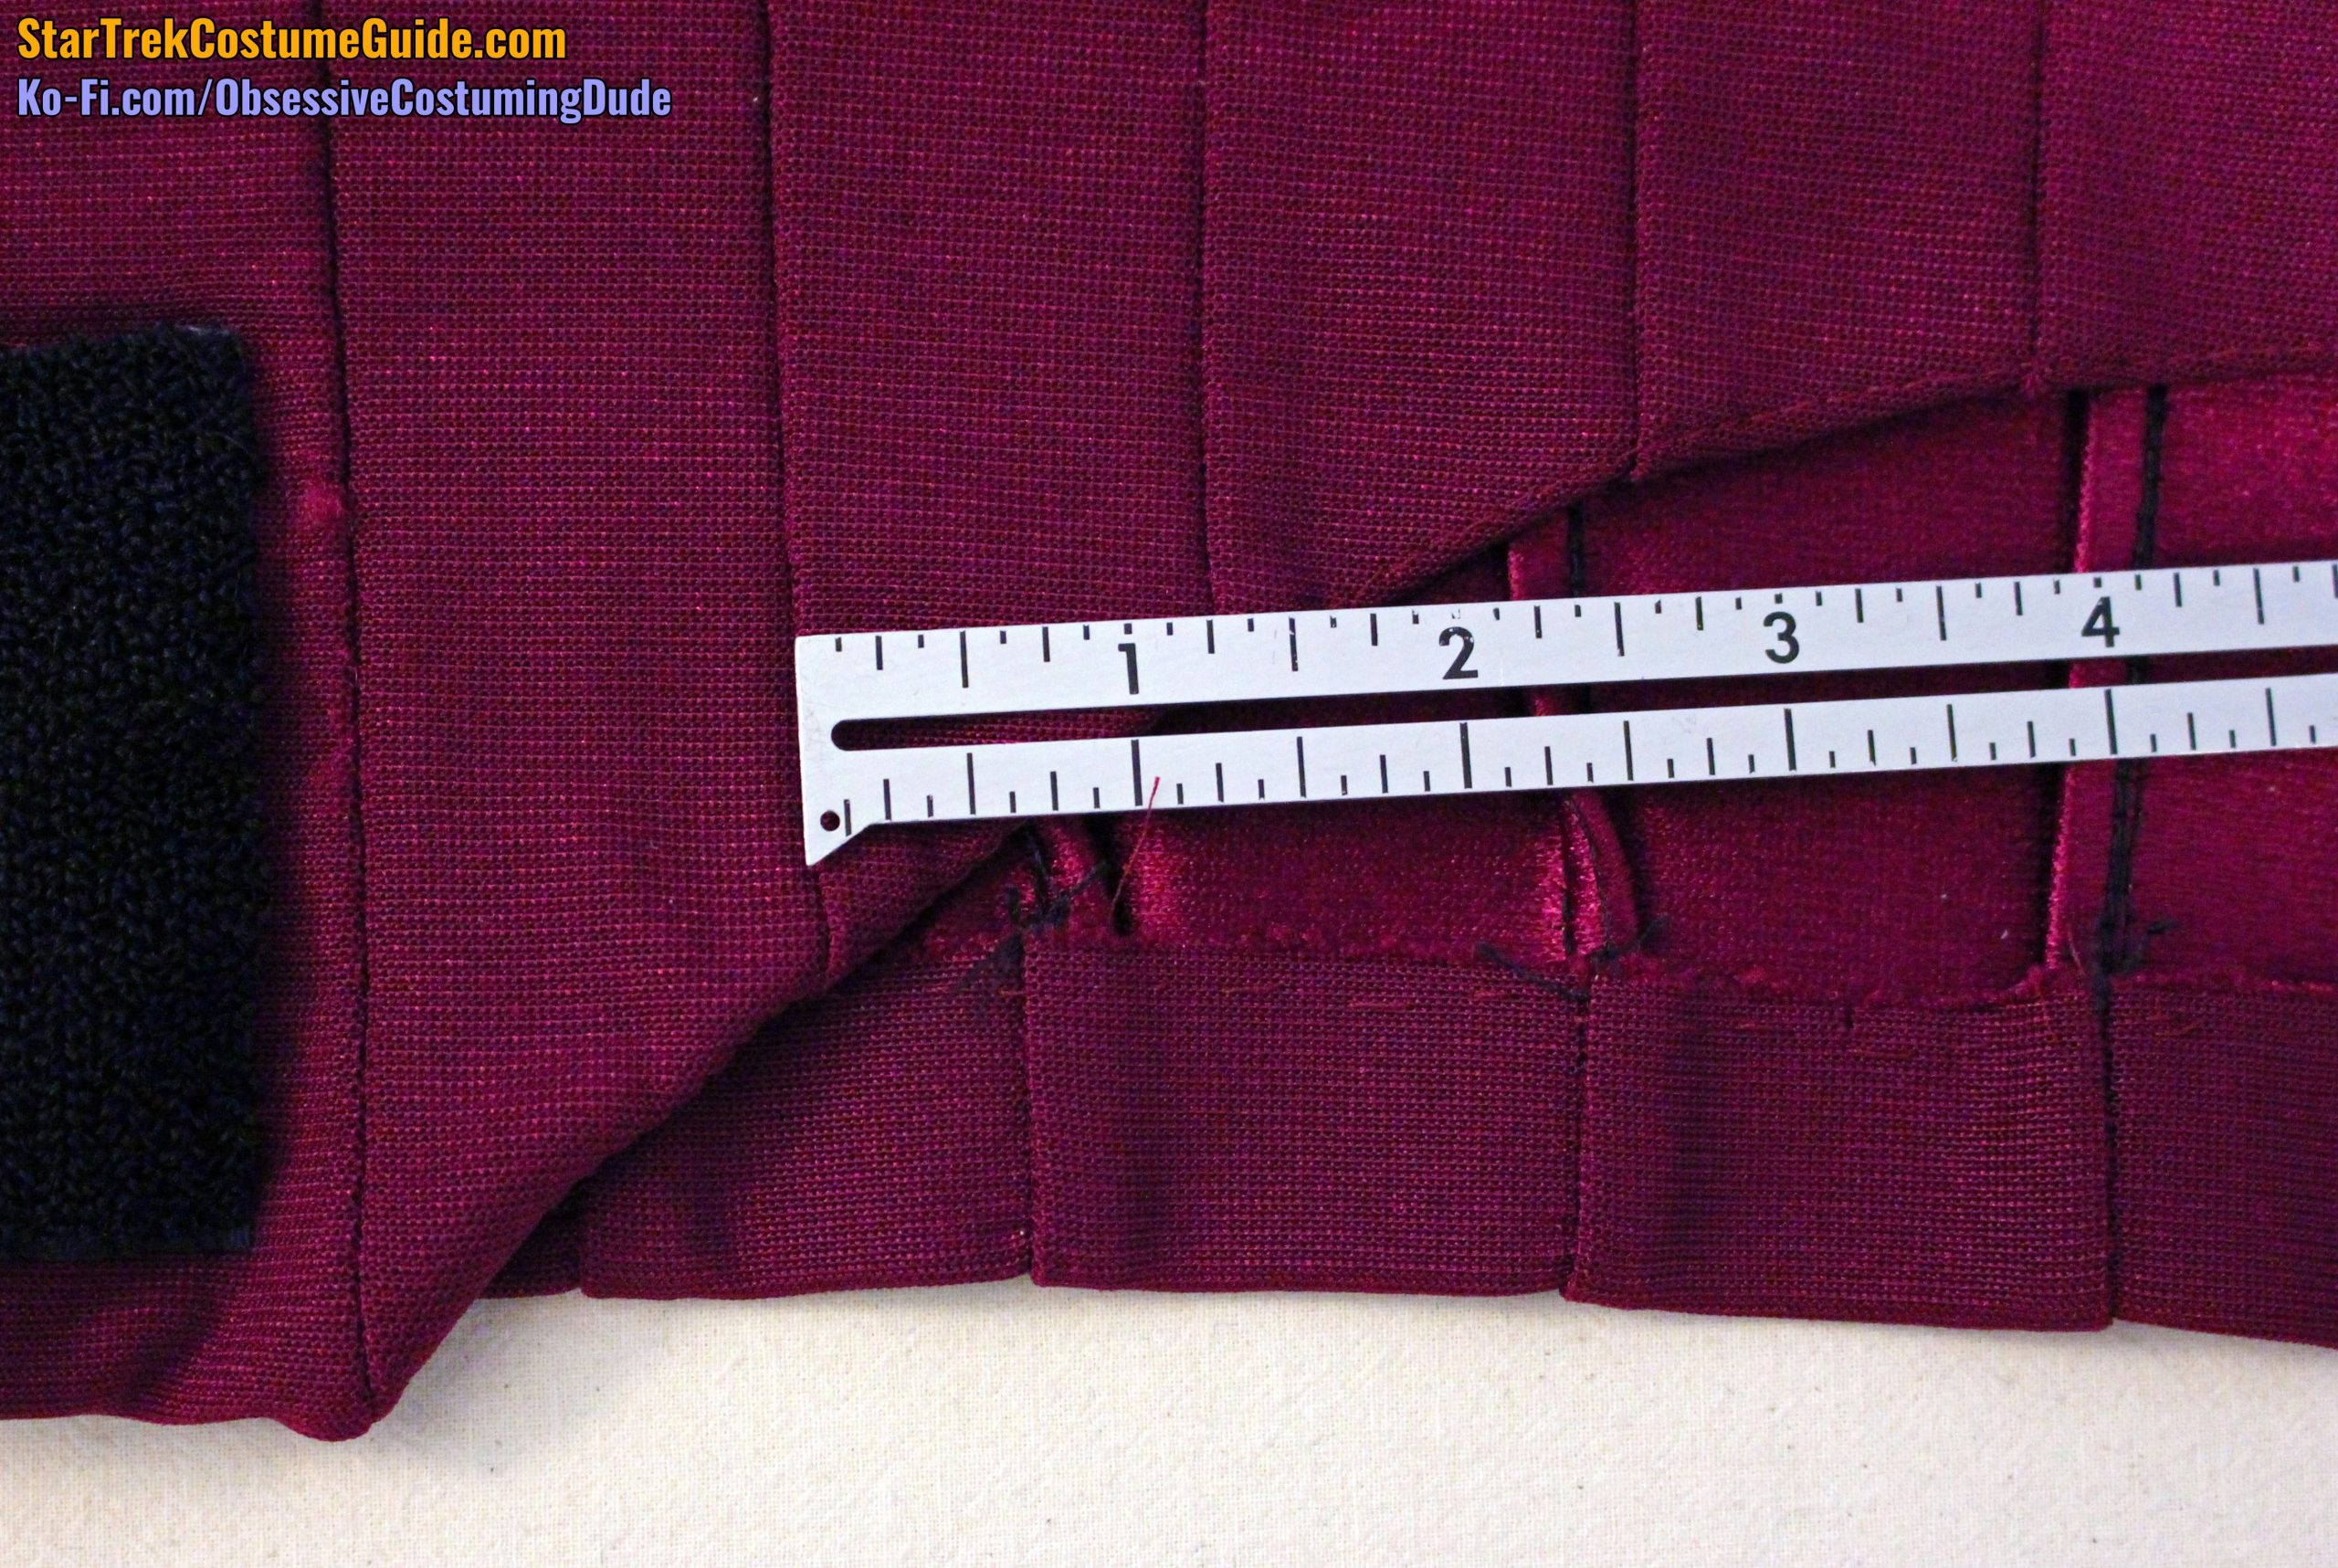
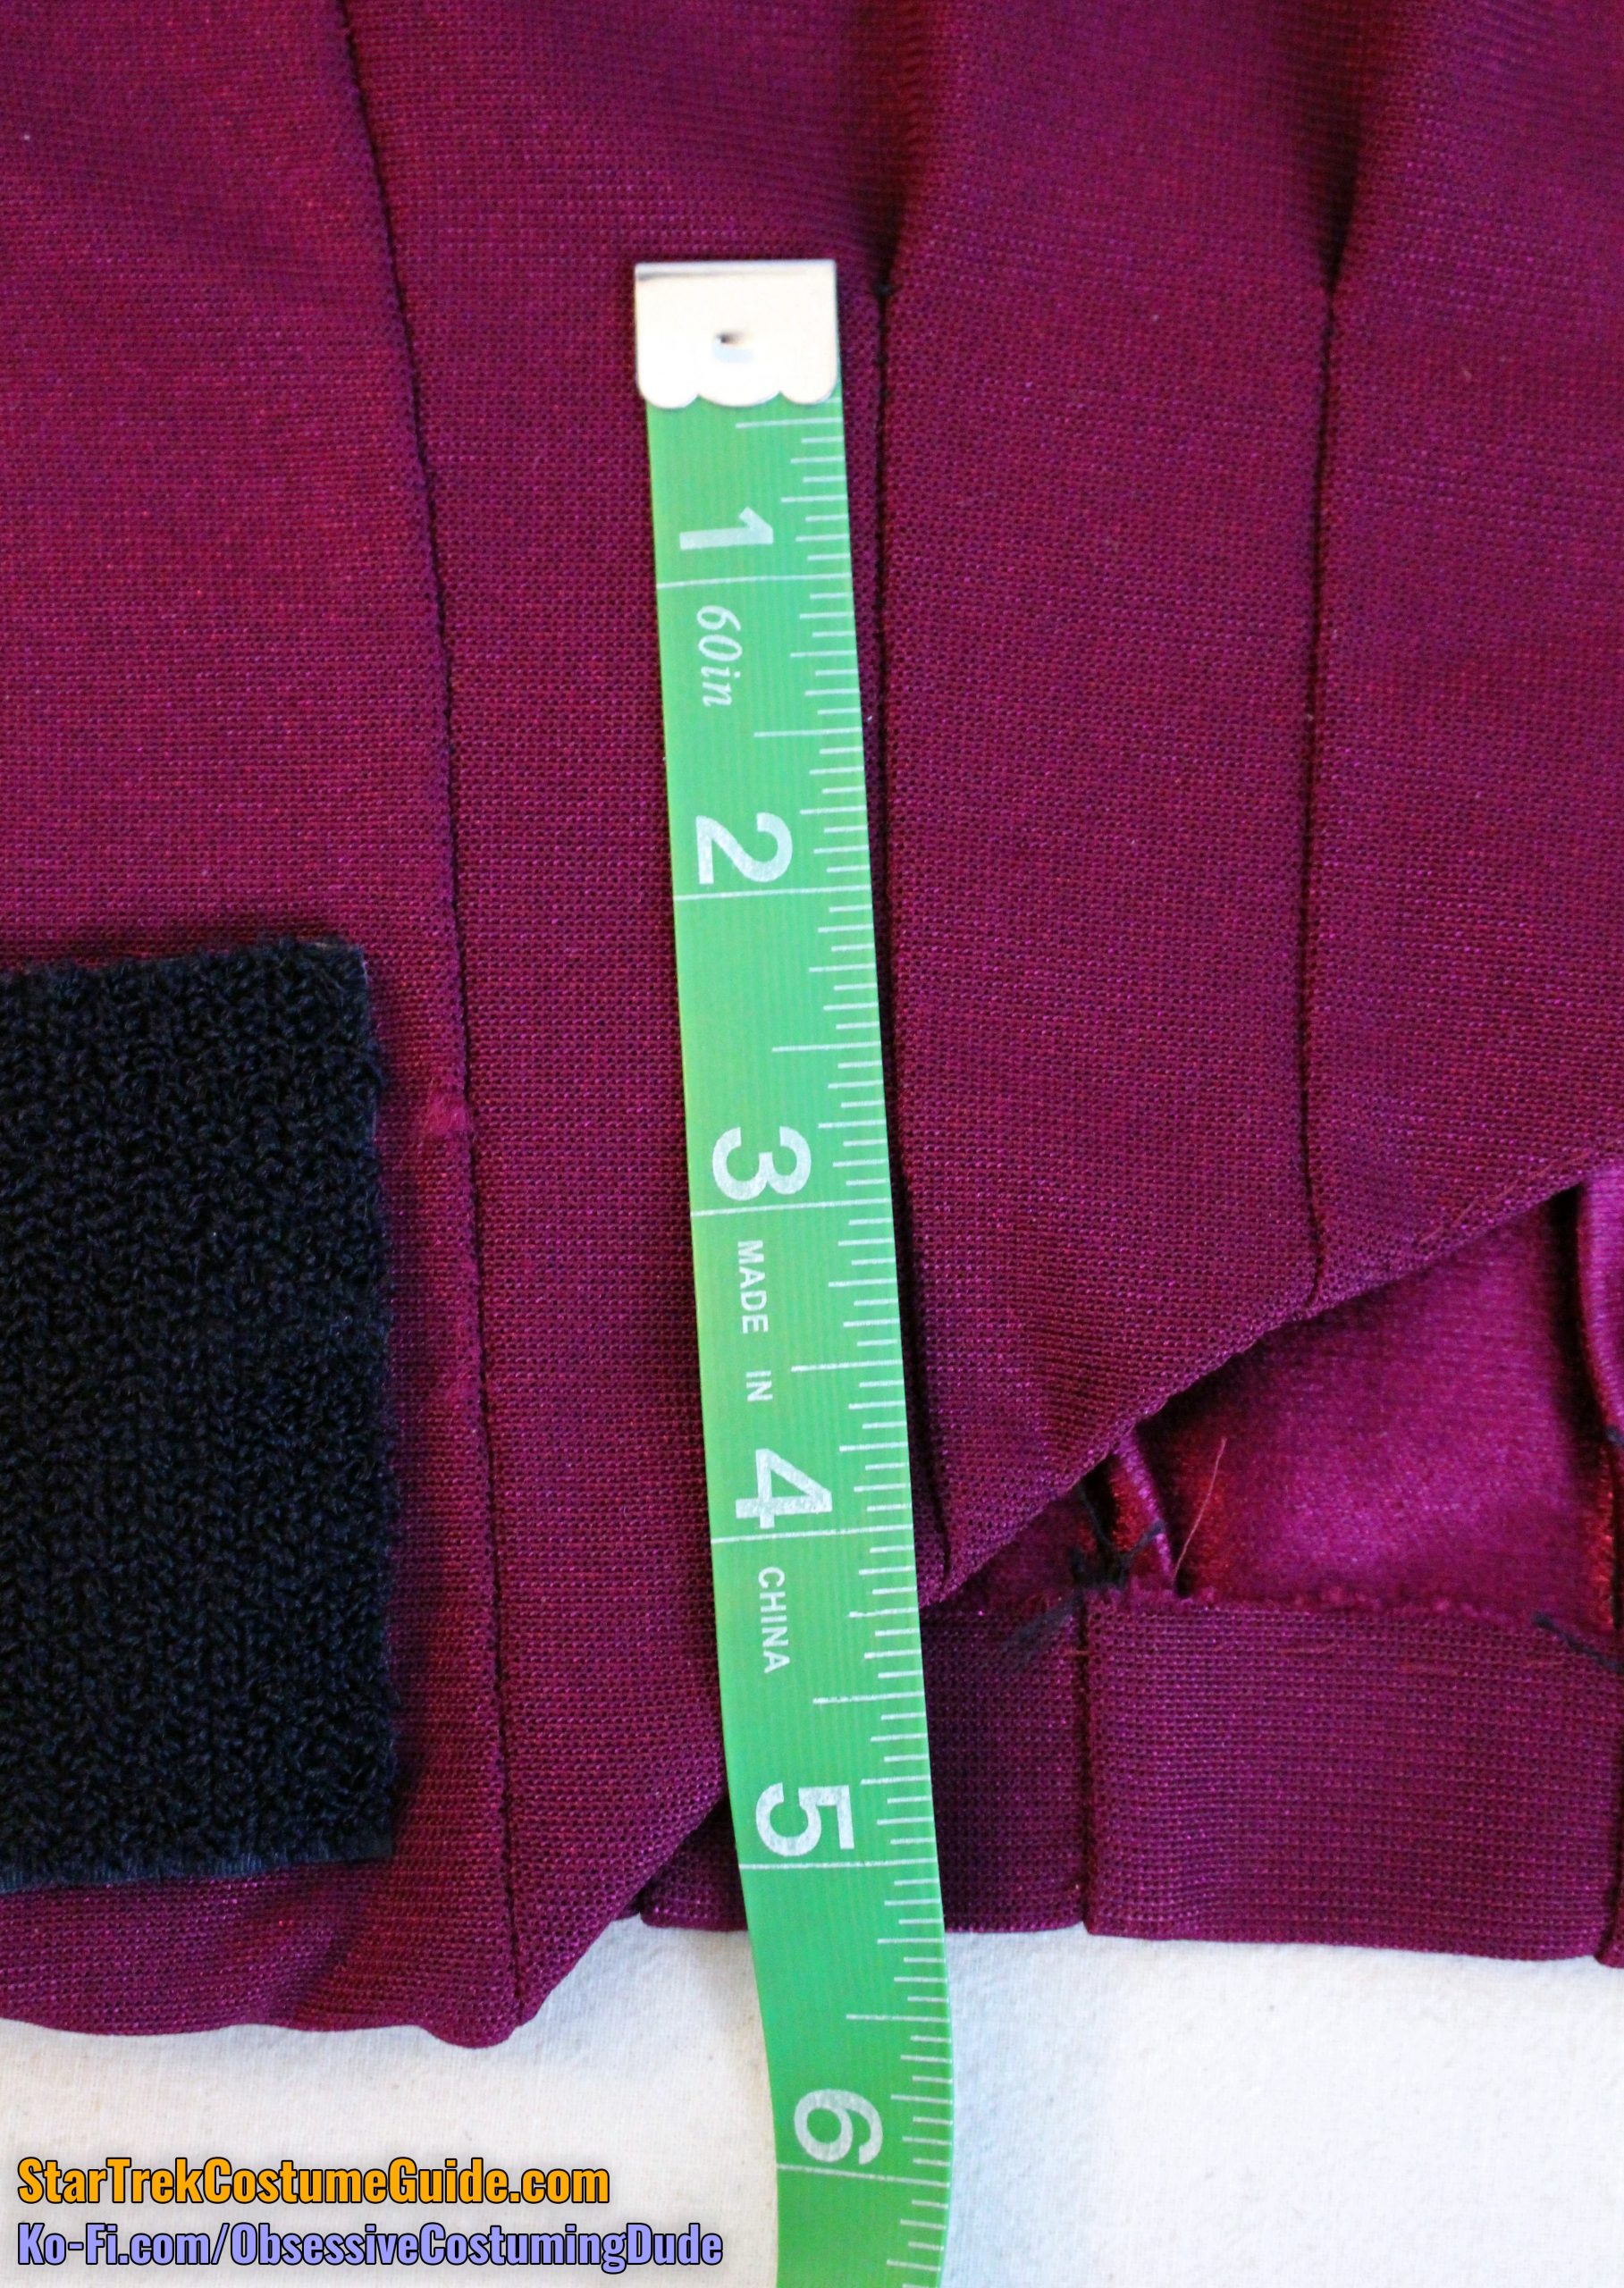
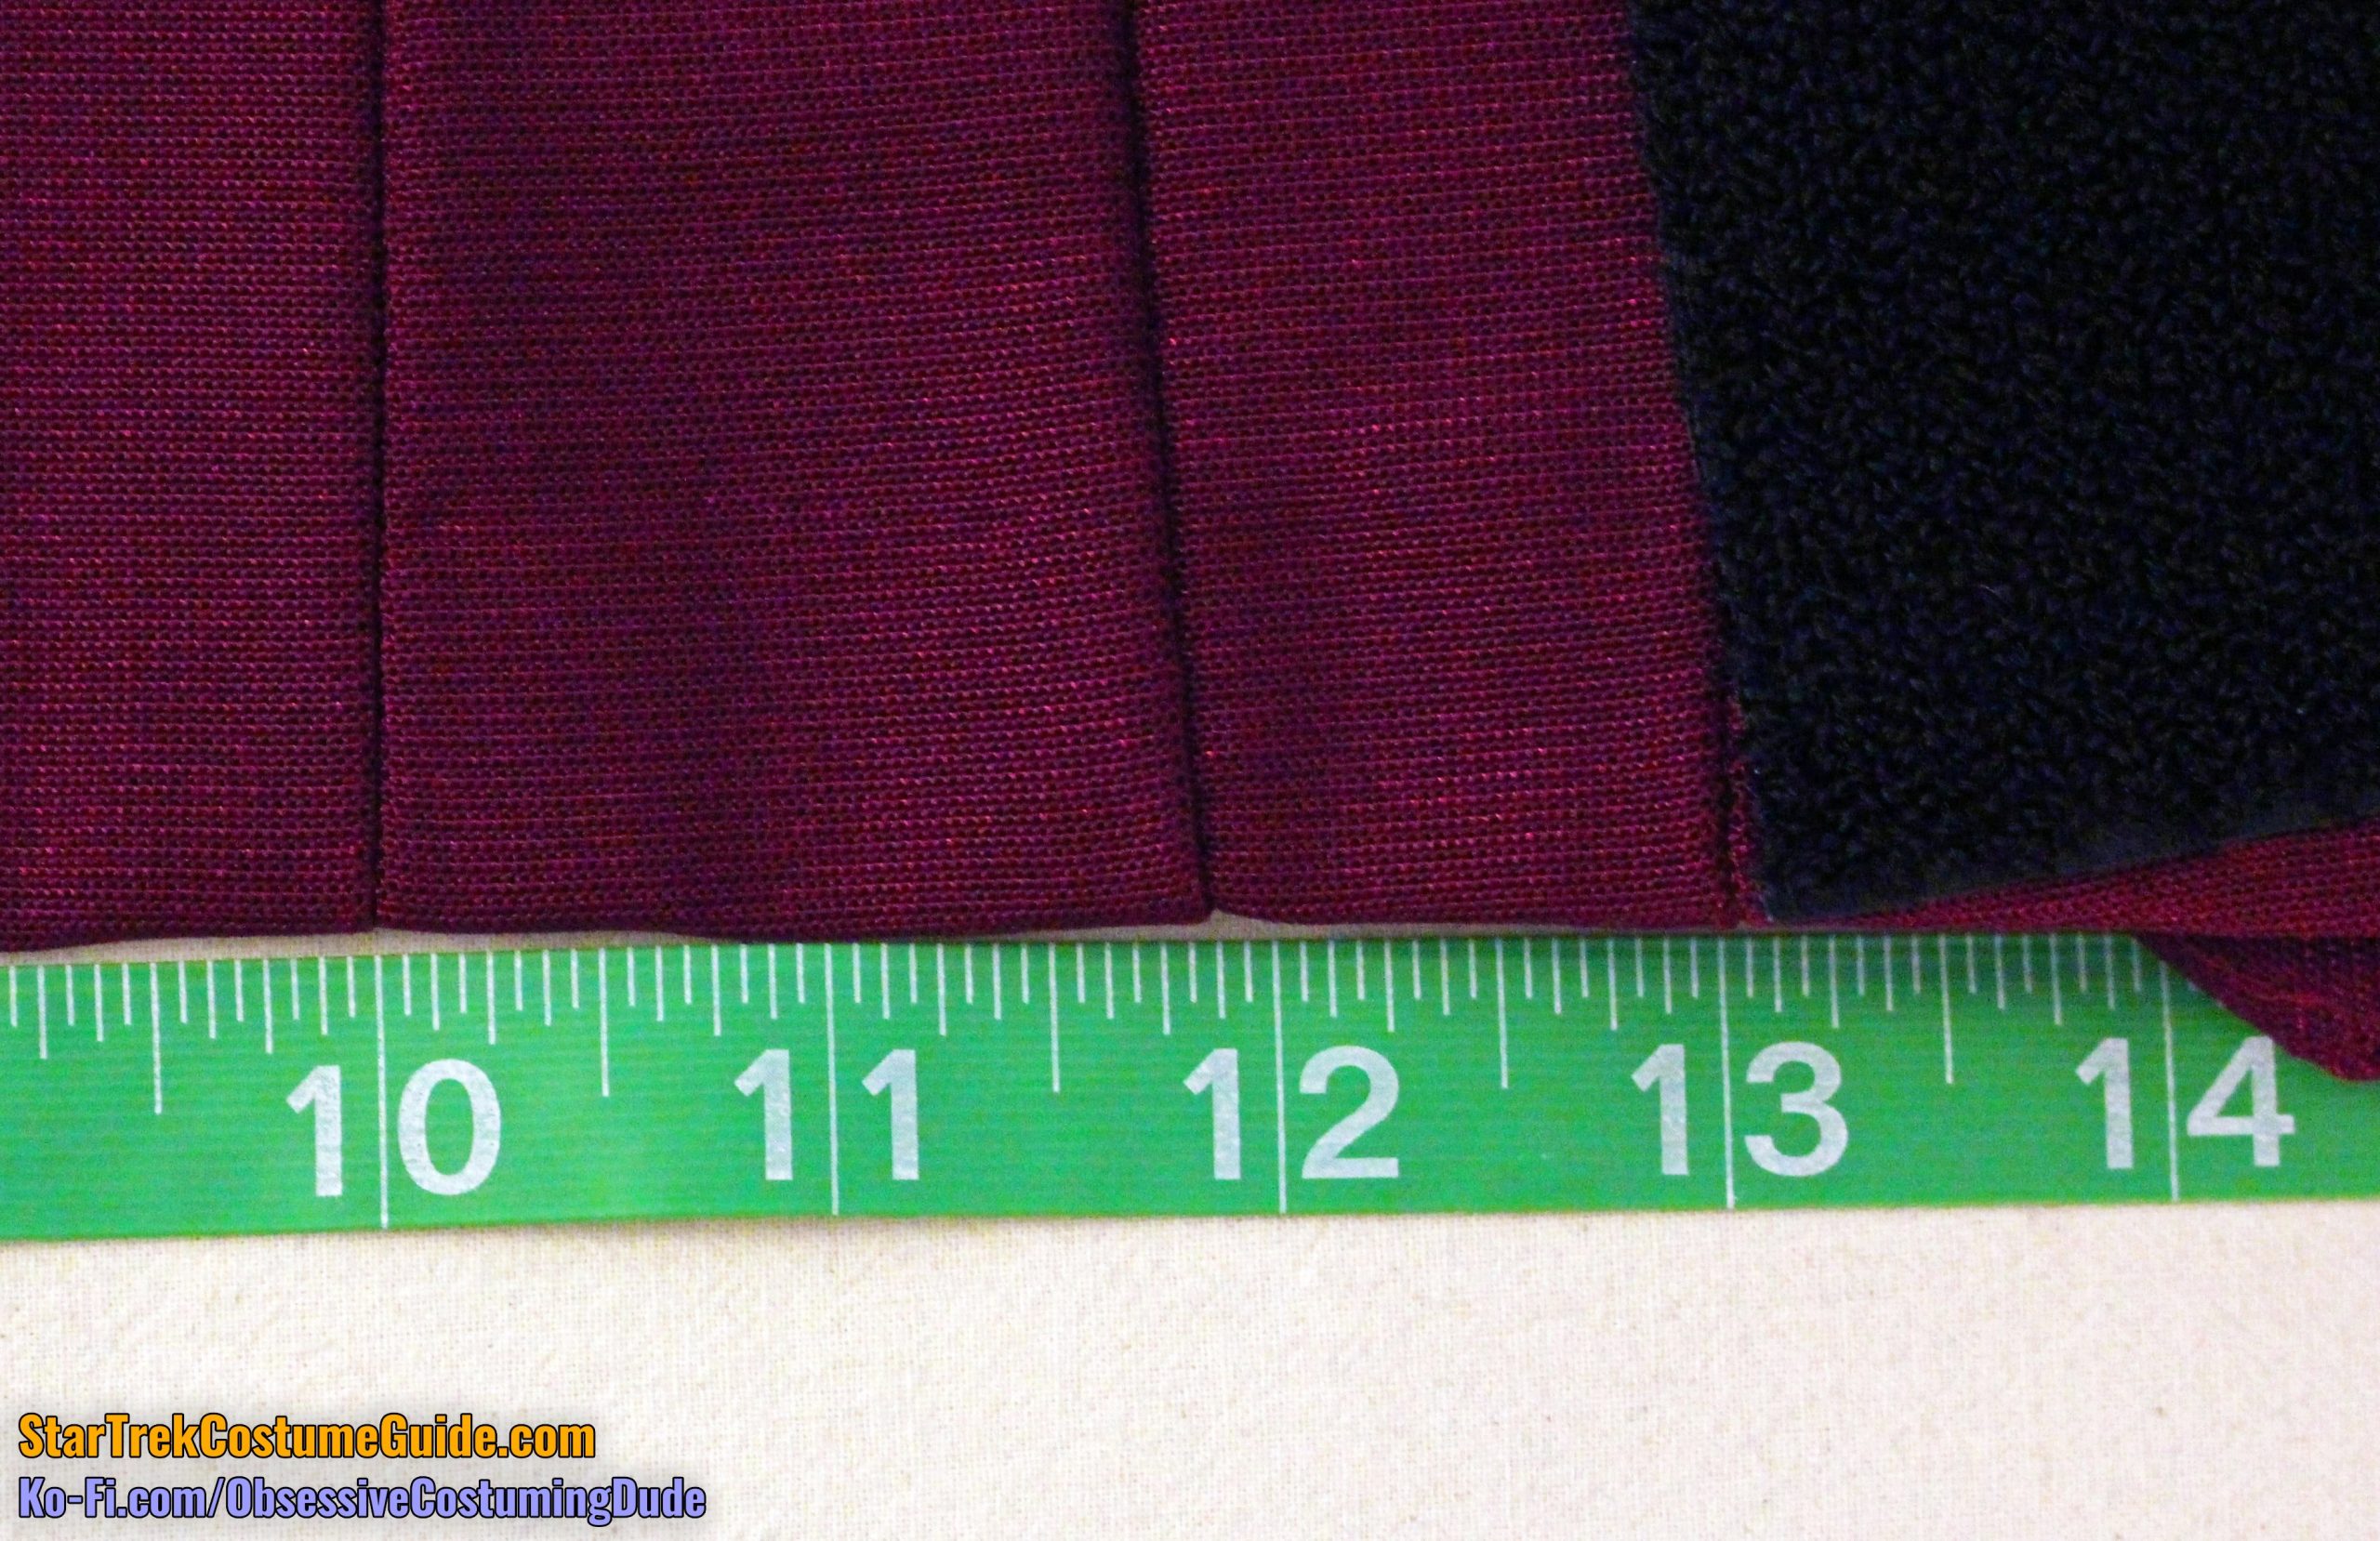
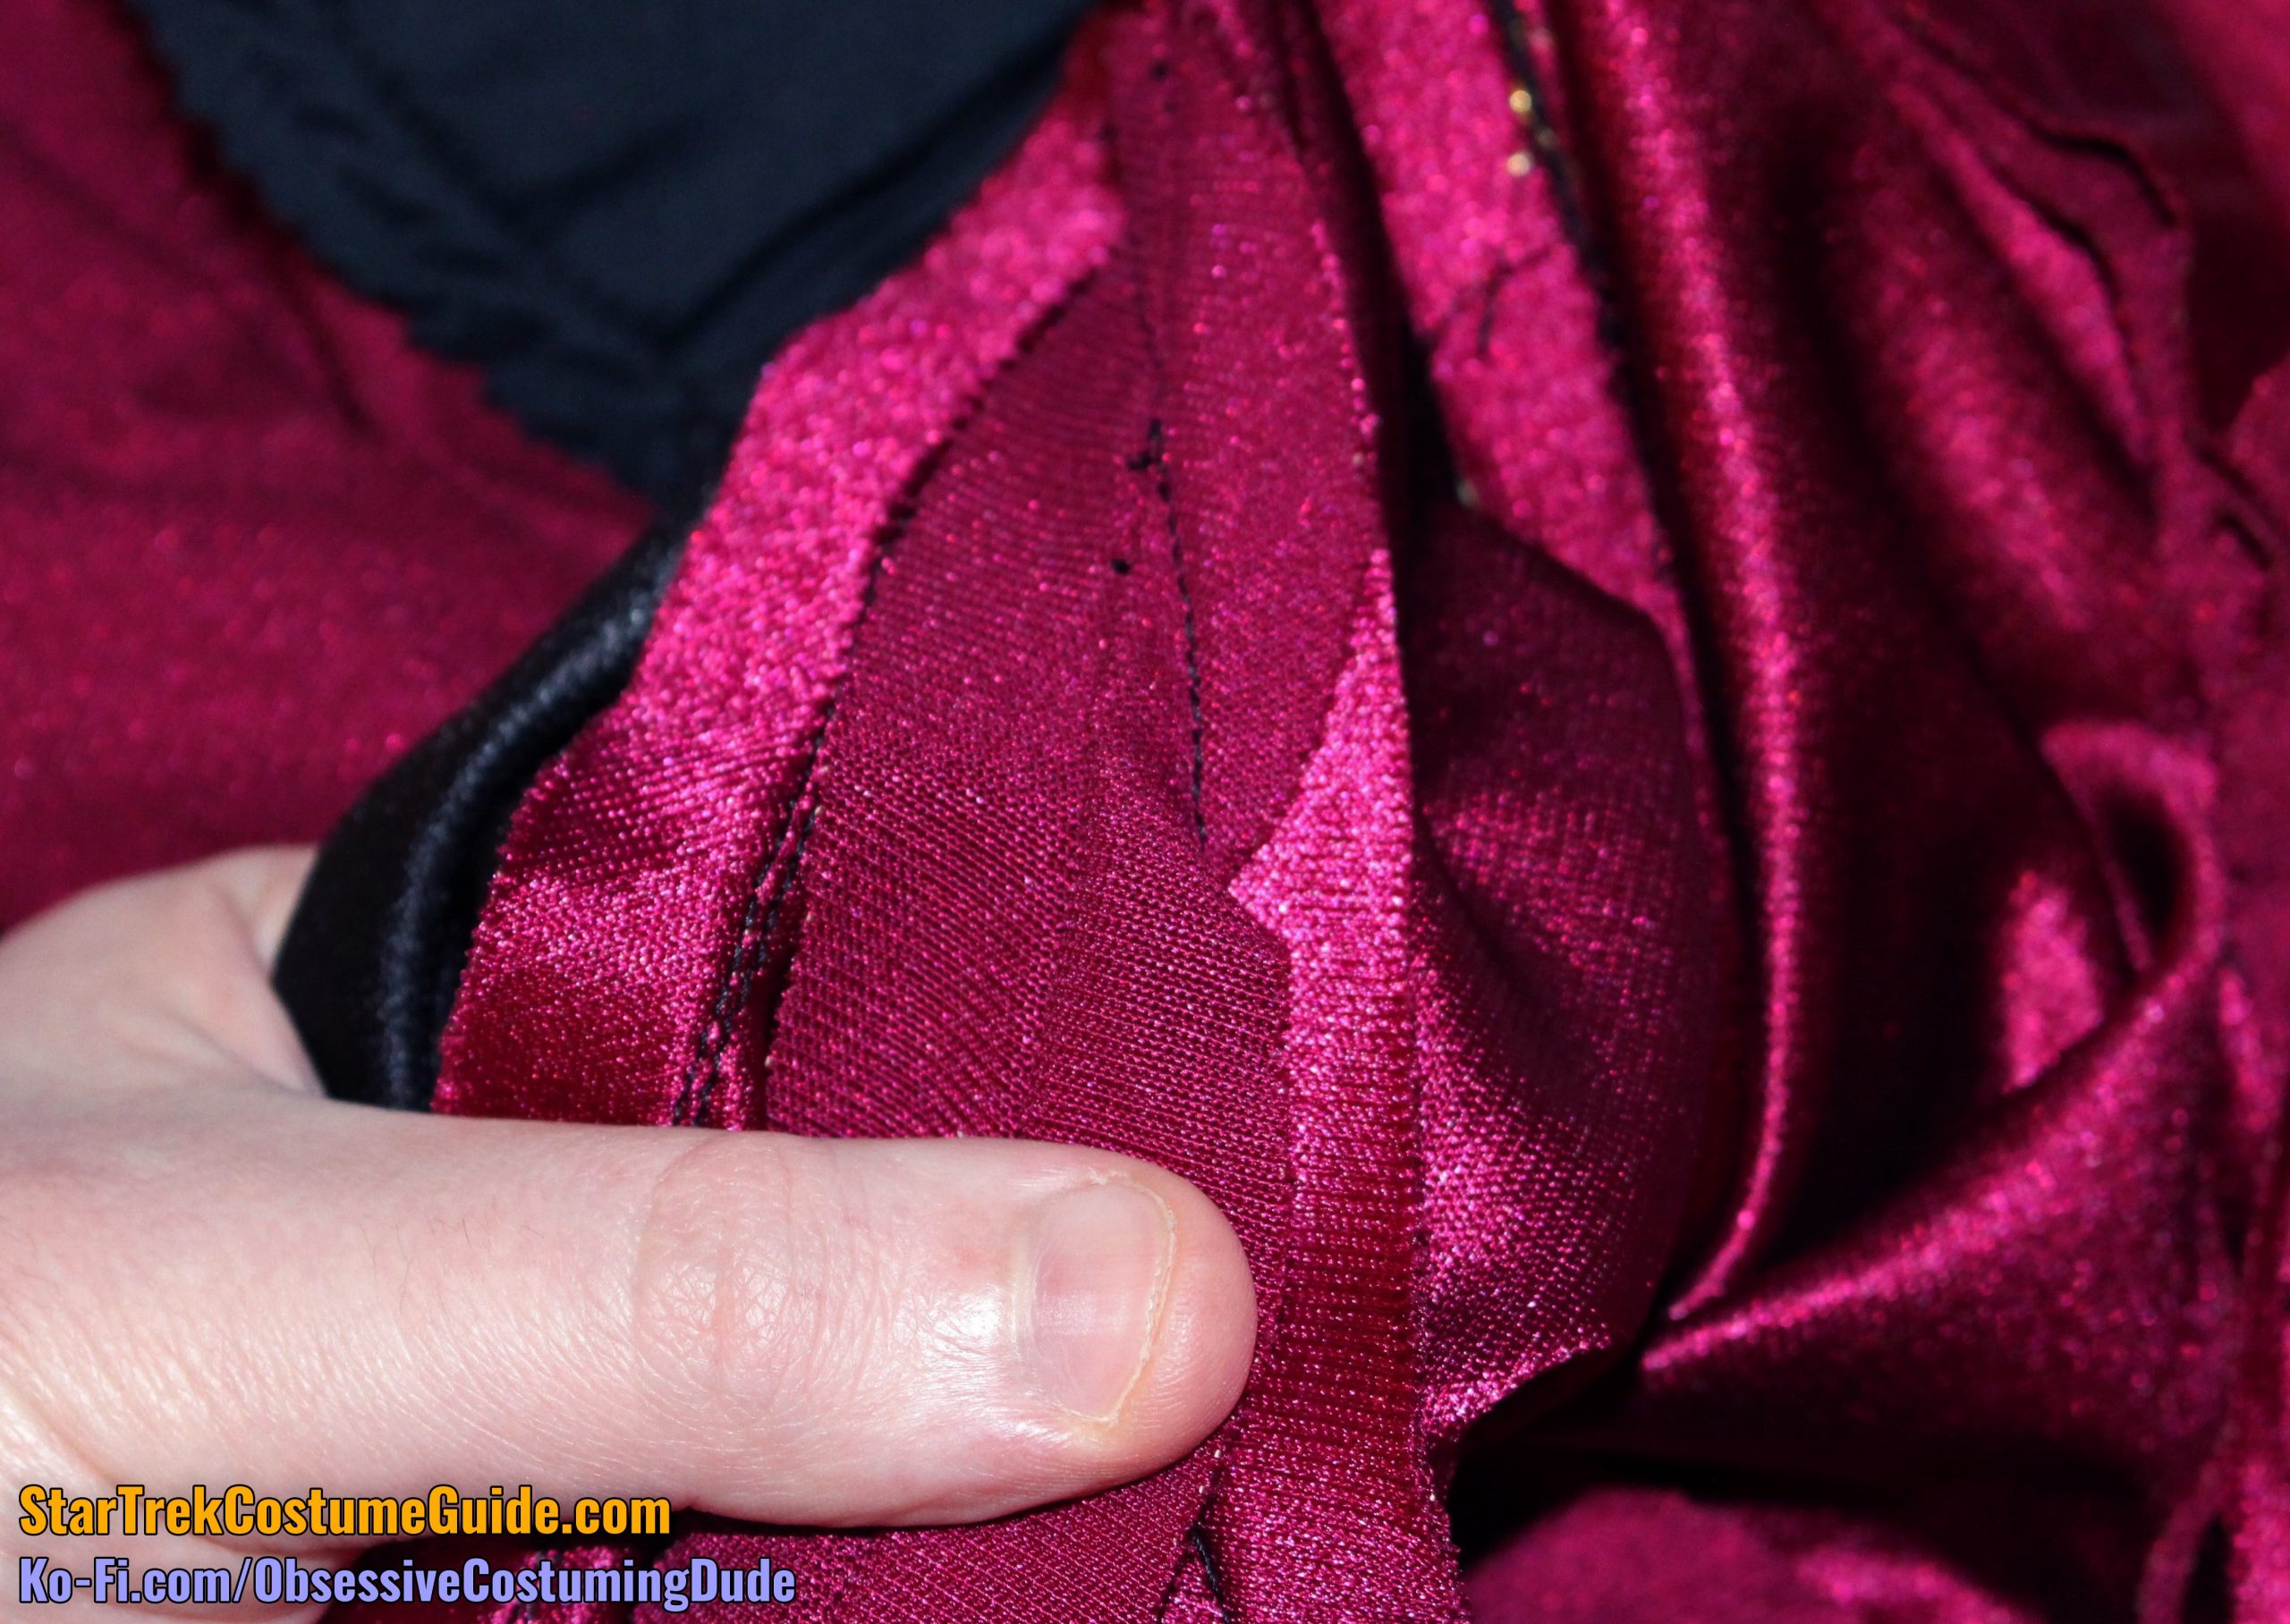
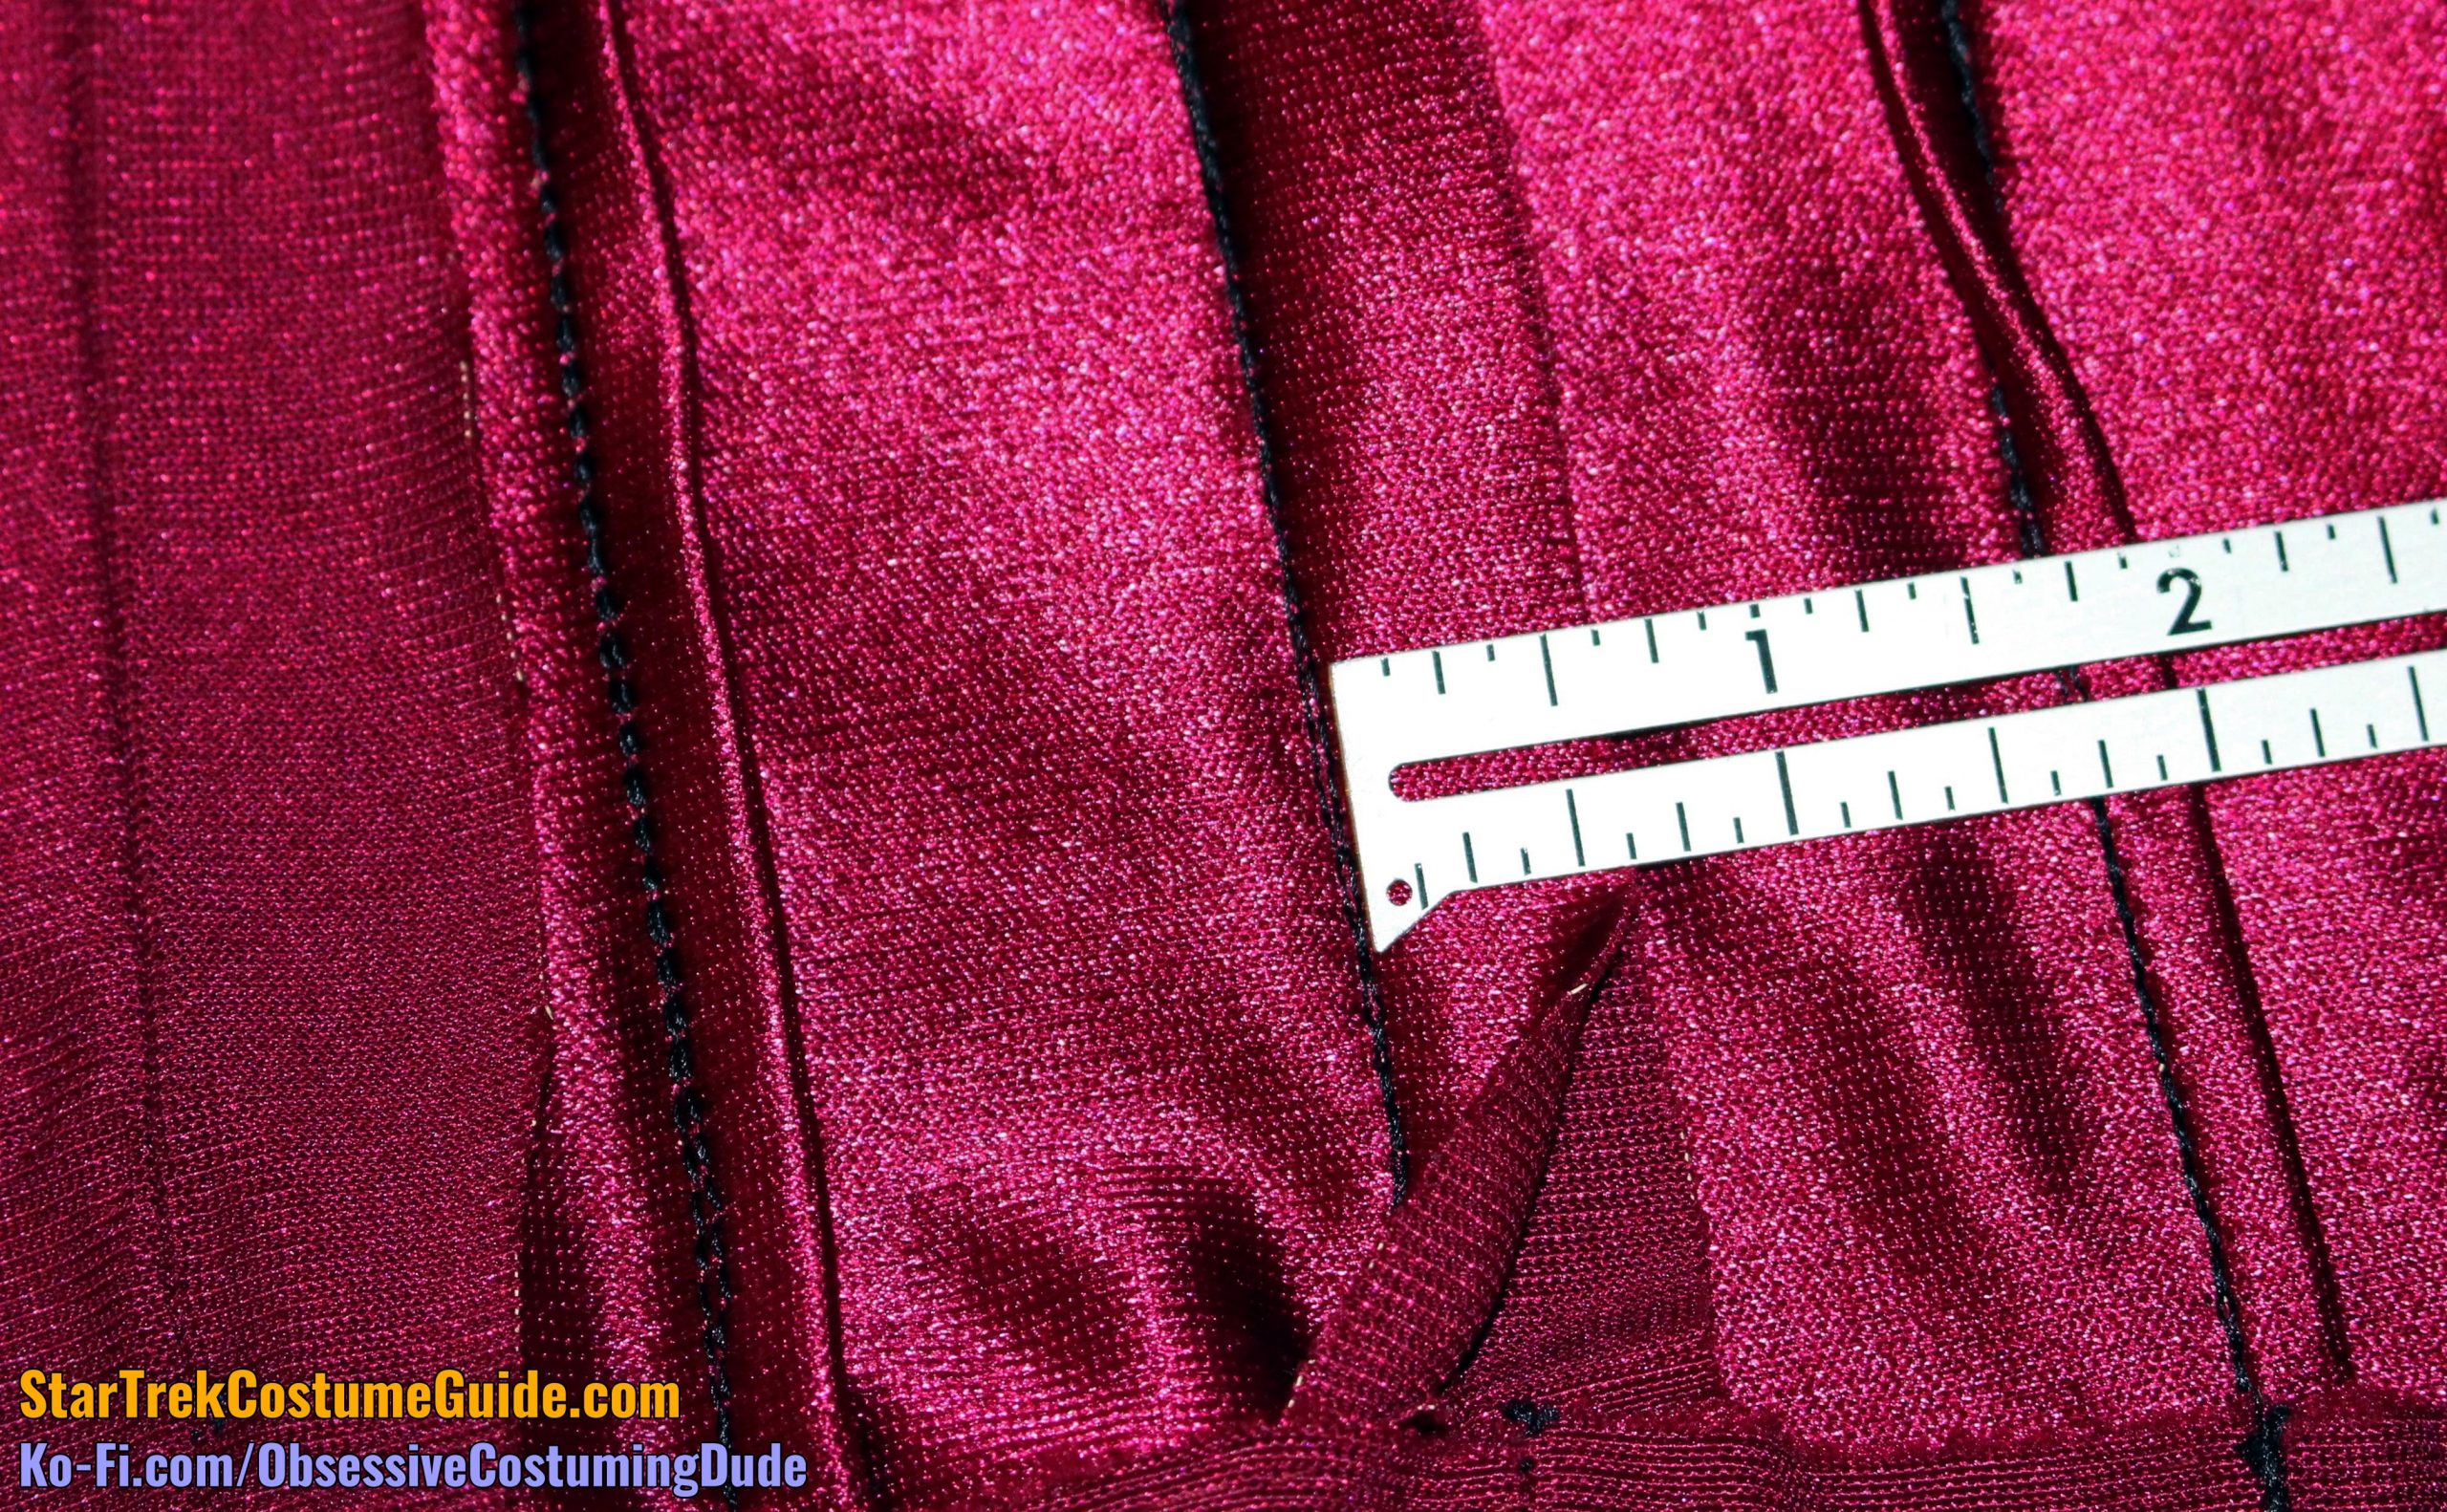
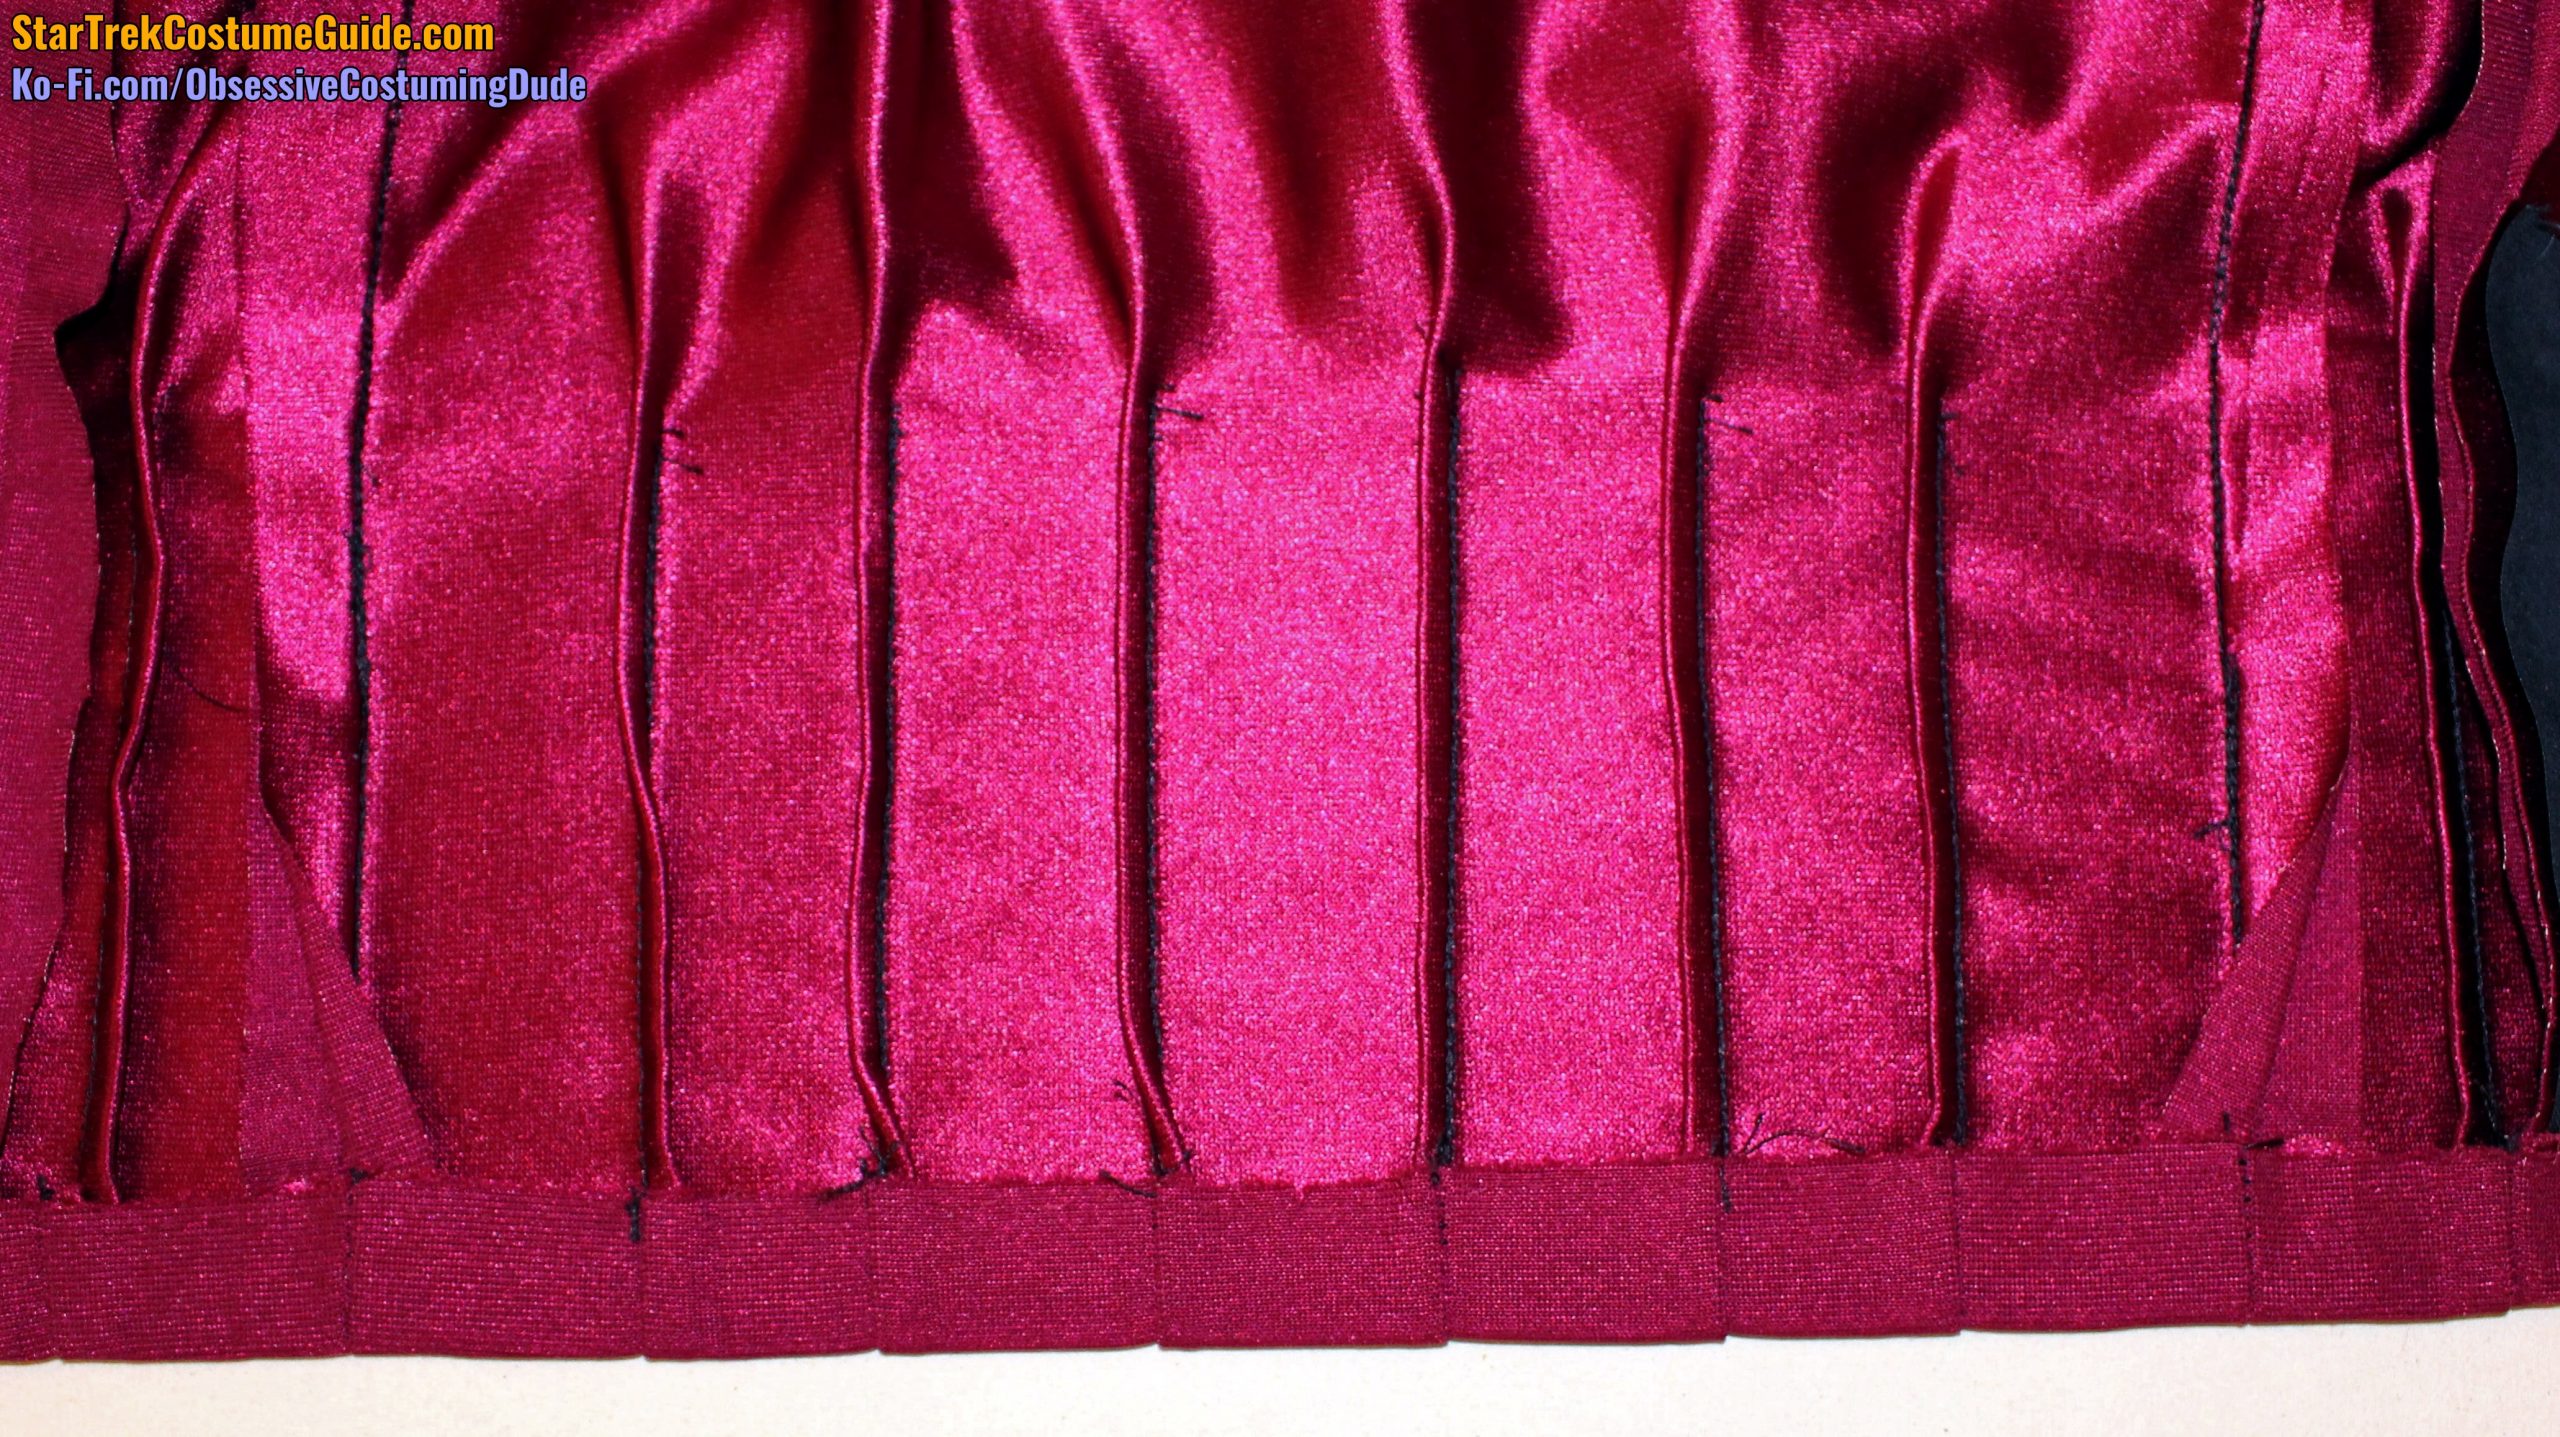
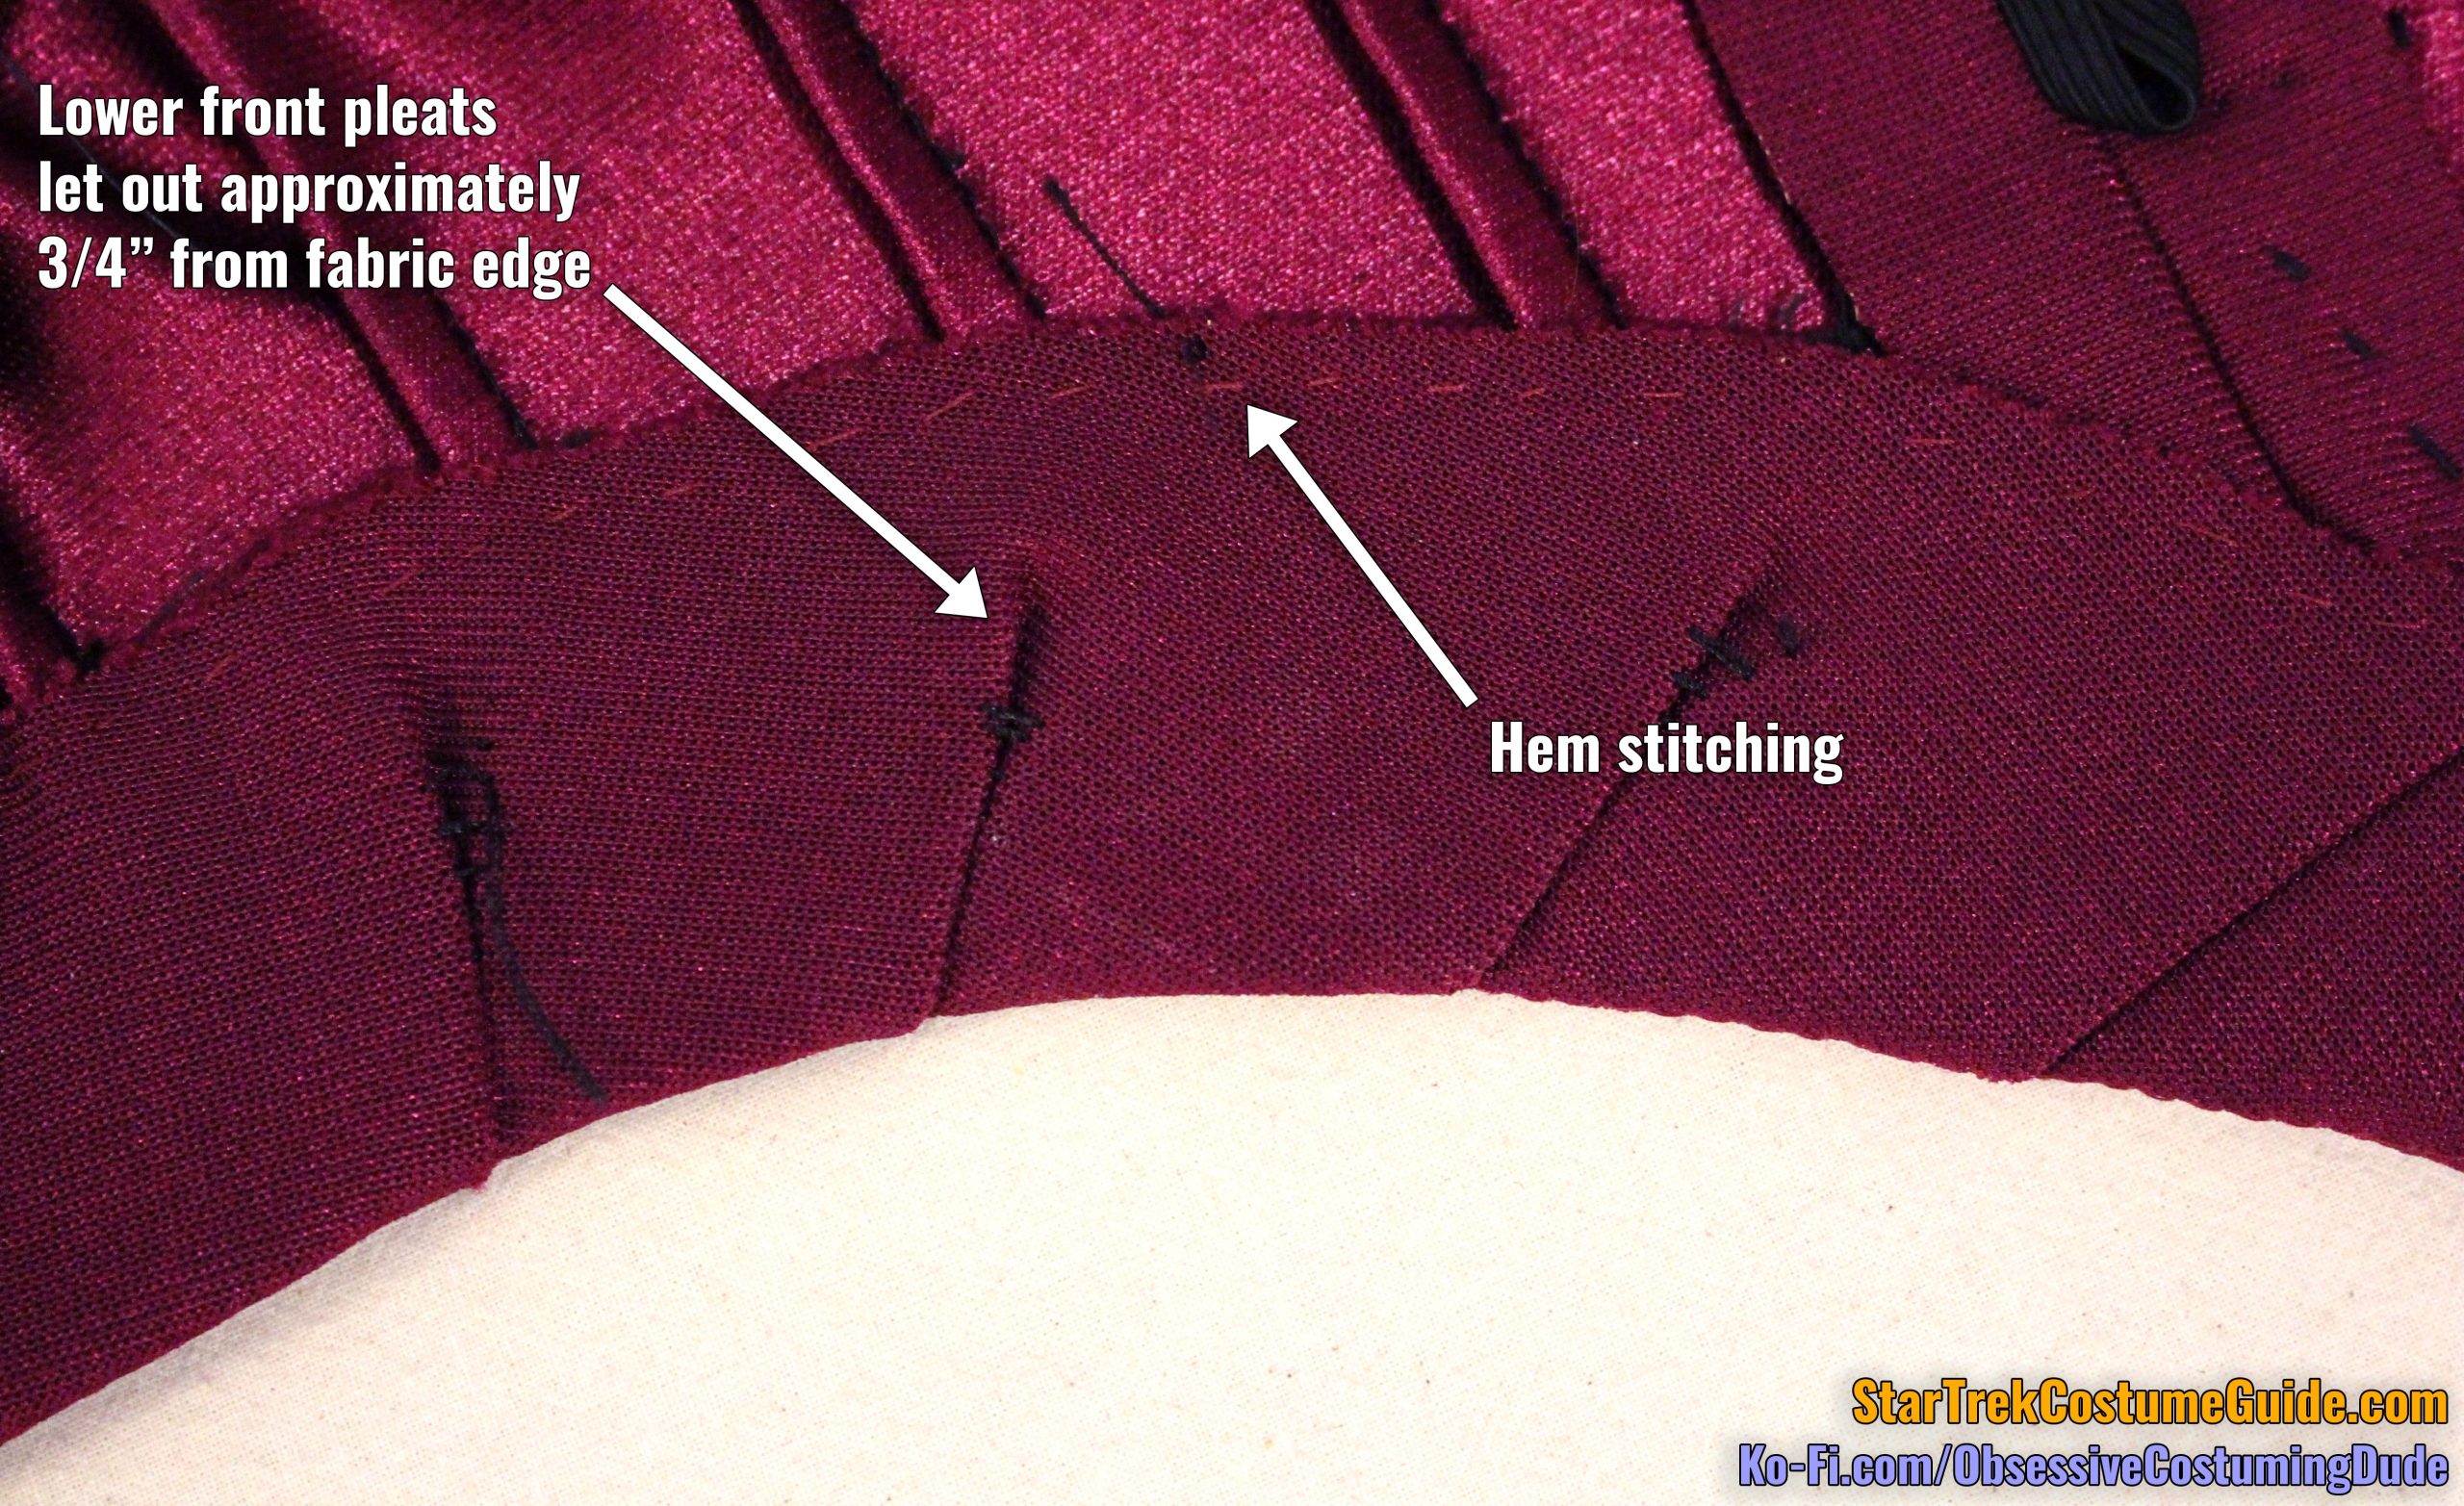
The pleats were nearly all irregularly spaced (because of course they were).
I documented them via their positioning along the bottom edge of the jacket, although it’s worth noting that they were all slightly farther apart at the top (up to ¼” or so) than the bottom.
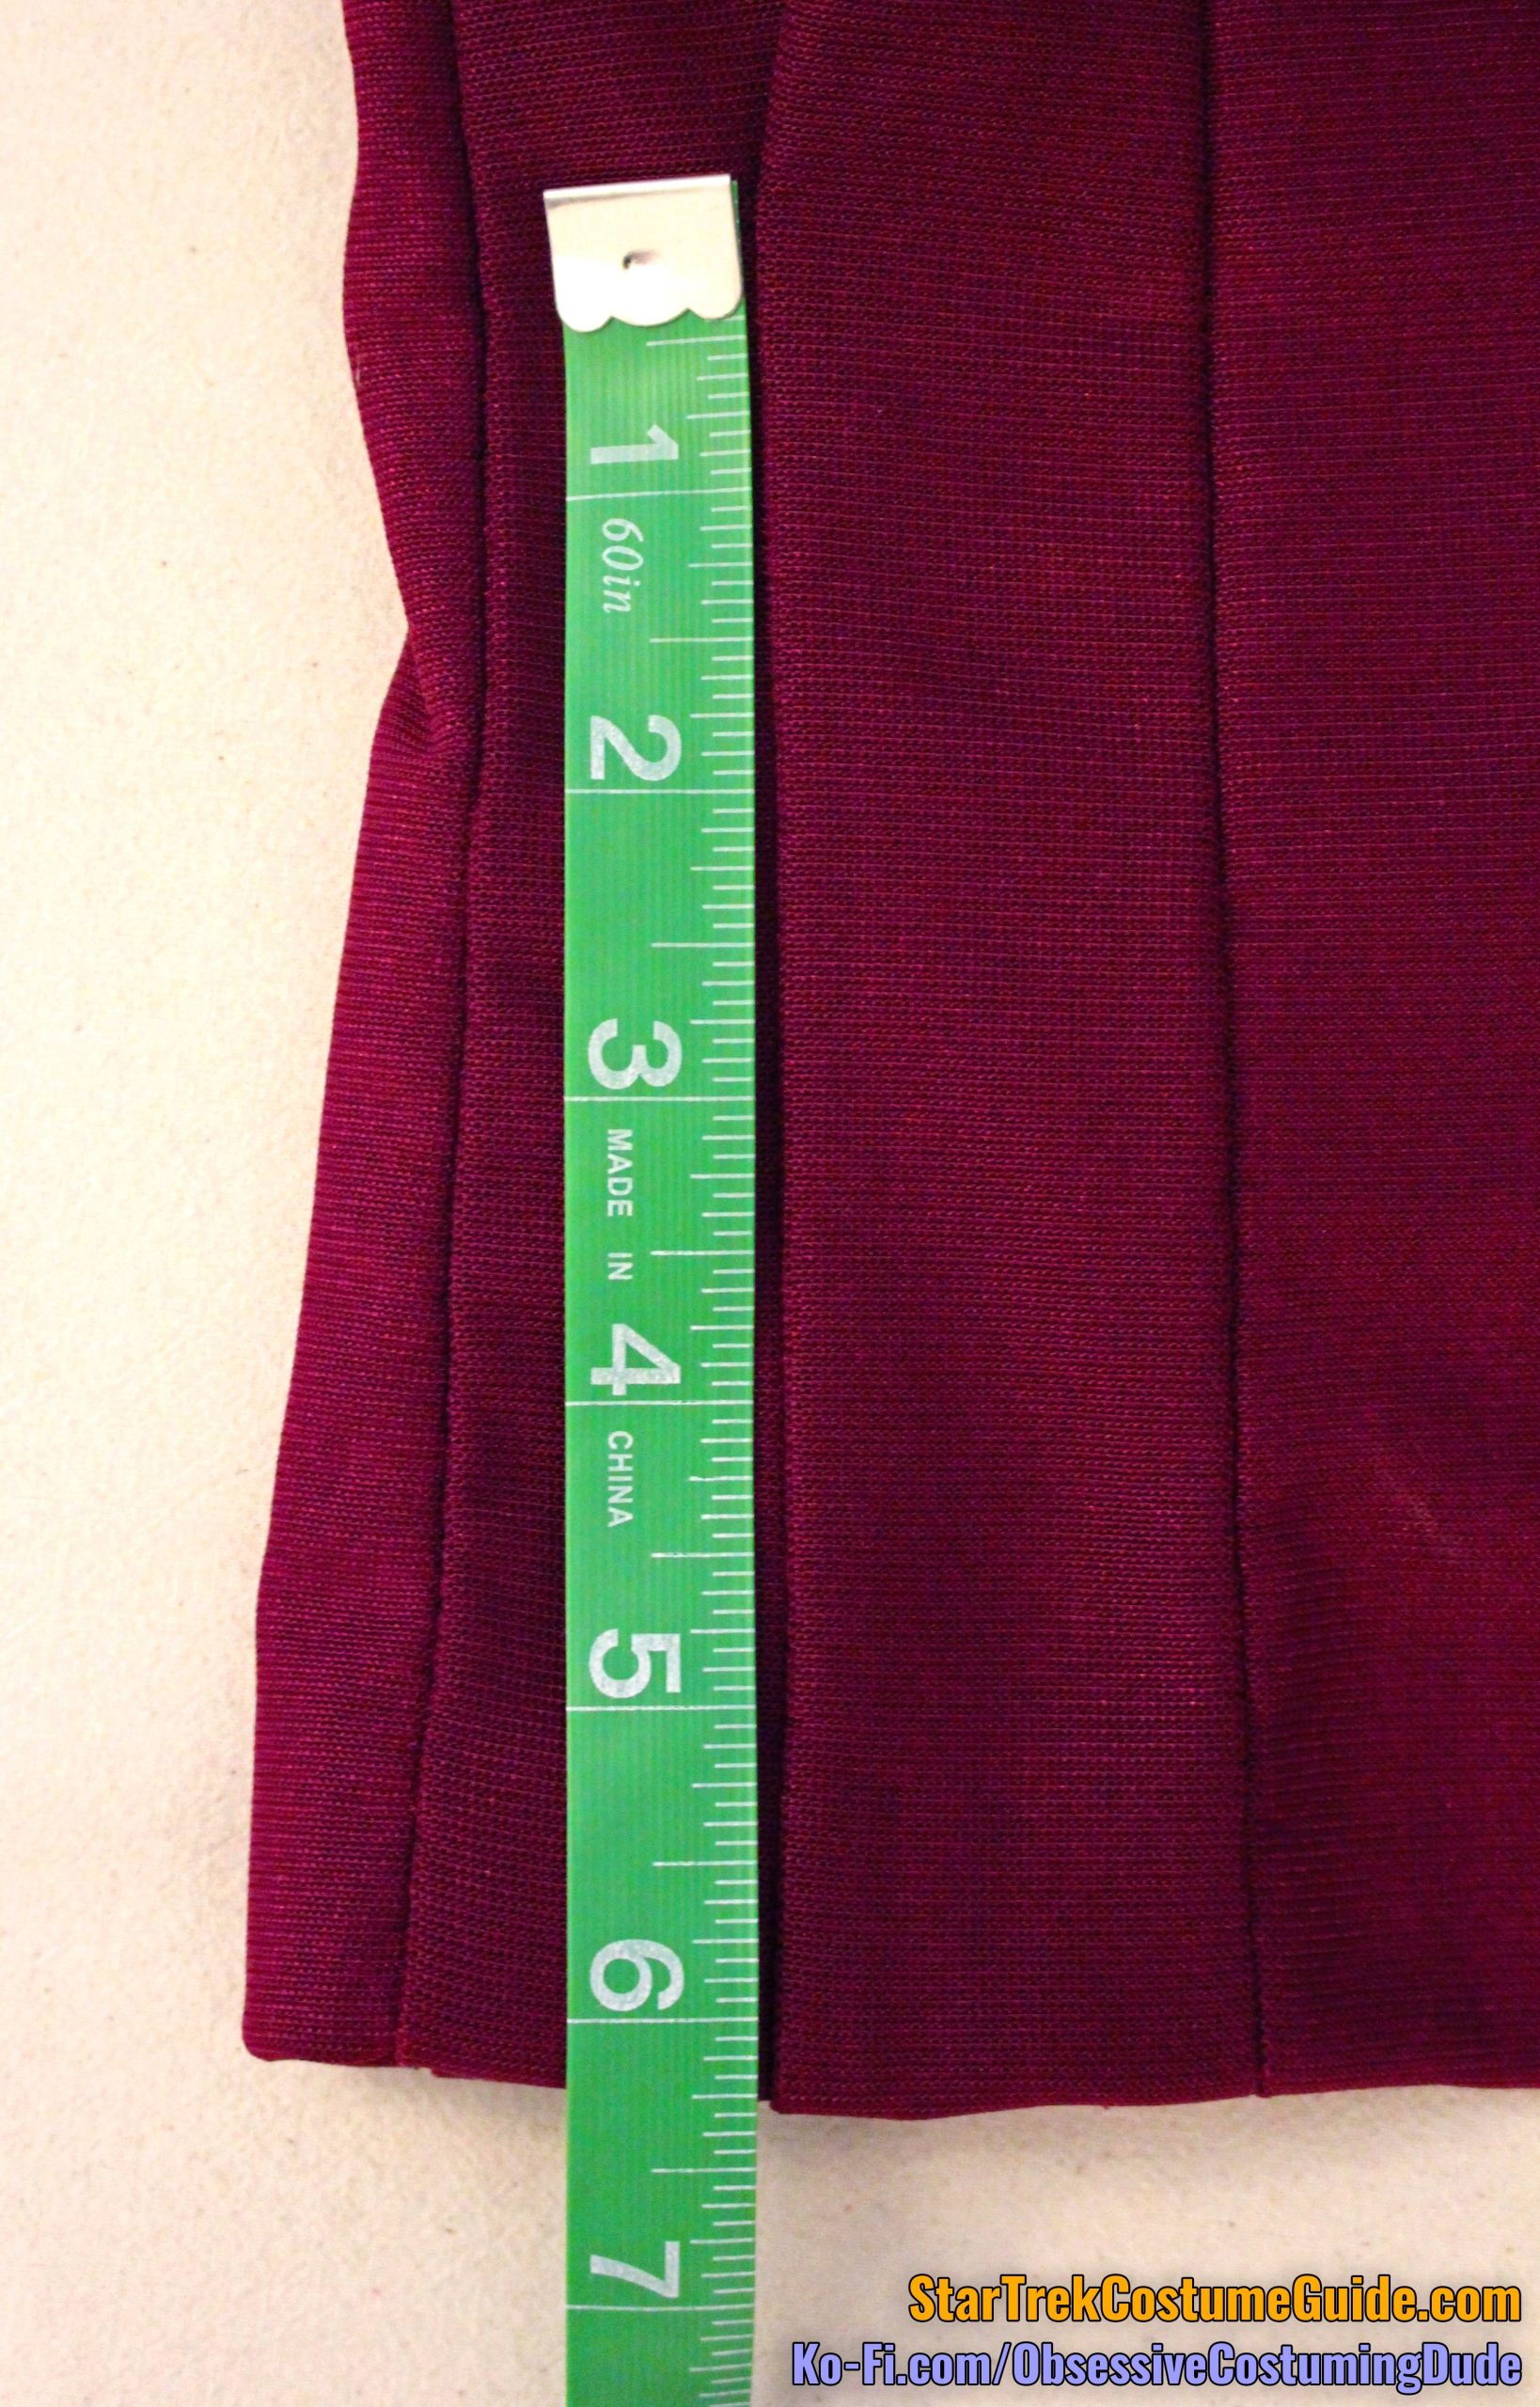
Each side panel had pleat approximately centered between the seams – never exactly centered, though.
On the right side front, the pleat was 1 ⅝” from the side seam and 1 ⅞” from the right front seam.
This pleat was about 6 ½” tall.
On the left side front, the pleat was 1 ⅜” from the side seam and 1 ⅝” from the left front seam.
This pleat was slightly shorter than the corresponding pleat on the right side front – about 6 ¼”.
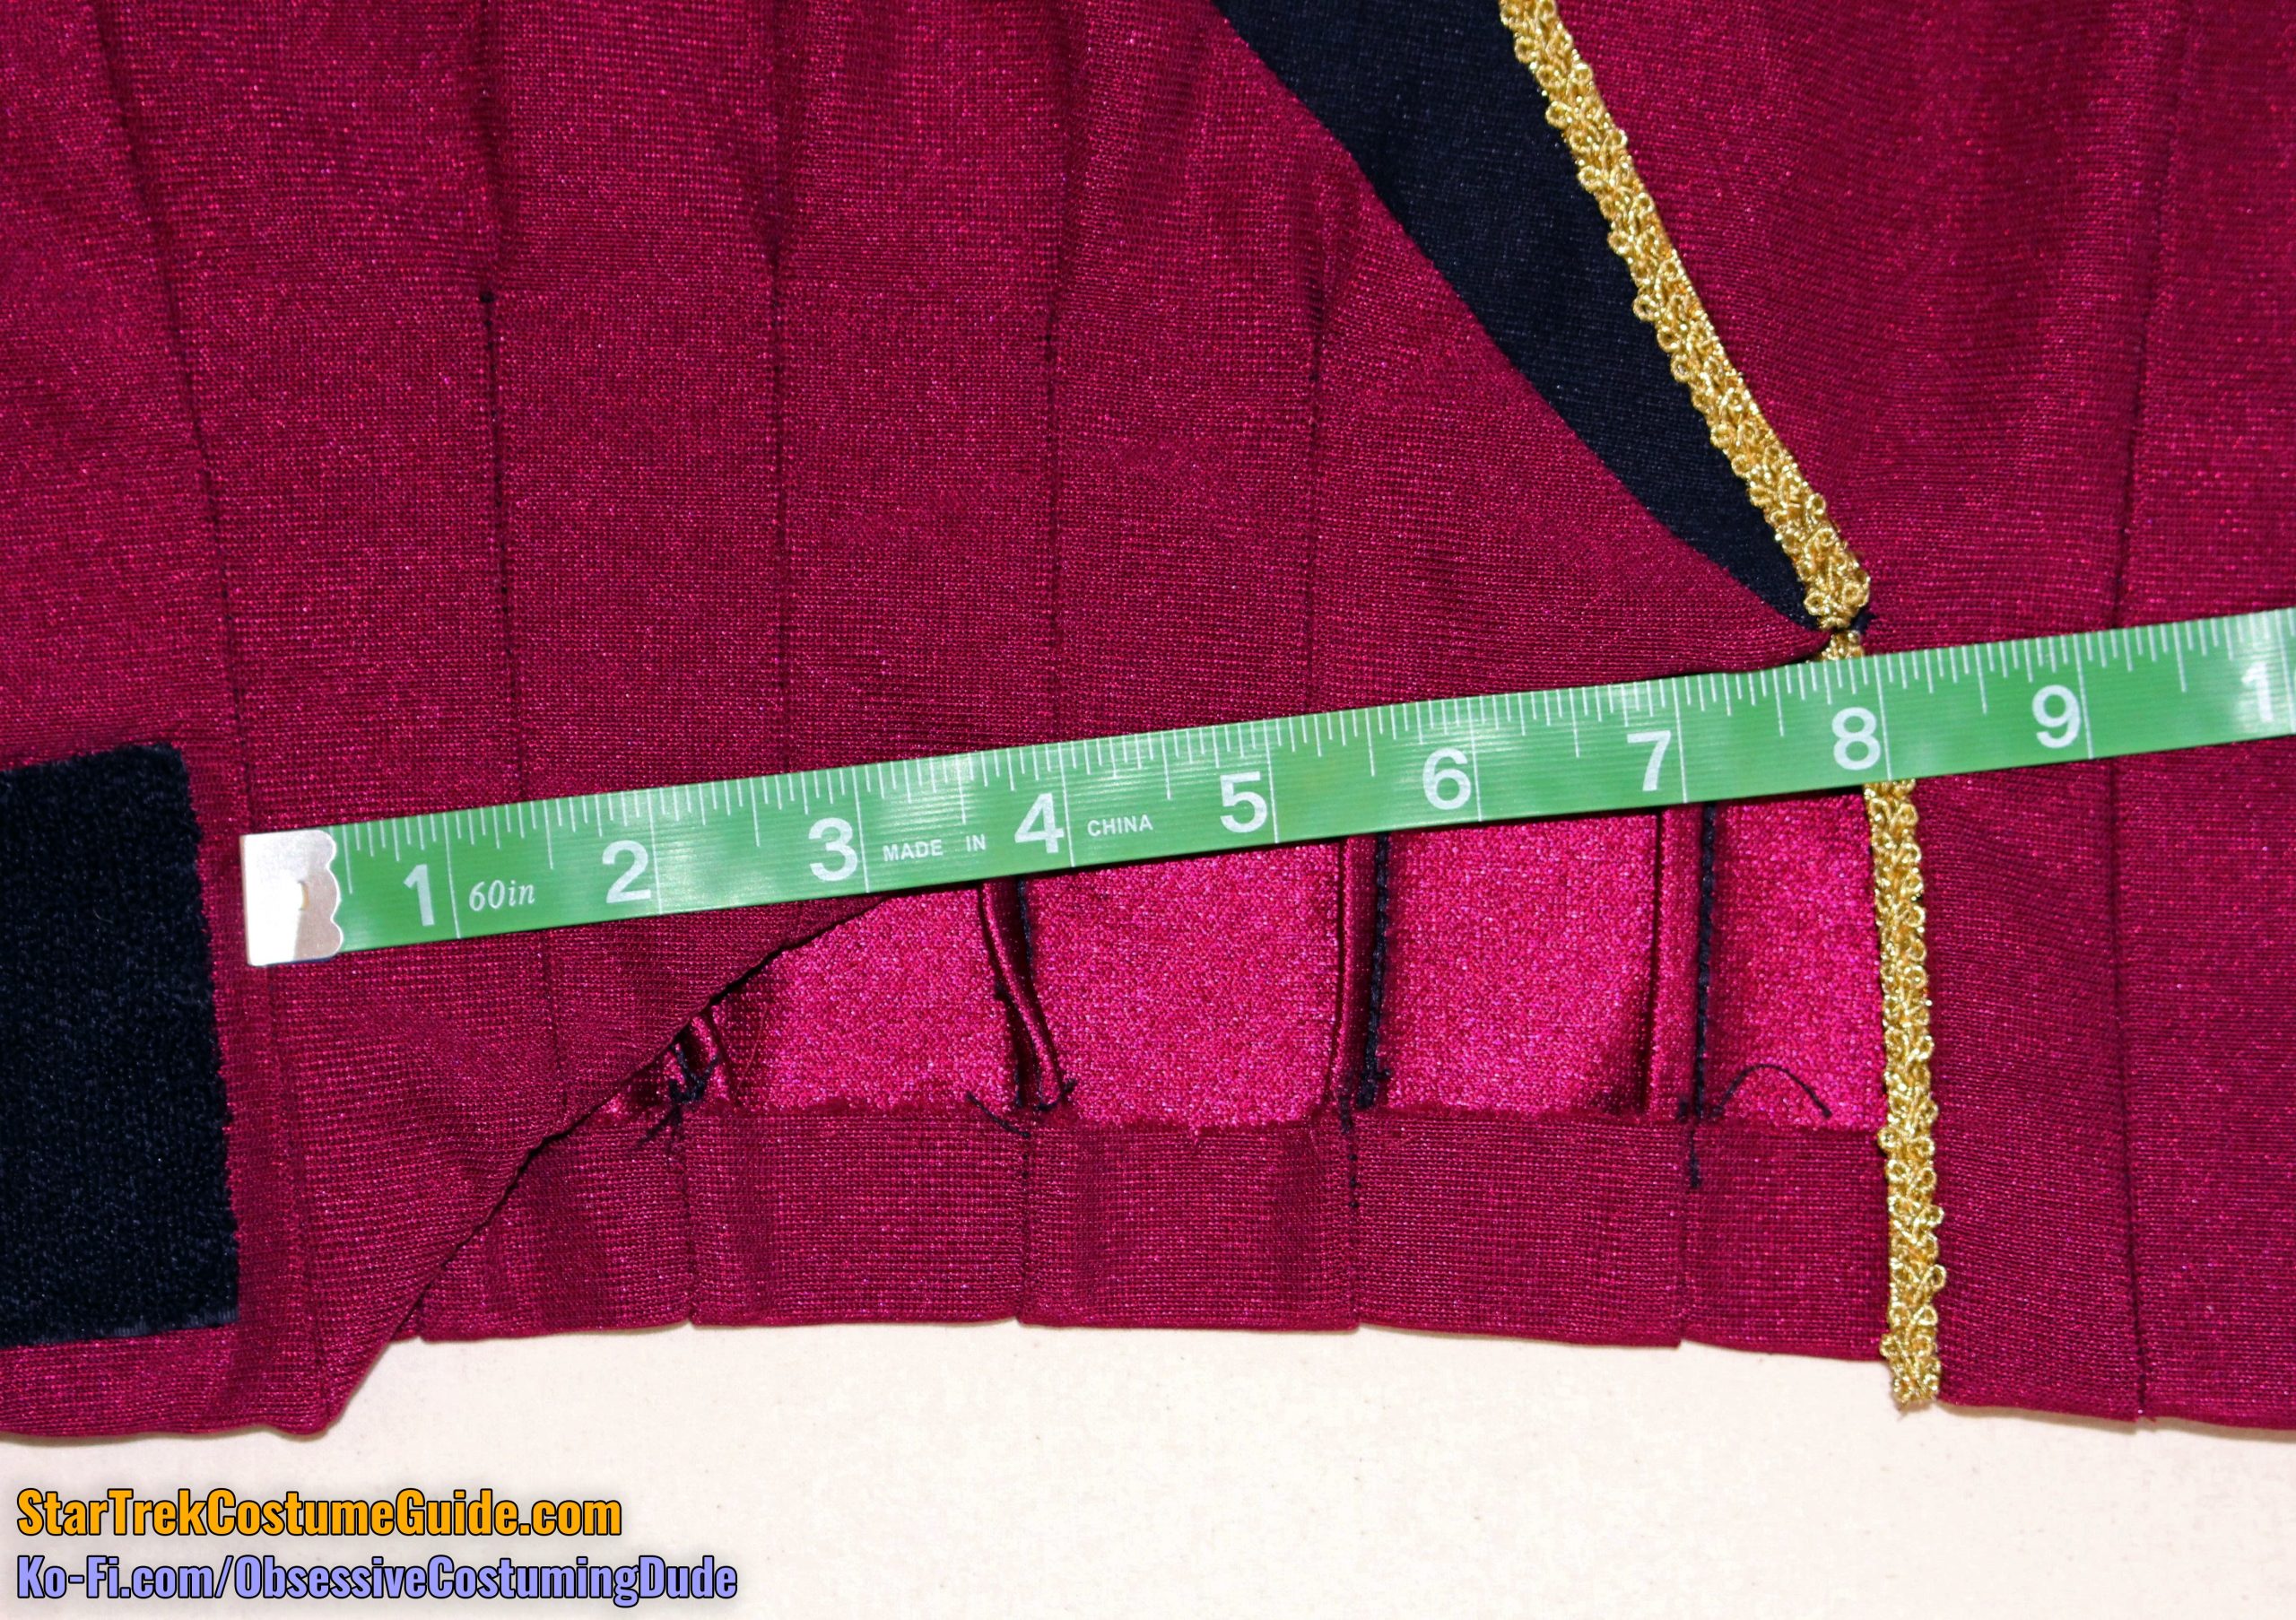
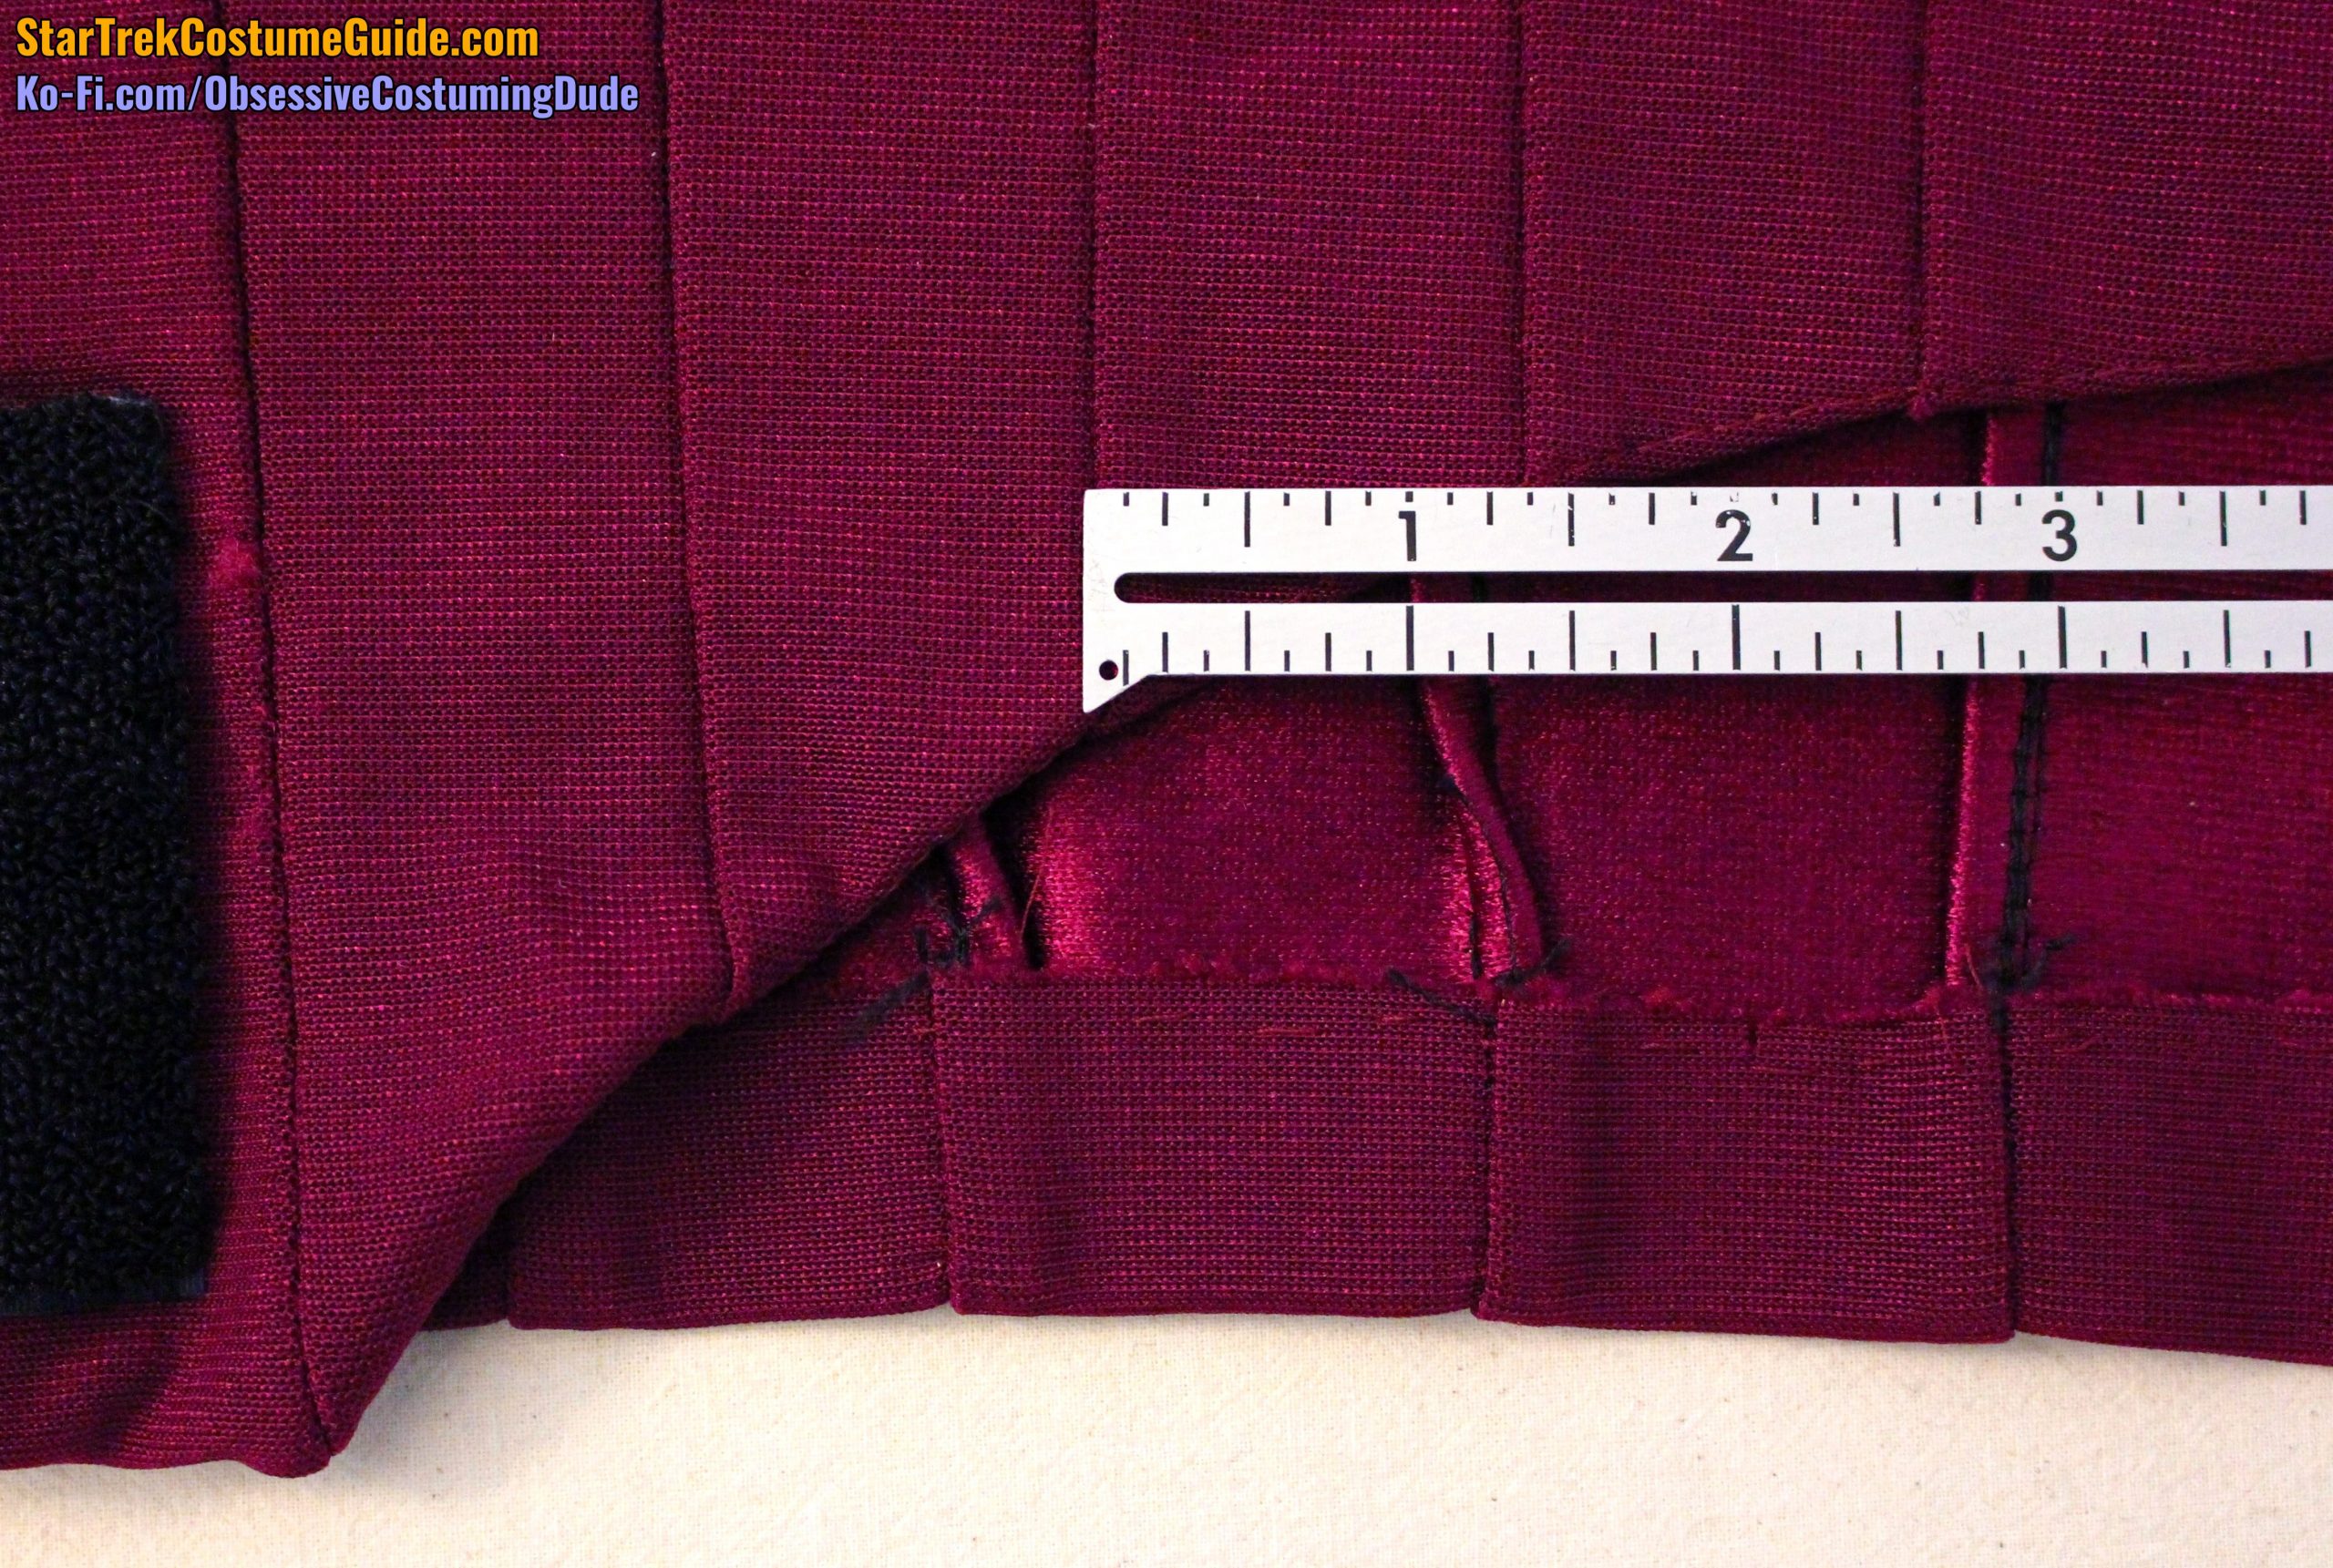
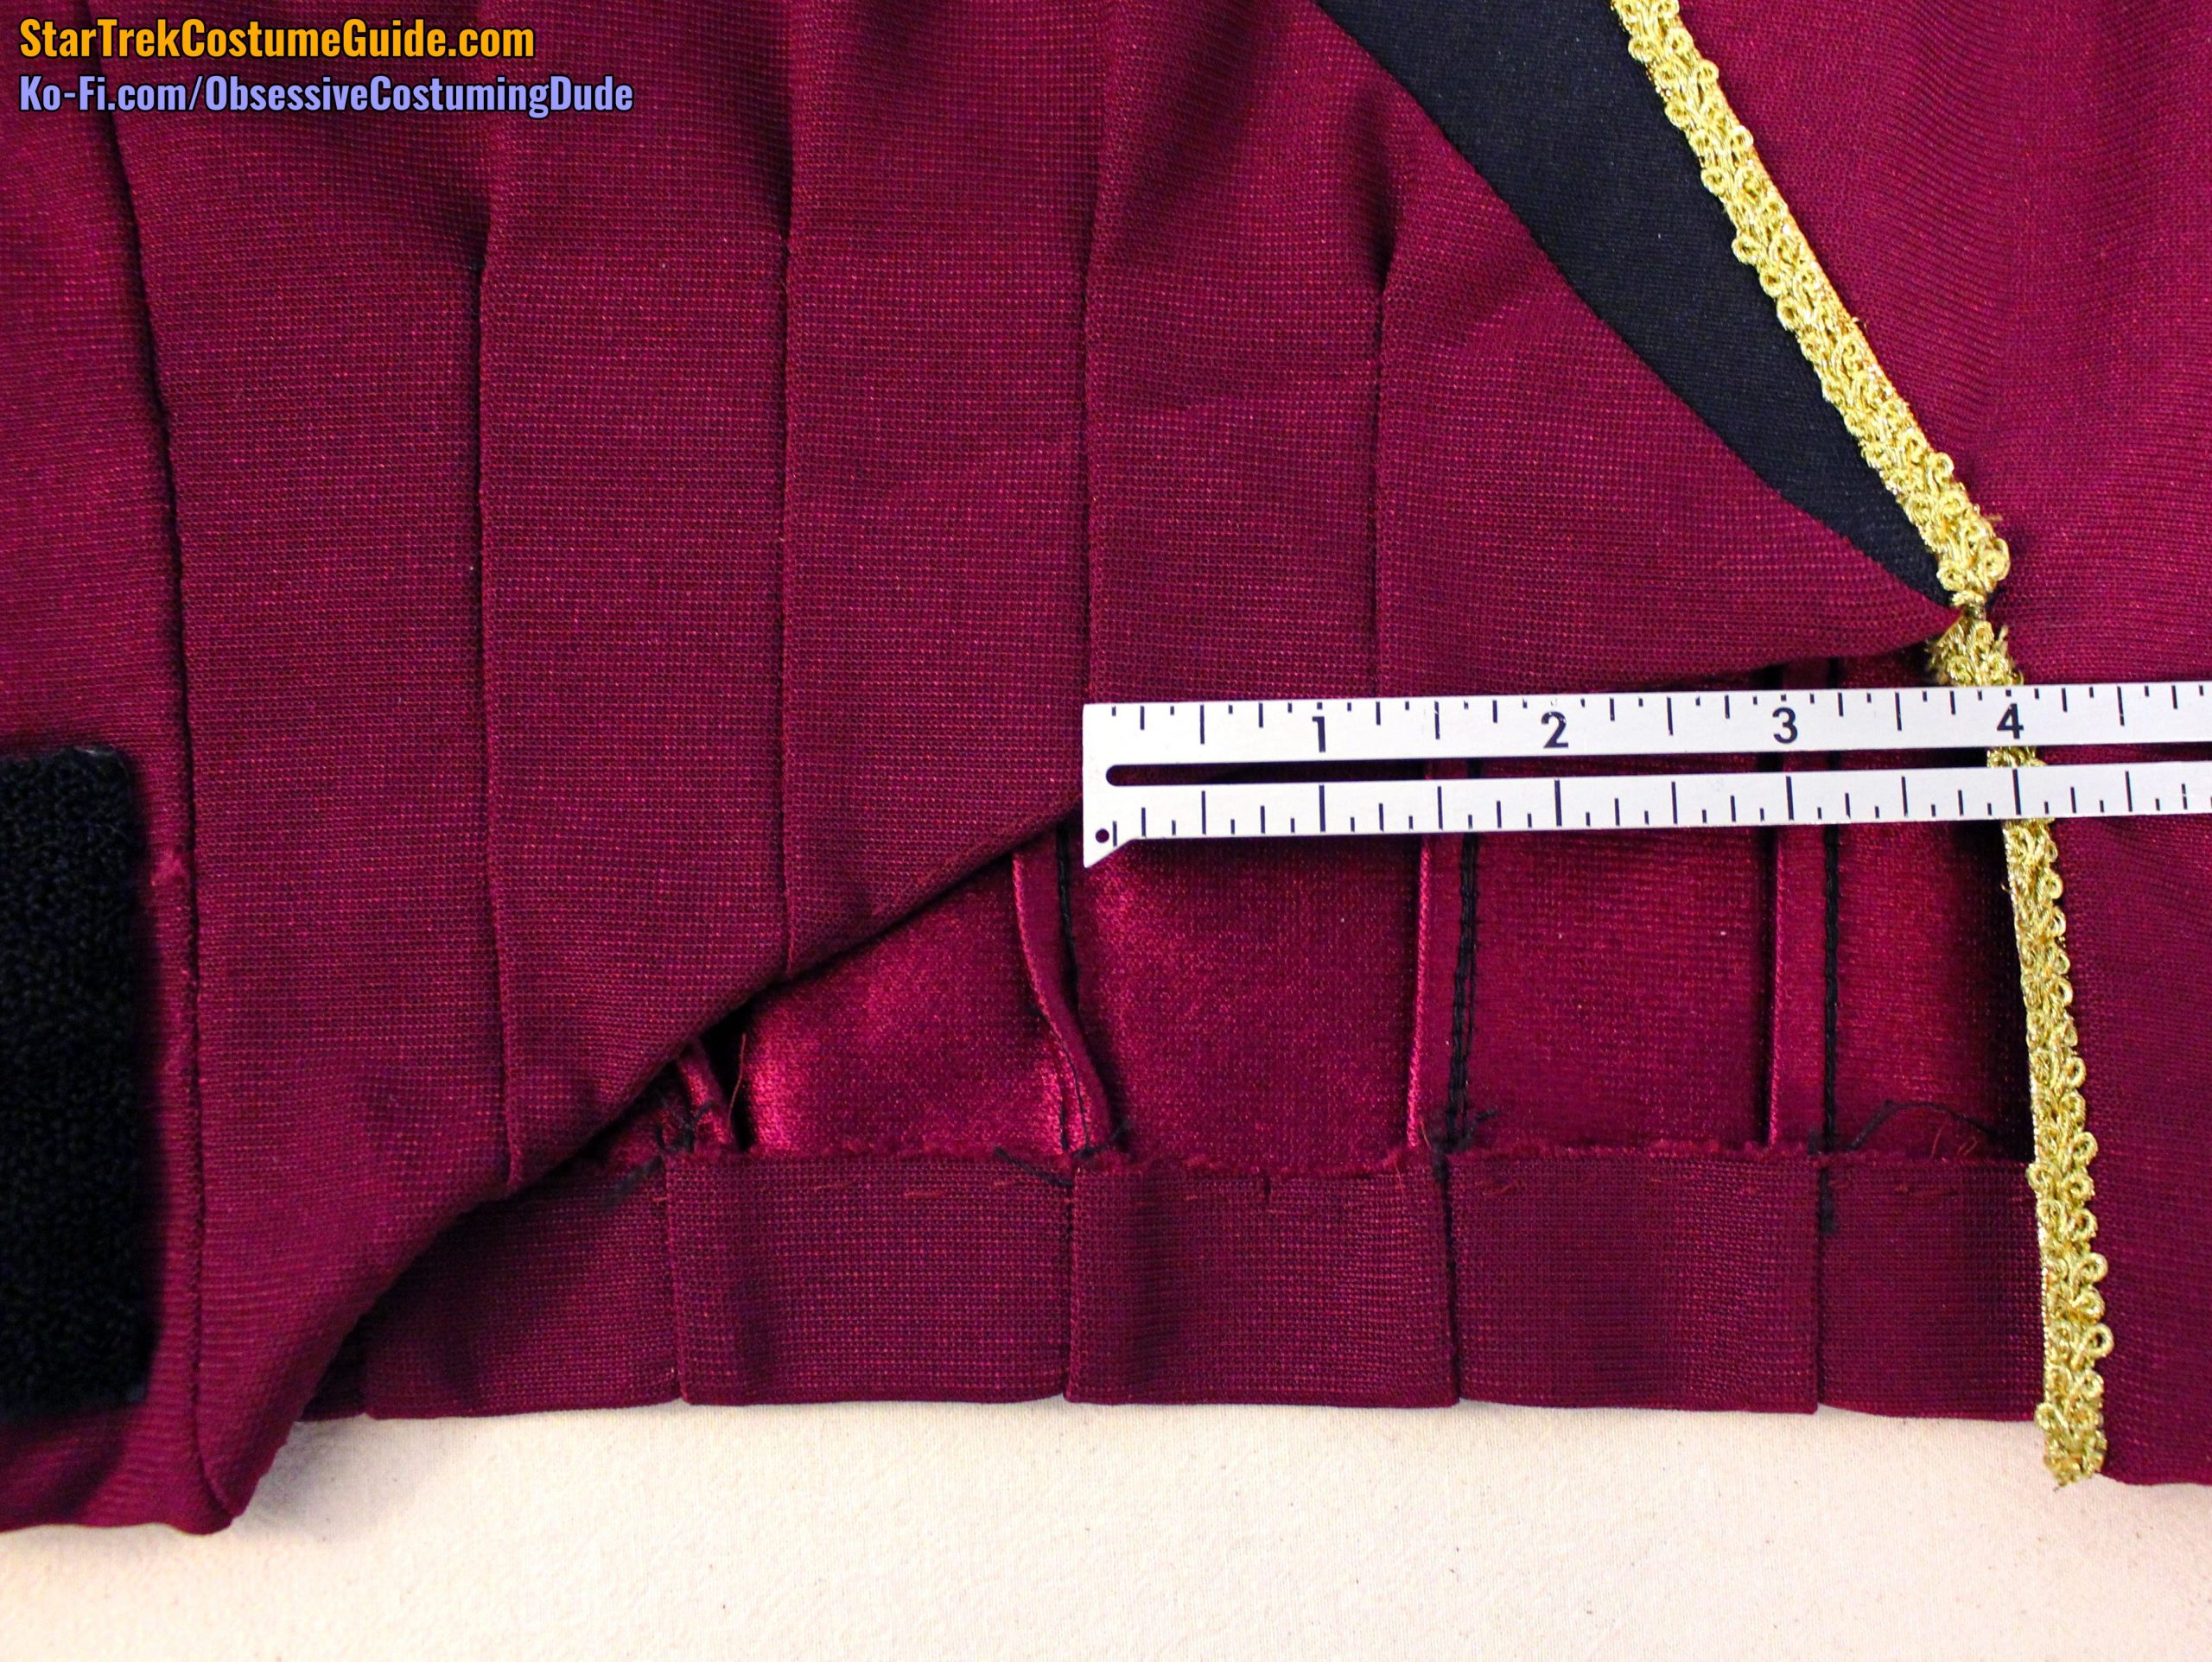
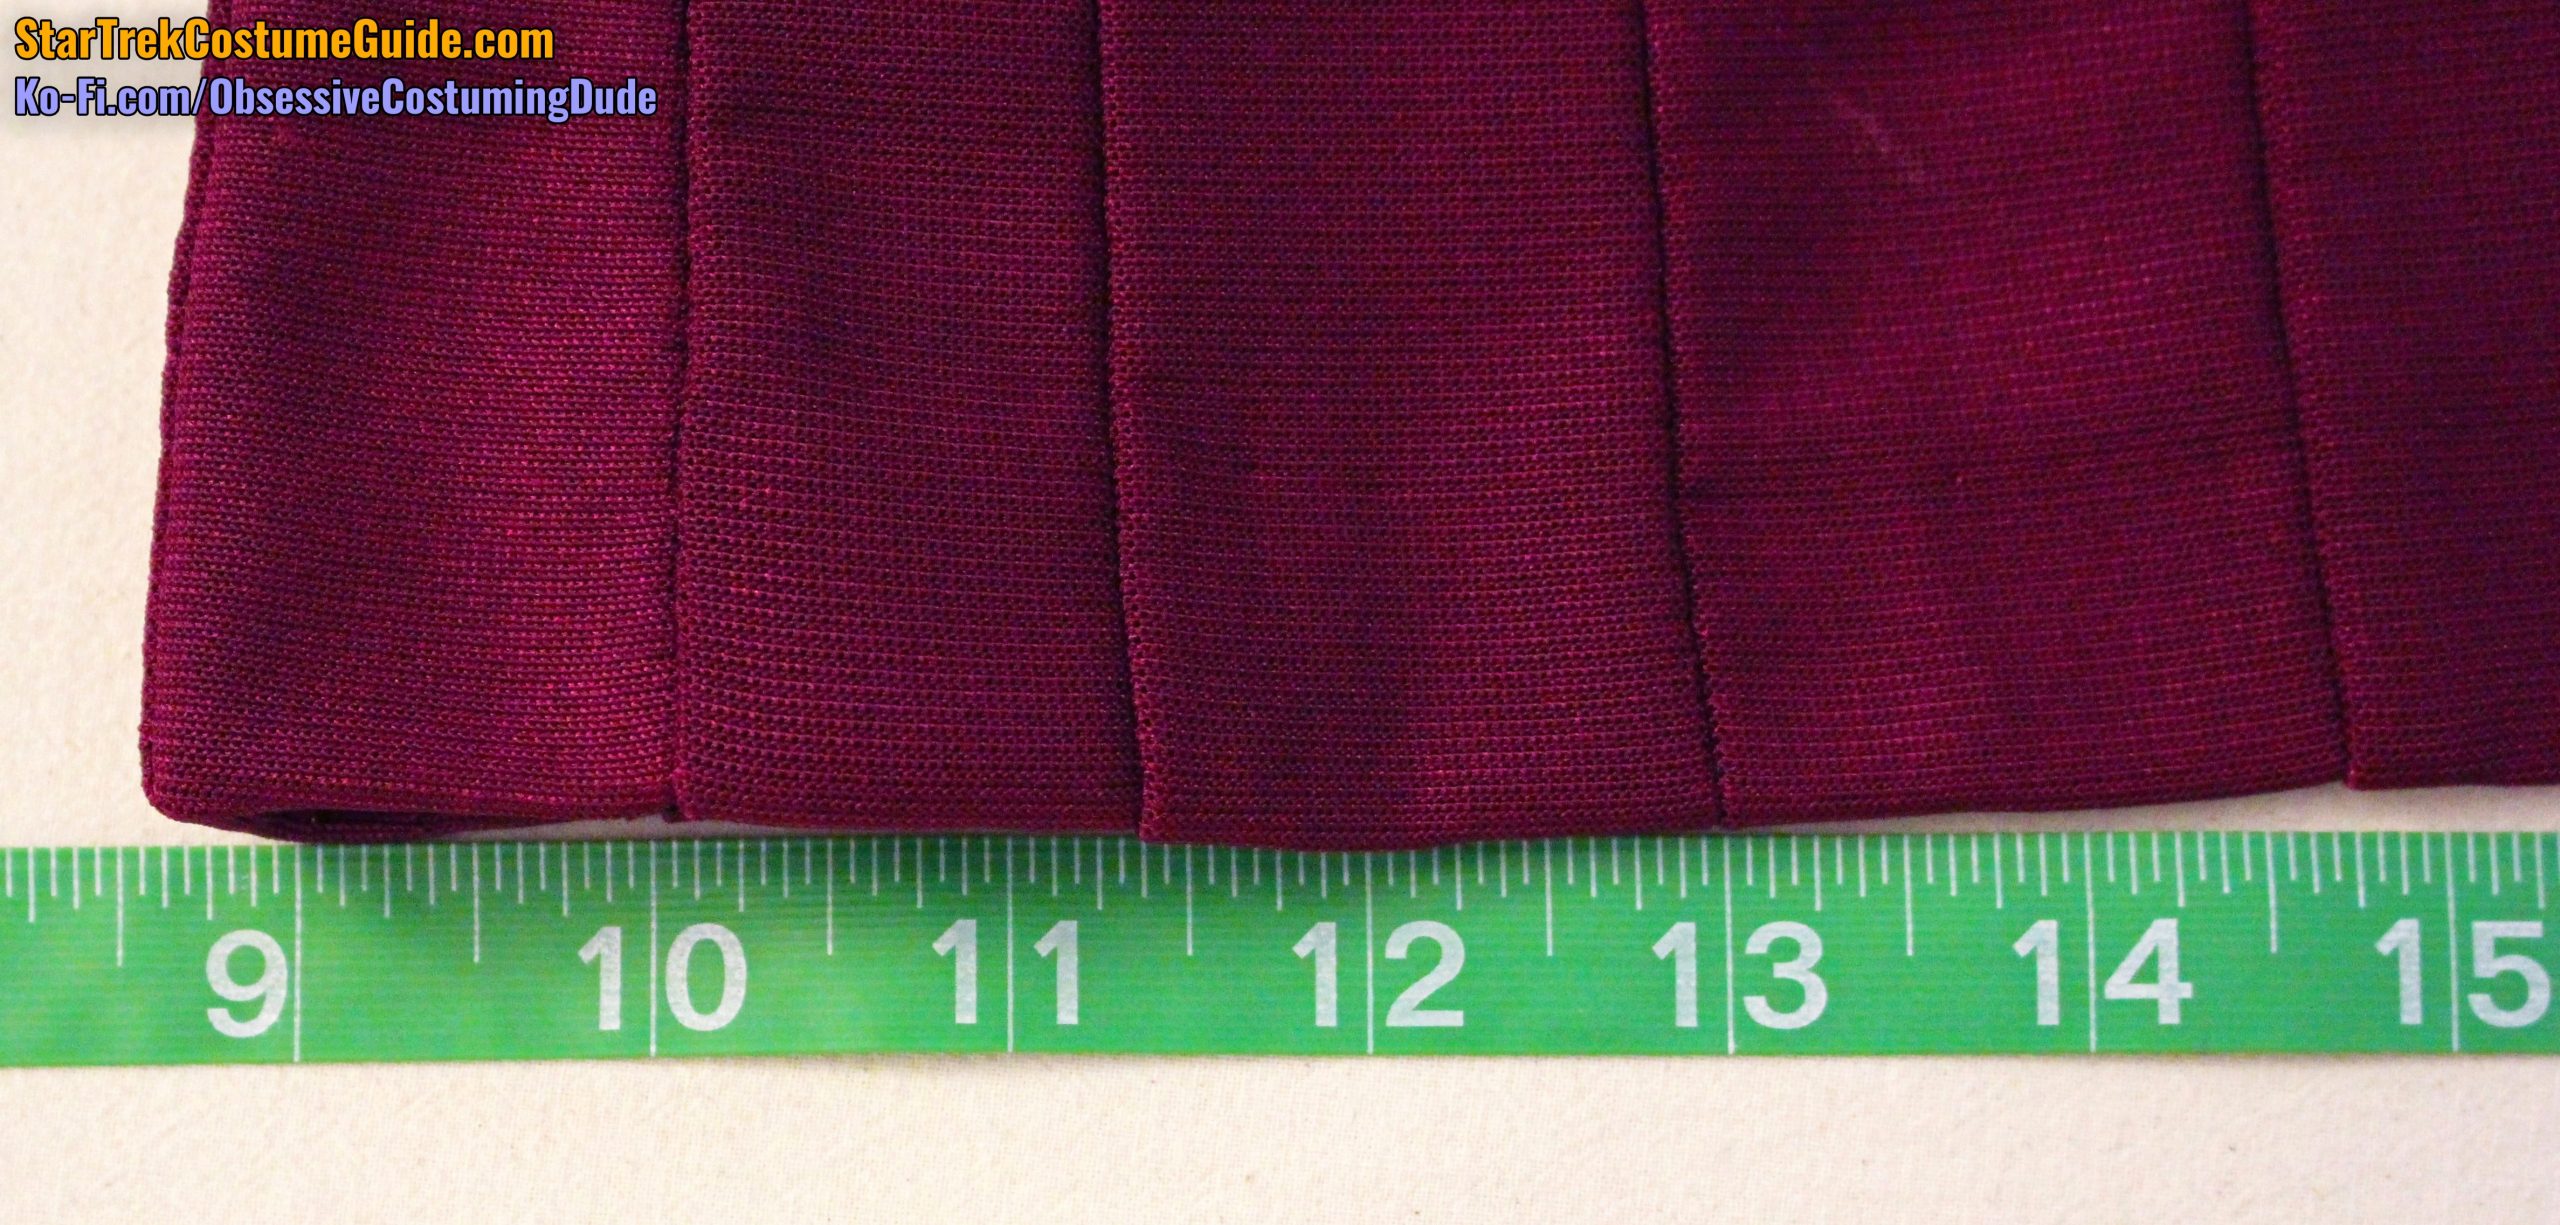
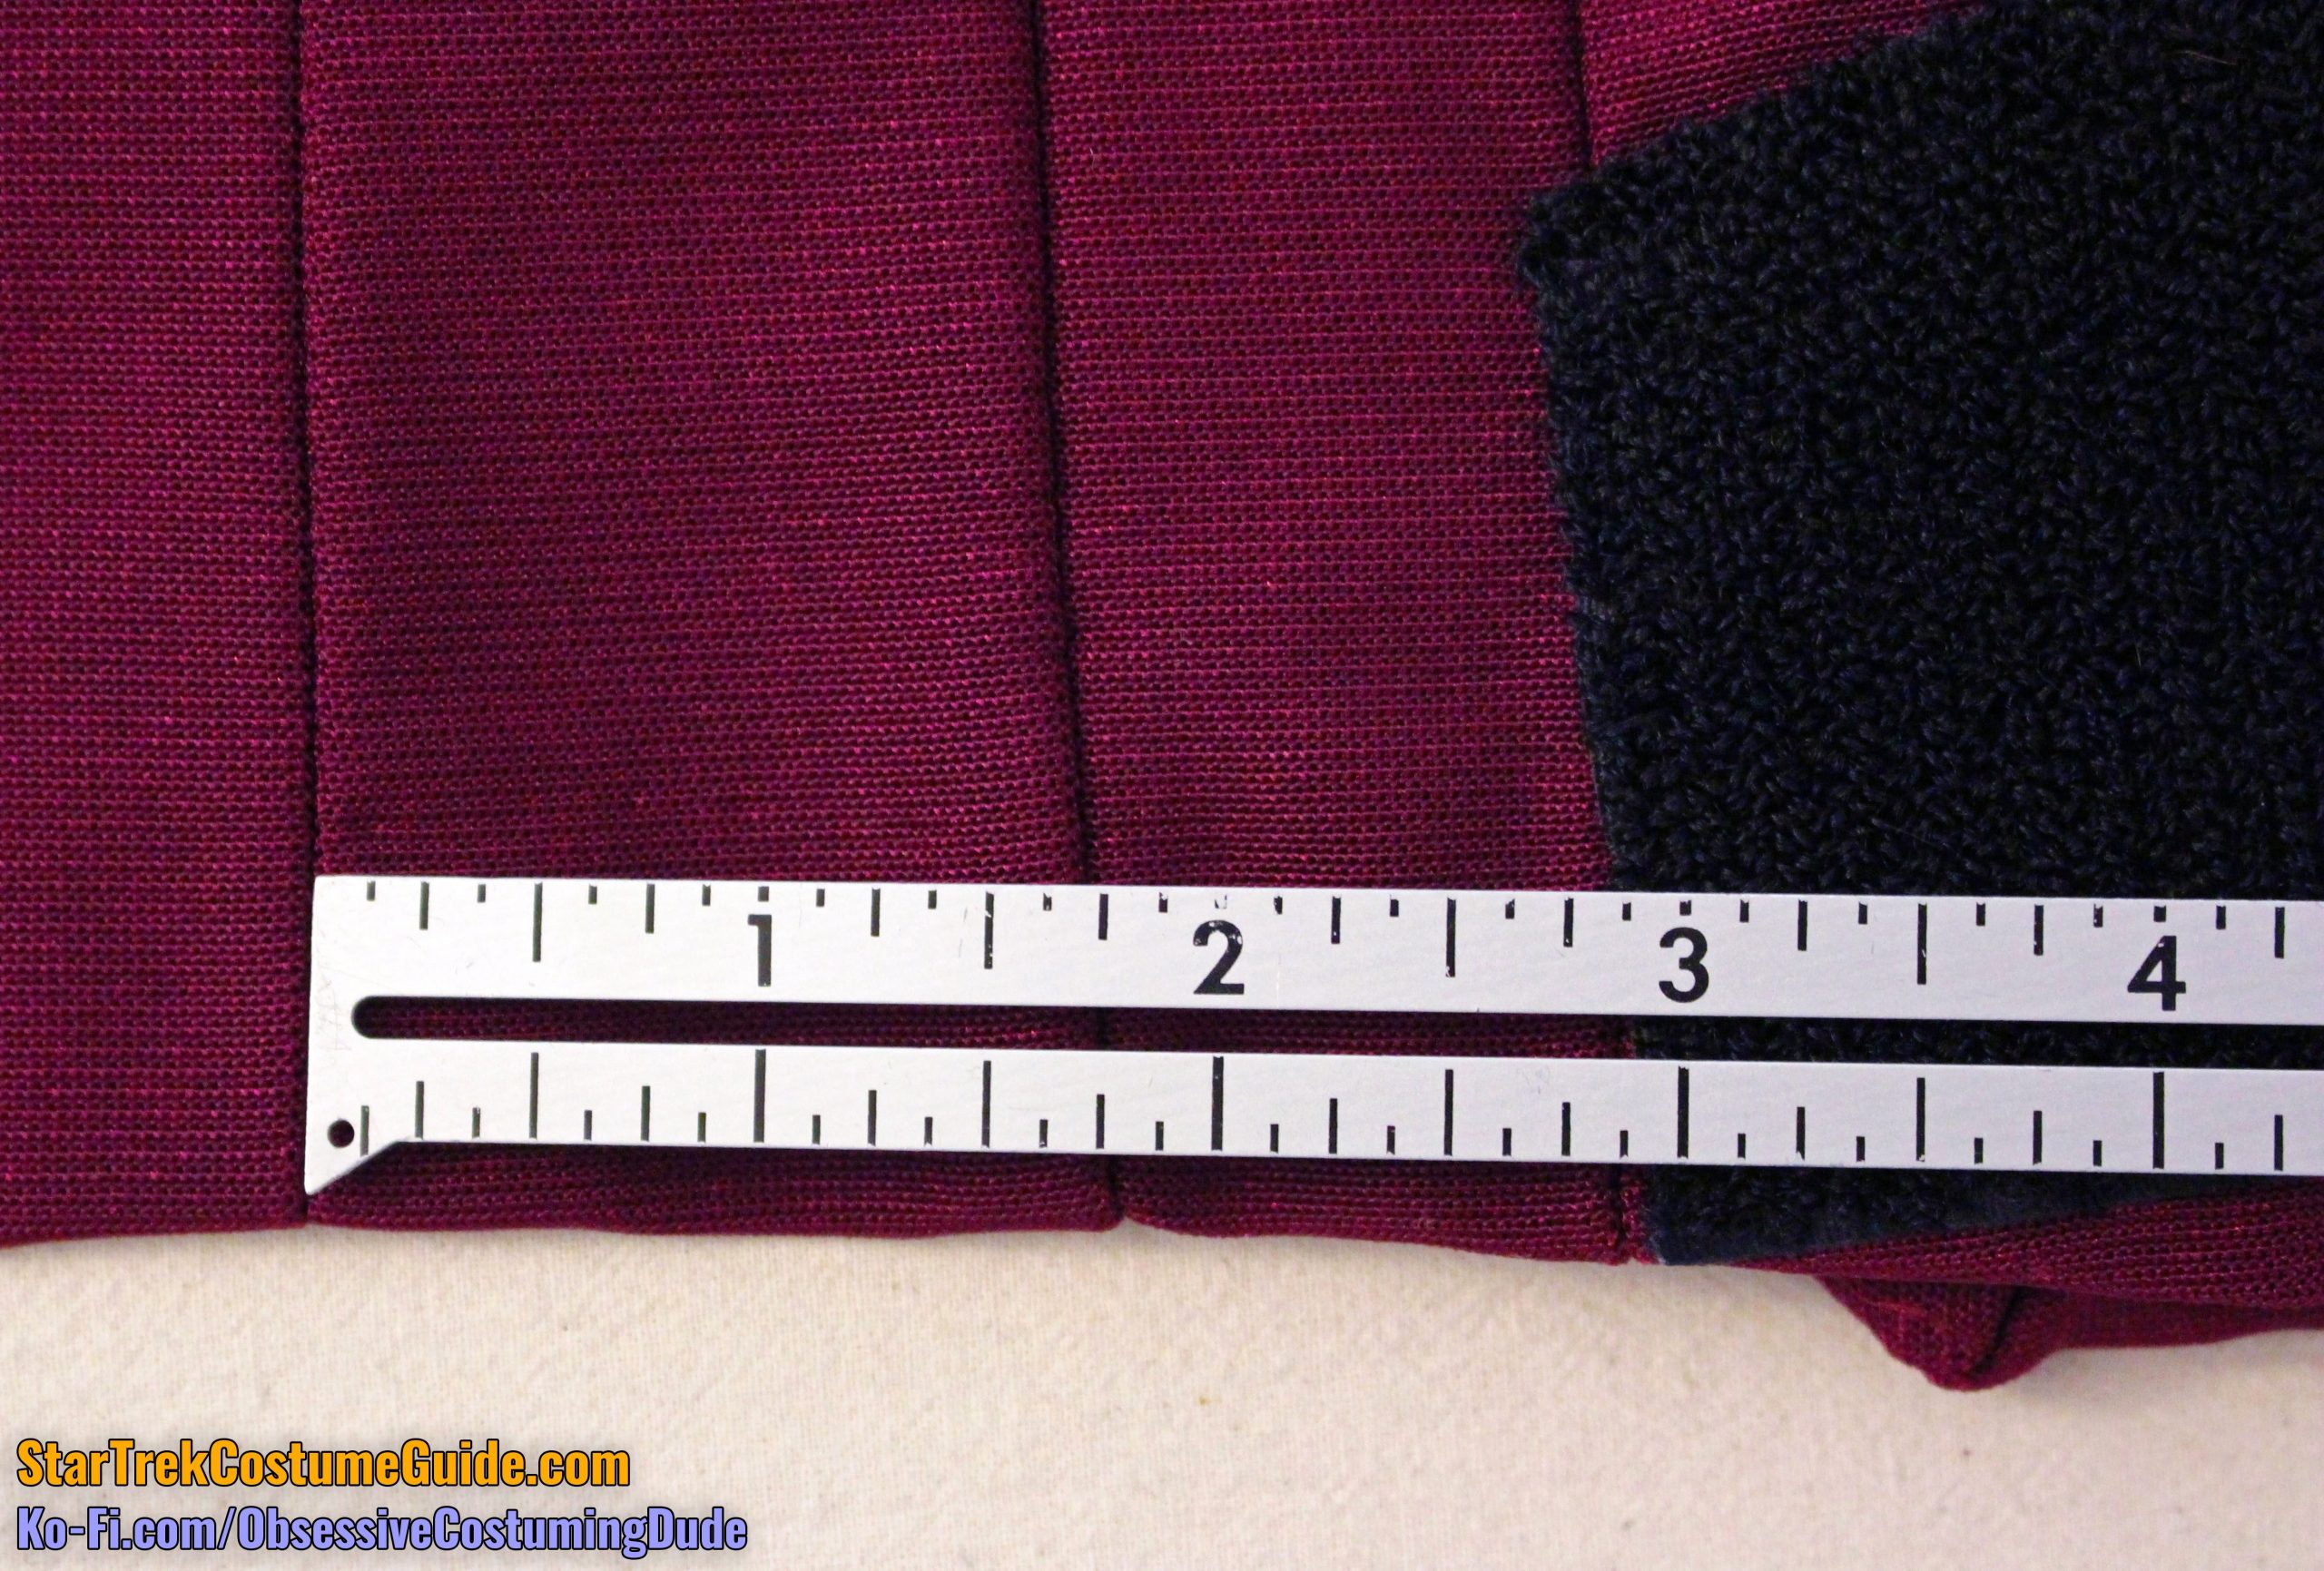
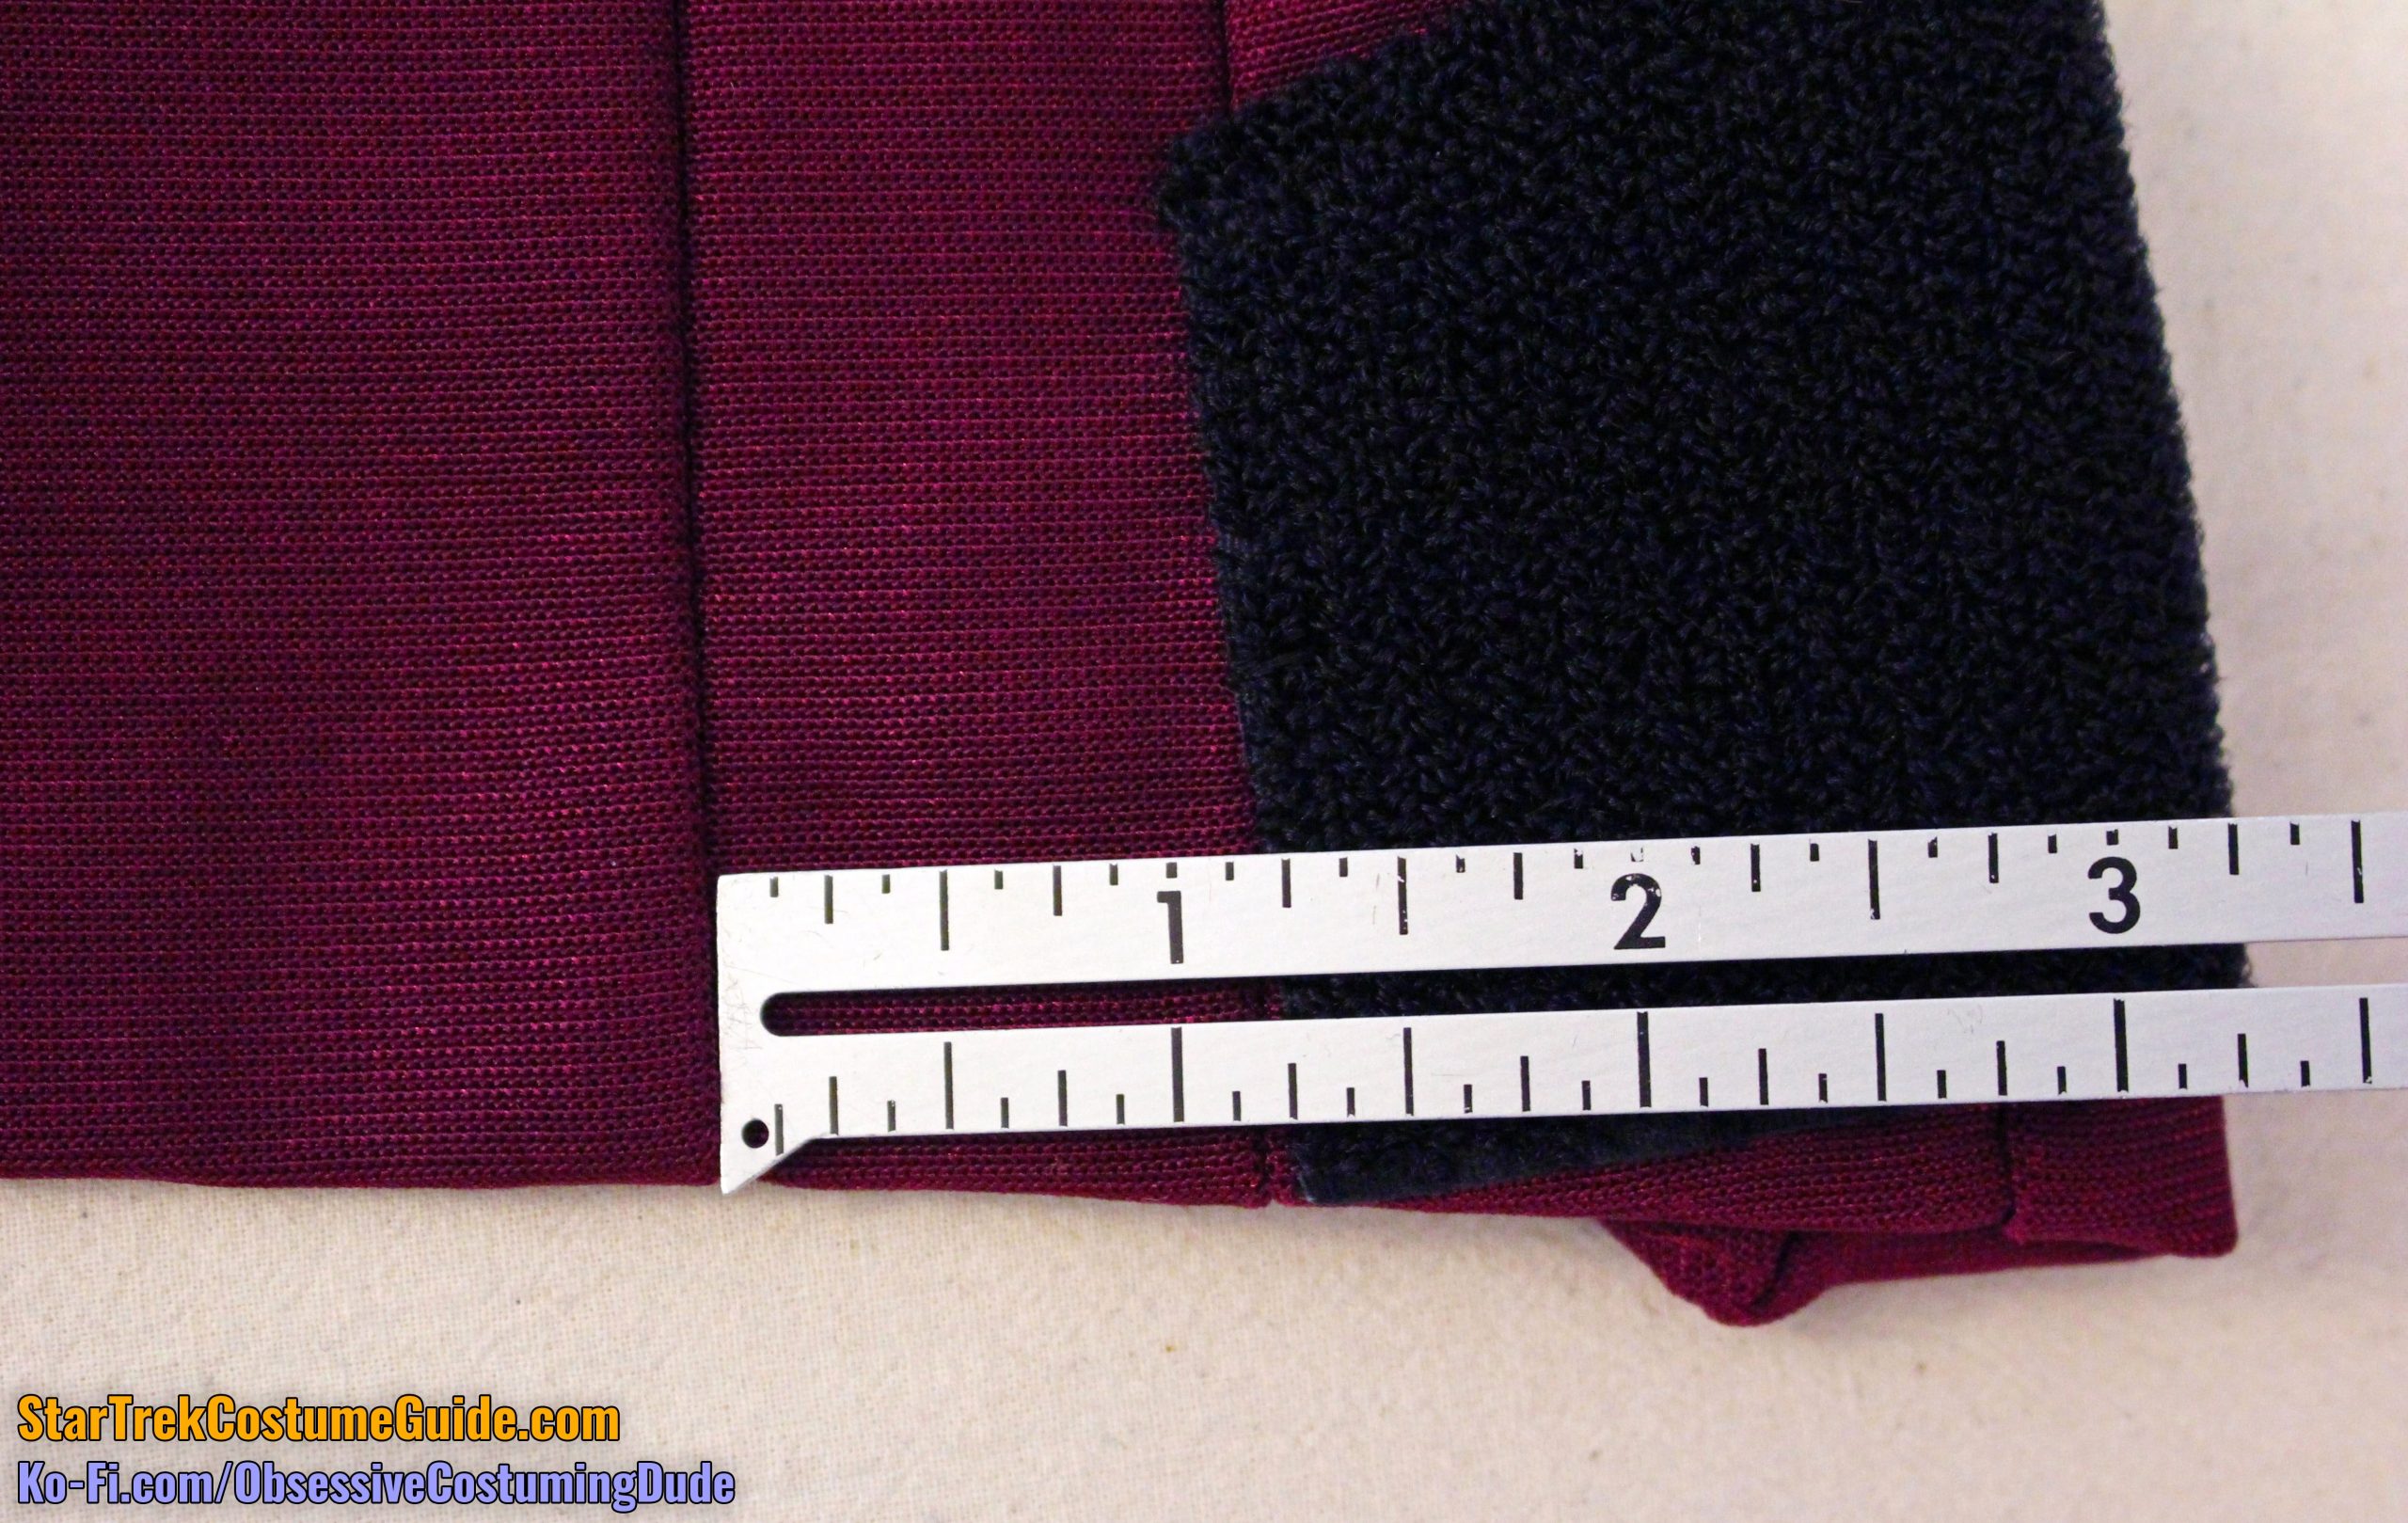
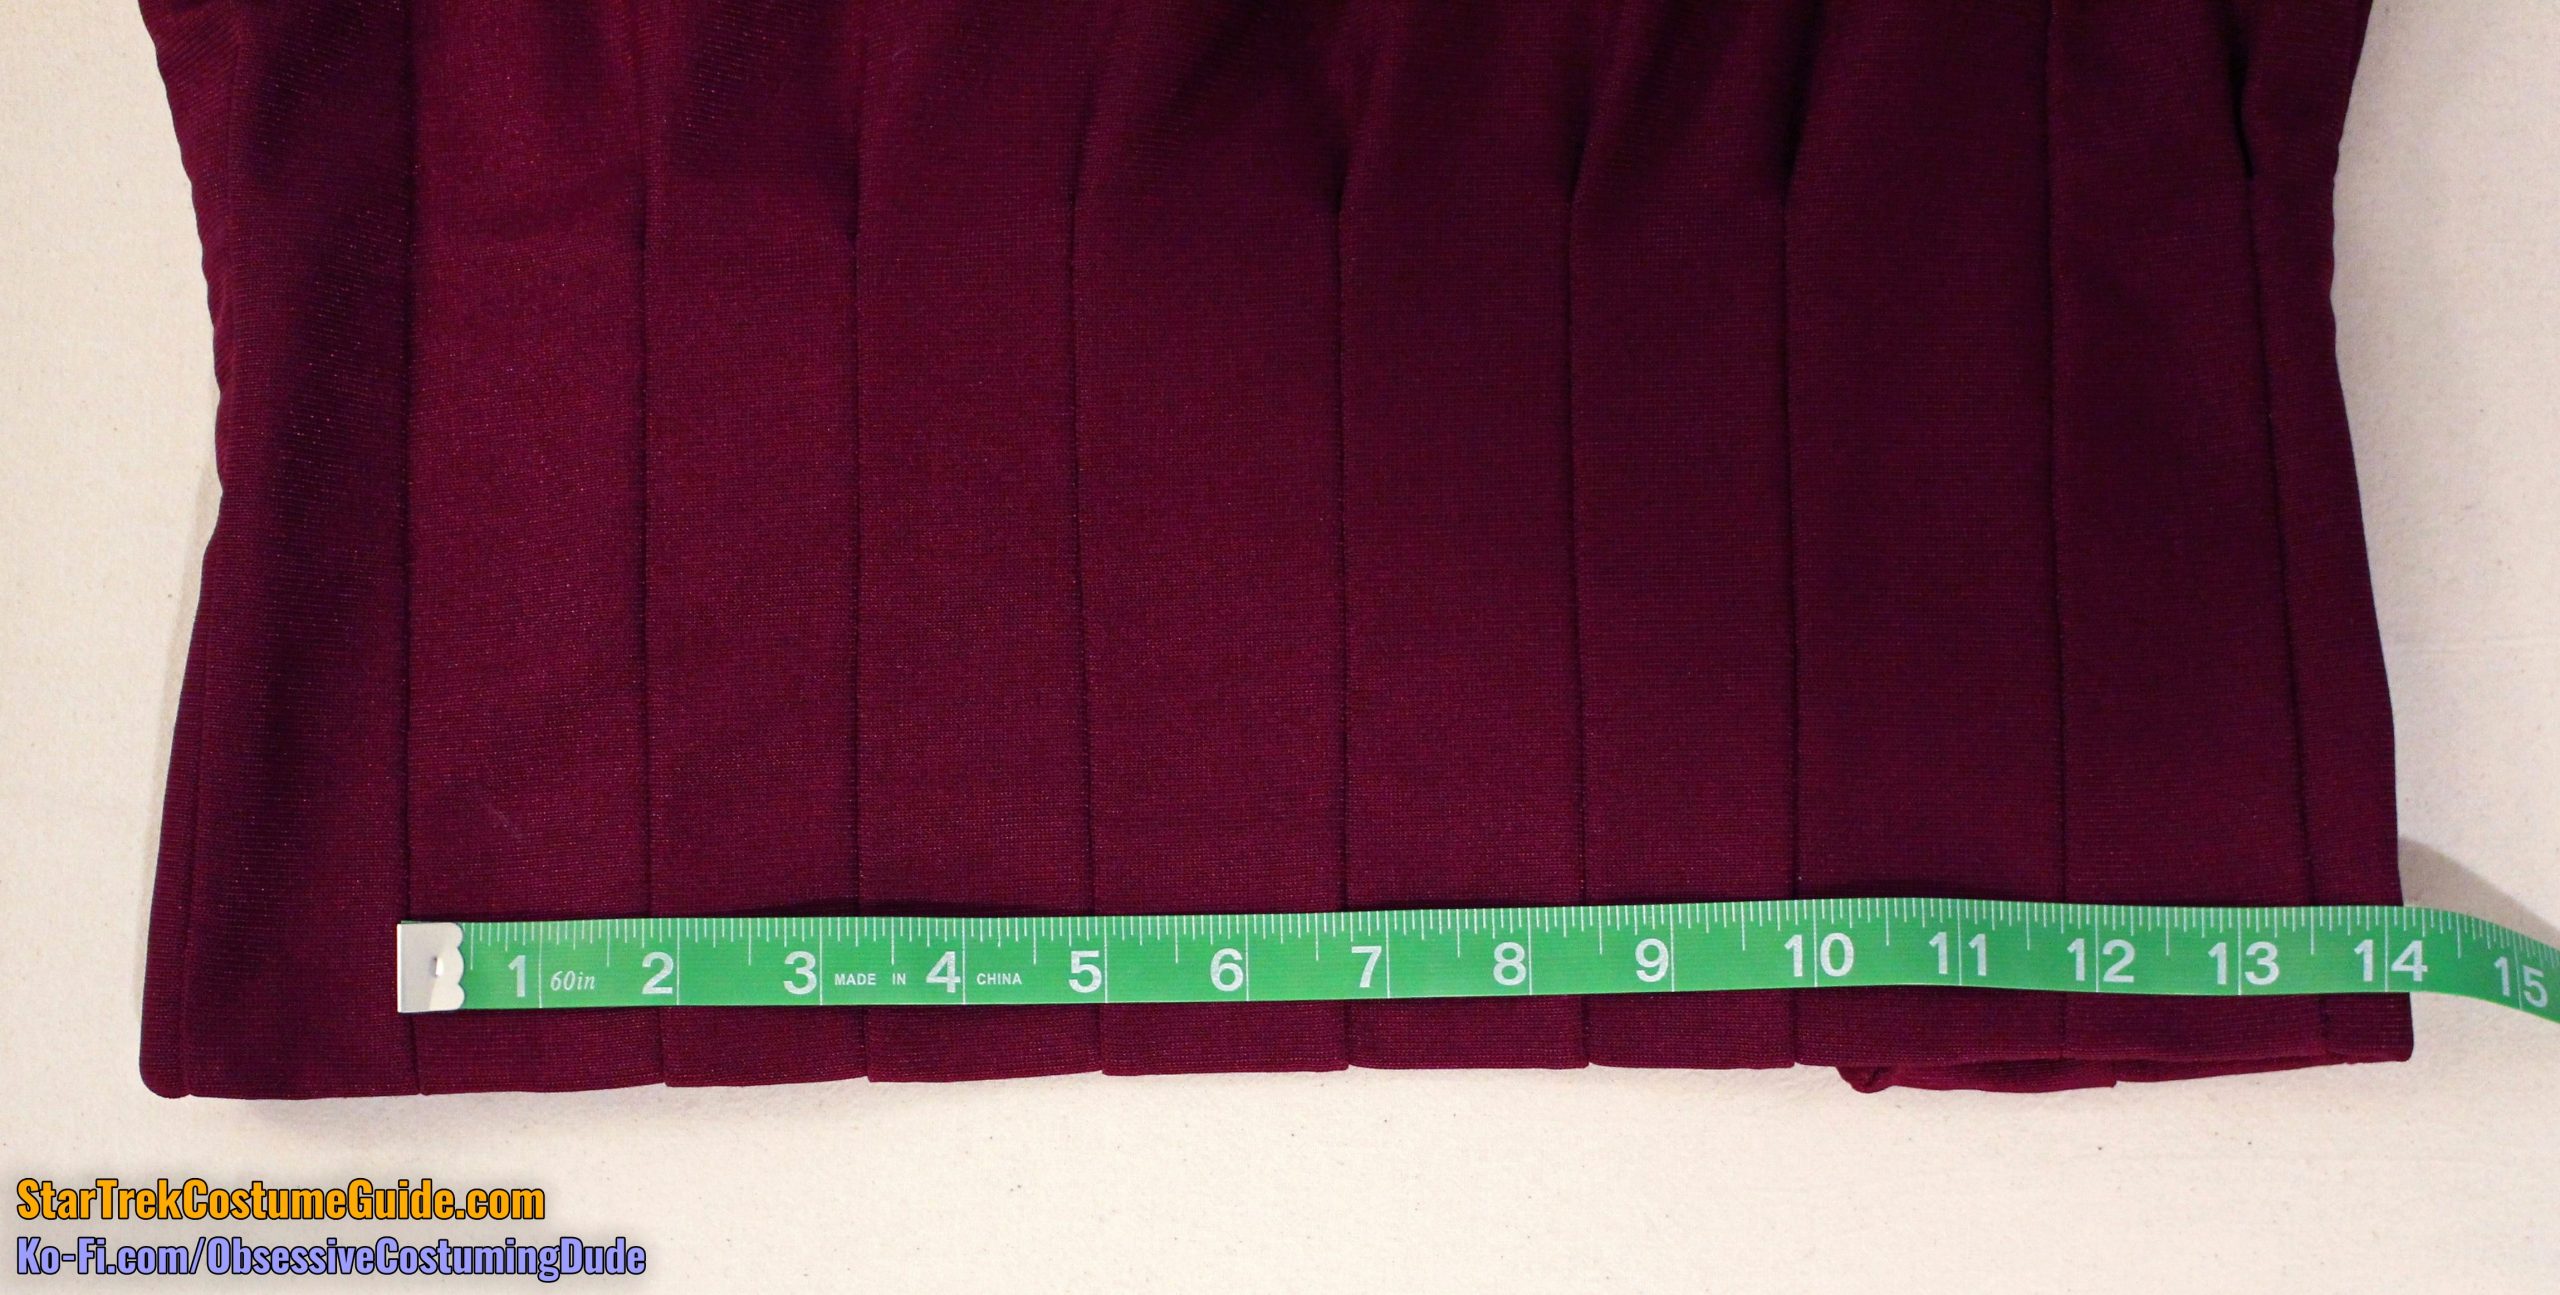
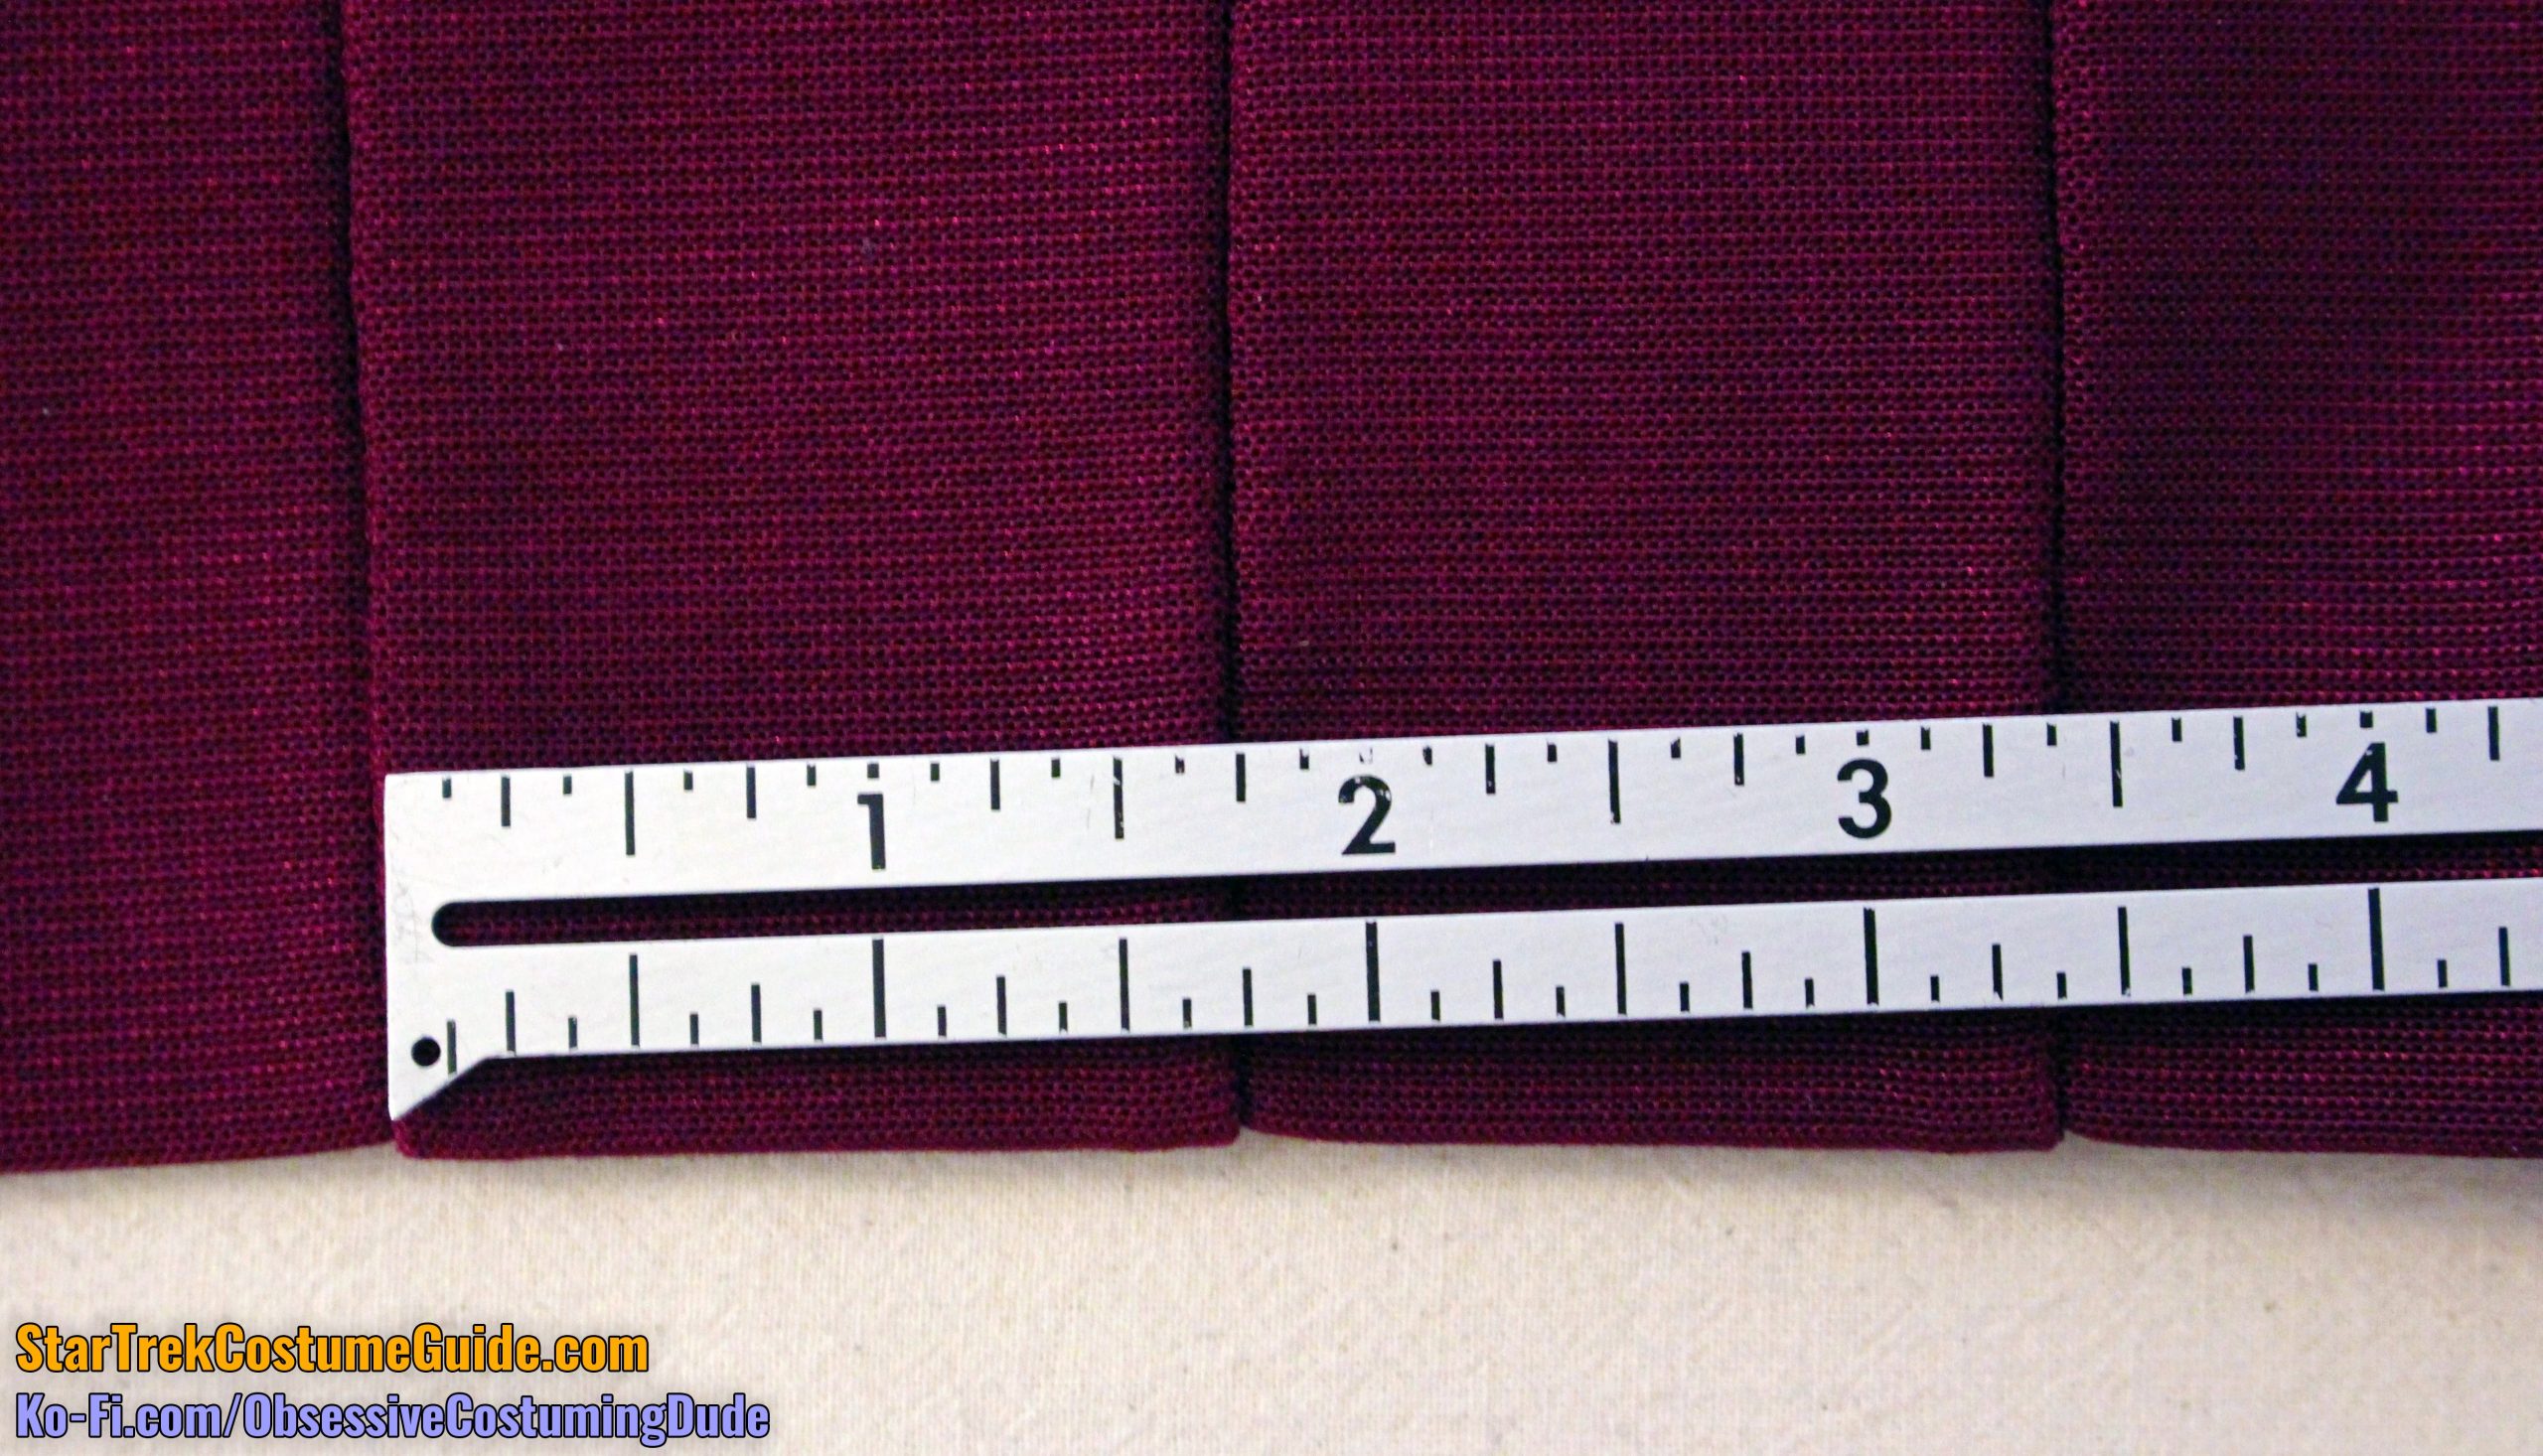
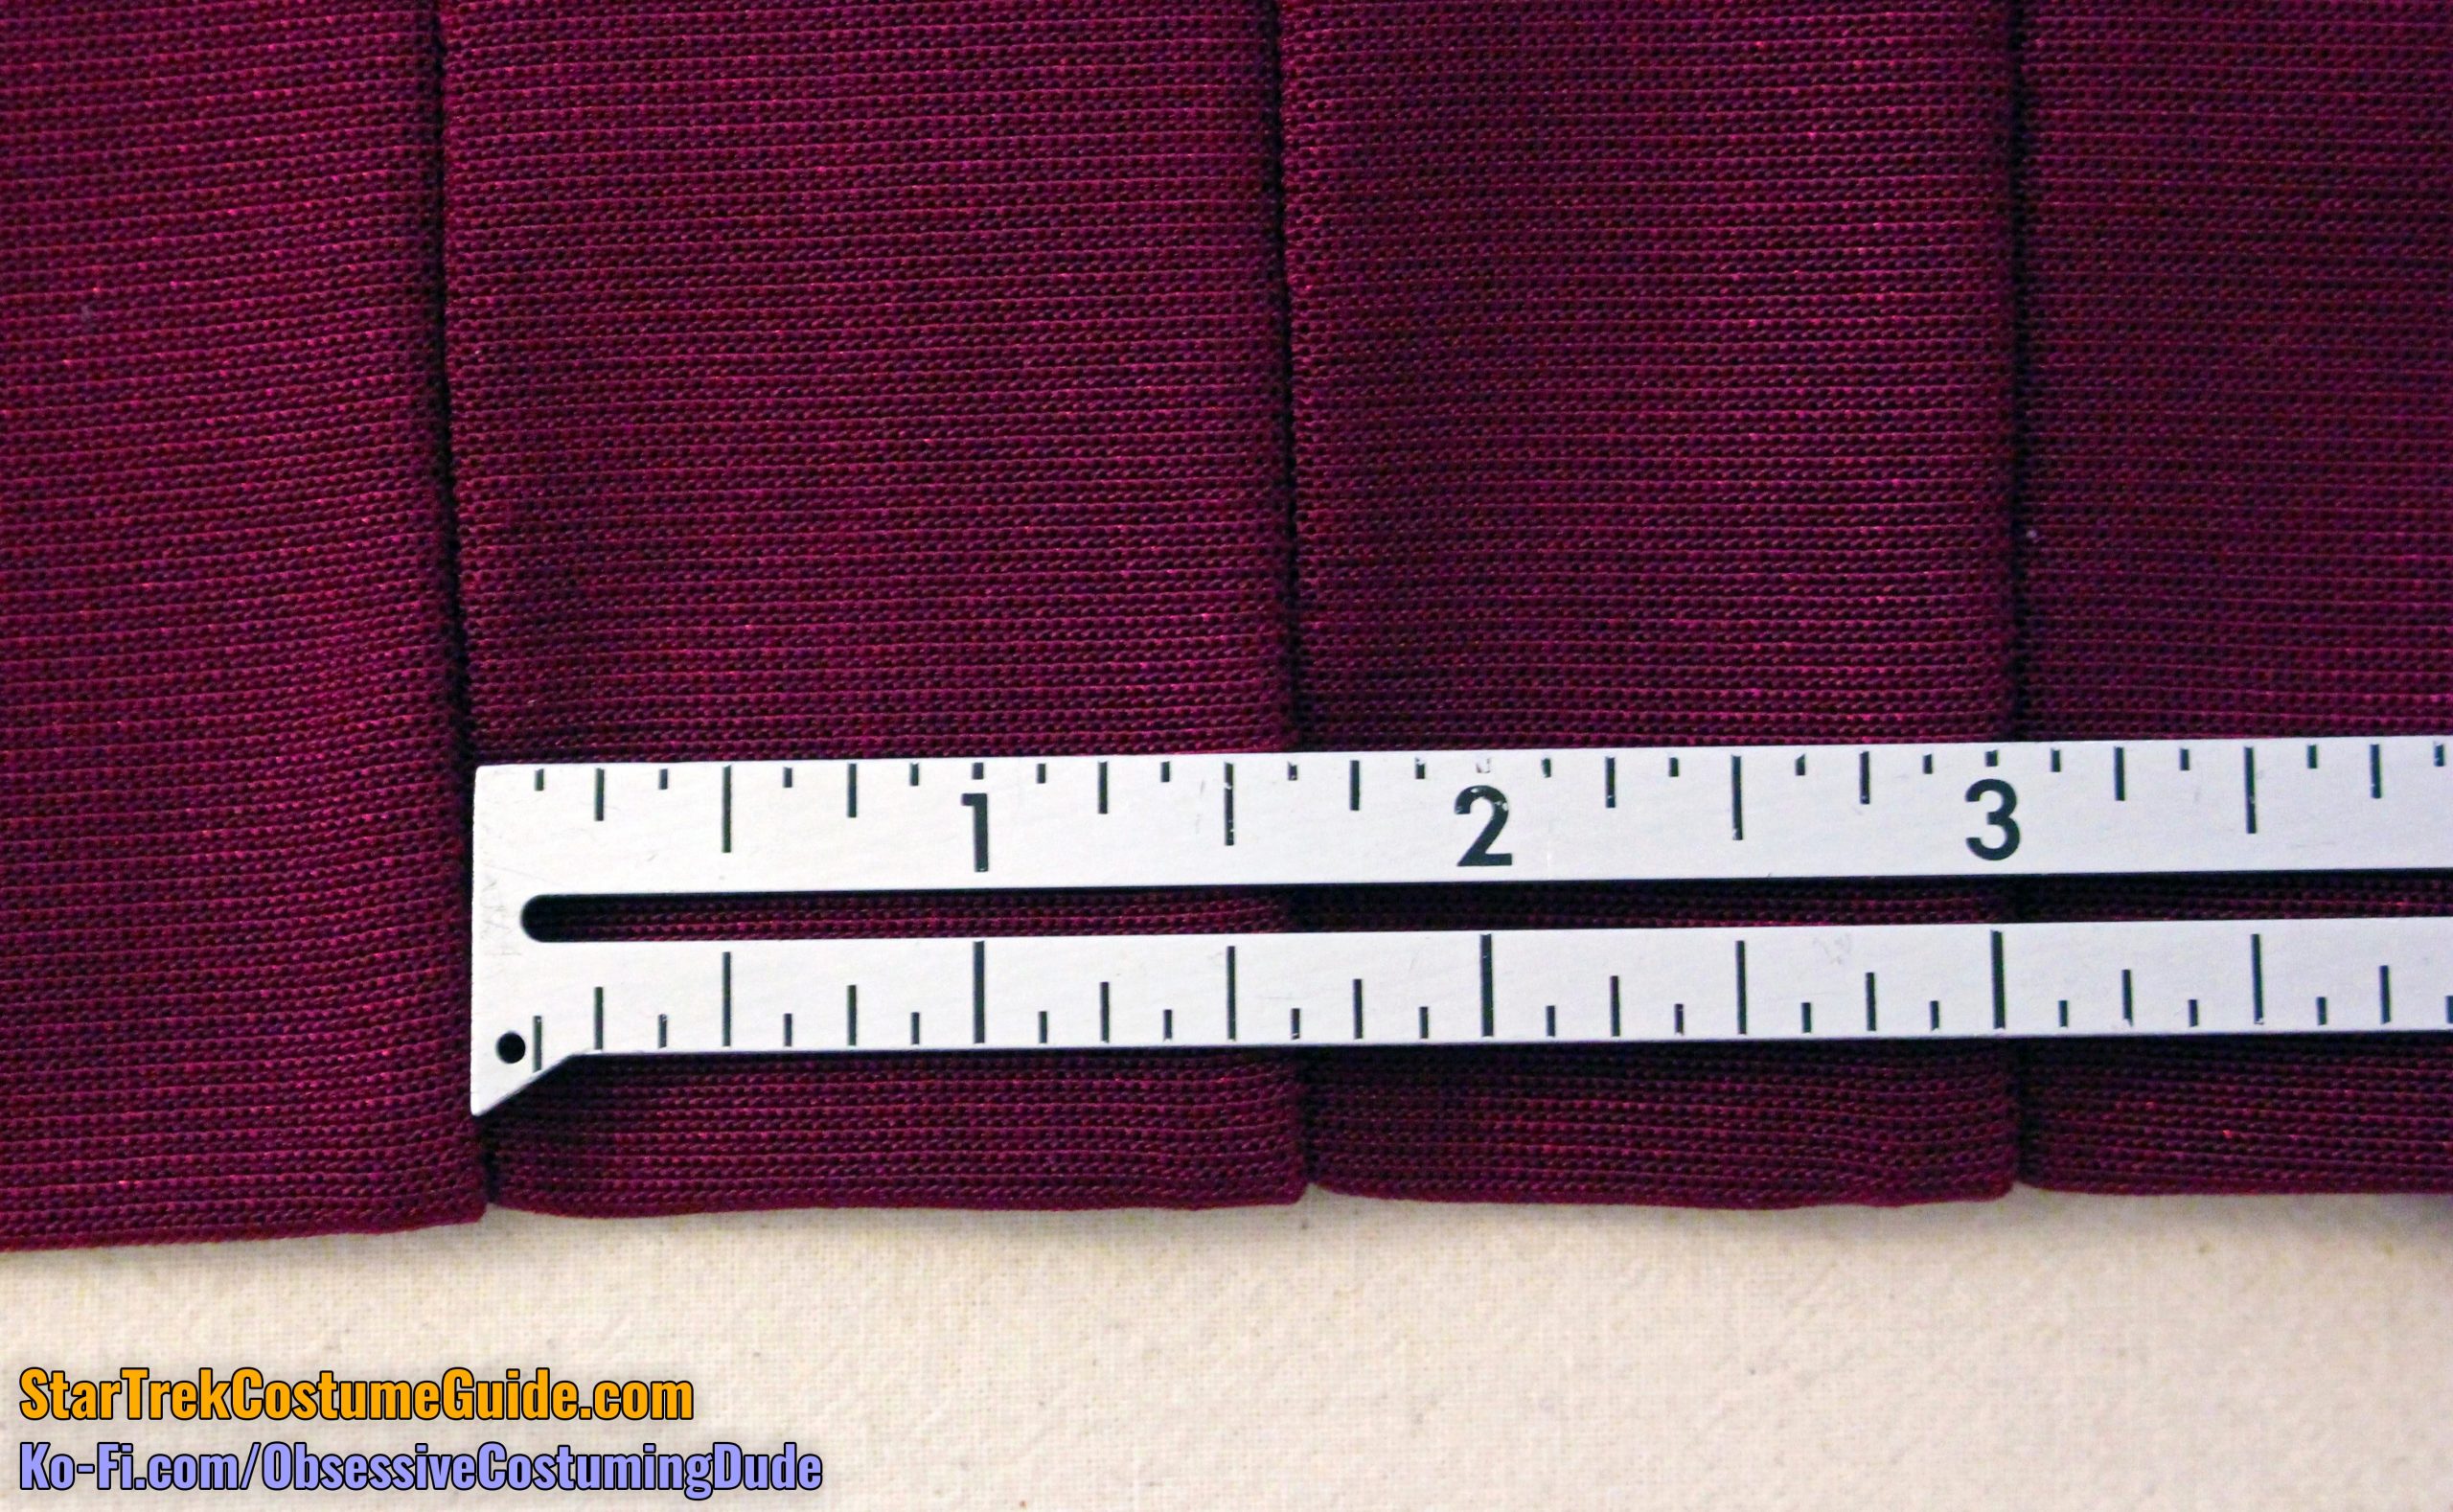
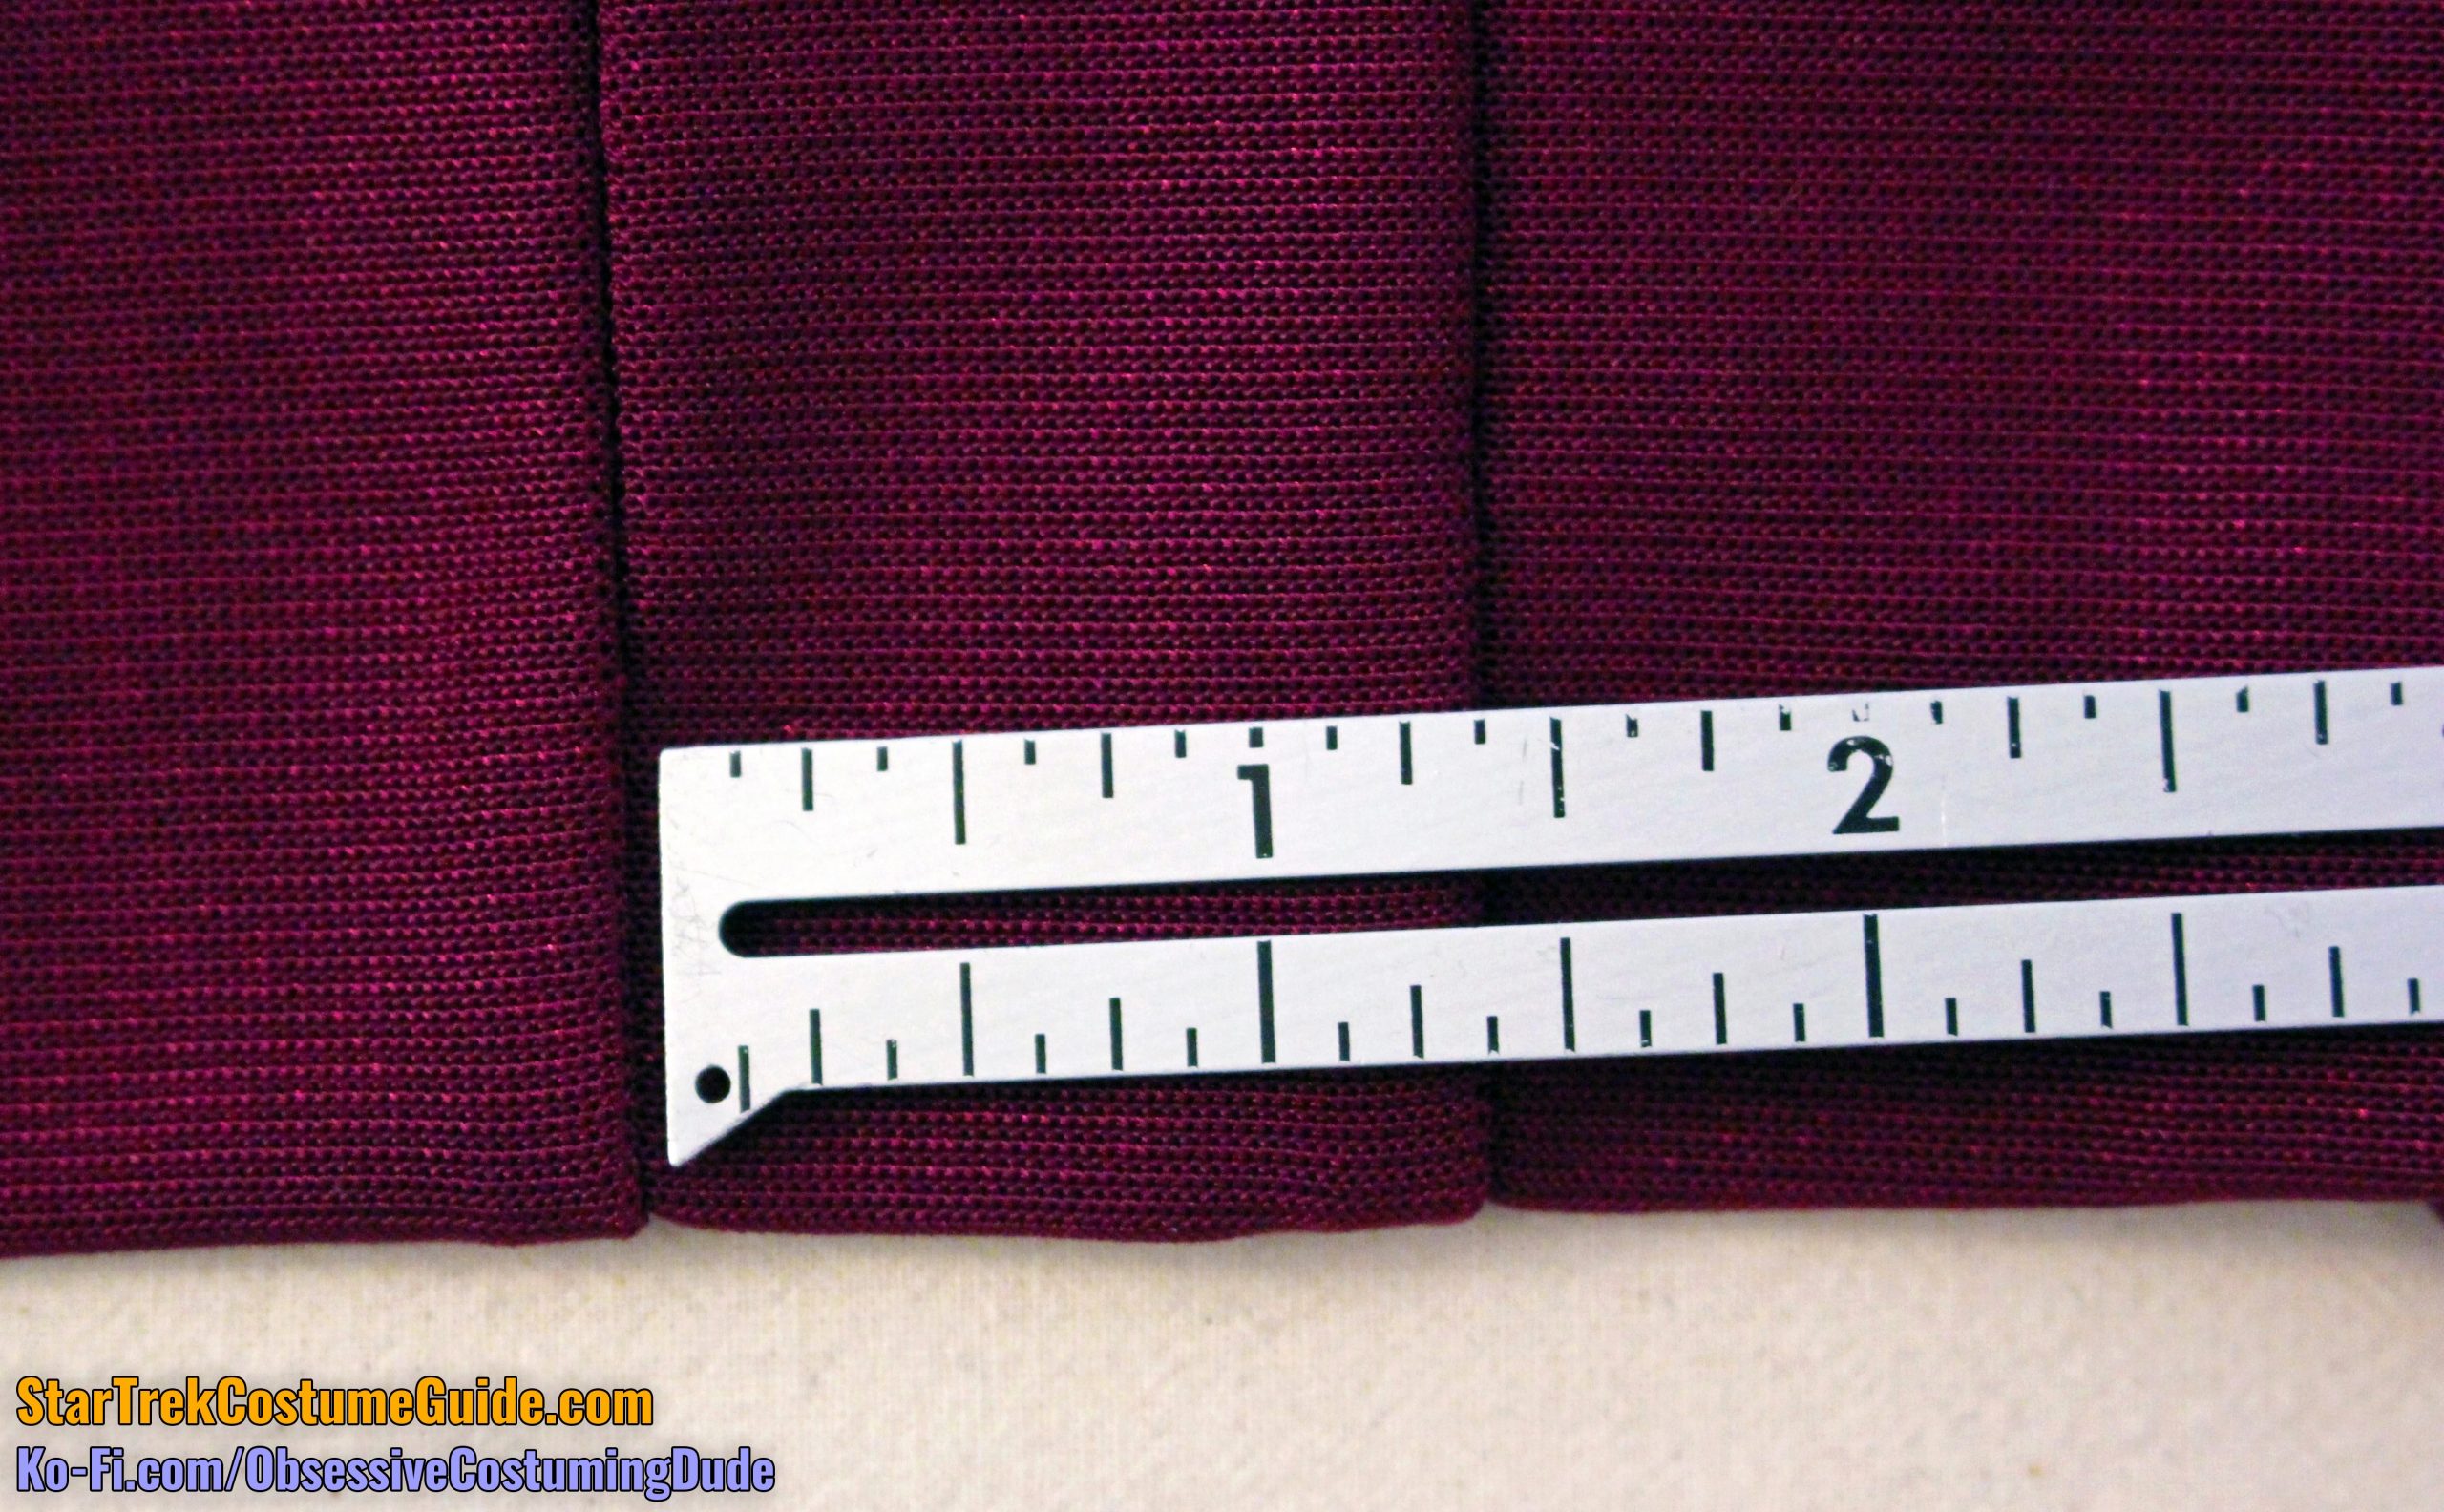
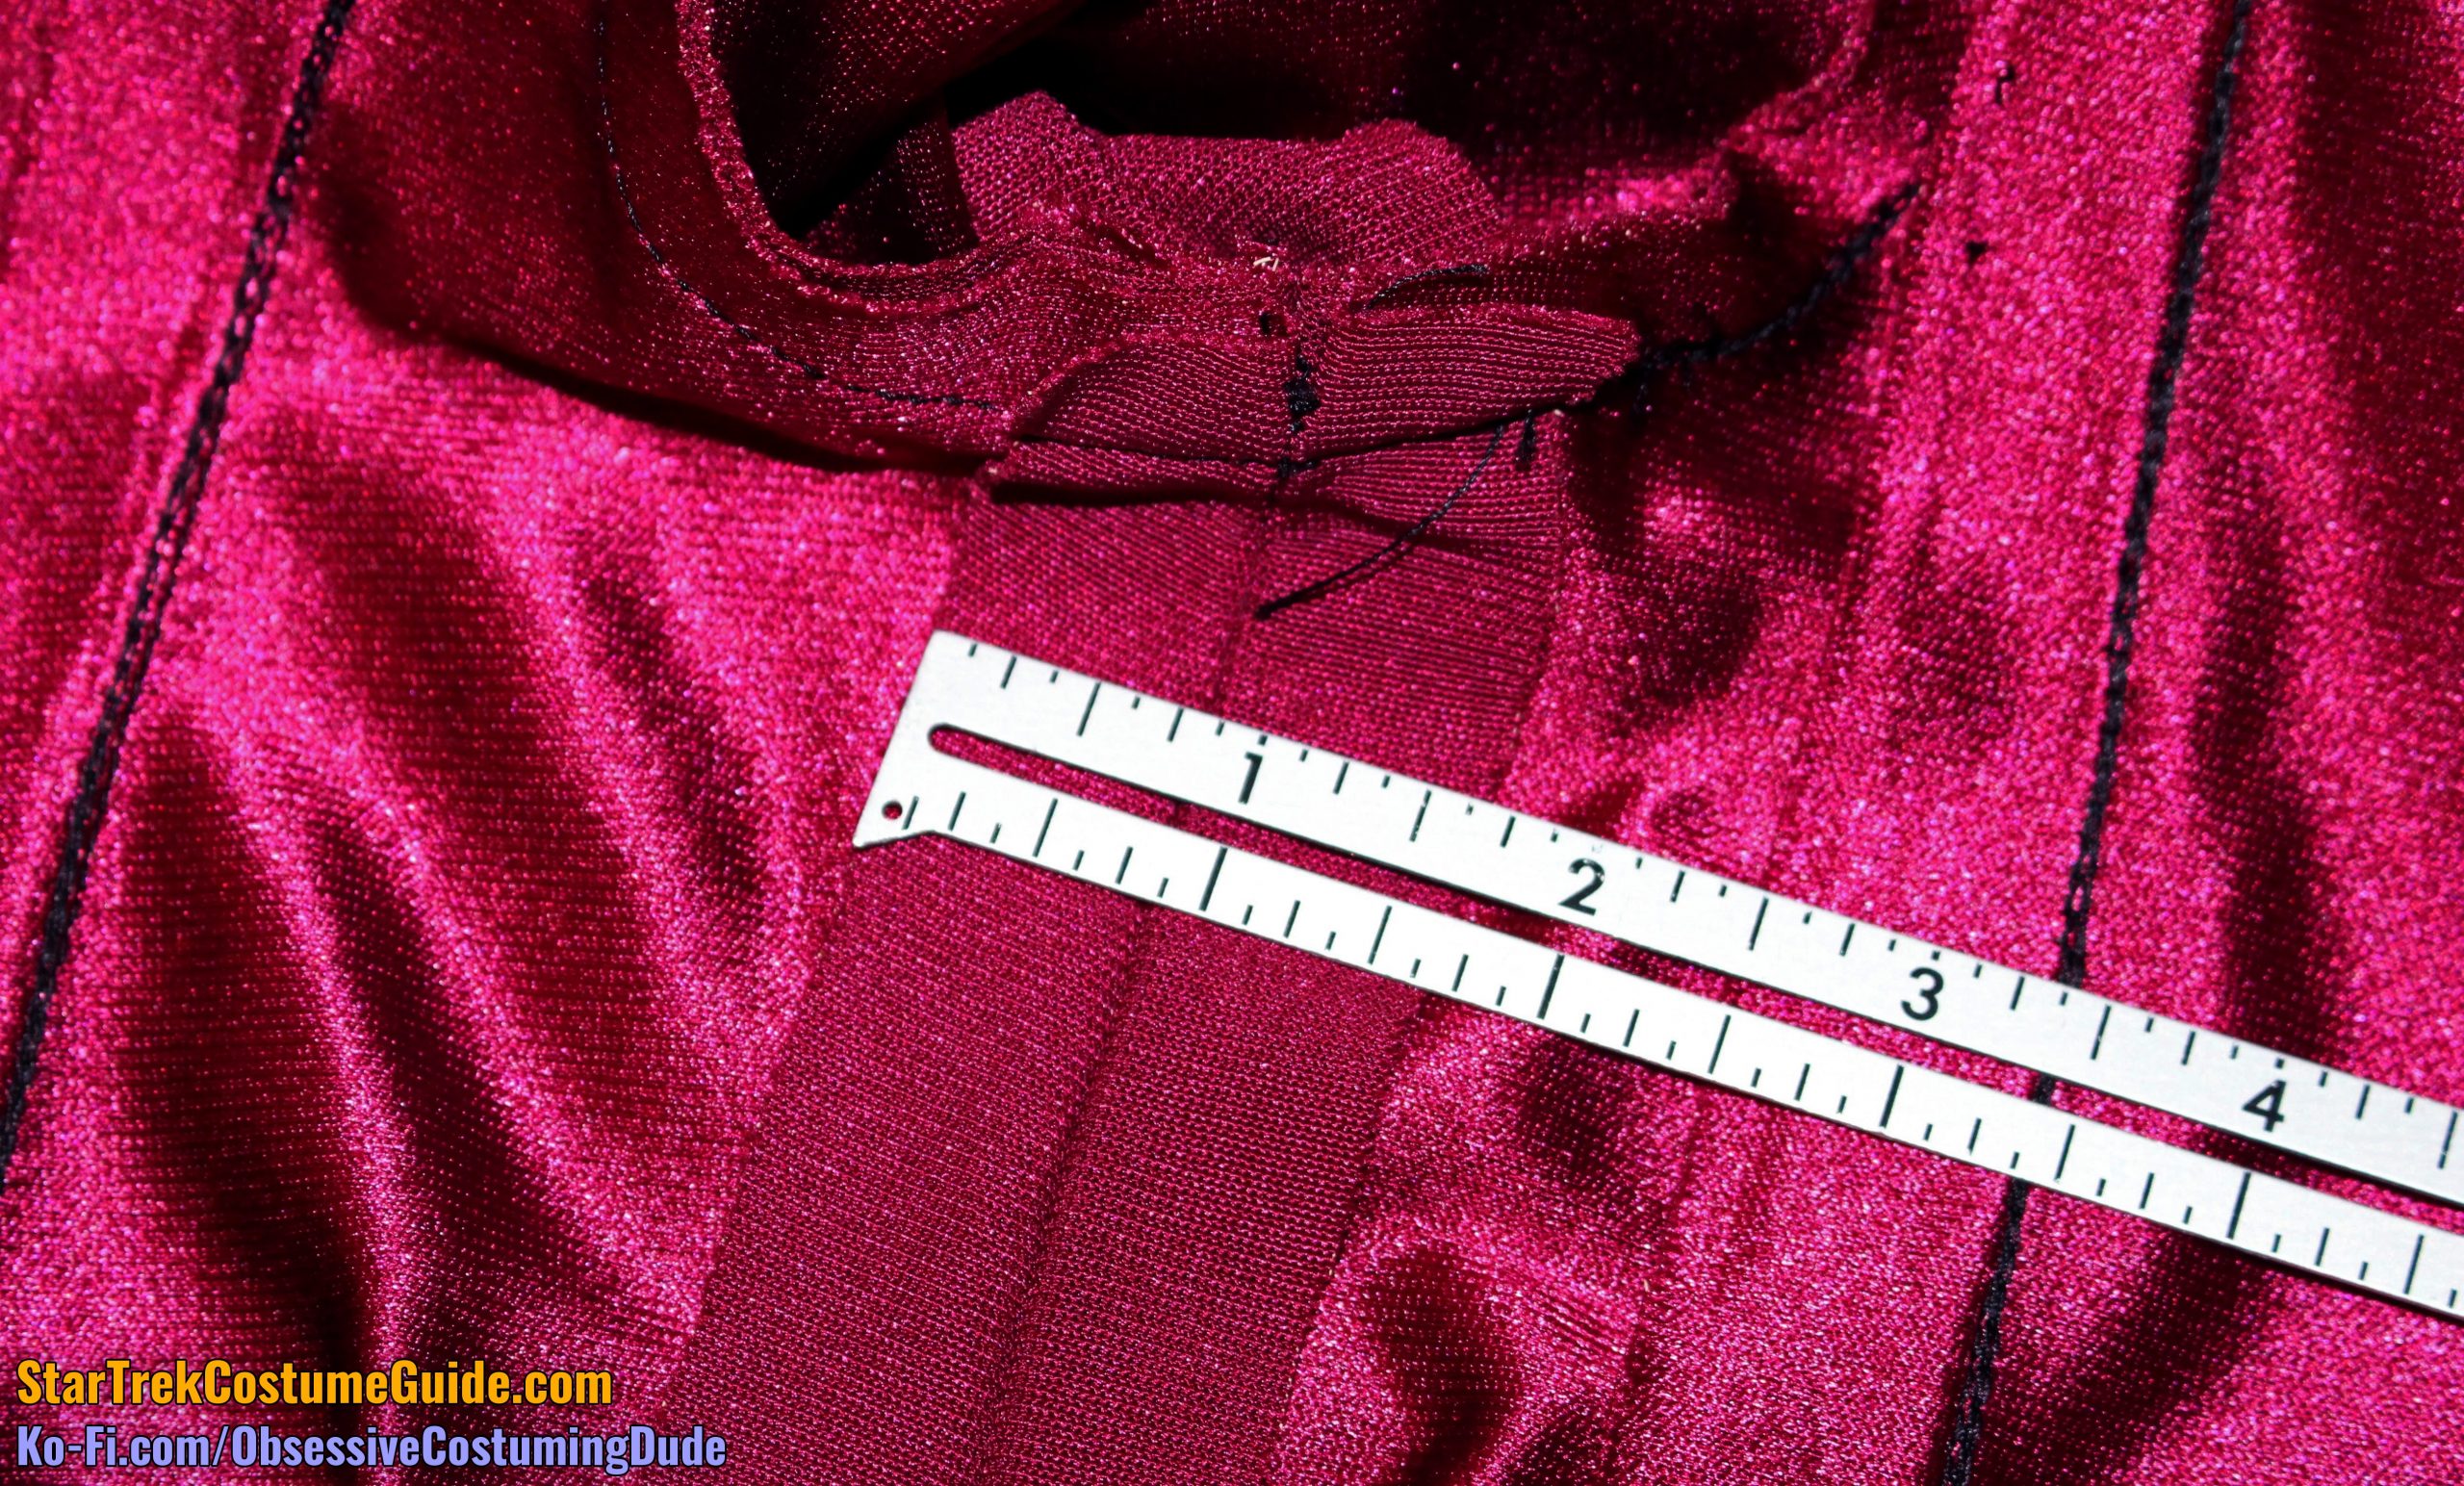
Here’s a visual reference for the pleats across the lower front opening.
I’ll refer to the four pleats as pleats #1-4, going from garment right to left (photo left to right), respectively.
Pleat #1 was 1 ⅜” from the right side front seam, and 4 ¼” tall.
Pleat #2 was 1 ¼” away from the first, and 3 ⅞” tall.
Pleat #3 was 1 ⅜” away from the second, and 3 ¼” tall.
And finally, pleat #4 was 1 ¼” from the third, and 2” tall.
Note: pleats #3 and 4 are actually about ⅛” shorter if you measure from the hem stitching, rather than the actual fold of the fabric.
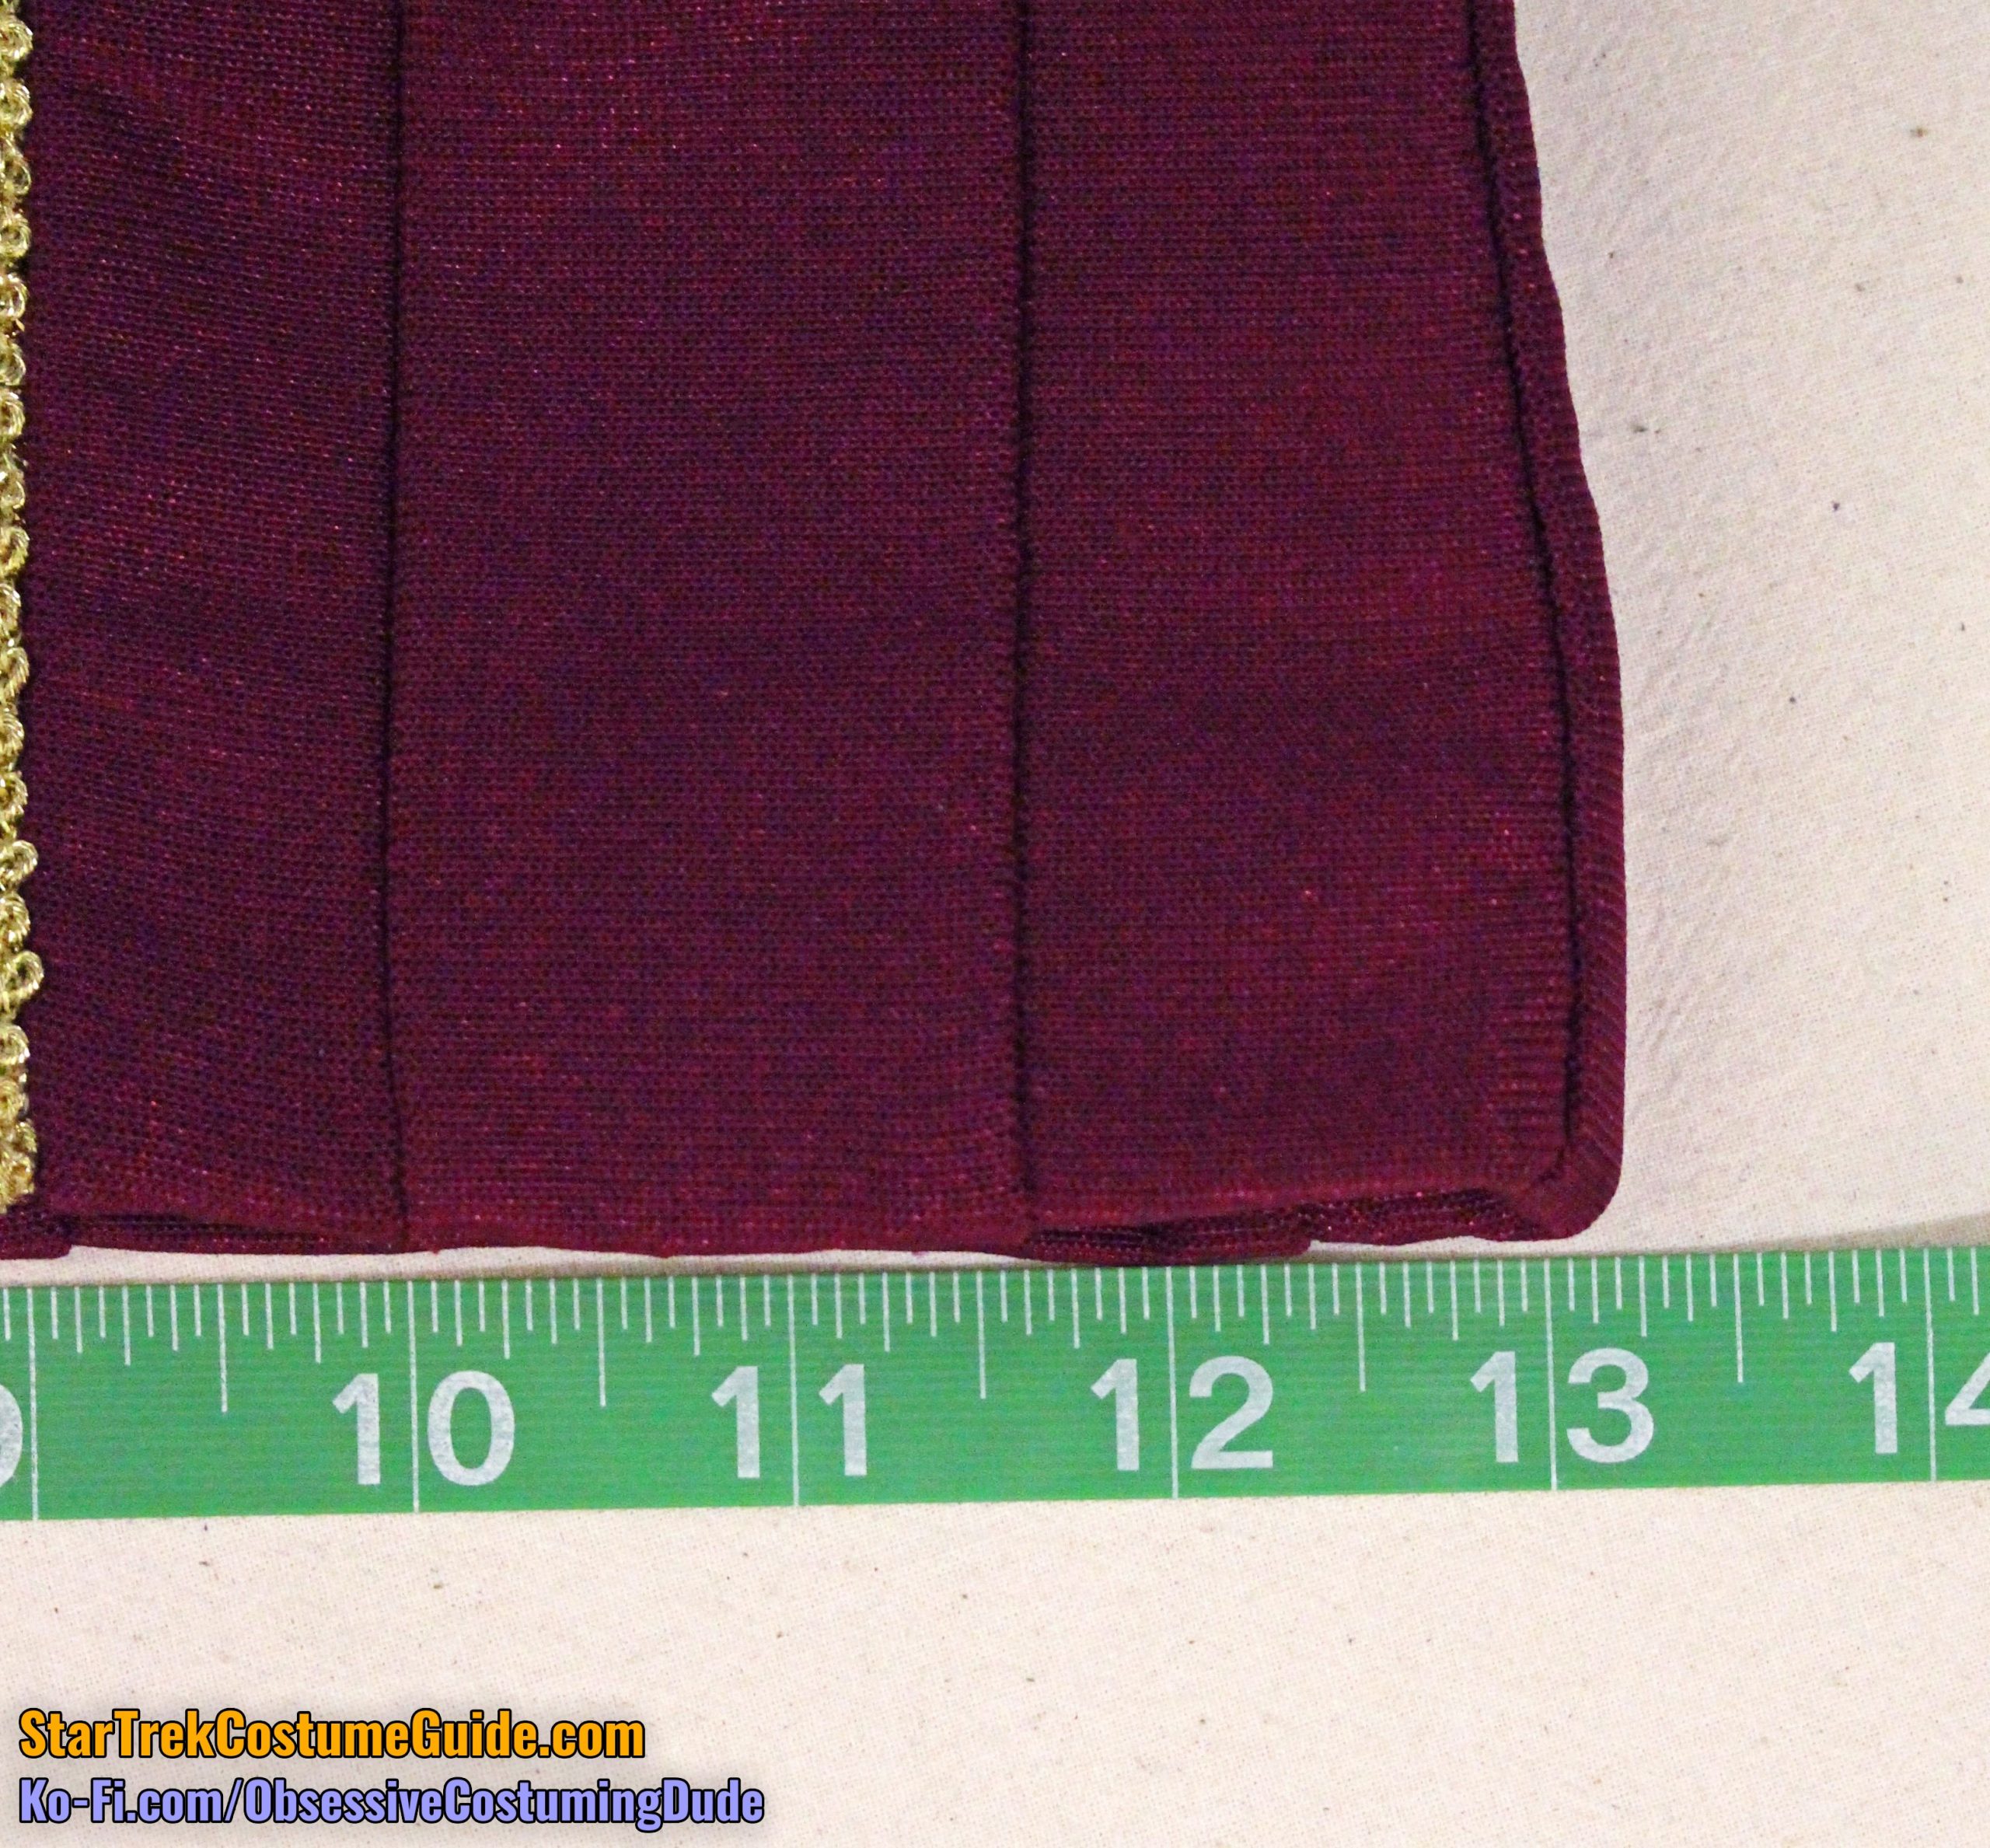
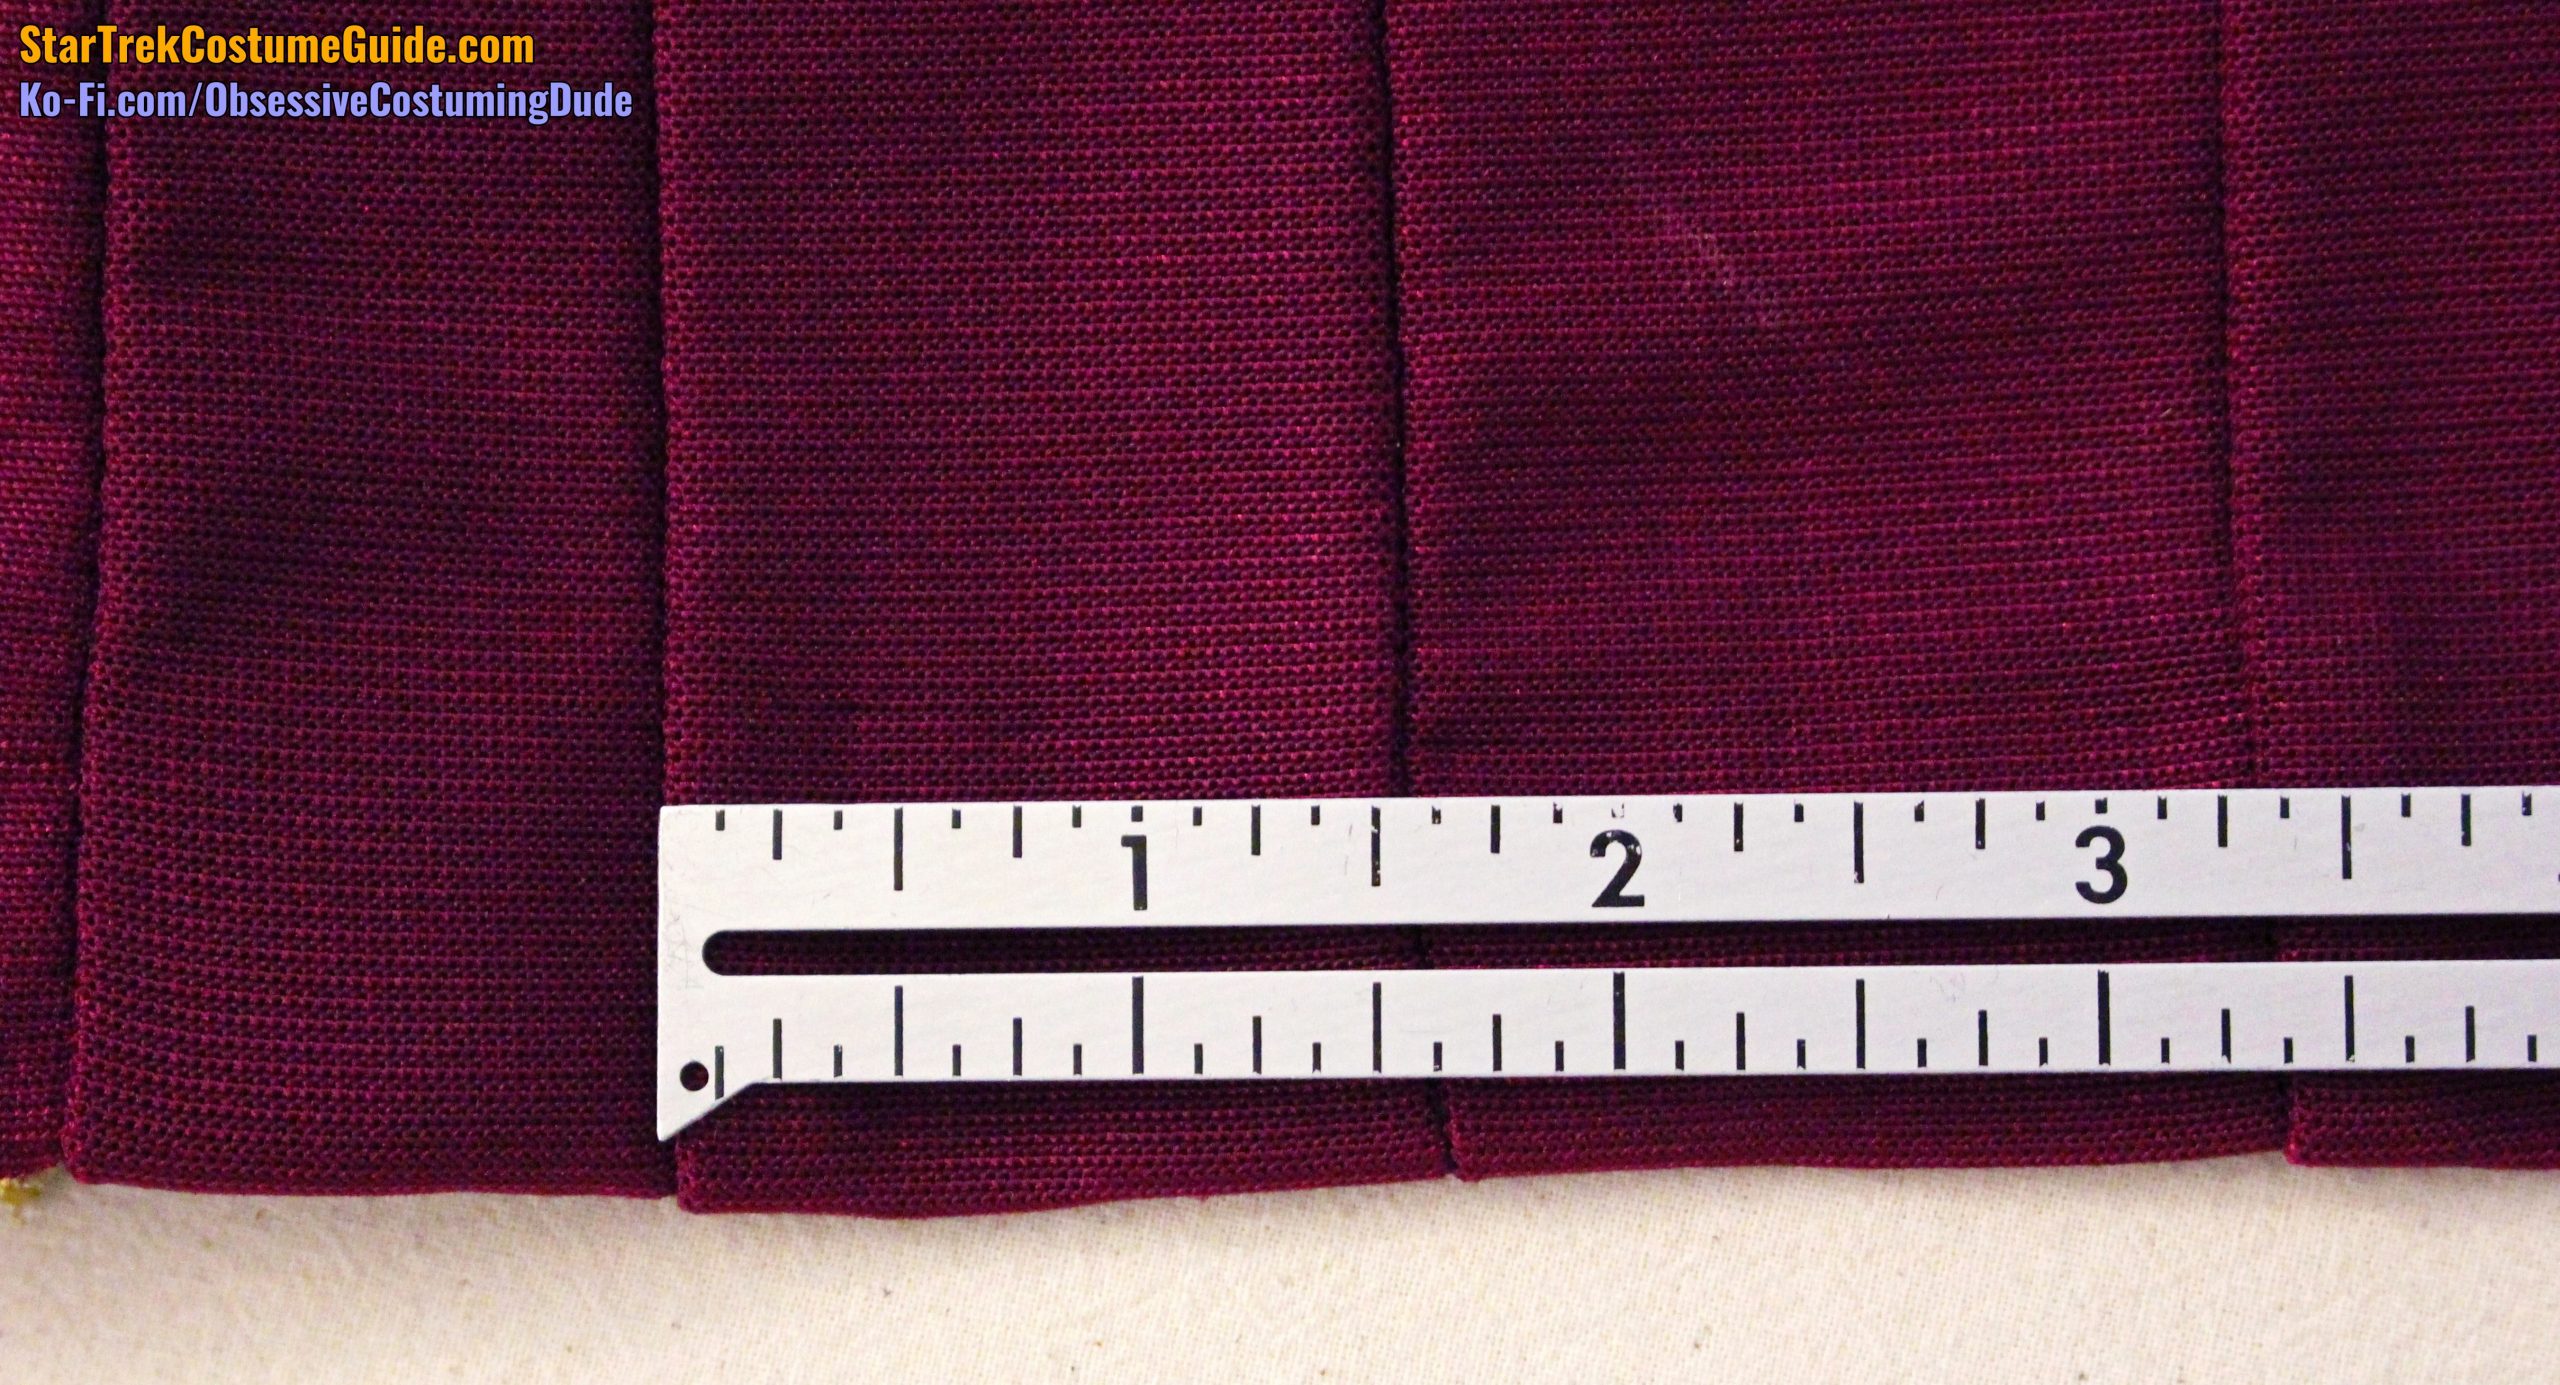
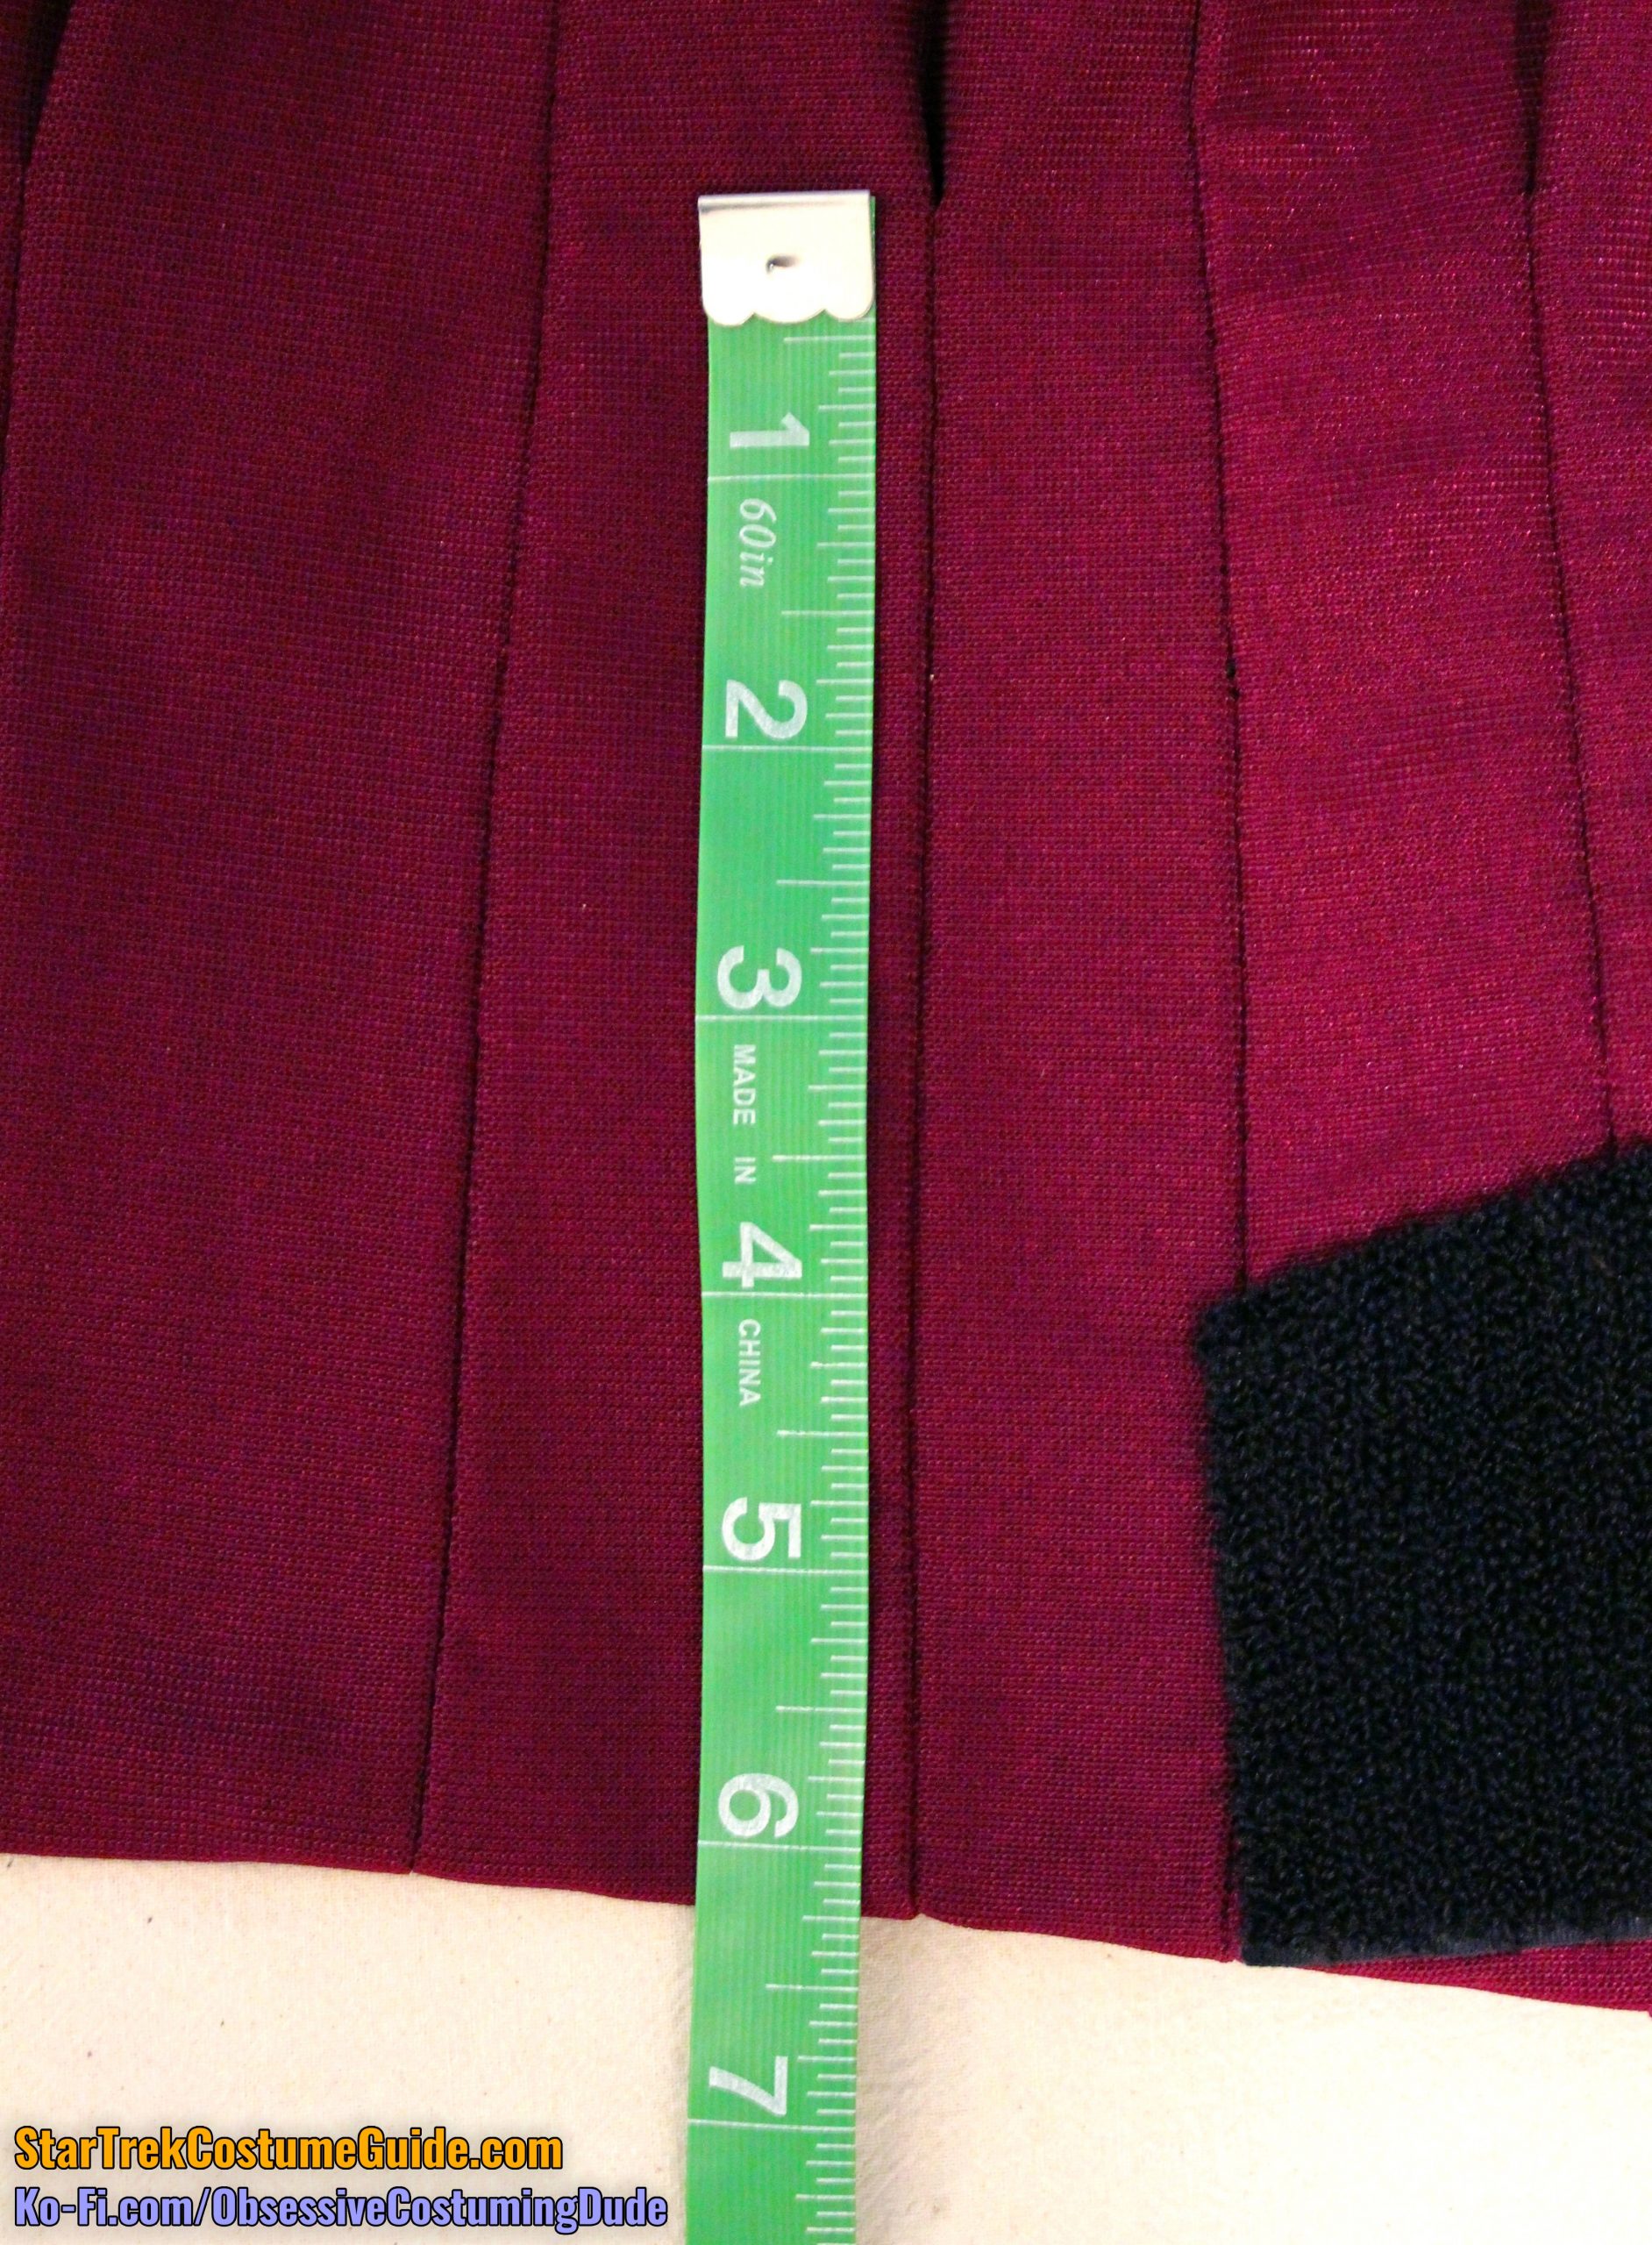
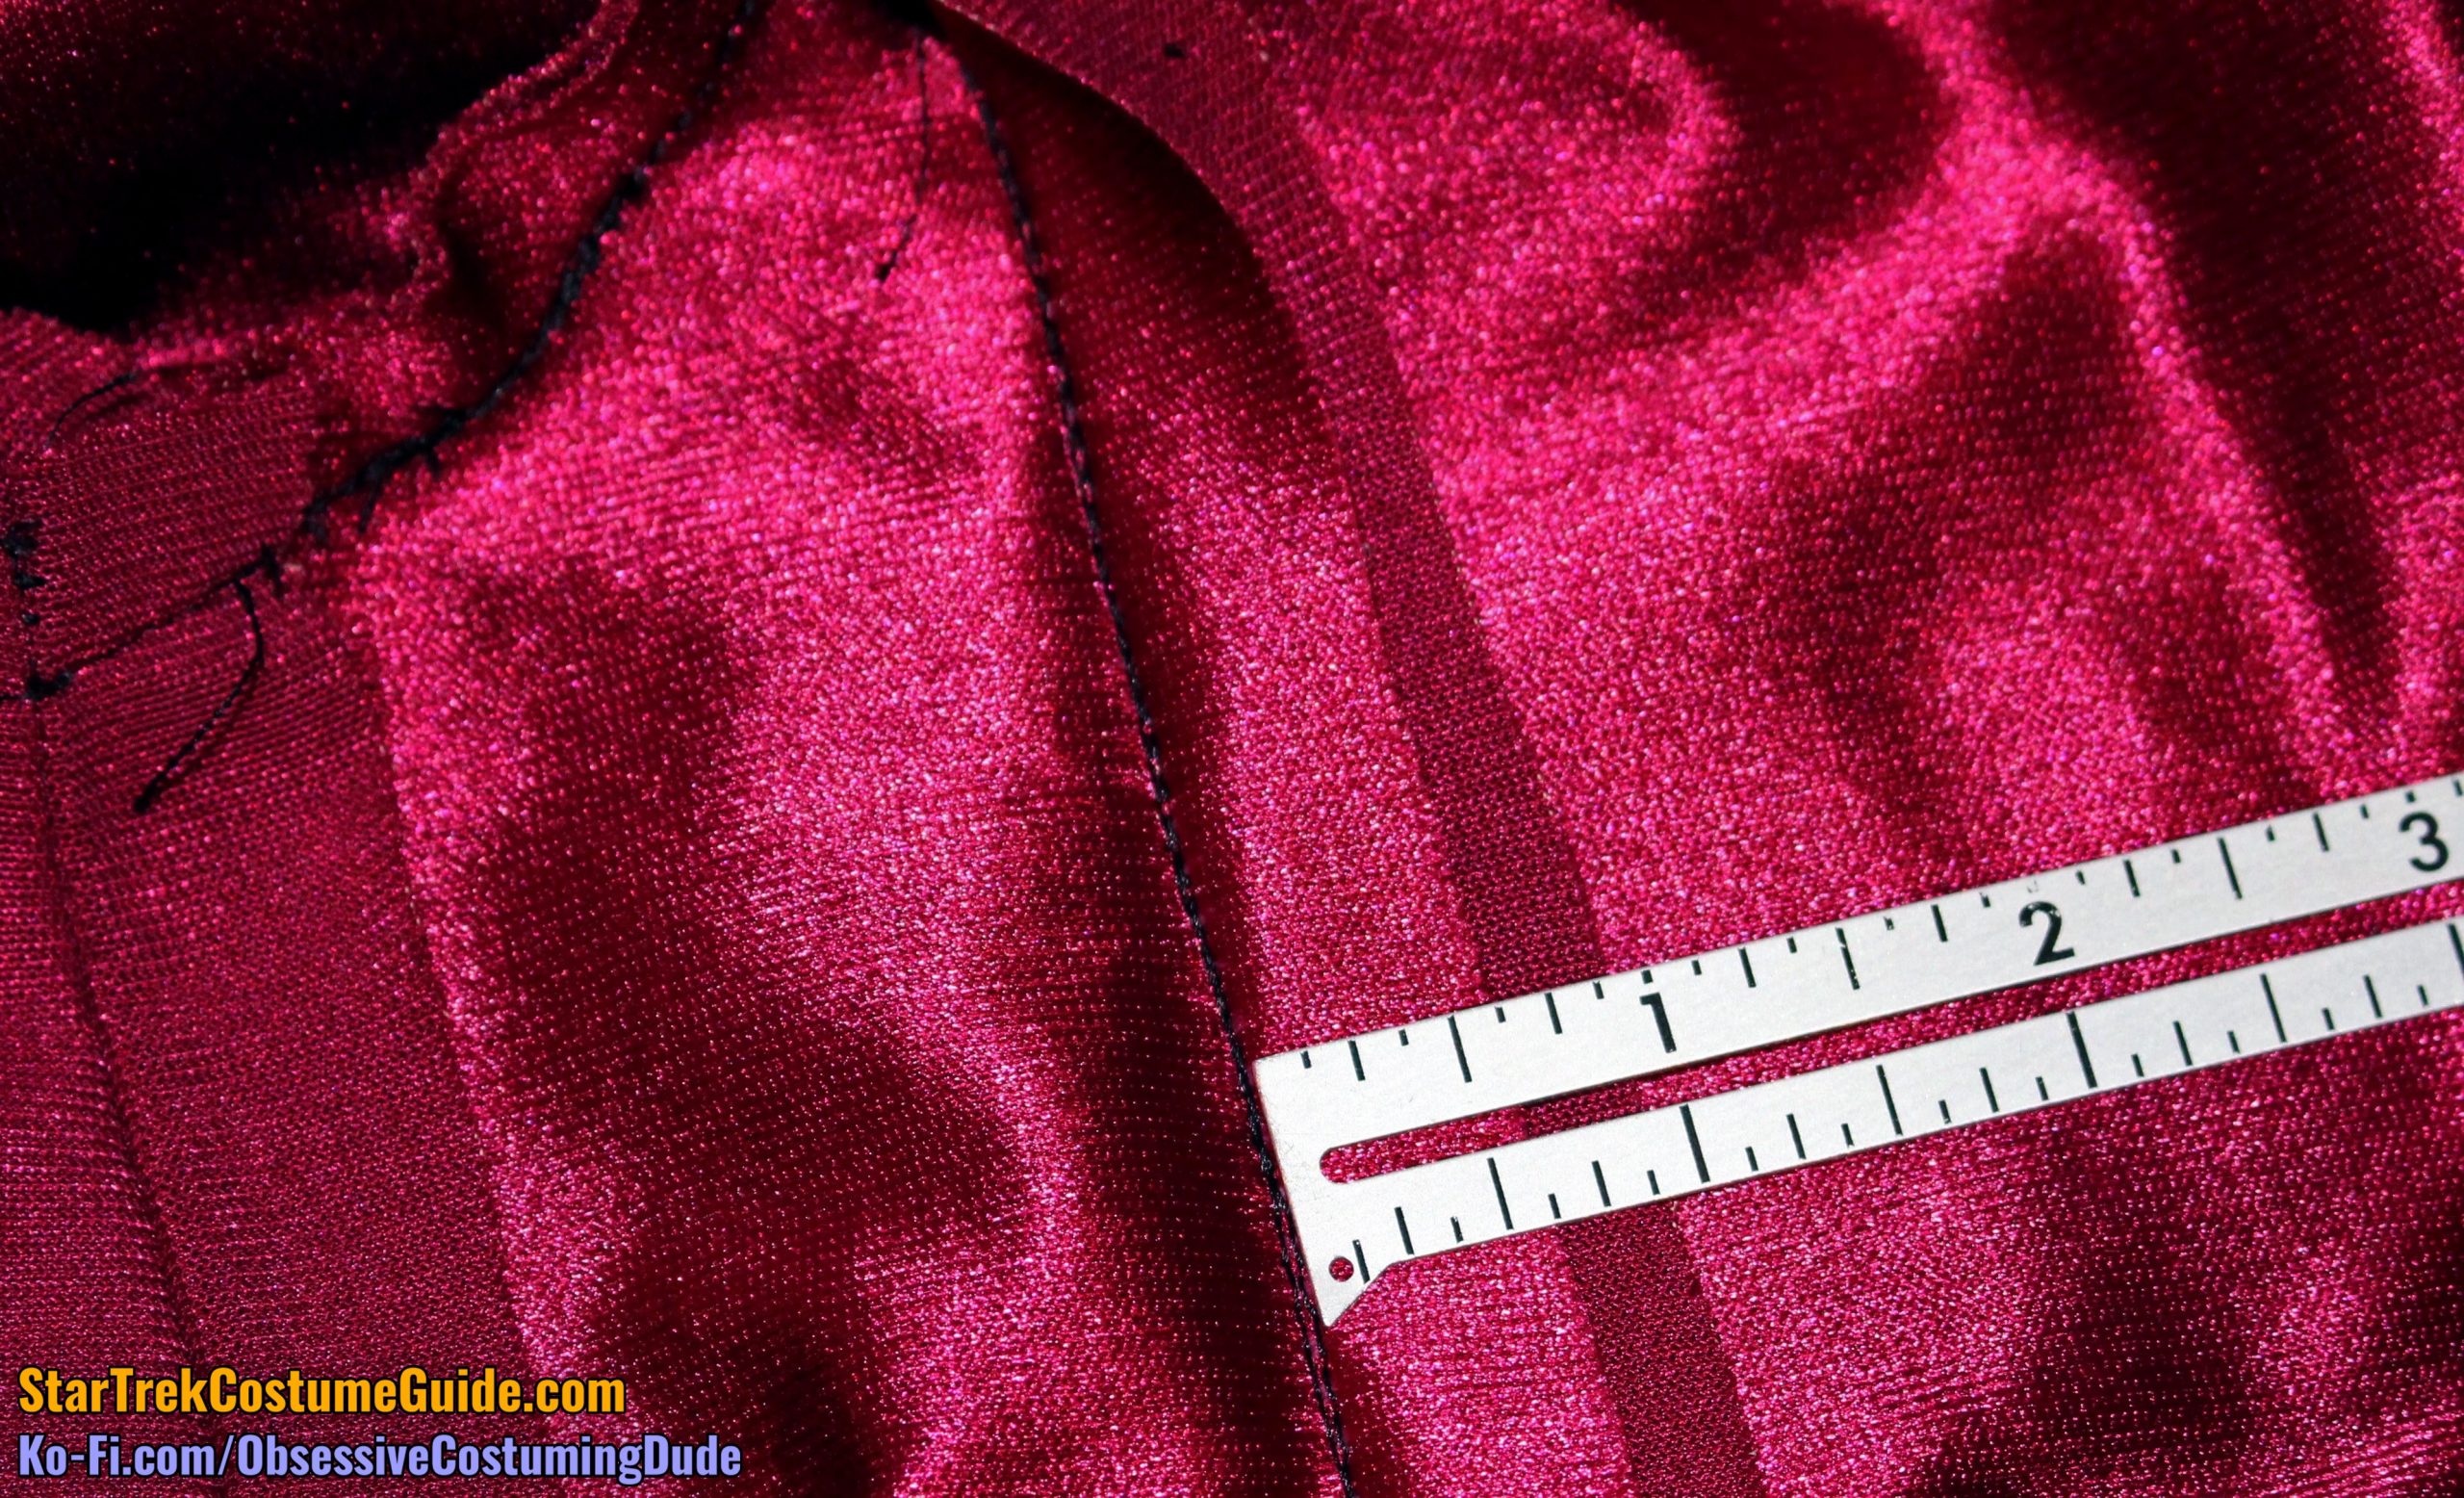
Making our way around to the back, the bottom of the side back left panel was about 2 ⅞” to 3” wide.
Its pleat was 1 ¼” (perhaps 1 ⅜”) from the side seam, 1 ⅝” from the side back seam, and 6 ¼” tall.
The right side back bottom was also about 3” wide.
Its pleat was not quite 1 ¼” from the side seam, about 1 ¾” from the right side back seam, and also 6 ¼” tall.
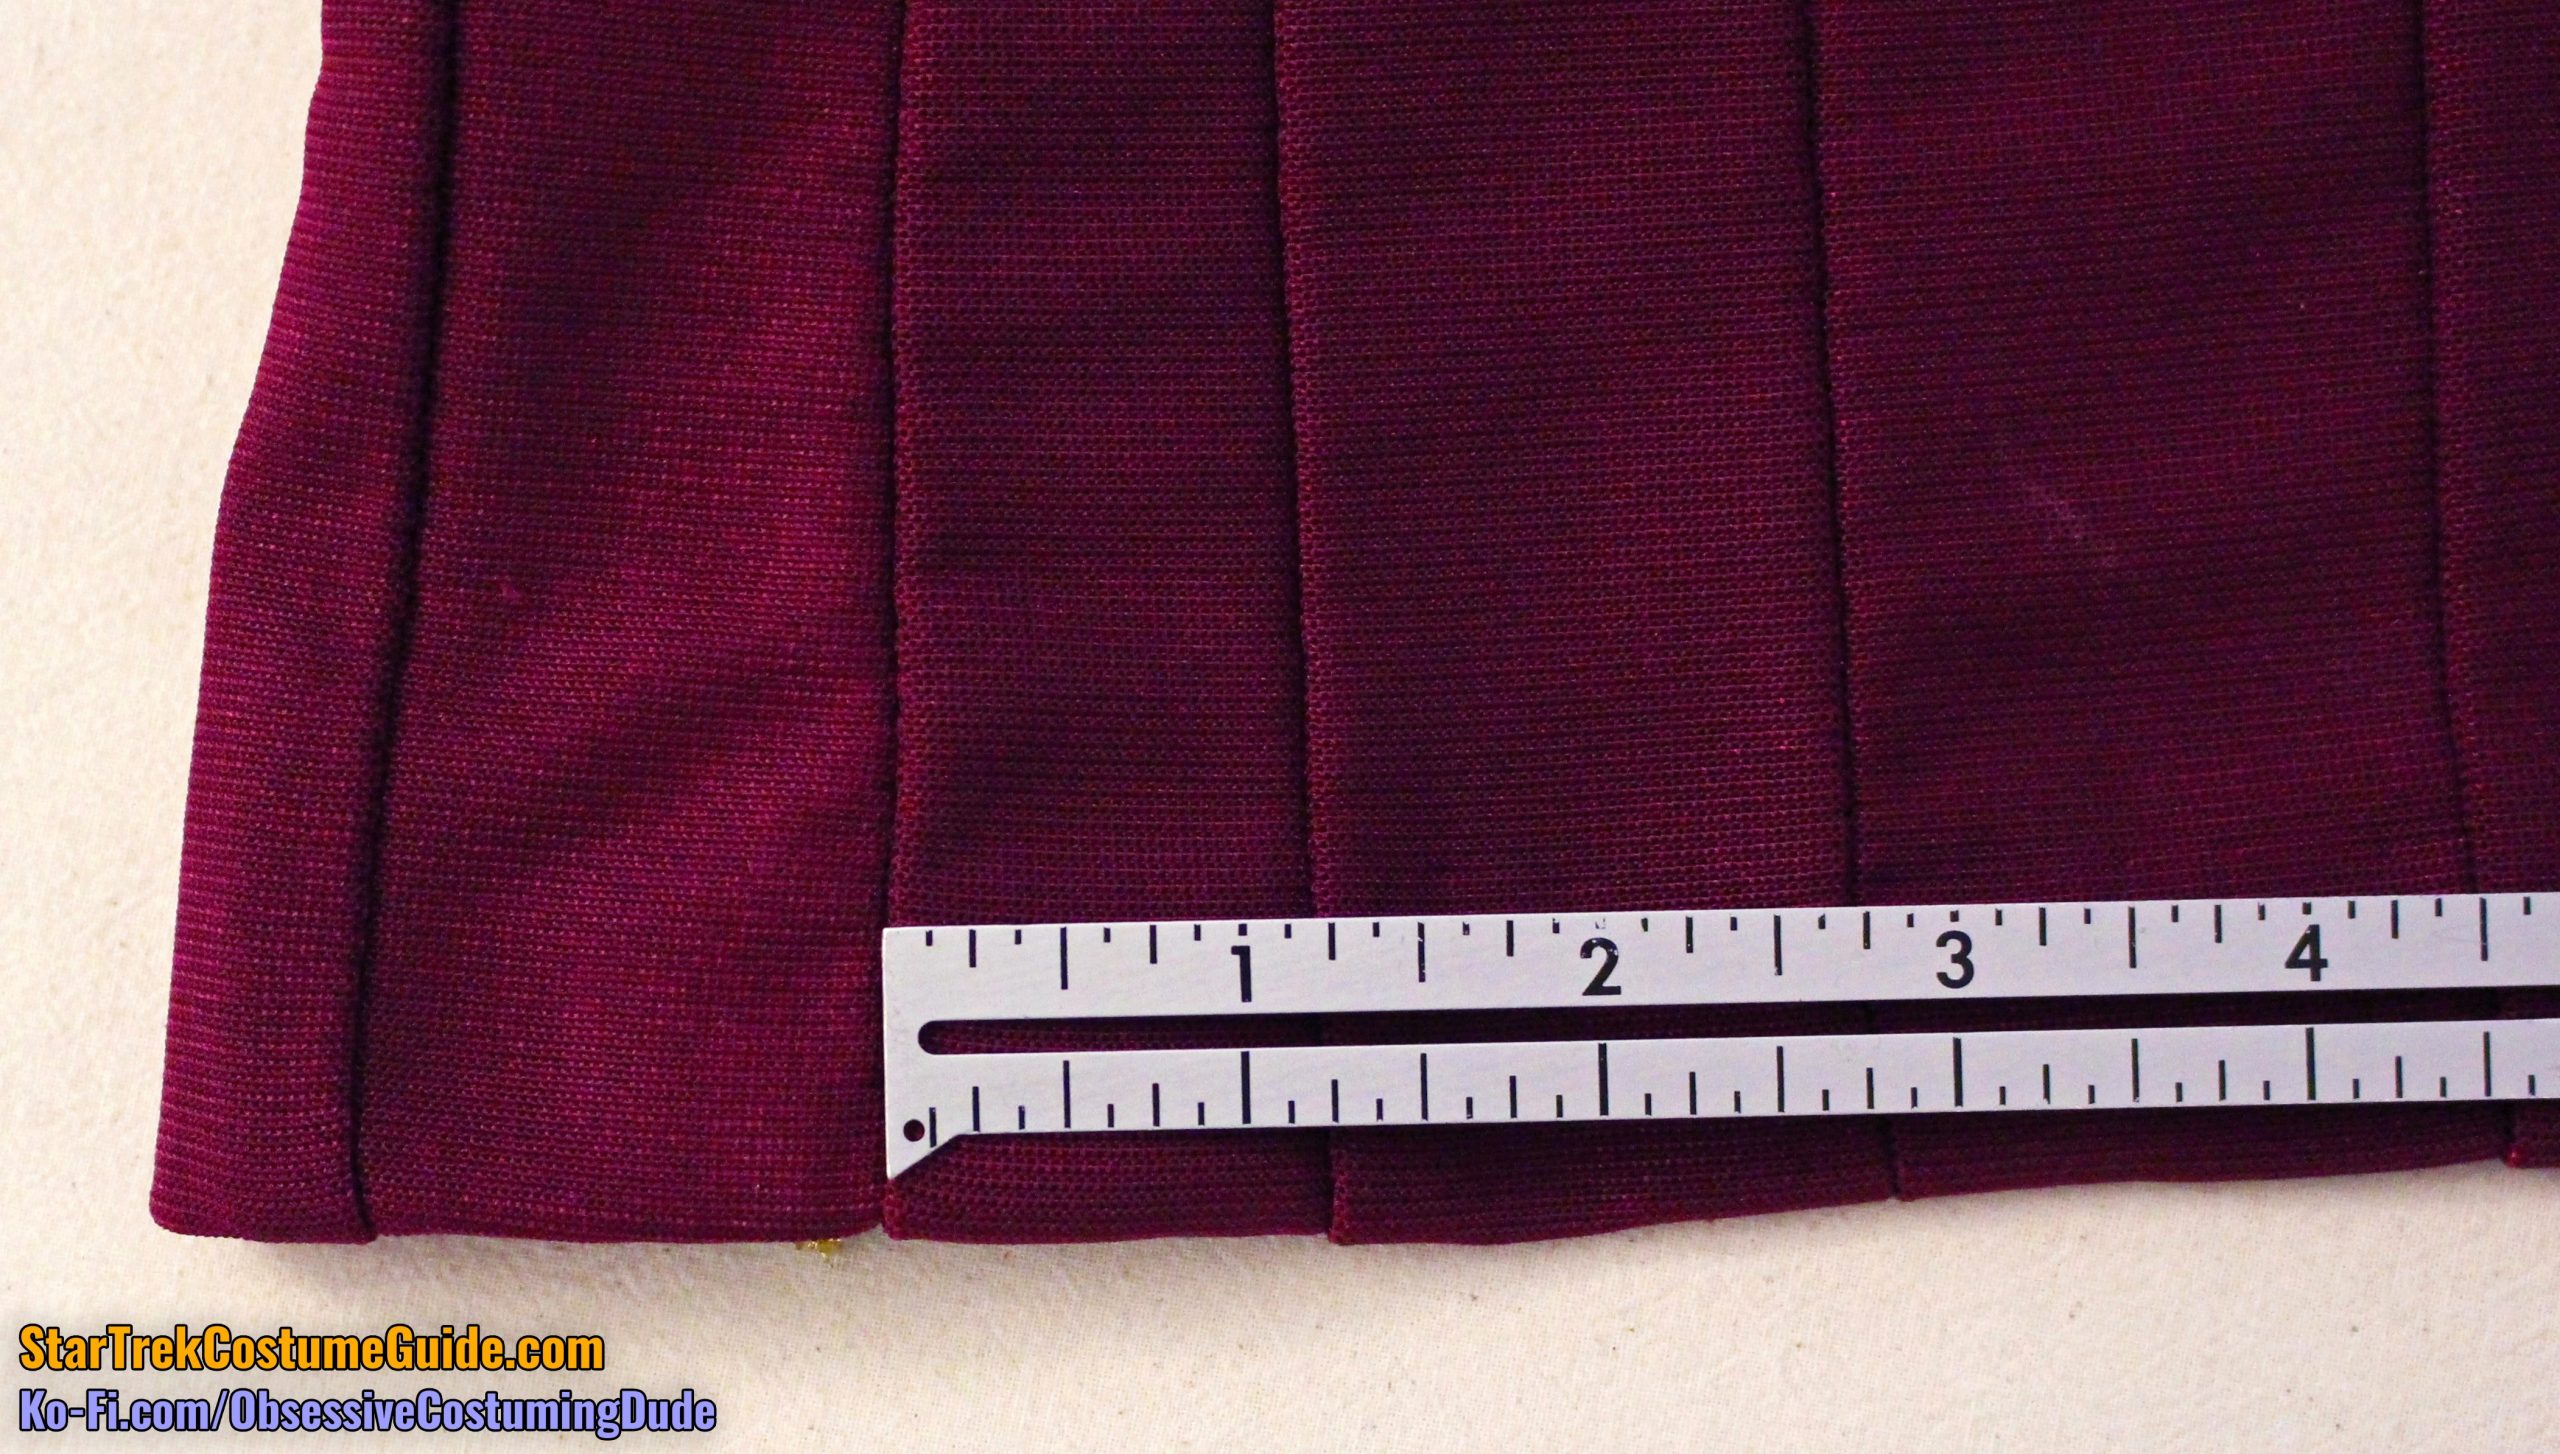
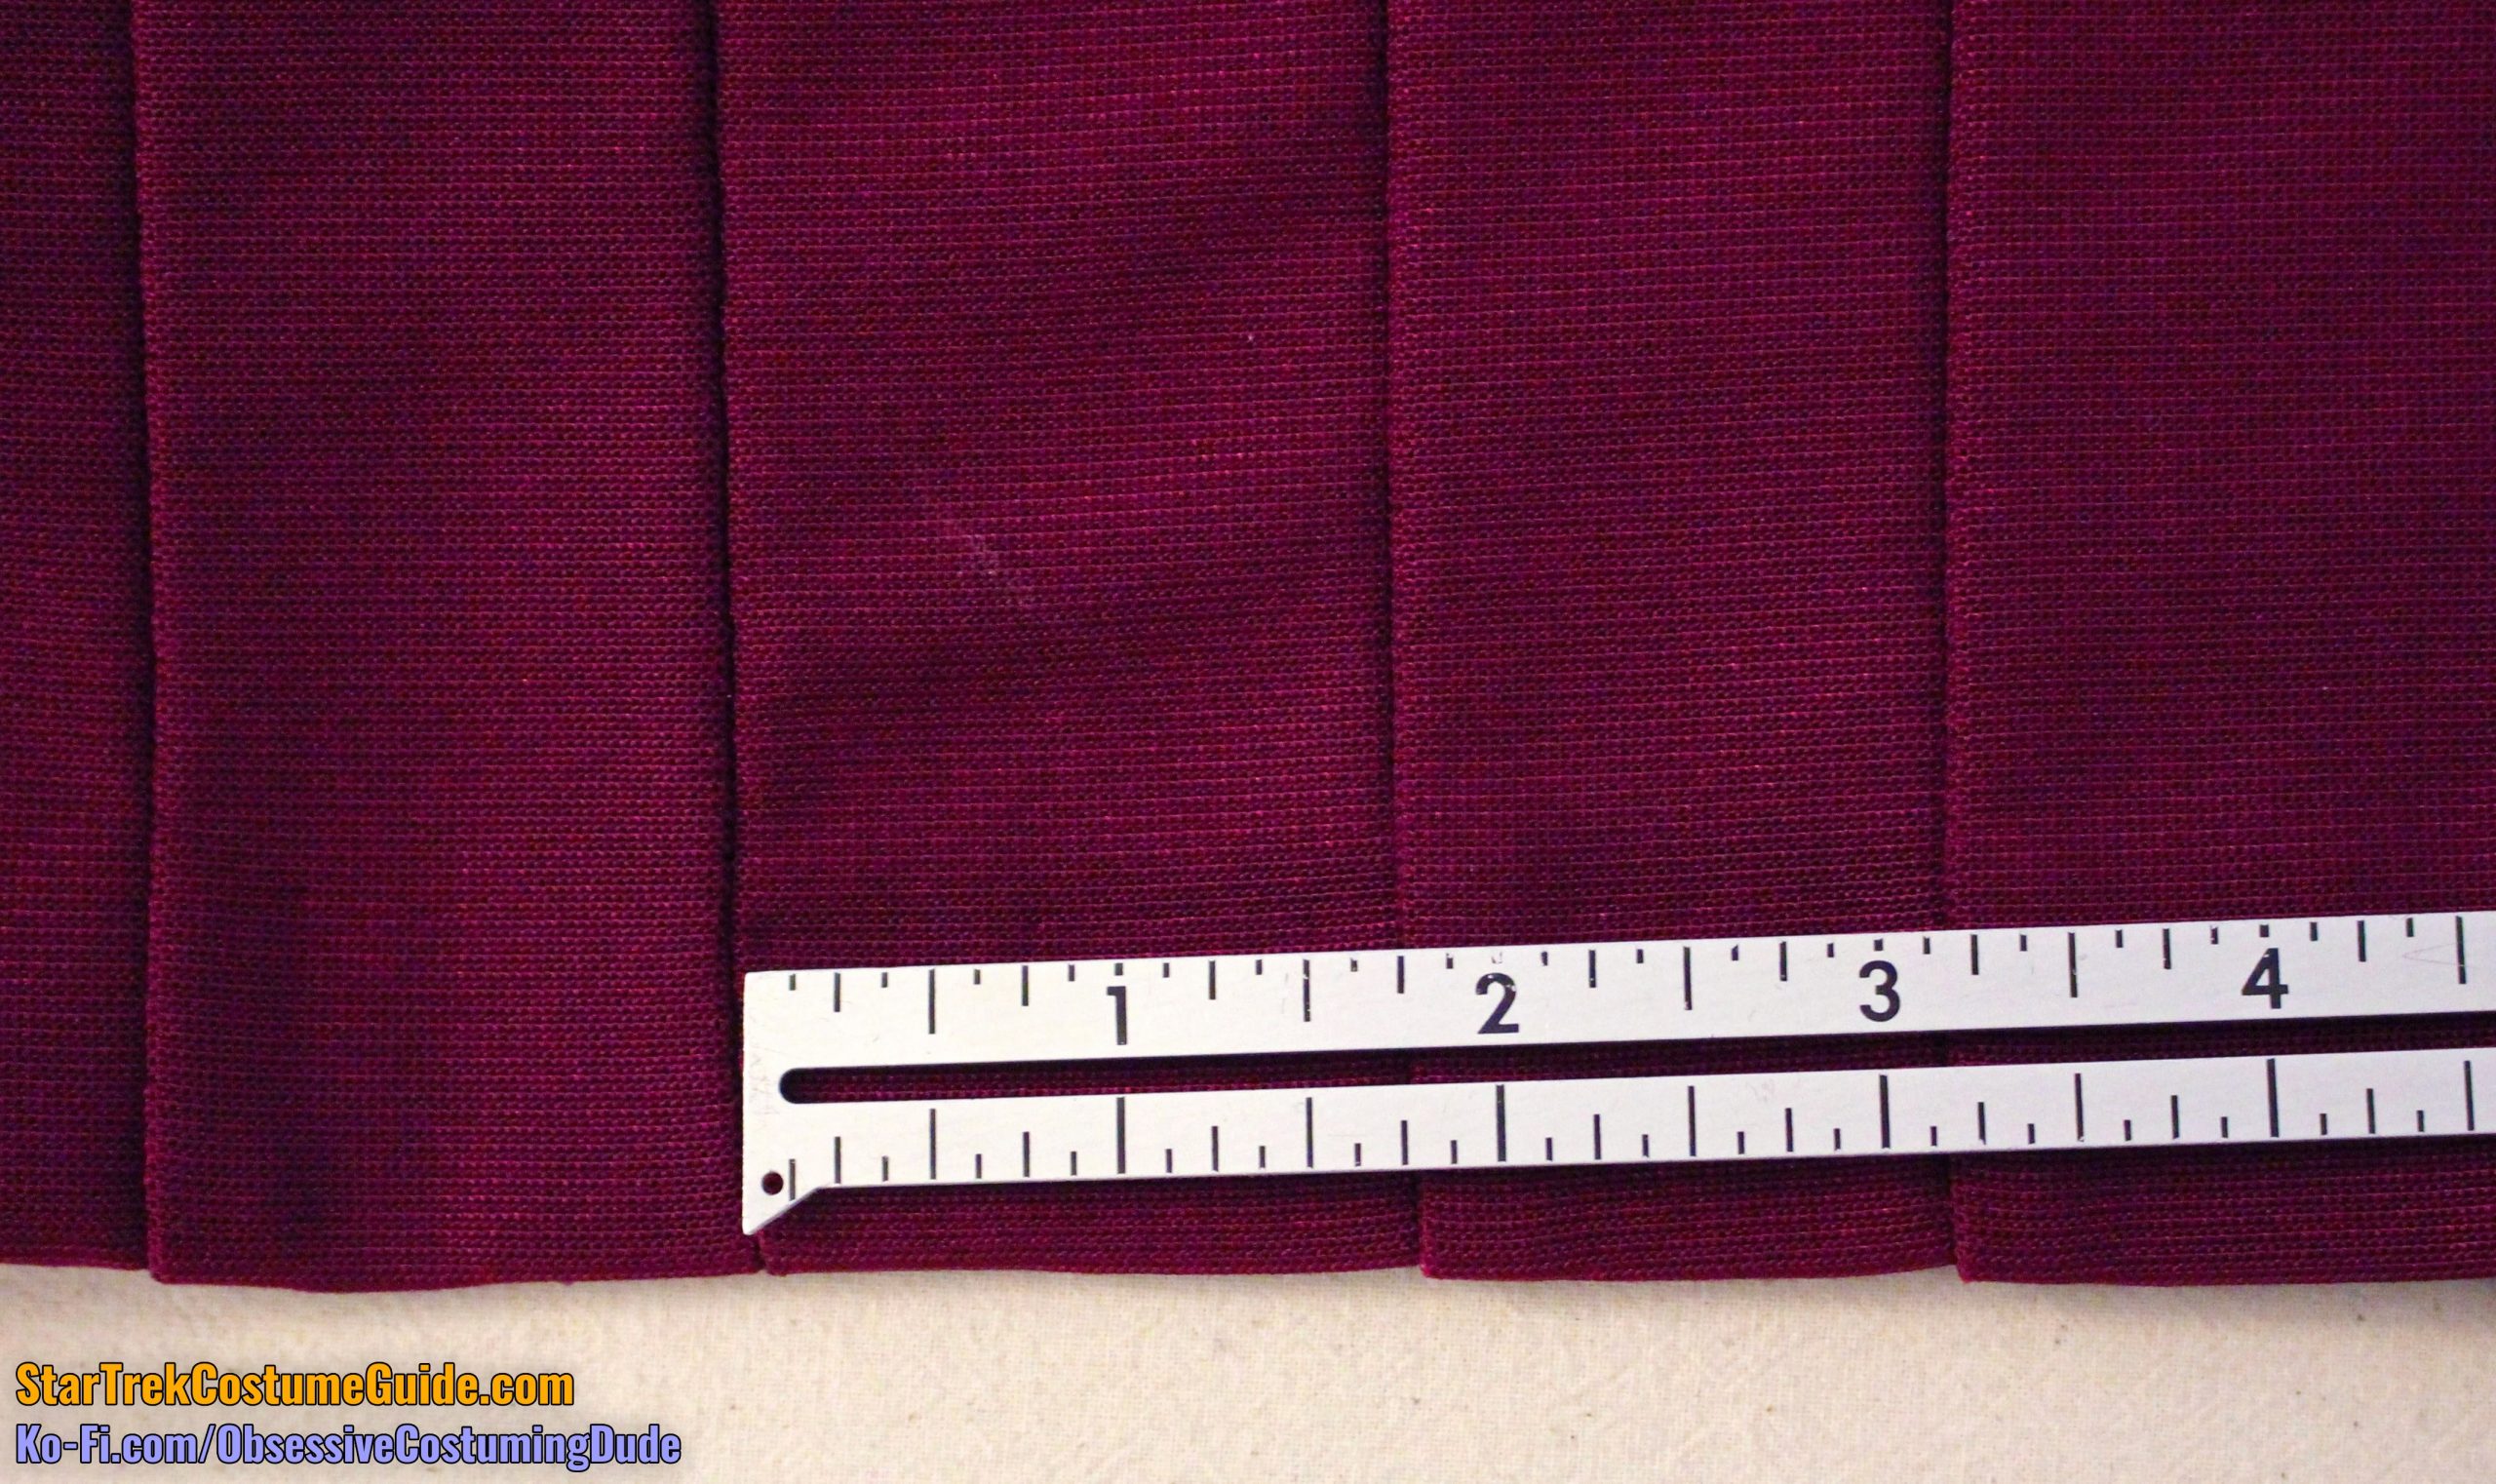
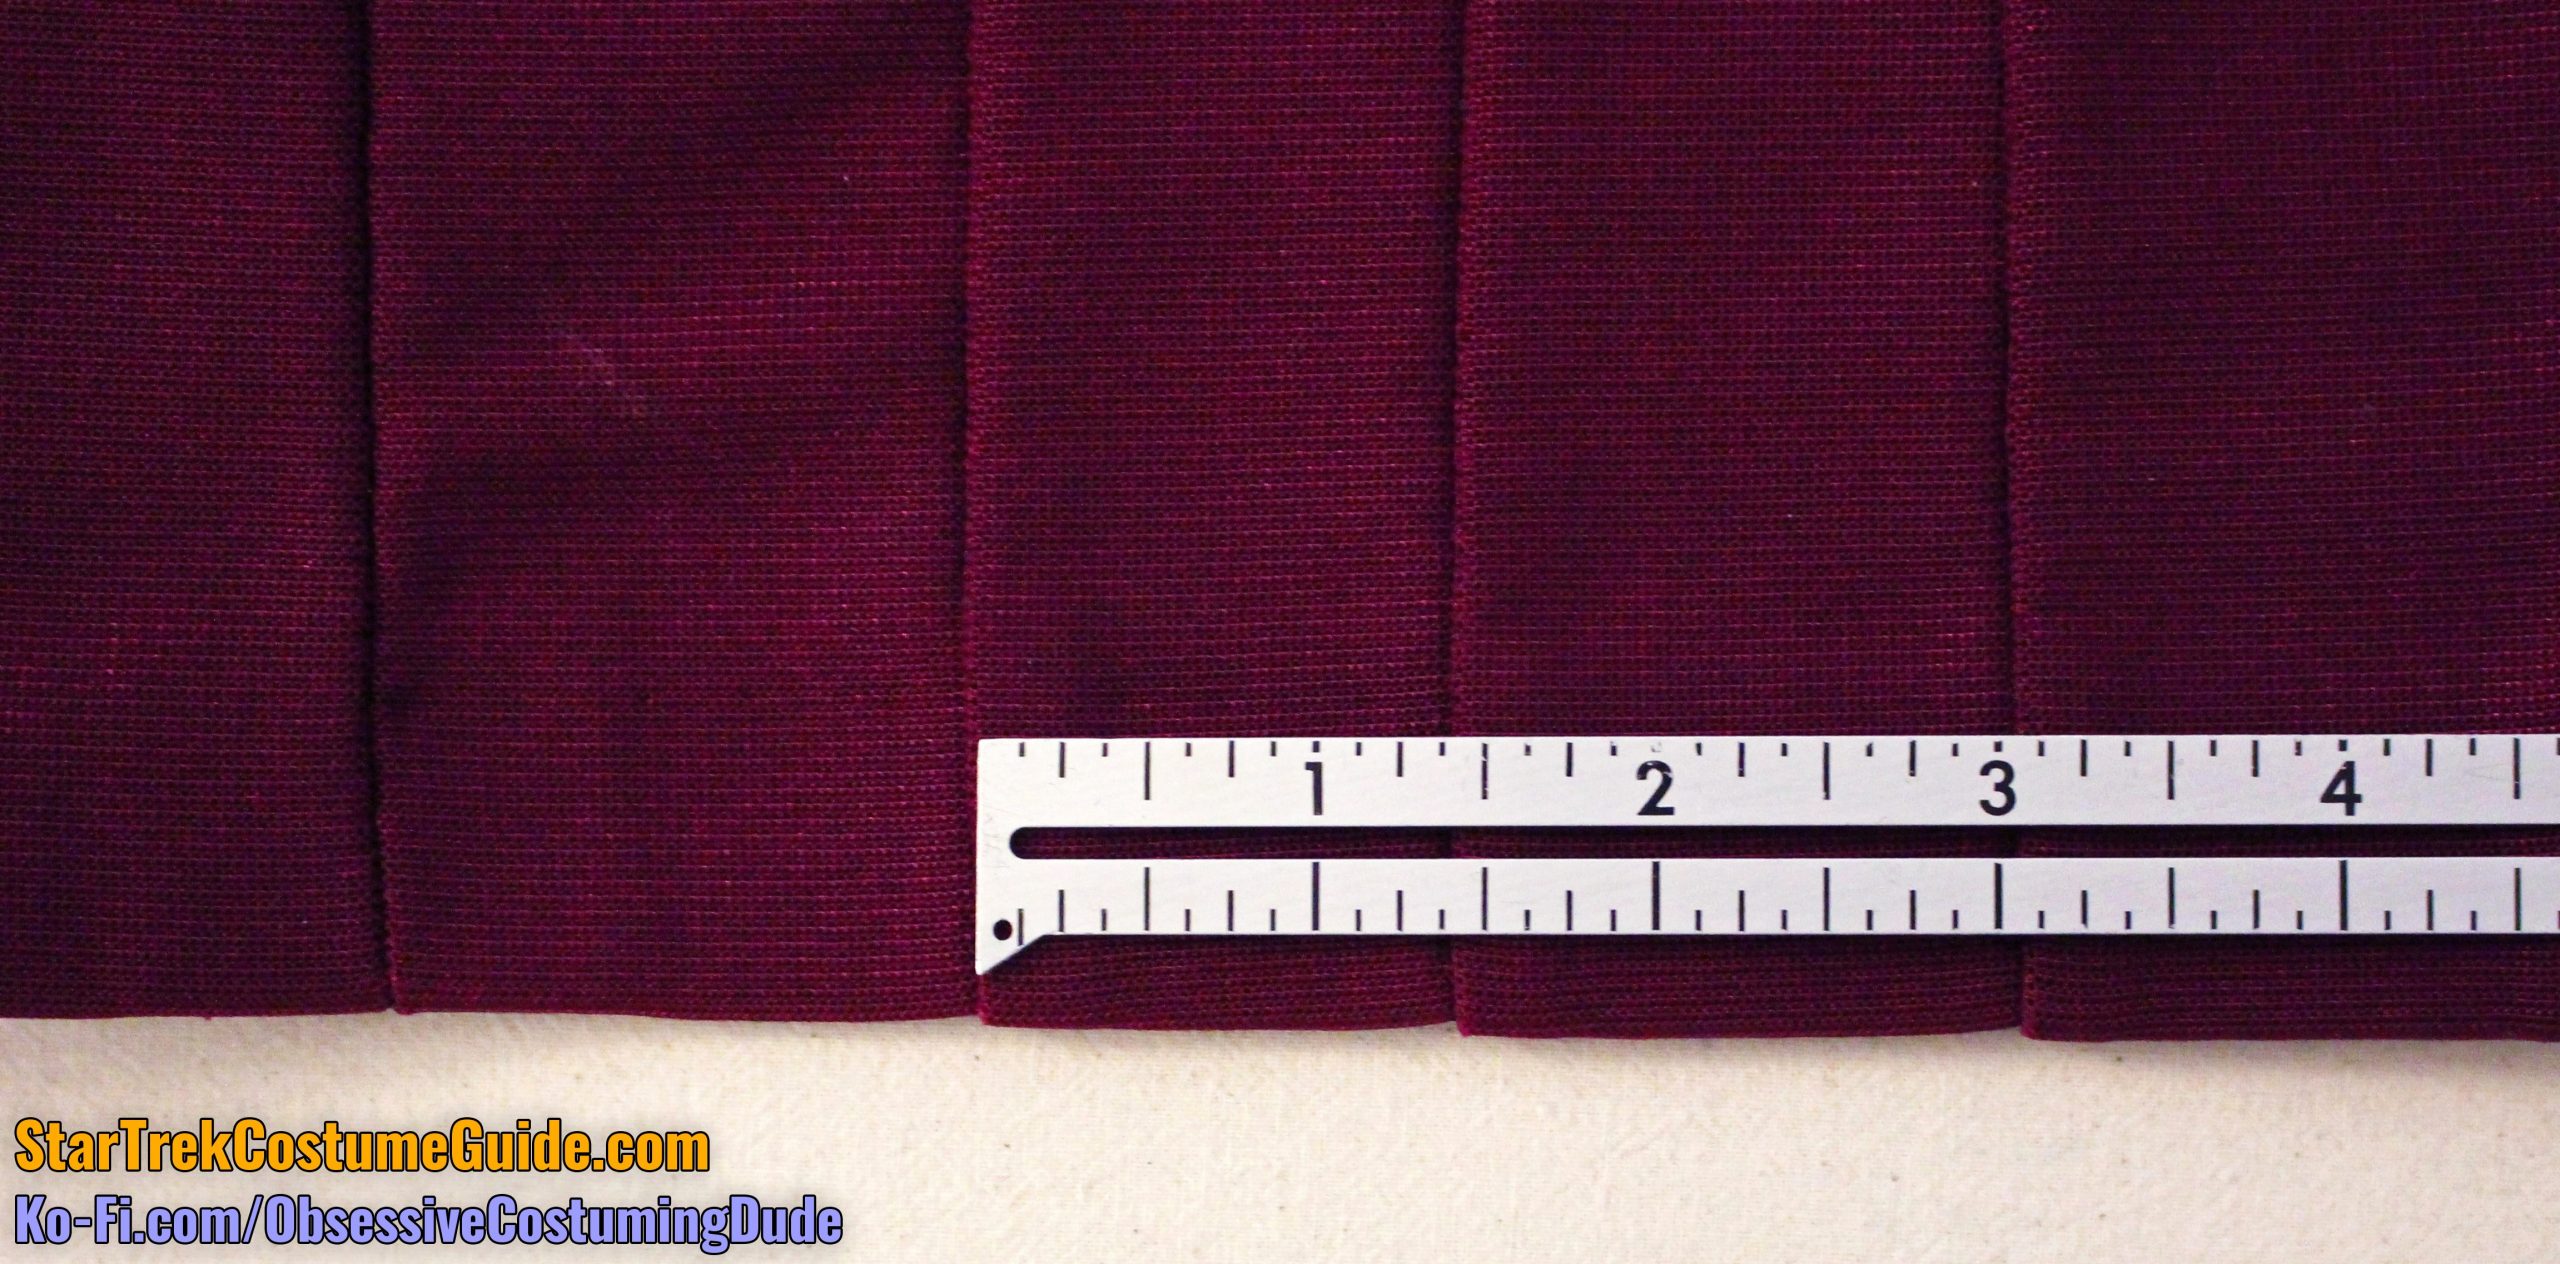
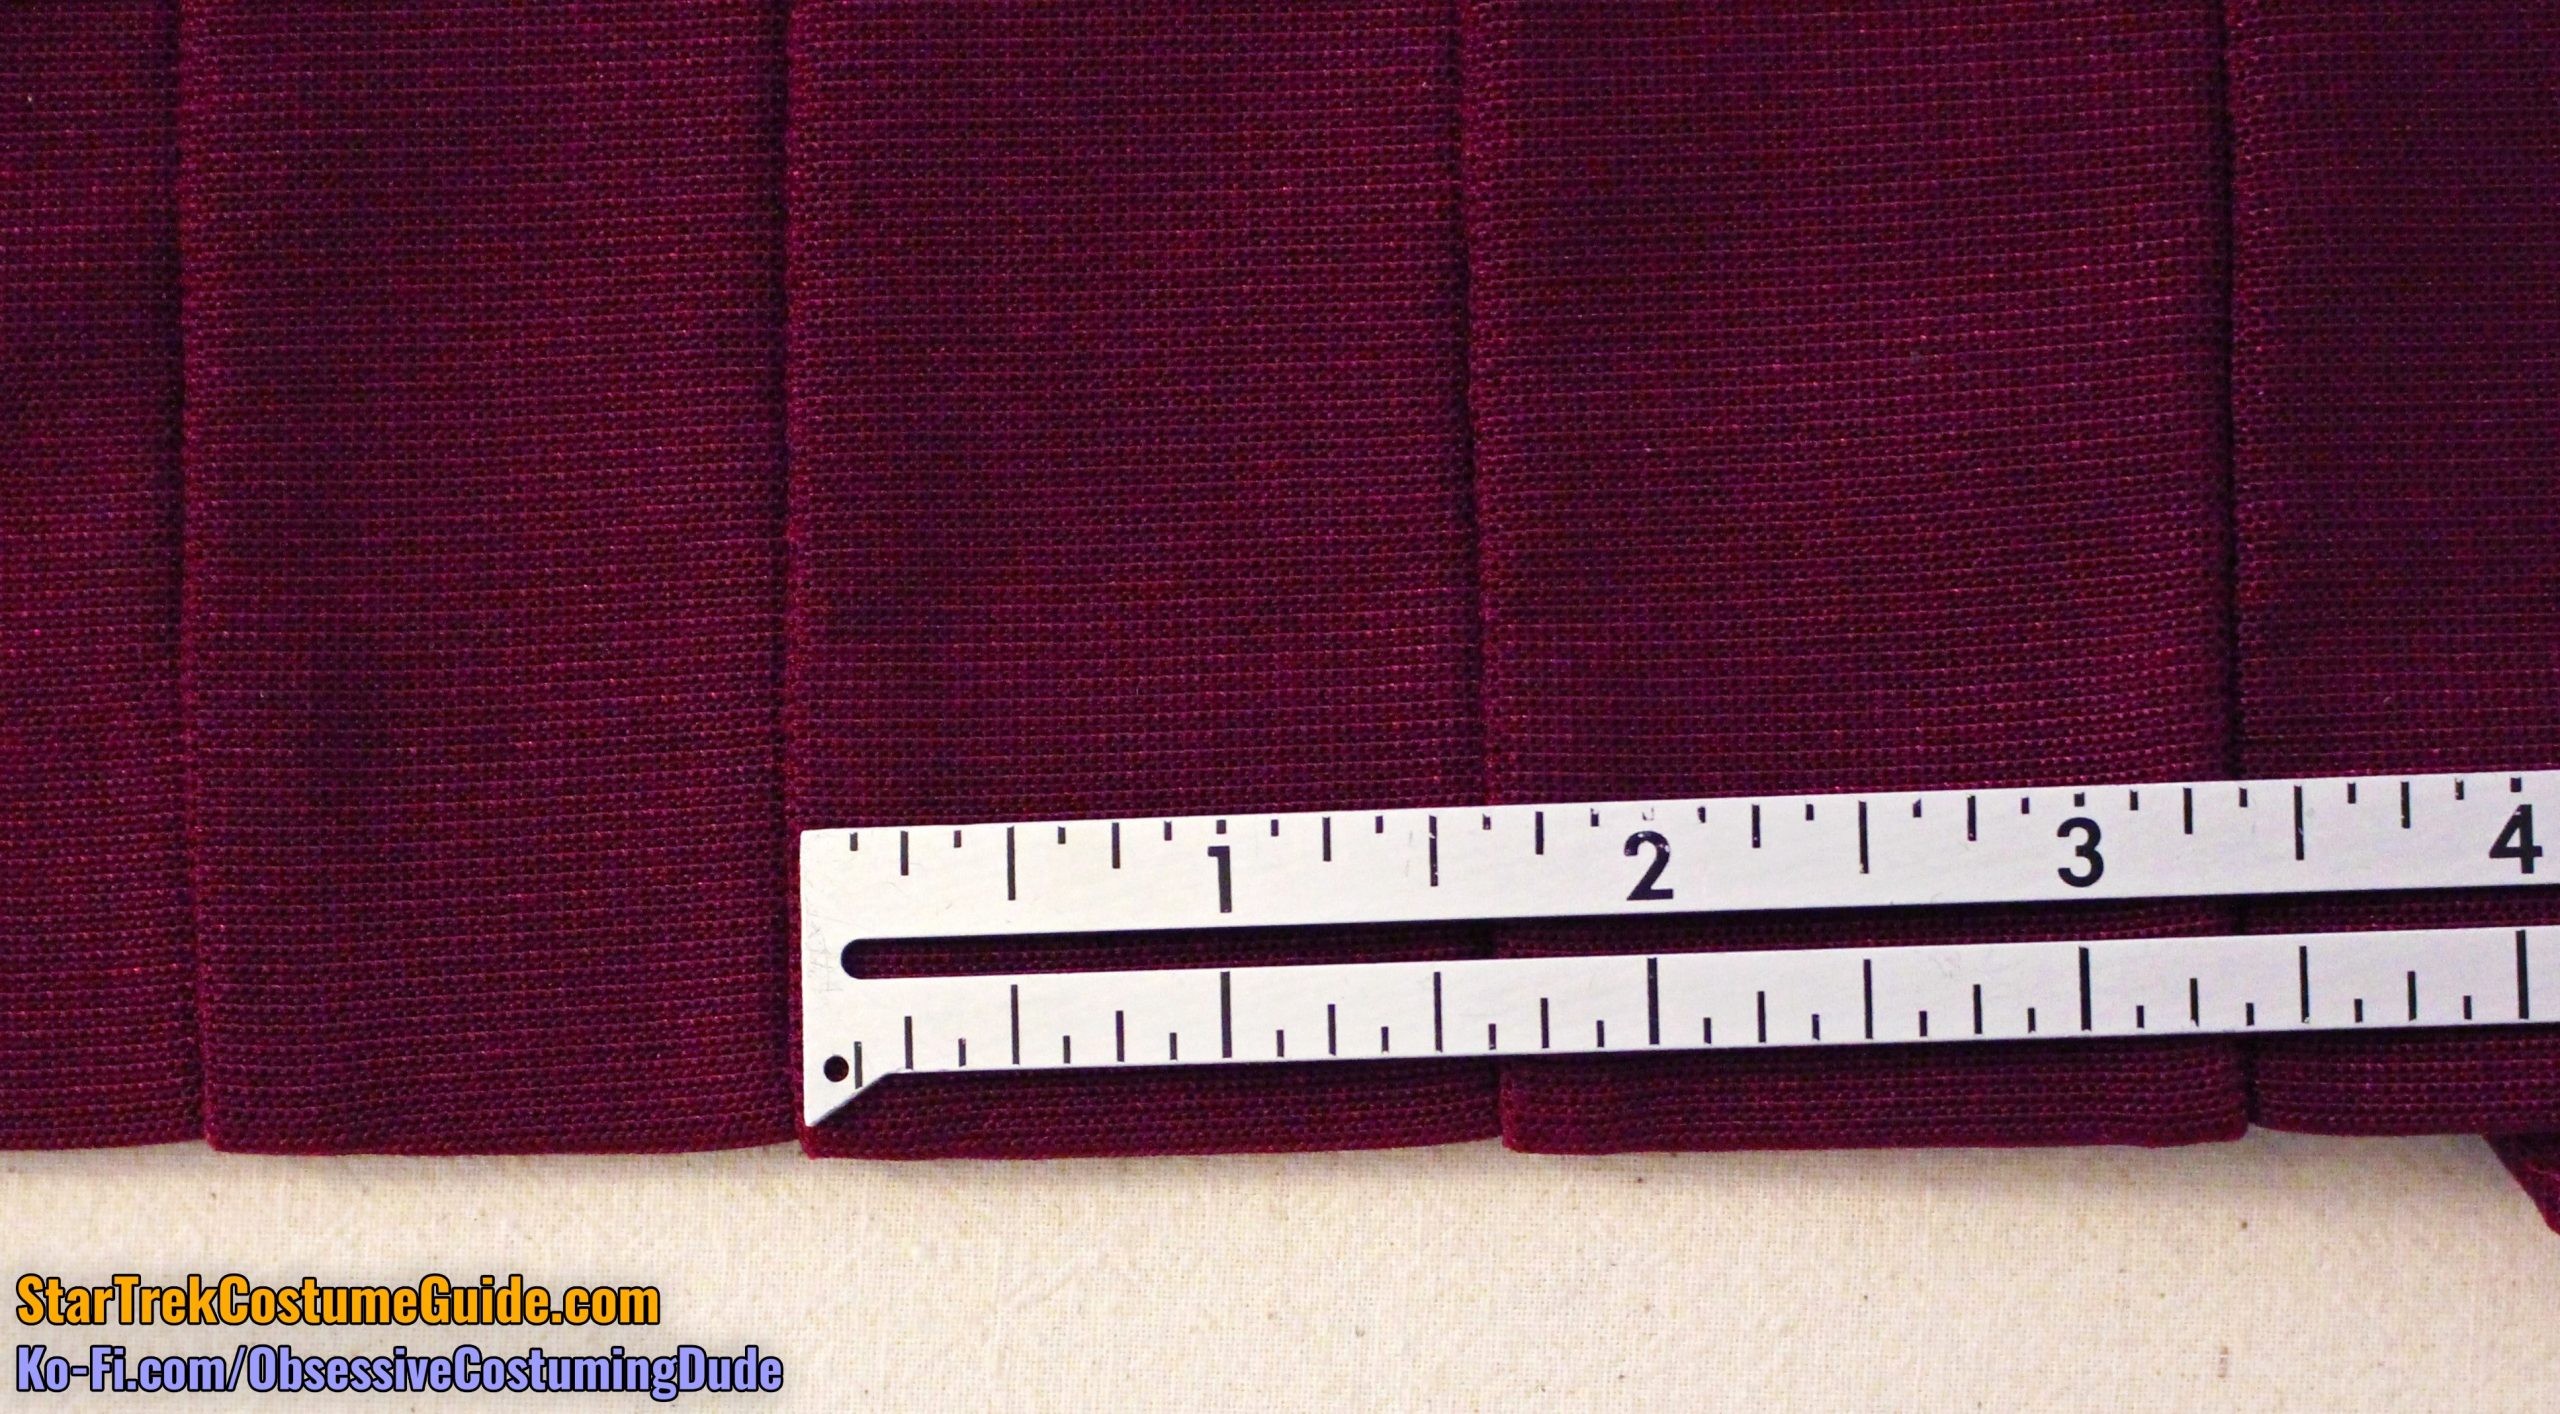
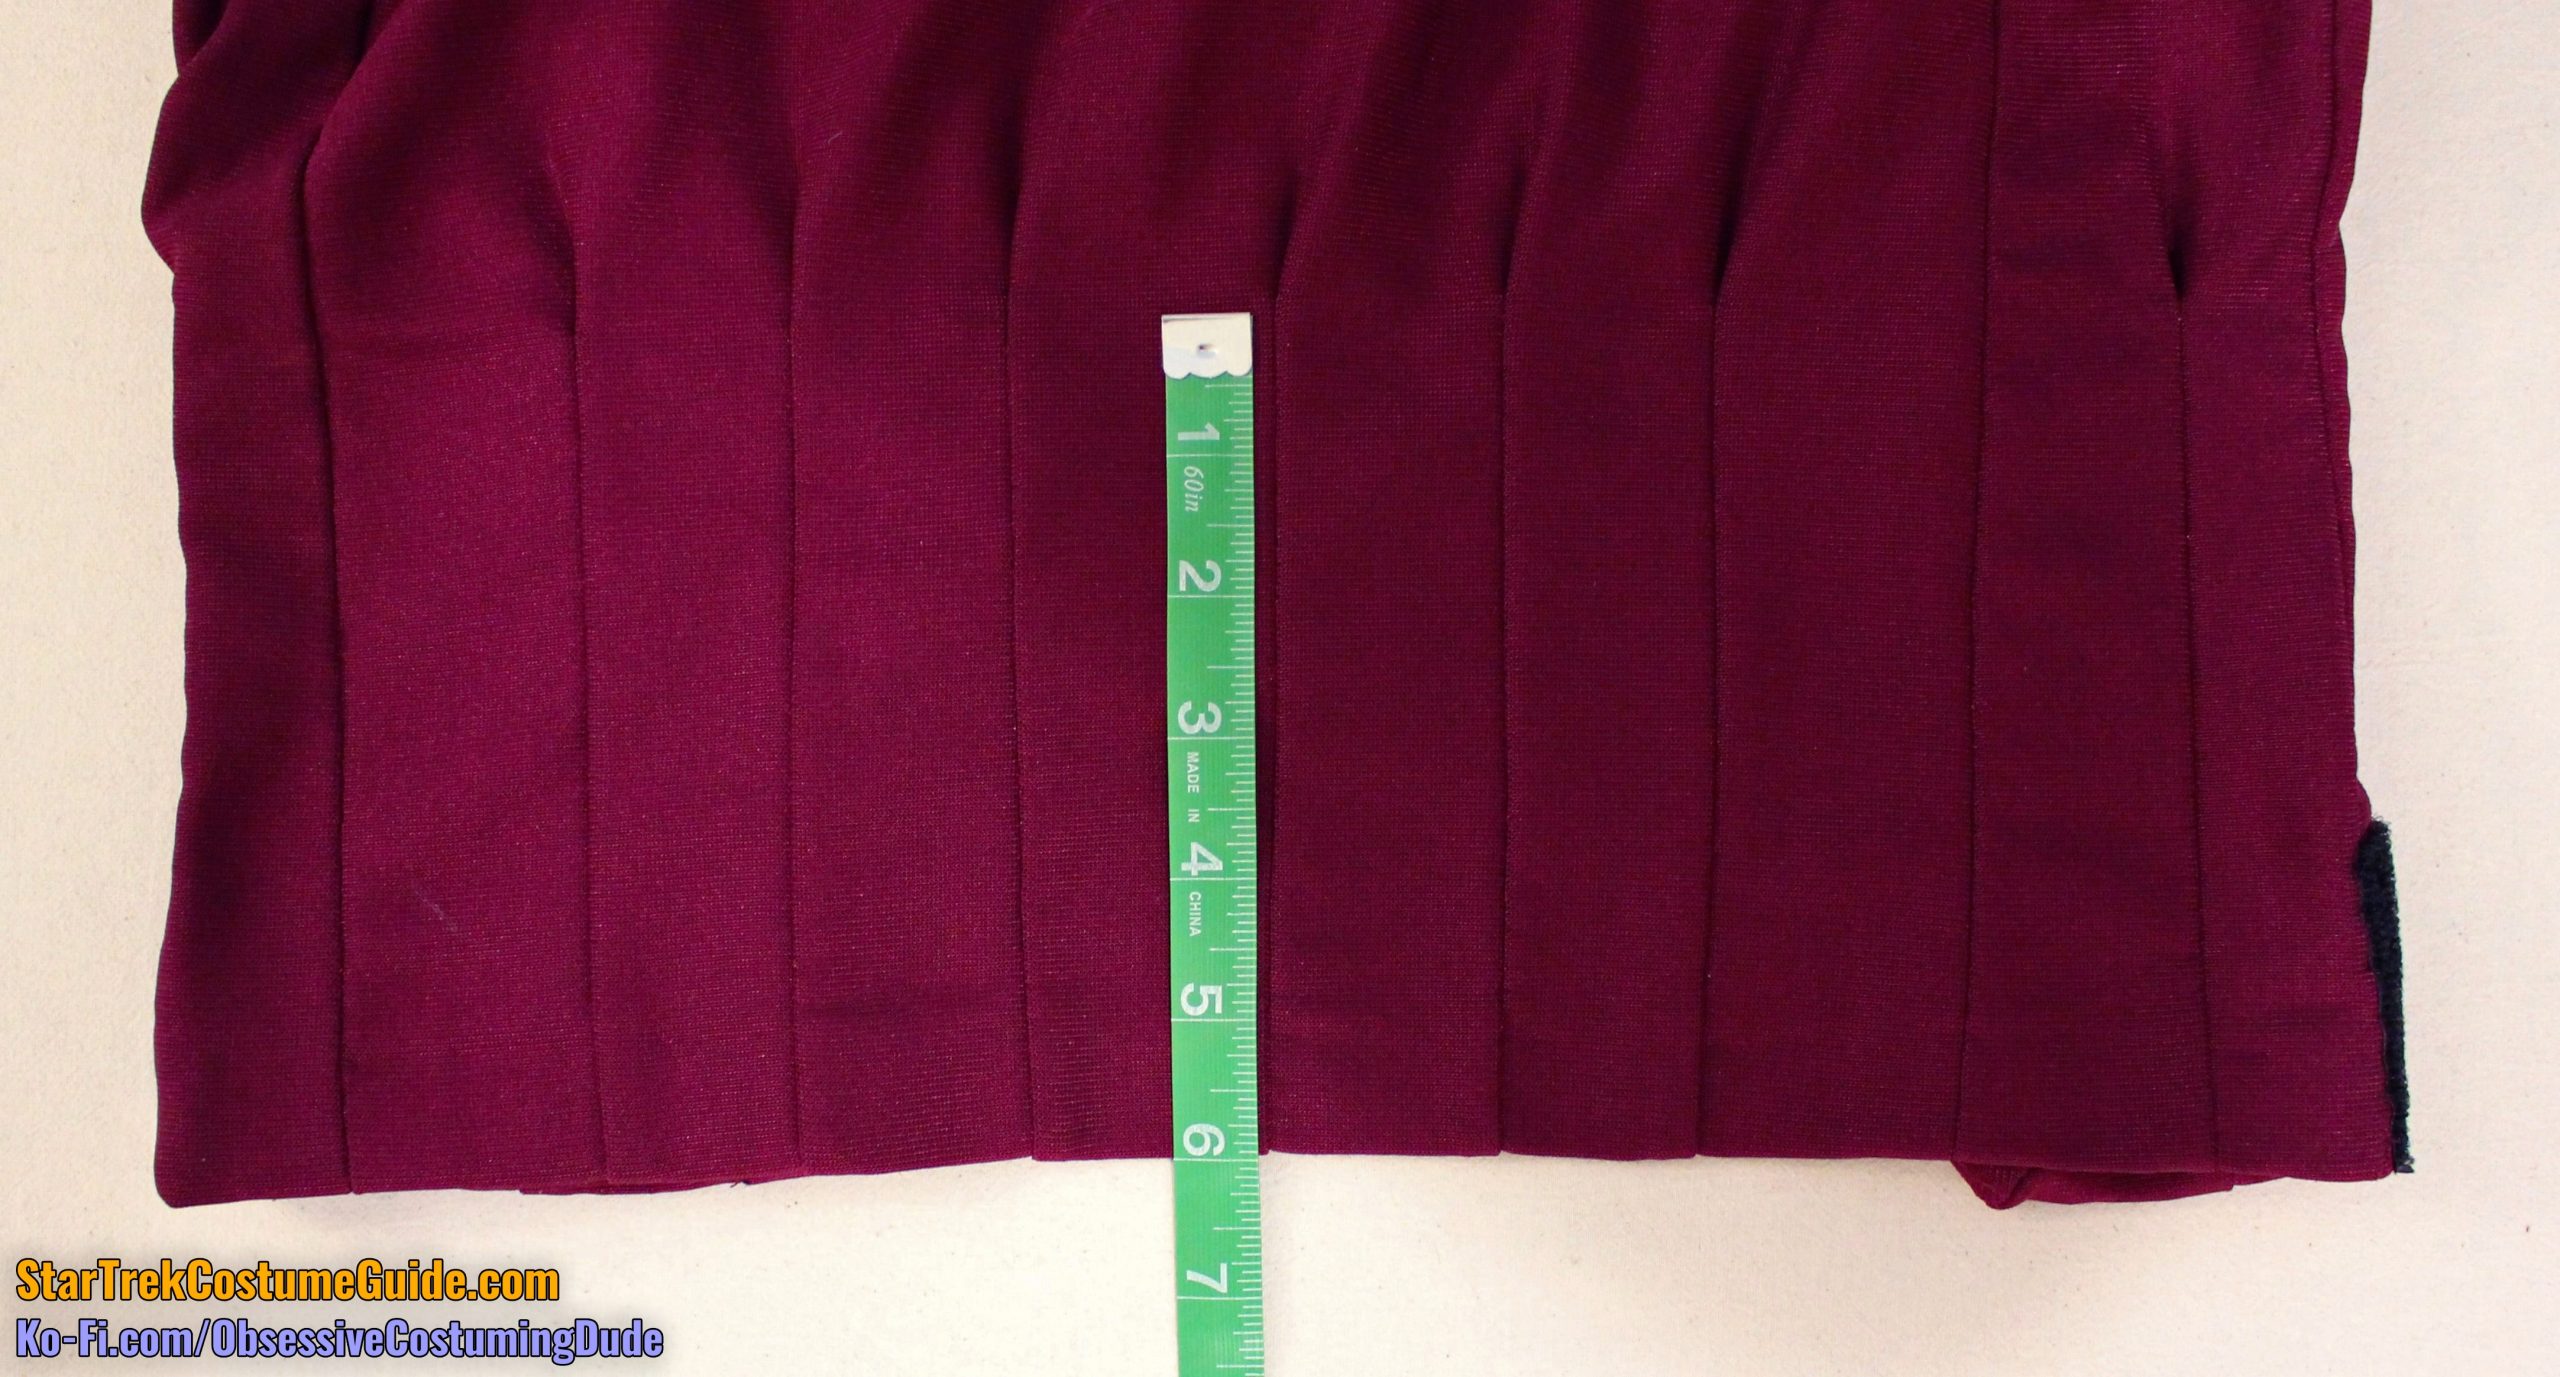
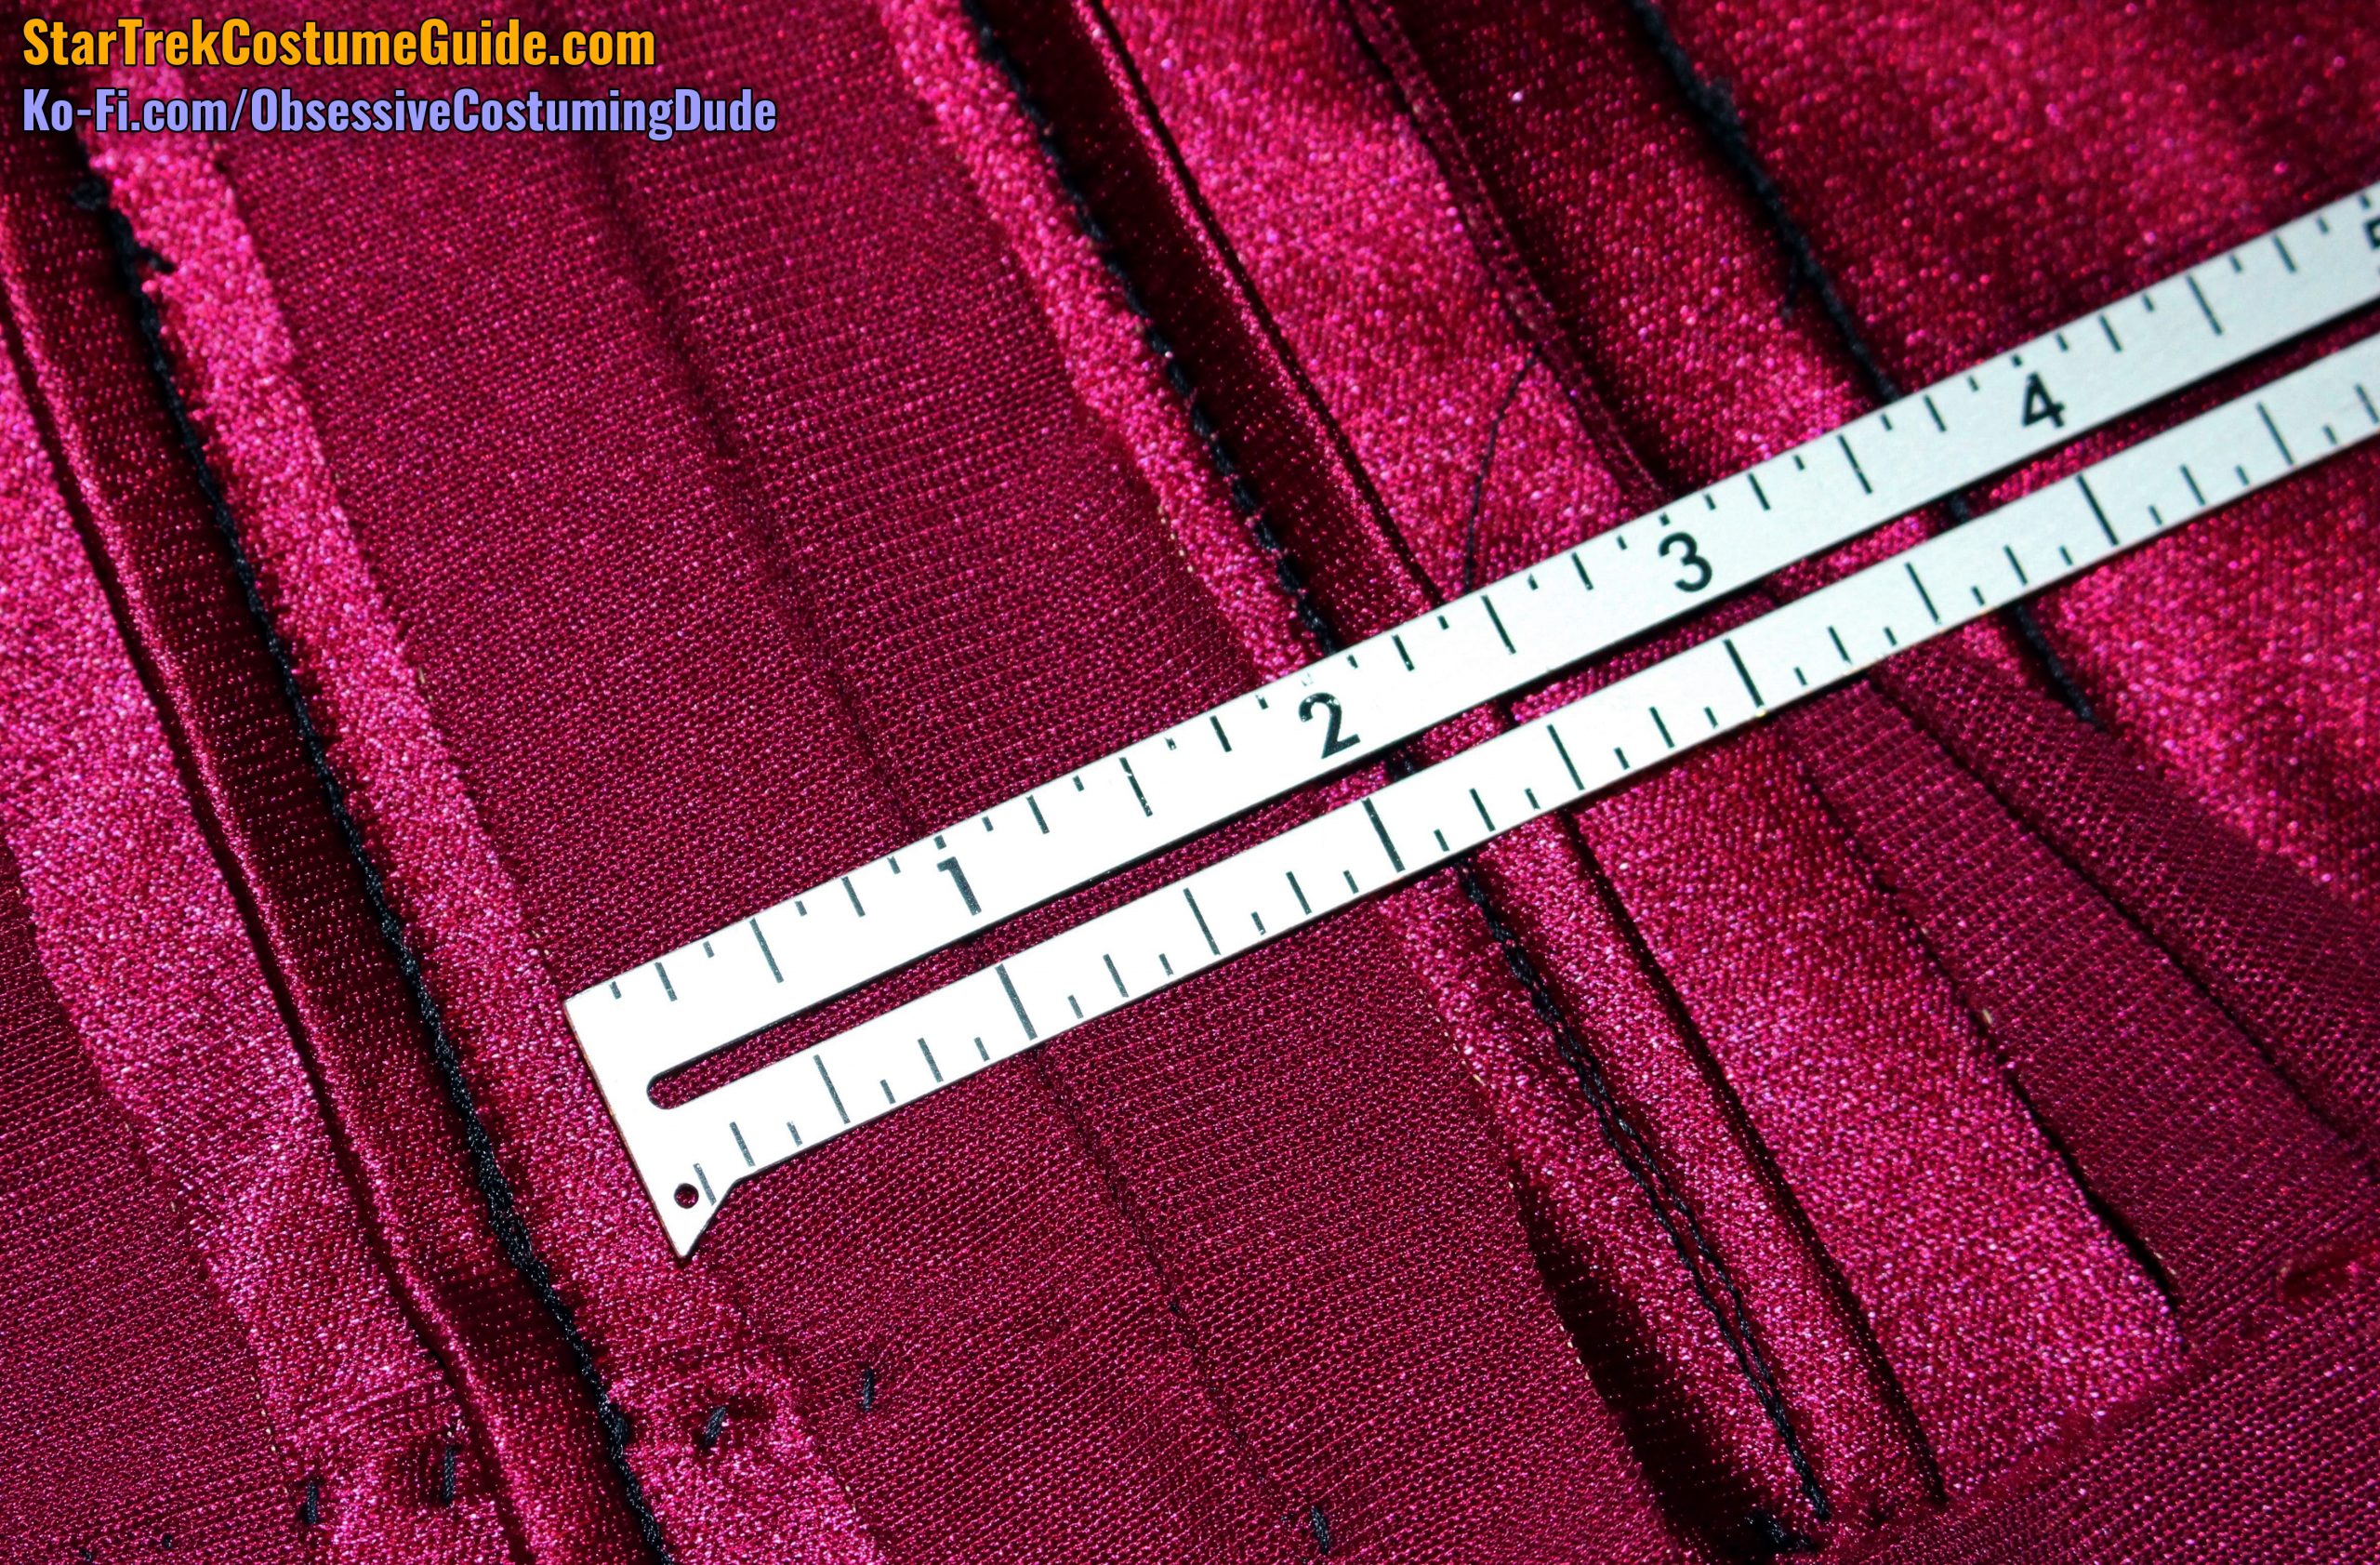
Here’s a visual reference for the pleats across the lower back of the jacket.
Again making our way garment left to right (photo left to right this time), I’ll be referring to the pleats as #1-6, respectively.
Pleat #1 was 1 ¾” from the left side back seam.
Pleat #2 was 1 ⅜” from the first.
Pleat #3 was 1 ⅝” from the second.
In this regard, the back was overall symmetrical.
Pleats #3 and #4 were 1 ¾” apart.
Pleat #5 was 1 ⅝” from the fourth.
And finally, pleat #6 was 1 ⅜” from the fifth, and about 1 ¾” from the right side back seam.
All of the back pleats were approximately 6” tall.
Here are a couple diagrams I whipped up to represent this survey of measurements:
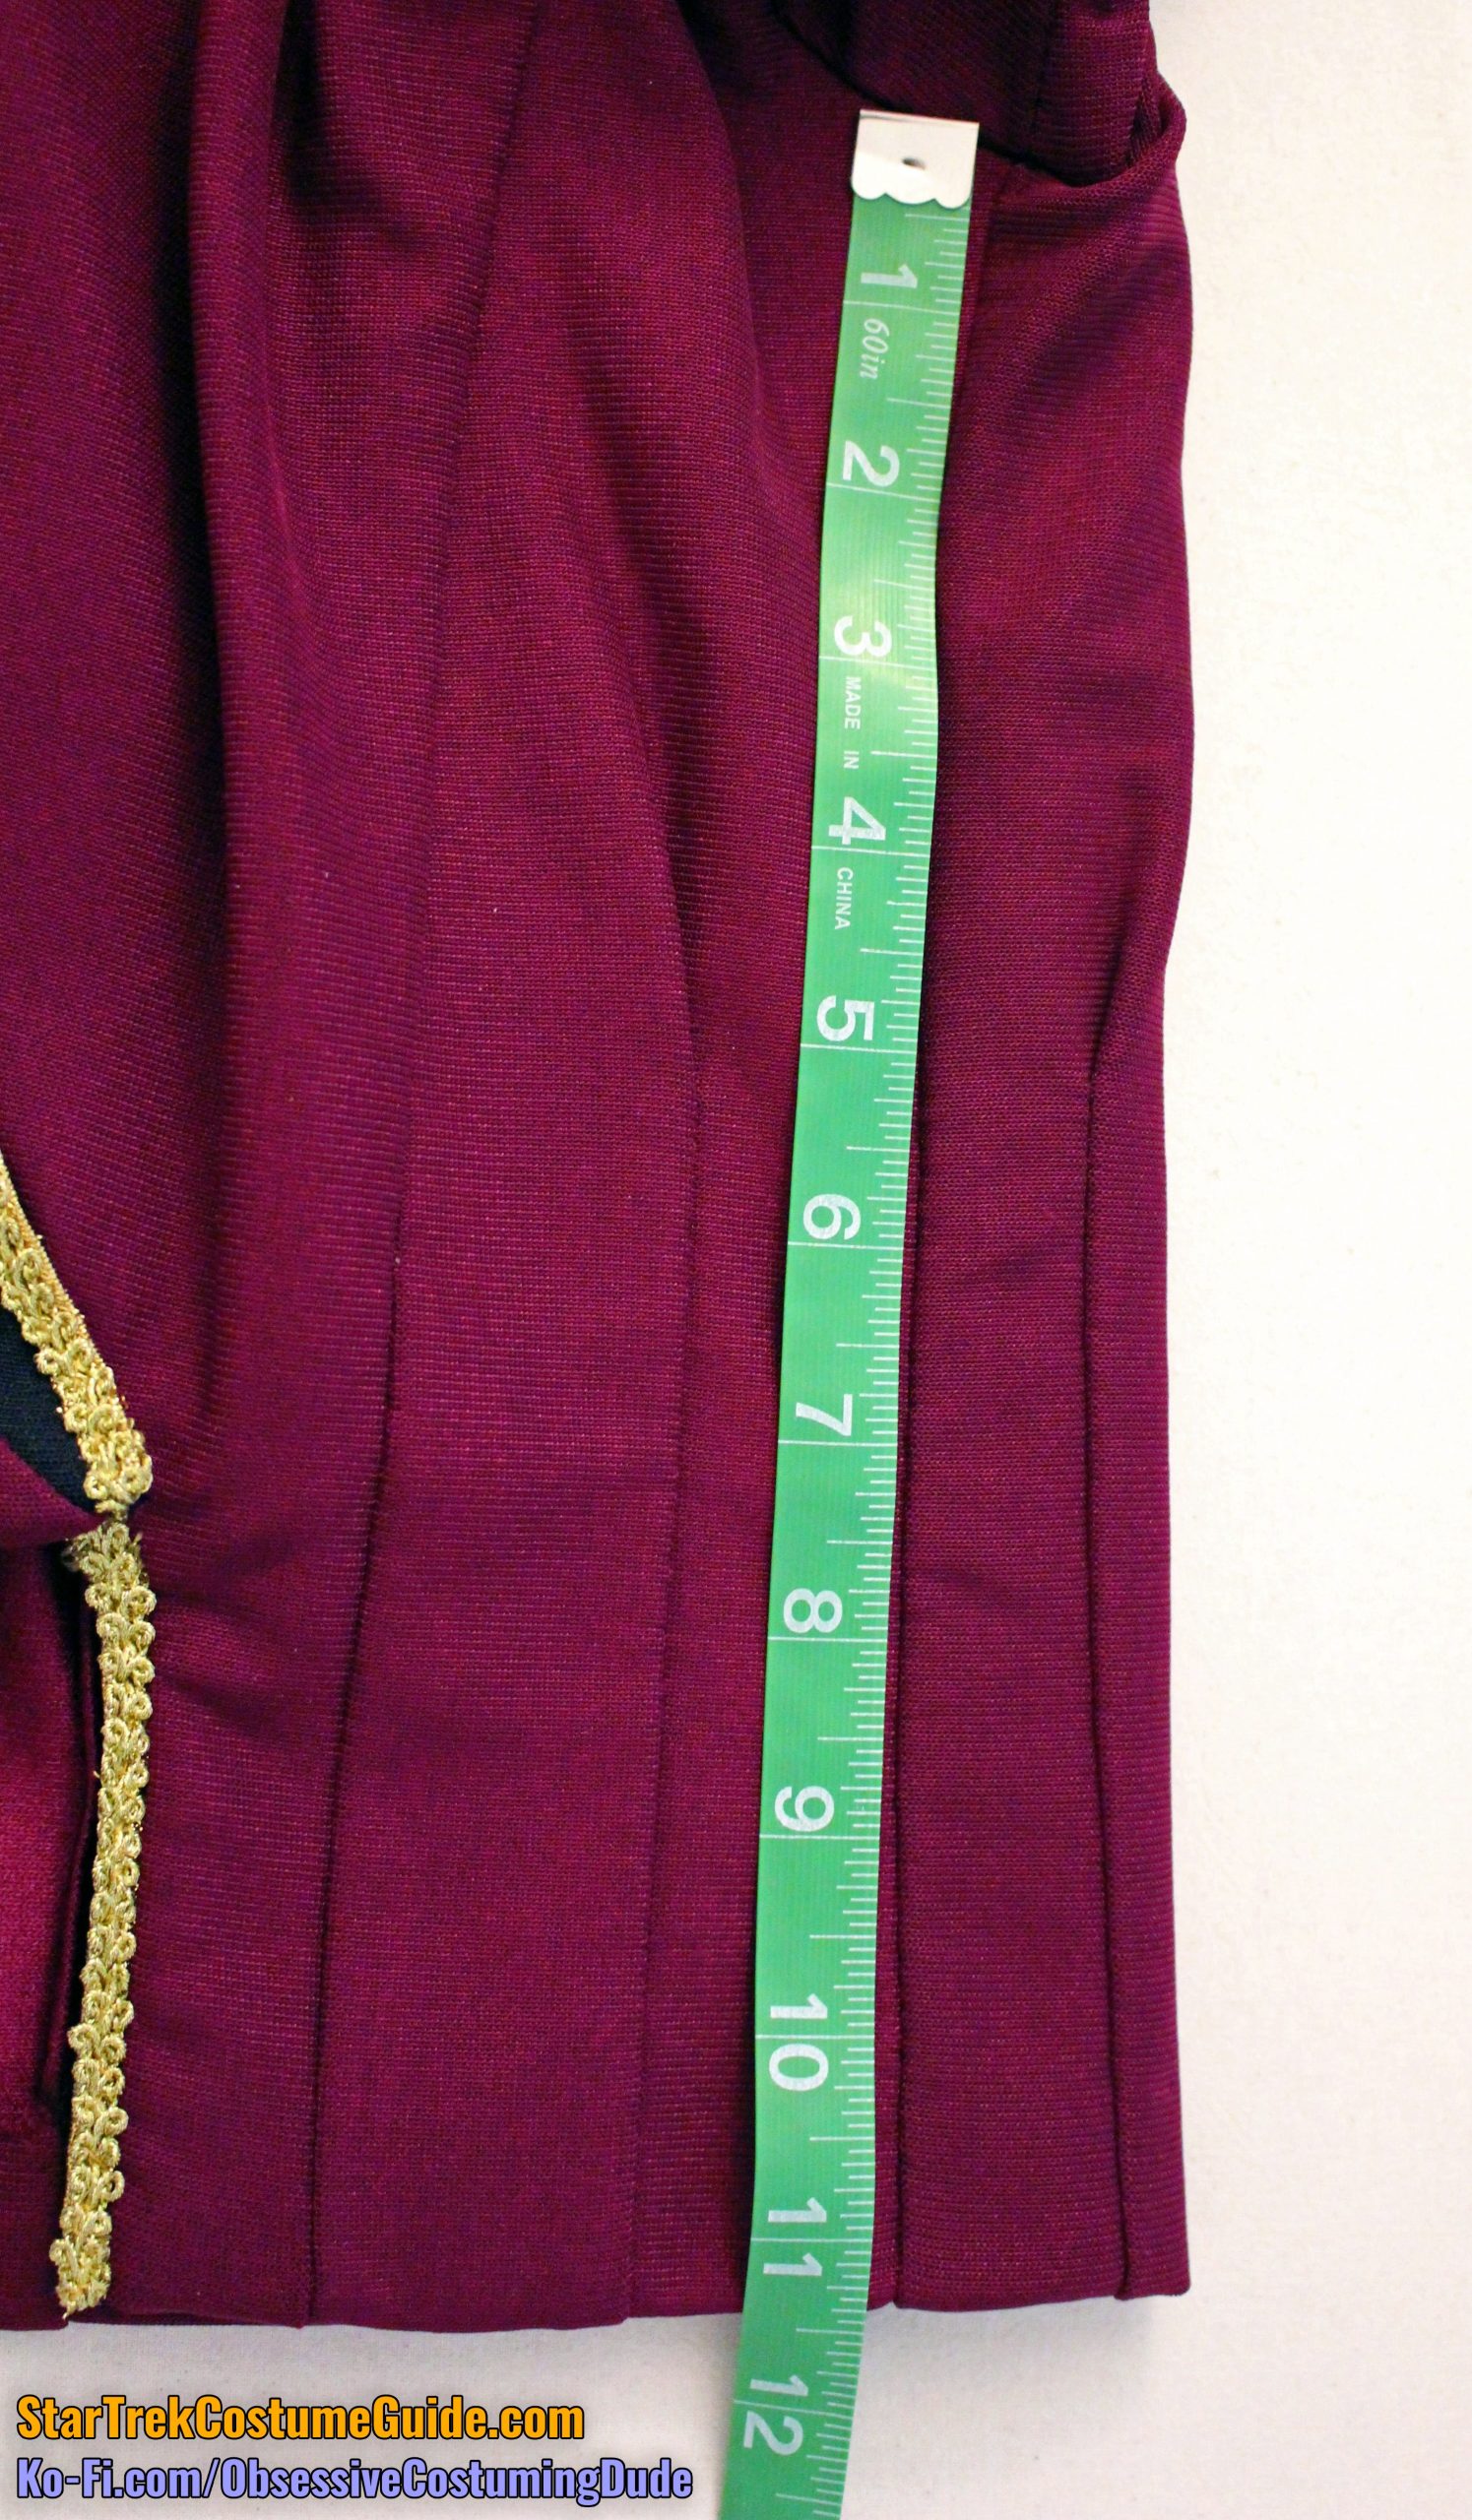
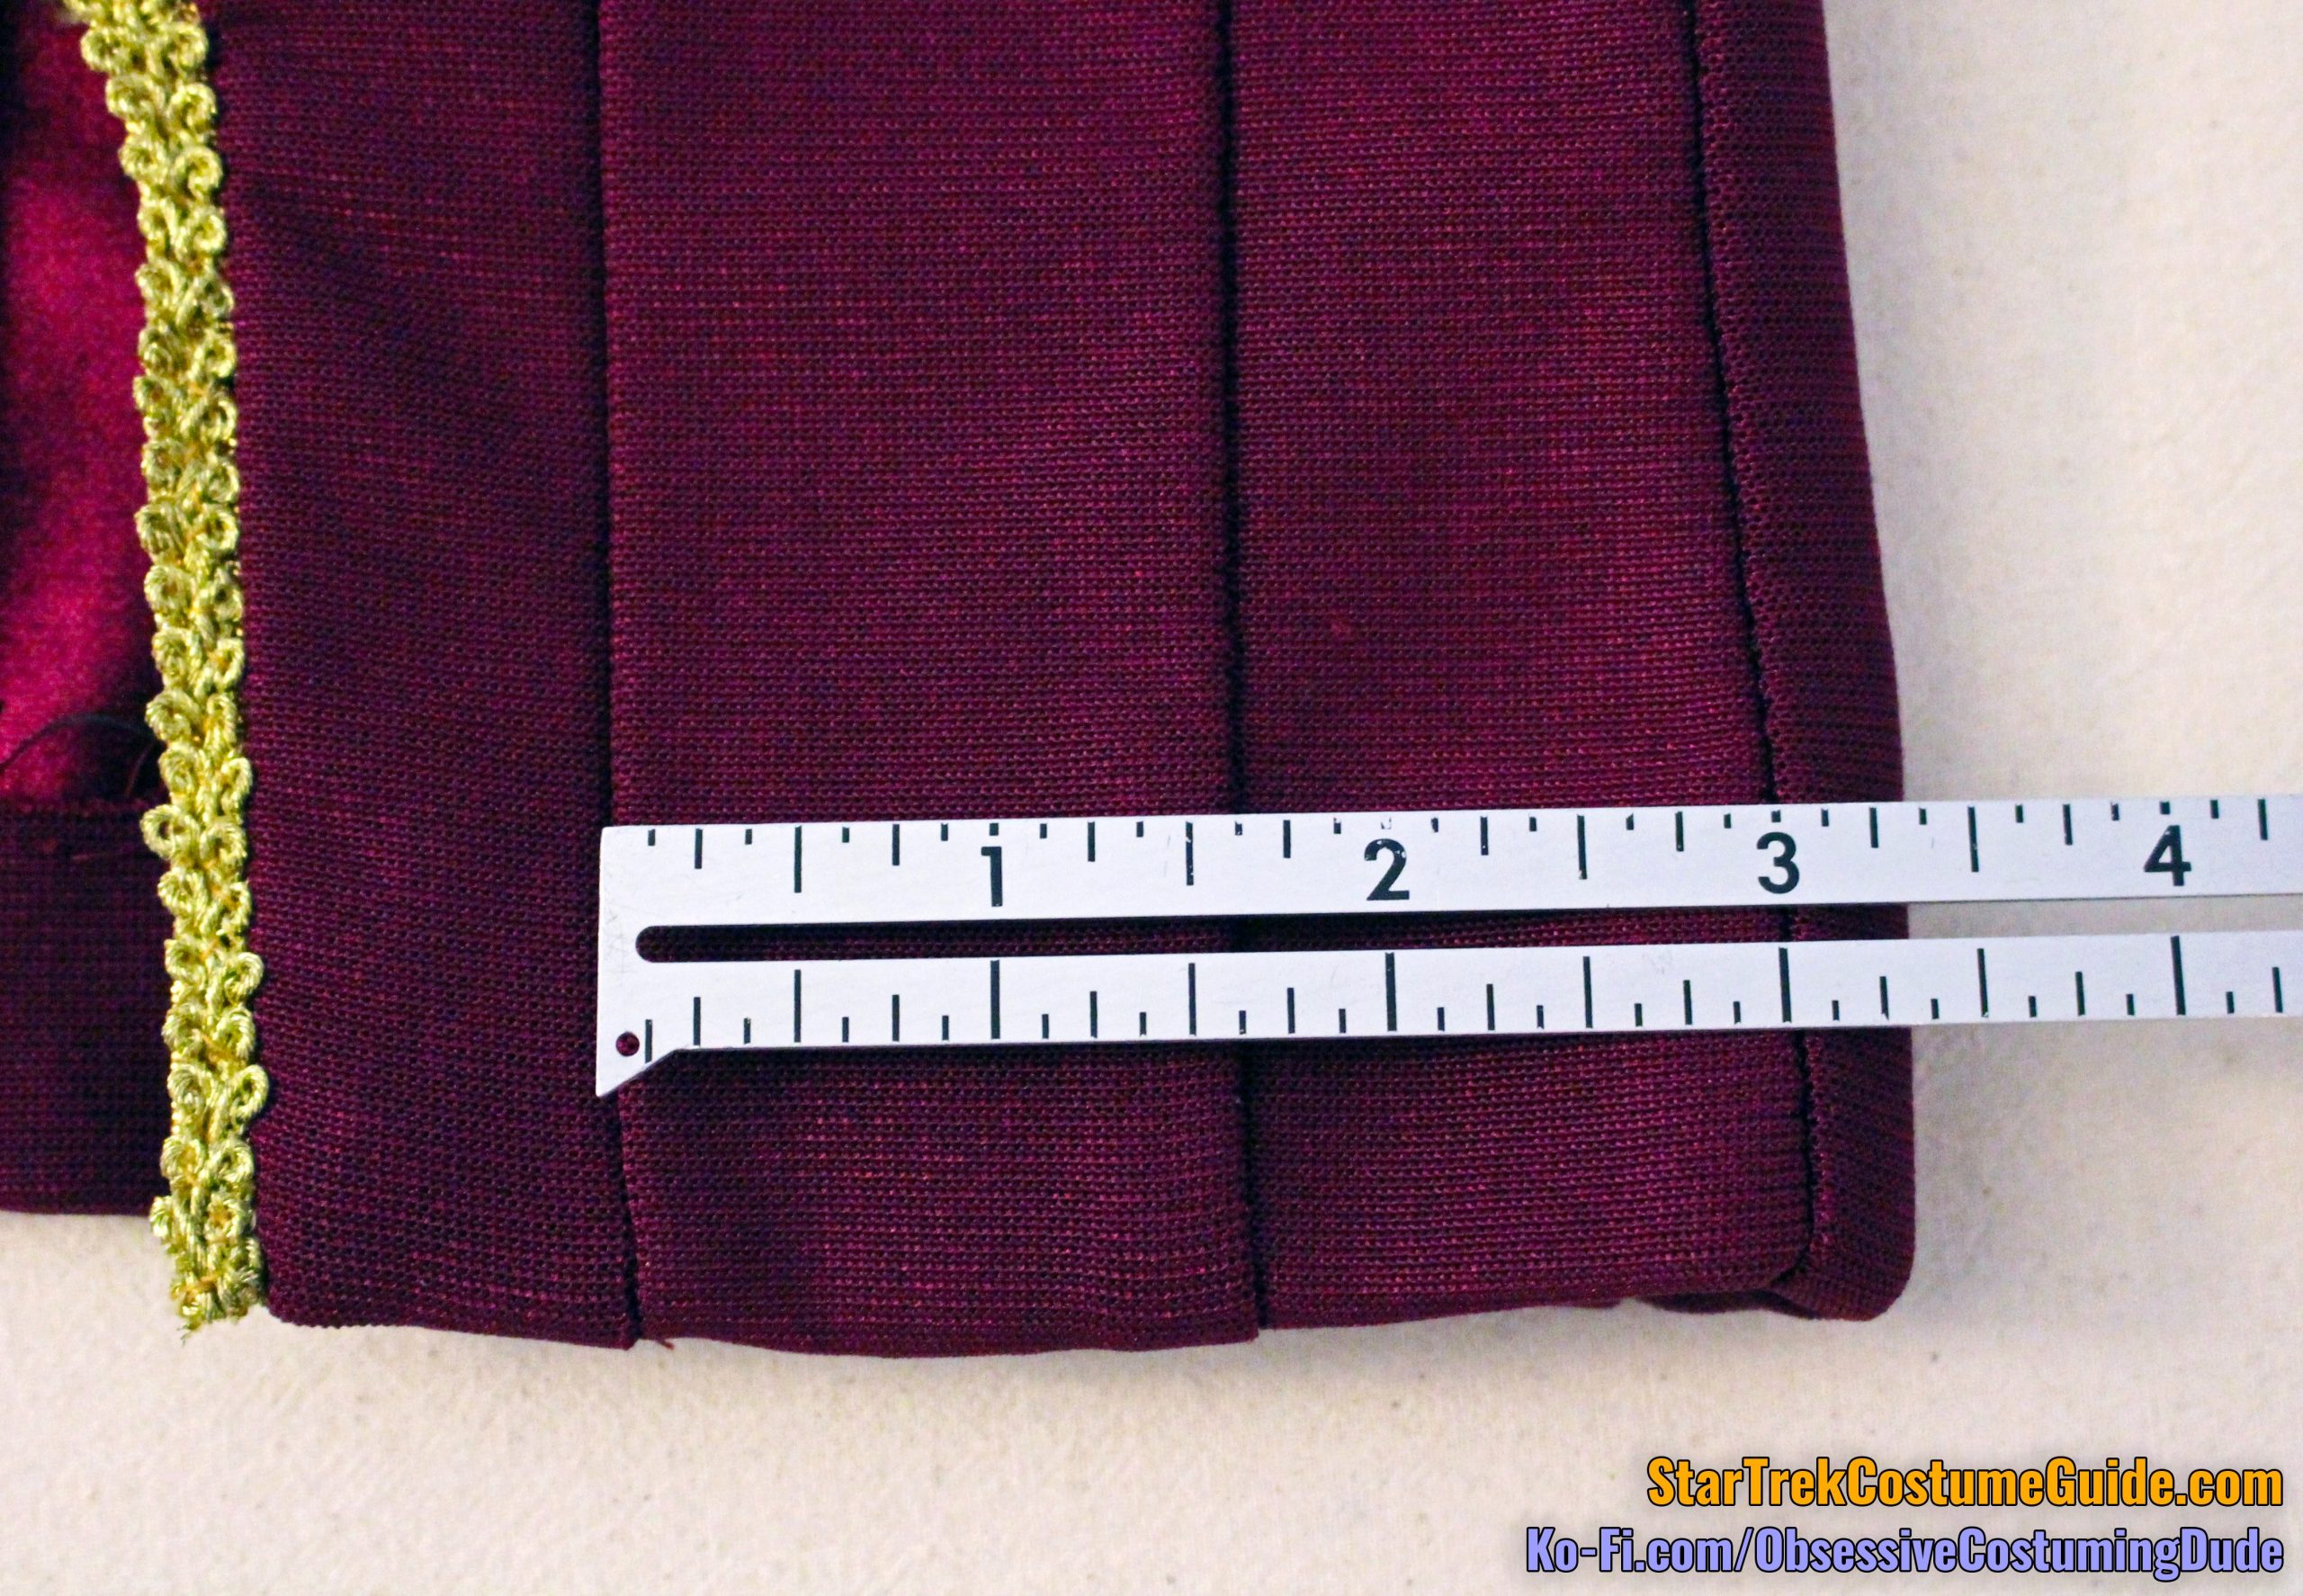
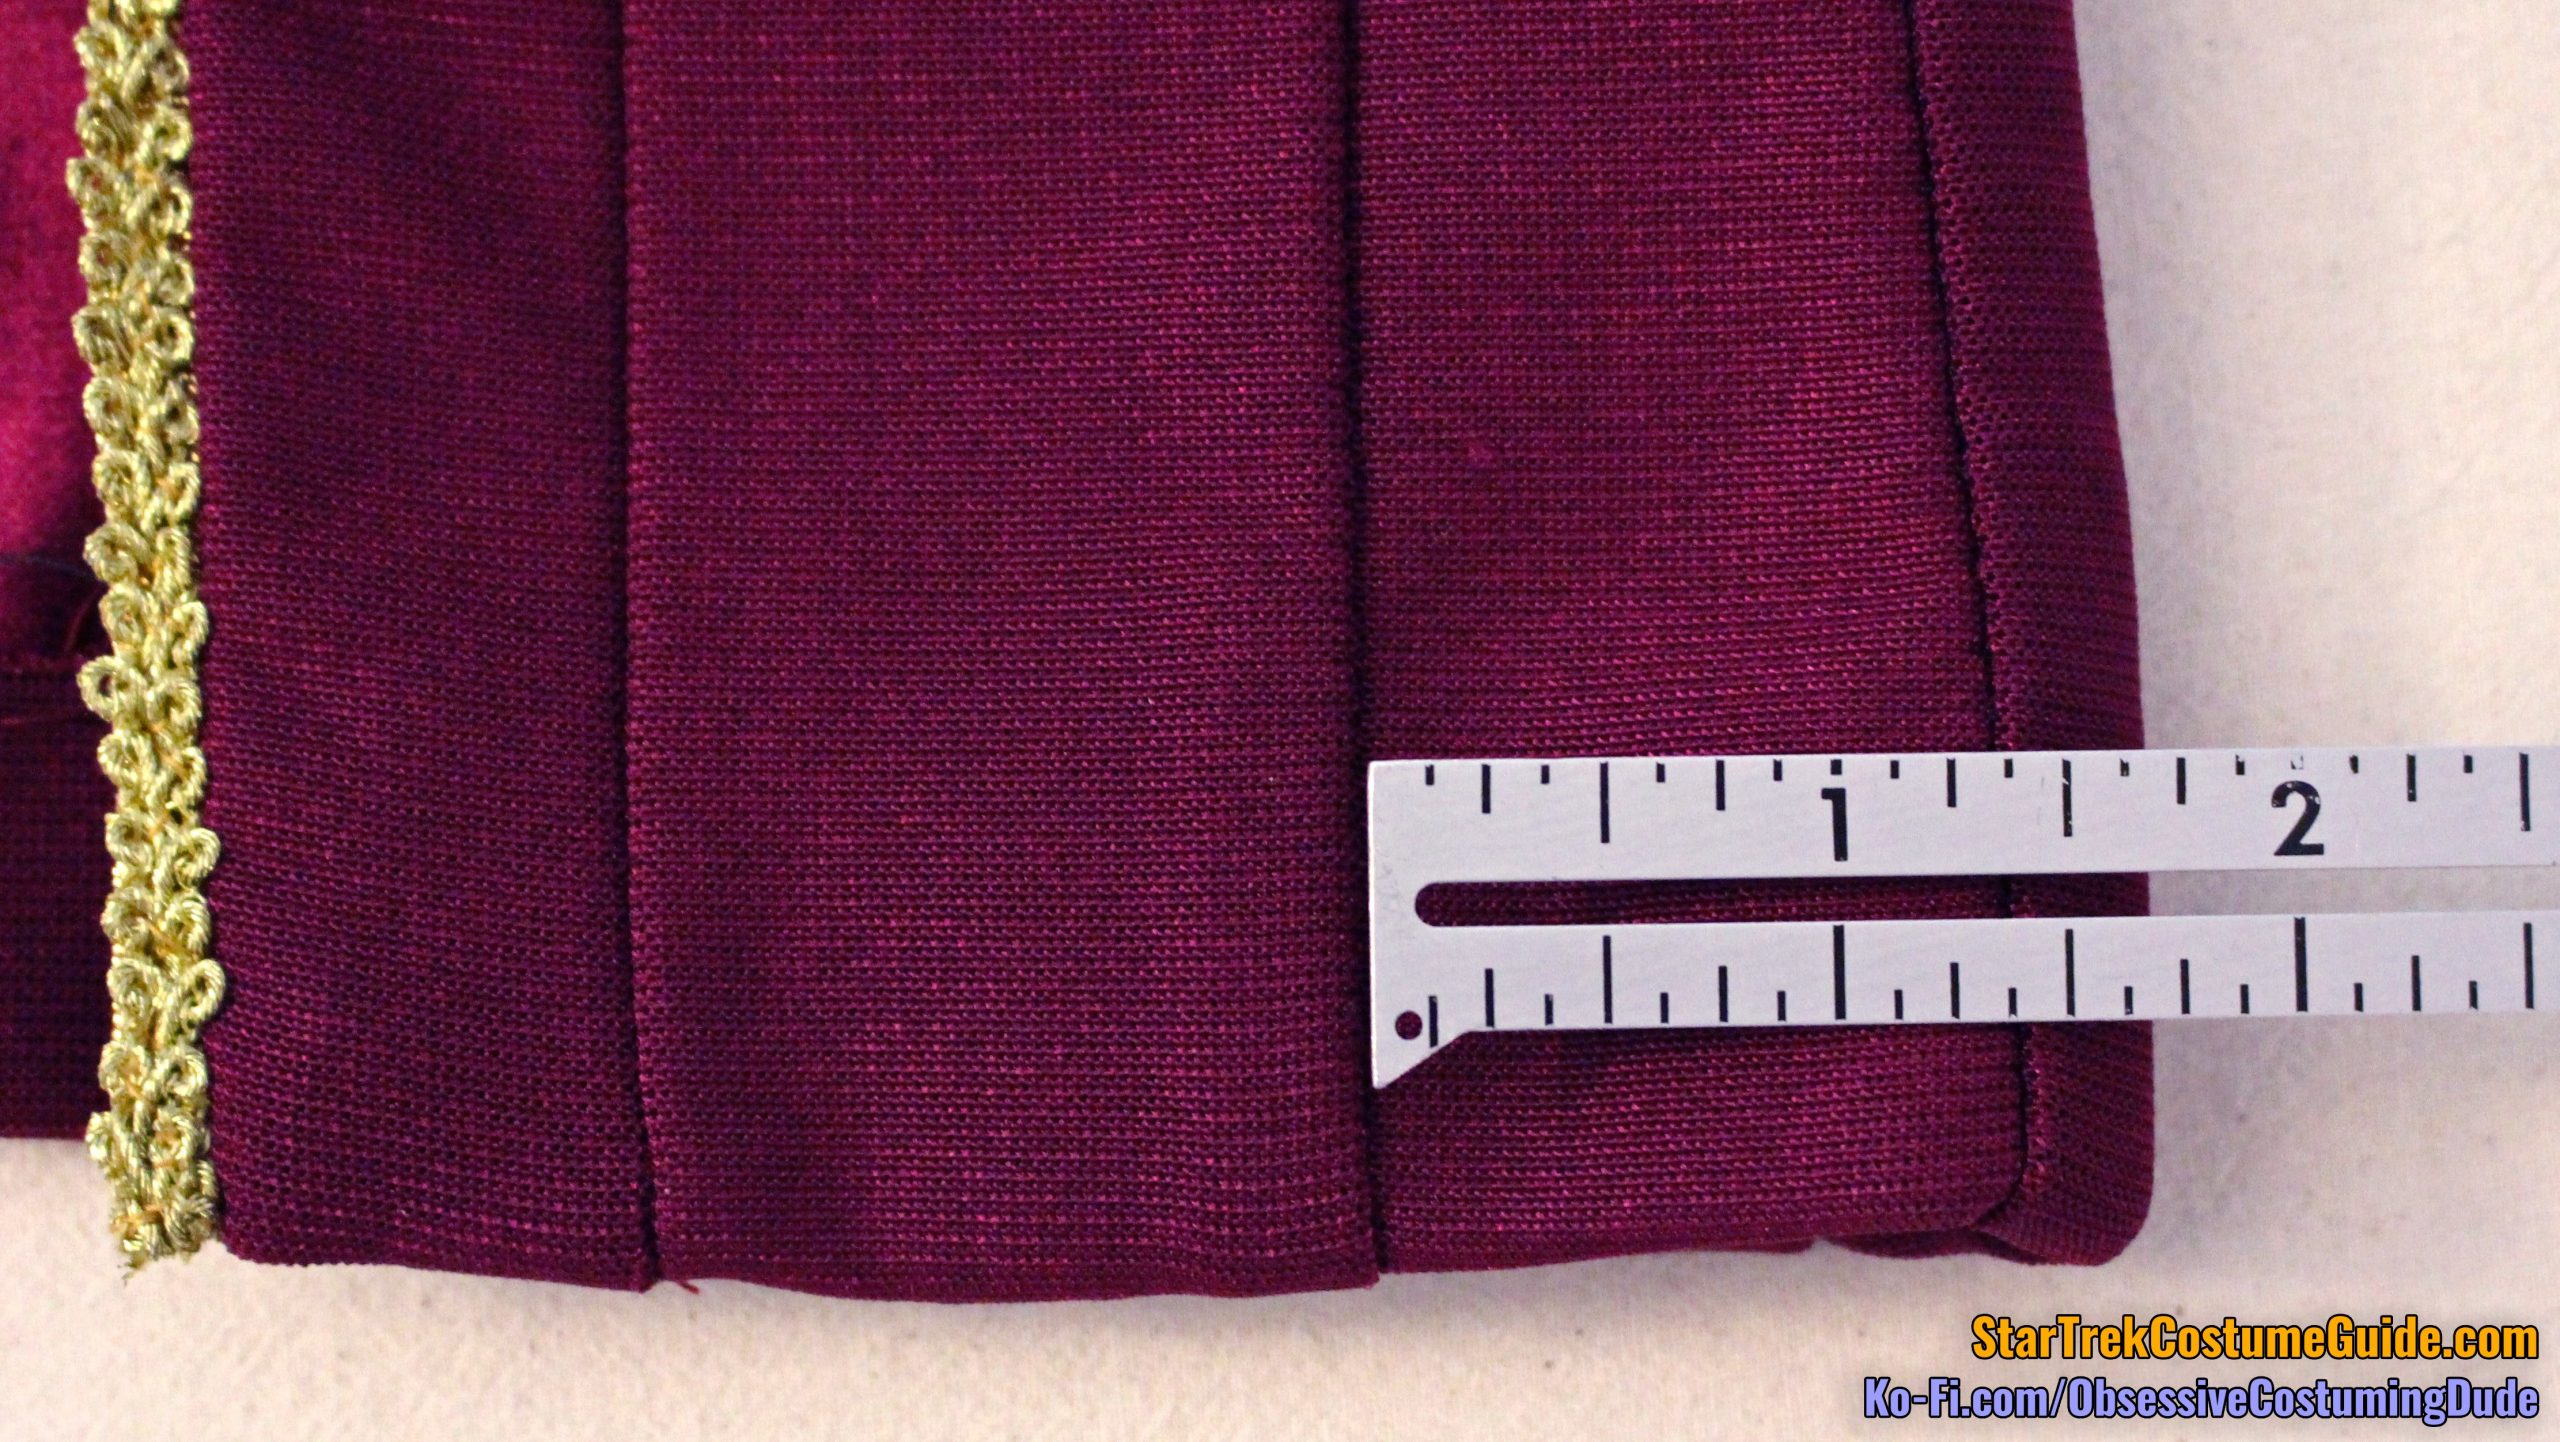
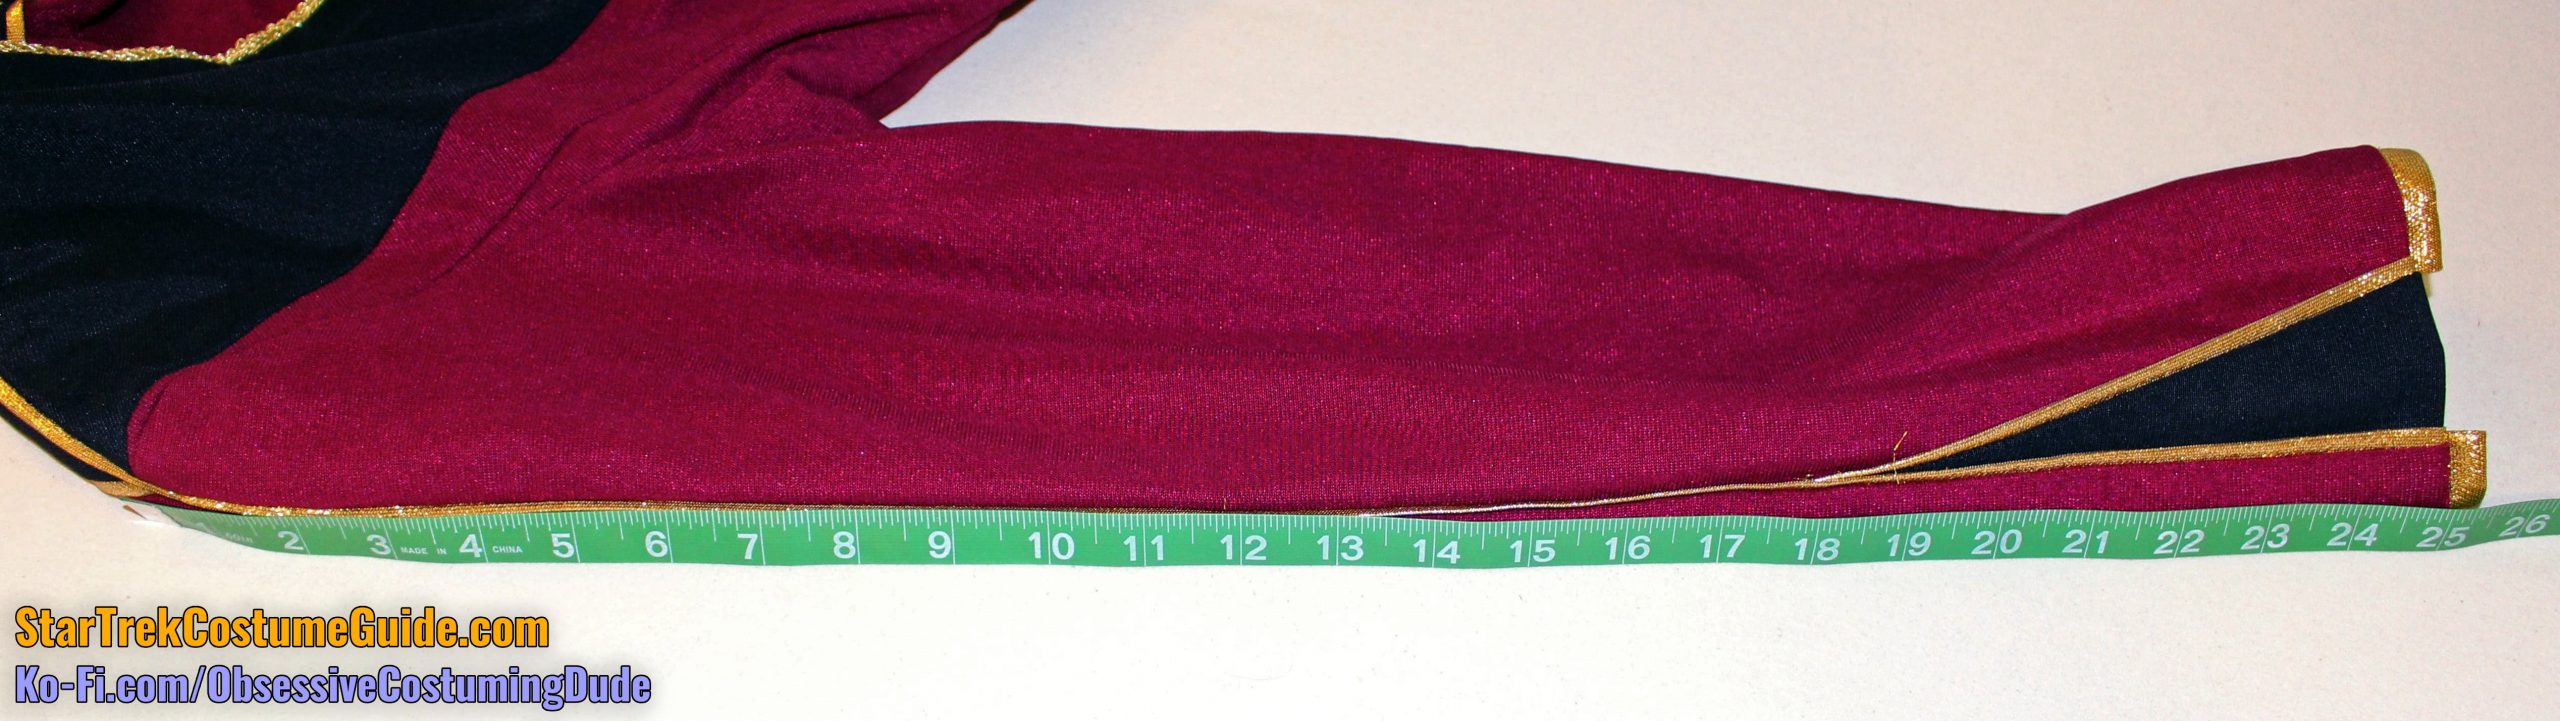
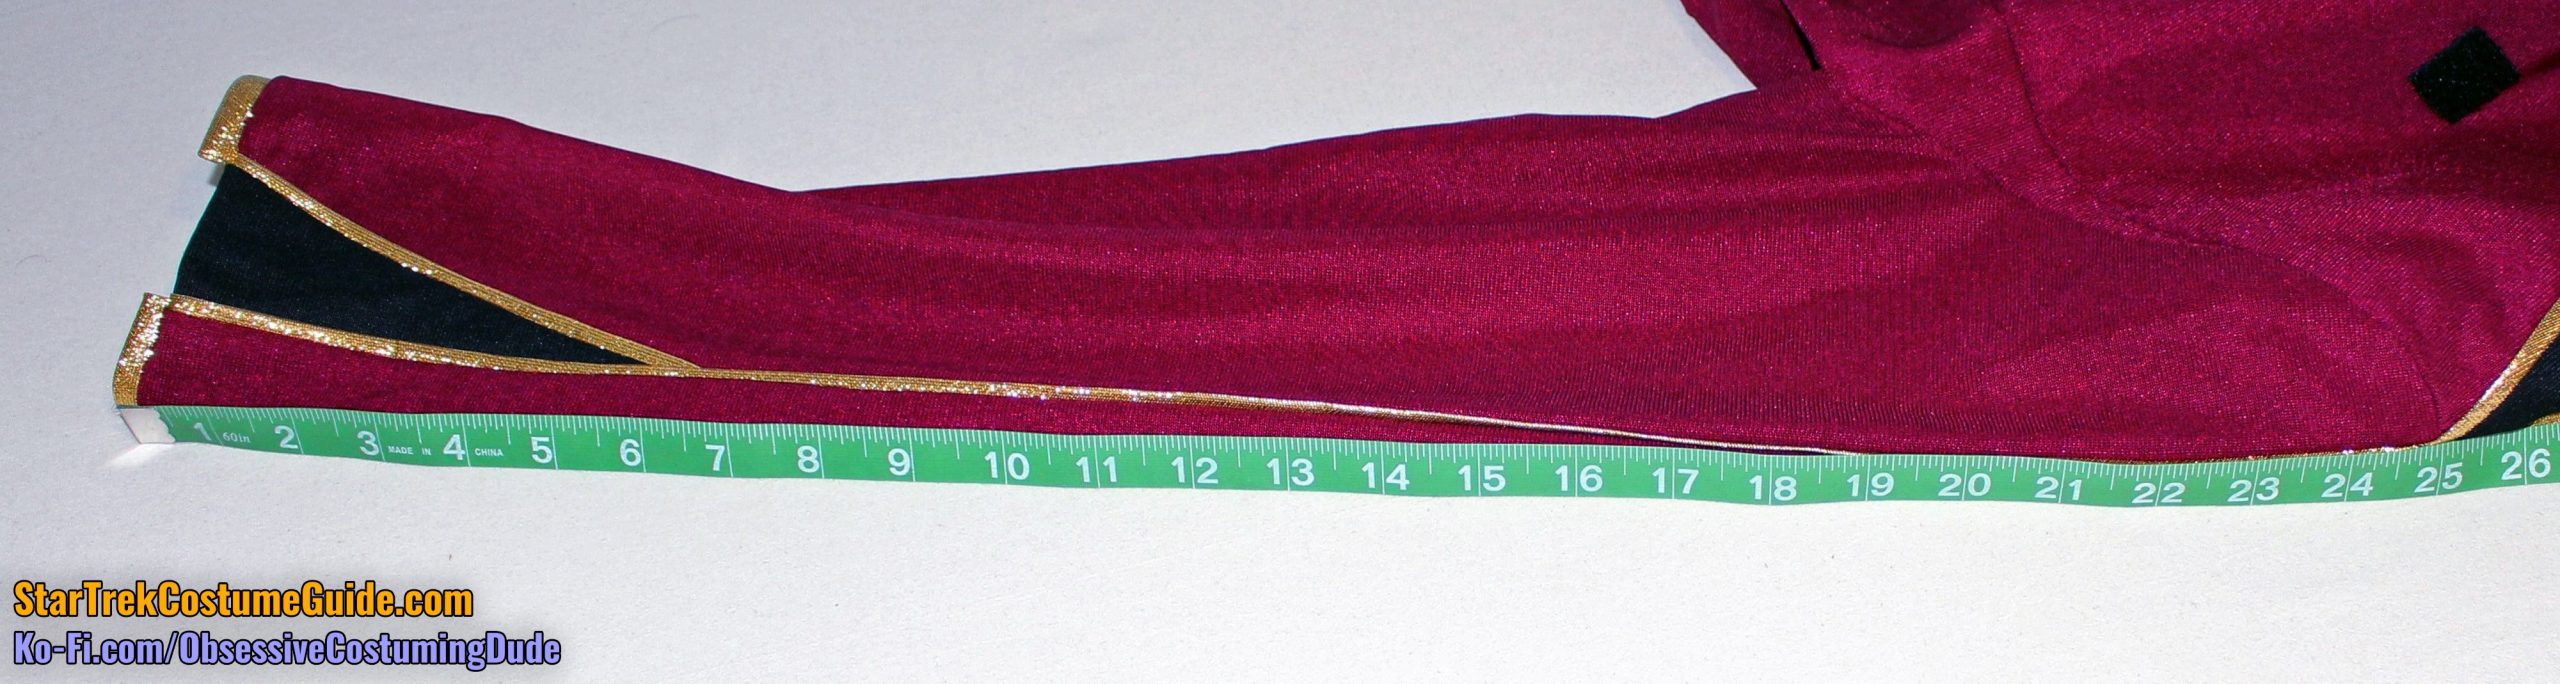
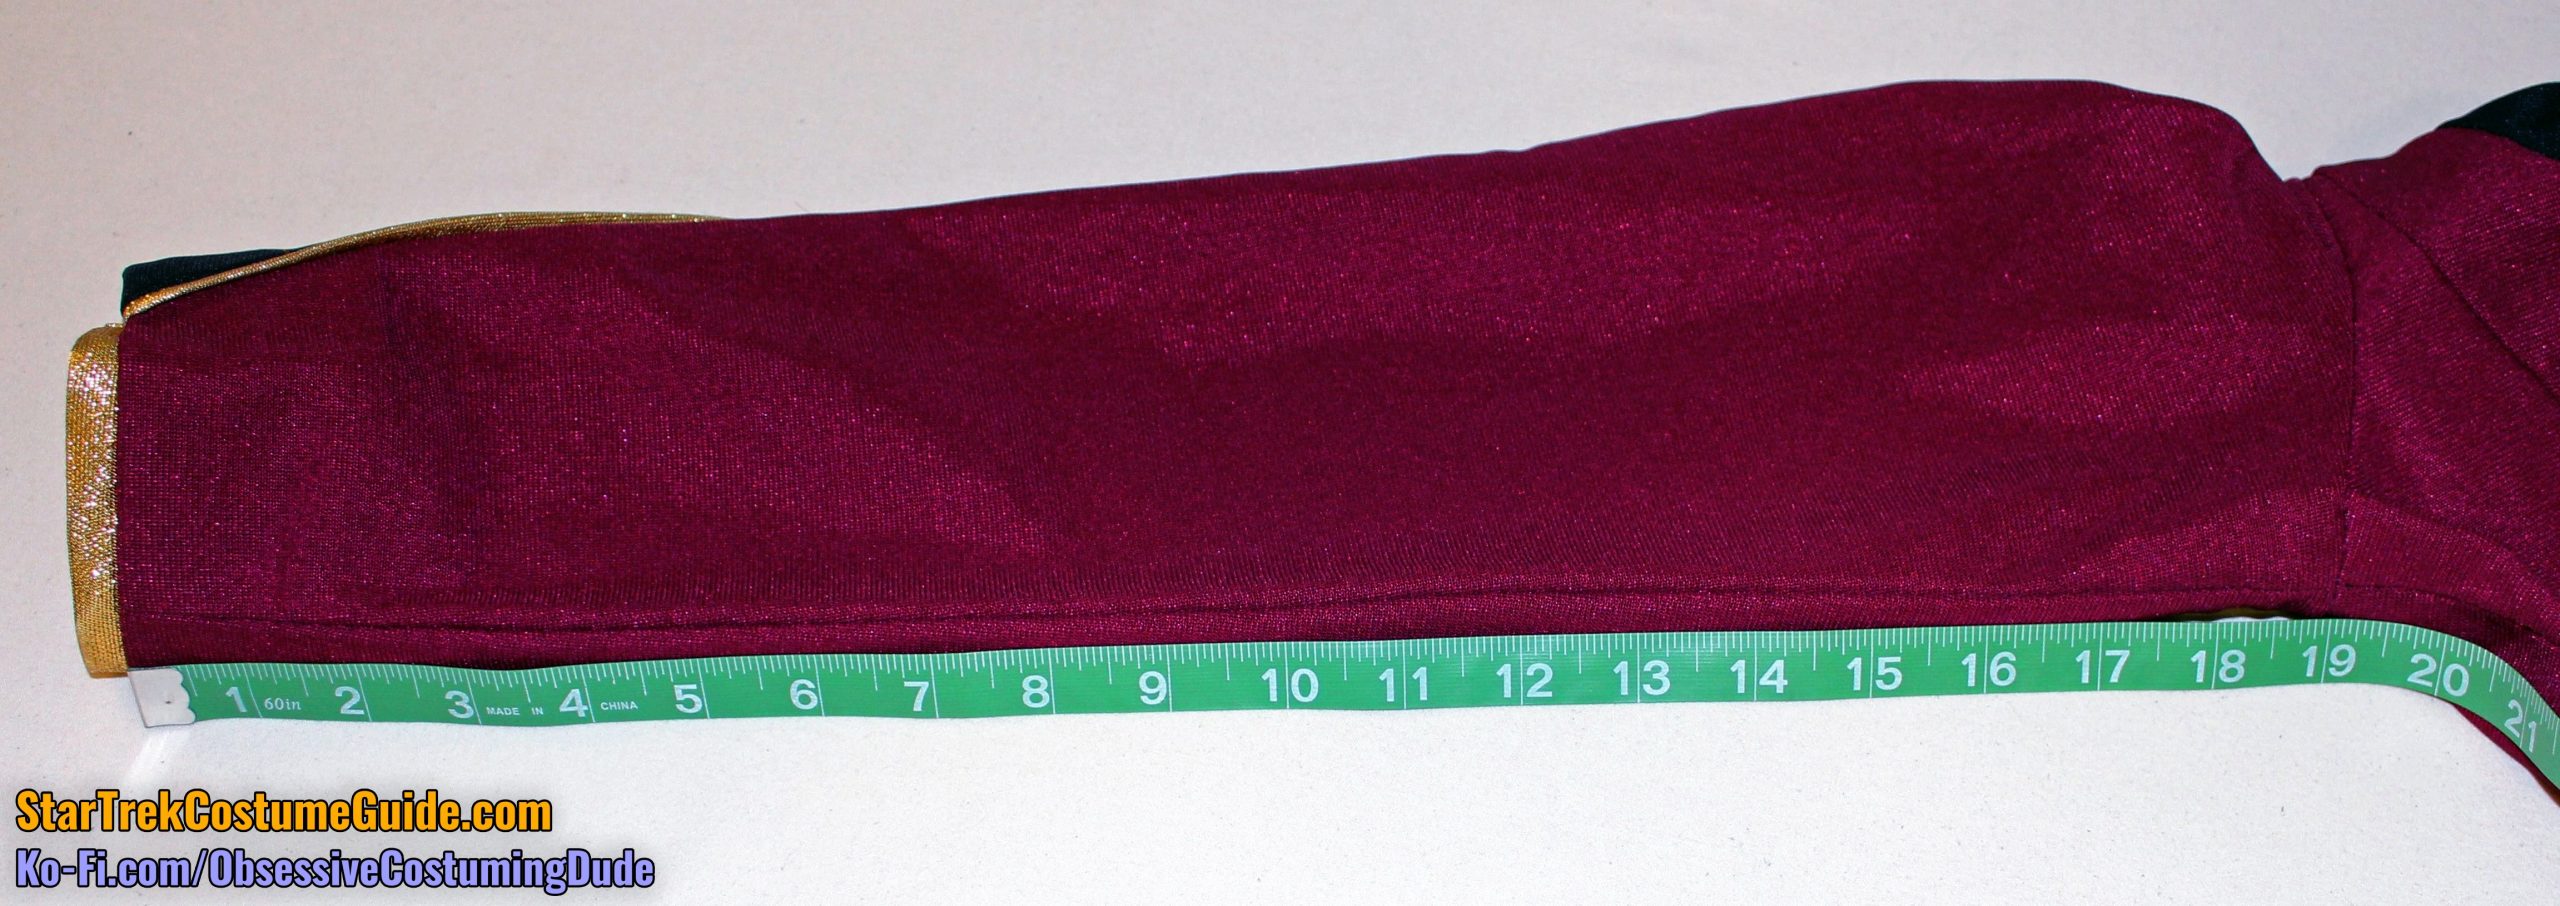
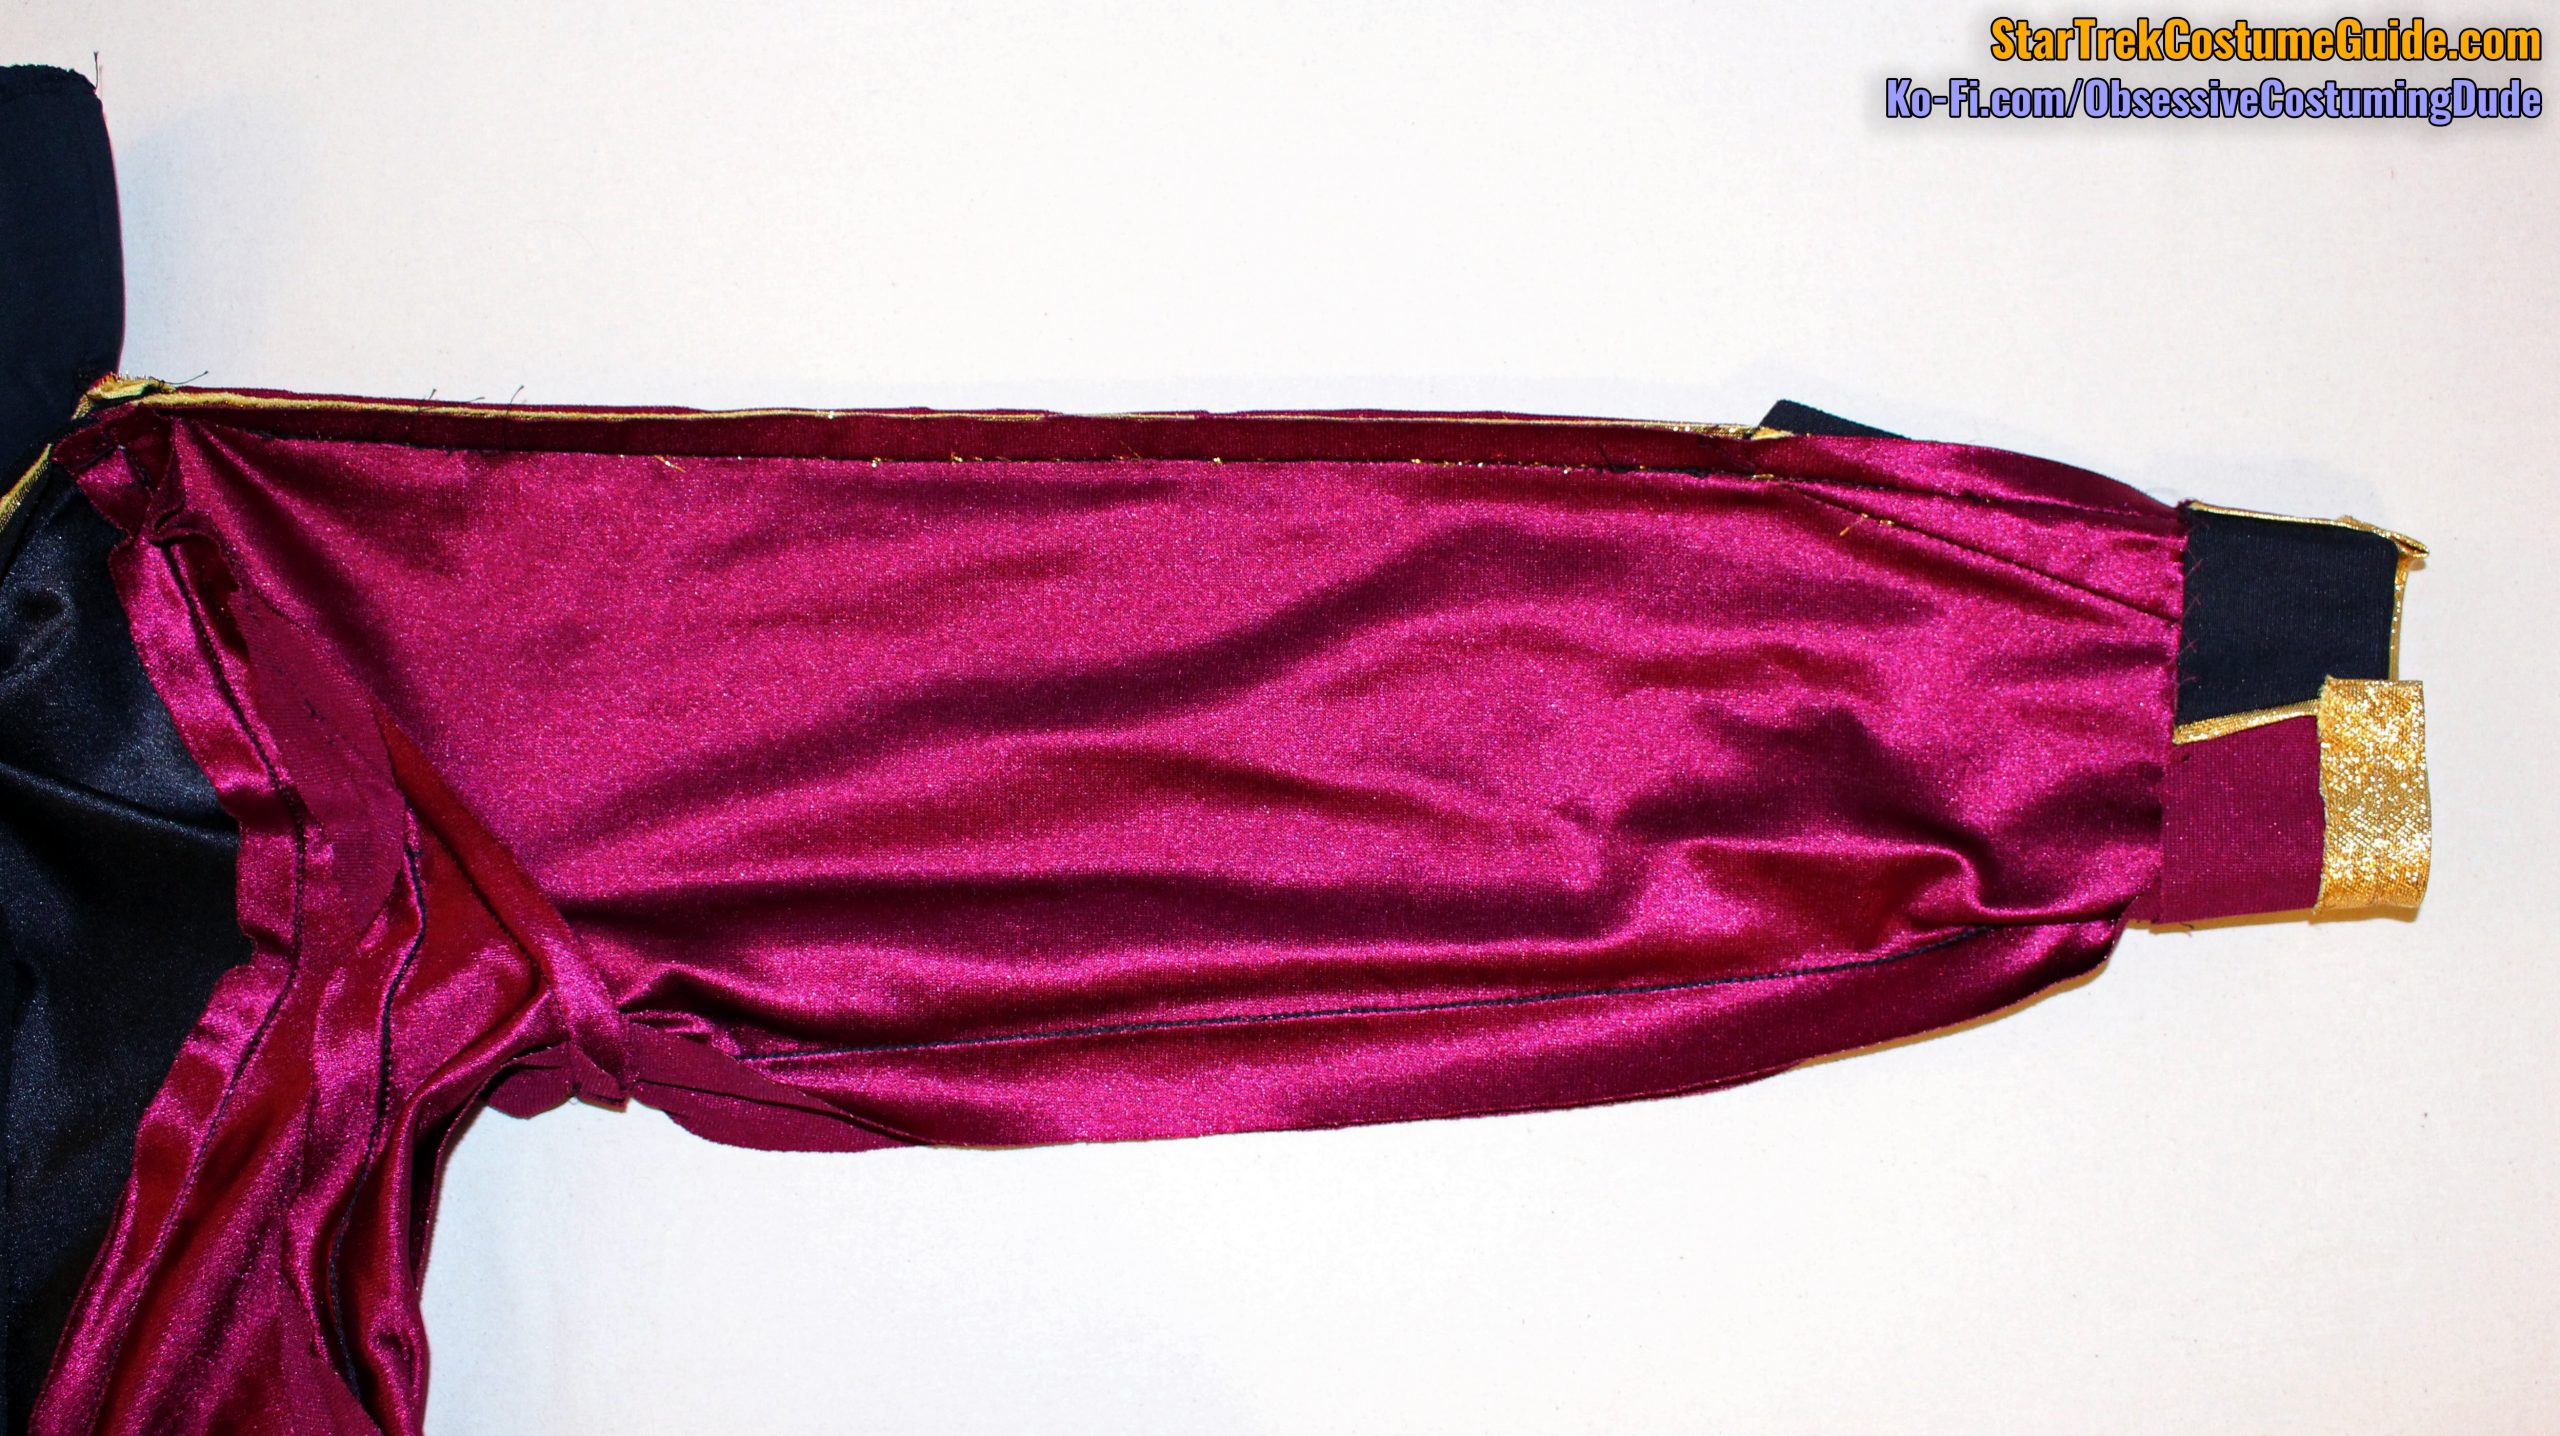
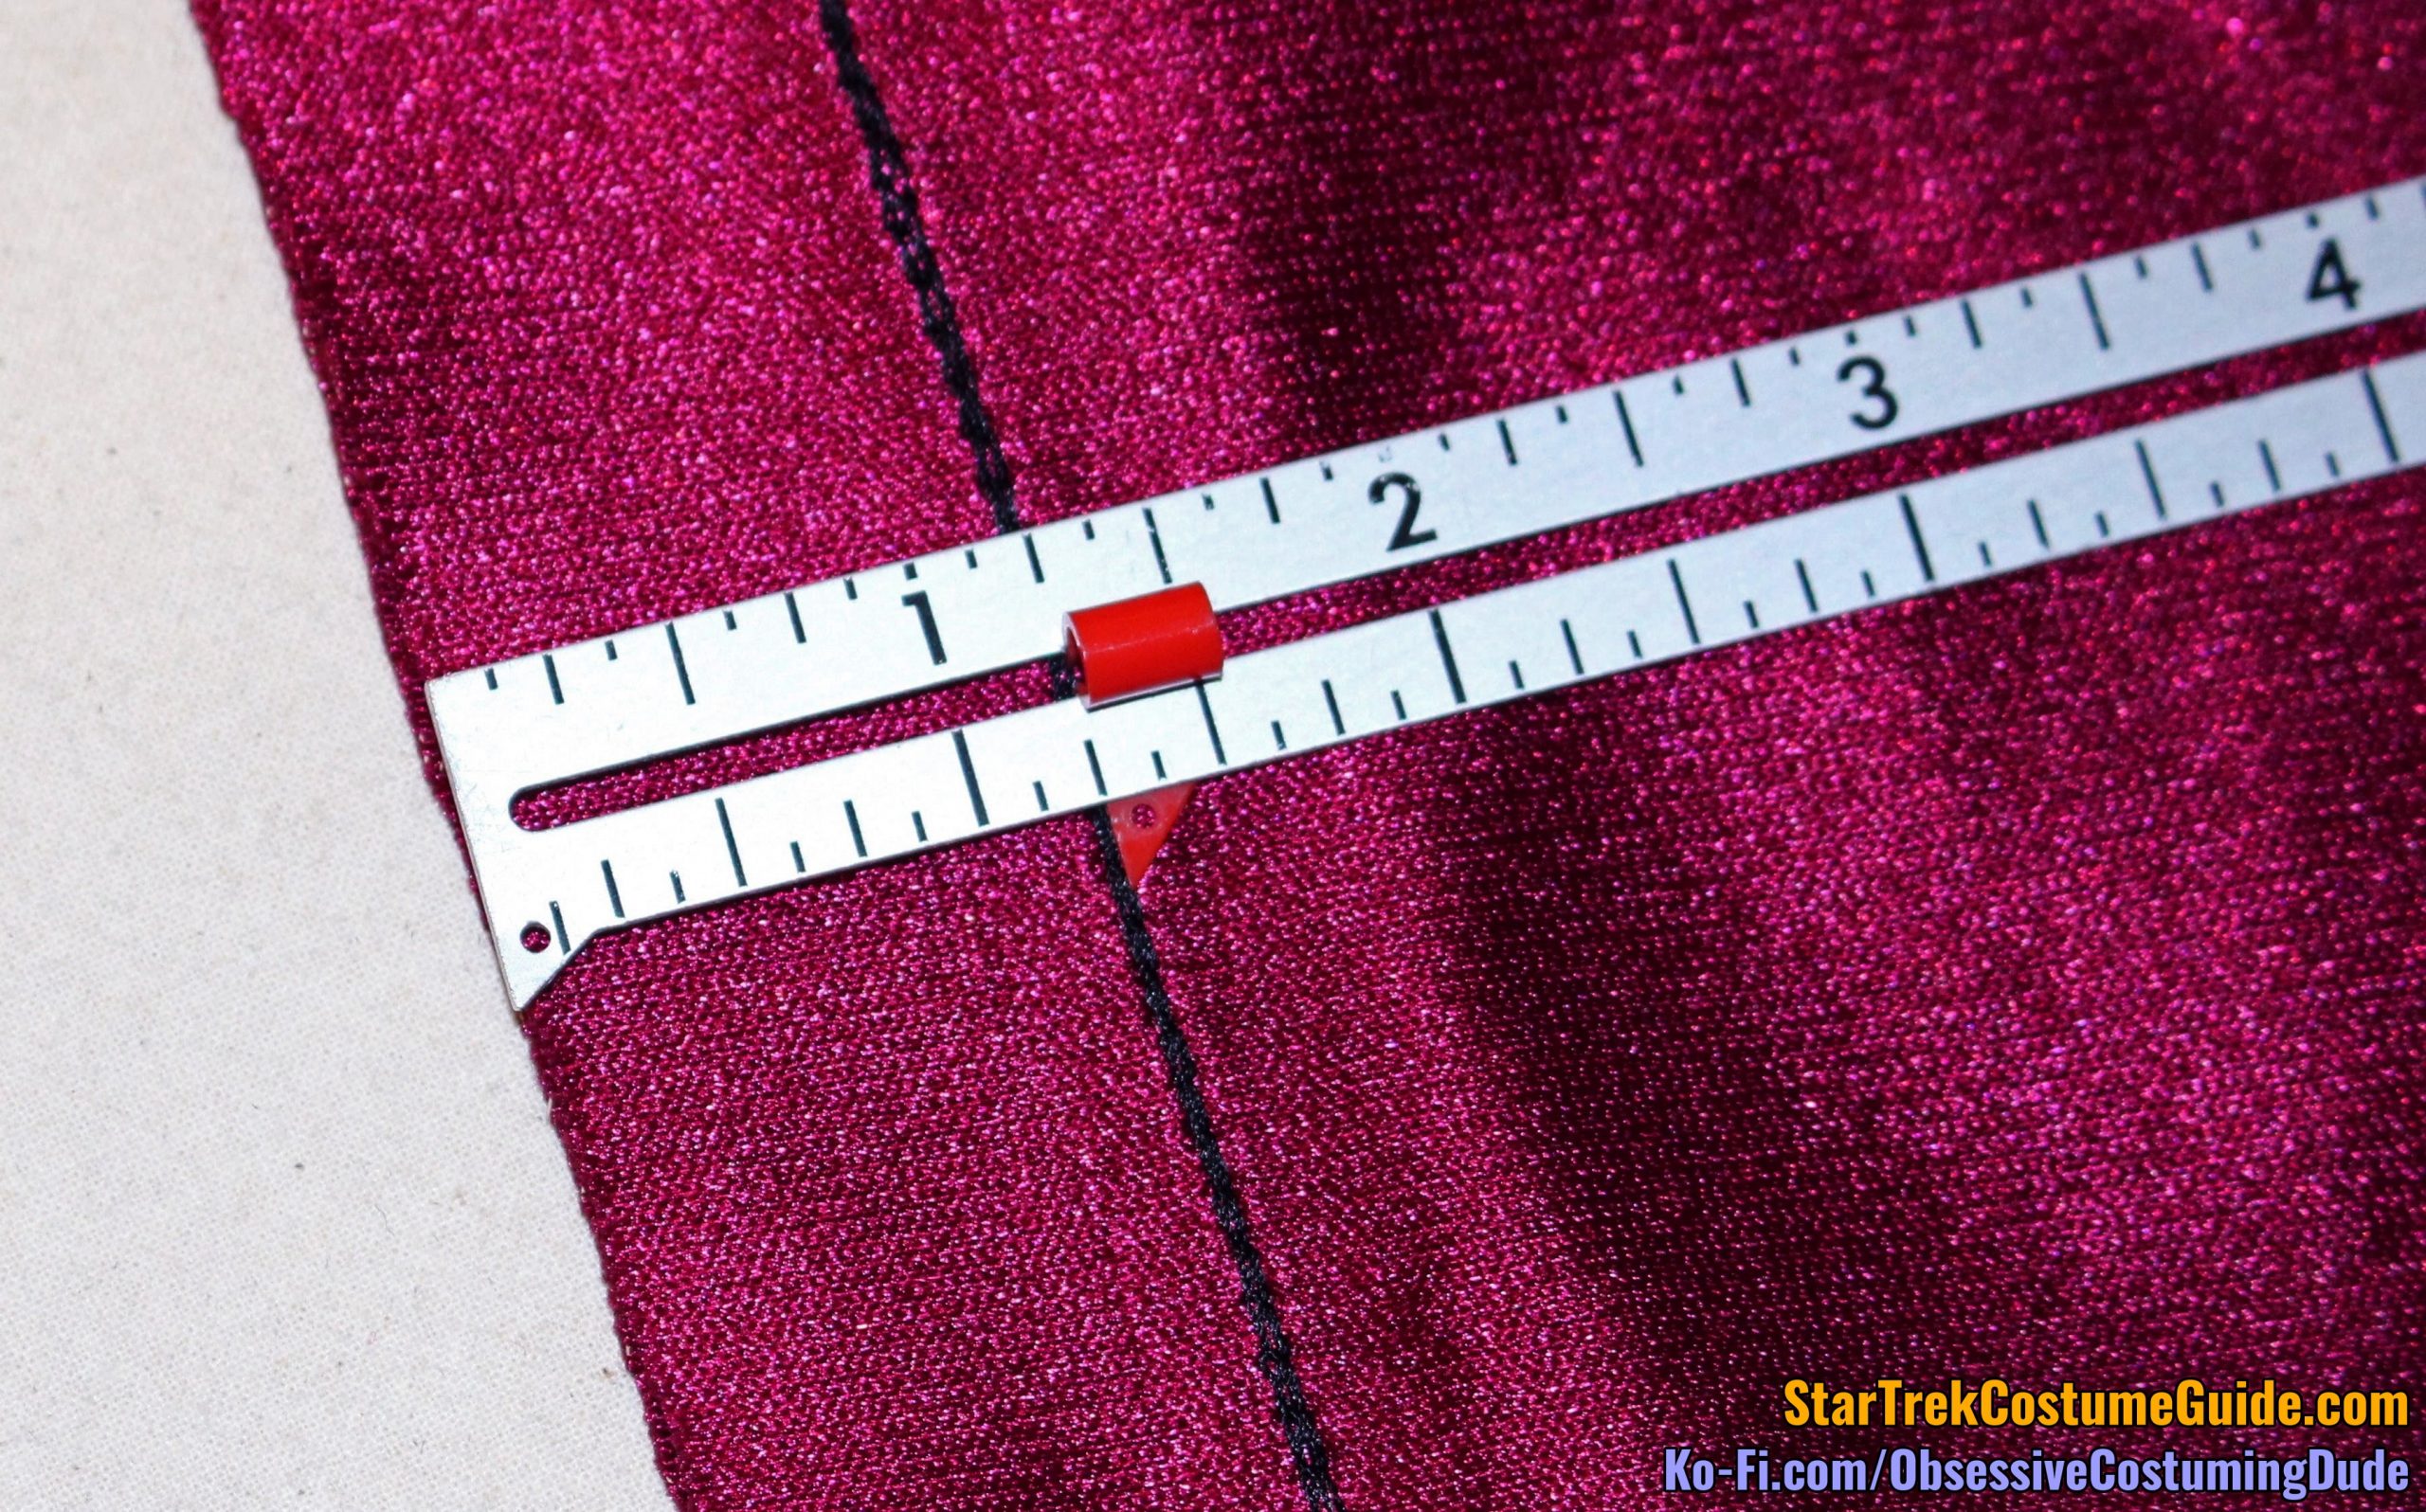
Both outer sleeve seams were 25”, from the top of the armscye to the upper edge of the trim.
Both inner sleeve seams were 19”, again measured from the armscye to the upper edge of the trim.
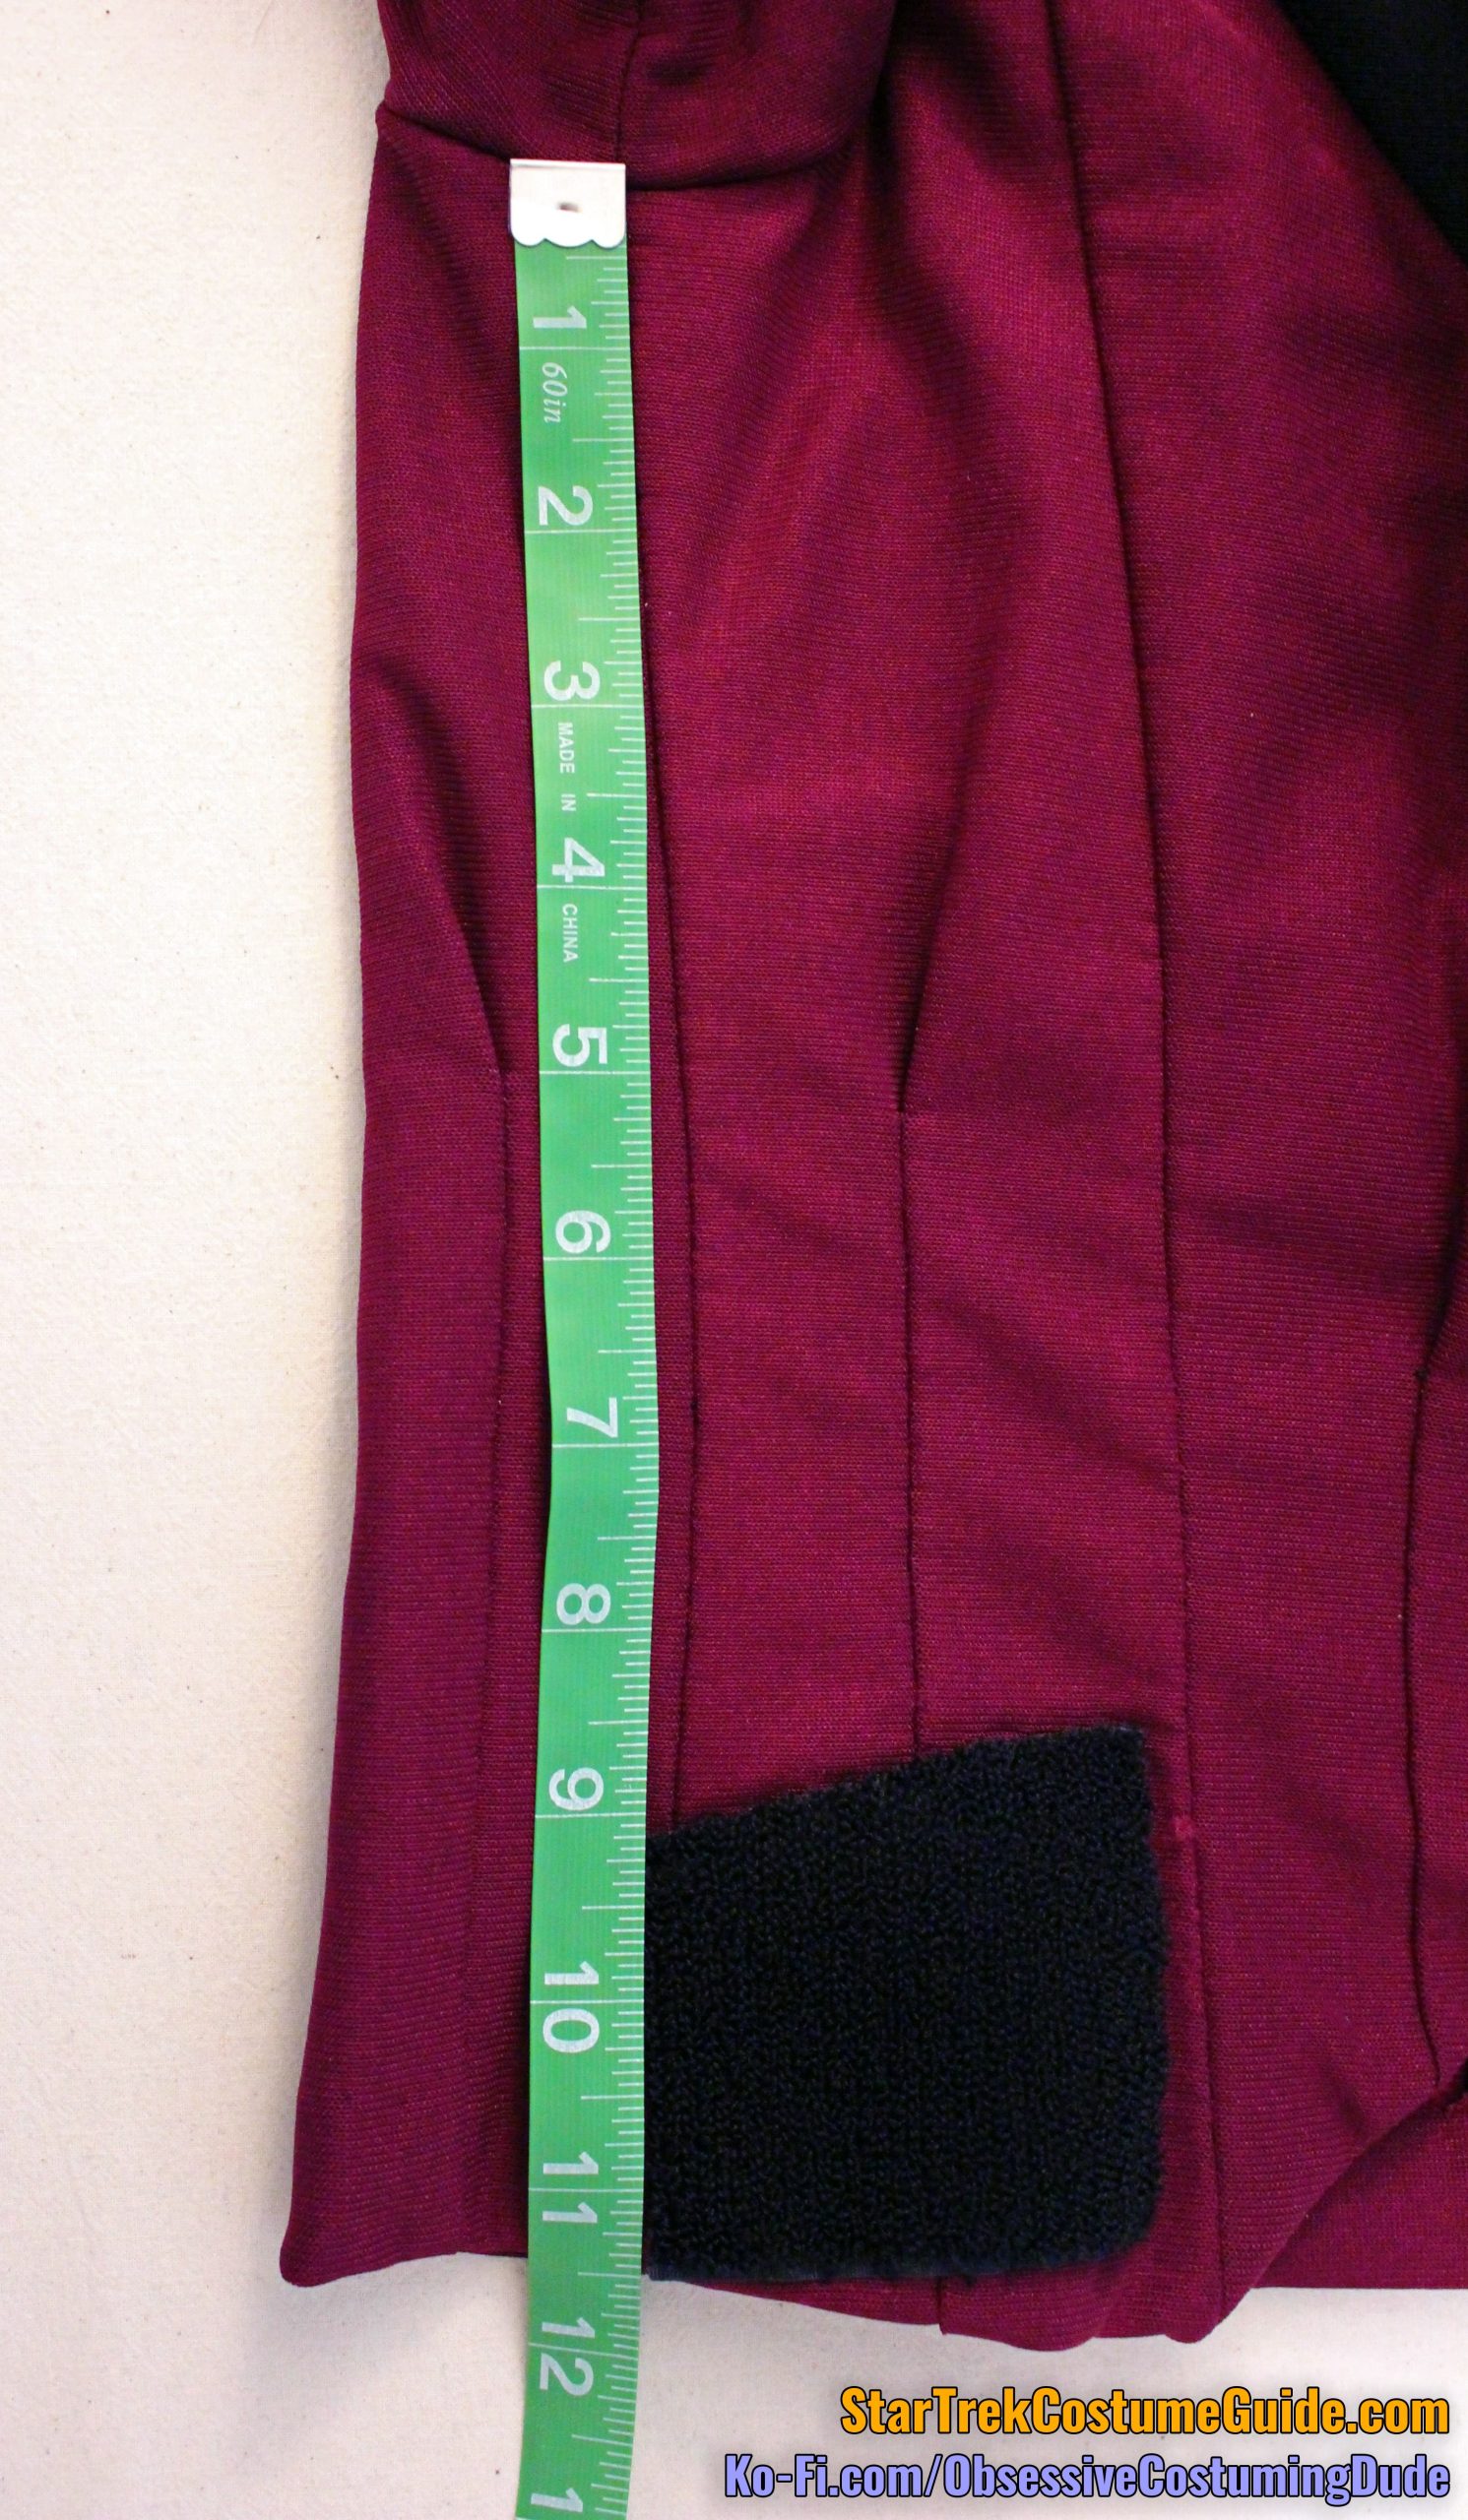
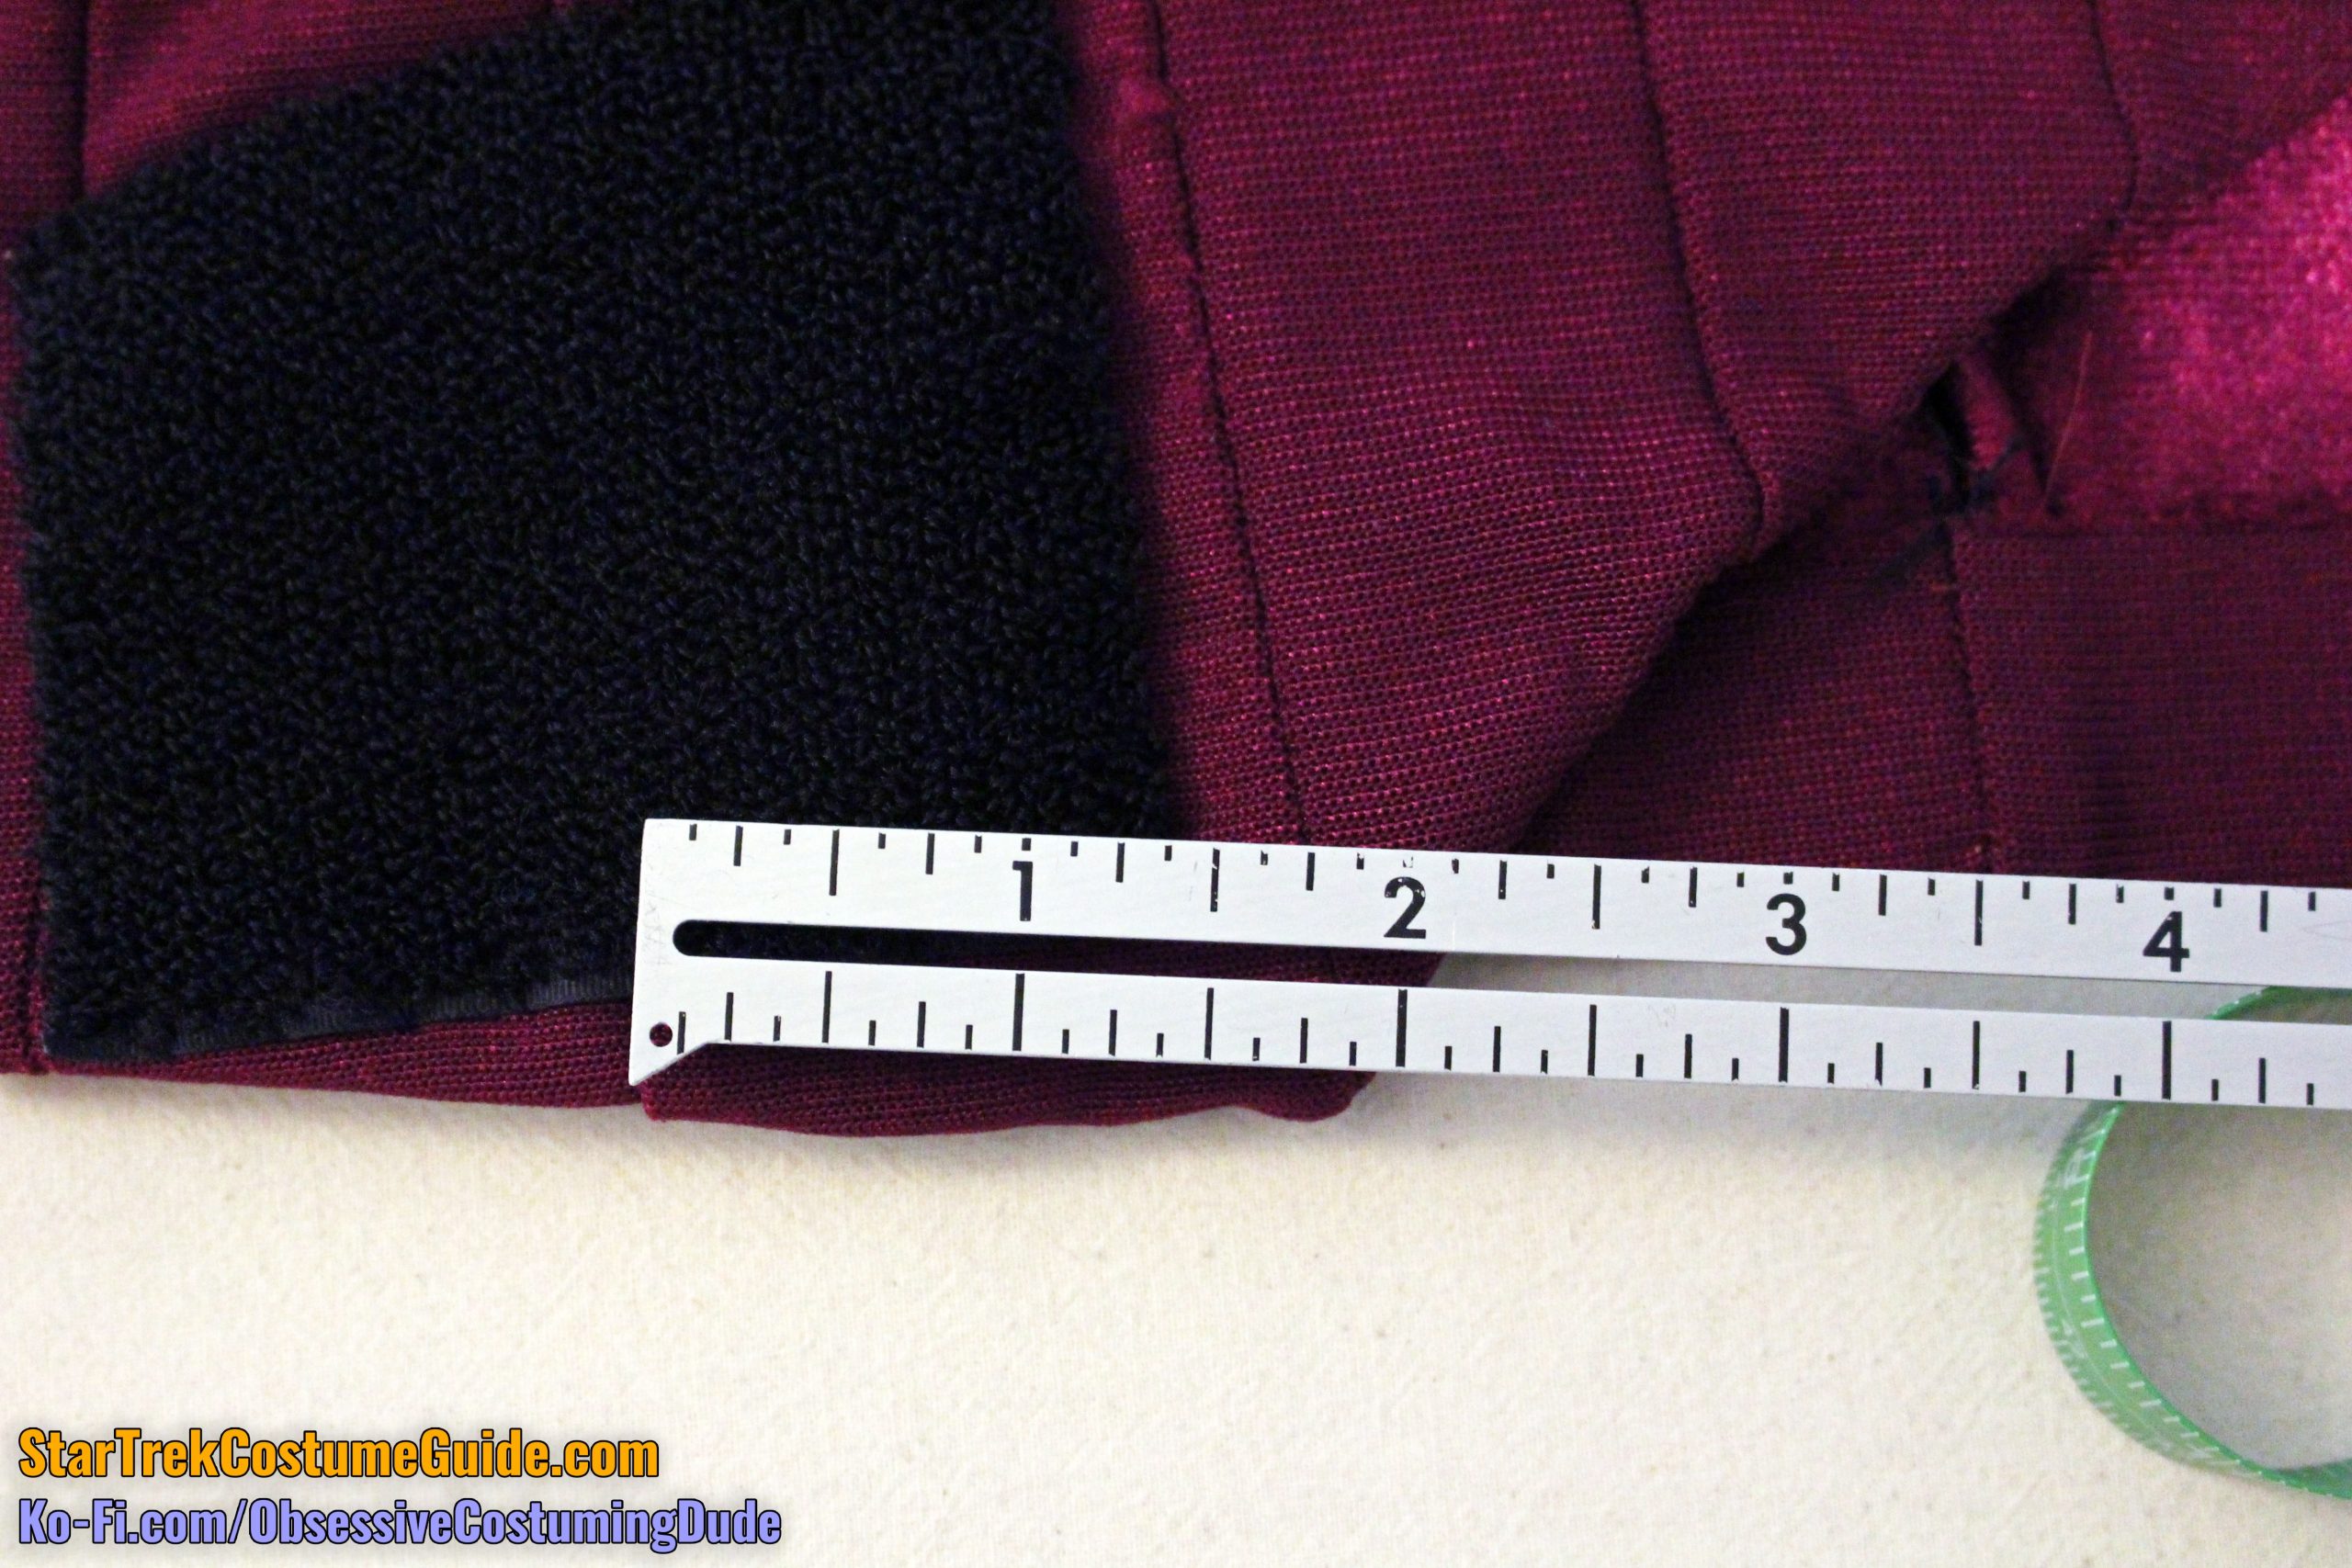
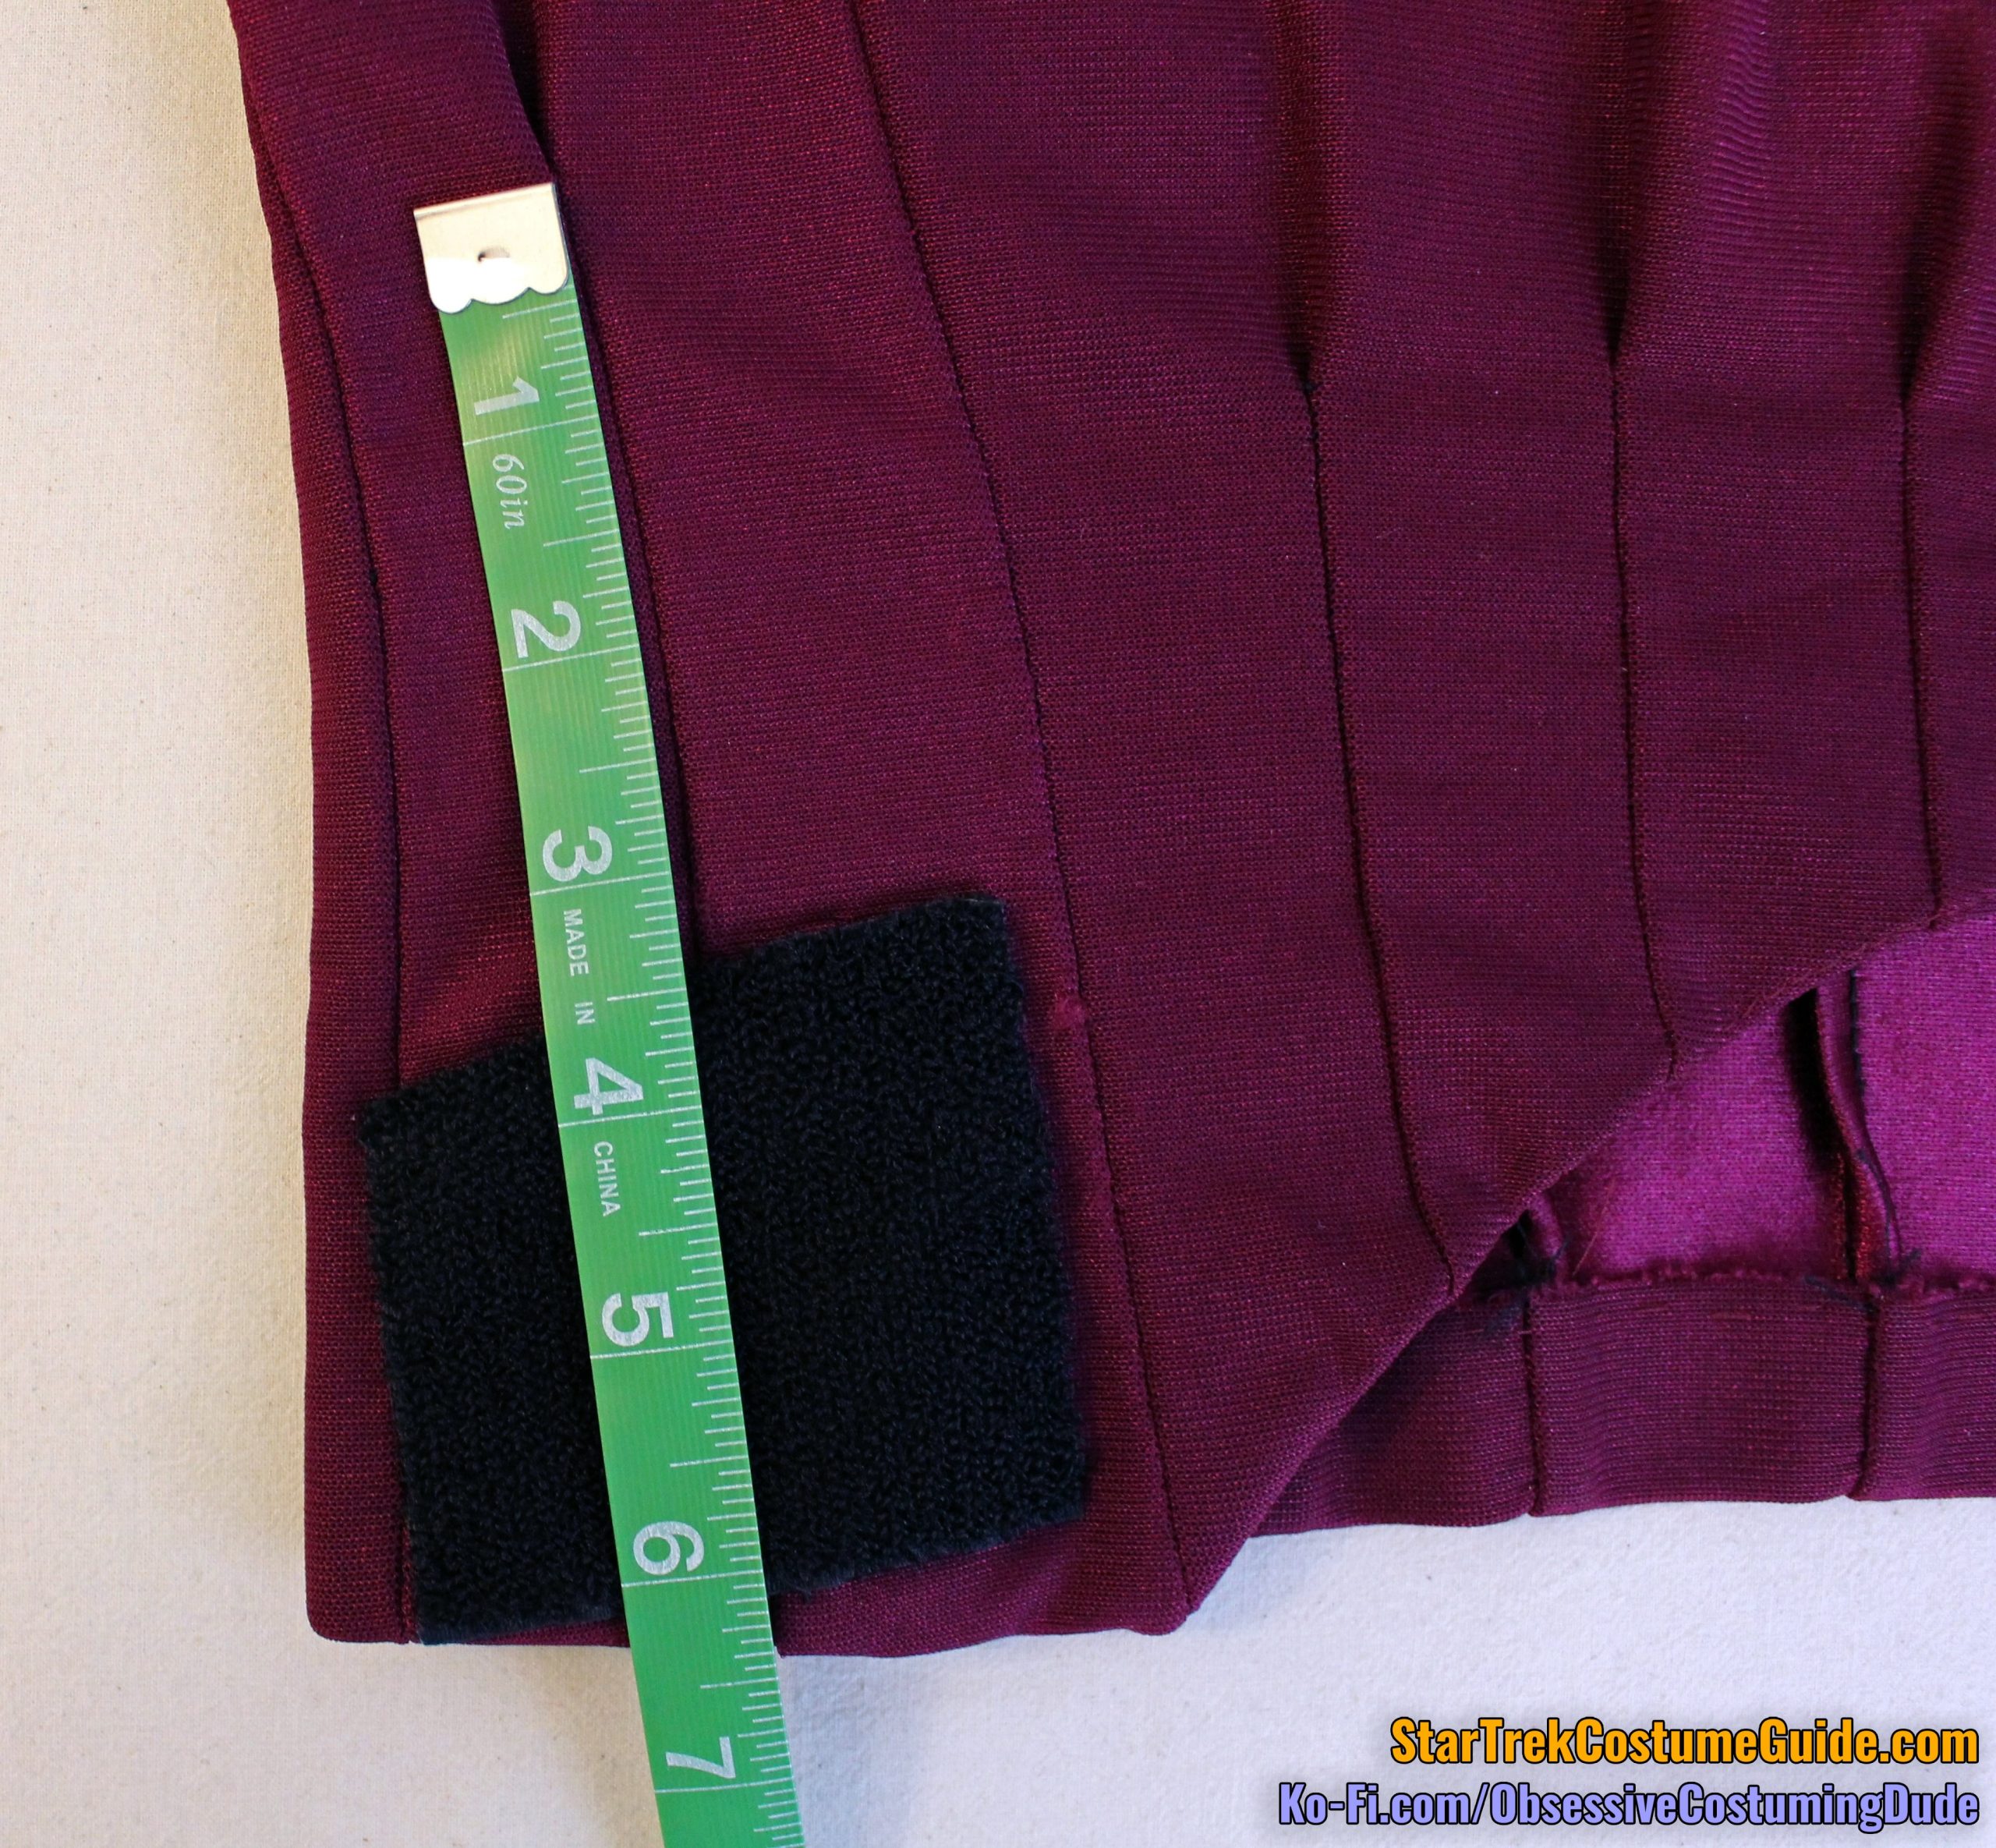
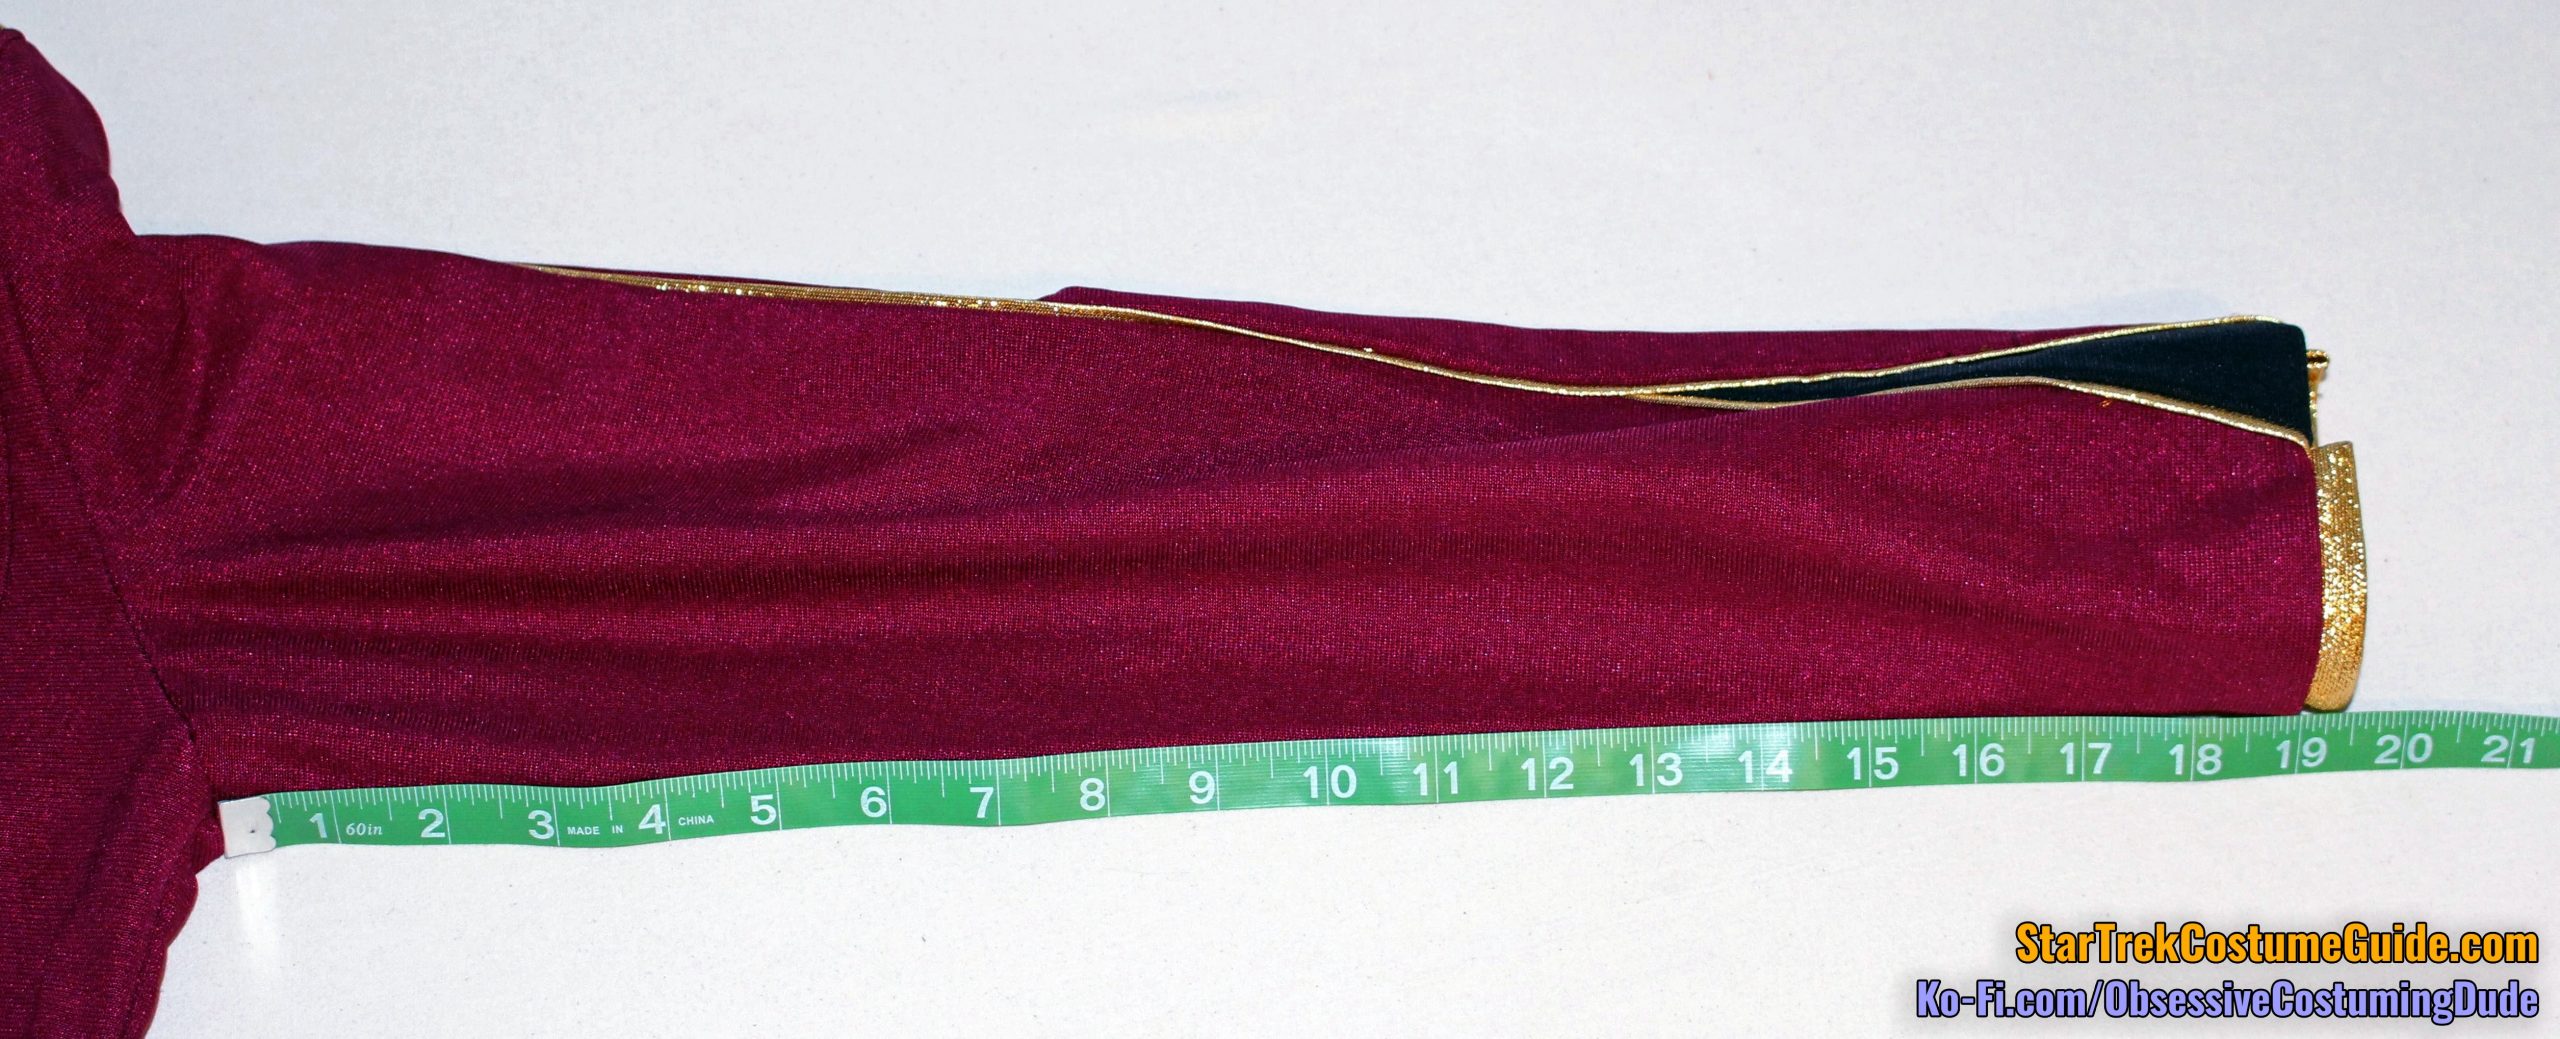
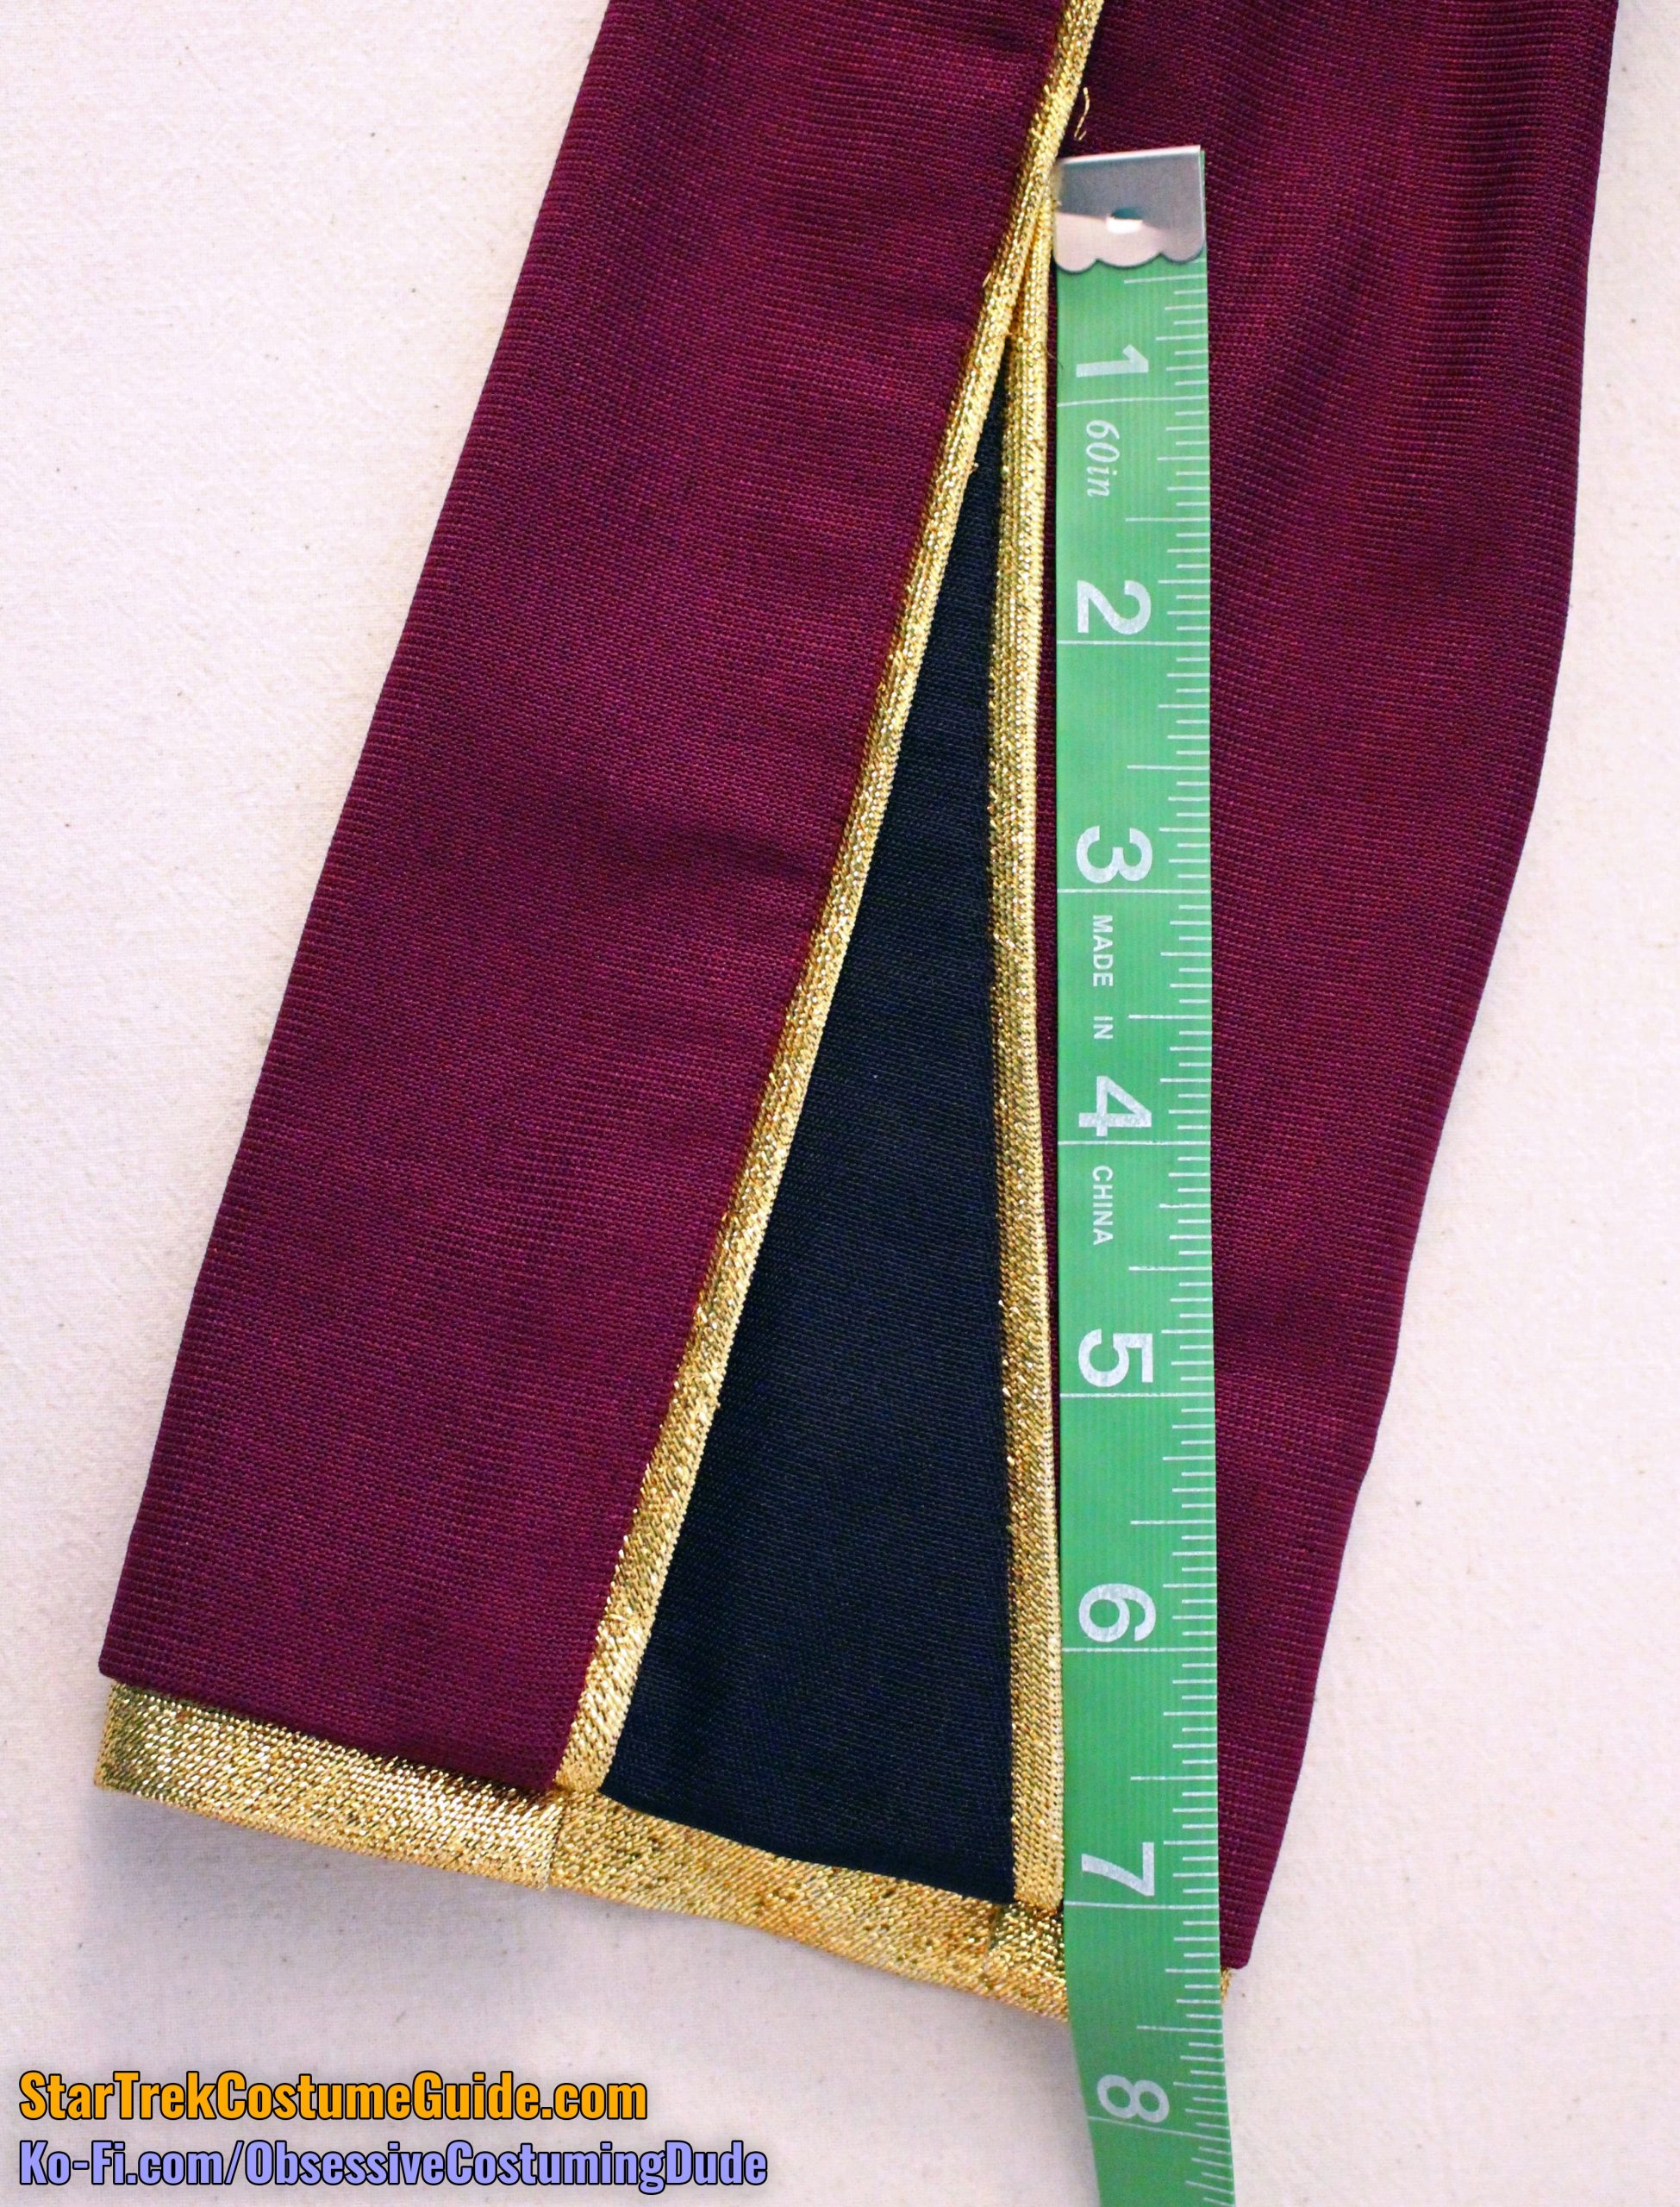
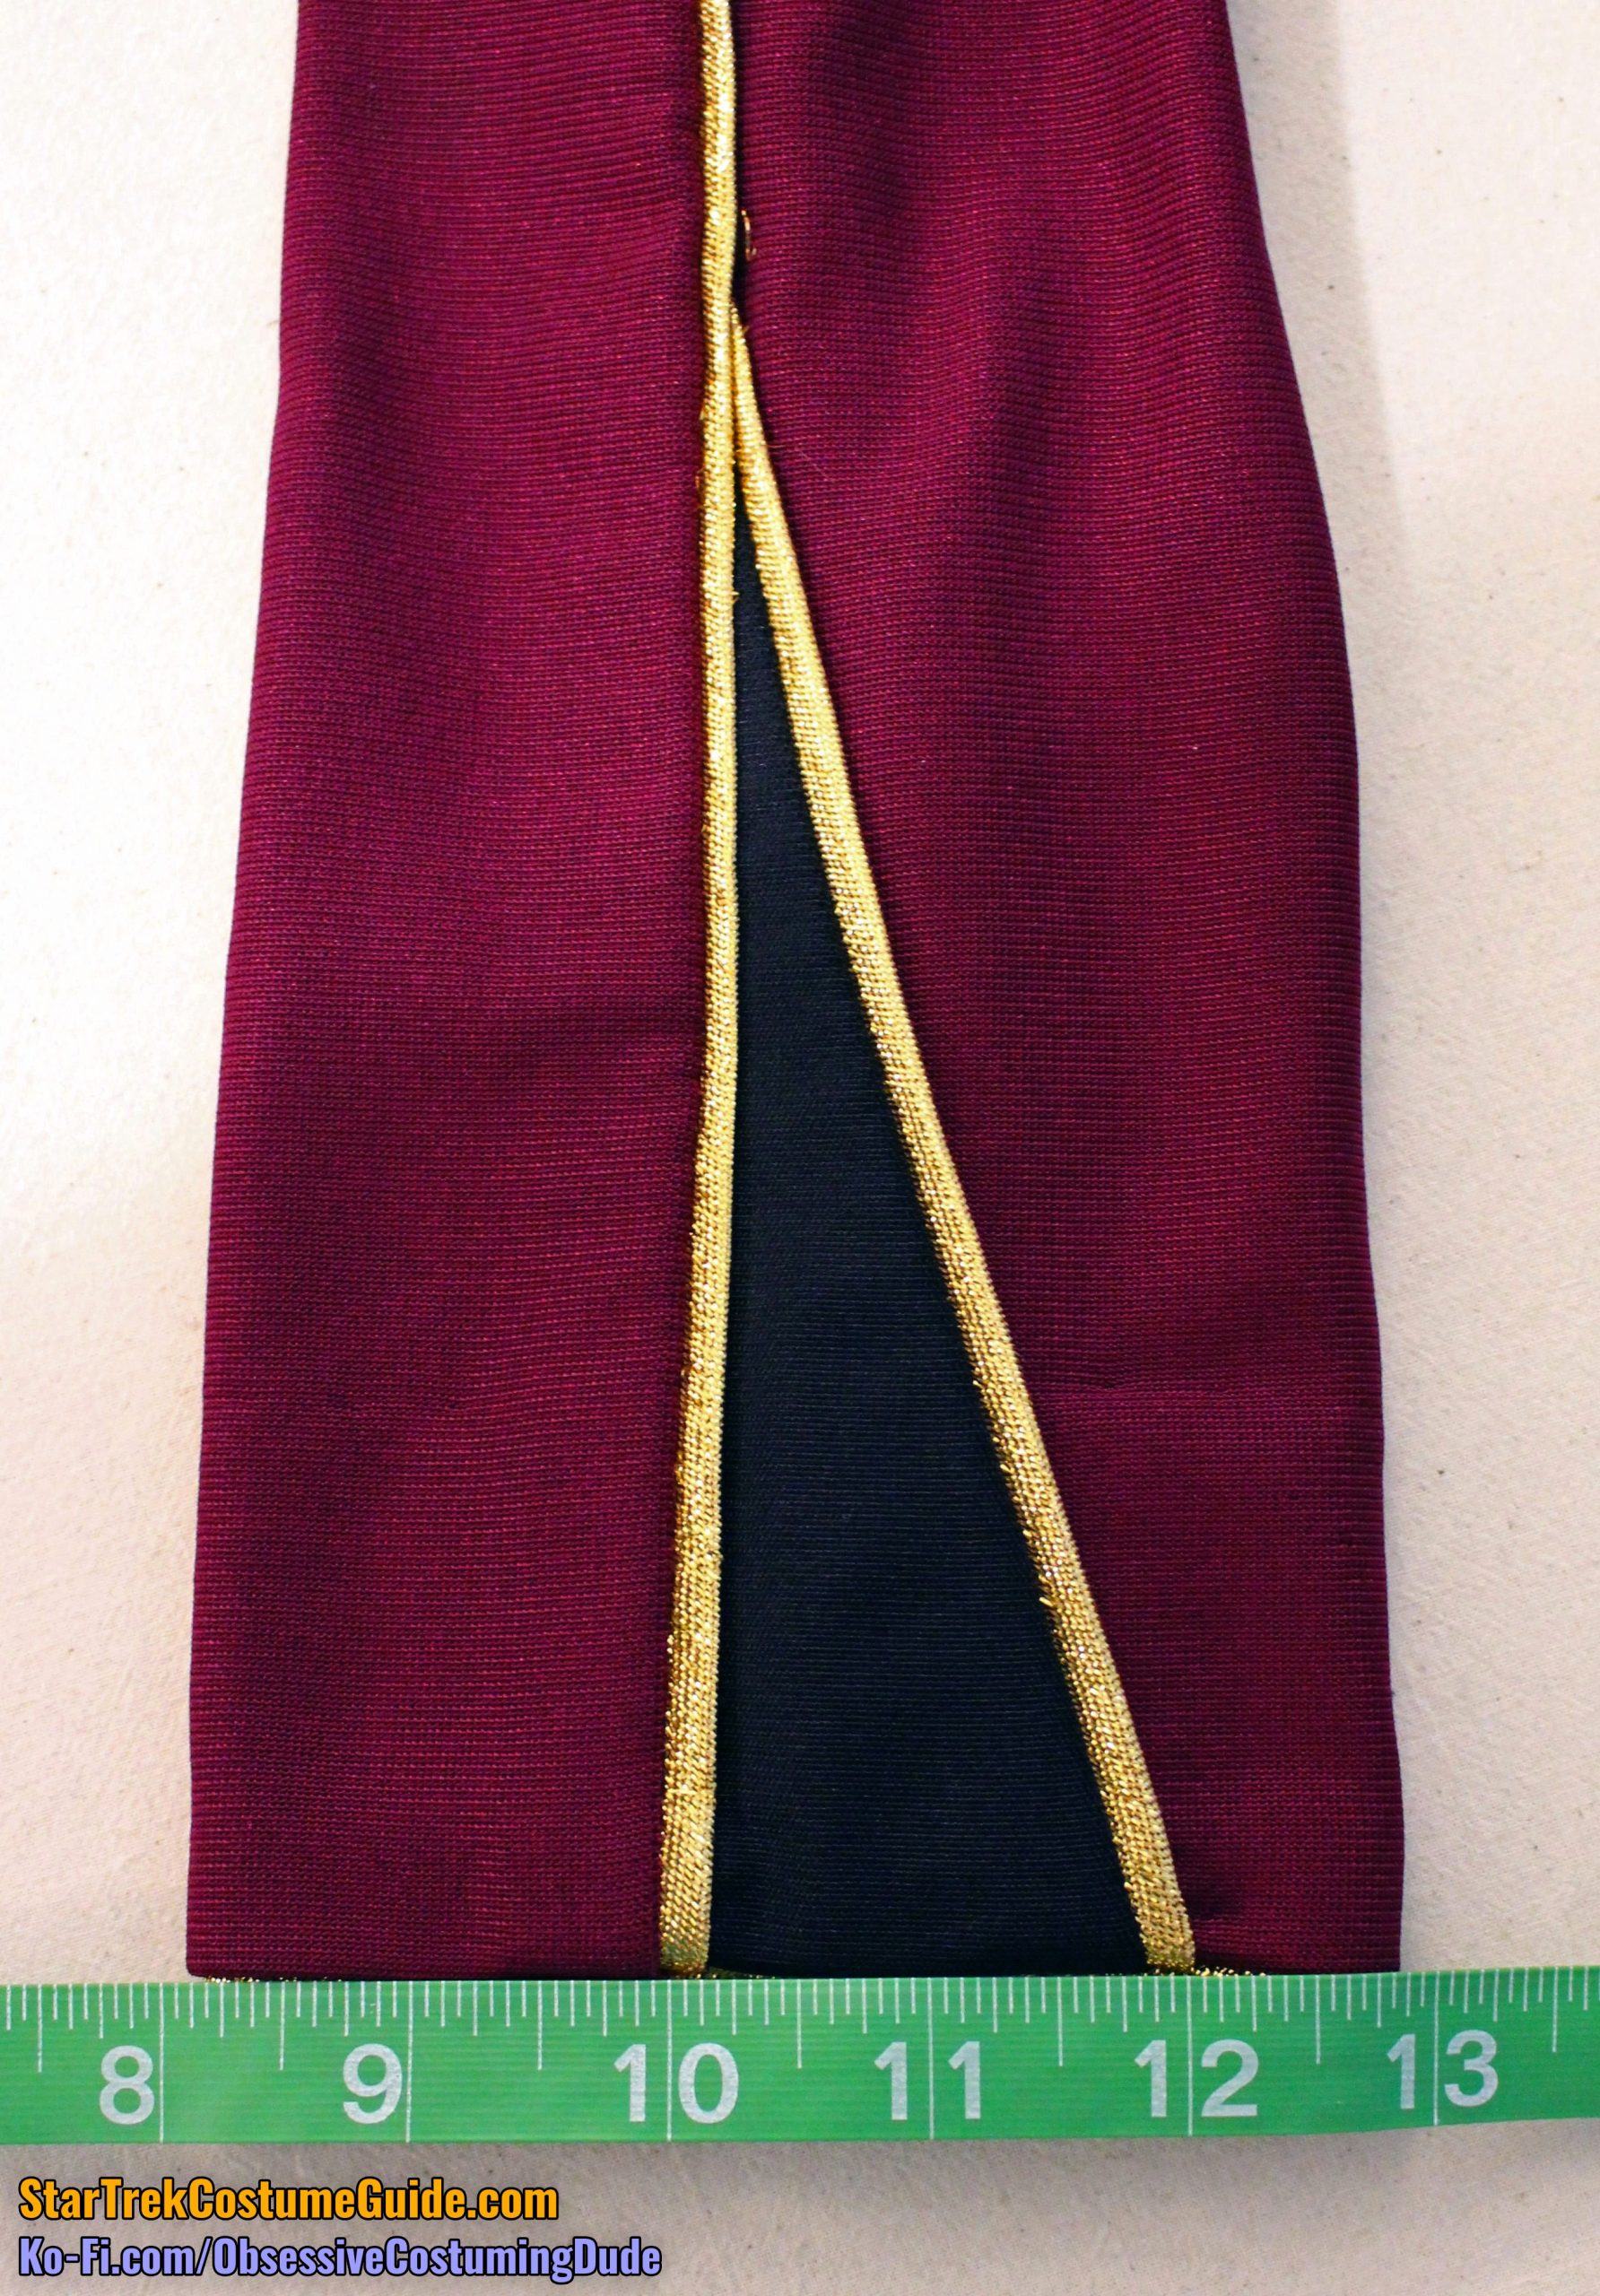
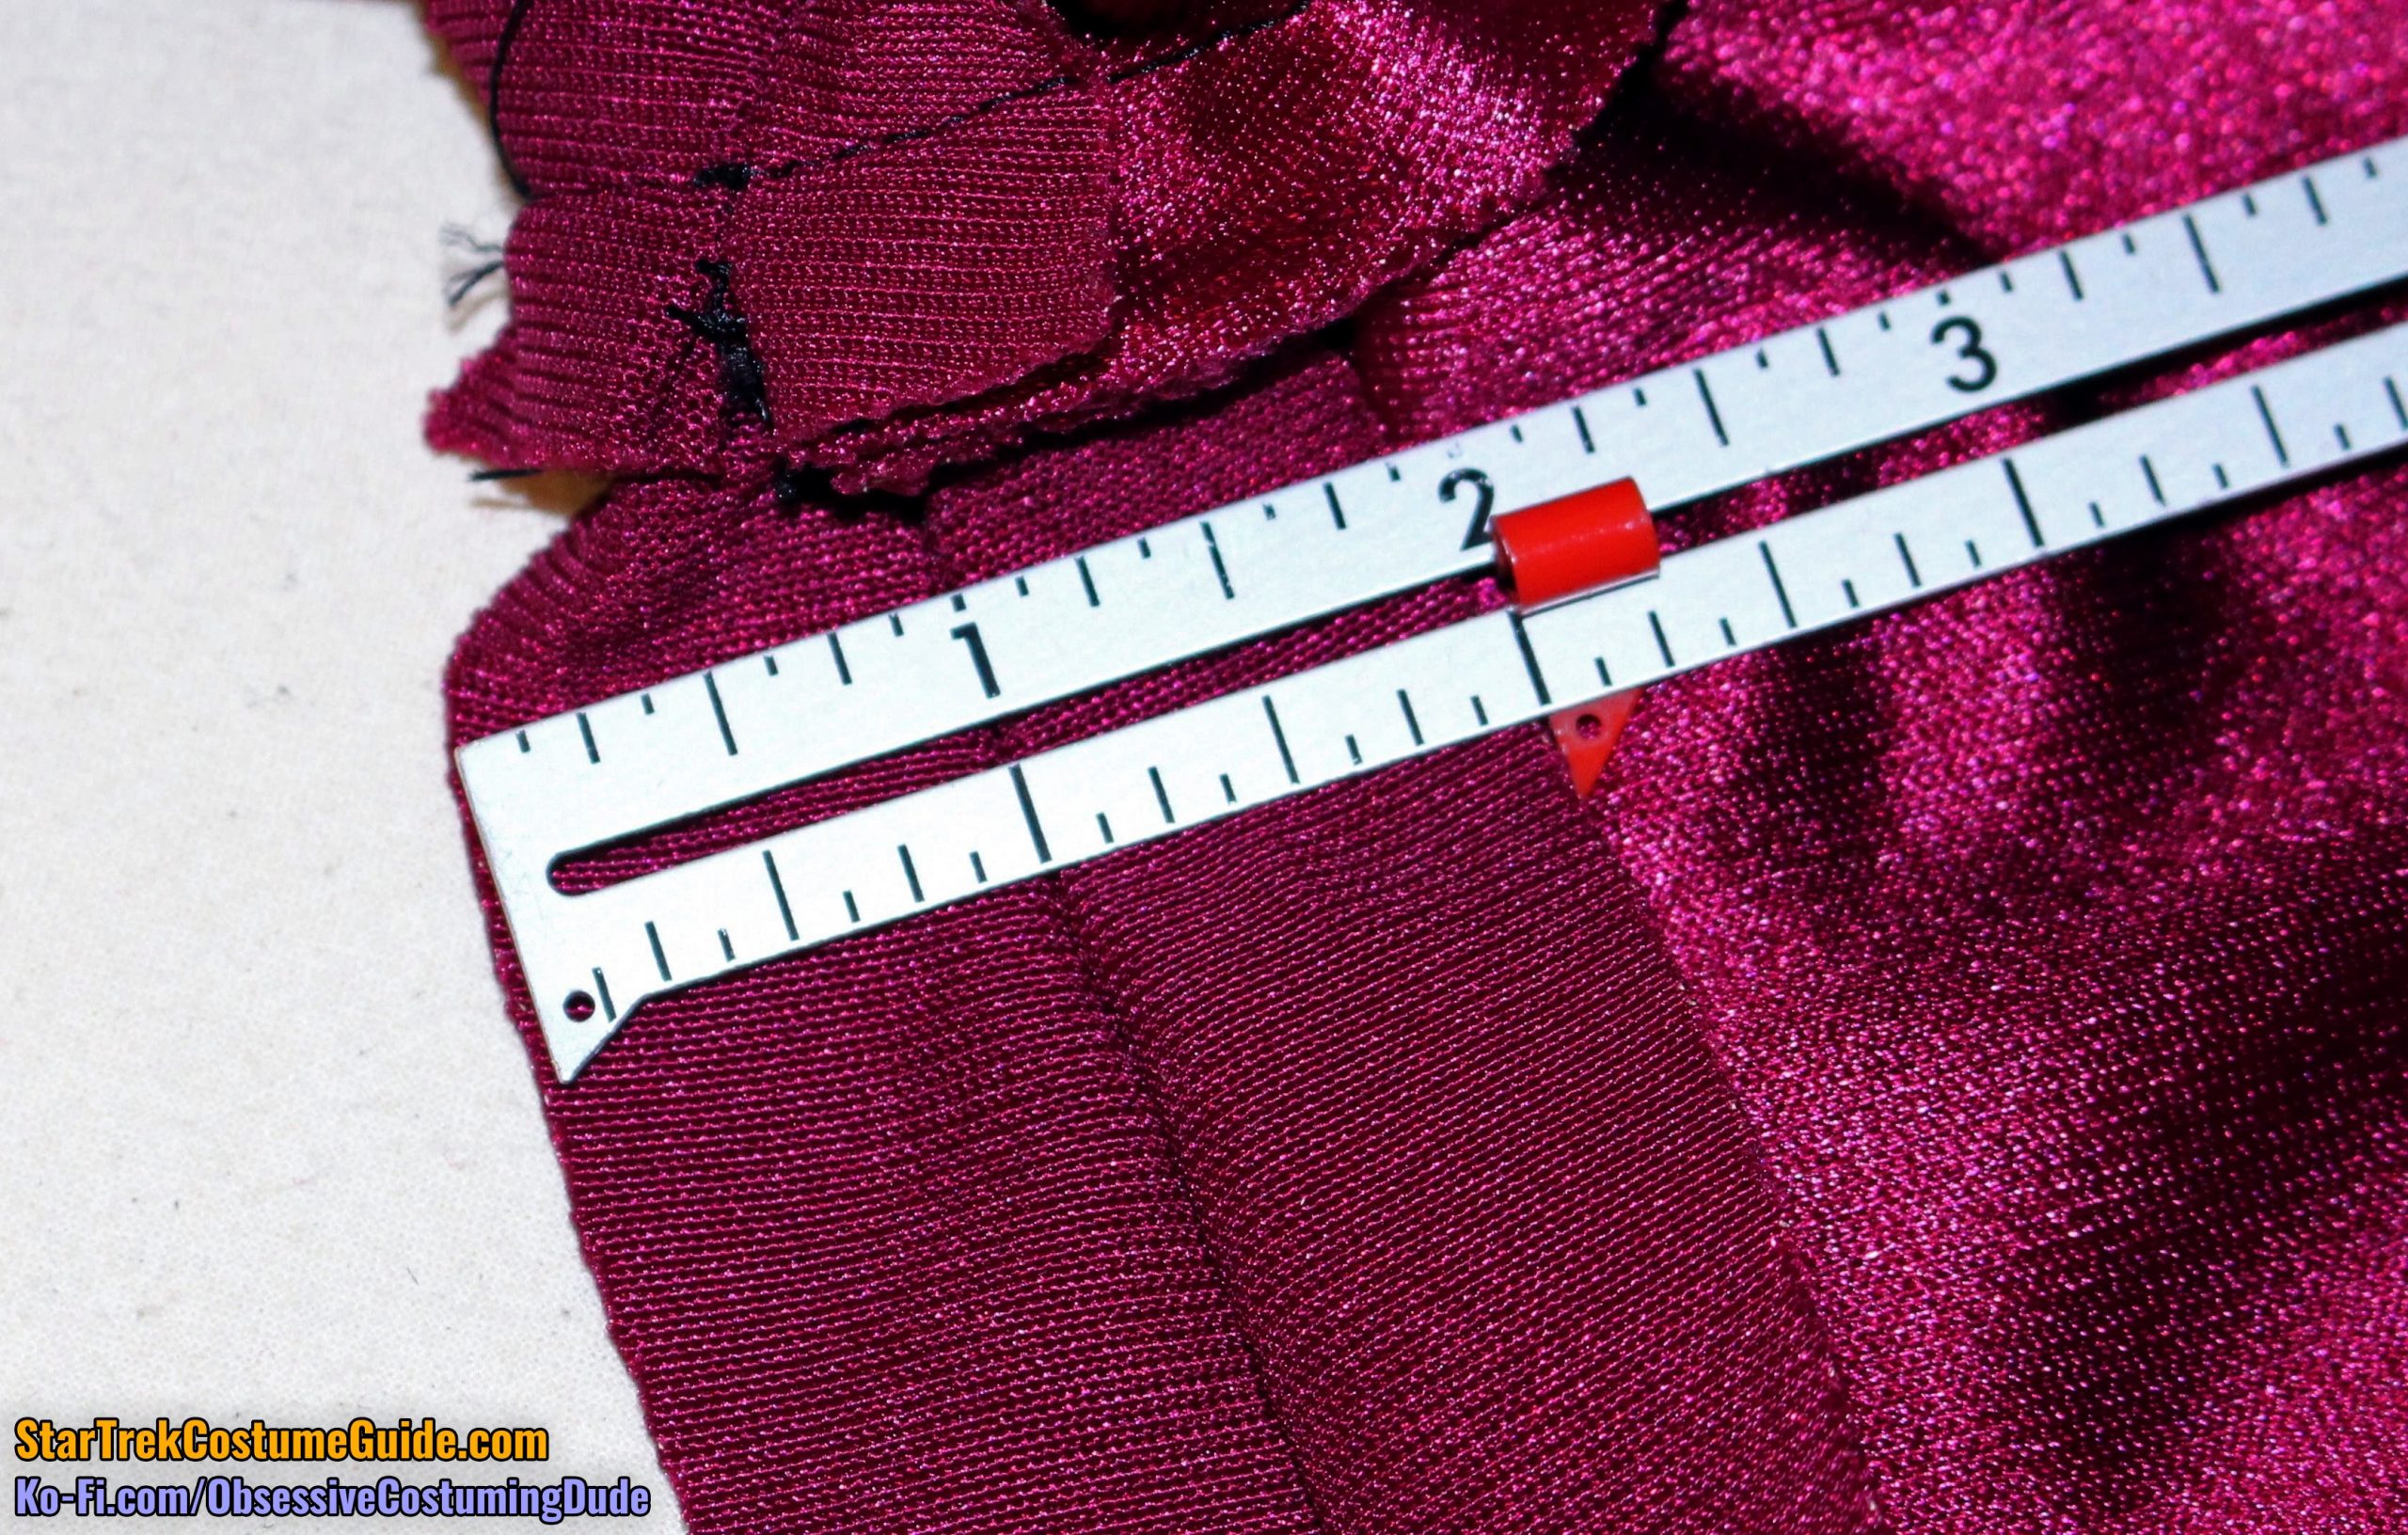
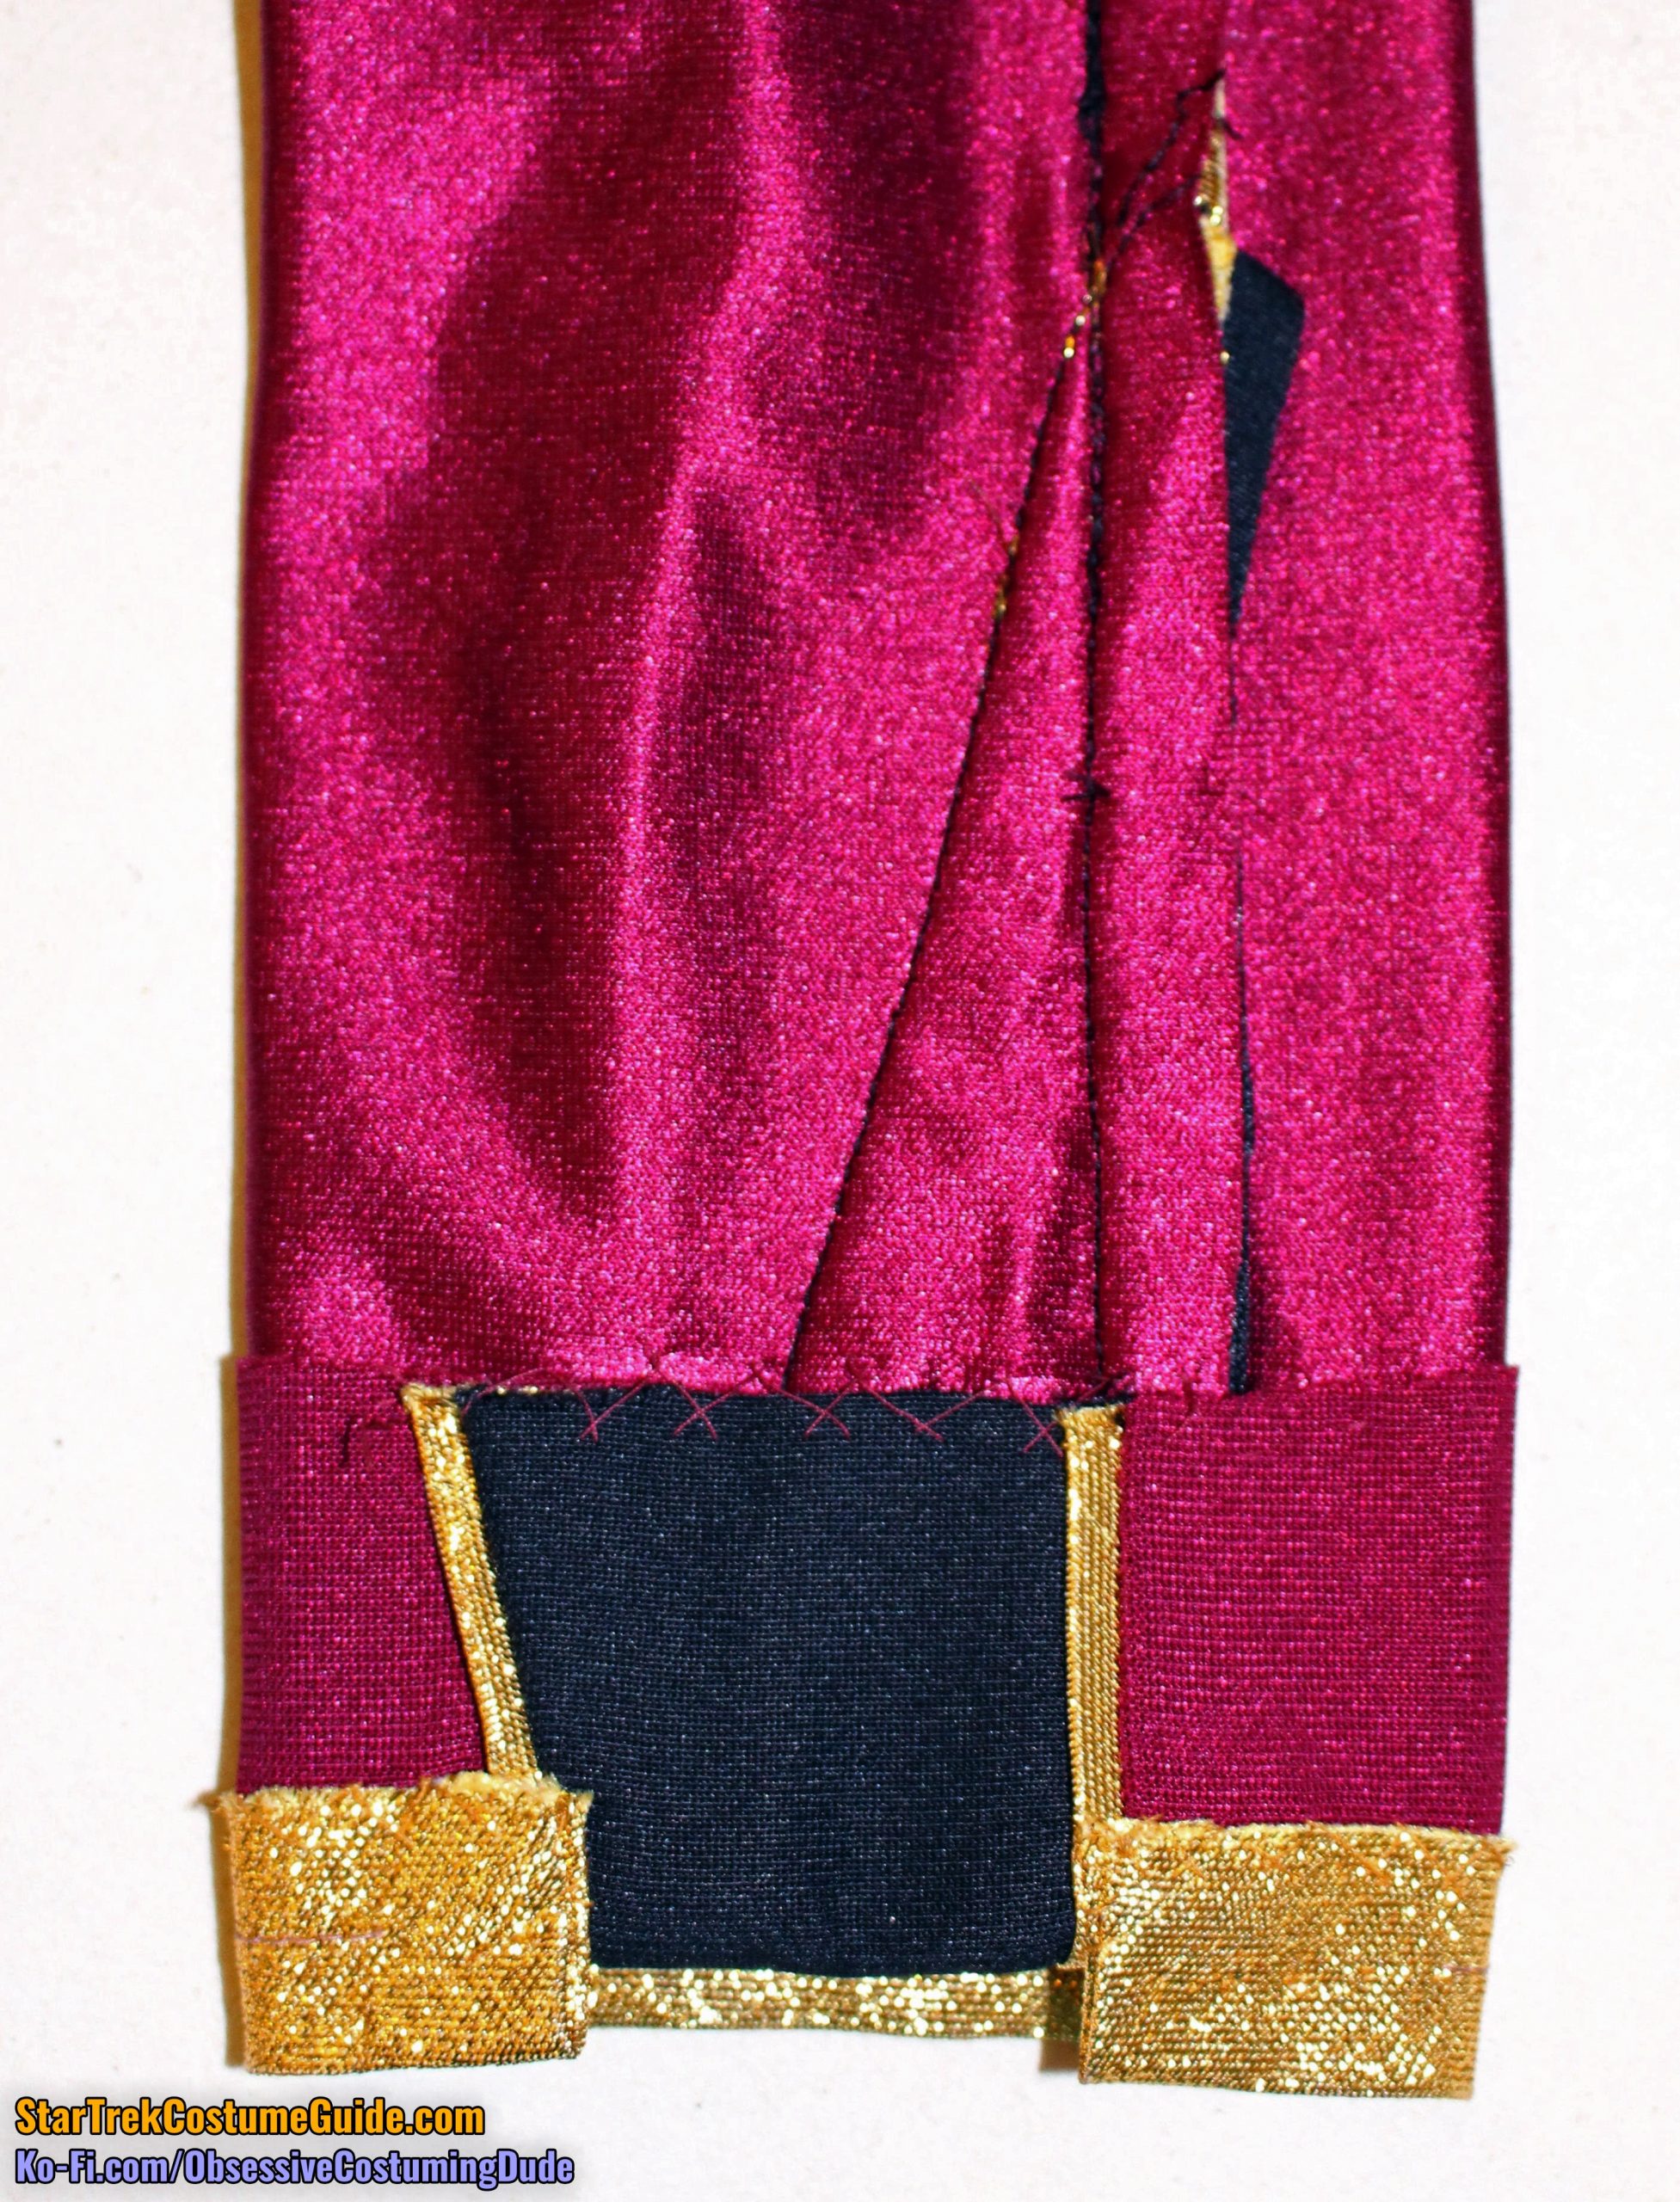
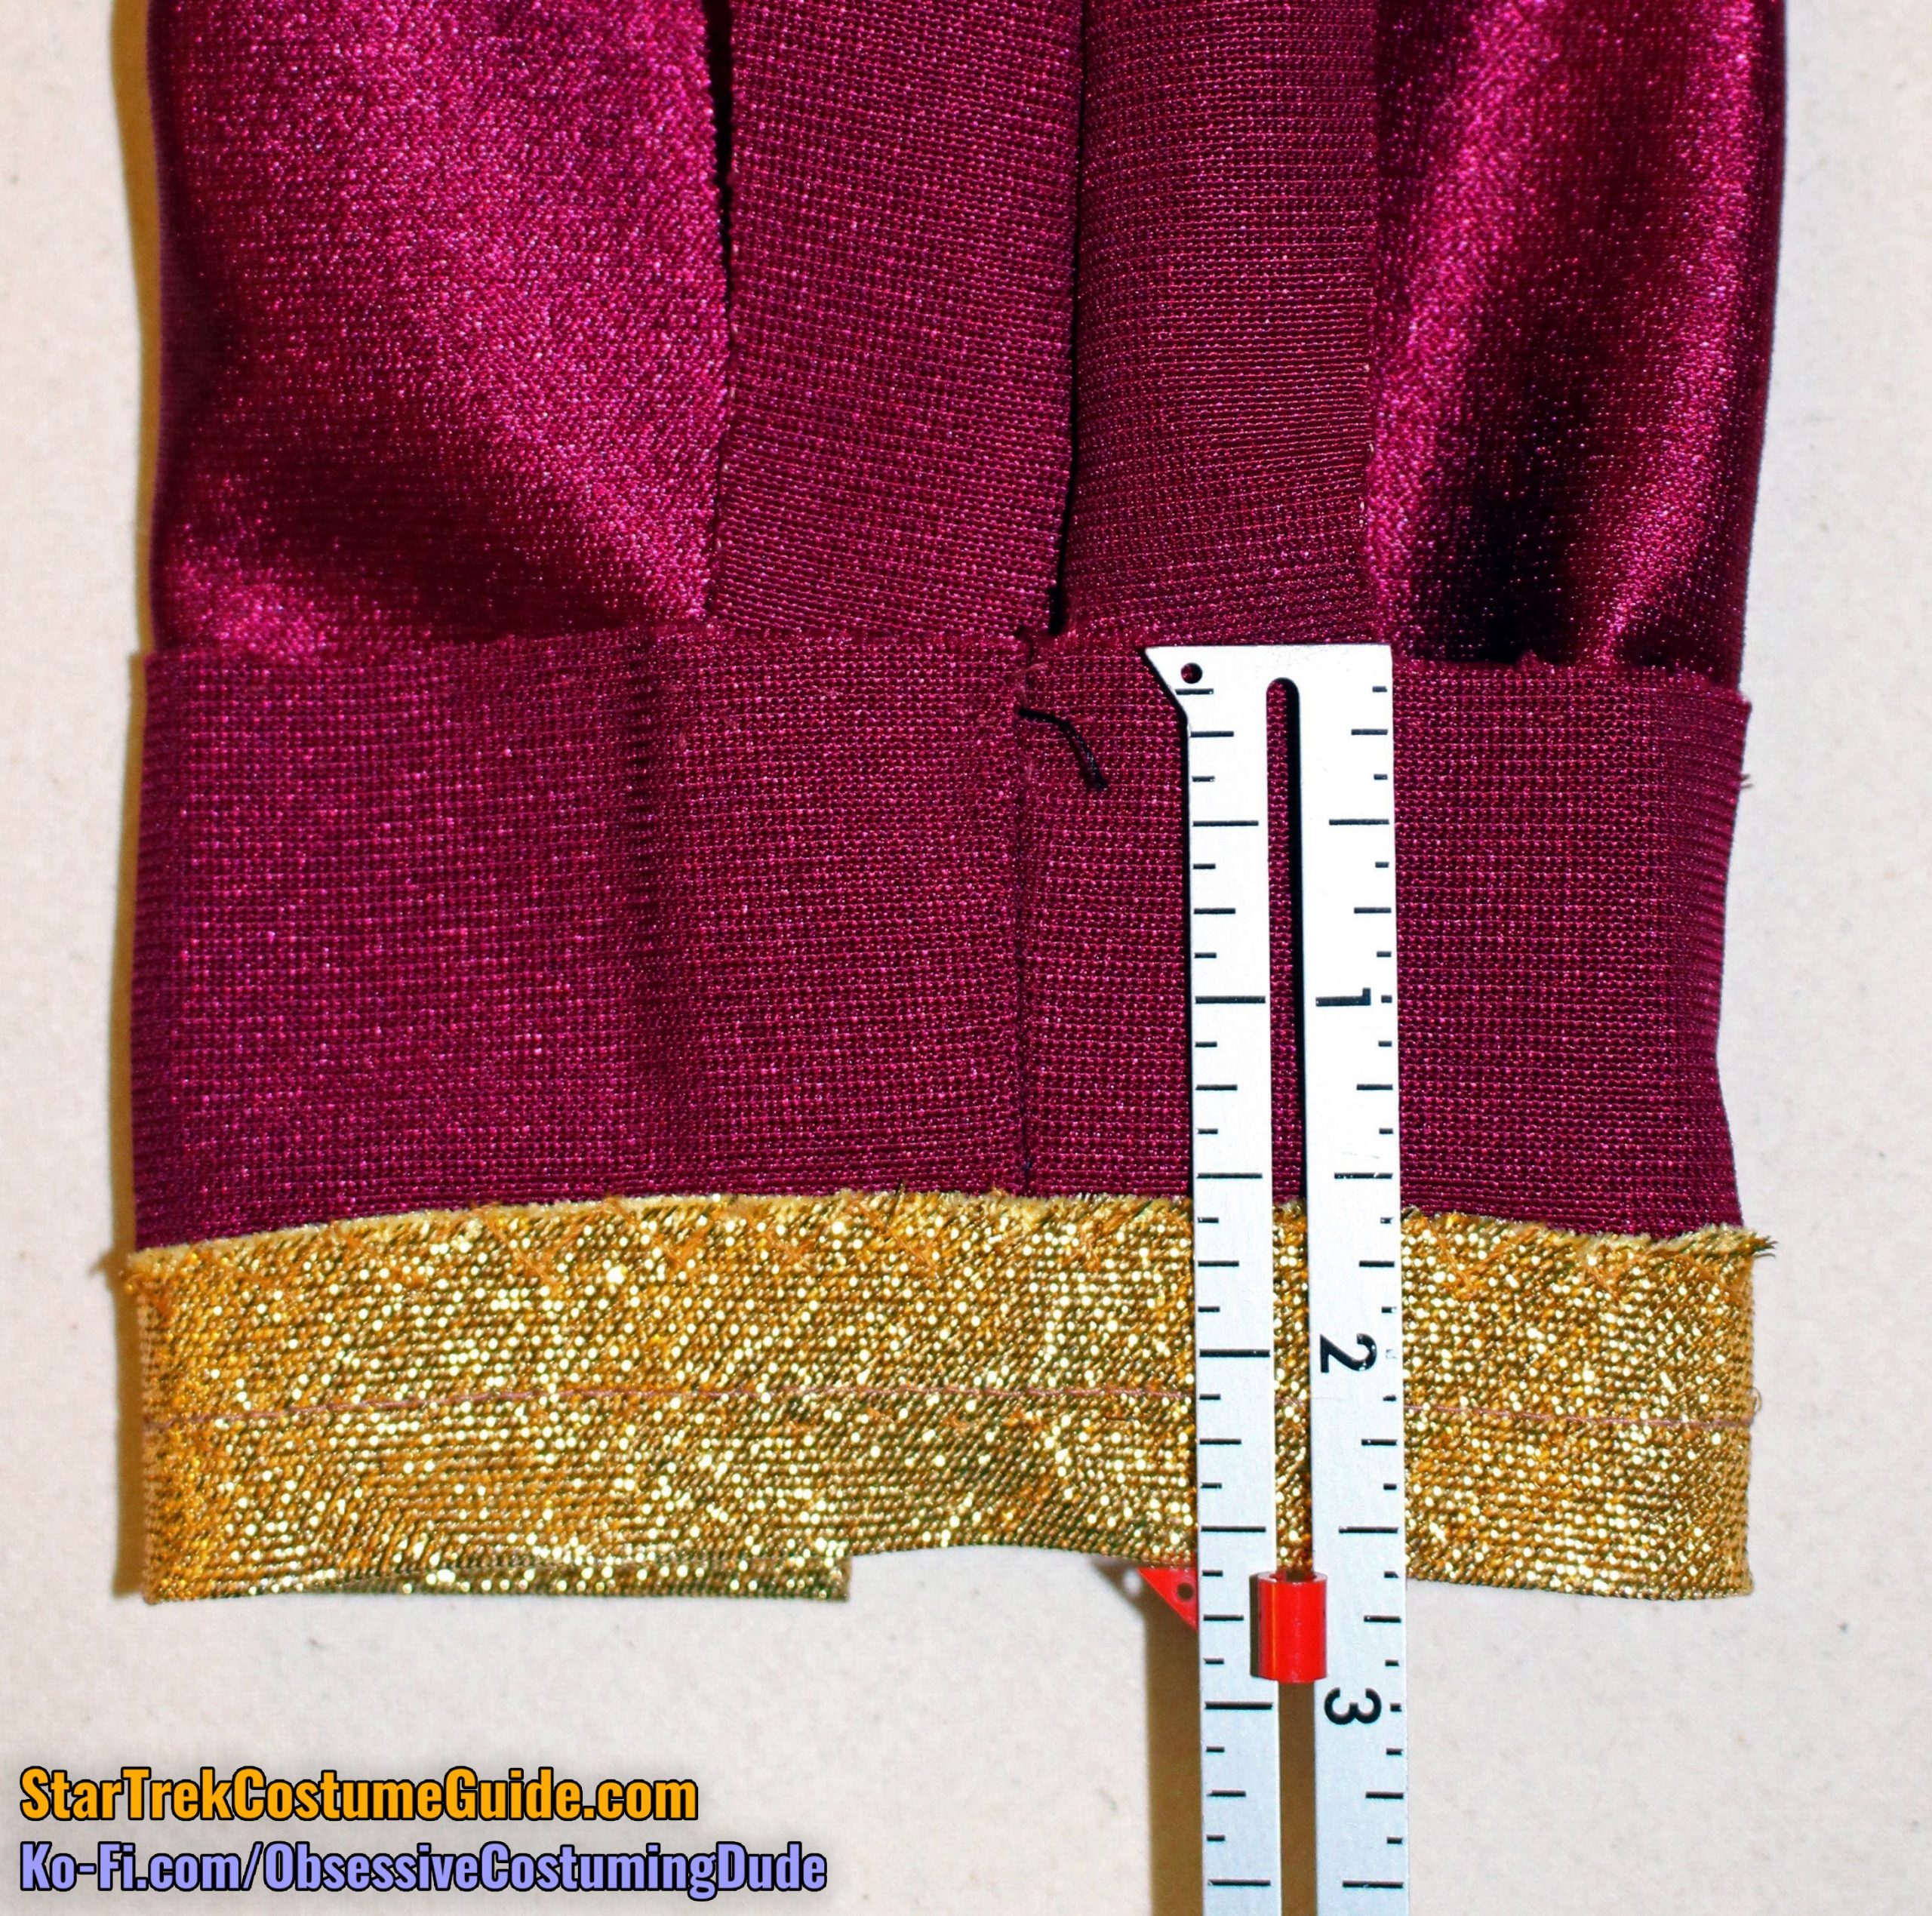
The right lower sleeve insert was 6 ¾” tall on the front (straight) edge, 7” tall along the back (diagonal) edge, and 2” wide across the bottom.
The left lower sleeve insert was about ¼” shorter – 6 ½” tall on the front (straight edge) and 6 ¾” tall along the back (diagonal) edge, but also 2” wide across the bottom.
The trim at the bottom of the sleeve was ⅜” wide, approximately twice as wide as on the rest of the garment.
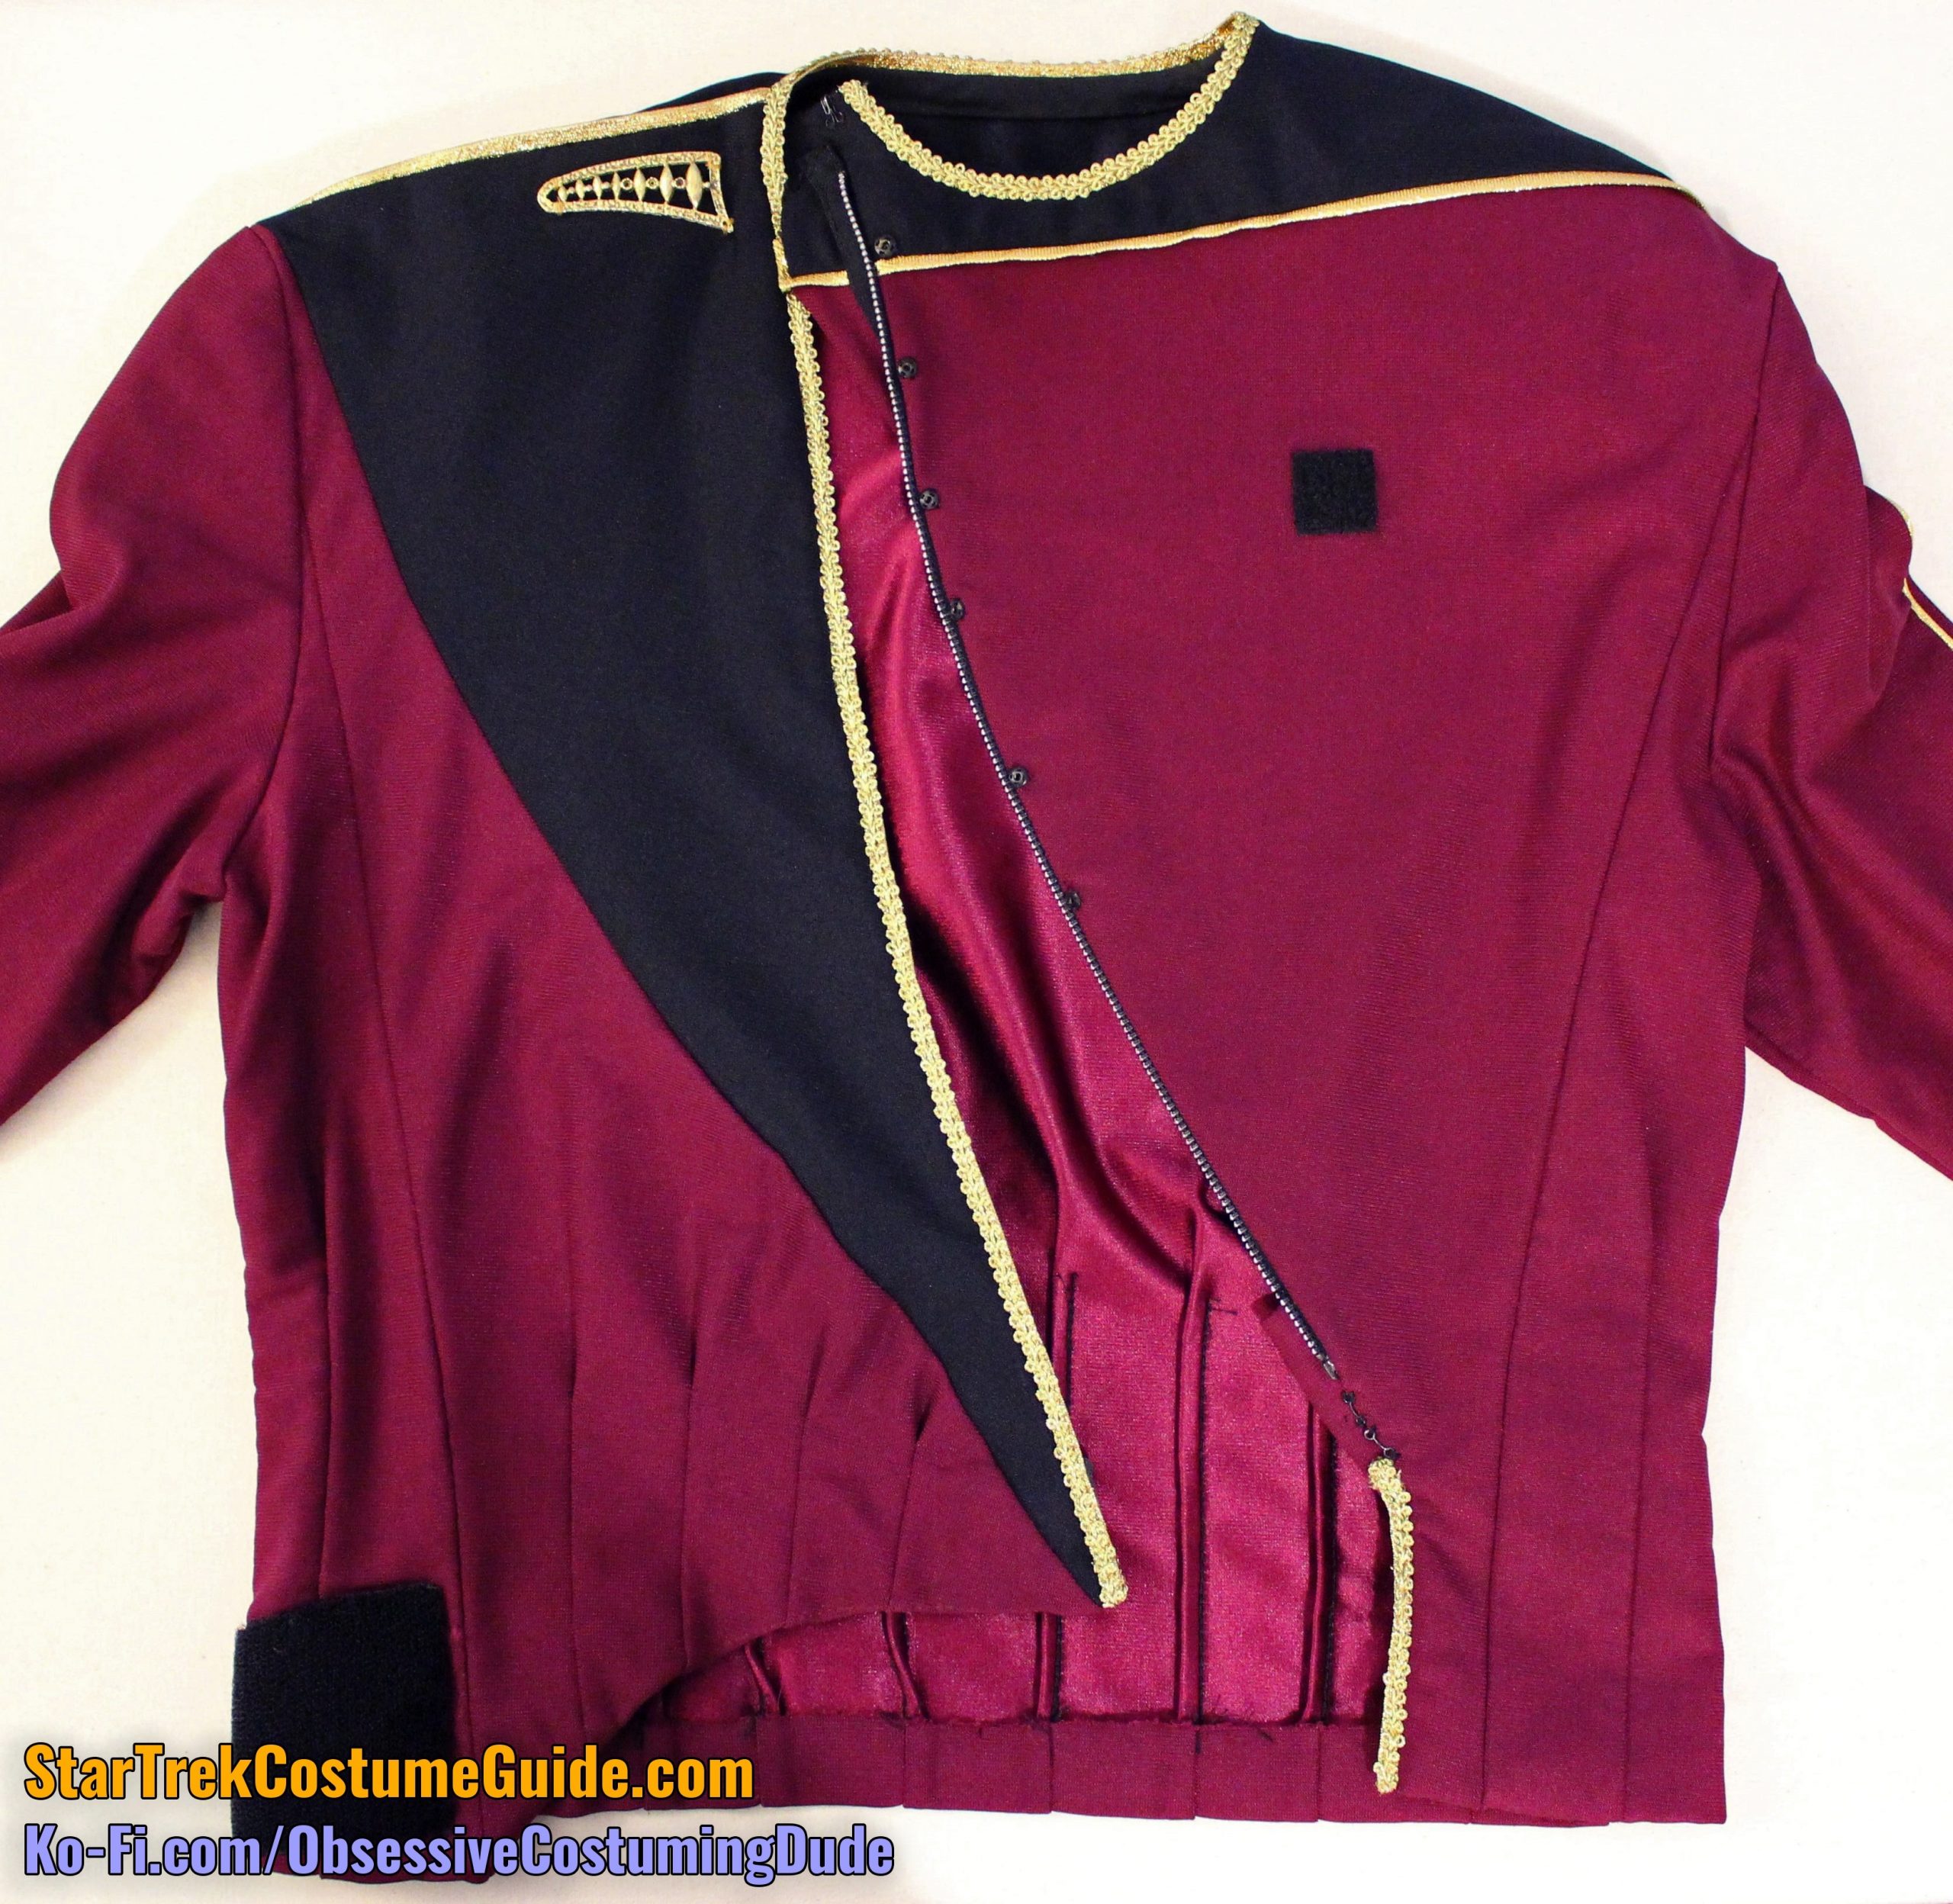
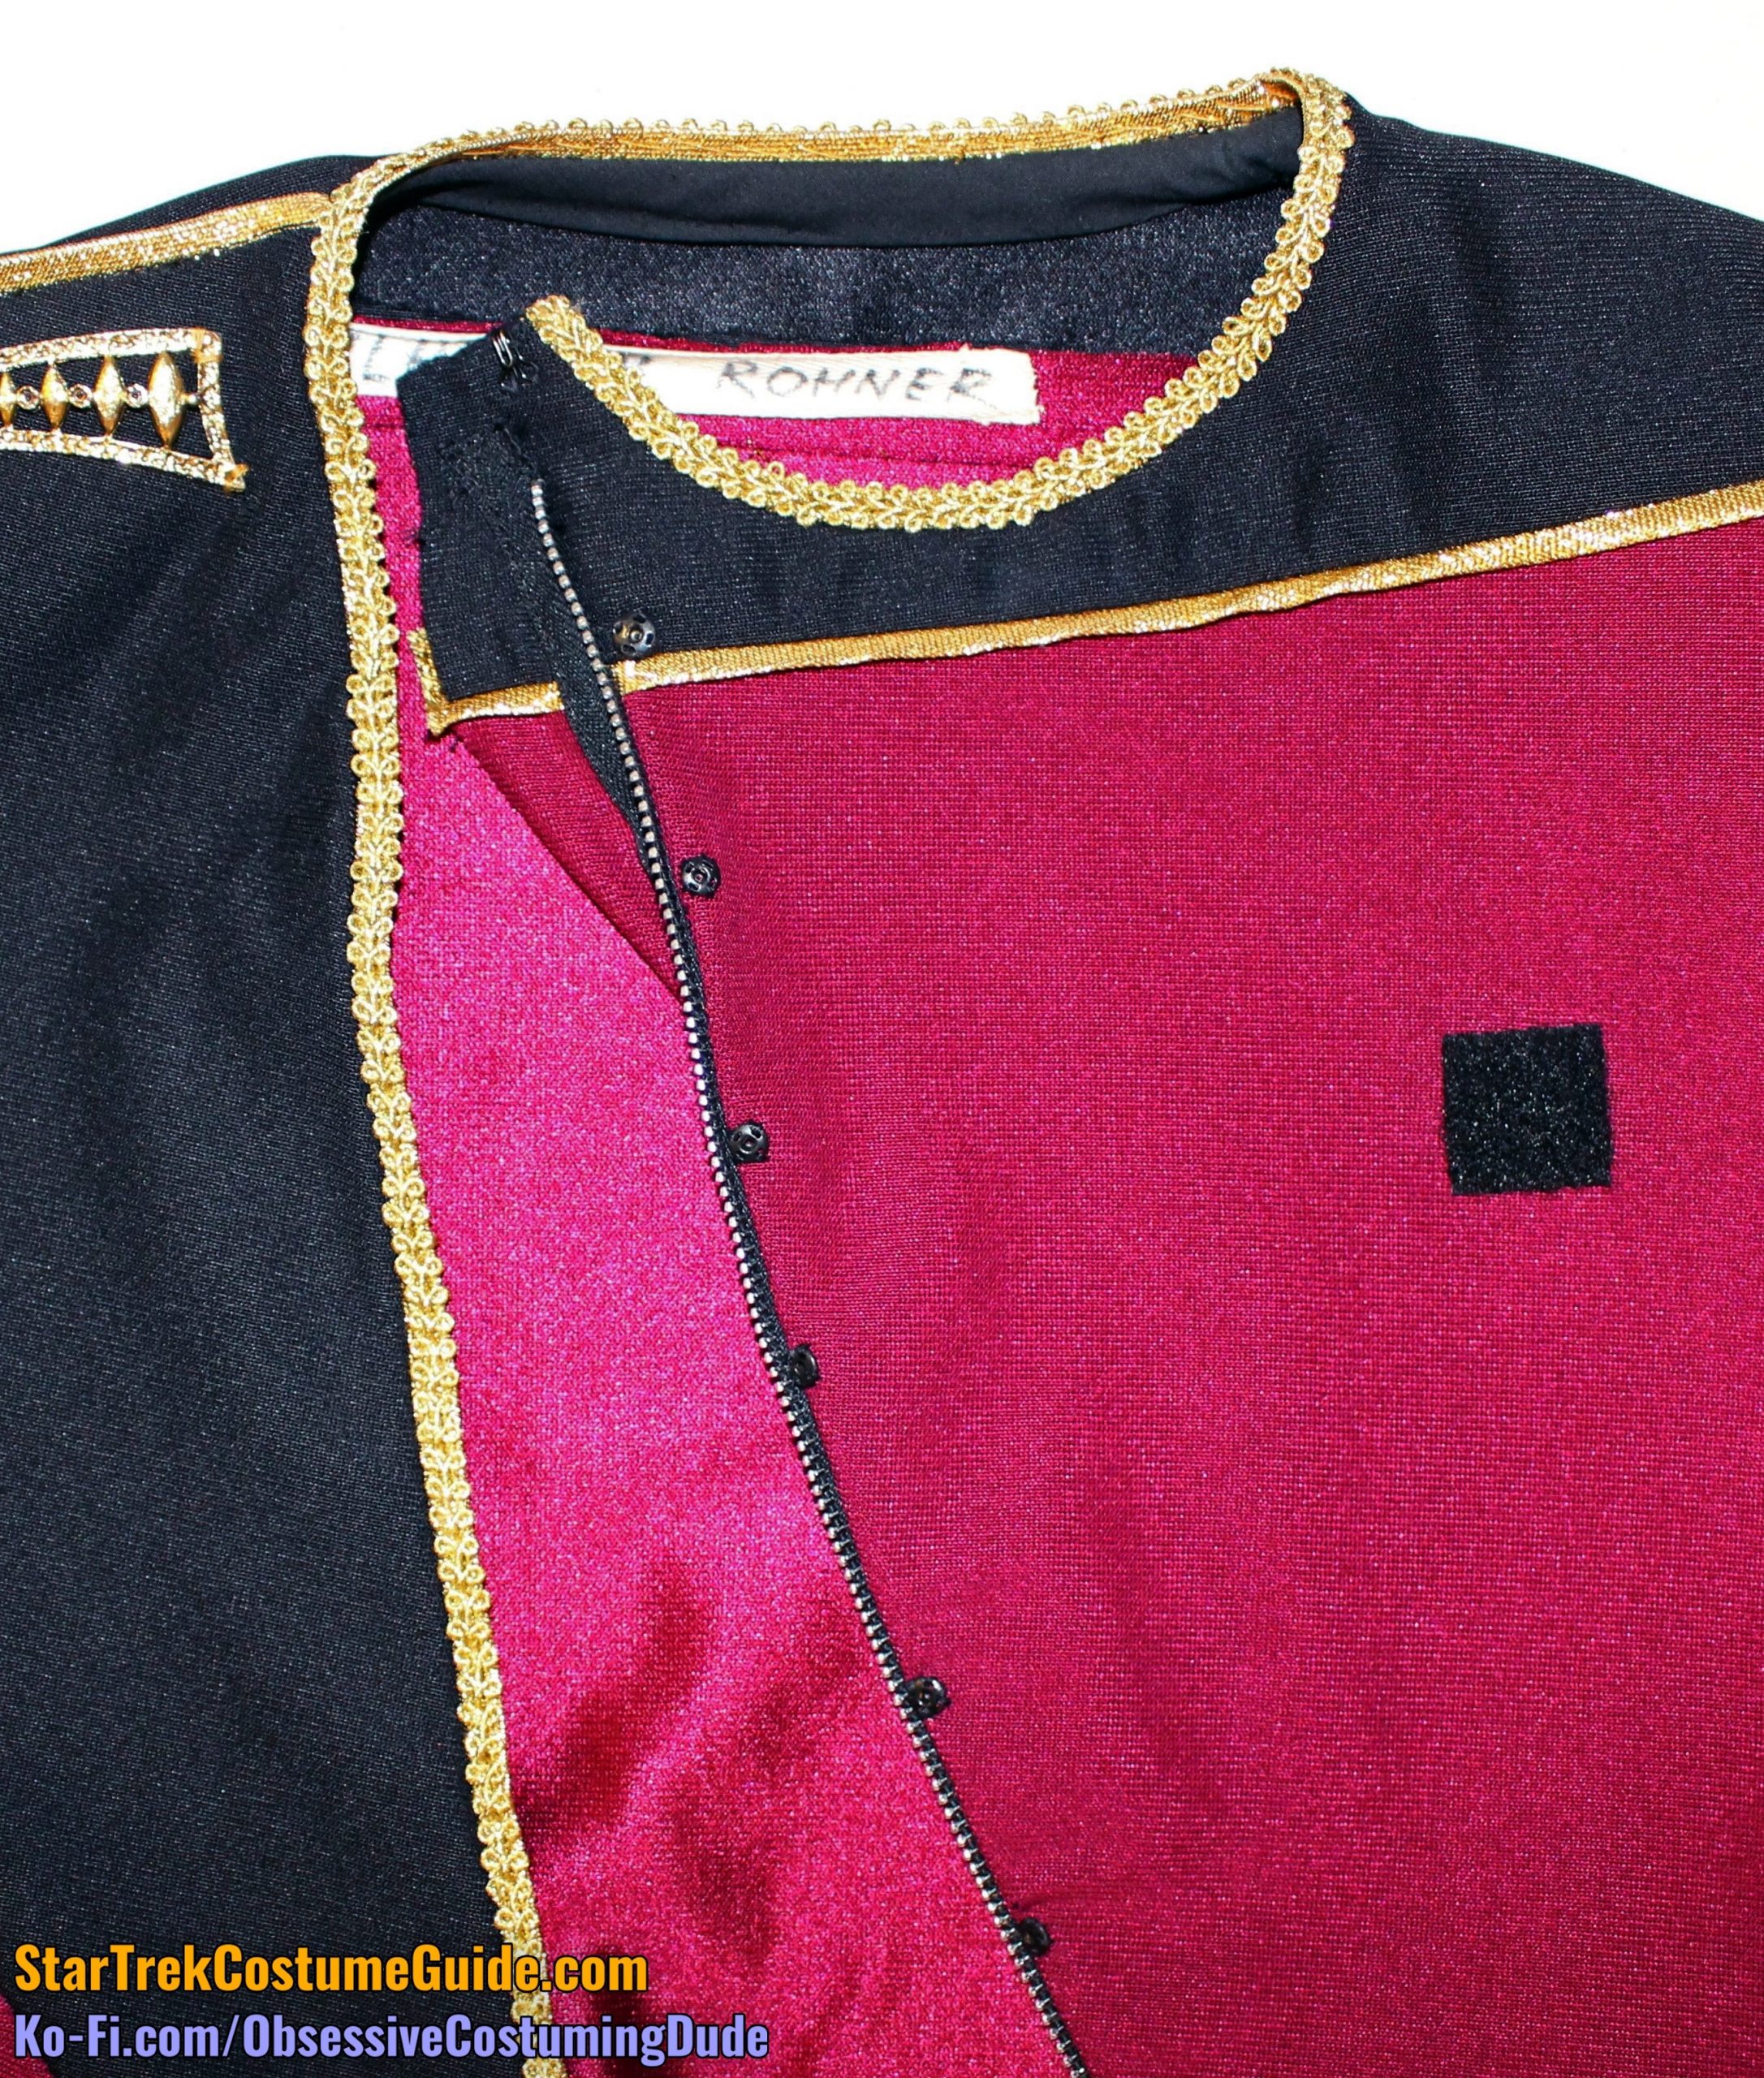
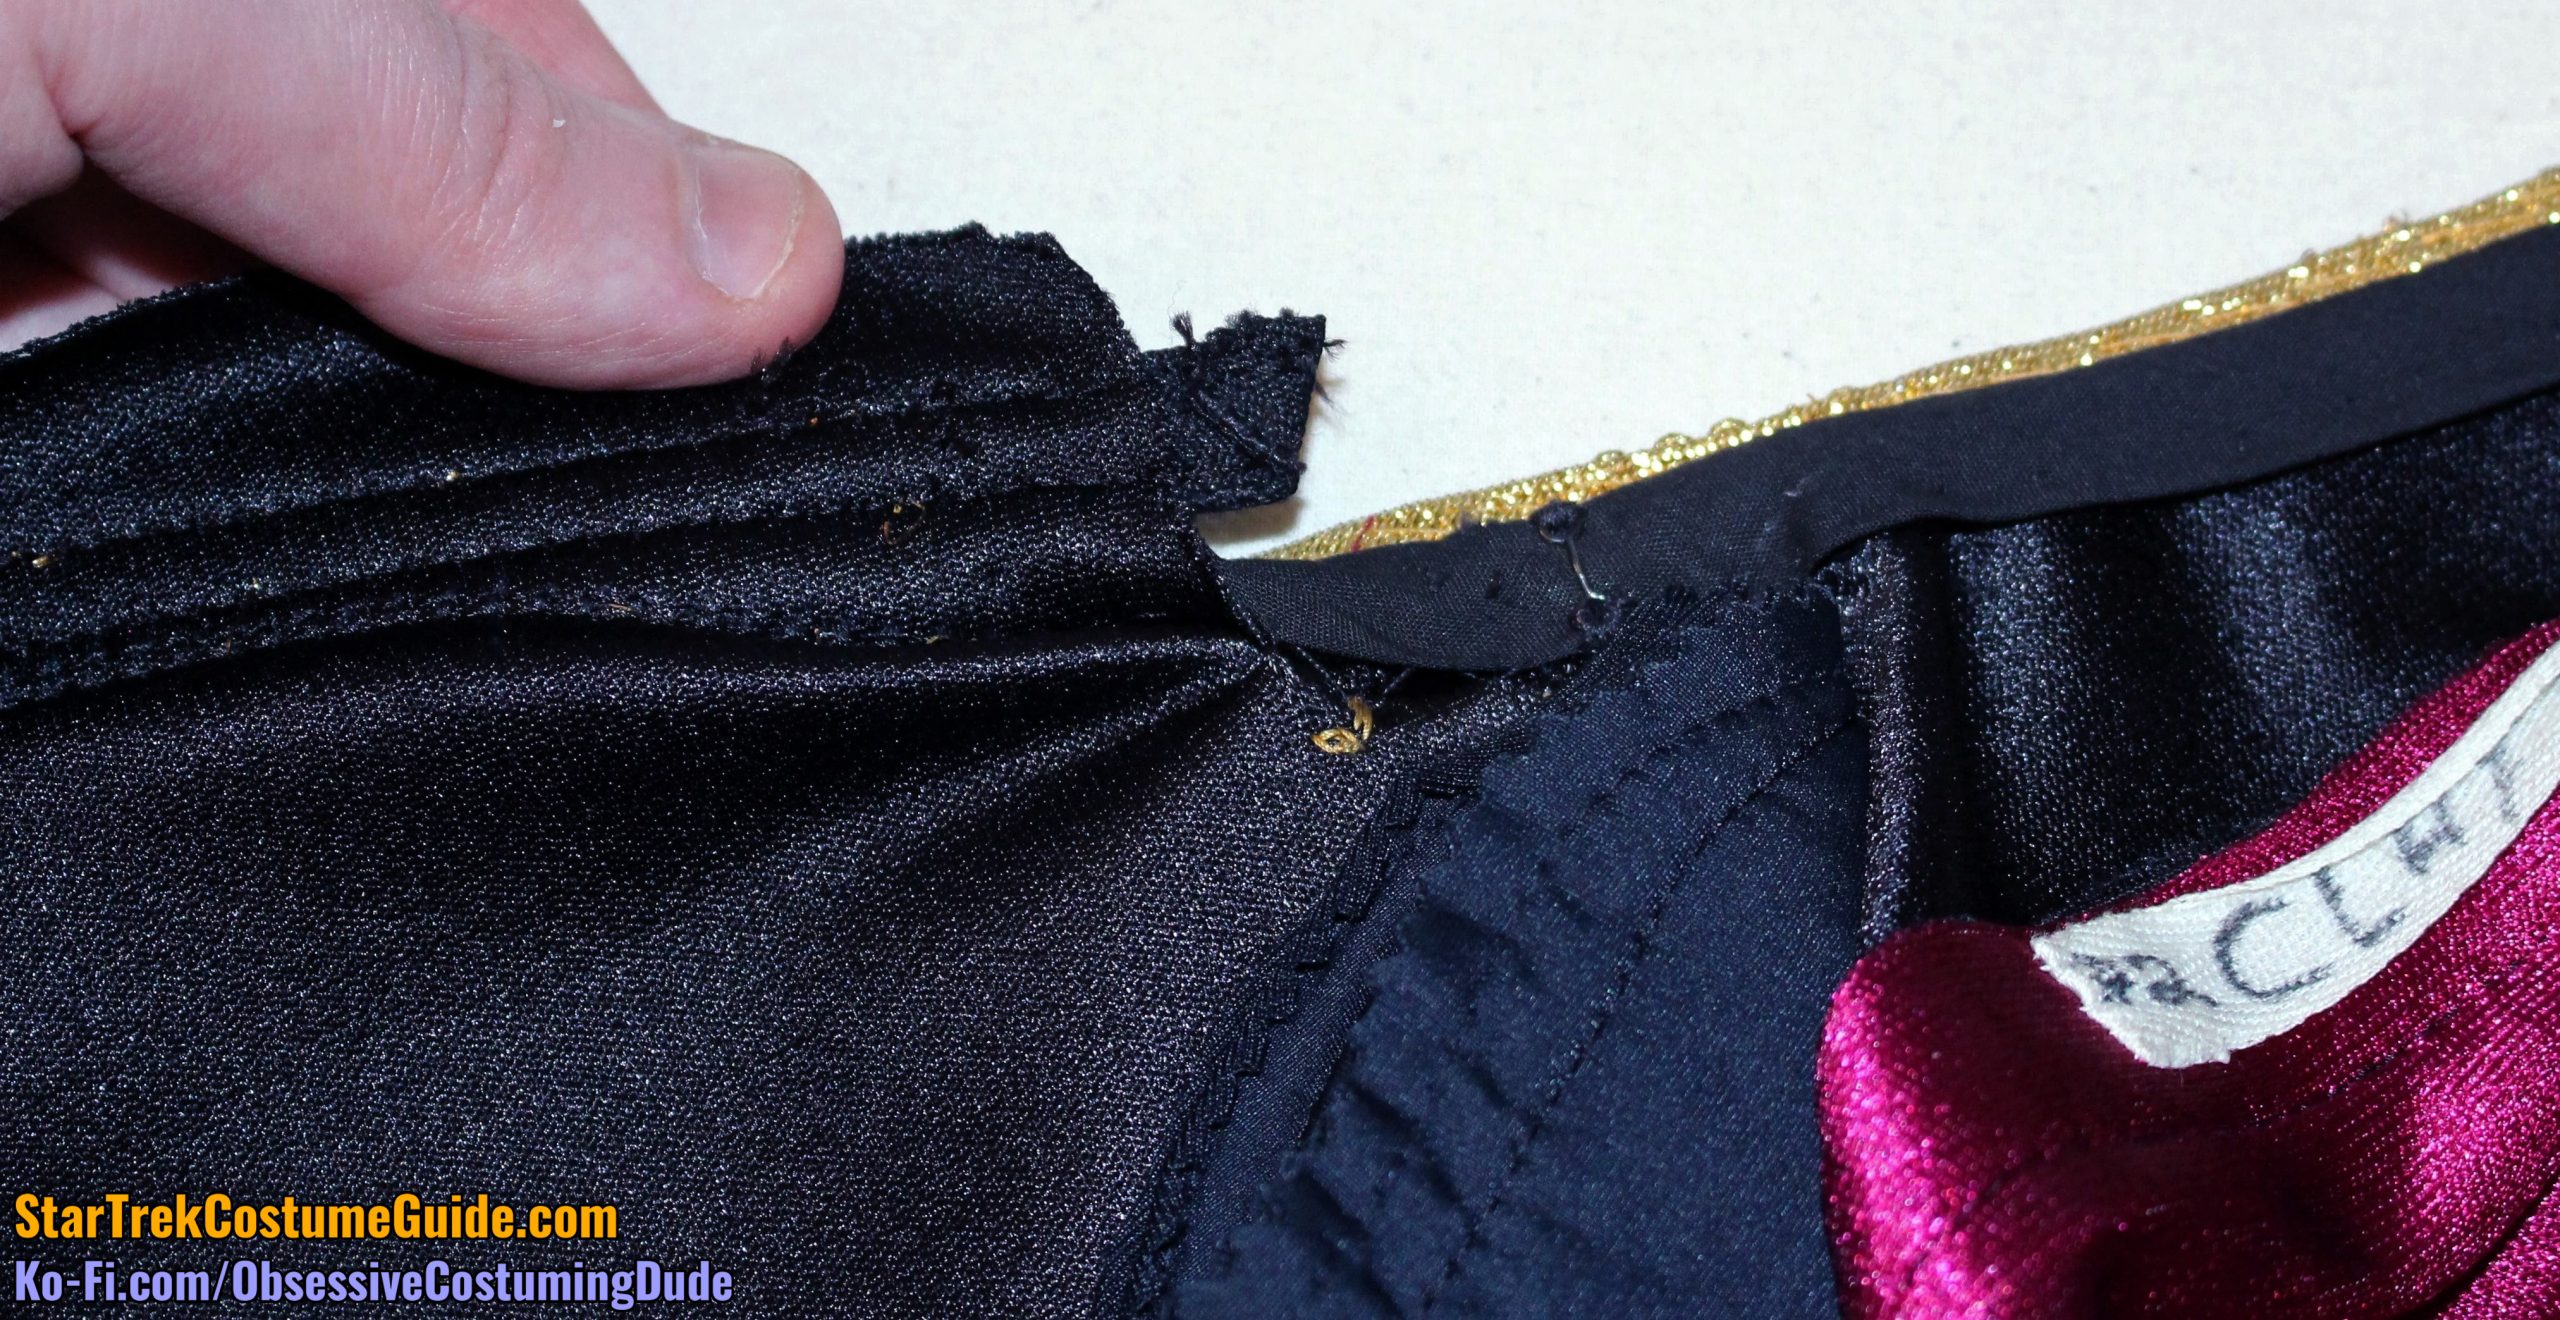
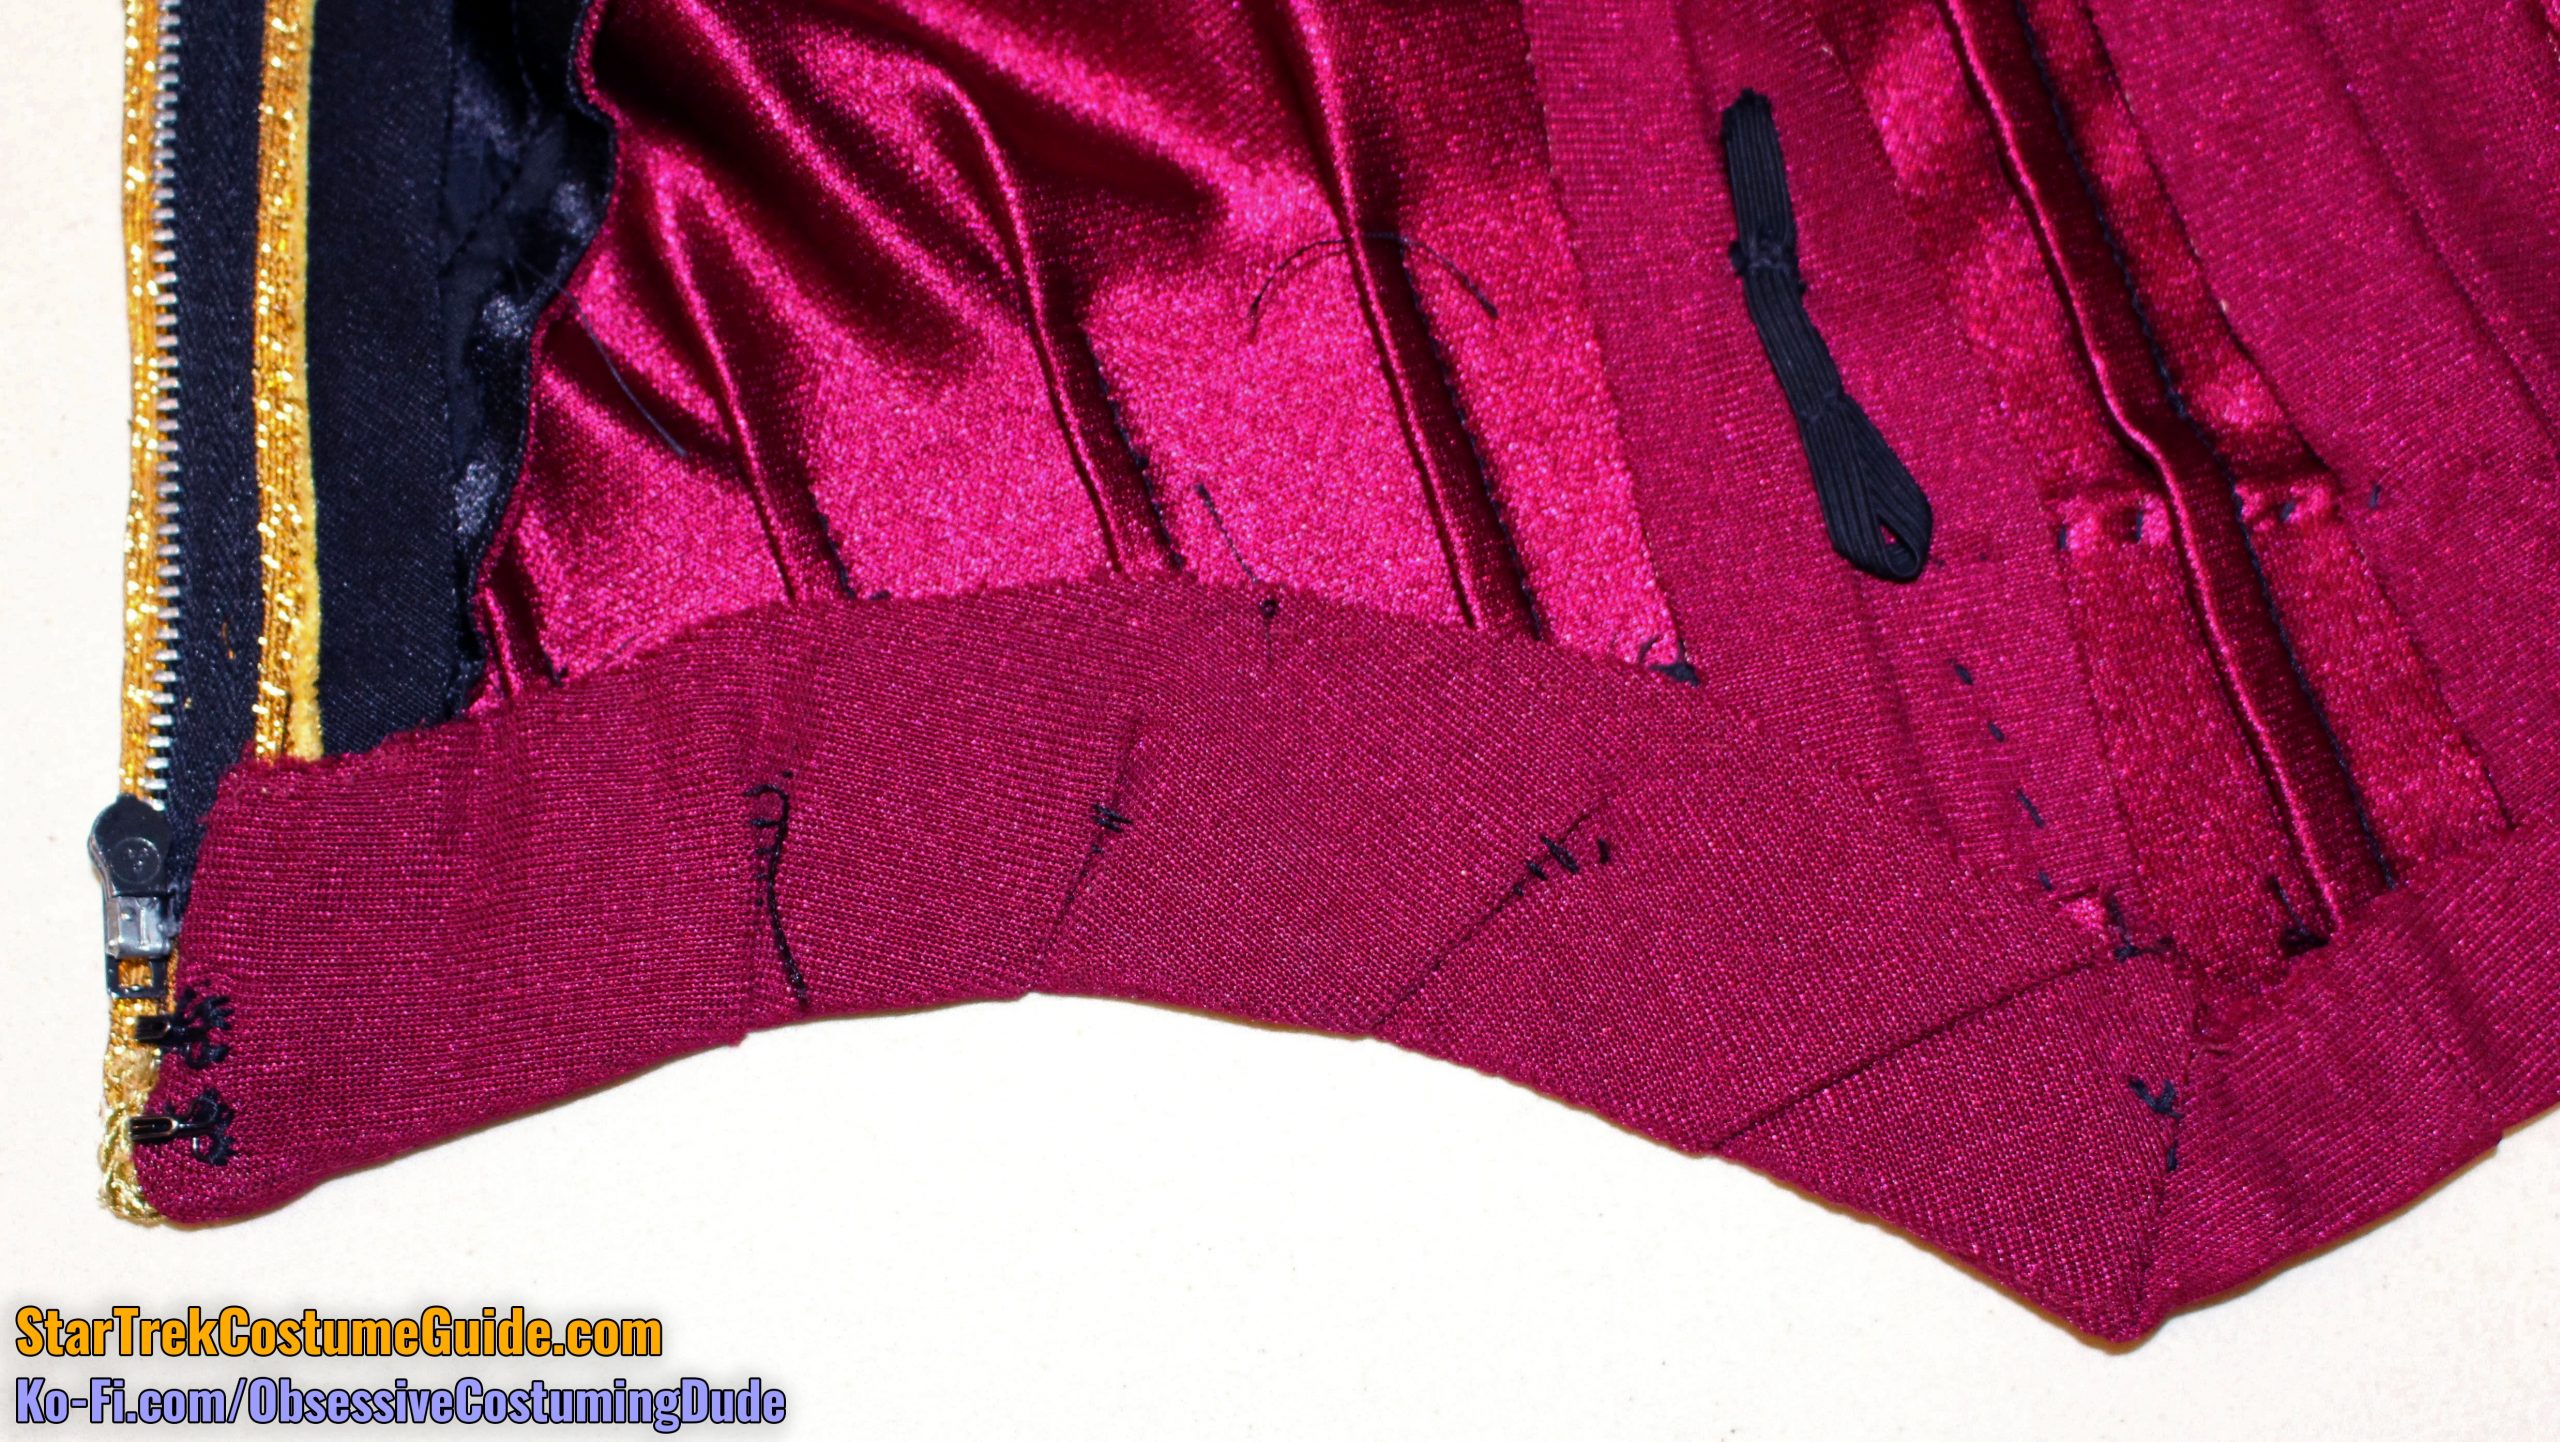
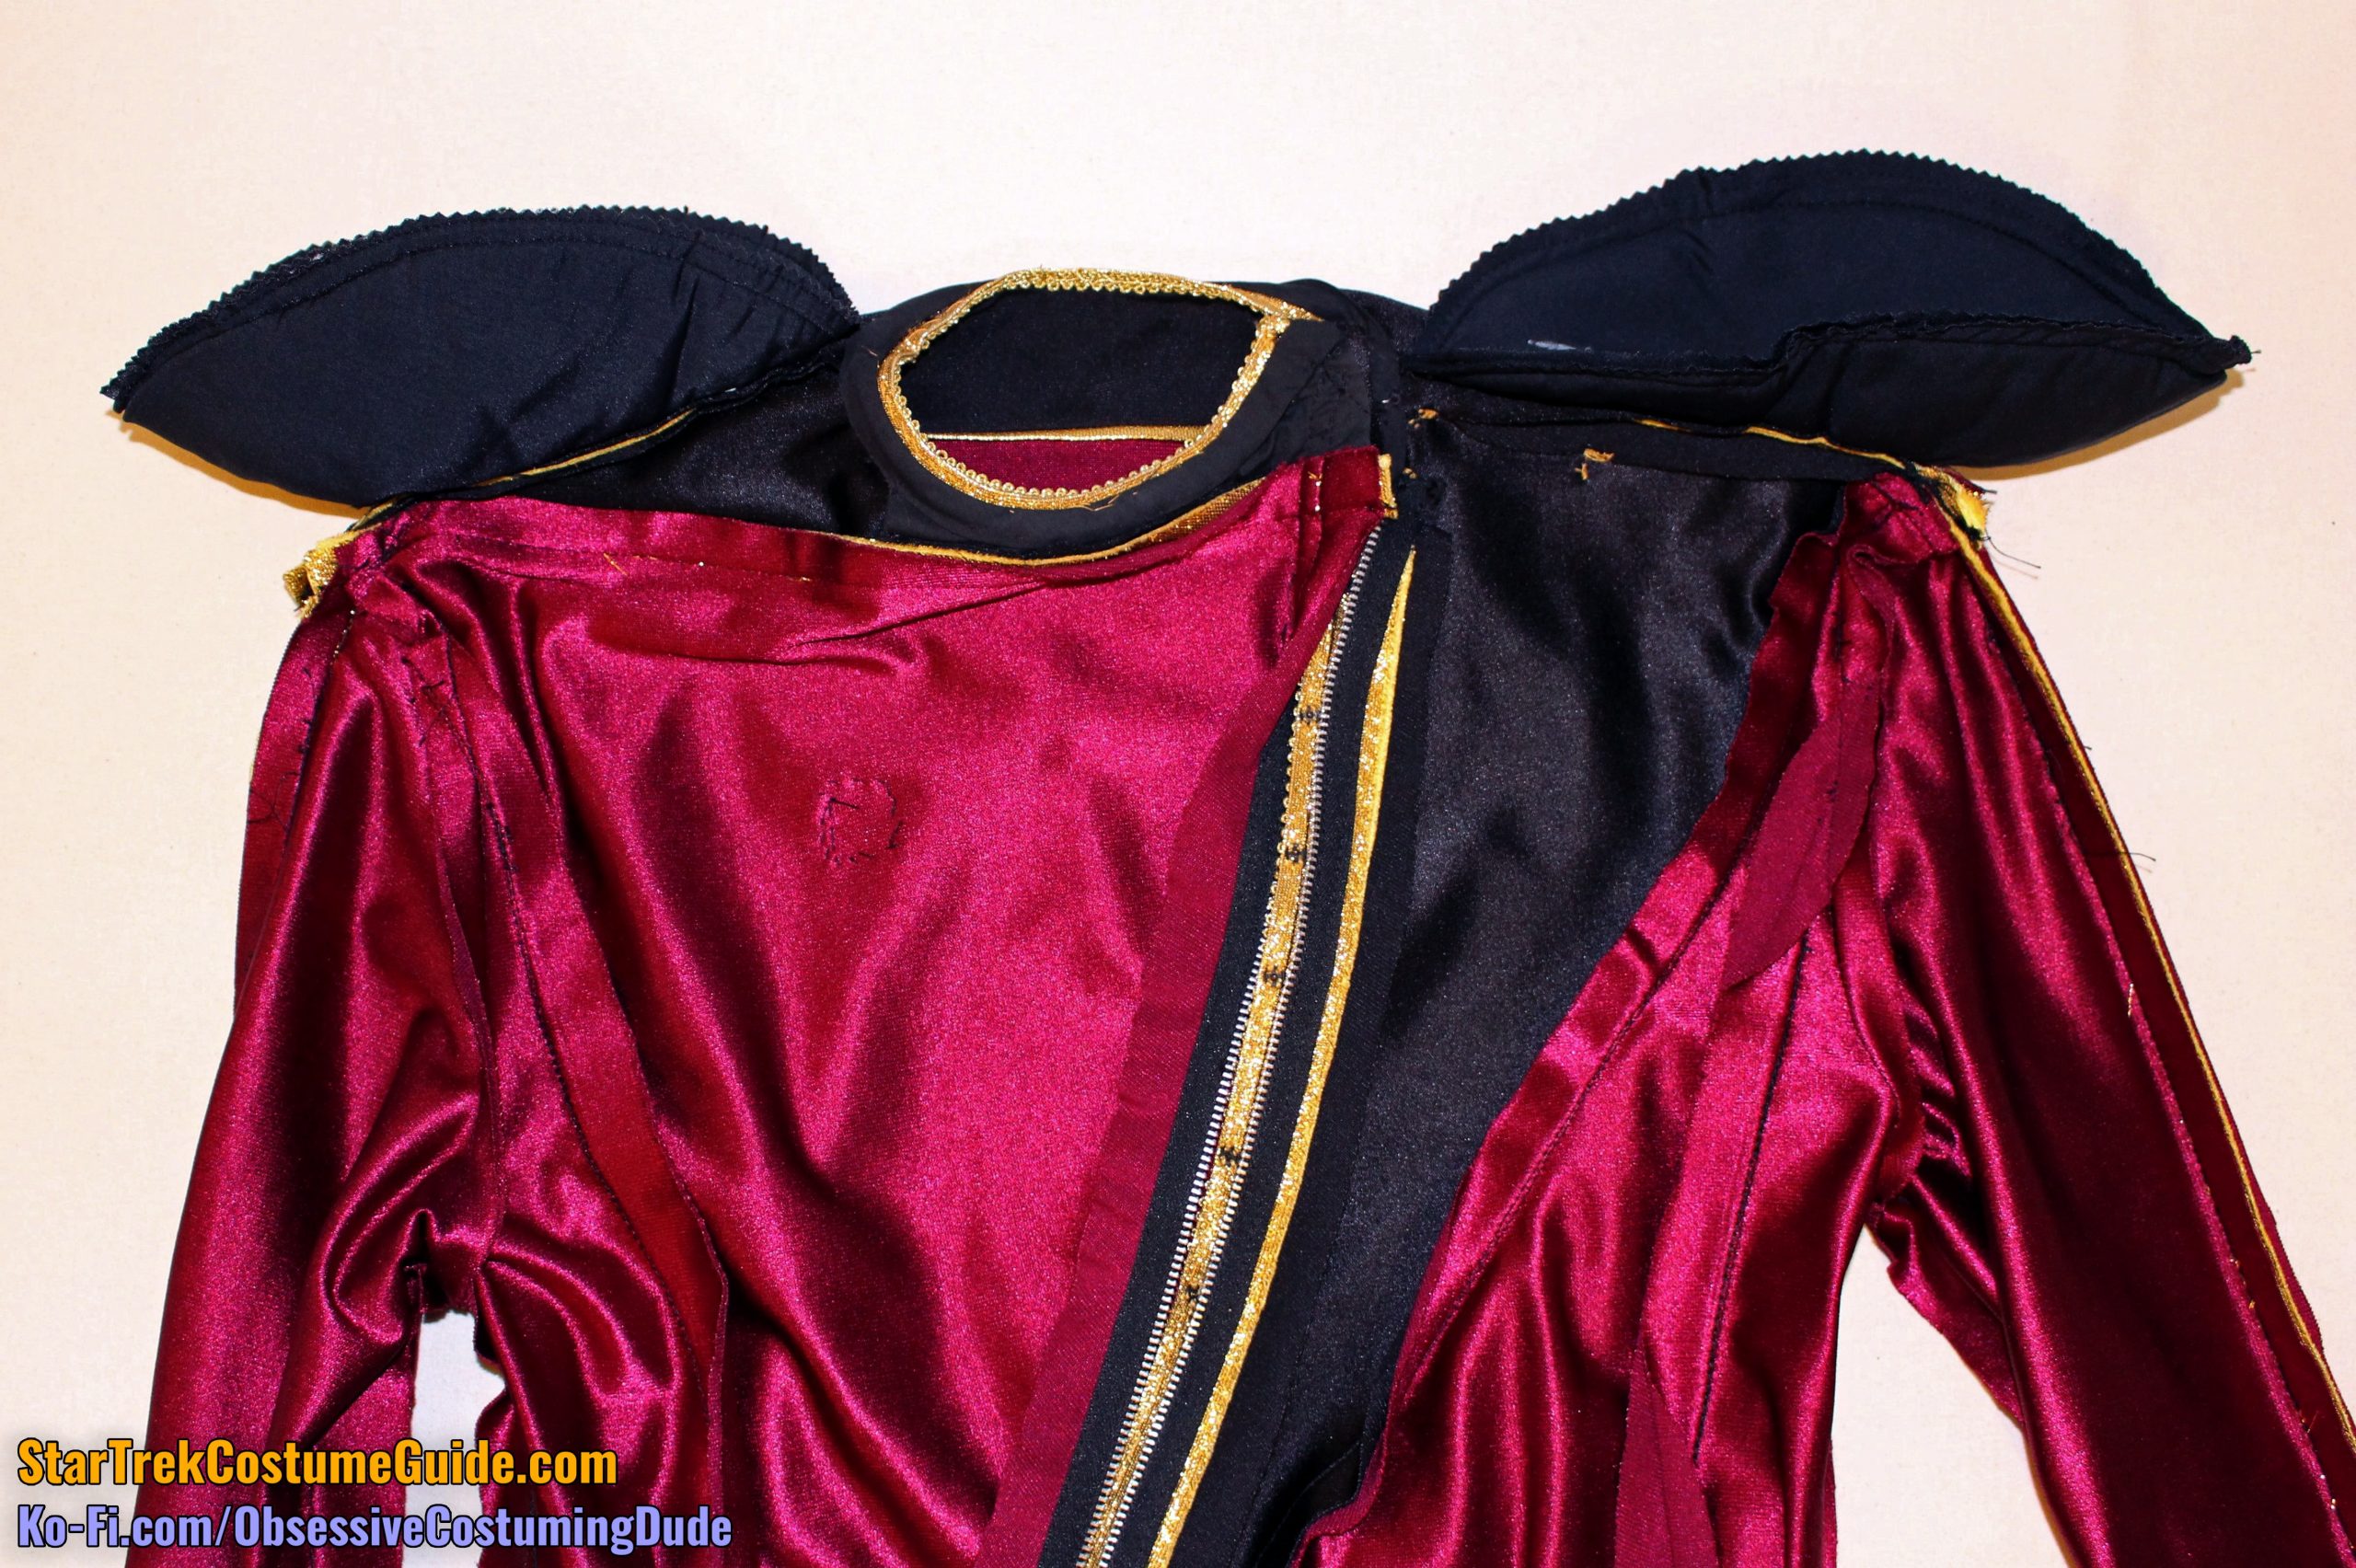
CLOSURE SYSTEM
Before we move on to the jacket’s interior construction, I’ll walk you through the unfastening process.
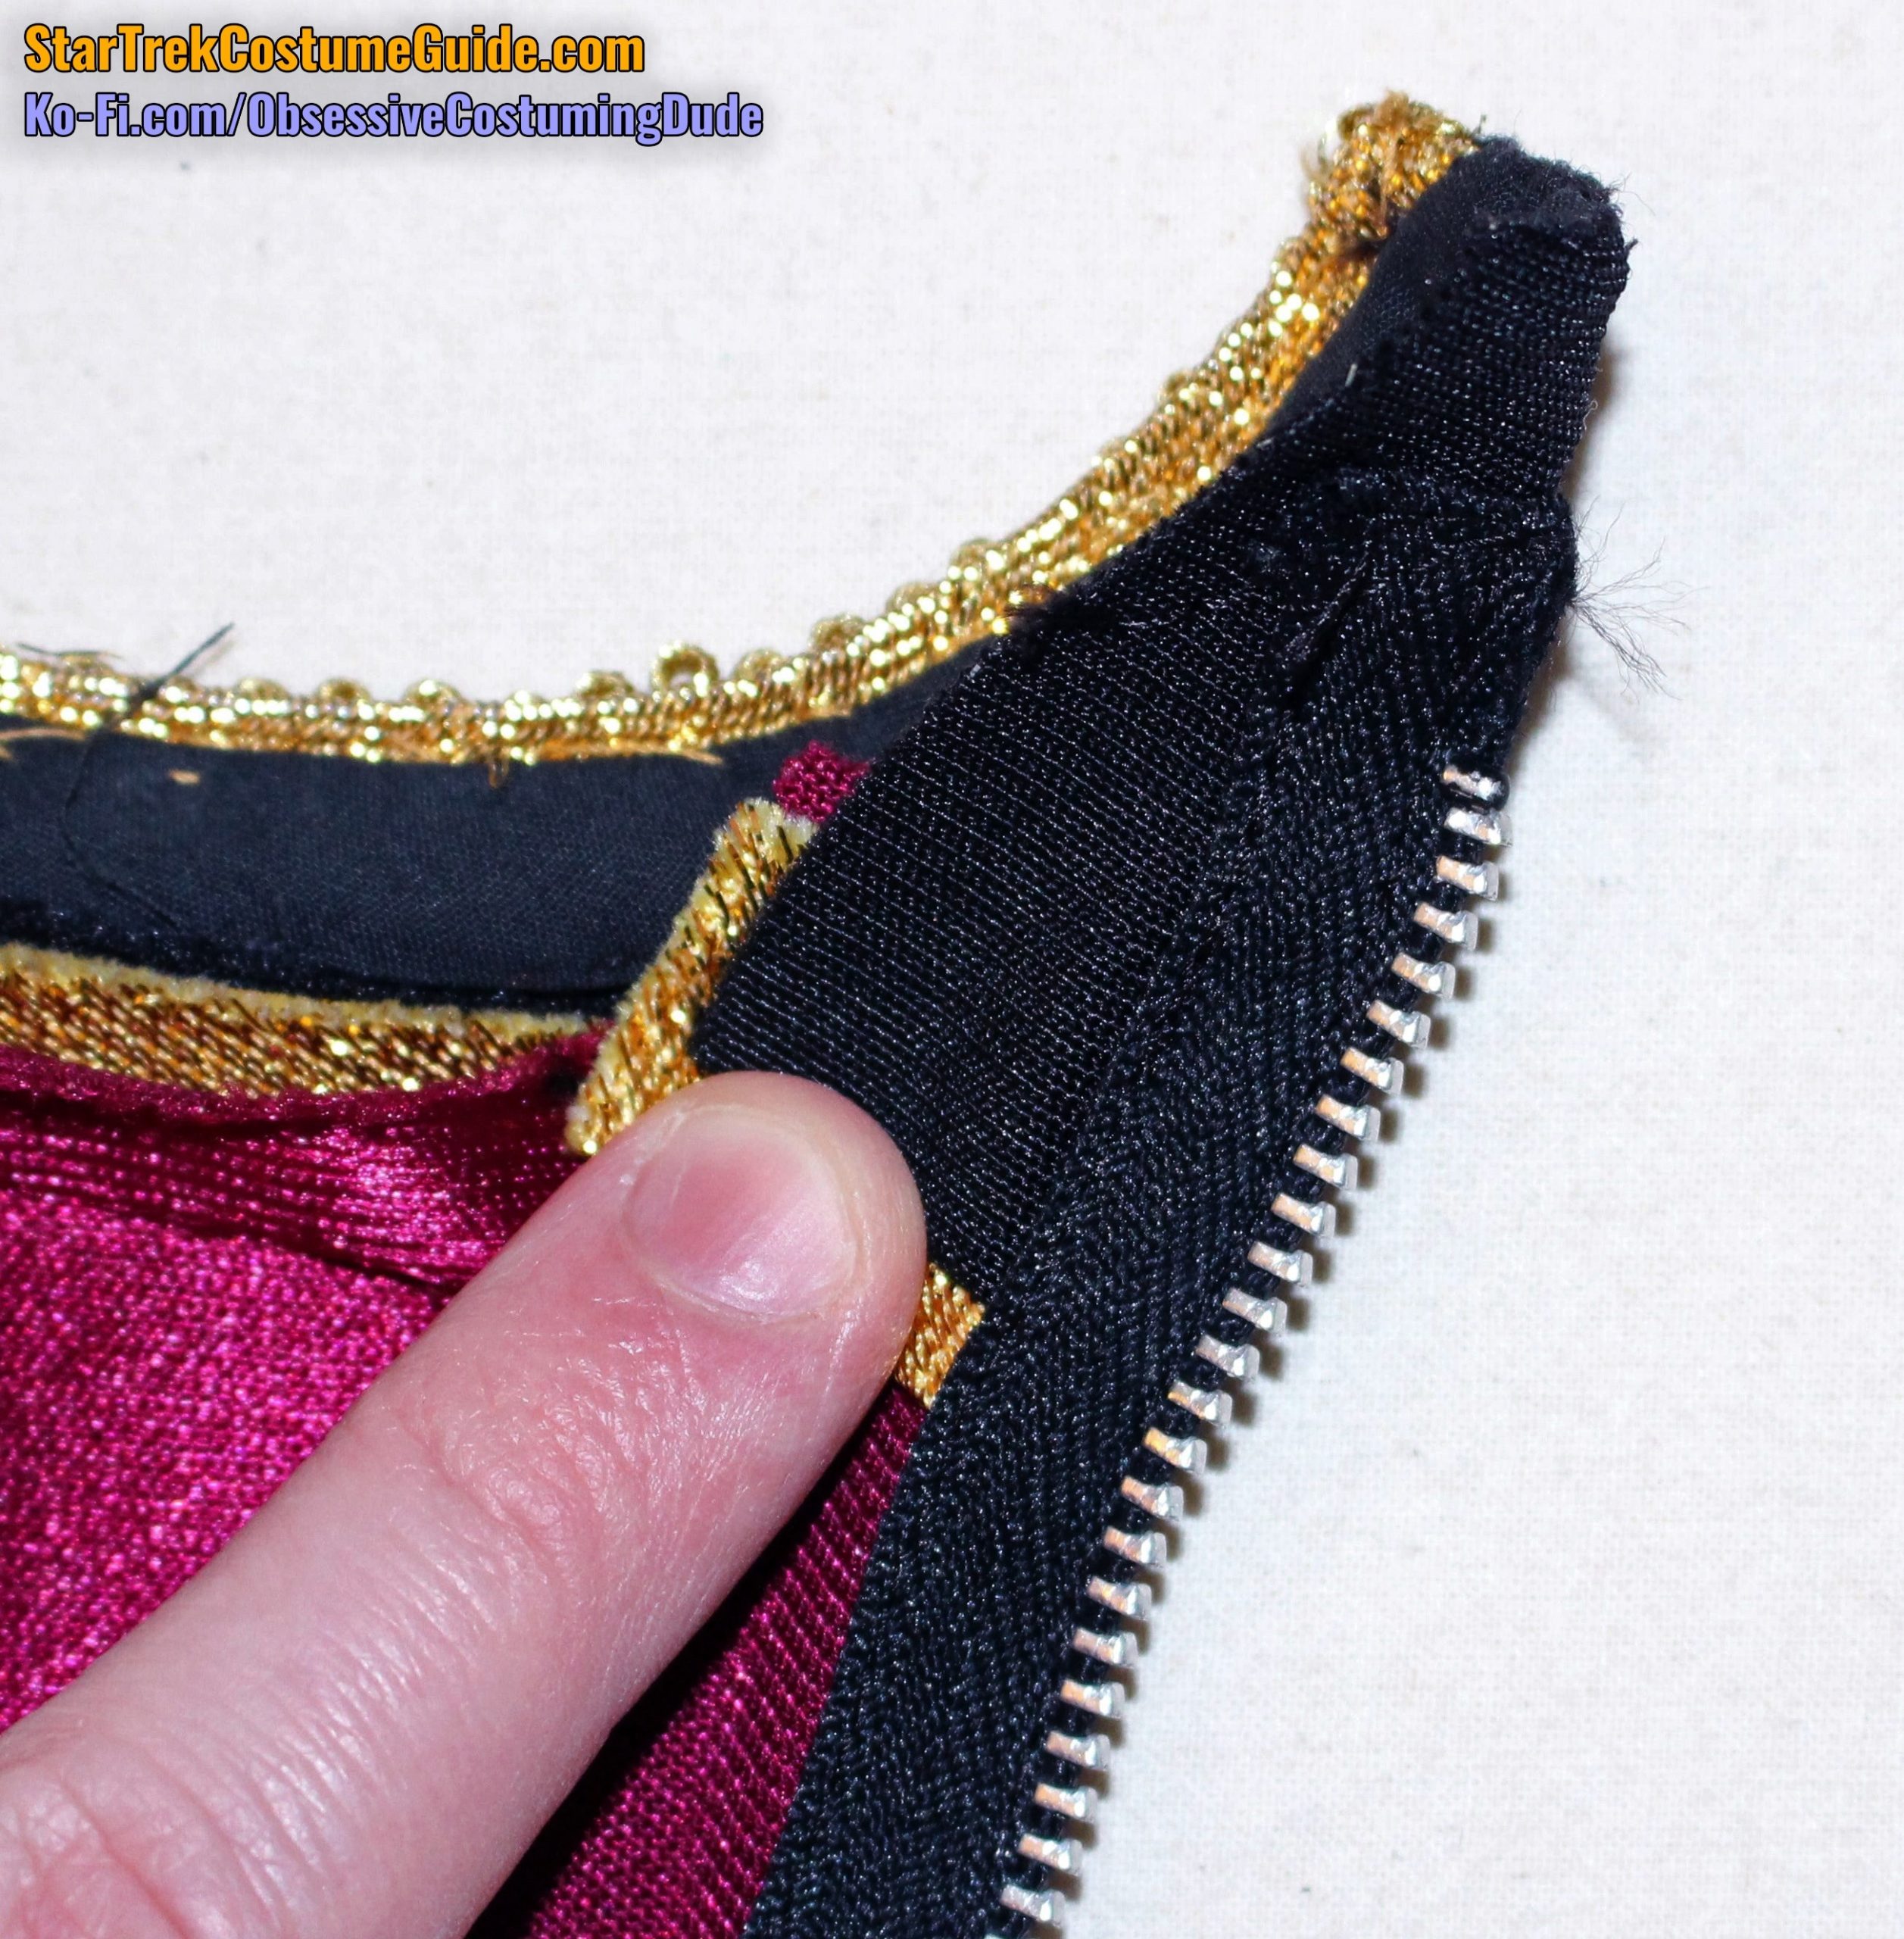
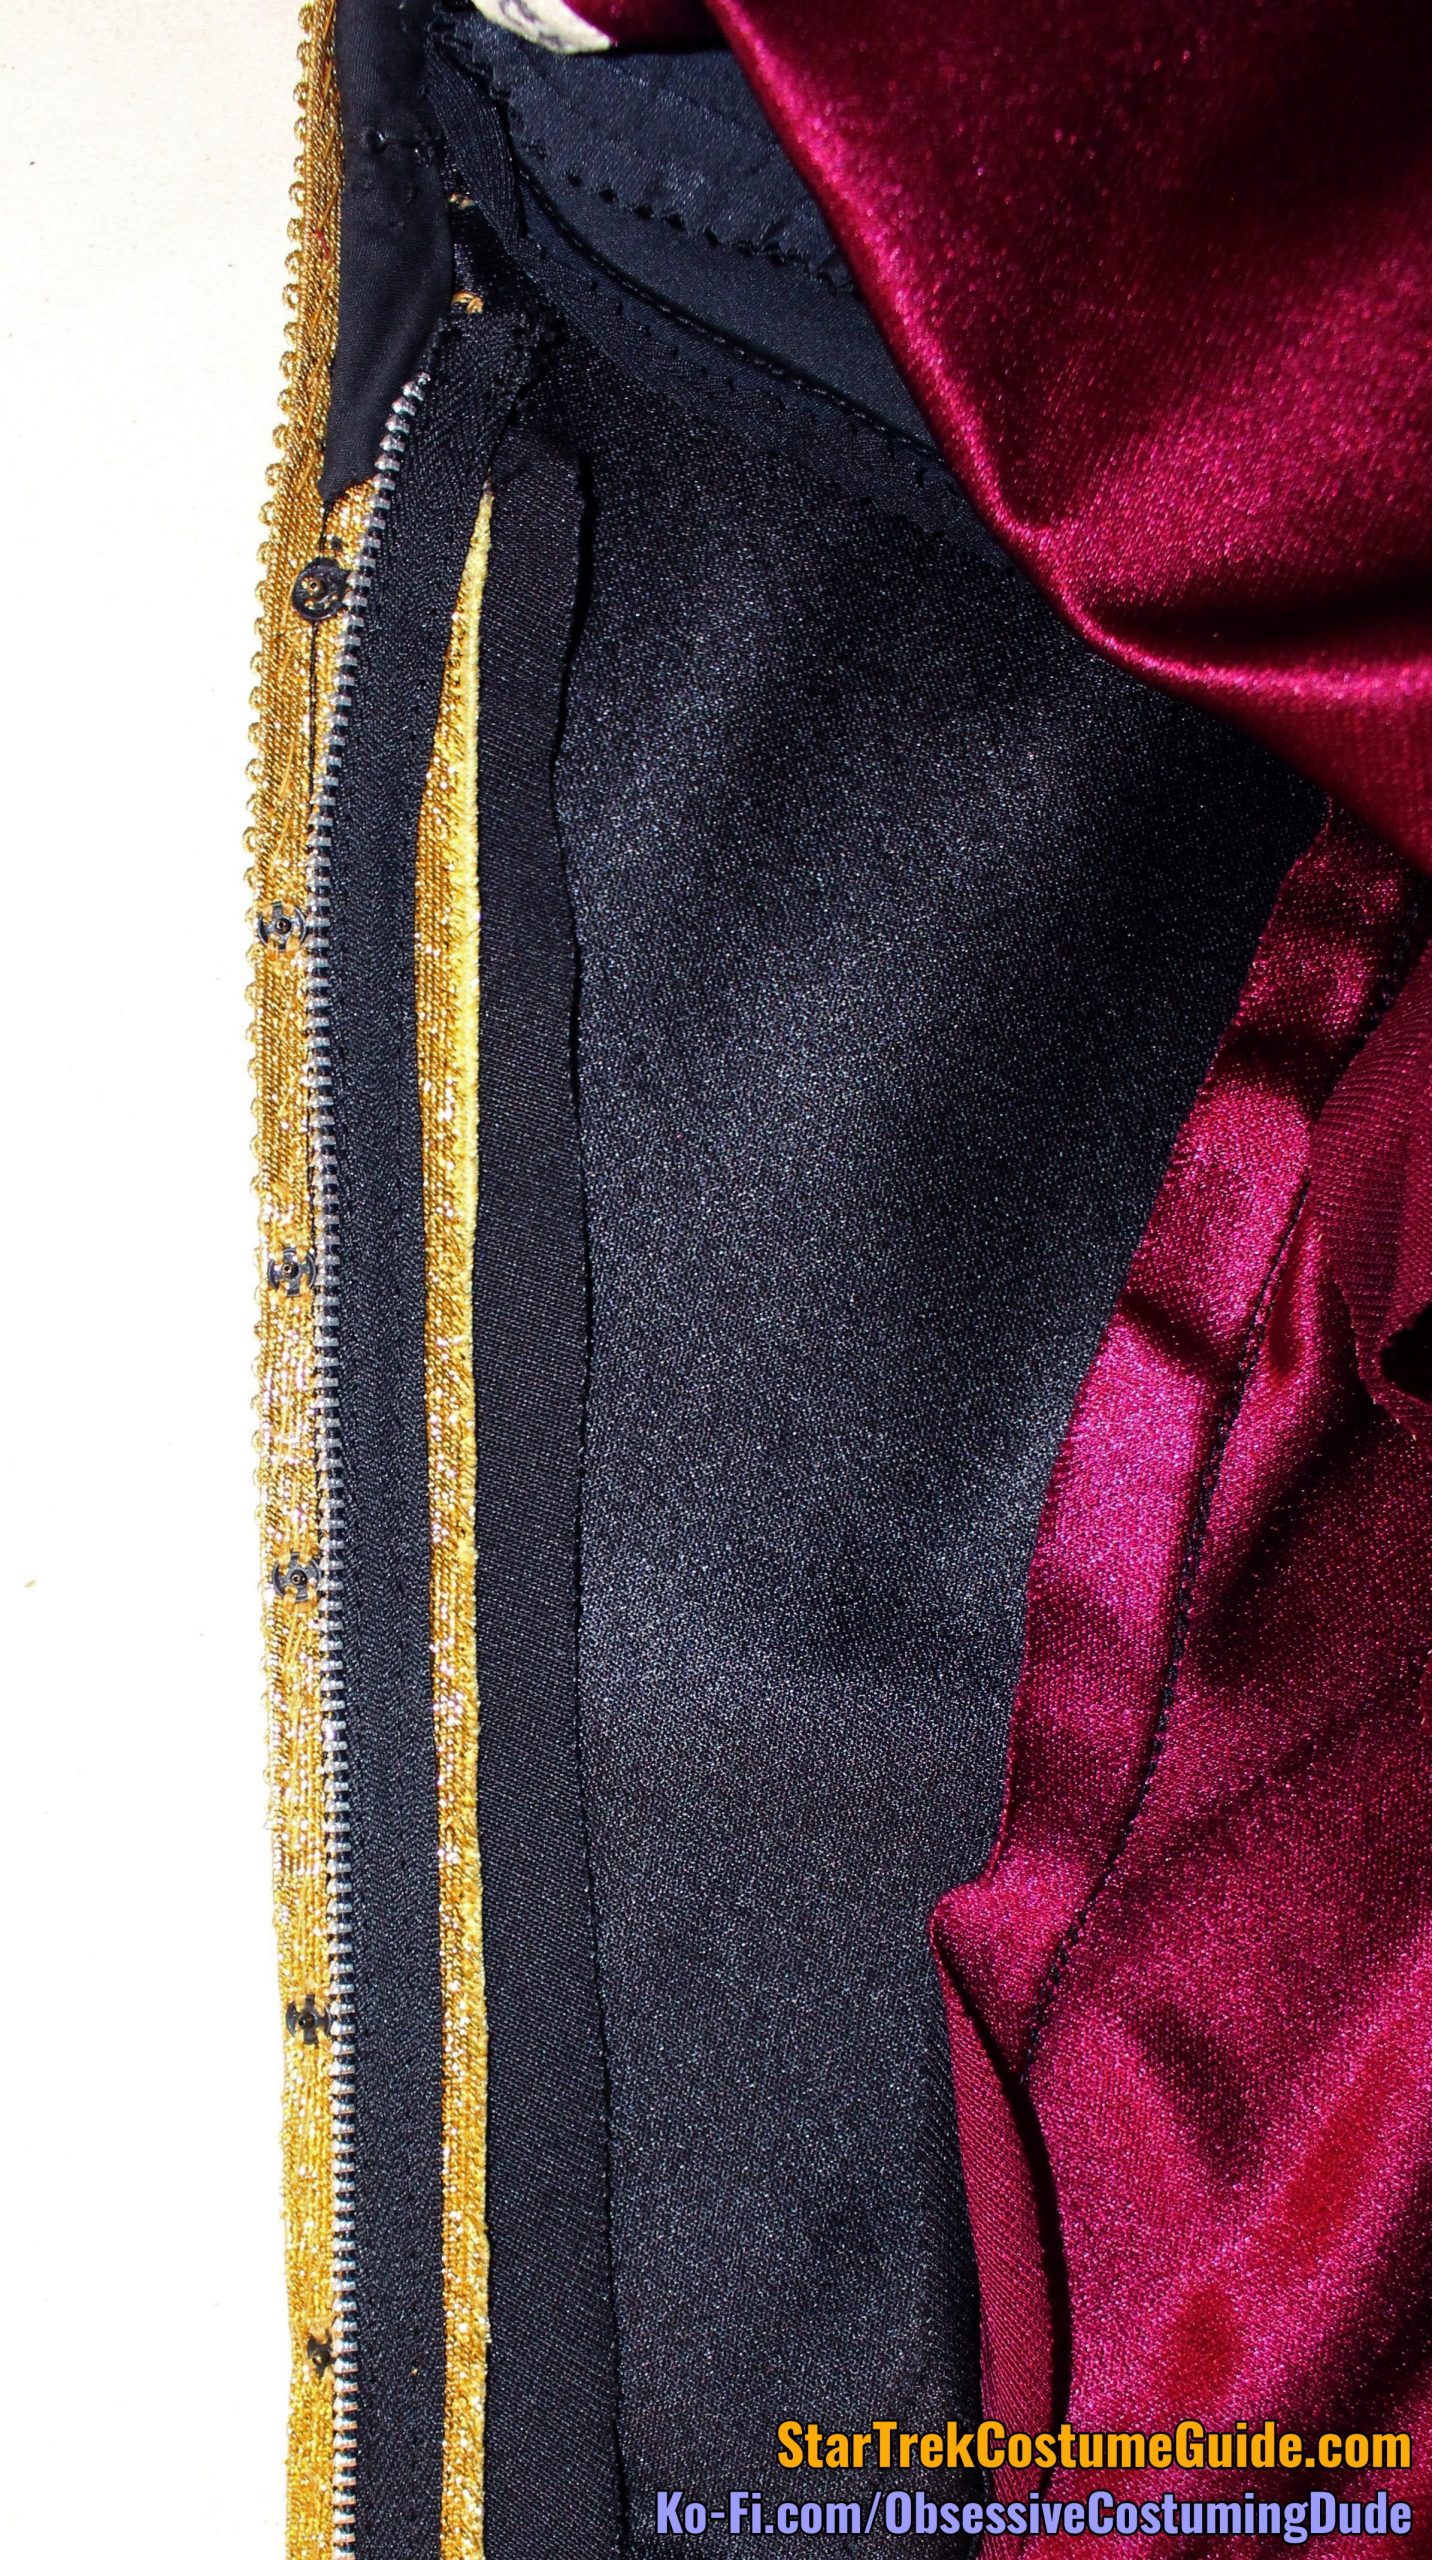
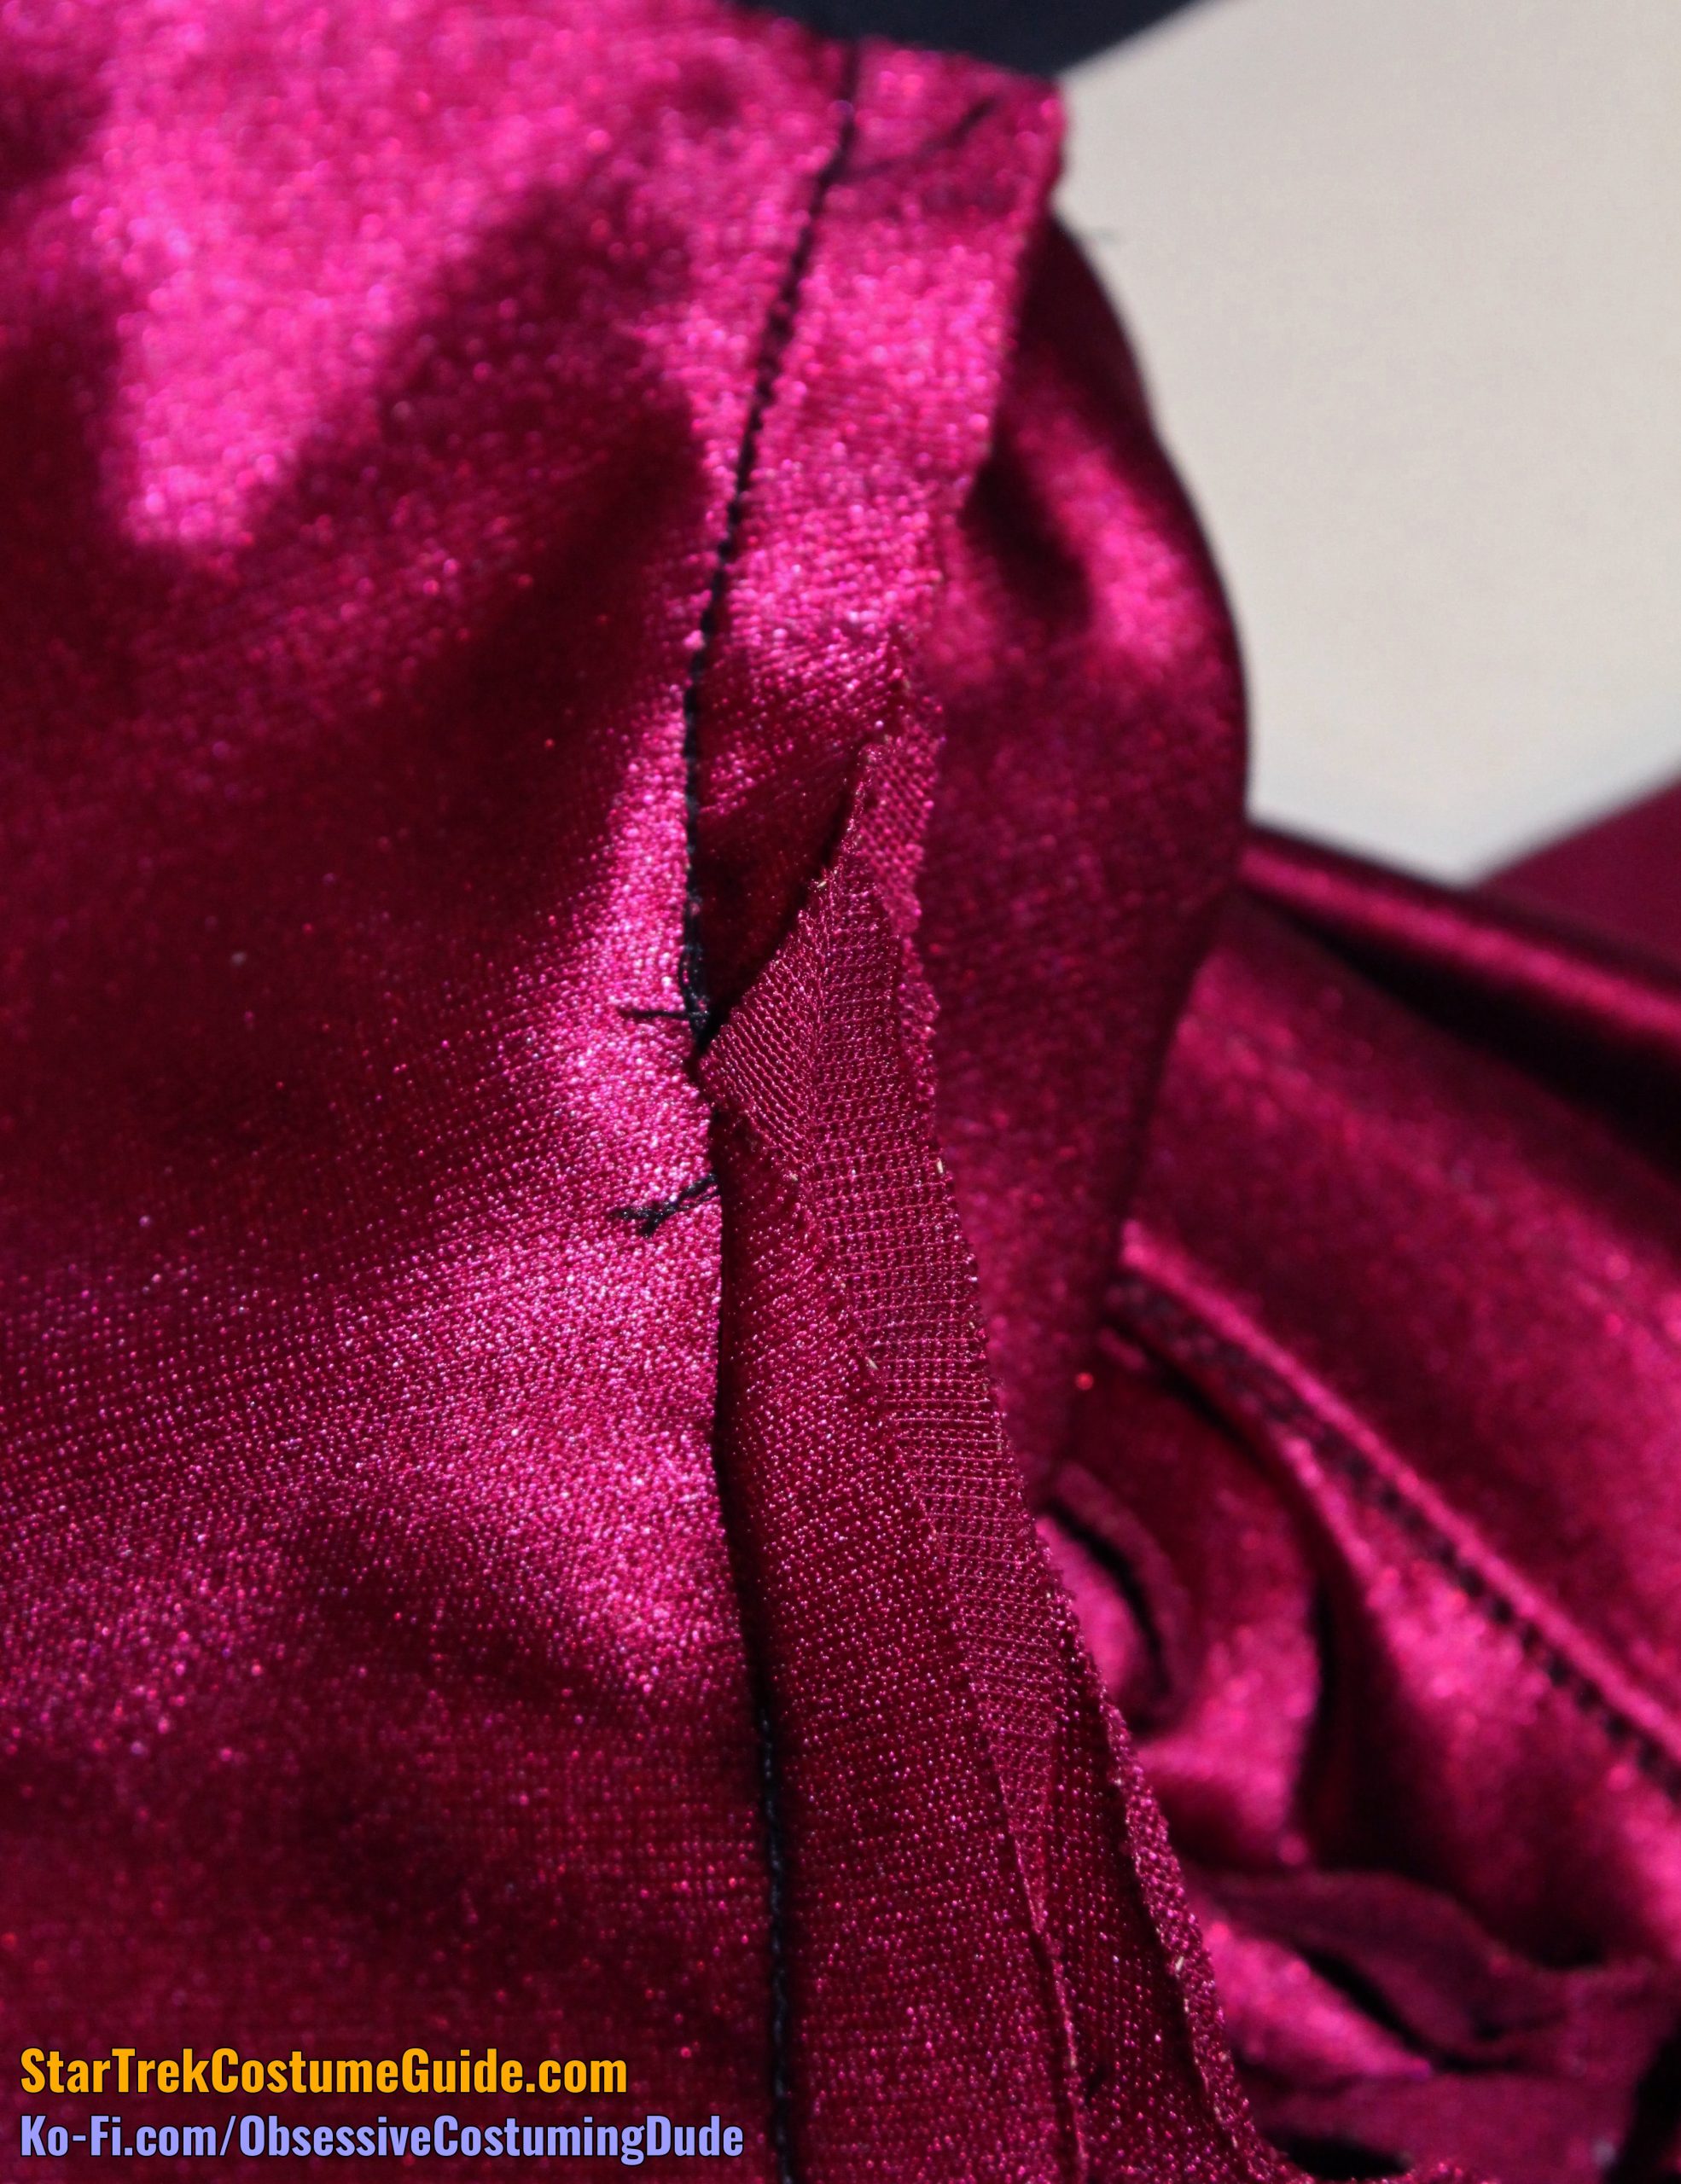
The jacket closed up the front via a separating zipper, underneath and just inside of the diagonal front trim.
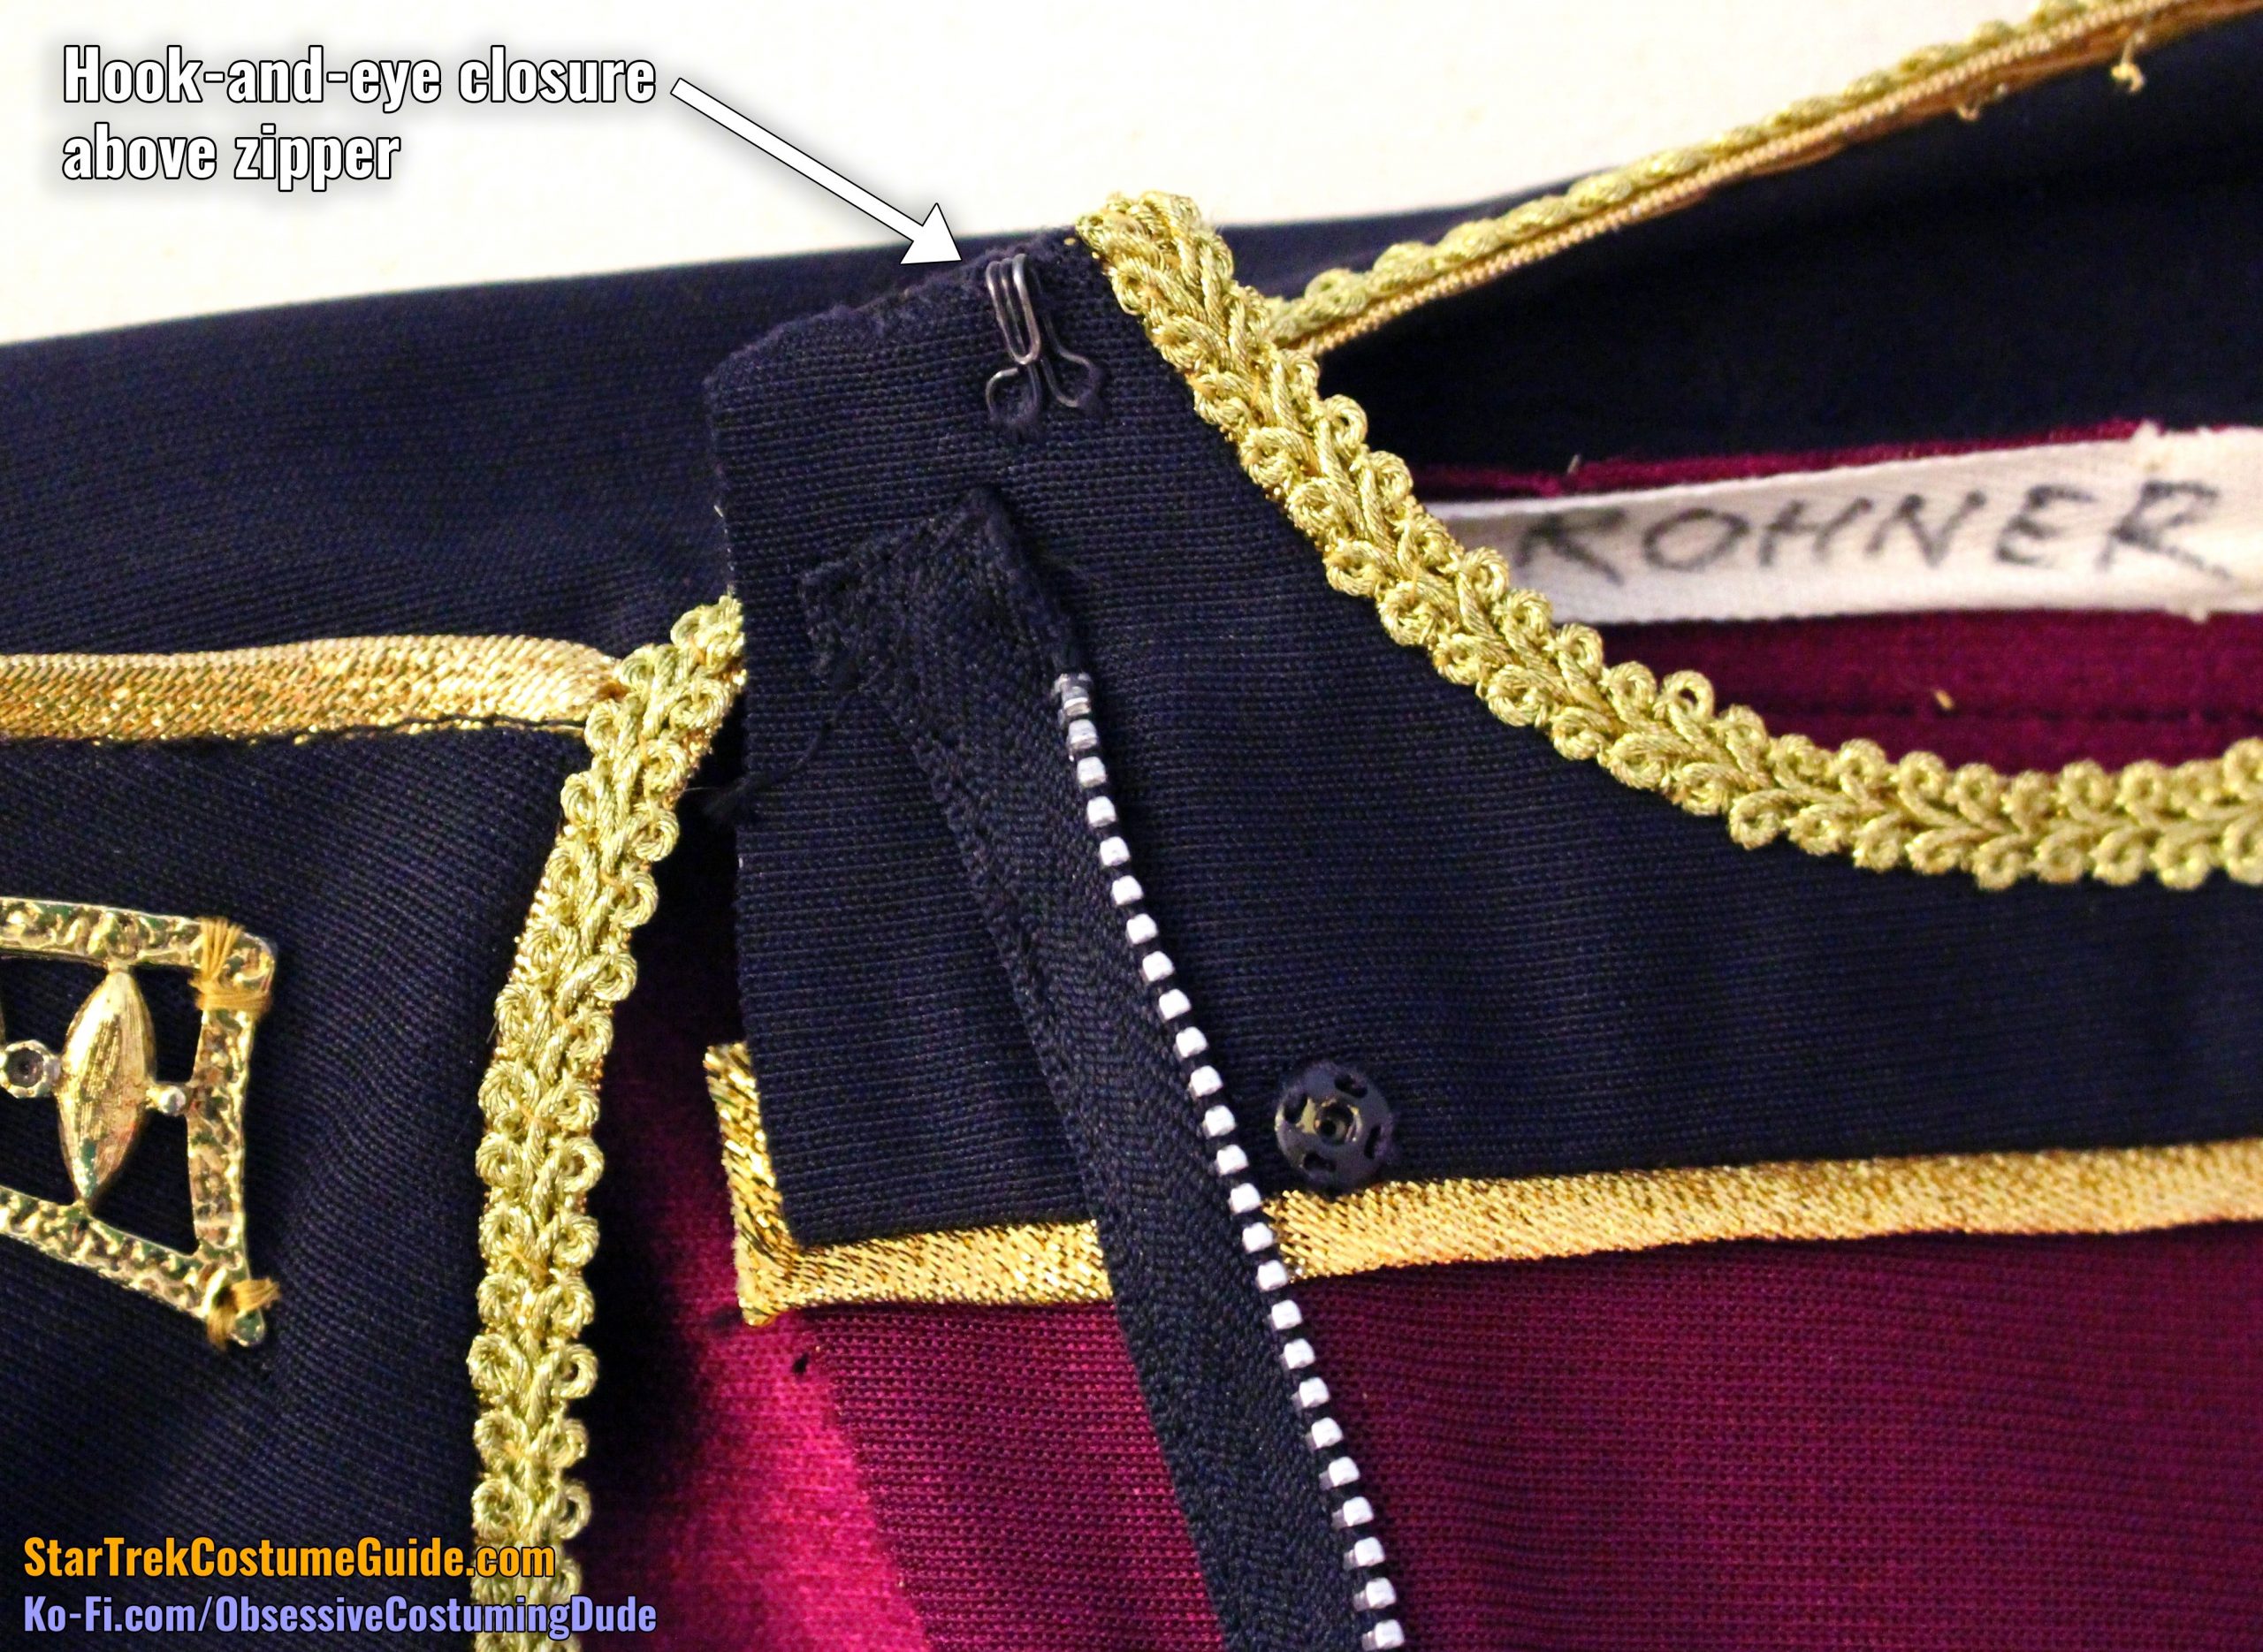
Above the zipper was a hook-and-eye closure to fasten the neck to the shoulder.
Also note the changing direction of the left front (zipper) seam allowance; at the bottom, it was turned under, but at the top, it opens out toward the shoulder rather remaining under toward the neckline.
There was no evidence that this seam allowance had ever been fastened down and it had simply come undone sometime in the past 30+ years.
I find this curious since if it was turned under and tacked down at the top, everything would not only work fine, but actually a little better!
It even seems to have been cut specifically for this purpose, so nothing would poke up out of the neckline. An unsightly bulk would be hidden underneath the diagonal front panel, and the hook-and-eye closure above the zipper would still fasten.
Maybe someone simply forgot (or didn’t have time) to do it?
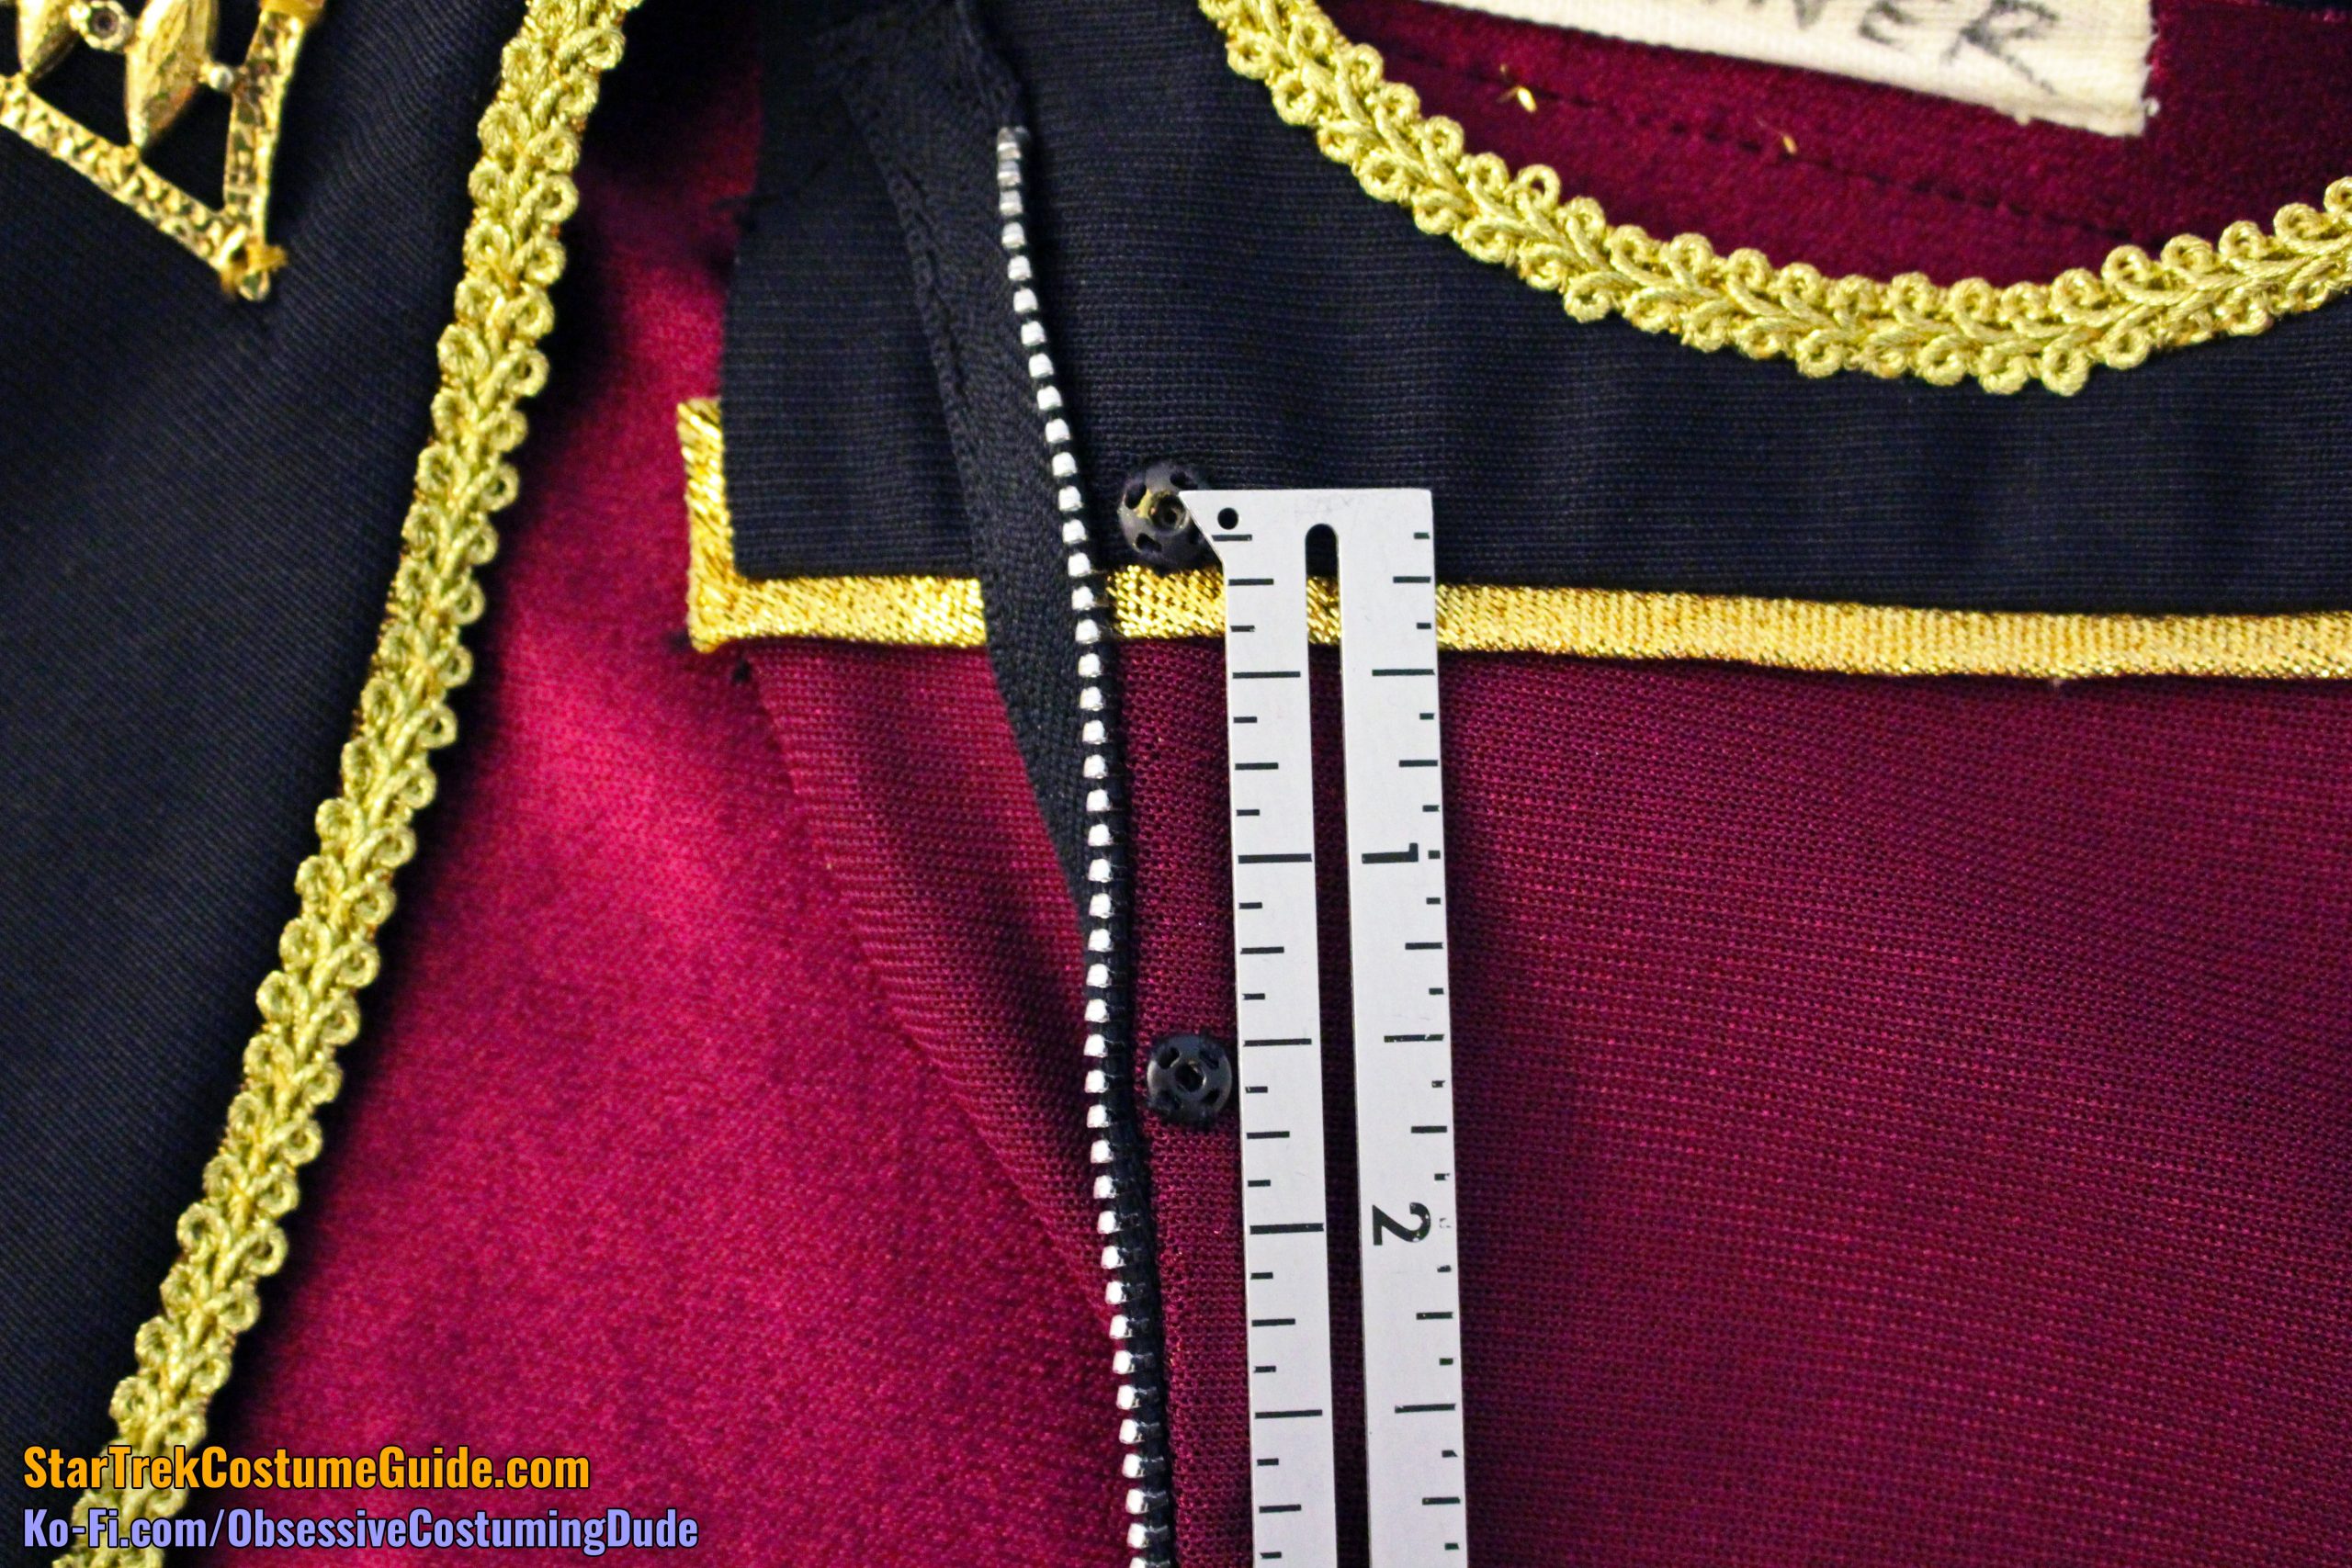
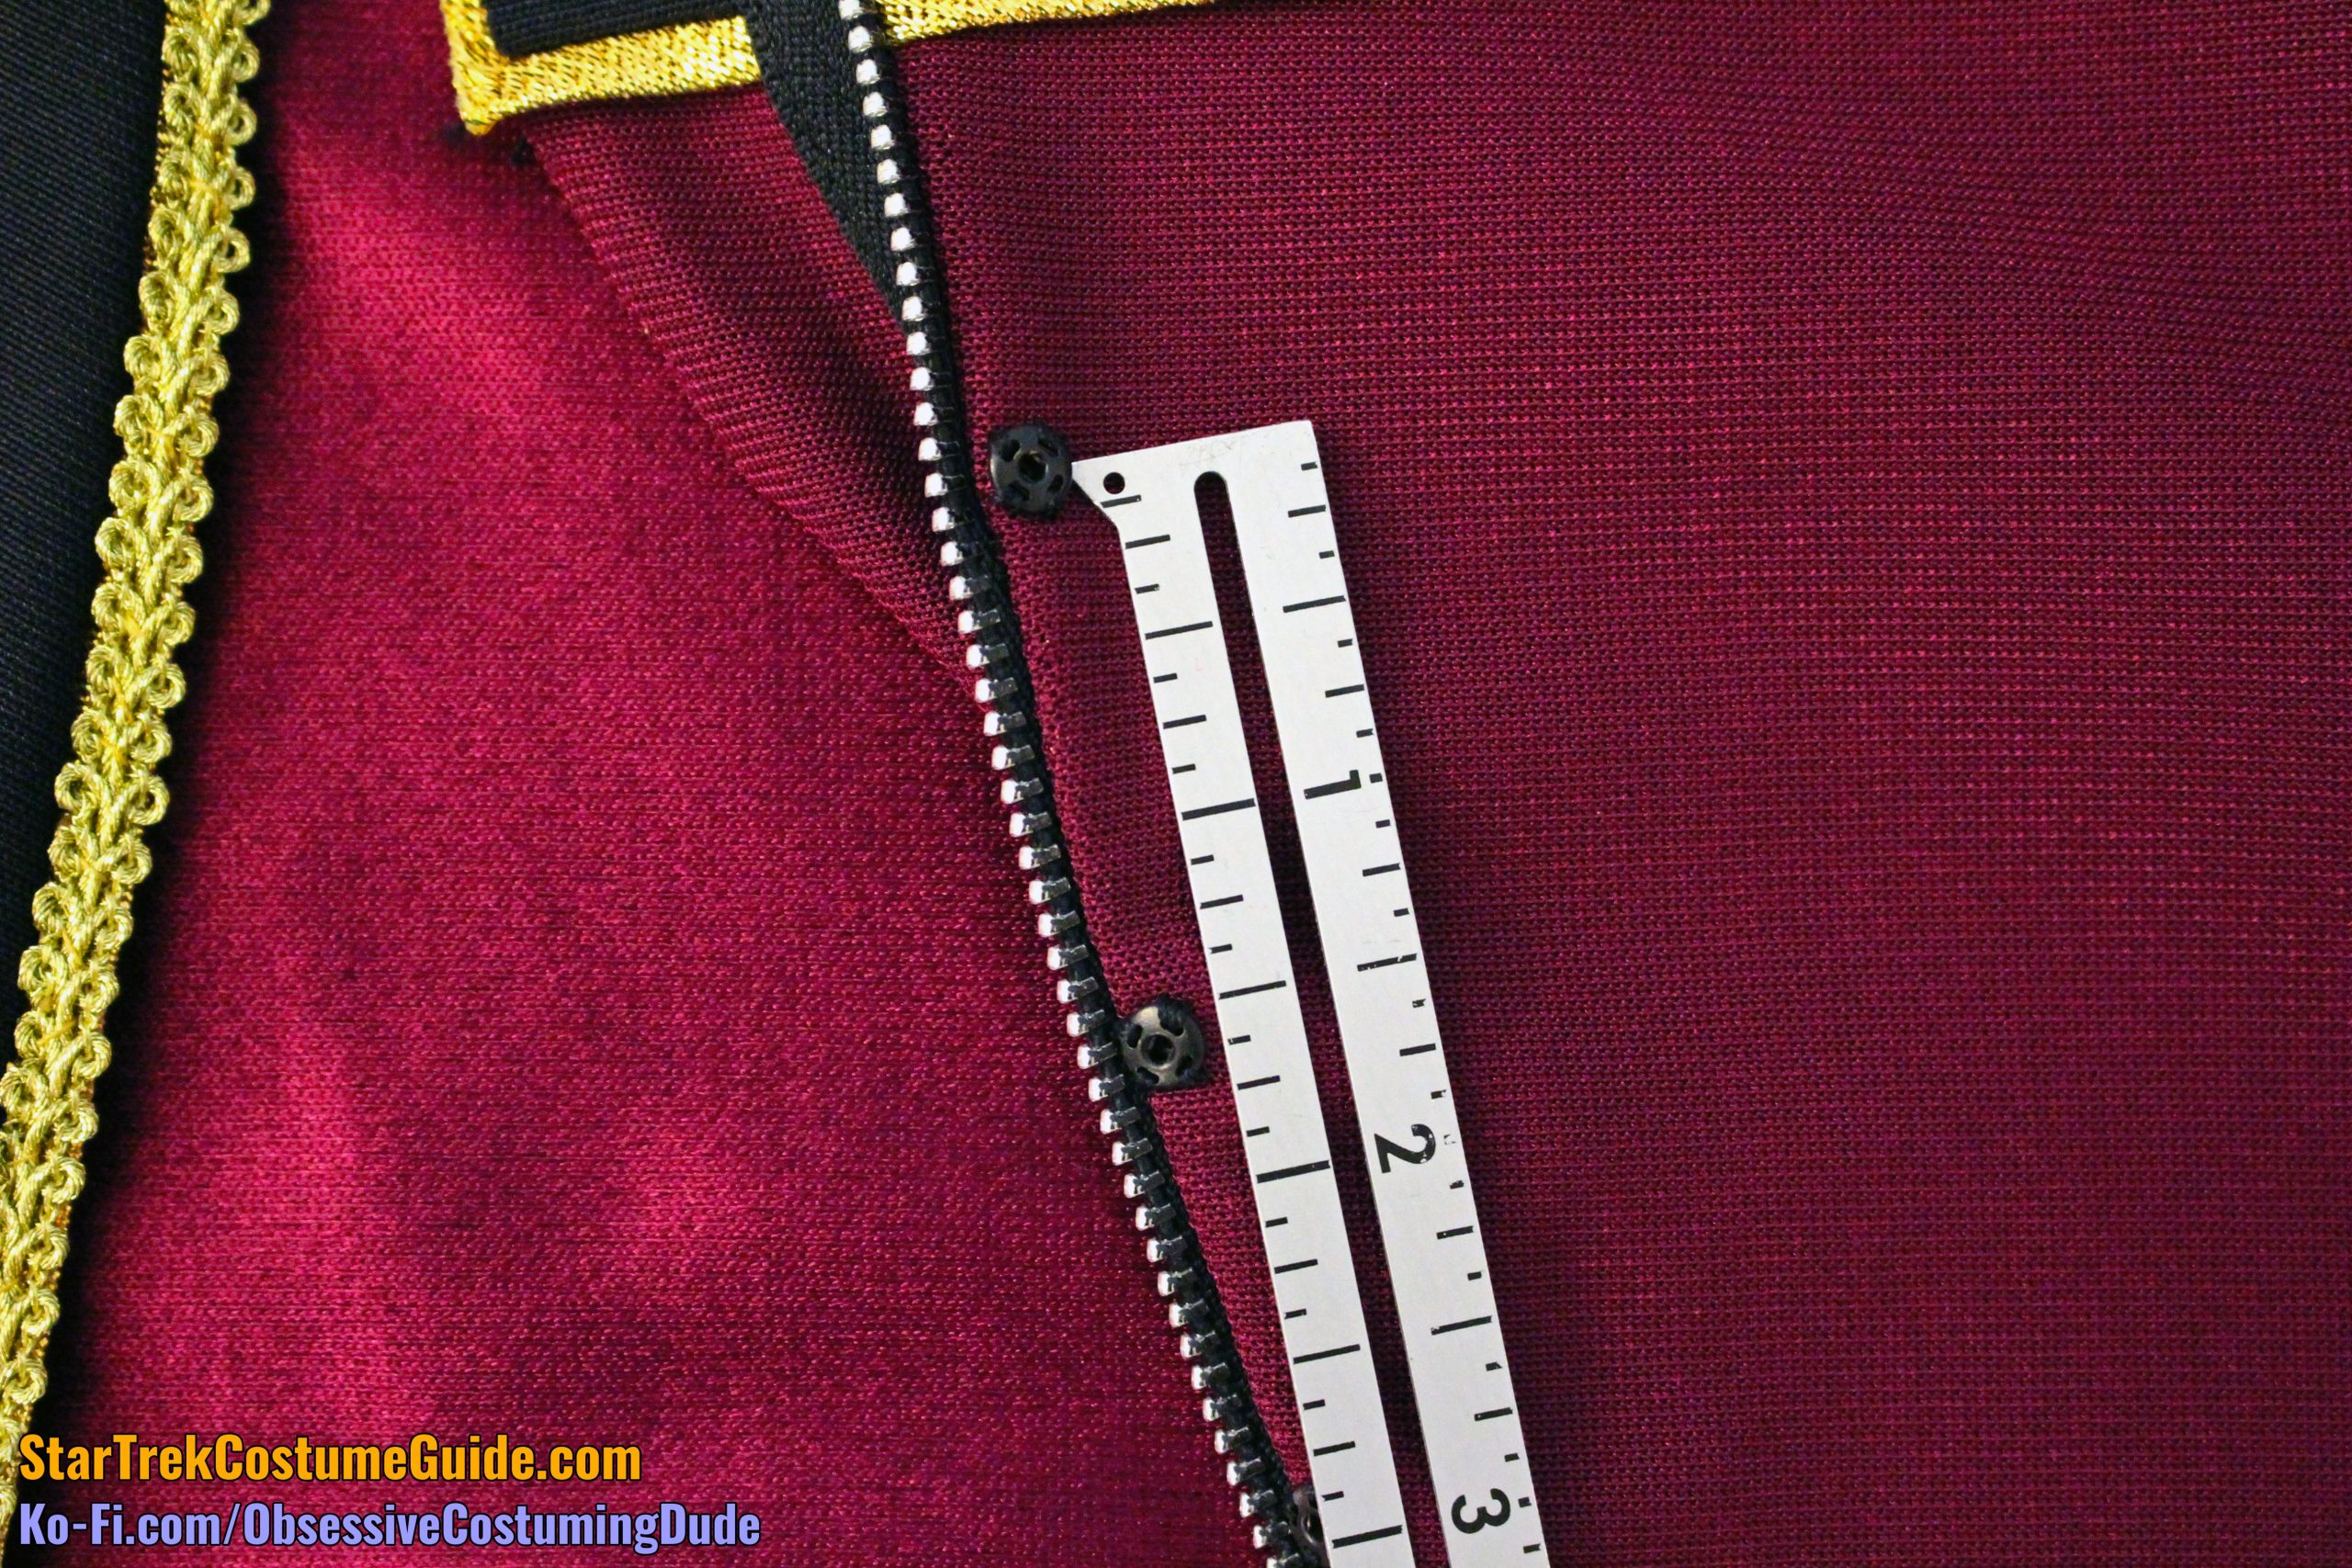
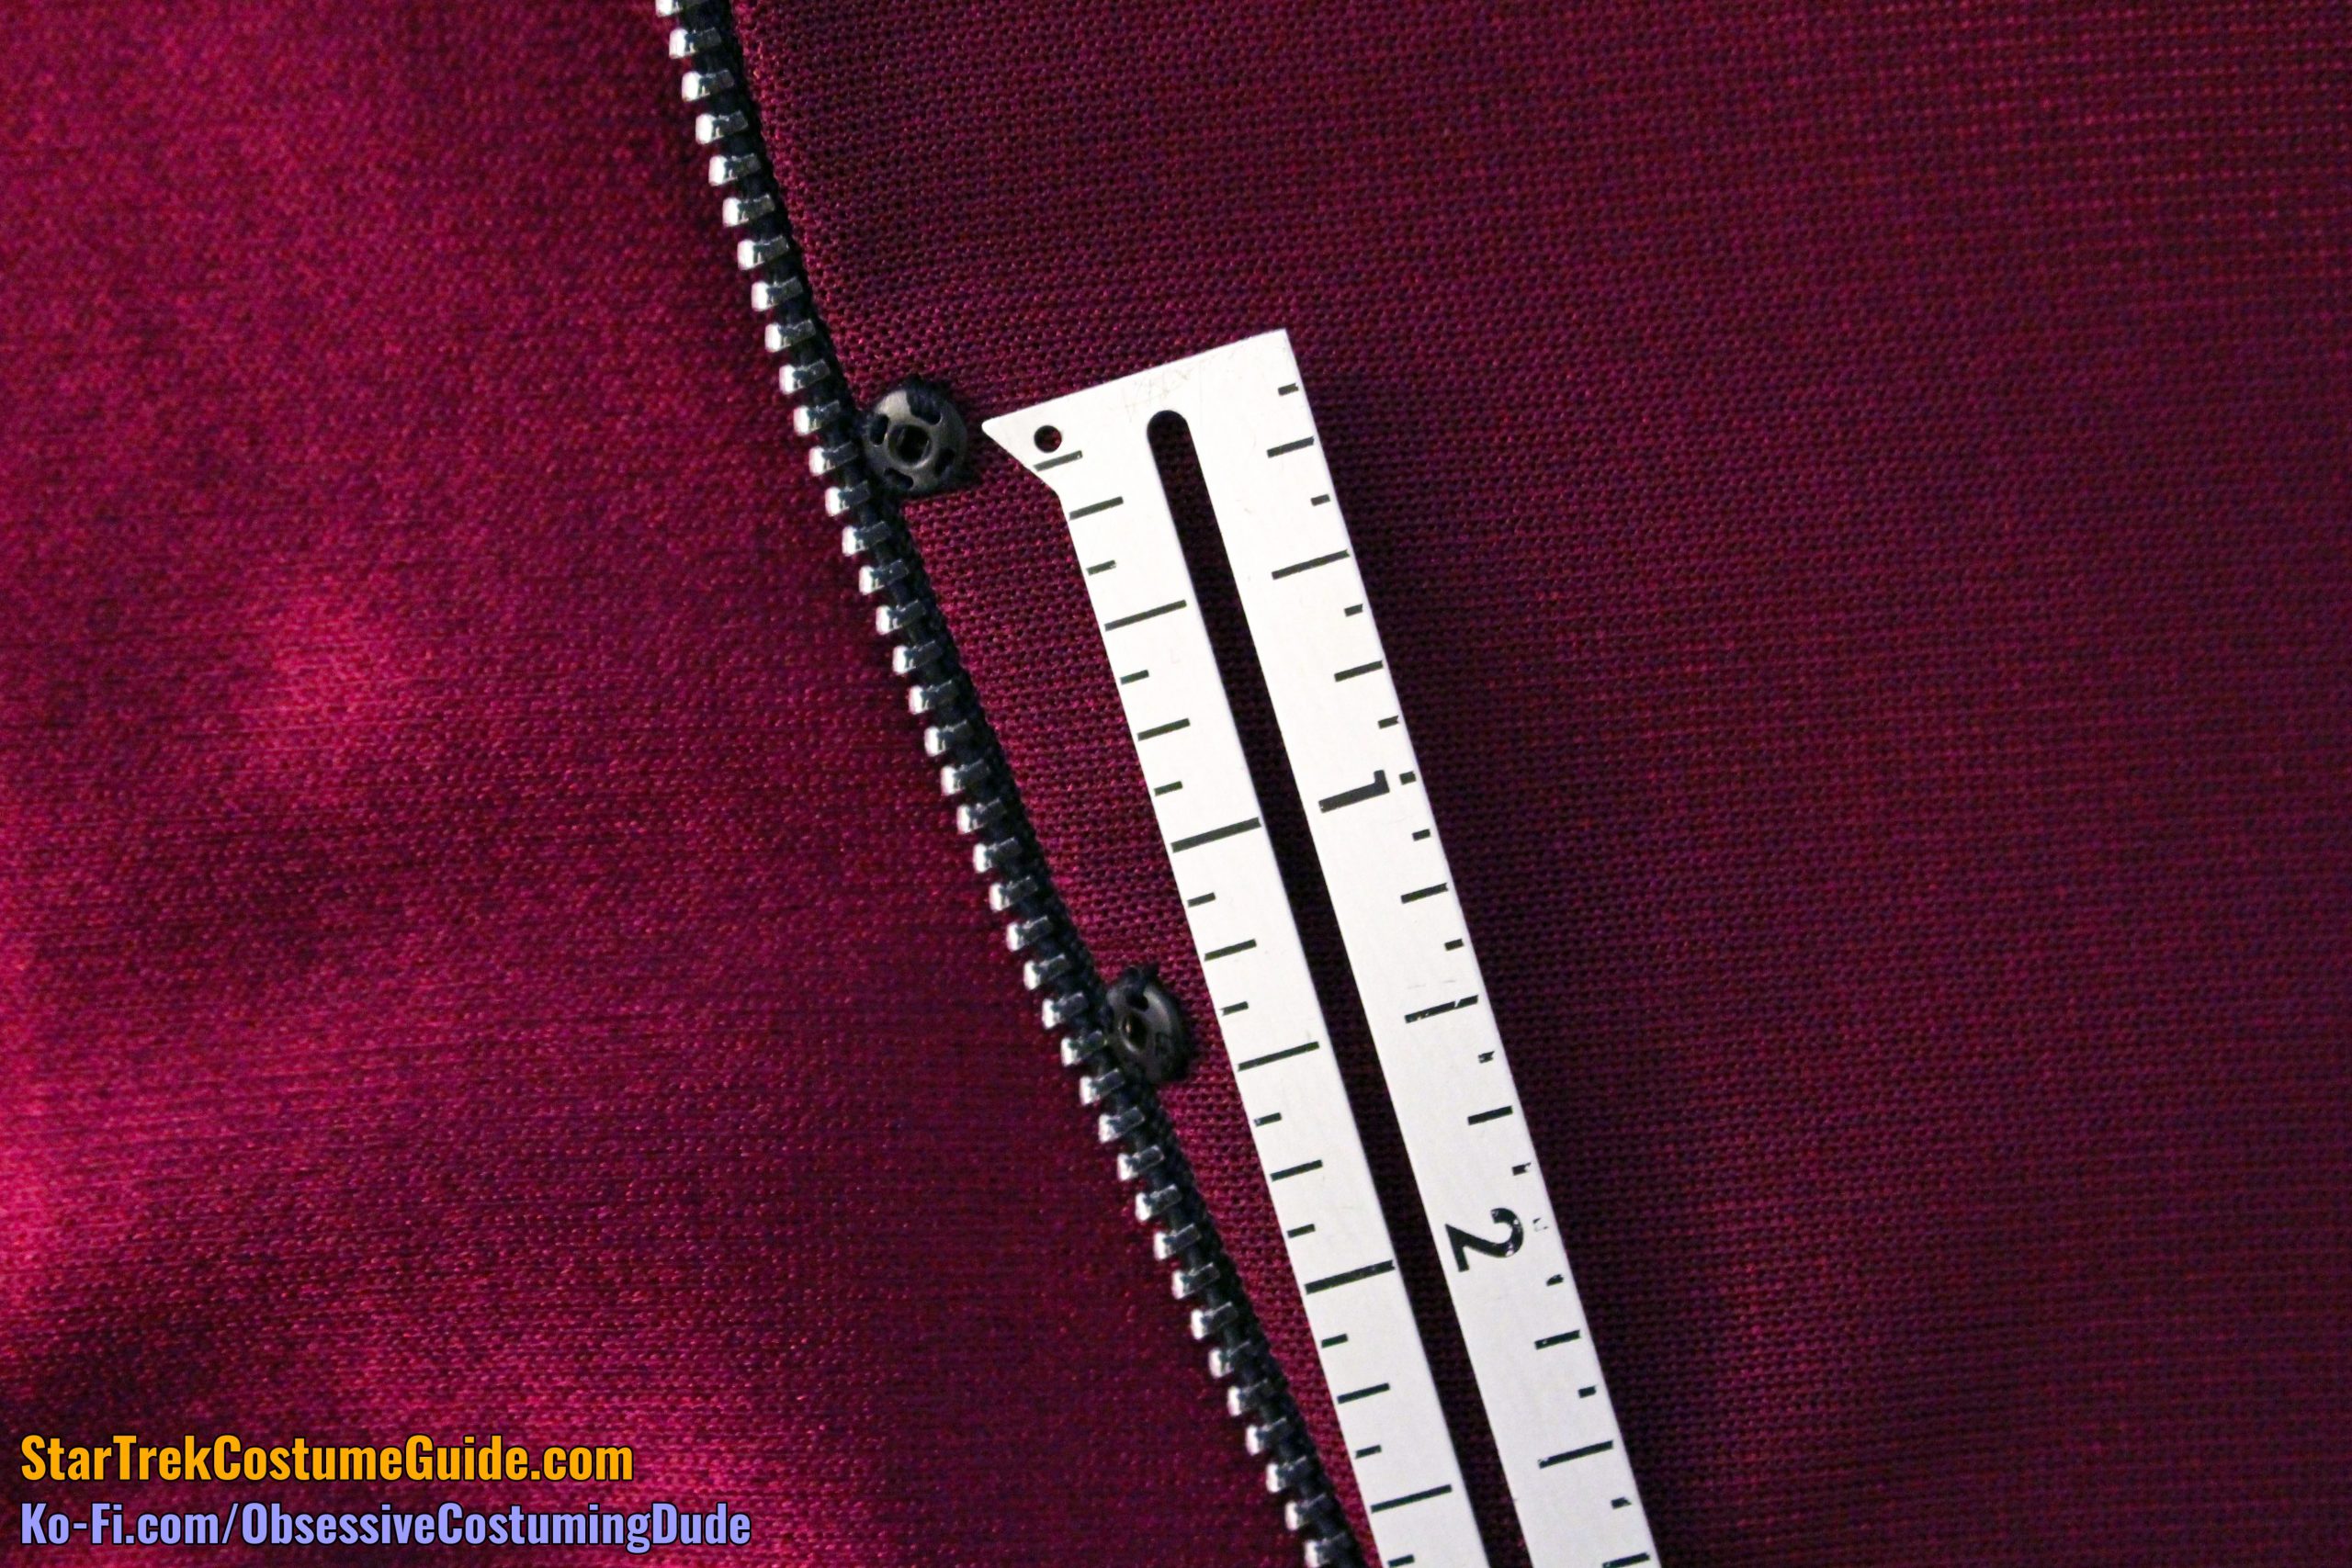
The snaps were irregularly positioned … because of course they were.
I’ll refer to them as snaps #1-6 from the top down, respectively.
Snap #1 was just above the yoke trim, and snap #2 was approximately 1 ½” beneath that.
Snap #3 was about 1 ⅝” beneath the second.
Snap #4 was 1 ⅜” beneath the third.
Snap #5 was 2 ¼” beneath the fourth.
And finally, snap #6 was 1 ⅝” beneath the fifth.
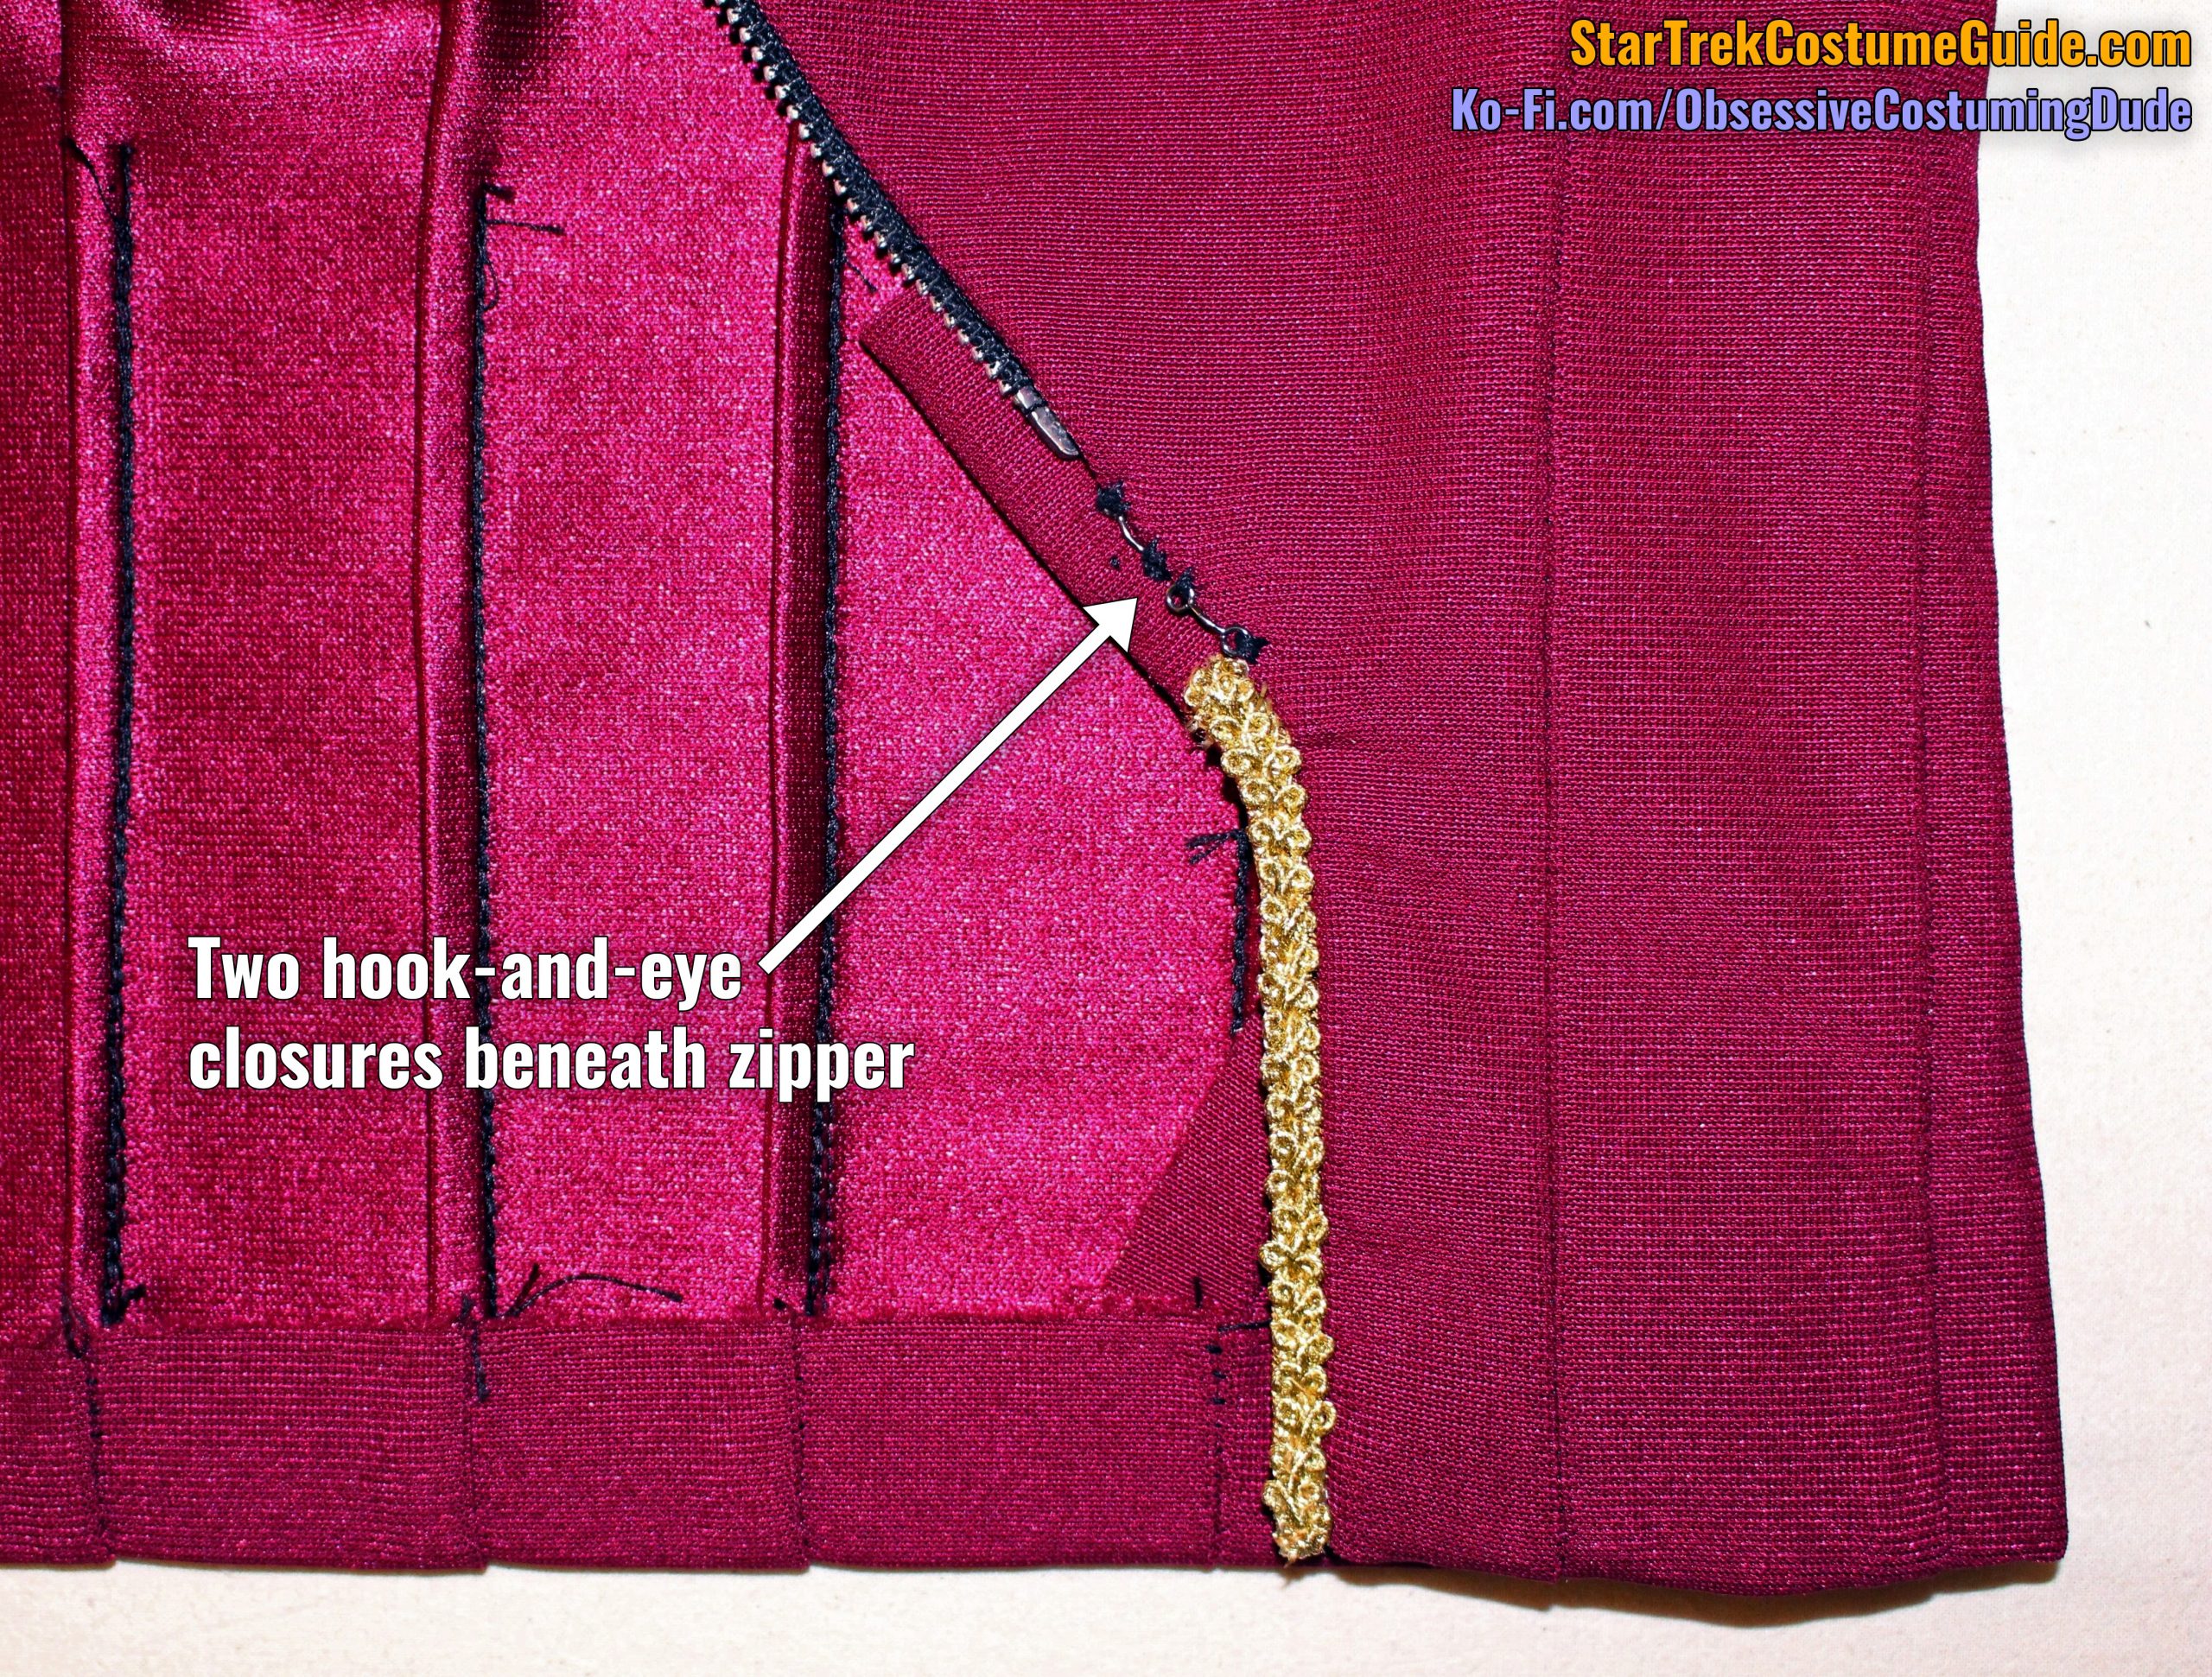
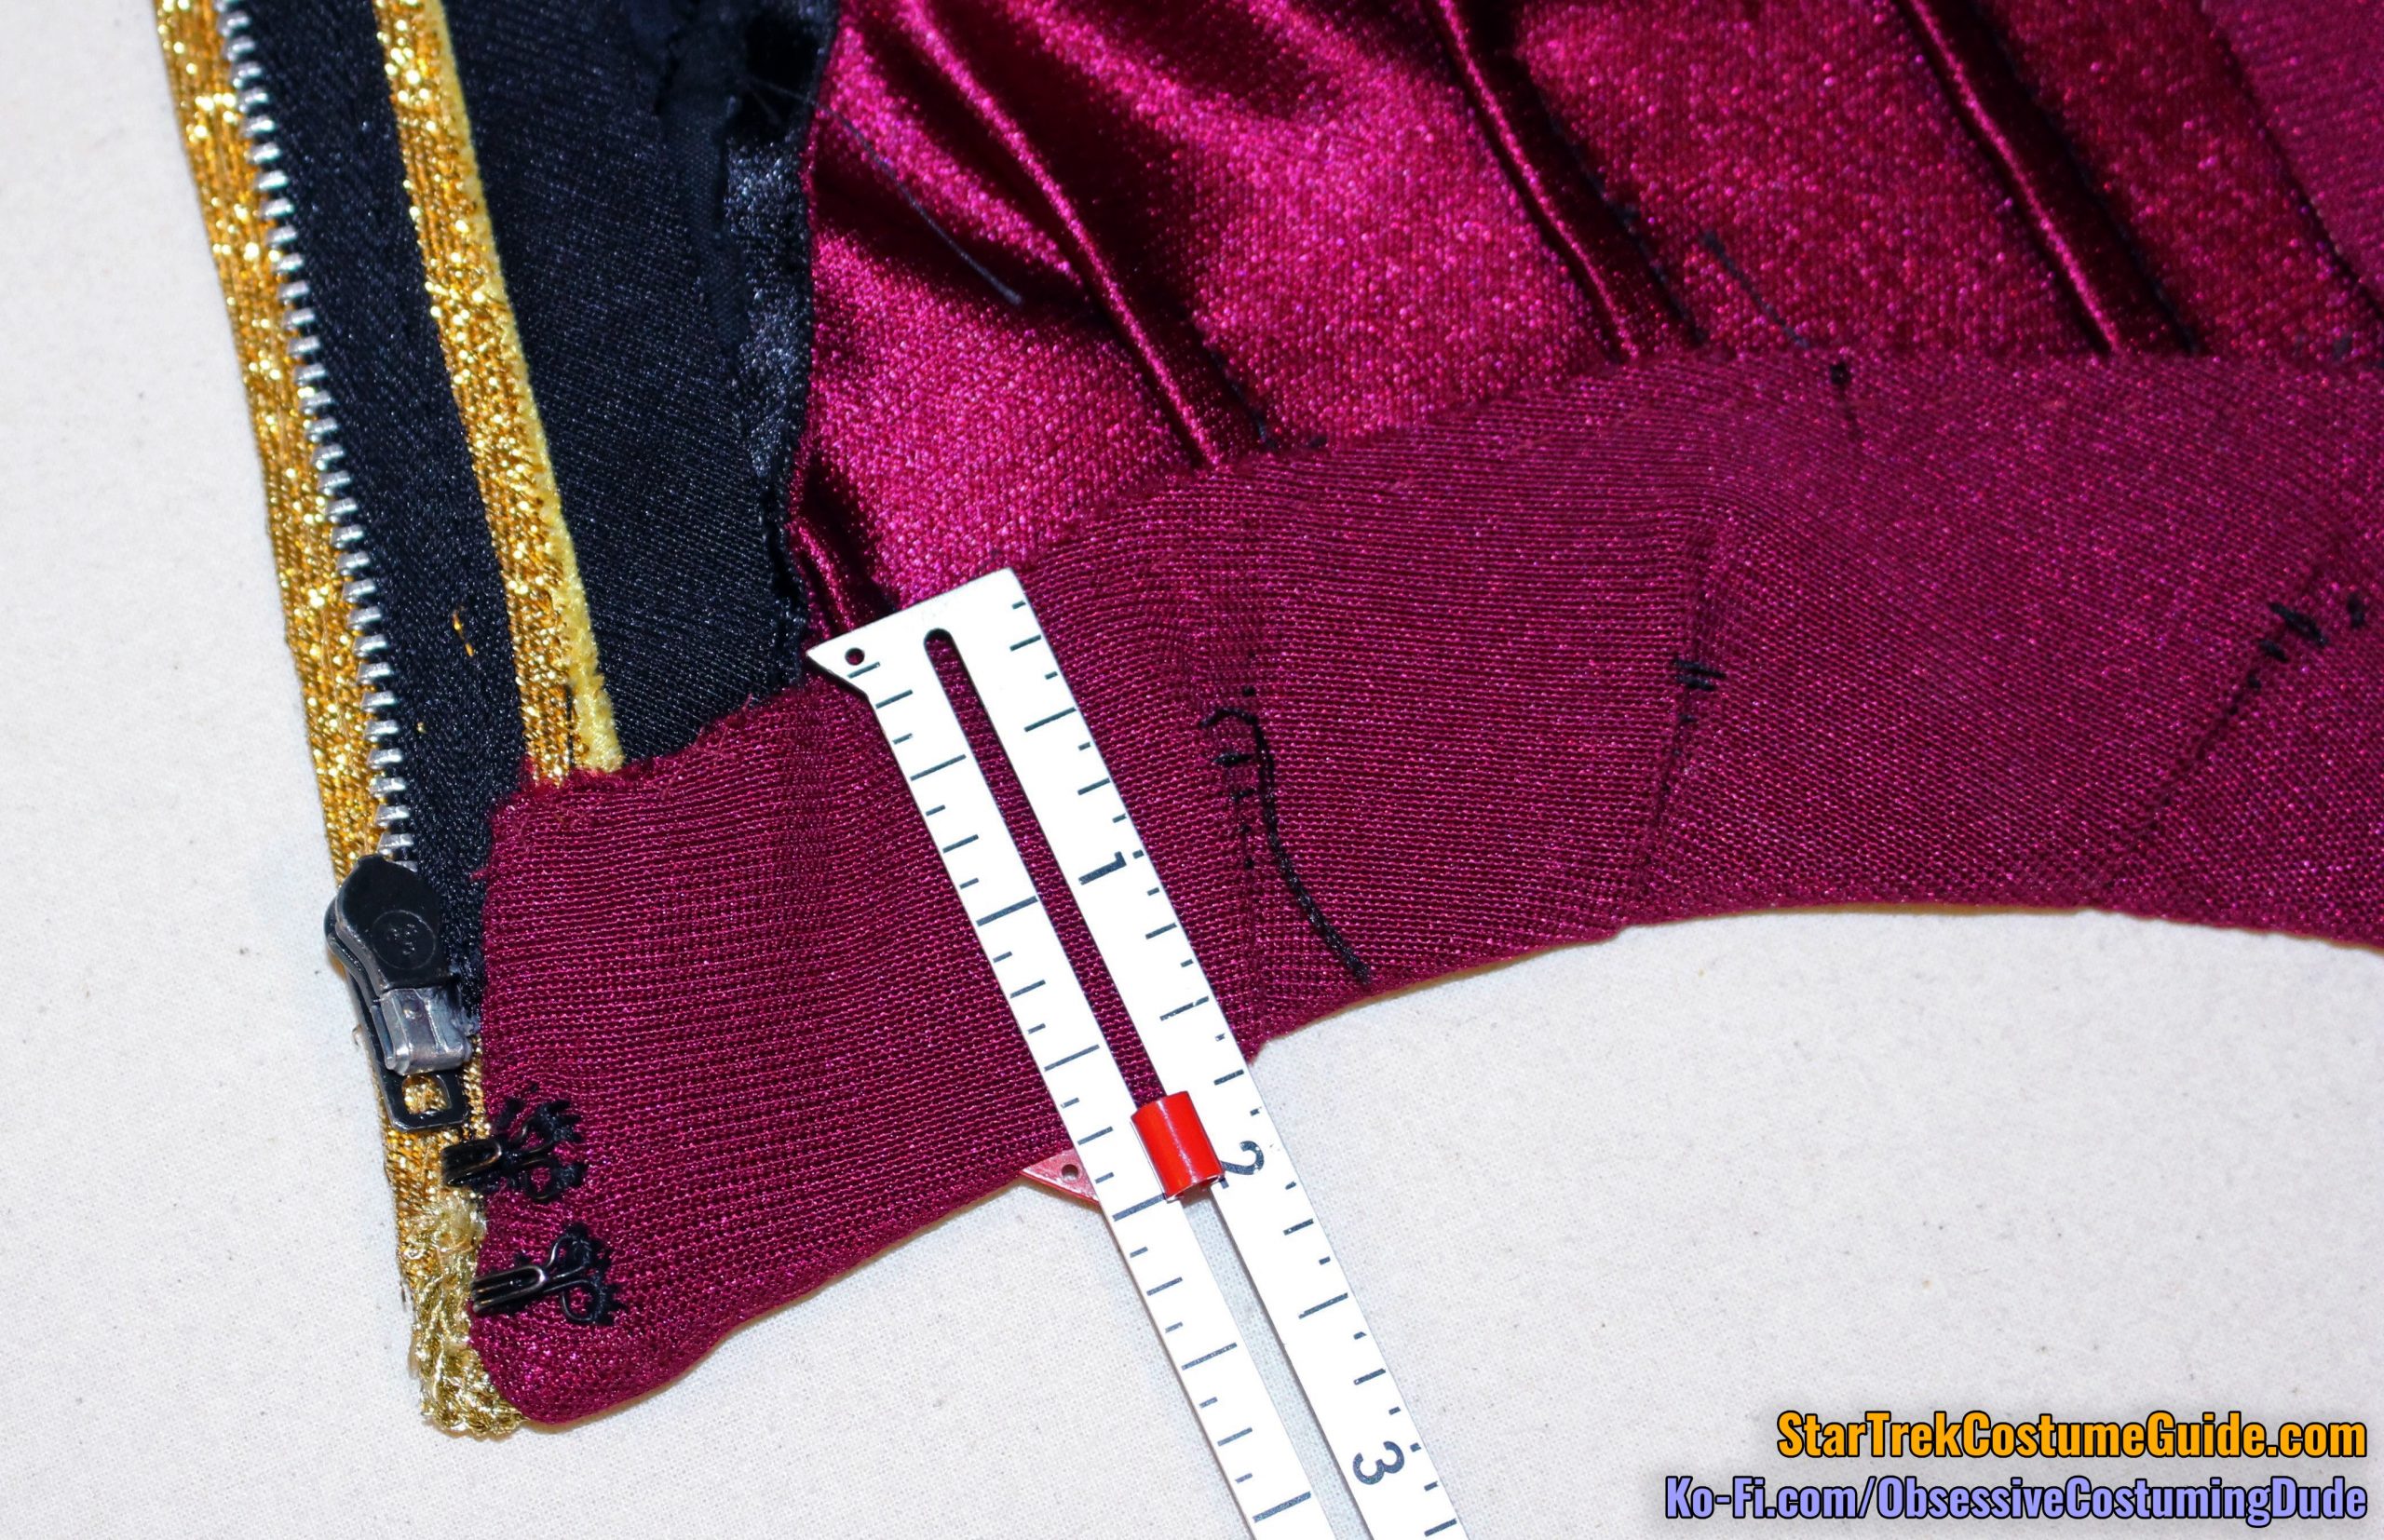
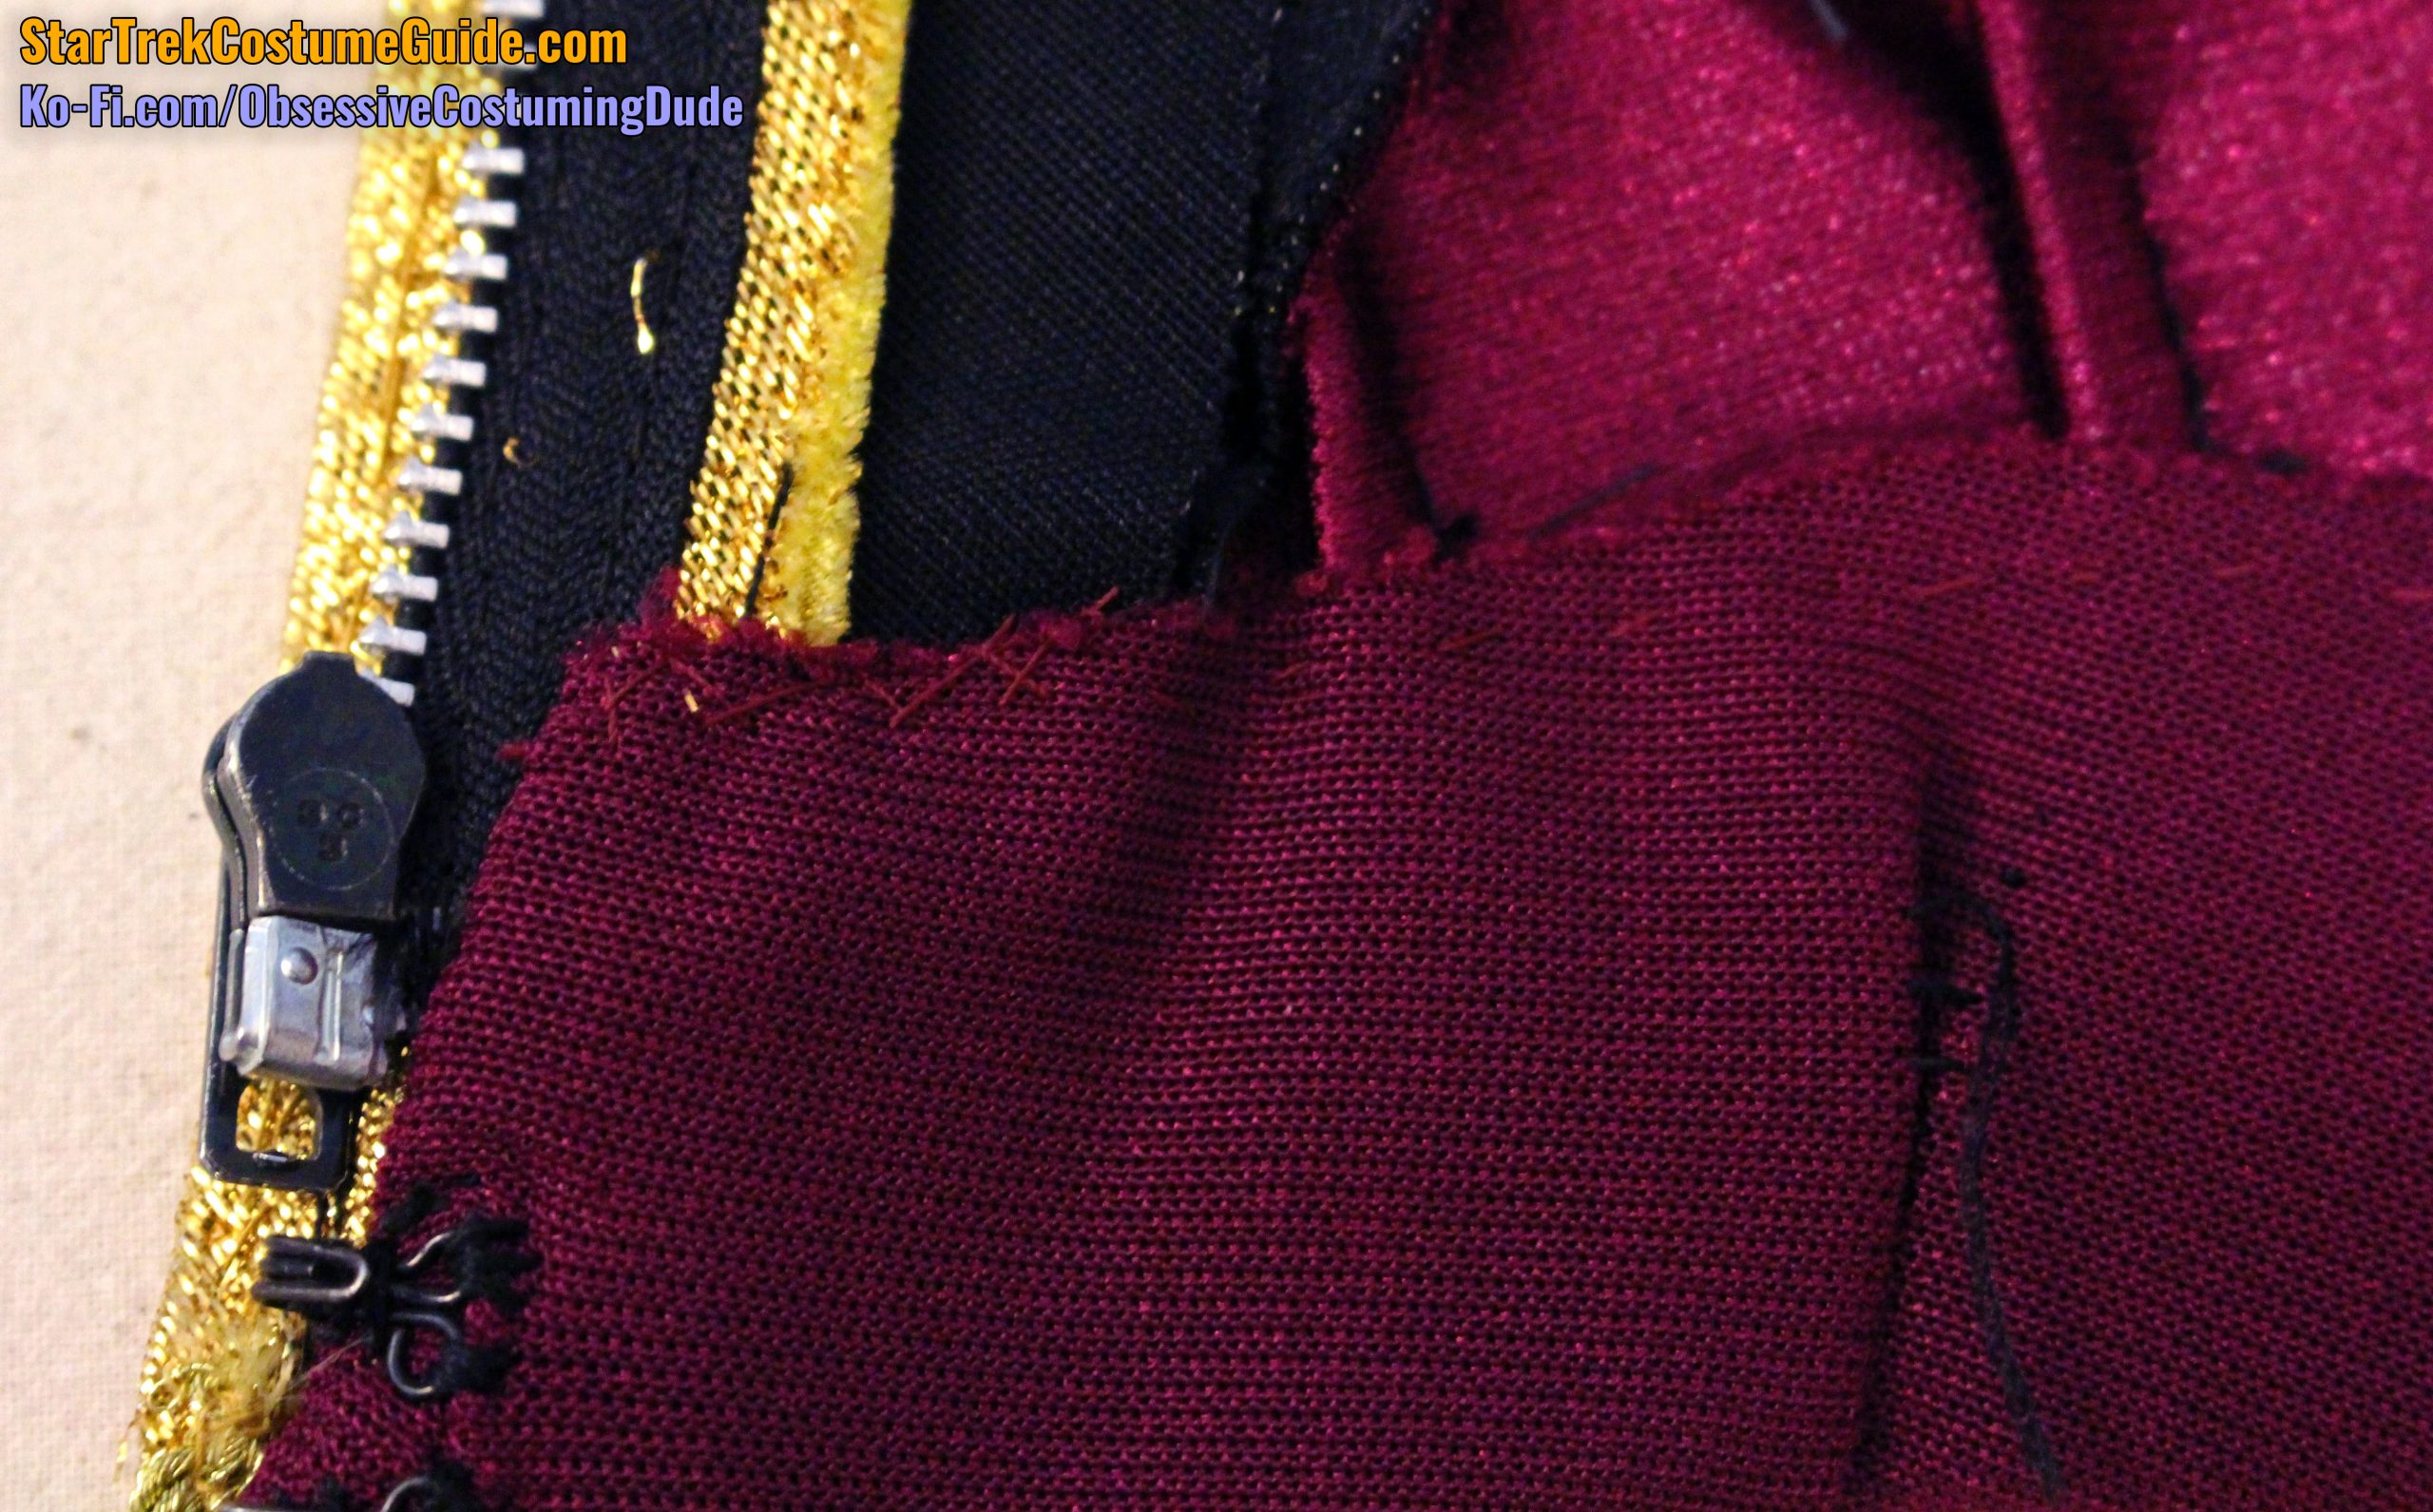
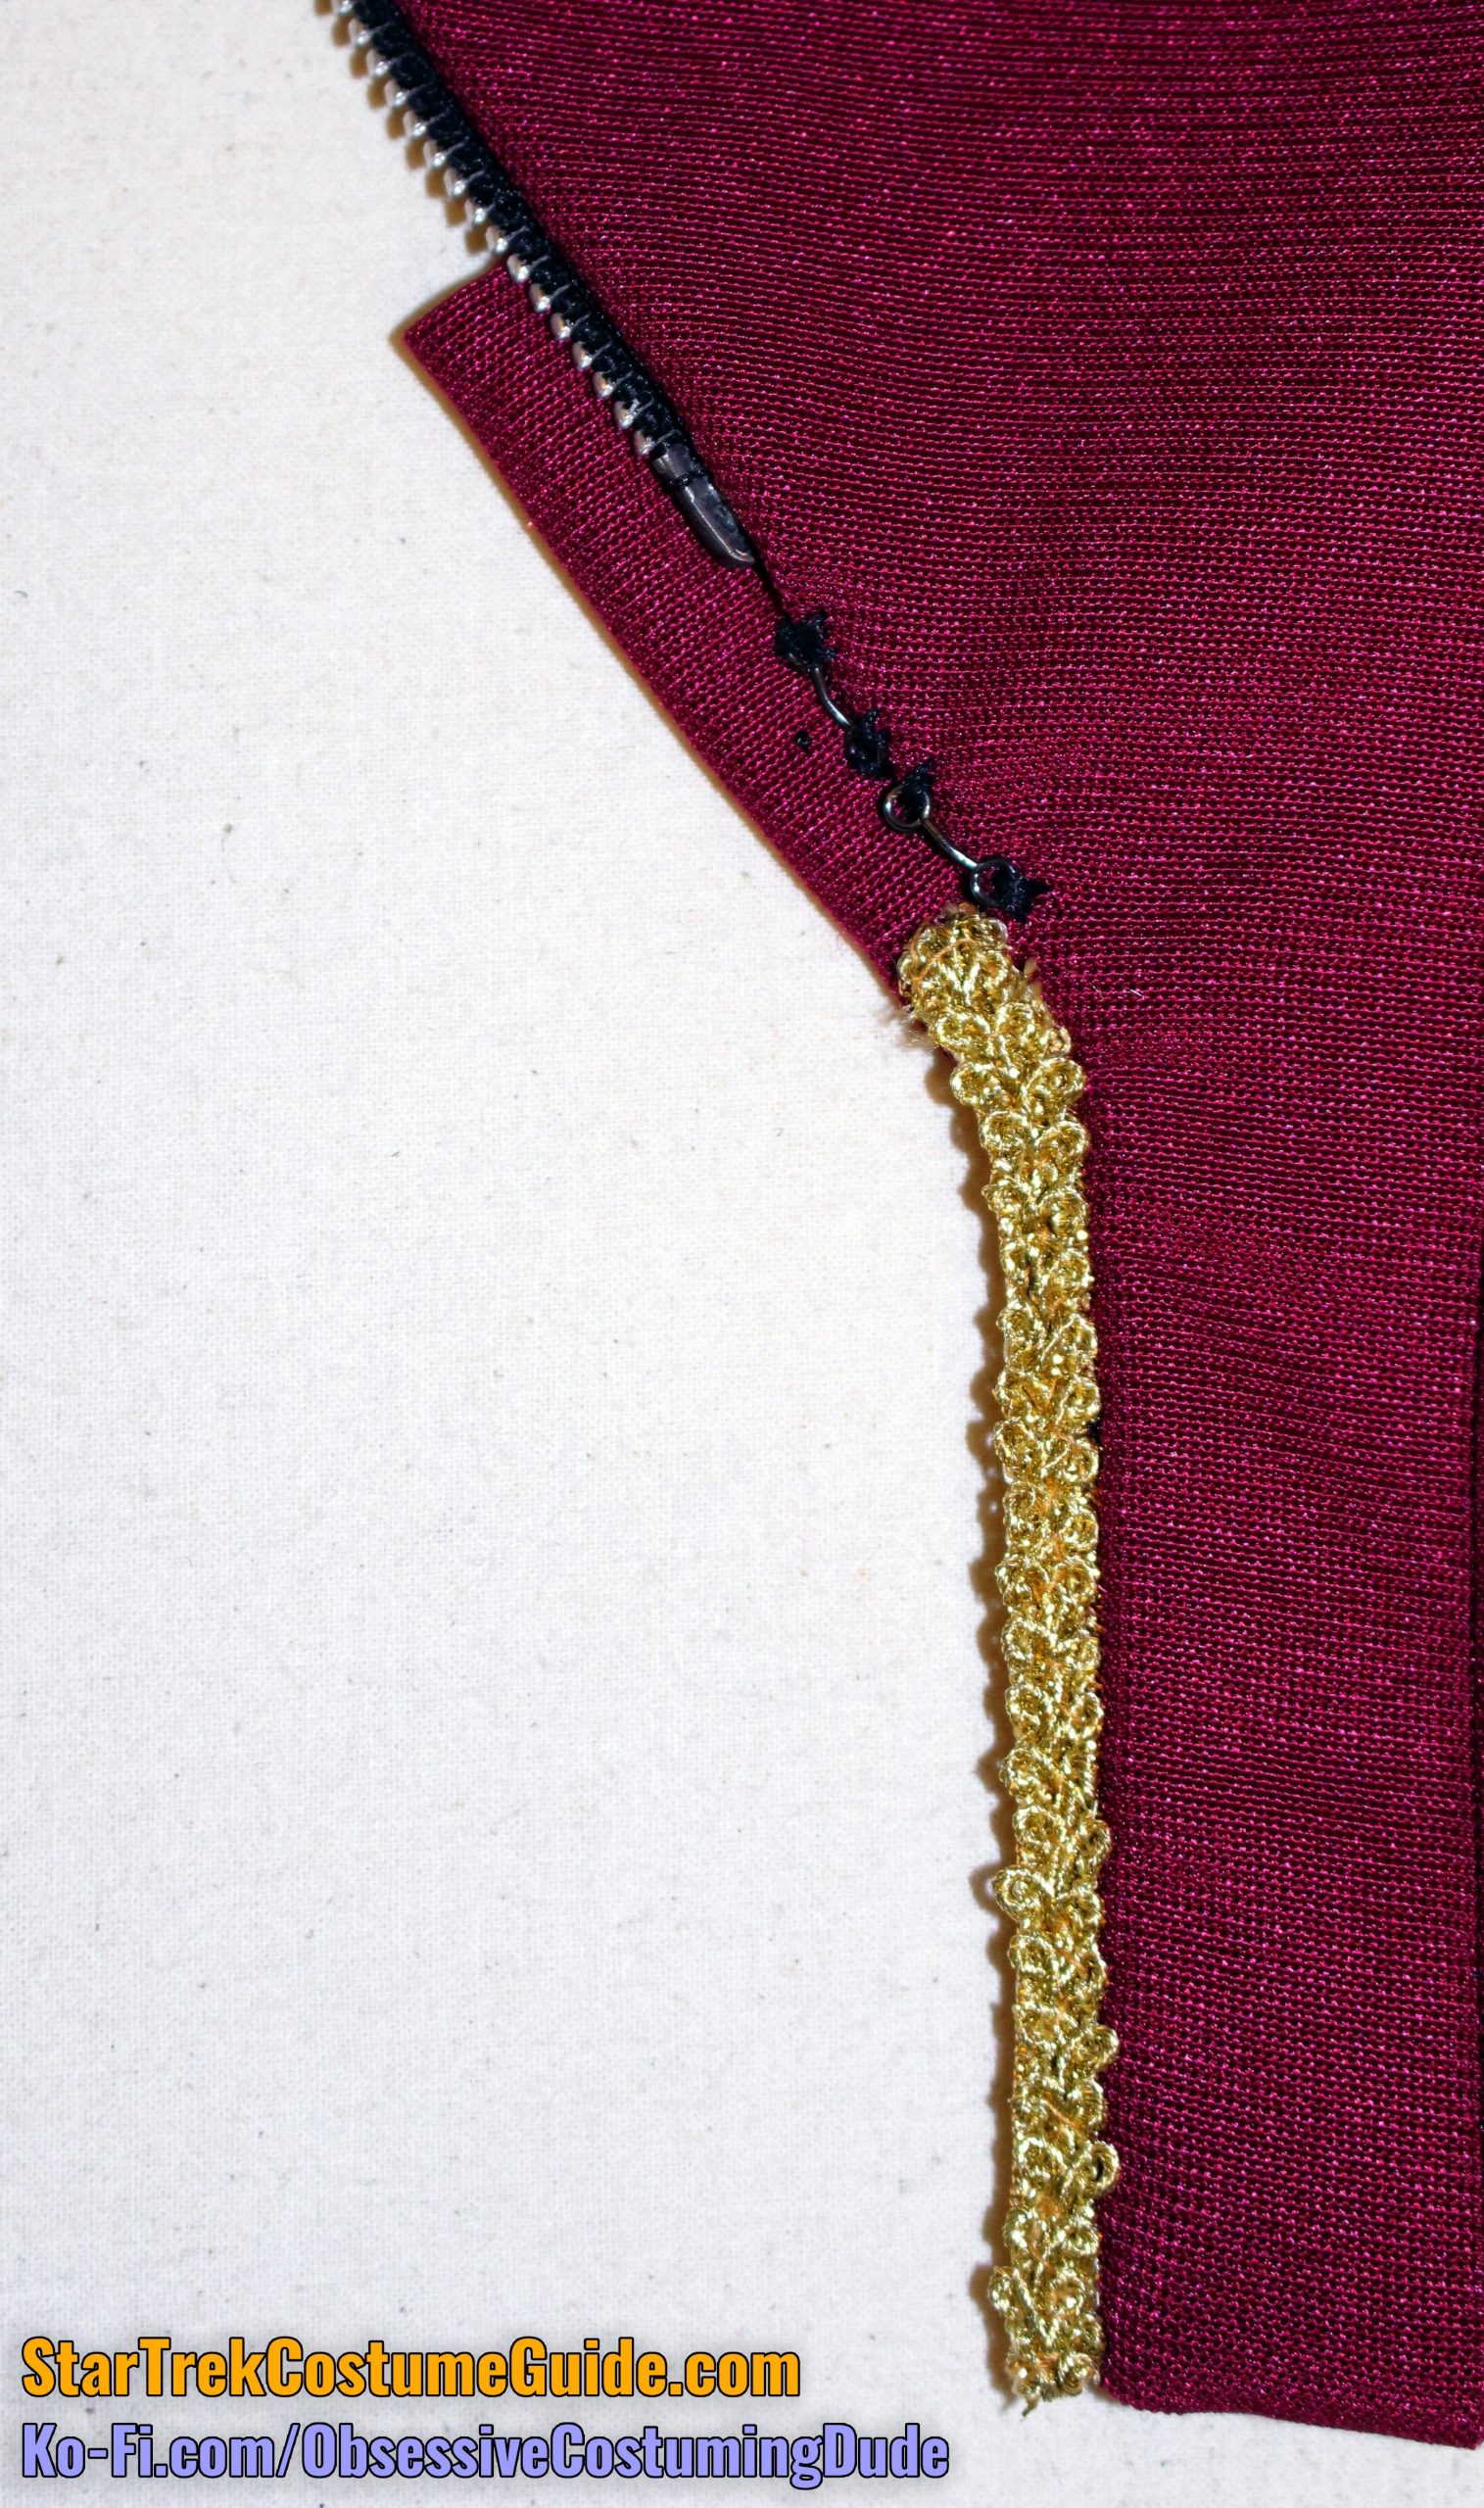
Beneath the zipper were two more hook-and-eye closures.
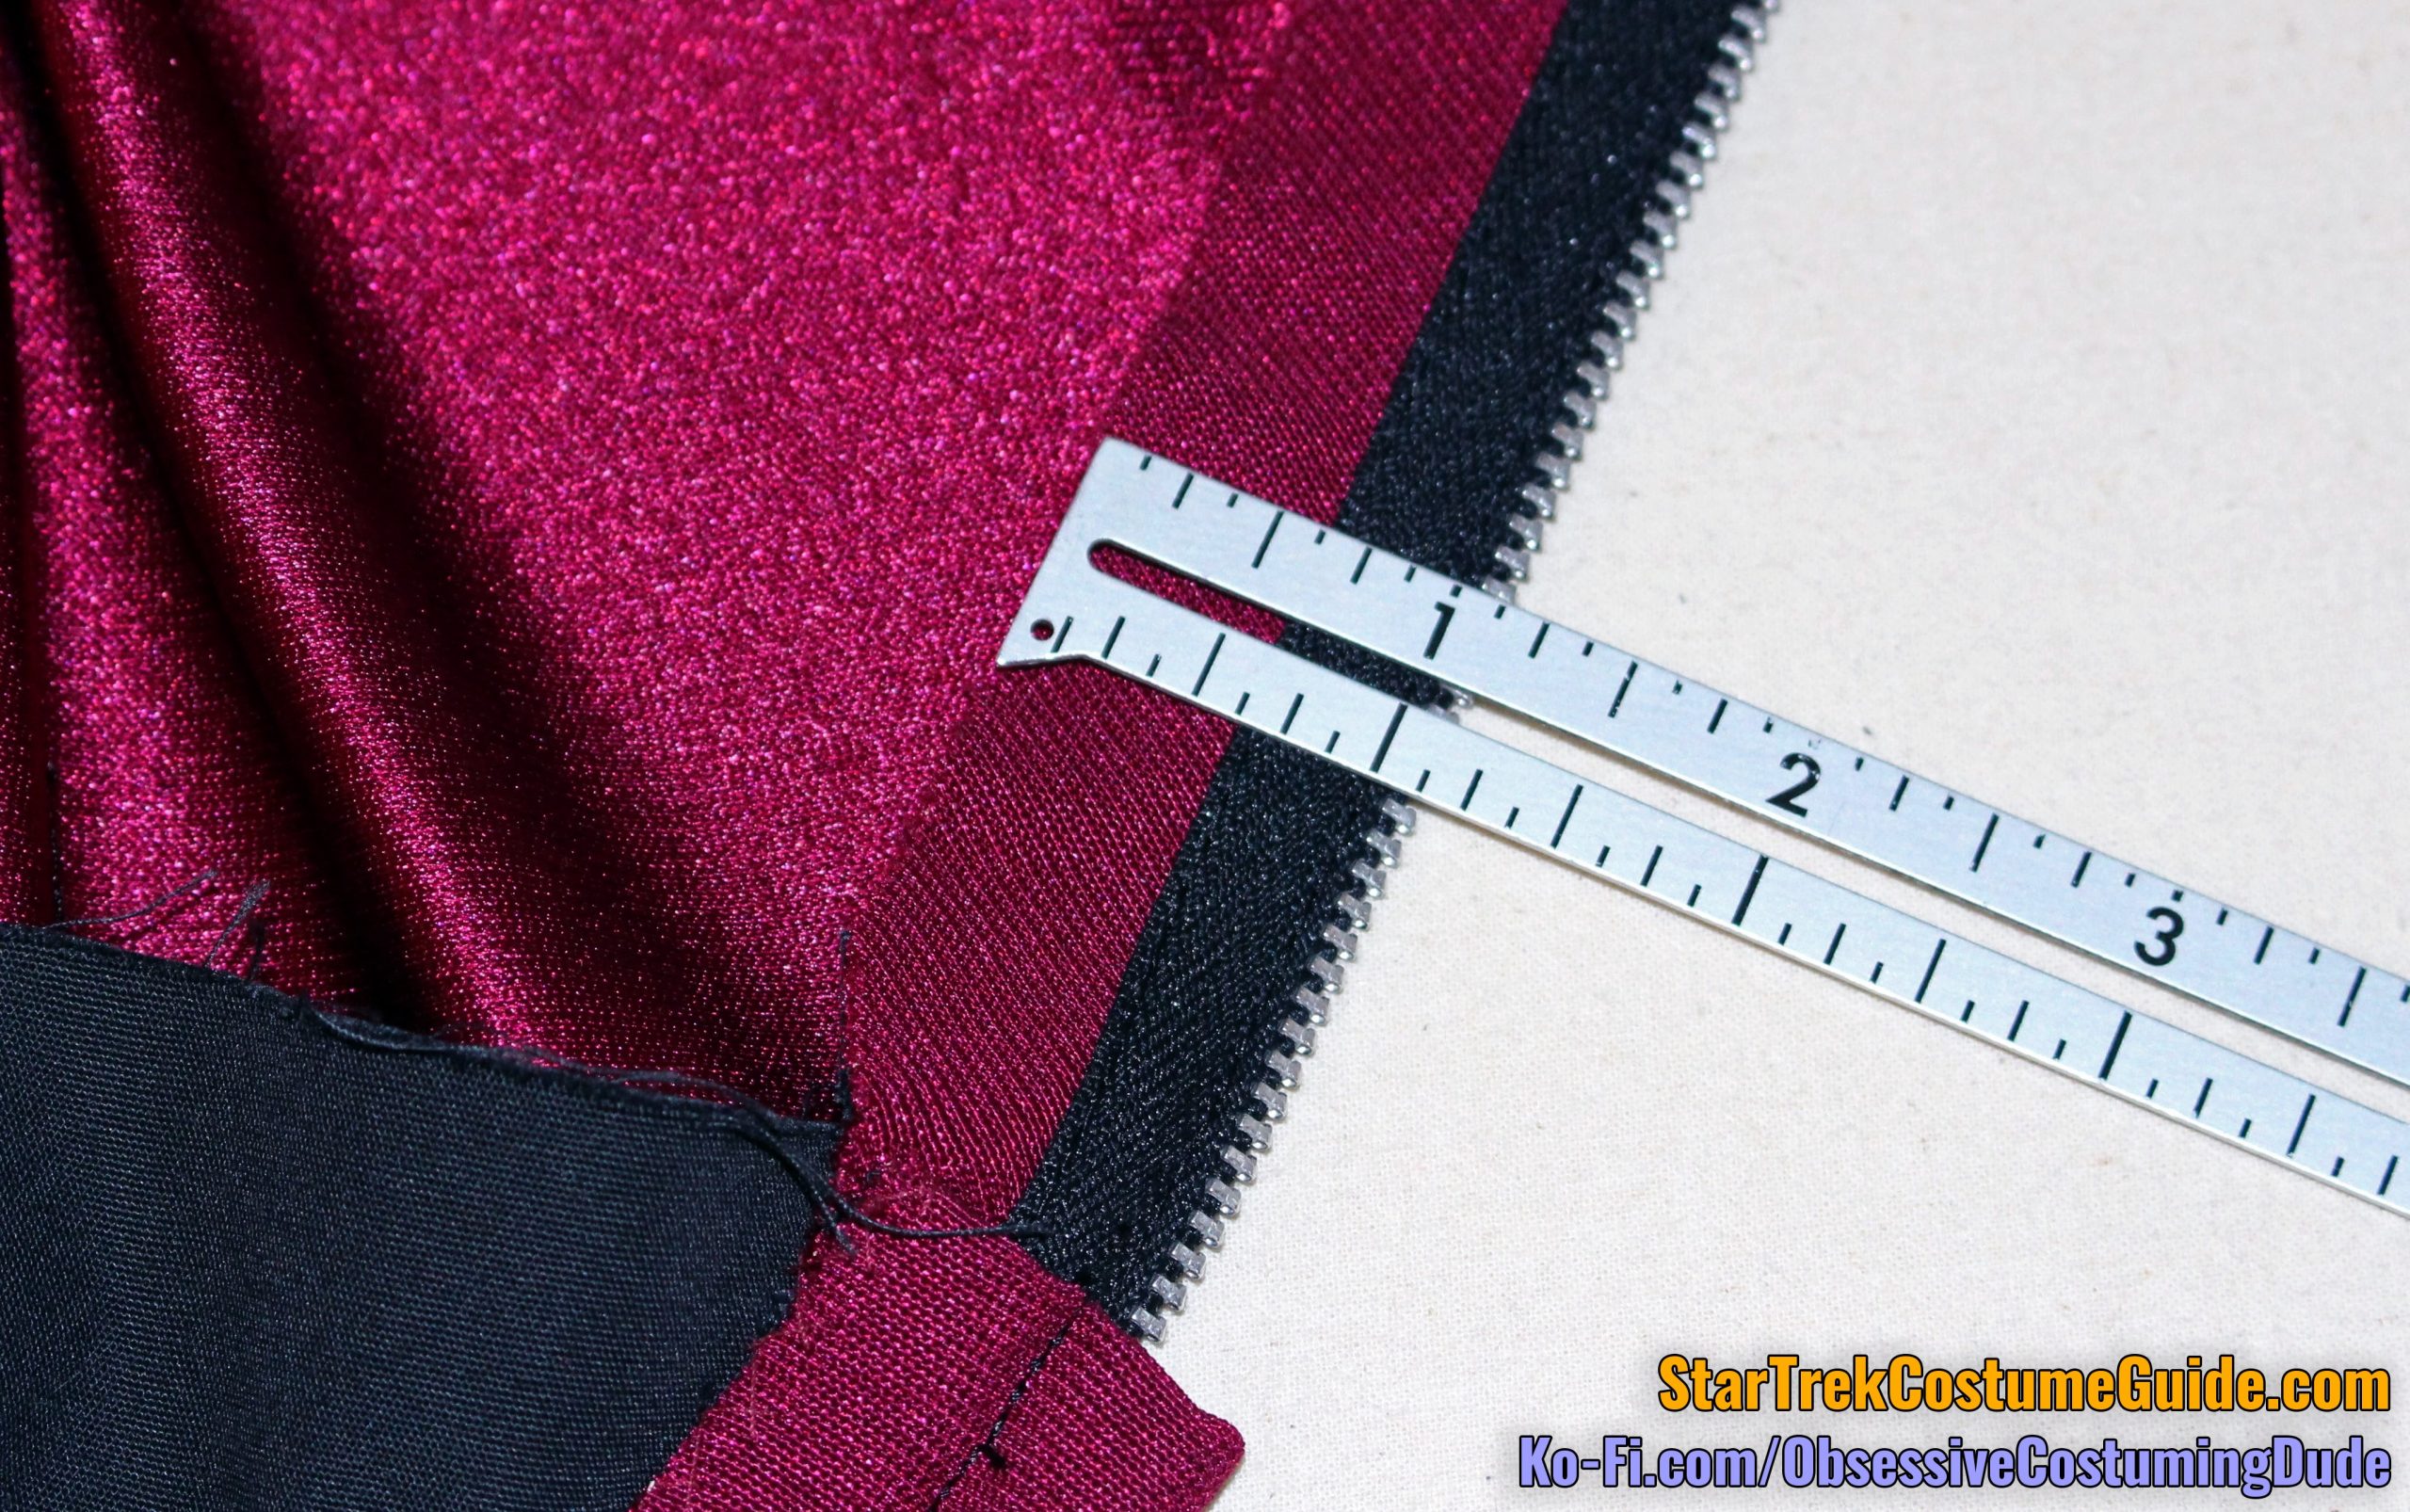
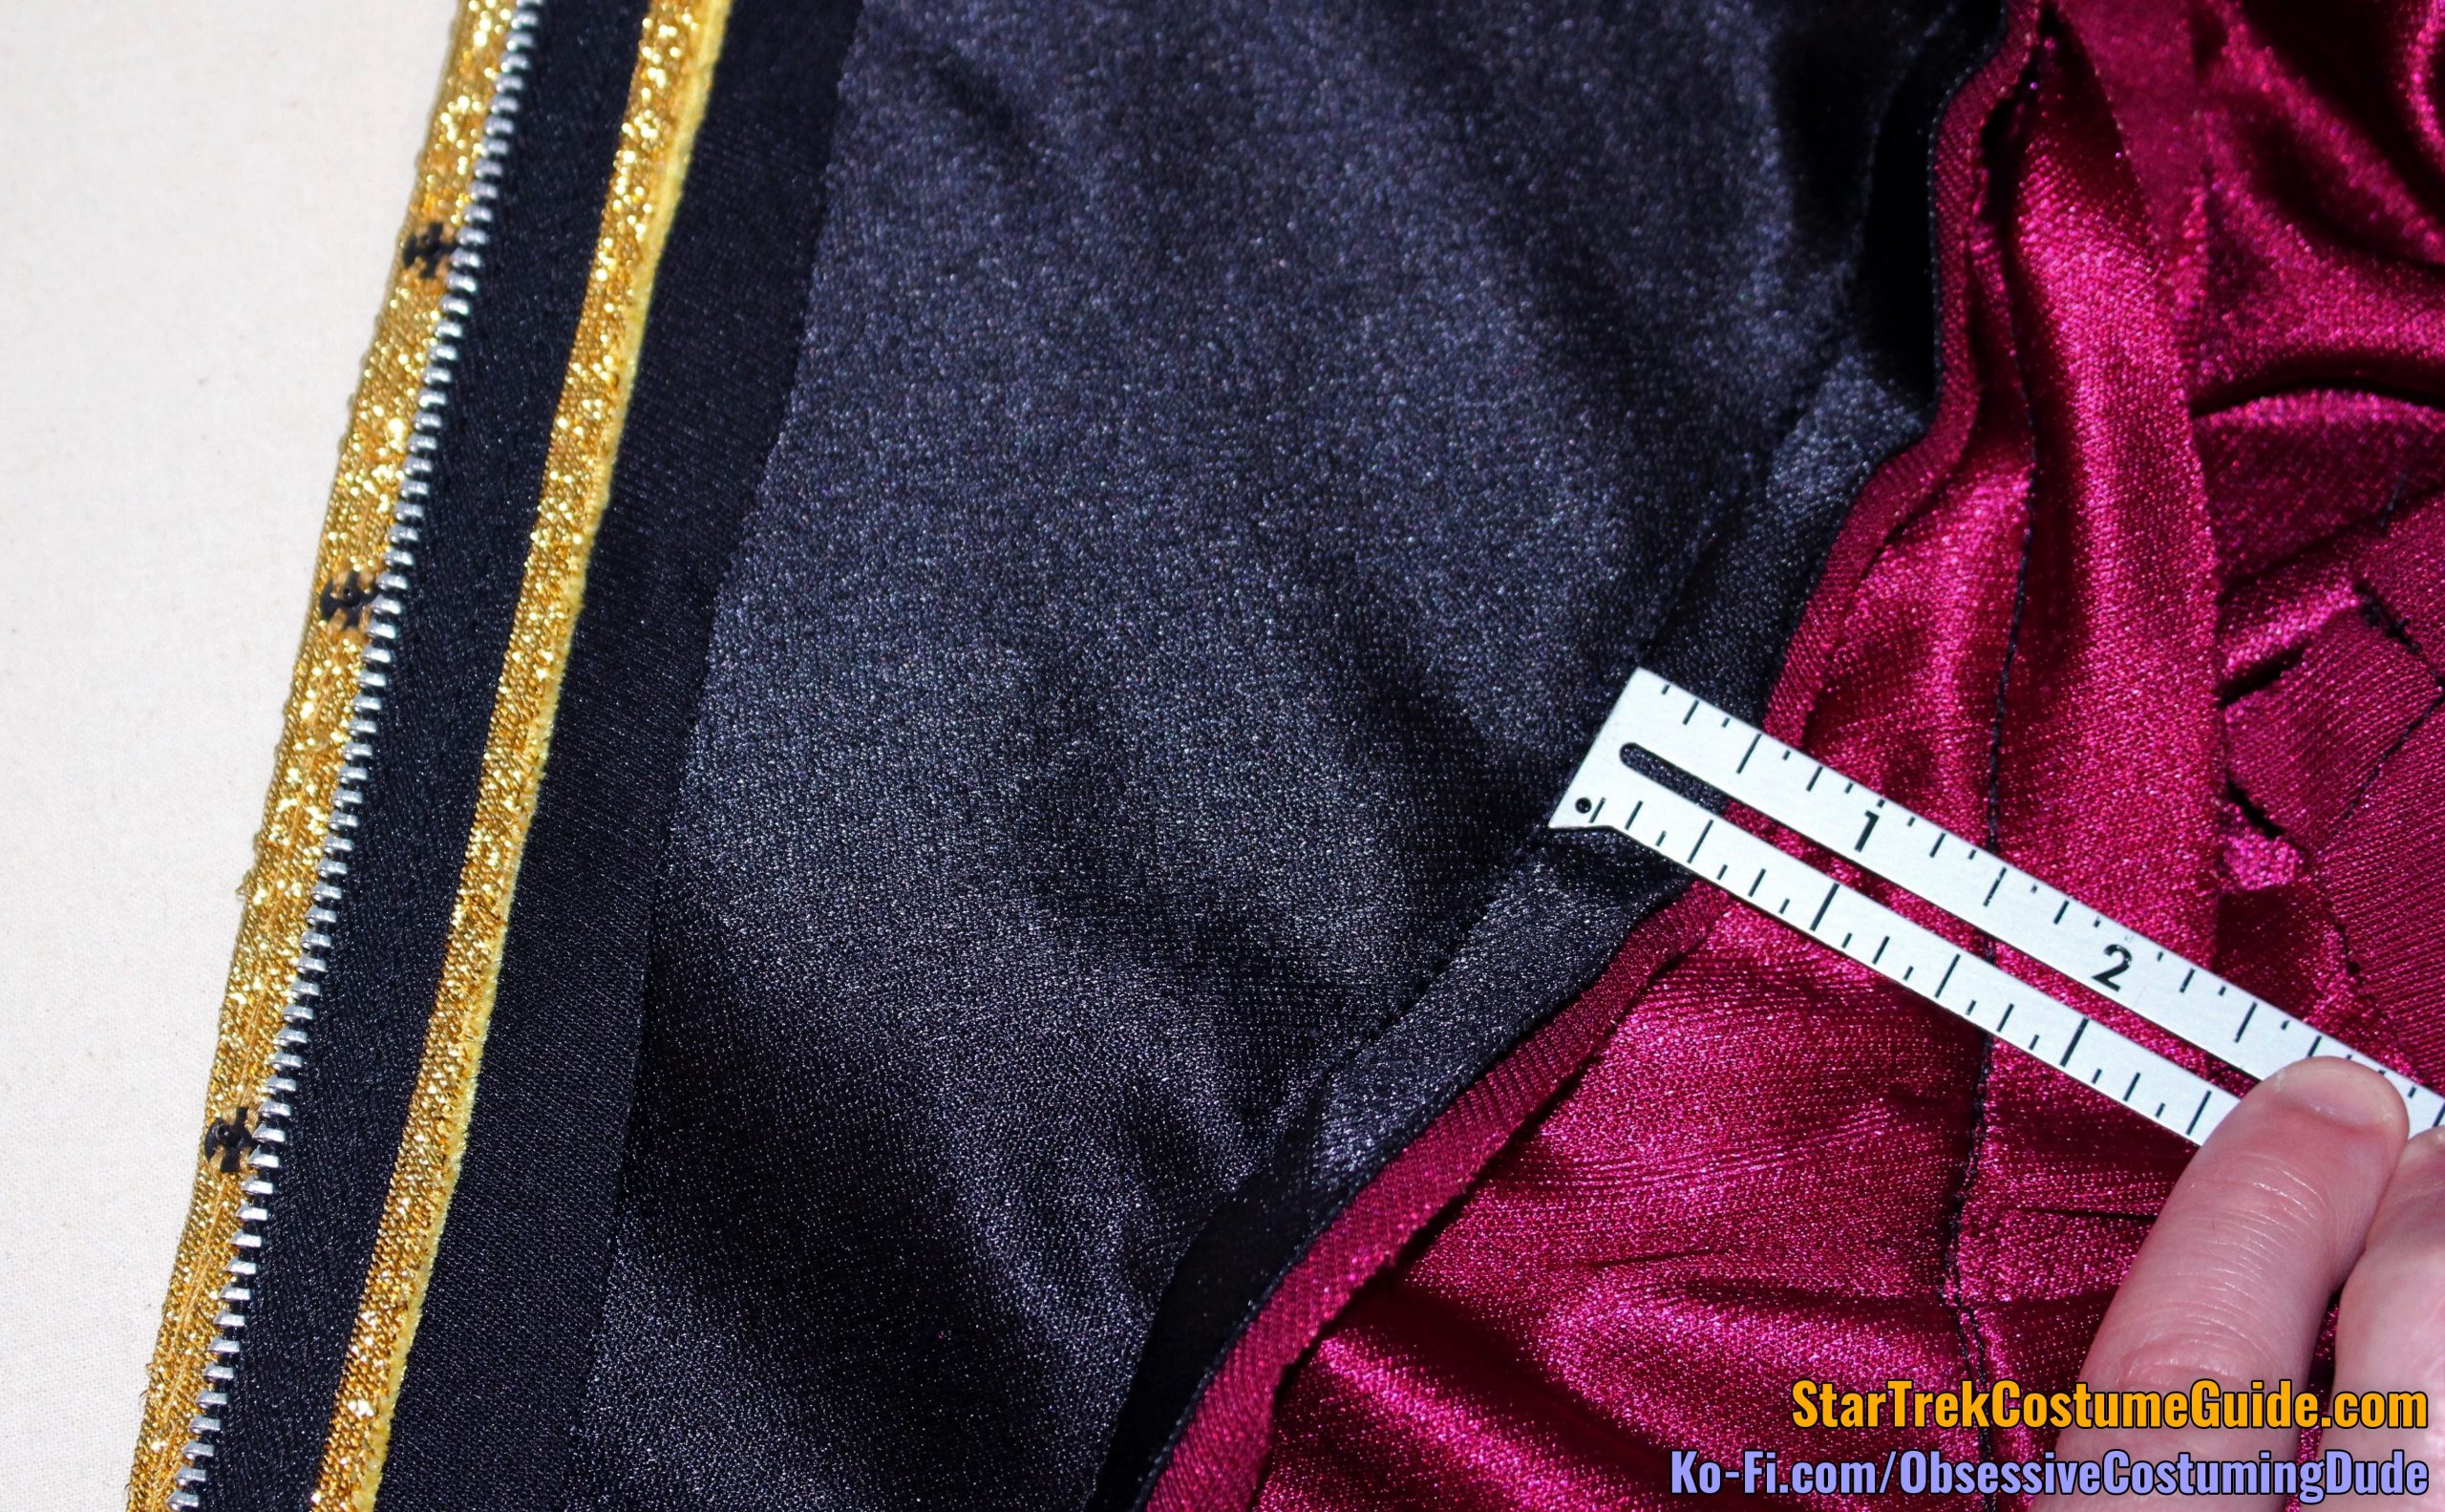
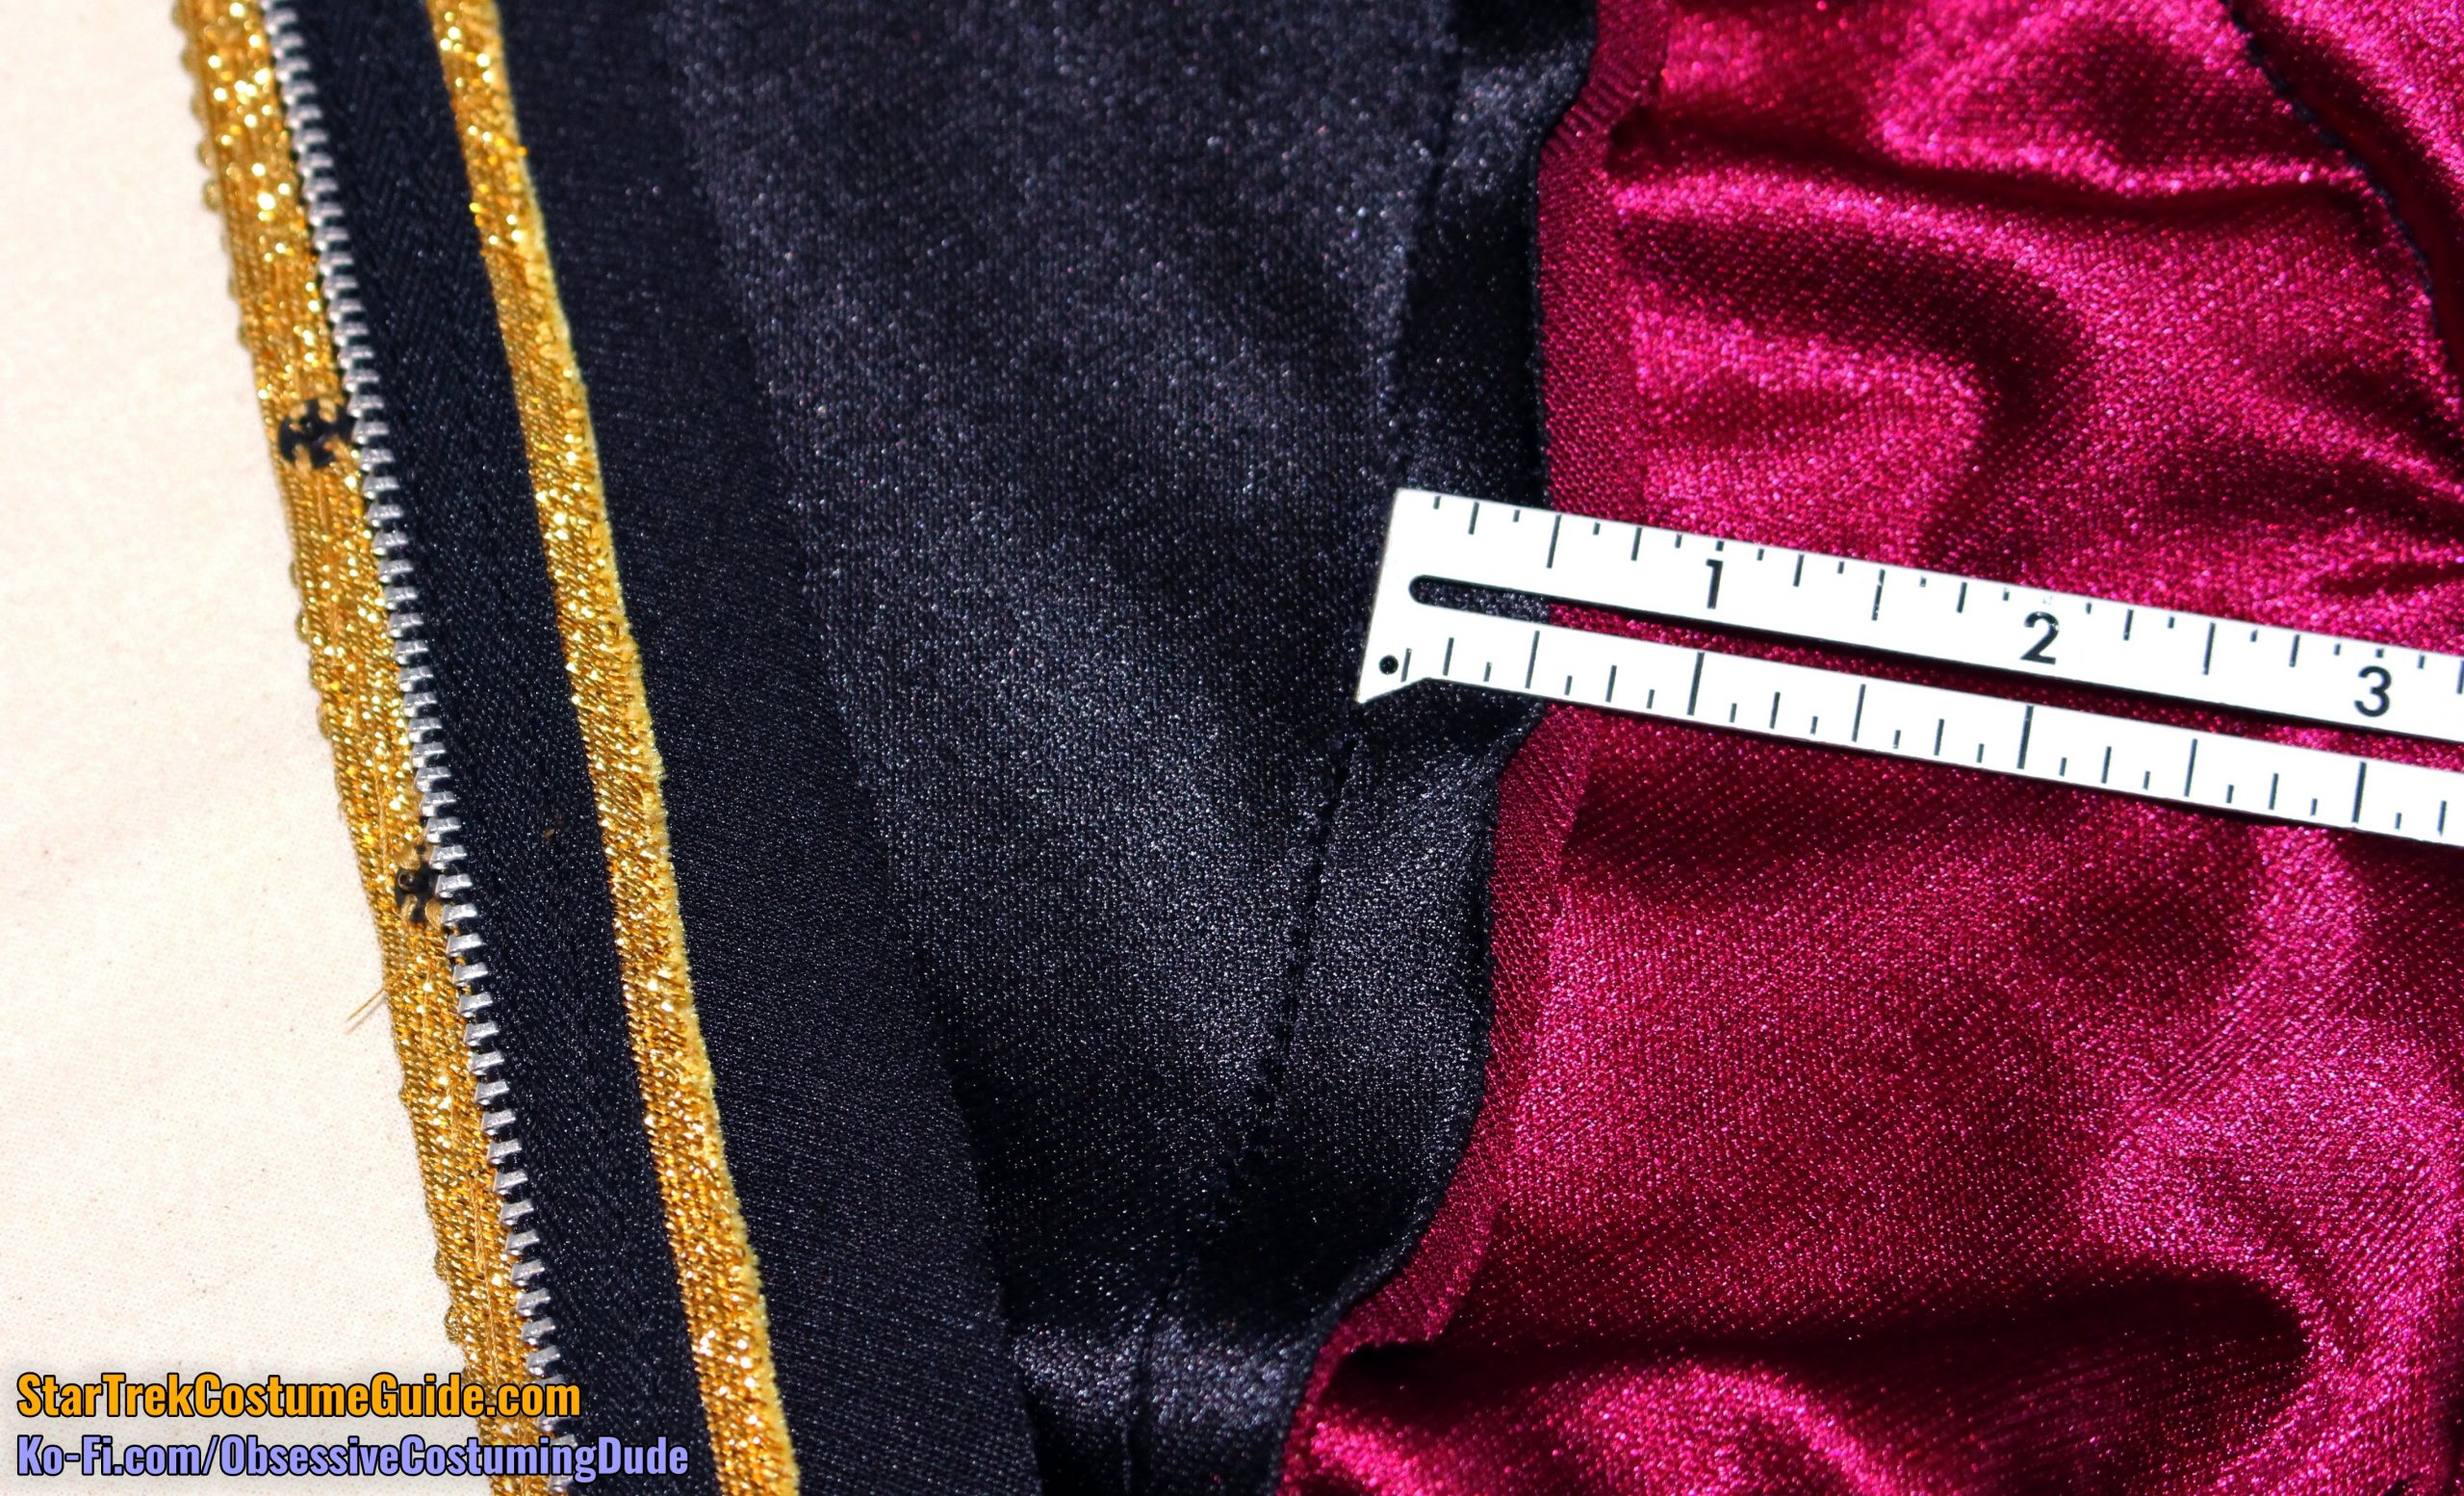
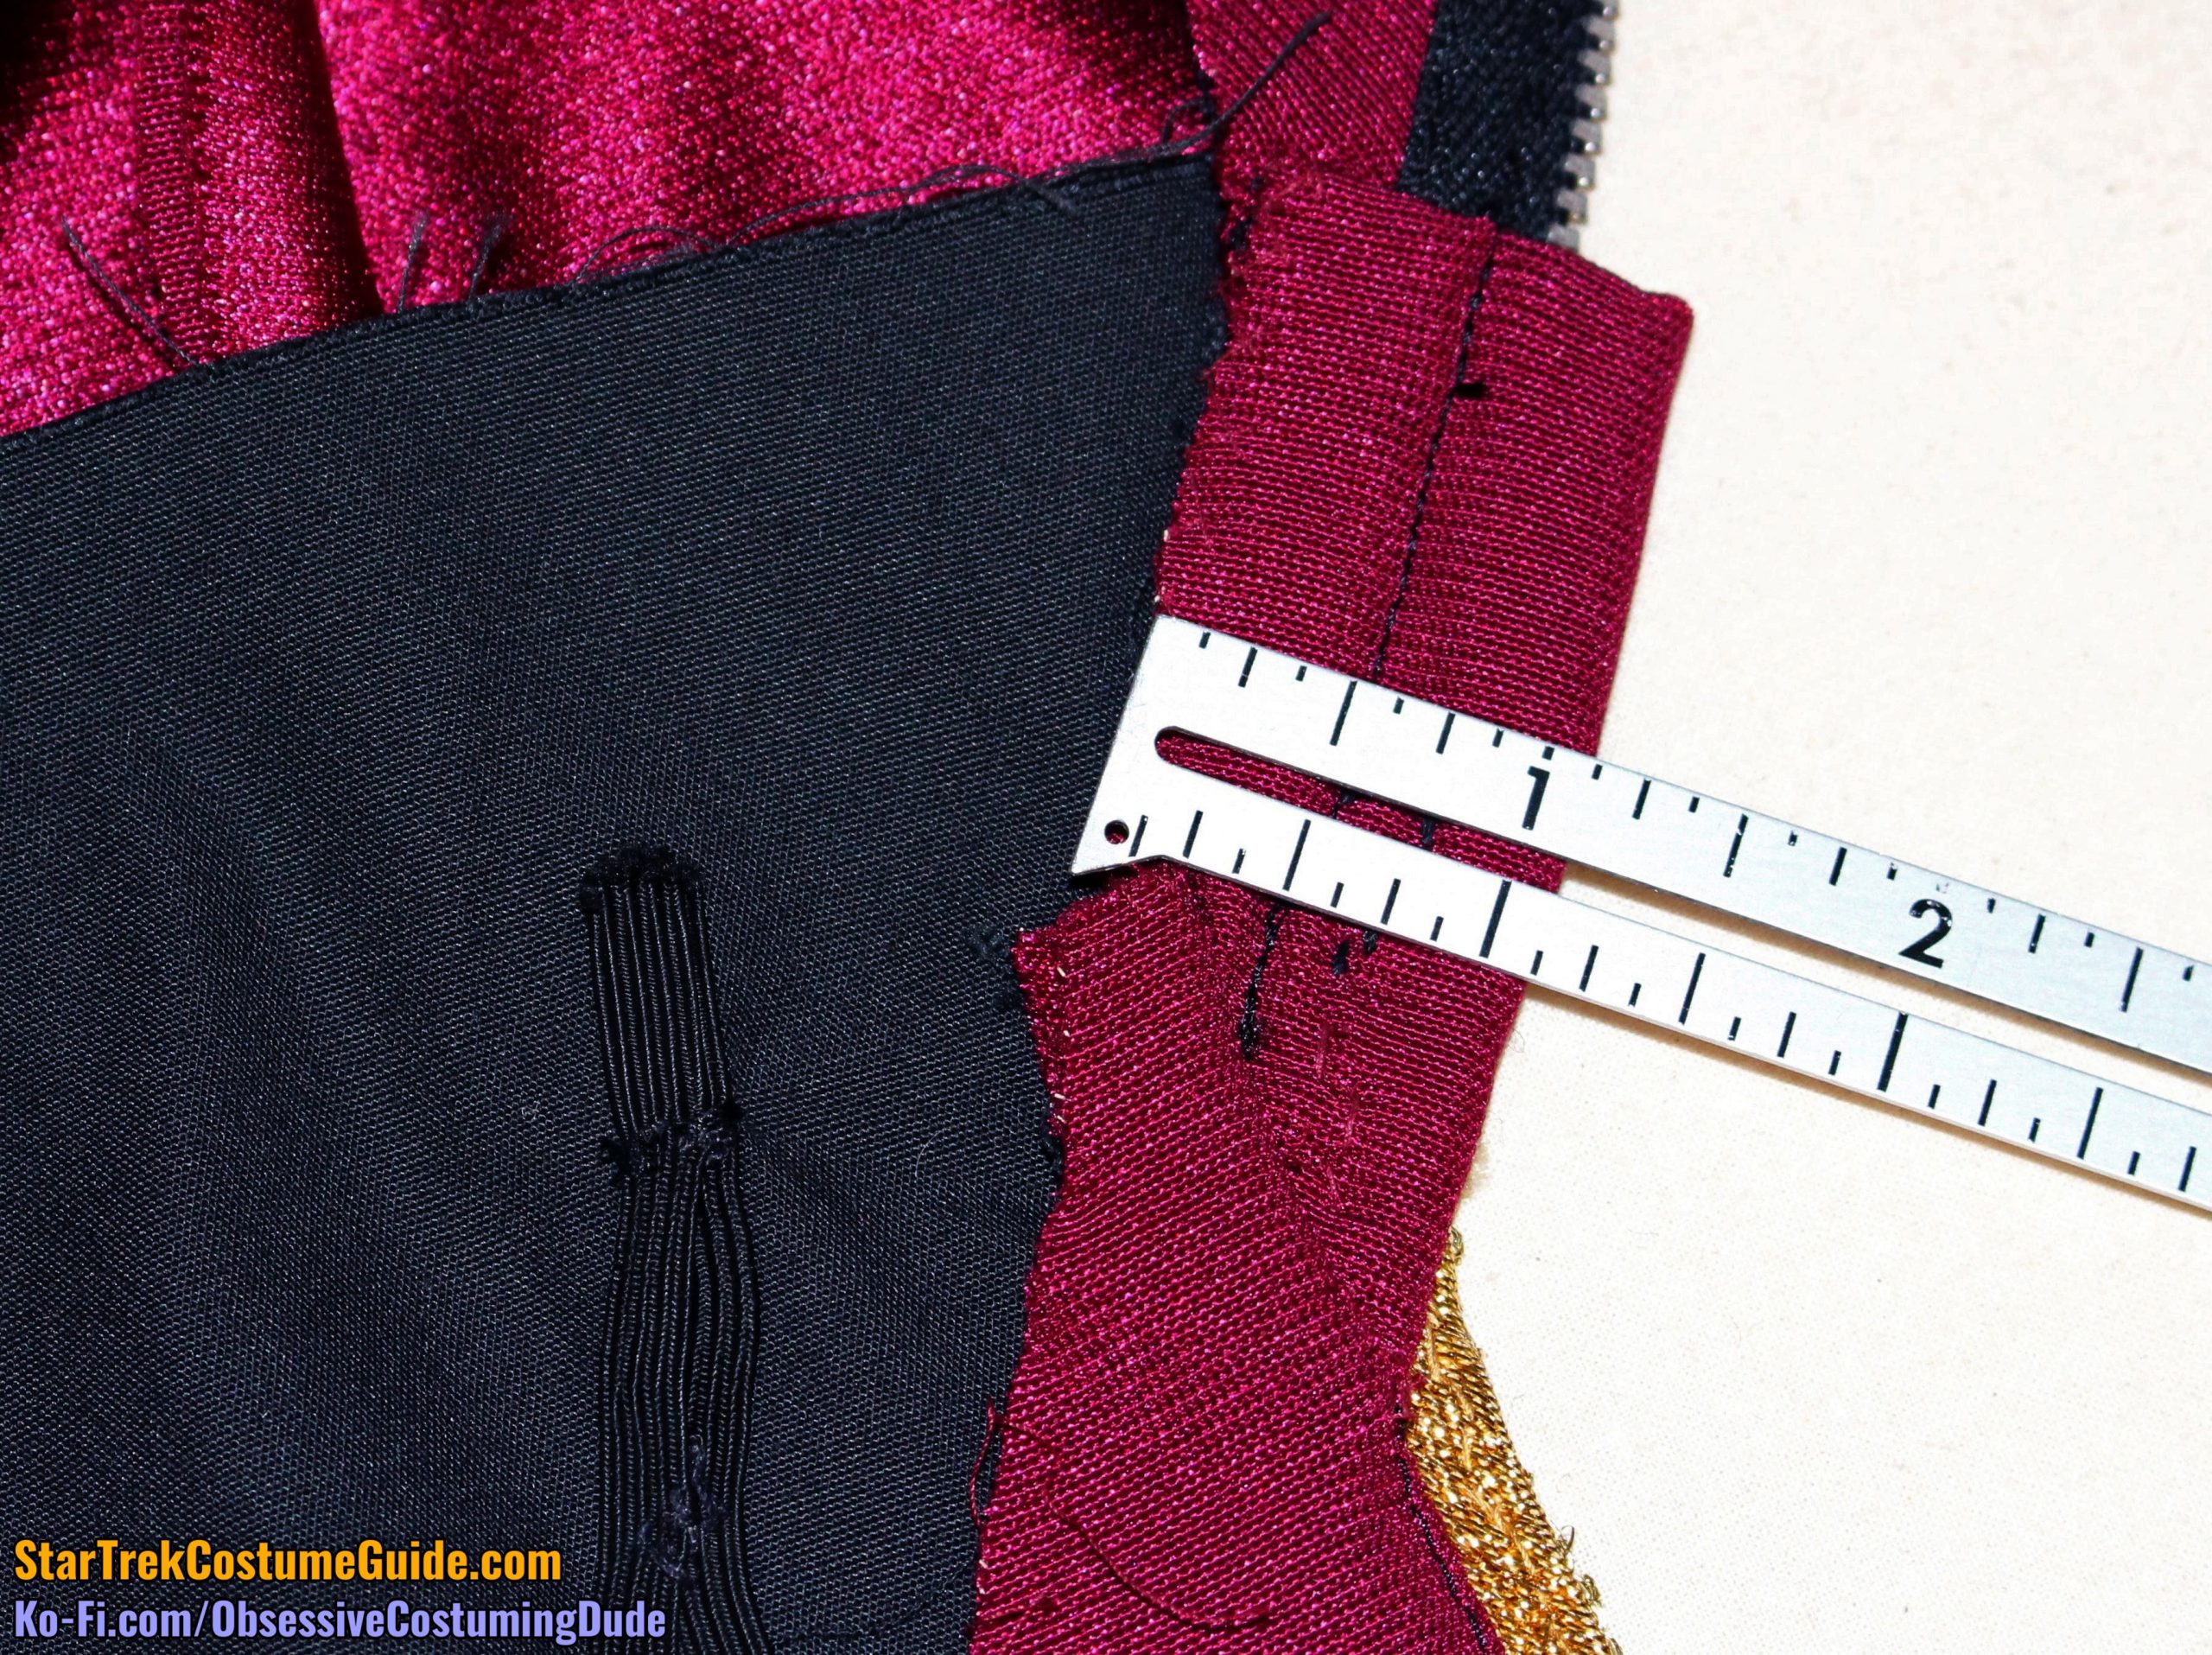
The left front (zipper) seam allowance was 1”.
The right front (zipper) seam allowance varied a bit; it appears to have also originally been 1”, but sometimes it was as much as 1 ¼”.
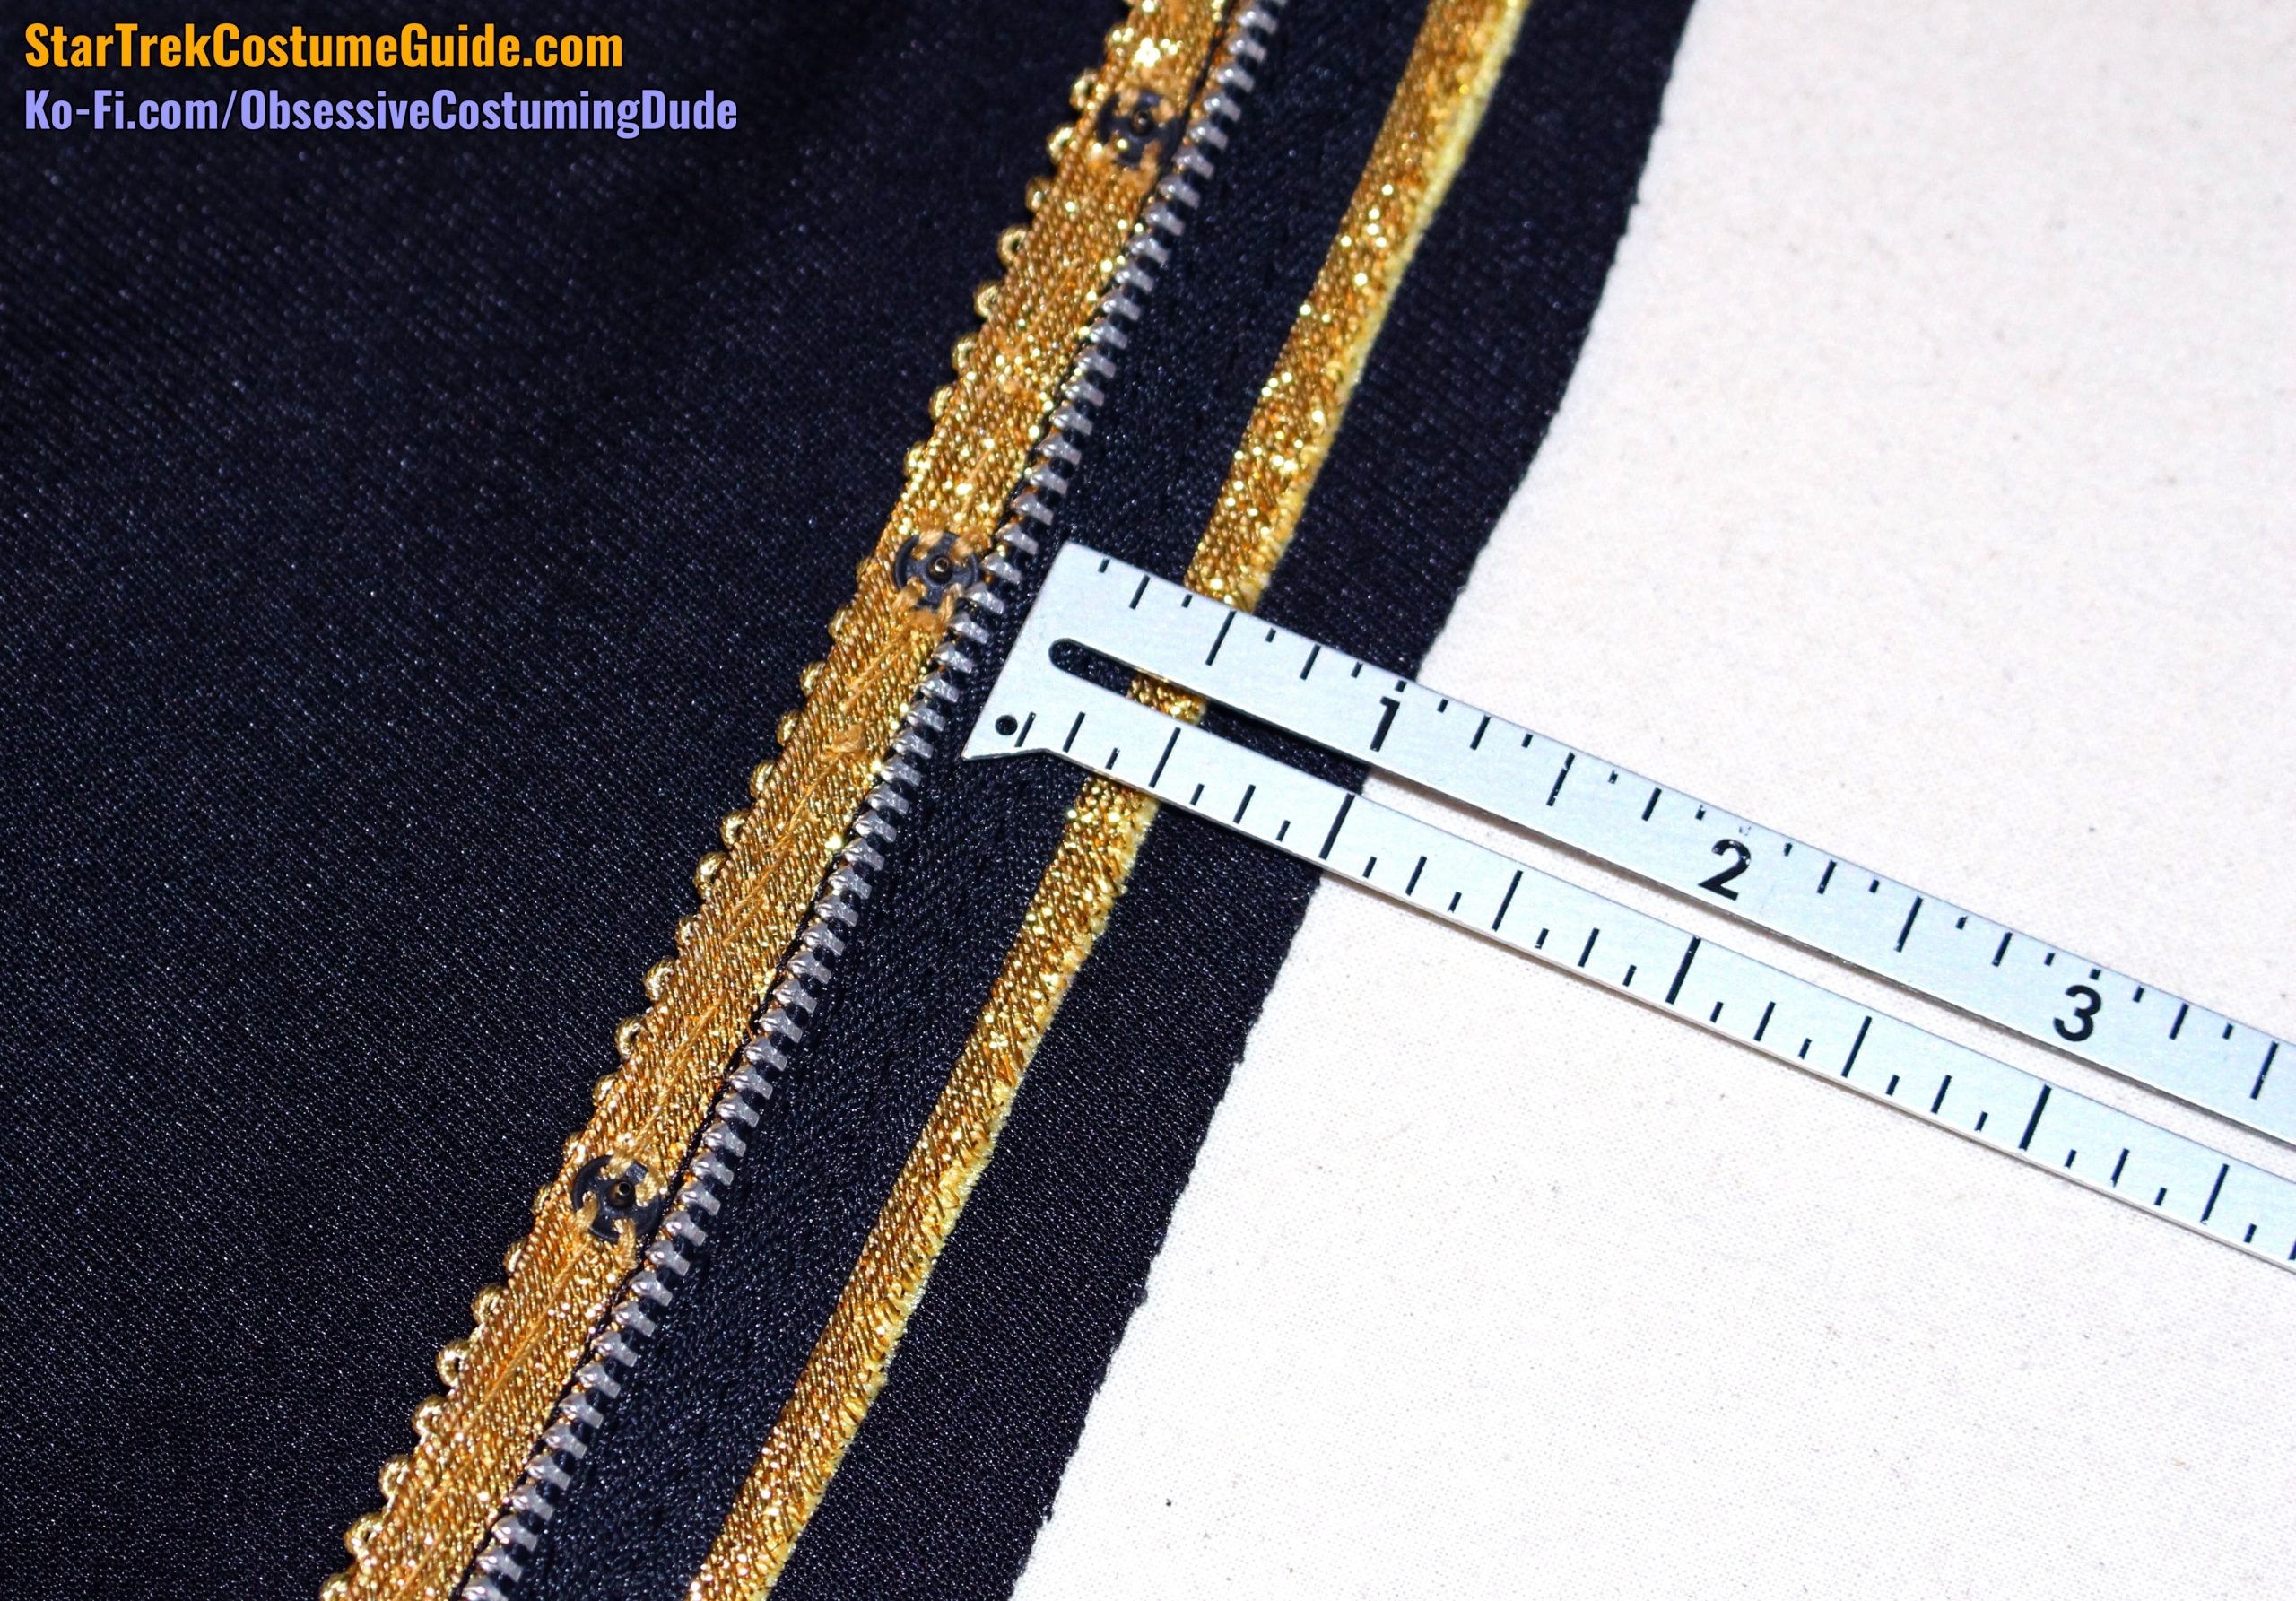
Here, you can see that the trim was originally 2” wide, folded in half, and sewn onto the seam allowance.
The zipper was sewn through all layers, and the hook-and-eye closures were hand-sewn to the underside of the trim.
The zipper was reinforced with an additional row of stitching, and several rows at the top (apparently veering away whenever the sewer/costumer felt like that was sufficient).
INTERIOR CONSTRUCTION
Now we’ll take a look at the inside of this admiral jacket, and its interior construction.
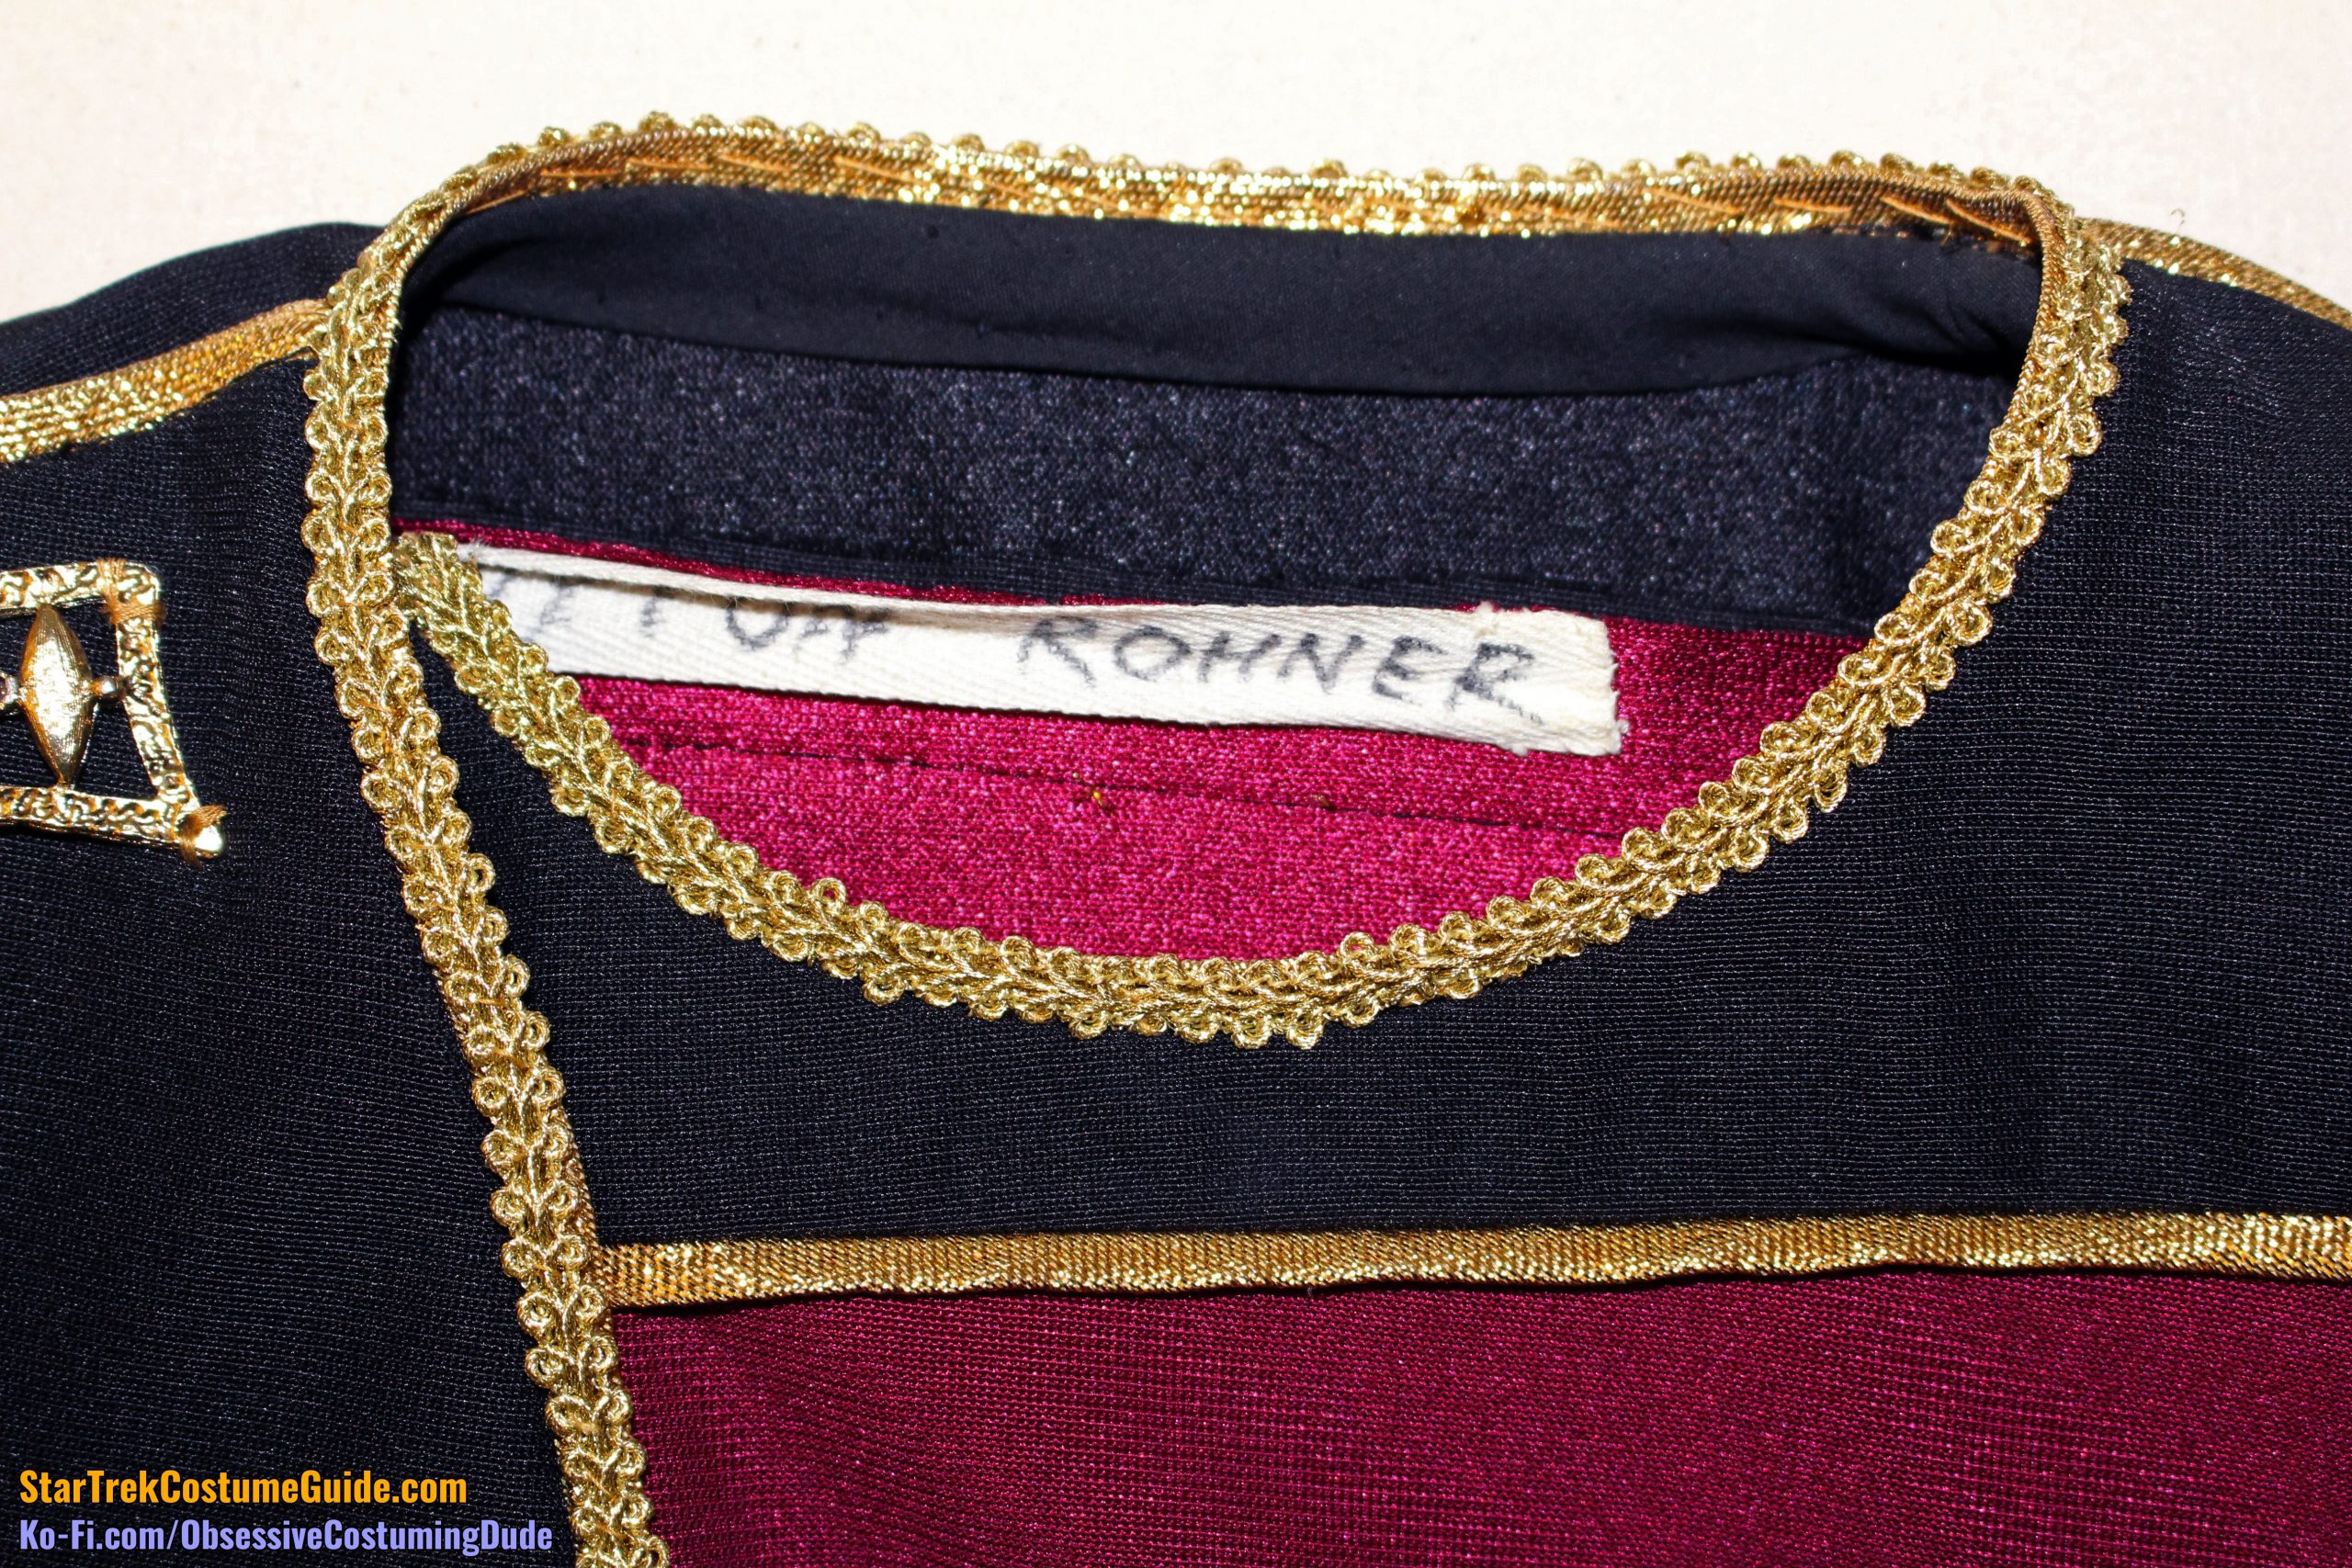
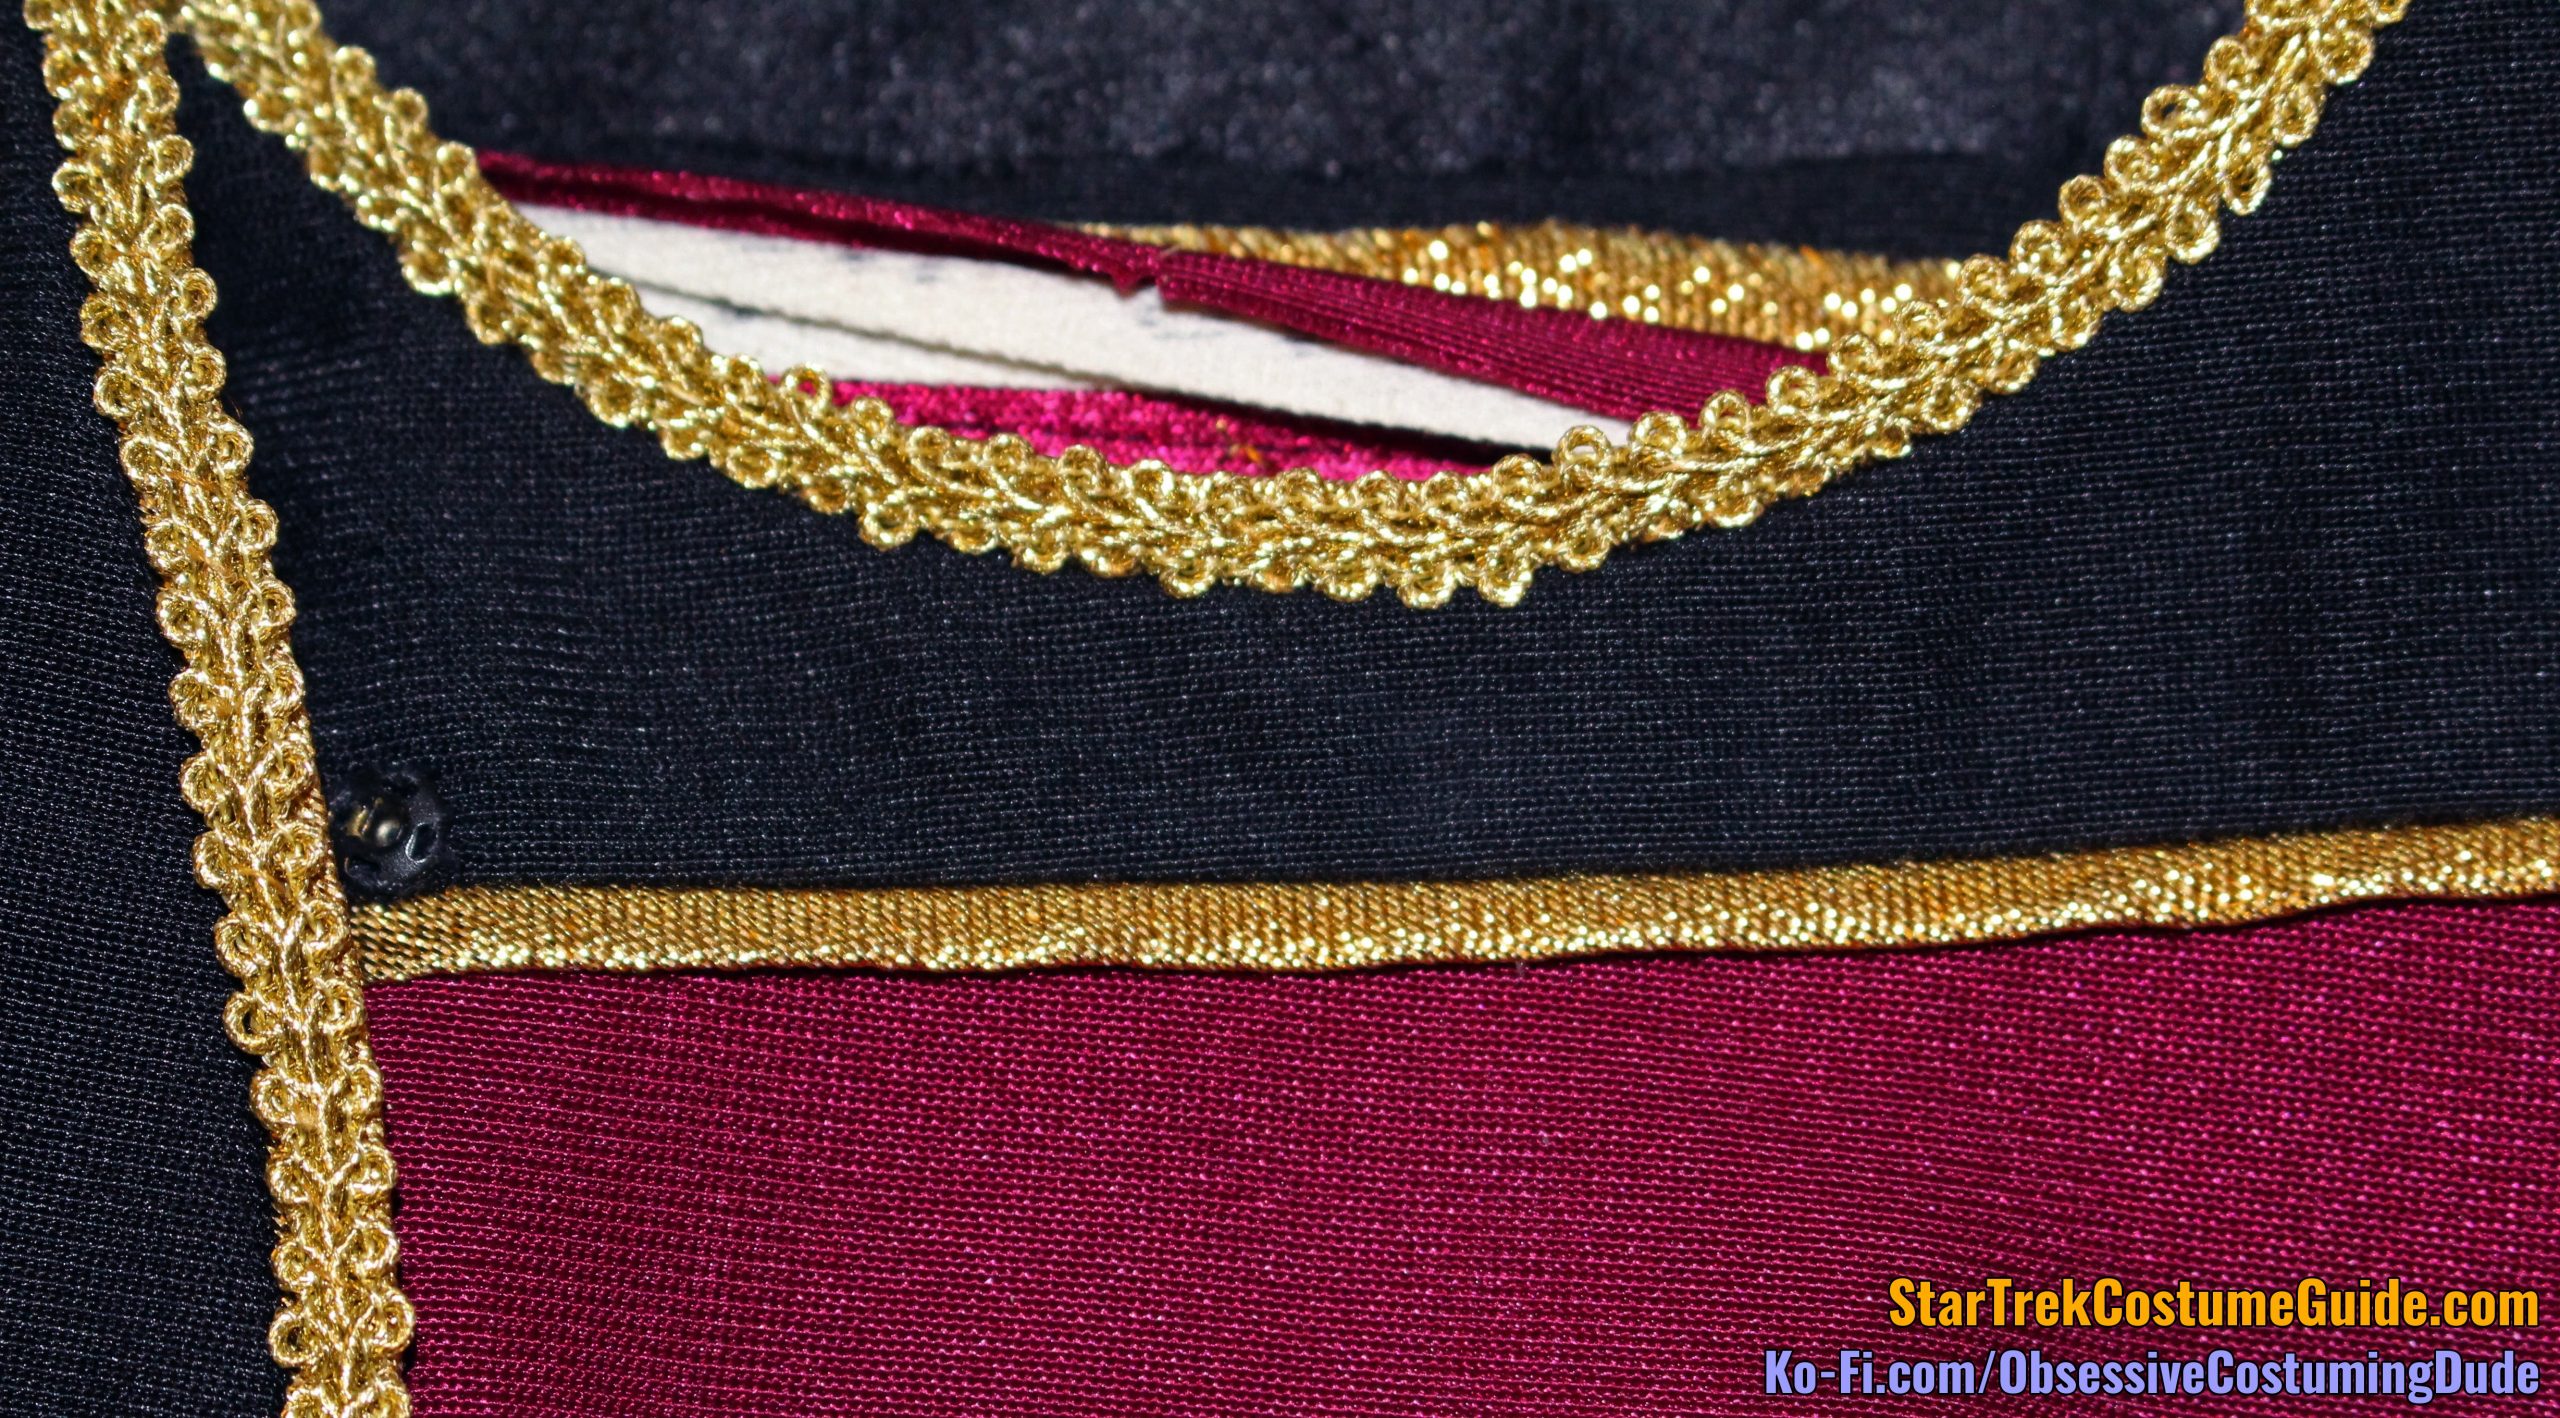
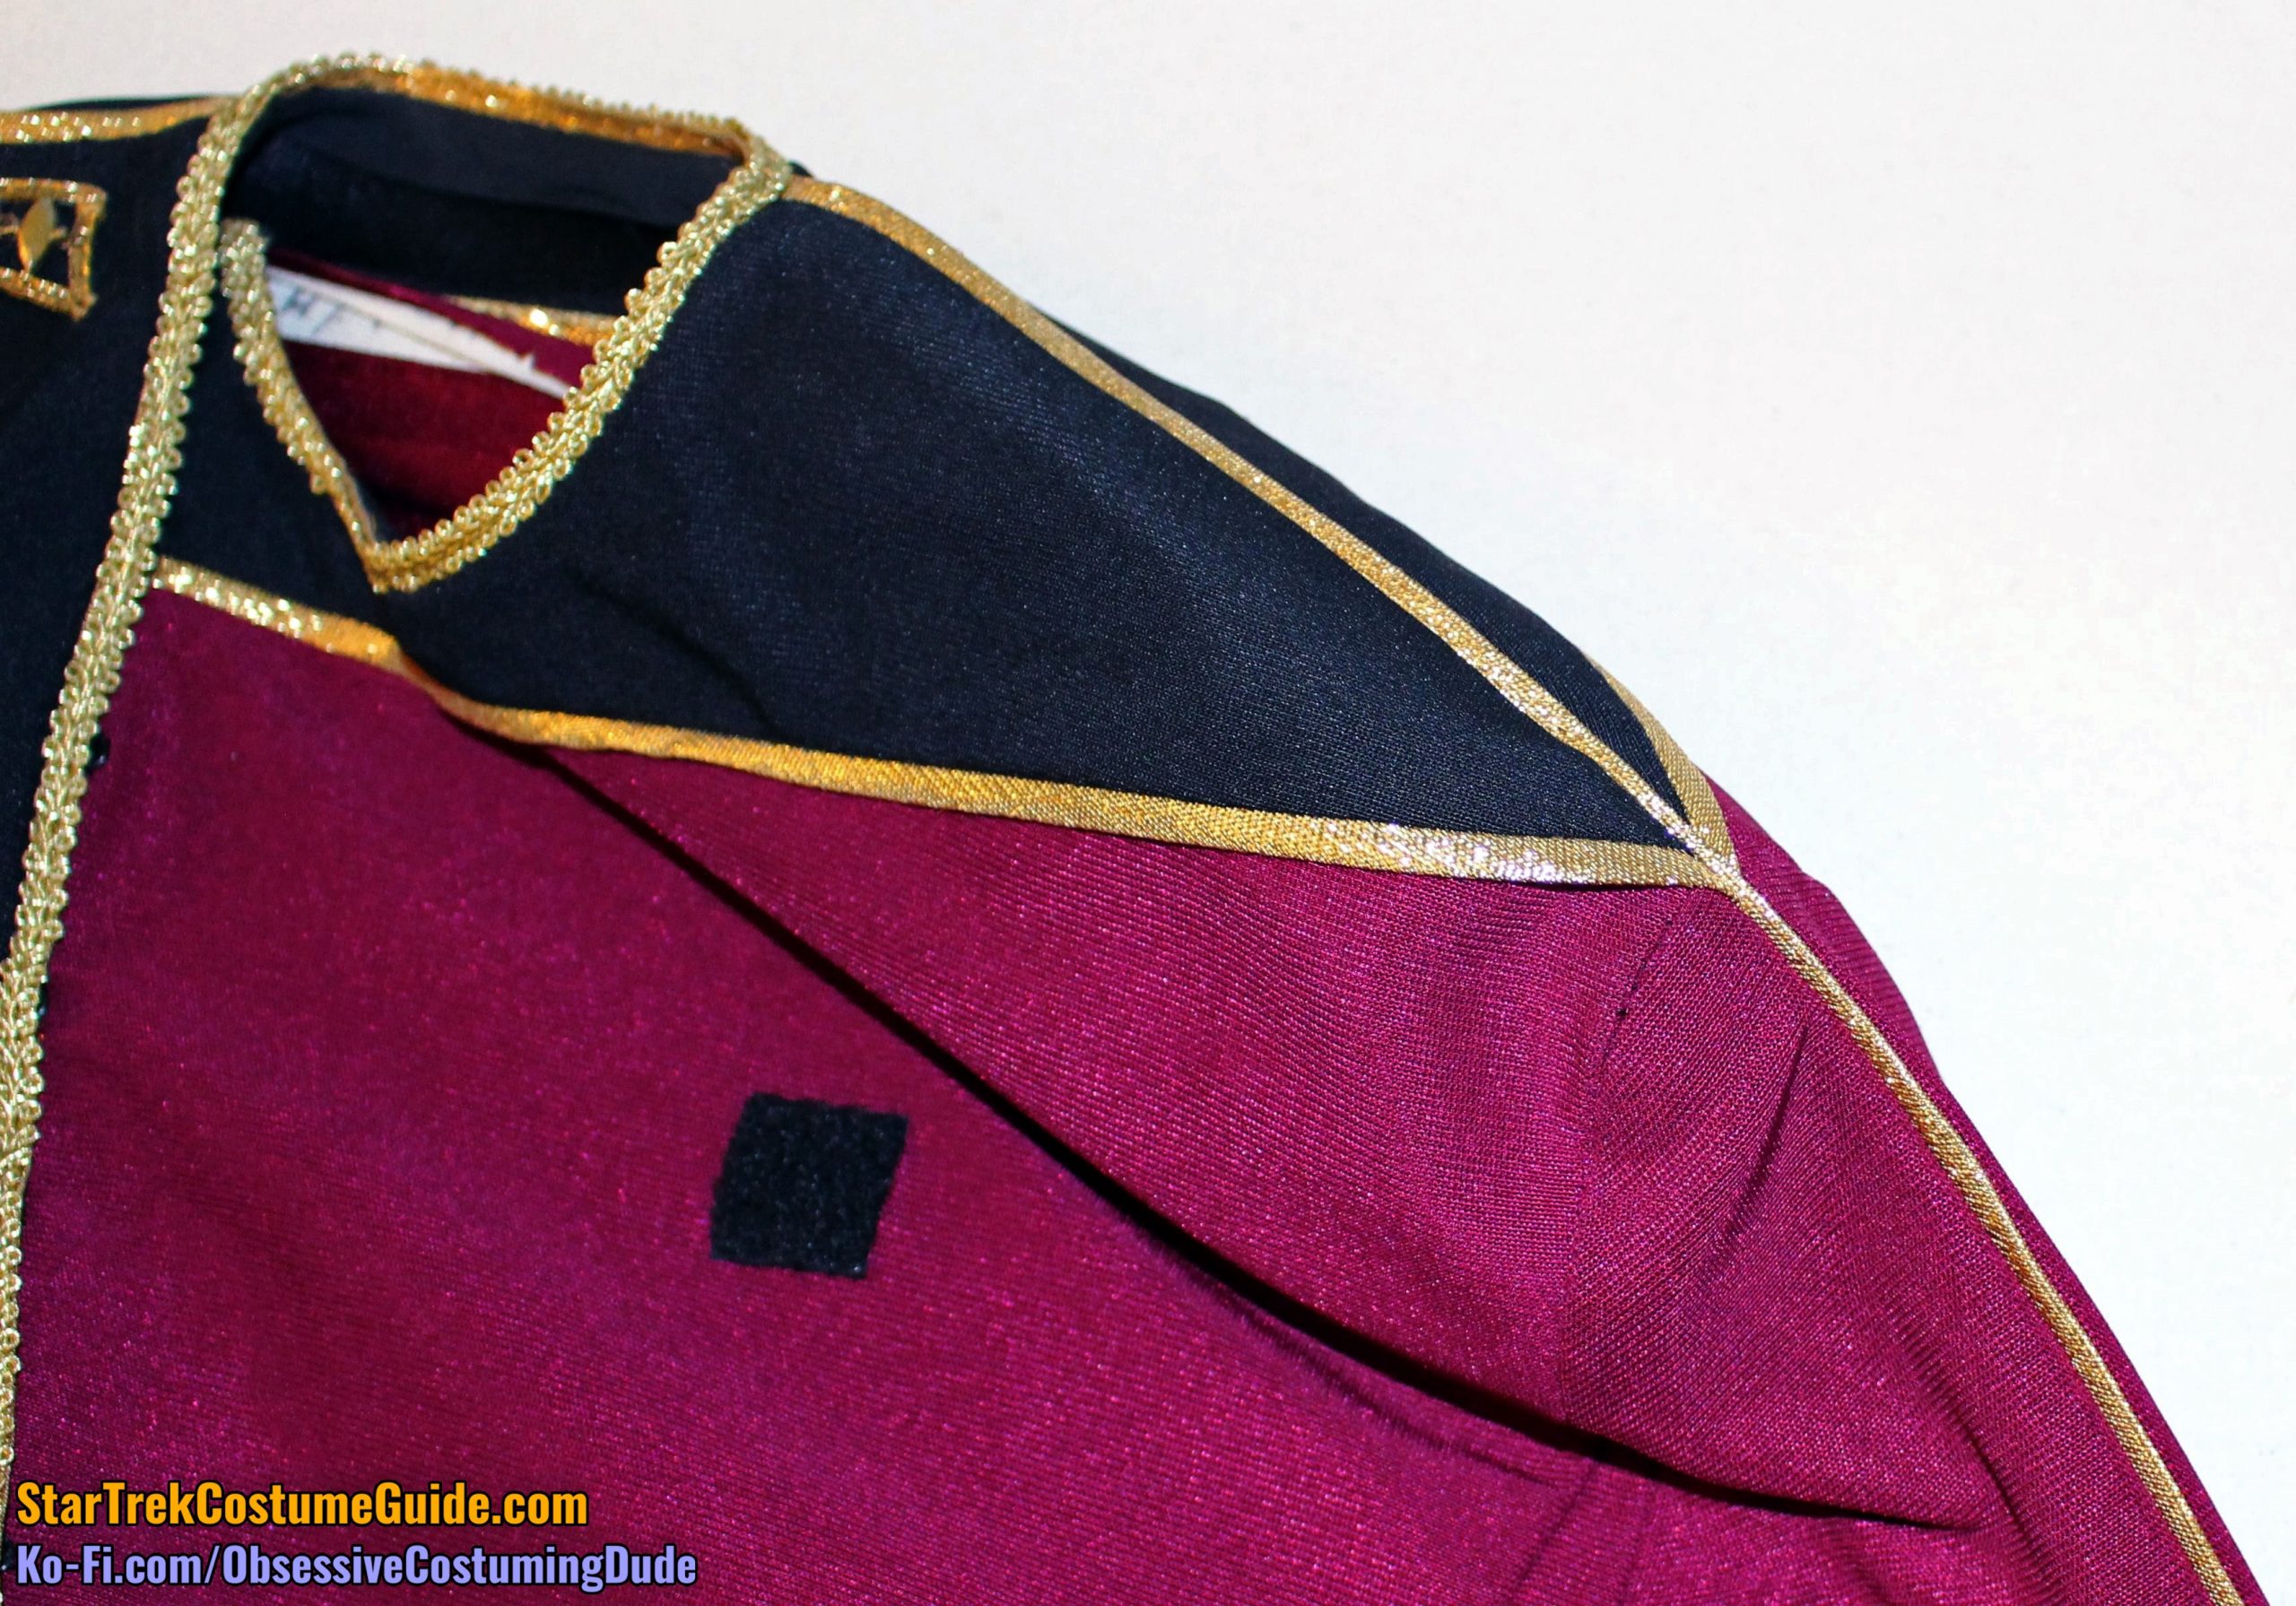
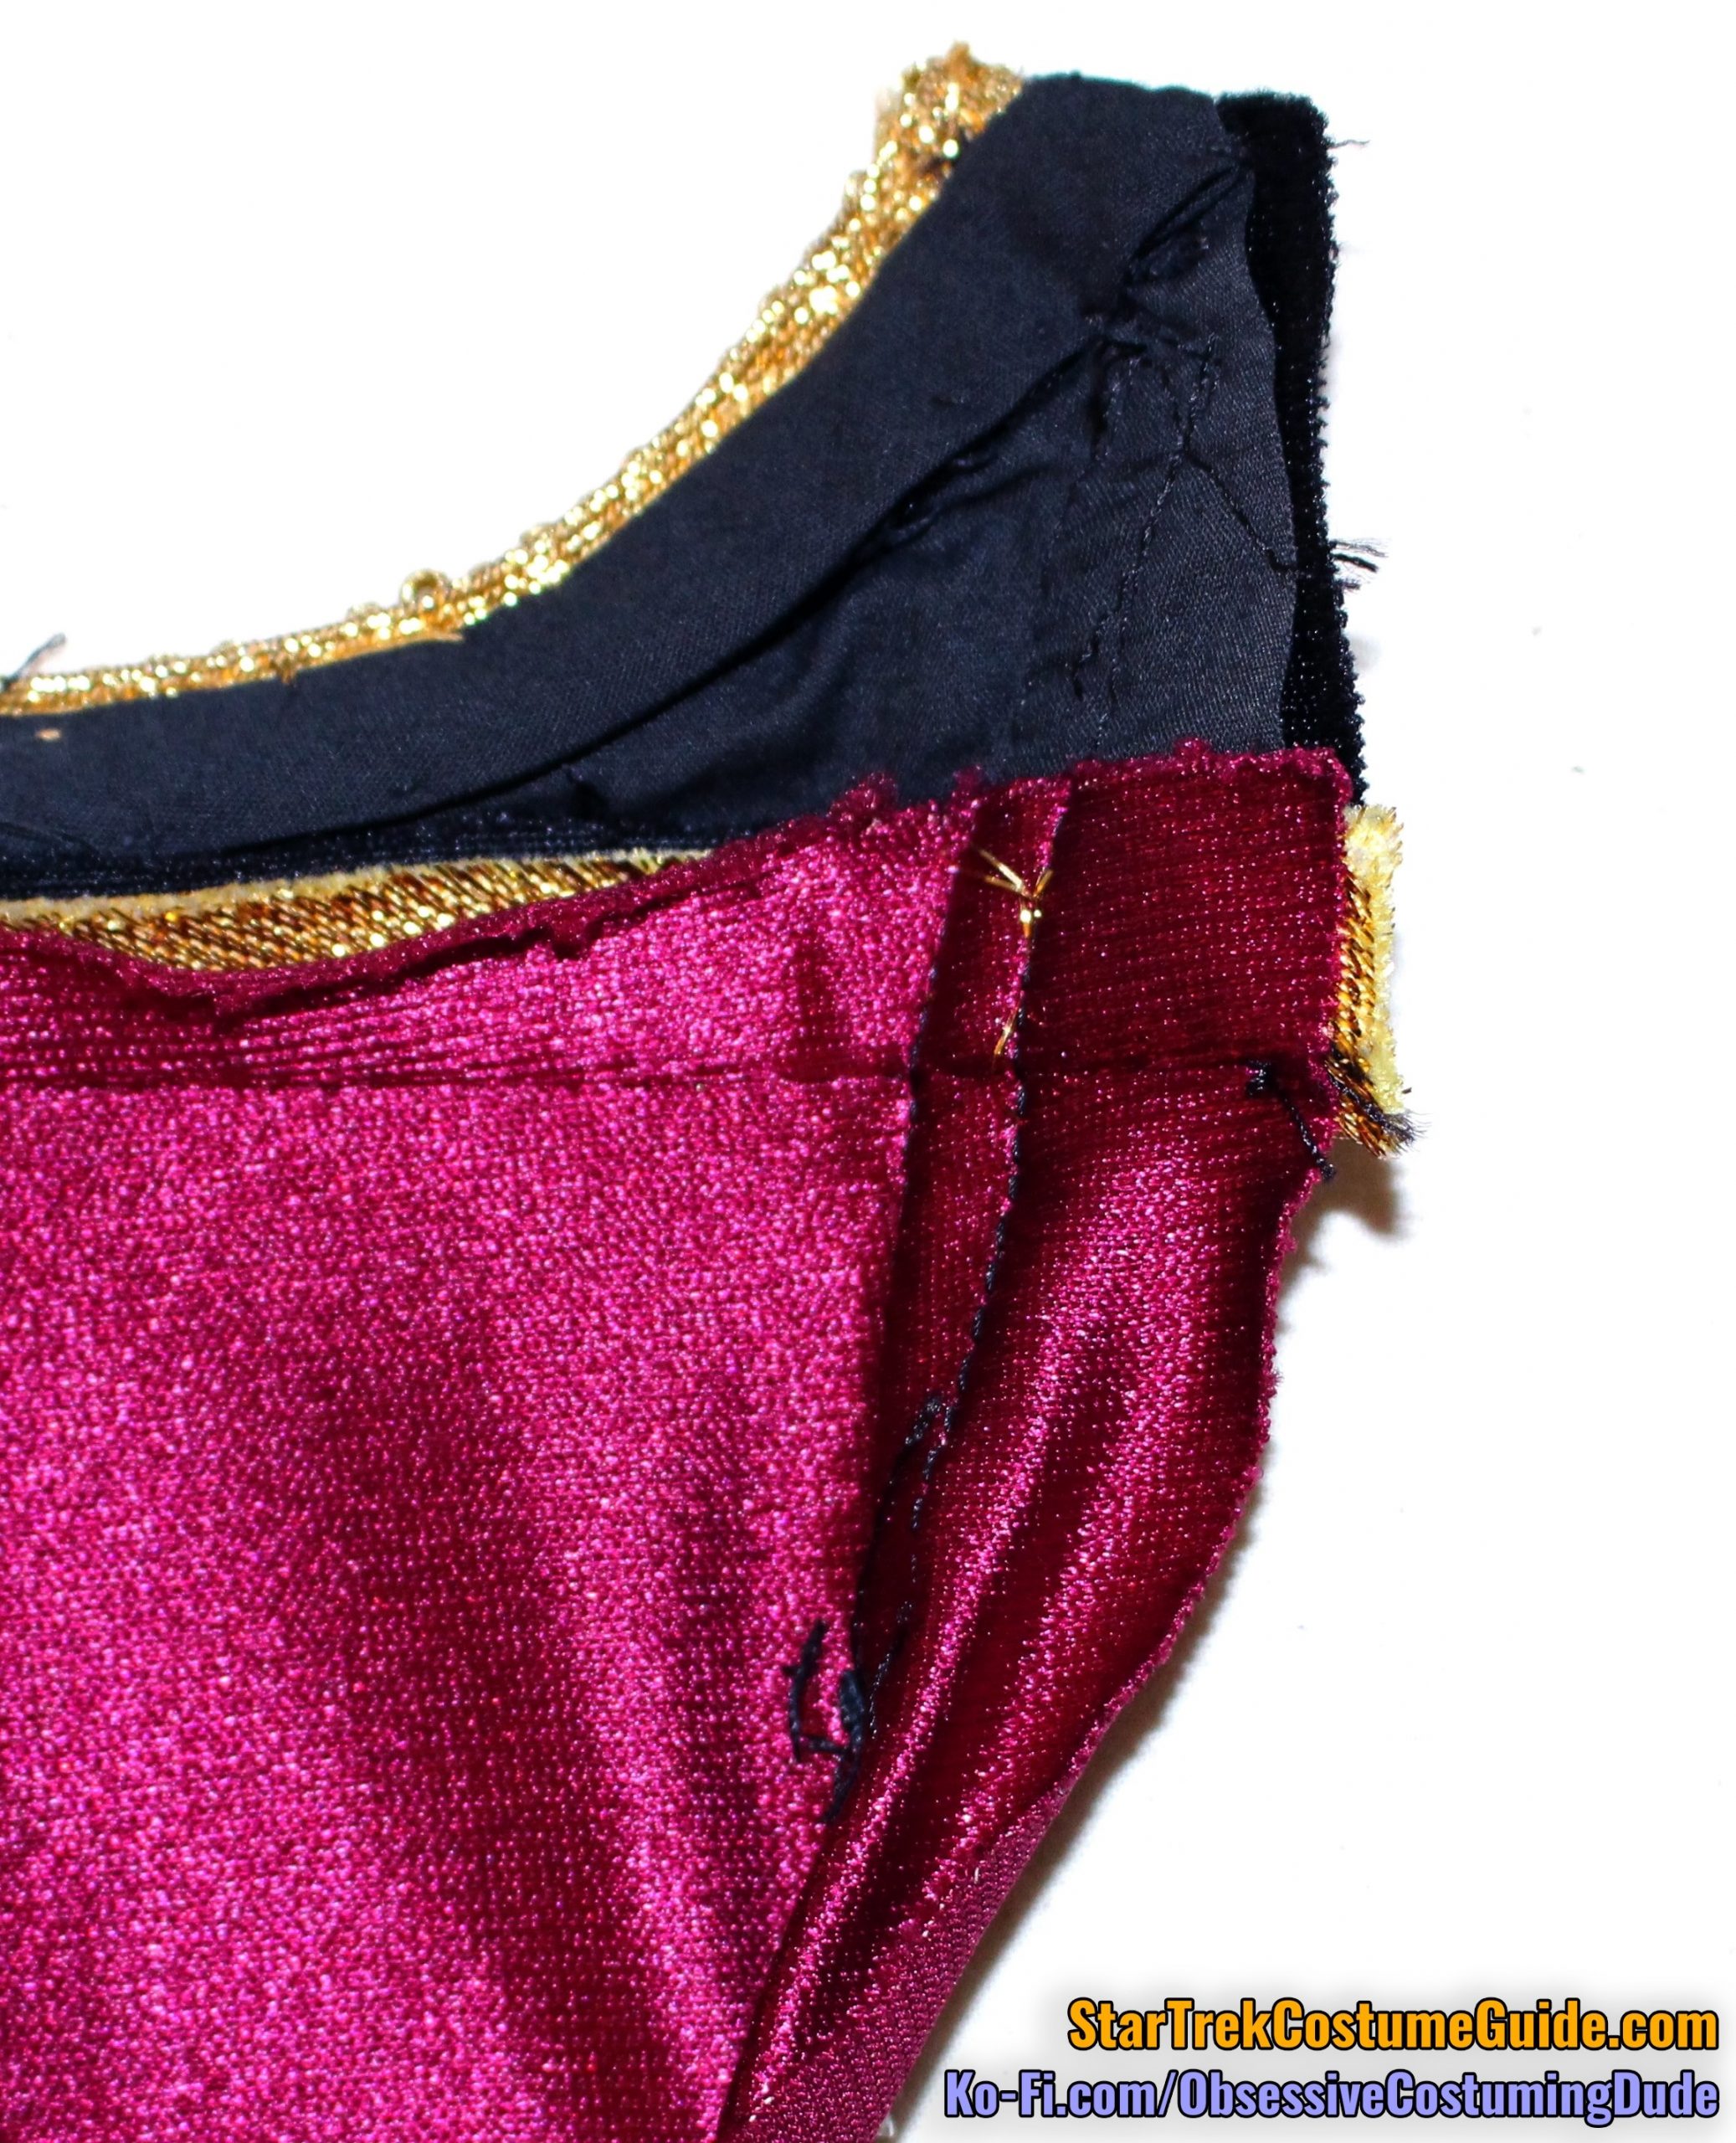
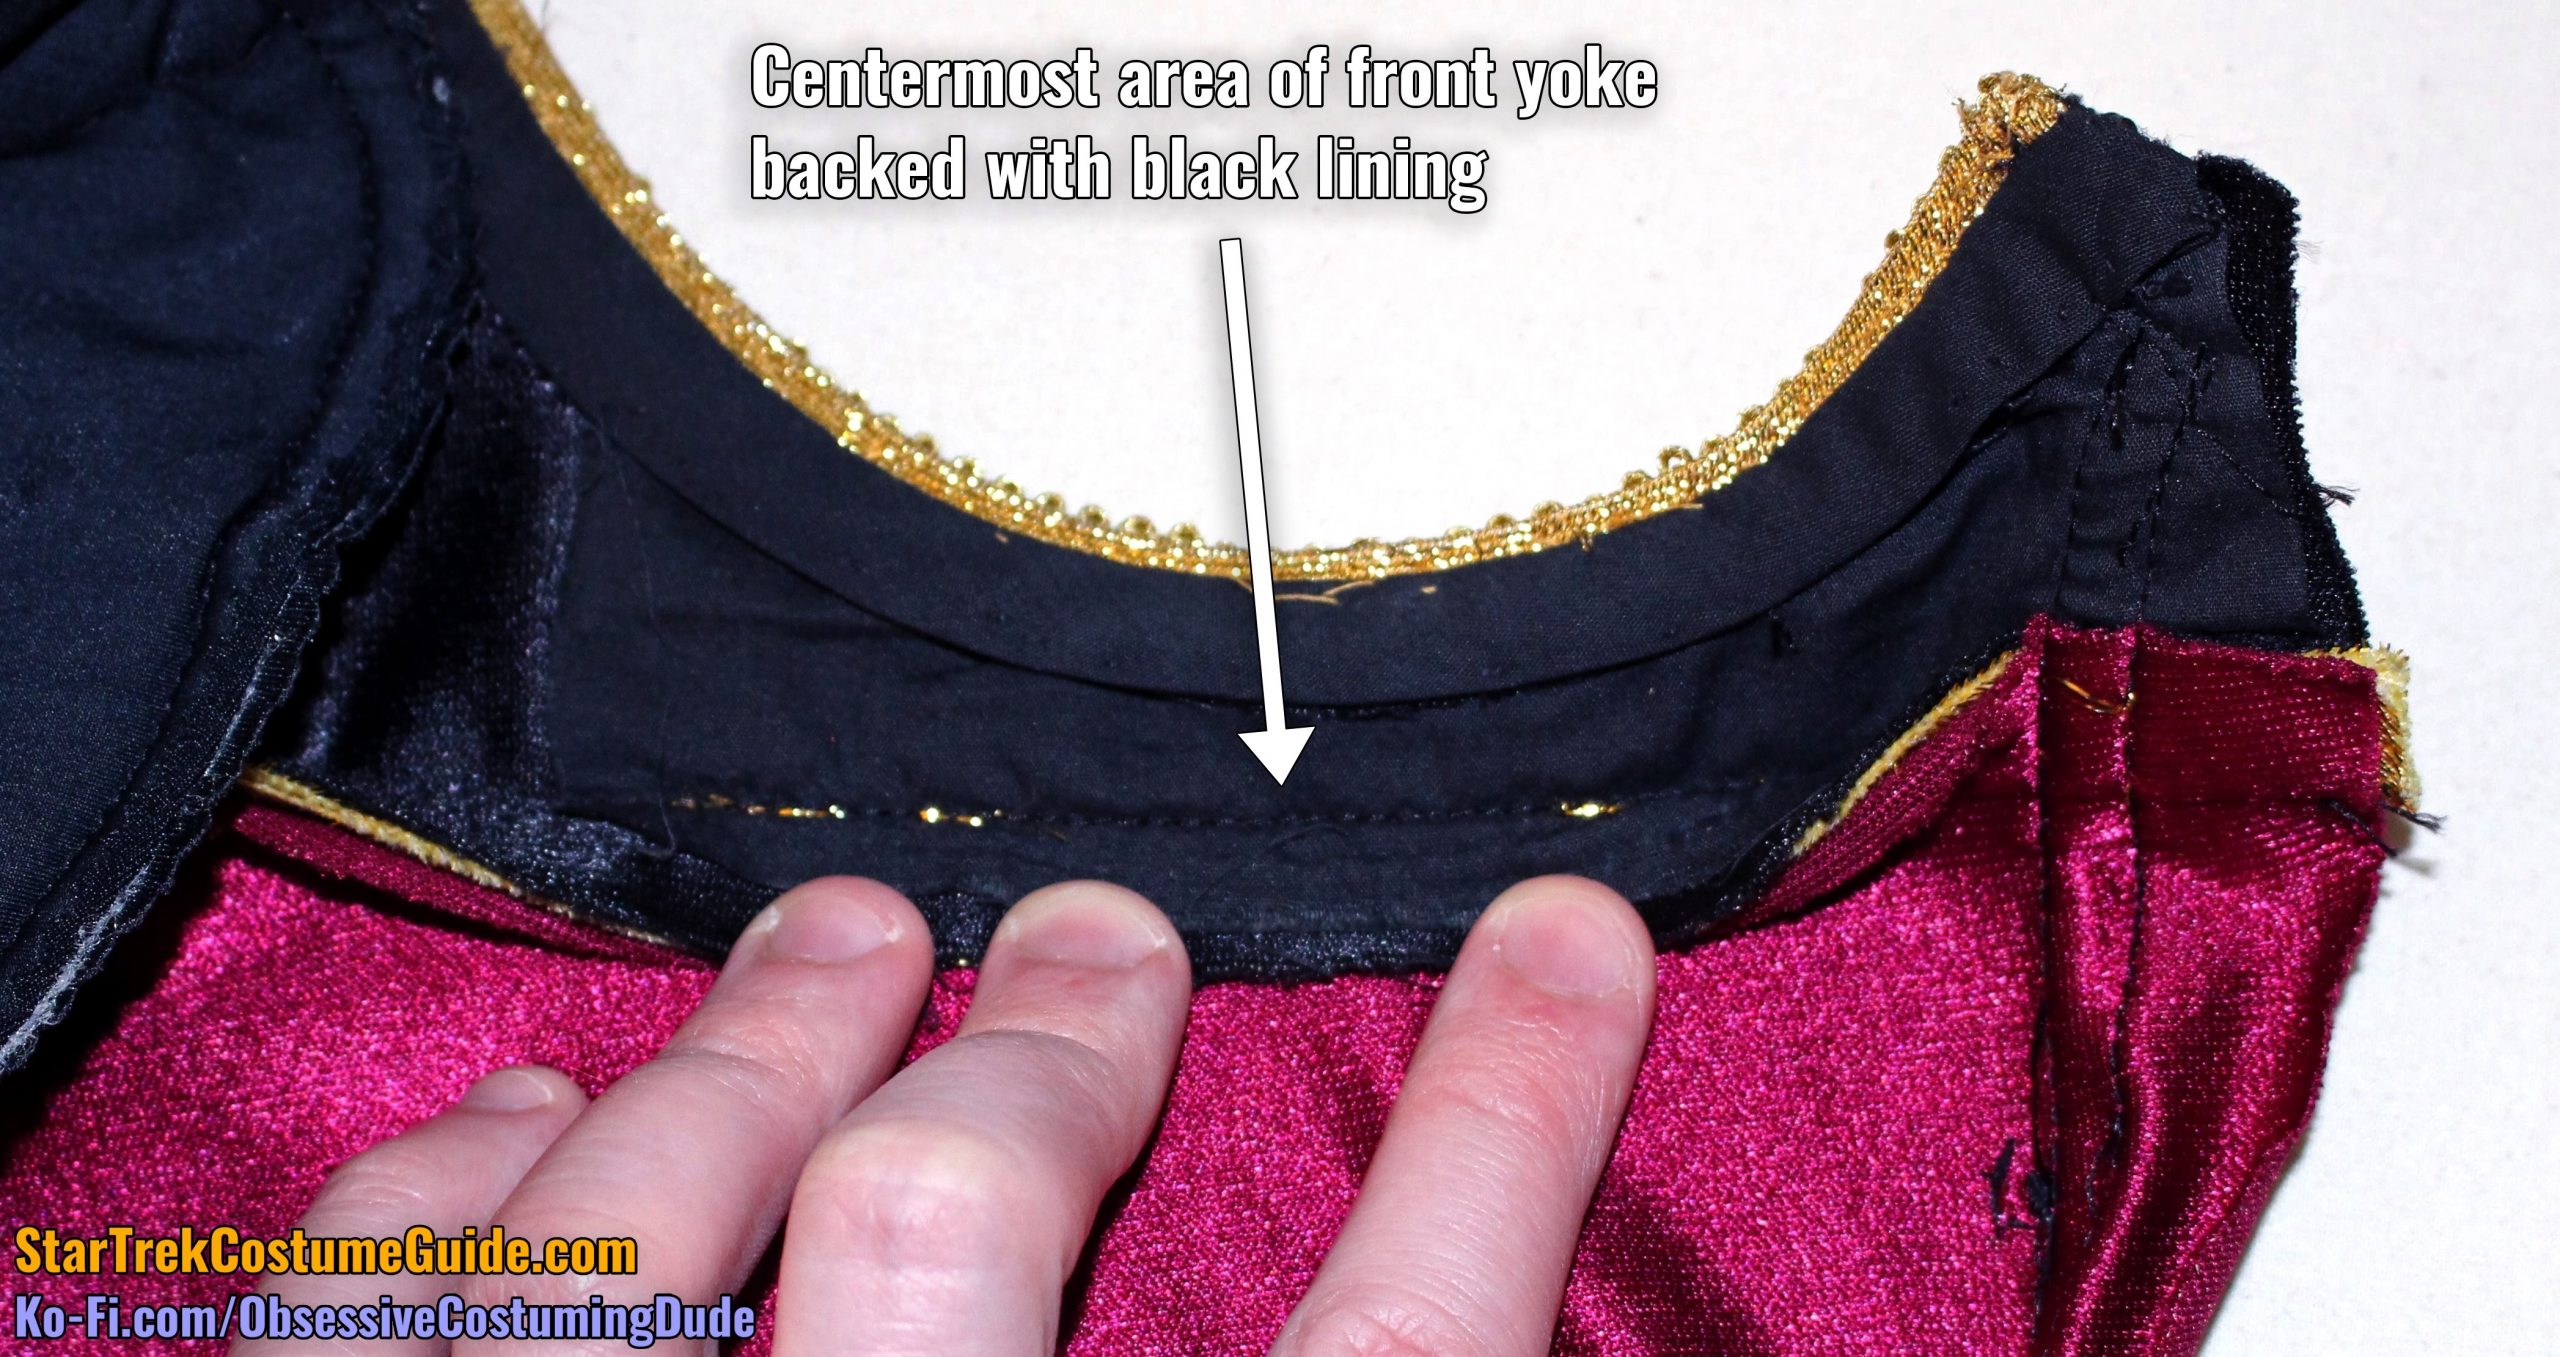
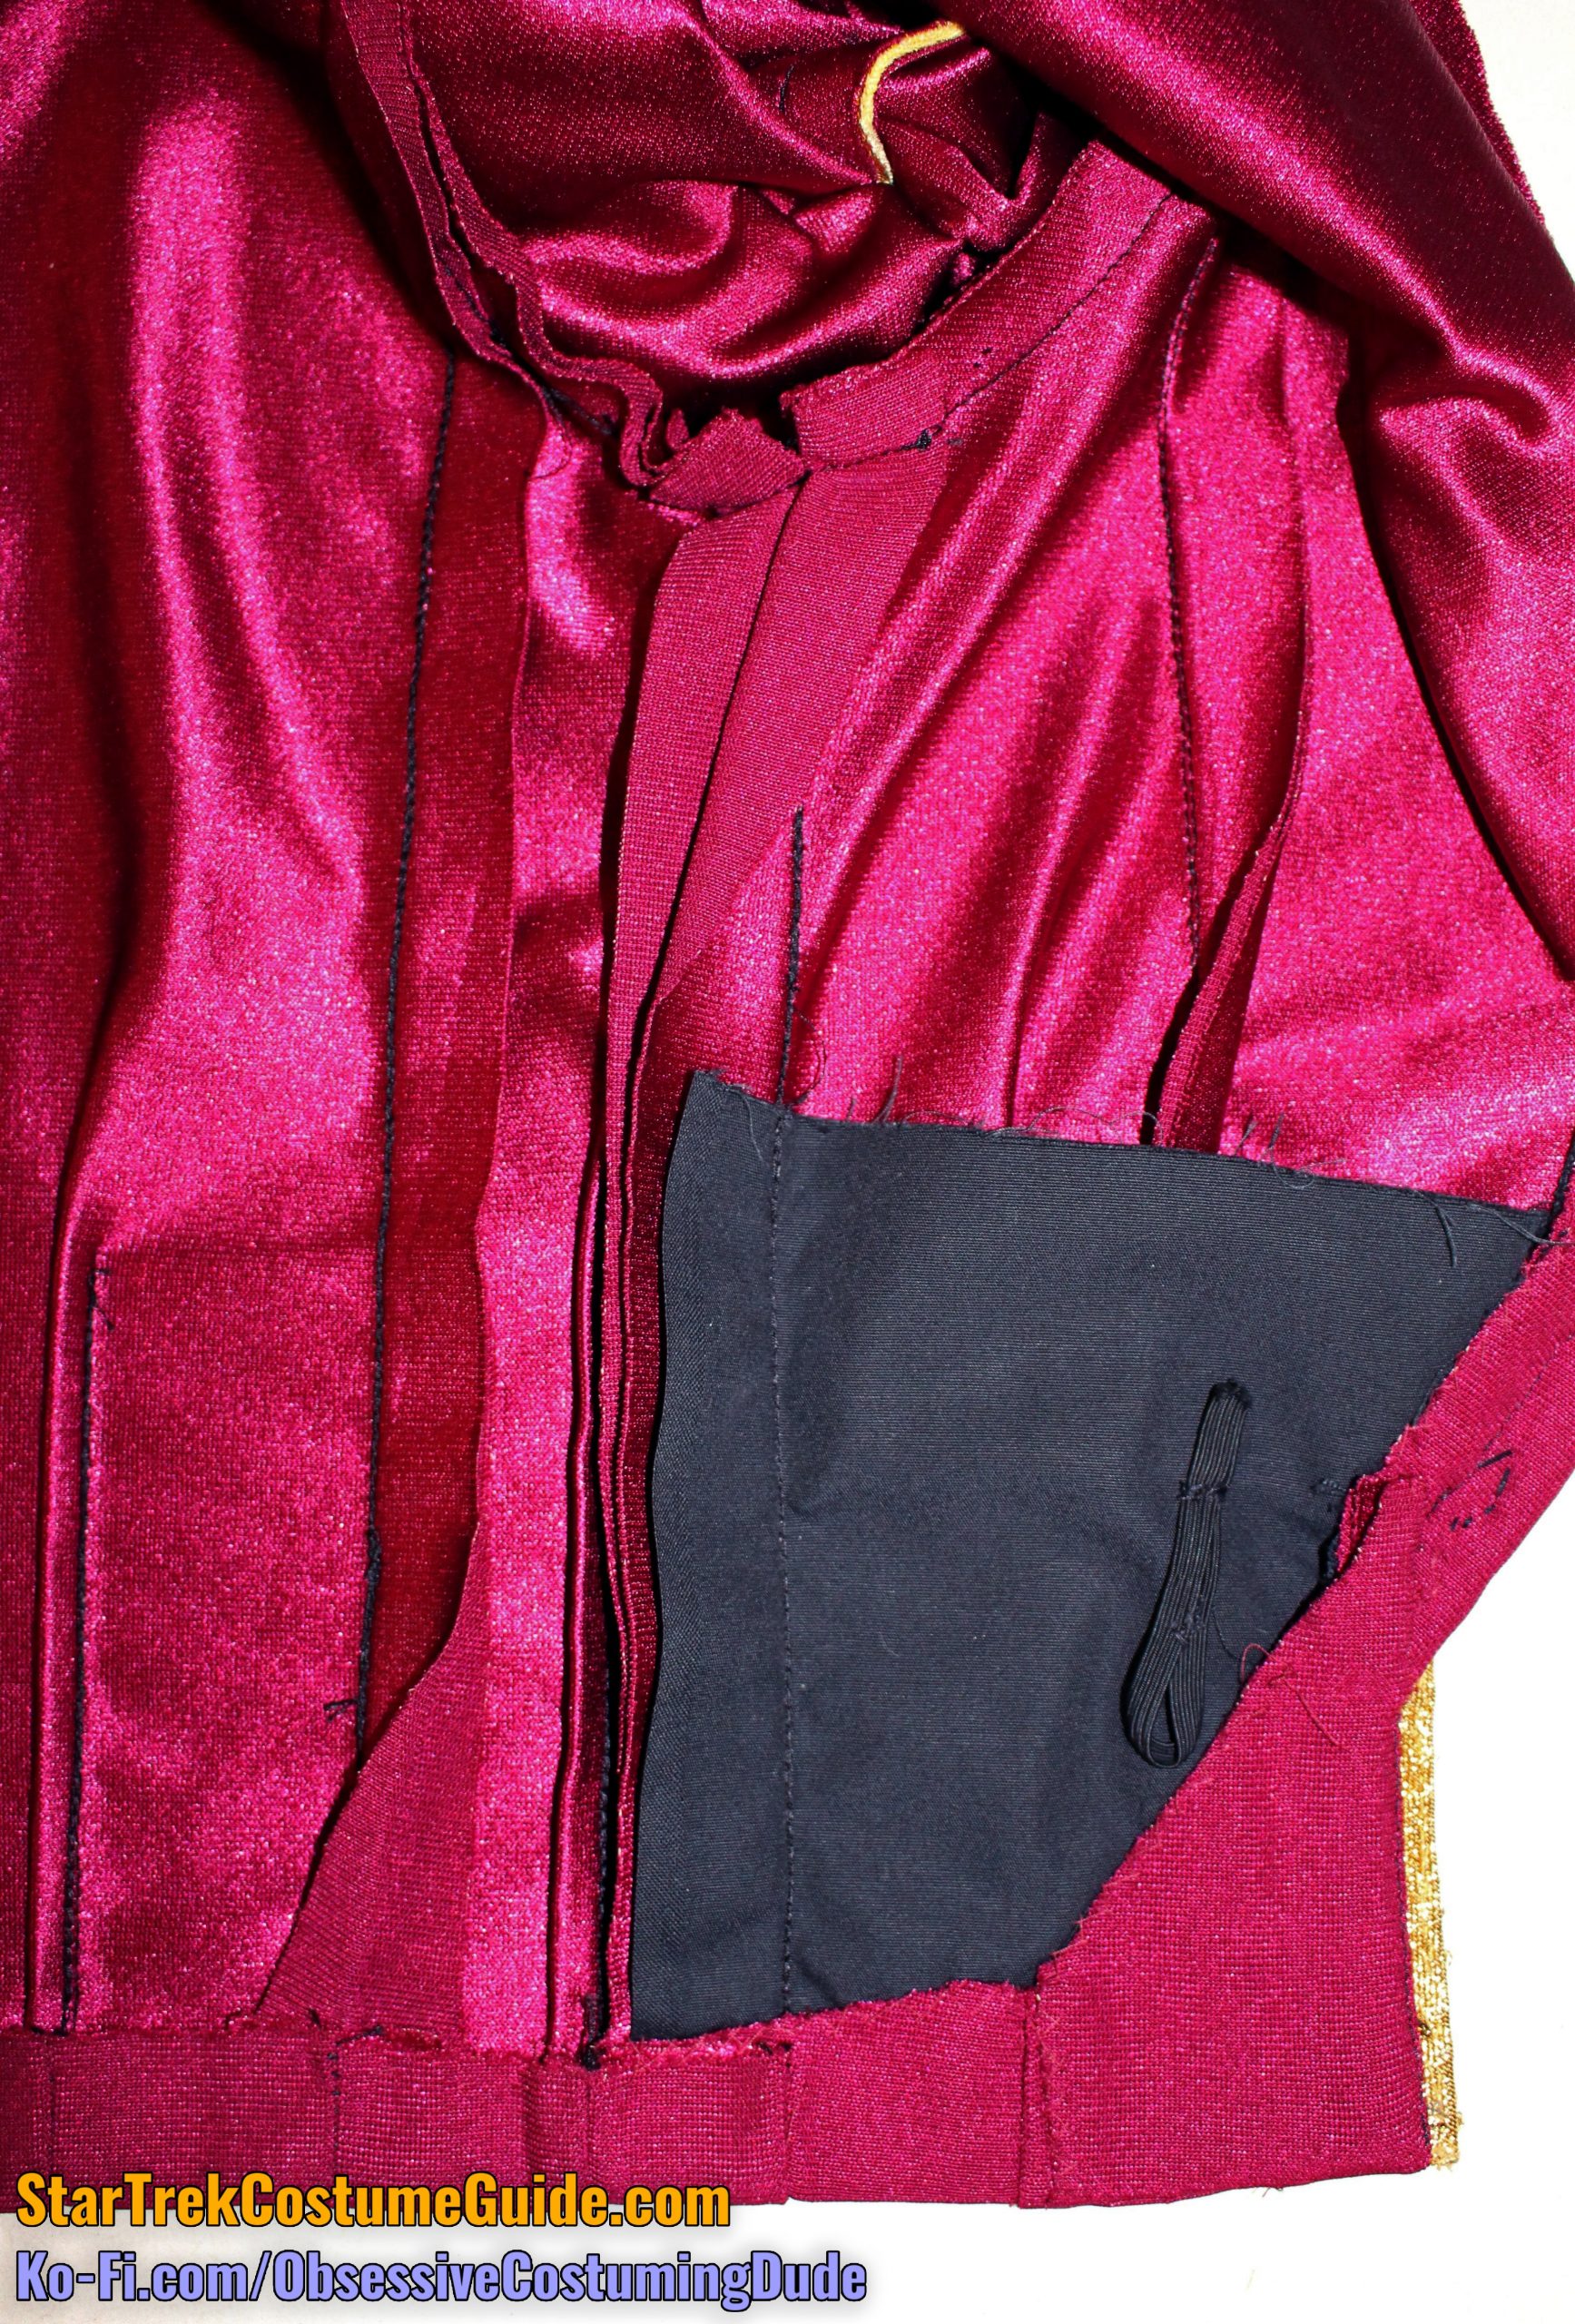
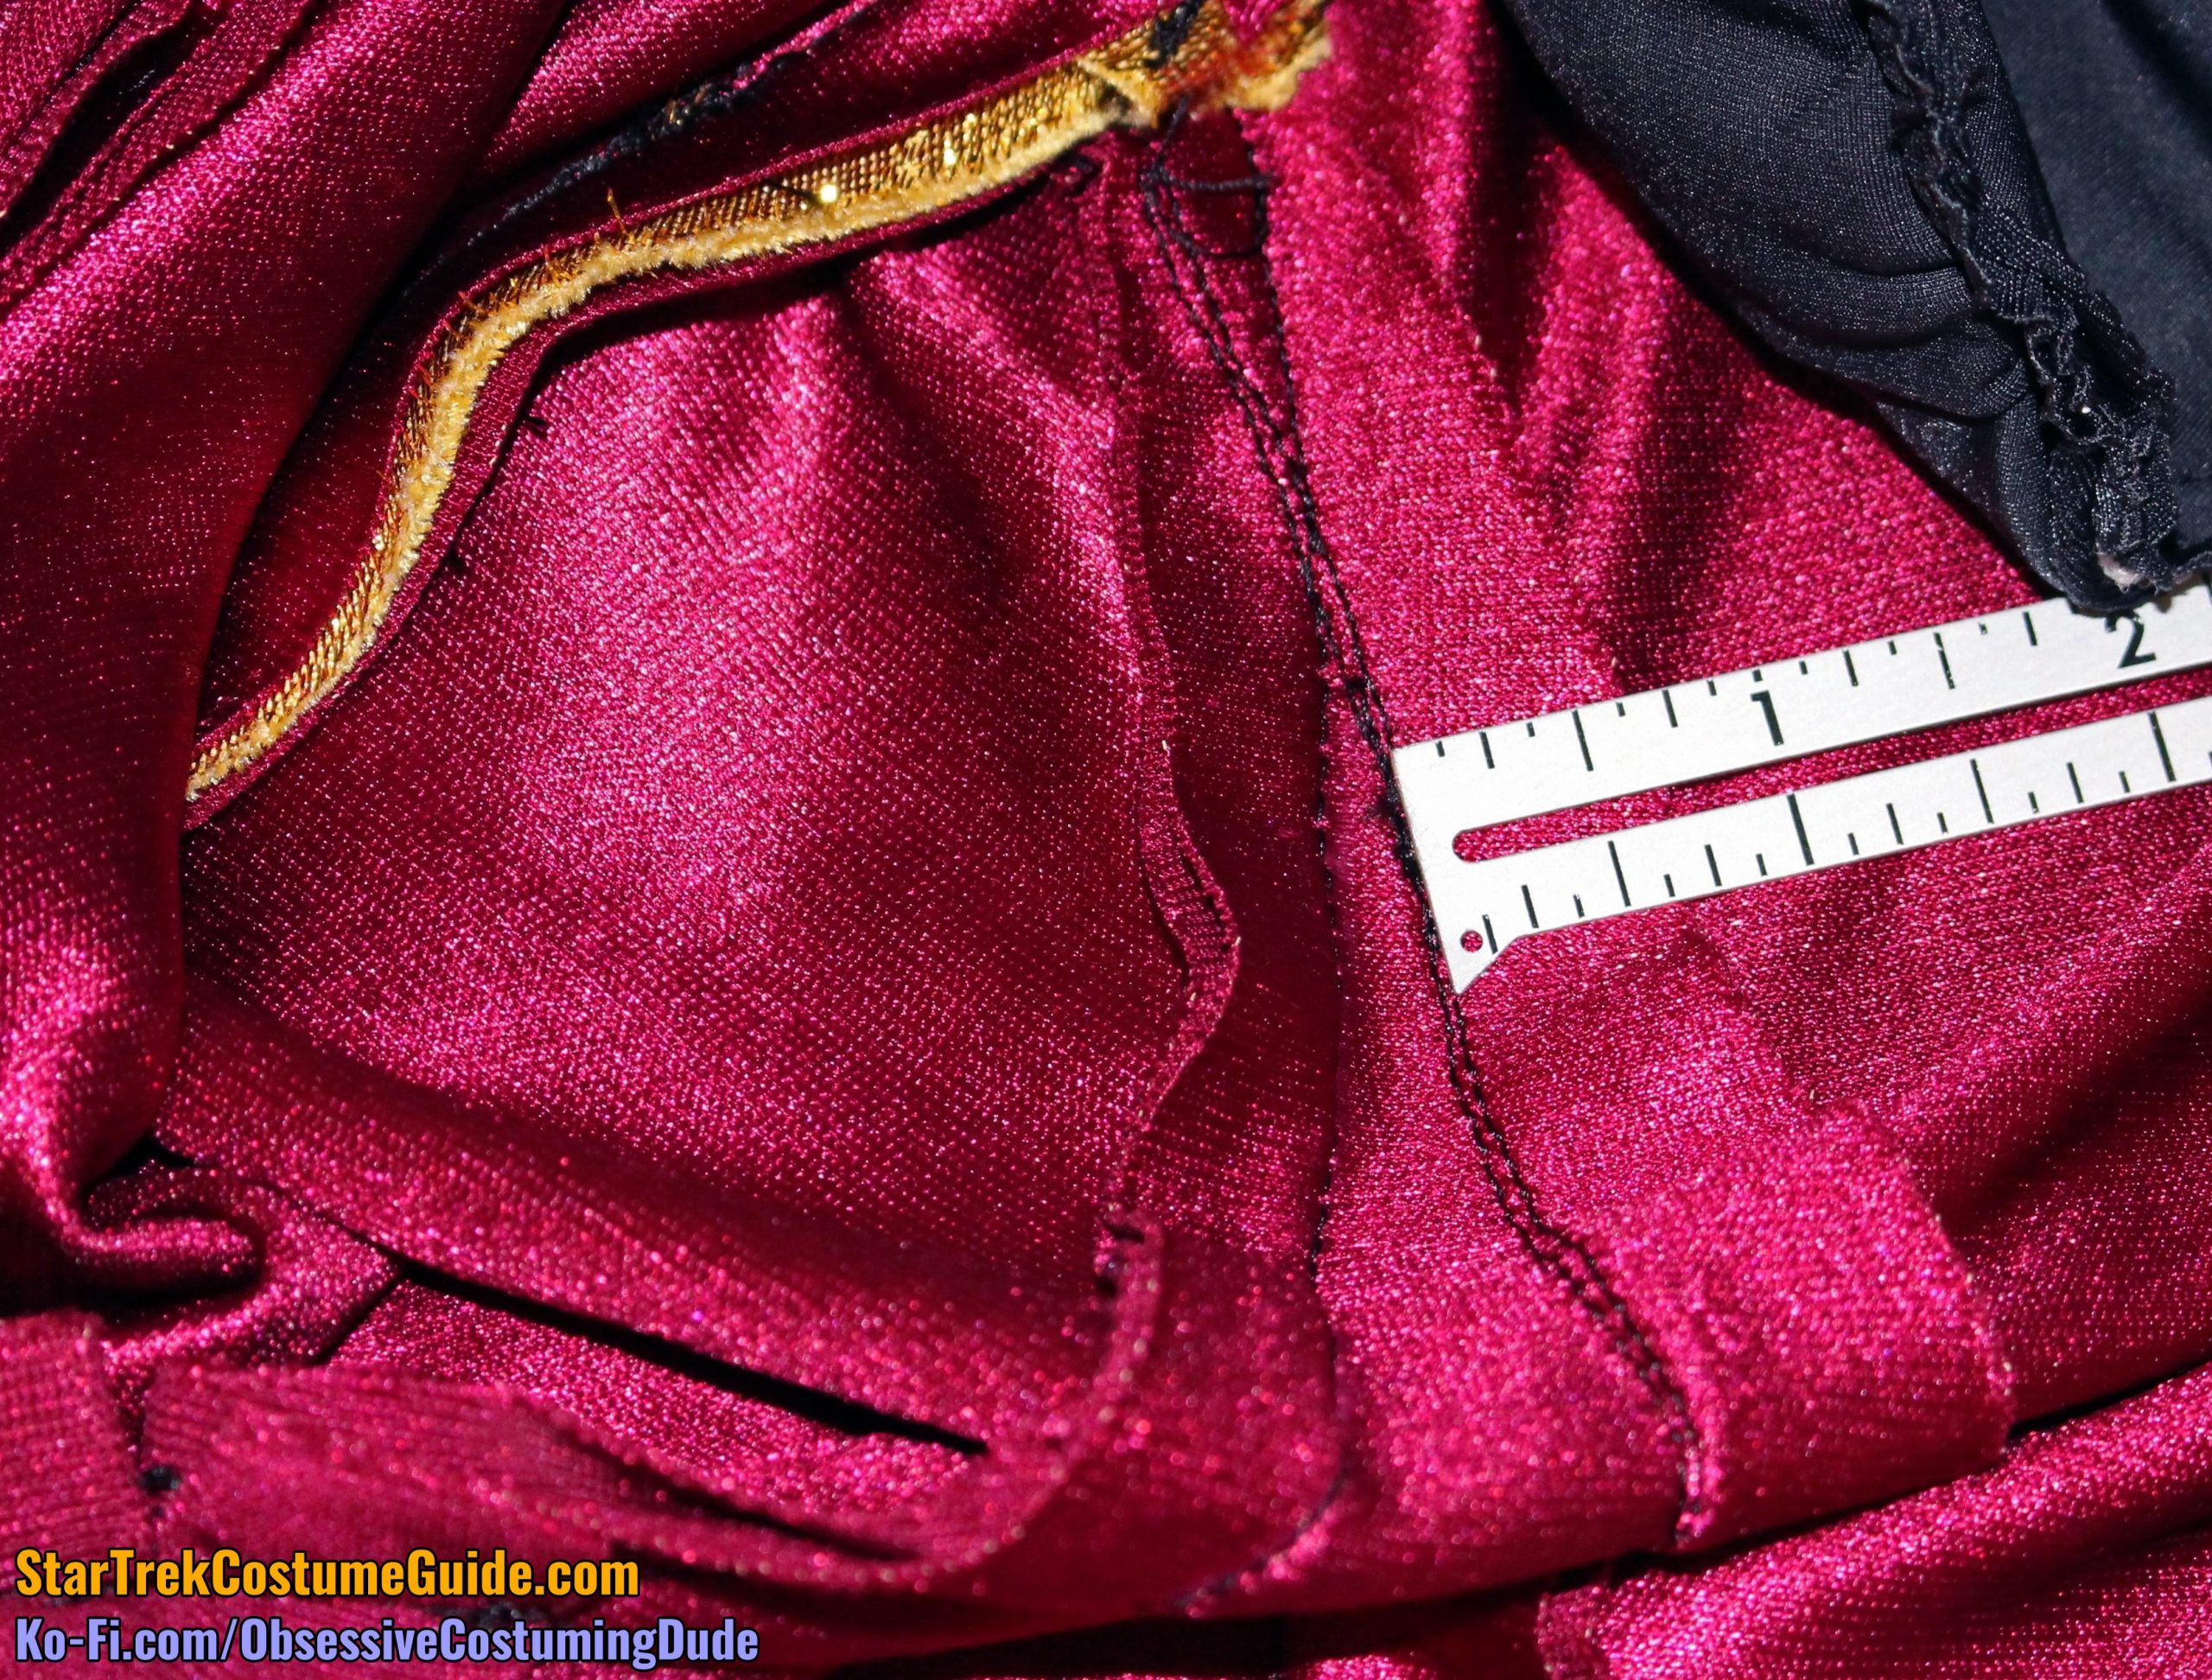
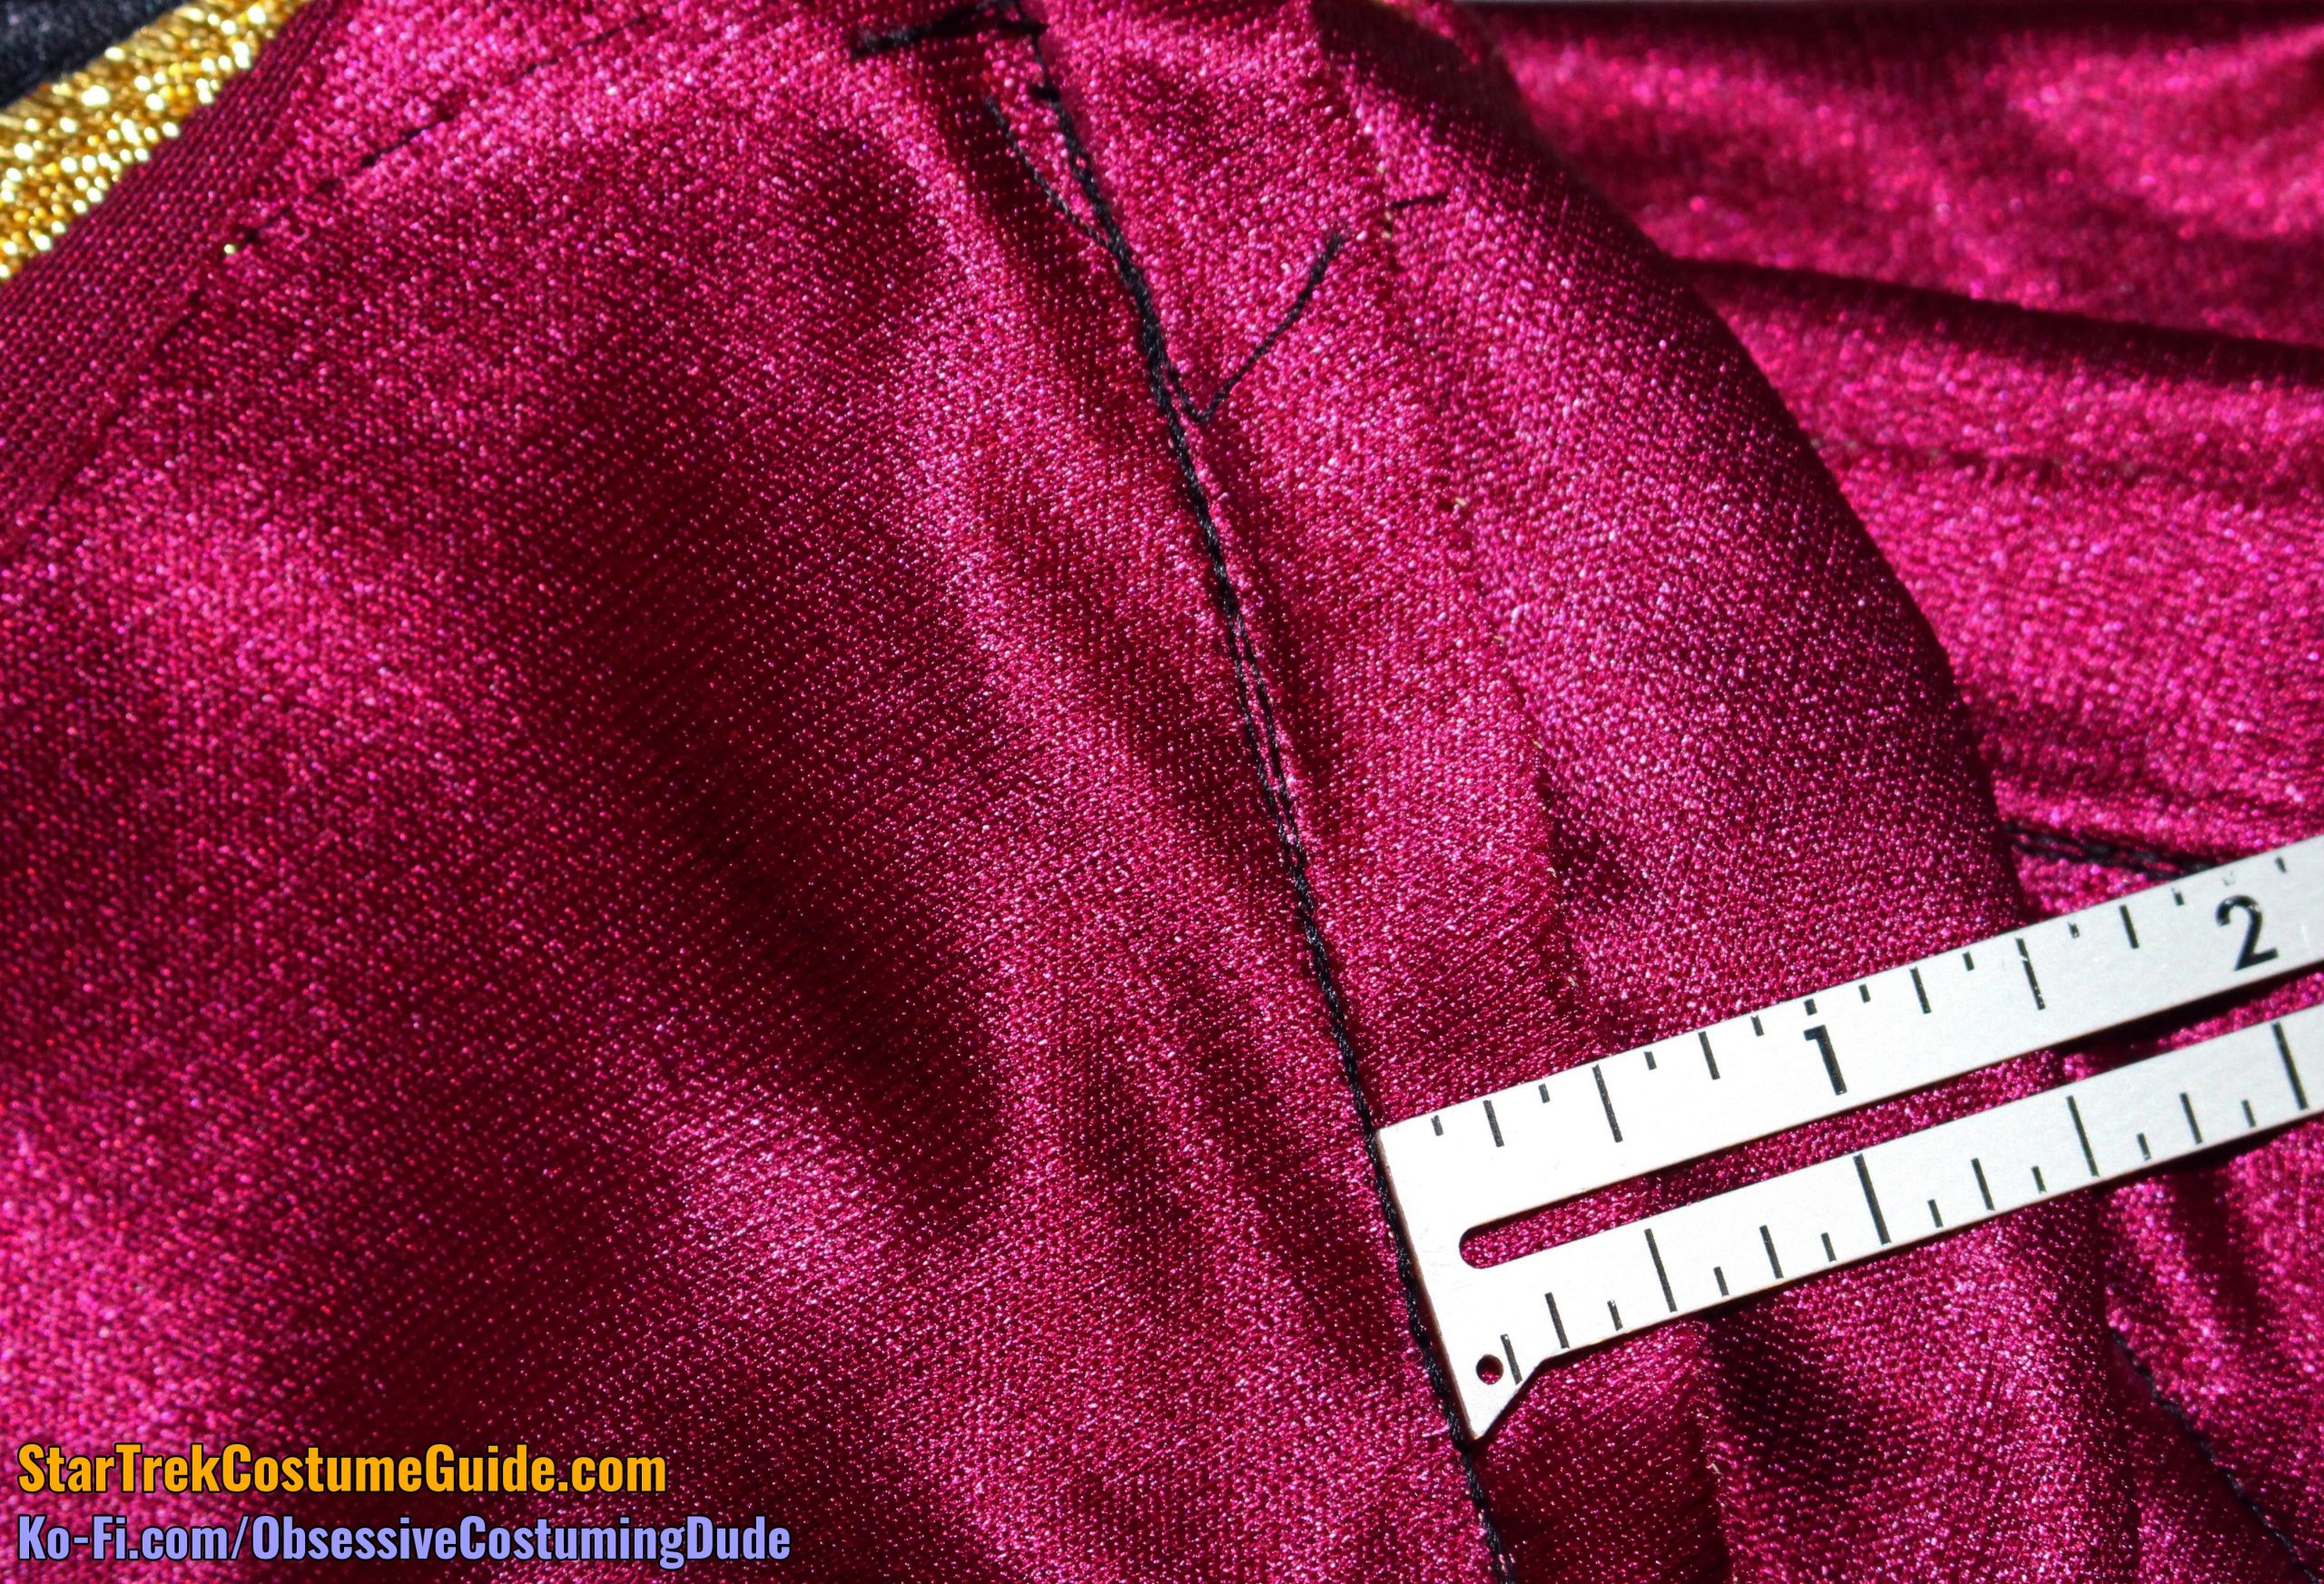
The centermost 6” or so of the front yoke was stabilized (?) with a piece of black lining, which was sewn into the seams and the zipper.
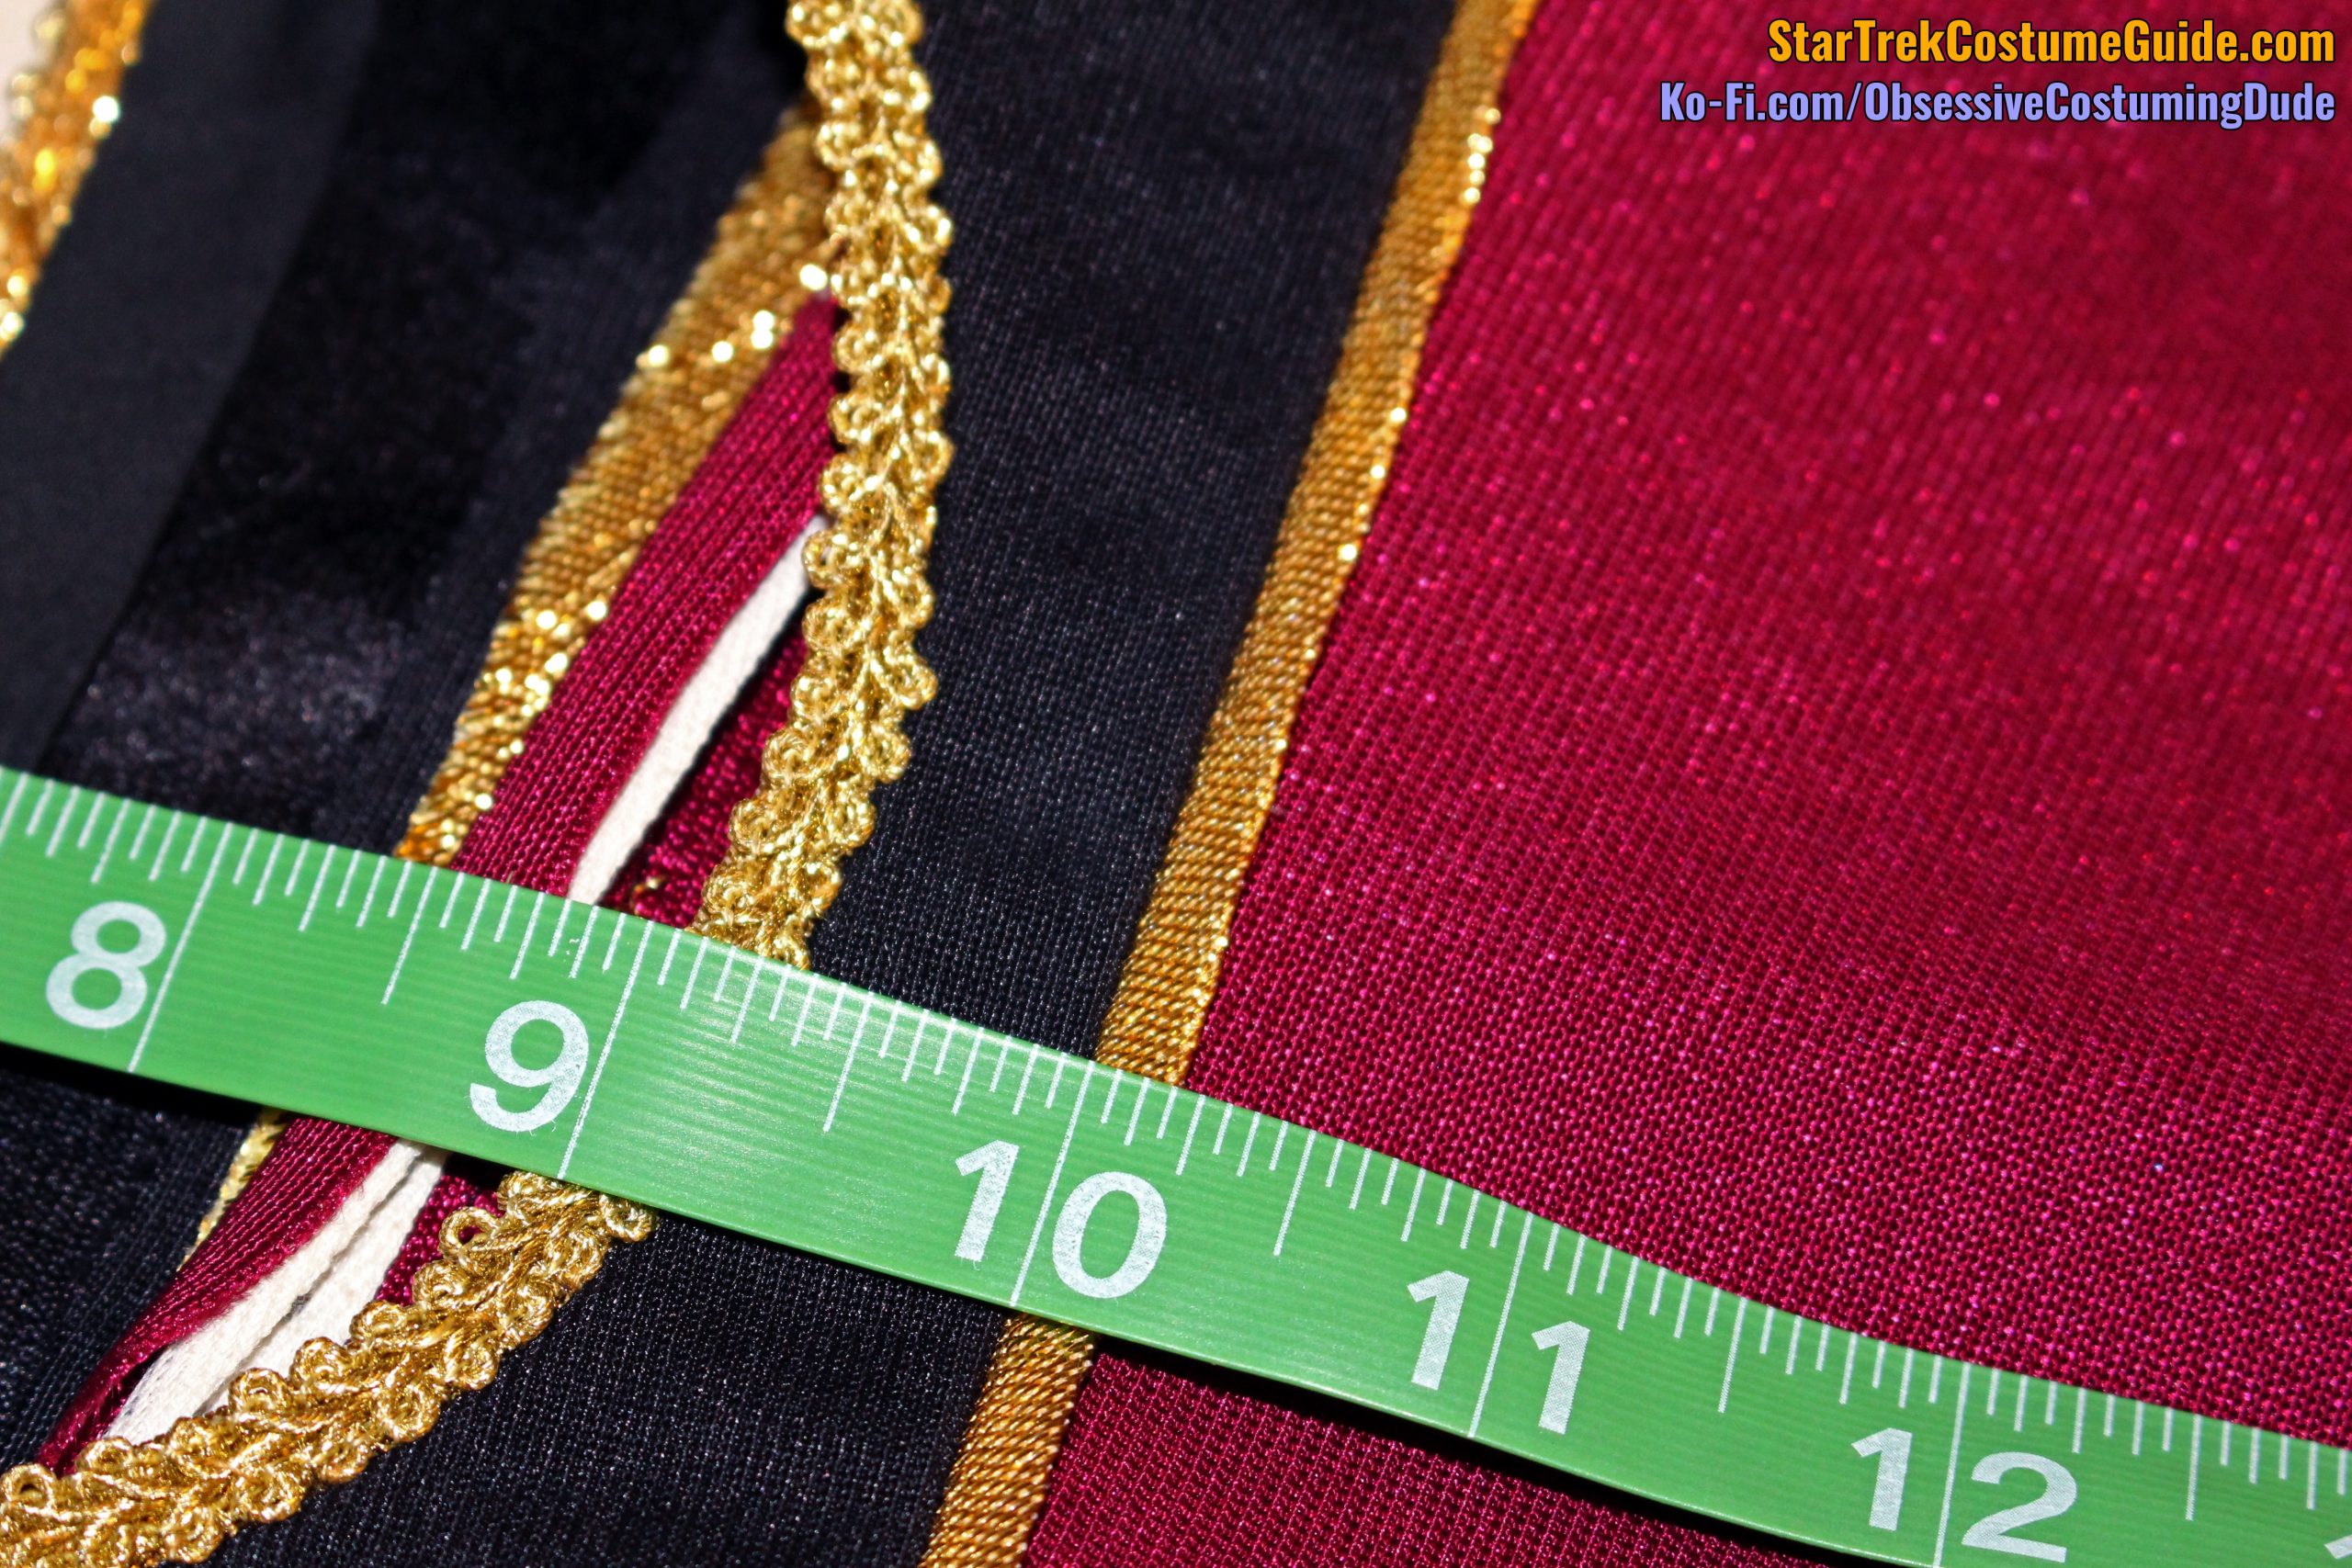
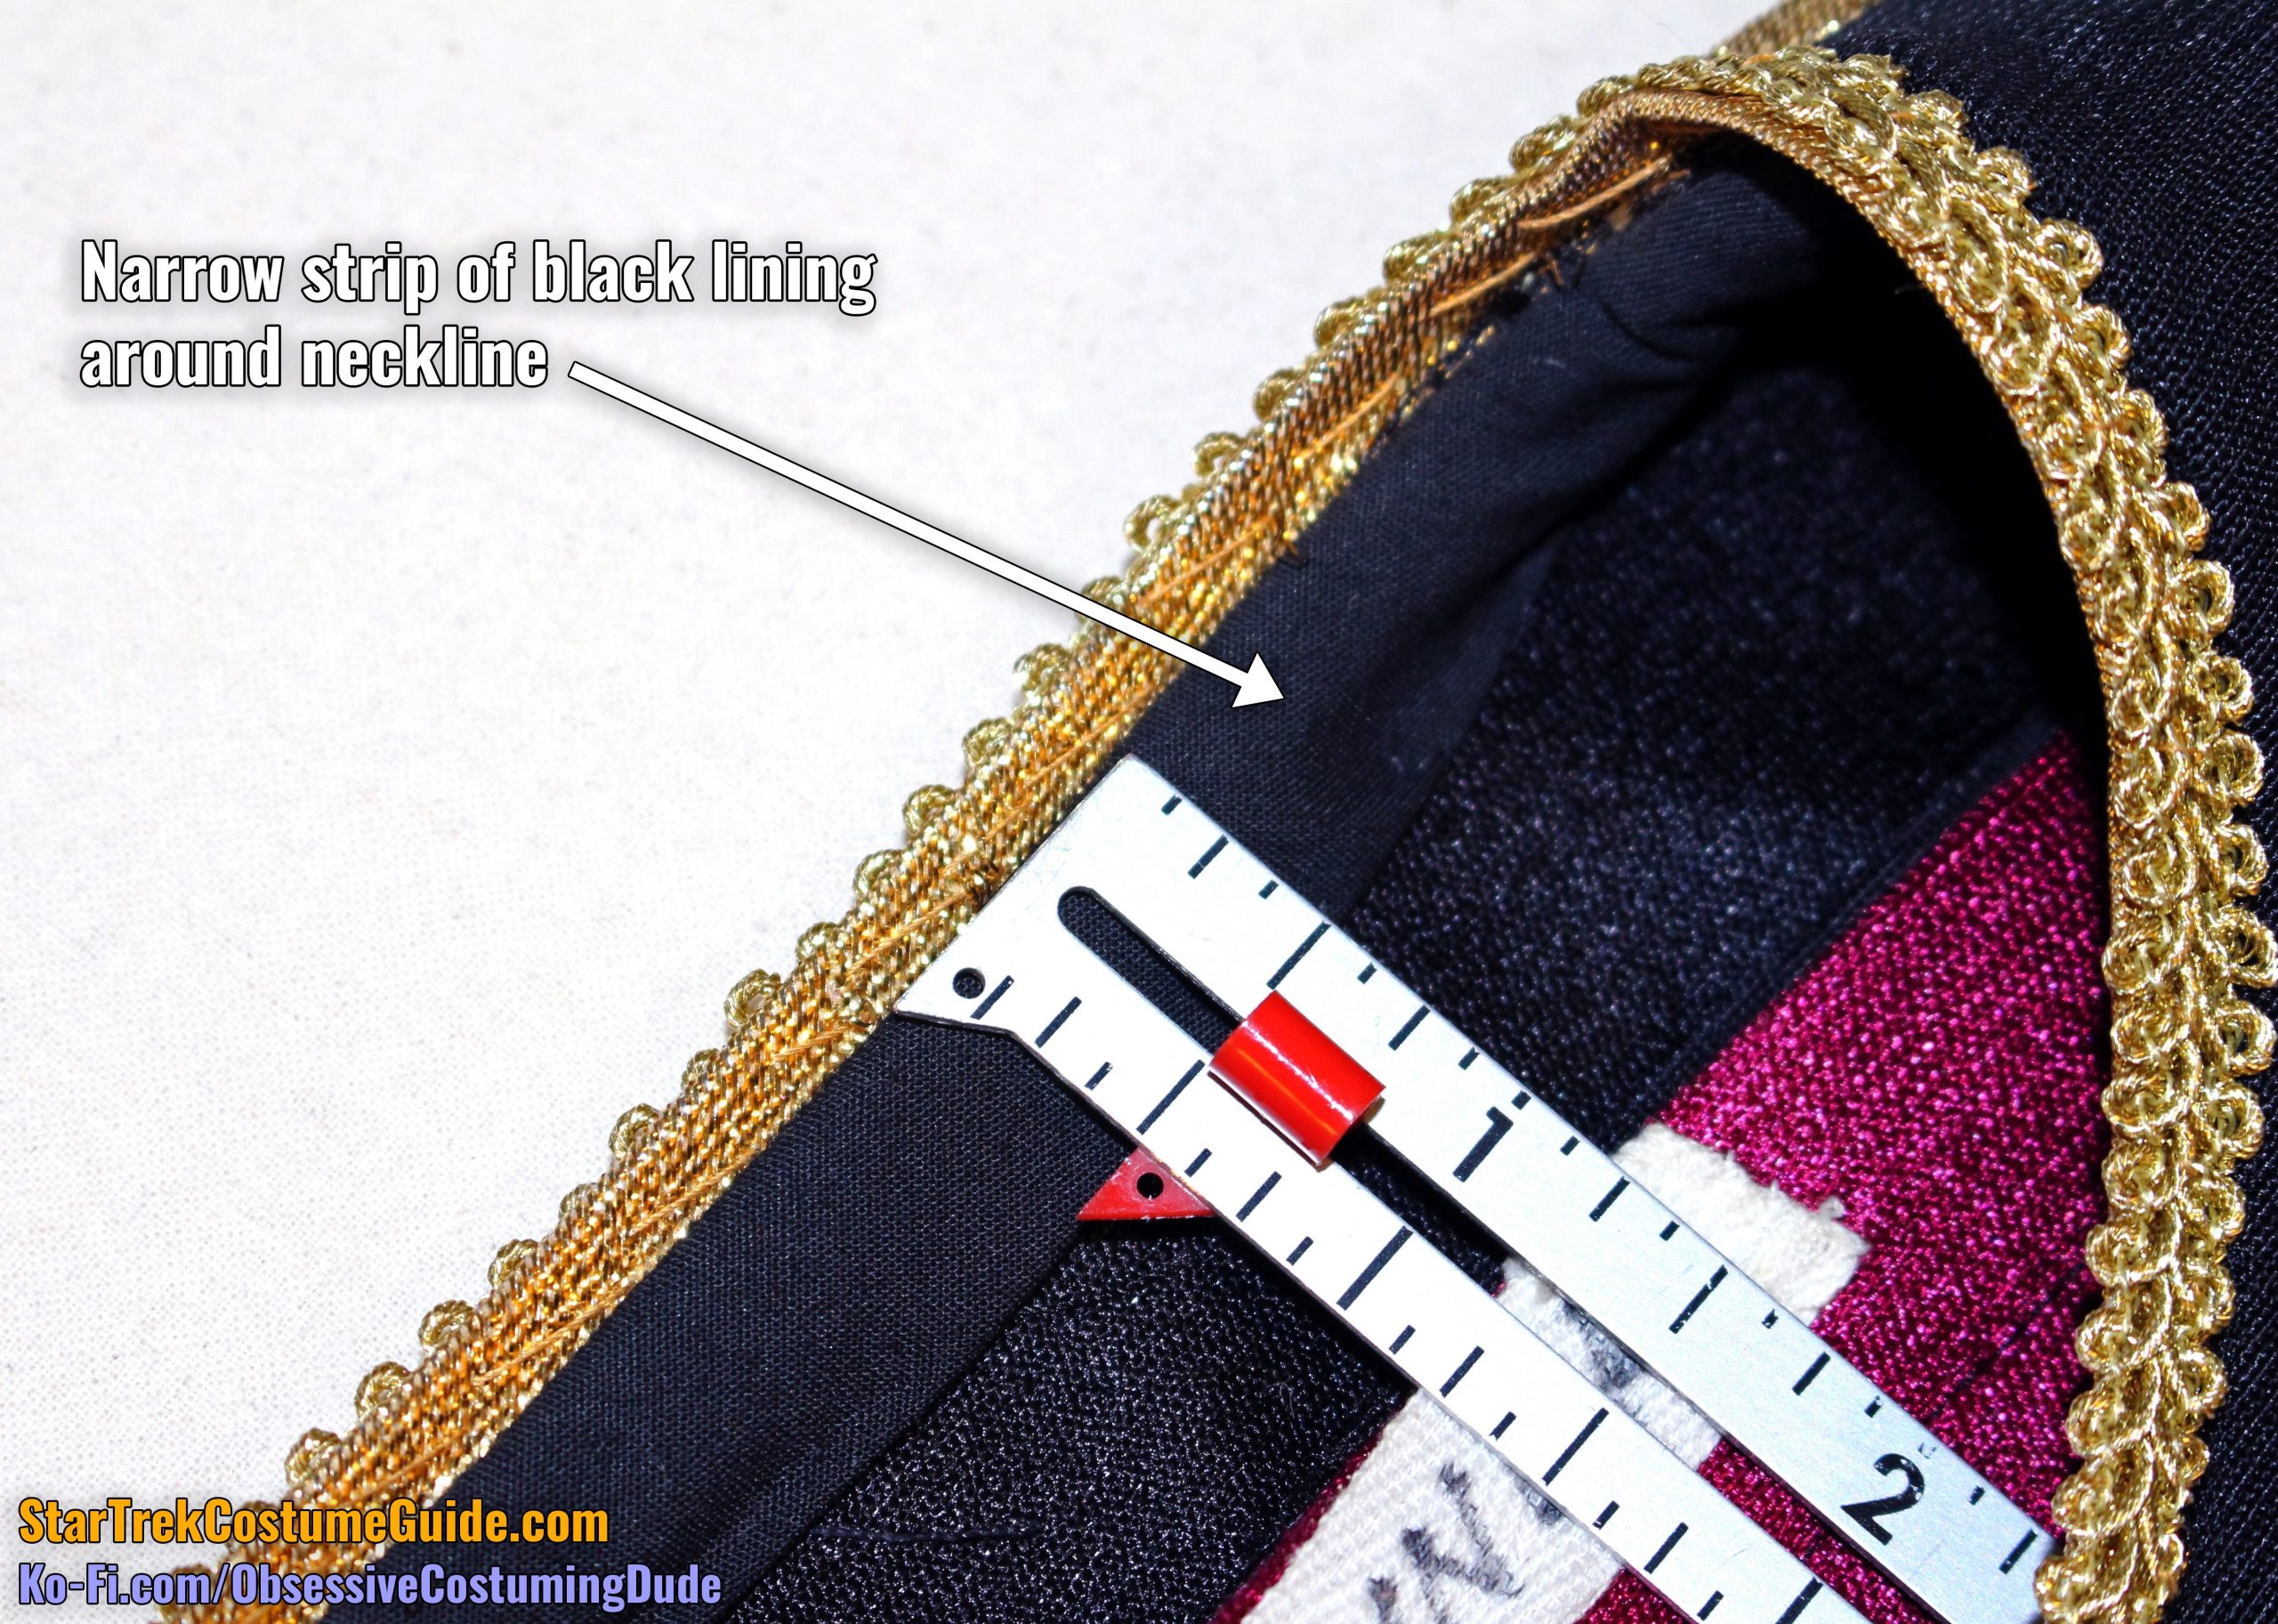
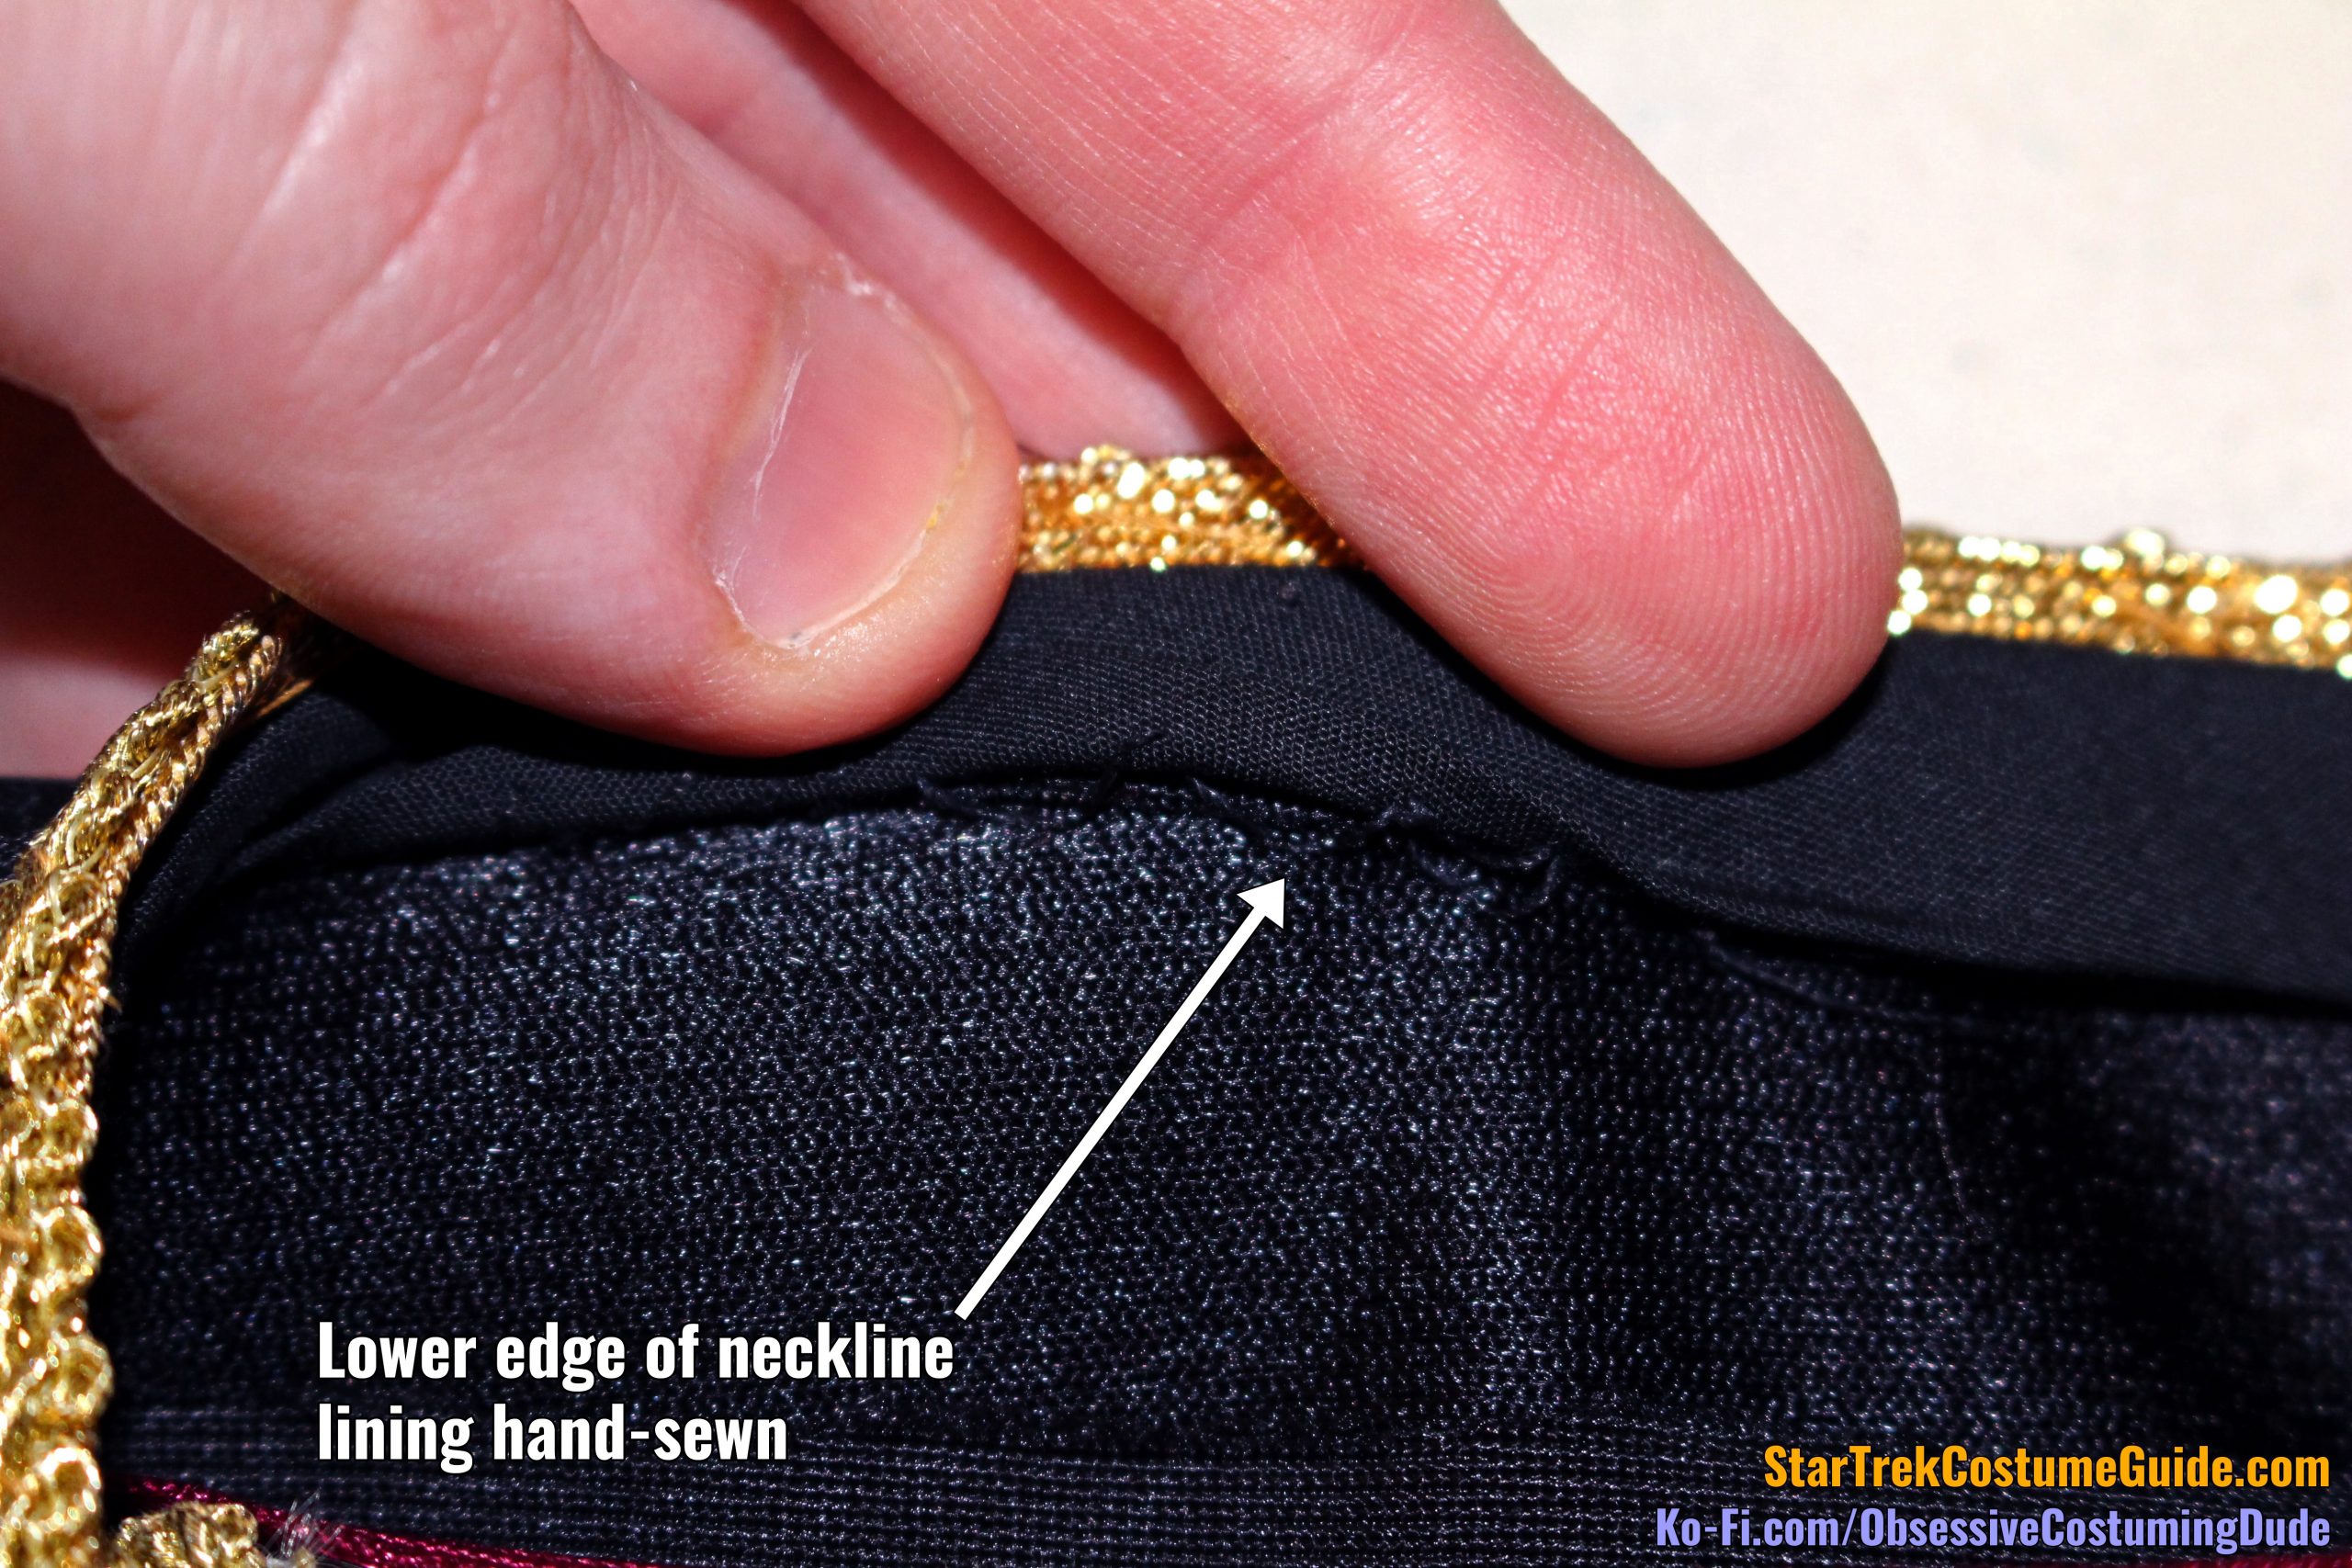
There was also a narrow strip of black lining around the neckline, about ½” wide (plus allowances), presumably either to protect the edge of the trim from unraveling, the actor’s neck from itching, or both.
The neckline lining was hand-sewn to the yoke slightly above the lower fold line.
It continued around the neckline and its lower edge was simply tacked down onto the front trim by hand, around the same place where the front 1” (zipper) seam allowance began.
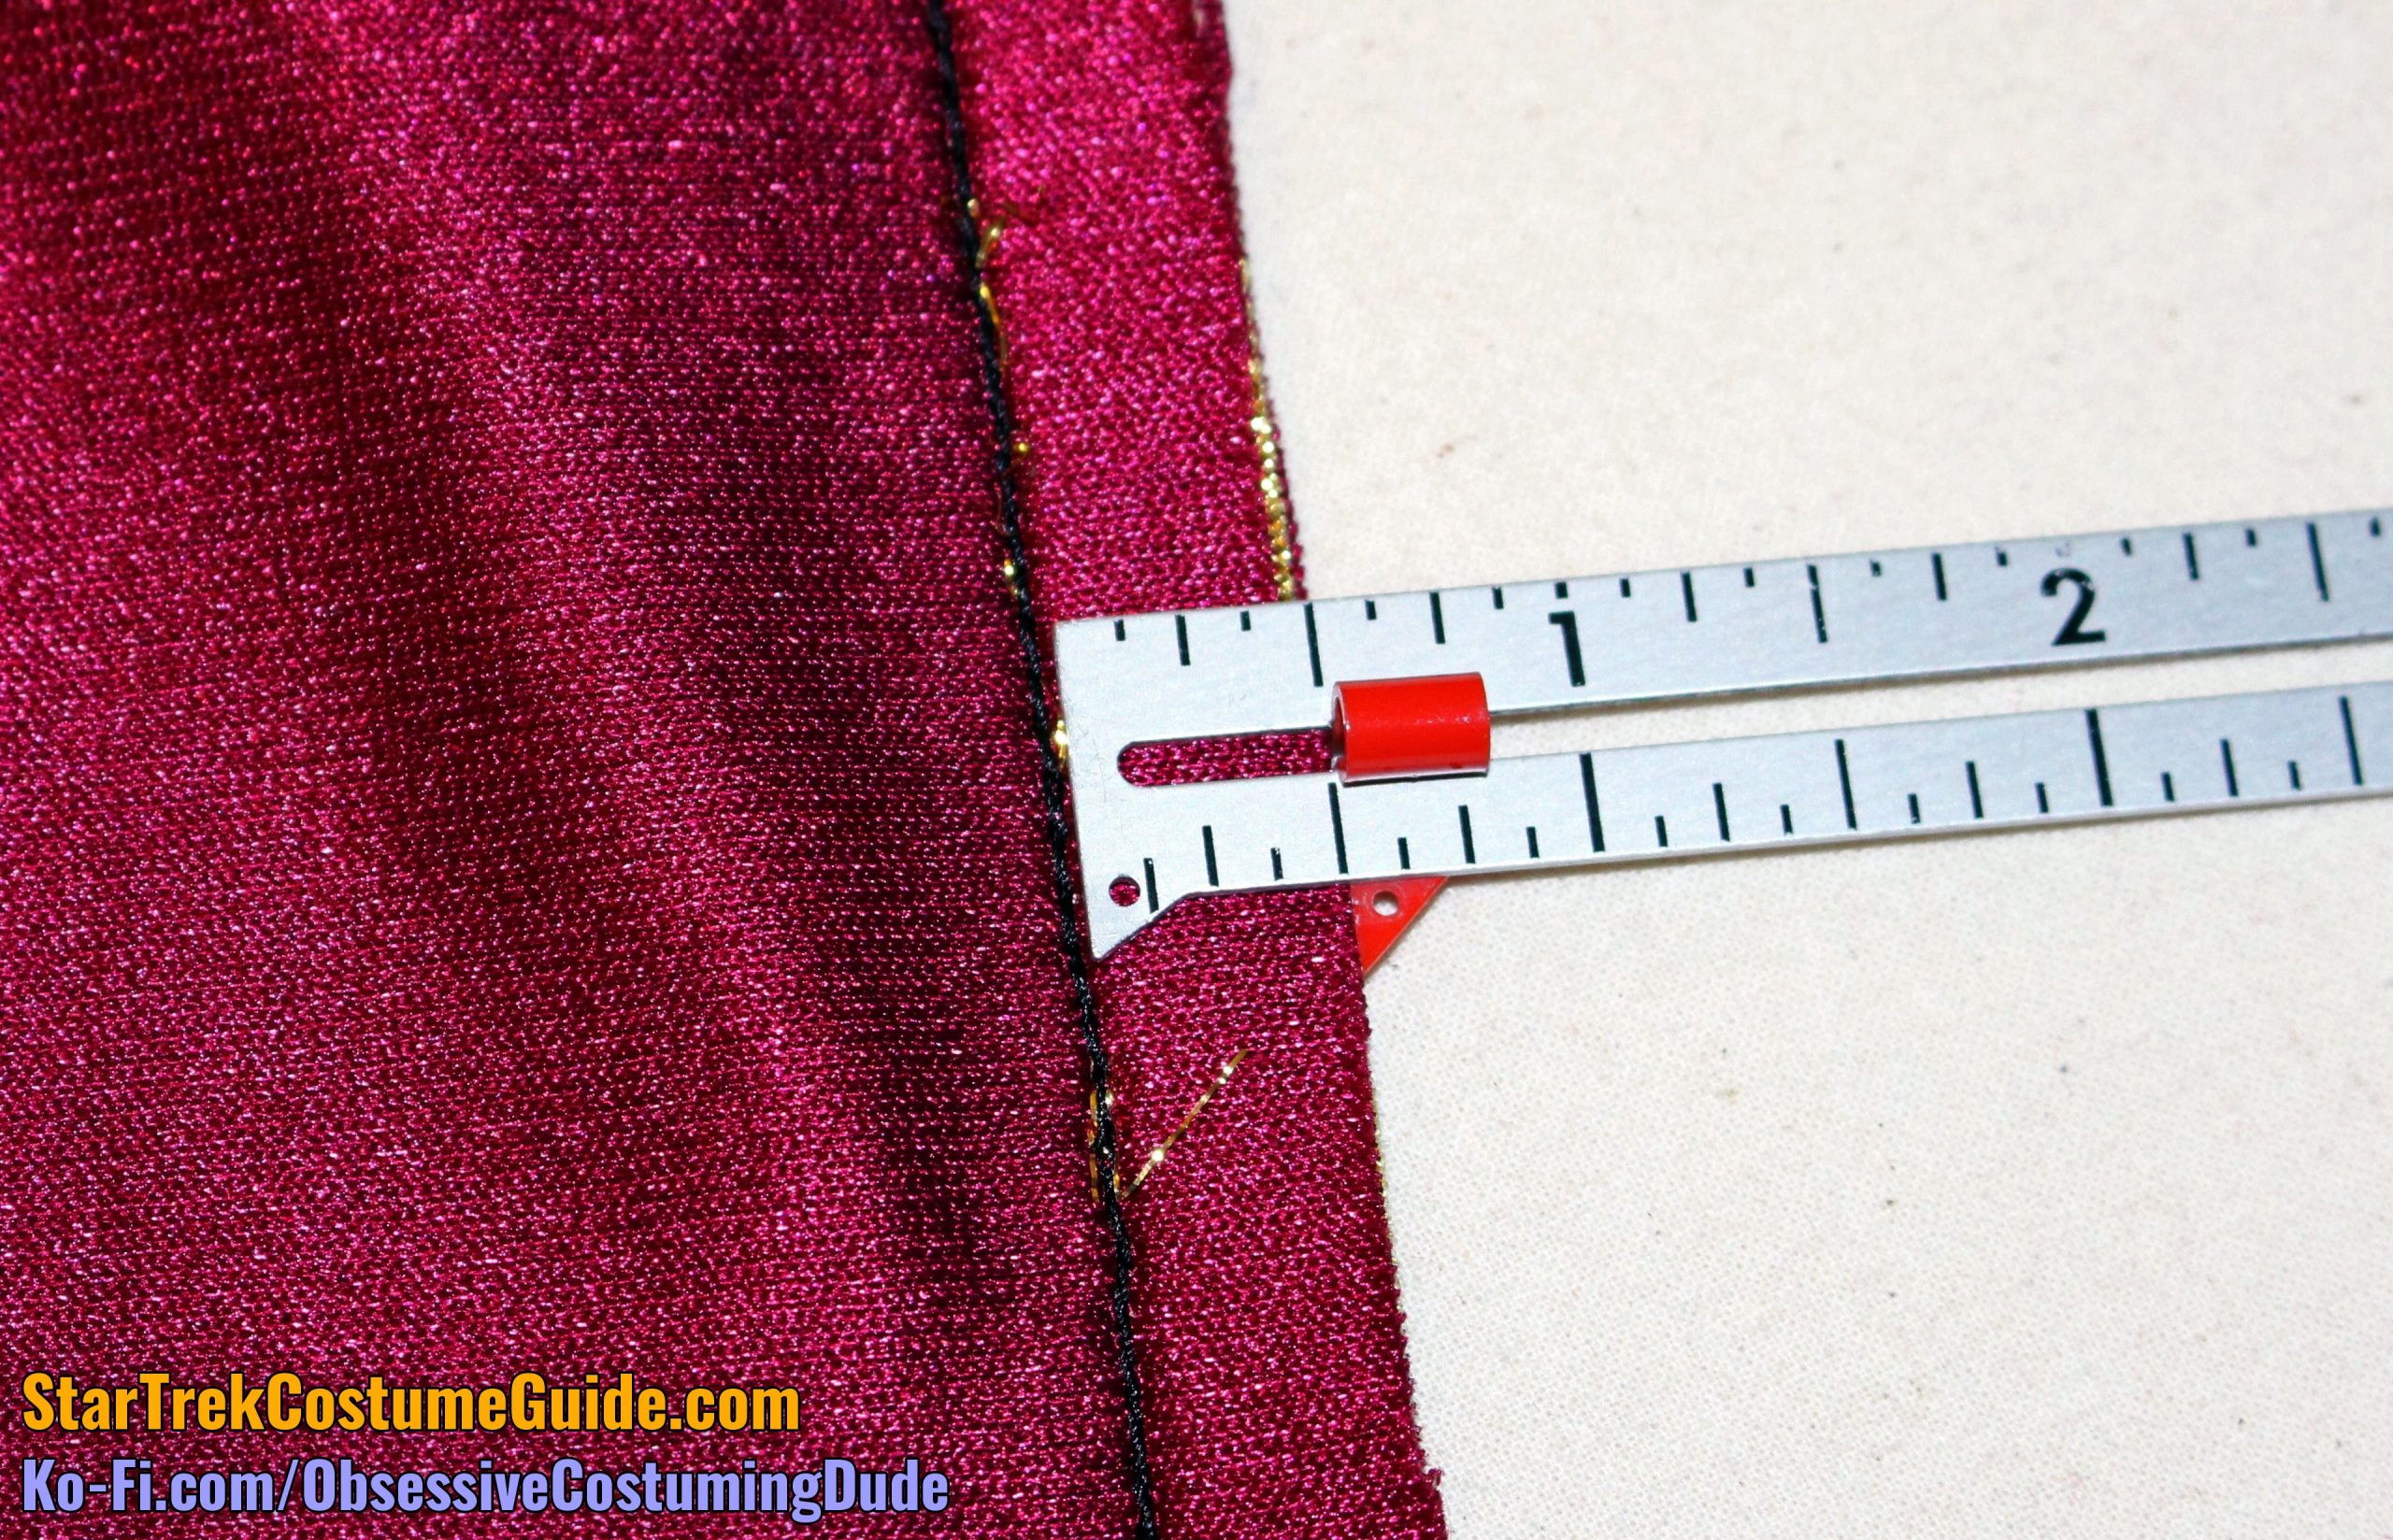
The front yoke/upper front seam allowance was usually ⅝”.
However, it appears to have been trimmed down to ½” at the center front.
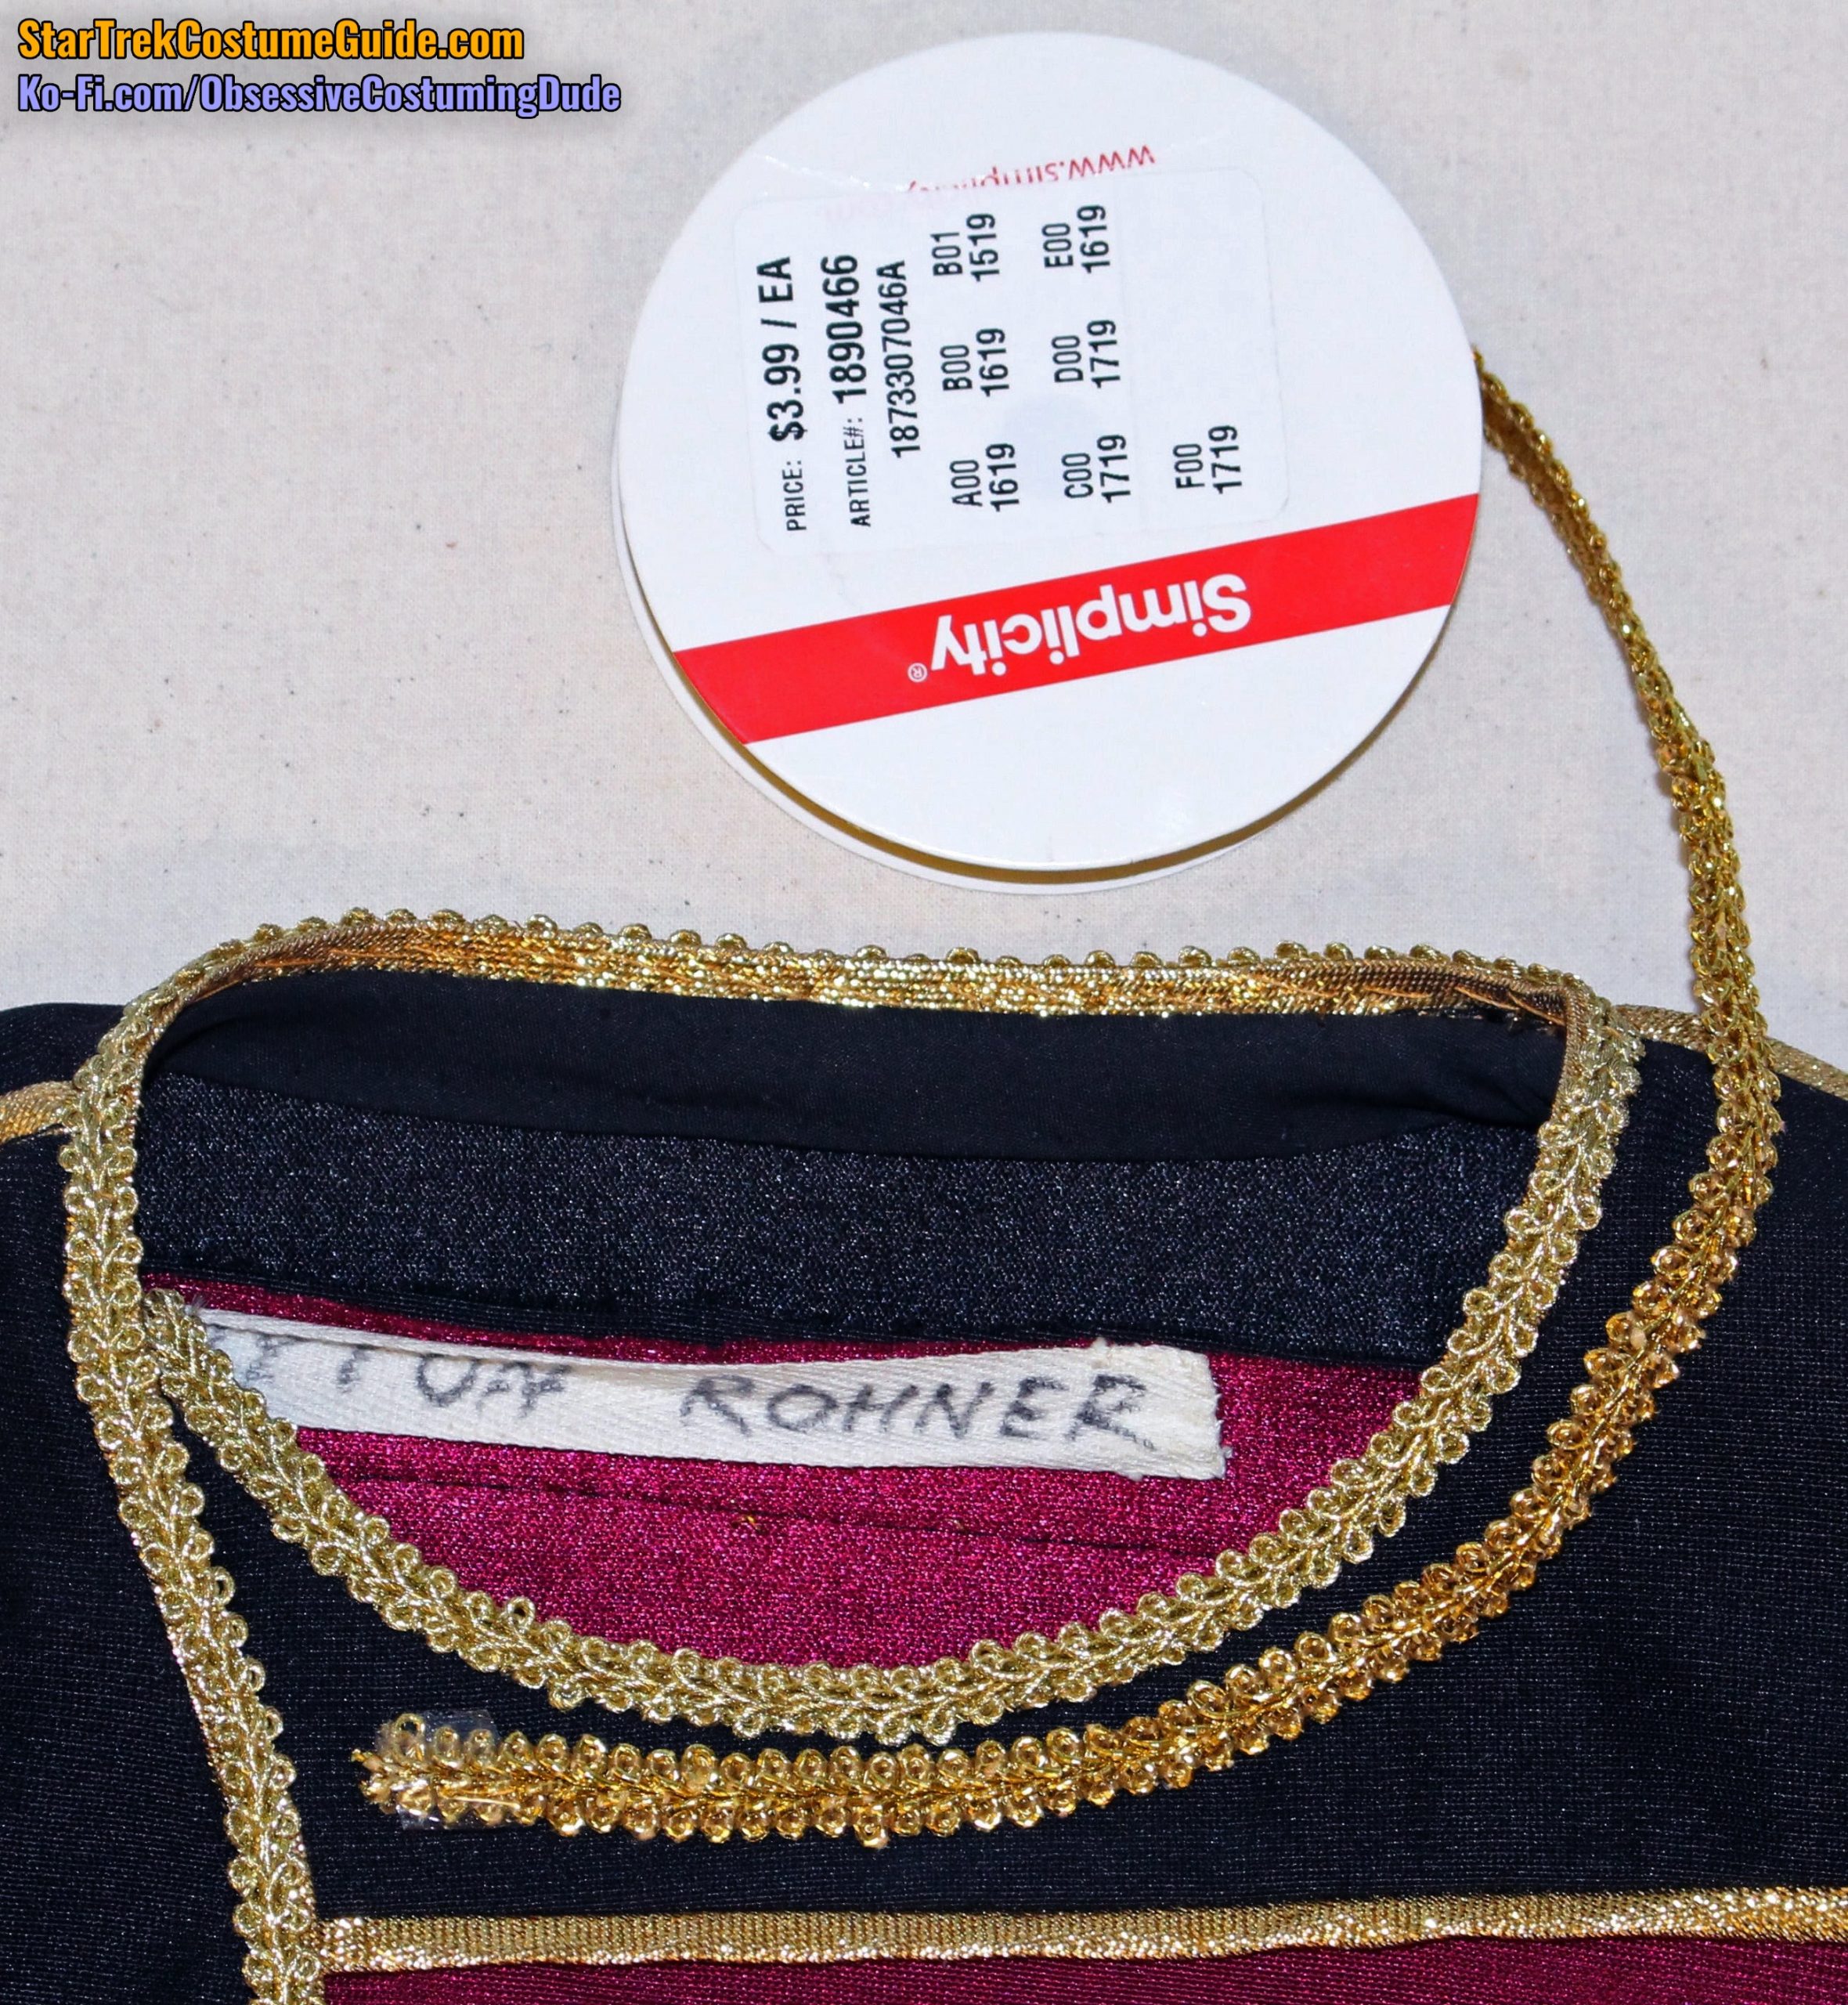
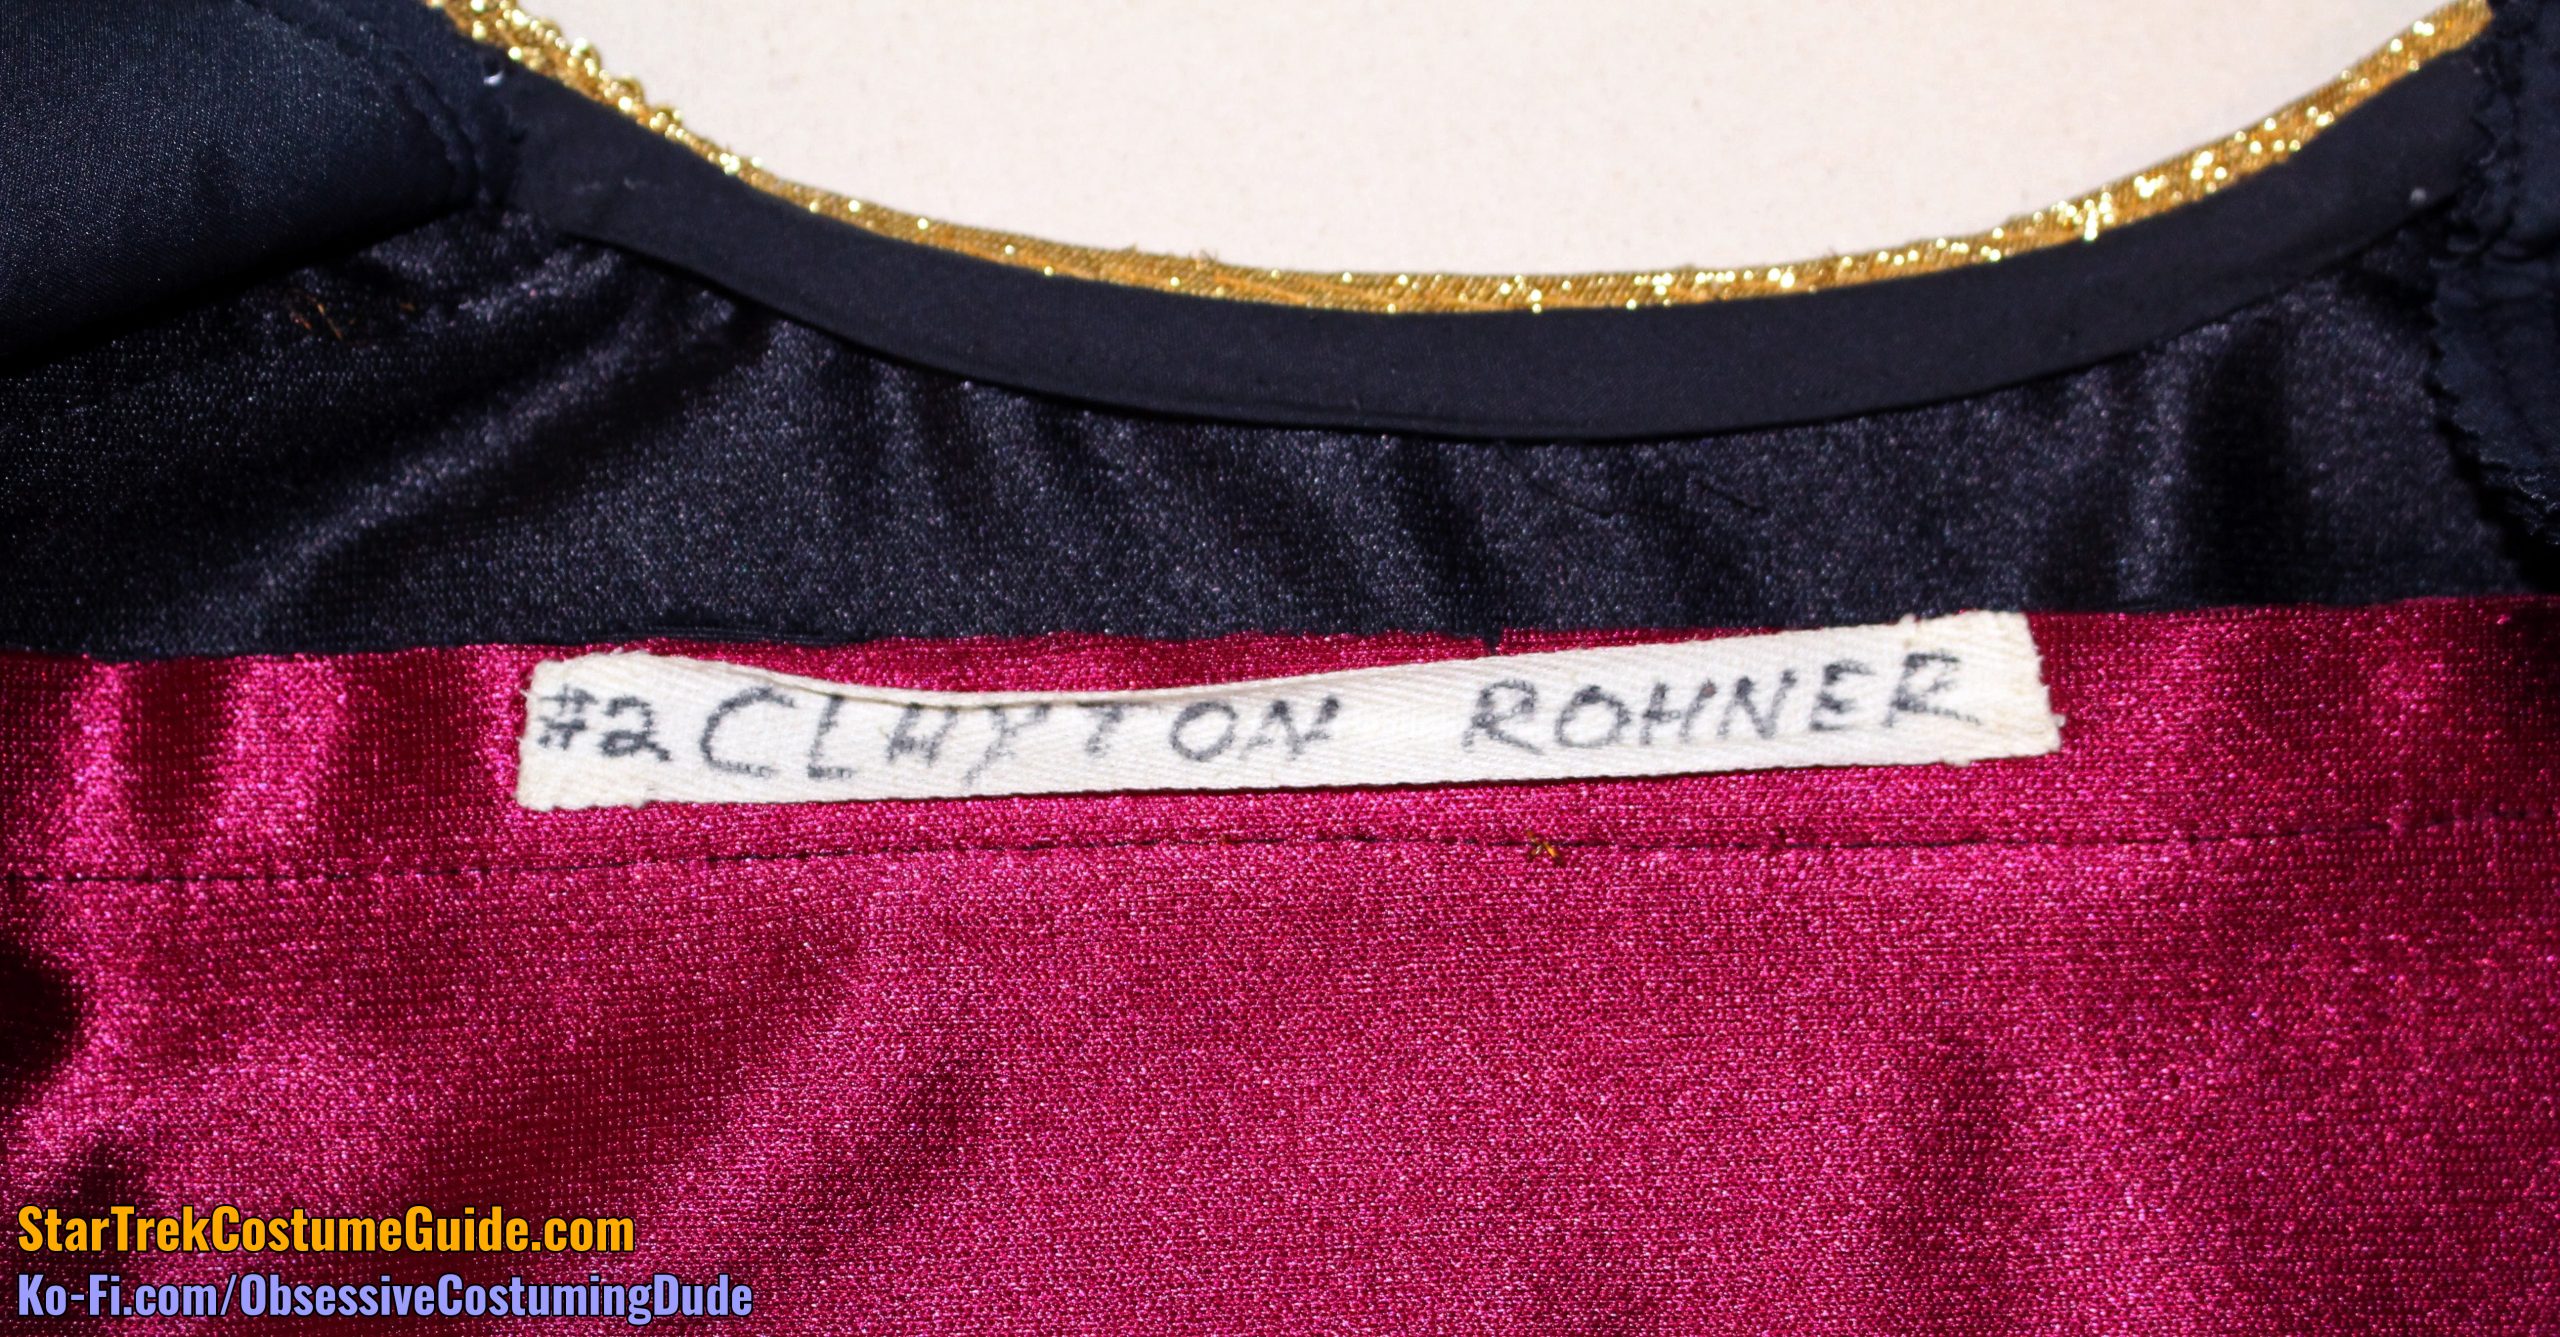
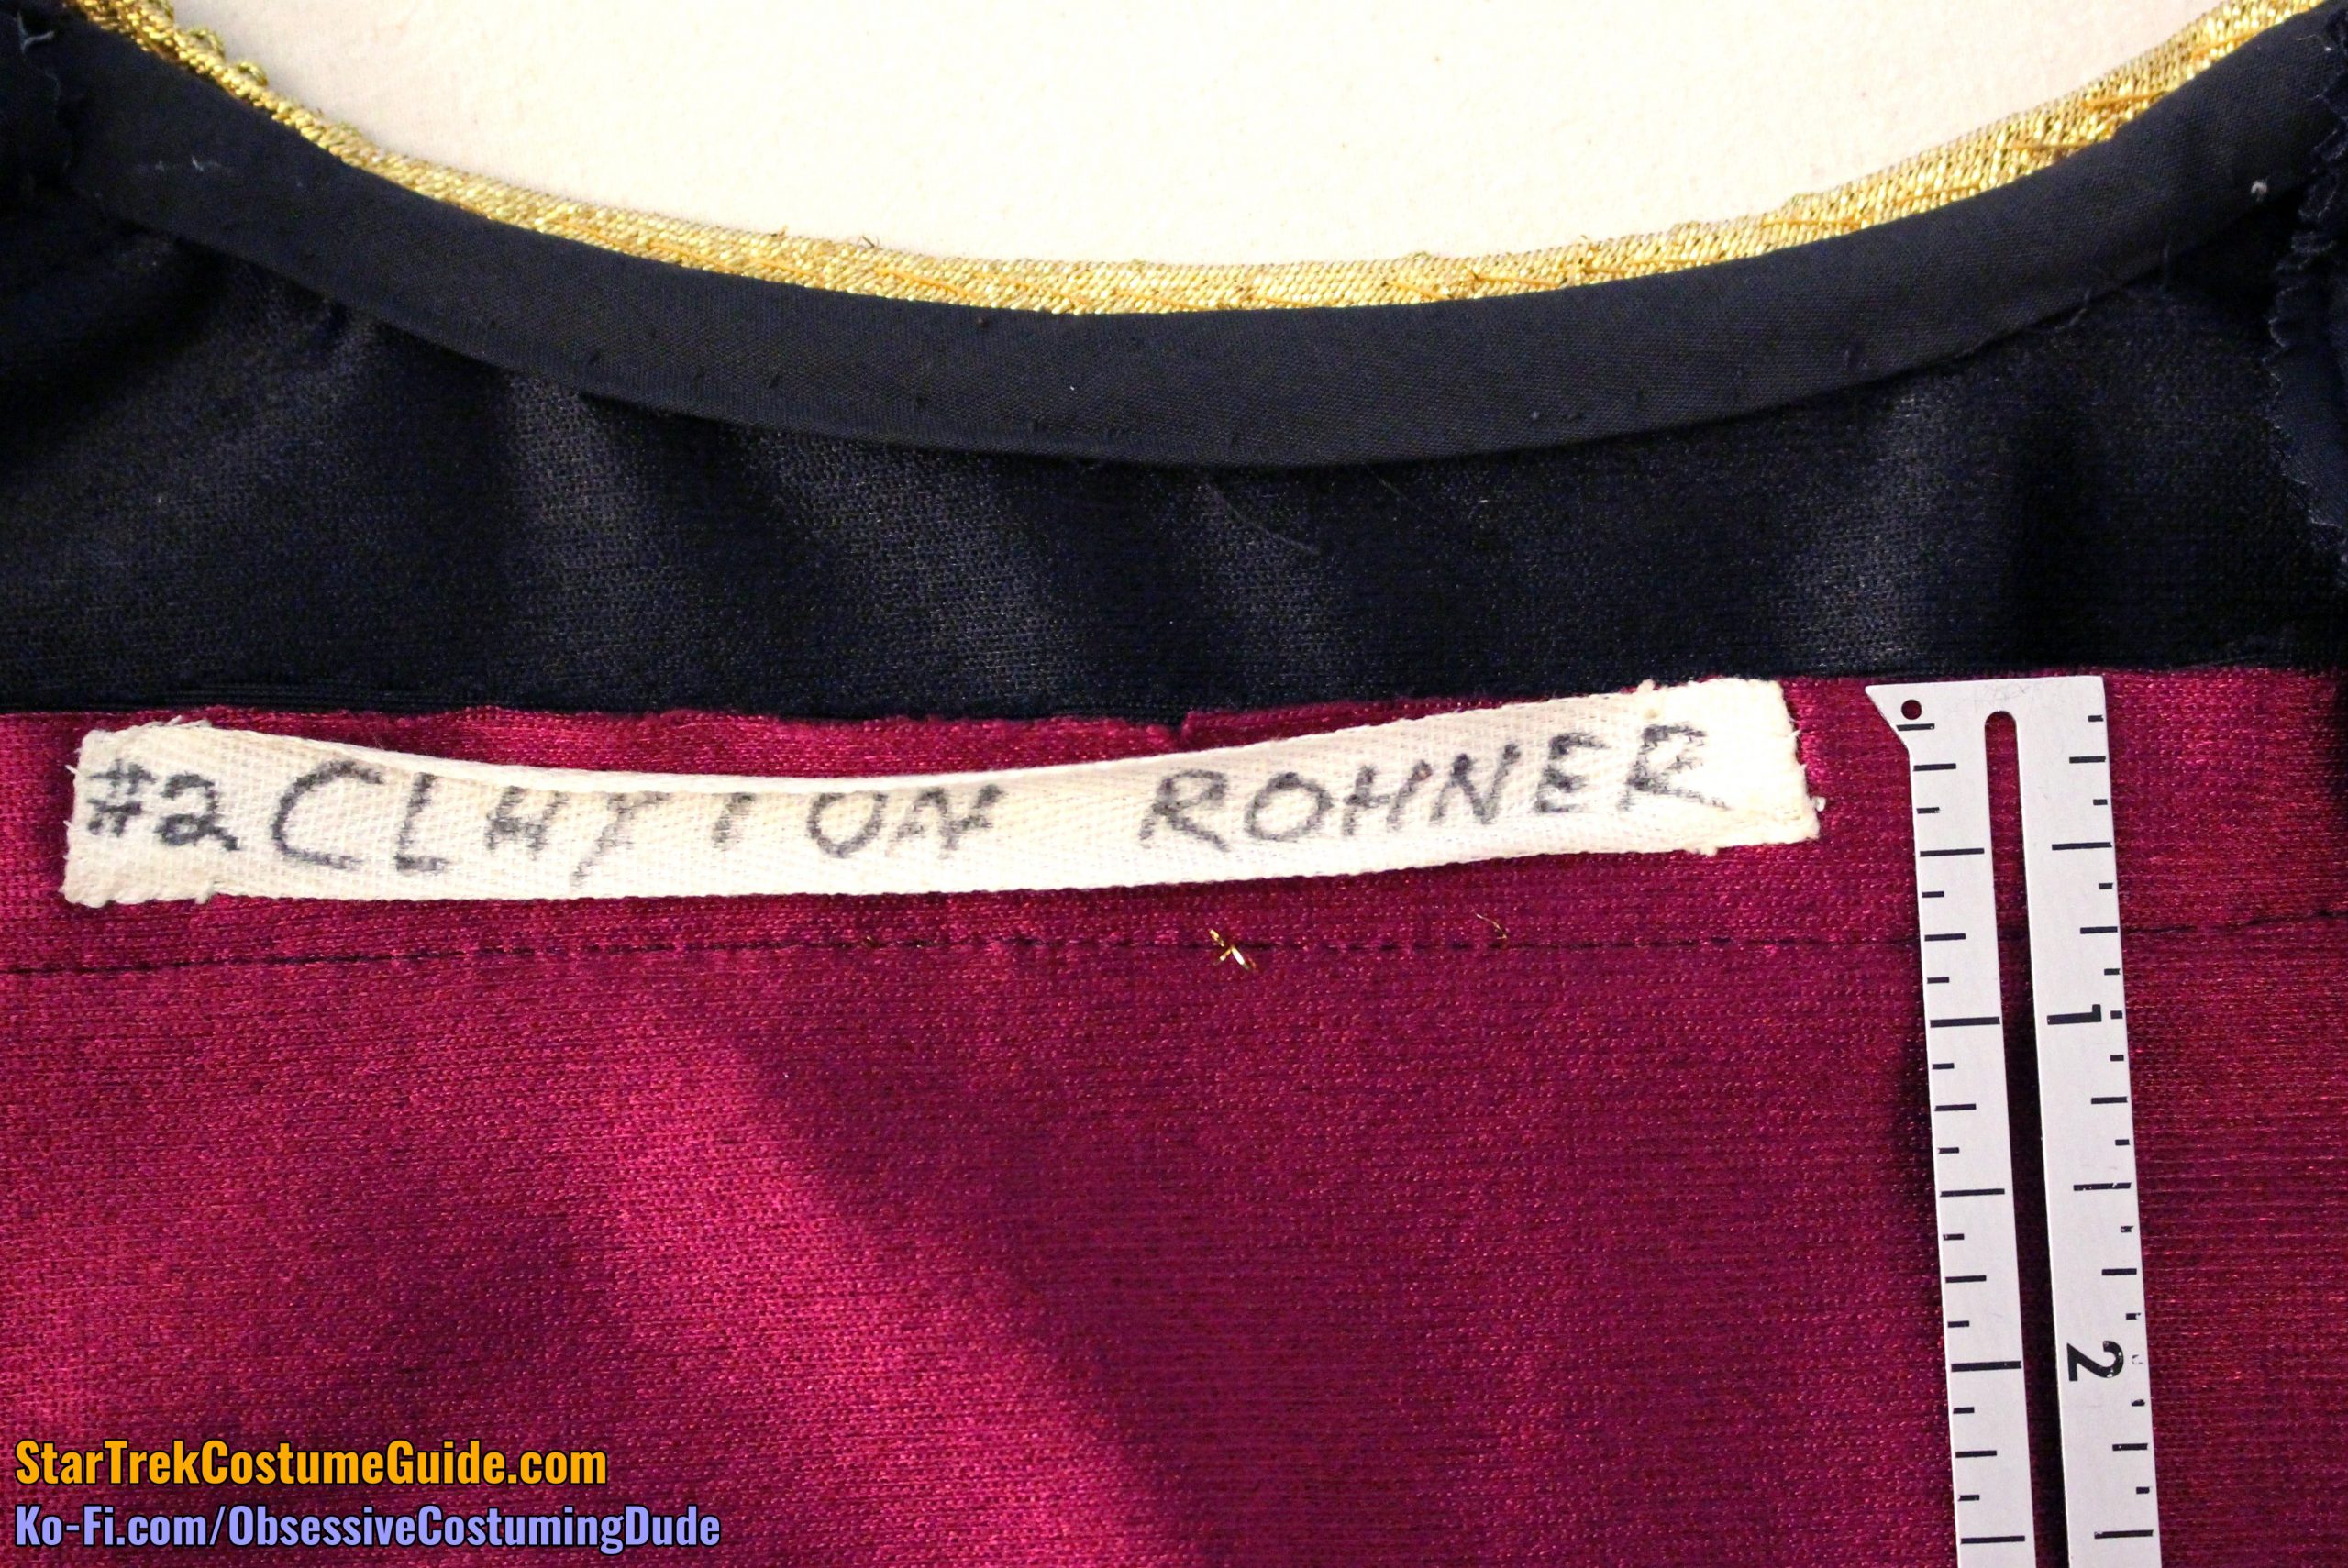
The back label appeared to be ½” white cotton twill tape, with the actor’s name written in marker.
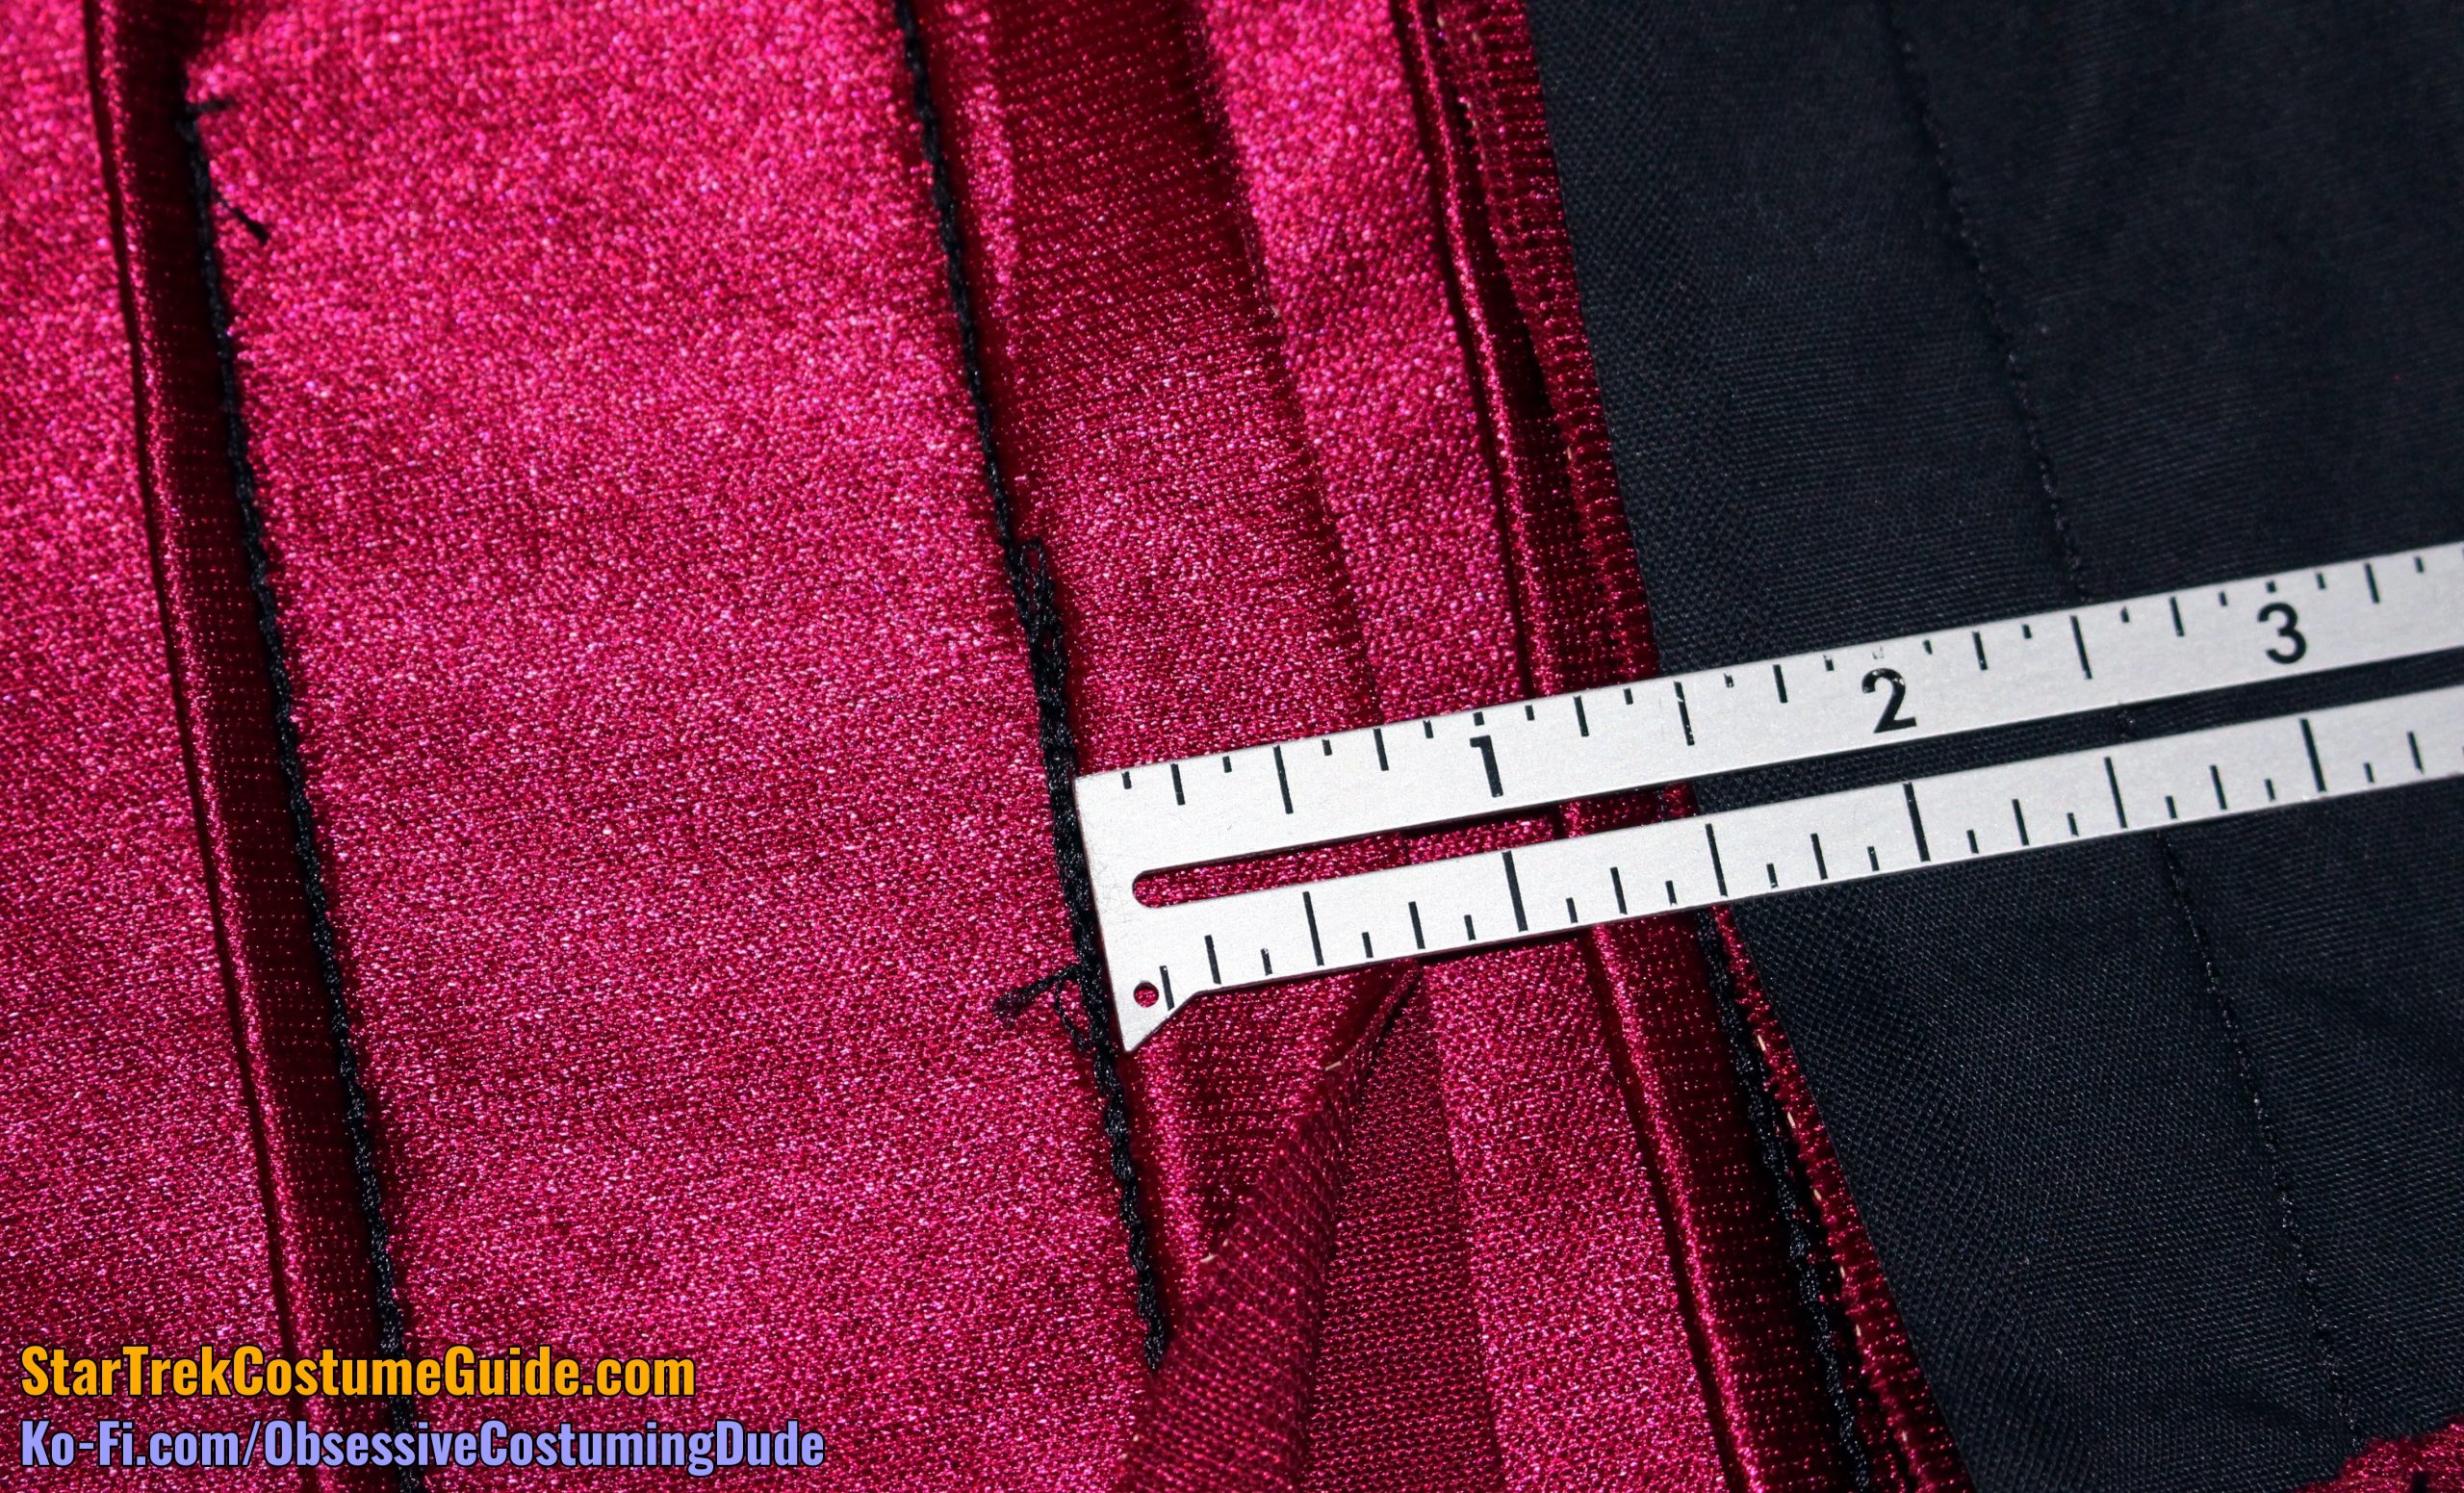
The back yoke/upper back seam allowance was ¾”.
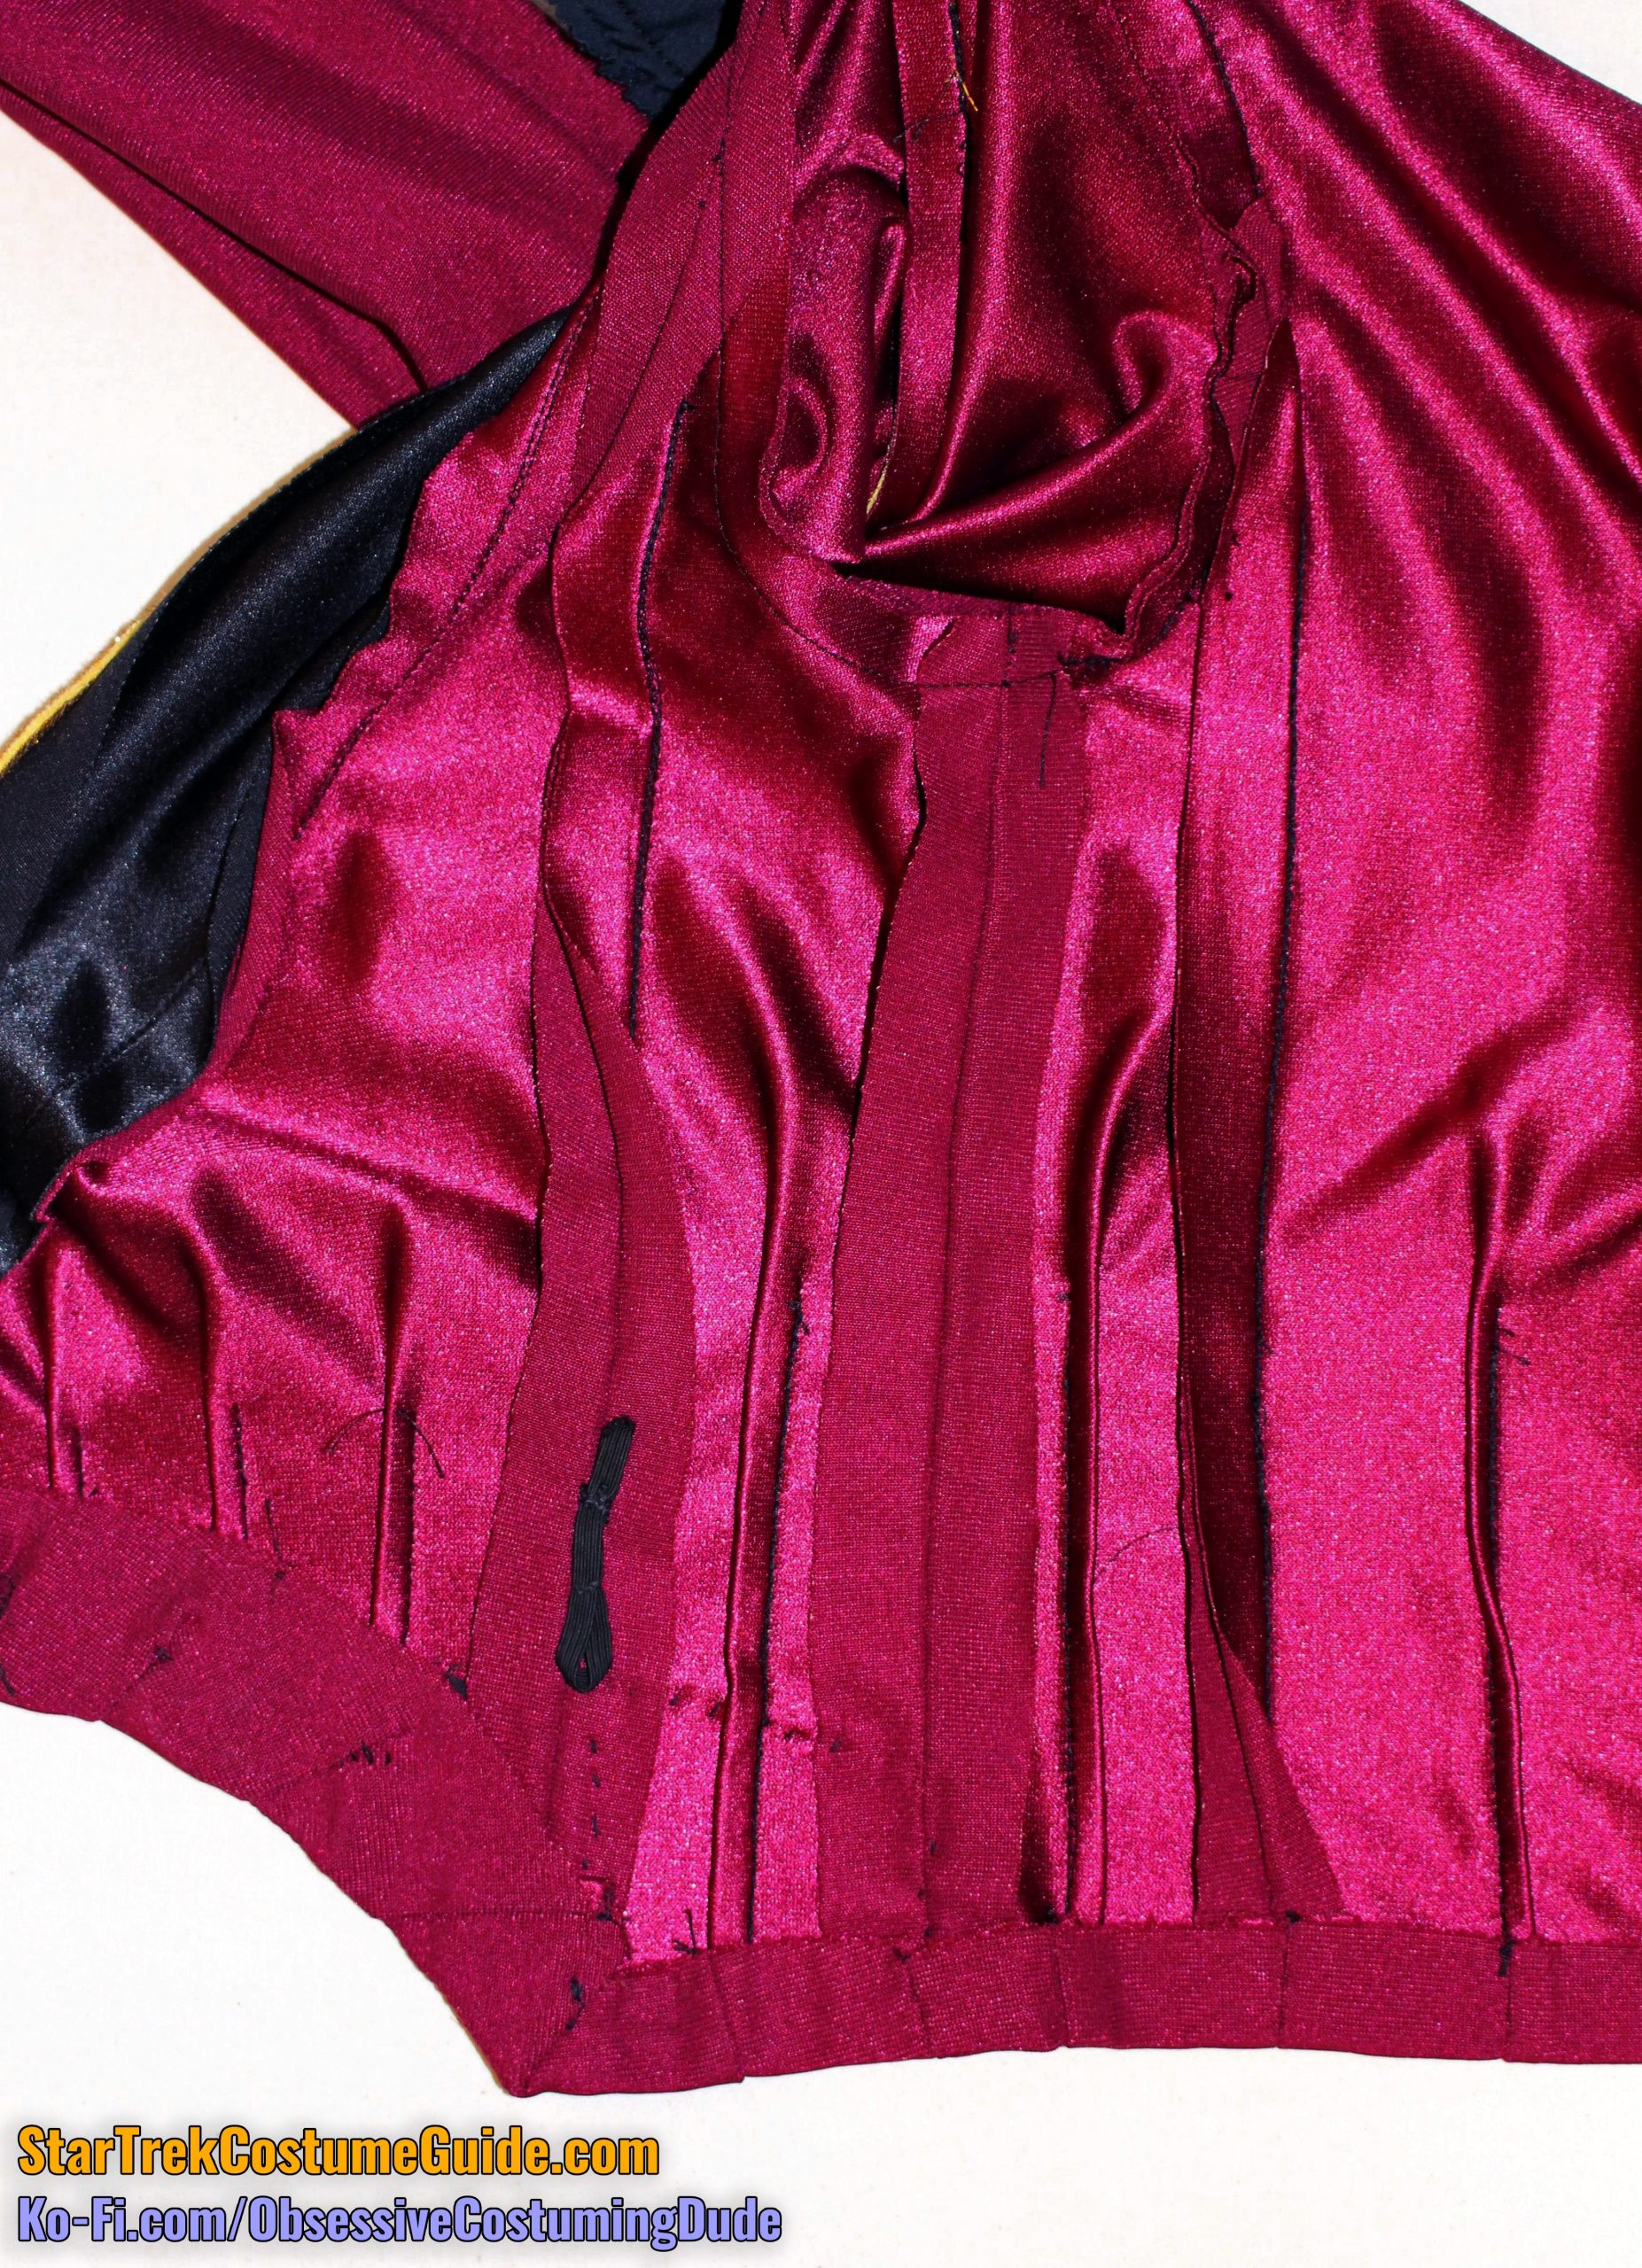
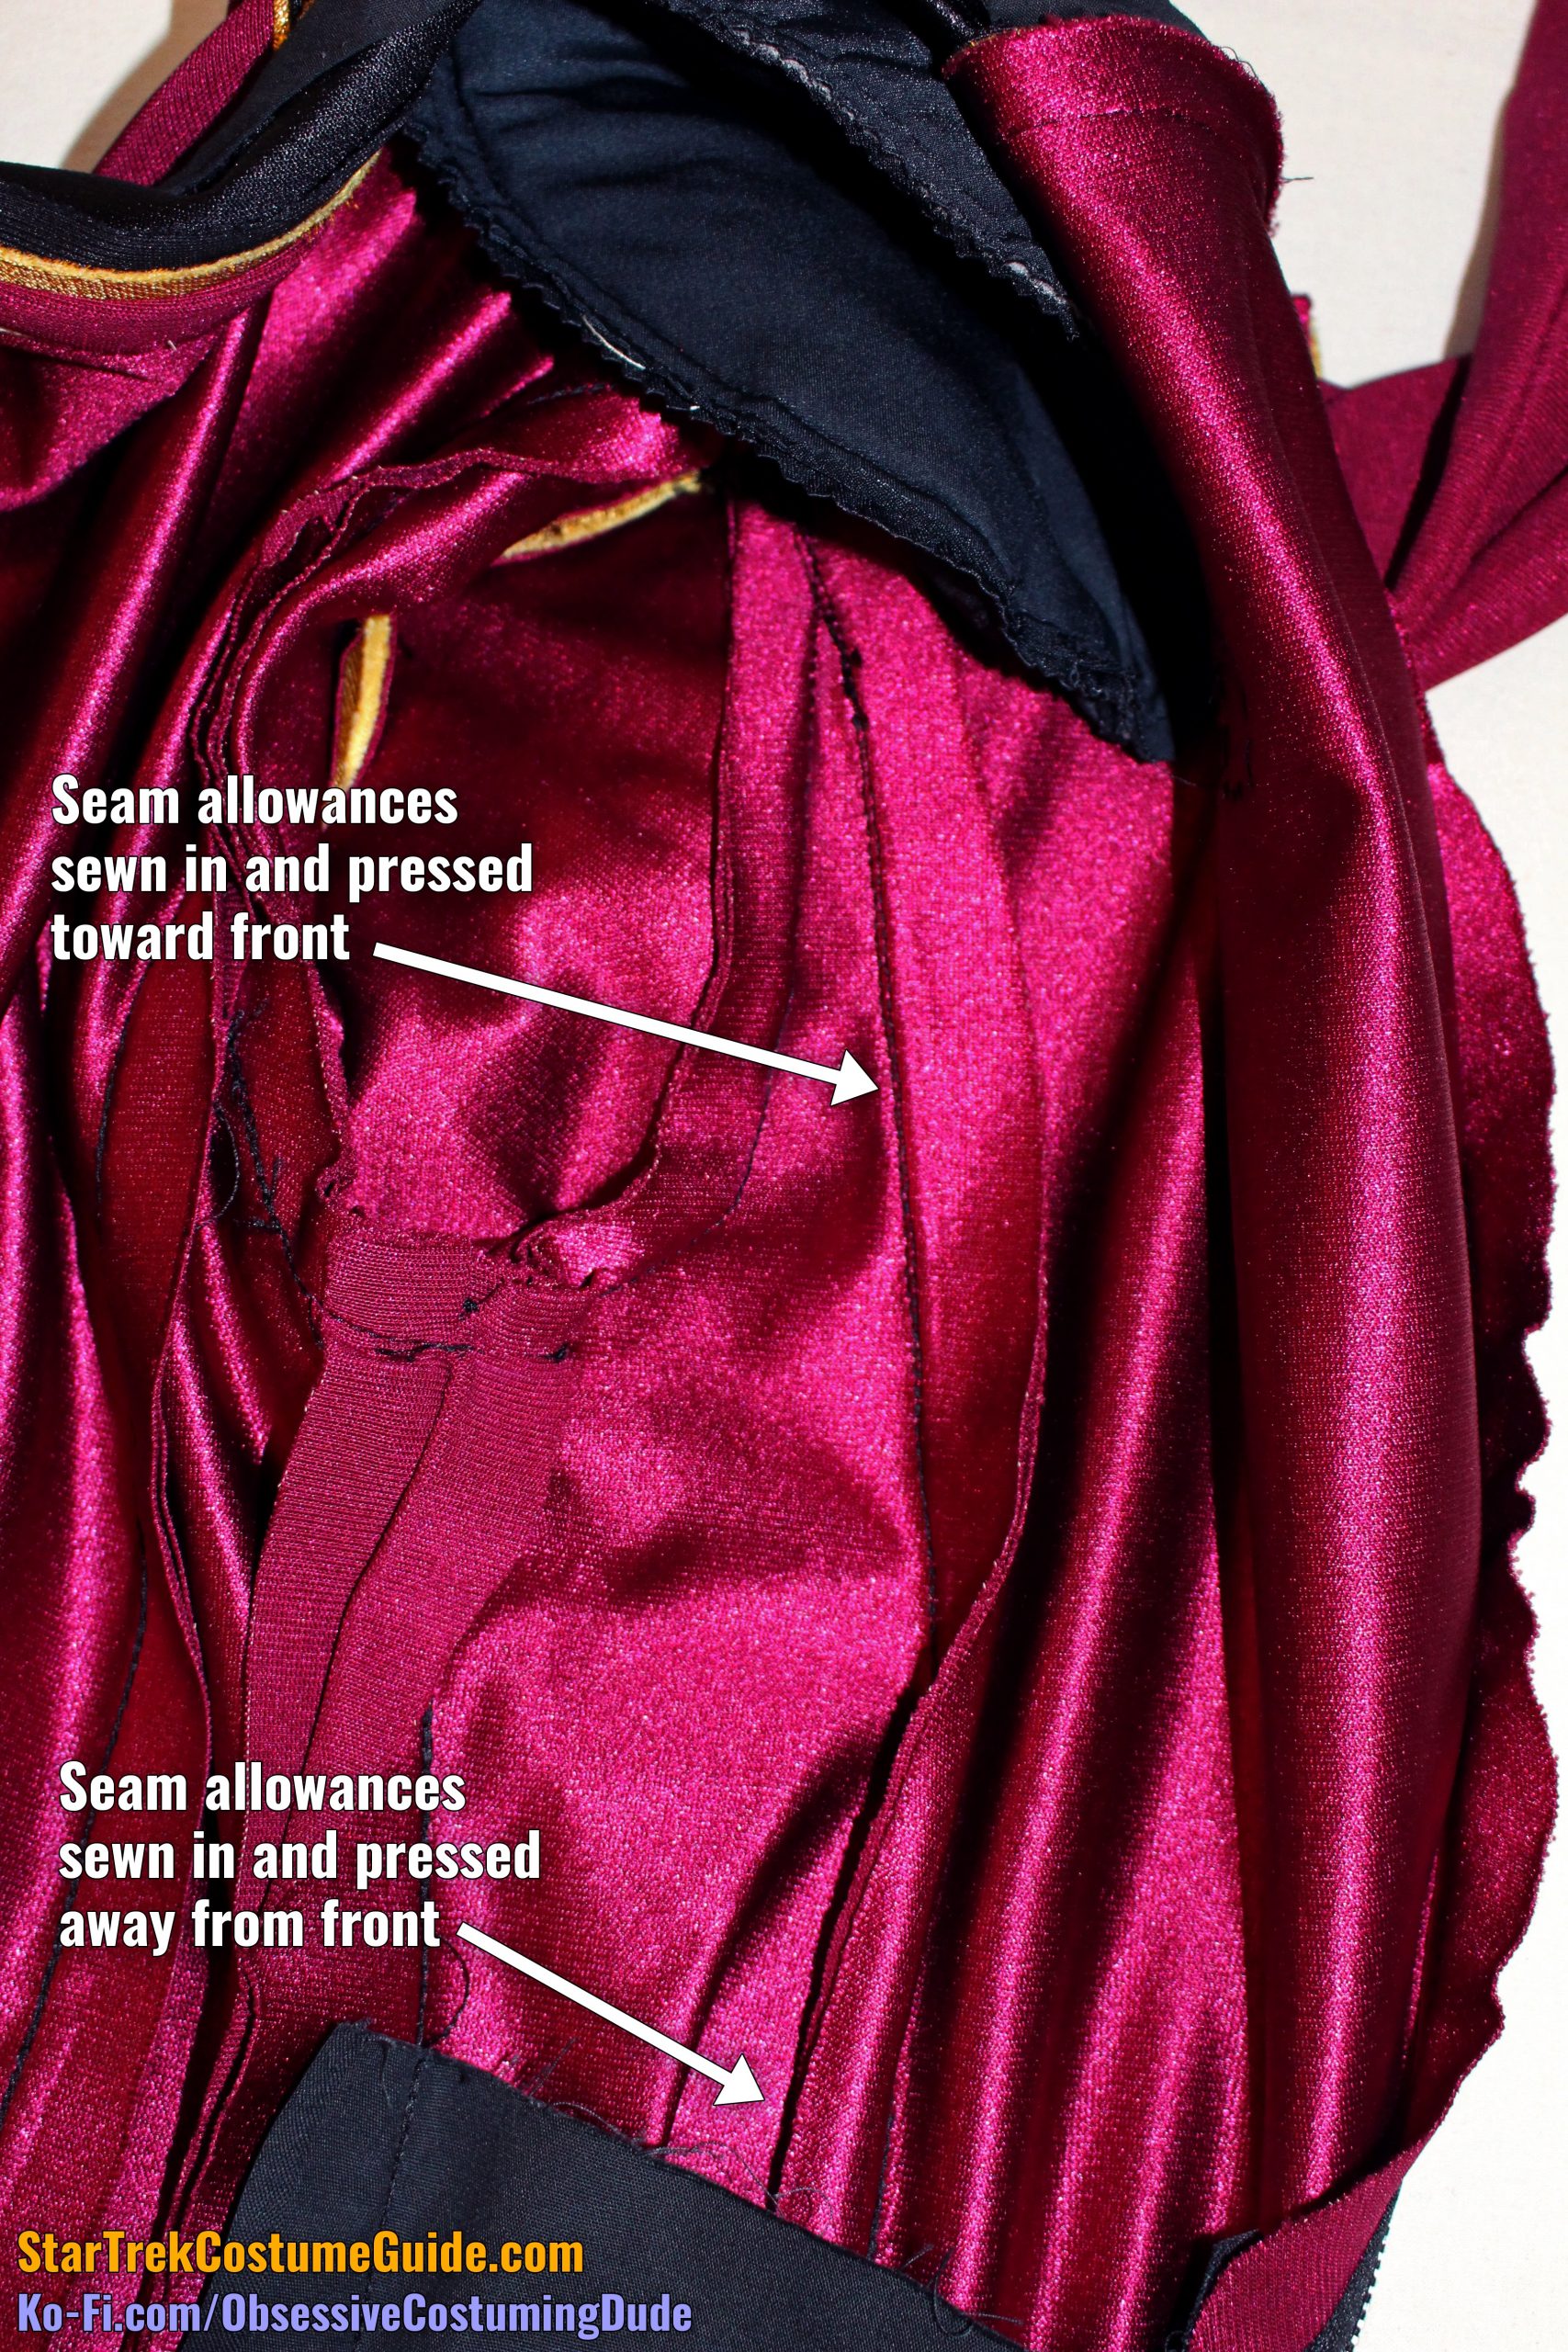
Aaand here’s where things really start to get weird.
Take a look at these right seam allowances.
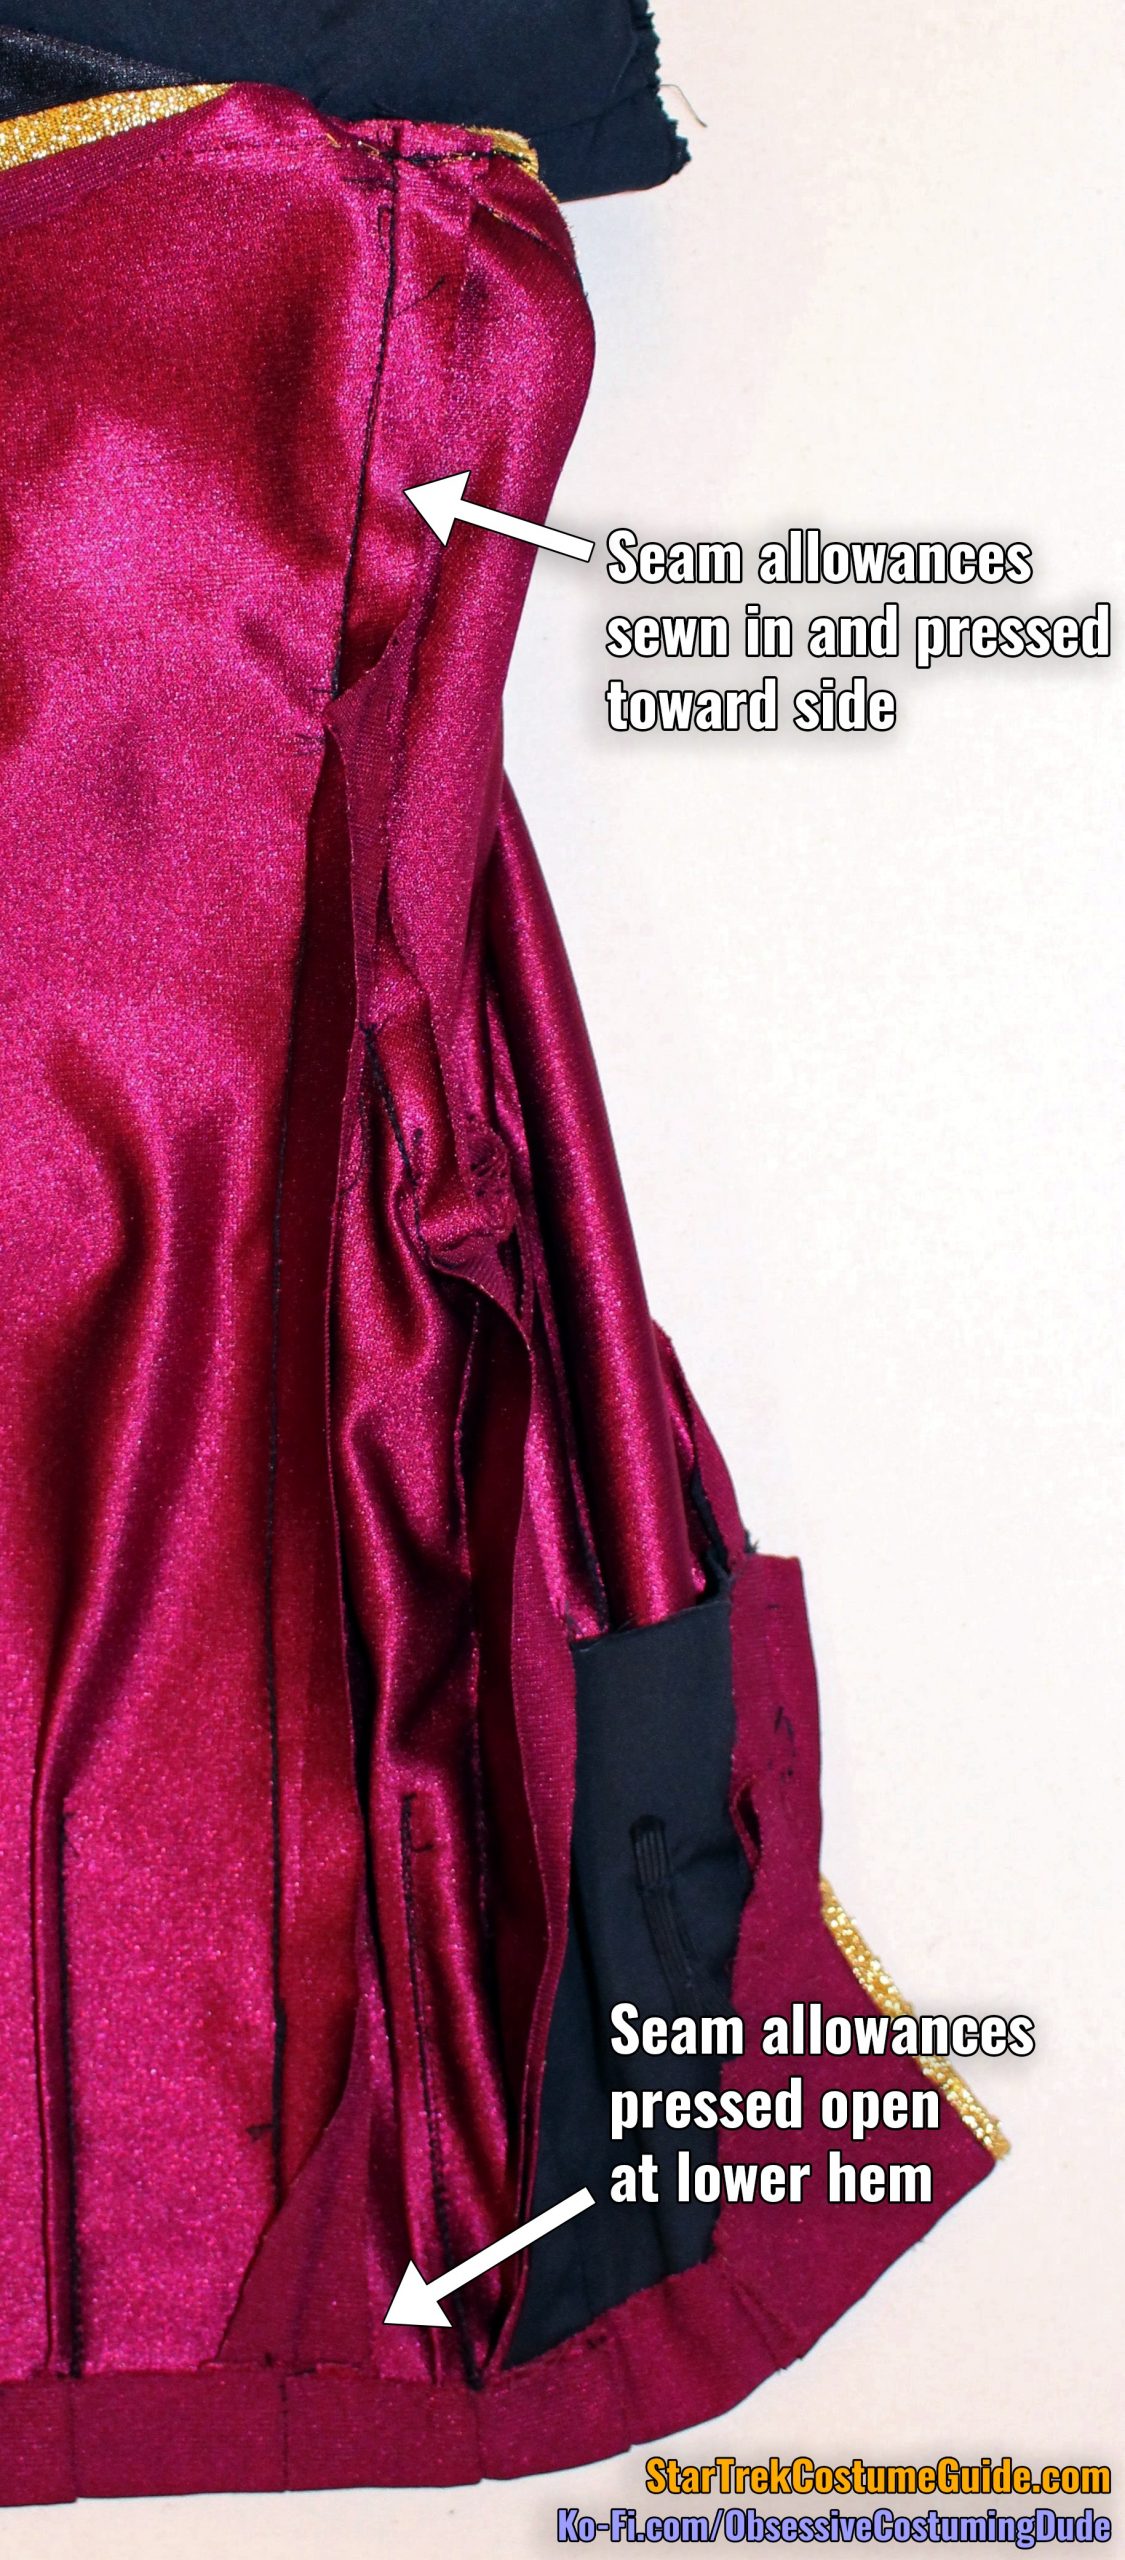
Aside from the seam allowances generally being unusual and inconsistent amounts (probably at least partly due to alterations for the actor), what surprises me most is how nearly all of them actually change directions from top to bottom.
Observe, for instance, that the front panel seam allowances were sewn in facing the front at the yoke, but twisted around and faced toward the side at the bottom.
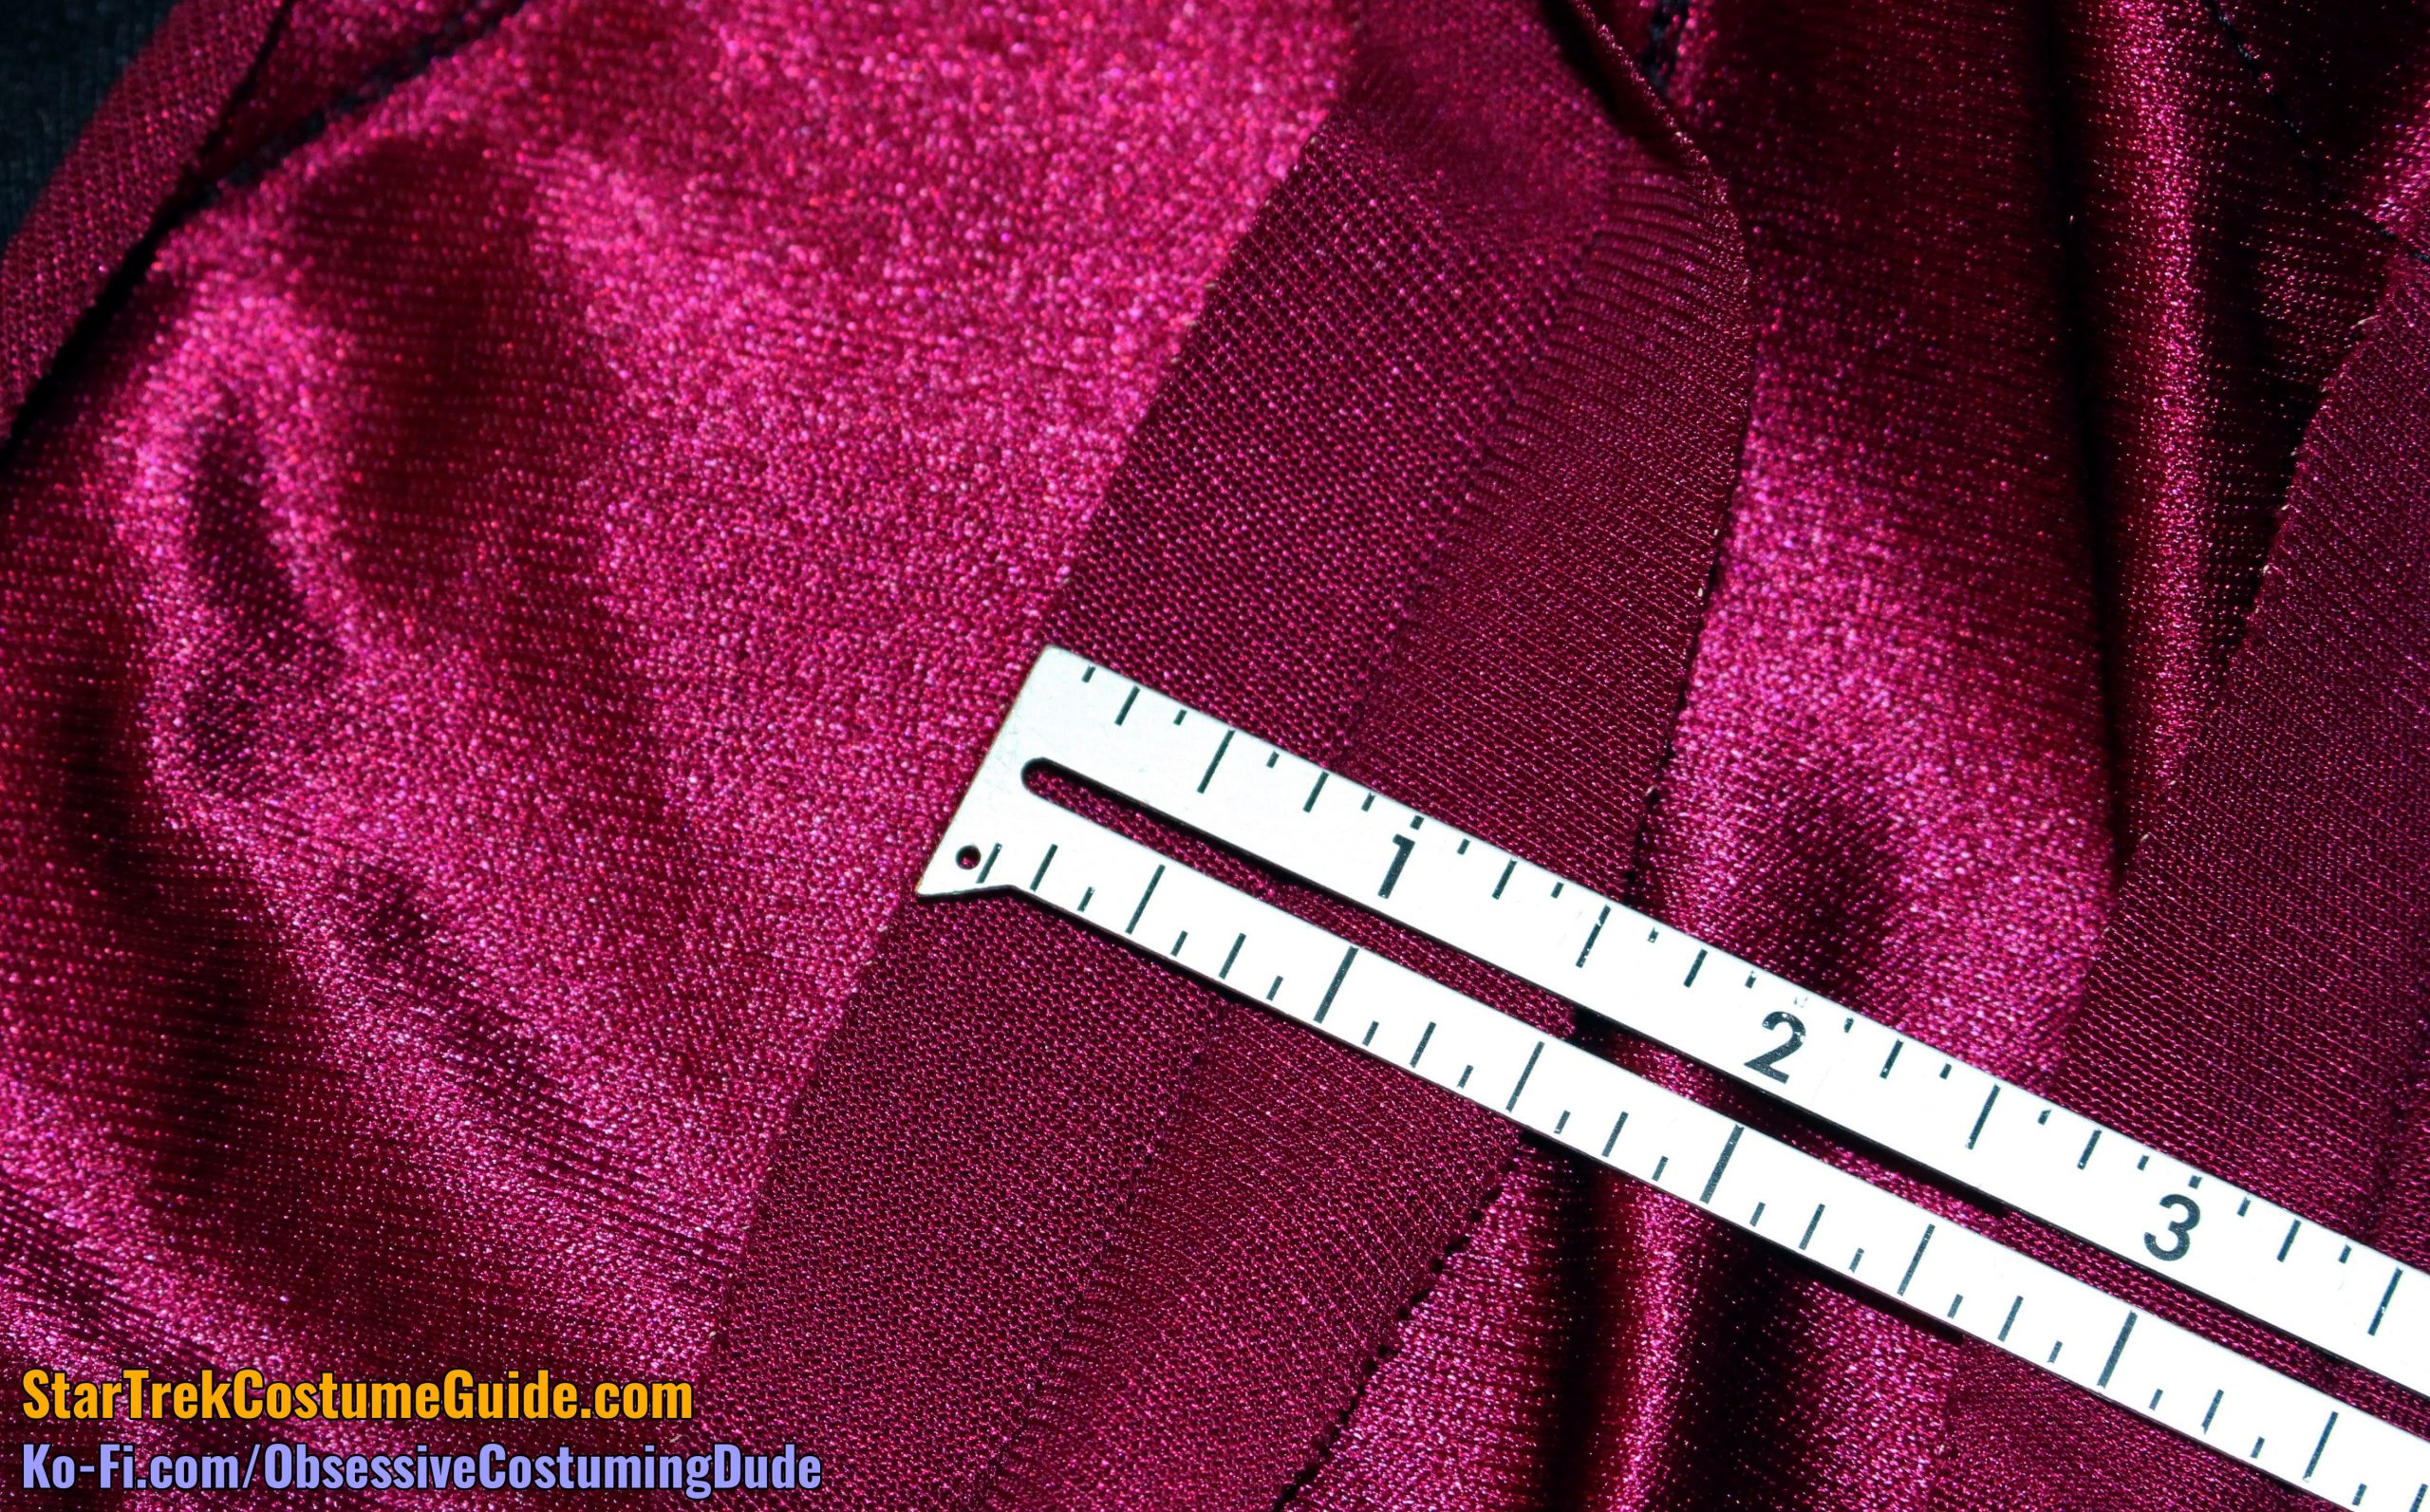
Also observe how the front (black) panel seam allowance was usually about ½”, while the front (red) panel seam allowance varied from about ⅝” to ¾”.
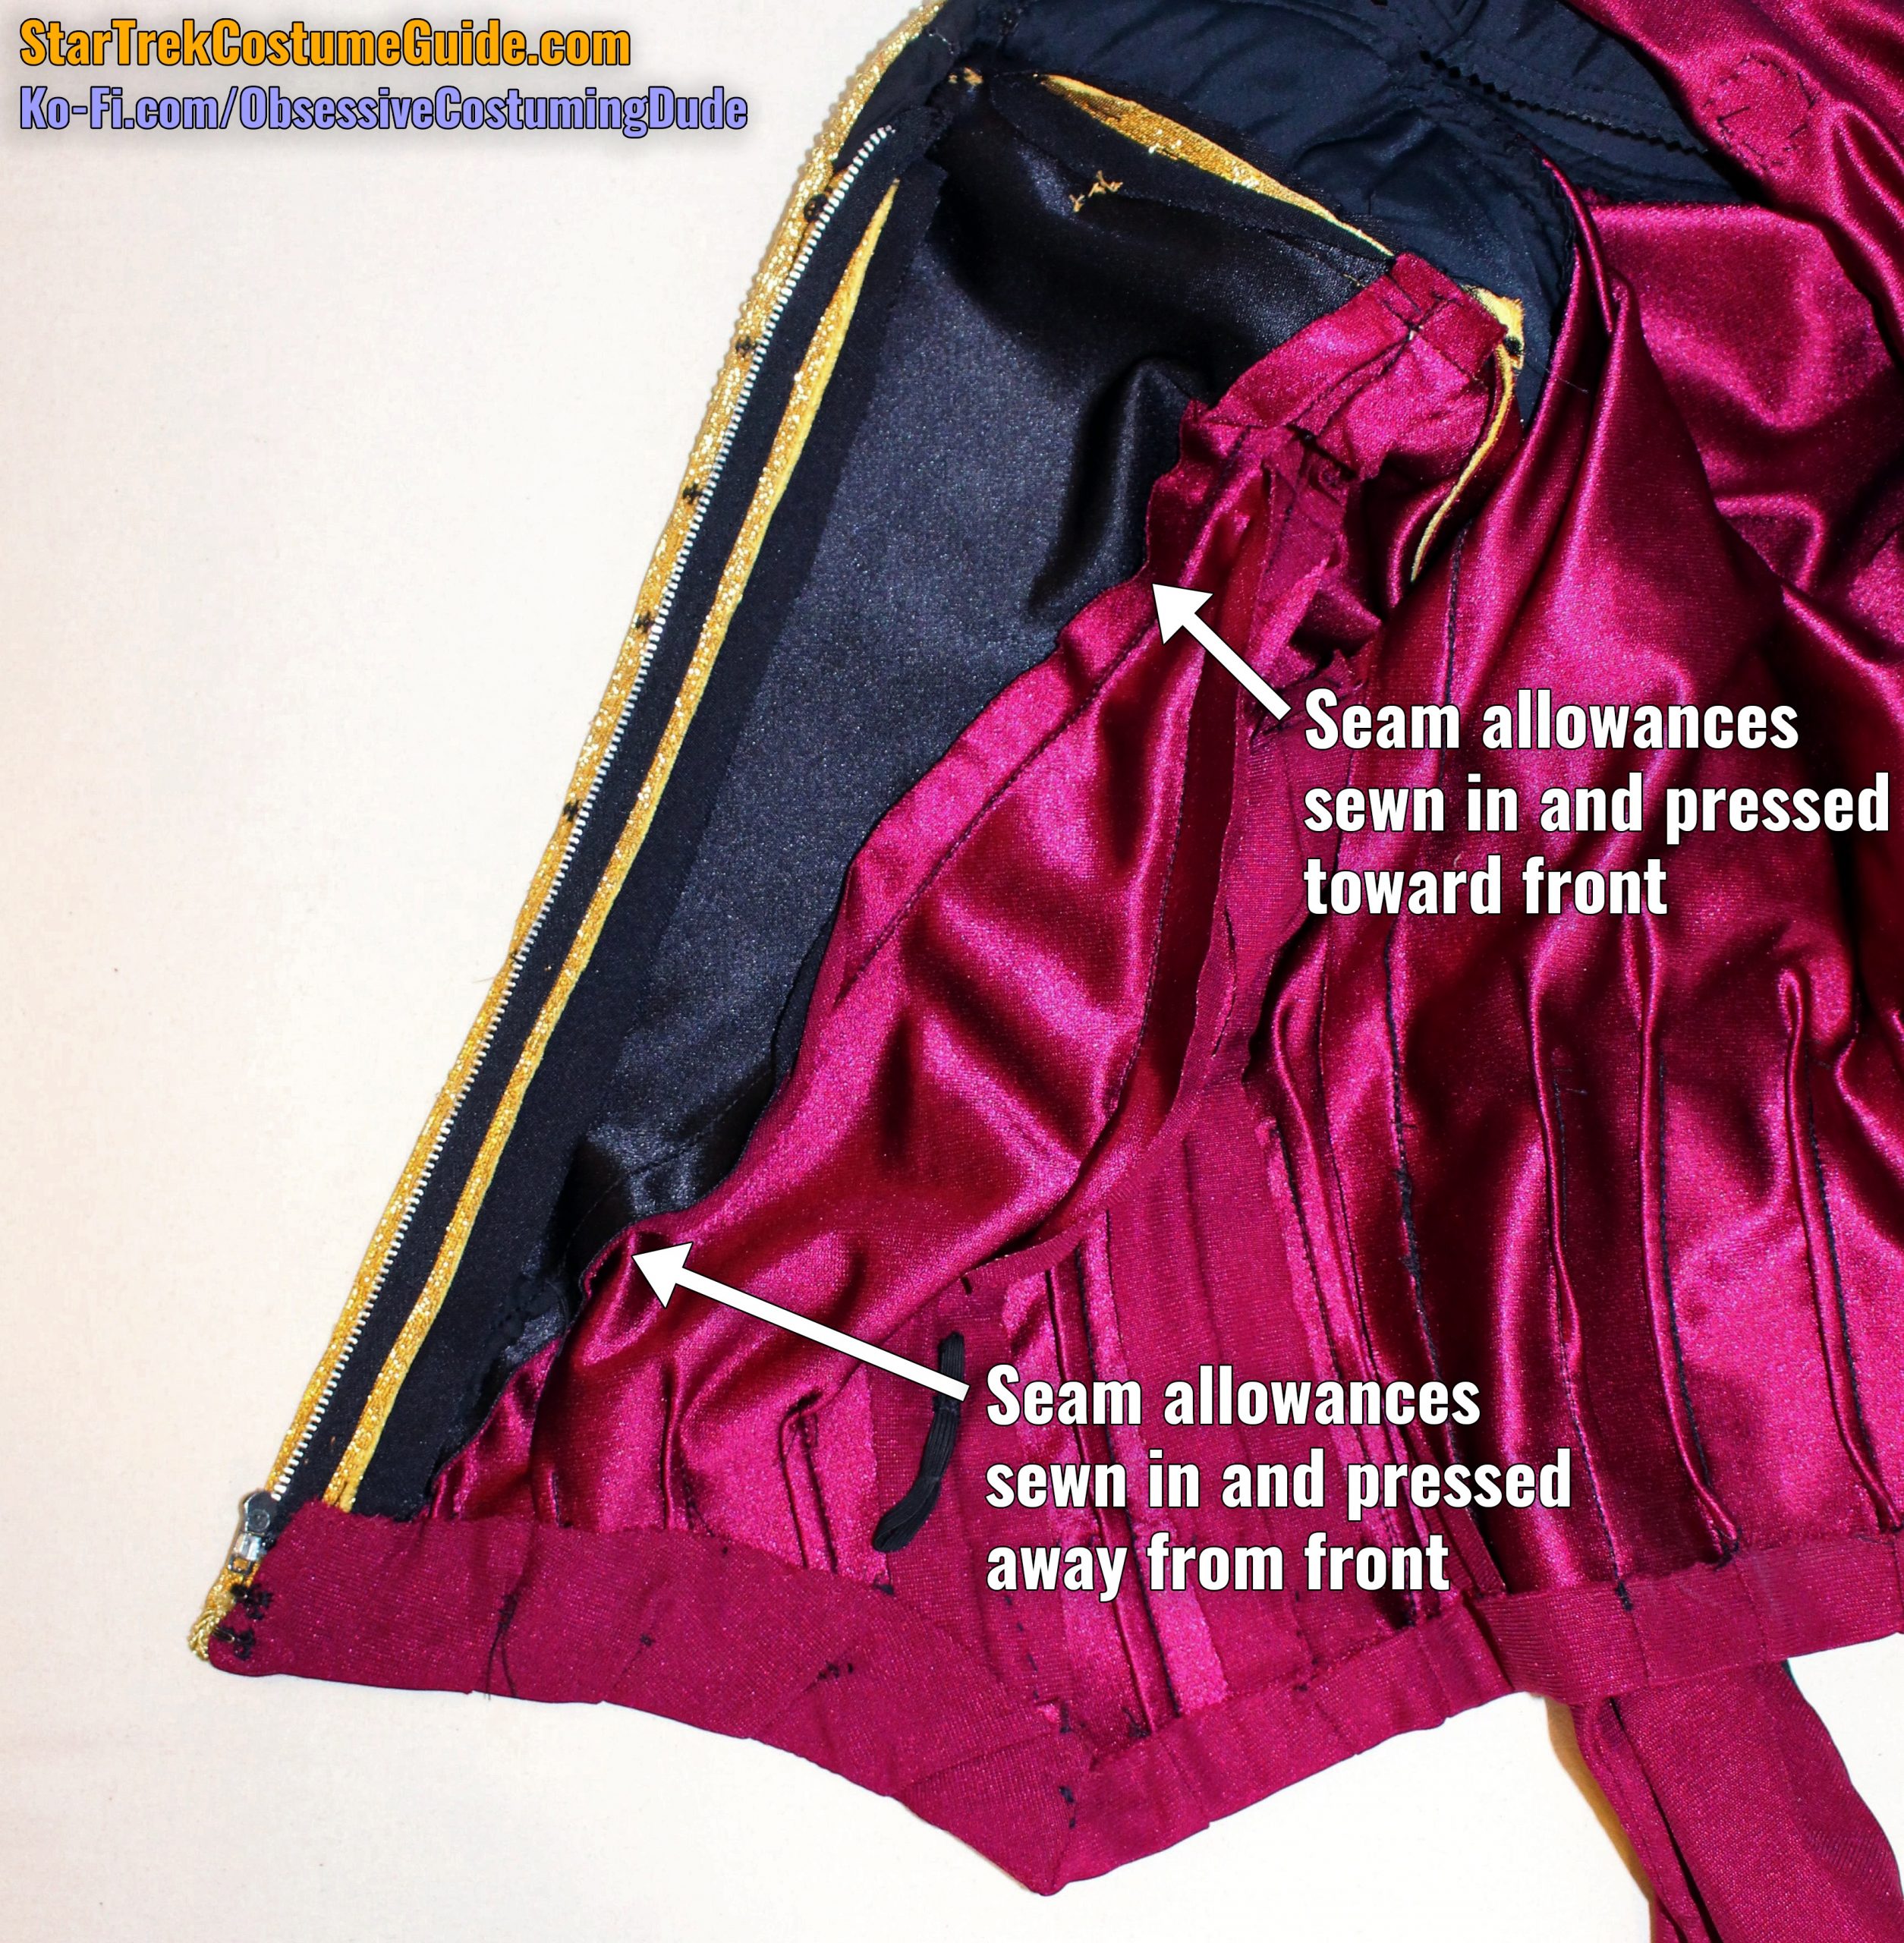
The right front seam allowance was sewn open into the armscye, appears to have been pressed toward the front in the underarm area, but is hemmed open.
The right front seam allowances were about ¾”.
I believe they may have been intended to be sewn into the armscye toward the front, rather than open, and they were simply opened and caught in the stitching when attaching the sleeve. Whoops!
The right side seam allowances were between ¾” and ⅞” at the top, but they widened to nearly 1” toward the bottom.
(My guess is that the jacket was taken in a bit after a test fitting.)
The right back seam allowances were mismatched toward the top – about ⅝” and ⅞”, although the back allowance reduced toward the bottom so they were both ⅝”.
(My guess is that they were both originally ⅝”, but the upper/middle back was taken in a pinch after a fitting.)
These allowances also changed direction; they were sewn into the armscye facing toward the sides, but they were hemmed open.
The left seam allowances were also crazy.
Just look at all those direction changes!
The front left seam allowances were sewn into the armscye facing the front, but they reversed toward the bottom and were hemmed facing the side.
The left front seam allowances were ⅝” at the top, but ⅞” for most of the lower body.
The left side seam allowances were about 1” at the top, but they widened to 1 ⅛” for most of the rest of the seam.
(Again, my guess is that they were taken in a bit after a test fitting.)
And alas, the left back seam allowances changed direction as well!
They were sewn into the armscye at the top facing the side, but they were hemmed open.
There was also this little FUBAR, where the seam allowance had gotten caught in another stitch …
And yet again, the specific seam allowance changed from top to bottom.
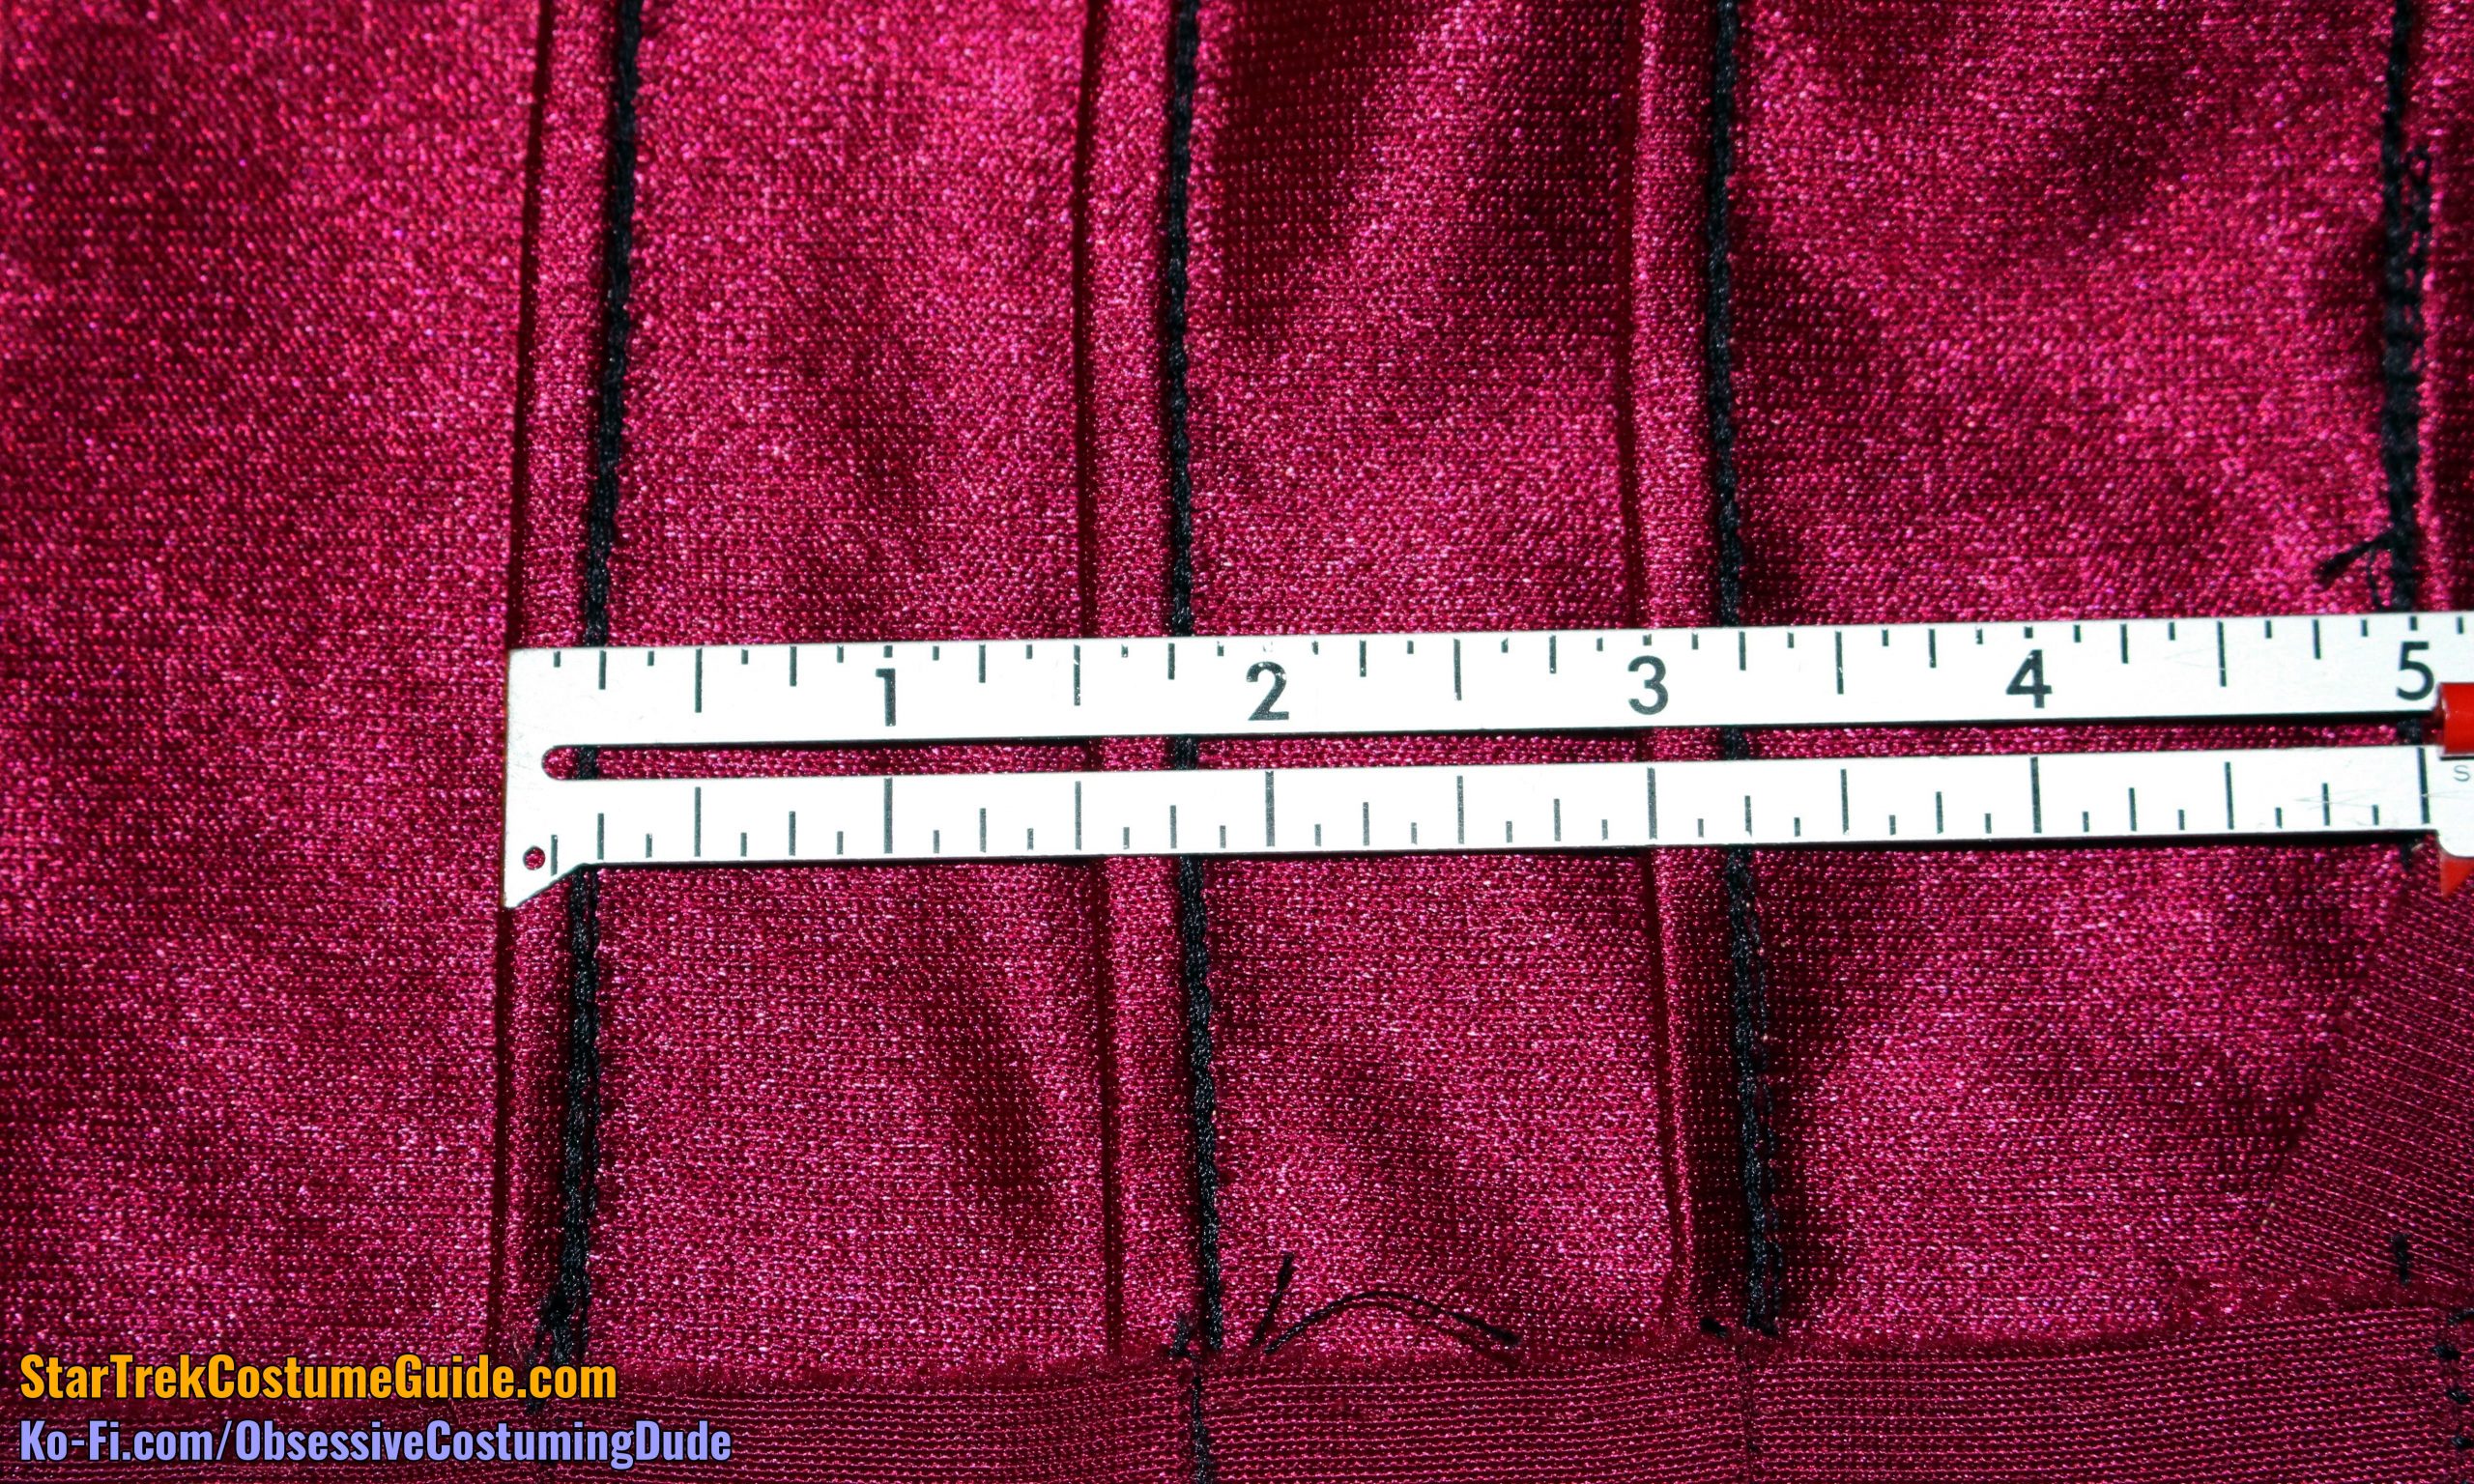
The upper left back seam allowances were ½”, but this widened to ¾” at the bottom.
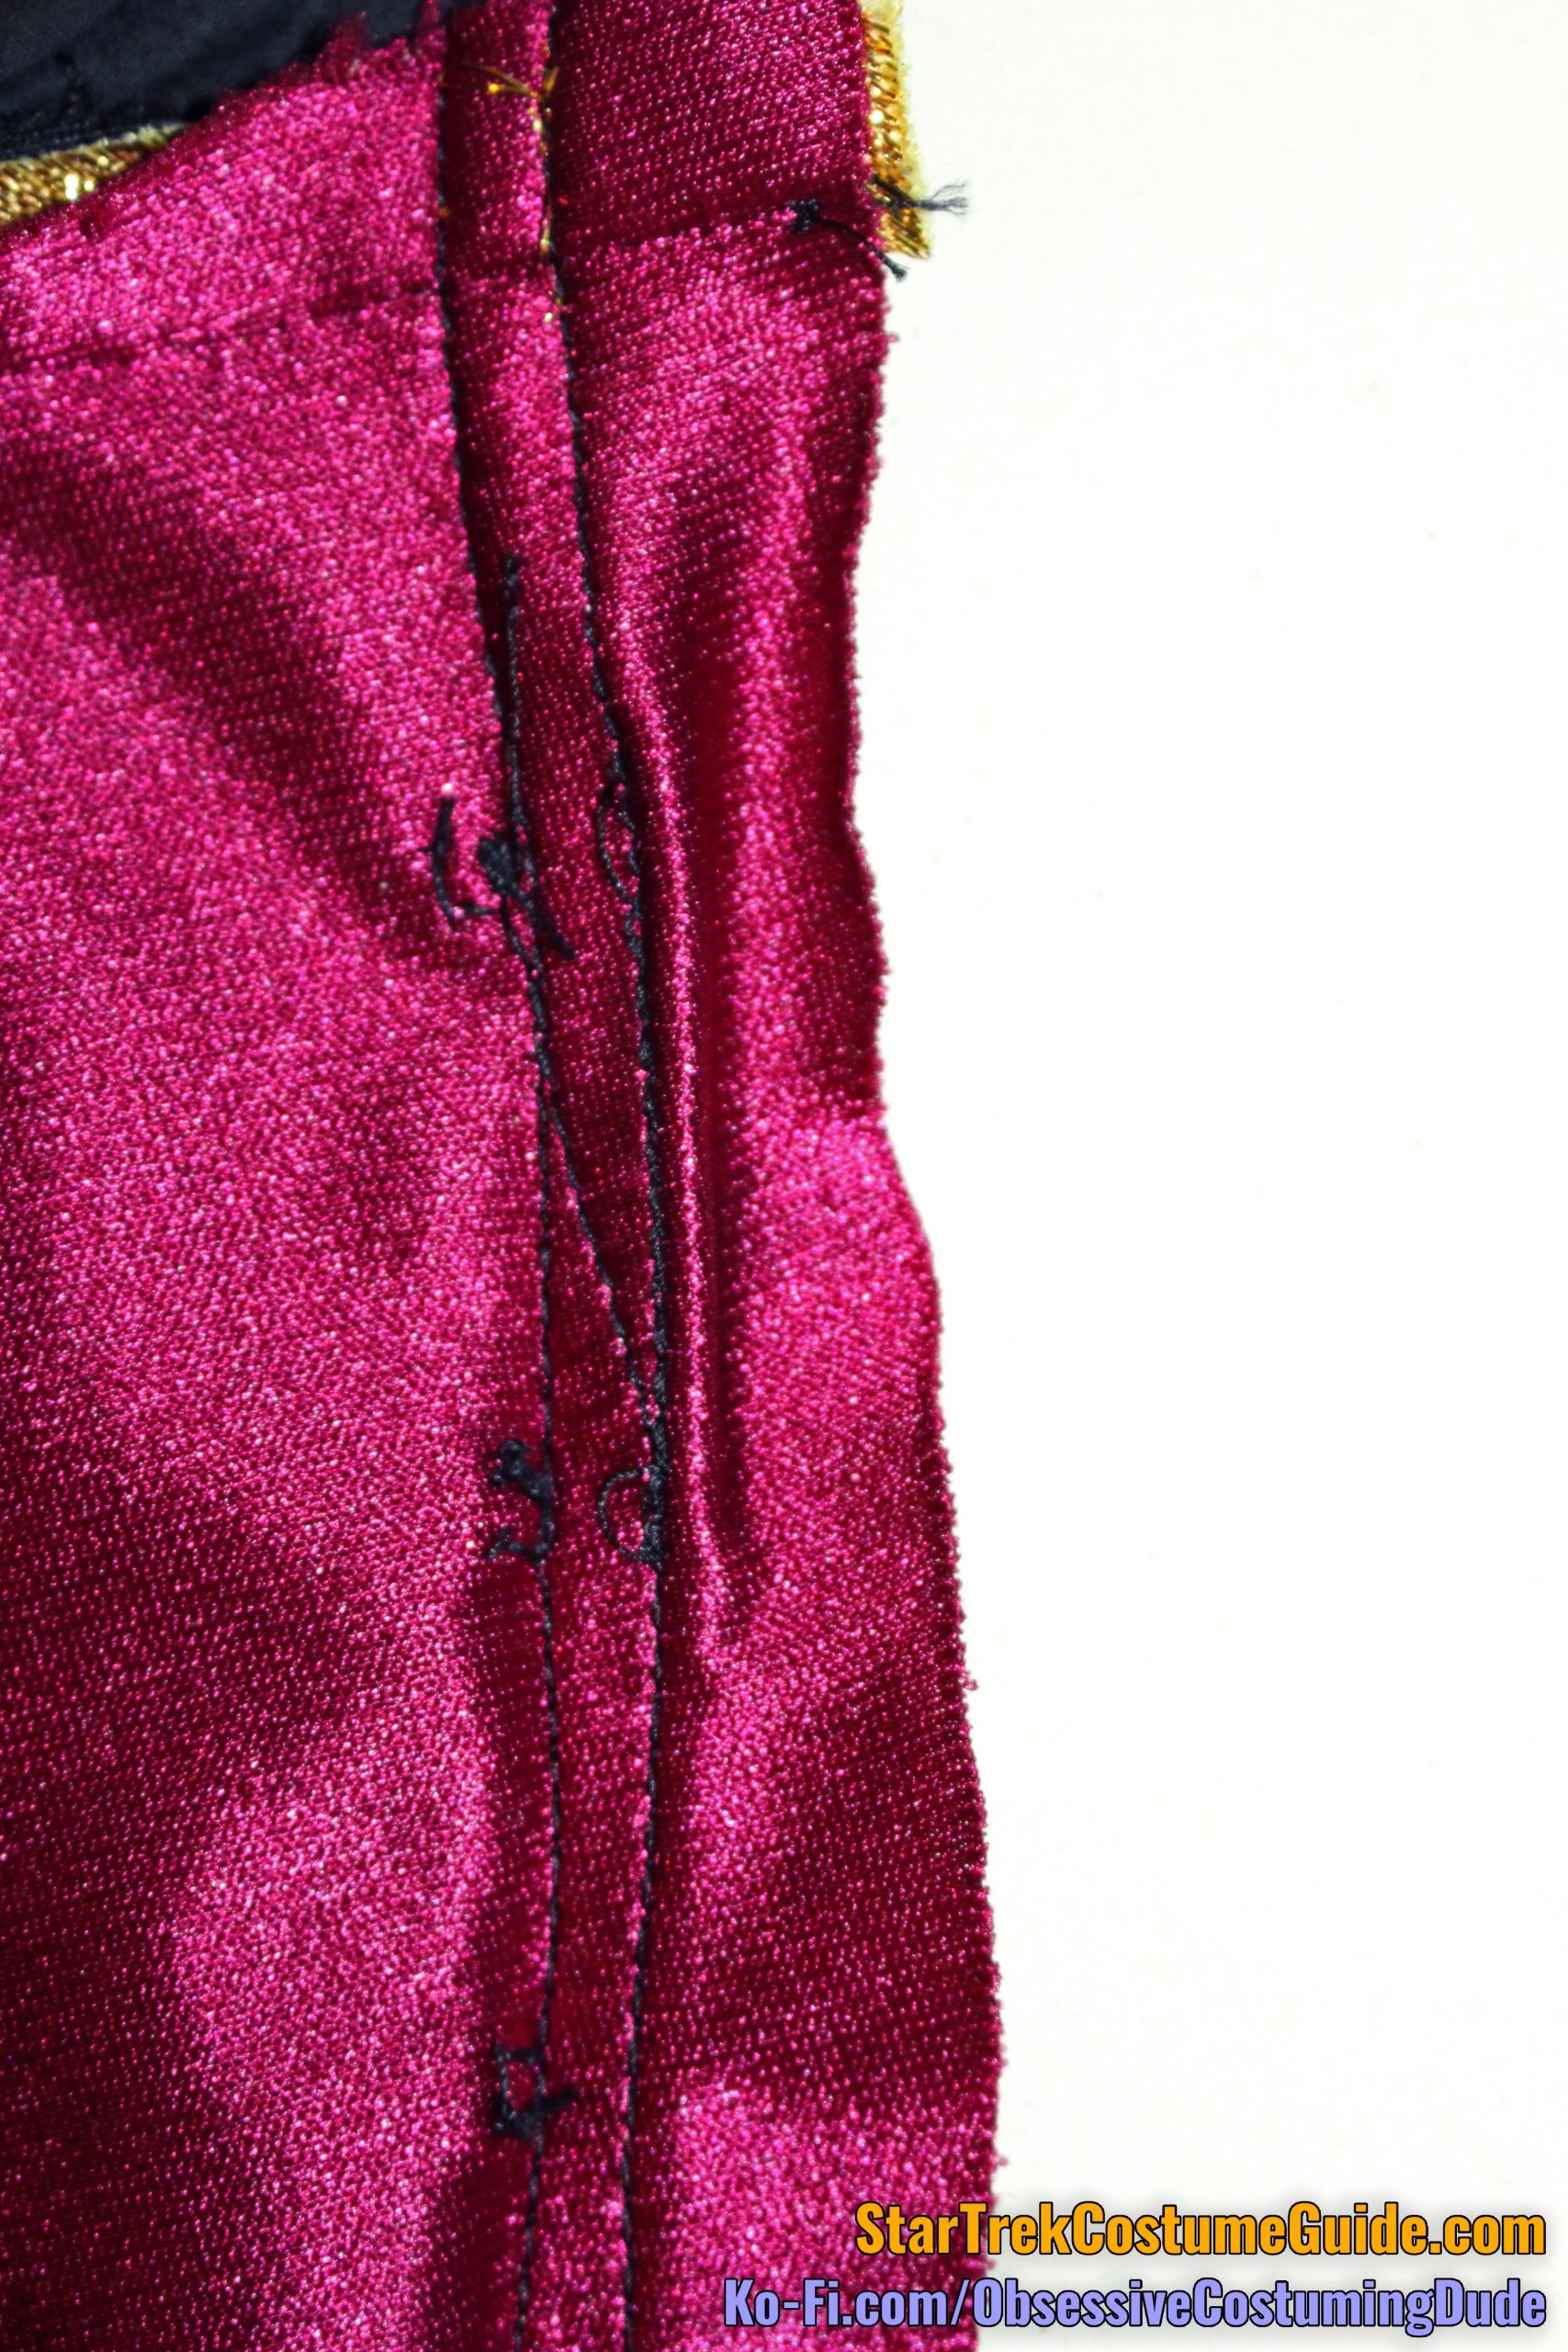
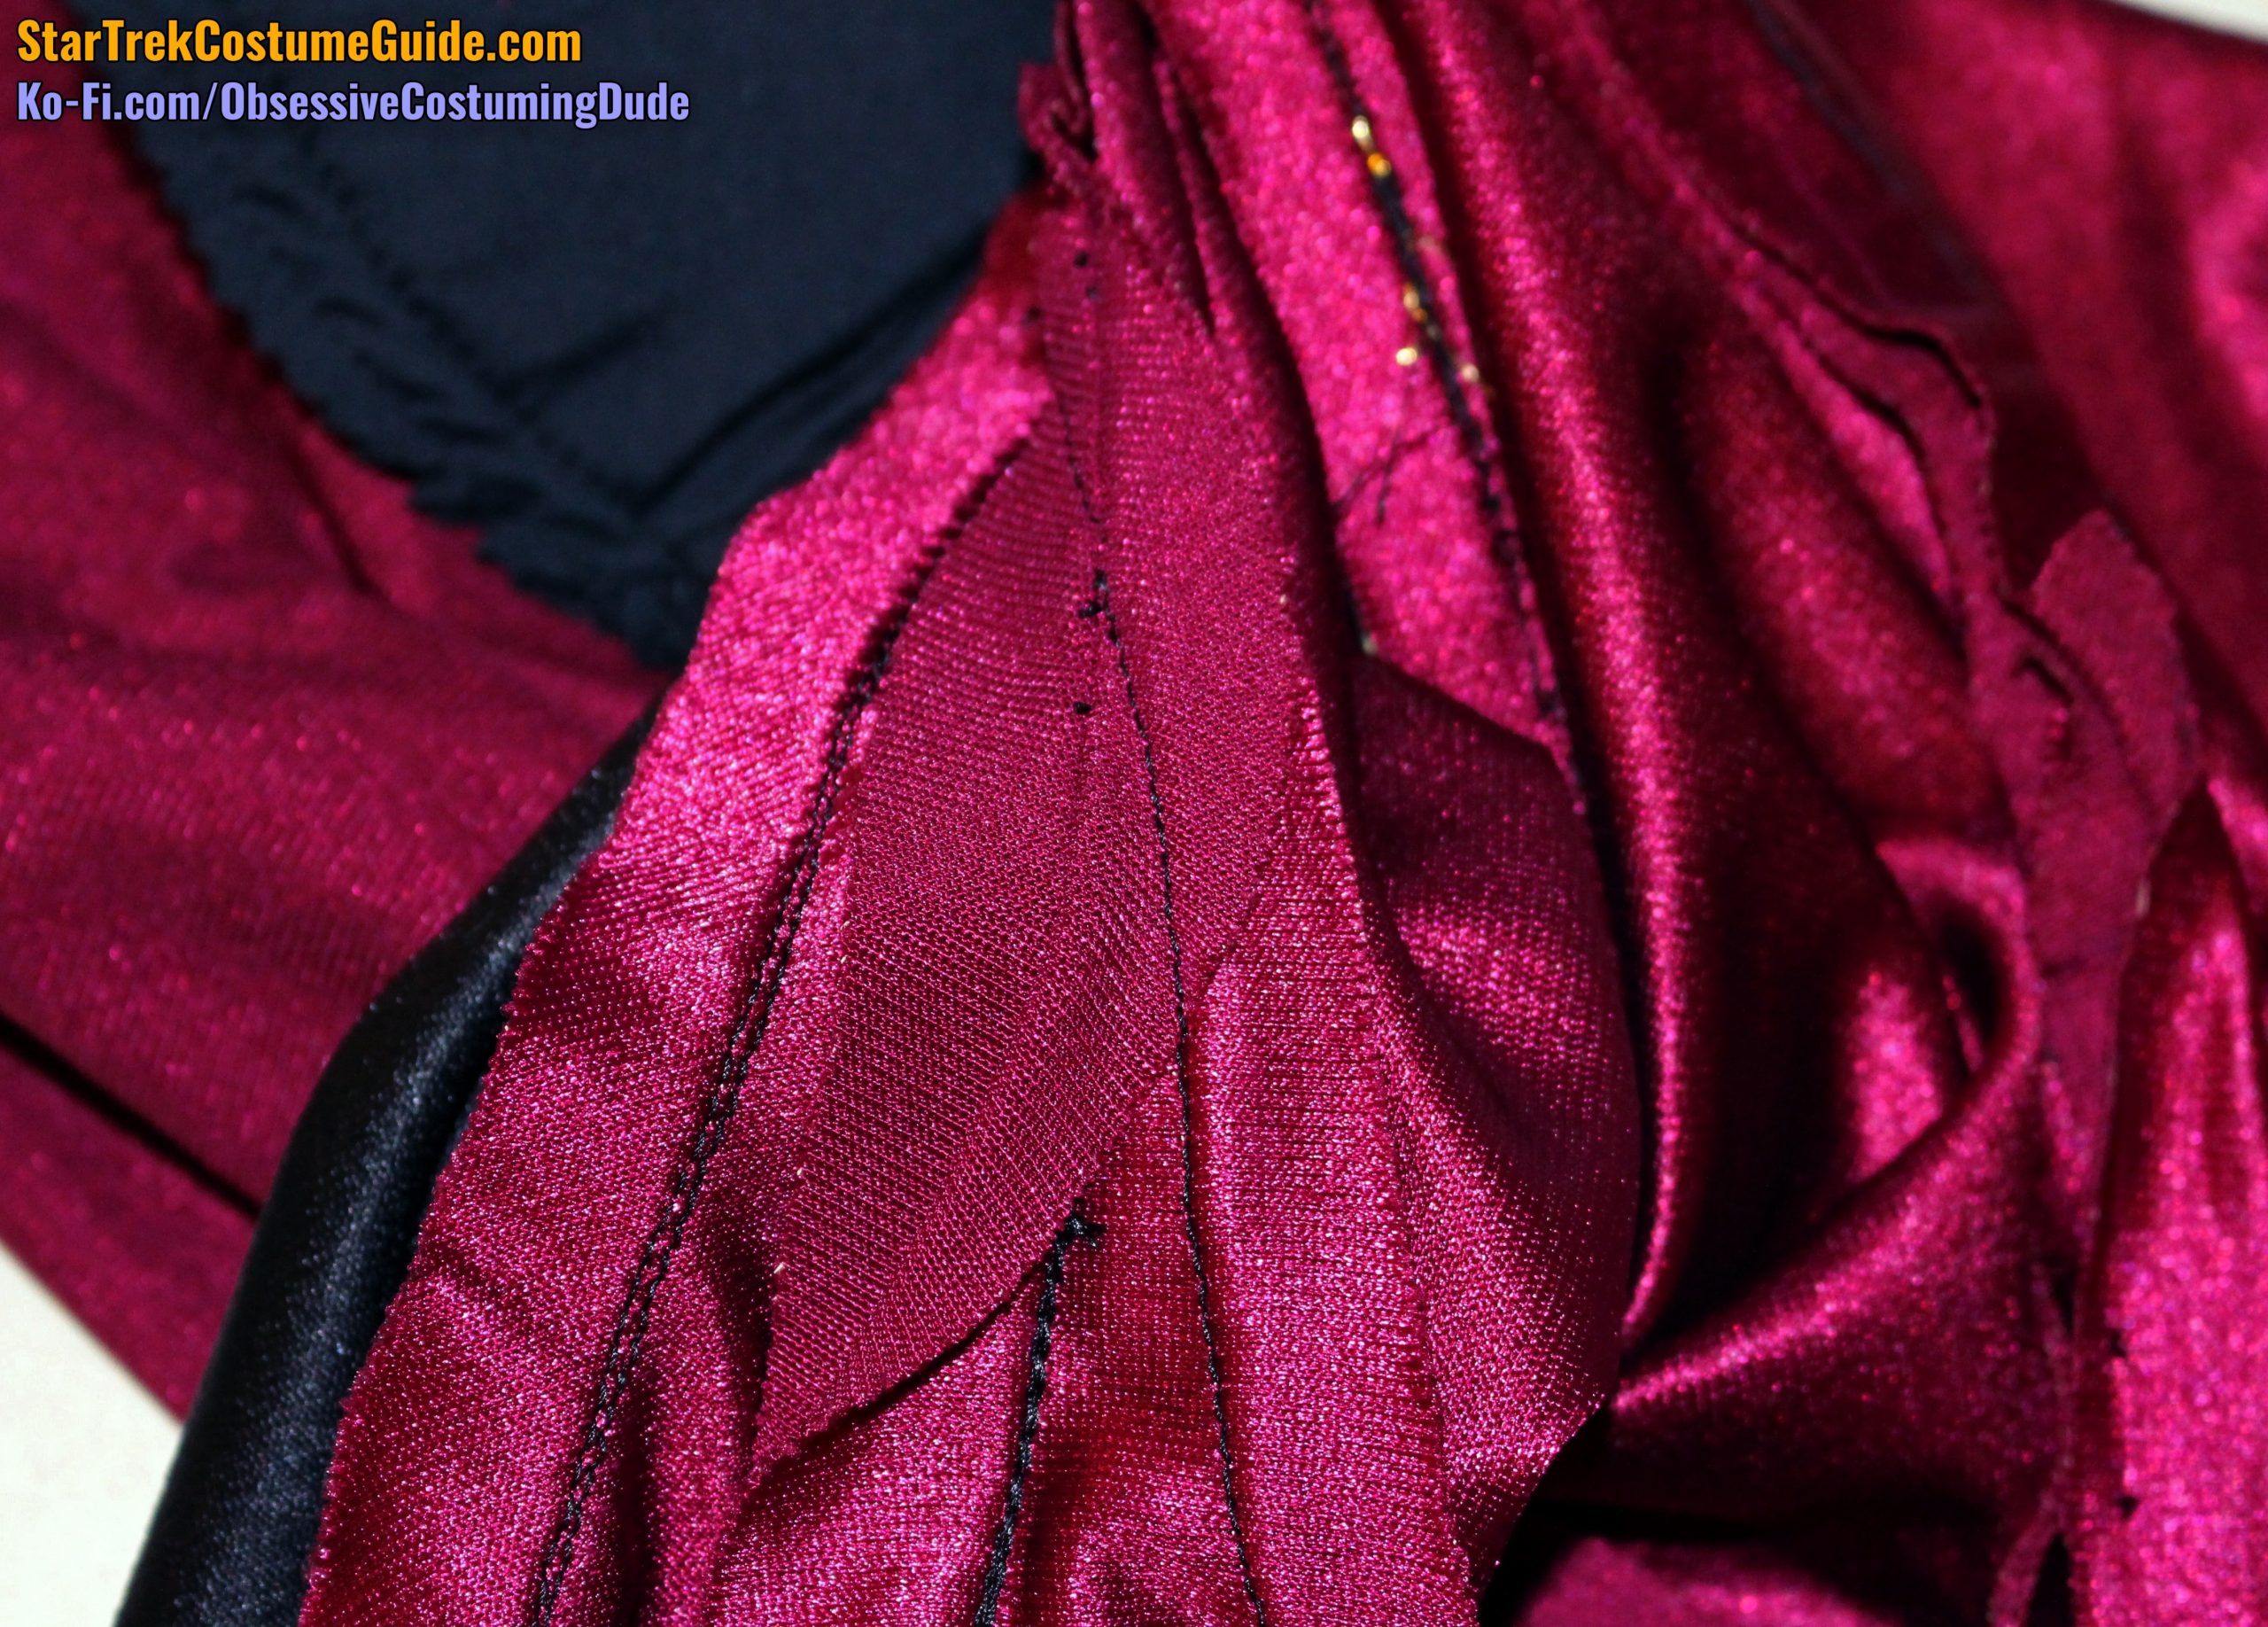
The pleats were all about ¼” wide (½” total) and stitched down numerous times with black thread (which I find curious, since the yoke was attached with red thread).
I find the direction of the back pleats a little confusing; one would think that they would all be pressed toward center, and that does appear to be how they were hemmed, but they also appear to have been pressed in the same direction toward the top.
Then again, it’s possible they were all pressed toward the center, and they’re simply lost their inclination to face that way after 30+ years.
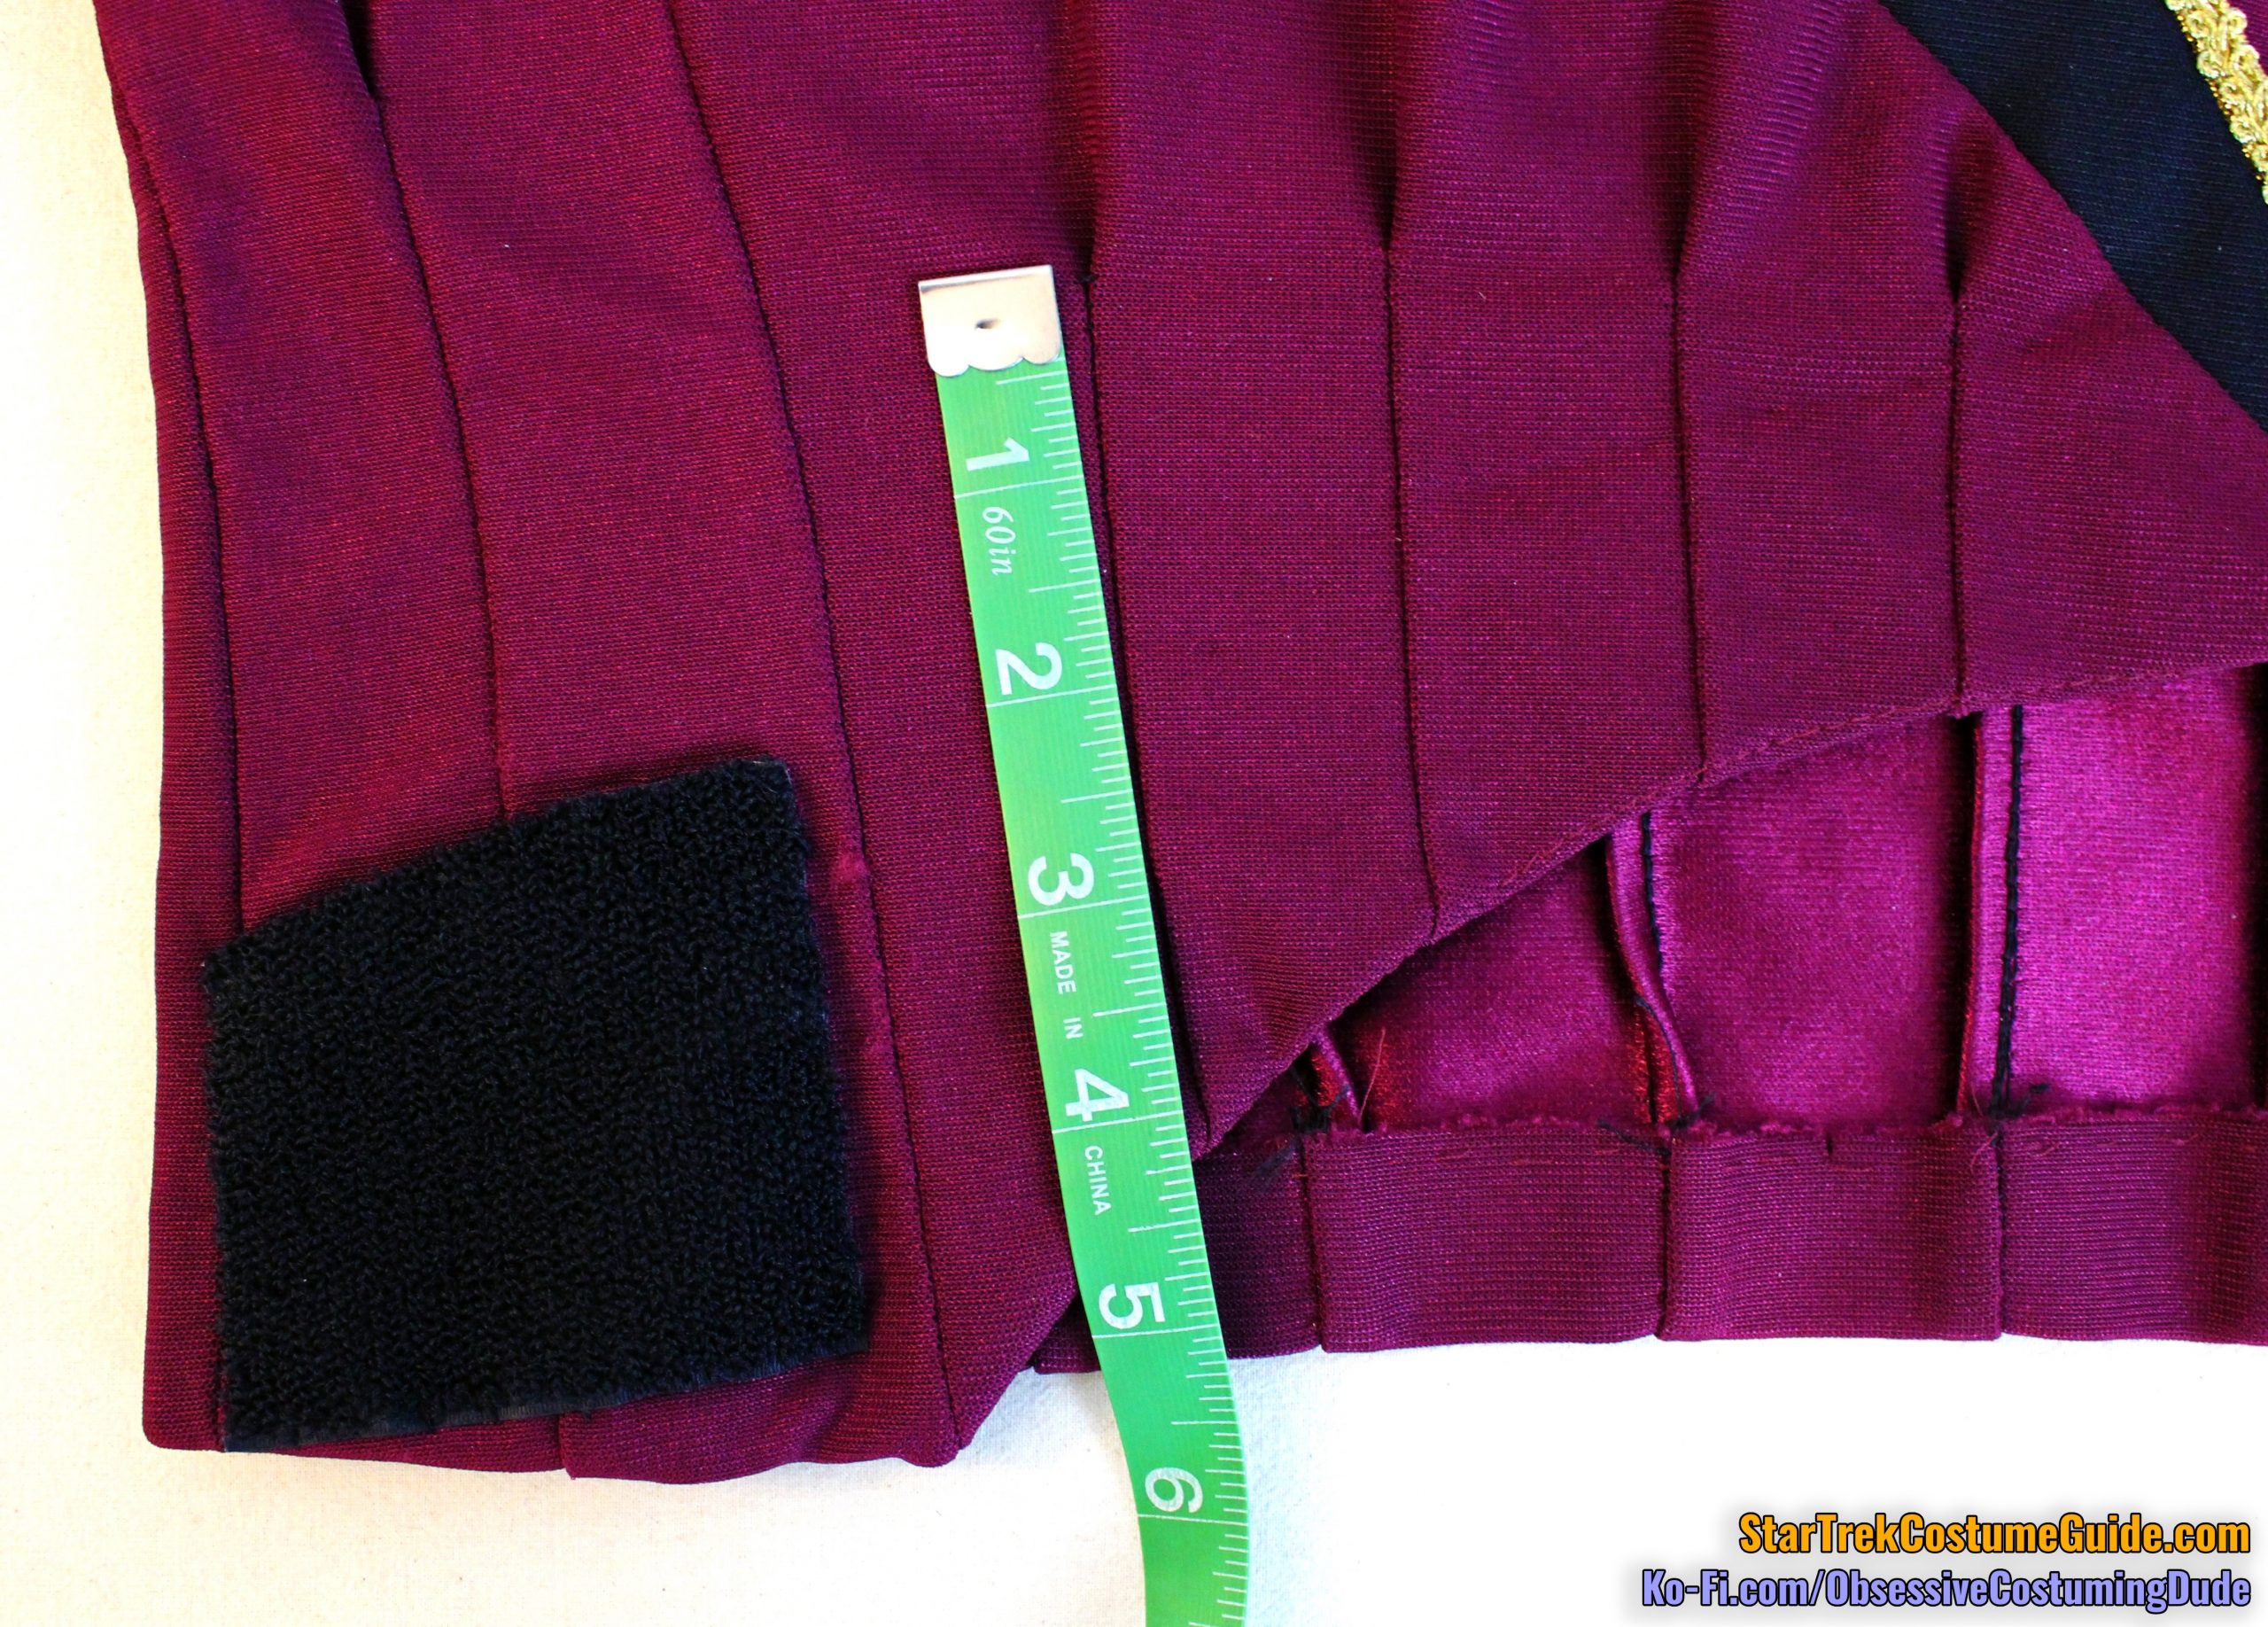
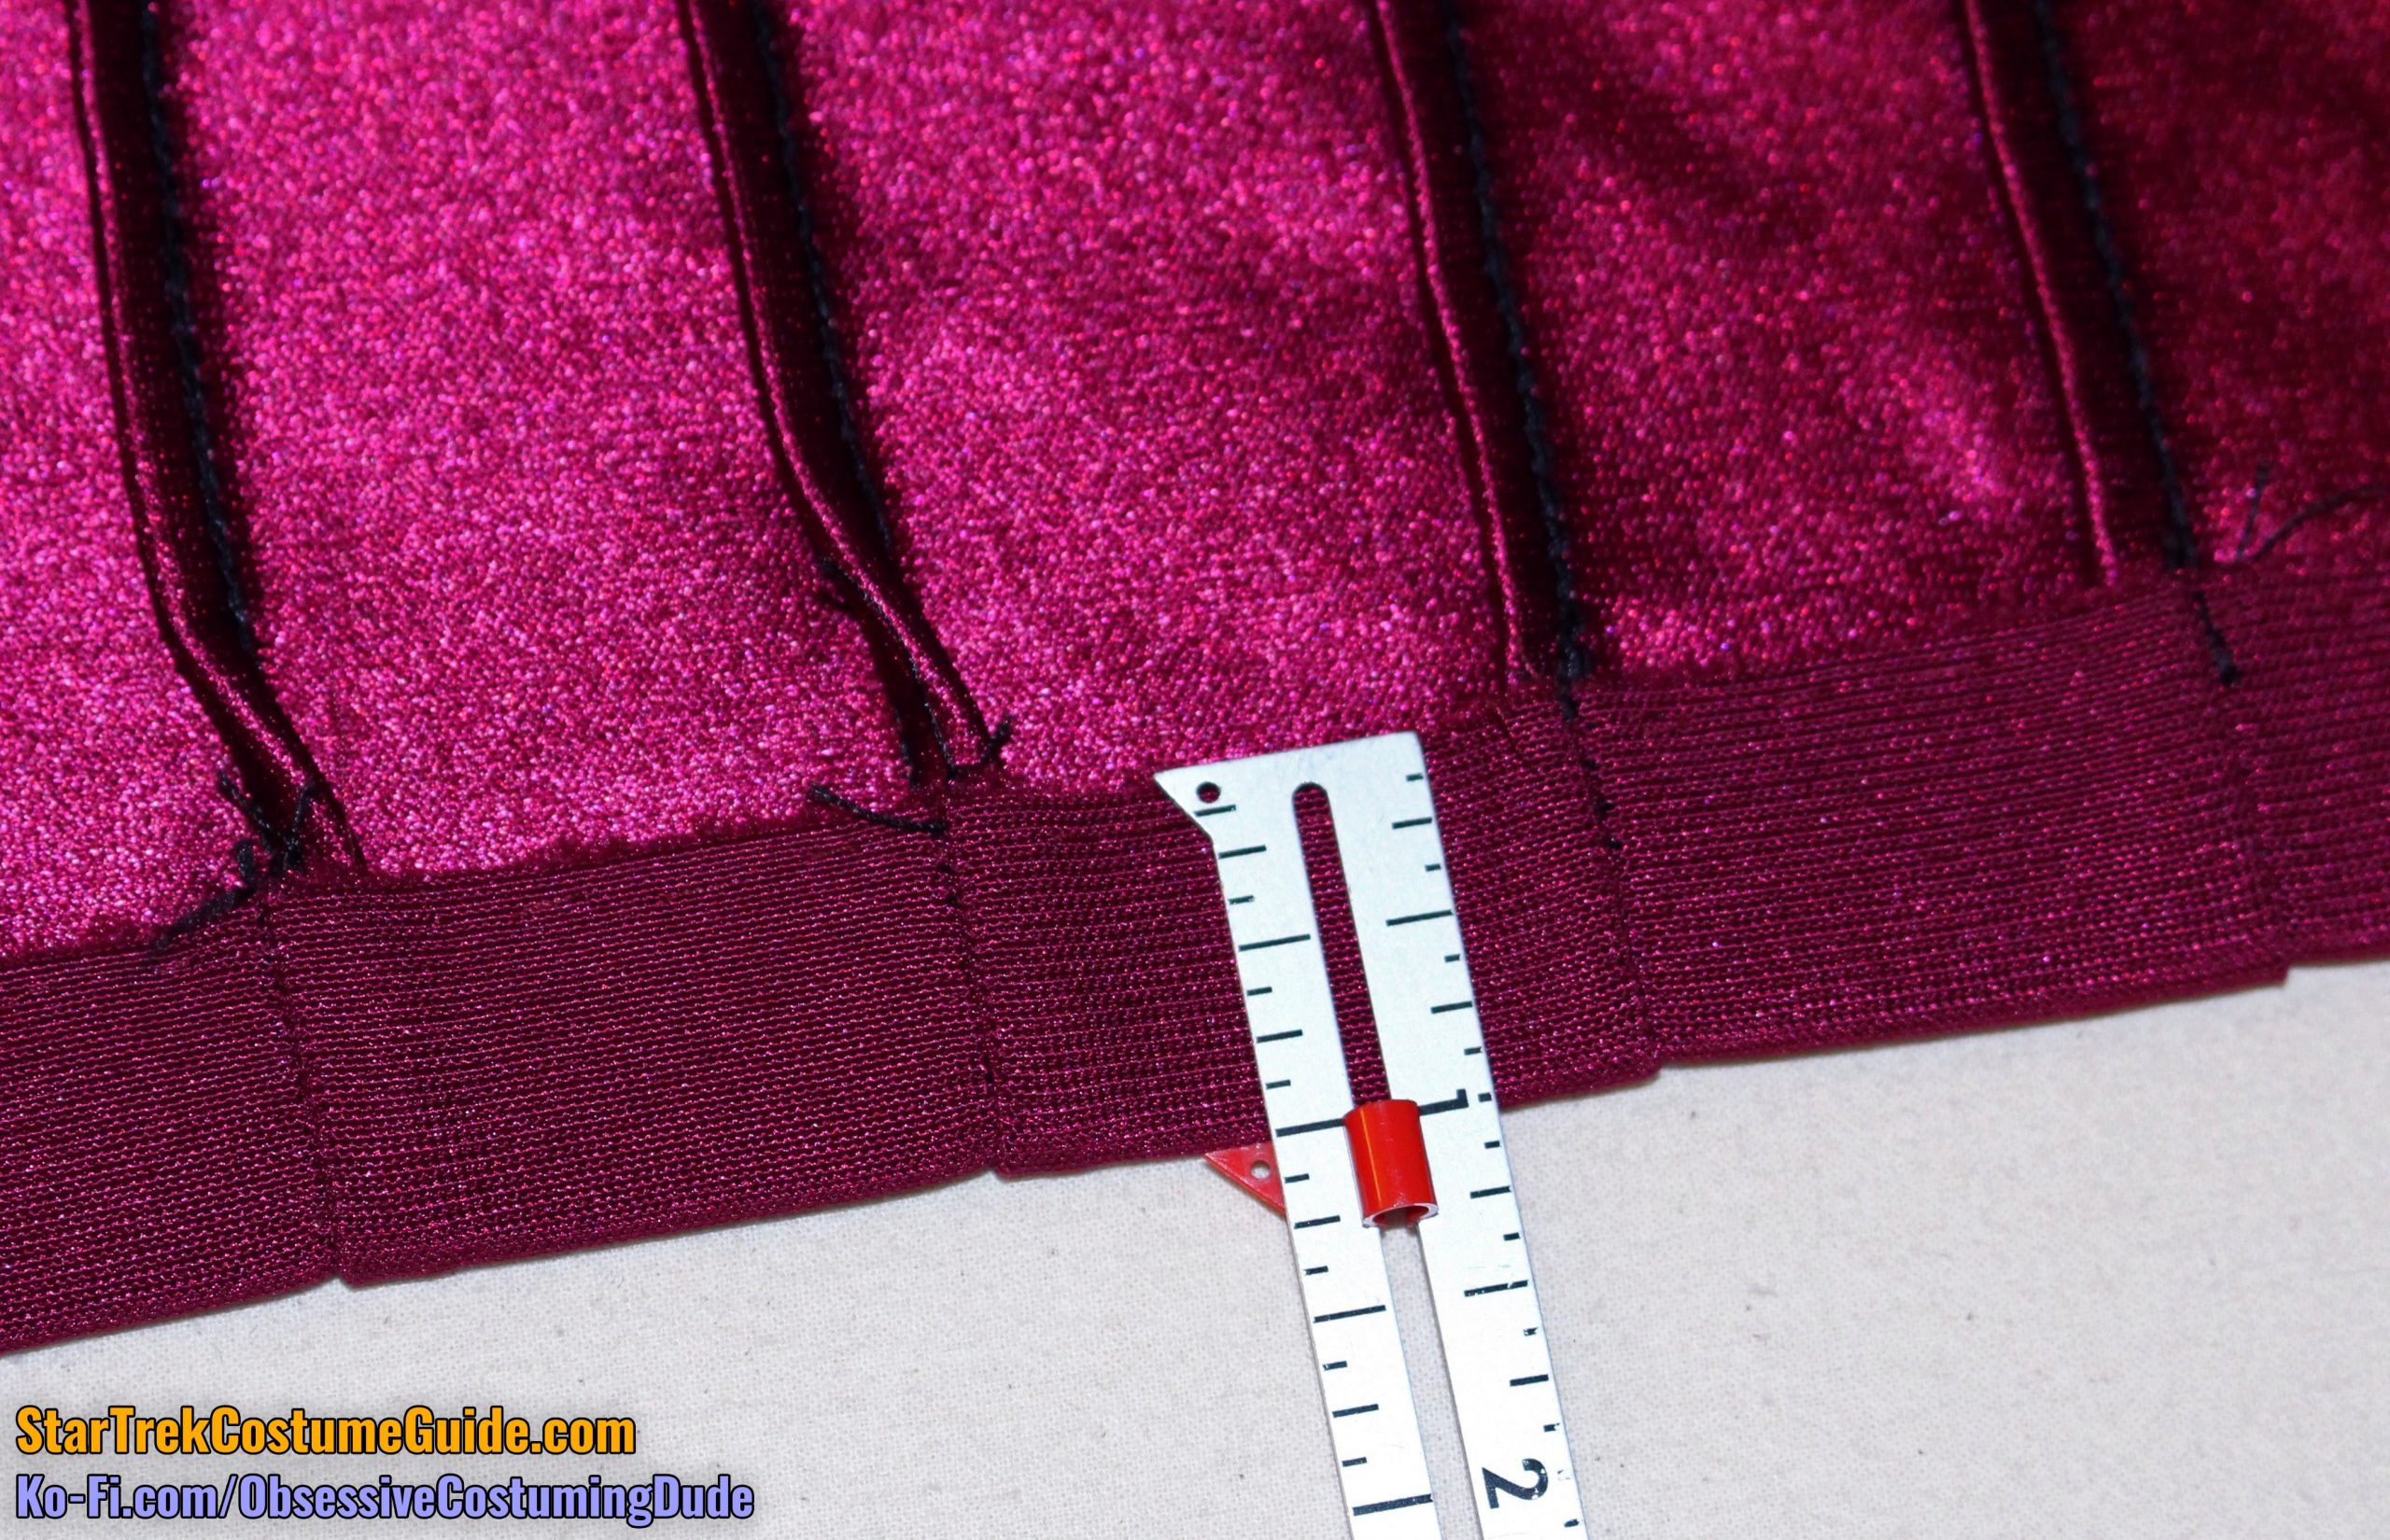
Here’s a look at the lower right front hem.
Note that the pleats didn’t extend all the way down to the bottom edge of the fabric; they were let out a bit above it.
The lower front hem allowance was about 1 ¾”.
The leftmost upper corner of the right front hem allowance was catch-stitched to the zipper seam allowance.
The remainder of the right front hem allowance was hemmed just beneath the edge of the fabric.
The lower side and back hem allowance was 1”.
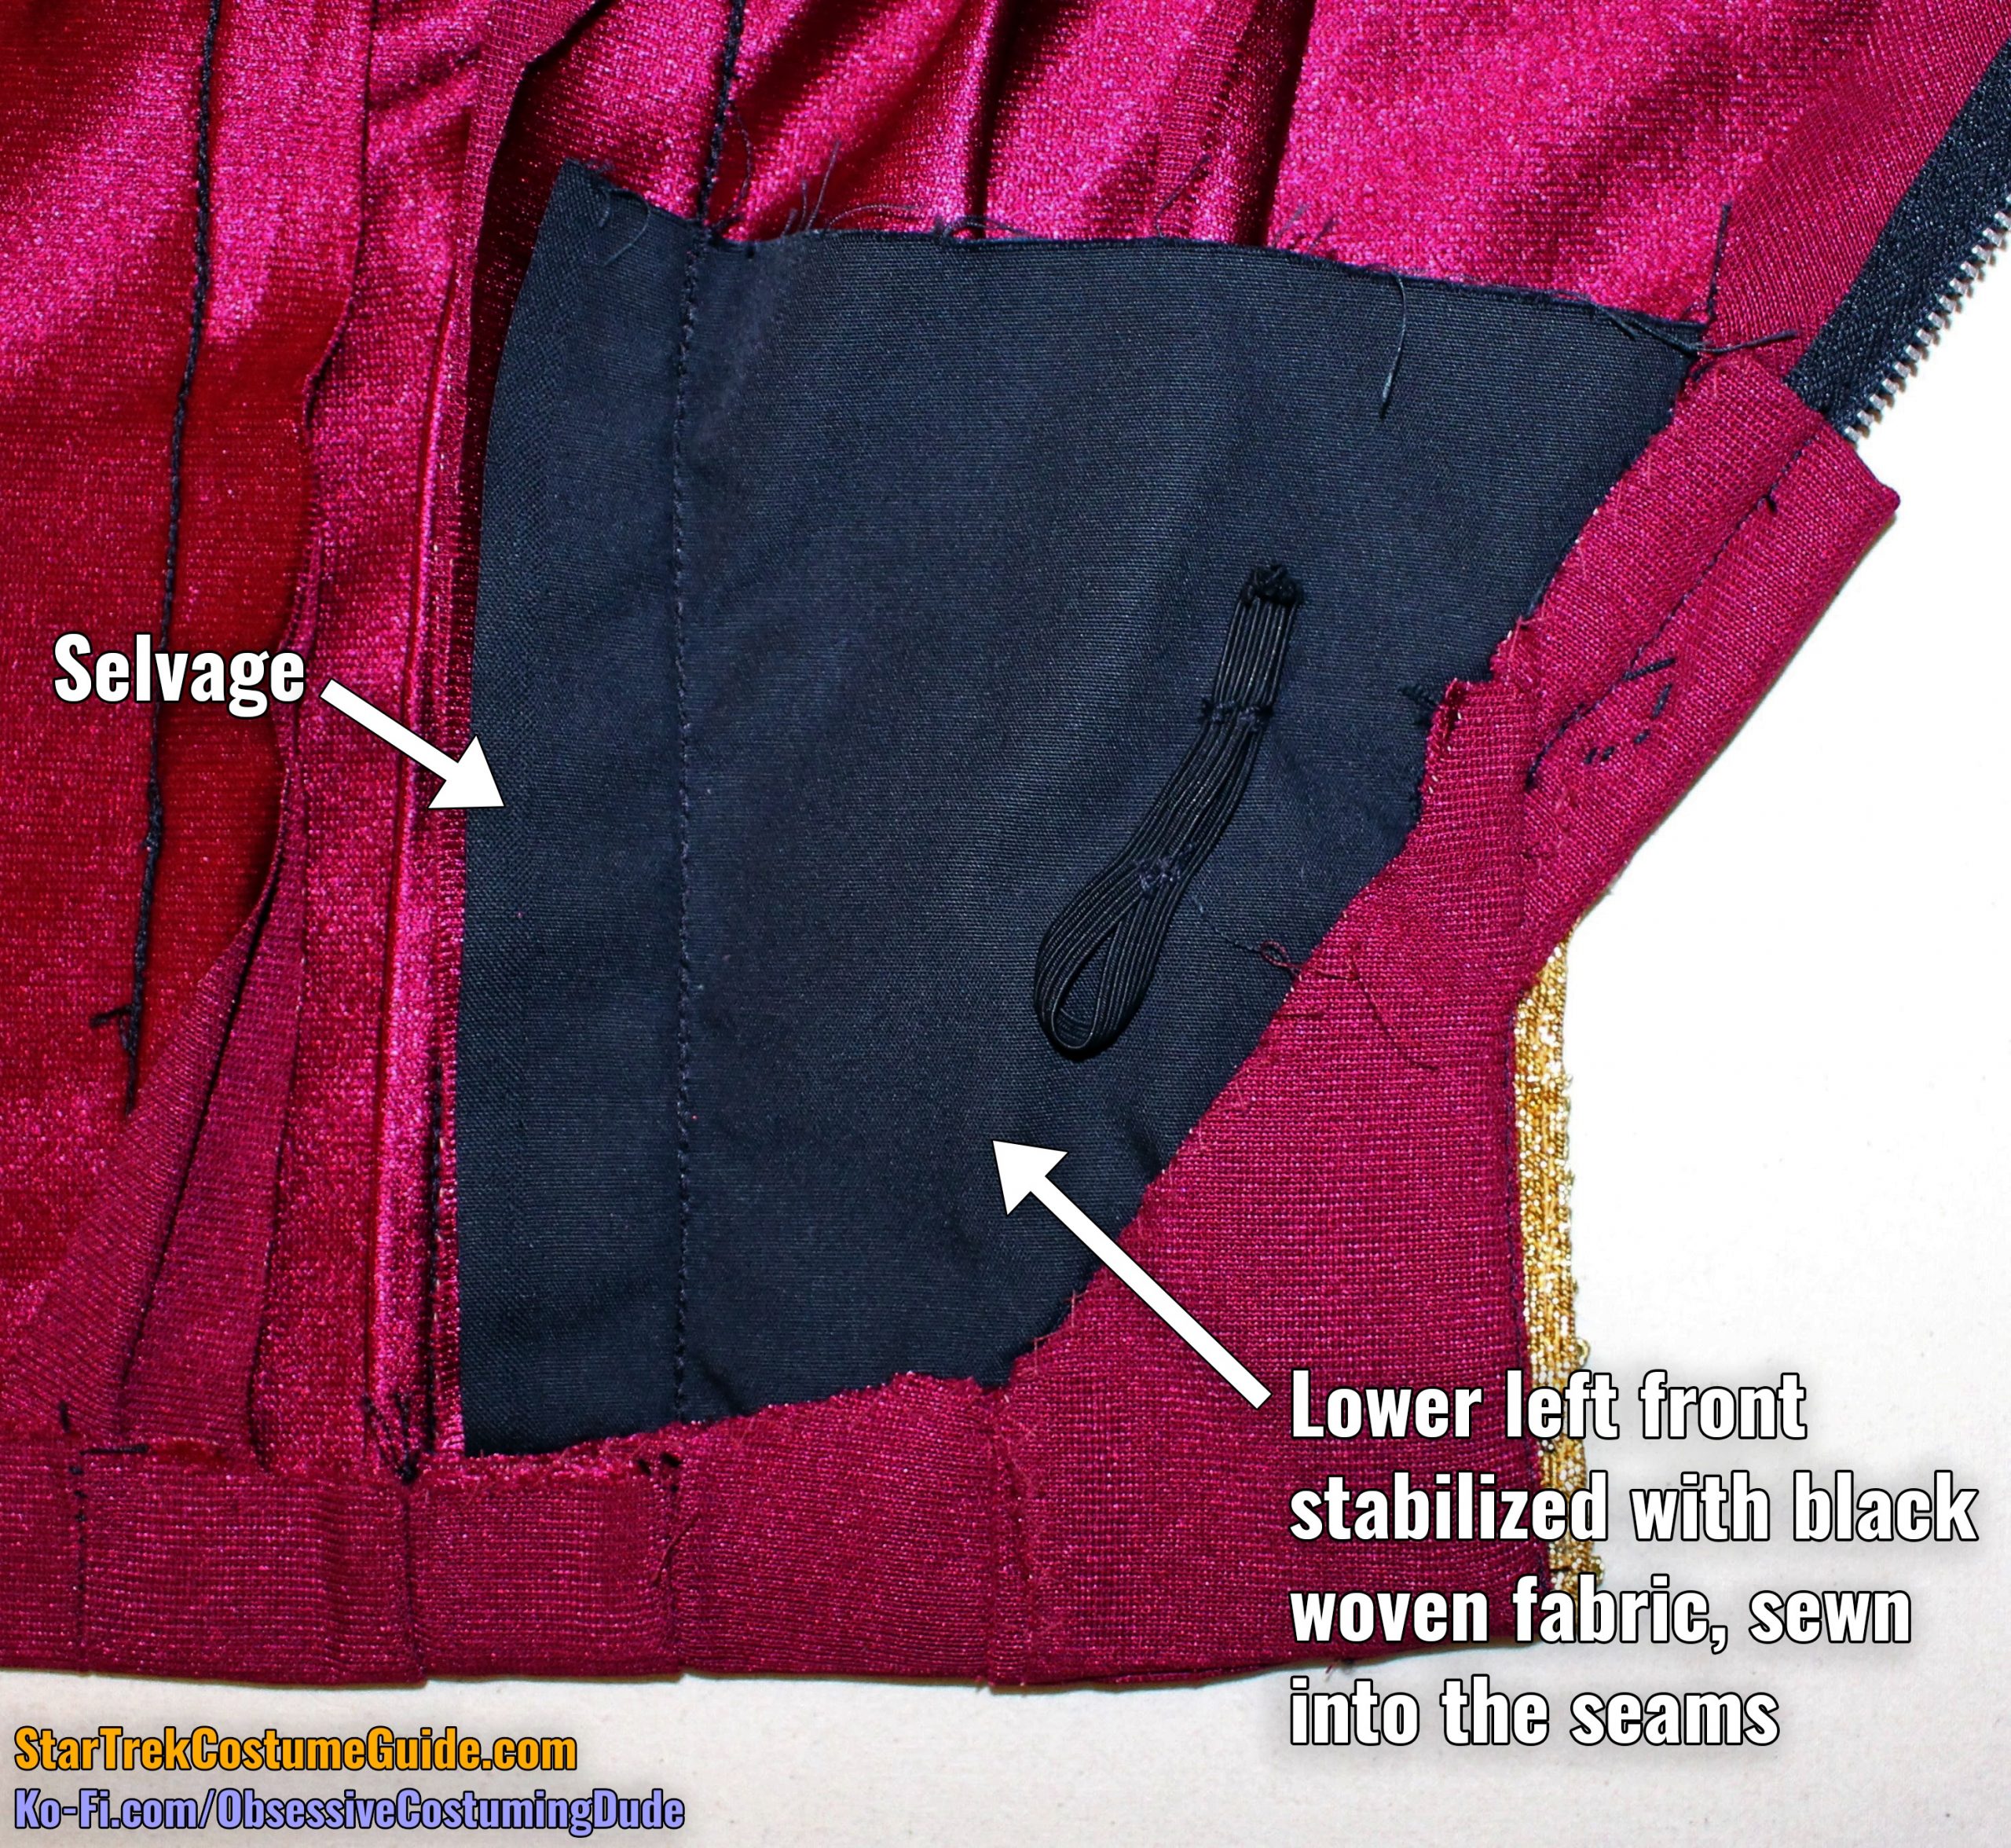
Now let’s take a look at the lower front area. This is a real piece of work, haha!
The whole area appears to have been stabilized with a black woven fabric comparable to sateen in weight and sturdiness, but it feels more like a synthetic fiber.
It was literally sewn directly into the seams; I believe its purpose was to stabilize the lower left front area and keep it from stretching while being worn … but that’s only a guess.
The fabric was cut with the selvage on the left, presumably to prevent fraying. (You can see some evidence of fraying along the upper edge.)
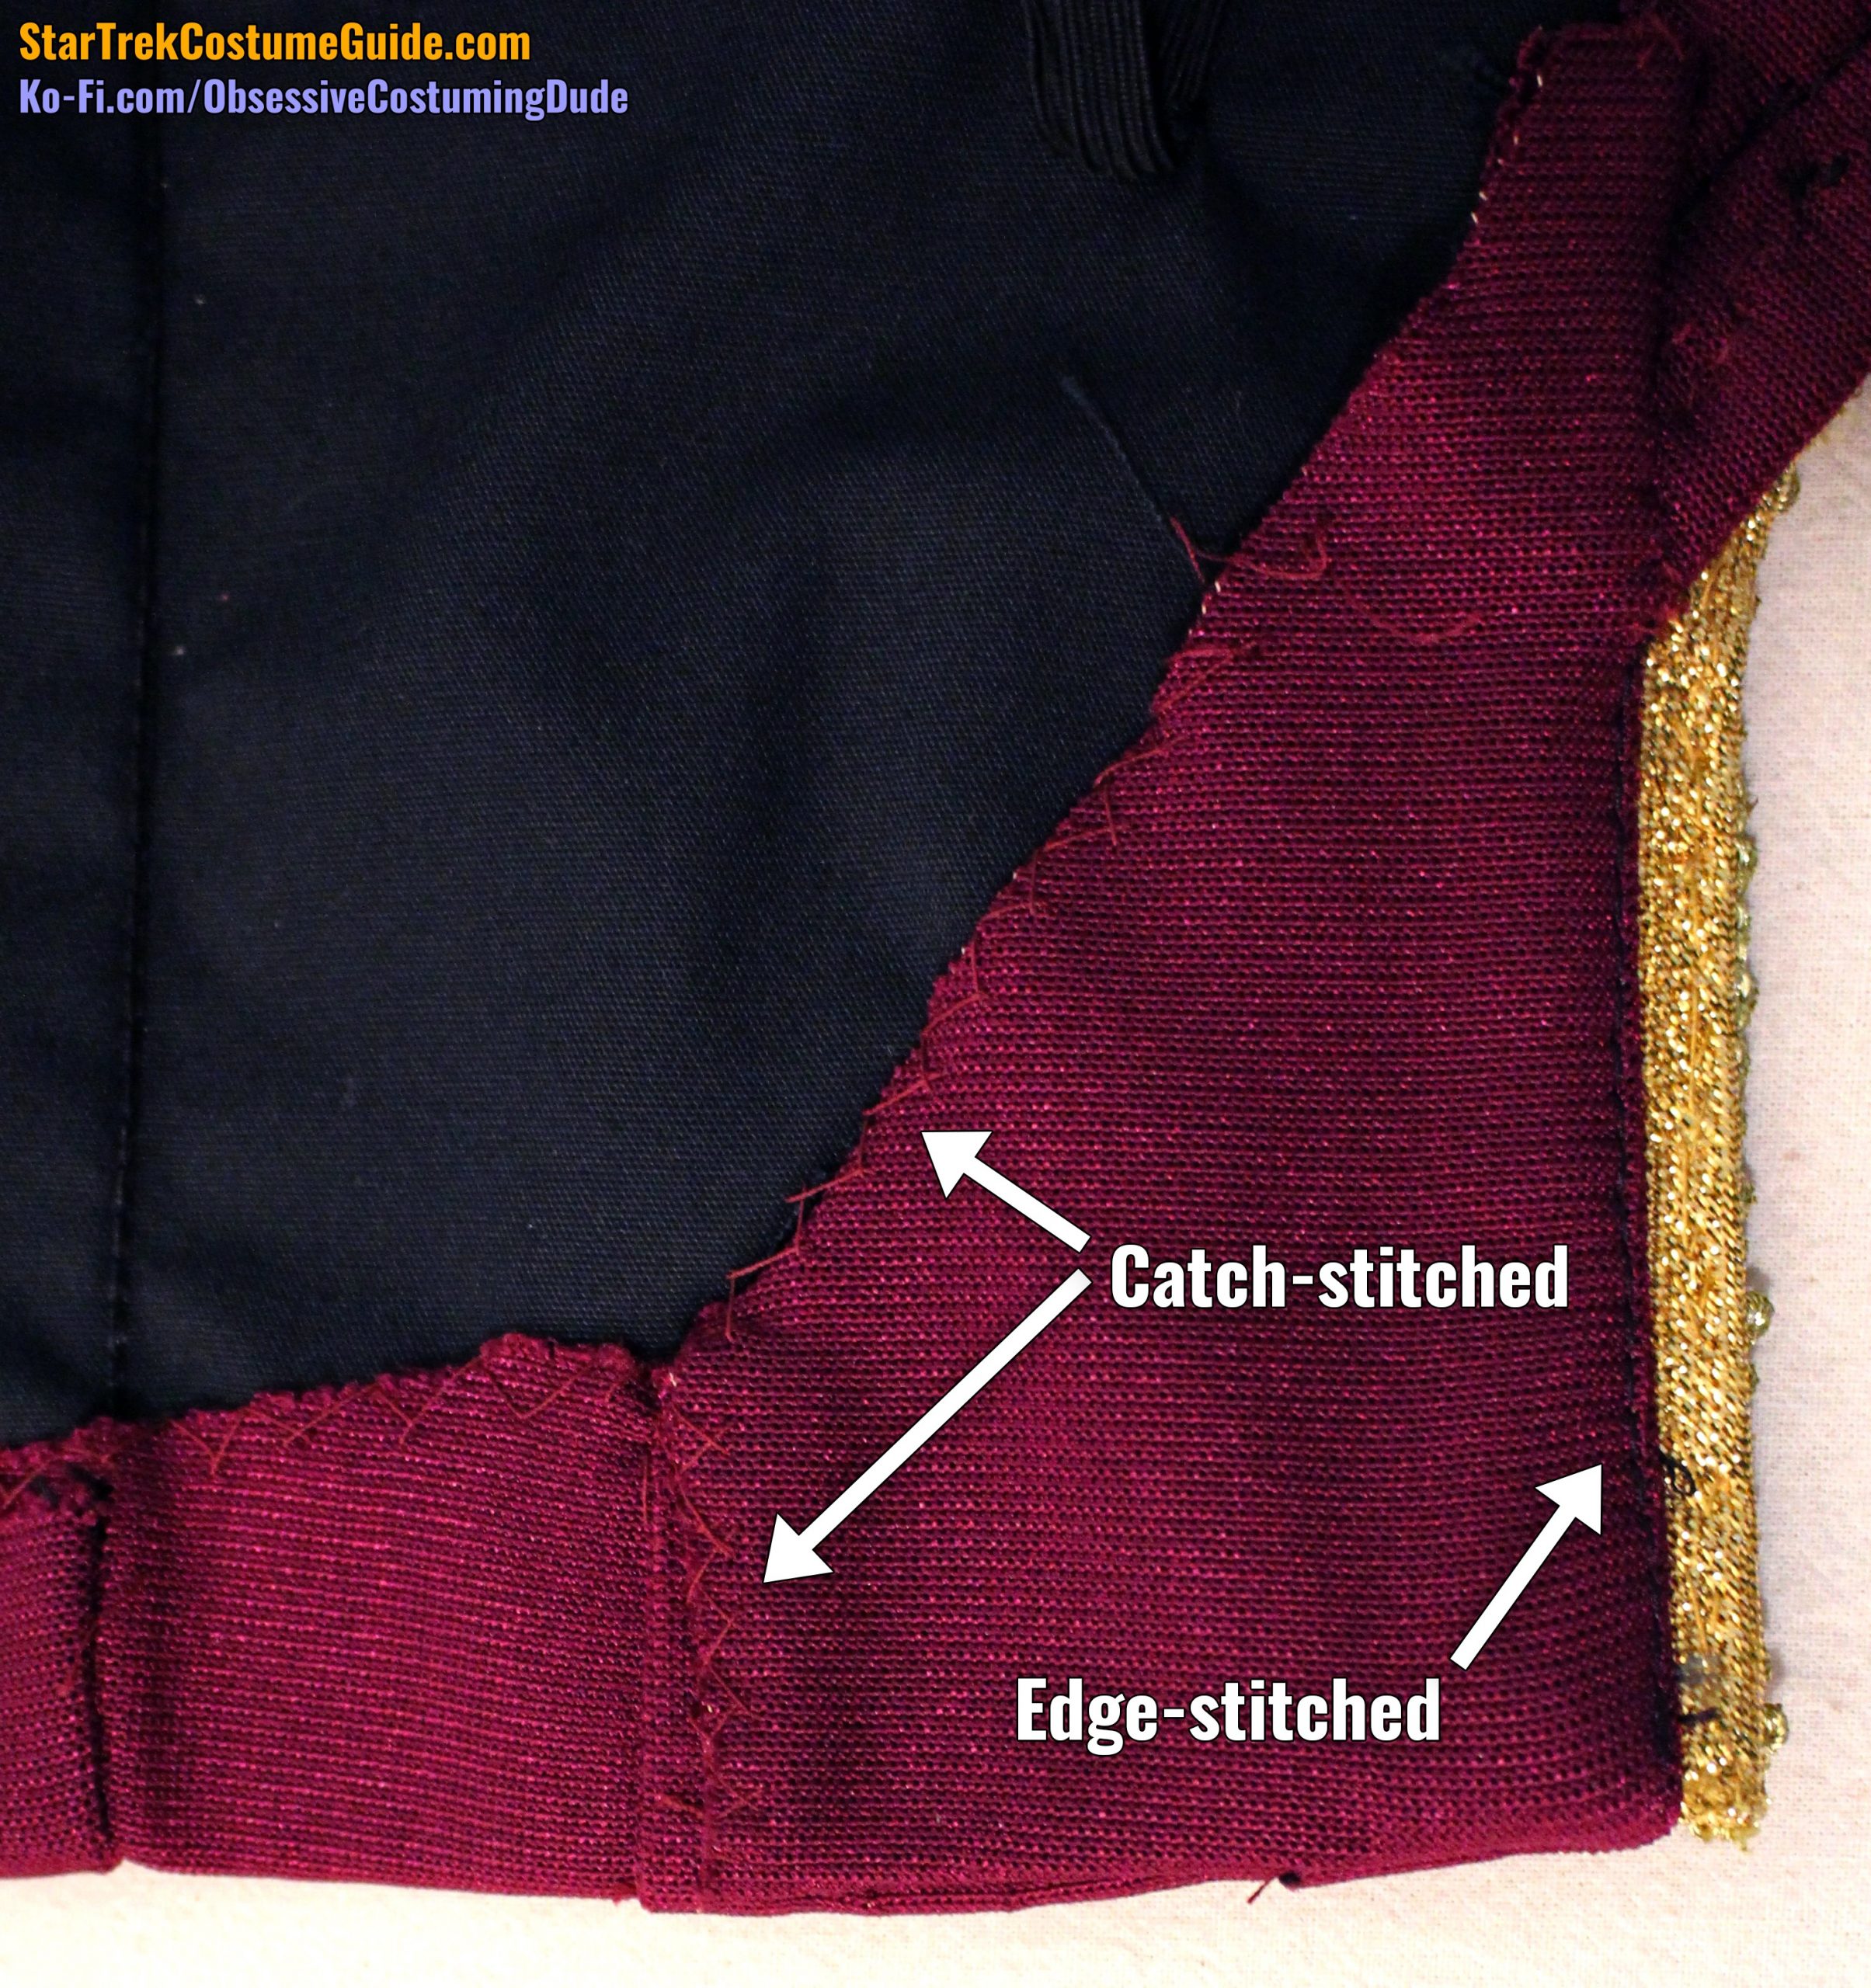
In the corner of the lower left front was a sort of facing piece, cut separately and sewn on.
Its purpose appears to have been to protect the raw edge of the trim.
The frontmost edge was edge-stitched.
The side and upper edges were catch-stitched to the hem allowance and black fabric, respectively.
The bottom edge appears to have been machine-sewn, but it could have been slip-stitched.
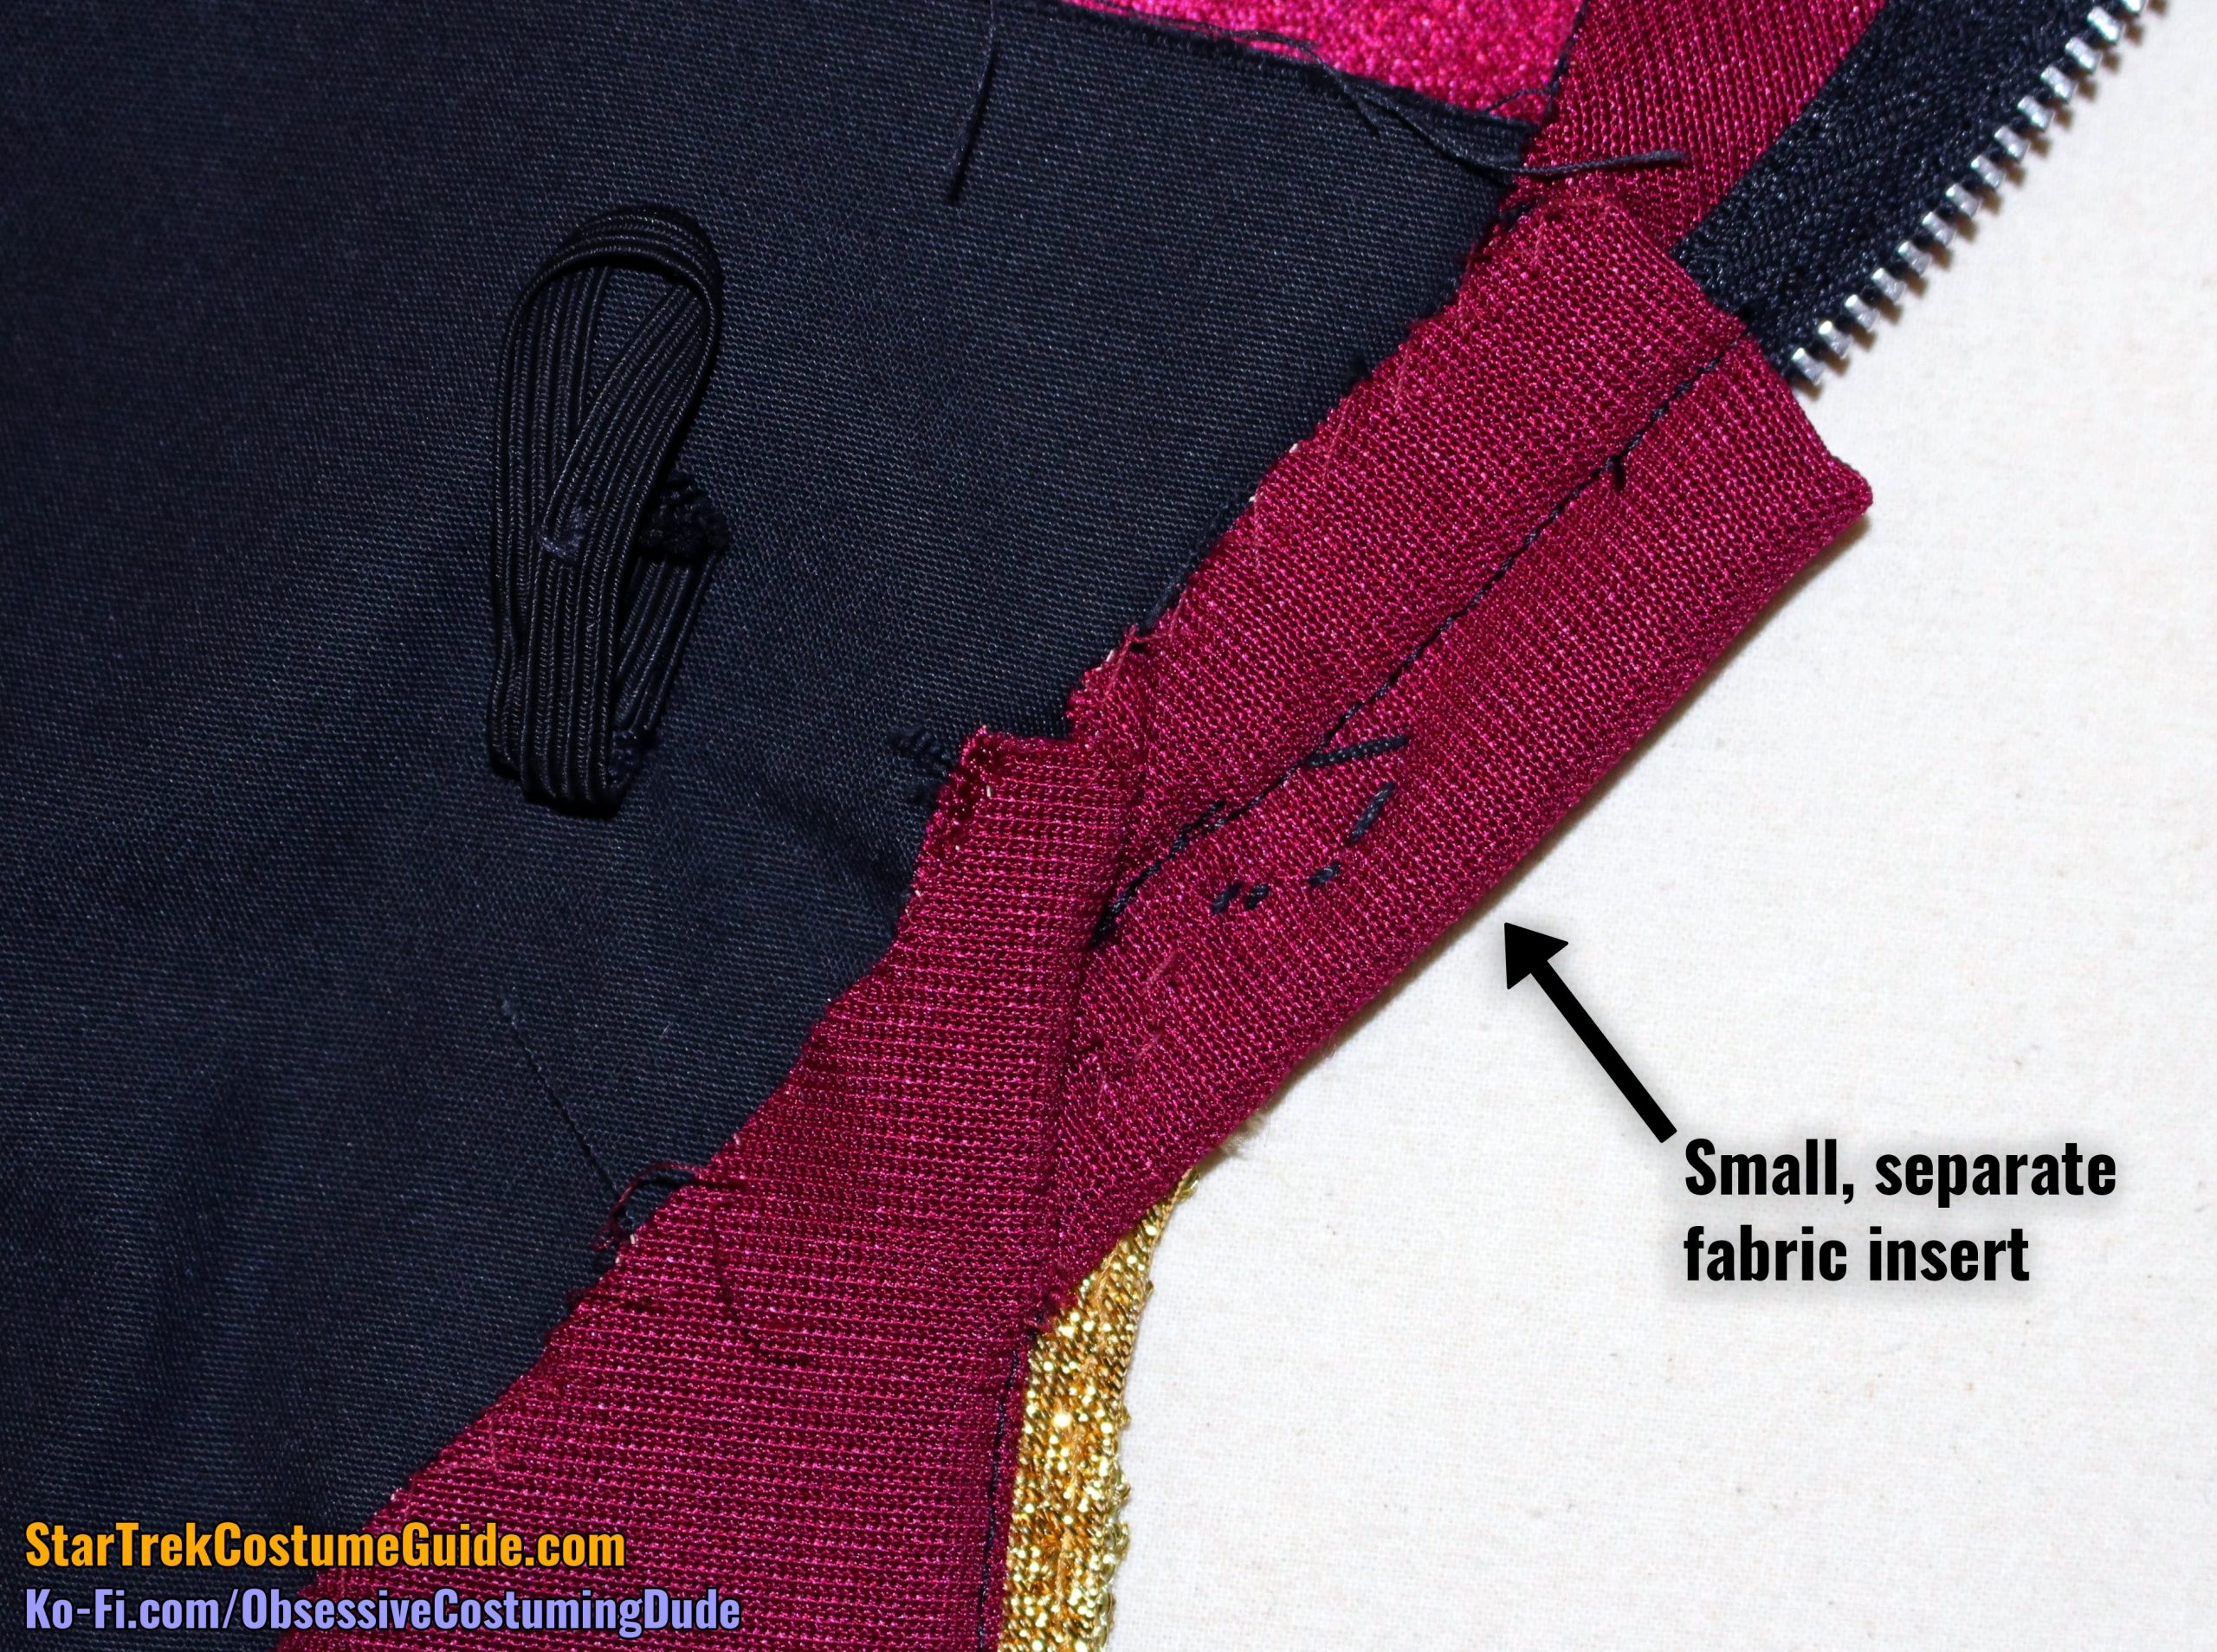
Above that was yet another separate piece, inserted between the lower left “facing” and the zipper seam allowance.
It appears to have been machine-sewn to the seam allowance, and it seems to me like a last-minute addition – as if someone saw it and said, “Oh snap, we need a bit more fabric below the zipper,” grabbed a scrap, folded it in half, and stuck it in.
Maybe the zipper wasn’t quite as long and/or didn’t extend quite as low as expected, and the little insert was added to compensate?
In any event, the upper insert was about 2 ¼” wide and folded in half, resulting in 1⅛” – with about ½” sewn in and ⅝” extending outward from the original stitch line.
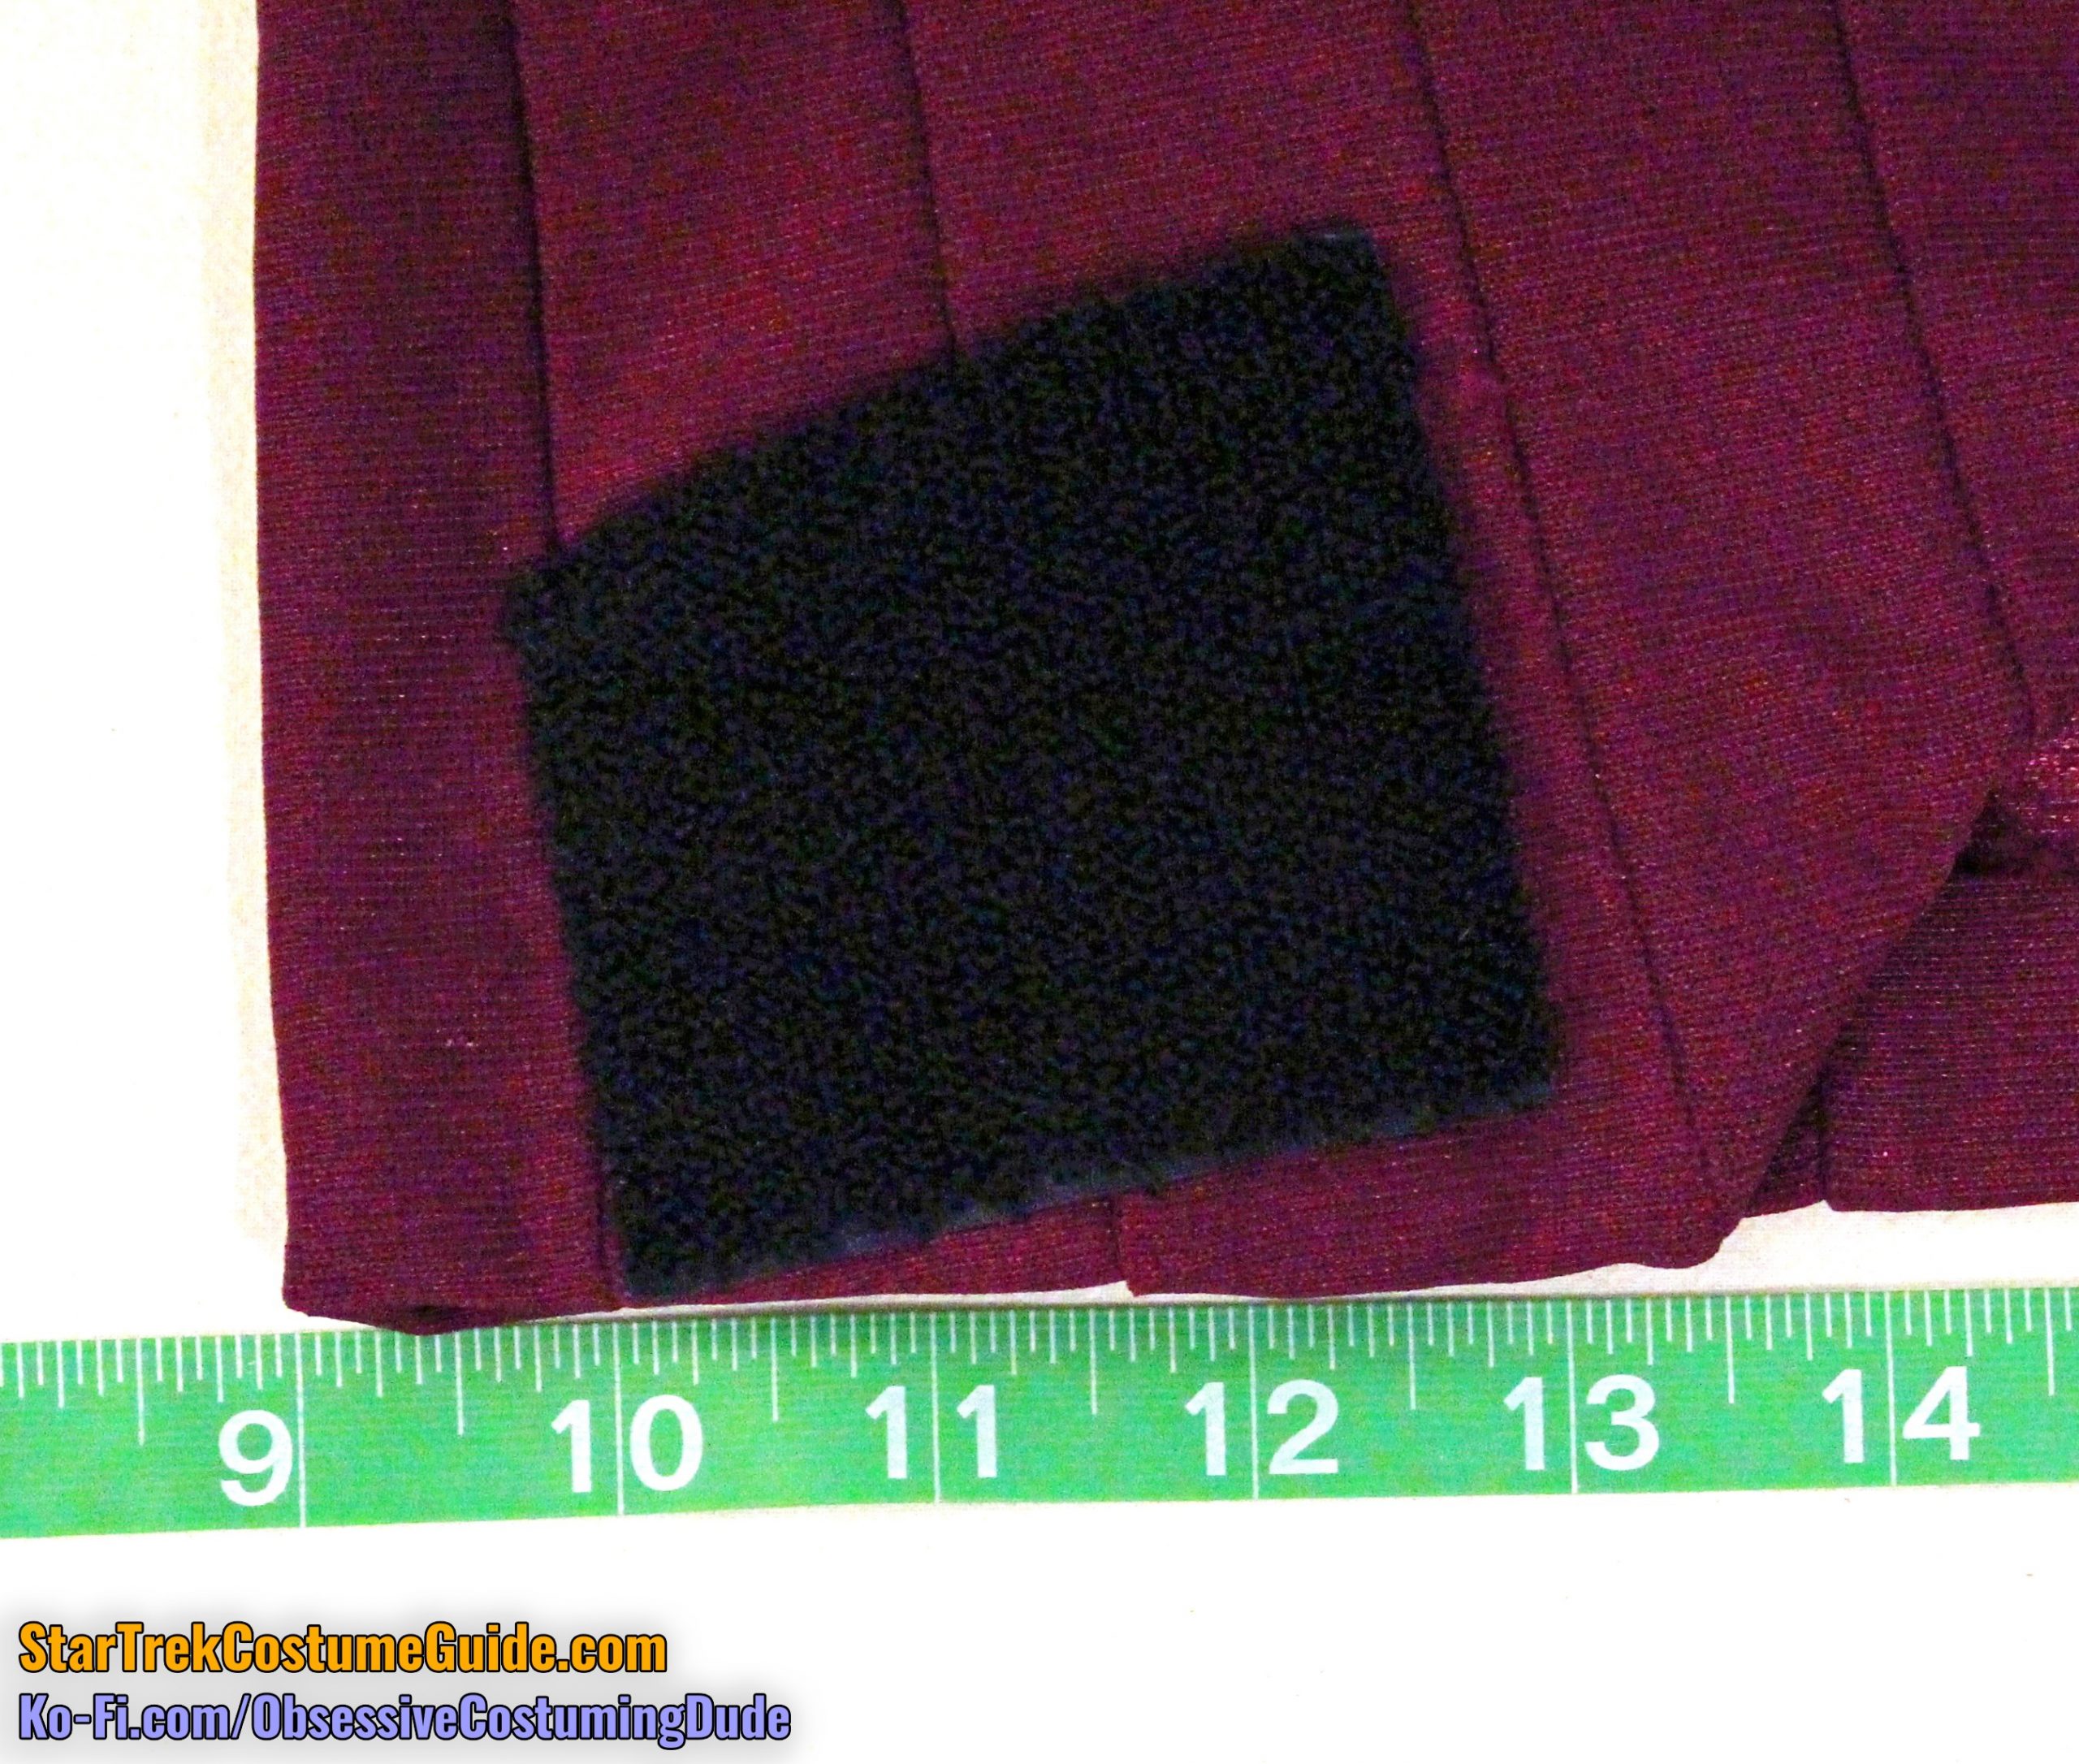
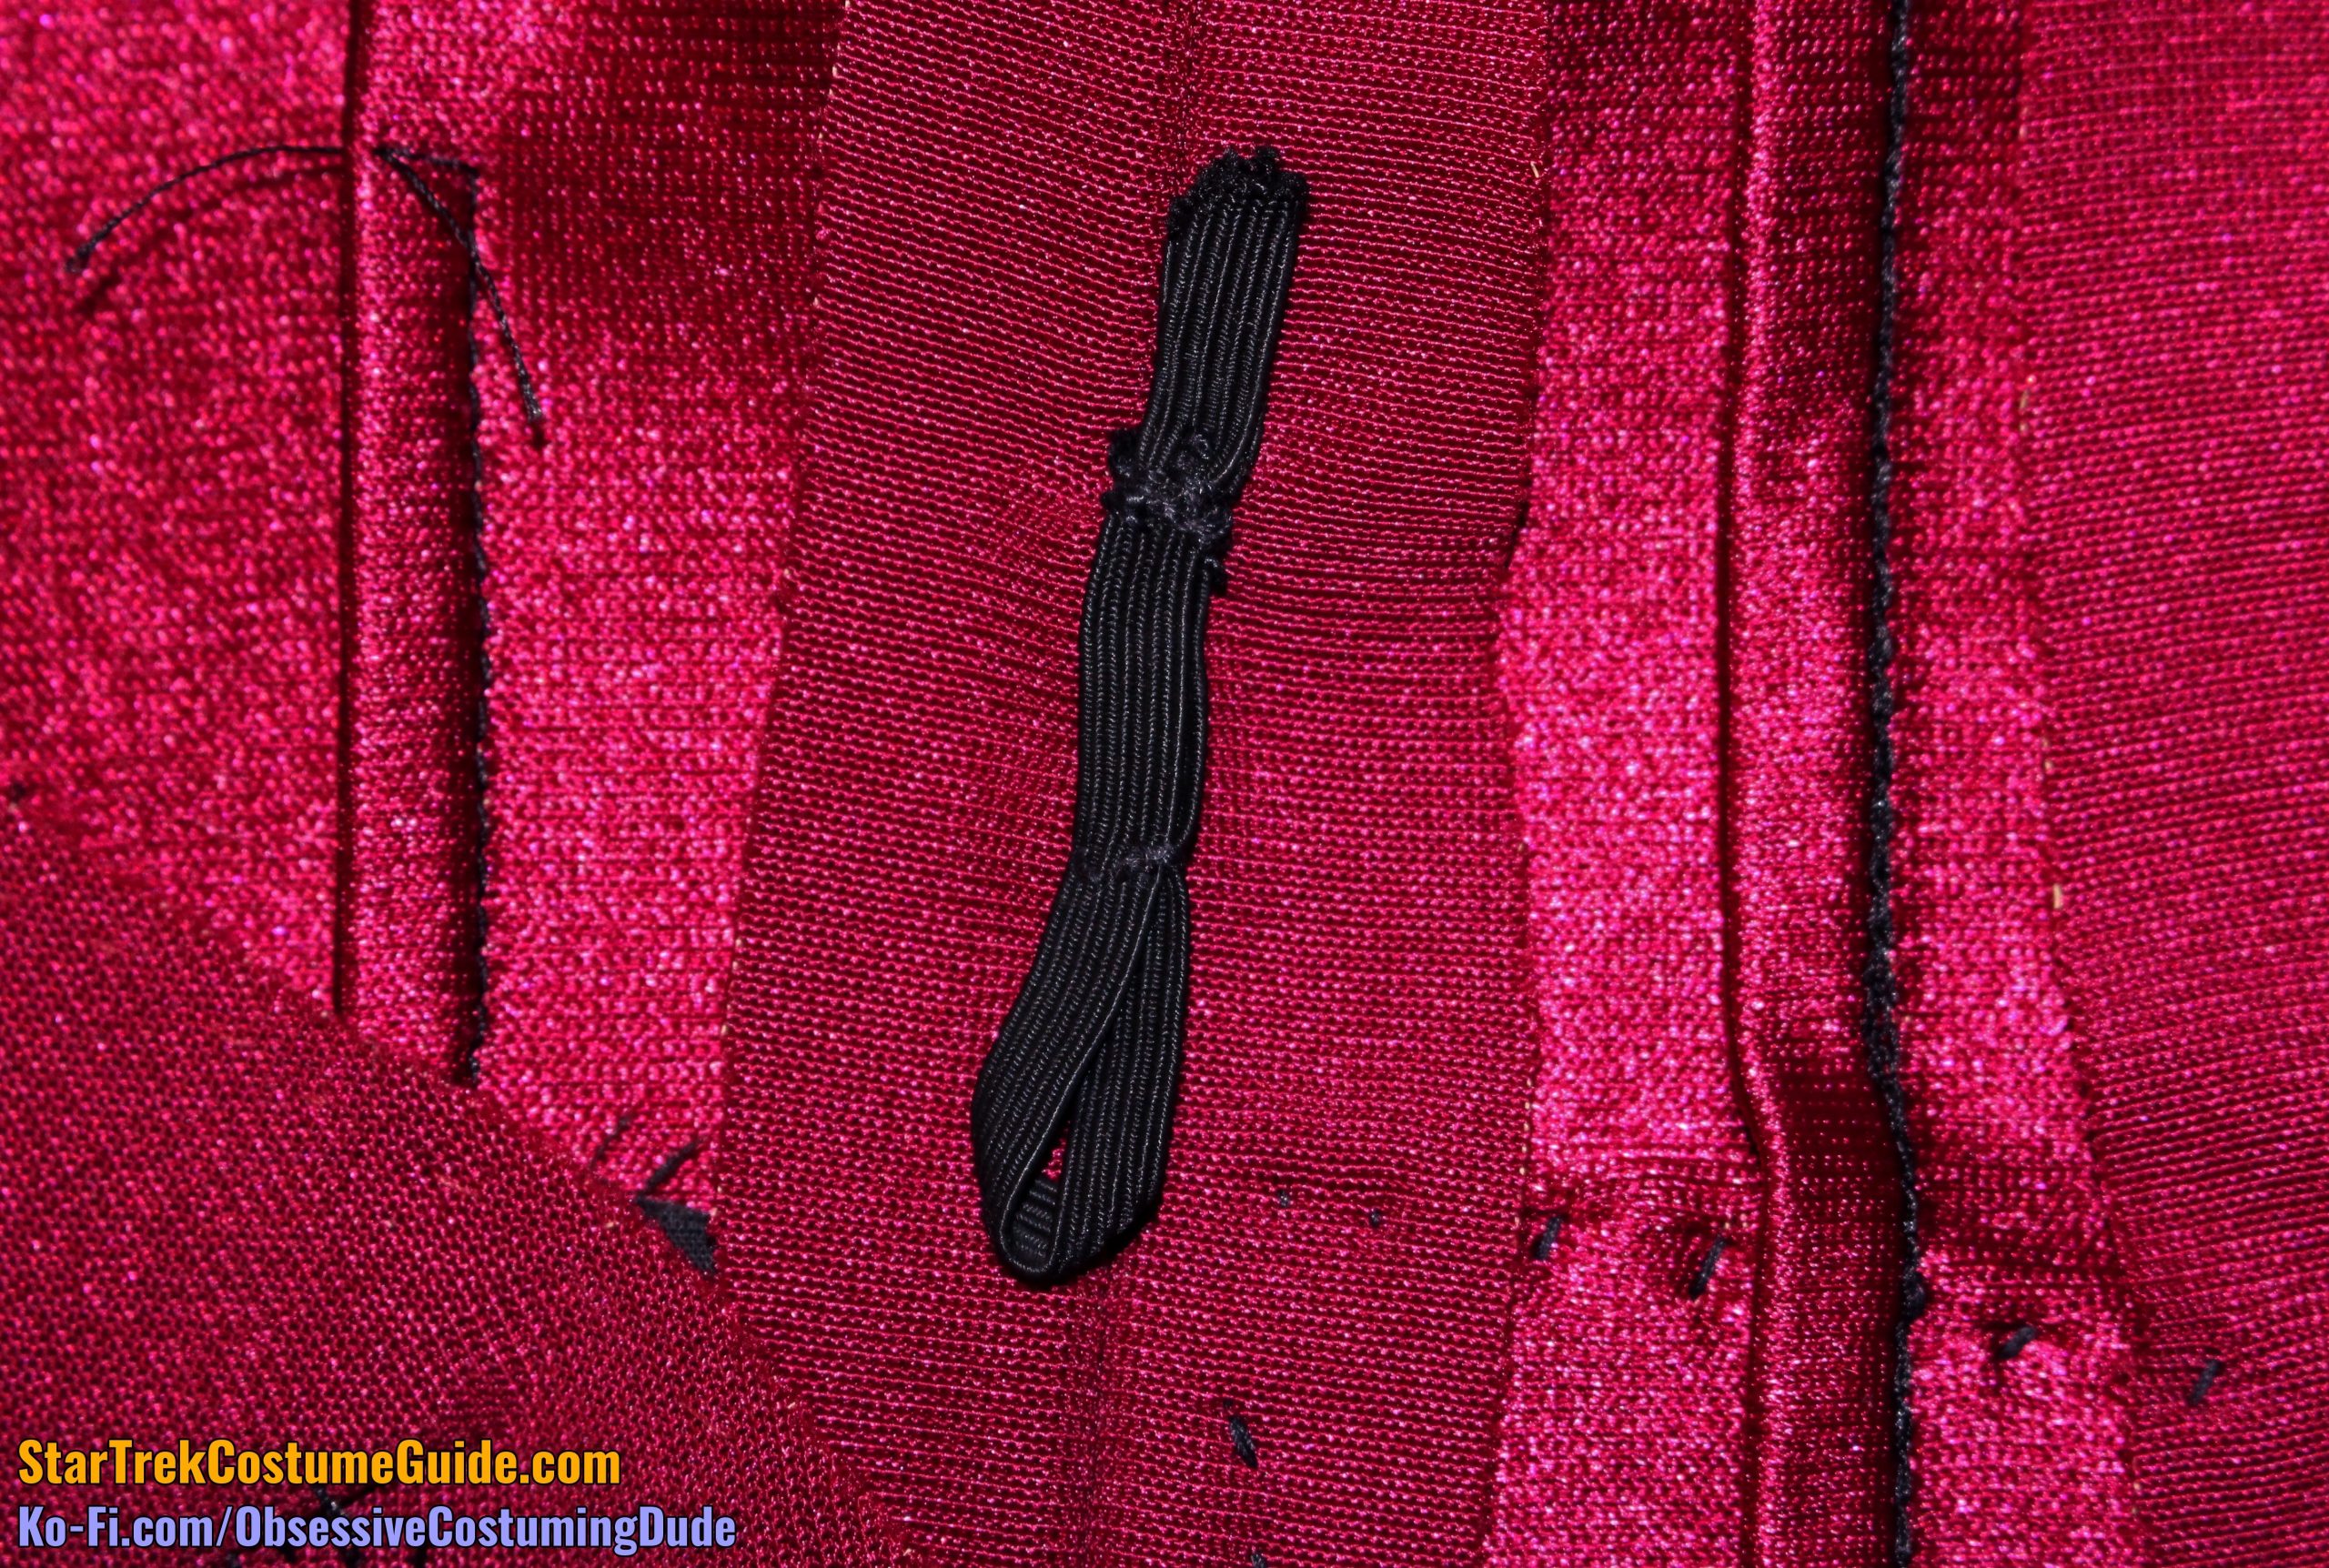
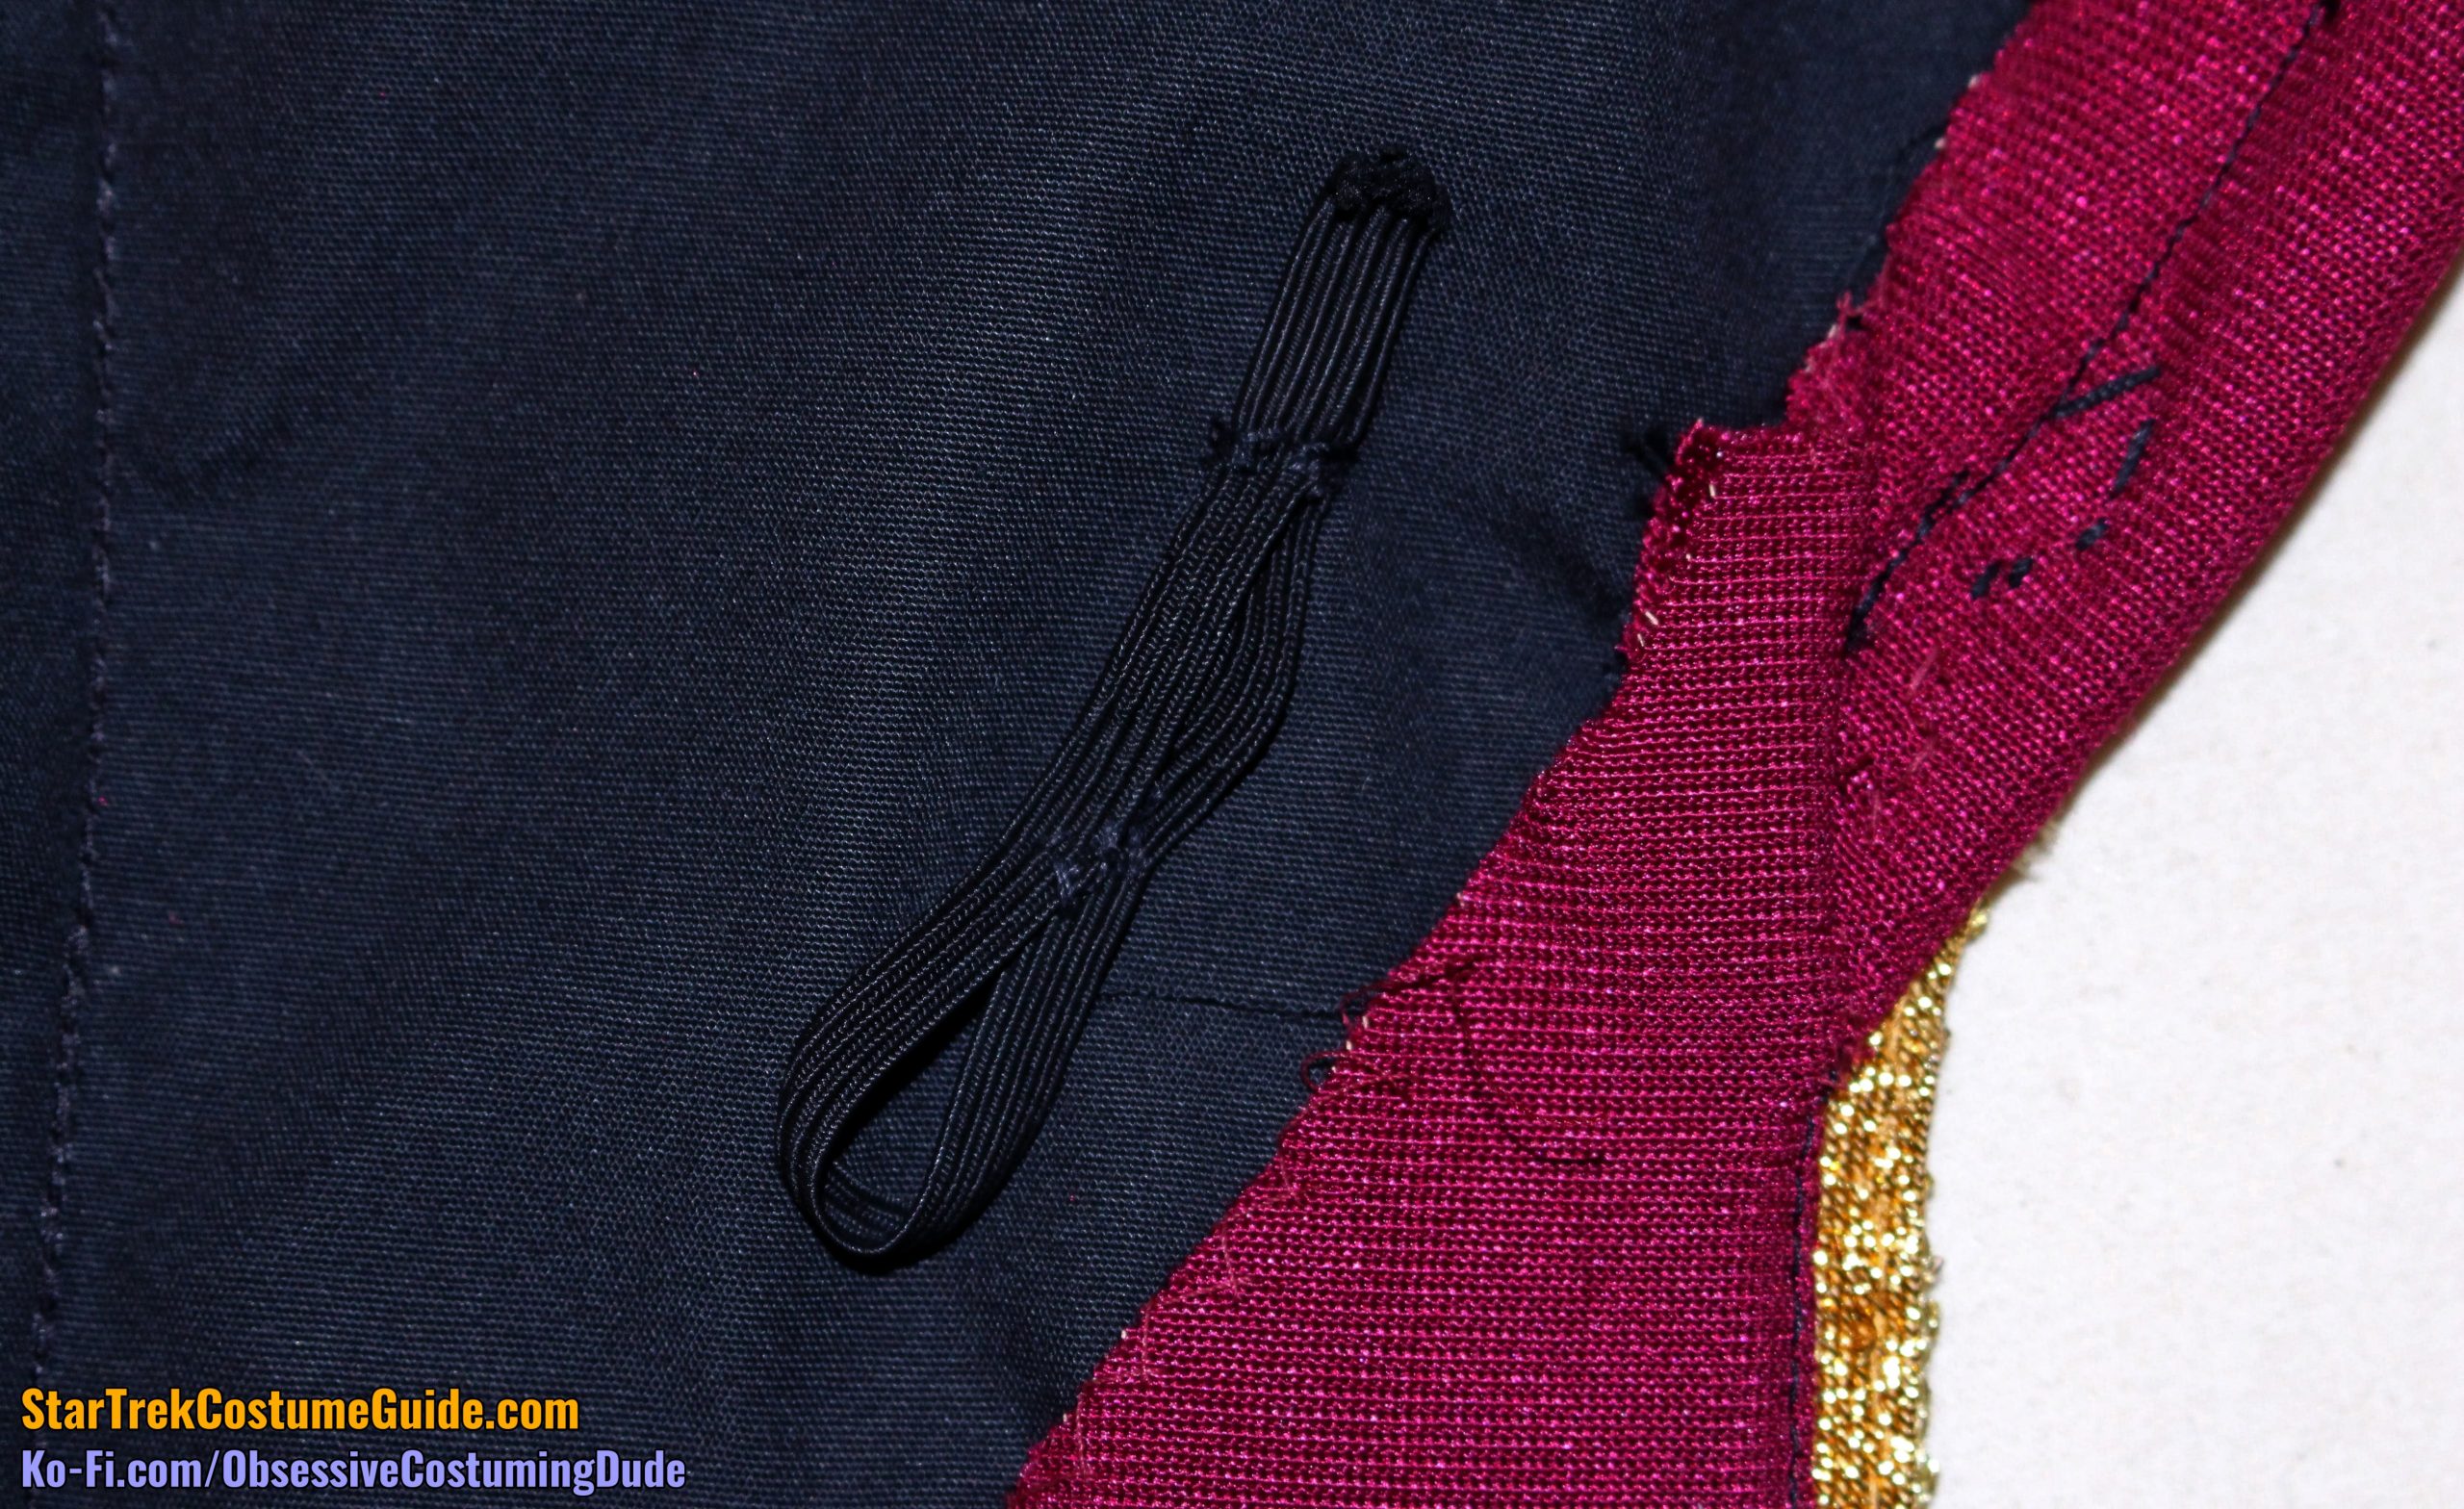
There were also these little ¼” elastic loops sewn into the side front seams, which presumably latched onto the trousers to help anchor the jacket in place.
The sleeves had some of their own weirdness going on, too.
The outer seam allowances on the right sleeve were consistently about ½”.
On the left sleeve, the outer seam allowance varied between ½” and ⅝”.
The inner sleeve seam allowances, though, were the largest that I’ve ever seen on a sleeve.
On the right sleeve, they were about 1” at the underarm, and they widened to 1 ¼” along most of the sleeve!
On the left sleeve, the top of the inner seam allowances was about ⅞”, but those also widened to about 1 ¼”.
I was surprised to learn that the lower sleeve inserts were simply topstitched down onto the existing back sleeve pieces.
The black sleeve insert continued to widen past the hem line.
The sleeve hem allowance was 2 ⅝”, including the trim.
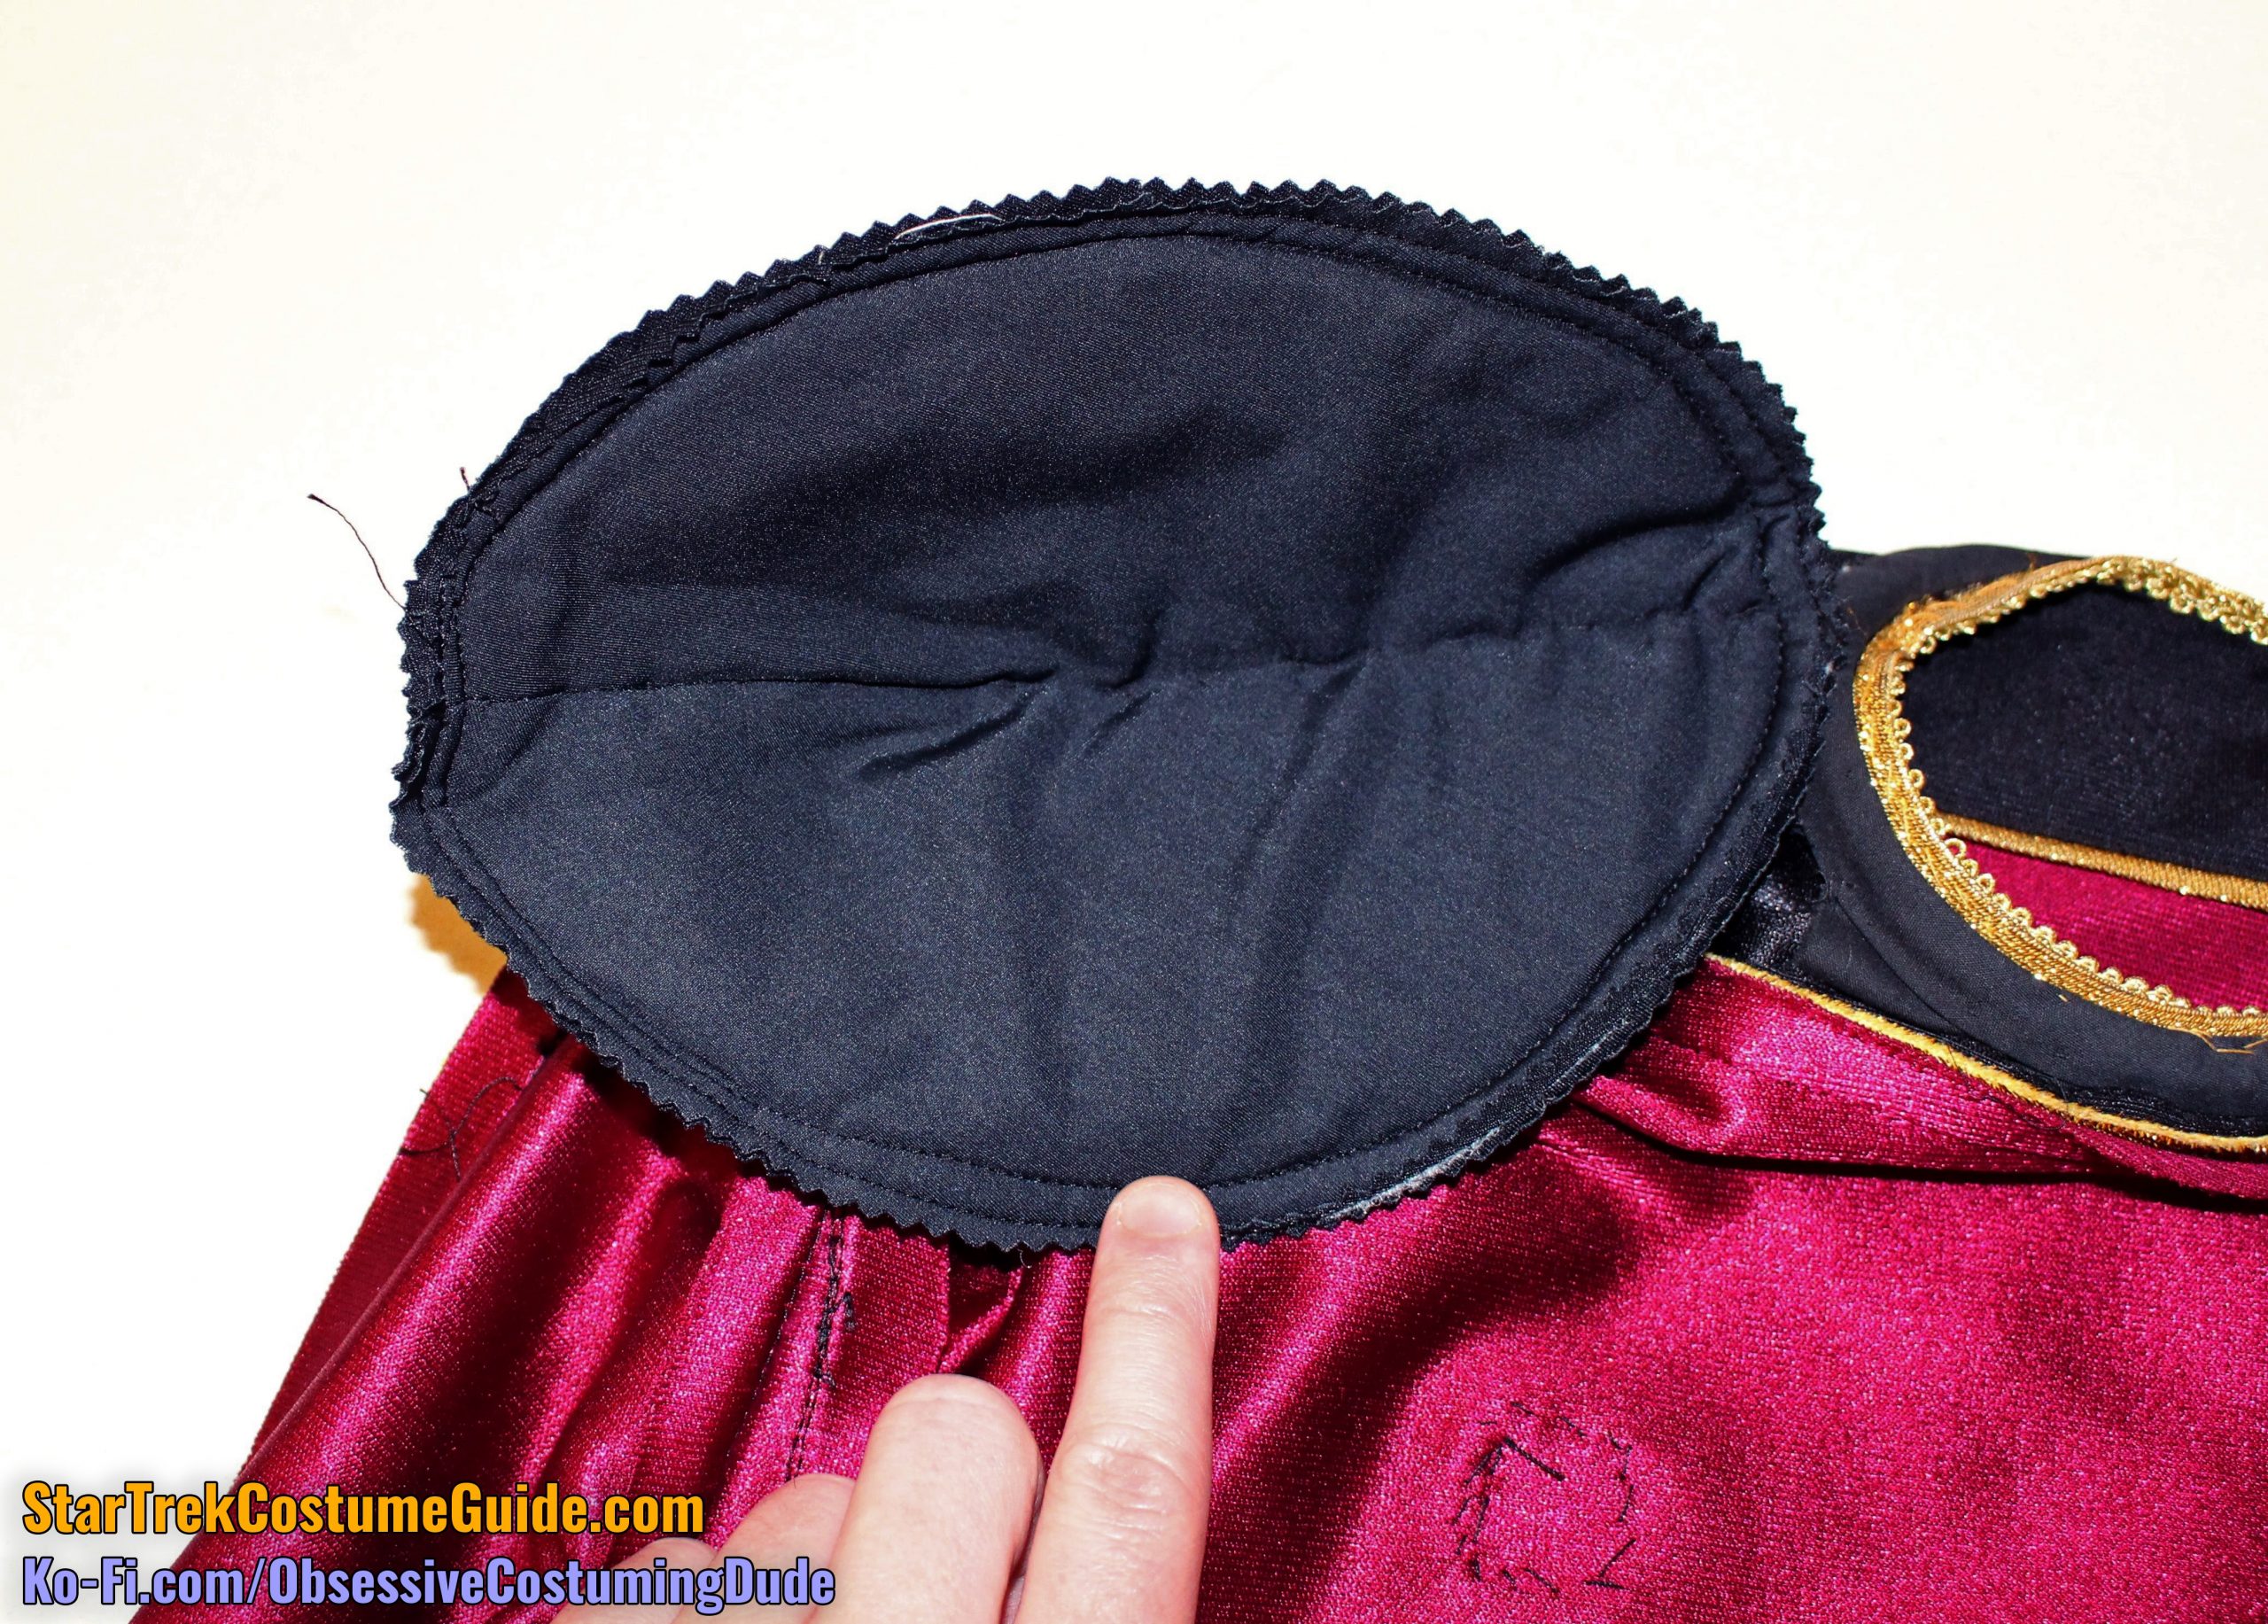
And finally, let’s take a look at these shoulder pads.
Simply put, they were massive.
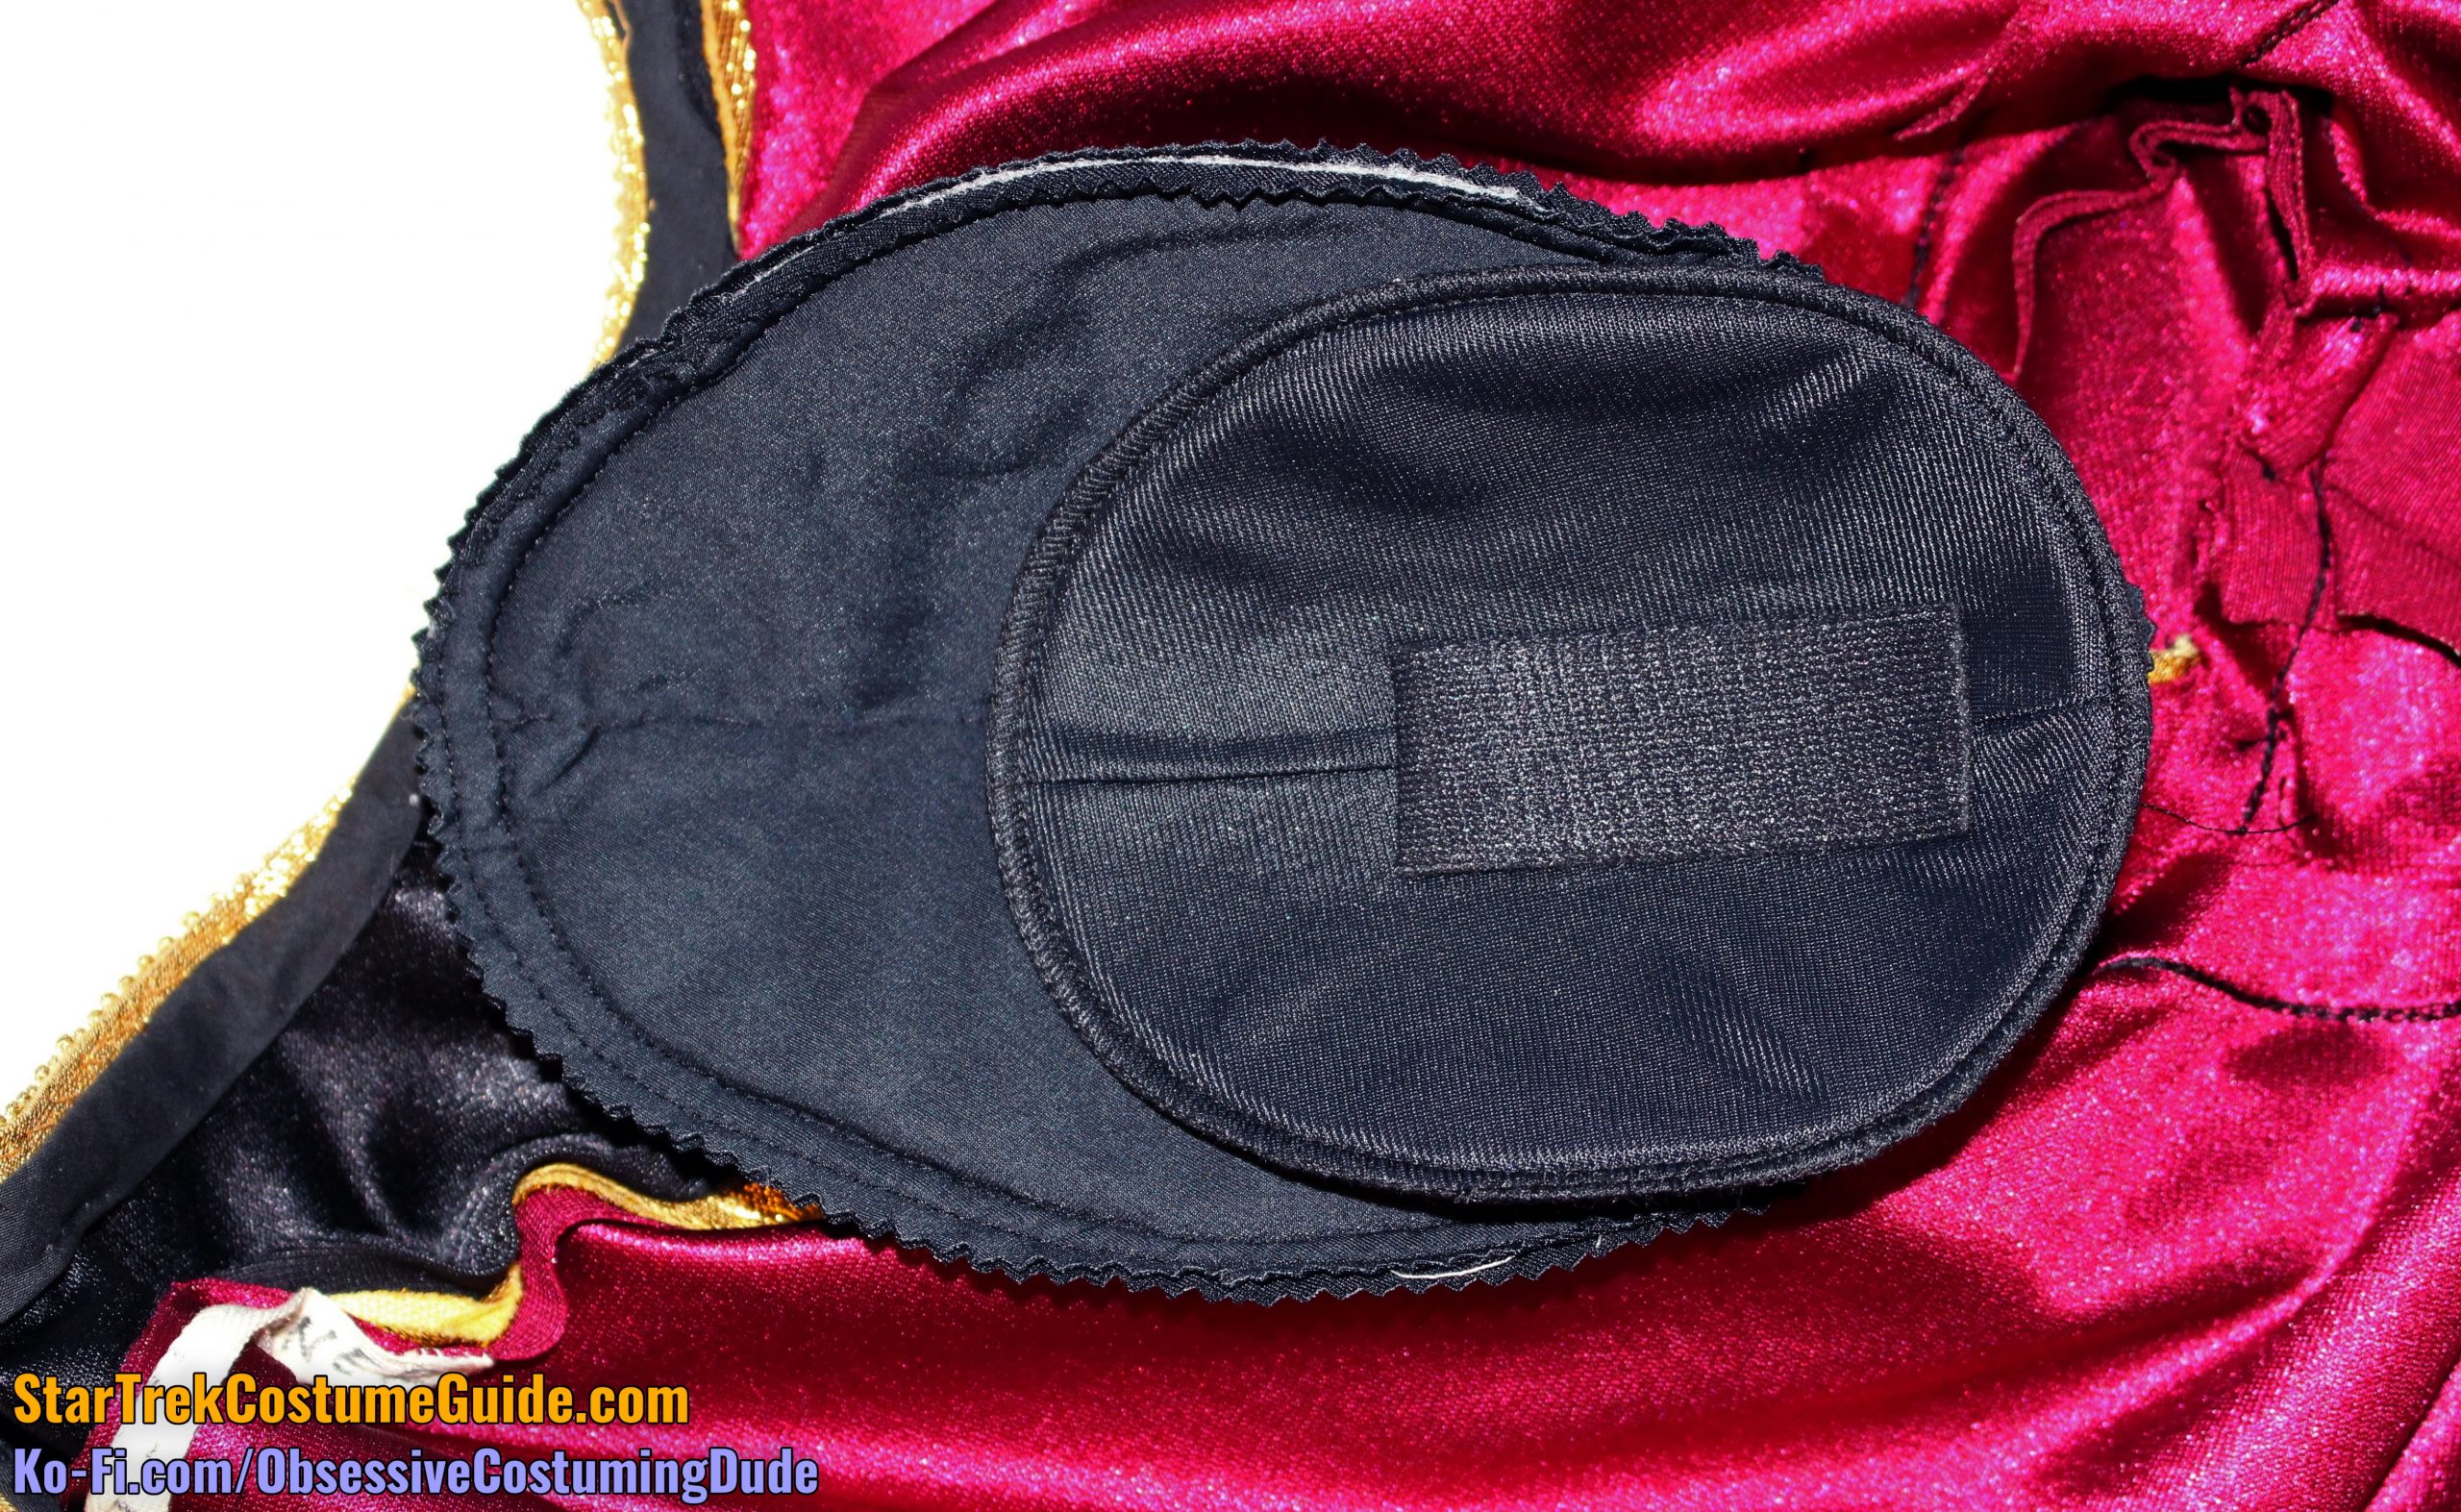
I thought the shoulder pads on the TNG skant I examined were huge, but these bad boys dwarf even those.
Unlike the skant shoulder pads, though, these had some serious loft to them.
Having examined quite a few screen-used men’s and women’s TNG-era uniforms, I believe the smaller shoulder pads (a la the TNG skant) to have been standard for the ladies, but these larger ones were standard for men.
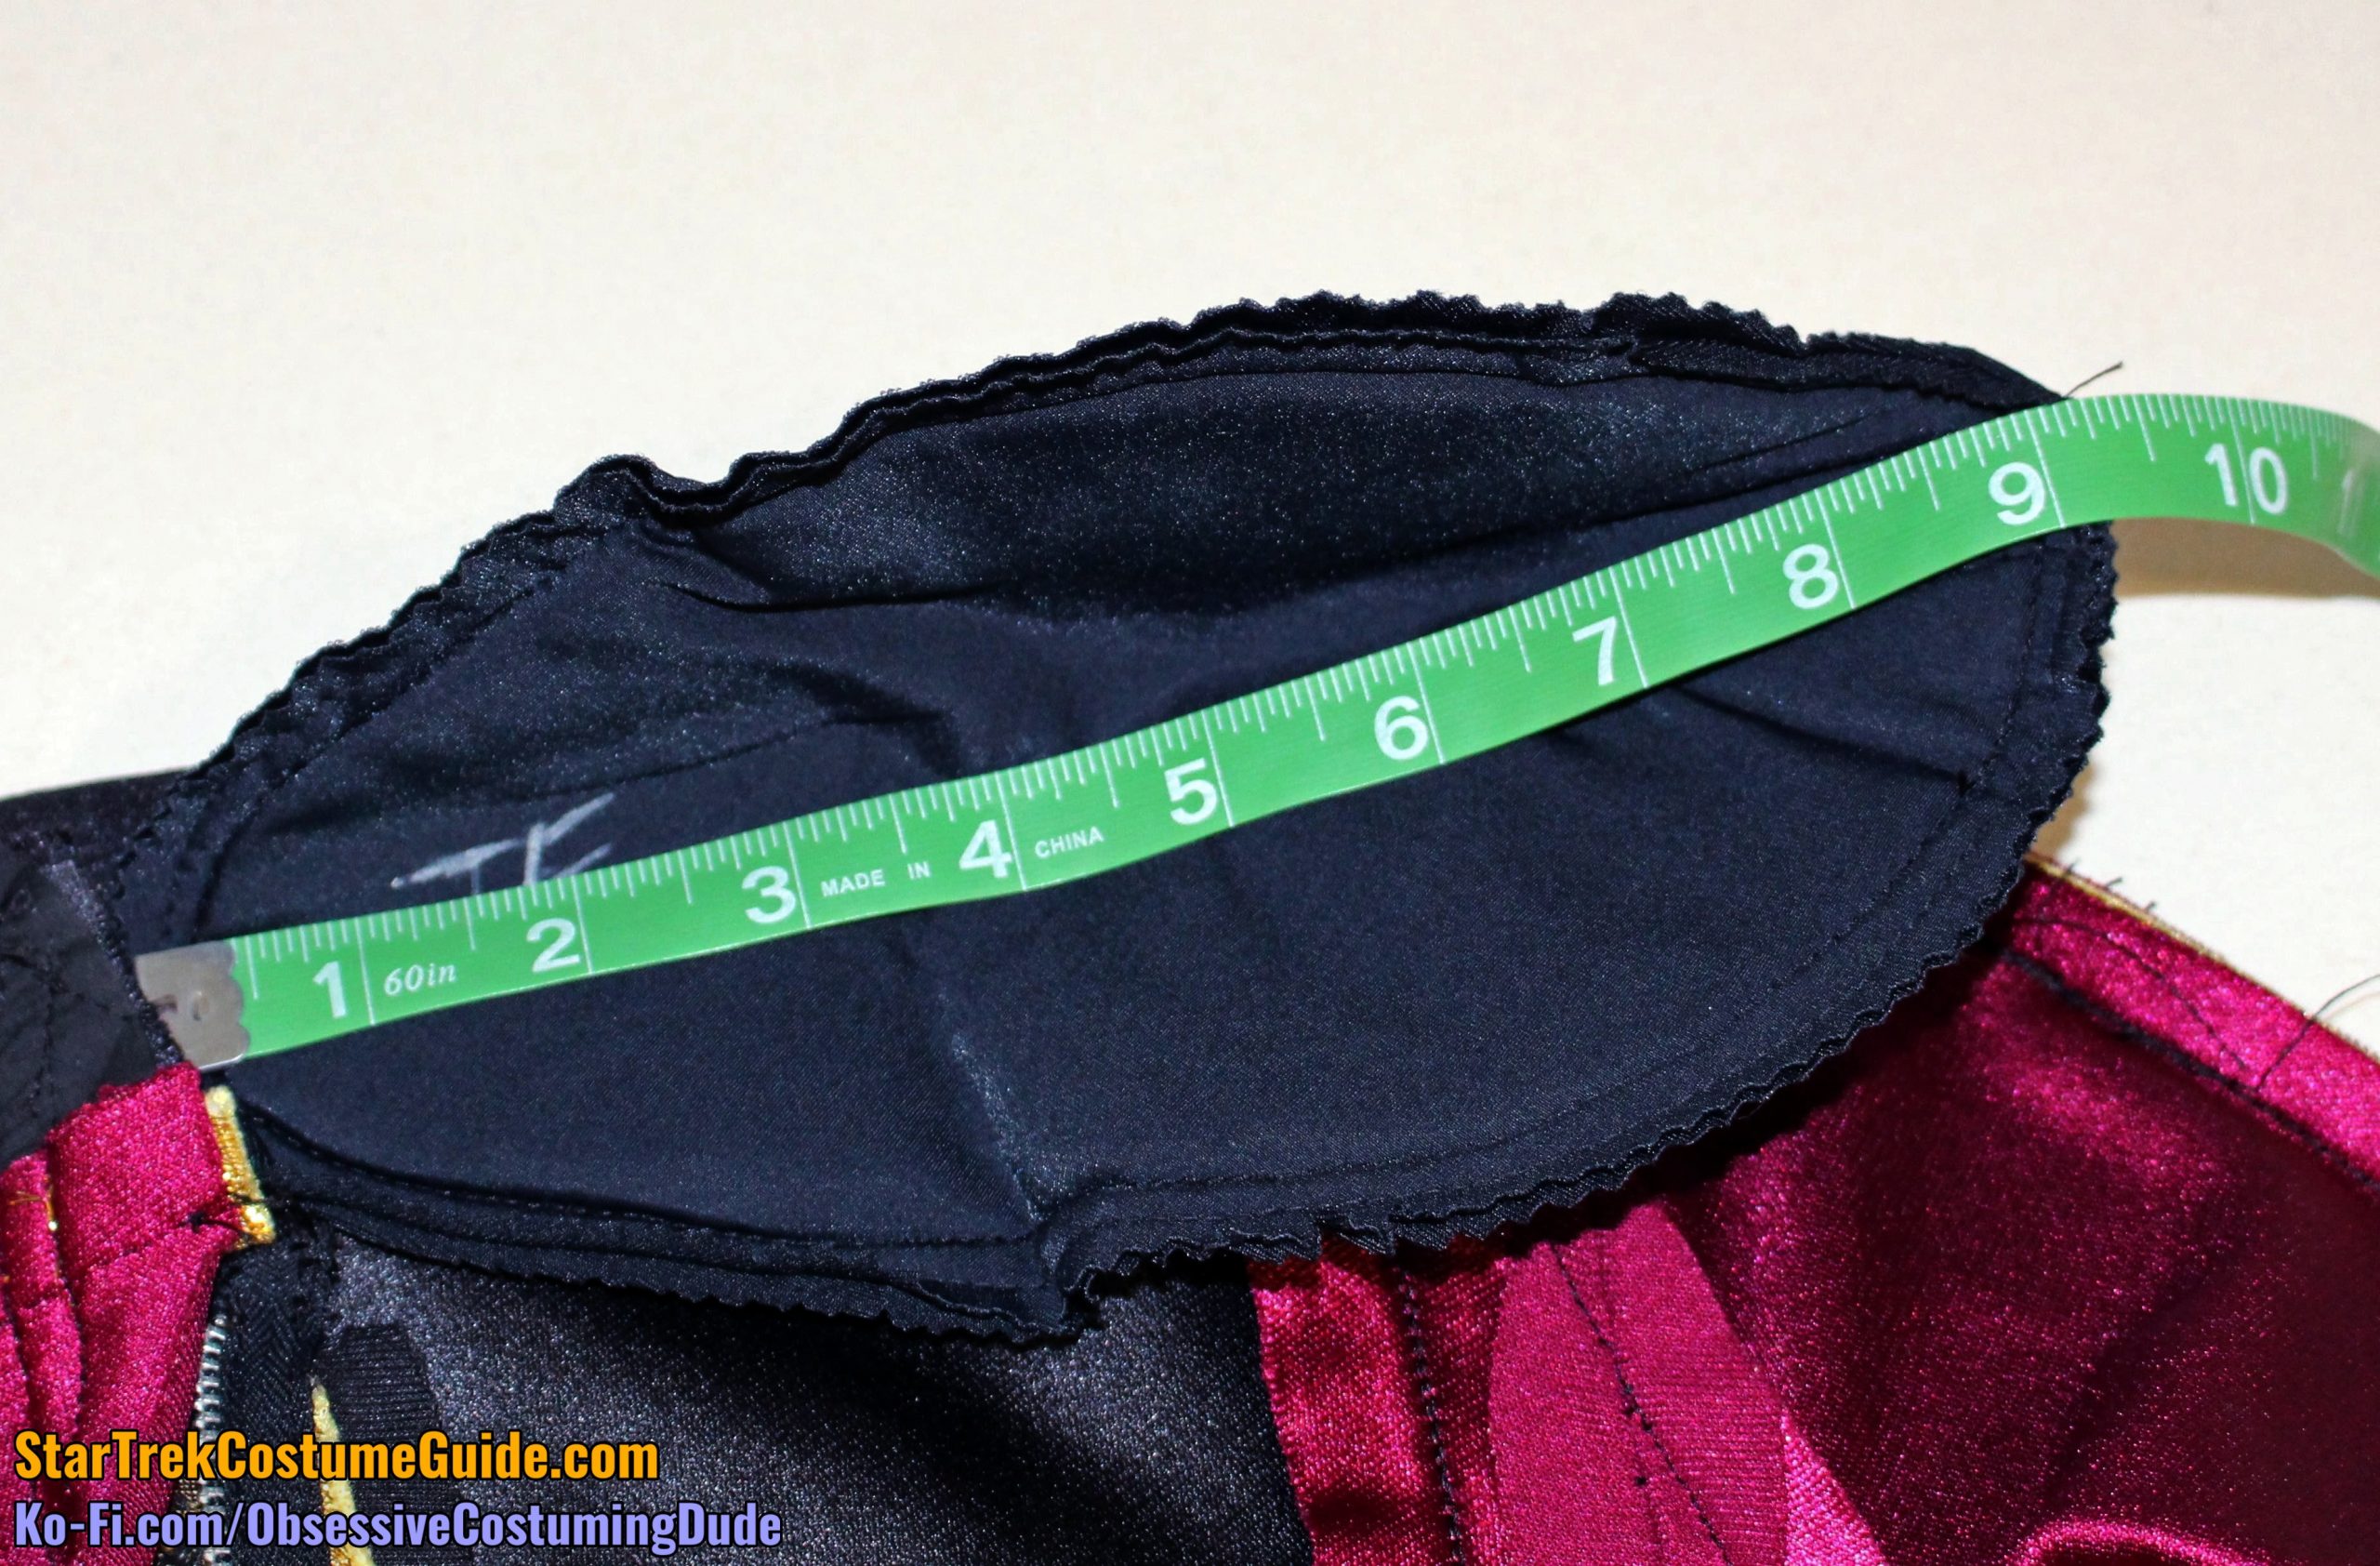
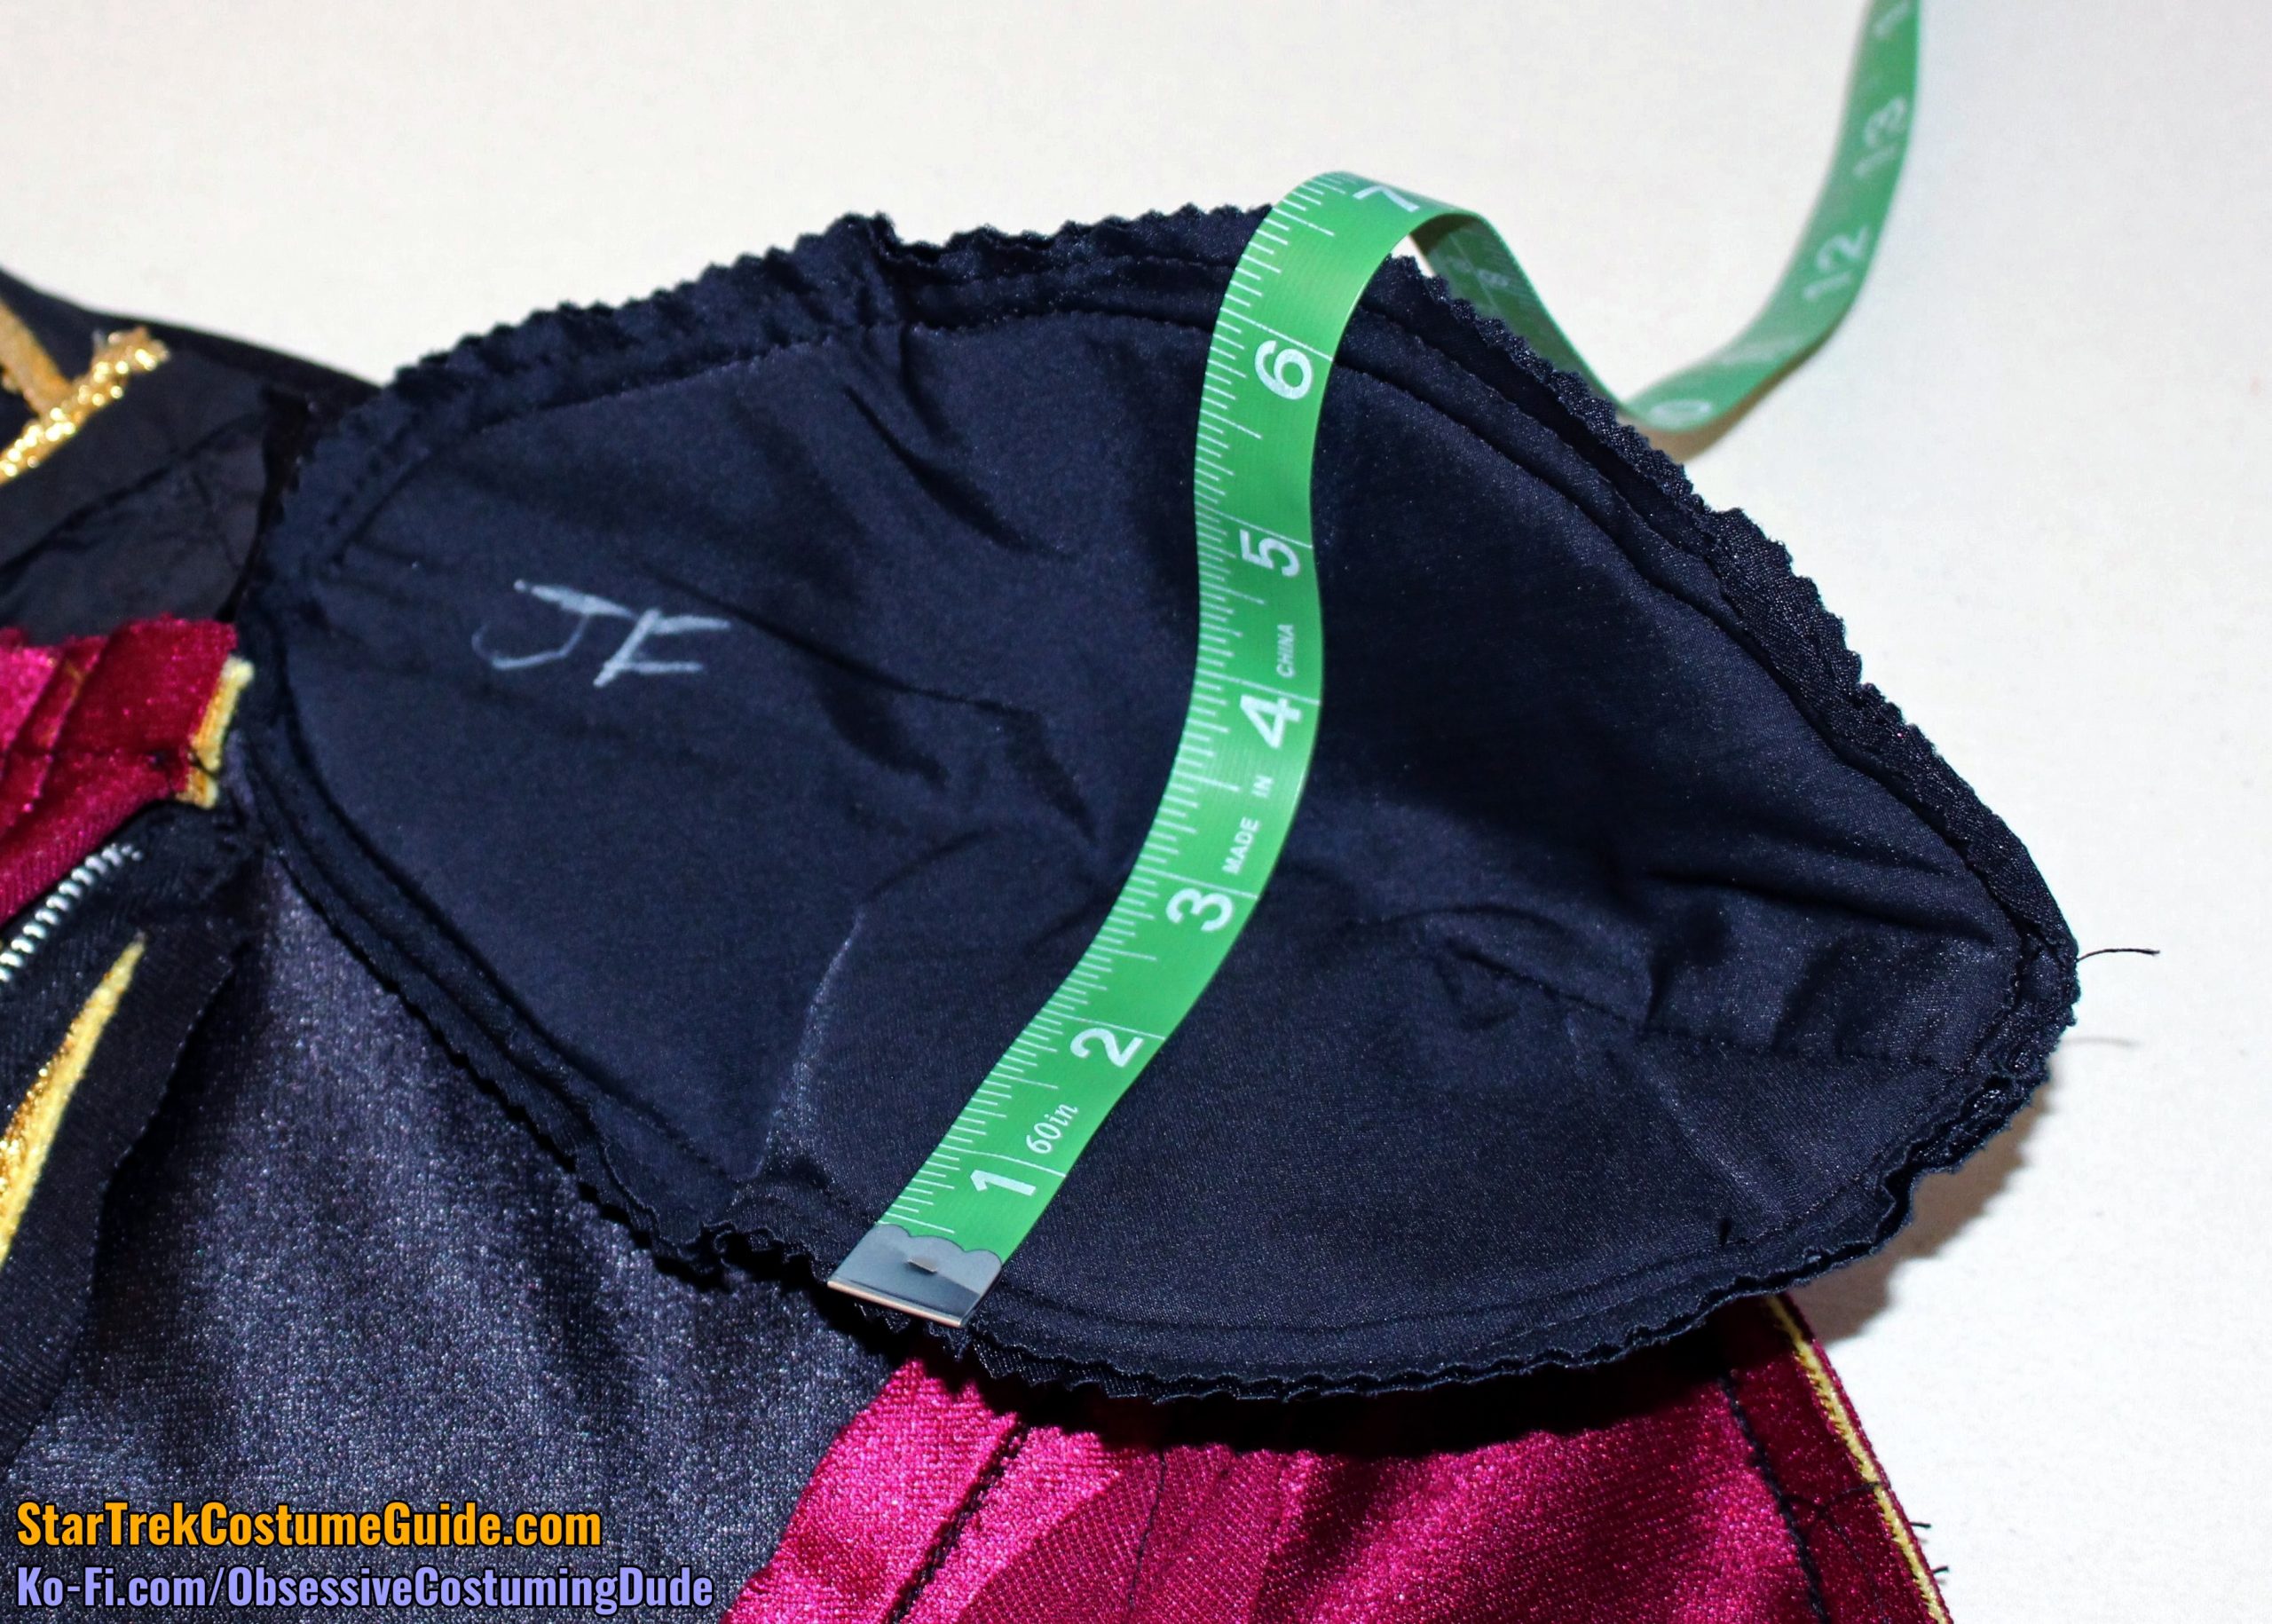
They appear to have been constructed in an identical manner: ovular, with padding enclosed in two layers of black lining, a dart establishing the rounded shape, stitched twice around the perimeter, and edges trimmed with pinking shears.
However, they were considerably larger – approximately 9 ¼” x 6 ½”.
Here’s a comparison between the shoulder pads in this uniform, and largest pair of retail shoulder pads I’ve been able to find:
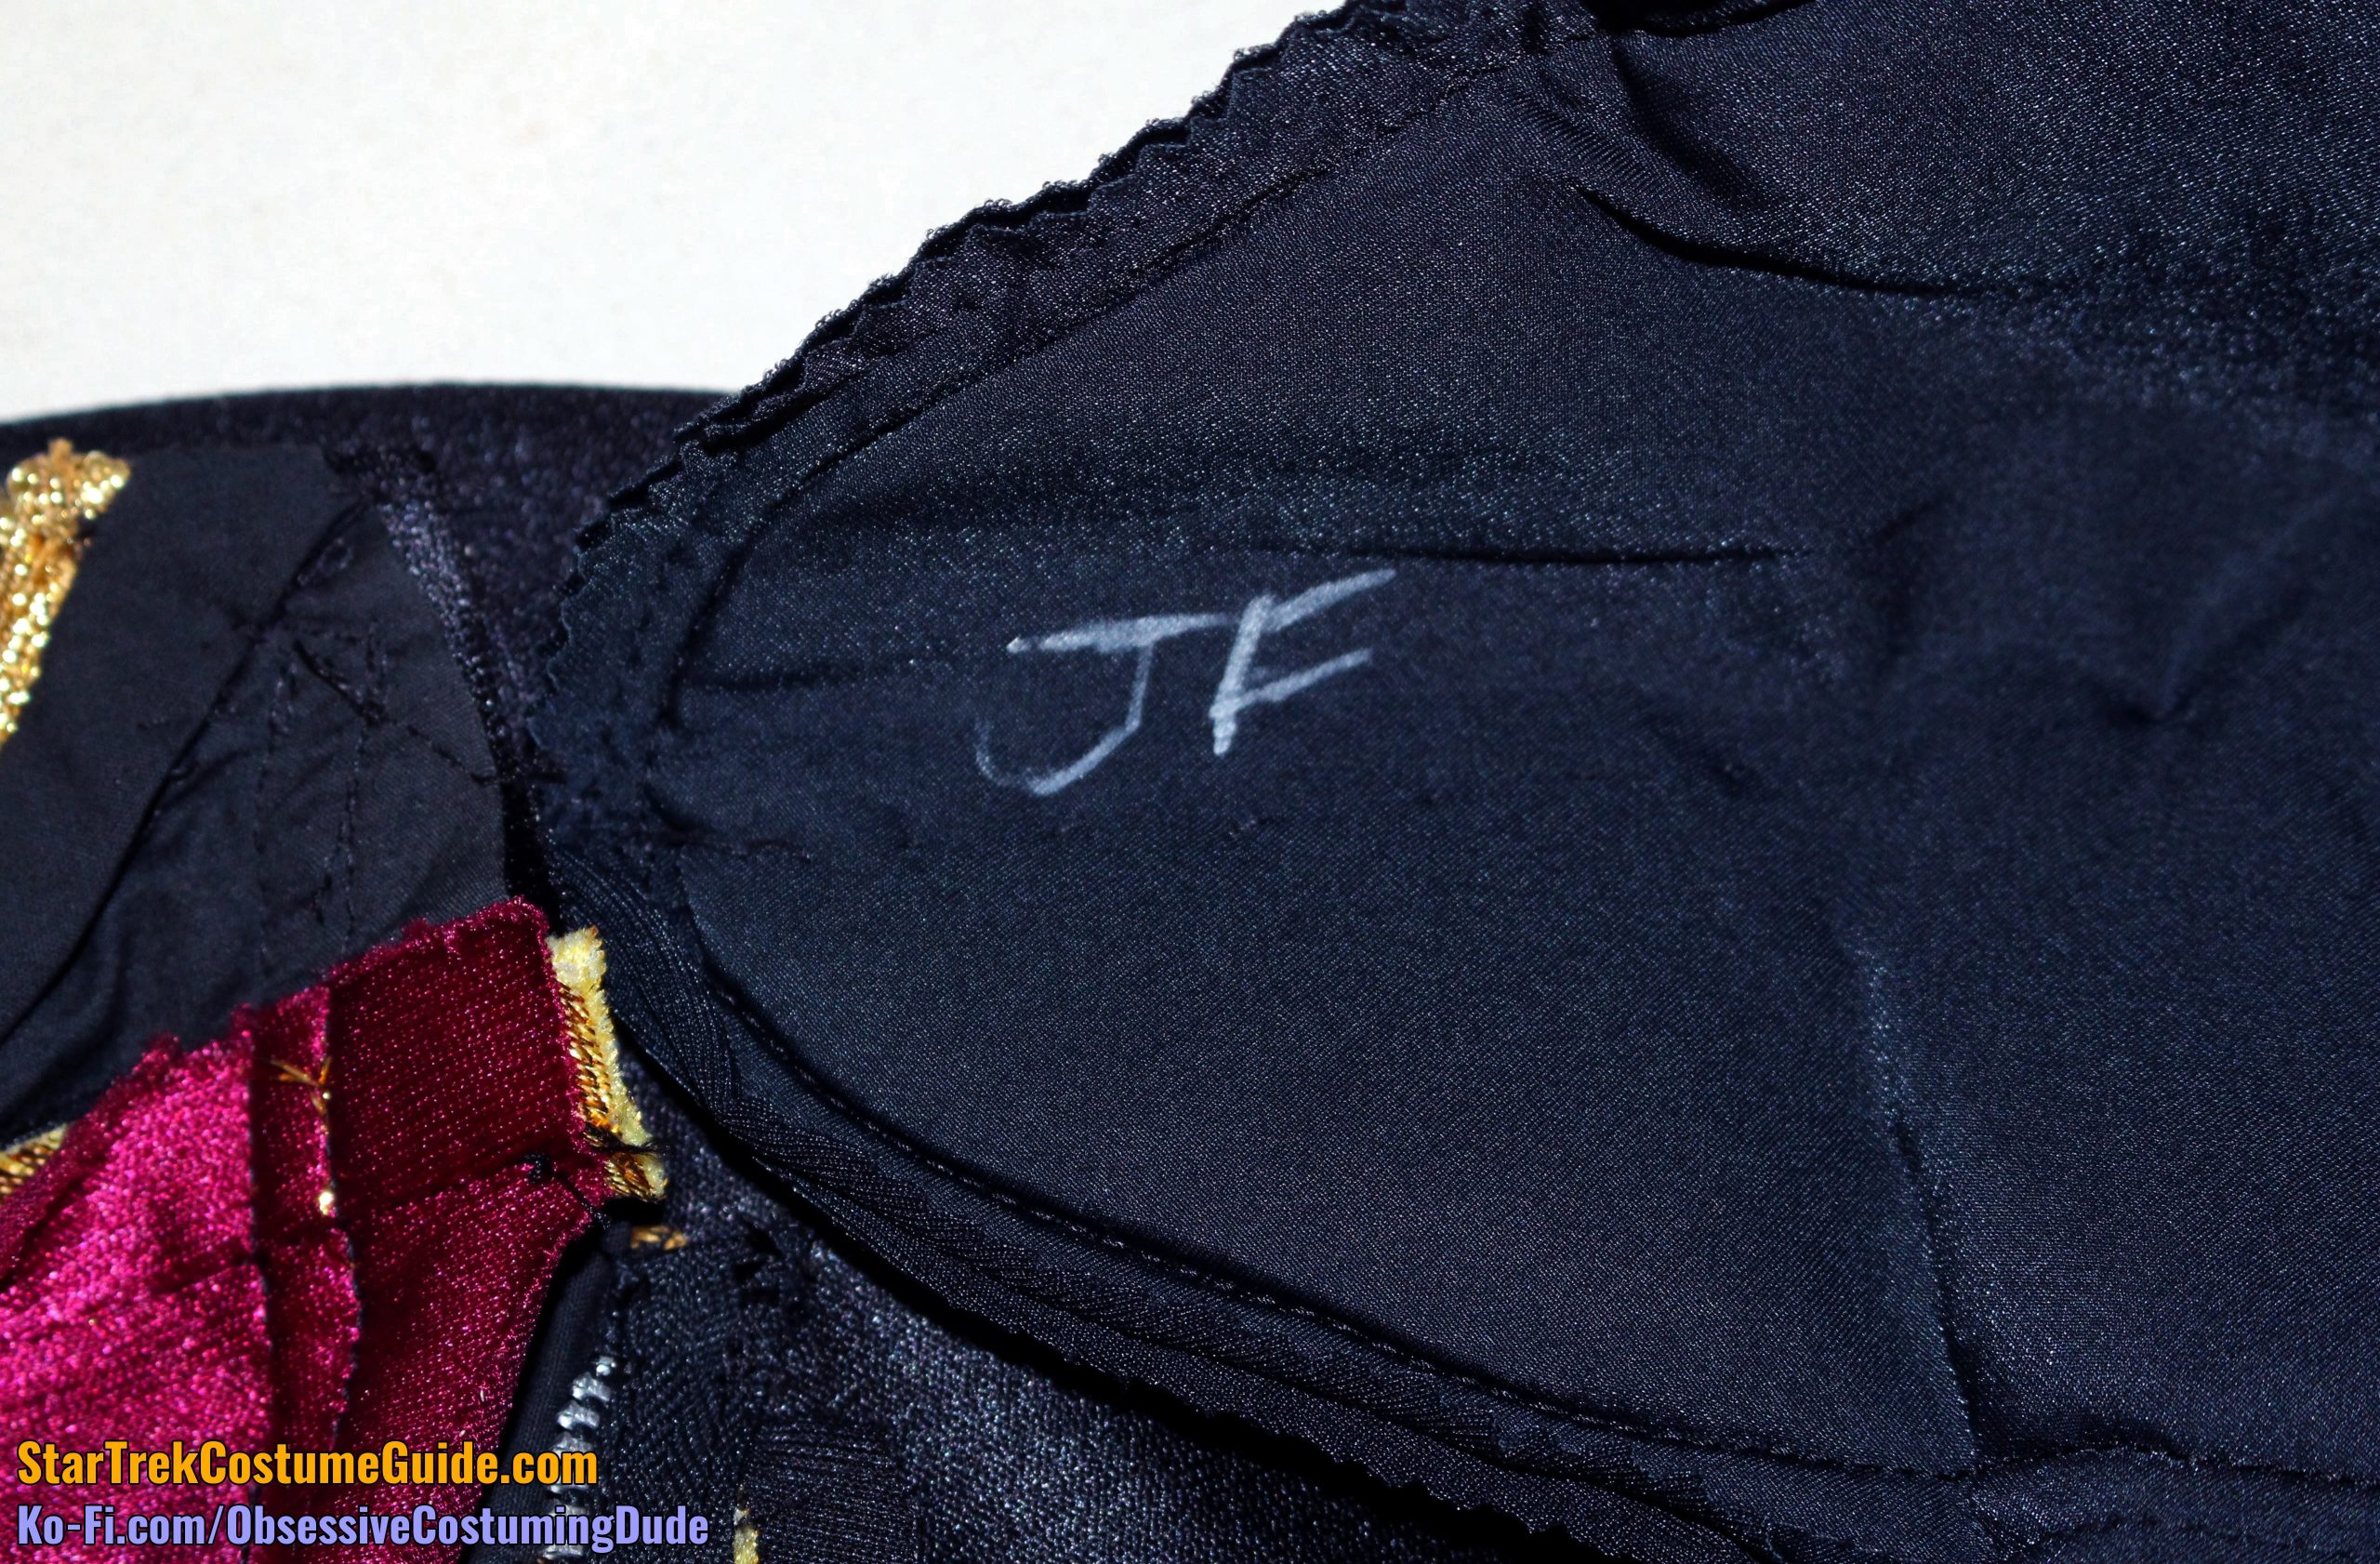
And finally, one of the pads had the letters “JF” written on it, although frankly I have no idea that that means …
Perhaps it’s the initials of the person who made the pad, or someone in charge of quality control?
IN CONCLUSION
I’d again like to thank Angelo Cifaldi for allowing me to study this screen-used TNG admiral uniform, and to share my research with you.
I learned a great deal from this costume examination, and I hope you did as well!
Every bar of gold-pressed latinum goes toward producing more sewing and costuming resources like this, for everyone interested in Star Trek costumes. 🙂
[…] you’ve probably seen from my TNG season 1 admiral uniform analysis and detailed costume examination, I got a lot of mileage out of the screen-used Admiral Jameson uniform I examined a few years ago, […]
[…] Coming soon … an examination of a screen-used TNG season 1 admiral uniform! […]


[…] you’ve probably seen from my TNG season 1 admiral uniform analysis and detailed costume examination, I got a lot of mileage out of the screen-used Admiral Jameson uniform I examined a few years ago, […]
[…] Coming soon … an examination of a screen-used TNG season 1 admiral uniform! […]