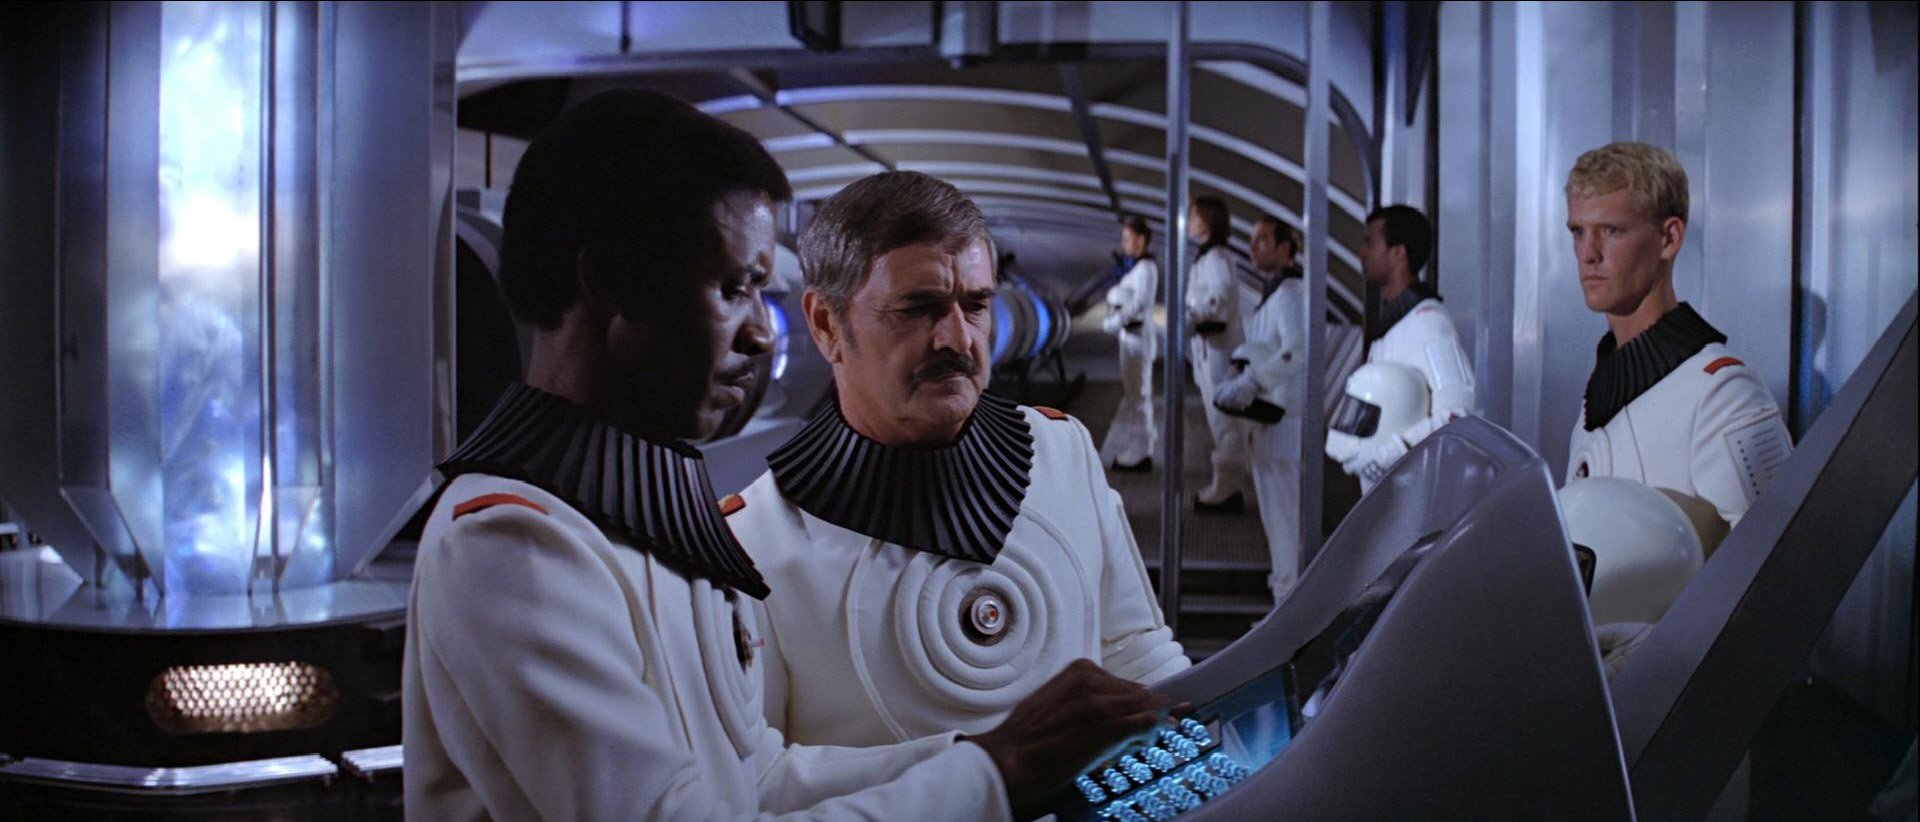
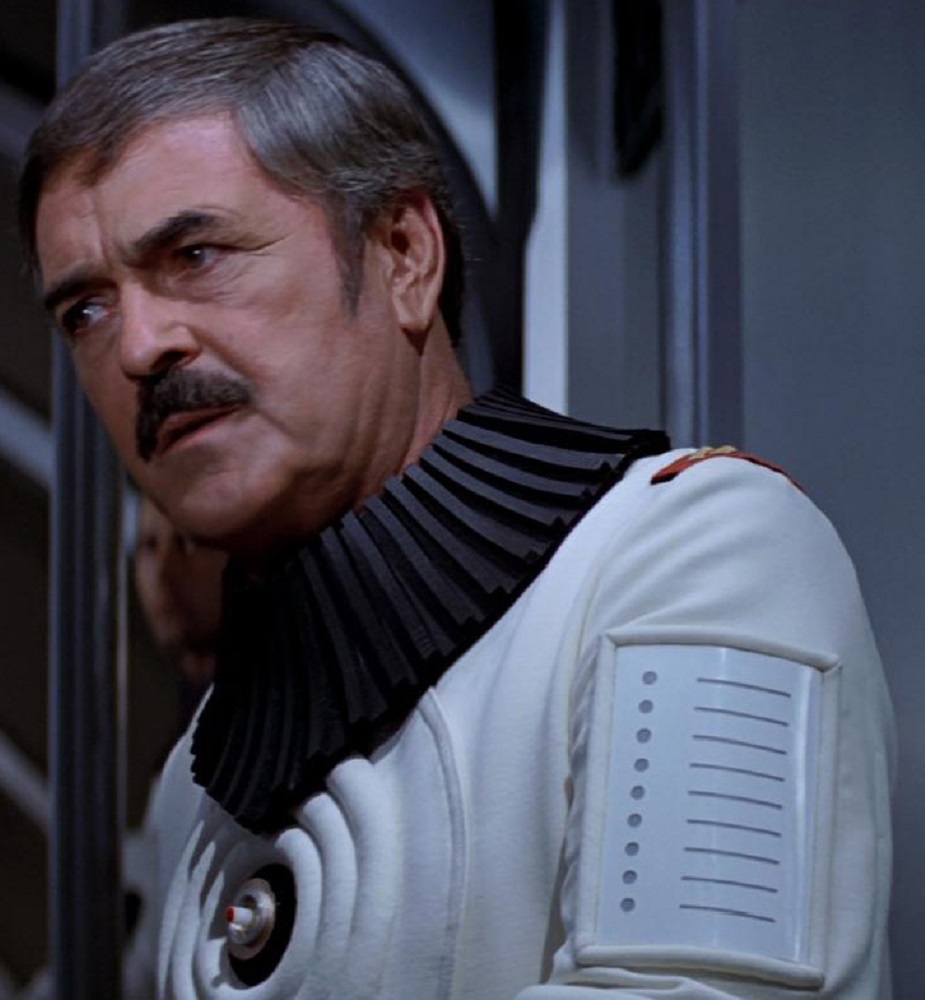
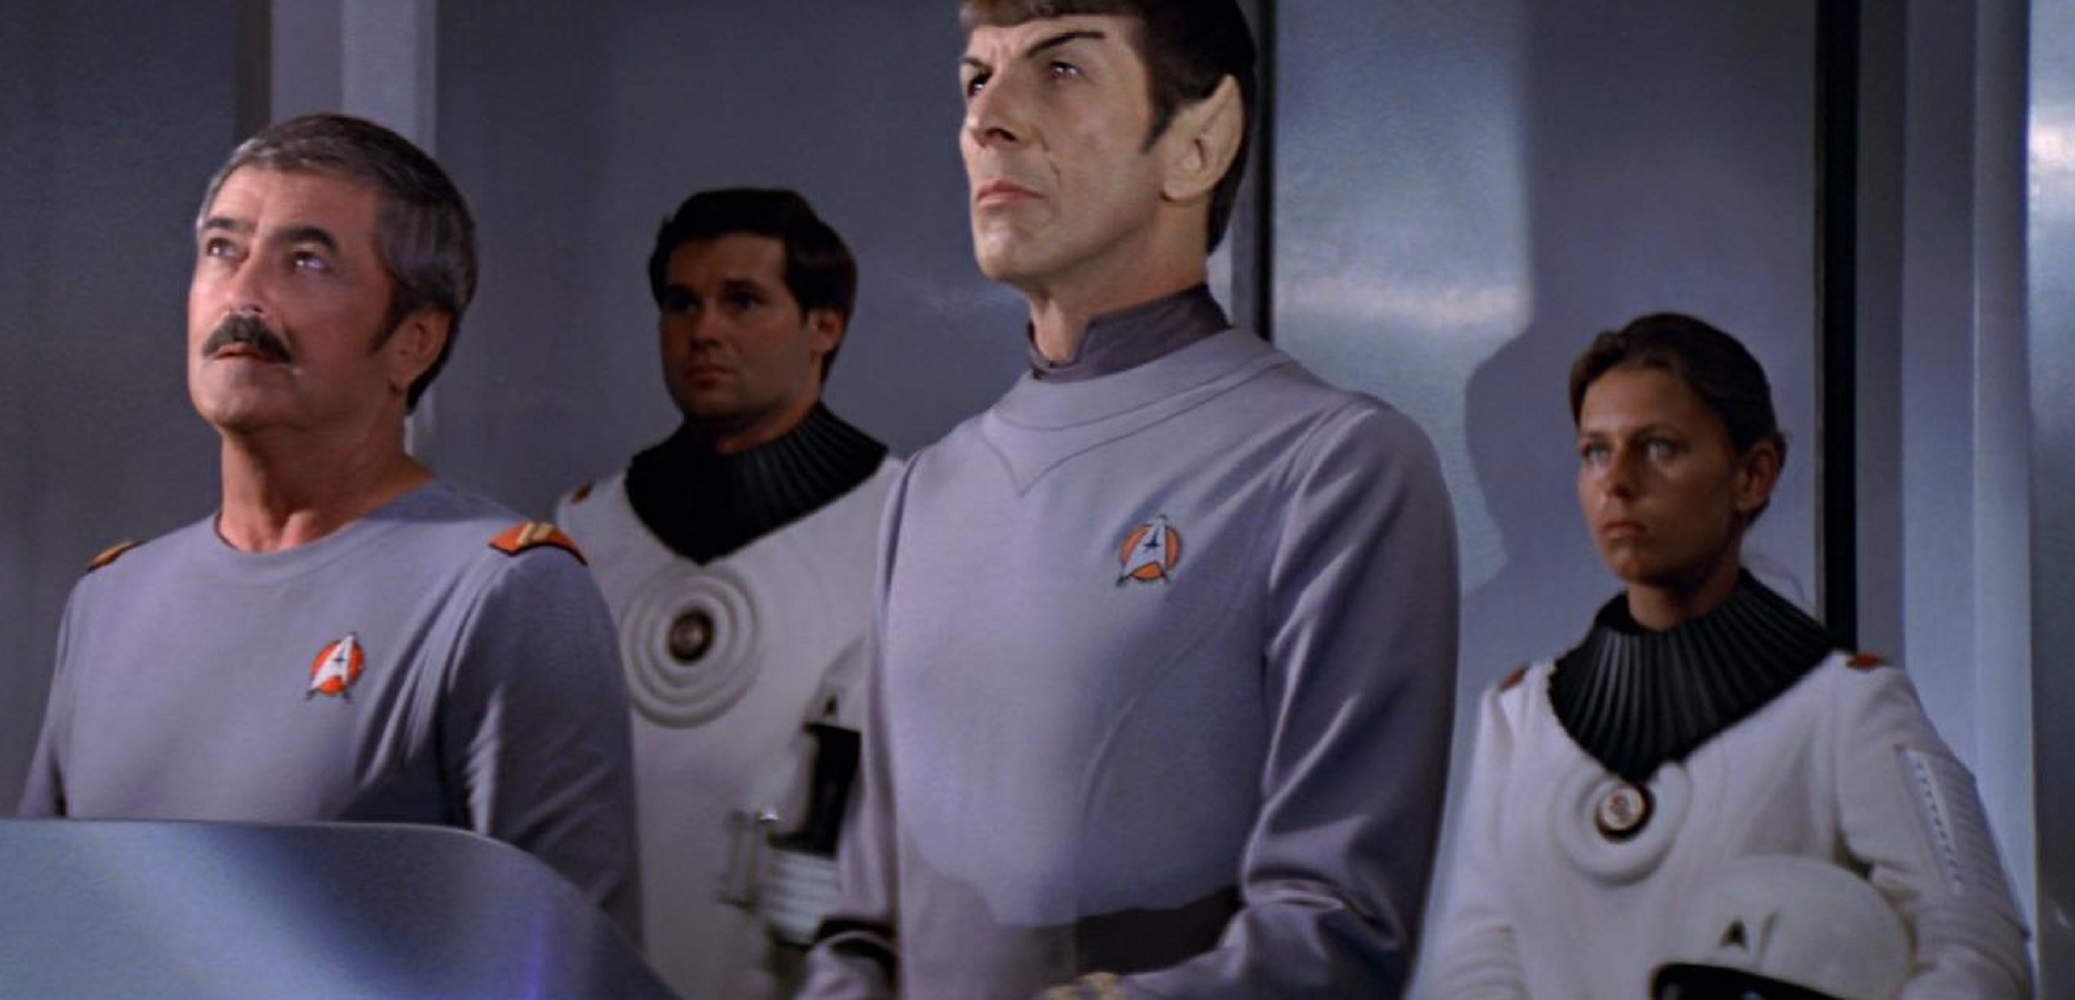
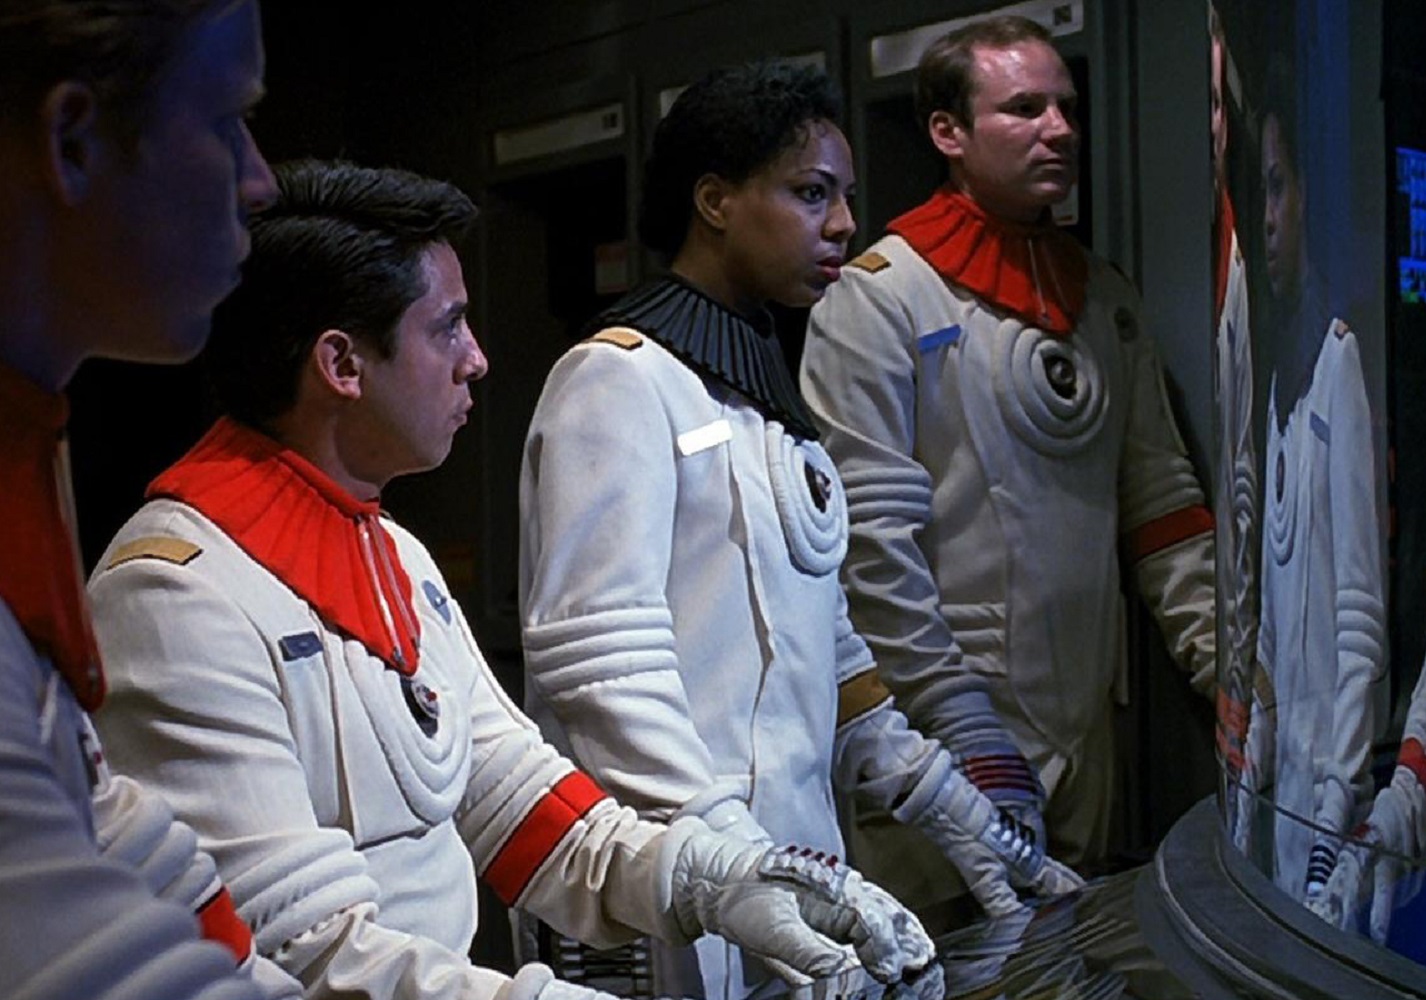
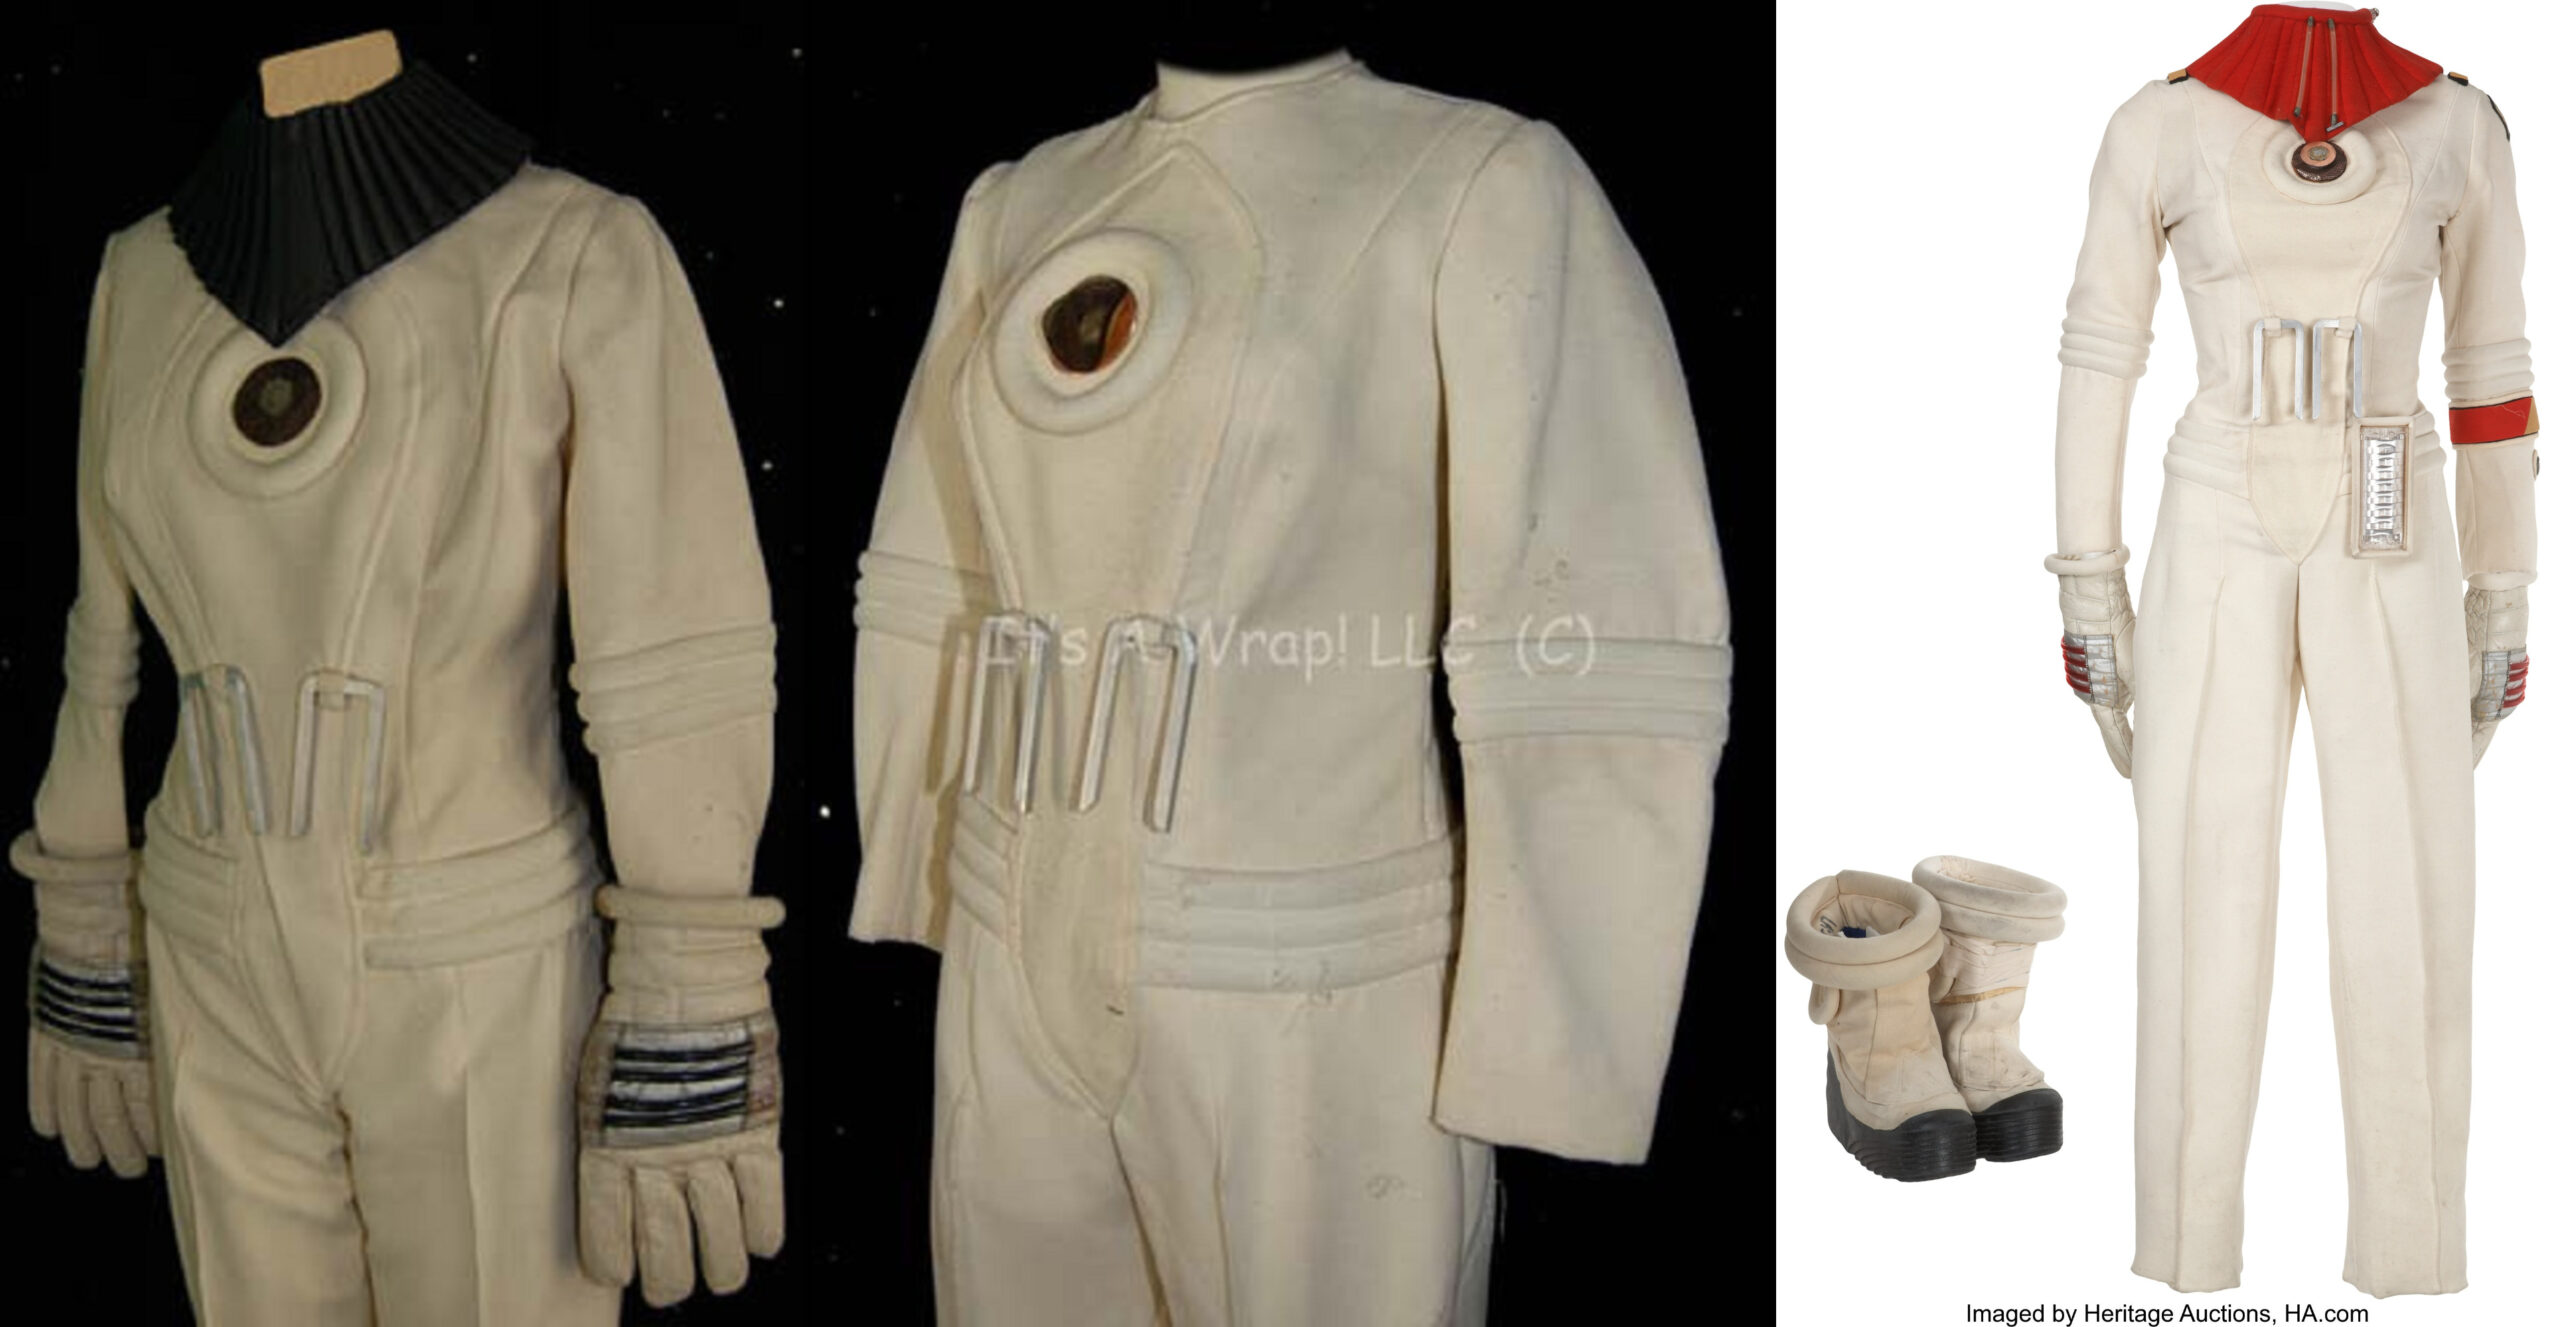
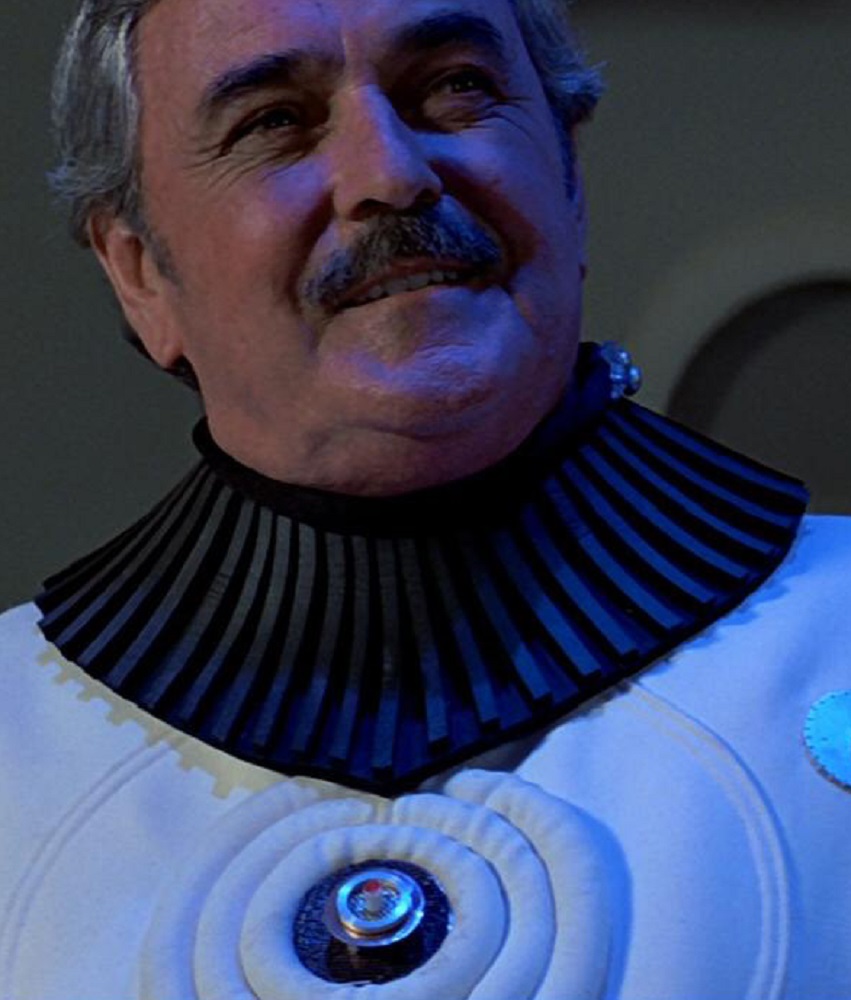
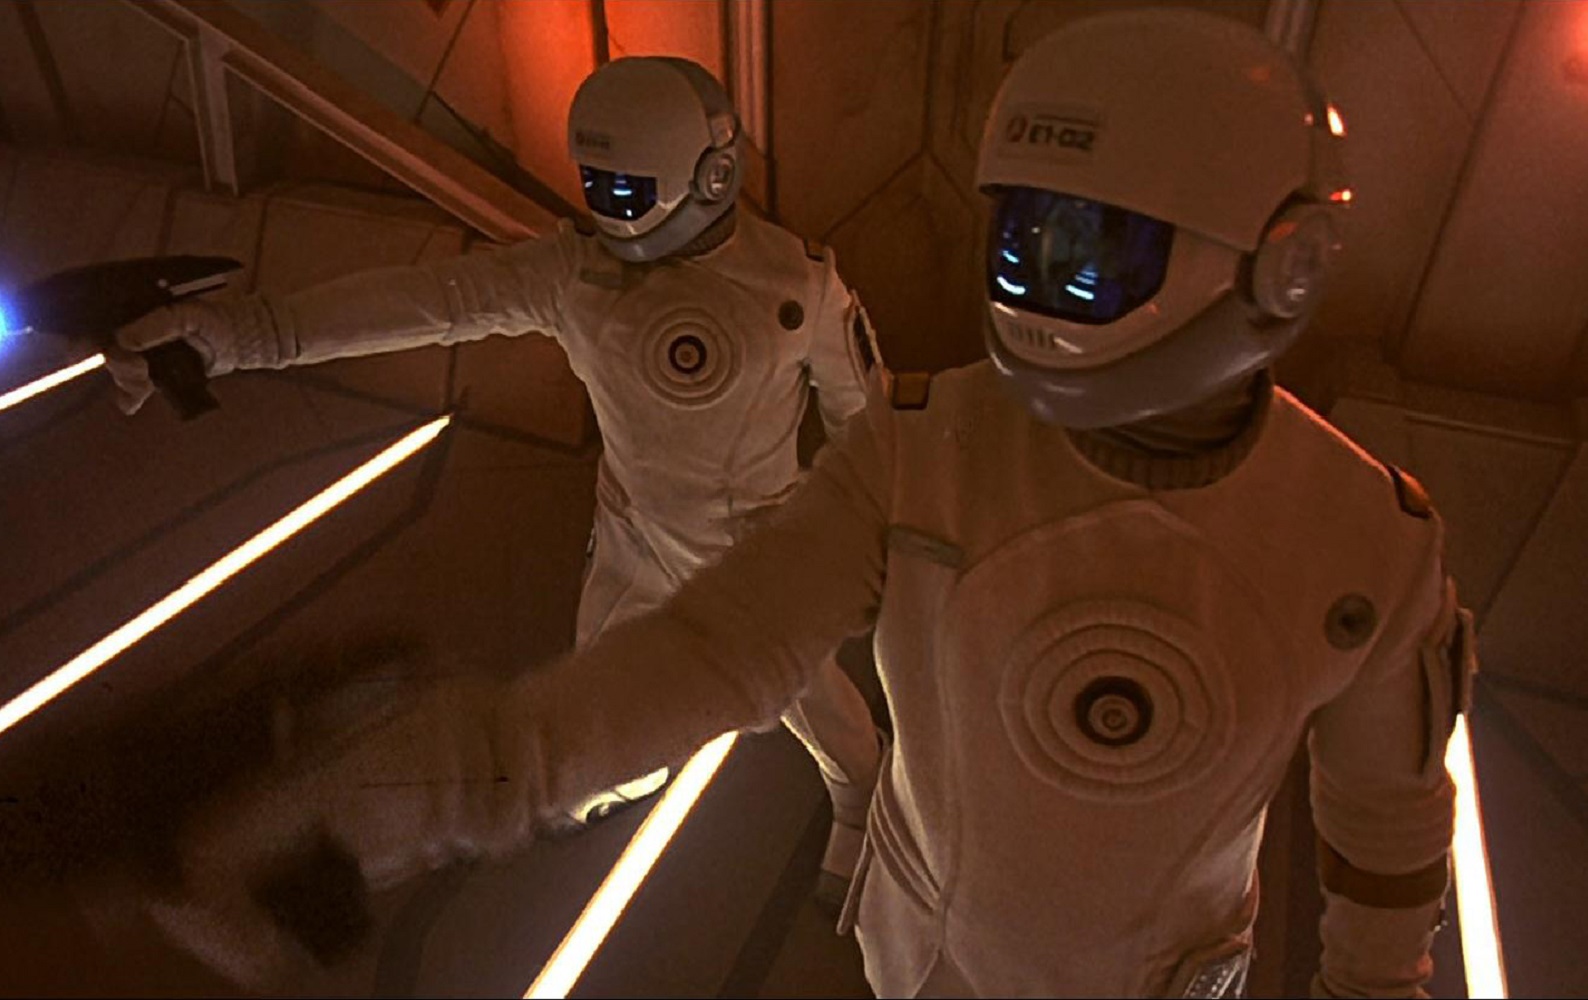
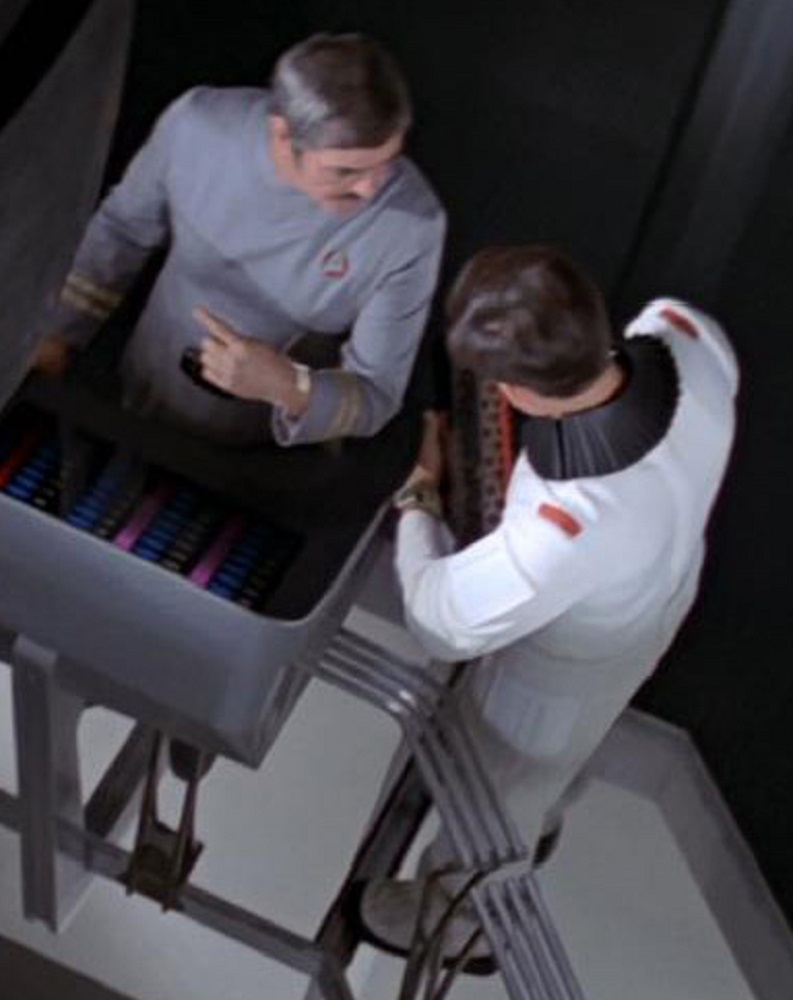
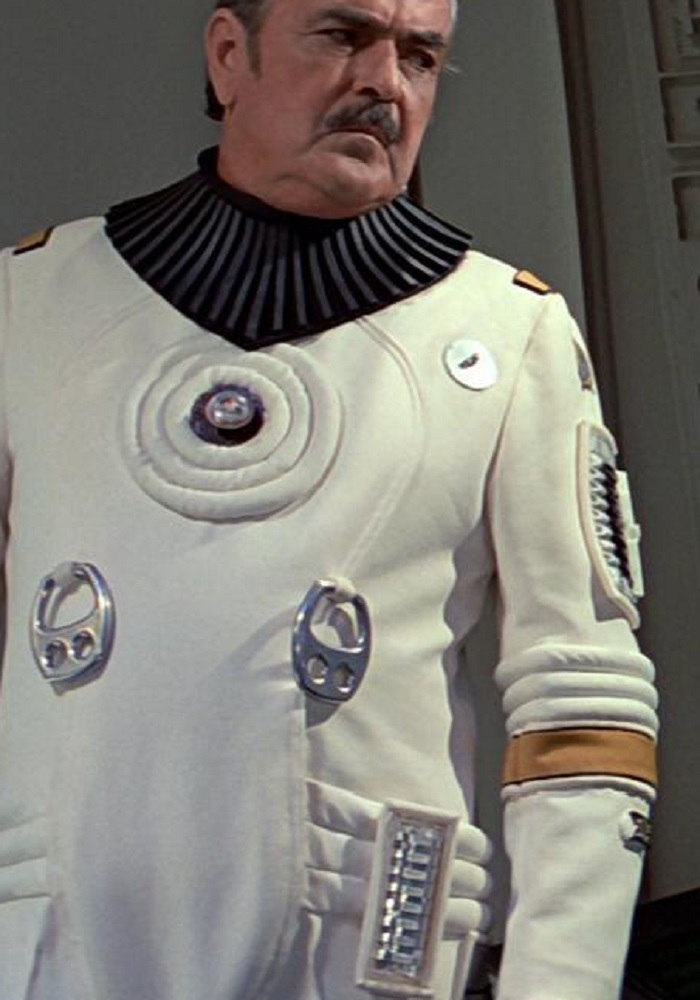
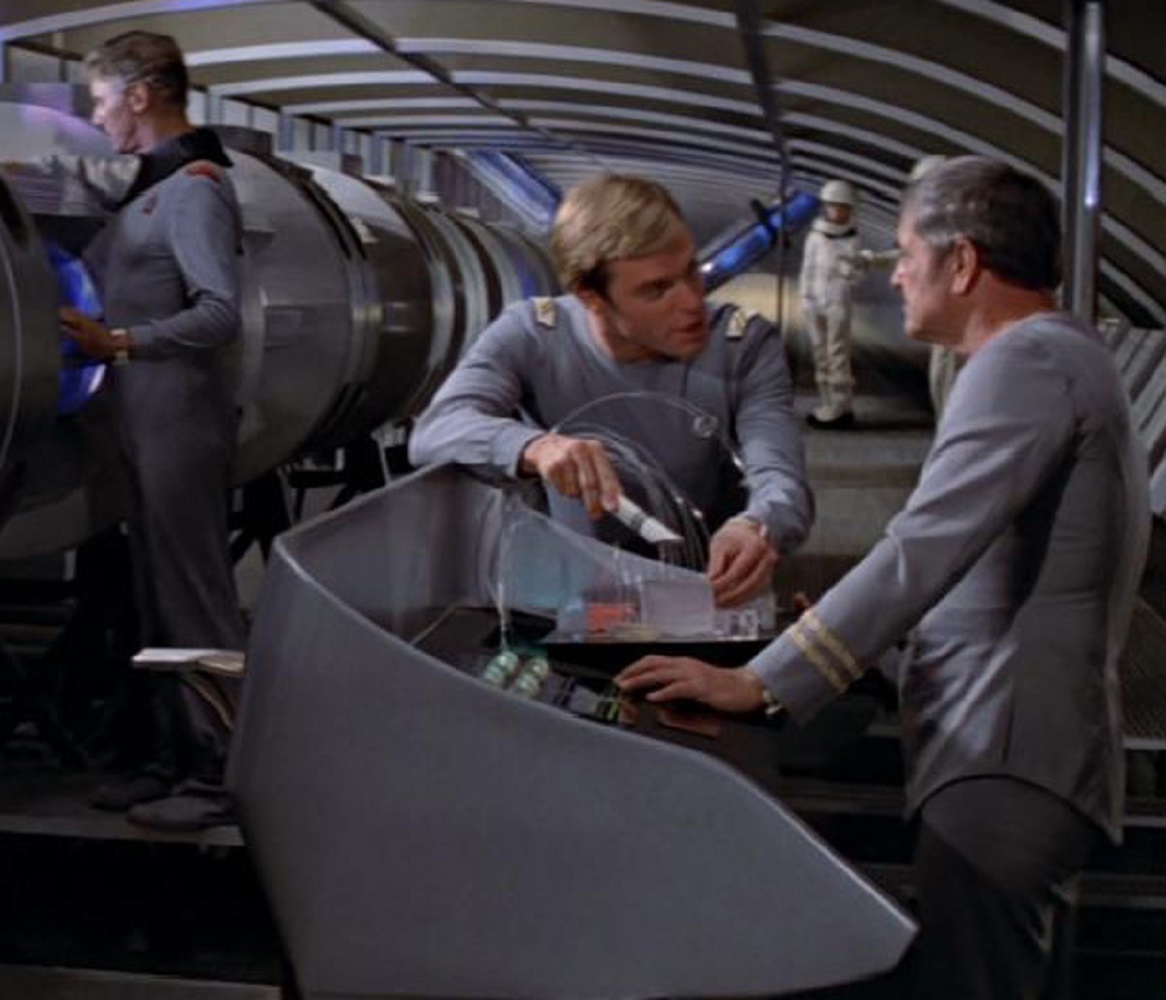
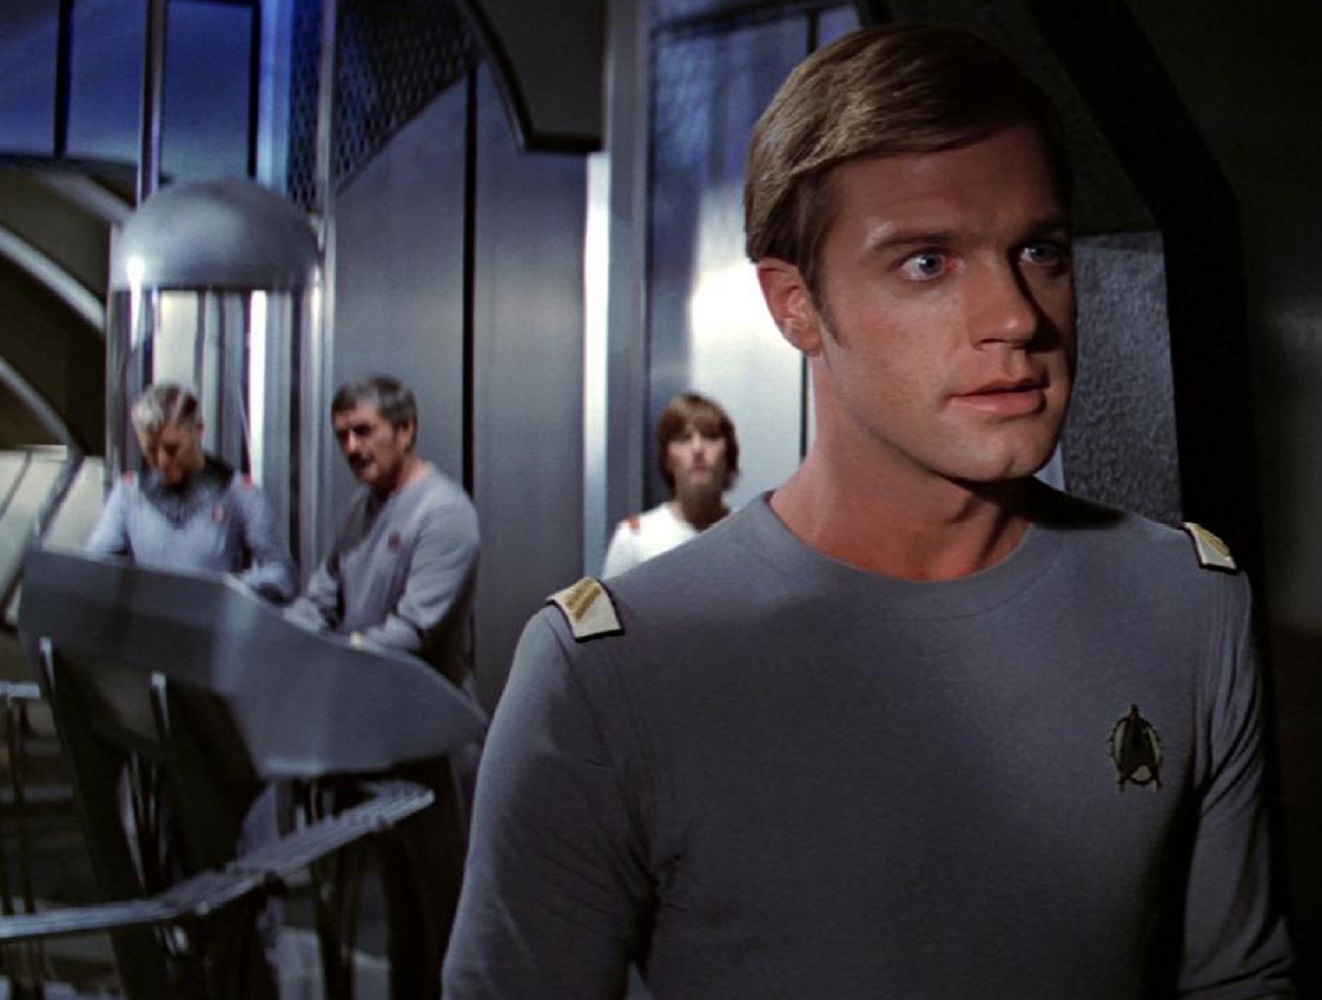
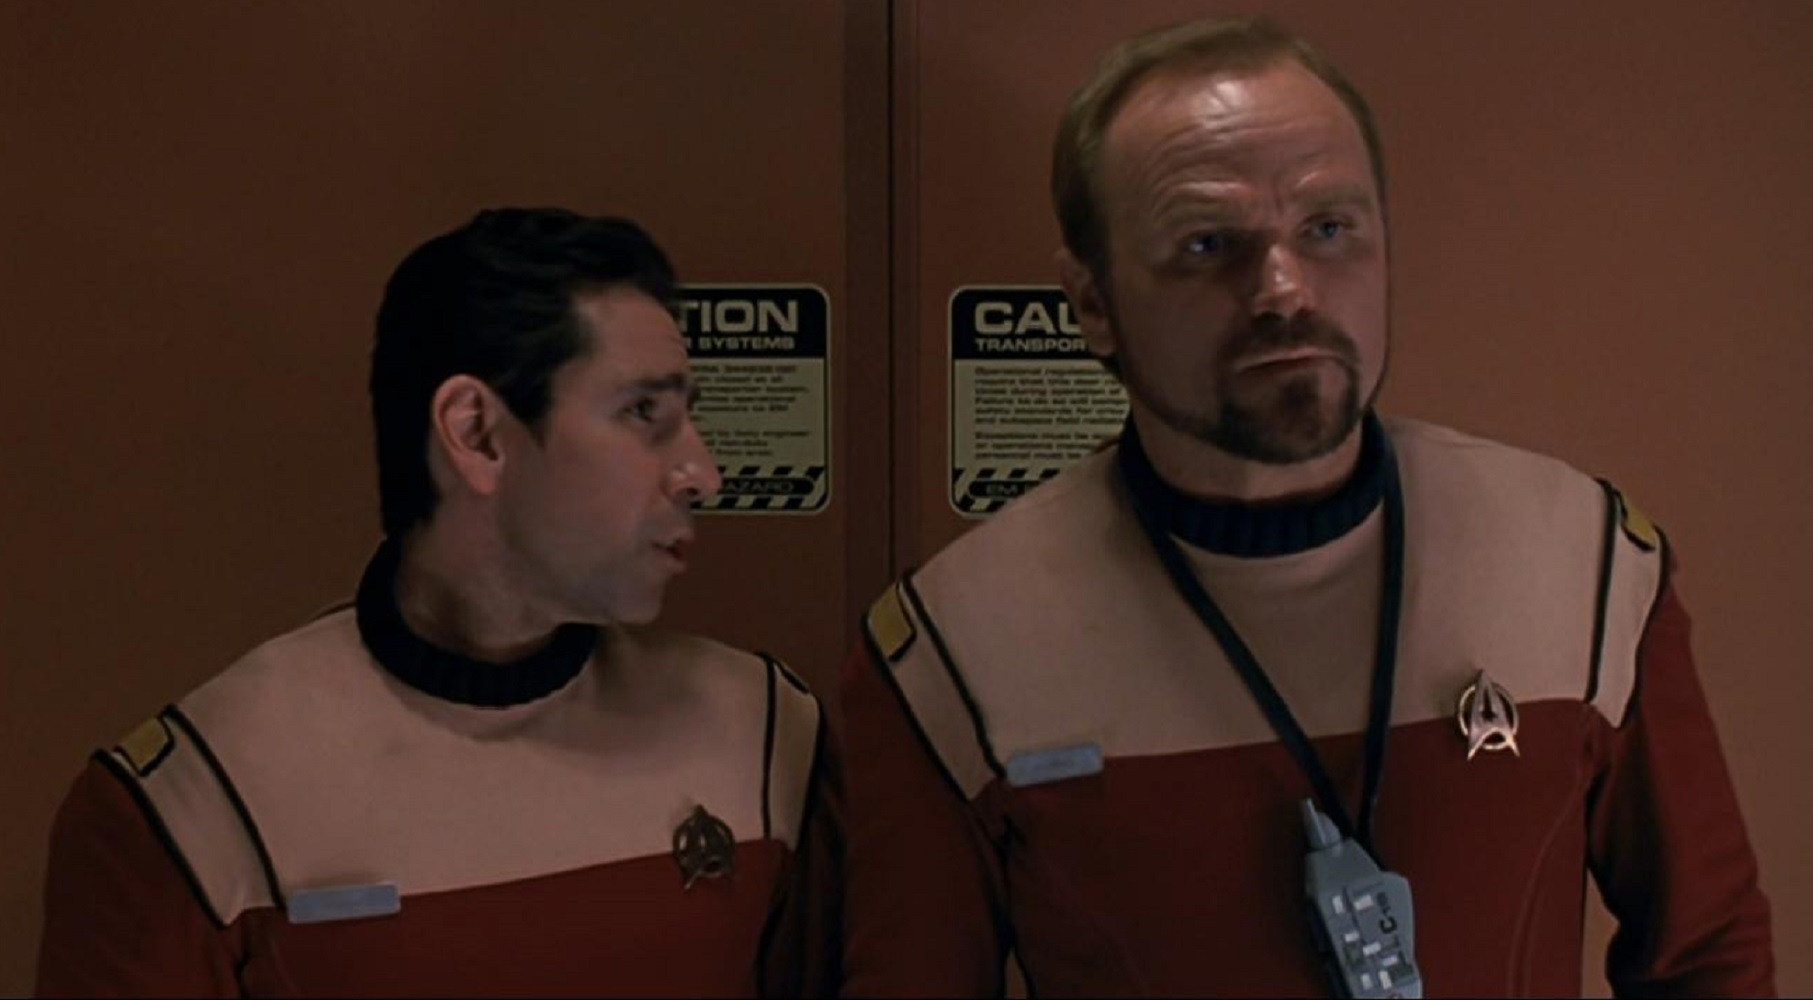
Among the many brilliant costume designs by Robert Fletcher were the movie-era engineering radiation suits, primarily worn by Scotty, his engineering crew, engineering trainees, and the anonymous assassins in The Undiscovered Country.
These incredibly detailed costumes gave a genuine sense of realism to the engineering crews of the future, and they contributed to the overall visual richness of the movies themselves.
I recently had the opportunity to examine one of these amazing costumes, courtesy of Ray Minarcik.
In this post, we’ll be taking a detailed look at this specific costume, as well as discussing some of the interesting variations seen over the course of the movies.
Although these uniforms were primarily seen in The Wrath of Khan, they actually appeared in all six of the original movies, beginning with The Motion Picture.
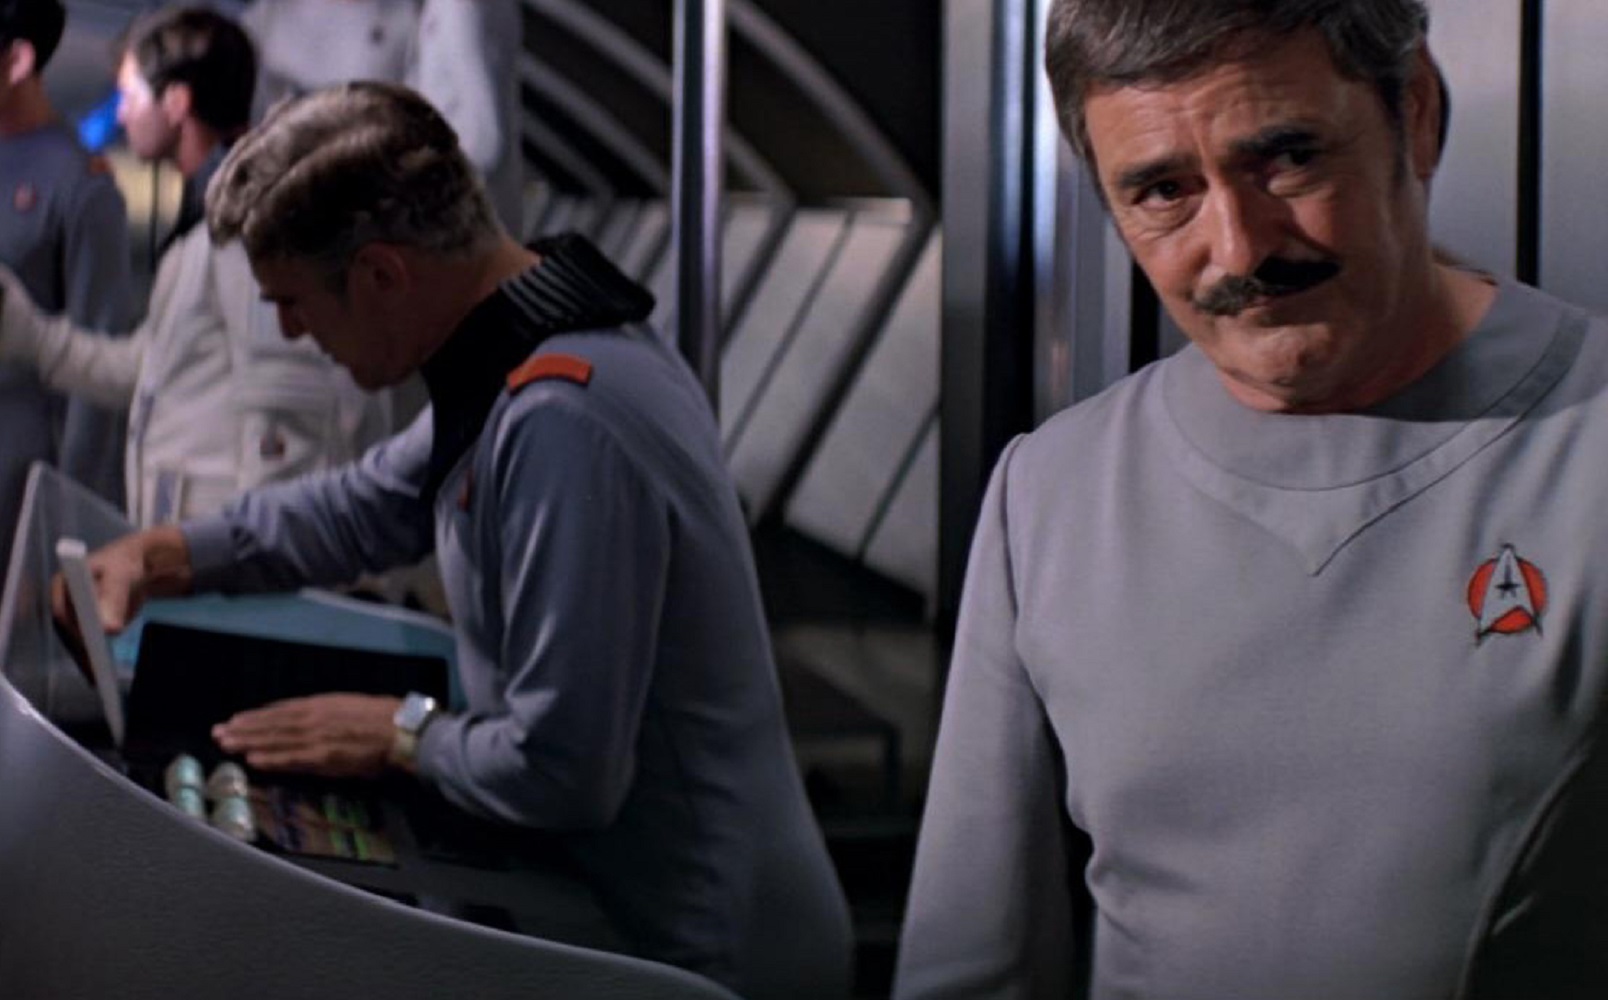
Star Trek: The Mustached Engineers
Star Trek: Two Styles of Every Uniform
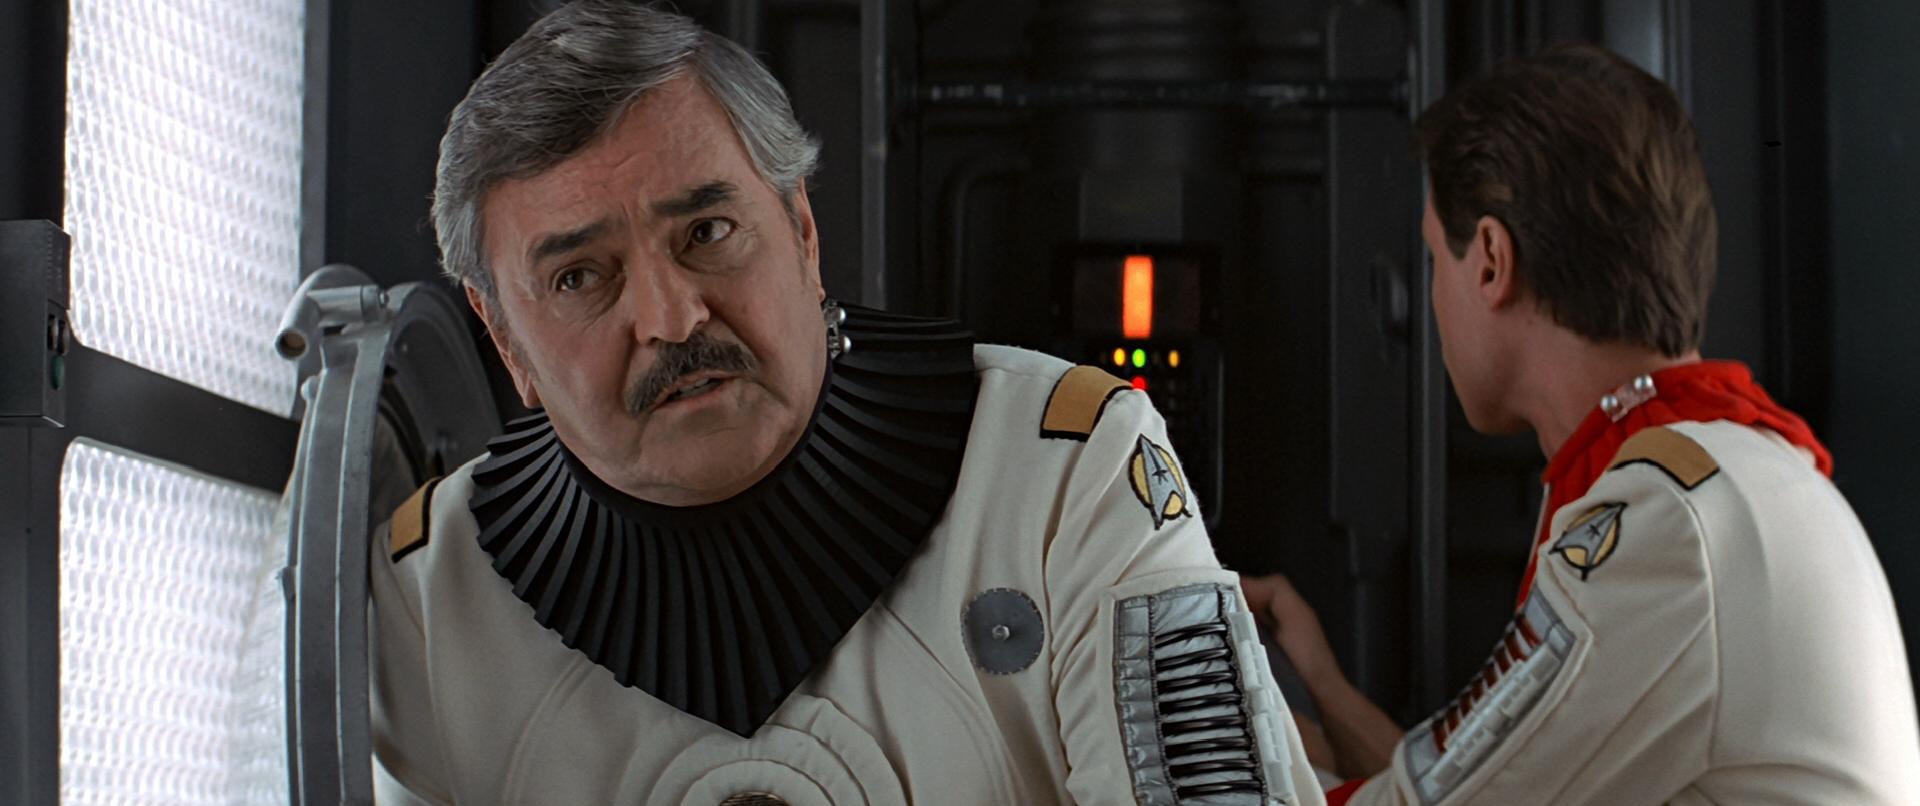
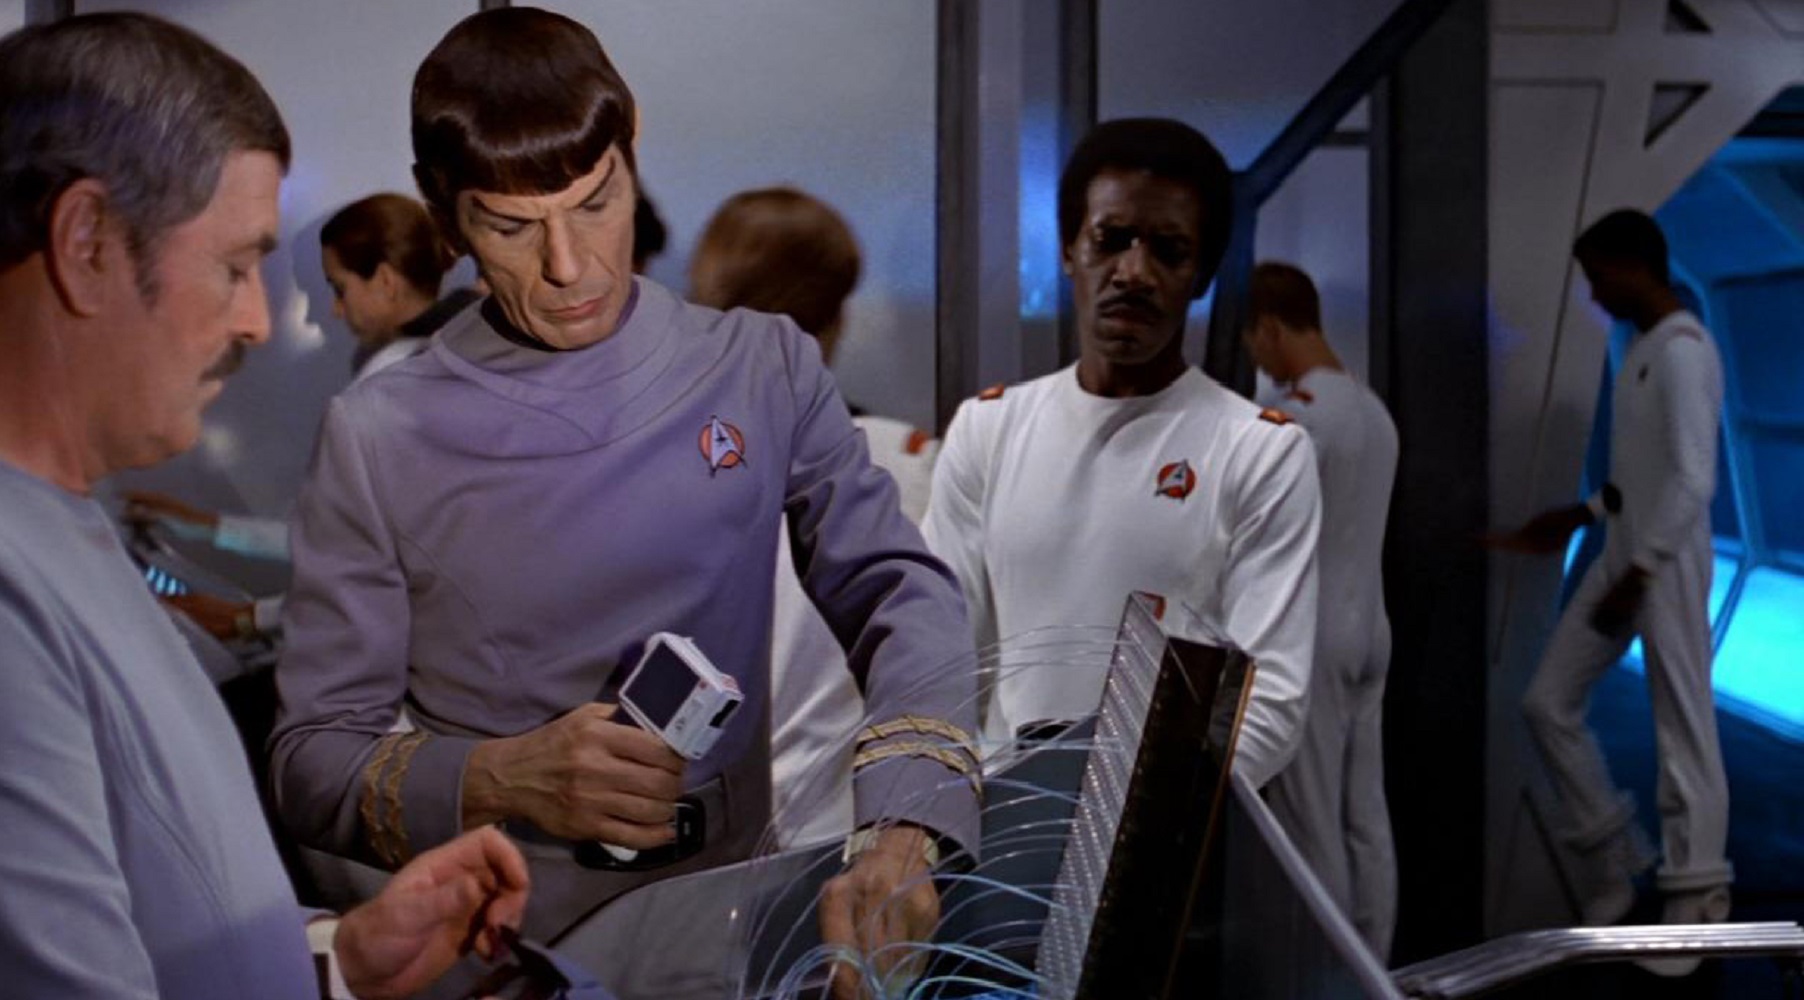
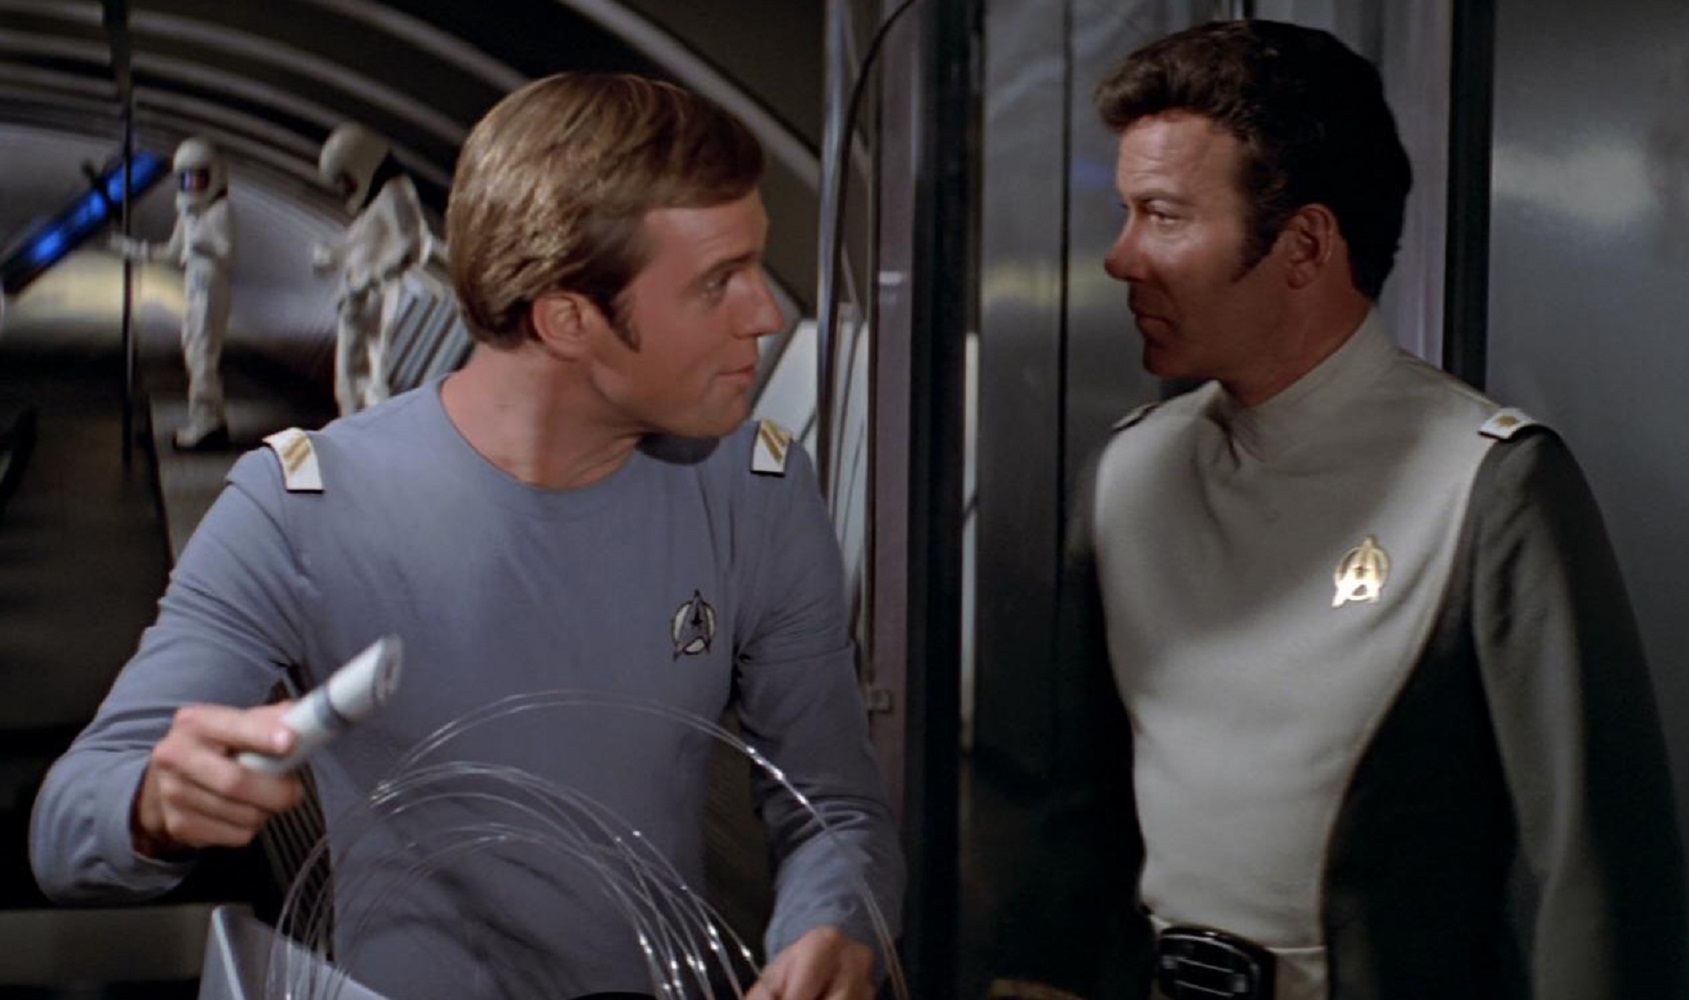
Star Trek III: The Suit of a Miracle Worker
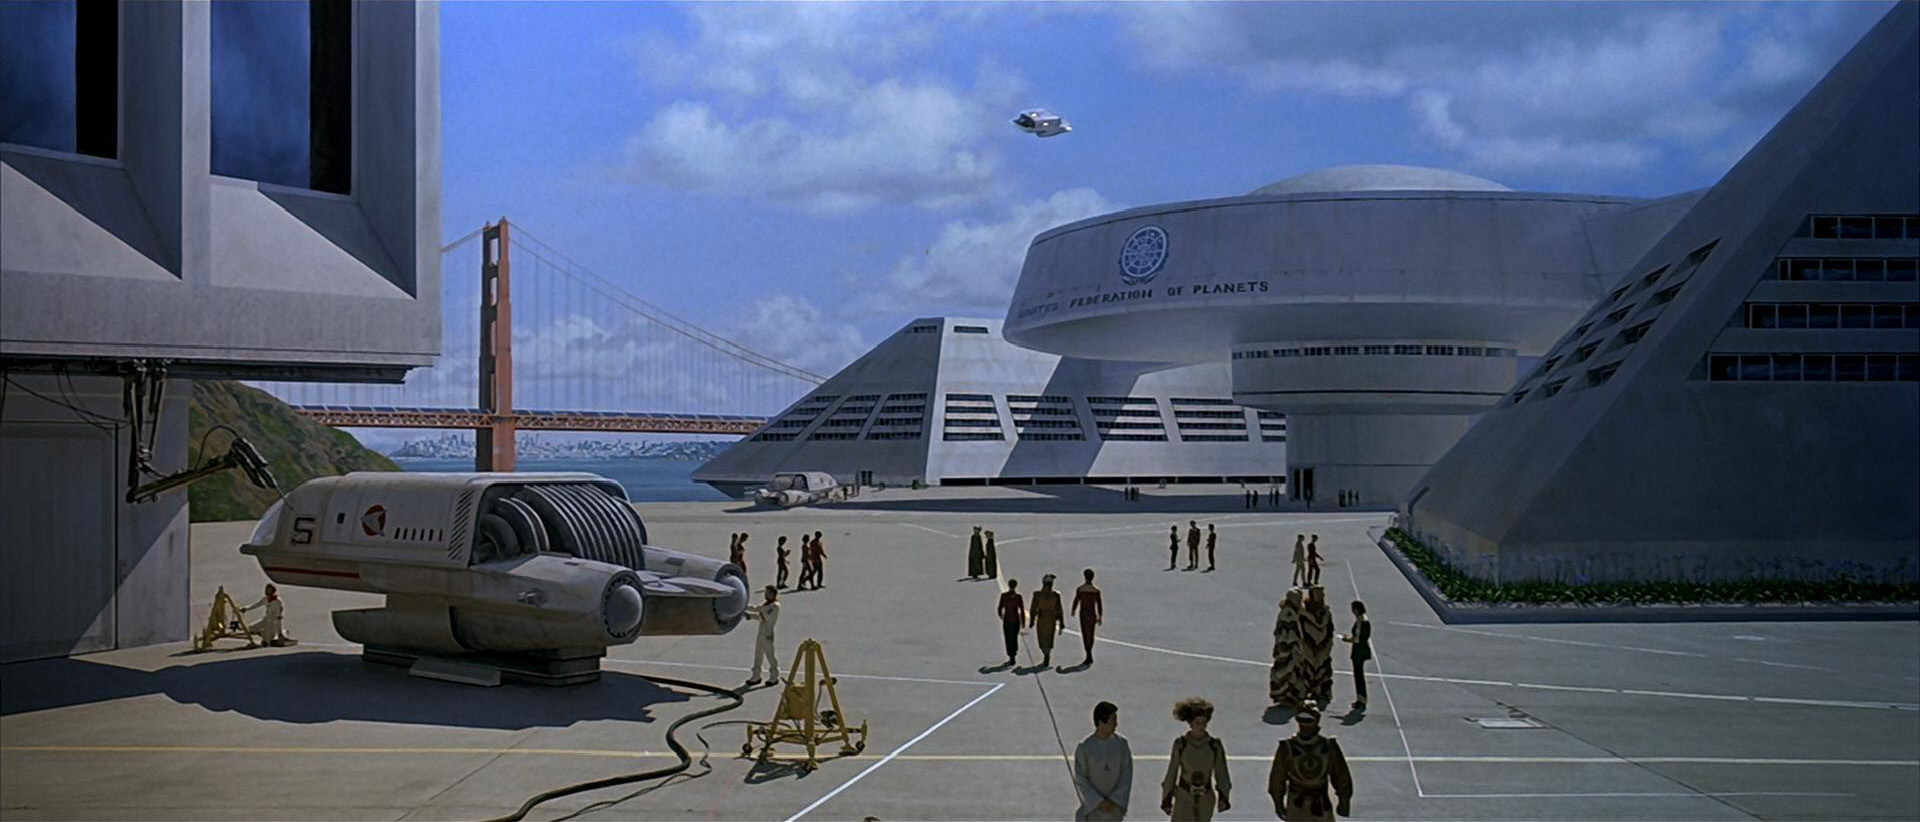
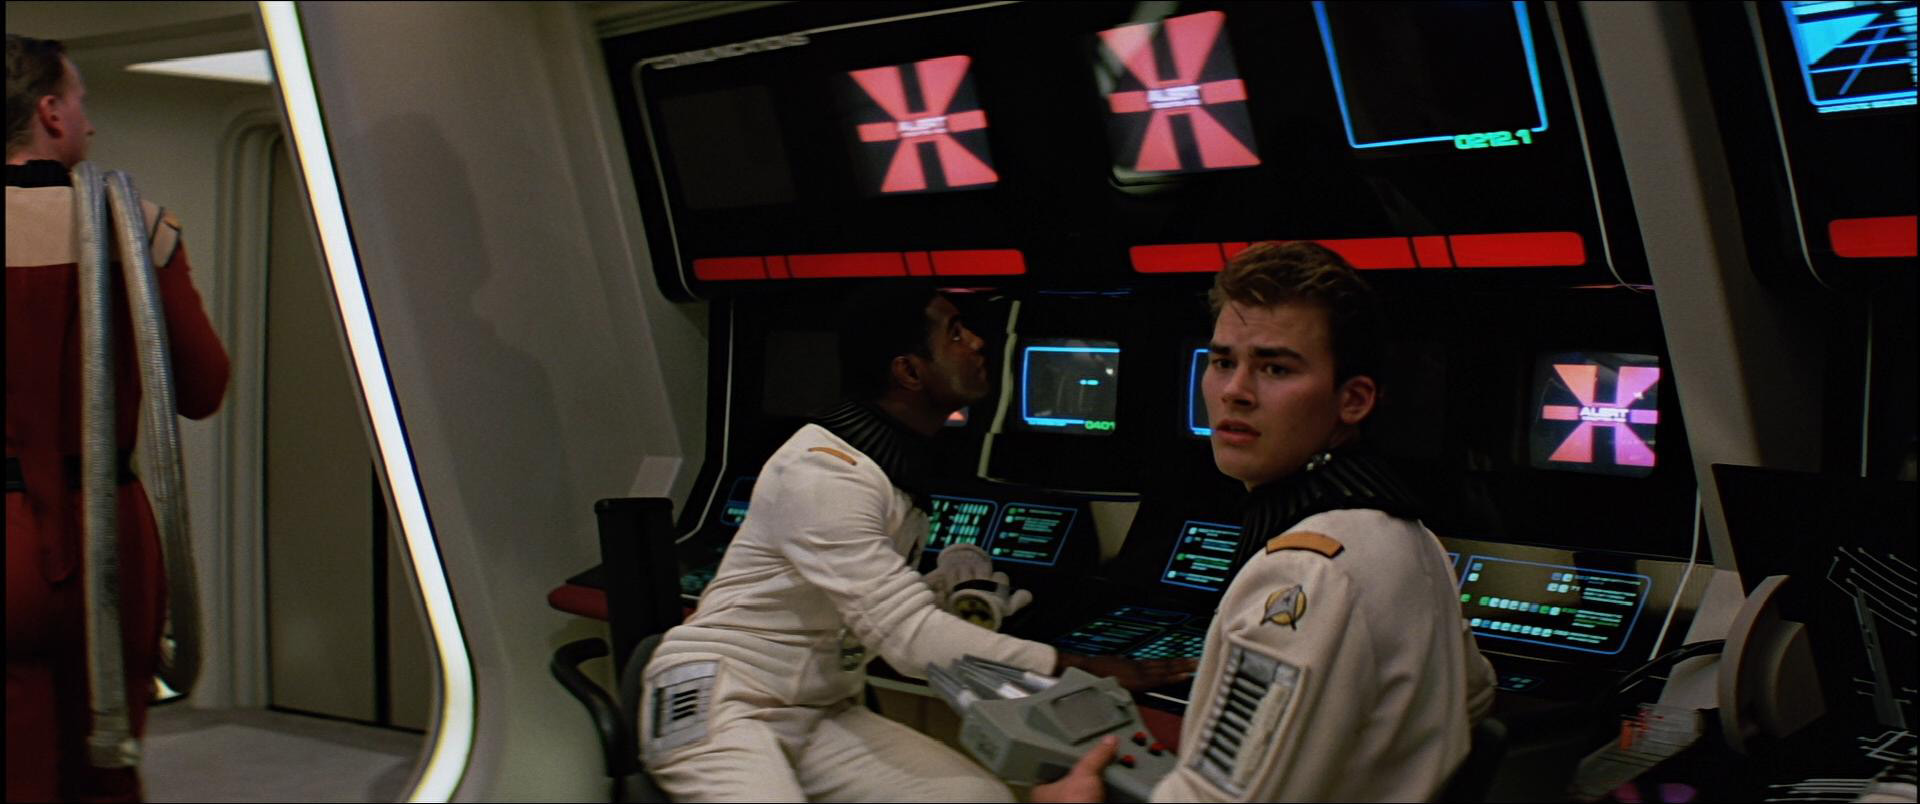
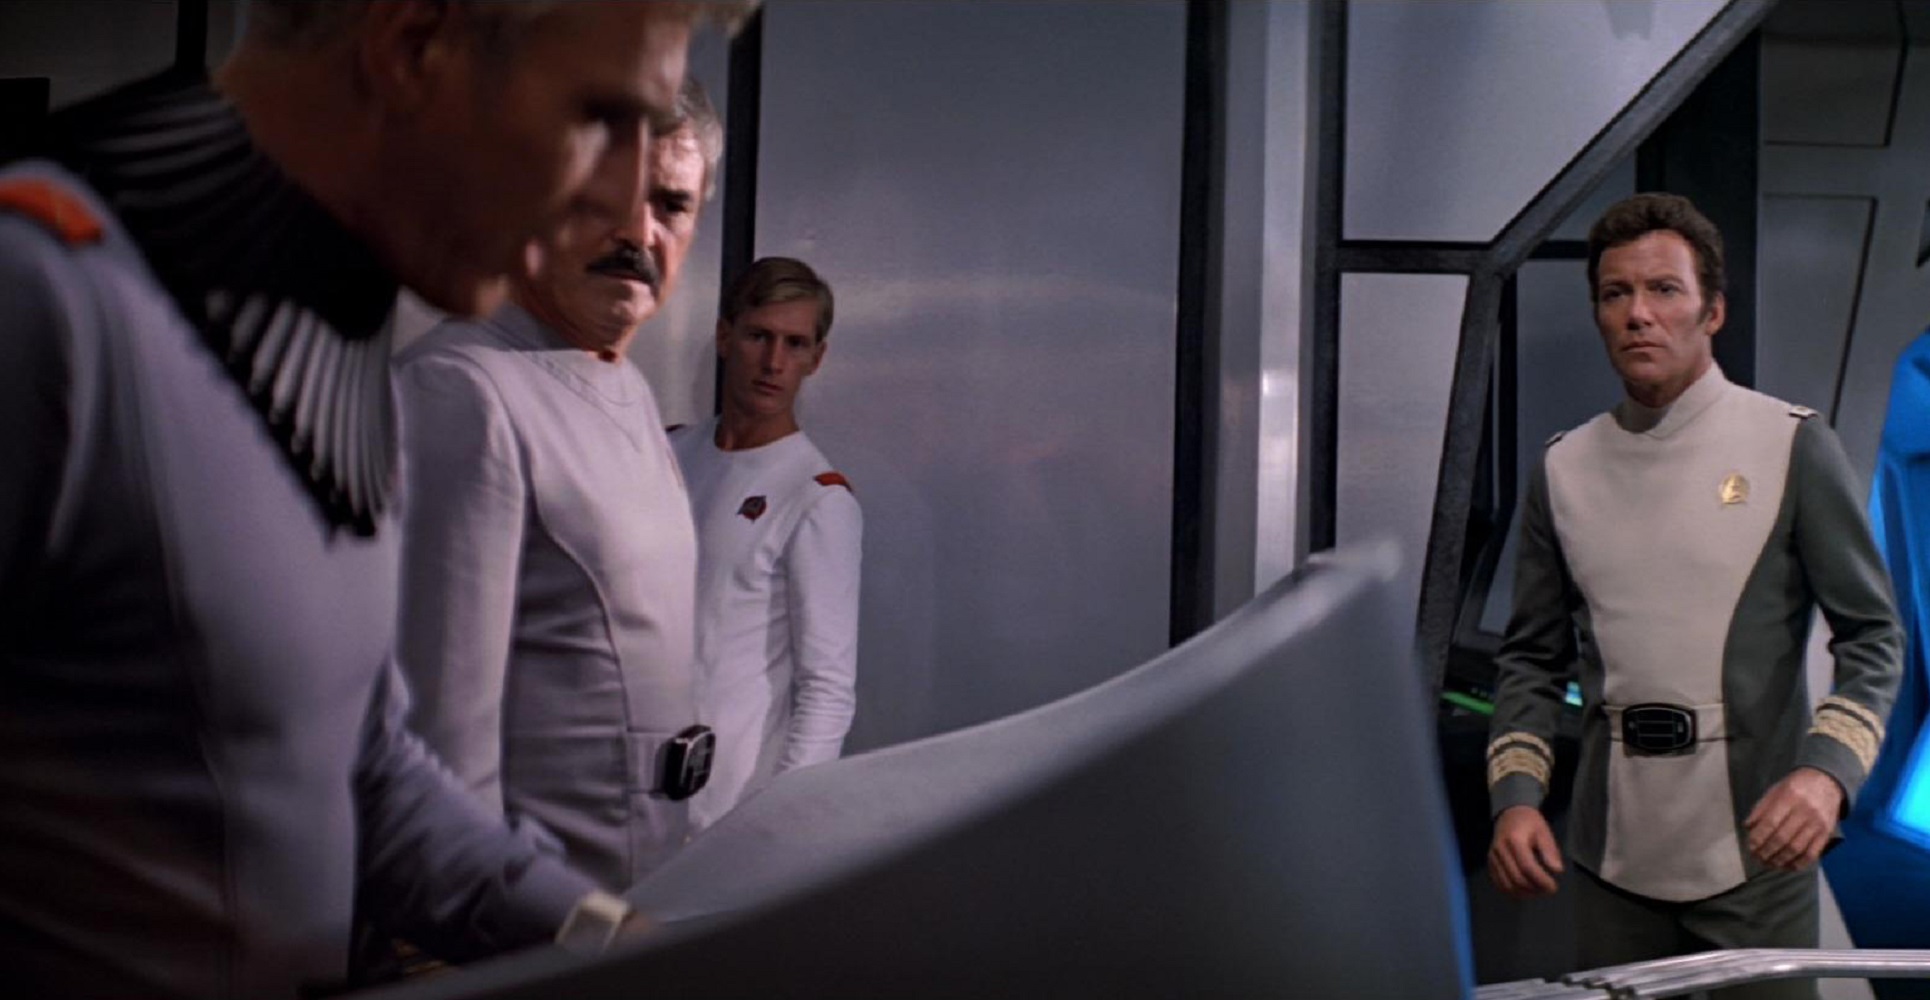
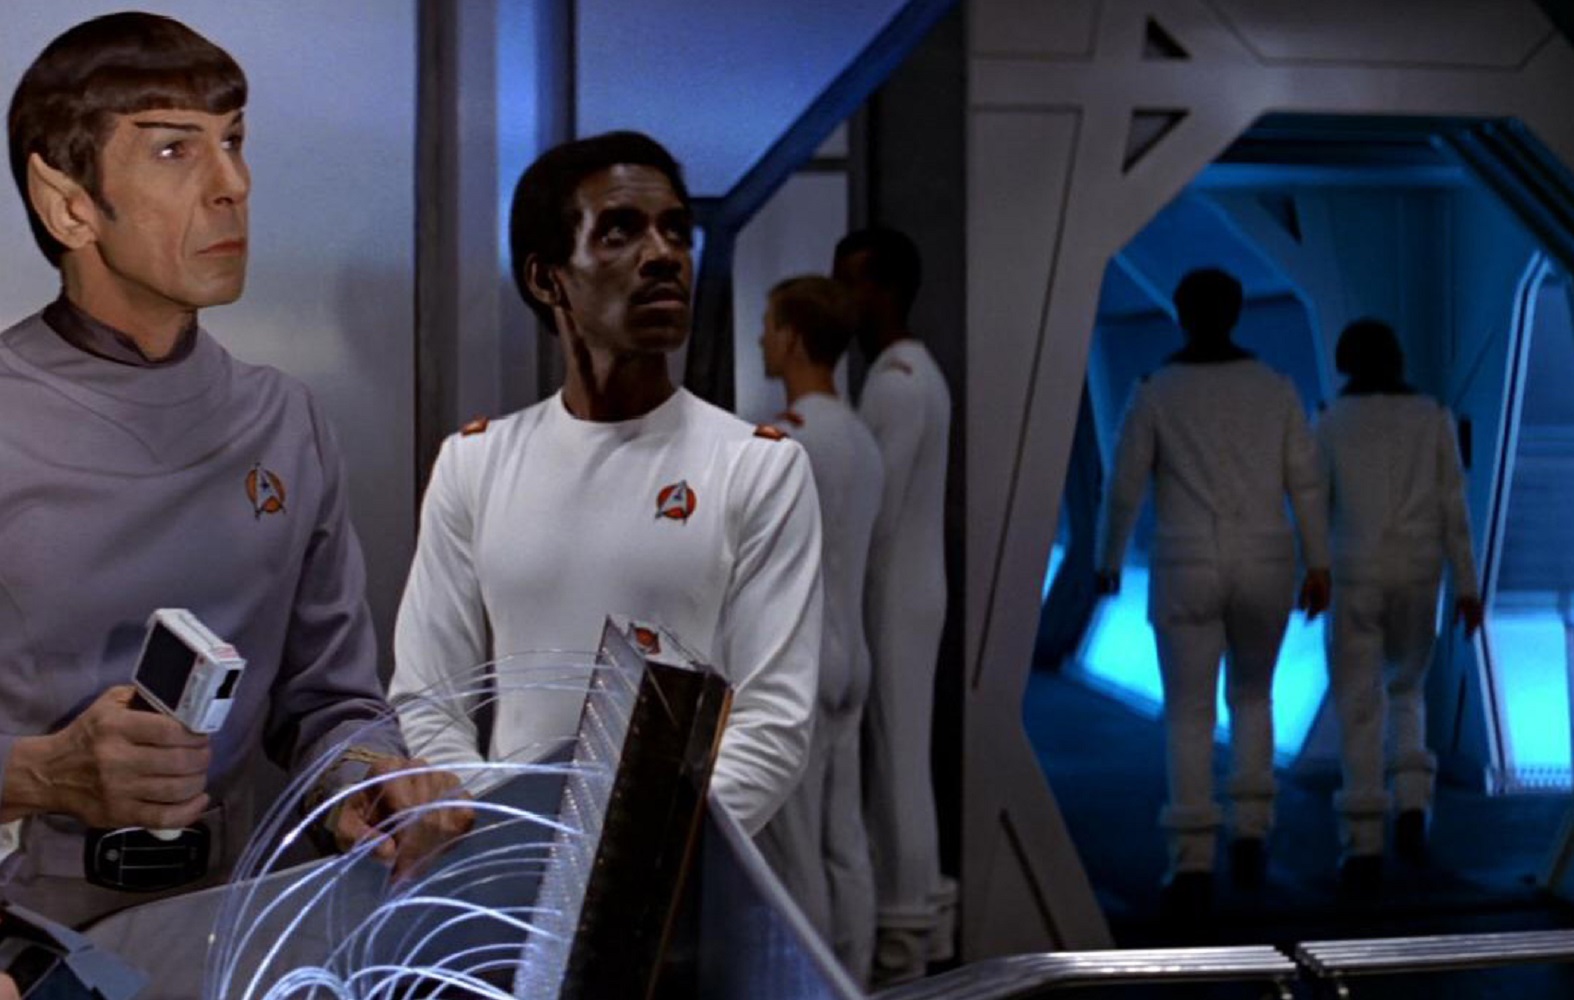
Star Trek: Four Seconds of Radiation Suits in the Establishing Shot
The Enterprise A must have been far worse off than we ever realized, if repair crews needed radiation suits on the bridge!
“F*** it, I’m never going to have kids anyway.”
Very special thanks to Ray for the privilege of examining this costume and sharing my research with you, and to my Ko-Fi supporters for helping make this happen. 🙂
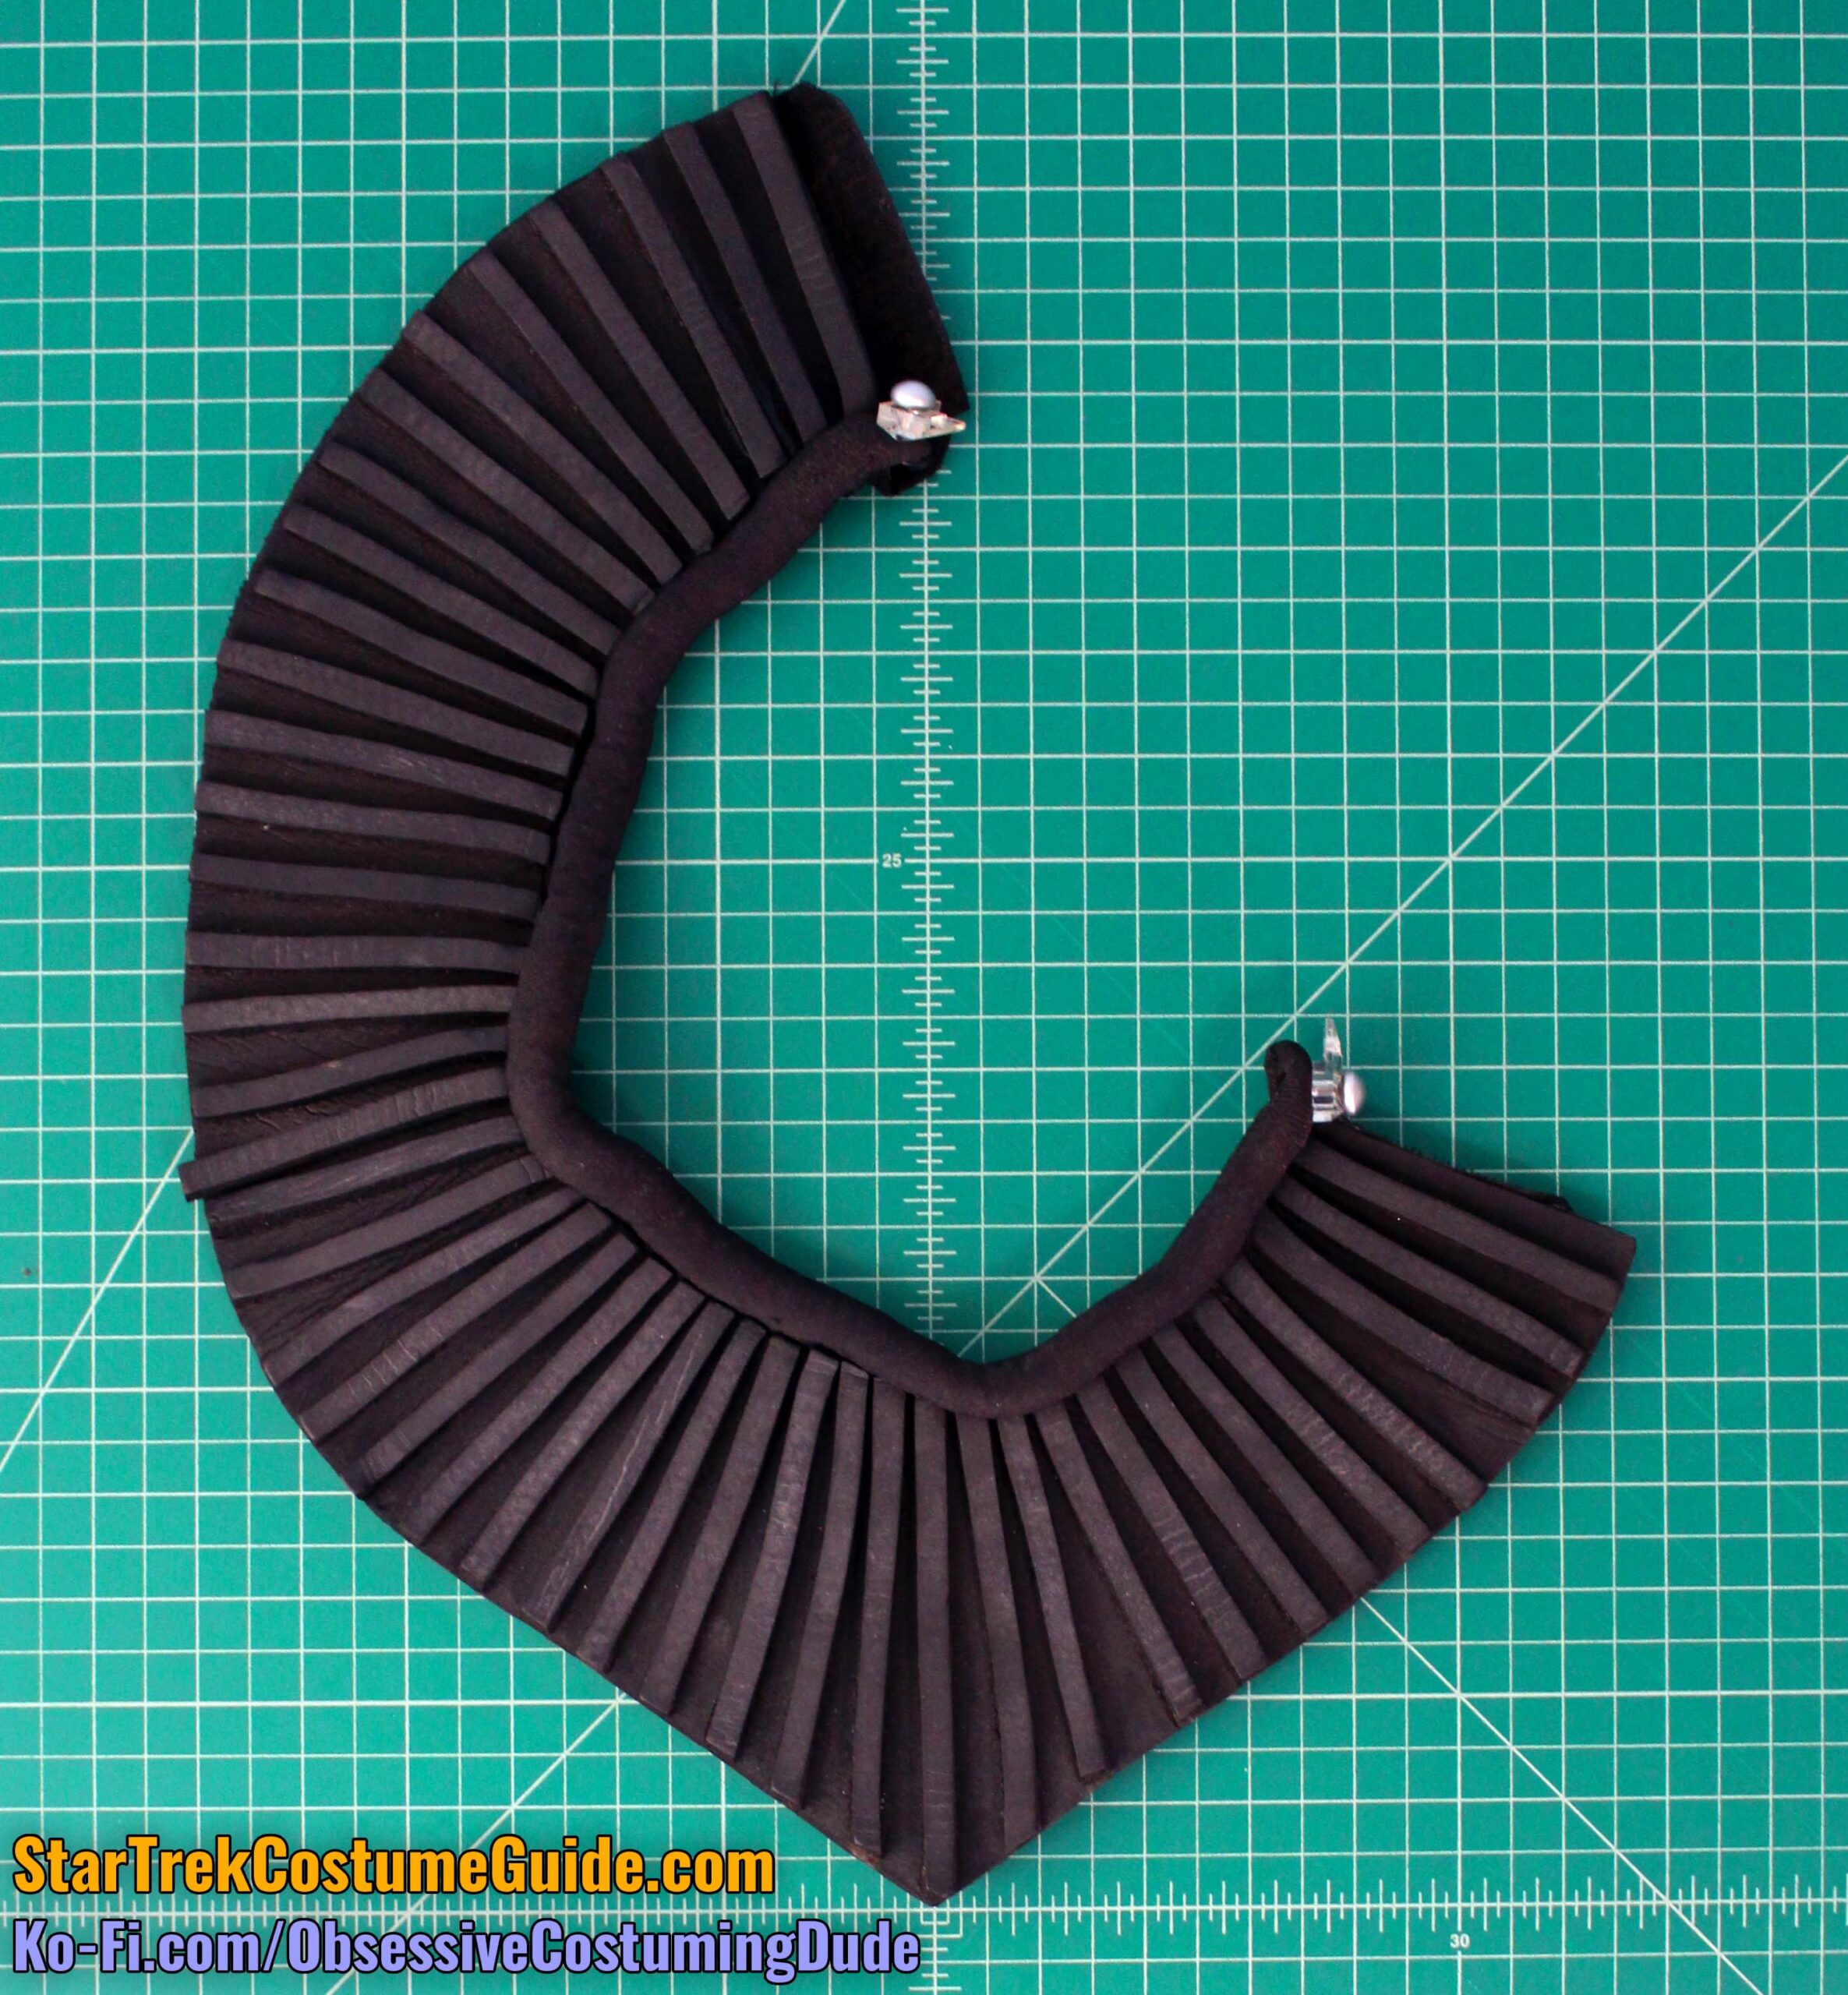
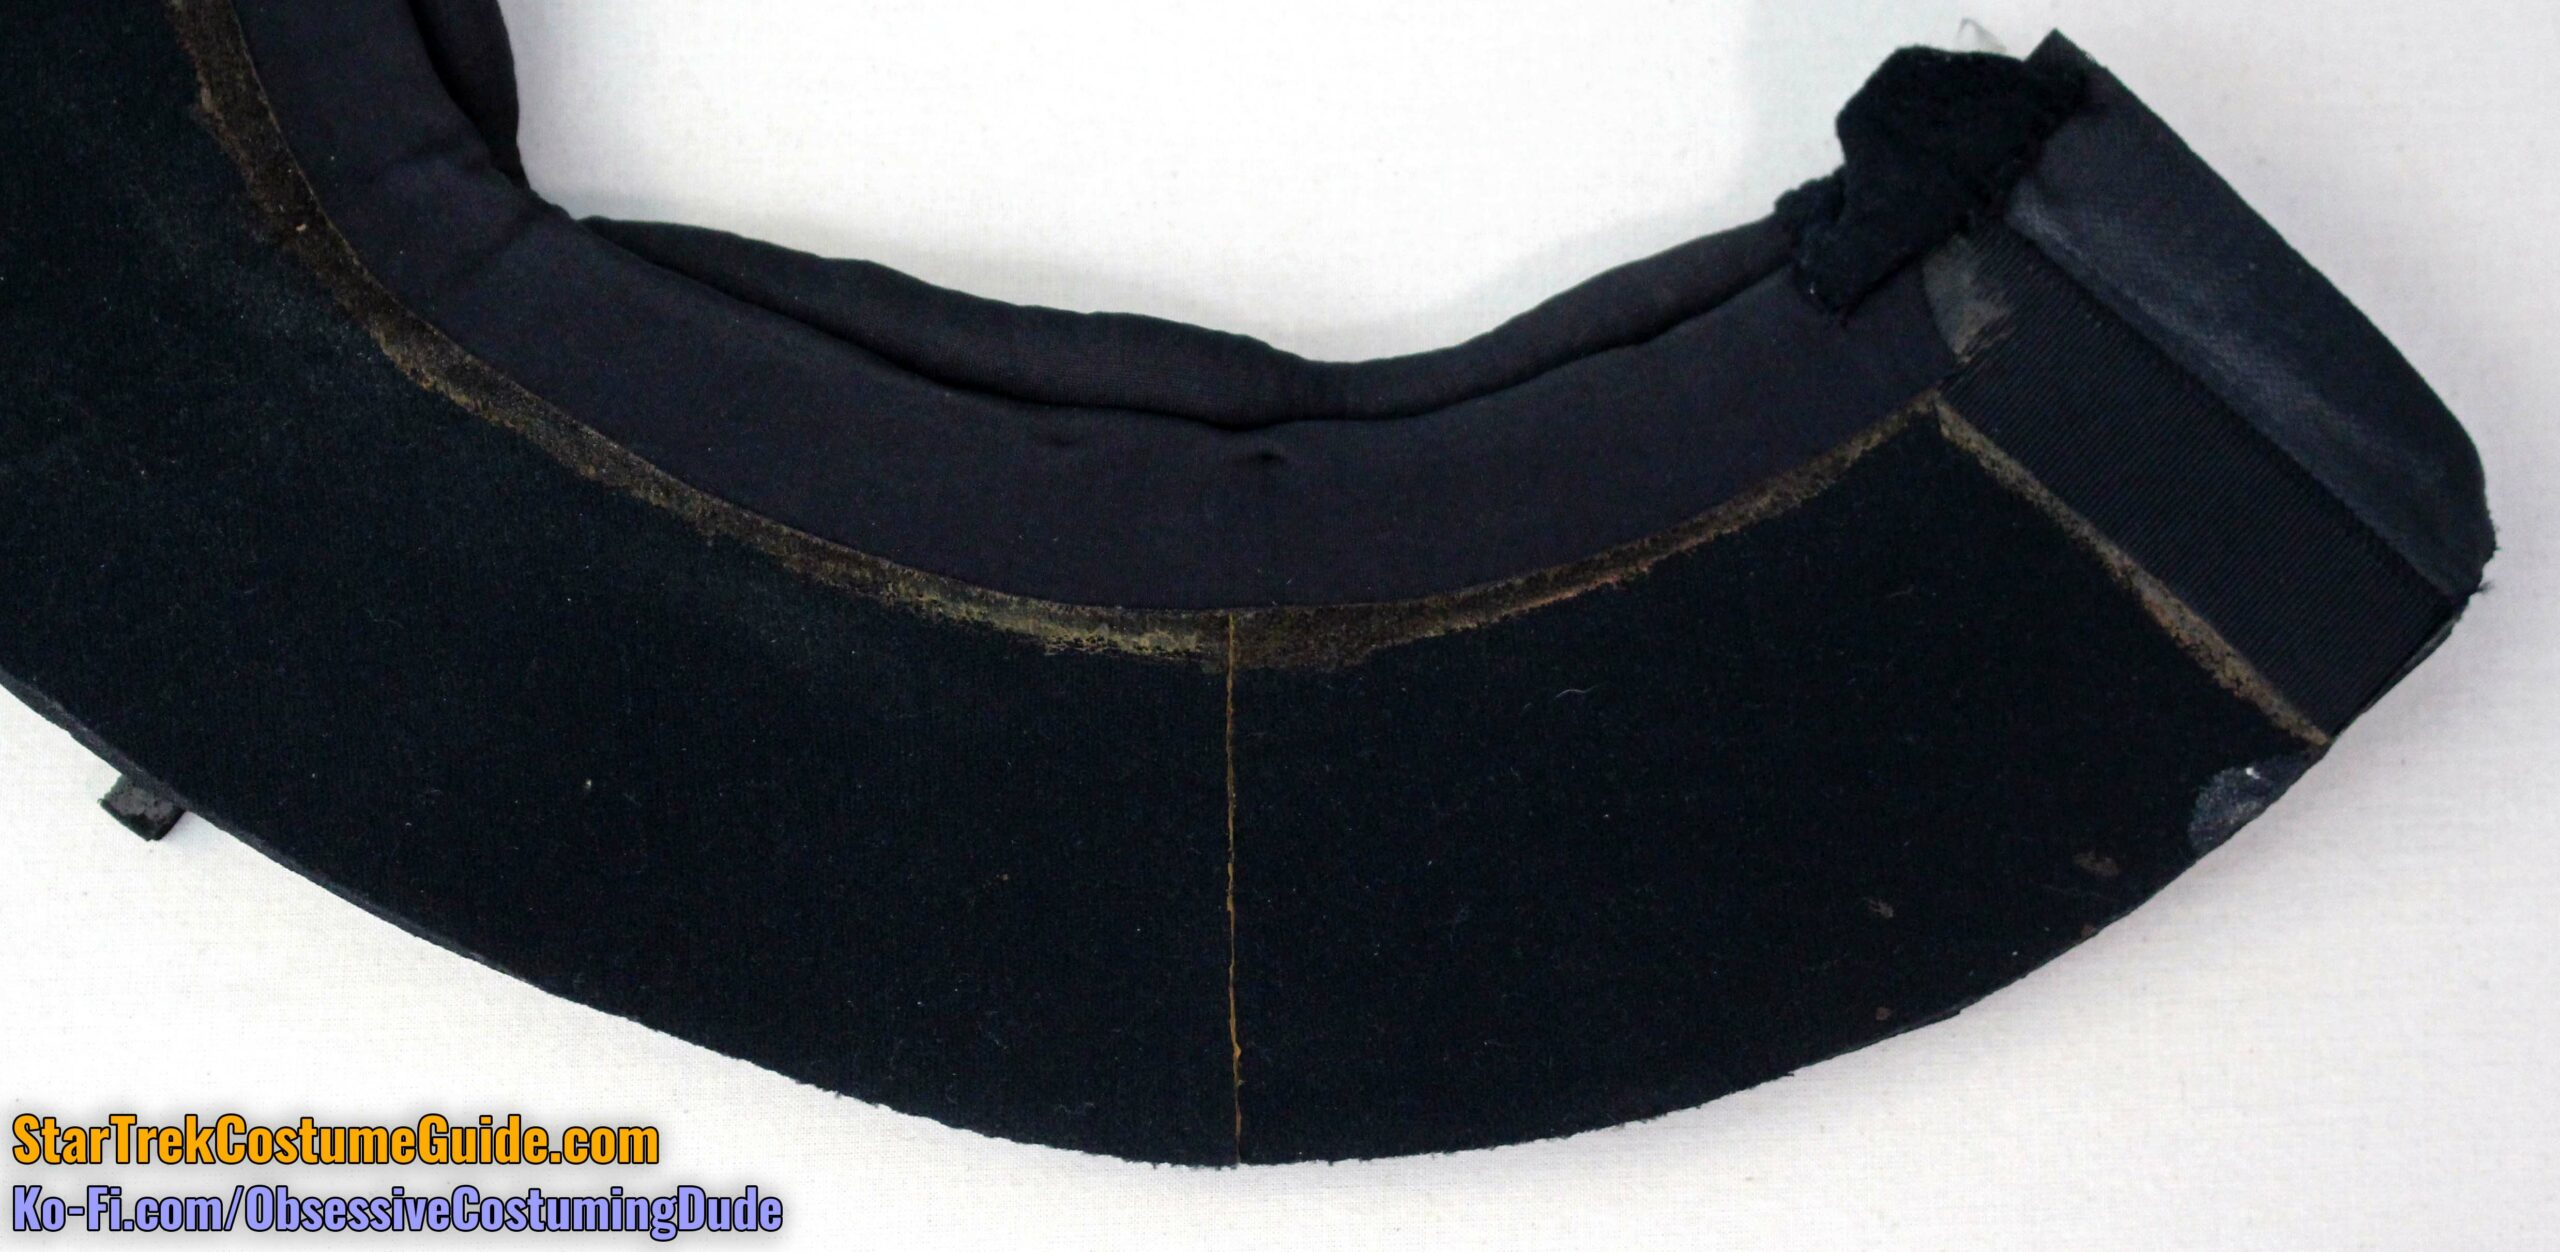
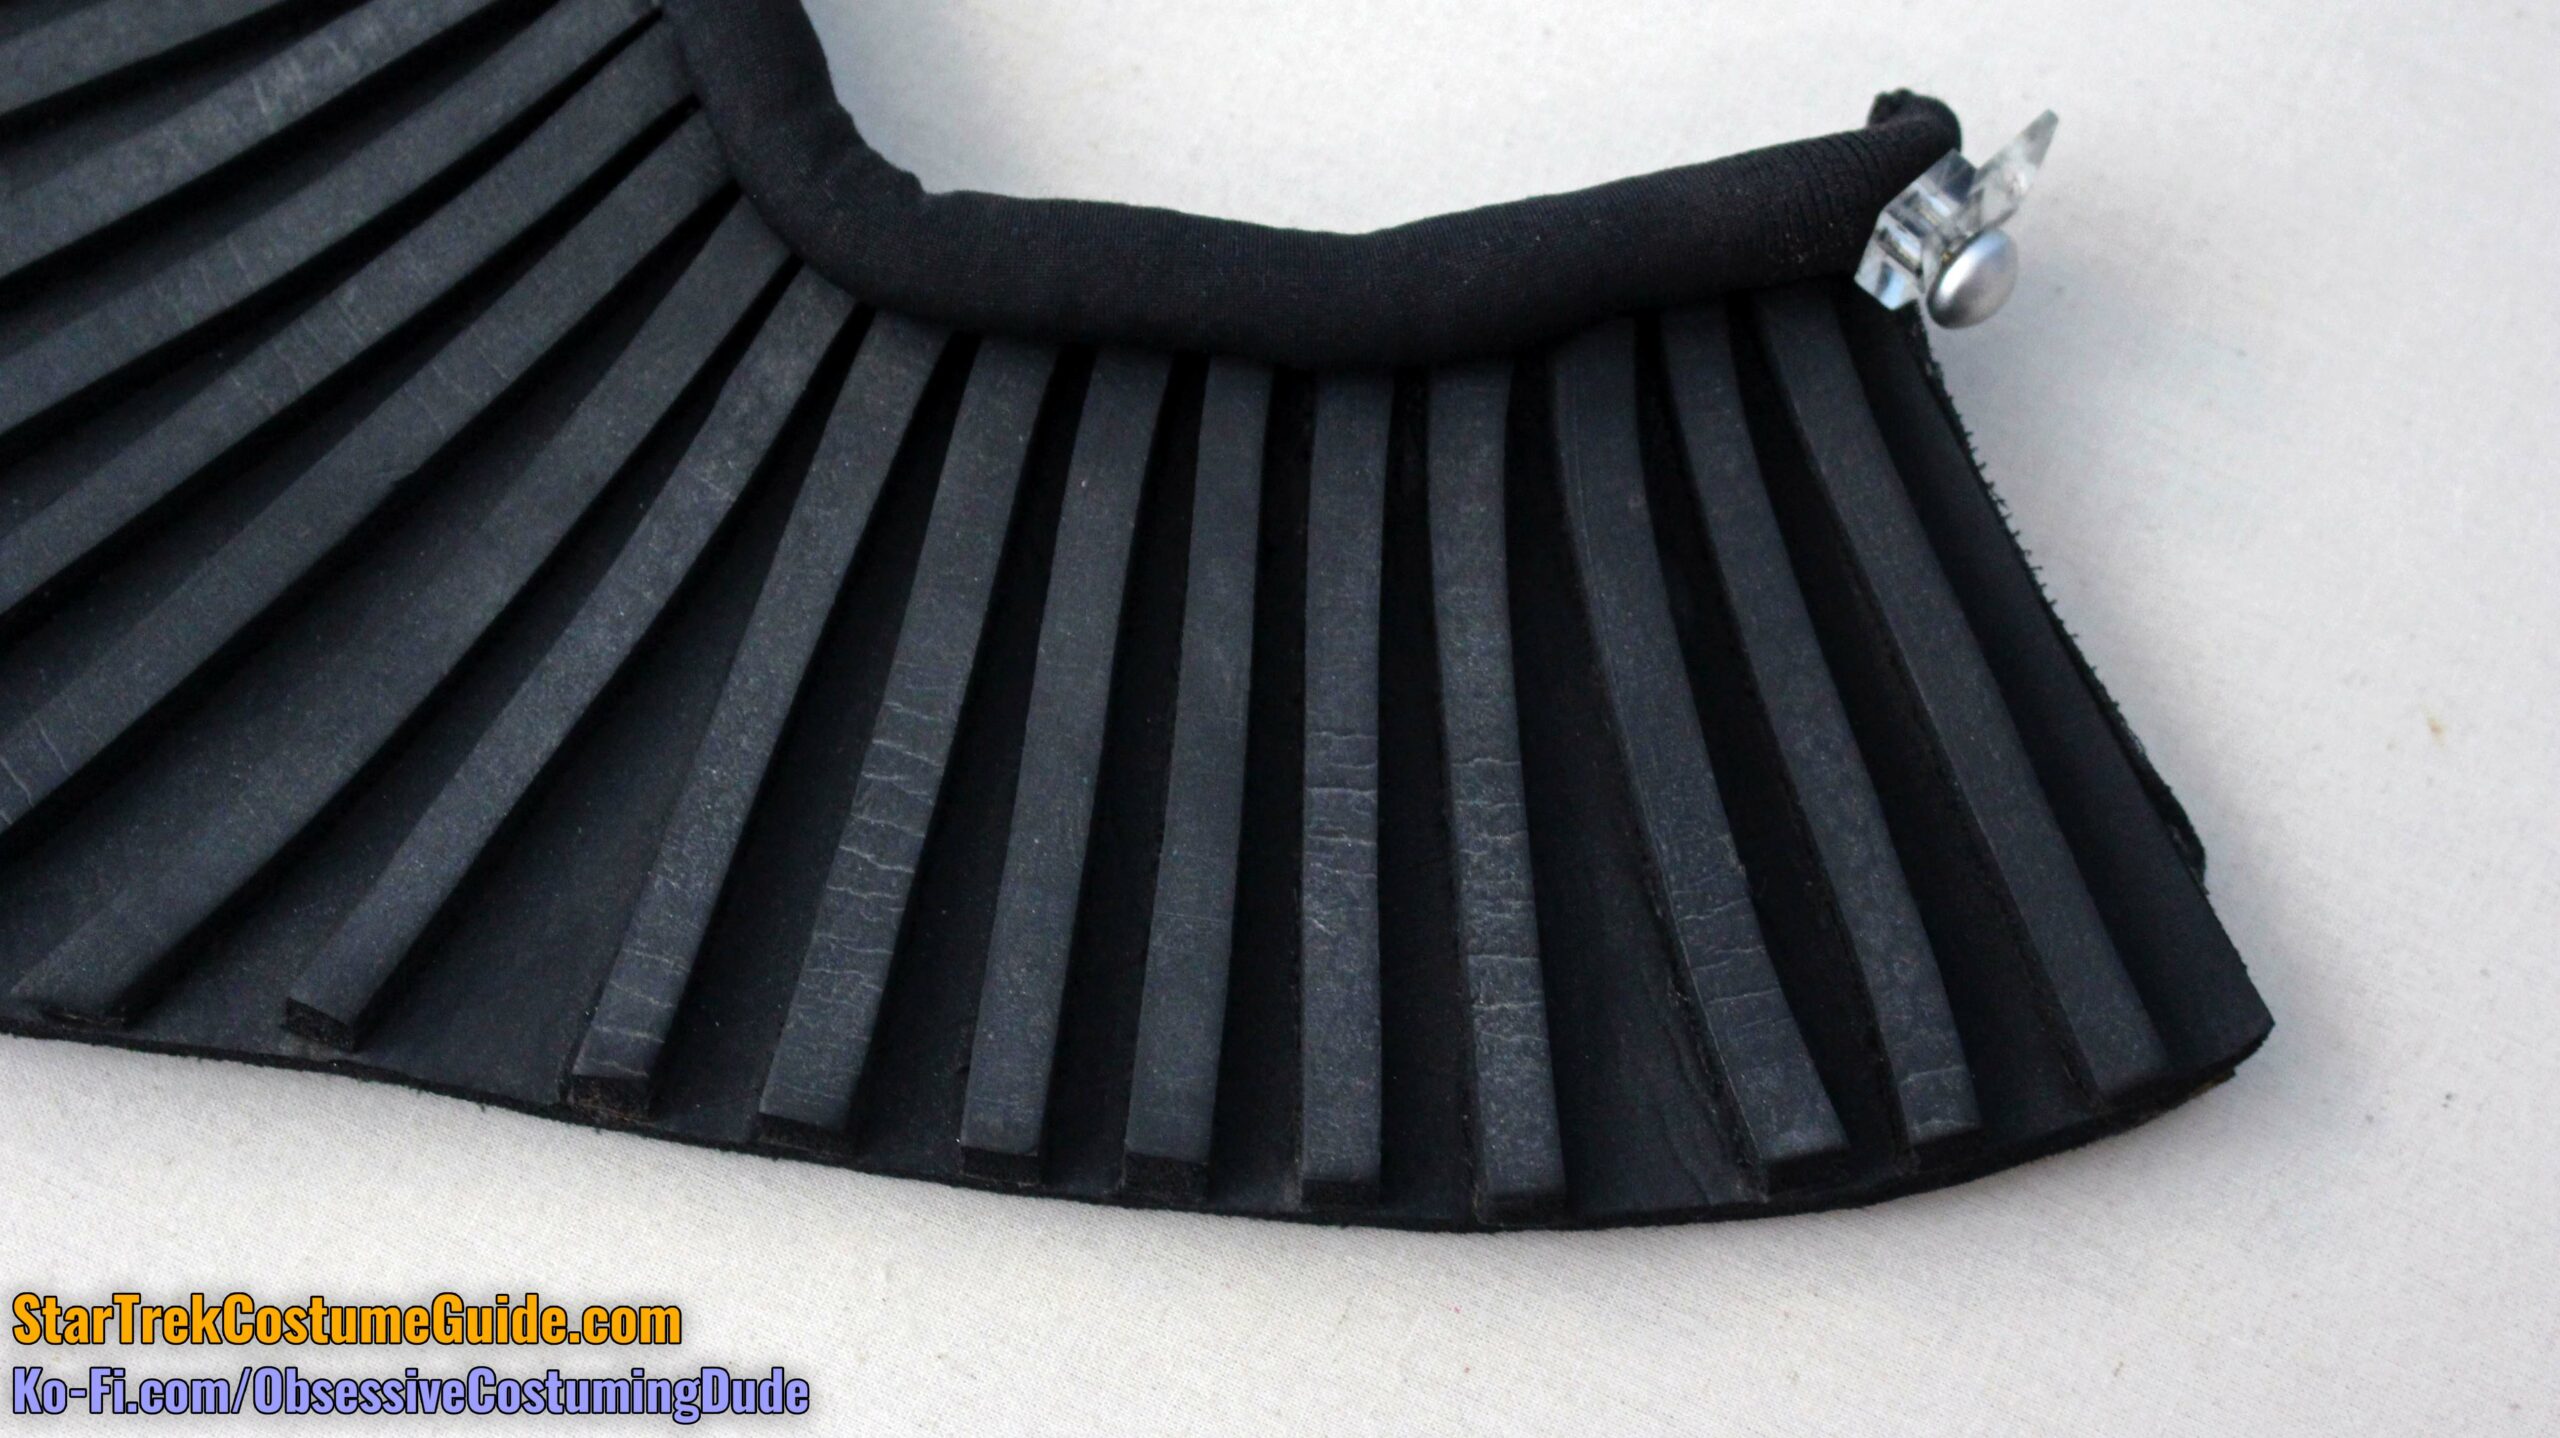
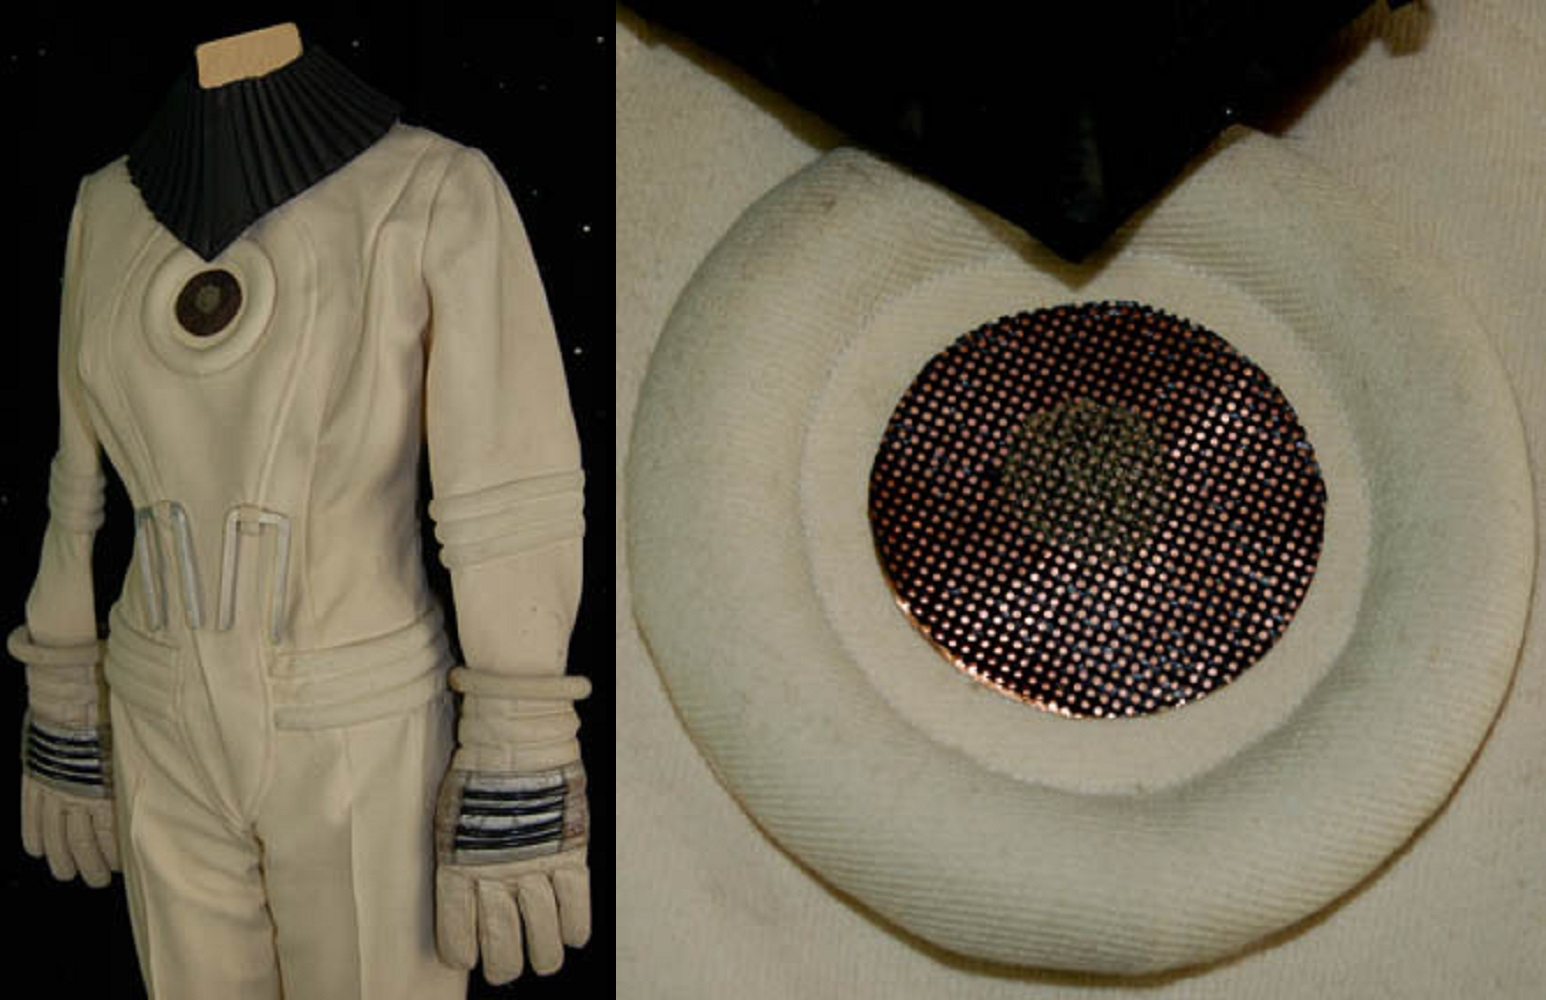
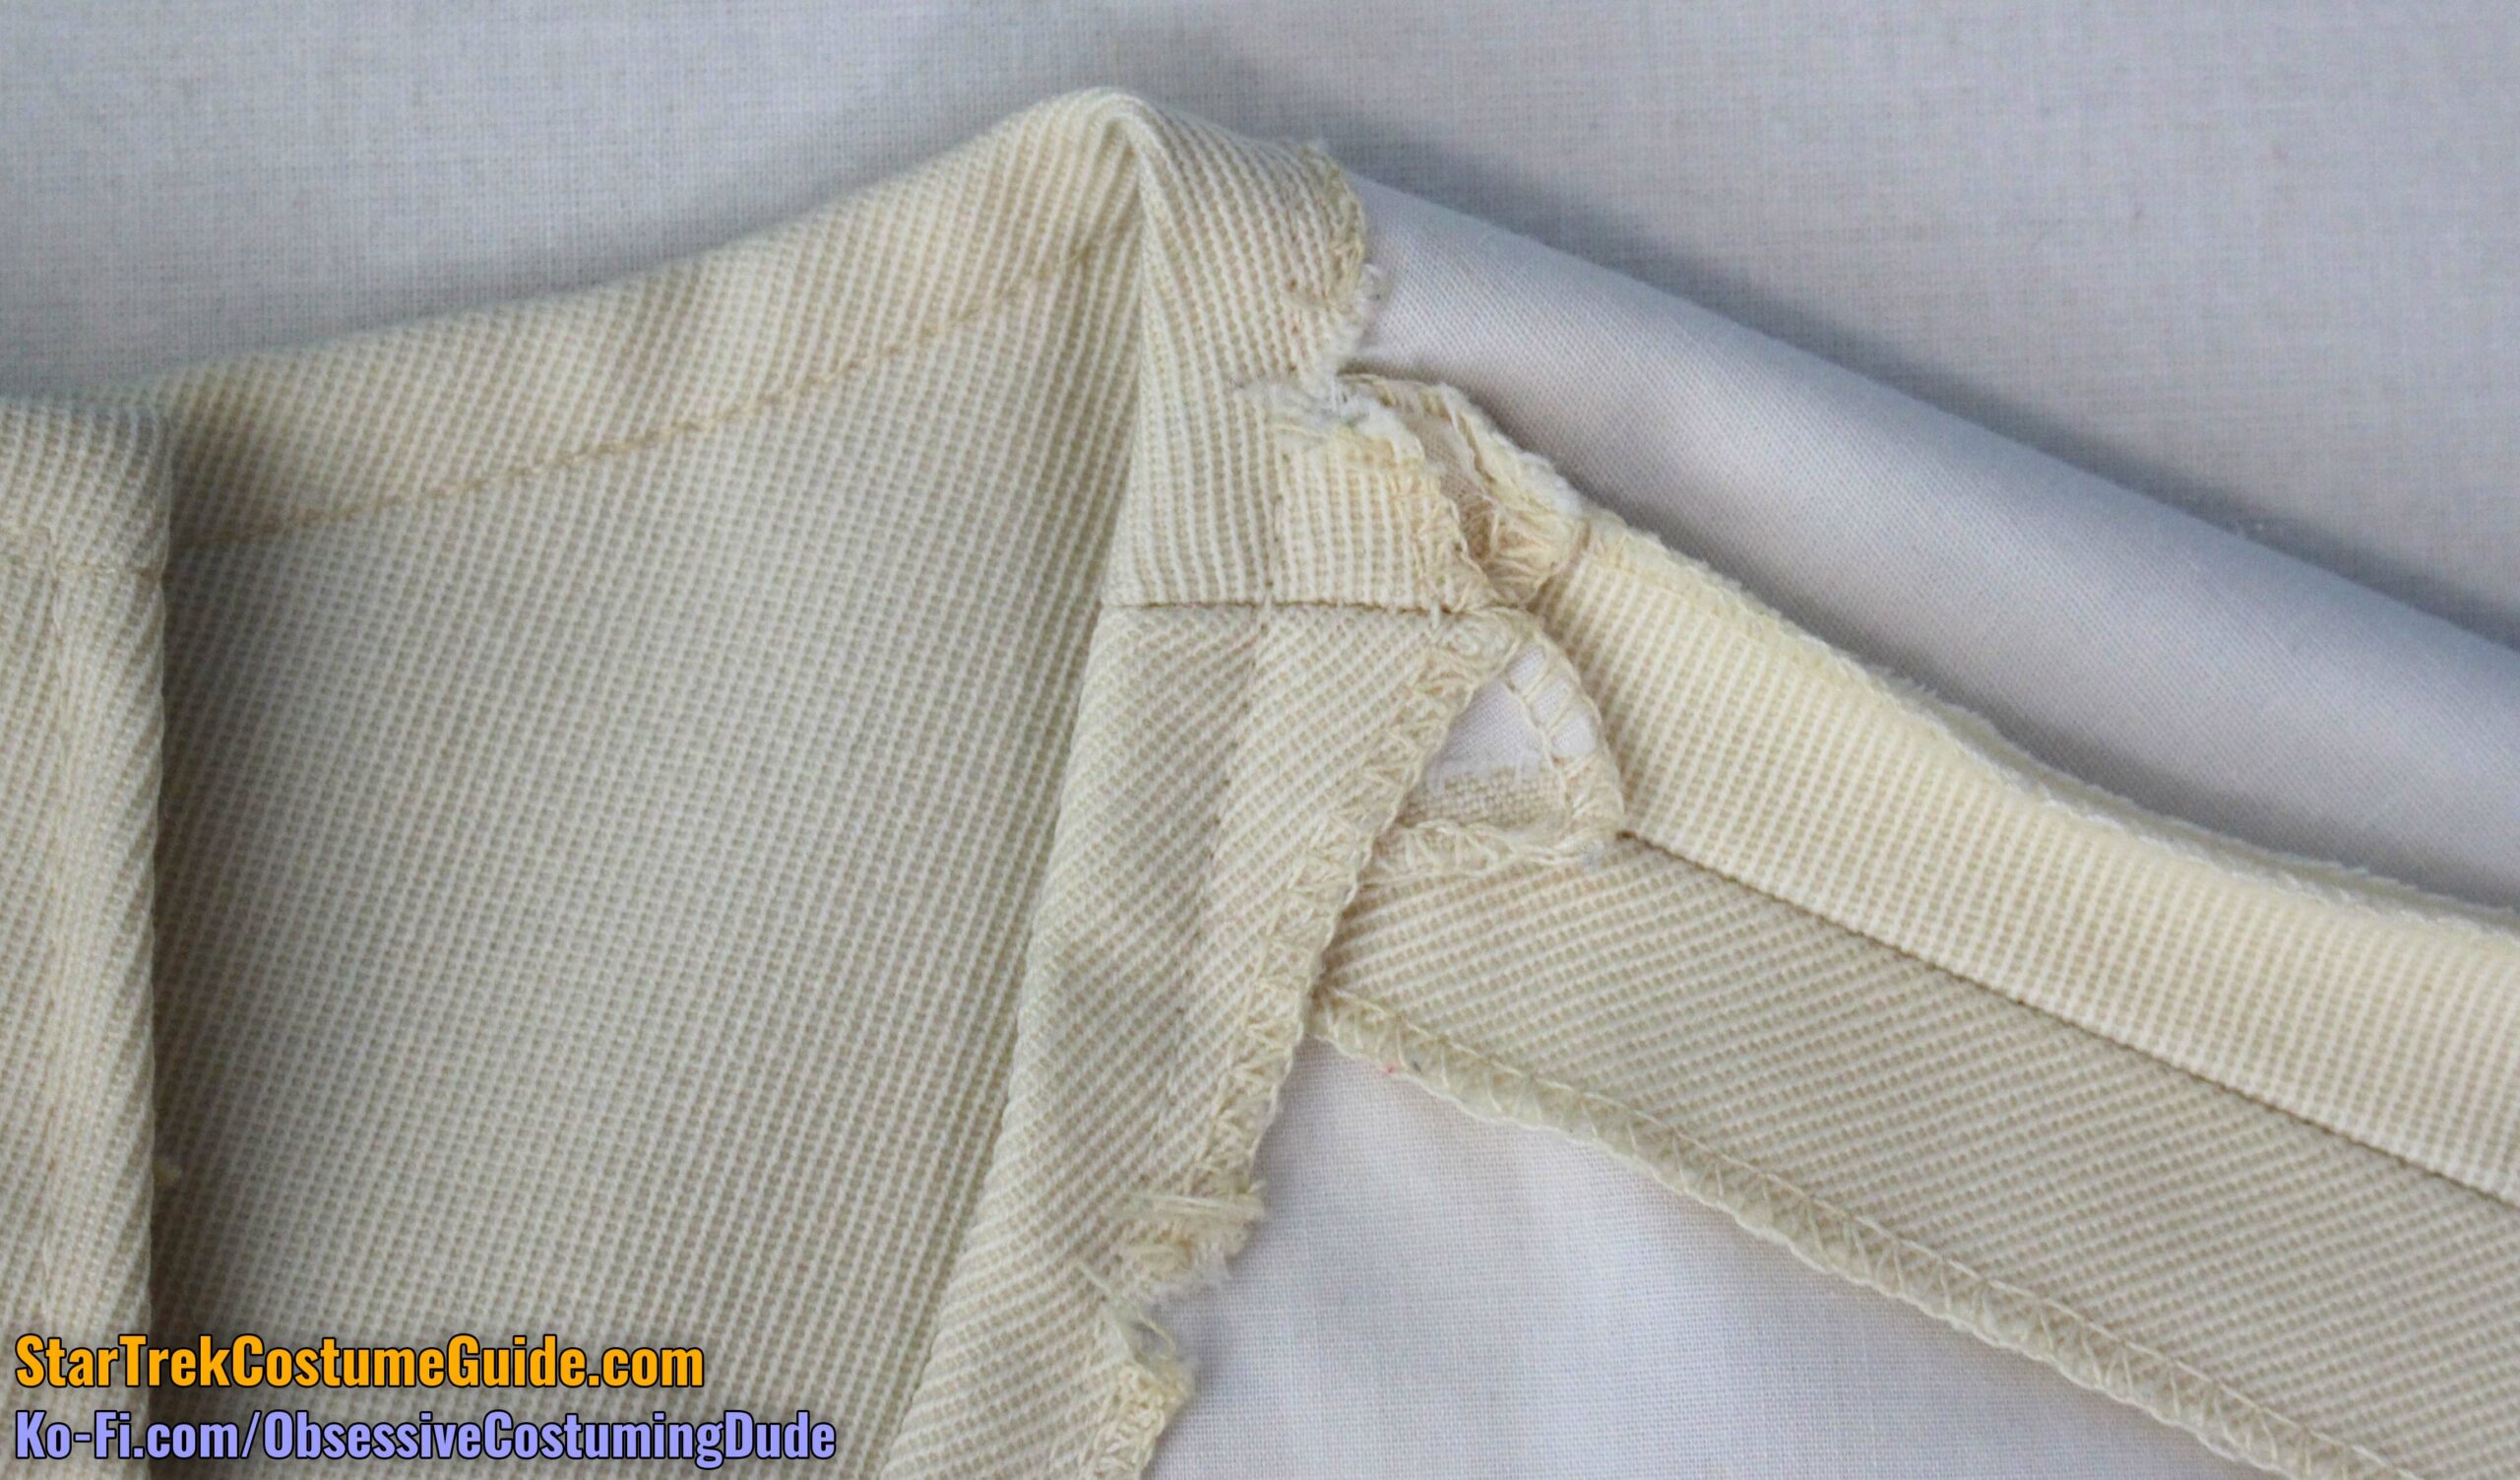
COLLAR
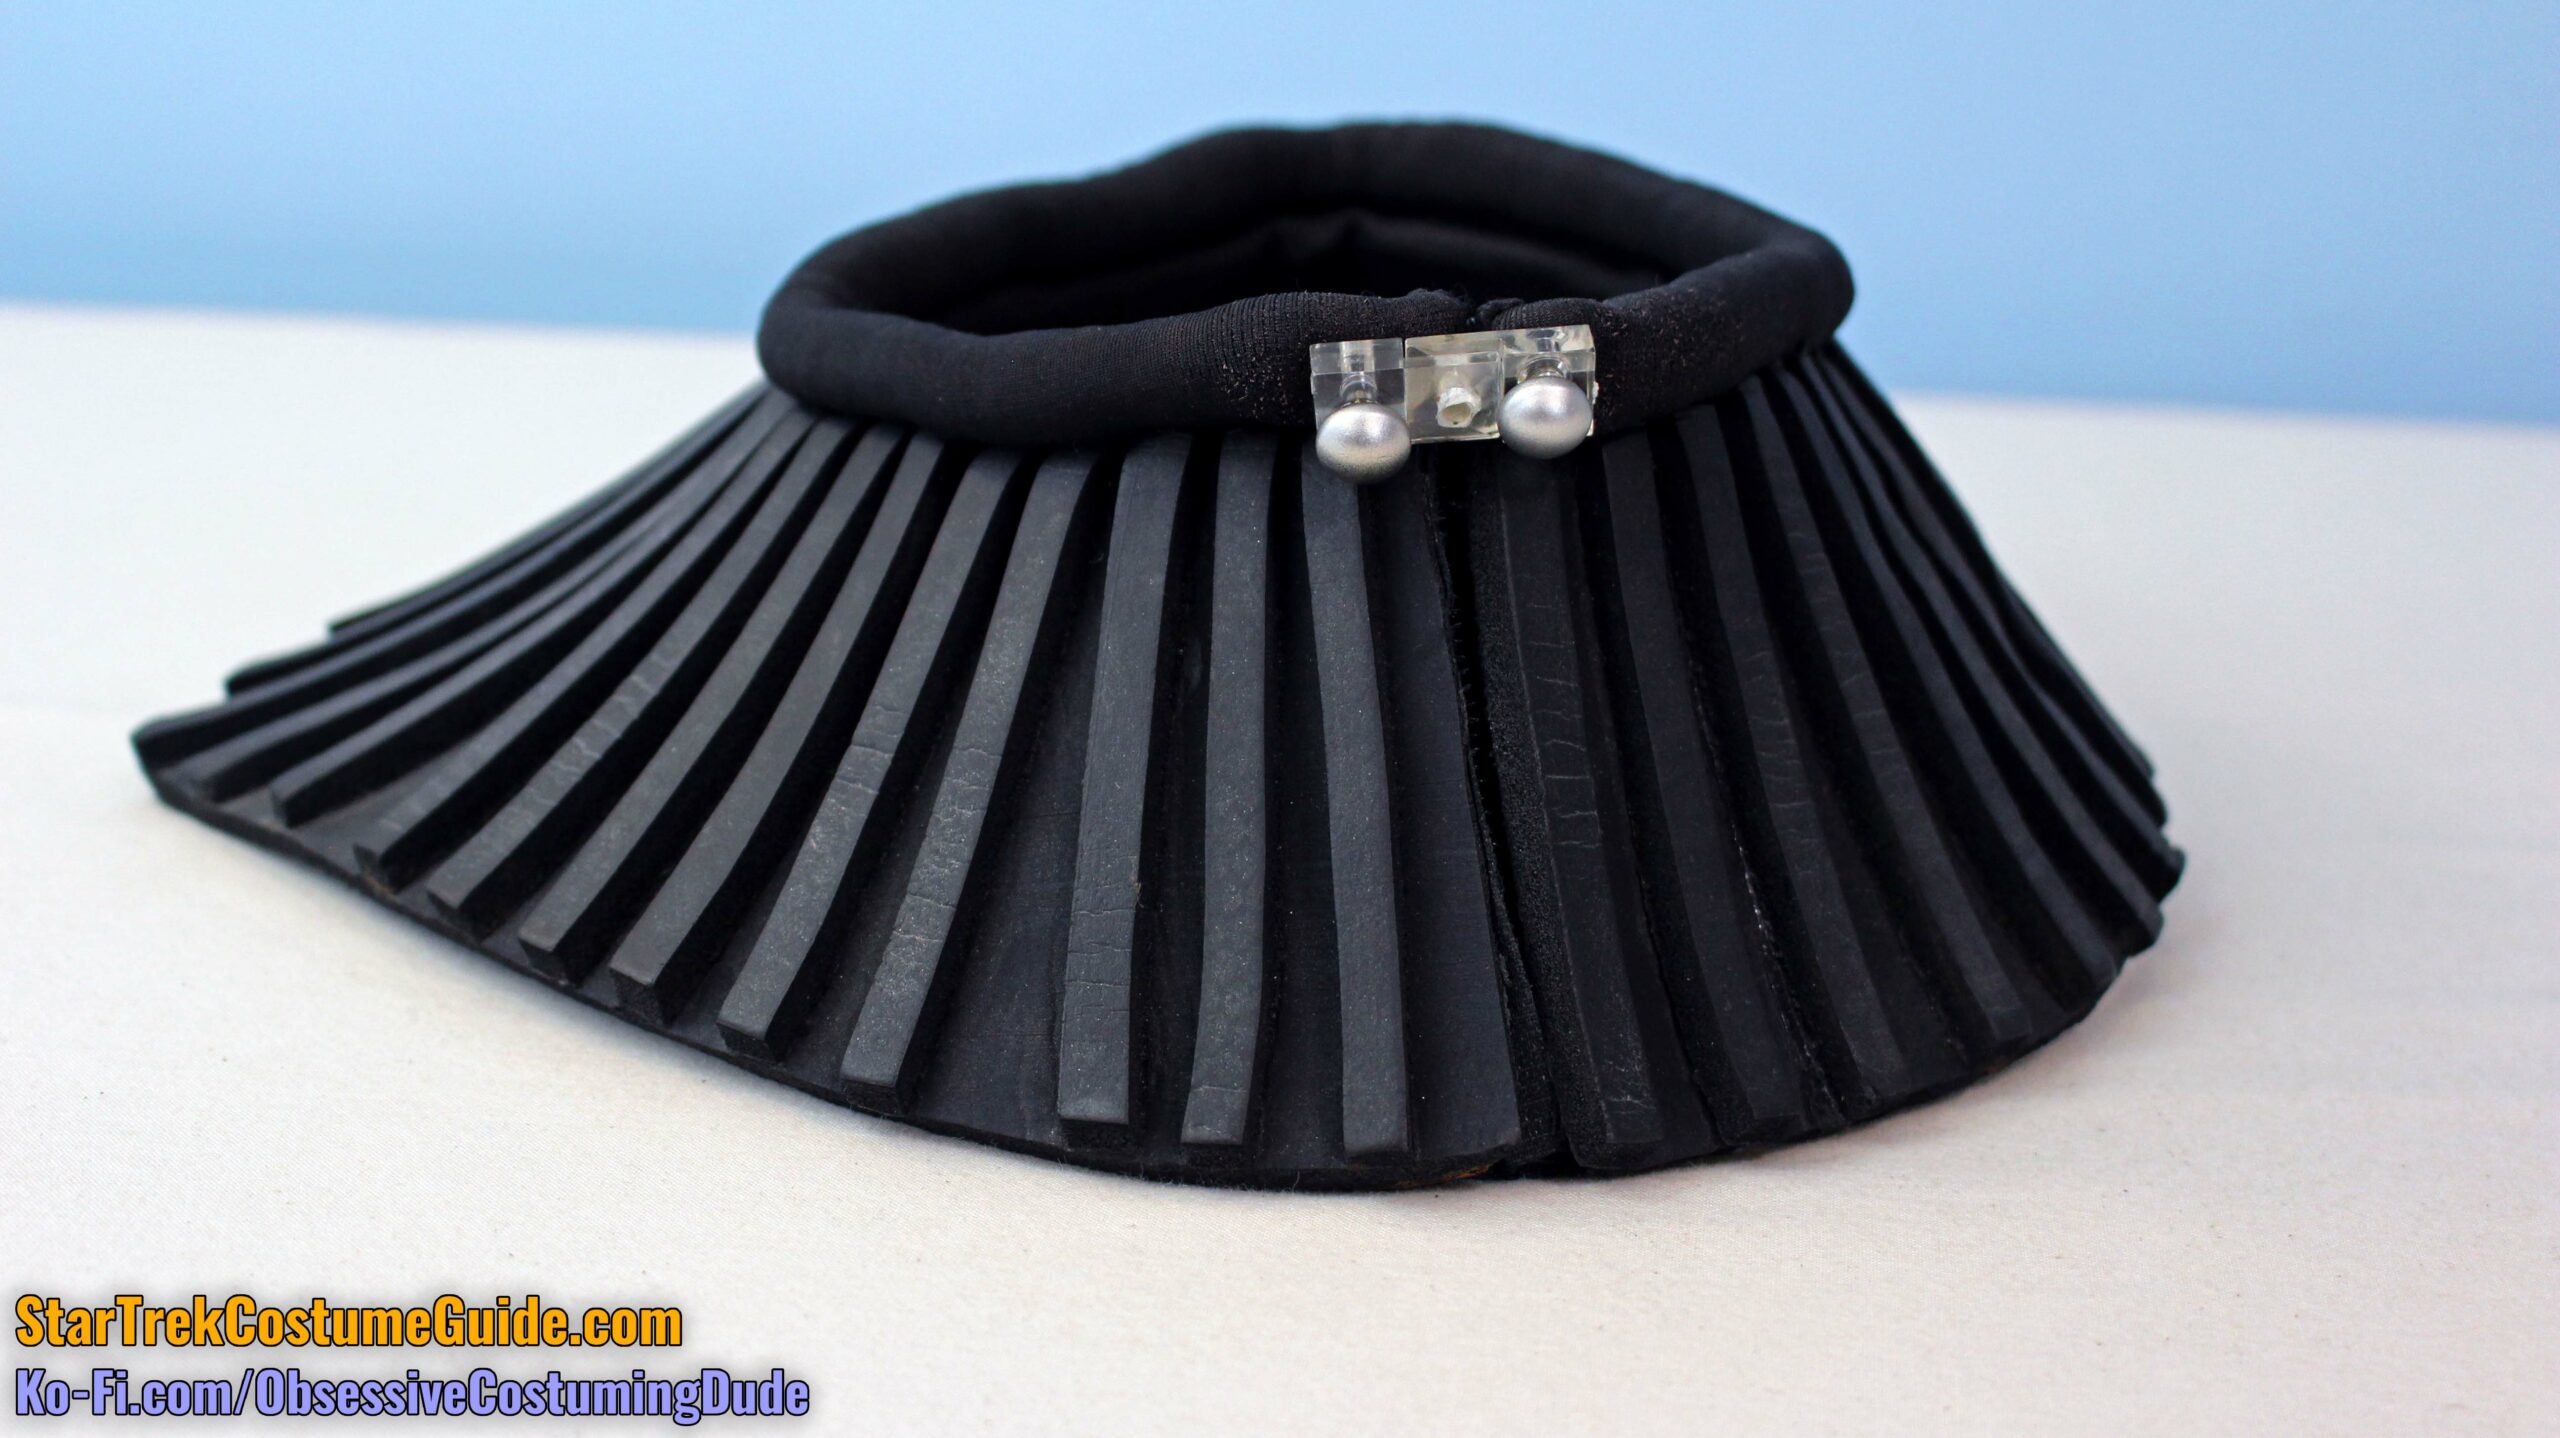
We’ll begin our costume examination with the collar, which fastened onto the rest of the uniform but was a separate component.
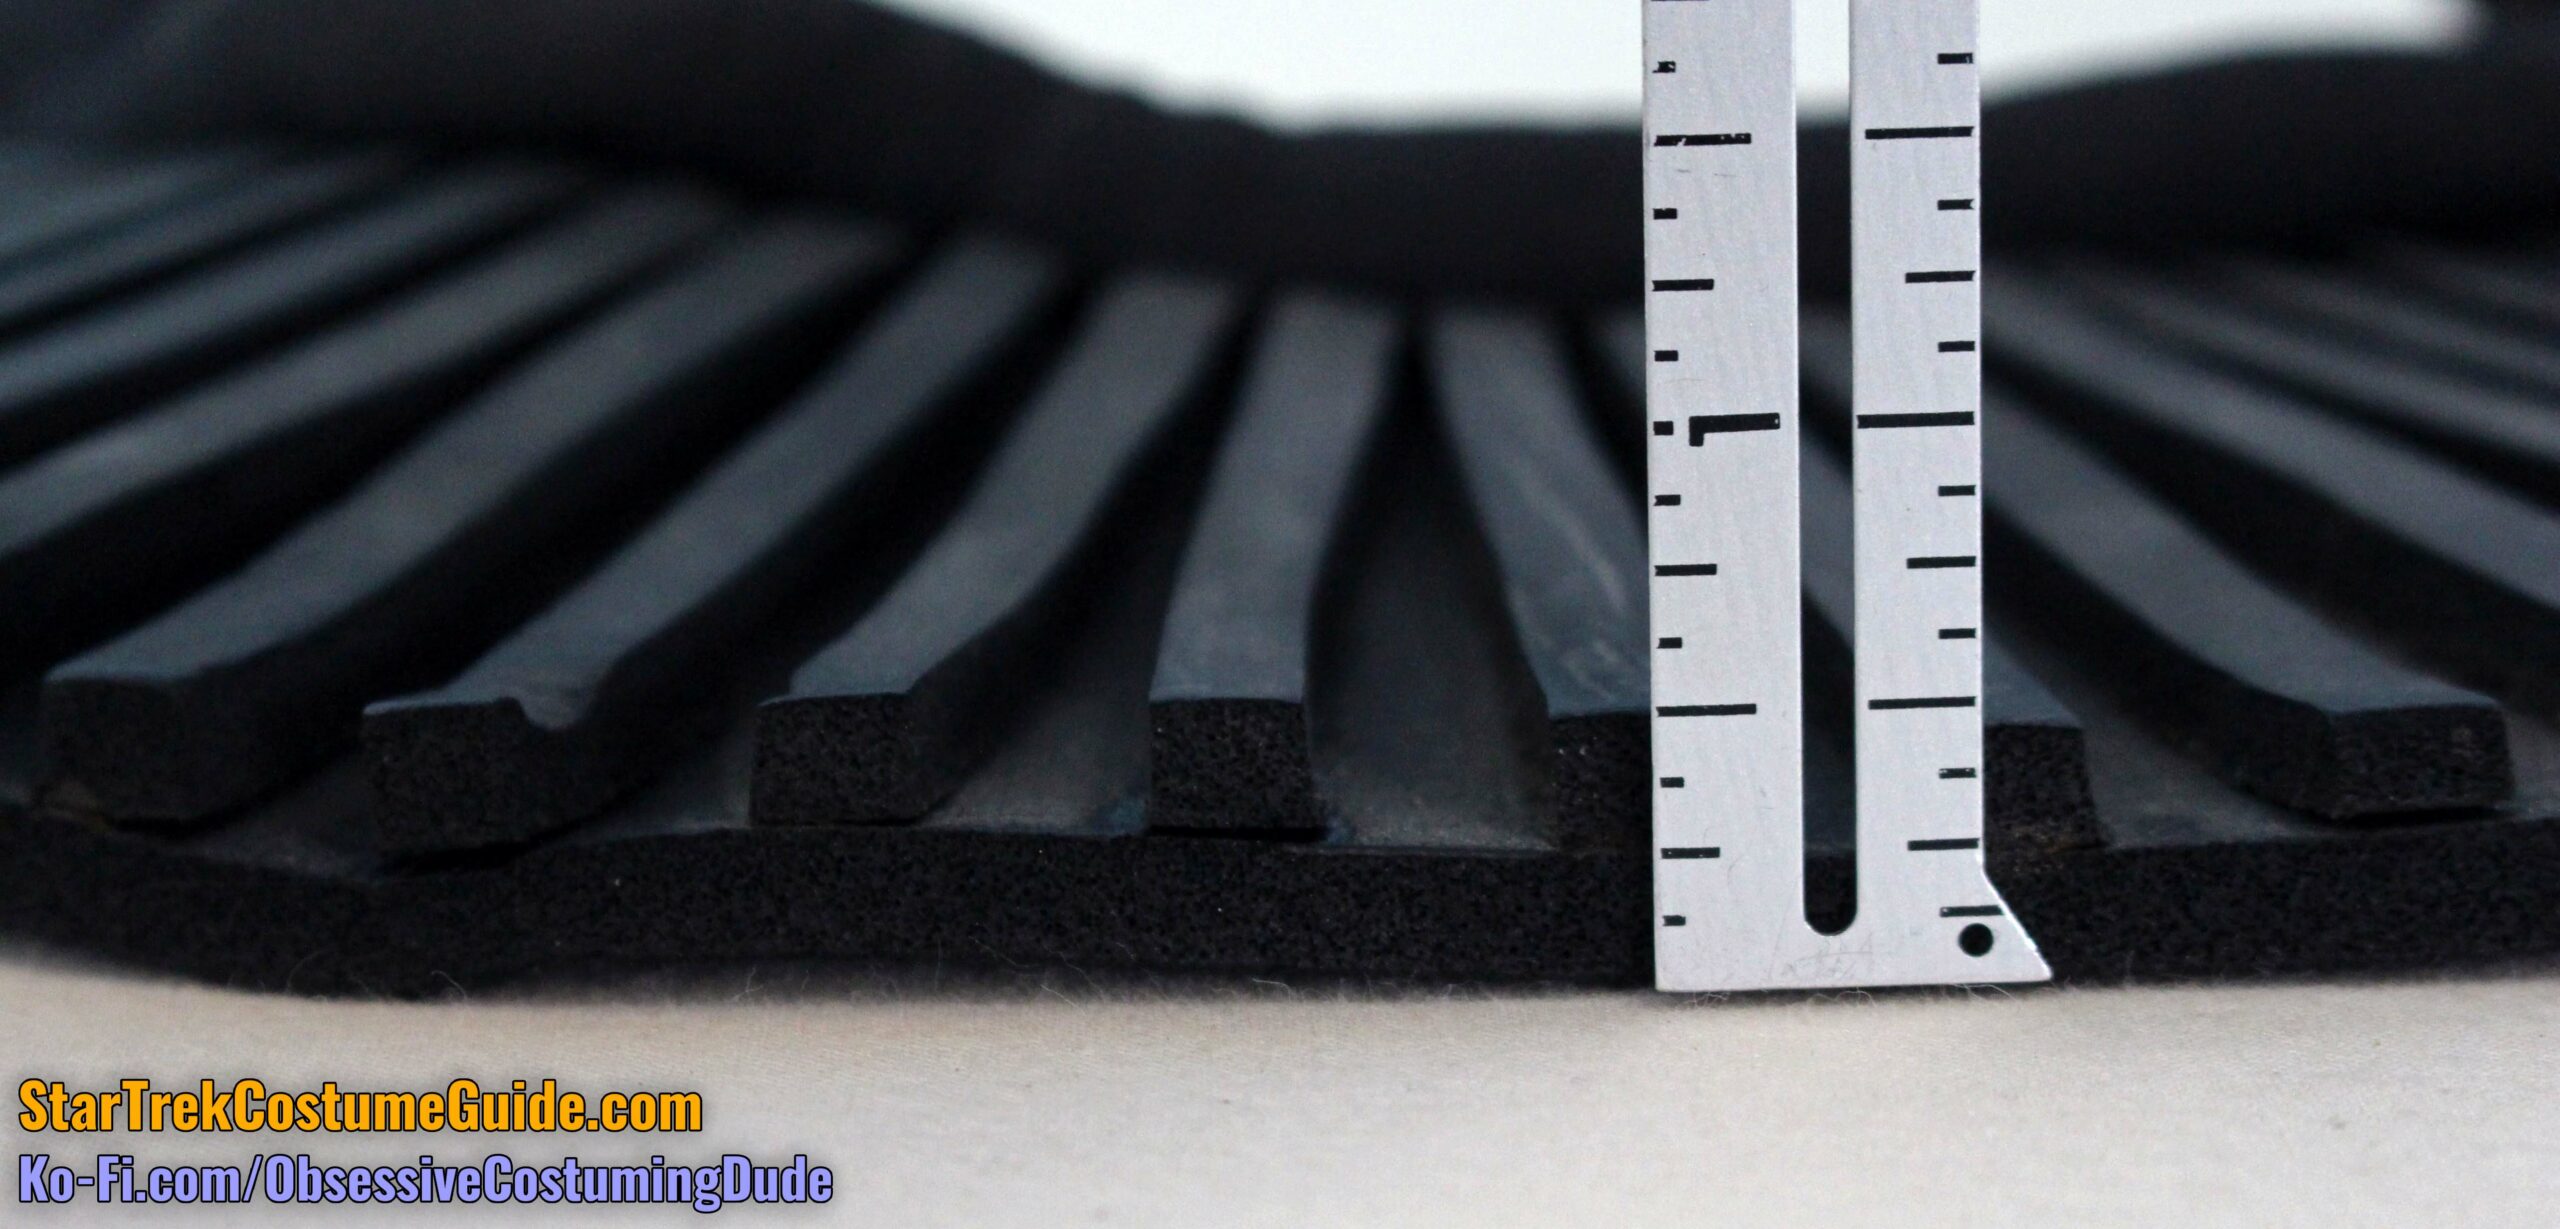
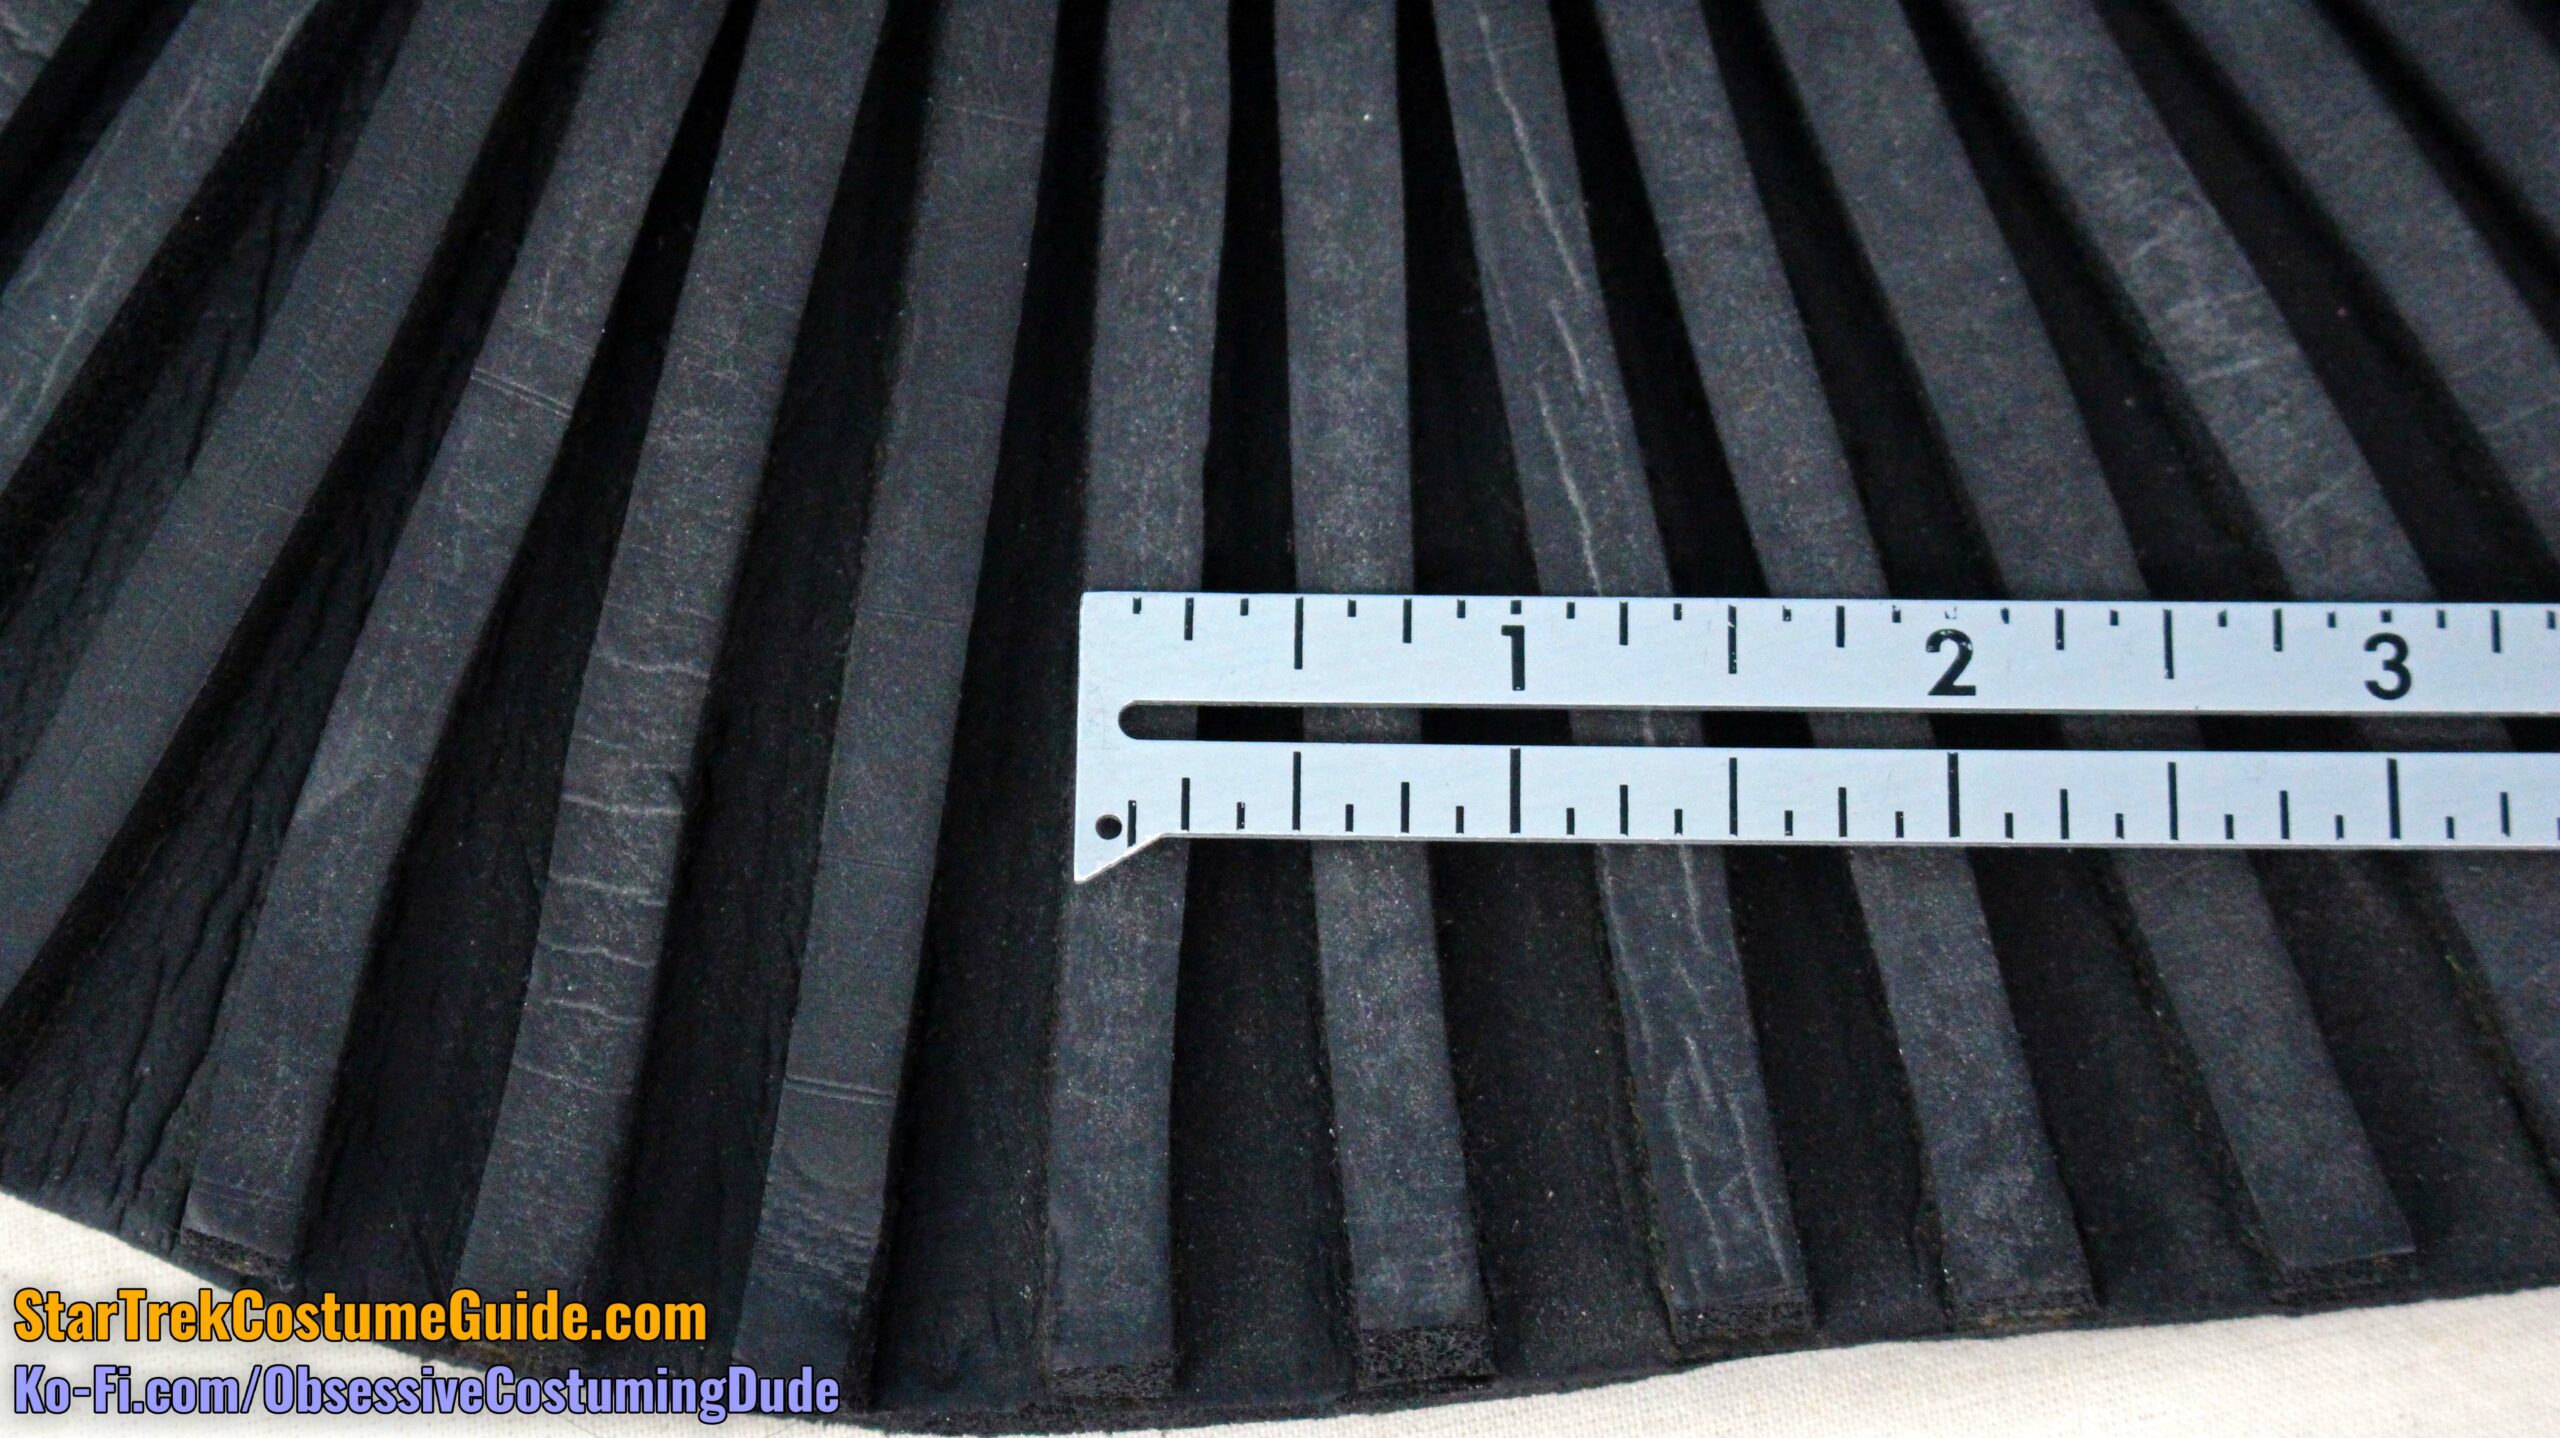
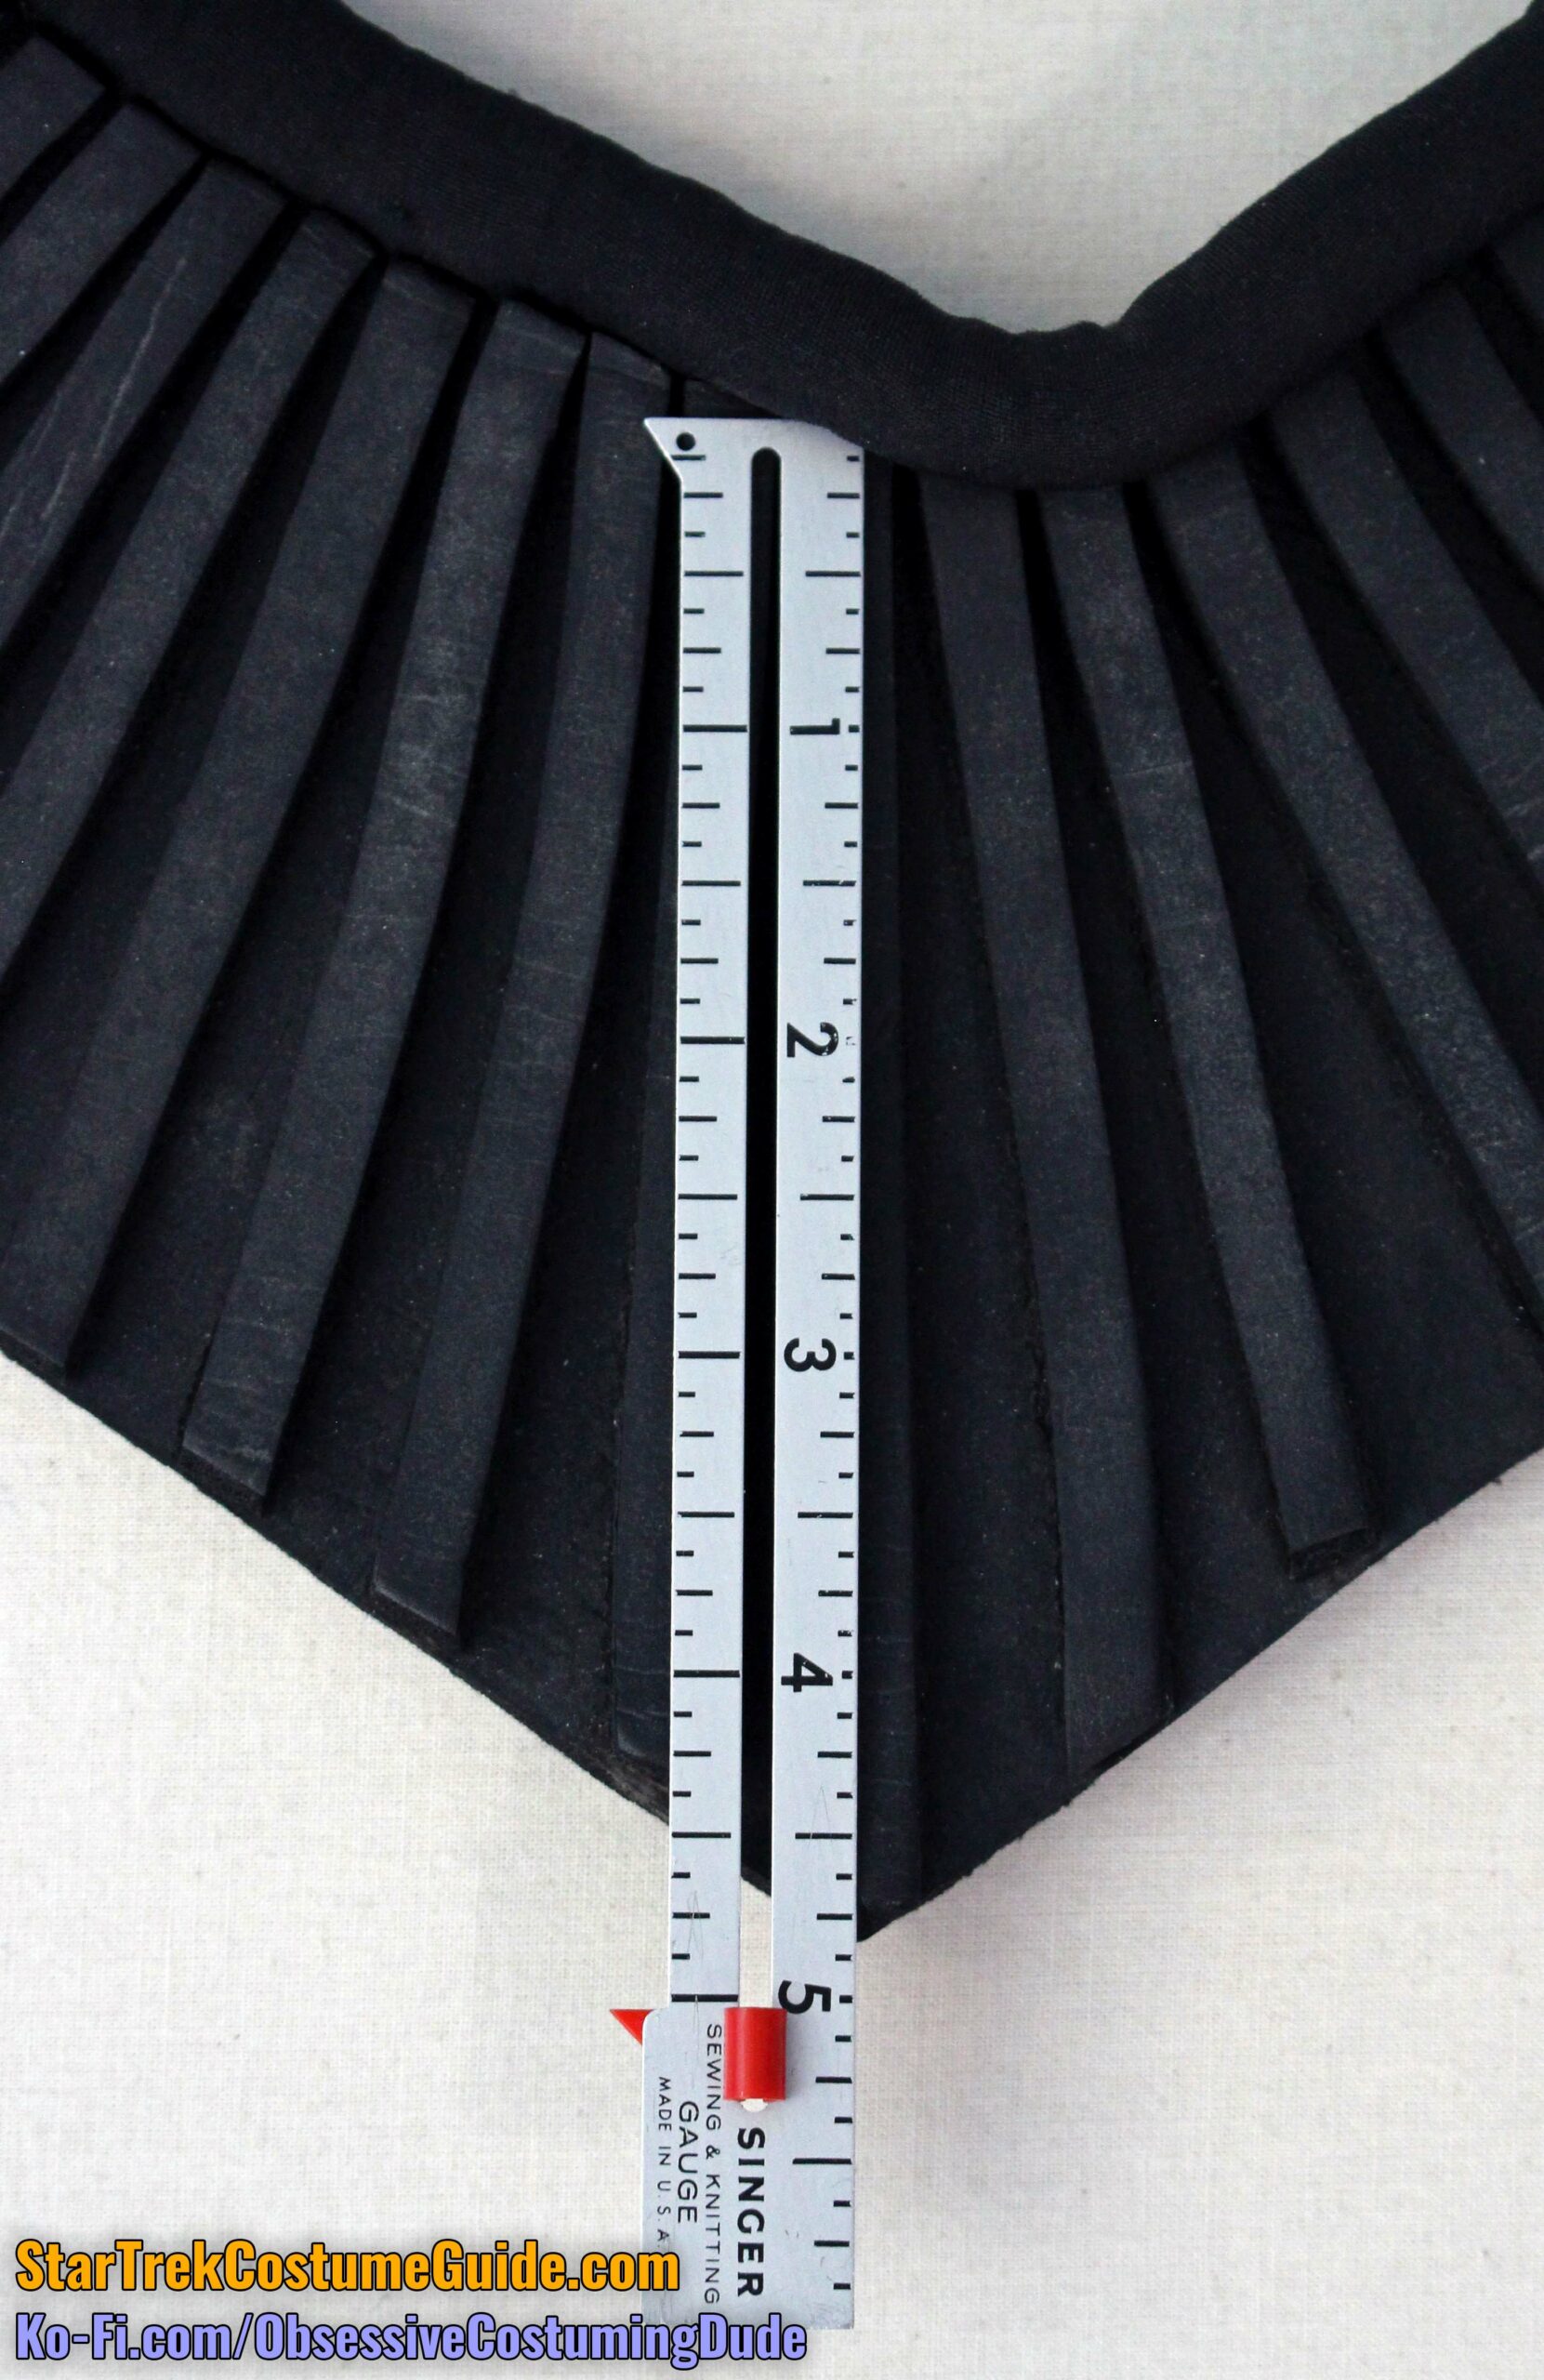
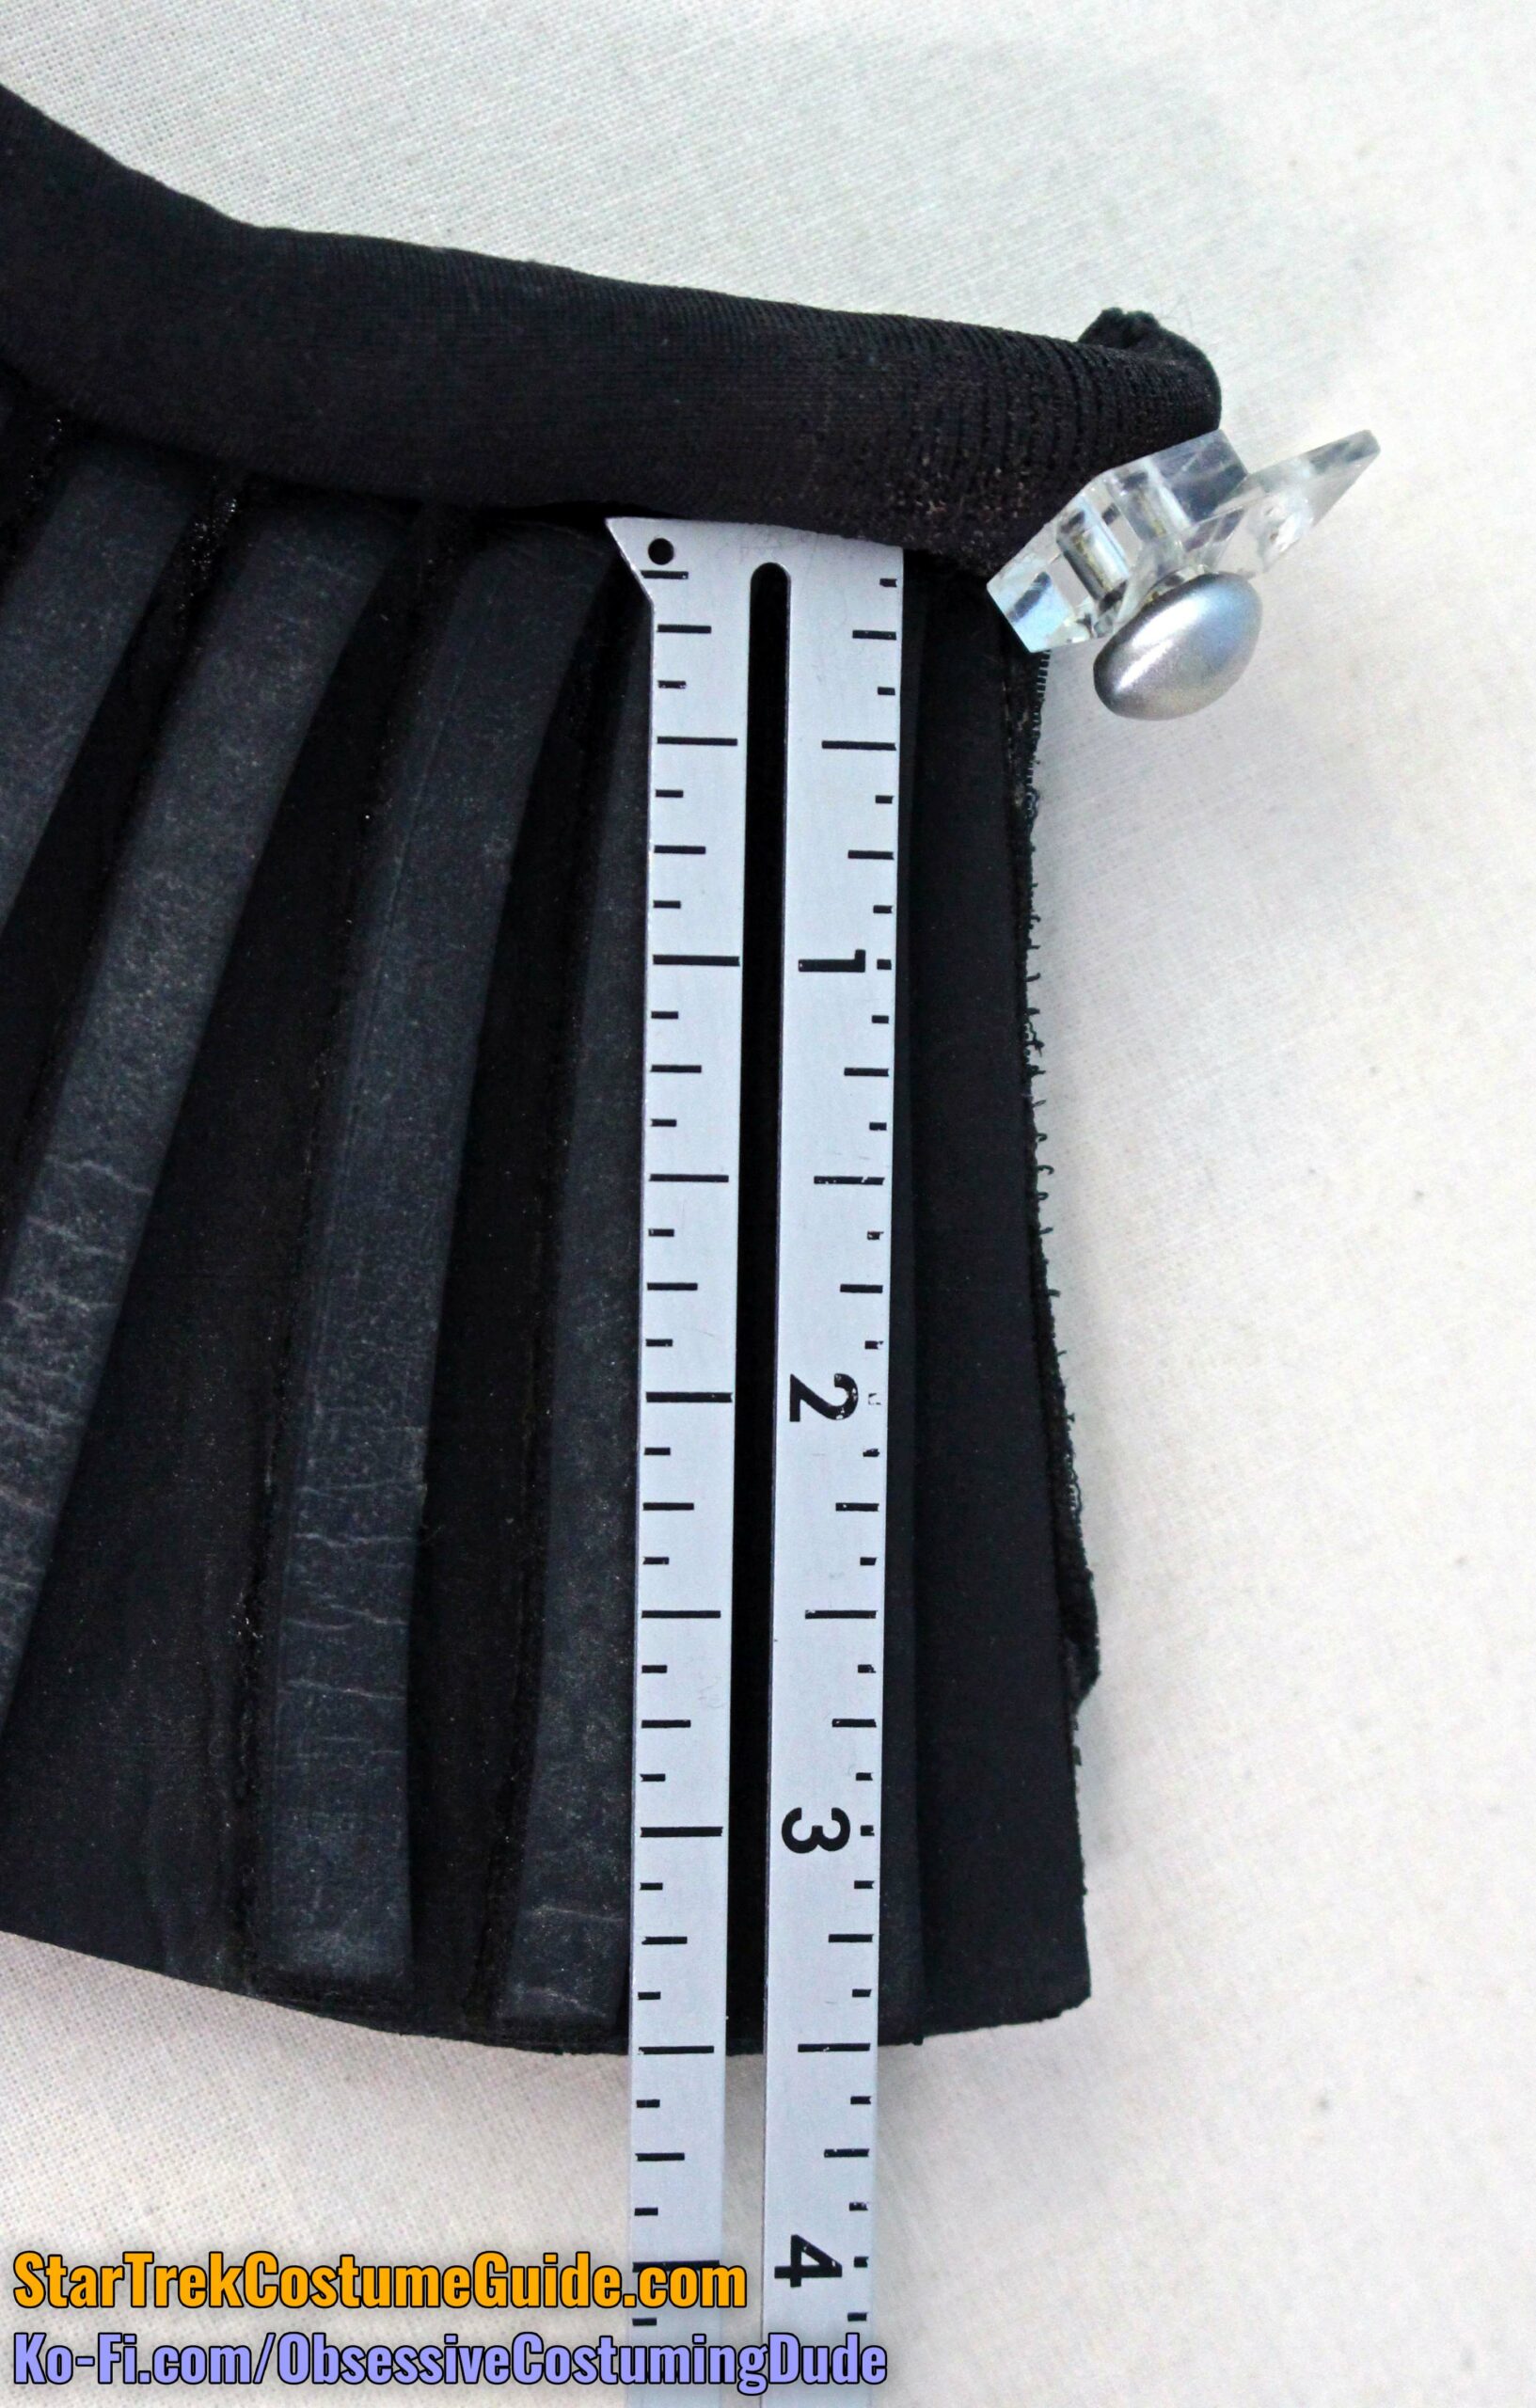
The collar was made of ¼” (6mm) black neoprene, as were the individual strips on top.
There was actually a seam in the neoprene that had been glued together and covered by one of the strips.
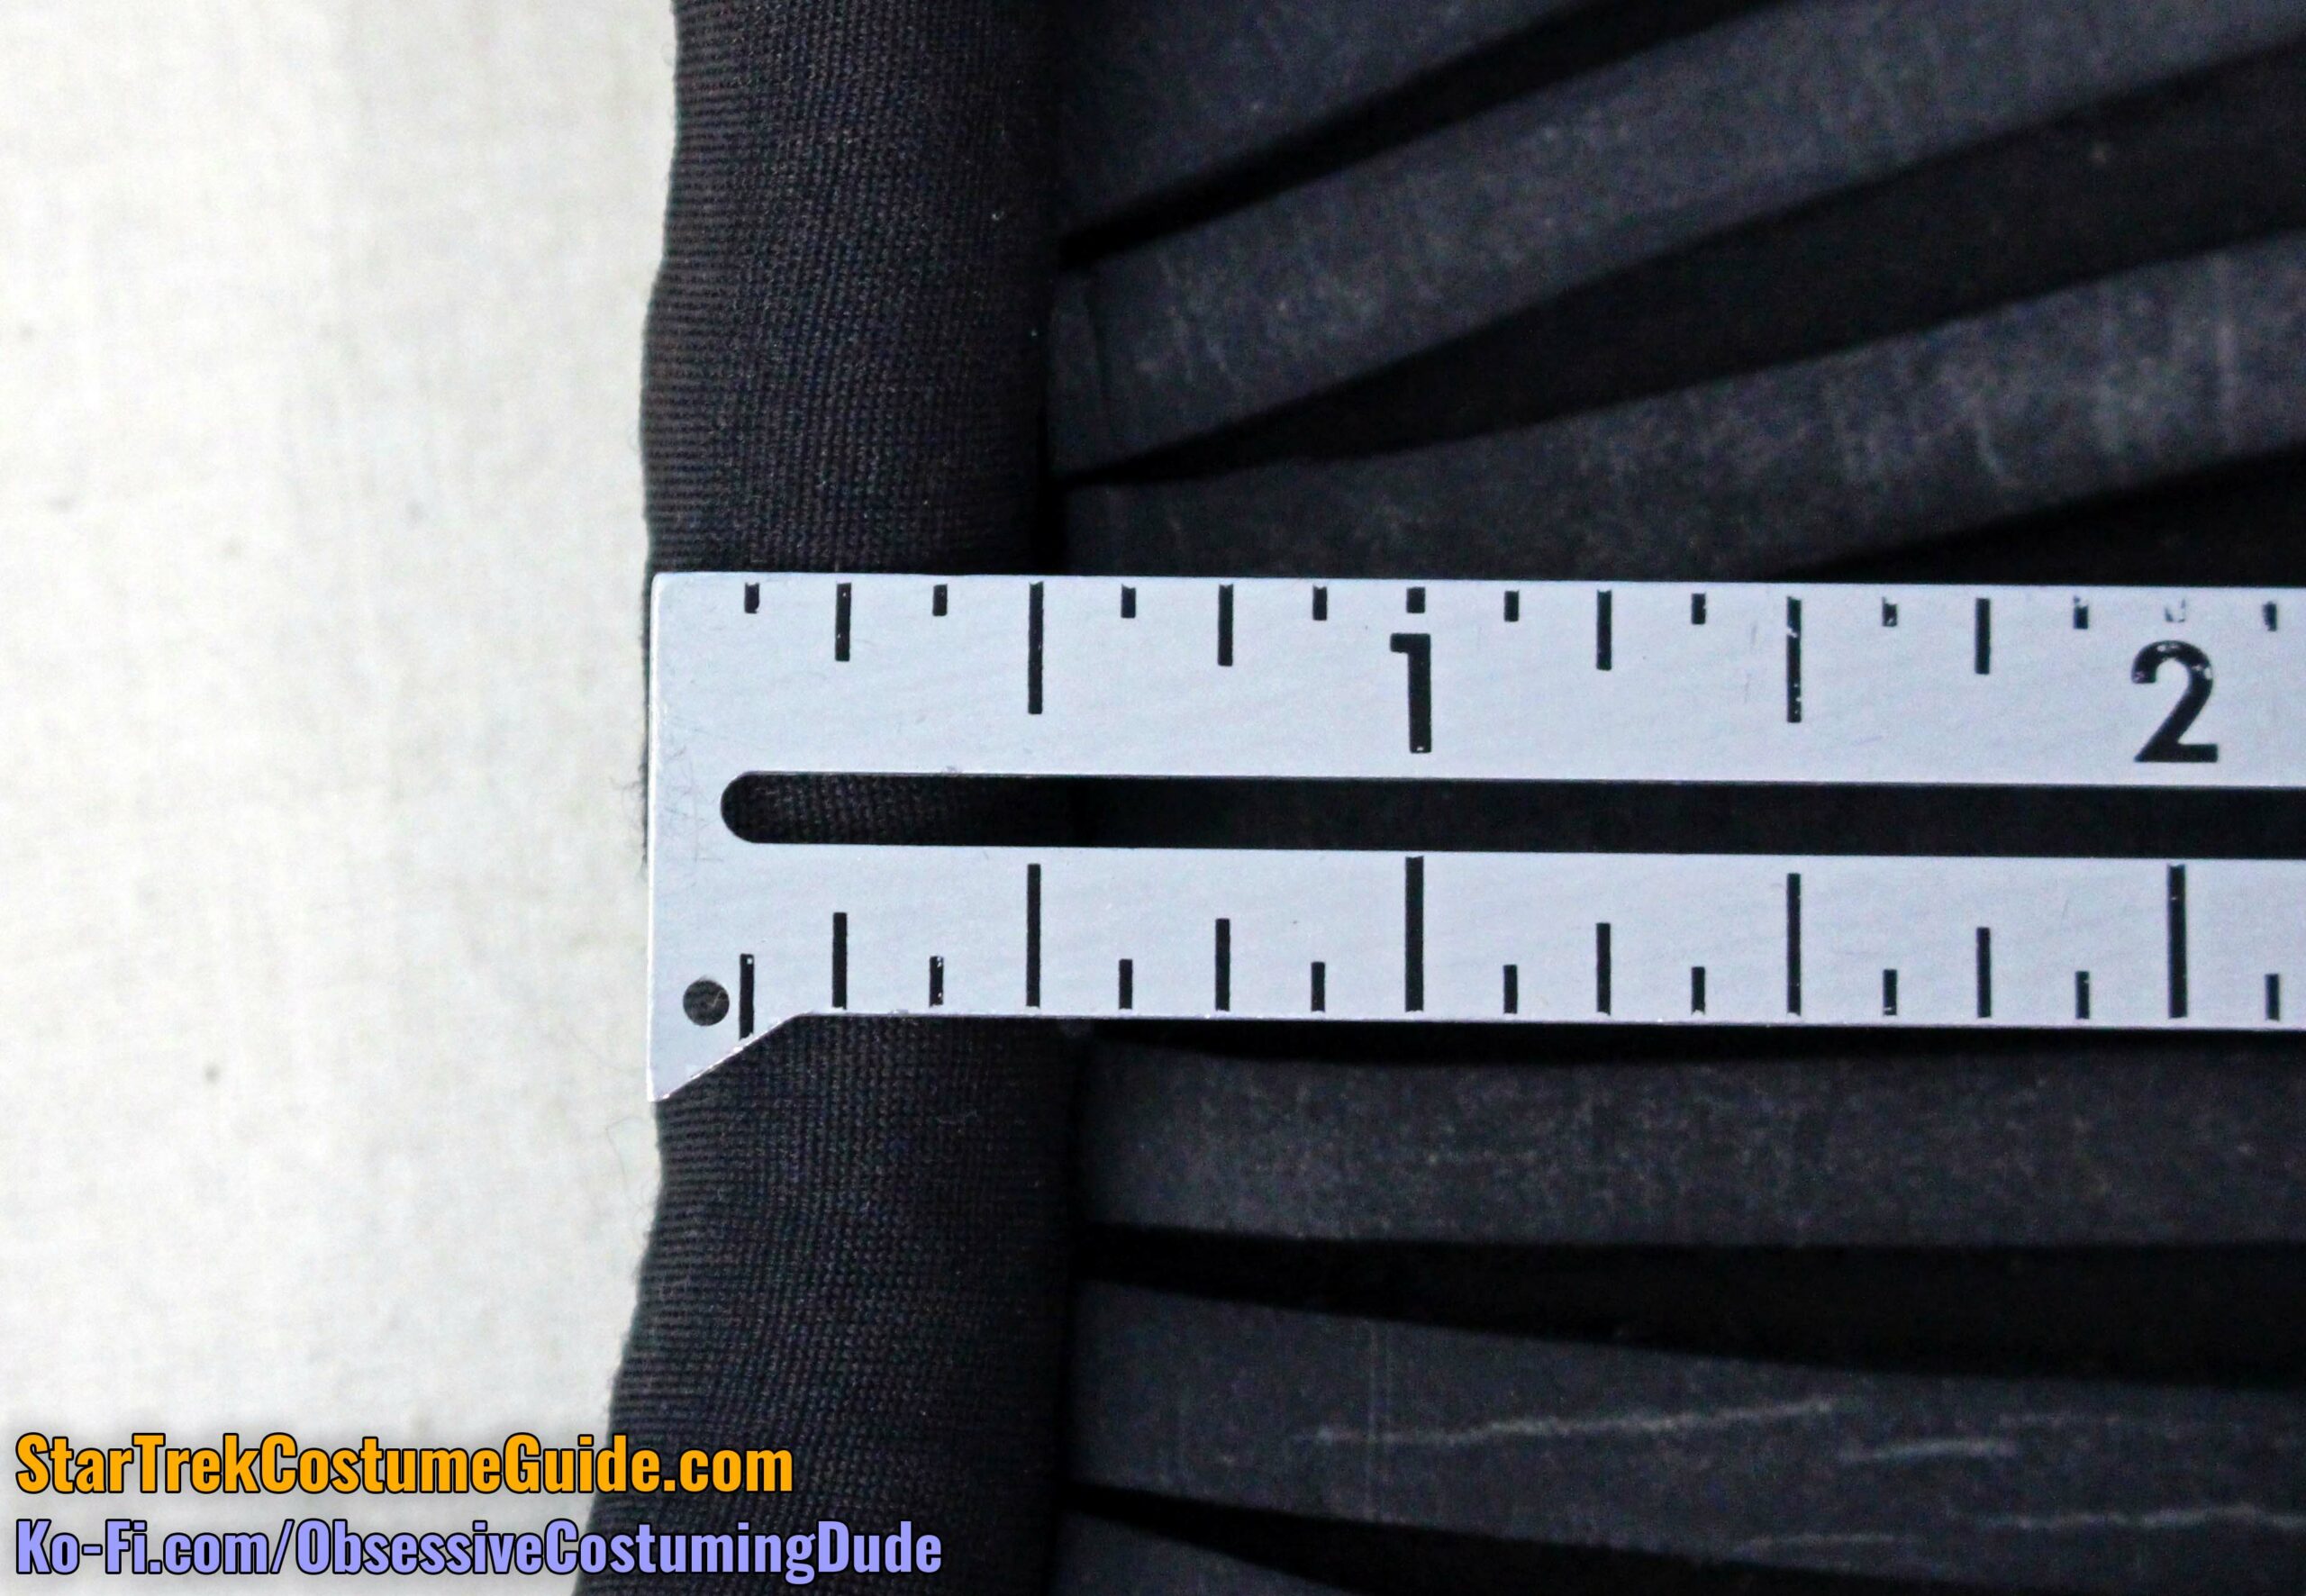
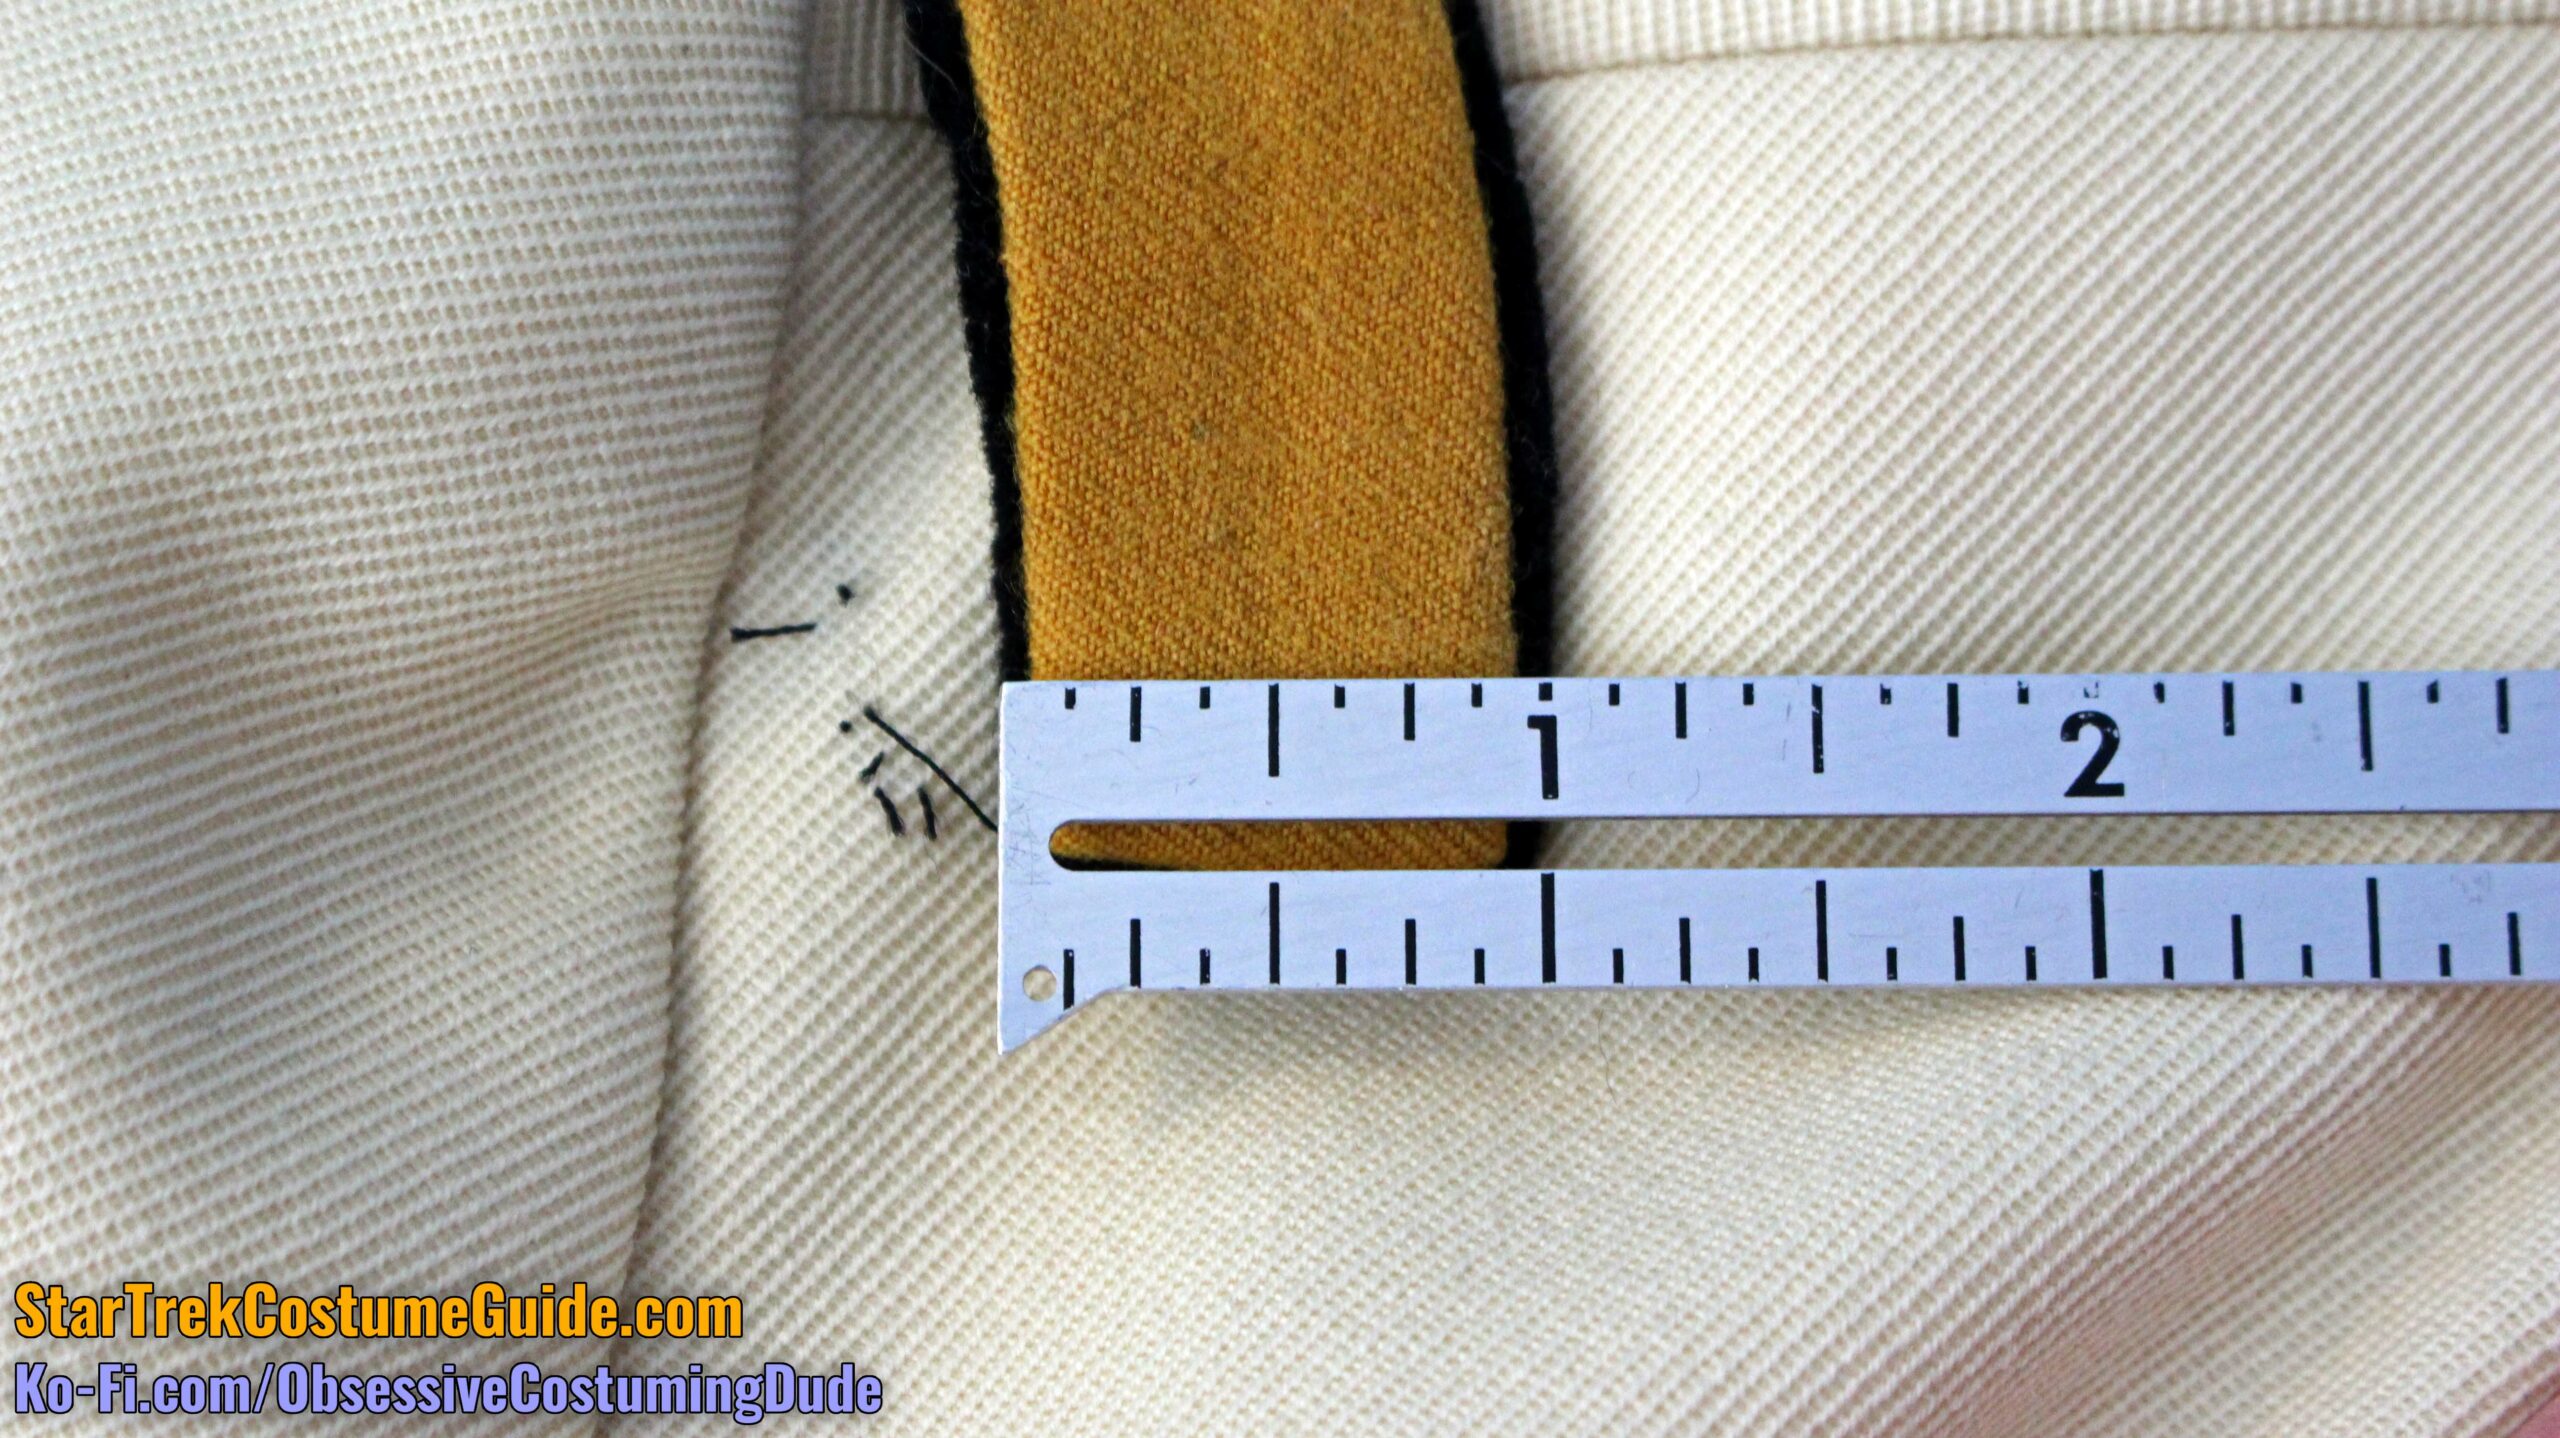
The aforementioned strips were approximately ¼” wide, although their width did vary slightly – probably due to minor irregularities in the cutting rather than by intentional design.
These strips were simply glued onto the base layer and while a few had understandably come loose over the decades, they were mostly still secure.
One of them was noticeably longer than the rest and extended a little beyond the edge.
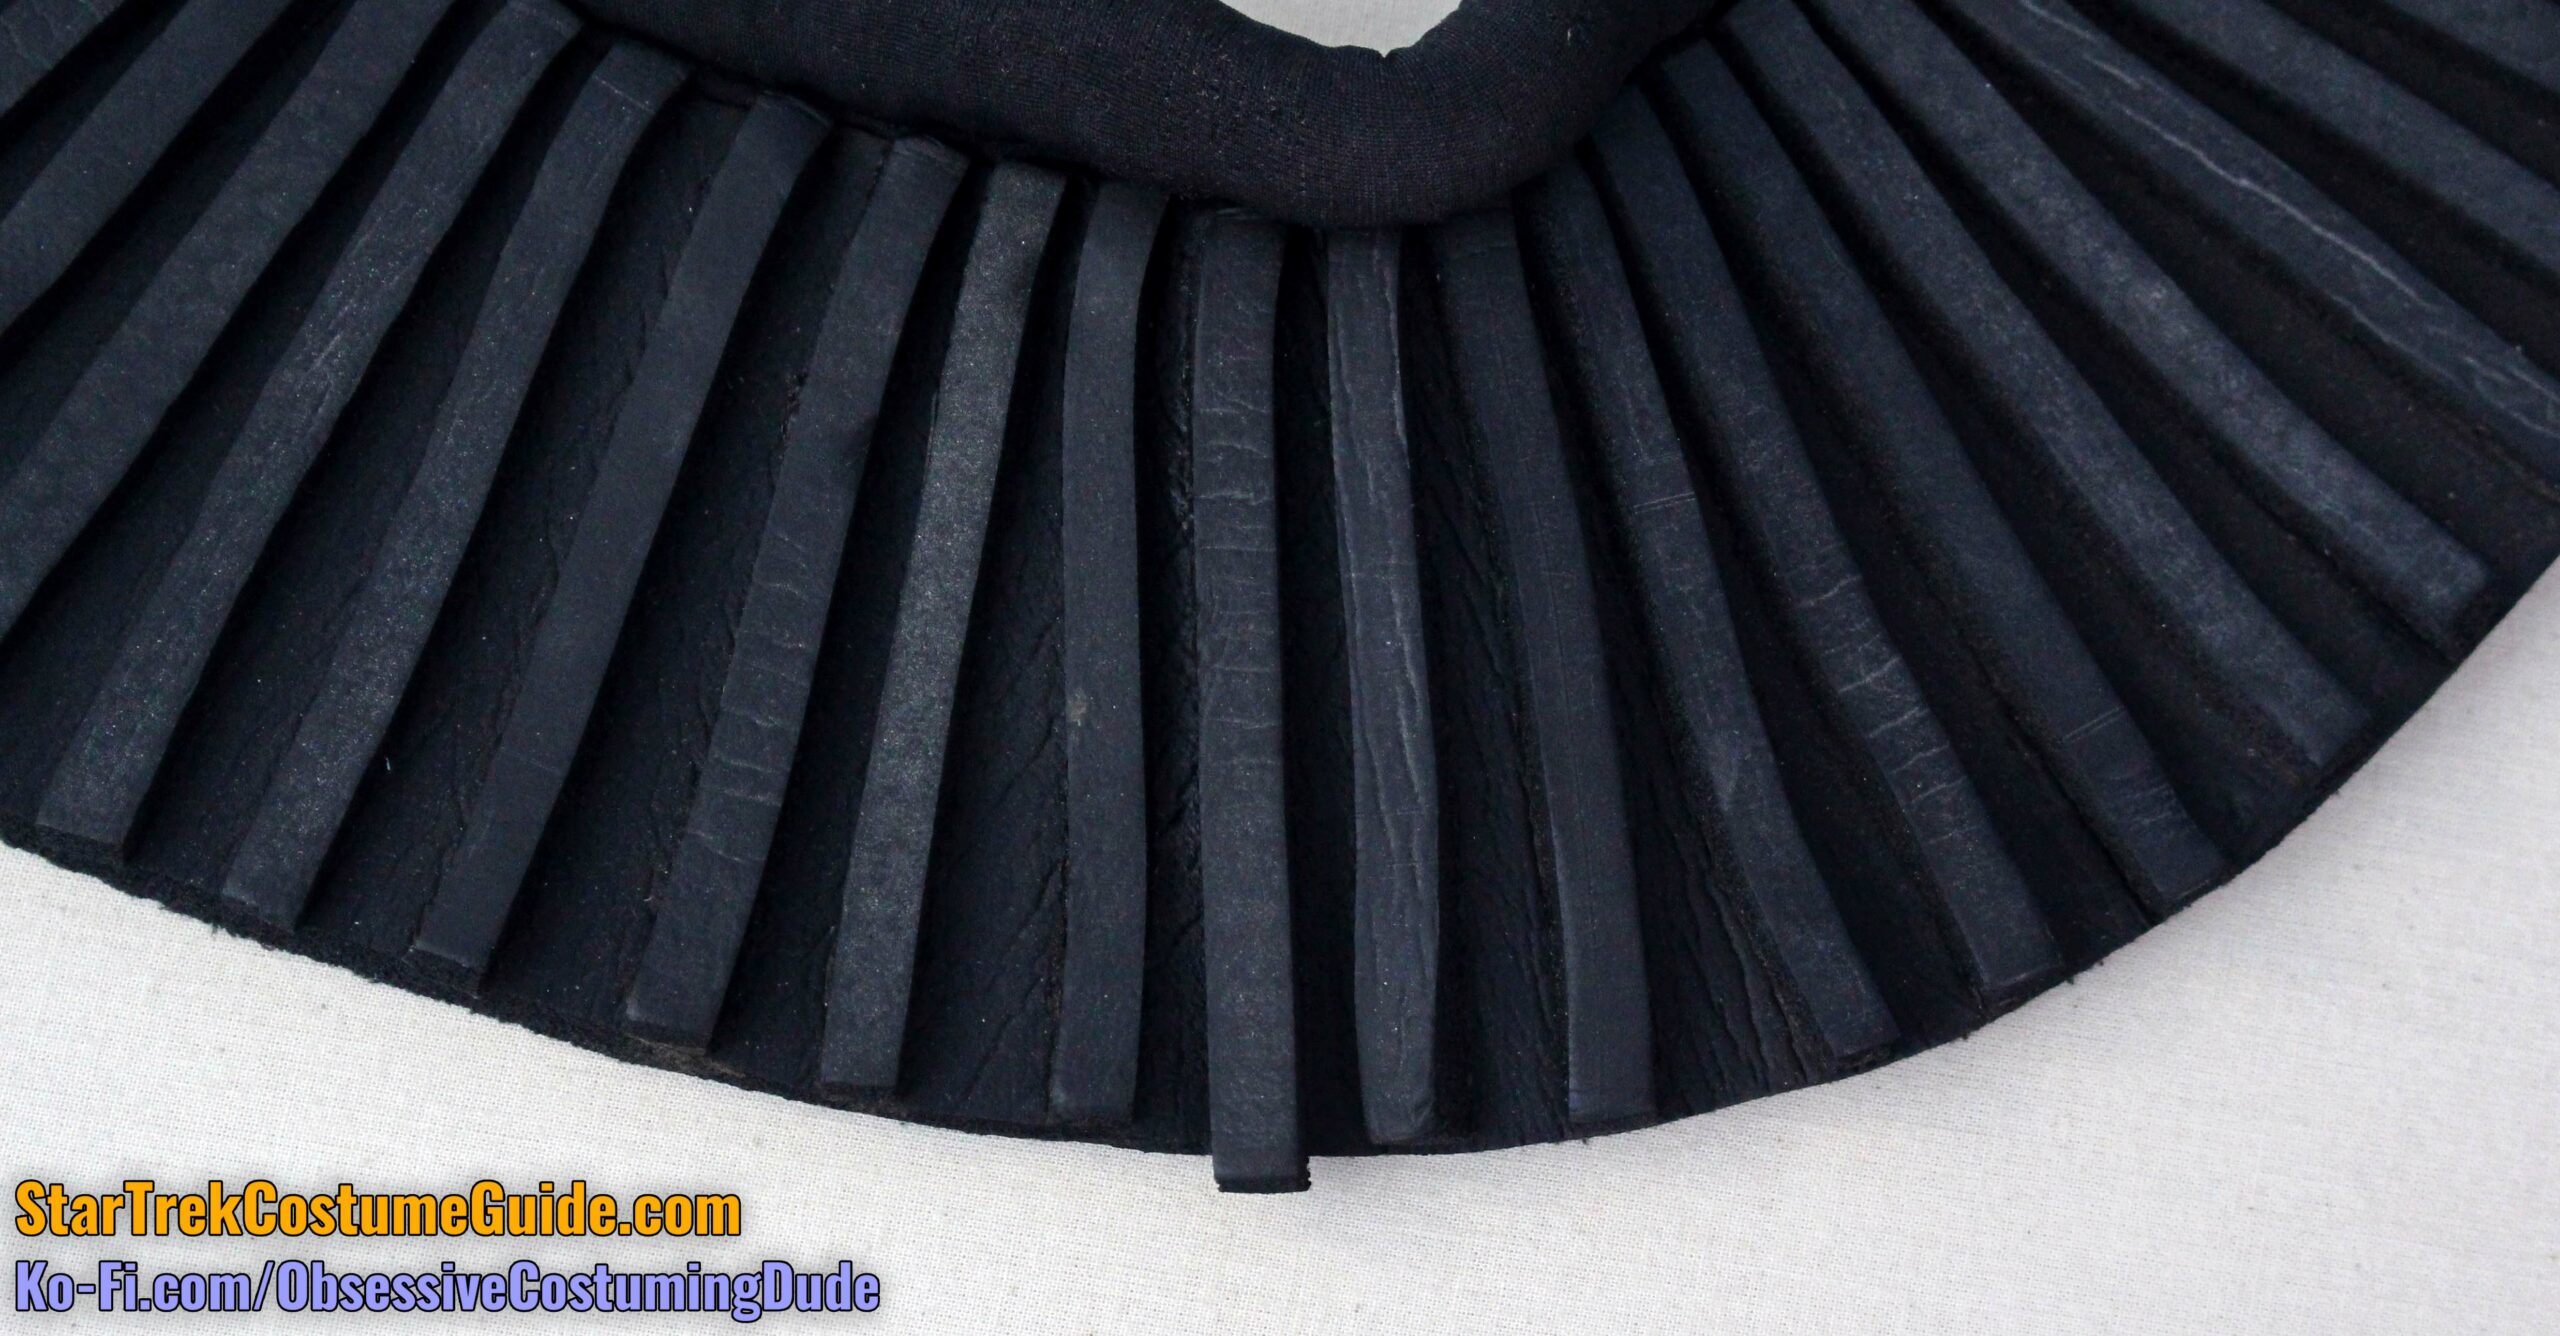
There didn’t seem to be any specific pattern or formula to the alignment of the strips – at least, none that I could discern.
The general aesthetic was simply that the upper ends were closer together (albeit irregularly so) and “fanned out” a bit toward the bottom.
The centermost few did seem to be about ½” apart at the bottom, though.
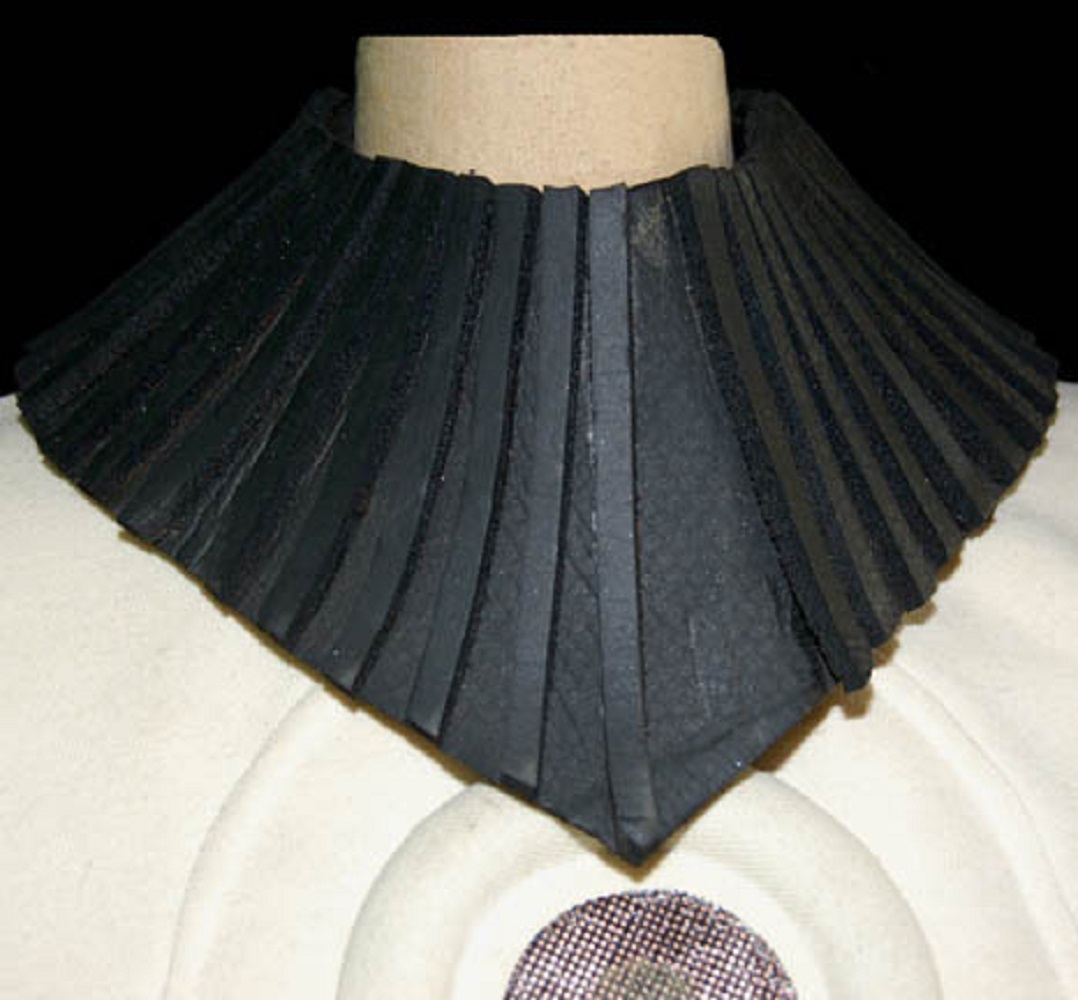
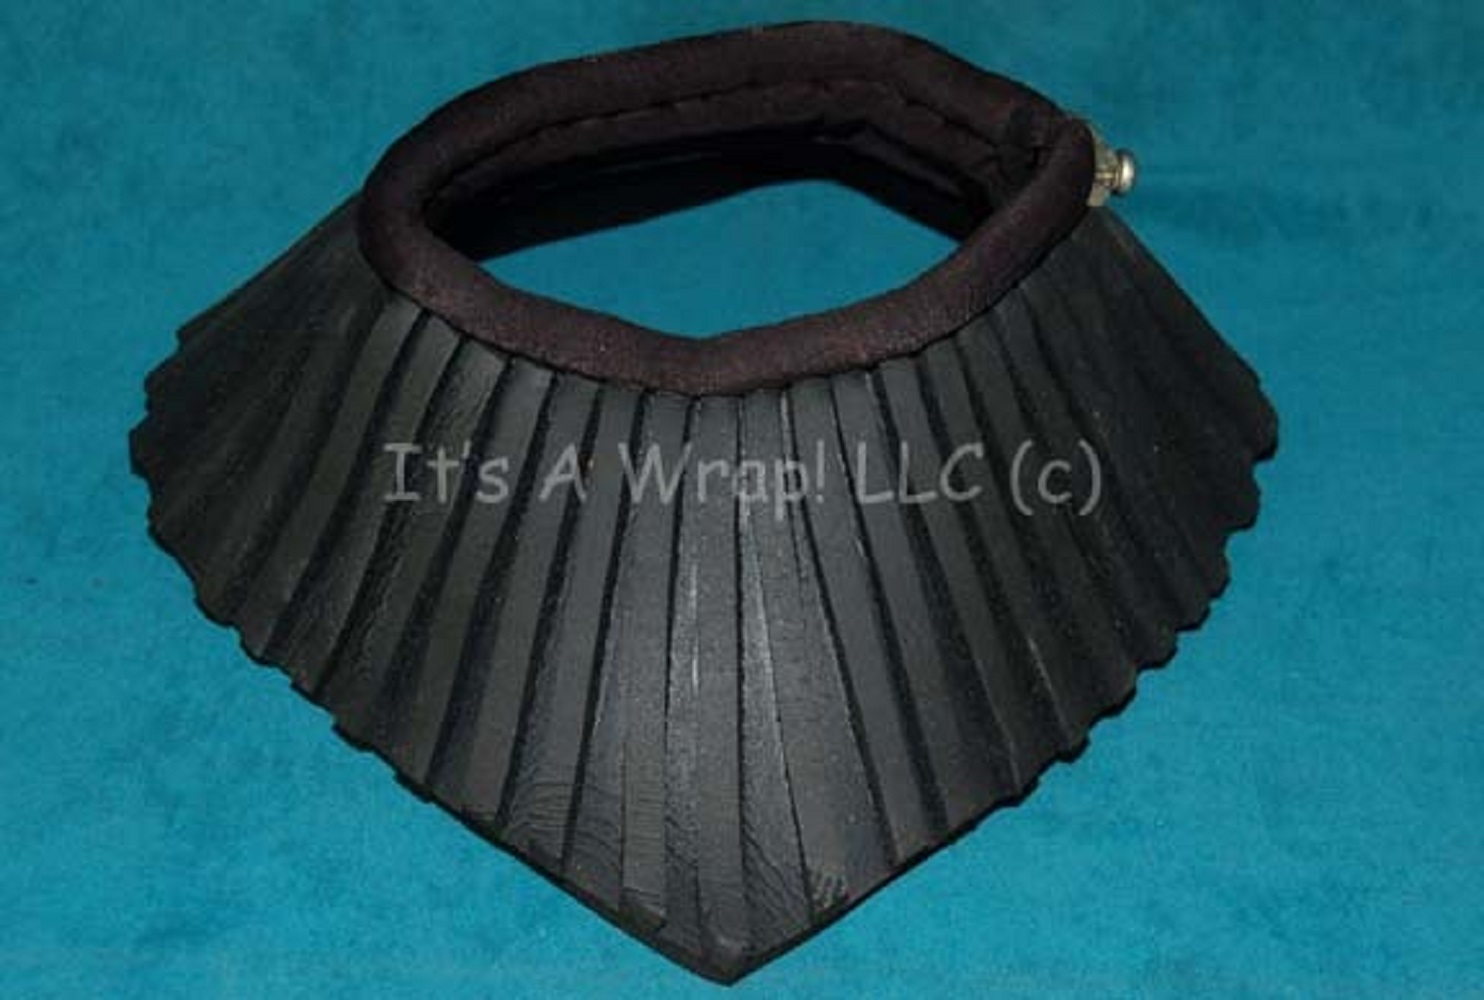
Here are some auction photos of a few other black collars, in which you can see a similar aesthetic but apparent lack of standardized positioning; I believe this was simply left to the discretion of the individual costumer(s).
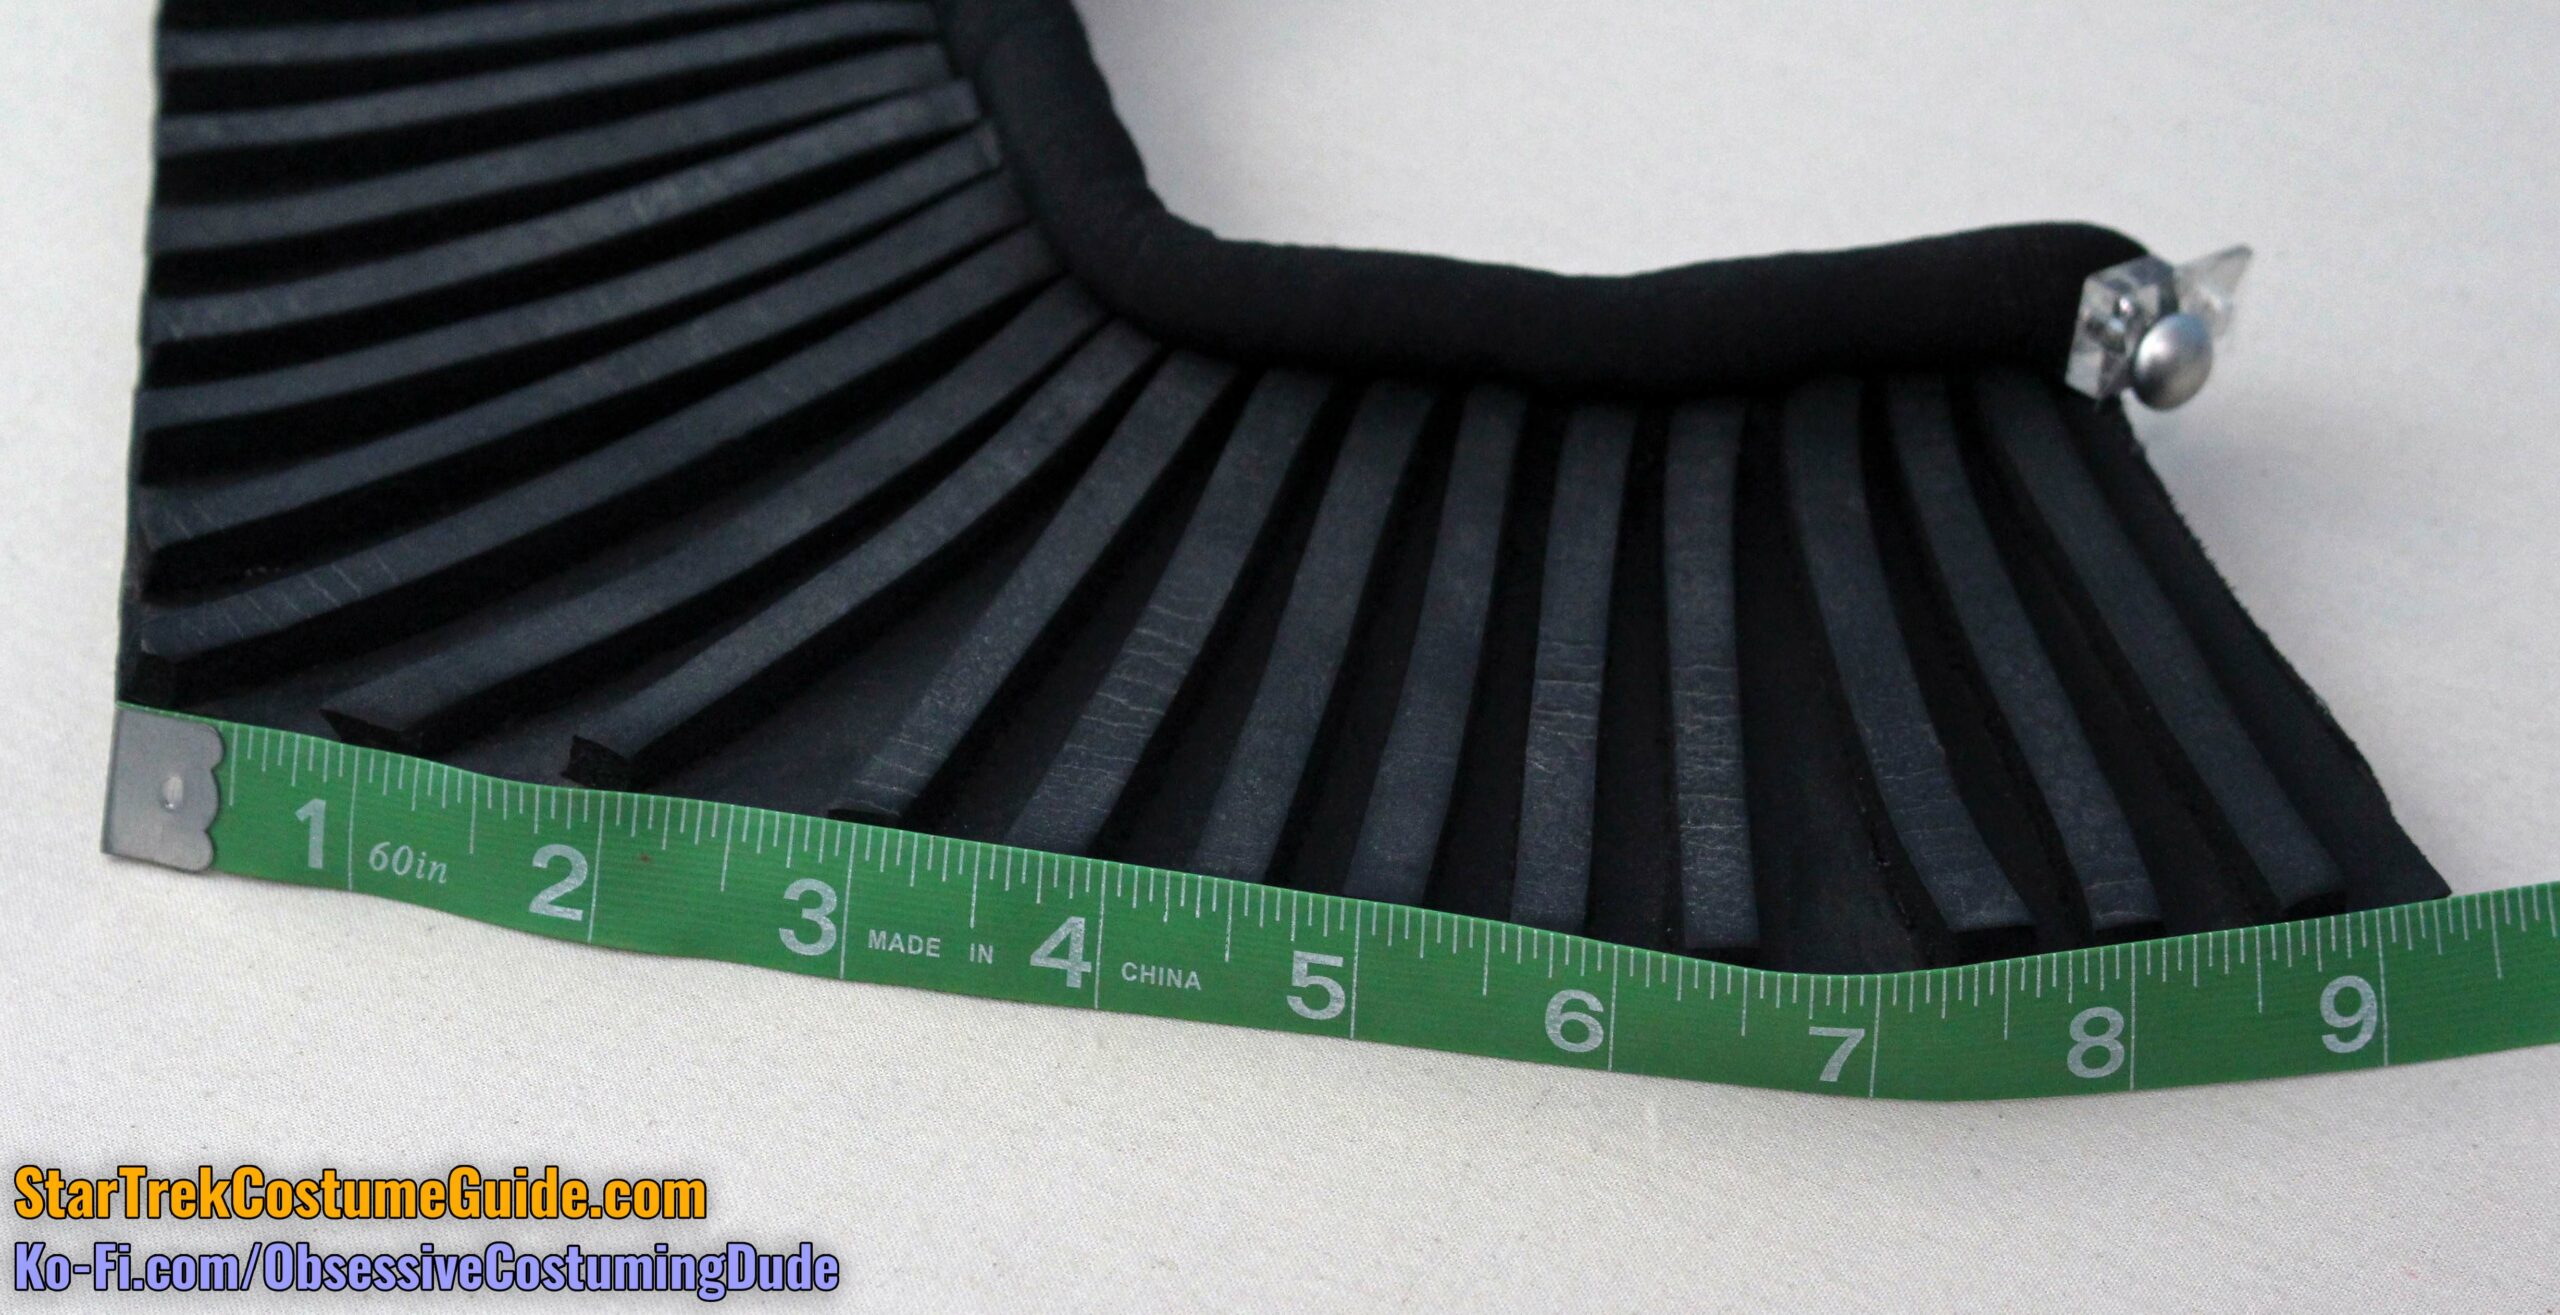
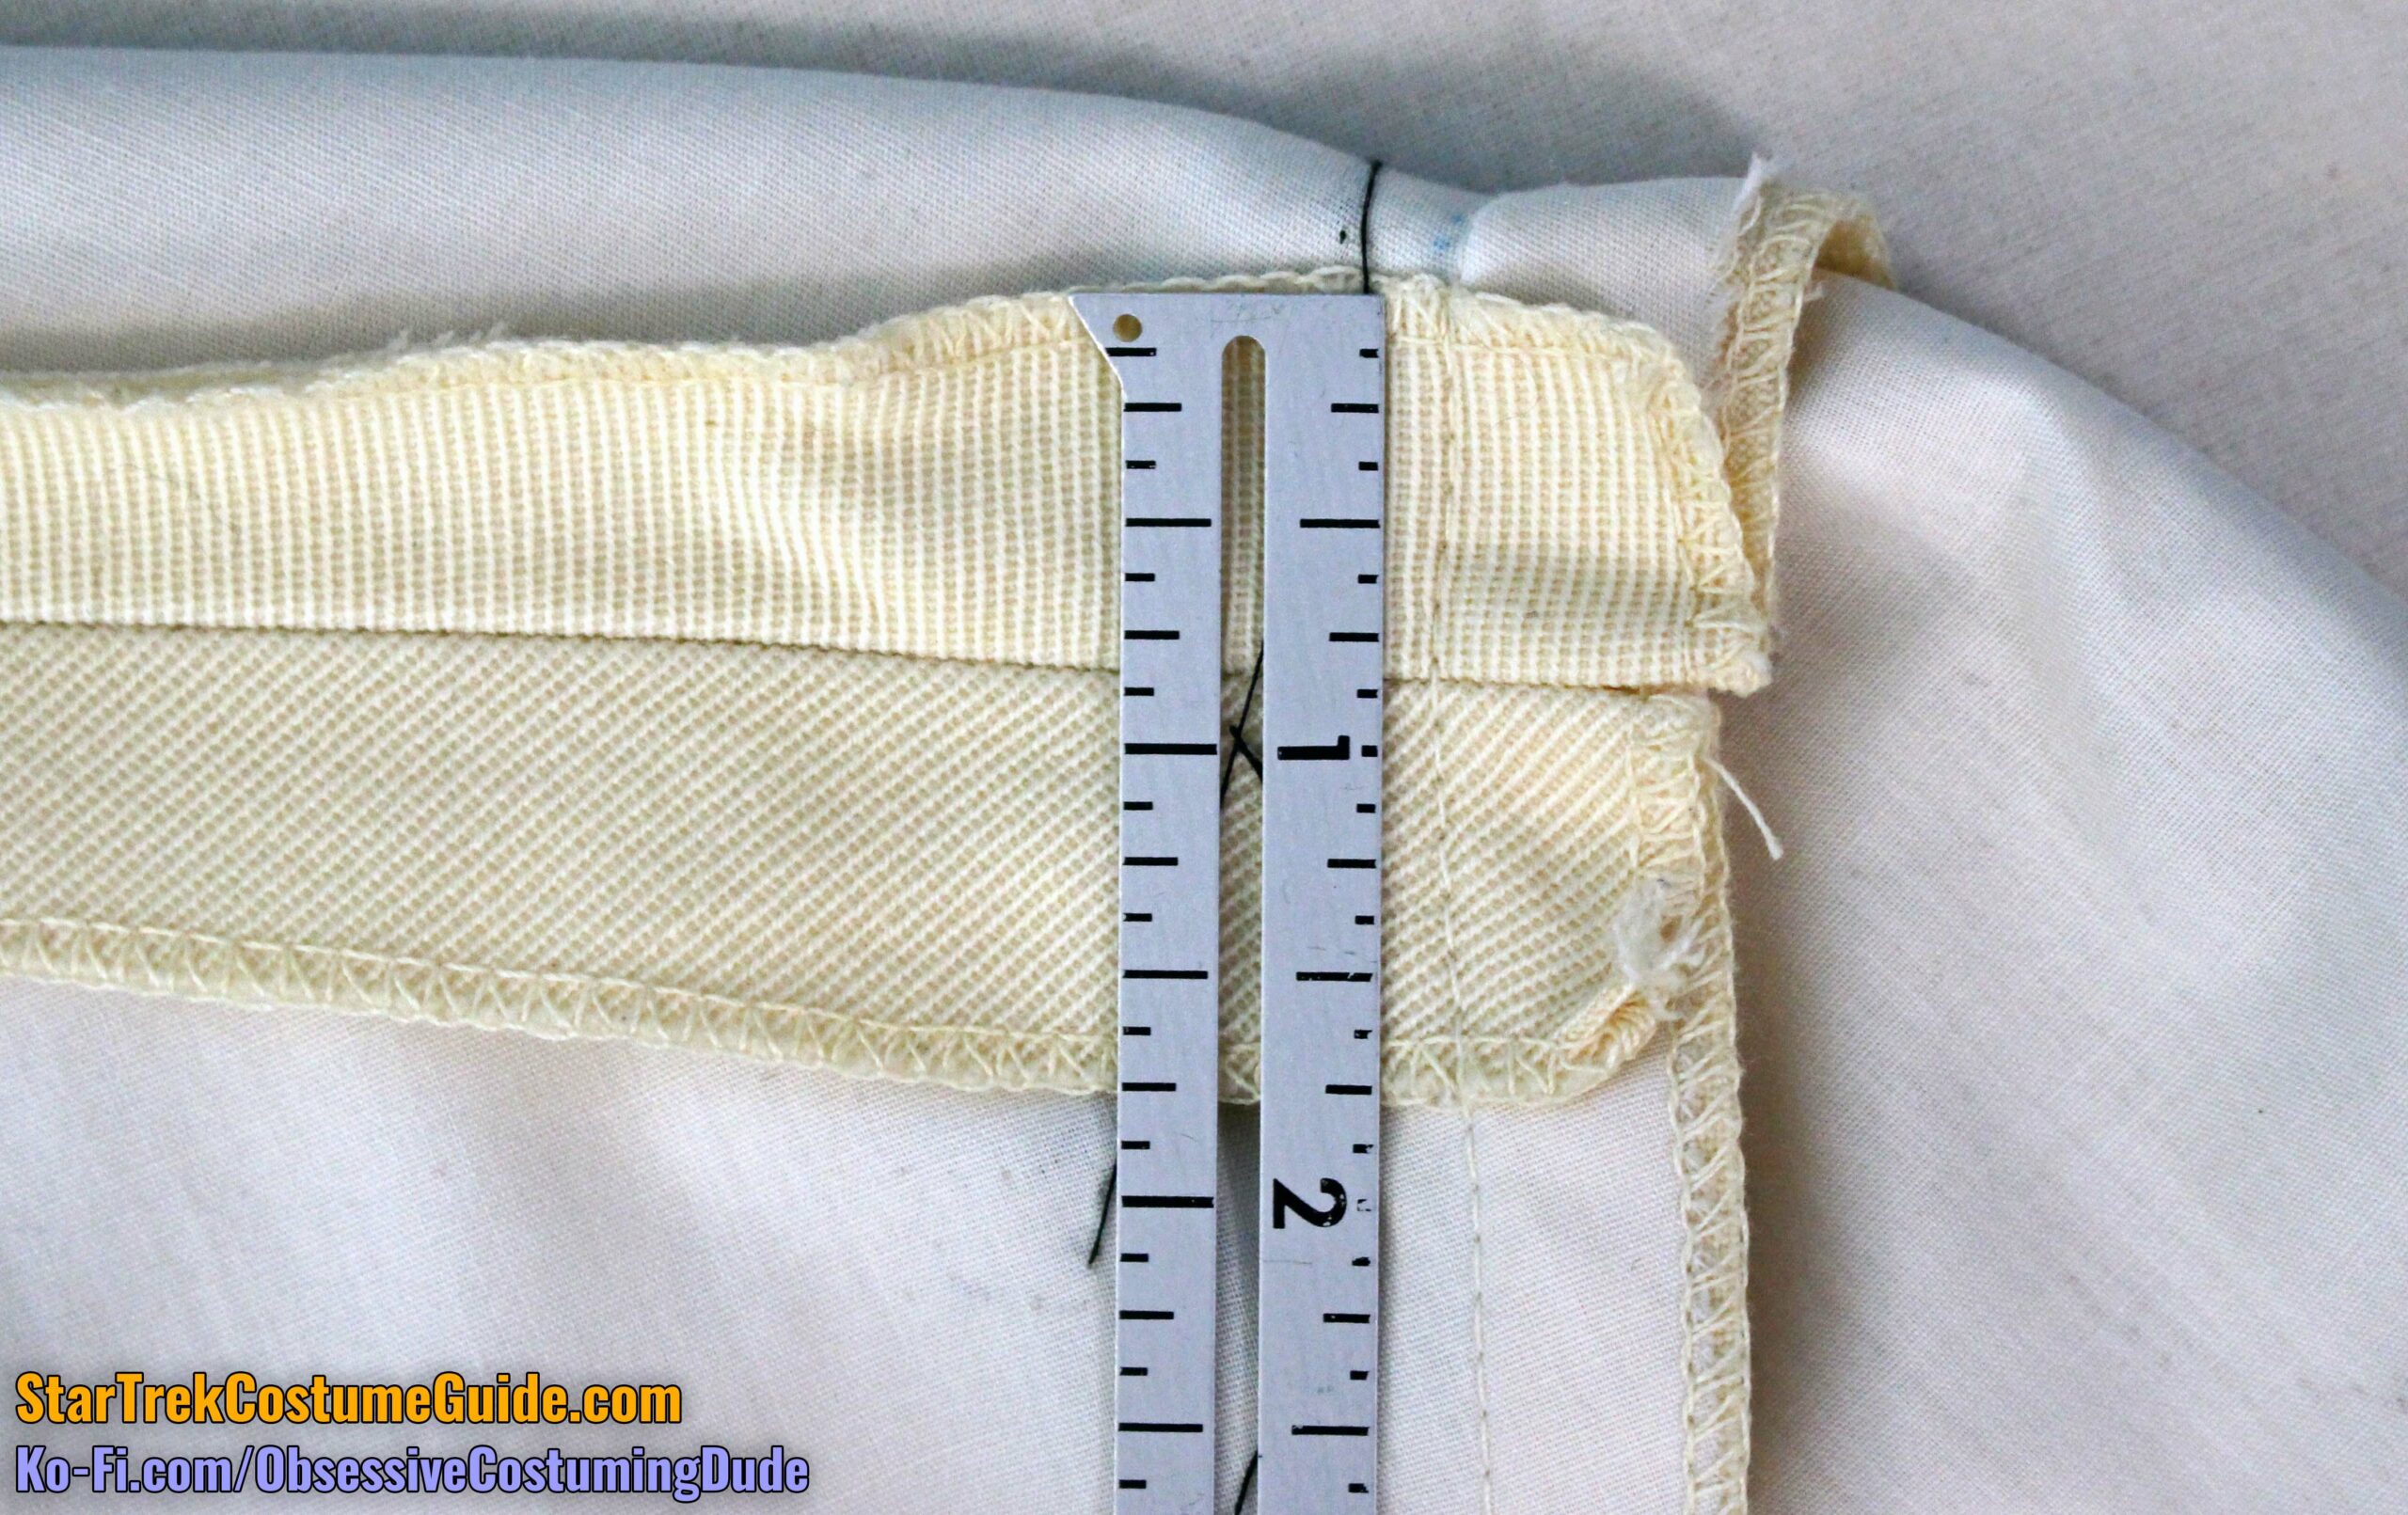
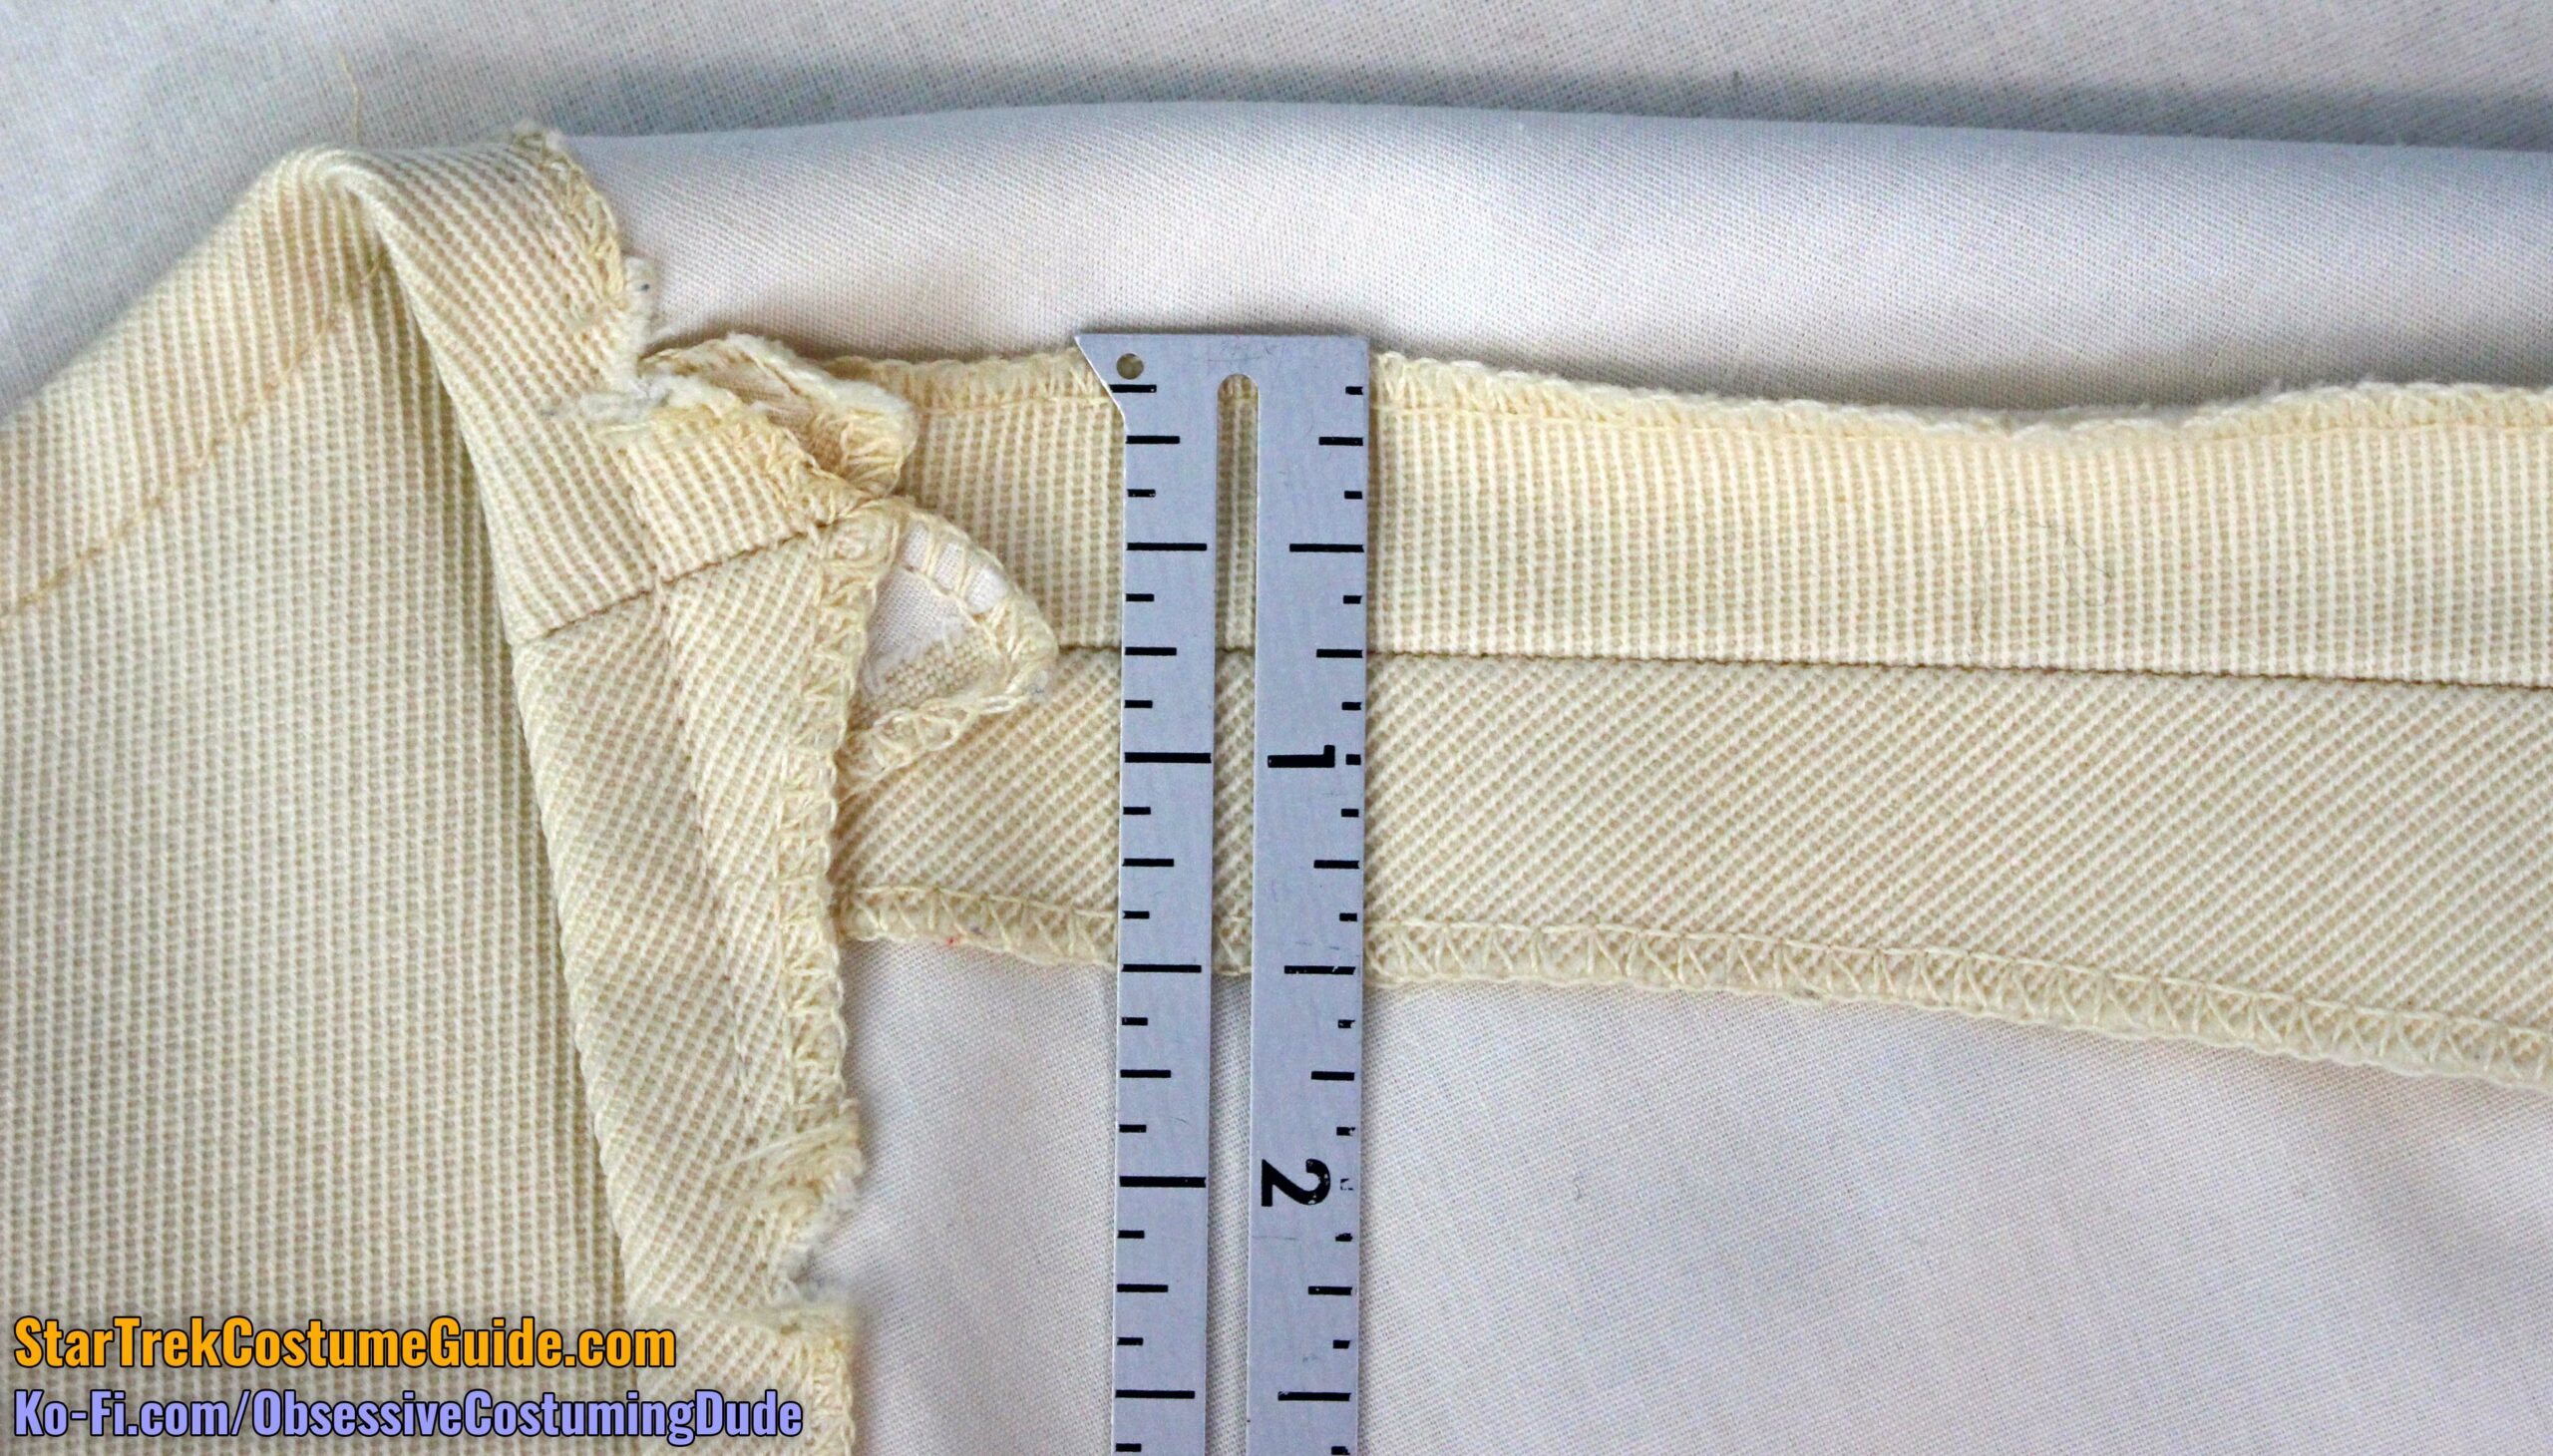
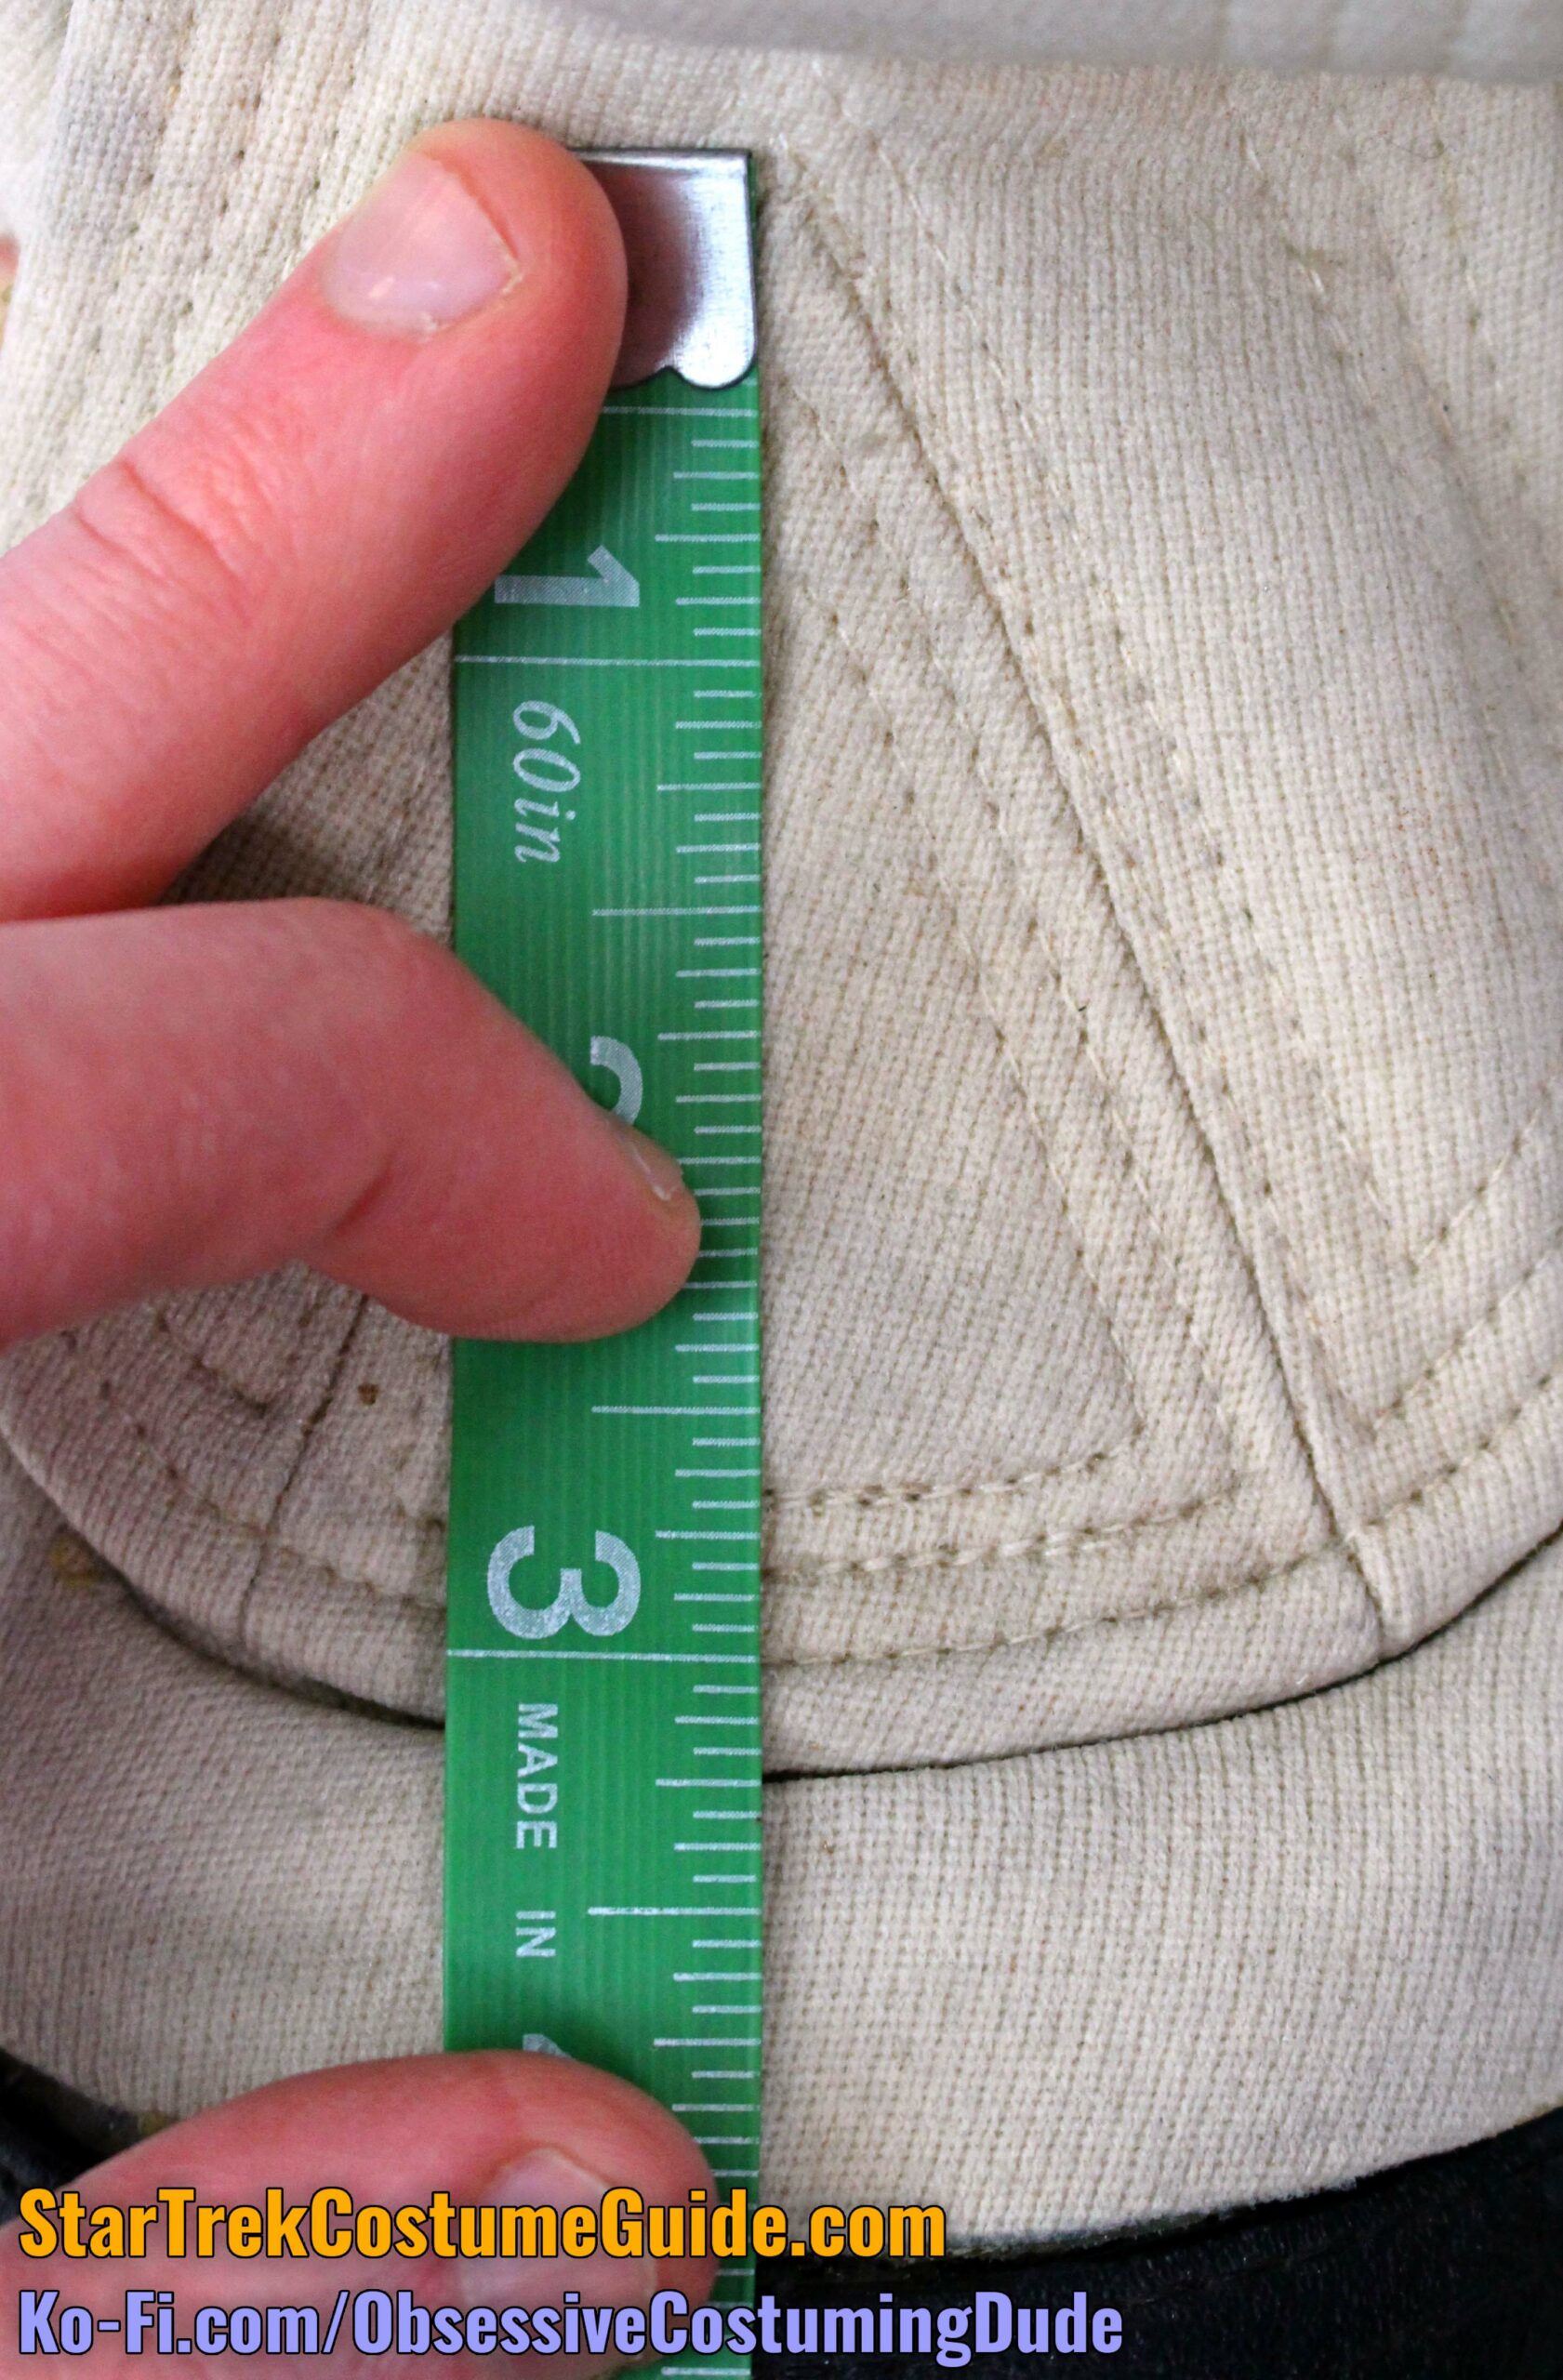
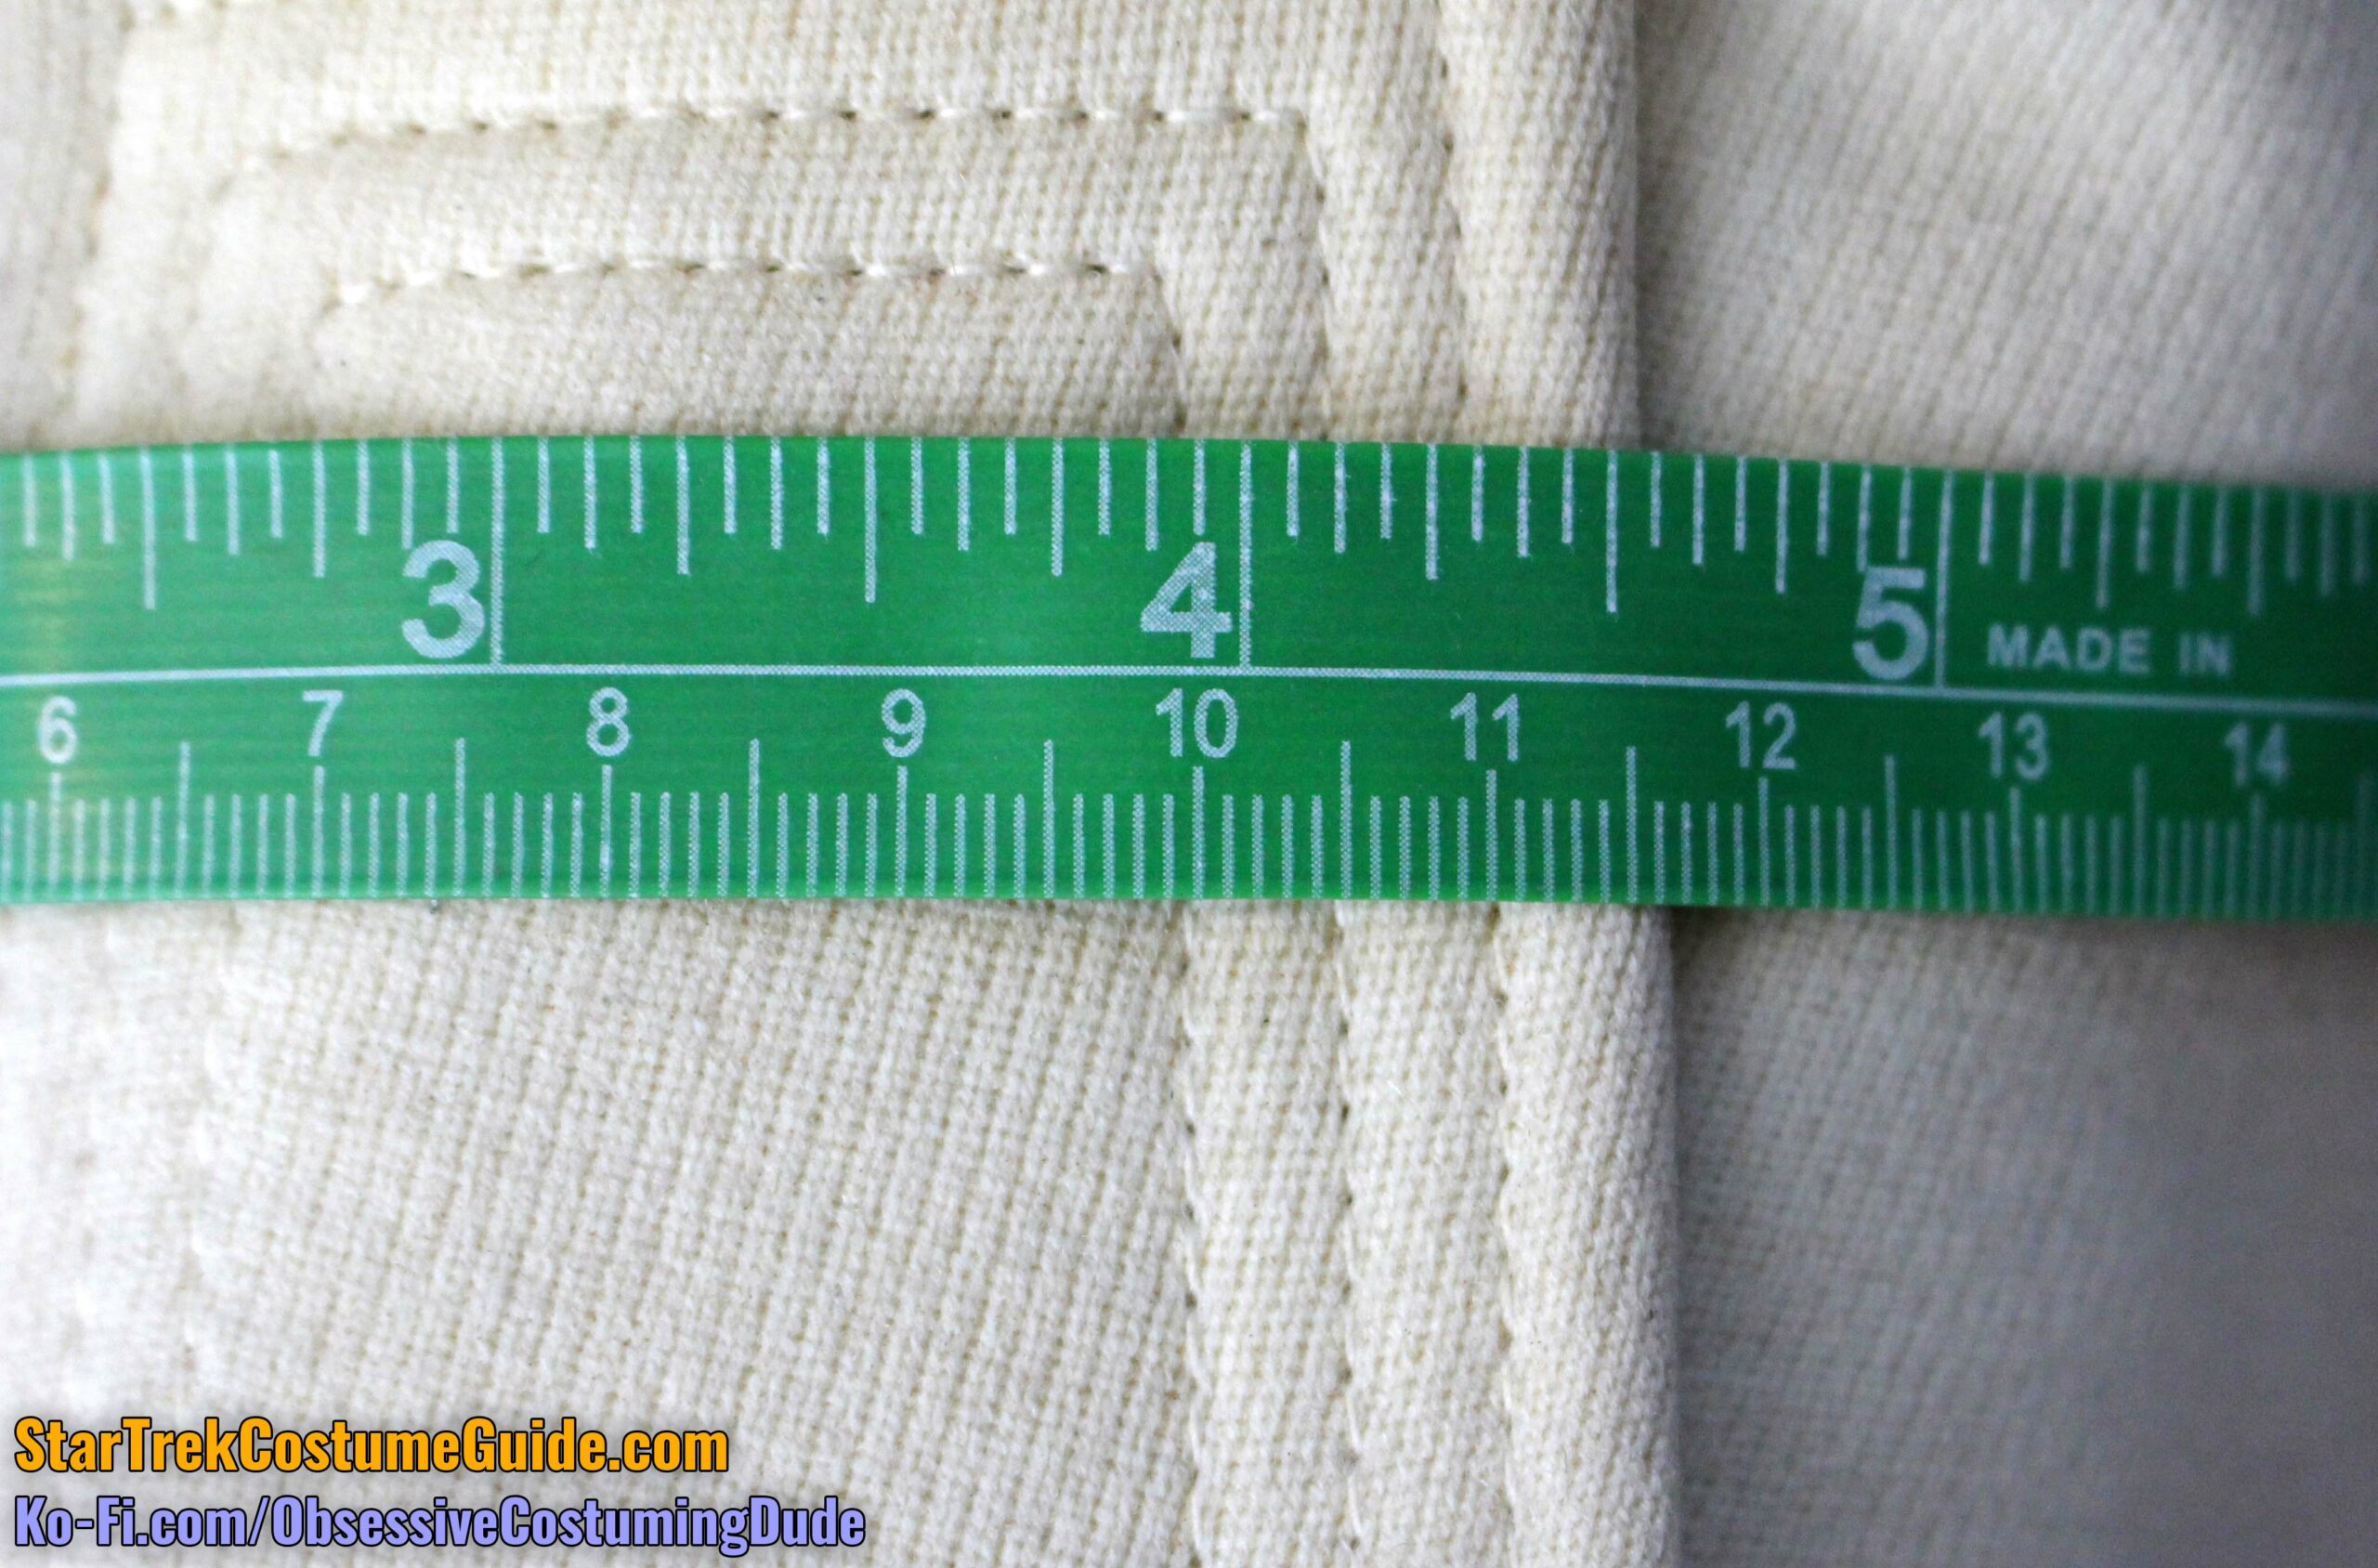
The collar measured 4 ⅞” deep at the center front, and 3 ½” deep at the sides.
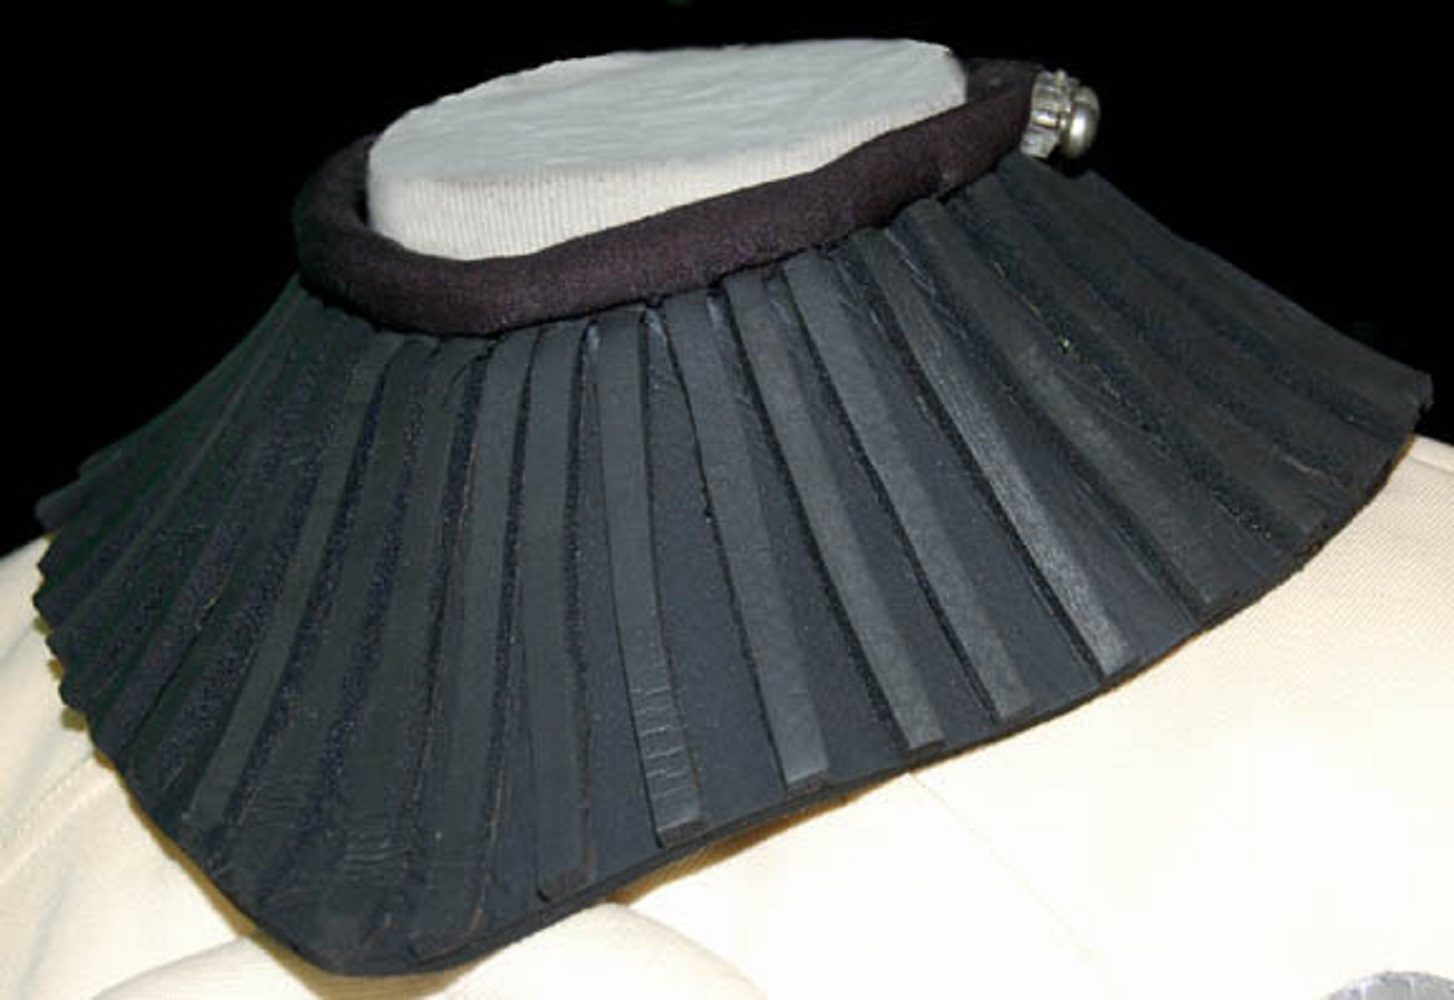
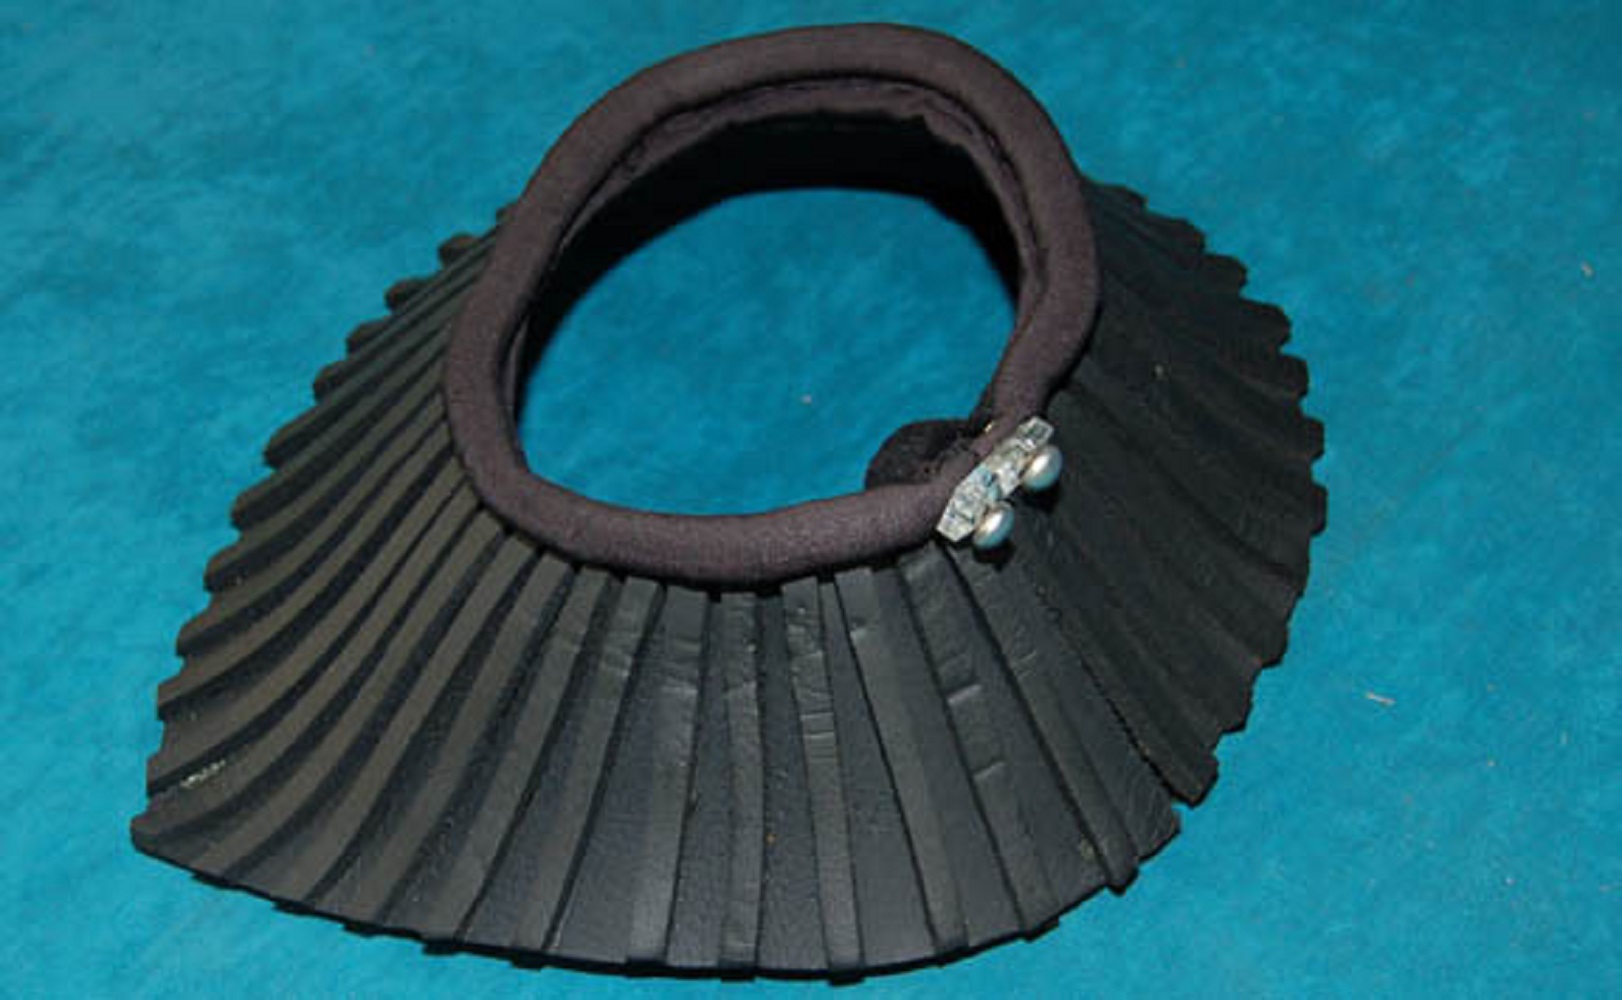
Along the neck of the collar was a round black band, which appears to have been black spandex wrapped around ½” cord, forming a length of custom-made piping.
The lip of this piping was glued to the underside of the neoprene base.
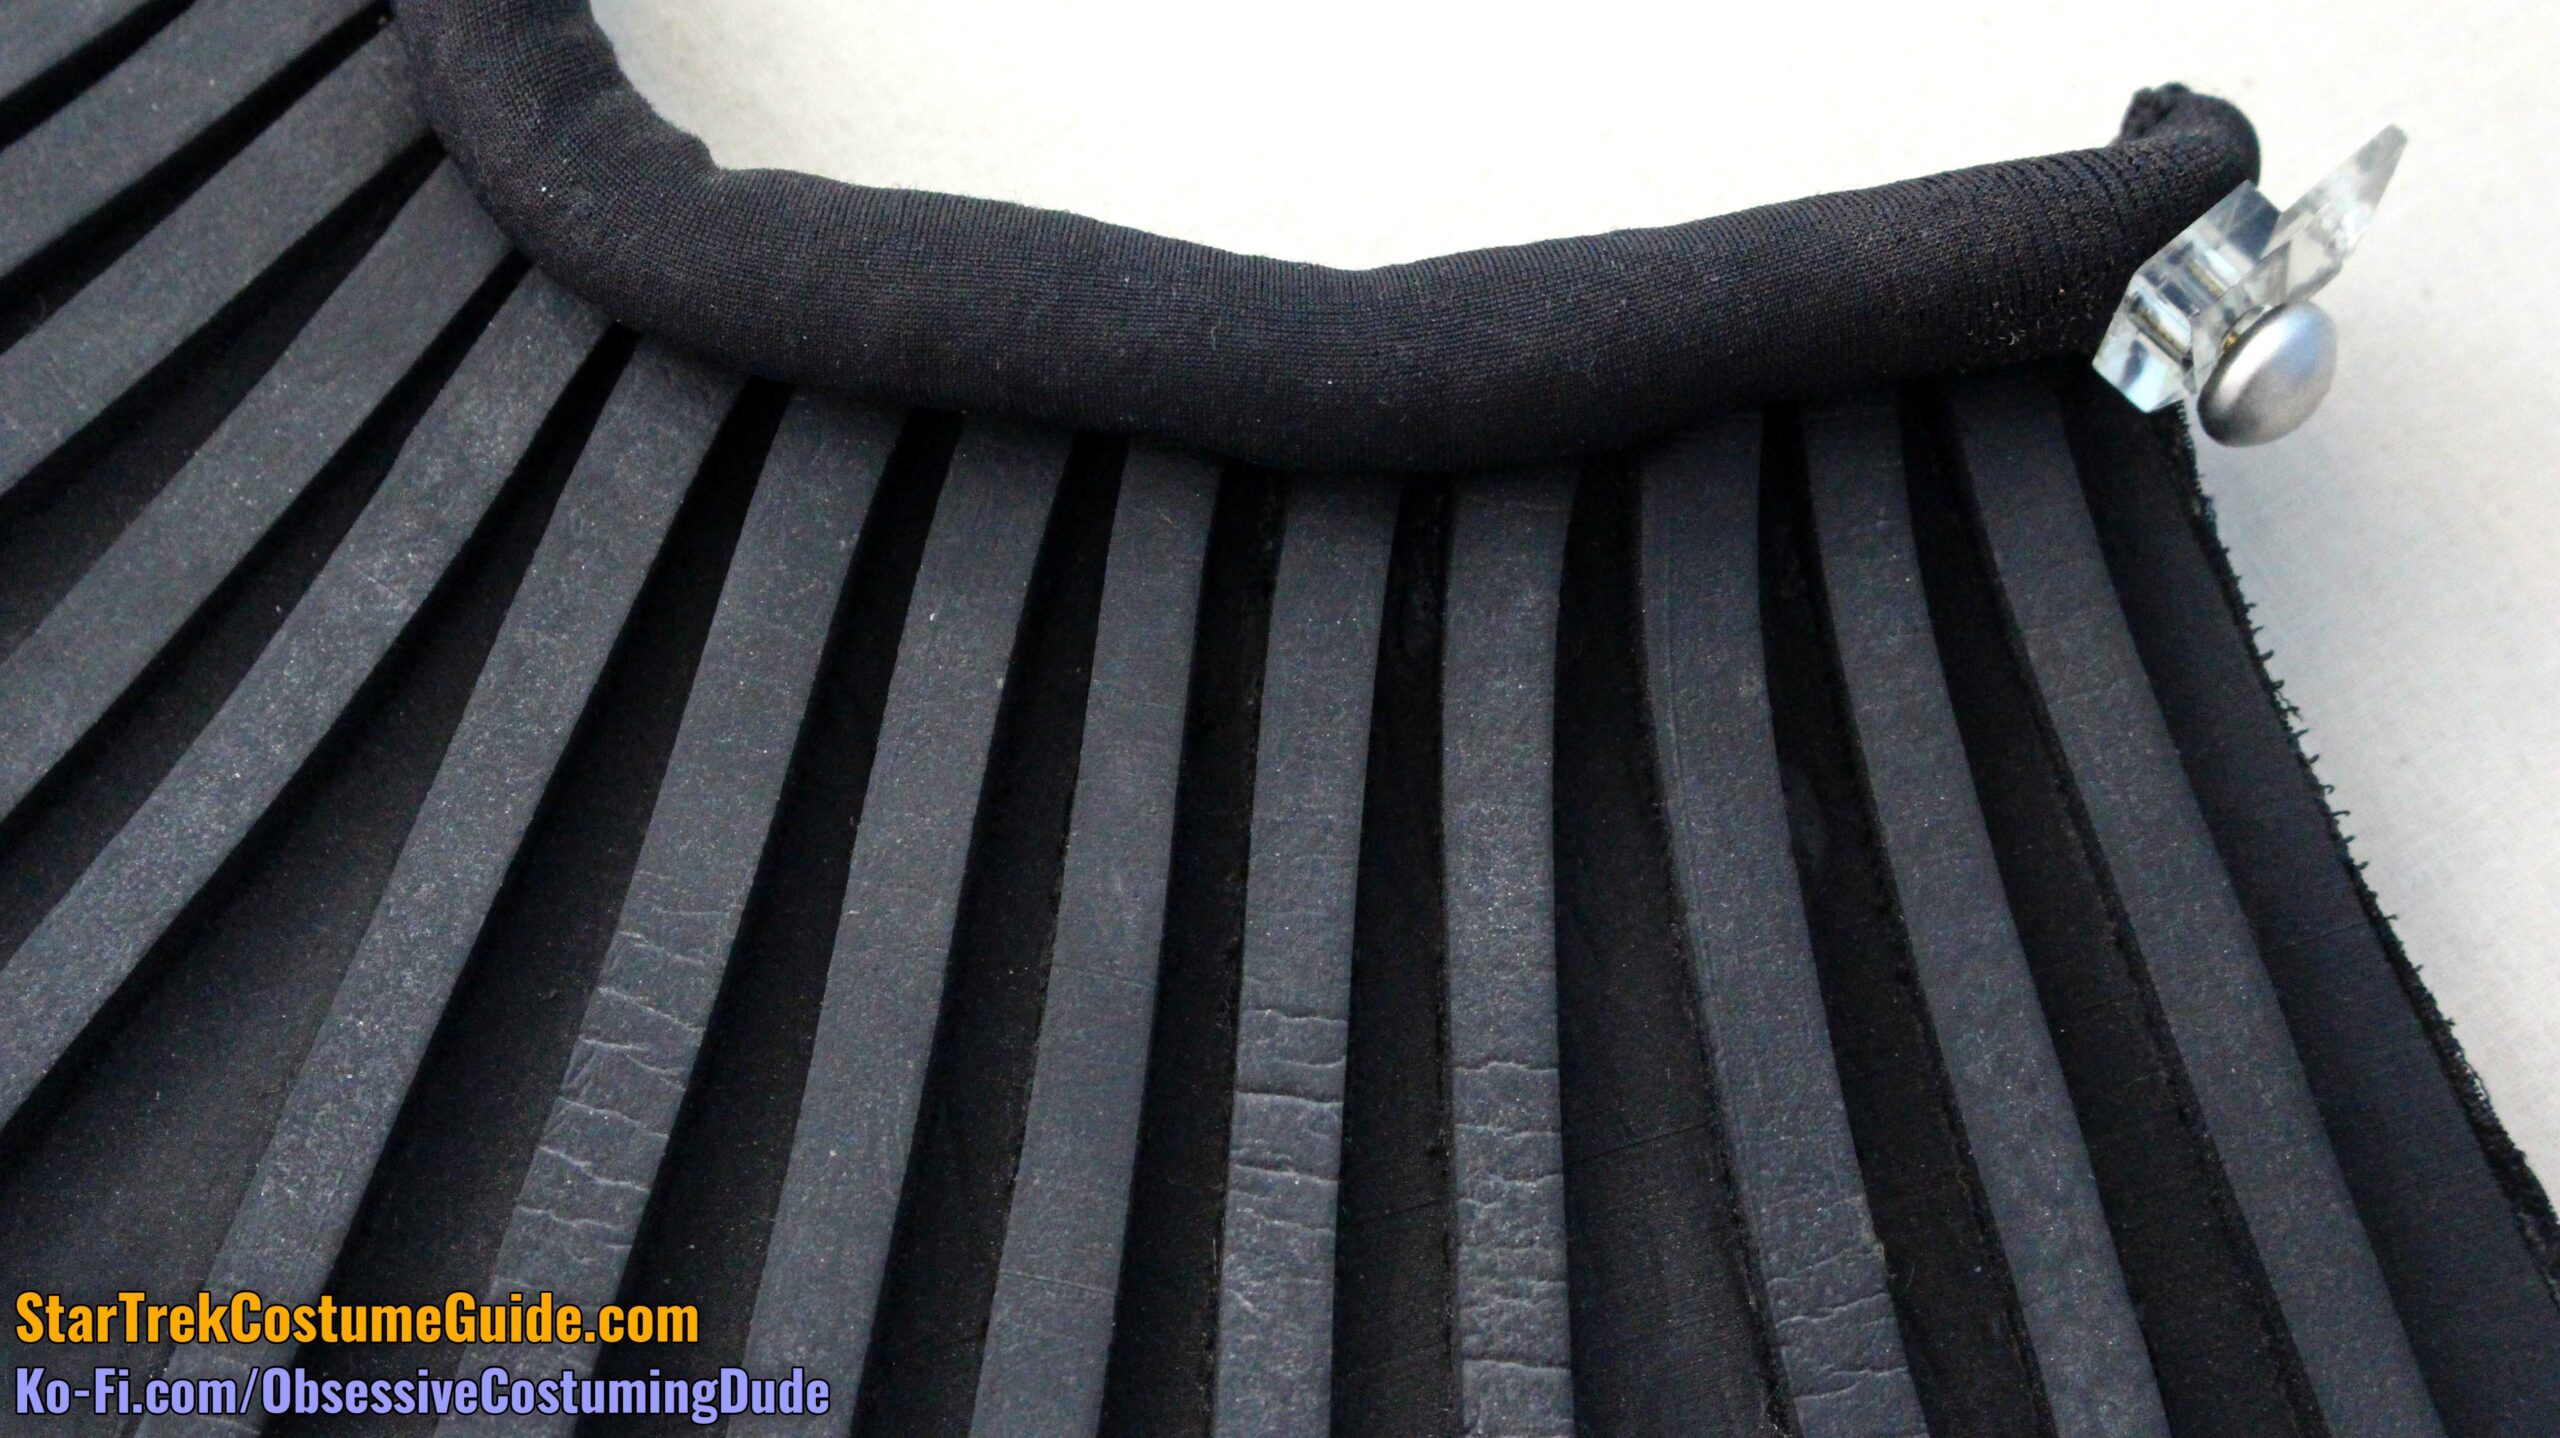
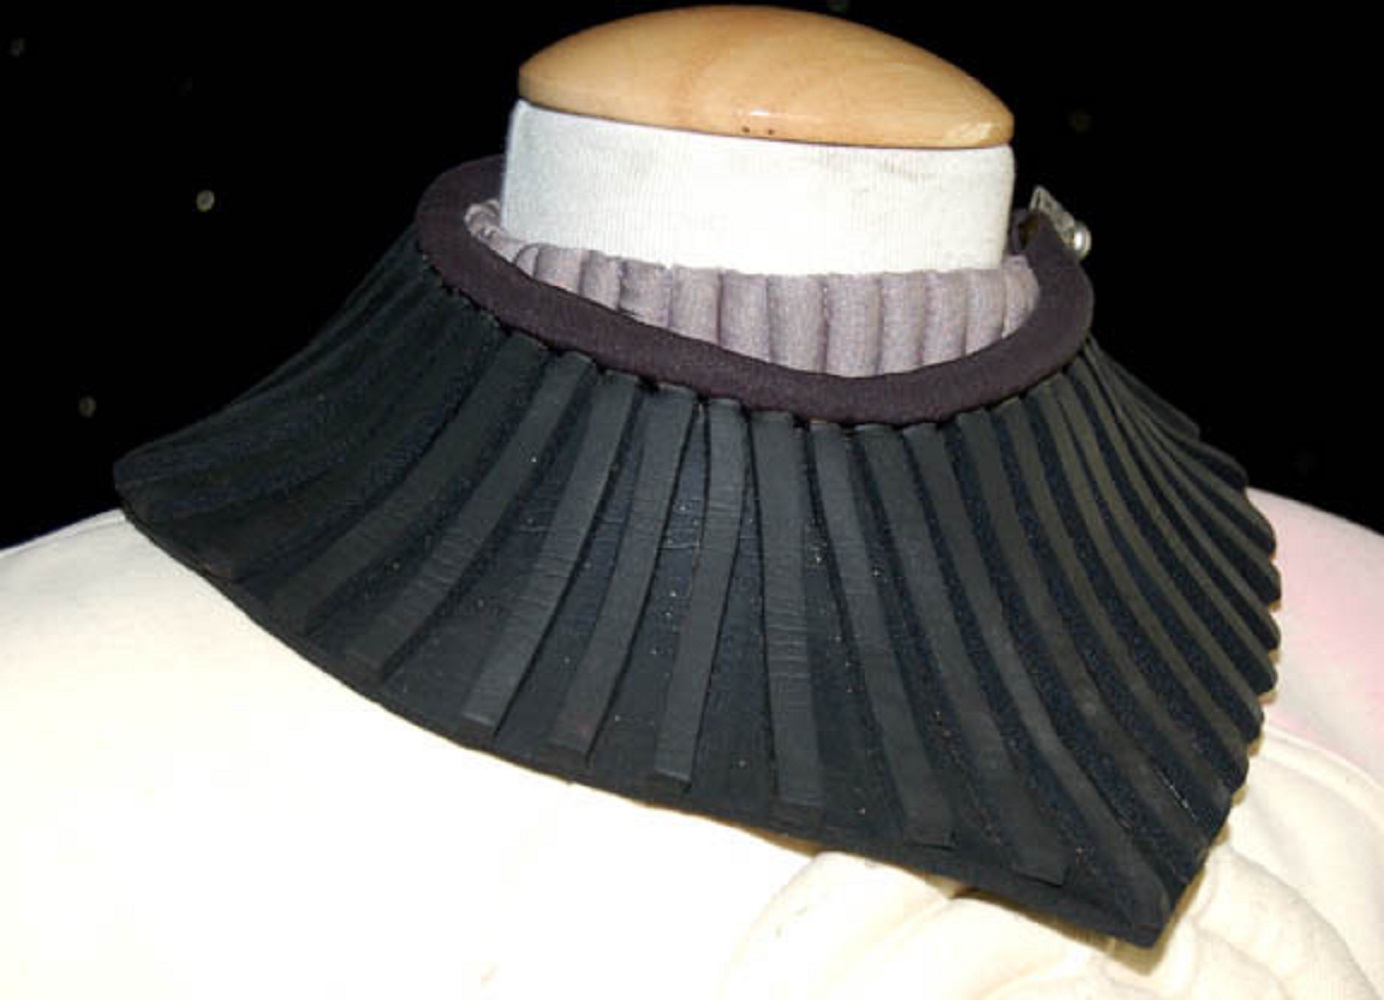
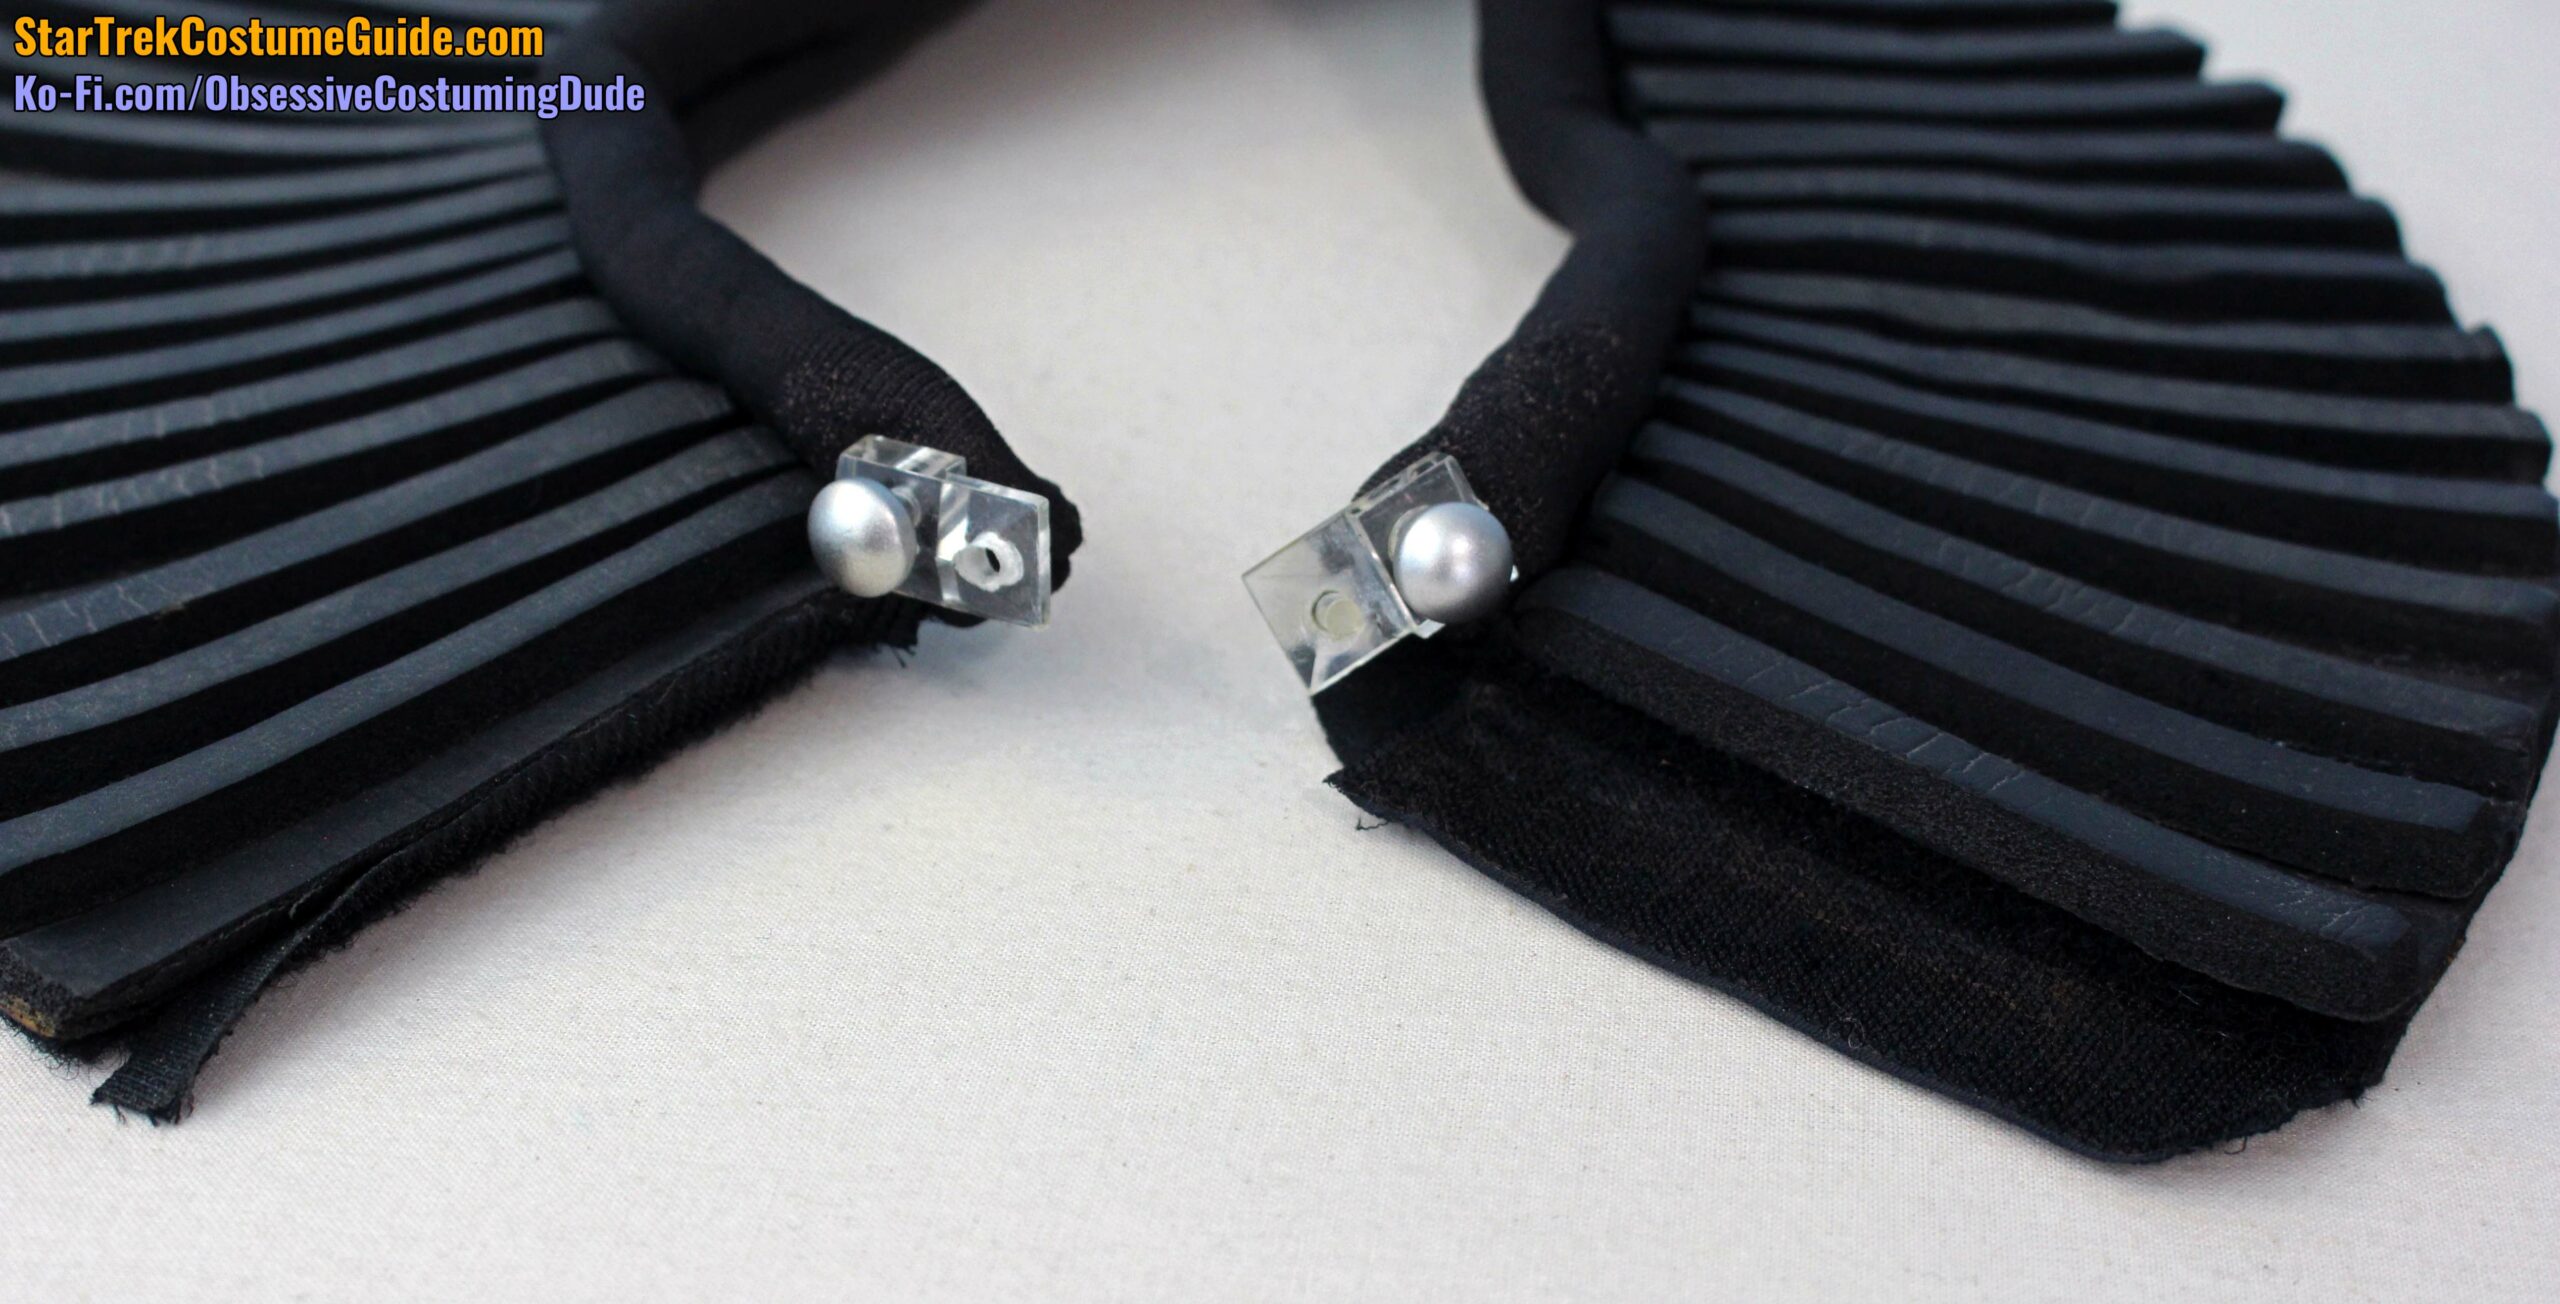
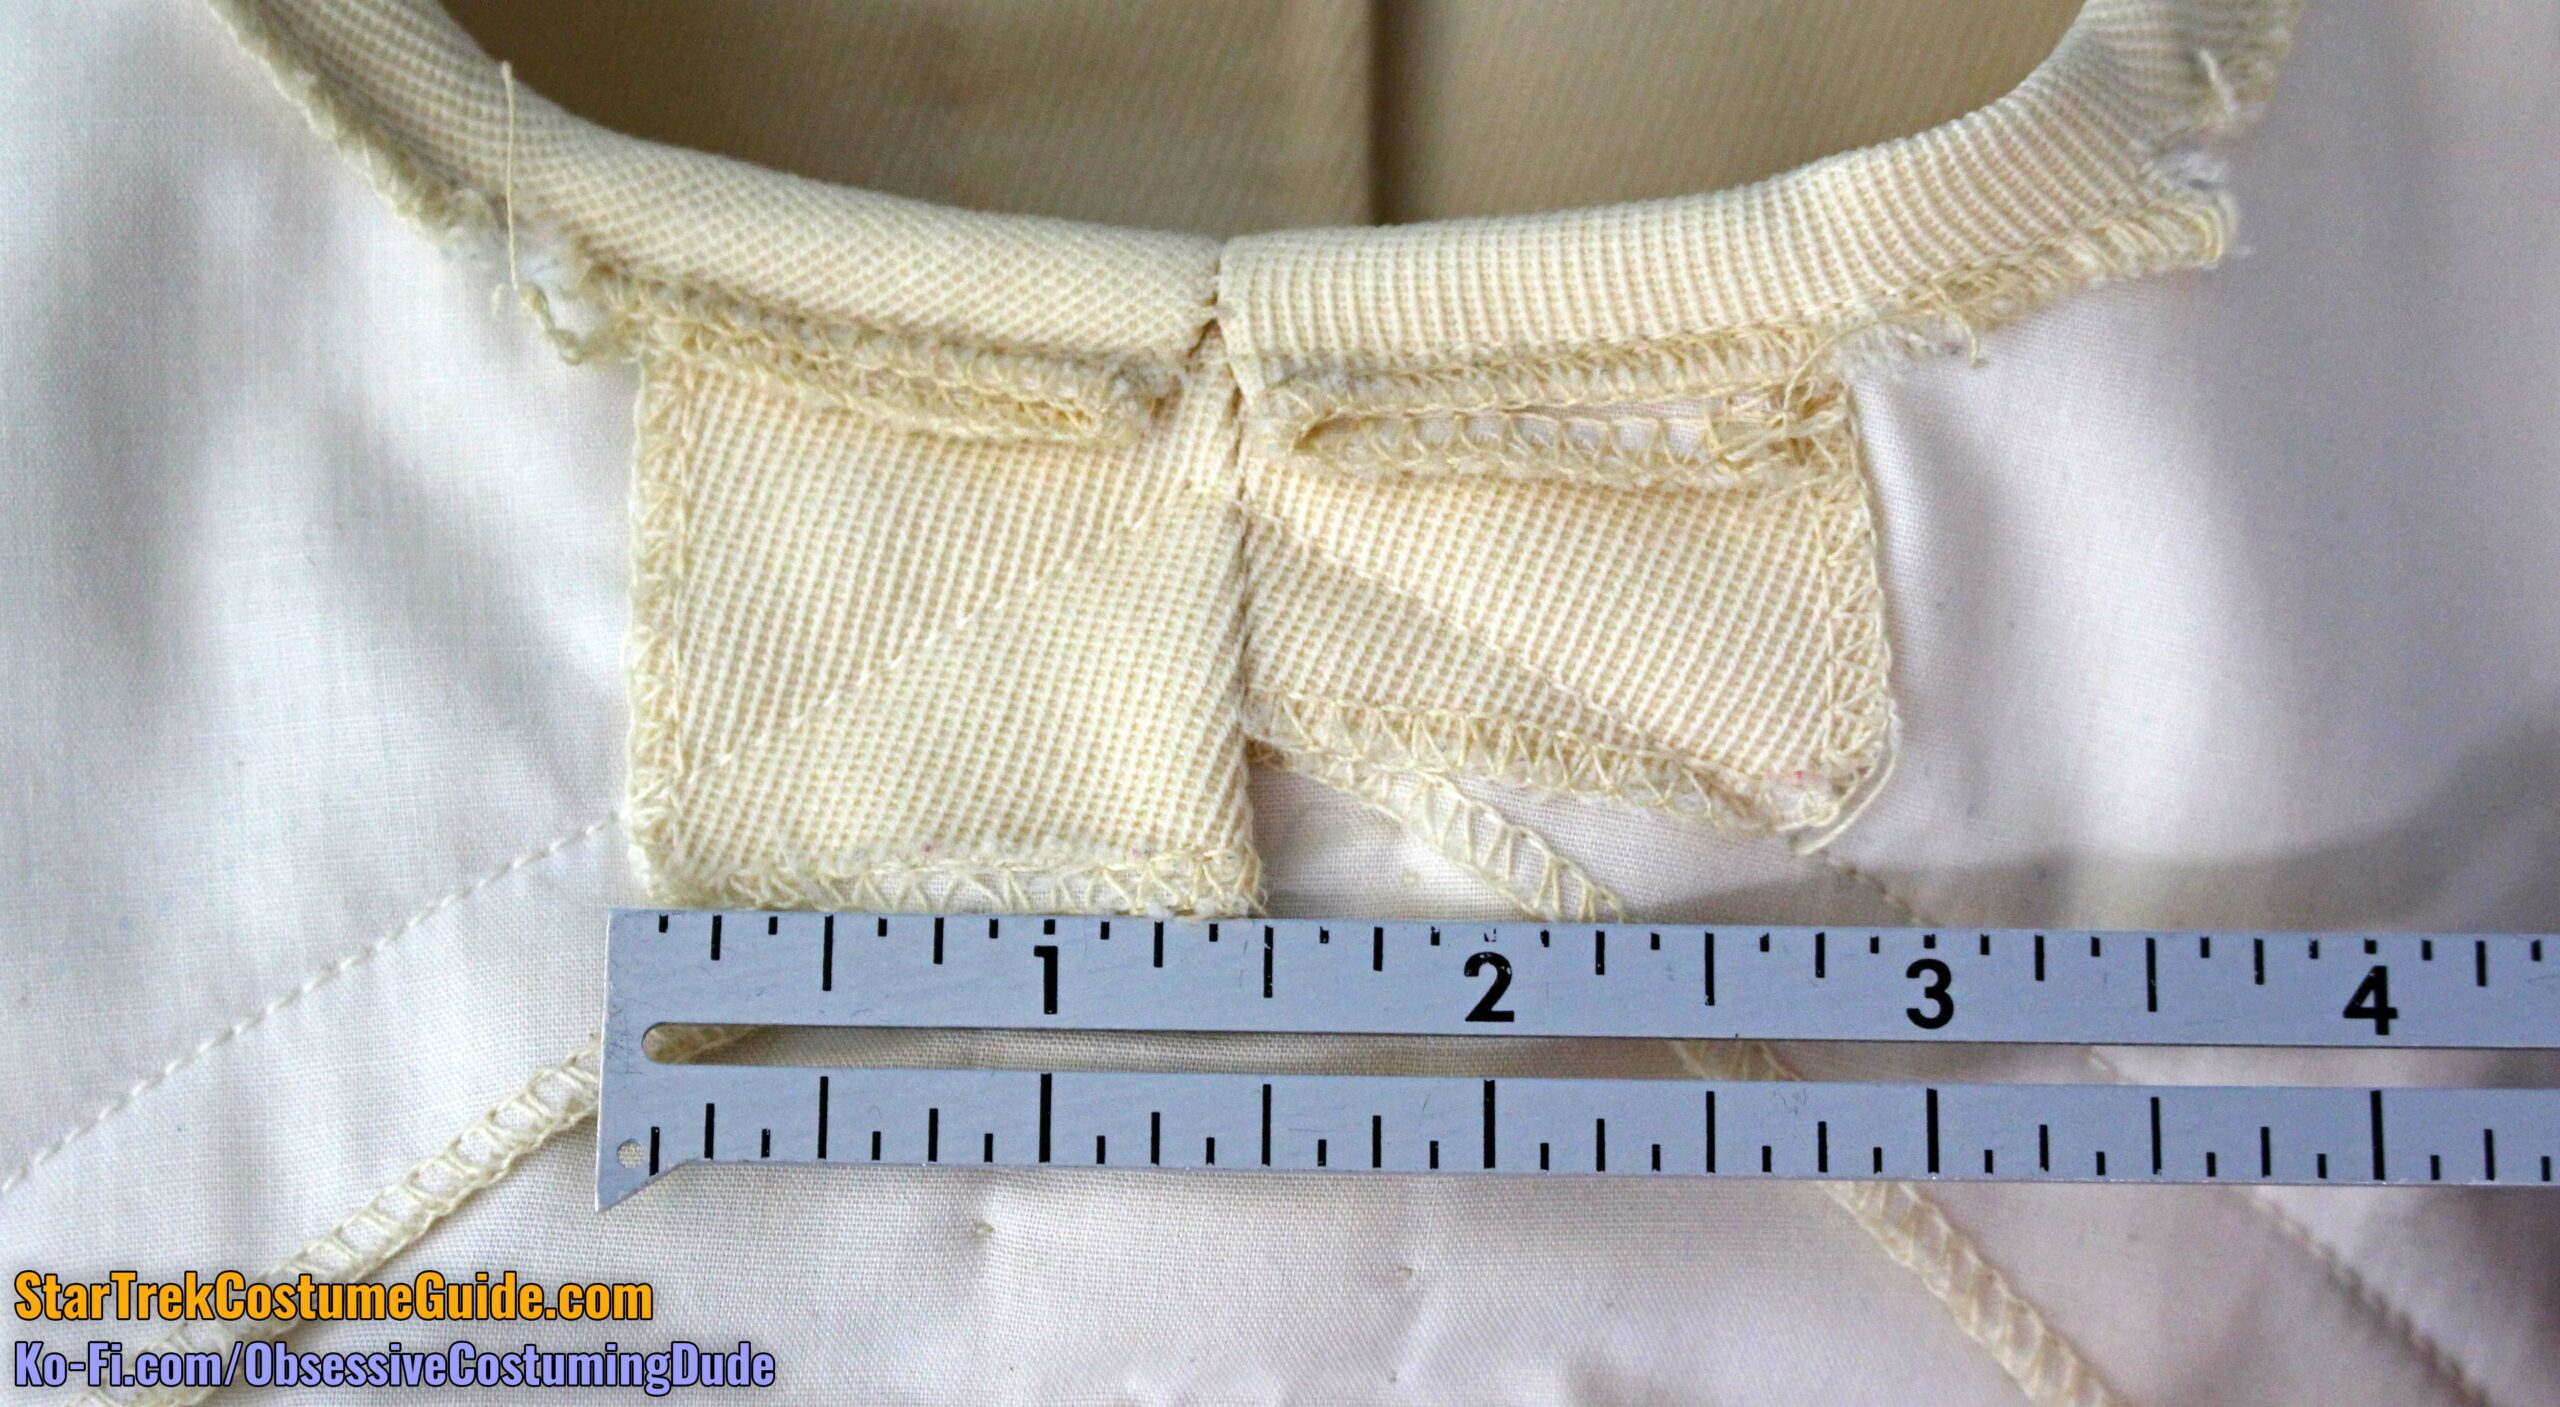
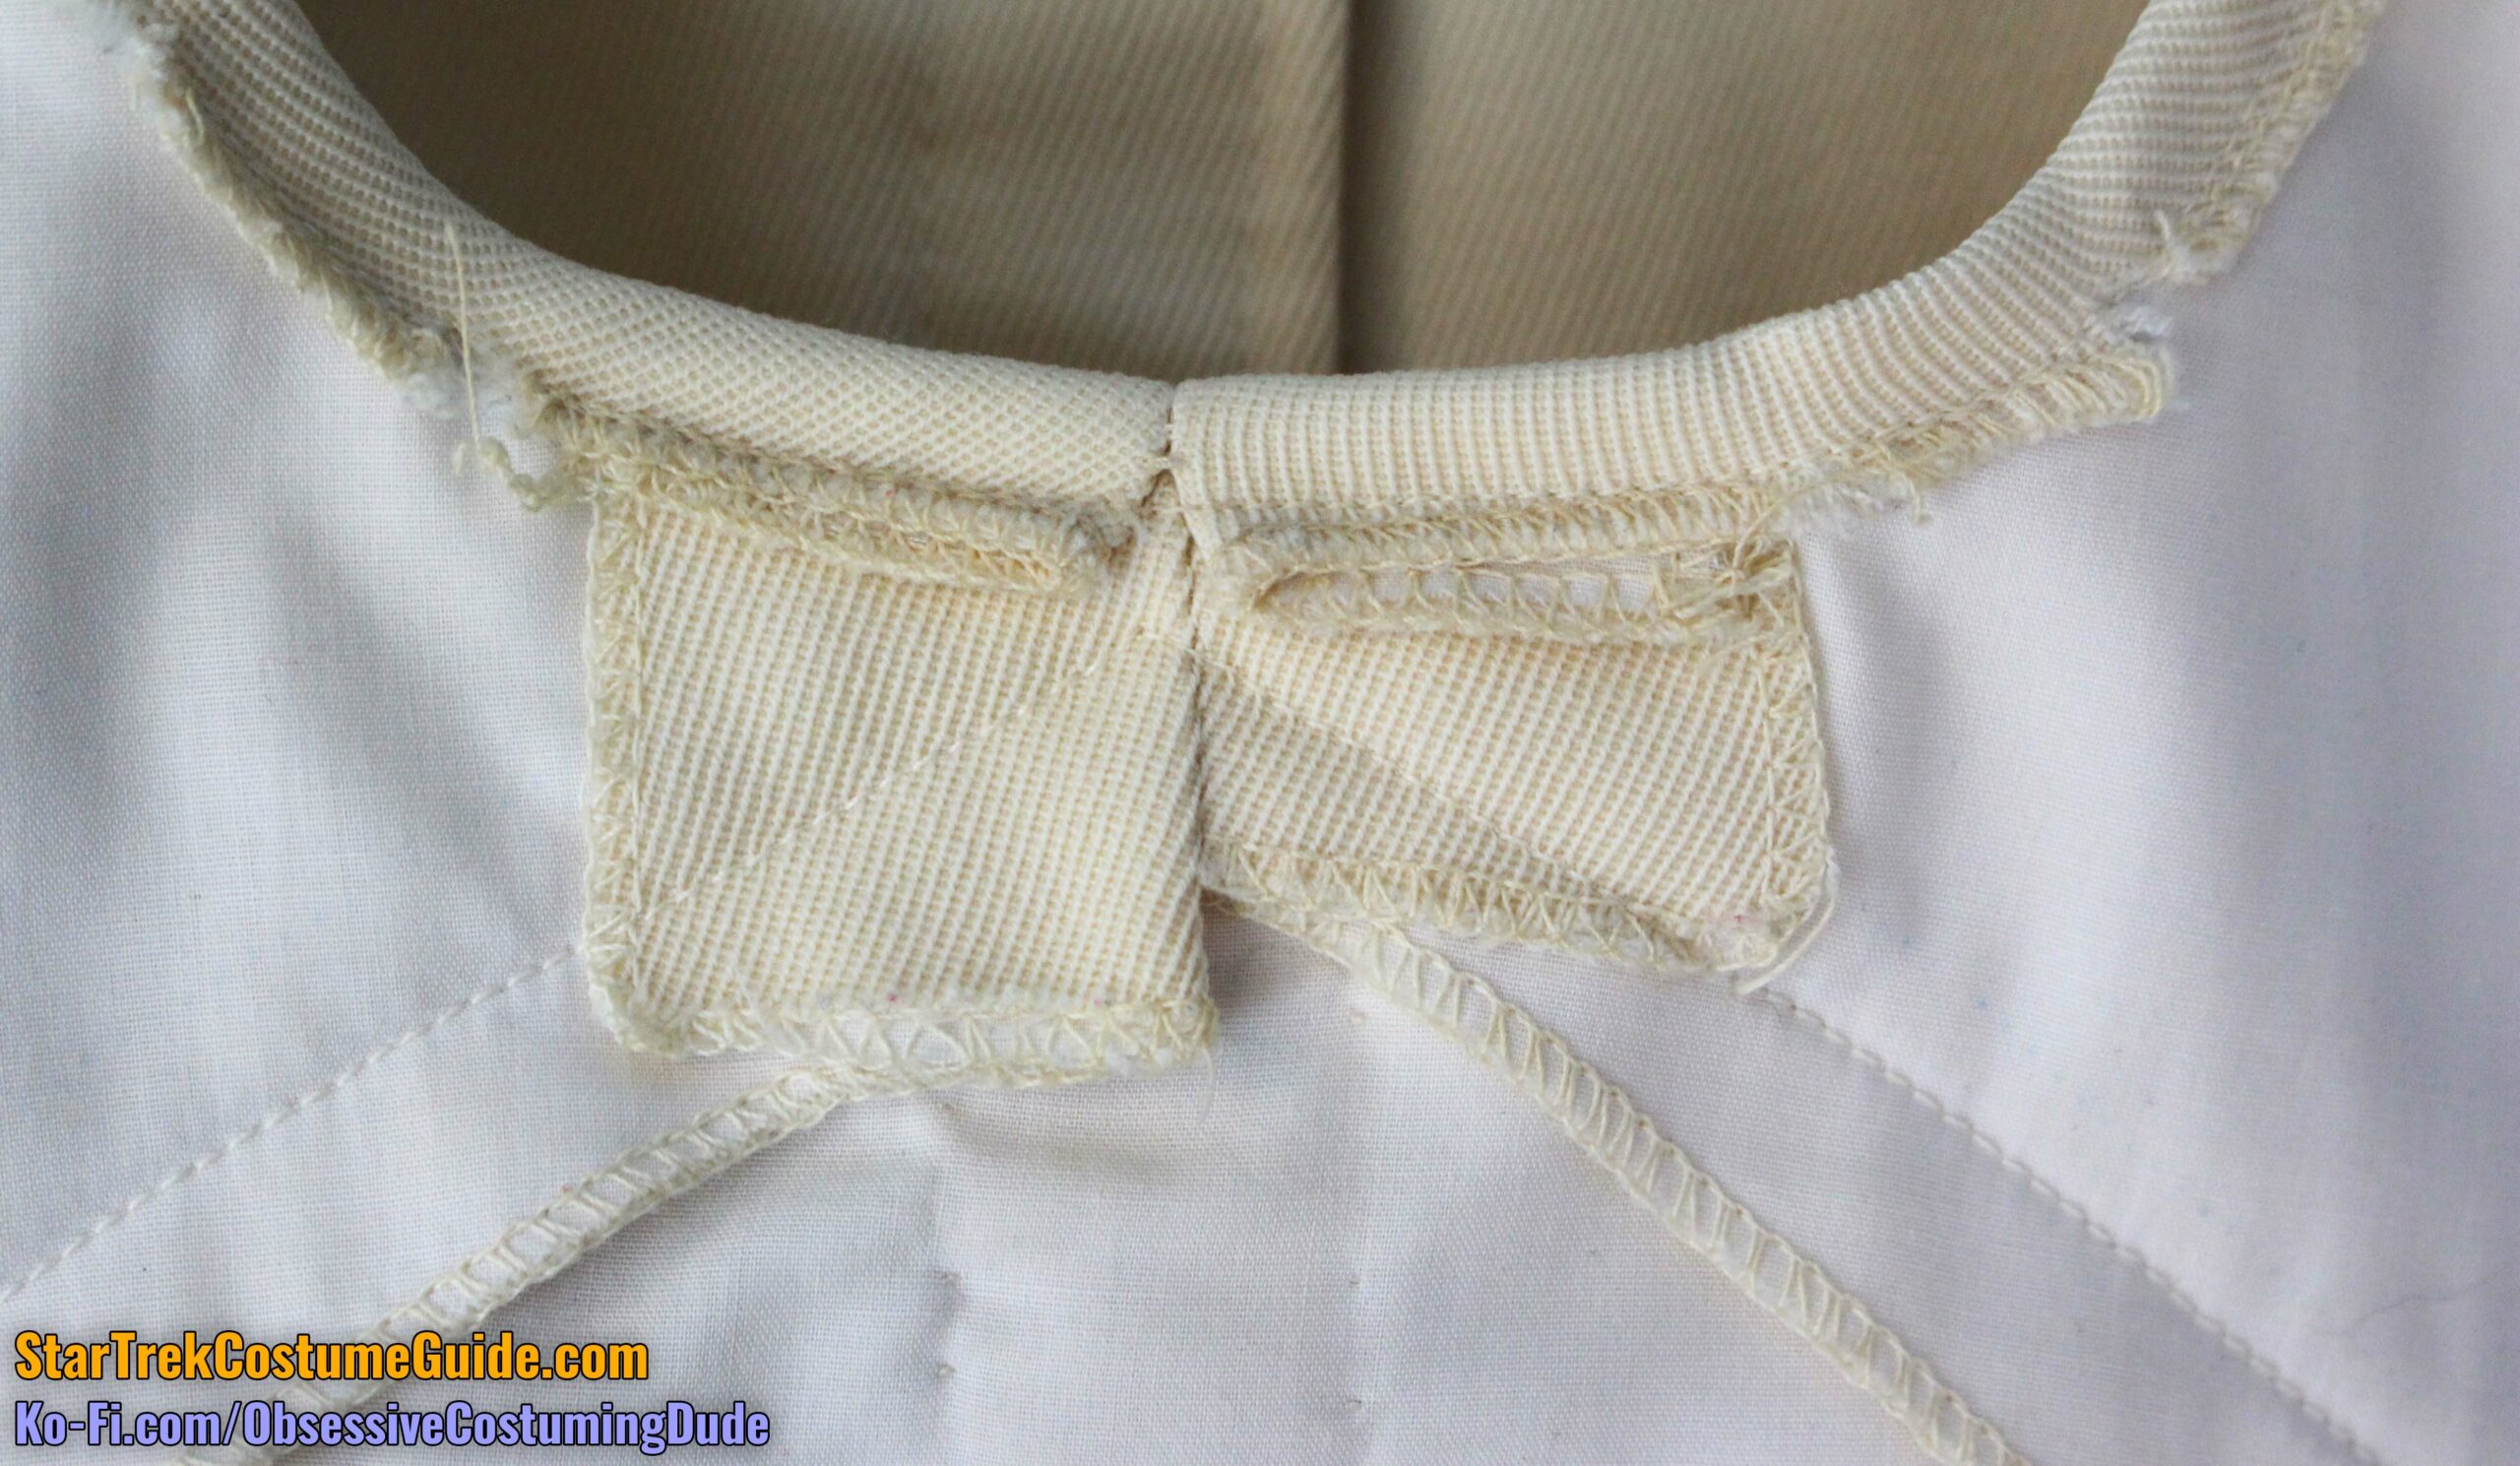
The collar opened and closed along the left side, with decorative accents at the top.
The upper black piping and decorative accents were absent from the collars in The Motion Picture and were added in The Wrath of Khan.
Star Trek: The Motion Picture
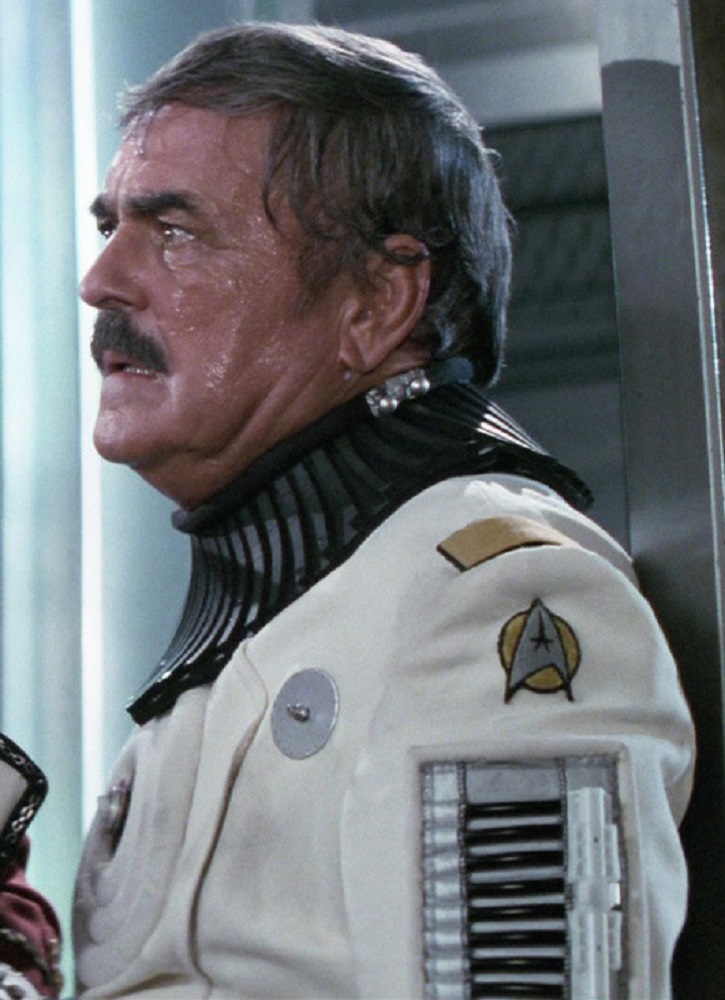
Star Trek II: The Wrath of Khan
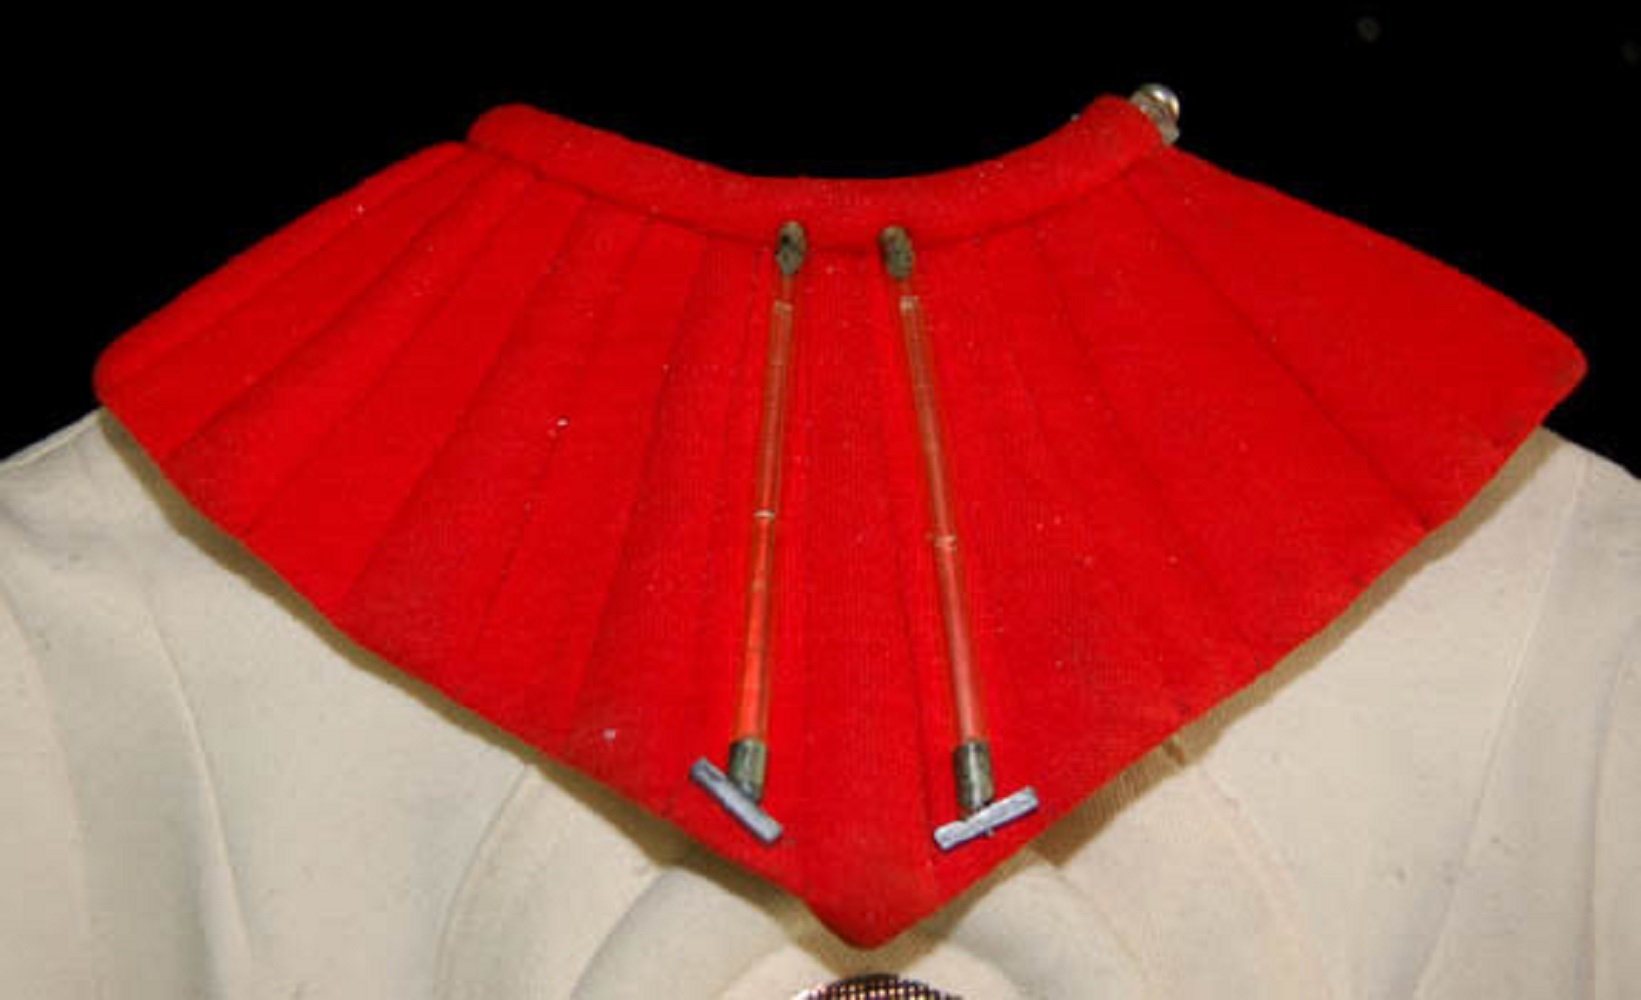
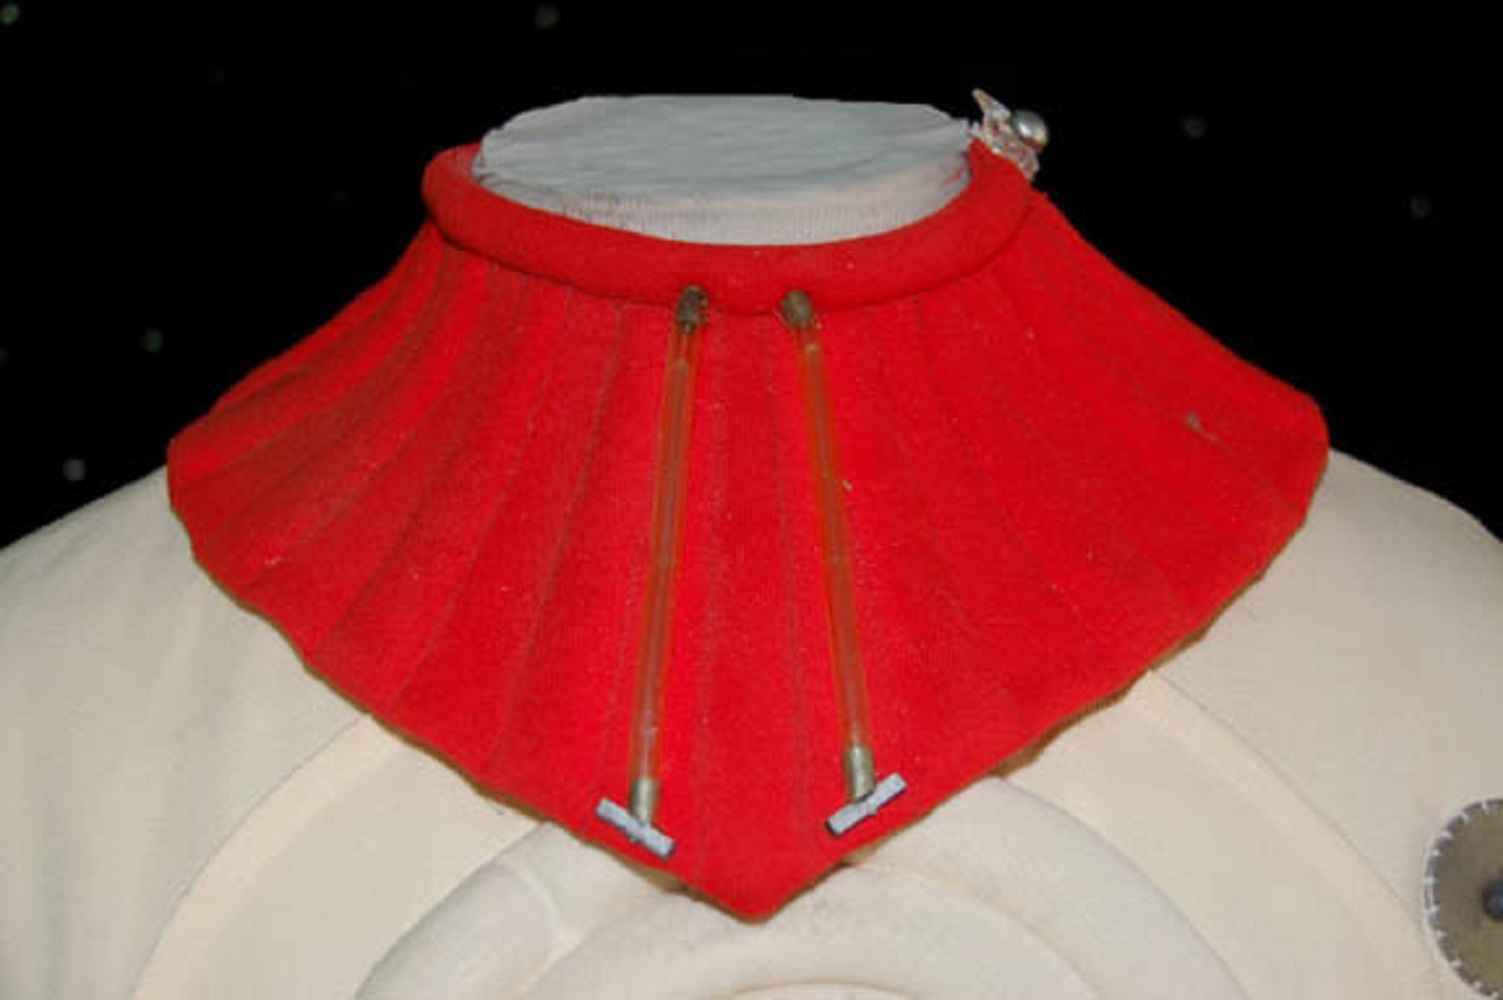
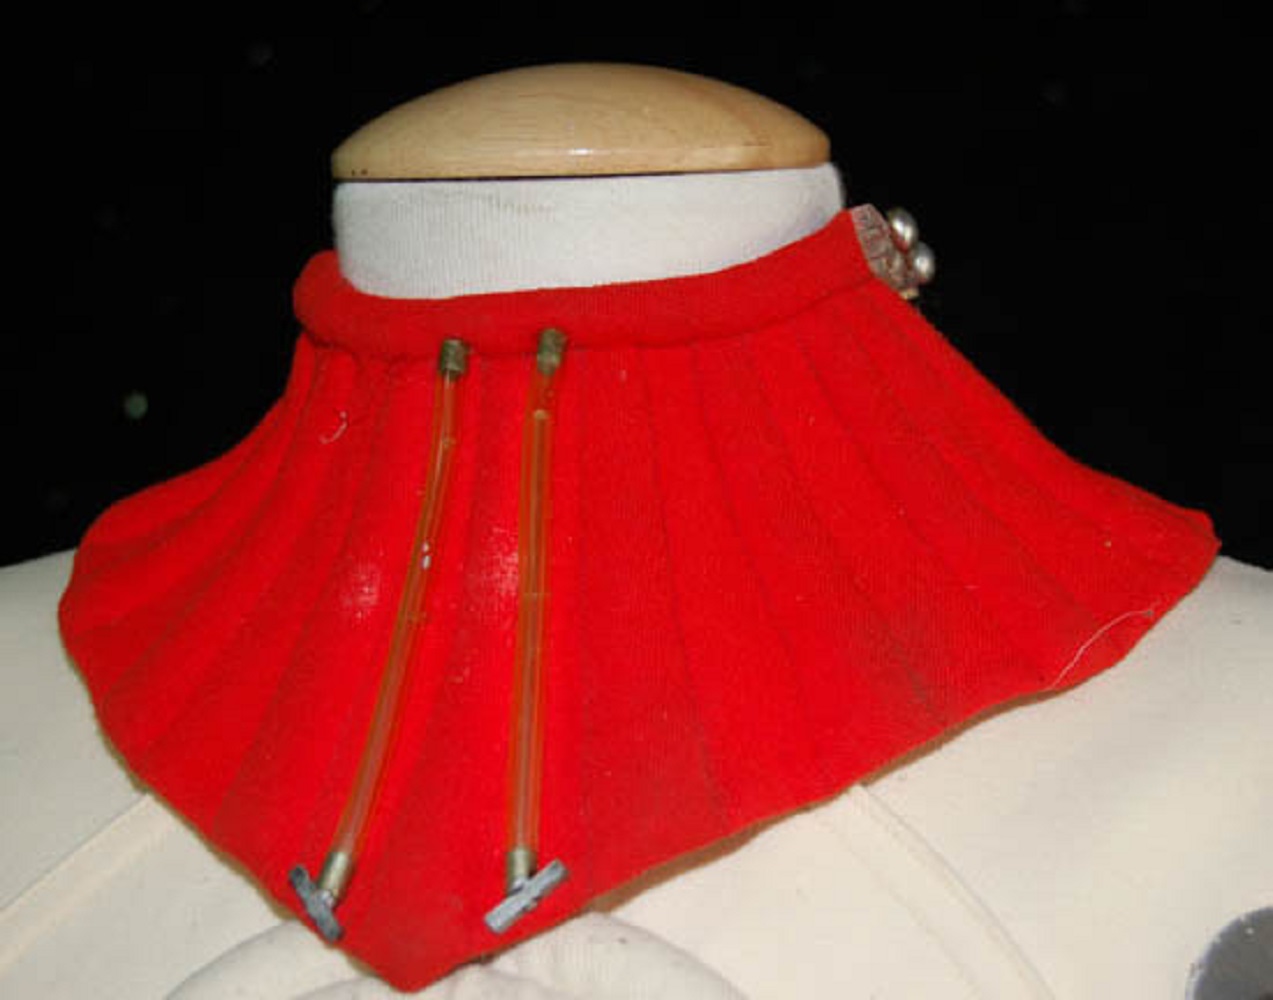
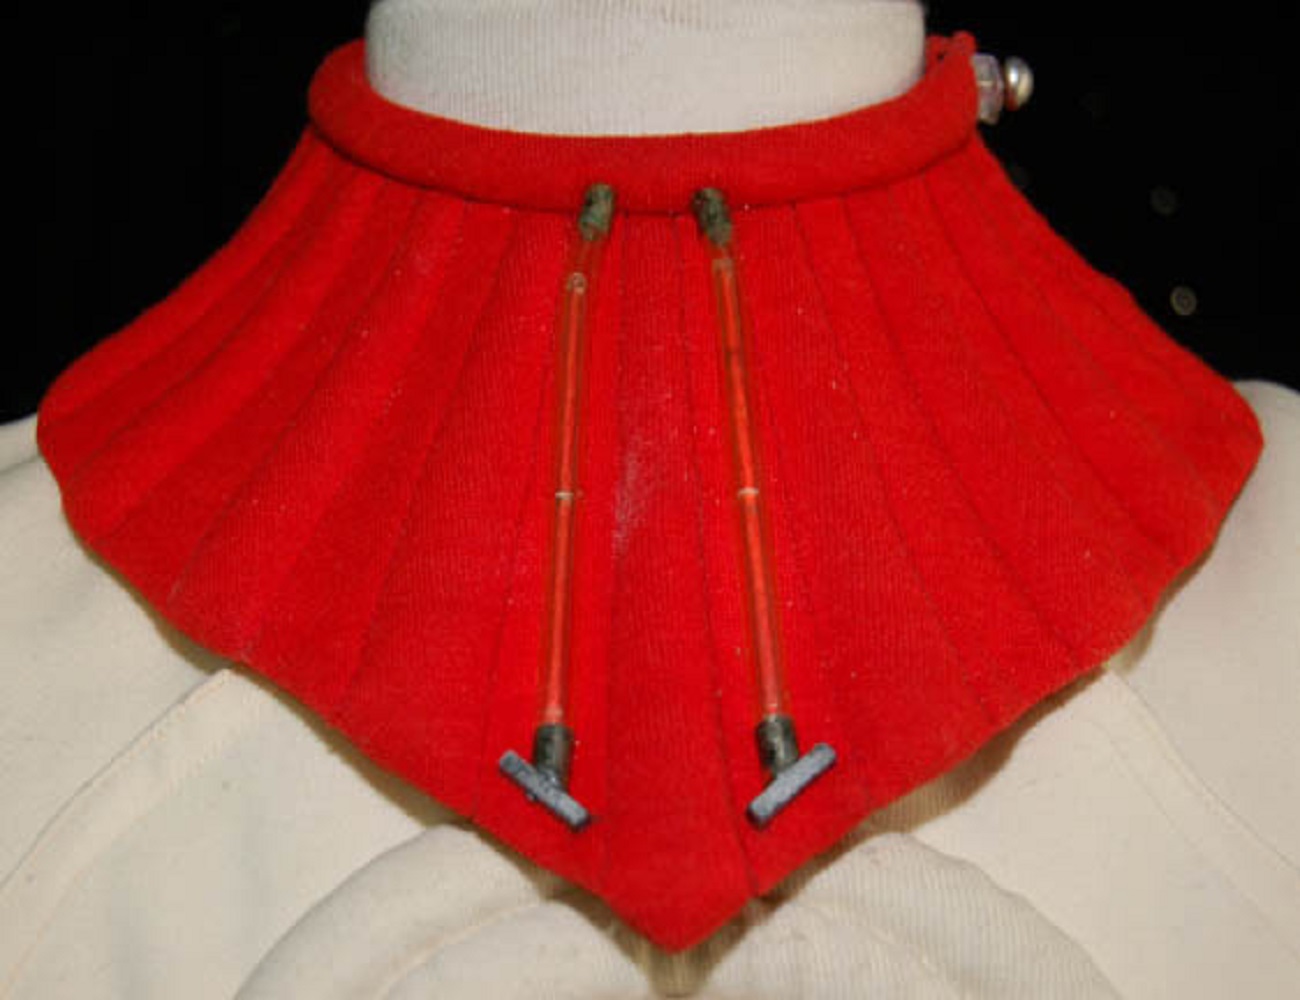
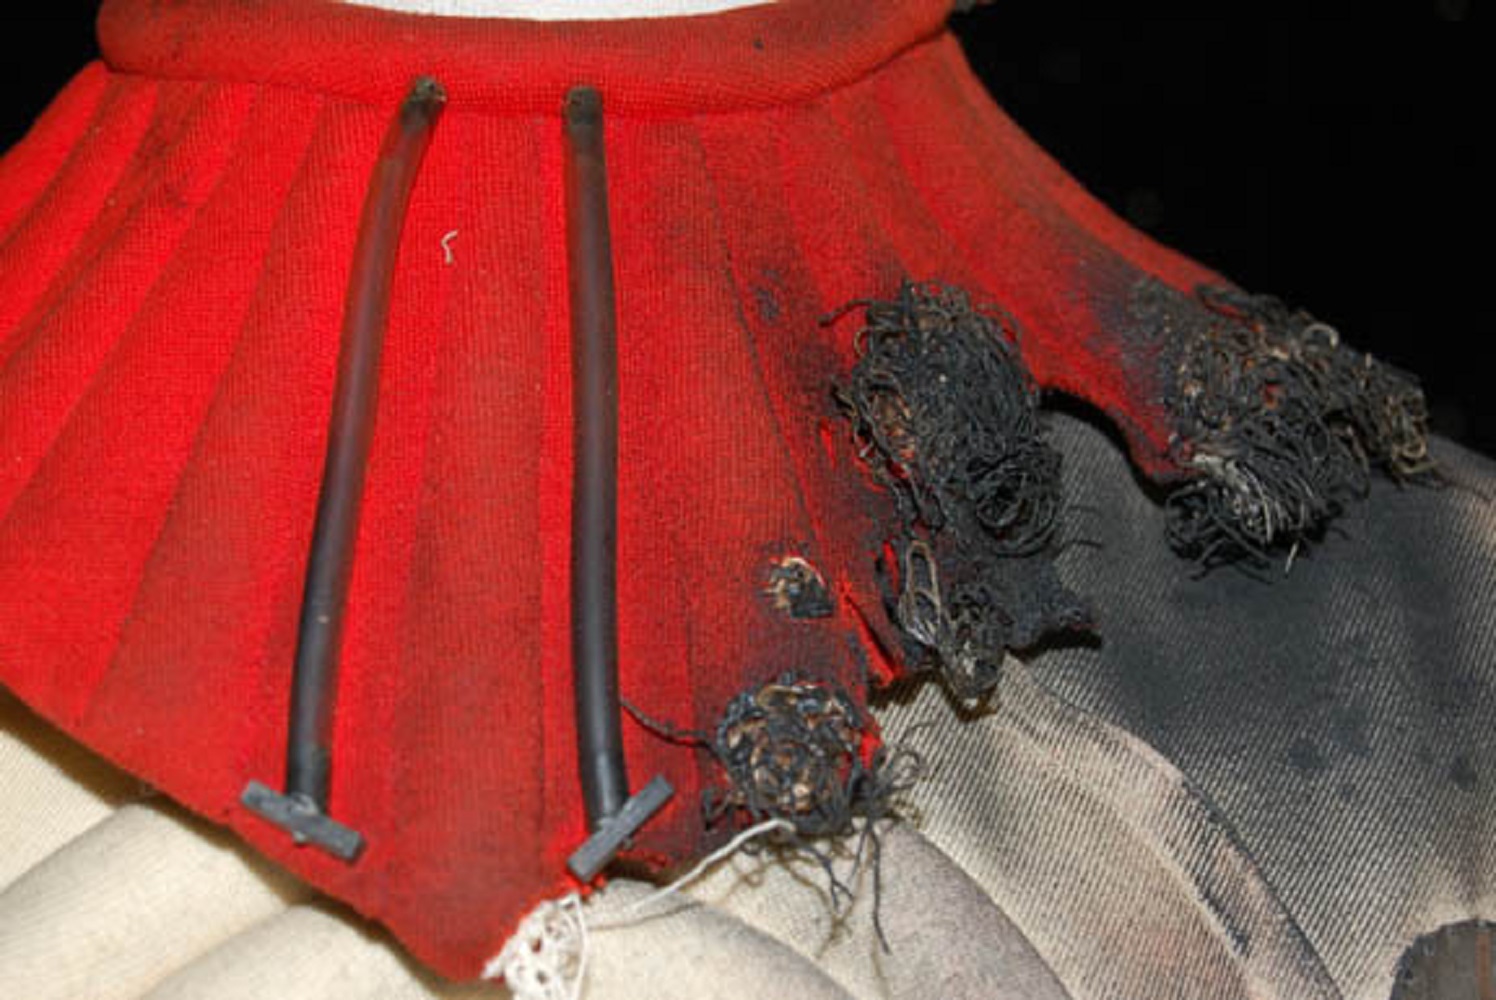
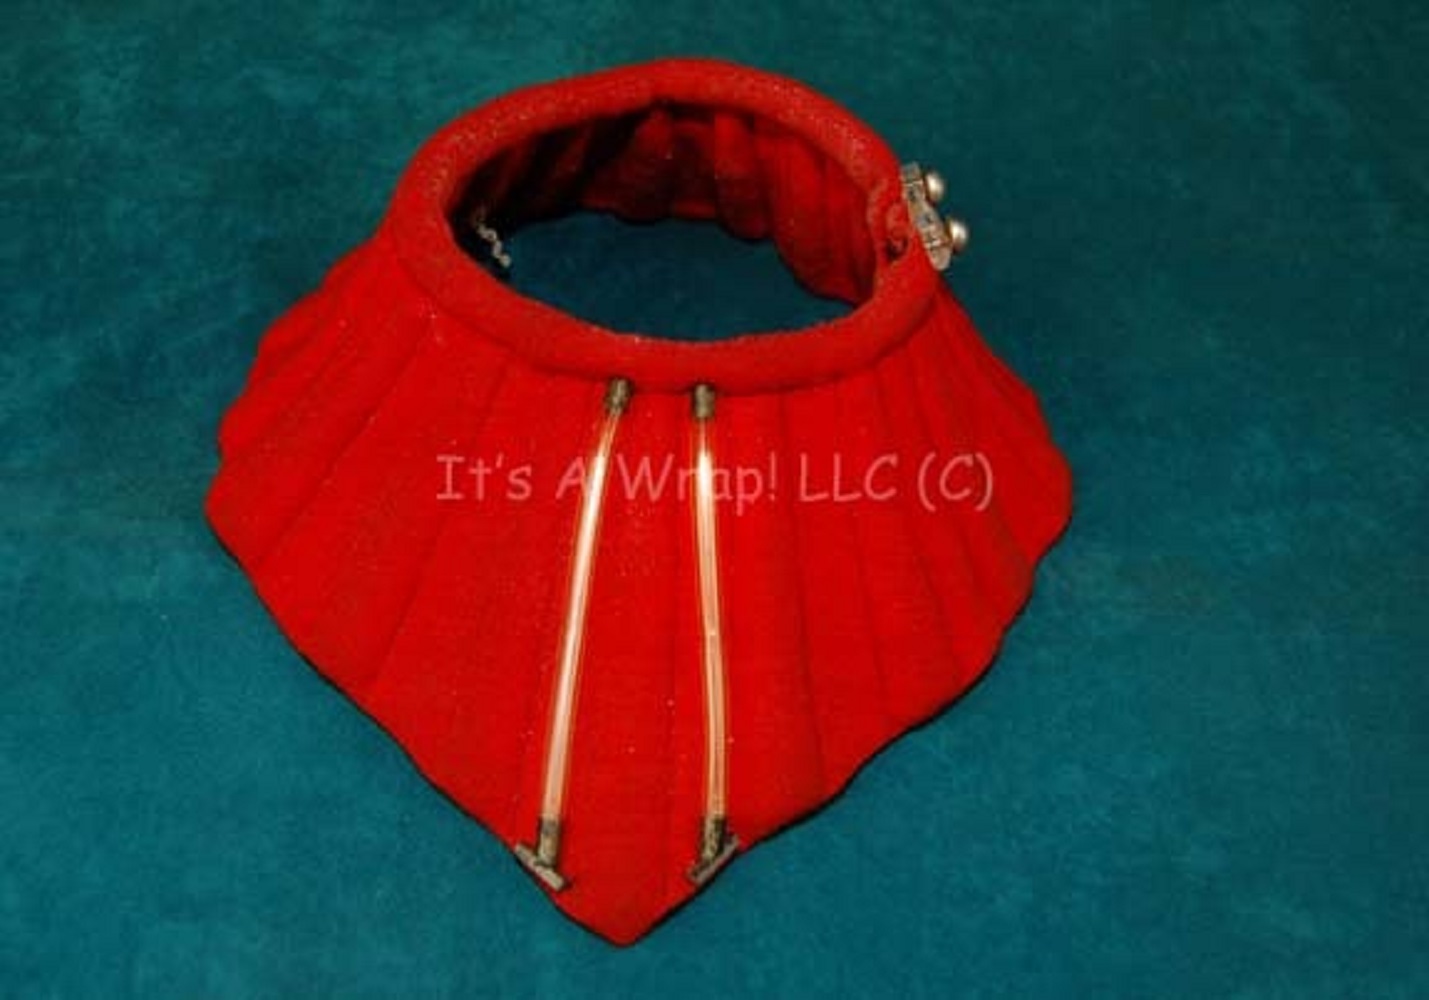
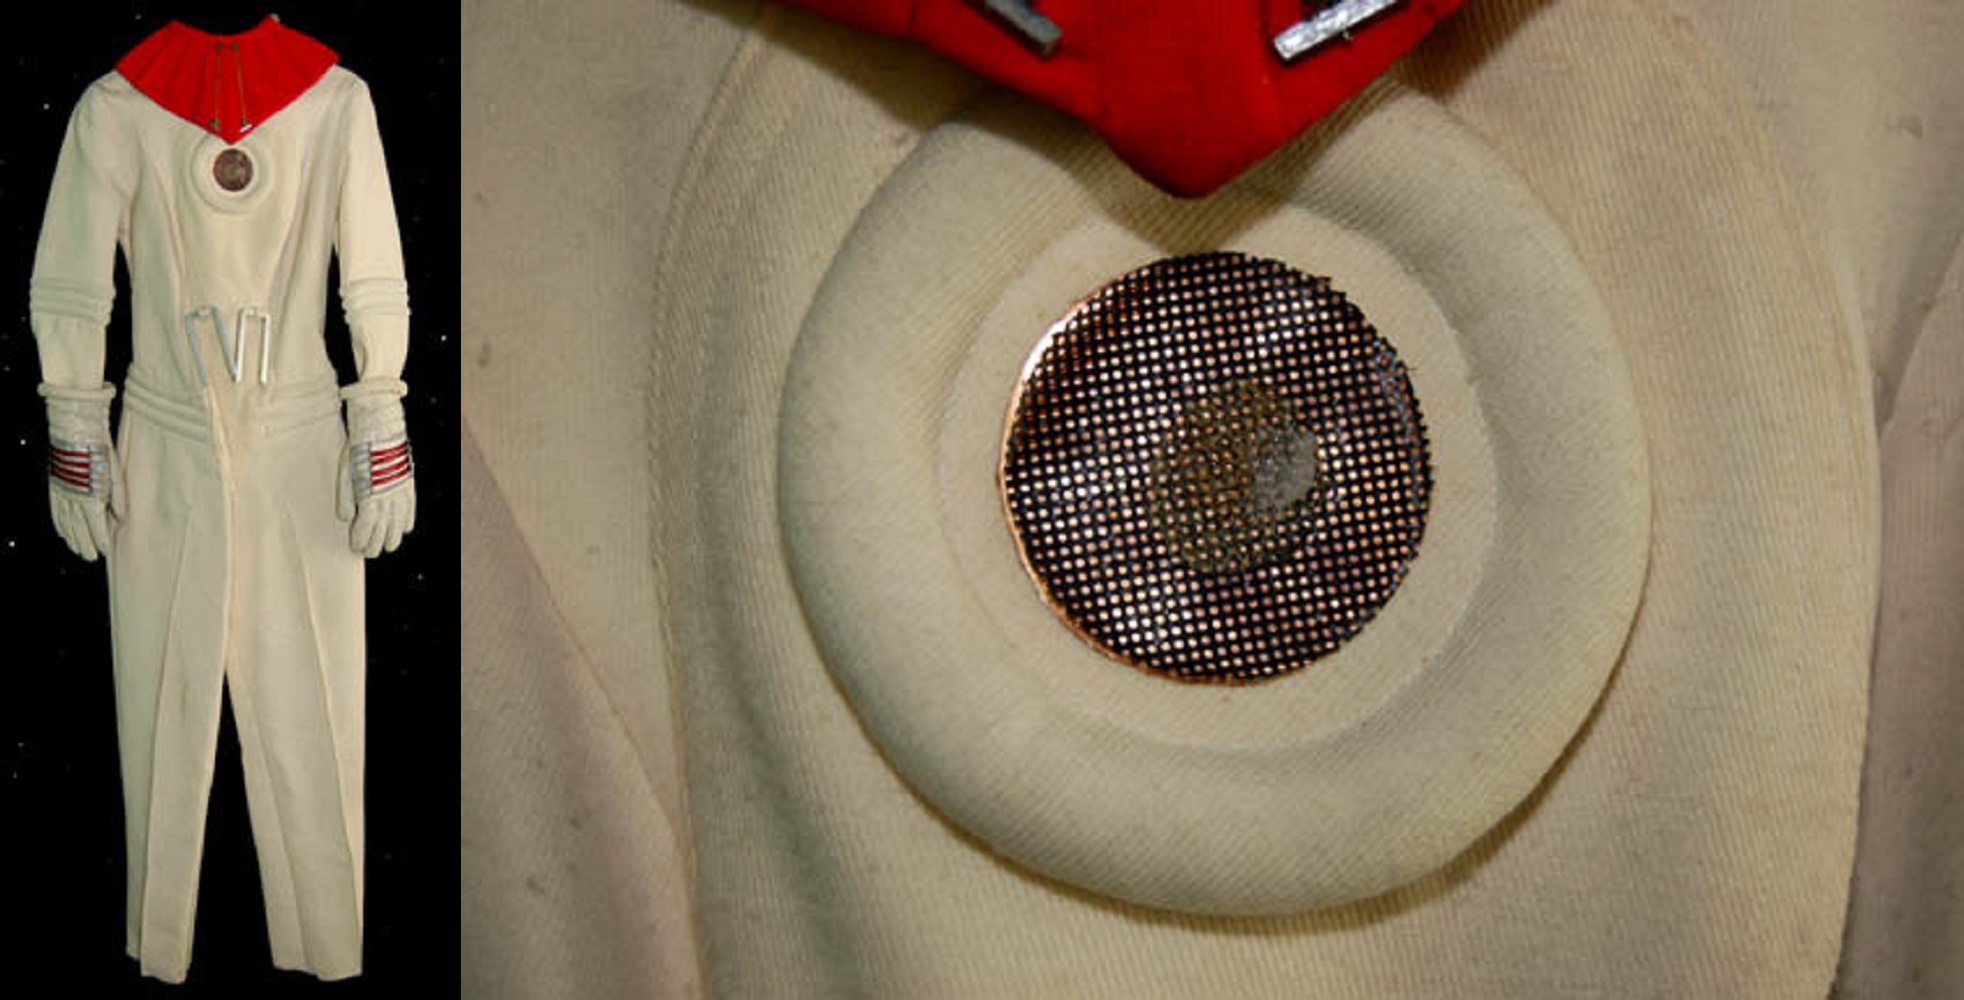
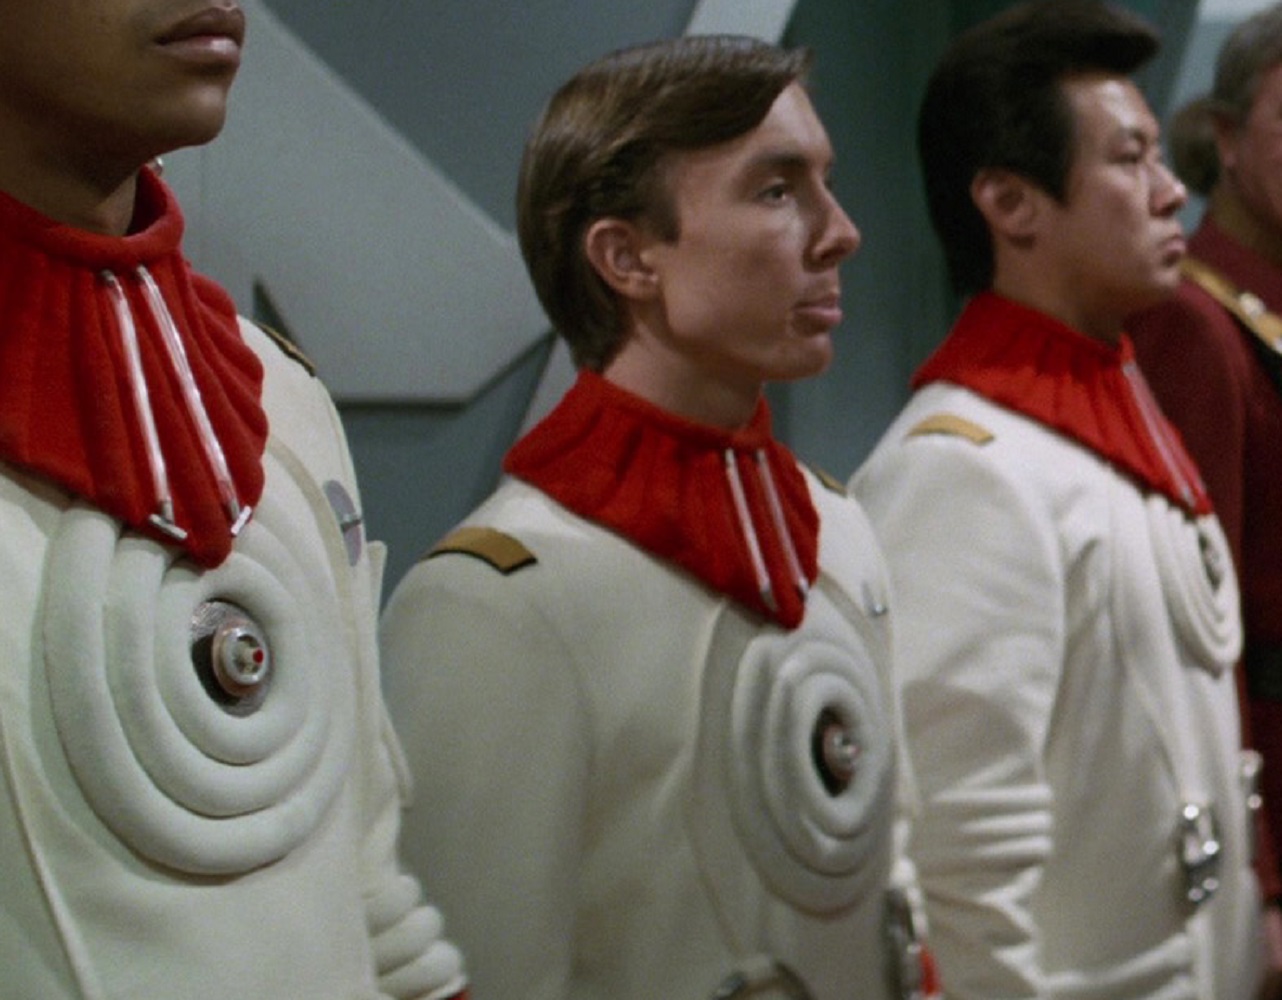
For The Wrath of Khan, Fletcher also introduced red collars for trainees, while officers and enlisted crew members continued to wear black.
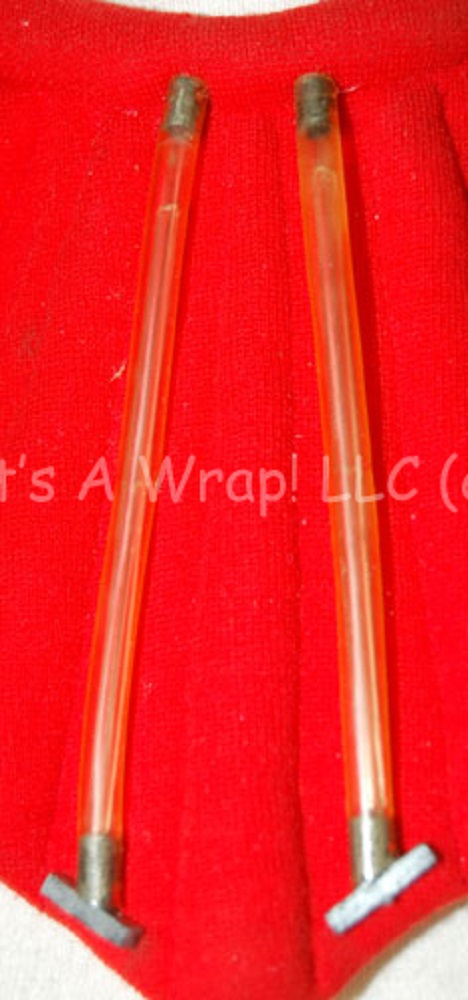
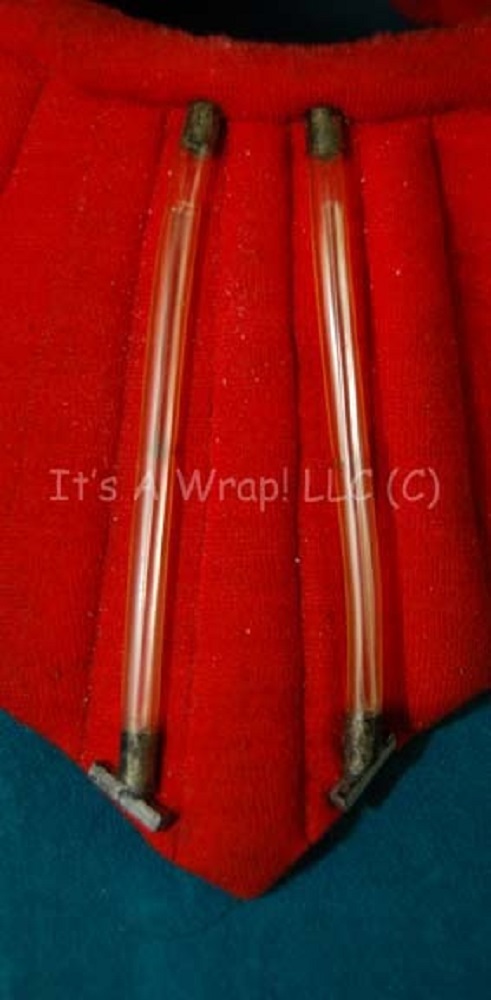
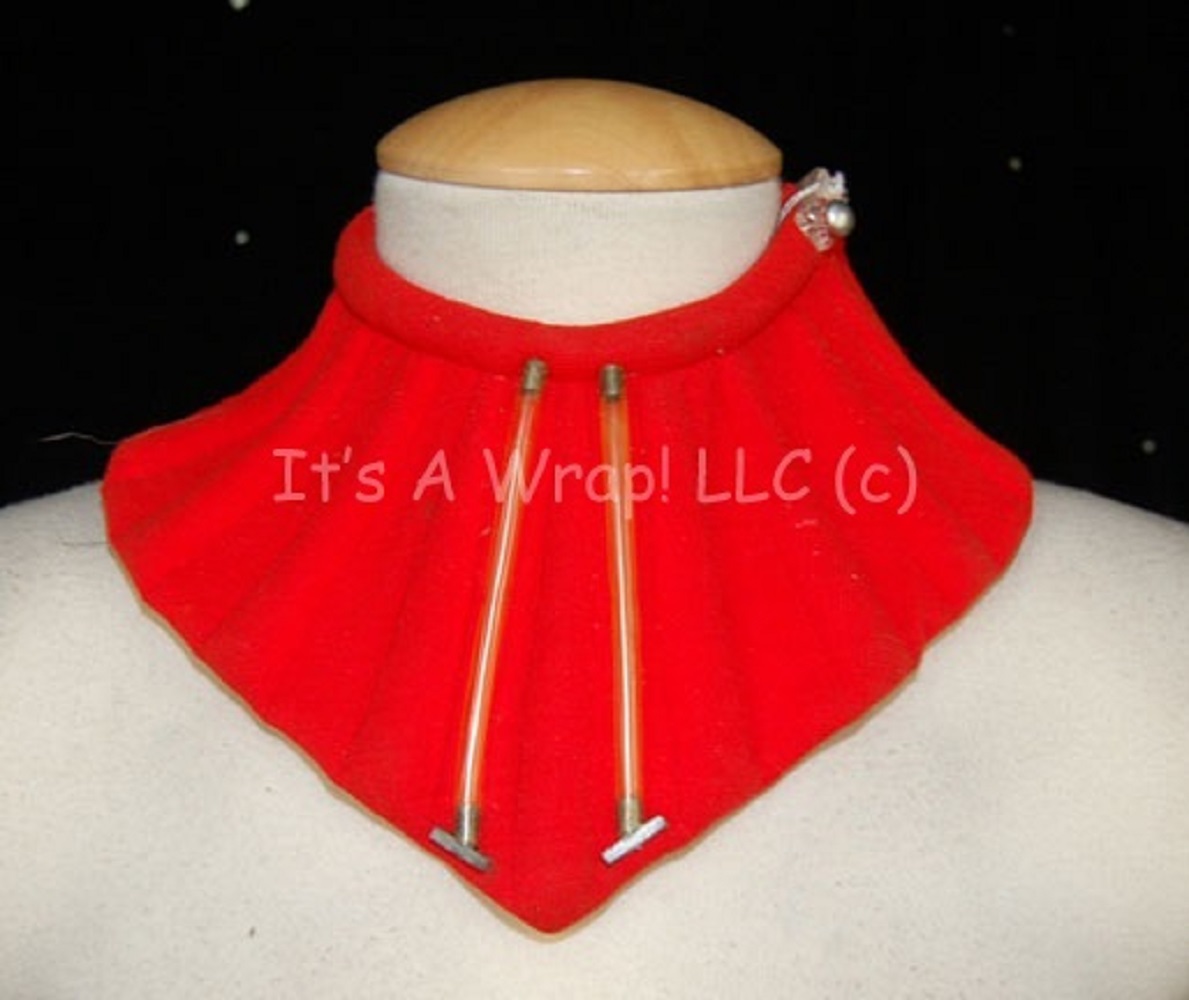
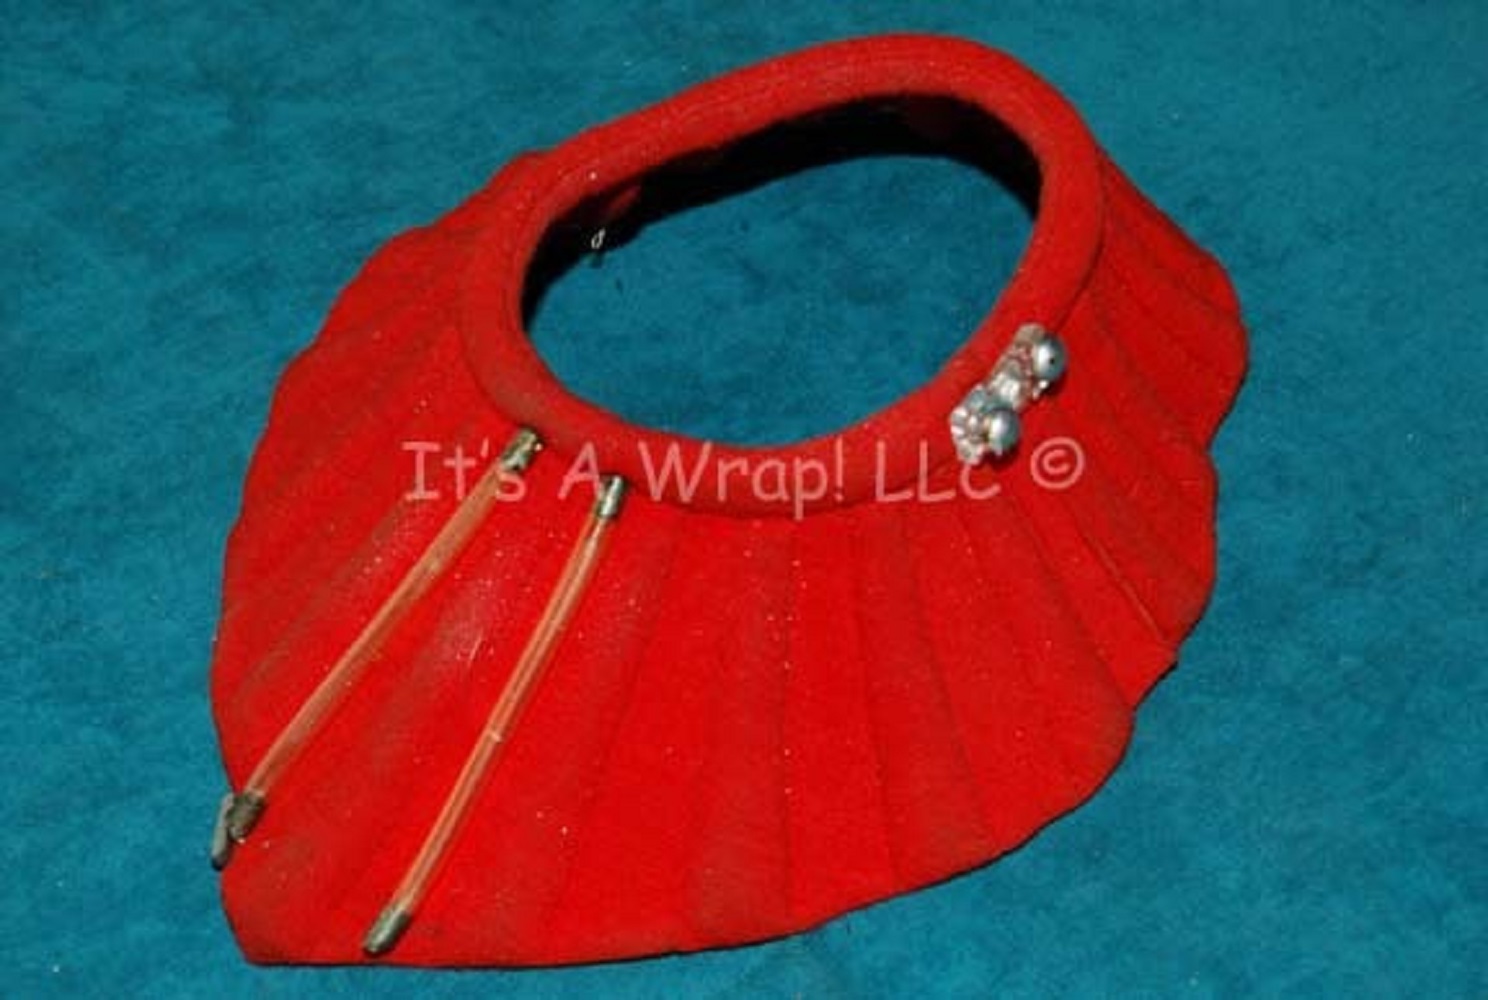
In auction listings, these red trainee collars were often described as being fabric (rather than neoprene), and they appear to have been thinner.
Their detailing was different from the black officer/enlisted collars too; the “raised” portions were wider and more gently rounded, and there were a couple clear-ish tubes at the front.
Here are some auction photos of the red trainee collars:
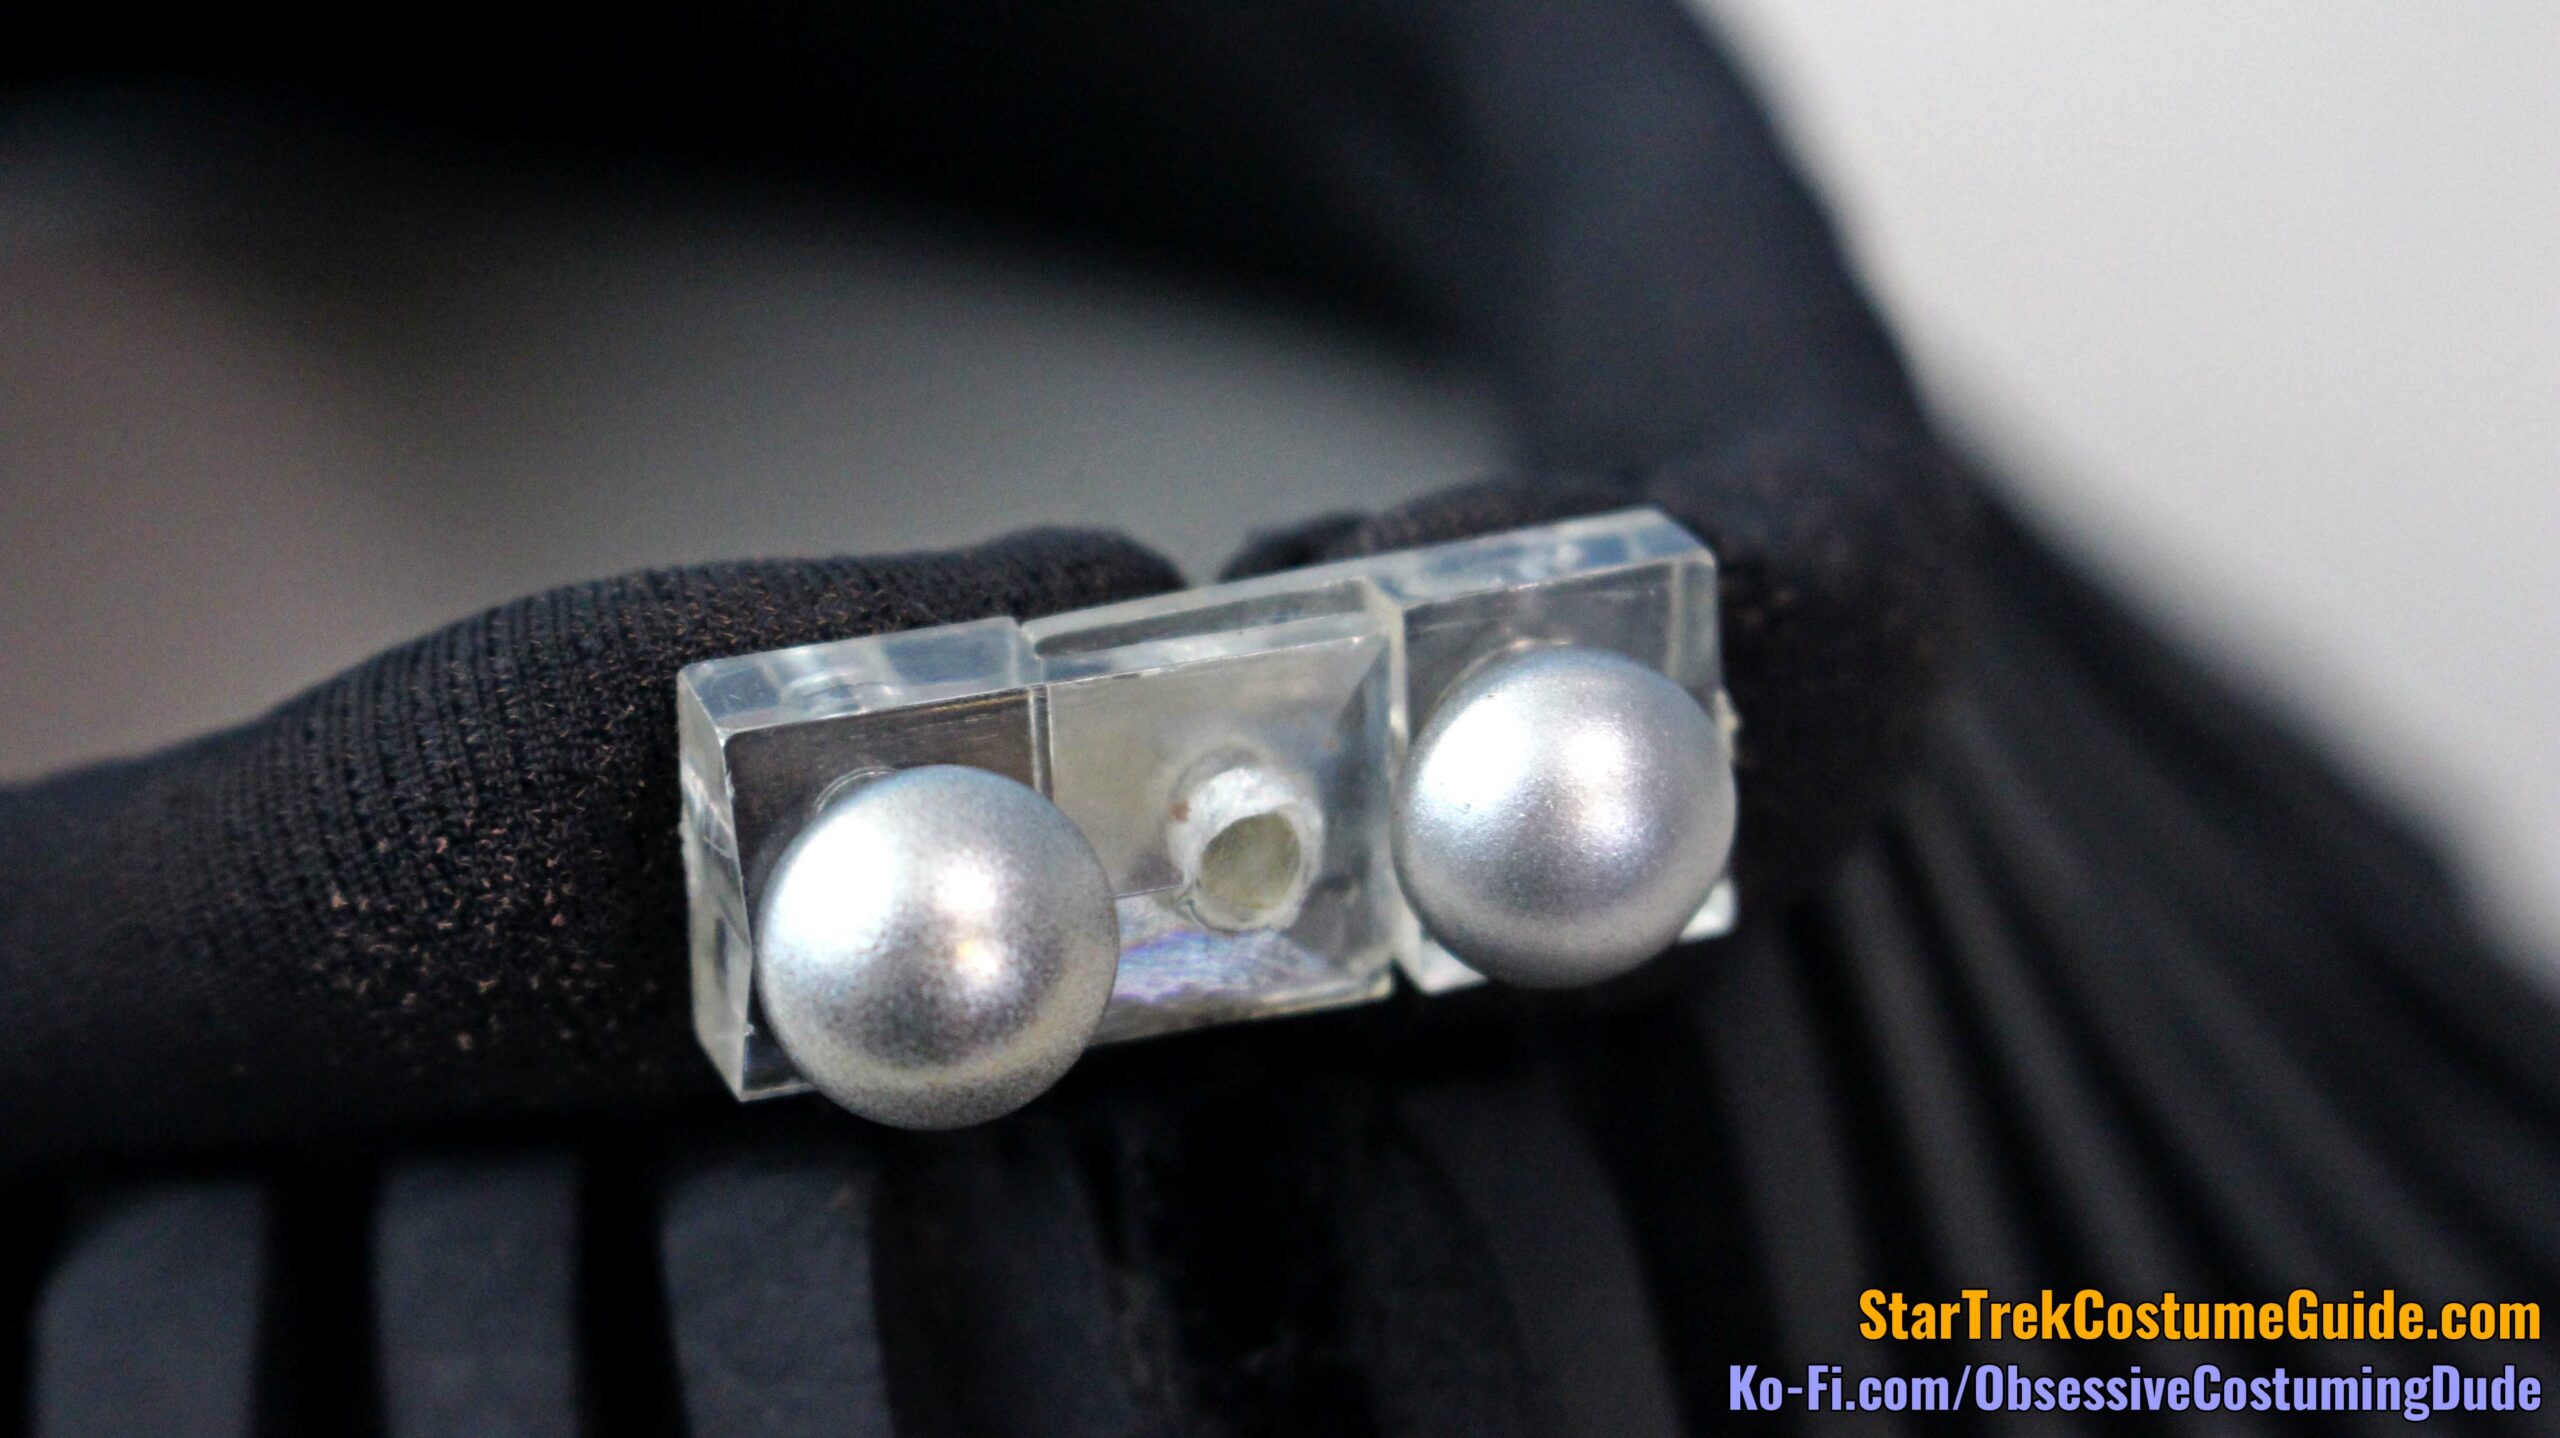
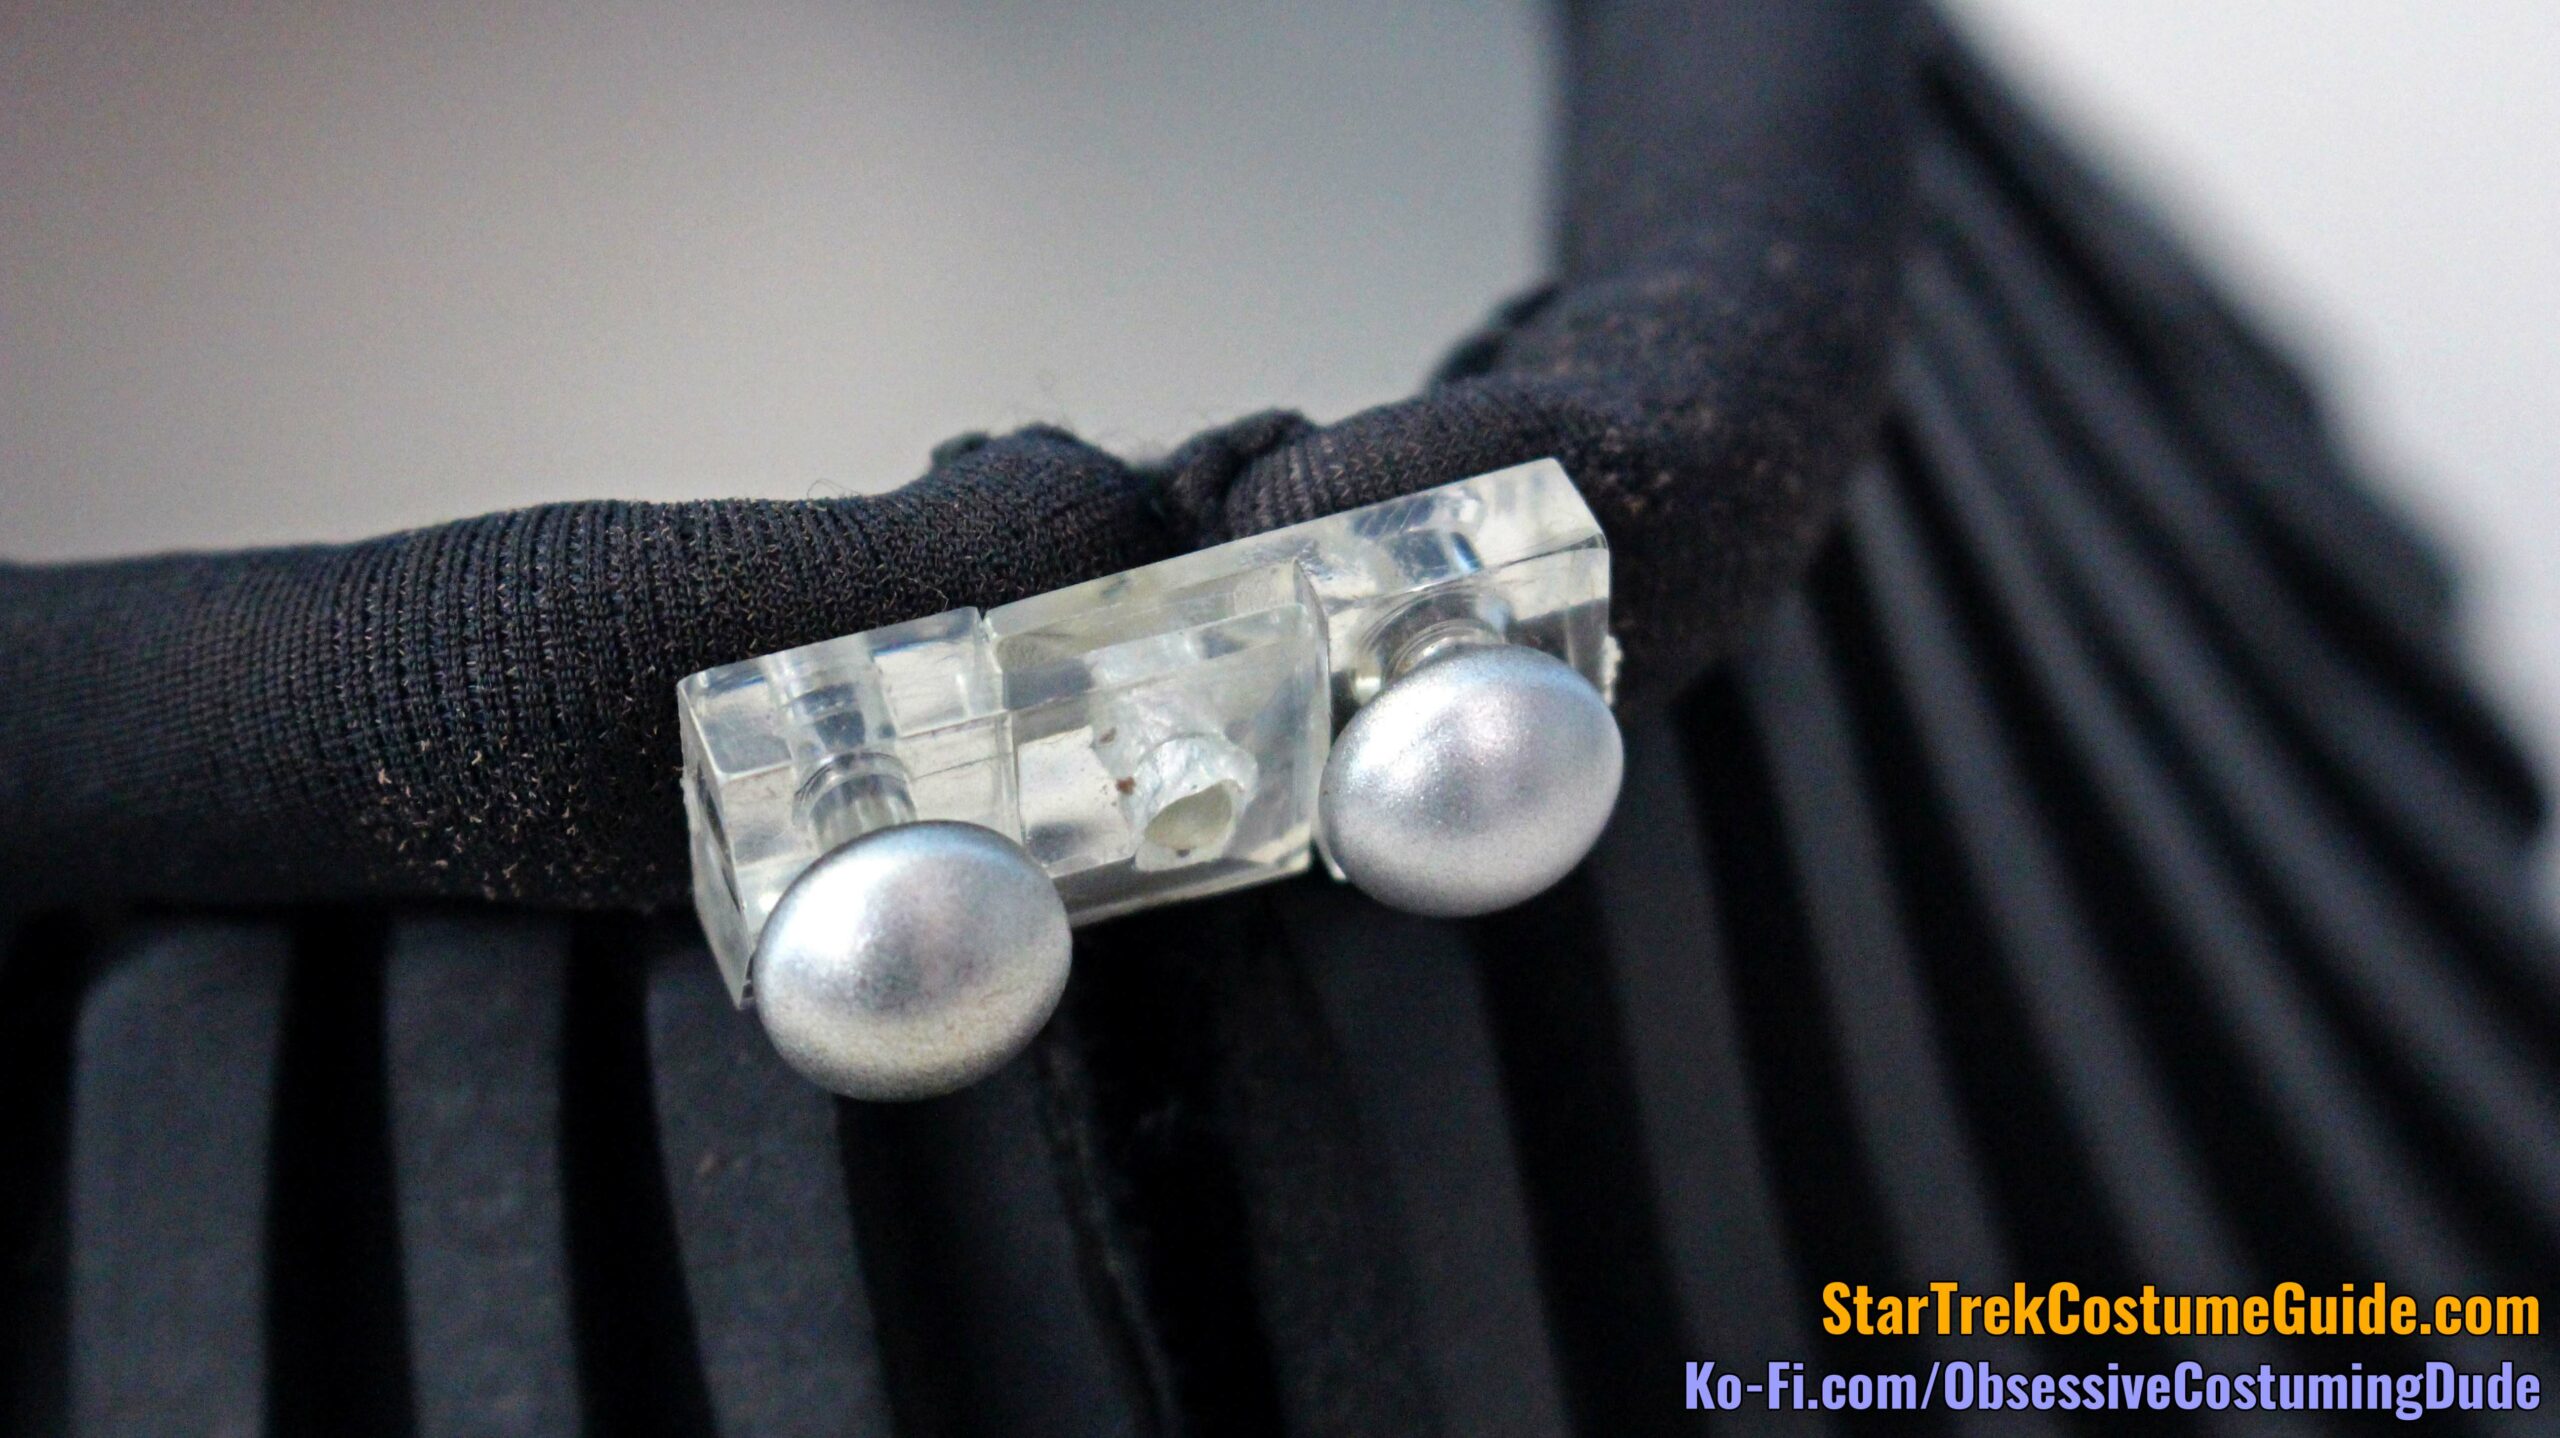
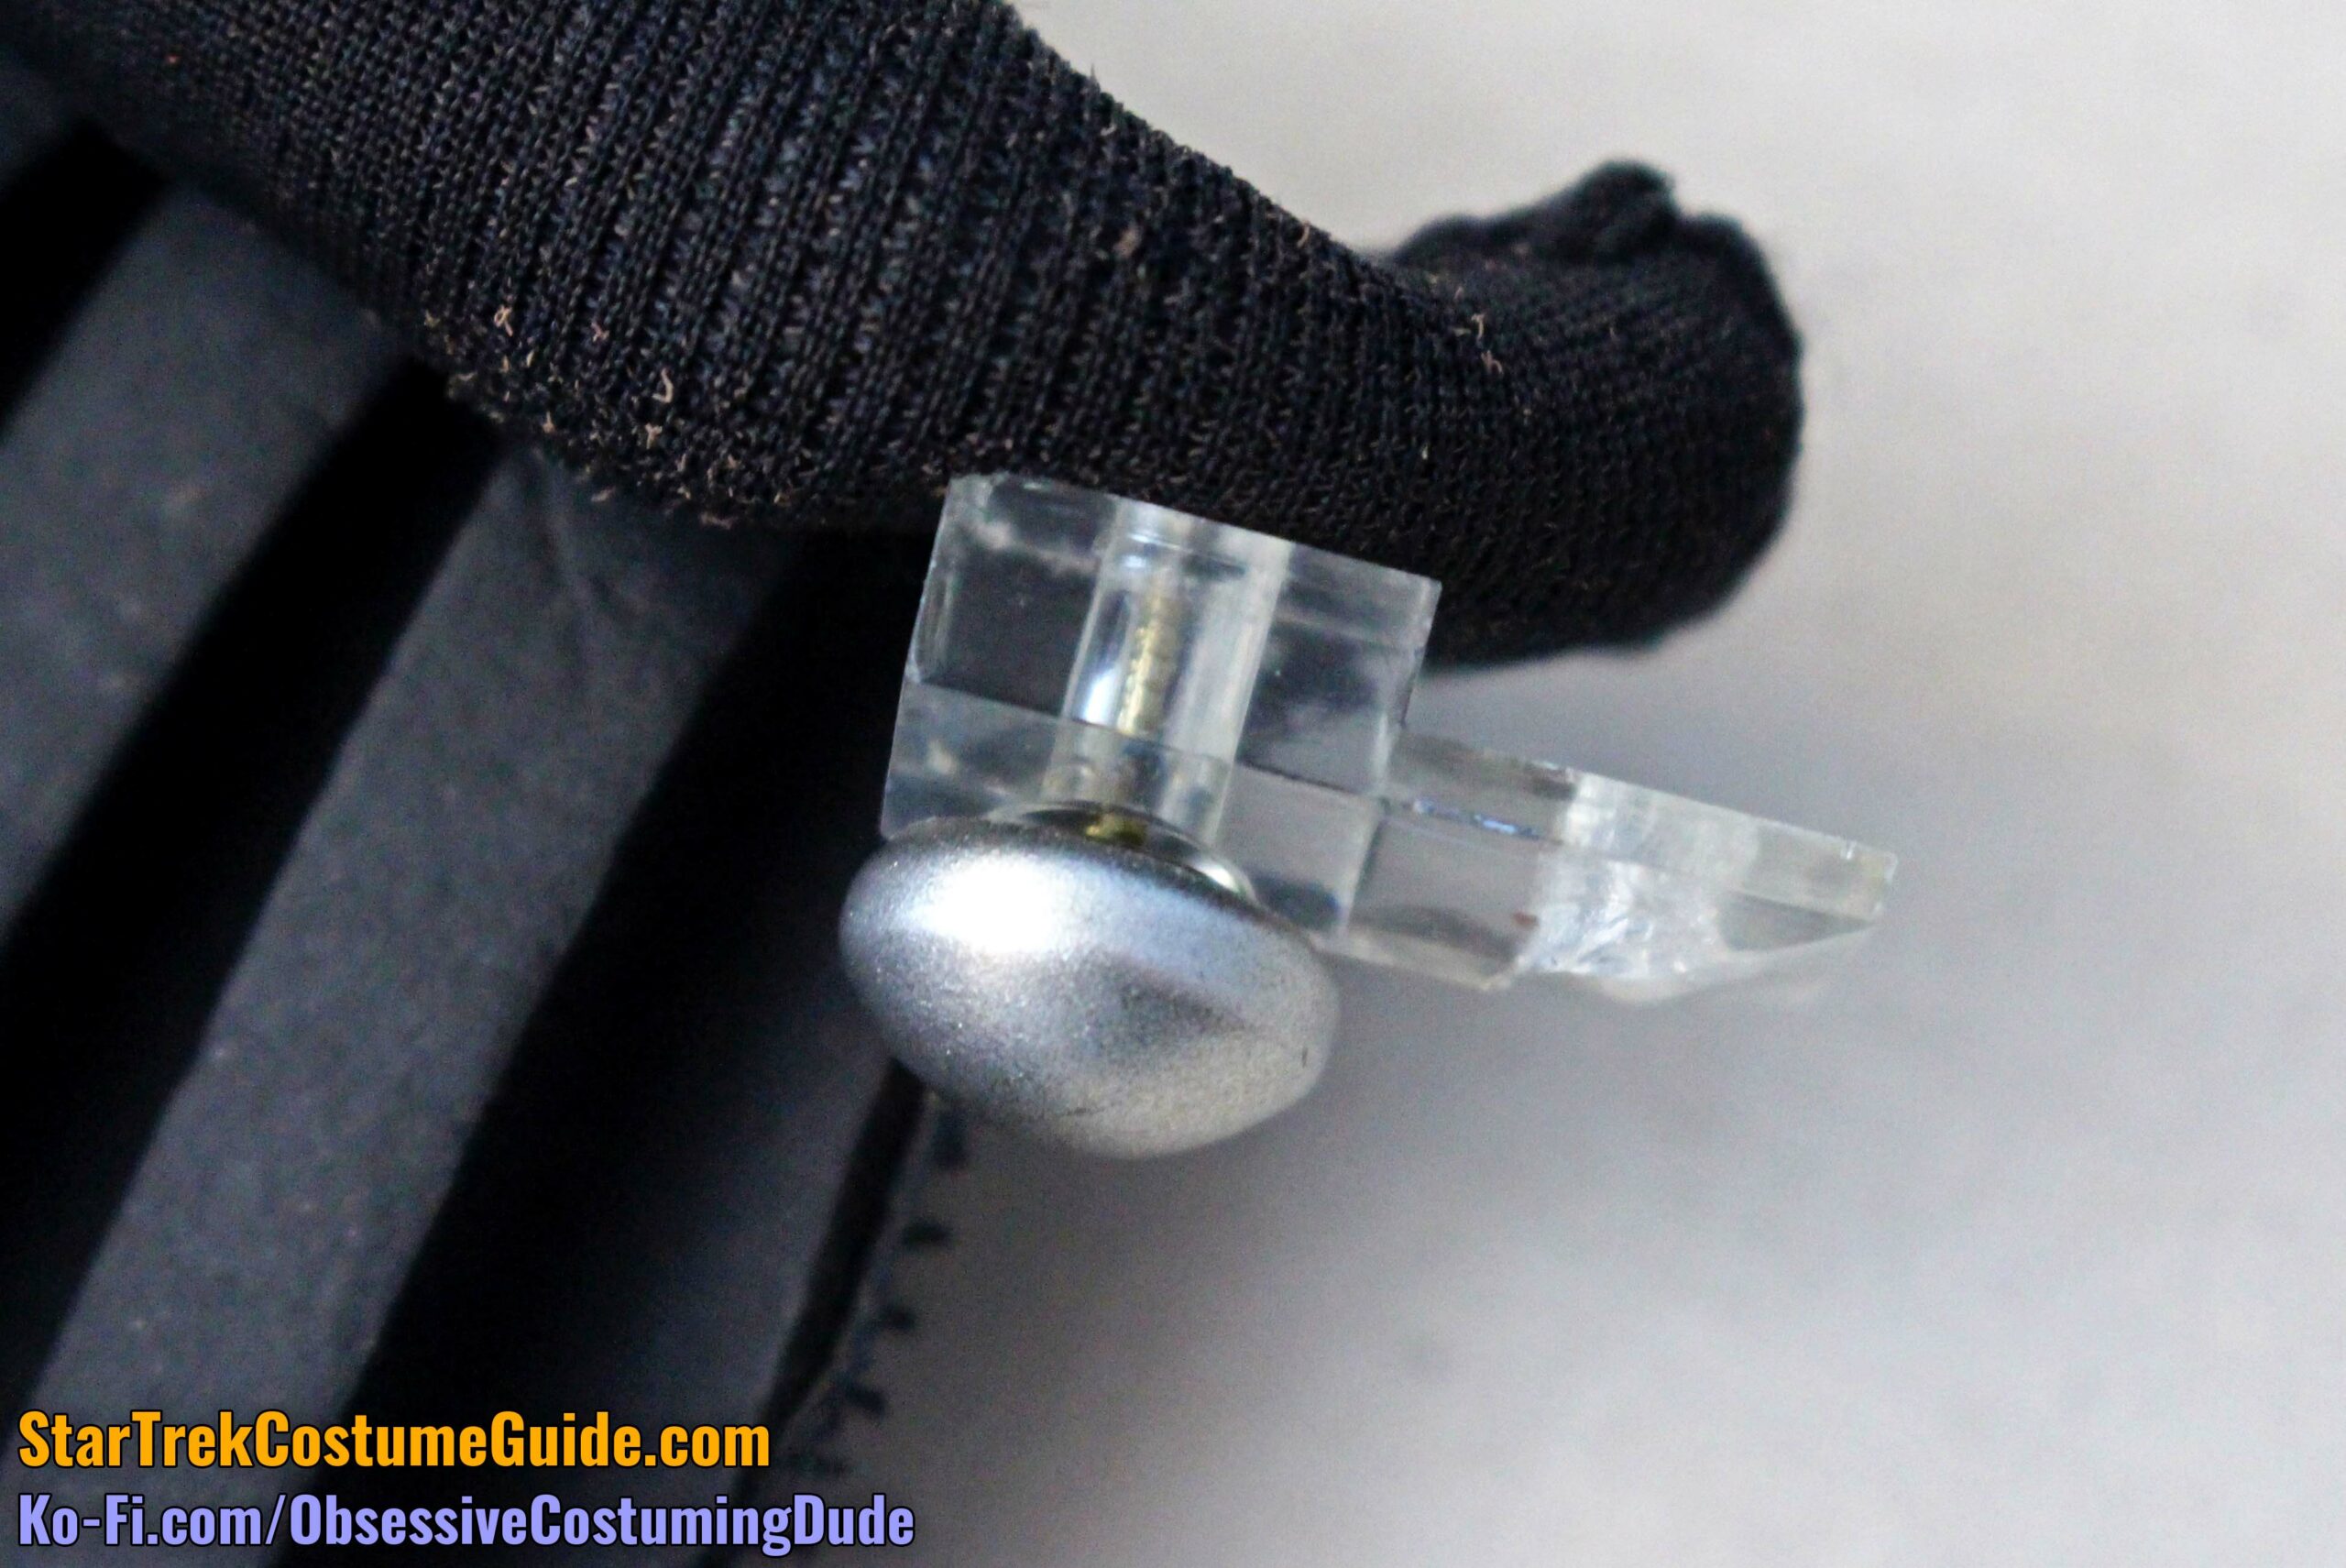
The upper accents appear to have been the same on both collar styles.
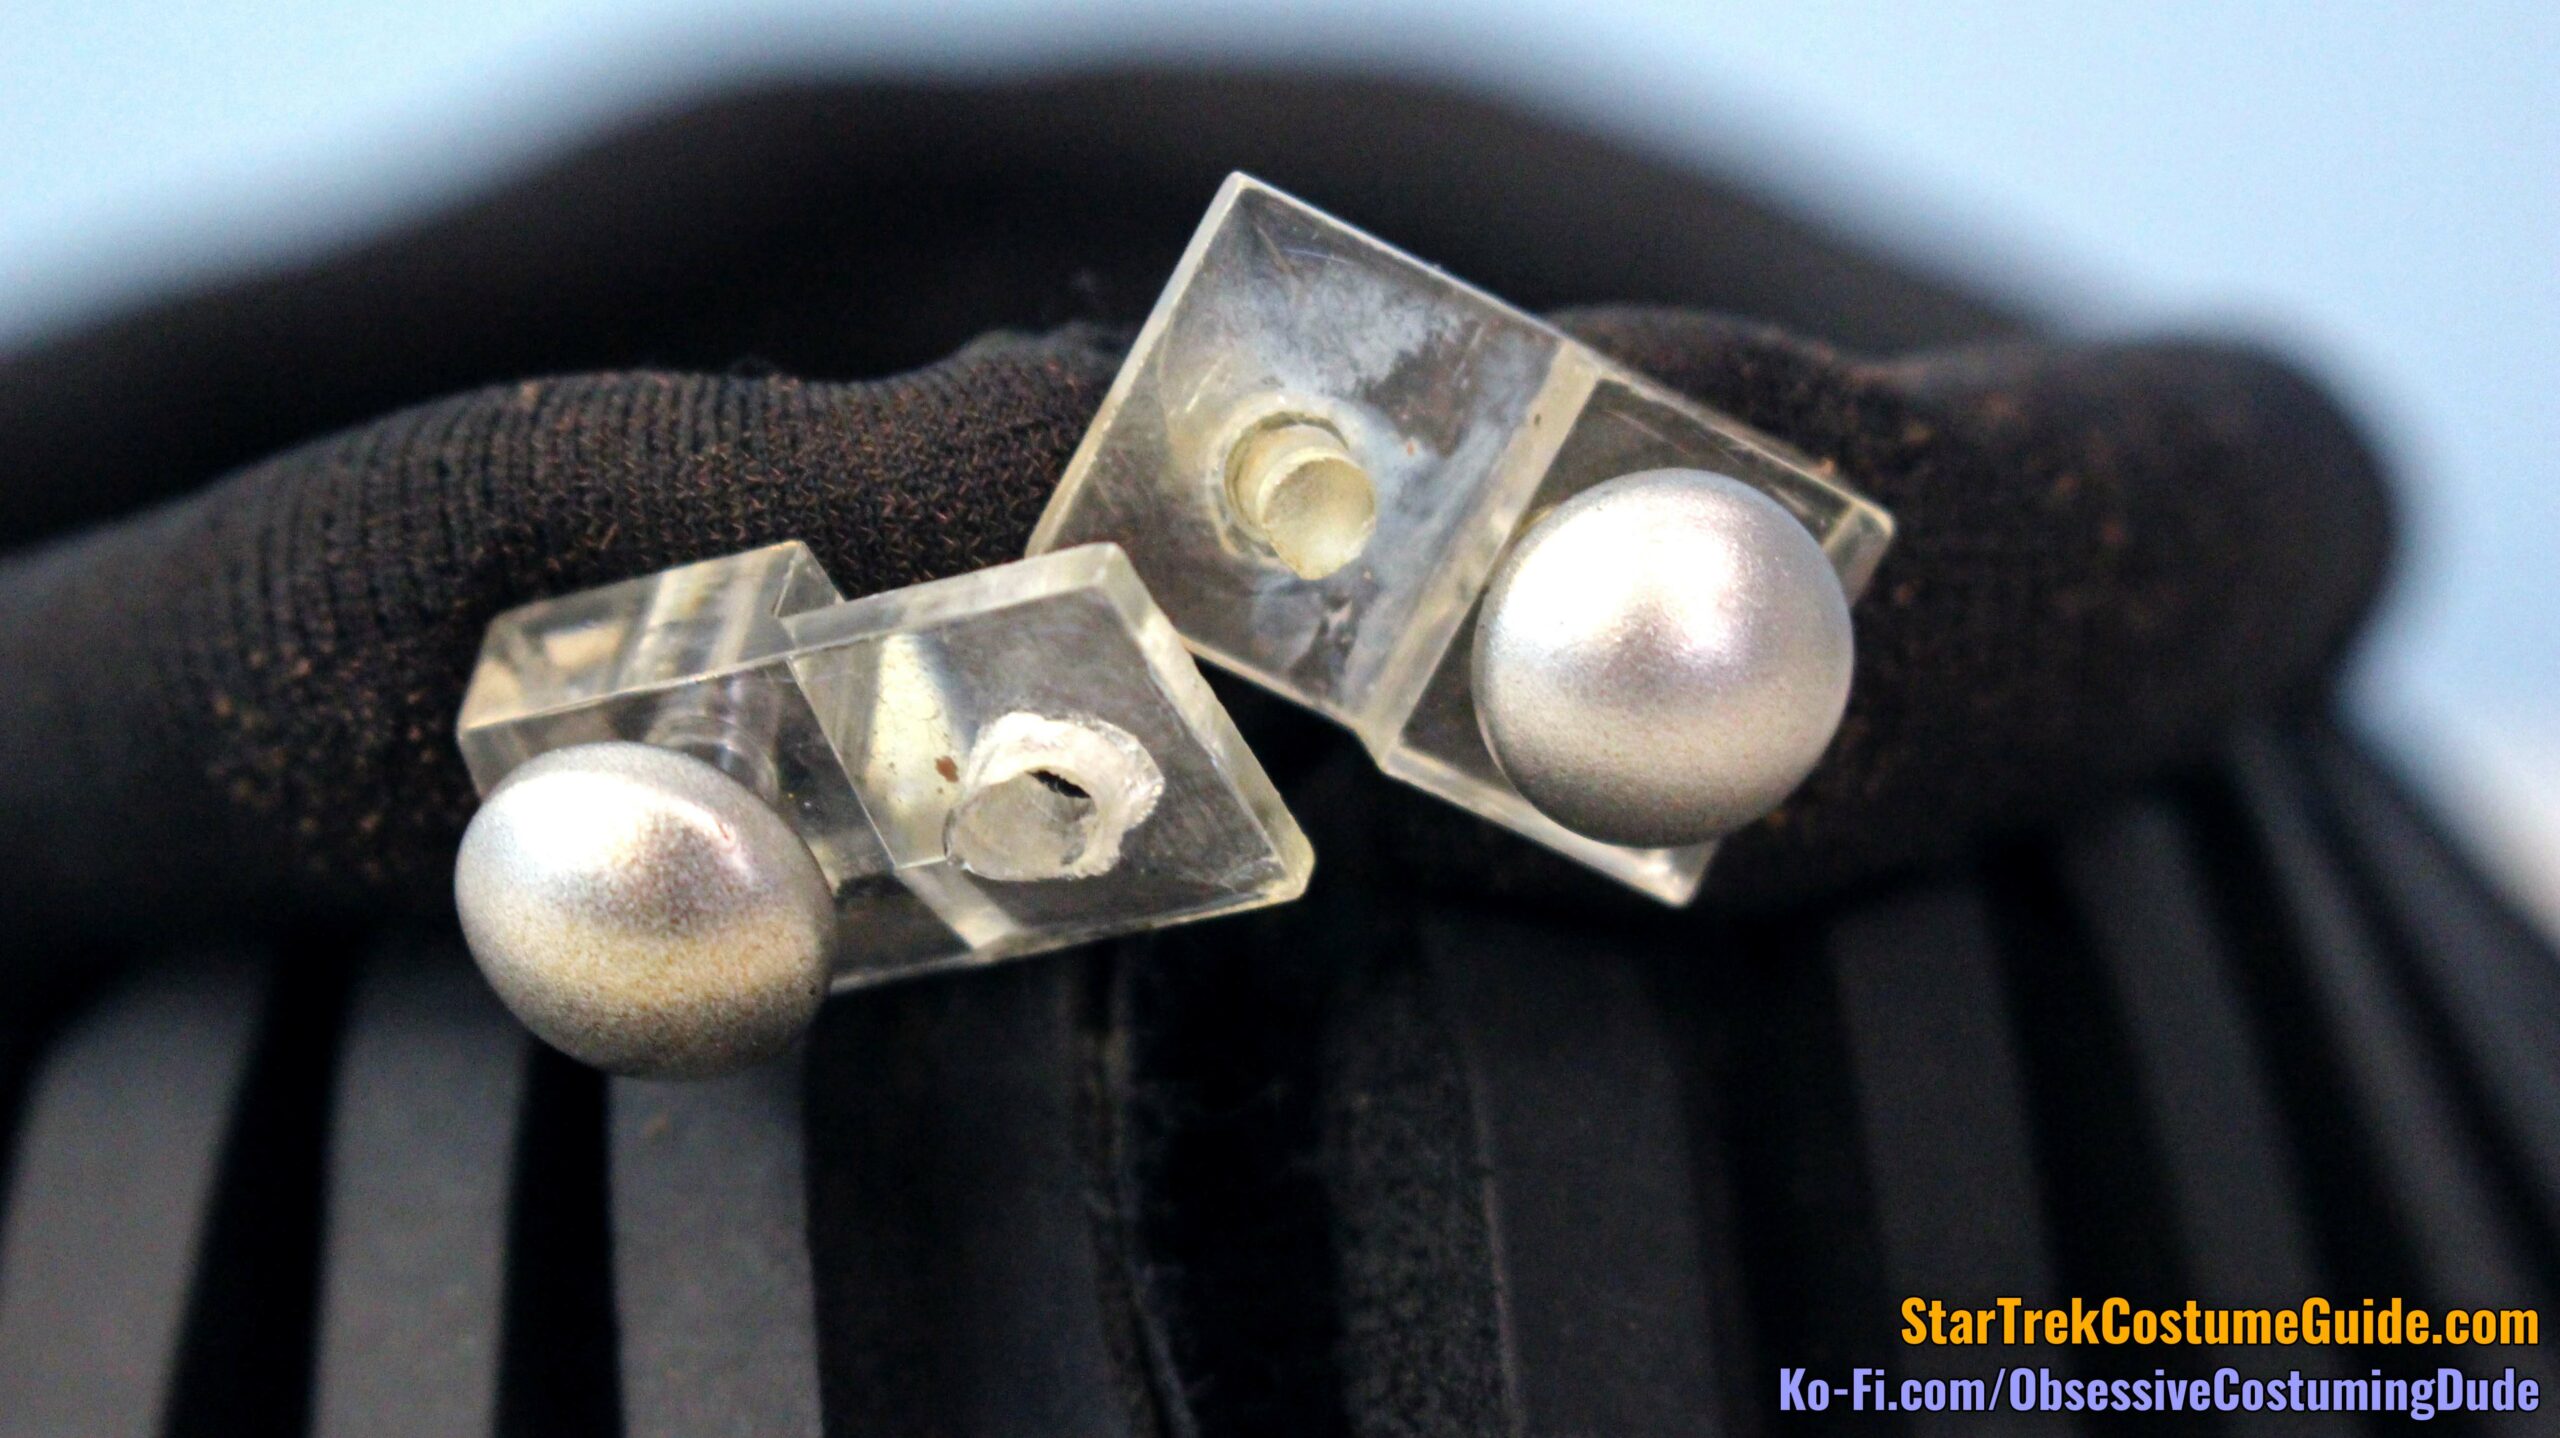
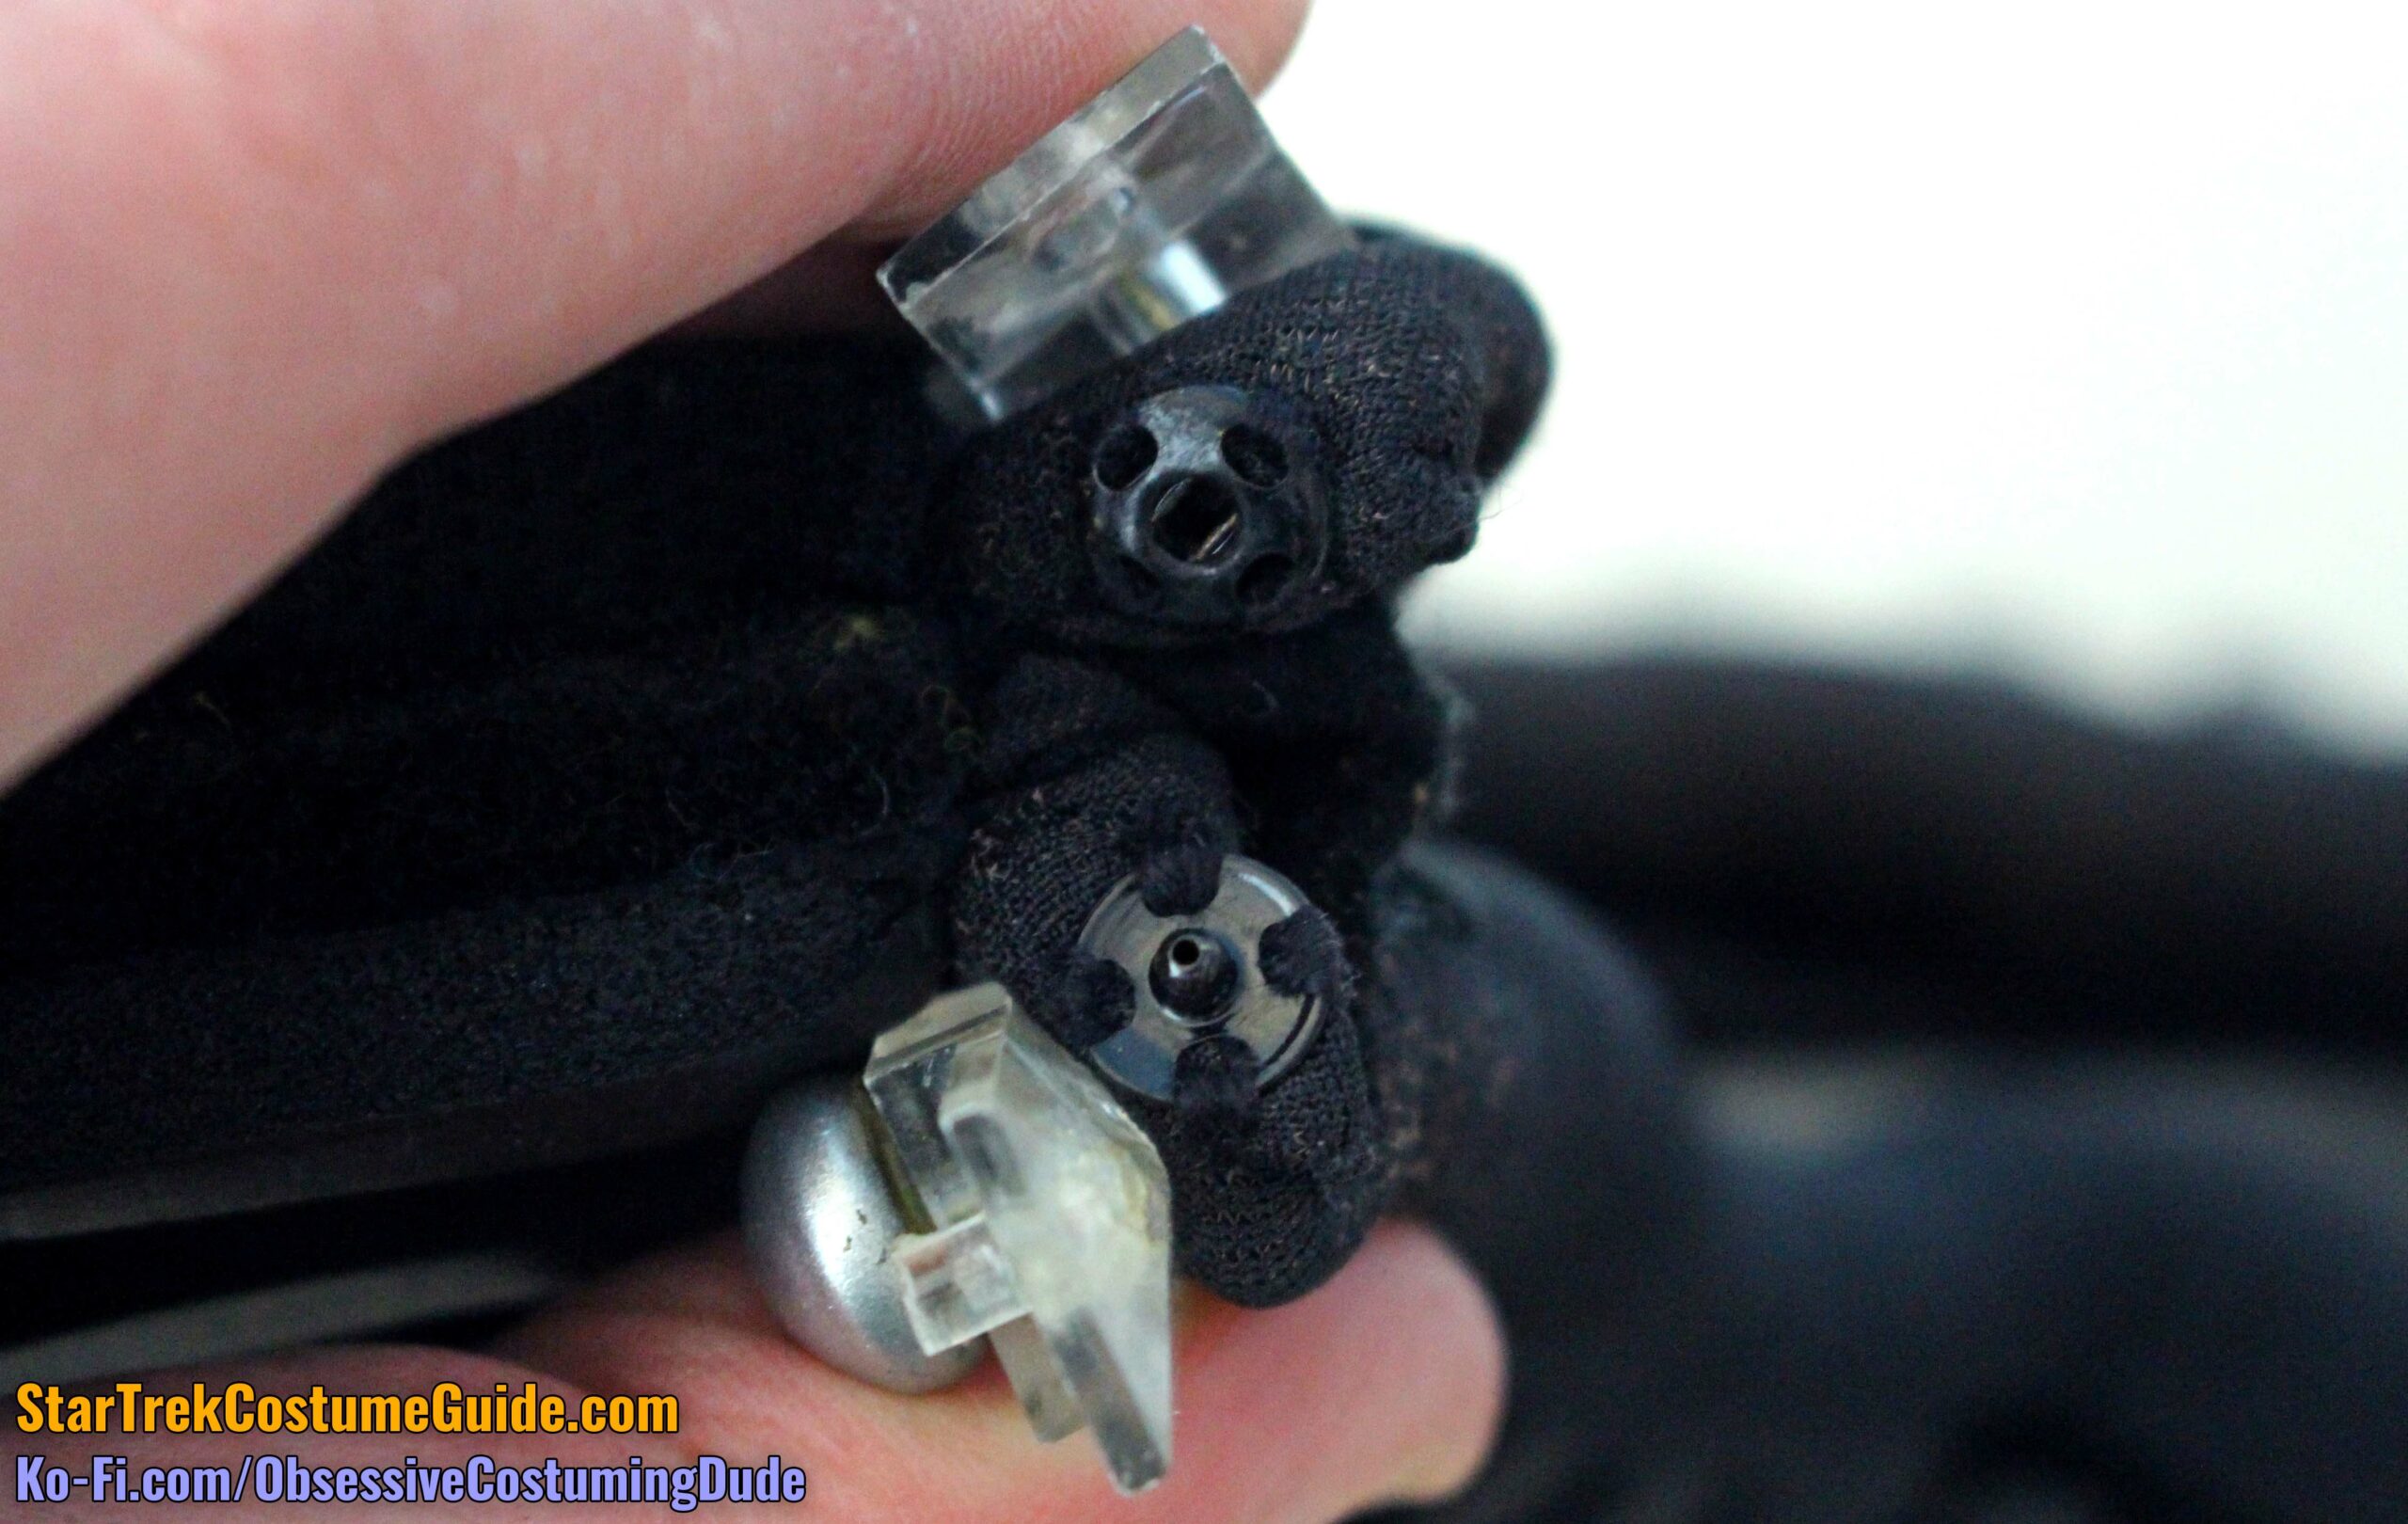
If we look at them from above, they might start to look familiar …
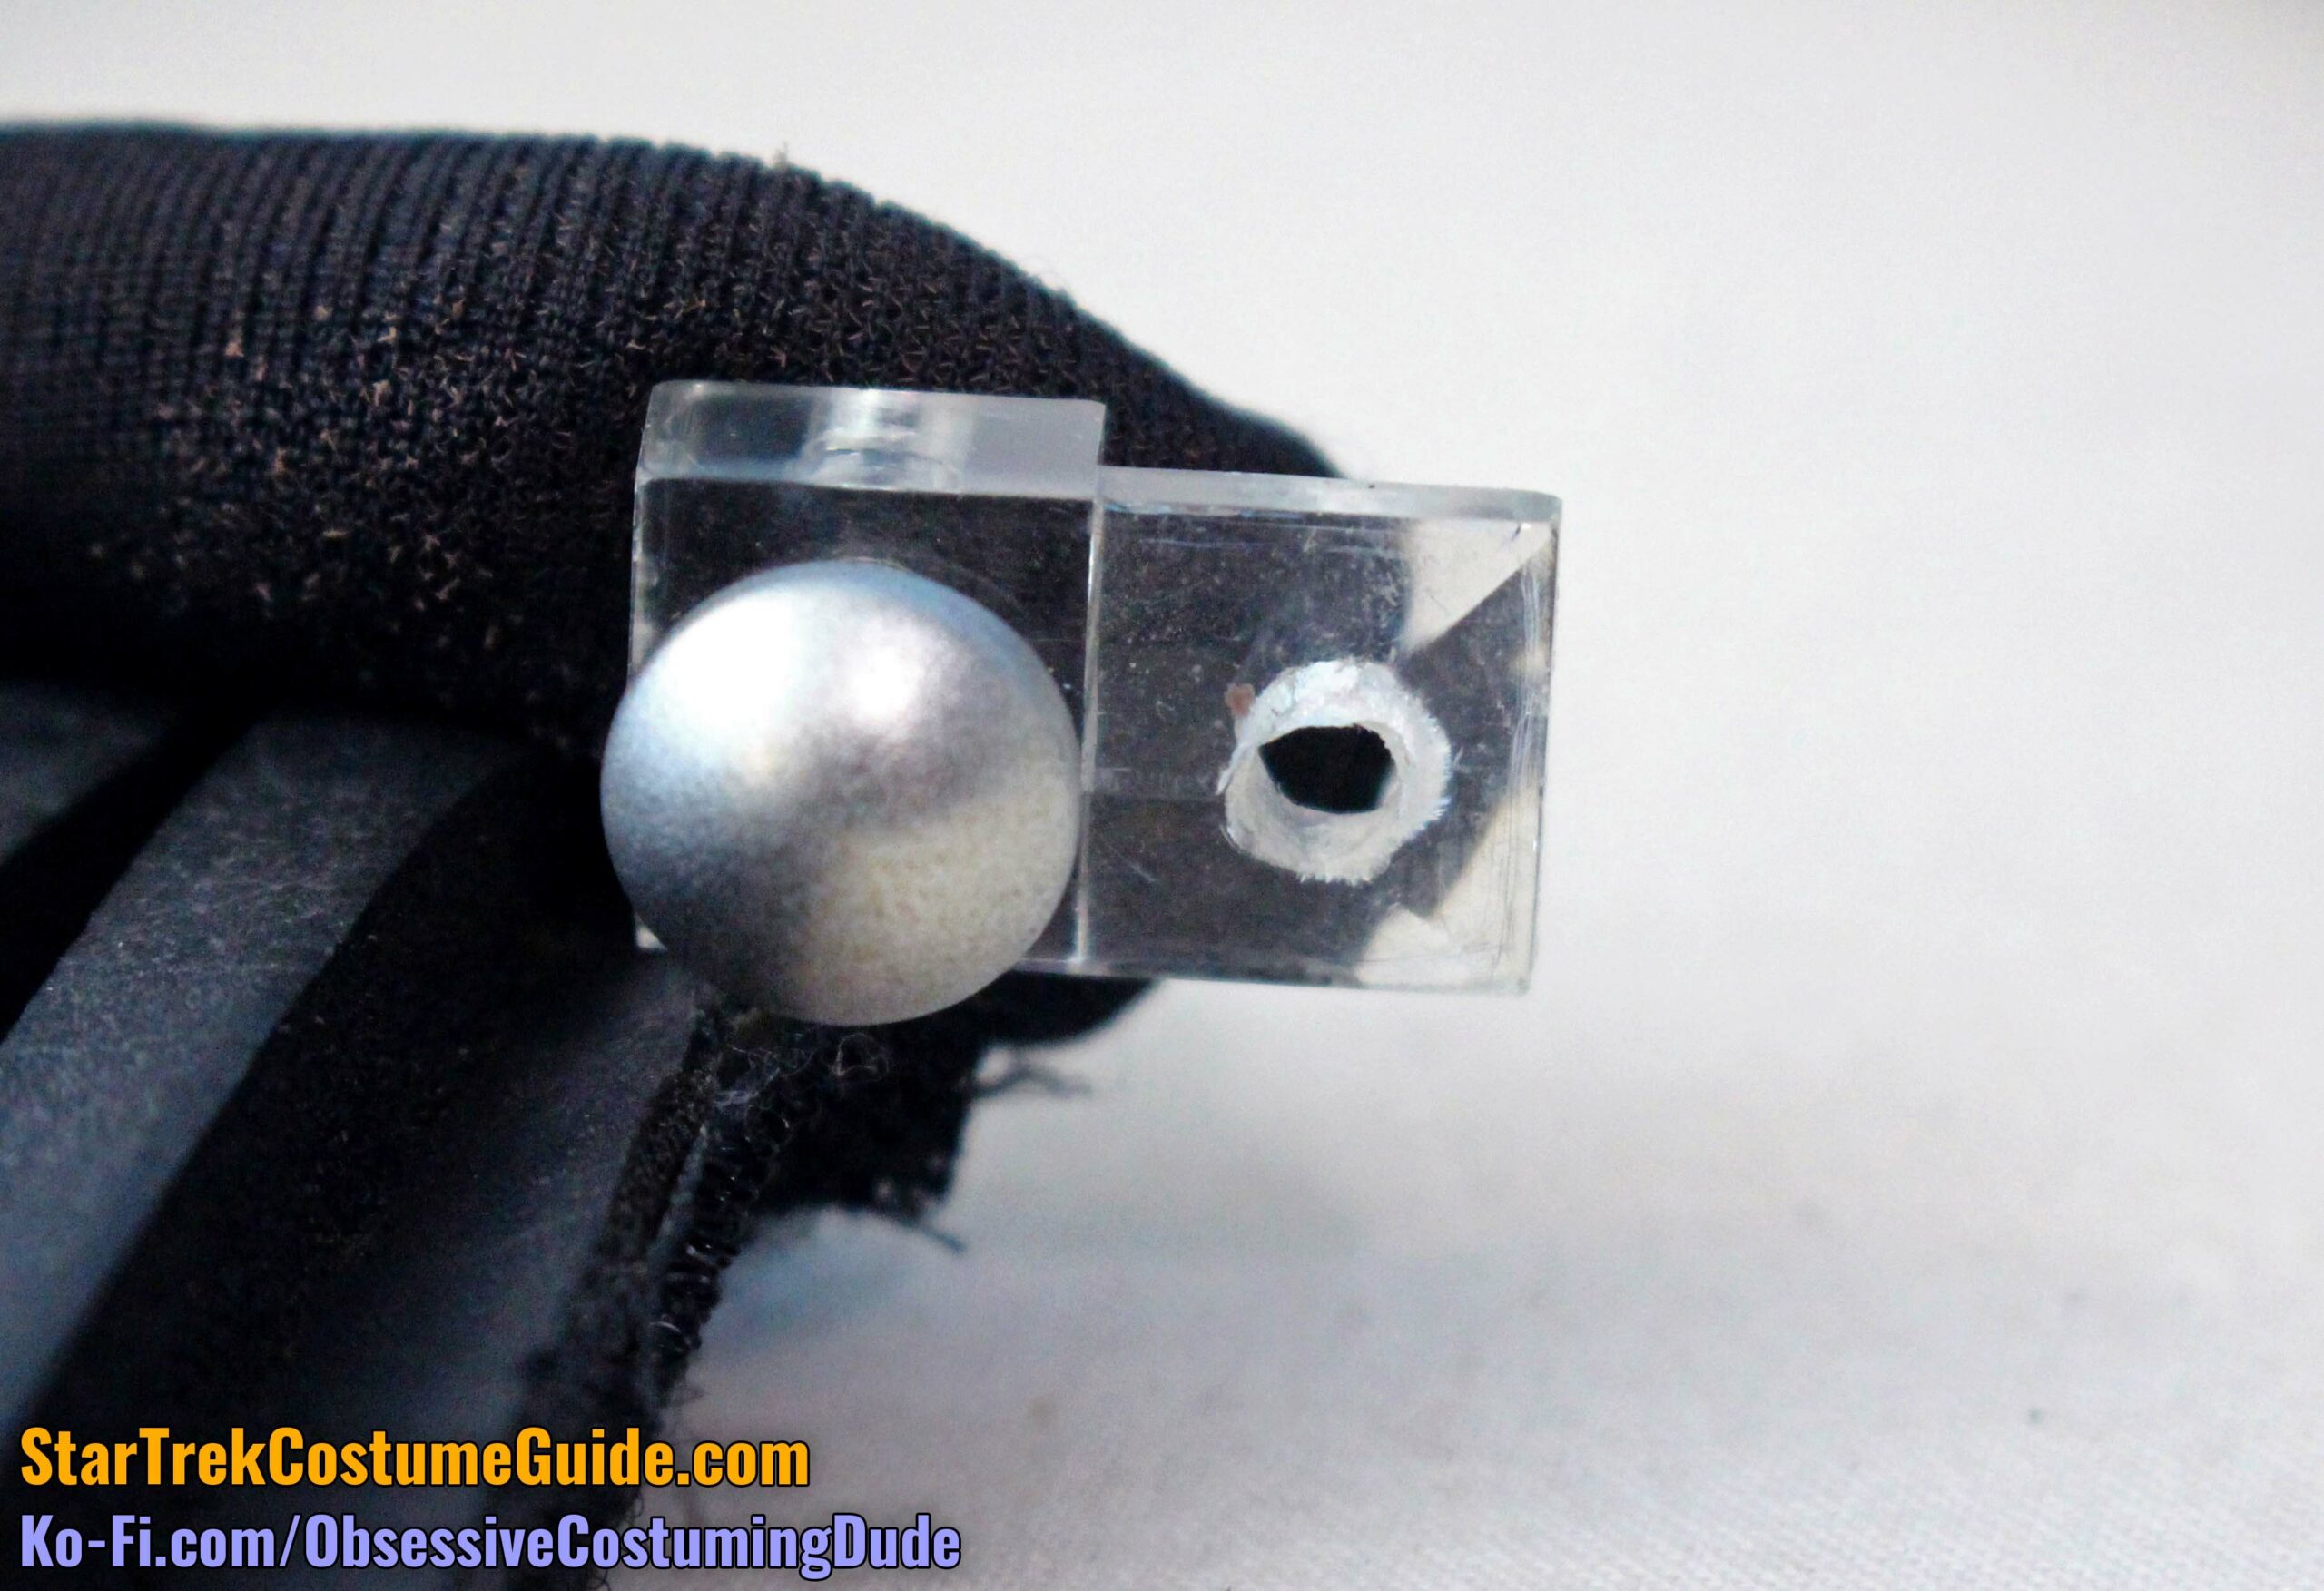
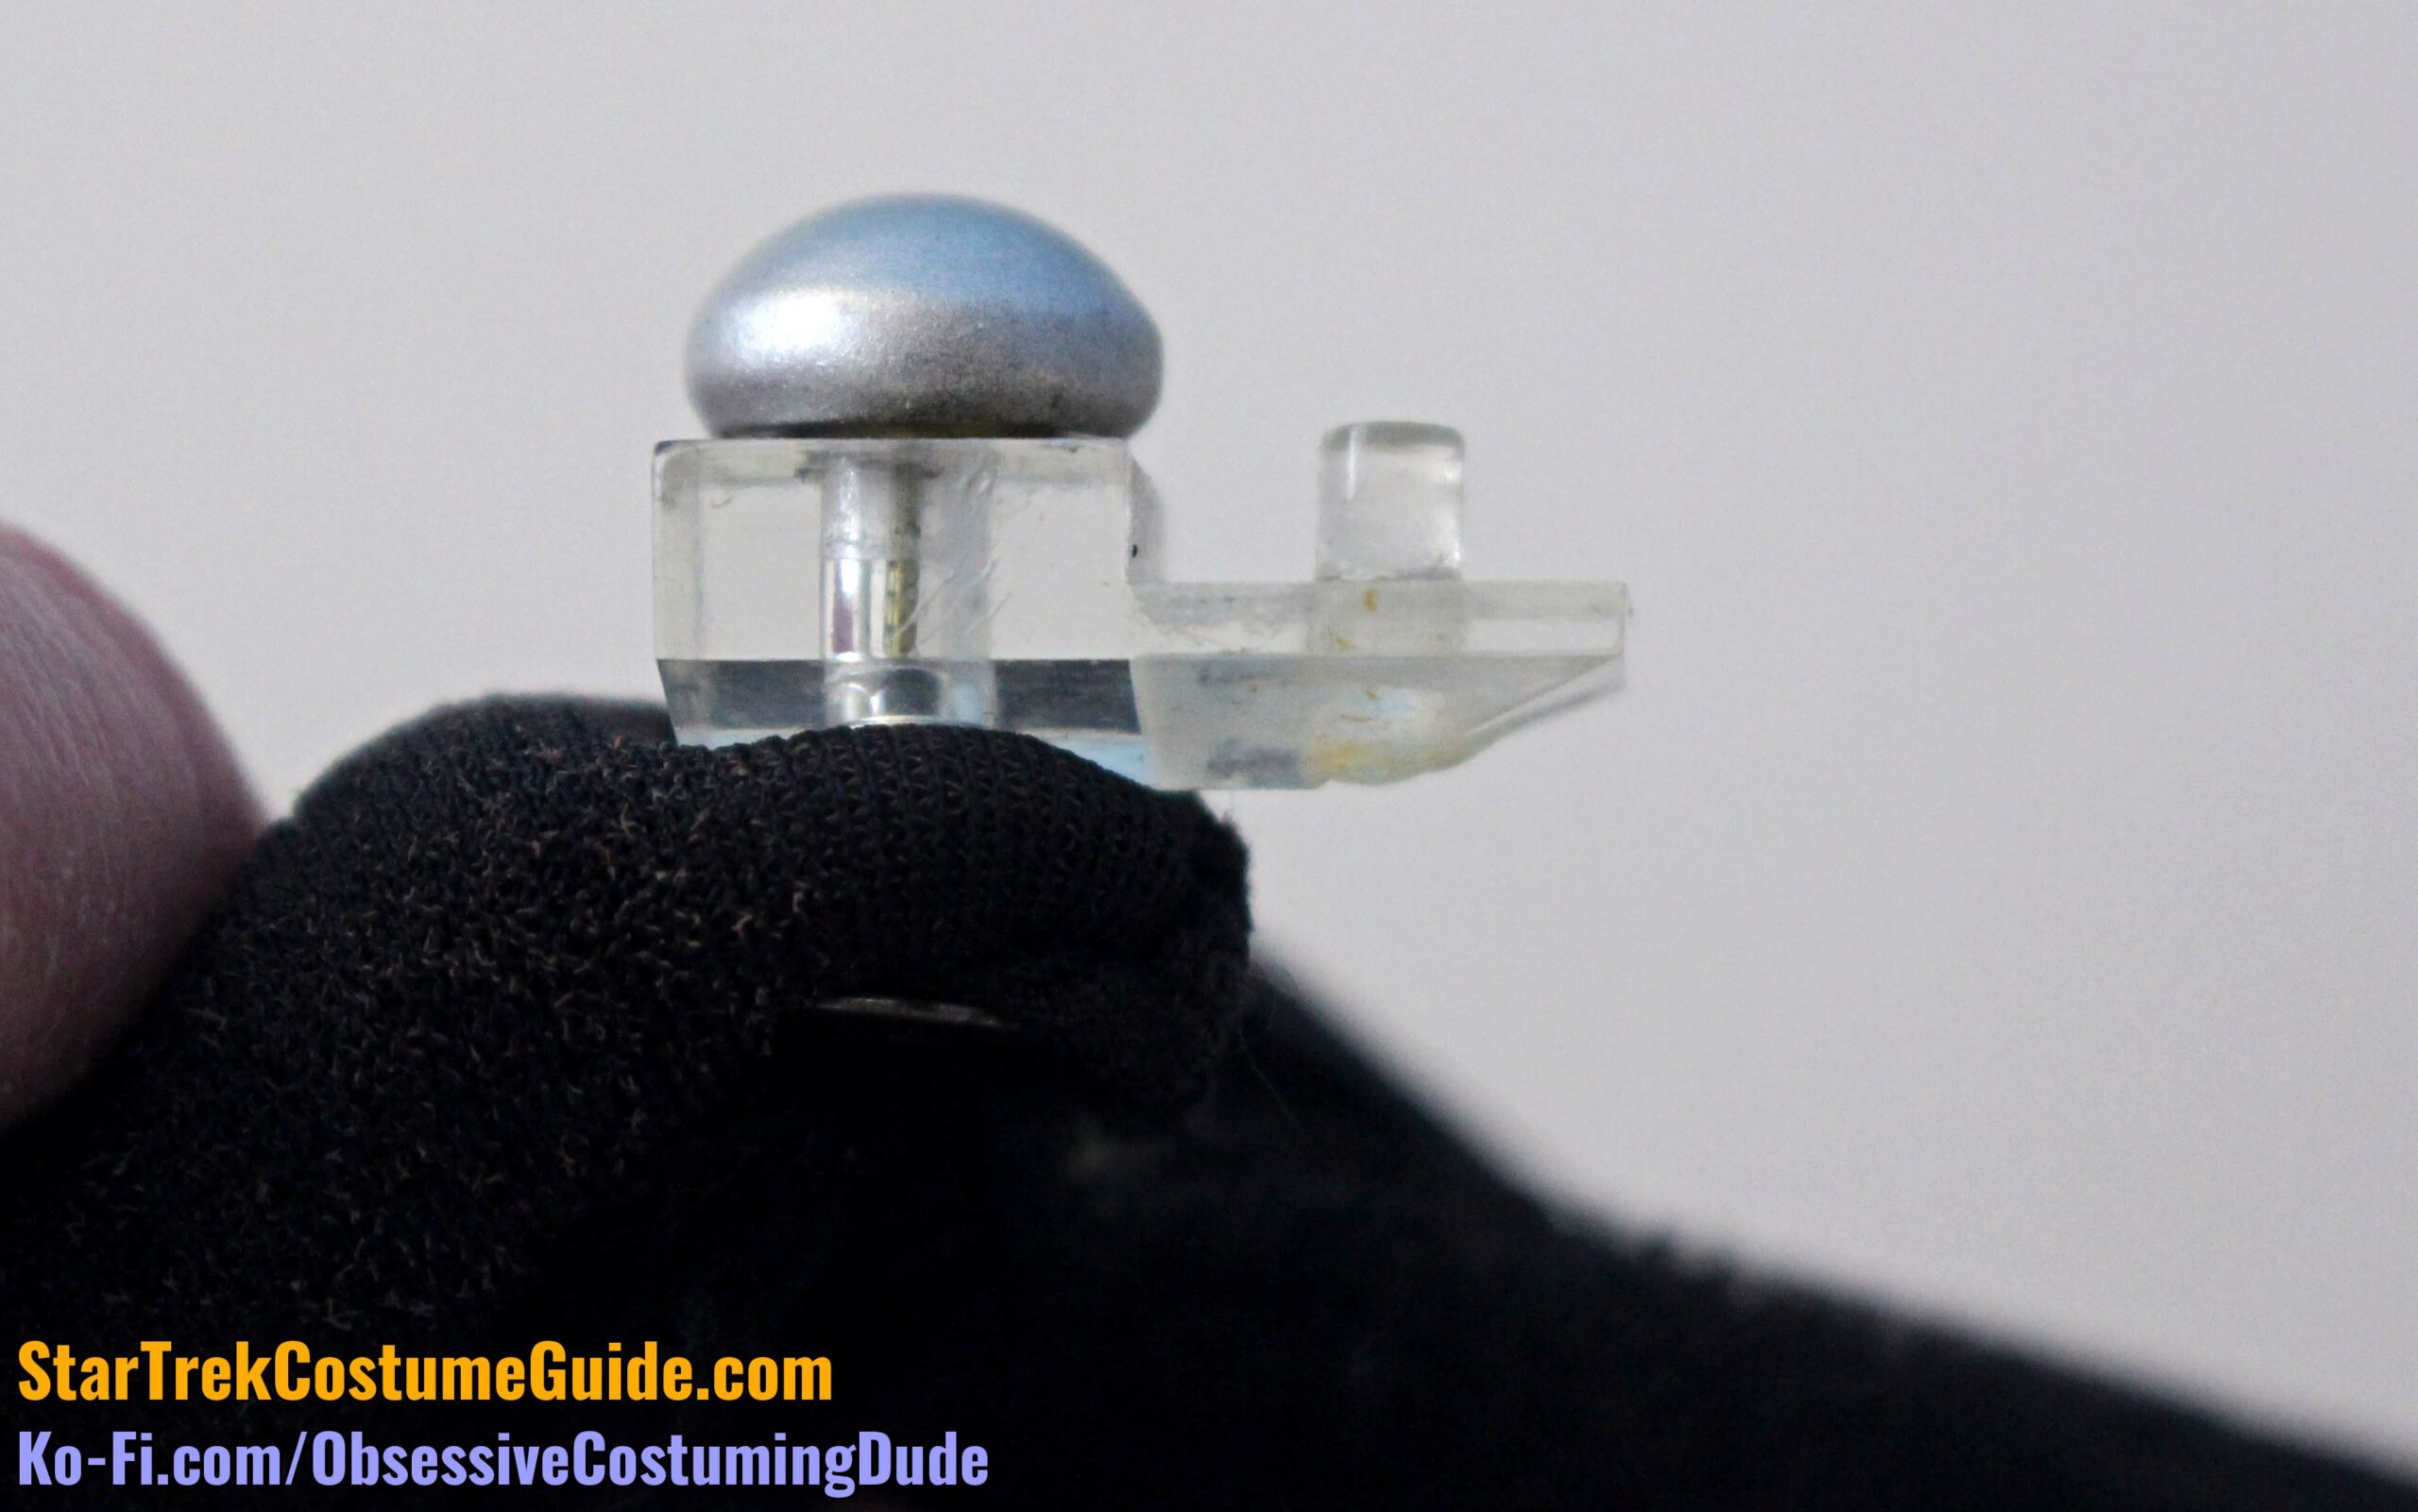
The front one had a small hole, and the rear one had a small rod to help them secure together.
Looking at just the front one from above, perhaps it’s starting to look even more familiar … especially if you’ve had to hang any mirrors lately! 🙂
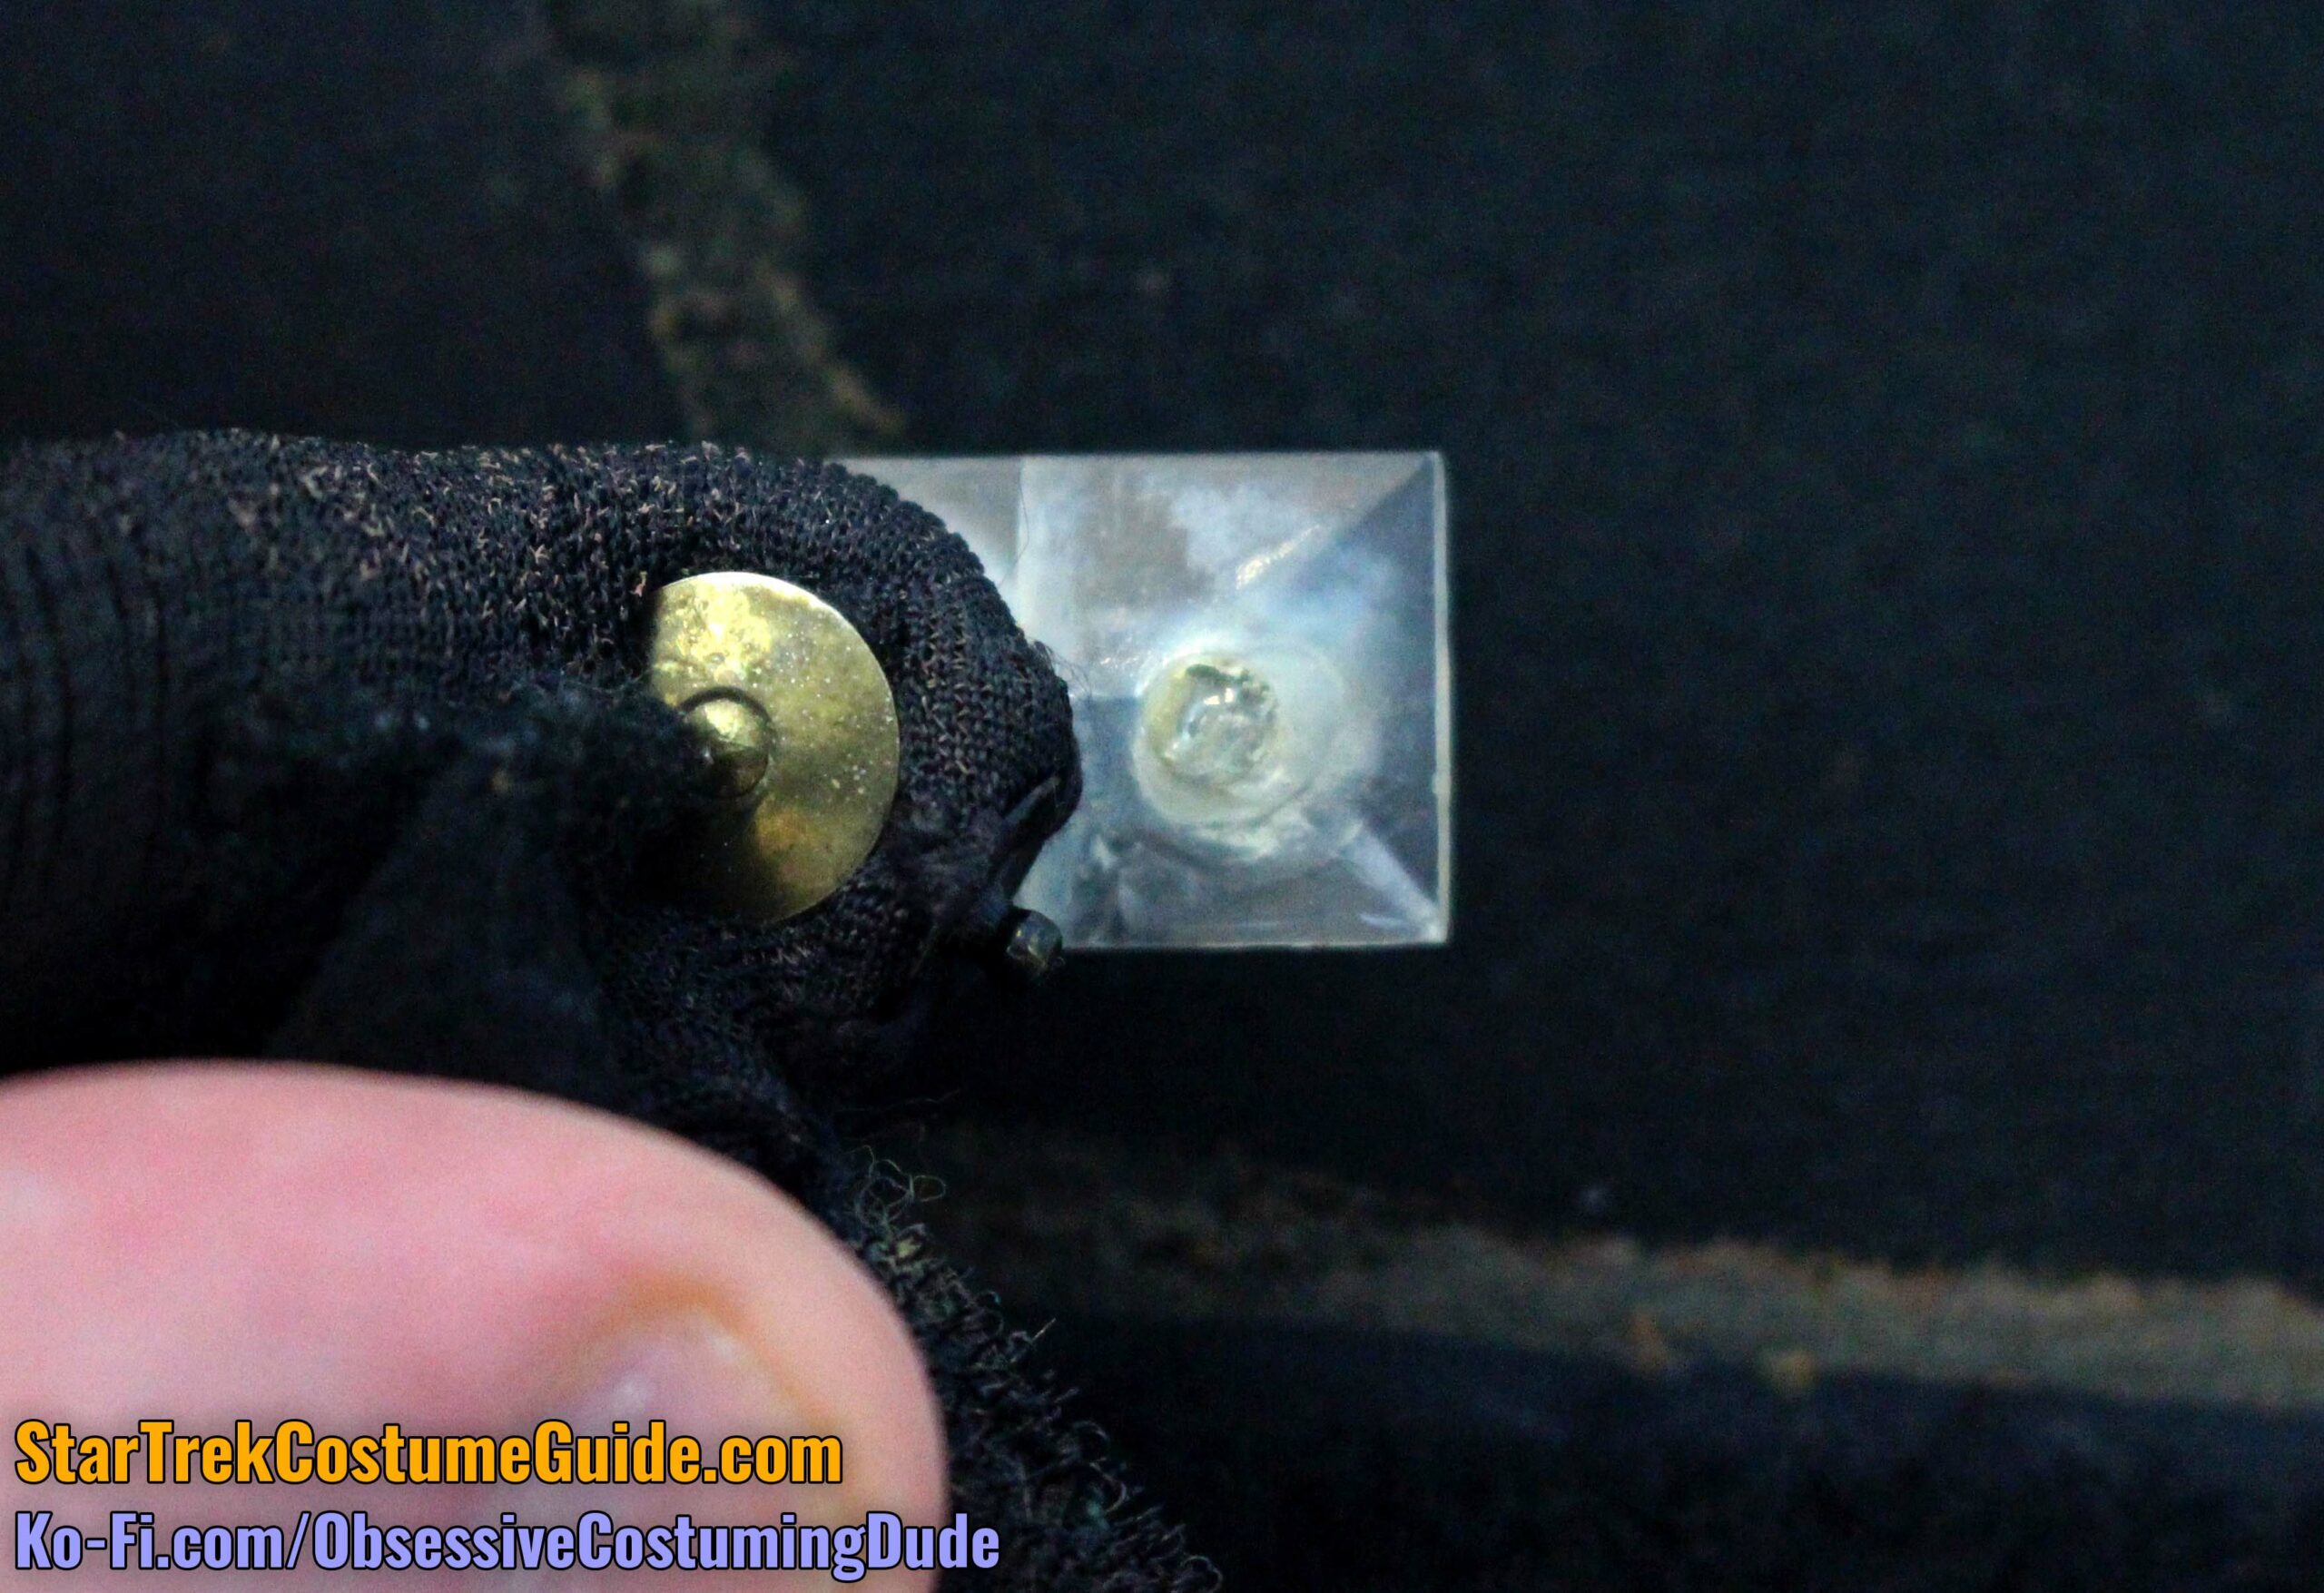
That’s right! These collar accents appear to have simply been plastic mirror mounts, with holes drilled in both and a small dowel glued into the rear one.
As brilliantly resourceful as these accents are, the little dowel isn’t enough to keep them fastened closed while being worn.
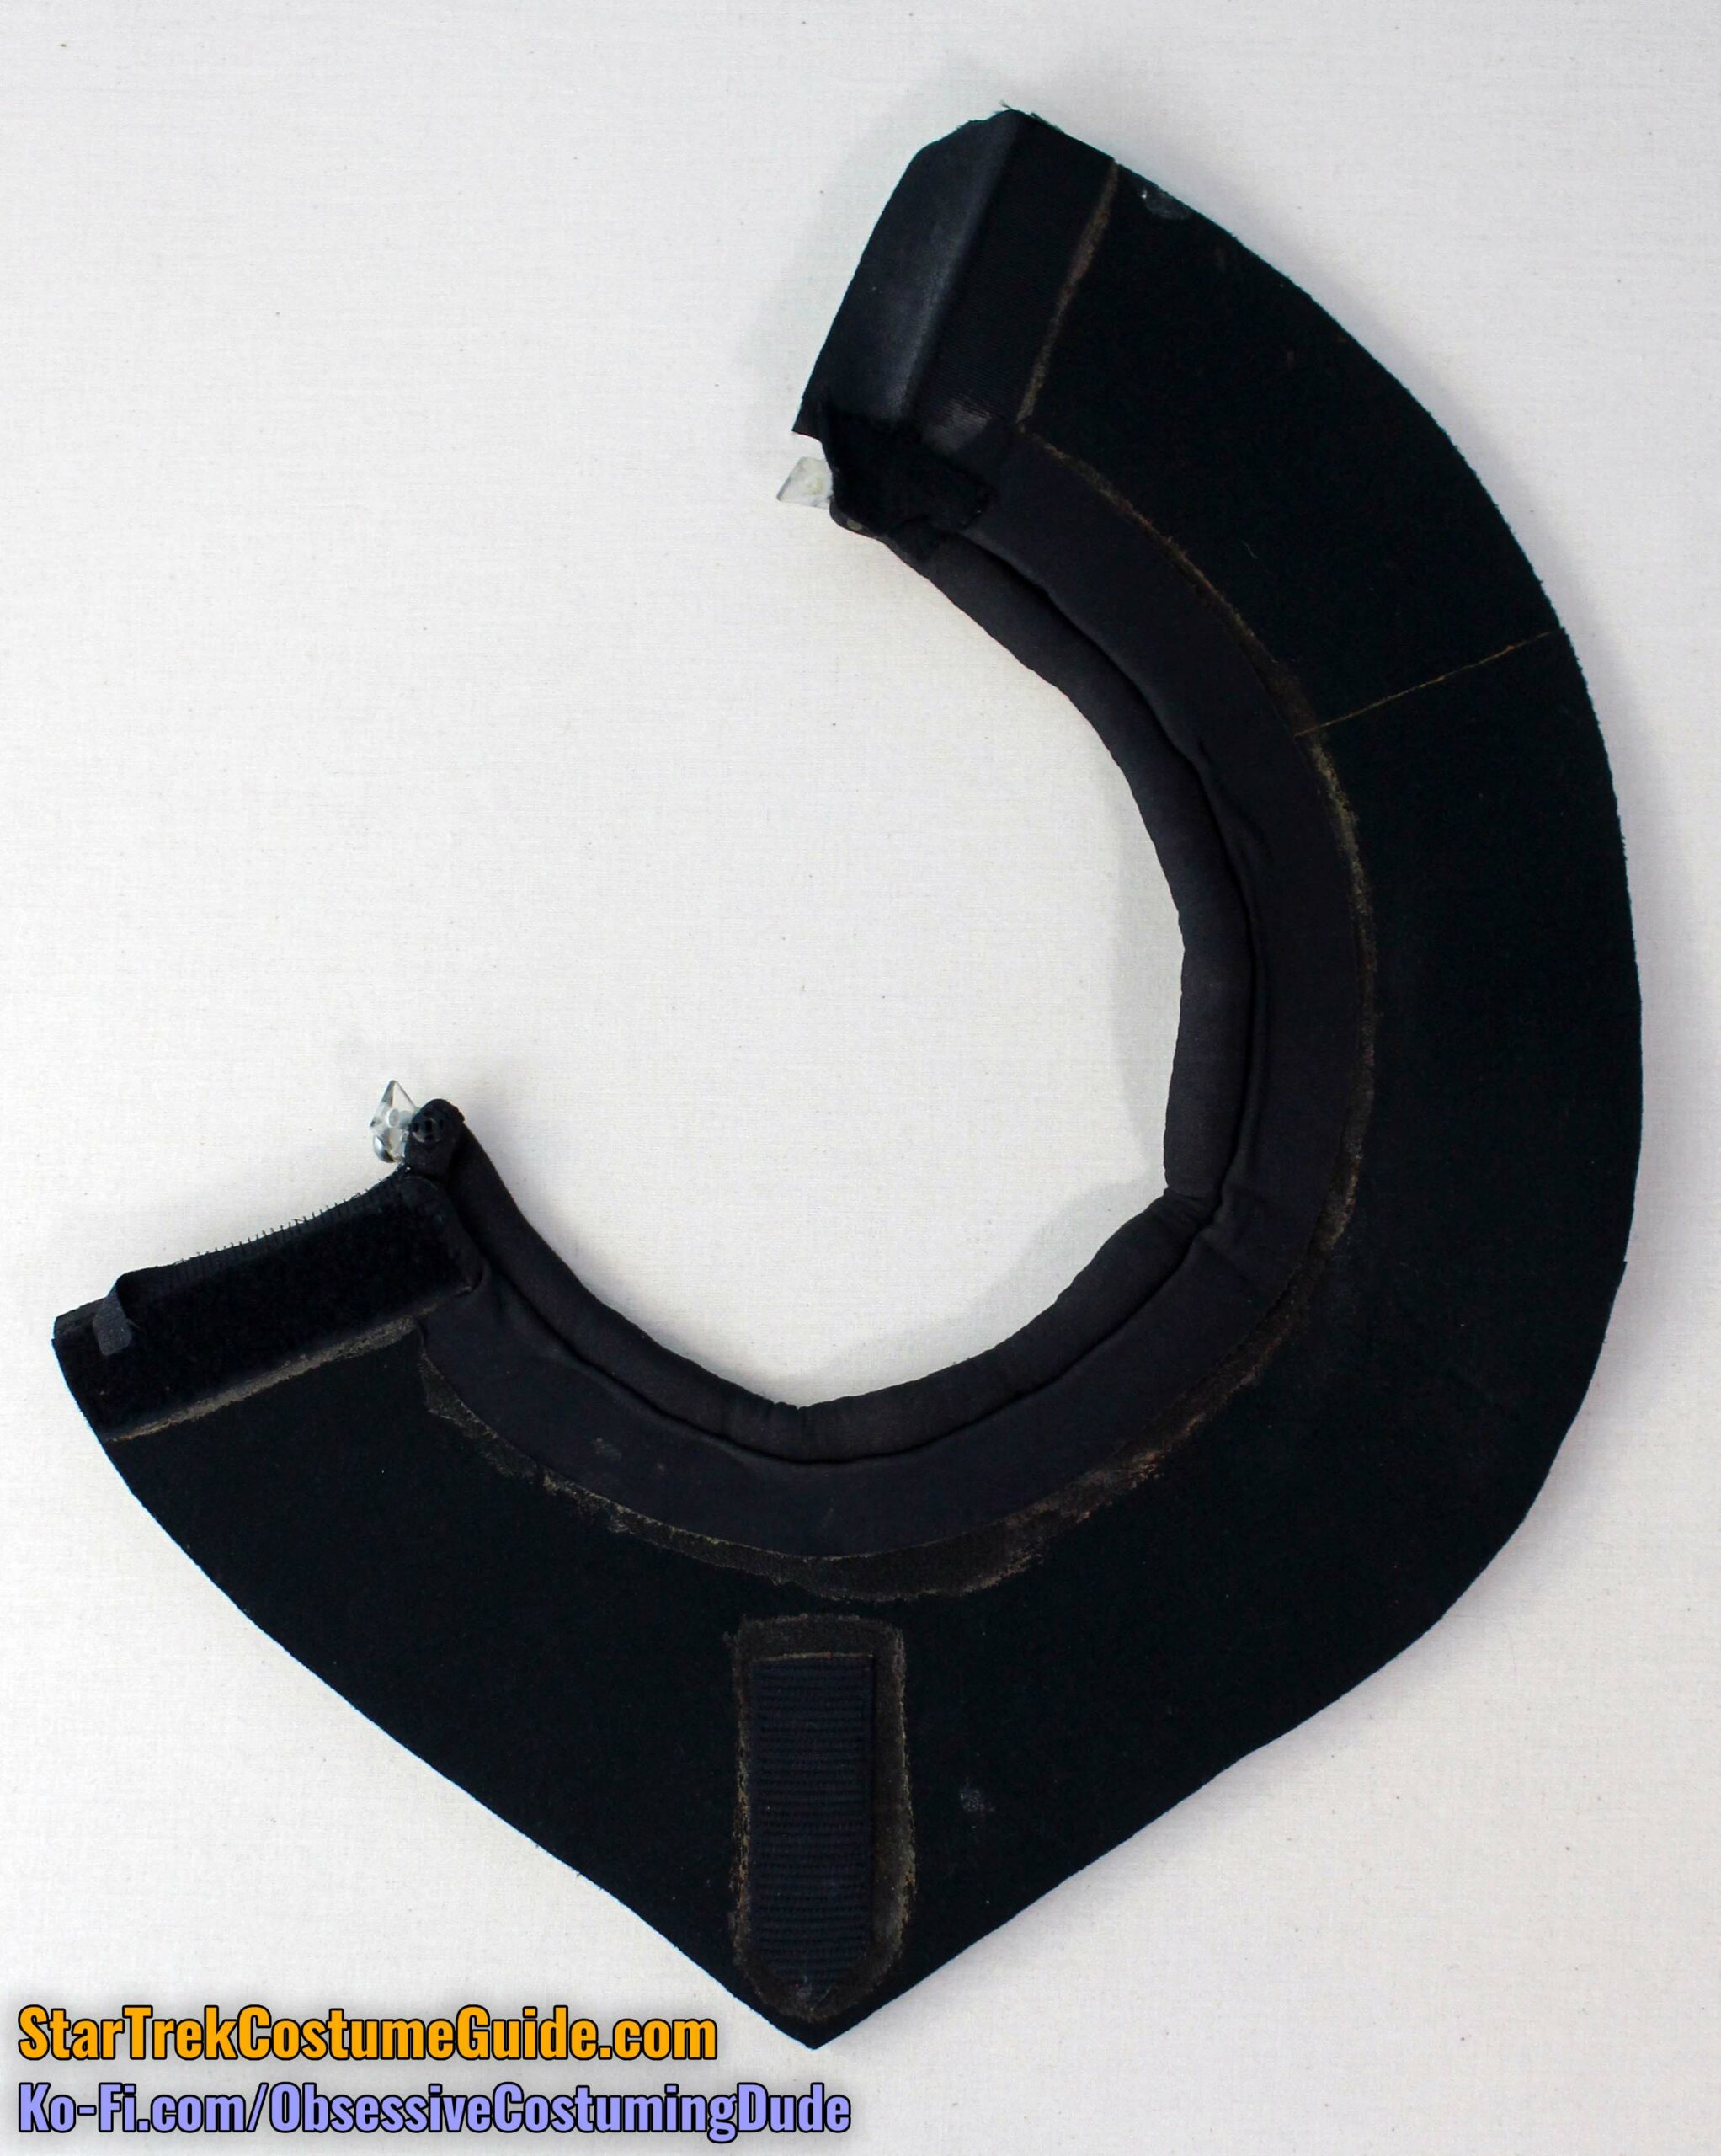
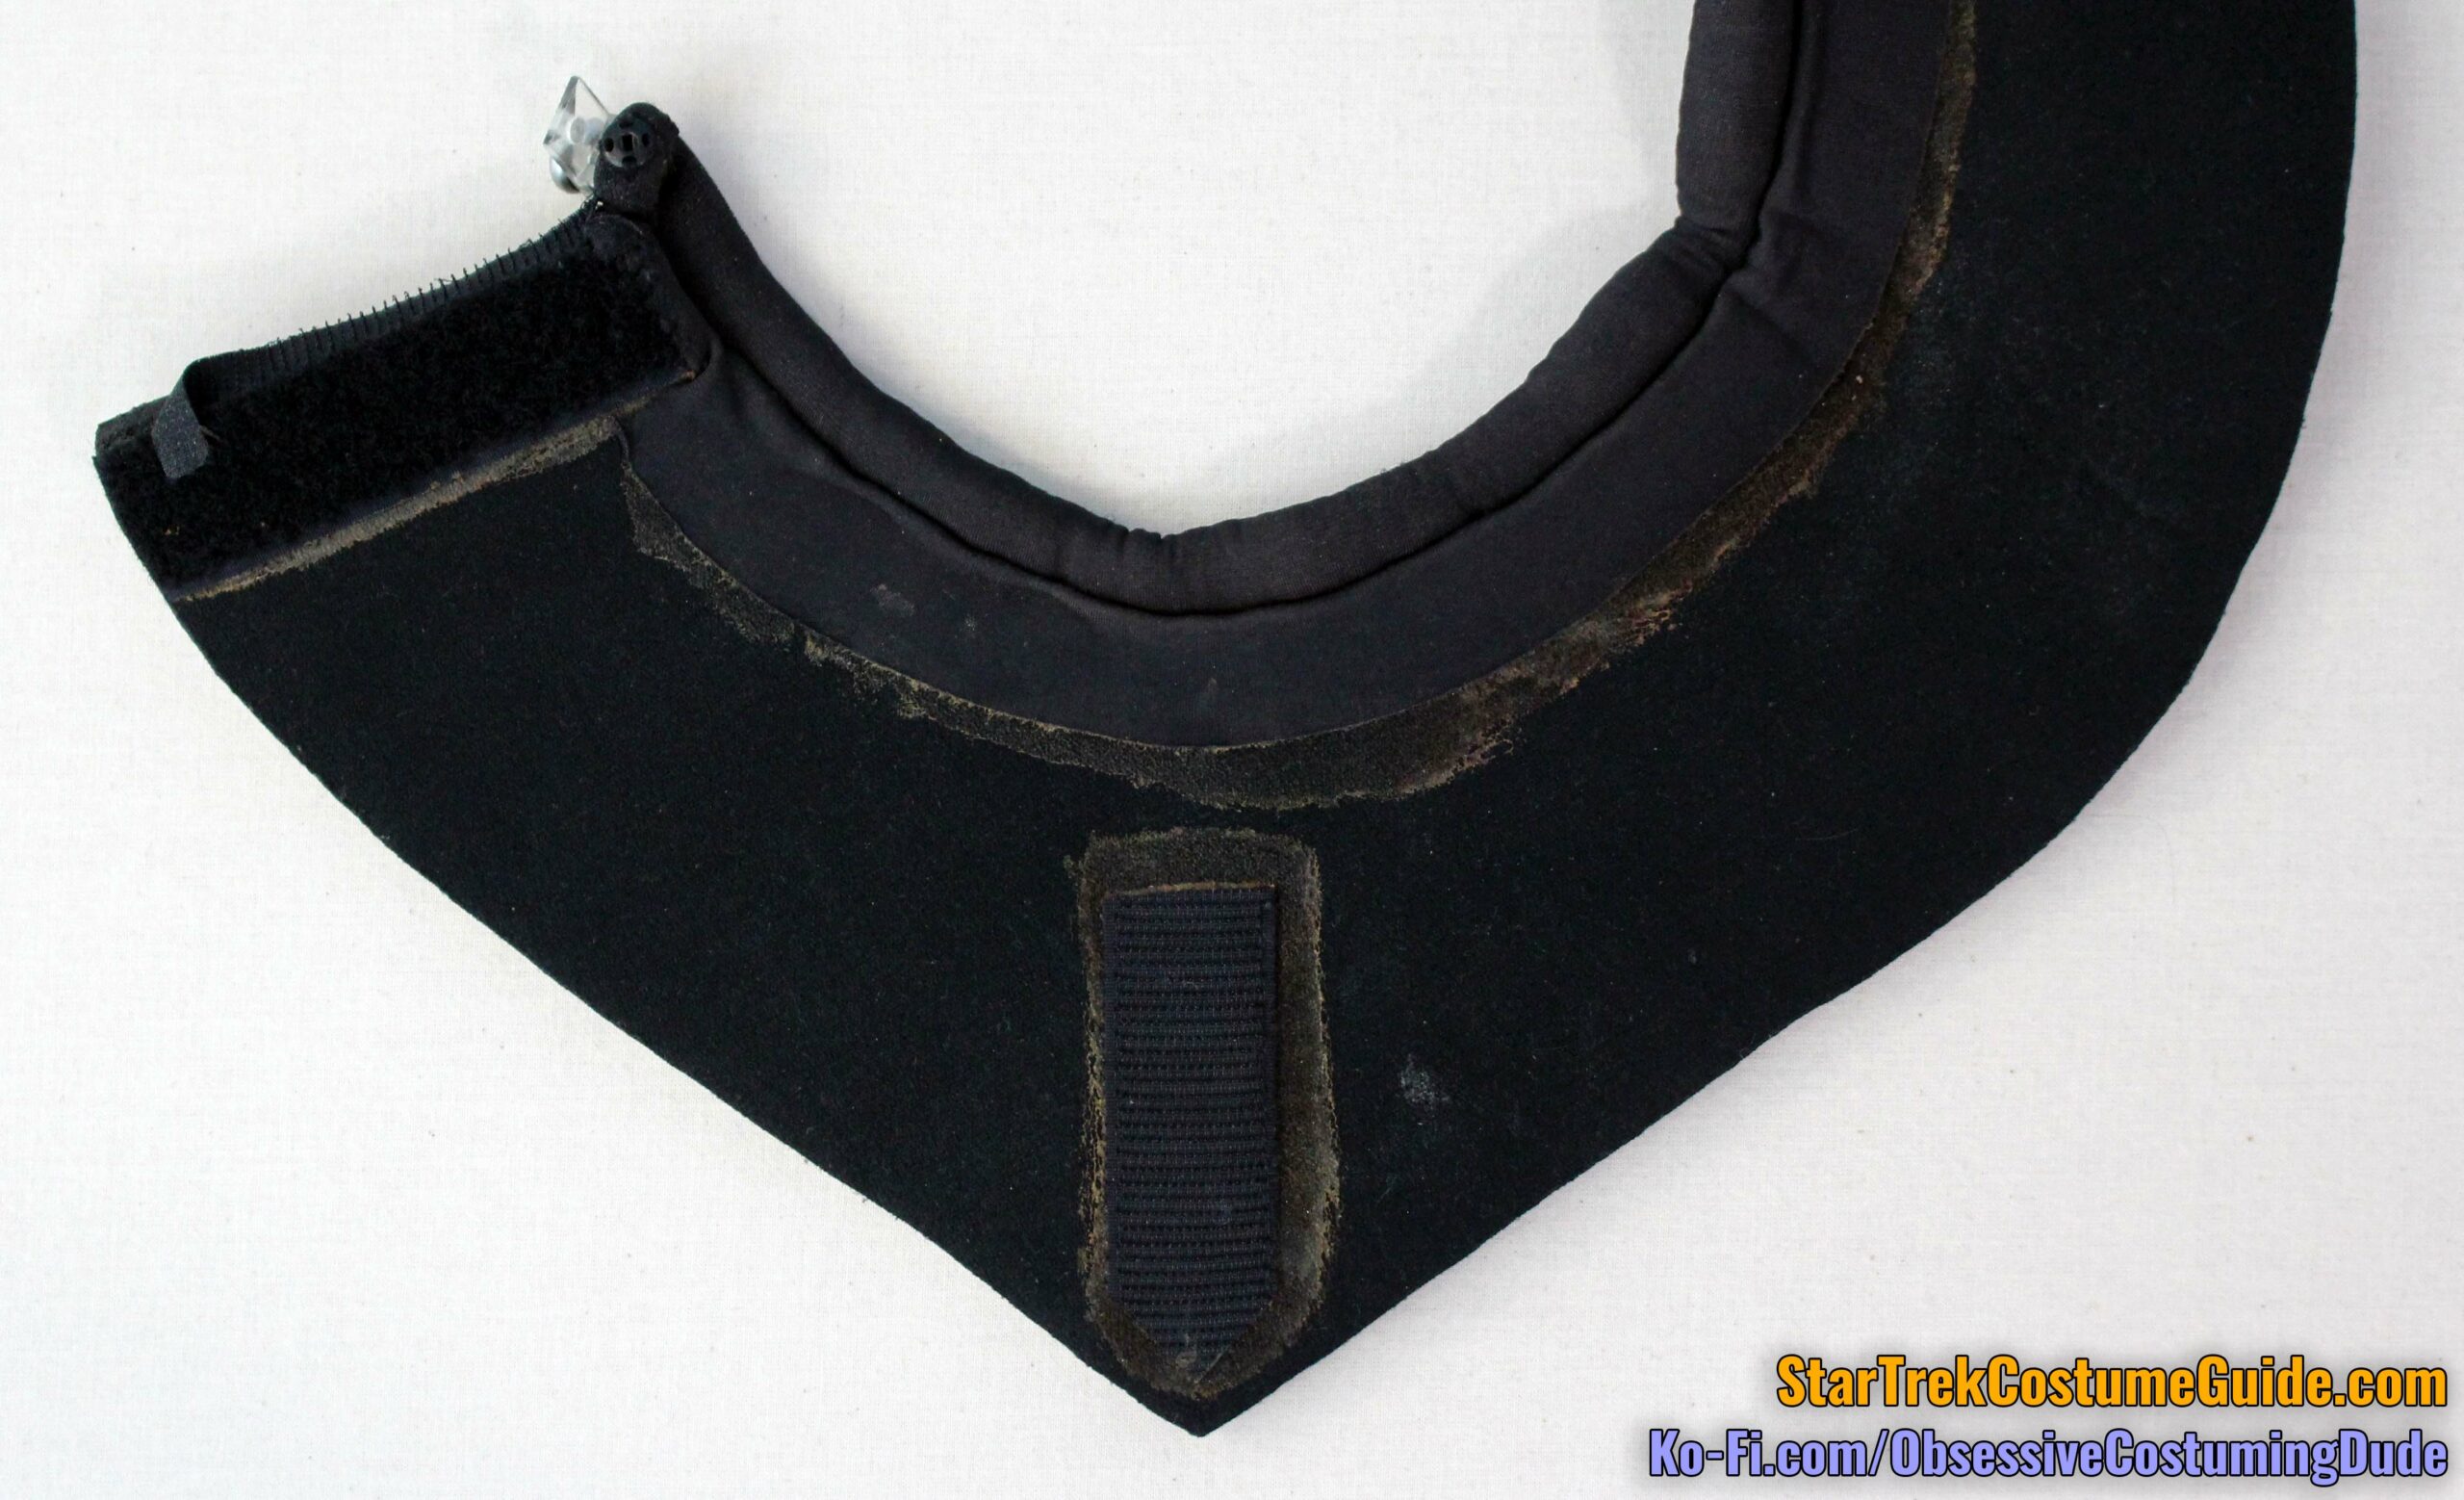
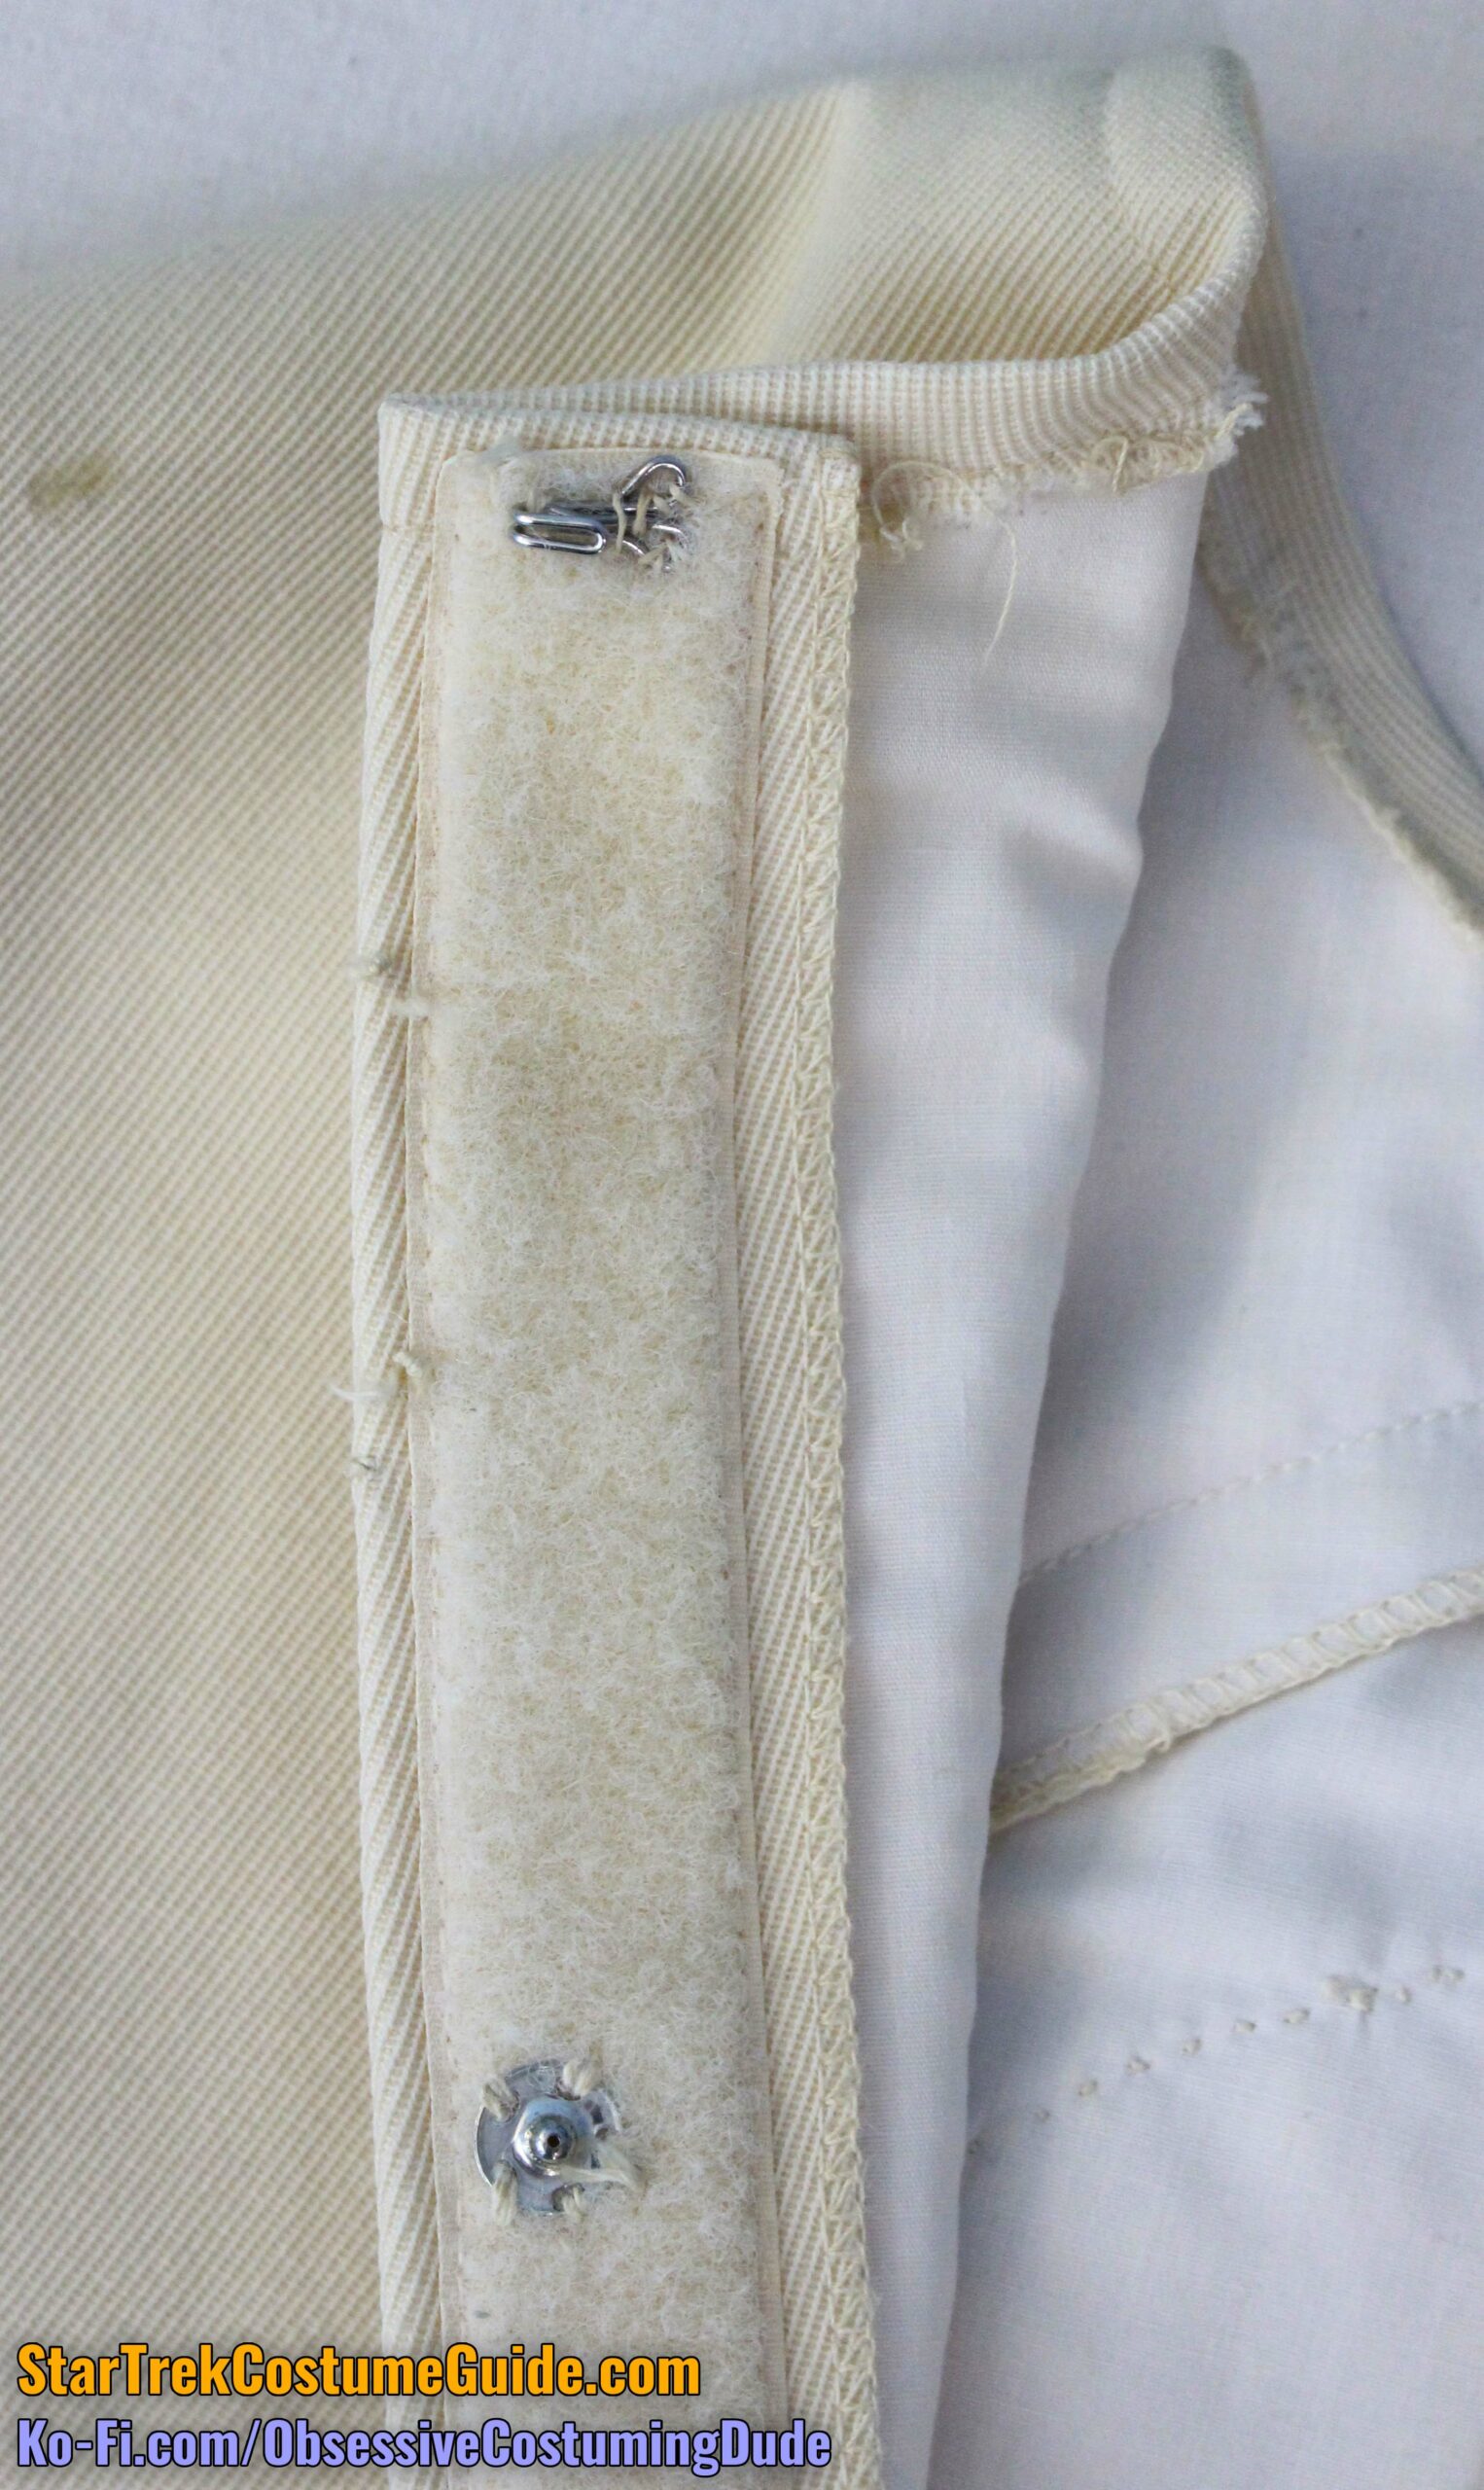
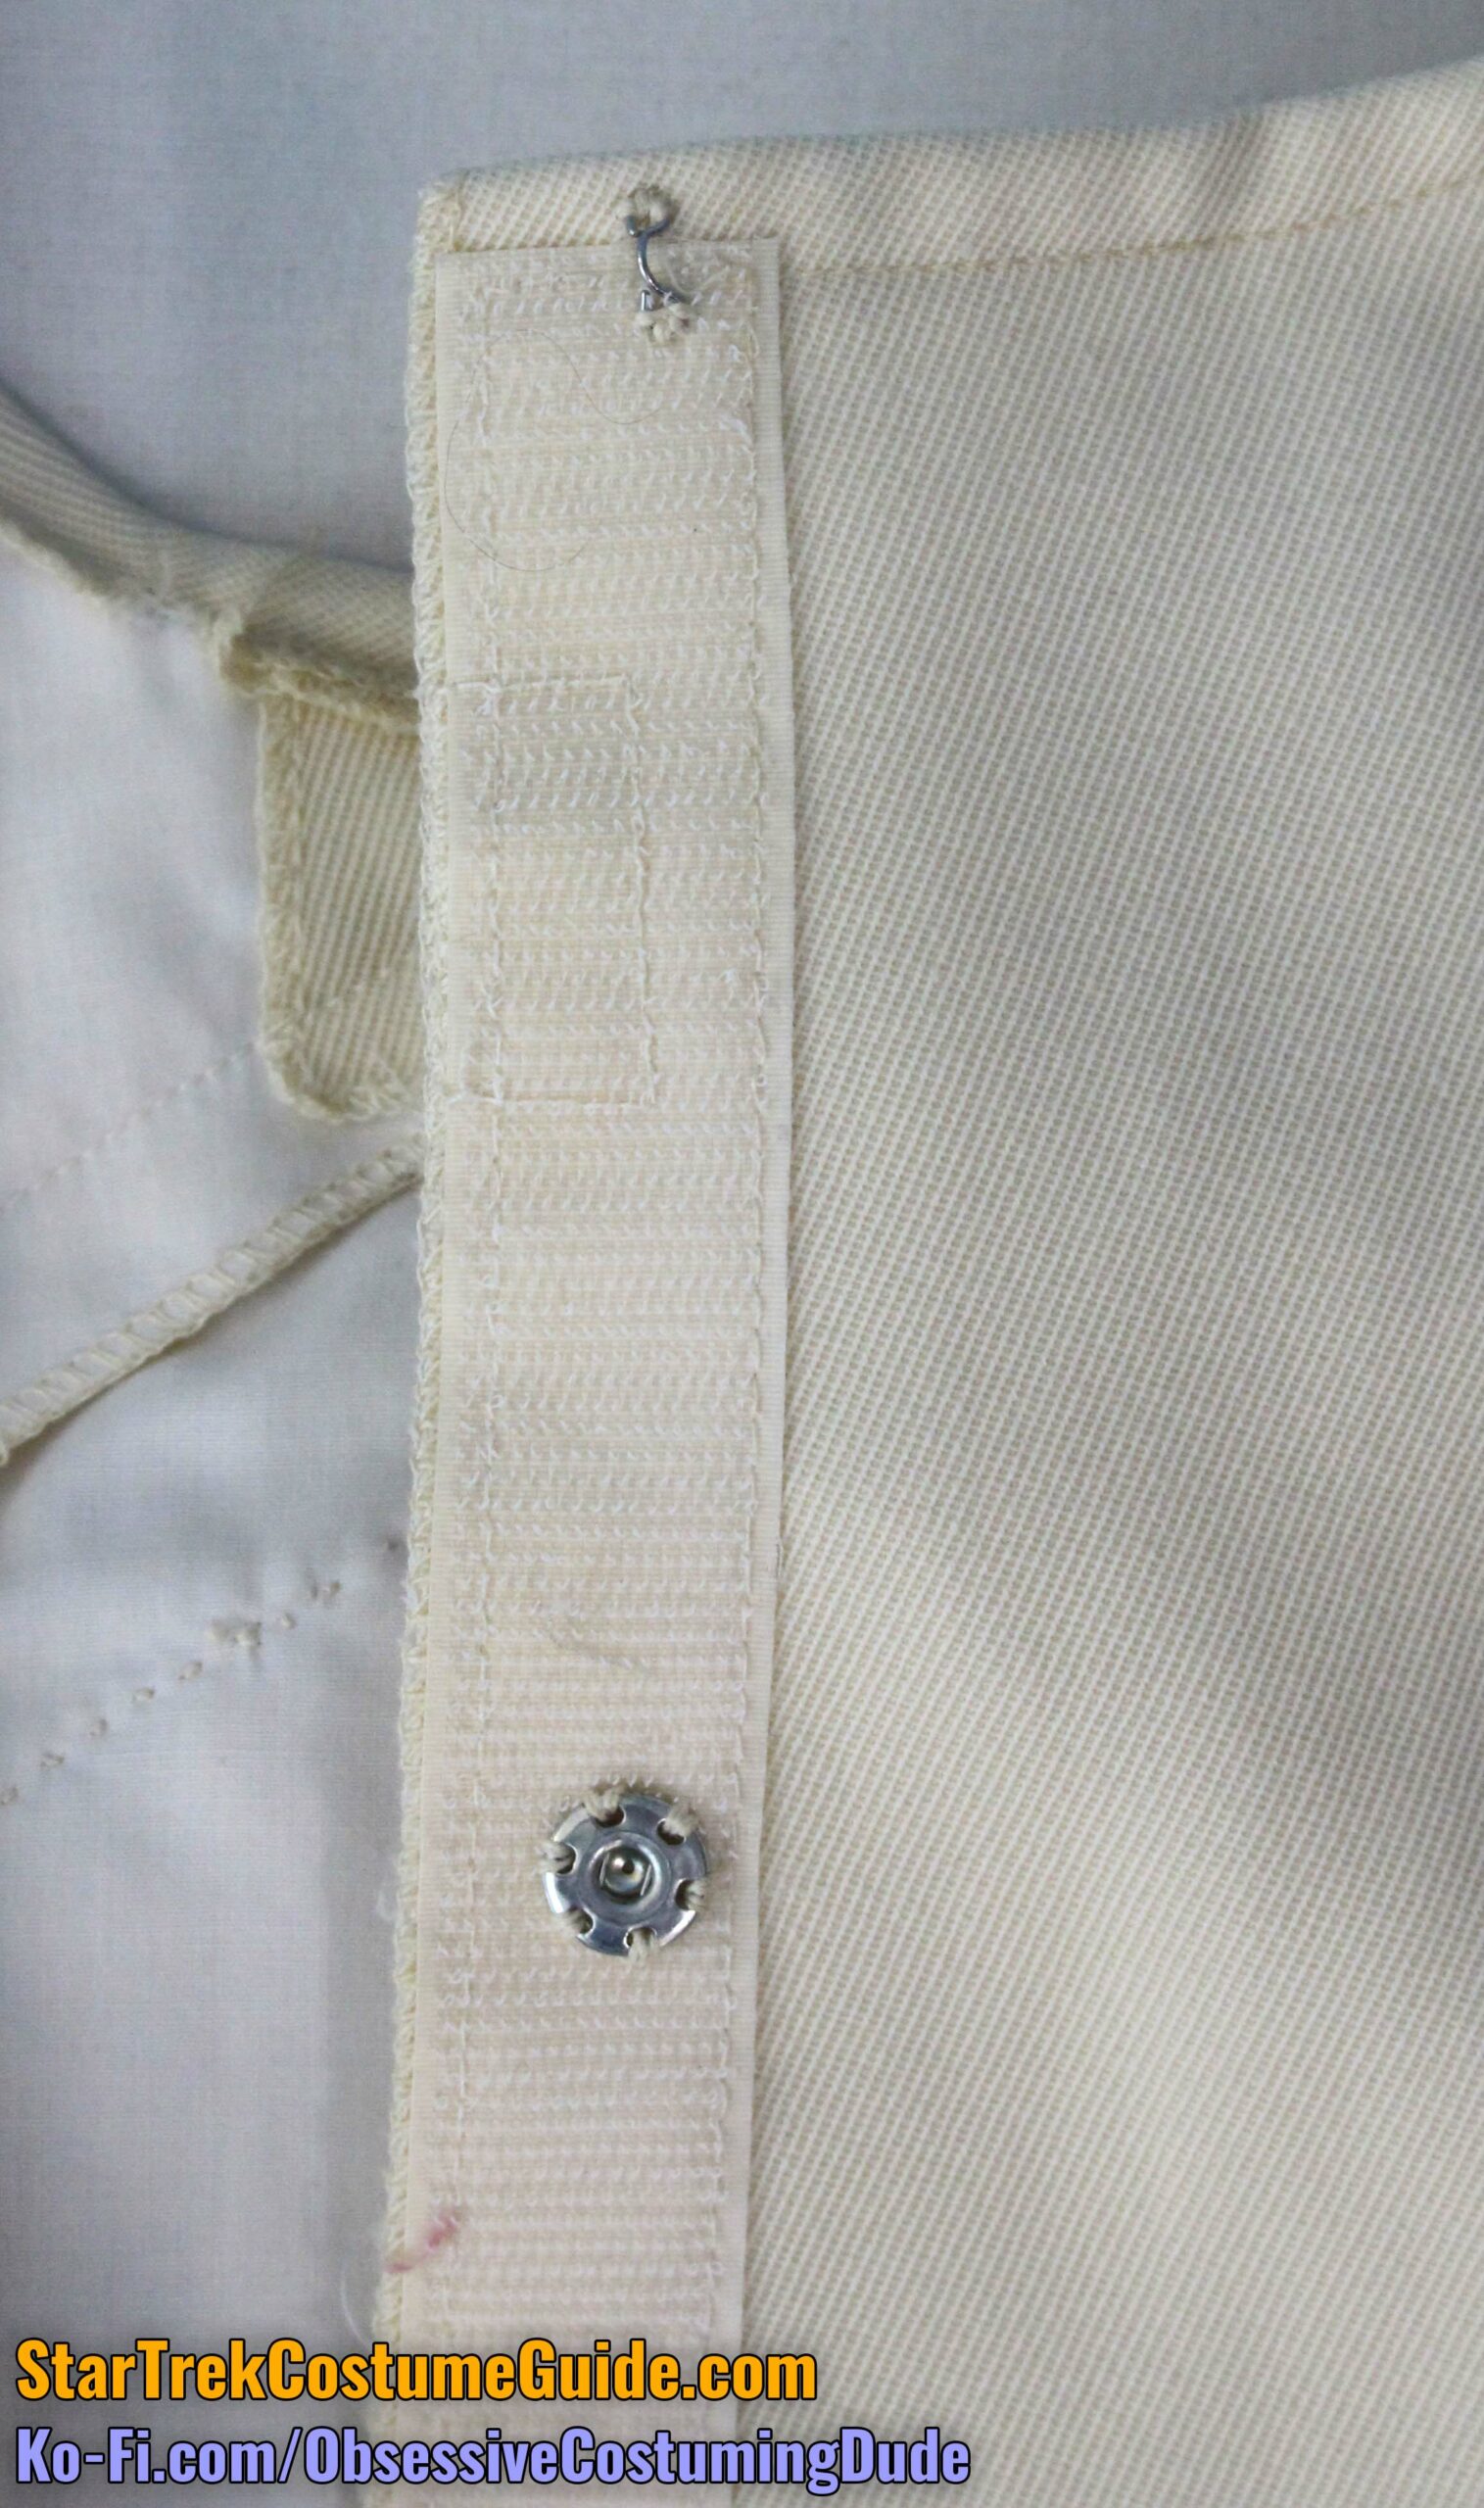
Behind them was a black snap closure, hand-sewn to the ends of the upper black band of piping.
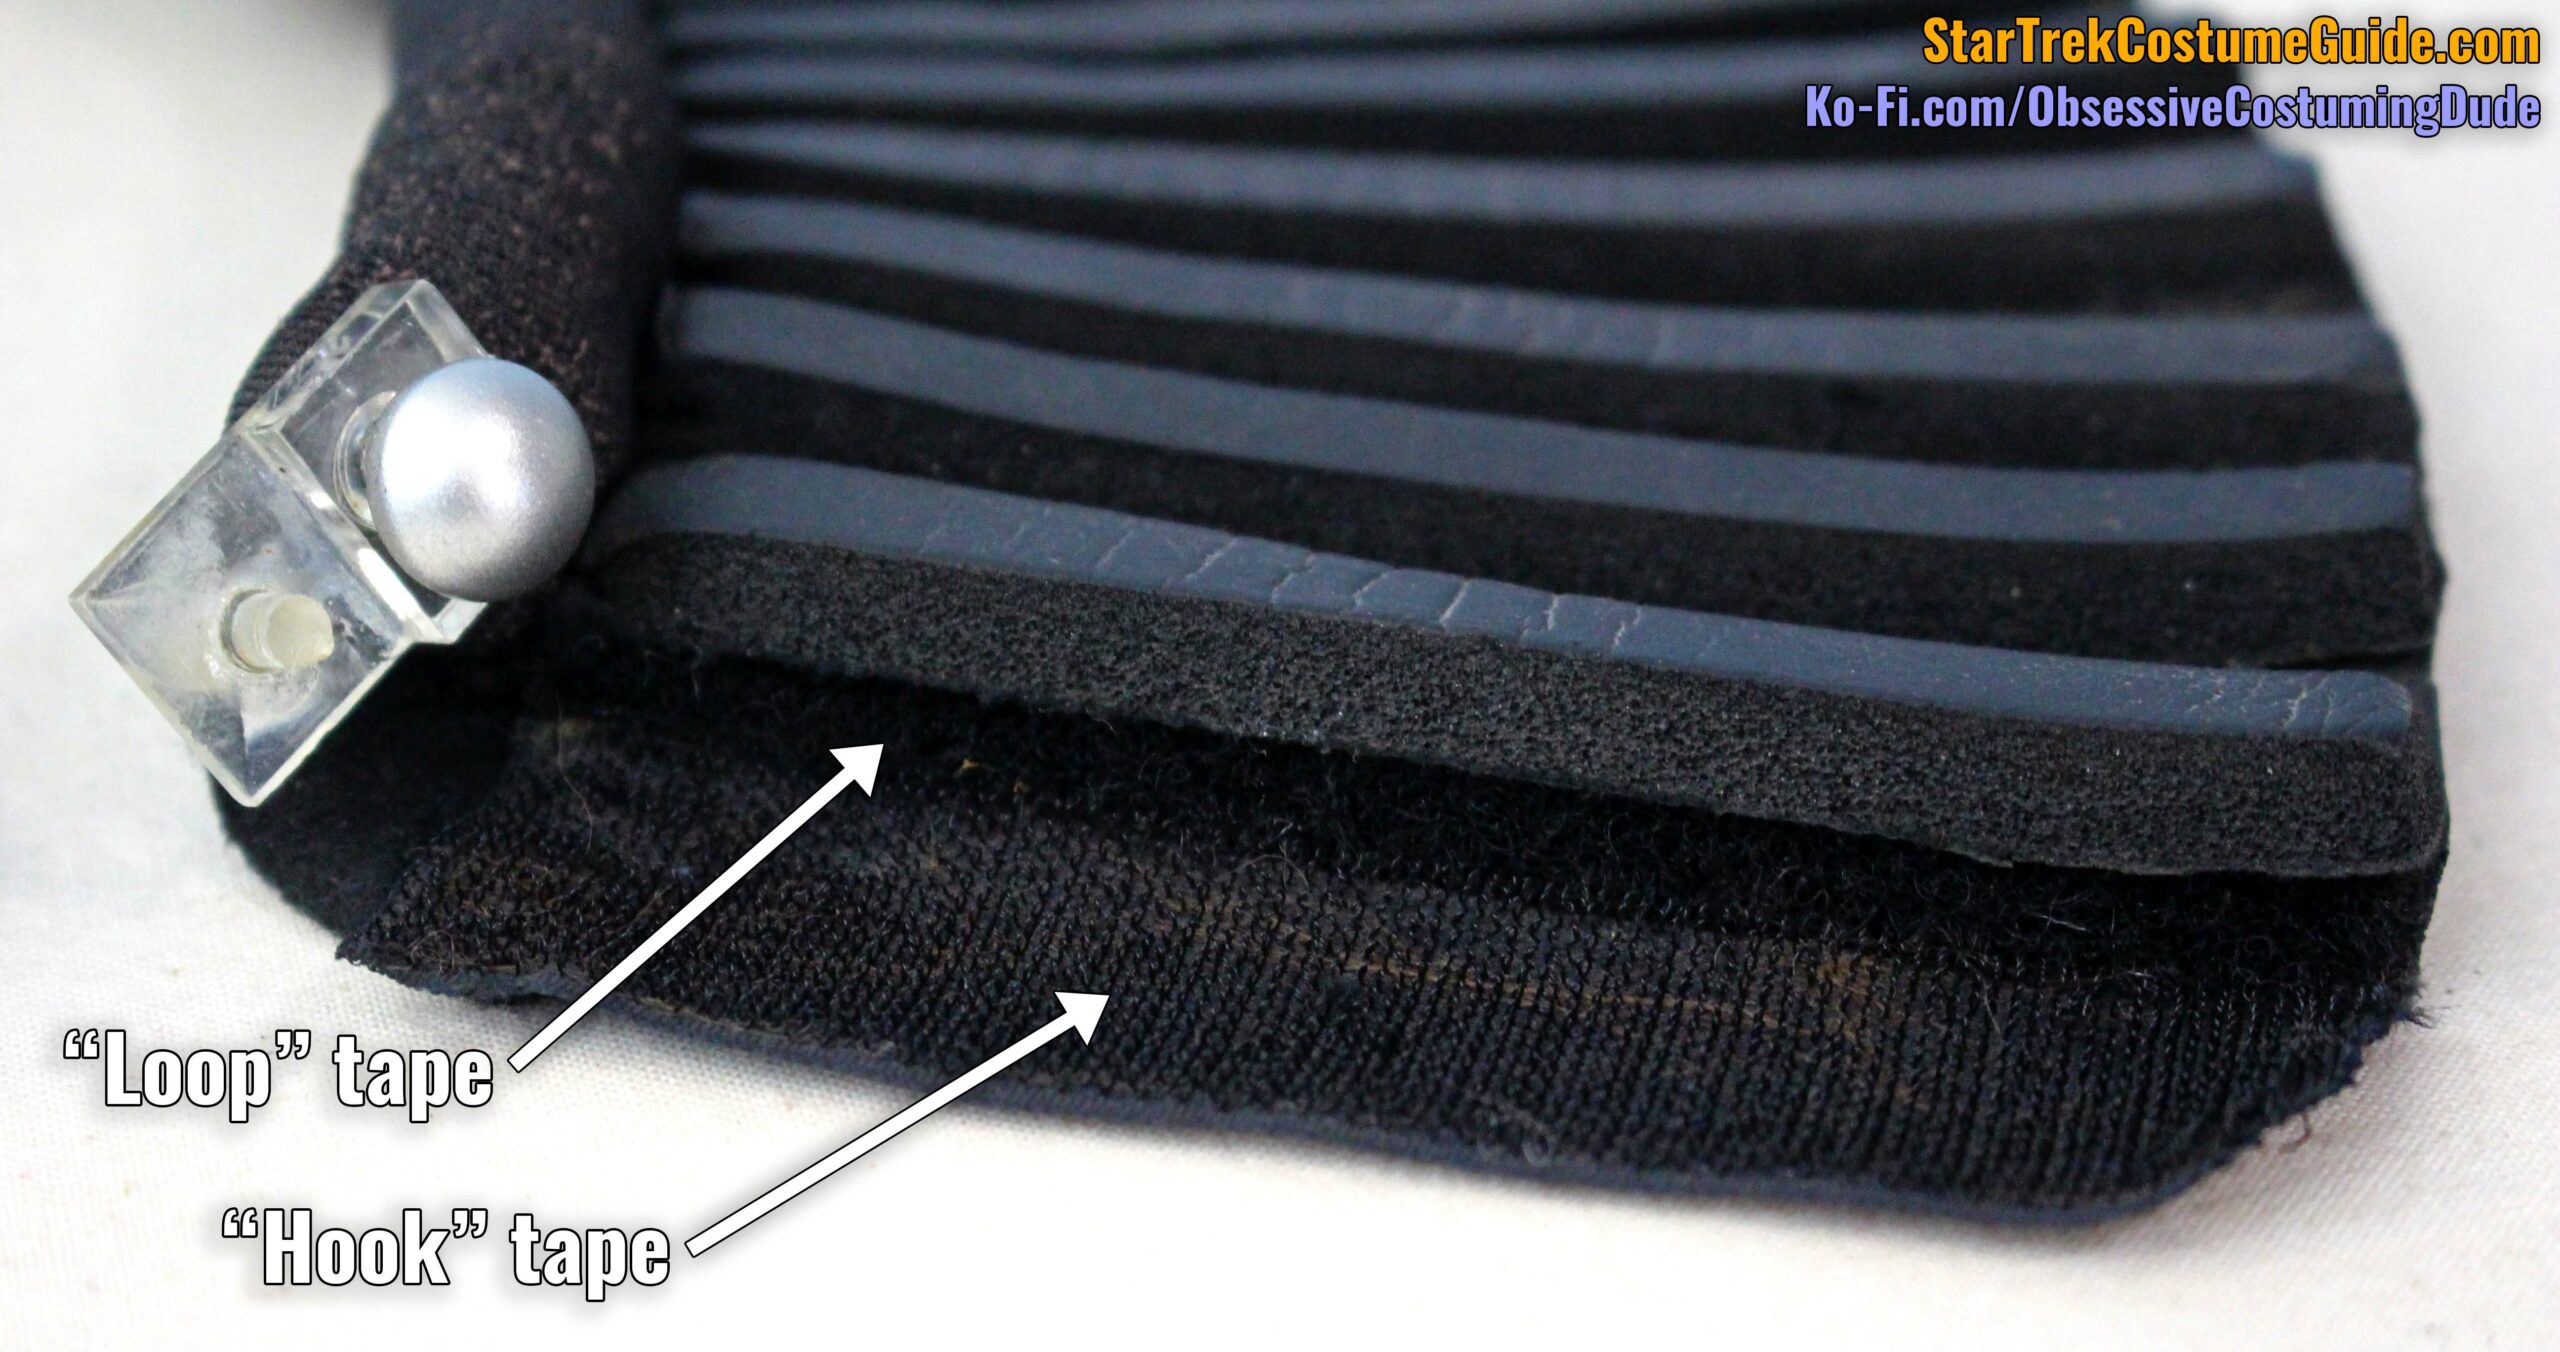
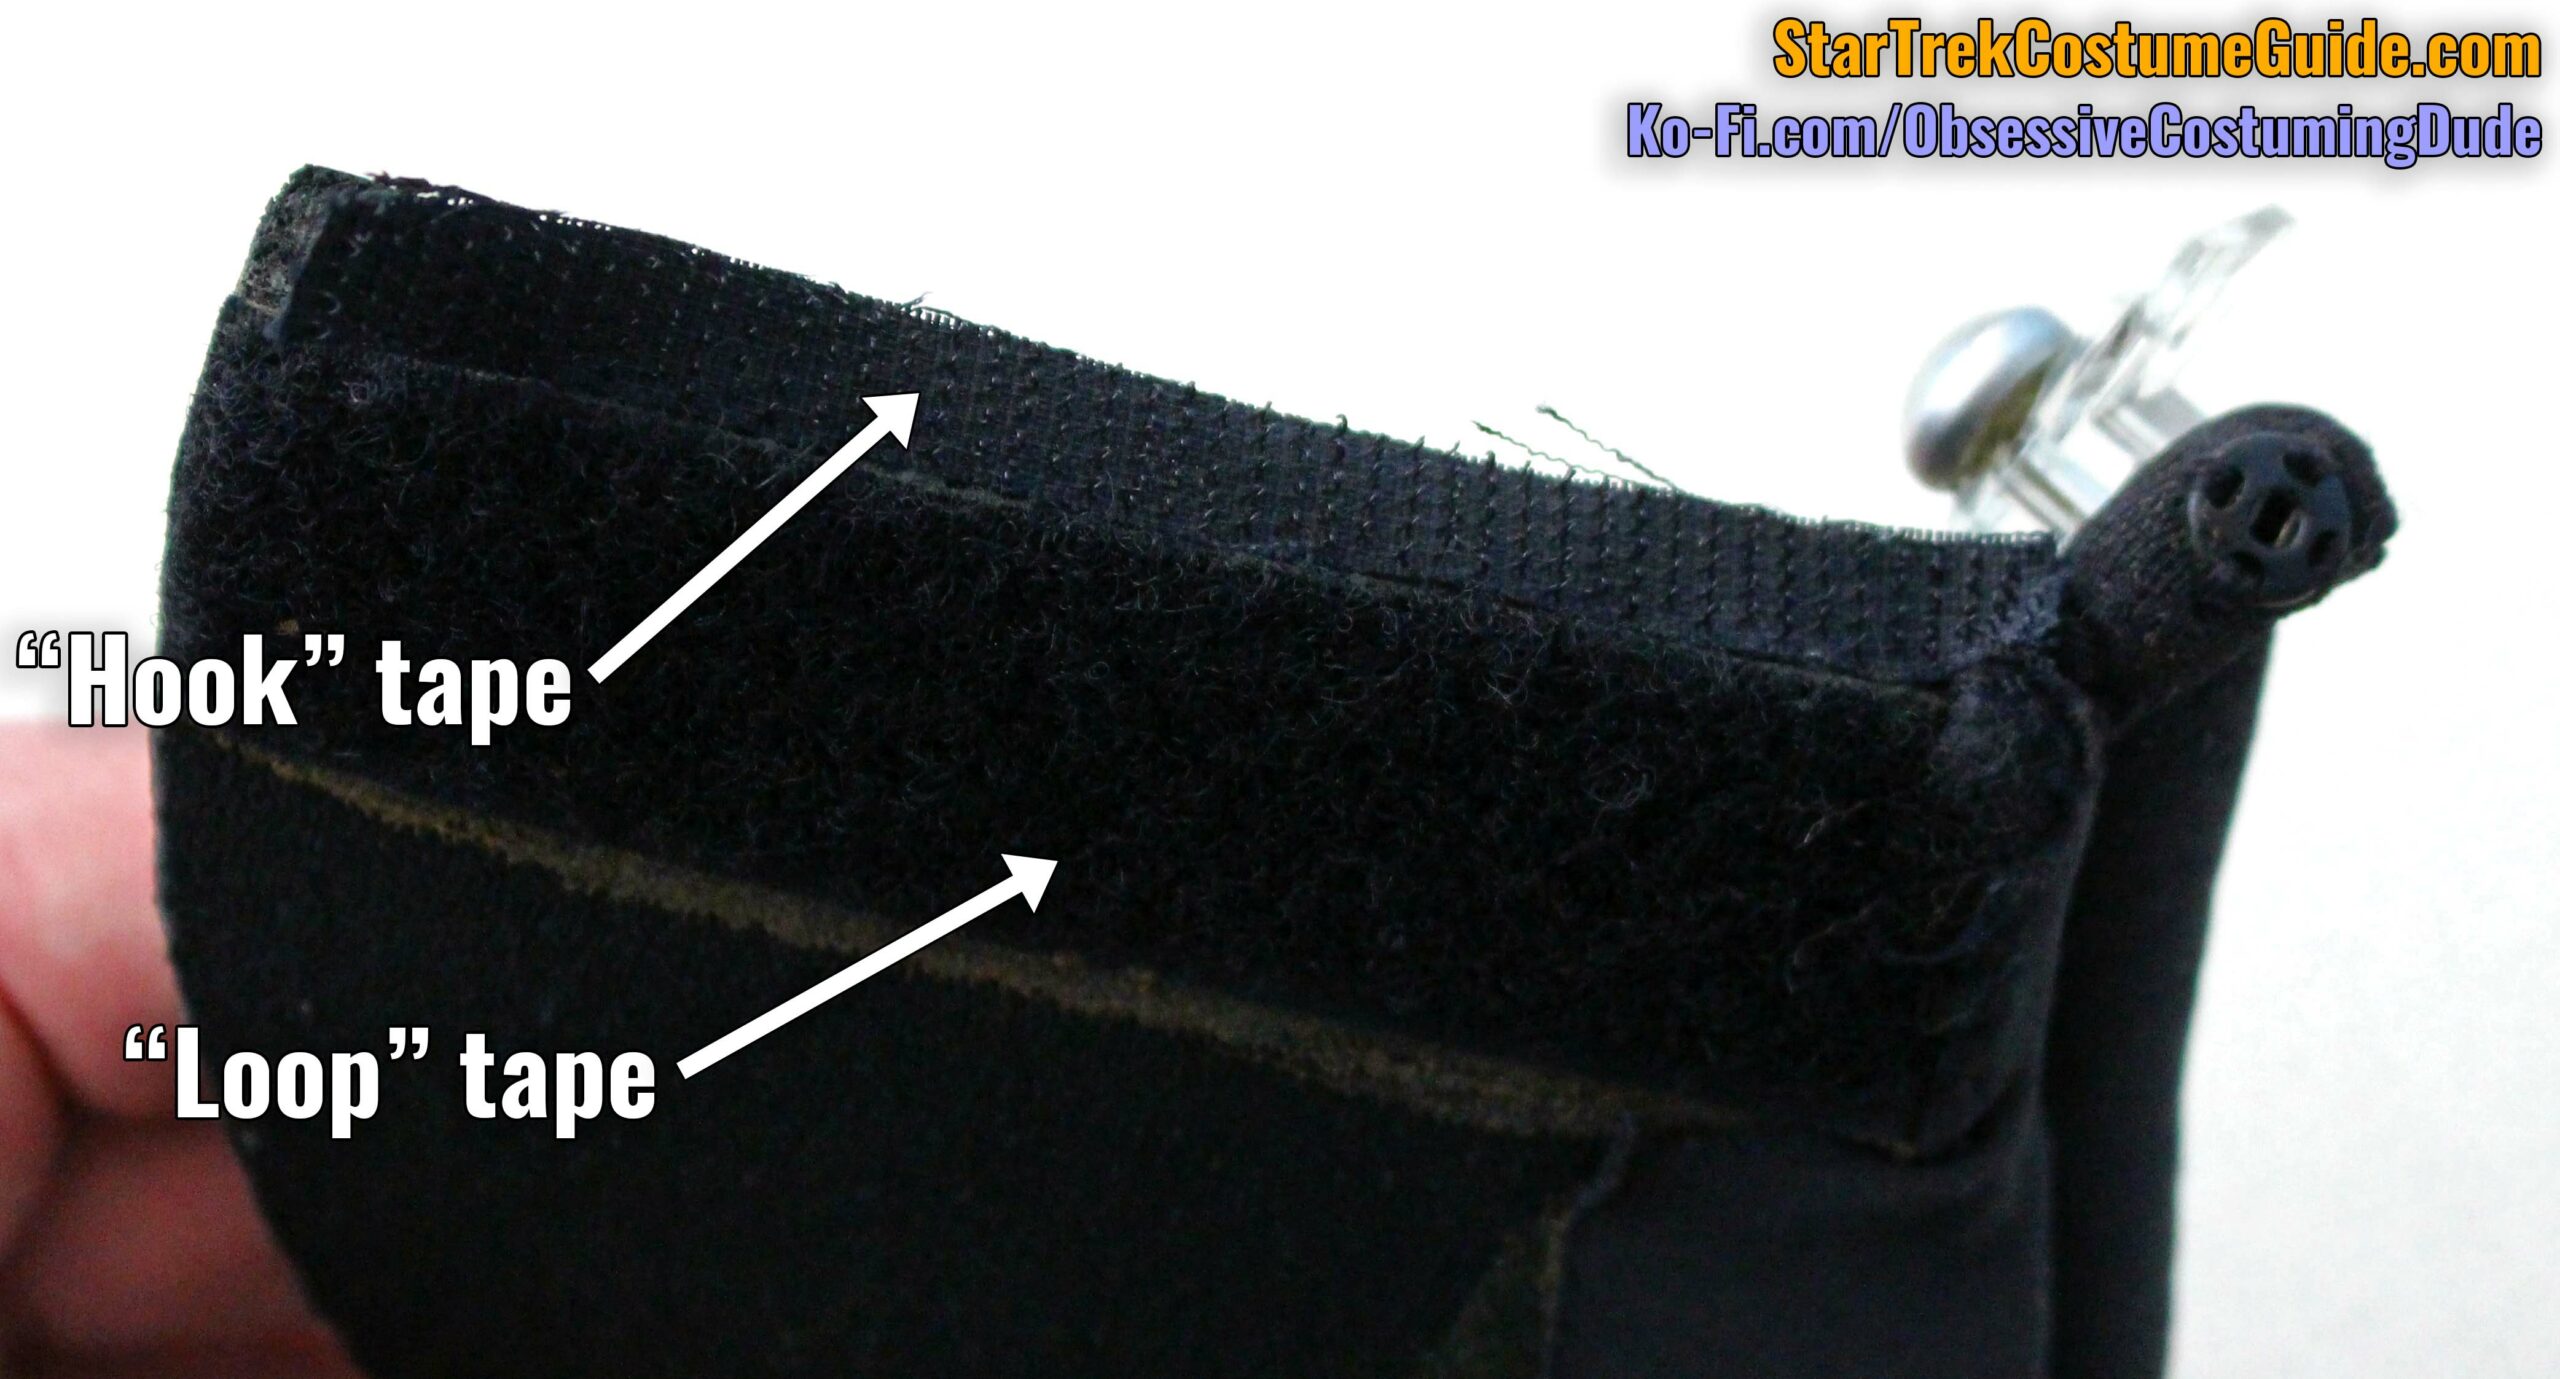
Below that, the collar assembly opened along the side via hook-and-lop tape (aka “Velcro”), with the front overlapping the back about an inch.
Both the front and back ends had contrasting hook-and-loop take on the horizontal and vertical edges, for additional closure security.
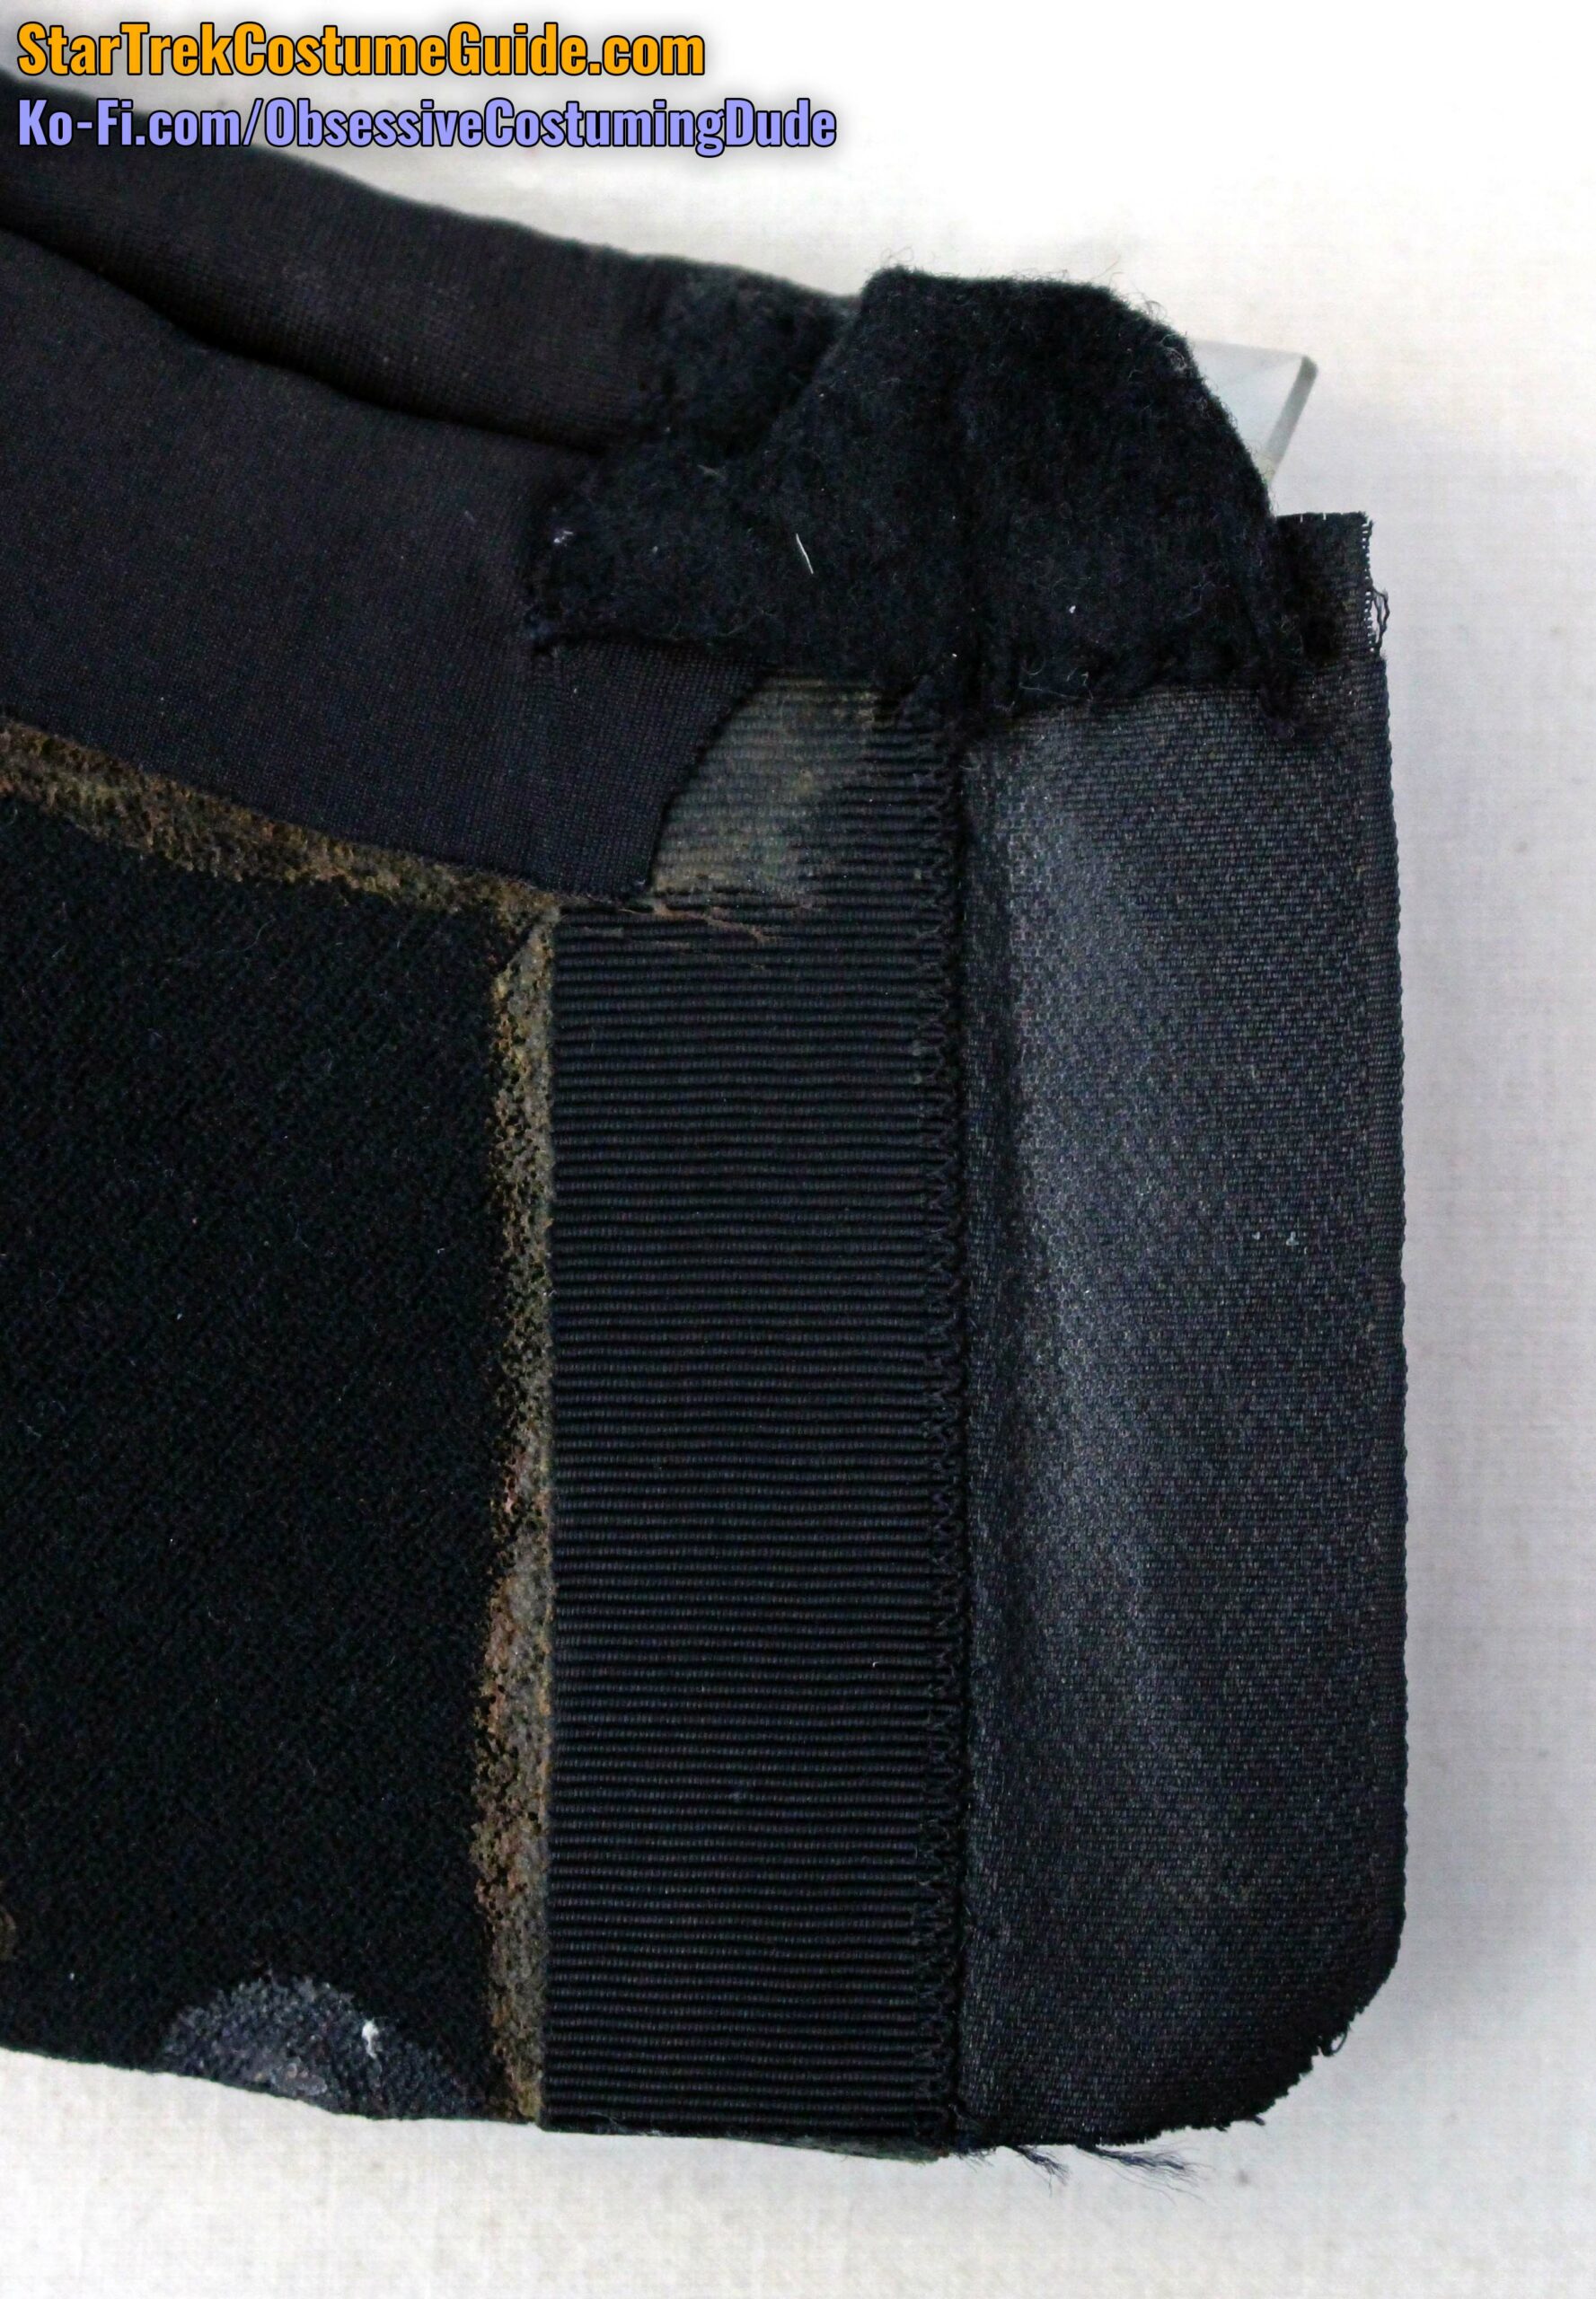
The back underlap appears to have been a length of 1” black hook-and-loop tape slightly overlapped and zig-zag stitched onto a length of black grosgrain ribbon, which was glued to the underside of the neoprene collar.
There was also a small piece of black felt behind the accents/snaps to keep them from chafing the wearer’s neck.
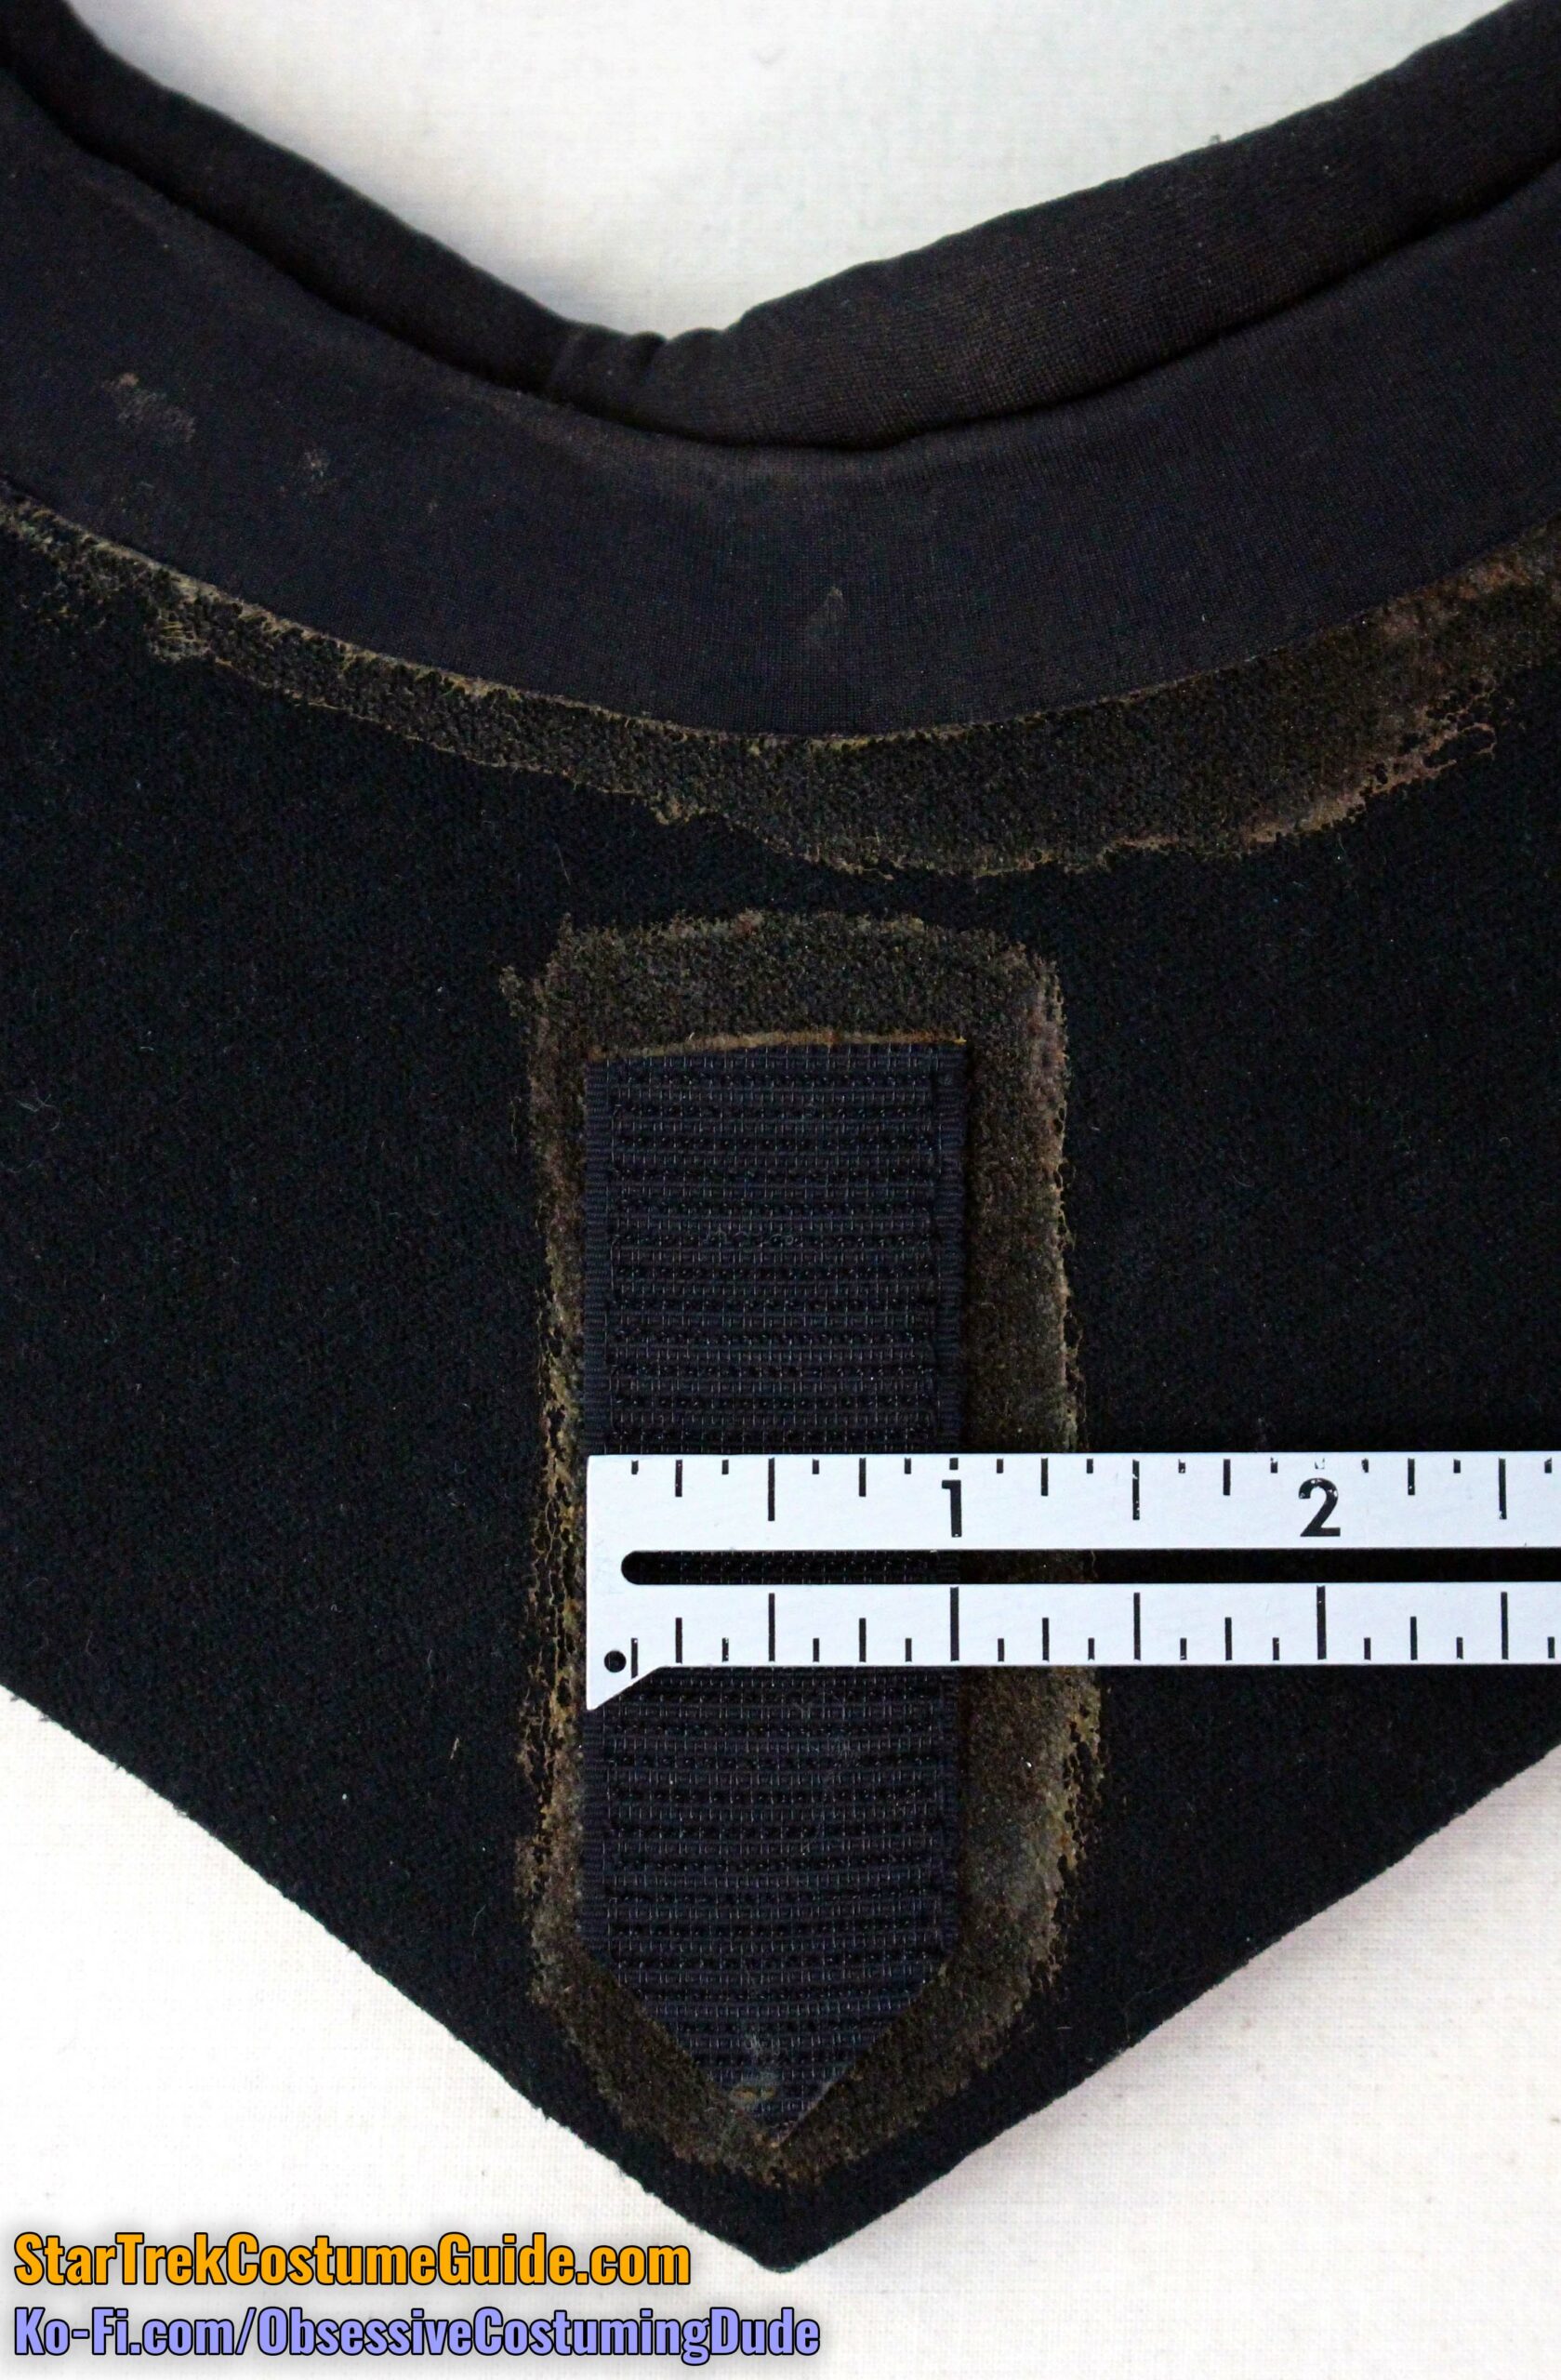
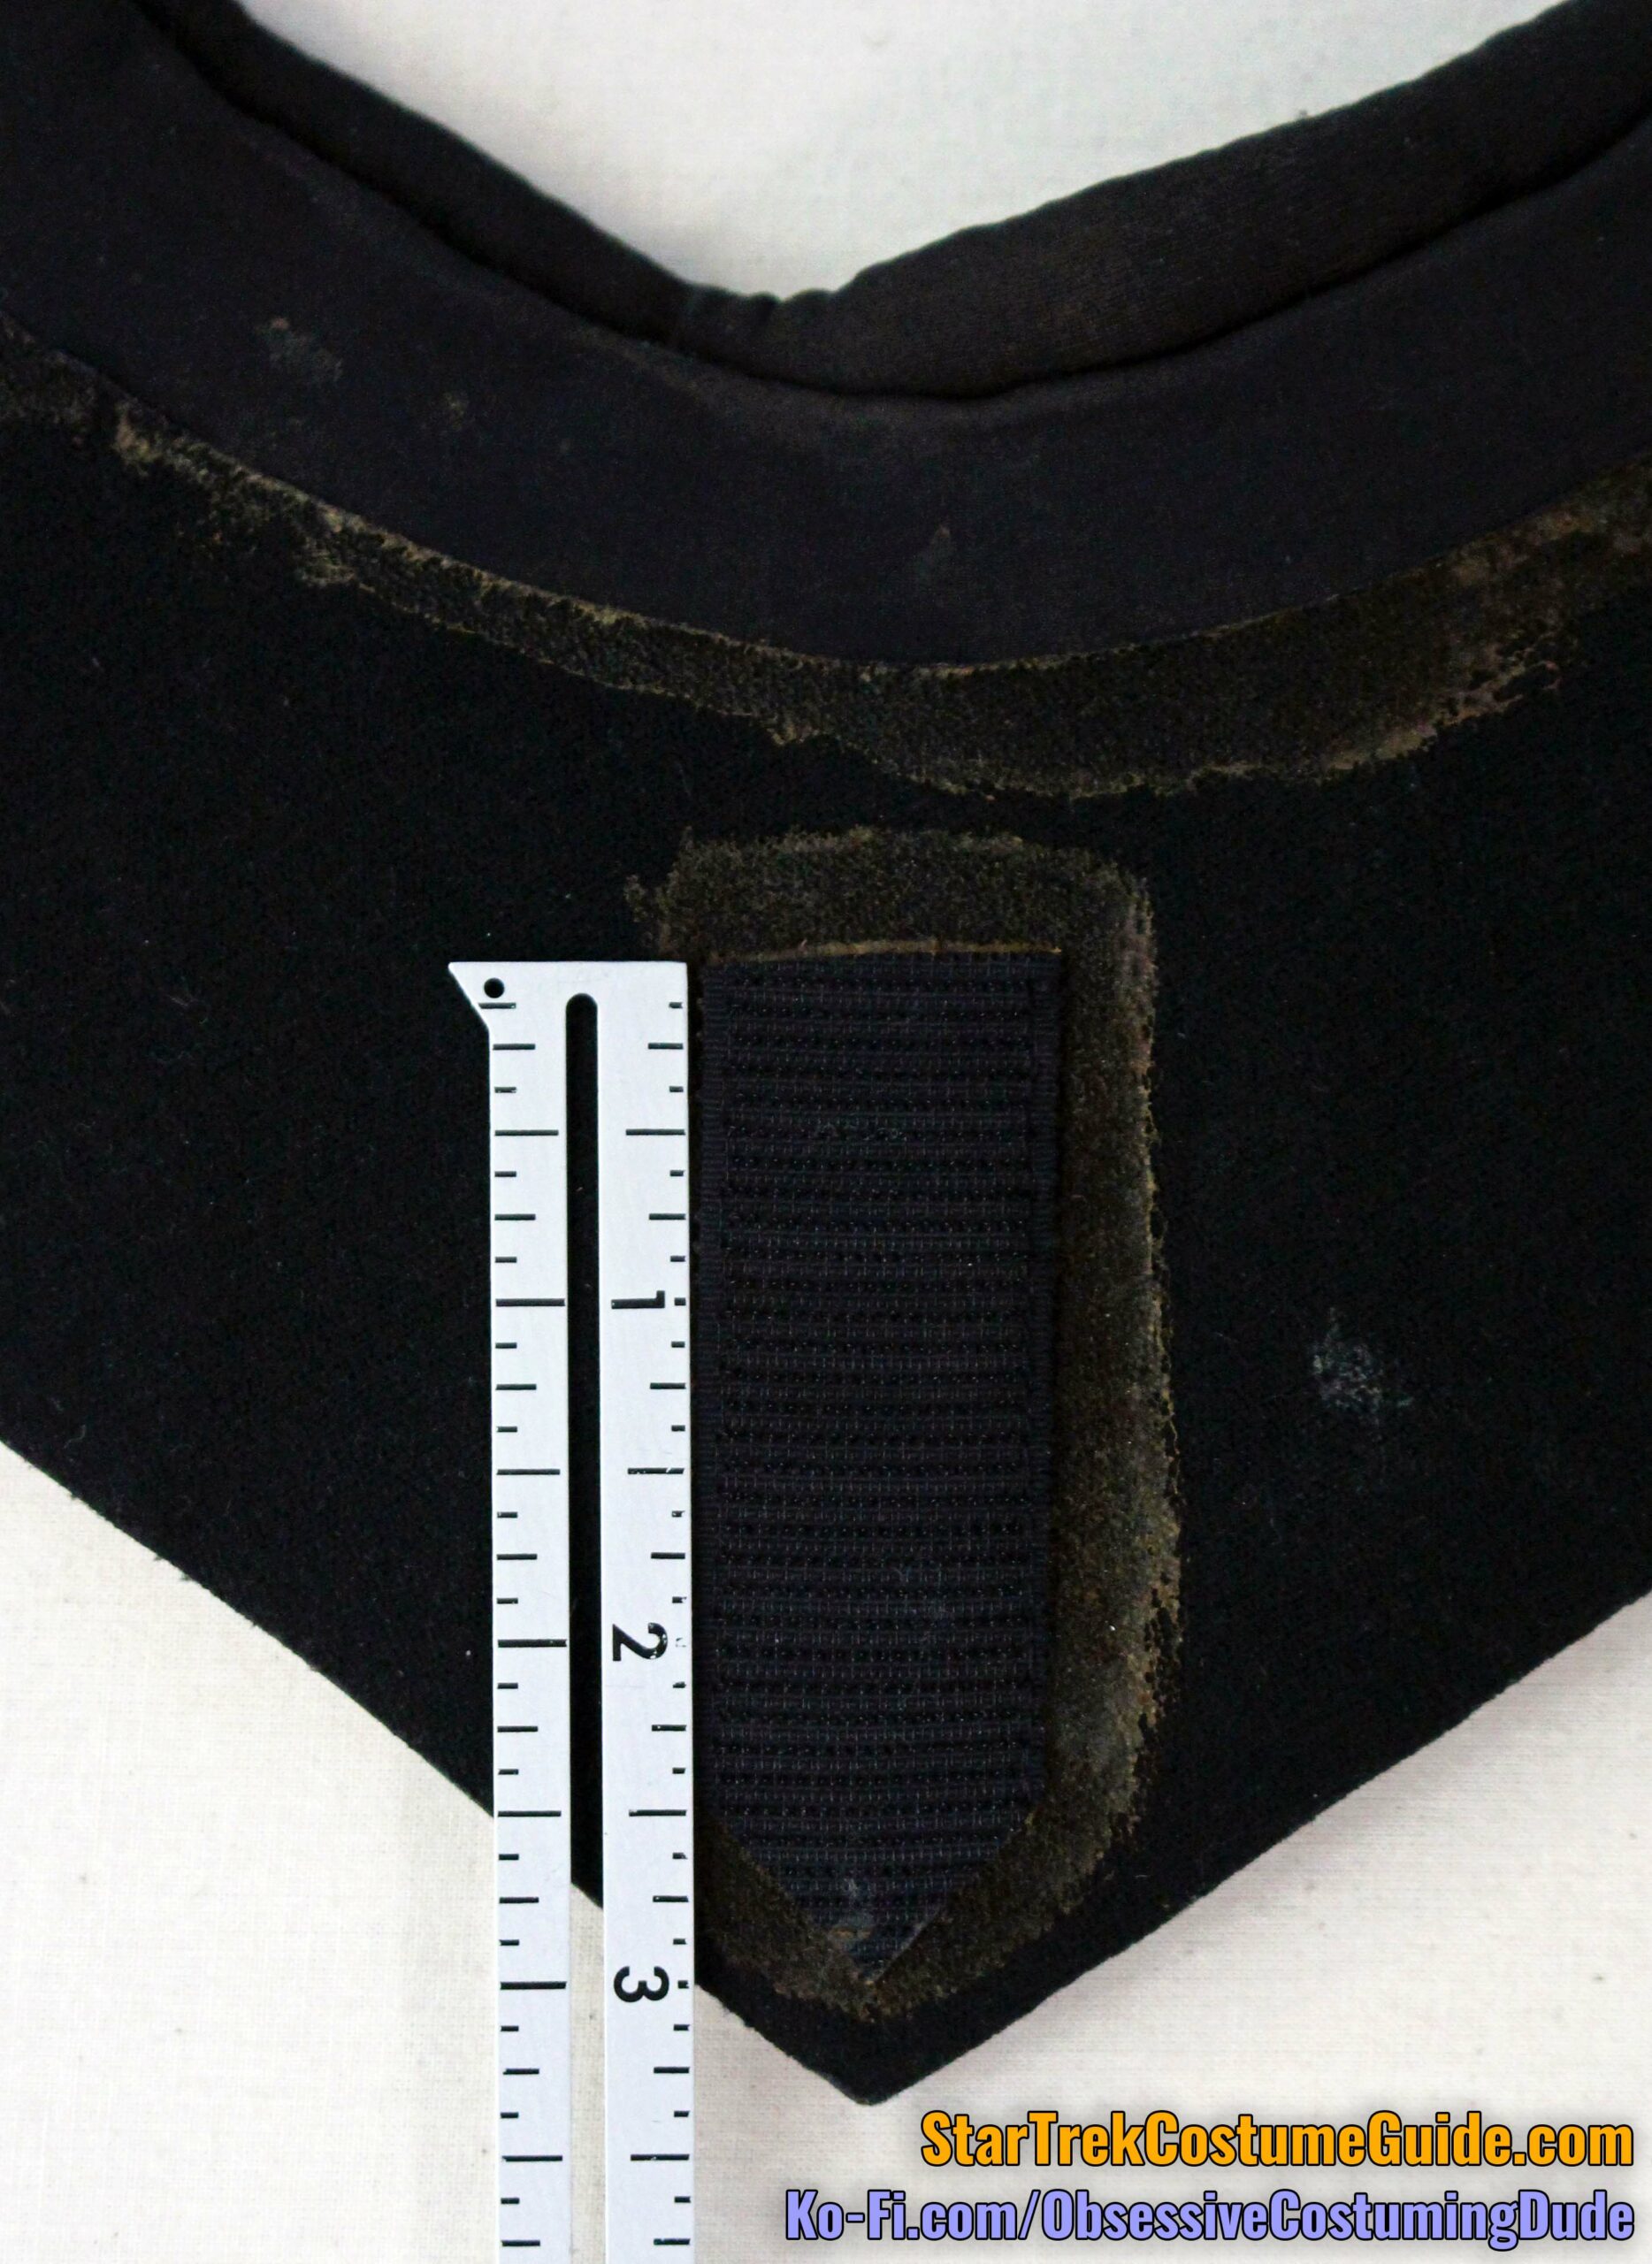
On the underside of the center front was a small strip of 1” black hook-and-loop tape, clipped to a point at the bottom, and again glued to the underside of the neoprene collar.
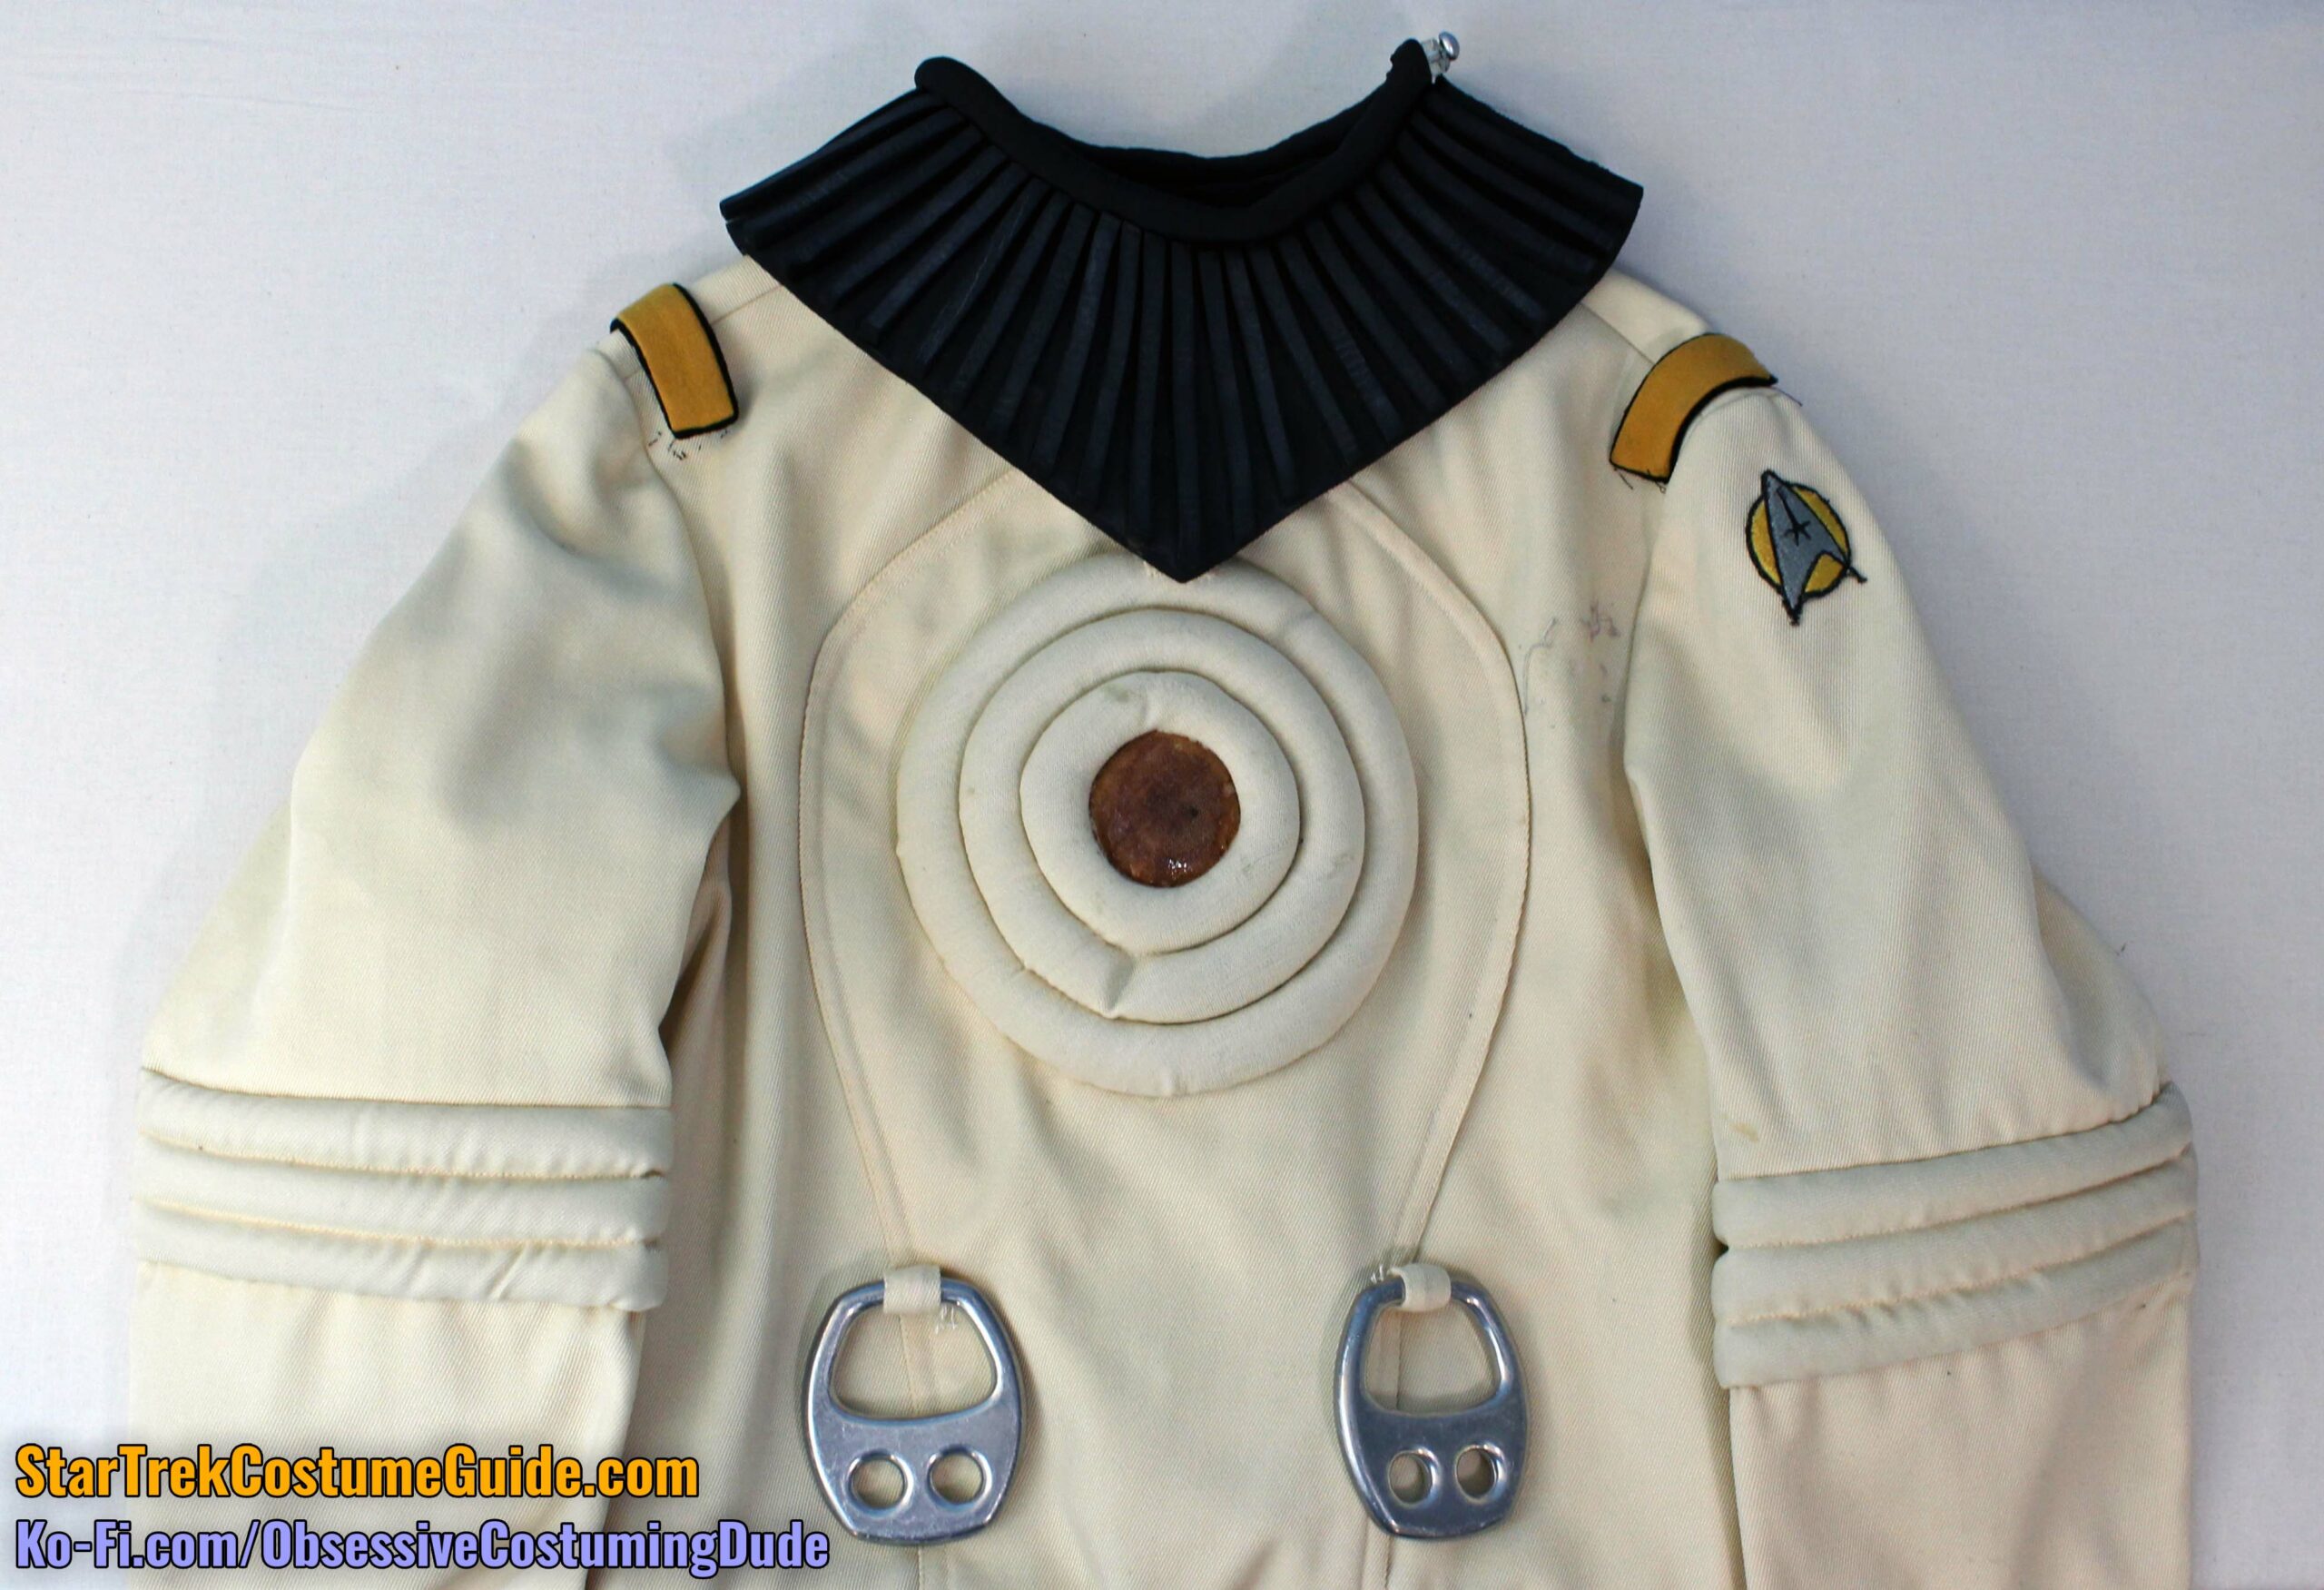
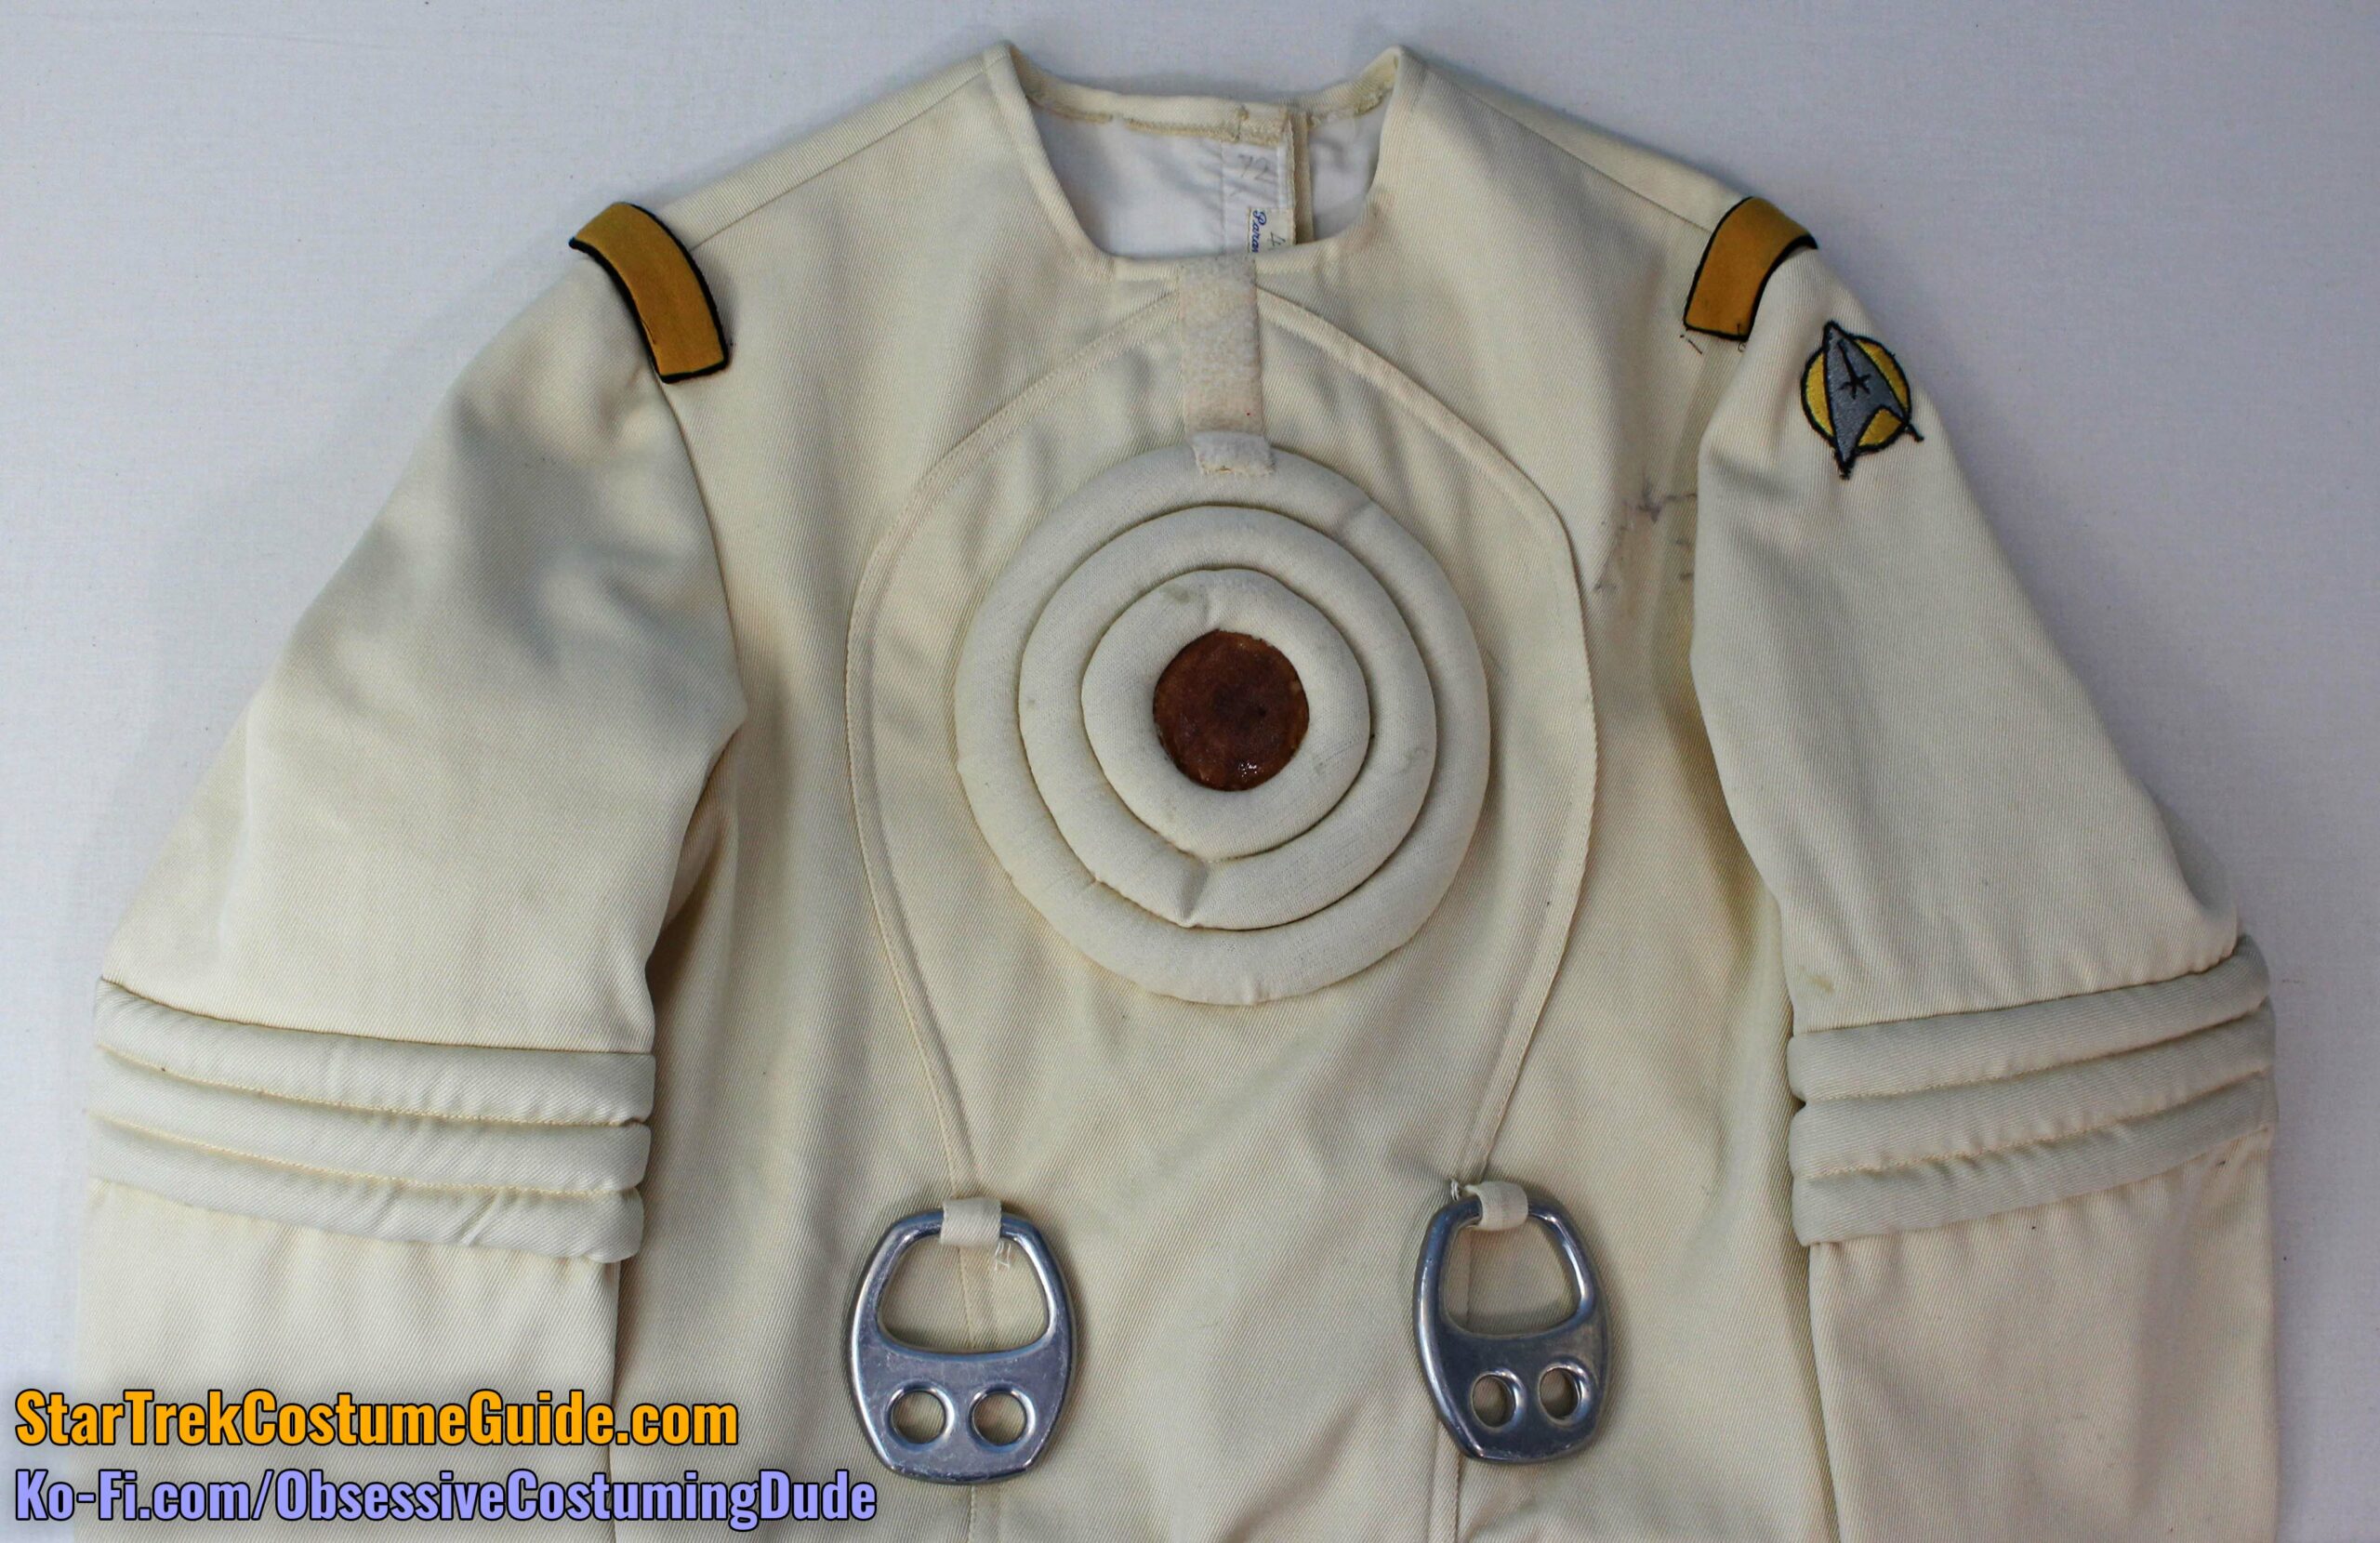
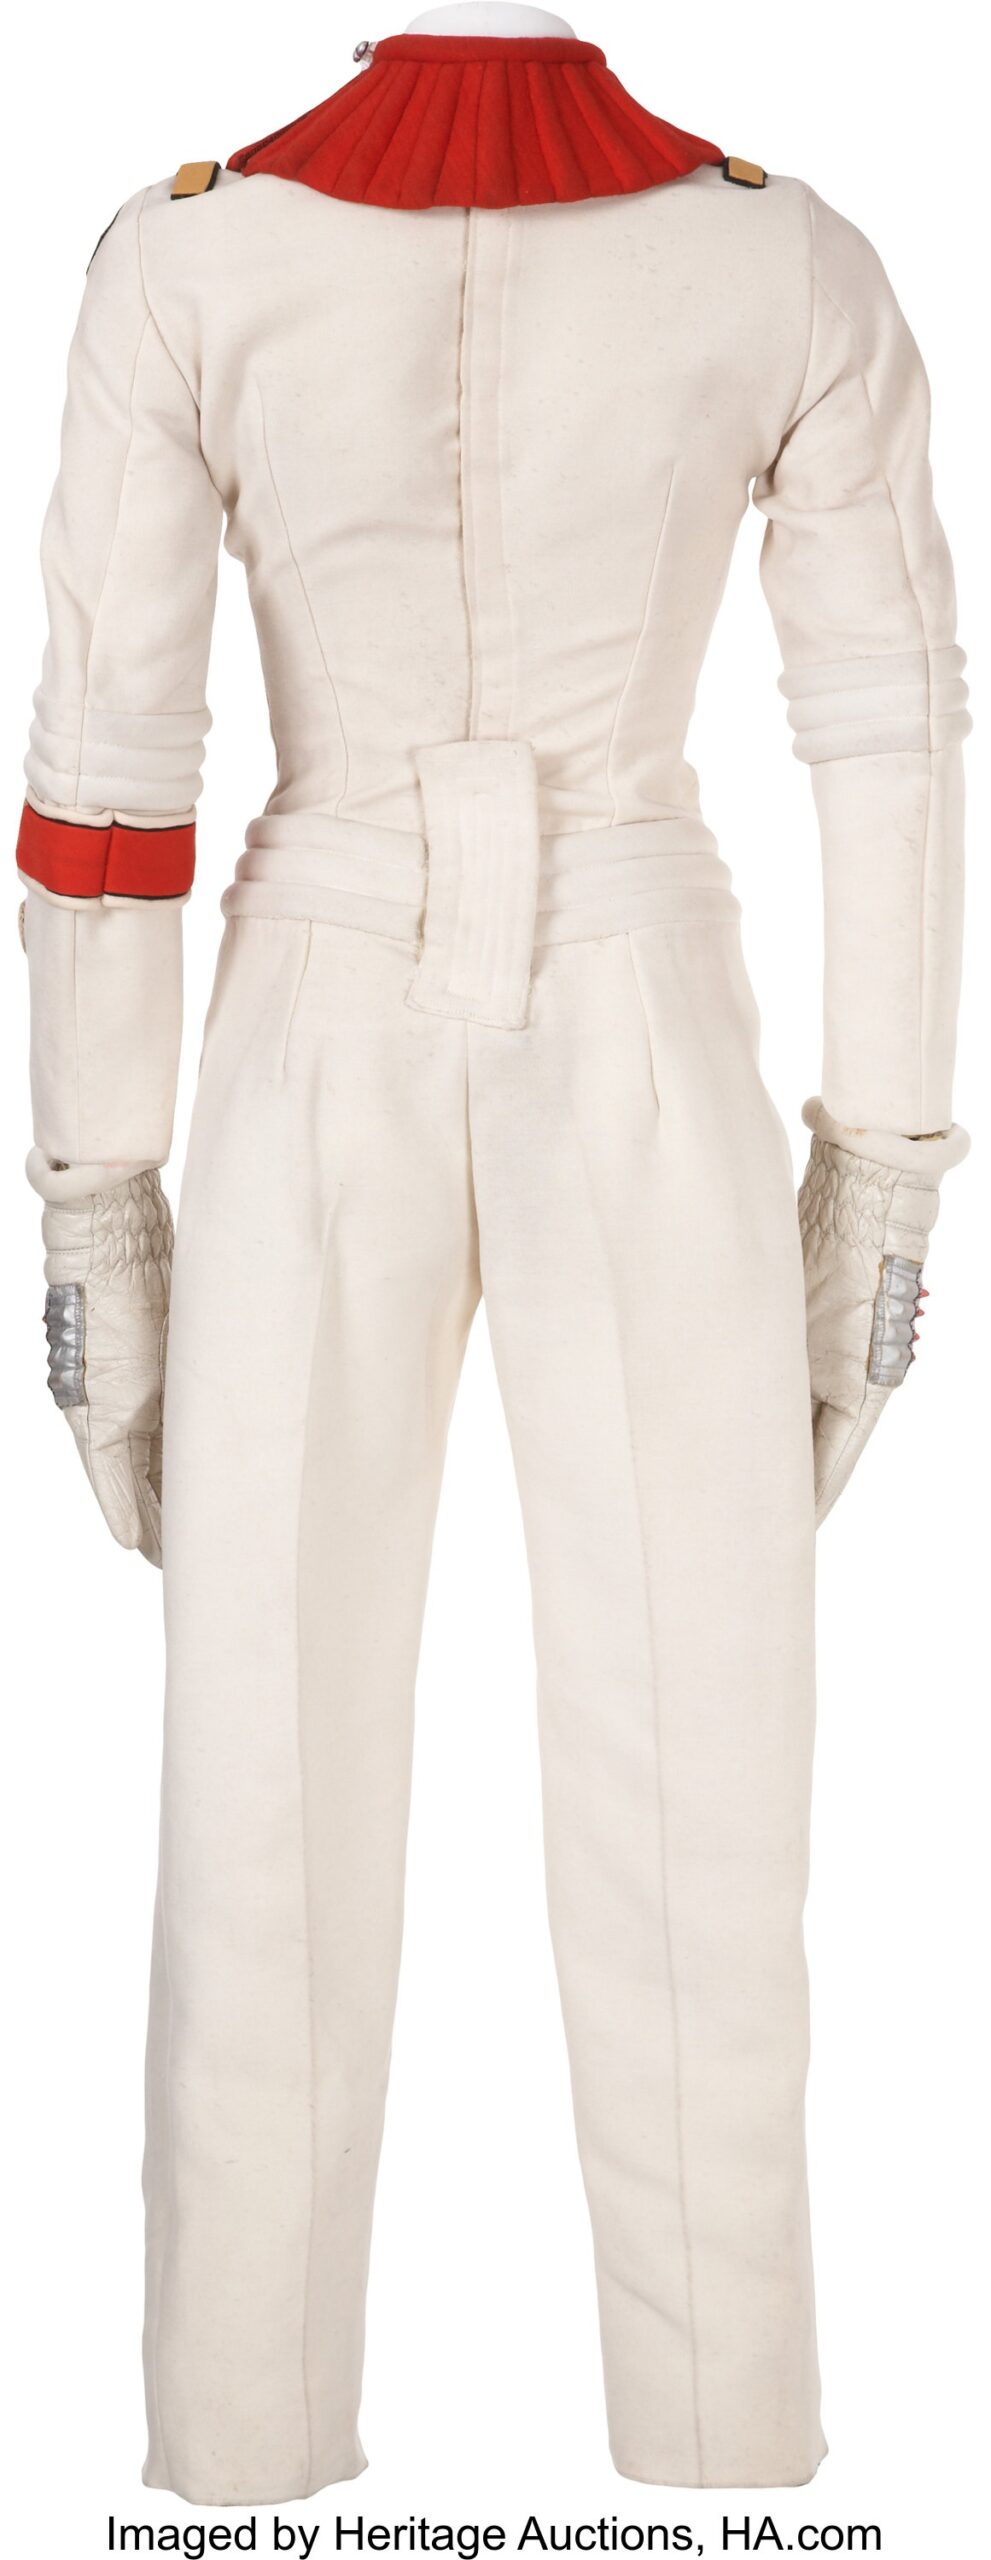
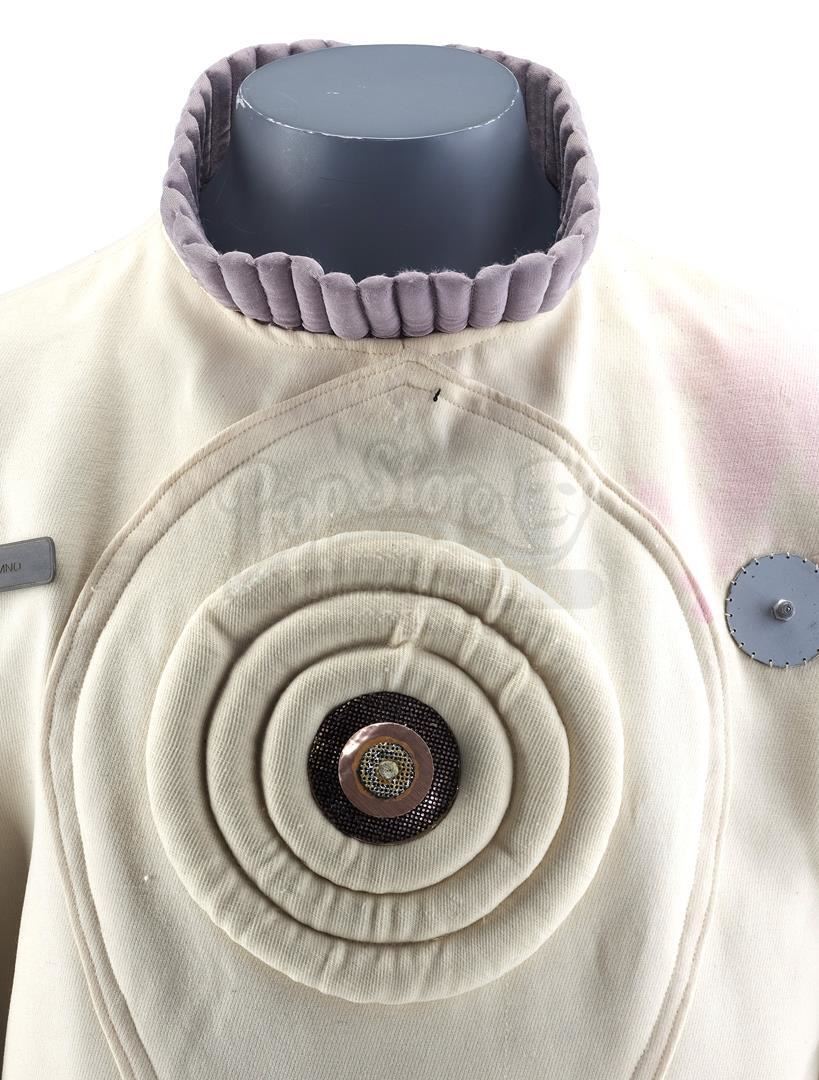
JUMPSUIT EXTERIOR
By far the largest element of this costume ensemble was the body of the uniform, which was a heavy jumpsuit.
Most of the jumpsuit was made from a coarse, somewhat heavy wool gabardine – a far cry from the lightweight, superfine wool gabardines seen on other Starfleet uniforms.
(The wool gabardine was also backed with an off-white lightweight cotton, but more on that later.)
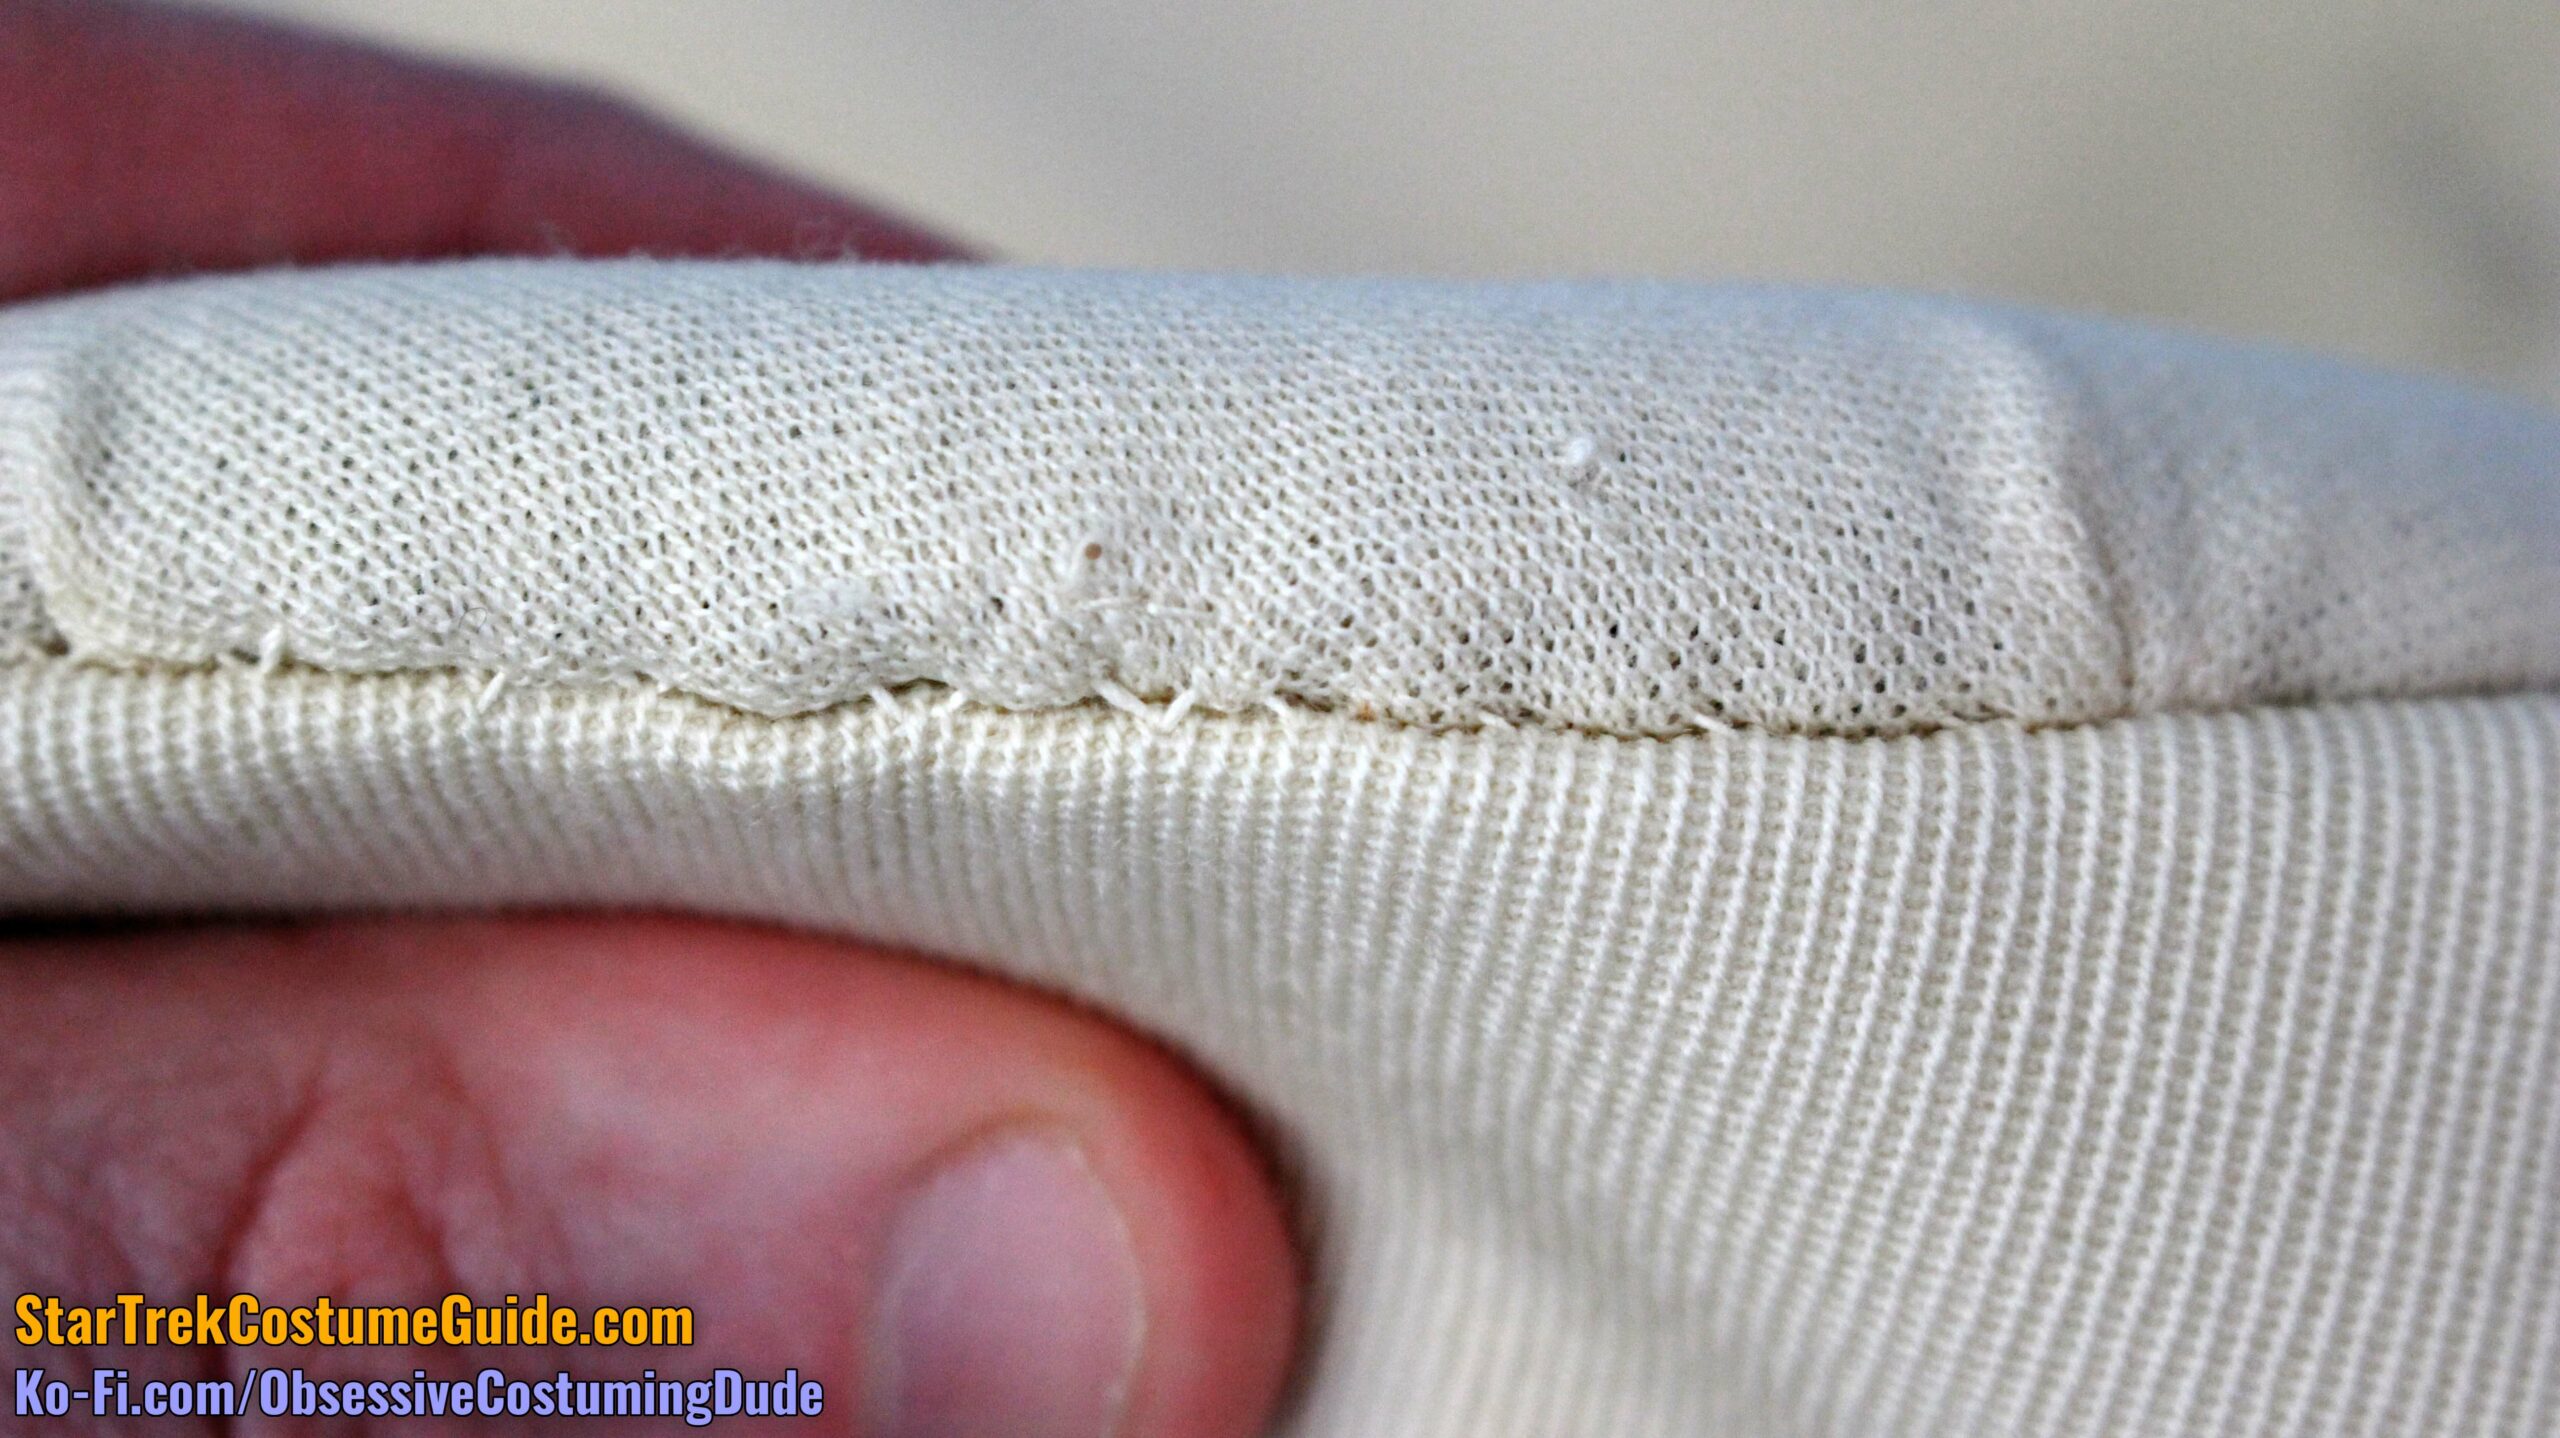
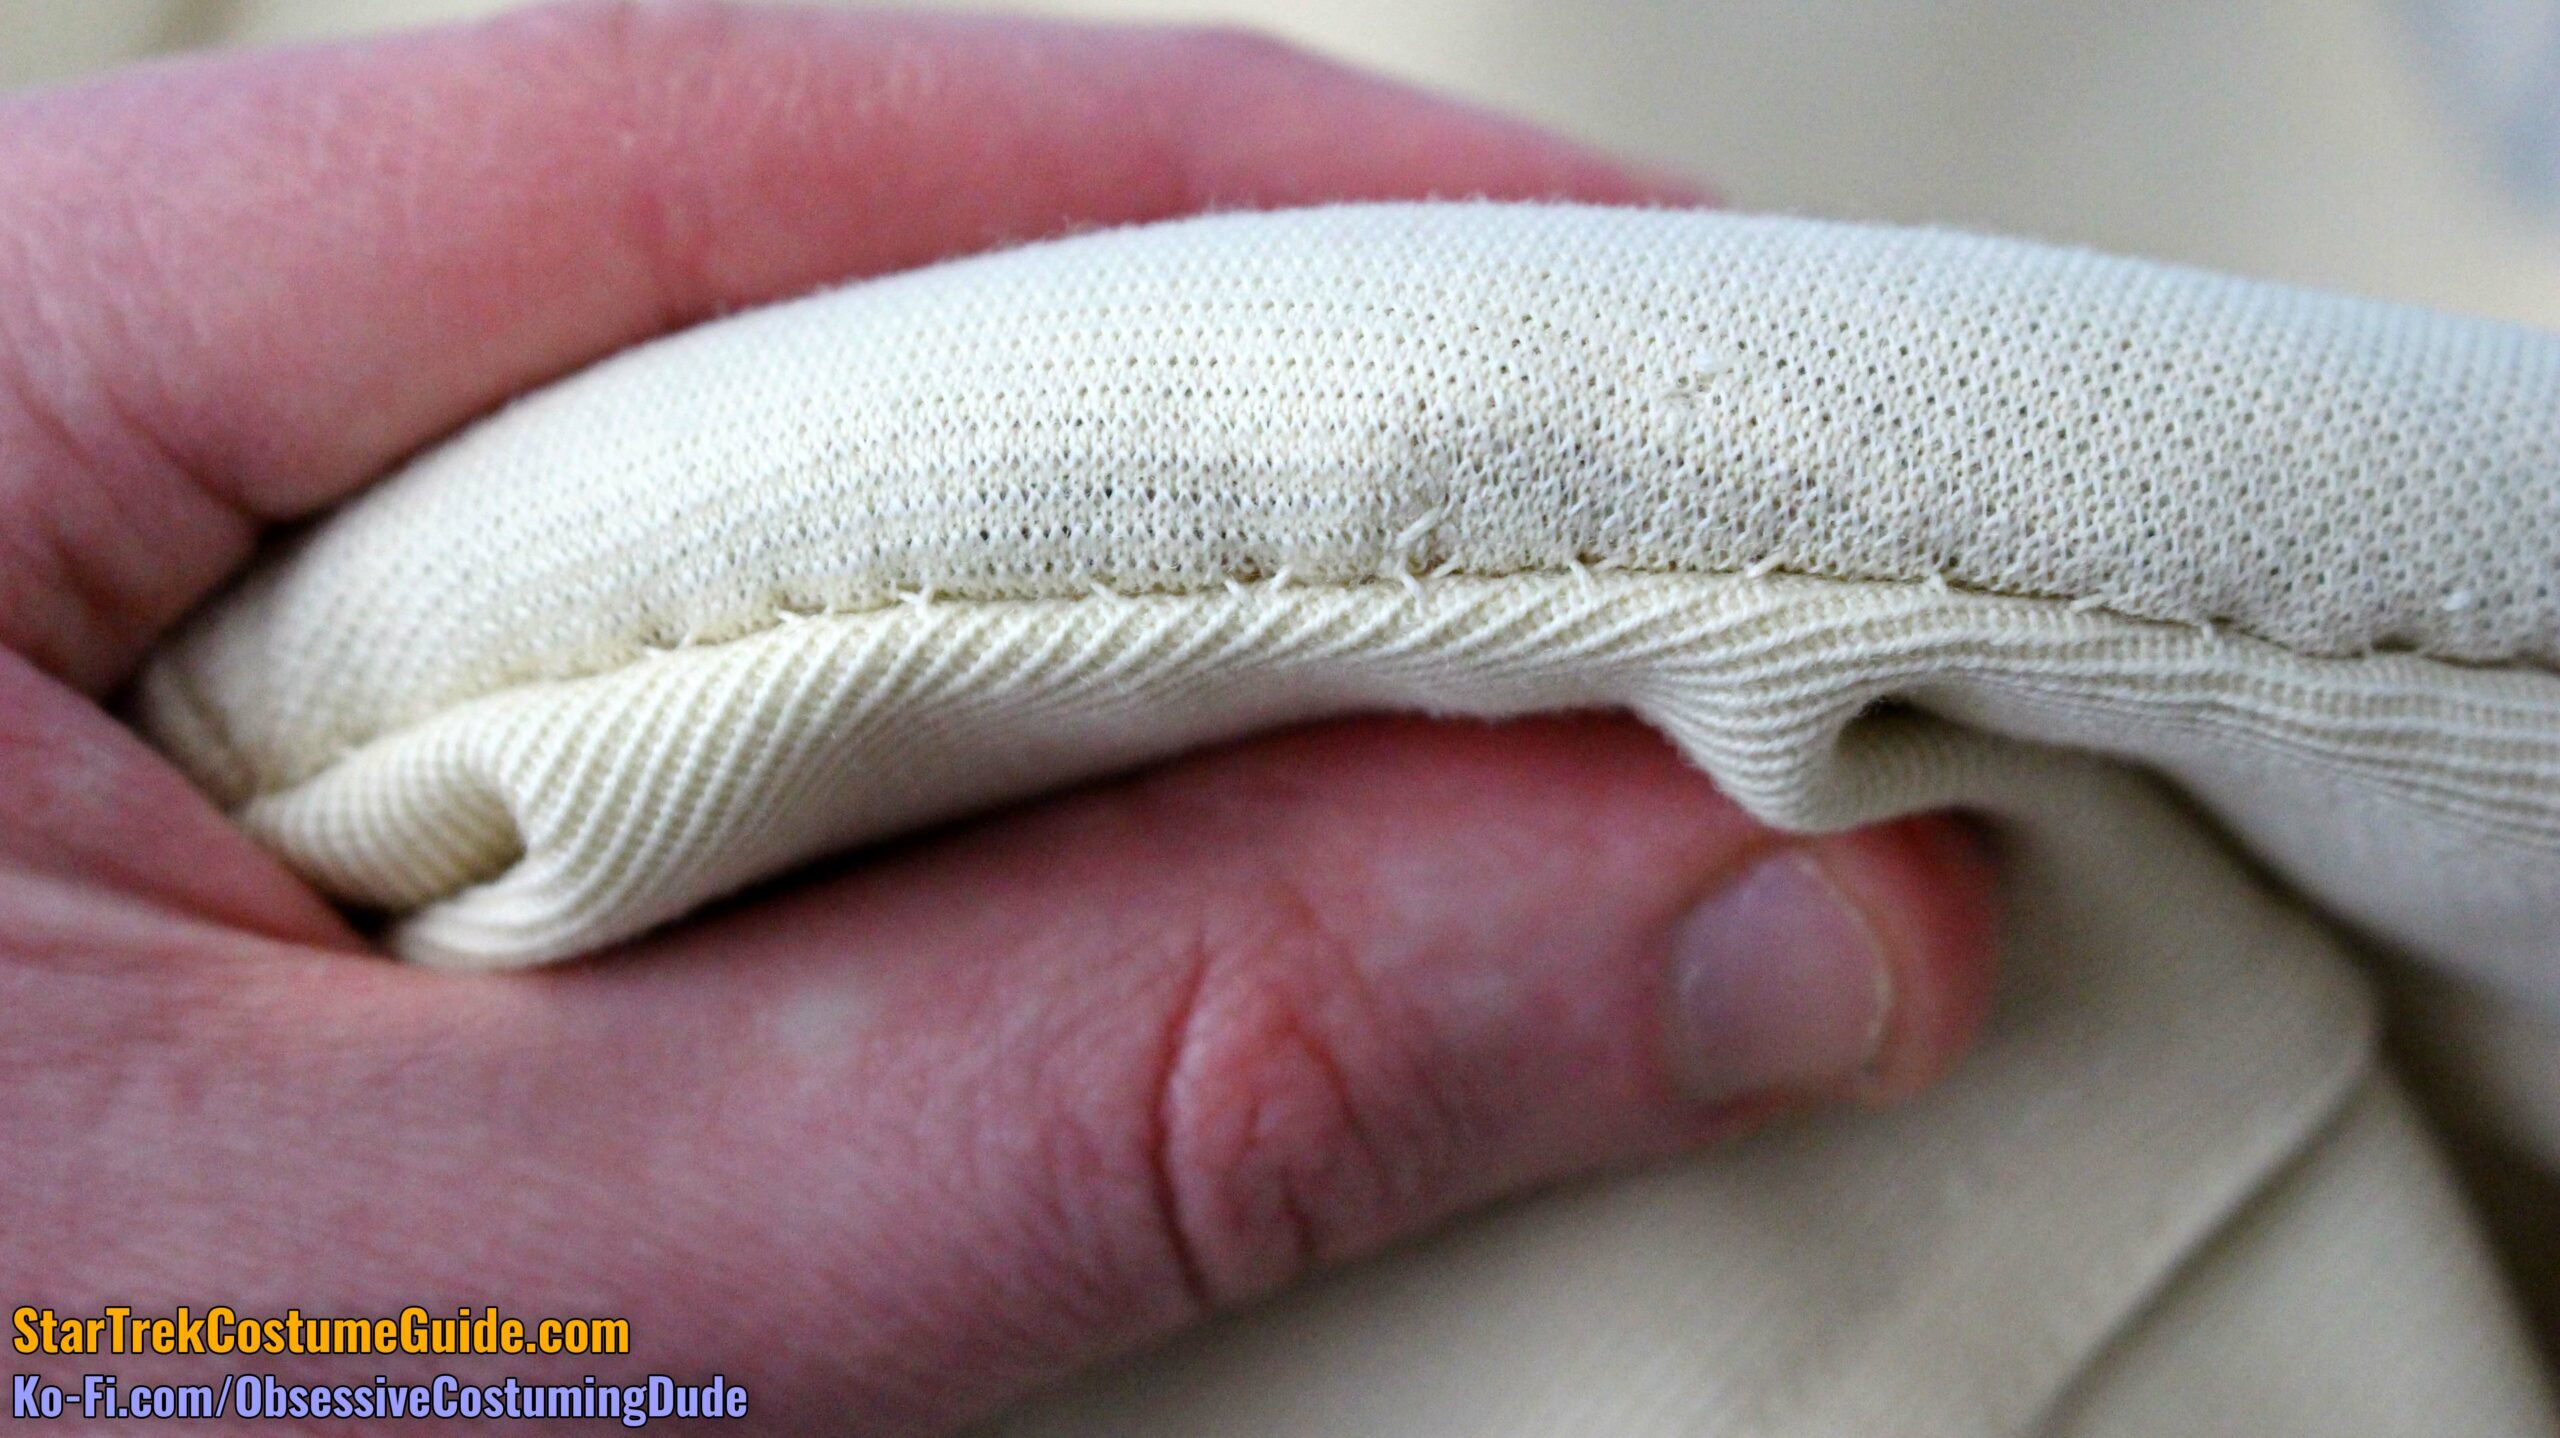
The “chest circles” were actually made of an almost (but not quite) matching knit fabric; here you can see the different weaves of each.
The shoulder tabs were also made of wool gabardine (mounted onto a slightly wider cut of black felt), but it was a noticeably finer weave than the jumpsuit body.
Although most of the jumpsuits seem to have been made from the aforementioned wool gabardine, at least some appear to have been made with wool cavalry twill.
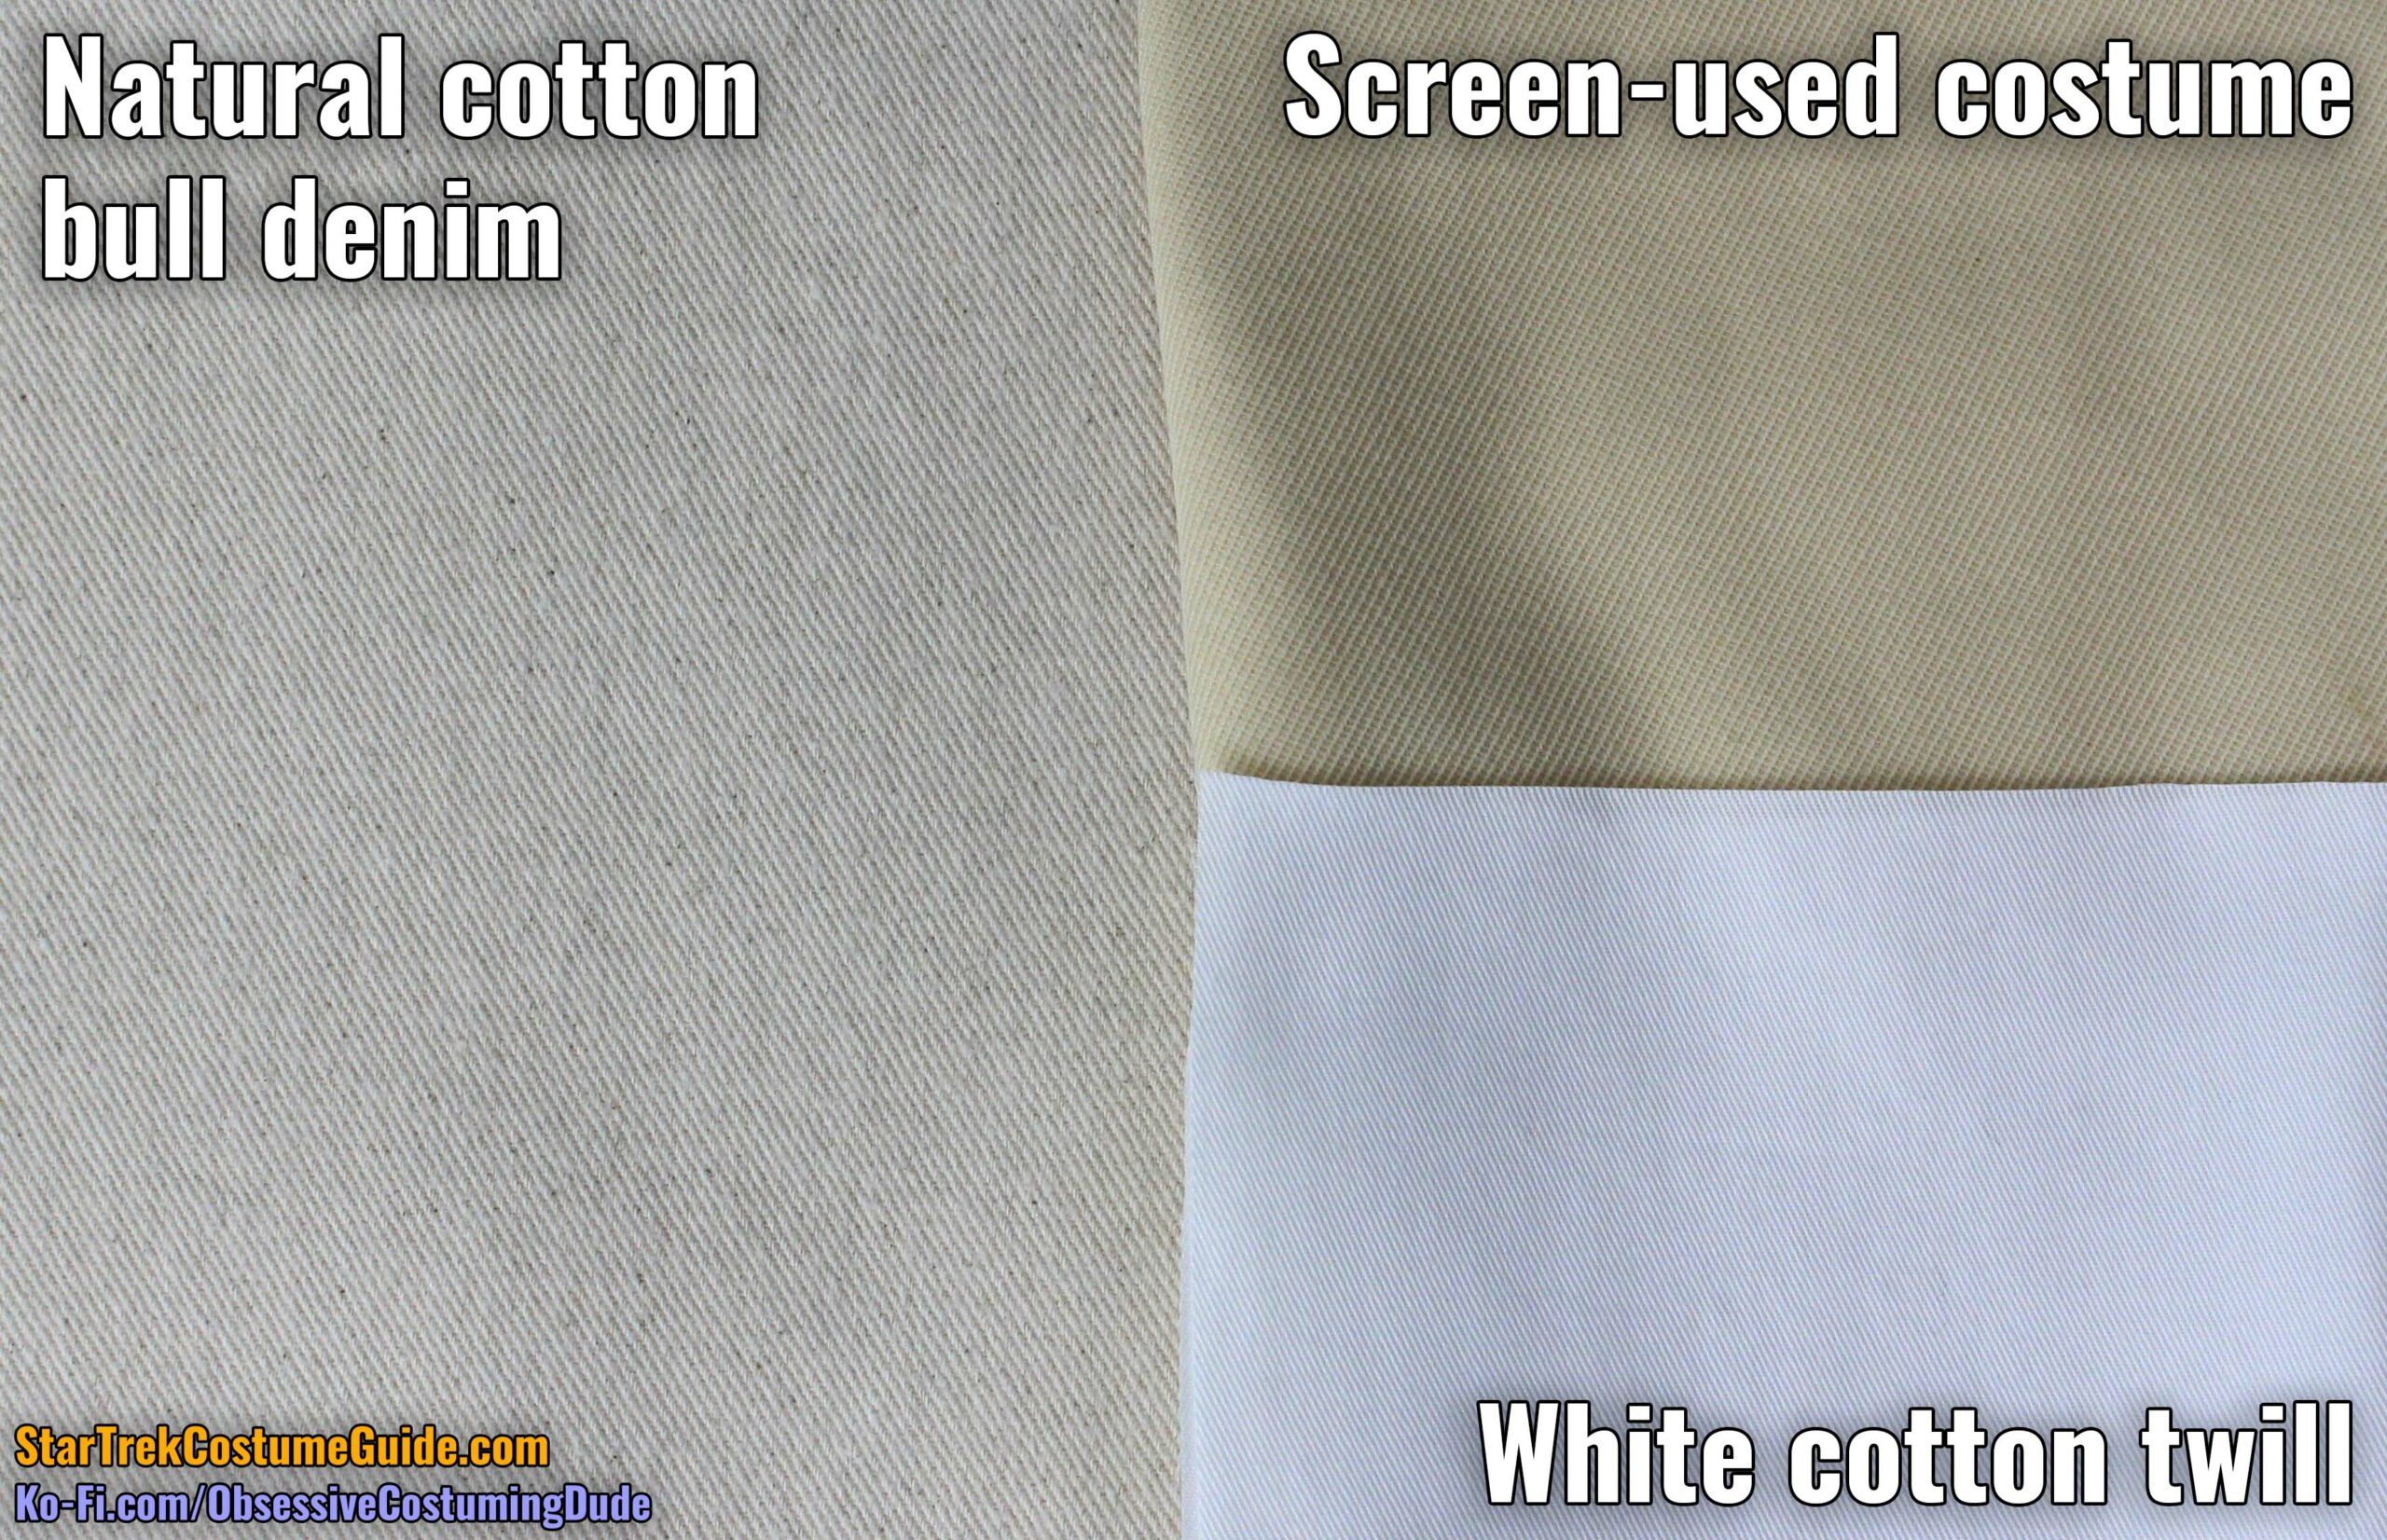
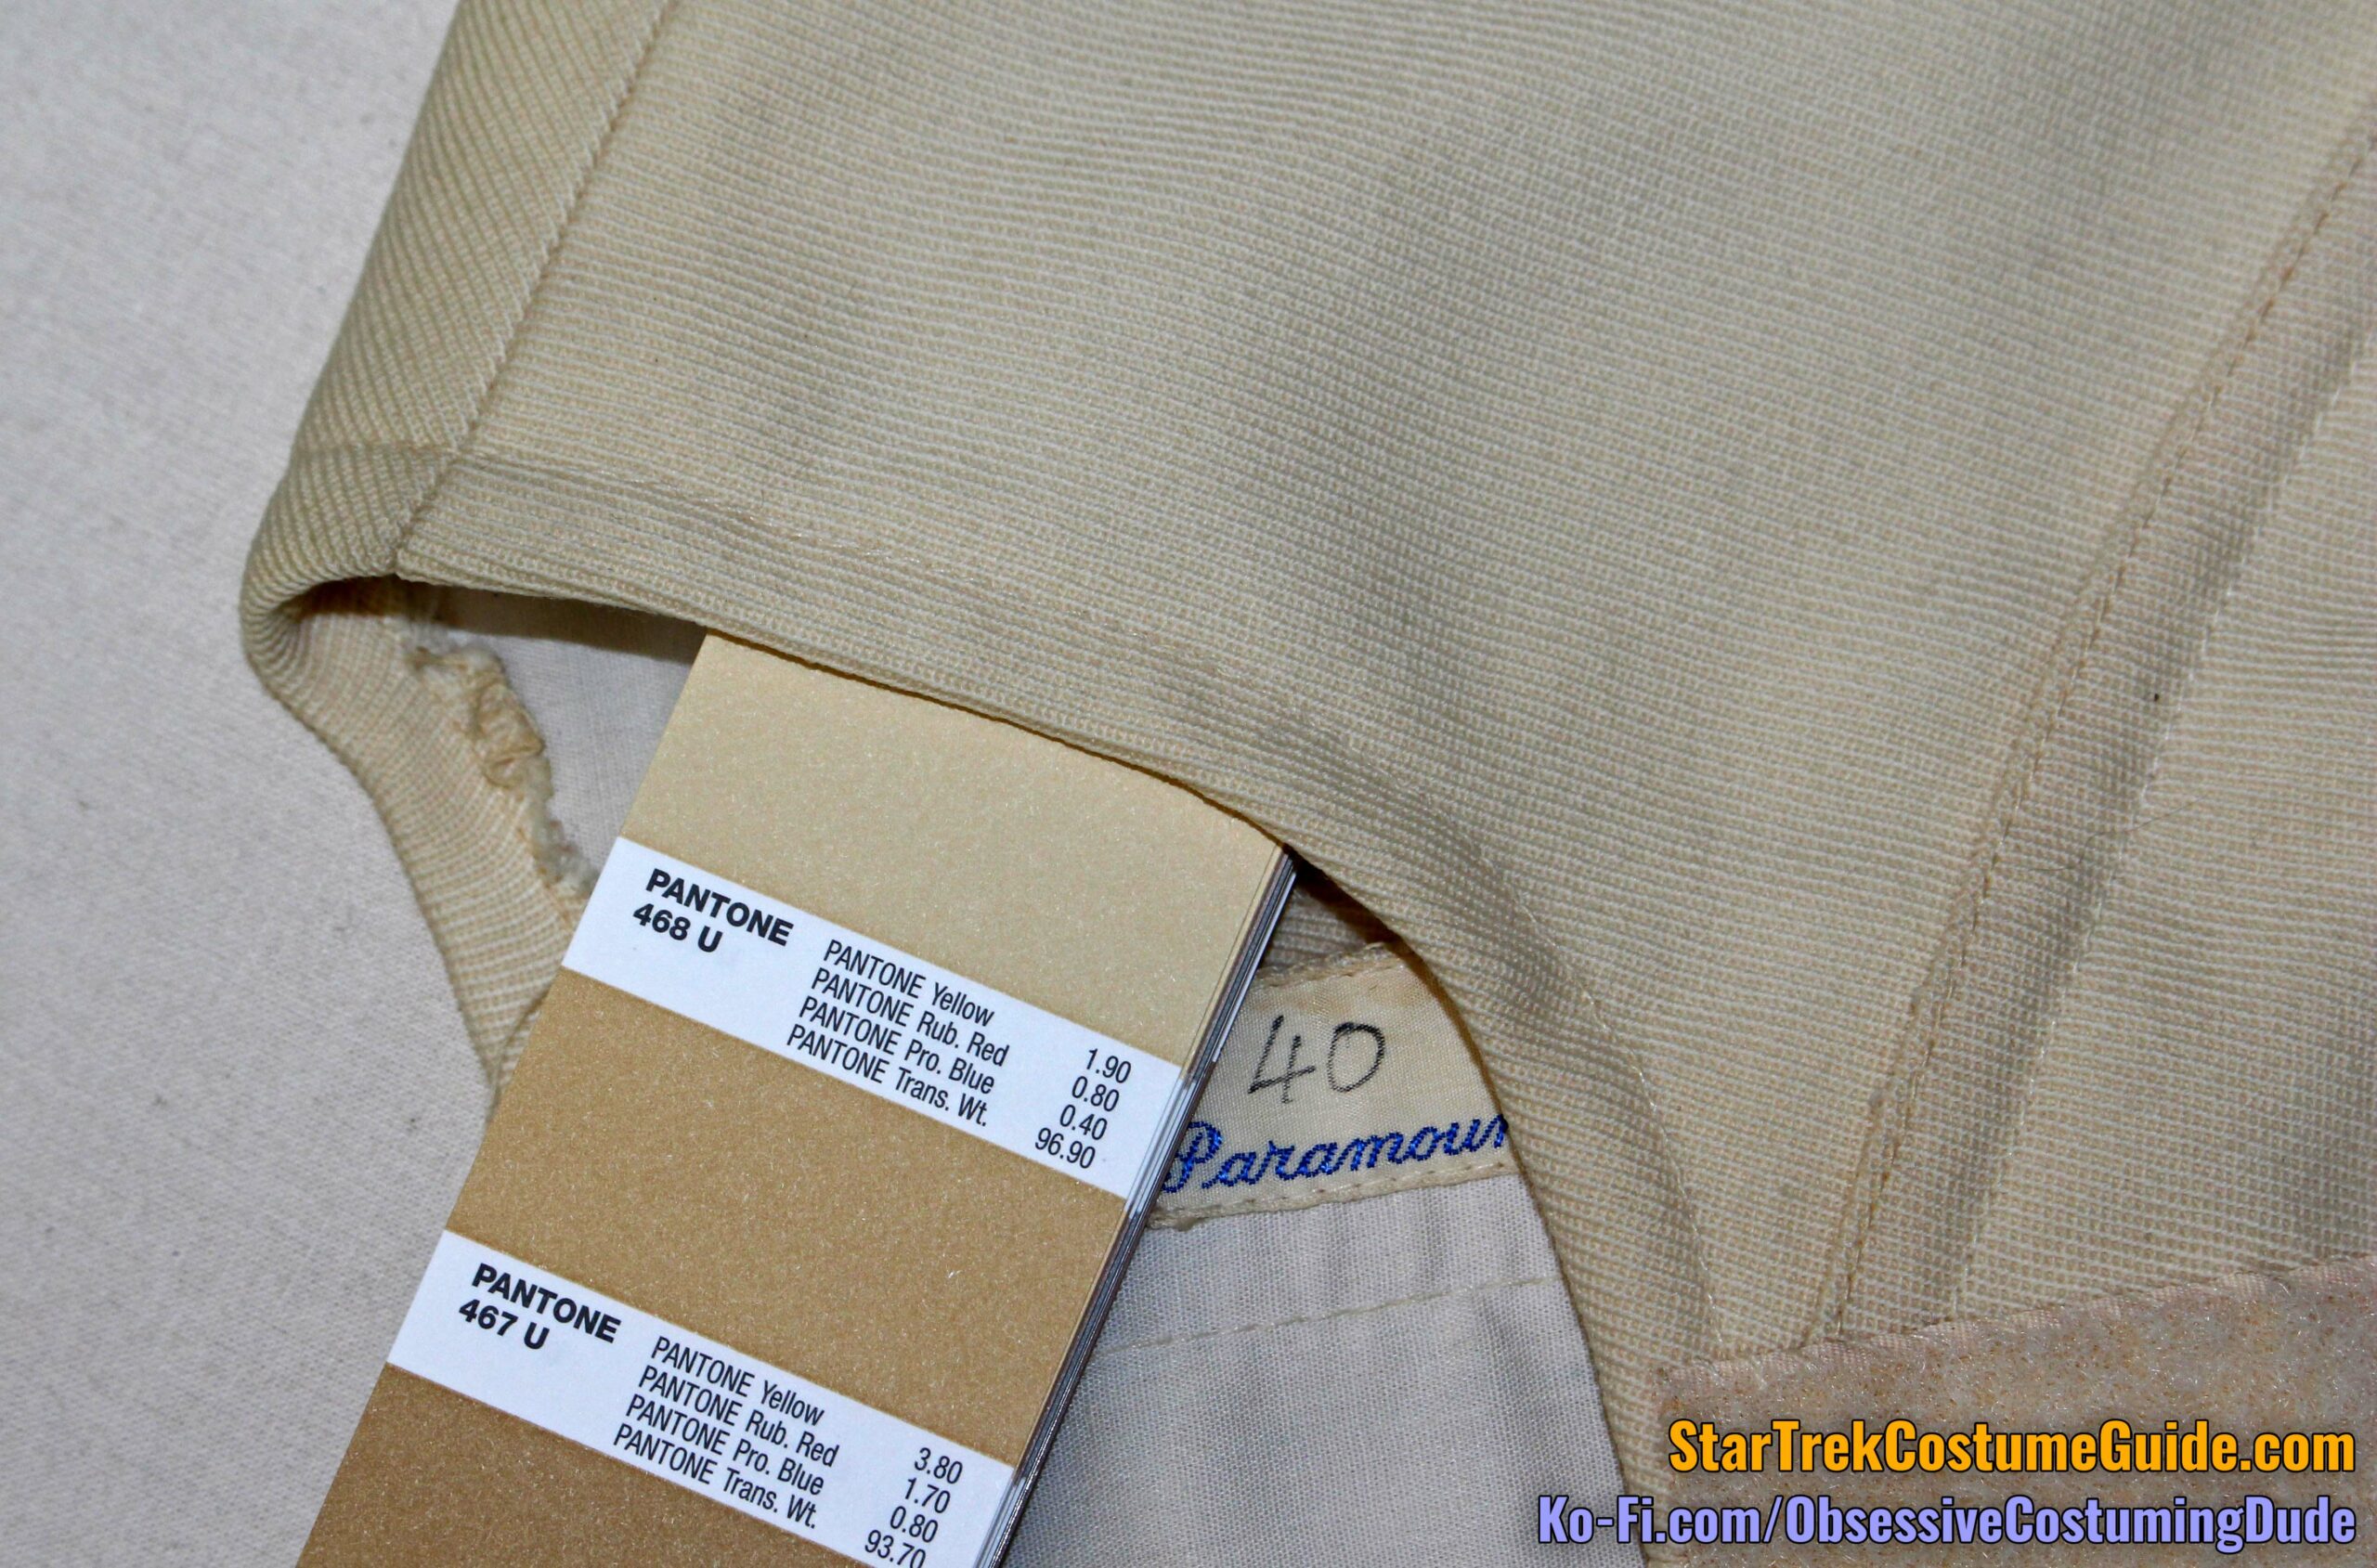
As often the case with Star Trek costumes, probably the most surprising aspect of the costume for me was the color.
I was obviously expecting it to be off-white; I think it’s probably common knowledge at this point that most “white” uniforms and costumes are actually off-white but only look white in the finished shows and movies.
But this jumpsuit was WAY more off-white than I anticipated – more of a rich “cream” color than the “natural” or “ivory” color I was expecting.
Here’s the jumpsuit pictured with a small piece of white cotton twill for comparison:
And here’s the jumpsuit pictured with both white cotton twill and “natural” bull denim, which was closer to the color I expected:
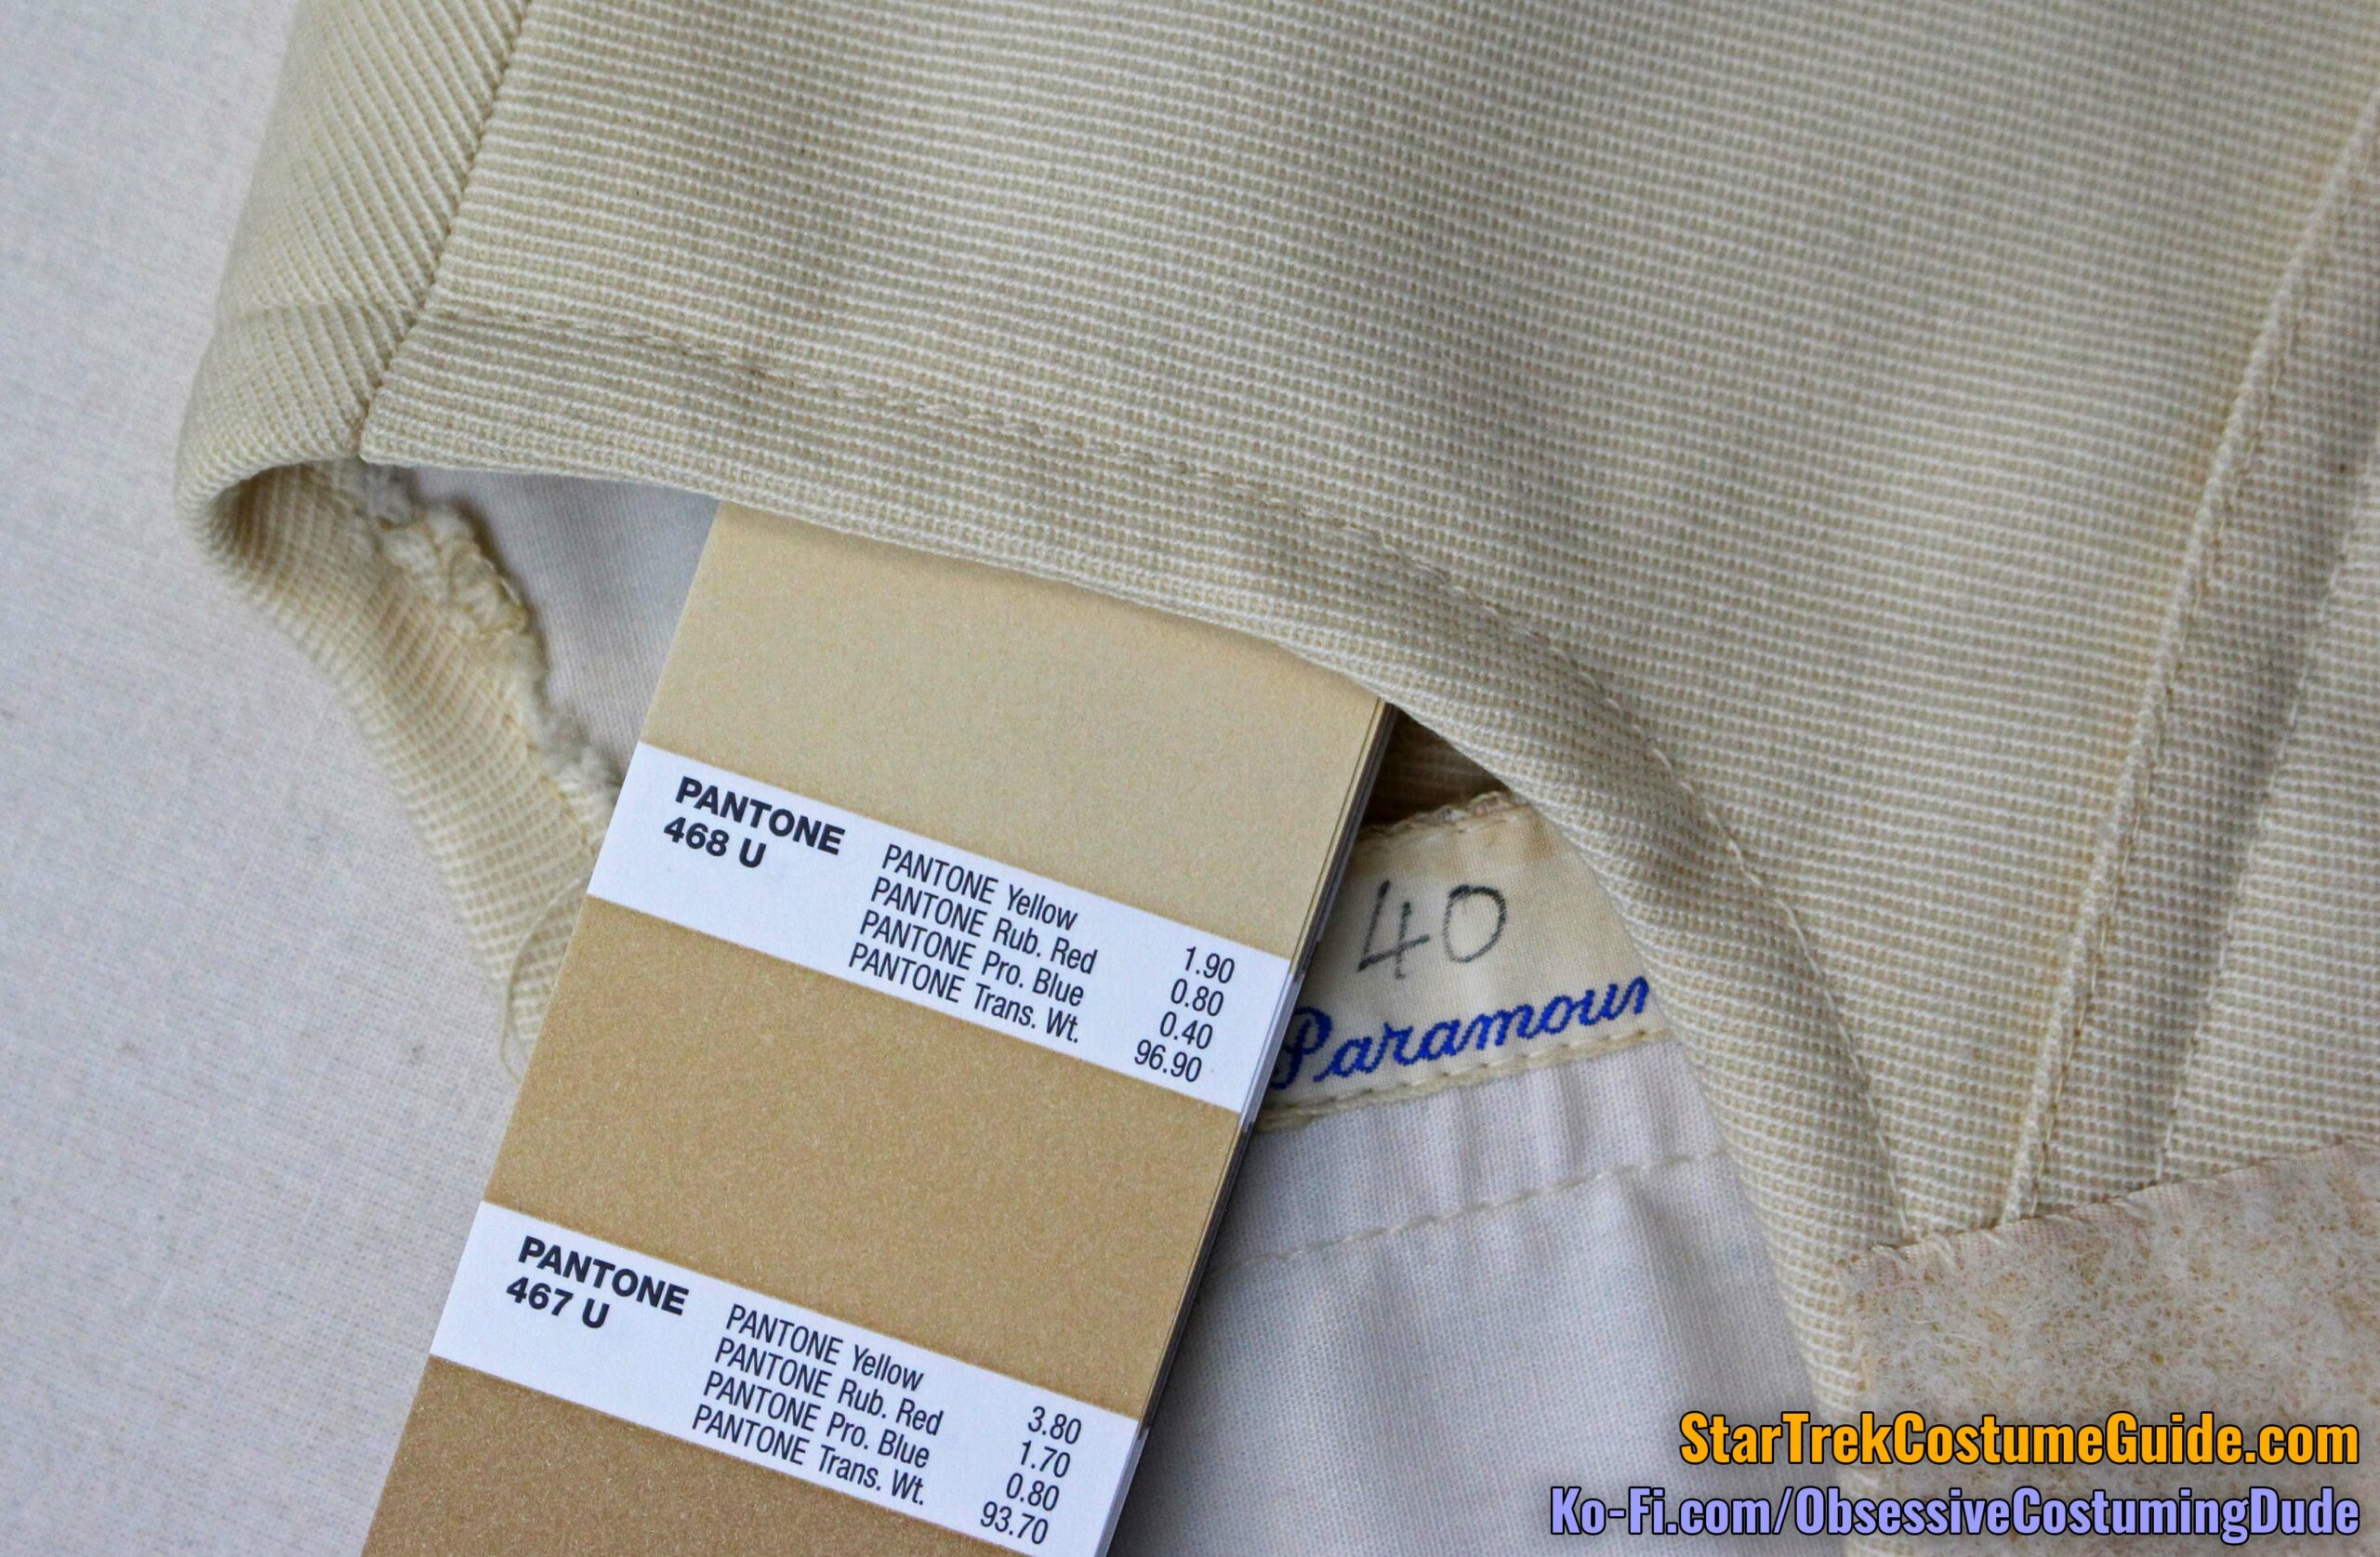
For those of you who have a Pantone book handy, see color #468 U as a close representation of the screen-used fabric color. (Or you could just Google it, although colors of course vary radically depending on graphics/monitor settings.)
Here is the aforementioned Pantone #468 U pictured with and without flash:
With flash
No flash
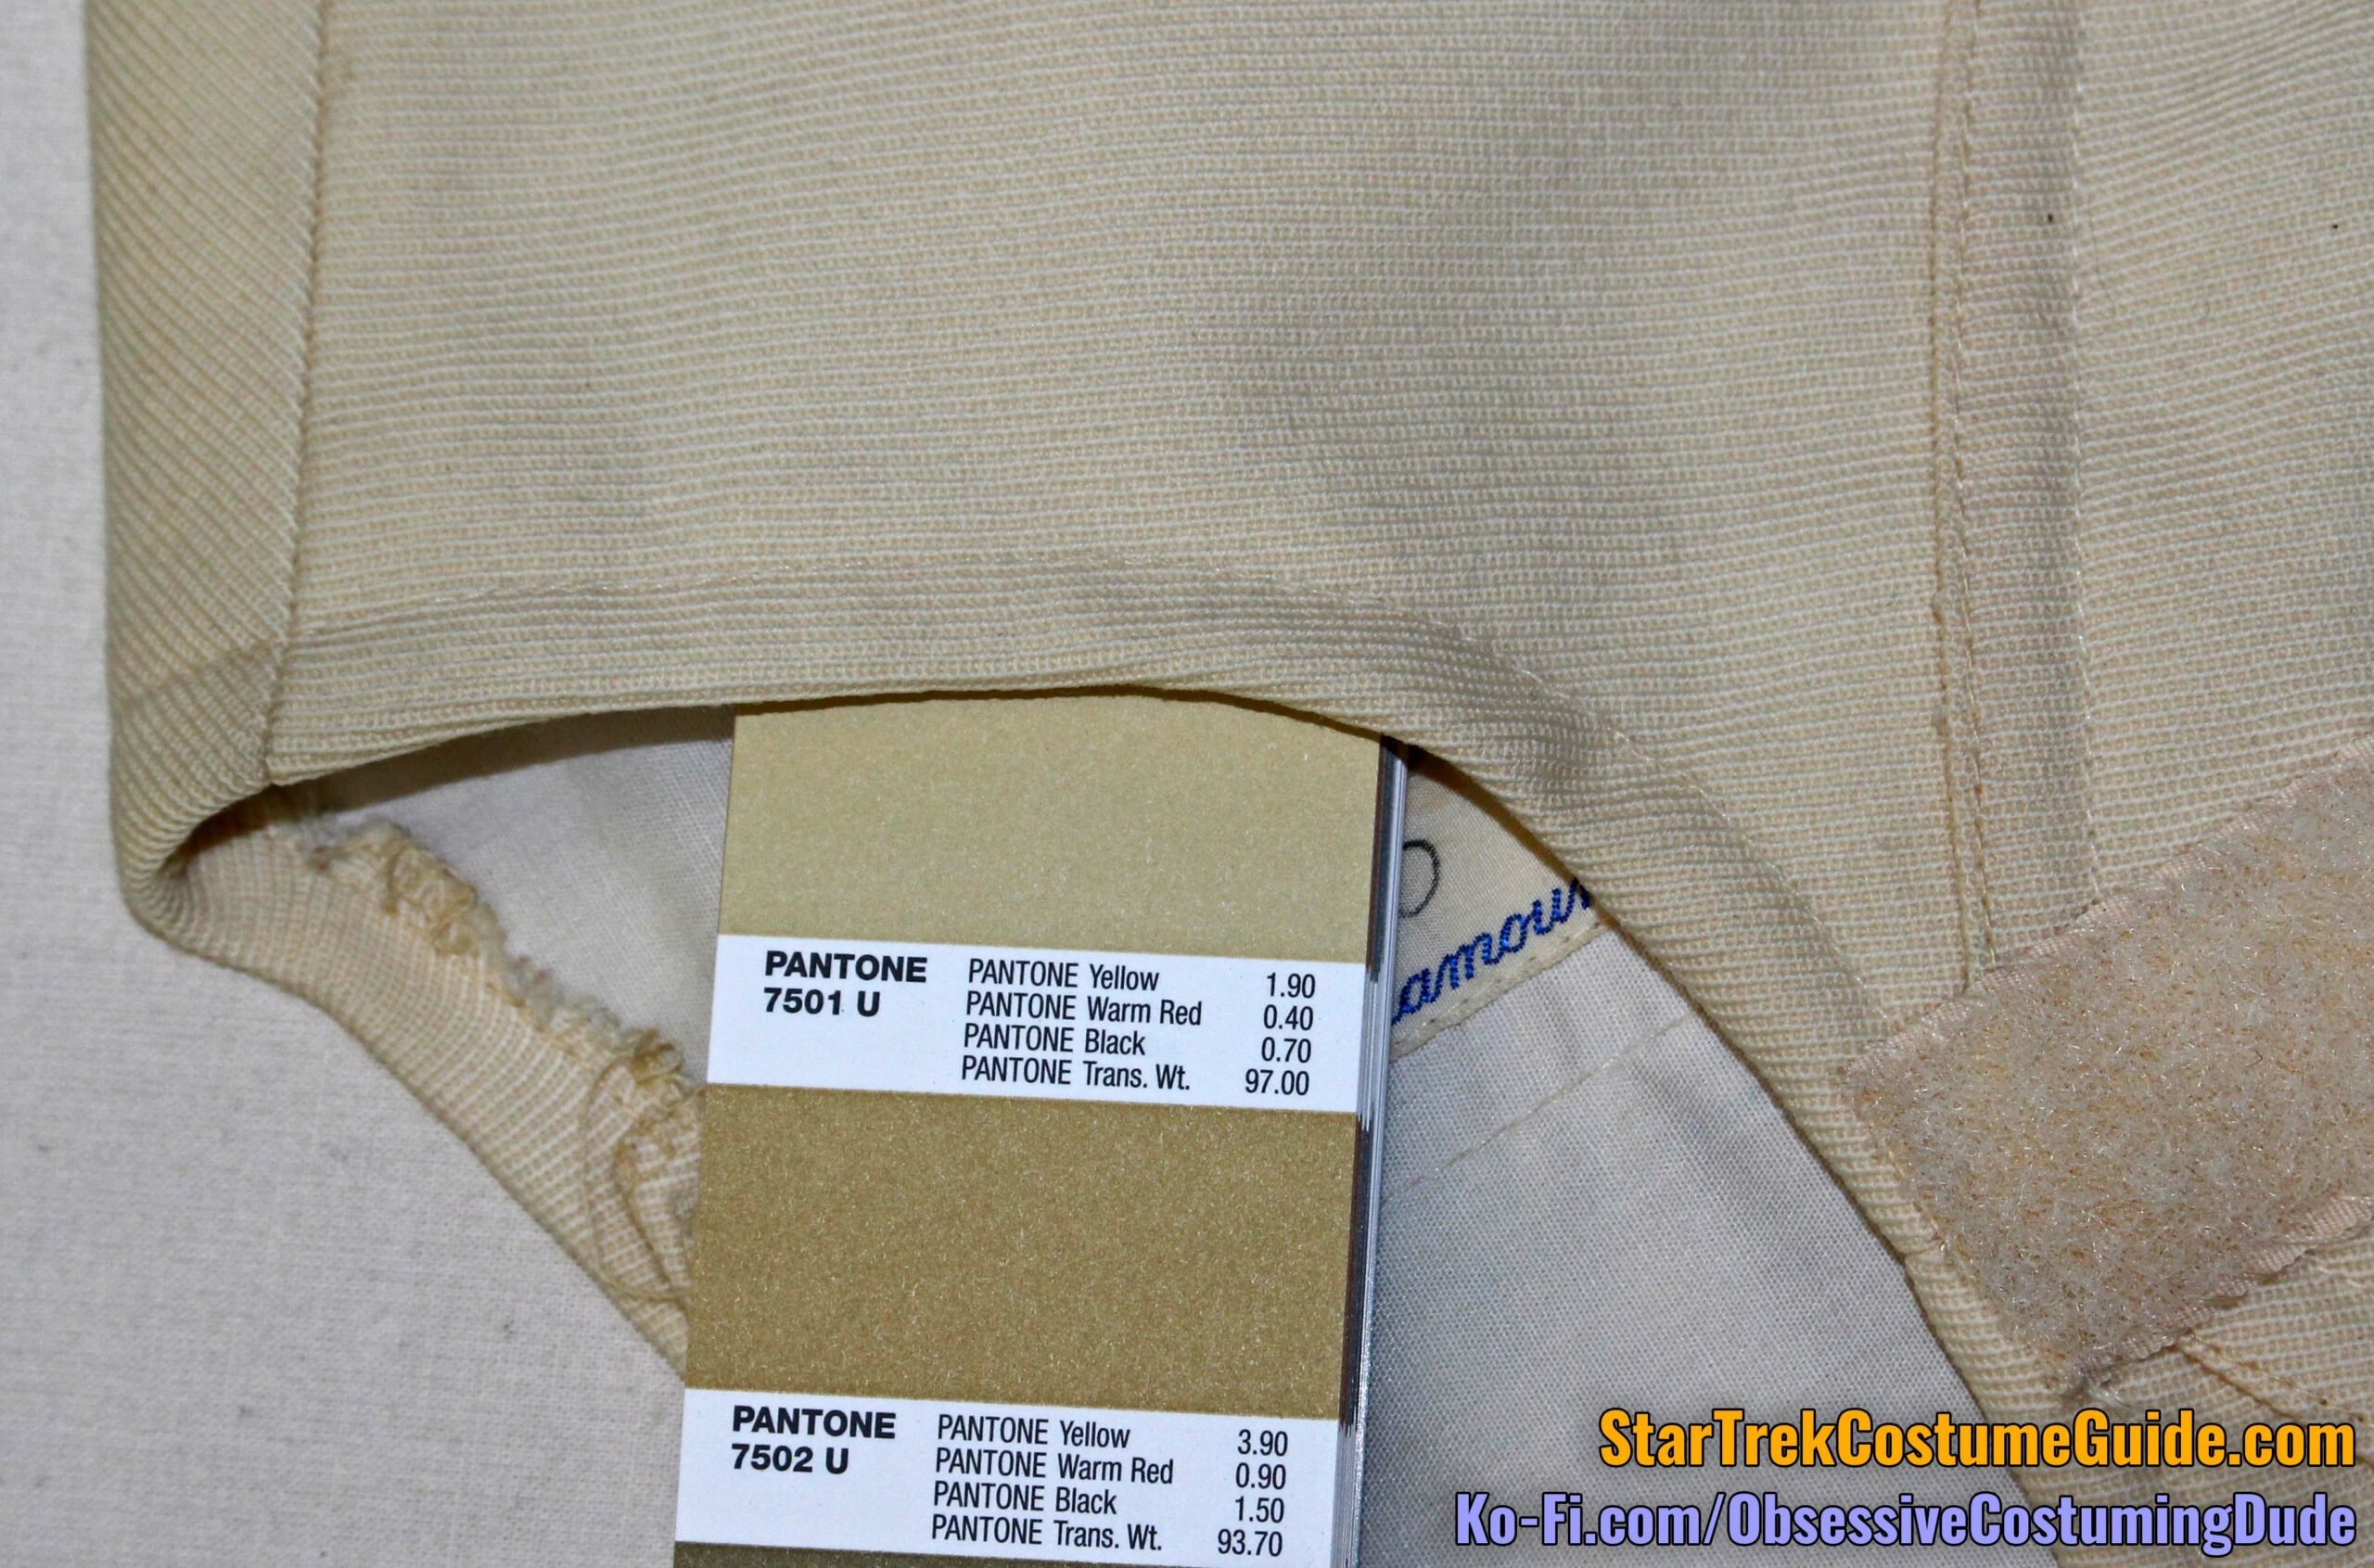
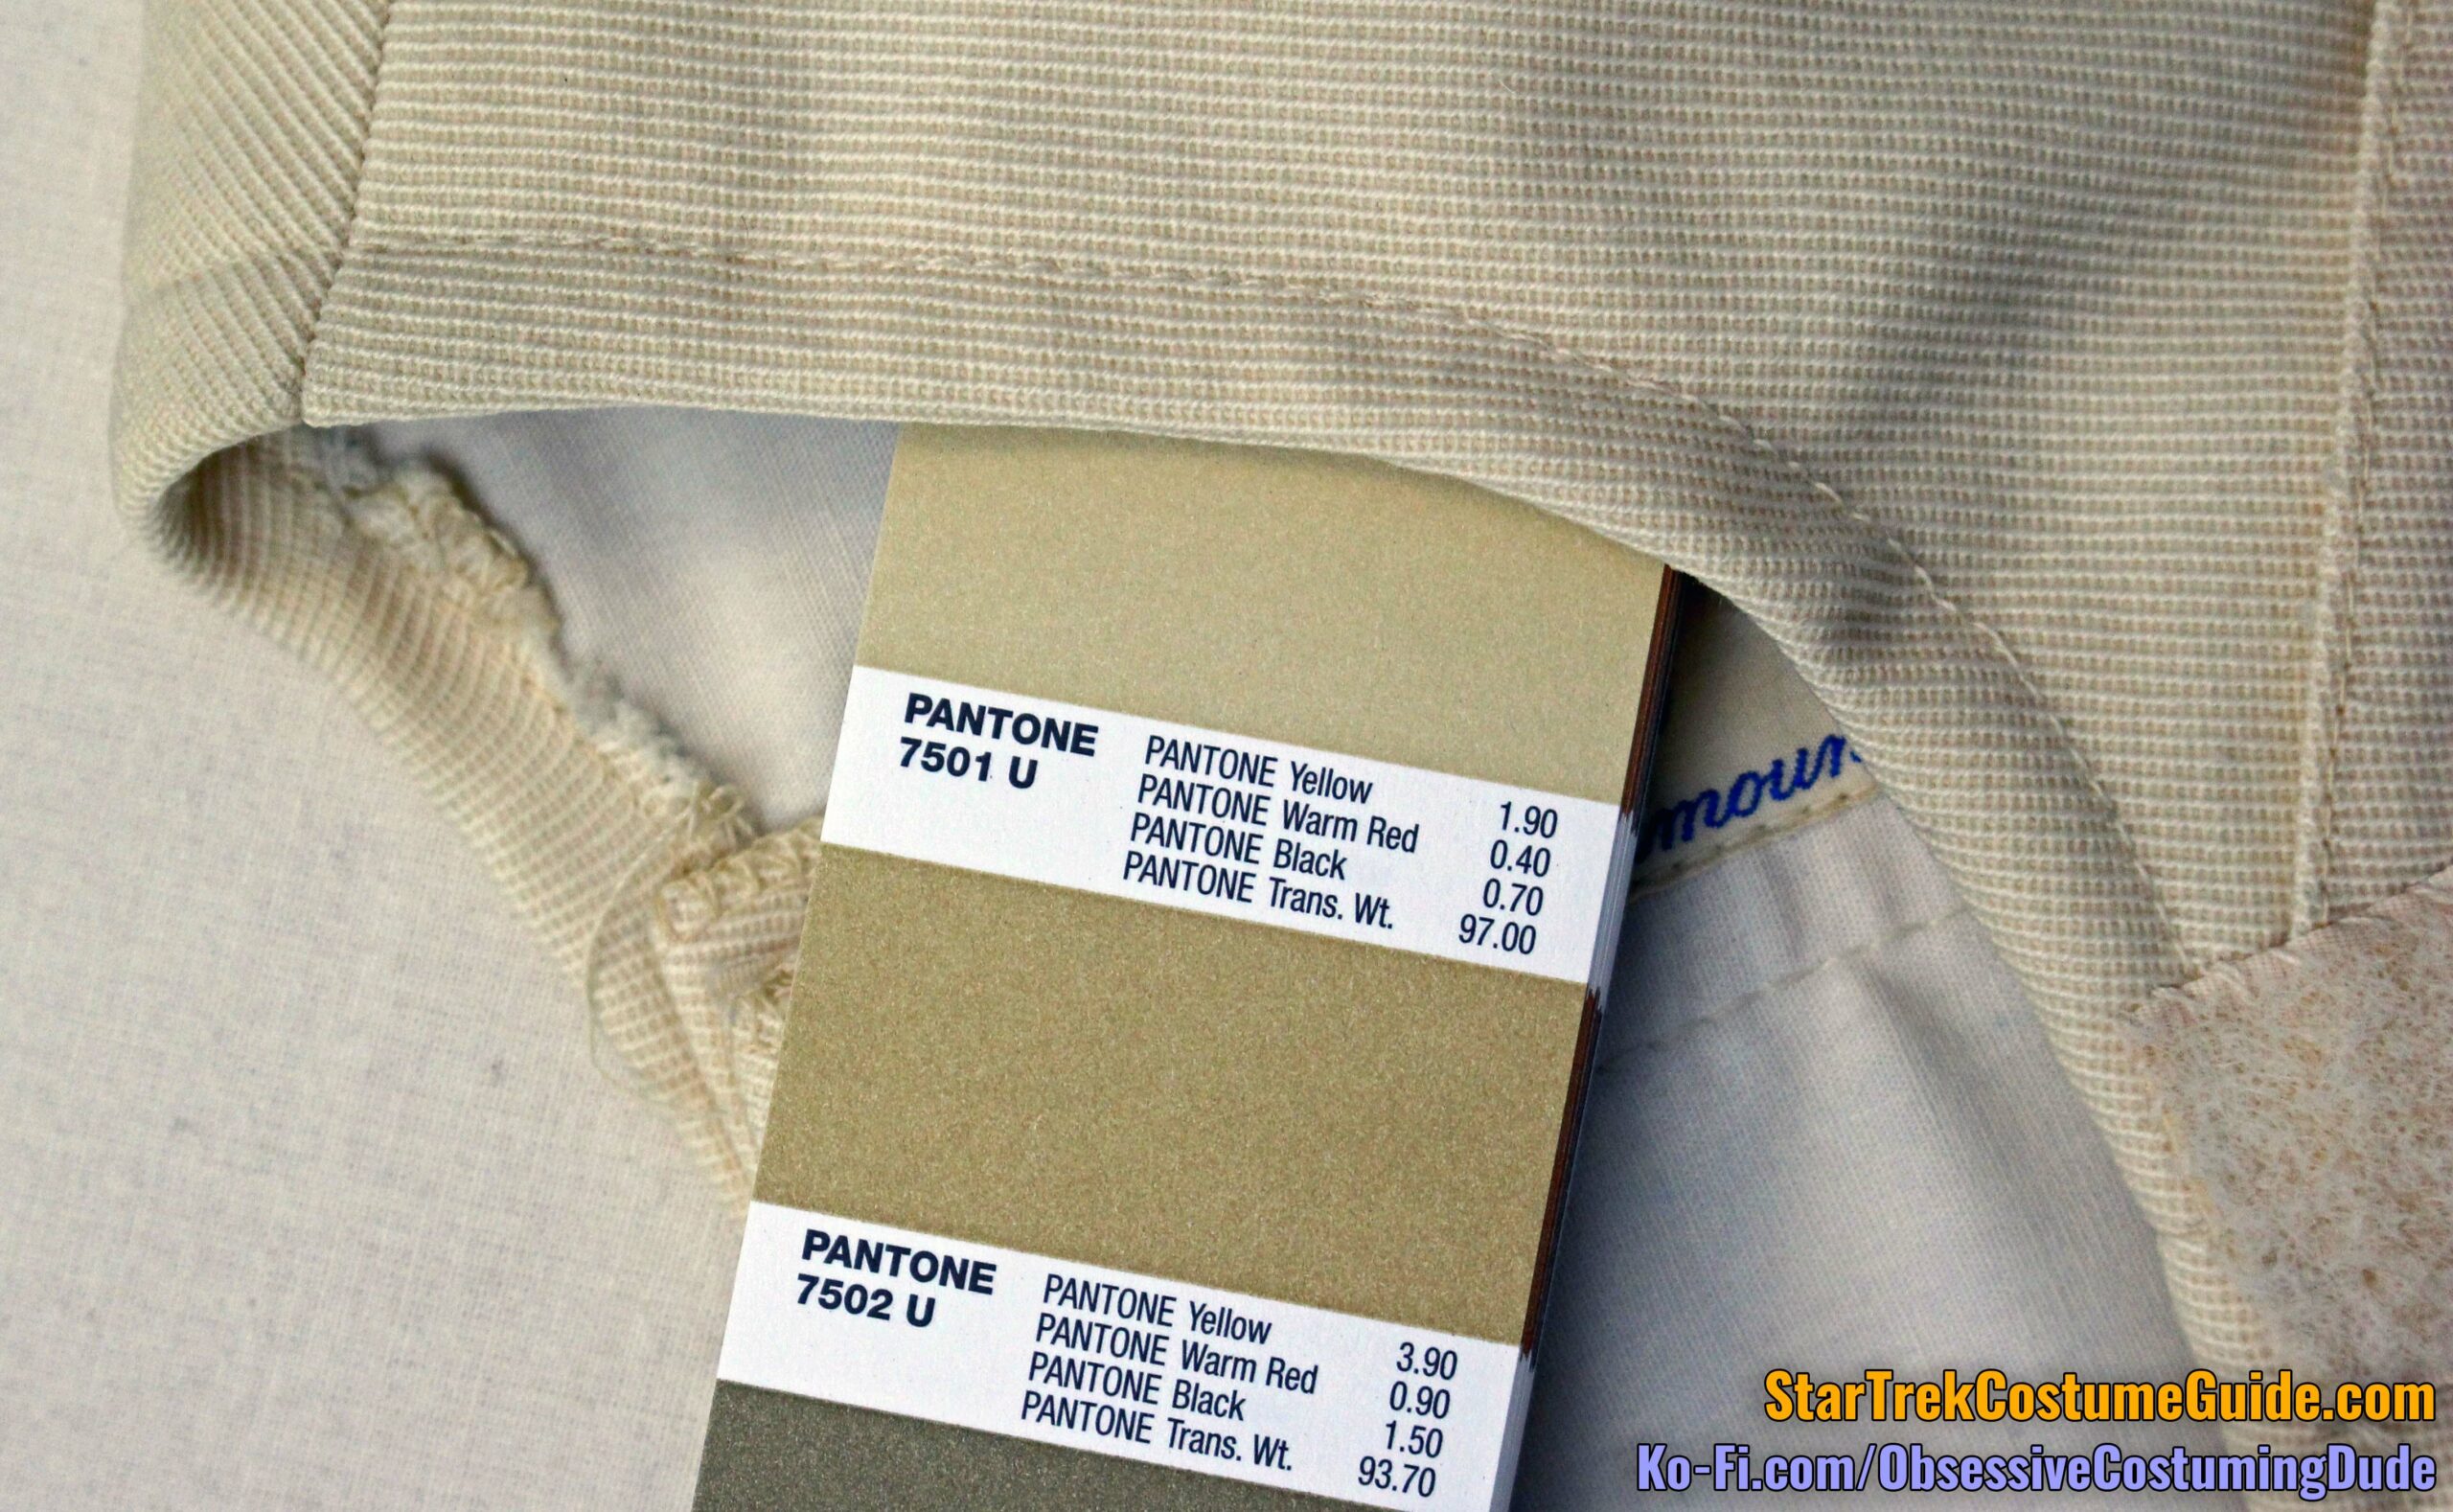
Pantone #7501 U was also fairly close – again pictured with and without flash:
With flash
No flash
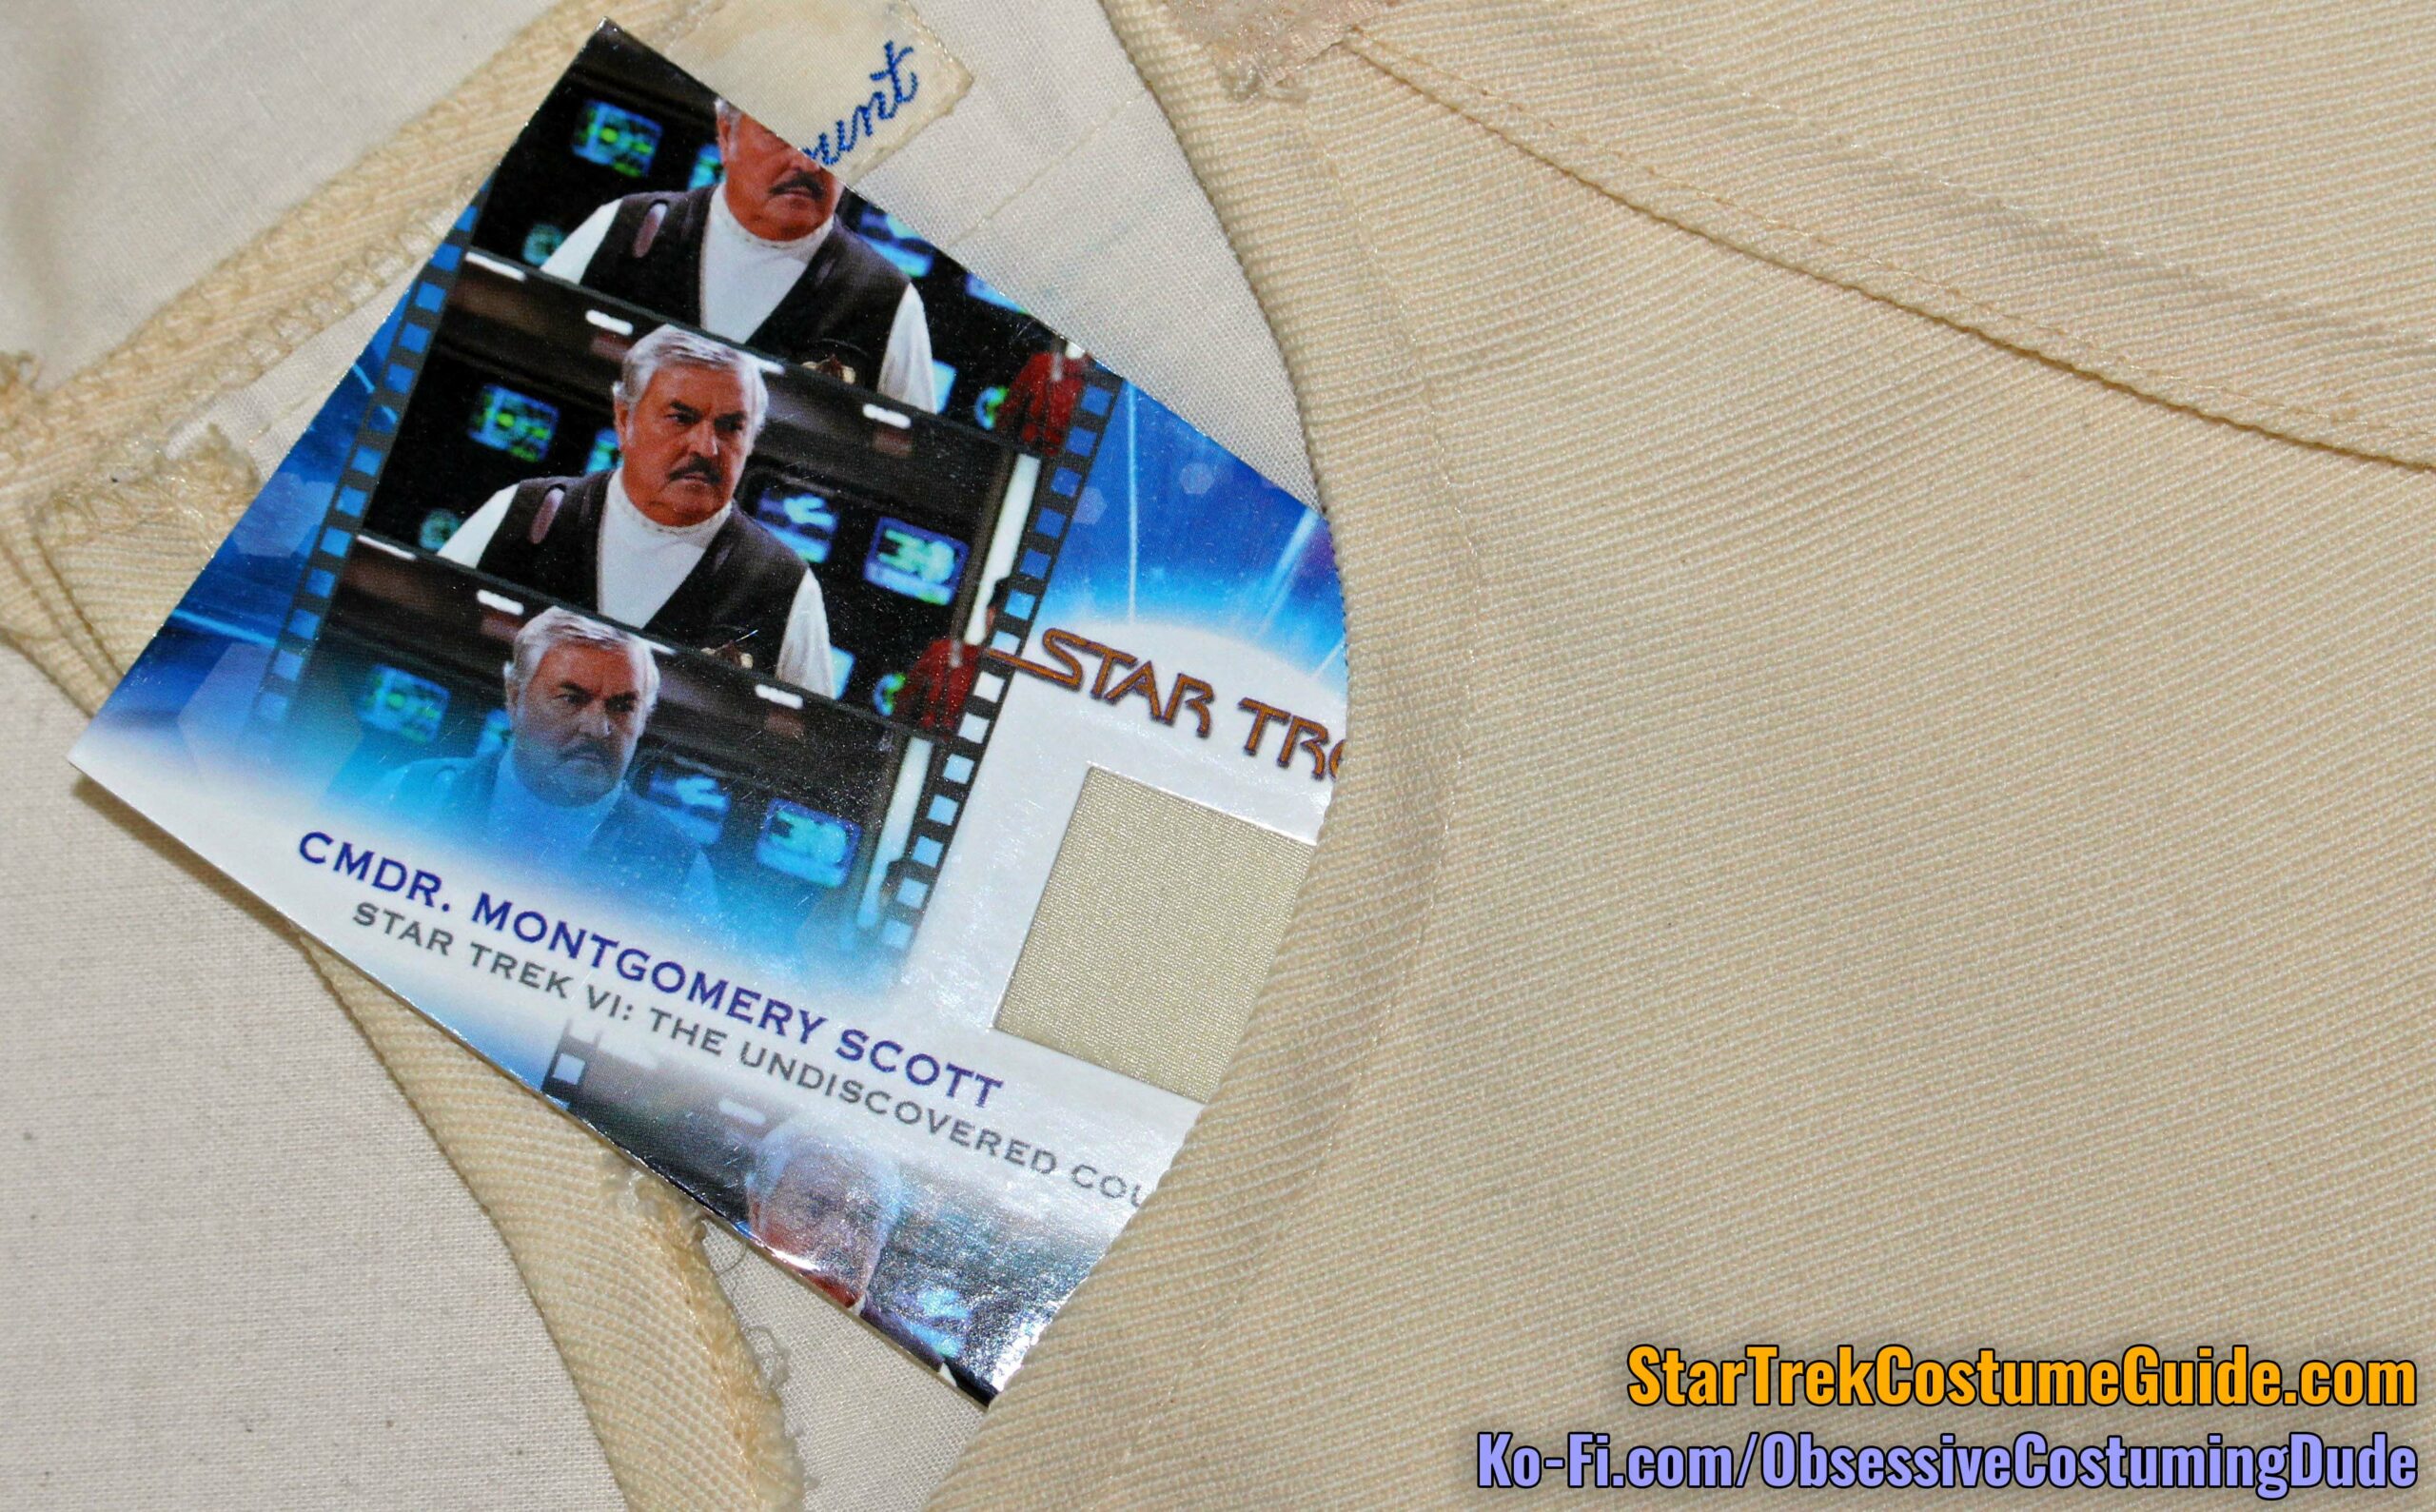
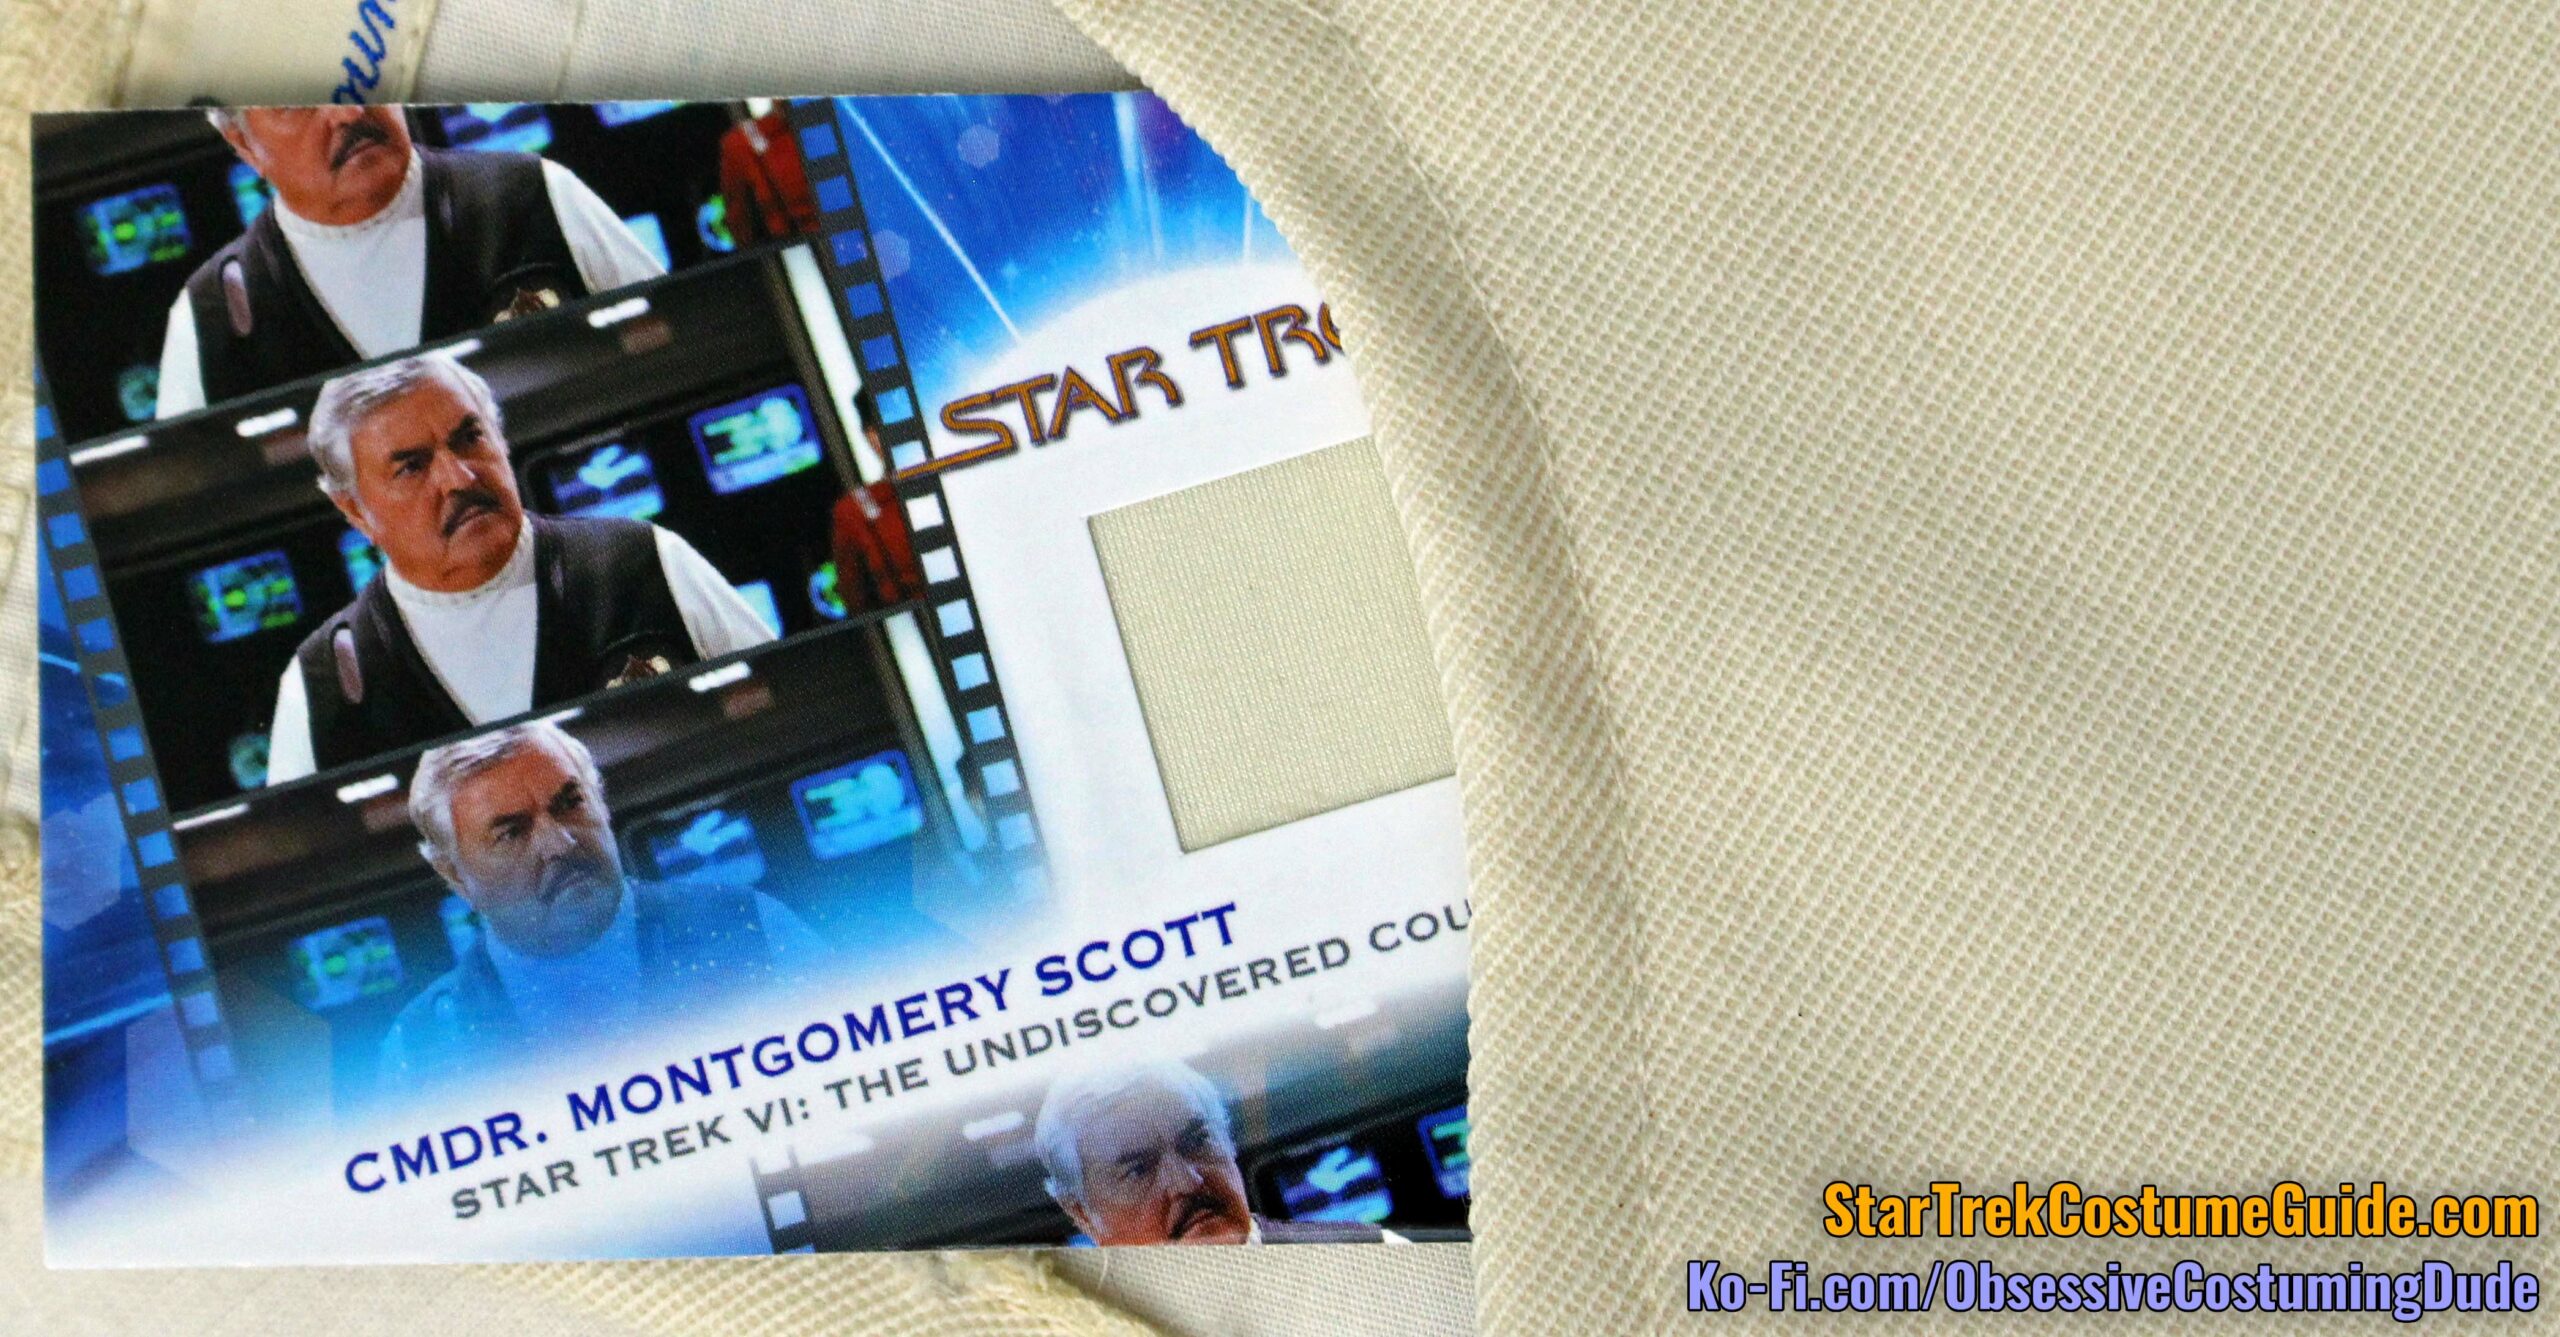
Just for kicks, here’s a swatch of Scotty’s “white” division shirt fabric from Star Trek VI with the radiation suit, again pictured with and without flash:
With flash
No flash
As you can see, the division shirt fabric is slightly lighter and greener, whereas the jumpsuit is slightly darker and … creamier?
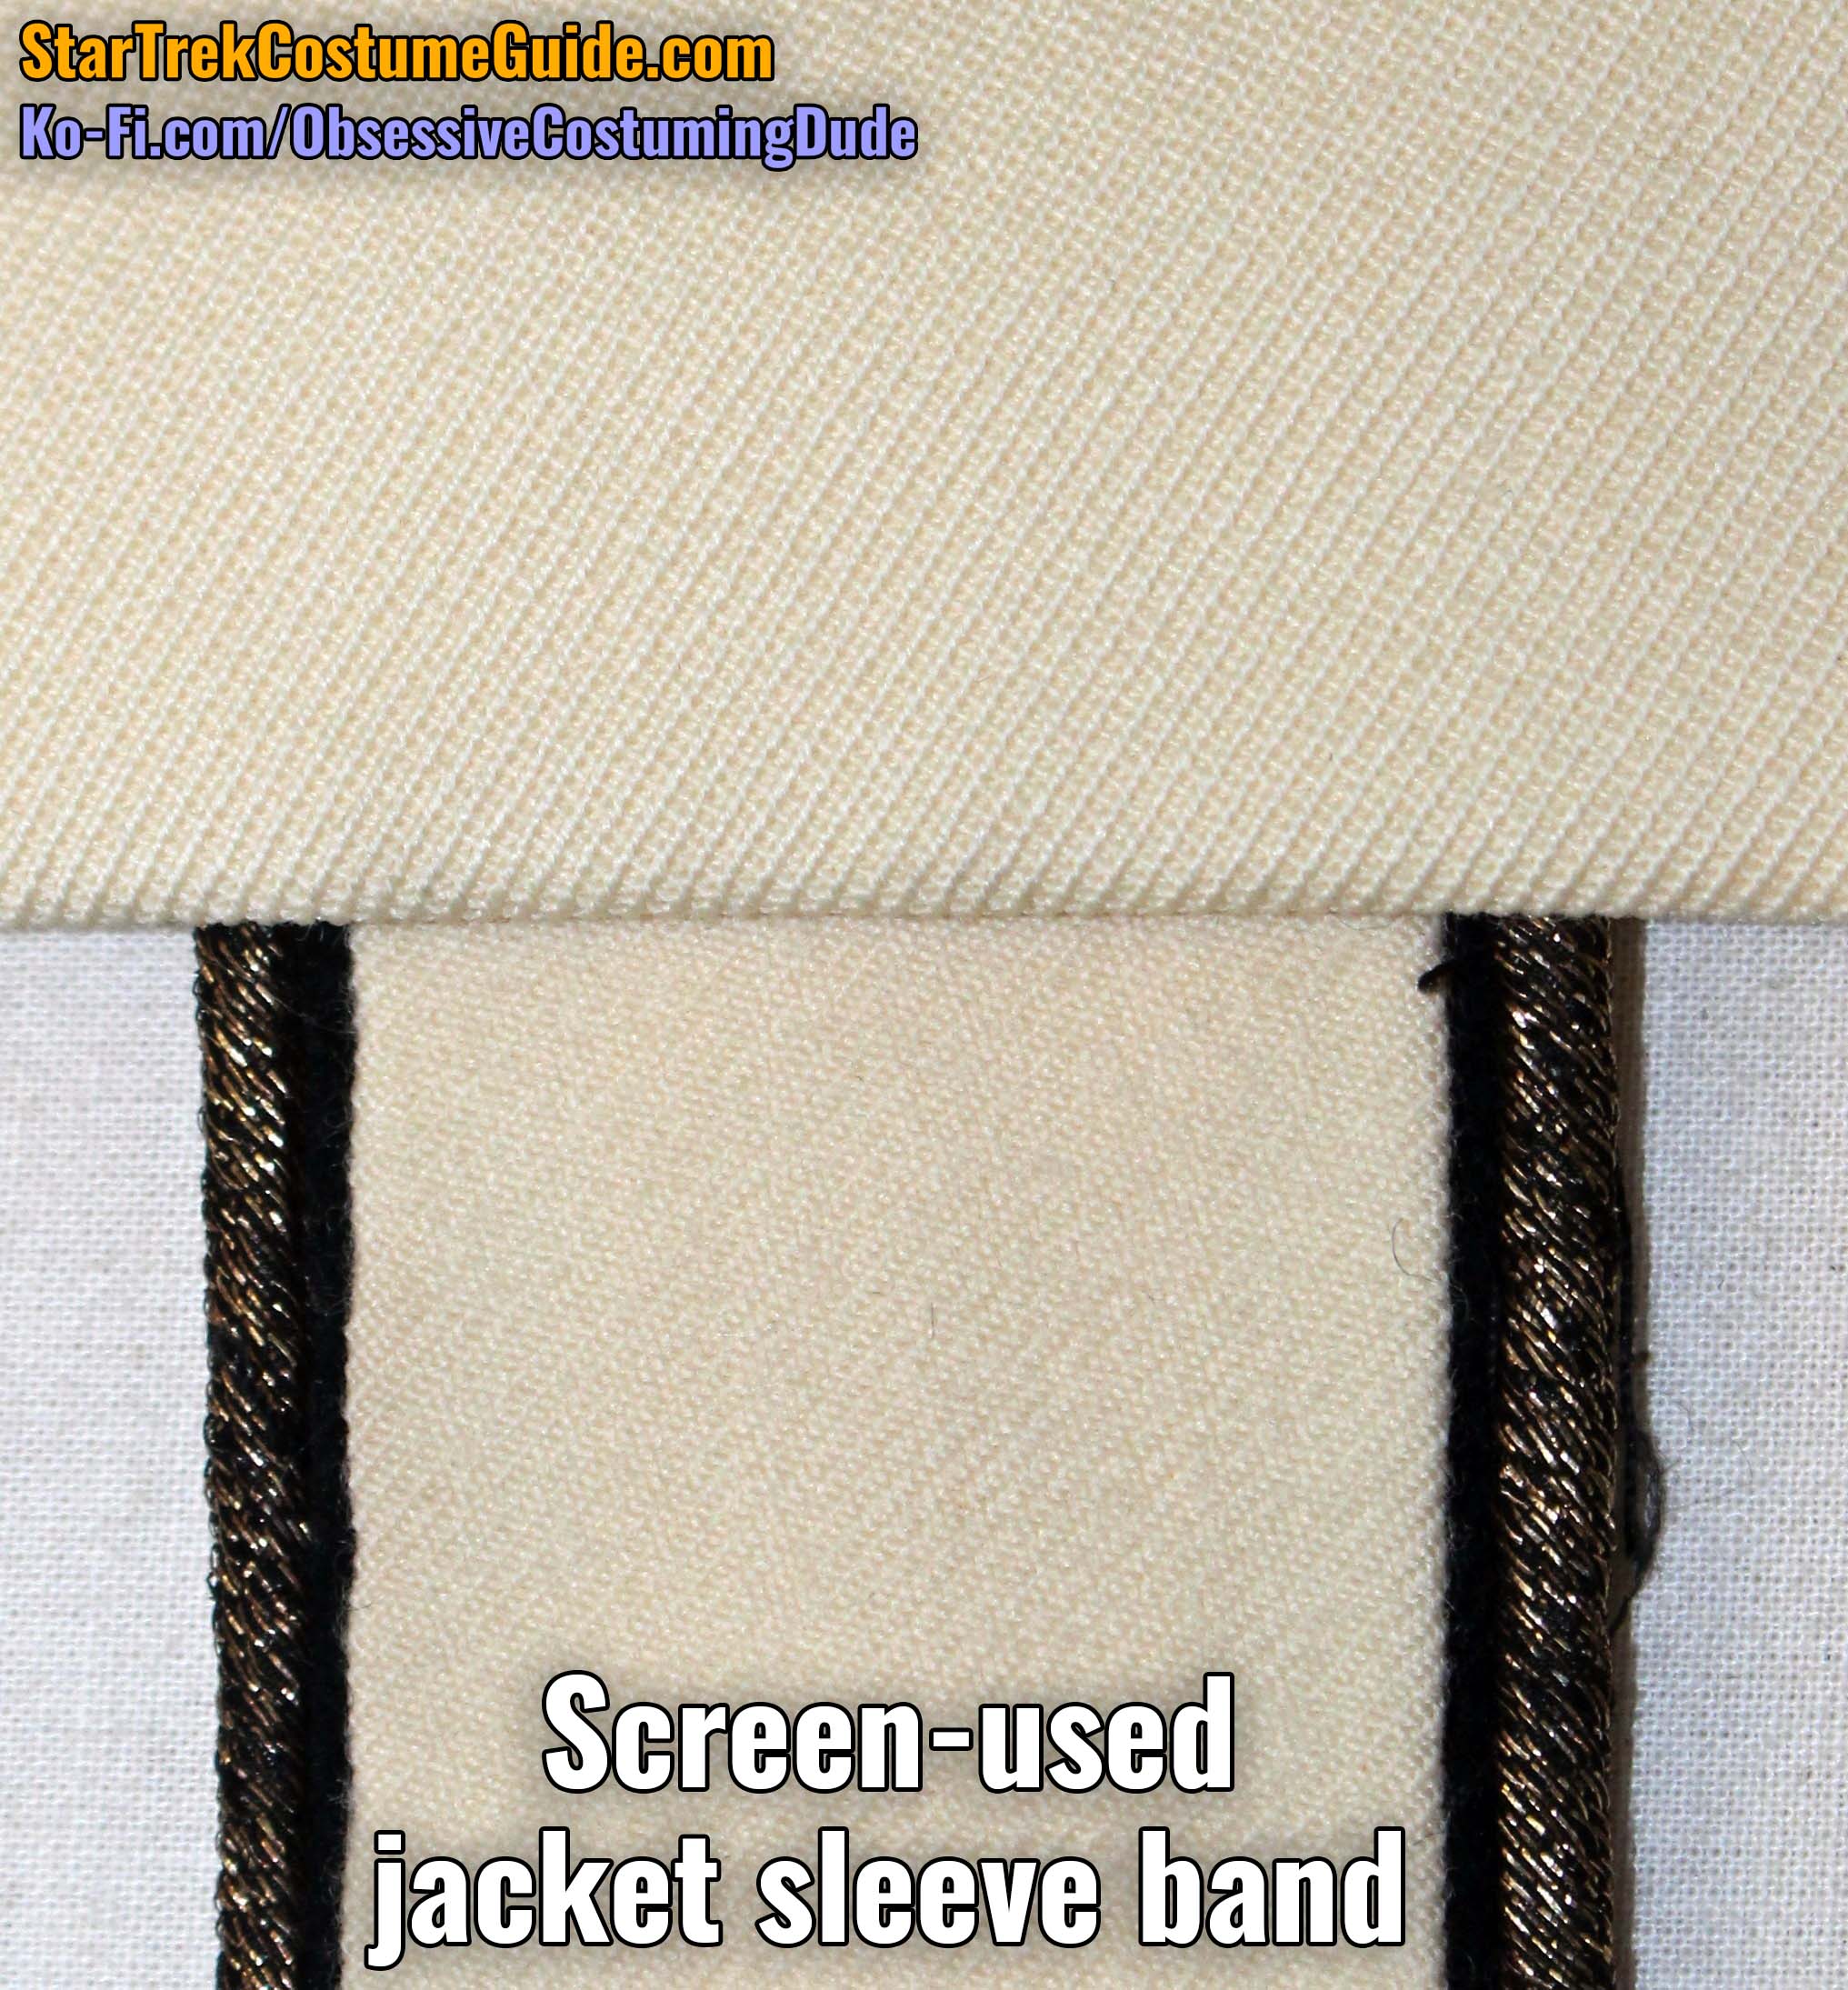
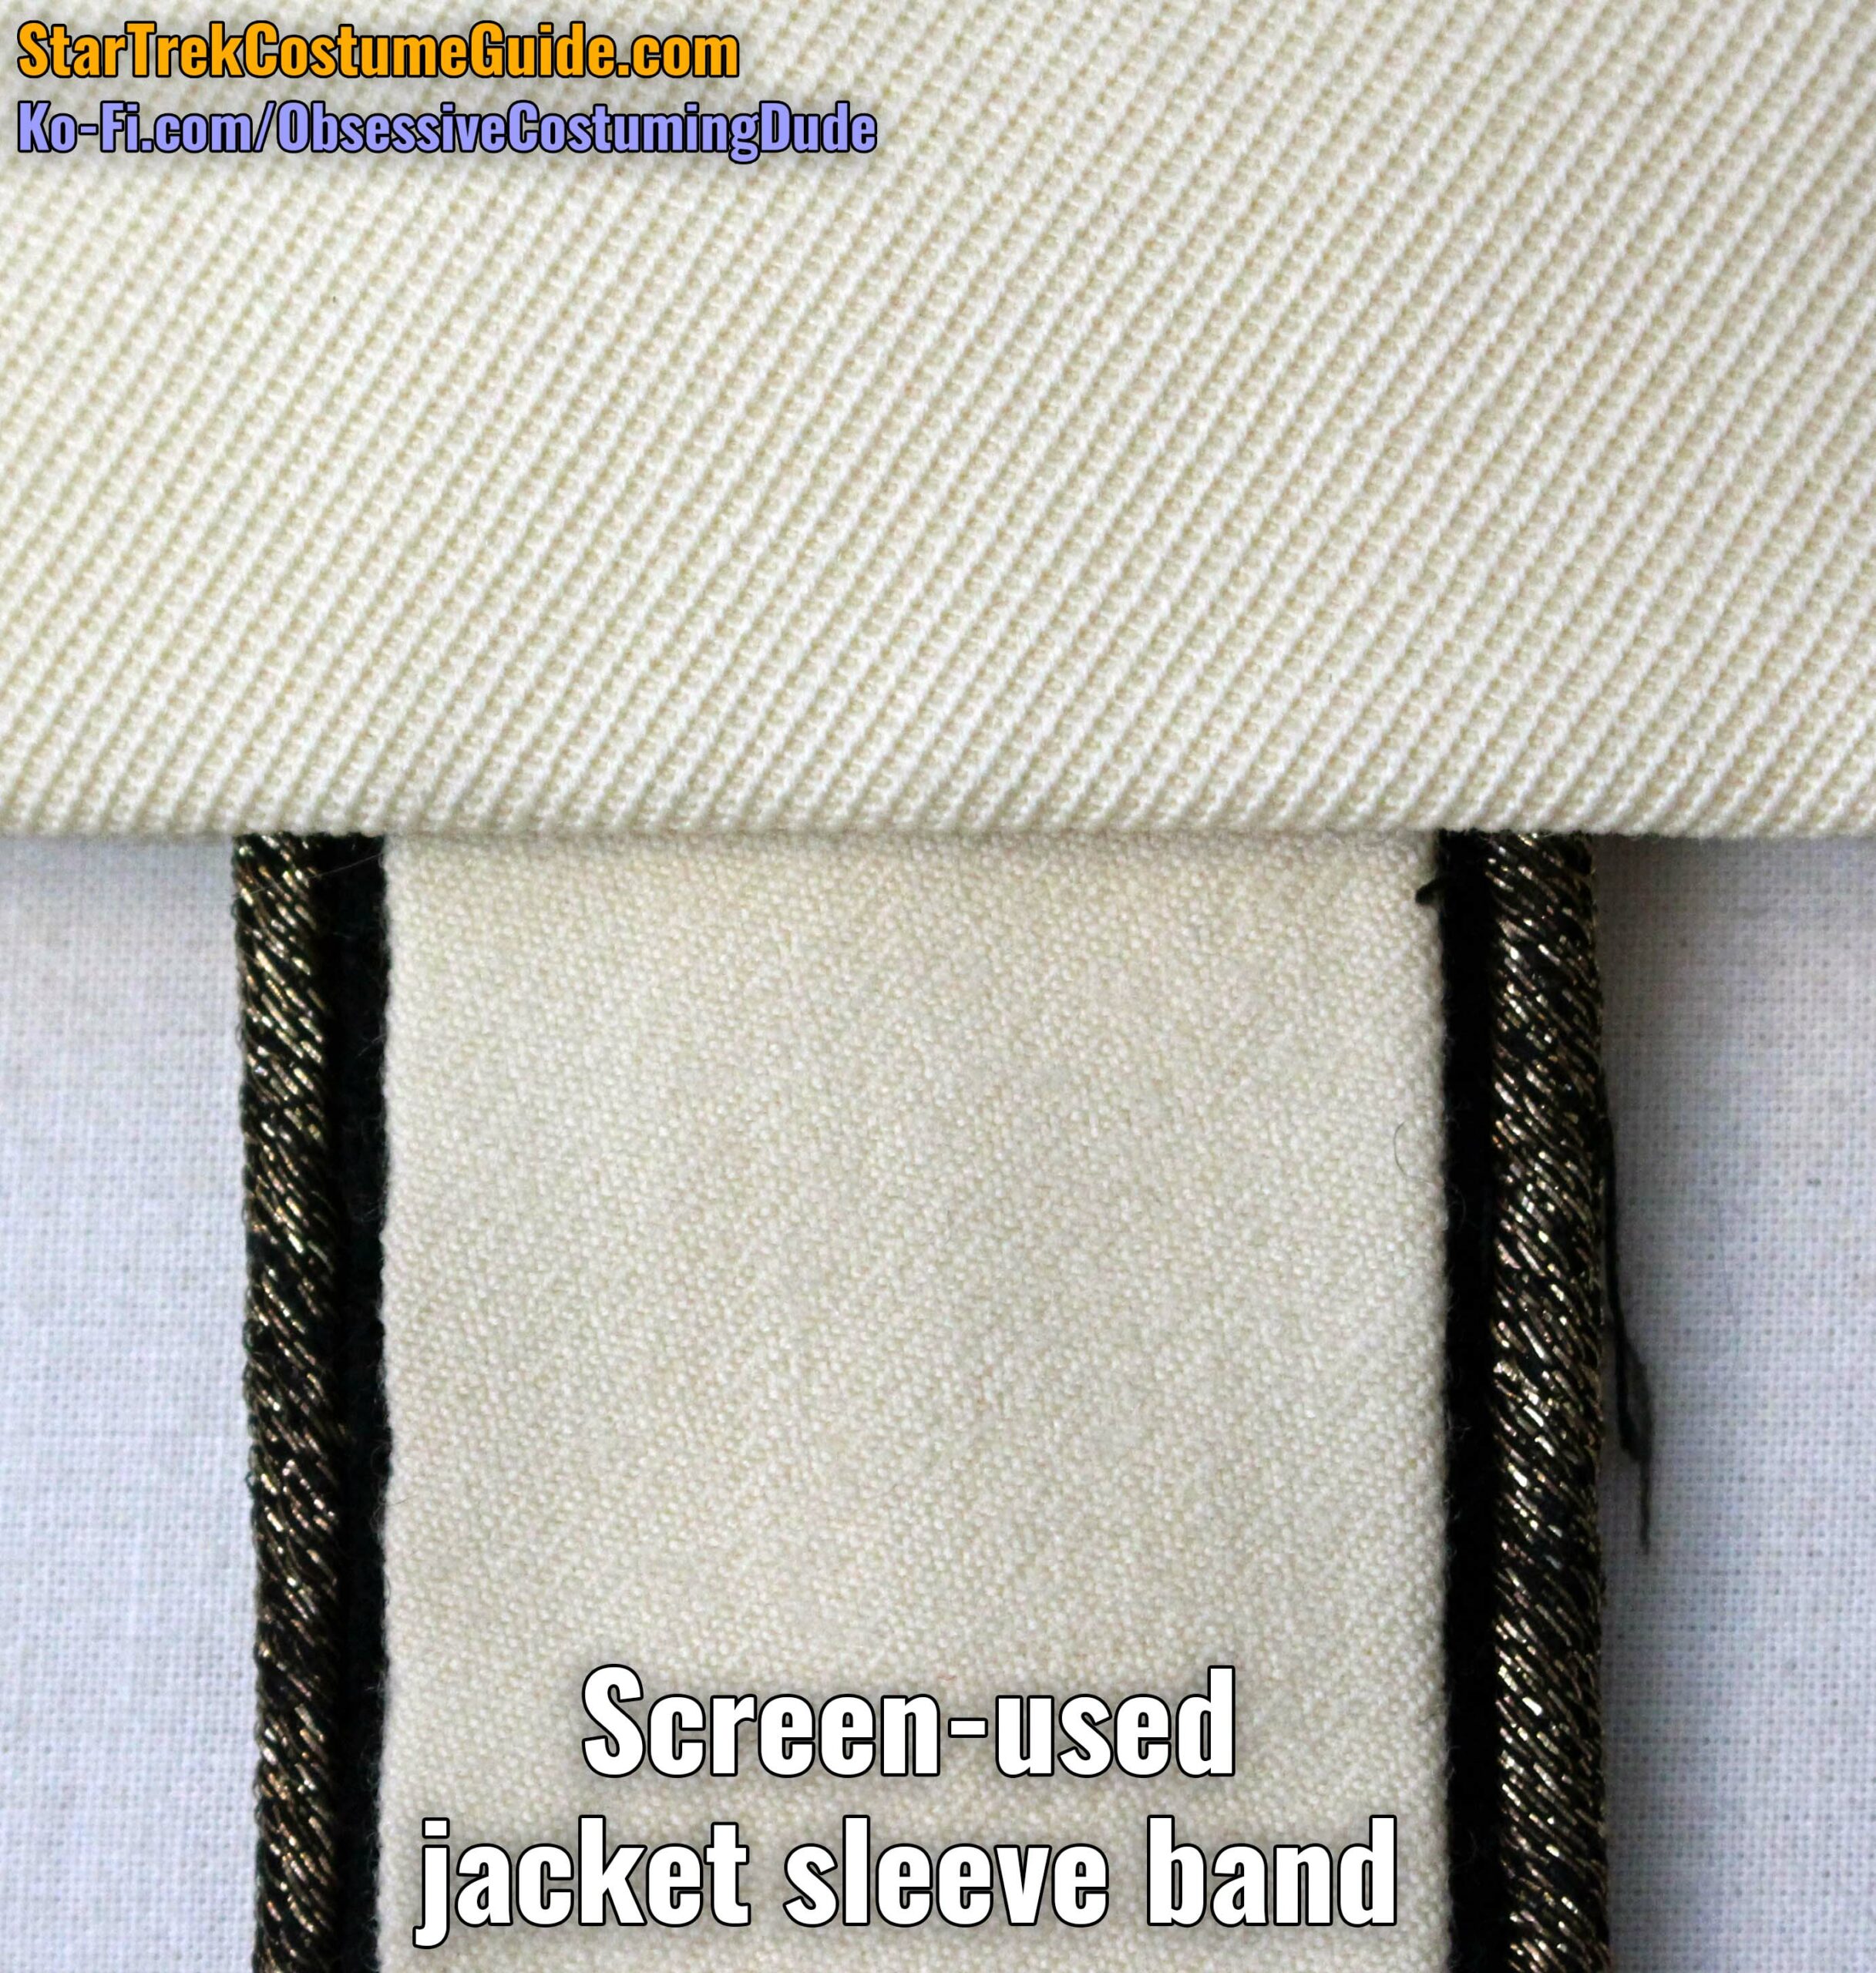
Here’s another fabric comparison – this time with a screen-used “monster maroon” jacket sleeve band, courtesy of Steve Barnes:
With flash
No flash
The colors are very close, and you can see the obvious difference in wool gabardine weaves (with the jacket sleeve band being the higher-end “superfine” gabardine).
Special thanks to Steve for the opportunity to do this fabric comparison, as well as couple others later in this post. 🙂
After documenting the color as best I could, I grabbed my measuring tape and began the process of documenting the jacket’s dimensions and construction, generally working from the top down; front, then back; outside, then inside.
However, in this case I was primarily interested in how each element of this costume was made, rather than the specific length and contour of every seam line – a departure from my usual process of documentation.
With a couple notable exceptions, it’s essentially “just” a white (well, off-white) jumpsuit with a myriad of accents and embellishments that produce the impressive final result.
The neckline was approximately 6” across at the shoulder seams, where it was widest.
The shoulder seams measured 6 ⅜” from neckline to armscye.
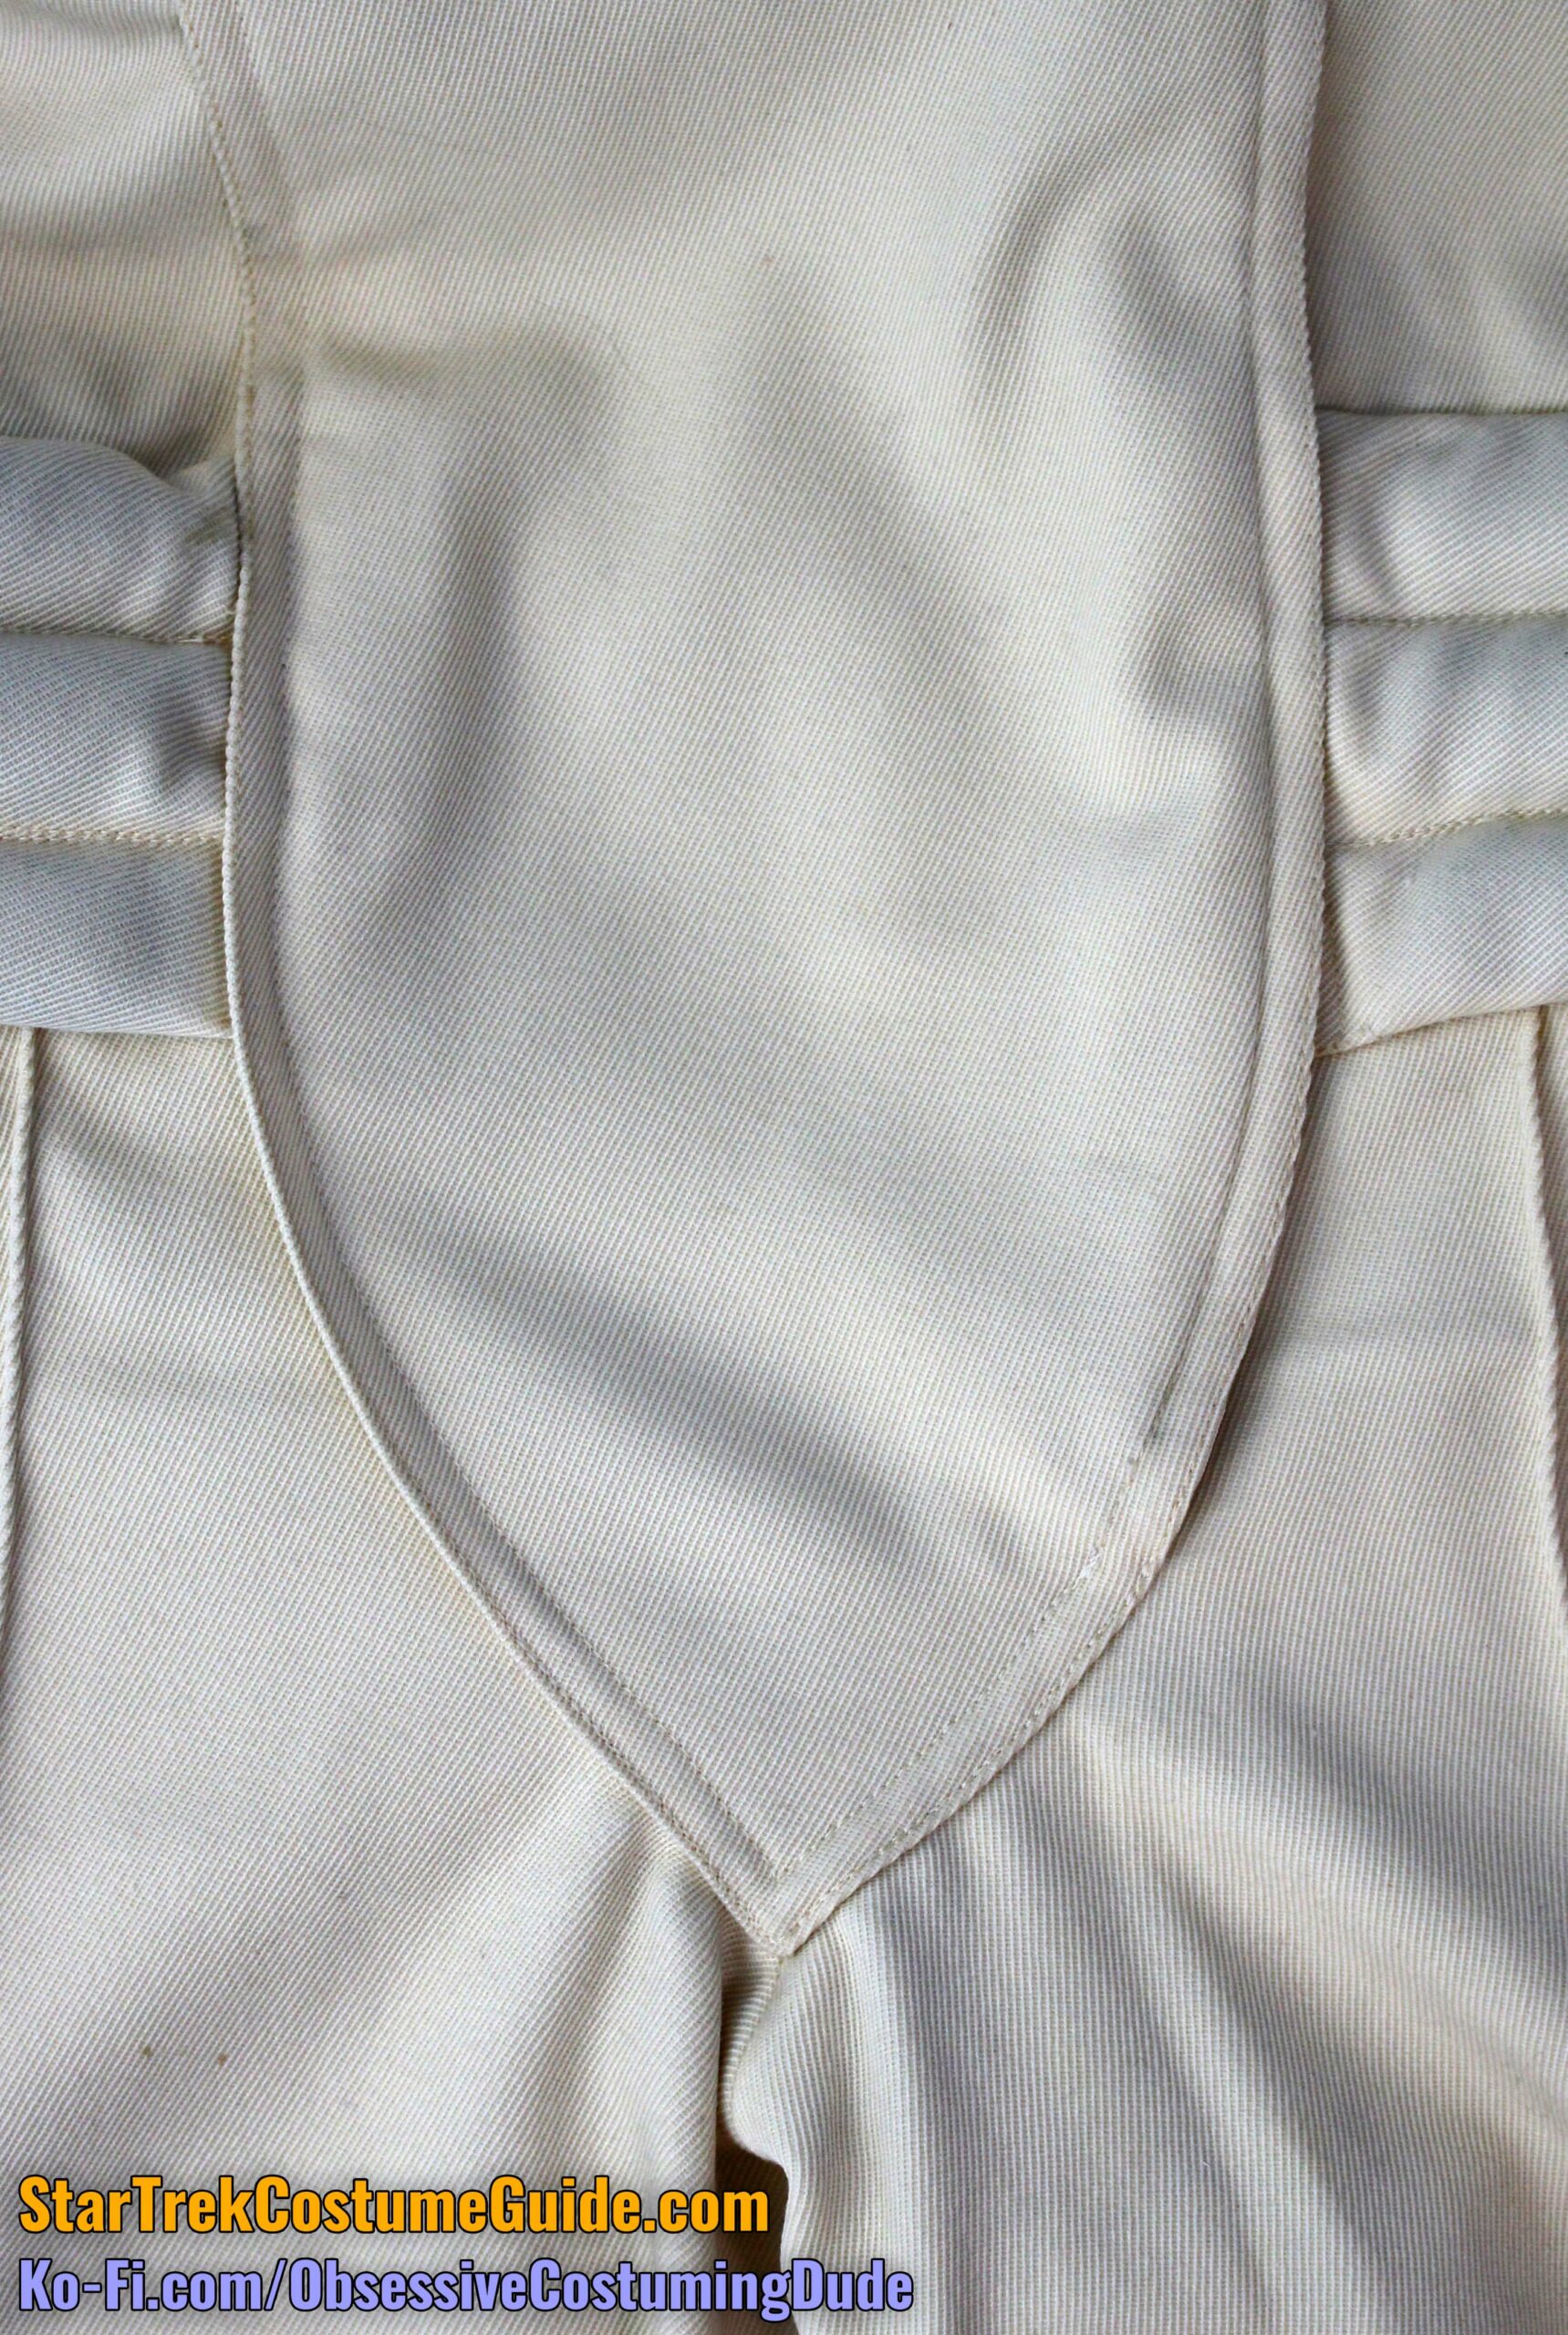
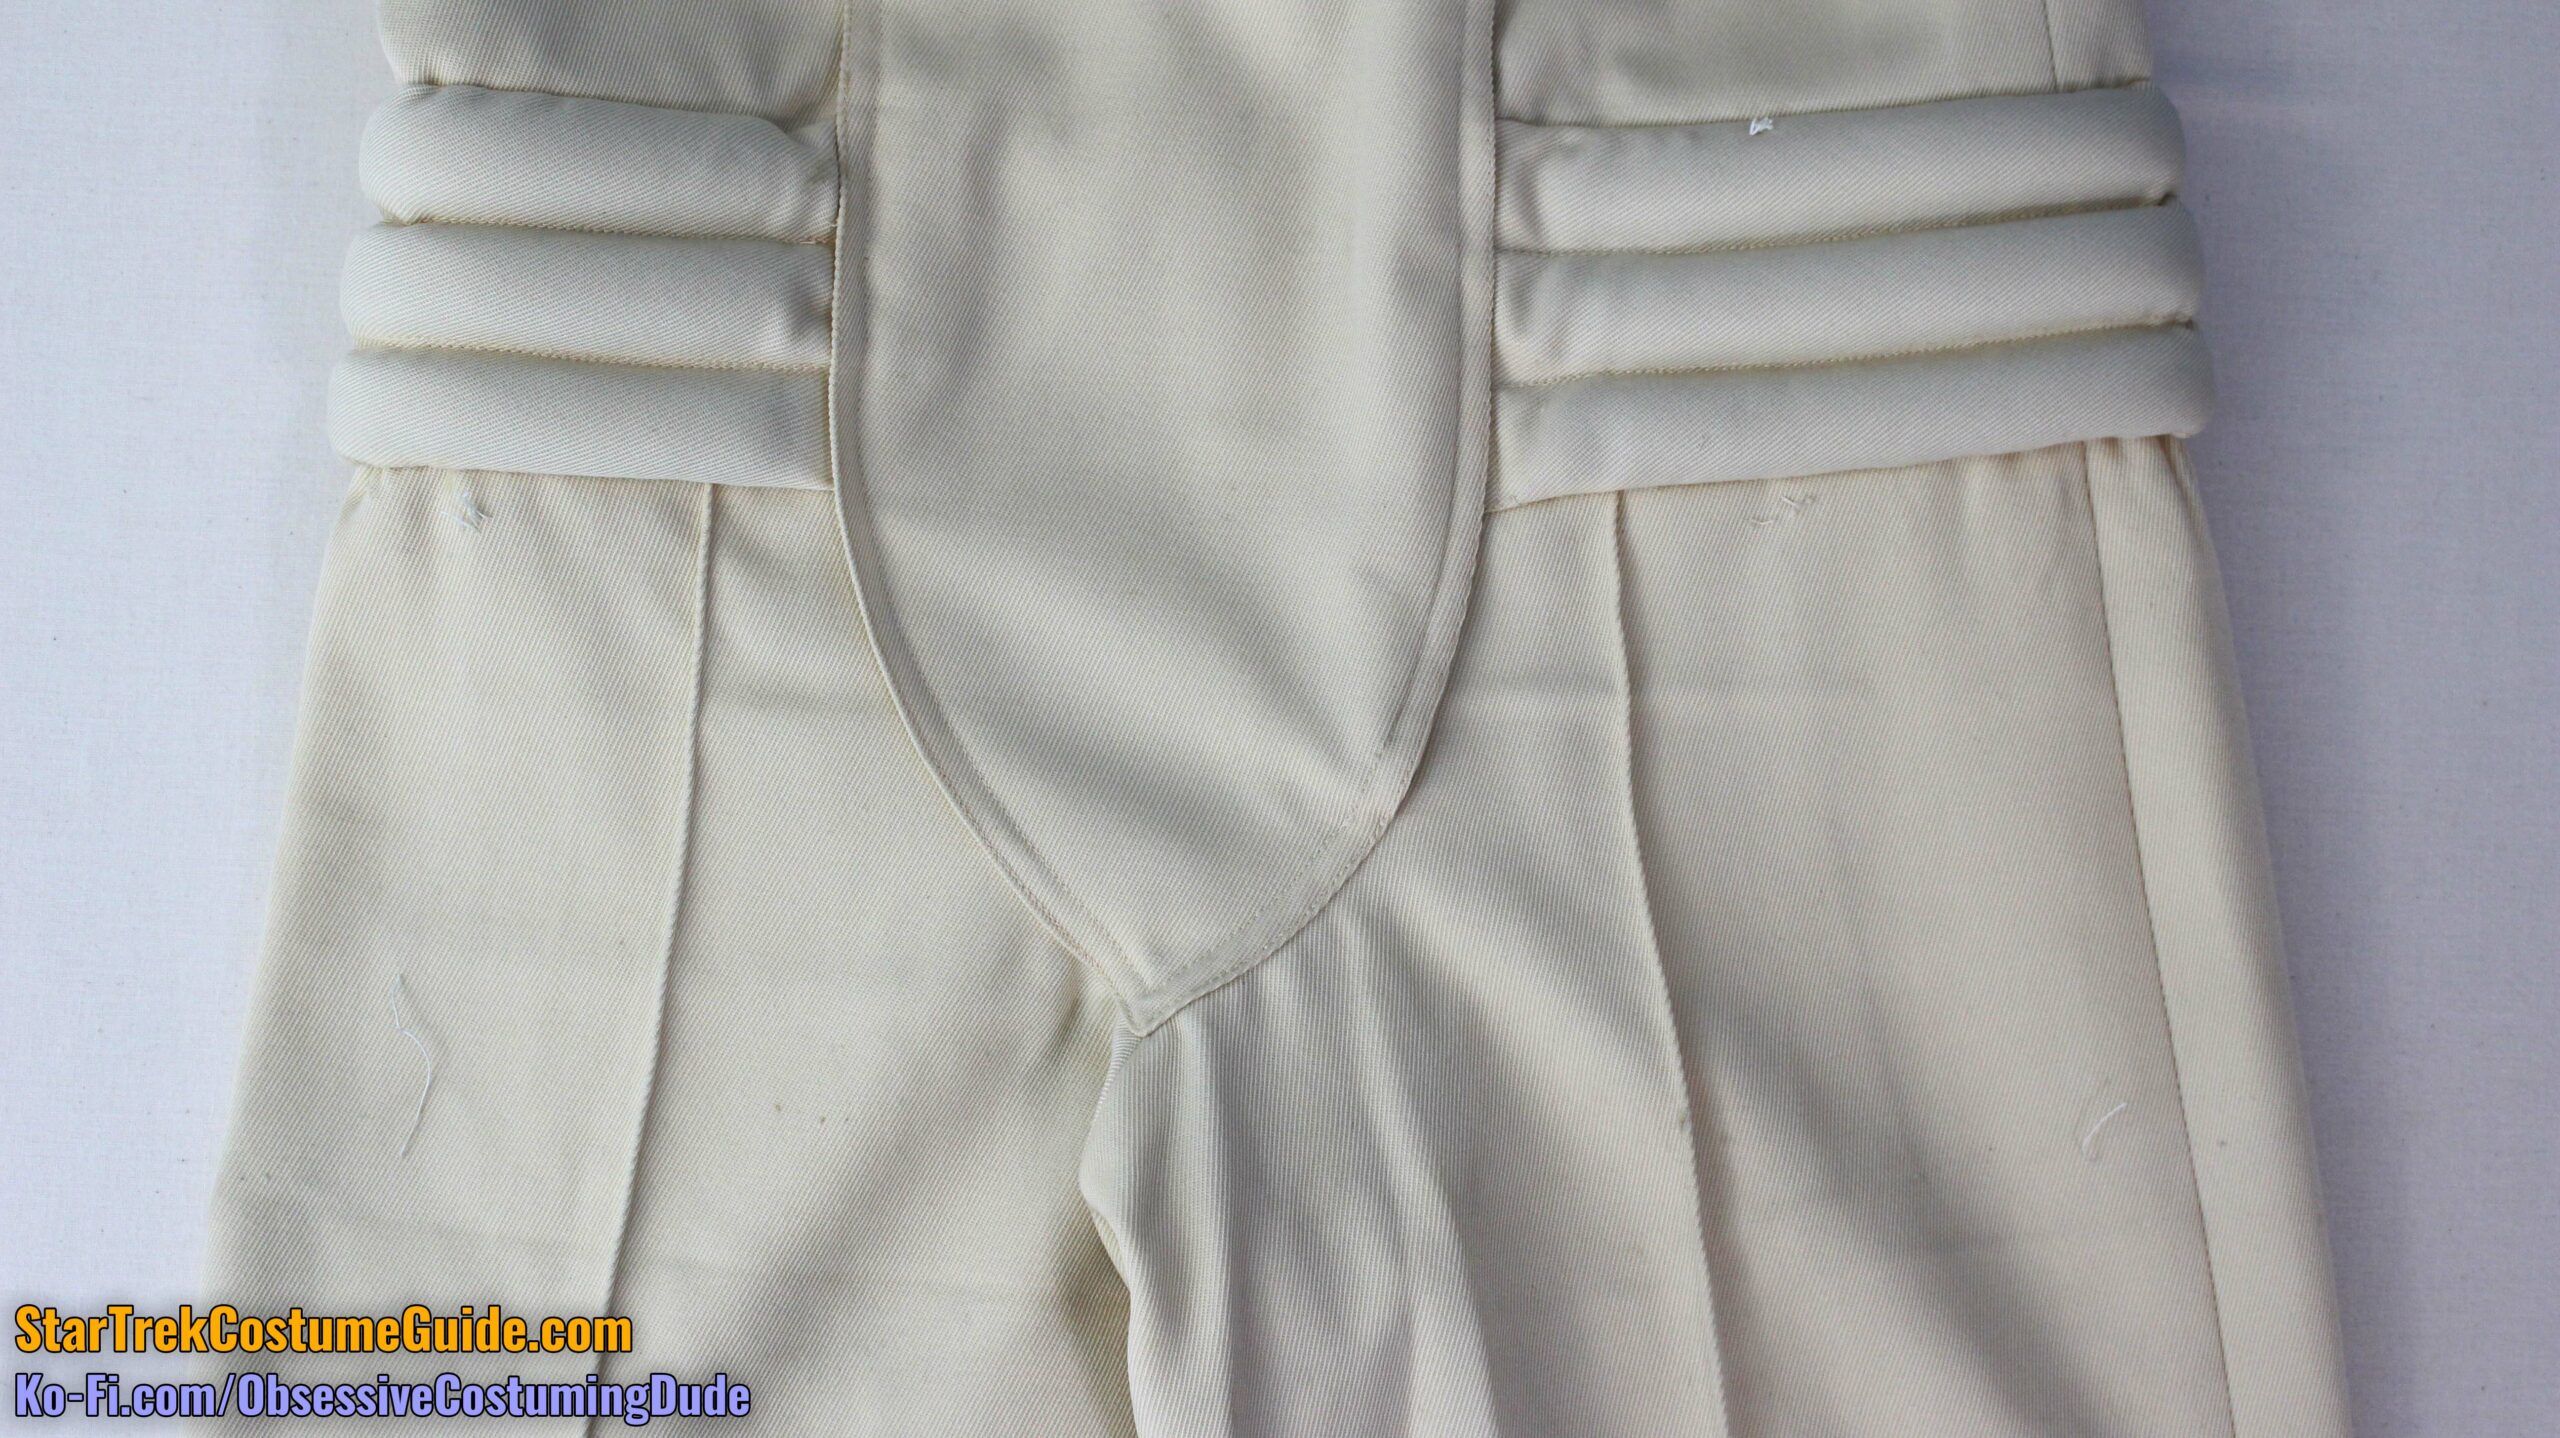
The front torso panel was patterned and cut separately, then seamed onto the jumpsuit (as opposed to being a purely decorative piece attached to an otherwise “full” bodysuit).
The upper corner of the front panel was approximately ⅜” below the edge of the neckline.
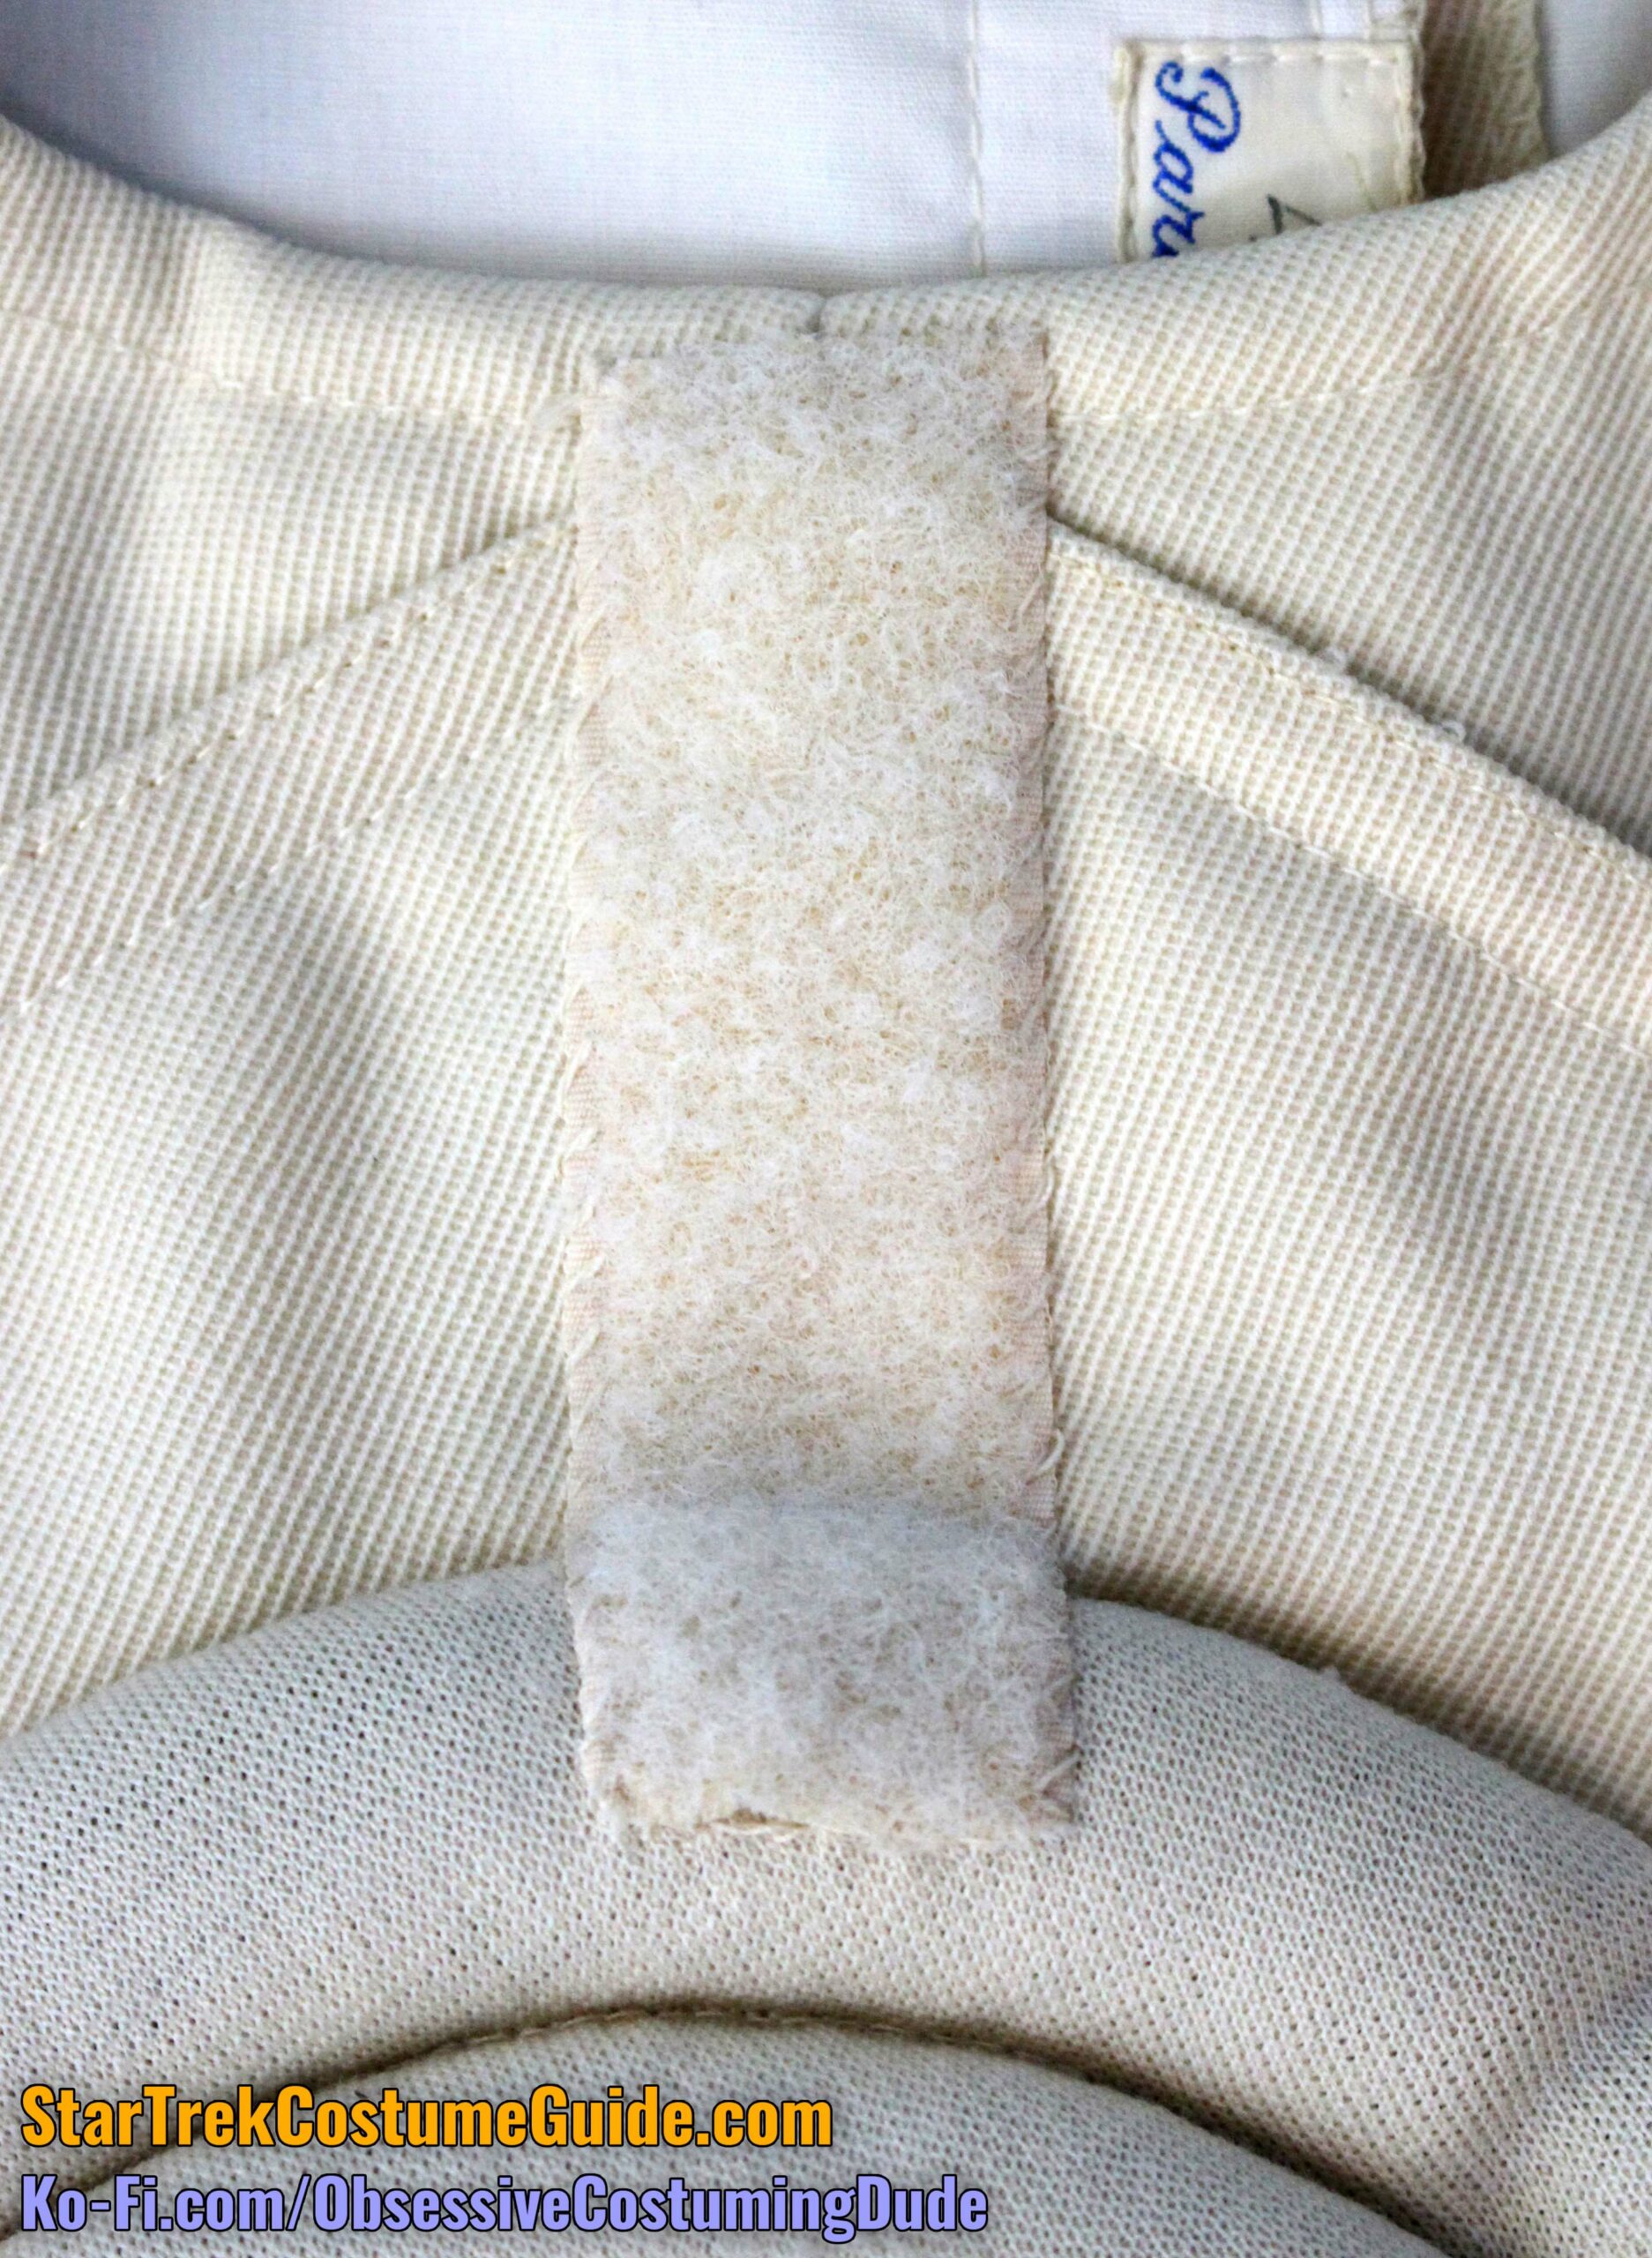
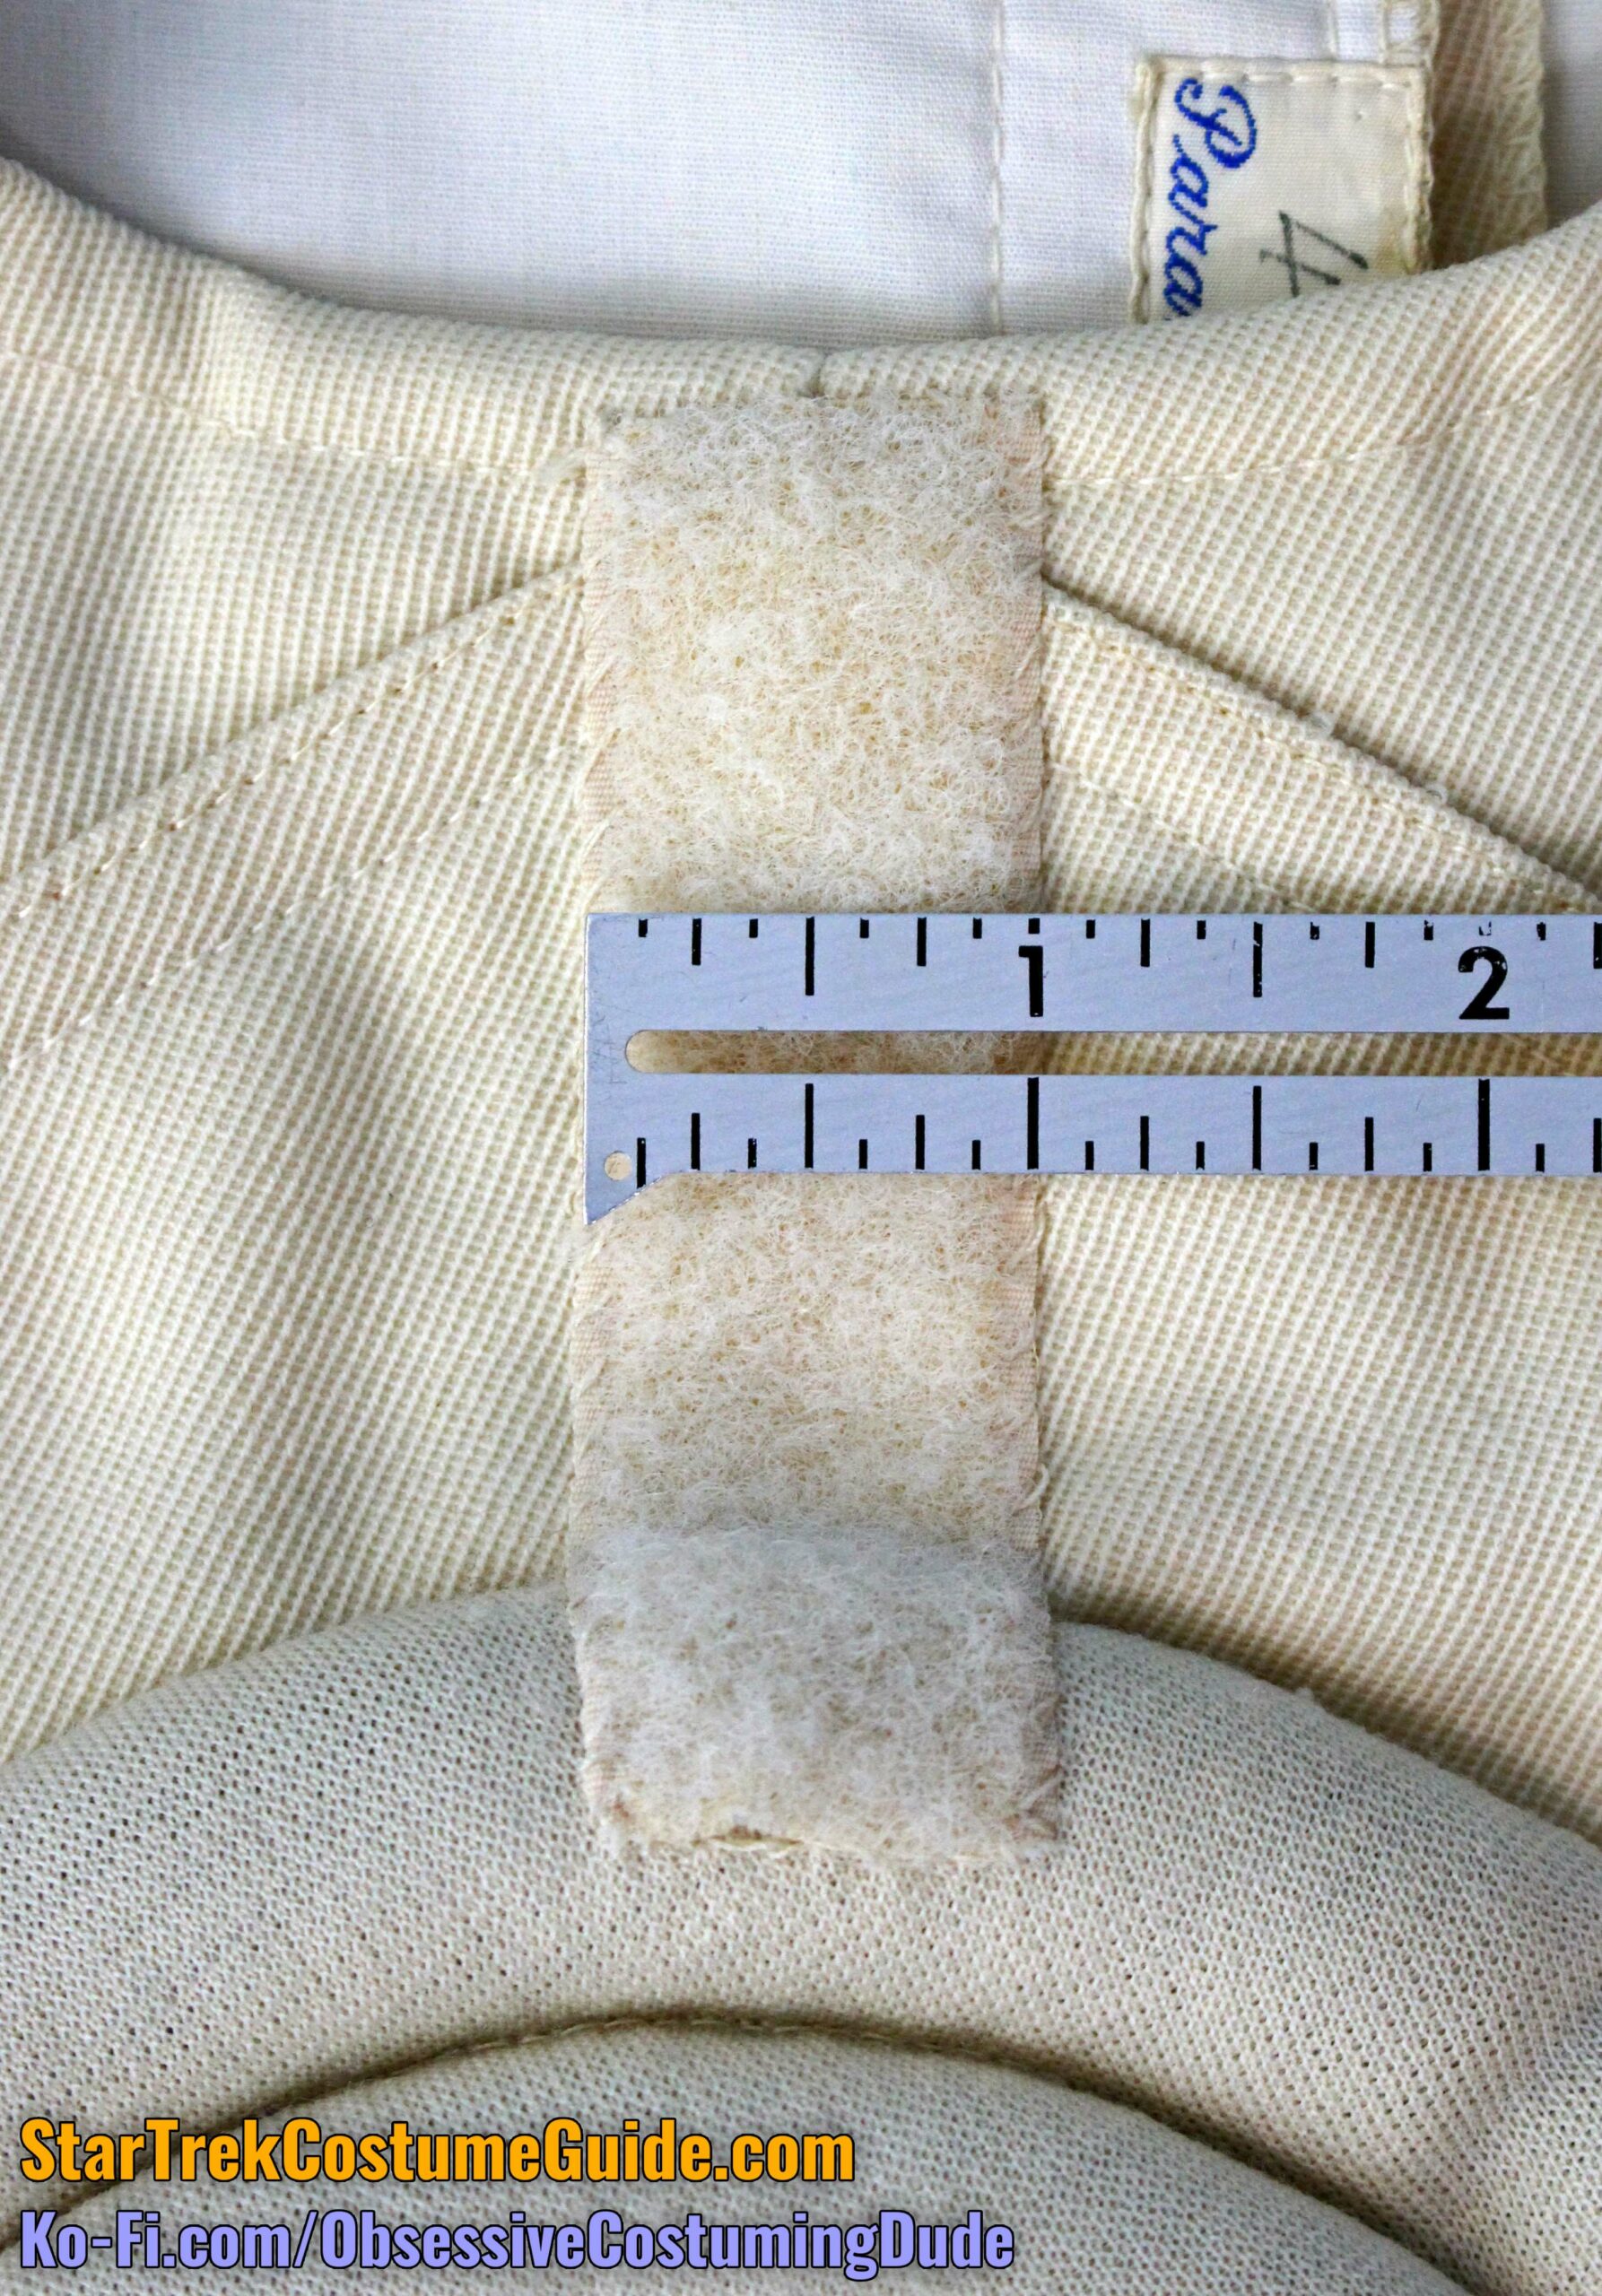
At the upper center front was a vertical strip of 1” off-white hook-and-loop tape, attached by hand, to secure the front of the collar.
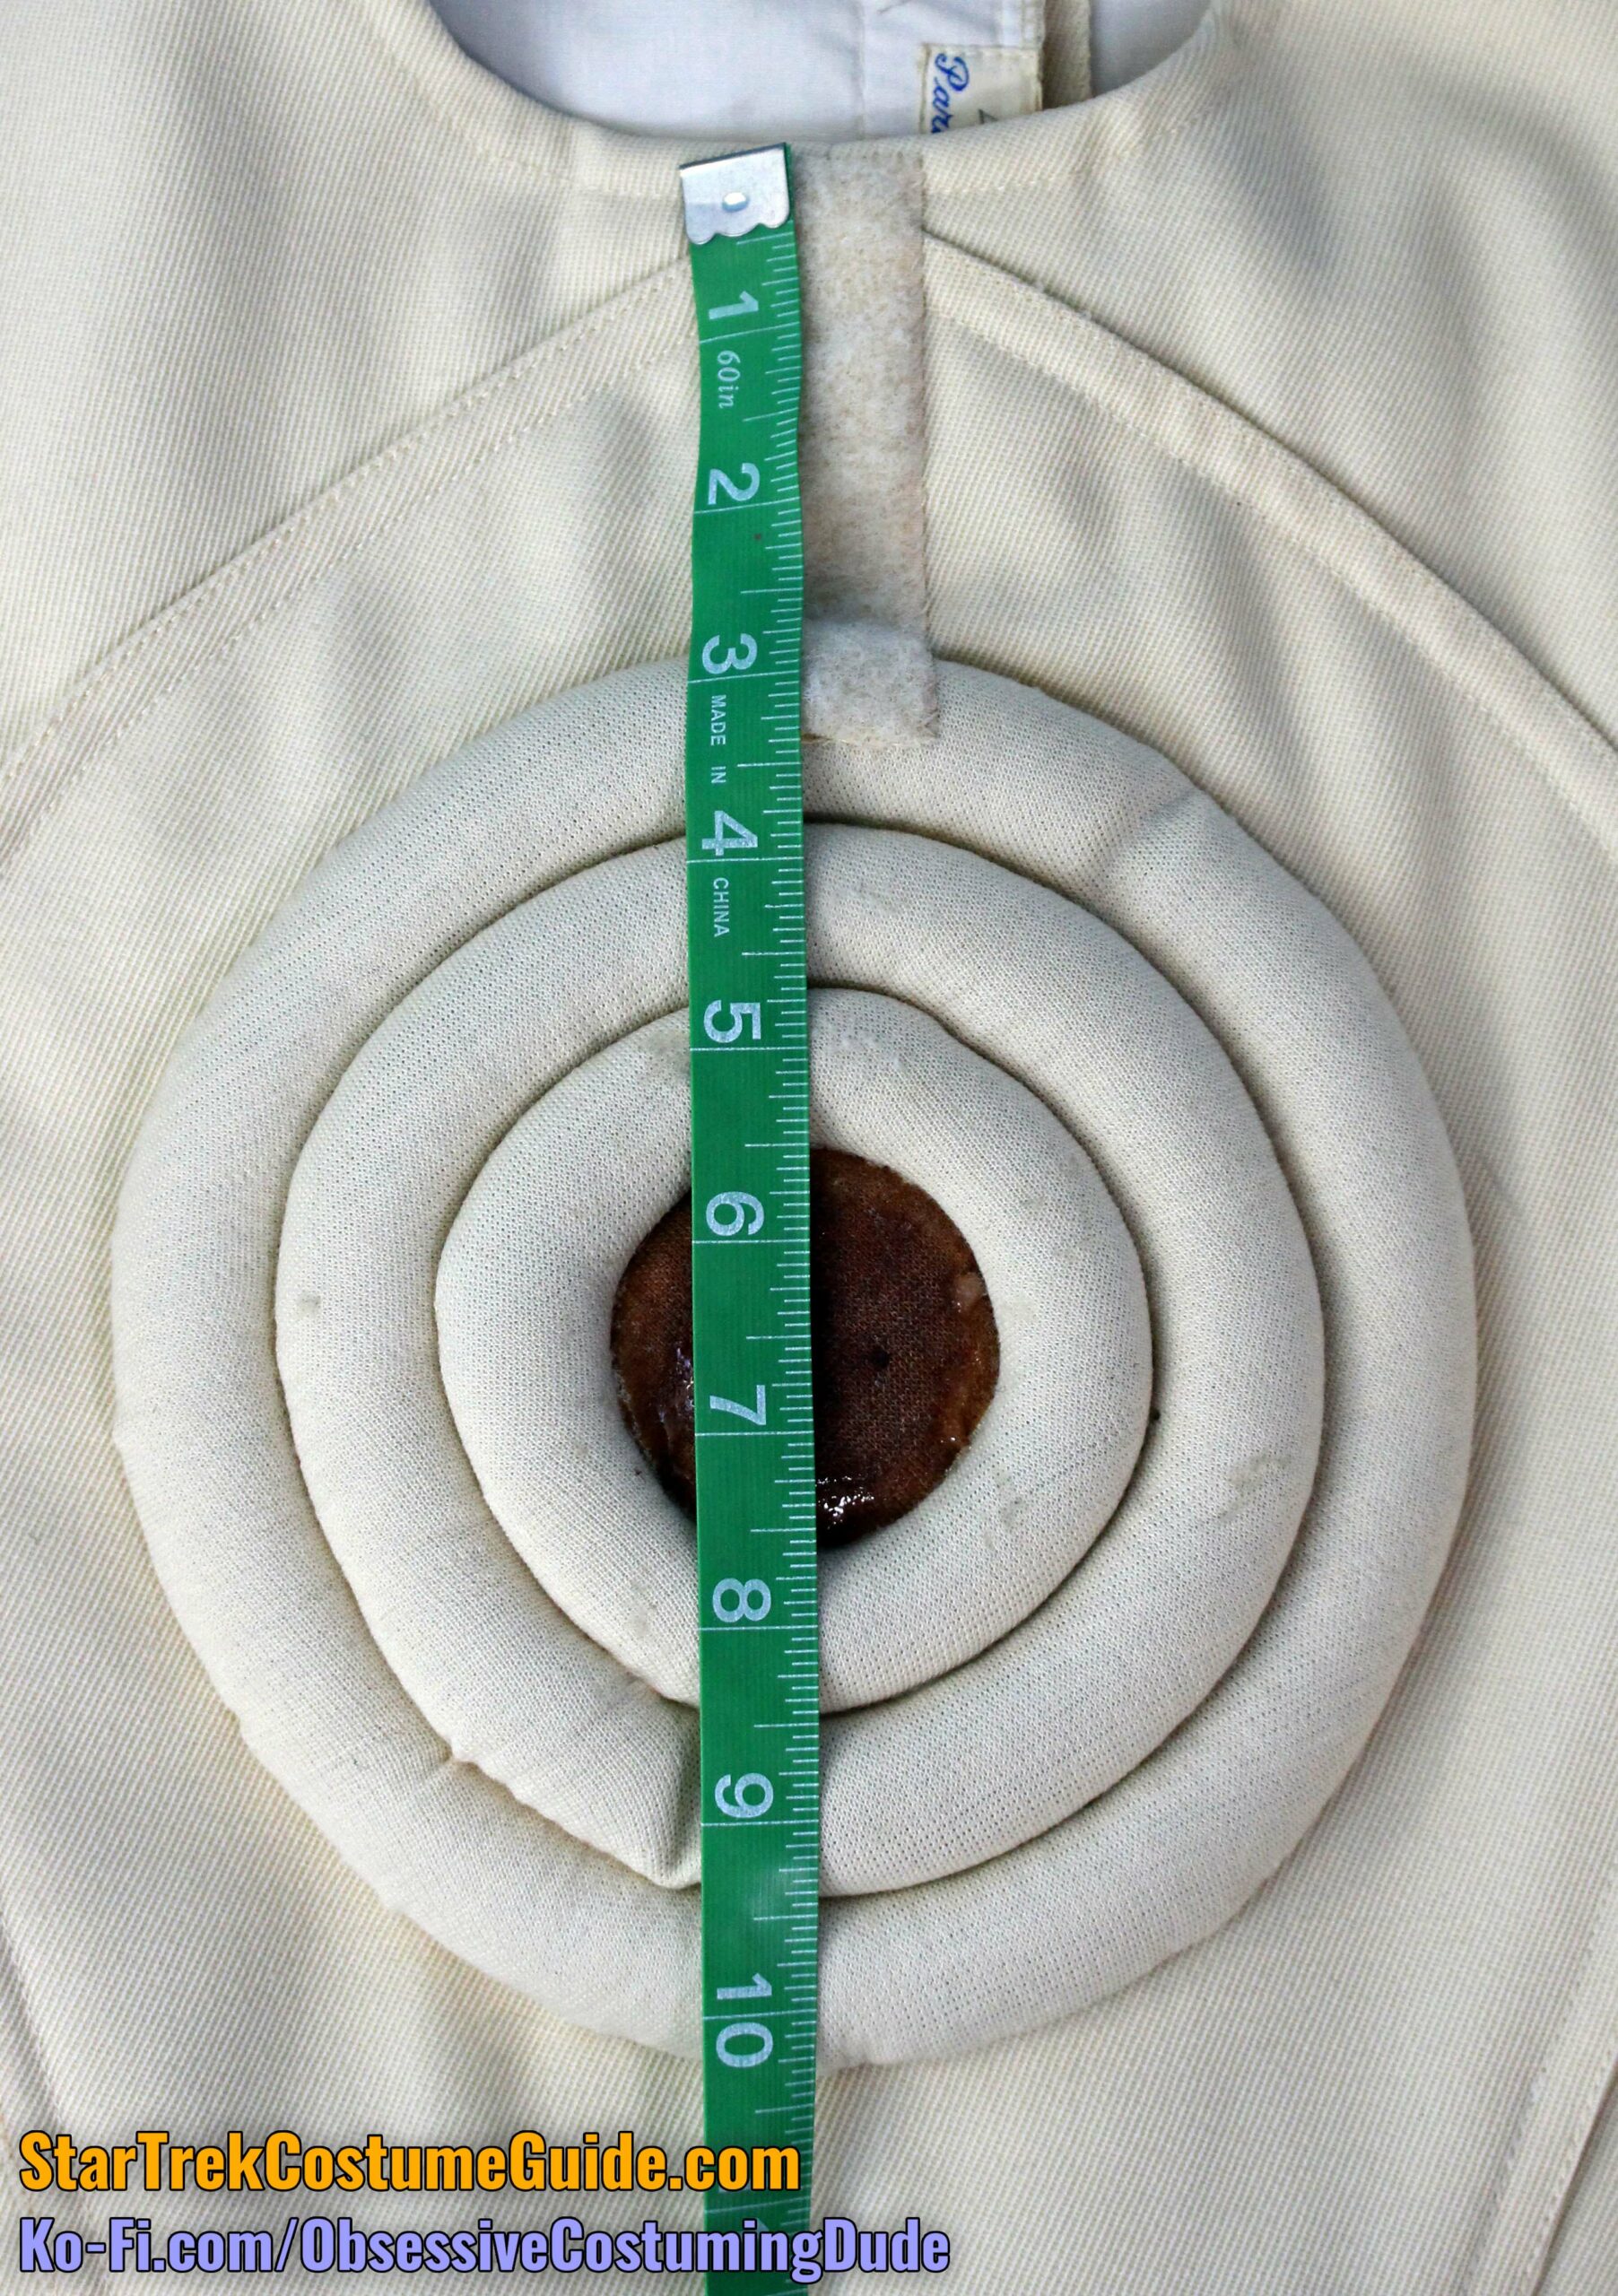
The center of the “bullseye” was approximately 6 ¾” below the neckline.
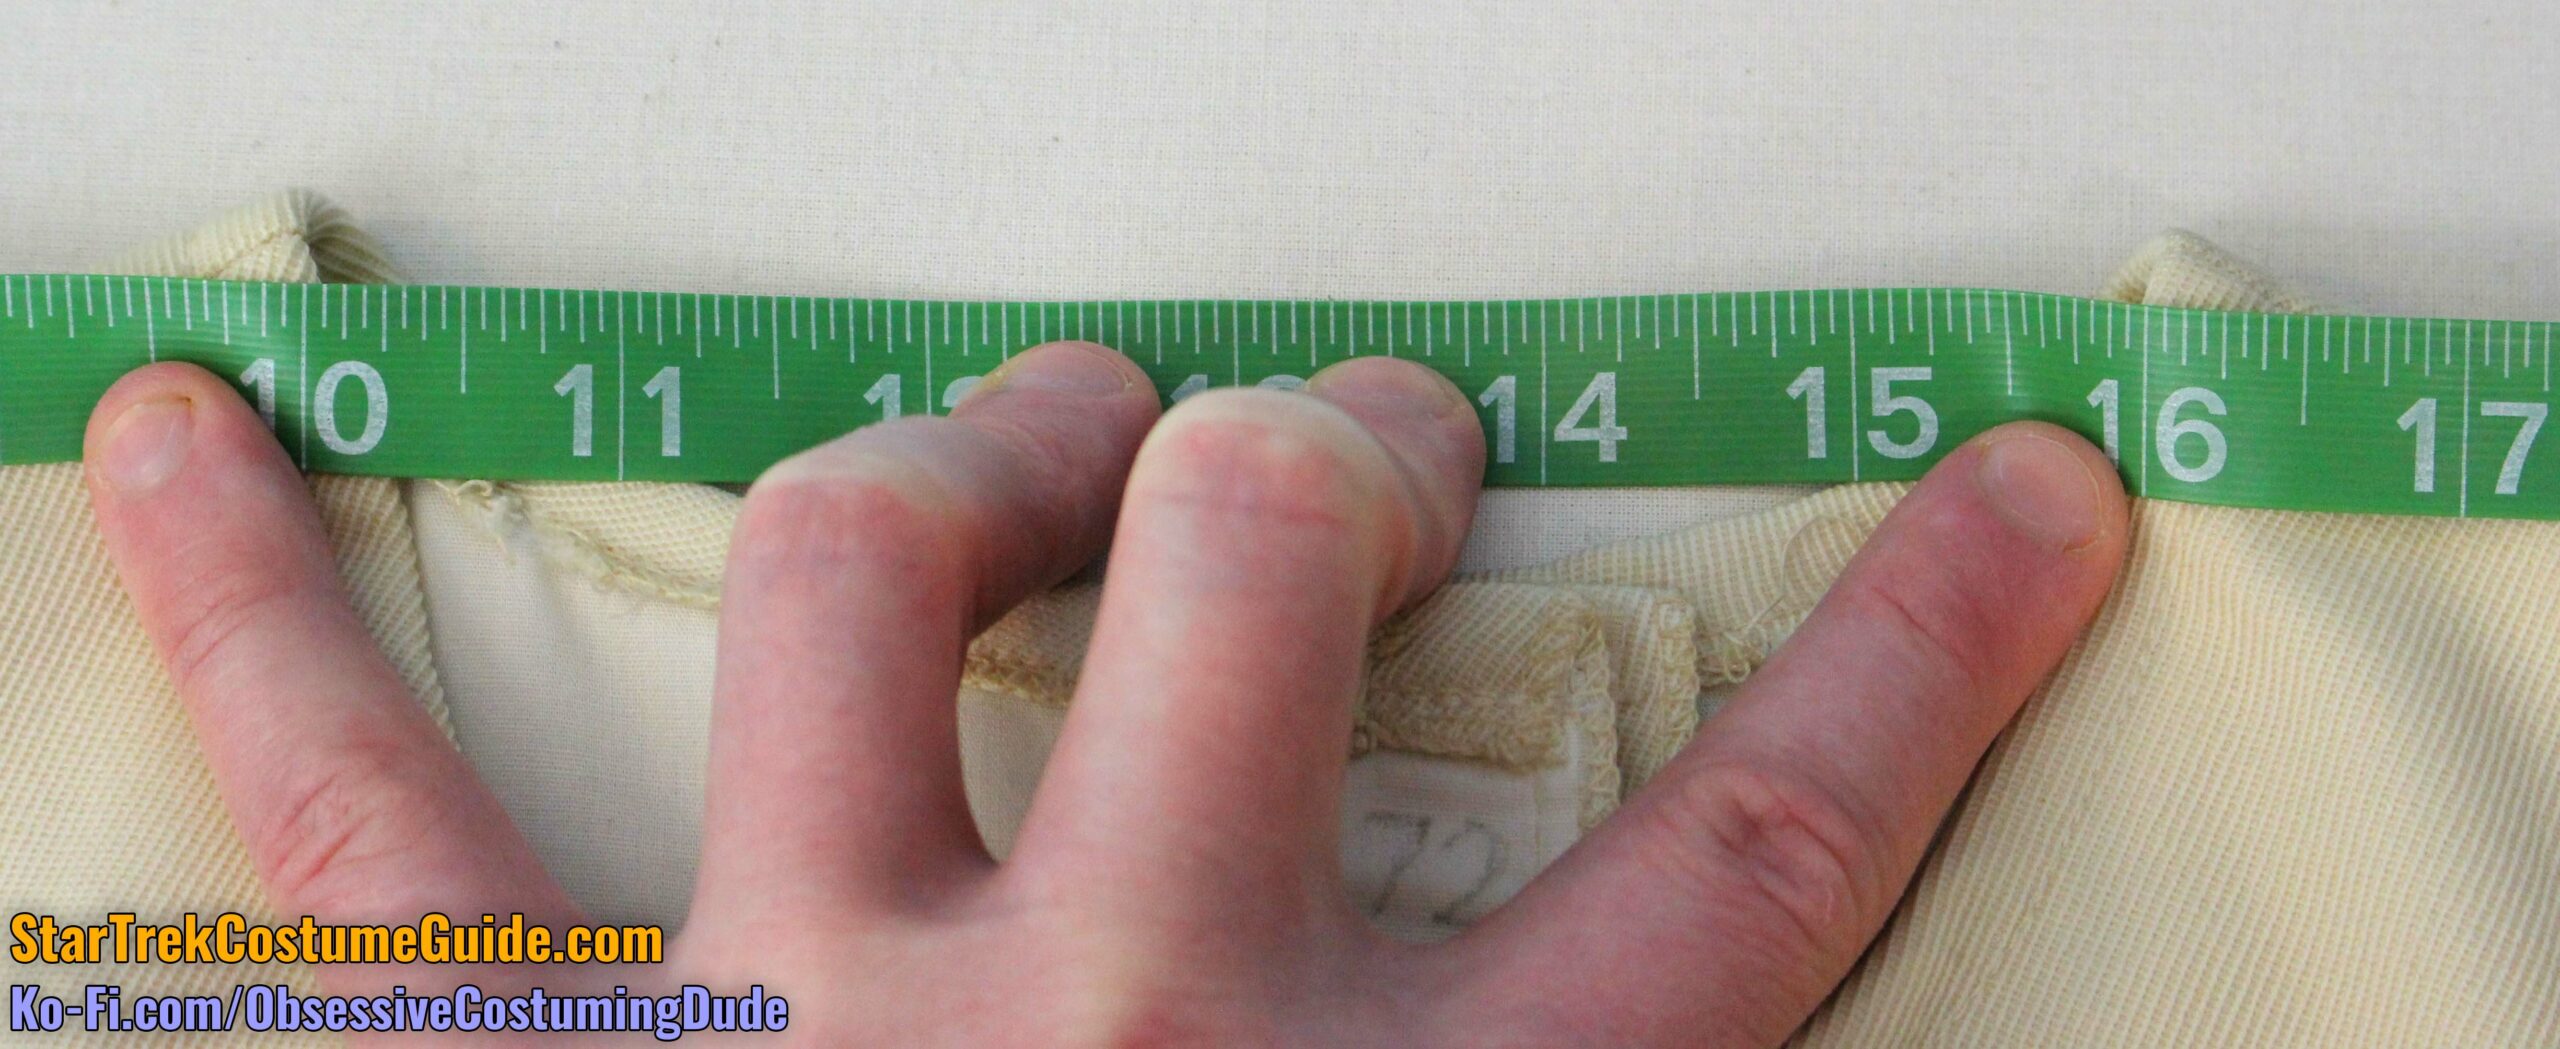
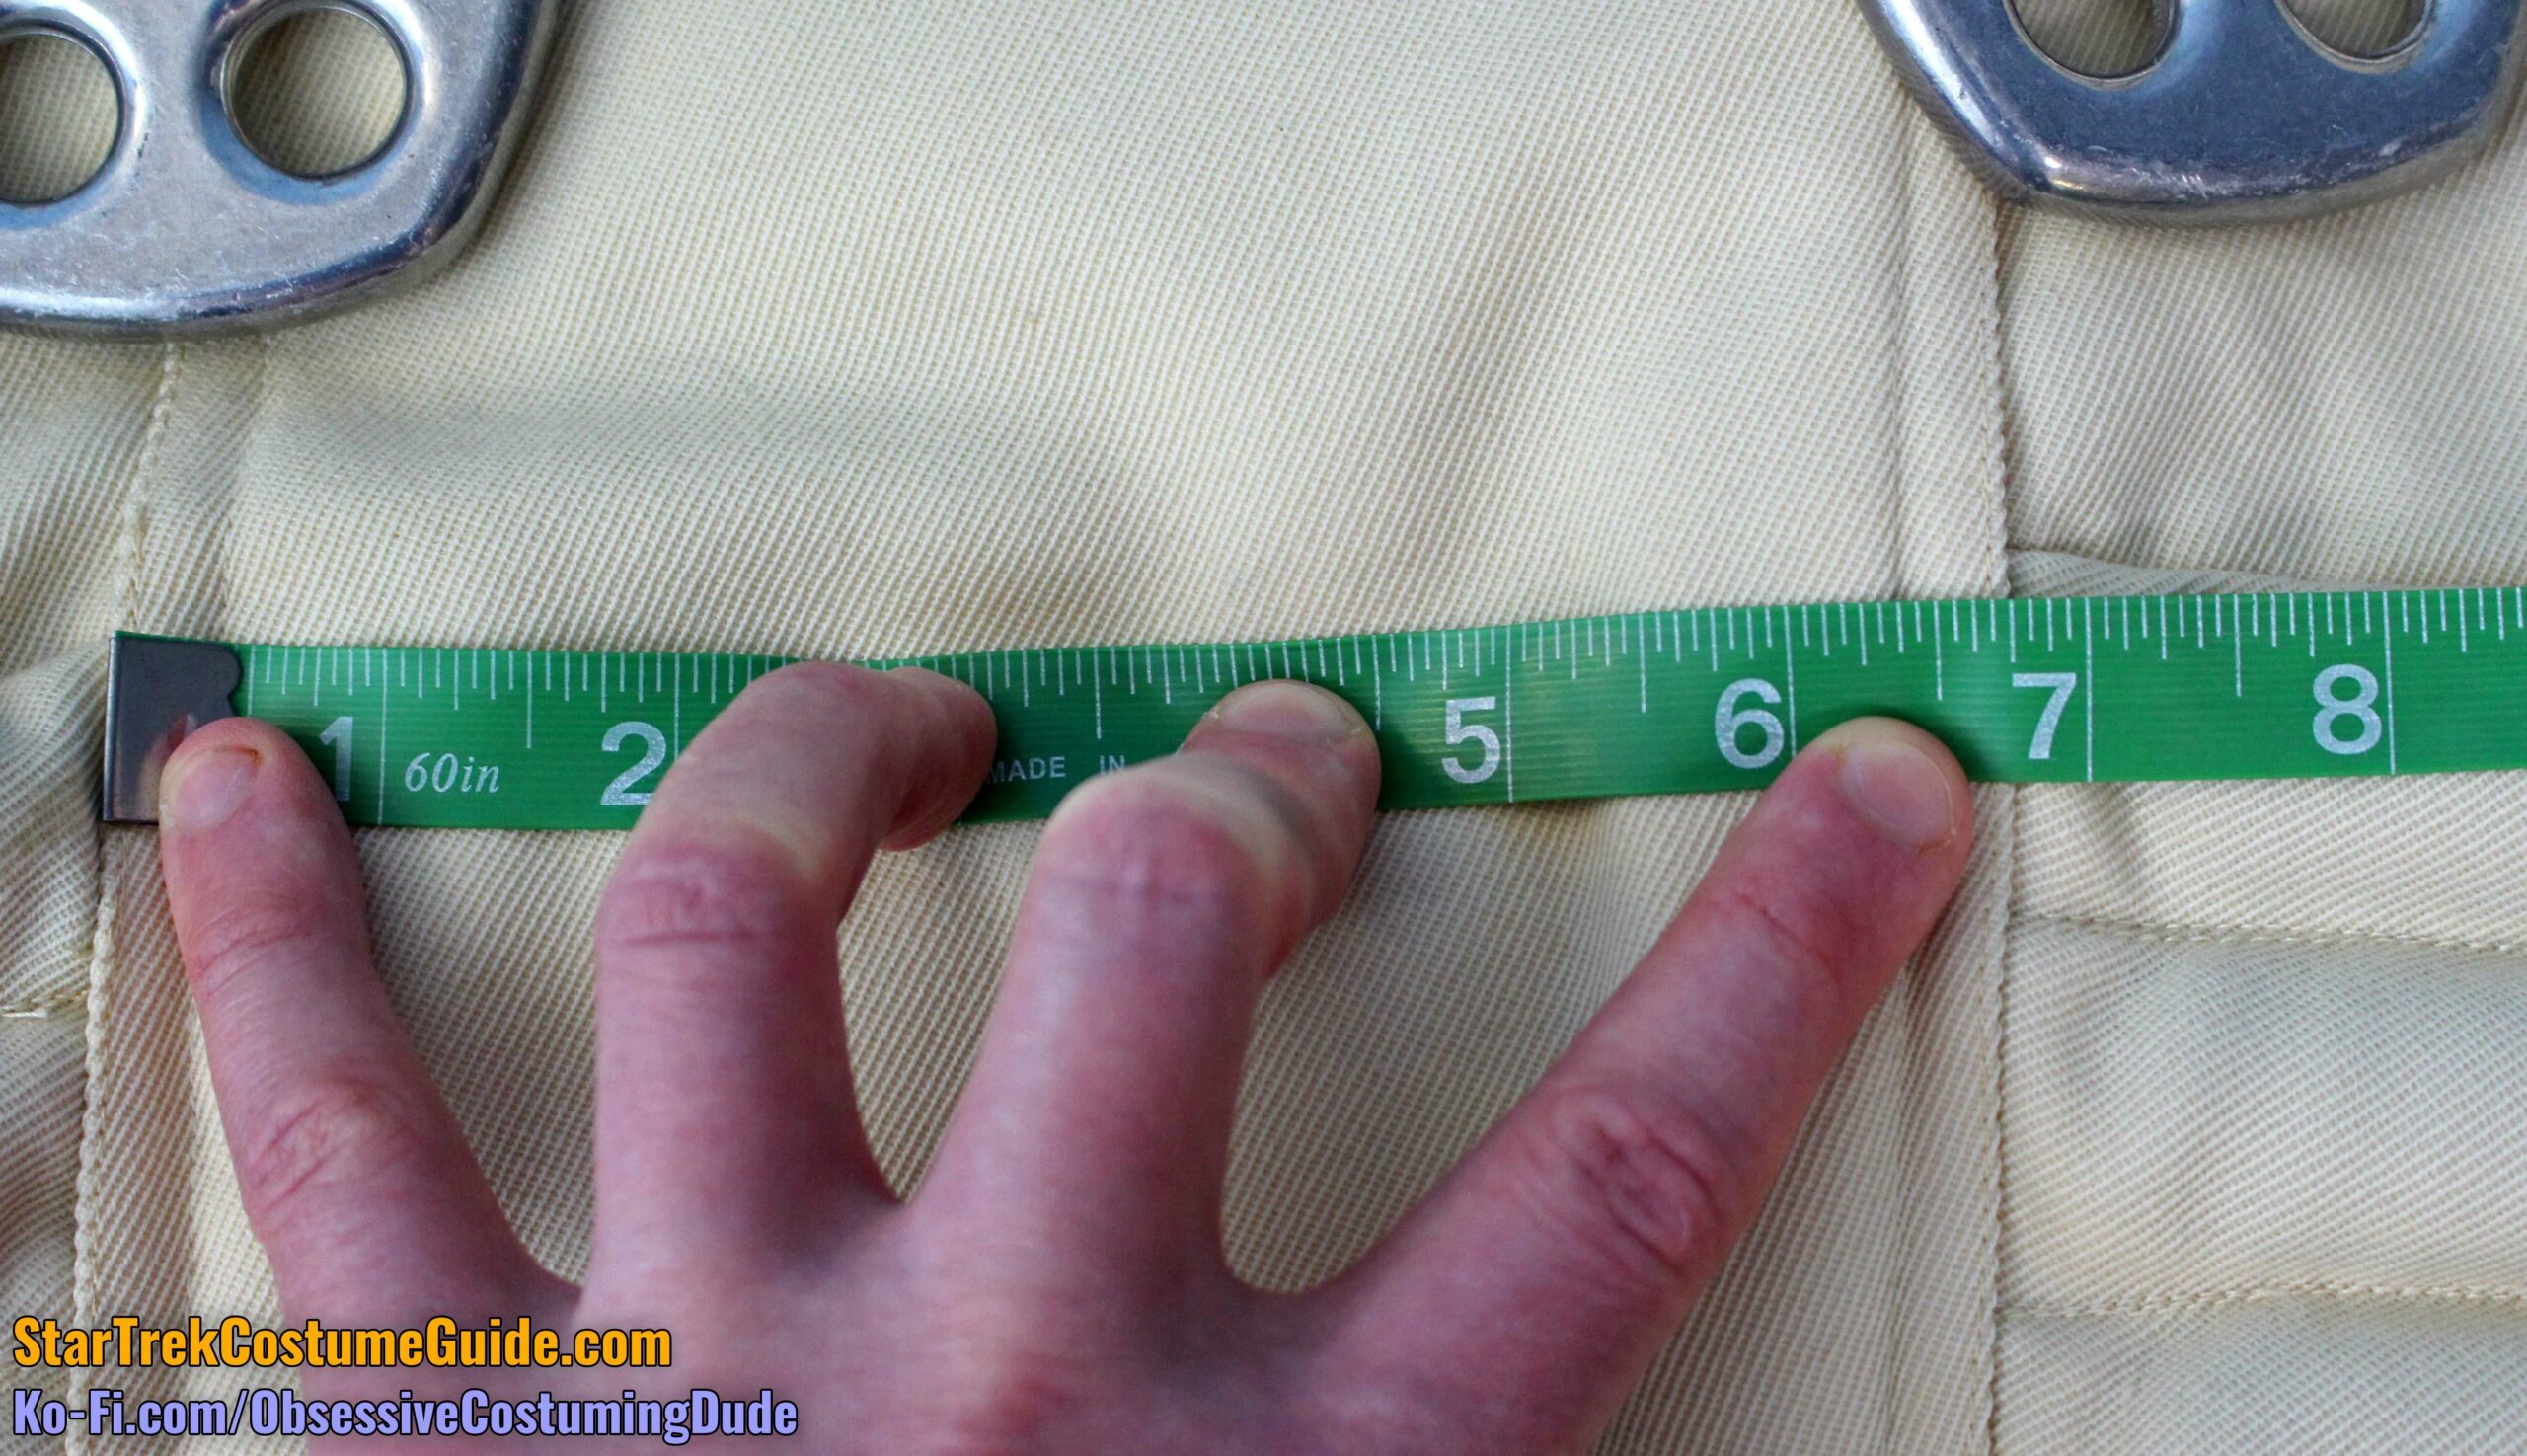
It was difficult to photograph due to the three-dimensional nature of the area, but the front panel was 10 ¼” across at the center of the “bullseye.”
The front panel narrowed to 6 ¾” wide at the waist.
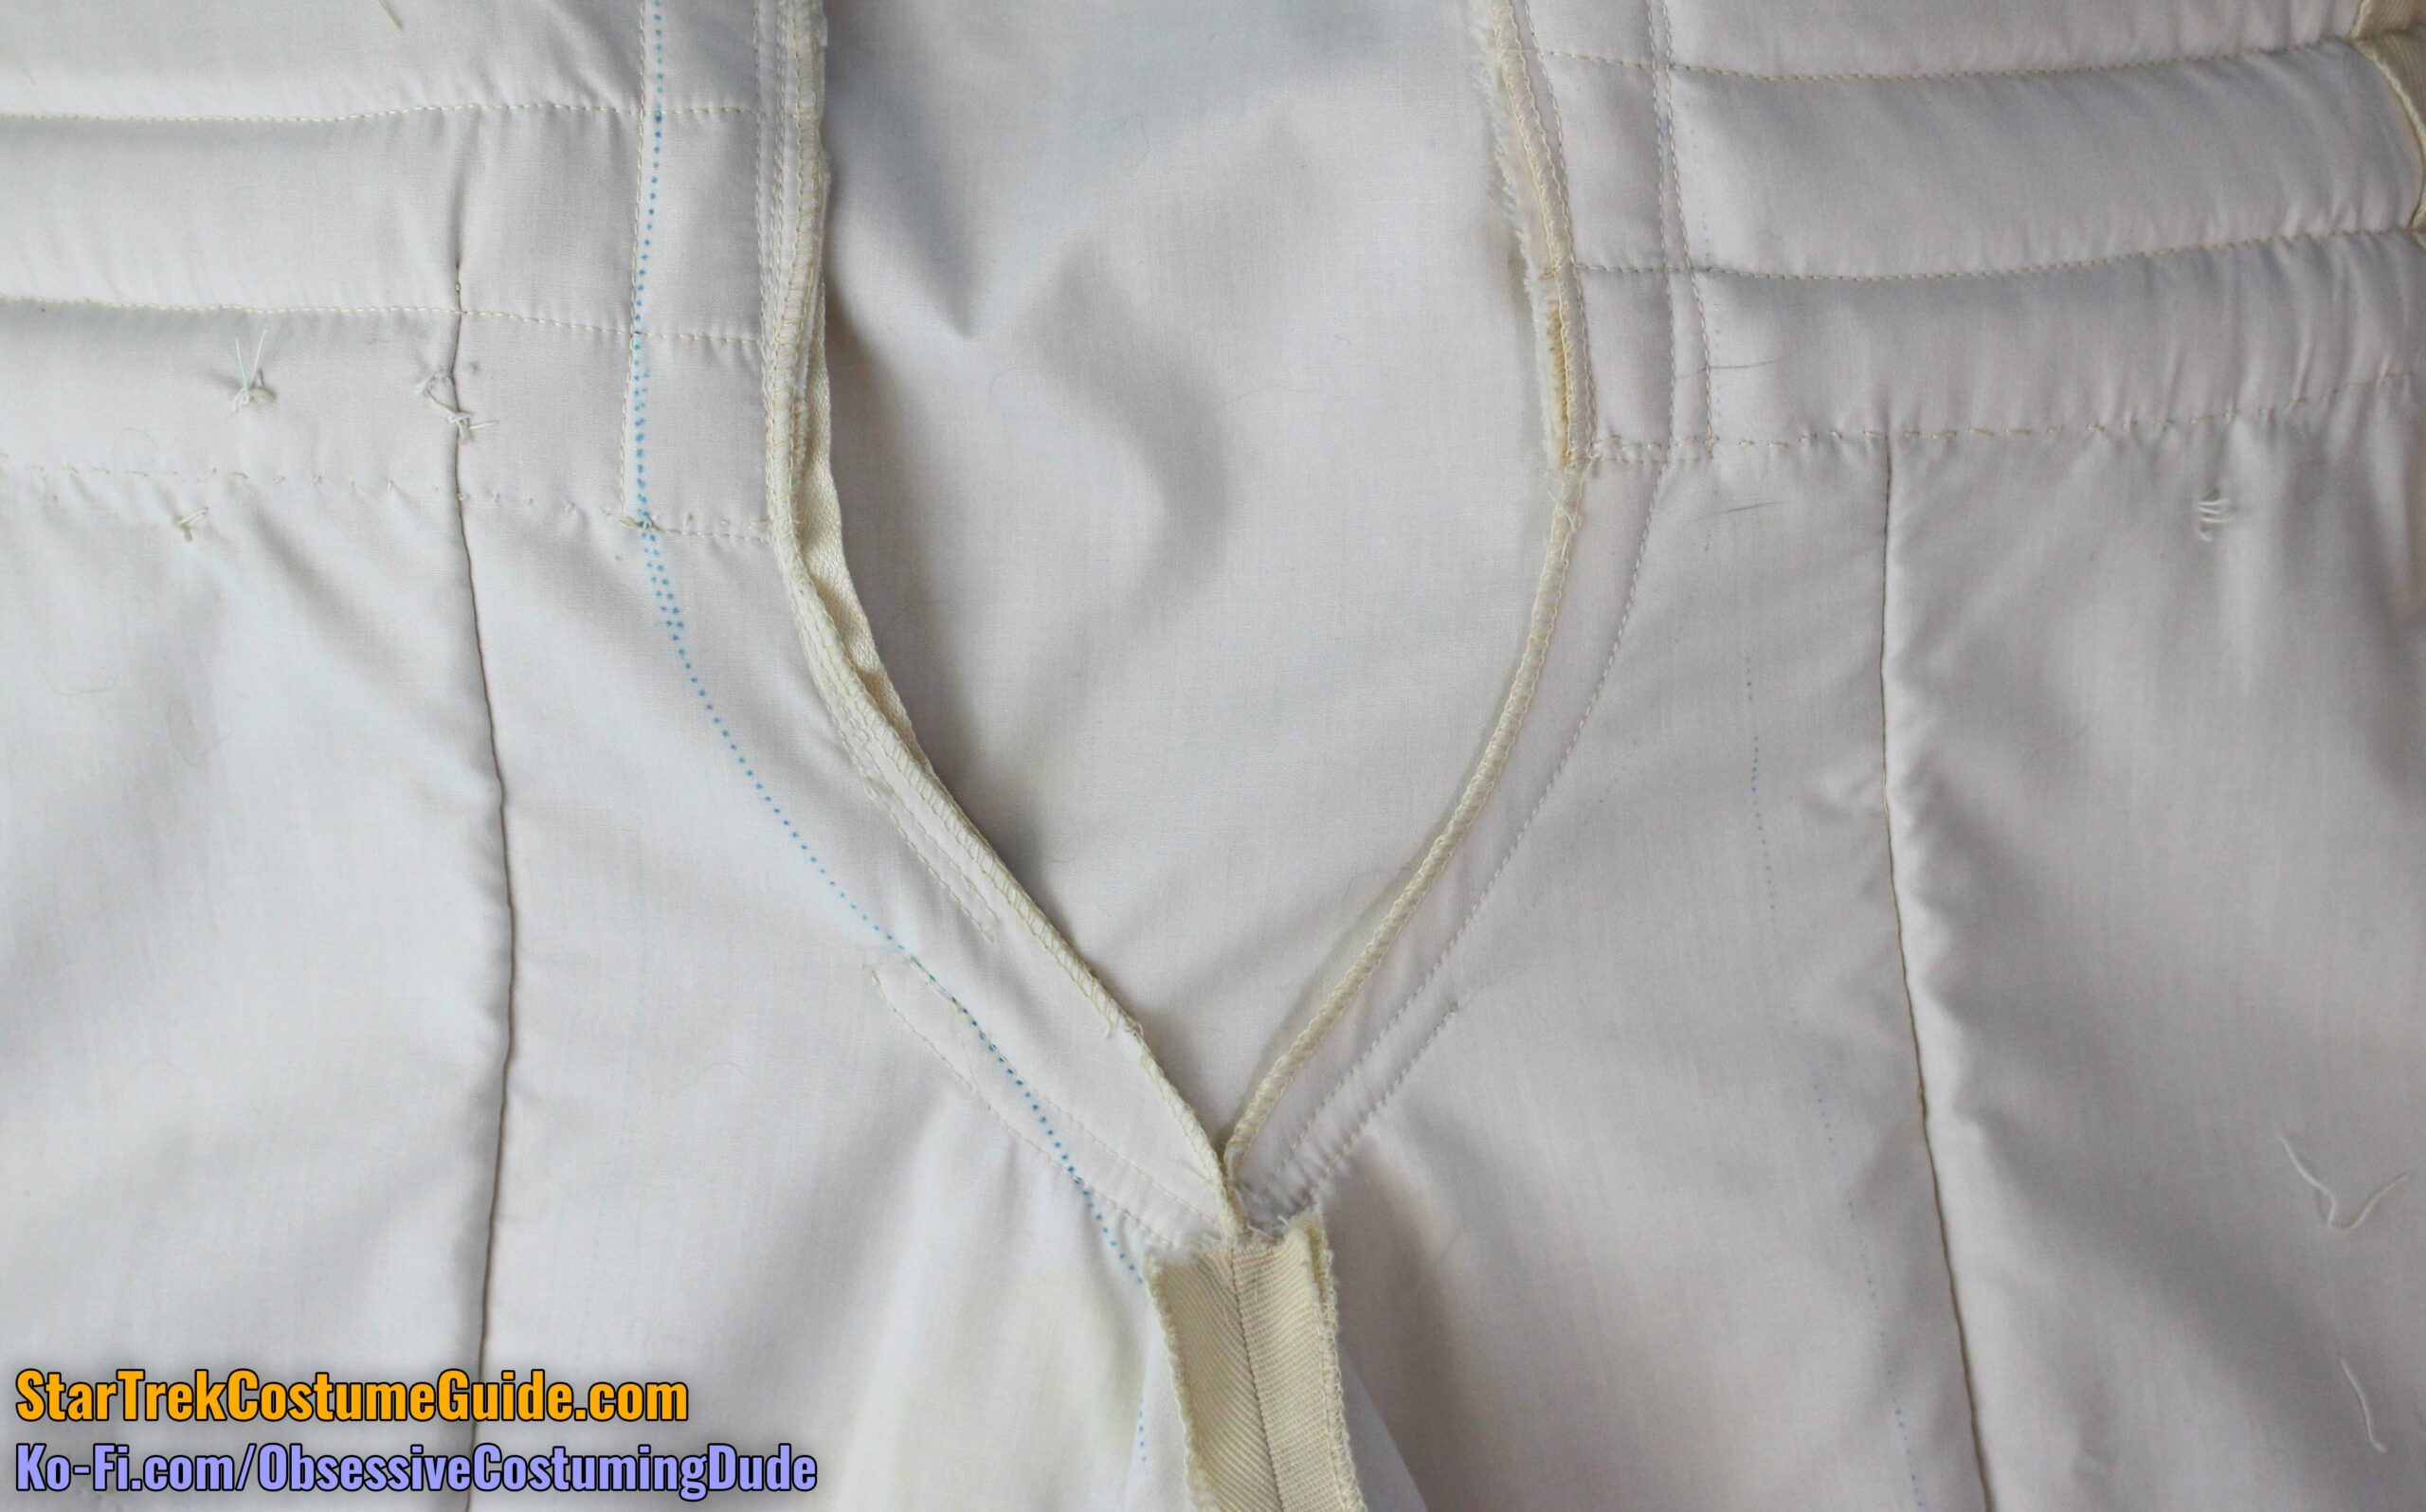
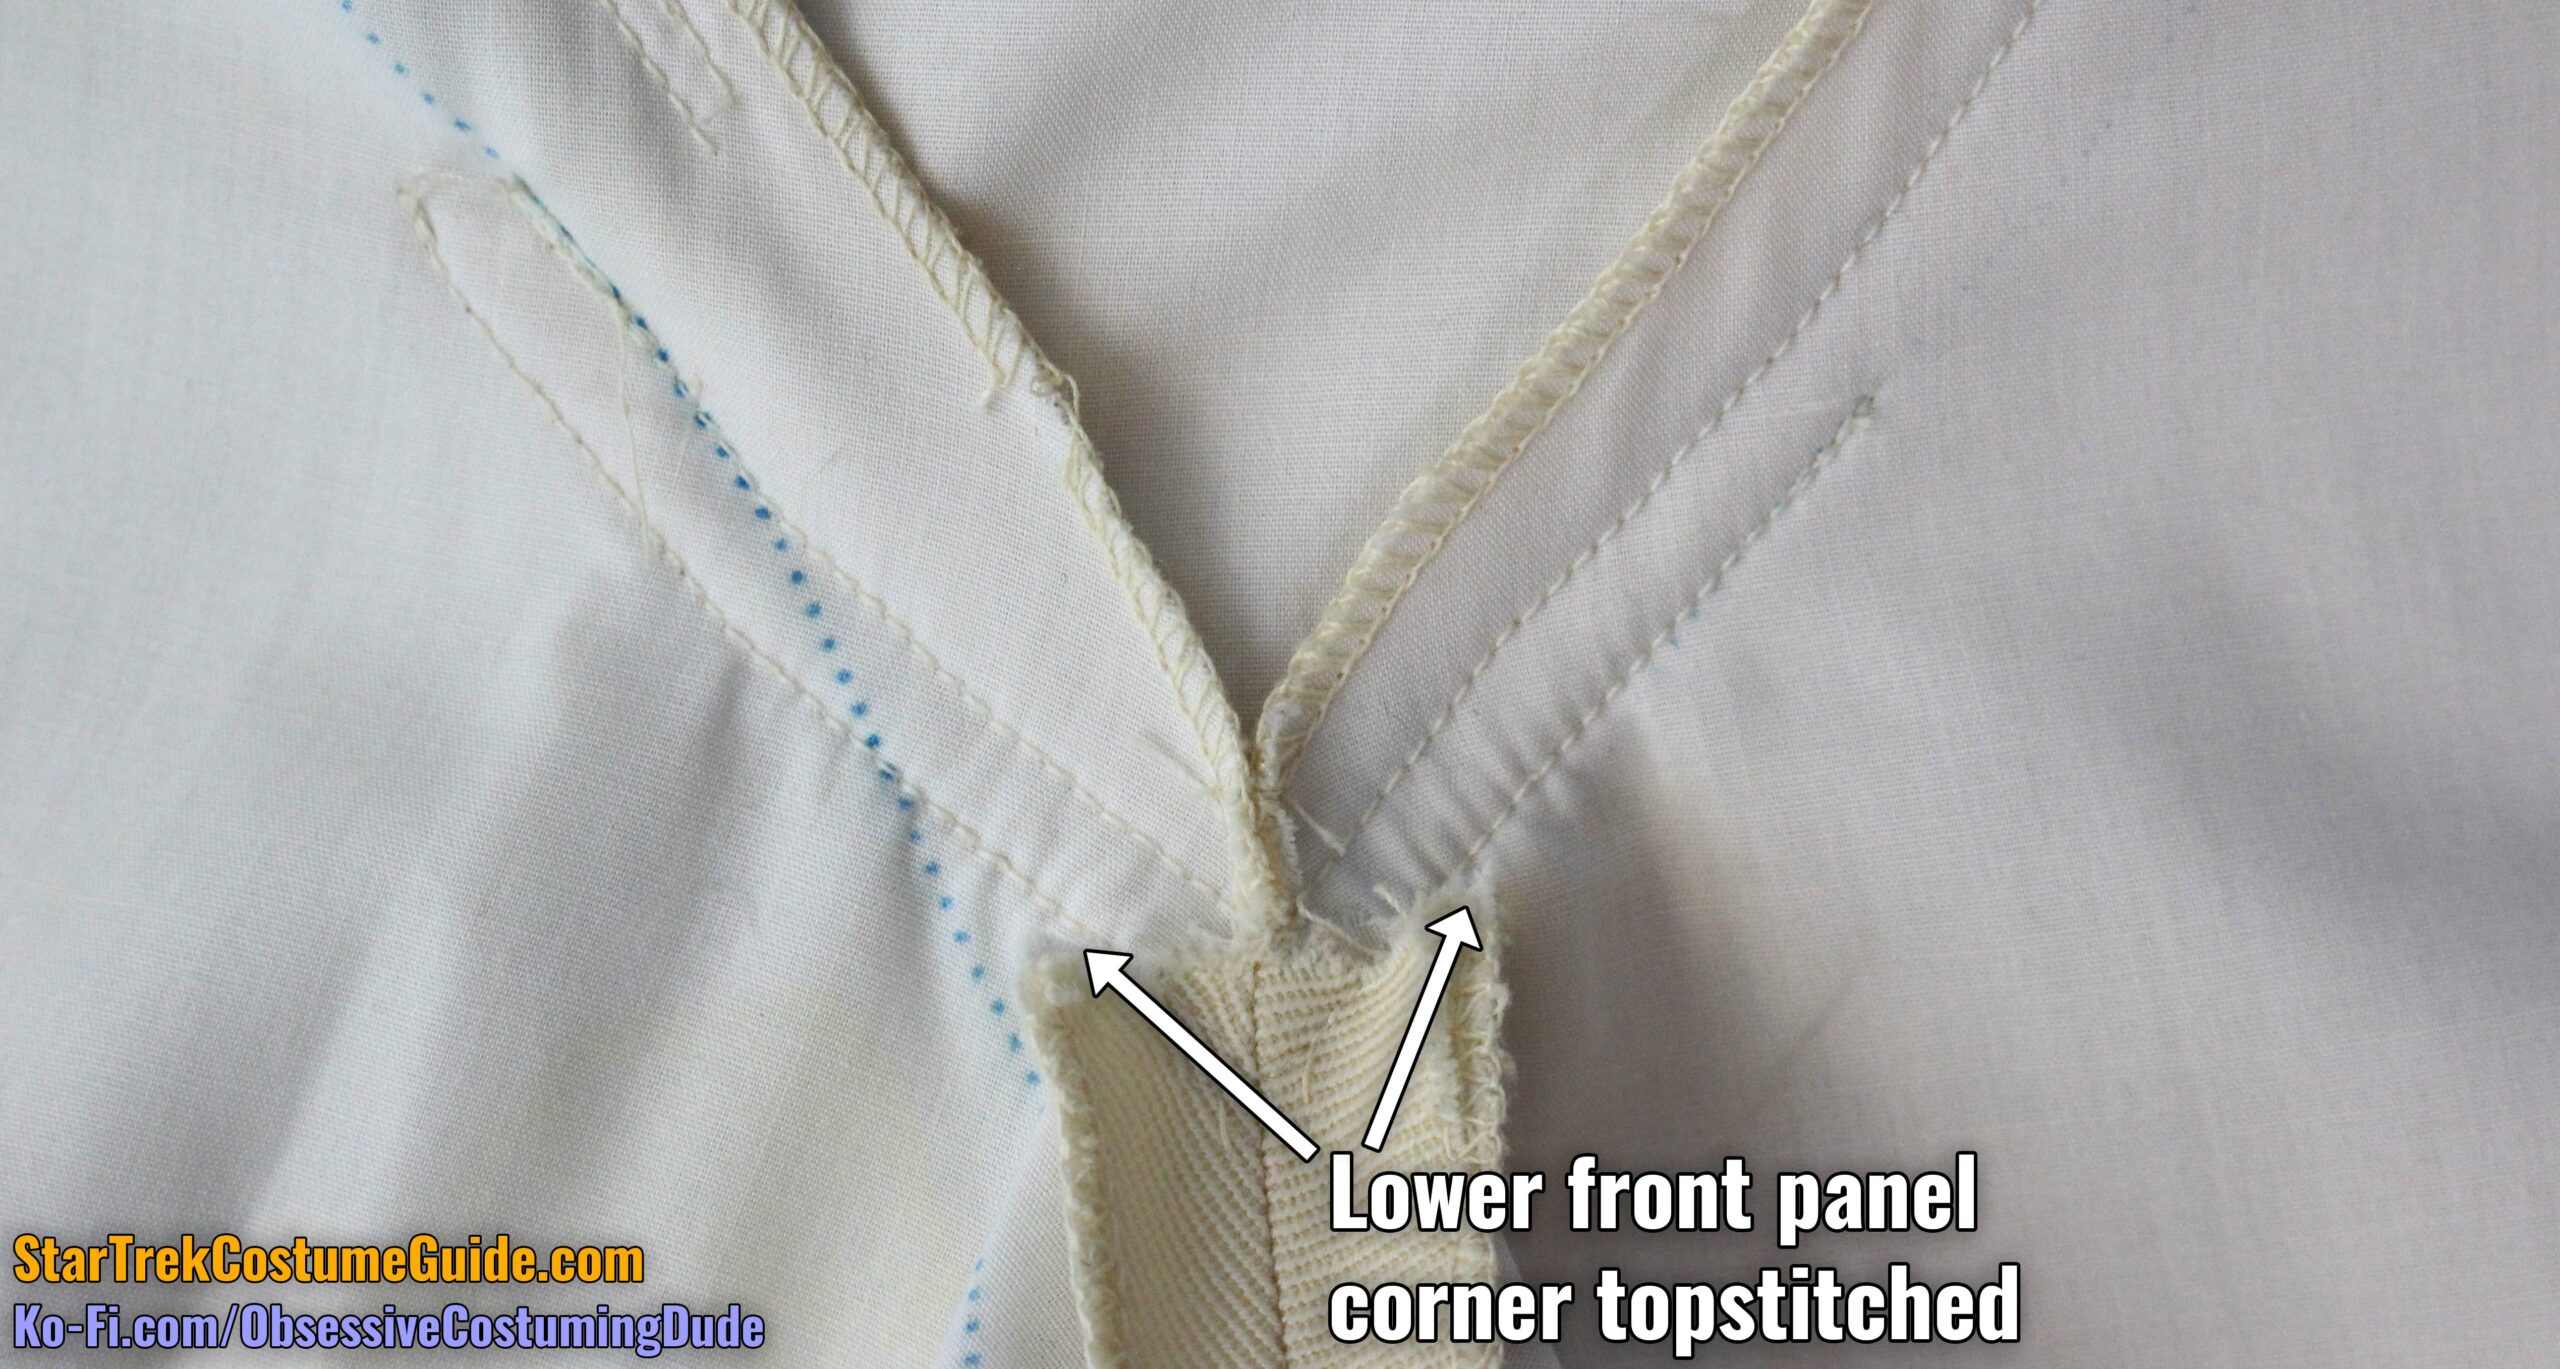
Beneath that, the lower front of the panel tapered to a corner toward the crotch.
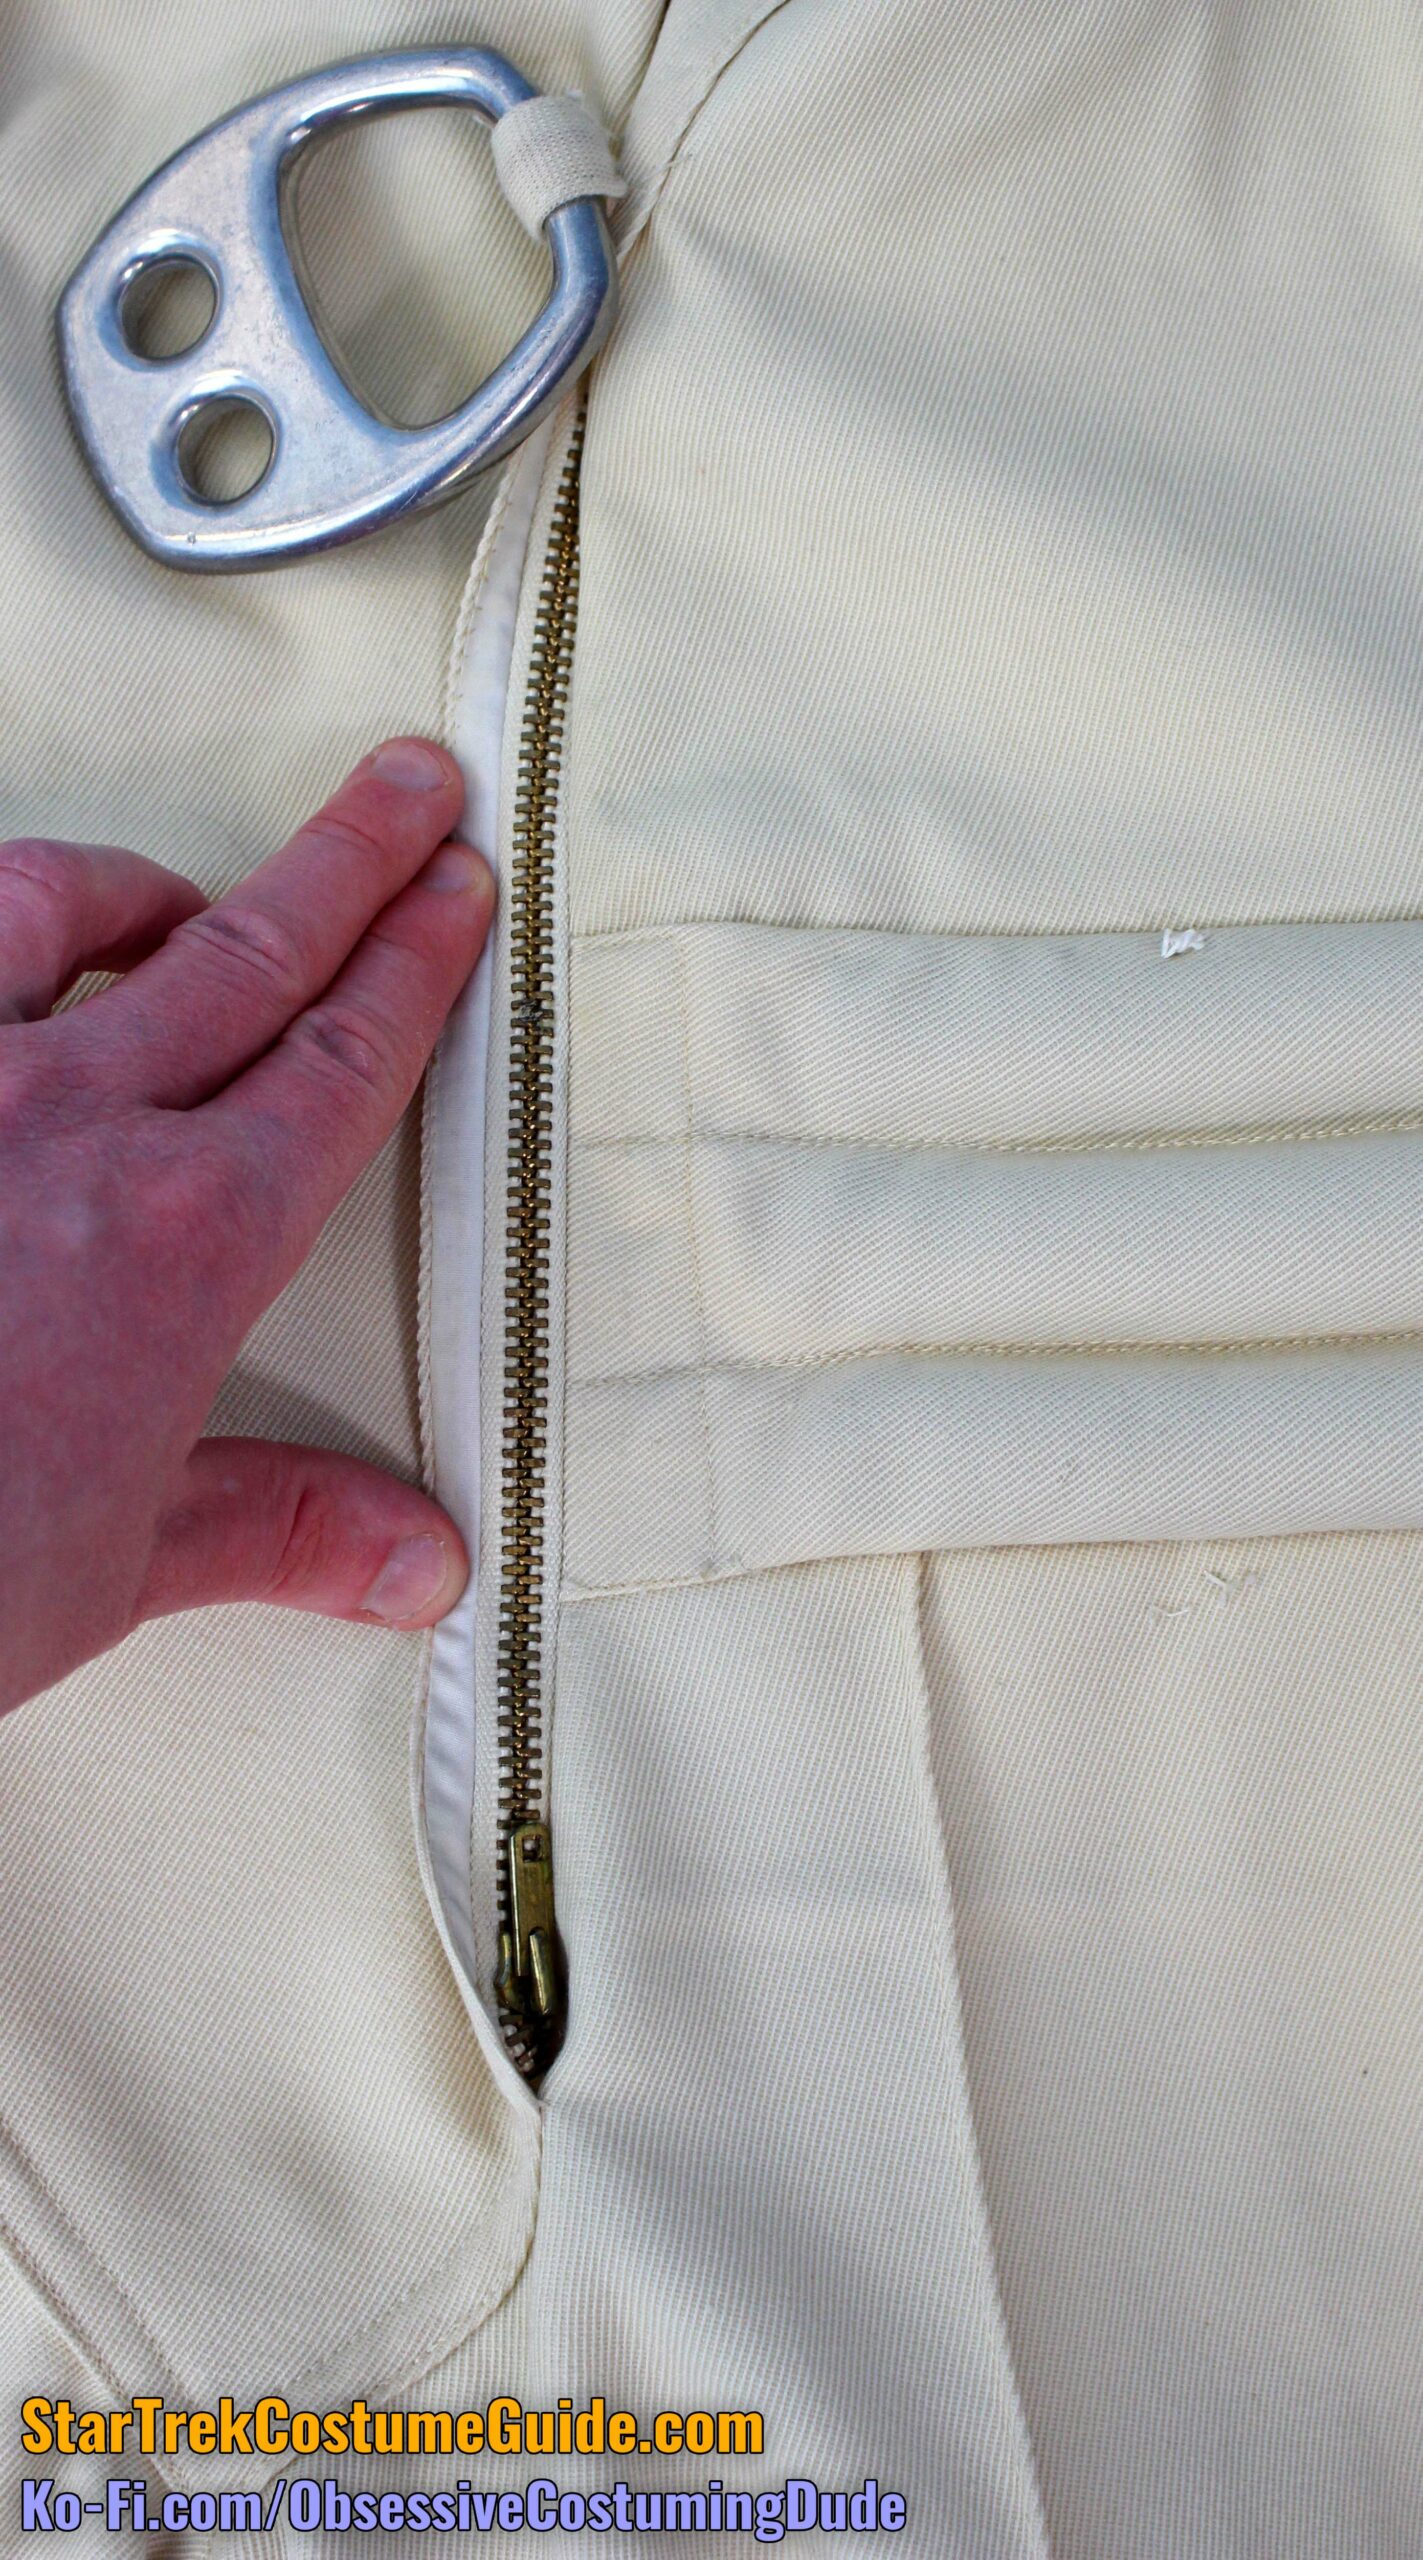
Along the lower left seam was a metal zipper, approximately 11” long – definitely convenient for male wearers who need to relieve themselves!
The entire front panel was edge-stitched around its perimeter, and there was a row of topstitching ¼” inside the edge-stitch.
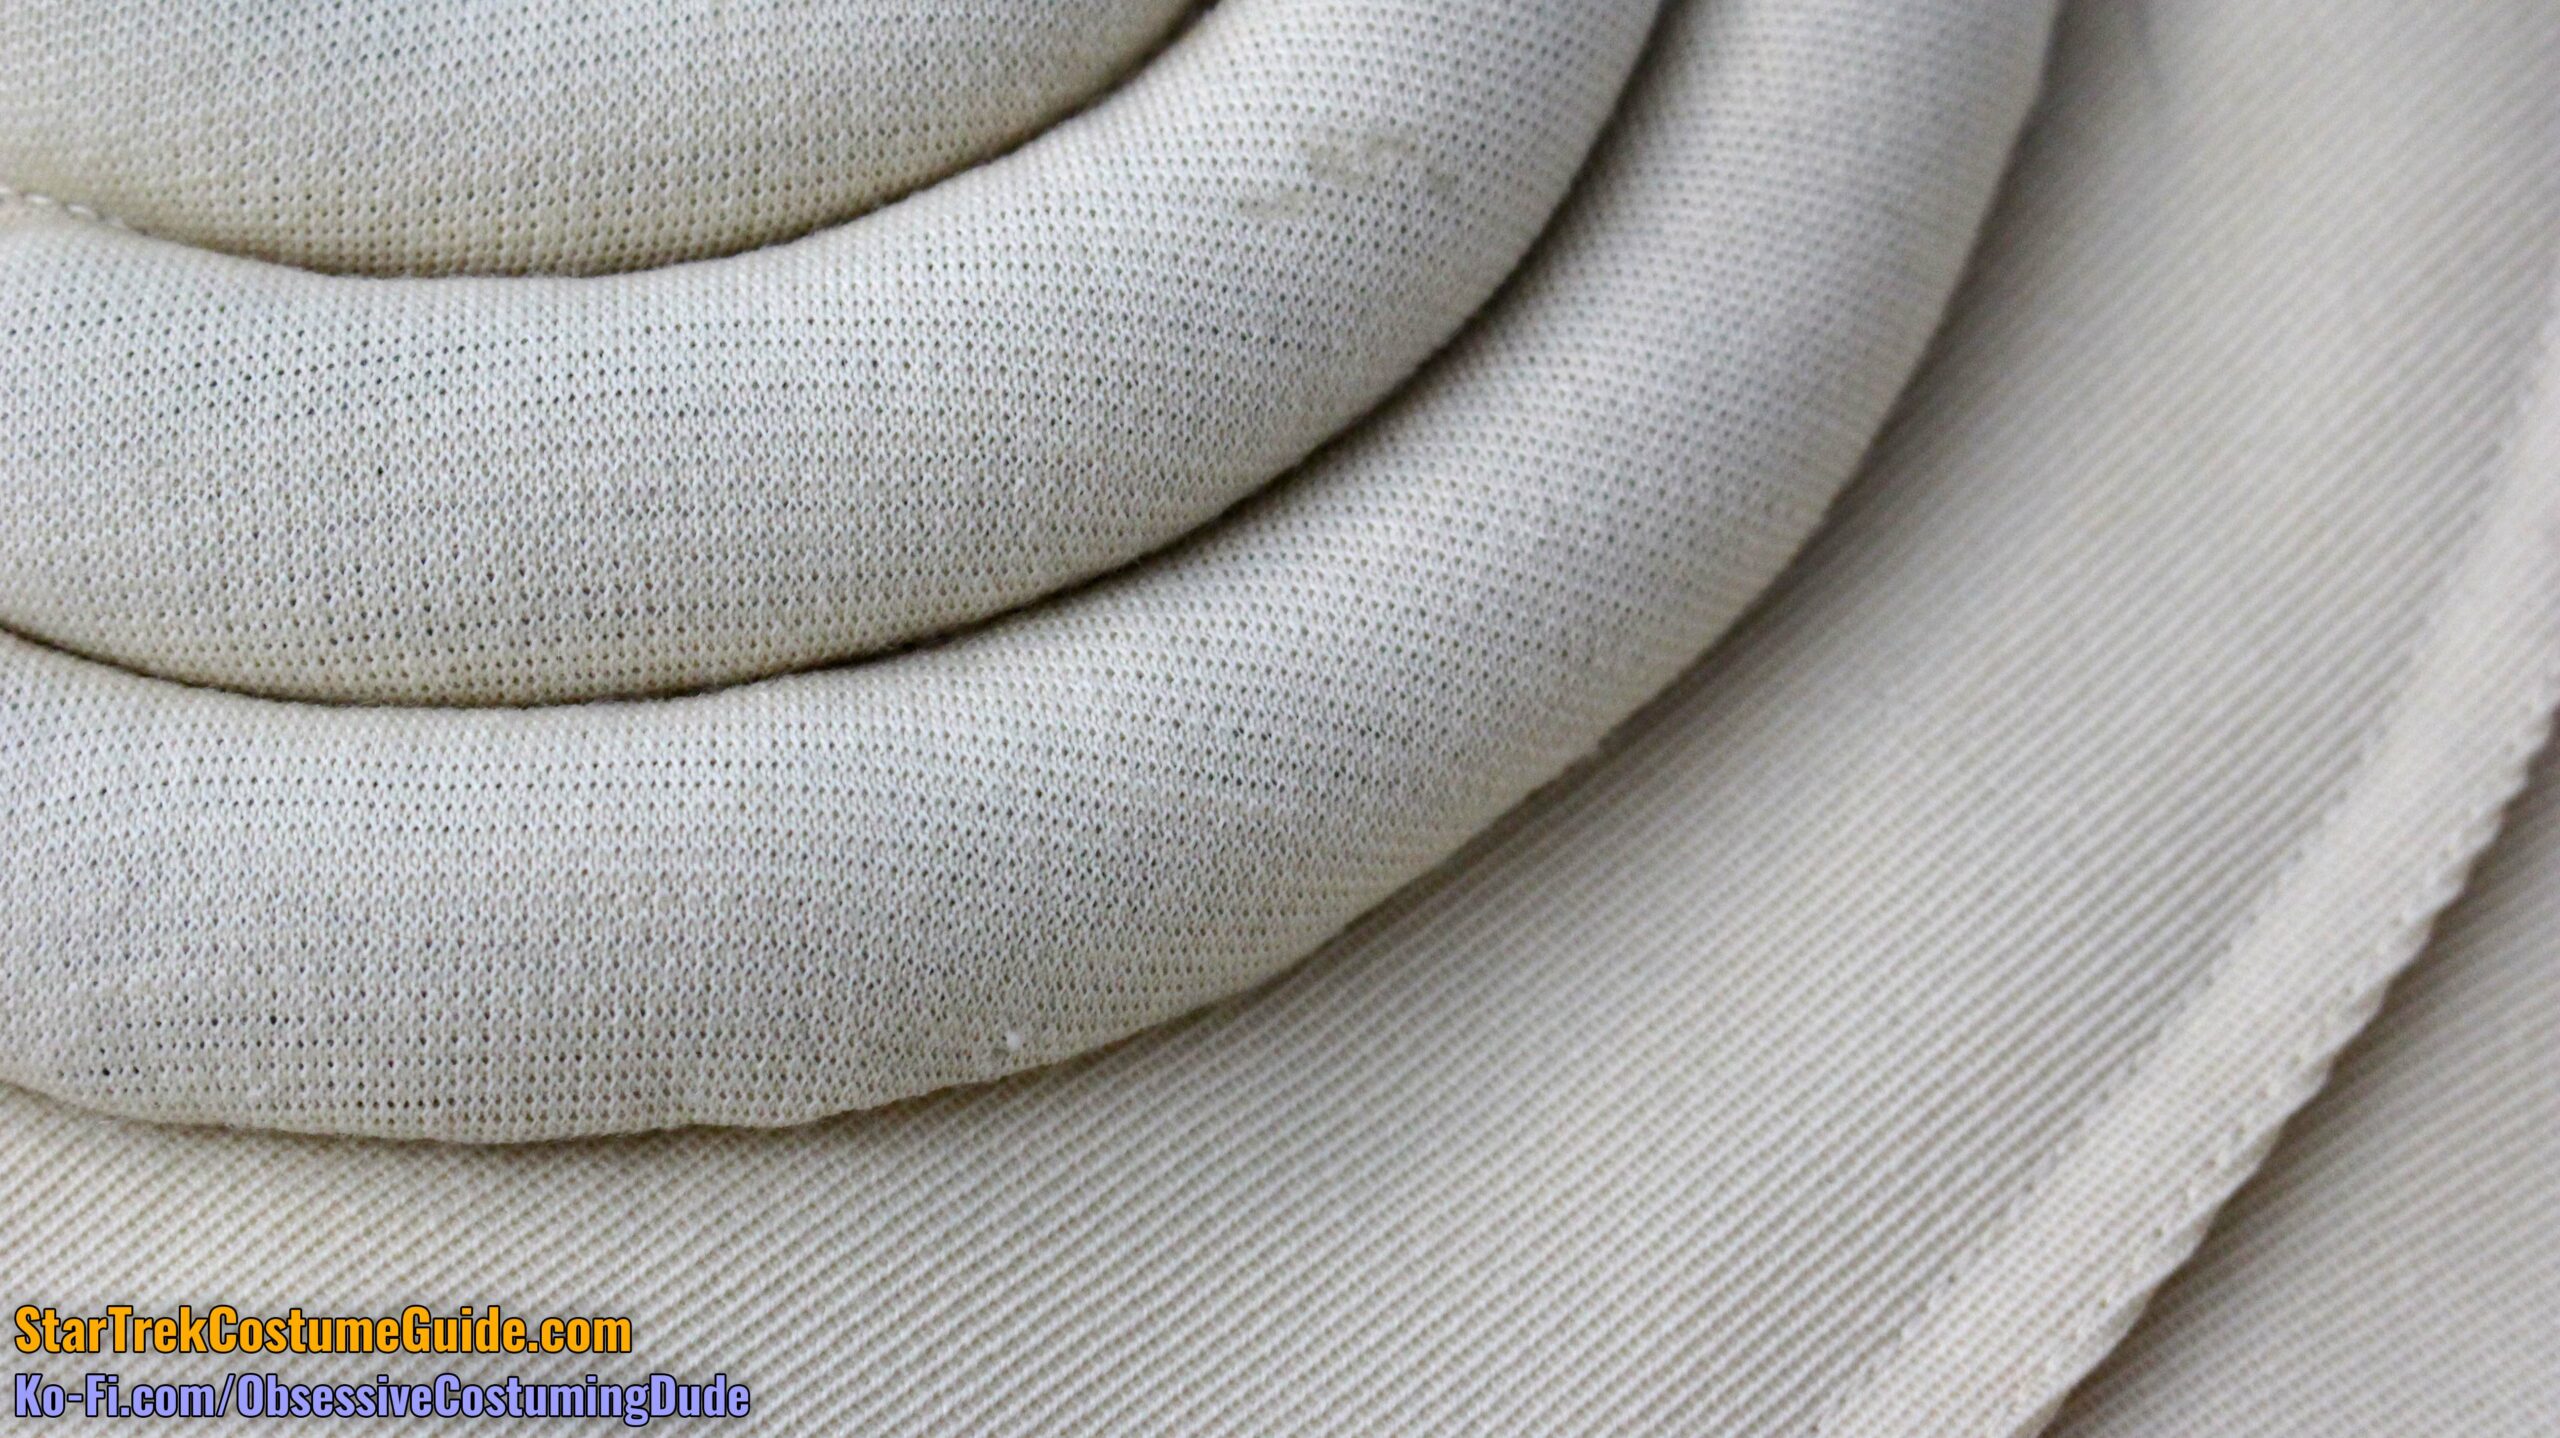
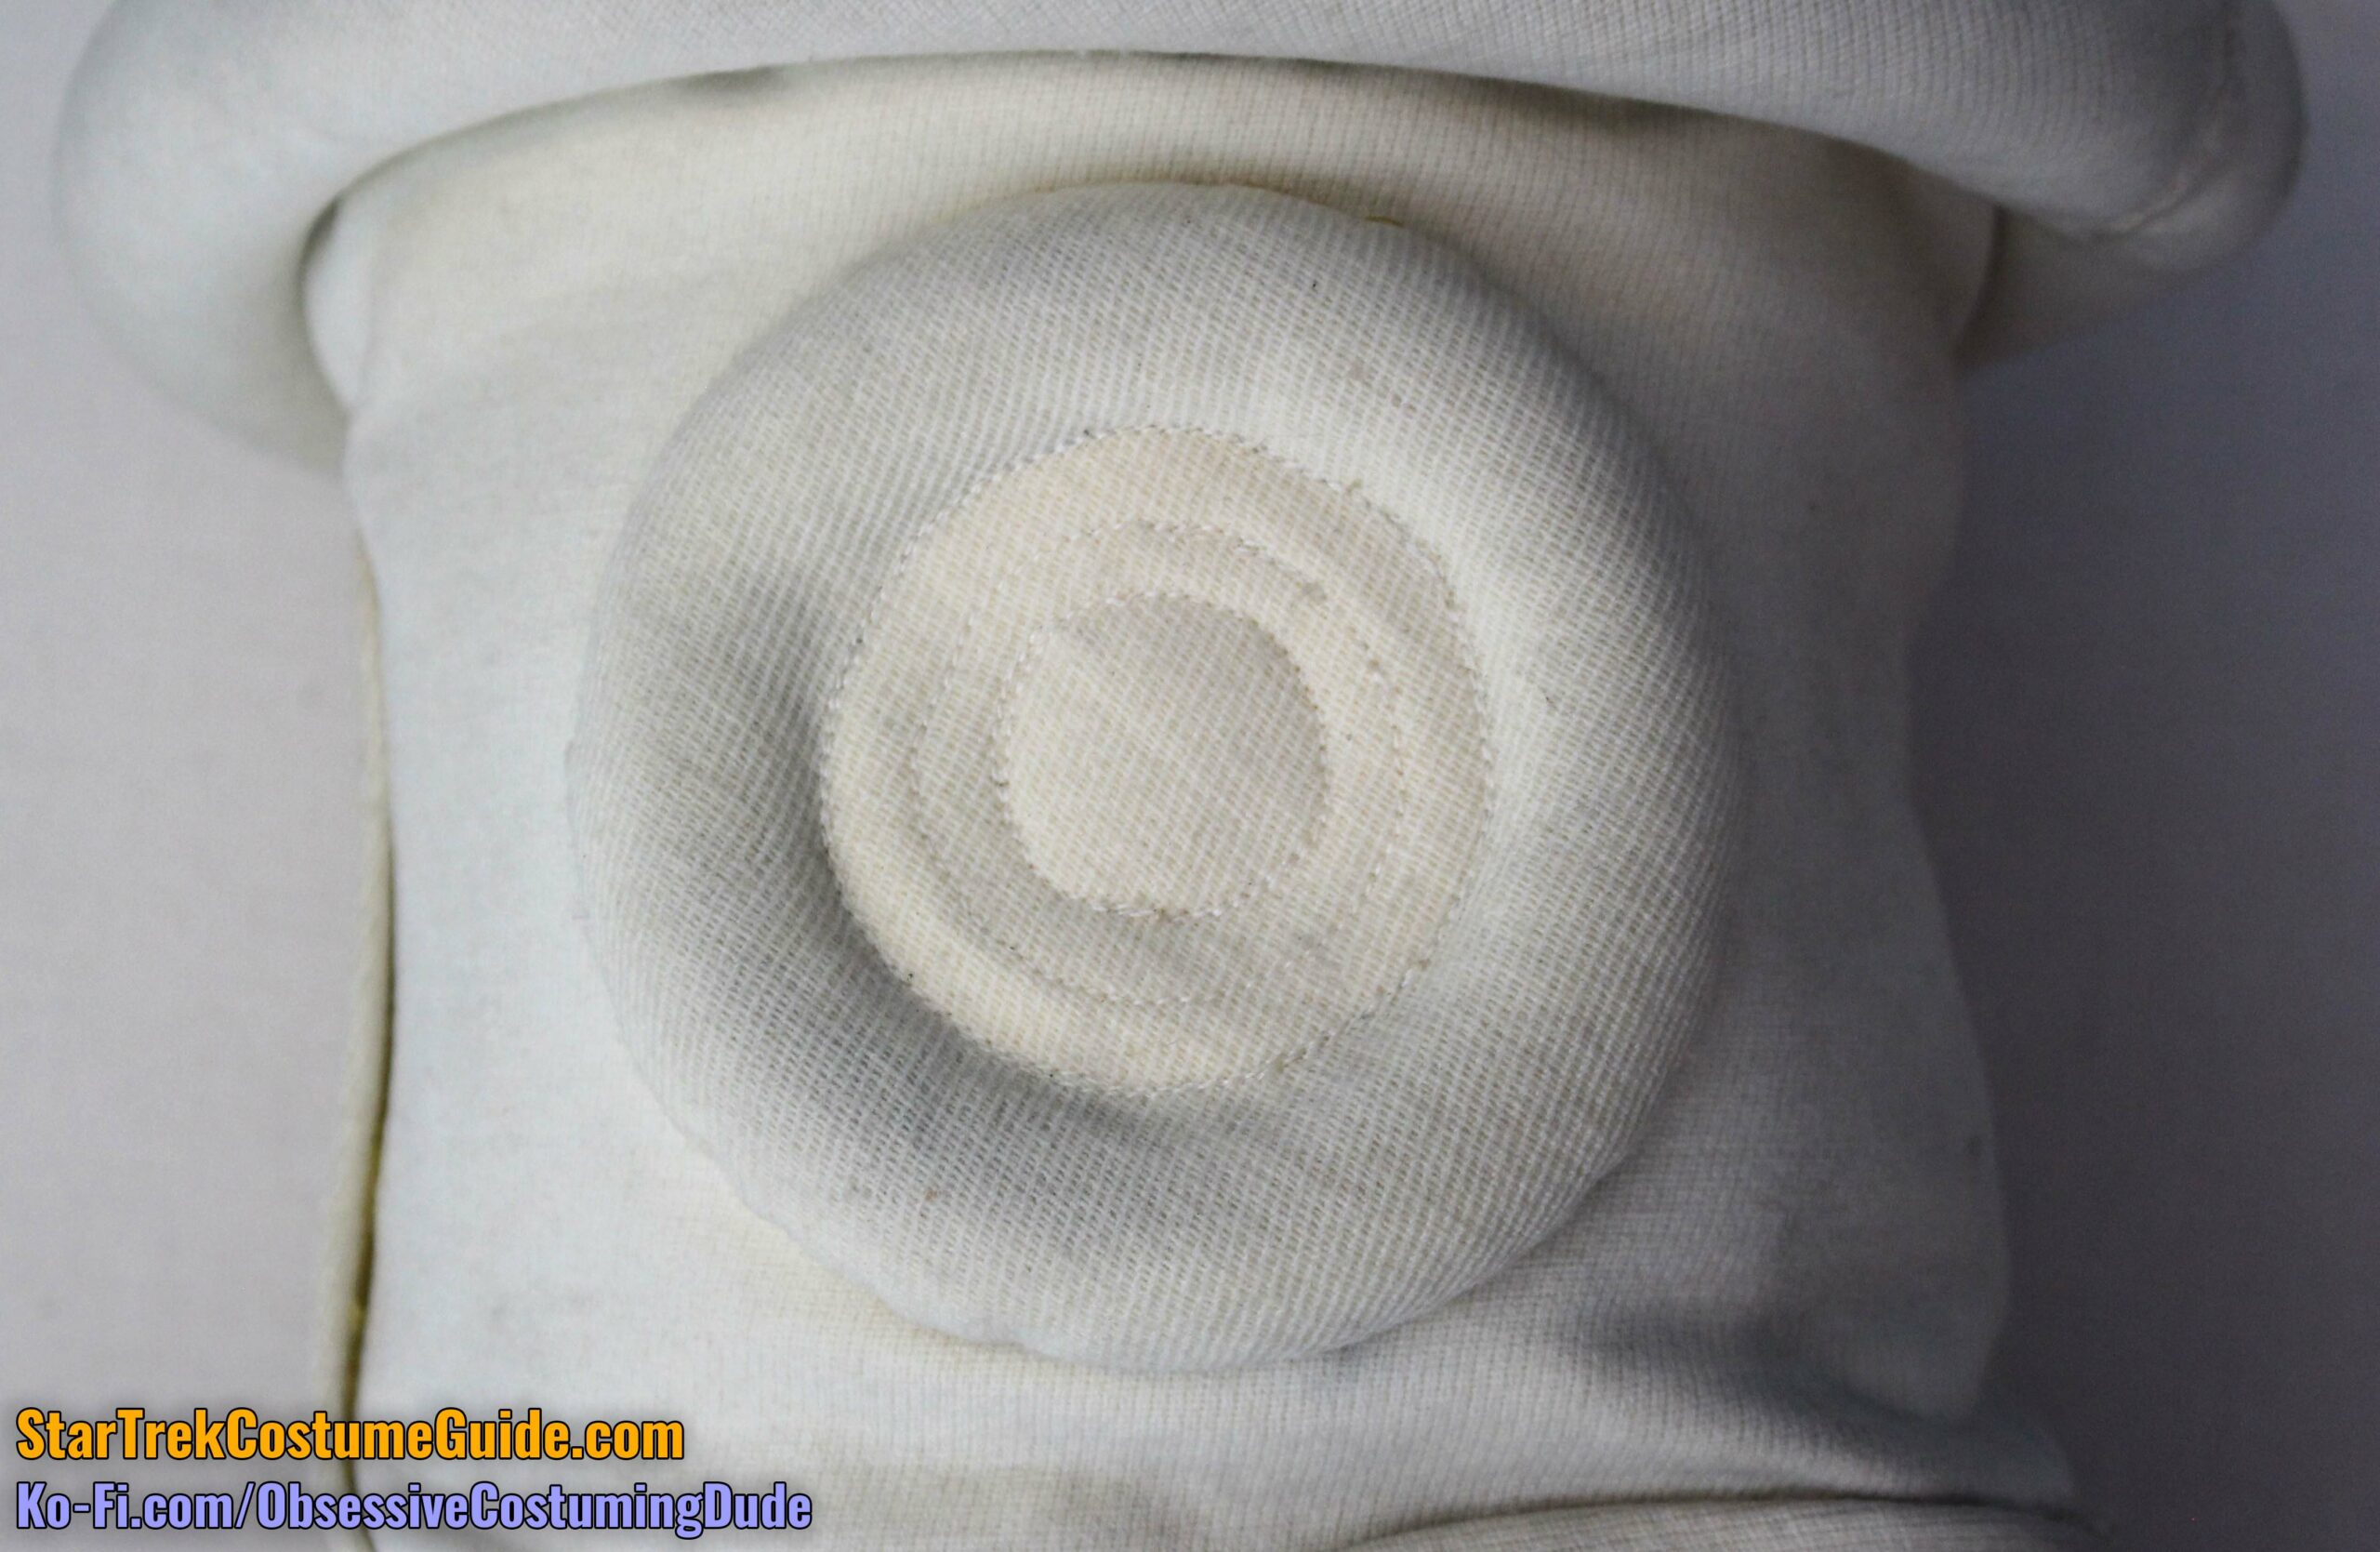
The three “chest circles” were assembled separately and mounted onto the front panel.
The edge of the outer “circle” was about 2 ¾” below the neckline at the top, and 1 ½” from the edge of the front panel at its widest.
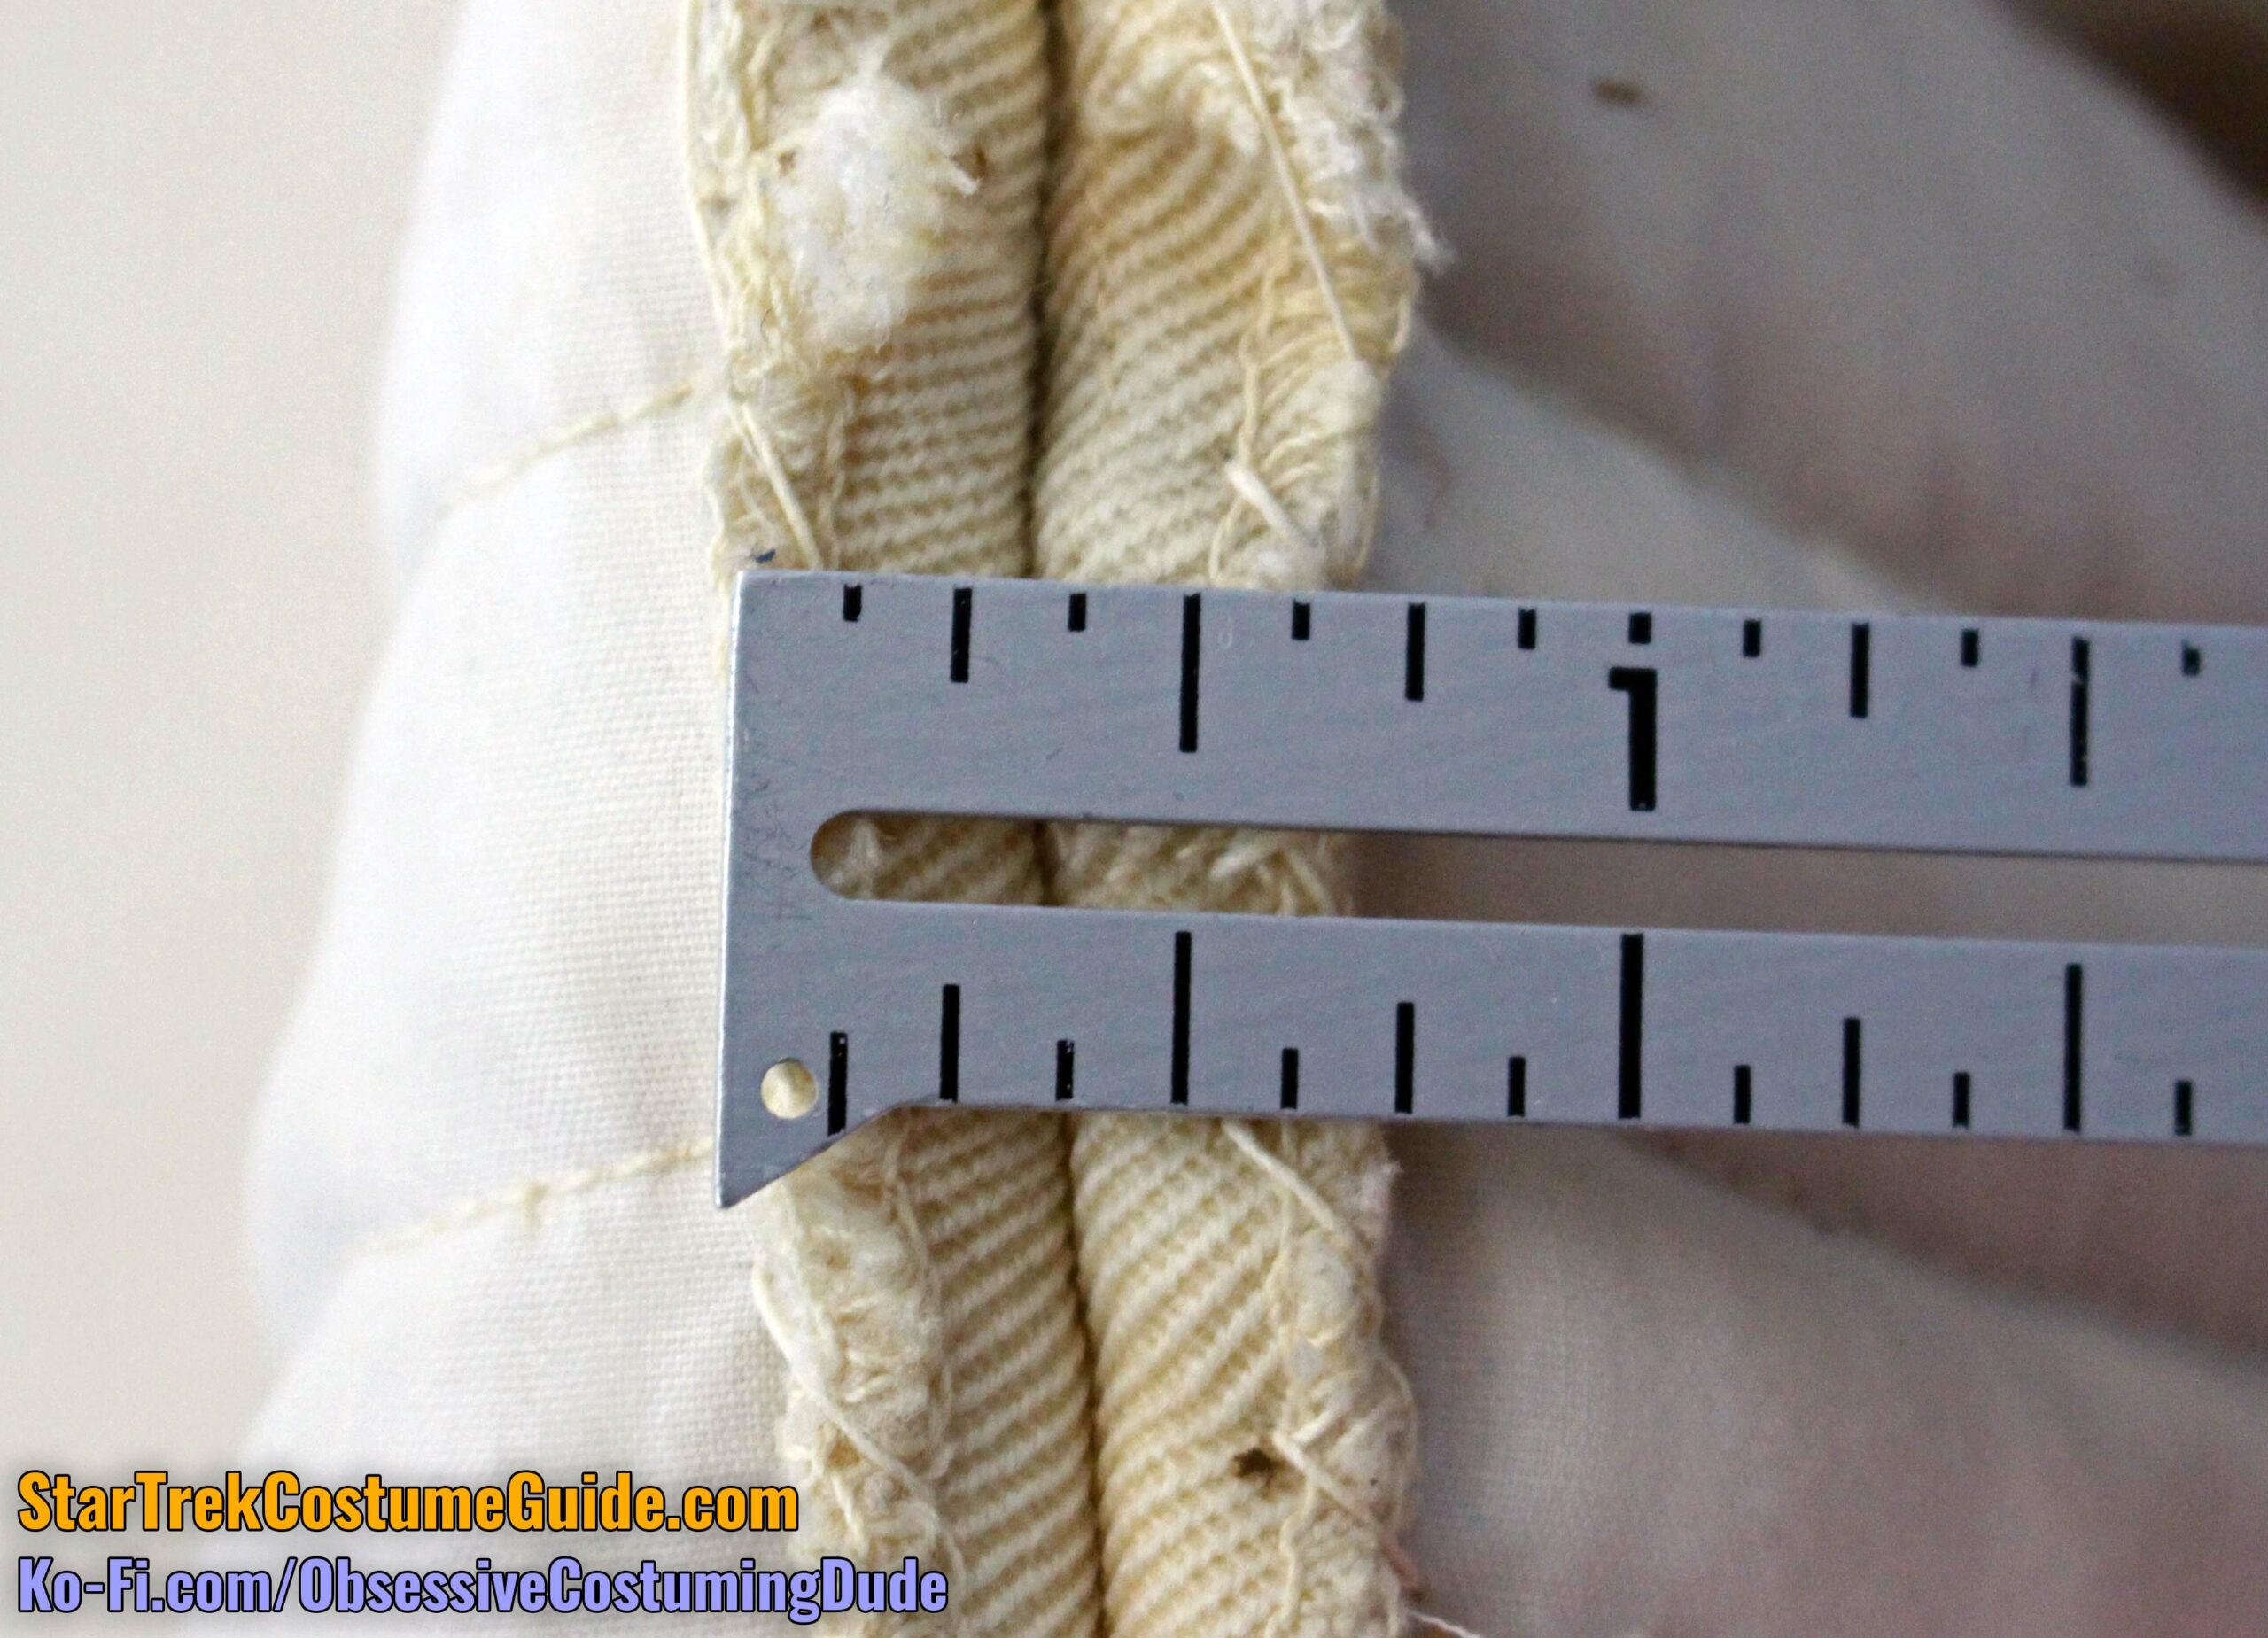
These “circles” were ⅞” wide … I’m reluctant to use the term “diameter,” since they weren’t entirely round. (They were closer to ½” tall, measuring from the jumpsuit body.)
I can only speculate as to what was inside the “circles”; it wasn’t as squishy as batting, but it wasn’t as hard as something like hose. The closest thing I know of to its tactile character is, of all things, a pool noodle.
But whatever’s inside, it doesn’t seem to be strictly cylindrical, unless it was compressed (intentionally or otherwise) during the construction process.
It didn’t feel like large (cotton or poly) upholstery piping, although for cosplaying purposes a product like that would make a decent replica.
Regardless of the internal composition, these “circles” were enclosed in the aforementioned knit fabric.
While there were obviously cut ends of the internal cording (?), there were no external seams in the knit fabric, adding to the mystique of the costume.
I believe this was accomplished by starting with a large circle of fabric, wrapping the outer end around the large cording (?) a little at a time, and sewing it closed near the edge like one would for custom piping. Then the other two were positioned inside and attached.
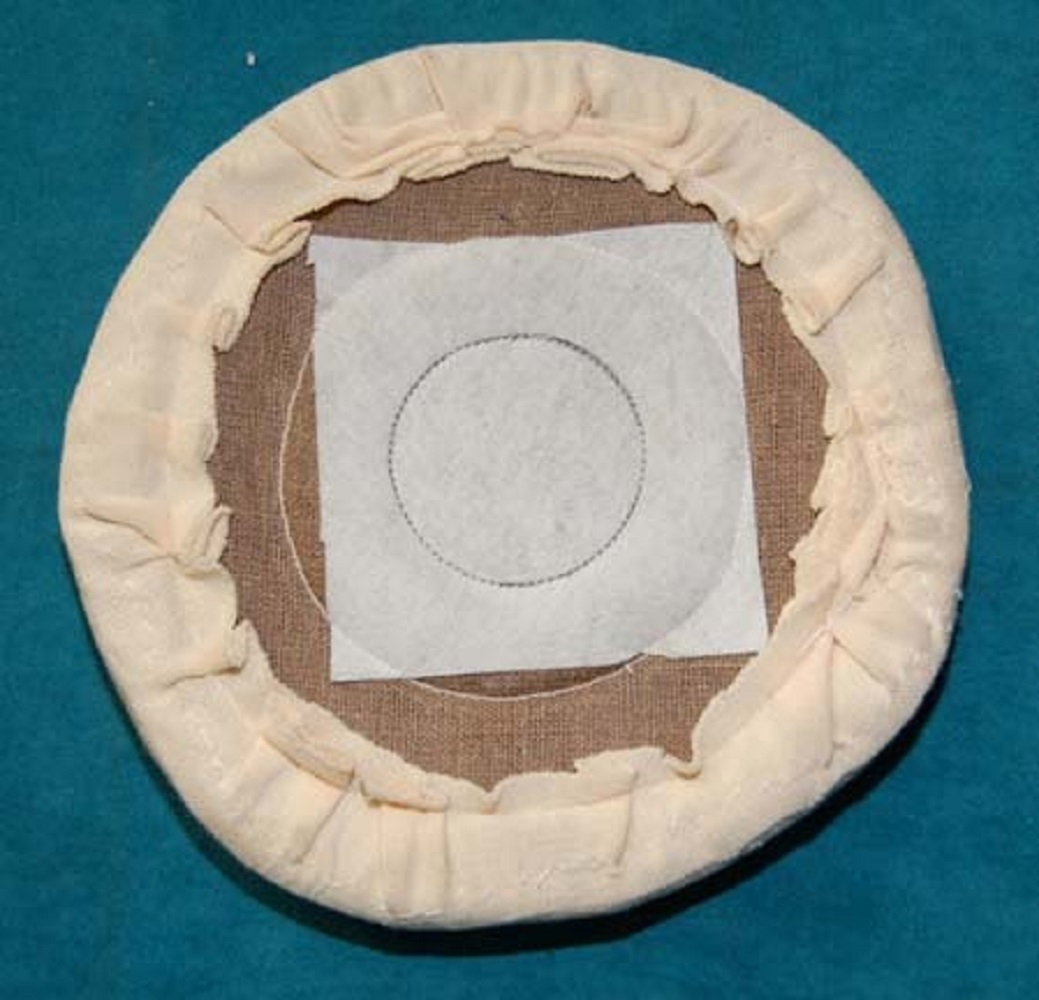
The “circle assembly” appears to have been backed with a stiff canvas – probably the same French canvas used for other accessories, but more on that in a bit. 🙂
The center of the assembly also appears to have been reinforced with an additional layer of white “mystery fabric.”
Engineering radiation suit auction photo
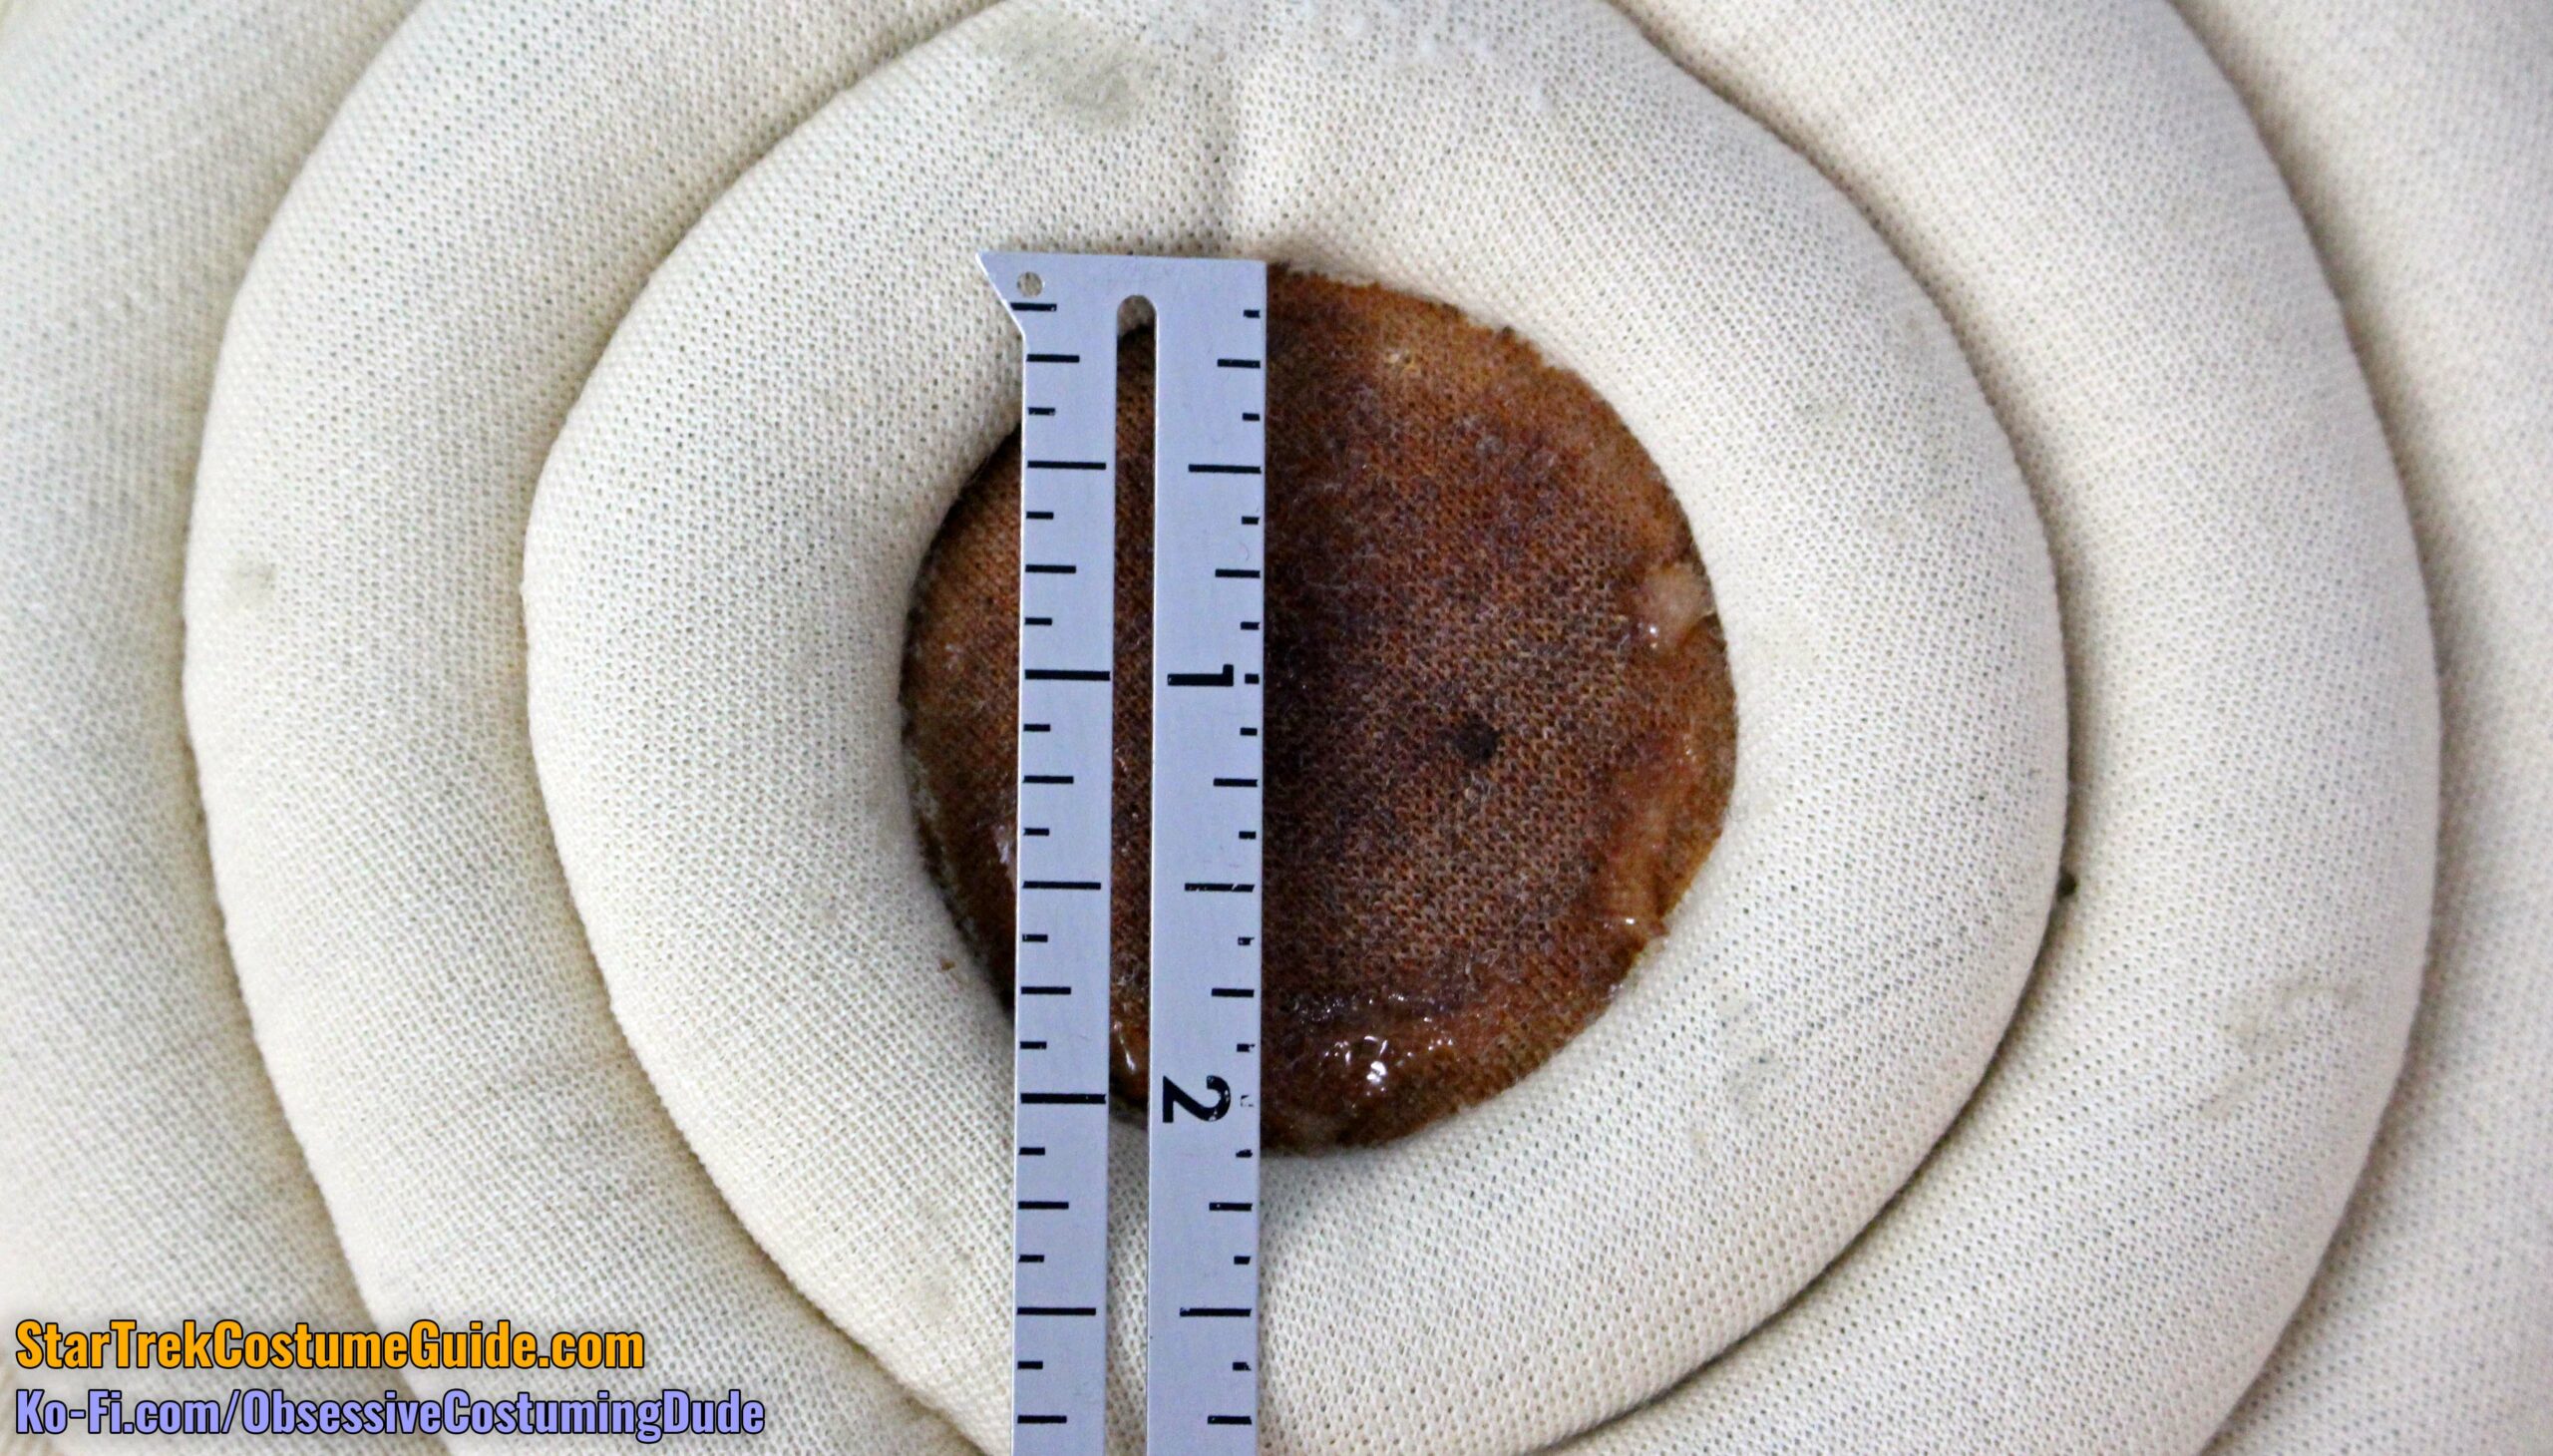
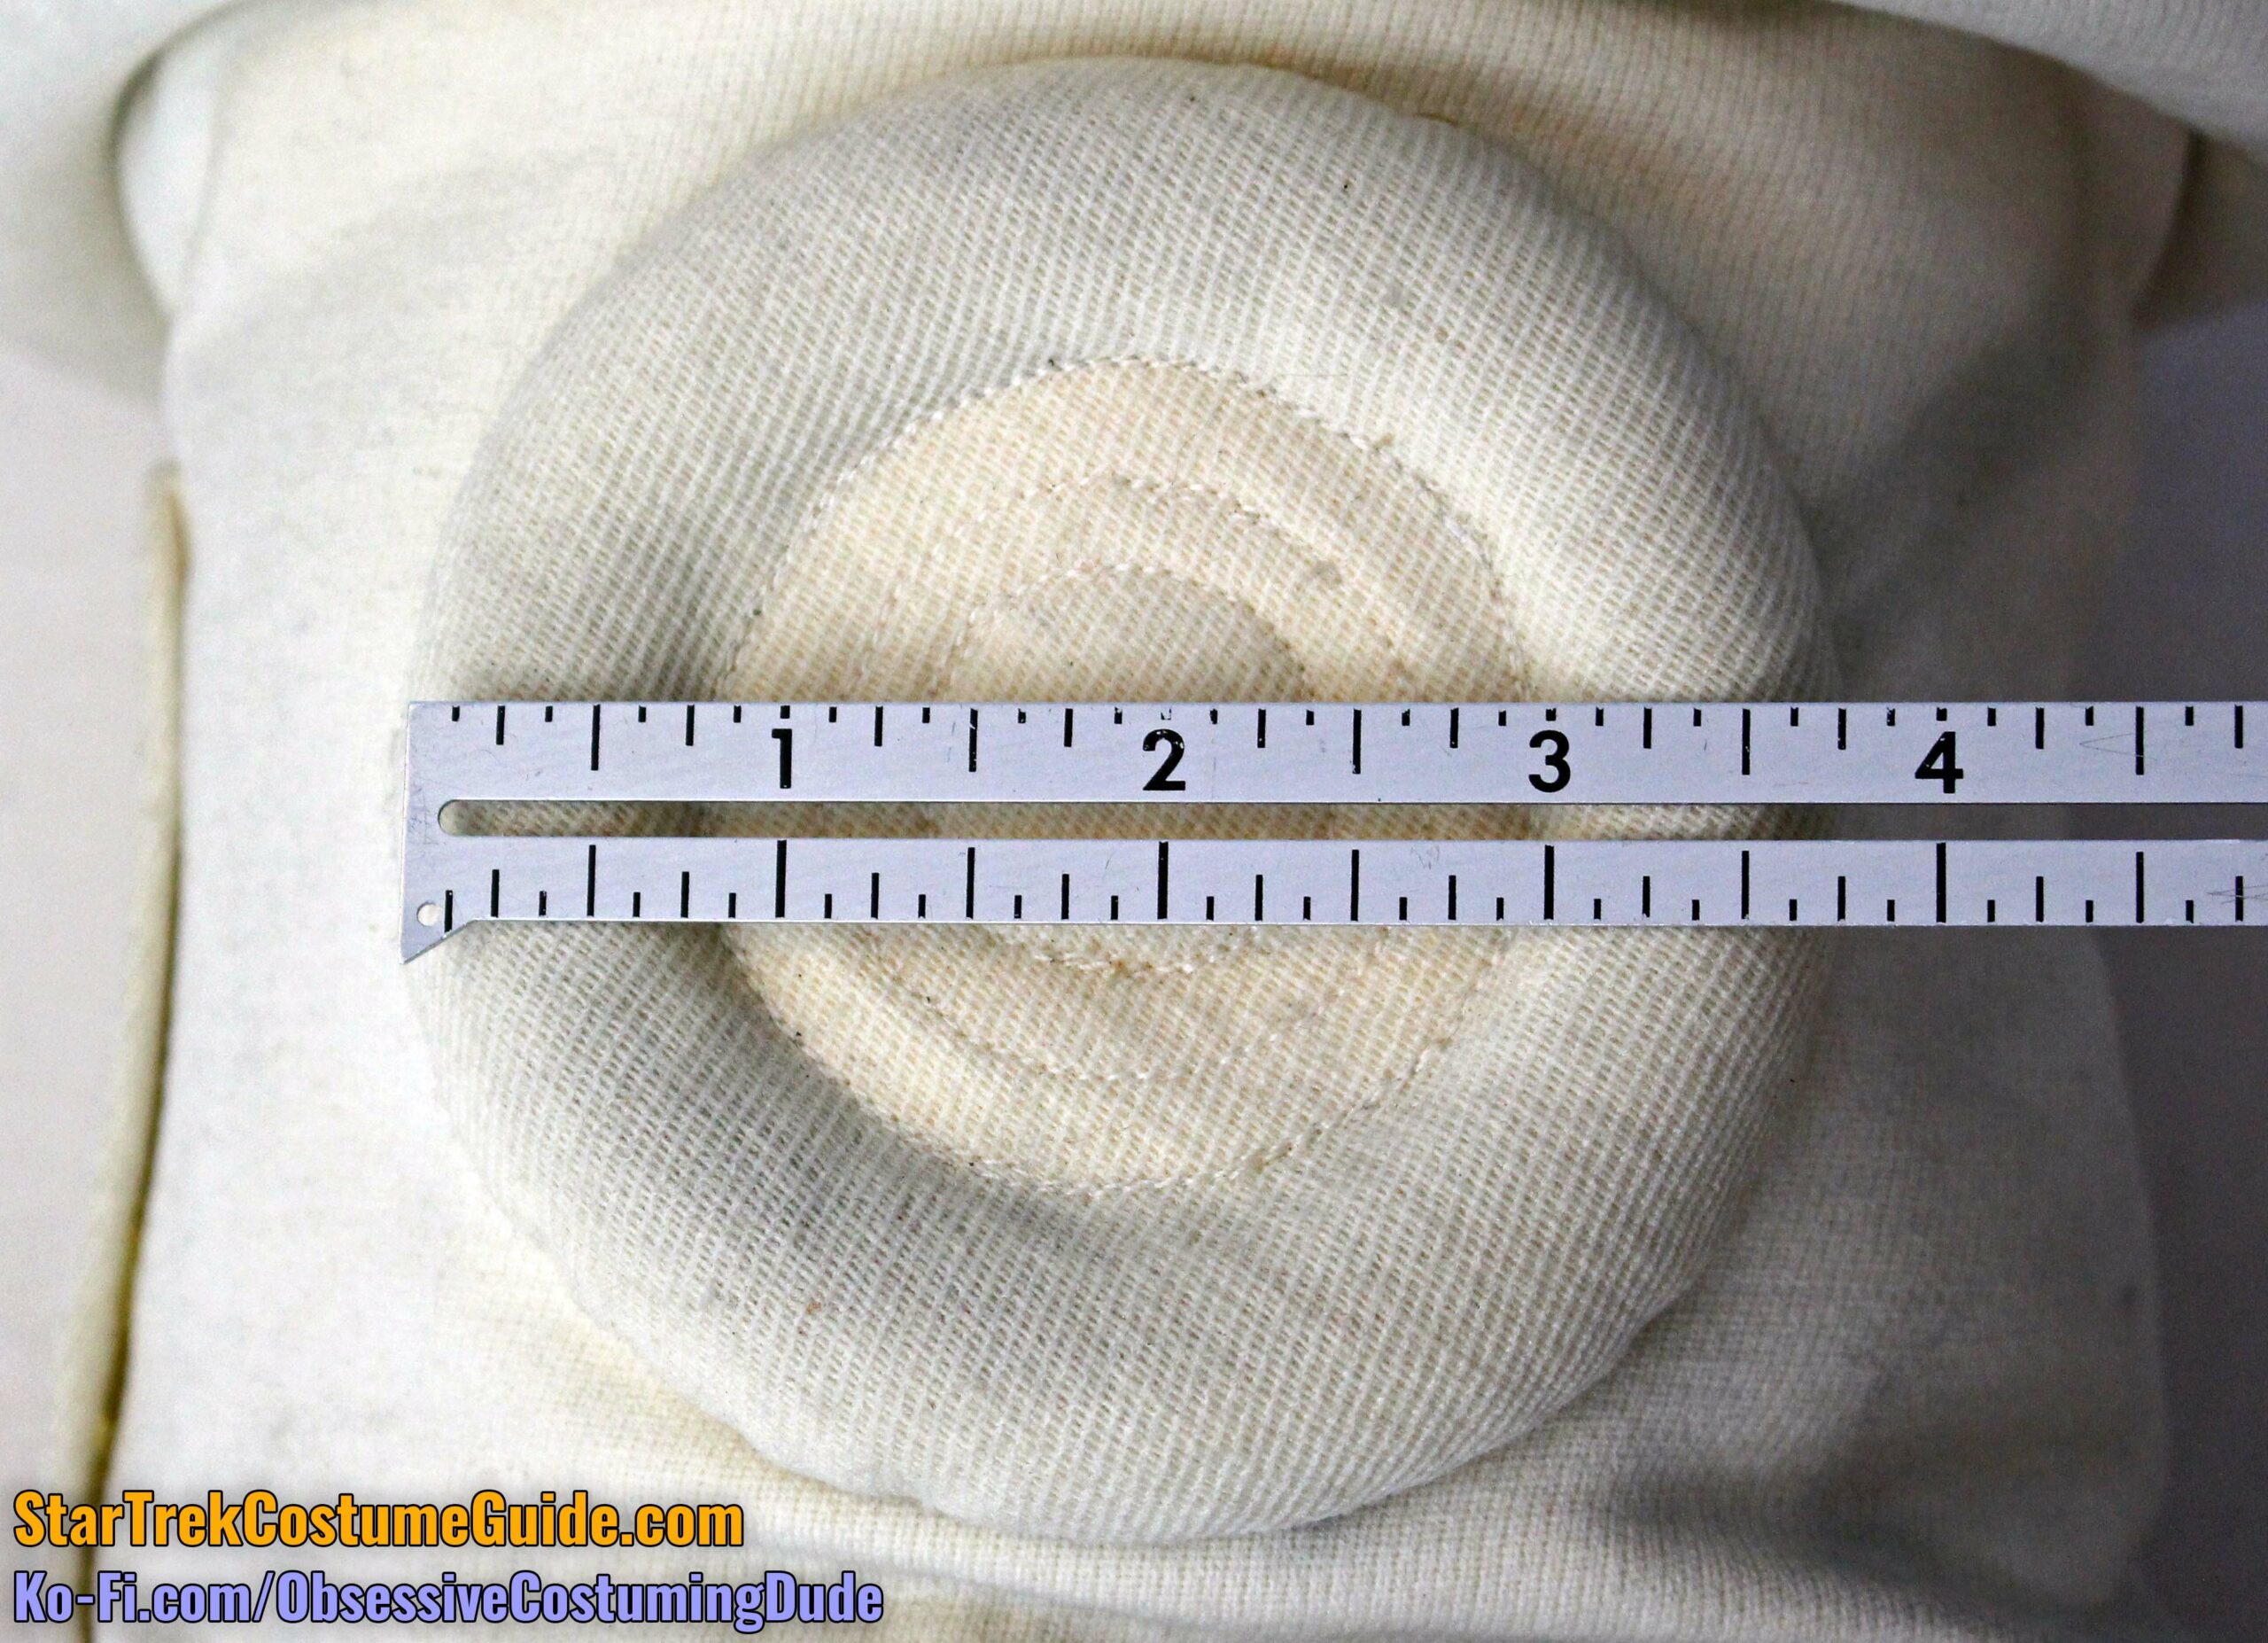
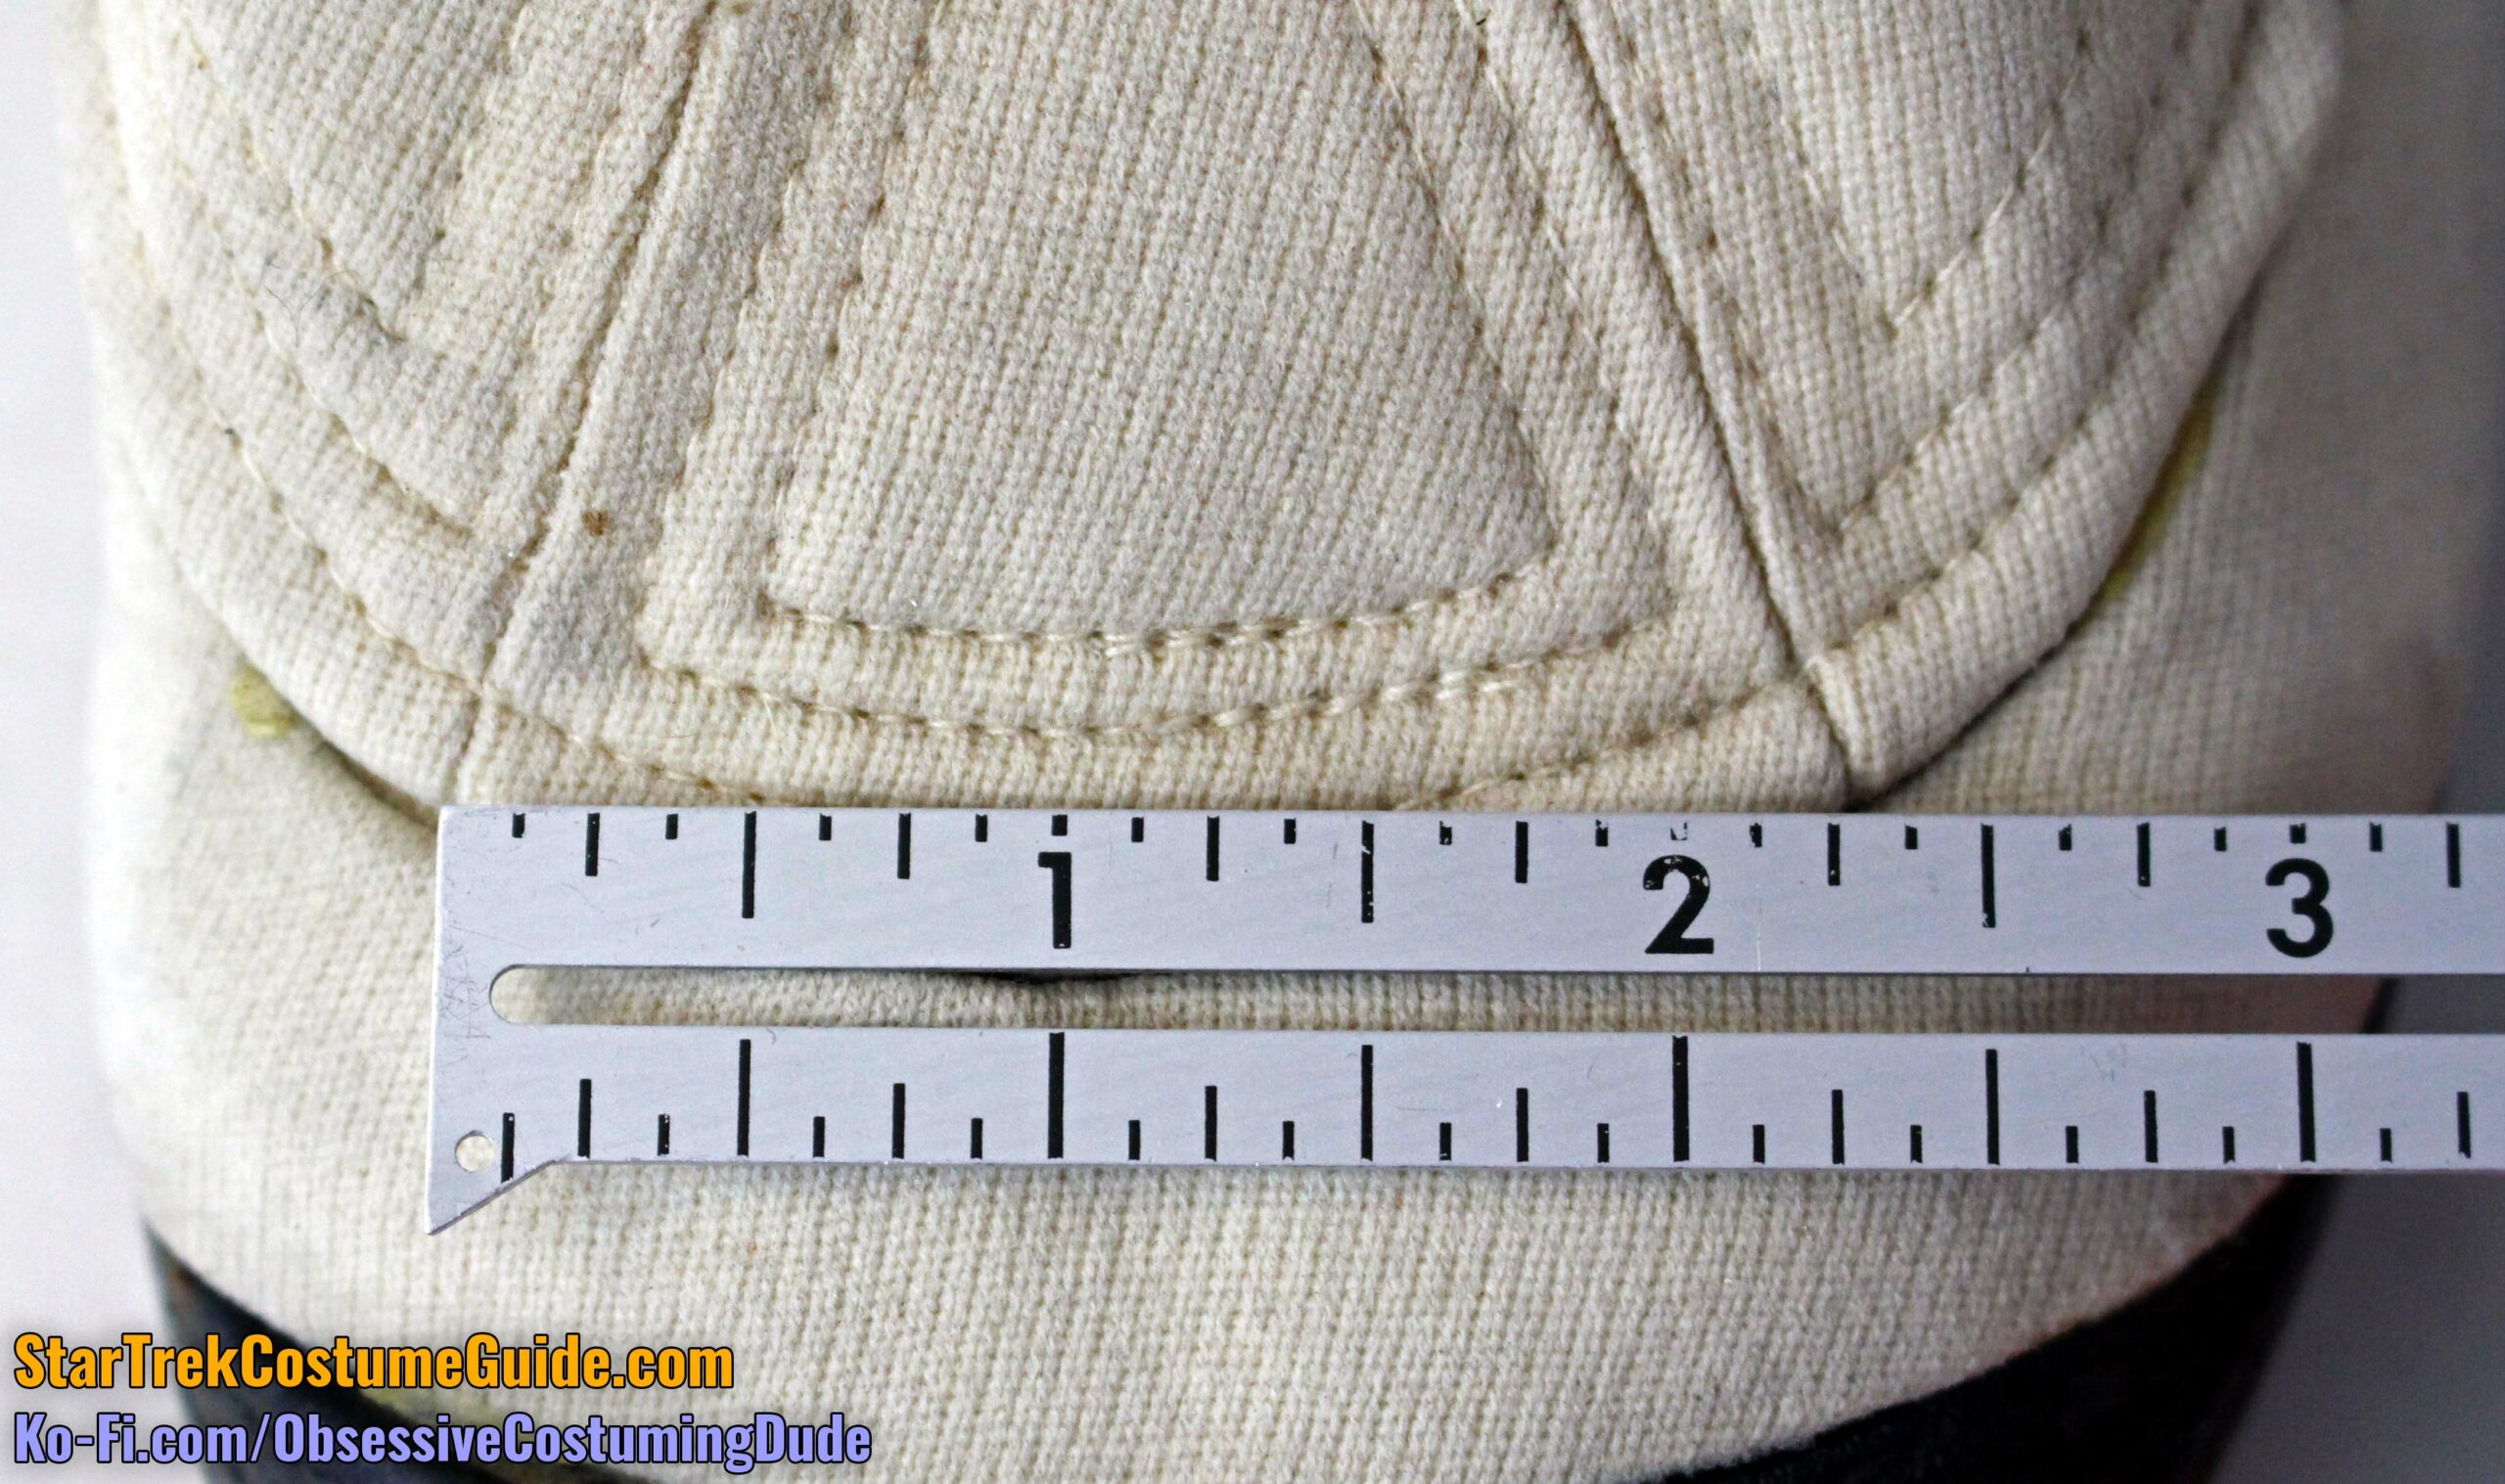
The “bullseye” wasn’t quite a true circle; it measured 2” in diameter (to use the term liberally) horizontally, but 2 ⅛” vertically.
The entire “circle trio” assembly was hand-sewn to the front panel around its outer edge.
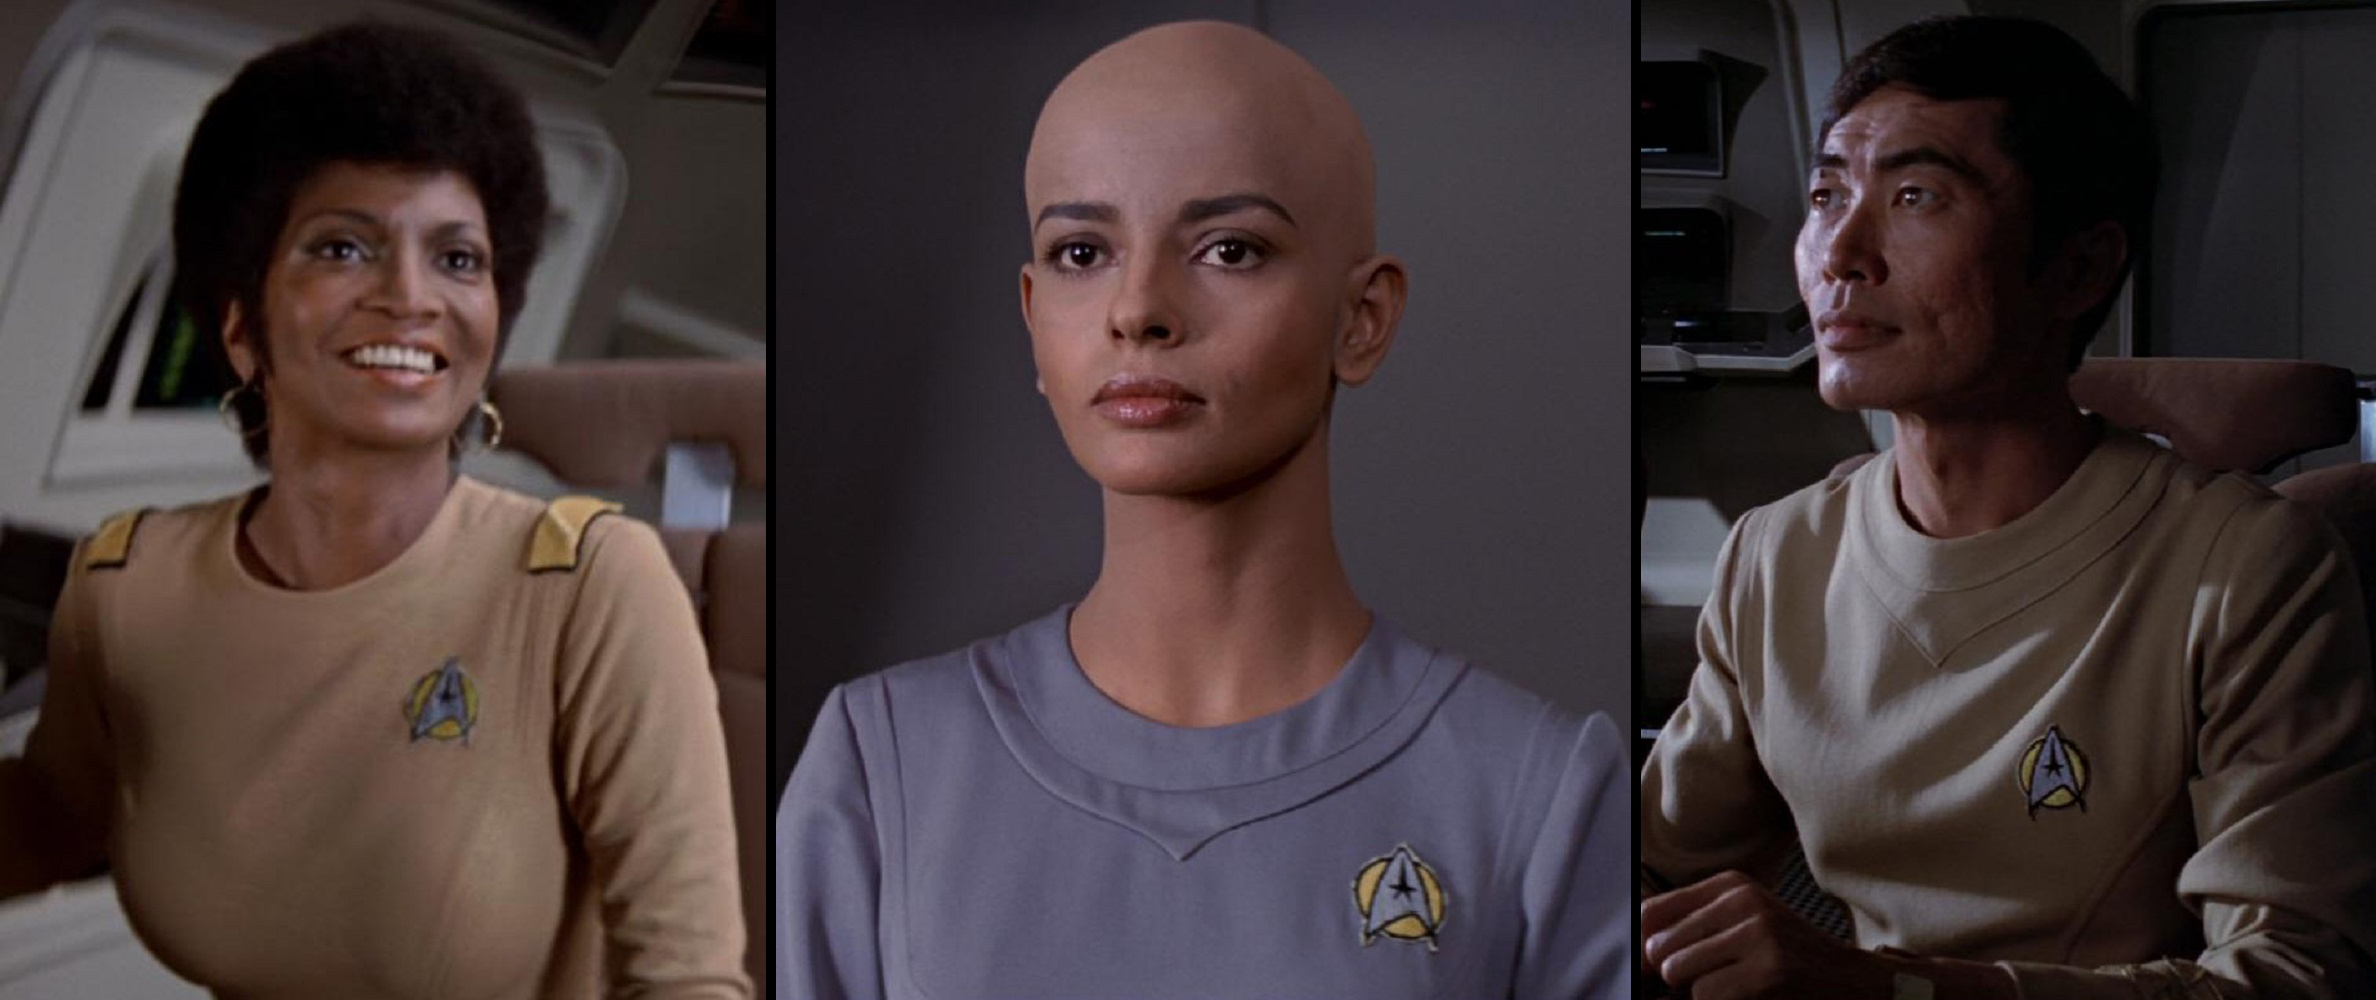
As best I could tell, the women’s version only had one “chest circle,” as opposed to the three on the men’s.
Engineering radiation suit auction photos
Engineering radiation suit auction photos
Engineering radiation suit auction photos
Engineering radiation suit auction photo
An exception would seem to be this lady from The Undiscovered Country, but based on the baggy fit, I think she may have been wearing a men’s uniform.
The women’s version also appears to have had a pair of extra vertical(-ish) side front seams, somewhat analogous to those on the TMP class-D jumpsuits.
Engineering radiation suit auction photos
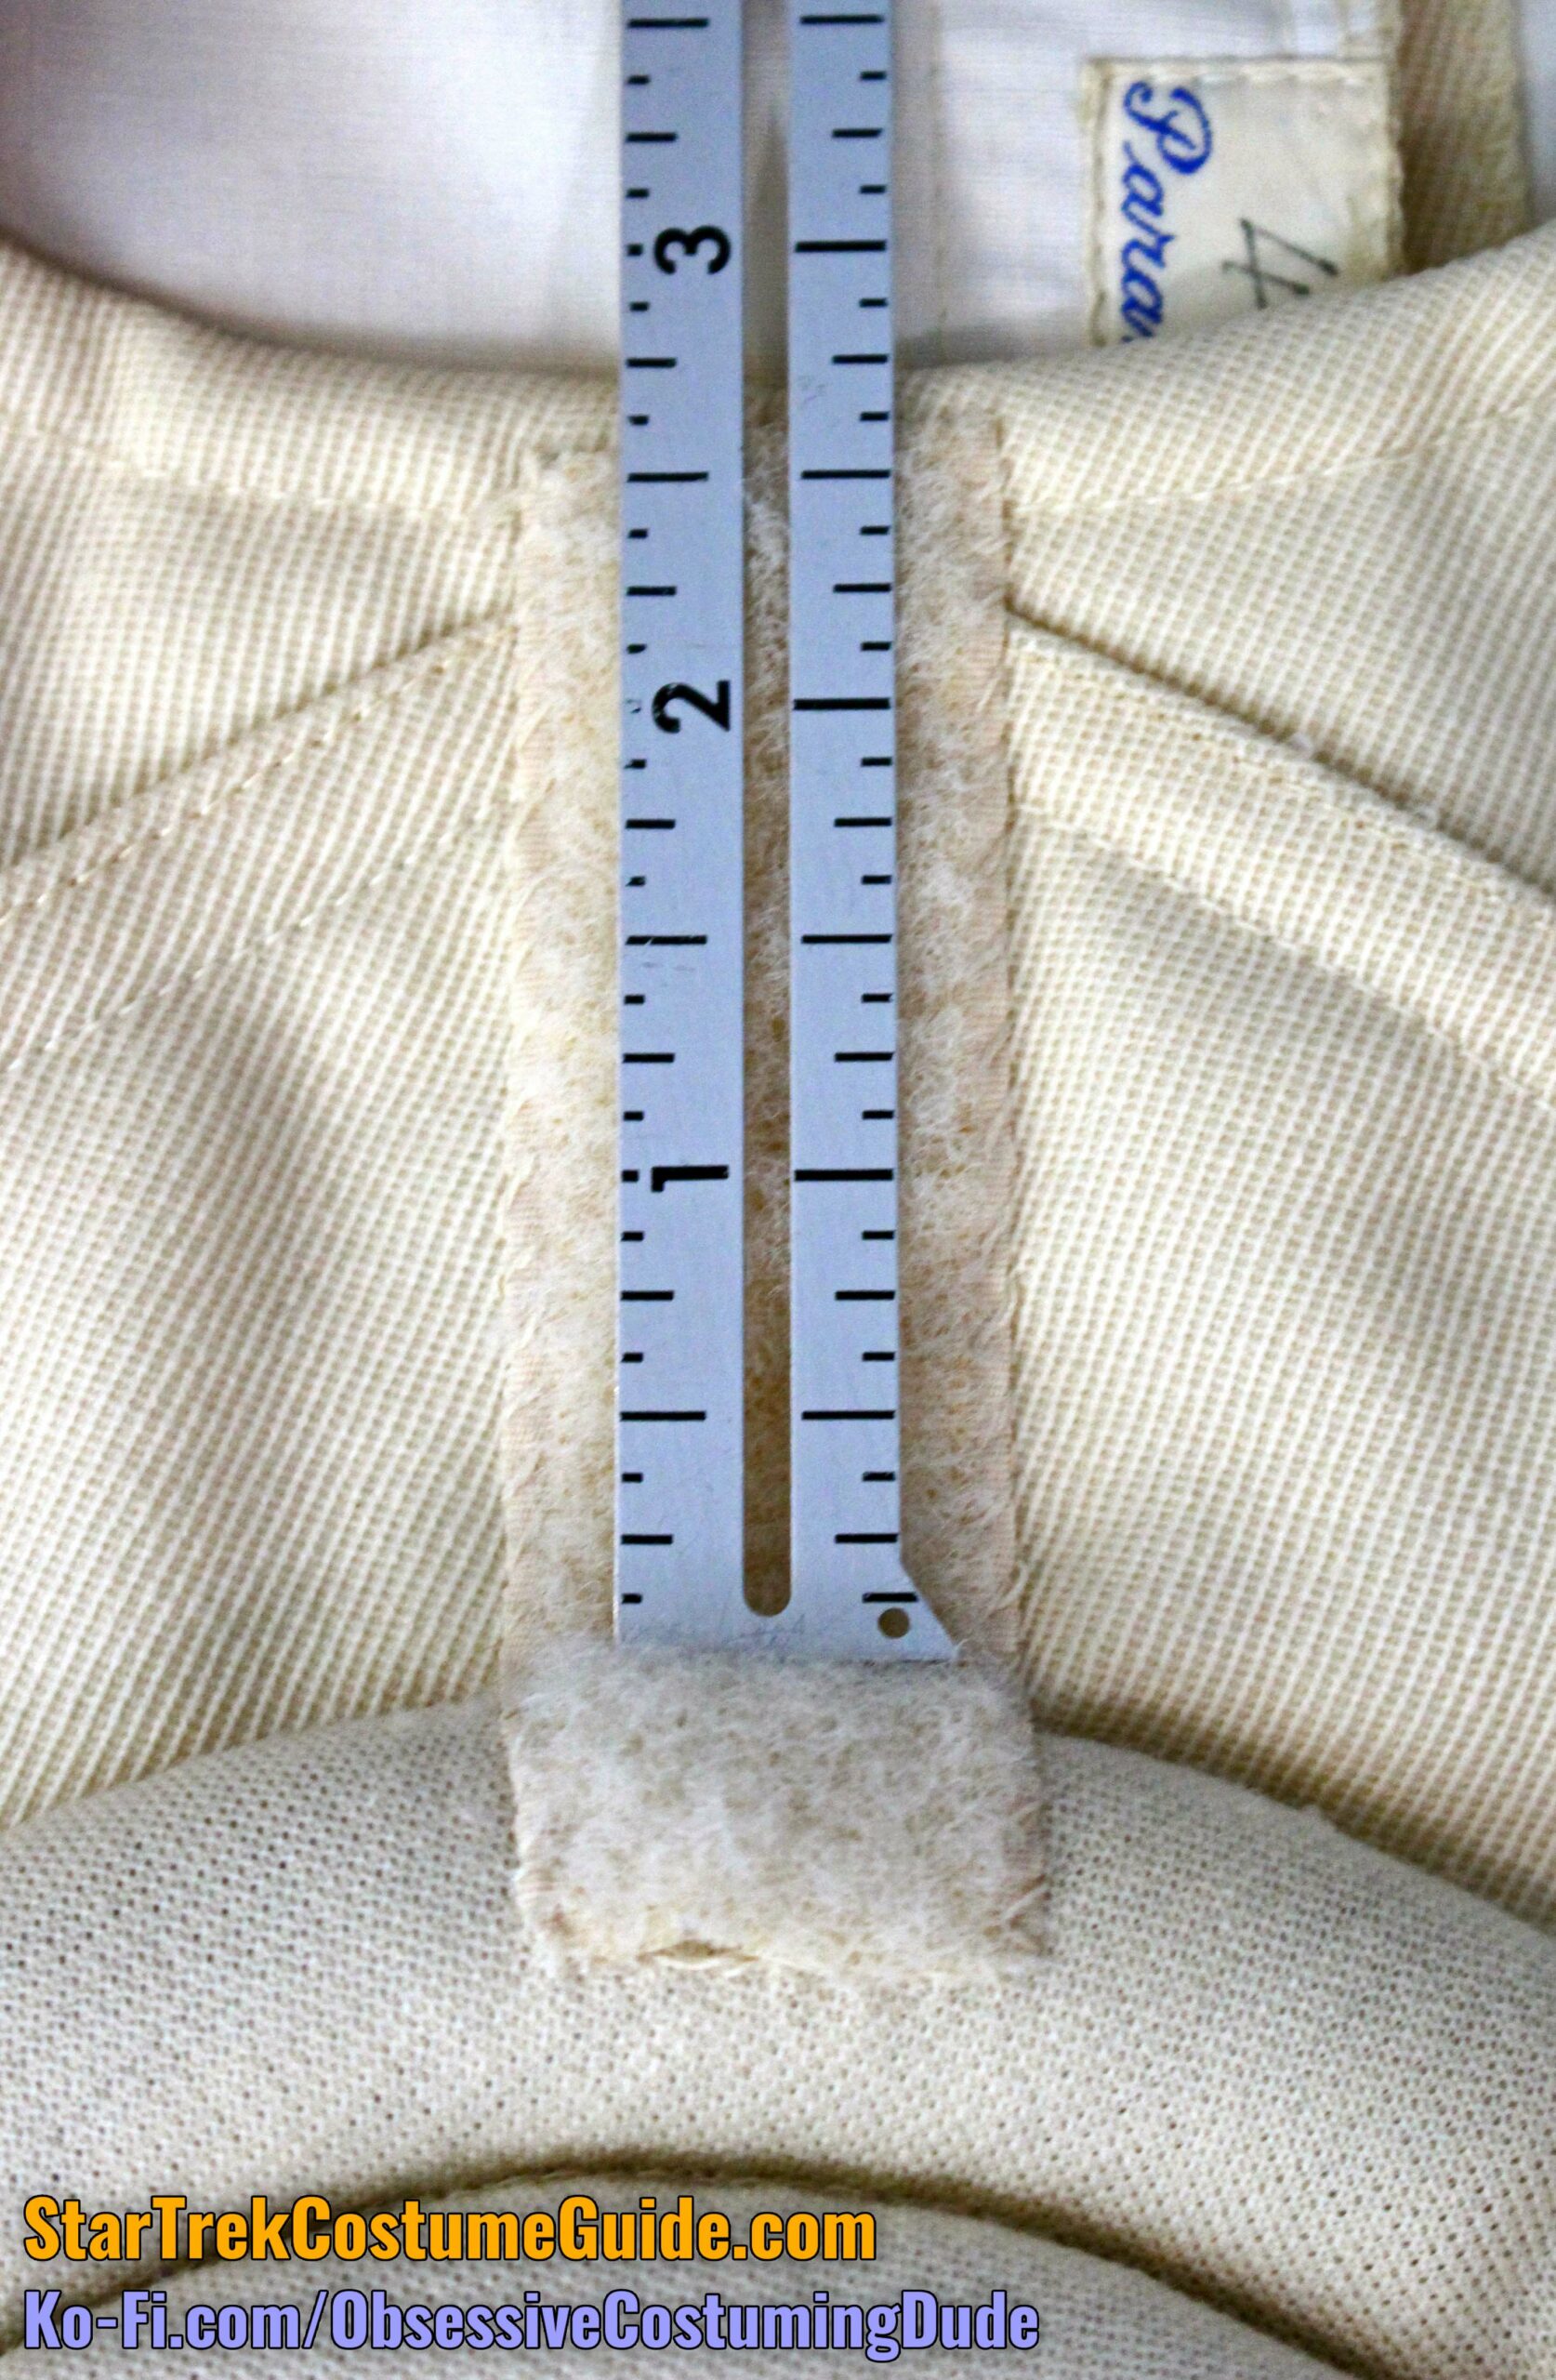
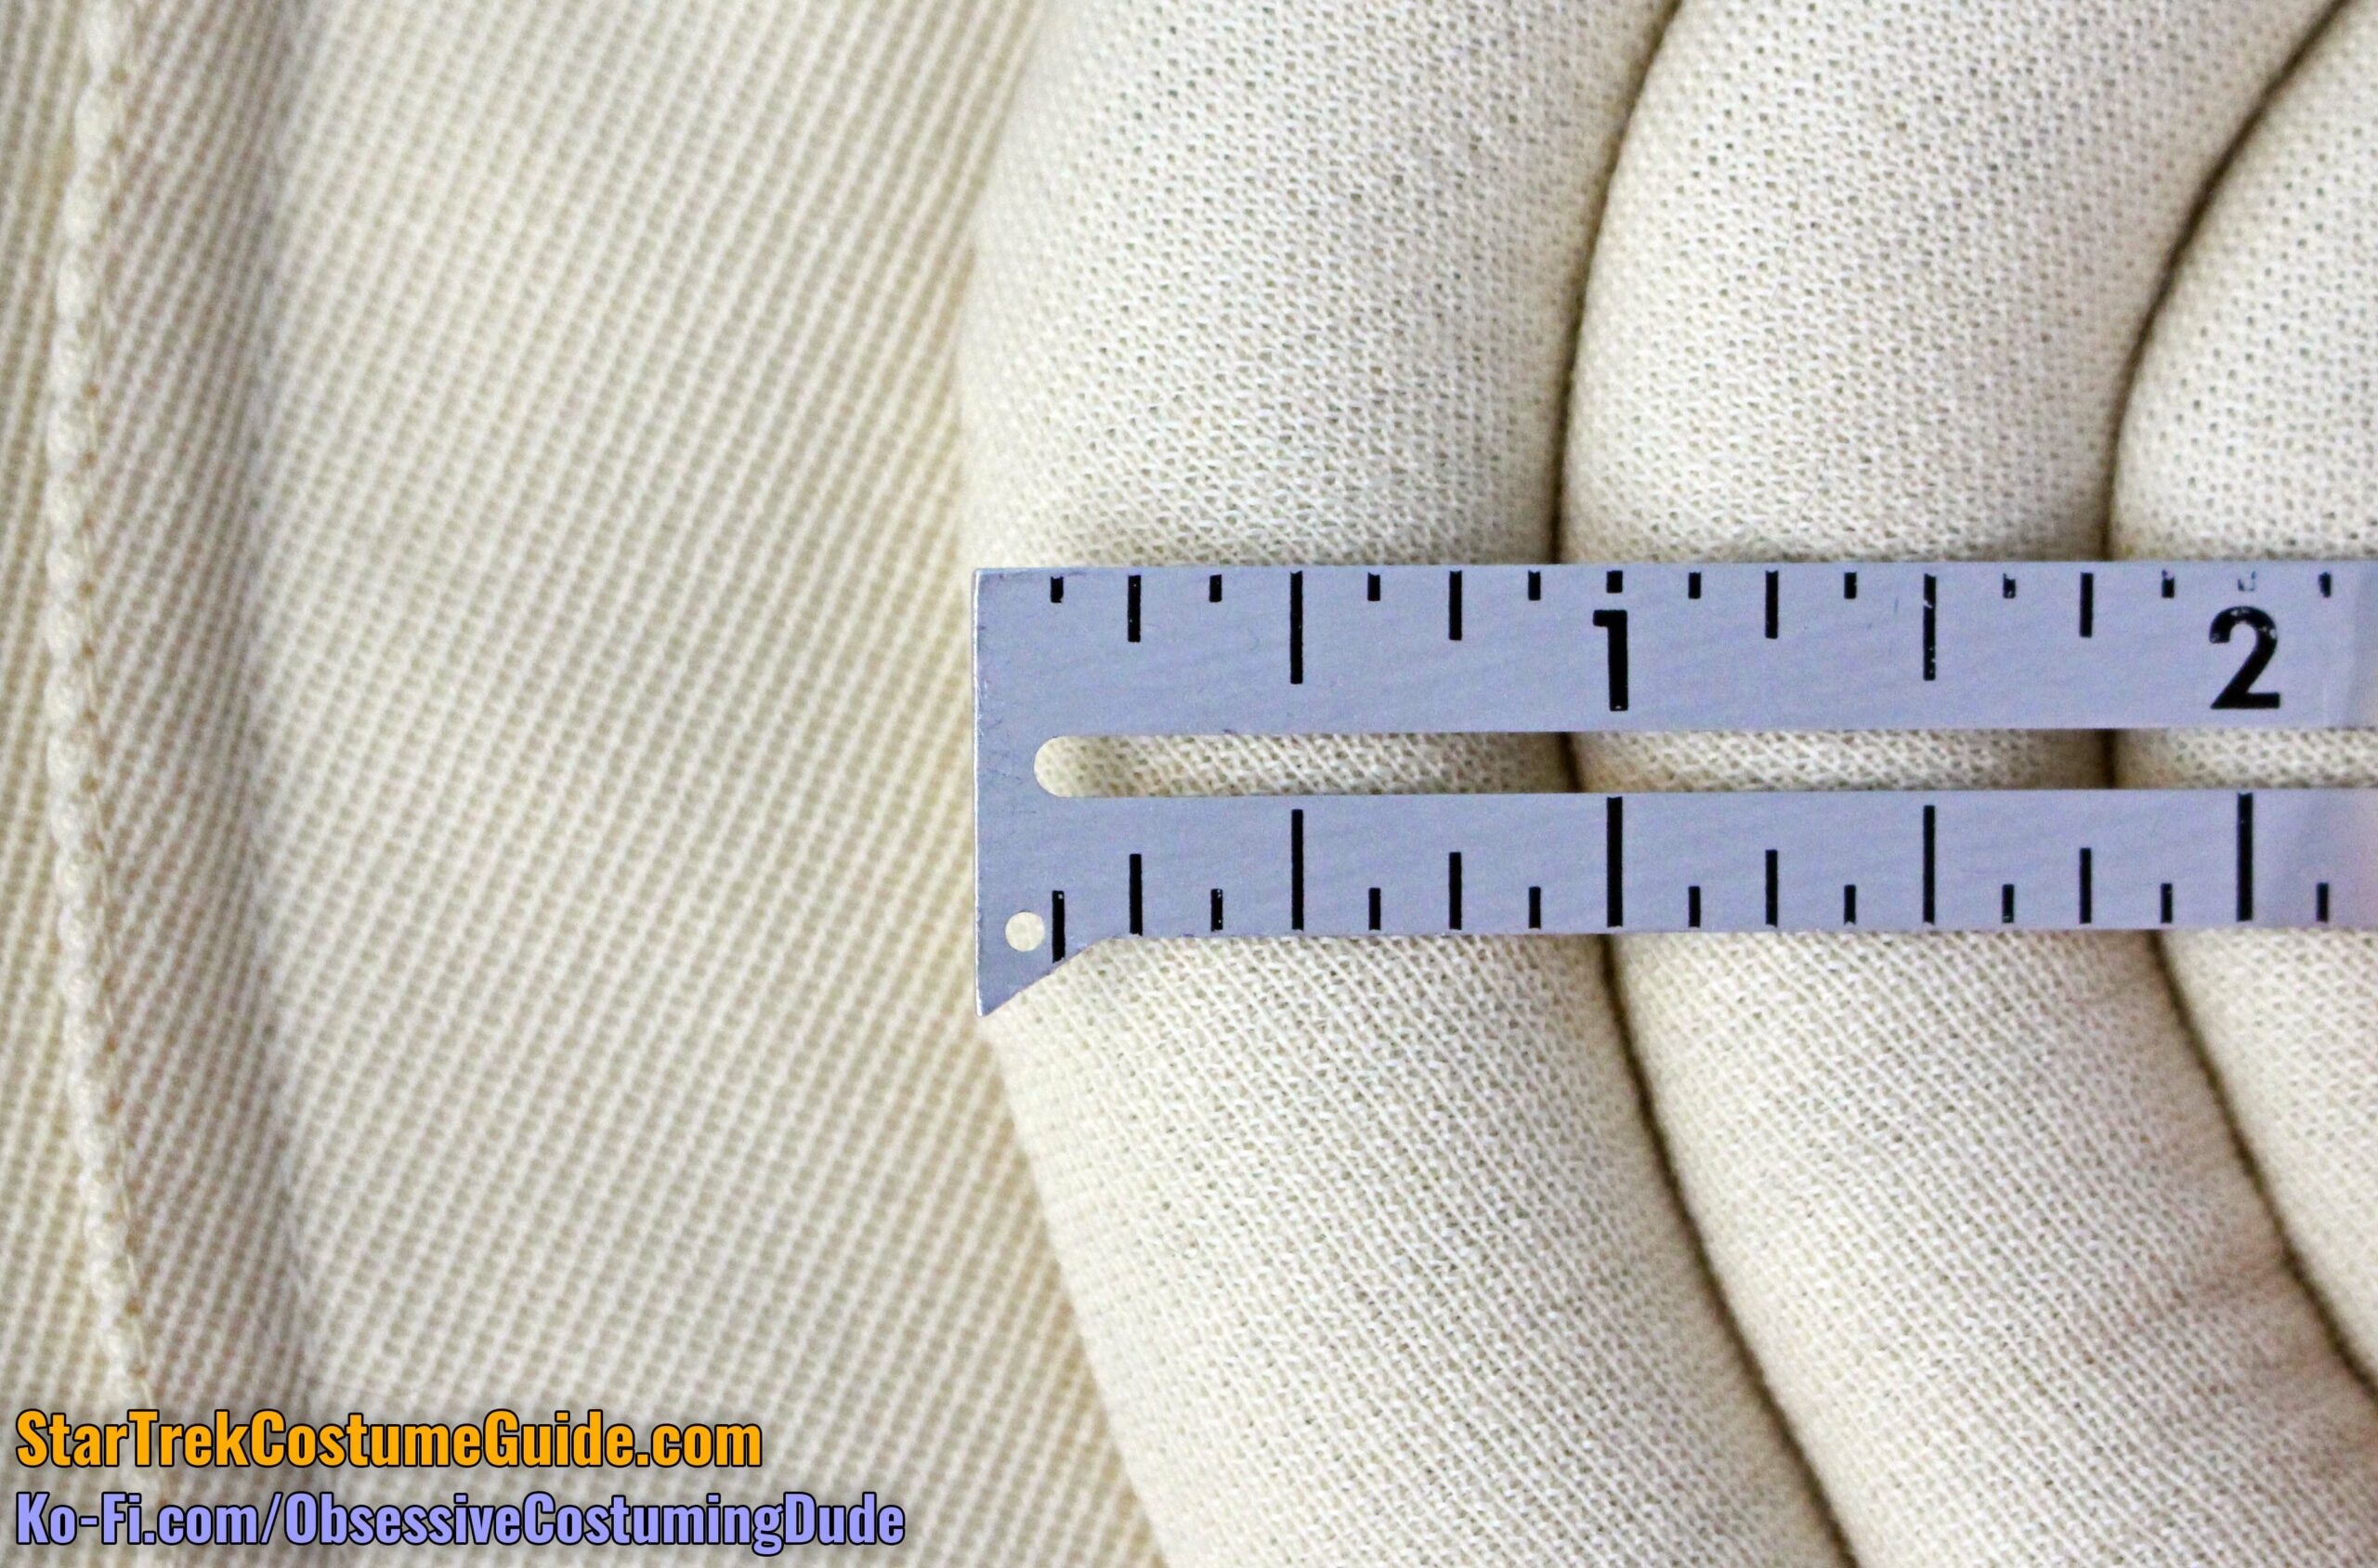
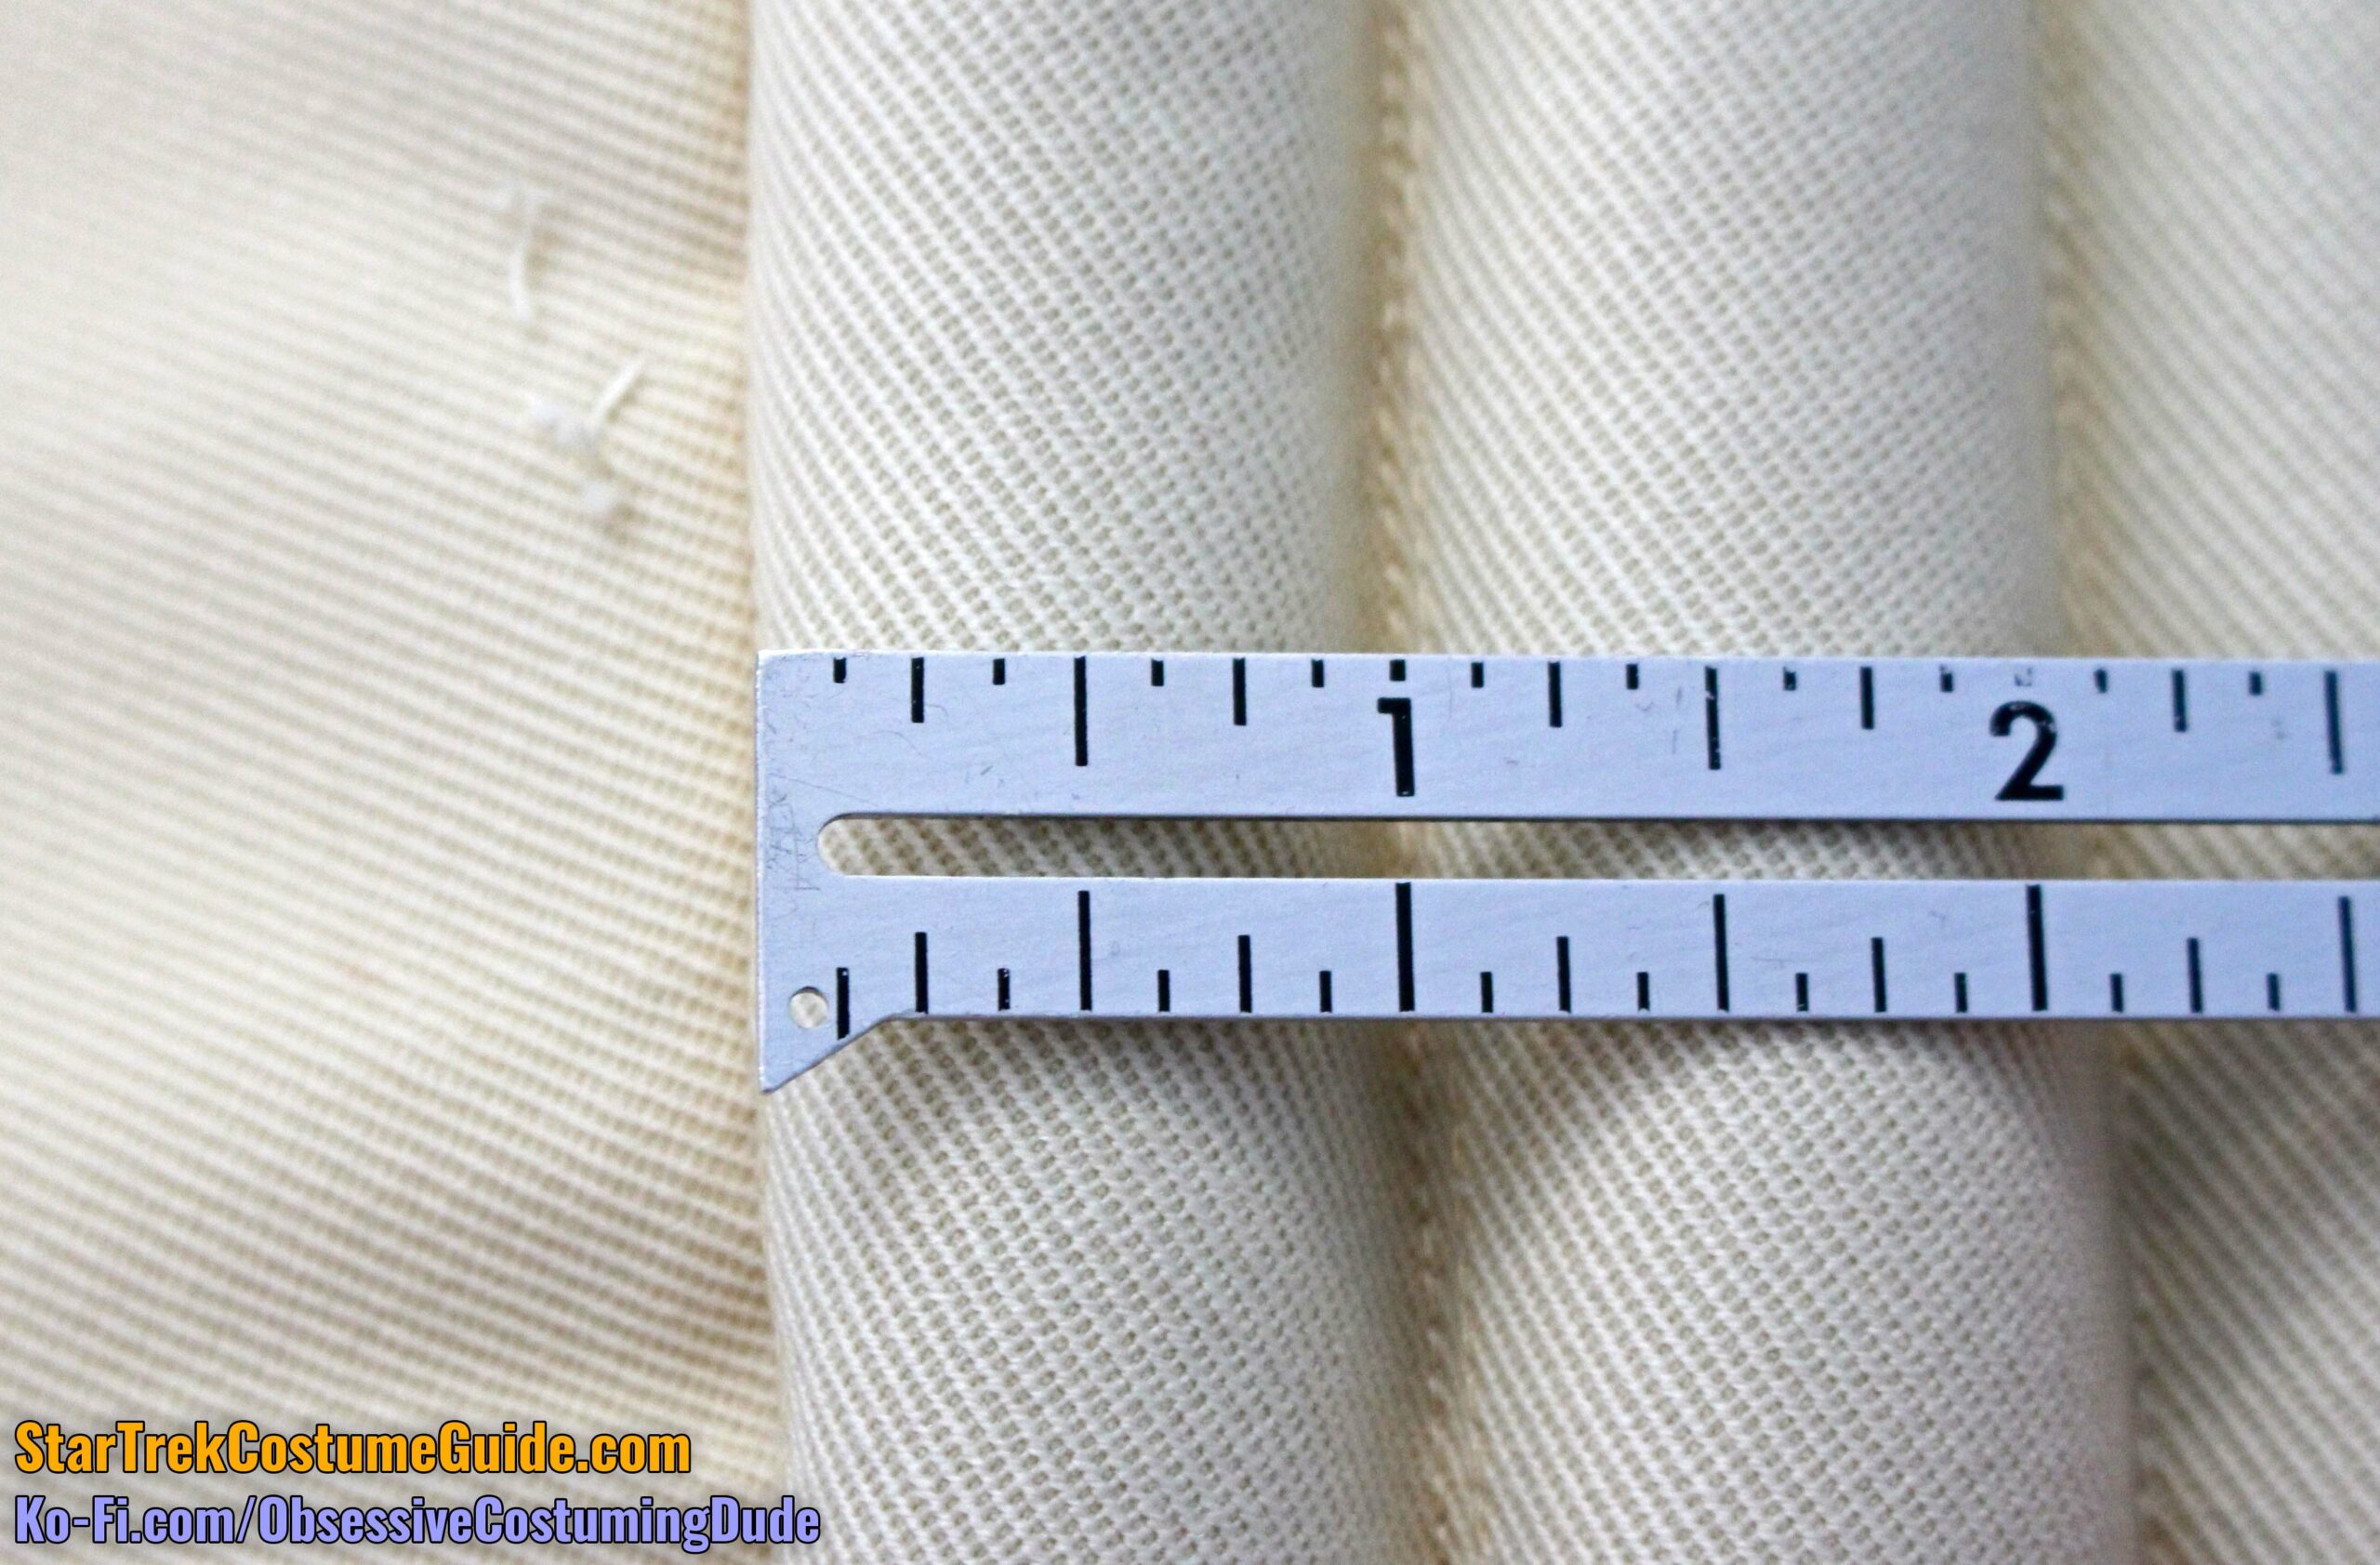
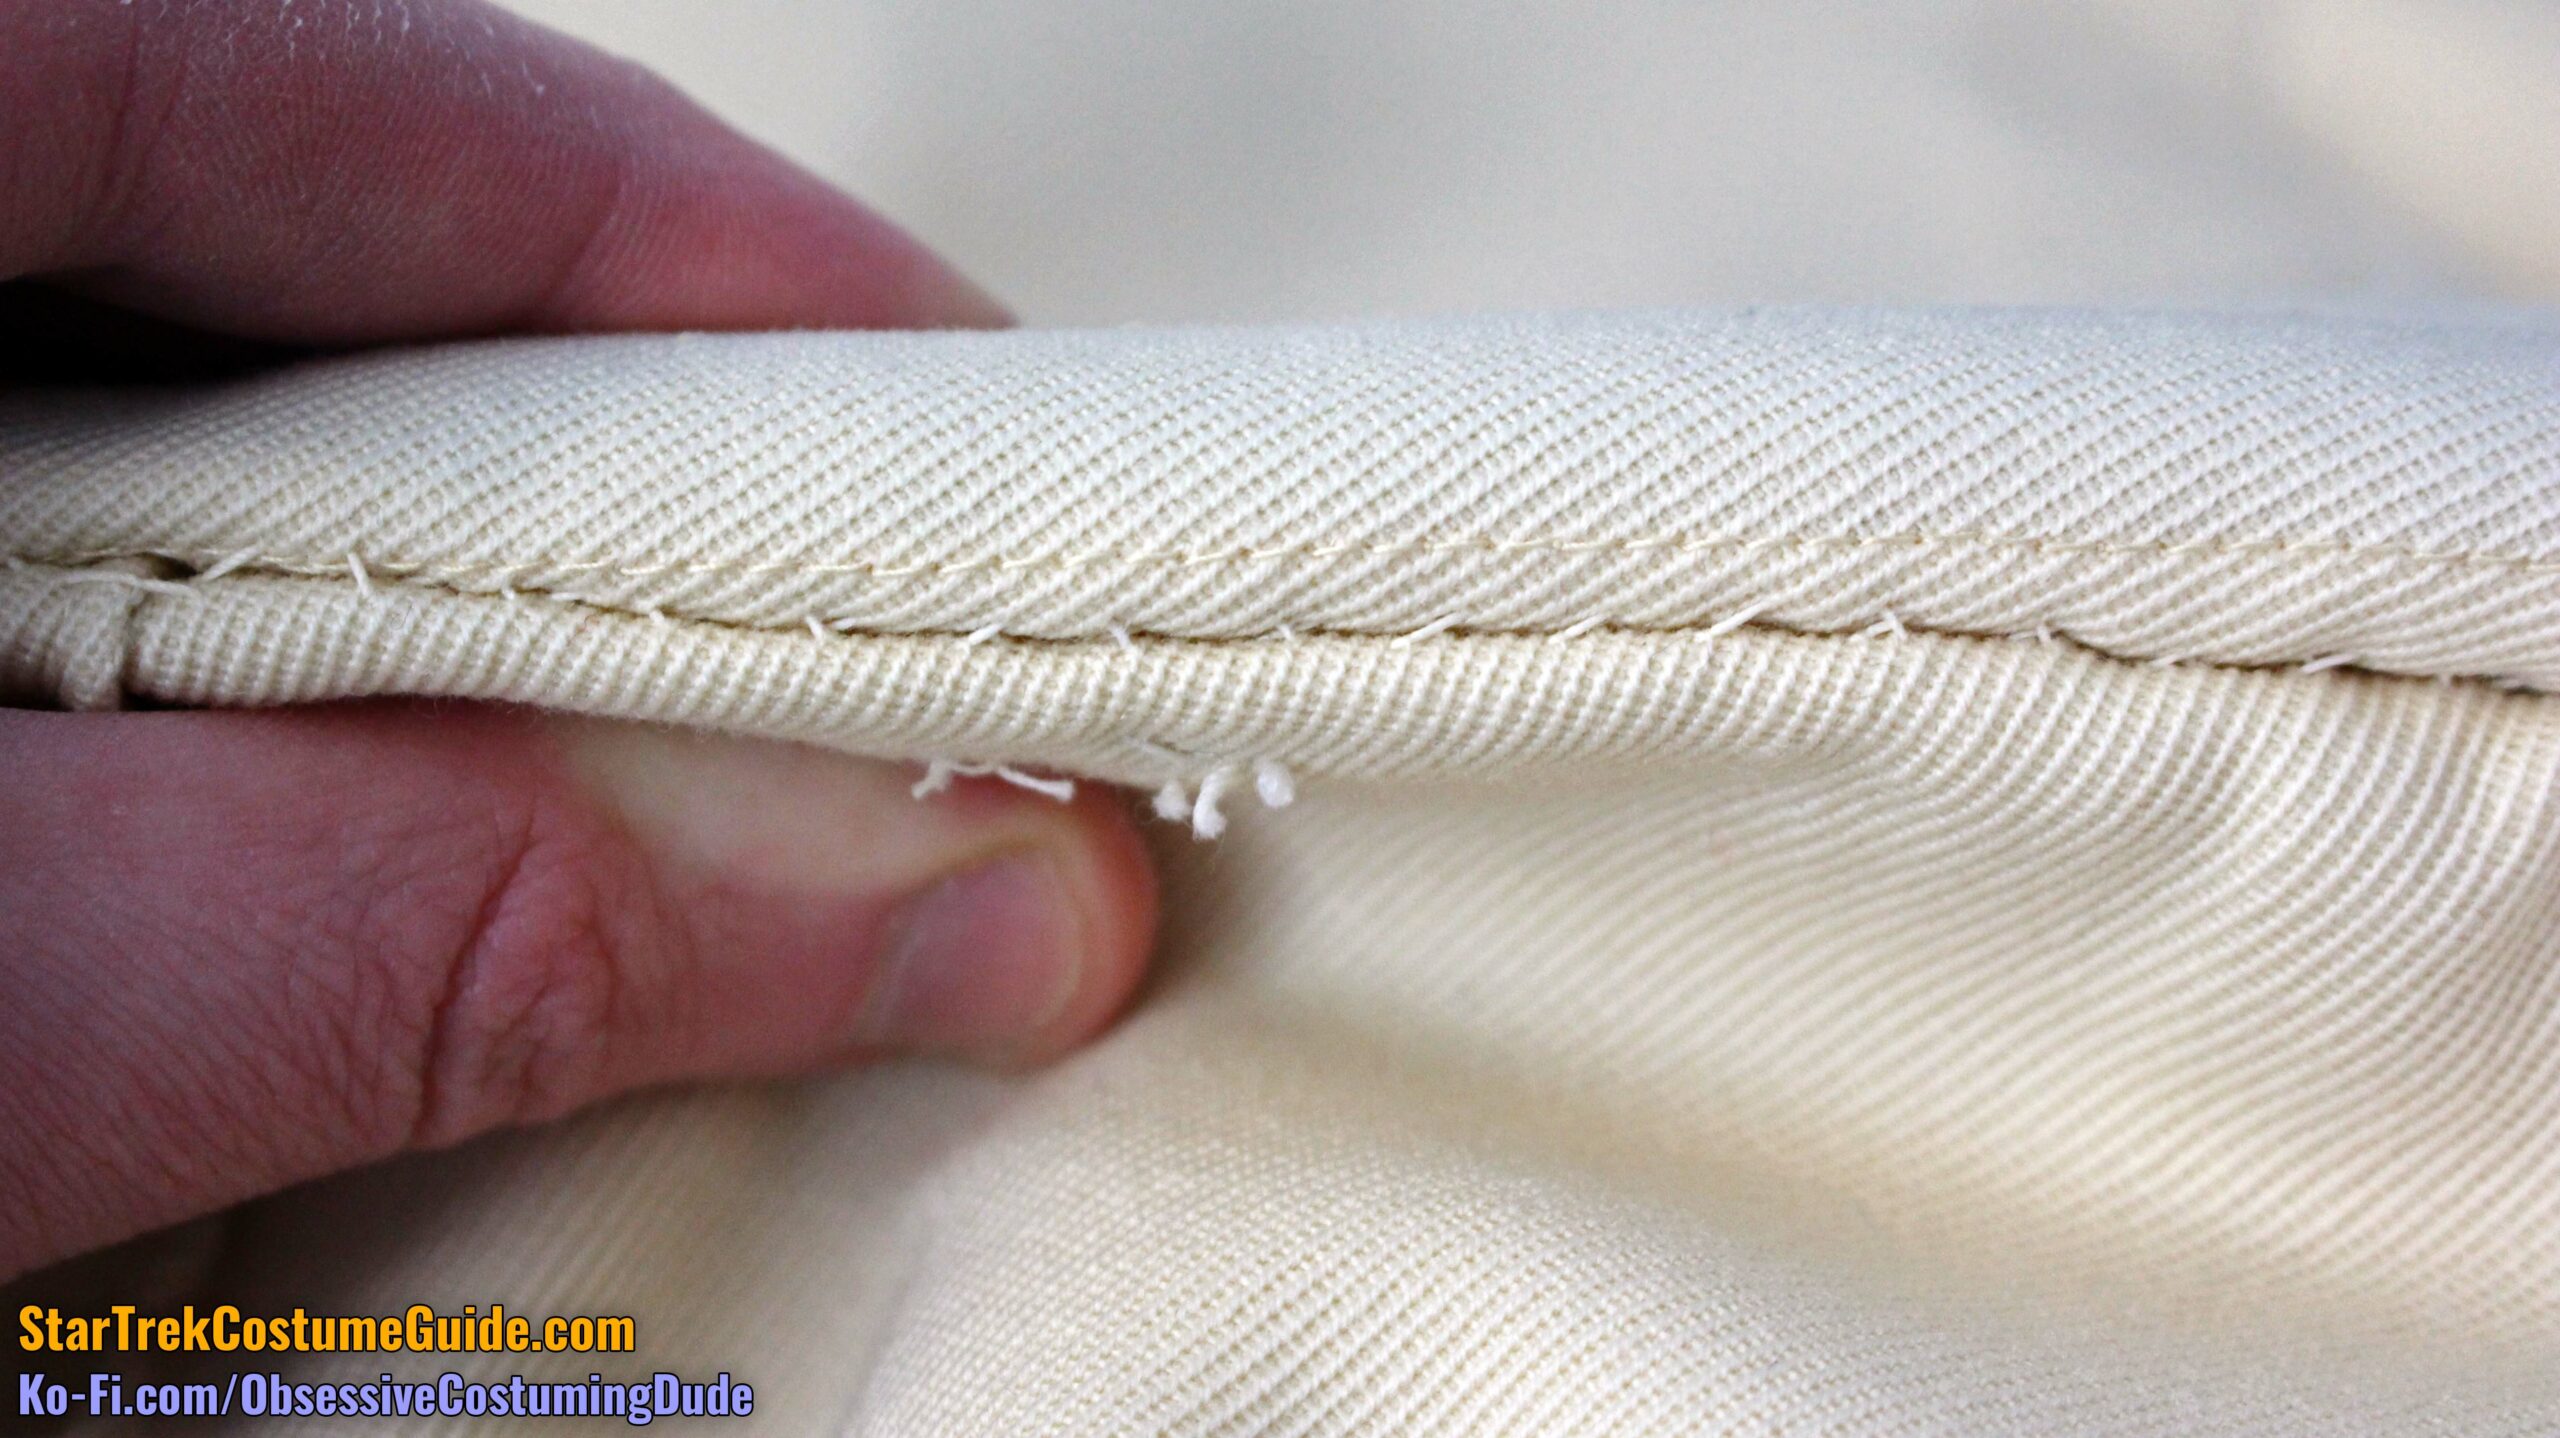
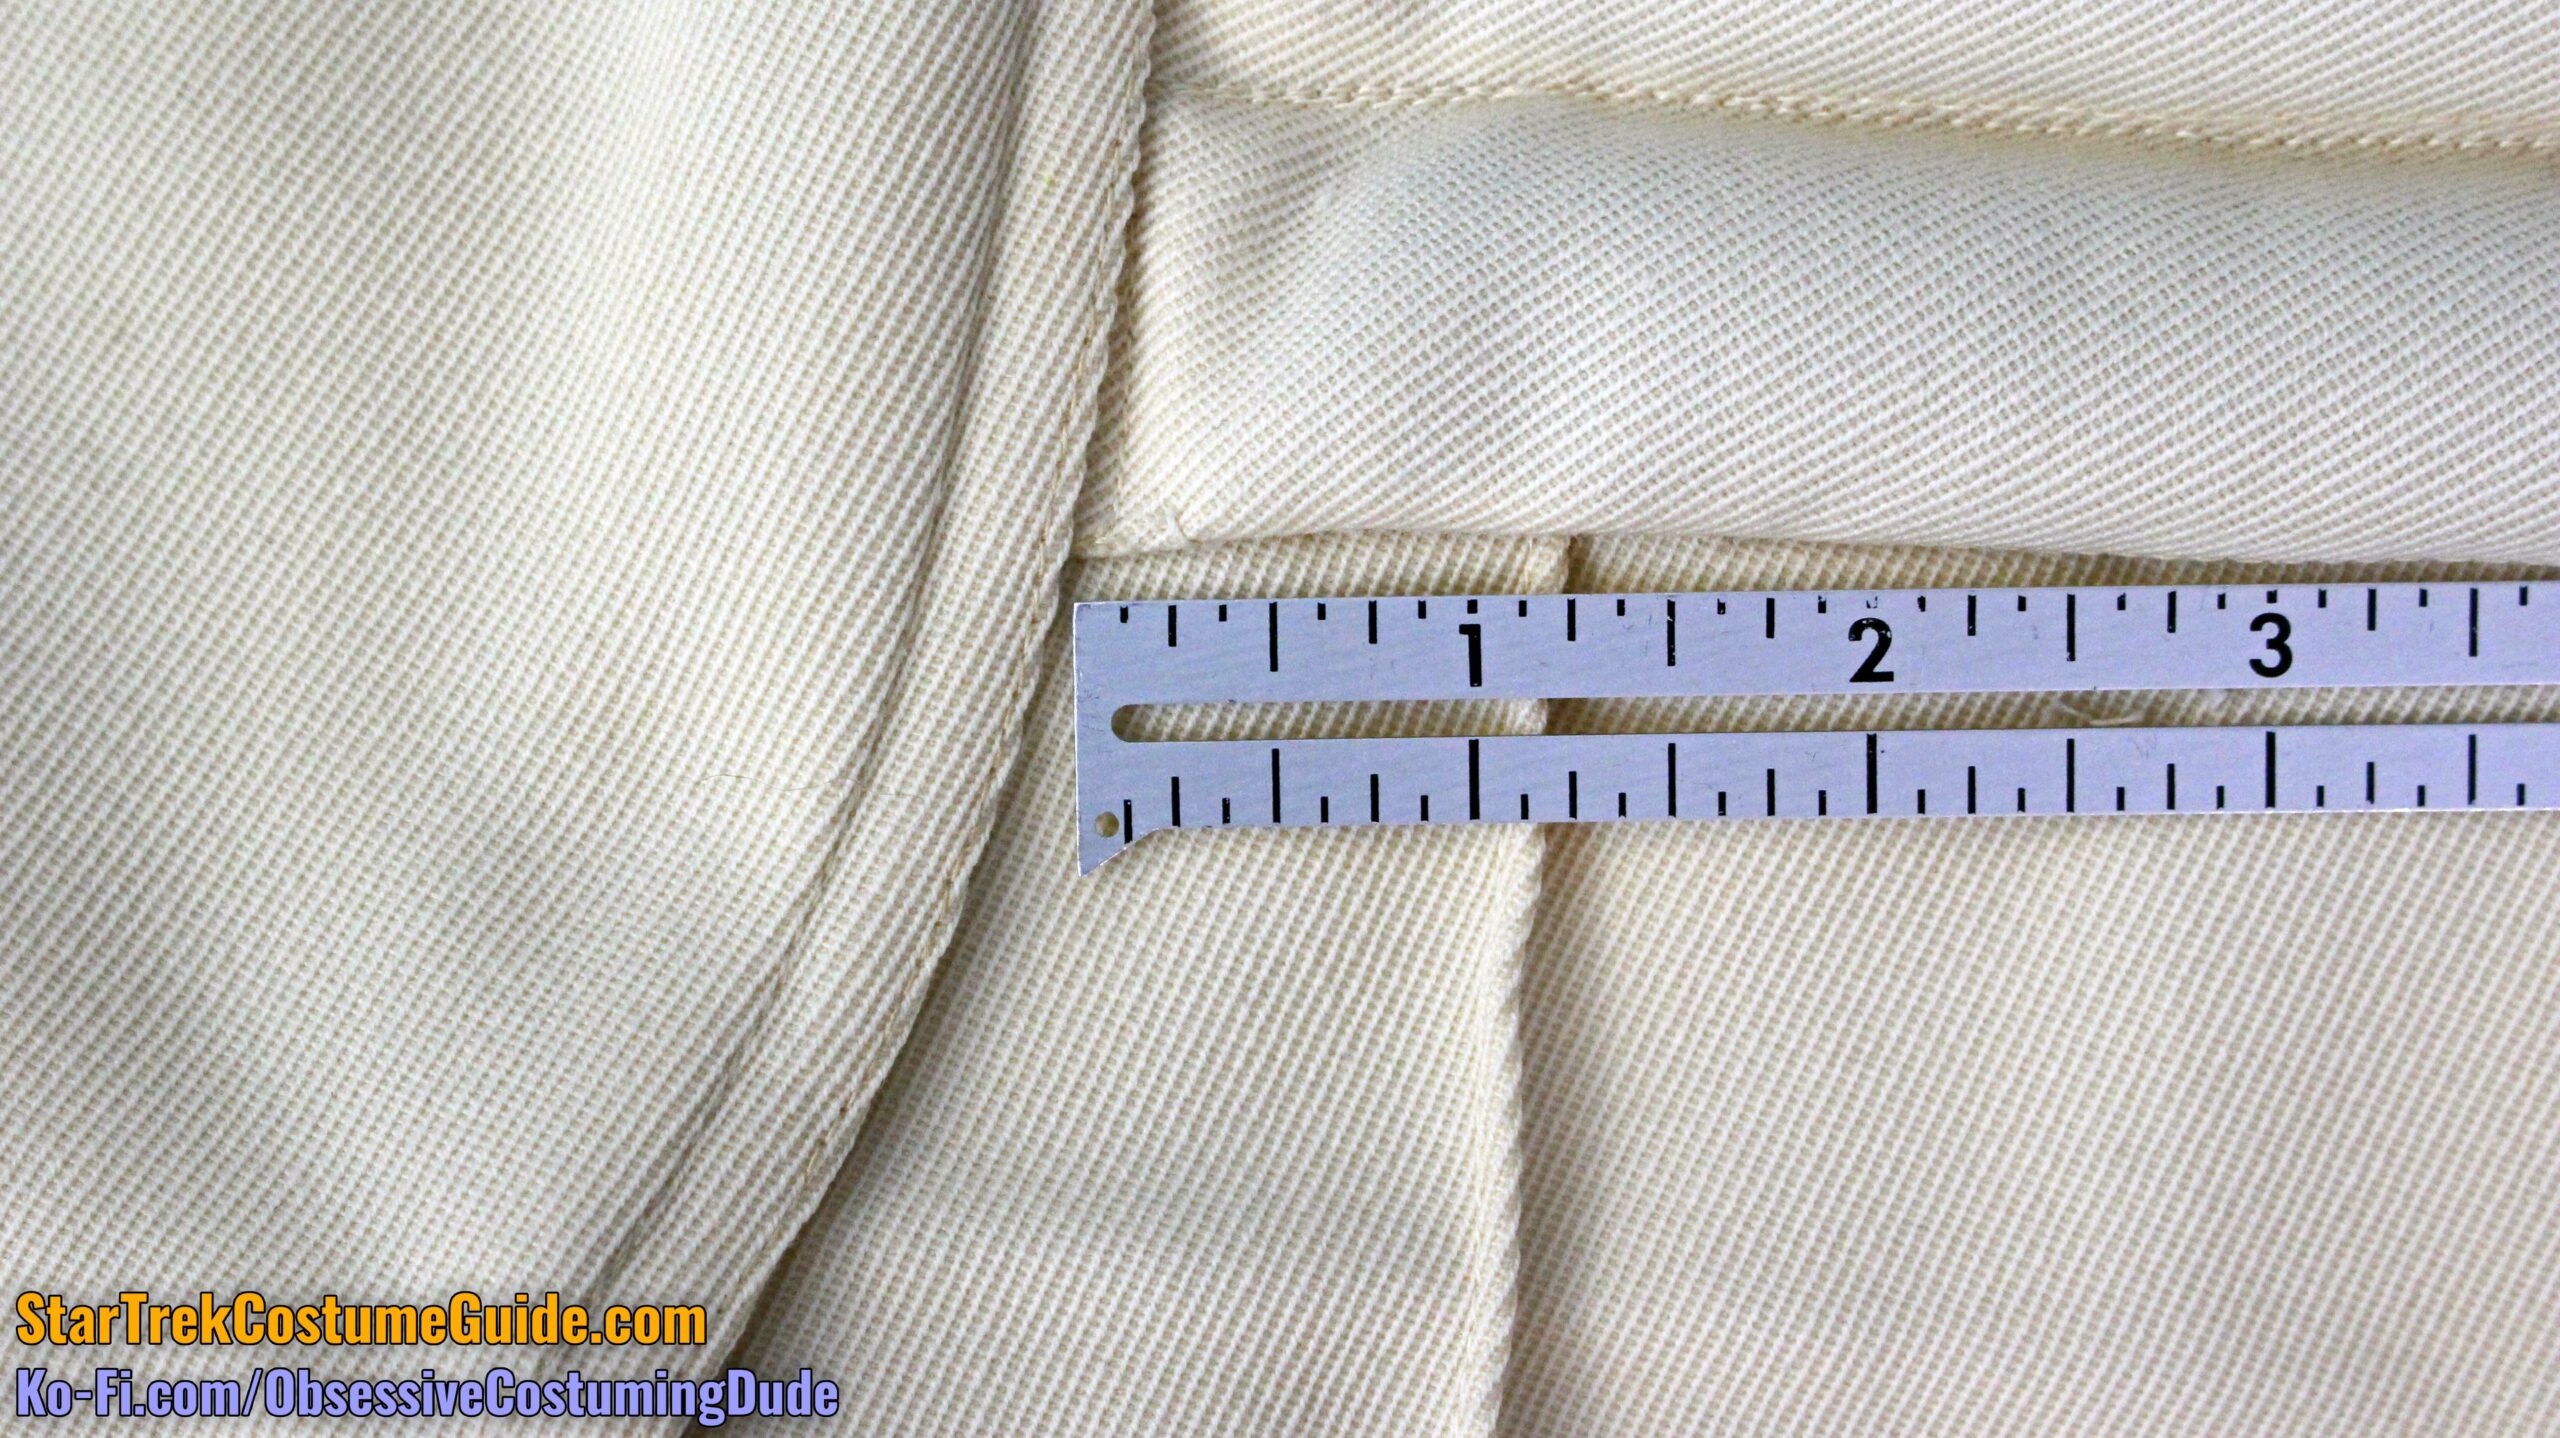
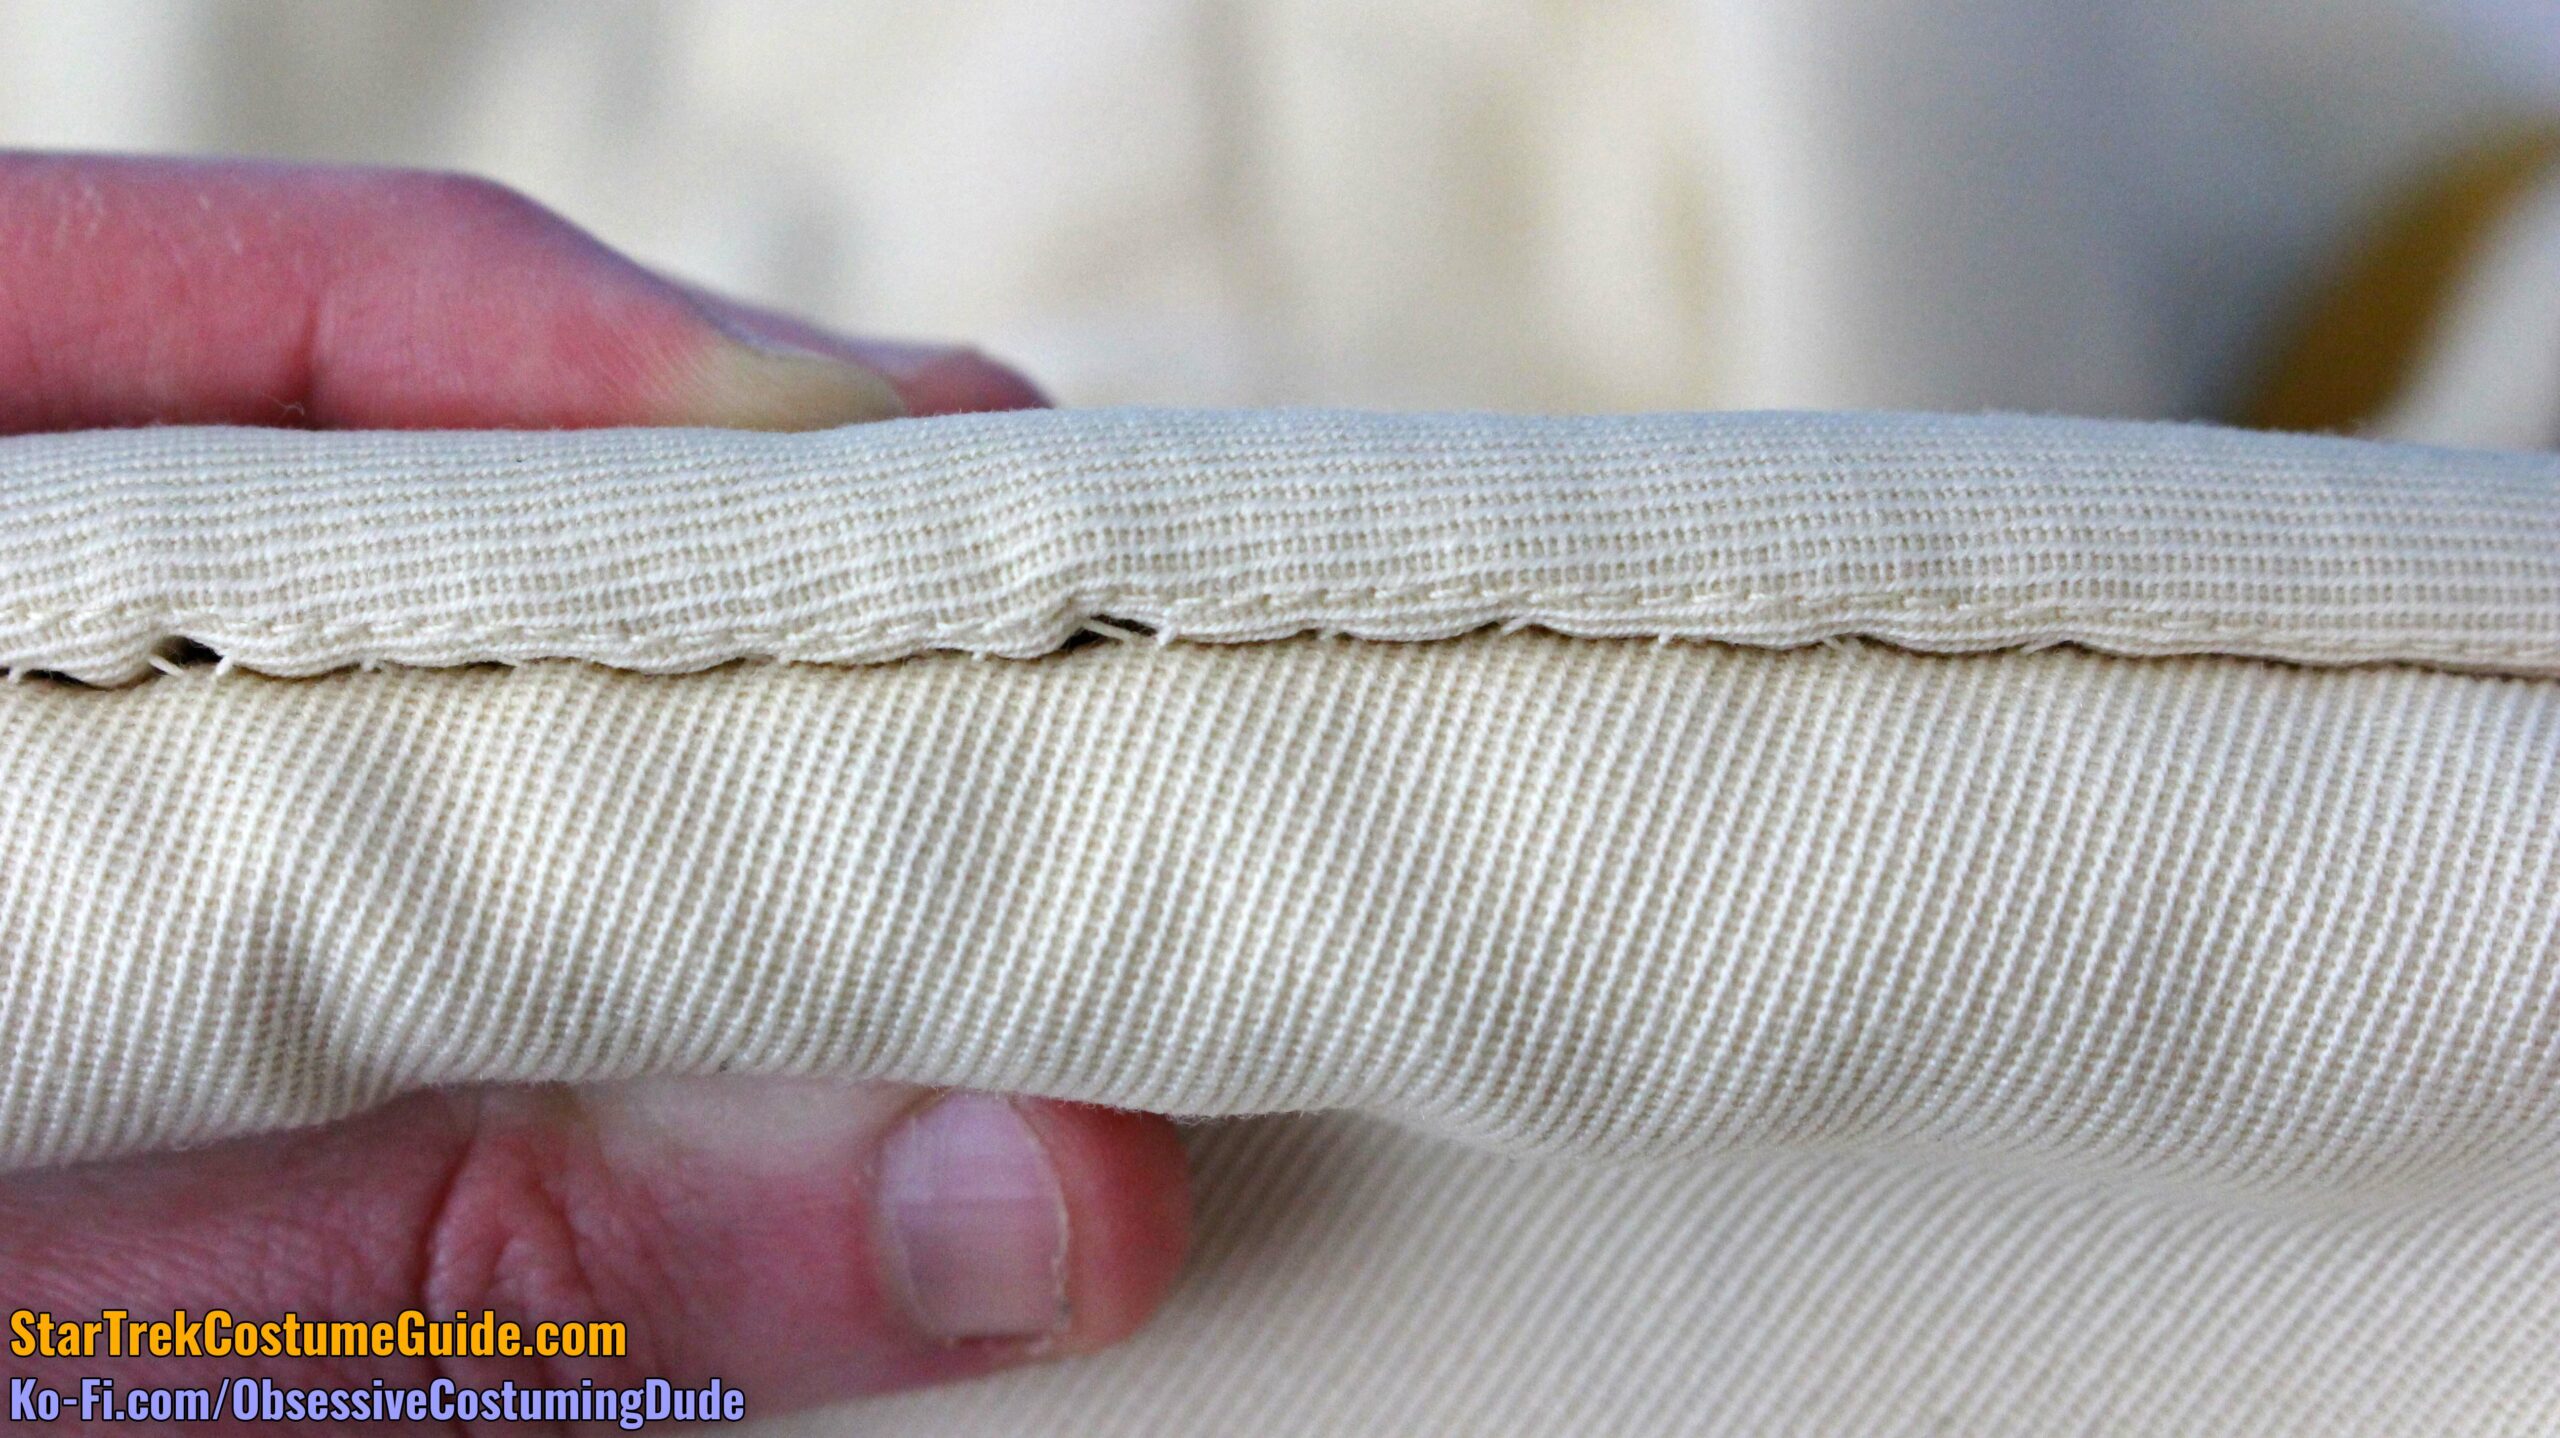
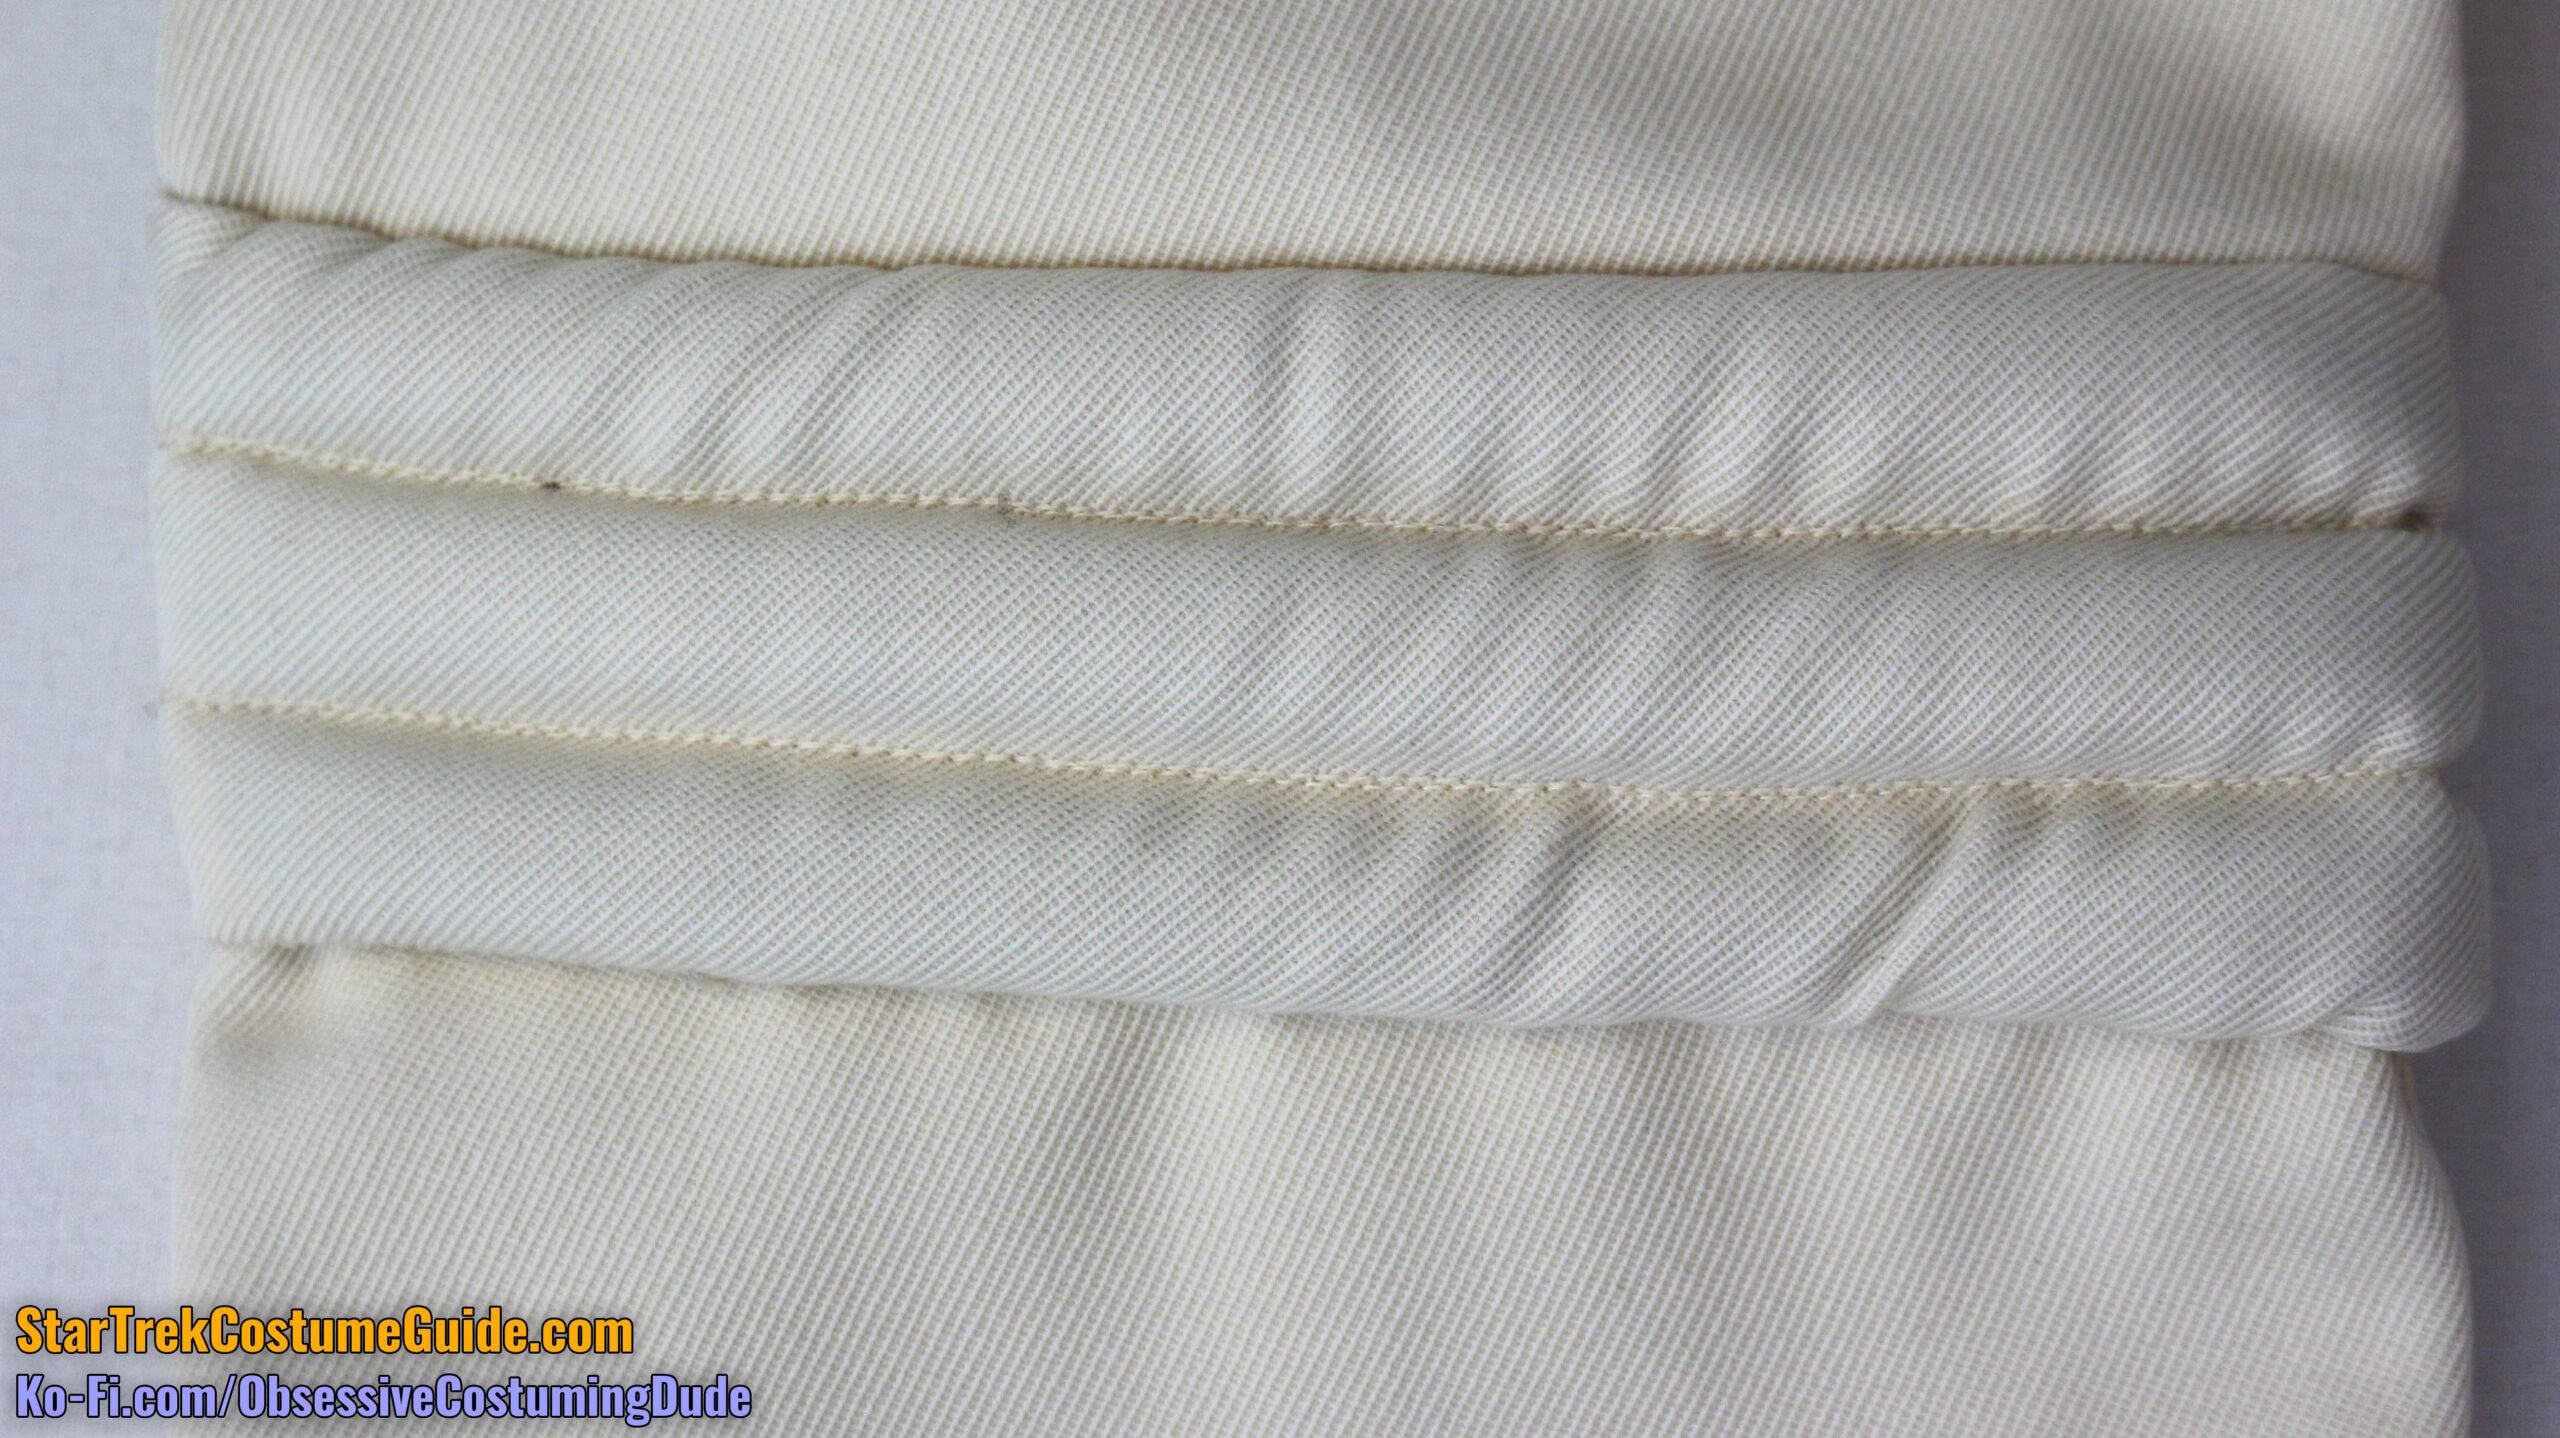
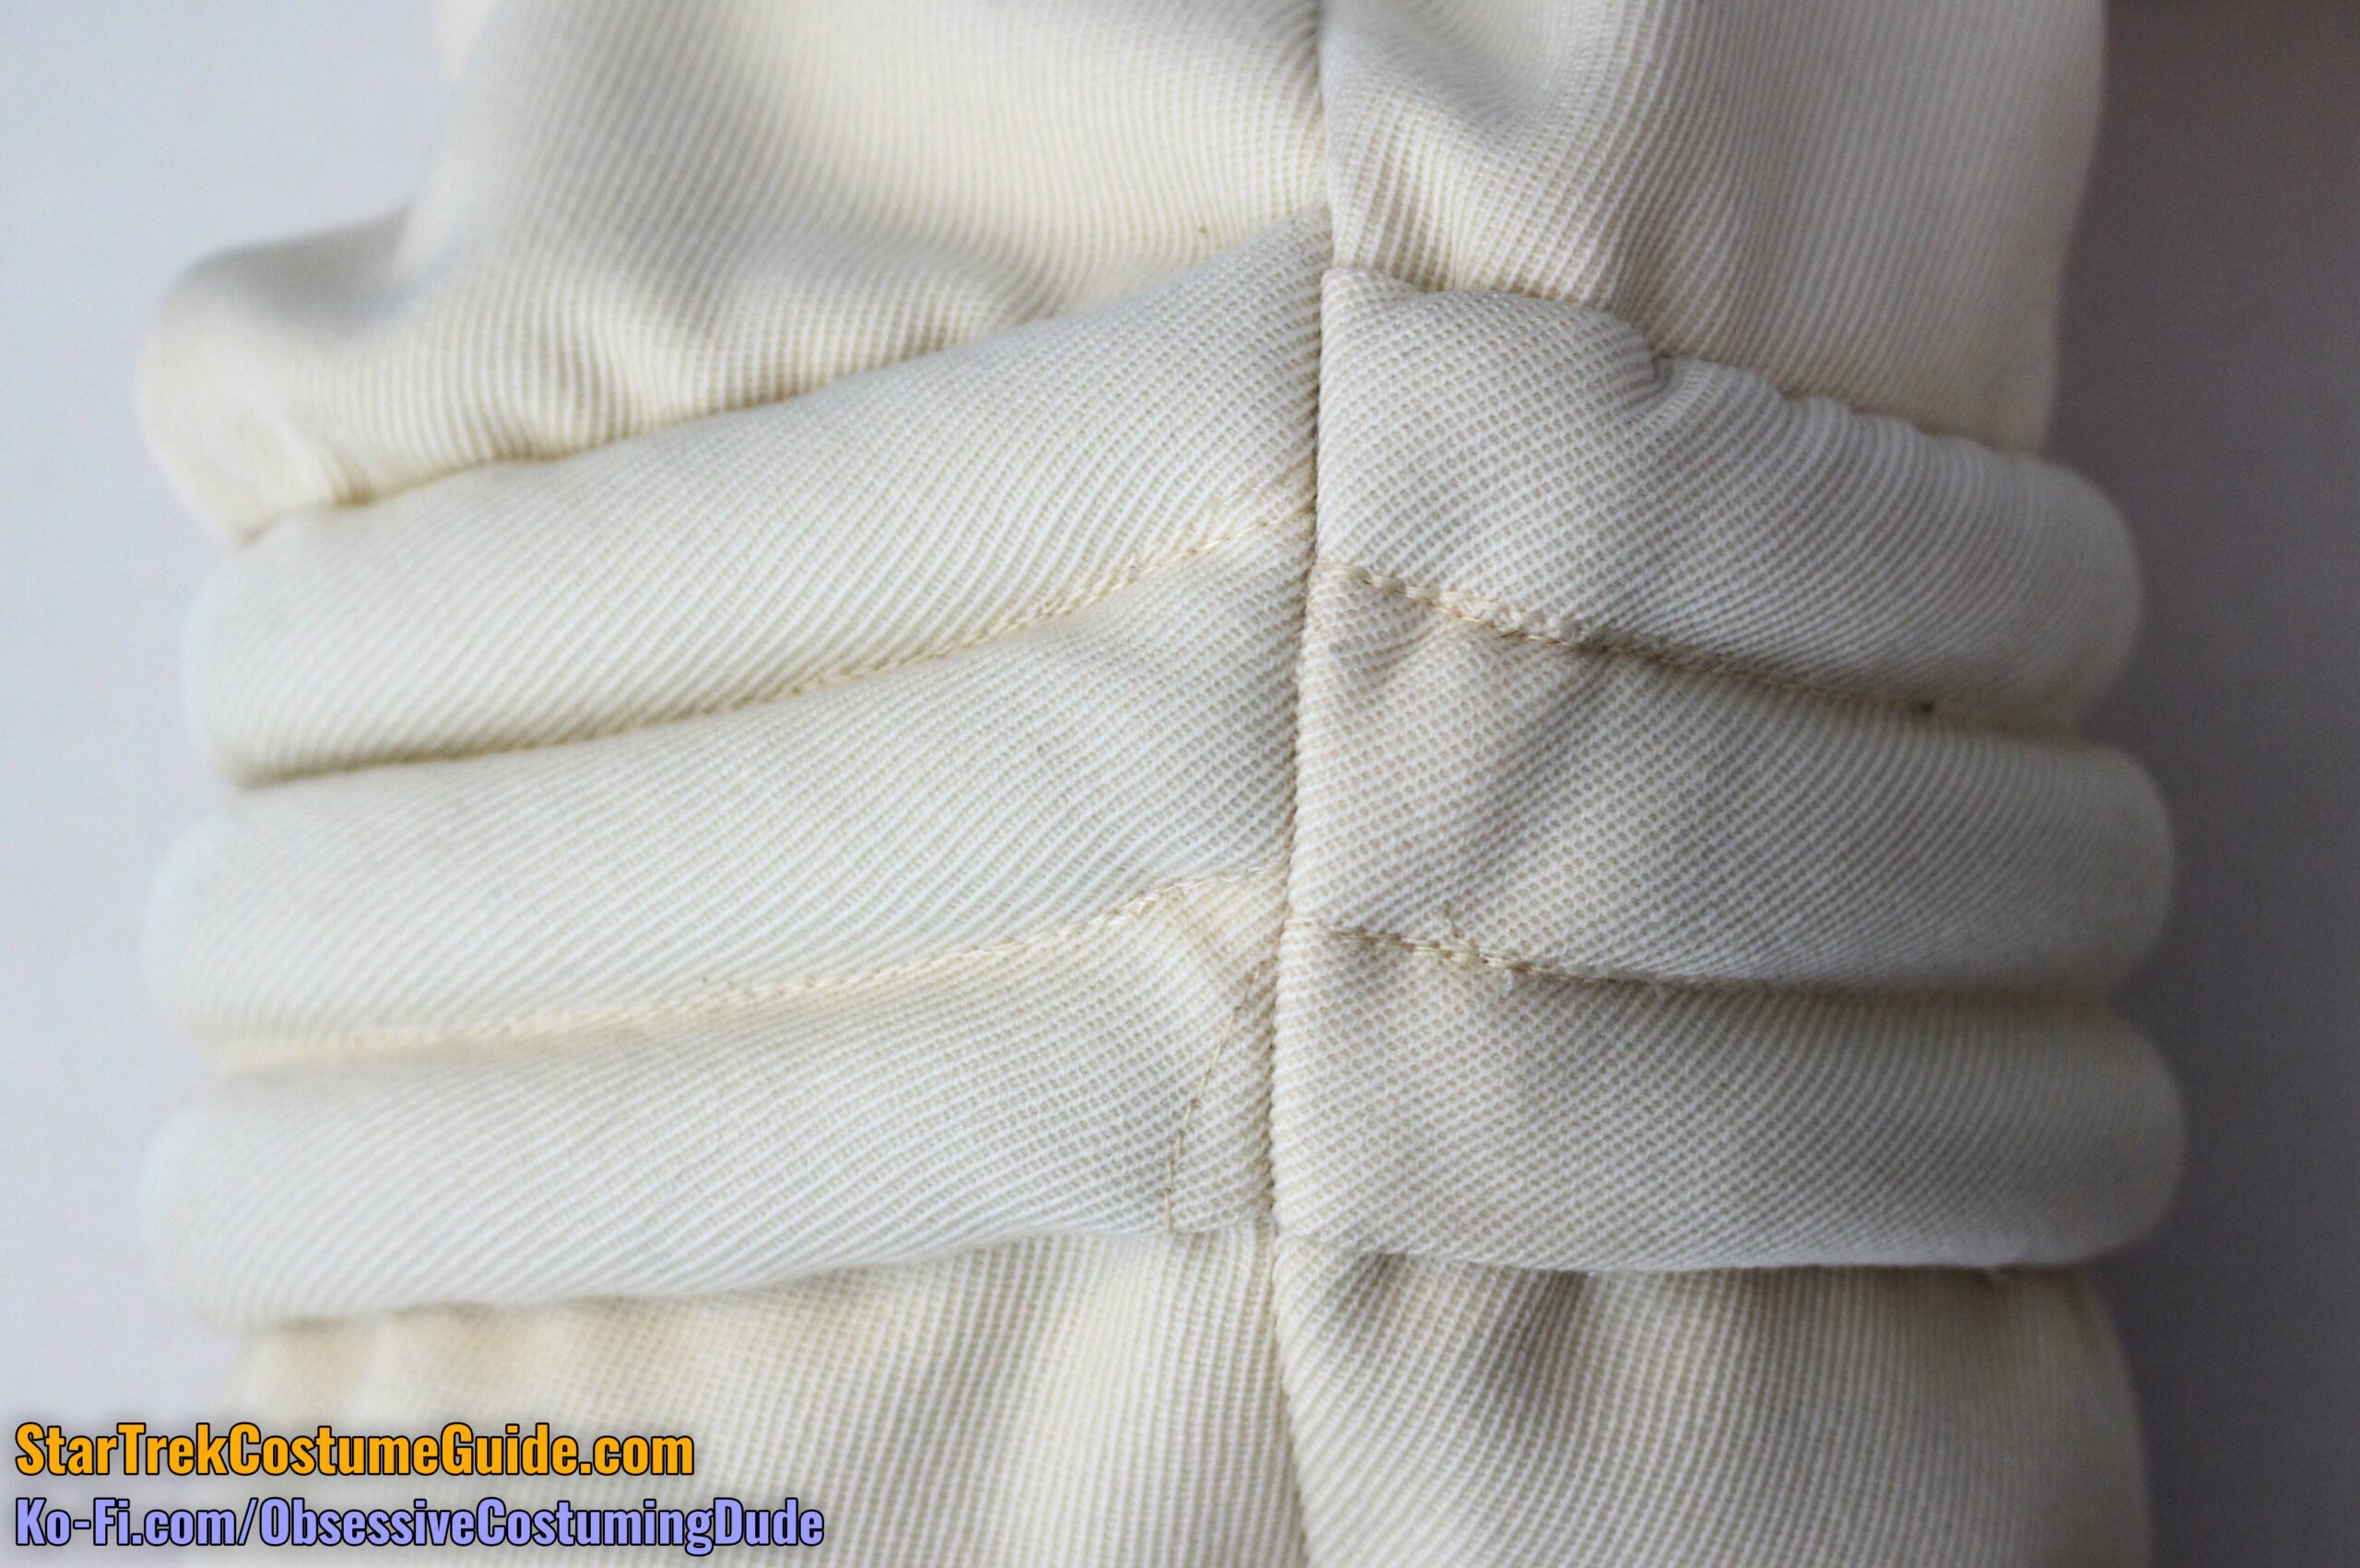
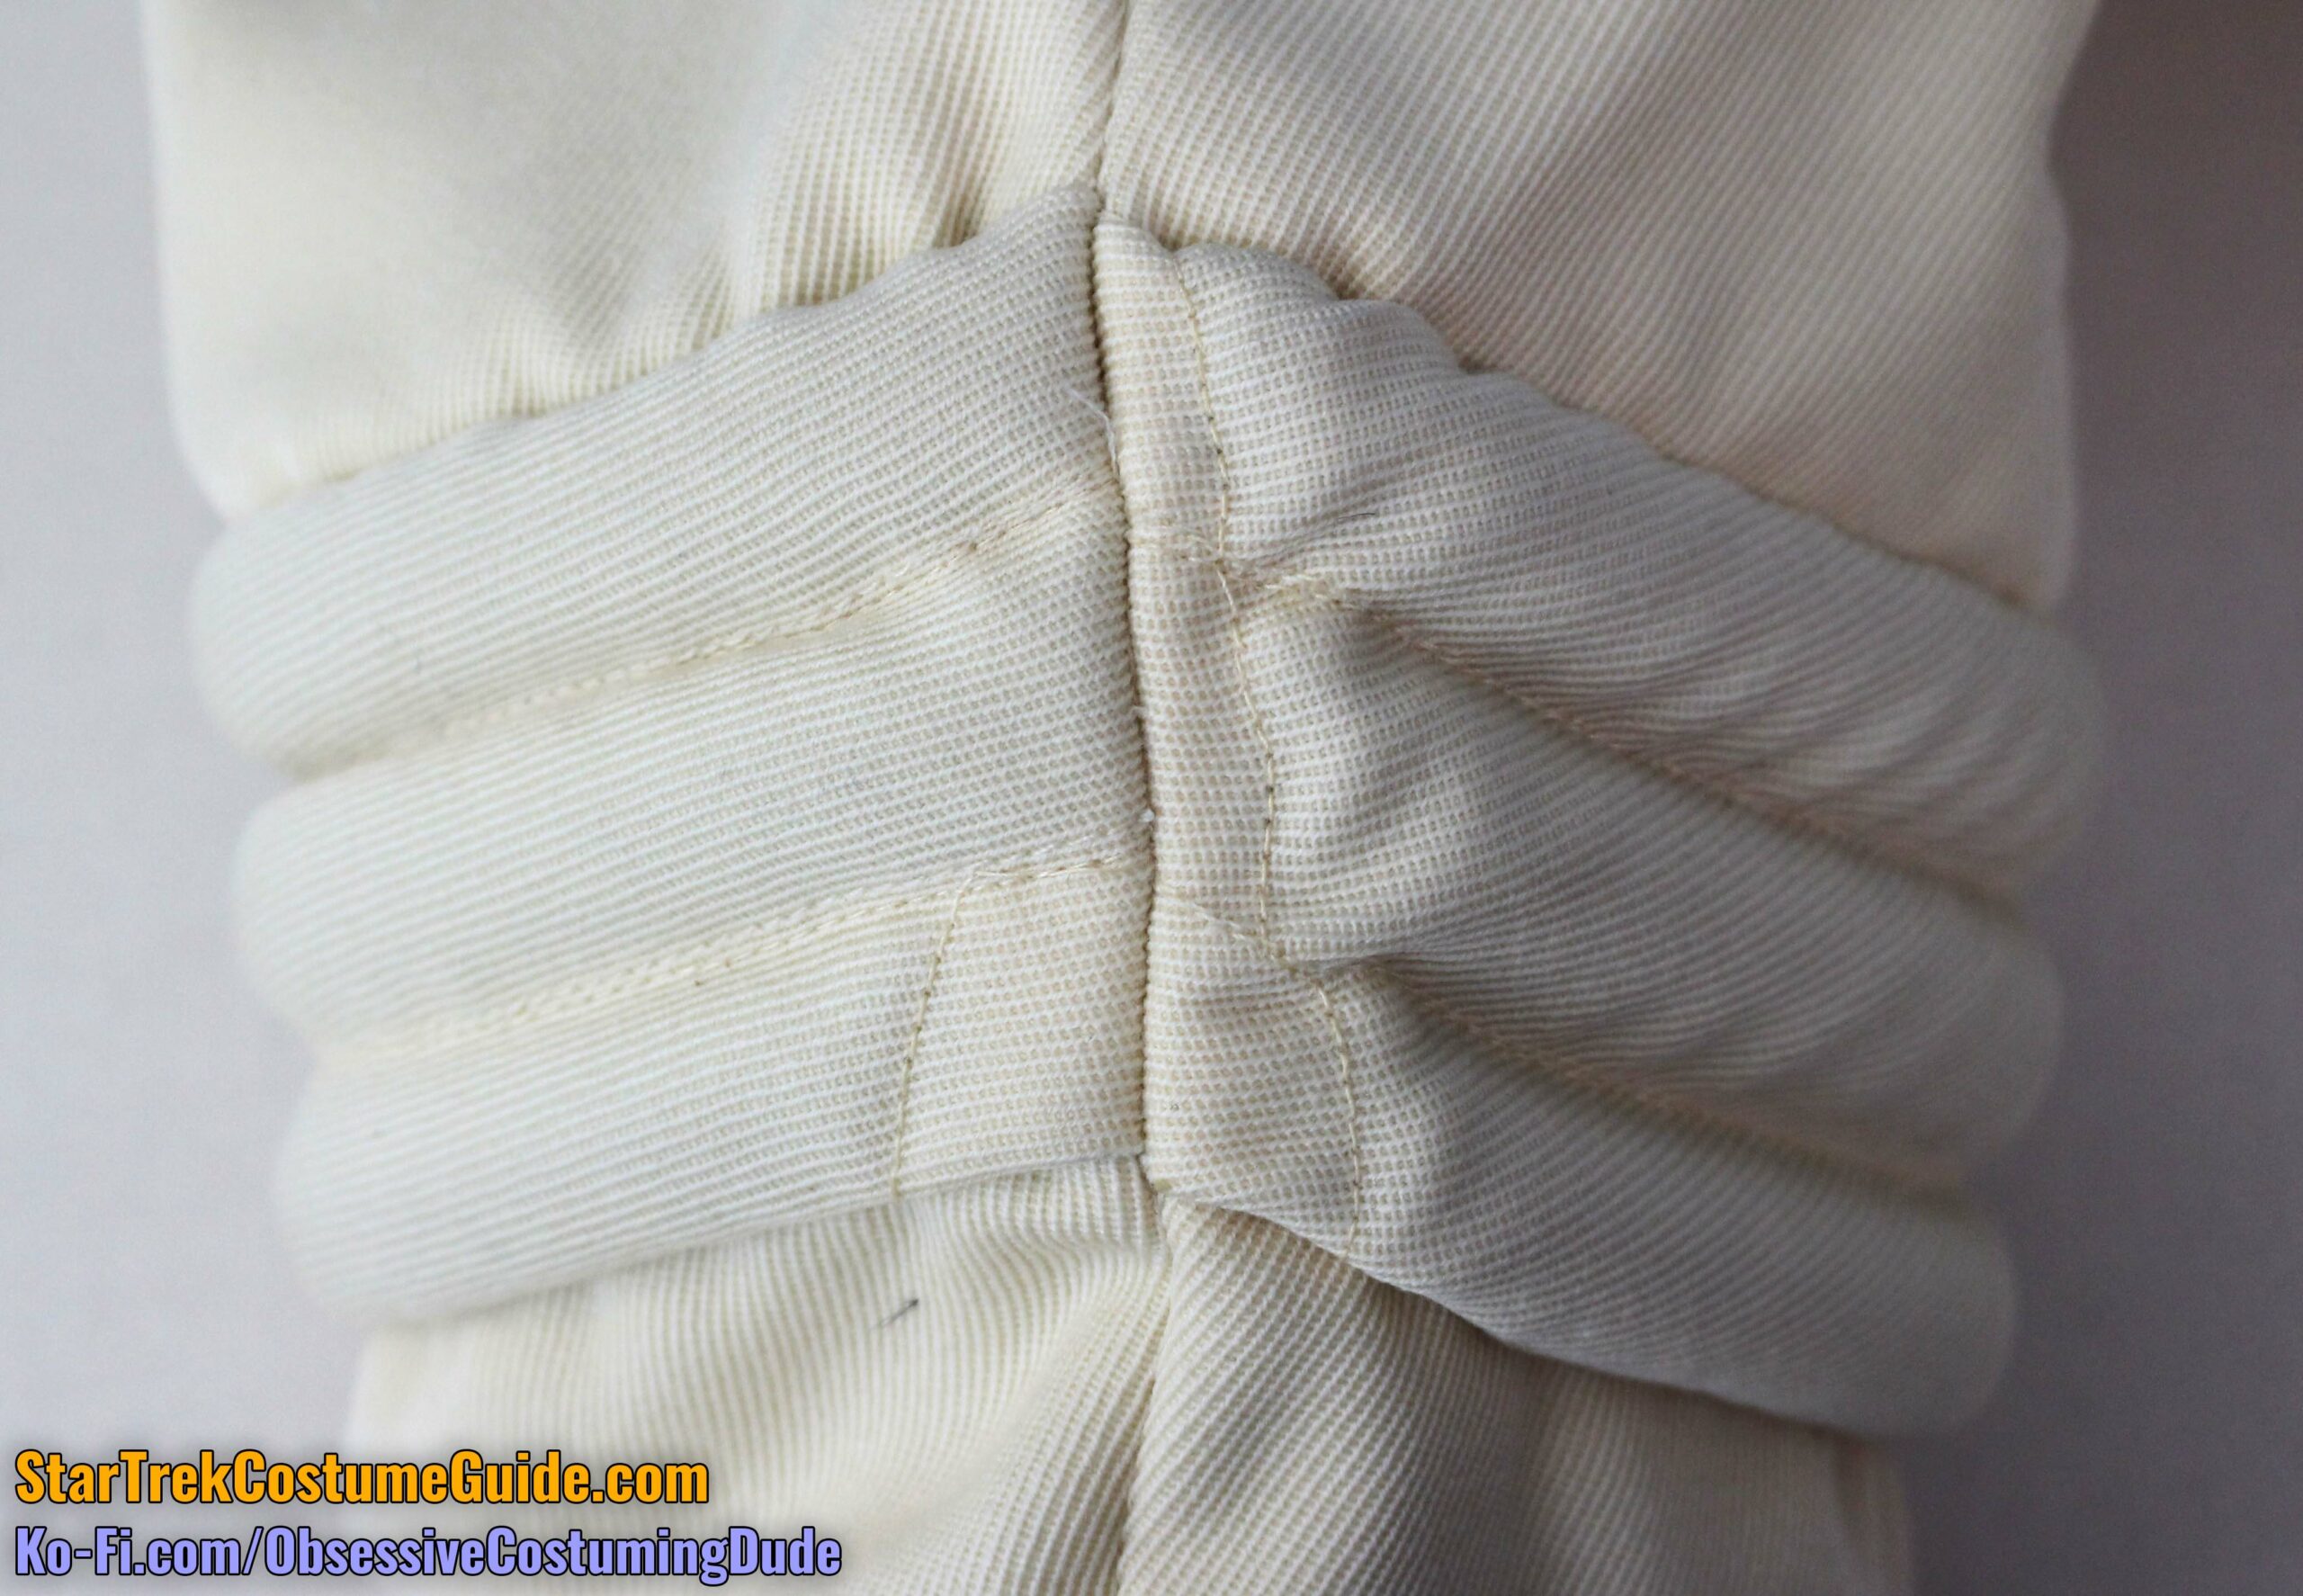
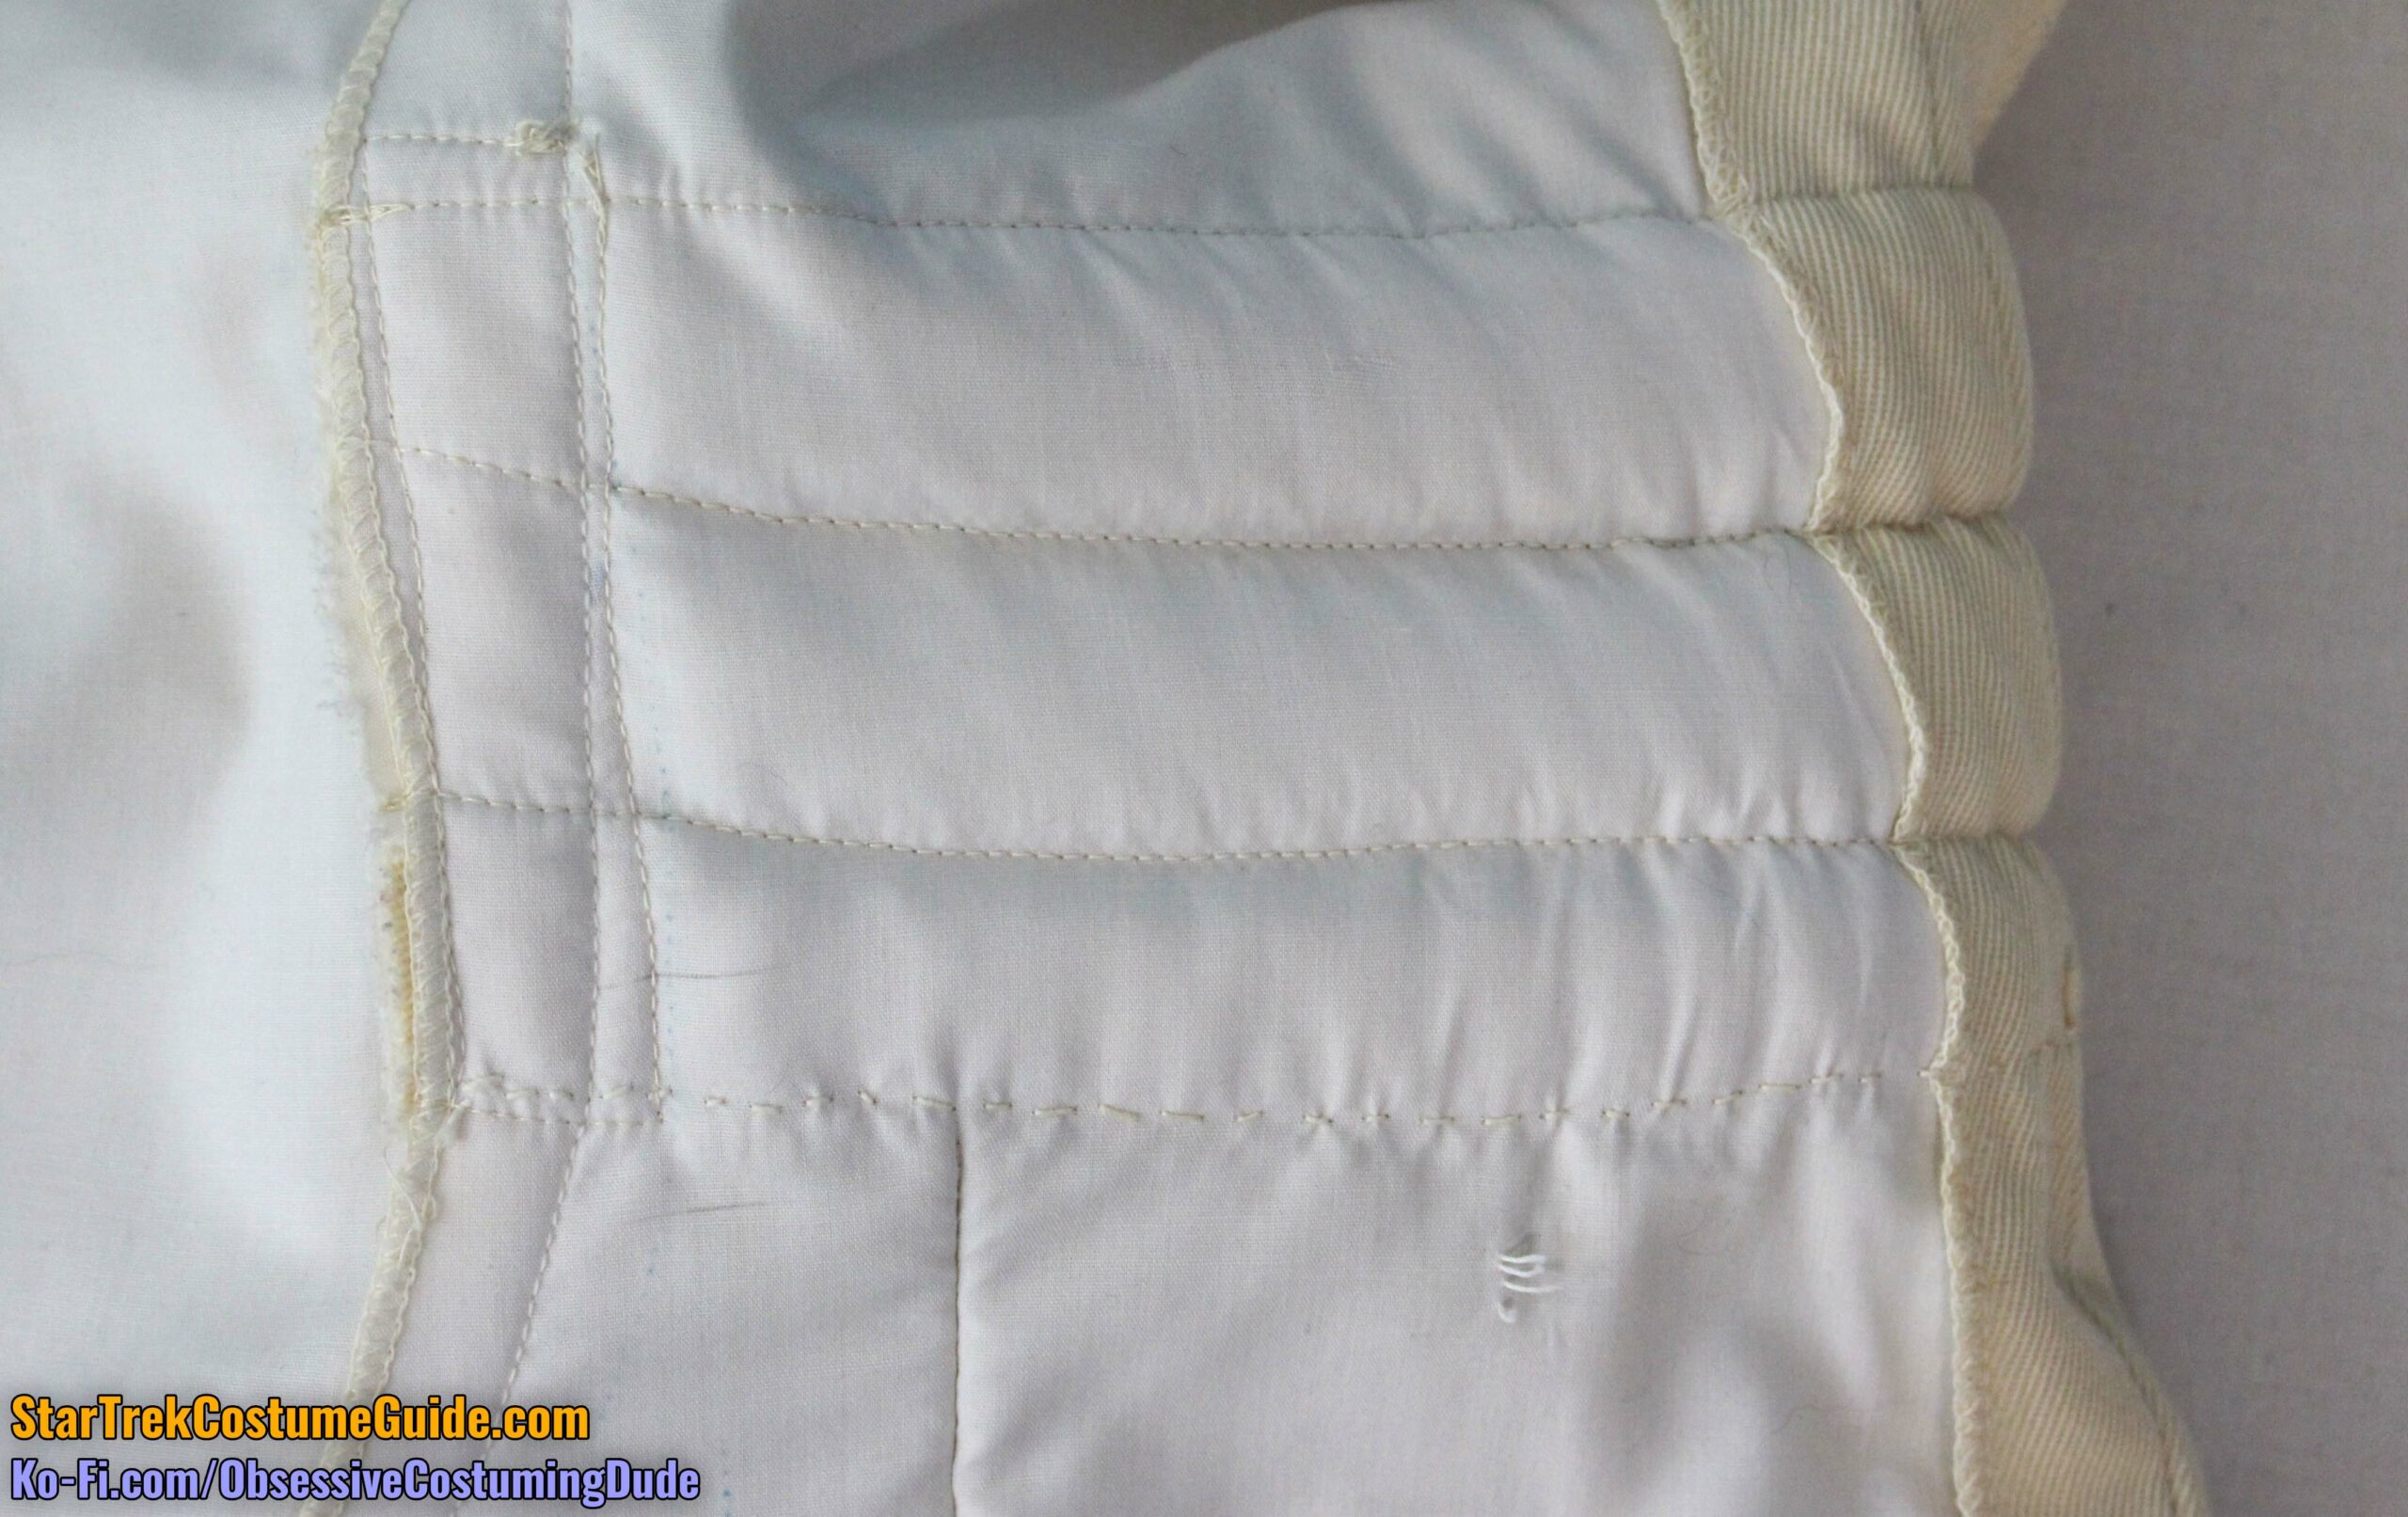
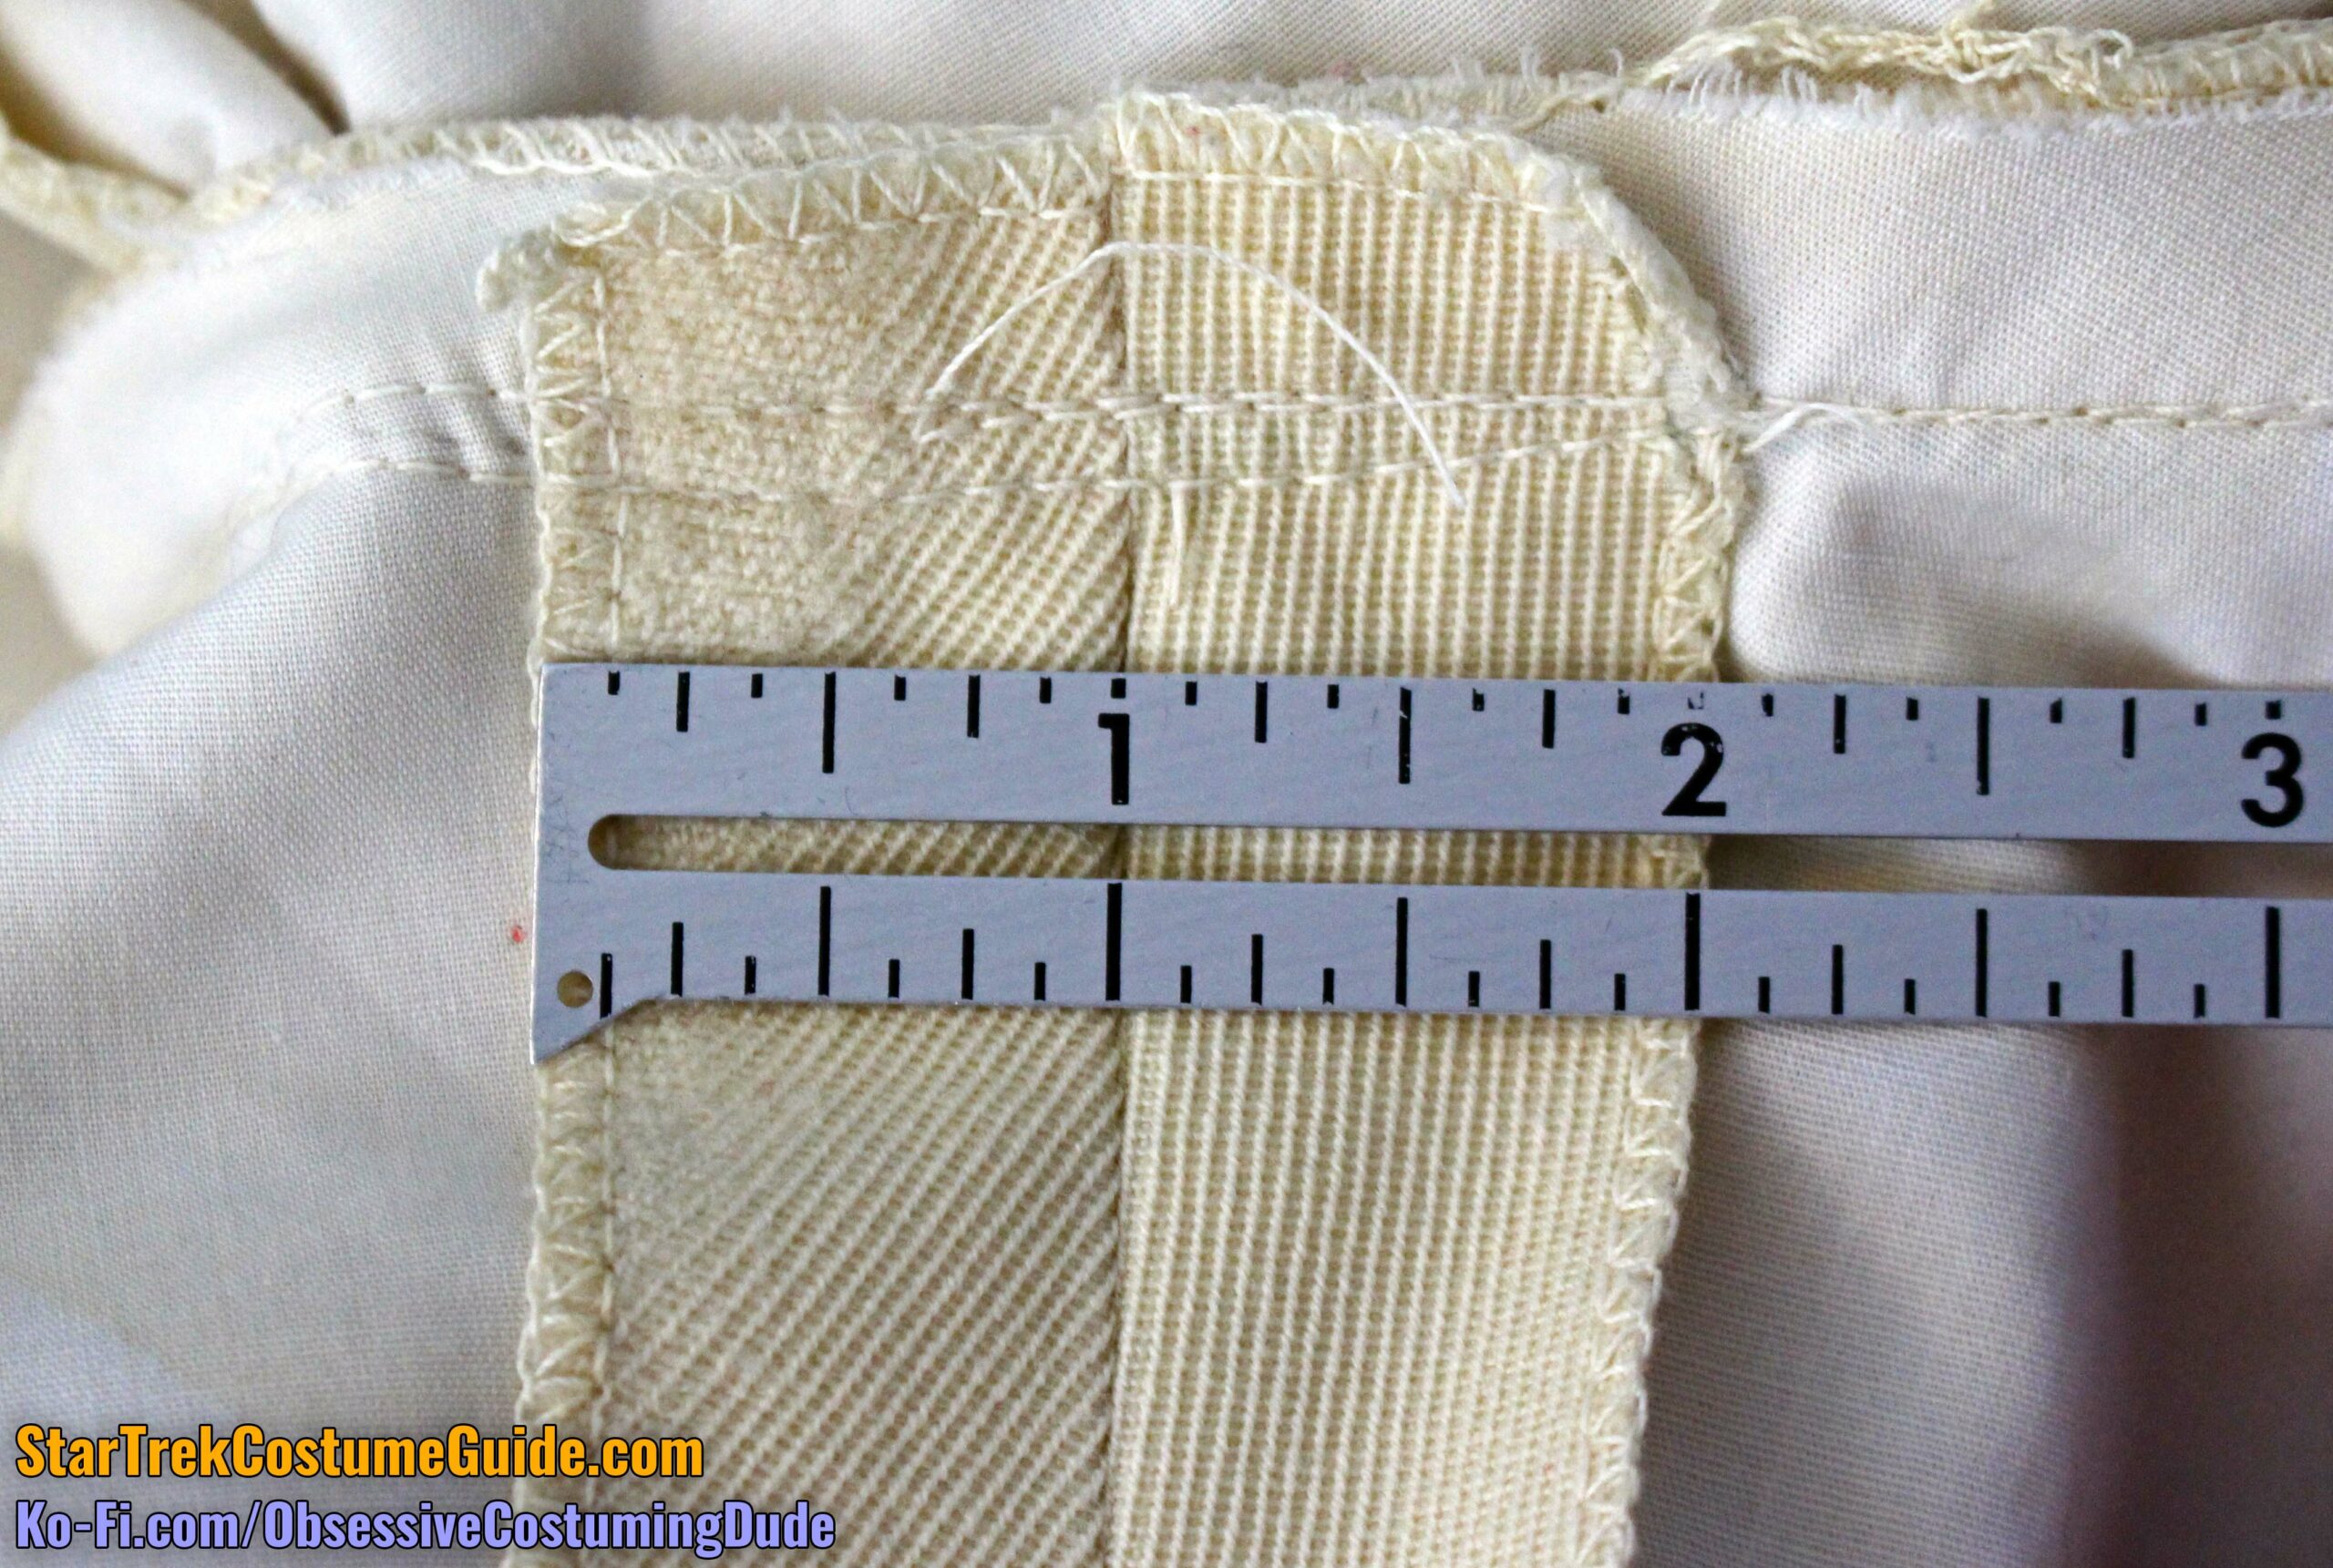
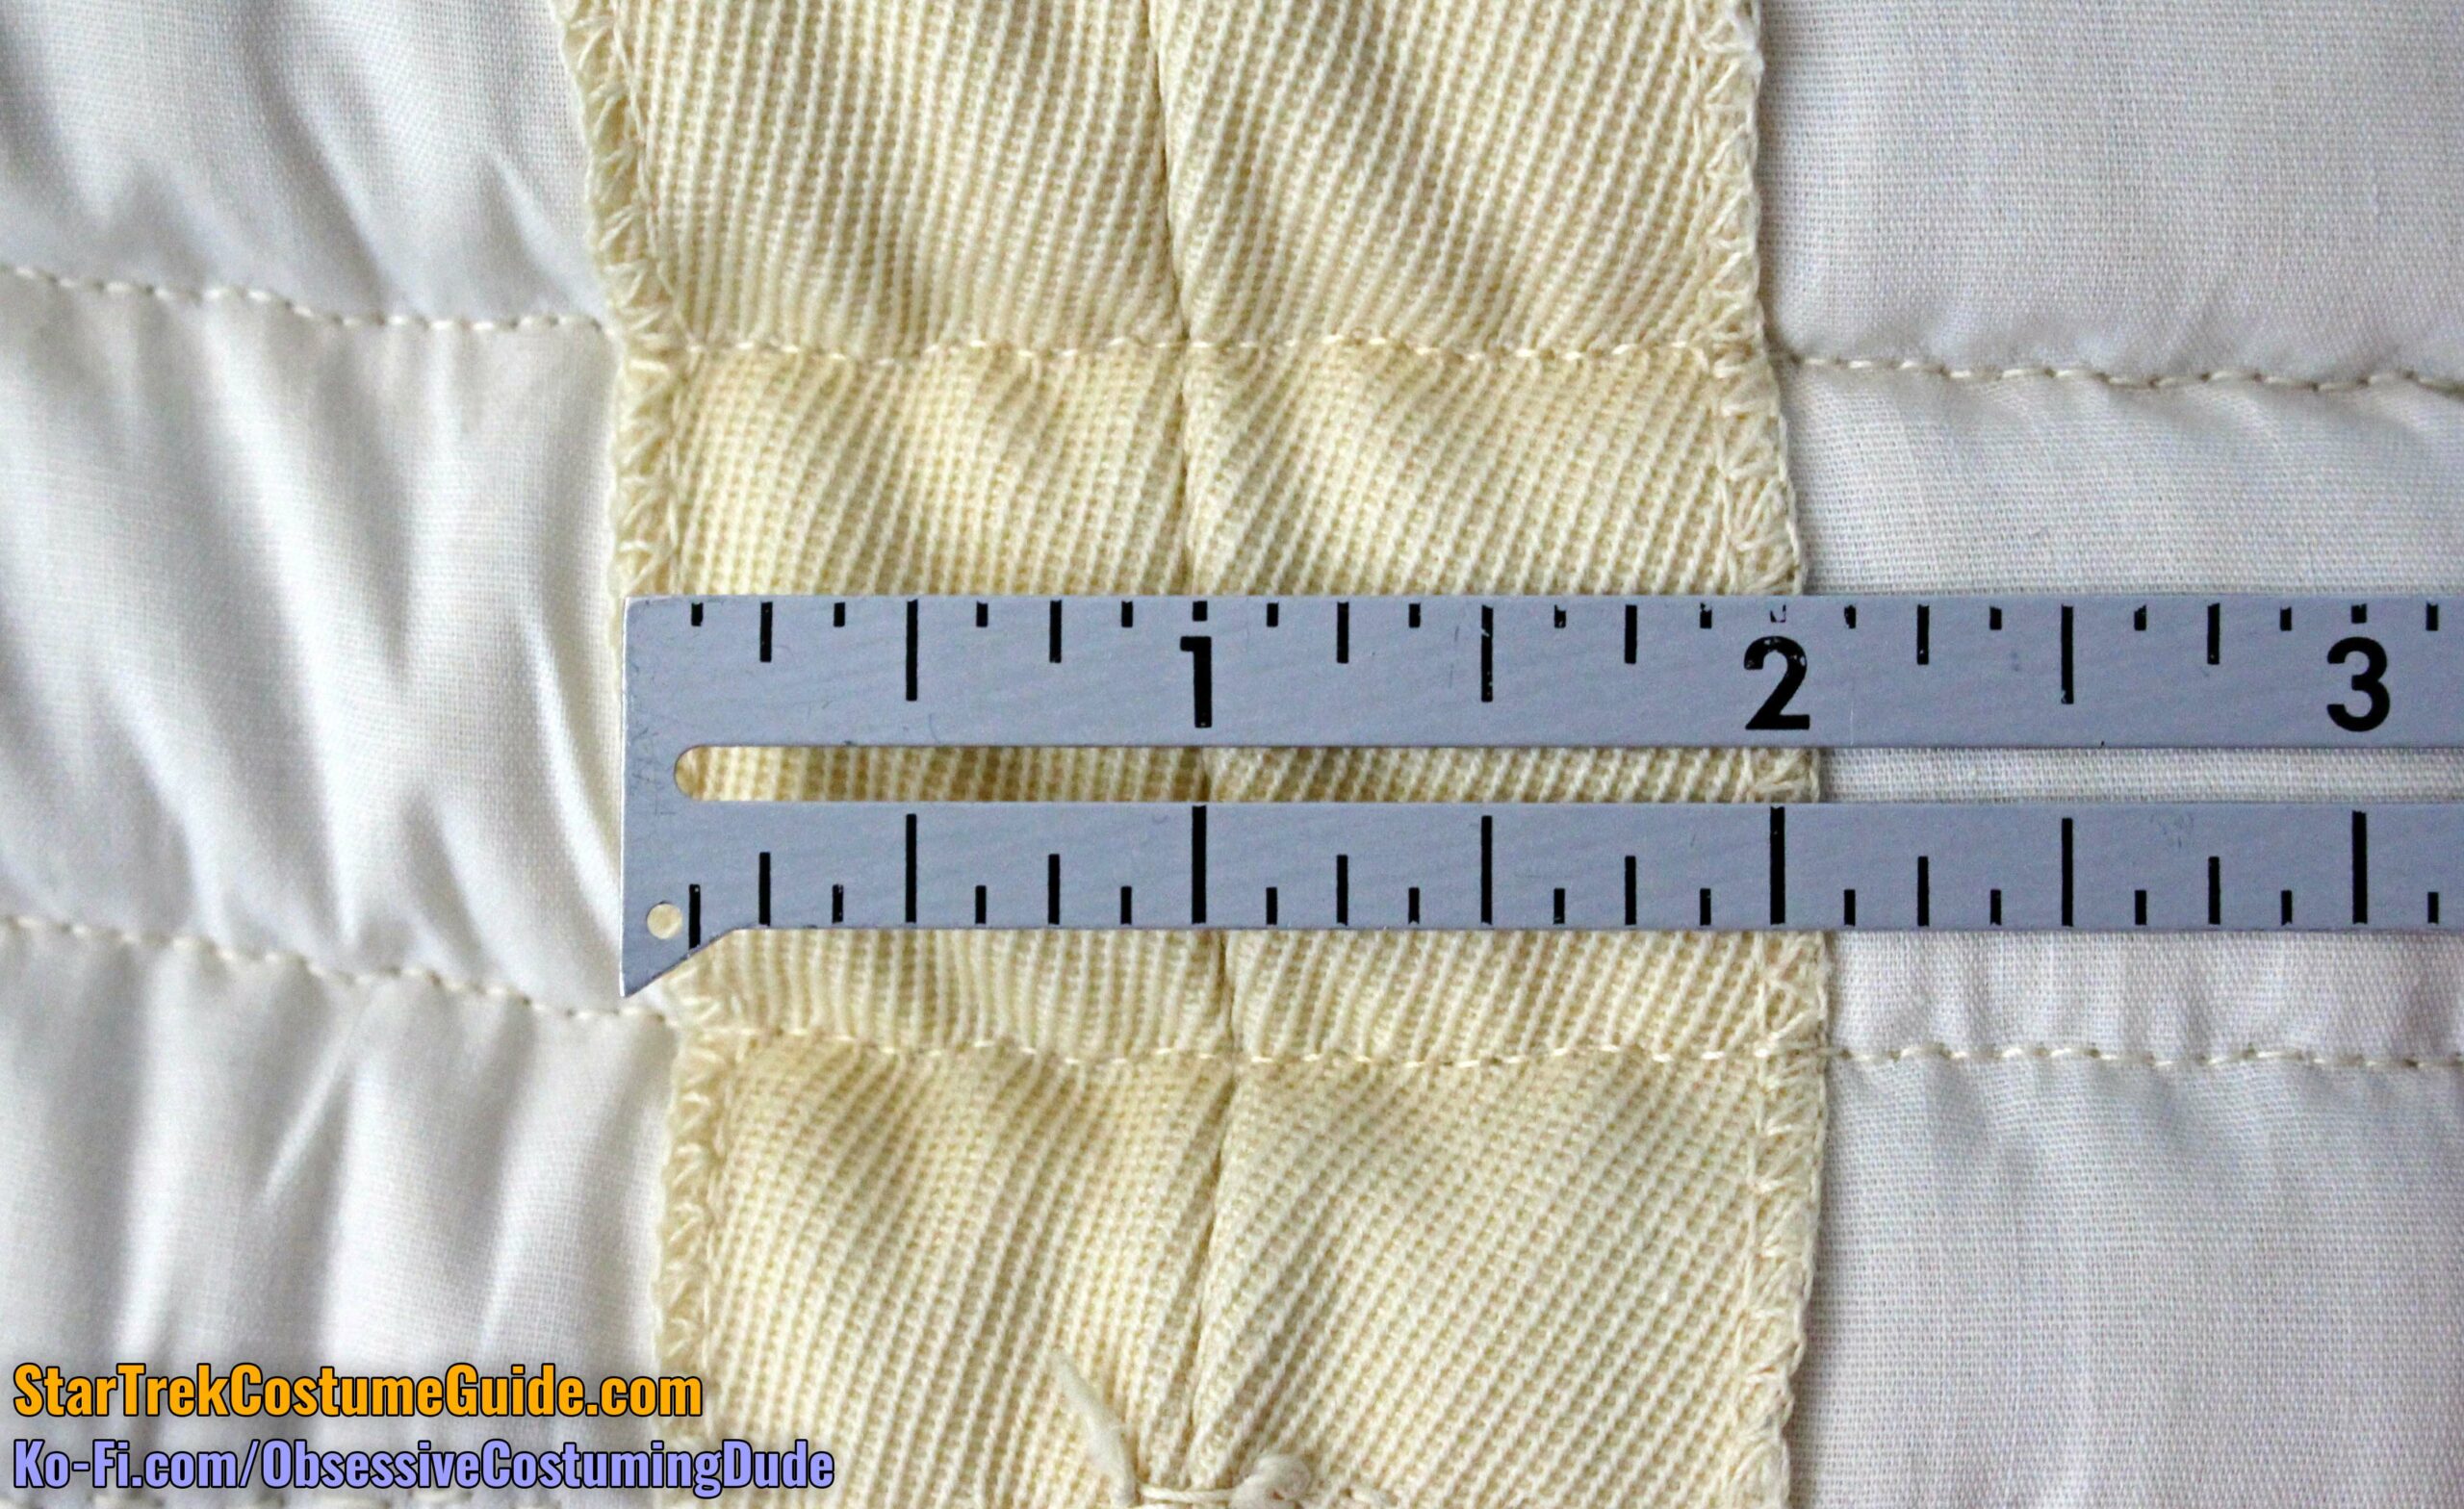
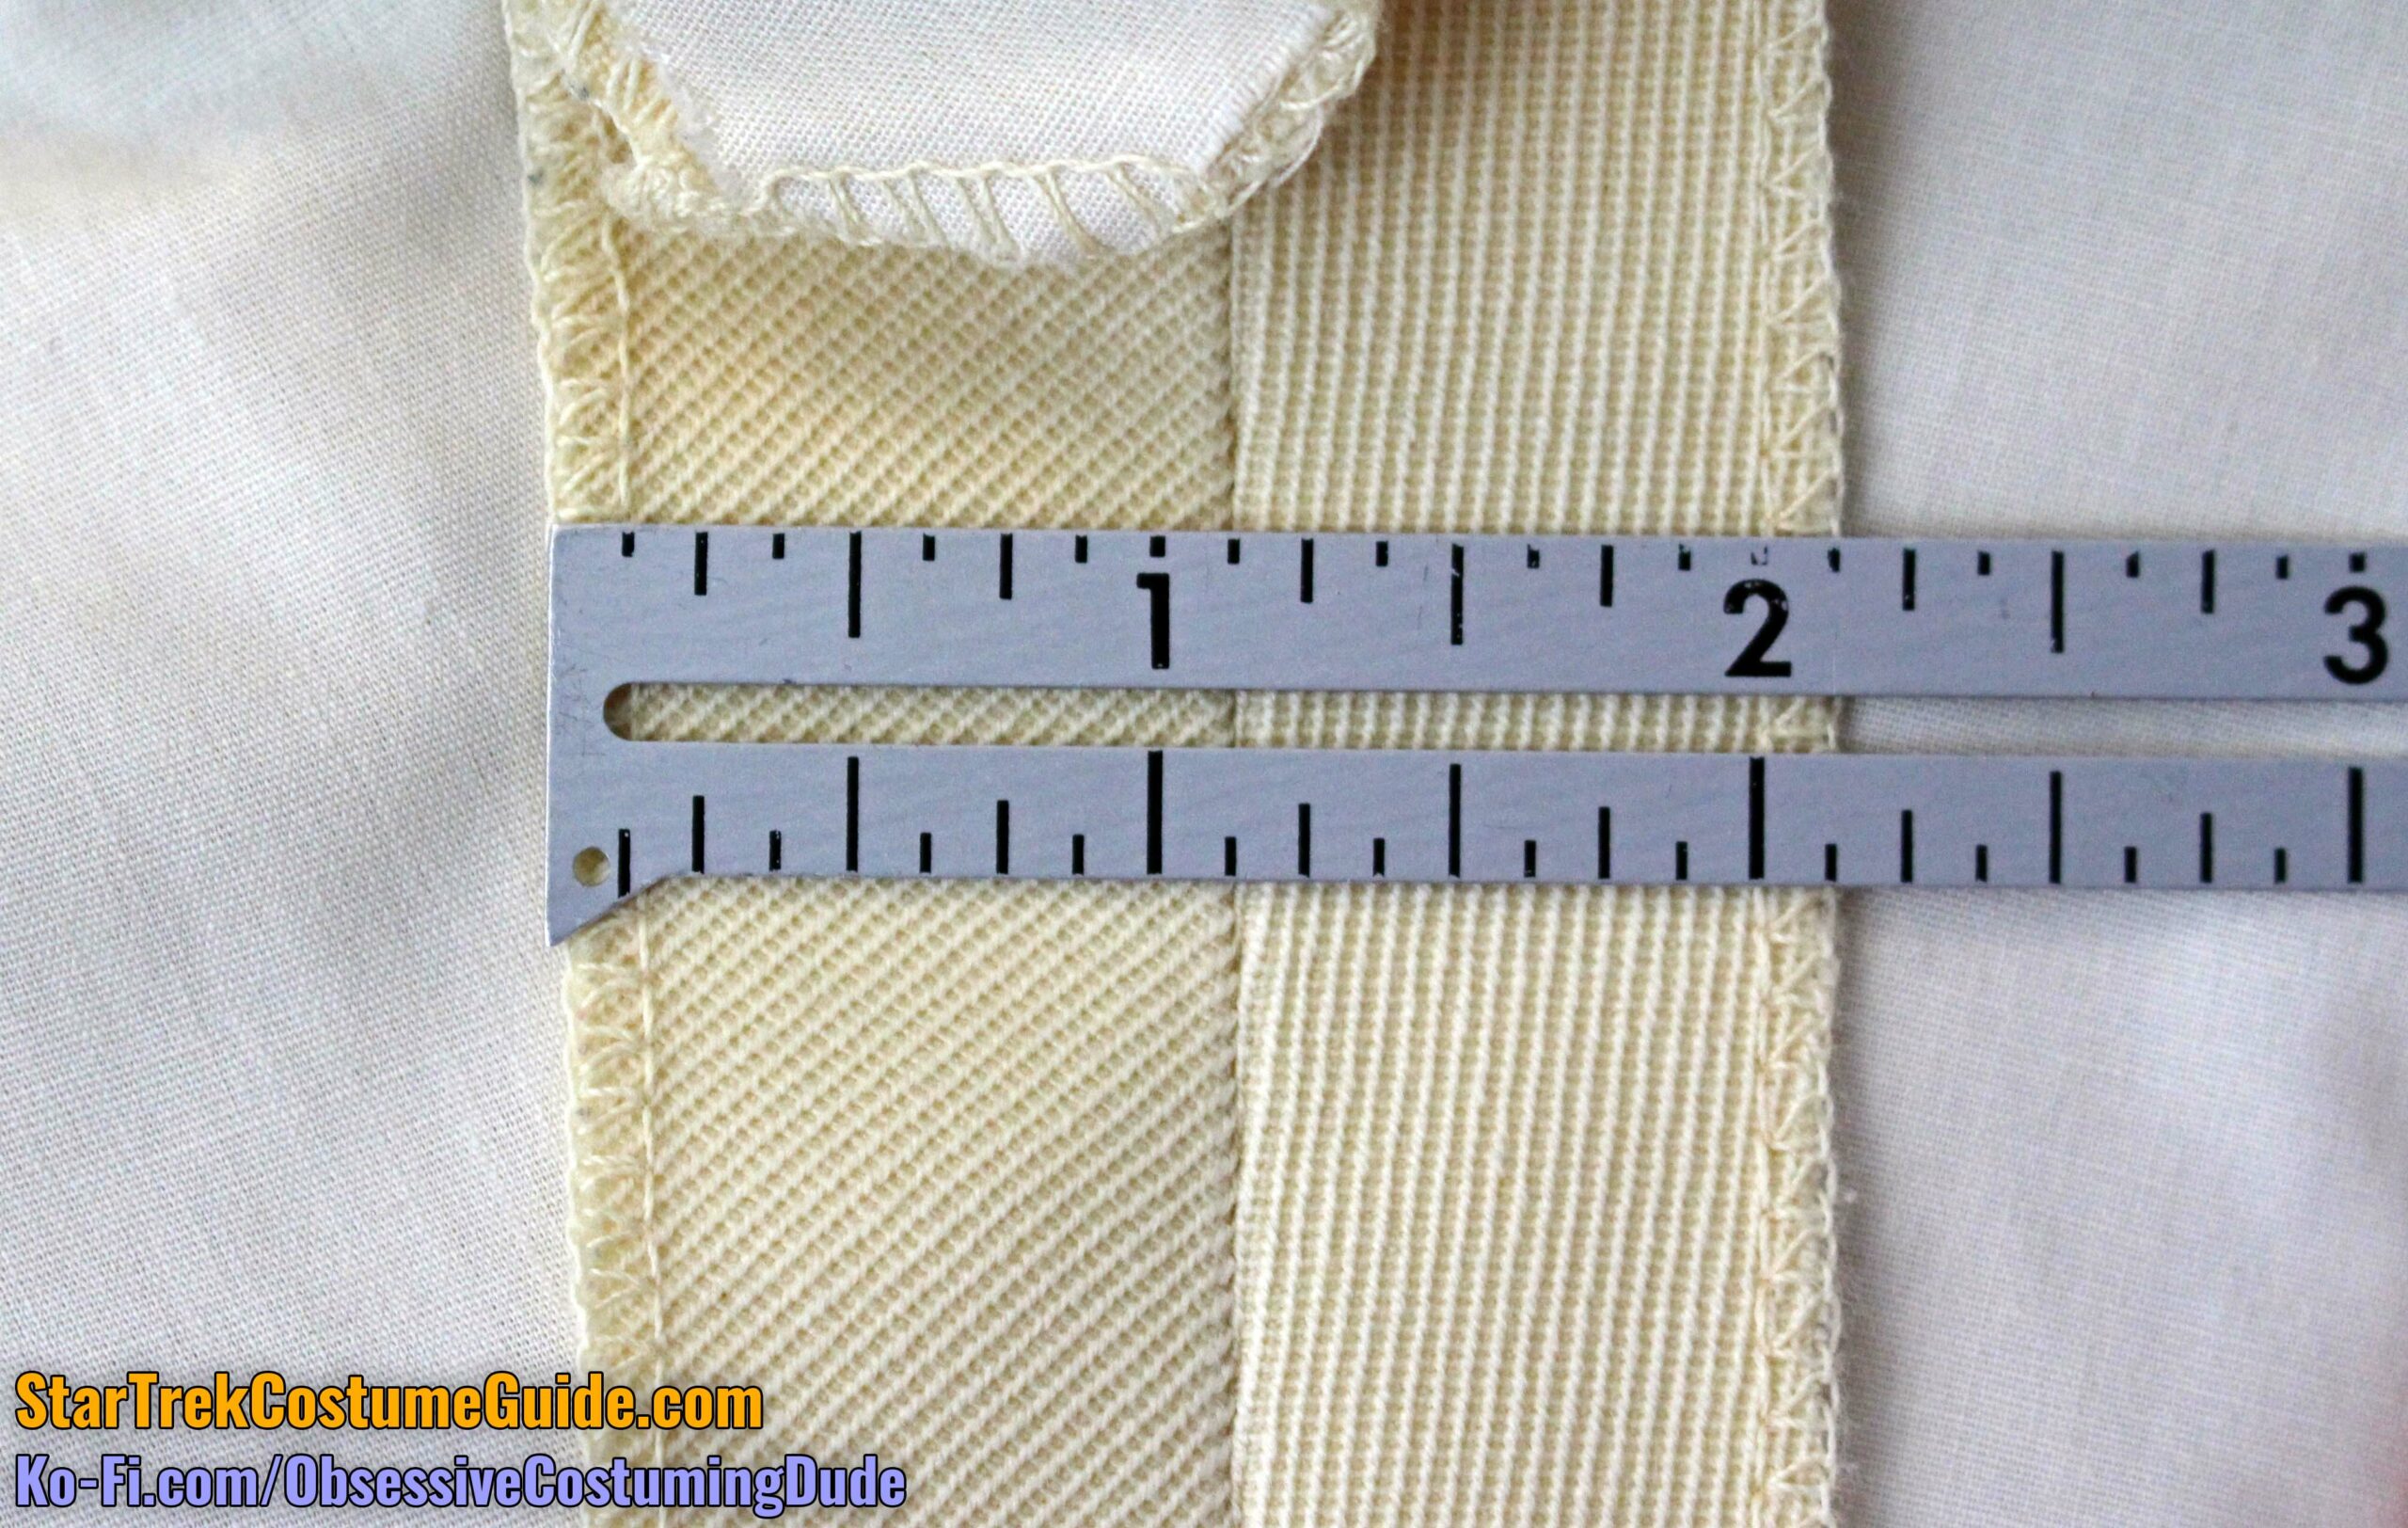
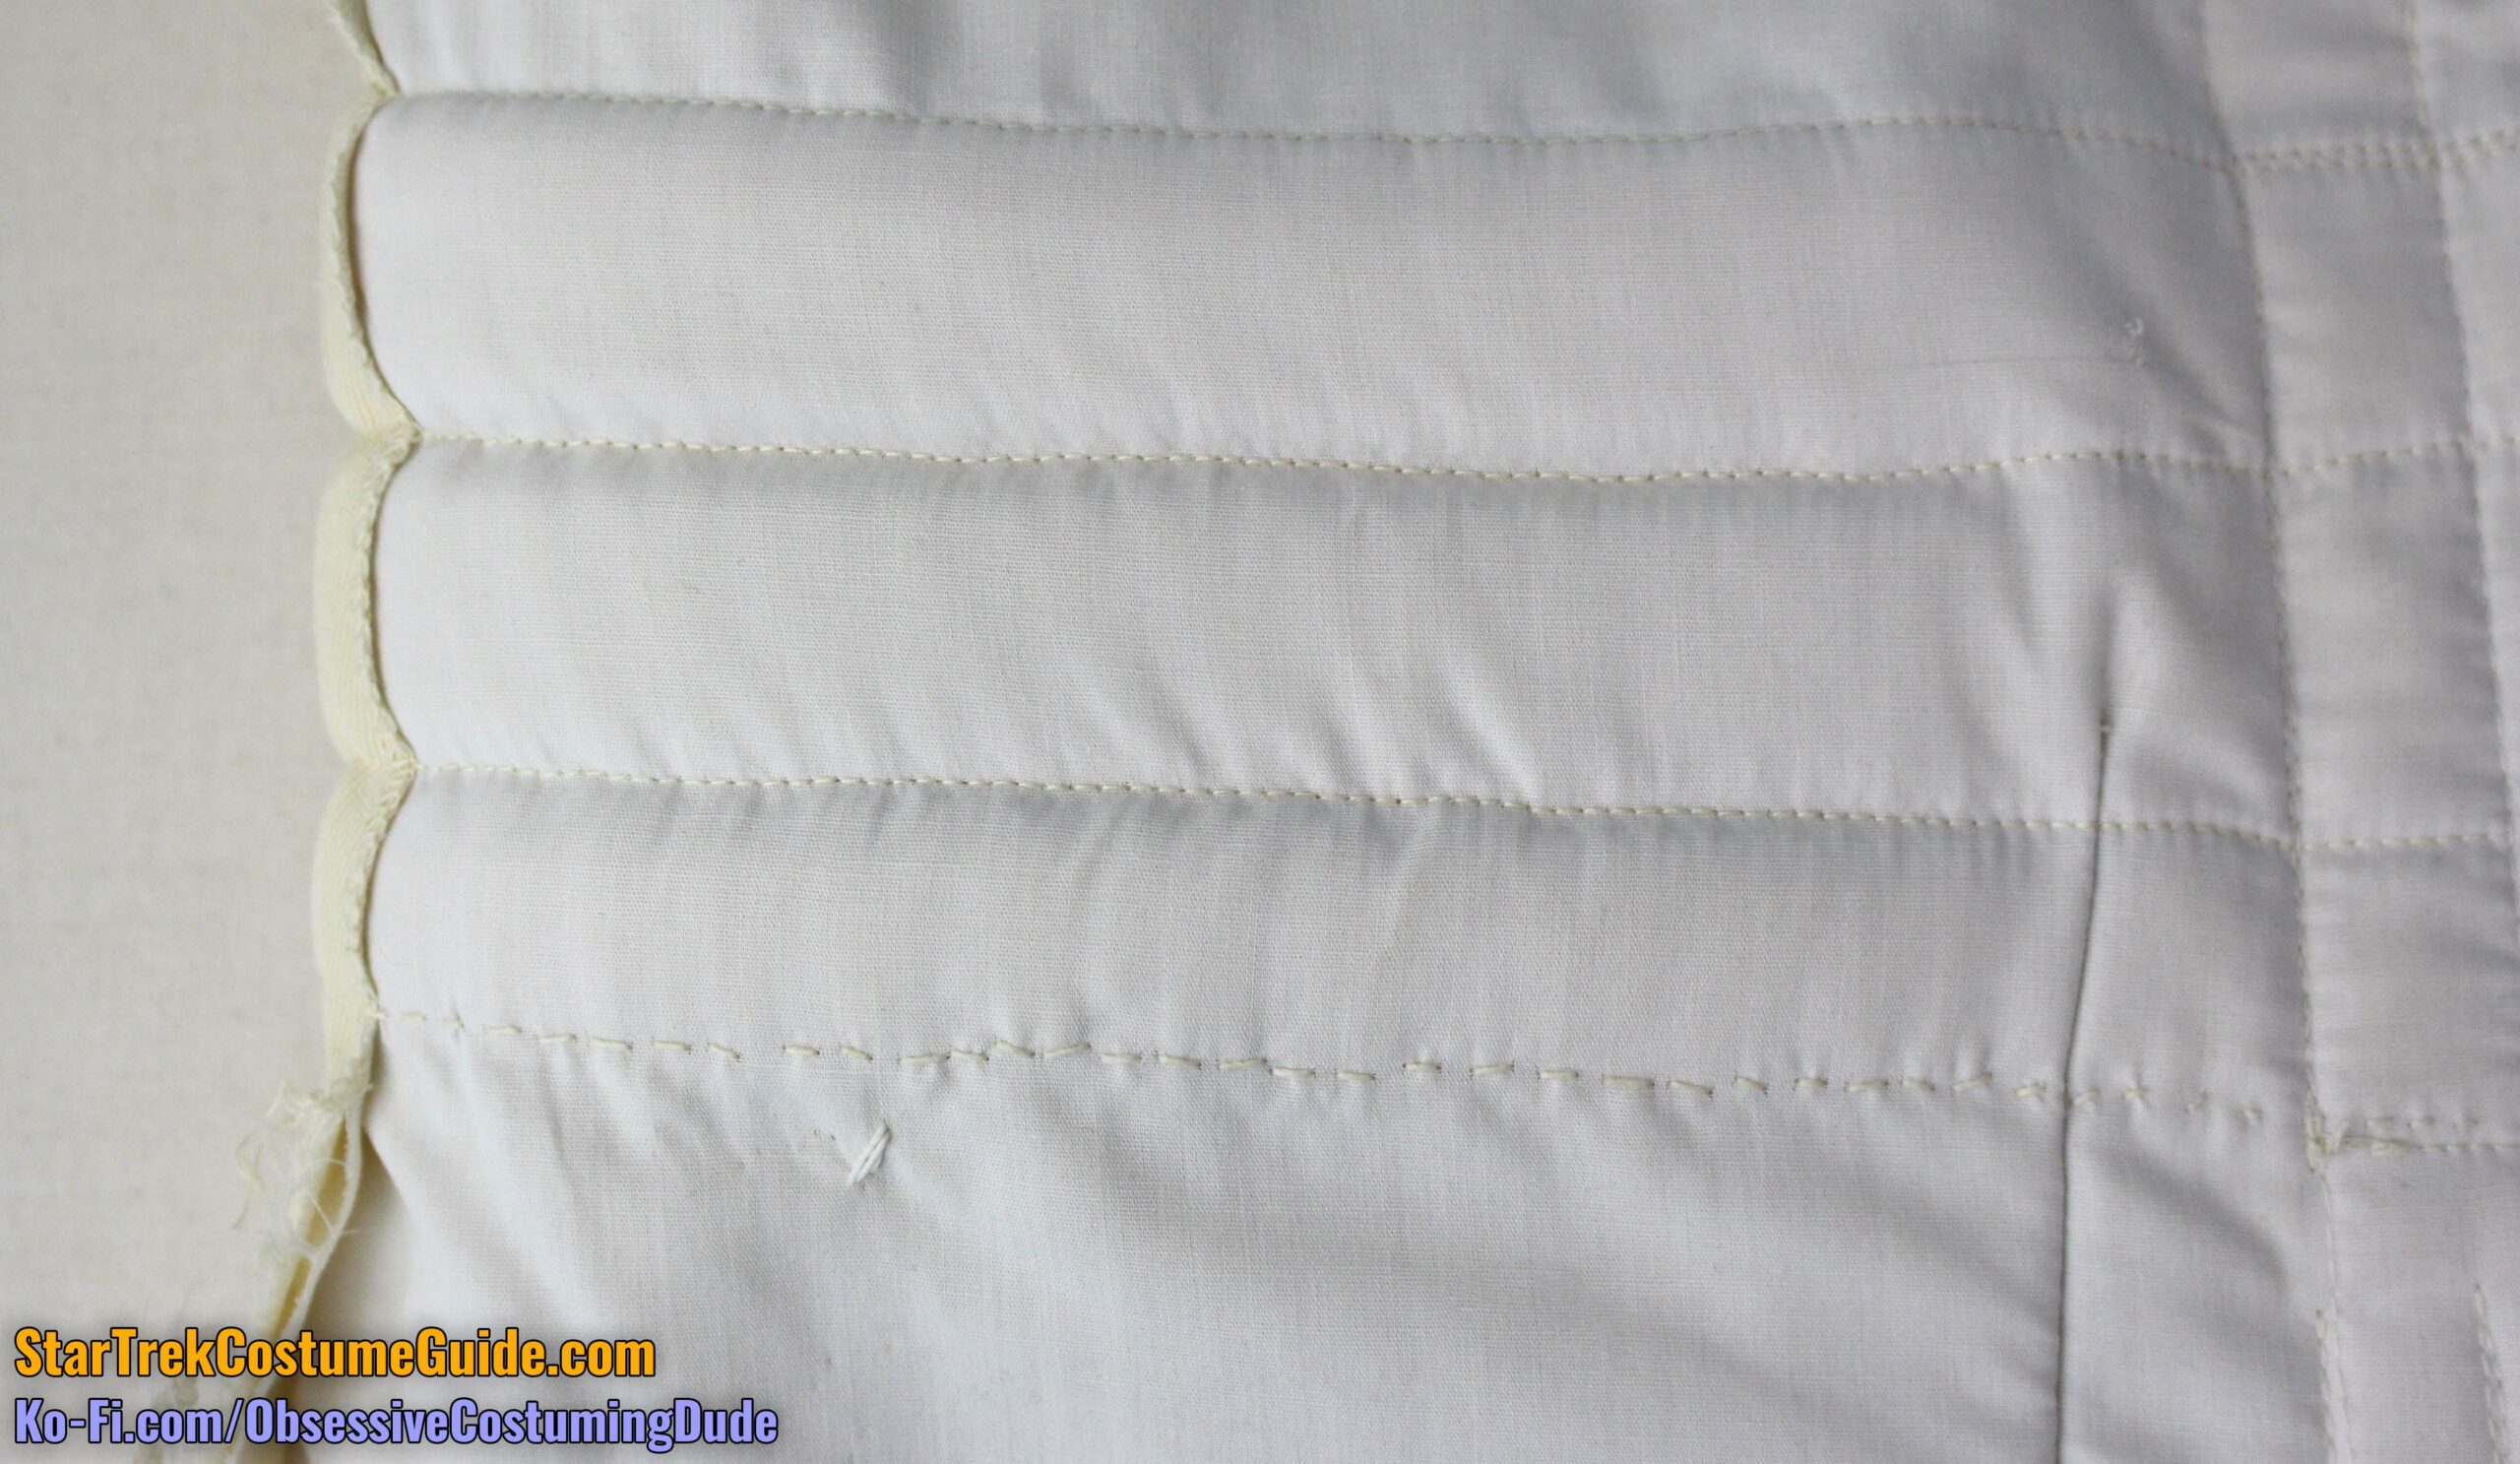
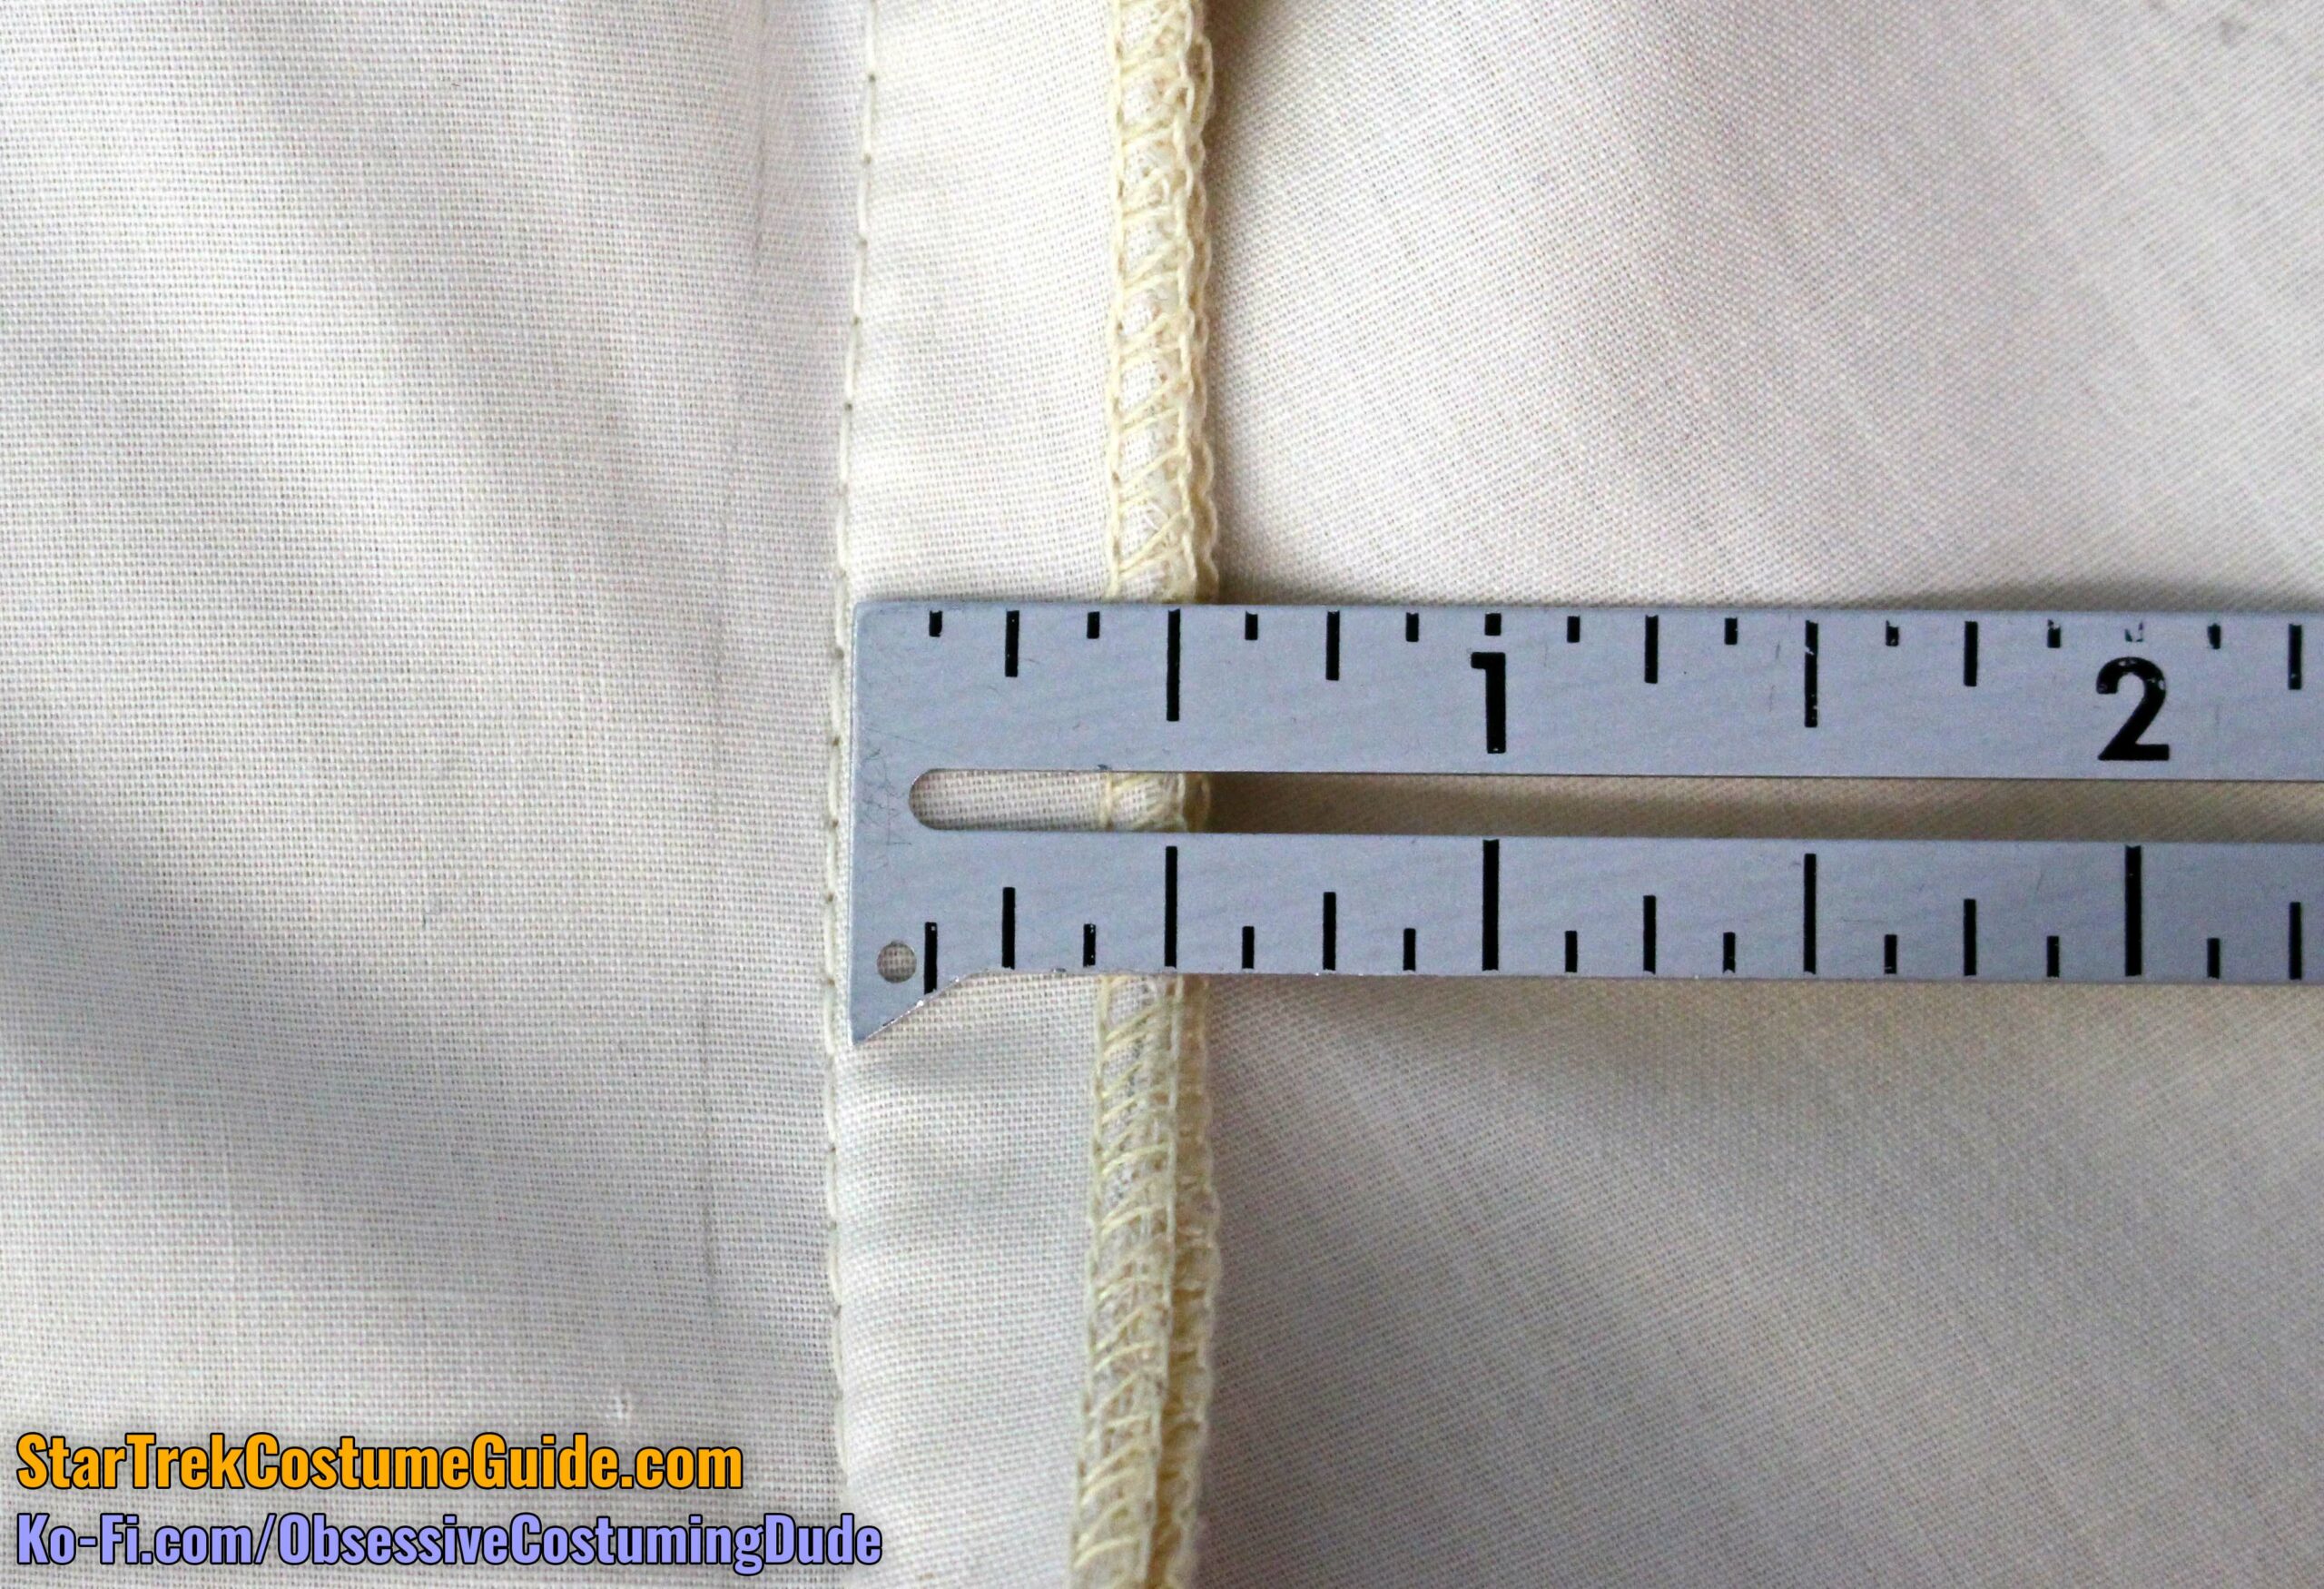
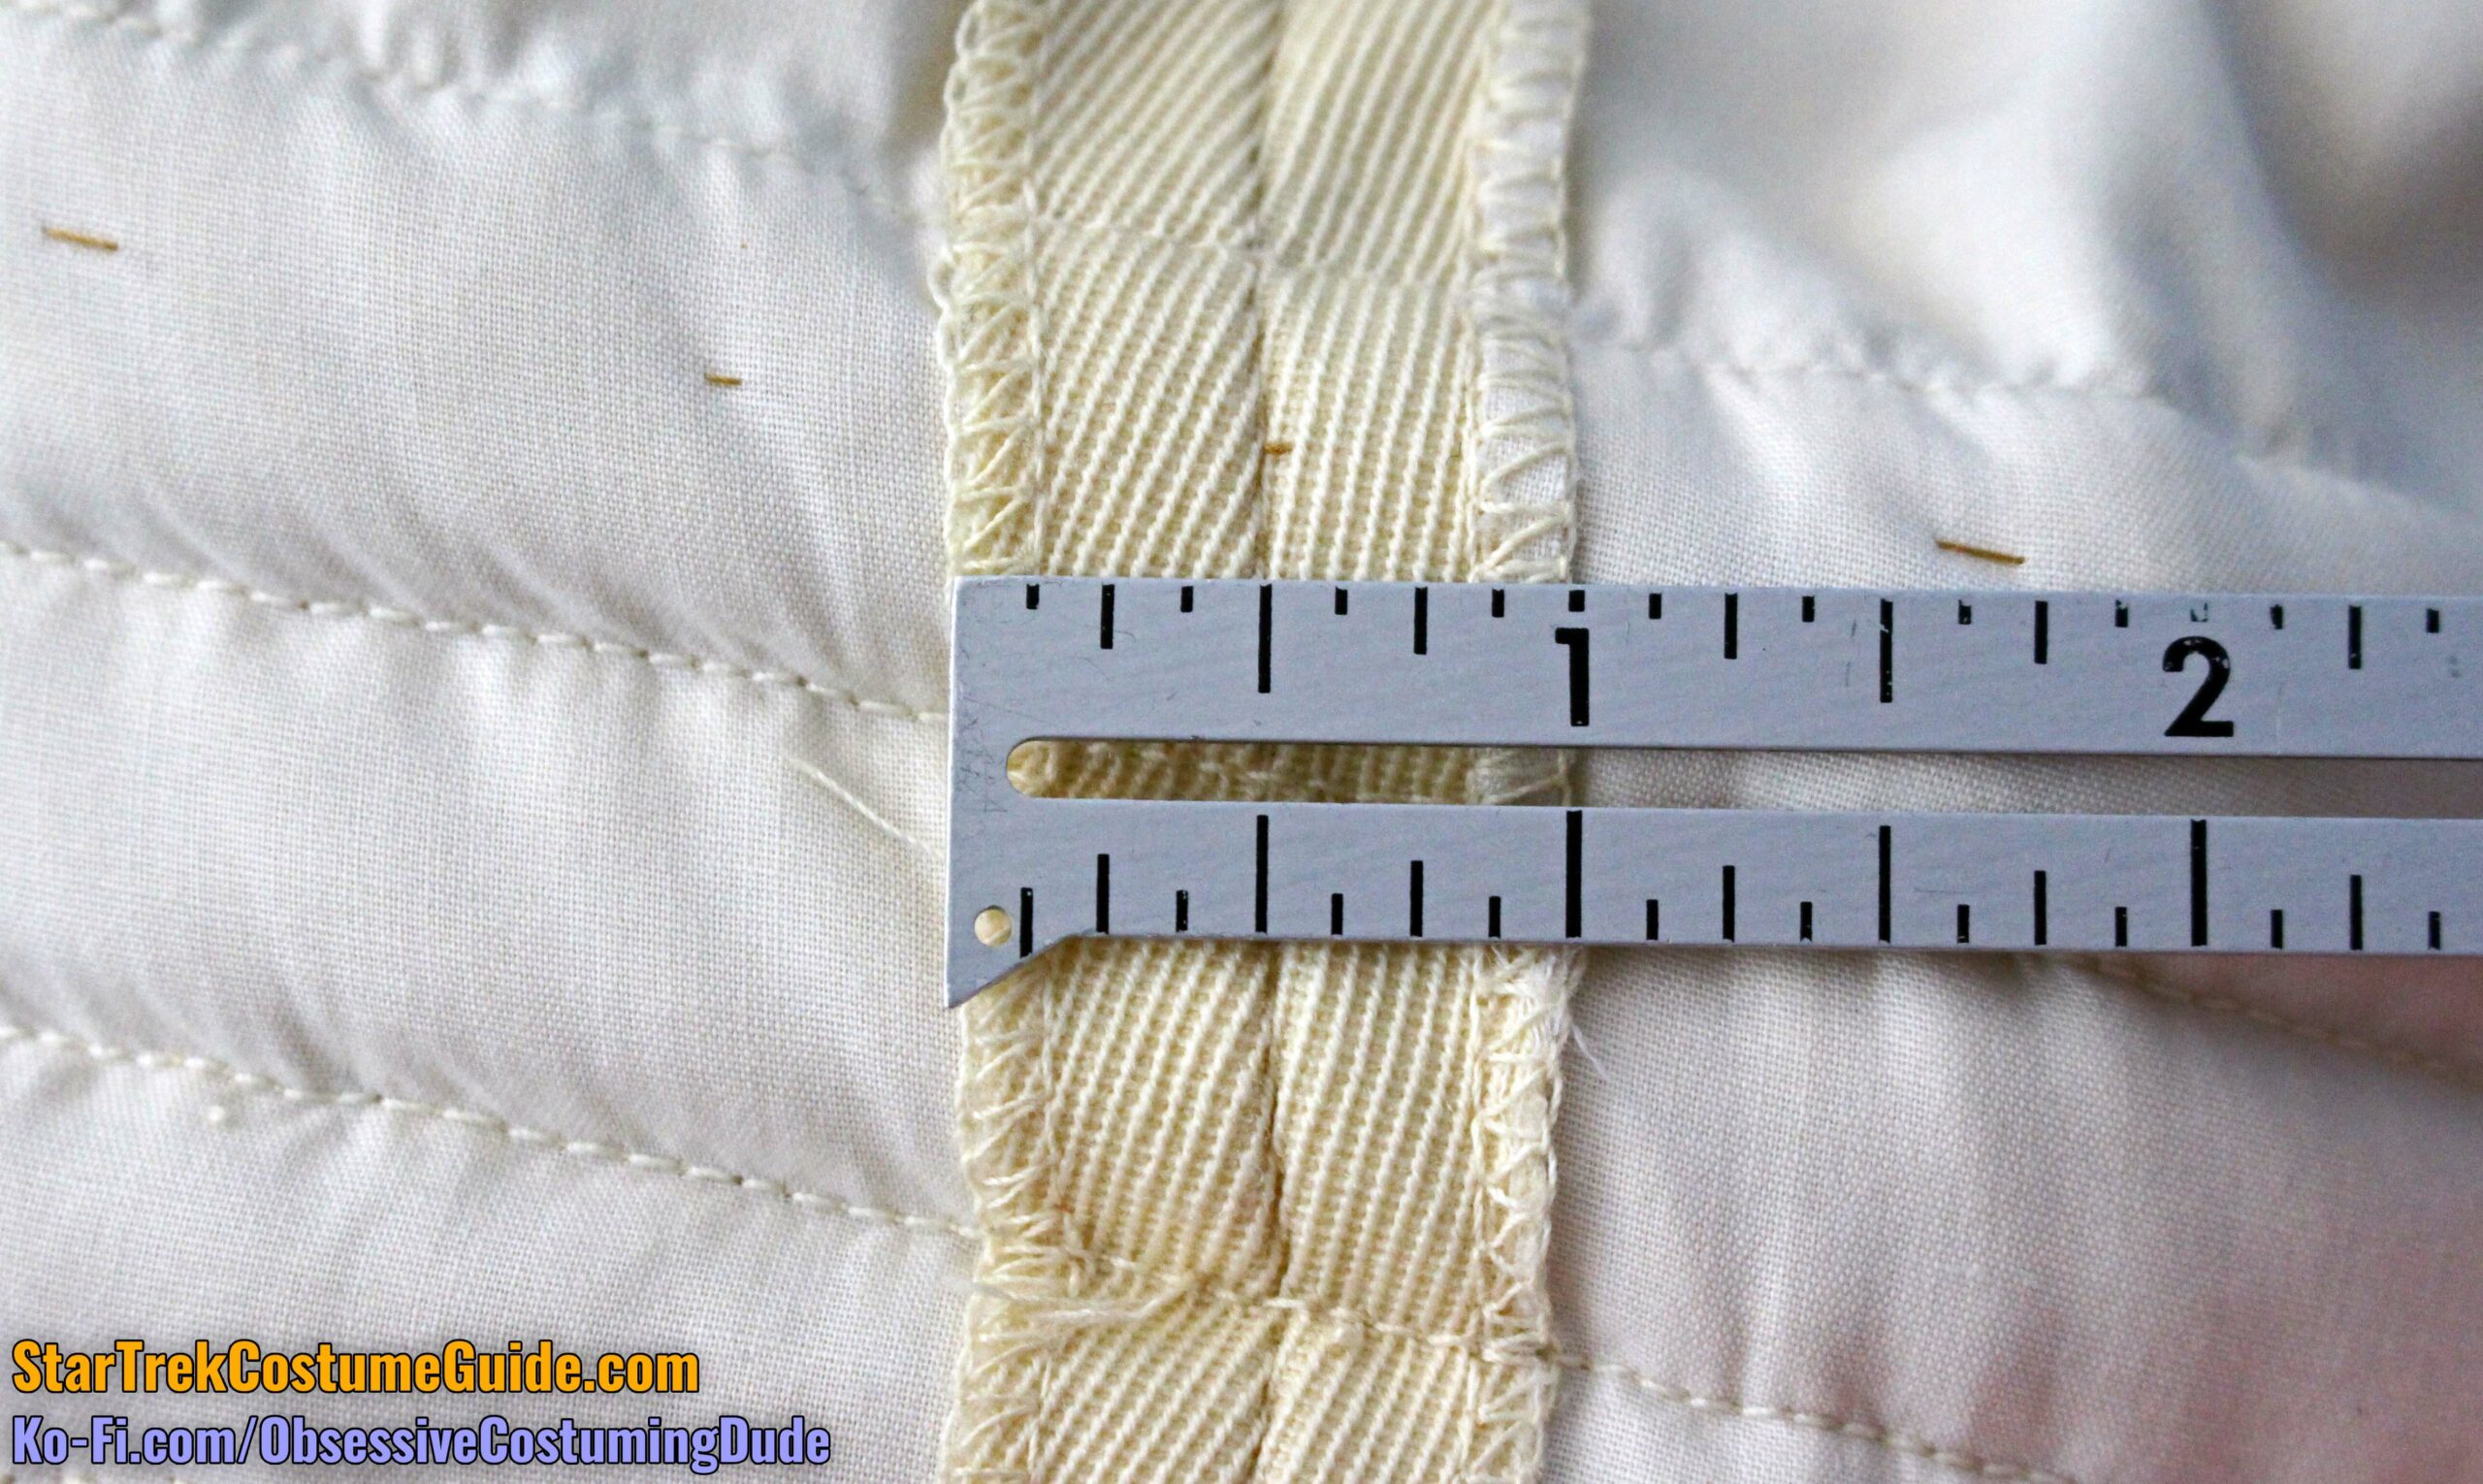
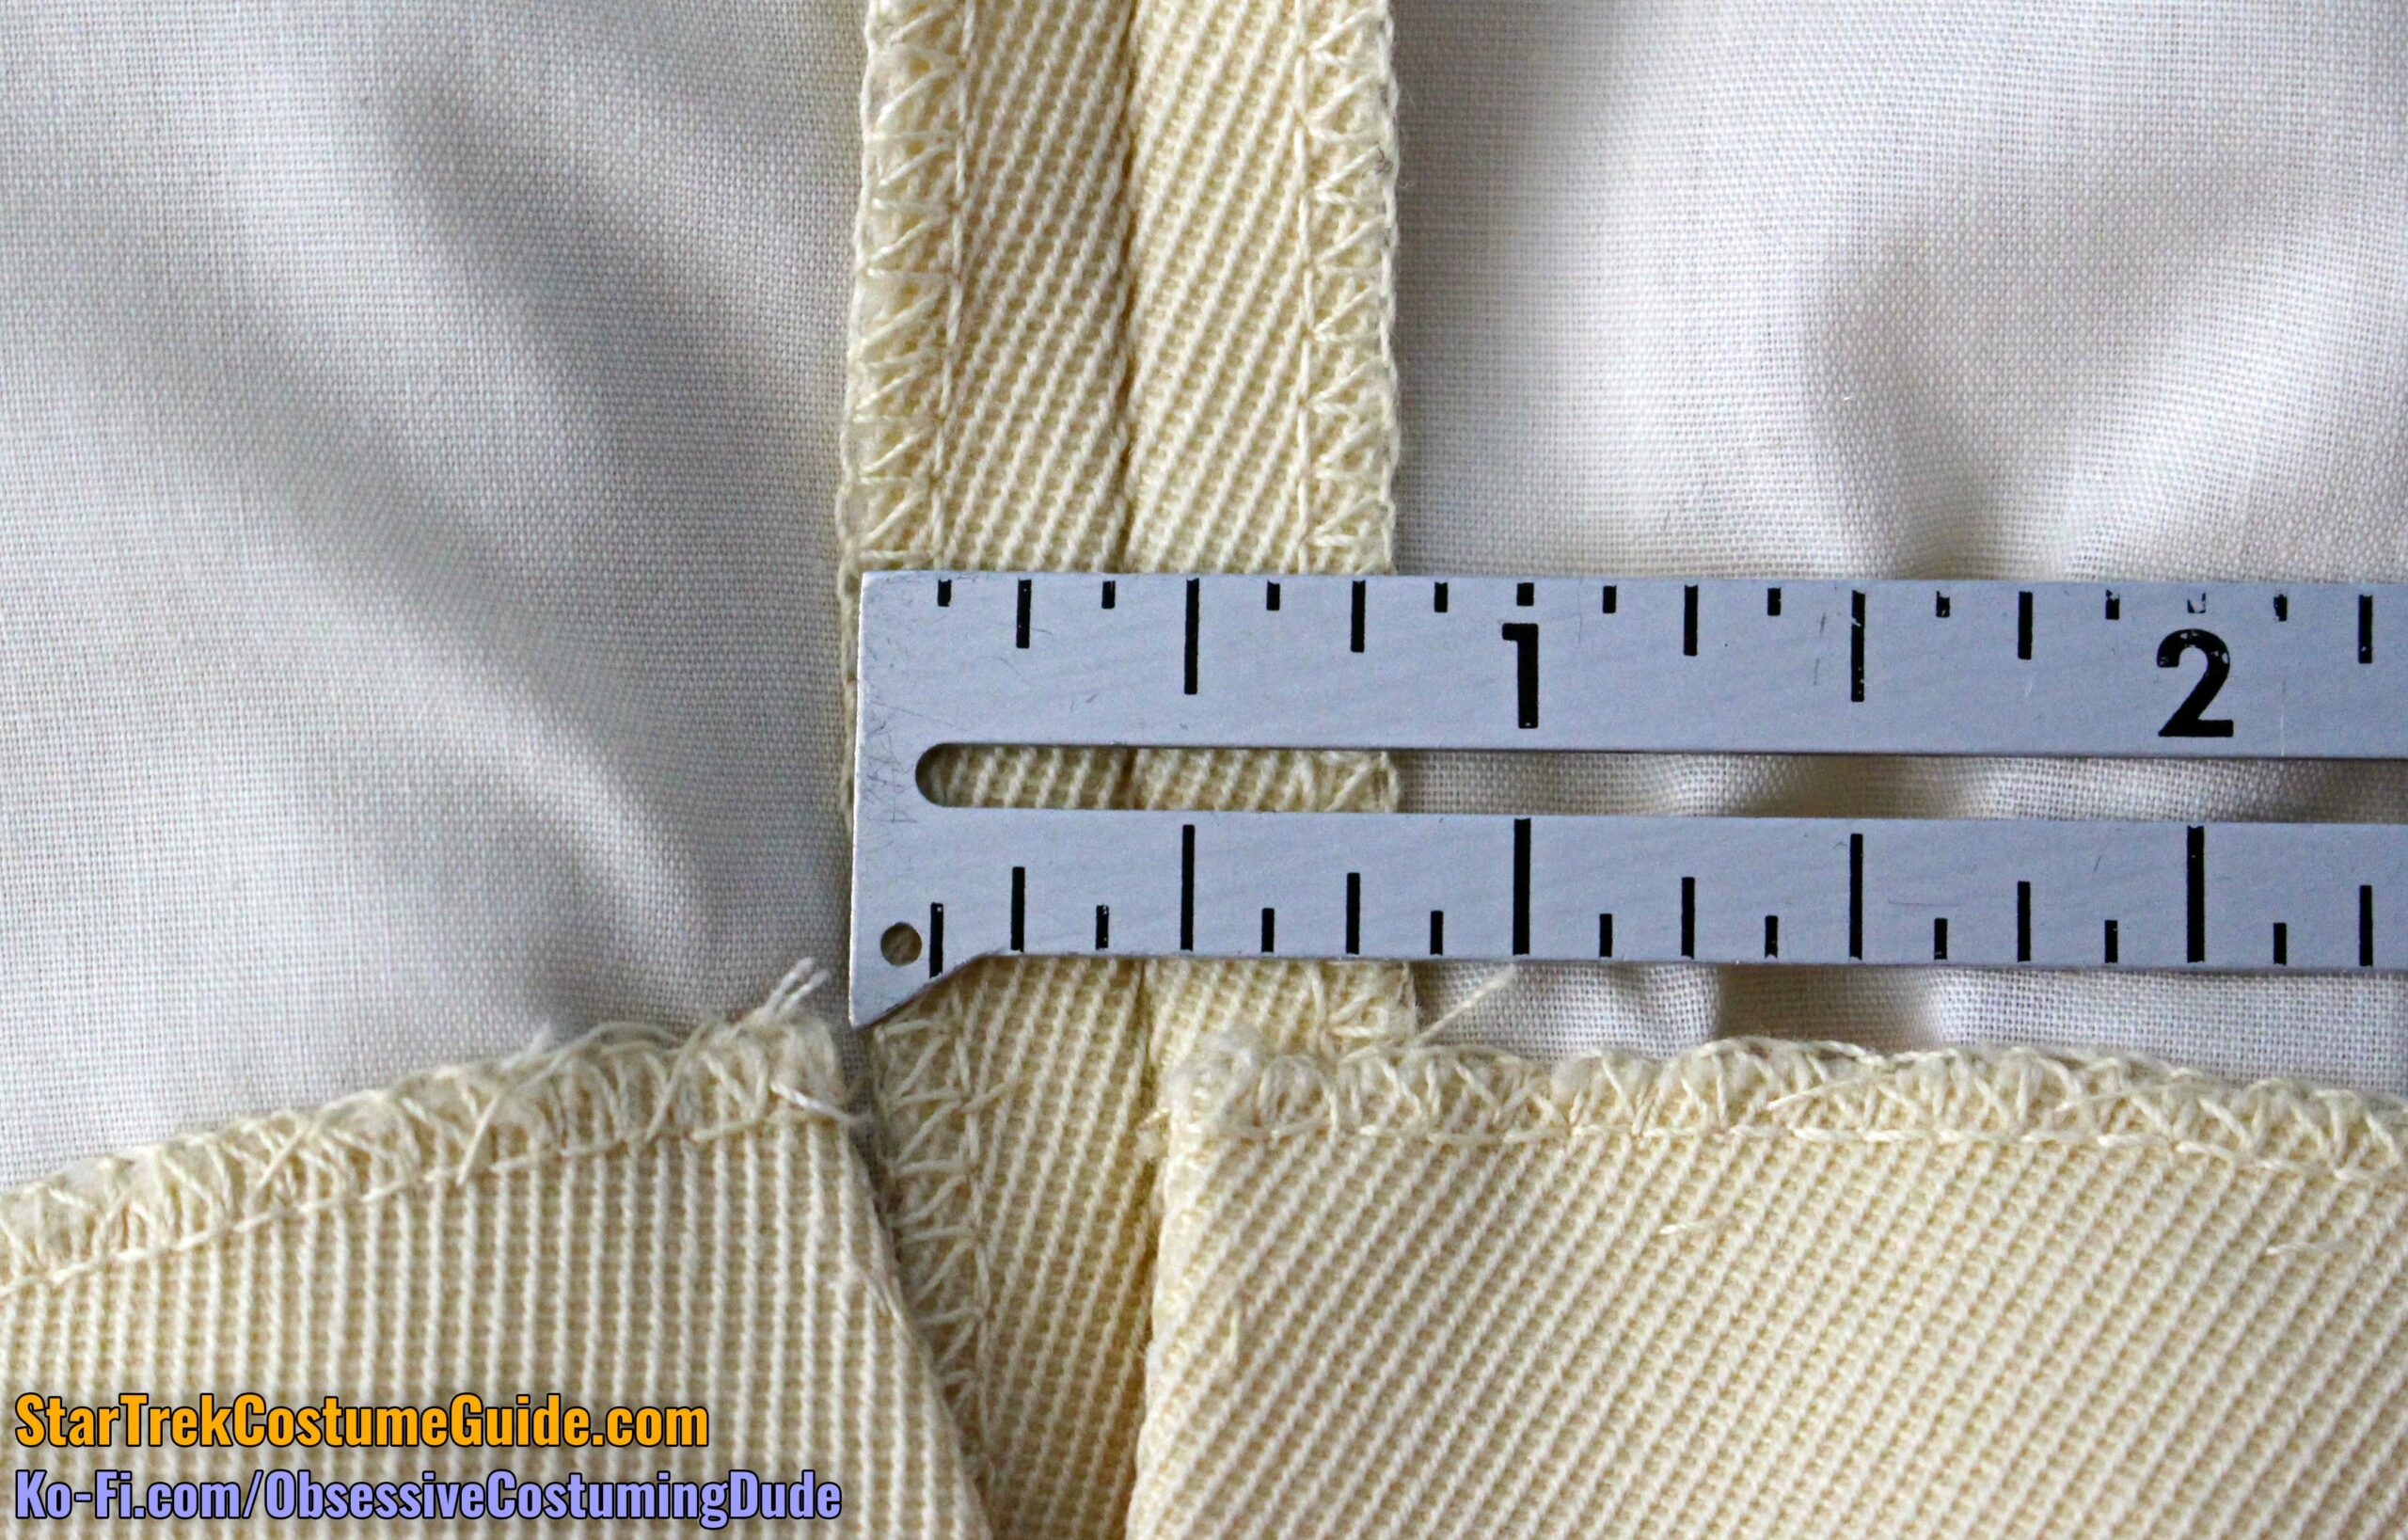
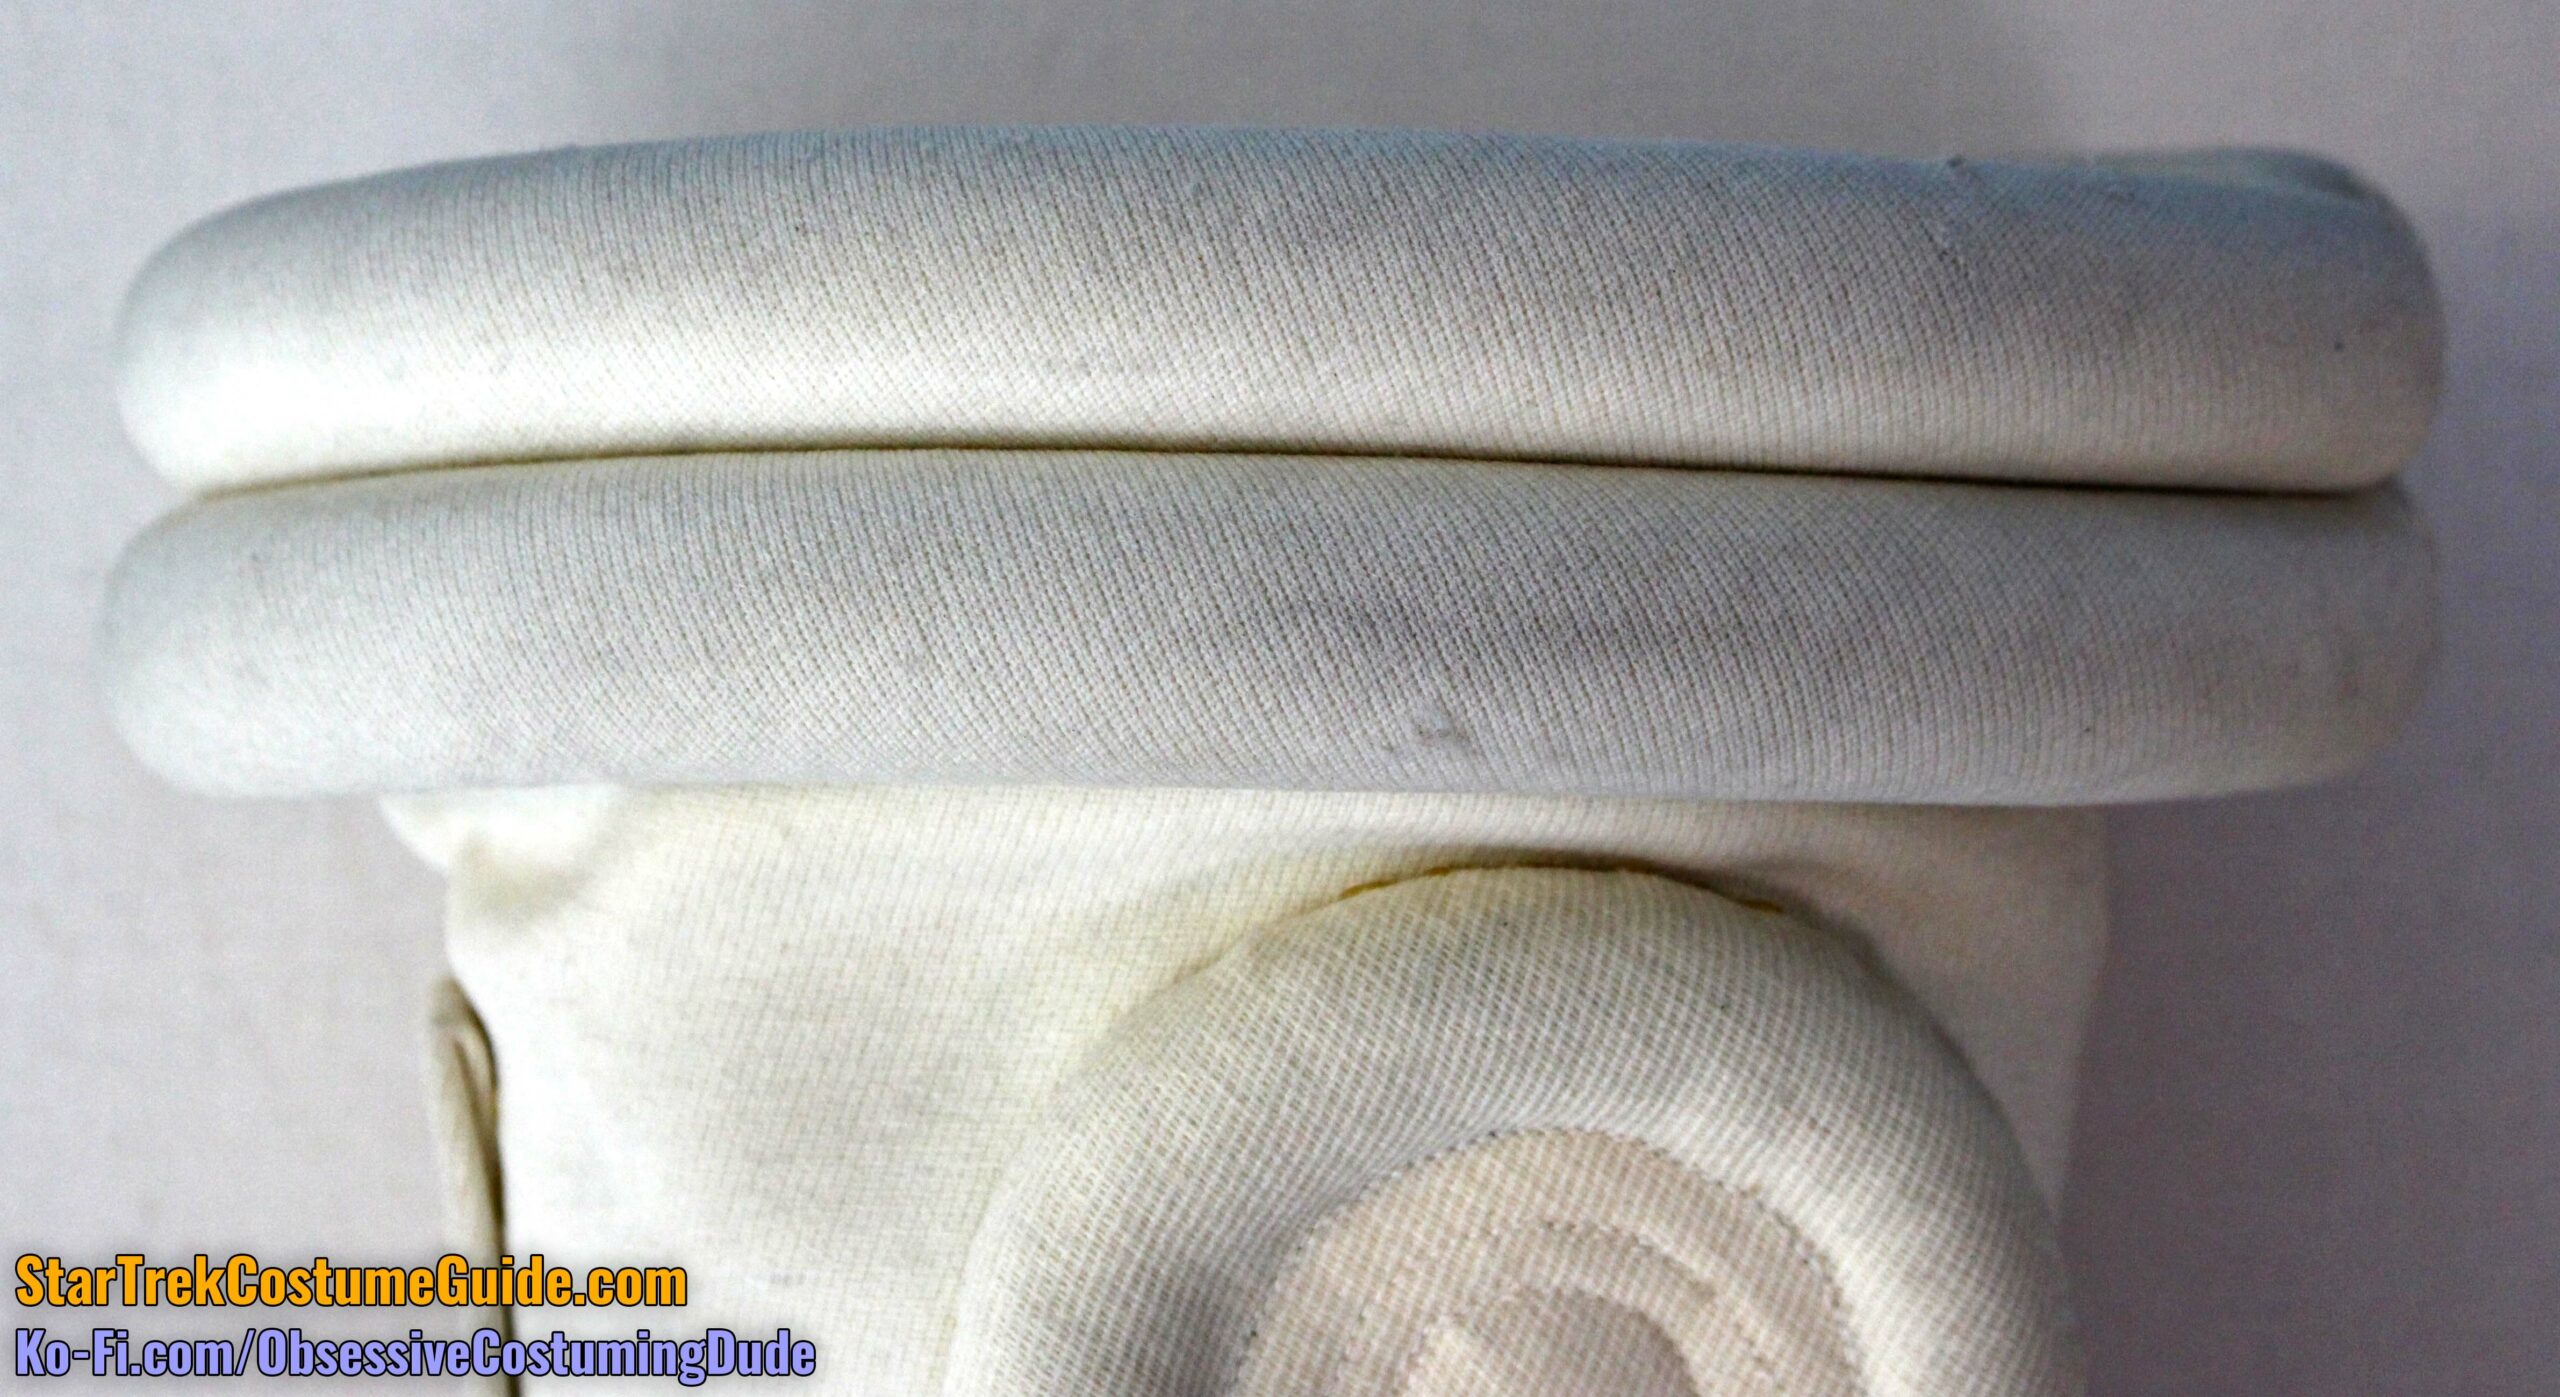
Across the jumpsuit waist were three similar horizontal bands.
Unlike the “chest circles,” these waist bands were made from bias-cut self-fabric (i.e. the same wool gabardine as the jumpsuit, but cut diagonally).
Each assembly (left and right) was made from a single strip of fabric, with the cording (?) channels stitched down individually, top to bottom.
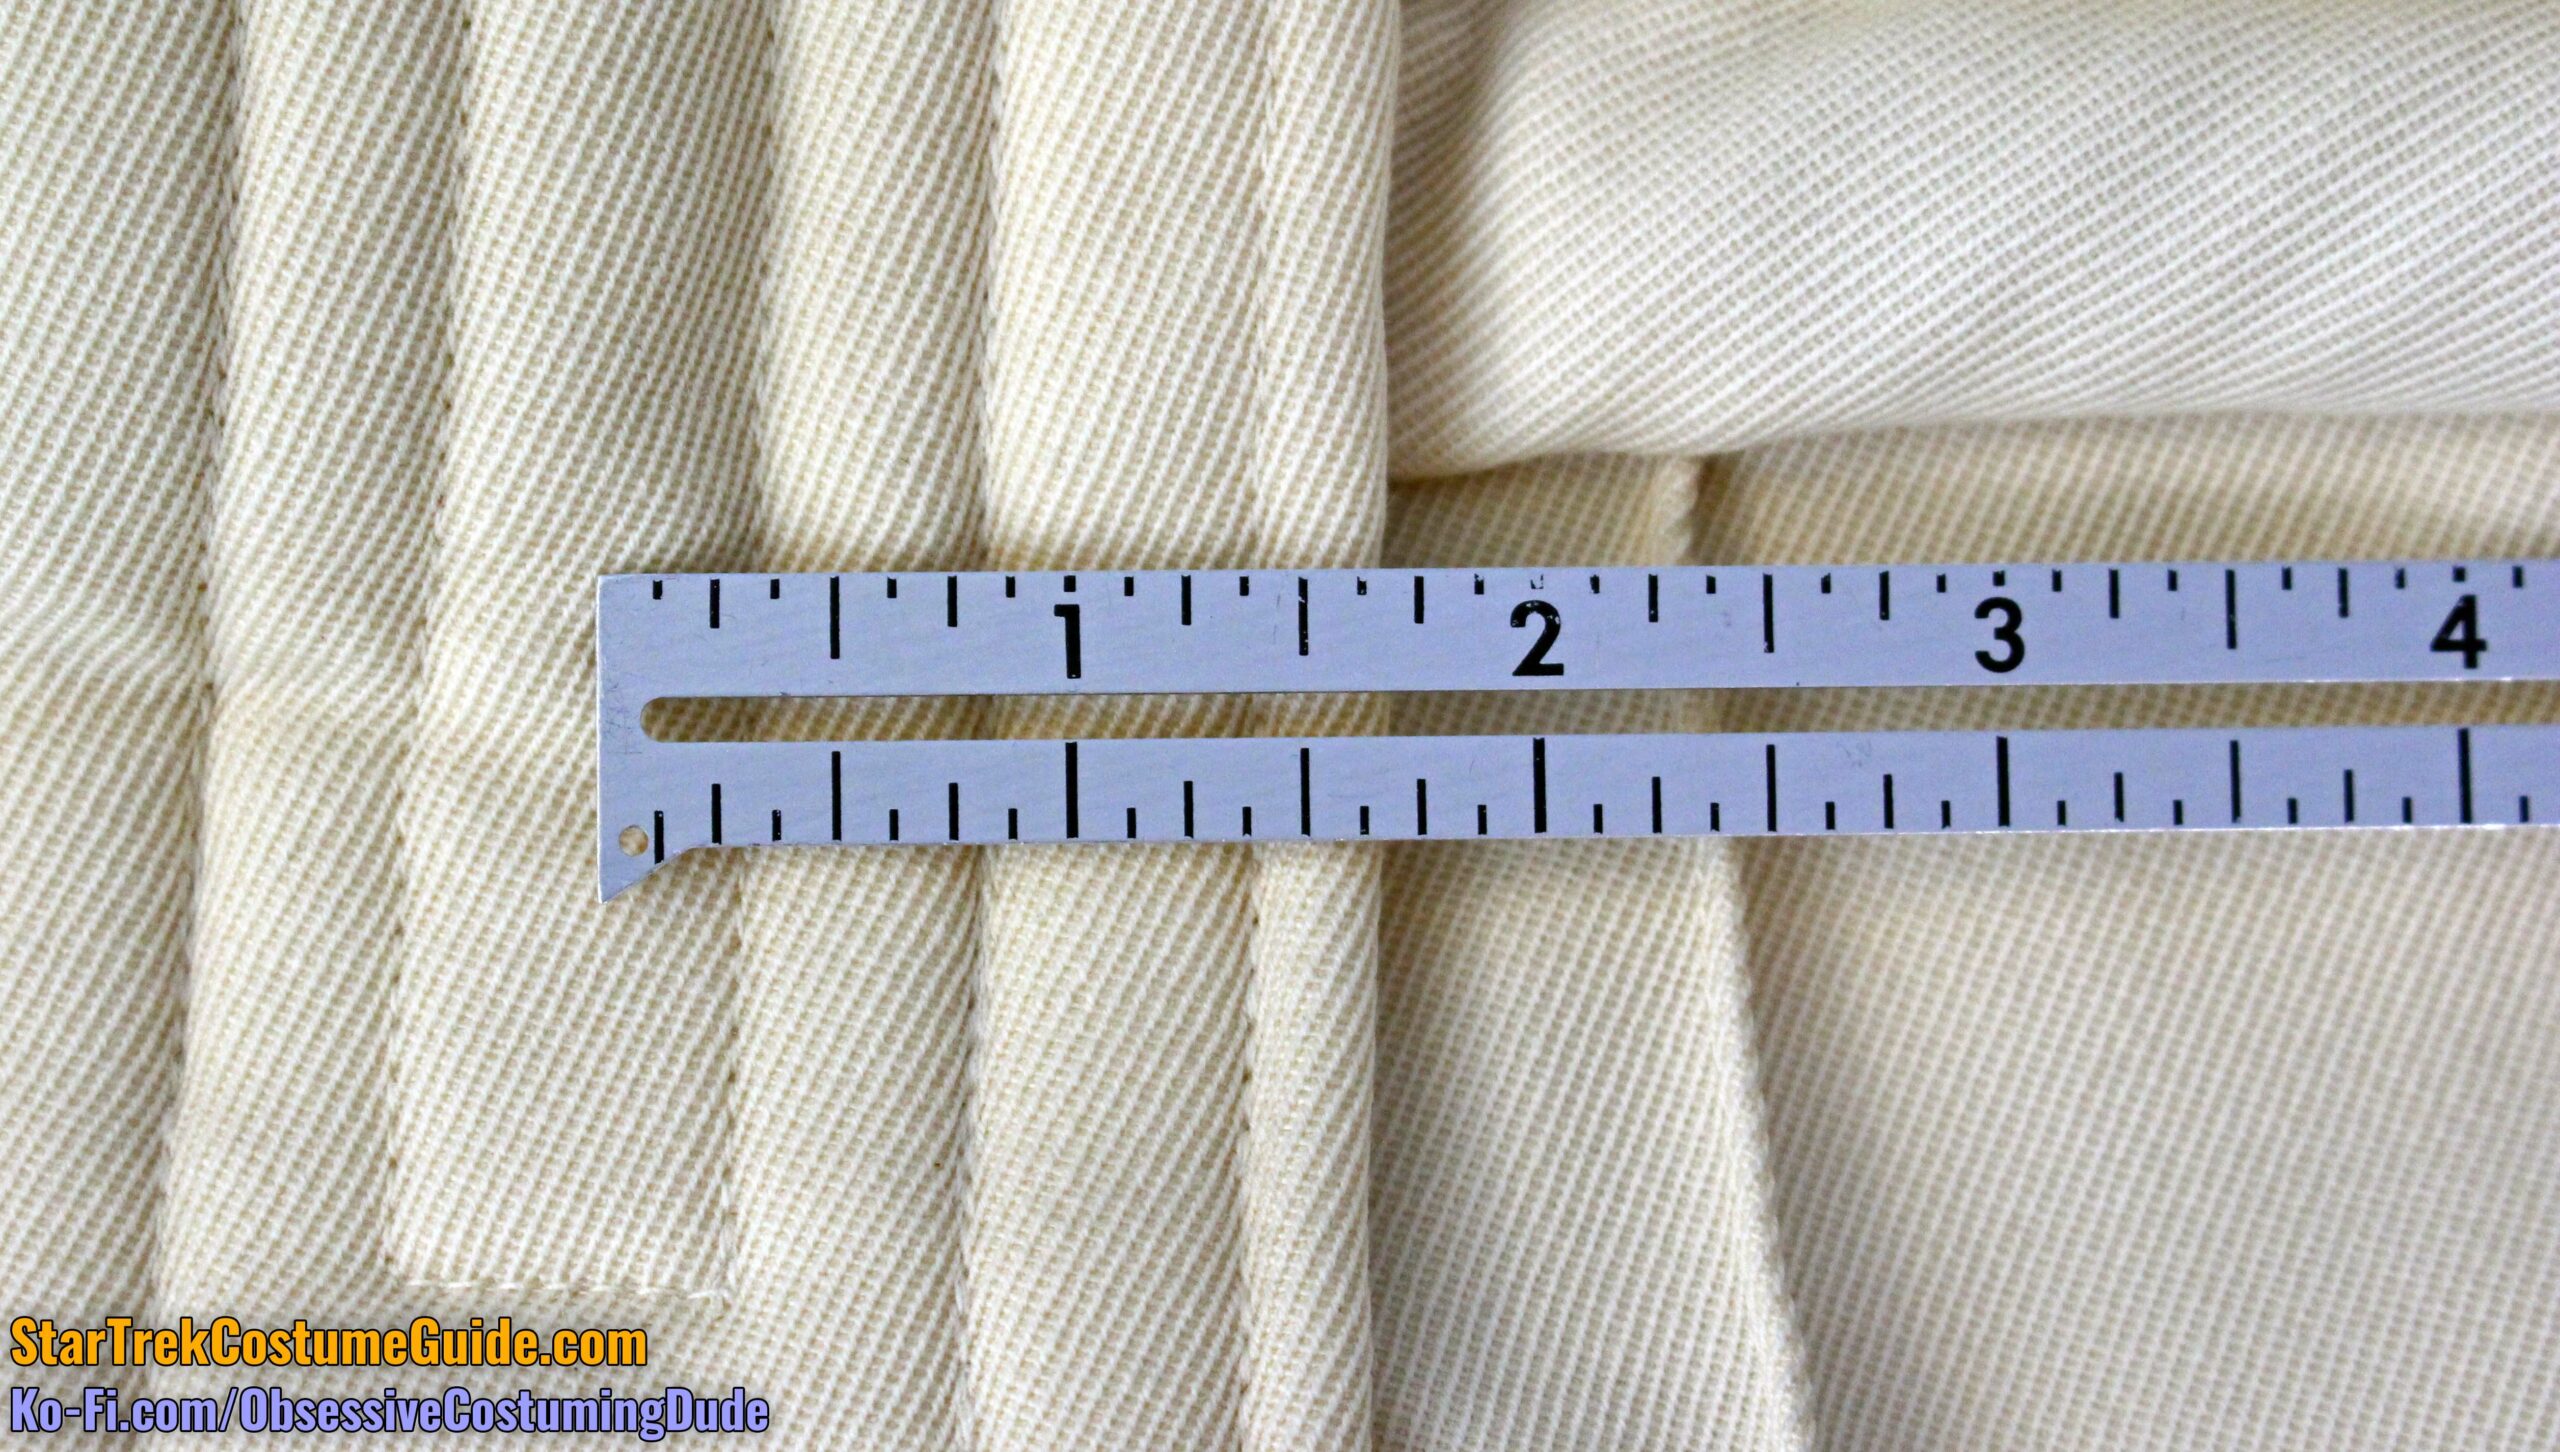
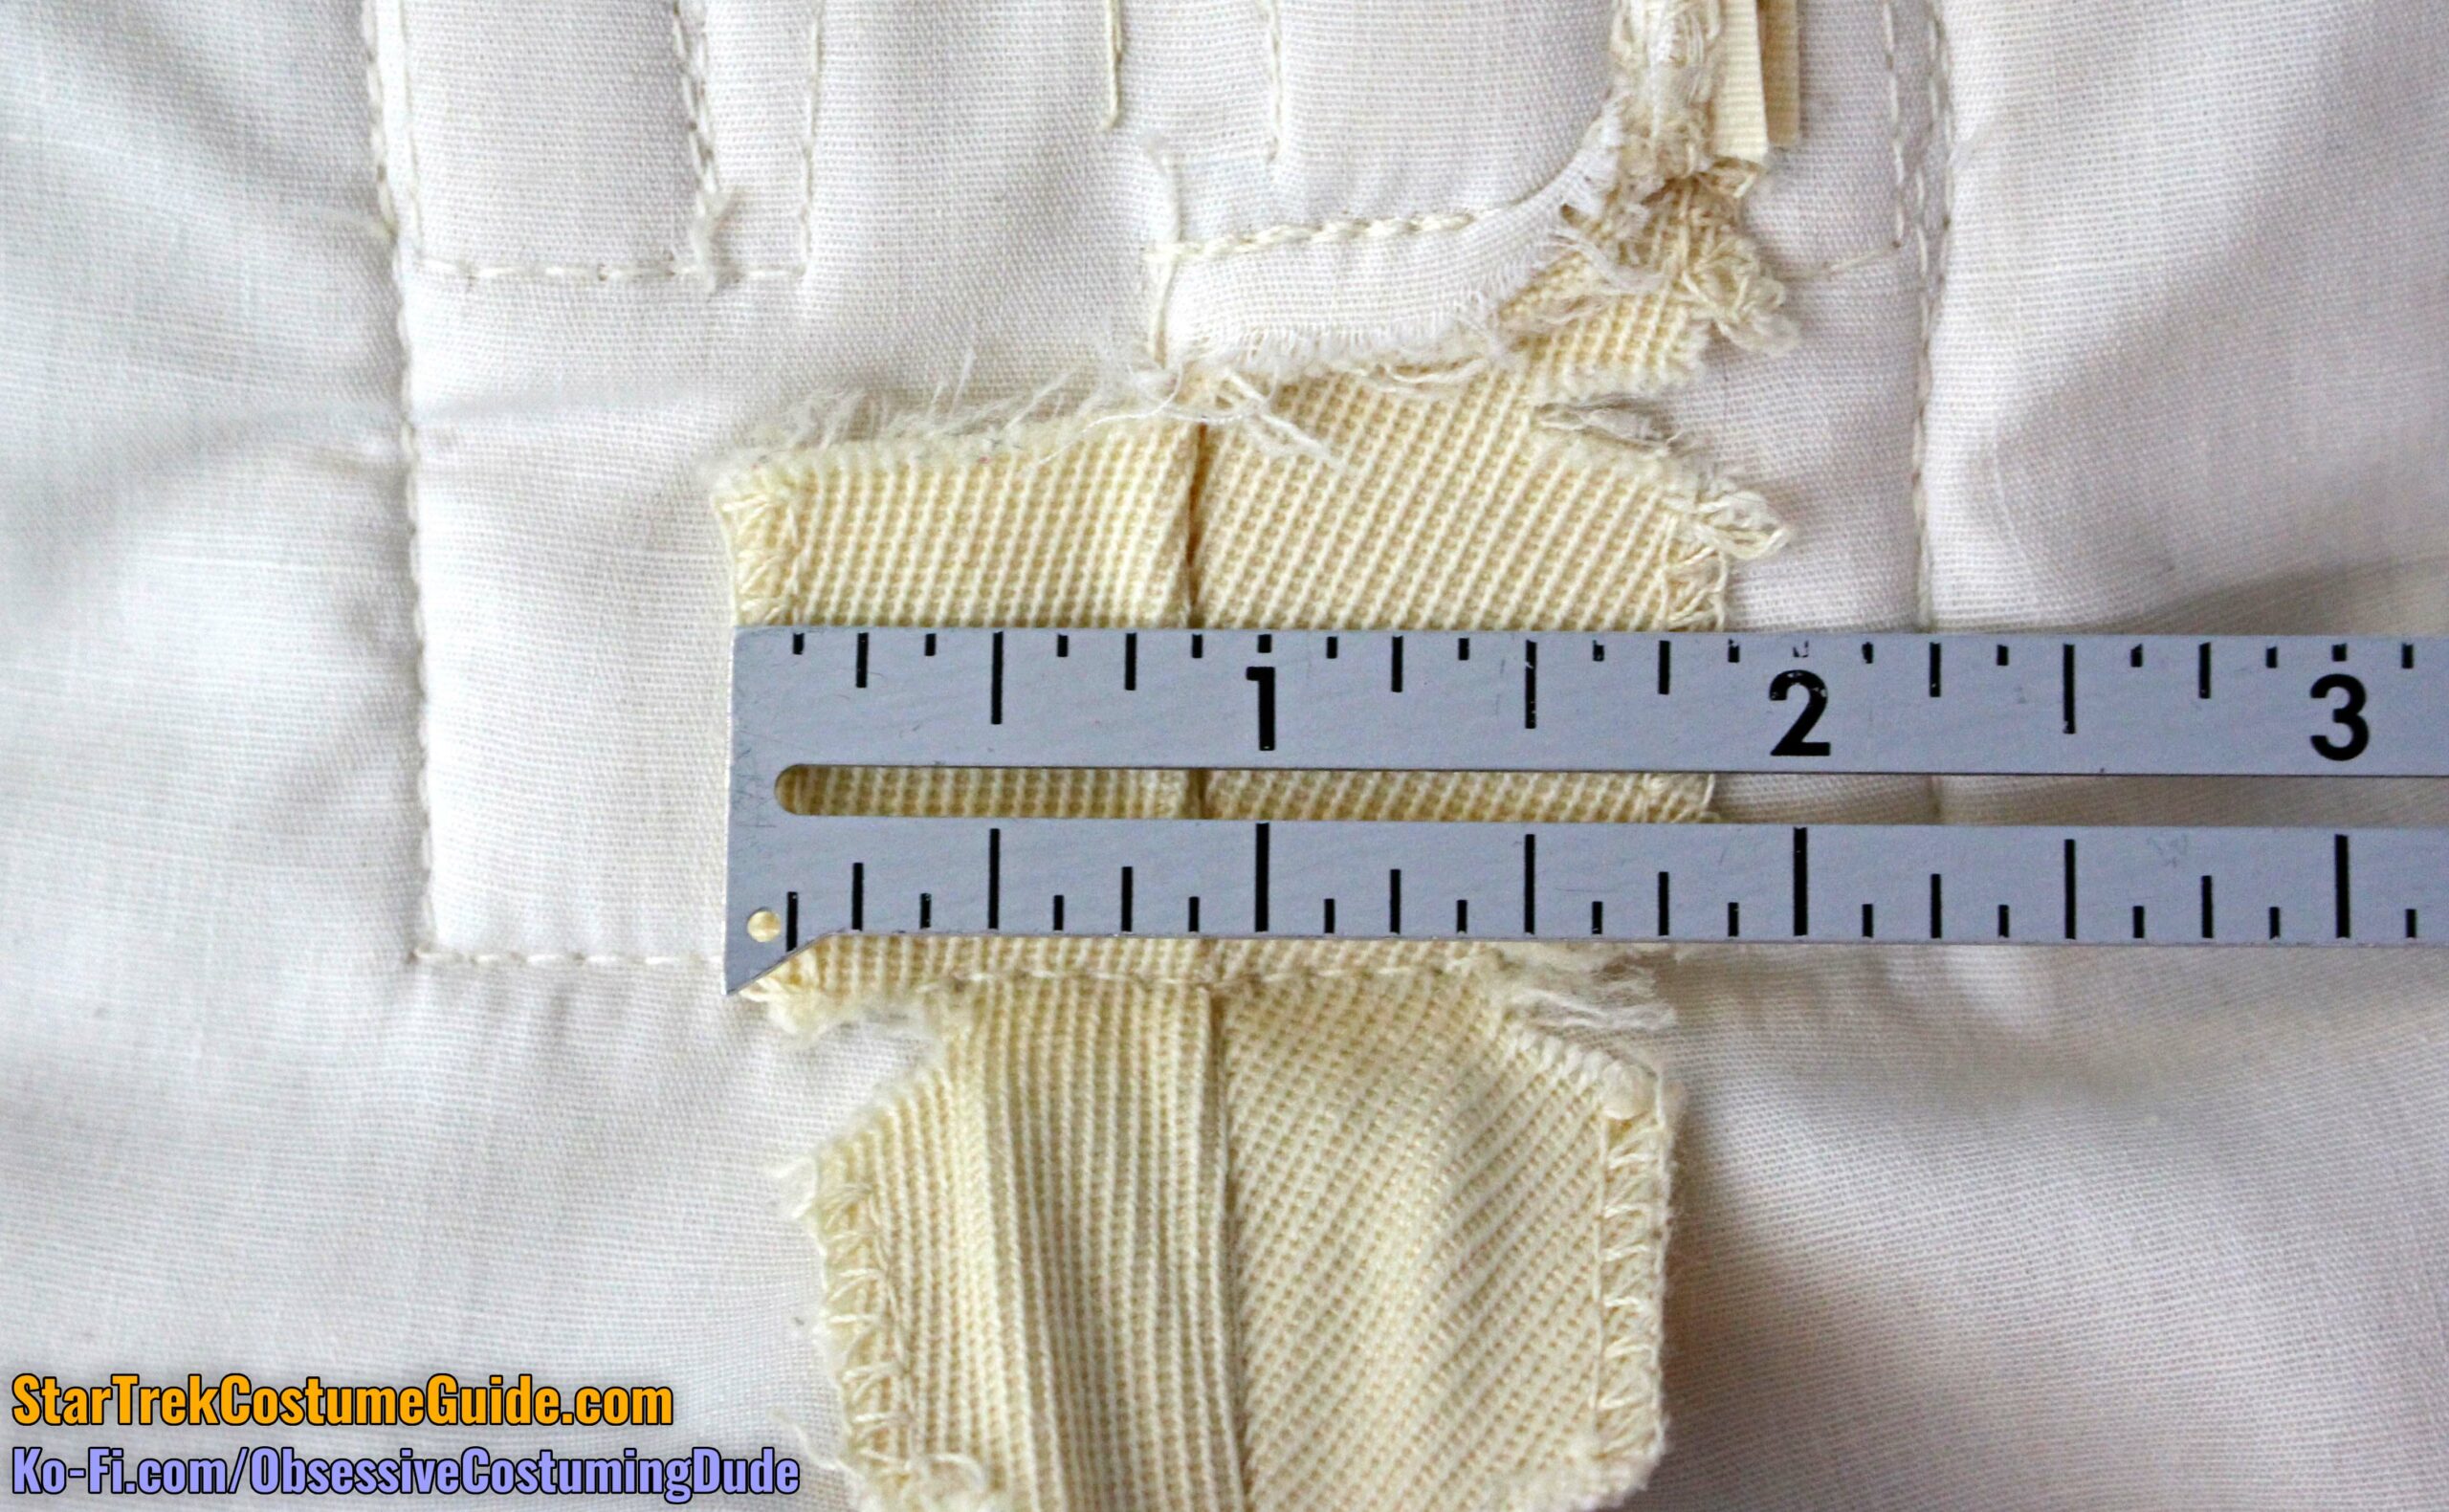
The cording (?) was slightly wider than the “chest circles,” being a full inch wide, although the fabric channels themselves were slightly uneven in places.
The ends of the cording (?) only extended to the edges of the front panel, where a vertical topstitch secured the assembly.
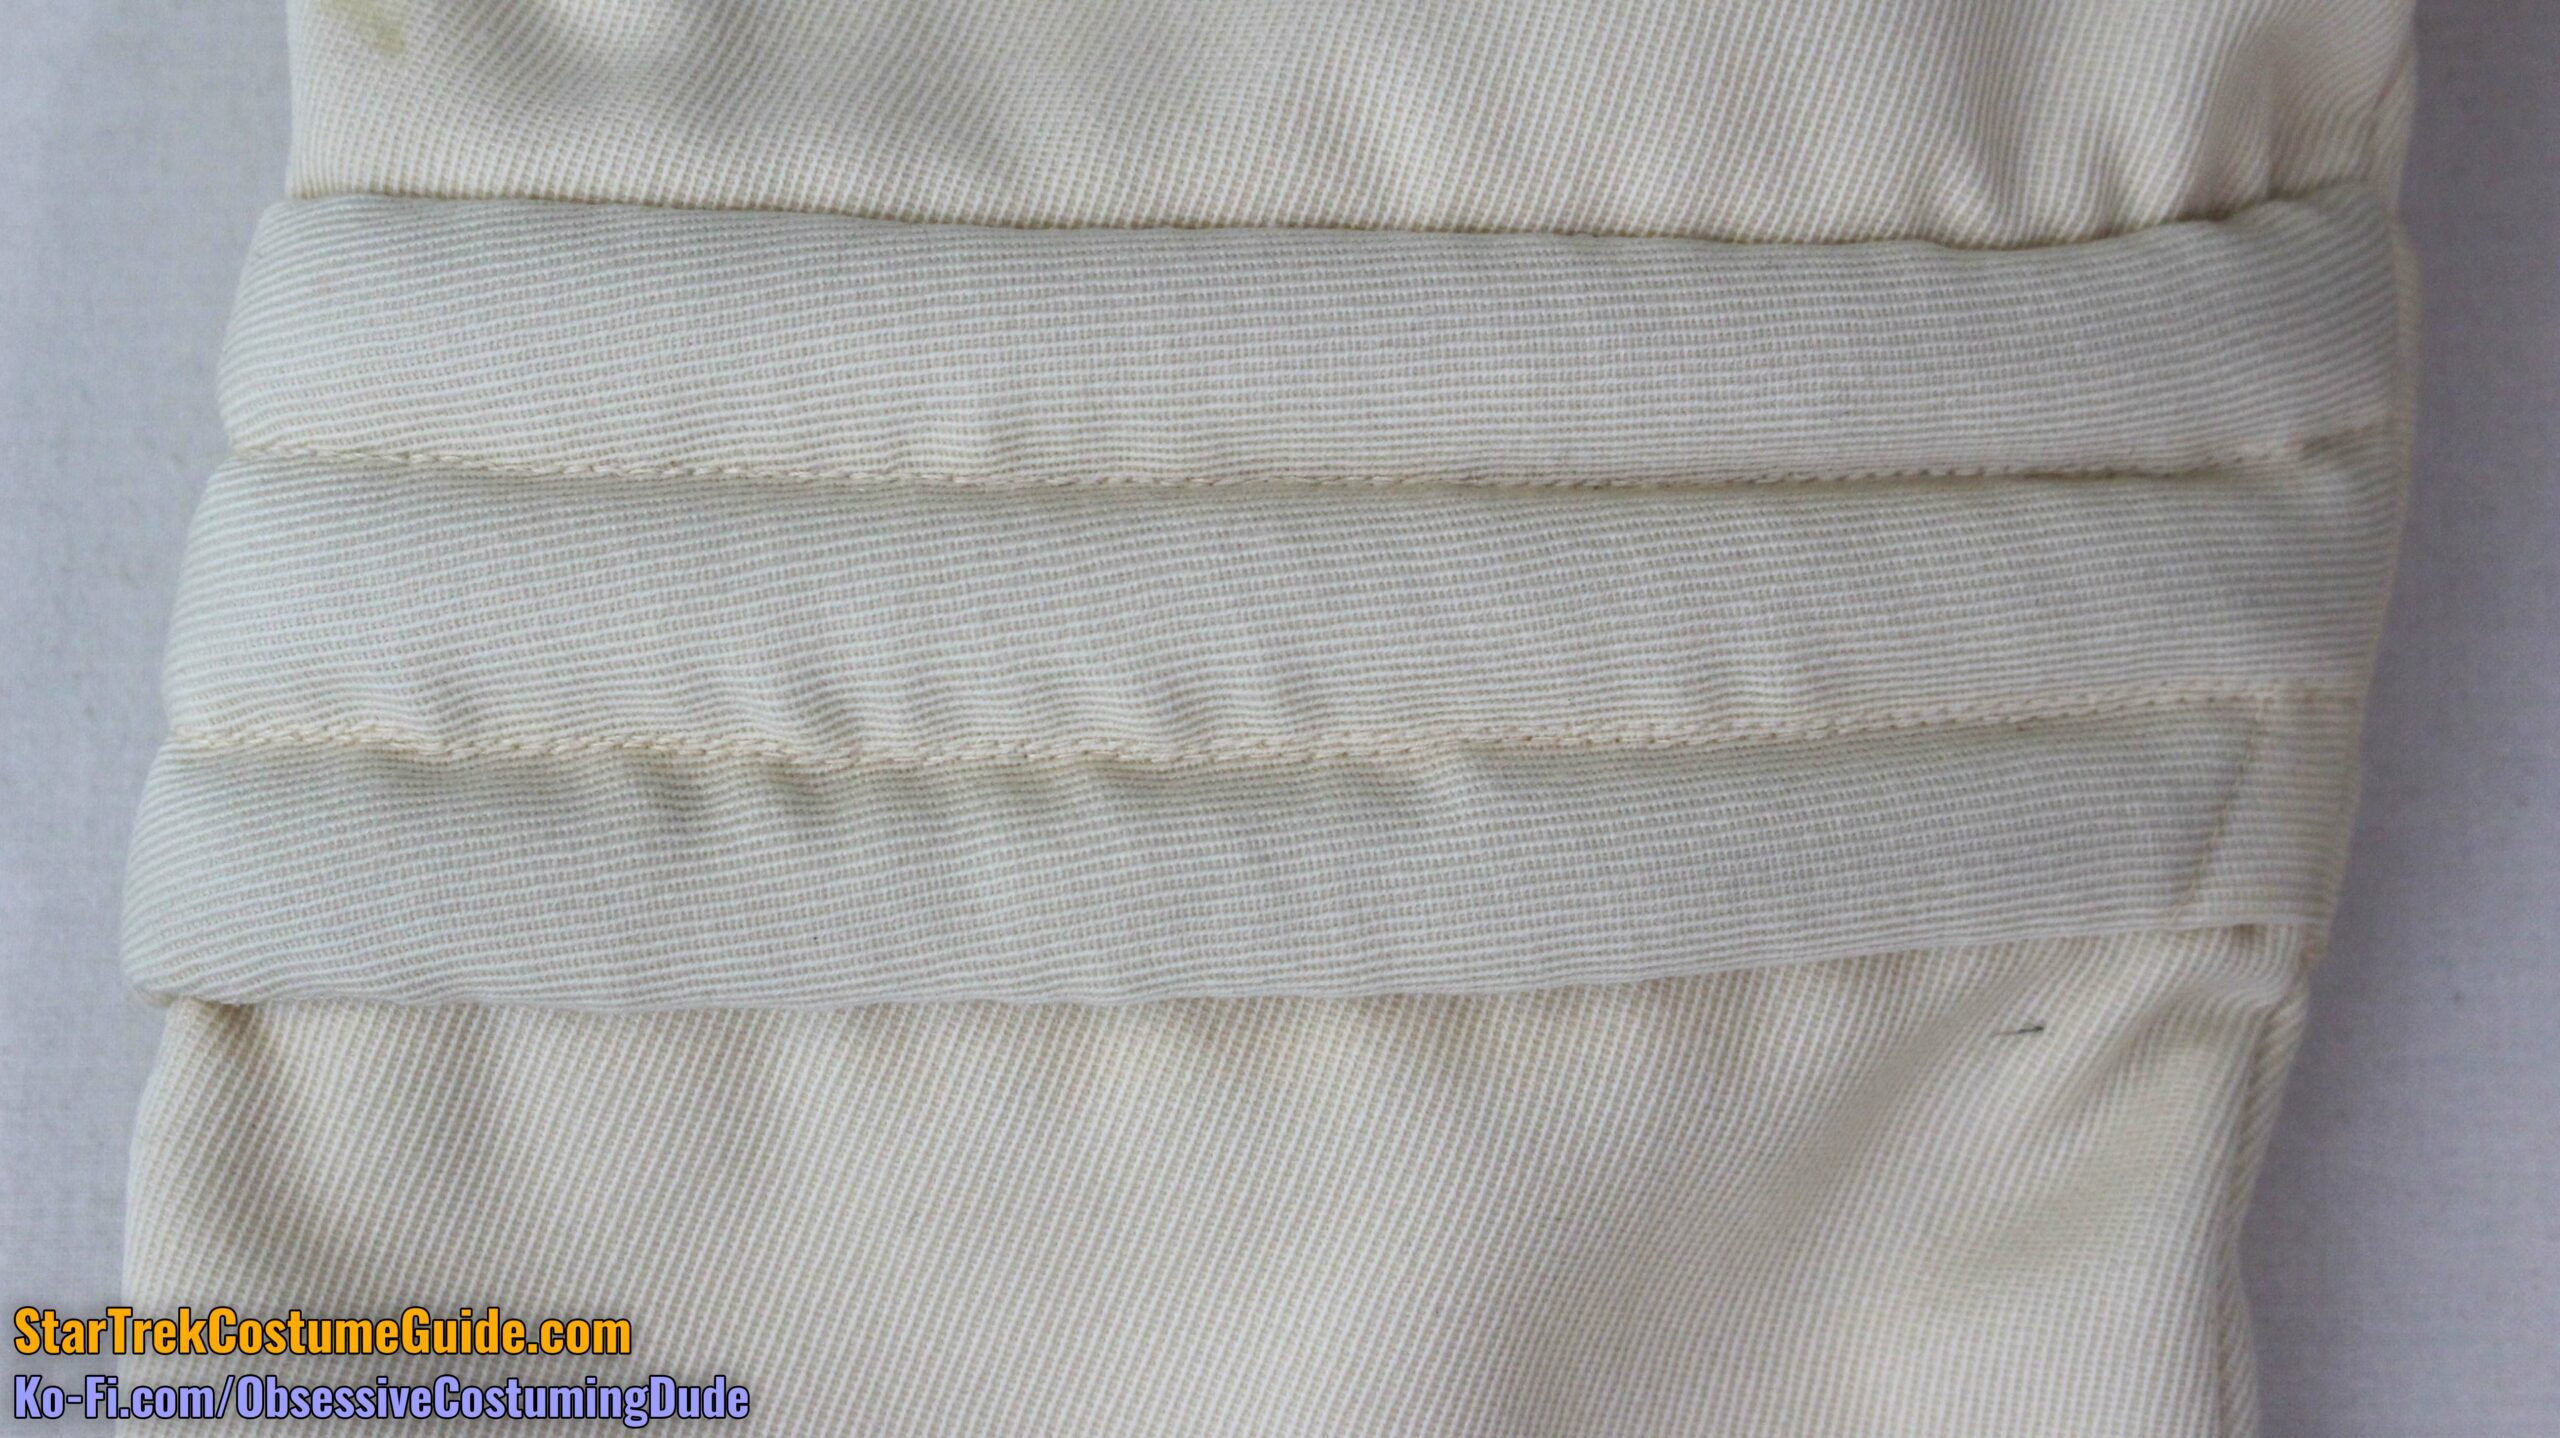
The upper edge of the assembly was machine-sewn to the jumpsuit body, as were the stitches separating the channels, but the lower edge was hand-sewn.
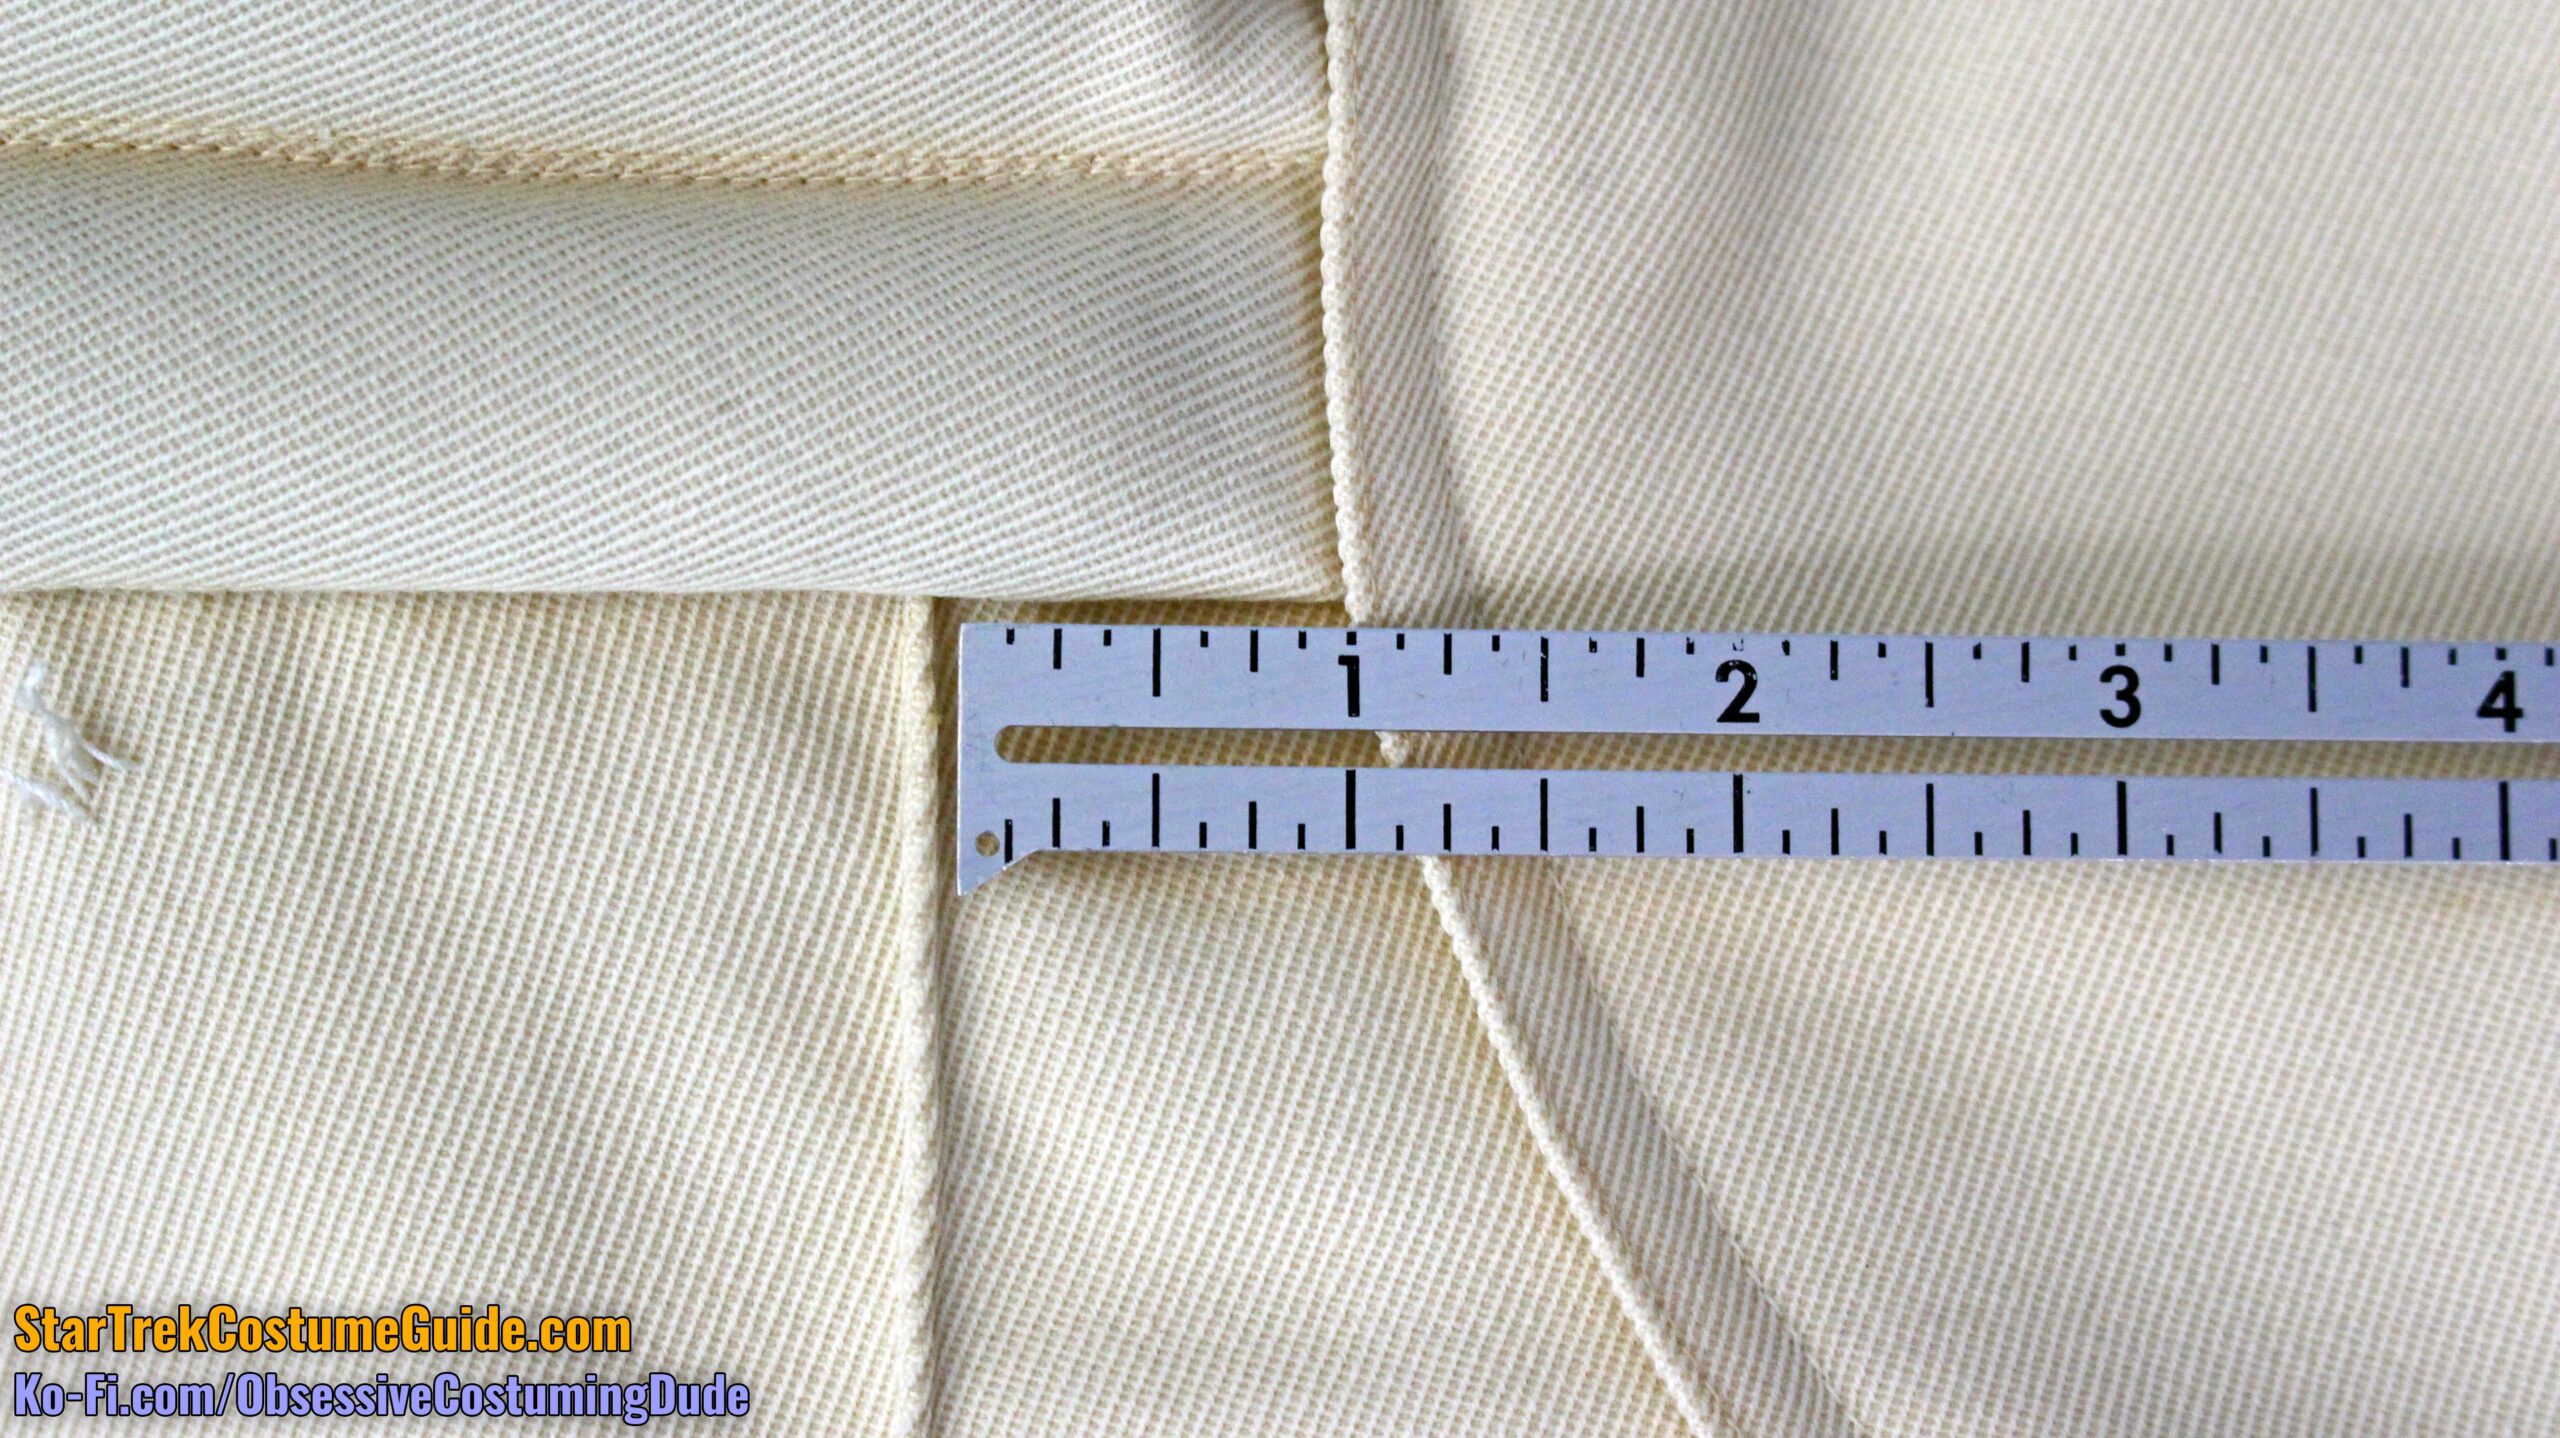
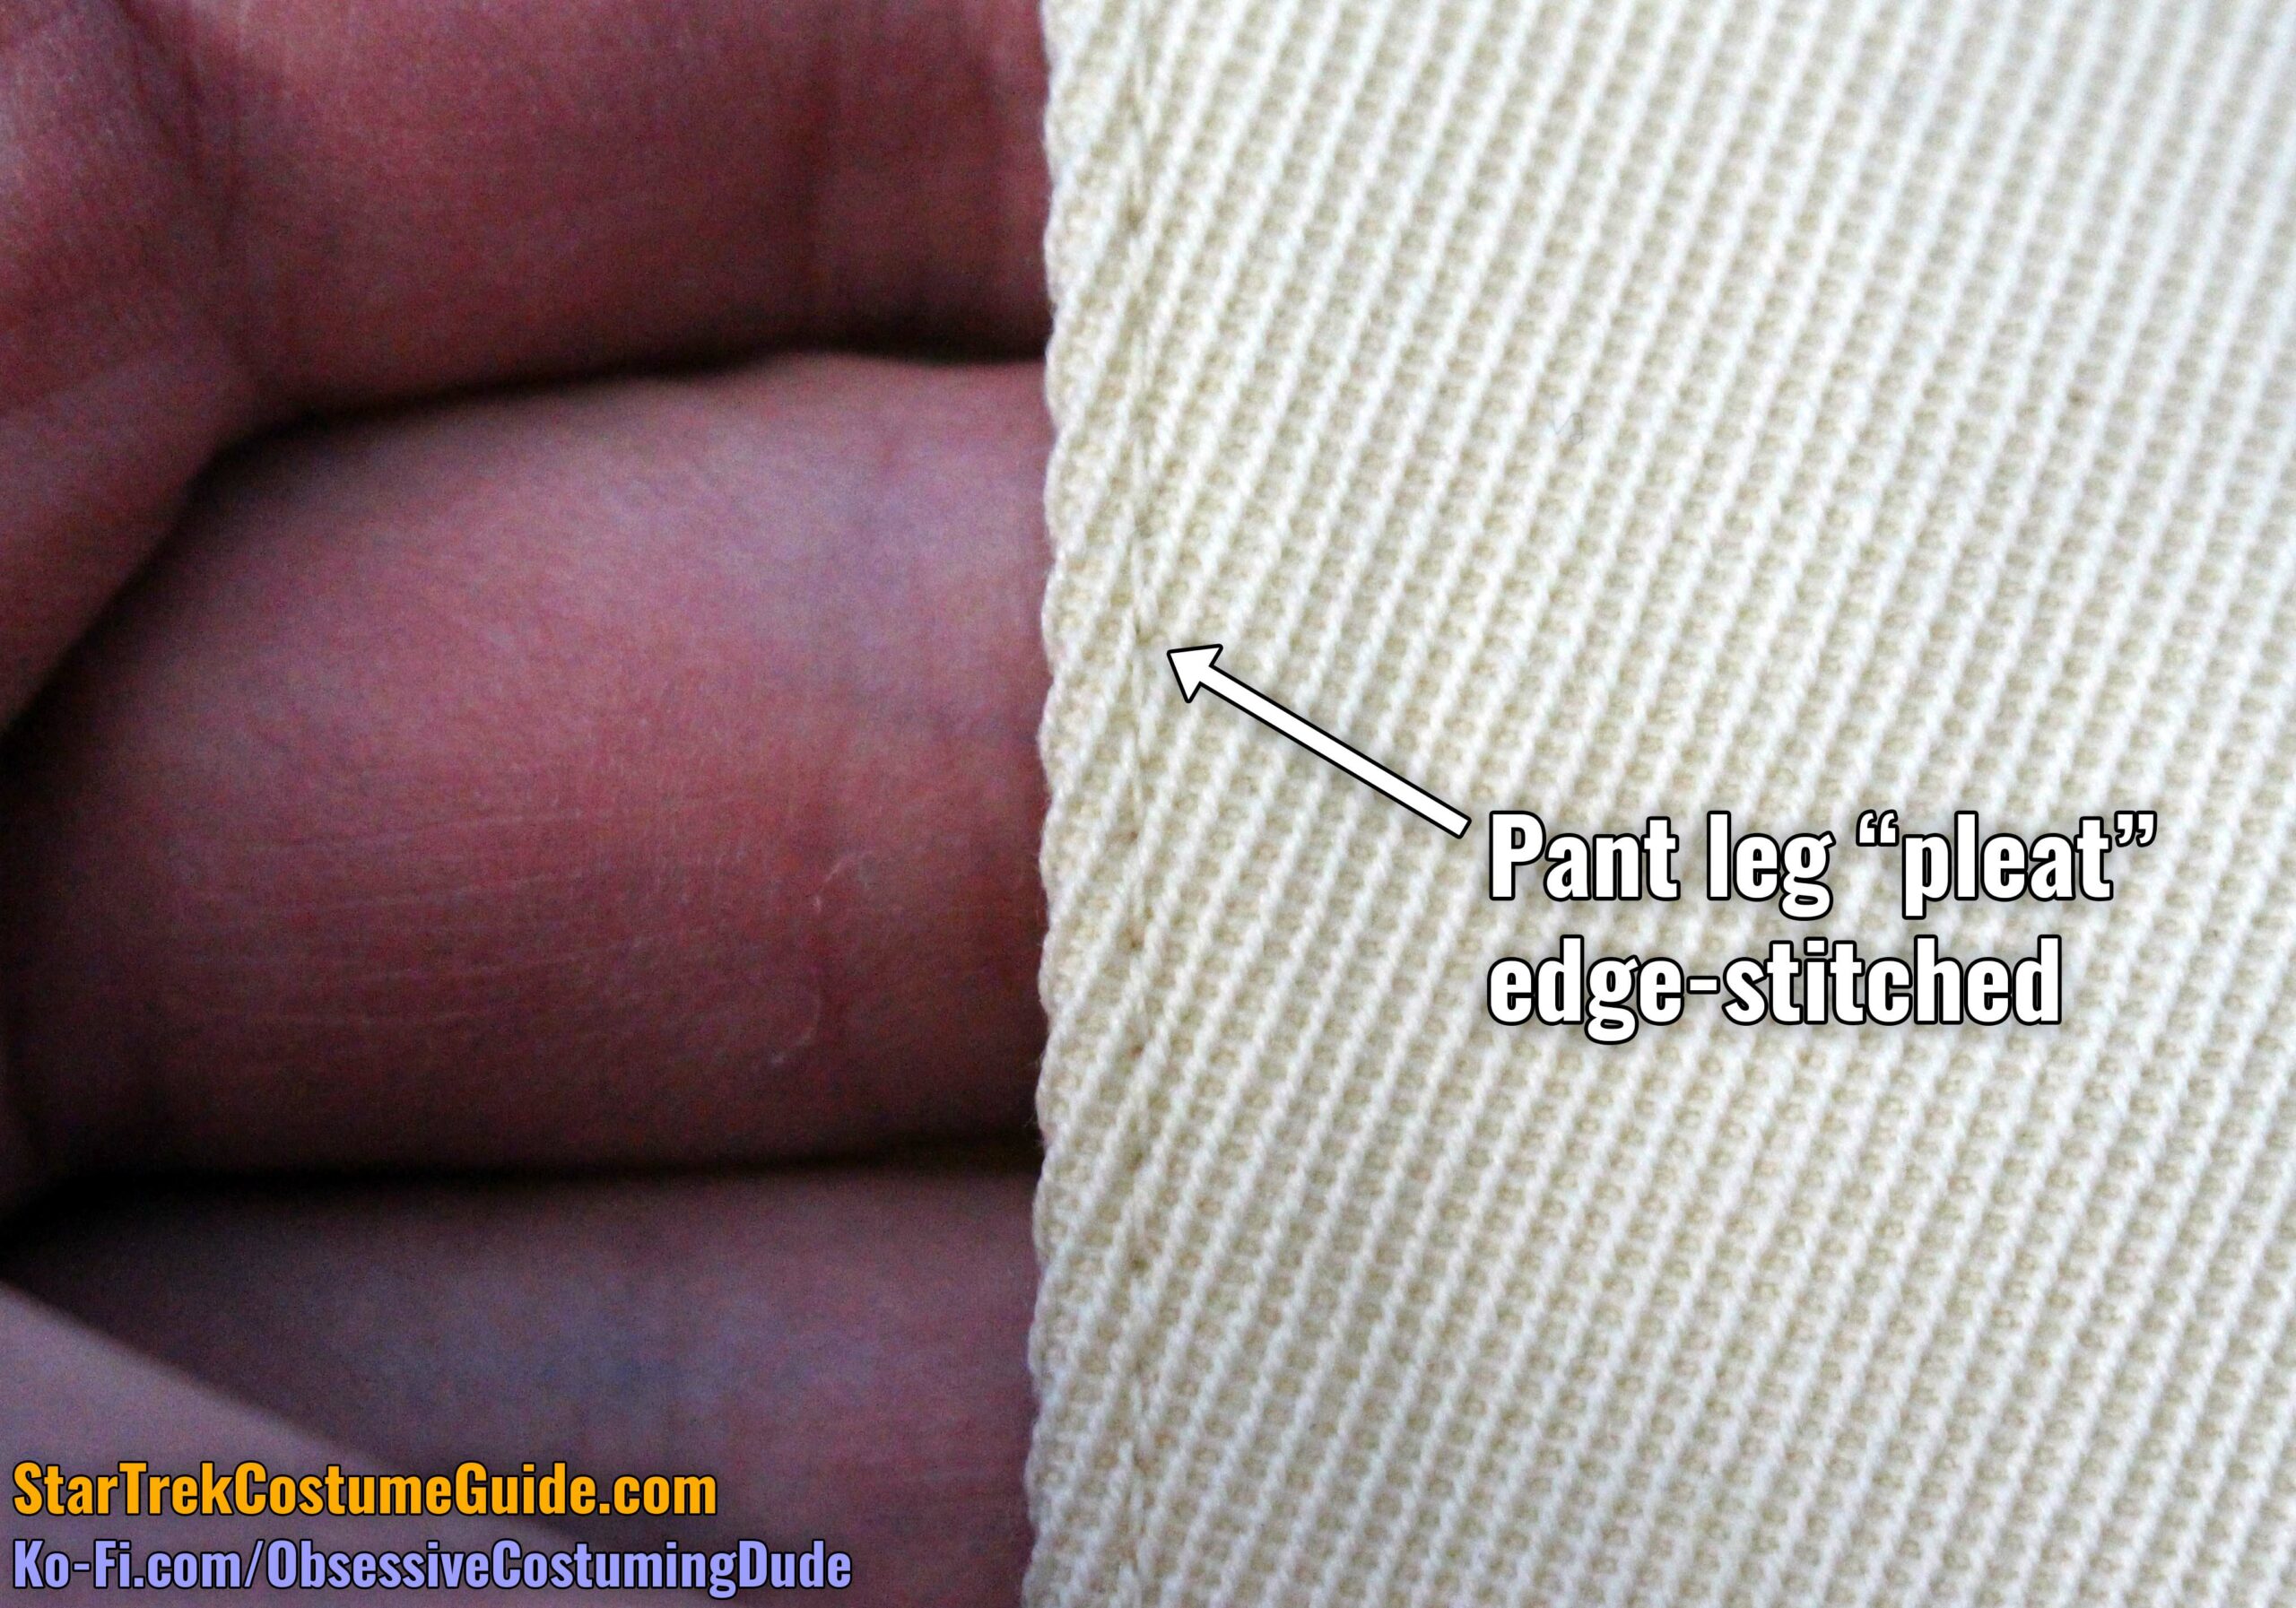
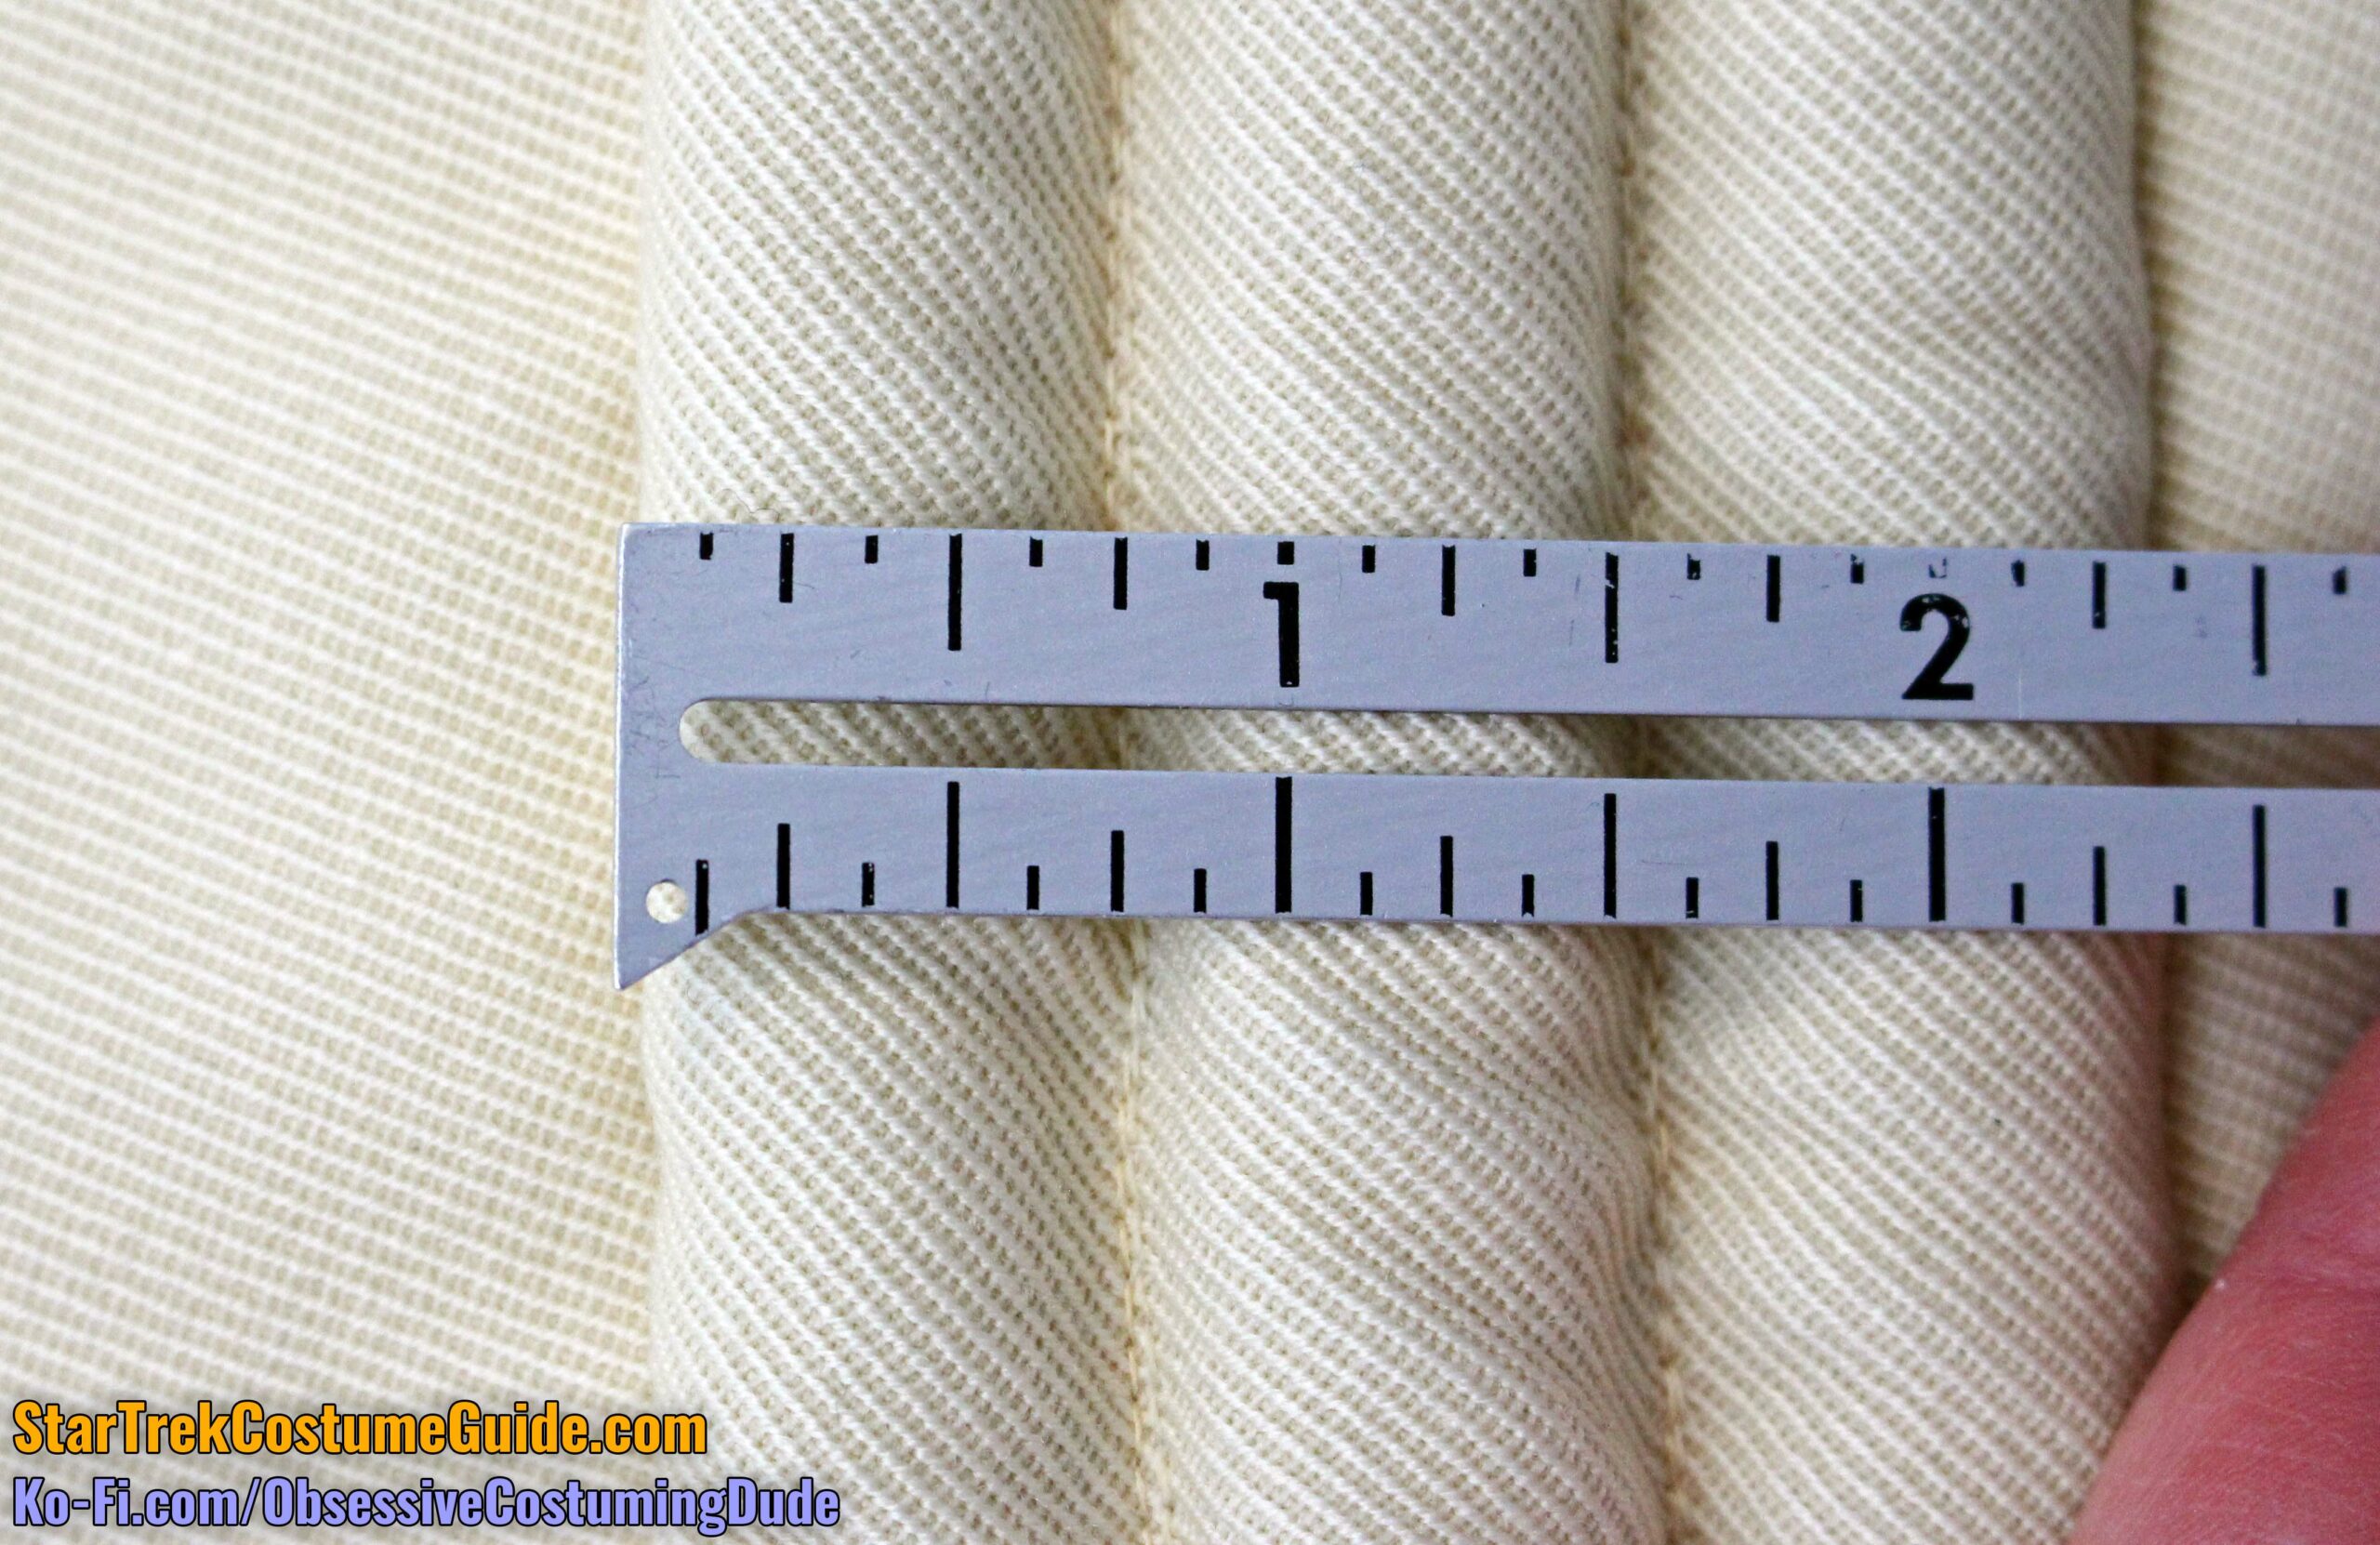
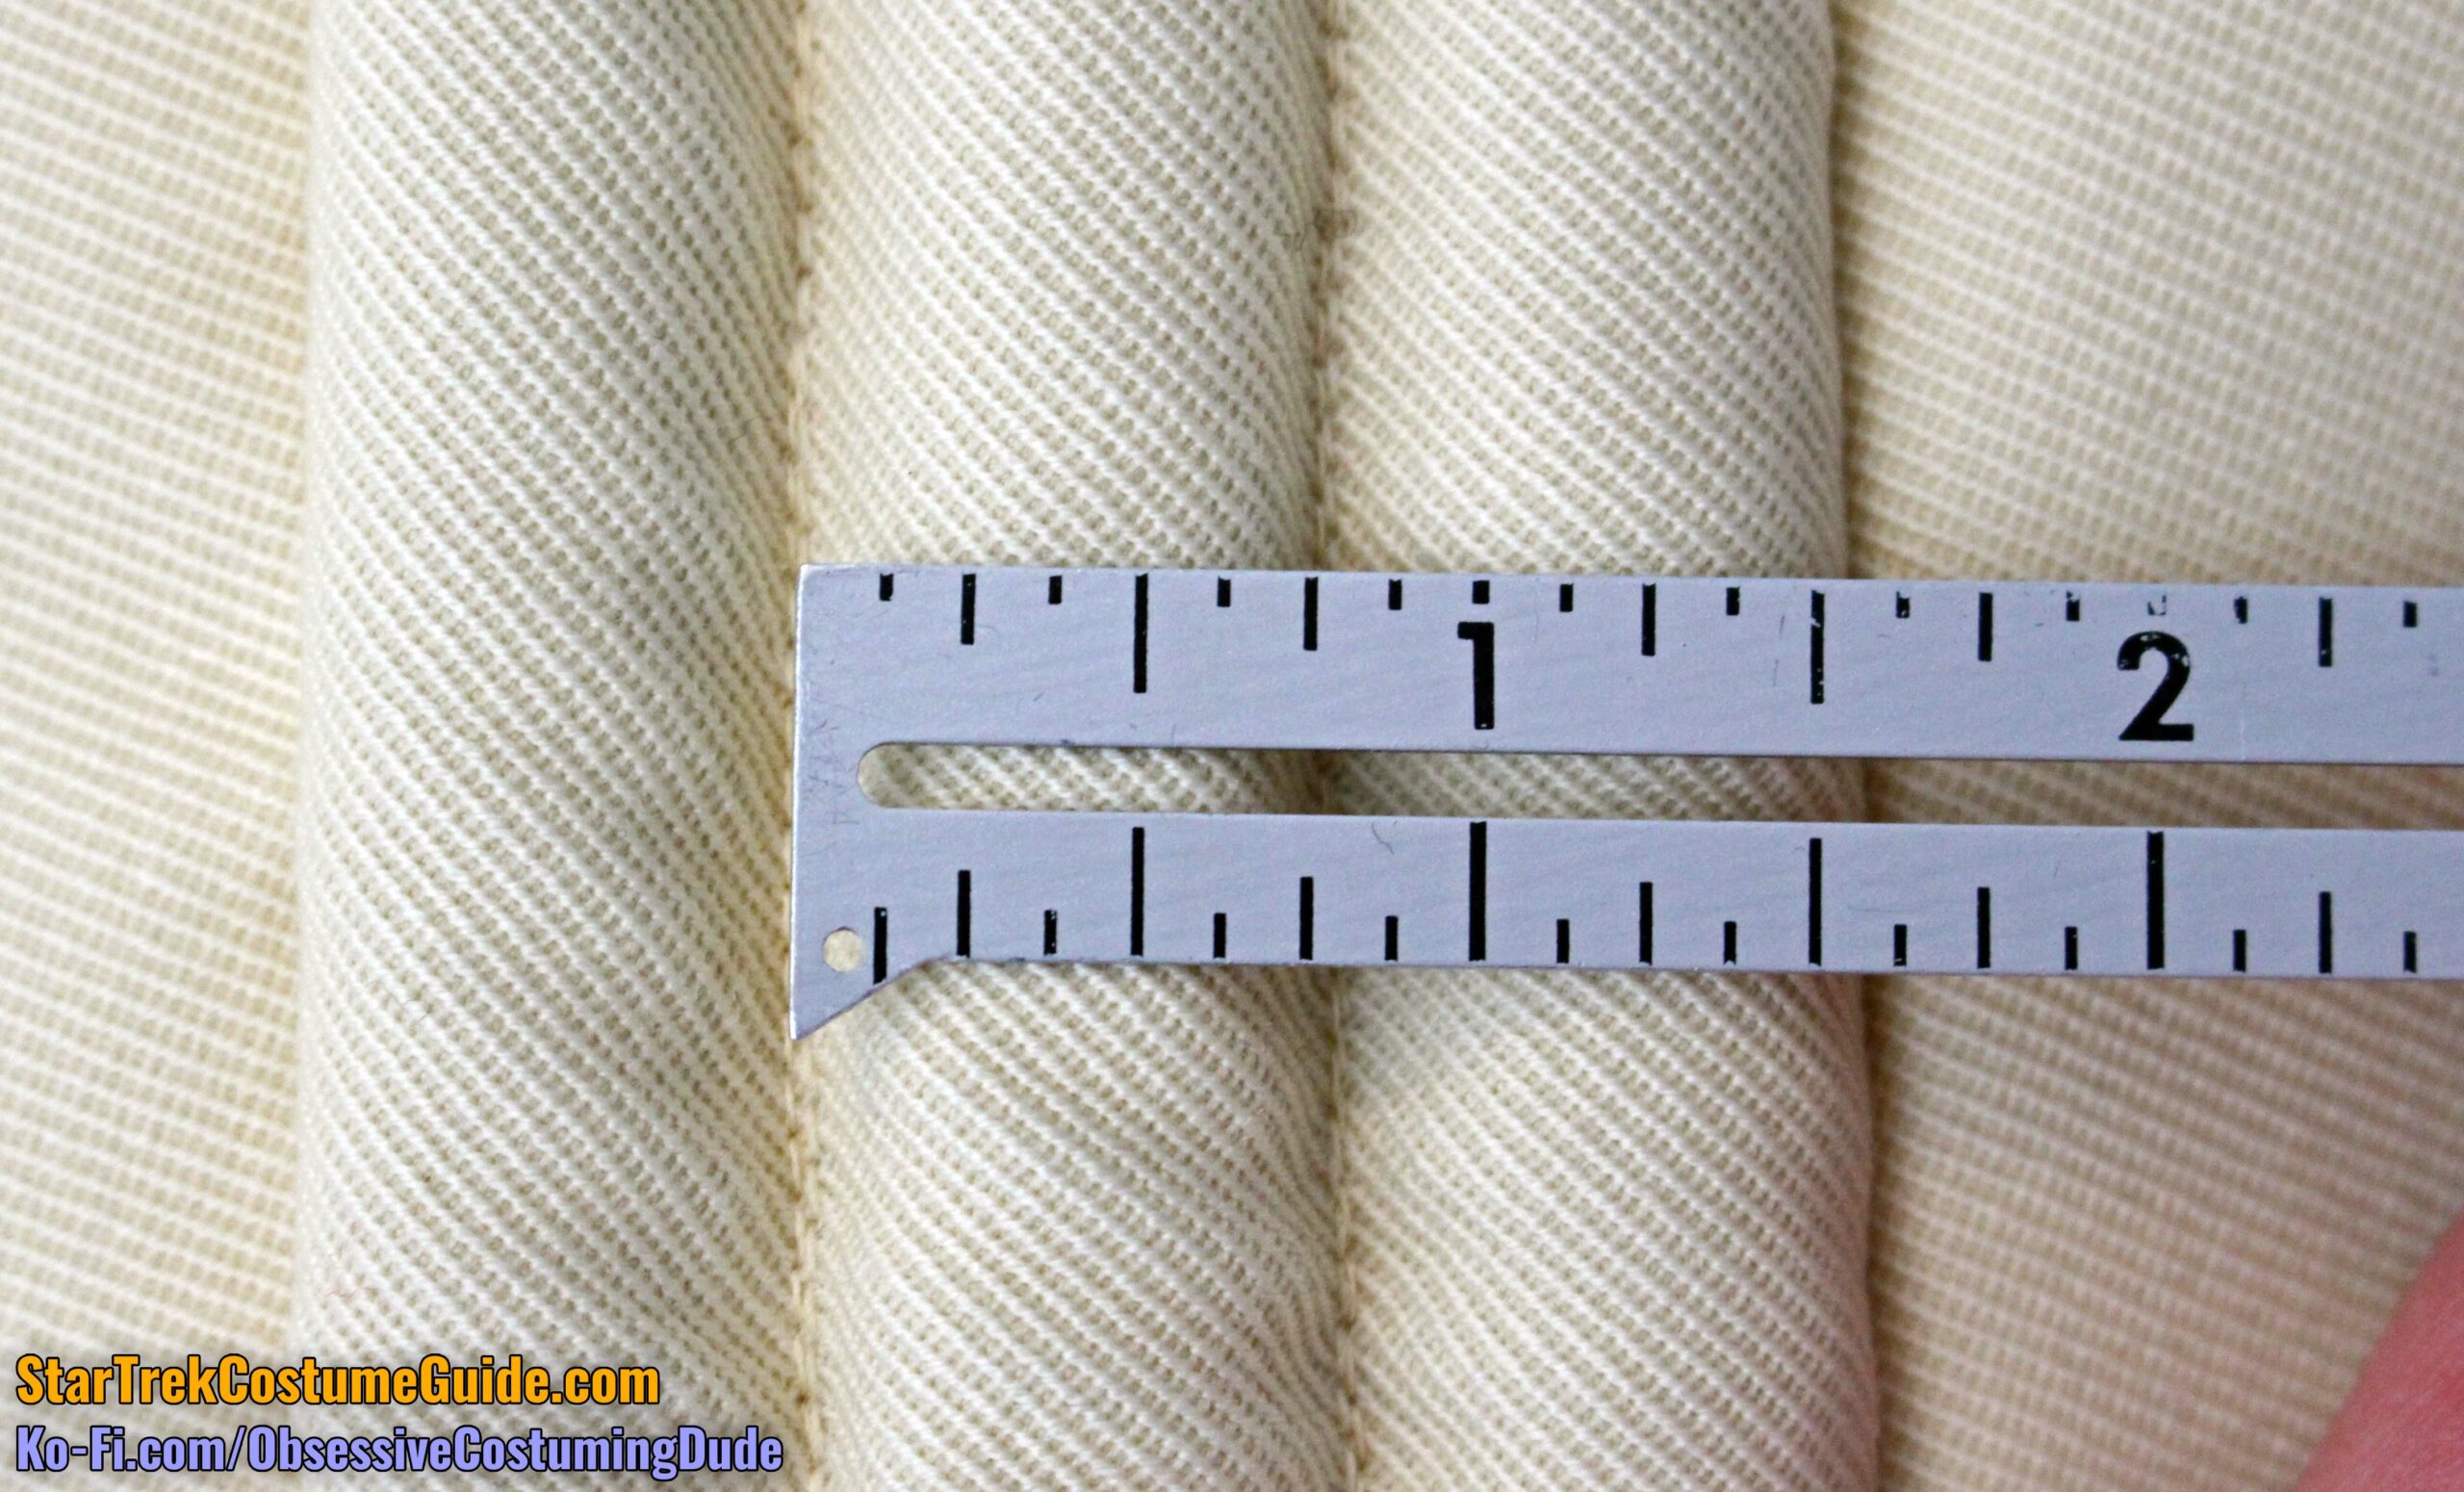
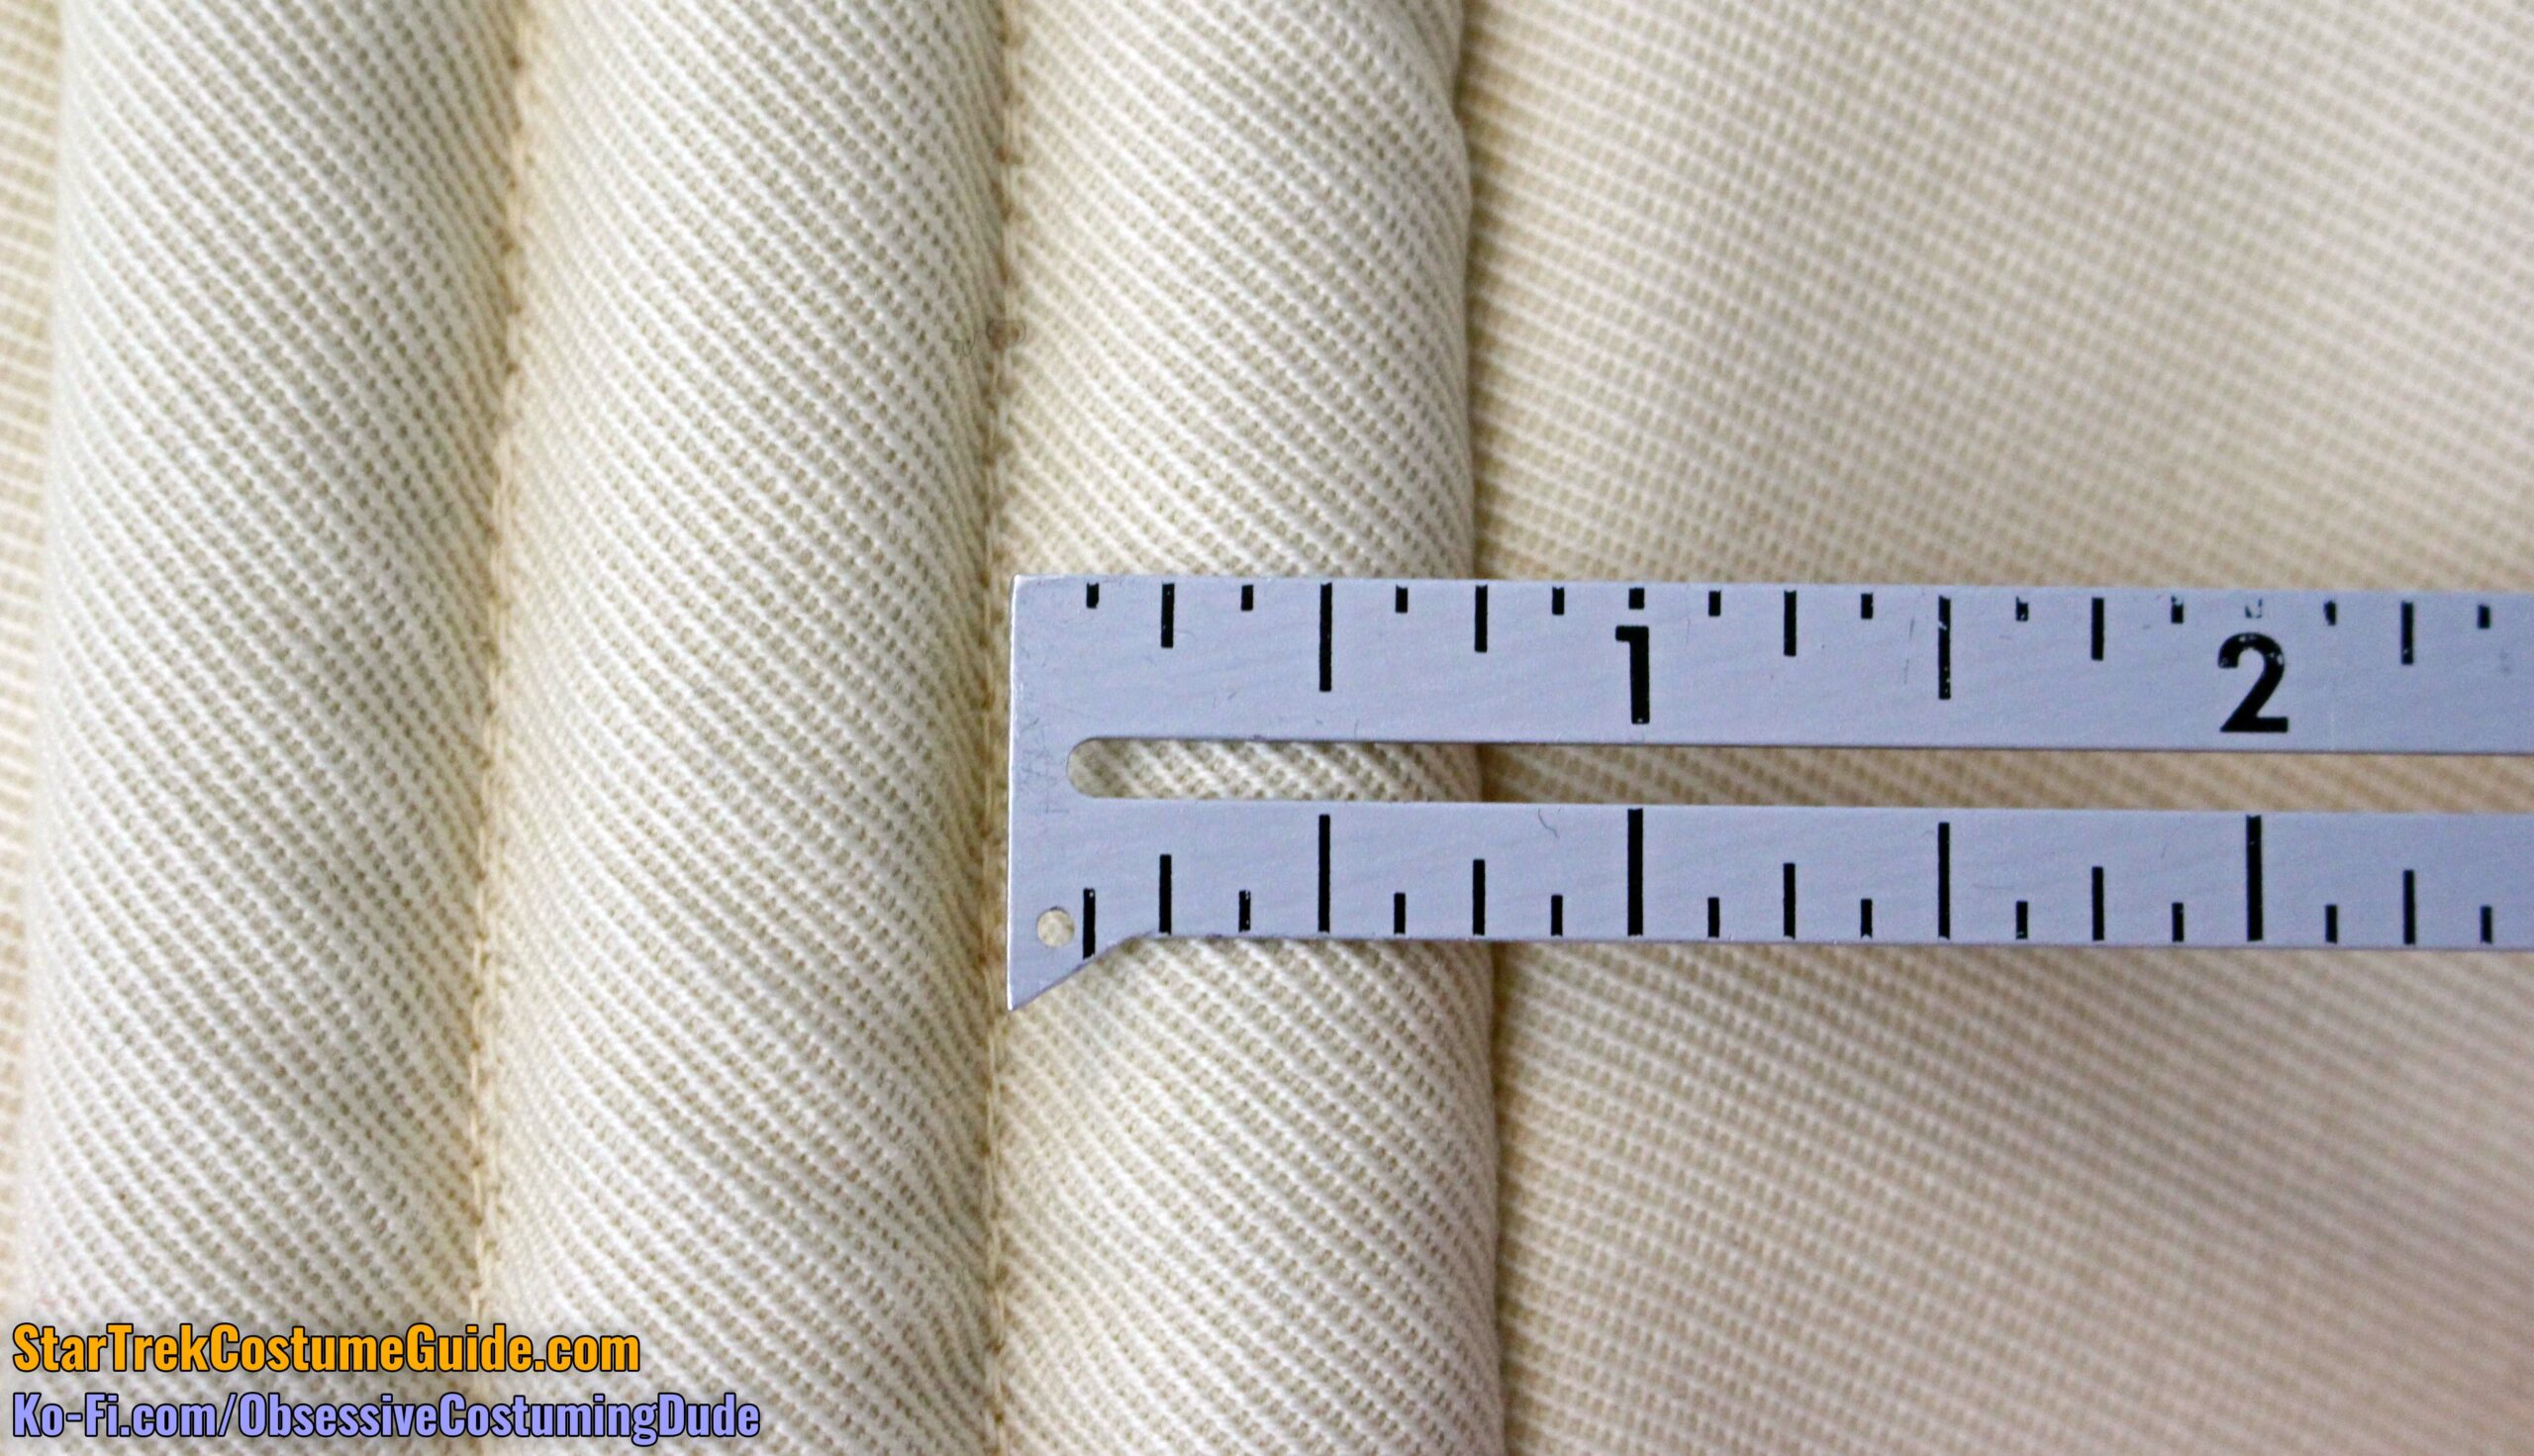
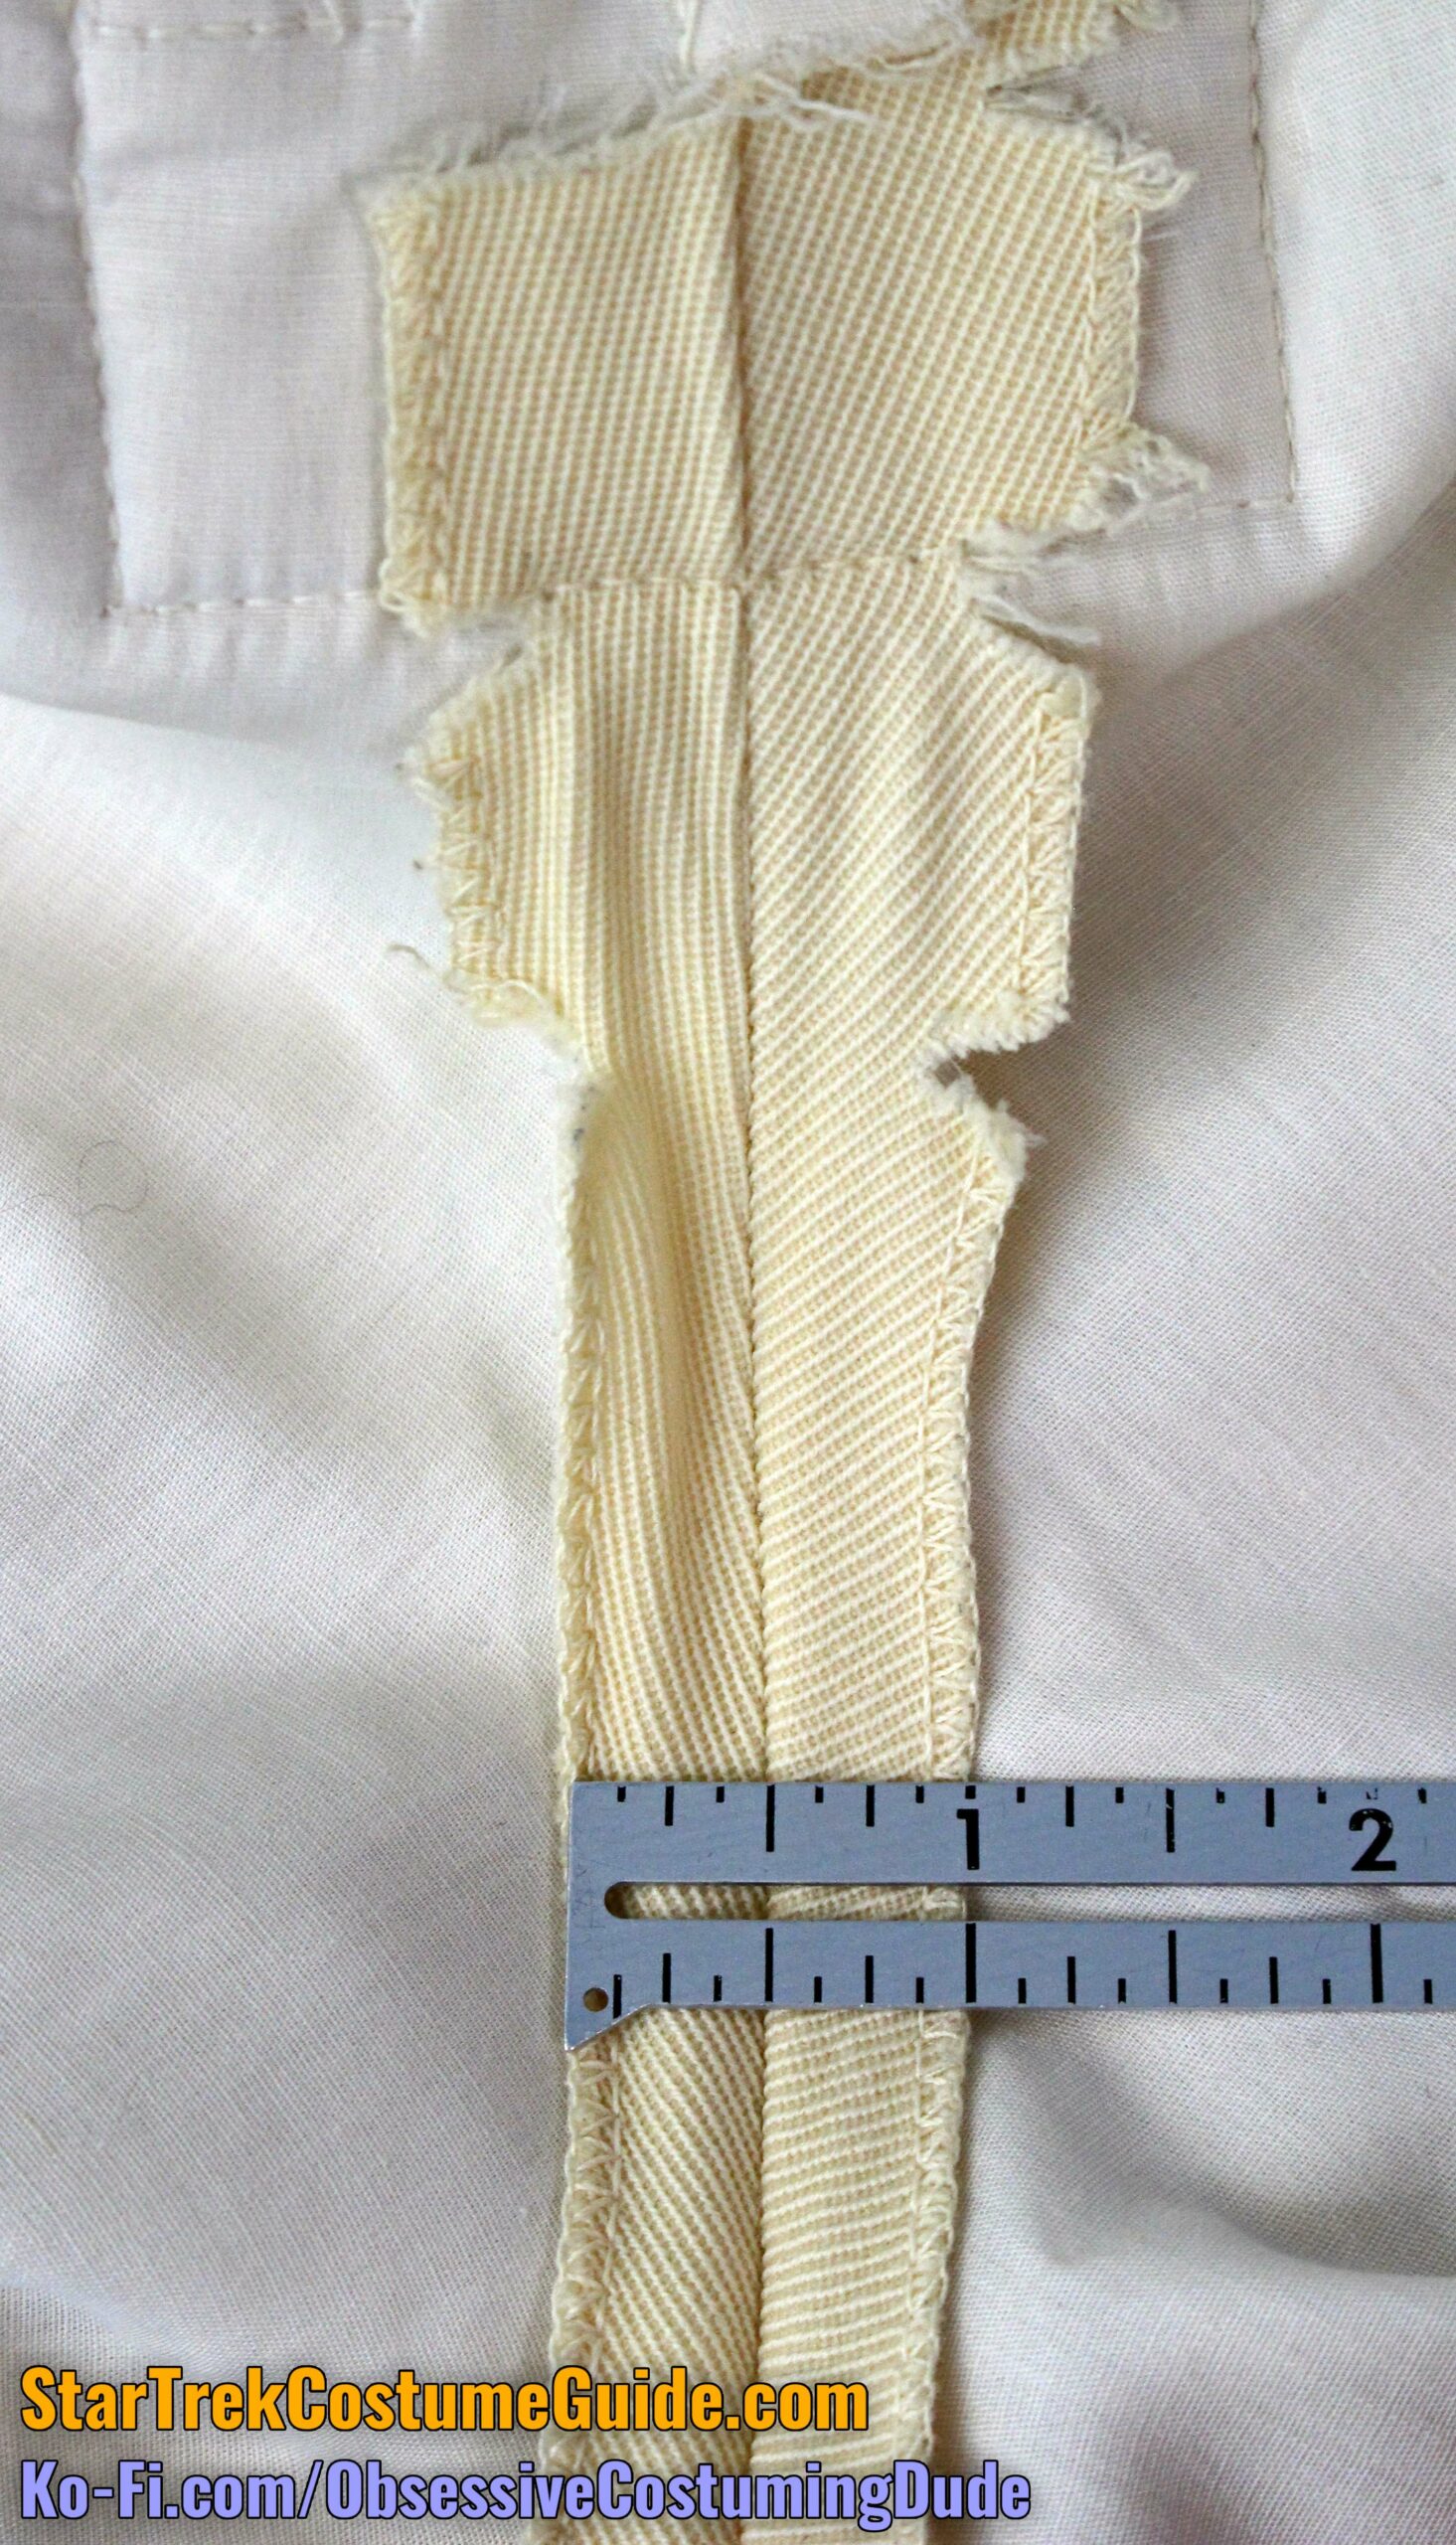
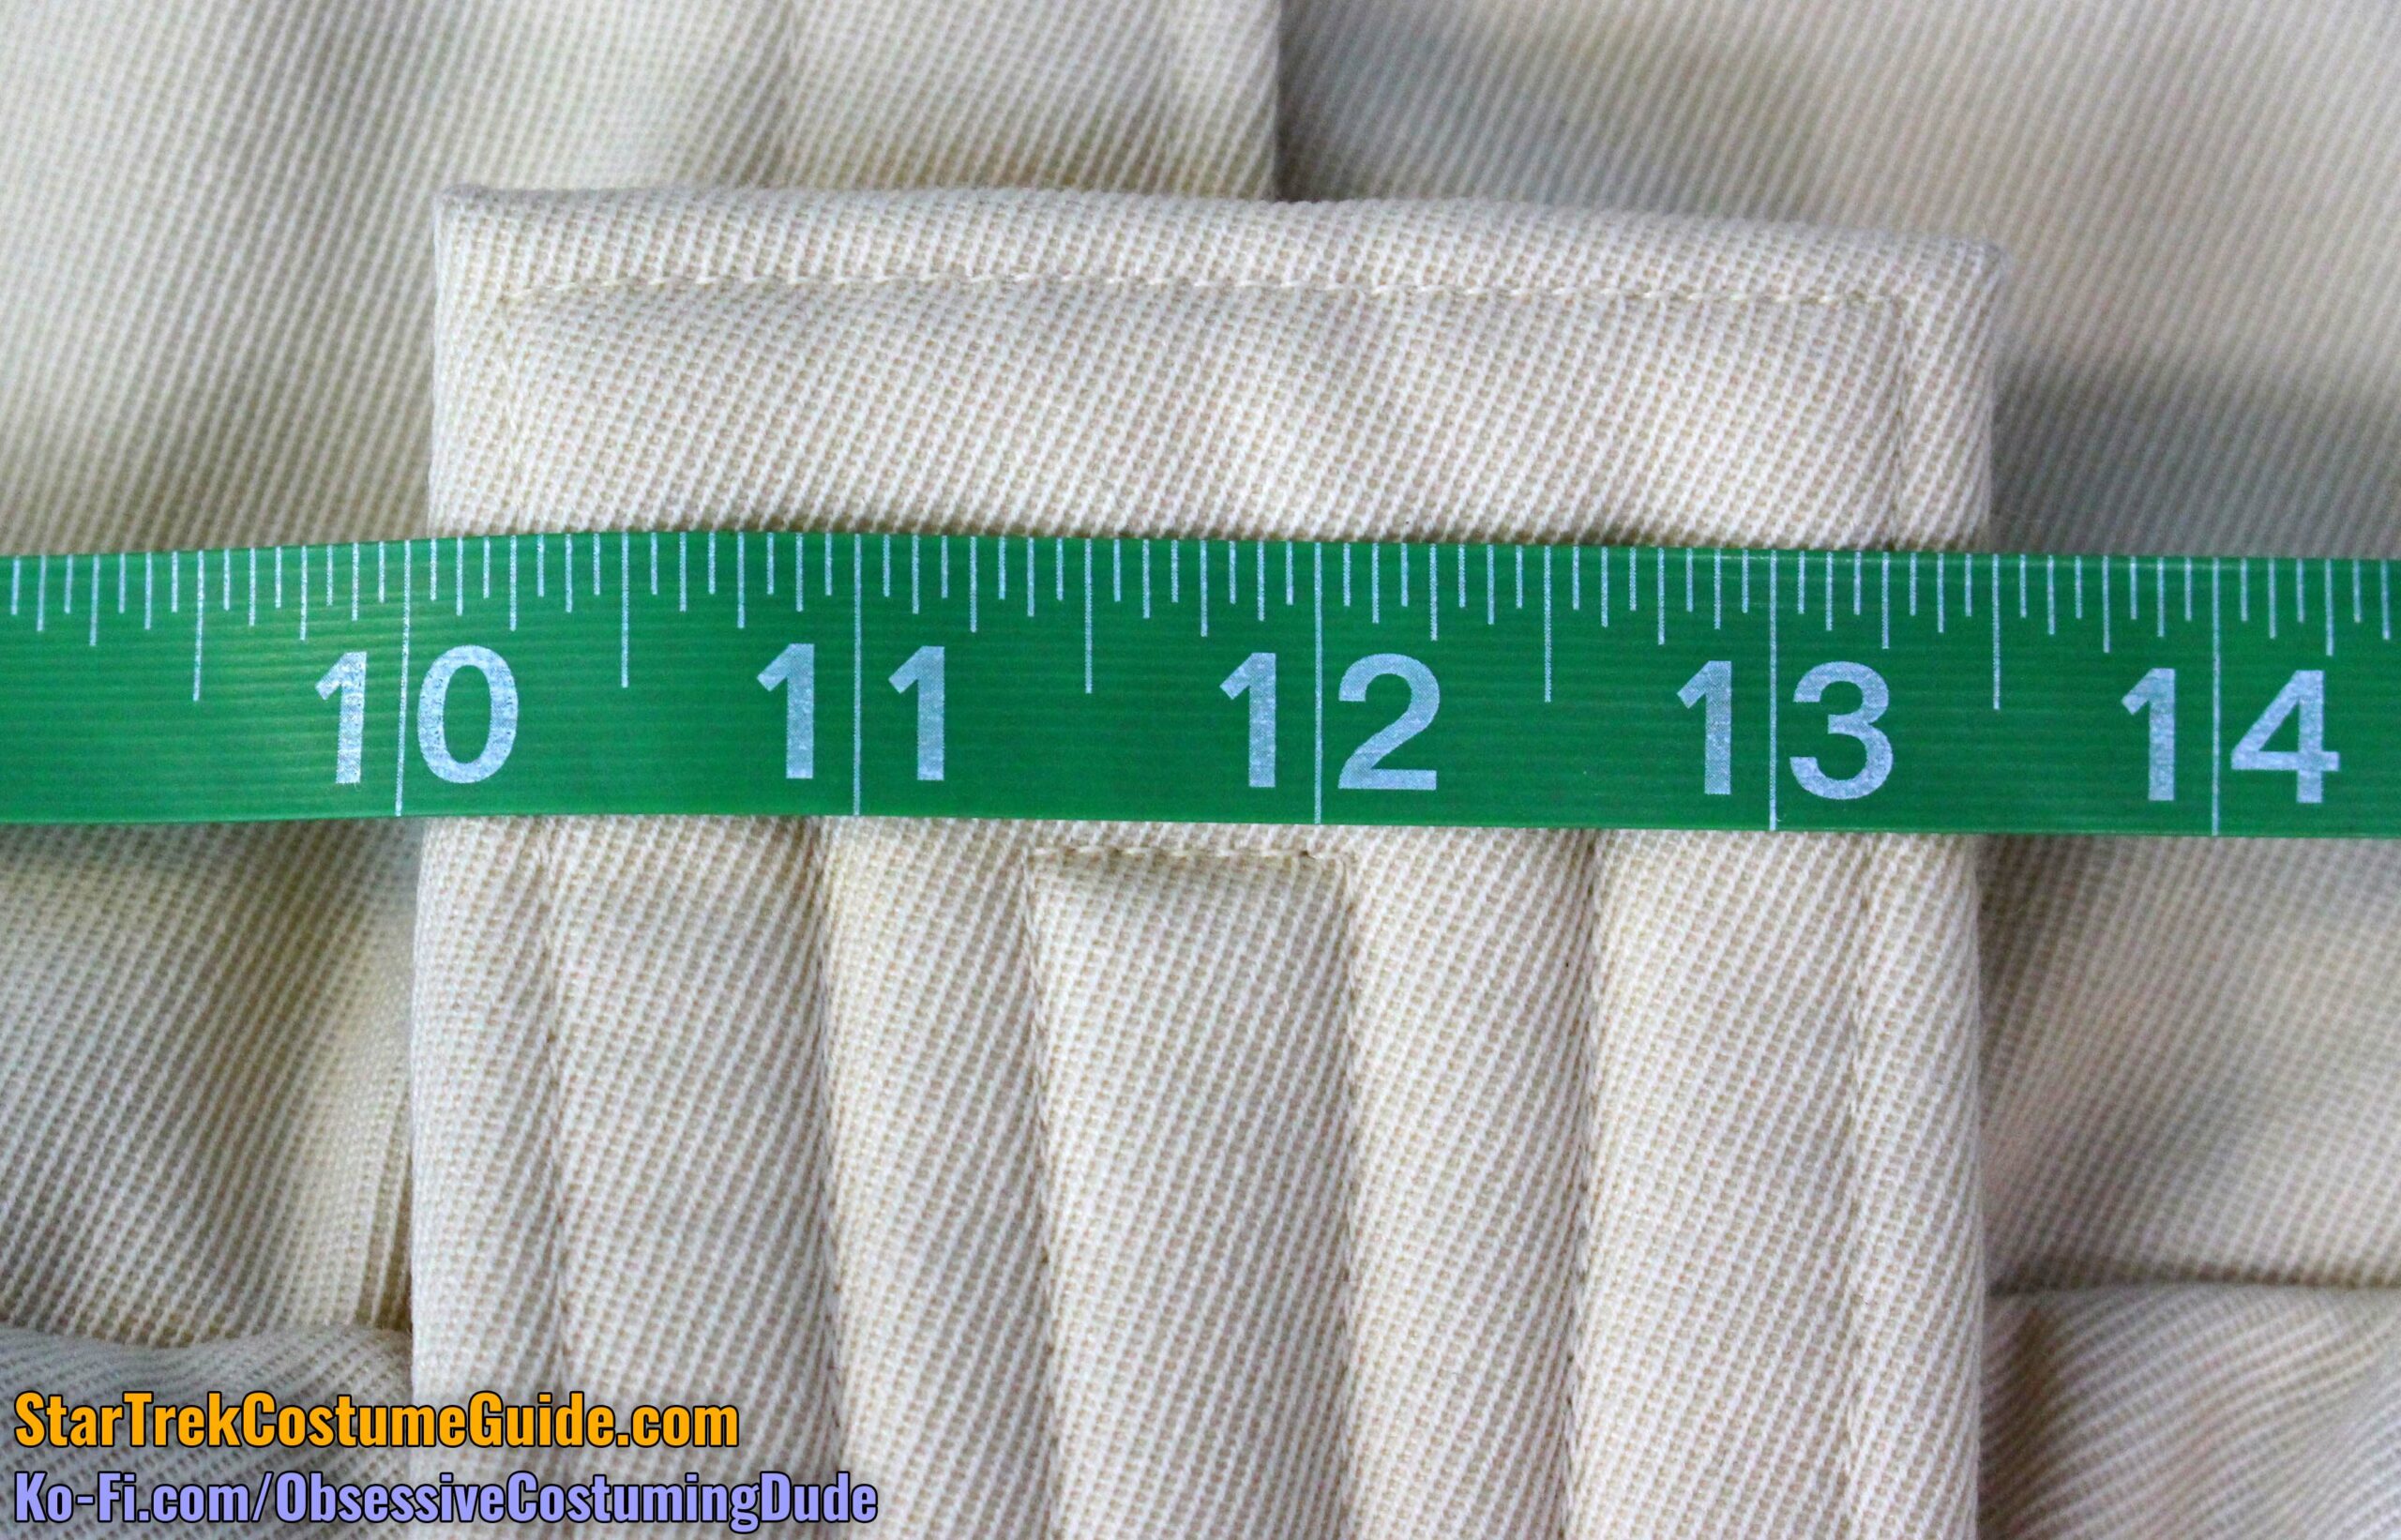
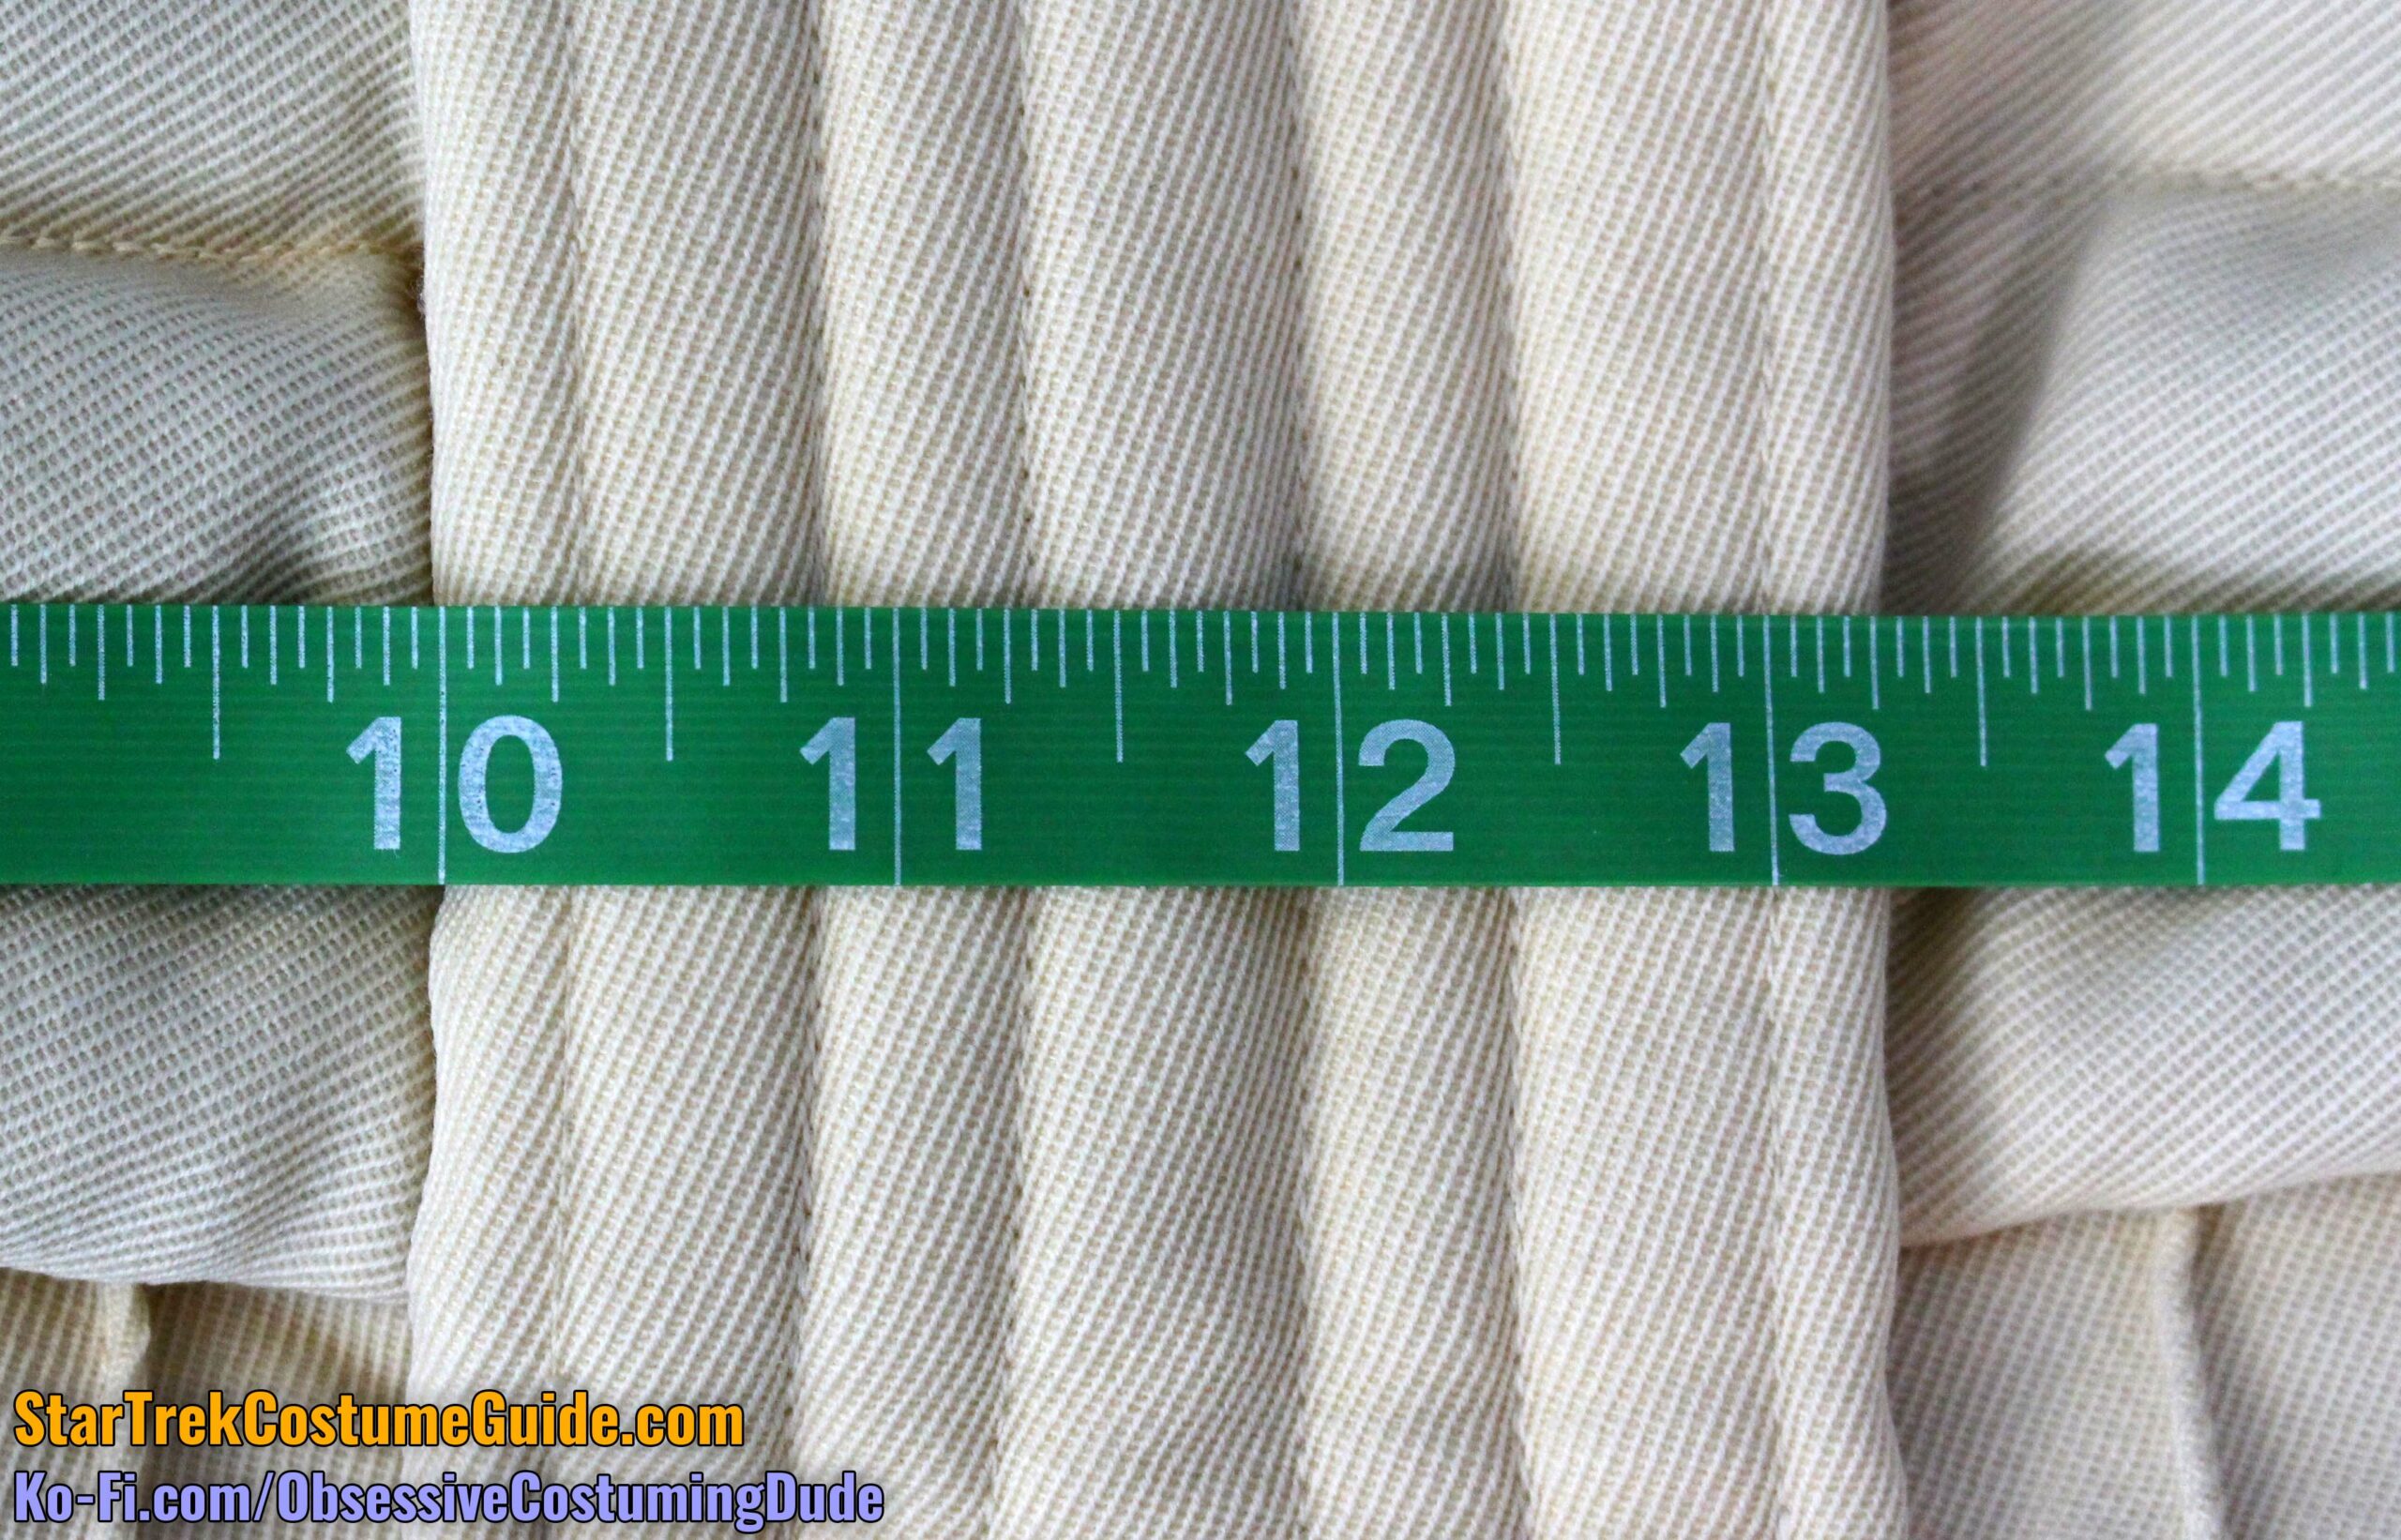
Beneath the waist bands were small vertical pleats down the pant legs, stylistically similar to the creases seen on contemporary trousers and dress pants.
On the right side, the top of the pleat was about 1” away from the edge of the front panel, but on the left side, it was slightly farther away – 1 ⅛”.
(I believe this to have simply been a minor error during construction, rather than an intentional creative choice. The difference in final results is negligible.)
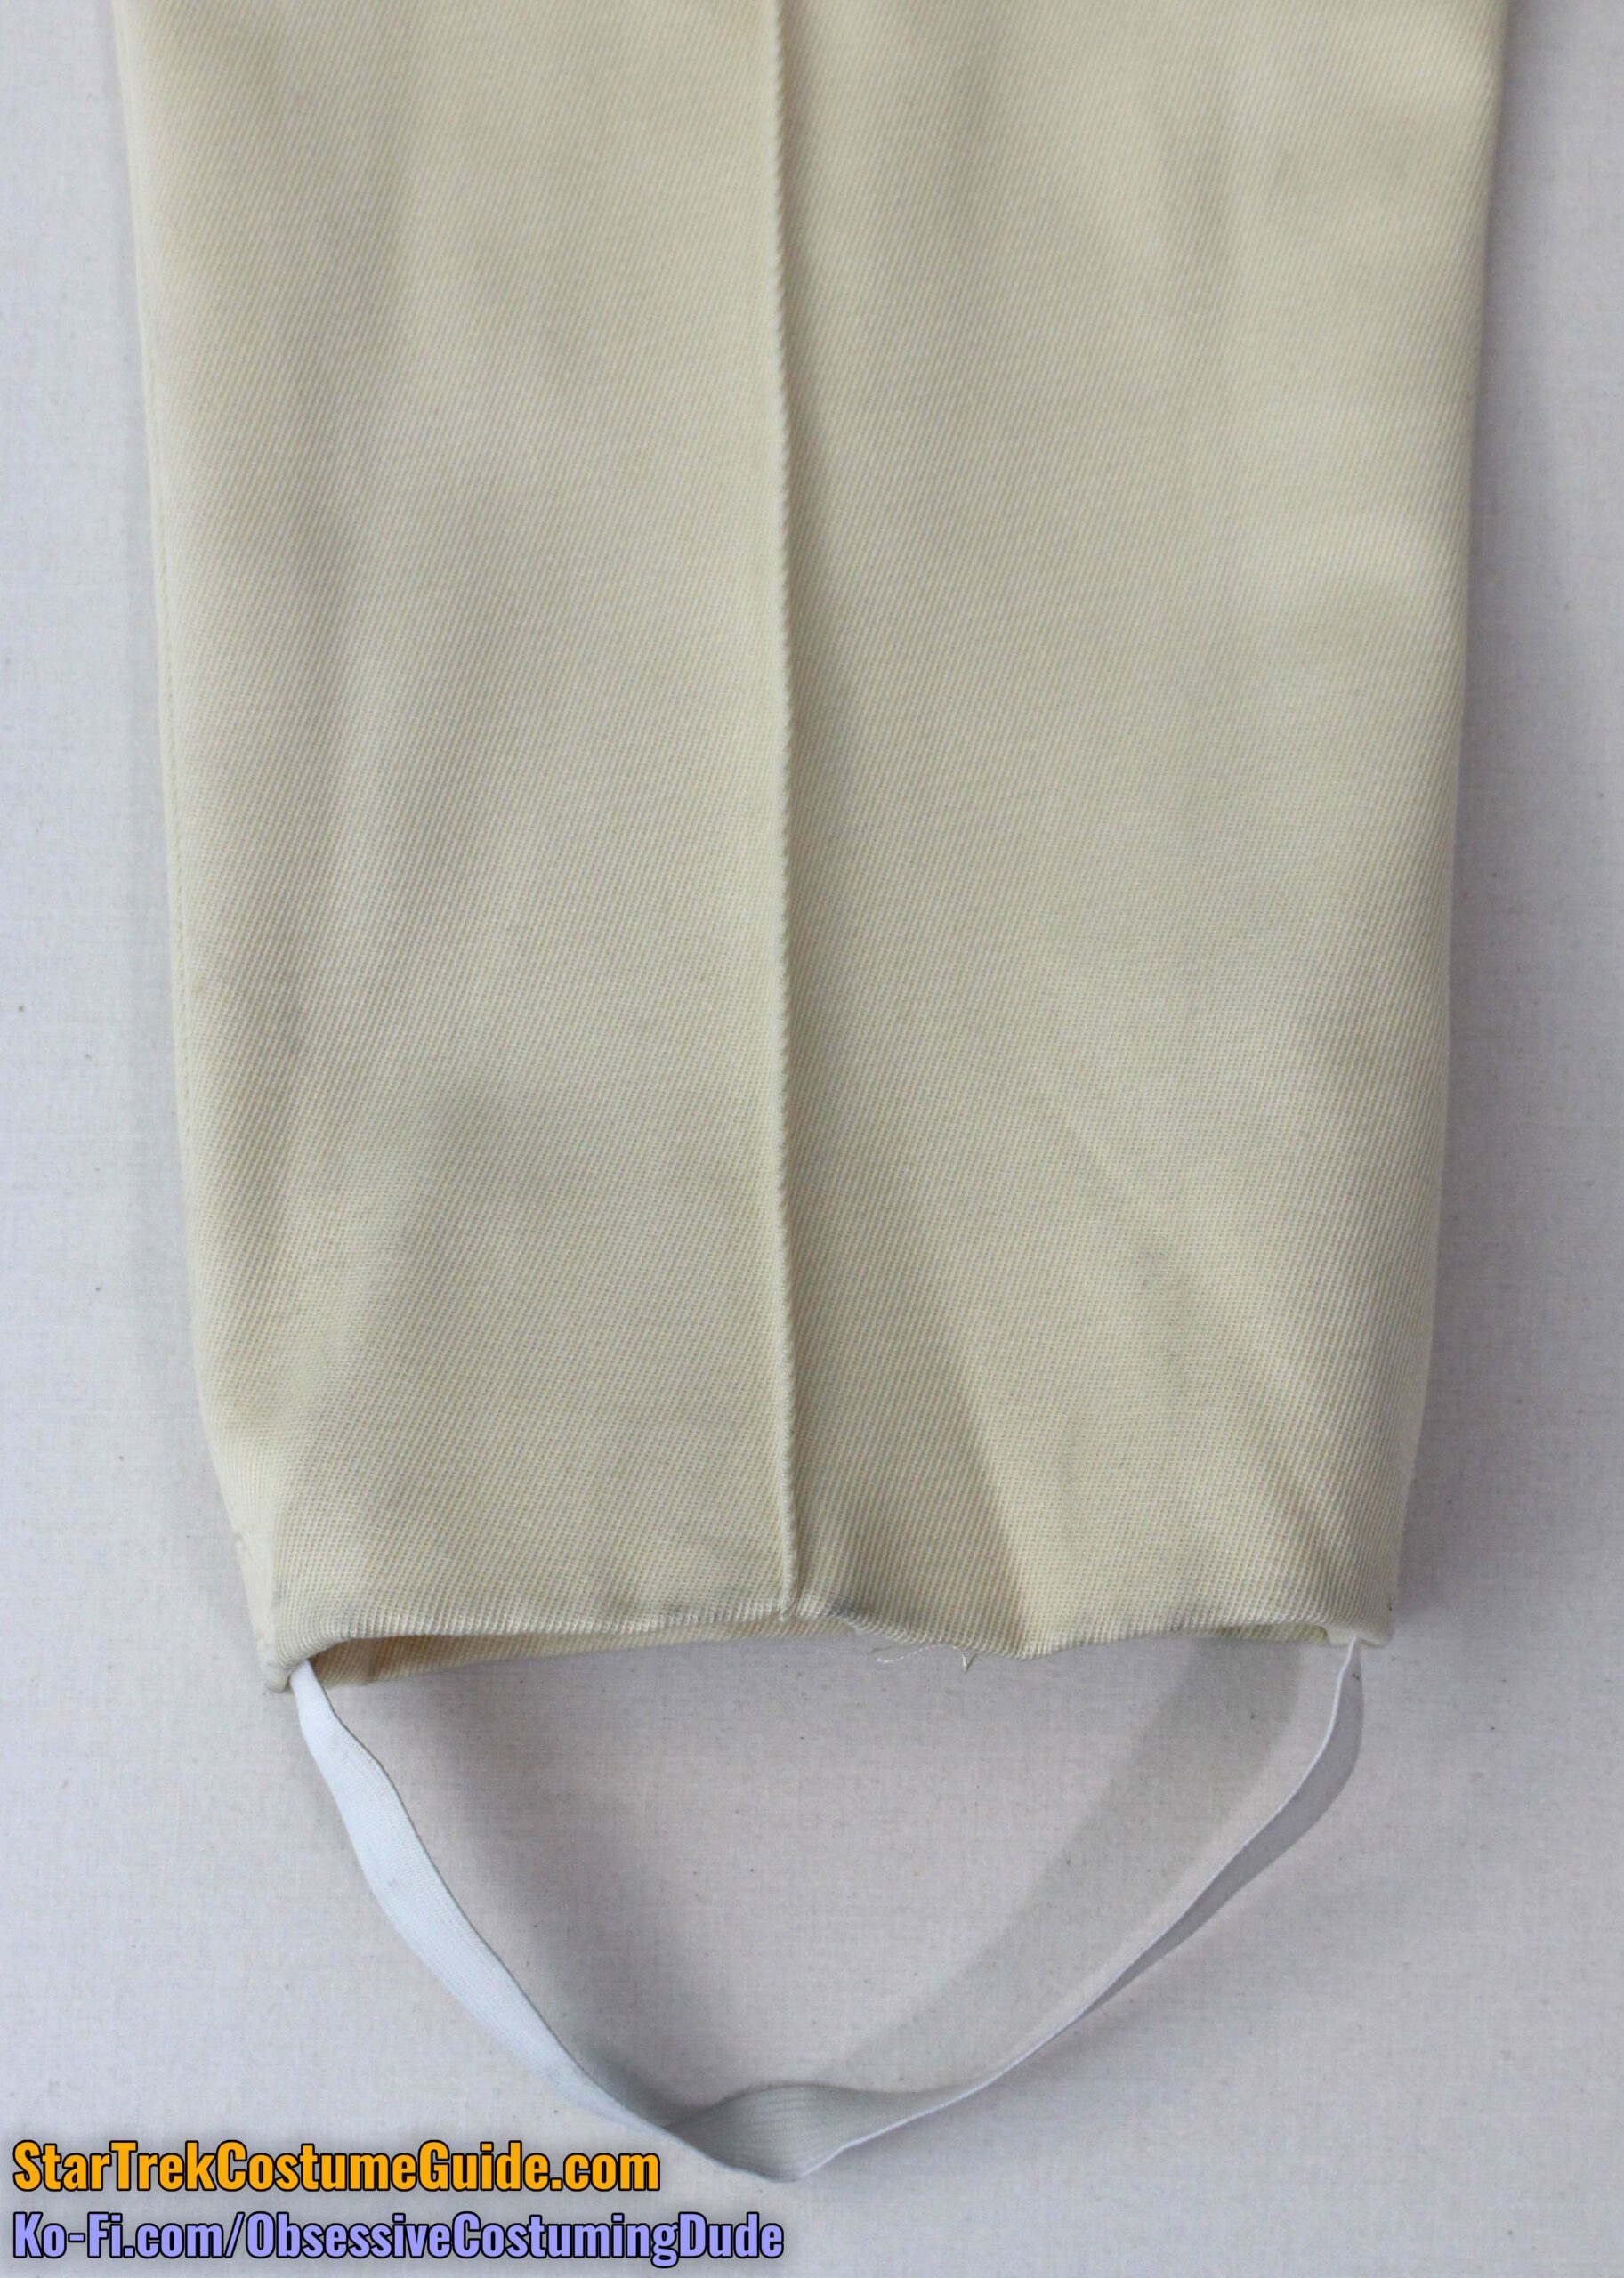
These “pleats” (they’re so small, I’m not certain the term even applies) were edge-stitched along their entirety and extended all the way down to the bottom of the pant legs.
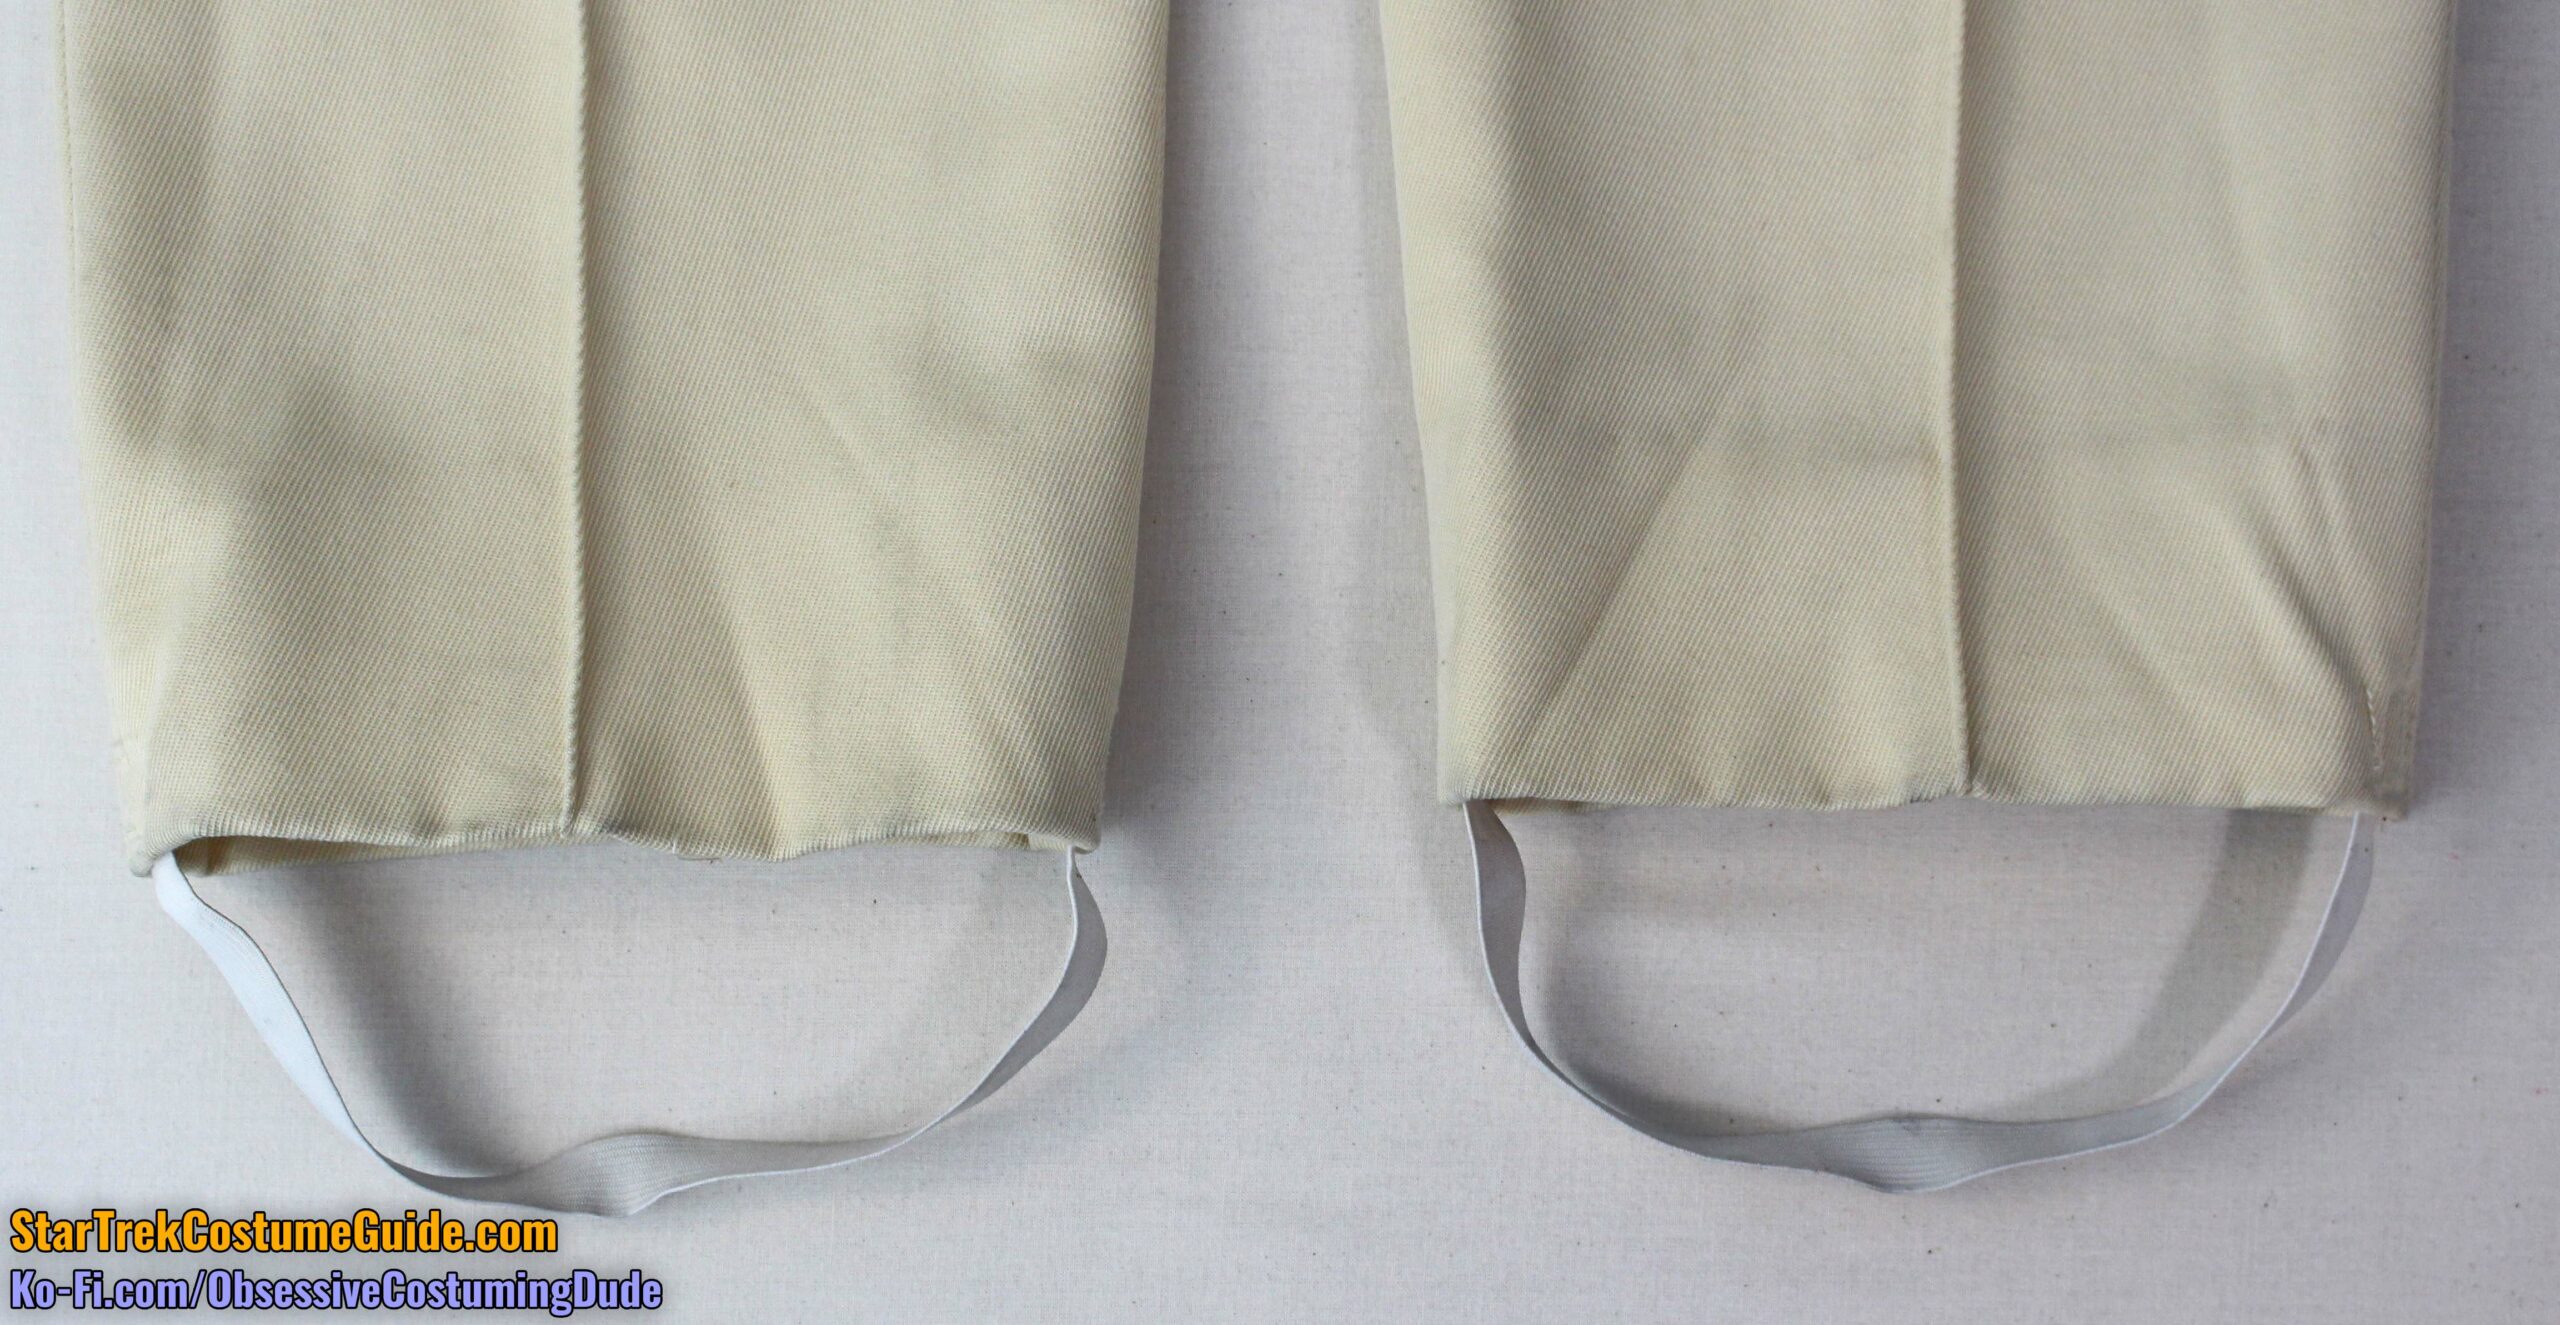
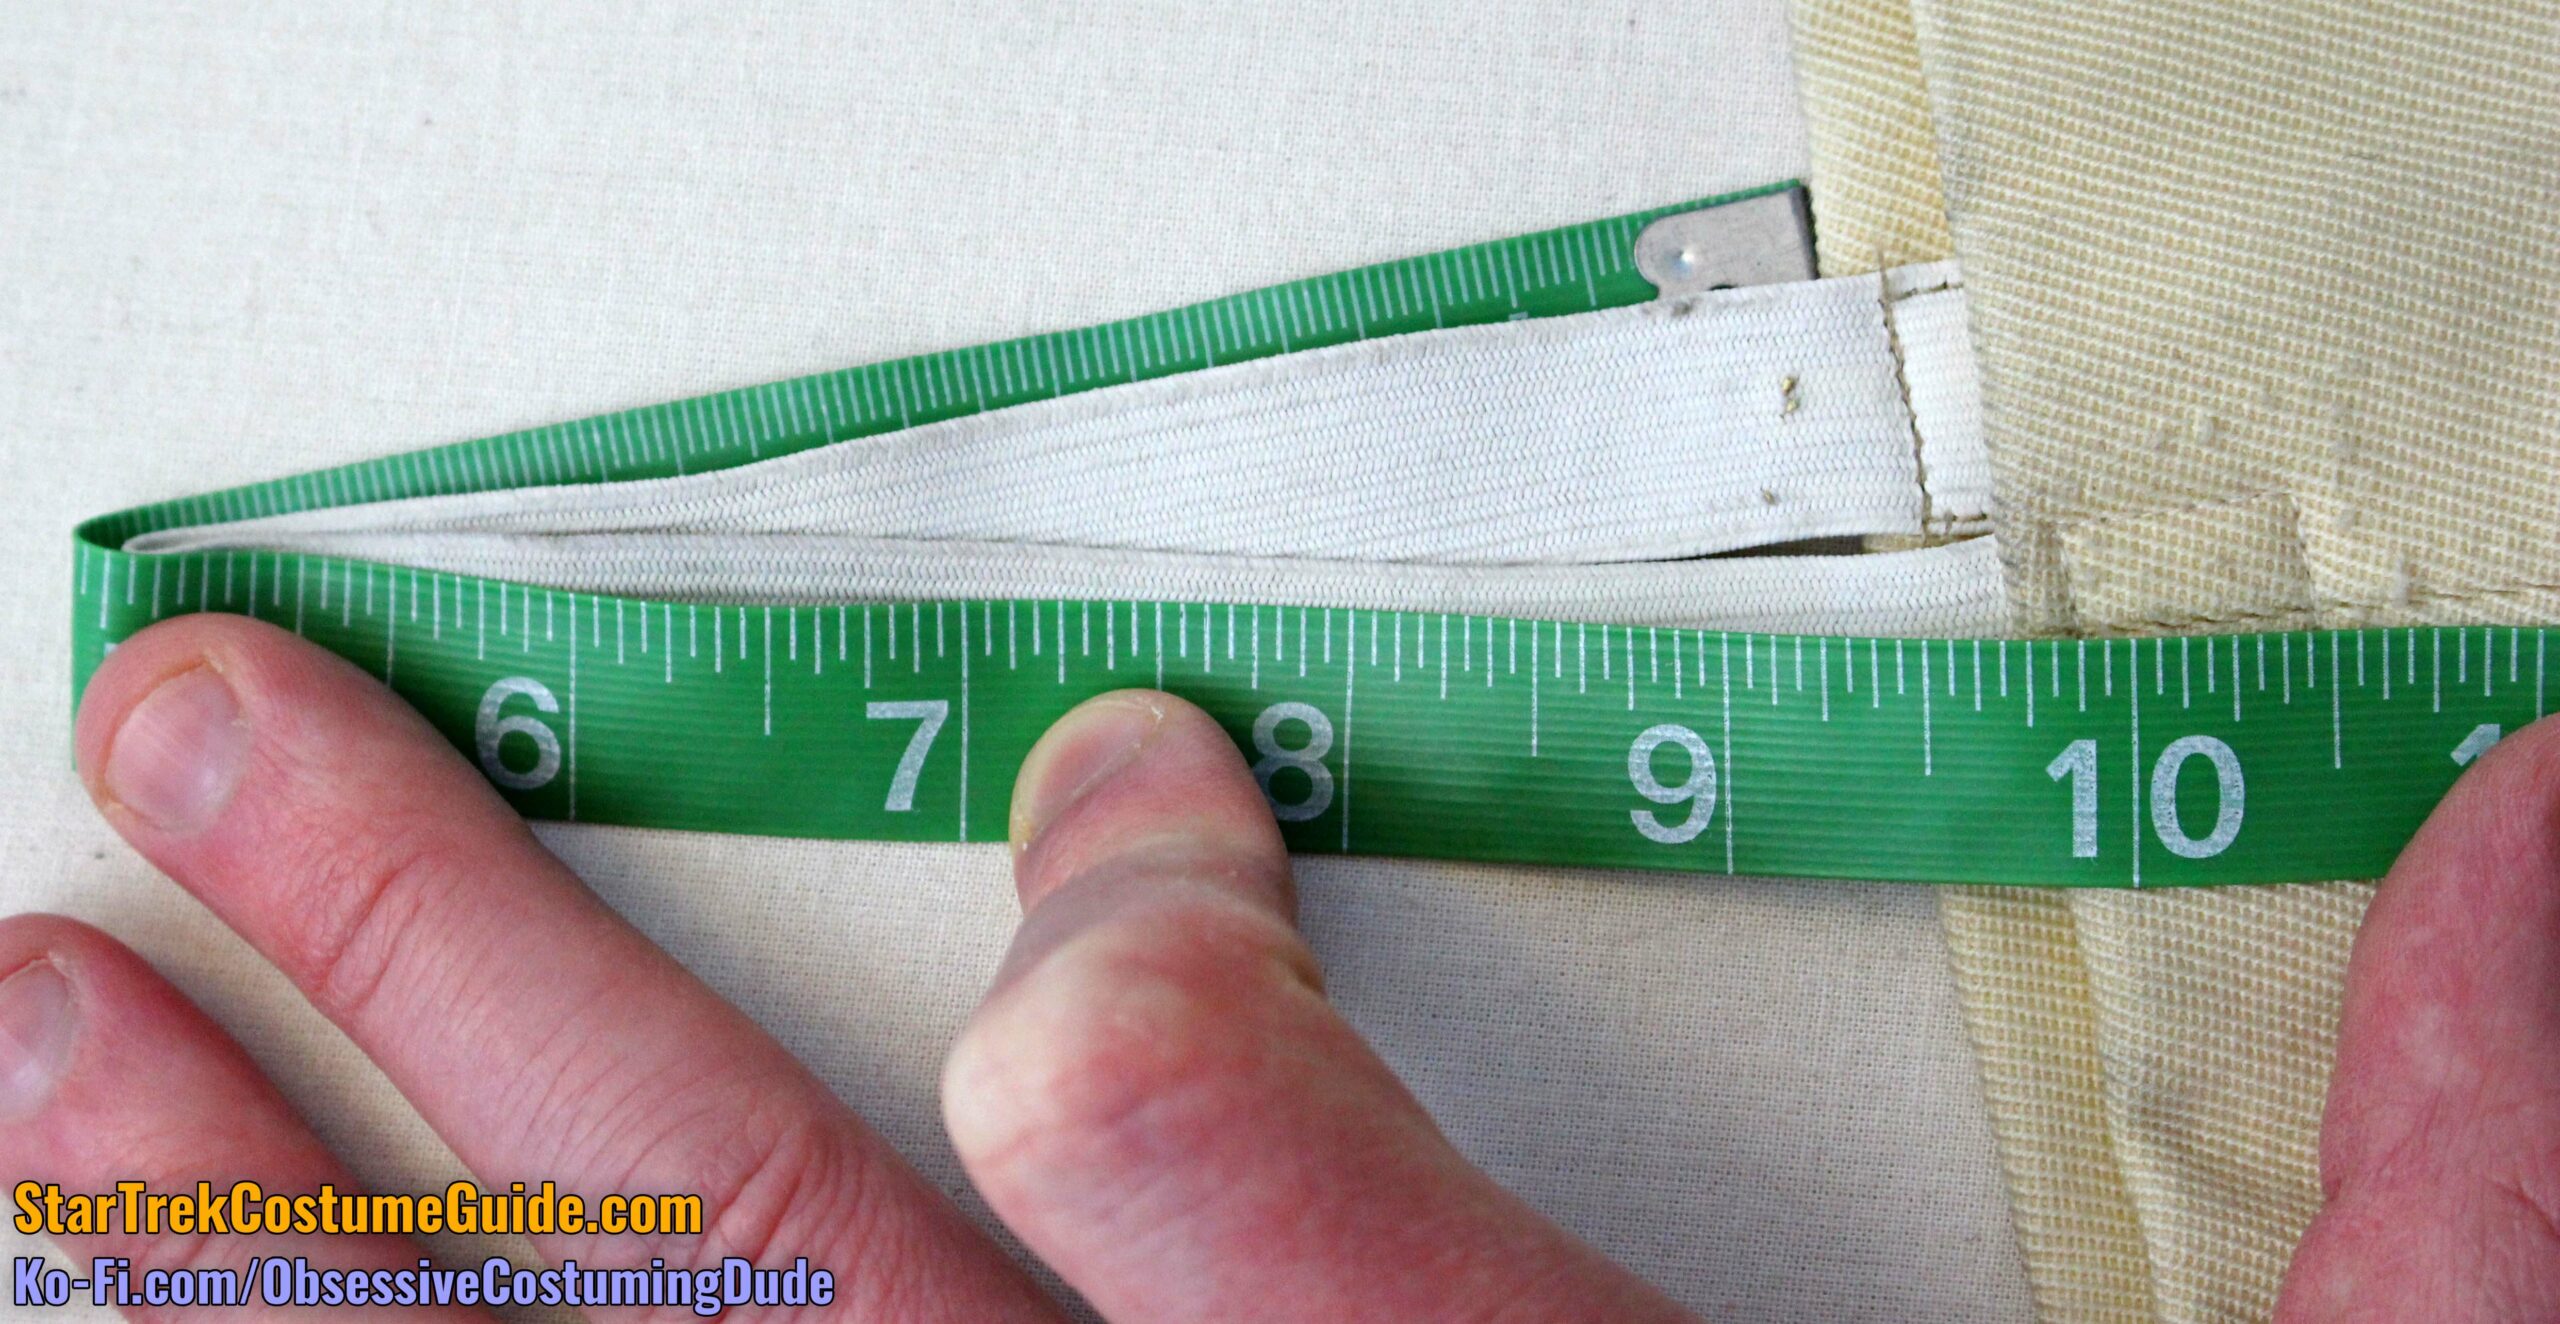
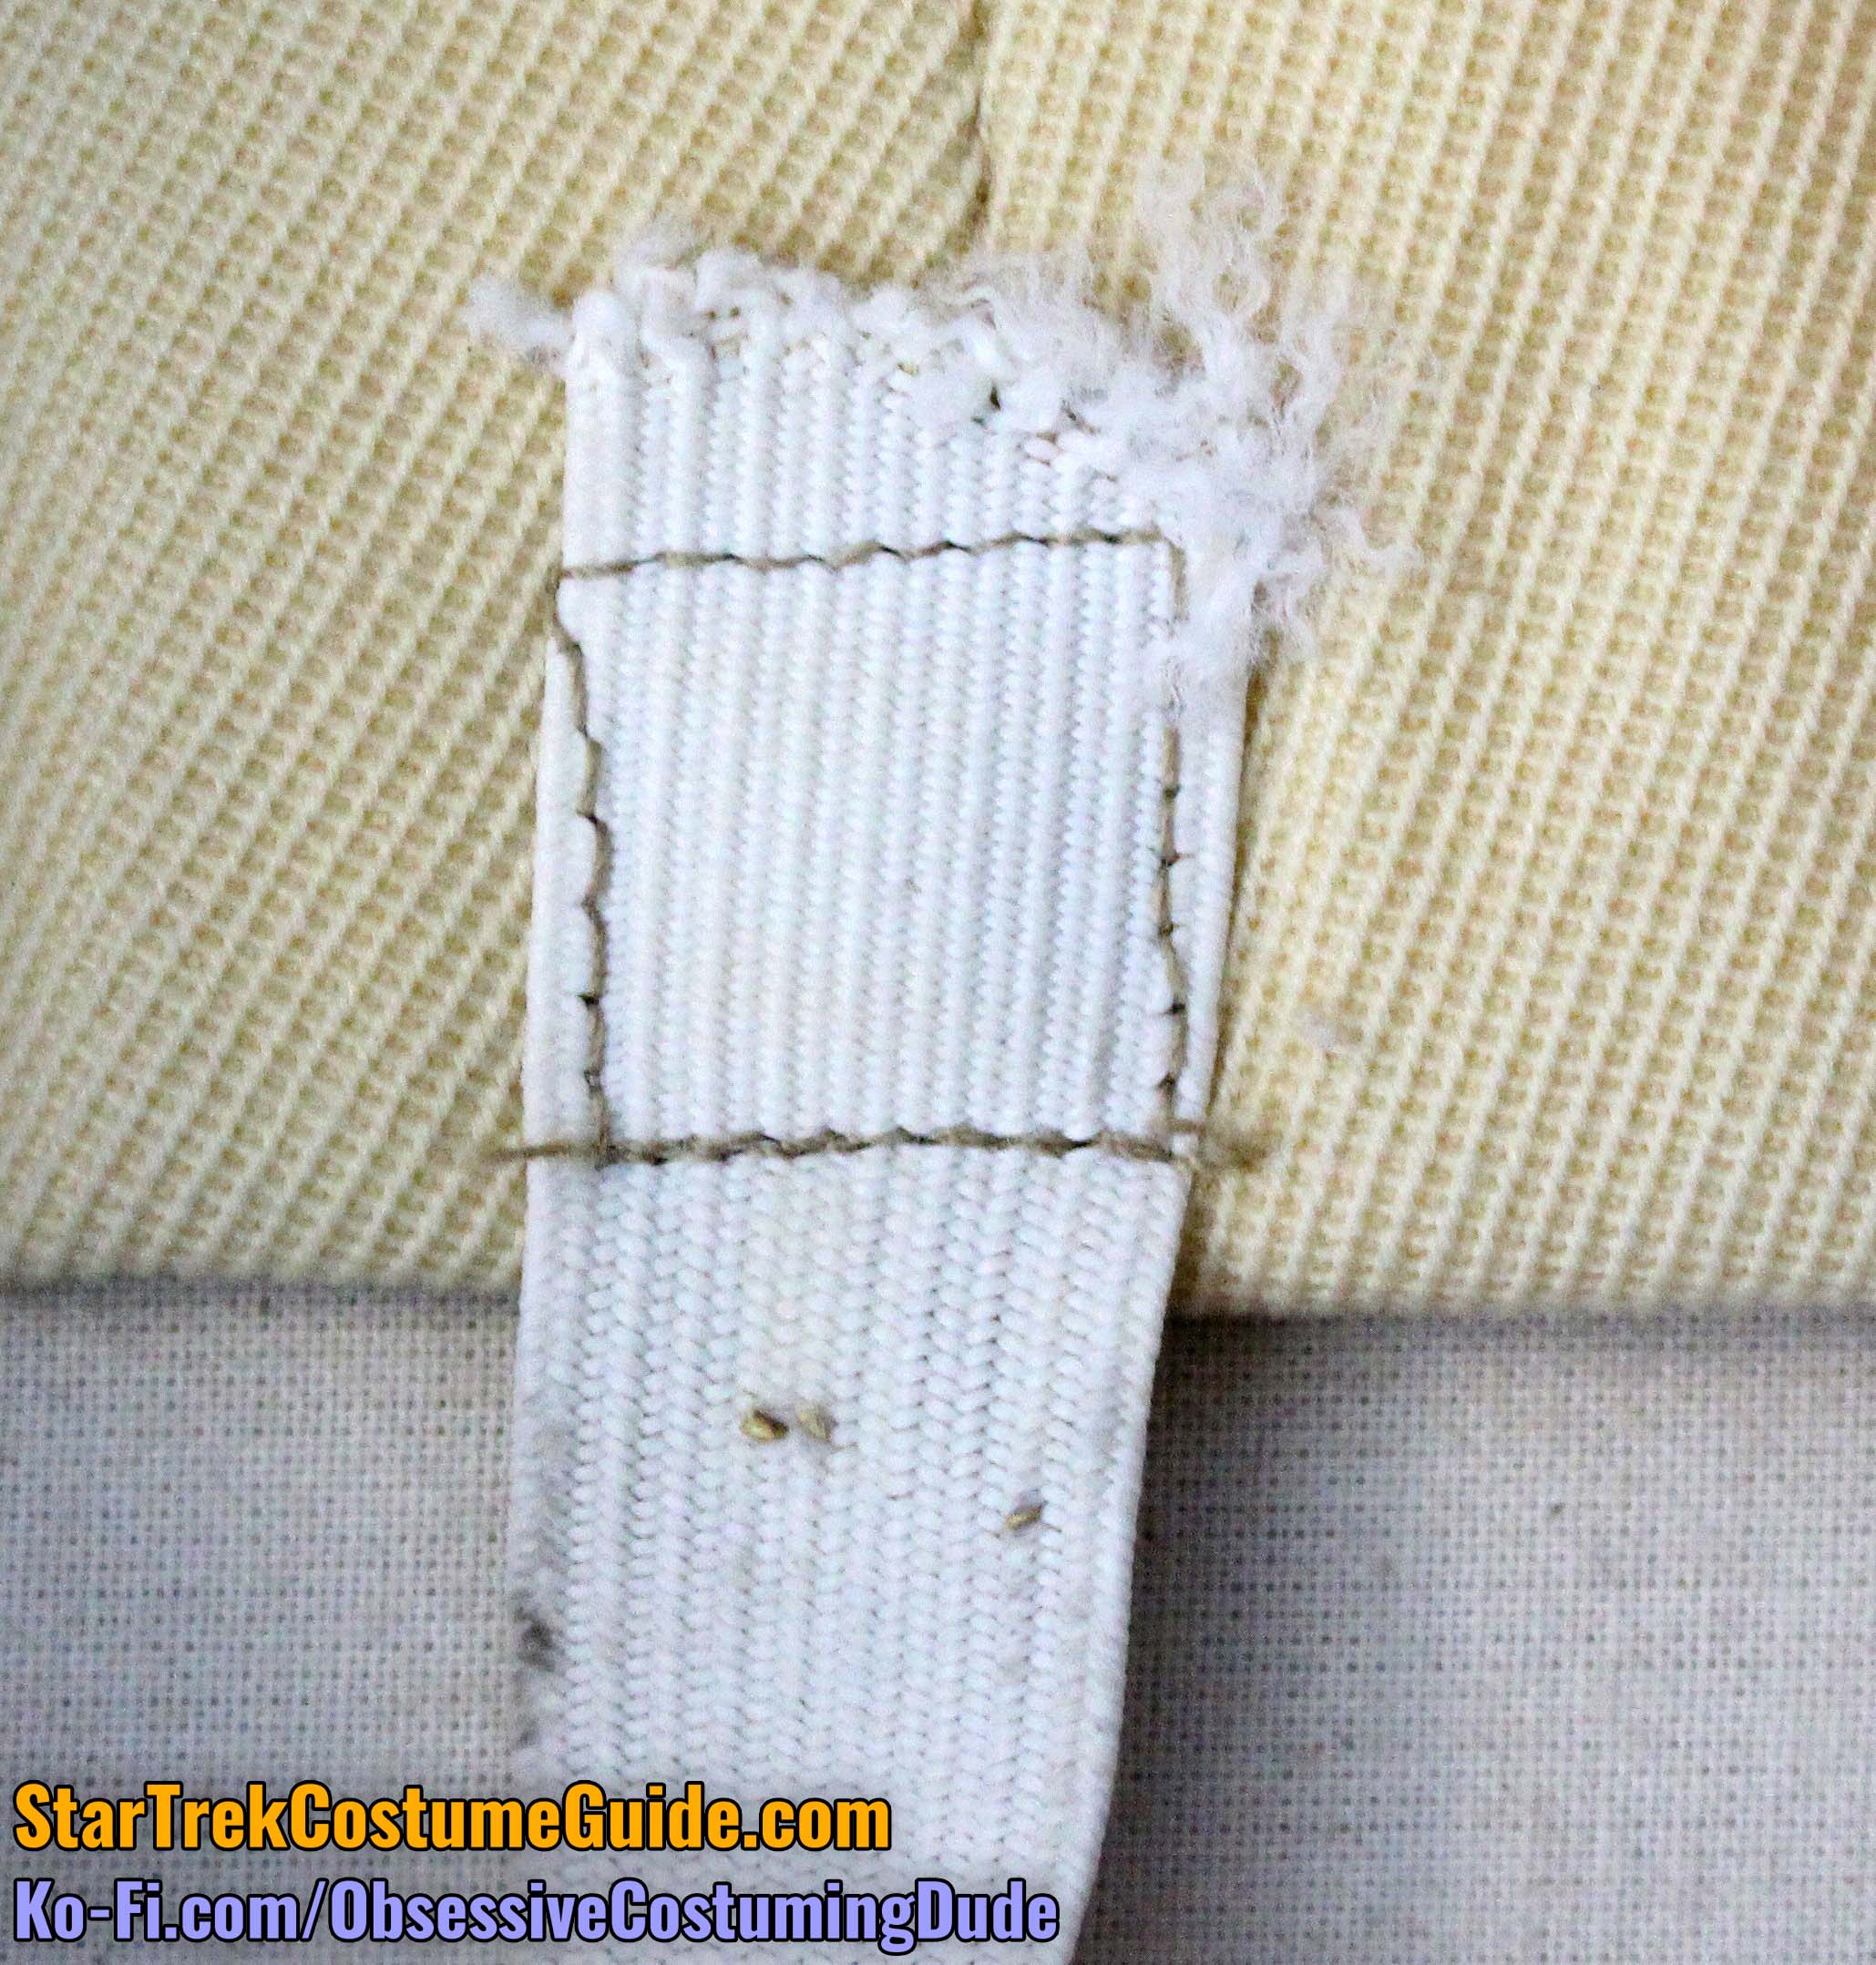
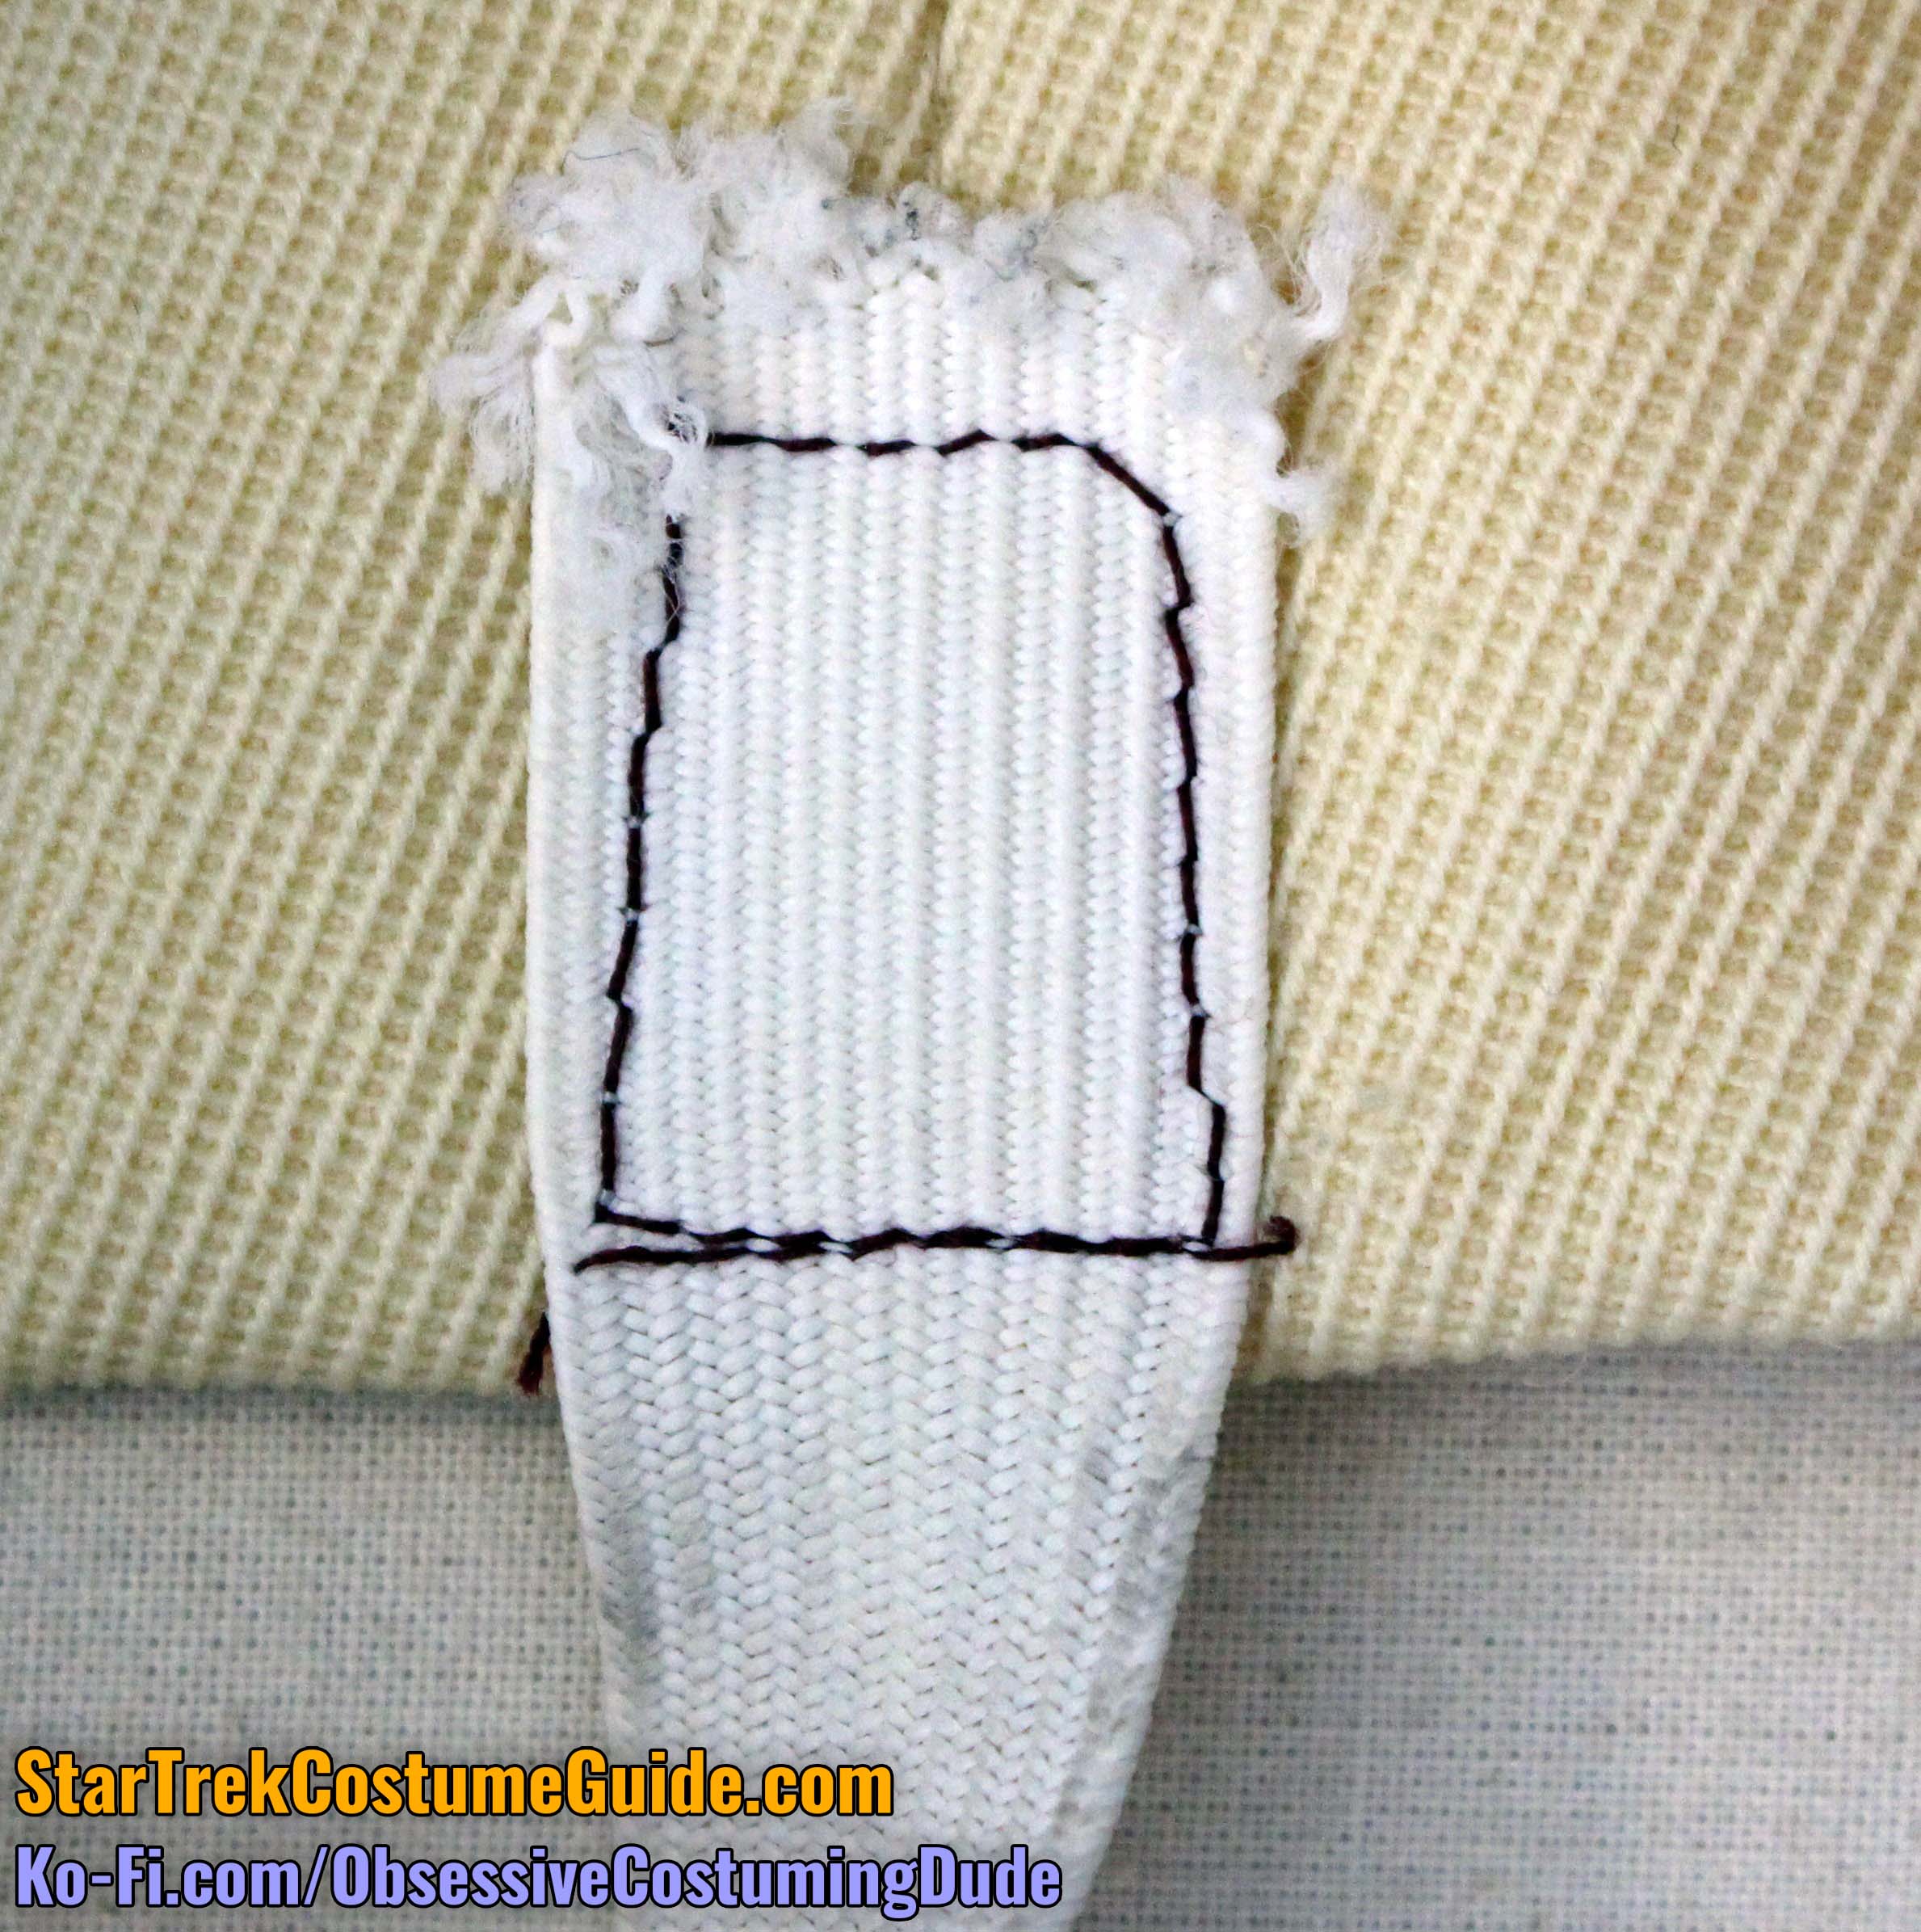
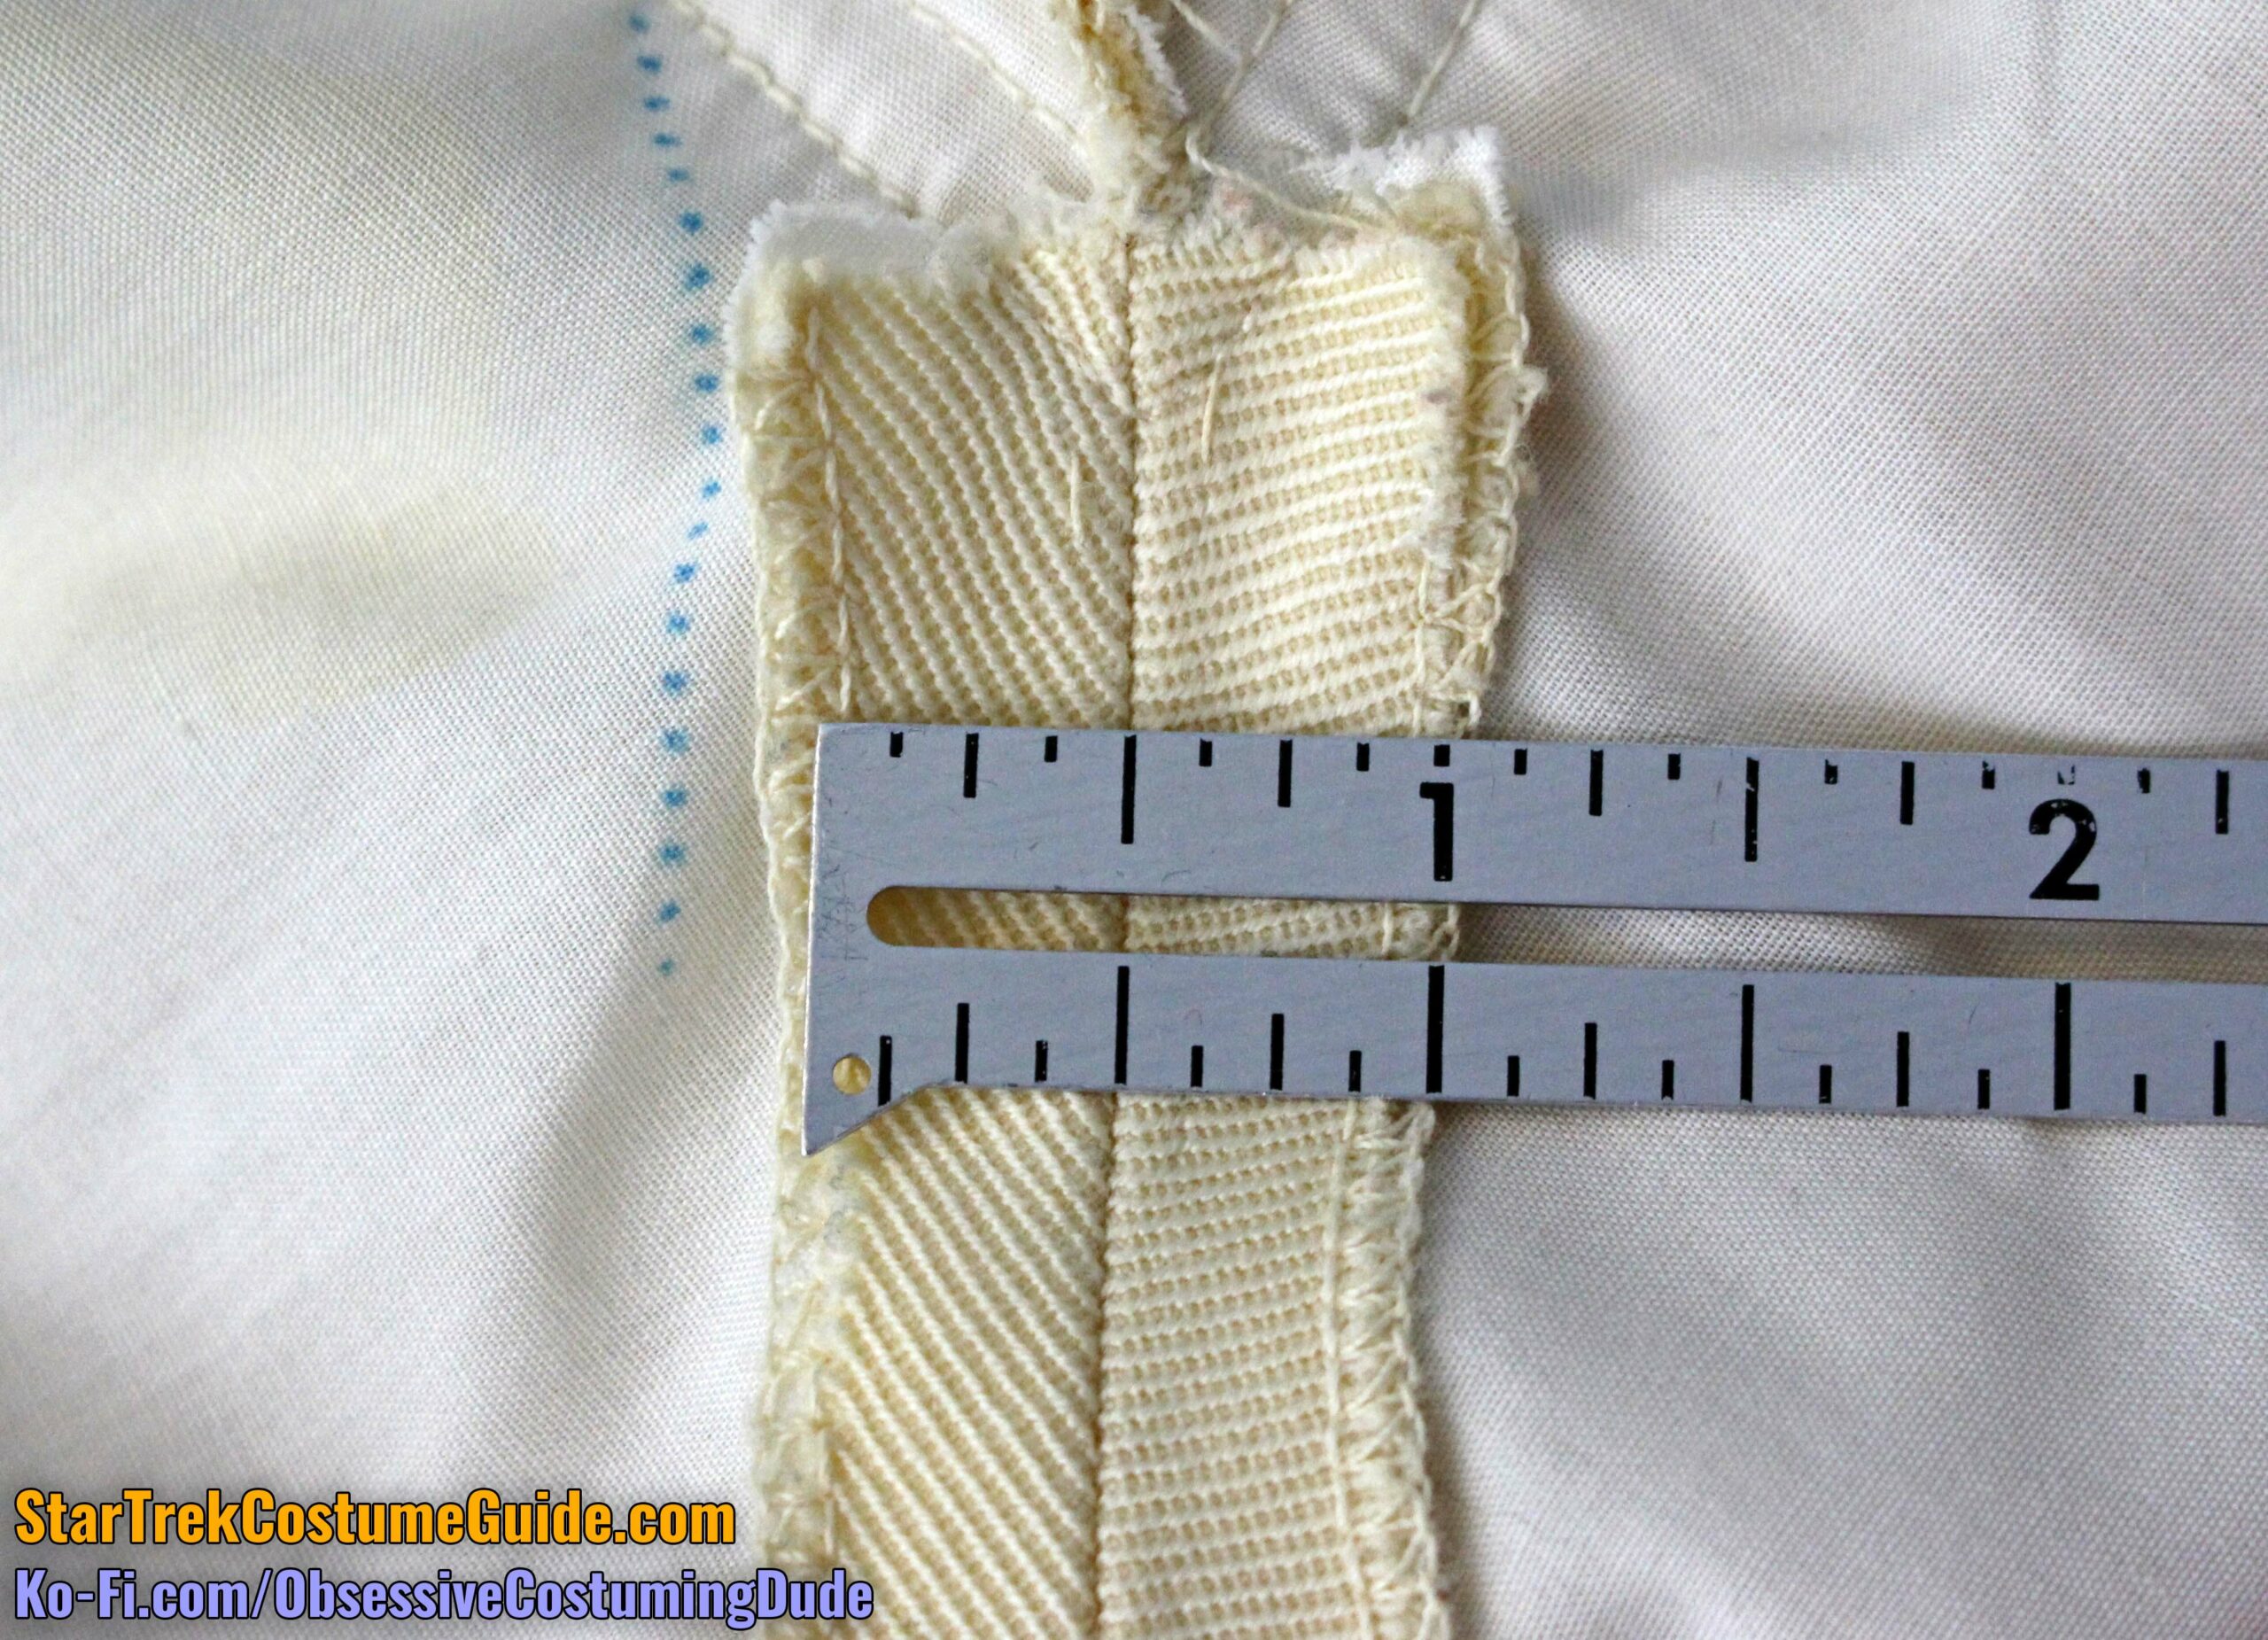
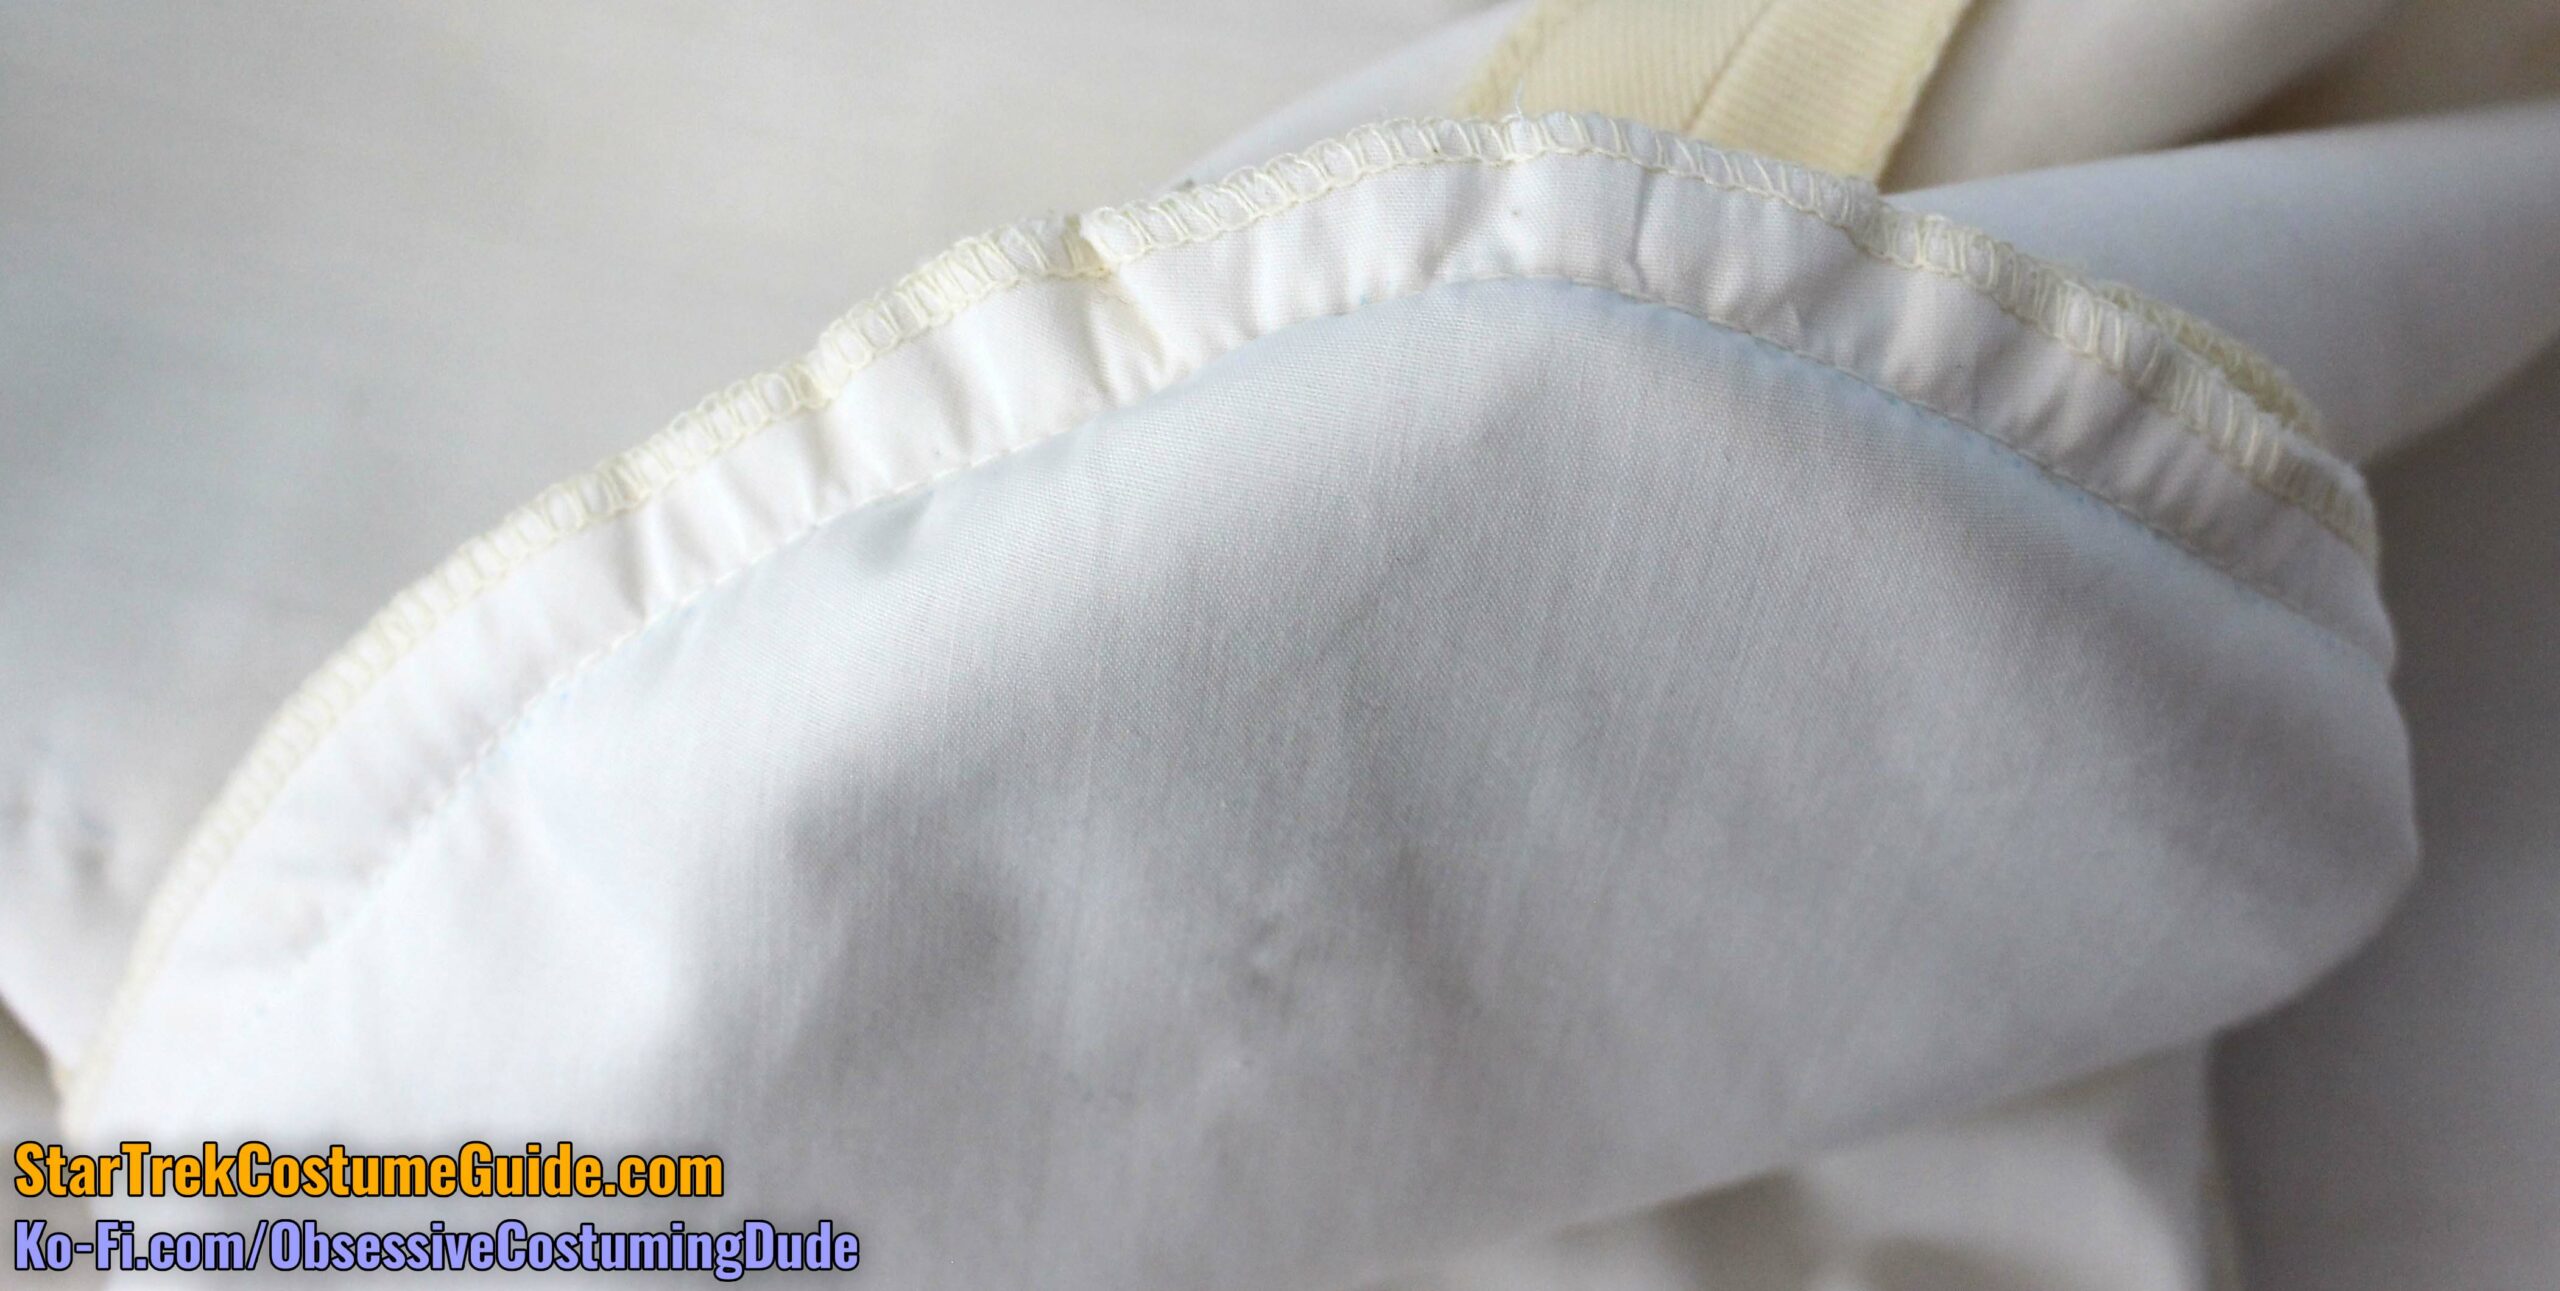
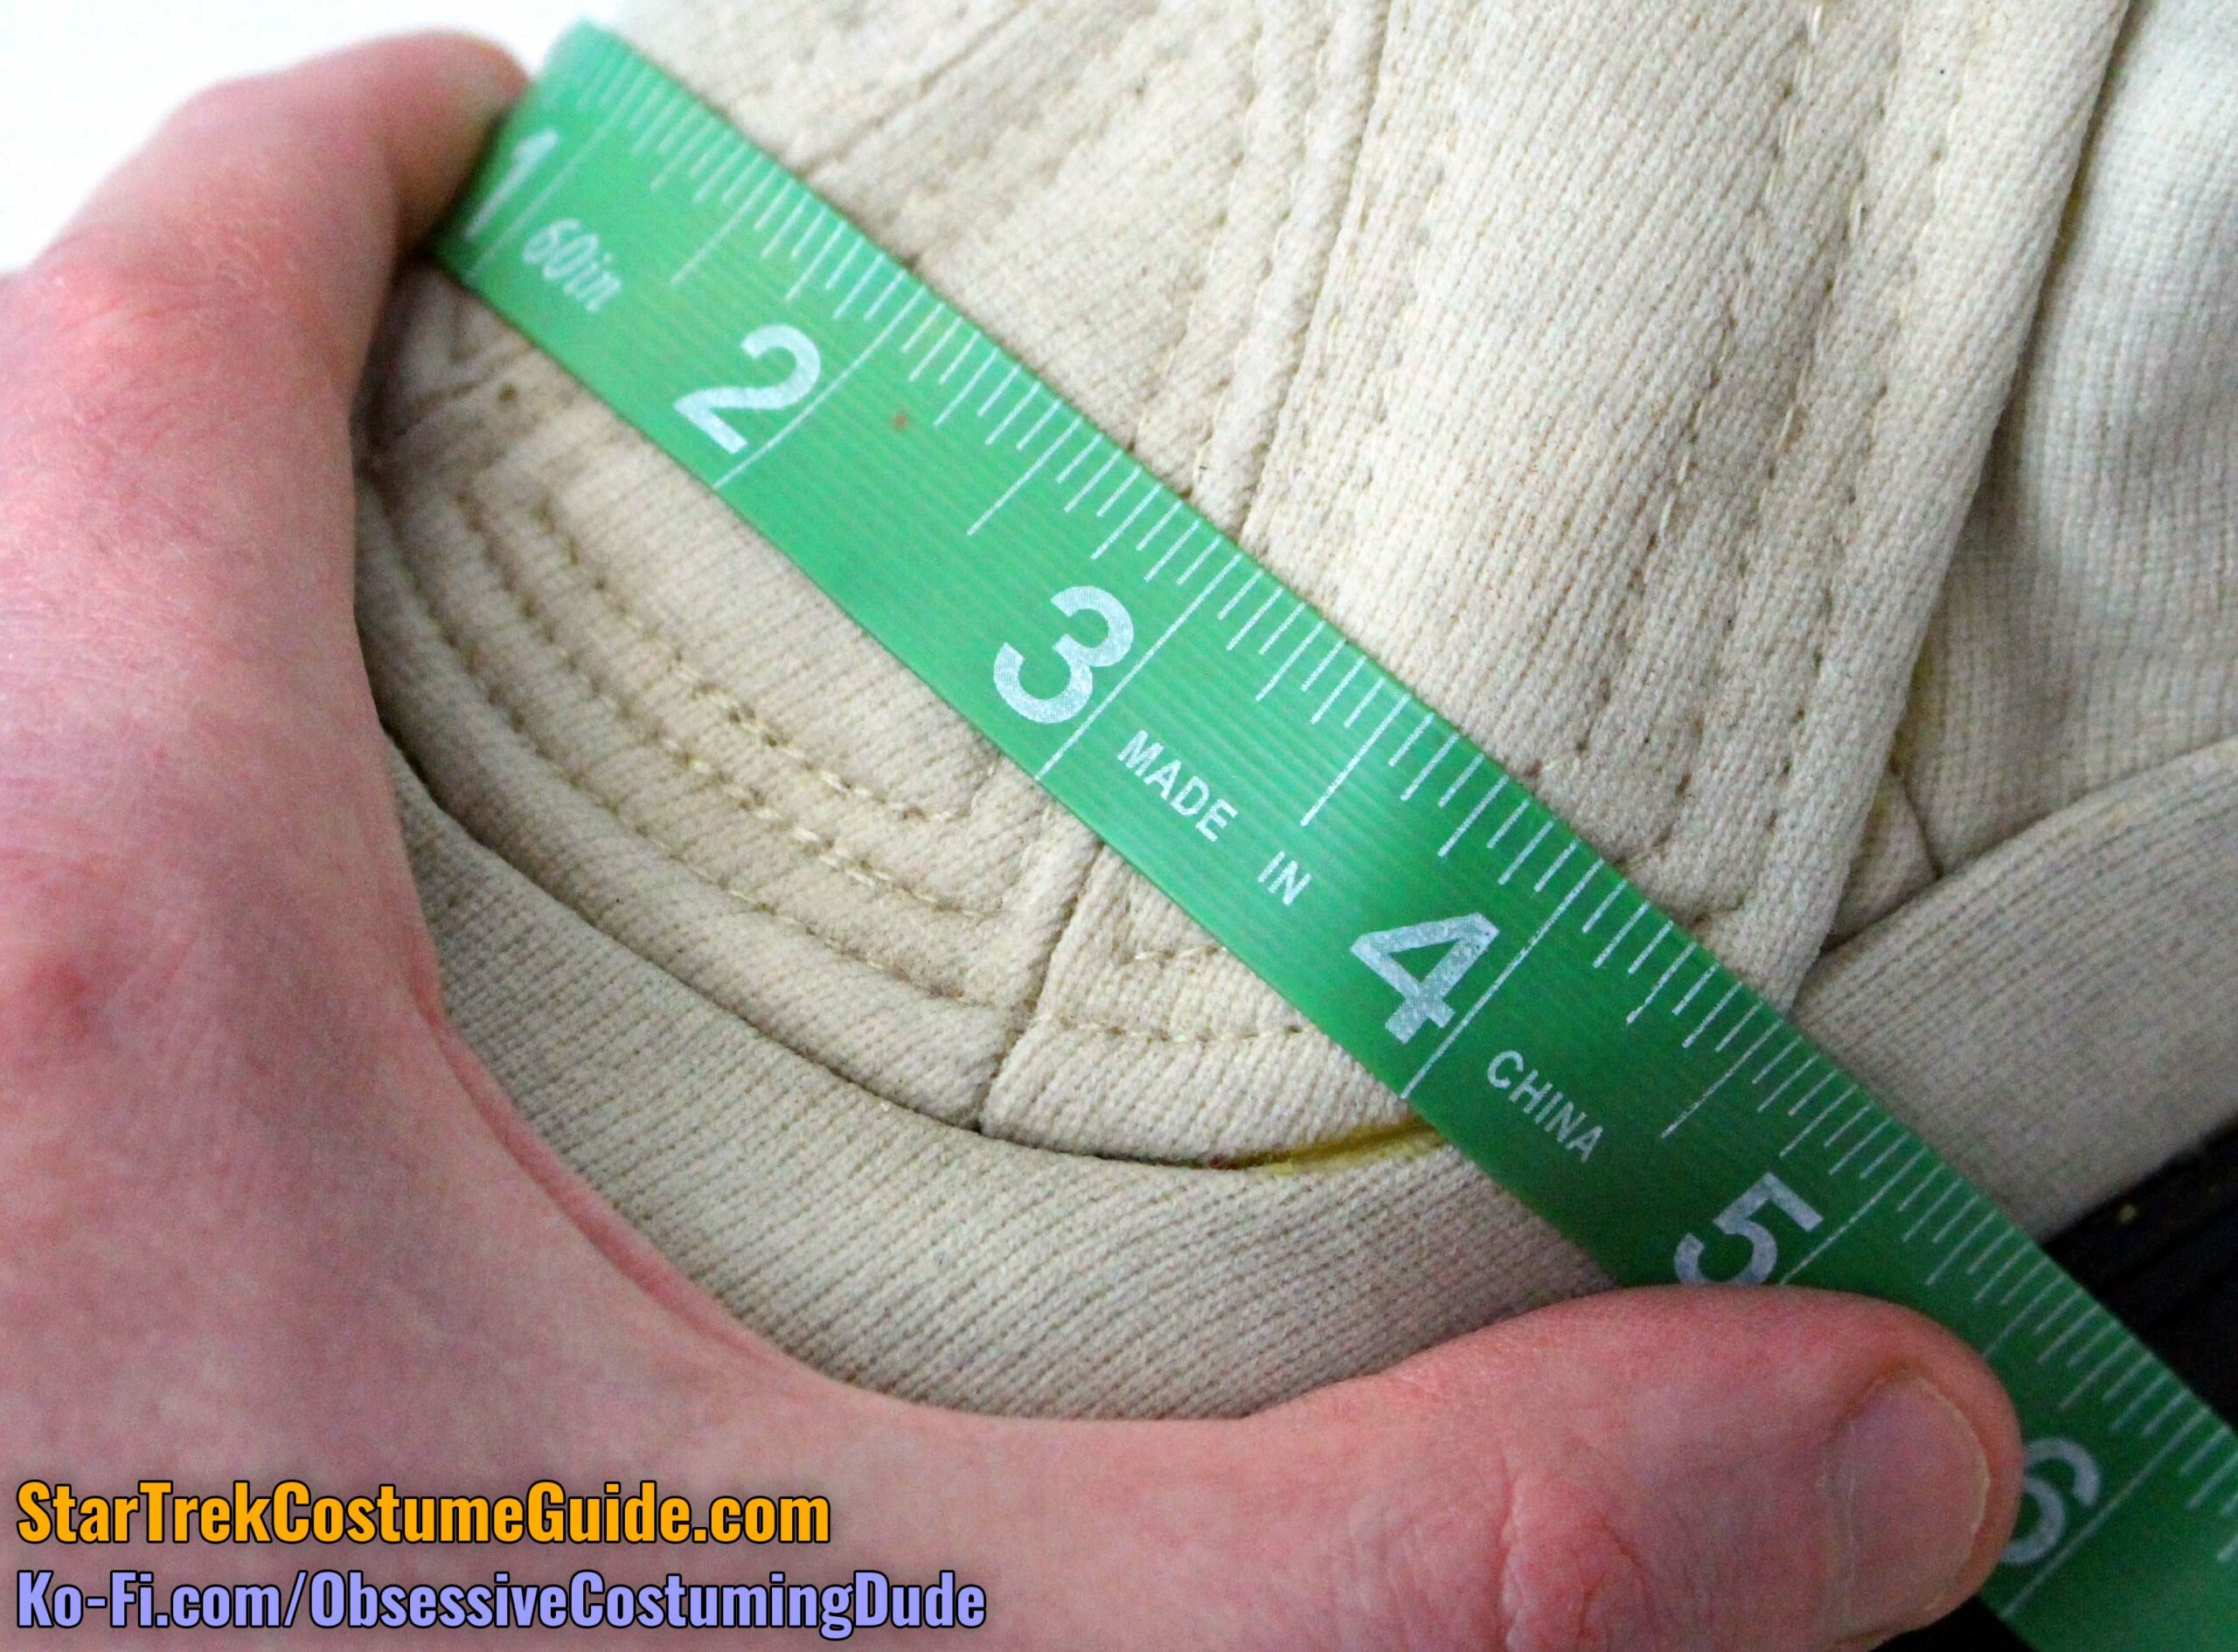
At the bottom of the pant legs were white elastic “stirrups.”
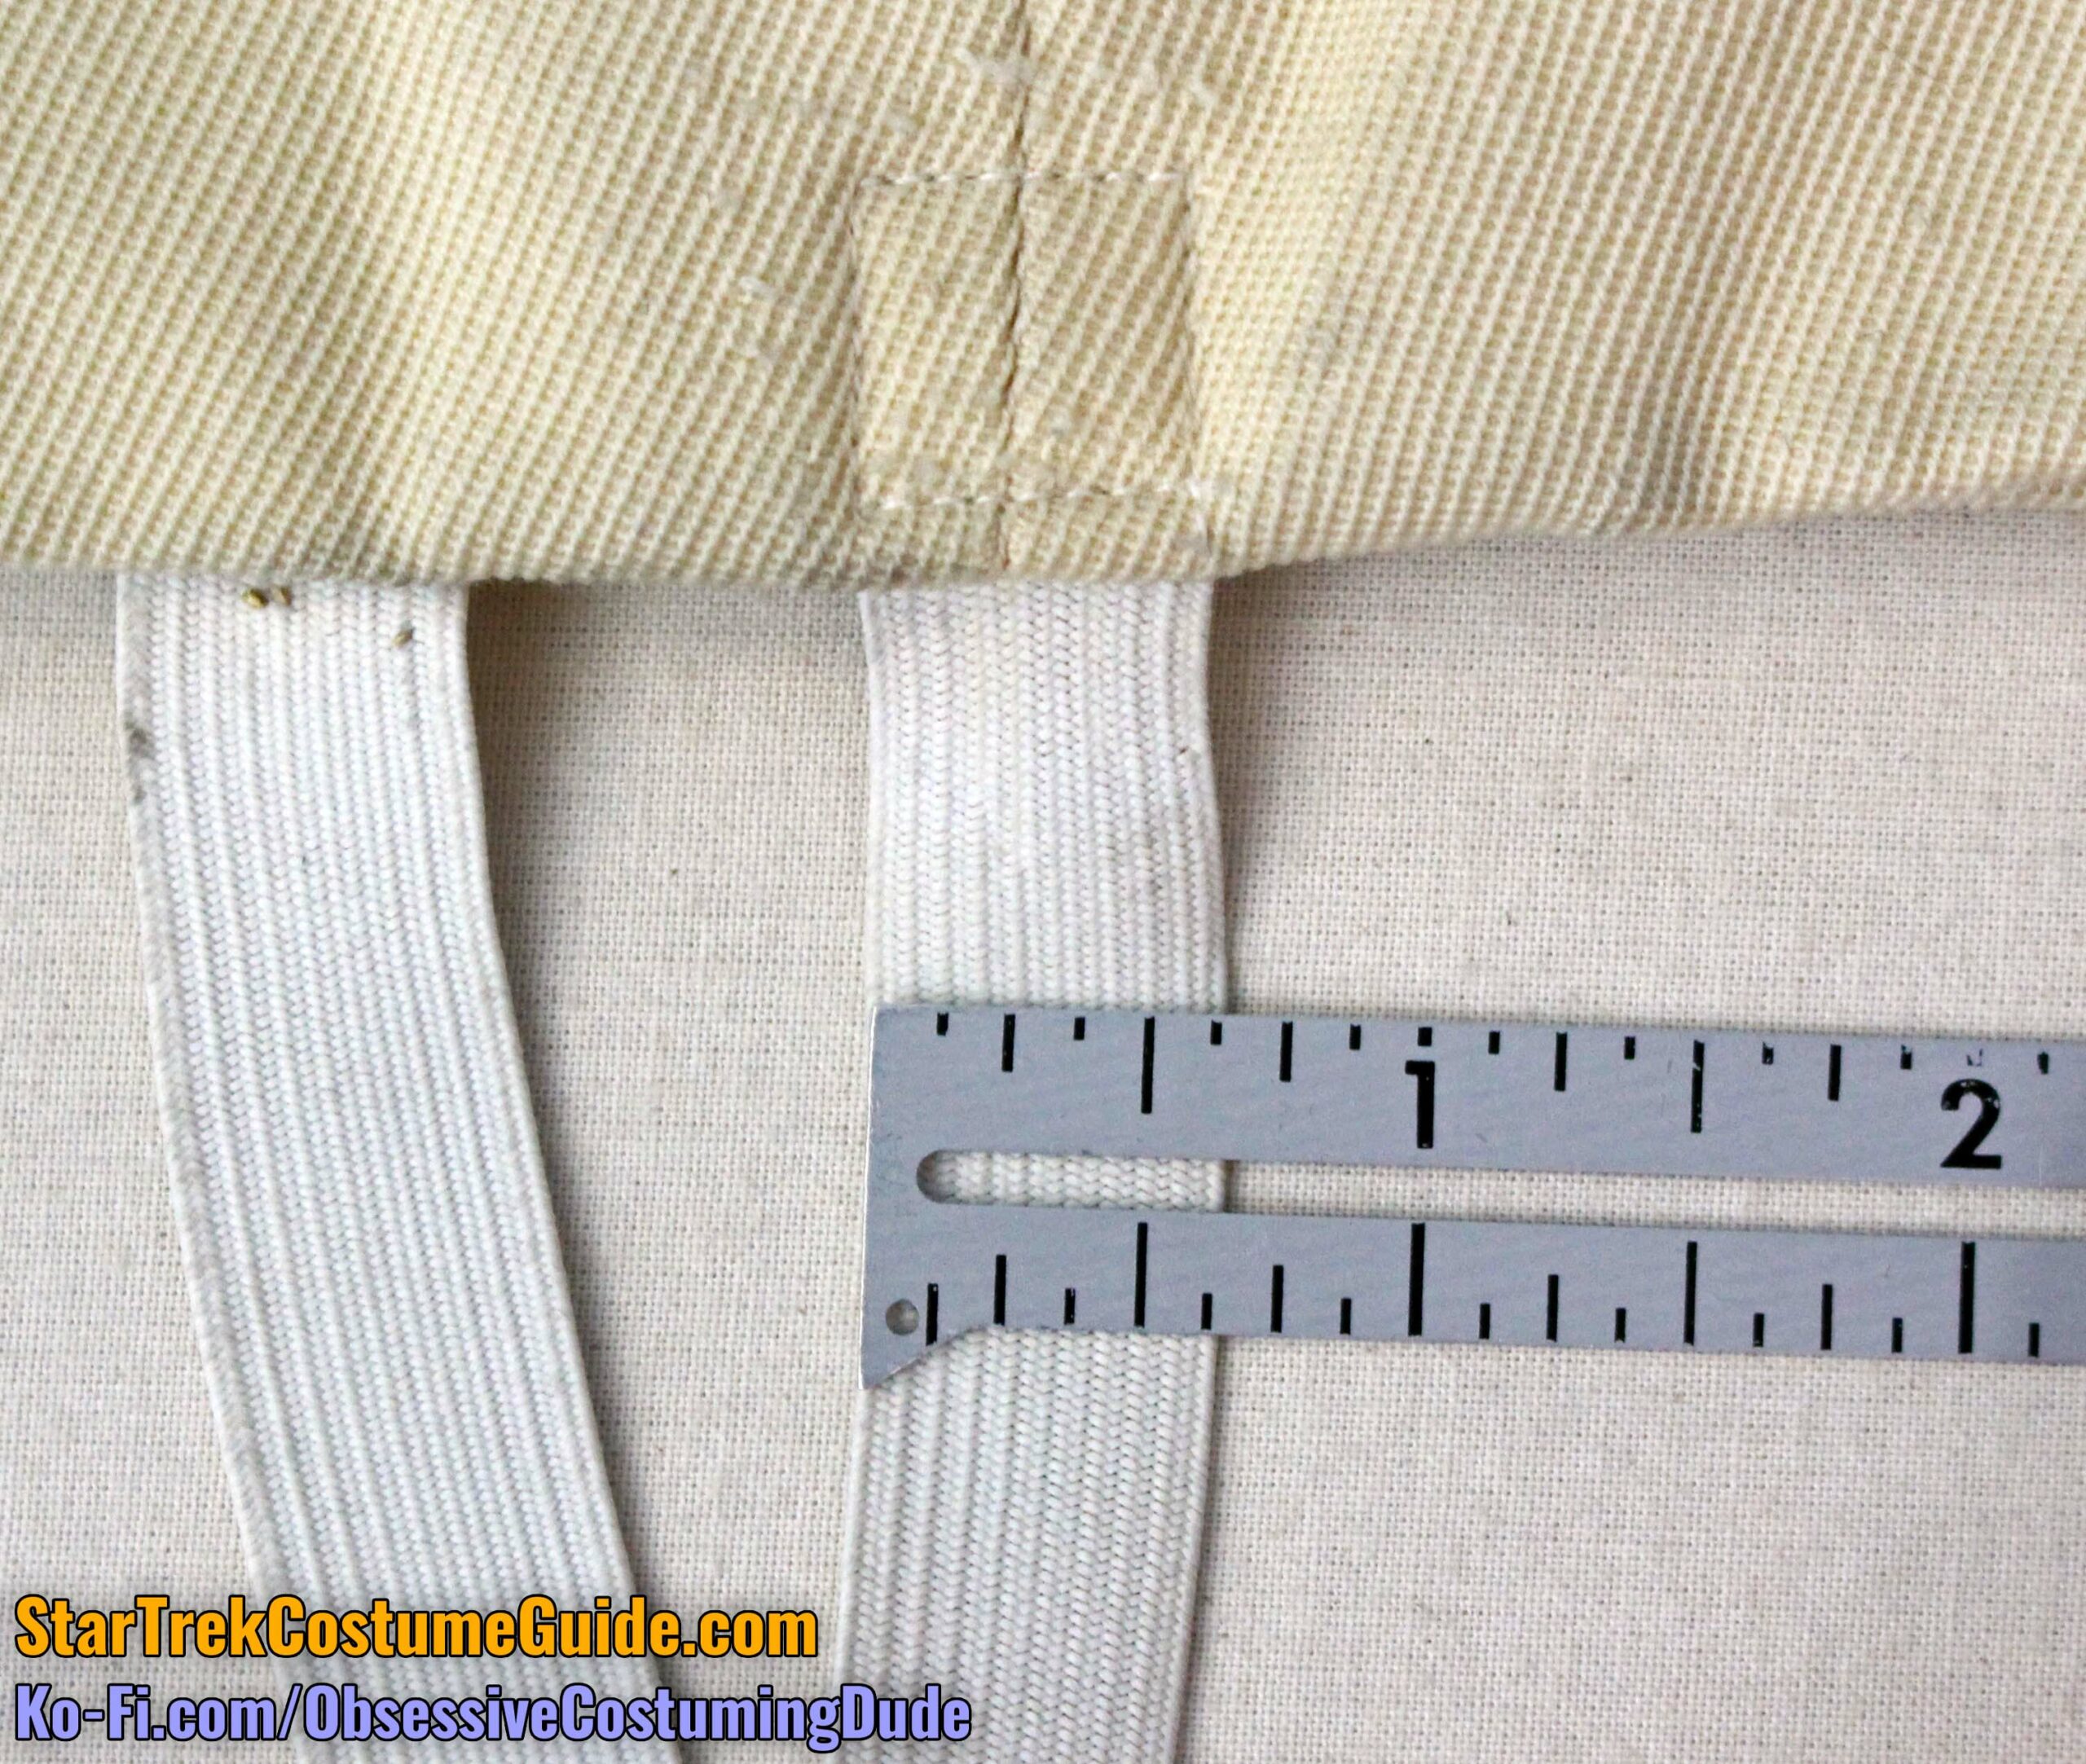
These stirrups were ⅝” wide and about 9 ¾” long, plus allowance.
They were secured to the lower pant leg via square-shaped topstitching near the hem line.
Interestingly though (to me, at least), they were attached with two different-color bobbins: one tan, and one maroon – perhaps some of the same thread used to sew the “monster maroon” uniforms?
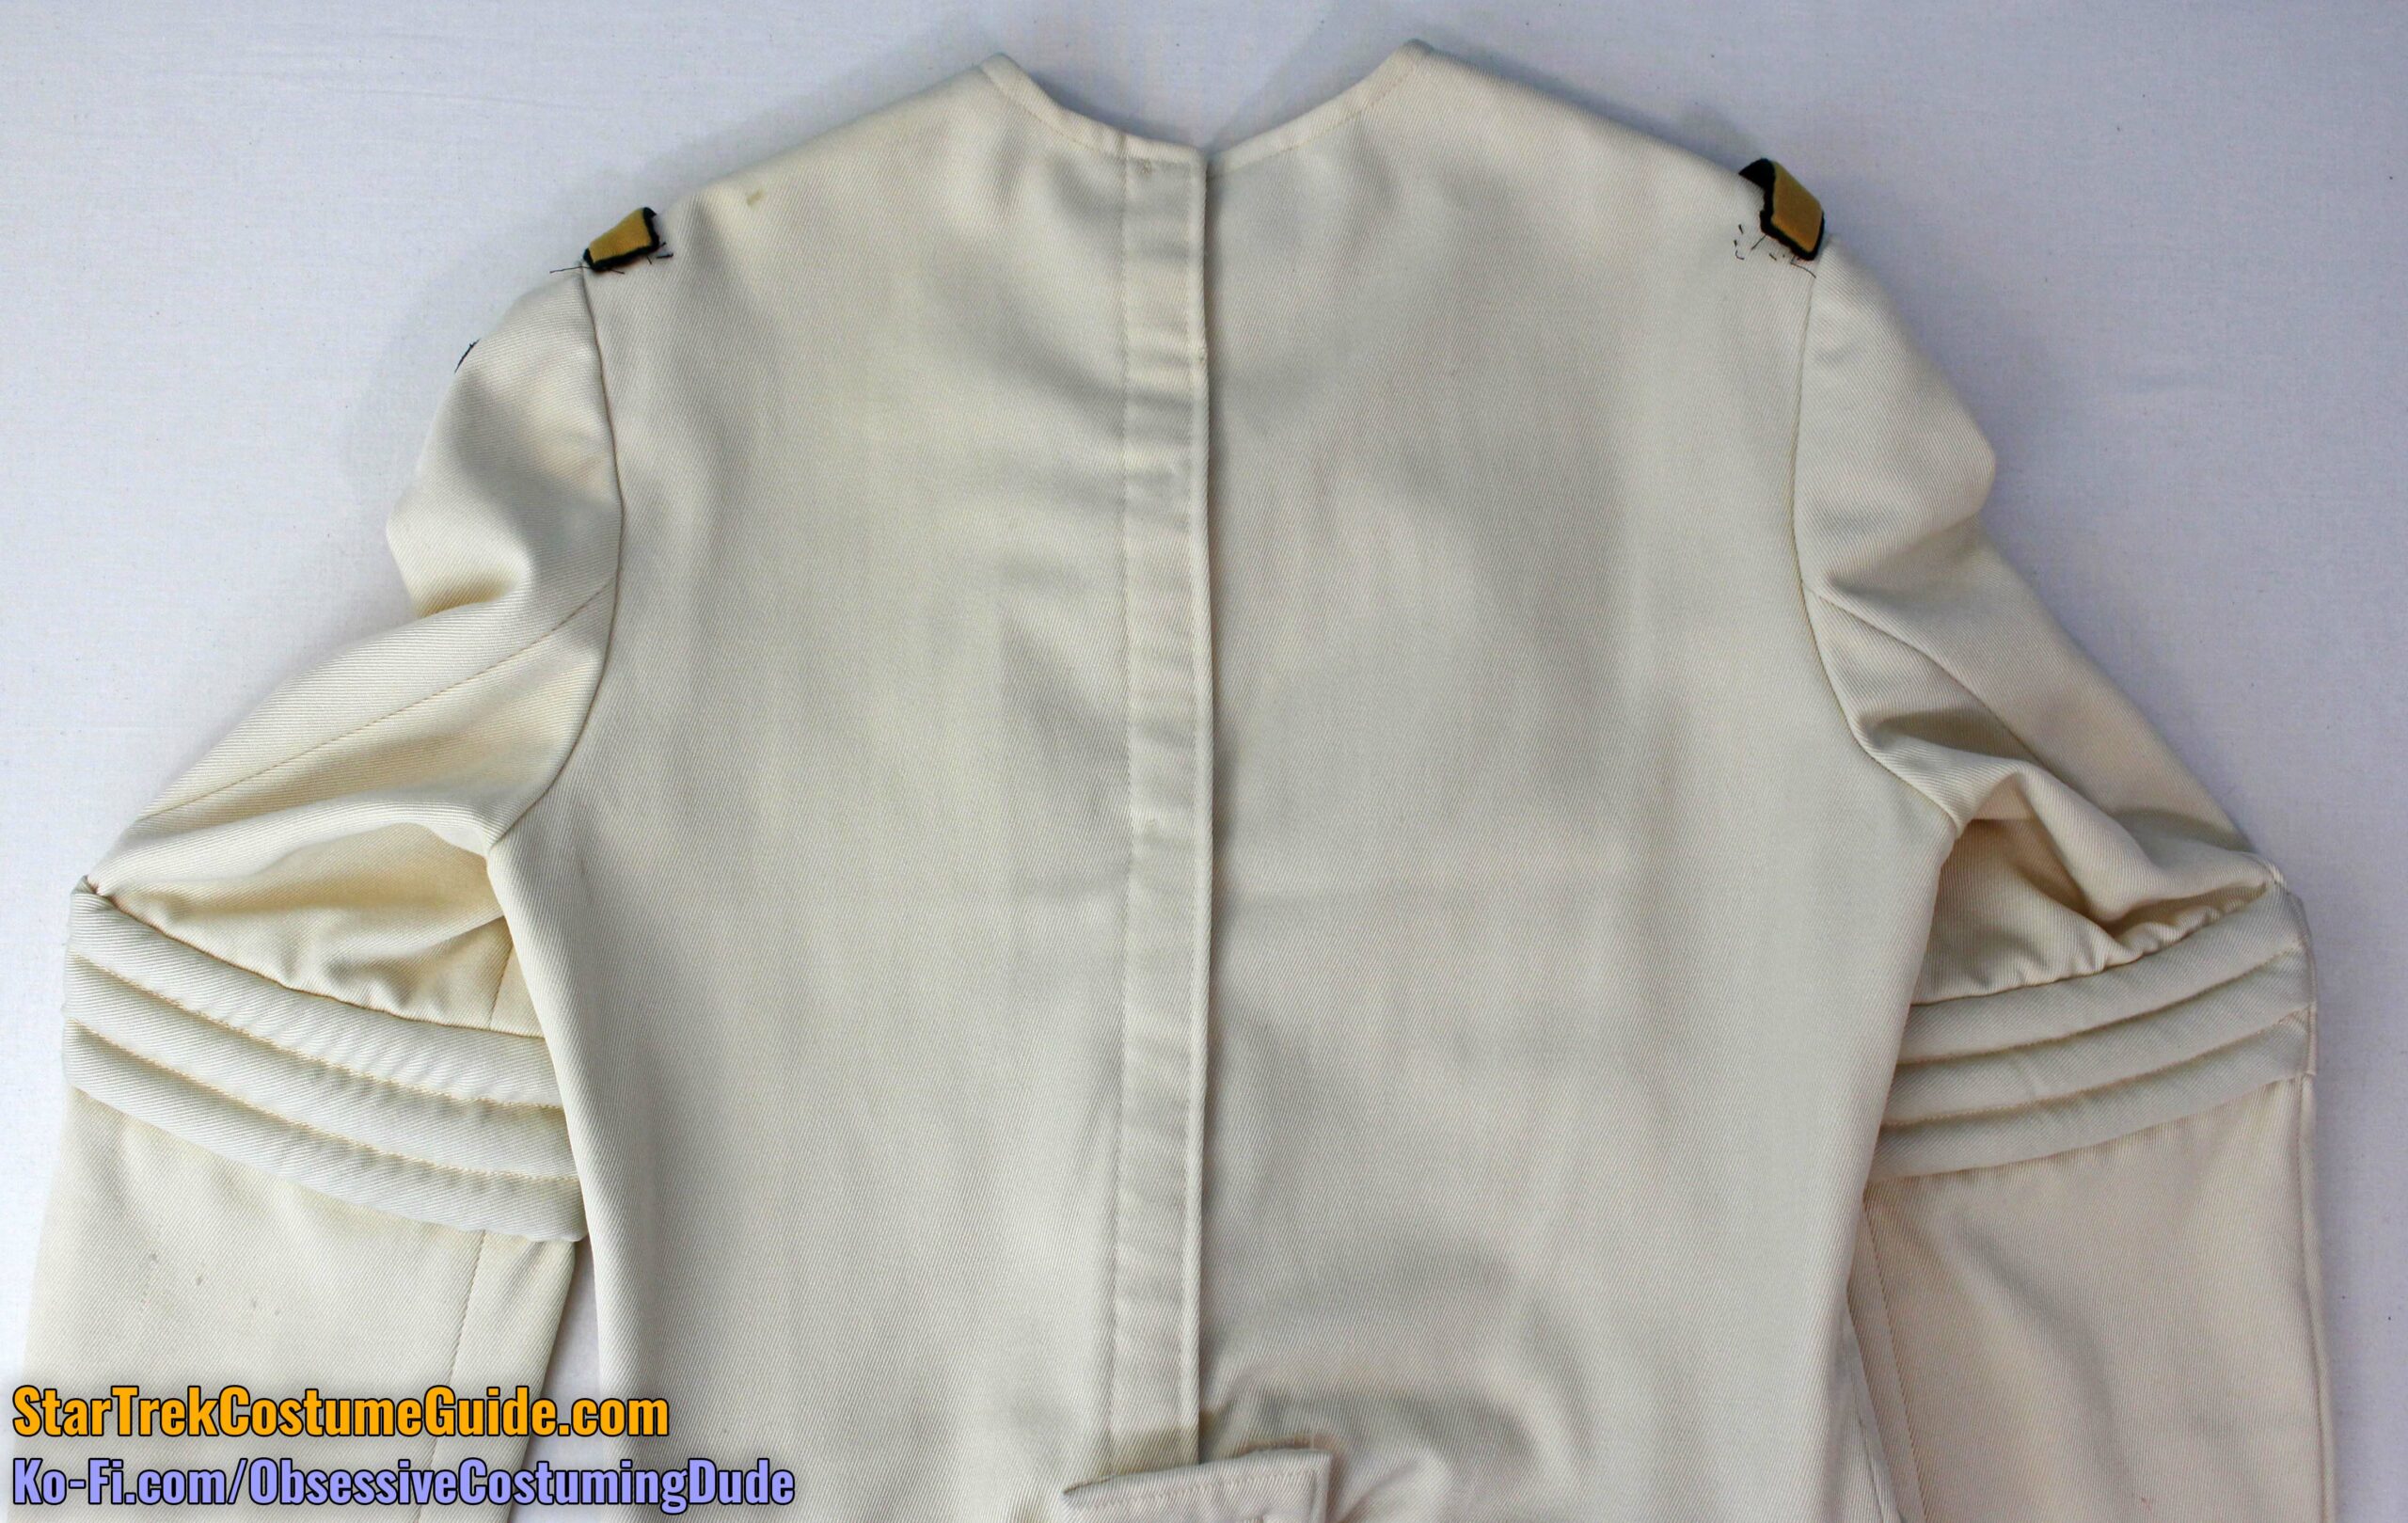
The back of the jumpsuit was comparatively plain compared to the front (not a criticism, just an observation).
This particular women’s jumpsuit had back fitting darts; perhaps we can deduce that this was standard for the women’s version?
Then again, curiously, Peter Preston’s jumpsuit also had back fitting darts …
As with the front, here you can see the hand-stitching along the lower edge of the waist bands.
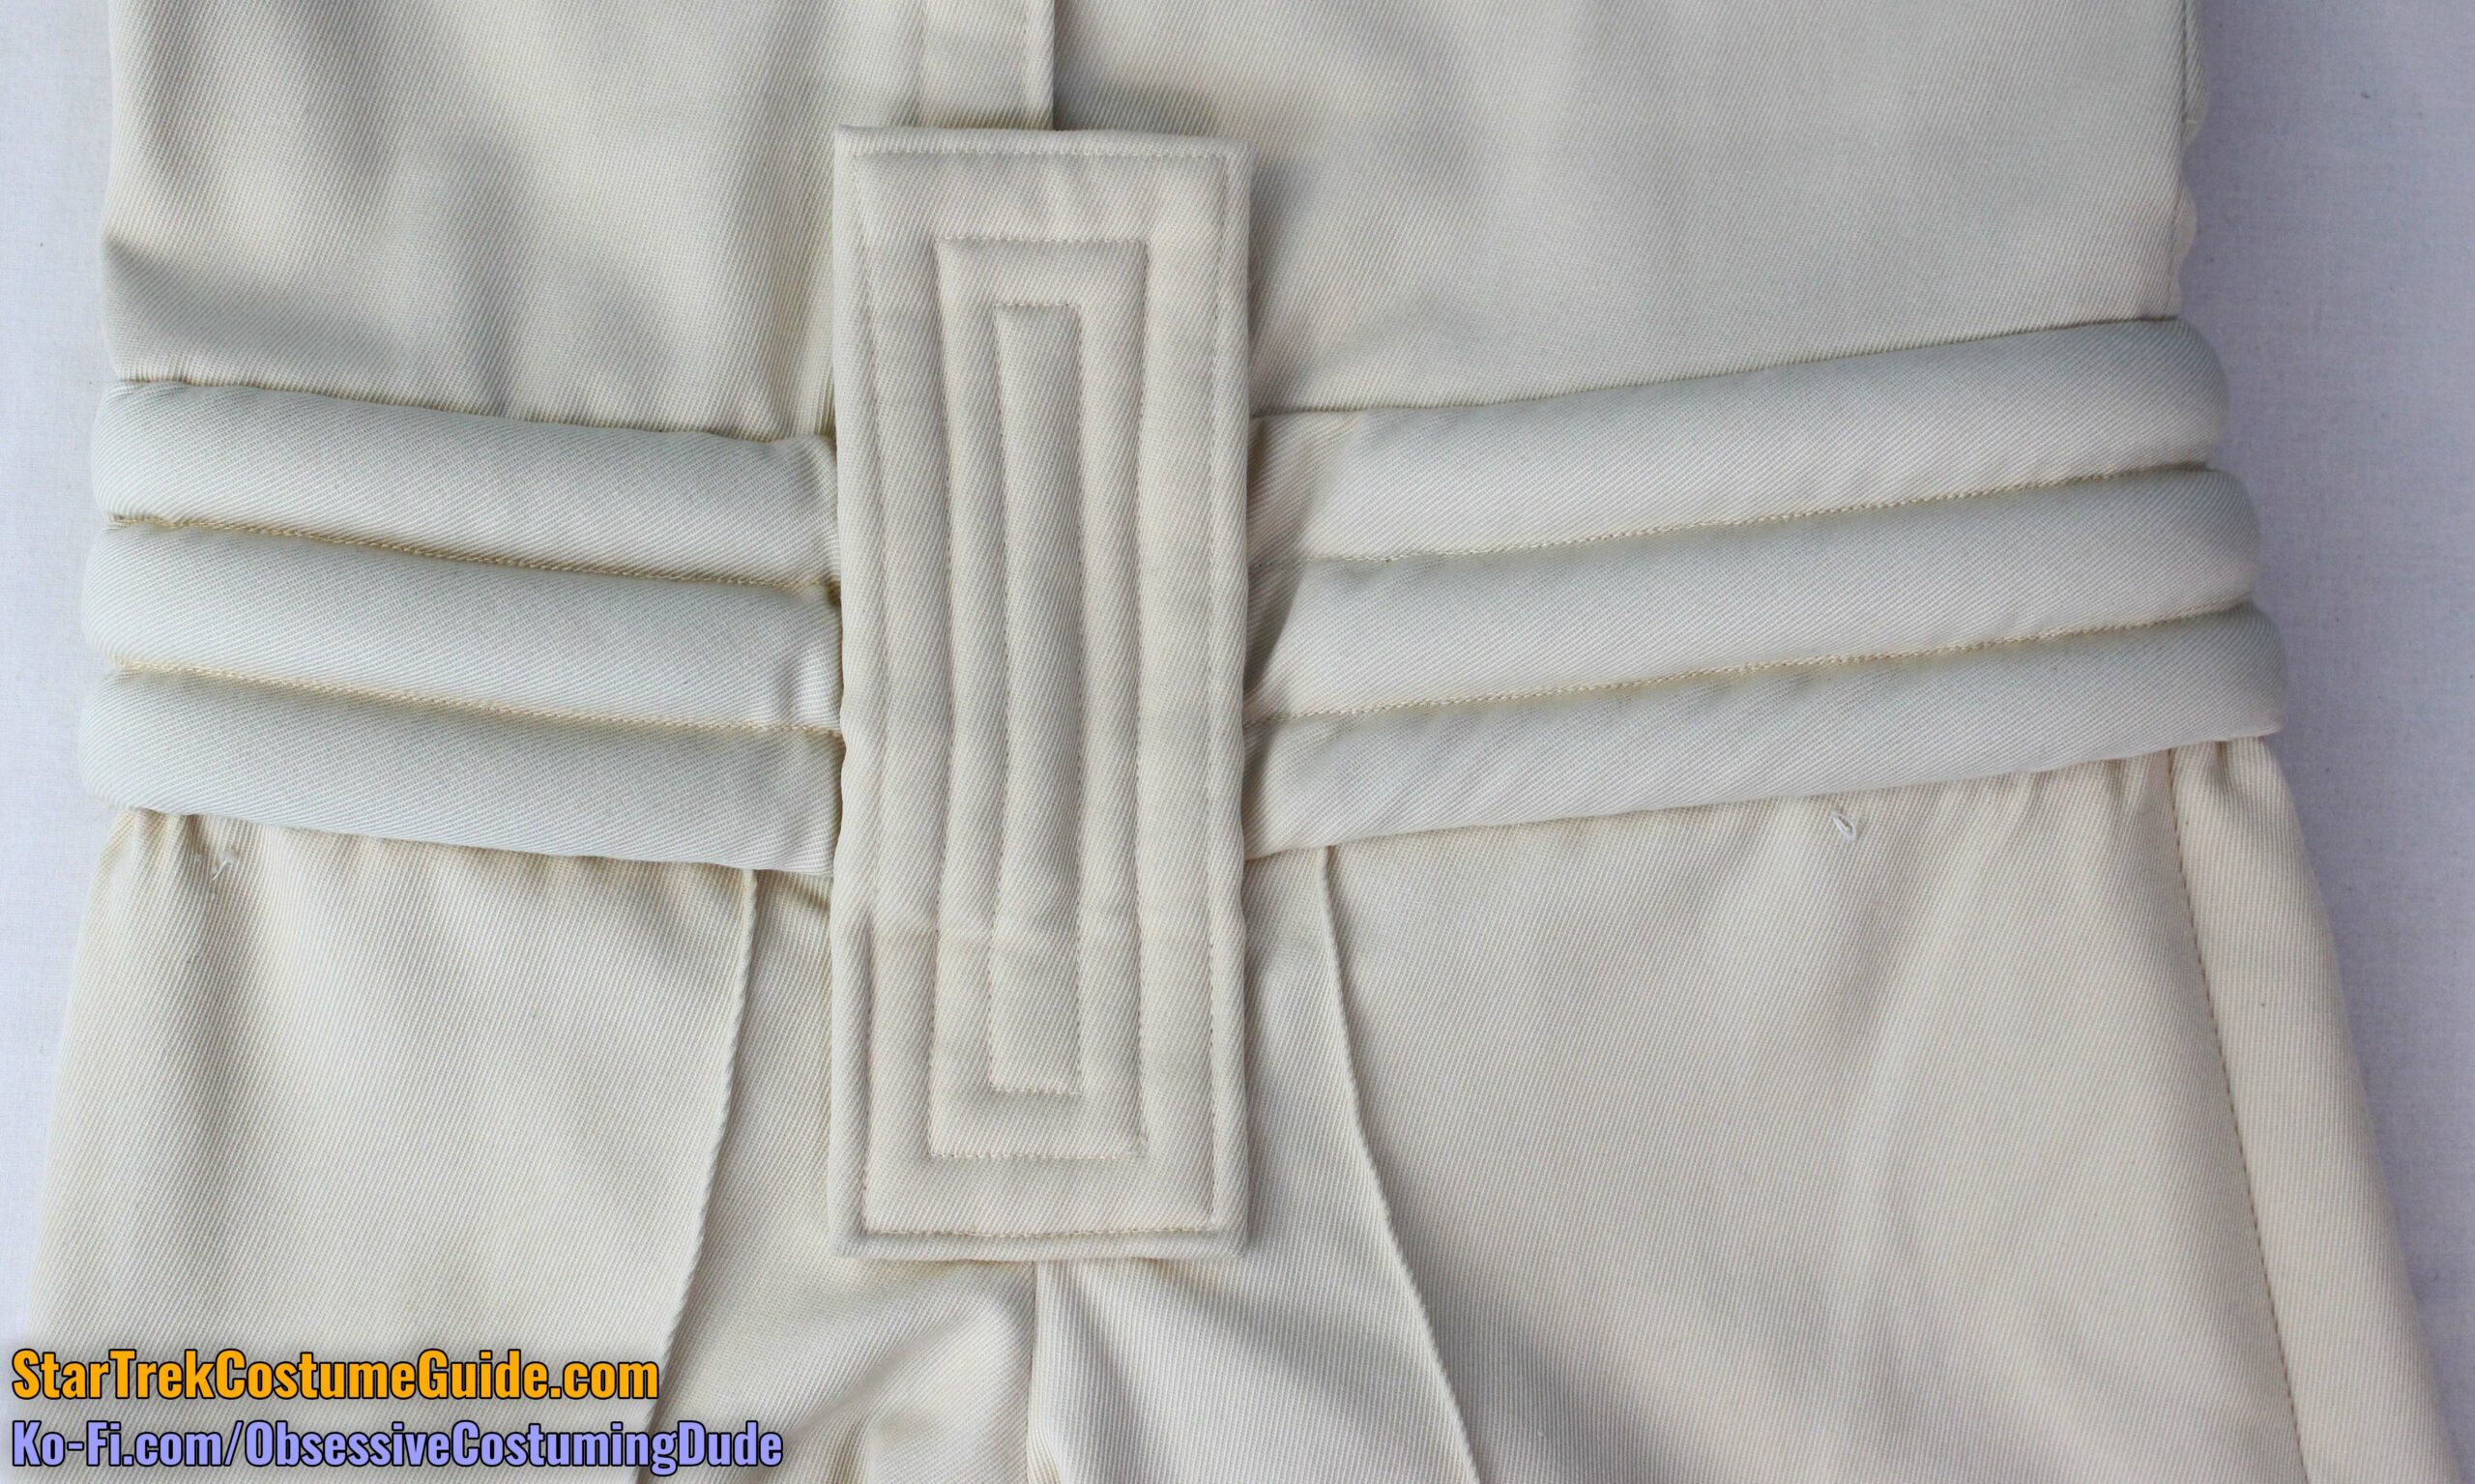
The only notable accent on the back of the jumpsuit was a tall quilted rectangle at the lower back, where the waist bands met.
The back of the pant legs were also pleated (?) and edge-stitched like the fronts were, and the pleats were positioned approximately 2 ¼” away from the center back at the waist.
The sleeves were traditional two-piece sleeves, with front and back sleeve seams about where one would expect them to be.
There was also a slight amount of sleeve cap ease, which was more easily observable on the interior of the jumpsuit (which we’ll look at shortly).
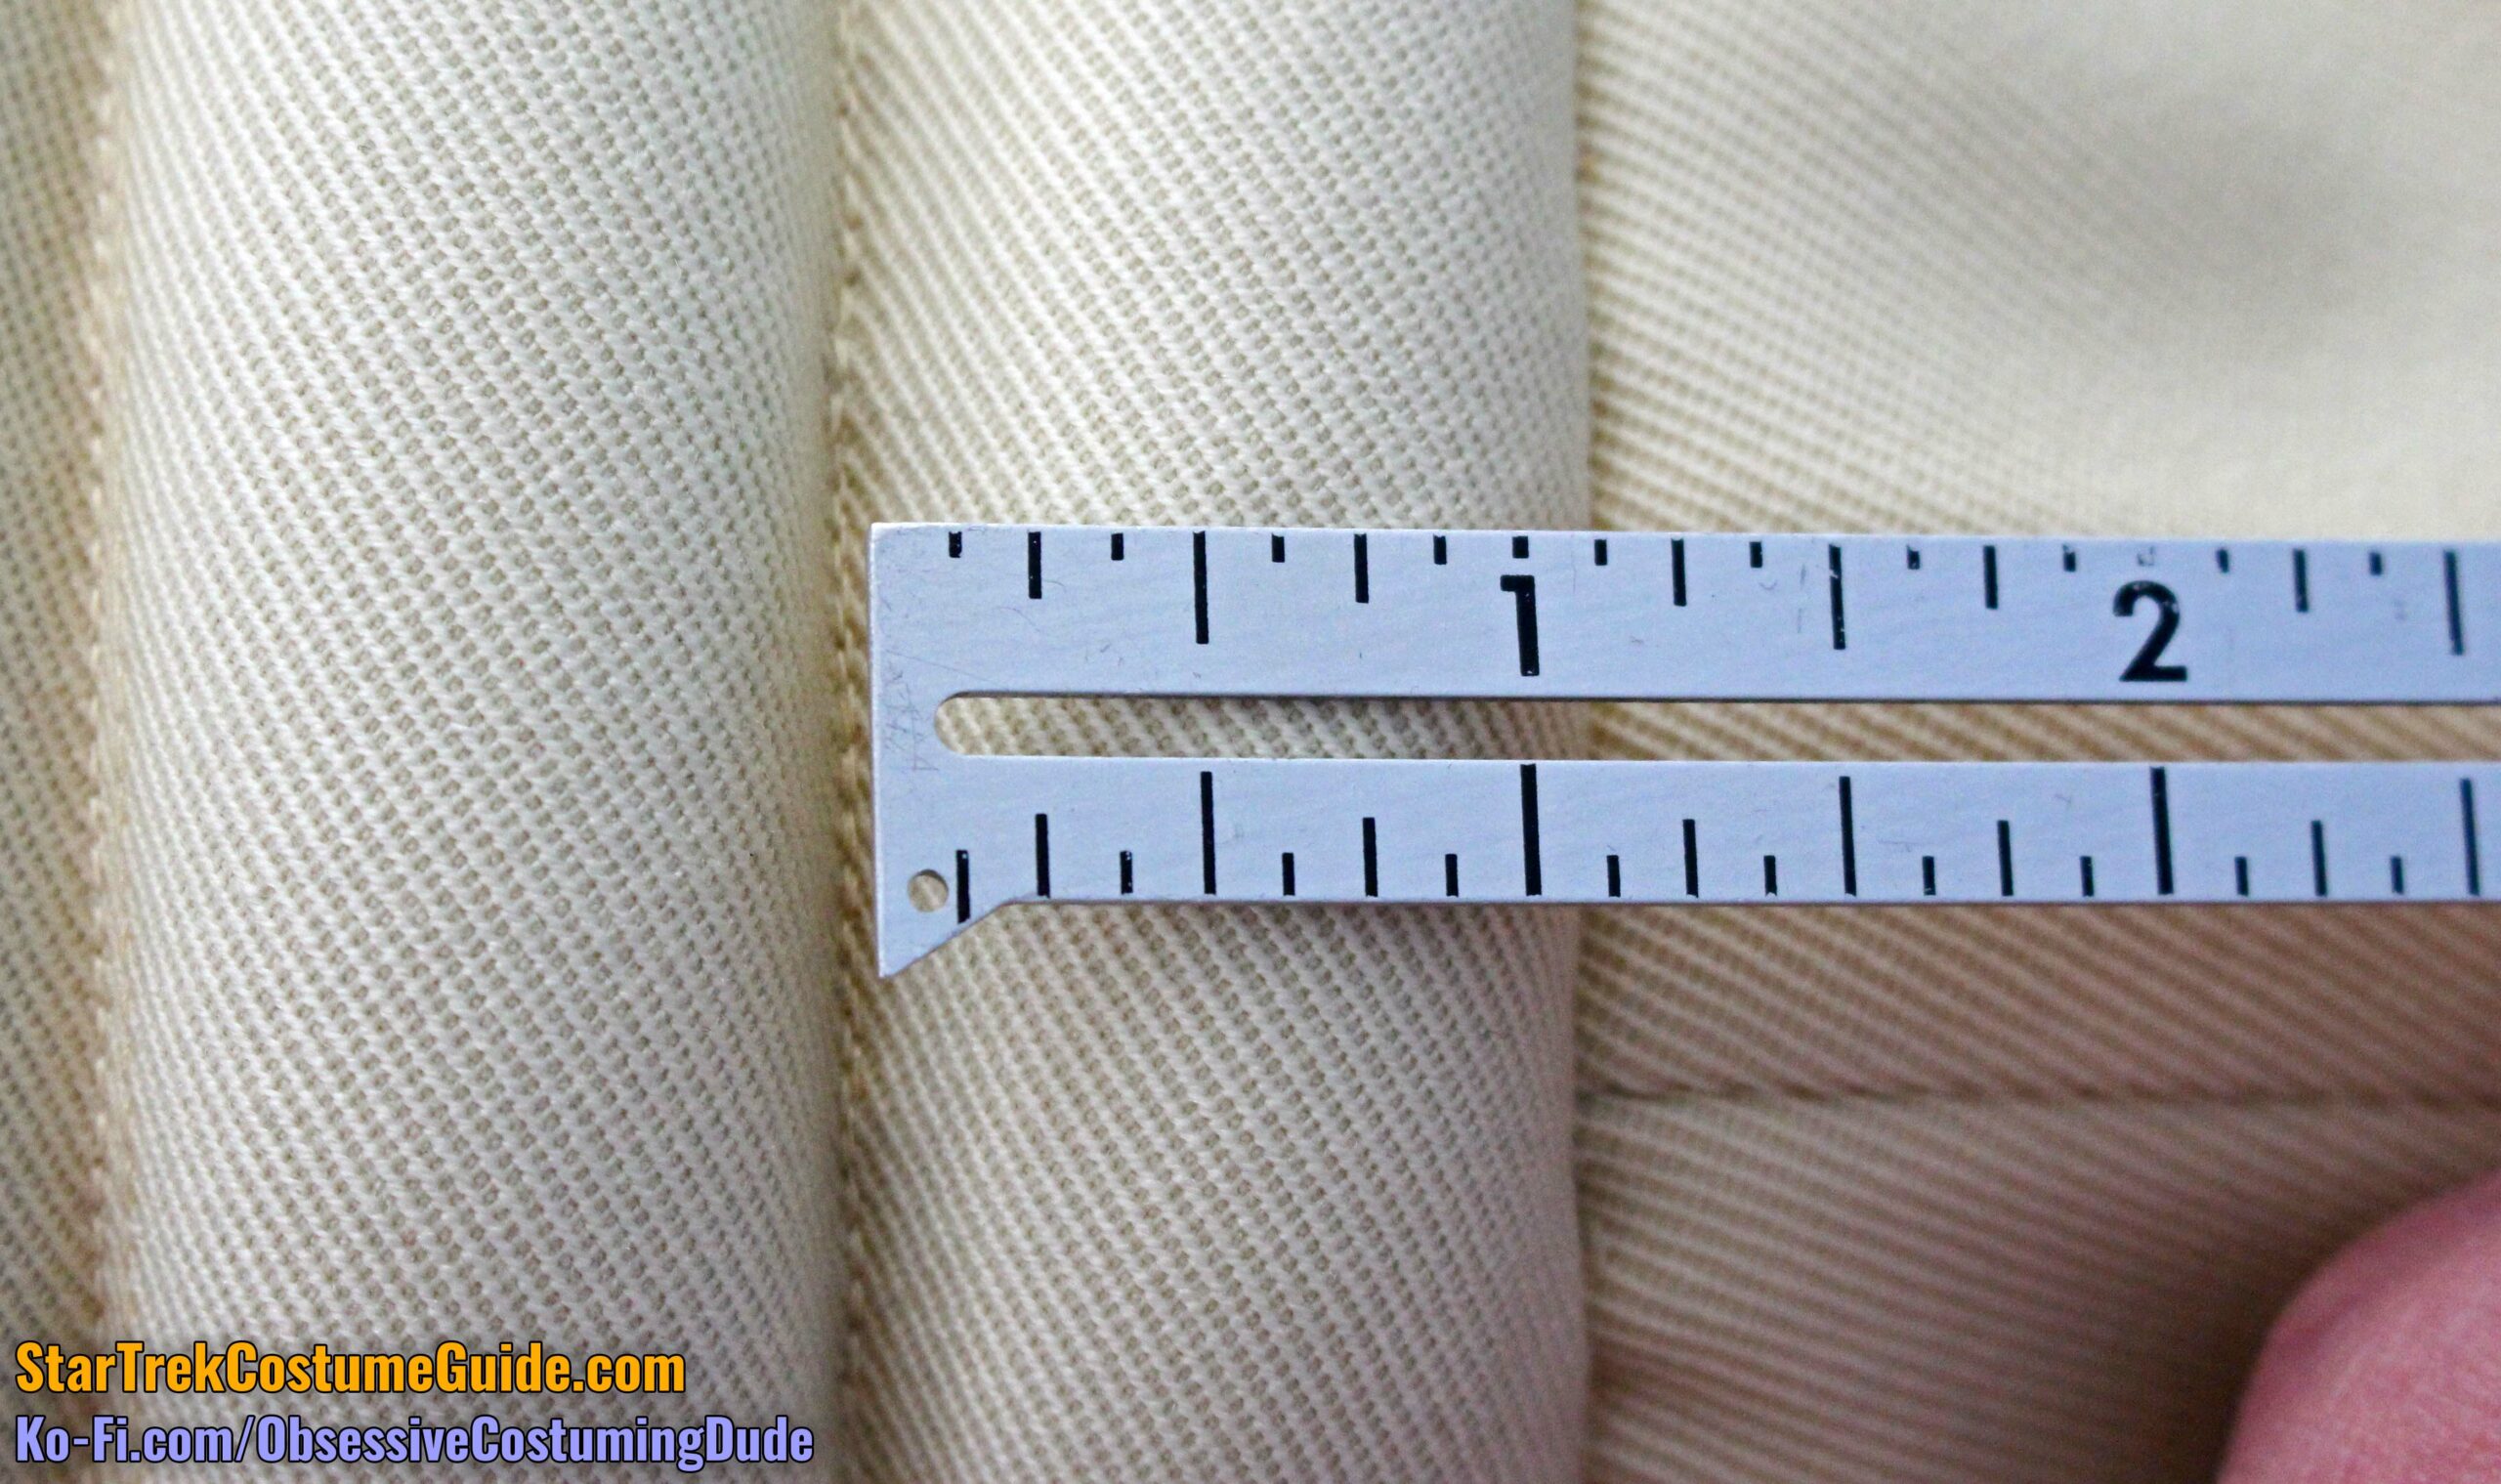
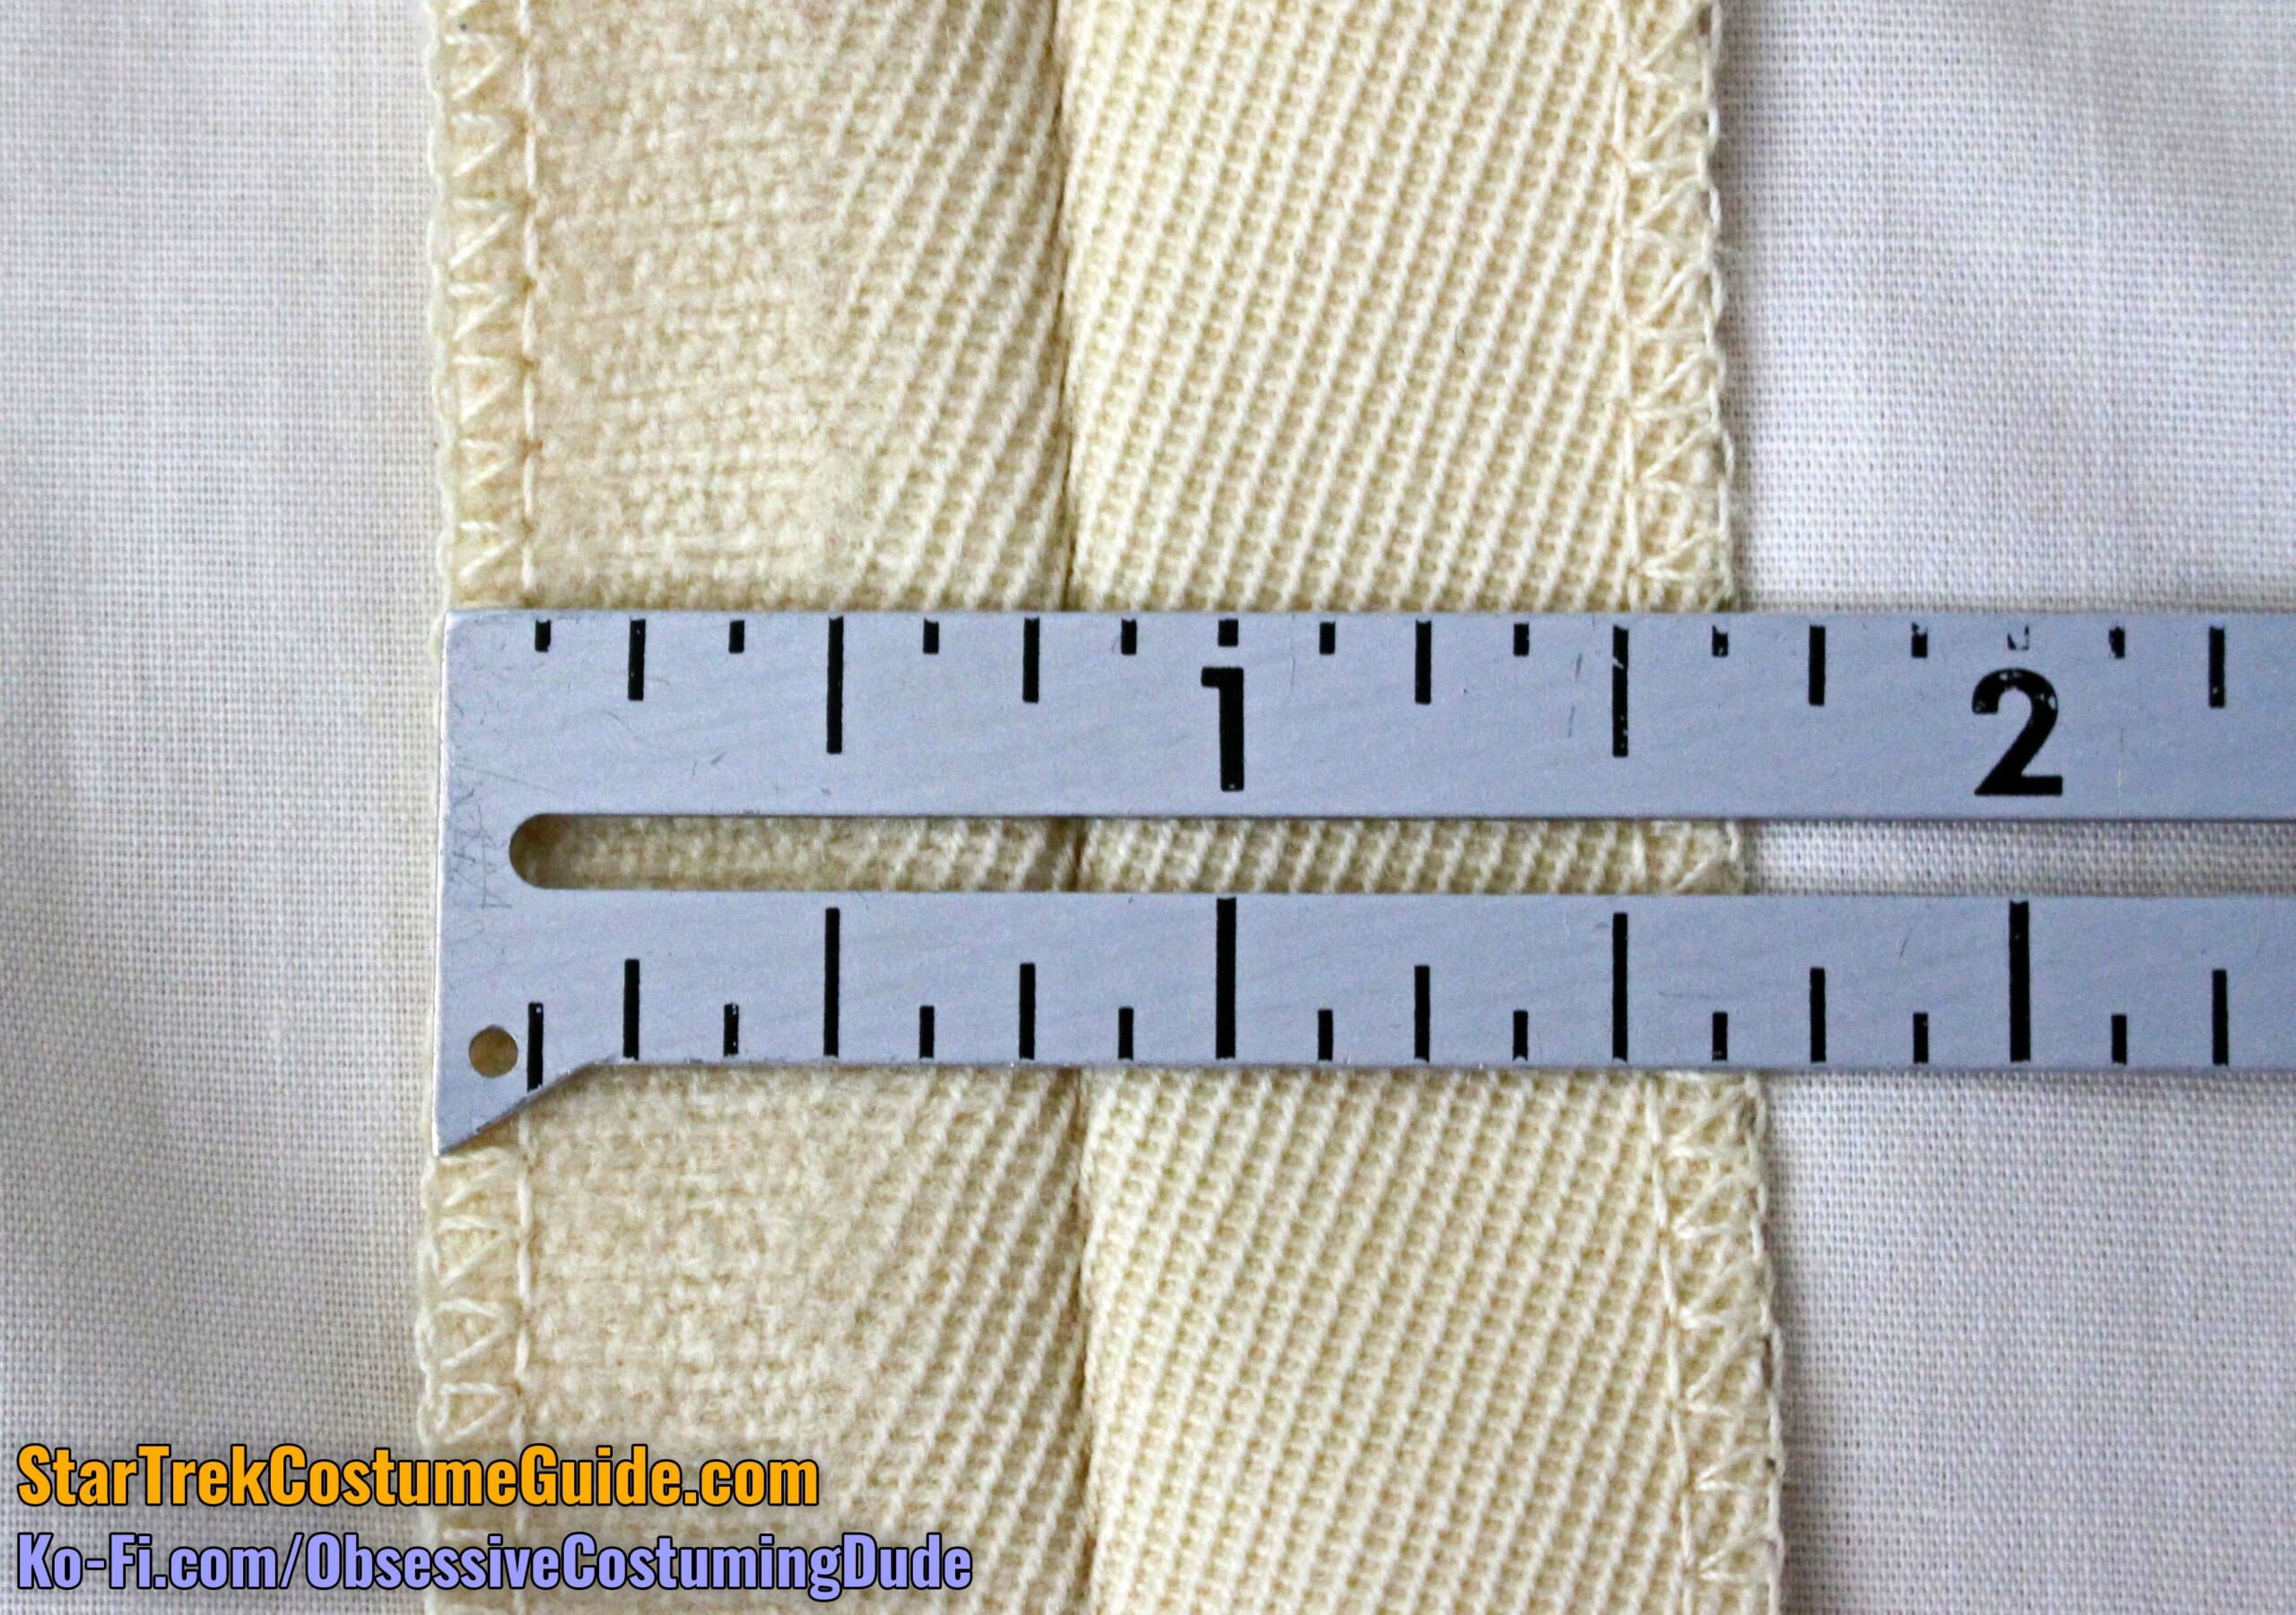
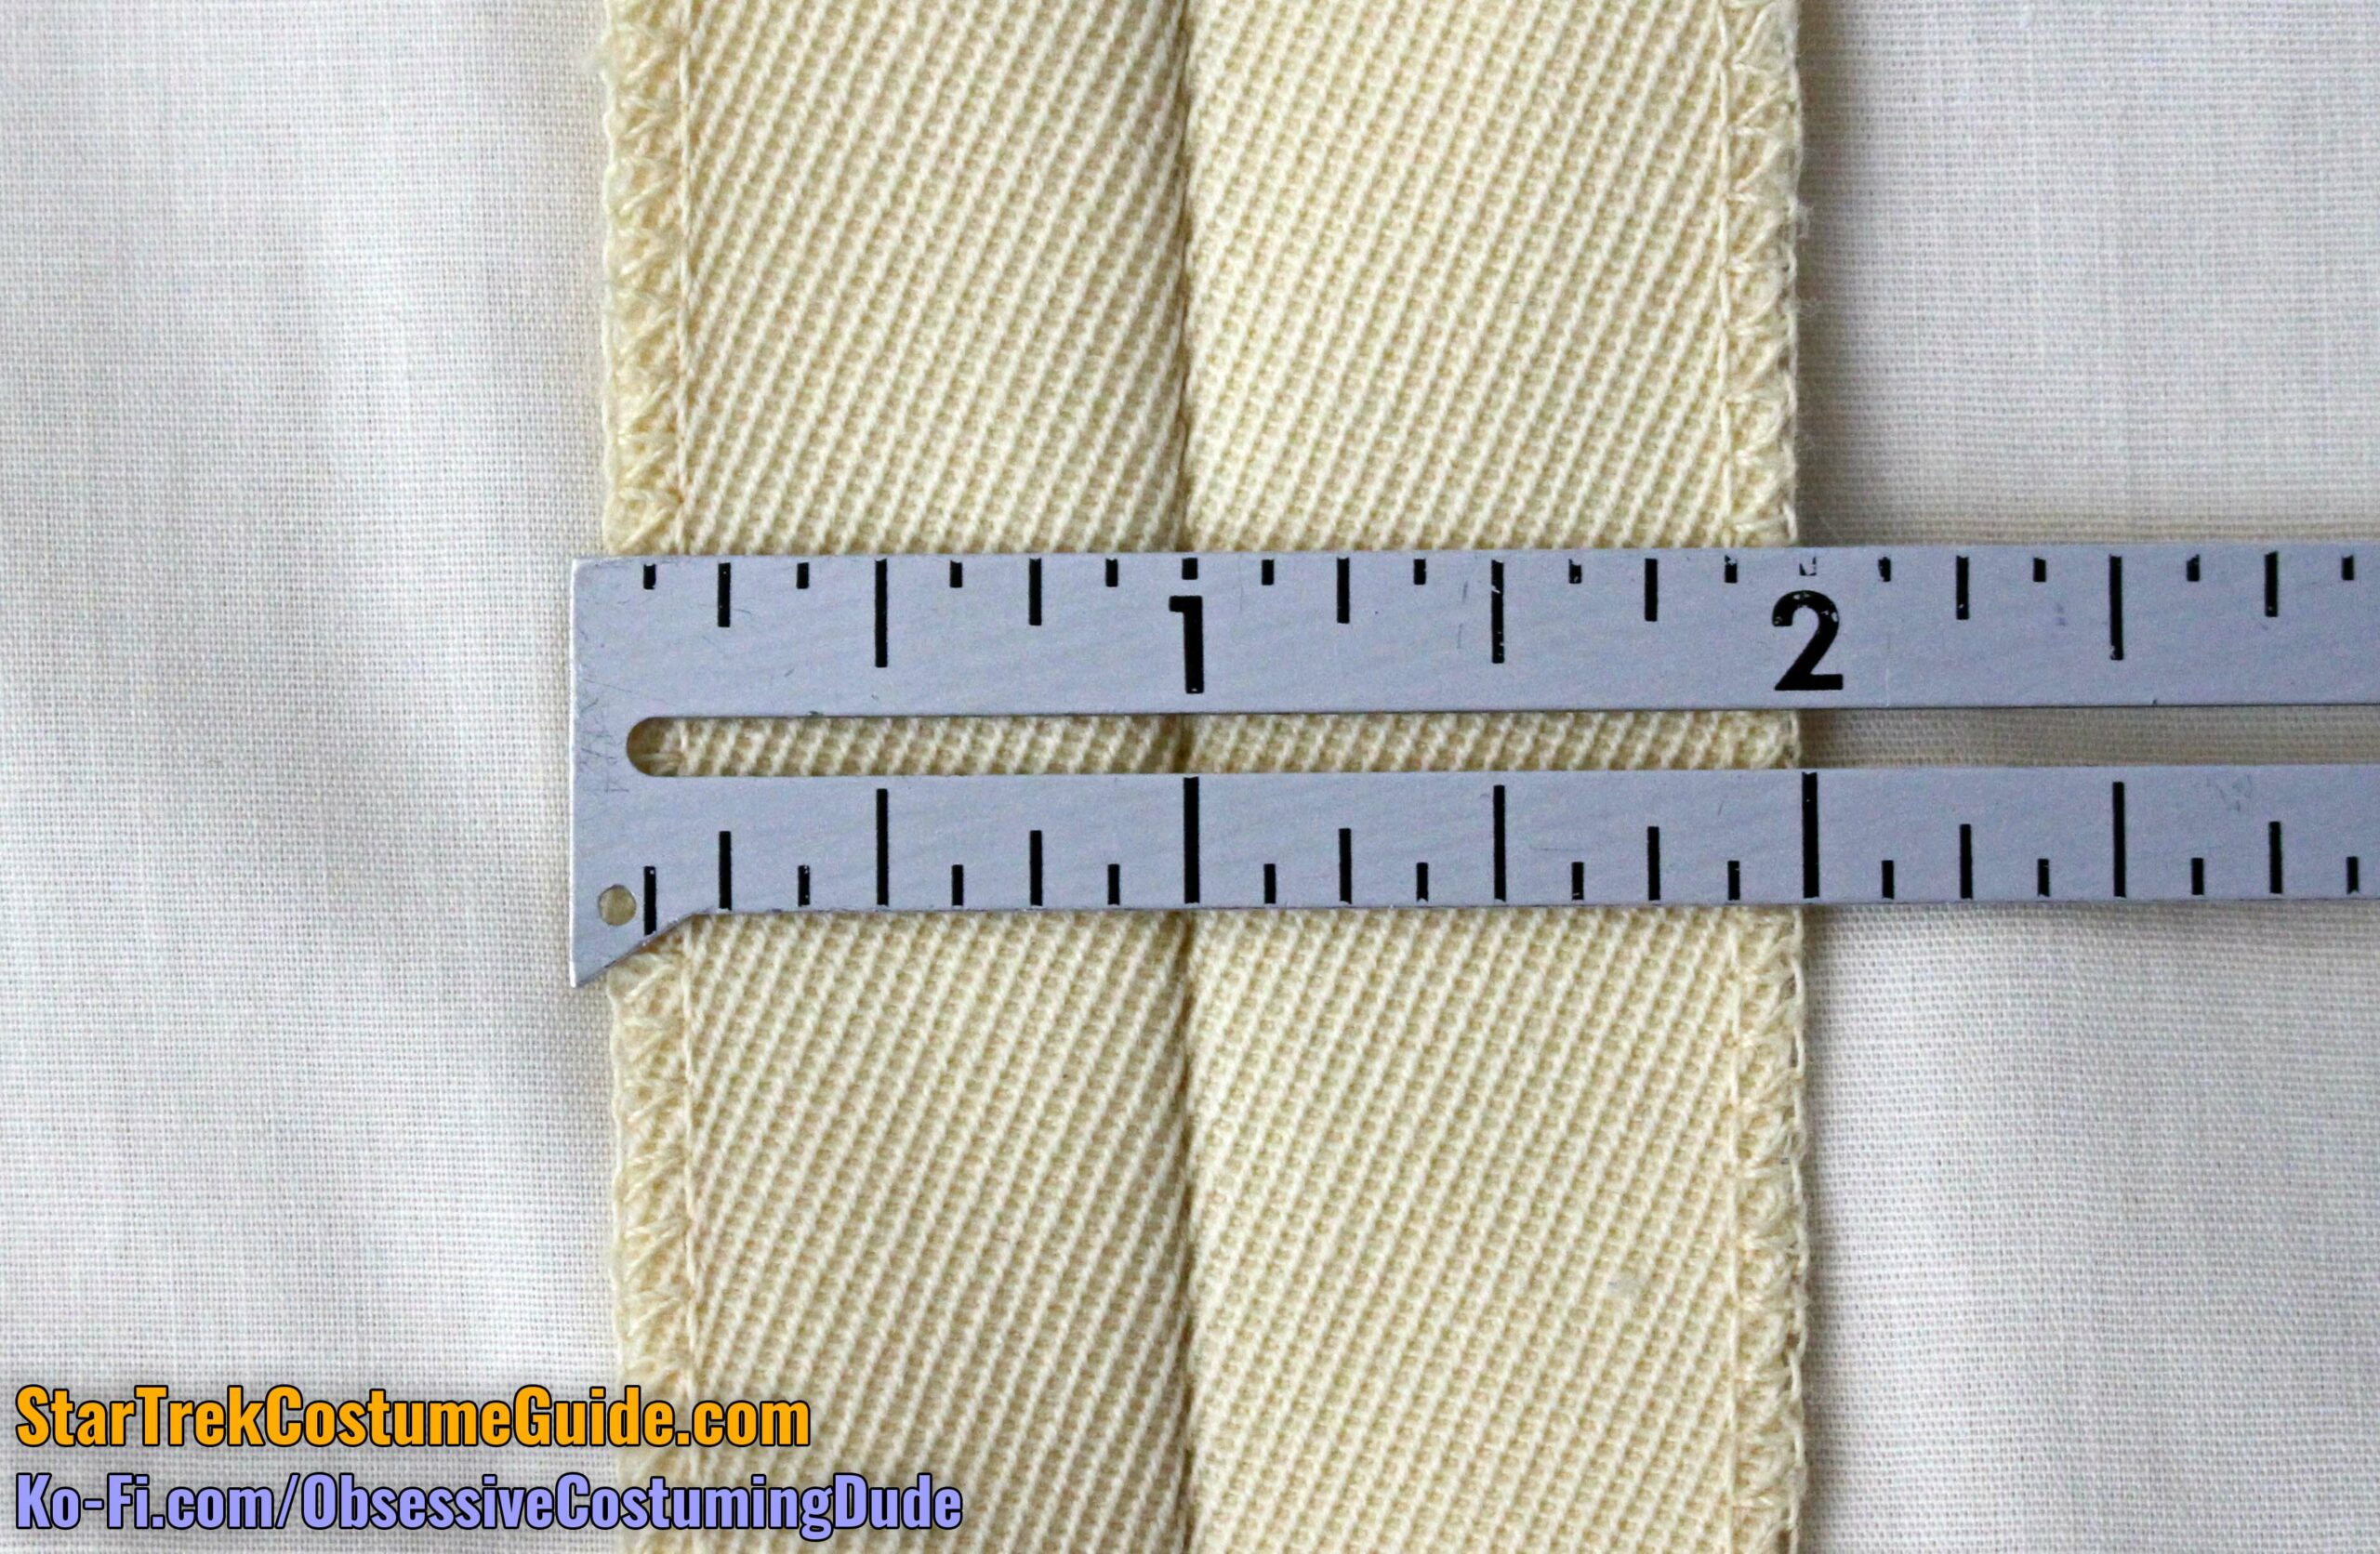
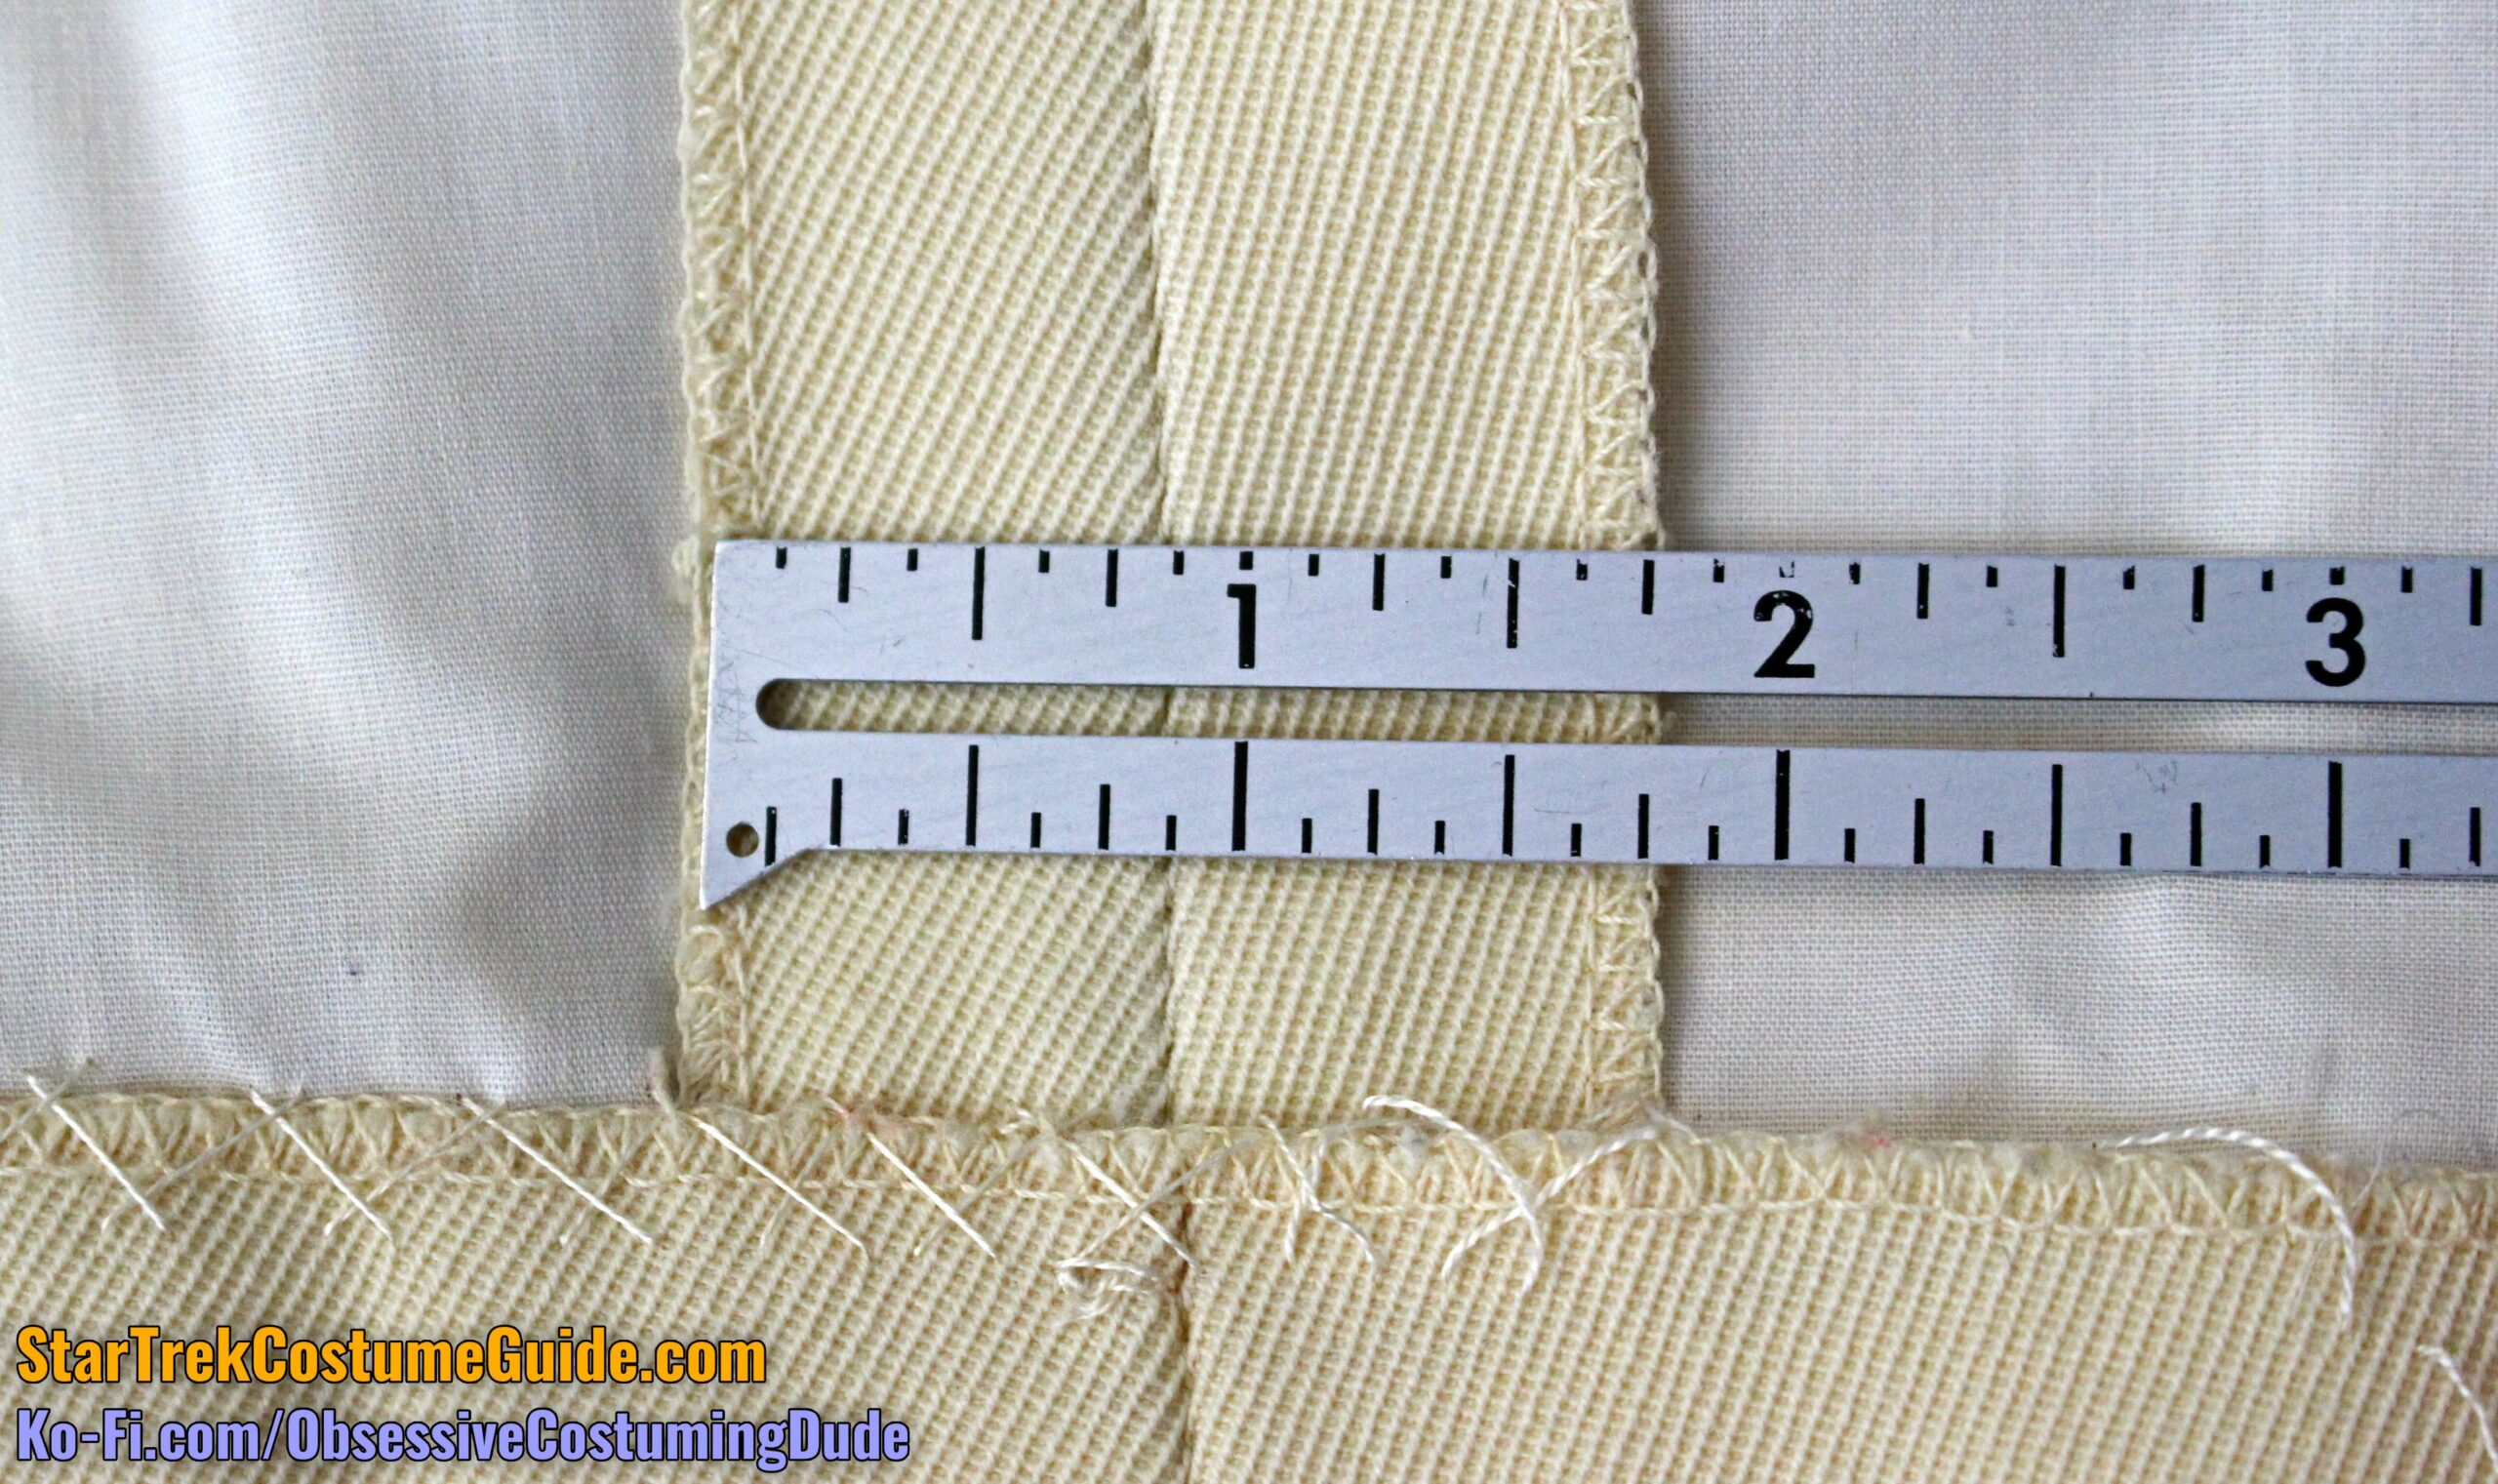
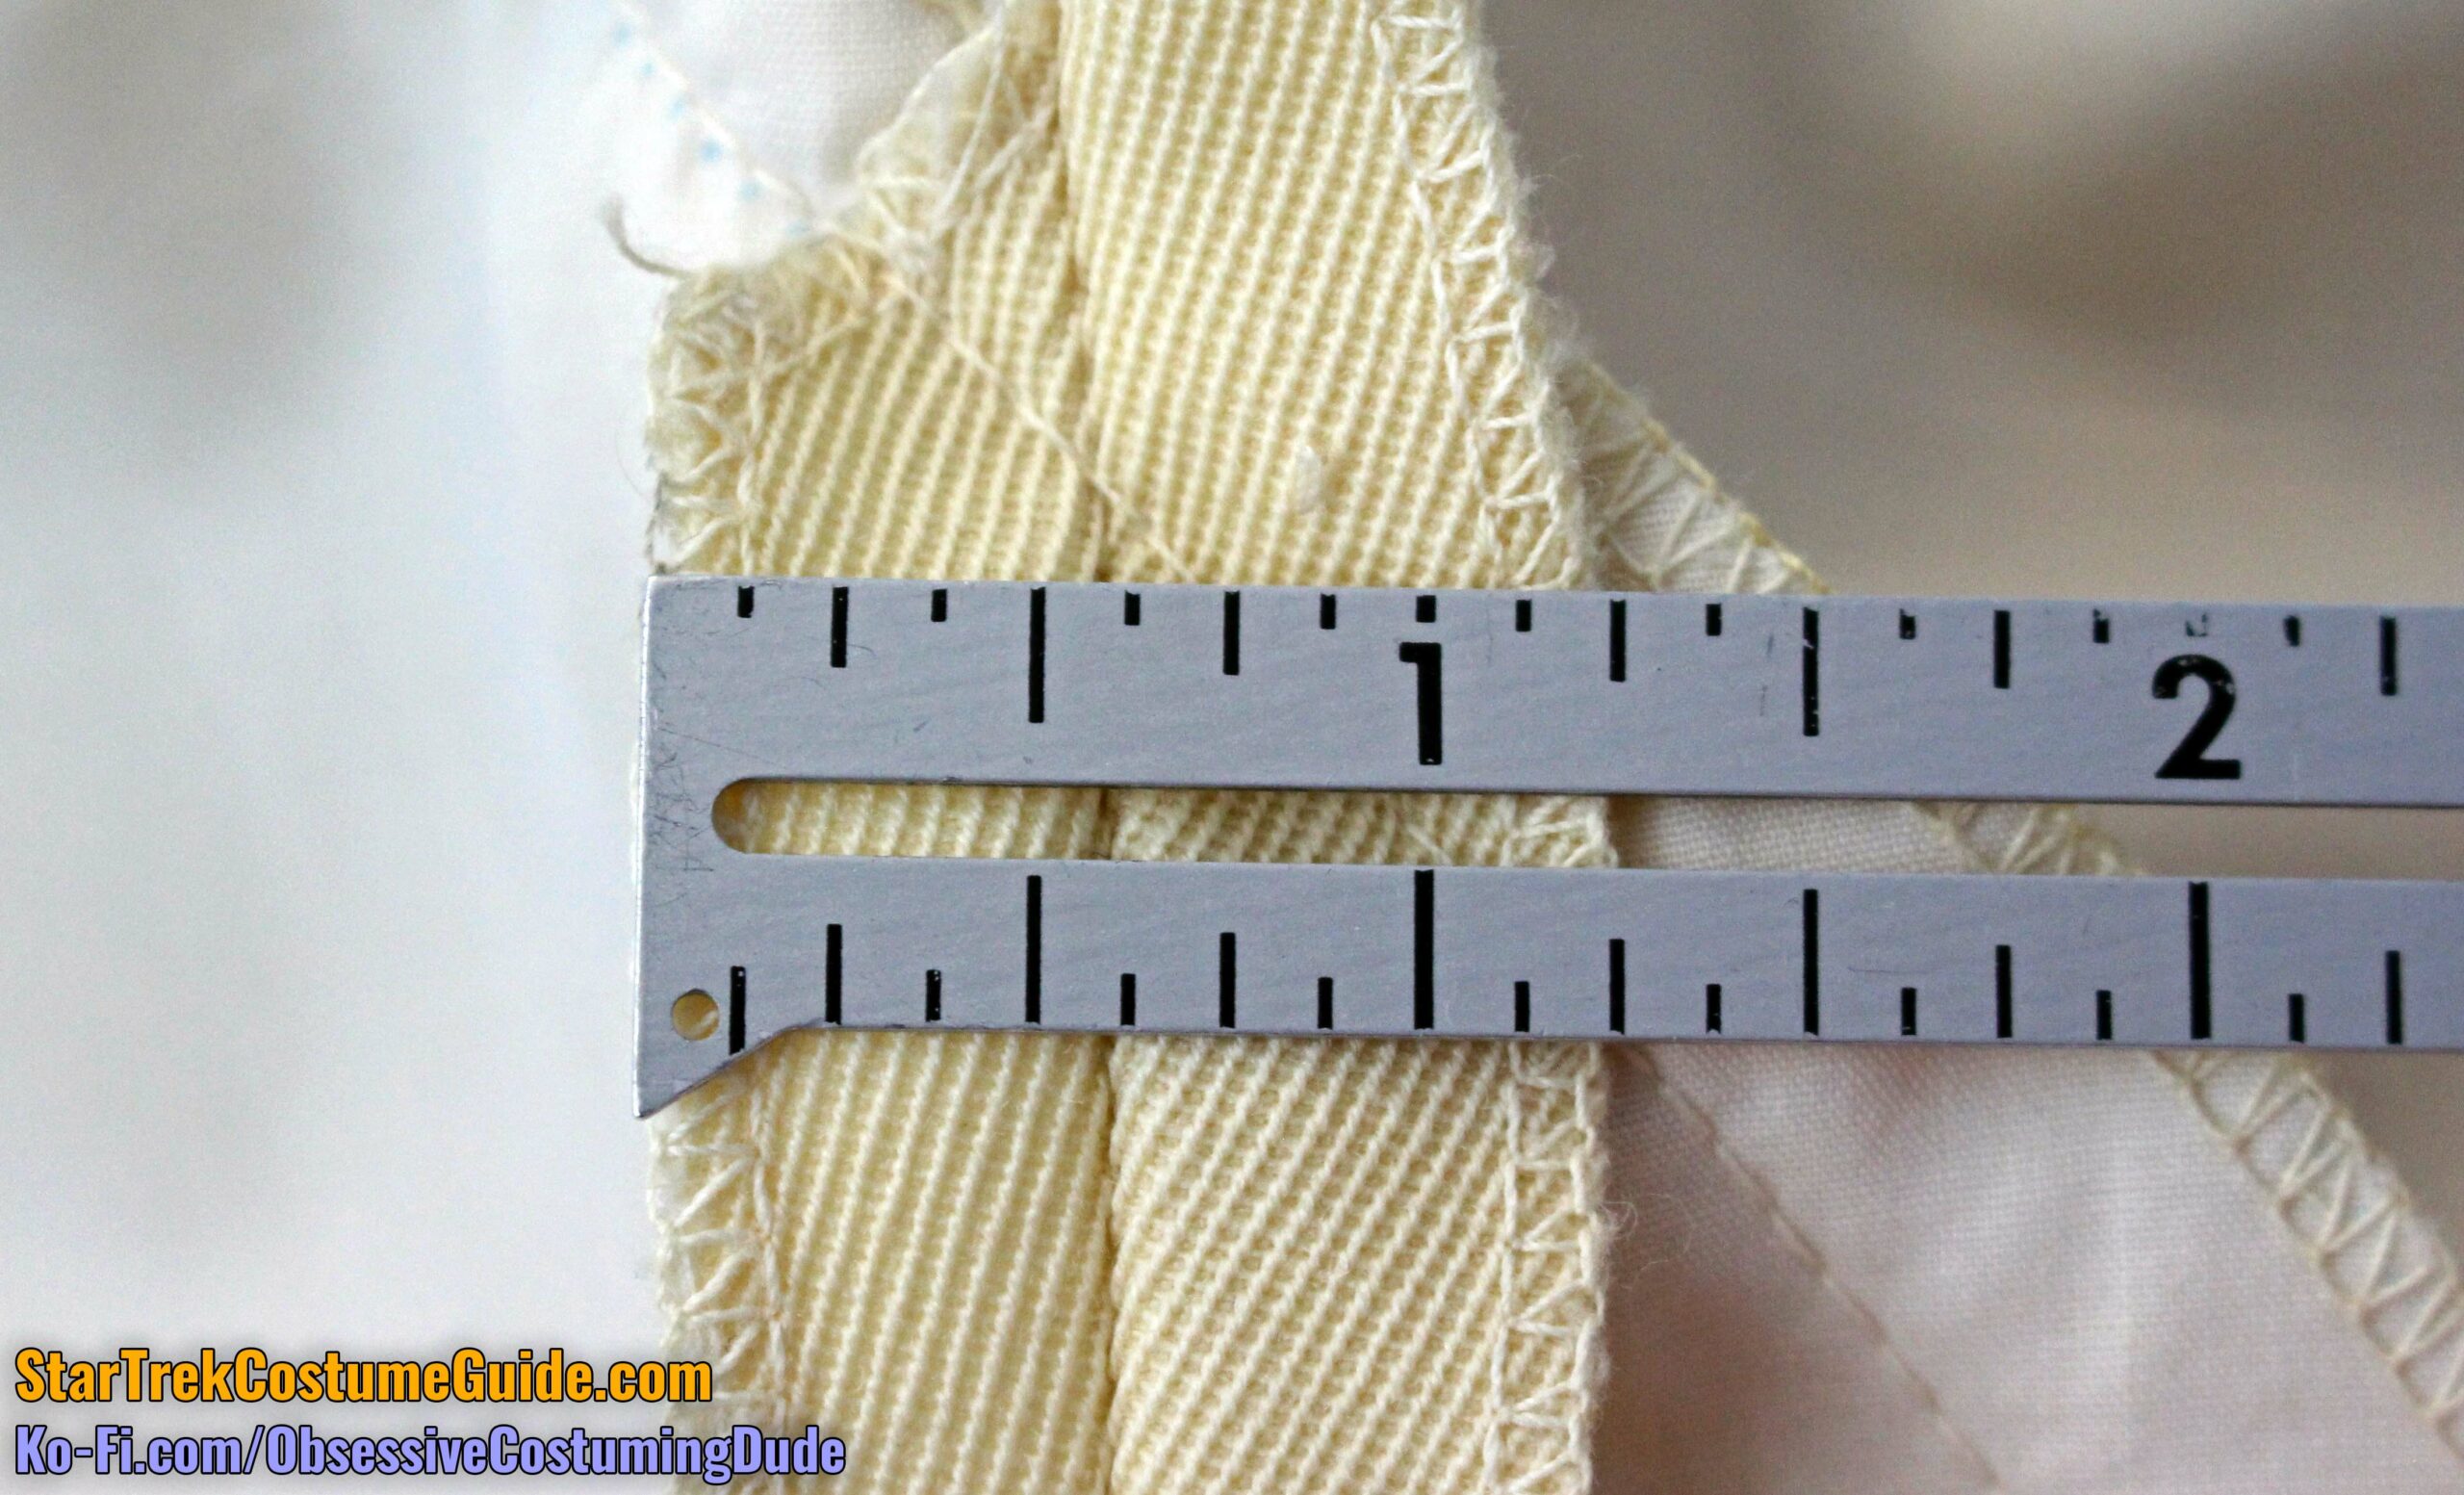
There were three large bands around the elbow area of the sleeves, analogous to those on the jumpsuit waist but slightly smaller.
Although both sleeve channels were cut on the bias, the fabric weave was angled in different directions (which is to be expected if a fabric has a diagonal weave, is folded over itself, and two bias channels cut simultaneously).
The cording (?) for the sleeve “tubes” was ¾” wide.
These channels were sewn into the back sleeve seams, although the ends of the cording (?) stopped just shy of the aforementioned seams.
On the left sleeve (right photo below), you can see the vertical topstitching marking the ends of the cording channels.
As with the waist bands on the jumpsuit, the lower edge of the sleeve channels was hand-sewn to the sleeves.
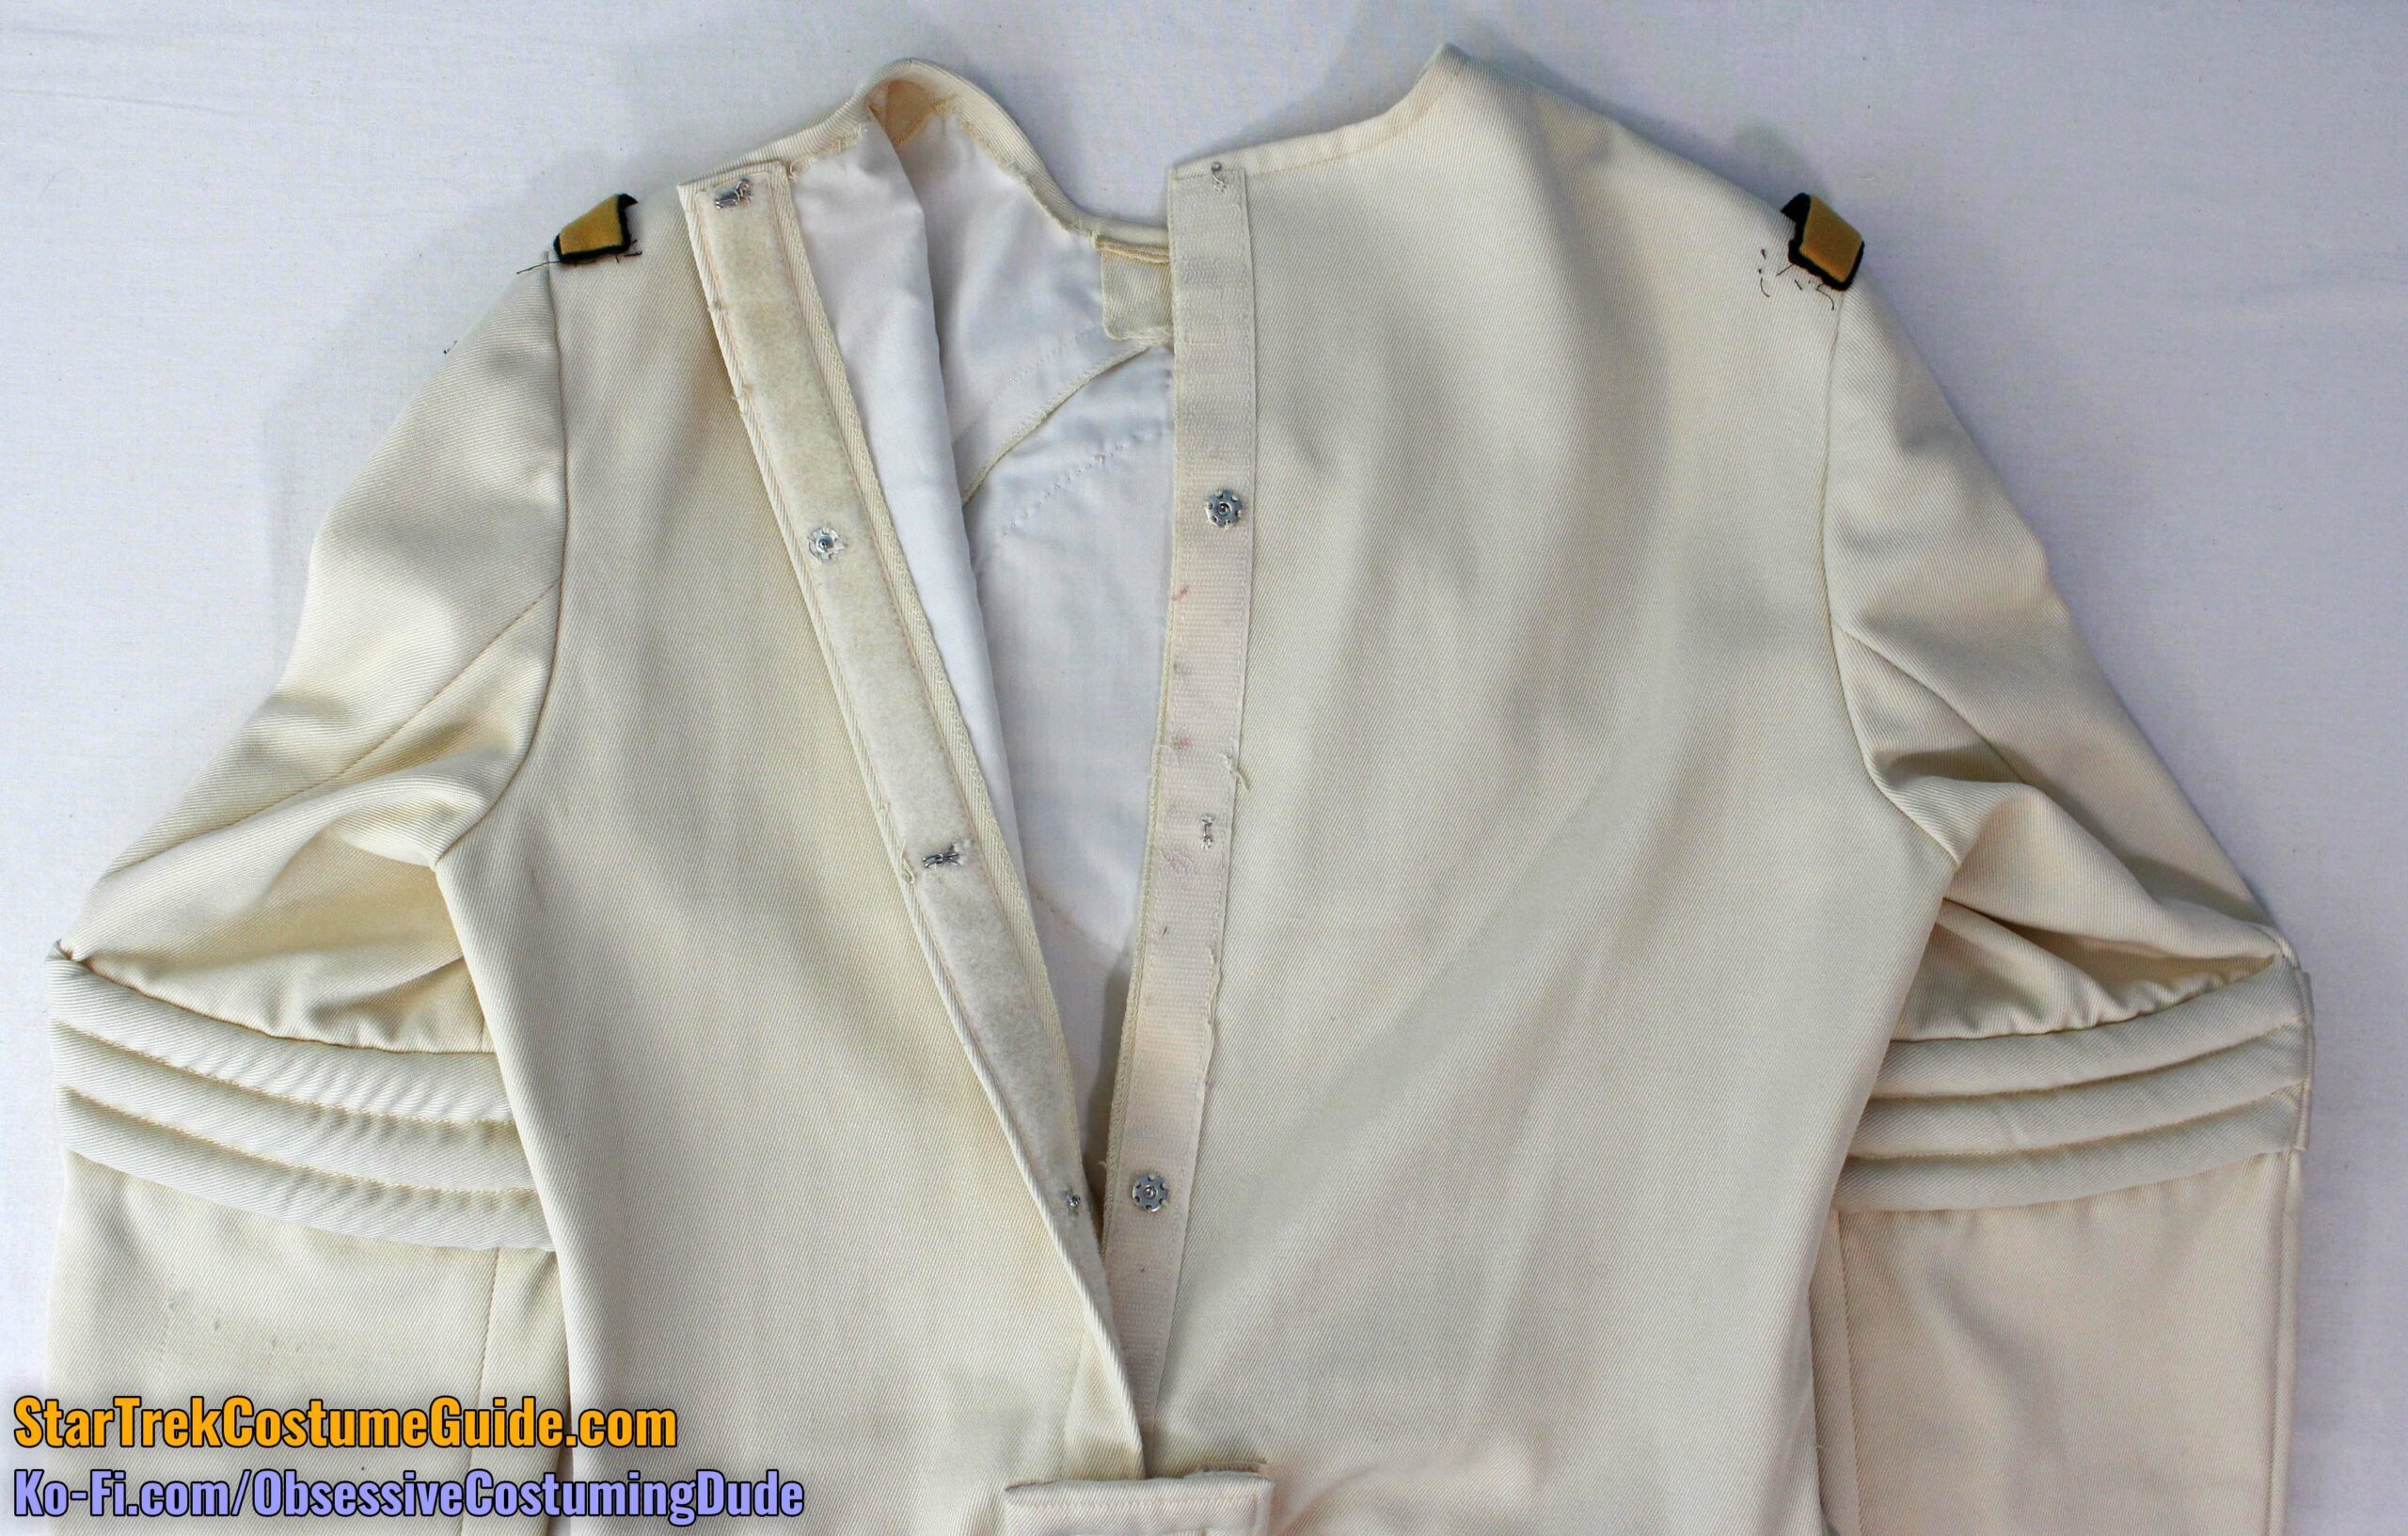
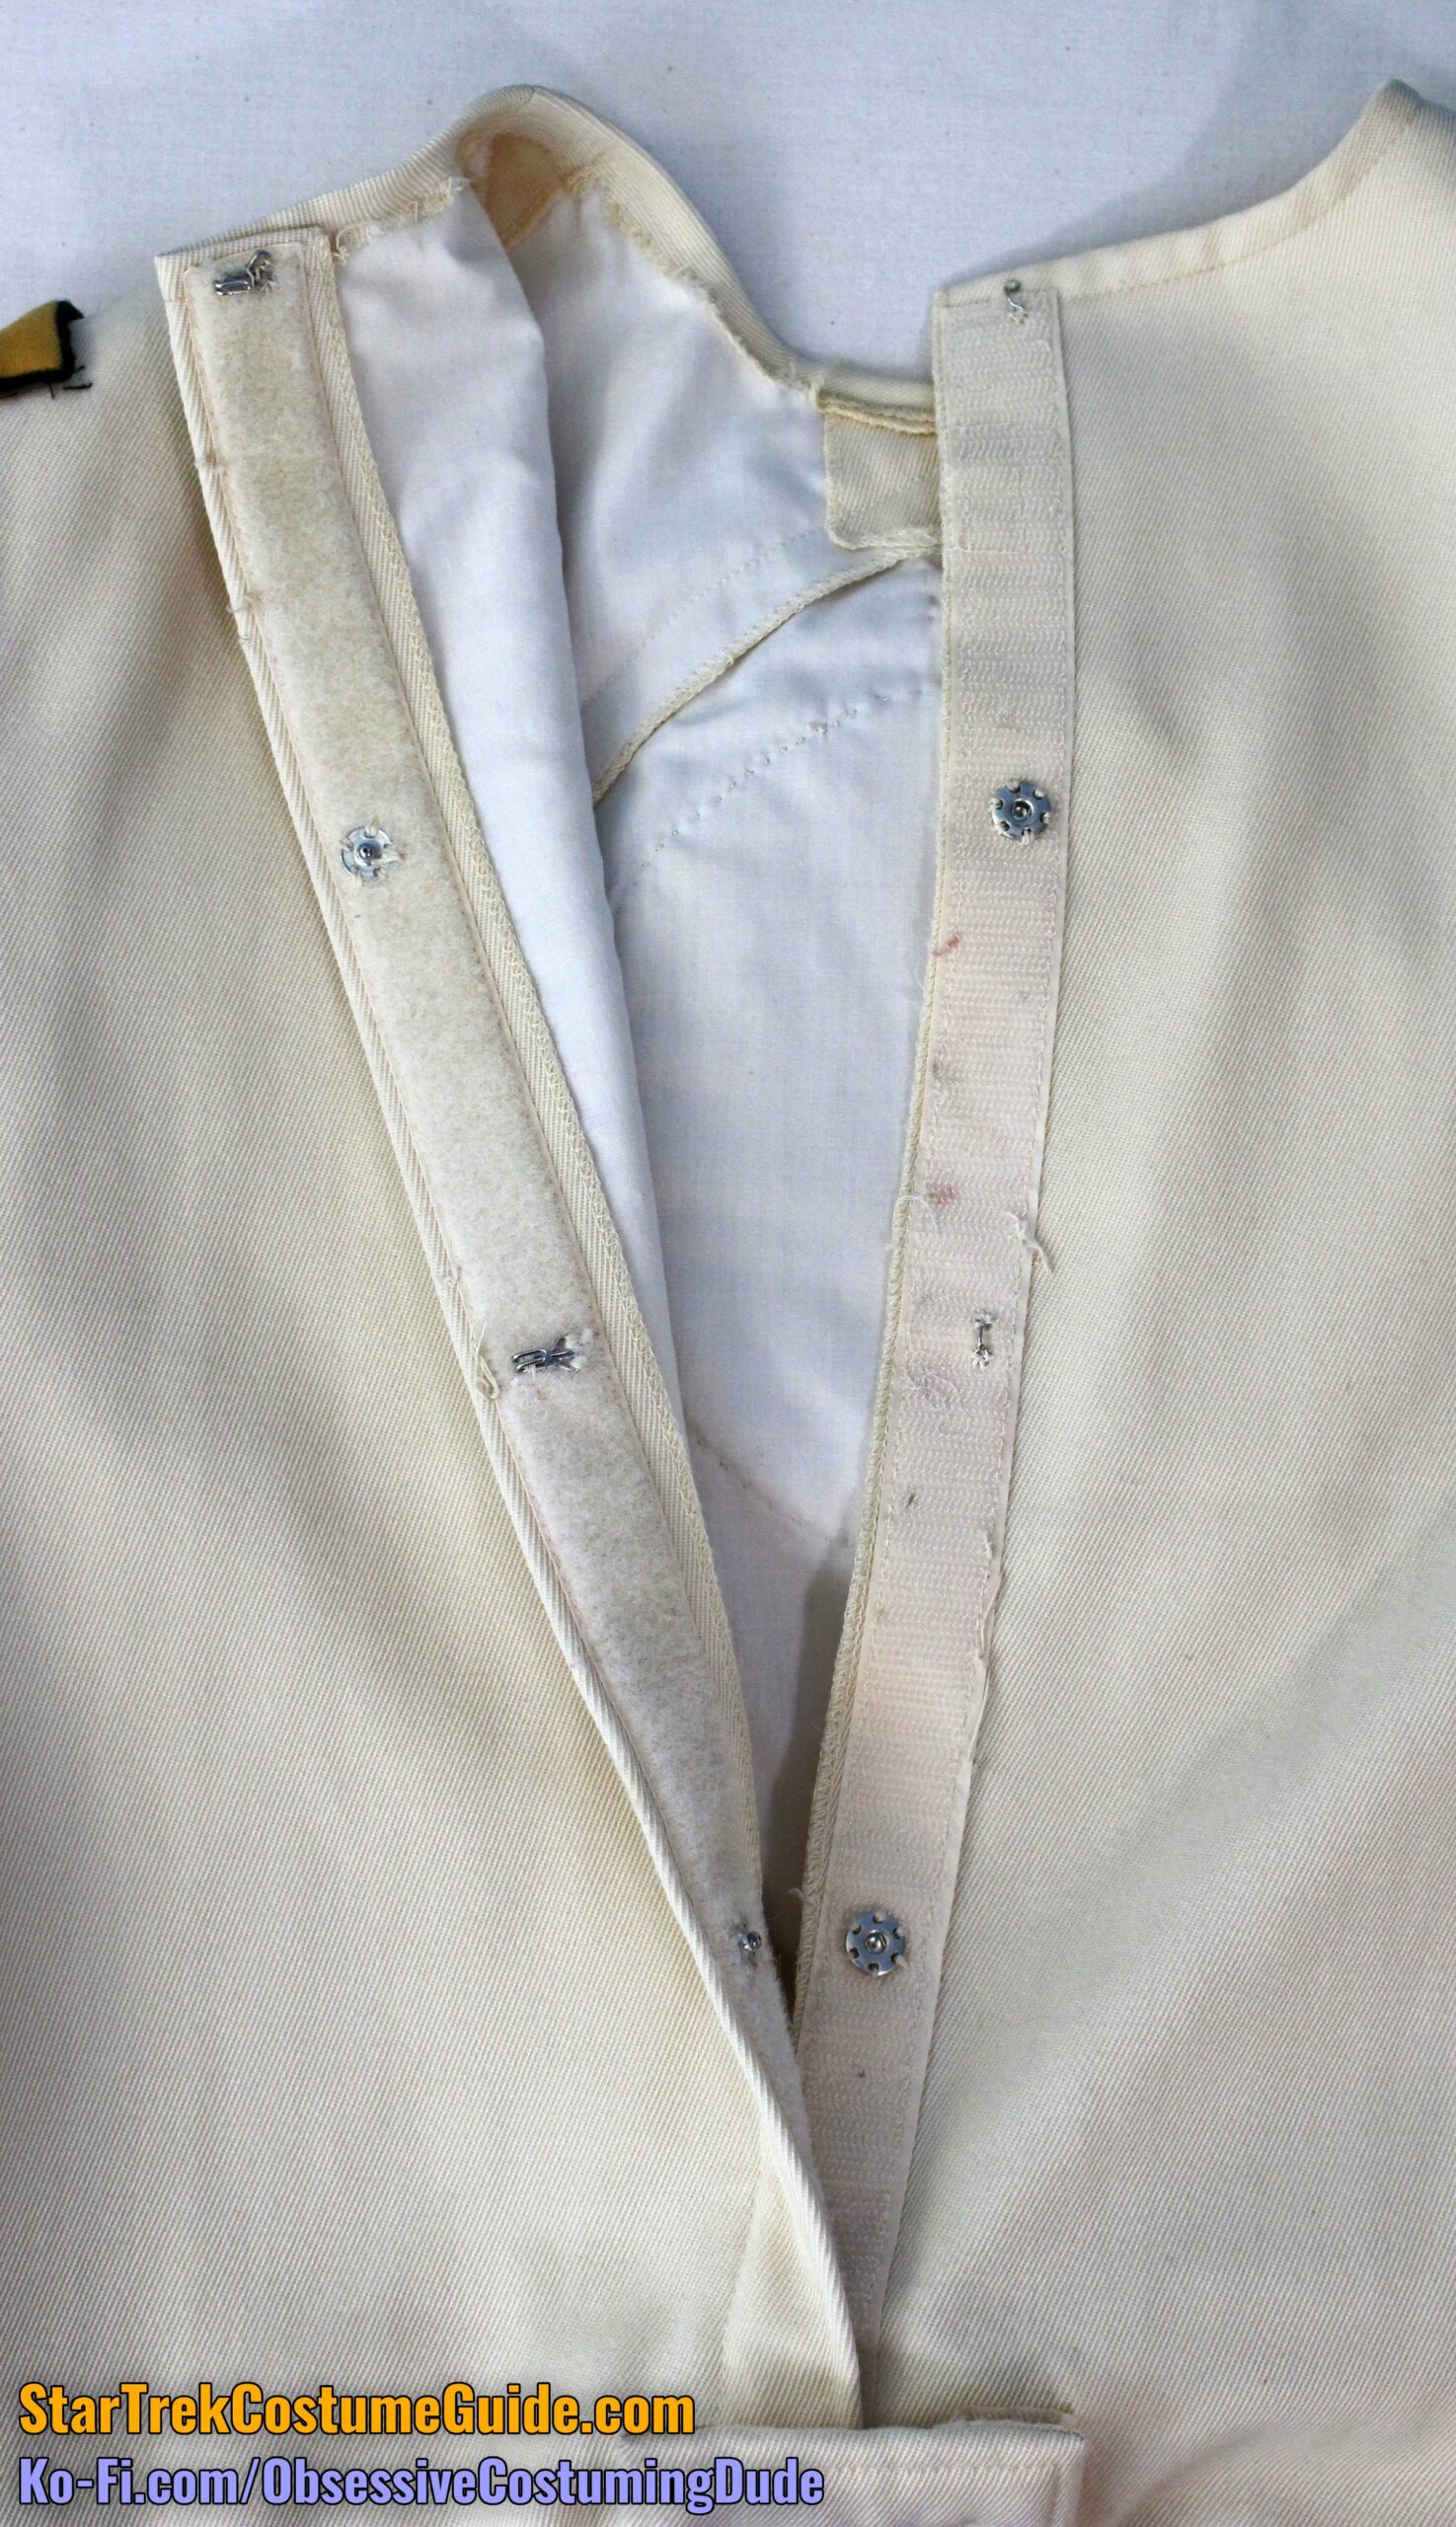
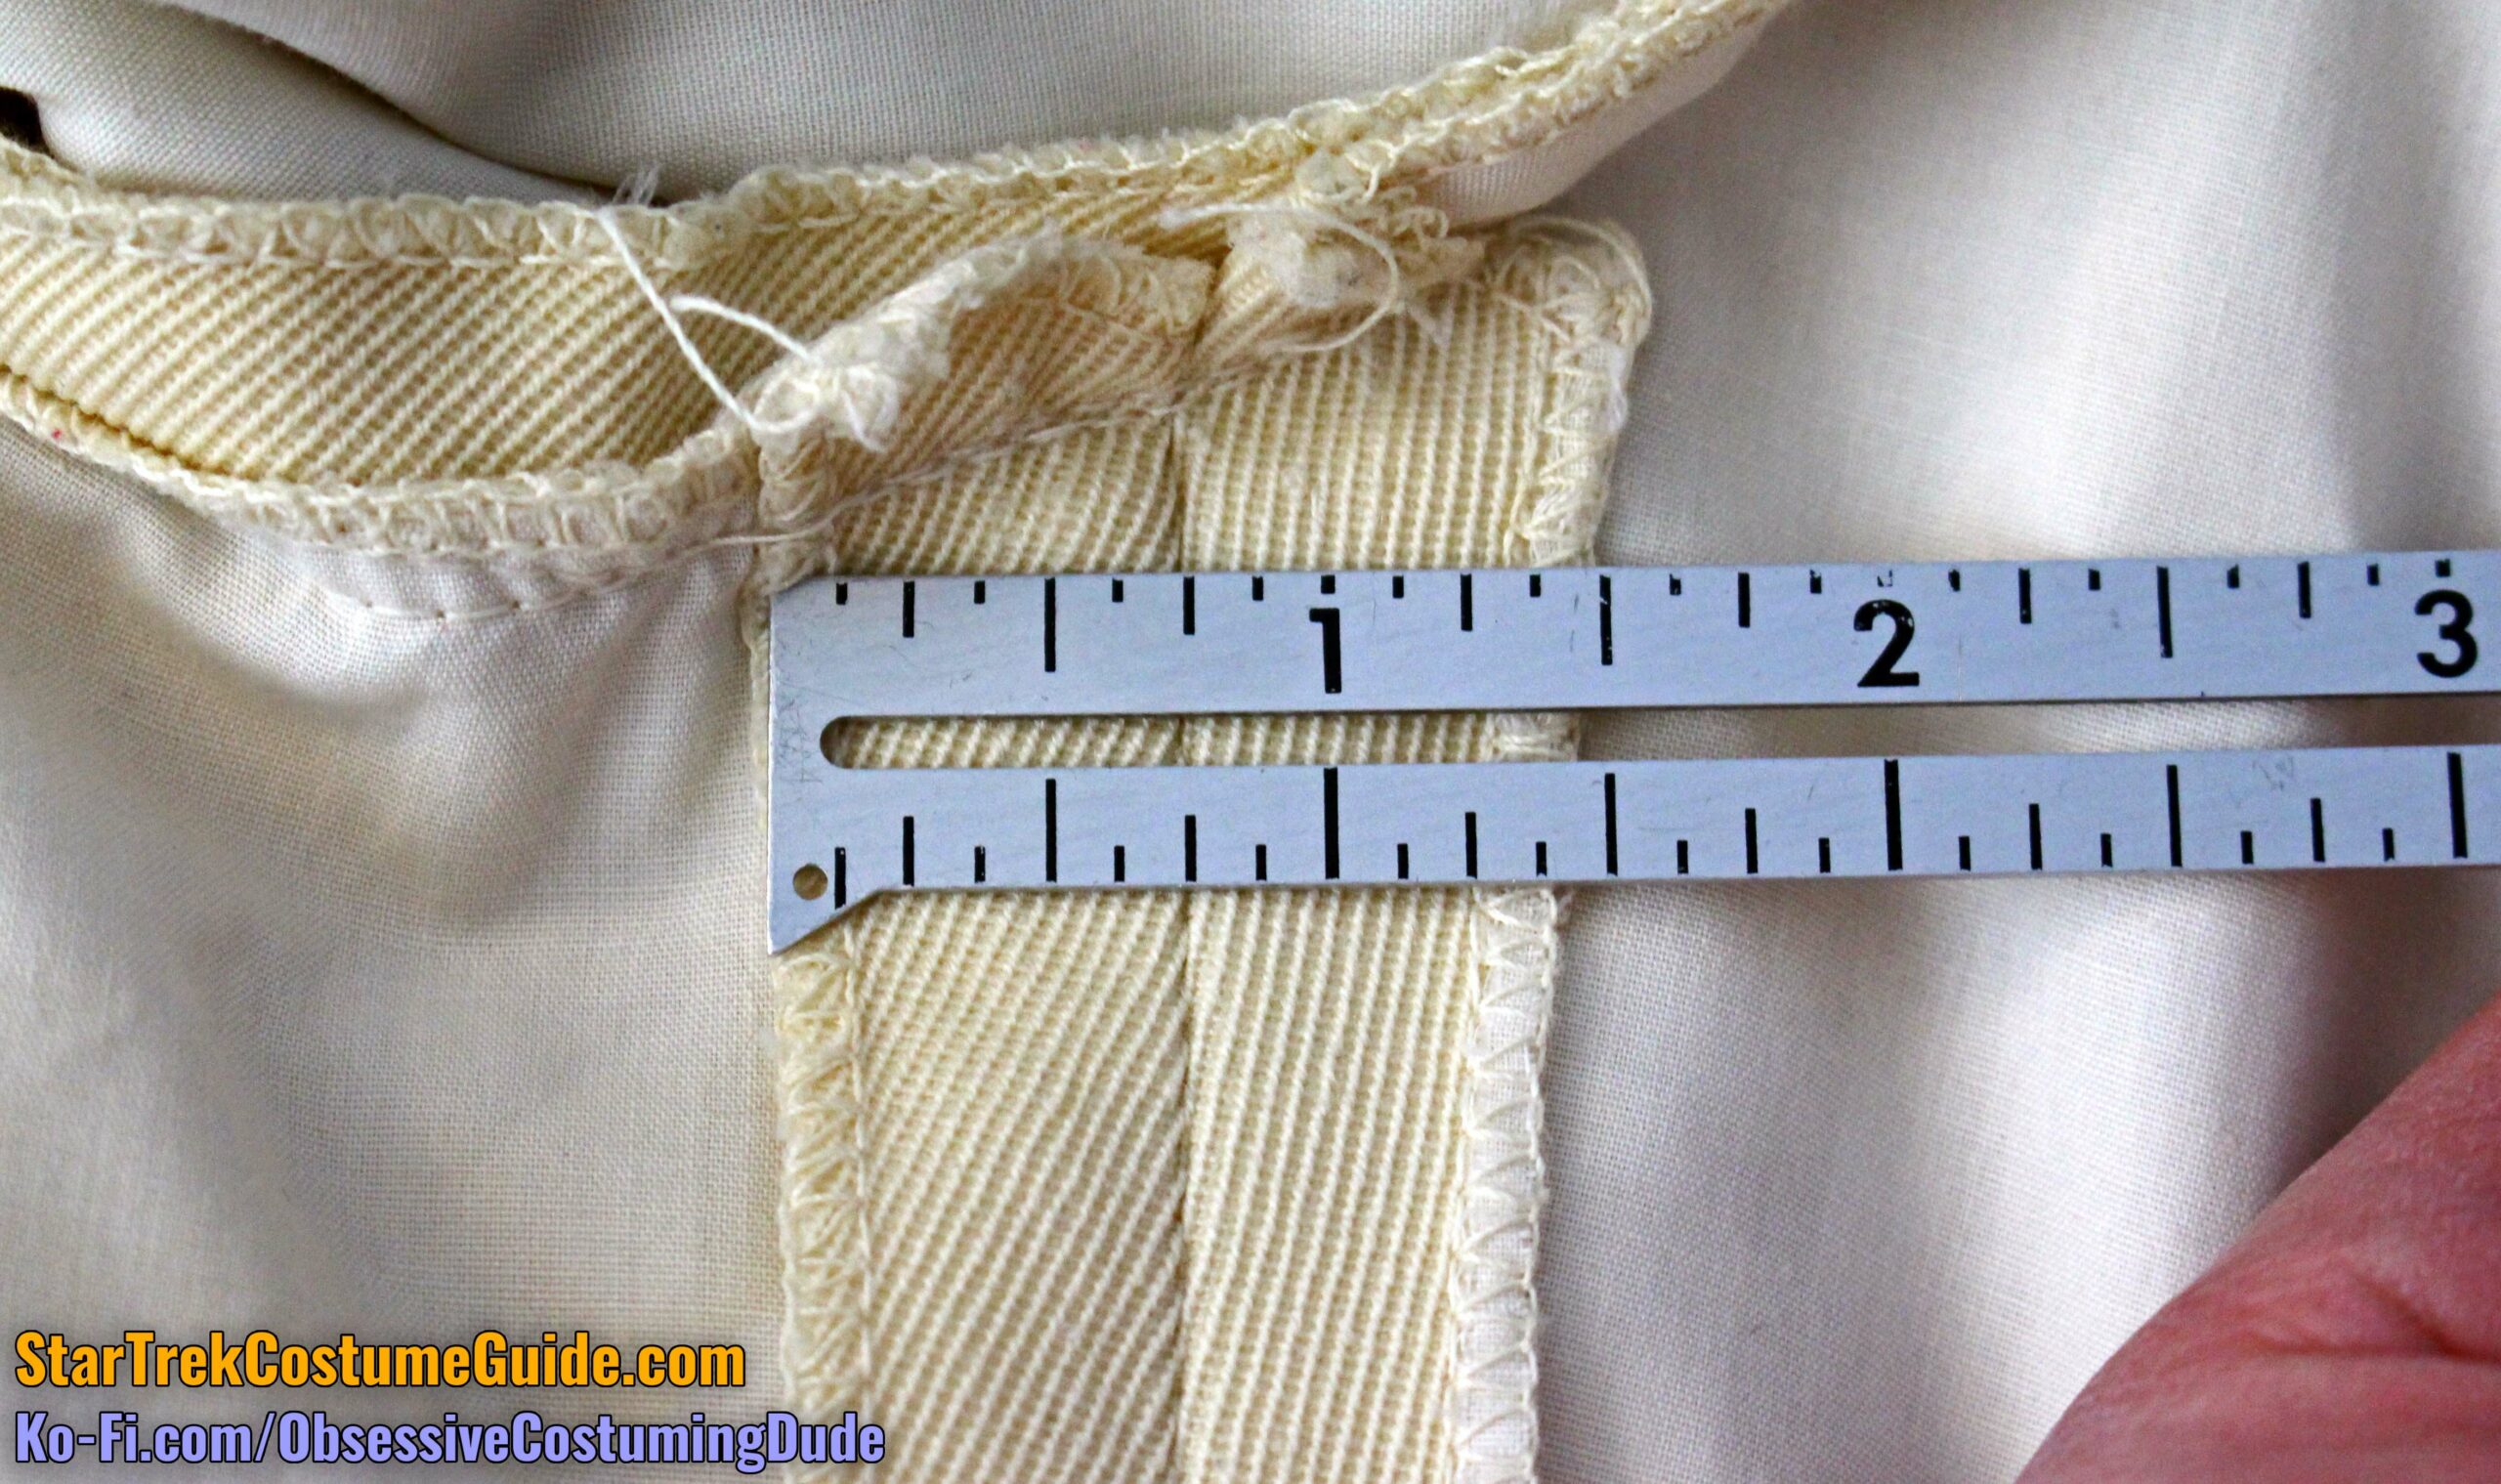
JUMPSUIT CLOSURE SYSTEM
The jumpsuit closed up the center back, which overlapped a bit above the lower “rectangle” accent.
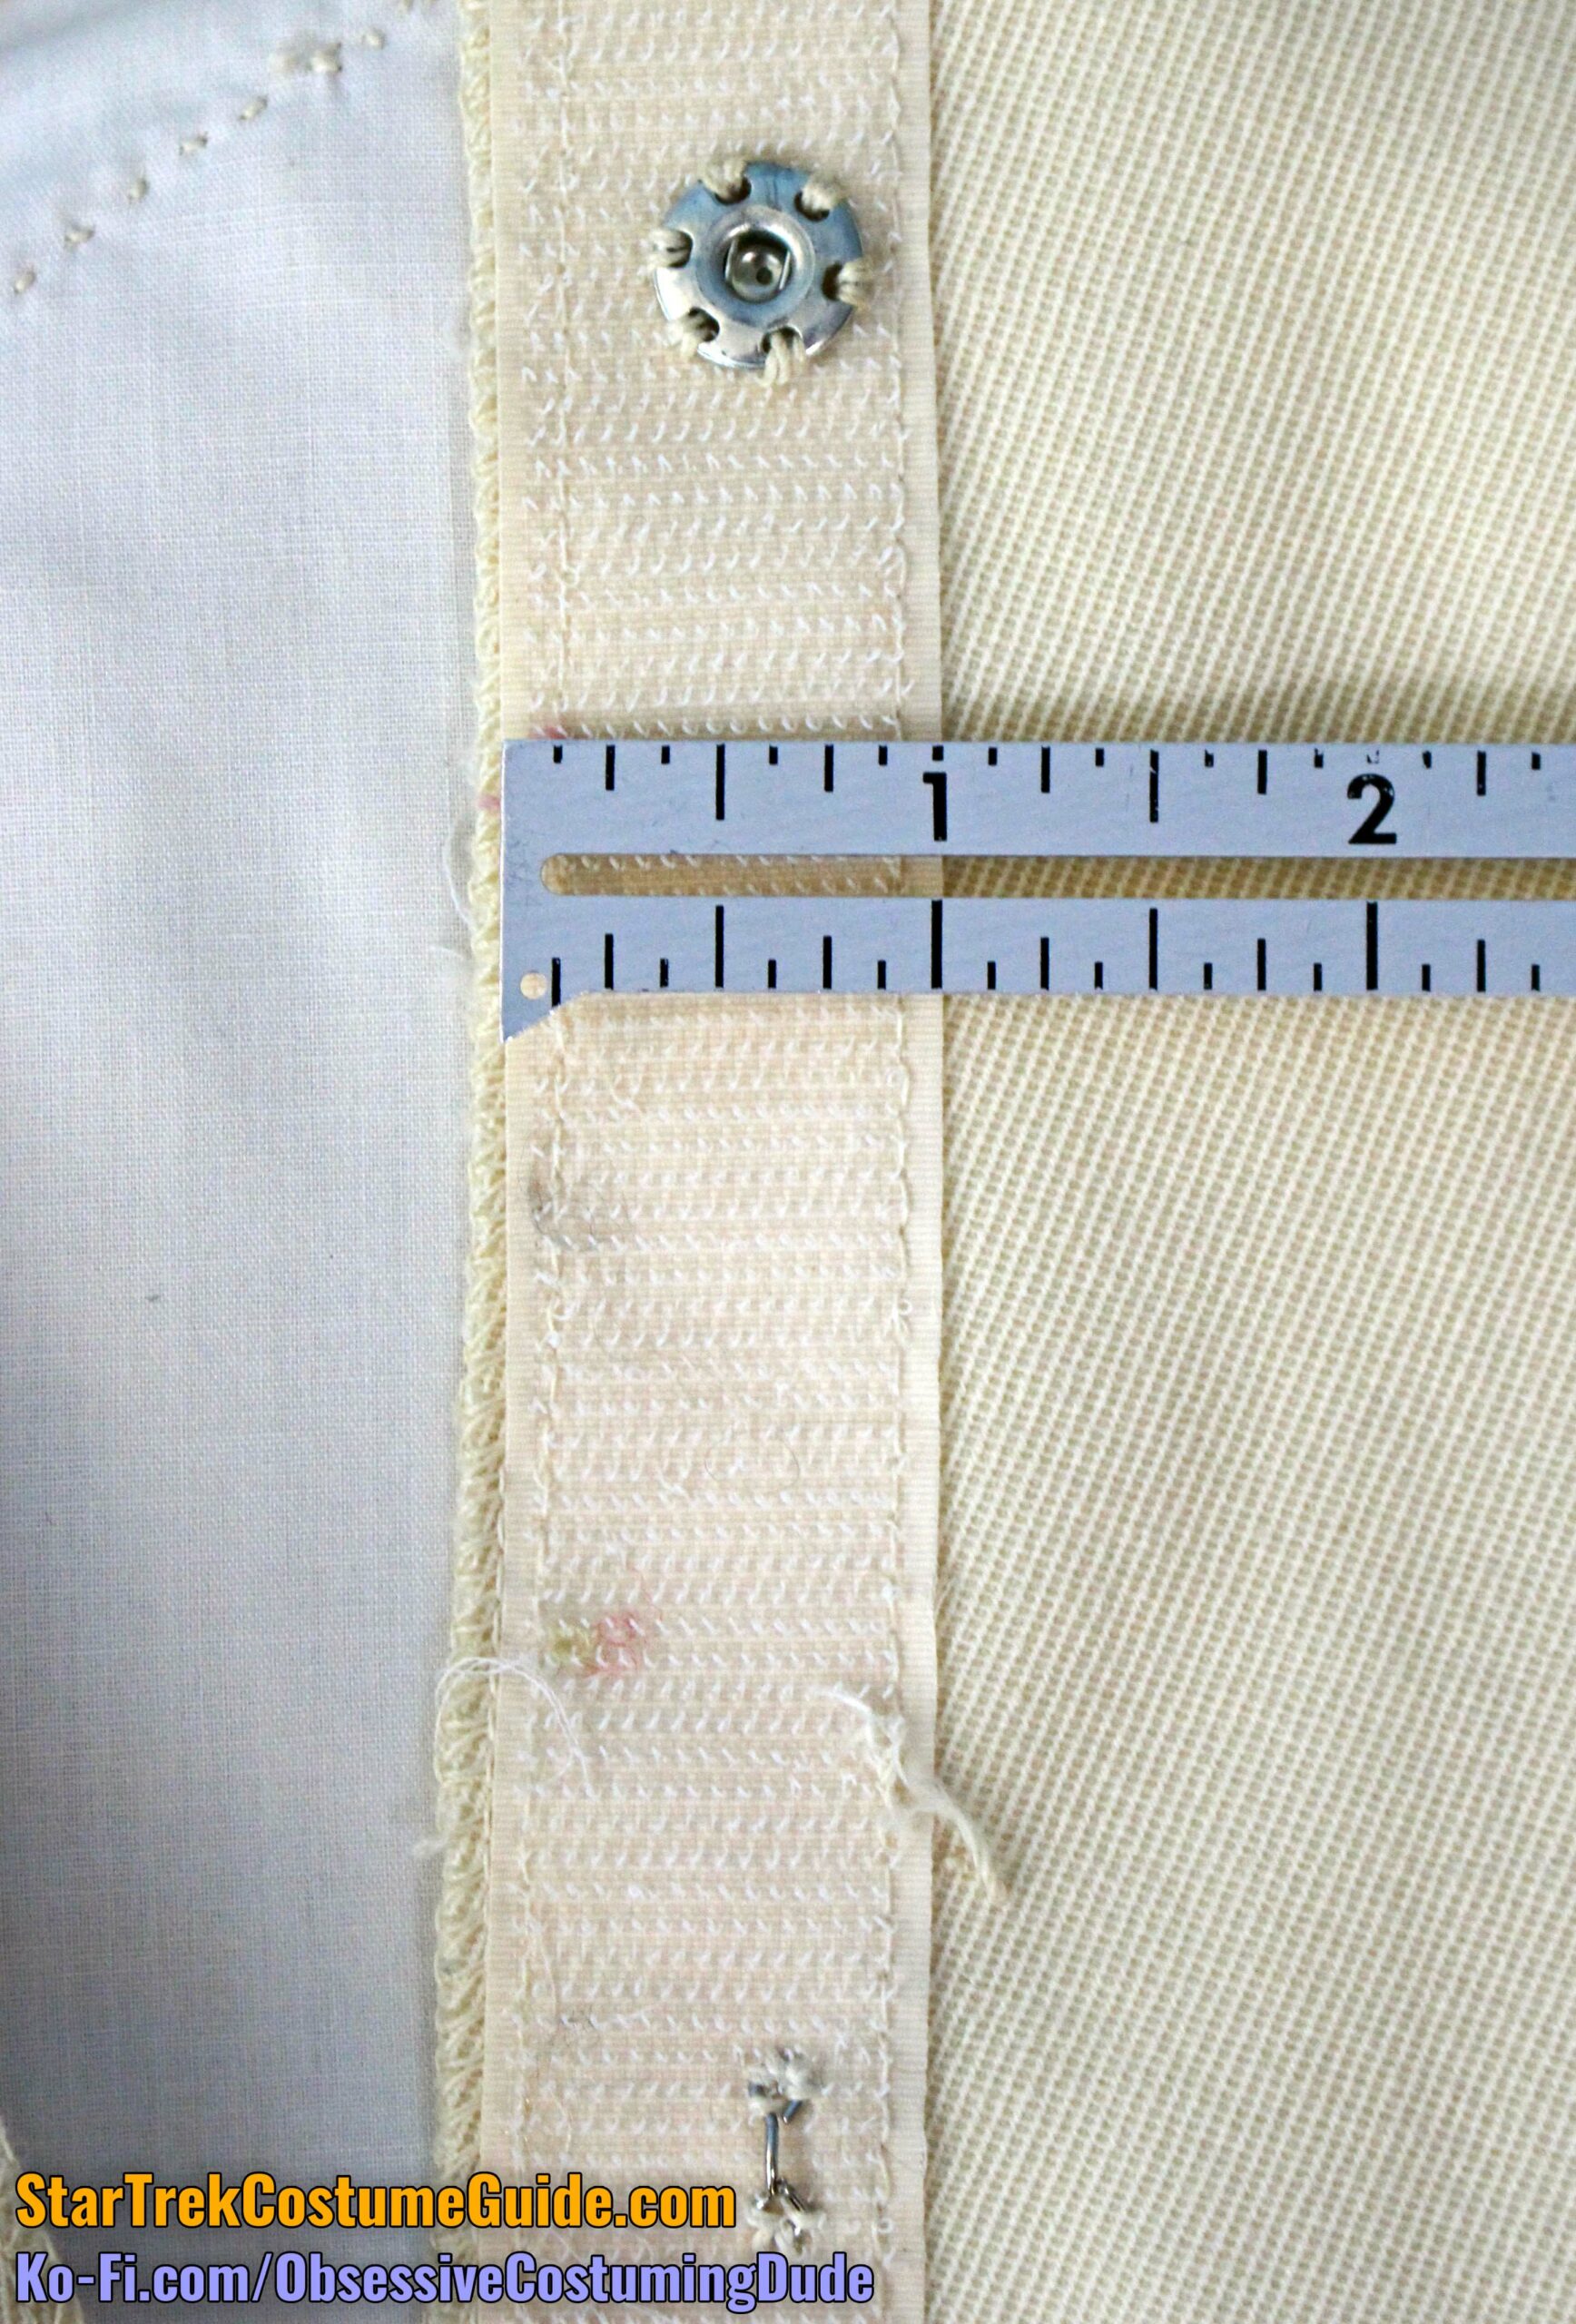
The closure system was comprised of 1” off-white hook-and-loop tape (“Velcro”) and four alternating silver closures – two silver snaps, and two hooks-and-eyes.
The upper portion of the lower back “rectangle” also opened downward via two strips of hook-and-loop tape.
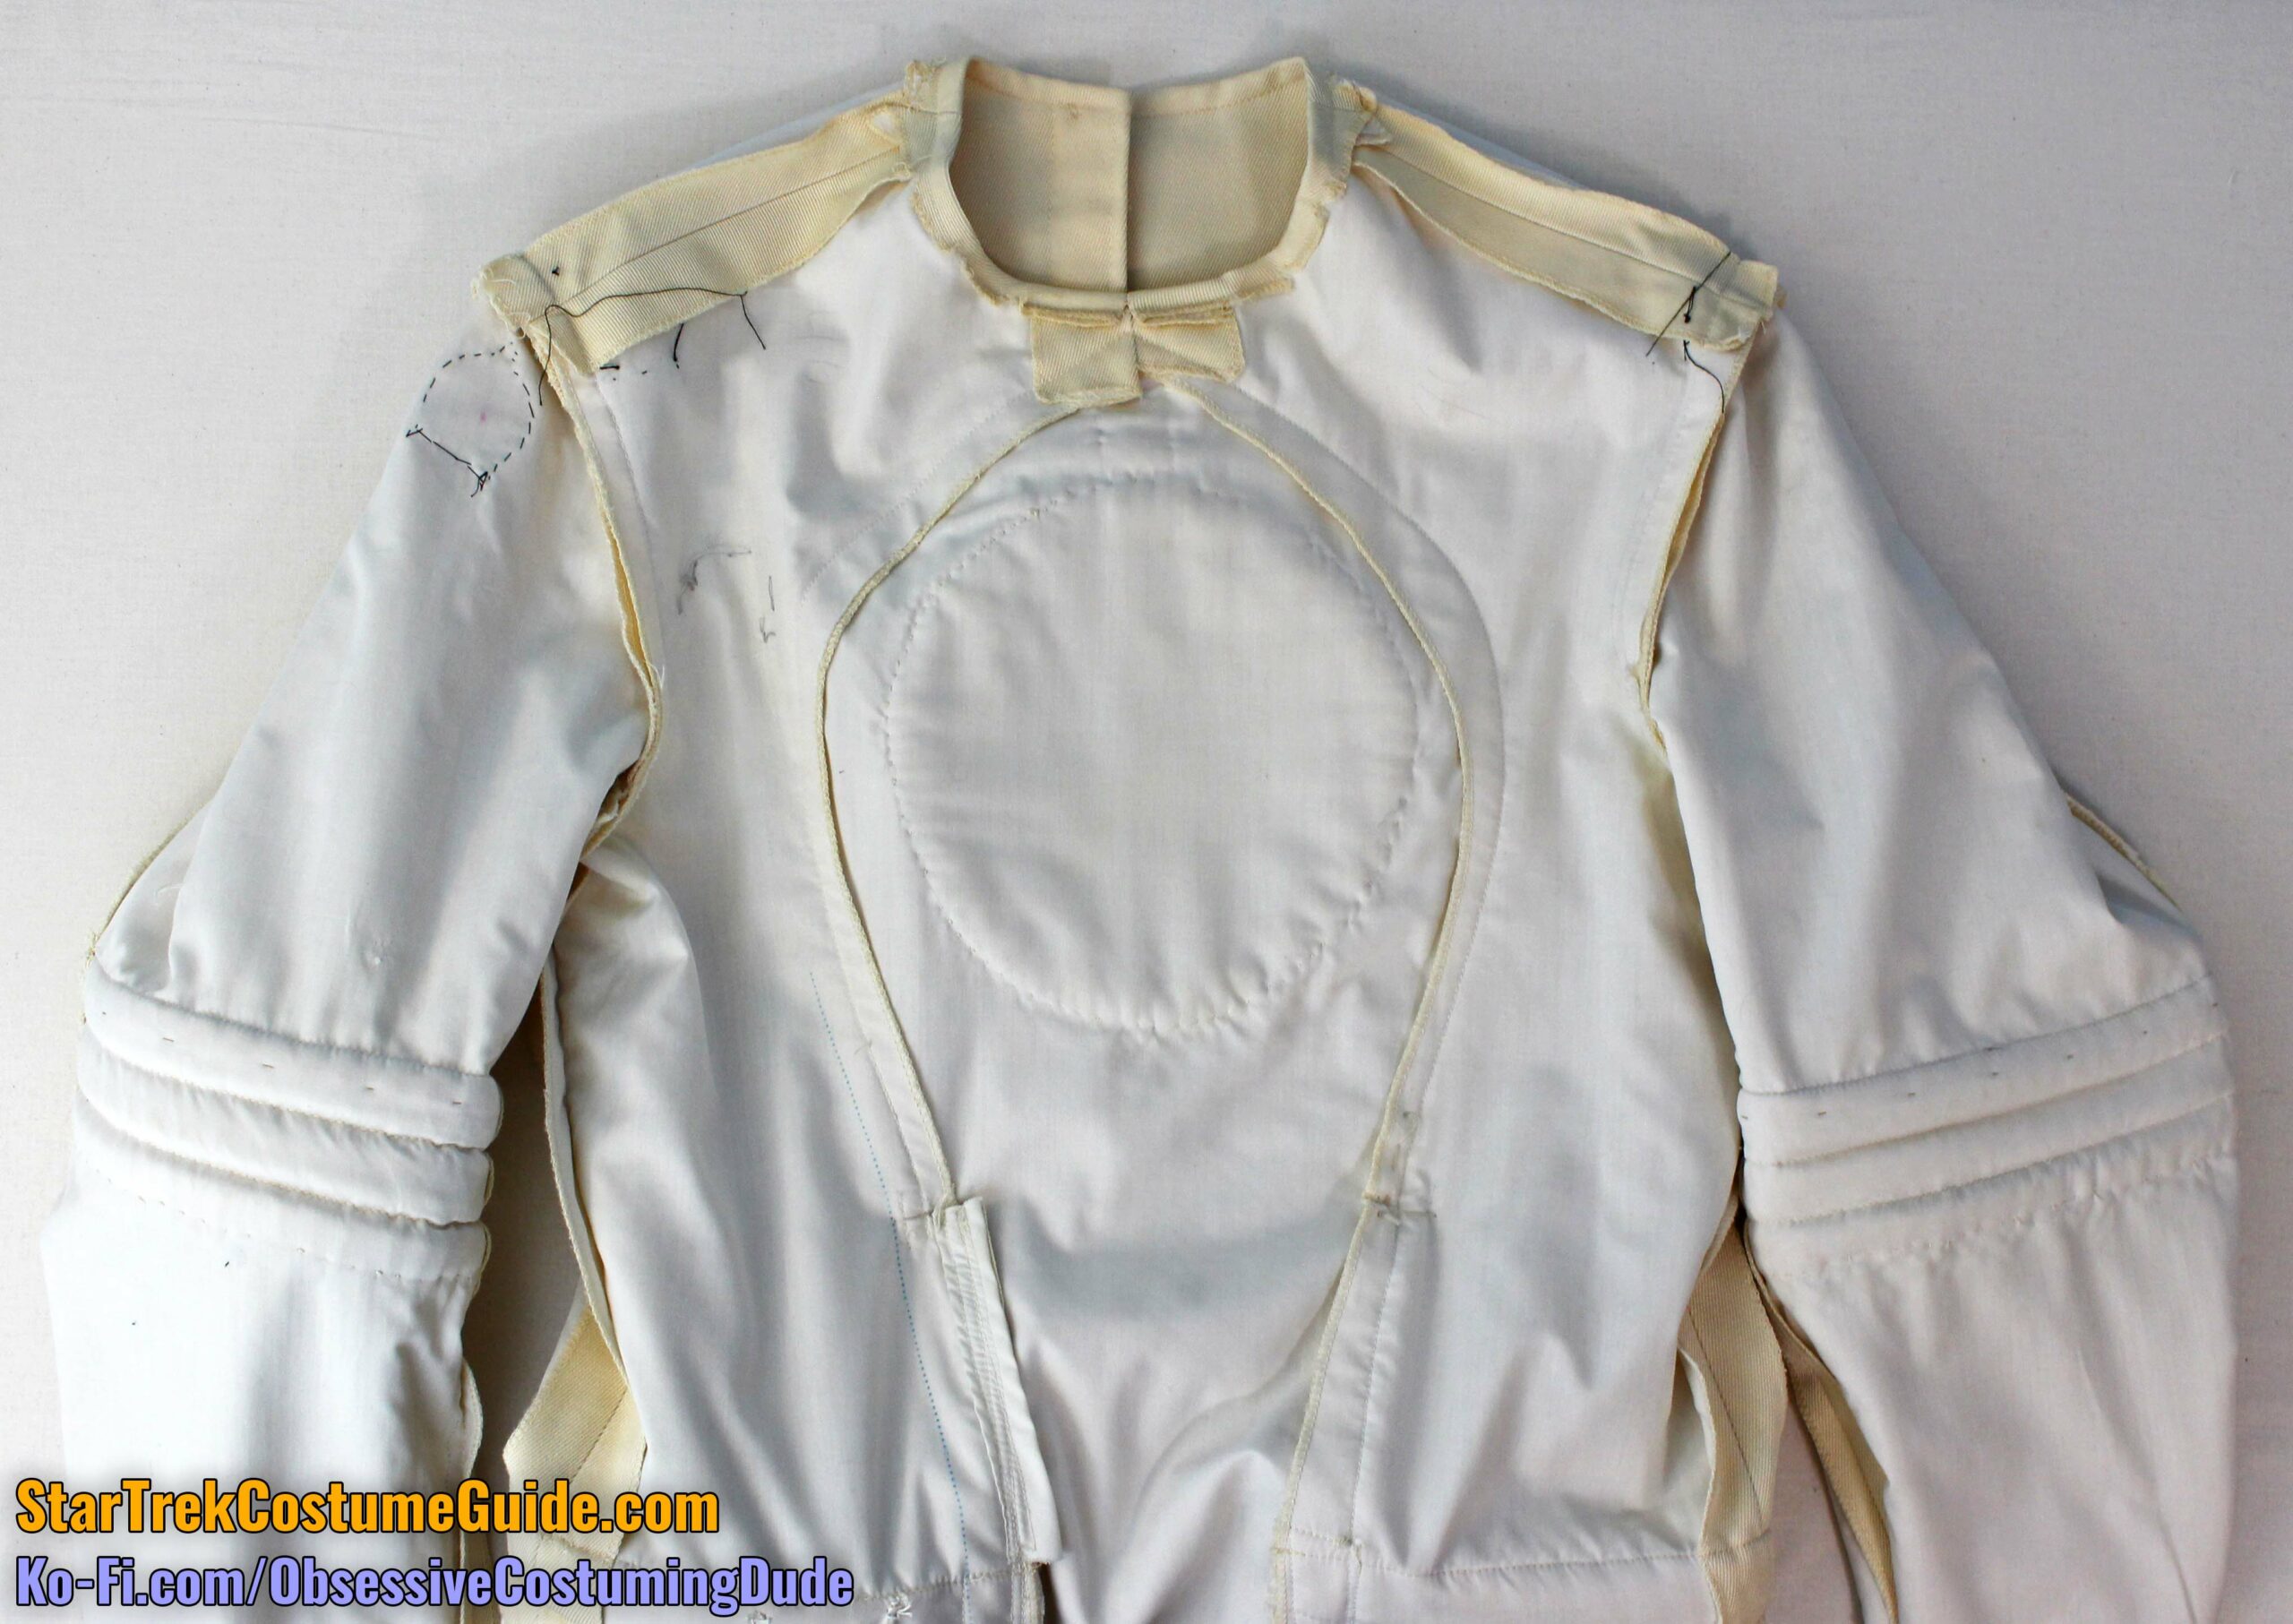
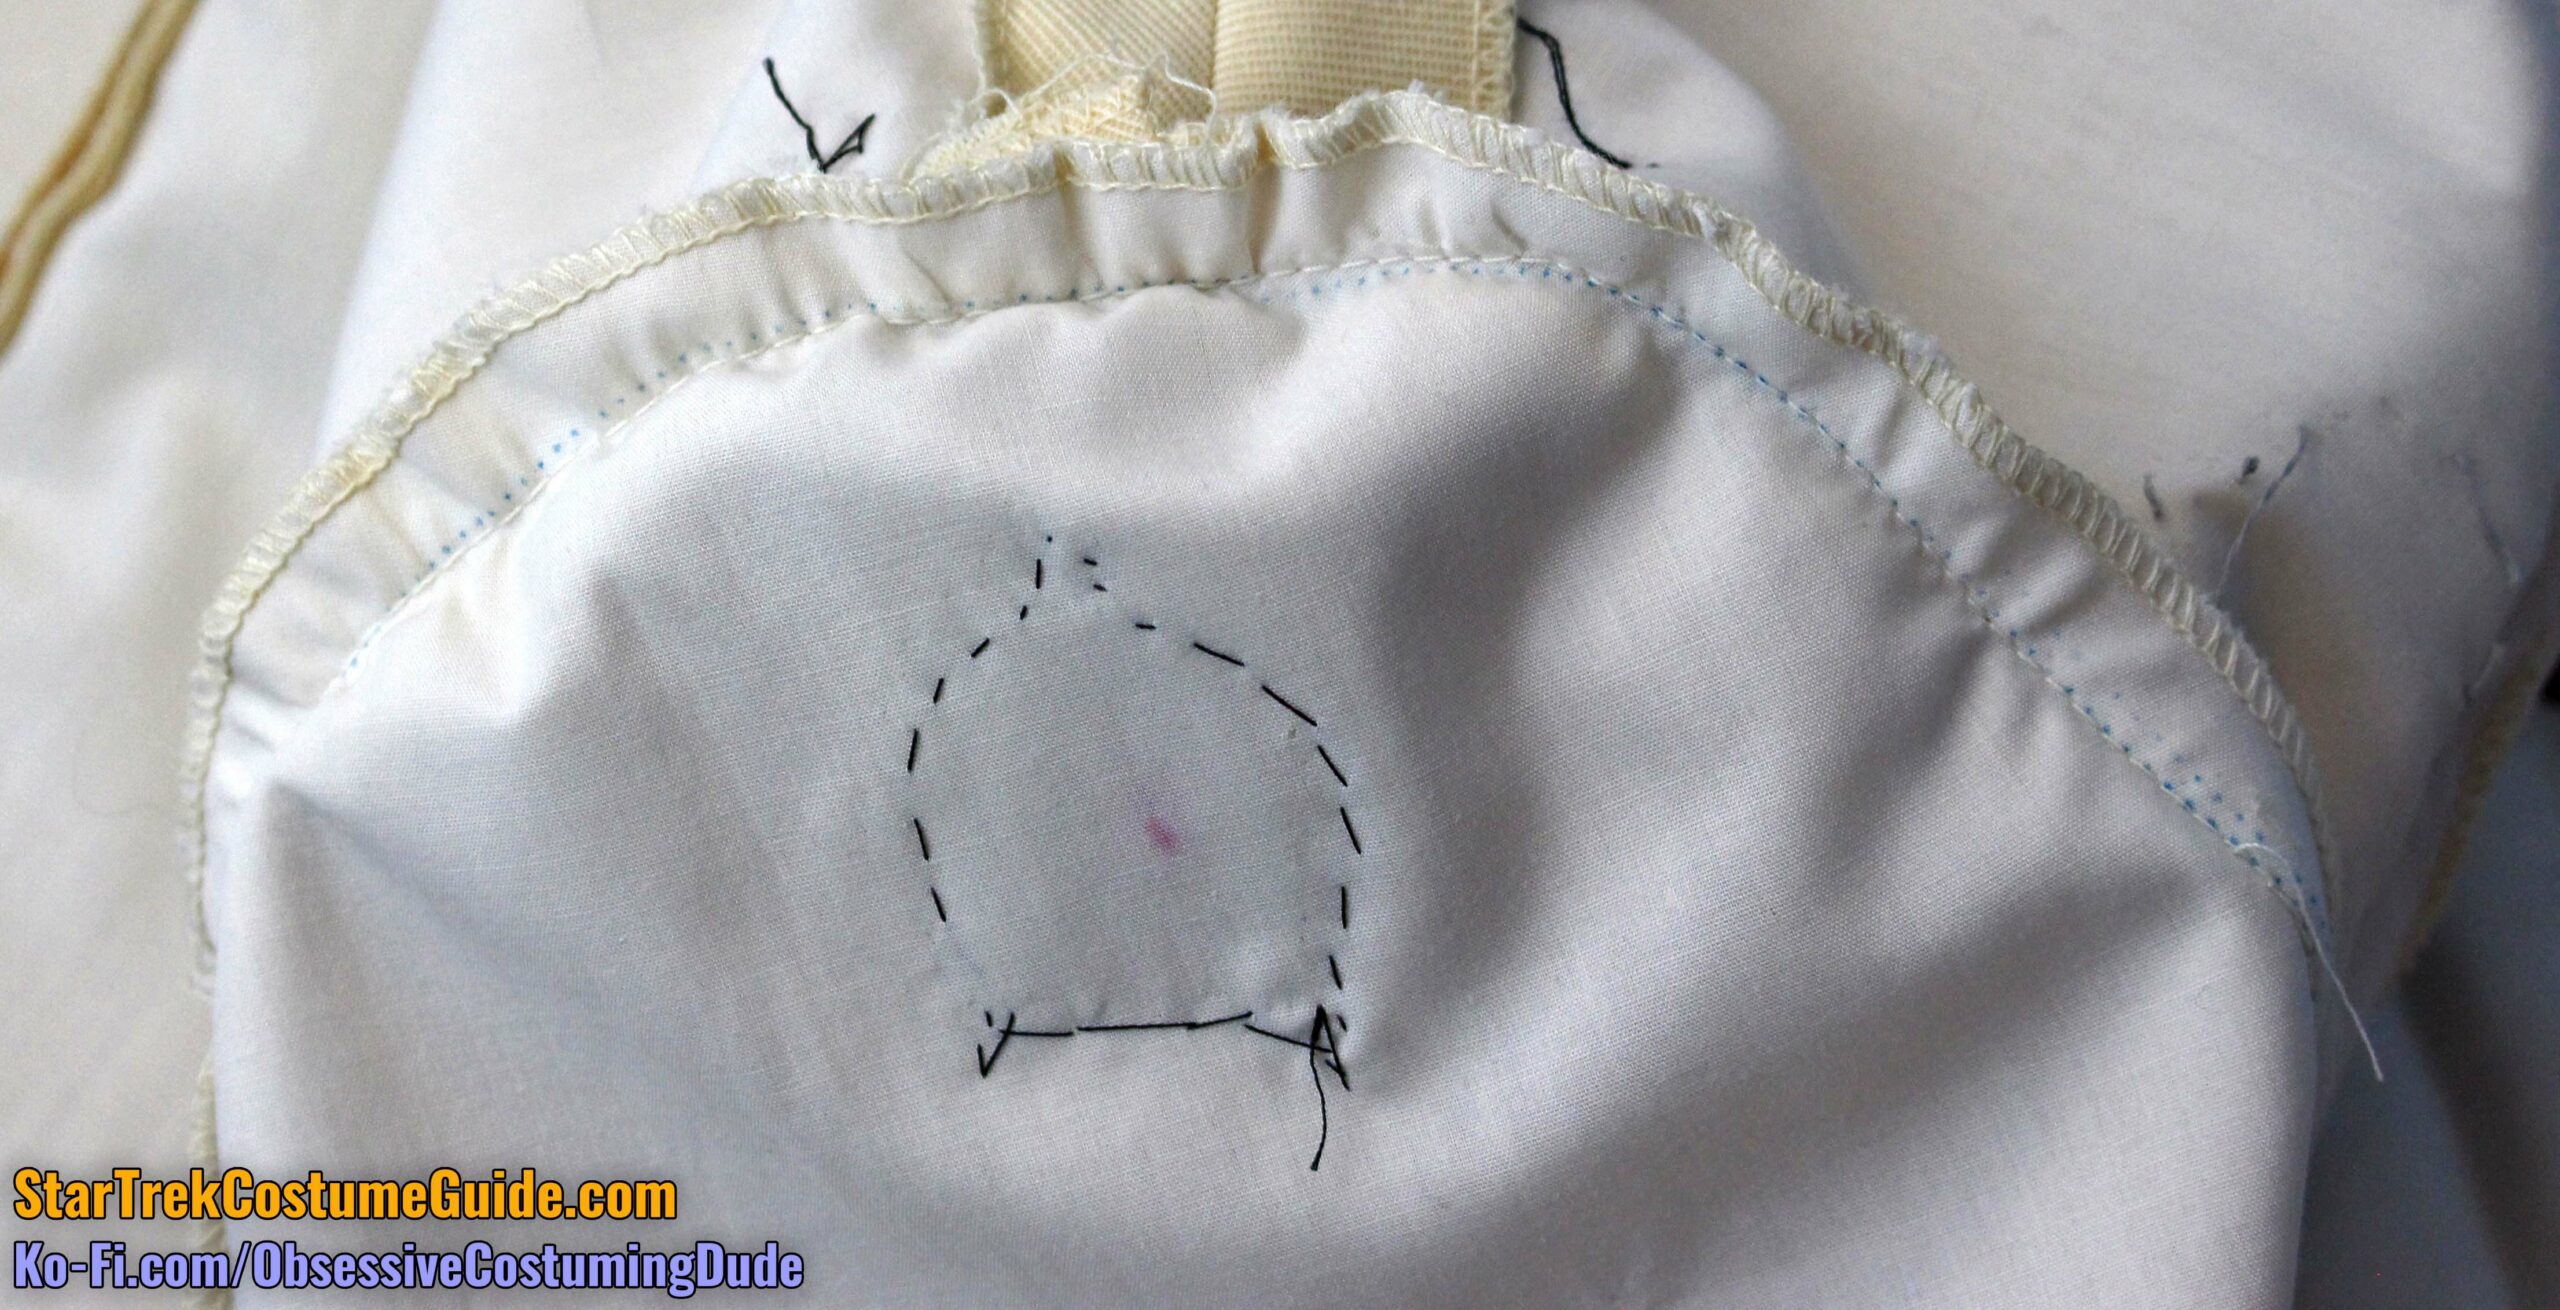
JUMPSUIT INTERIOR
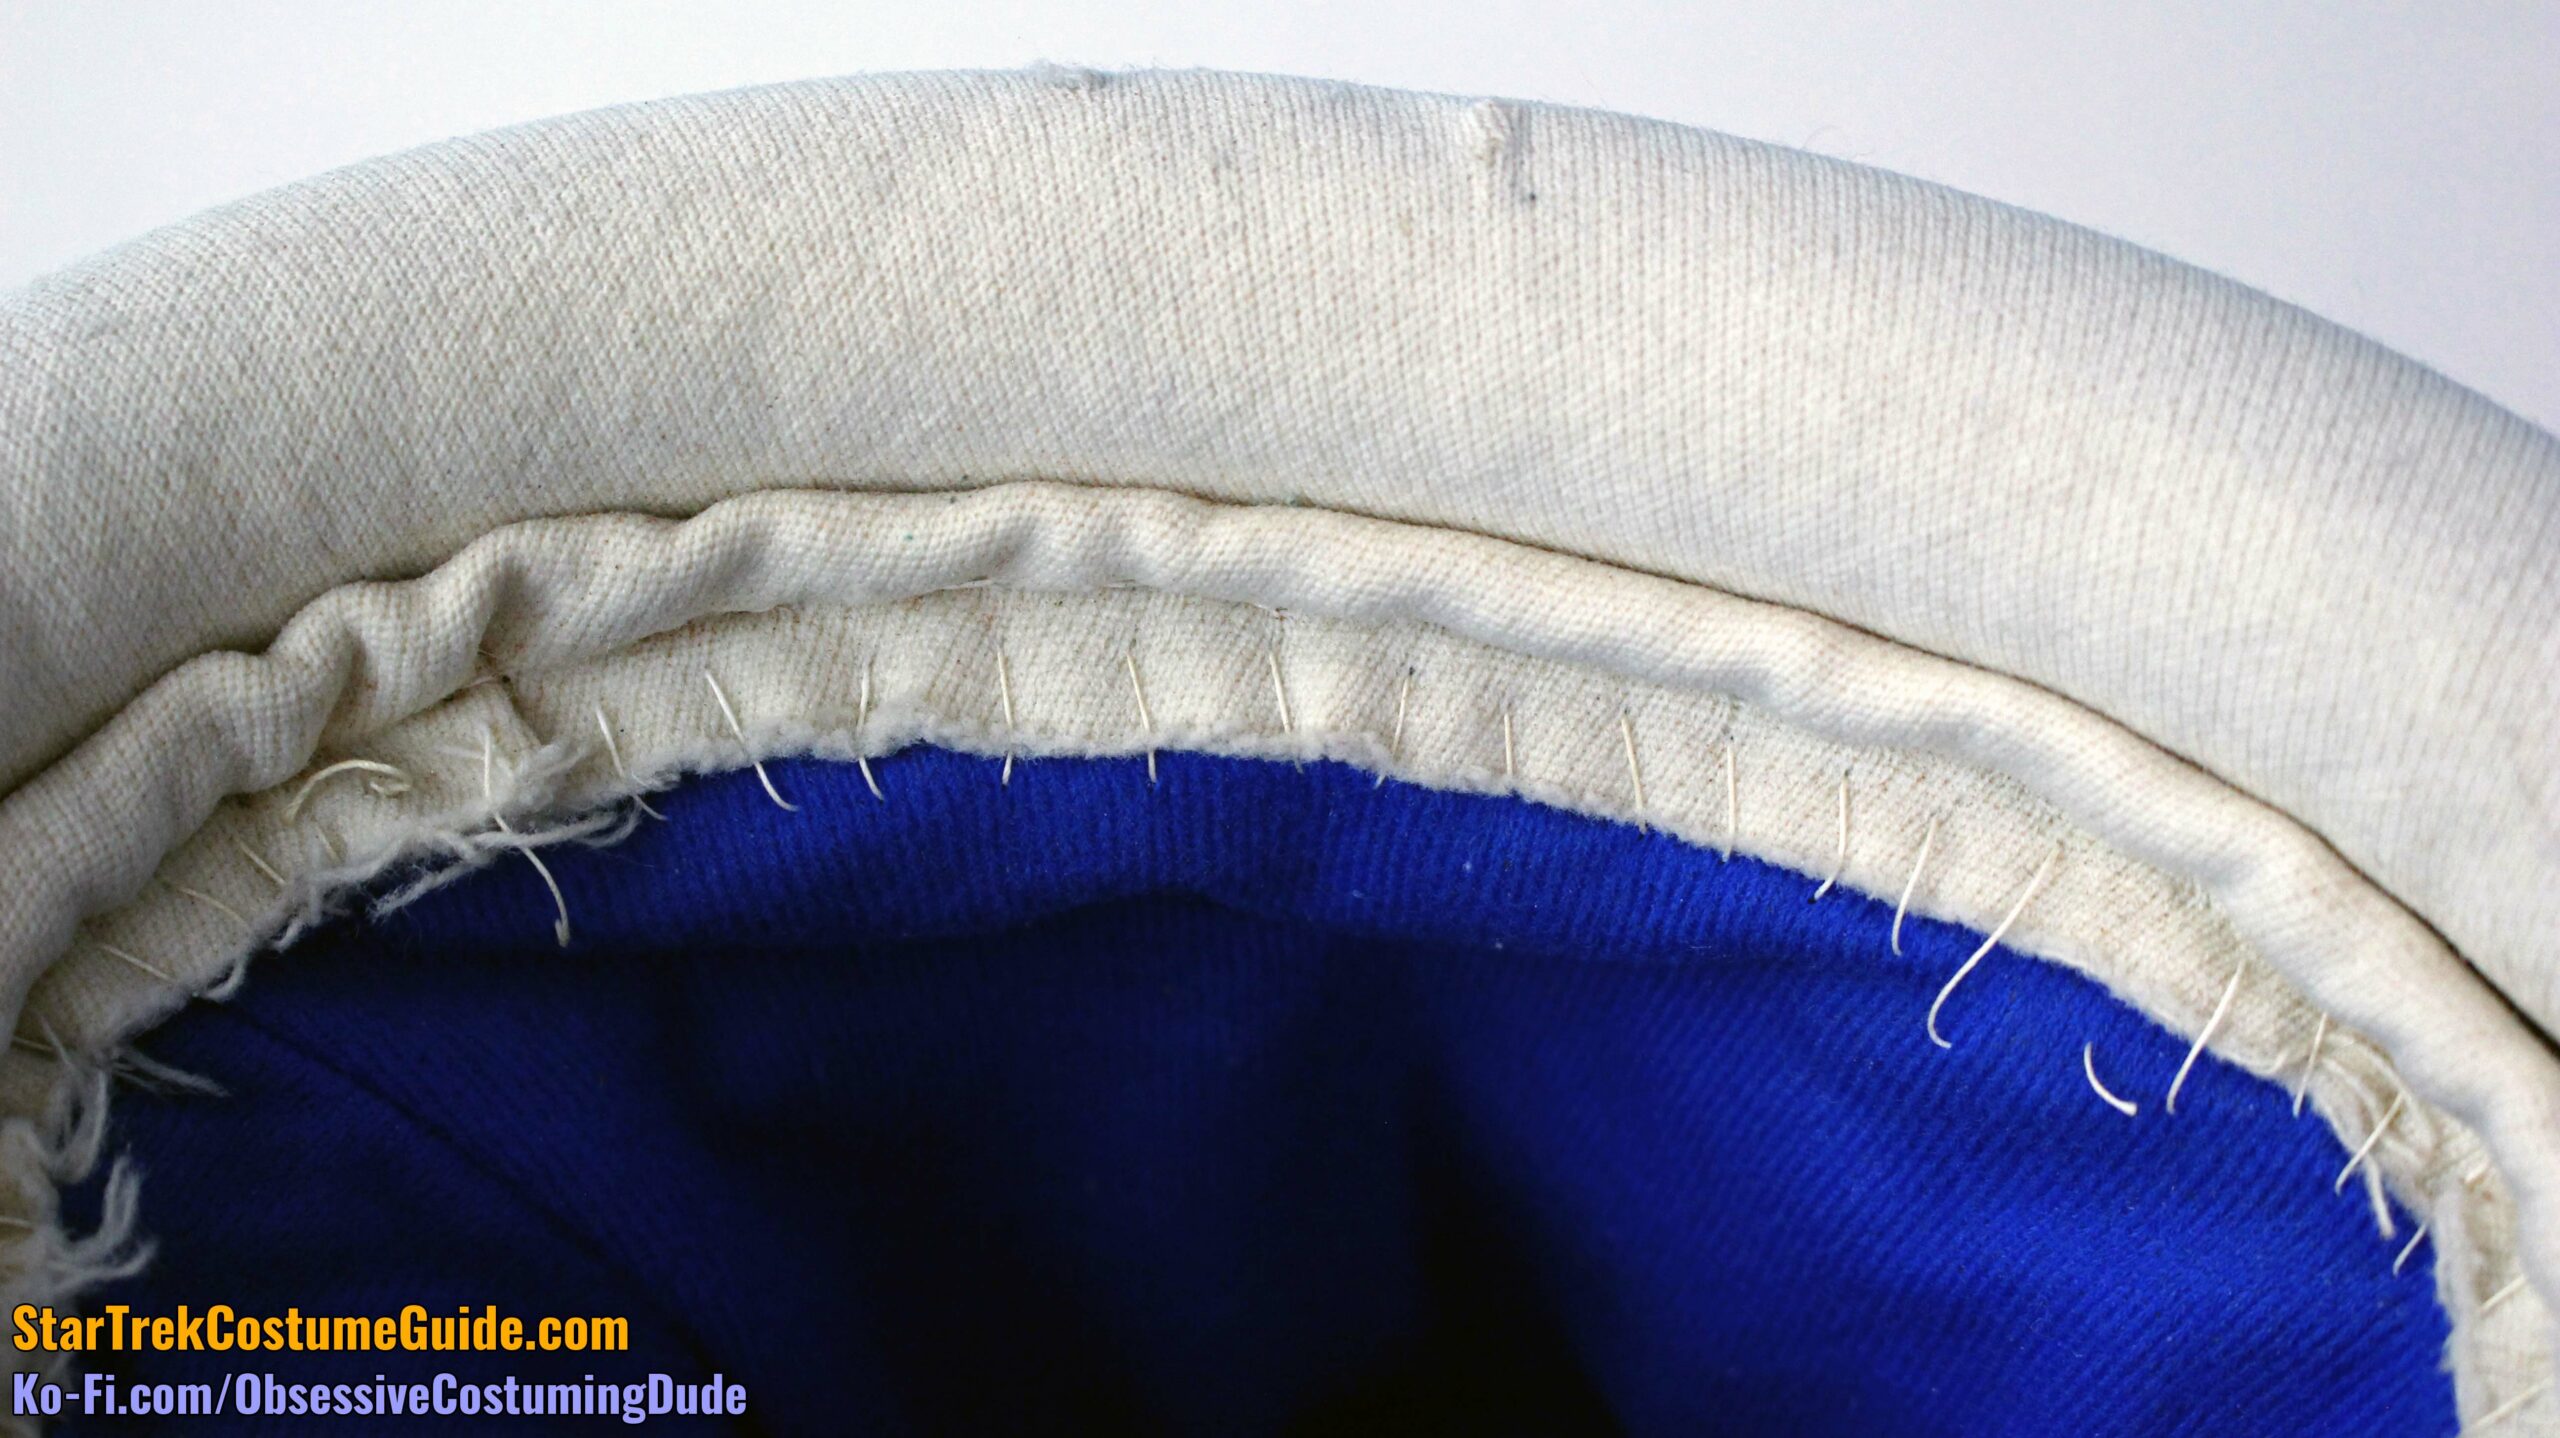
As I mentioned previously, the wool gabardine was underlined (also called “flatlined”) with a layer of lighter, but still off-white cotton.
The layers were serged together along most of the edges.
The neckline was simply turned under and hemmed, and the hem allowance was approximately ½”.
For some reason, the neckline hem was a bit wonky at the shoulder area.
The shoulder seam allowances were ¾” at the neckline, but they widened a bit toward the armscye.
On the right side, they widened to about ⅞”, but on the left, they widened to a full inch.
The upper front allowances were both 1 ½”, but for some reason they were vertically mismatched.
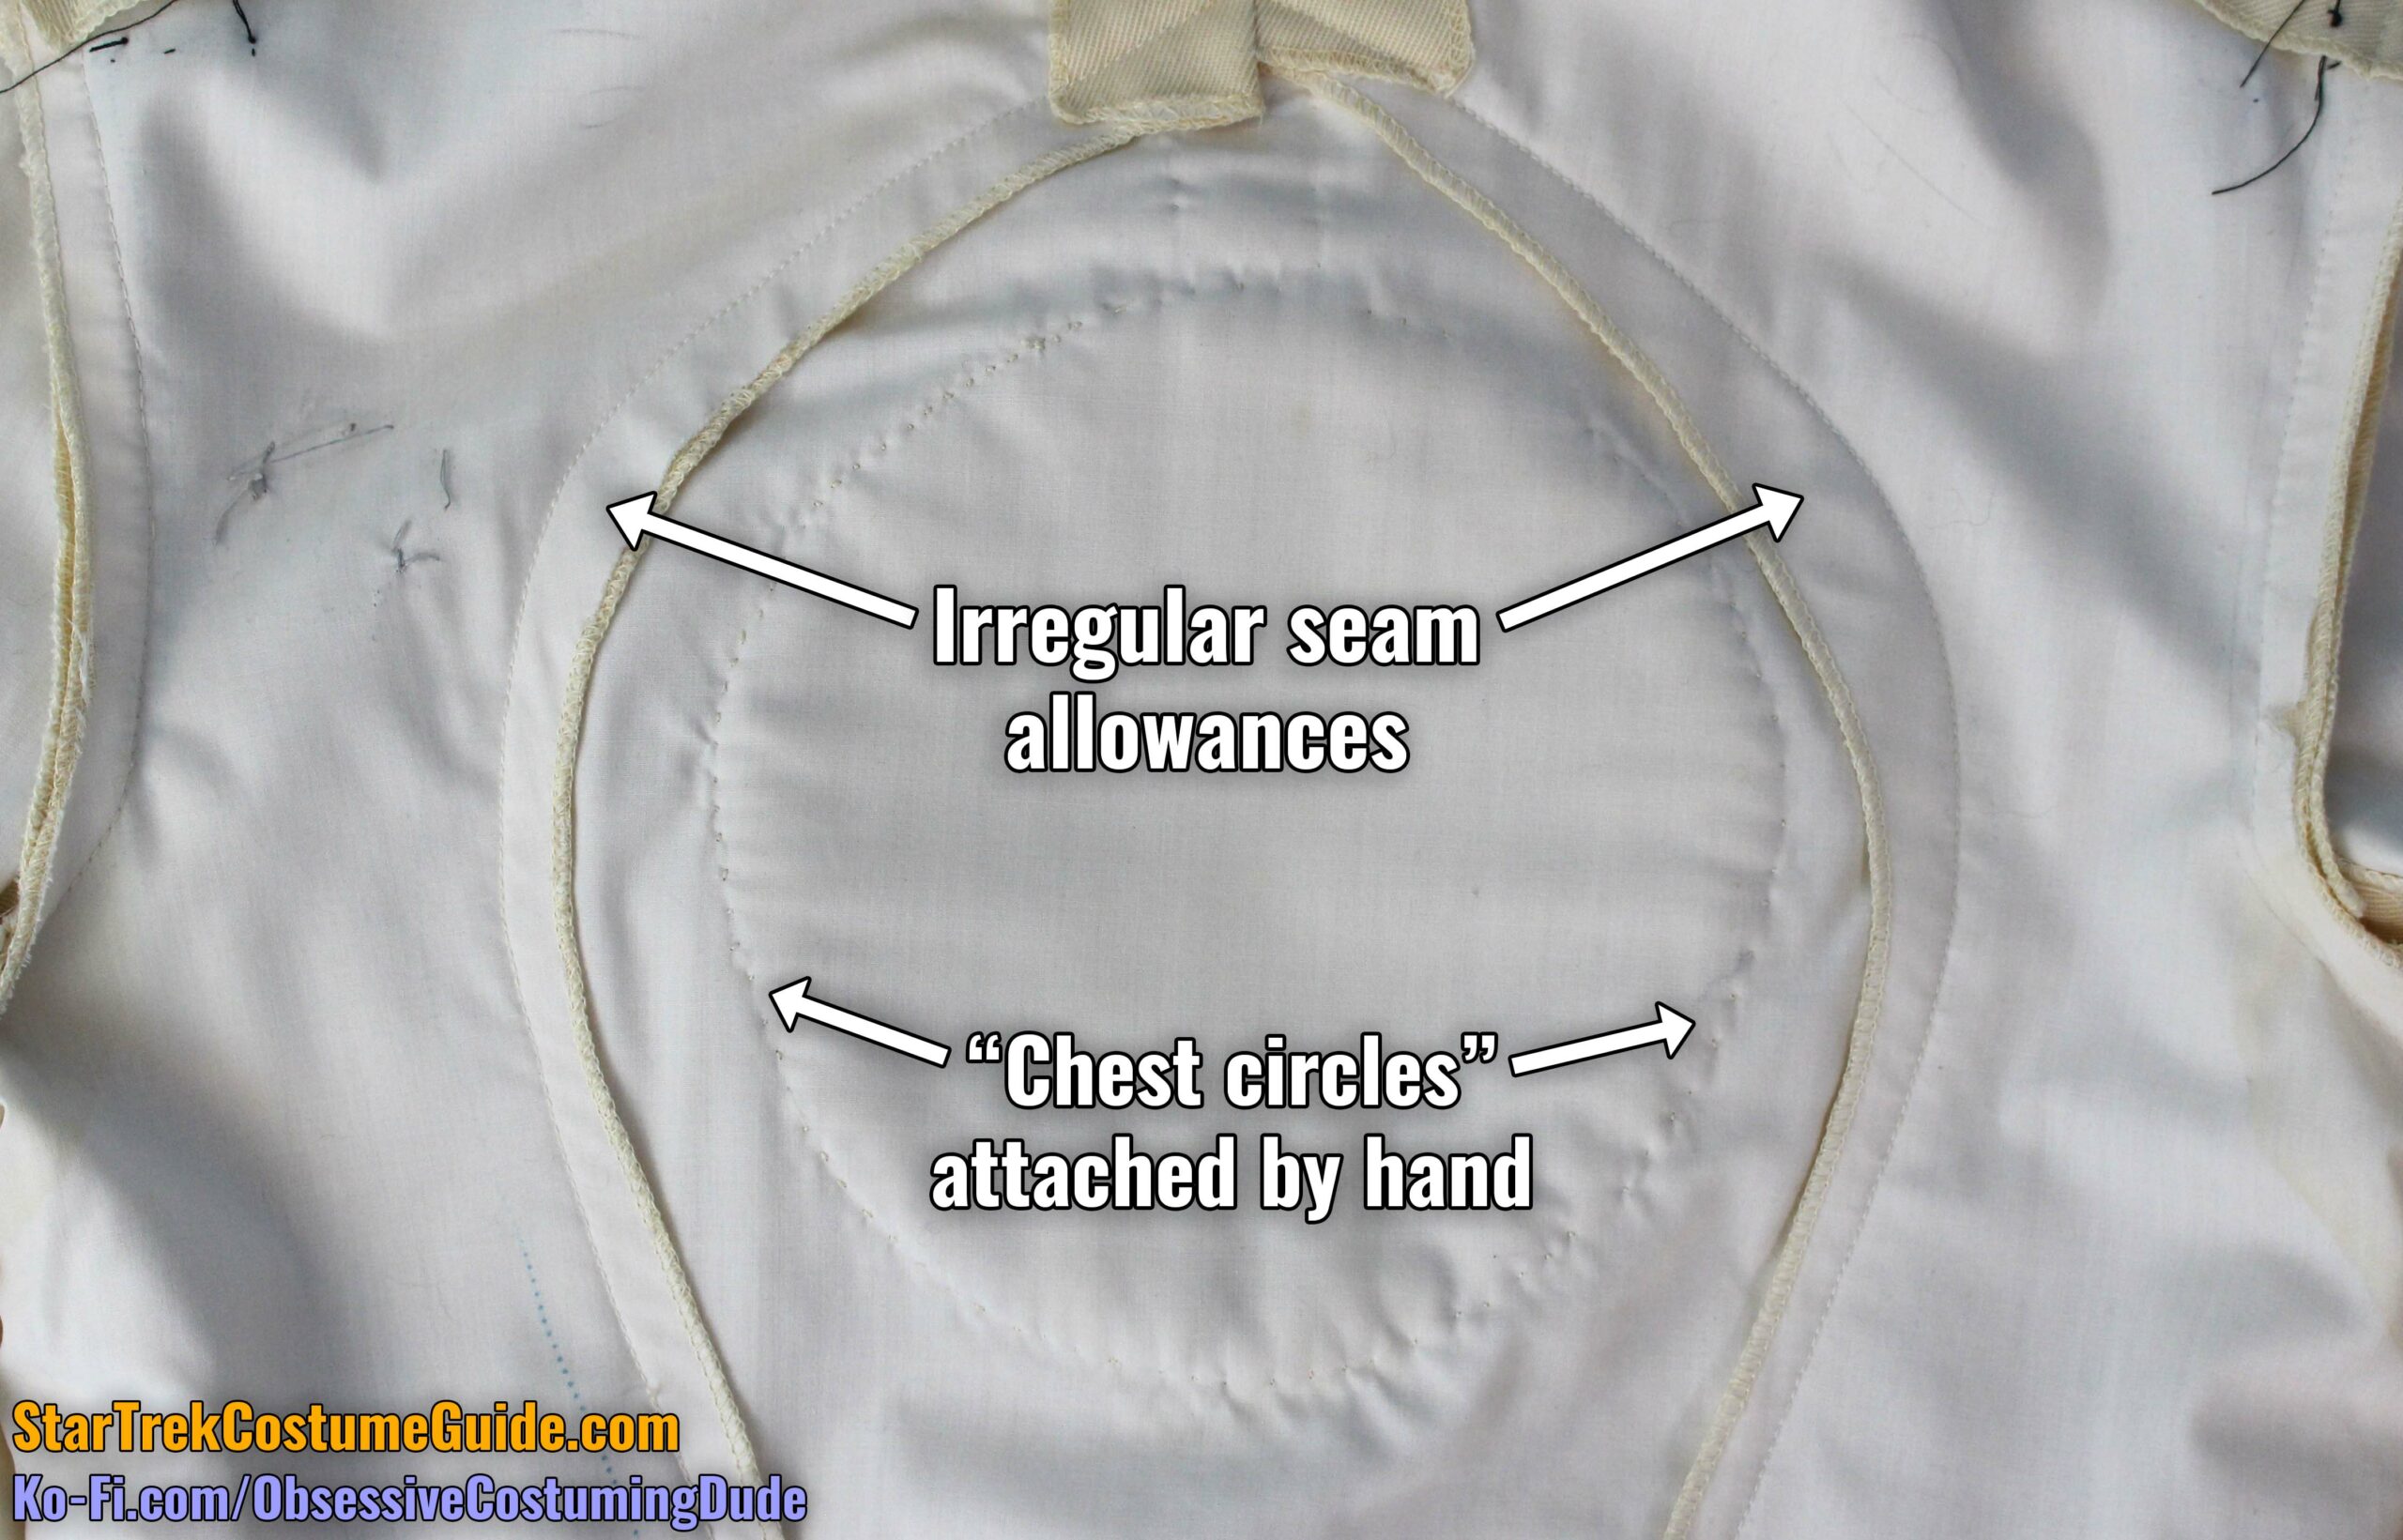
Along the chest area, one can more easily see the hand-stitching where the “chest circles” were attached to the front panel.
We can also see the irregular seam allowances where the front panel was attached to the jumpsuit, suggesting that these seams may have been adjusted for specific wearers.
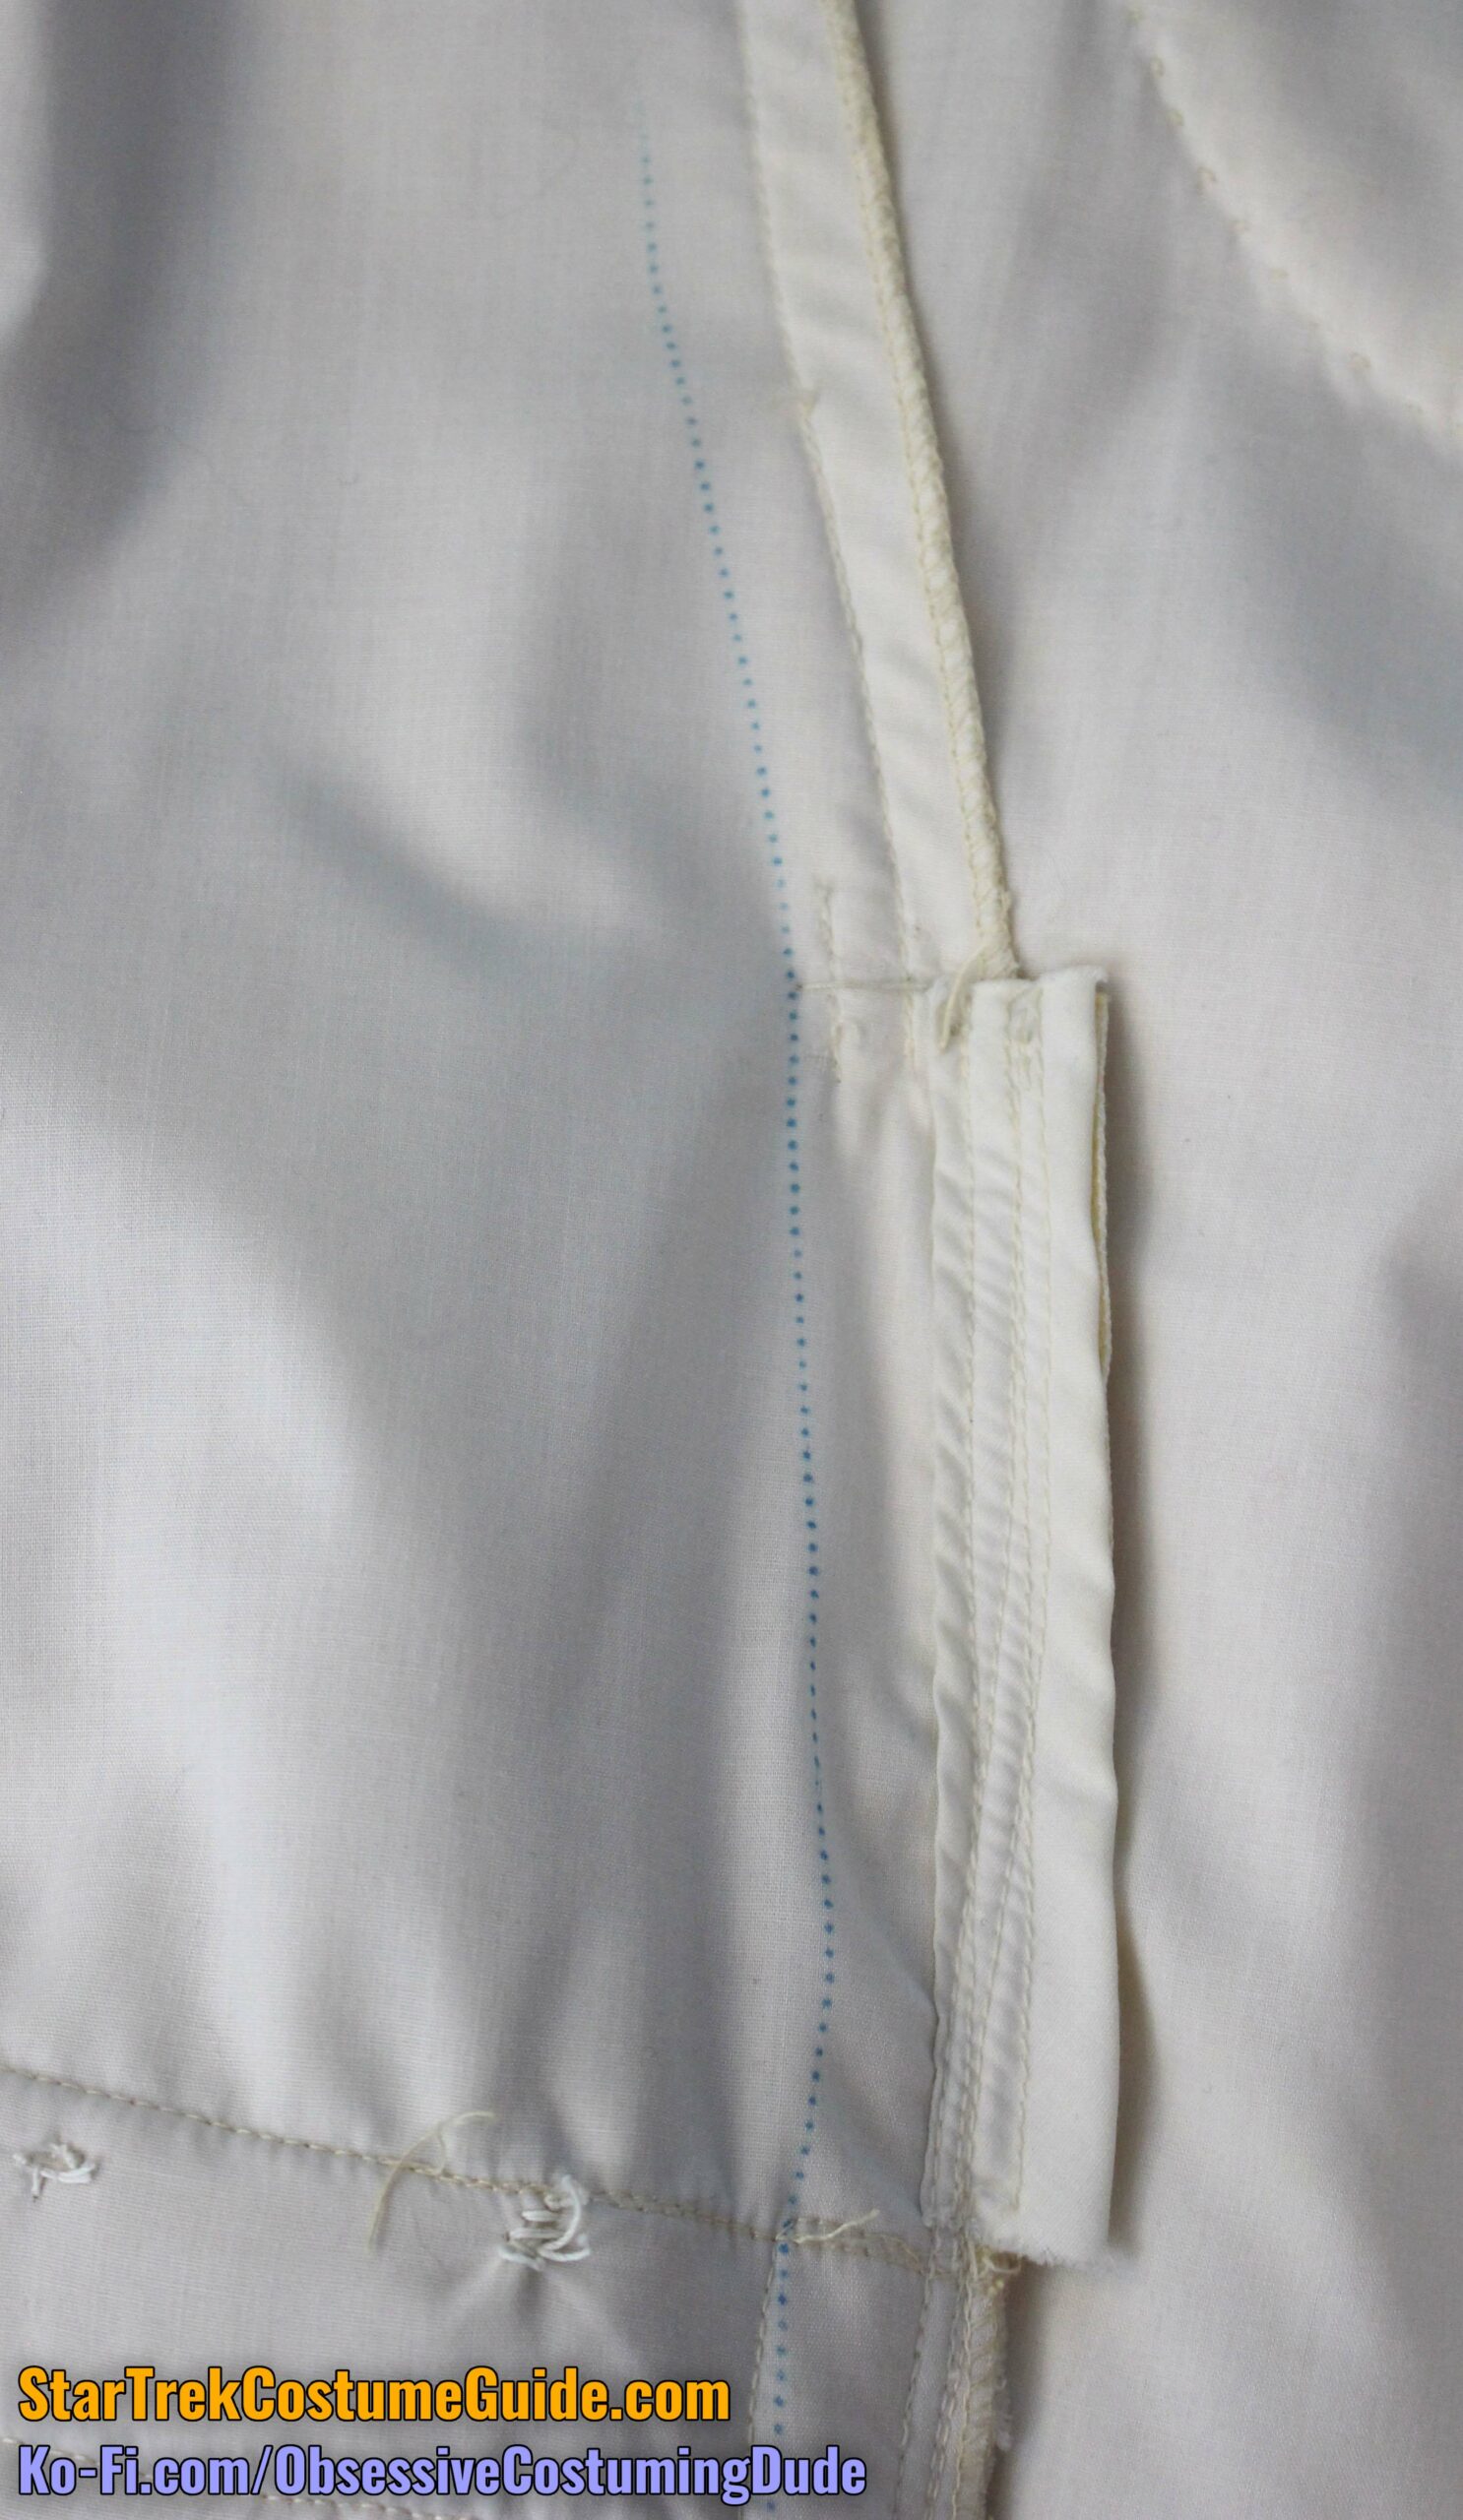
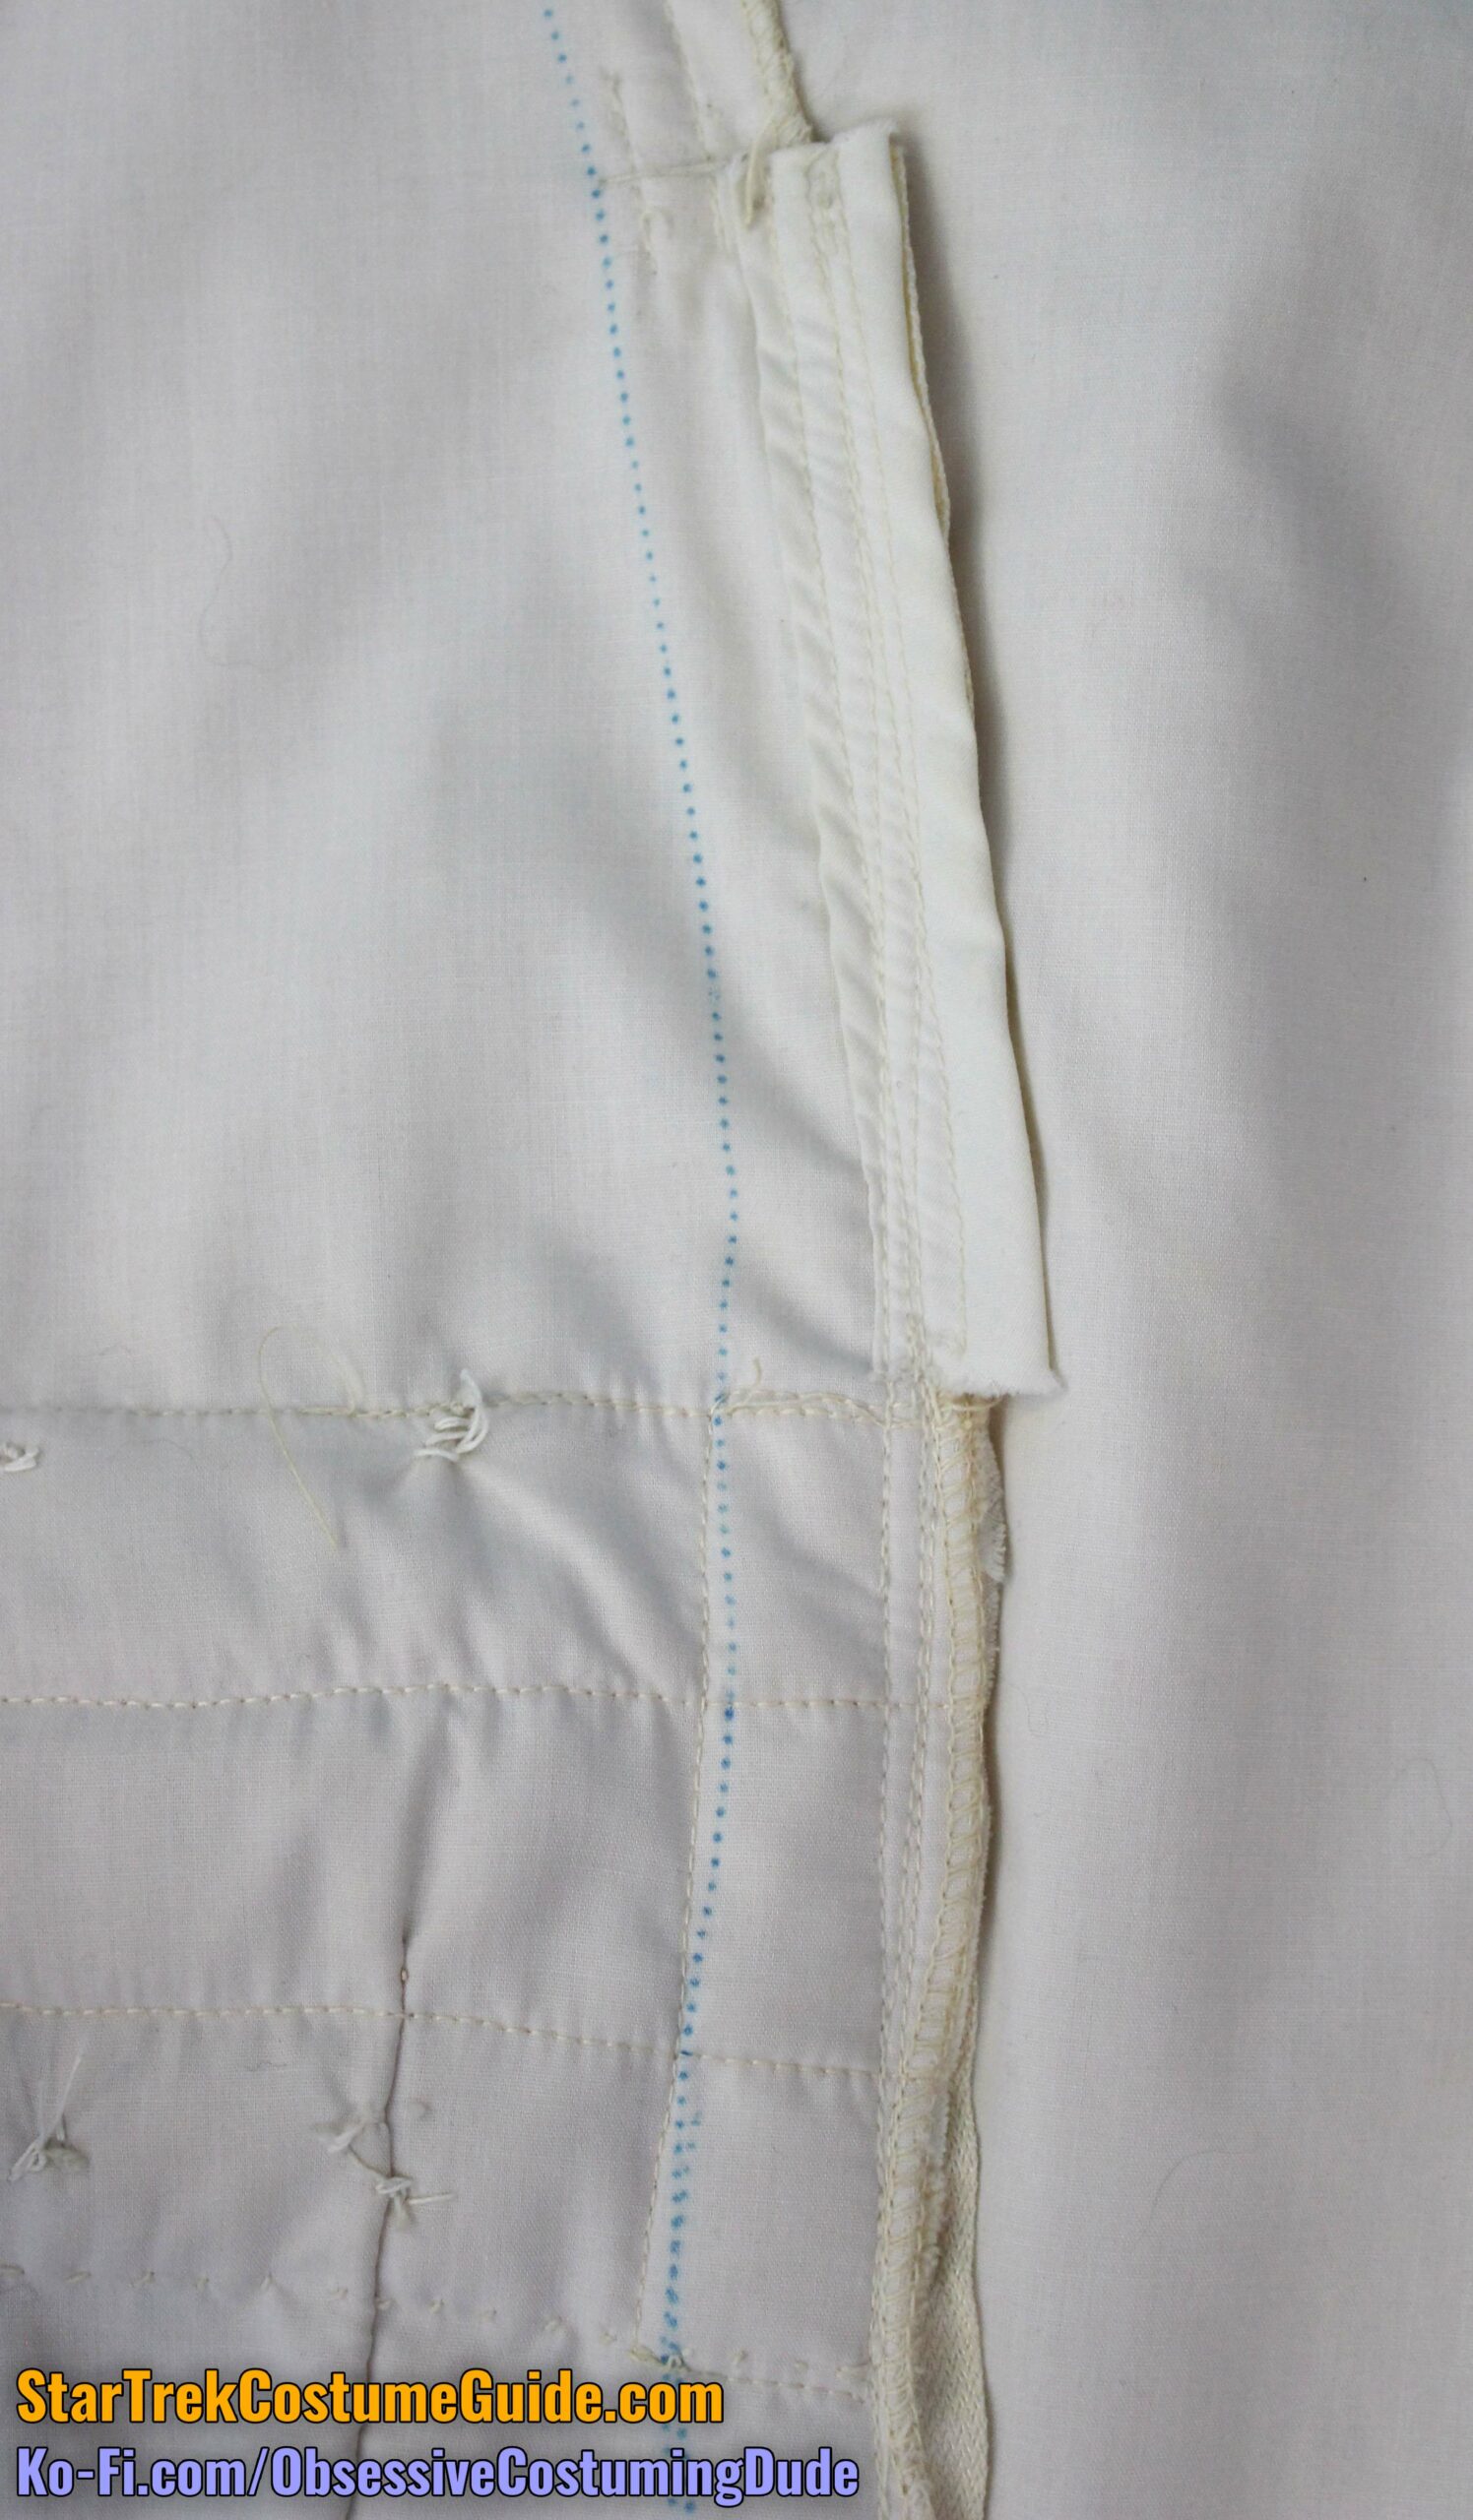
Along the left side seam was a long series of small blue dots.
These may have possibly marked an original seam line that was subsequently adjusted, or perhaps an intended alteration that was never actually done.
(There were more blue dots in various other areas on the underside of the jumpsuit – some of which coincided with established seam lines, and some of which didn’t.)
Also note the small strip of fabric backing the upper portion of the zipper, presumably for the wearer’s comfort (to prevent chafing and scratching).
A minor detail (and one you’d never see from the outside of the garment) was that the top of the “pleats” were uneven; the left one extended about 1 ½” higher than the right one.
The bottom right 2” and bottom left 3” of the front panel were topstitched onto the jumpsuit.
Here you can see the machine stitching along the upper edge and upper two channels of the waist bands, and the hand-sewing along the lower edge.
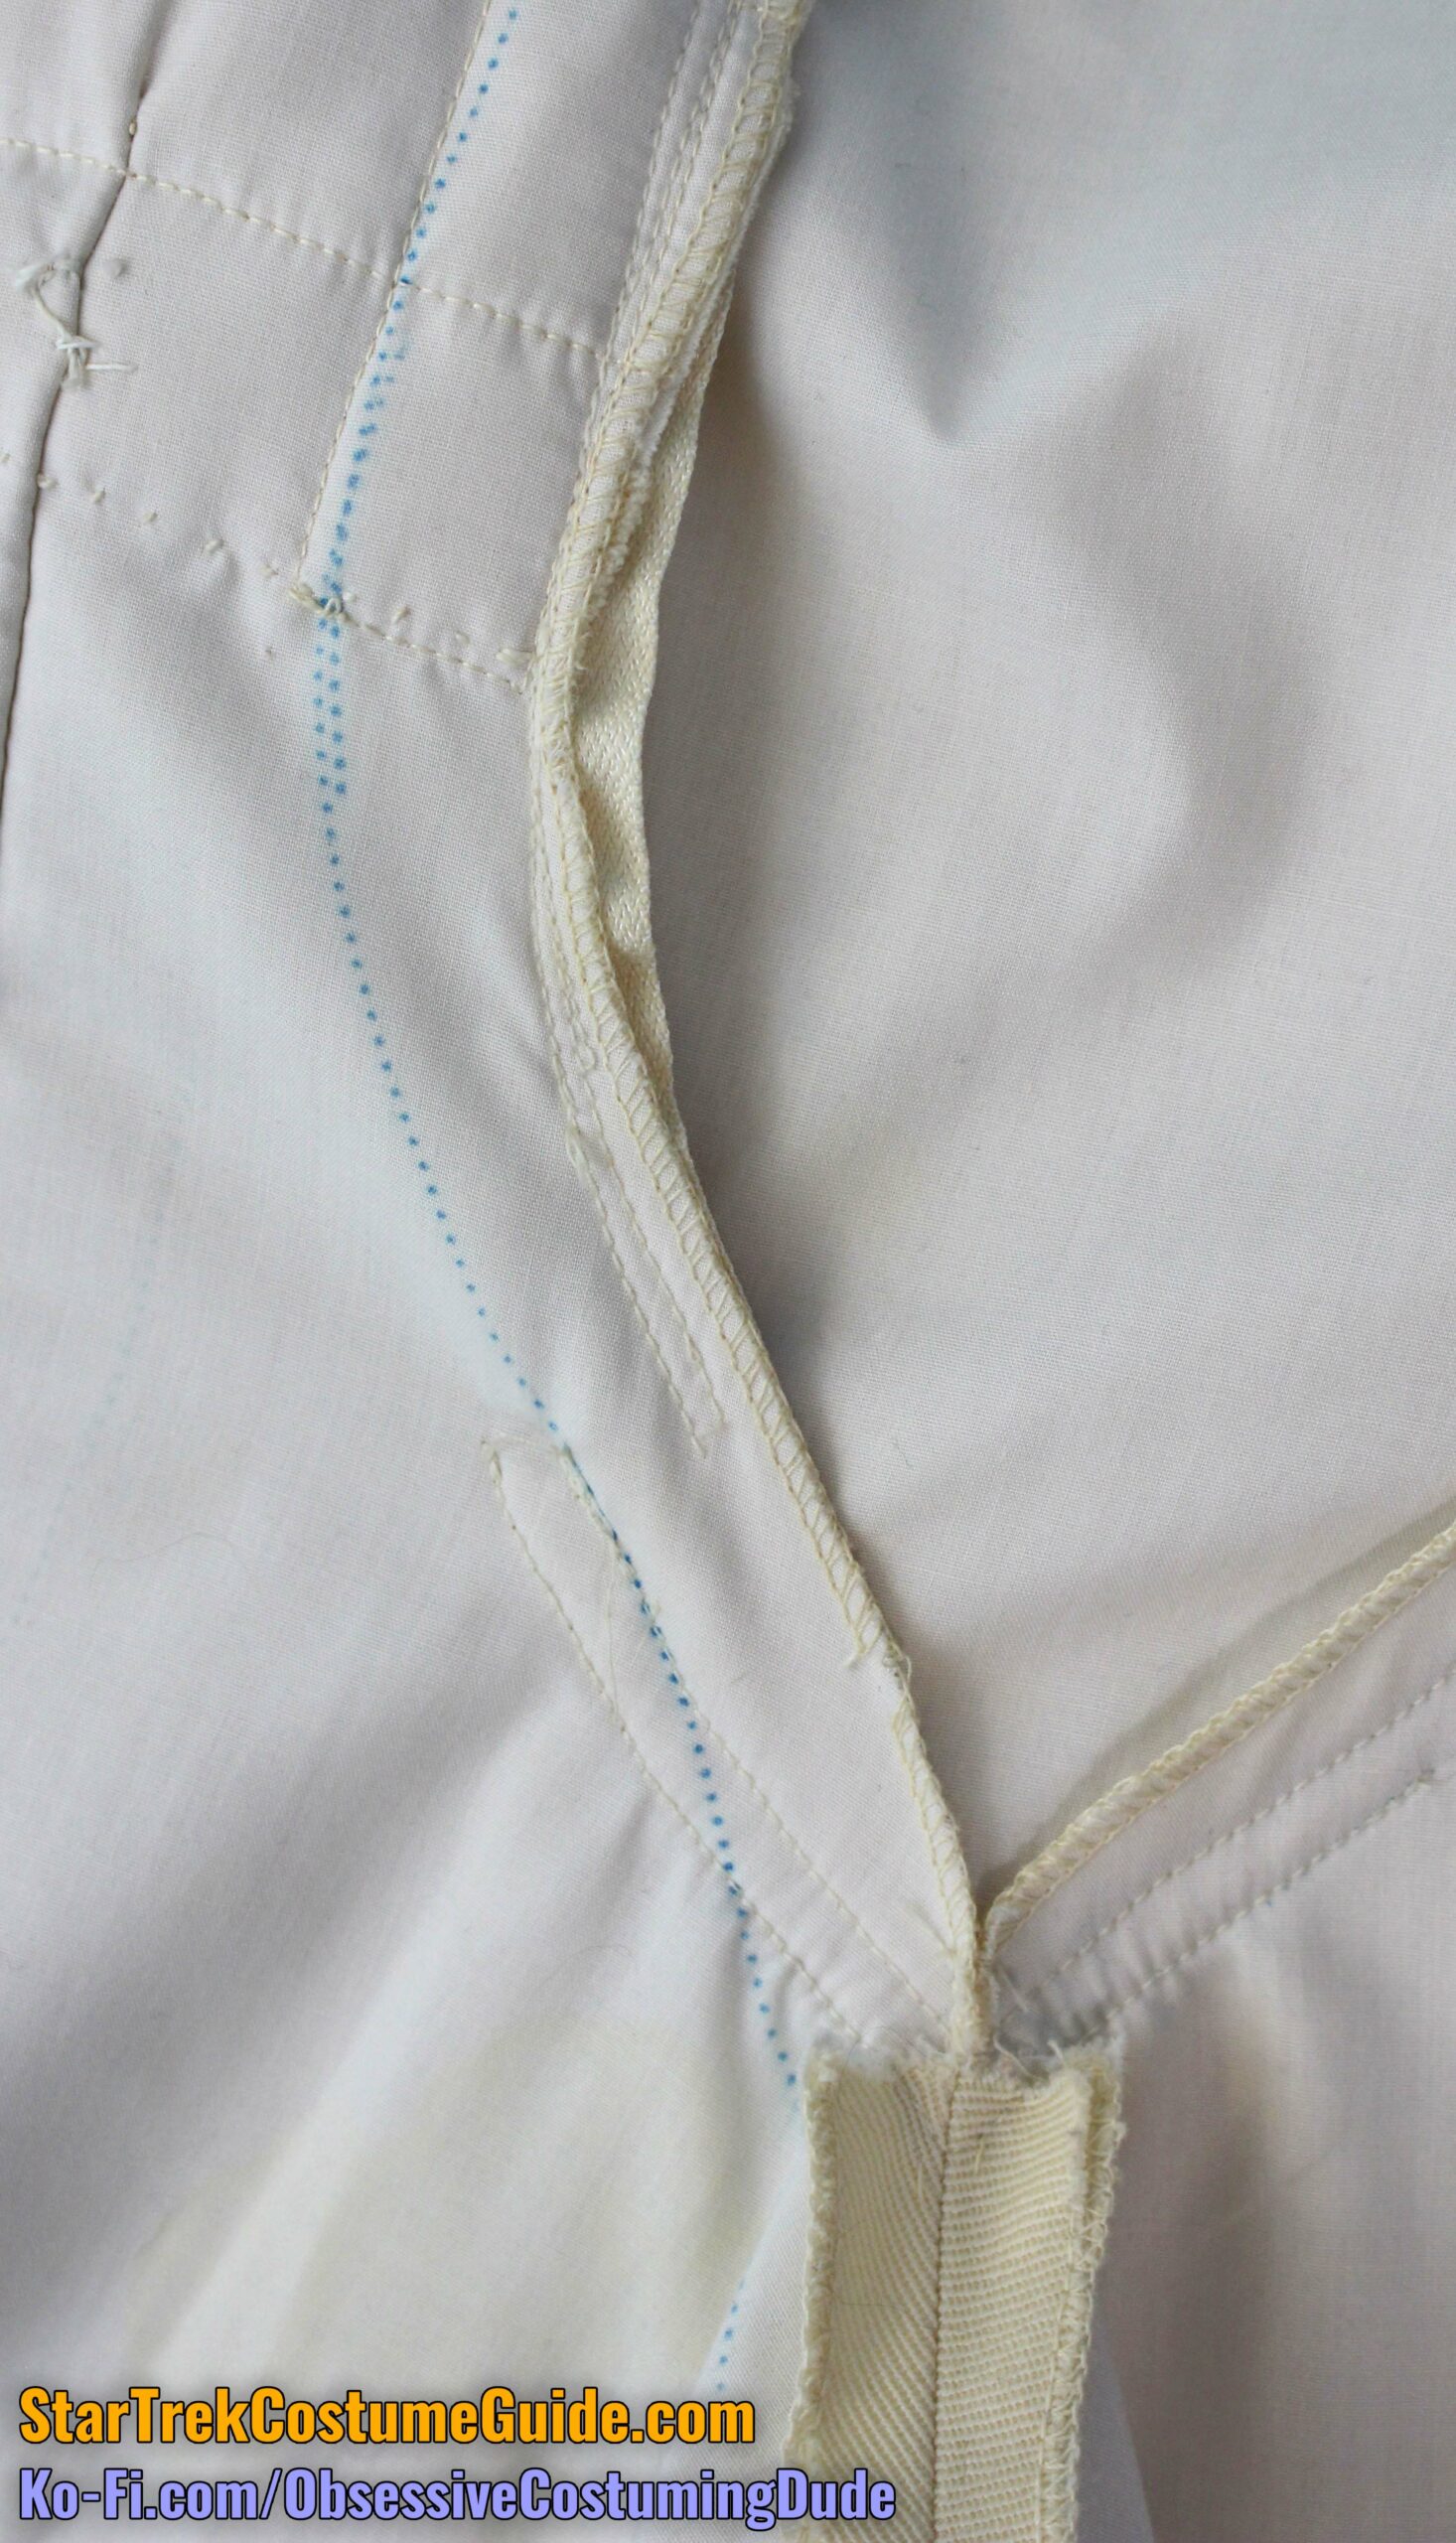
The front crotch seam allowance was approximately ½”.
The side seam allowance was 1” for most of its duration, although it did taper down to about 13/16” toward the thighs.
The inseam allowances were slightly larger than 1” at the crotch, and they tapered down to about ⅞” at the hem.
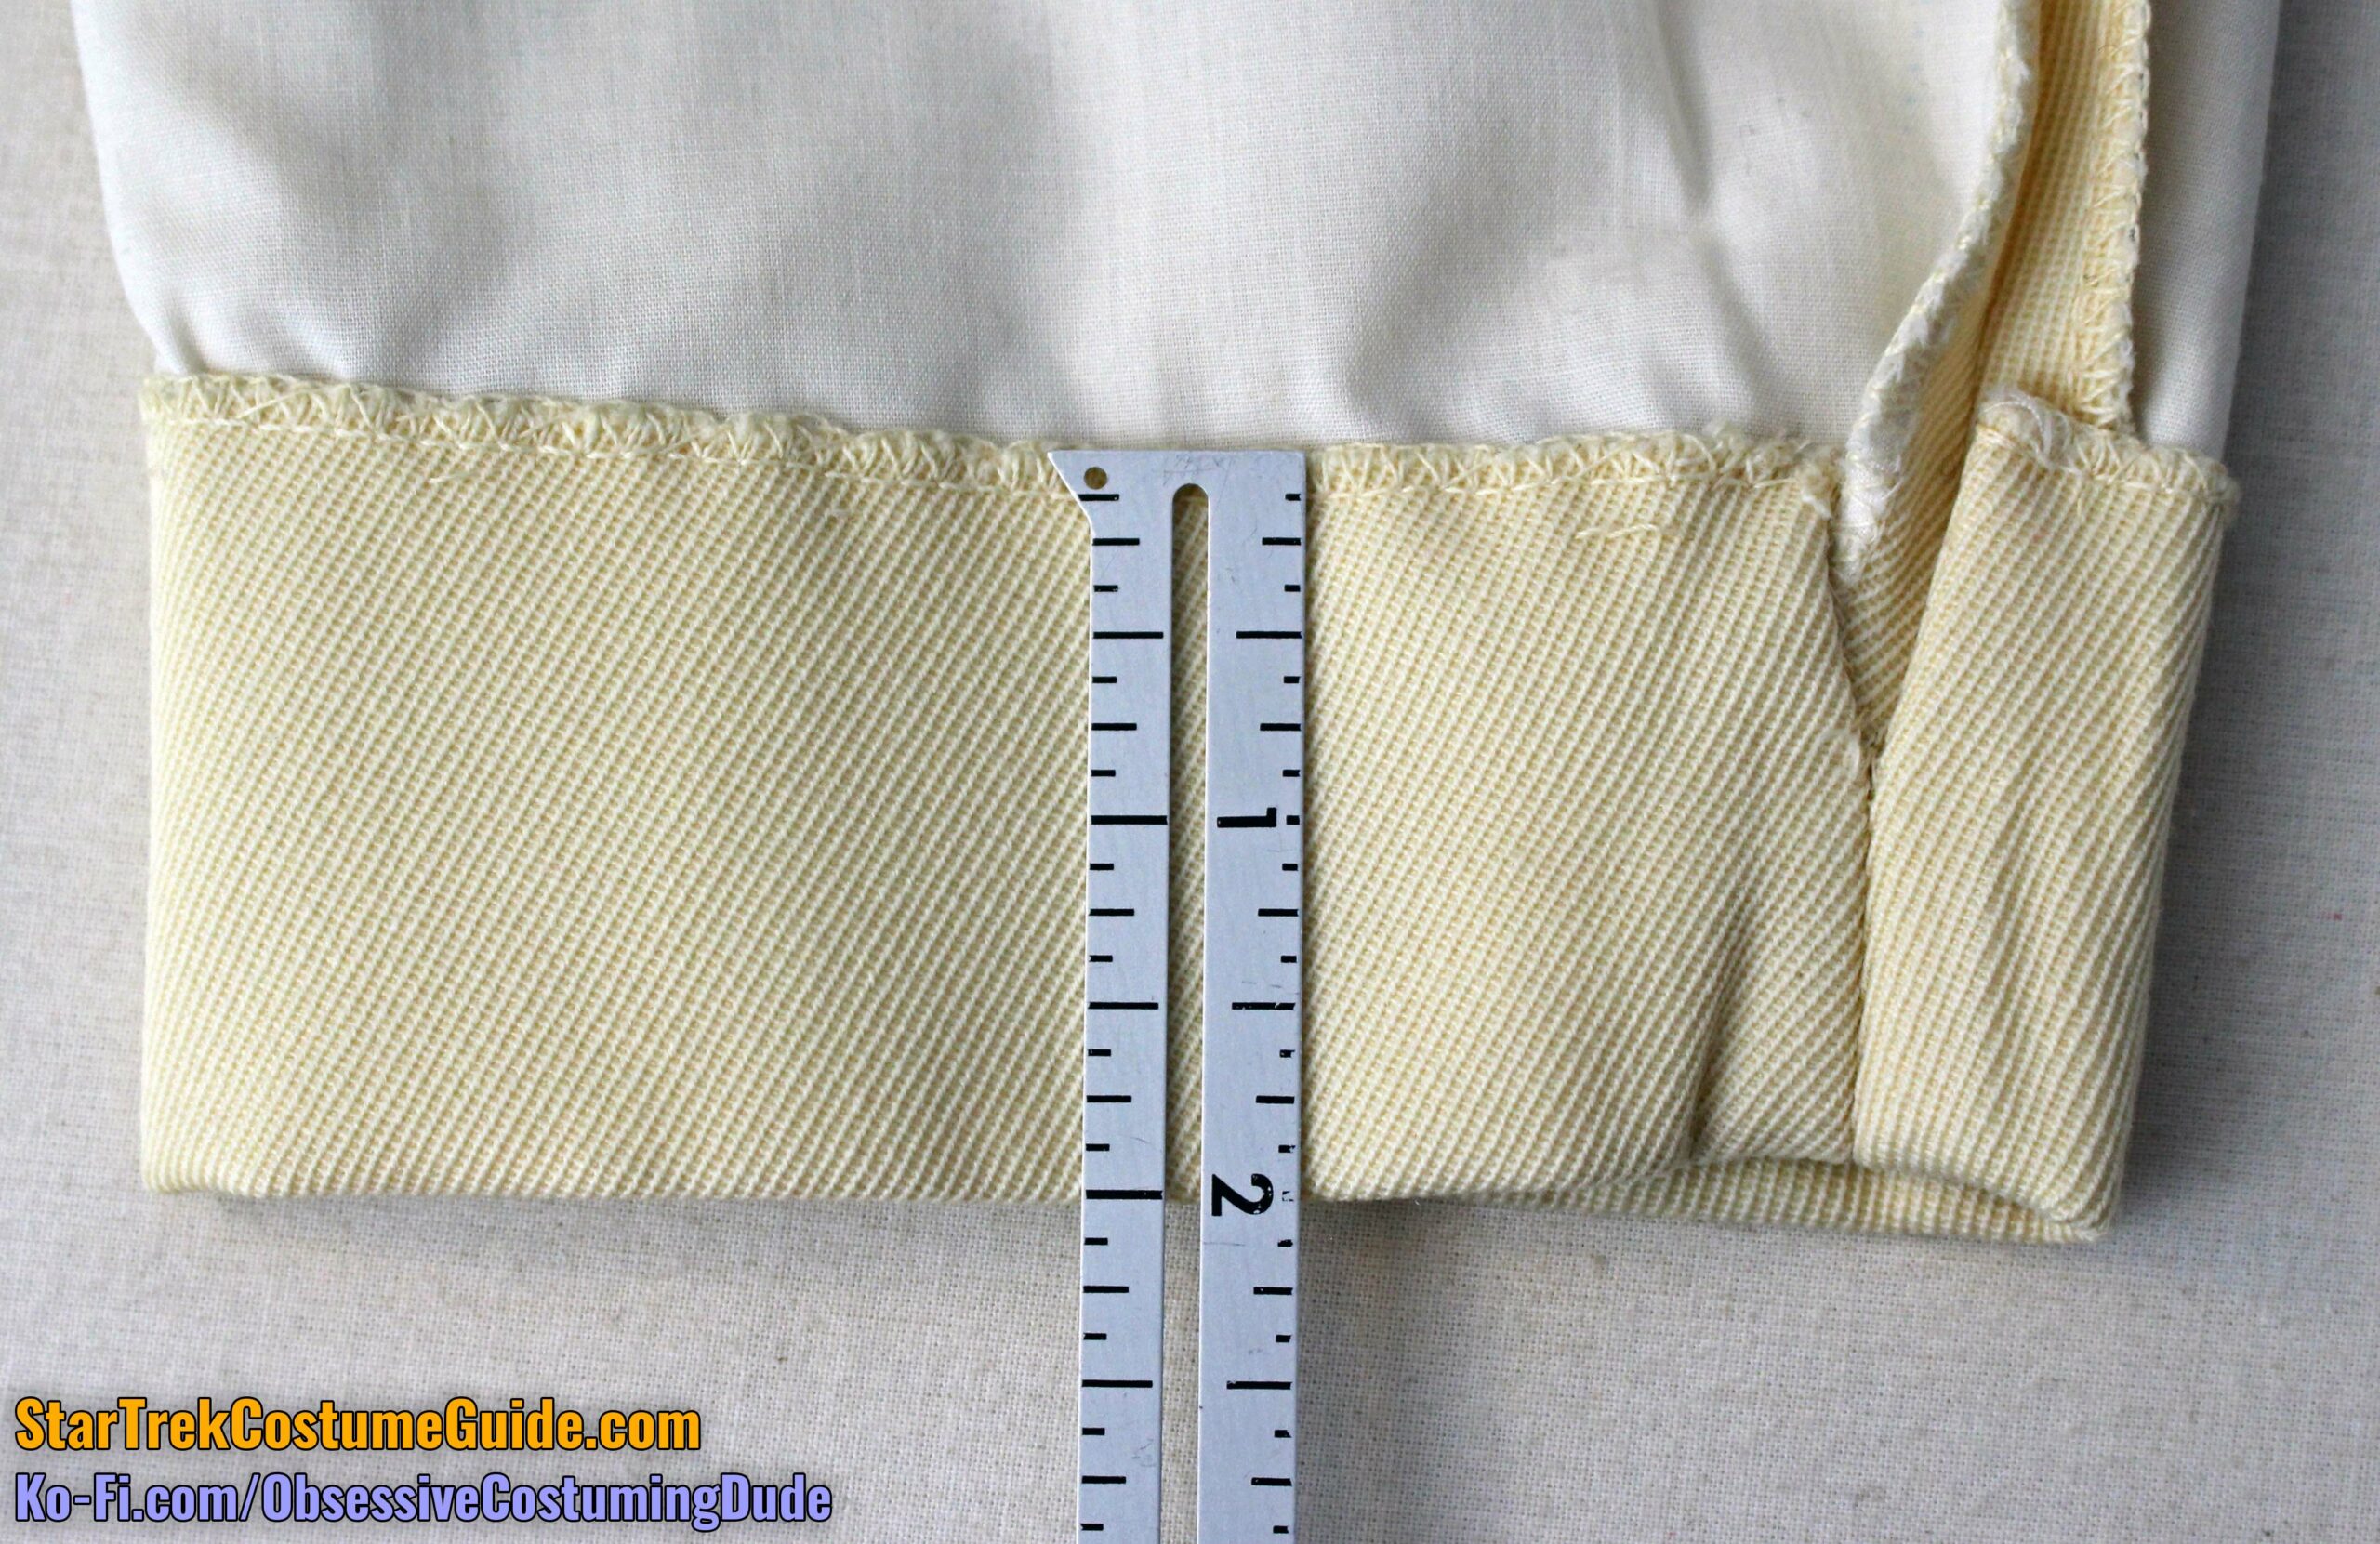
The pant leg hem allowance was 3”, and it was catch-stitched to the cotton underlining.
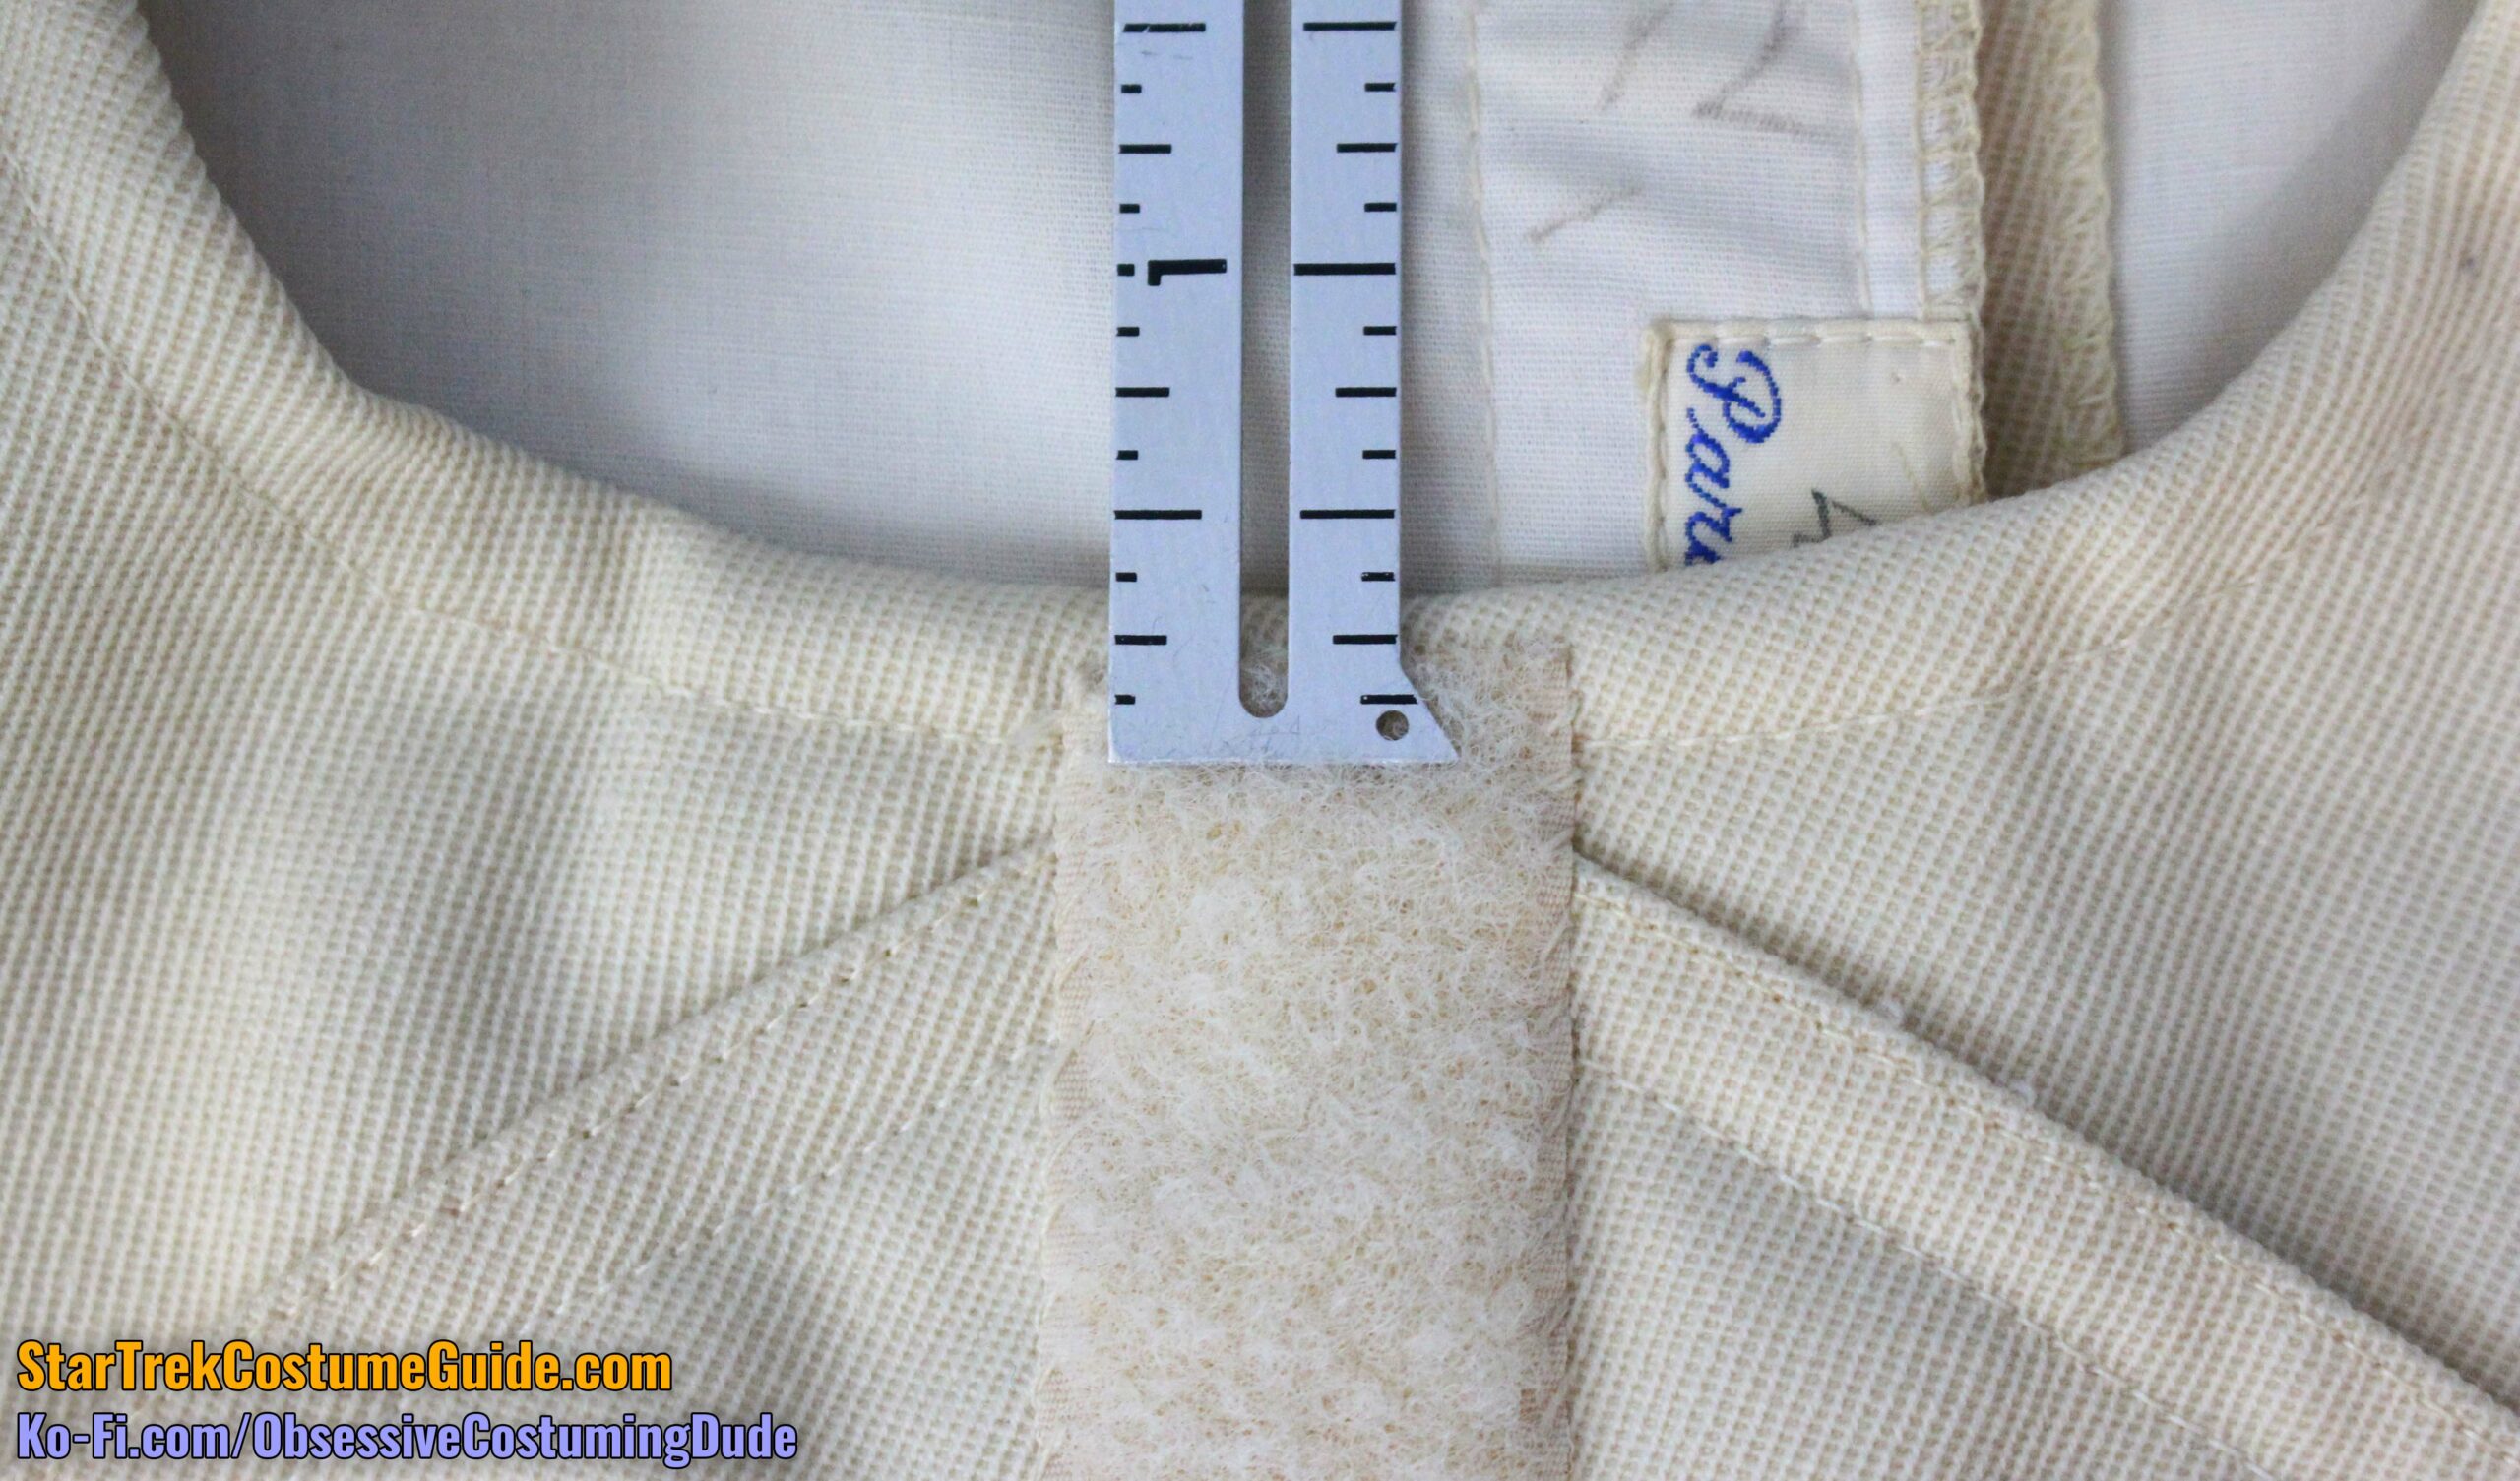
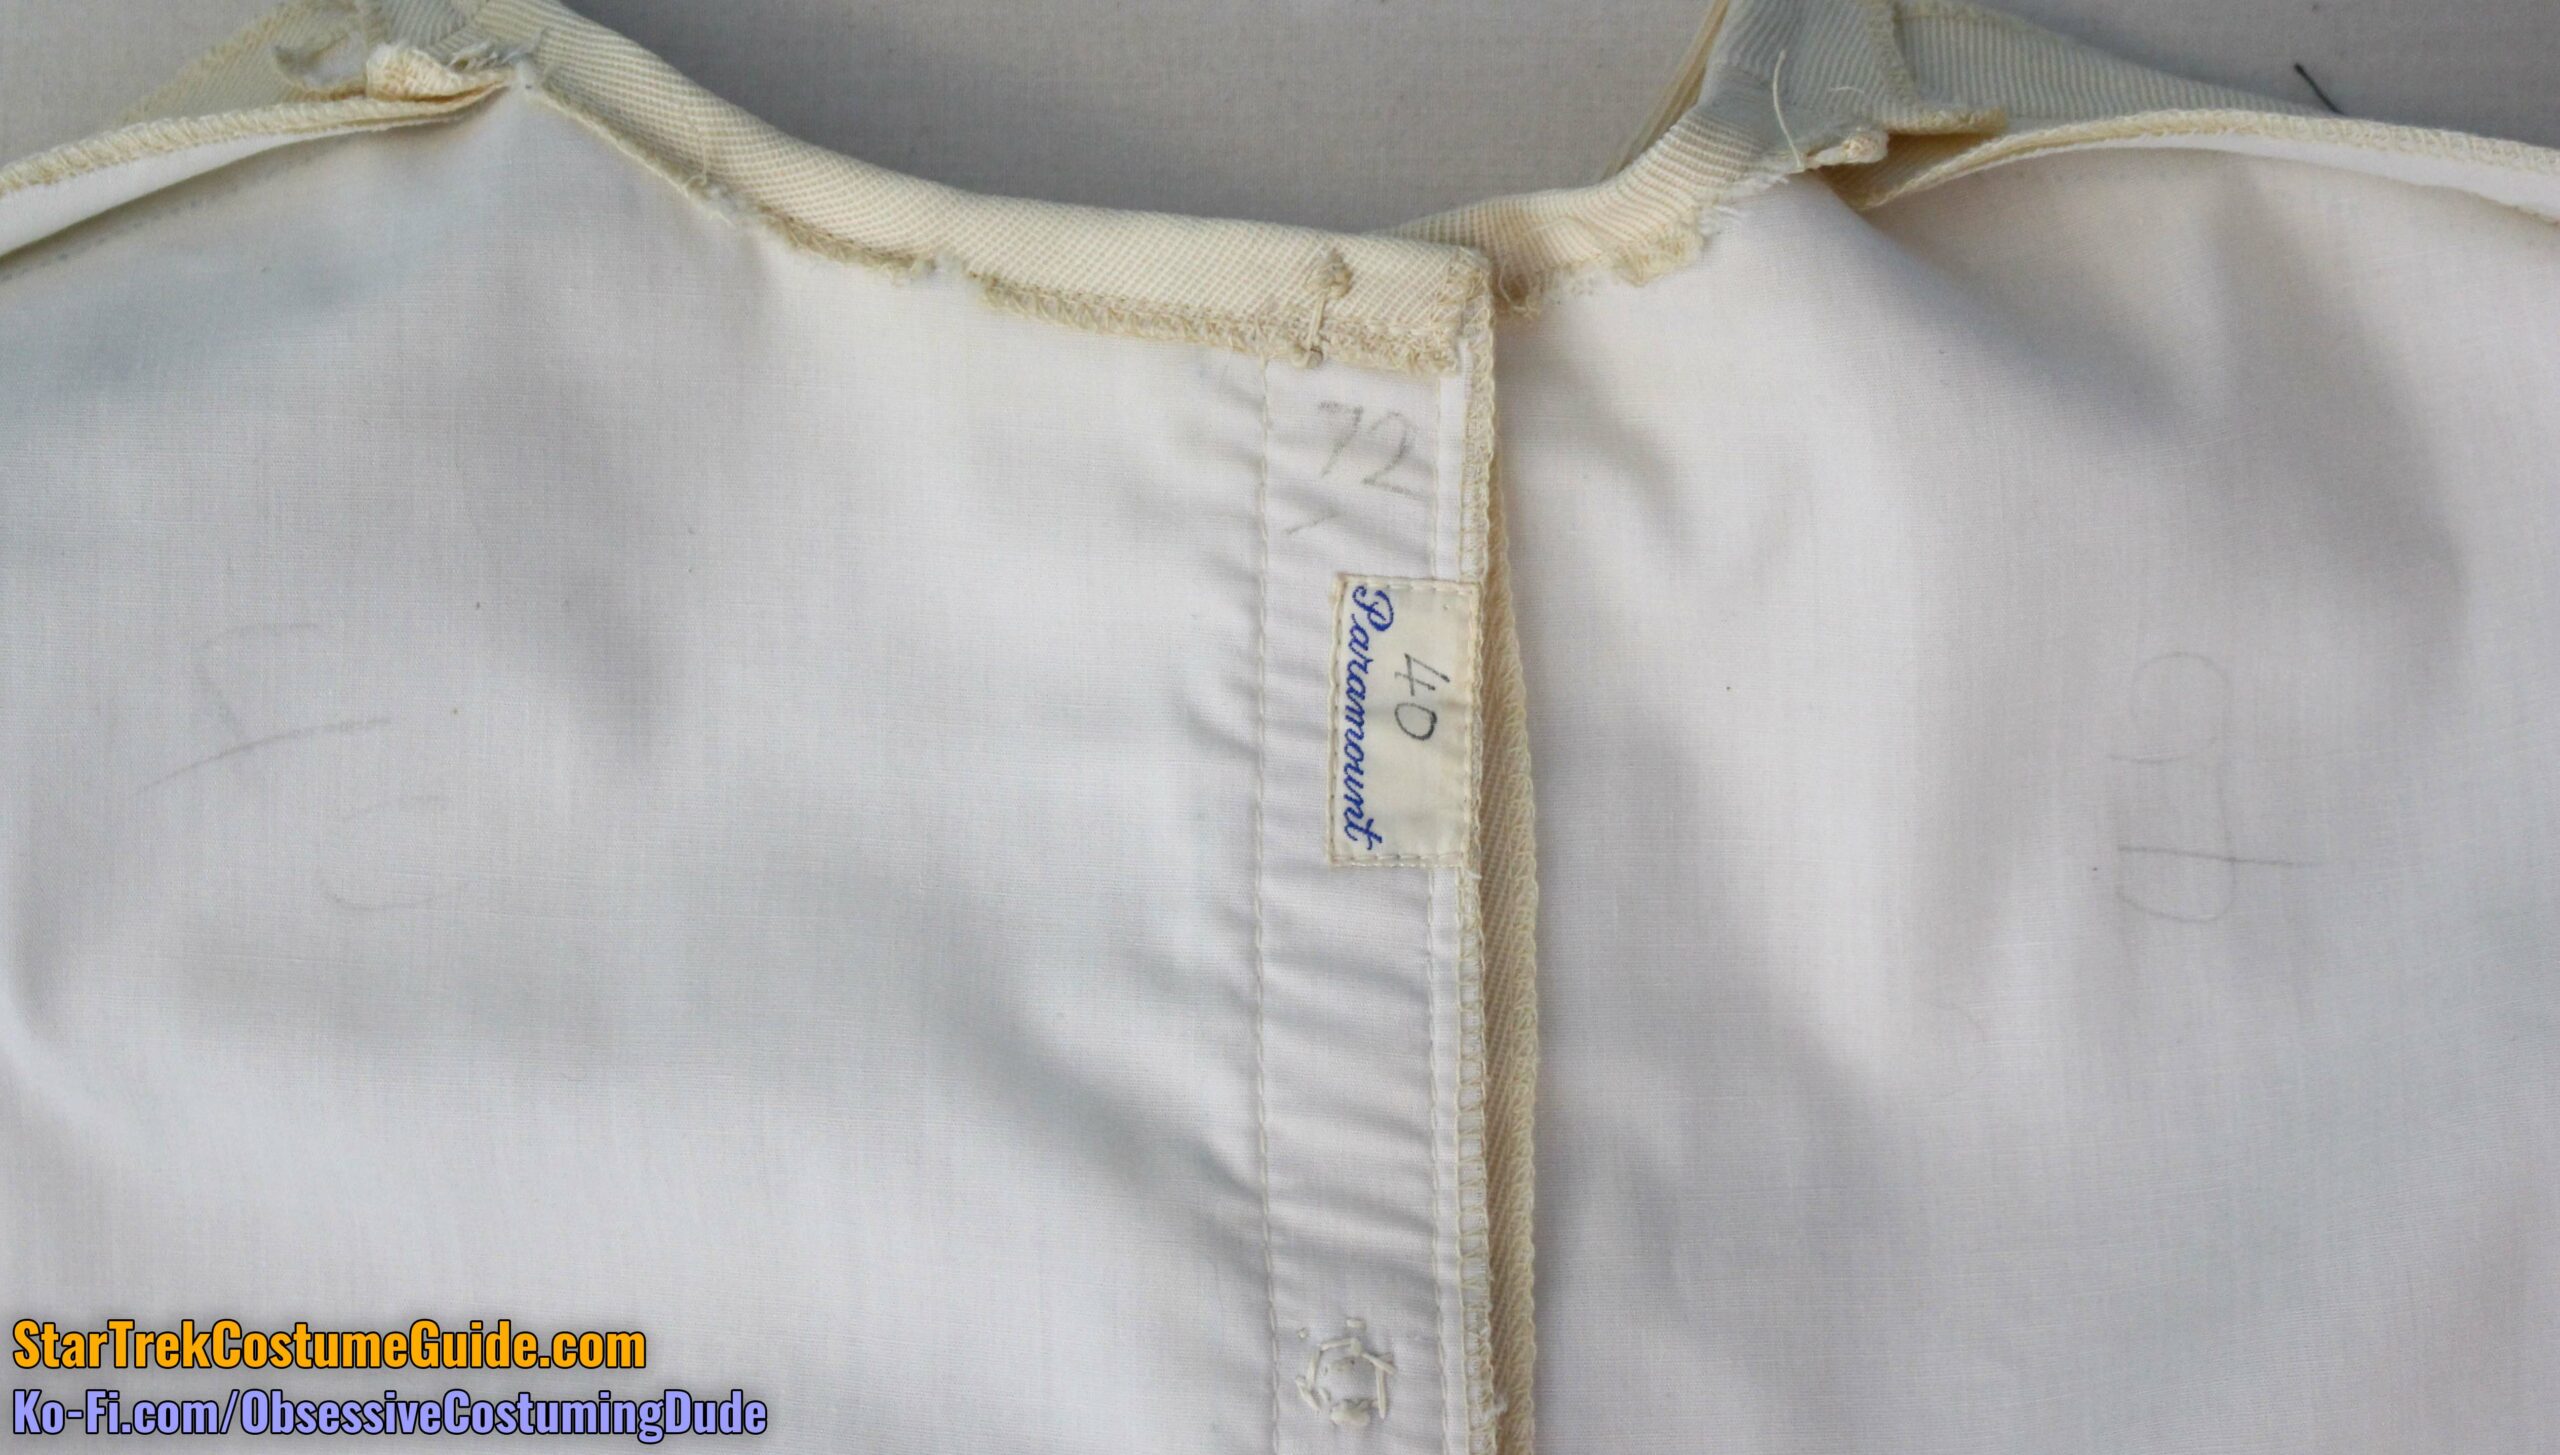
Here’s a photo of the Paramount production tag:
On the tag, the number “40” was written in pen (presumably indicating the garment’s size), as well as in pencil on both sides of the cotton underlining.
The number “72” was also written in pencil above the Paramount tag, possibly indicating the ideal height of the wearer?
On the back waist, you can again see the machine stitching along the upper edge and upper two channels of the waist bands, and the hand-sewing along the lower edge.
The back crotch seam allowances were ⅞” were they were clipped to form the back overlap, but they tapered down to ½”.
As I mentioned earlier, the slight ease in the sleeve cap was easier to observe with the jumpsuit inside-out.
The armscye seam allowances were approximately ½”.
The front sleeve allowances were ¾” at the armscye, although they tapered down to ½” at the elbow and ⅜” toward the sleeve hem.
The back sleeve allowances were about ⅝” at the armscye, but they tapered down to a scant 5/16” at the elbow (possibly due to the bulk produced by the cording?), and then widened back to ⅜” toward the sleeve hem.
The sleeve hem allowance was 2”.
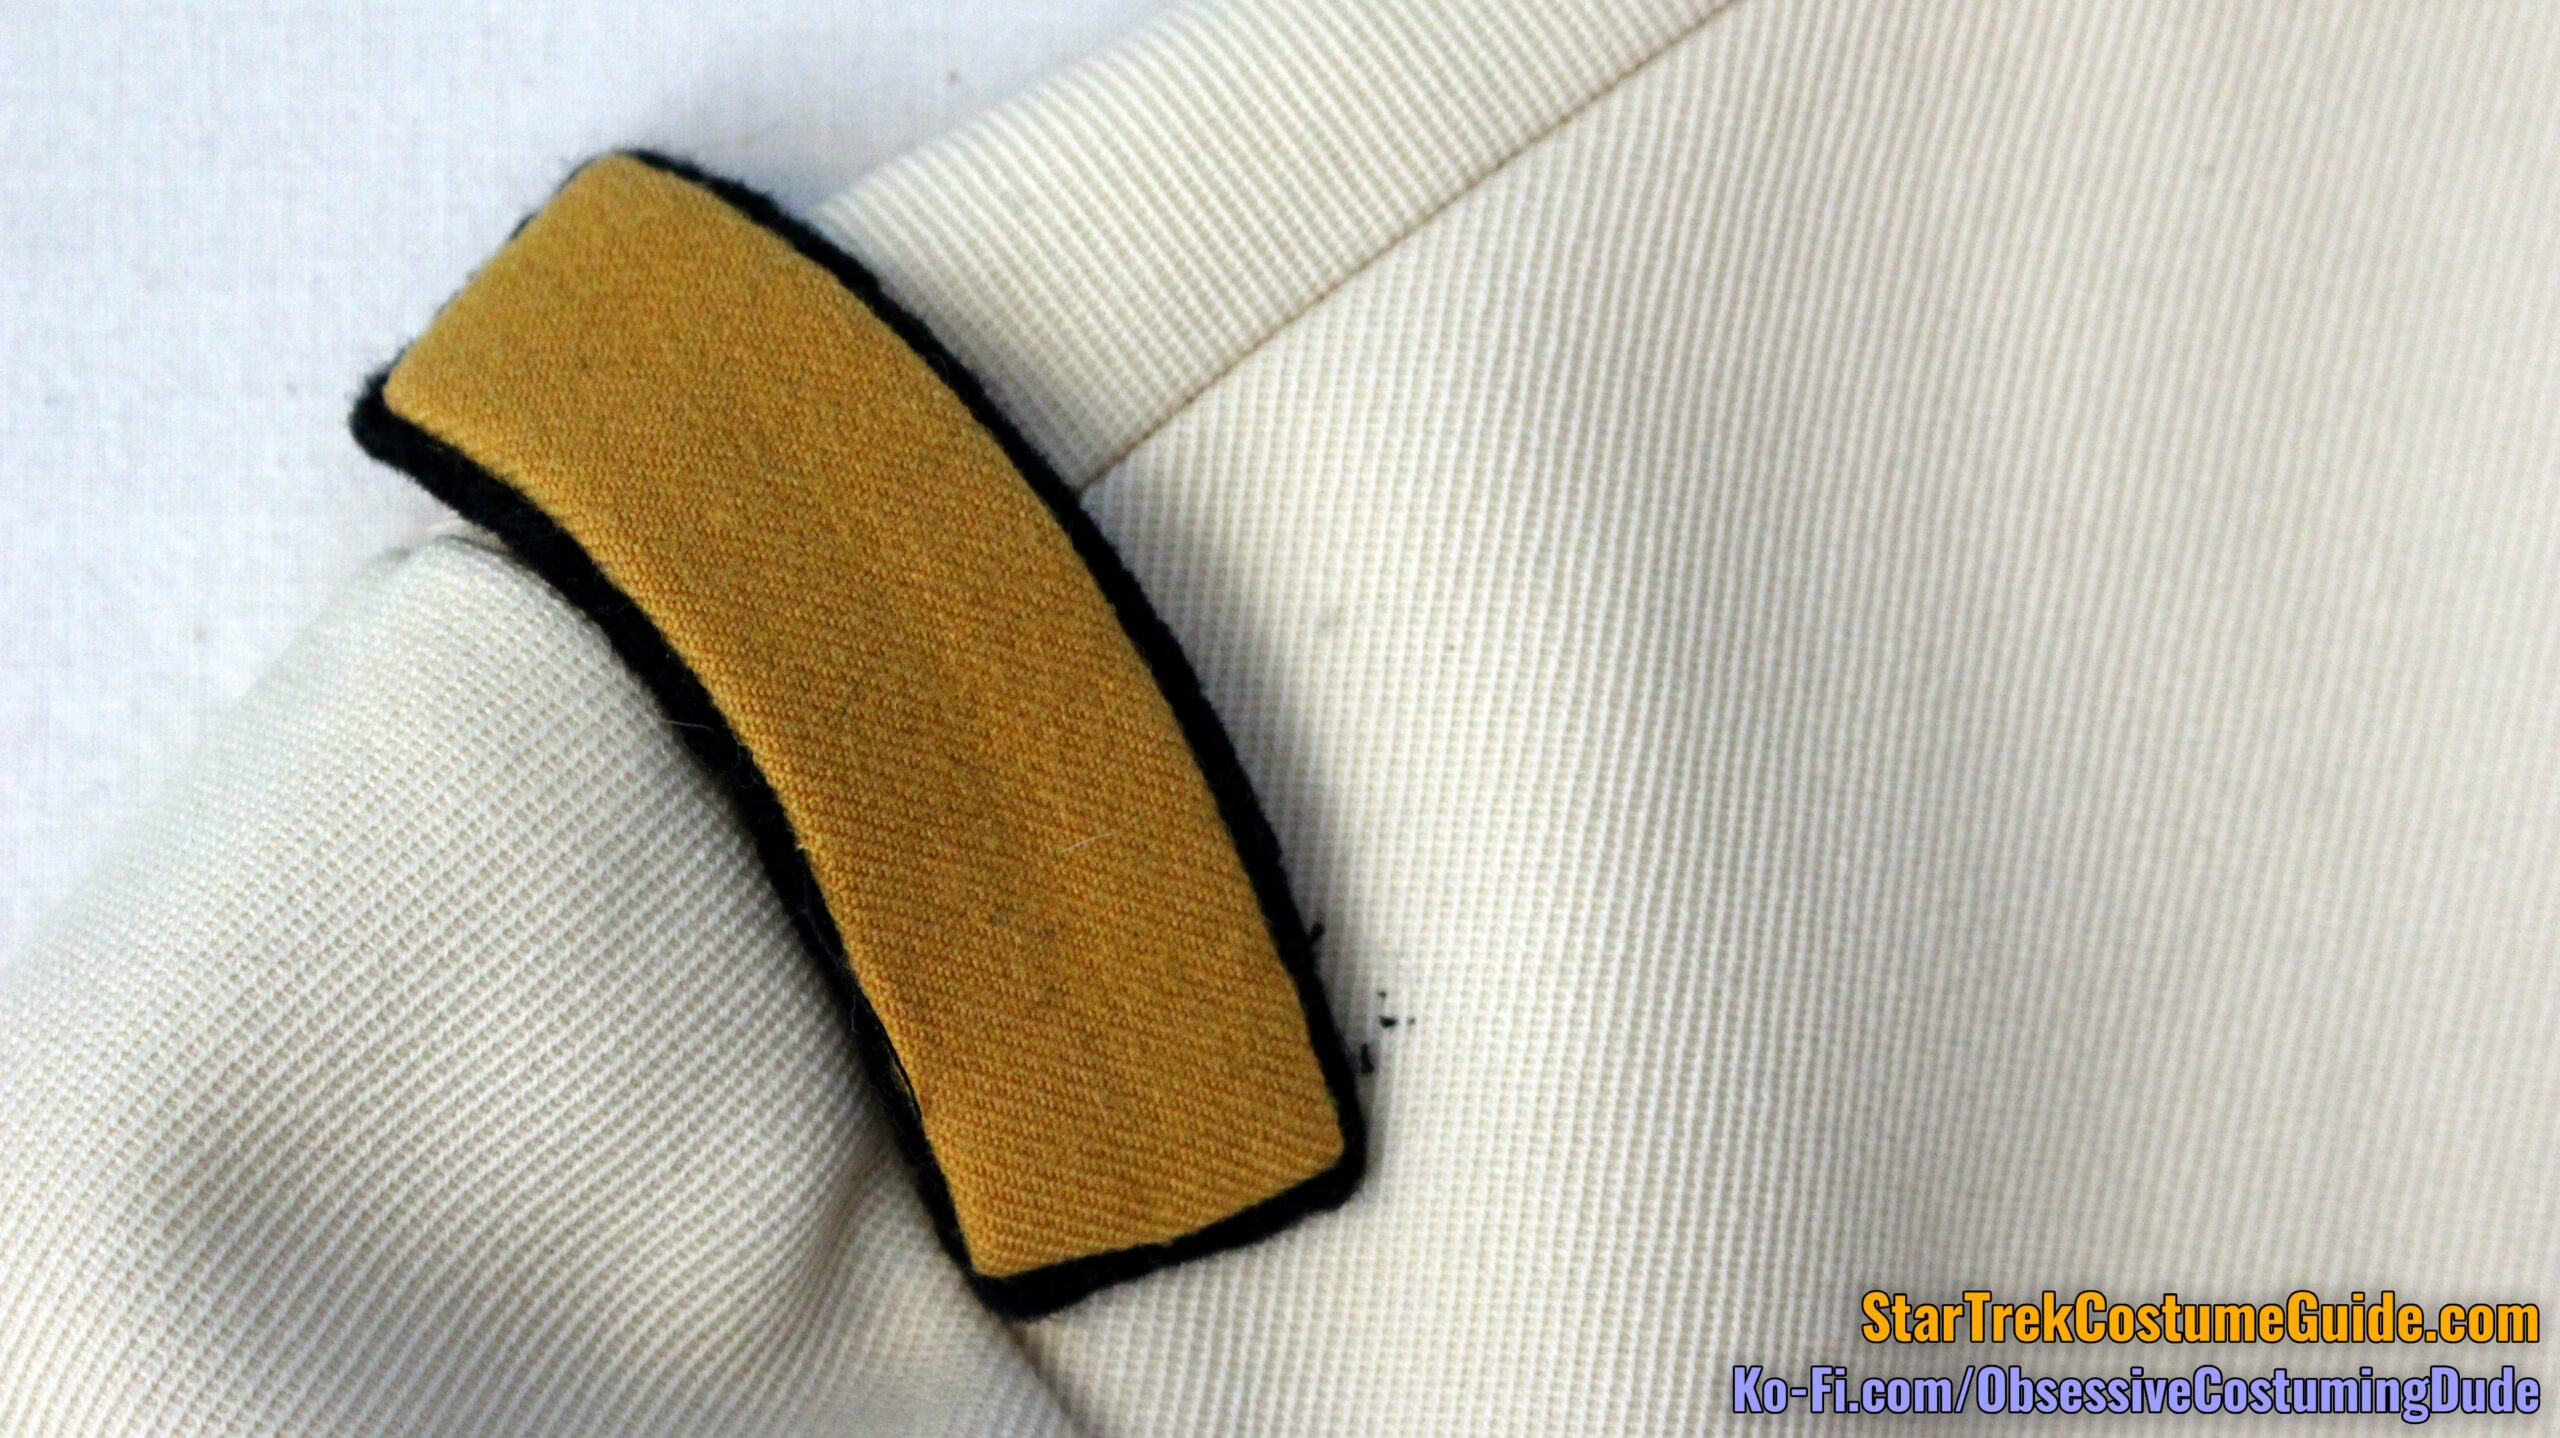
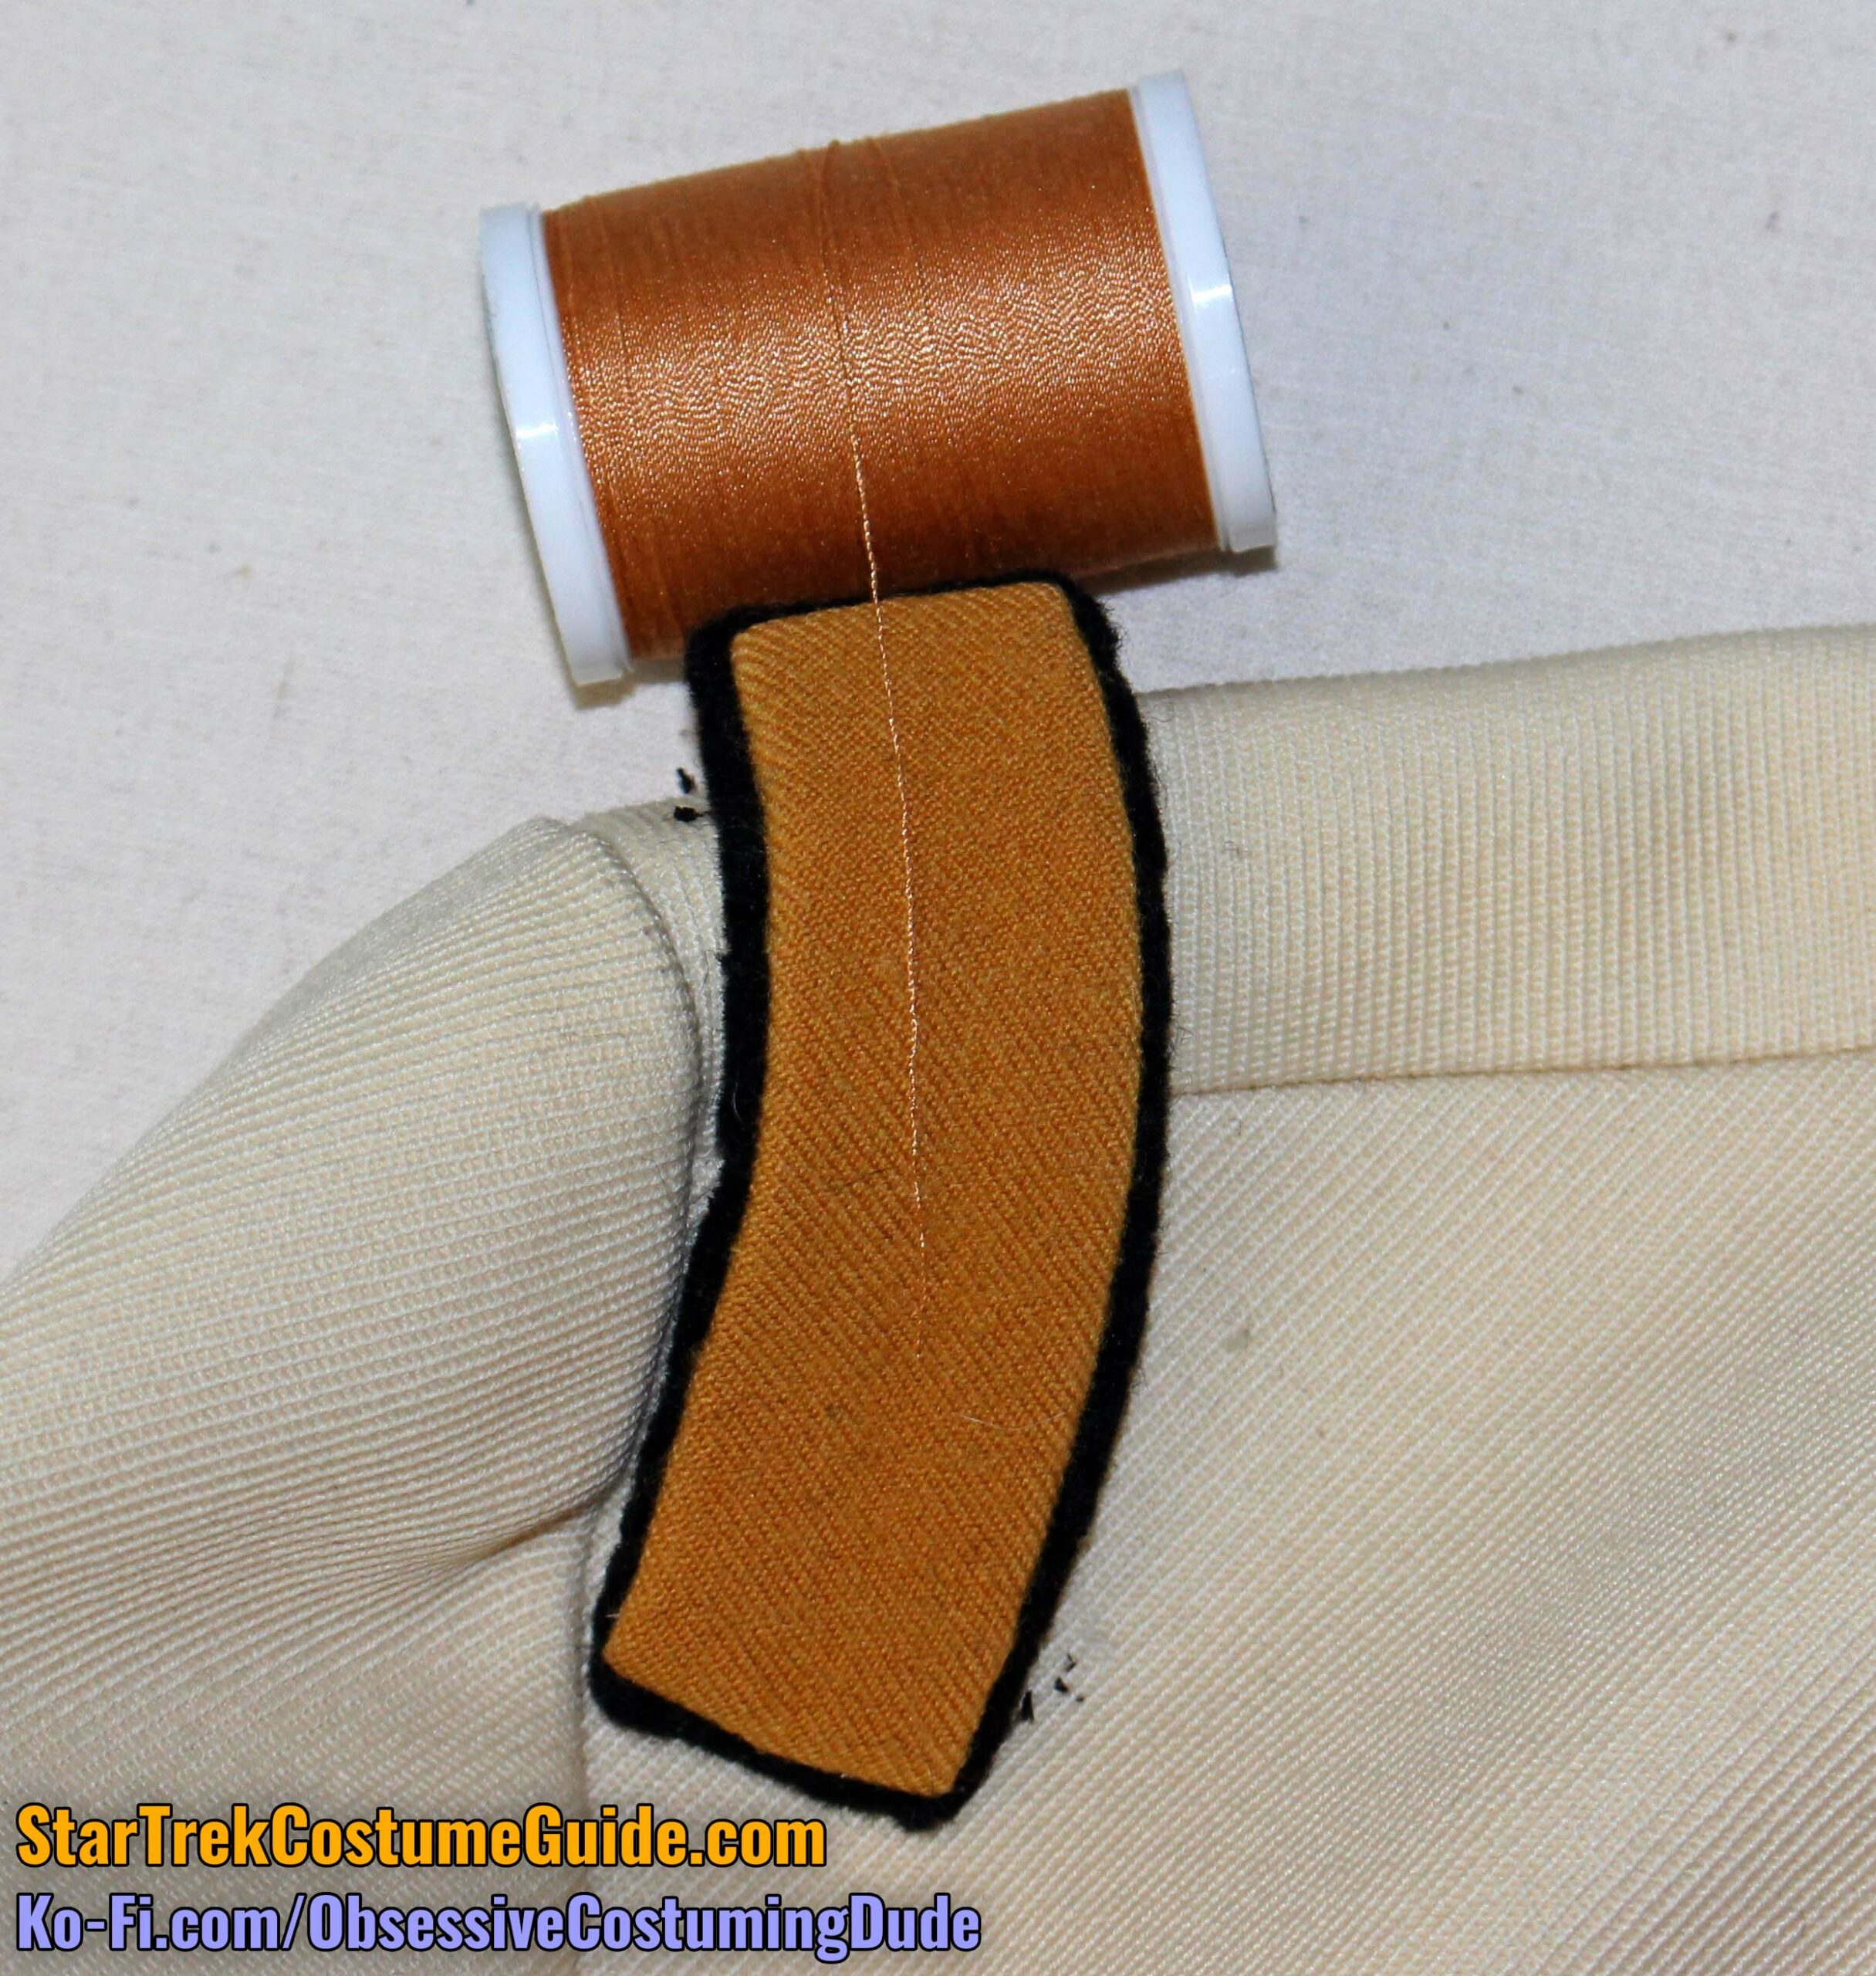
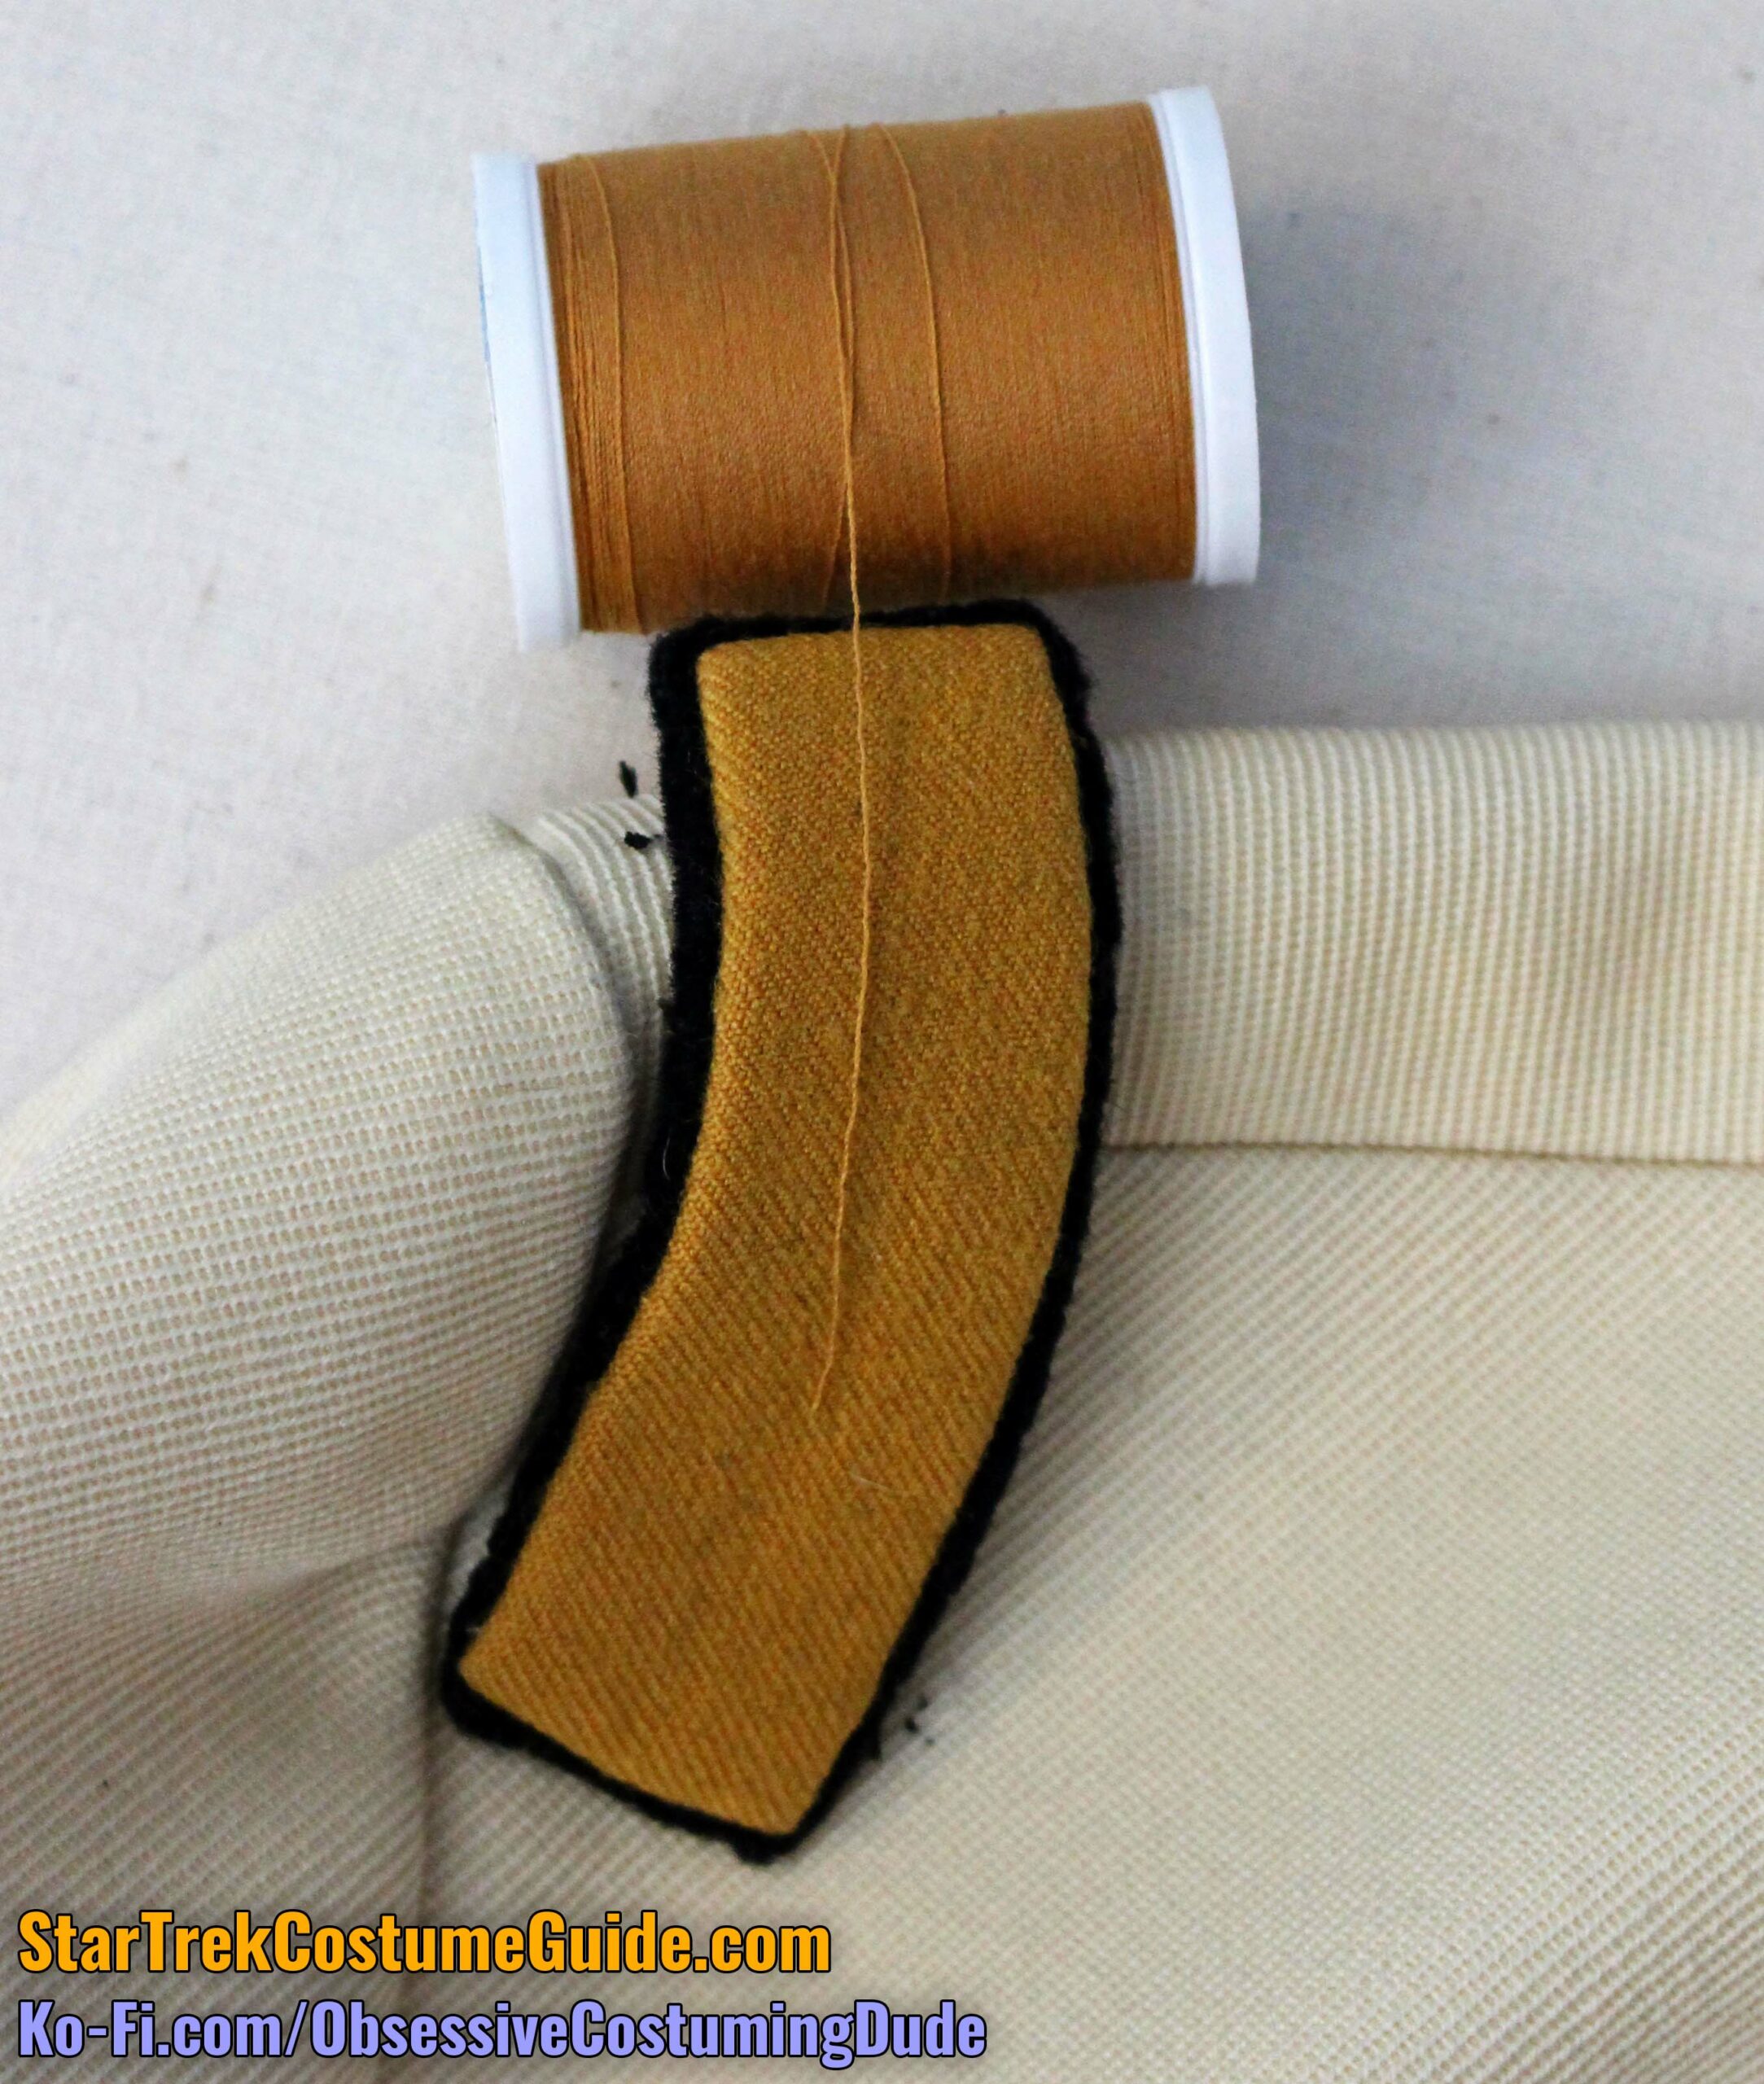
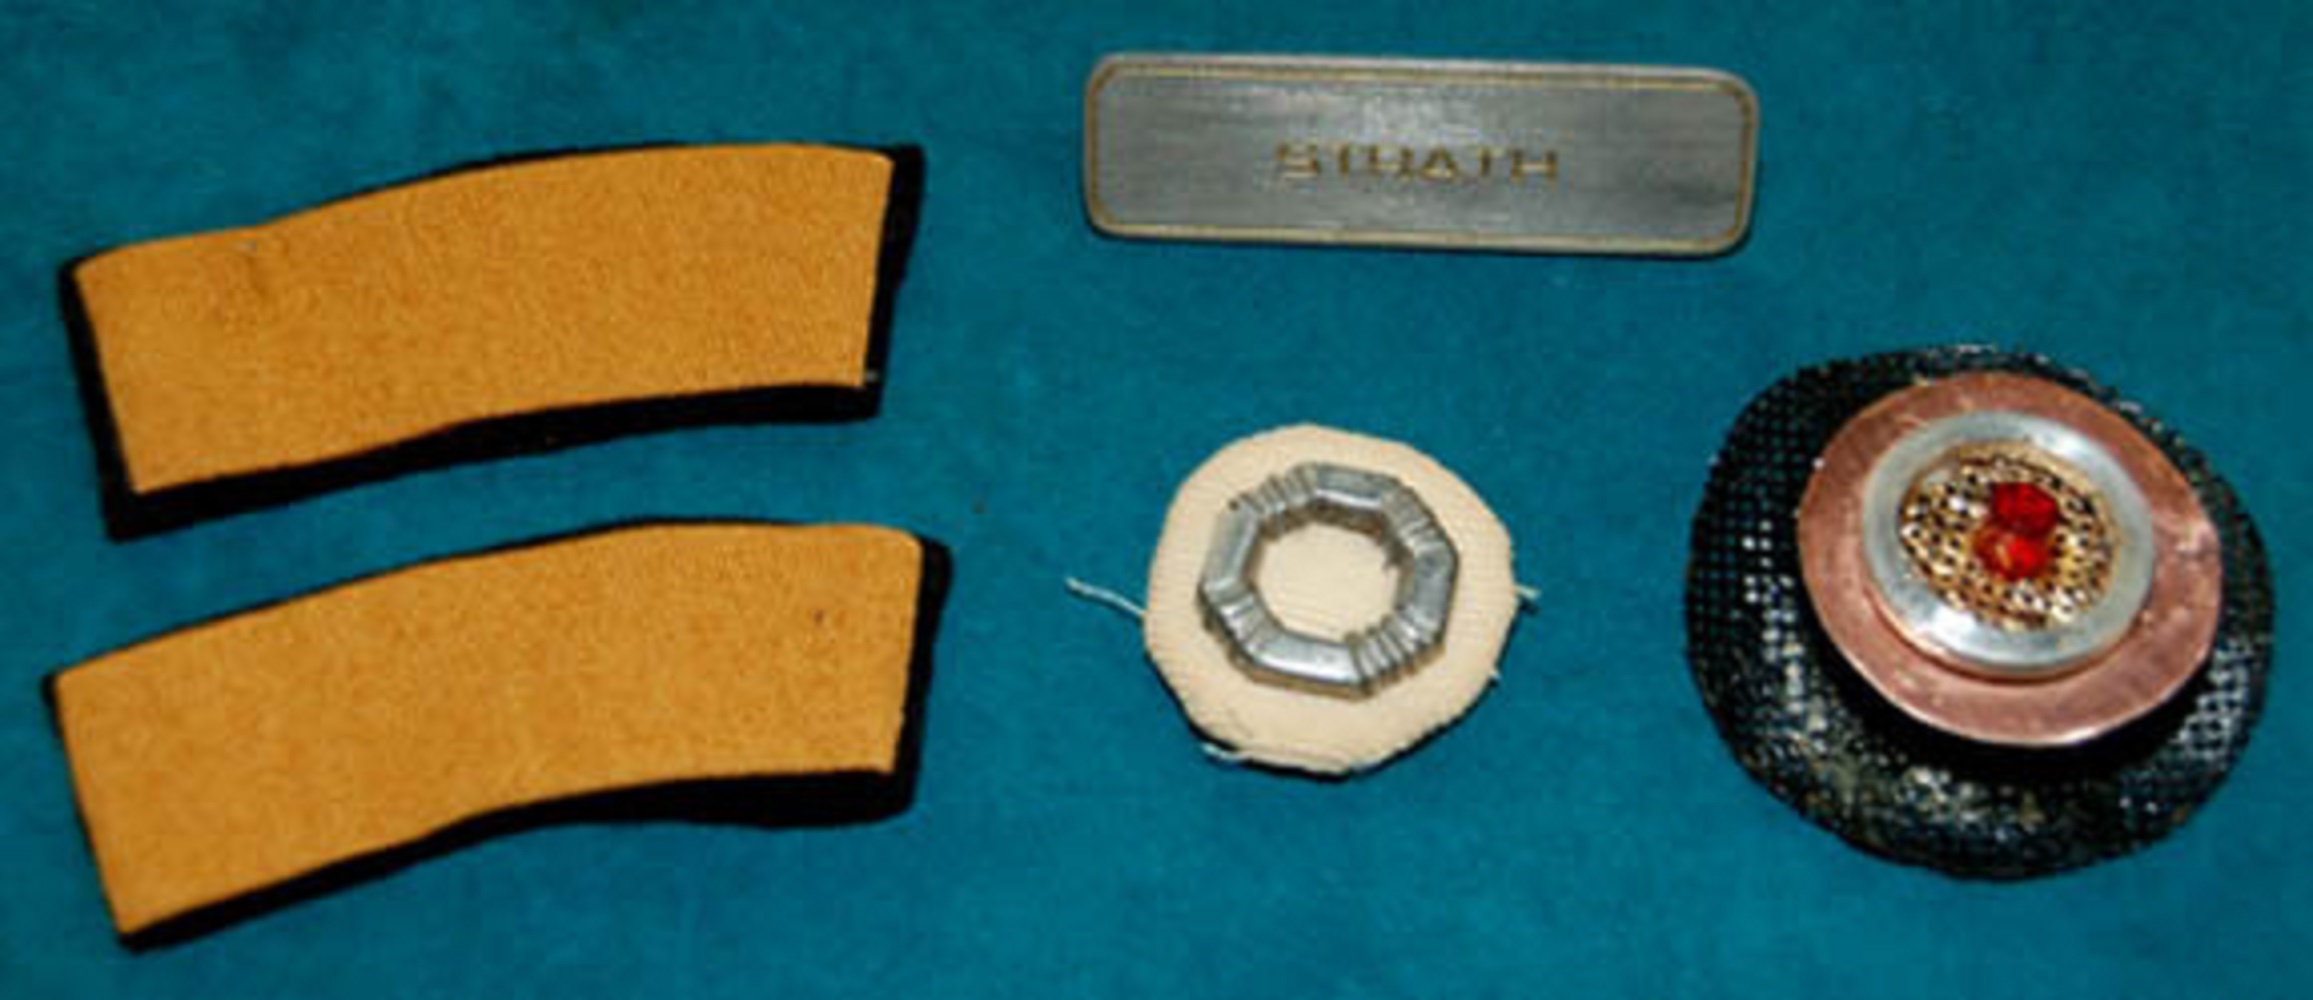
SHOULDER TABS
Having completed our examination of the jumpsuit, we can now turn our attention to the myriad of accents and attachments that gave the costume so much of its amazing detail.
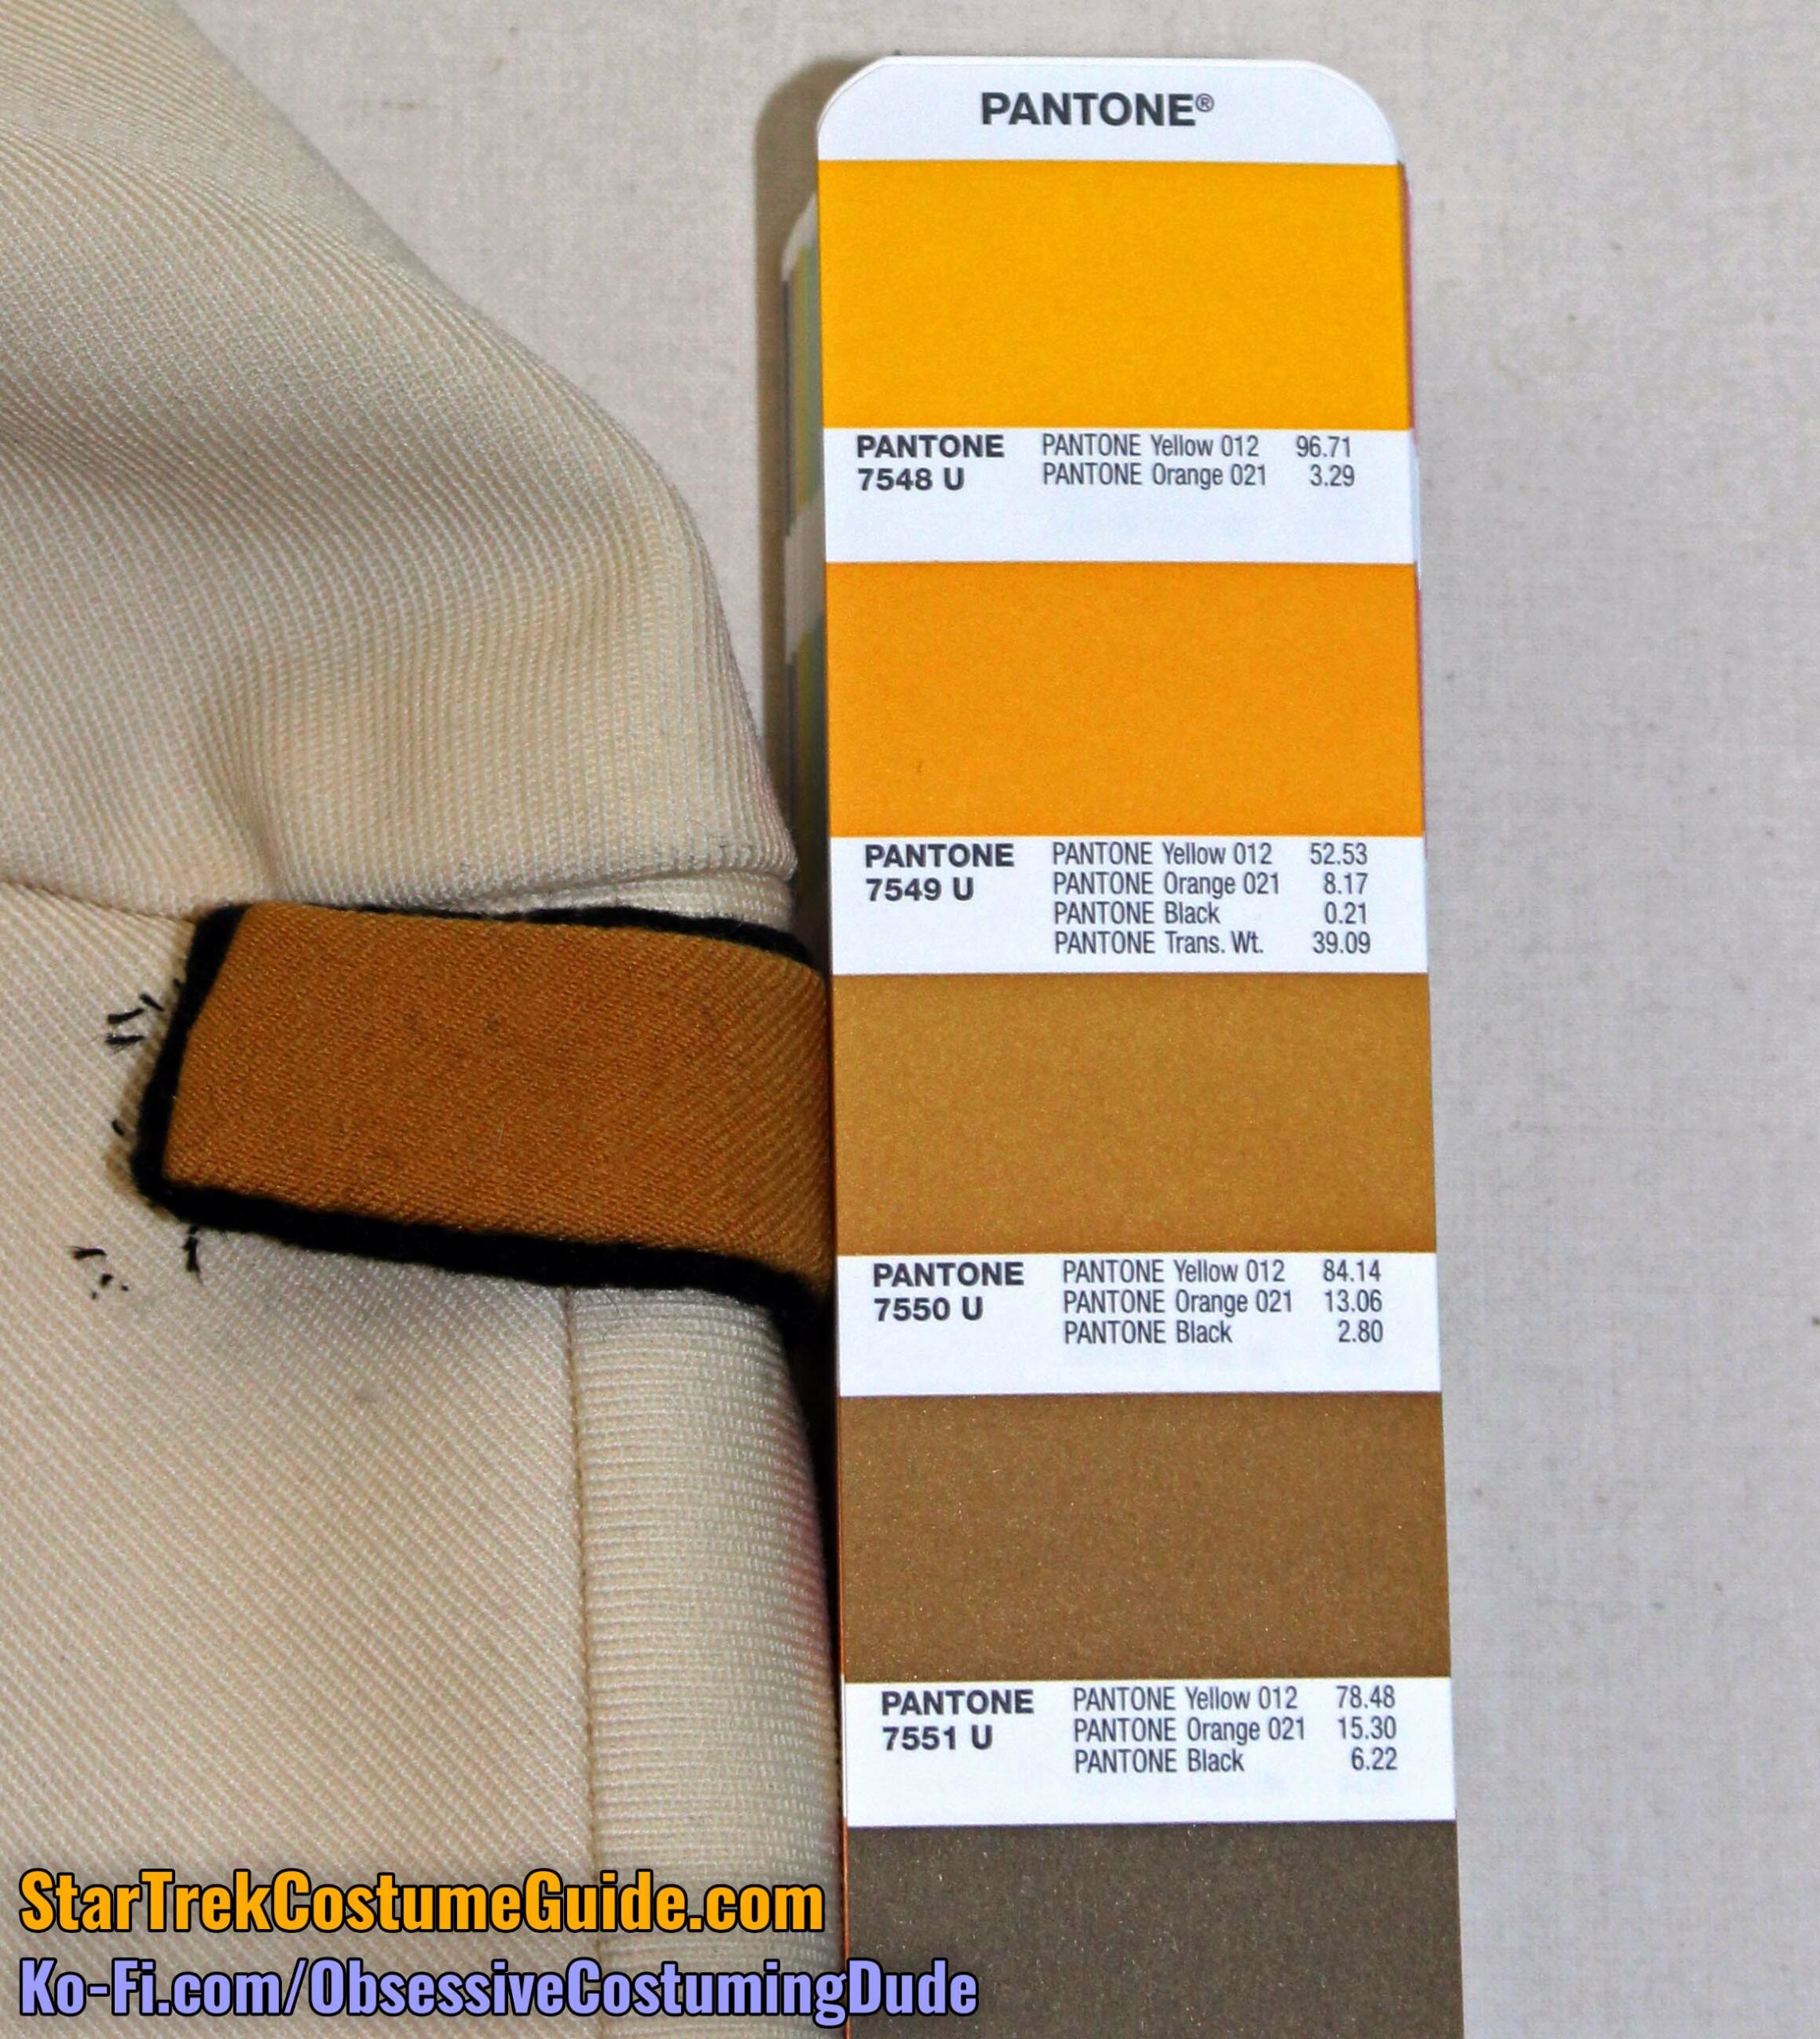
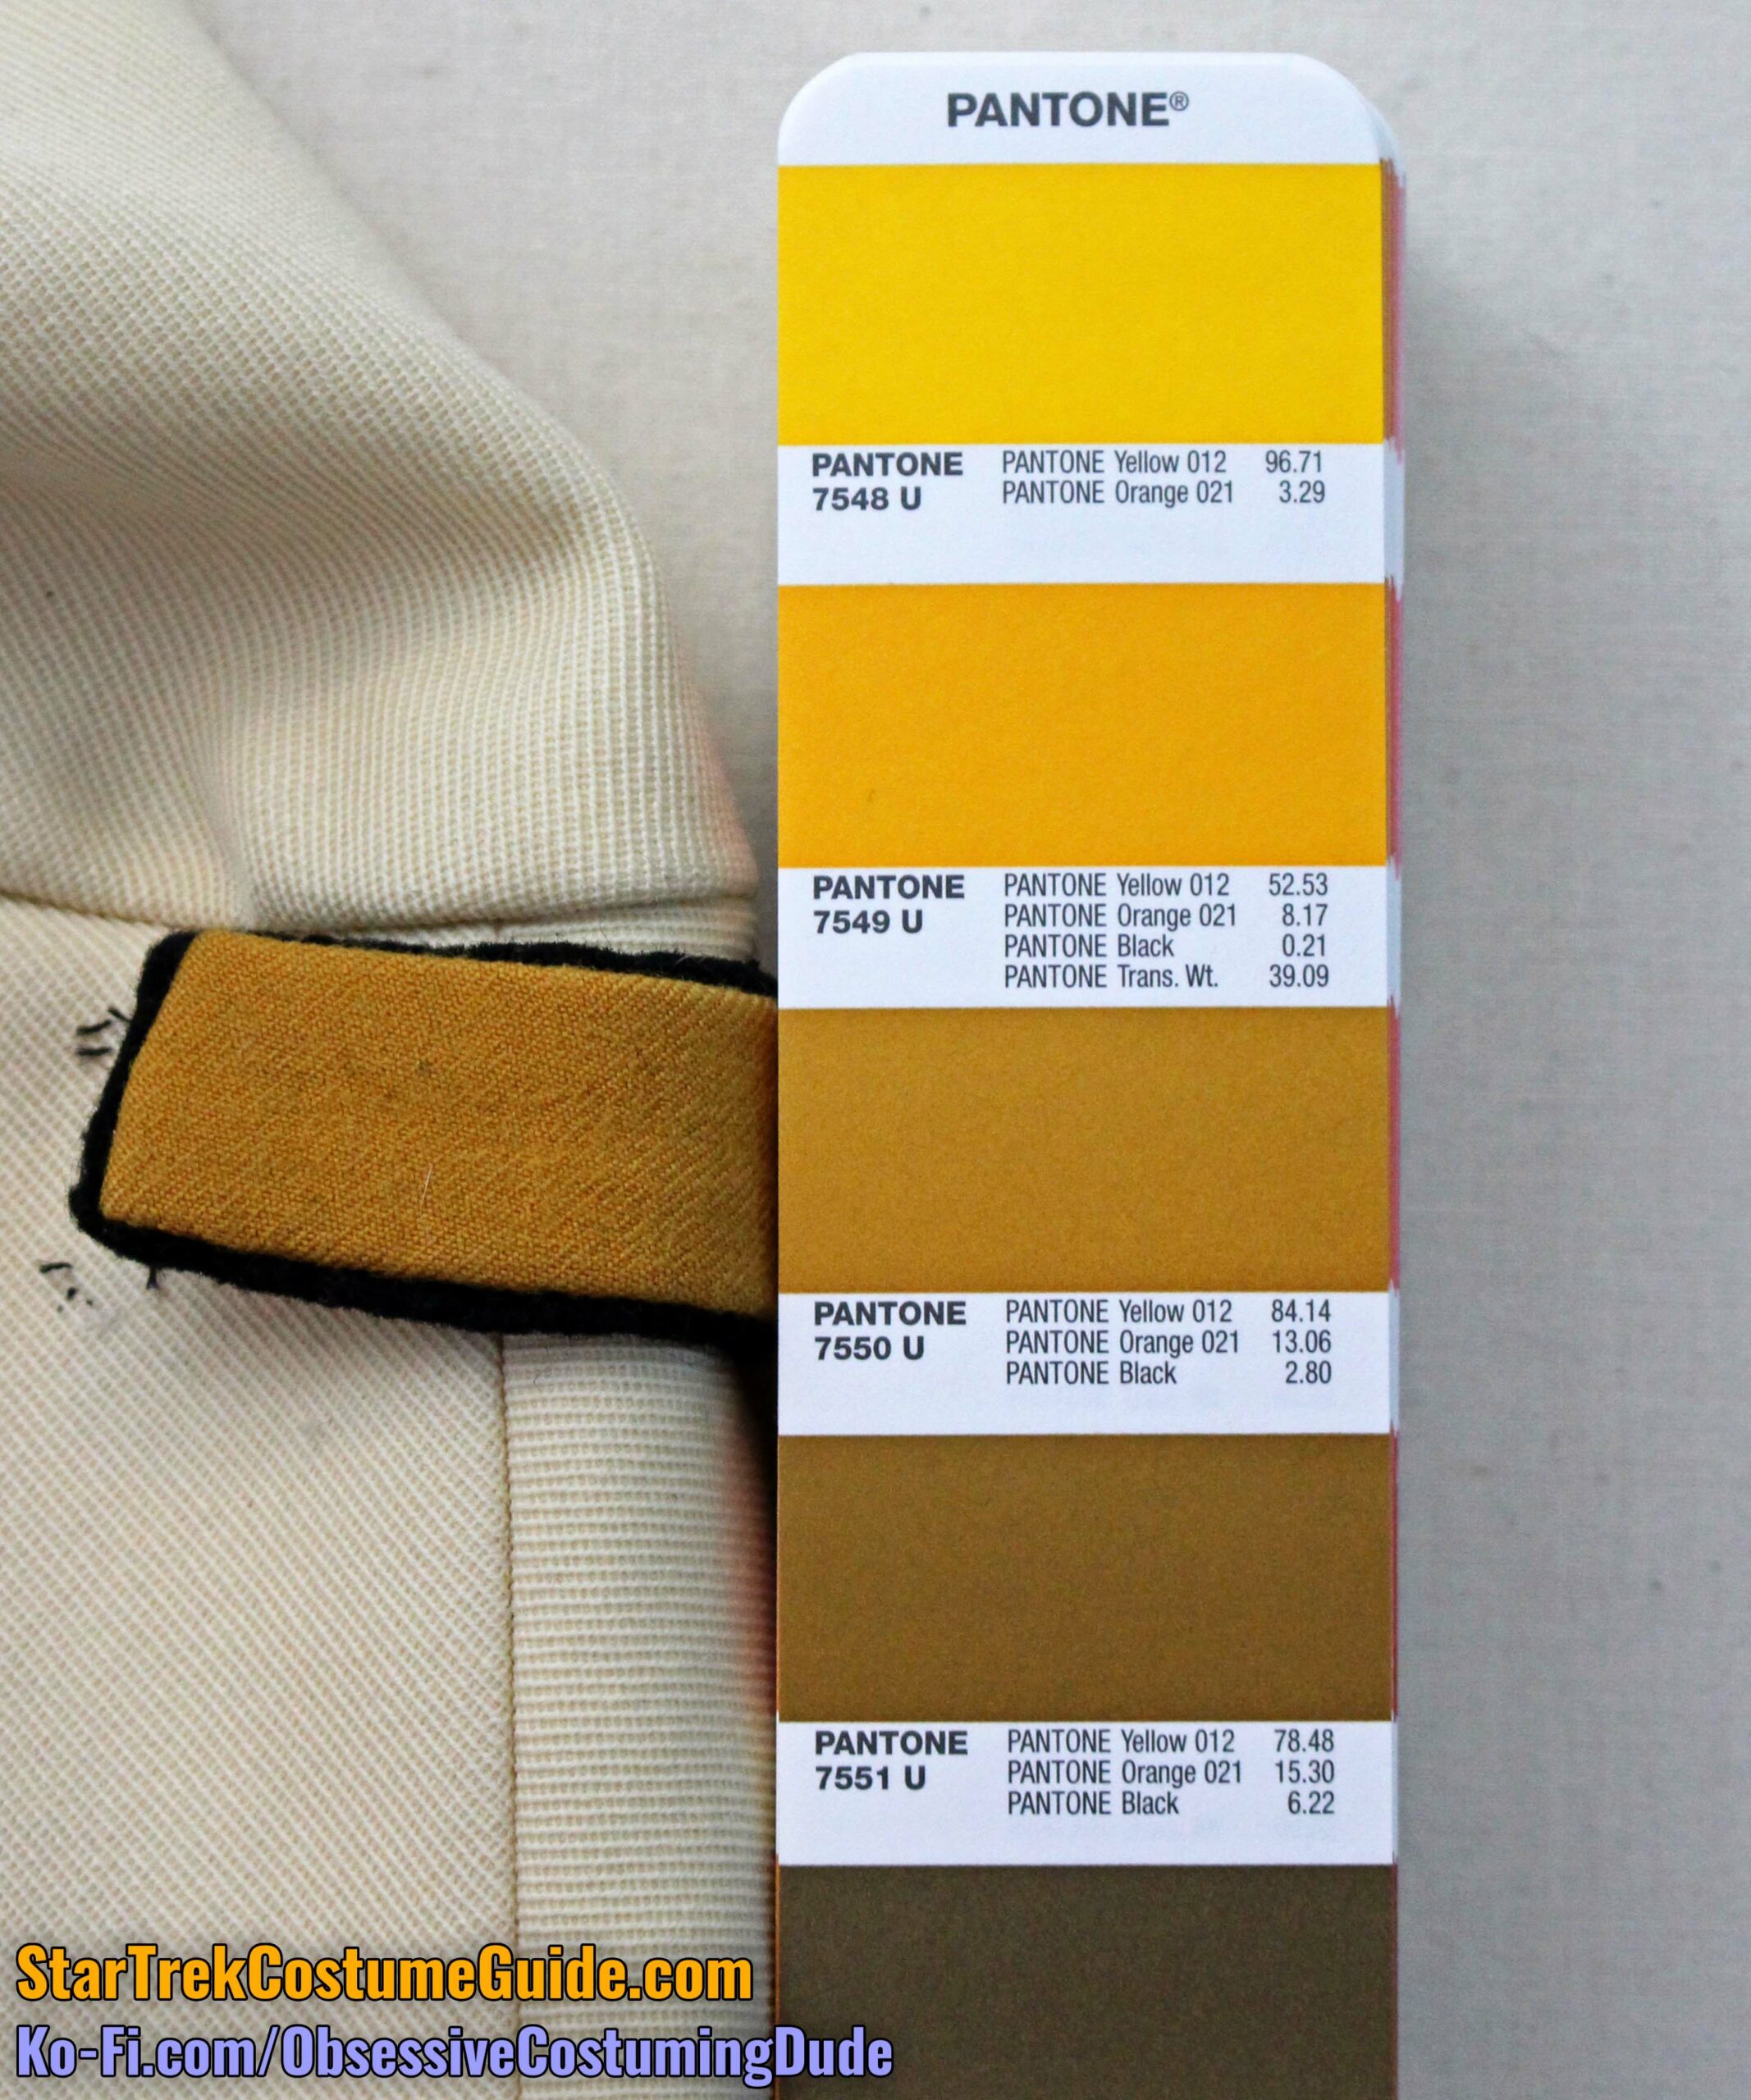
On the shoulders were gold division tabs, indicating the wearer’s engineering division (although this does perhaps prompt the question as to whether radiation suits with other division colors might’ve ever been worn, in-universe).
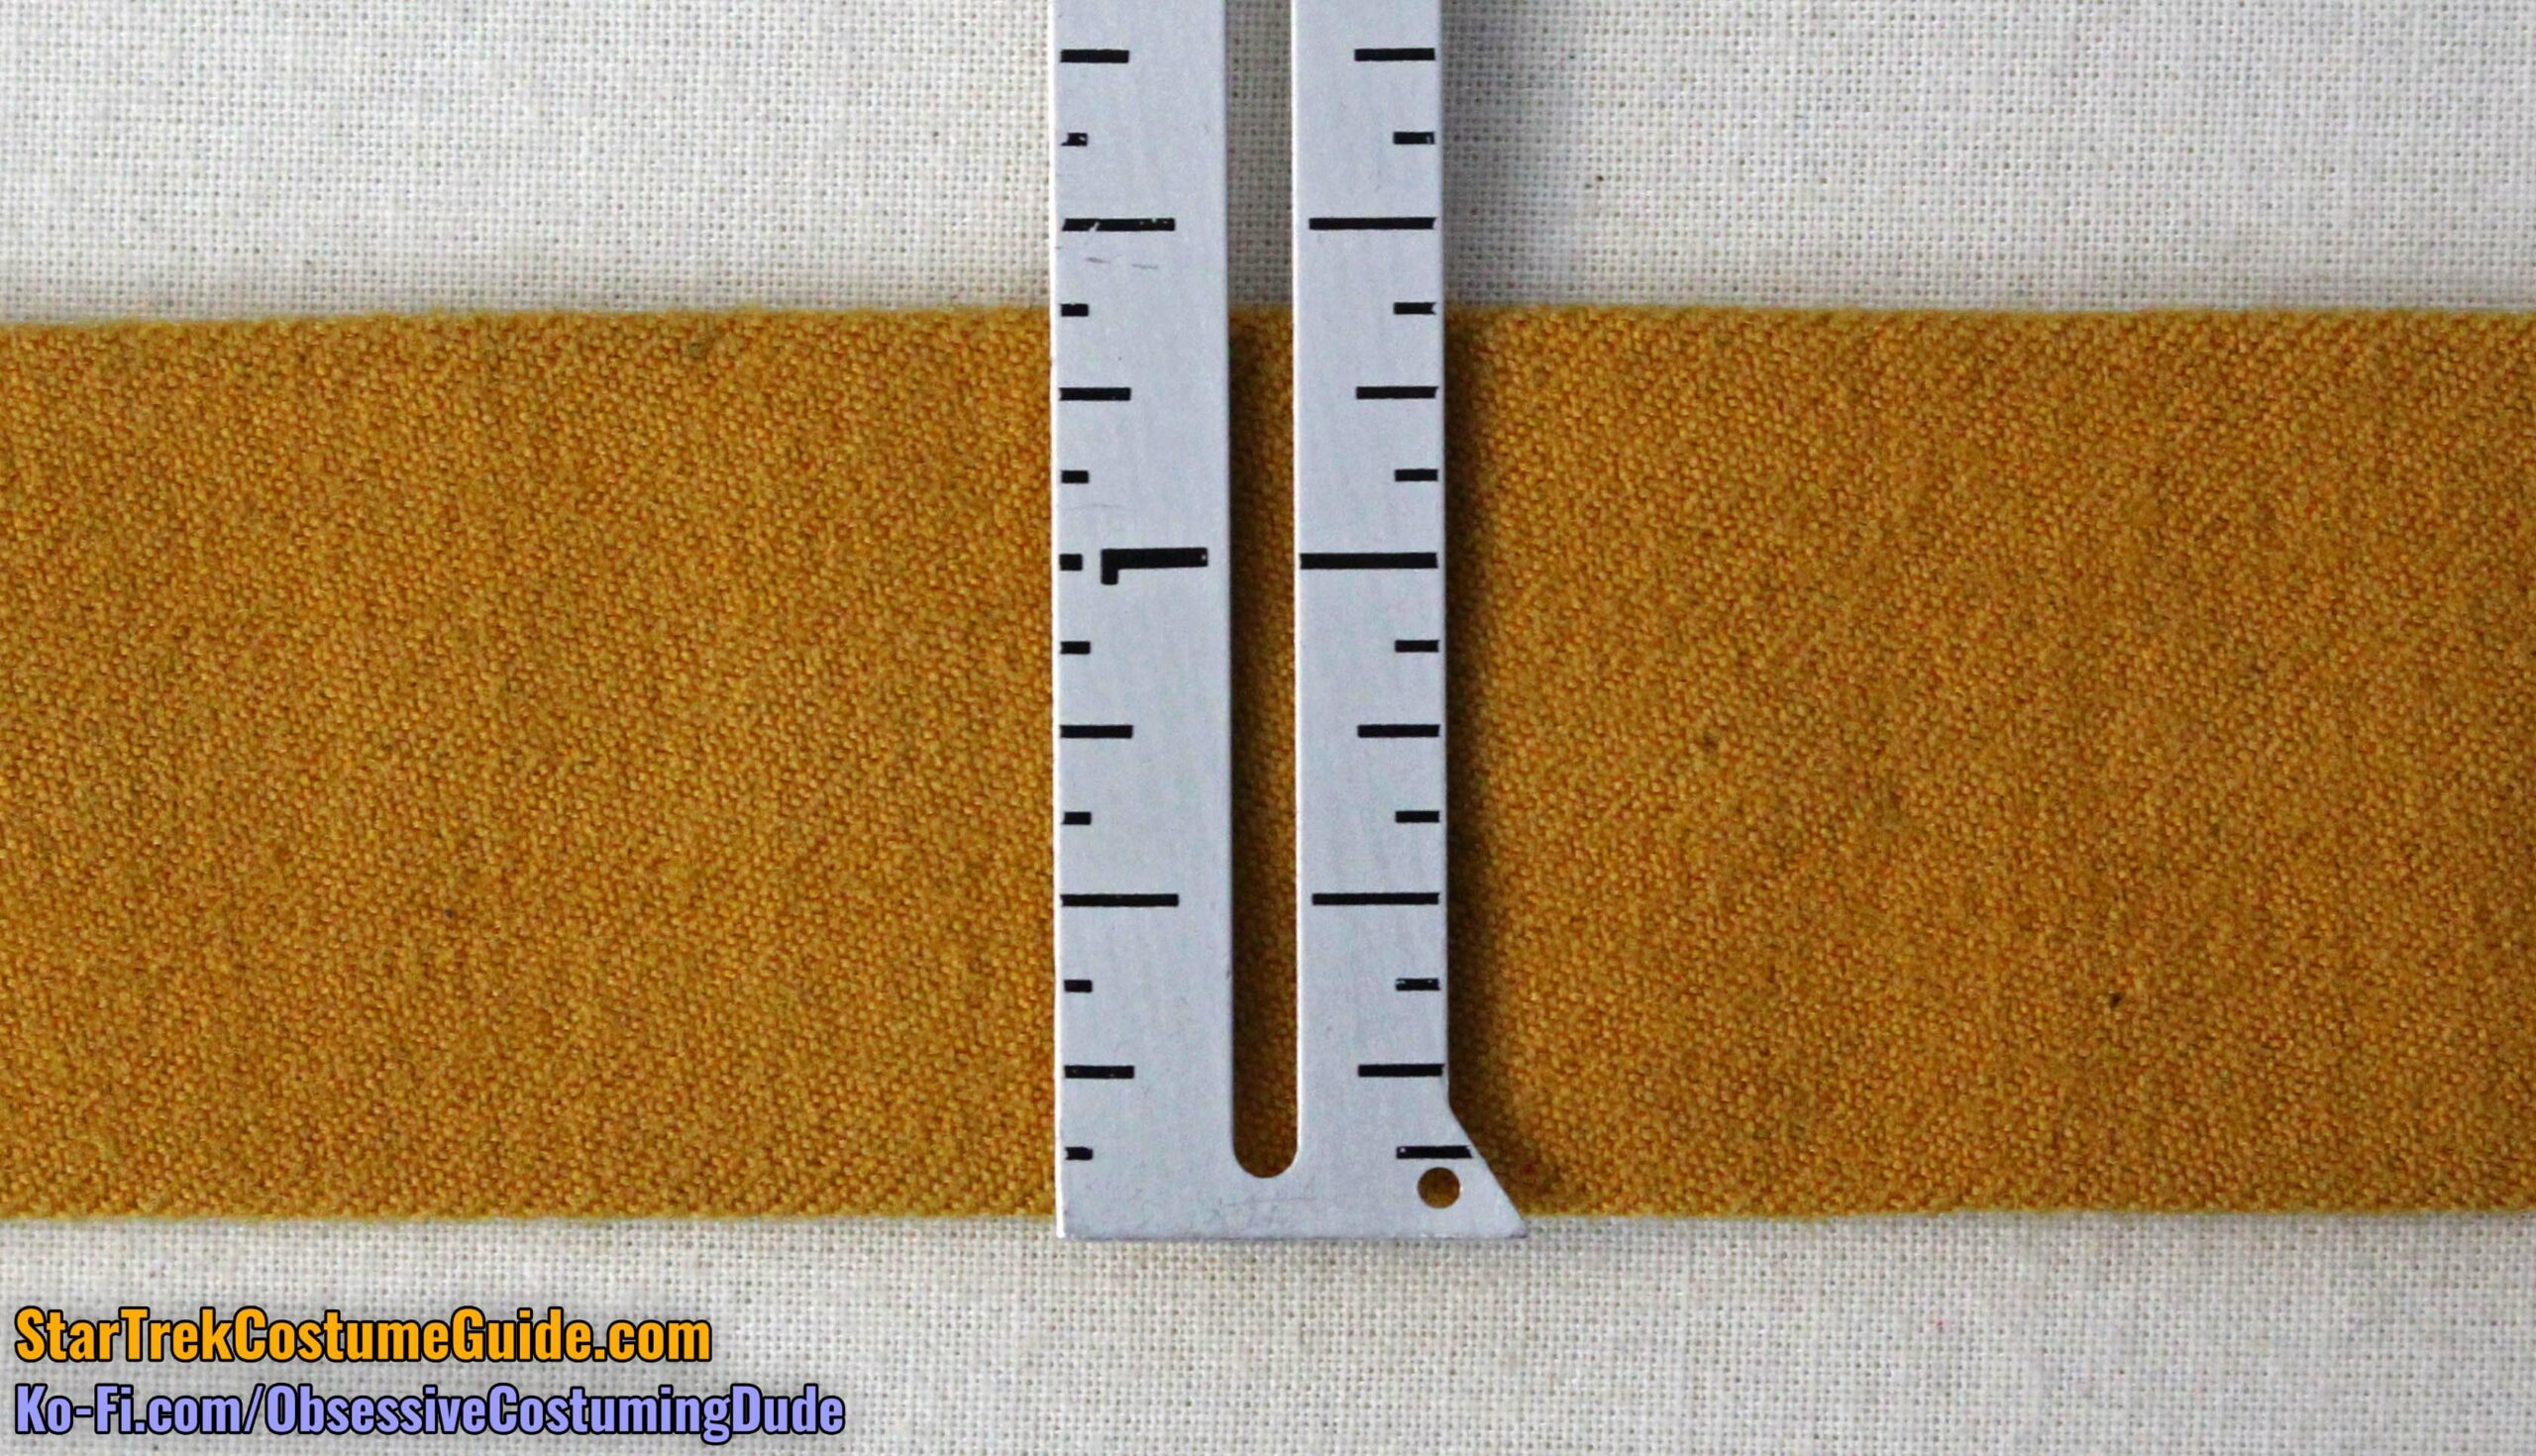
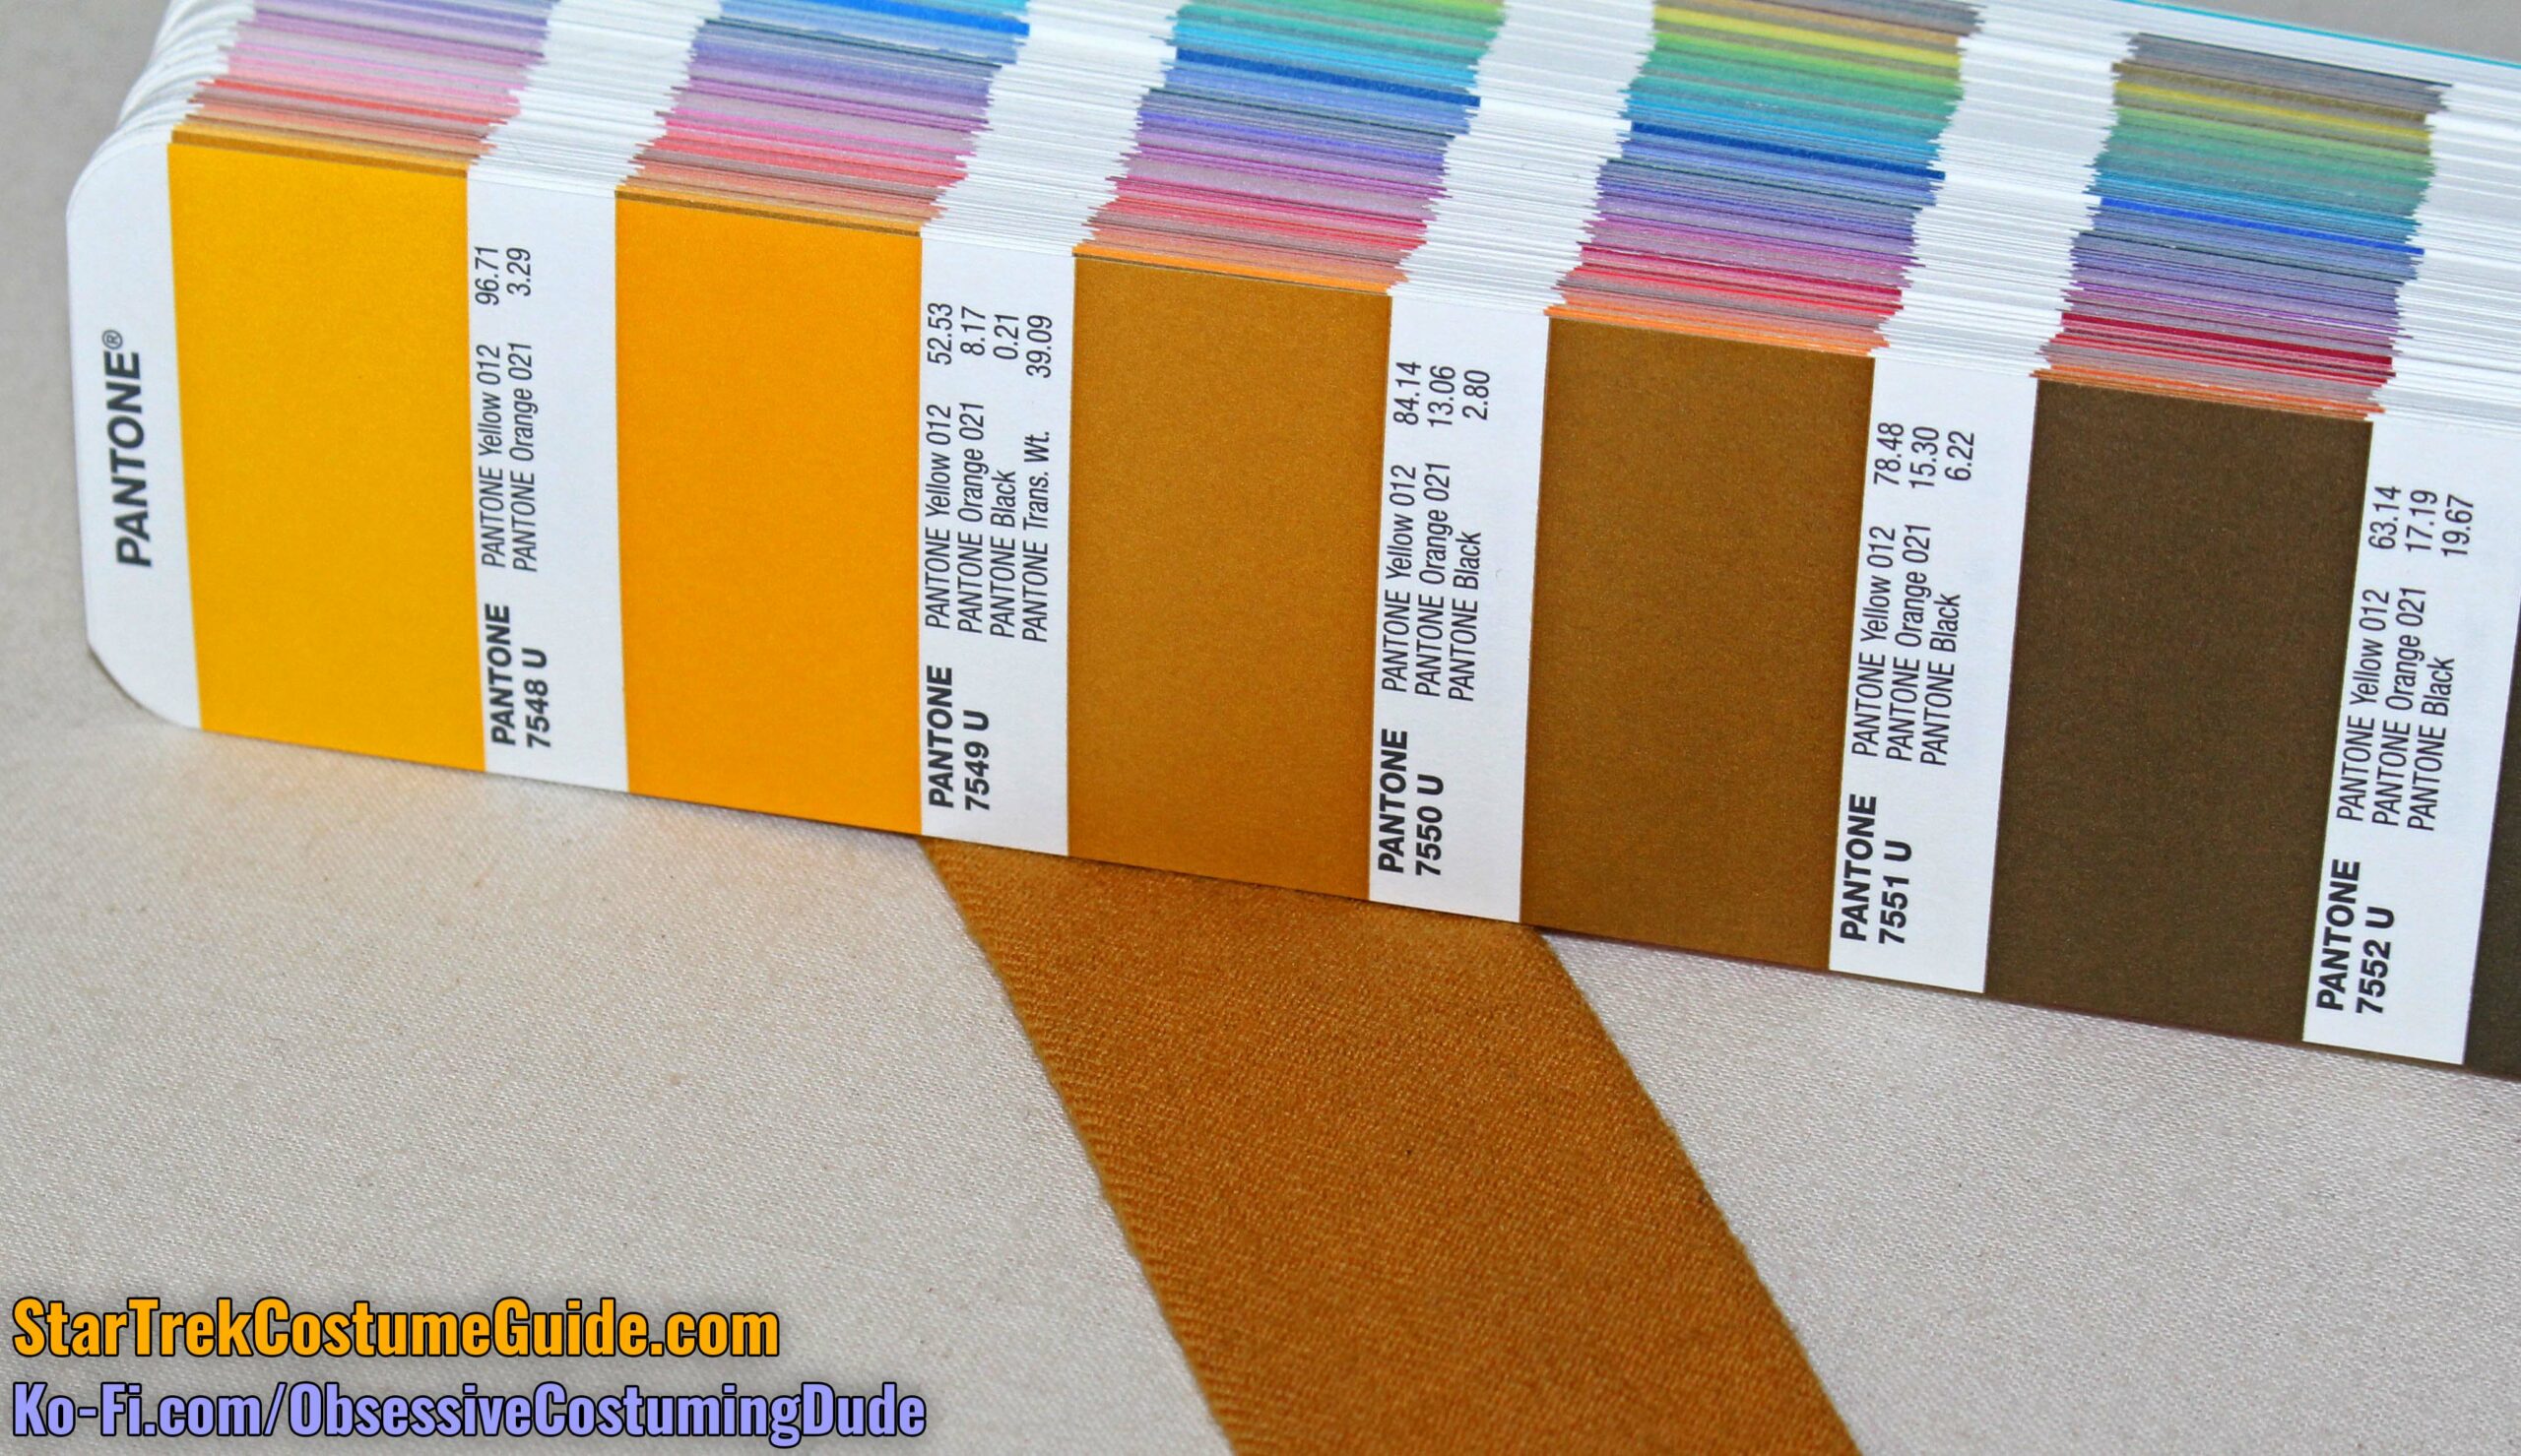
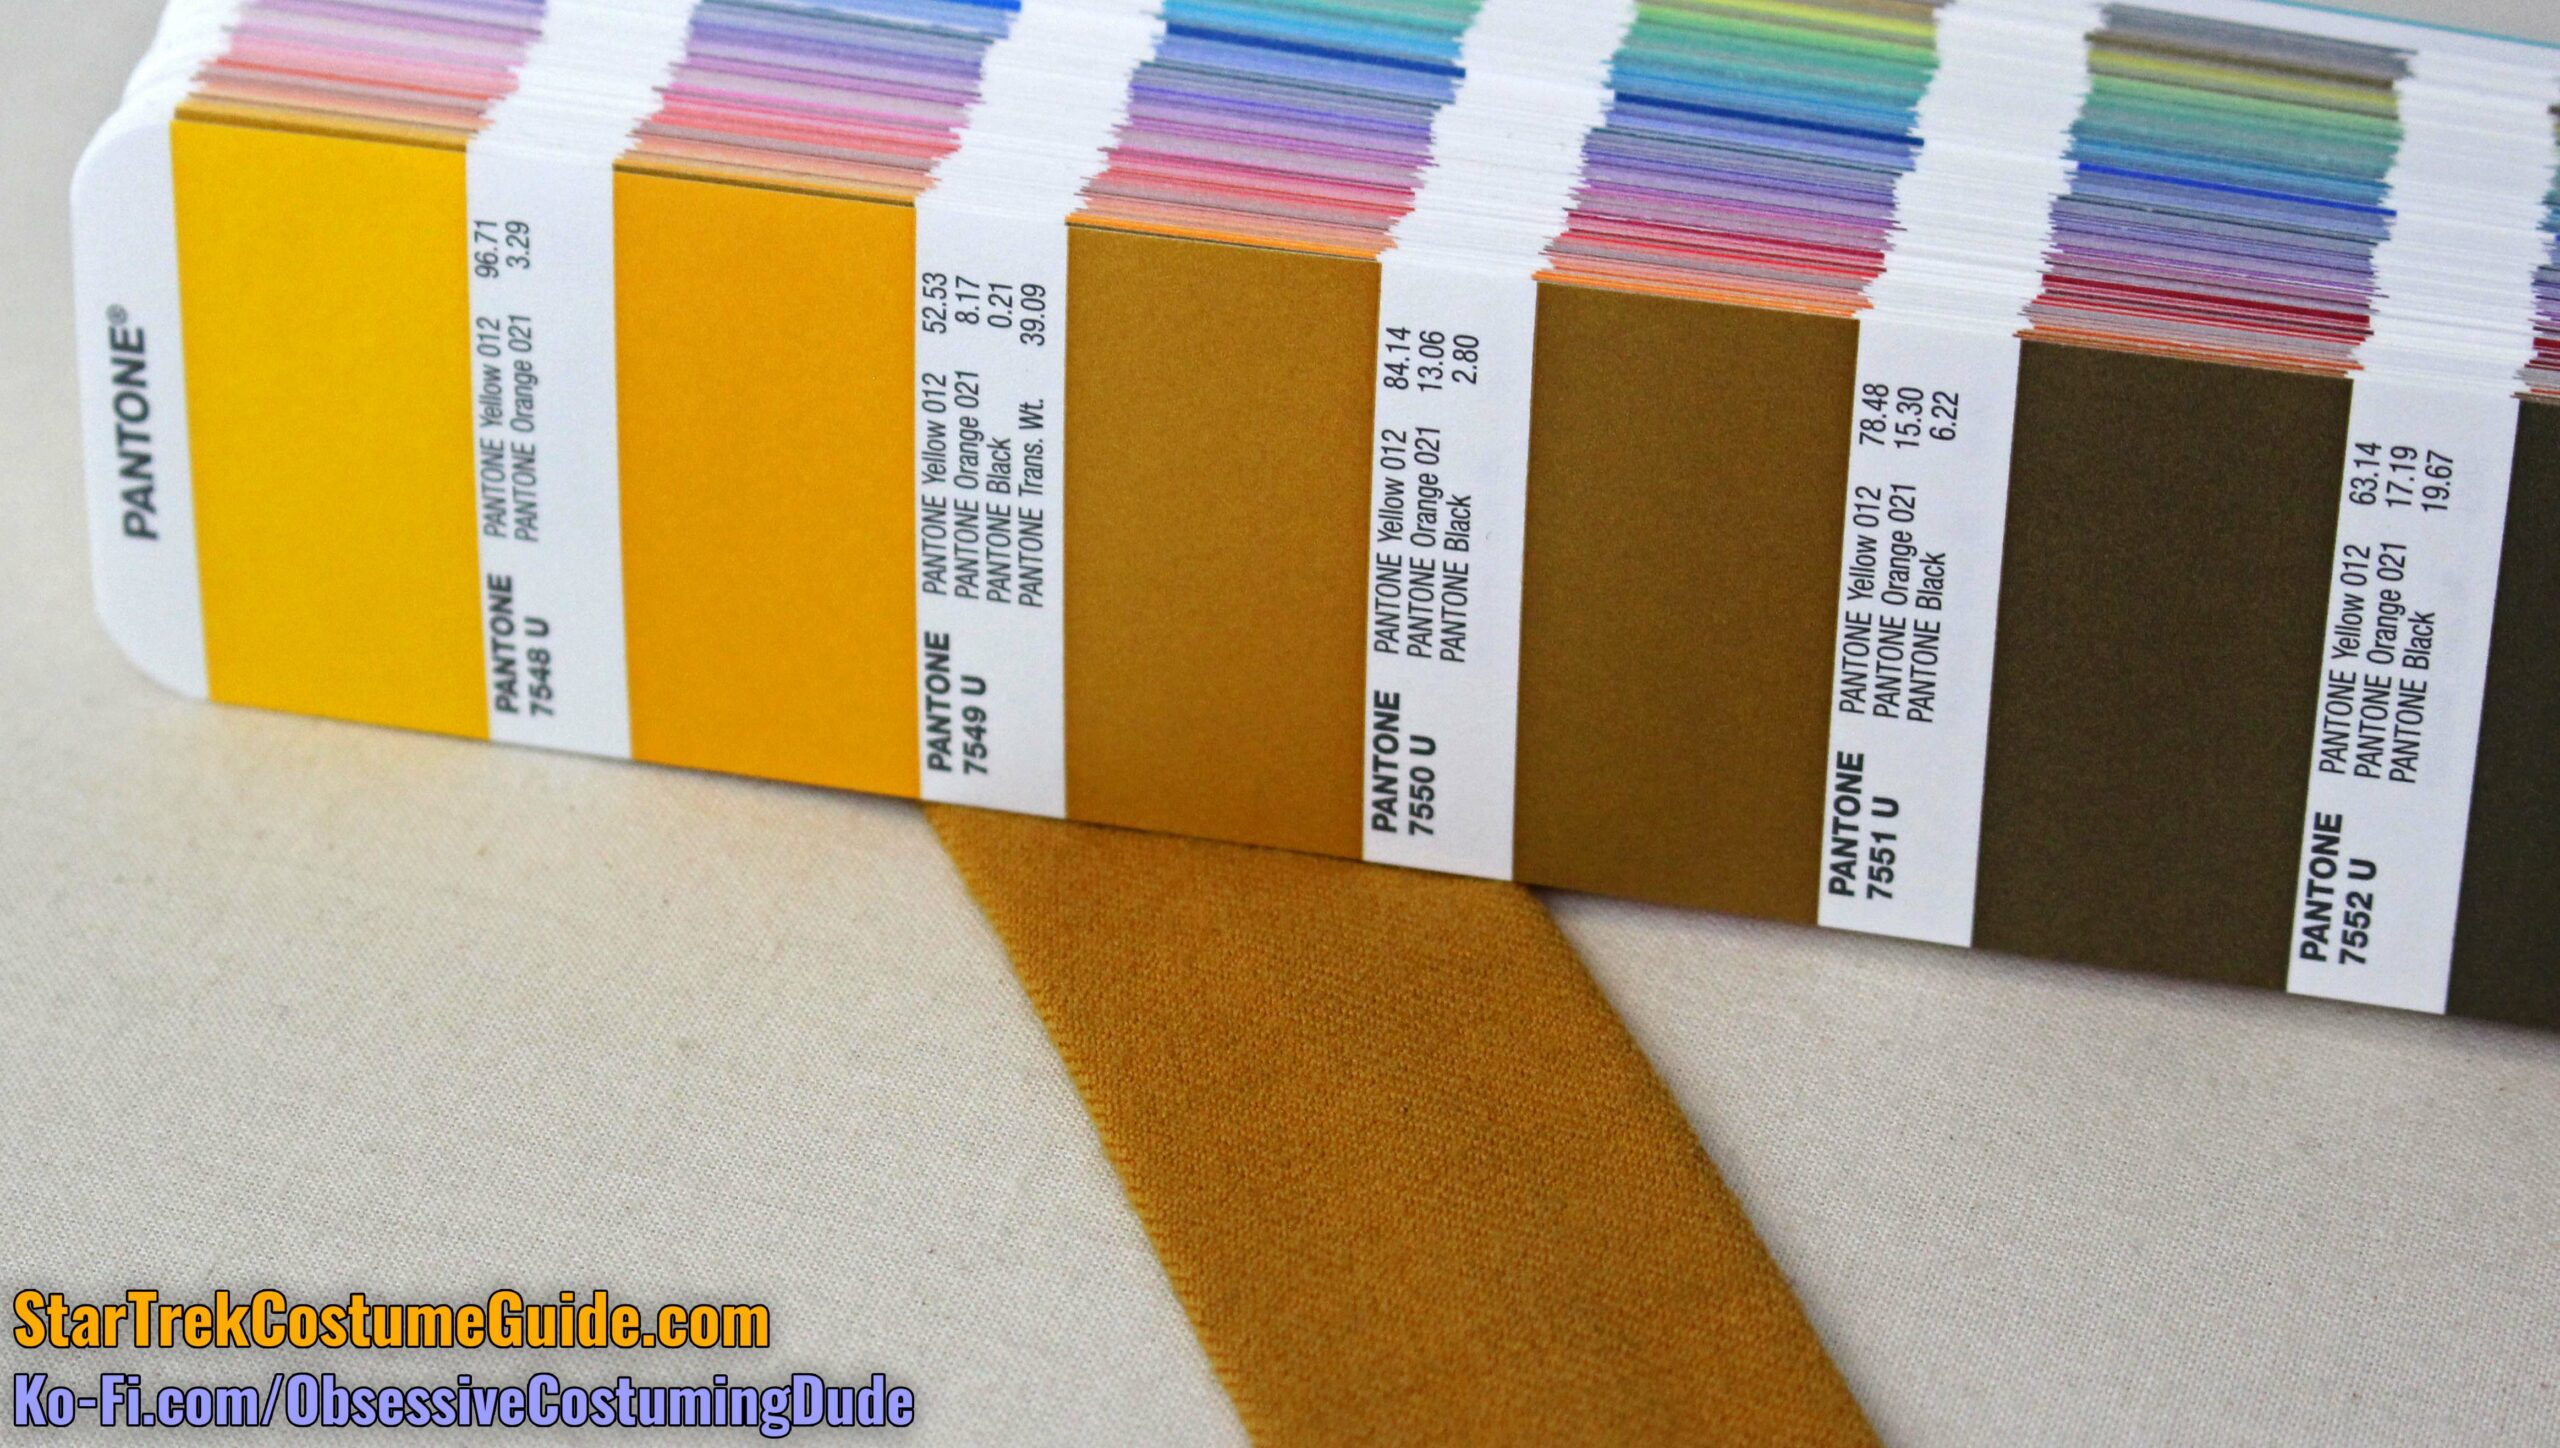
As a close representation of the gold wool color, see Pantone #7550 U.
Here is a comparison, pictured with and without flash:
With flash
No flash
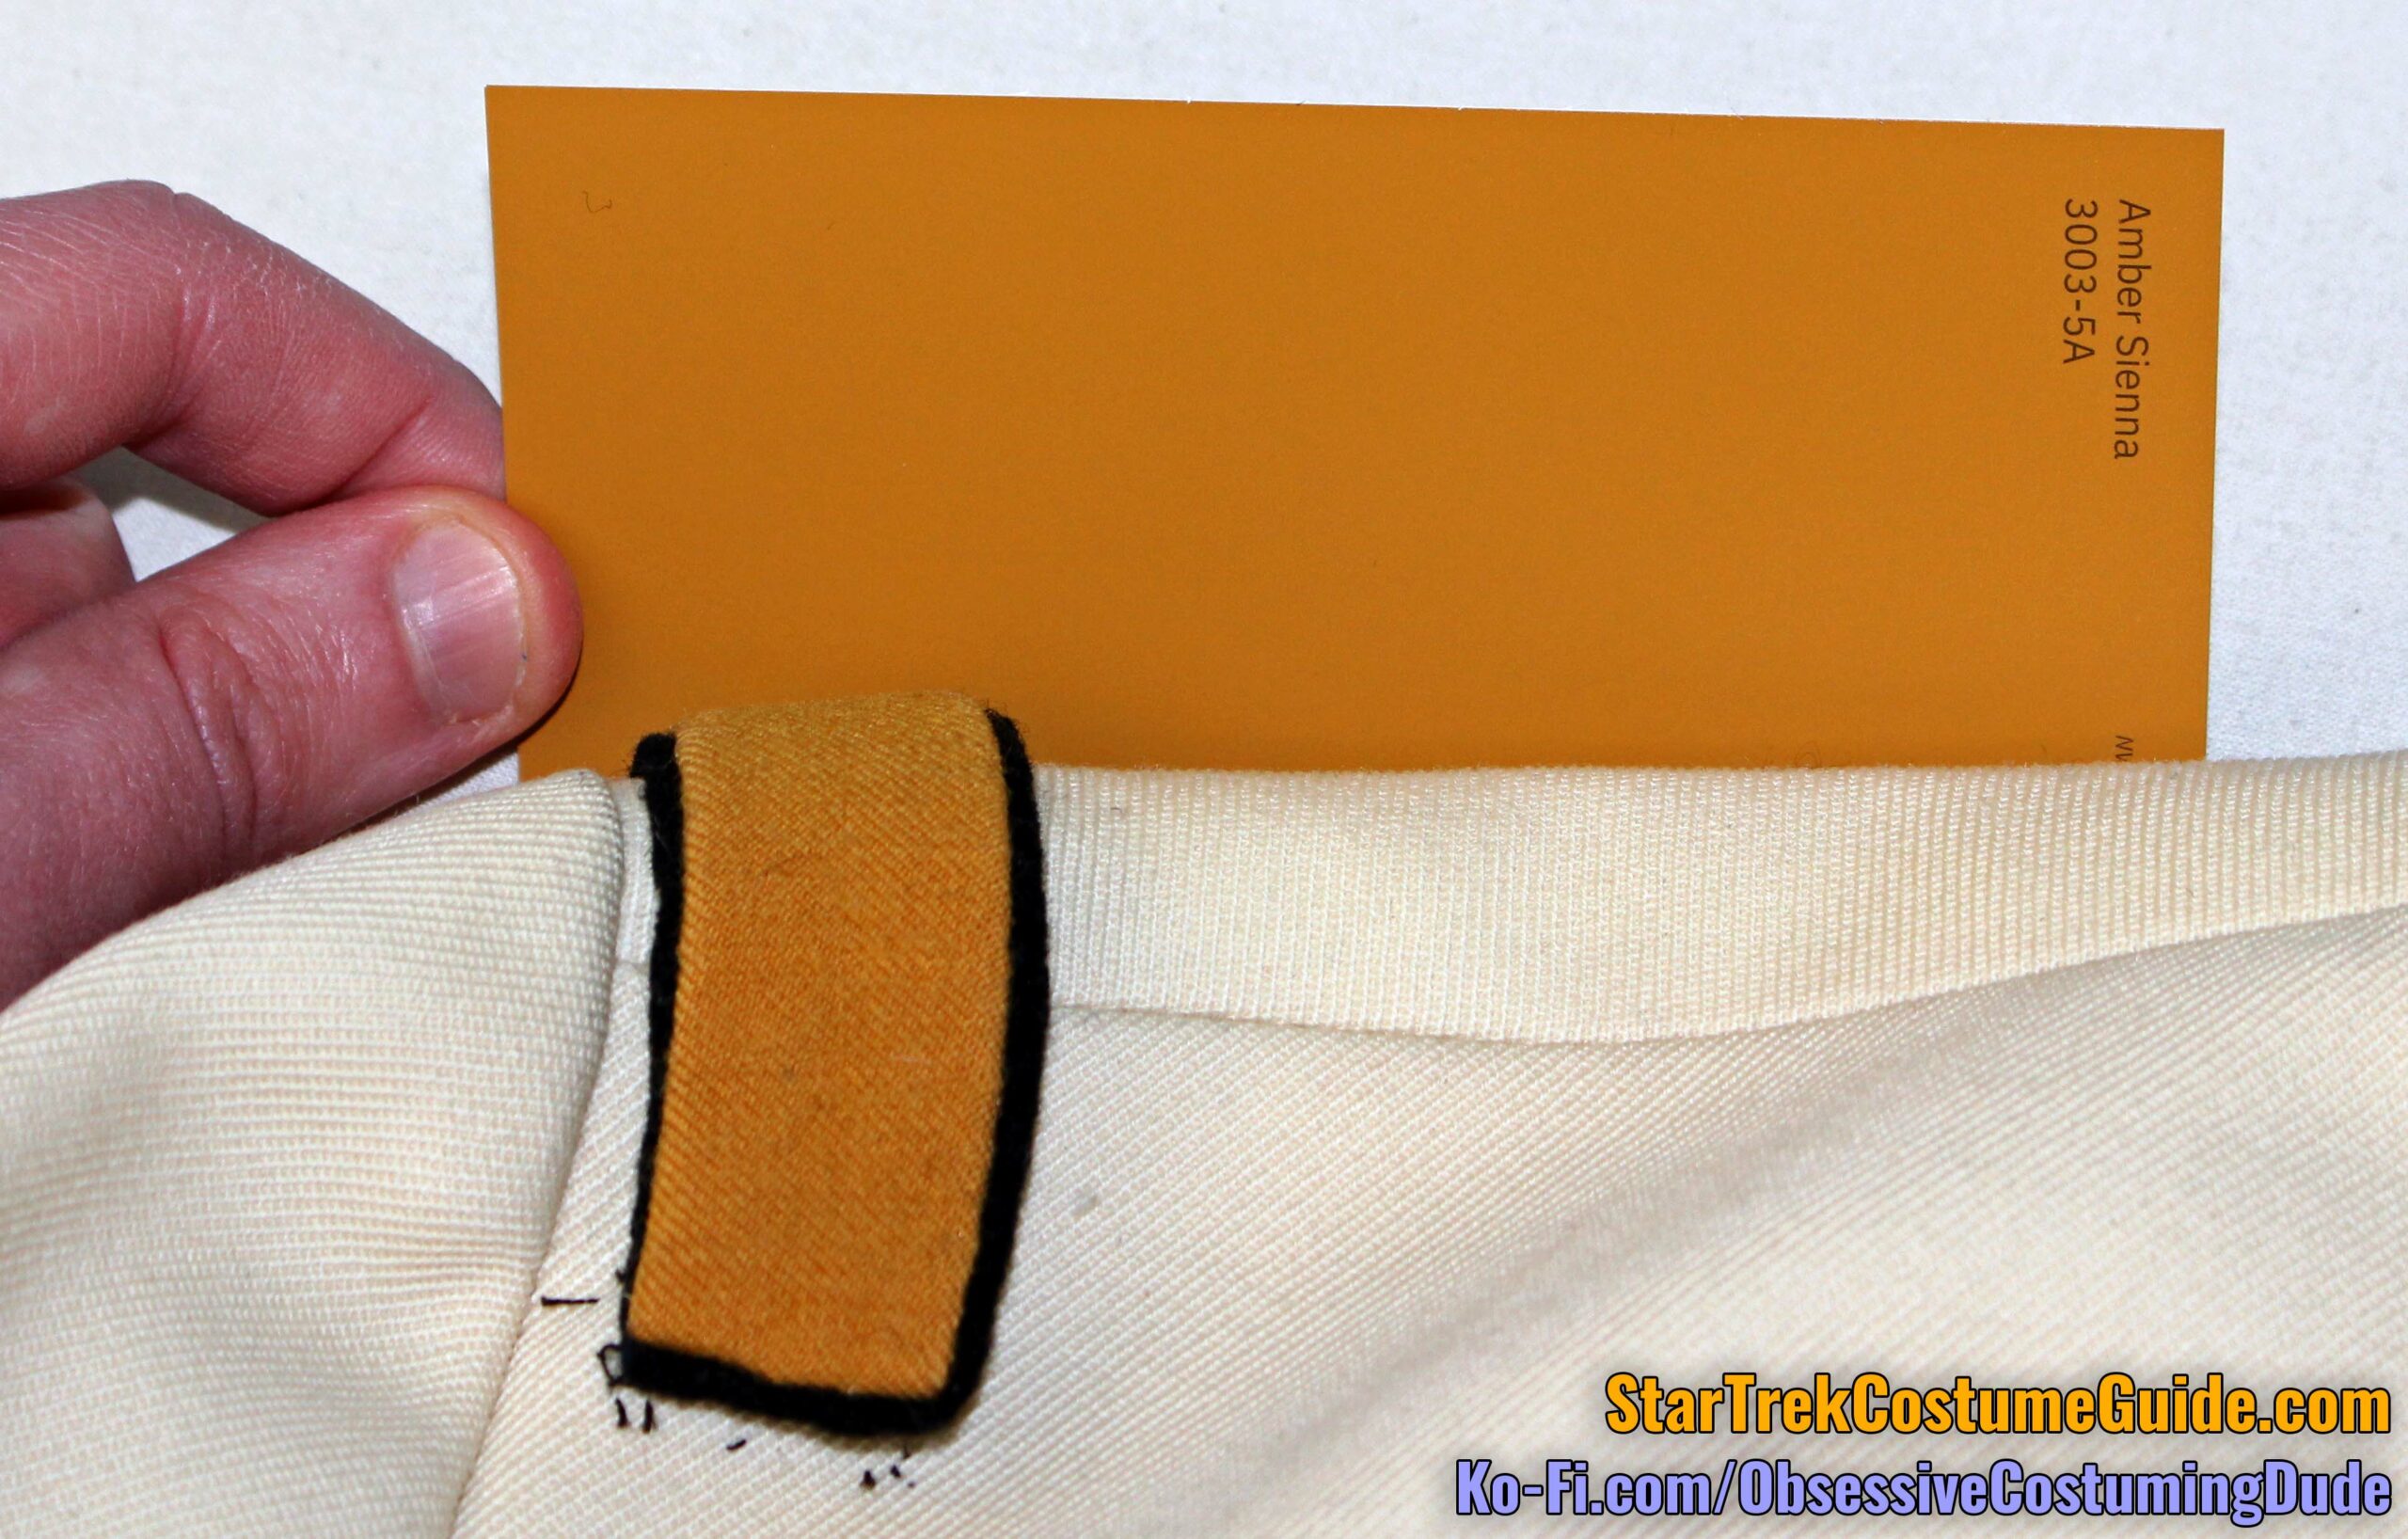
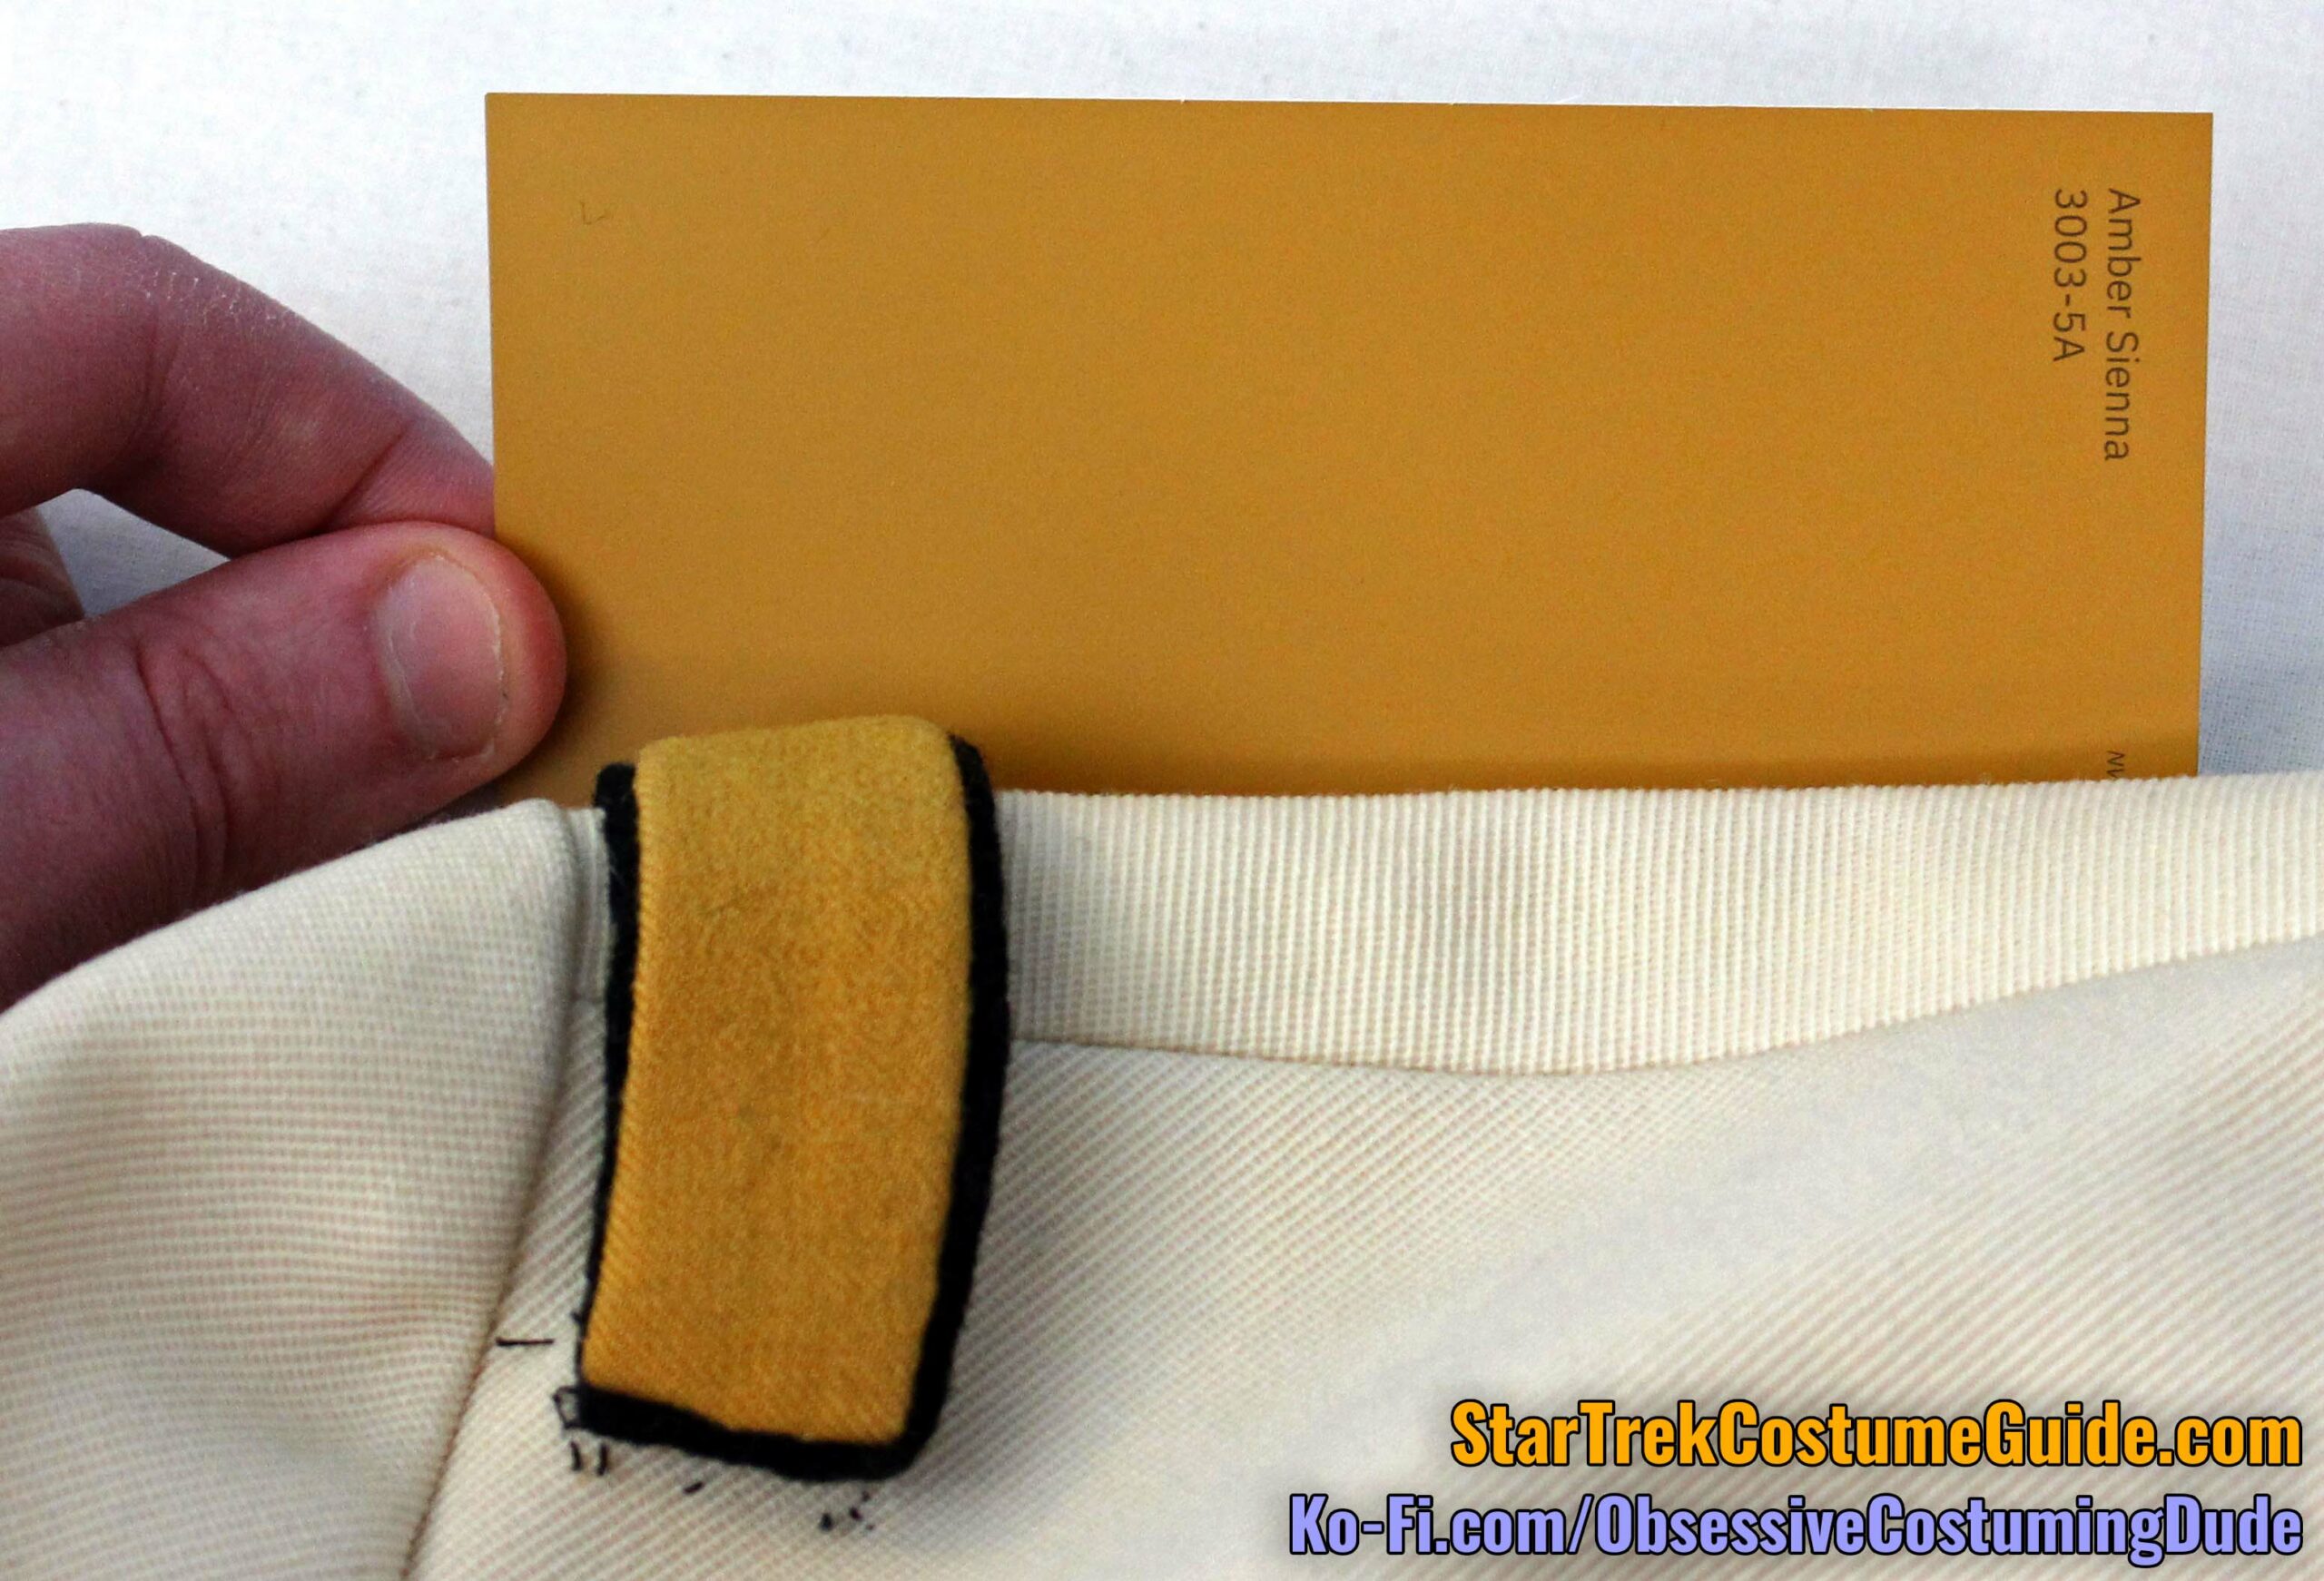
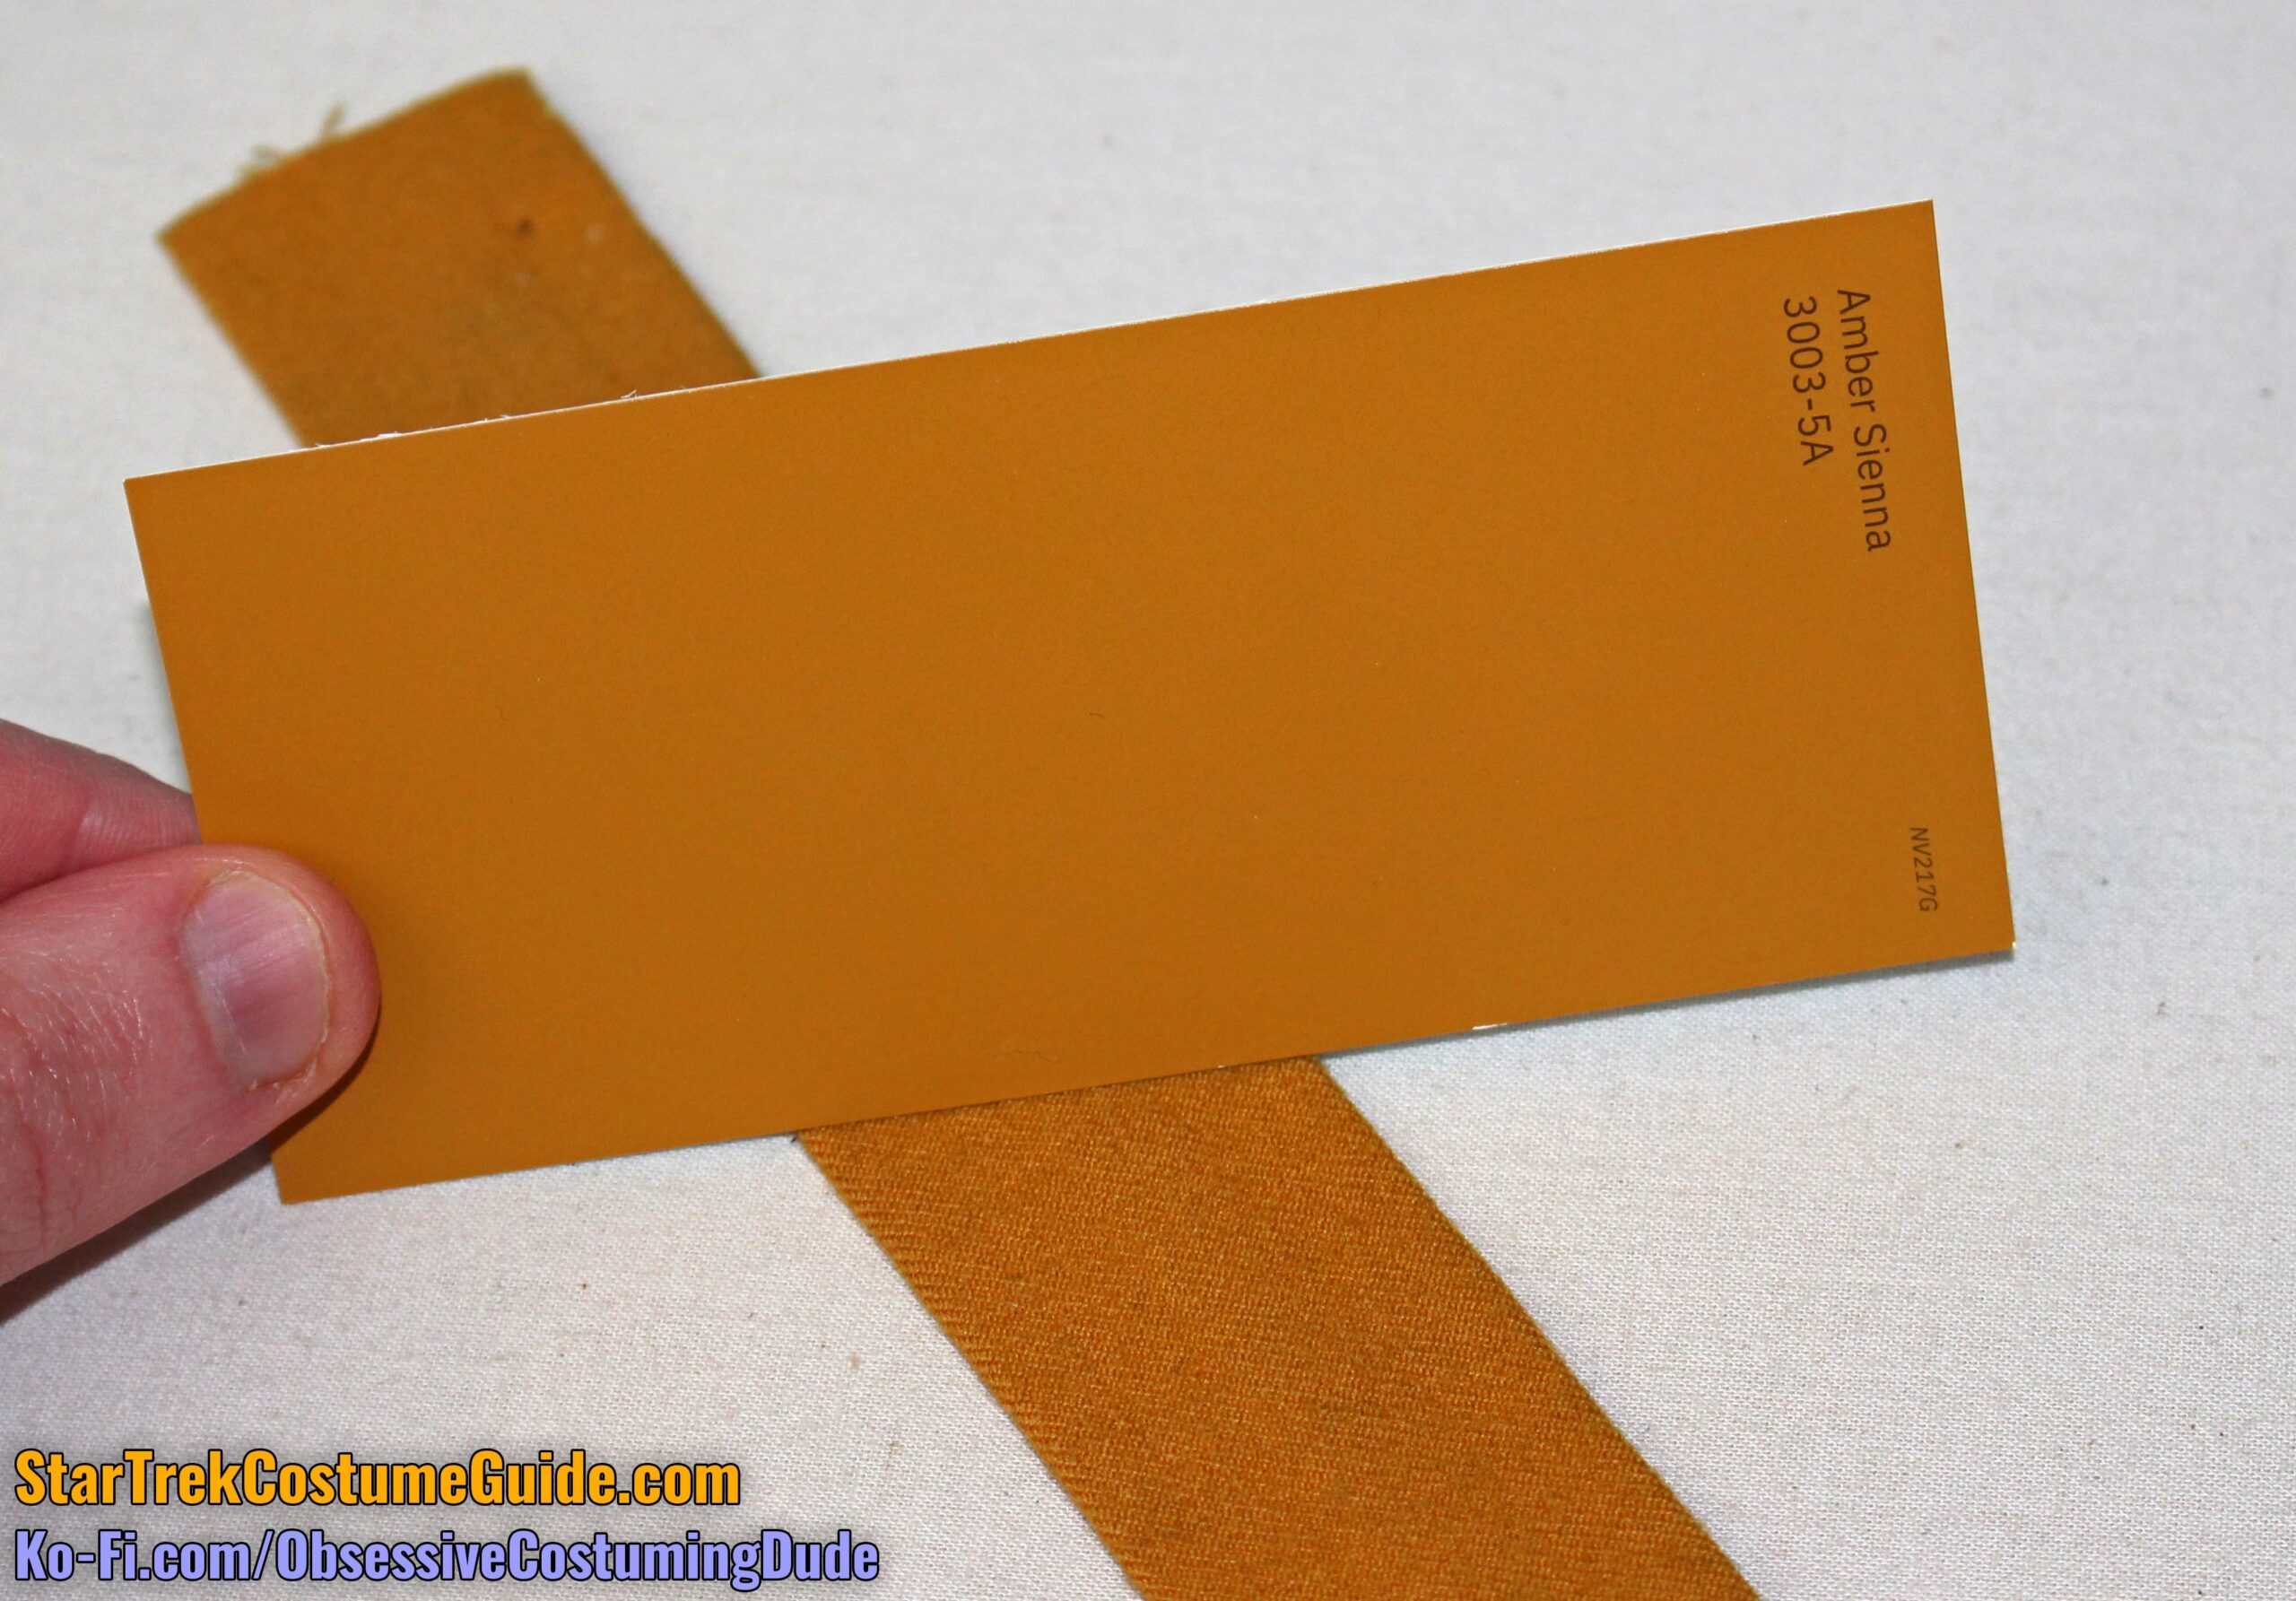
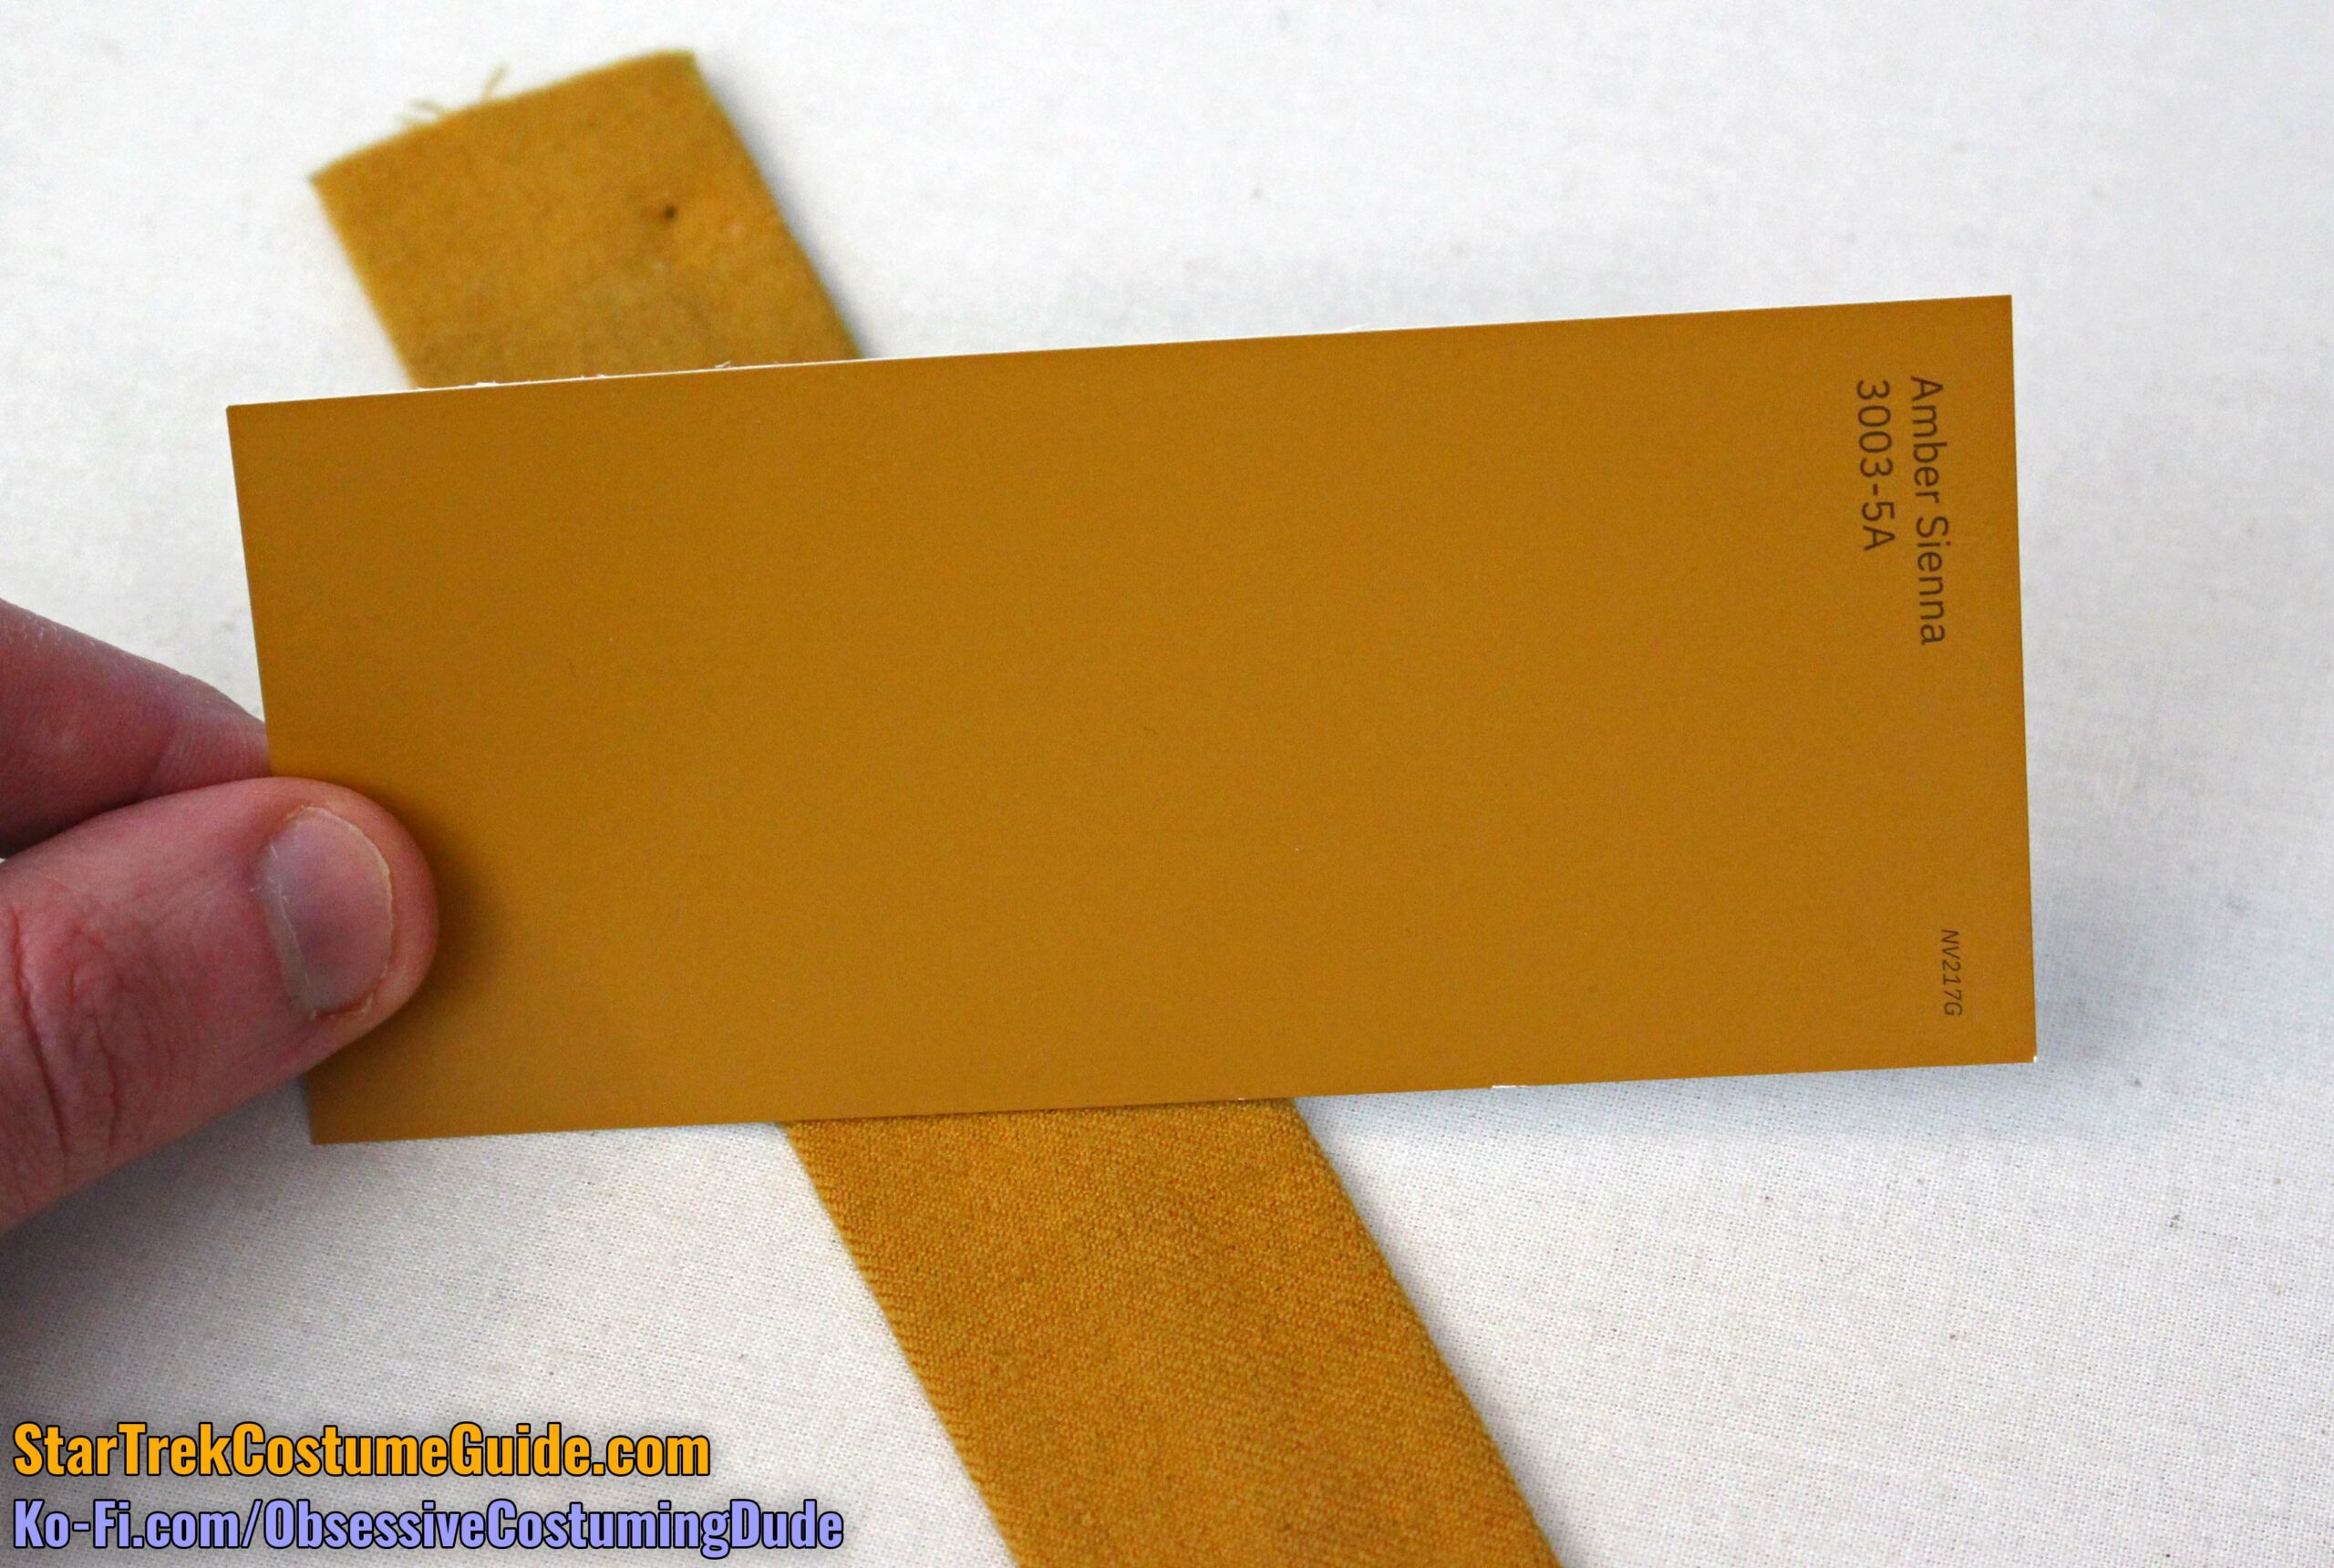
Alternatively, you can head to your local hardware/paint store and pick up the Valspar paint chip #3003-5A “Amber Sienna” as another close reference for the gold fabric color.
With flash
No flash
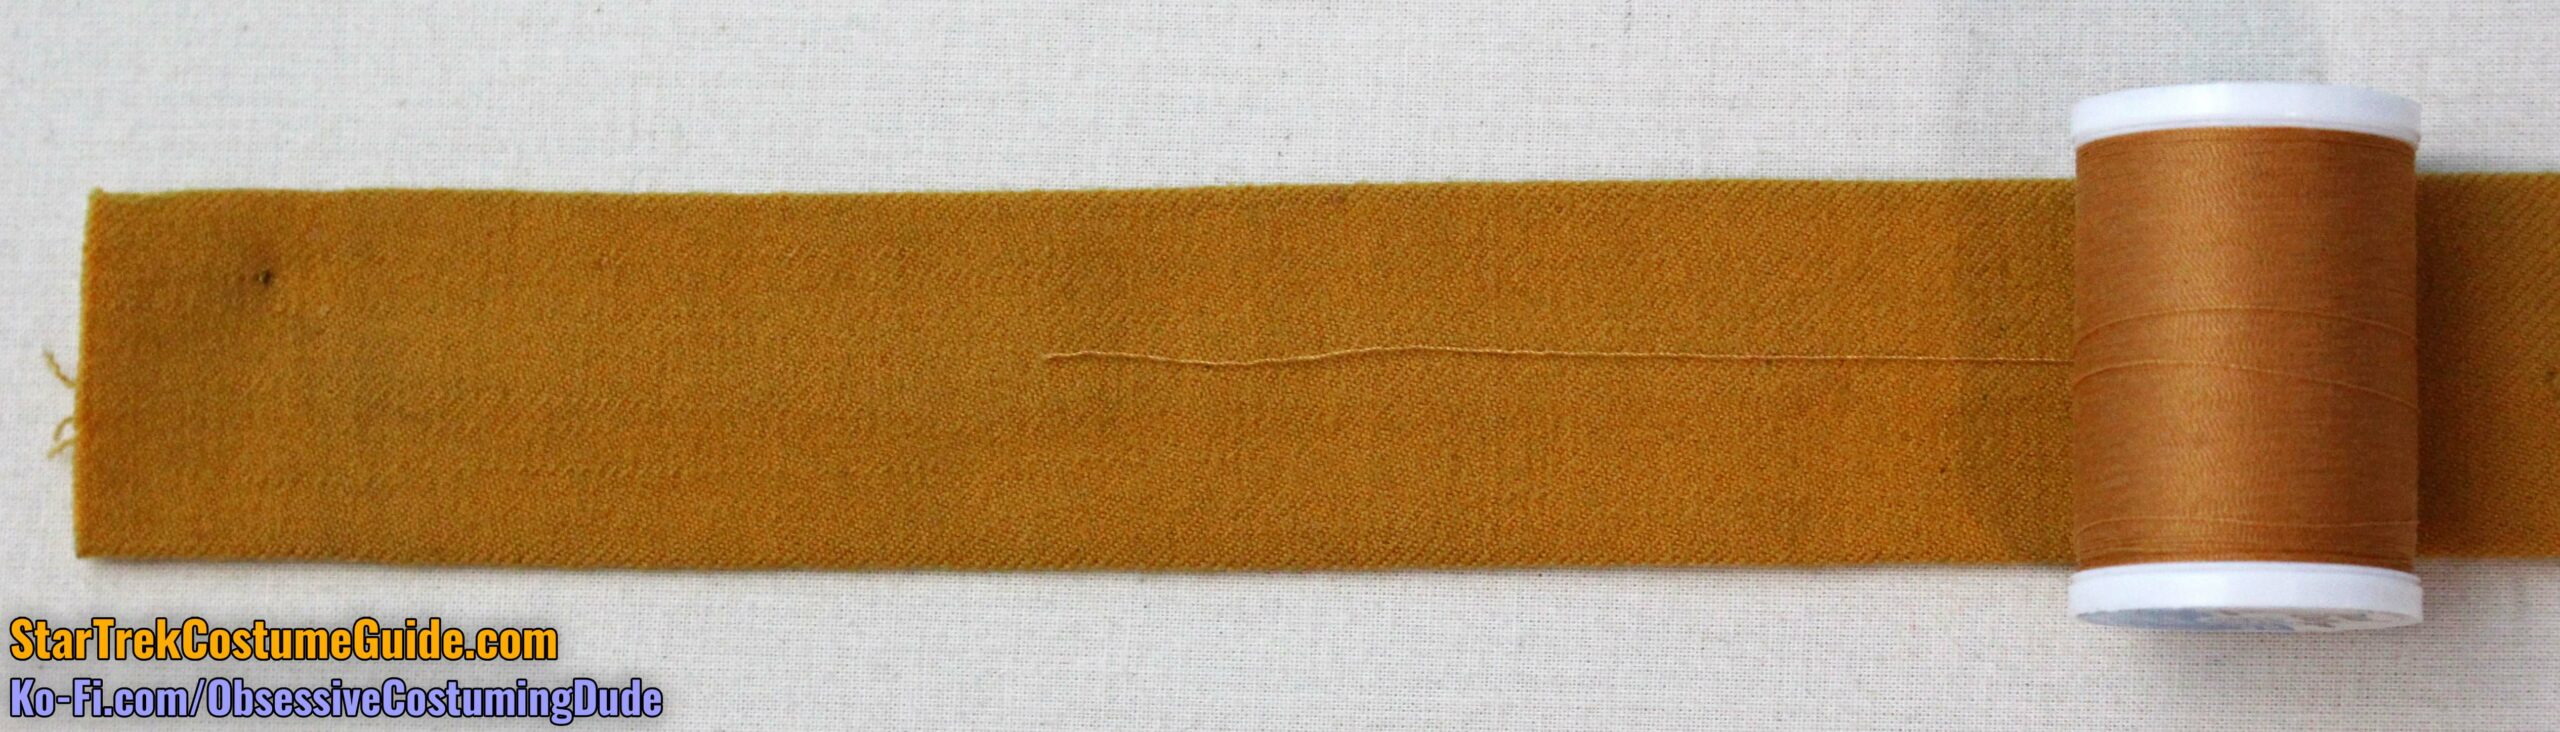
And finally, the Coats & Clark thread color #7010 “Cider” was the closest match I found to the fabric at my local JoAnn – not perfect, but close enough to inconspicuously sew with at least.
With flash
No flash
Again for kicks, here’s a comparison between the gold on the radiation suit’s shoulders and the aforementioned screen-used “monster maroon” jacket sleeve band:
With flash
No flash
As you can see, the two were very close, although the radiation suit’s gold was ever-so-slightly greener.
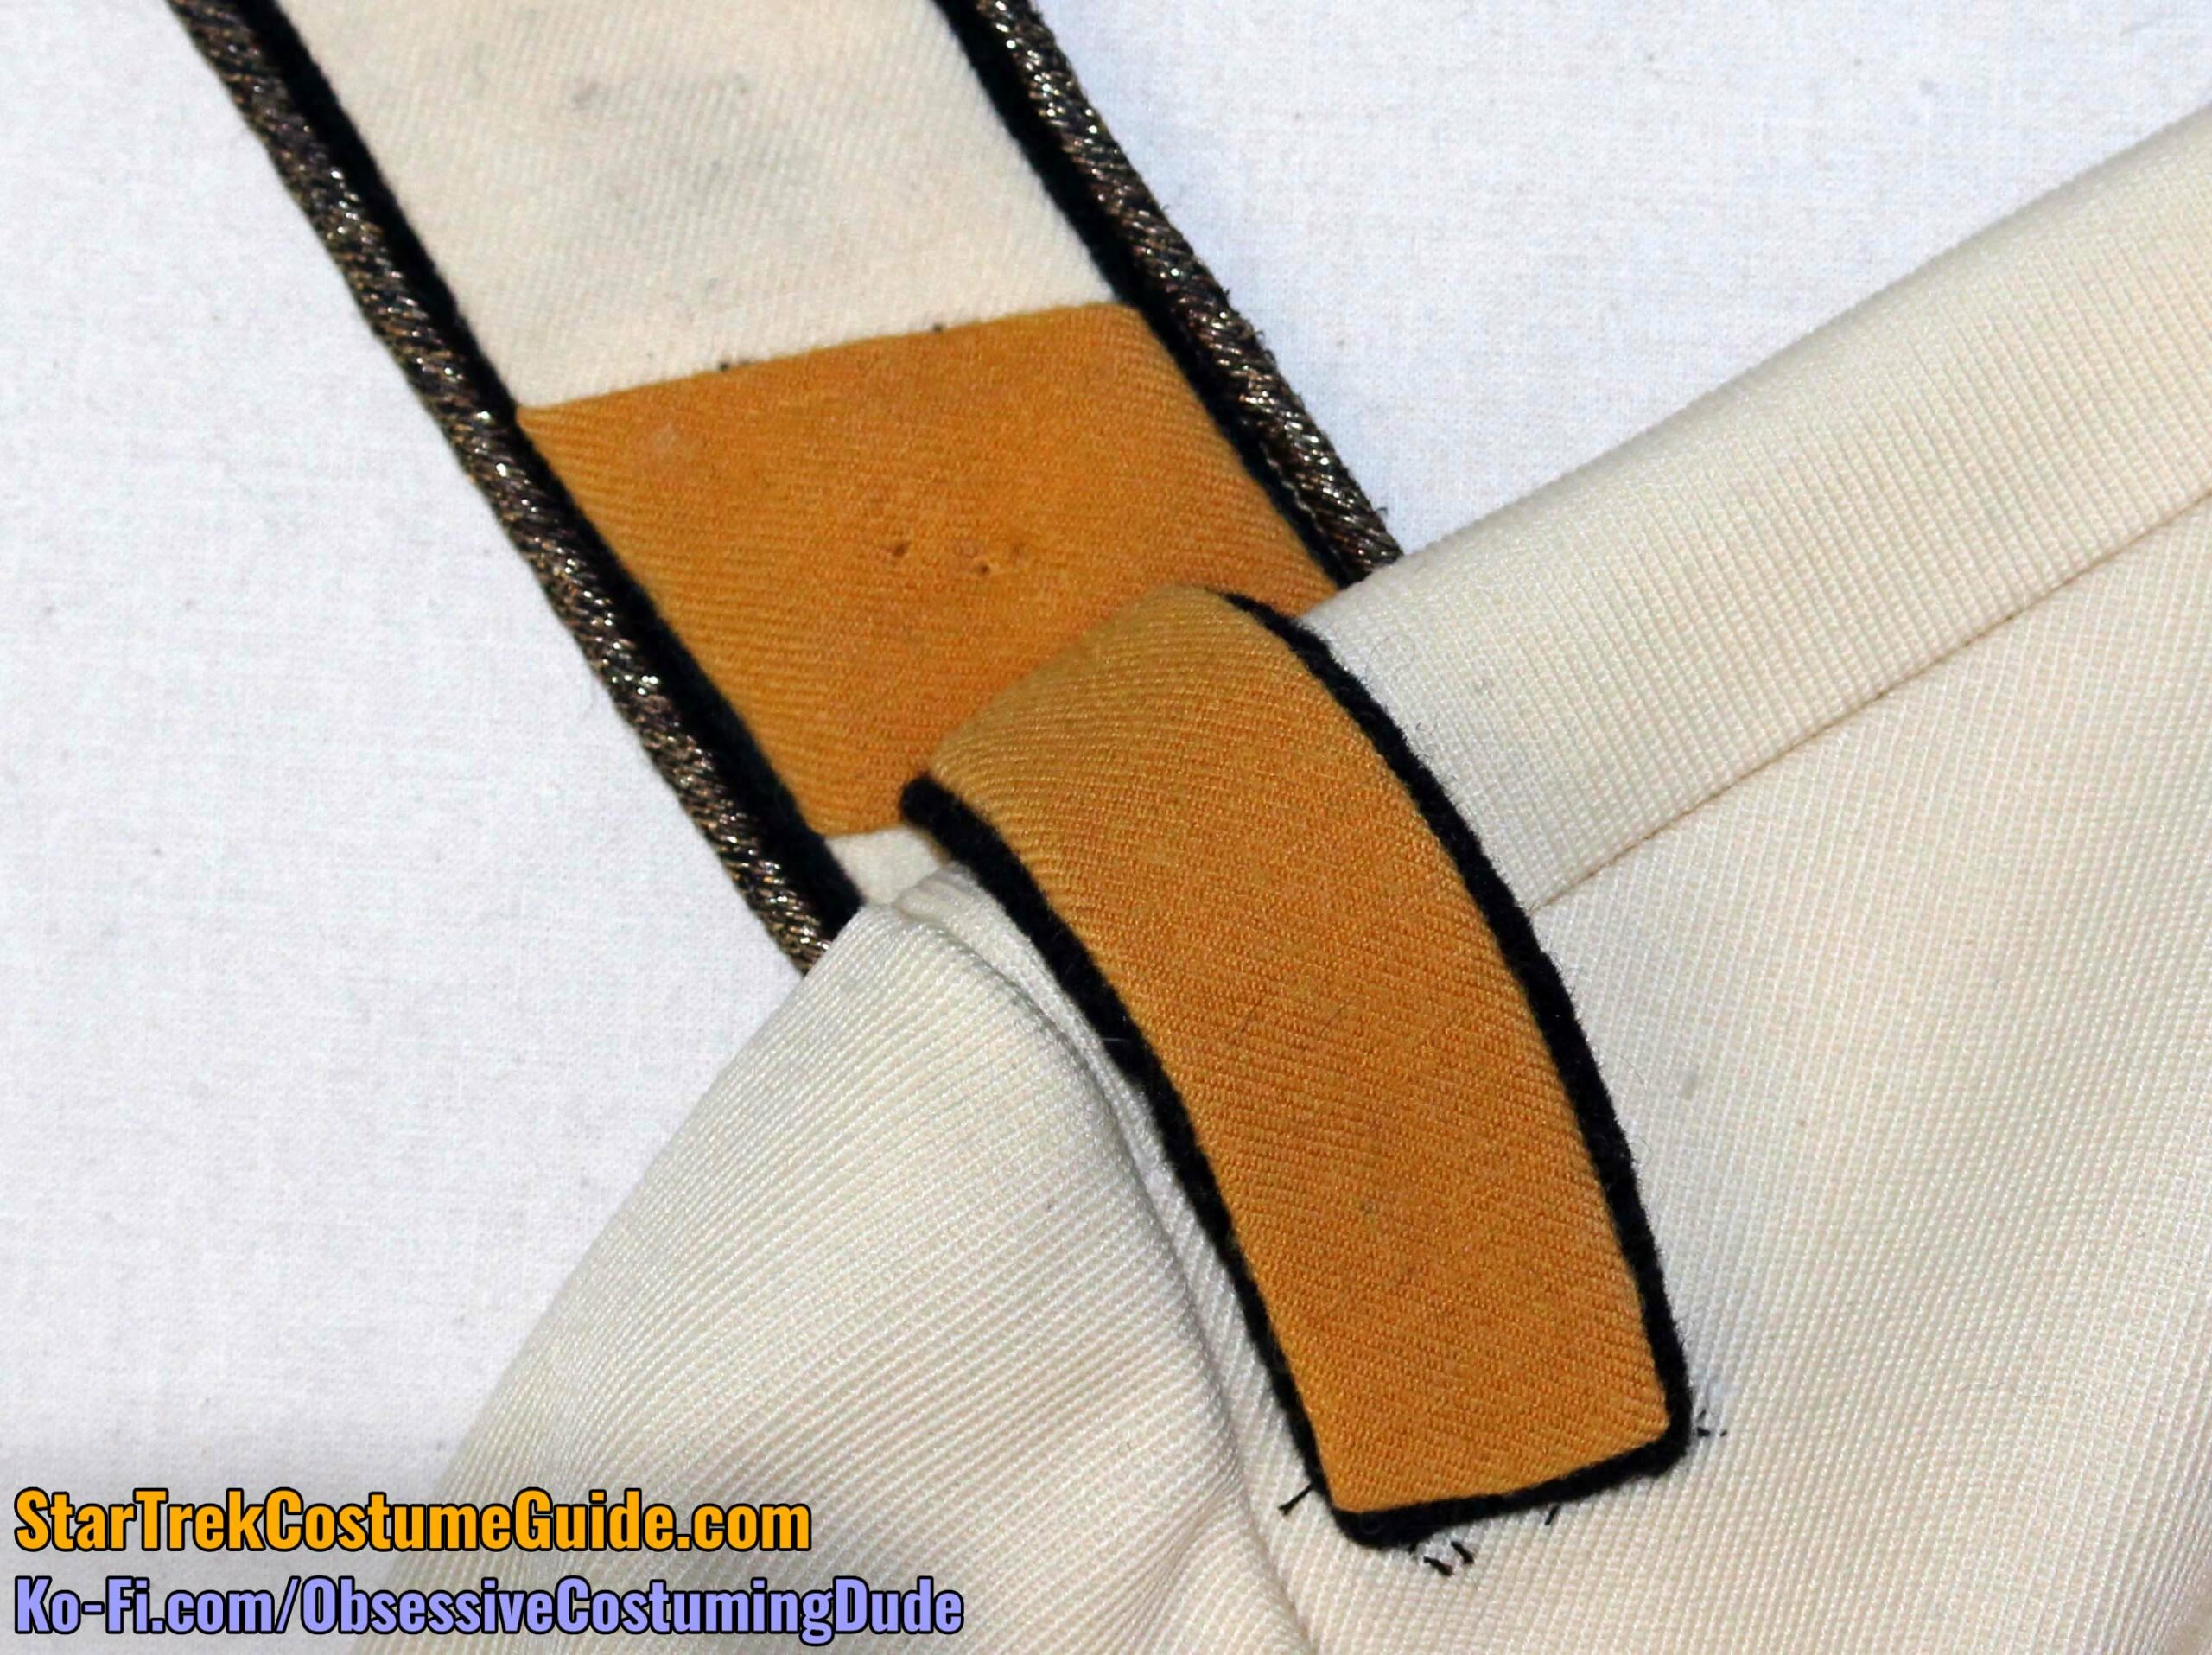
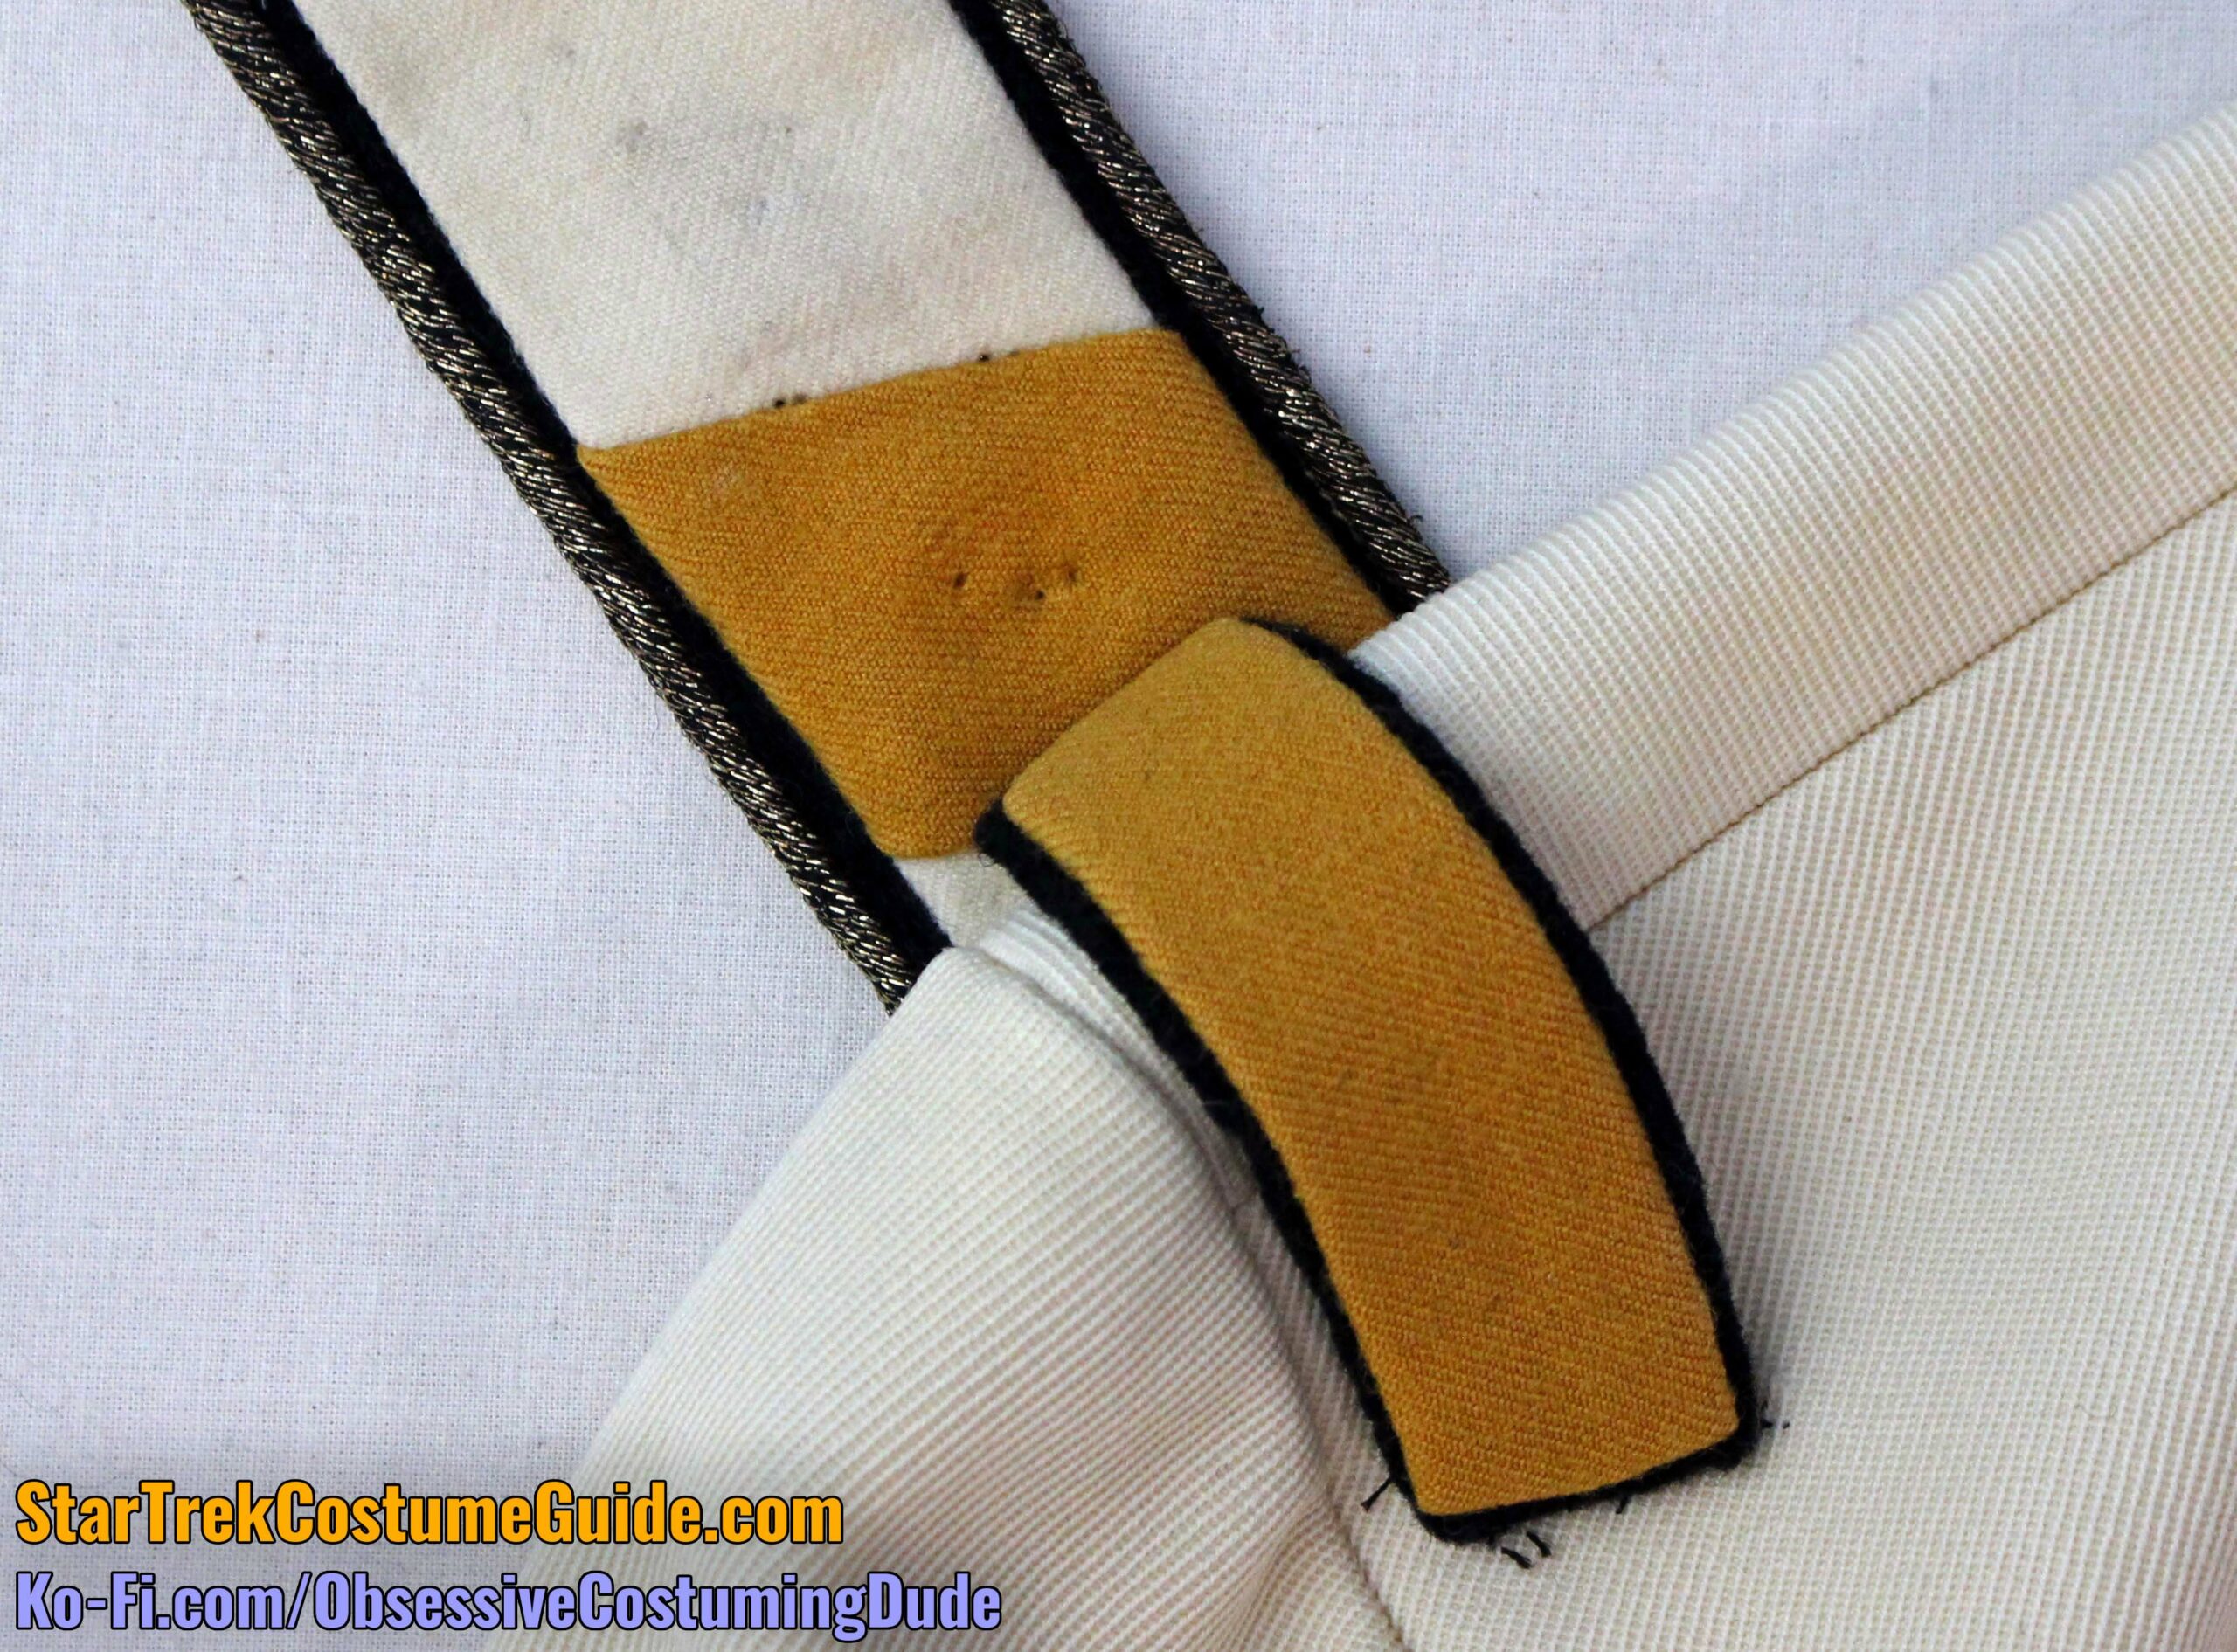
The shoulder stripe assembly consisted of a 1” black felt base, onto which a ⅞” width of gold wool was centered and hand-sewn.
Although these shoulder accents were common on many of the uniform styles seen in The Motion Picture, in that movie the engineering division color was actually red.
(It was subsequently changed to gold from The Wrath of Khan onward.)
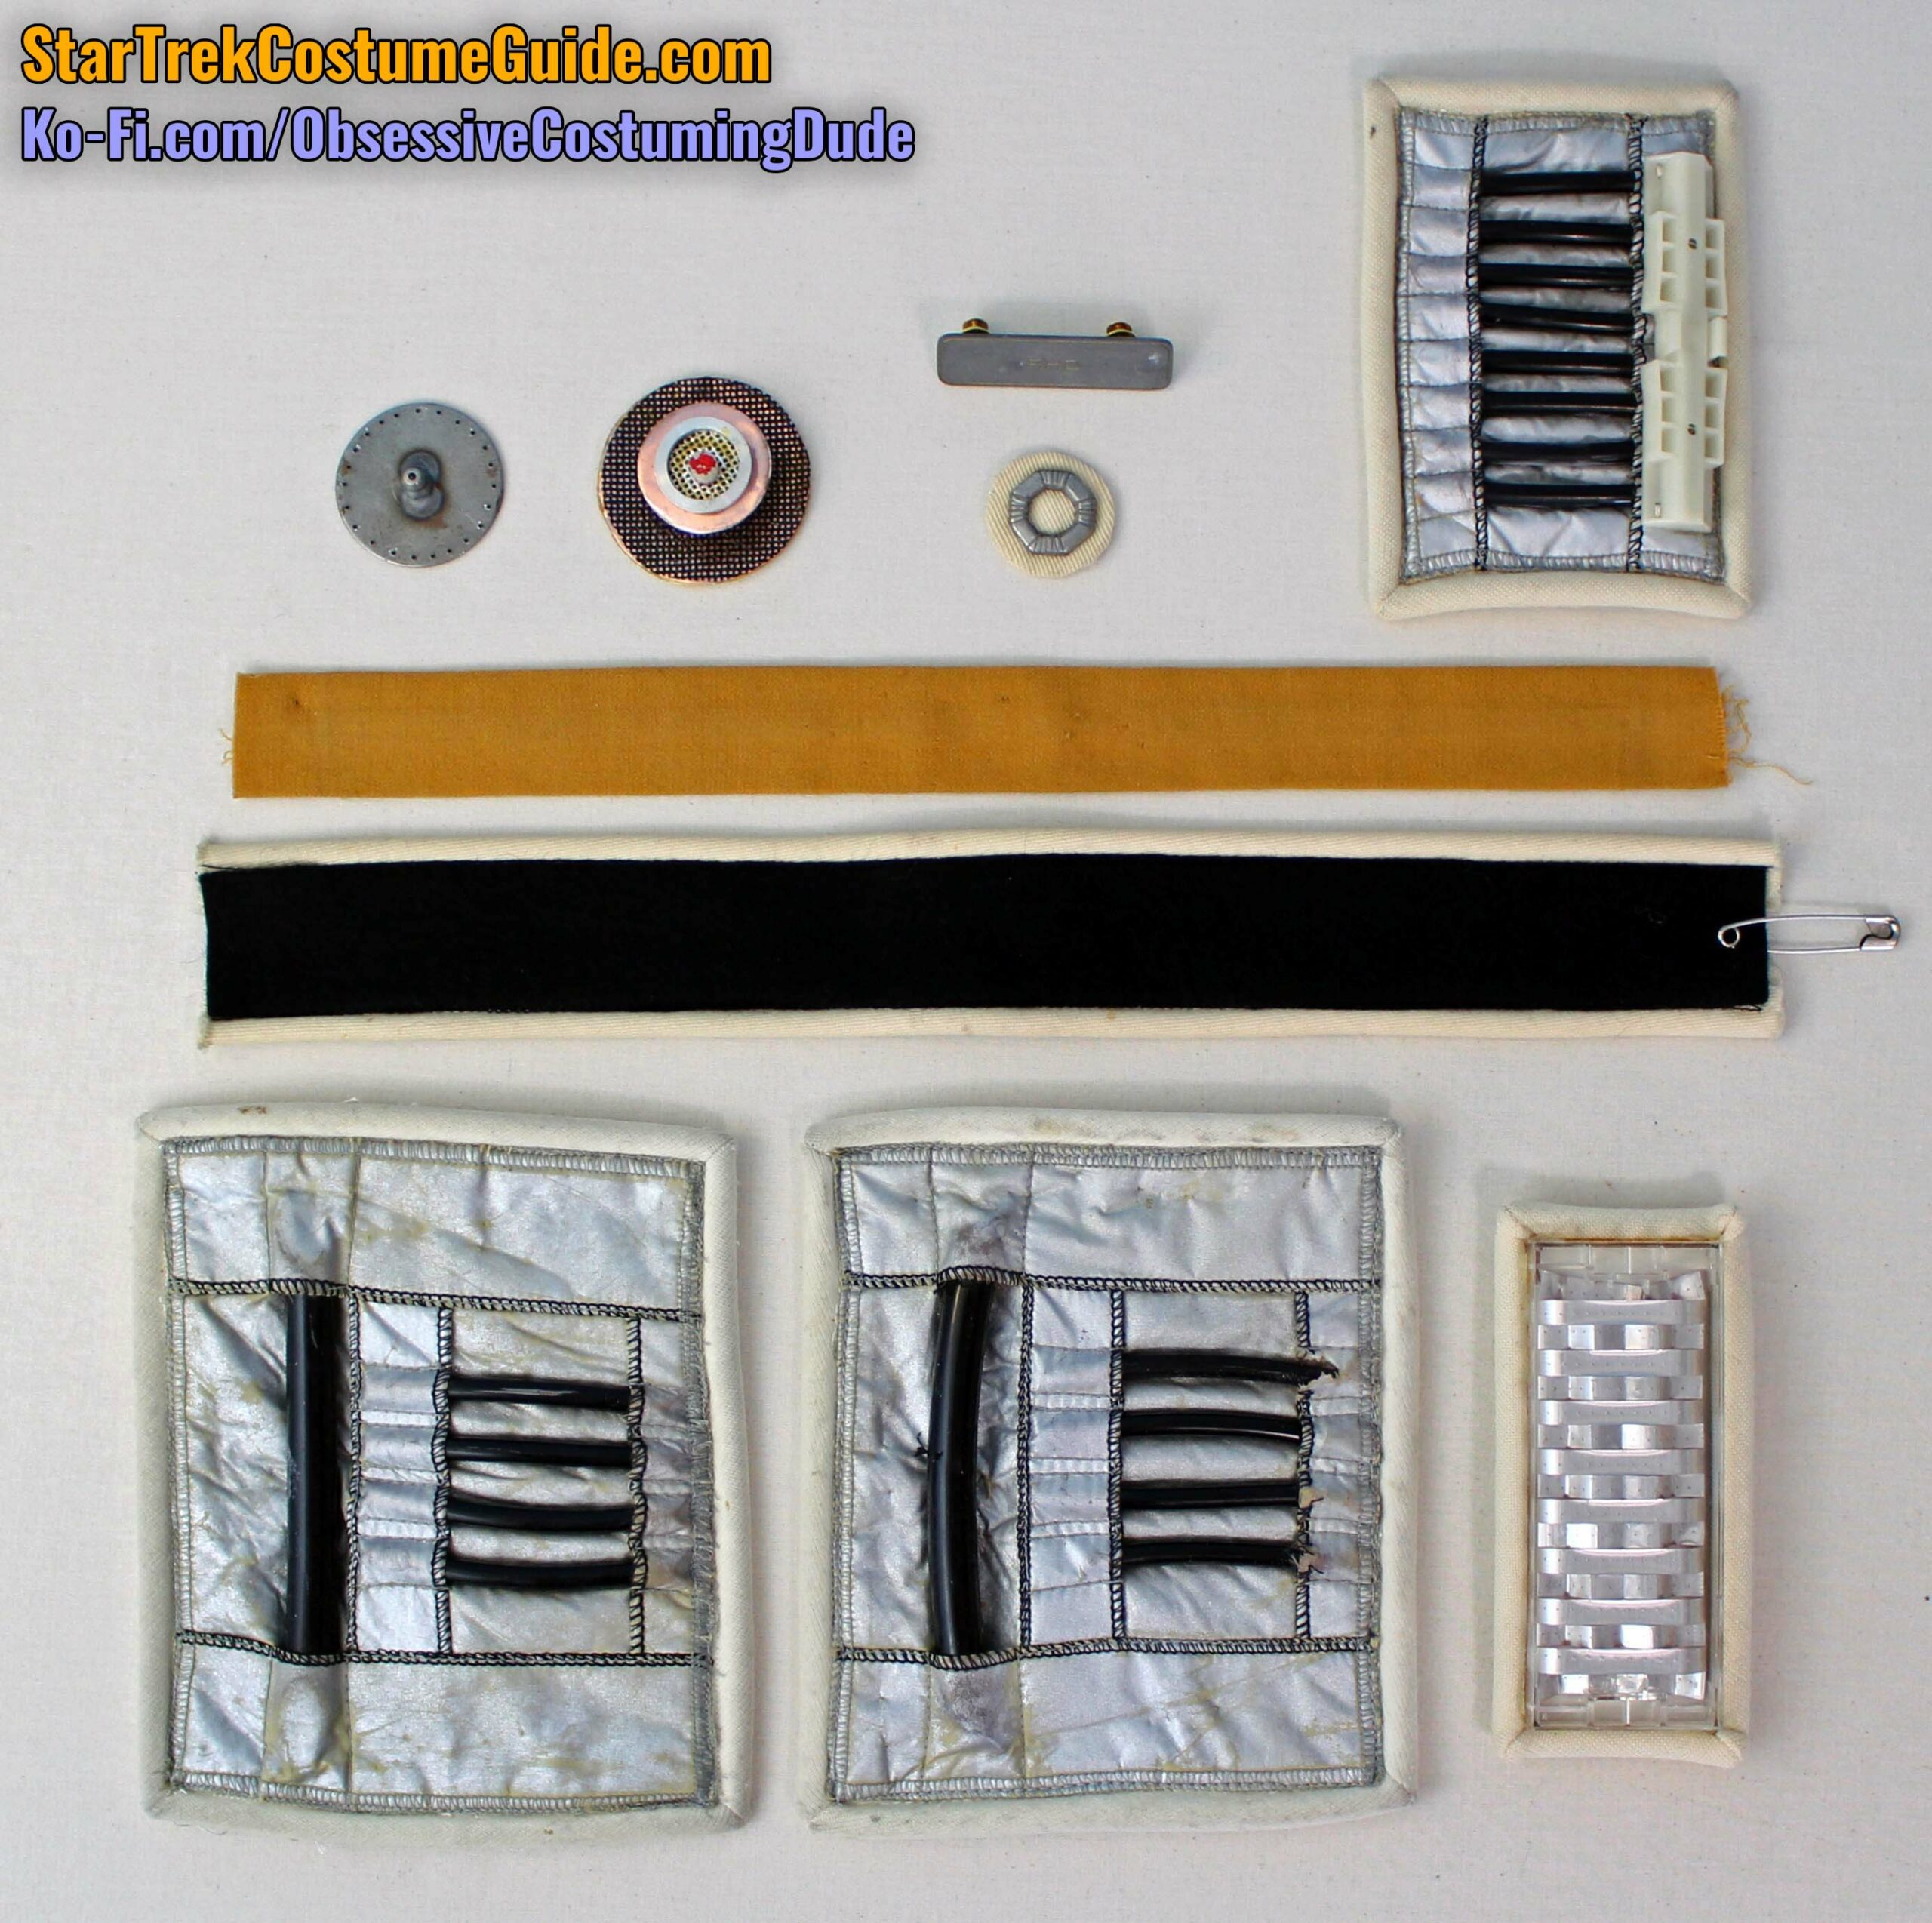
Fortunately for us, the costume included all the other various accents and attachments, but most of them were separate from the jumpsuit itself, allowing us to examine each of them in more detail than if they’d been attached!
We’ll take a look at each of them in turn, starting toward the top of the uniform and working our way downward, then onto the sleeves.
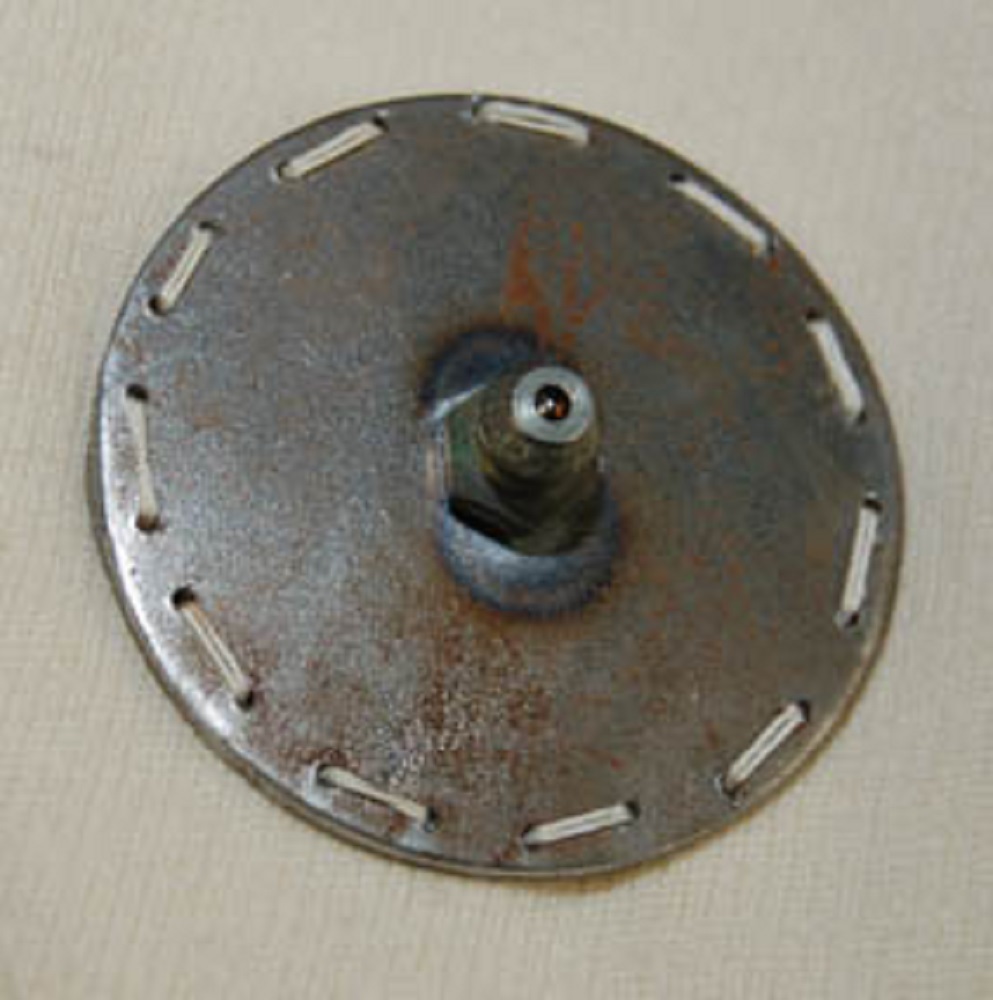
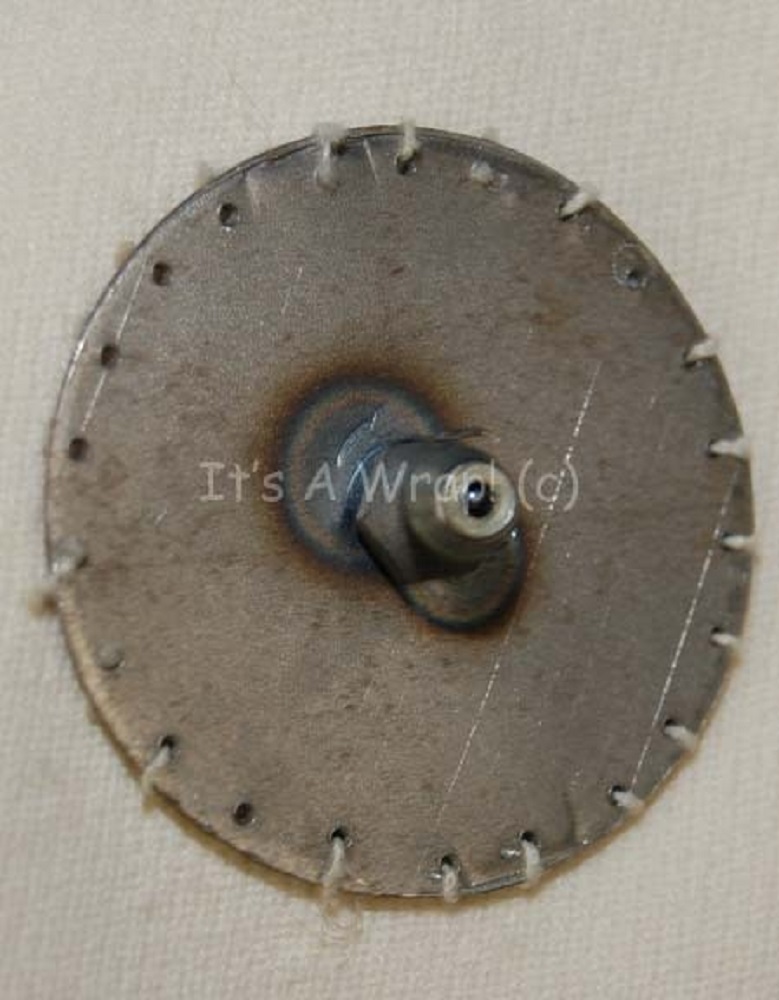
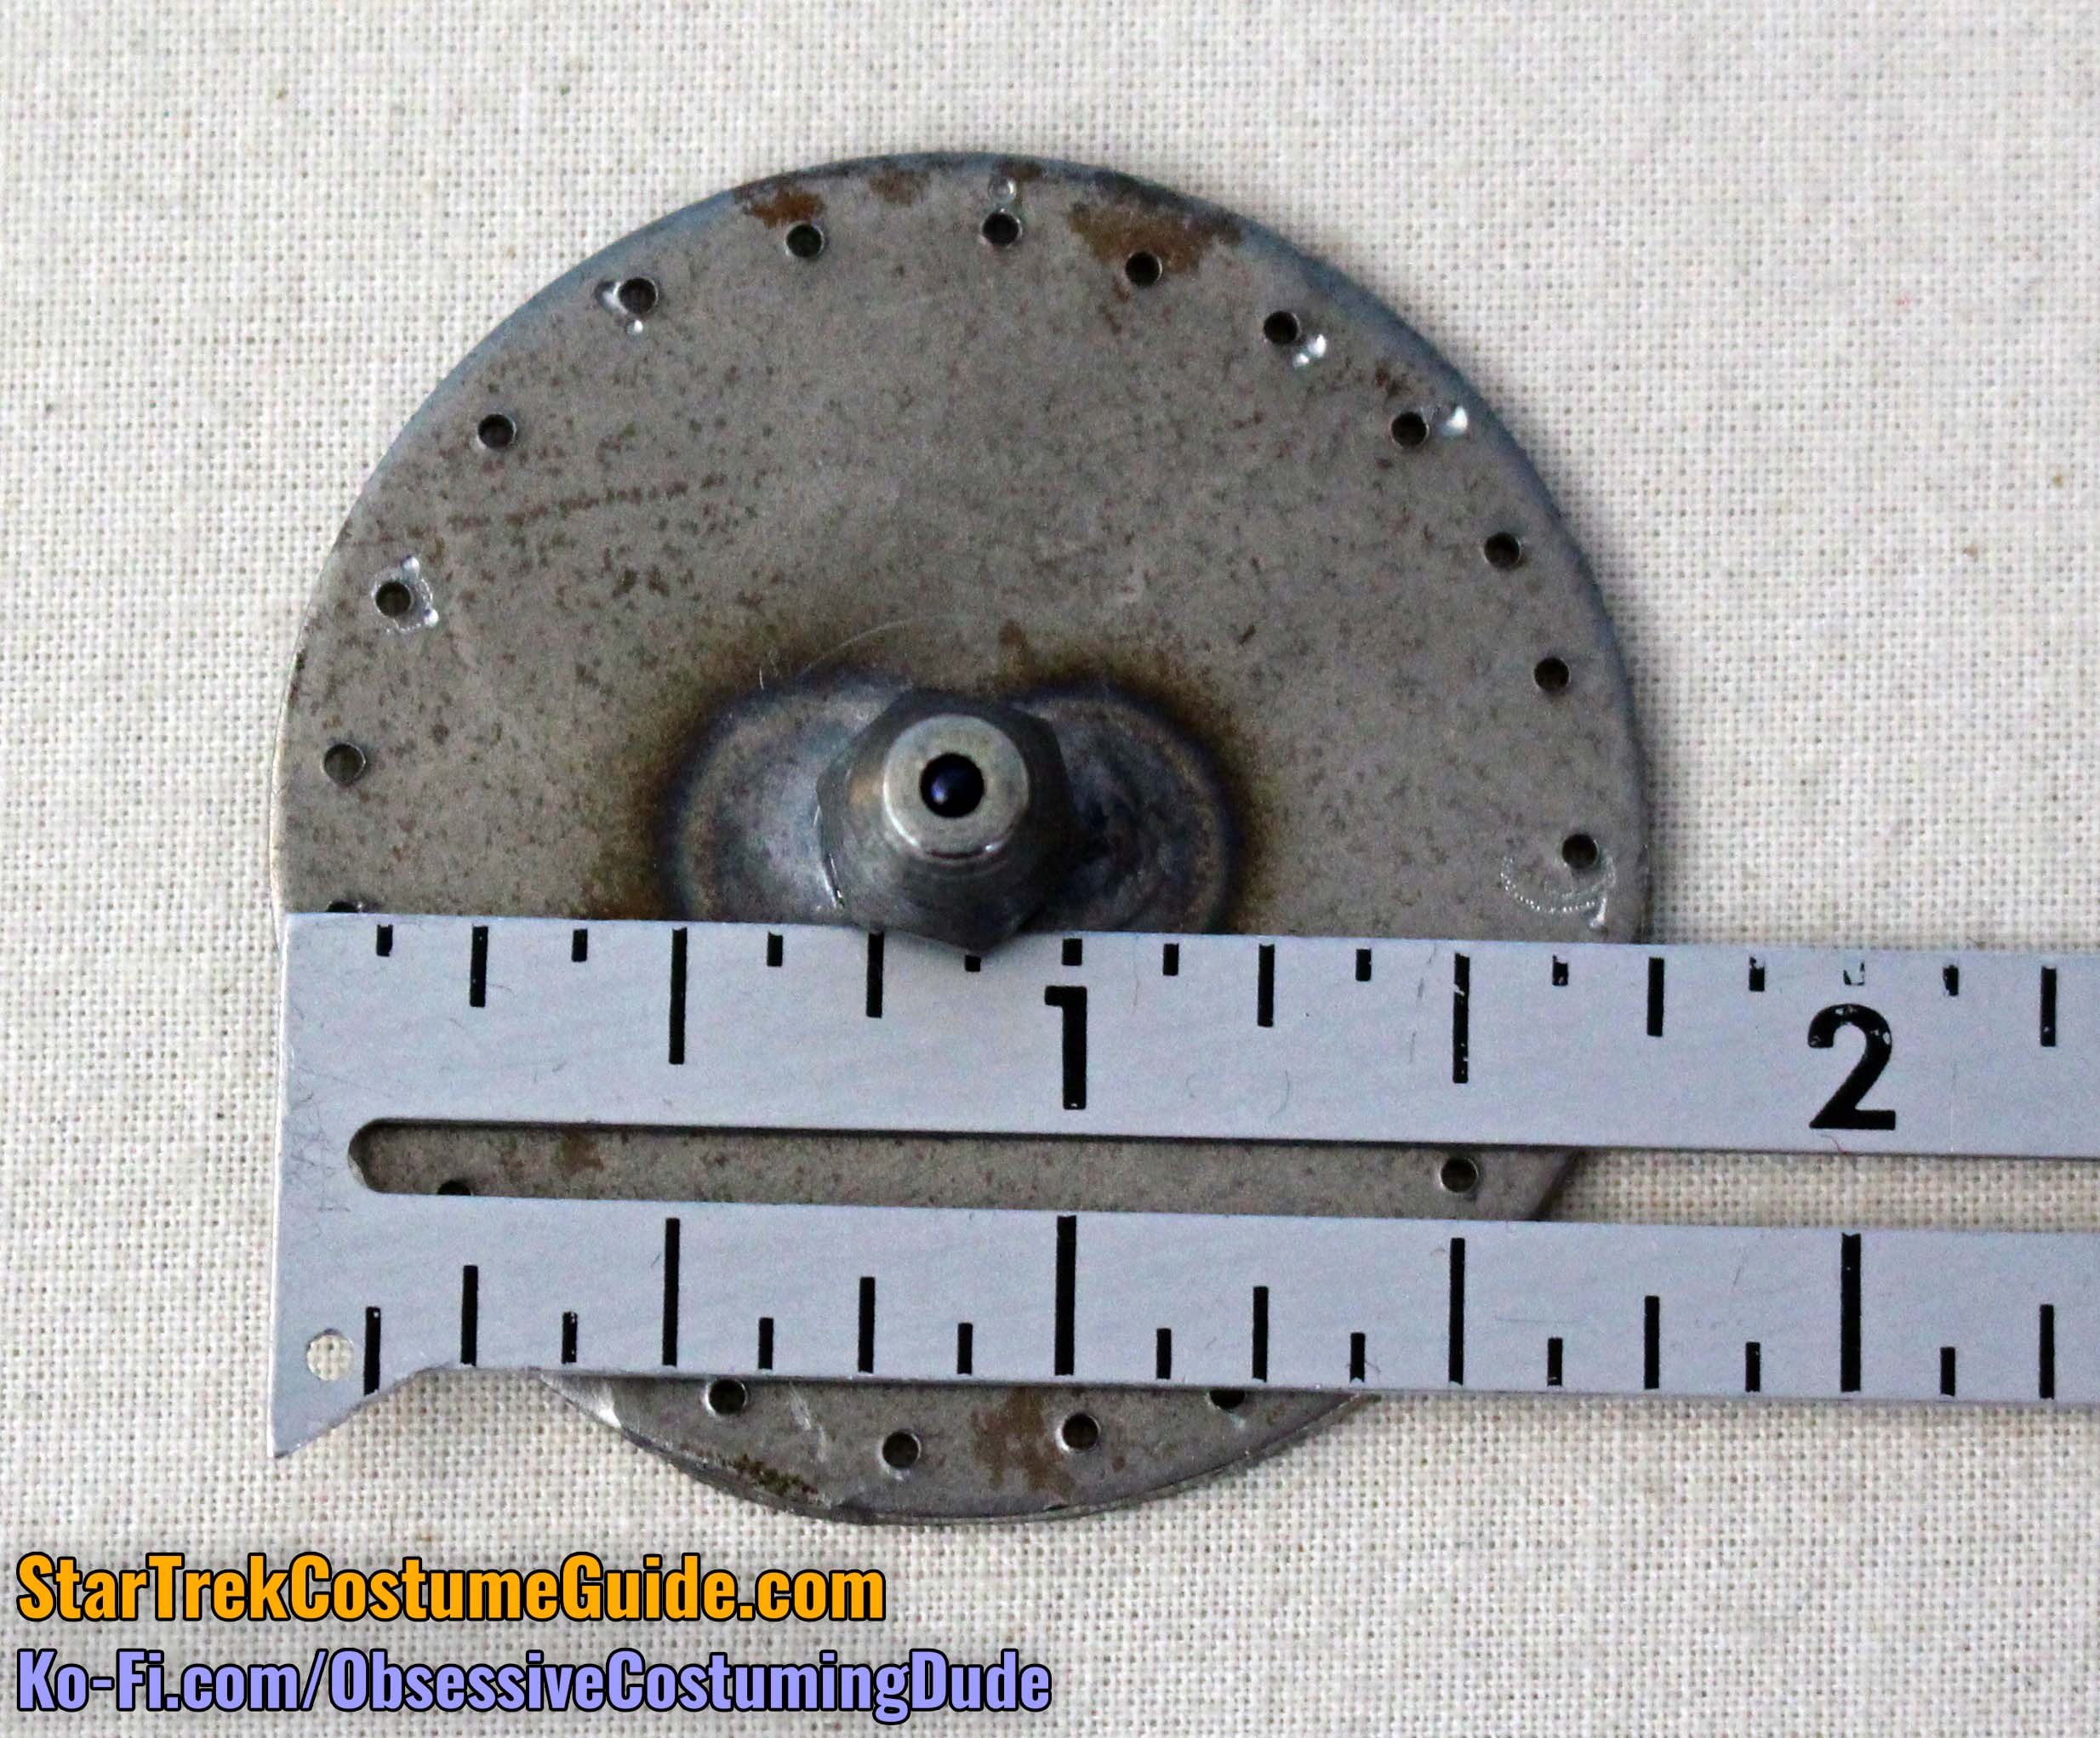
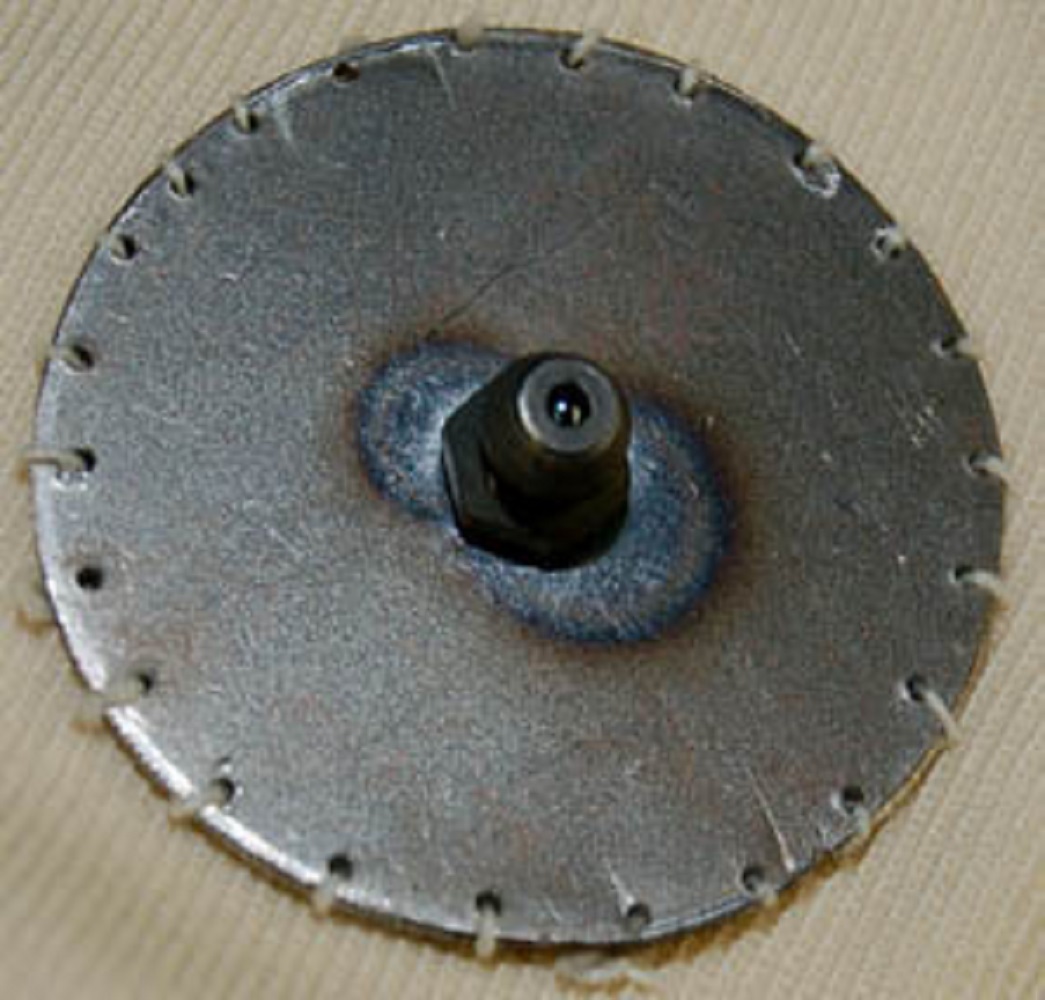
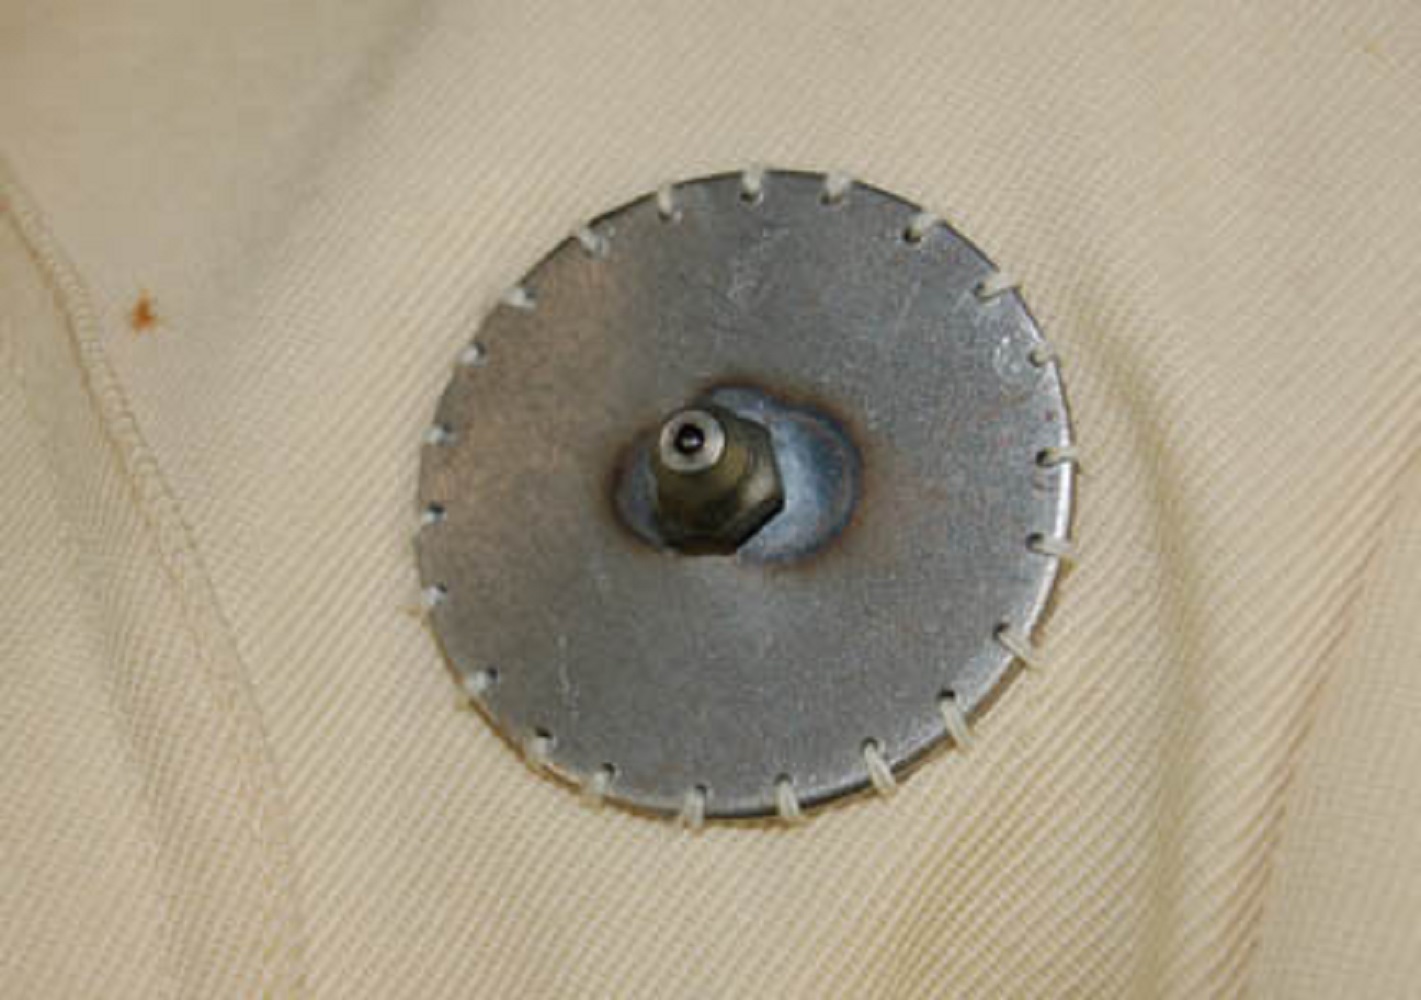
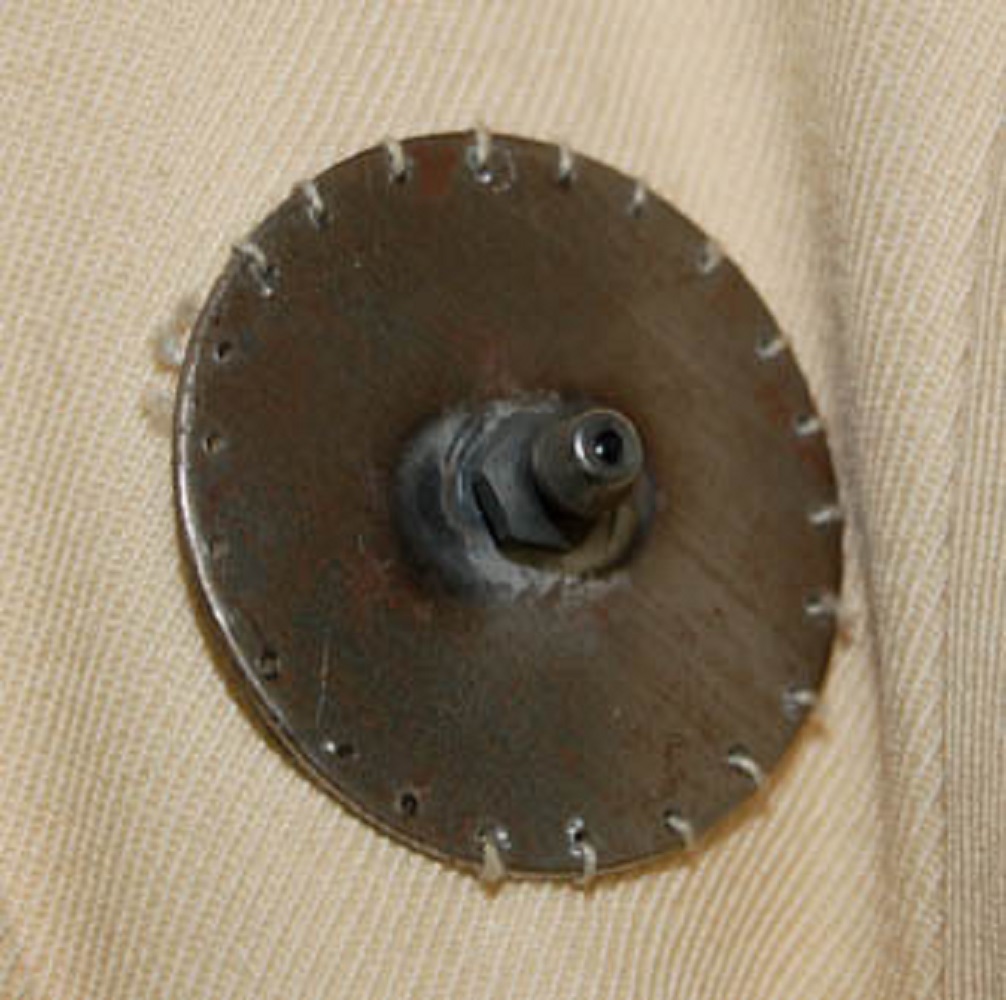
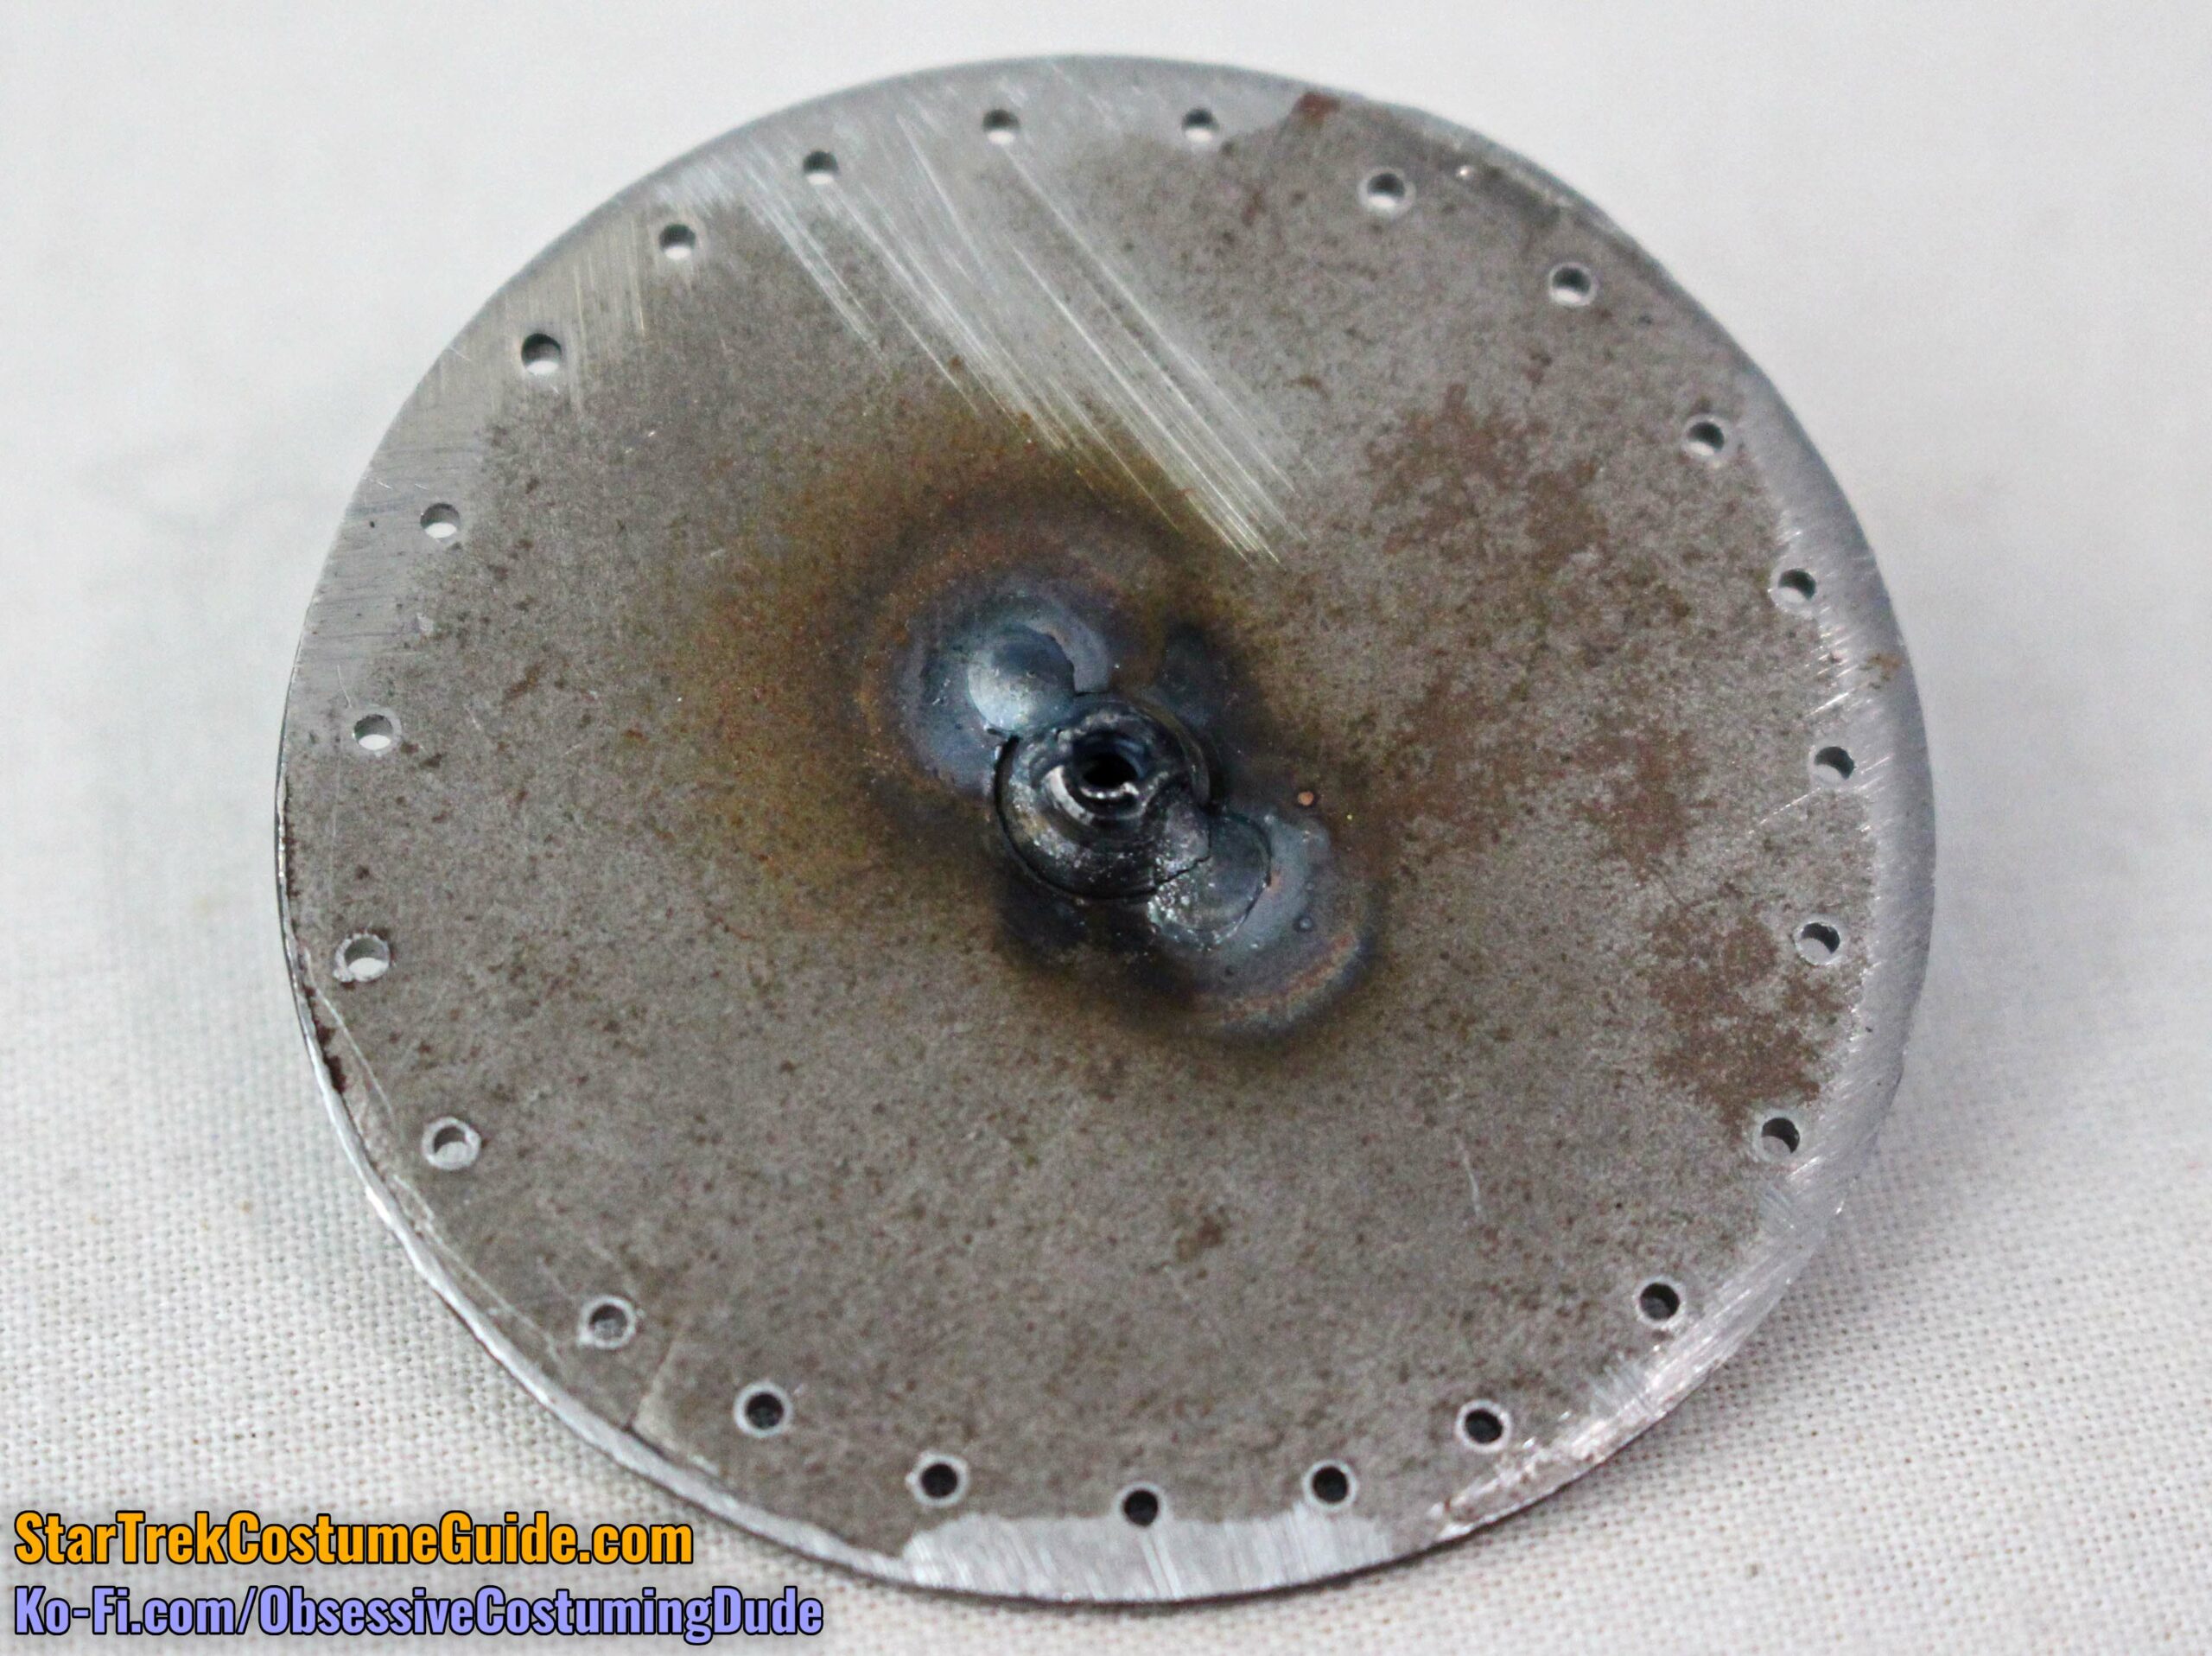
LEFT CHEST ACCENT
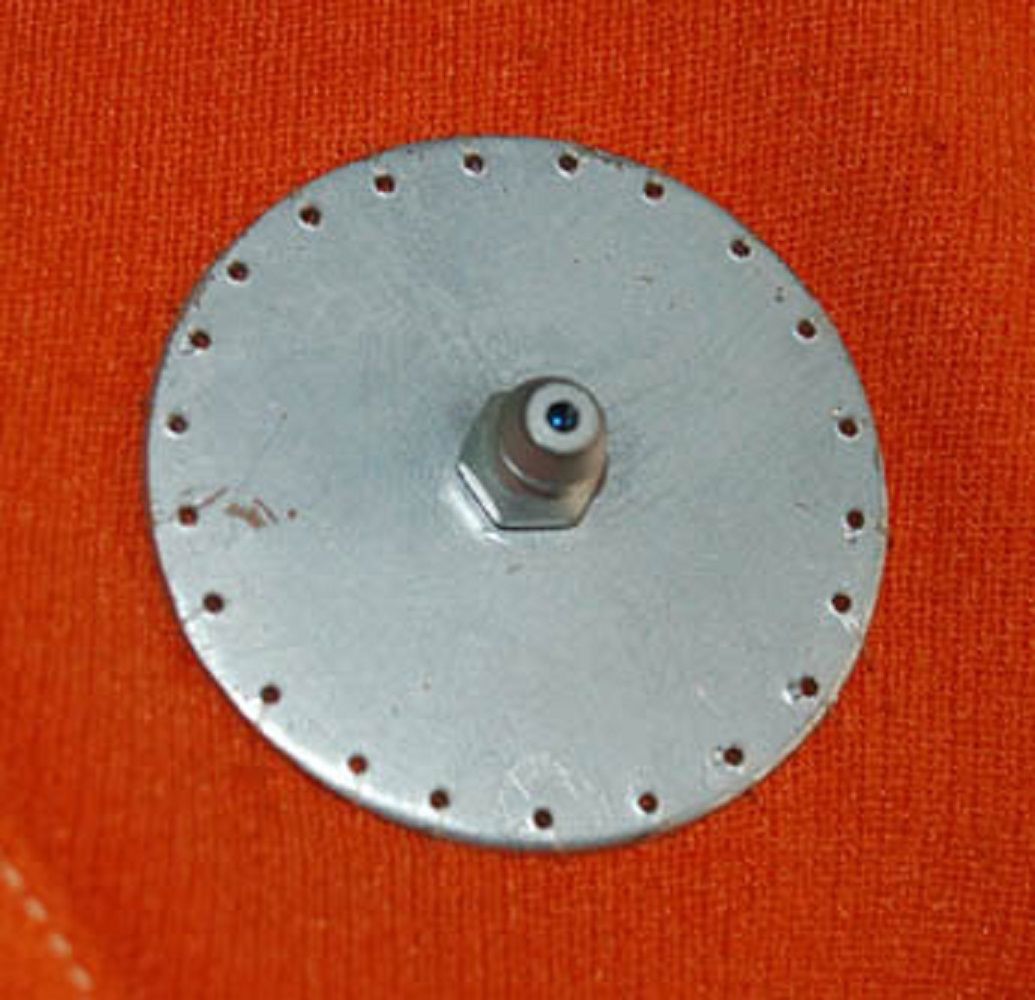
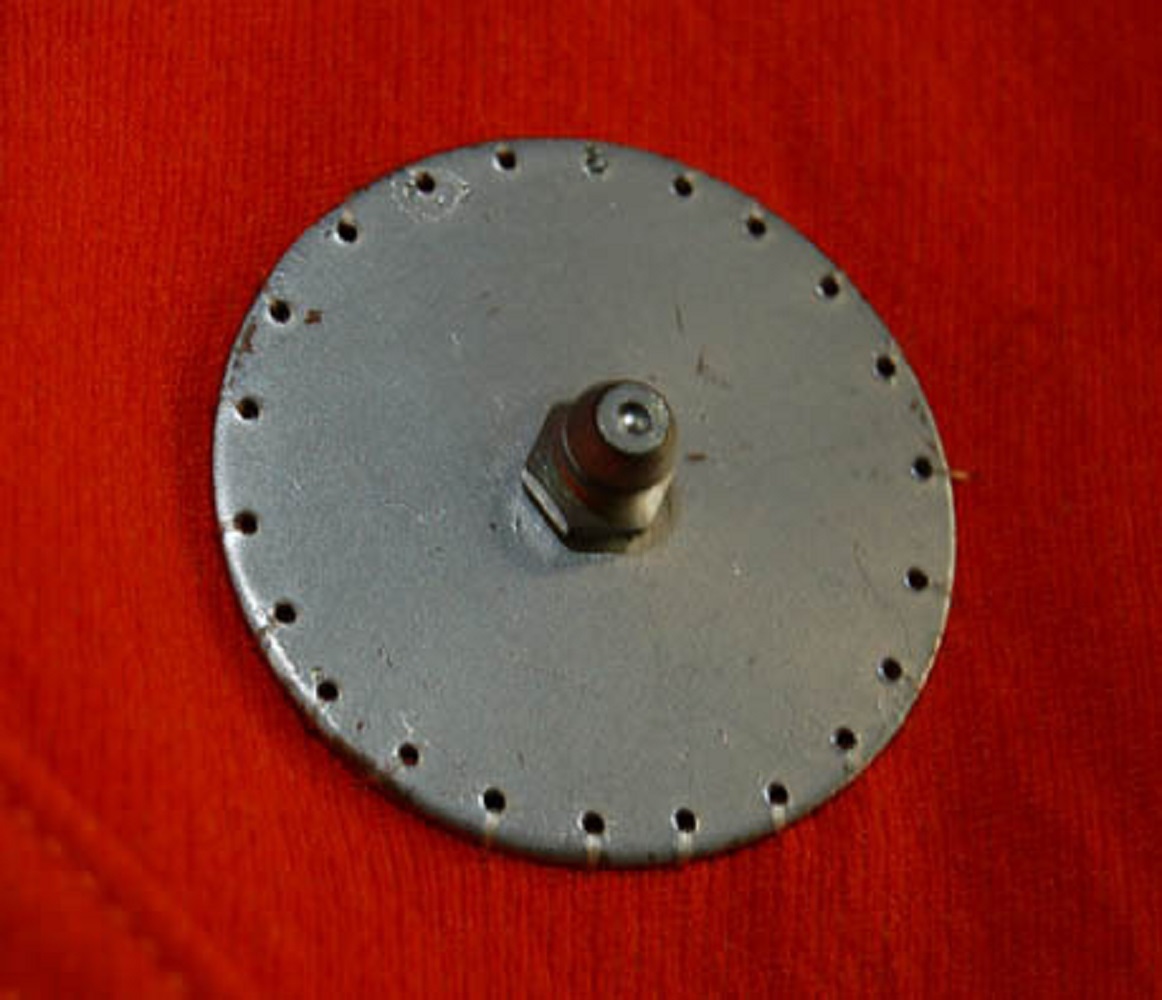
On the upper left chest was a circular, metallic accent:
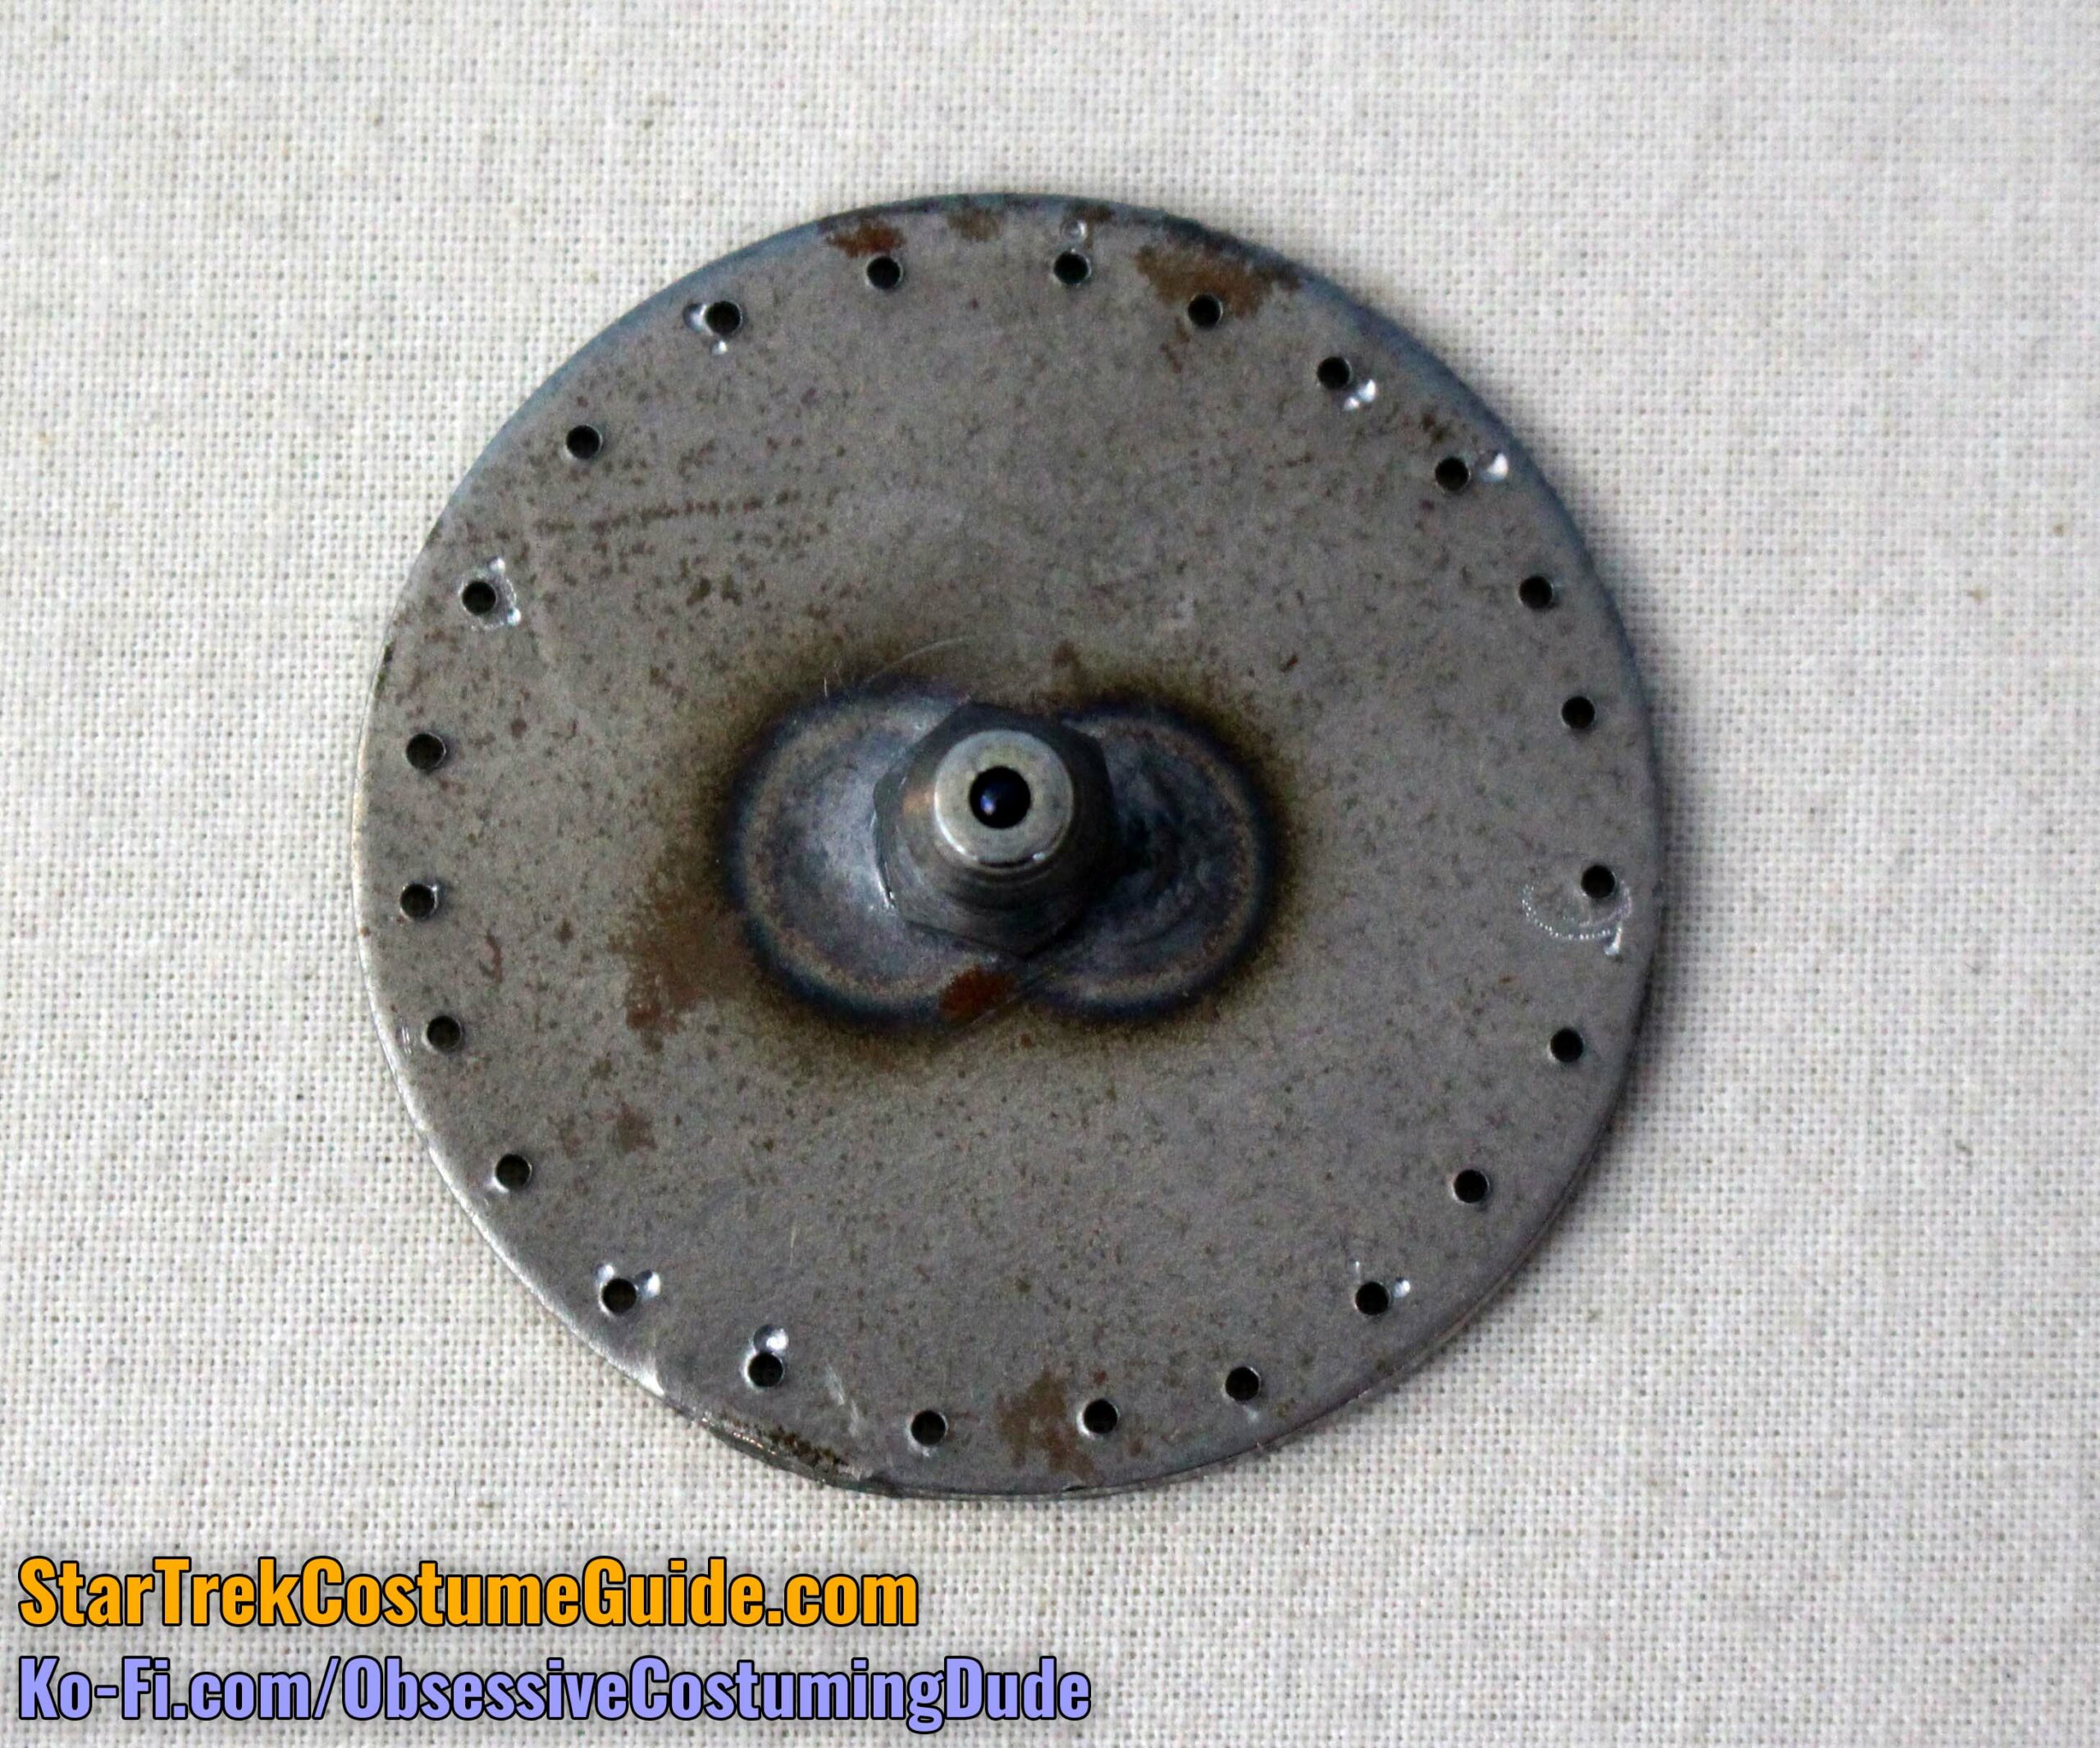
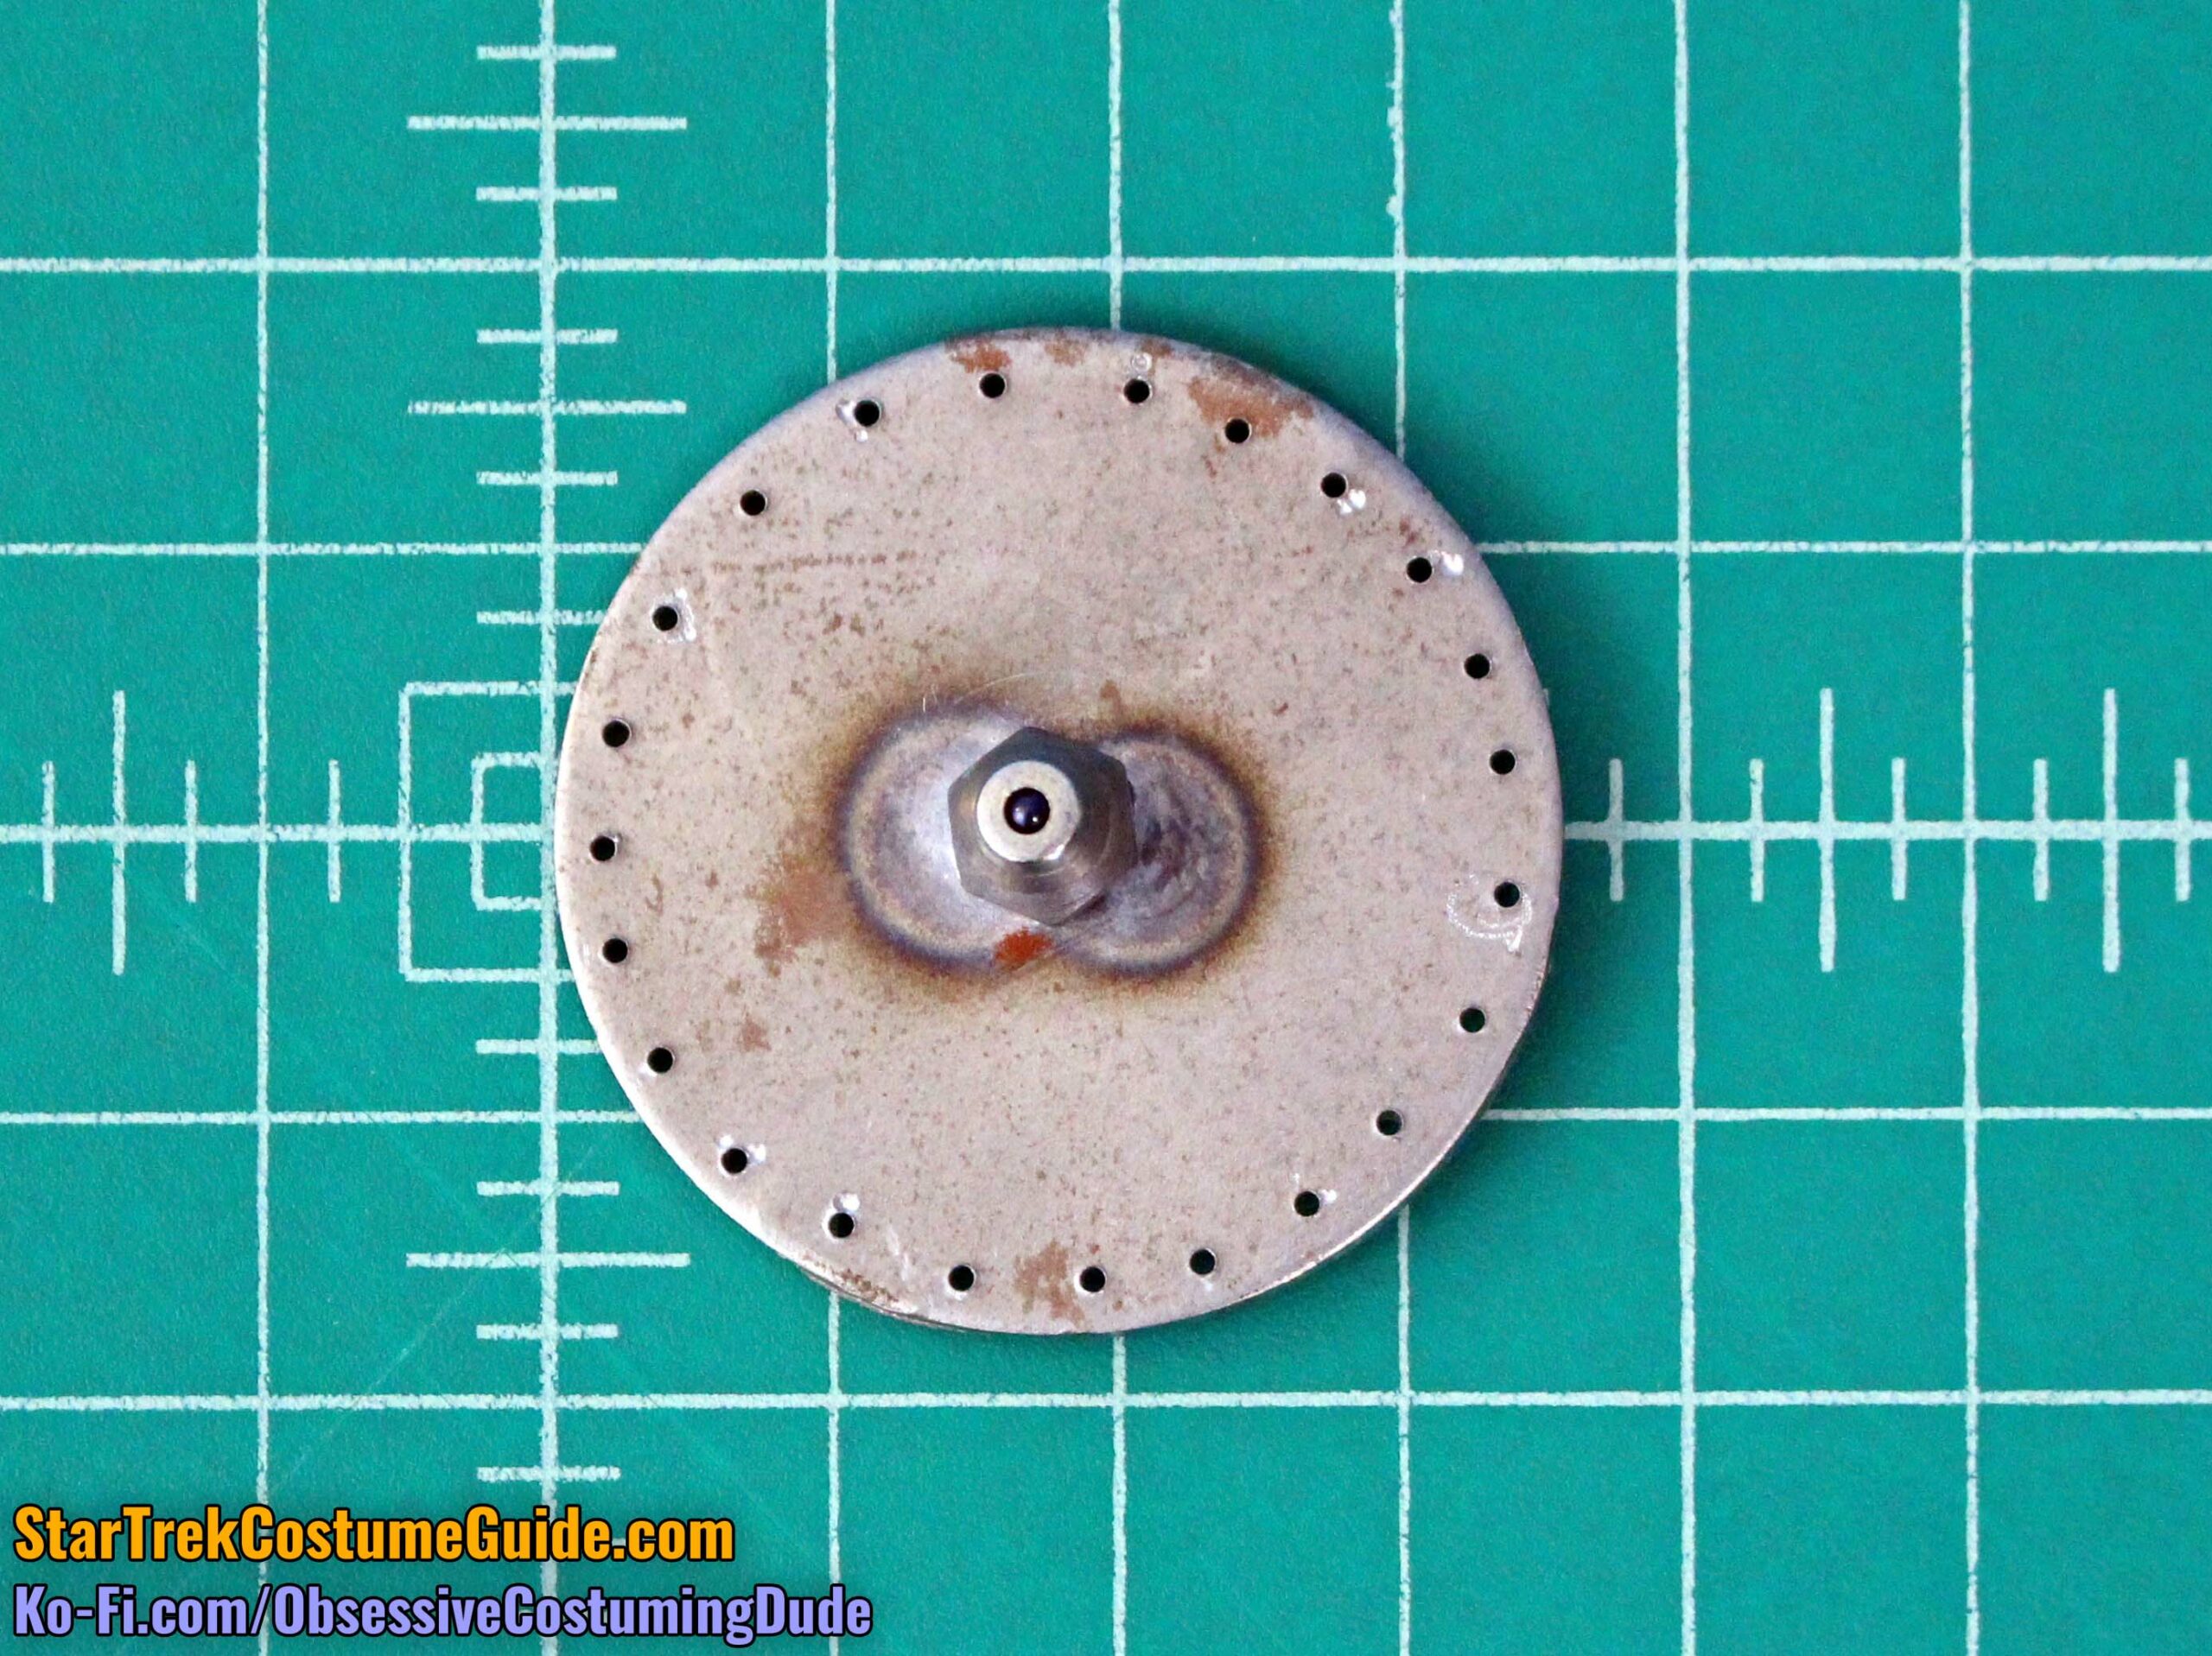
This metal circle was 1 ¾” in diameter and had a bunch of small holes (23, in this case) drilled close to its outer edge.
Others had only 21 or 22 holes along the circumference, but they appear to have always been hand-sewn to the jumpsuit (although one was attached in an obviously different manner).
At the center of the metal circle, another hole was drilled to accommodate an automotive grease fitting.
This fitting extended outward approximately ⅜” from the metal base.
The fitting was actually soldered to the metal base on the underside to secure it.
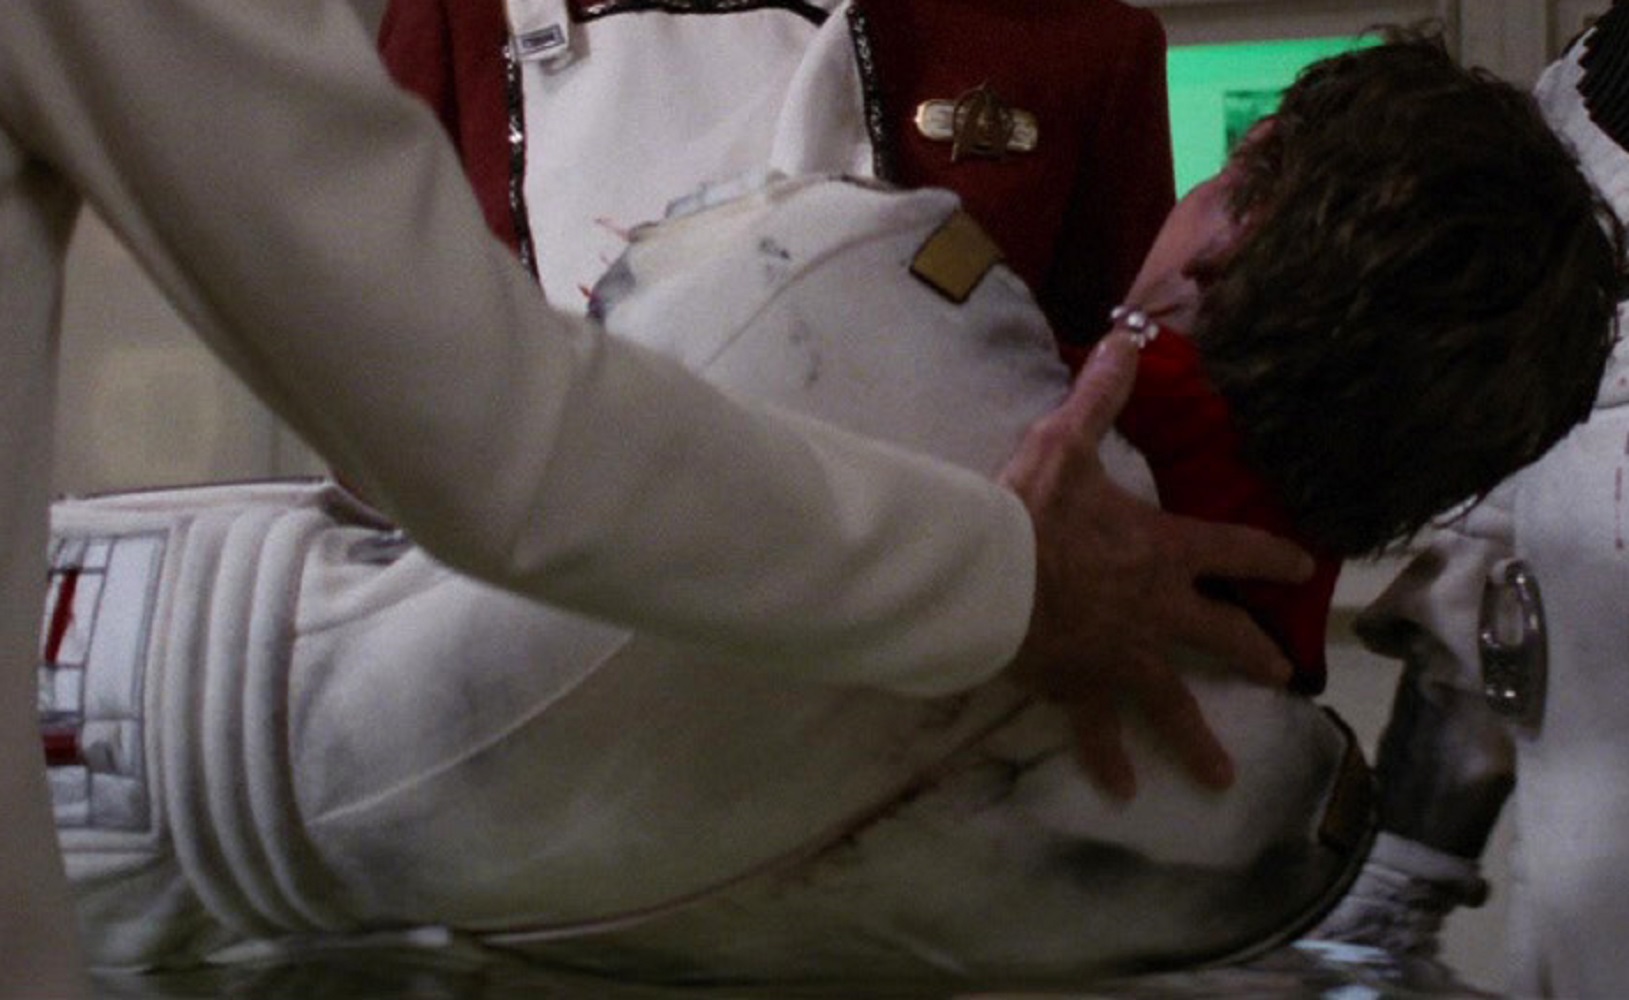
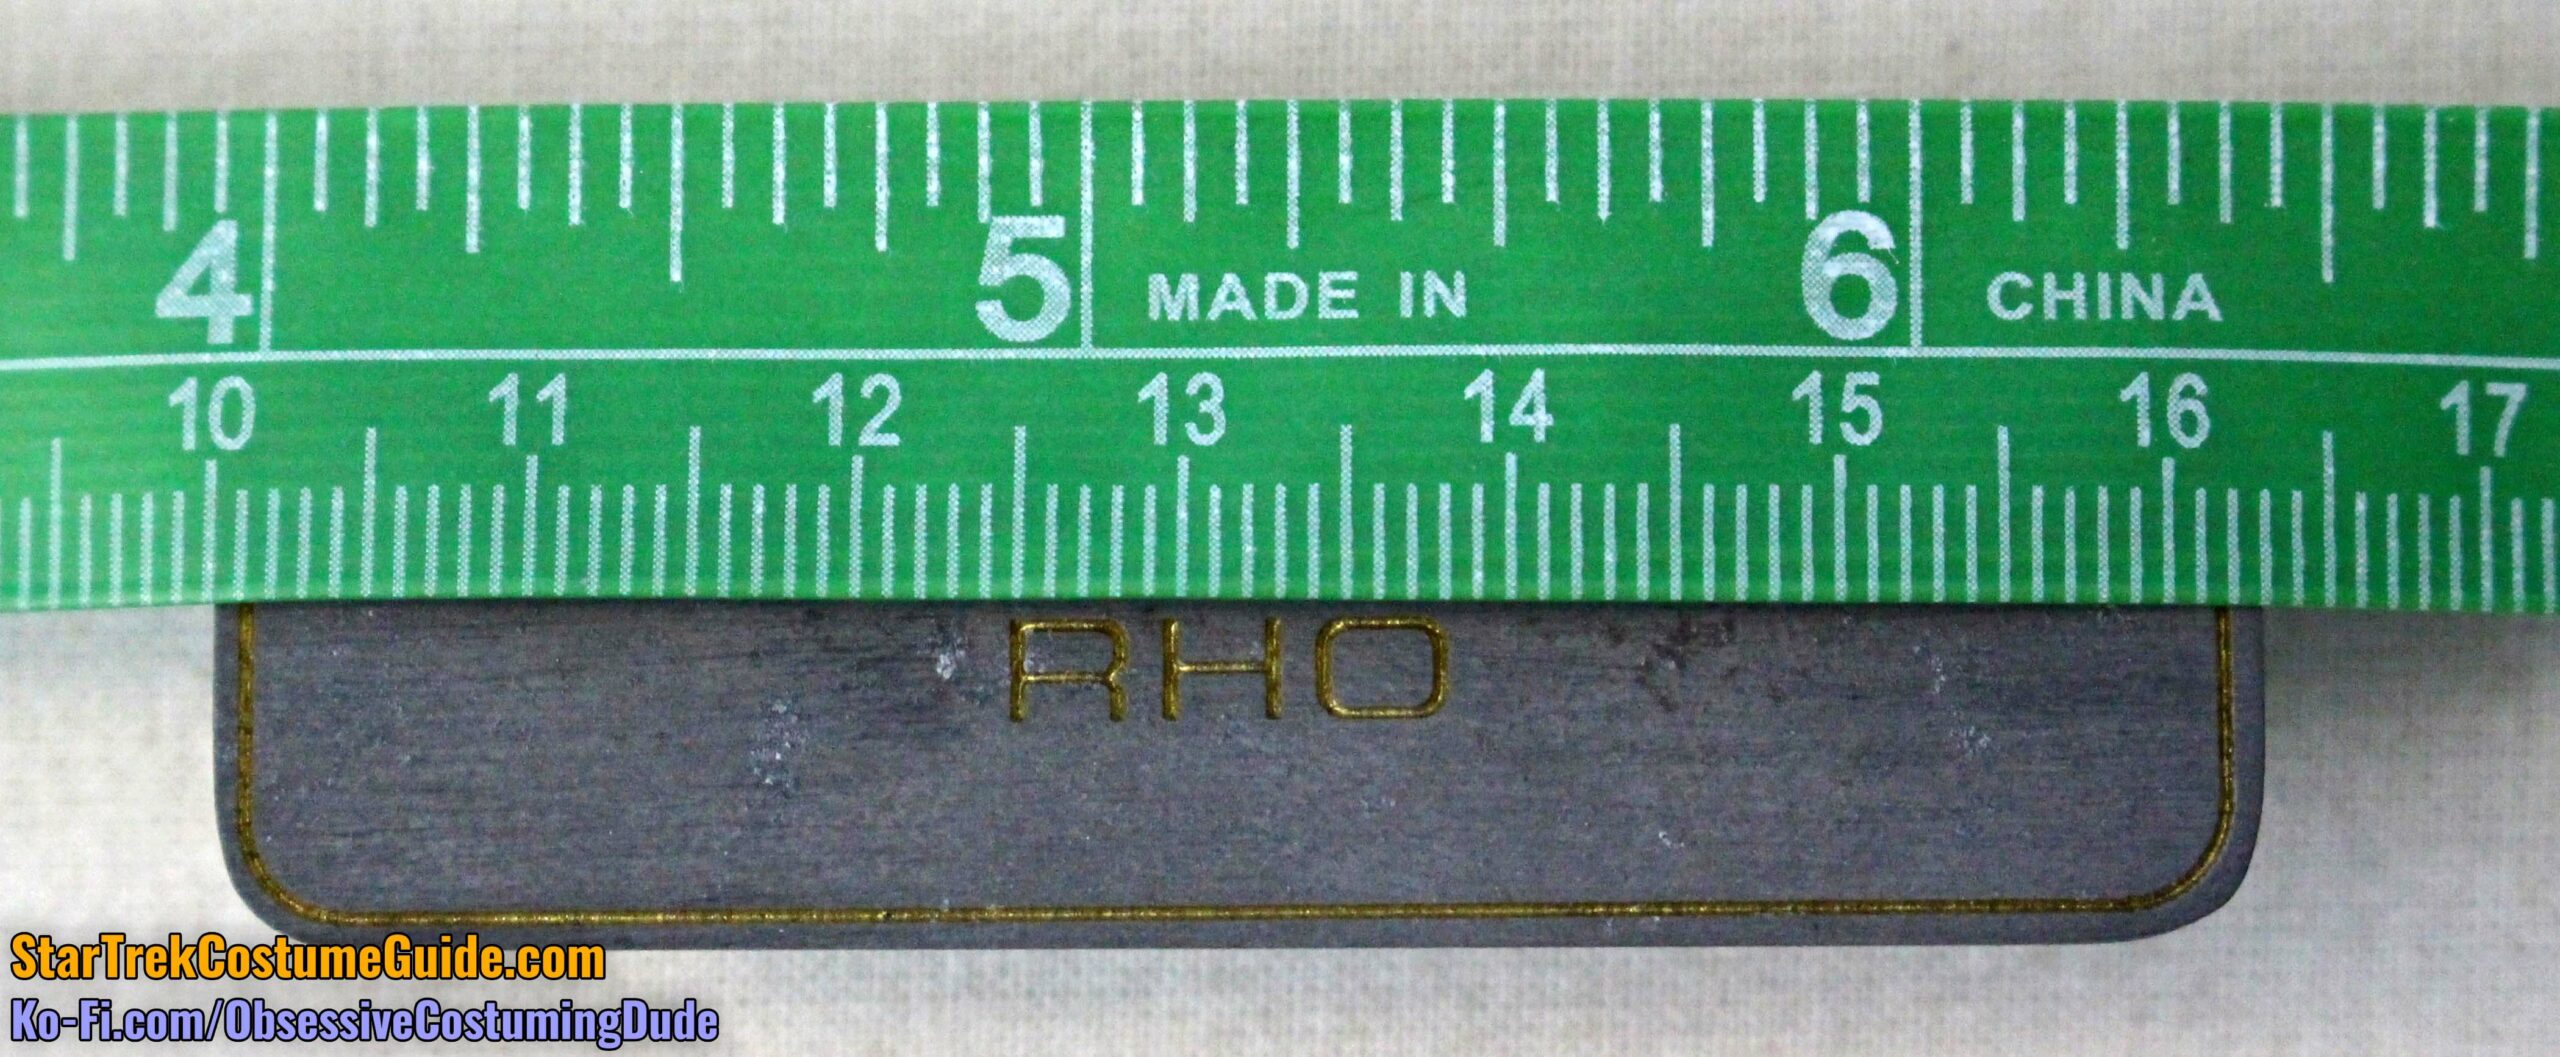
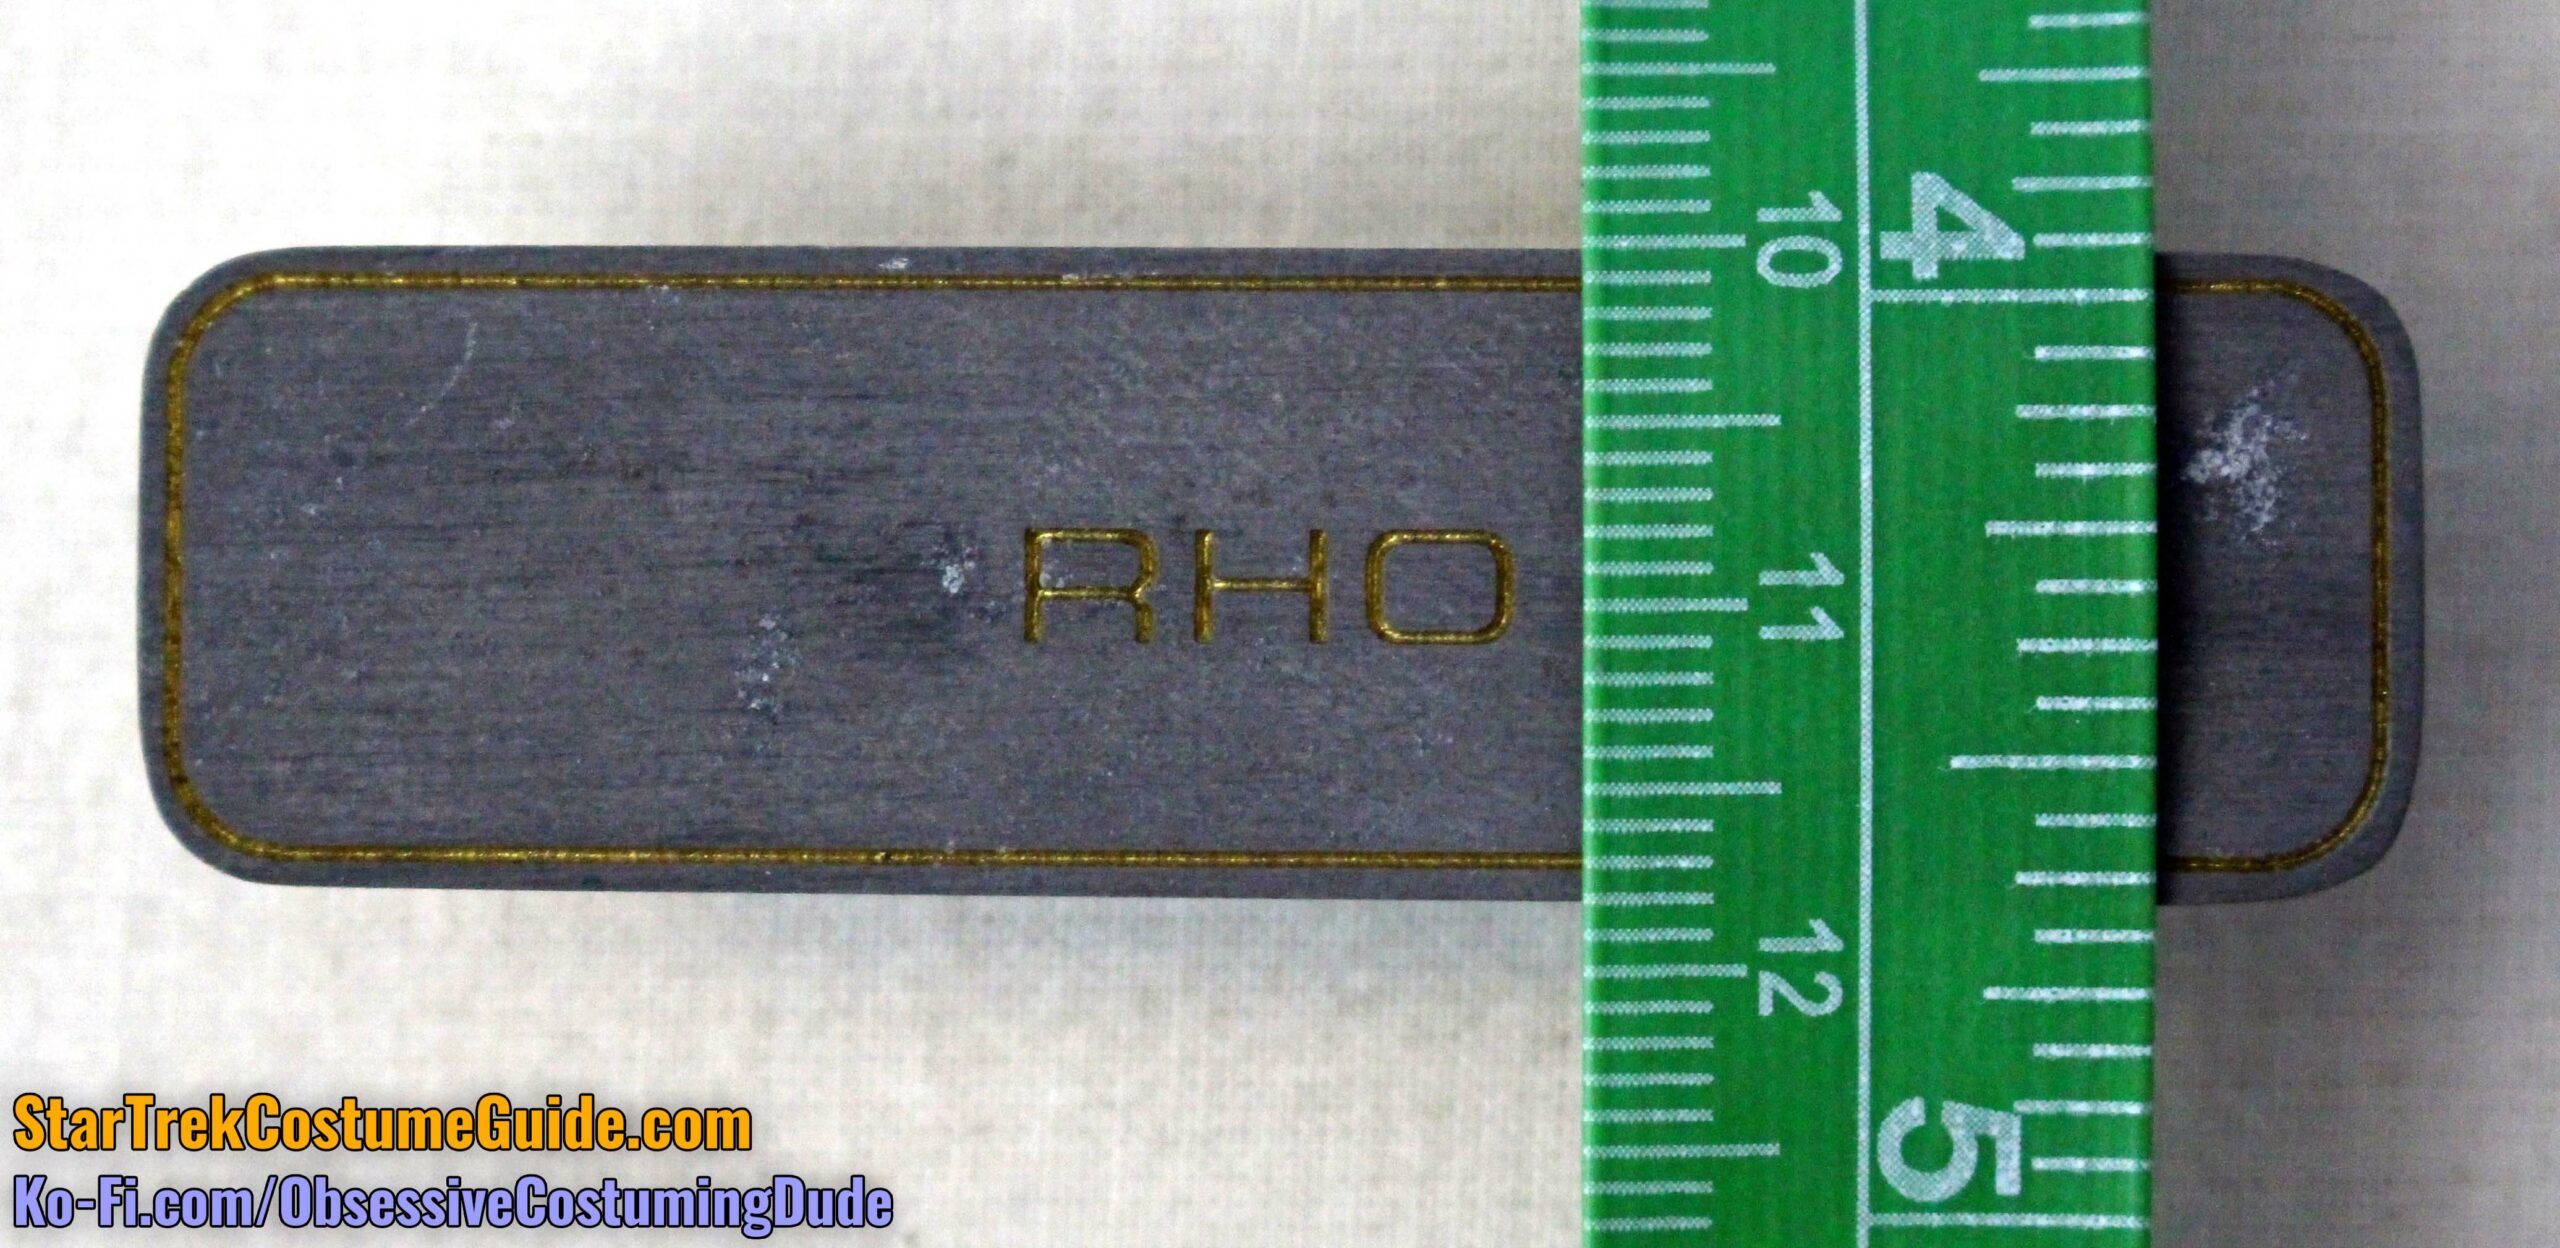
NAME TAG
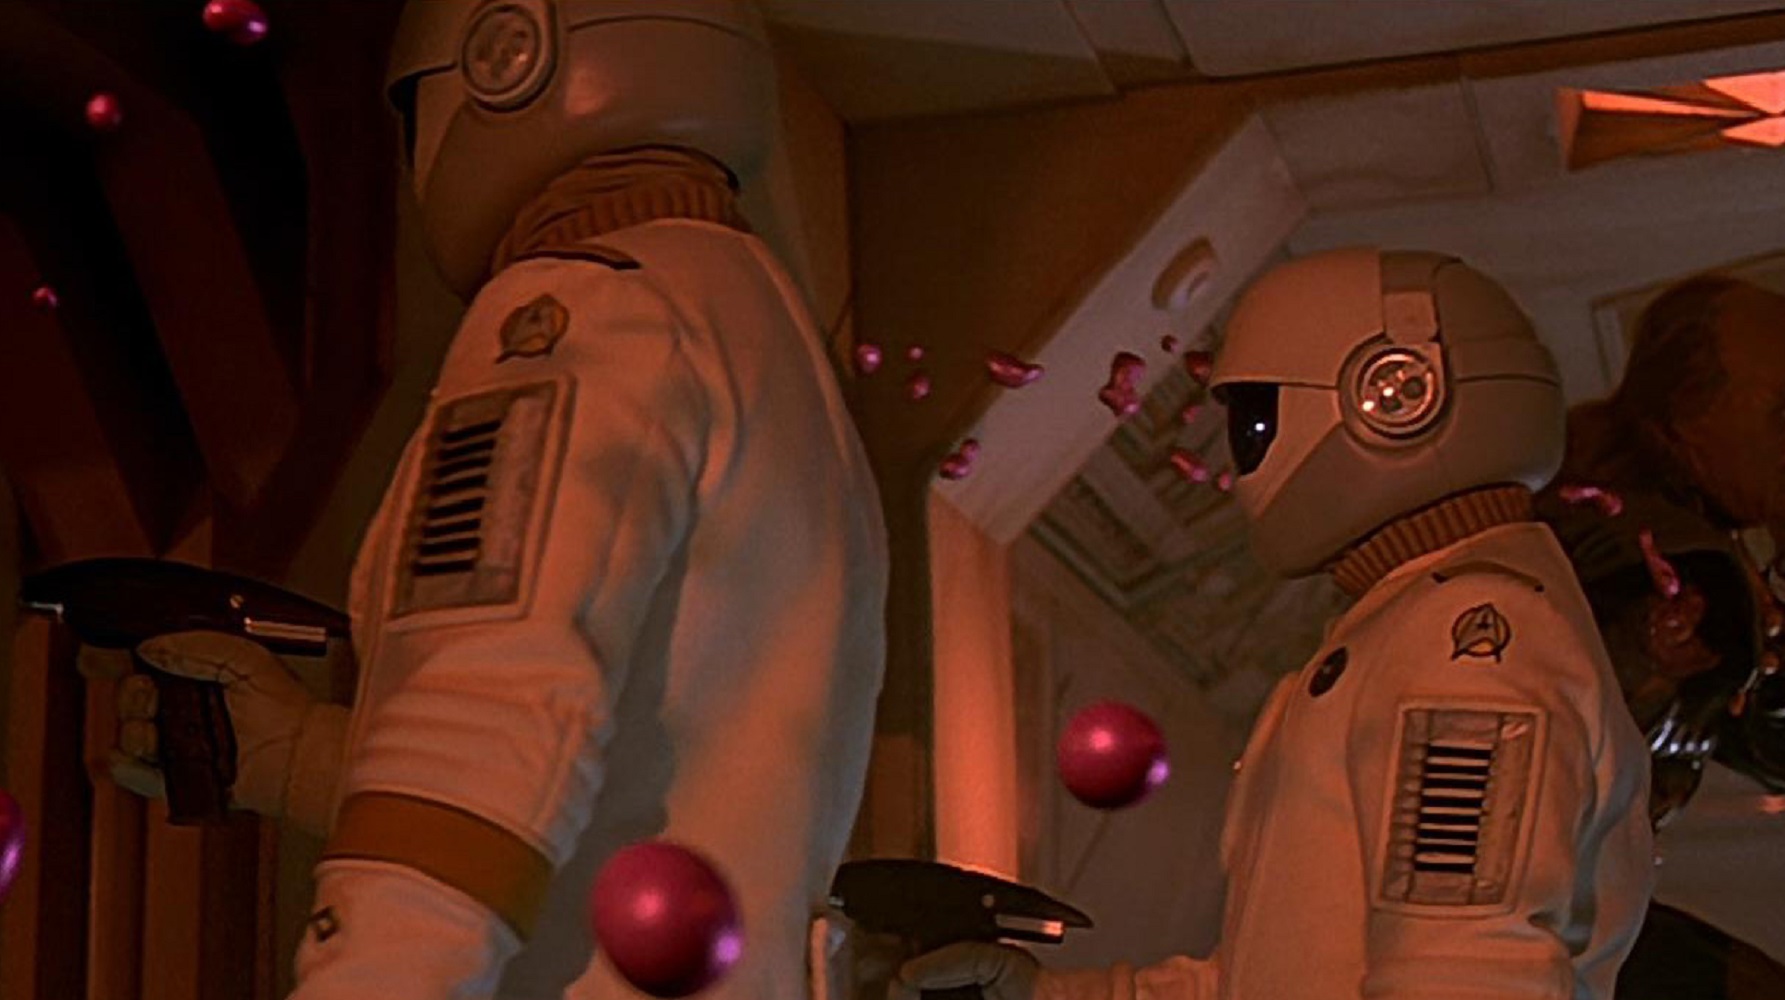
Exclusive to The Undiscovered Country were small “name tags,” worn on the upper right chest, primarily seen on the enlisted crew uniforms and engineering radiation suits.
I’m no expert in the art of espionage, but literally wearing a name tag on your secret mission seems like an iffy move.
One of these name tags was included with this costume, although I’m not entirely convinced it was actually used in this particular movie.
This name tag was 63mm wide and 18mm tall.
This converts to slightly less than 2 ½” by approximately 11/16”.
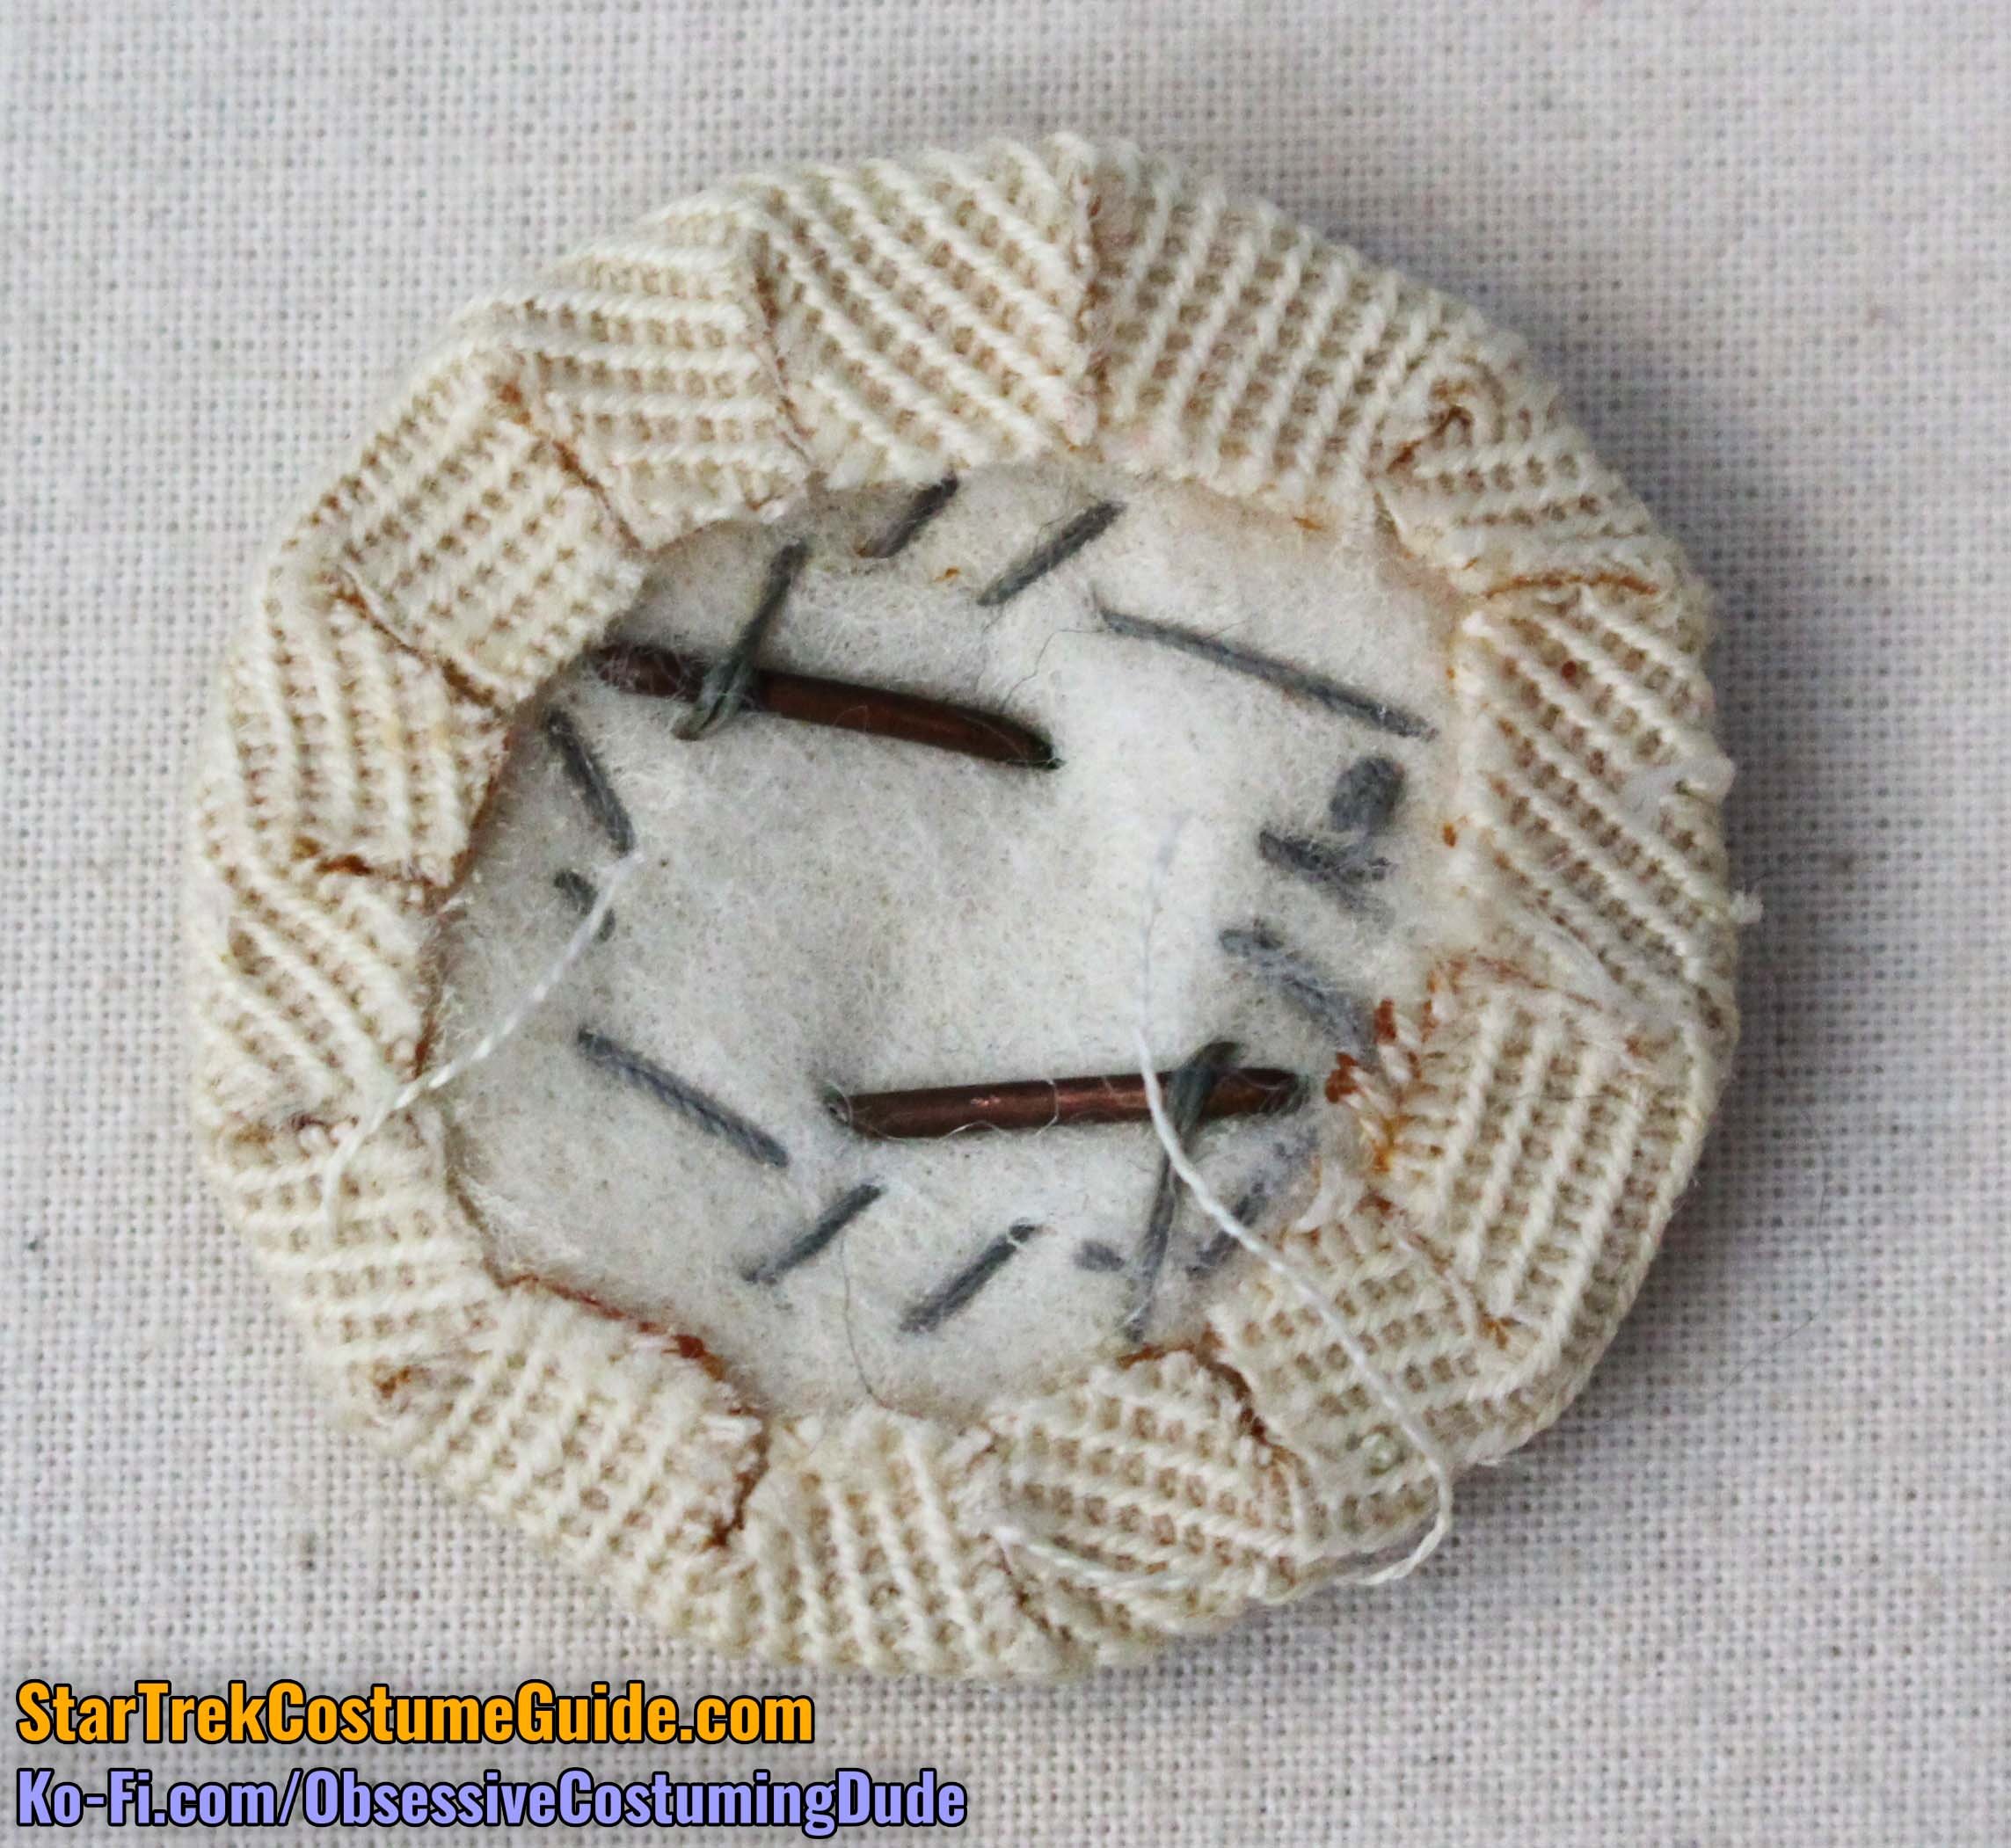
The name tag had two pins on the back; also note the asymmetrical spacing (which I believe to have been done in haste, rather than an intentional creative decision).
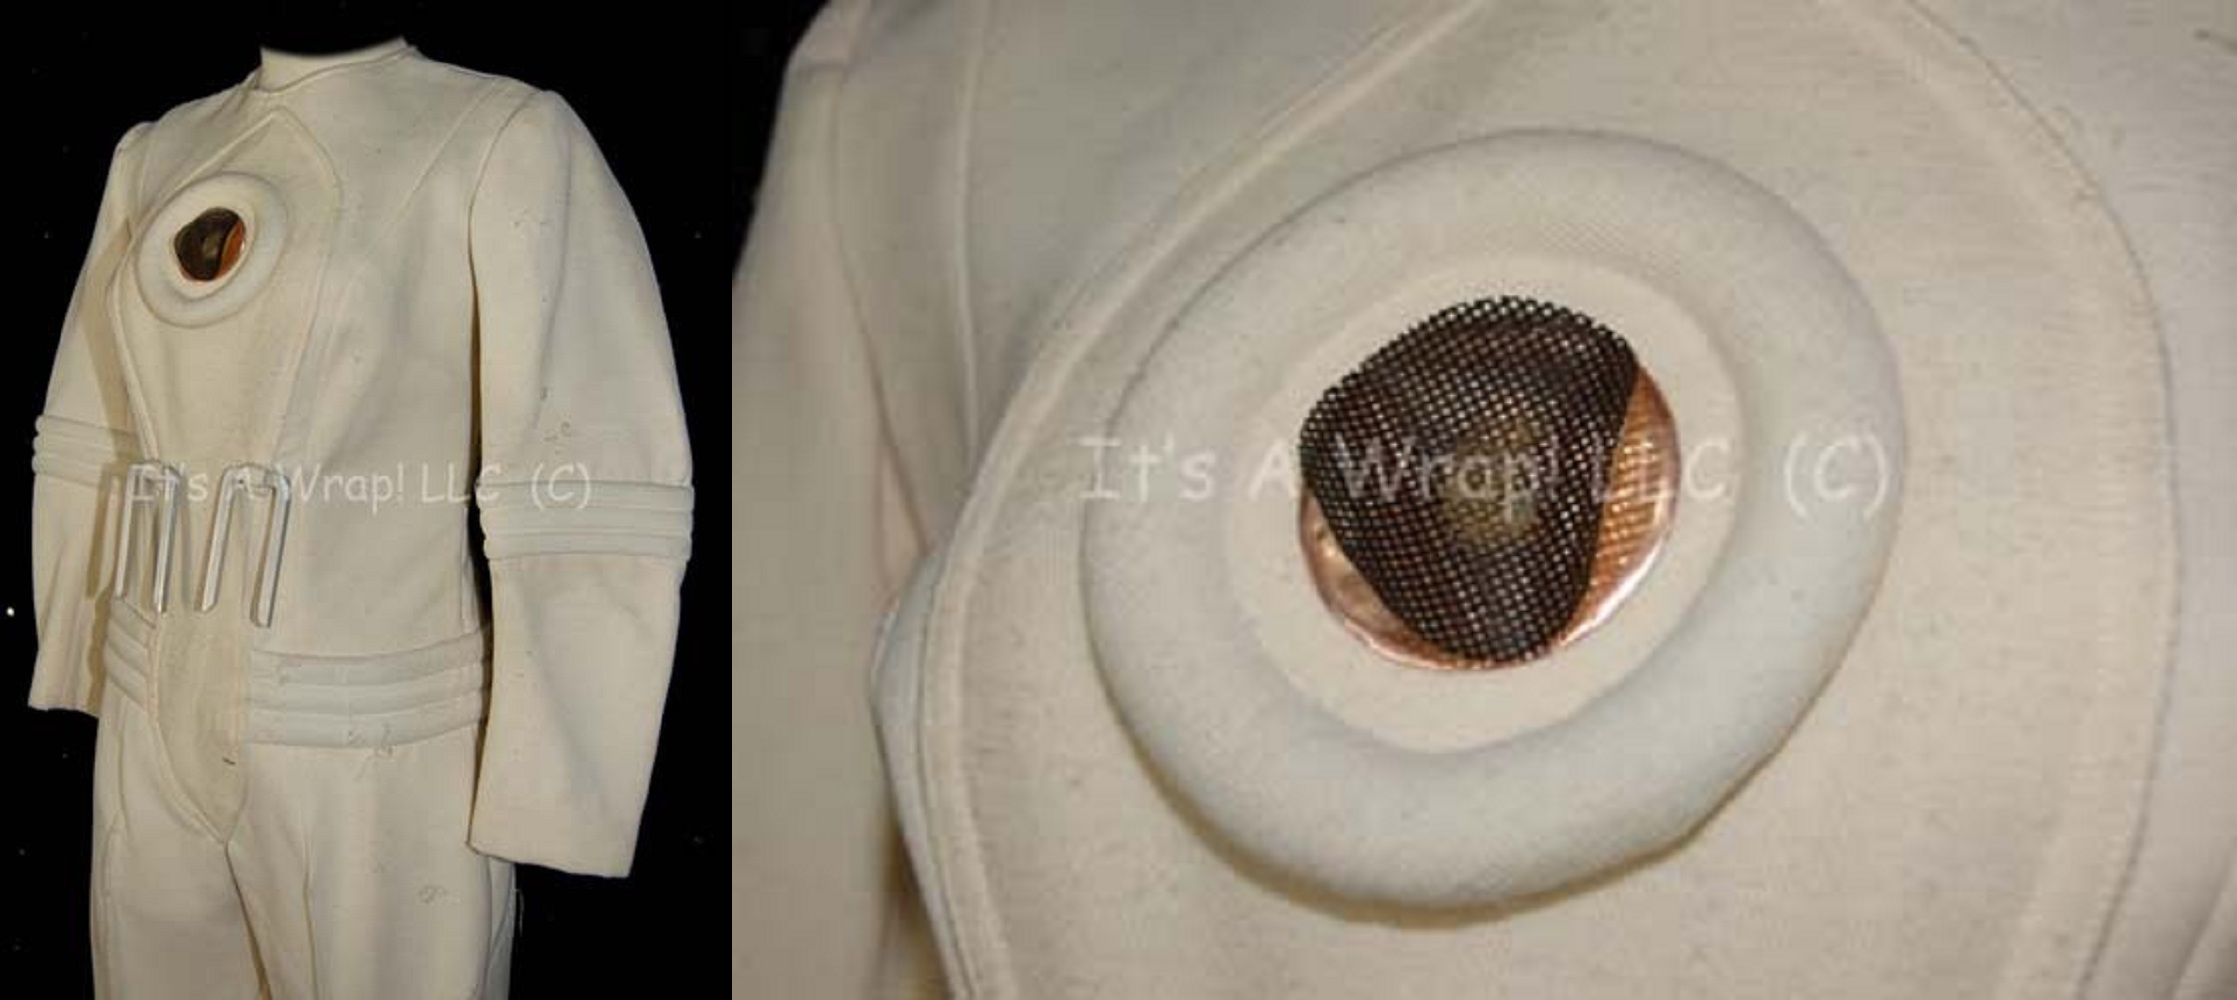
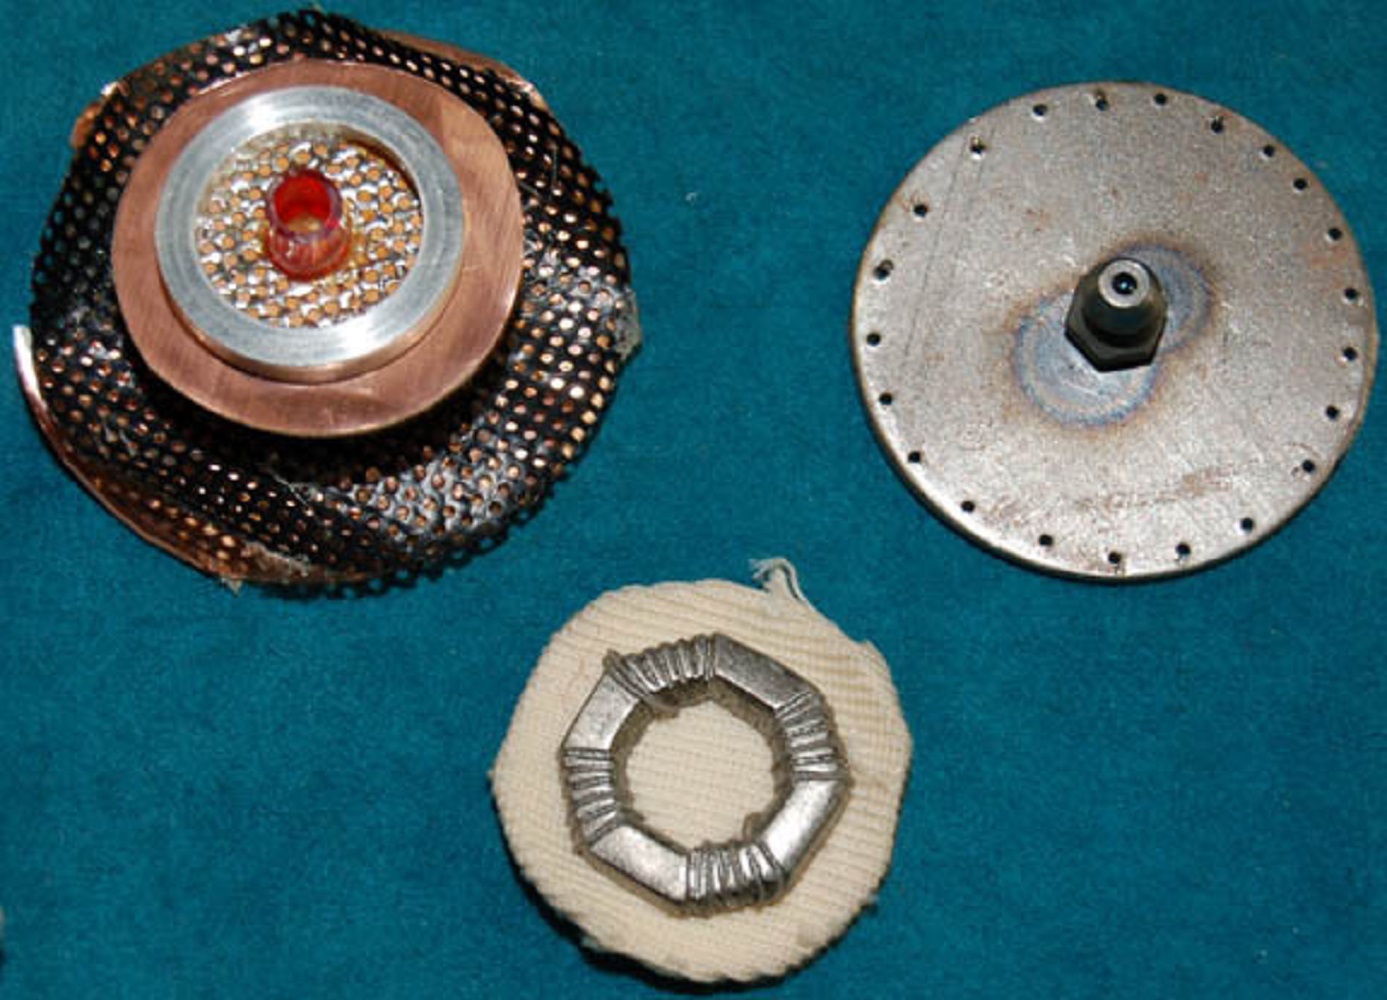
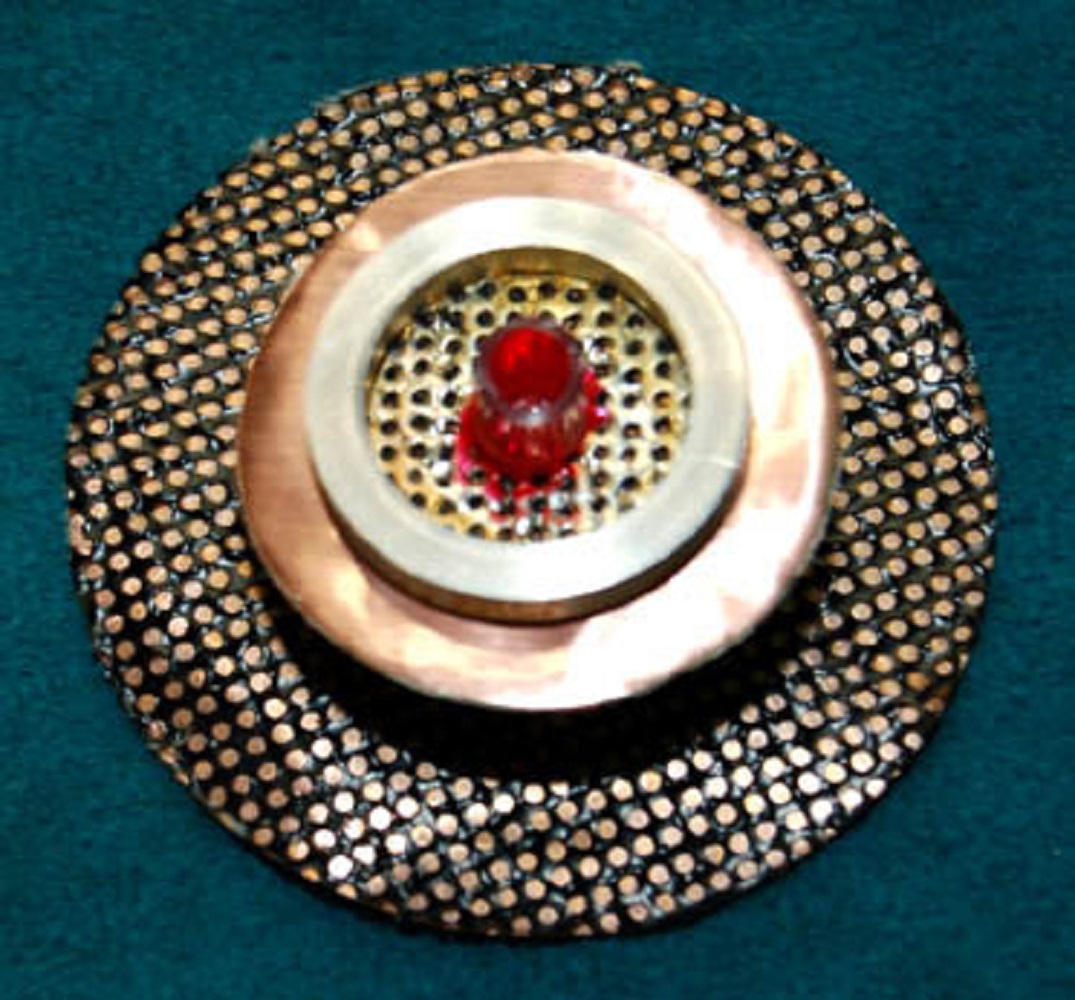
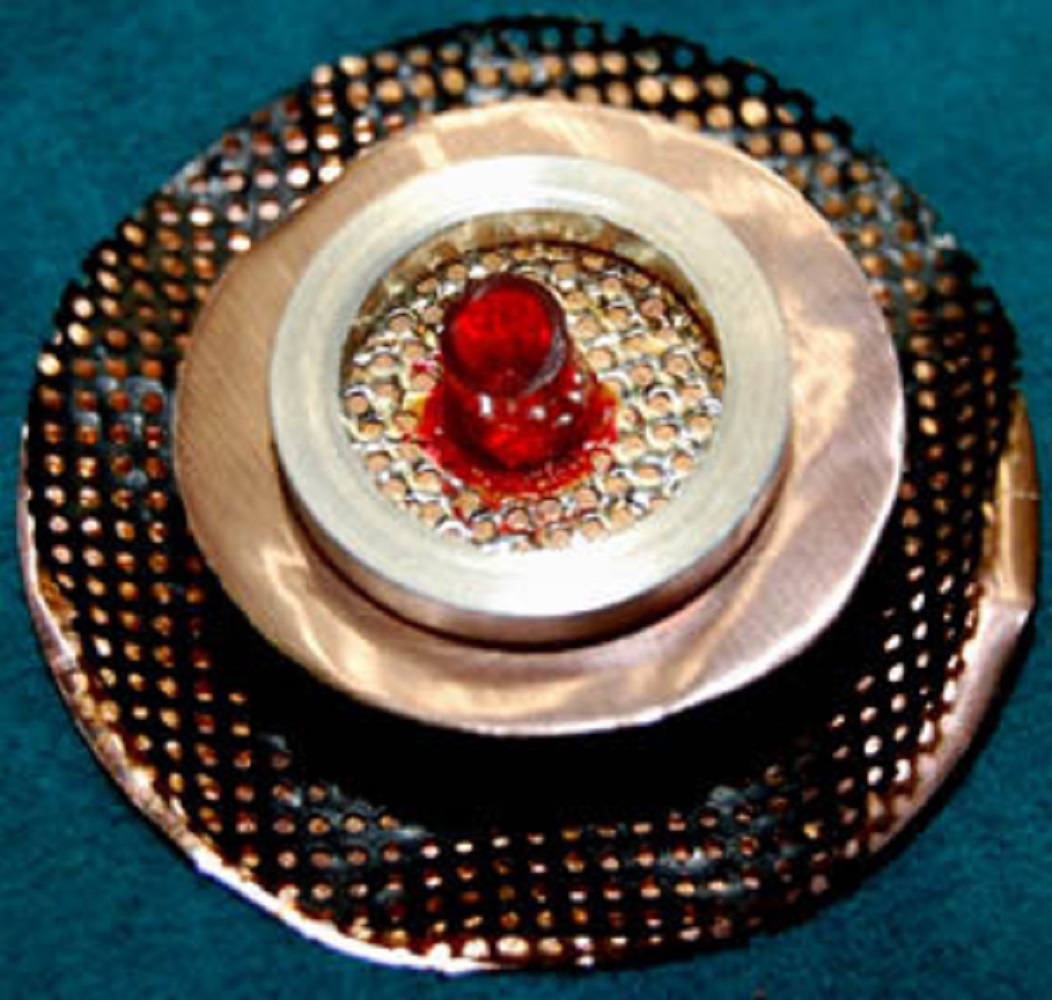
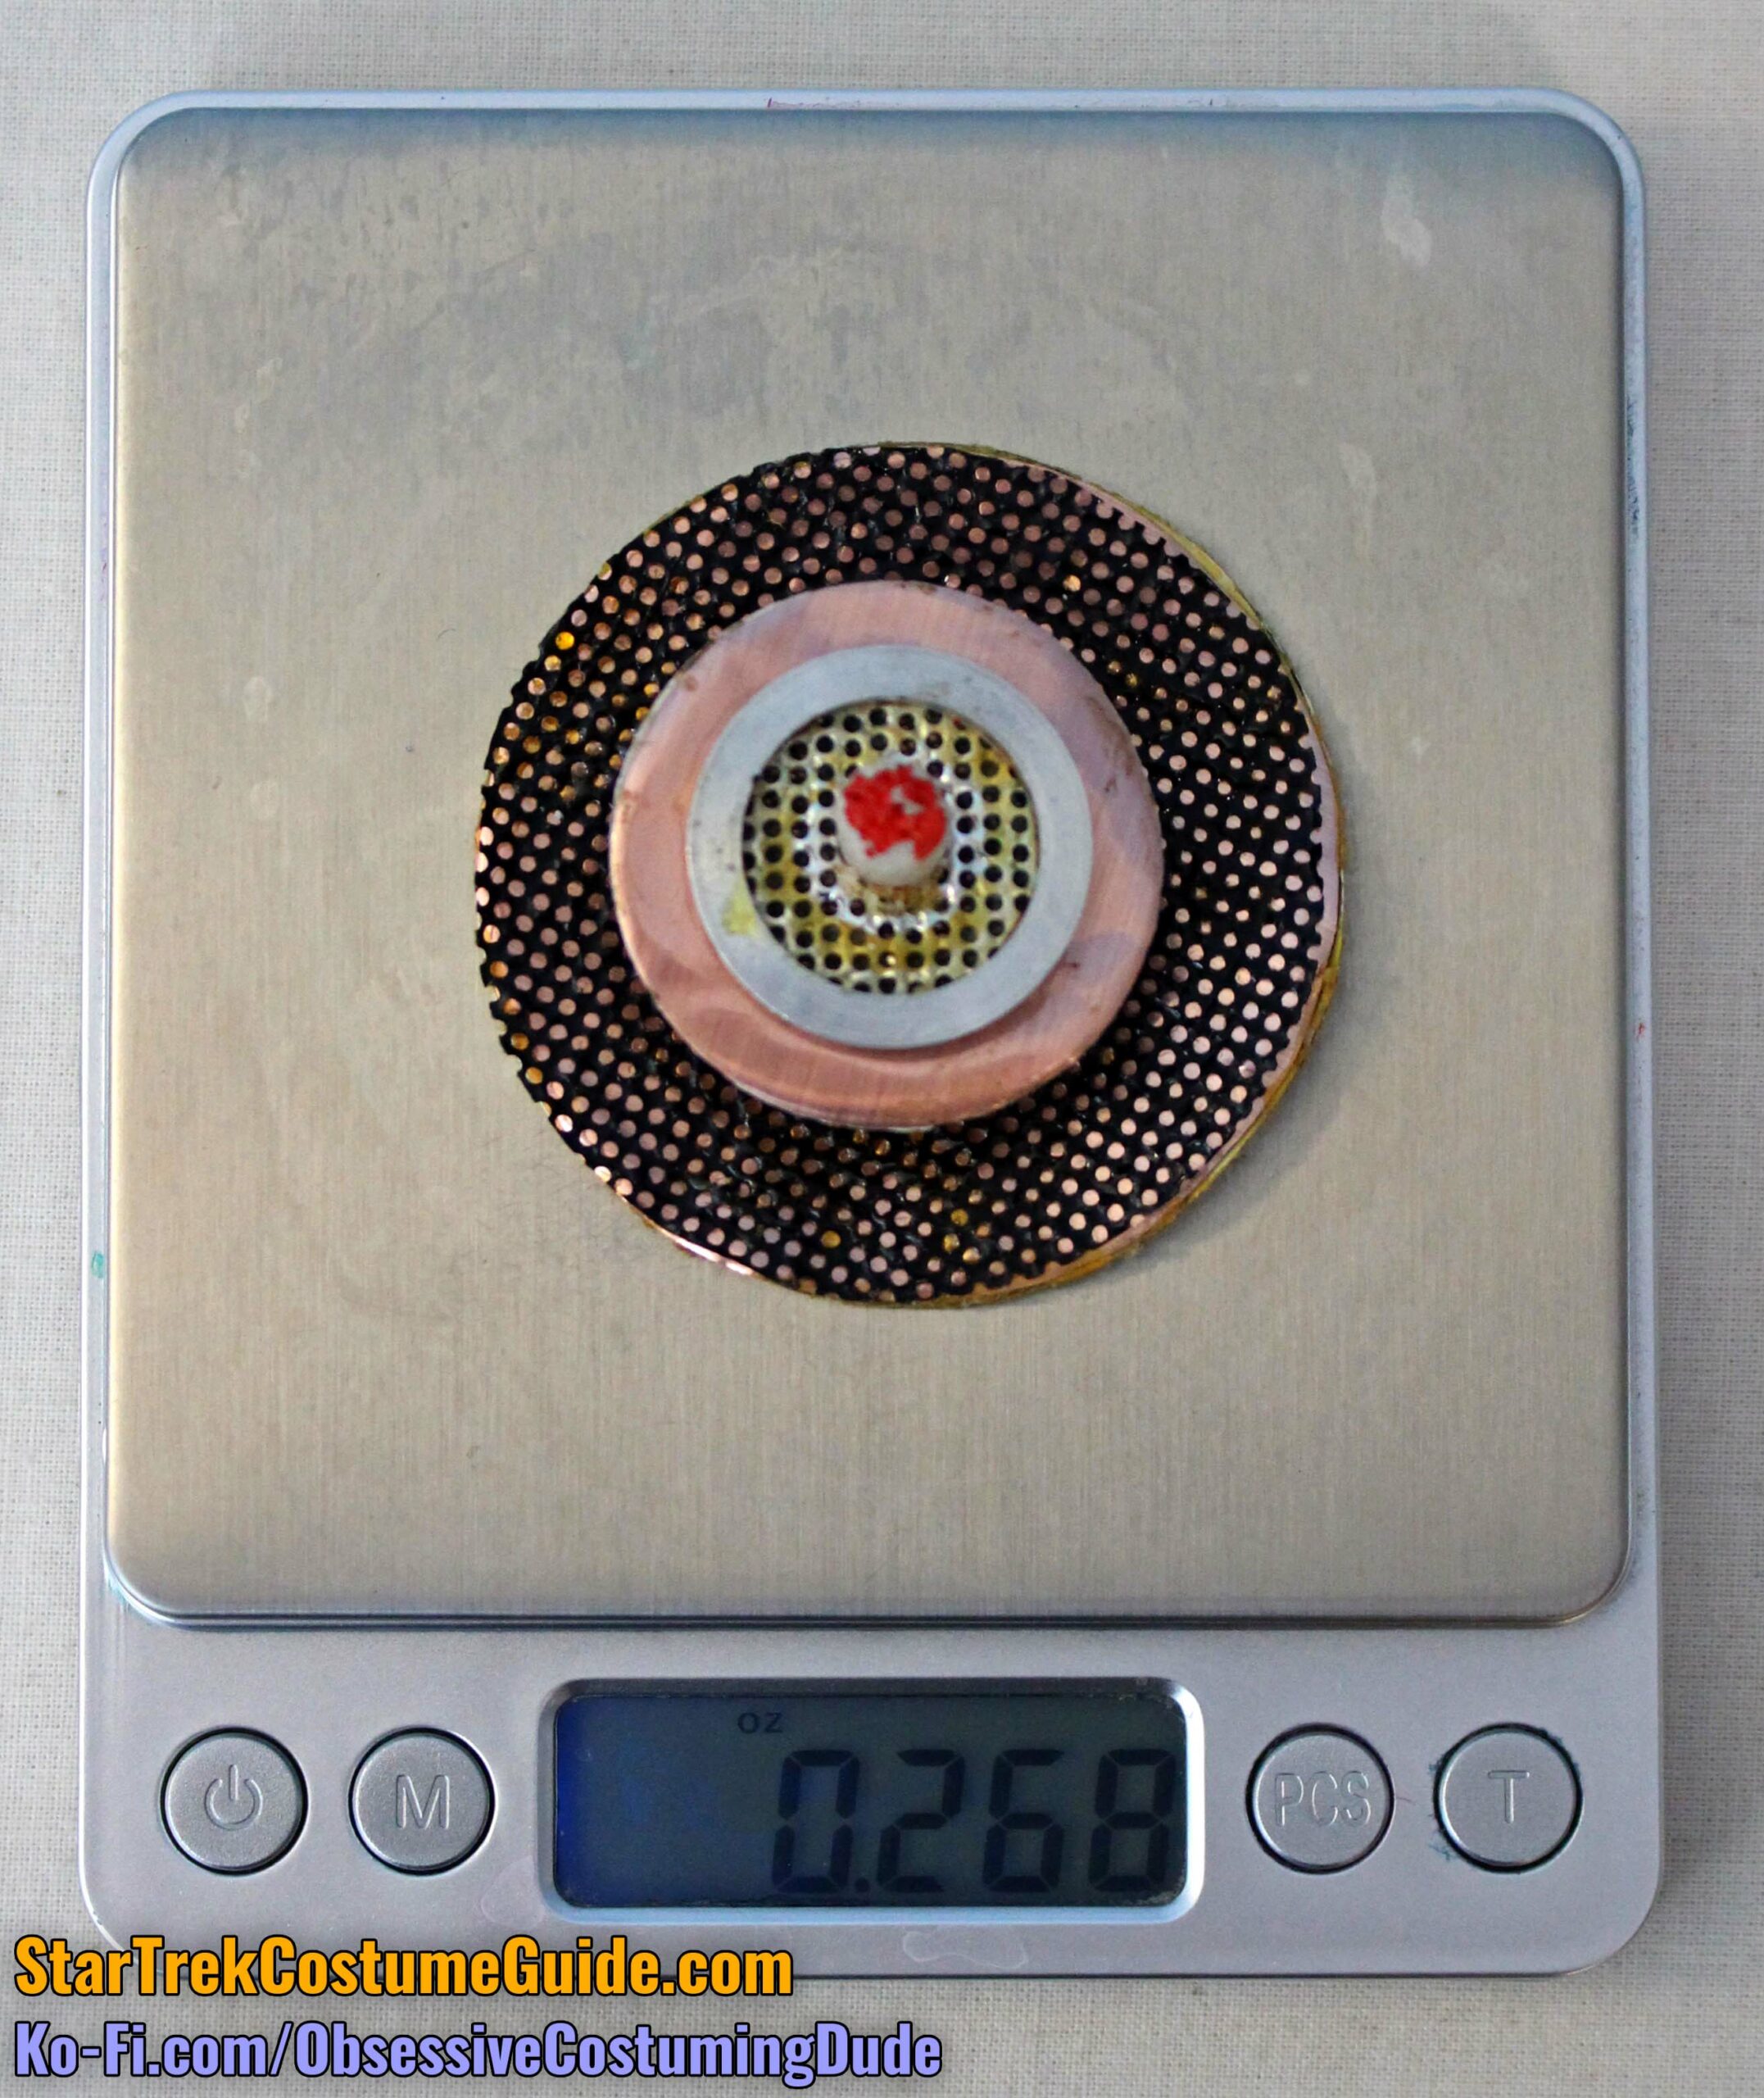
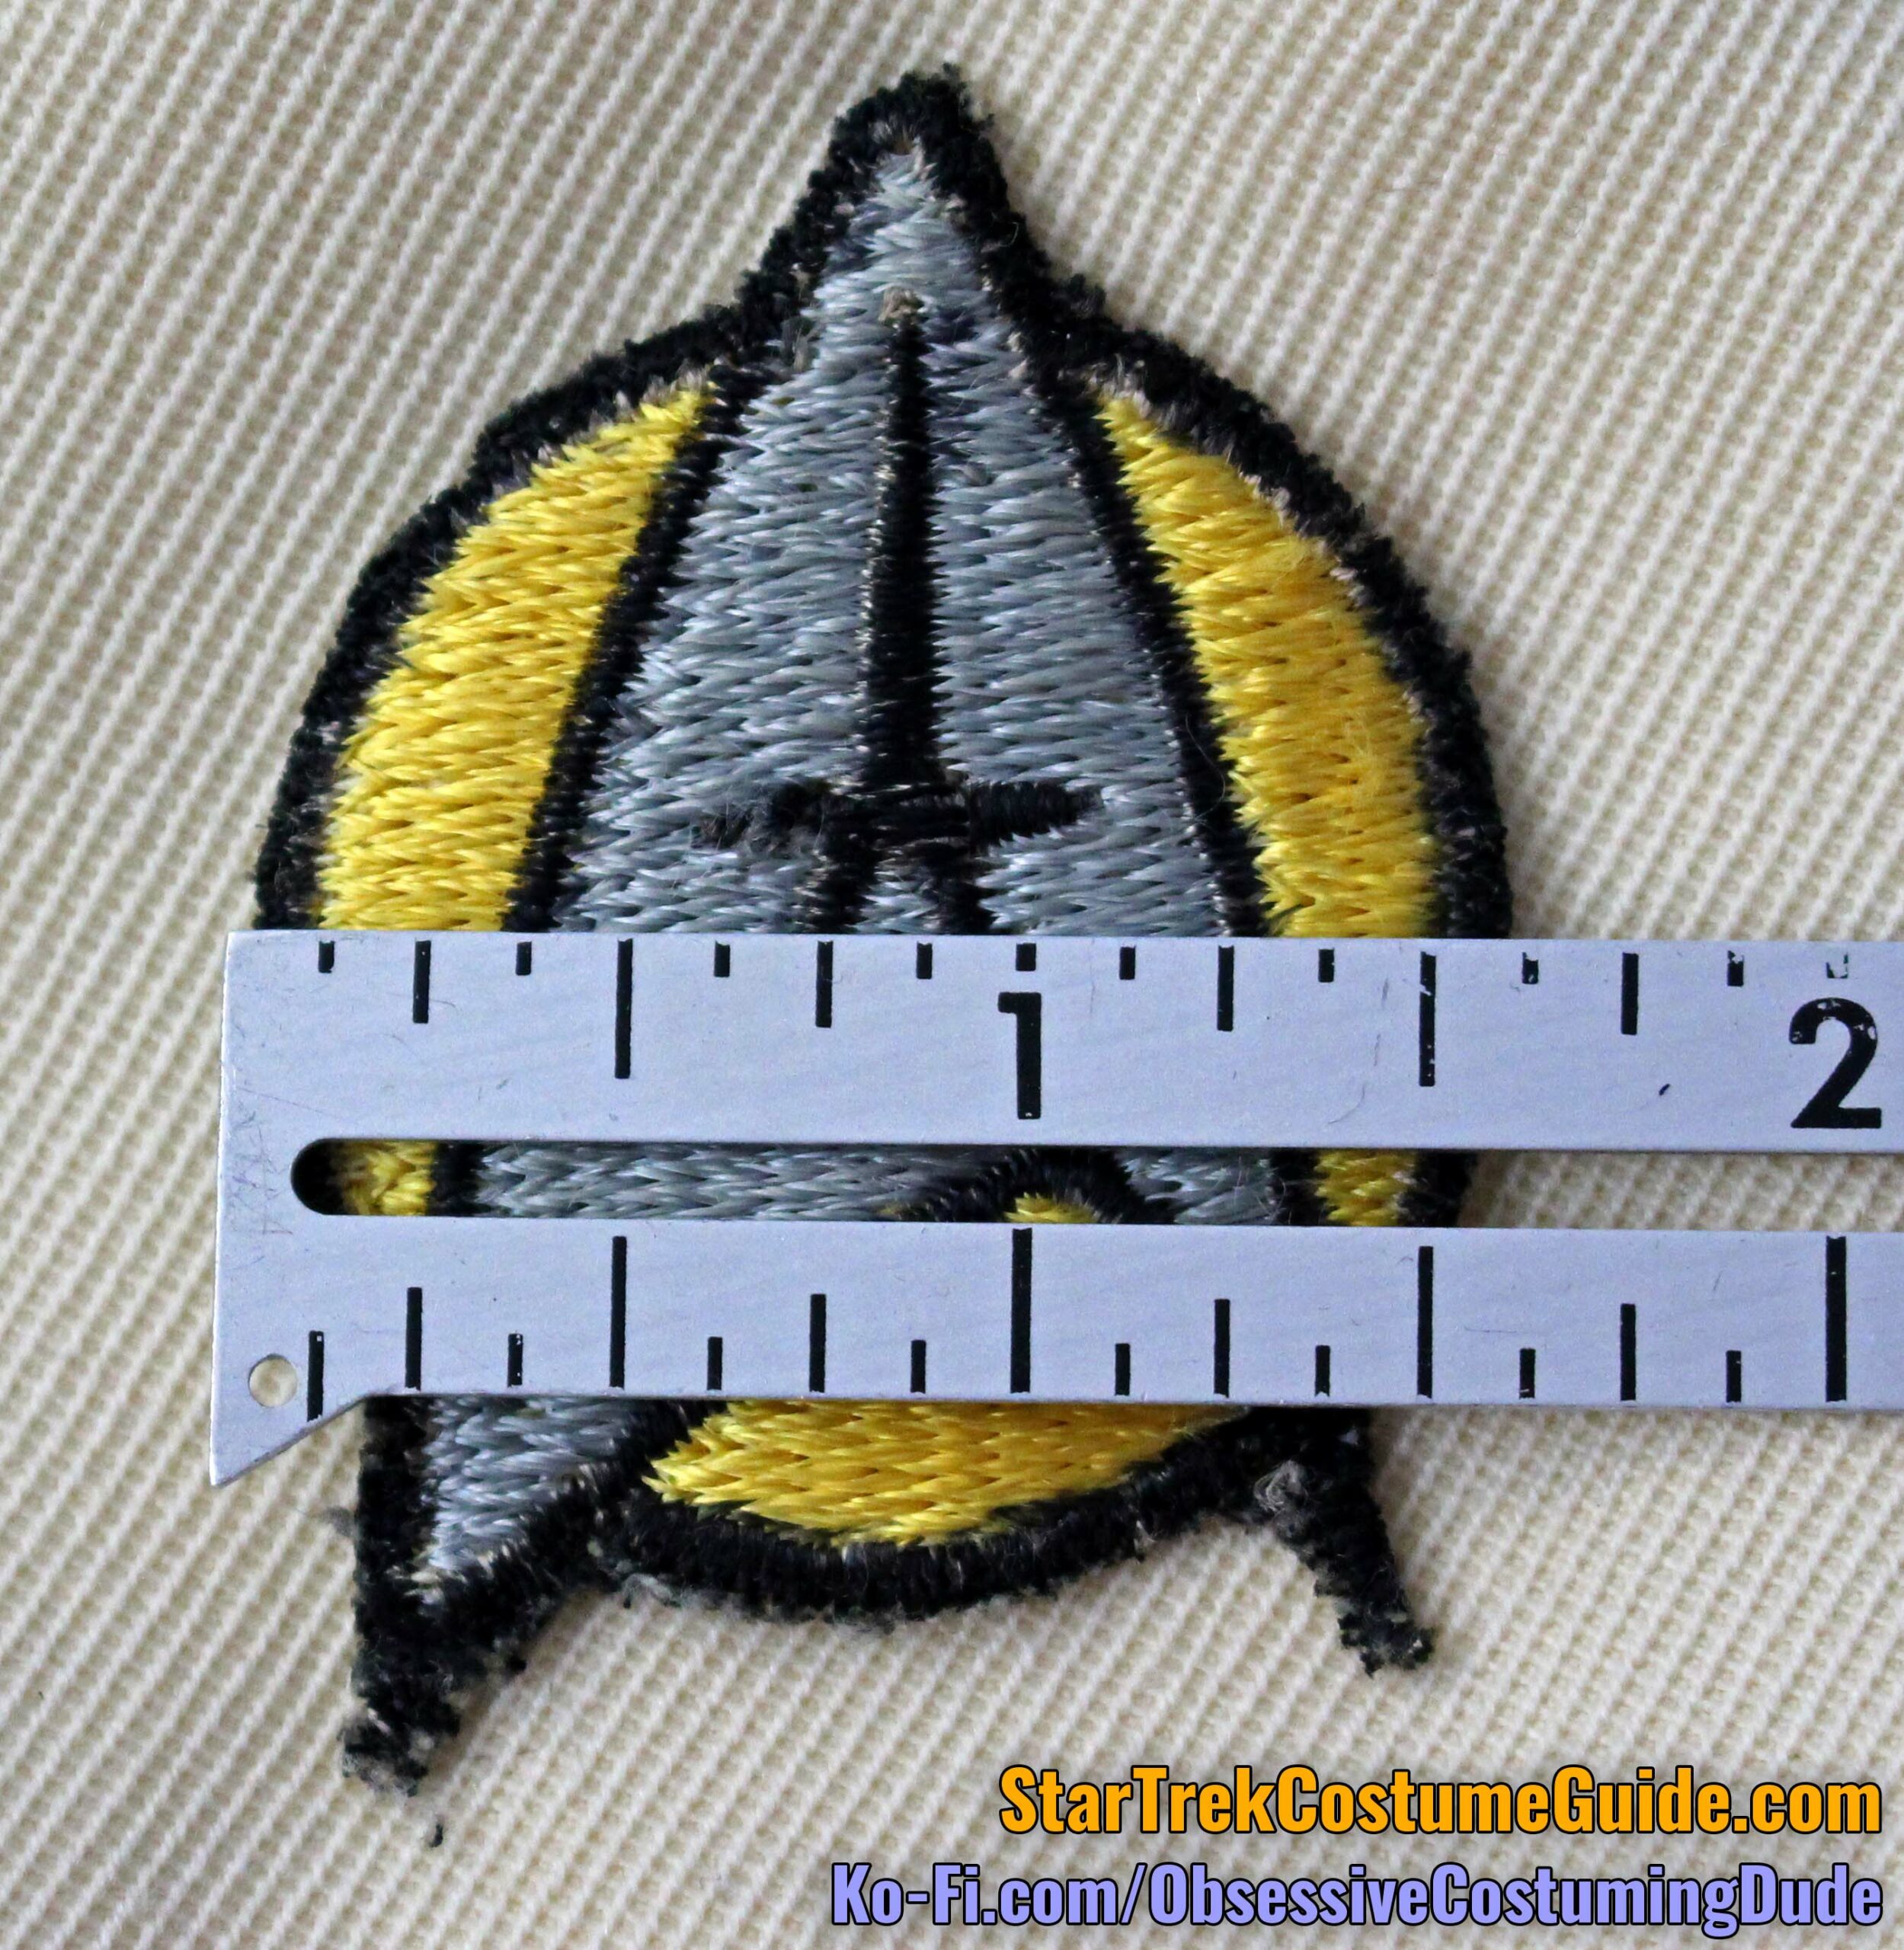
"BULLSEYE" ASSEMBLY
The “bullseye” assembly at the center of the chest perhaps best encapsulates the brilliant, frugal-yet-resourceful approach to Robert Fletcher’s design of this costume.
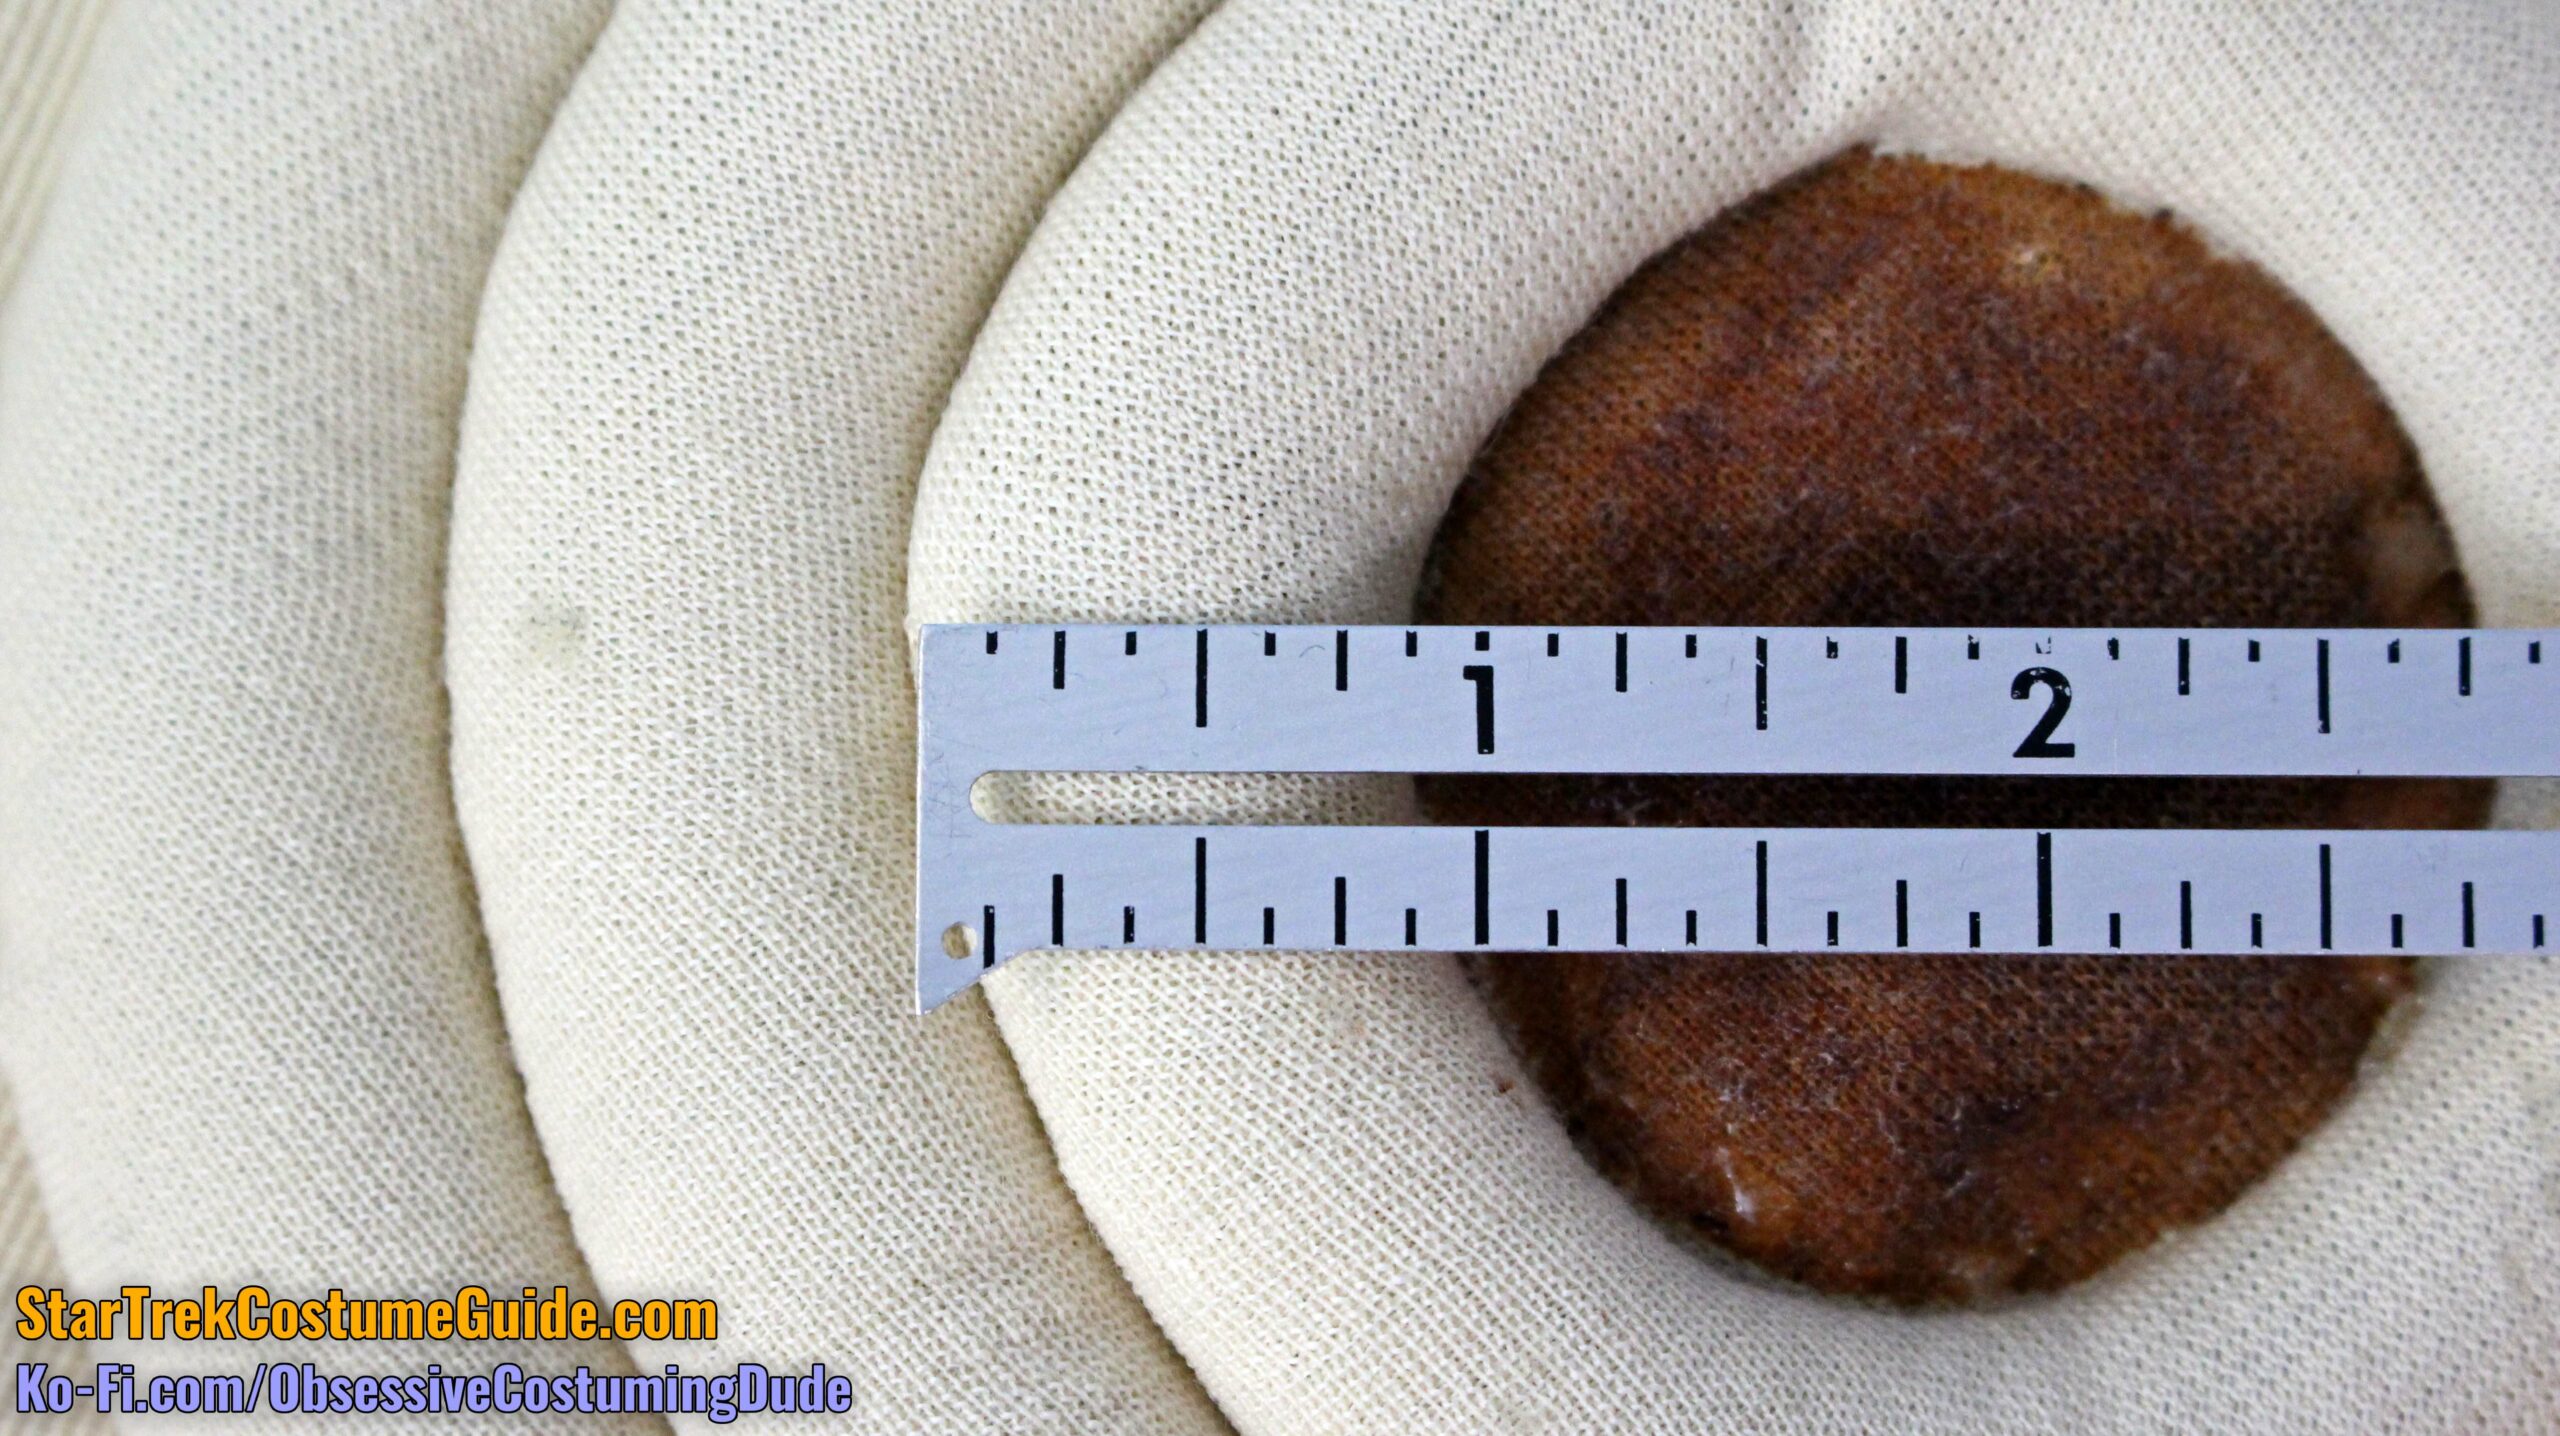
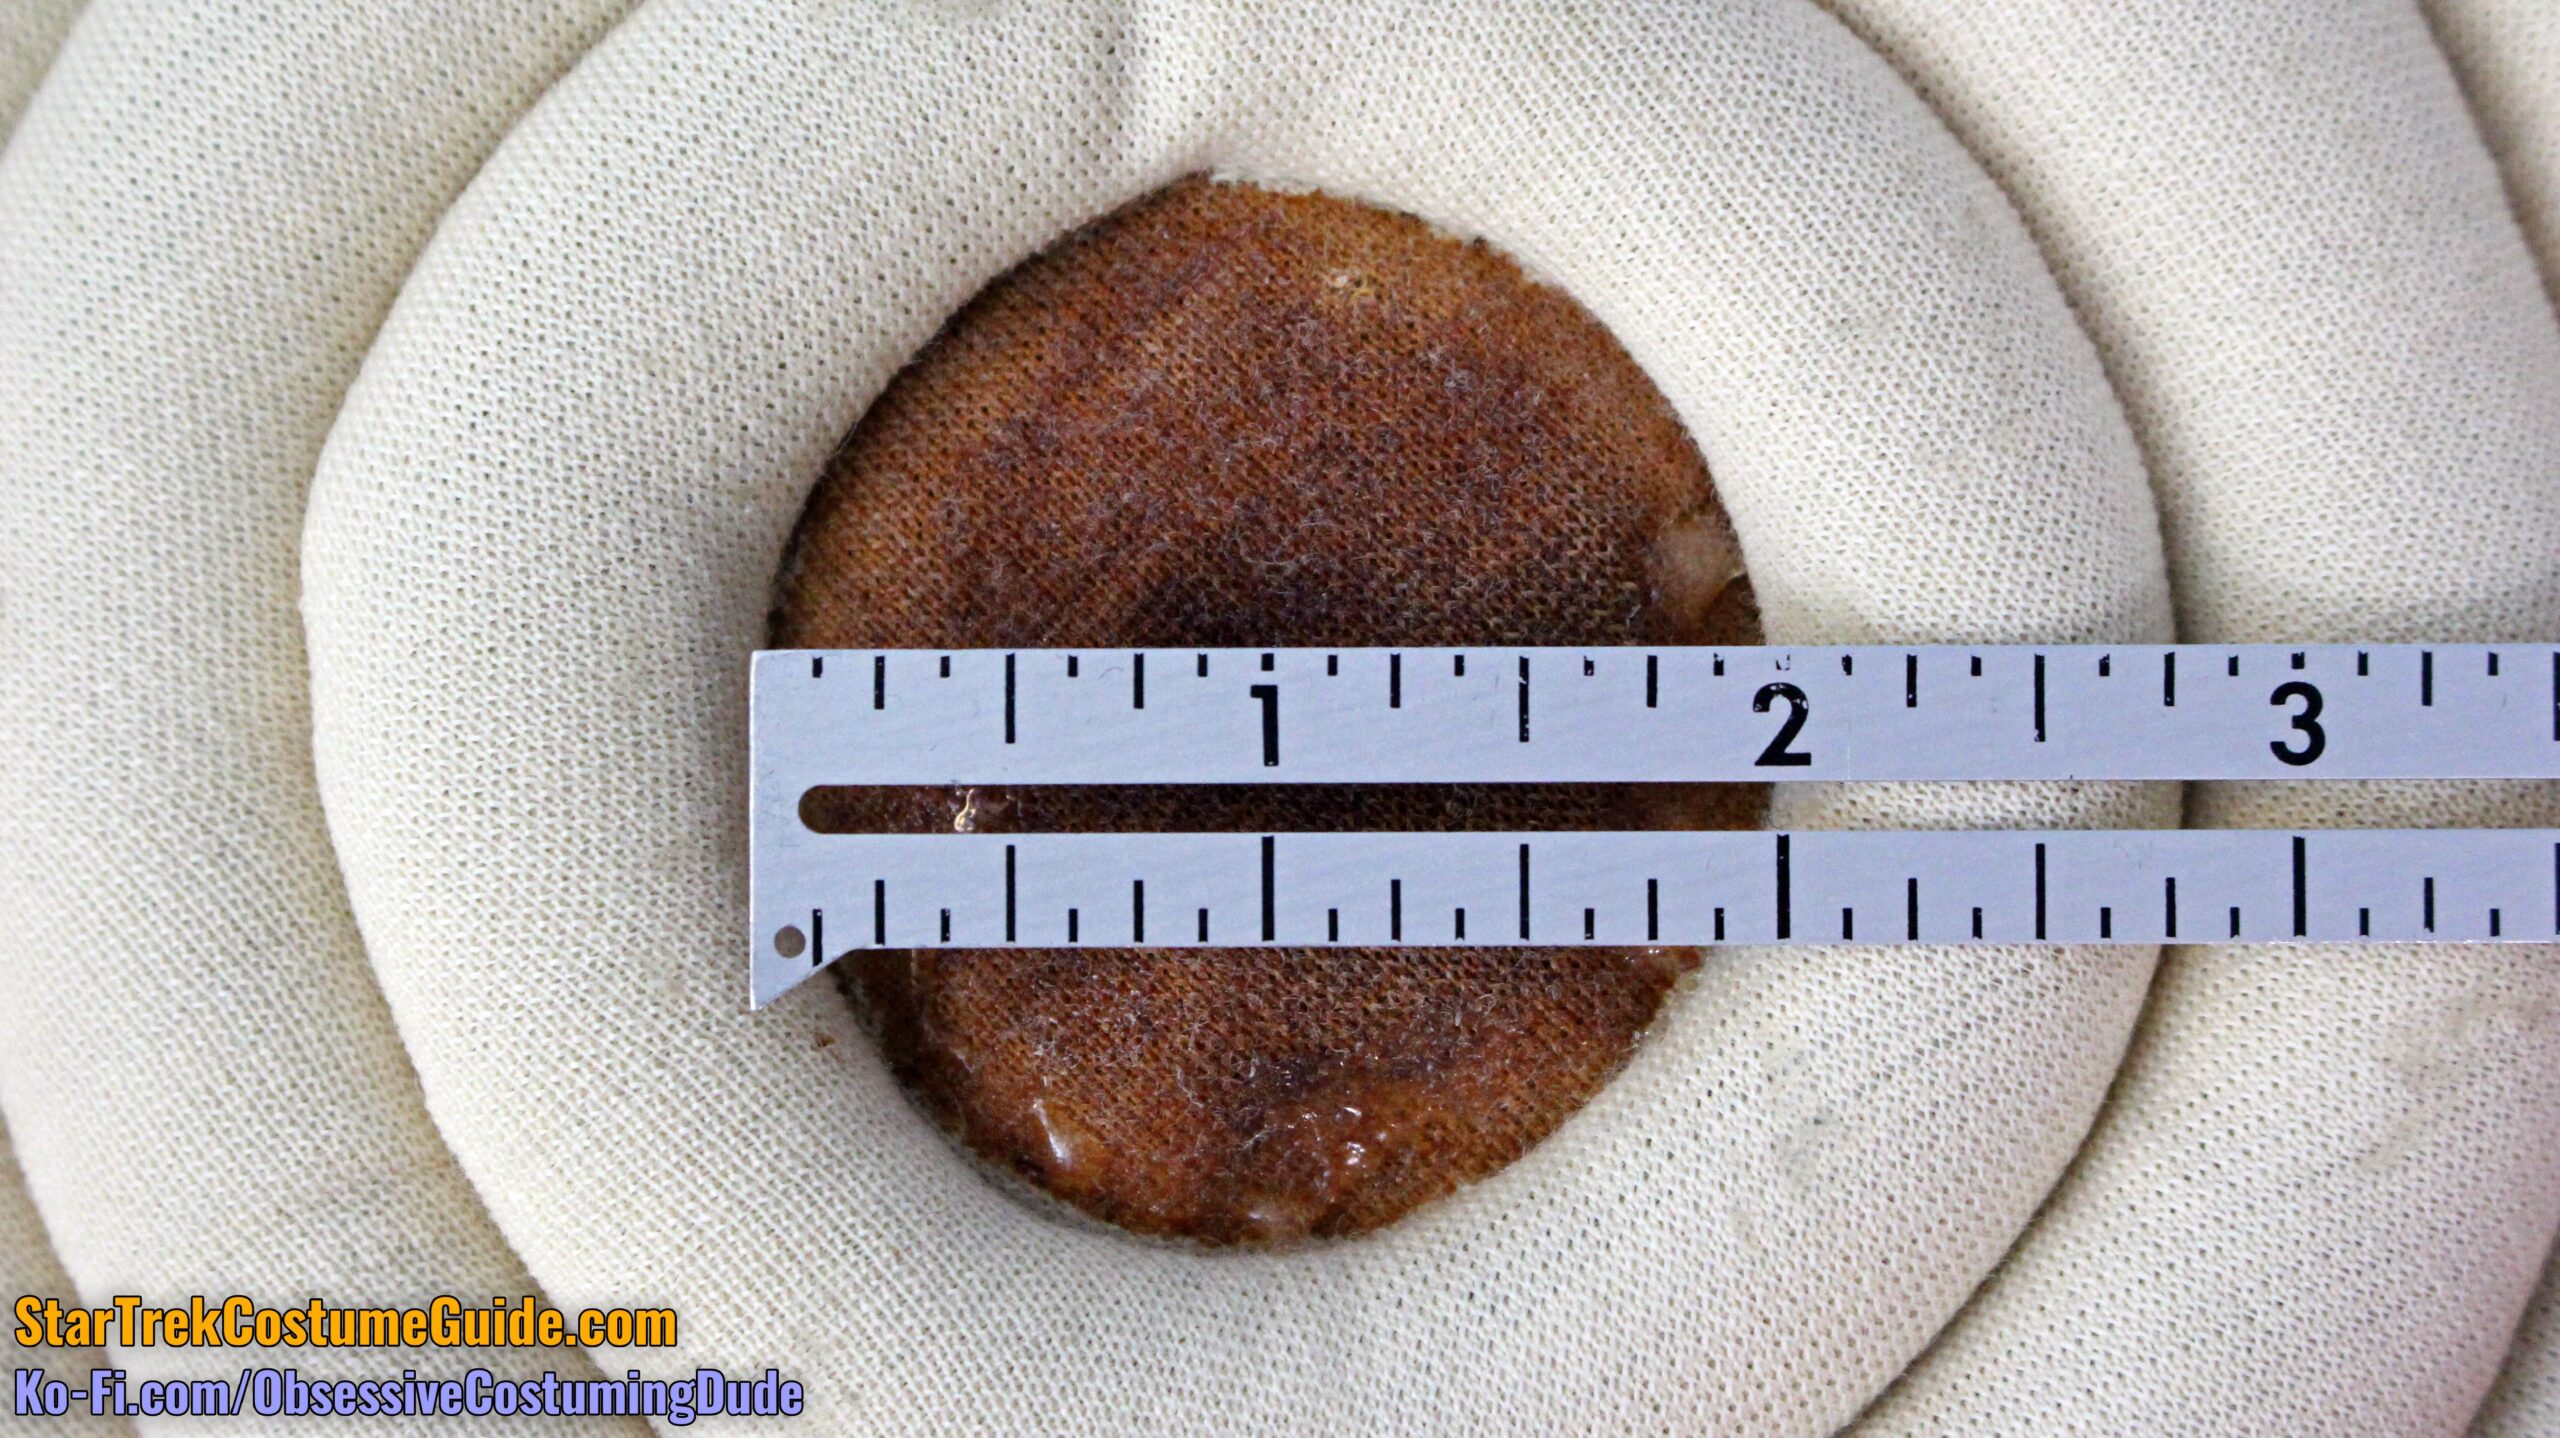
The thin base layer was perhaps lightweight wood or plastic (it didn’t feel like metal) and painted copper.
It was 2 ¼” in diameter and had a layer of thick black door/window screen mesh glued on top.
The next layer was a black cylinder (made of Prophets-know-what), 1” in diameter and about ½” tall.
On top of that was a smaller circle, also painted copper (similar to the base layer in both respects).
This layer was 1 ⅜” in diameter.
Glued onto that was a small circle of the door/window mesh, painted silver around the center and yellowish-gold around the edges, and with a black background.
Covering the edges and accenting the assembly was a silver washer, 1” in diameter and with a large (approximately ¾”) hole.
And finally, a small (Styrofoam?) dowel completed the assembly.
This dowel was ¼” in diameter, extended beyond the second copper circle approximately ⅜”, and the “tip” was painted red.
Curiously, Scotty’s “bullseye” rod appears to have been all white (with no red) in TWOK.
It definitely had the red tip in ST3, though.
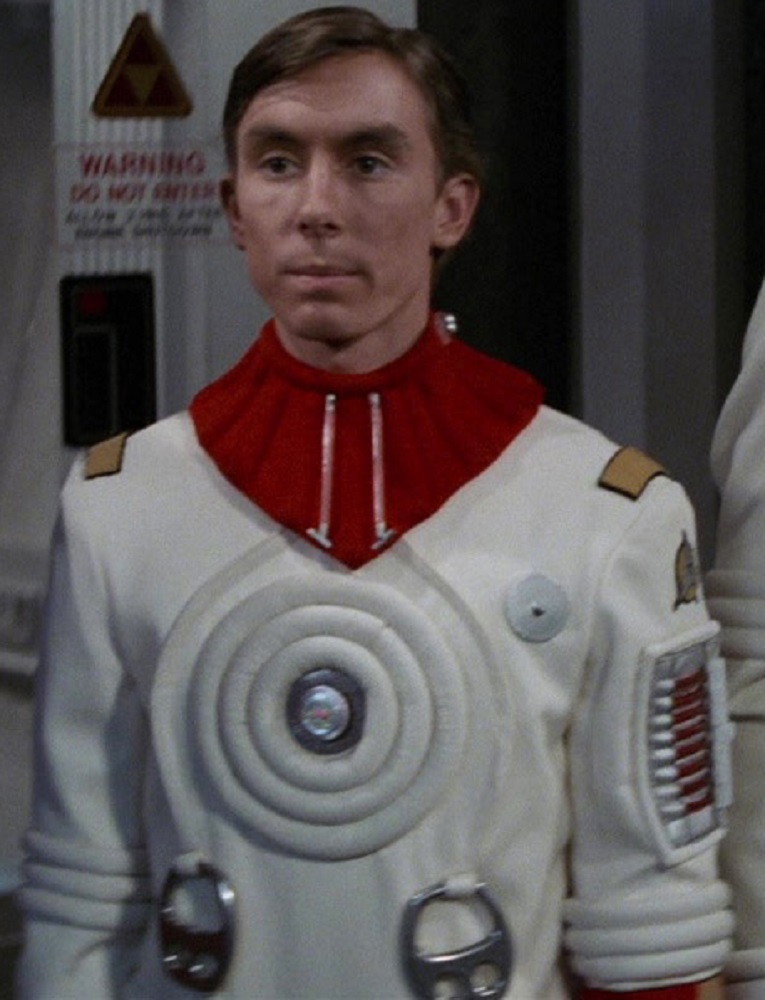
This TWOK trainee’s “bullseye” rod was also white, with no red:
But the other trainees’ right next to him did have red tips.
Conversely, some of the “bullseye” dowels appear to have been all red:
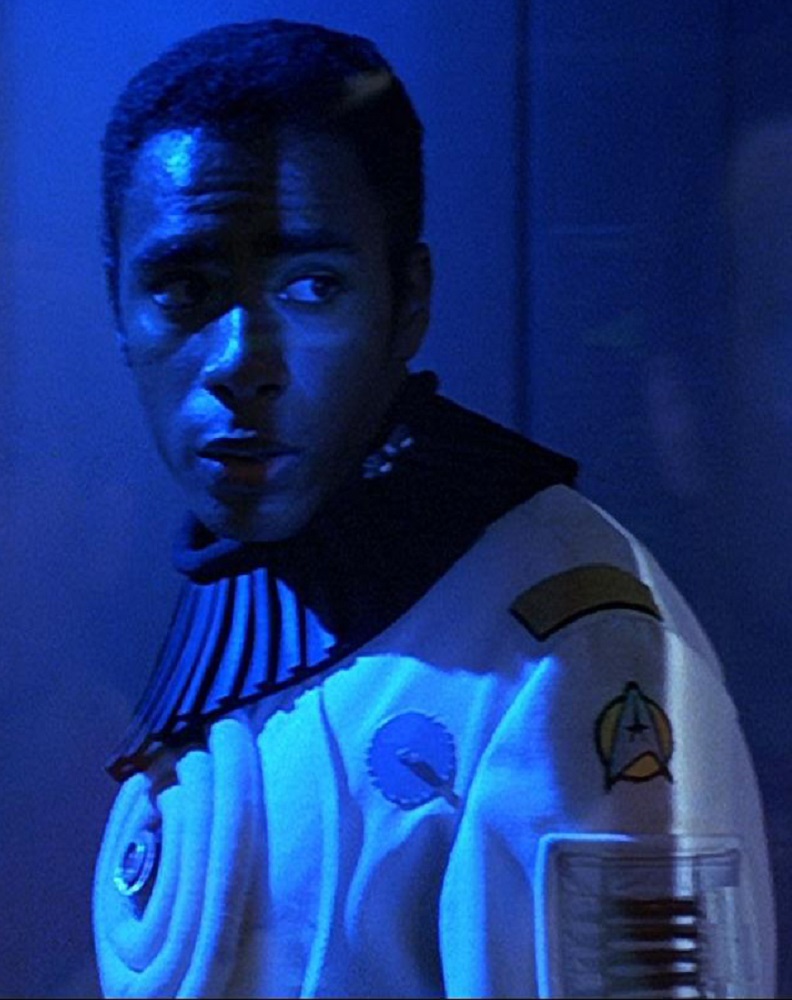
In ST6, this poor fellow’s engineering radiation suit was missing the “bullseye” rod entirely.
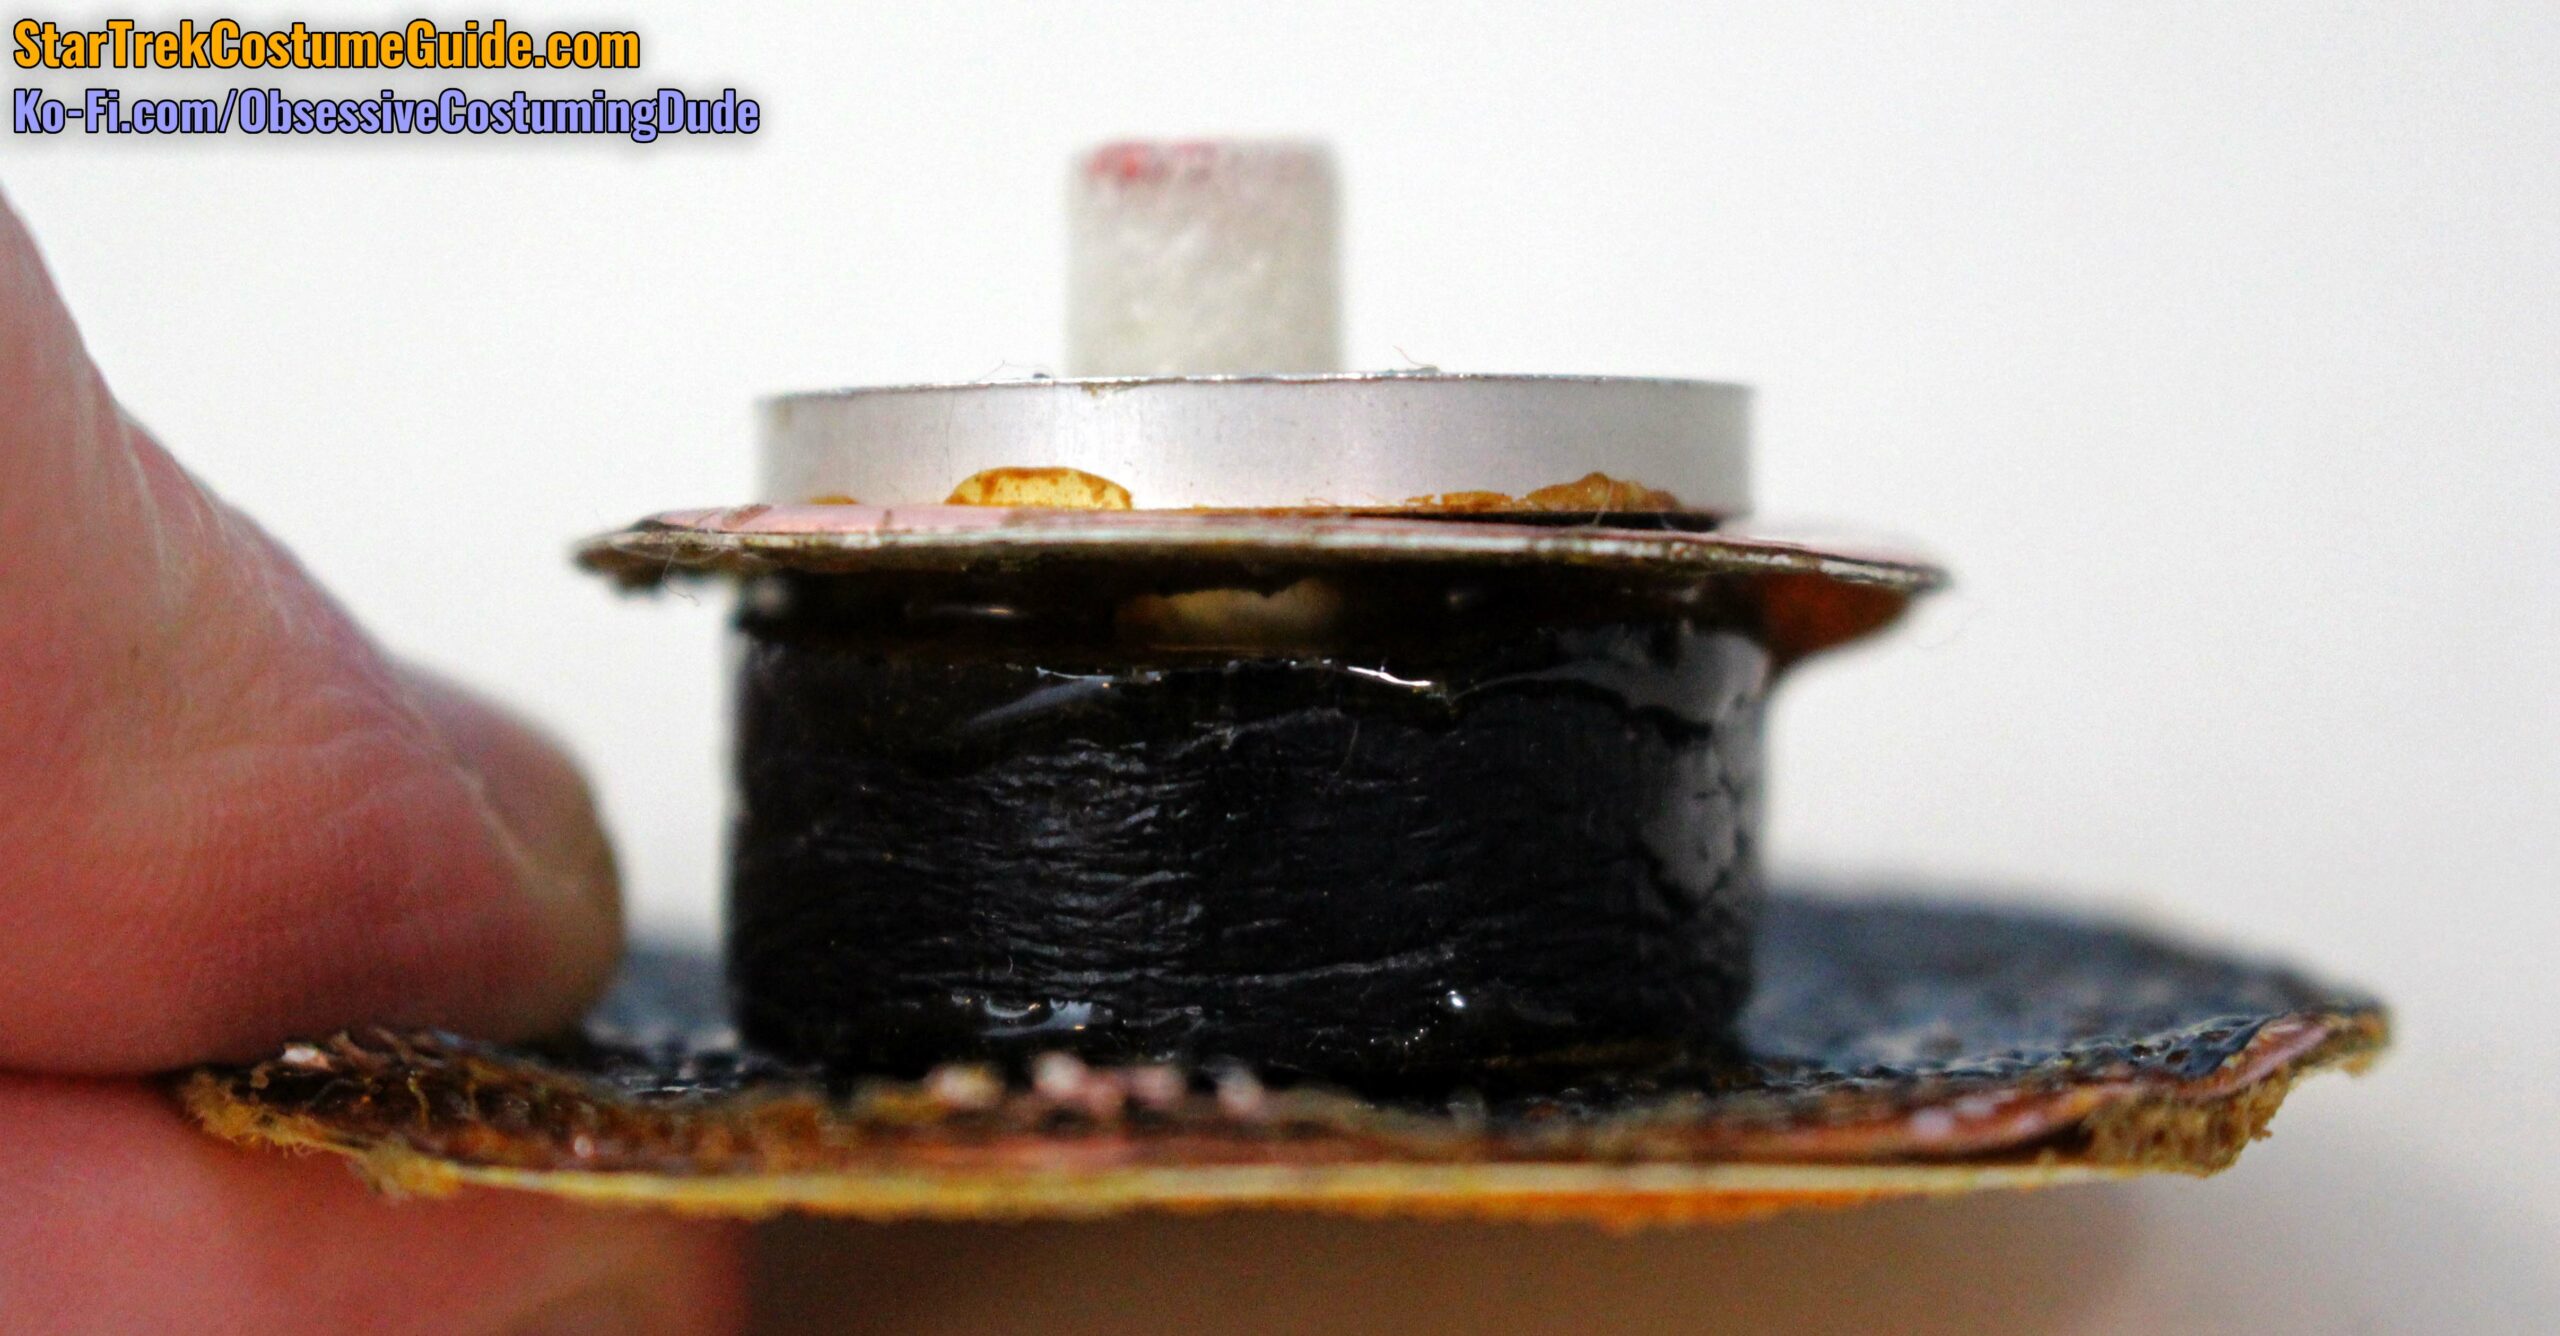
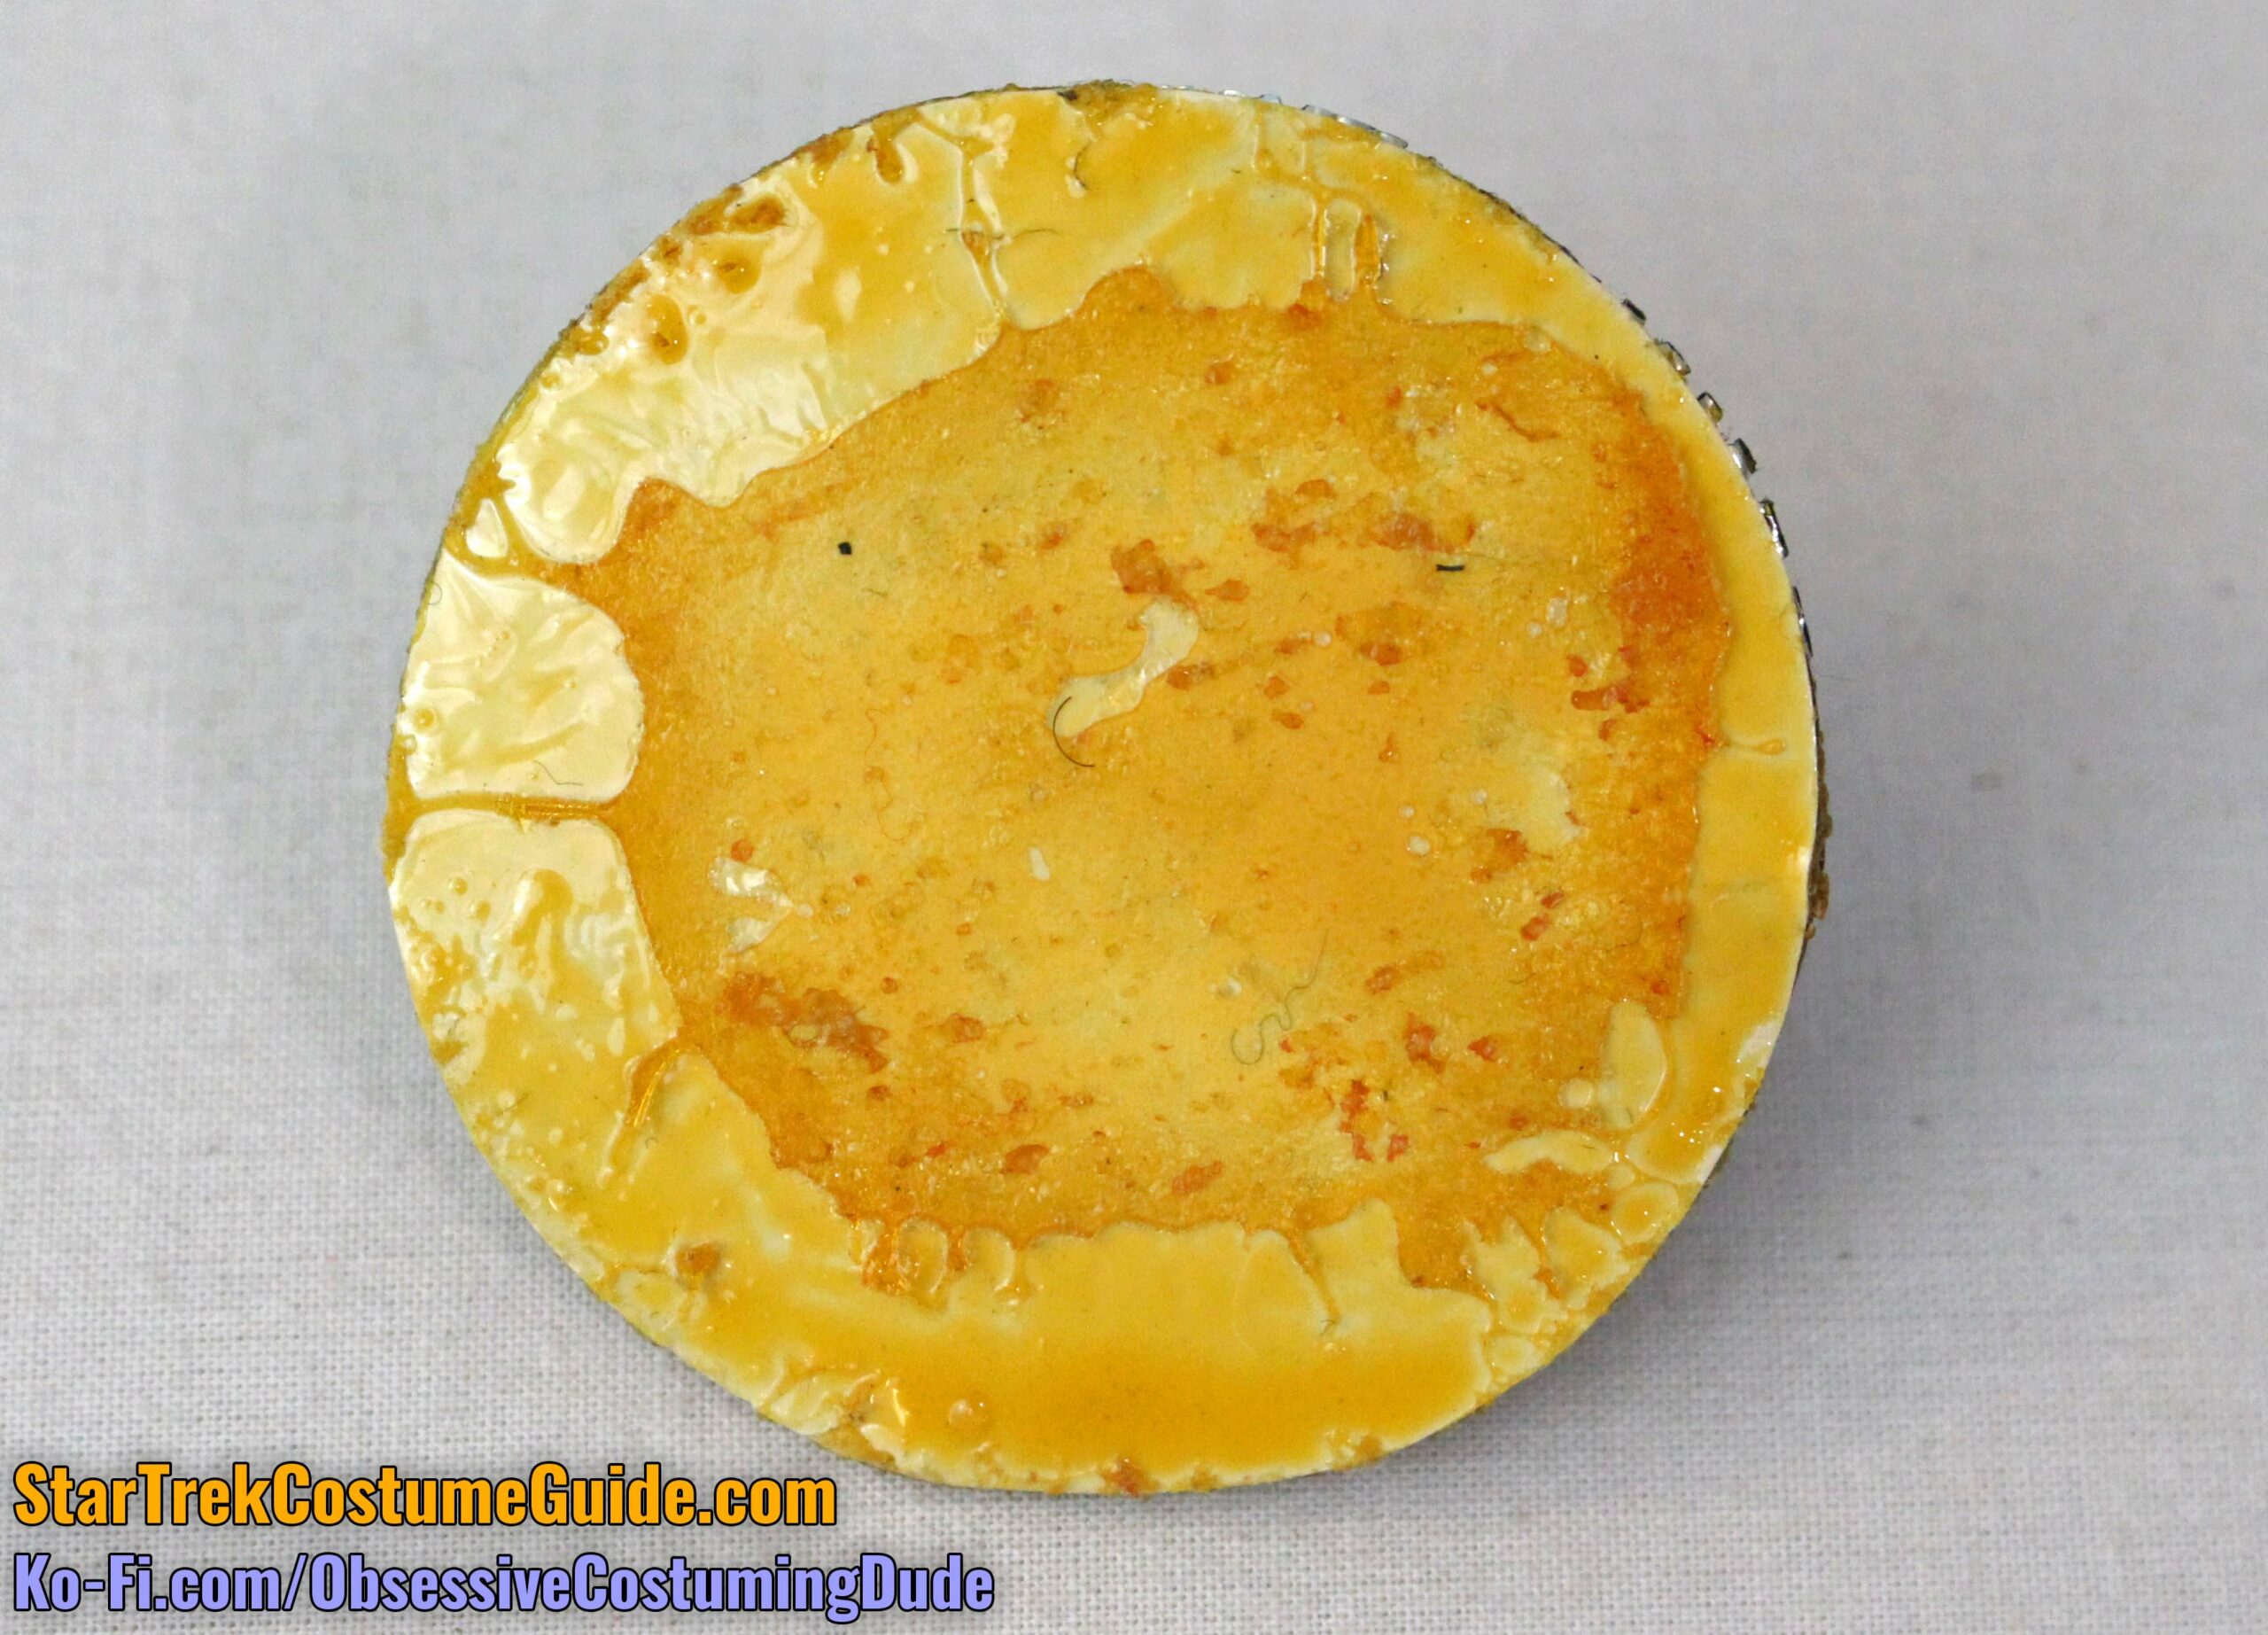
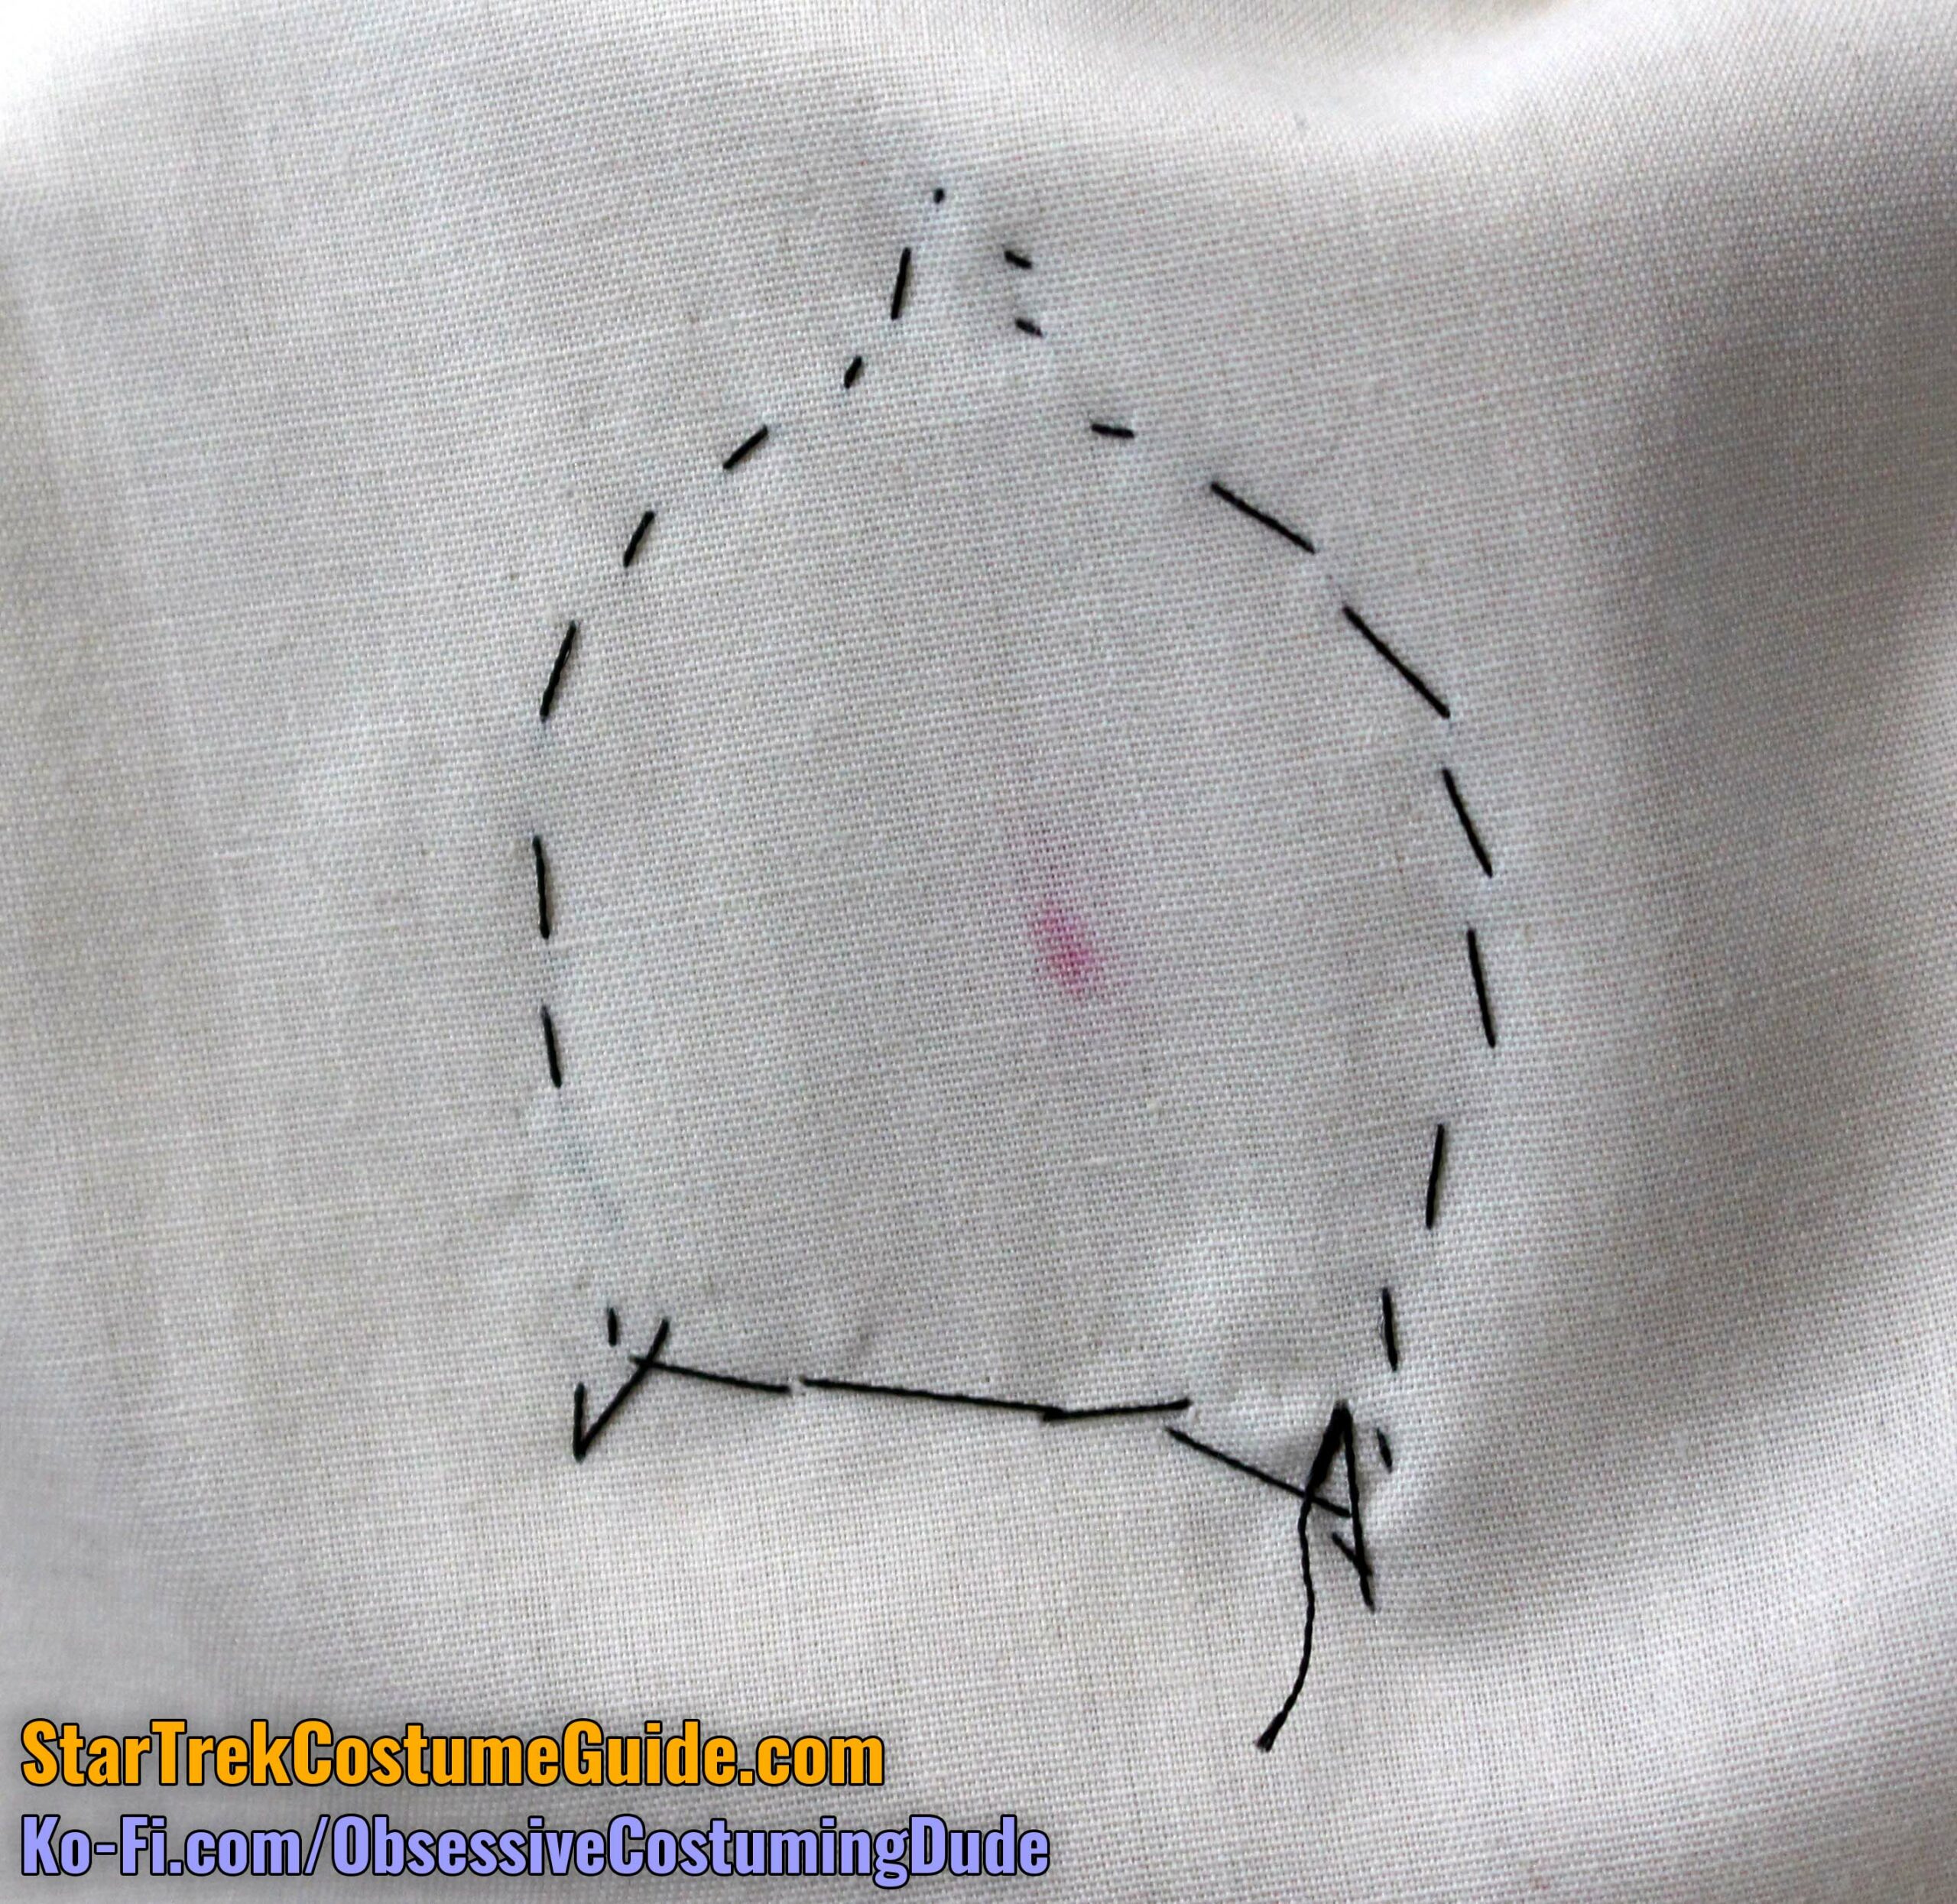
The dowel wasn’t just glued to the second copper circle, though; here you can see it actually extended downward beyond that, presumably all the way to the larger base.
At least some of the “bullseye” assemblies were constructed differently, with the dowel apparently just glued to the second layer (rather than extending through the entire assembly).
Here’s a diagram of the entire assembly:
The entire assembly was remarkably lightweight, weighing only about 7.6 grams, or just over a quarter of an ounce.
The assembly appears to have simply been glued to the corresponding area of the jumpsuit.
Anyone else wonder if the original costumer’s DNA is still preserved intact inside all that glue?
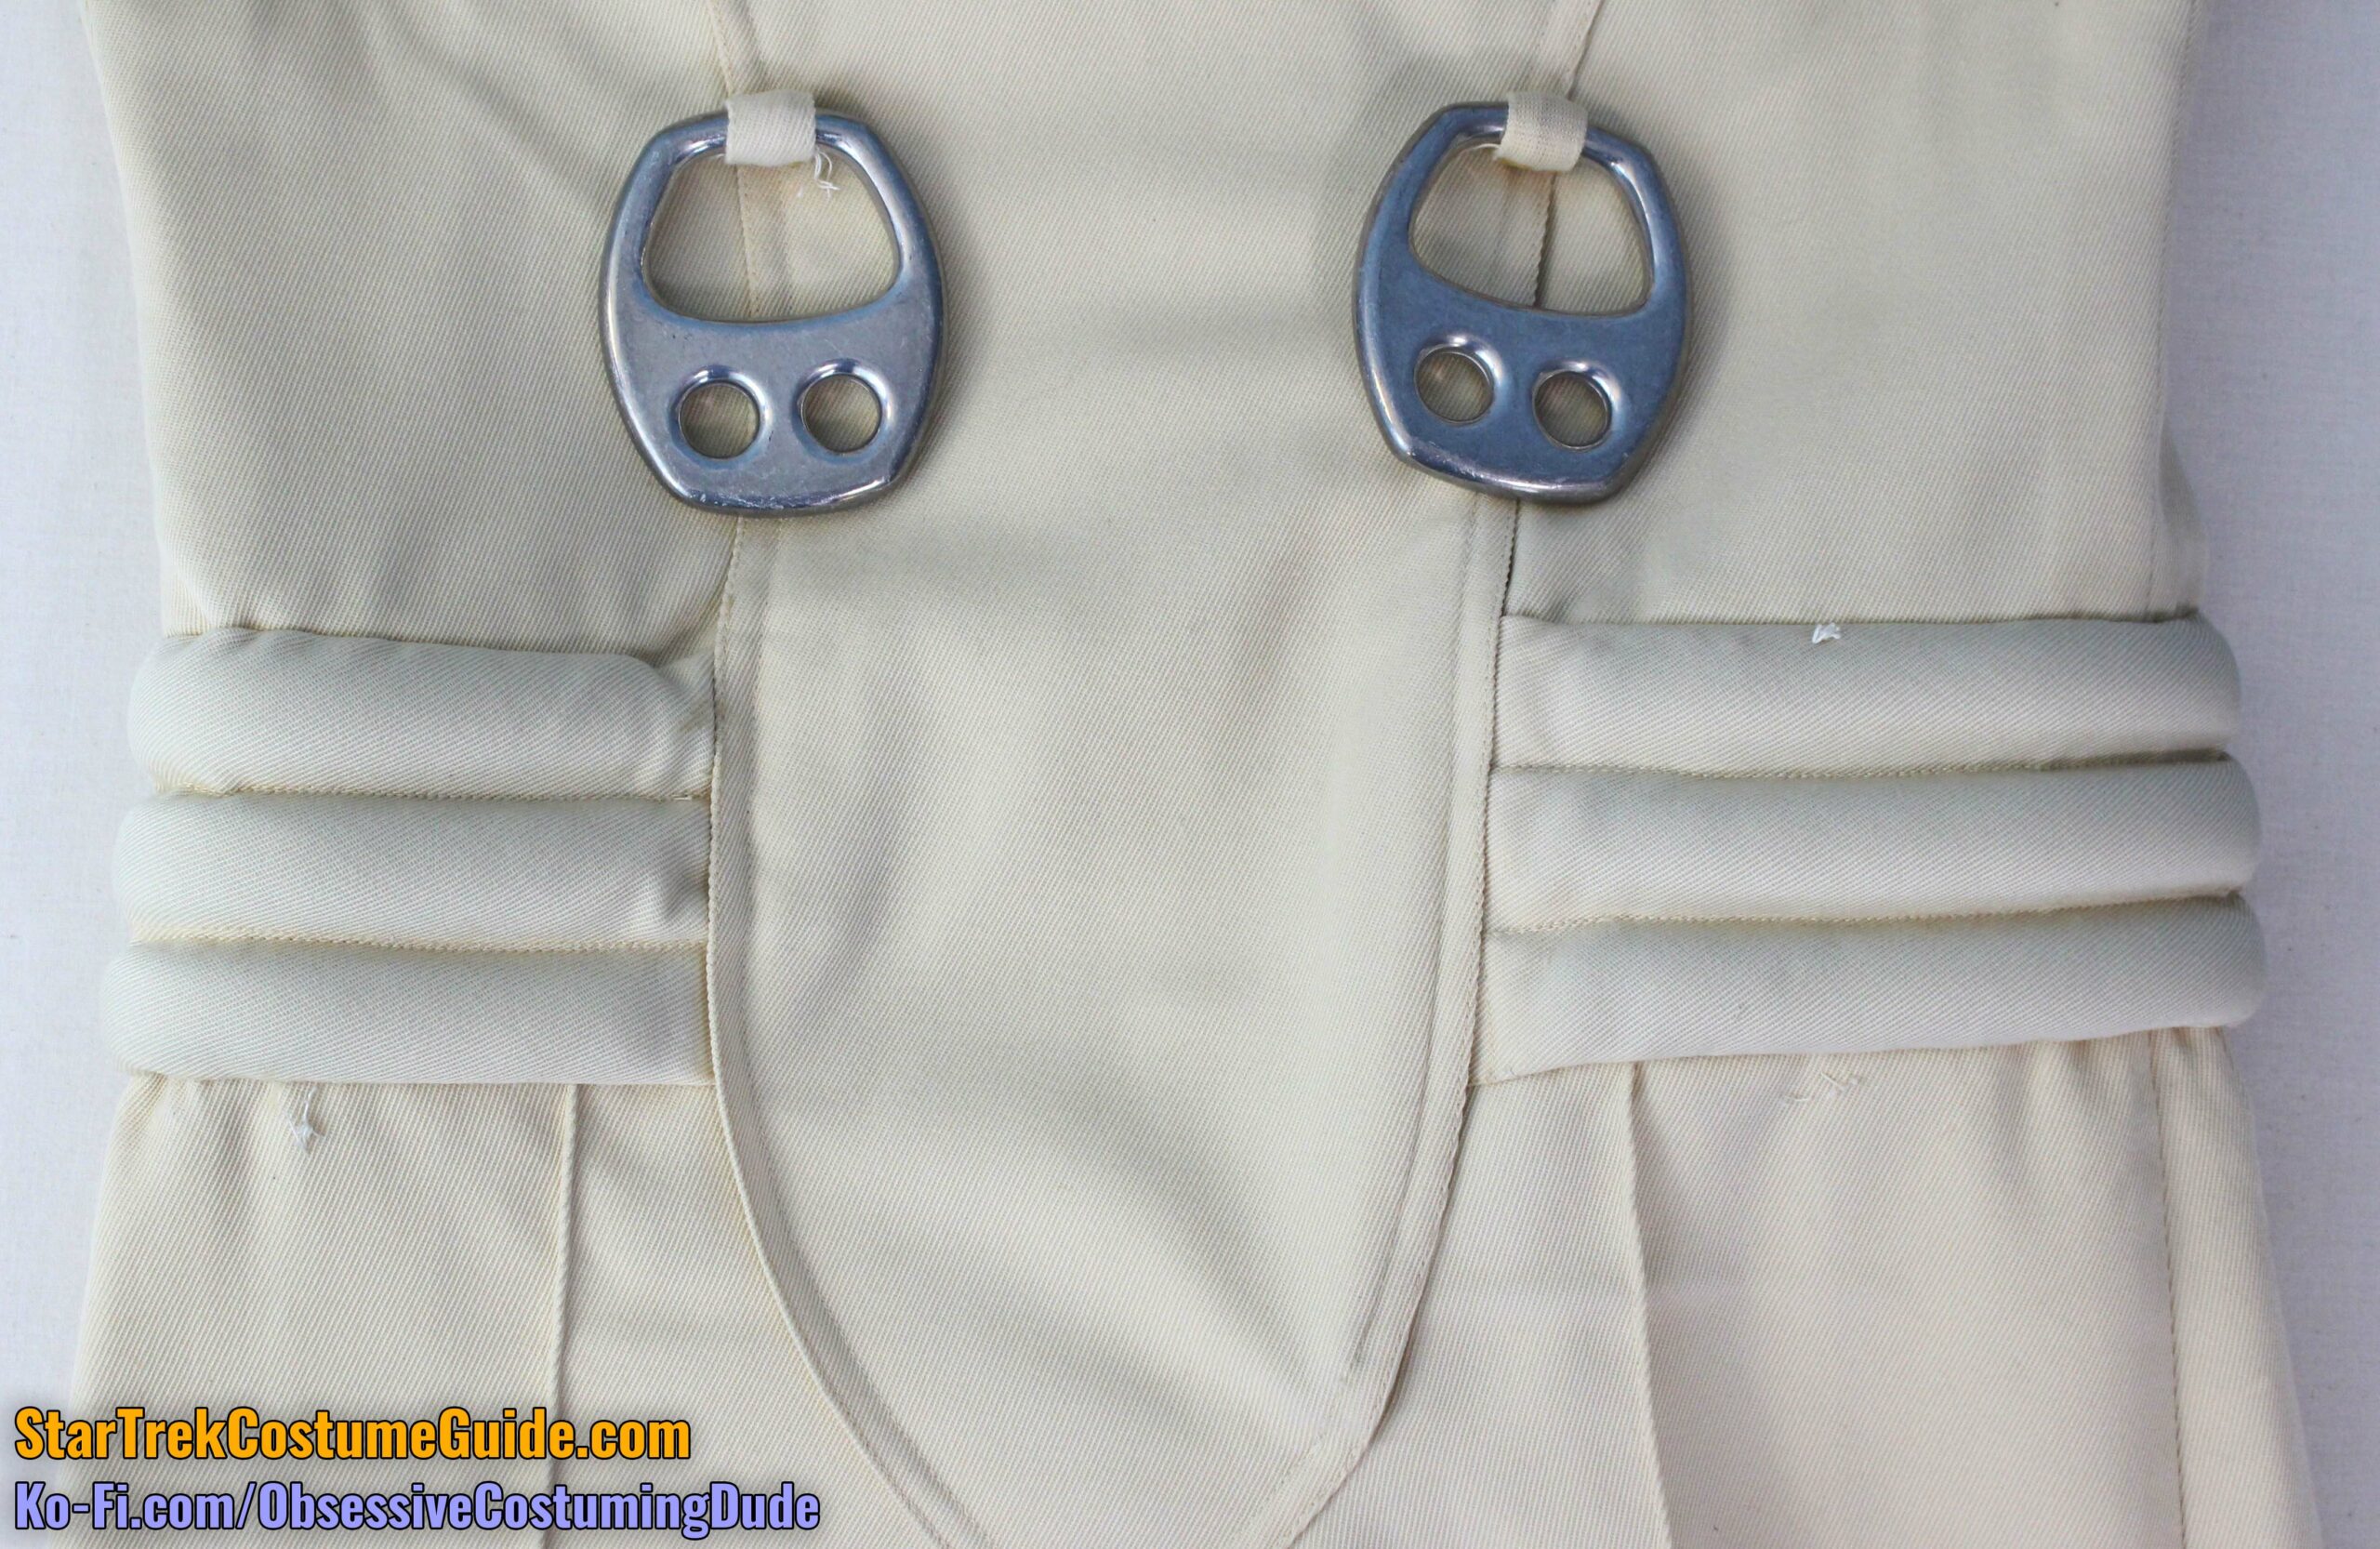
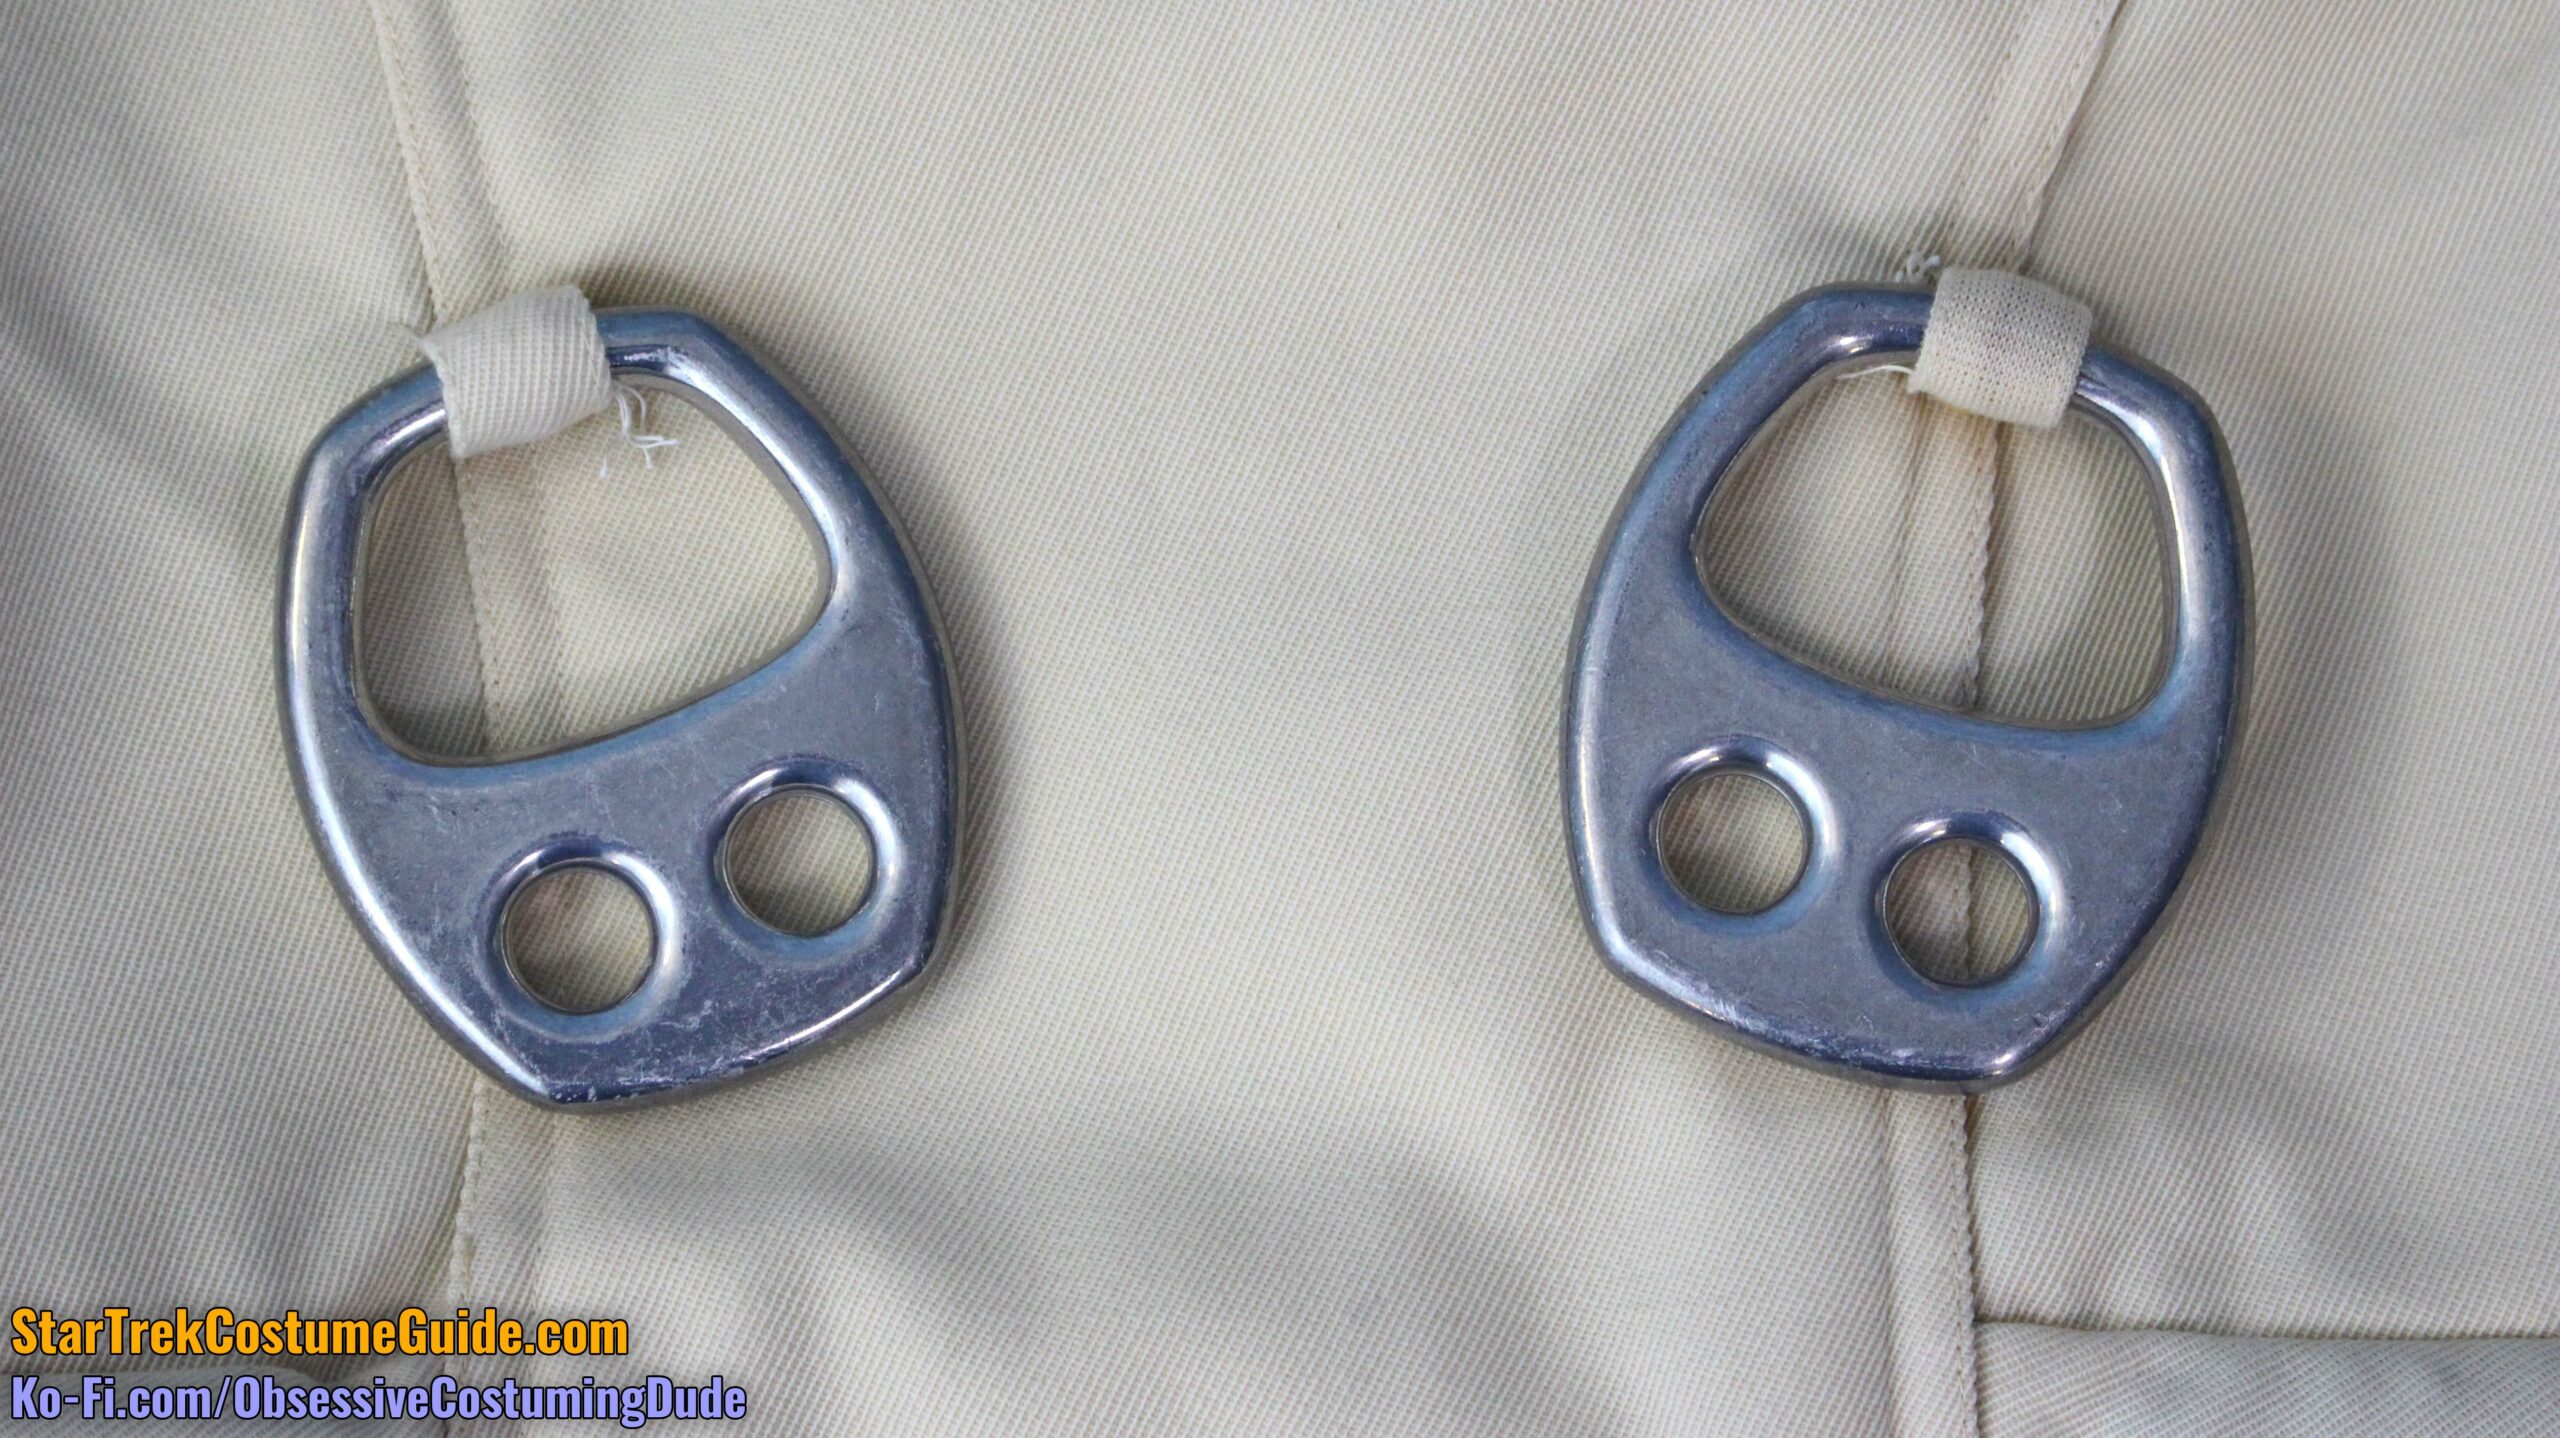
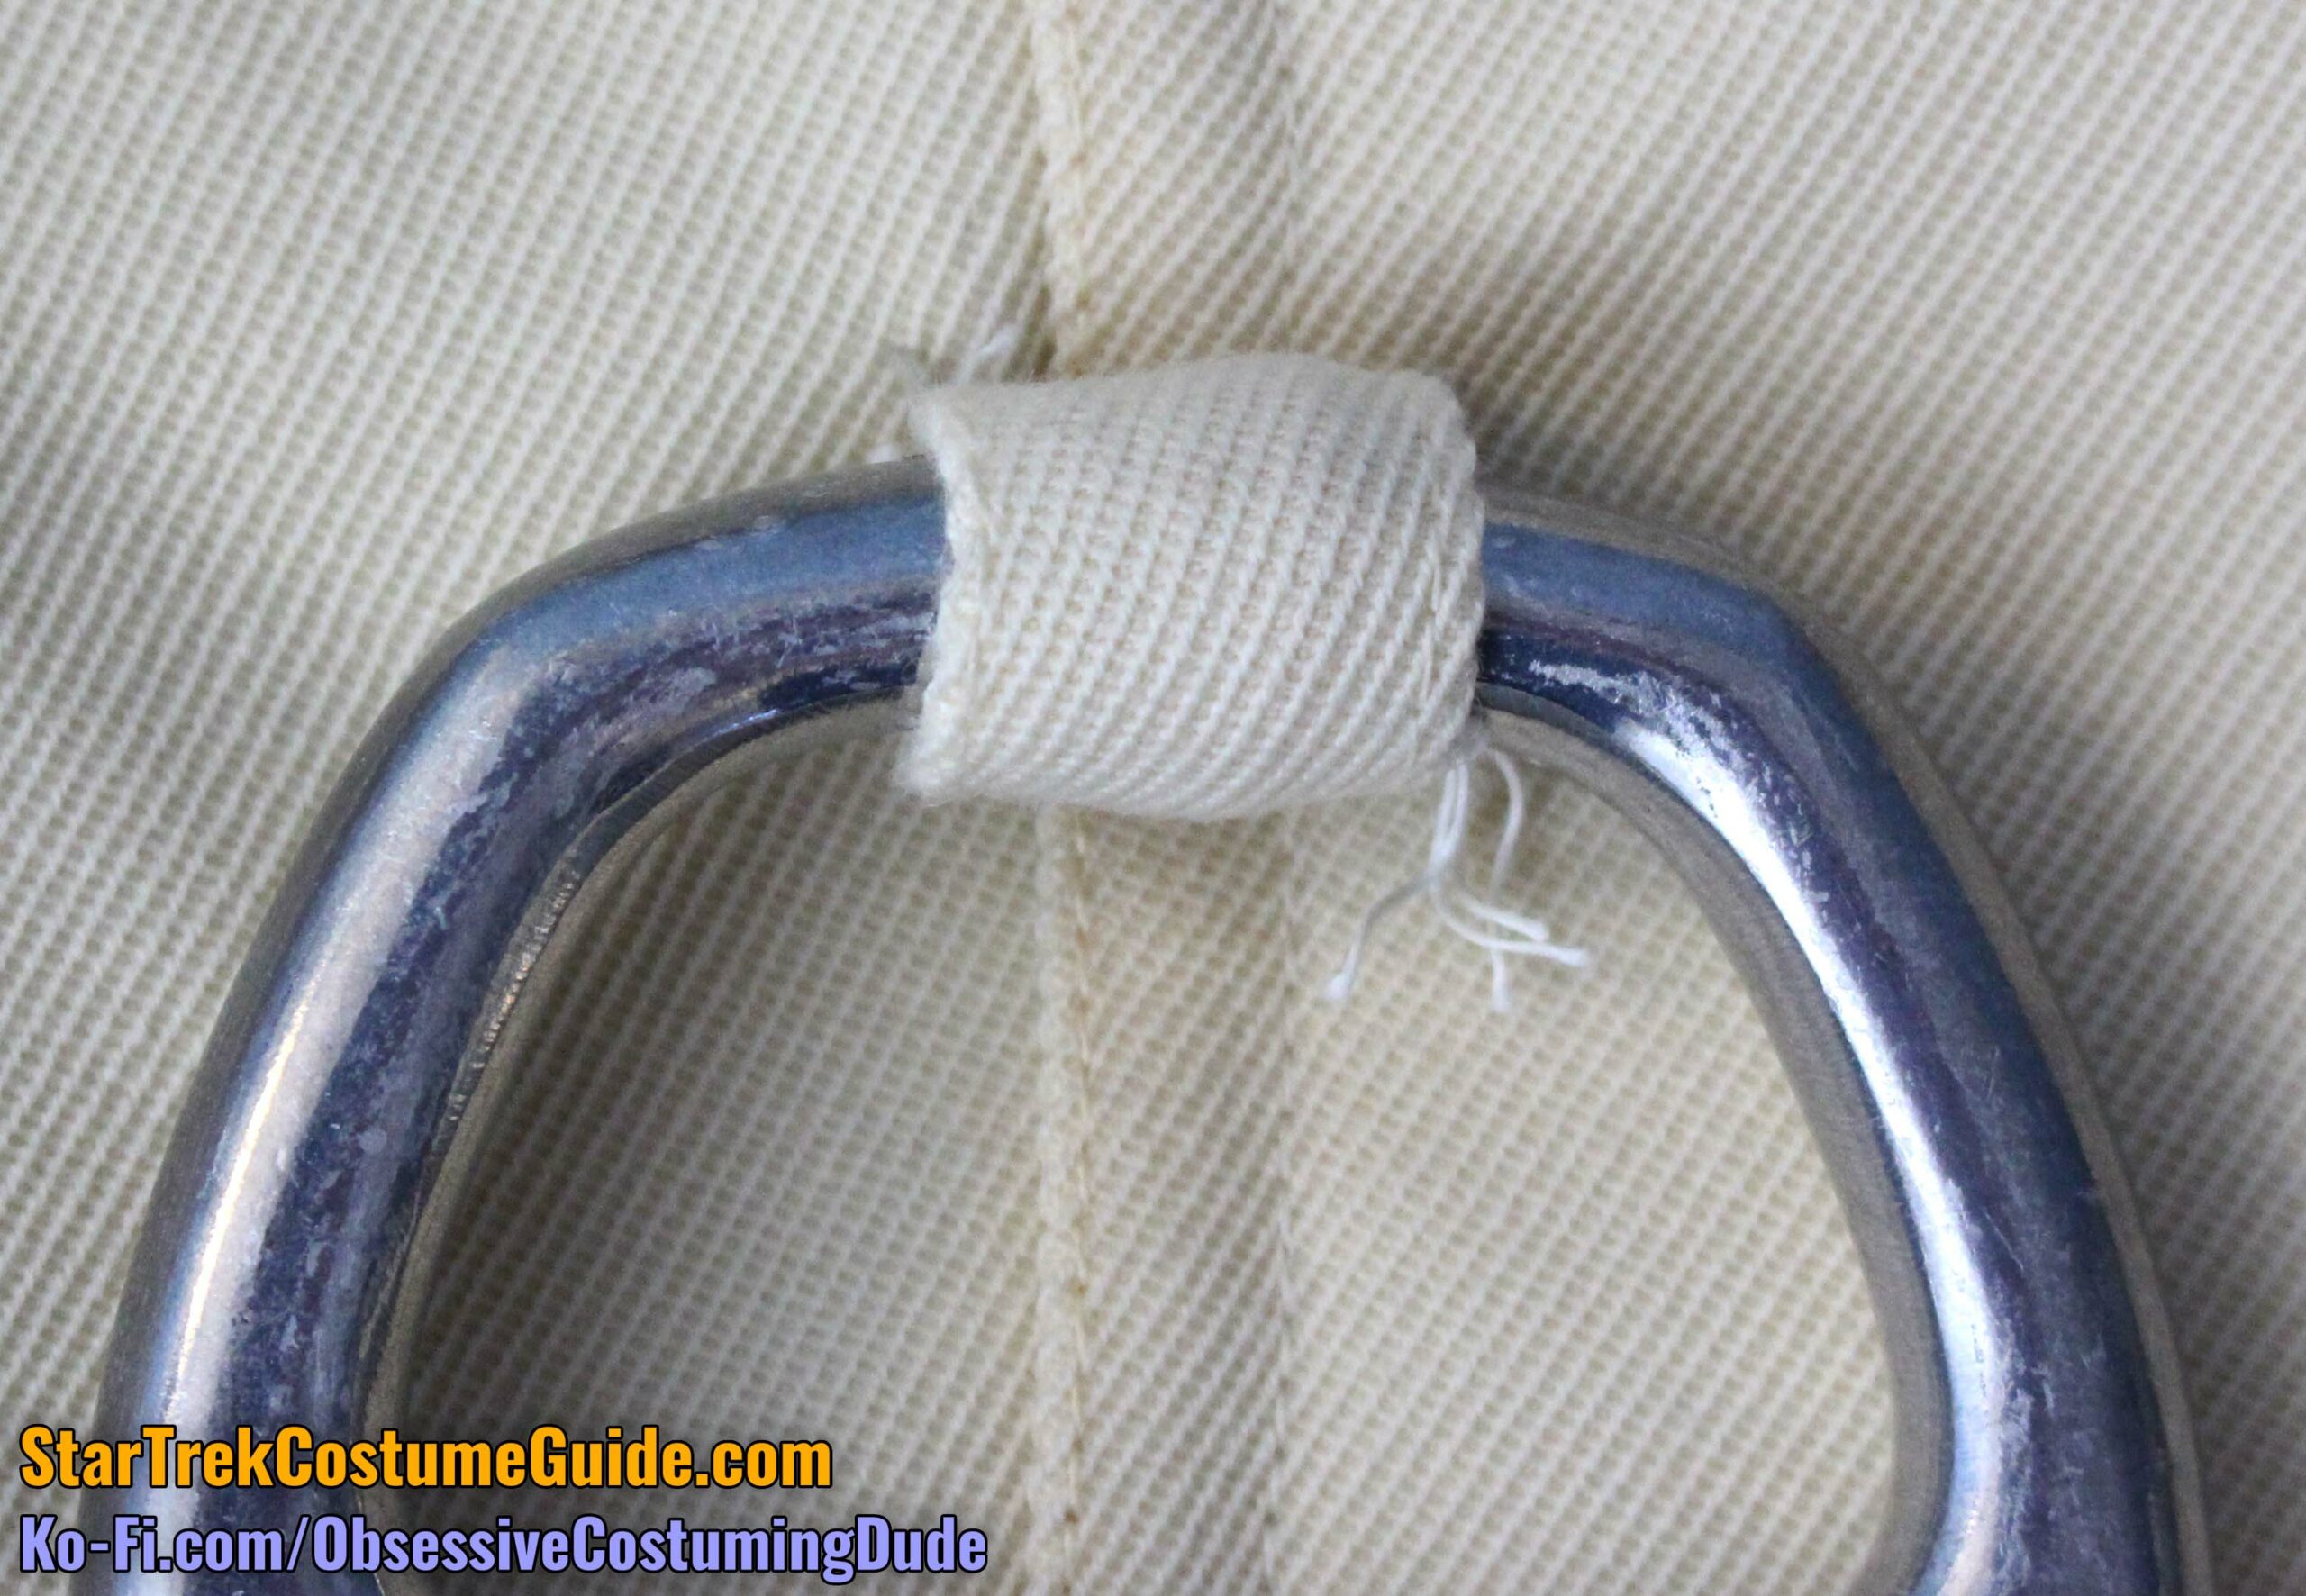
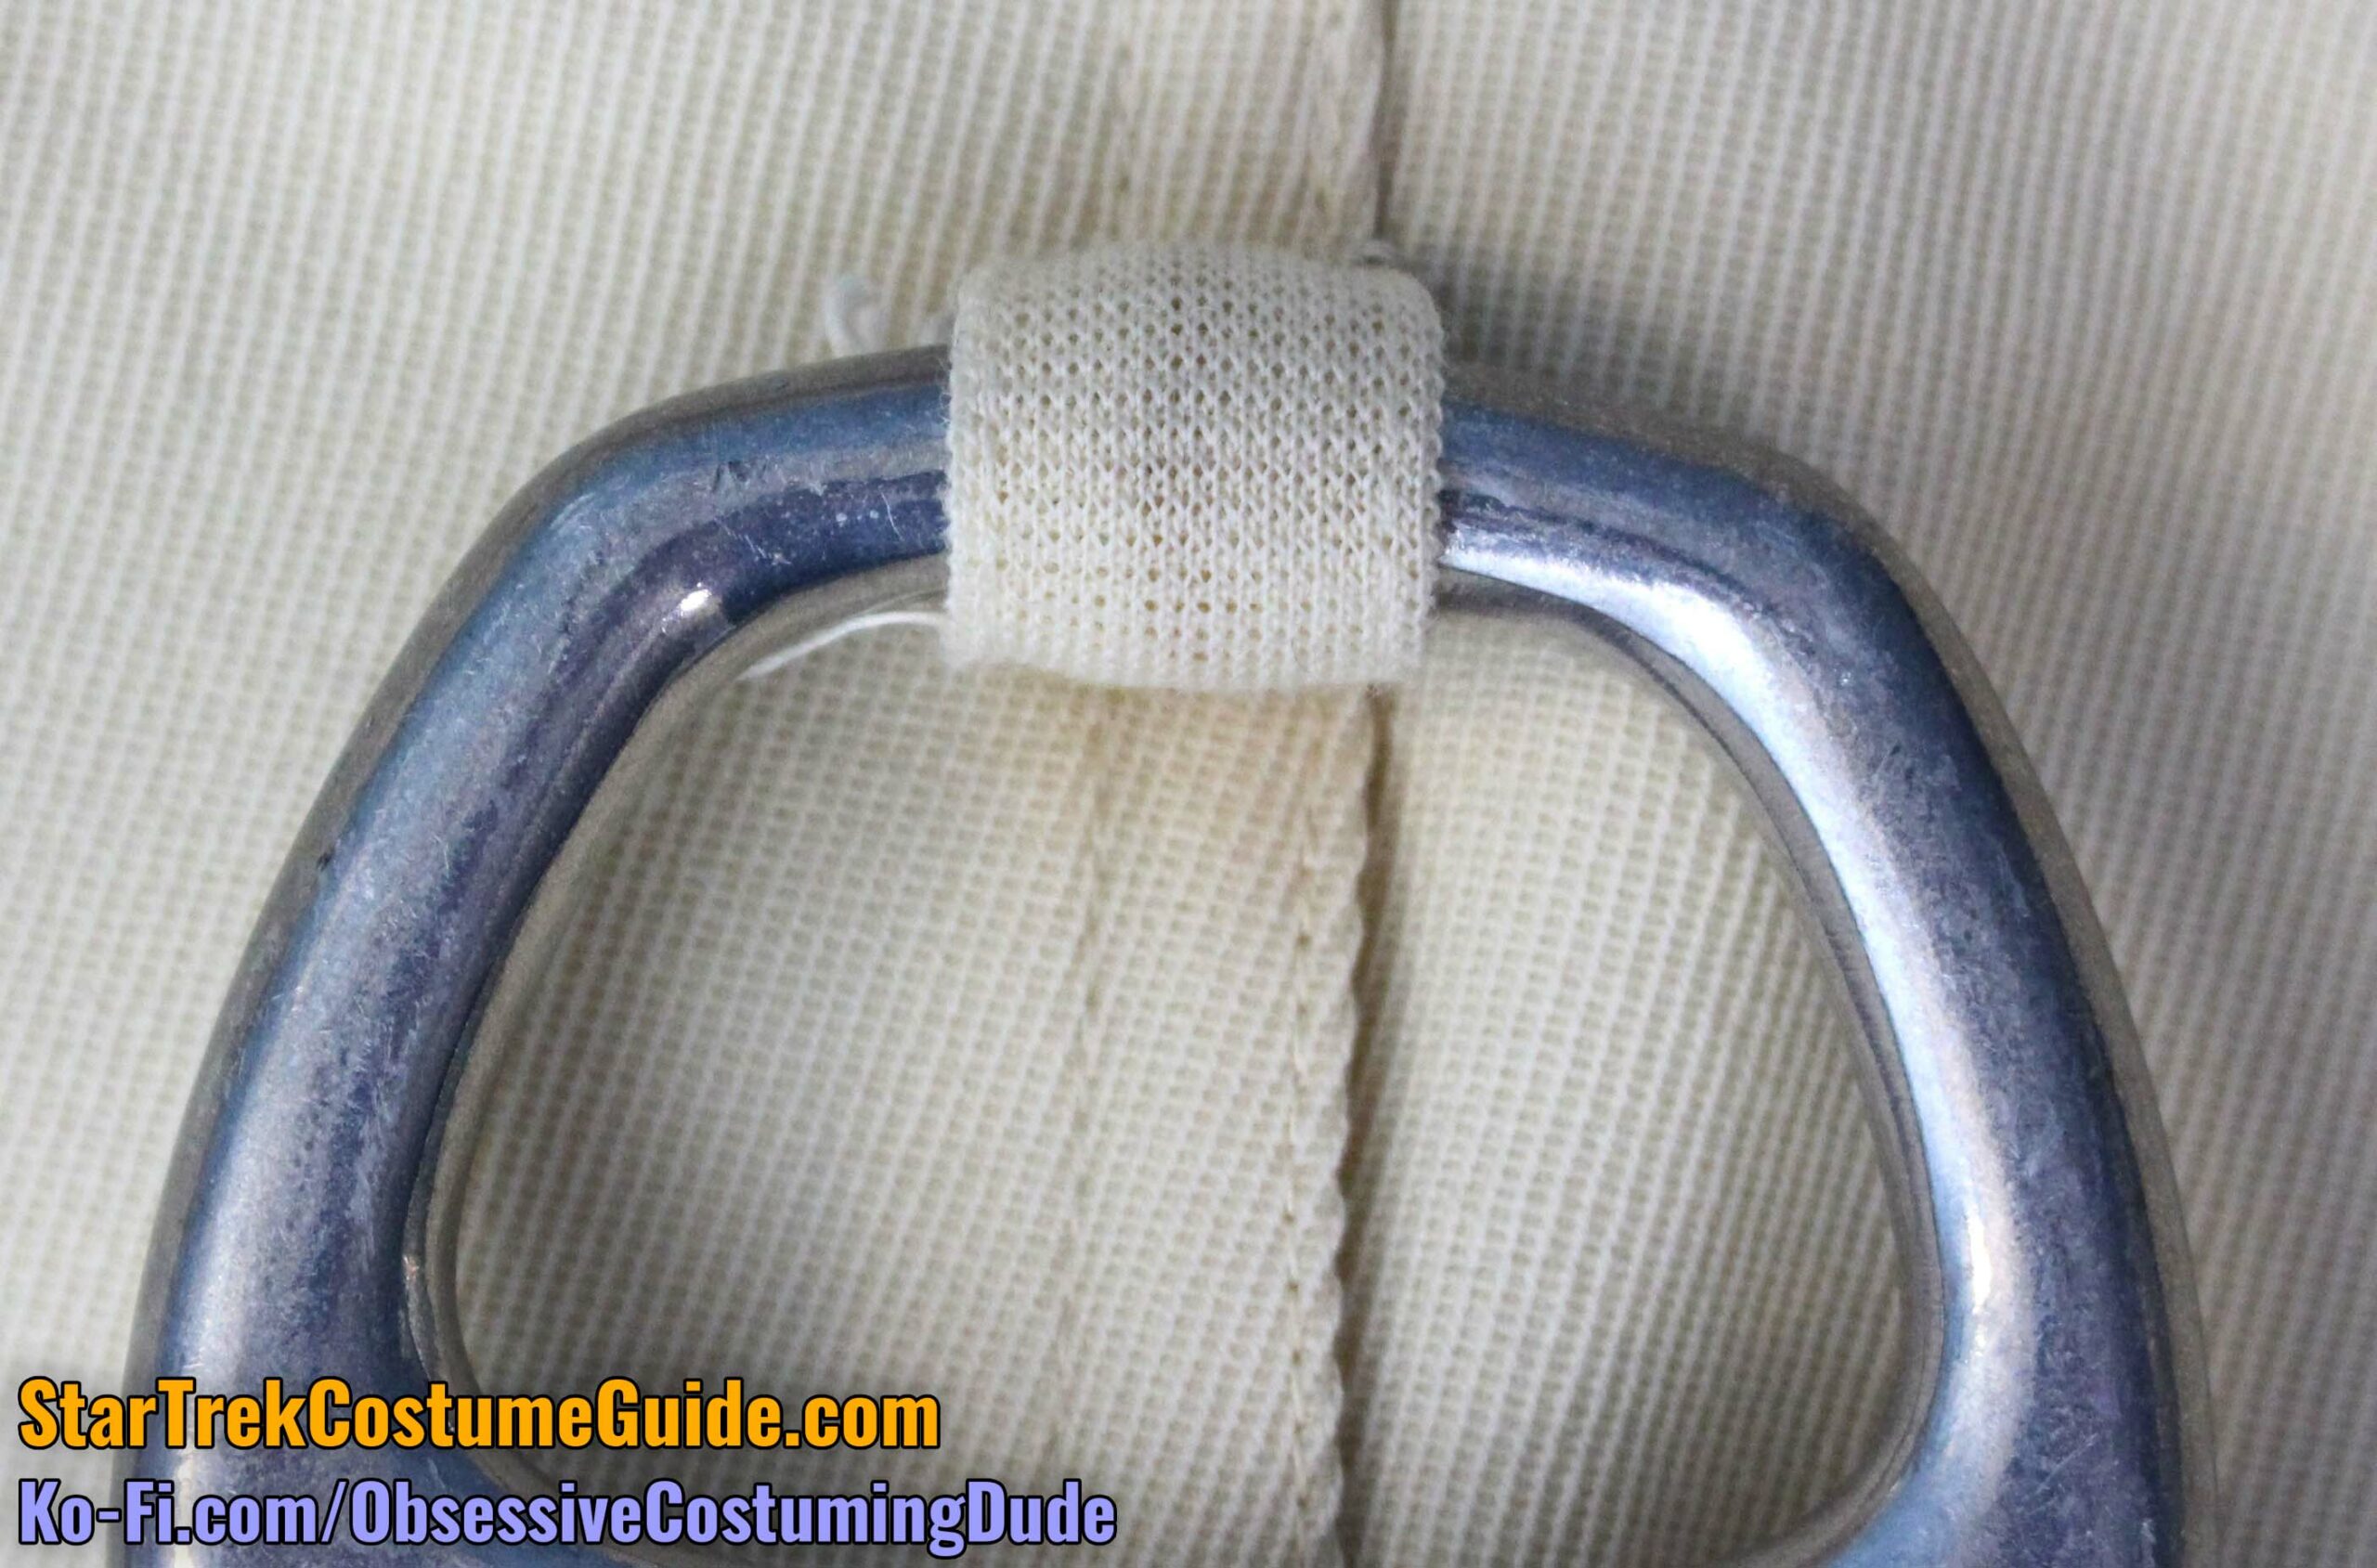
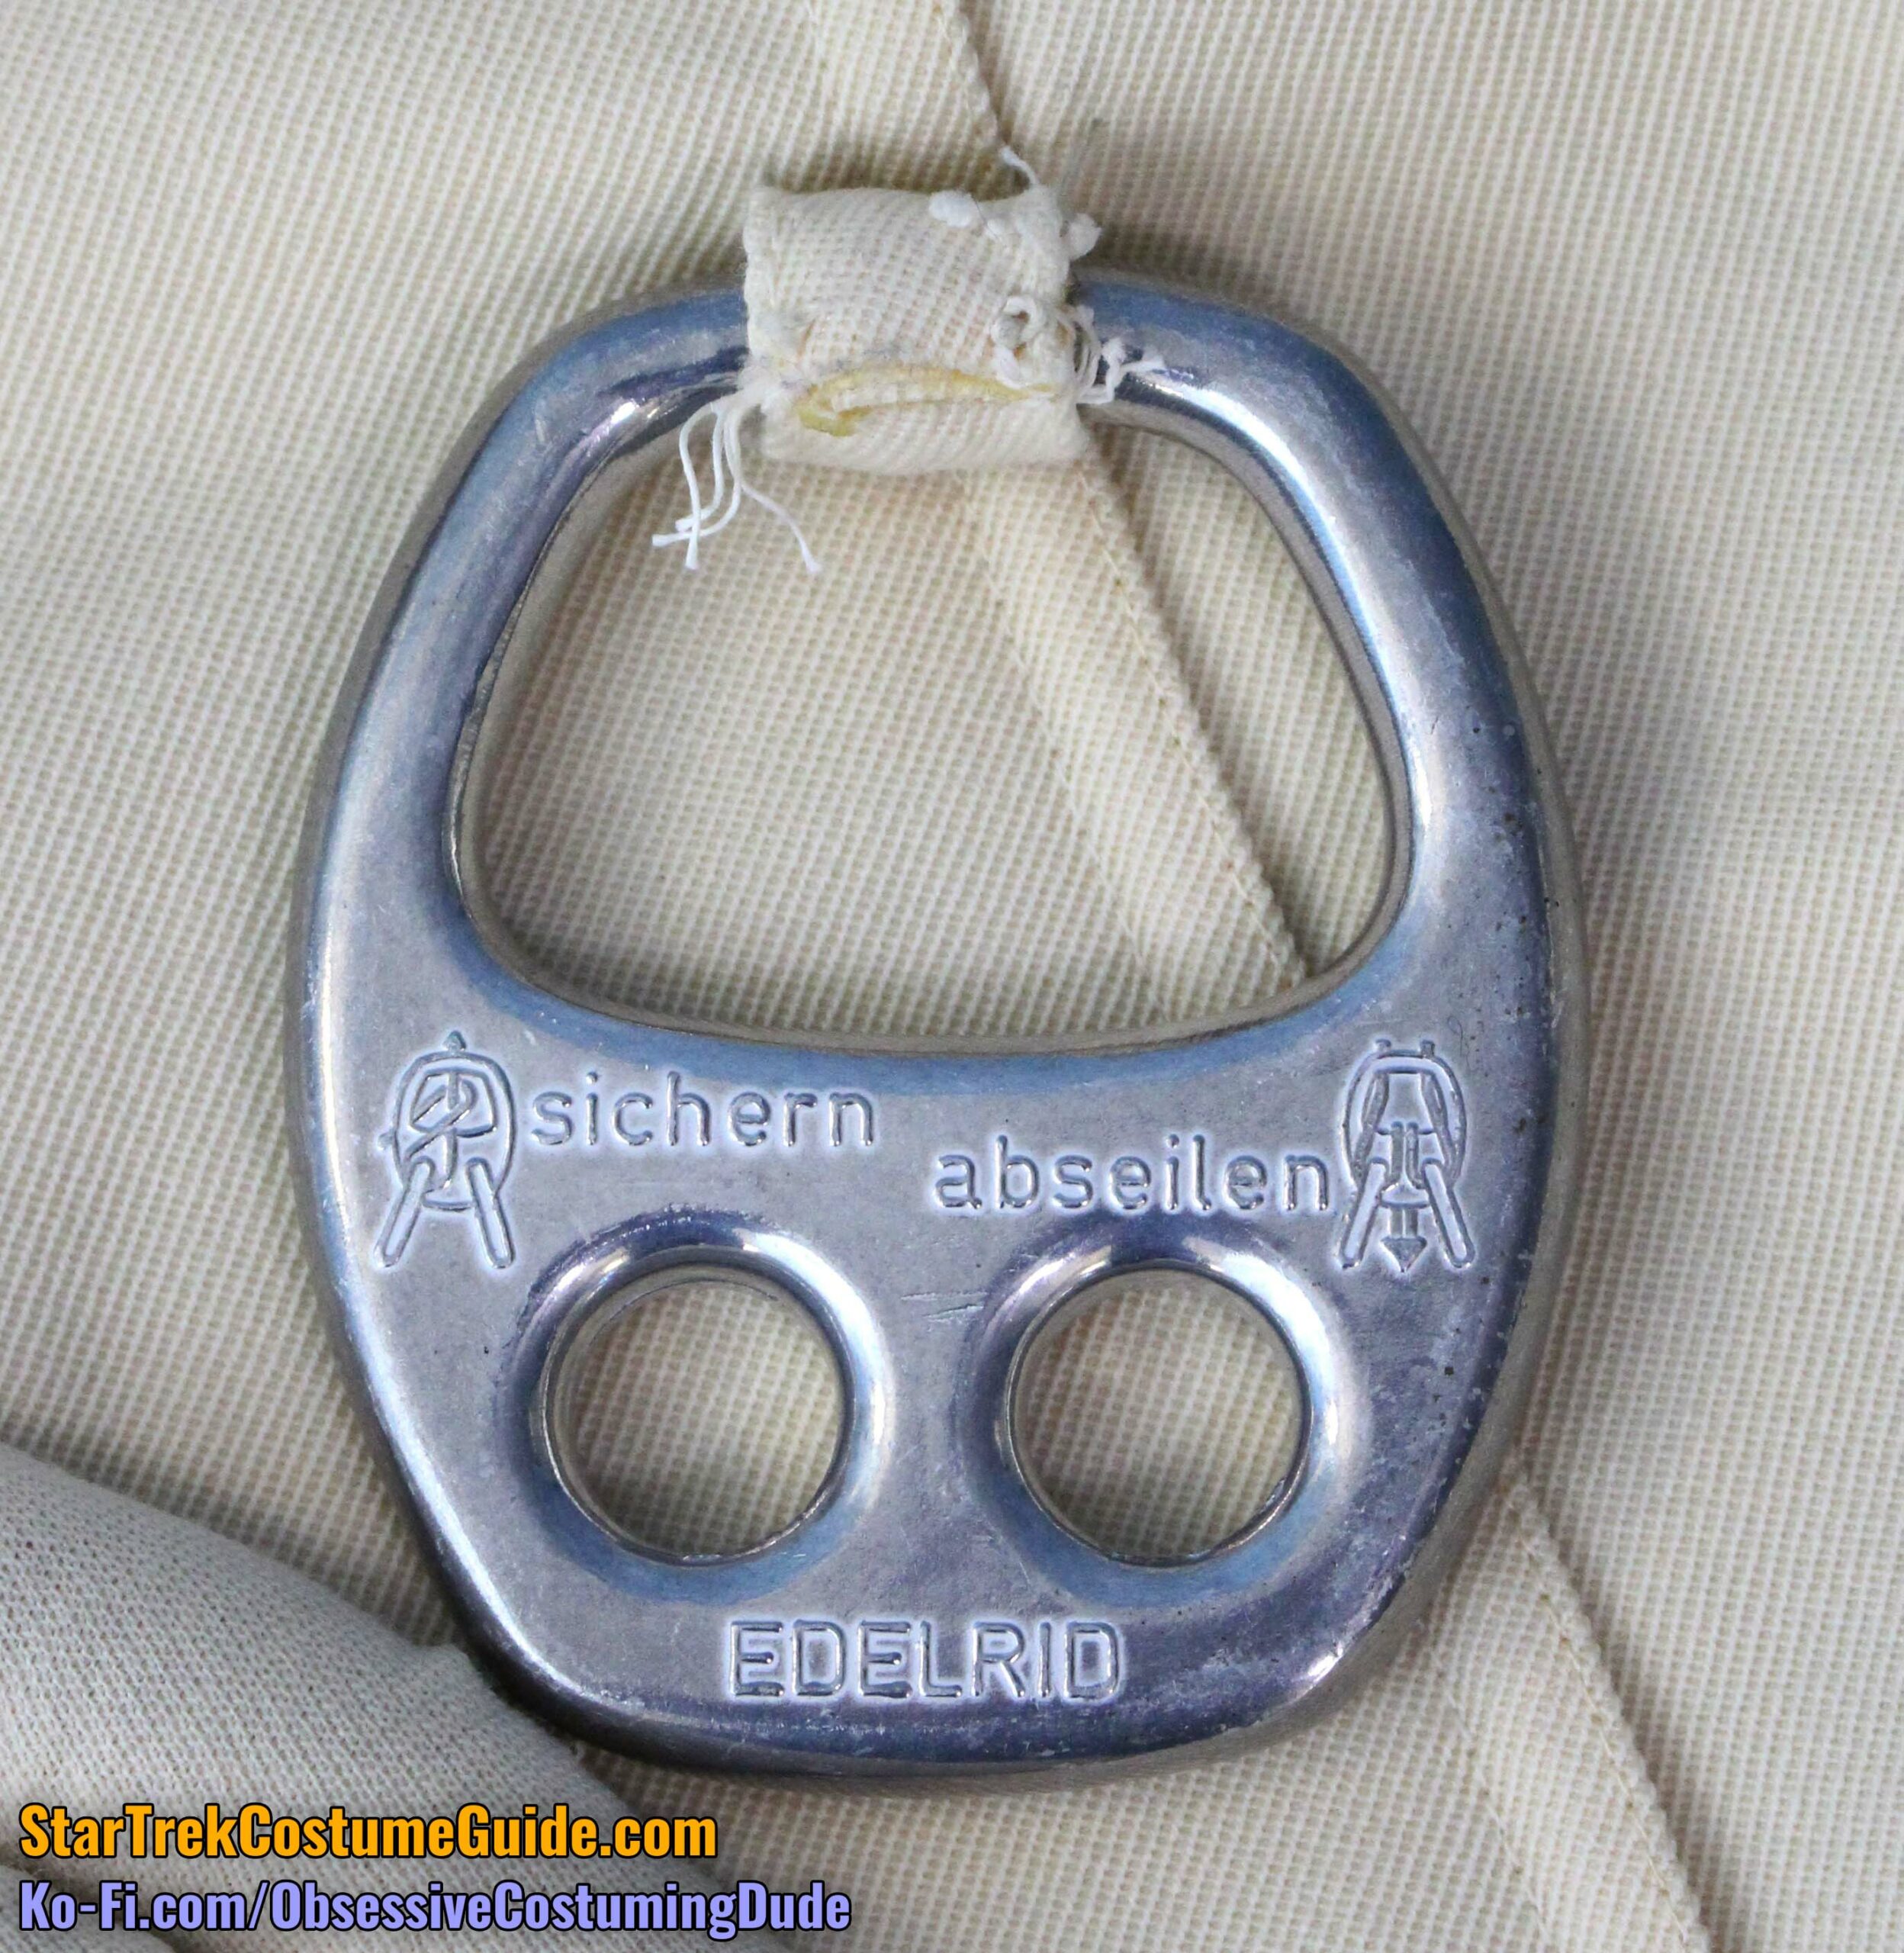
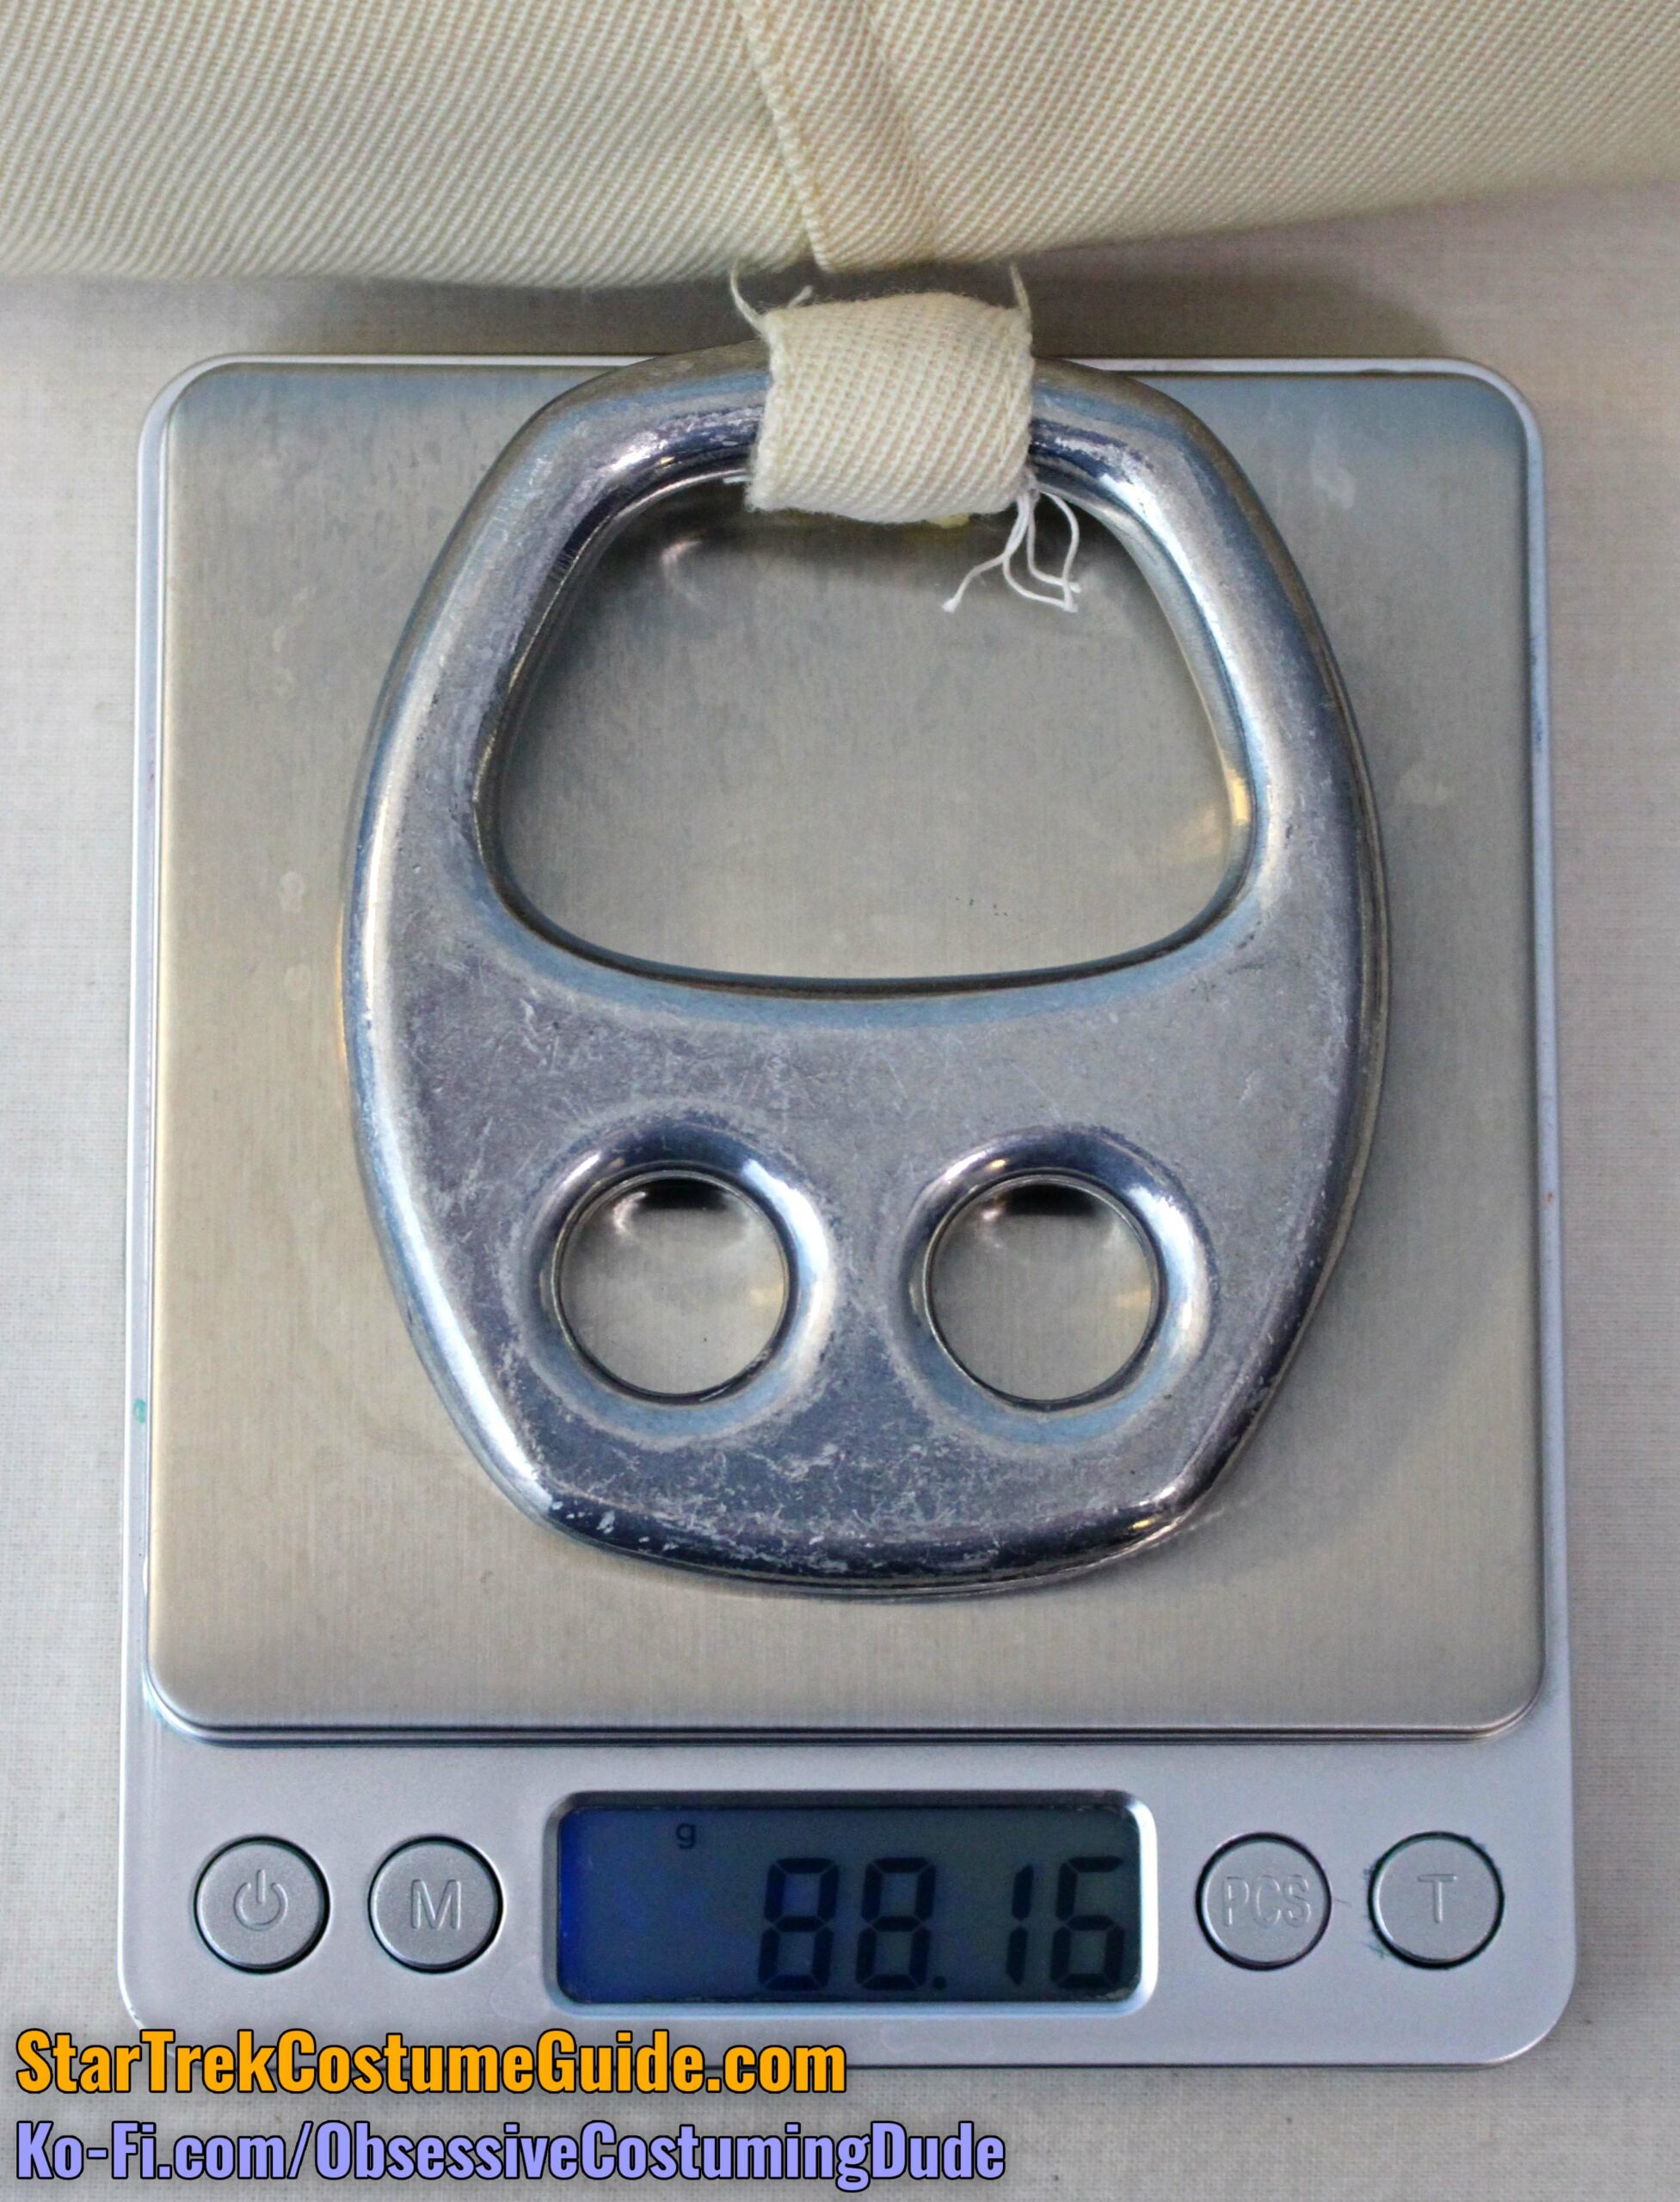
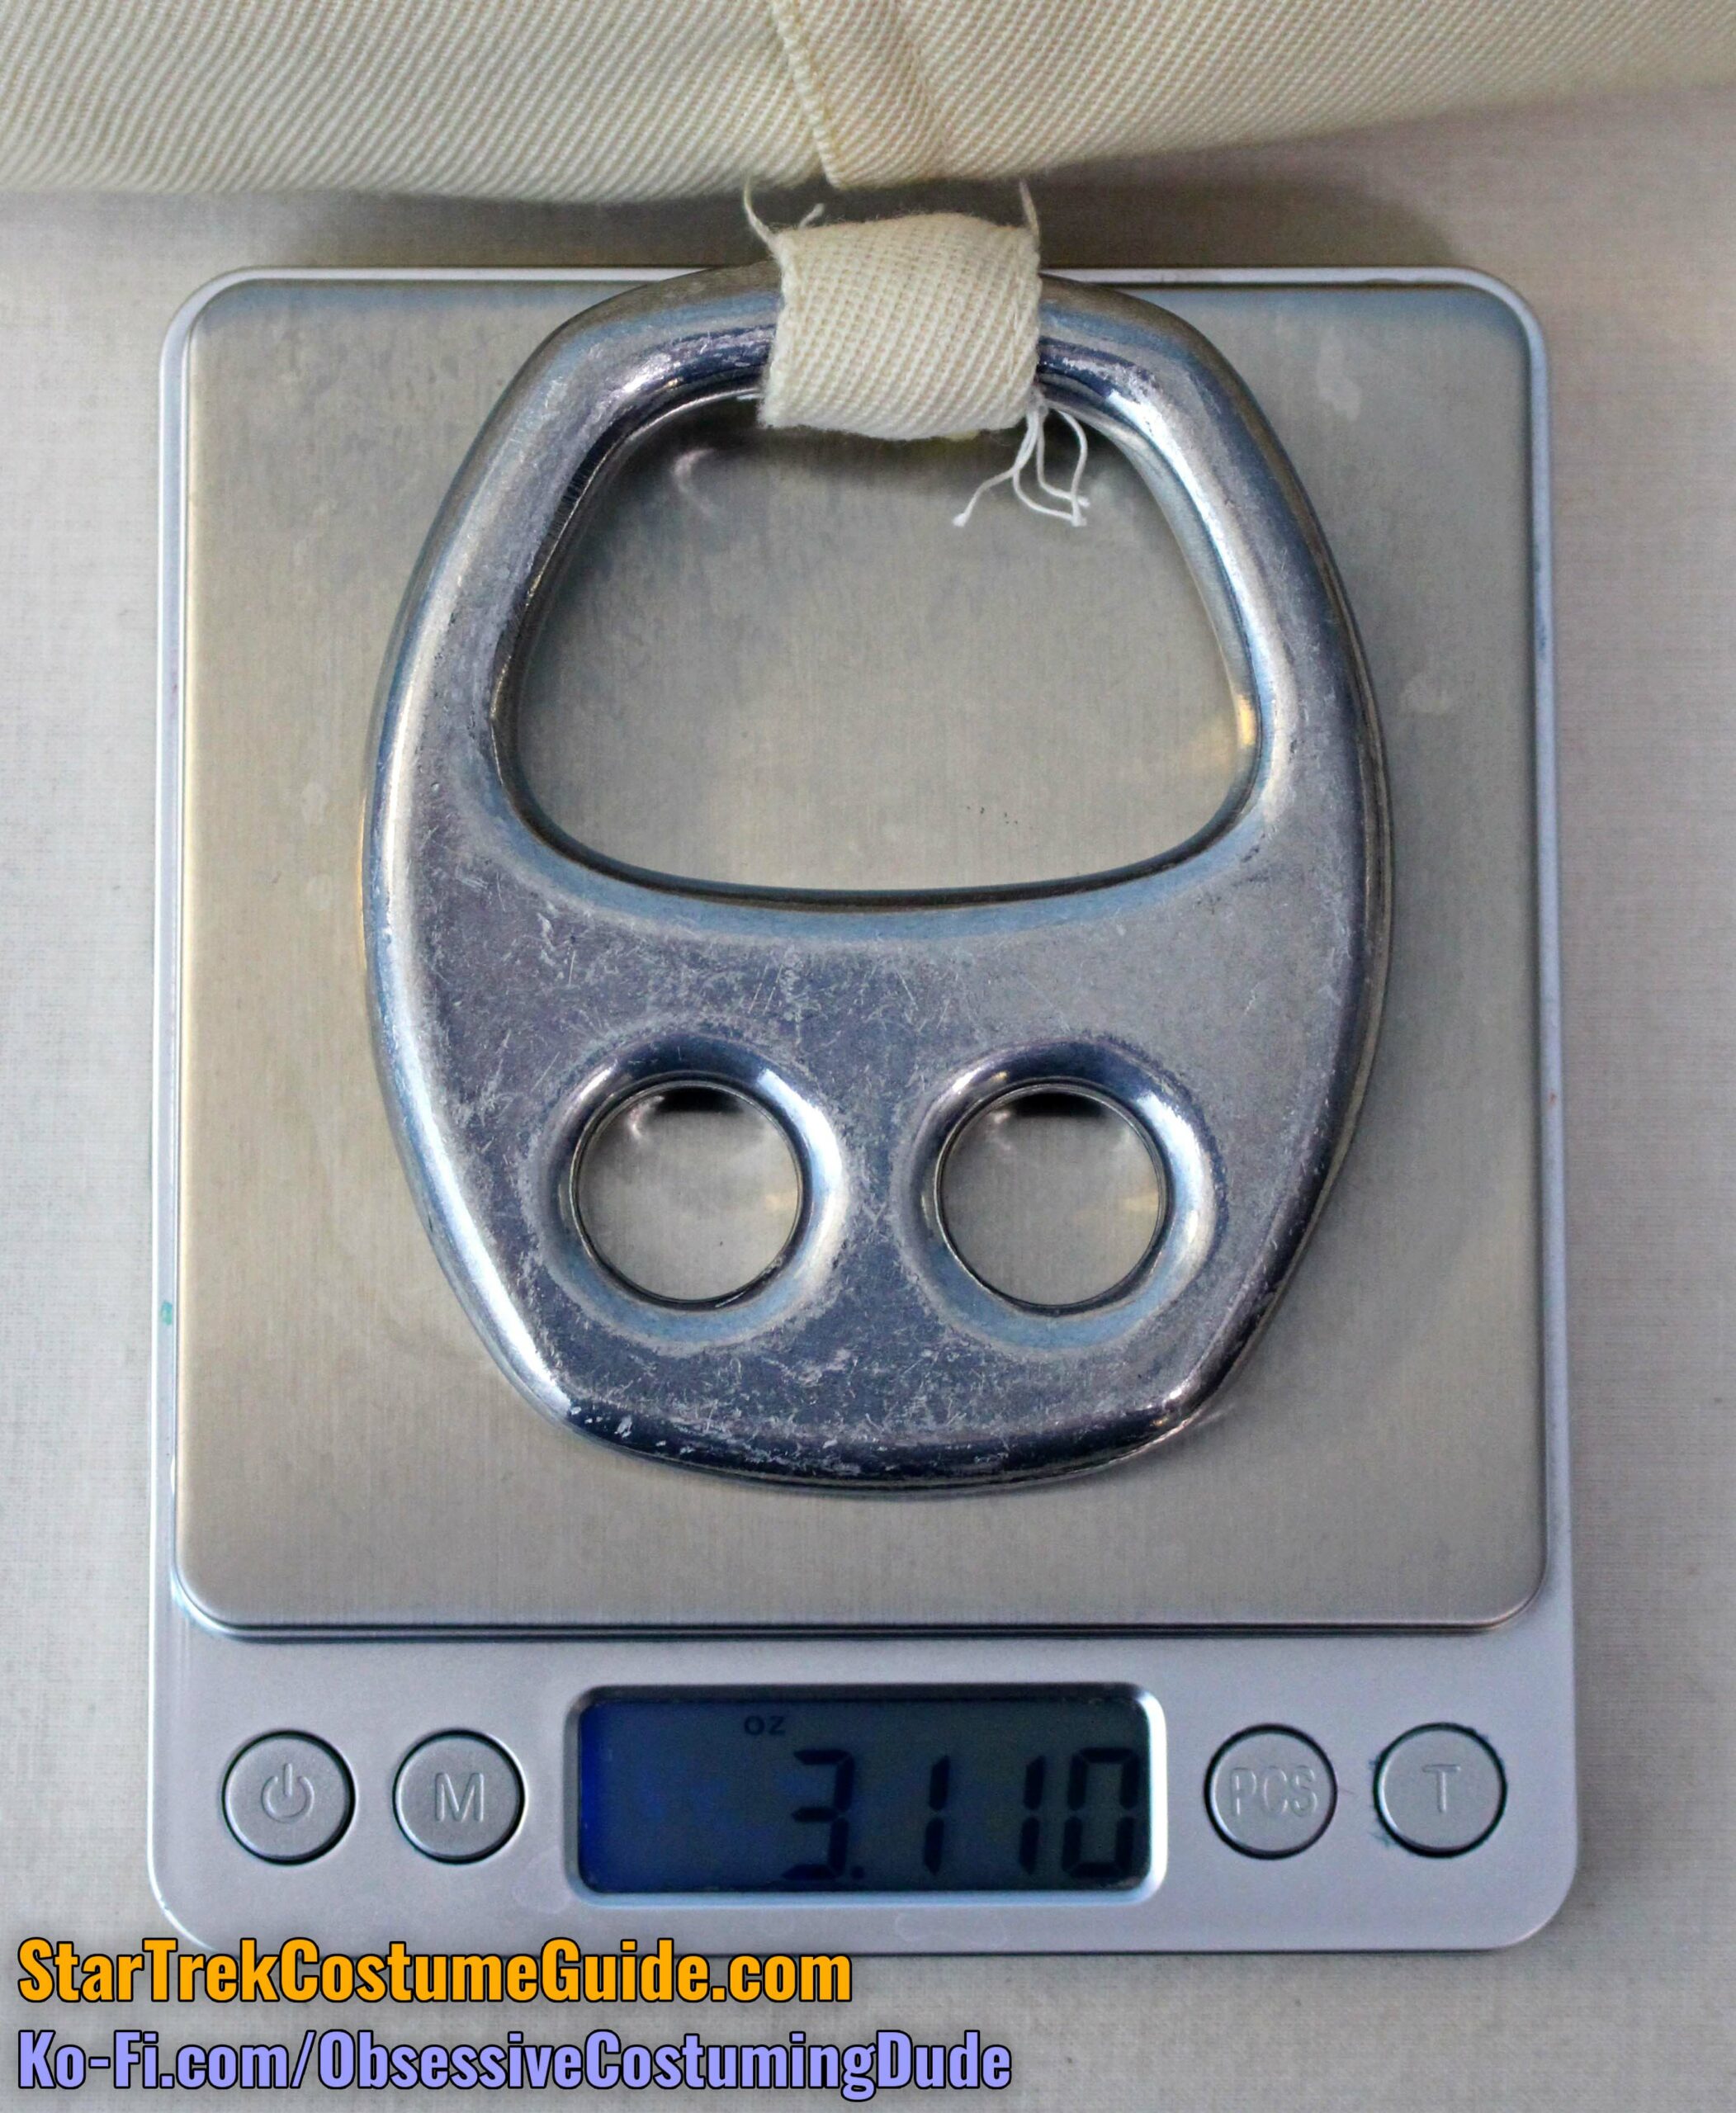
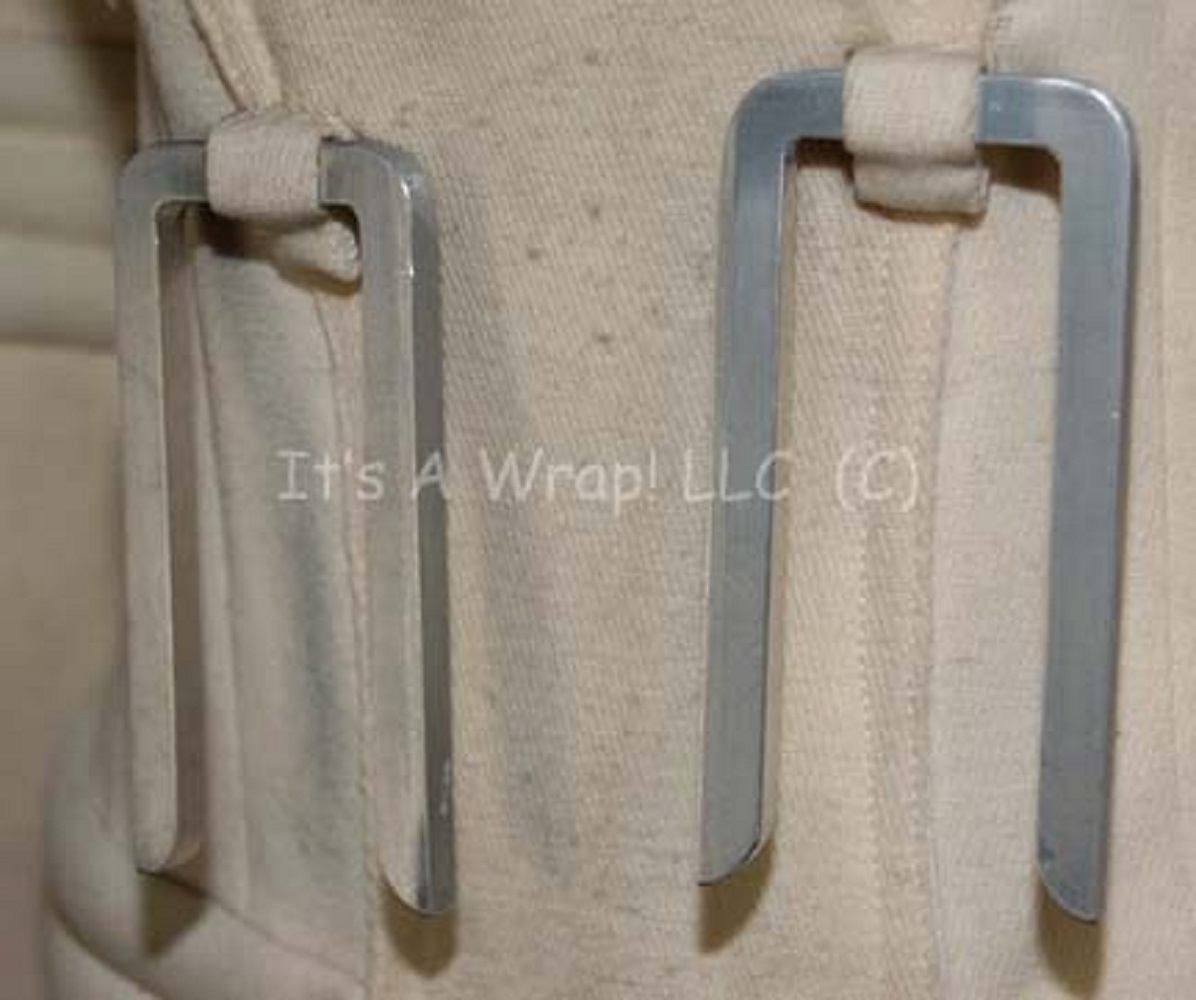
BUCKLES
Toward the middle of the torso was a pair of these large metal buckles.
These were attached via small fabric loops, which were hand-sewn to the jumpsuit along the front panel seams.
Curiously, in this case the right buckle’s loop was made with self fabric (wool gabardine), but the left buckle’s loop was made with the knit fabric used for the “chest circles.”
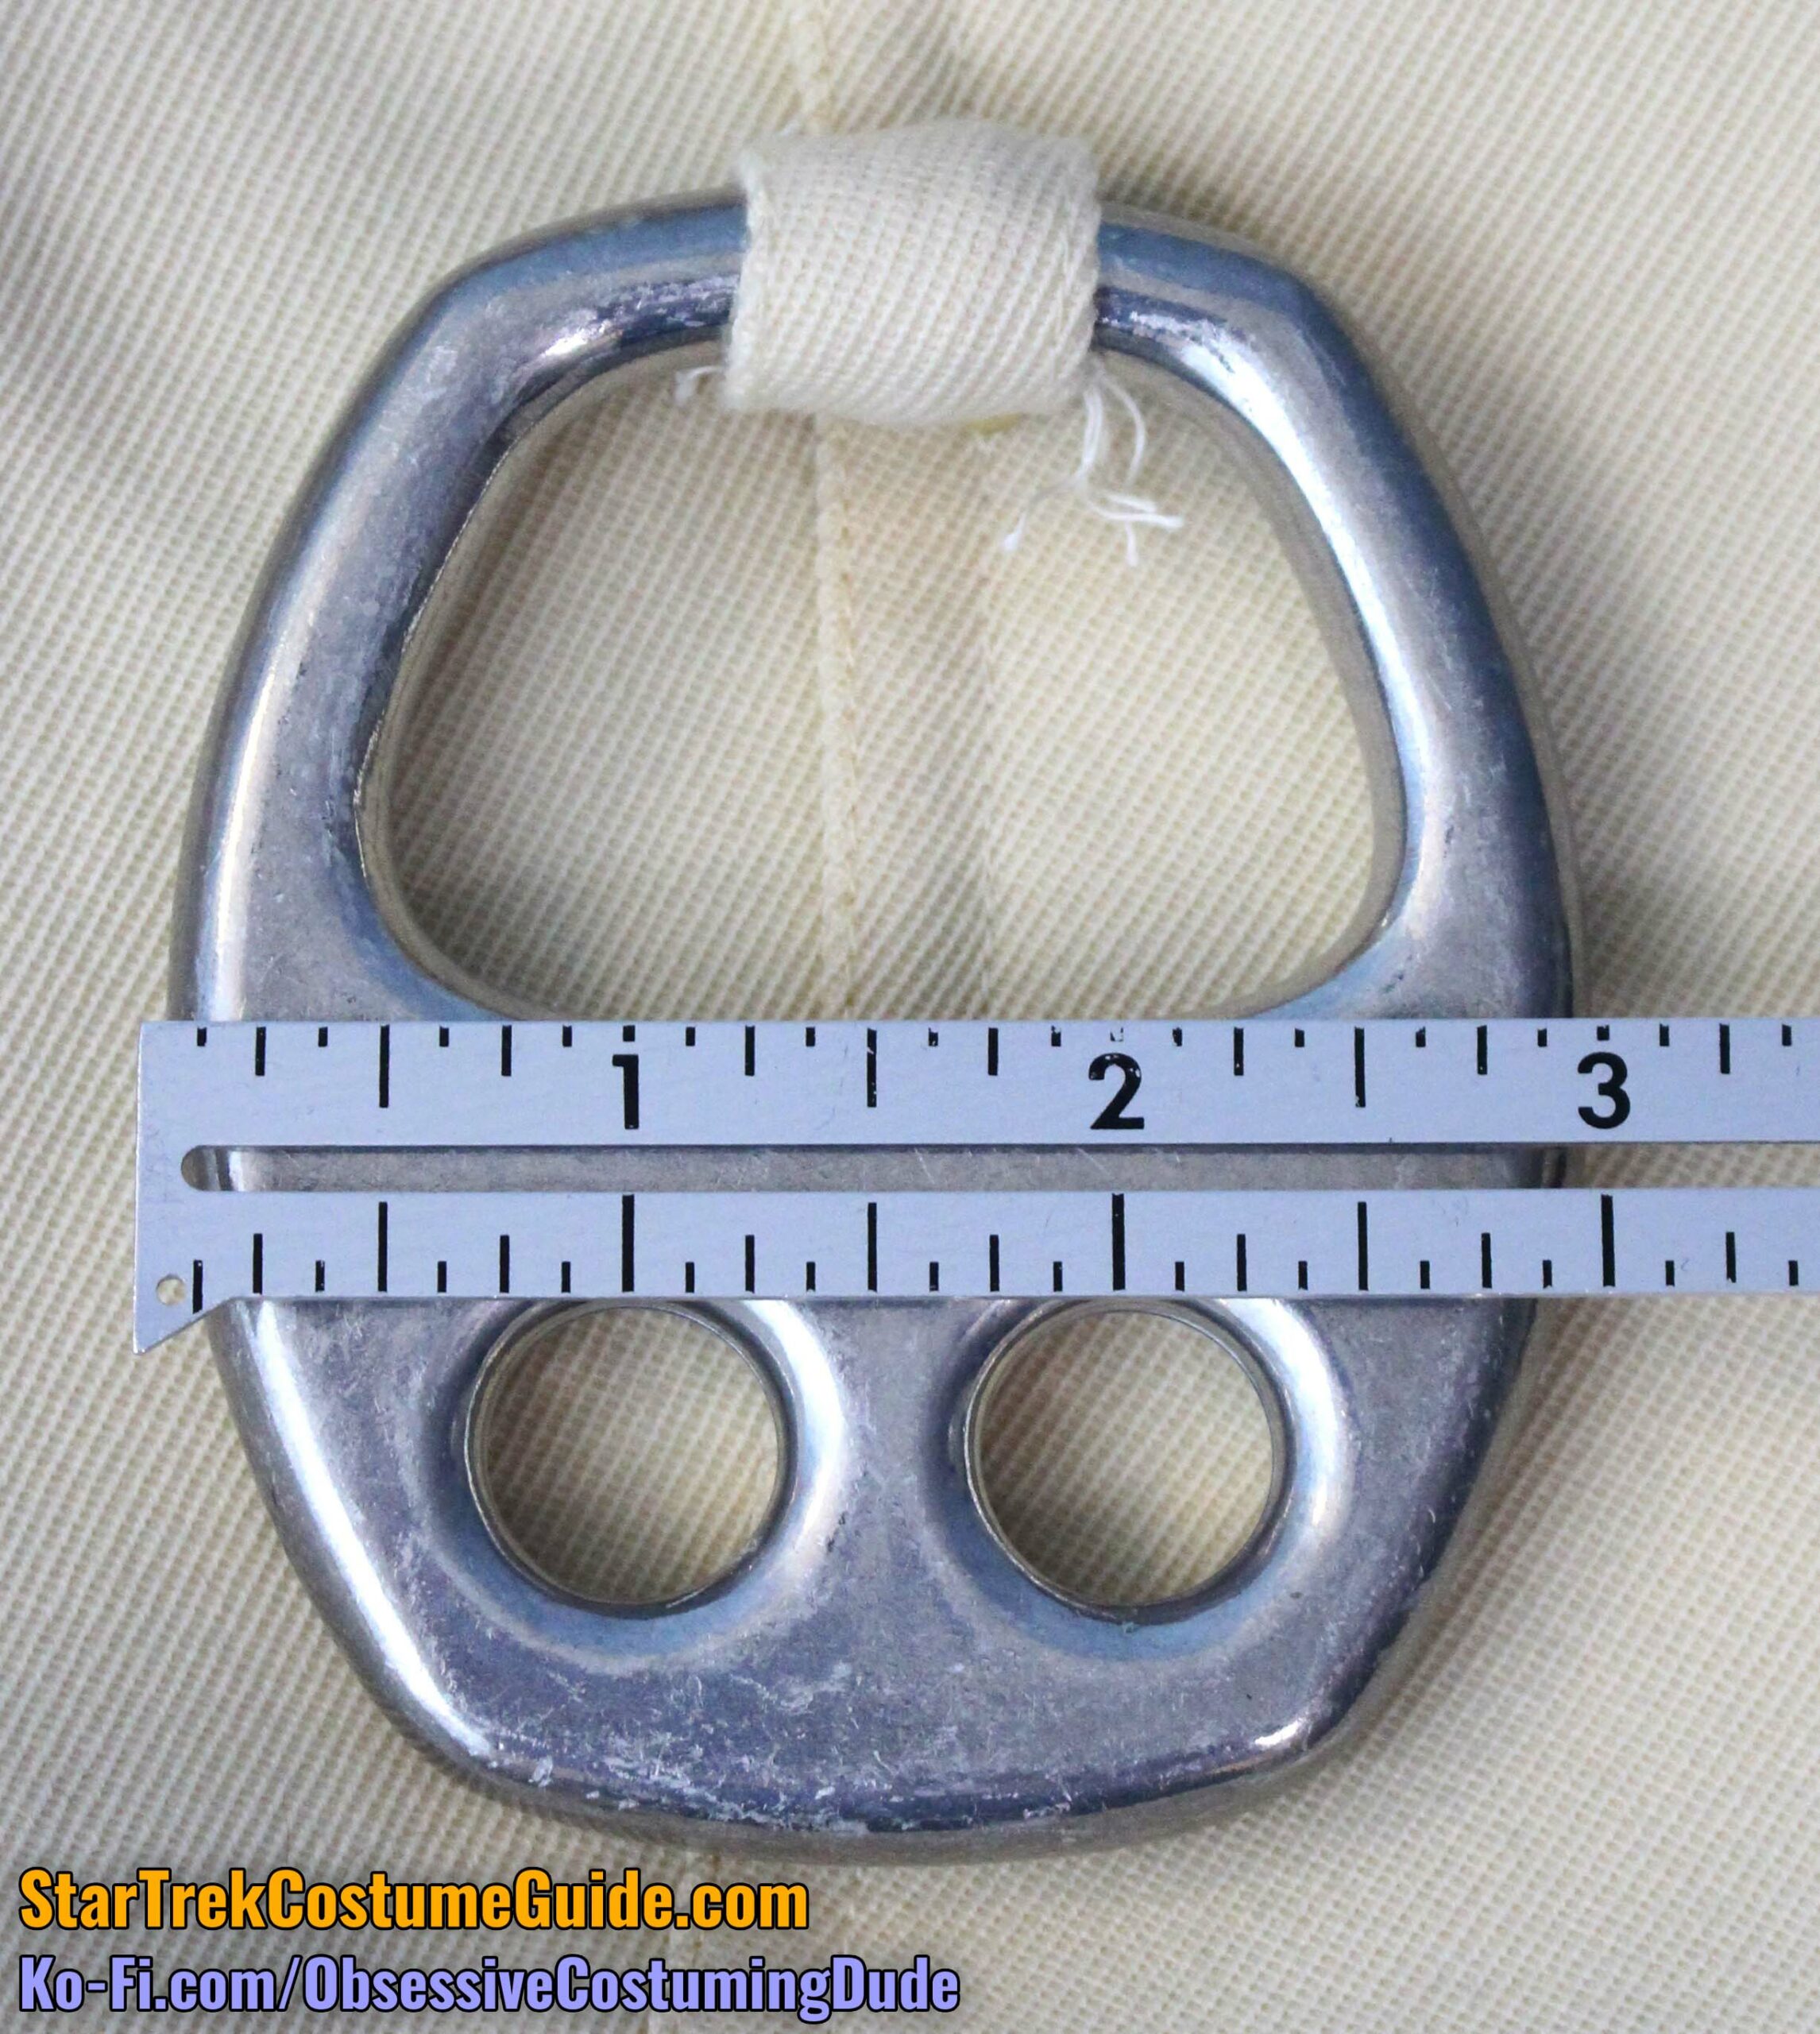
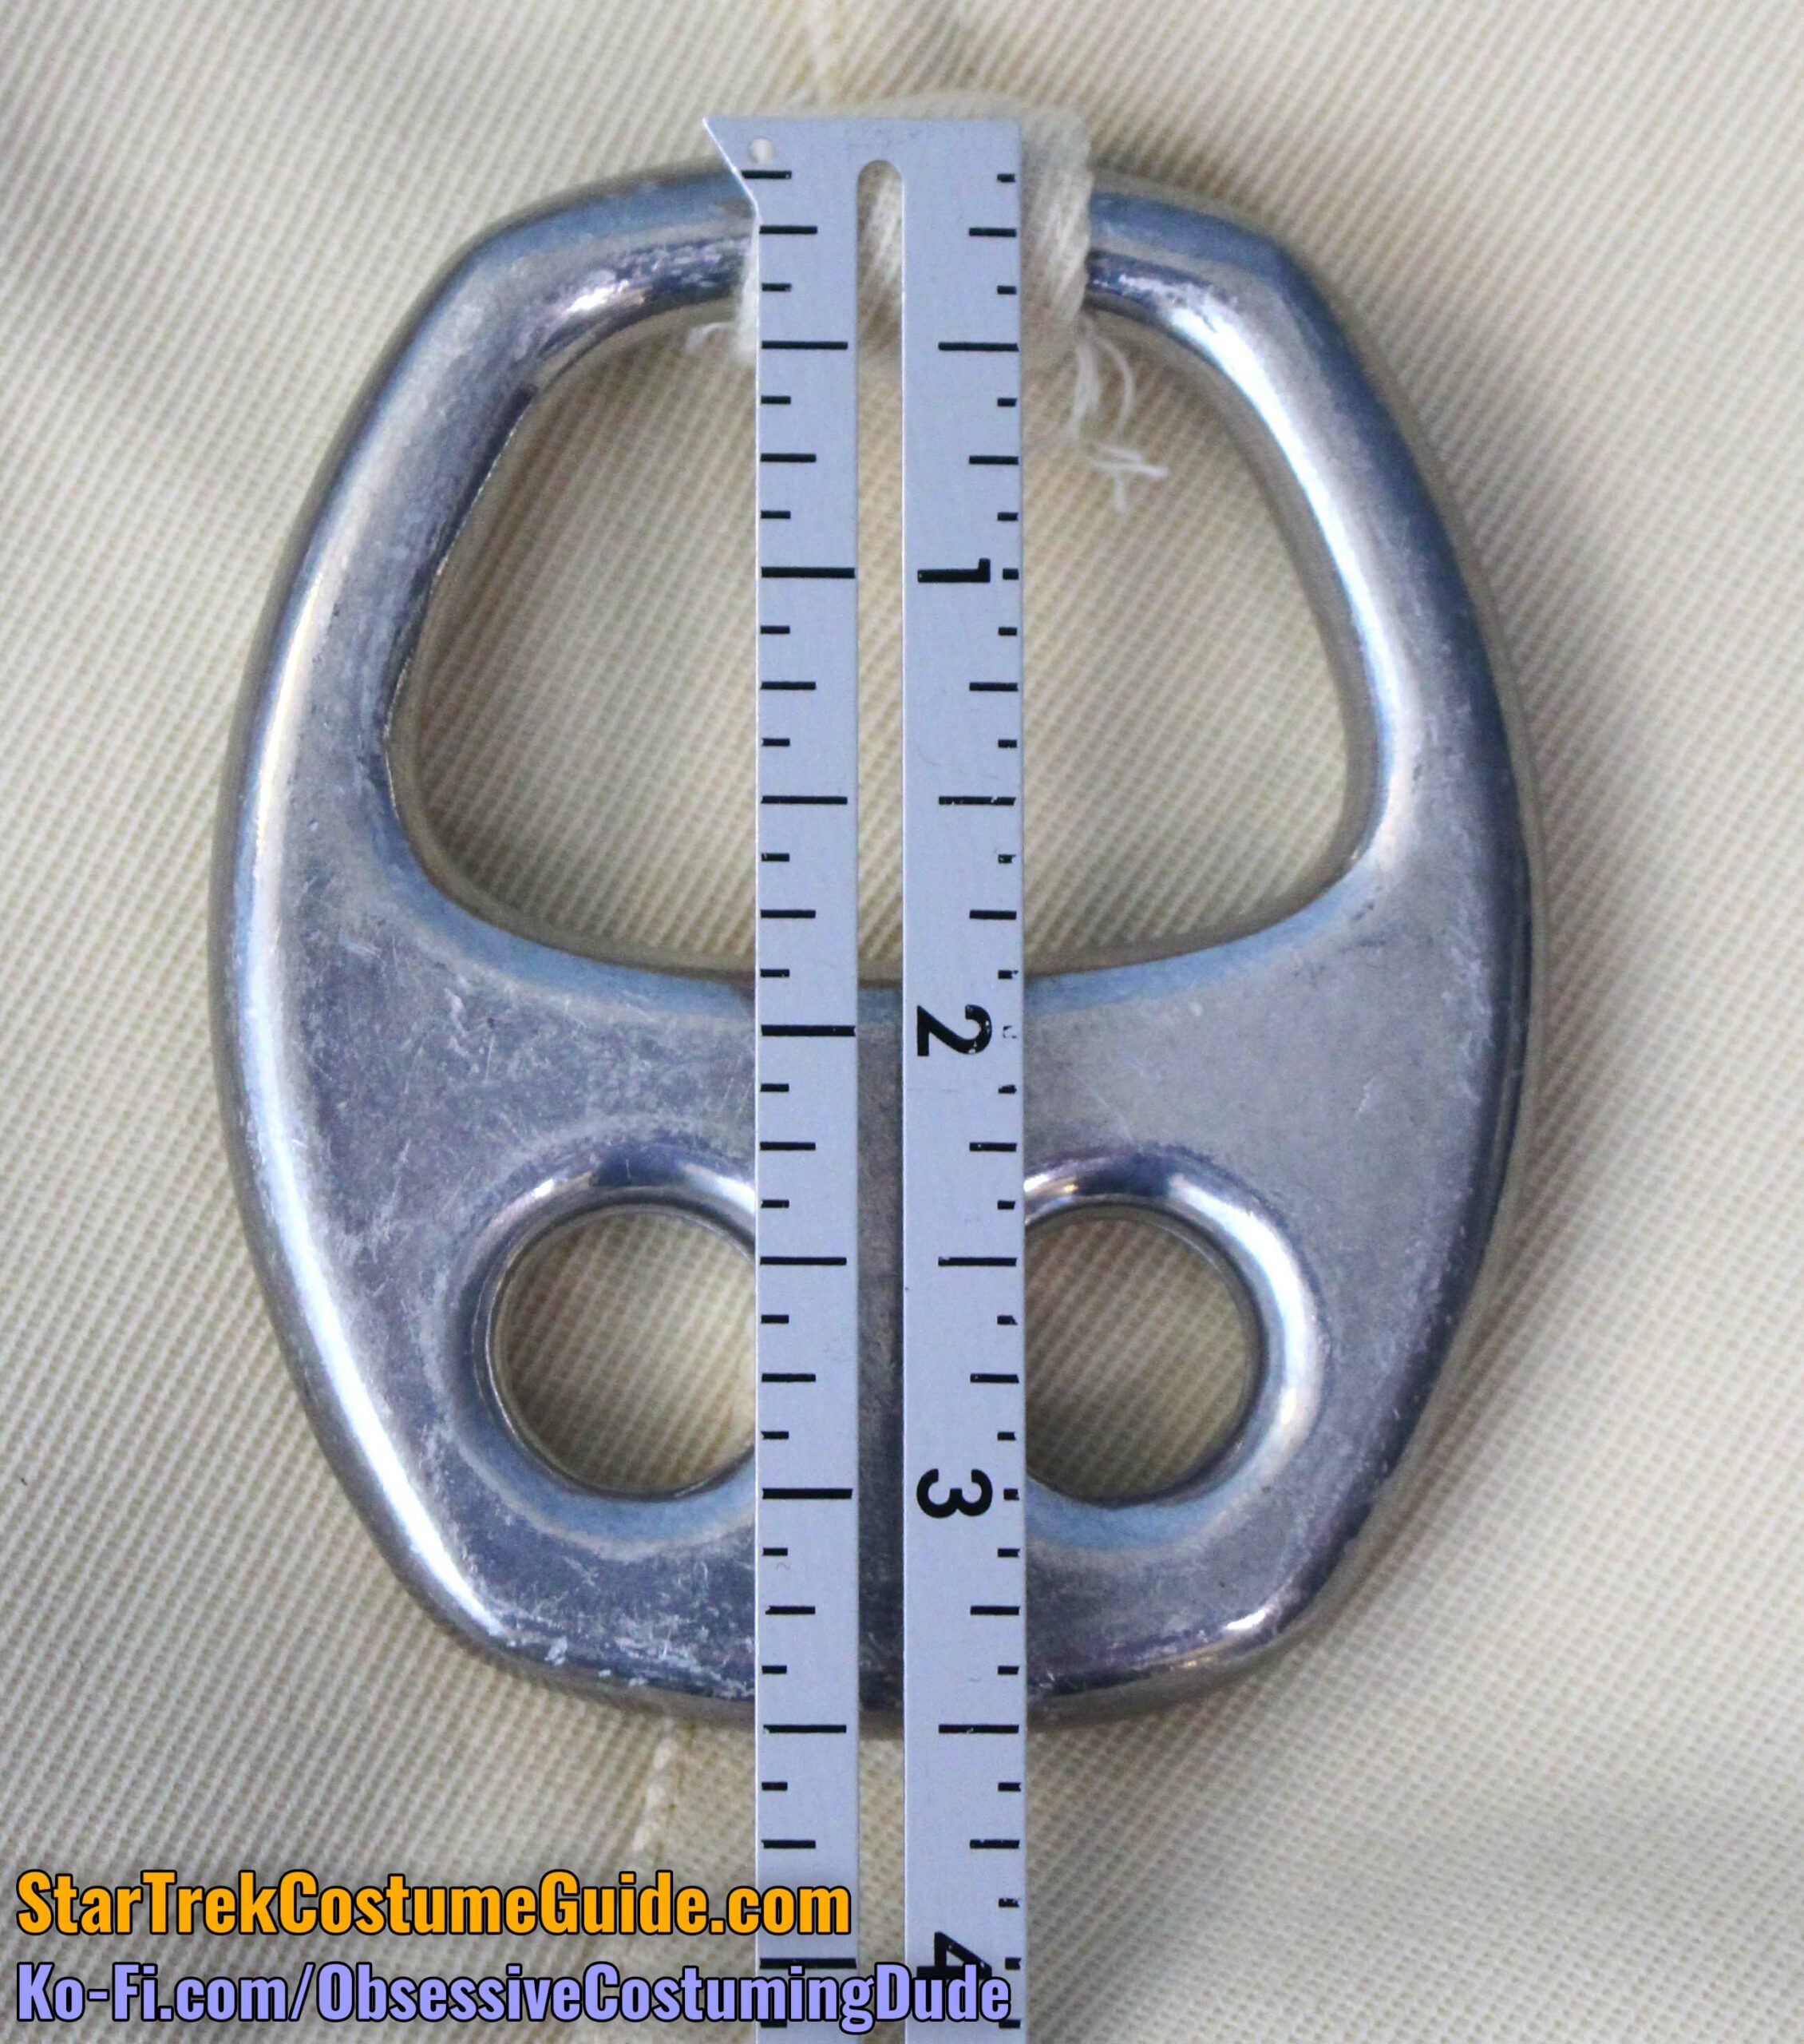
These large buckles were “Edelrid” climbing gear (unfortunately no longer available), 3” wide, and 3 ½” tall.
These buckles were quite heavy, too – approximately 88 grams, or 3.1 ounces.
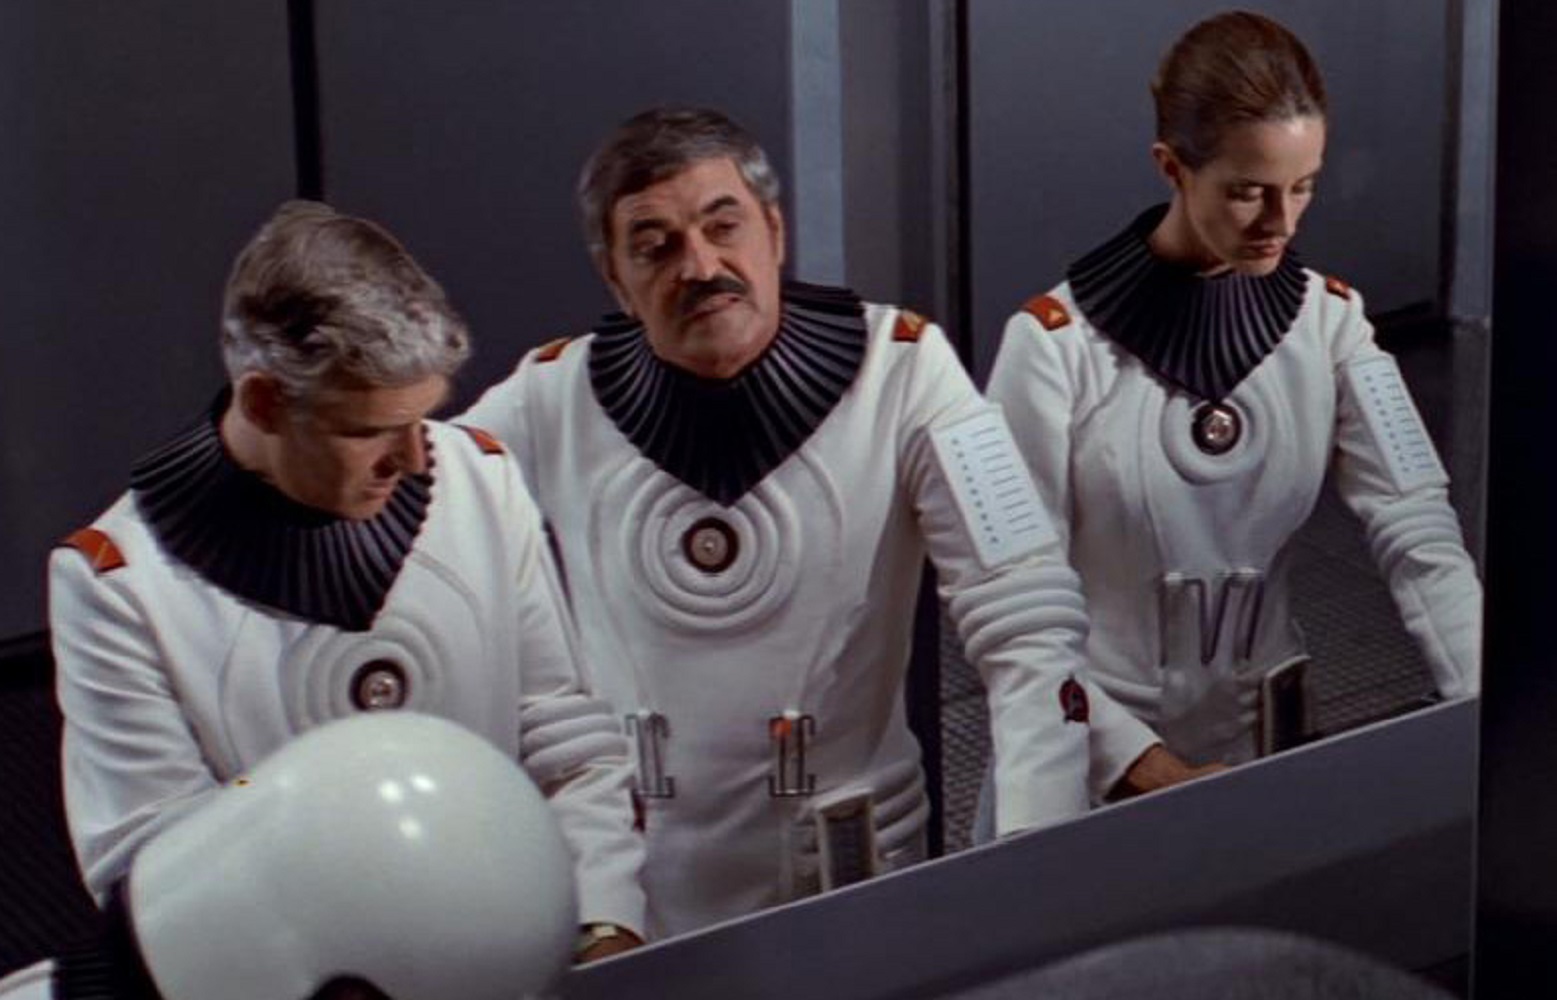
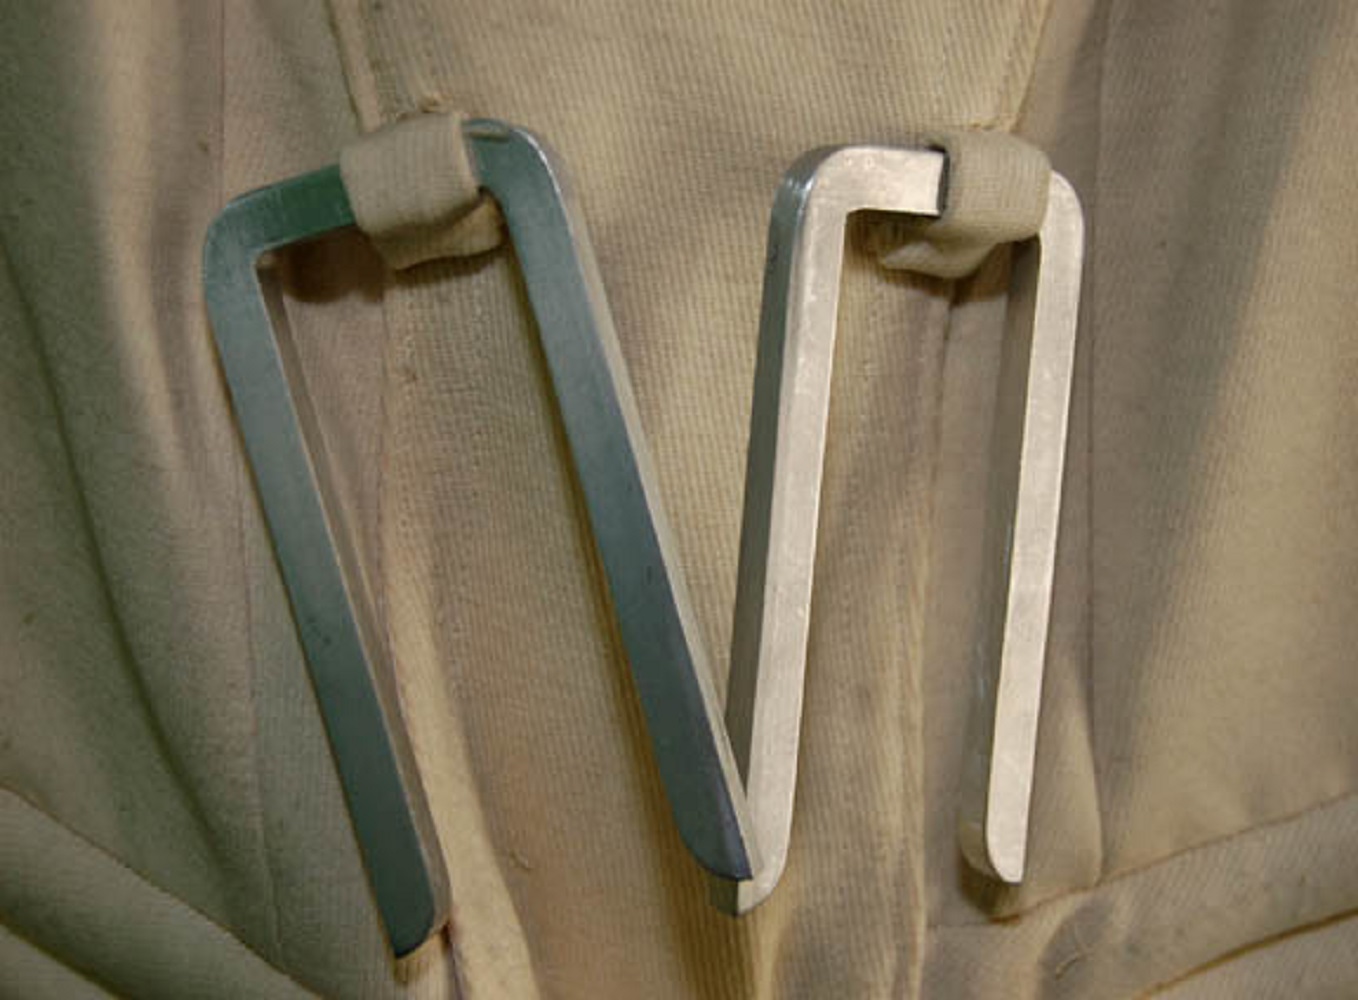
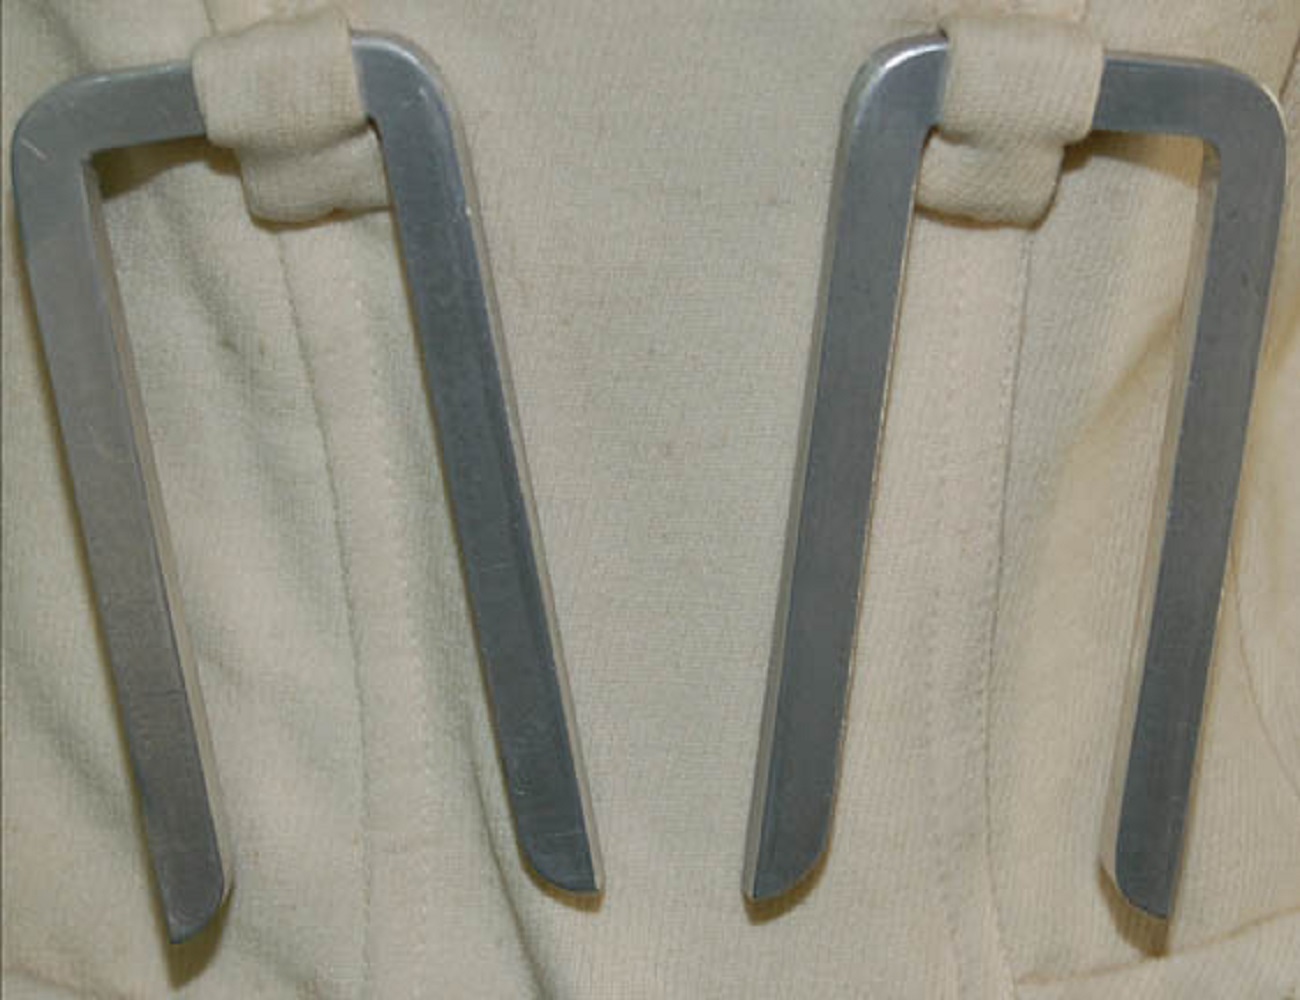
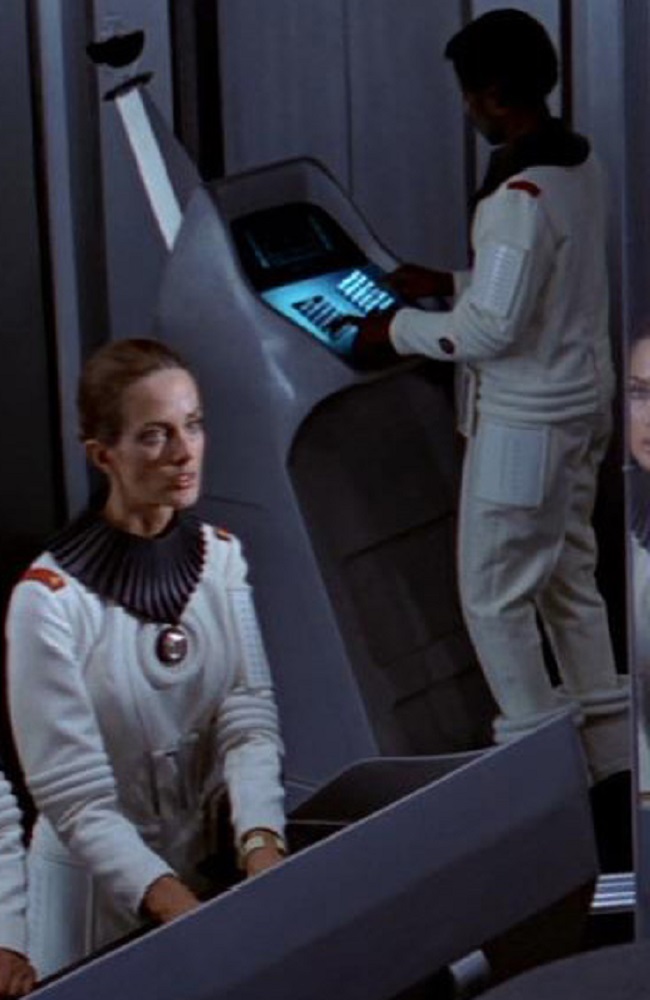
While these were by far the most common buckles (used on these costumes from The Wrath of Khan onward), there were at least a couple different styles of attachments used in The Motion Picture.
Here you can see both Scotty and the lady beside him wearing different (but similarly-positioned) attachments.
And here are some close-up auction photos of the attachments like the lady wore:
For some reason, The Undiscovered Country costume designer Dodie Shepard chose to remove all of the buckles from the engineering radiation suits in that movie.
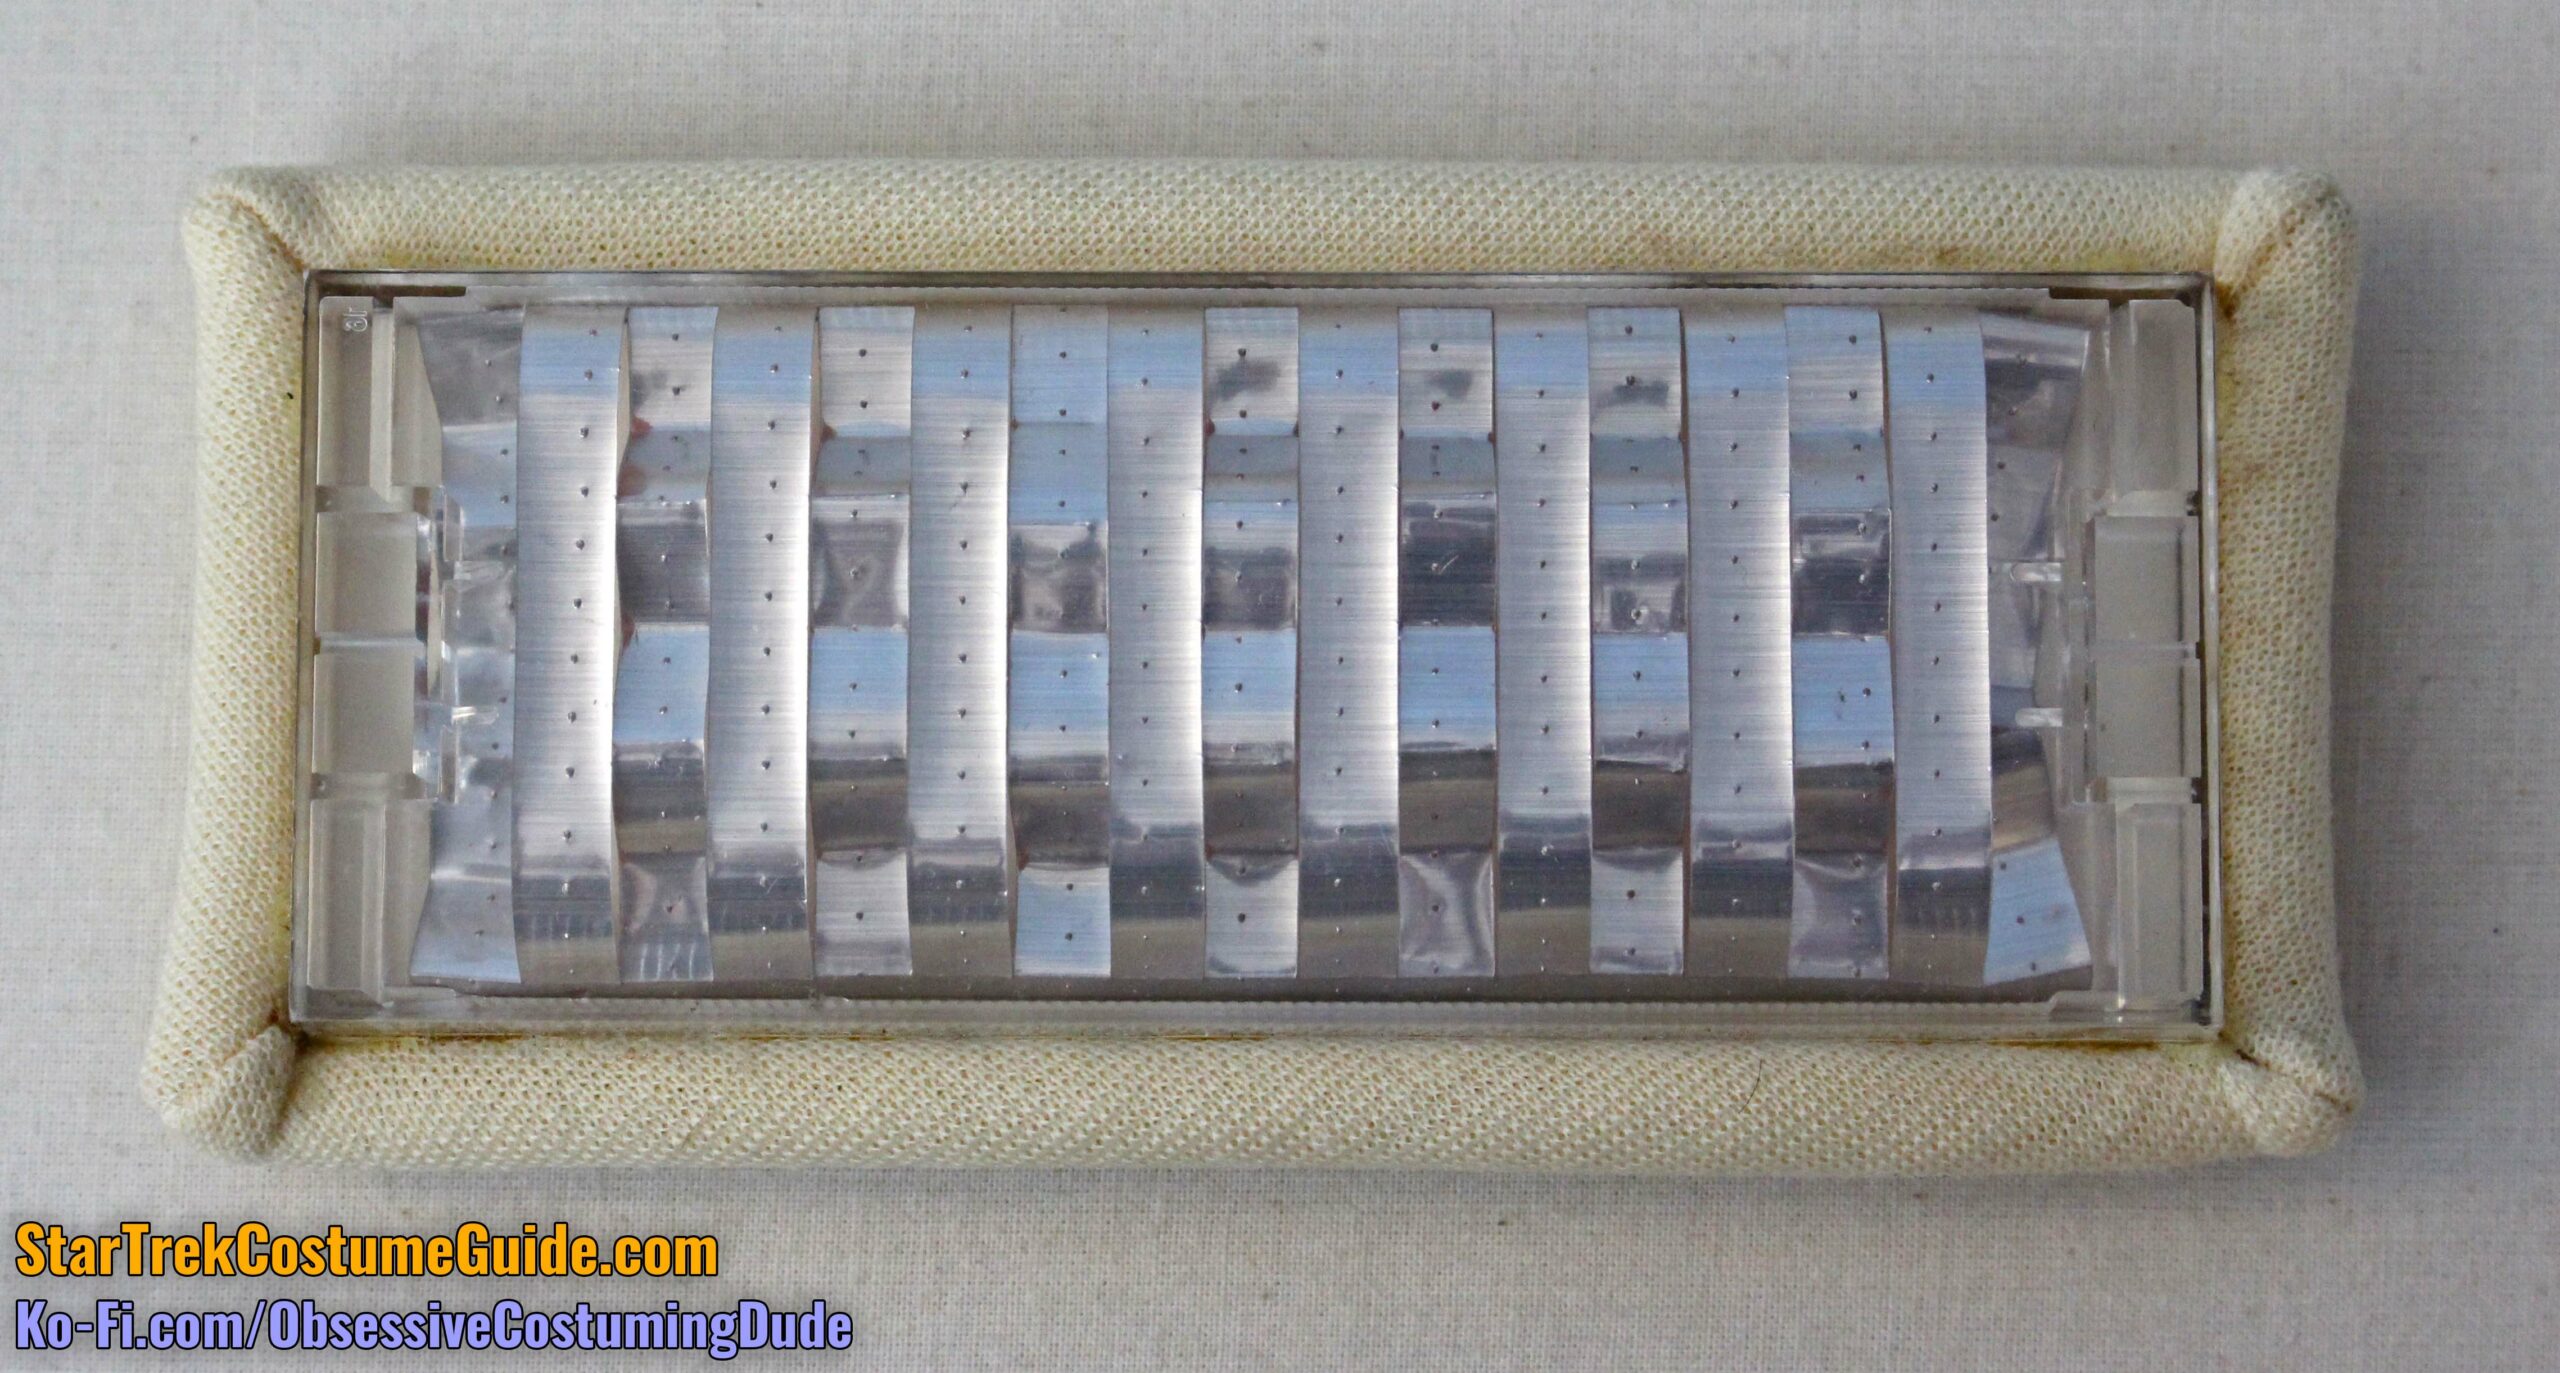
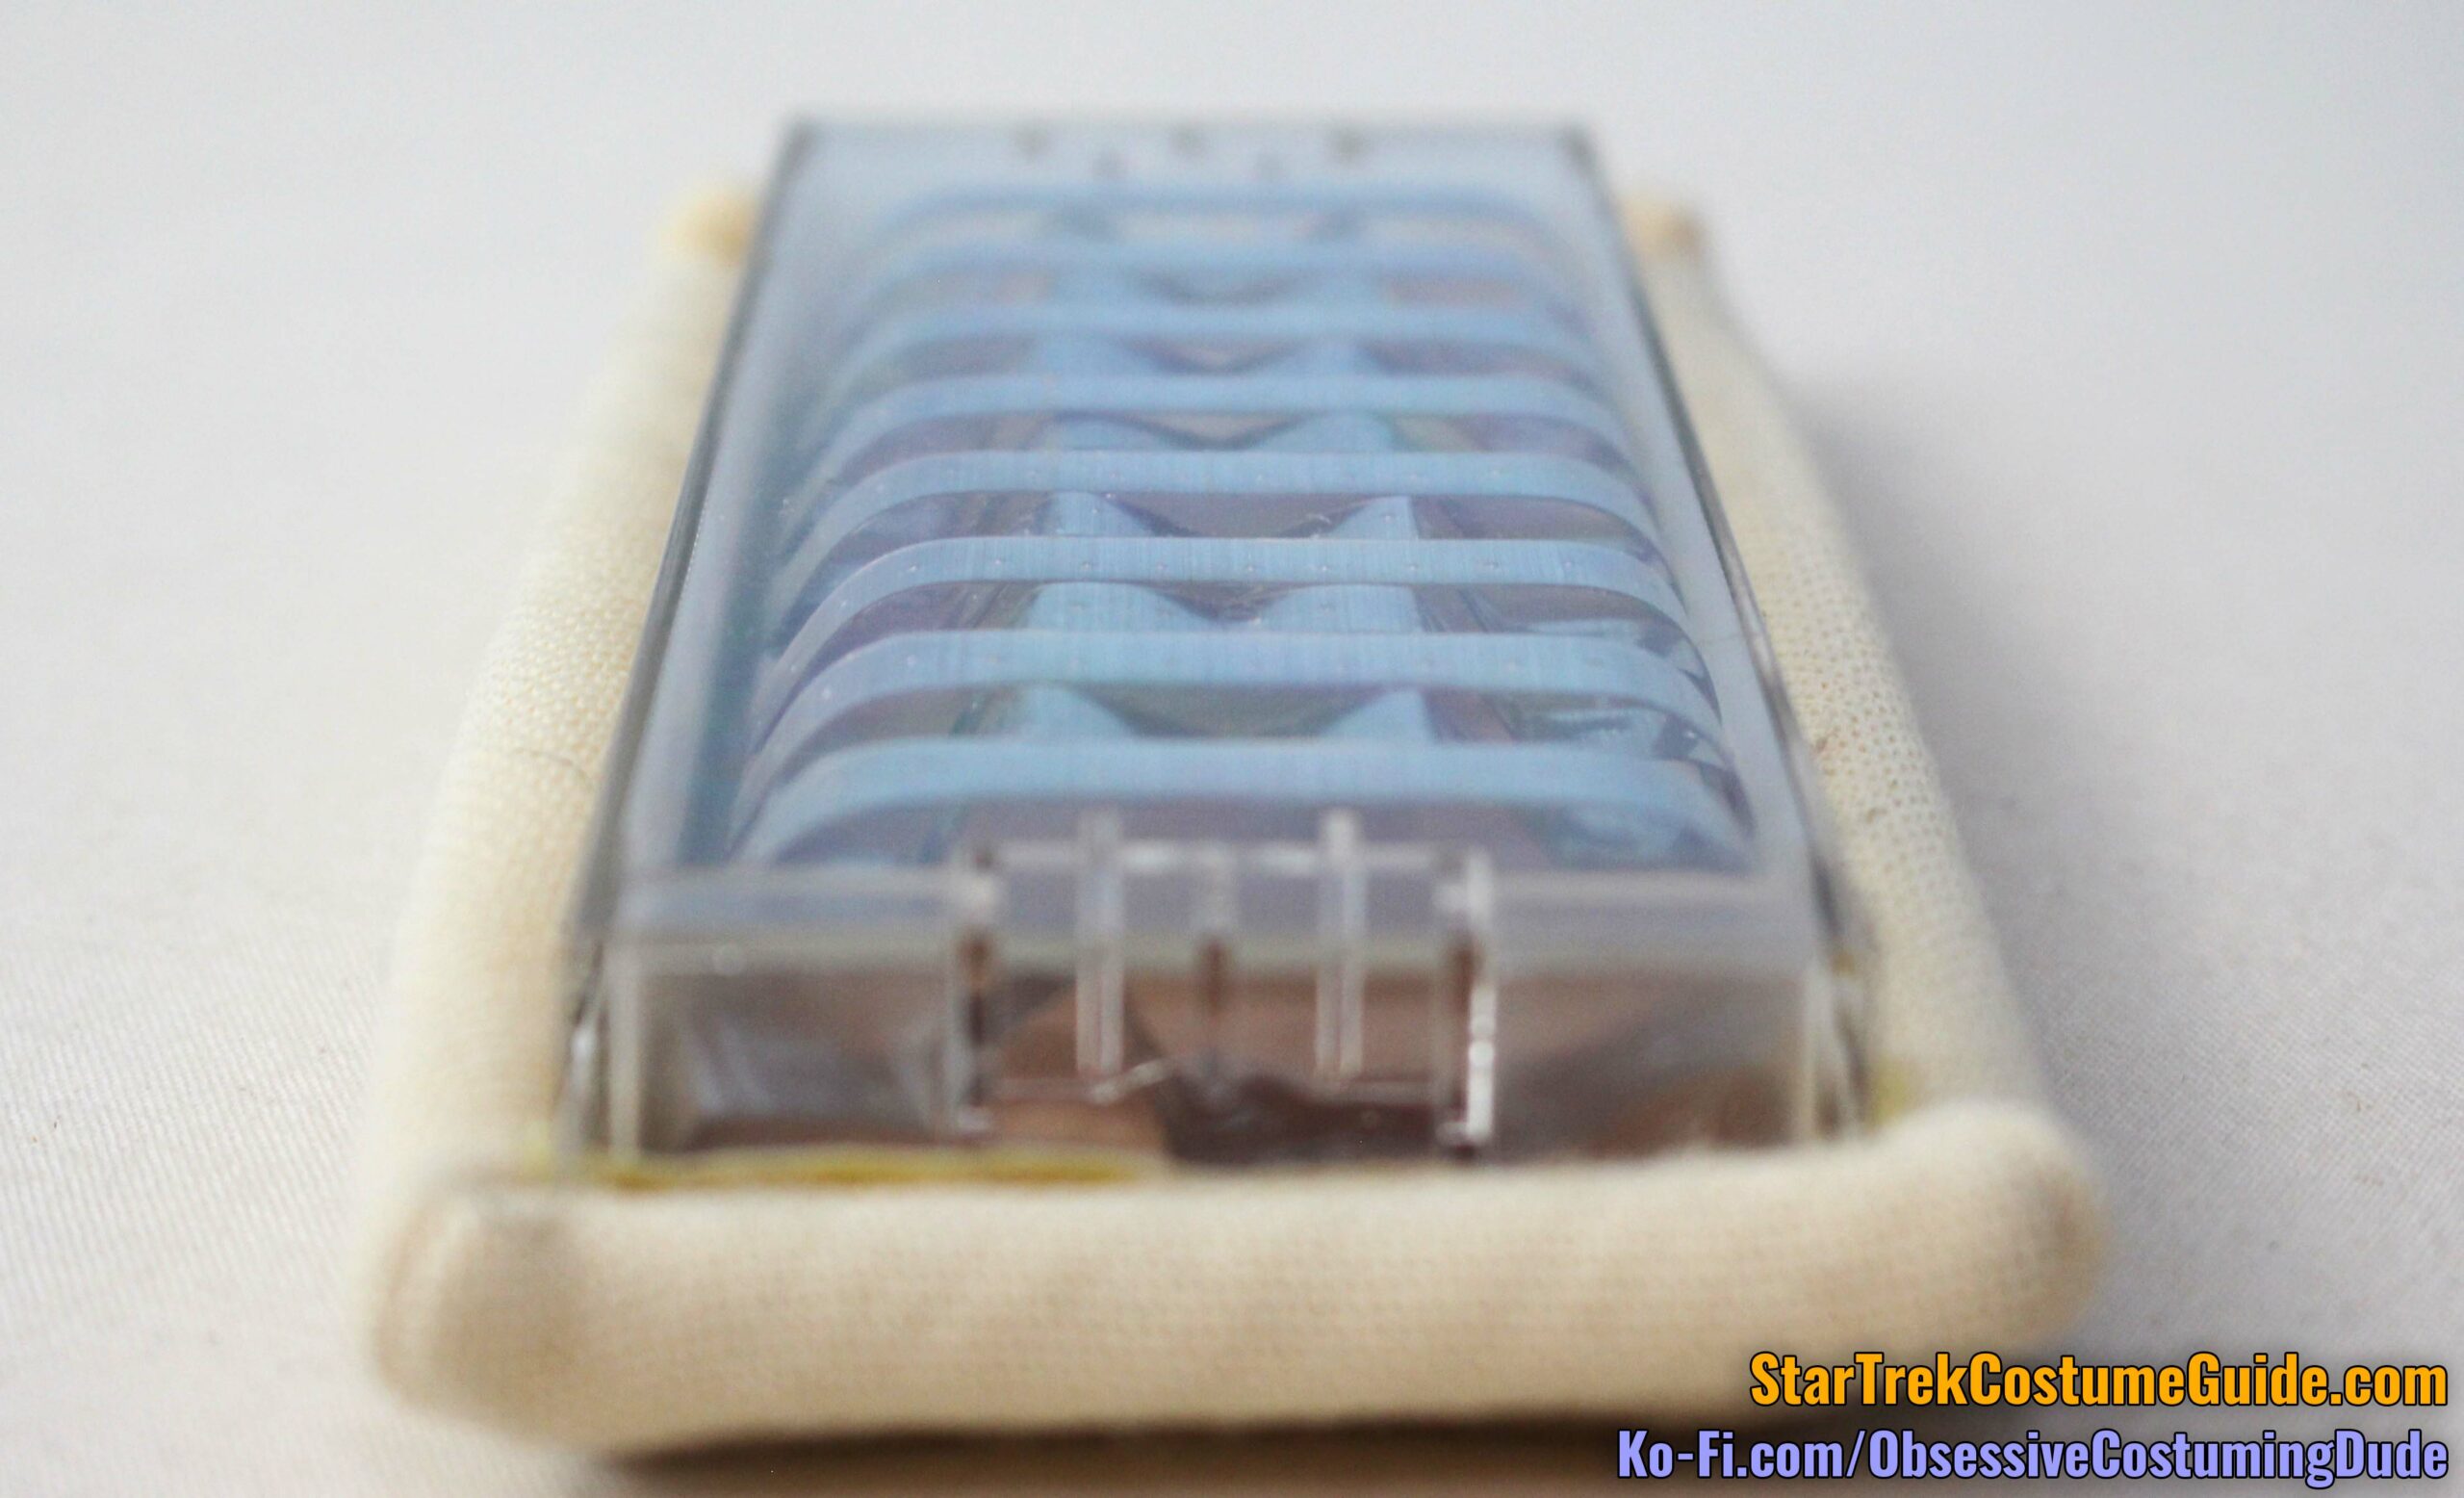
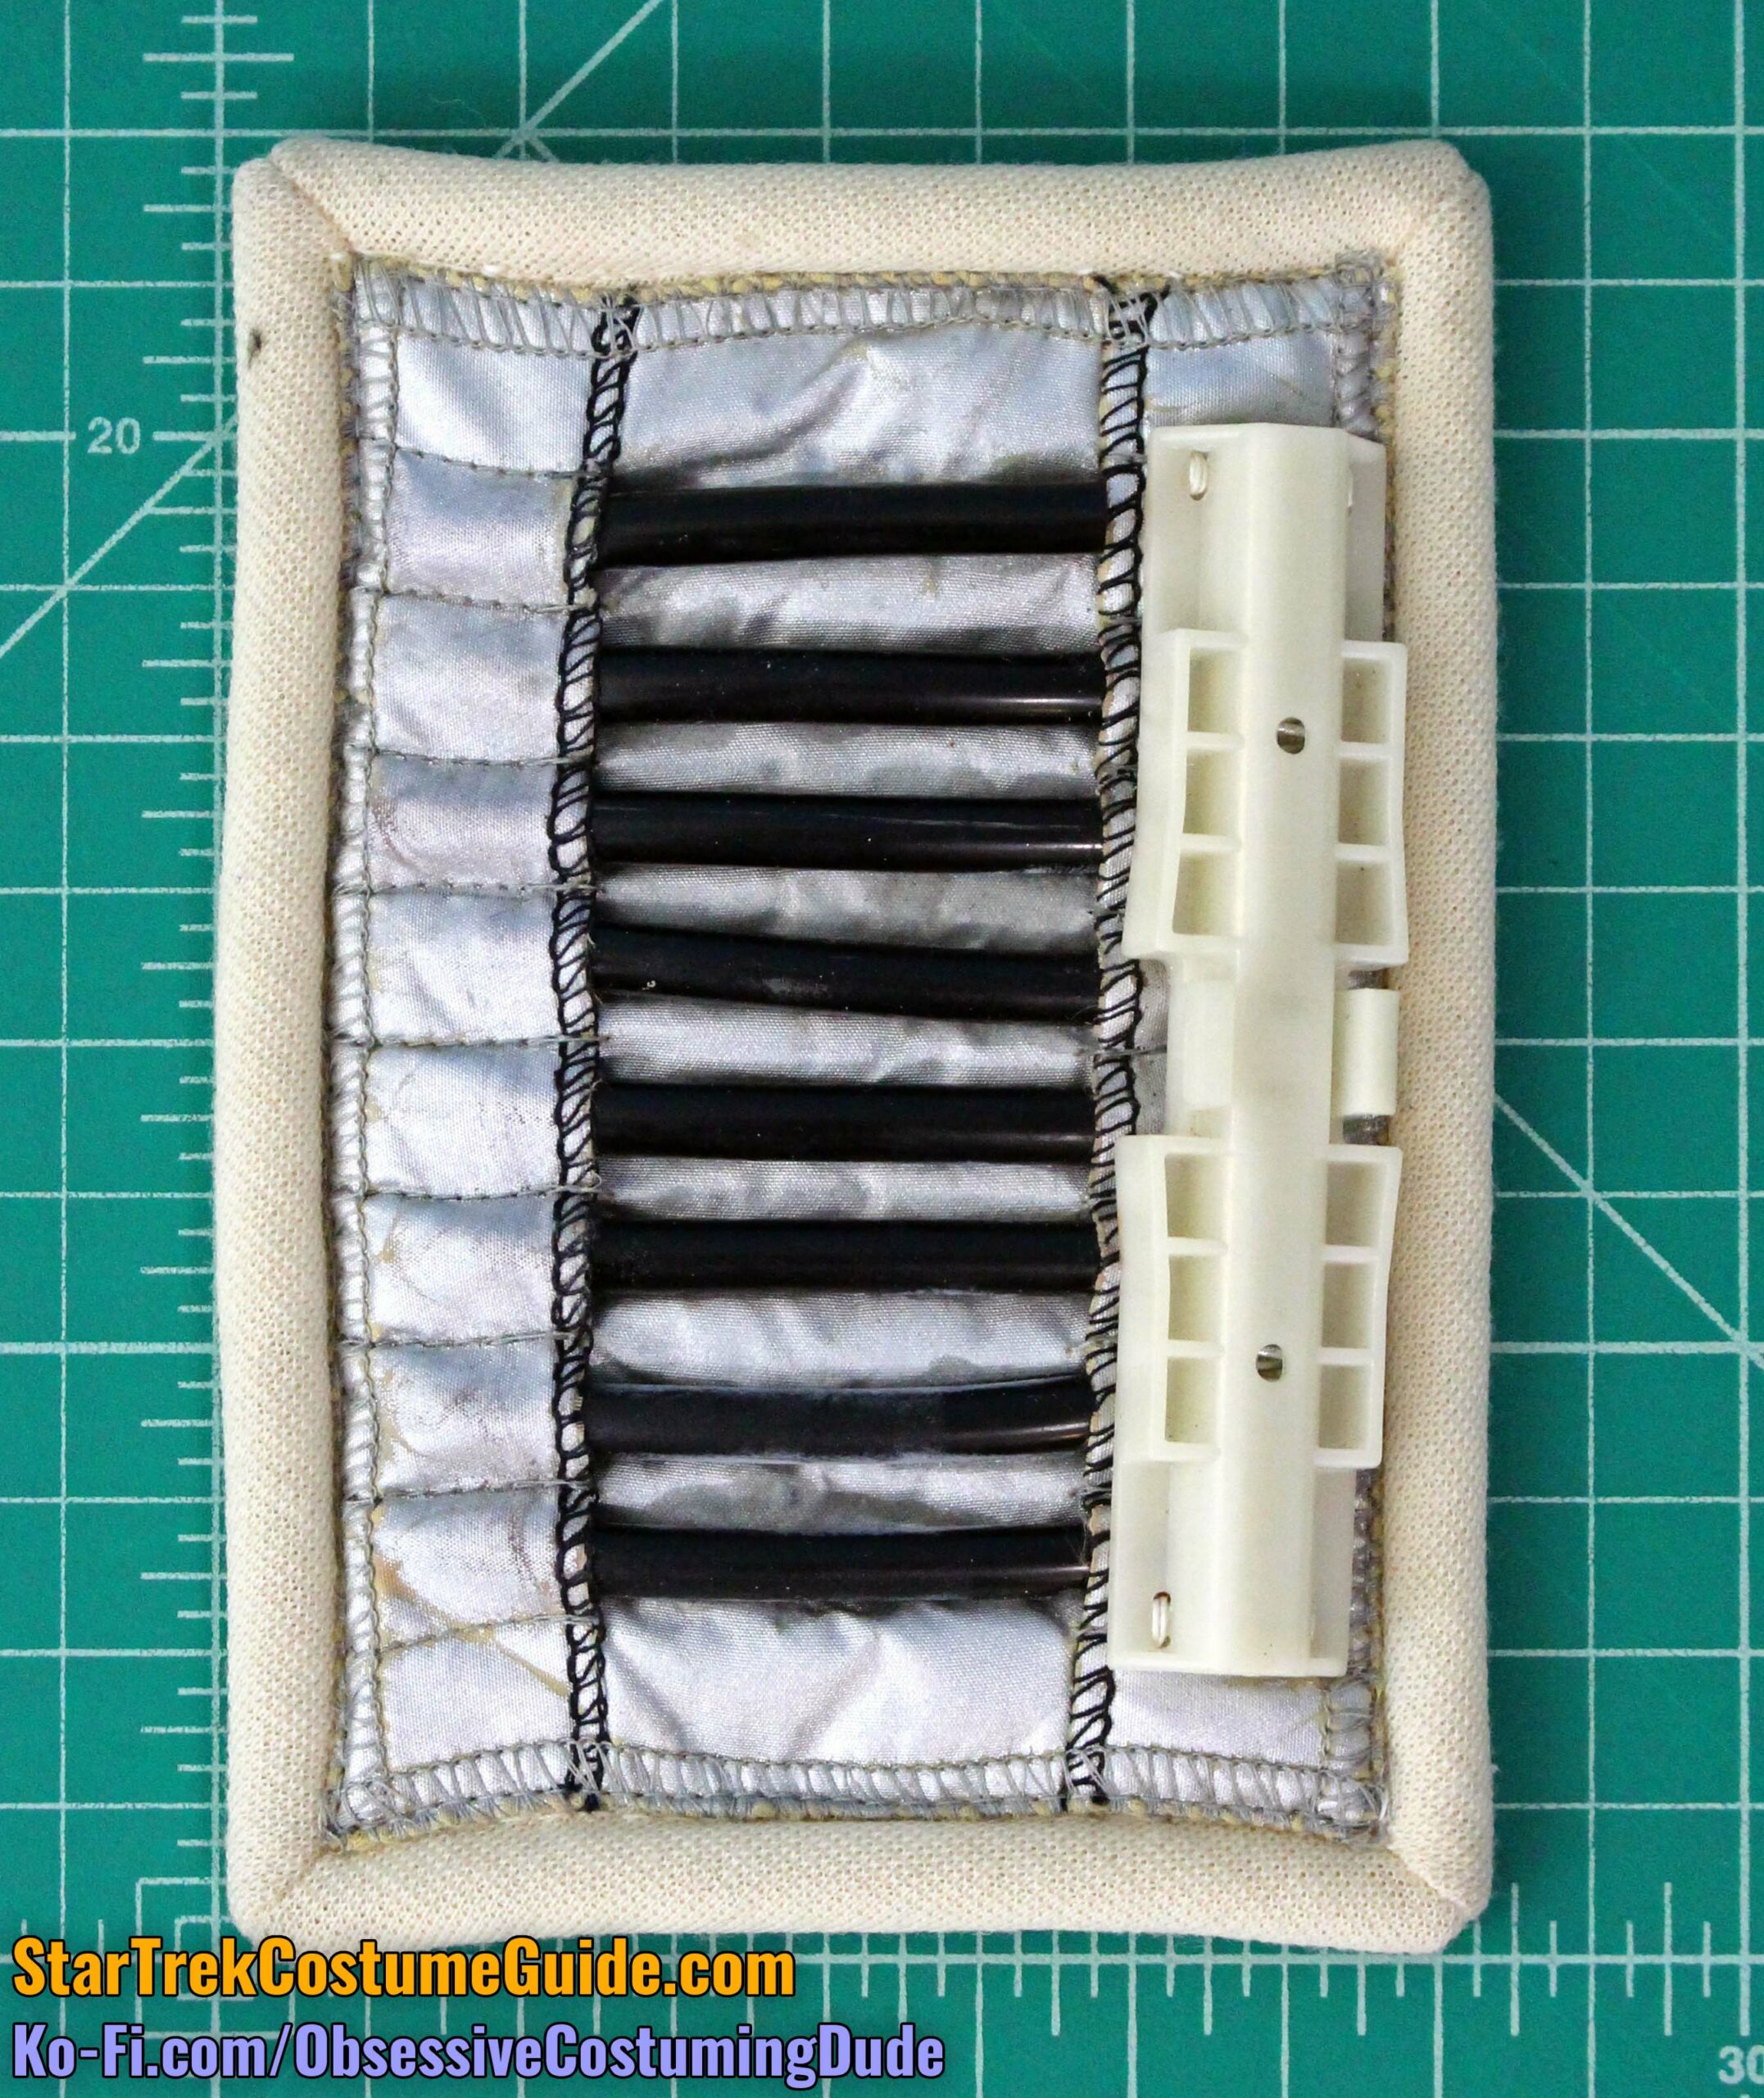
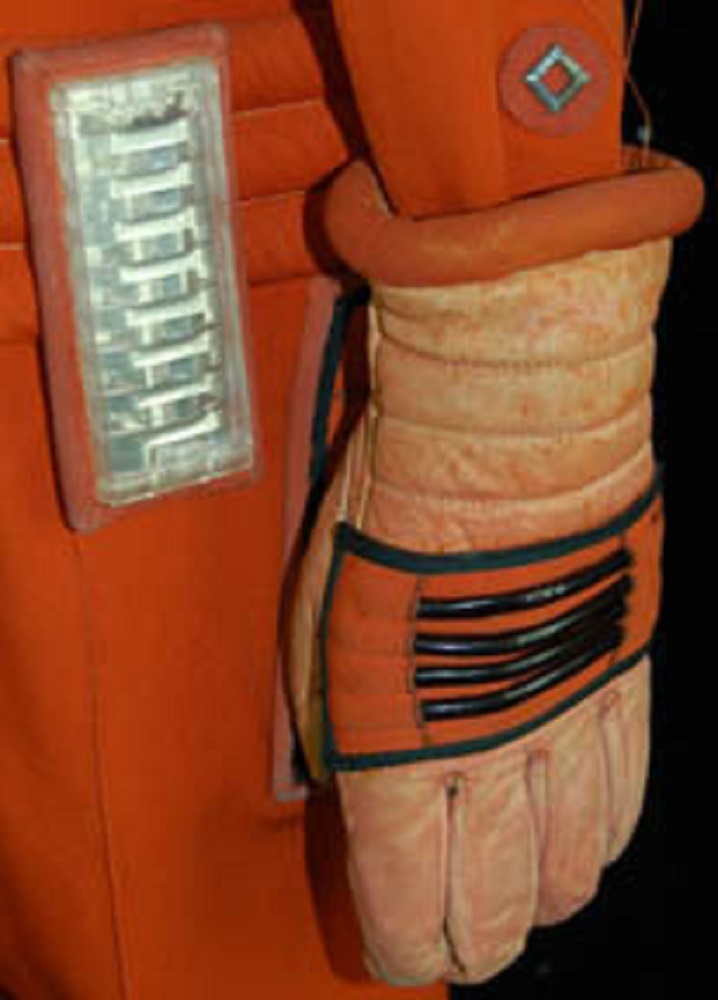
HIP BOX
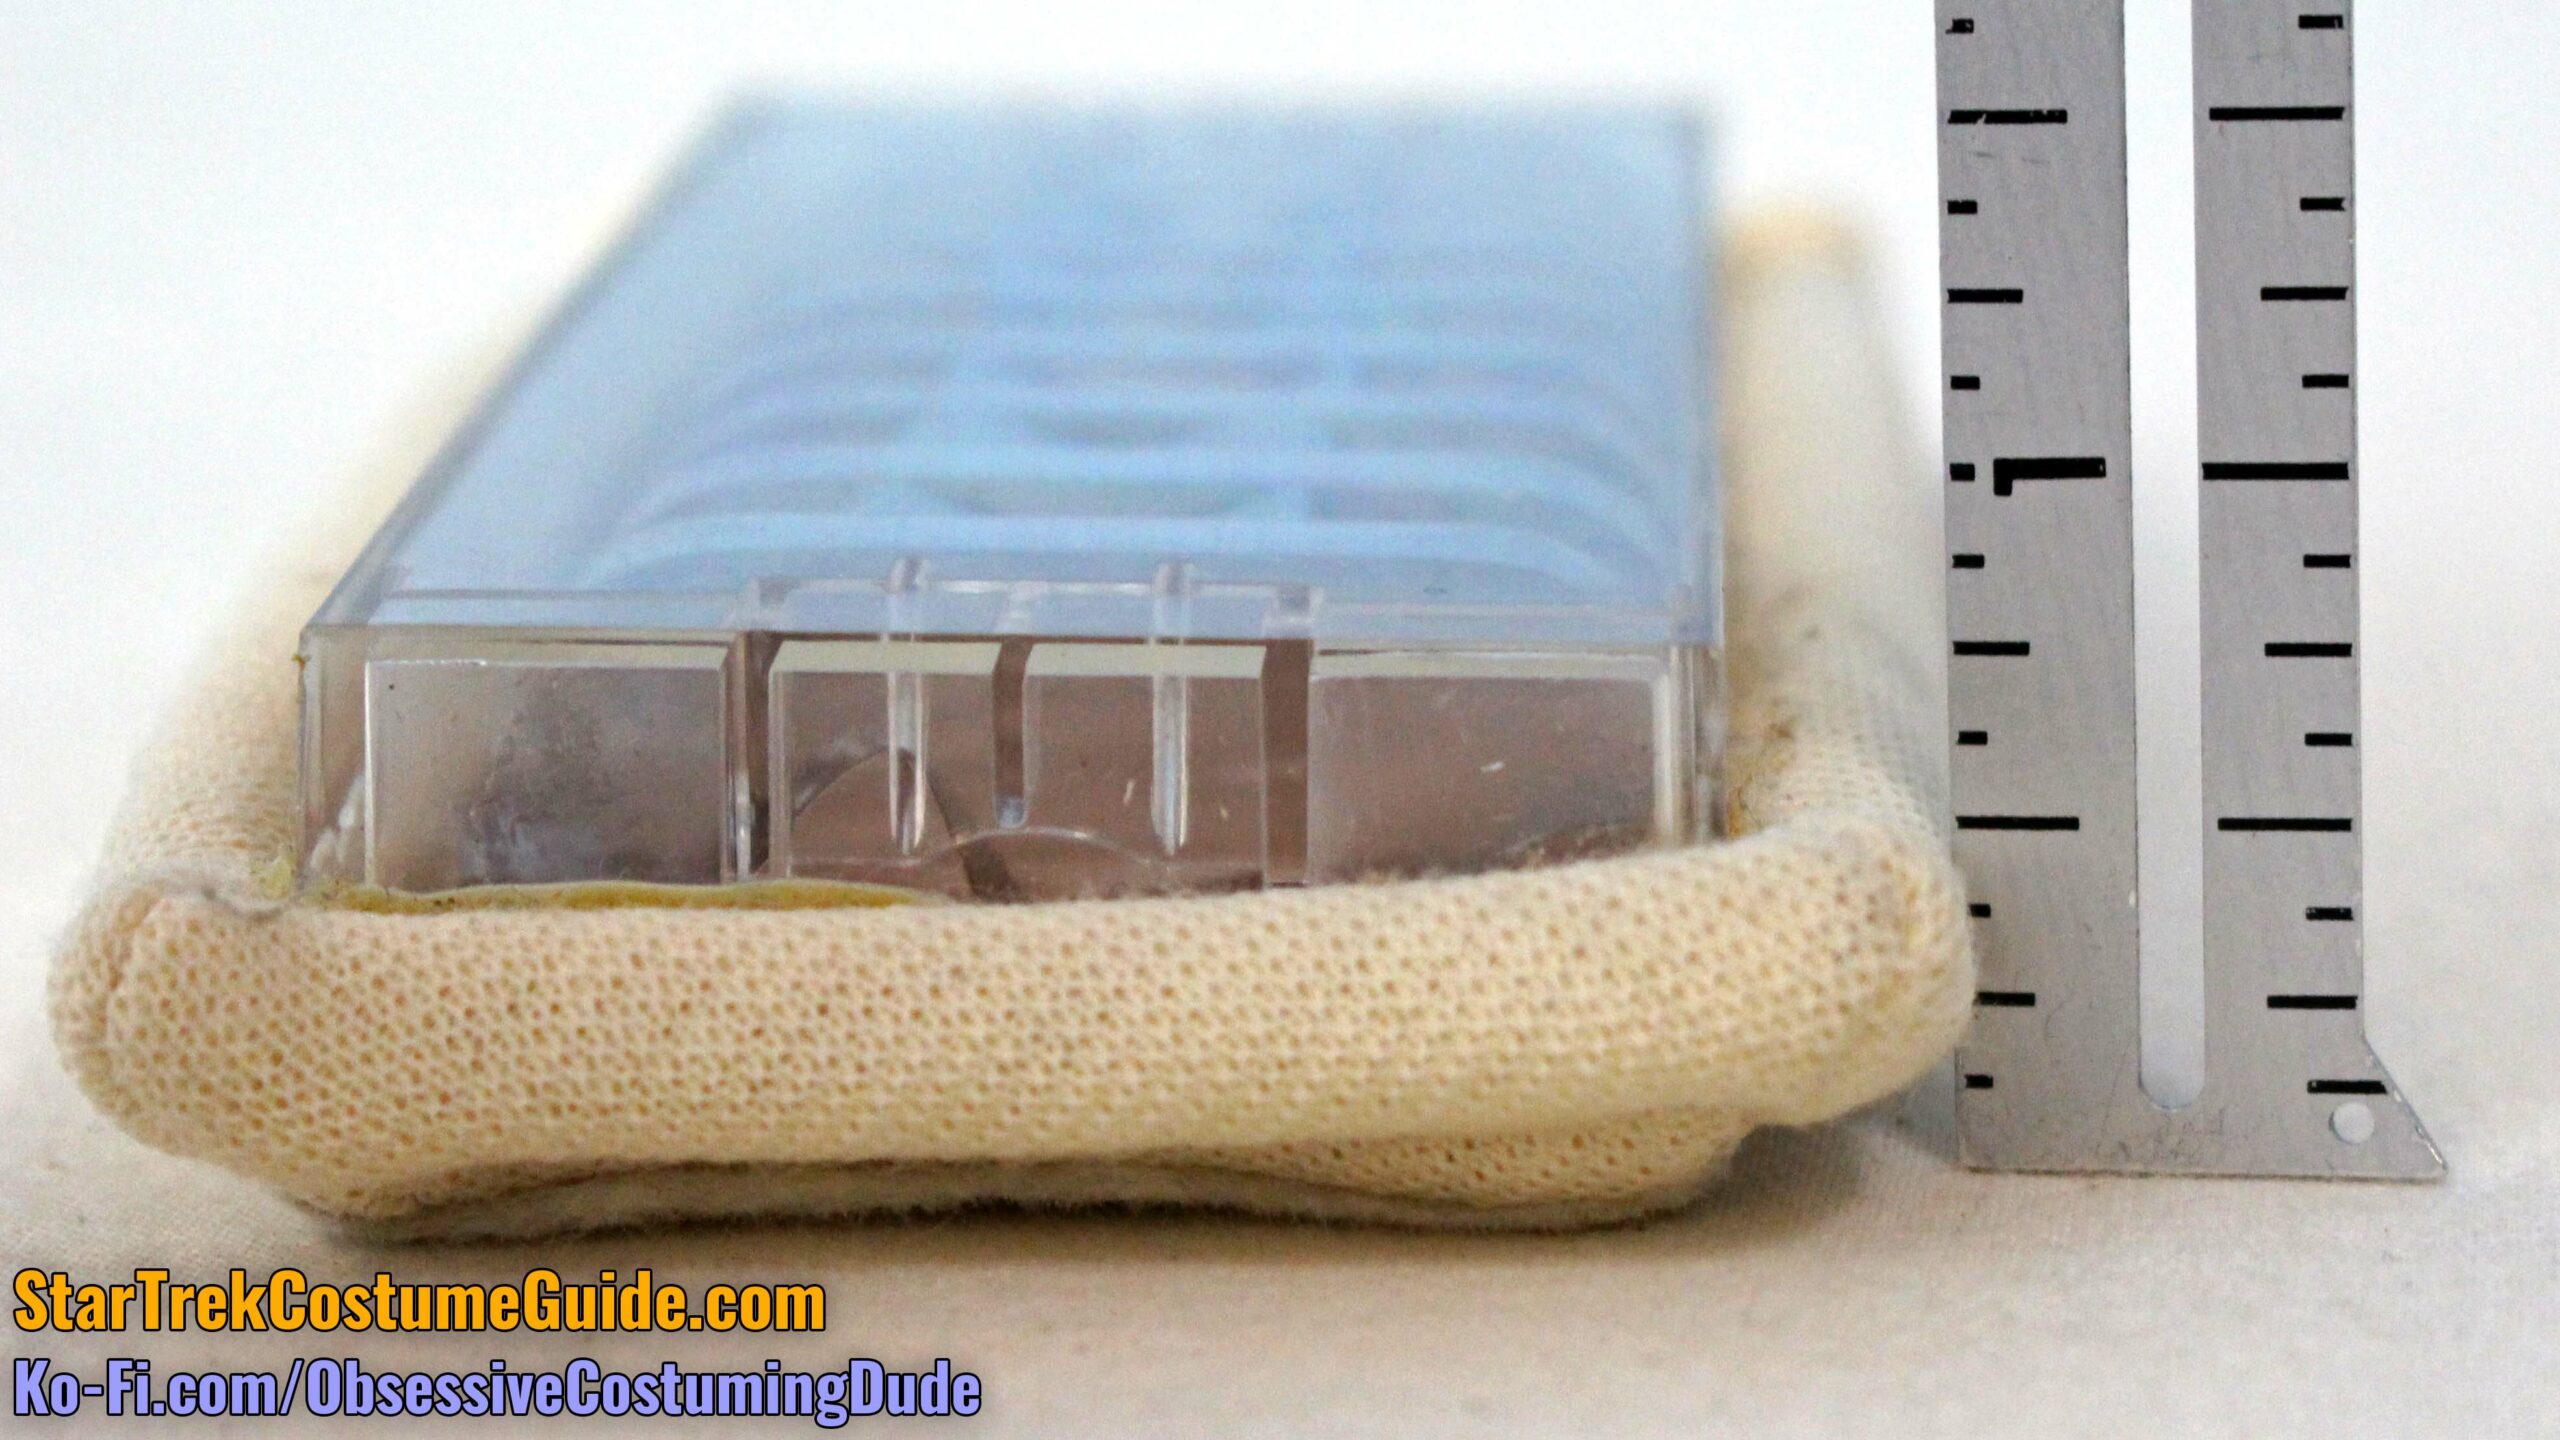
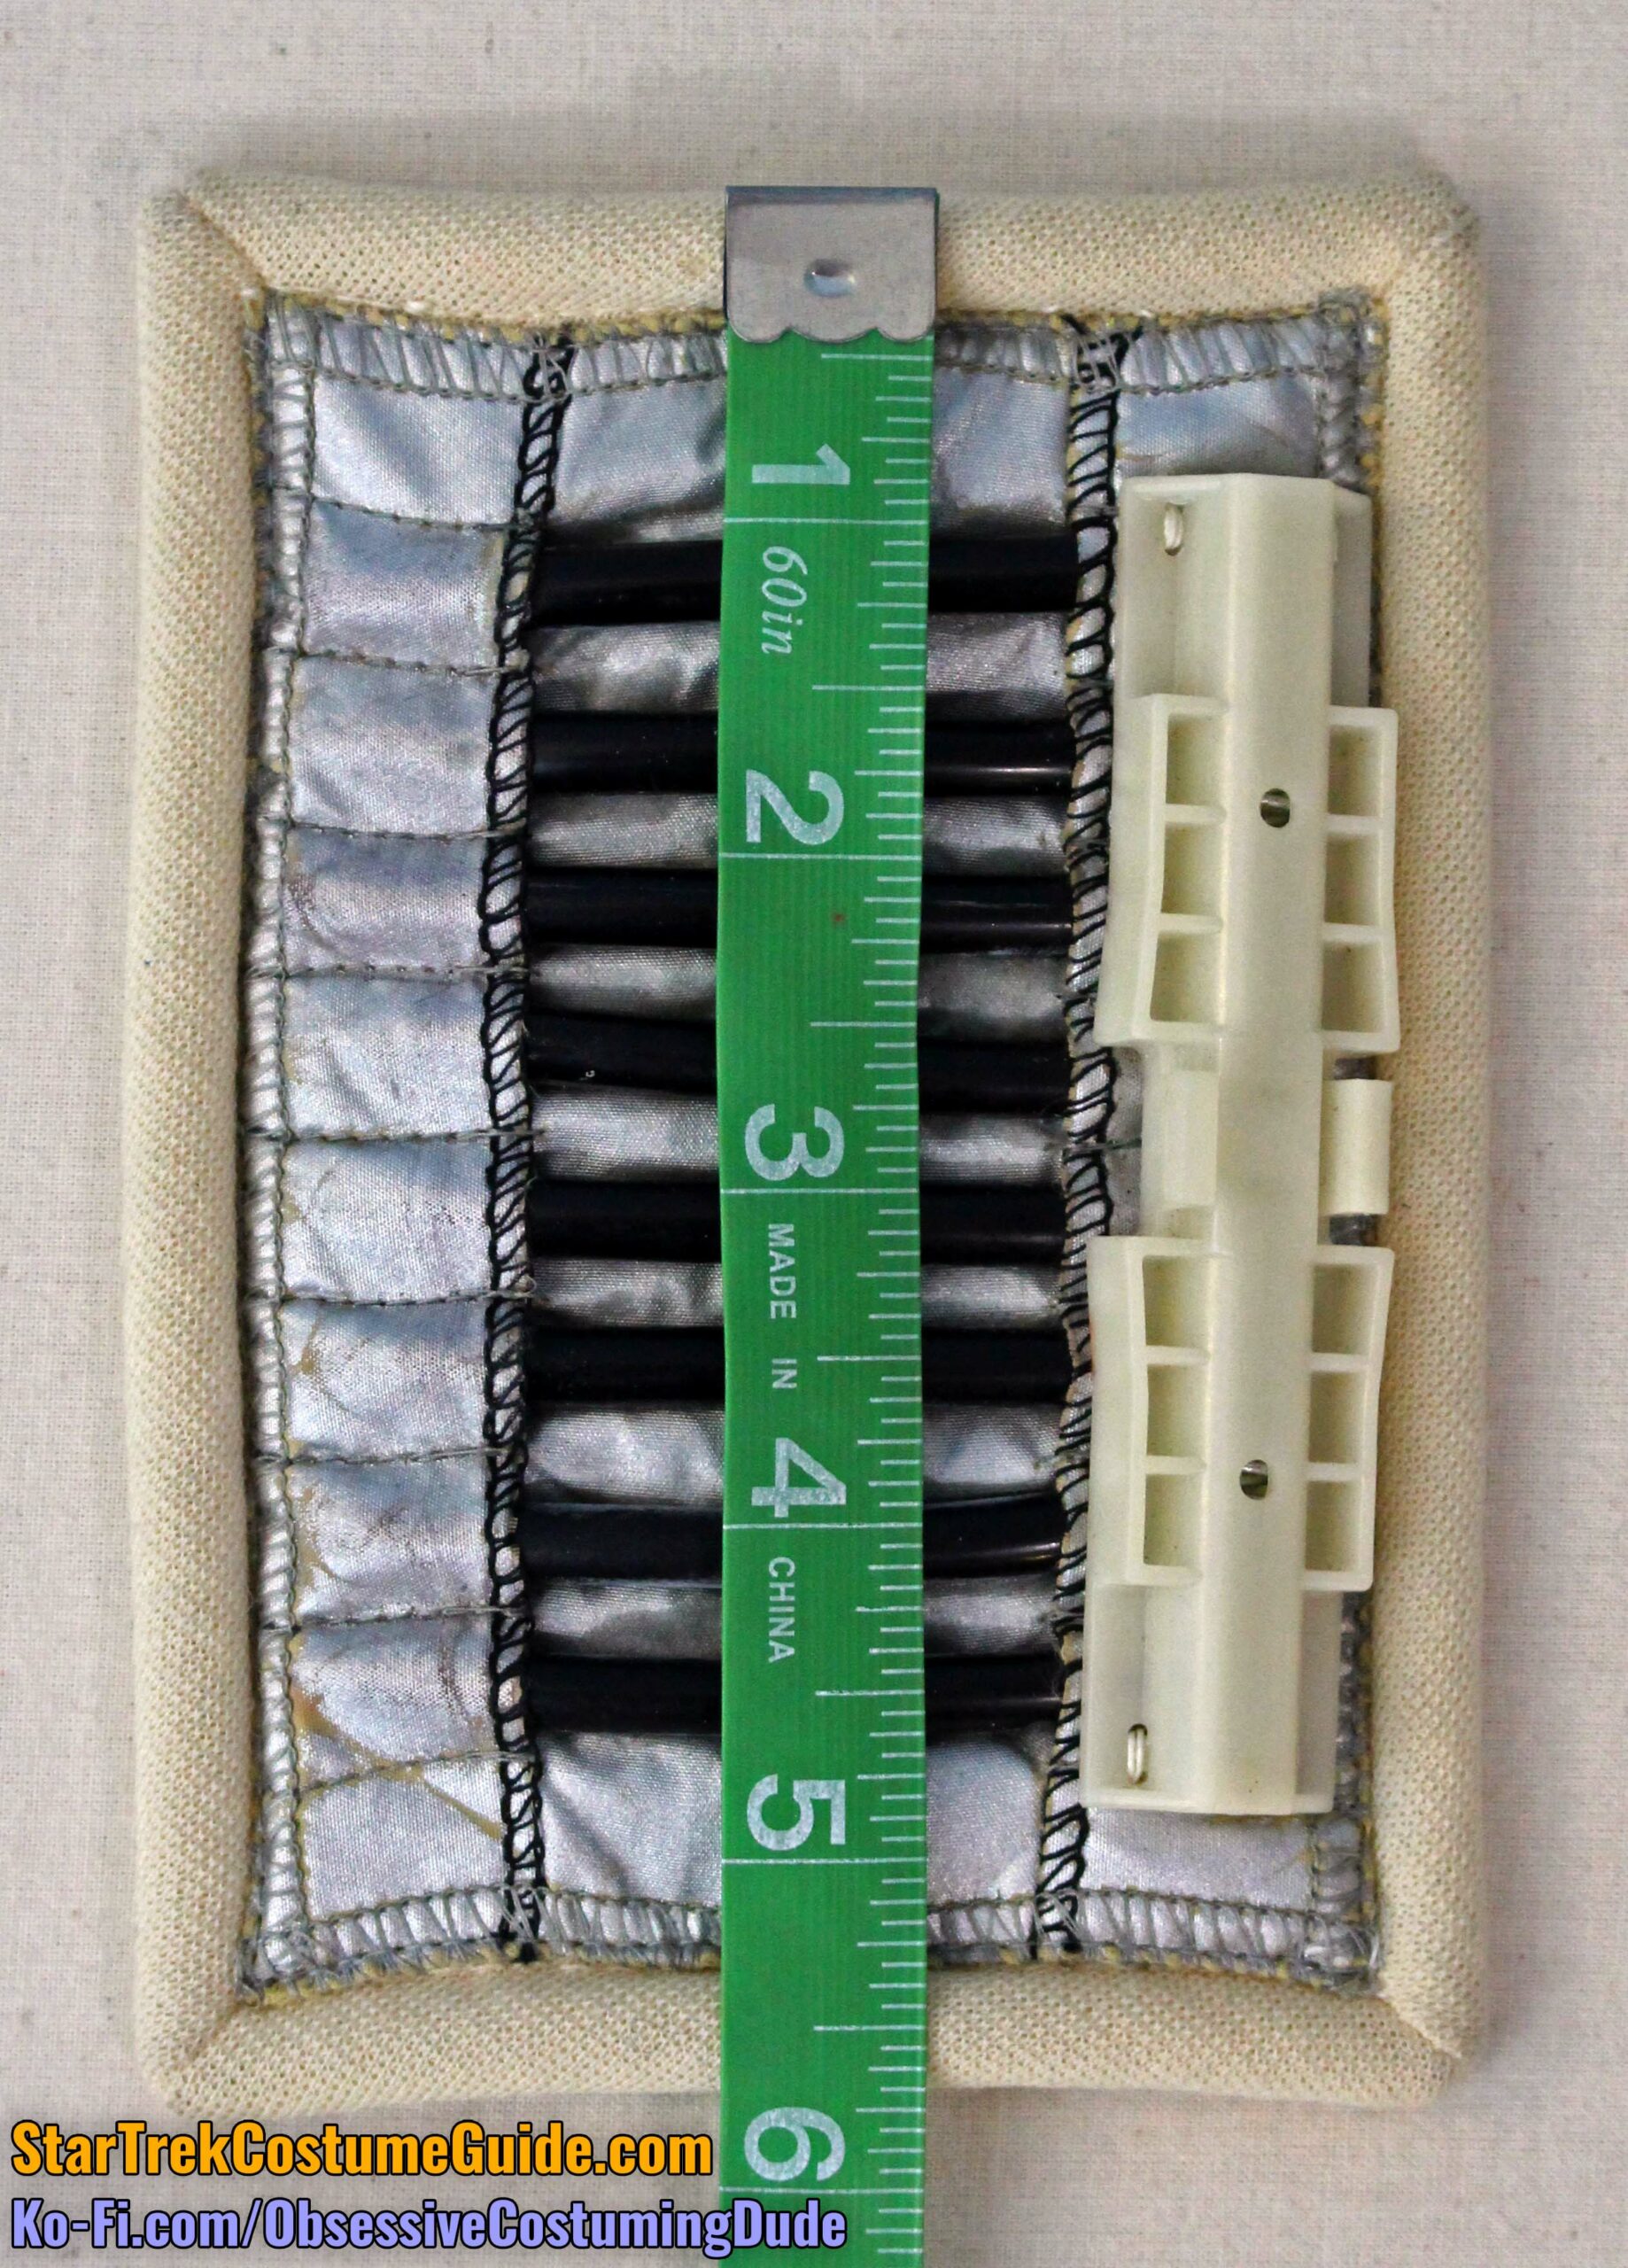
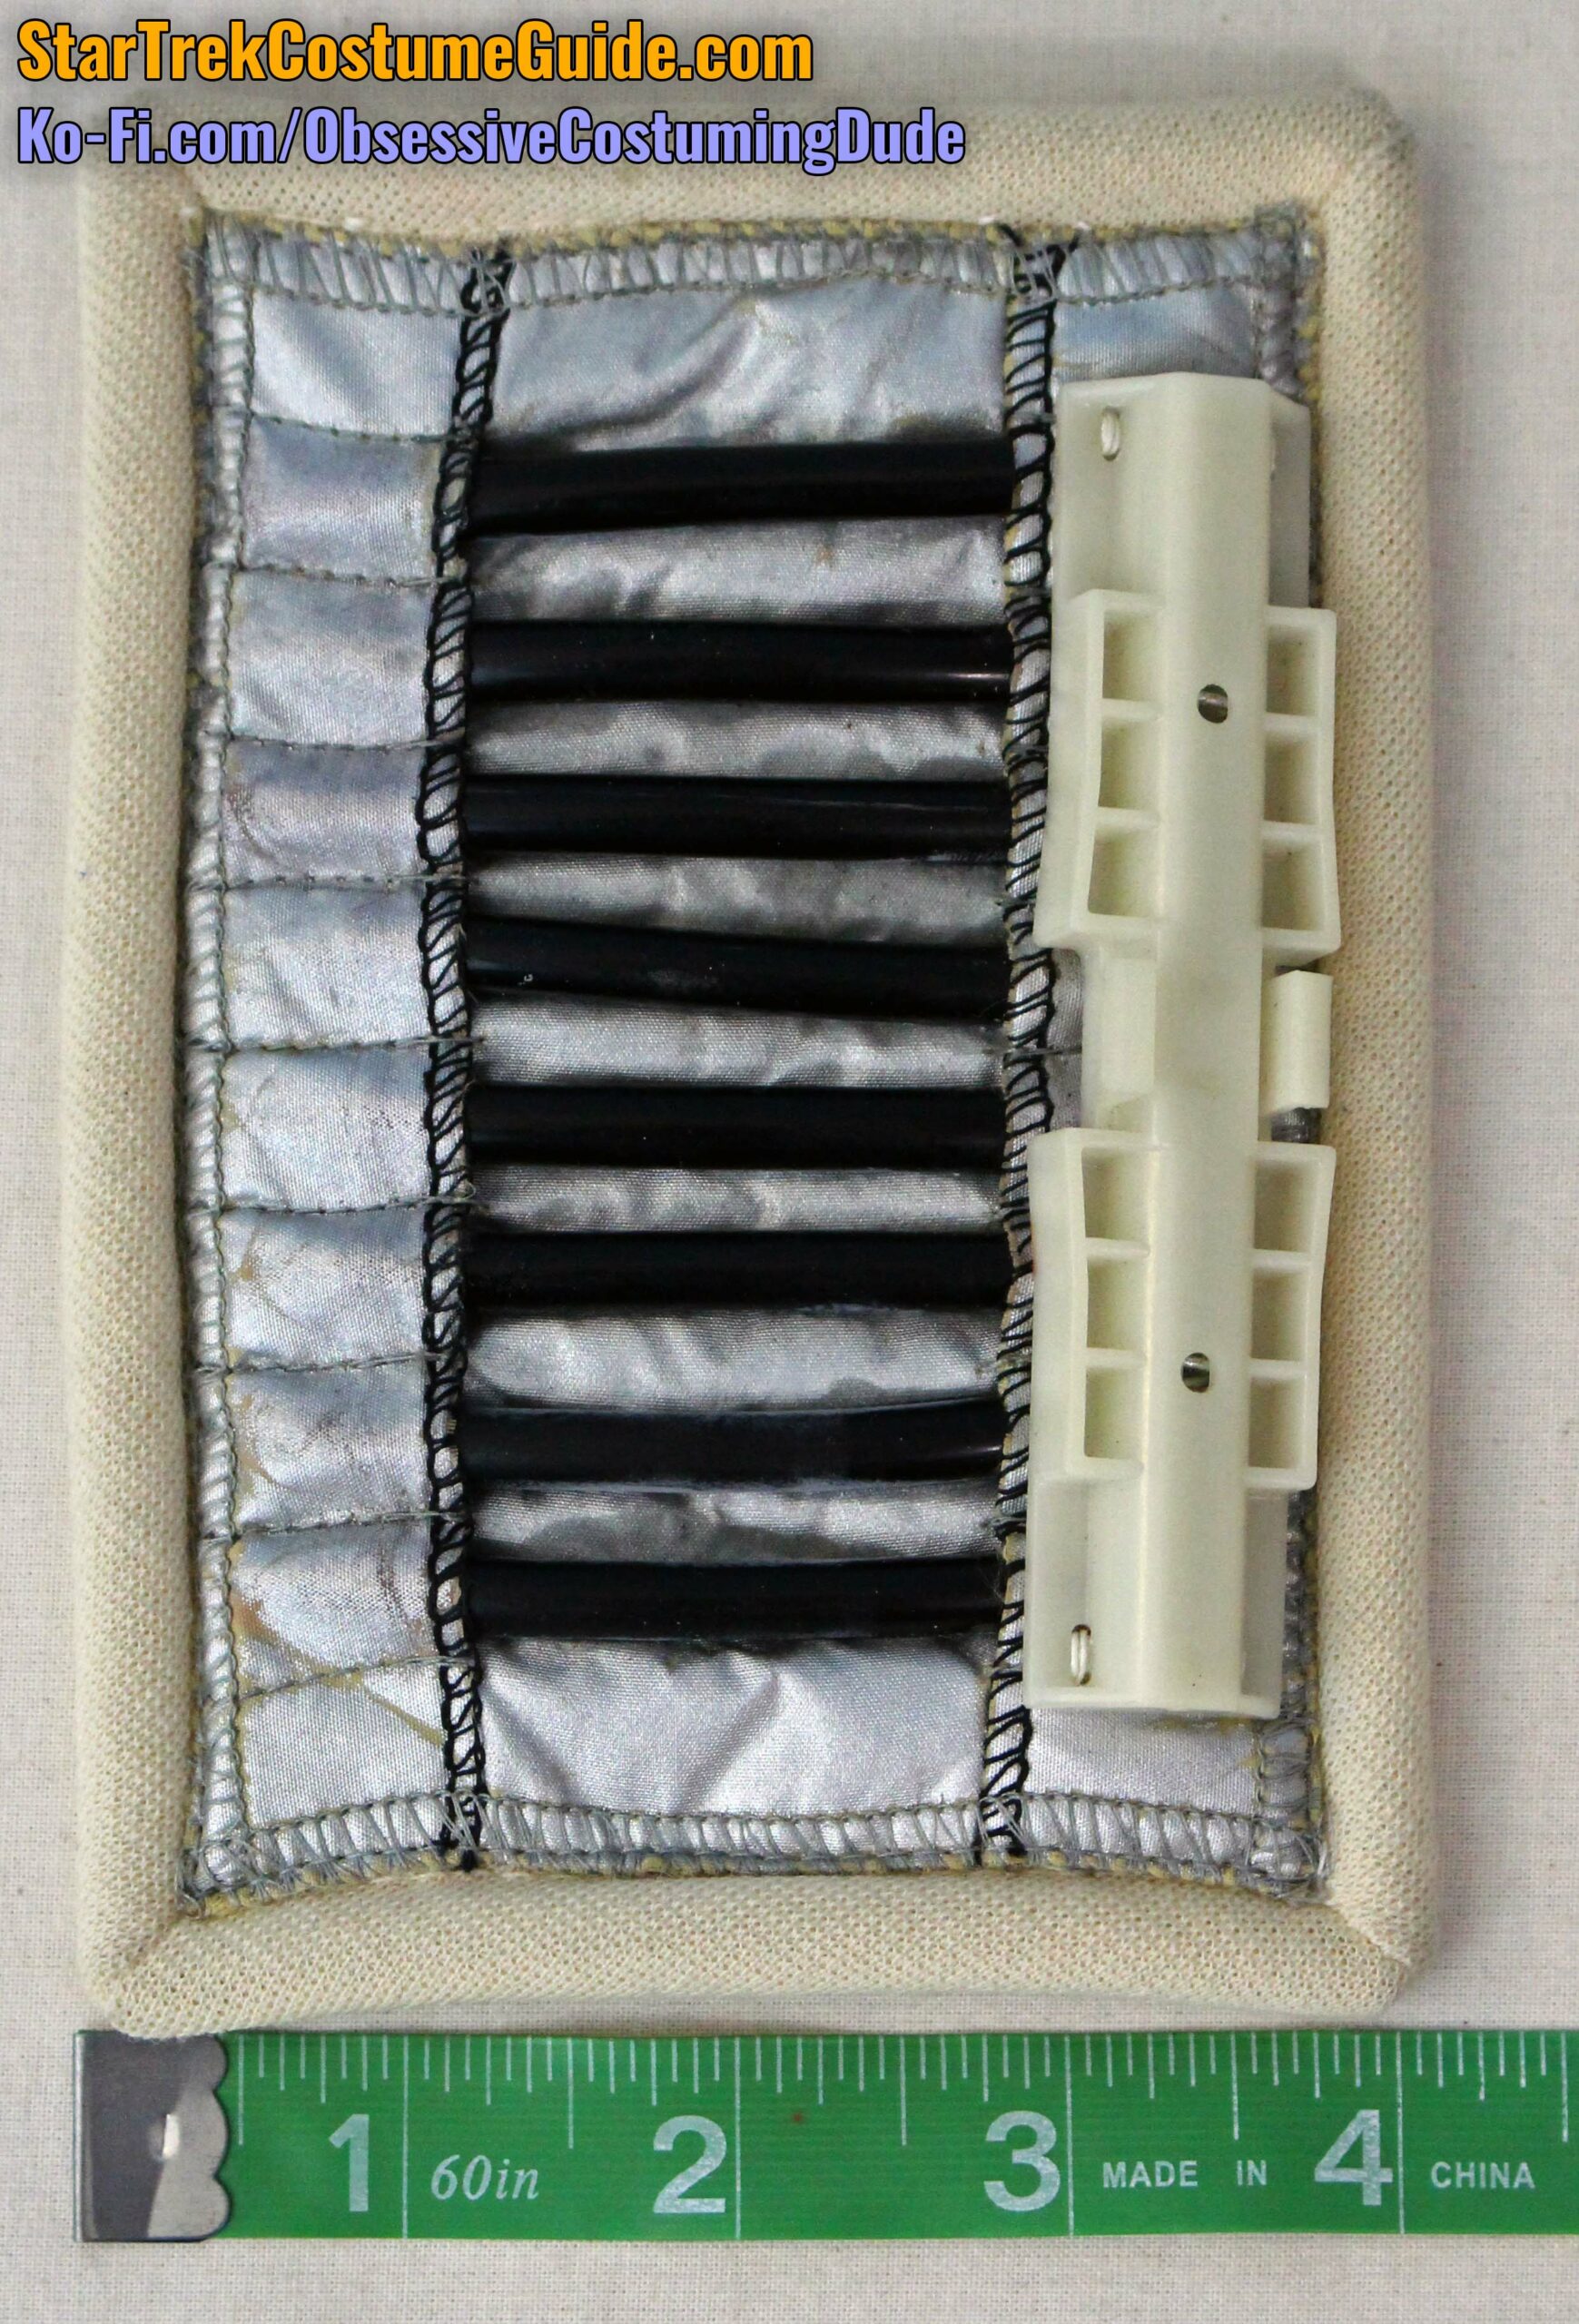
On the wearer’s left hip was a neat, rectangular accent.
I could be wrong, but I’m fairly sure this was a reflector box of some kind, like one might typically attach to the back of a trailer.
It’s lightweight, plastic, has no internal wiring or lights, and is about the right size, so it seems to fit the description.
Unfortunately, it appears to have been a particular brand/model from the late 70s or early 80s that’s no longer available. (It’s possible it was even a specific model for a specific type of vehicle, but given the context of the costume’s other attachments, I believe Fletcher simply found an inexpensive reflector box he liked at a hardware store and picked up a bunch of them for costume purposes.)
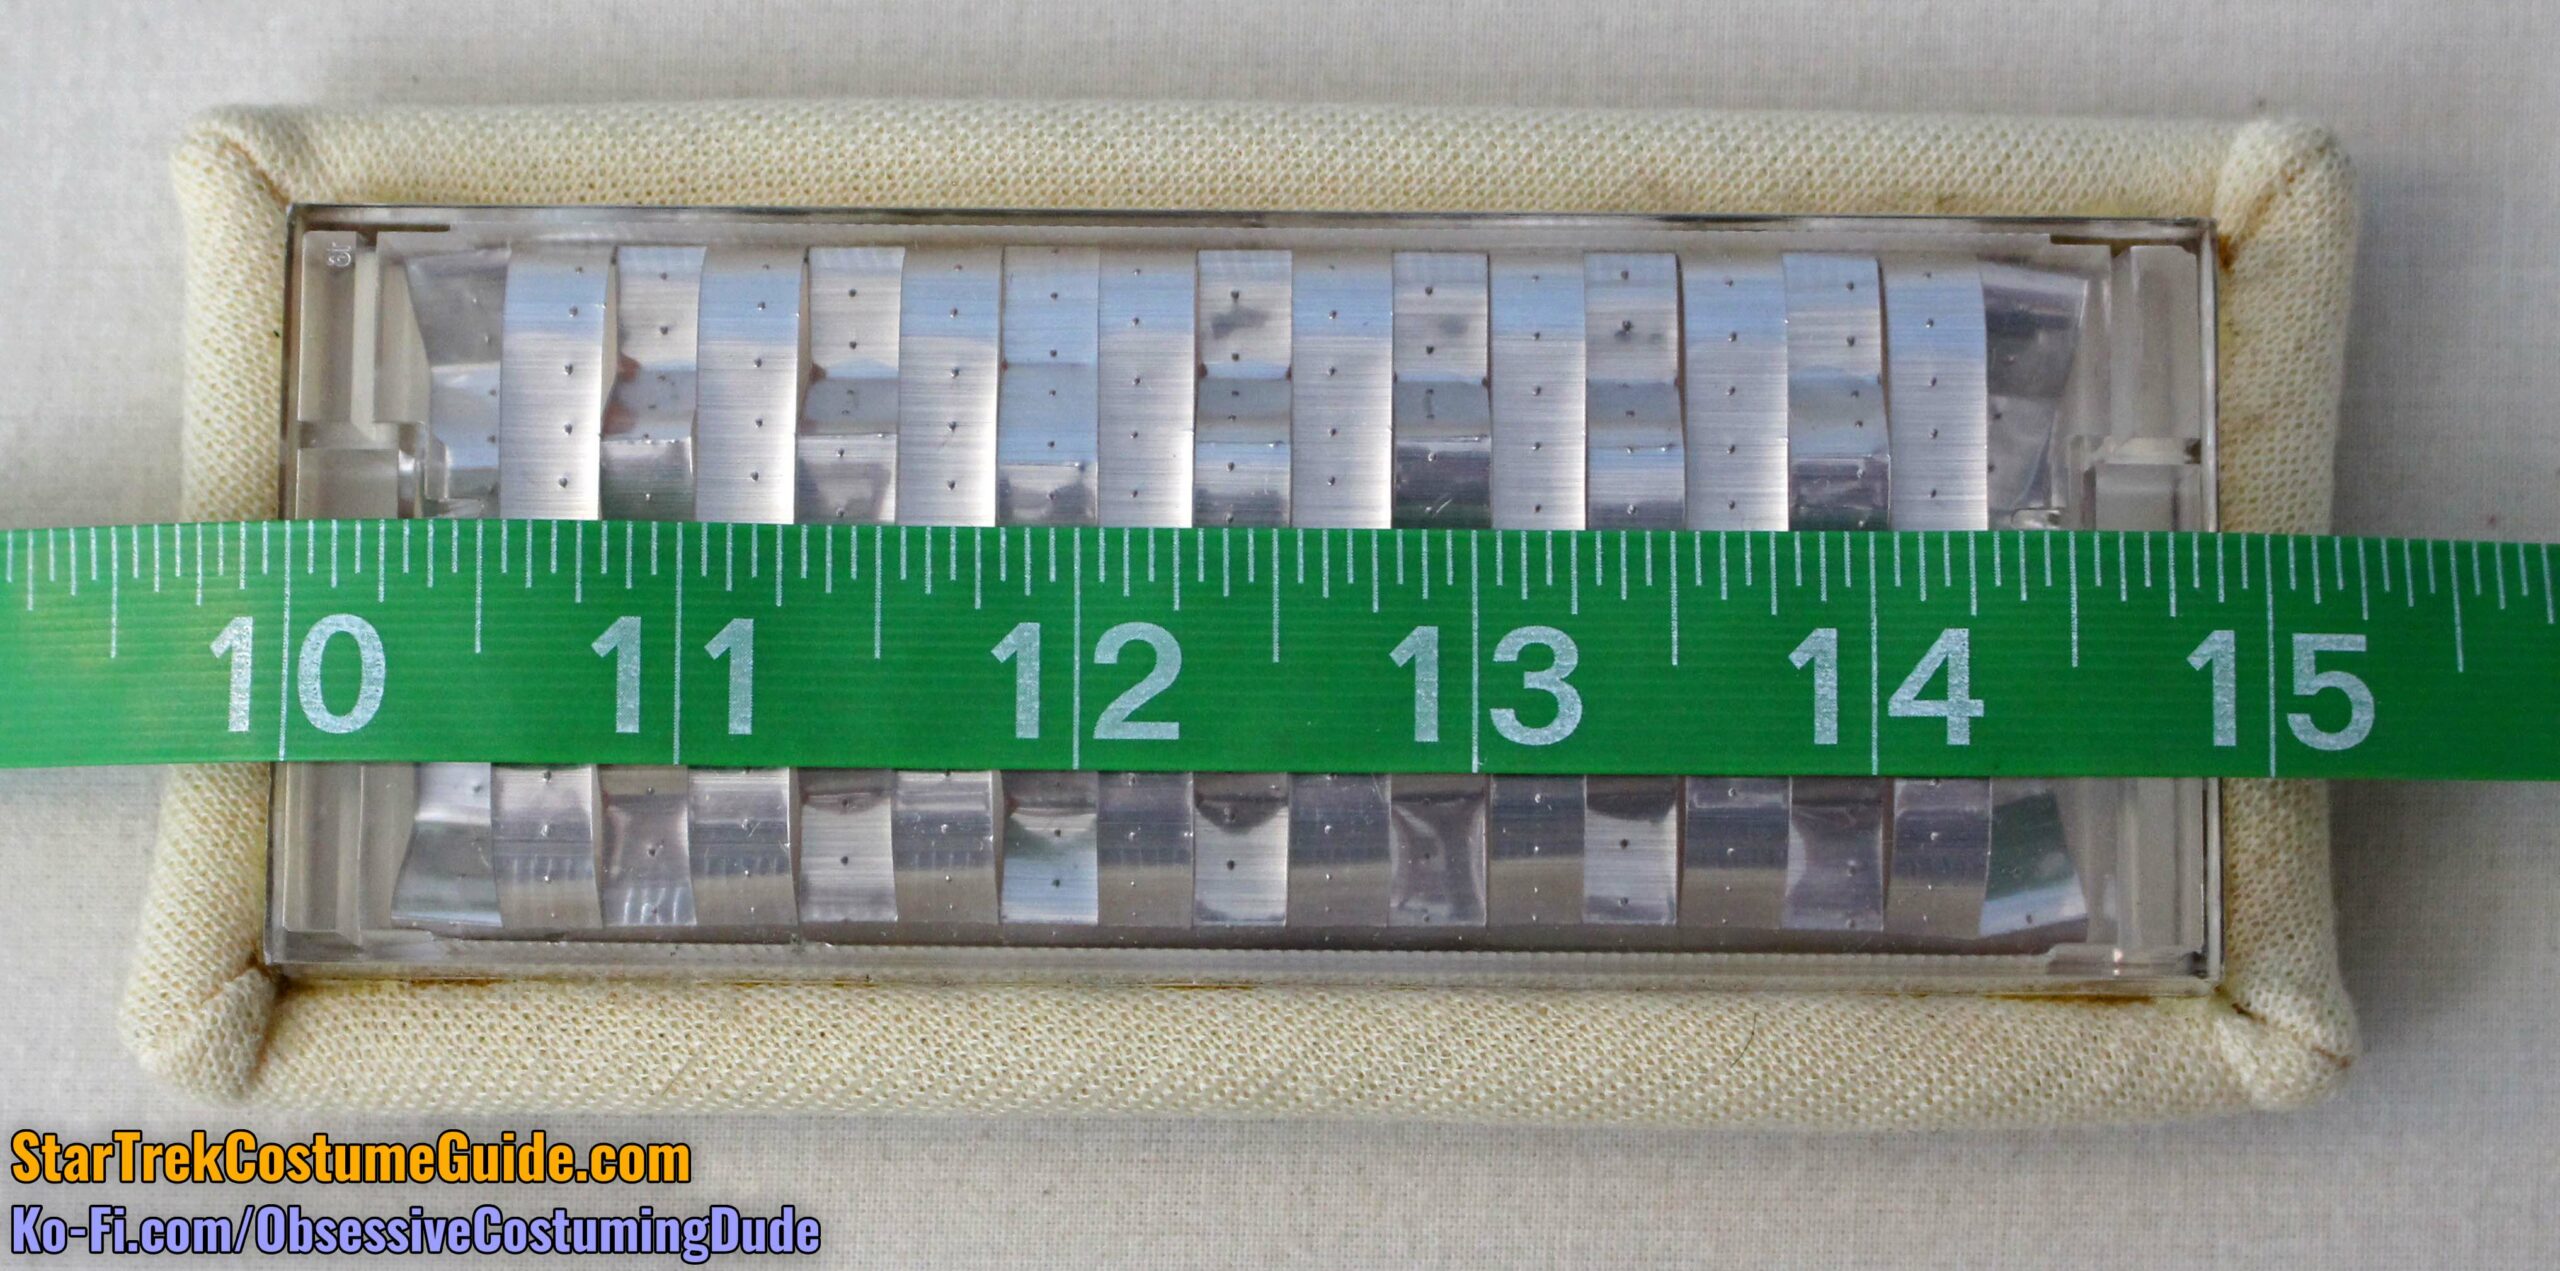
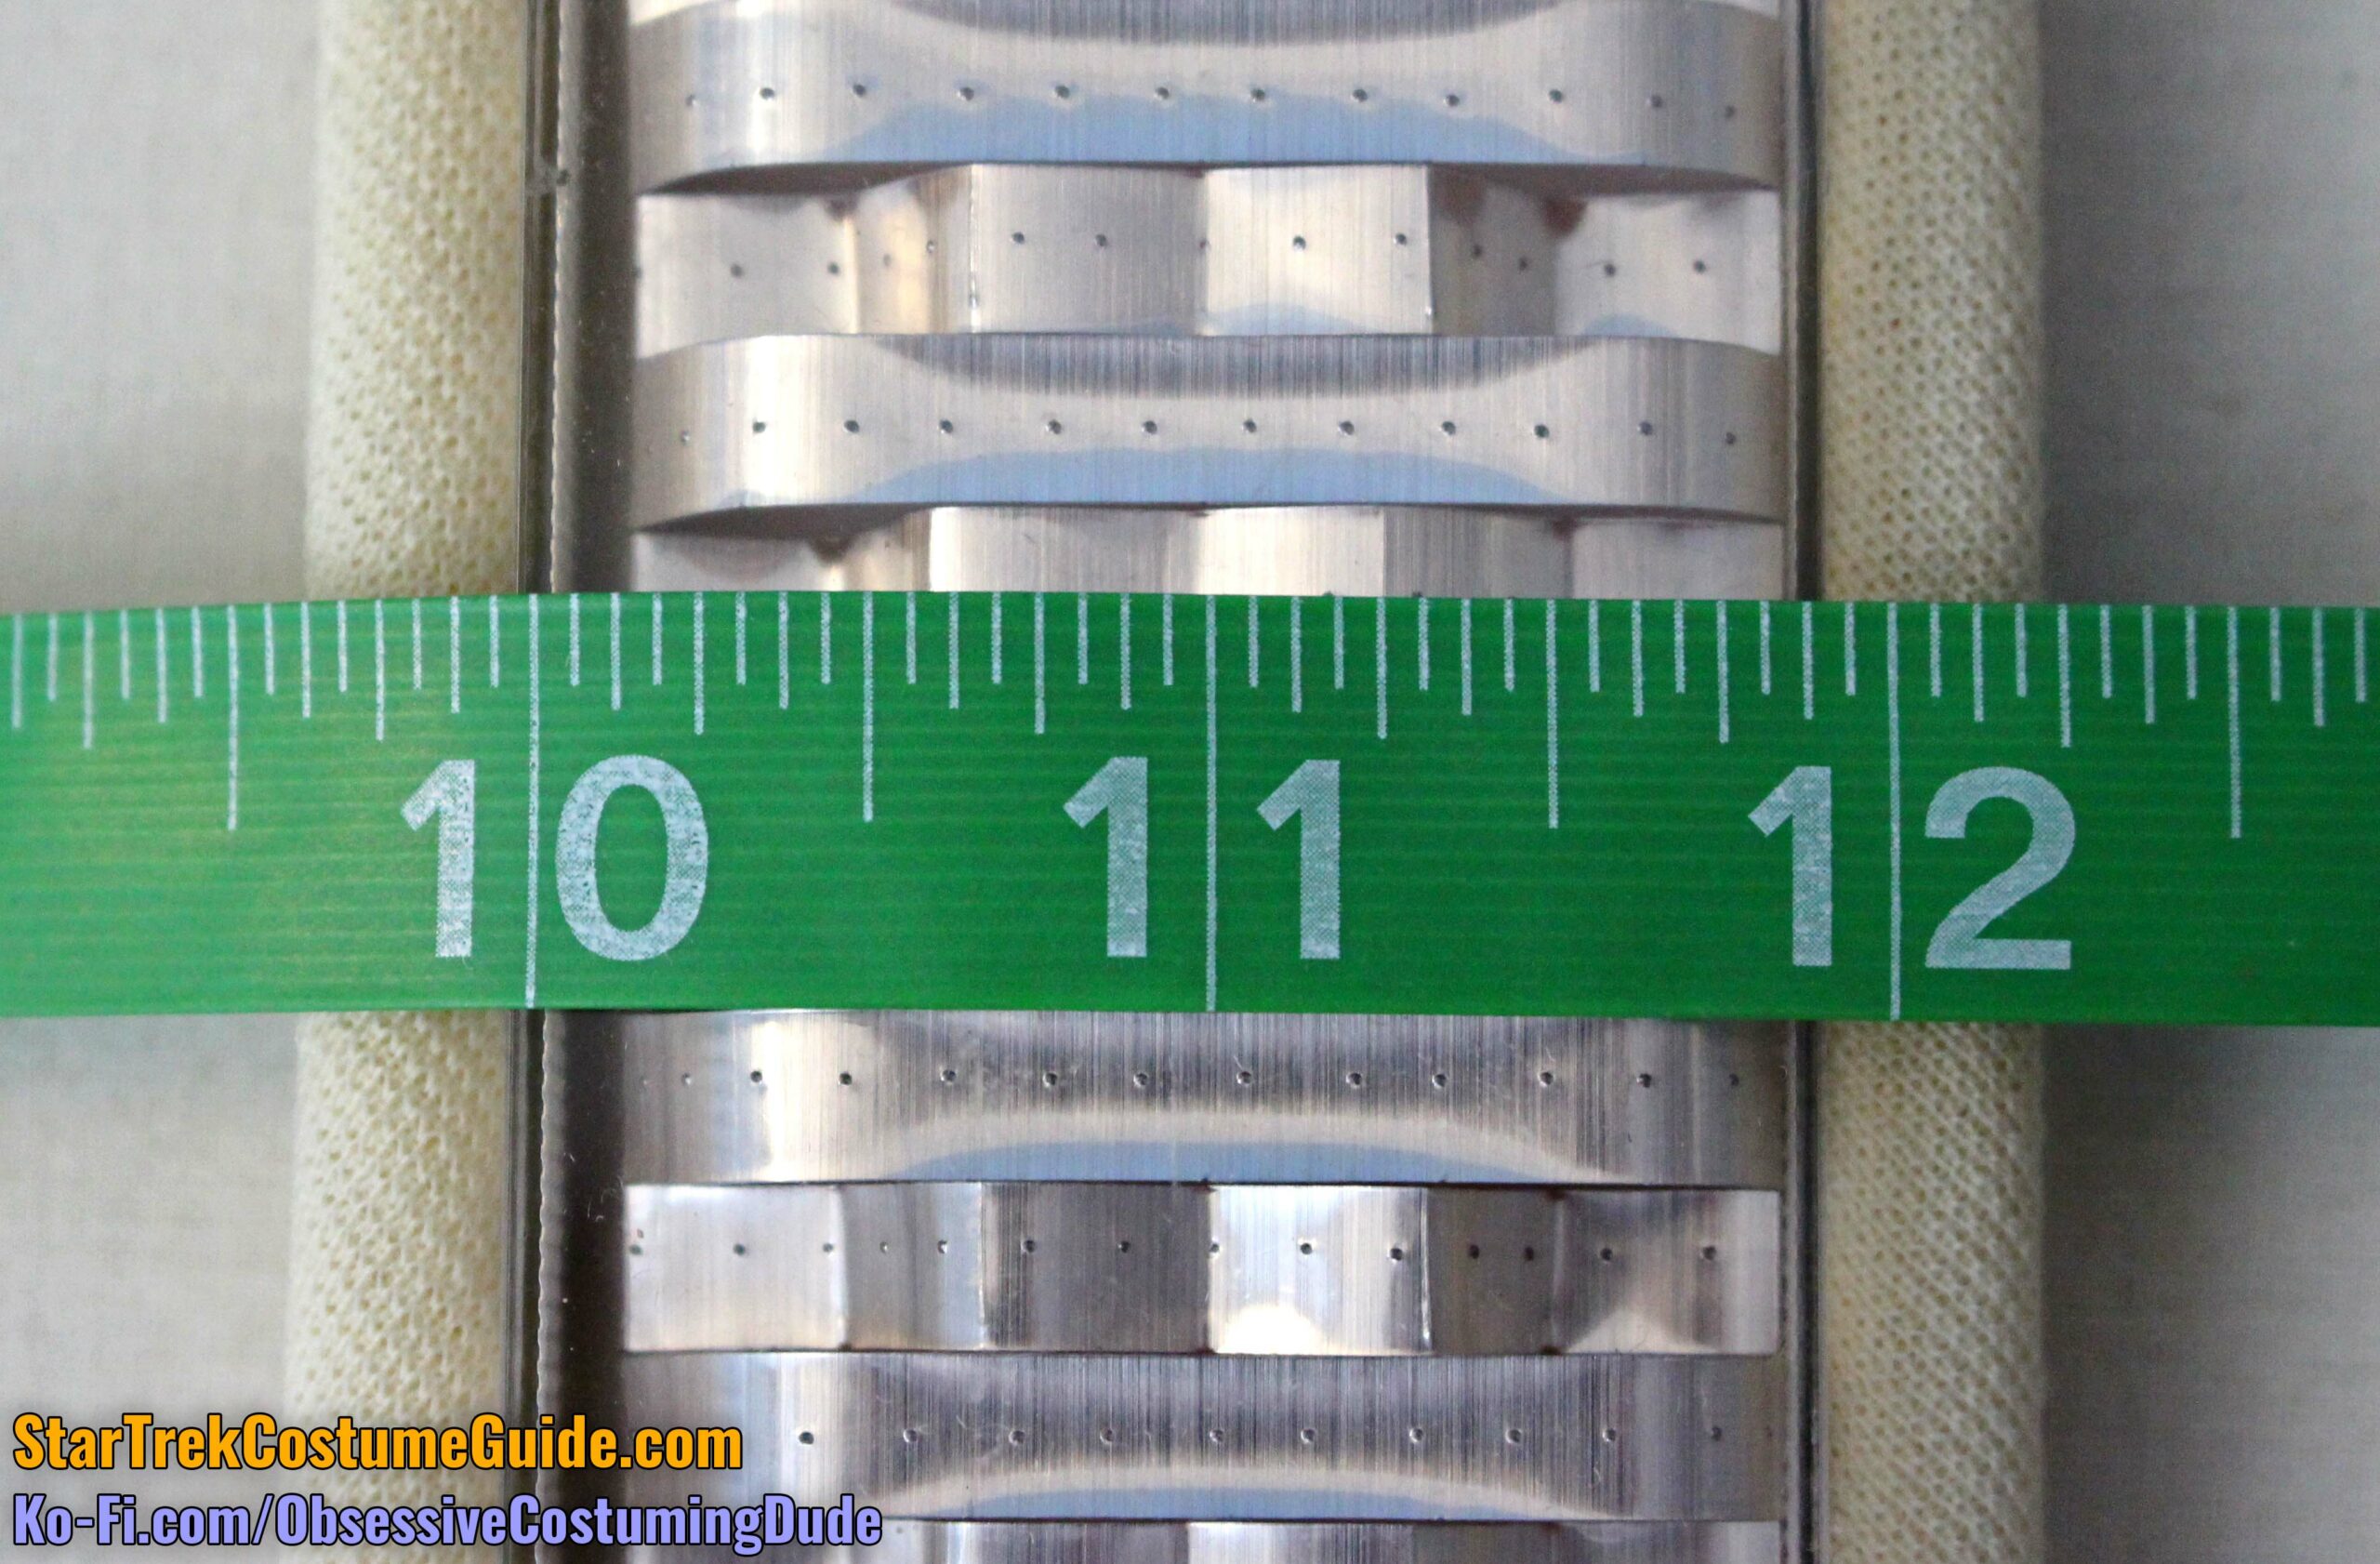
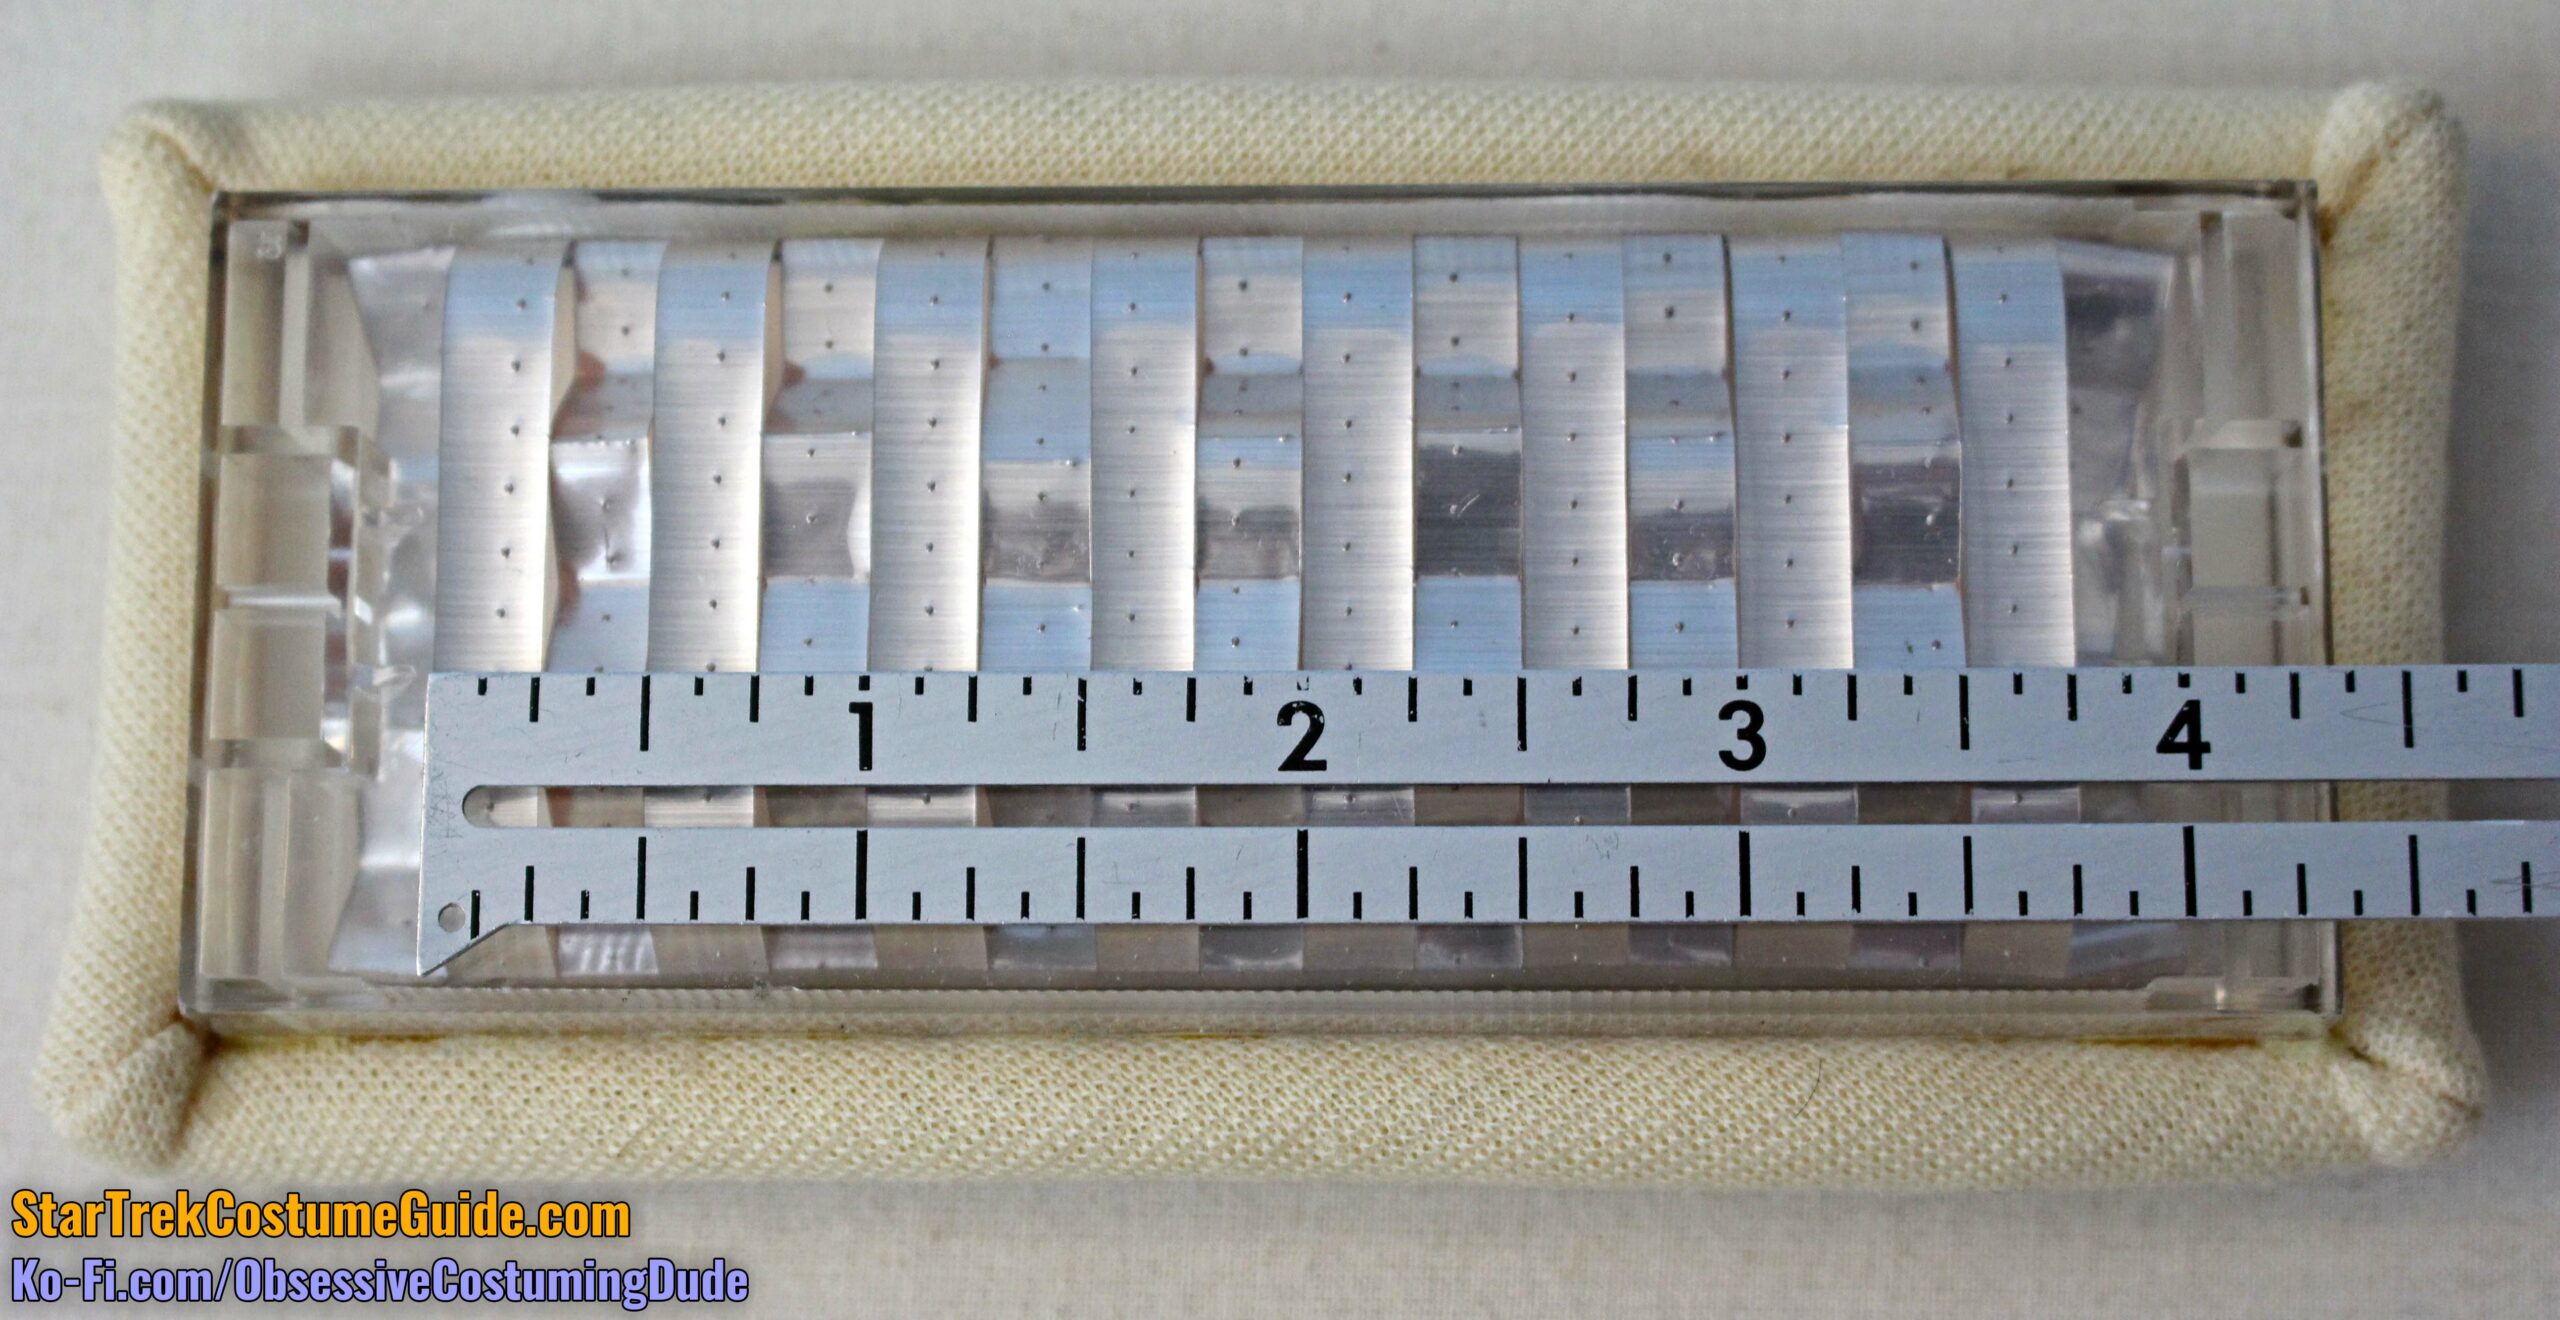
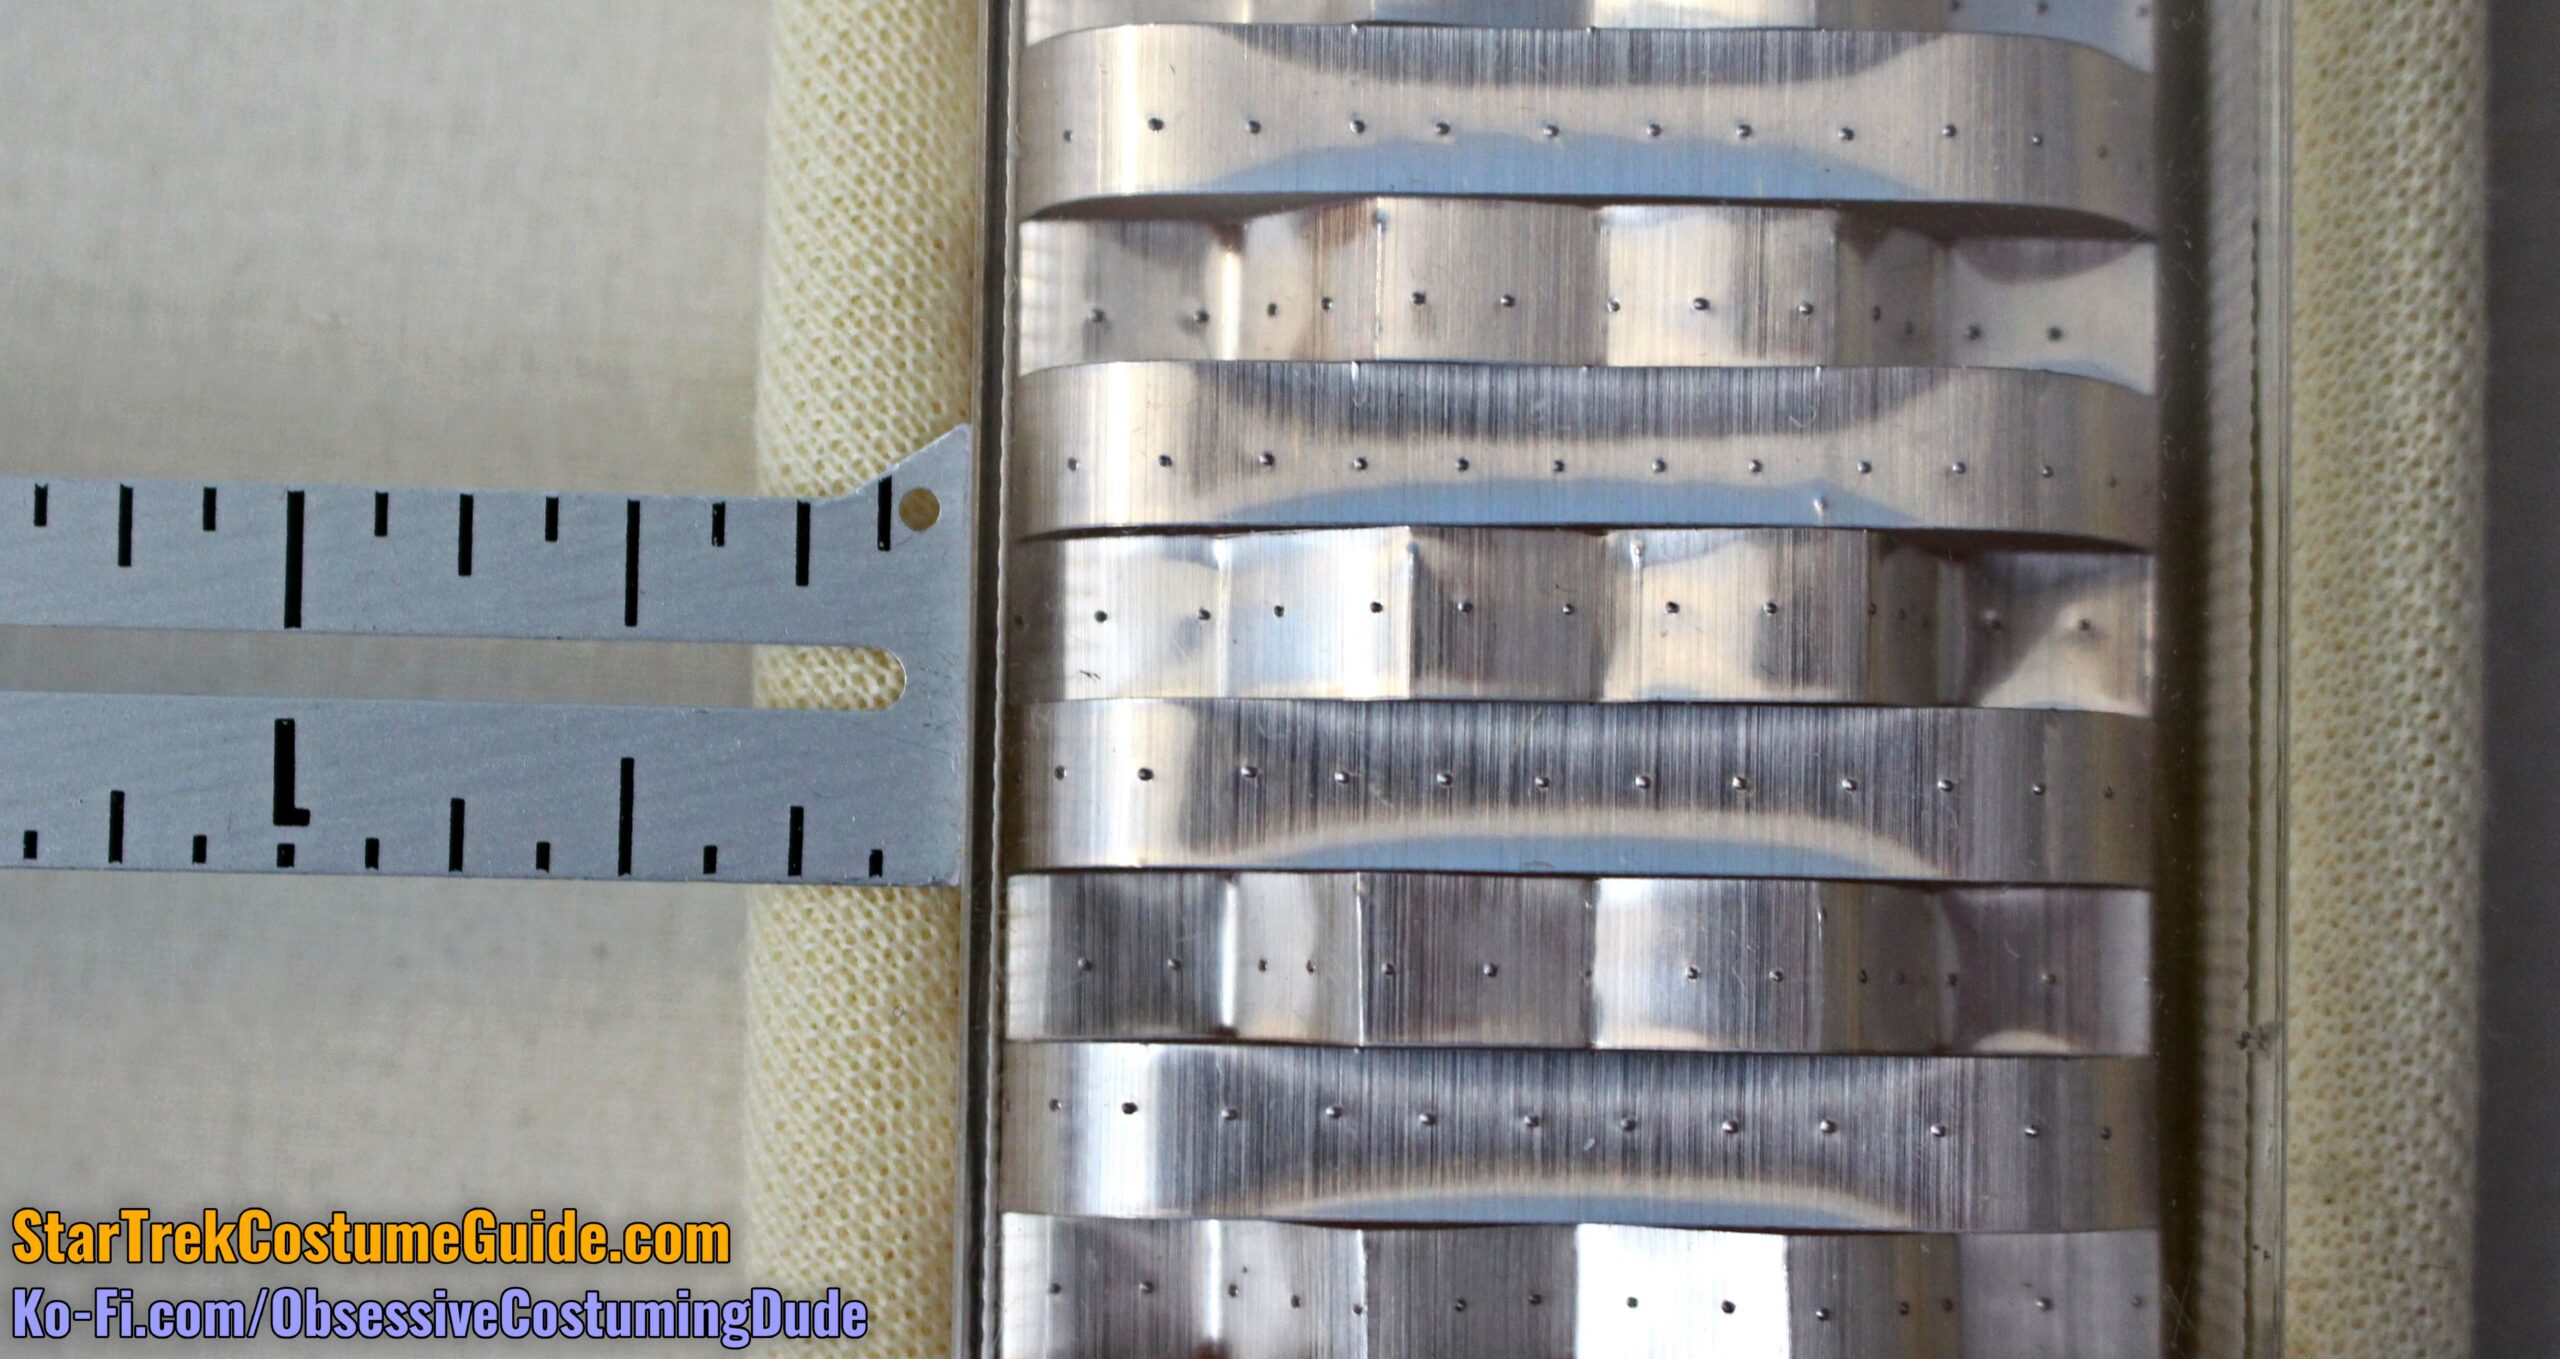
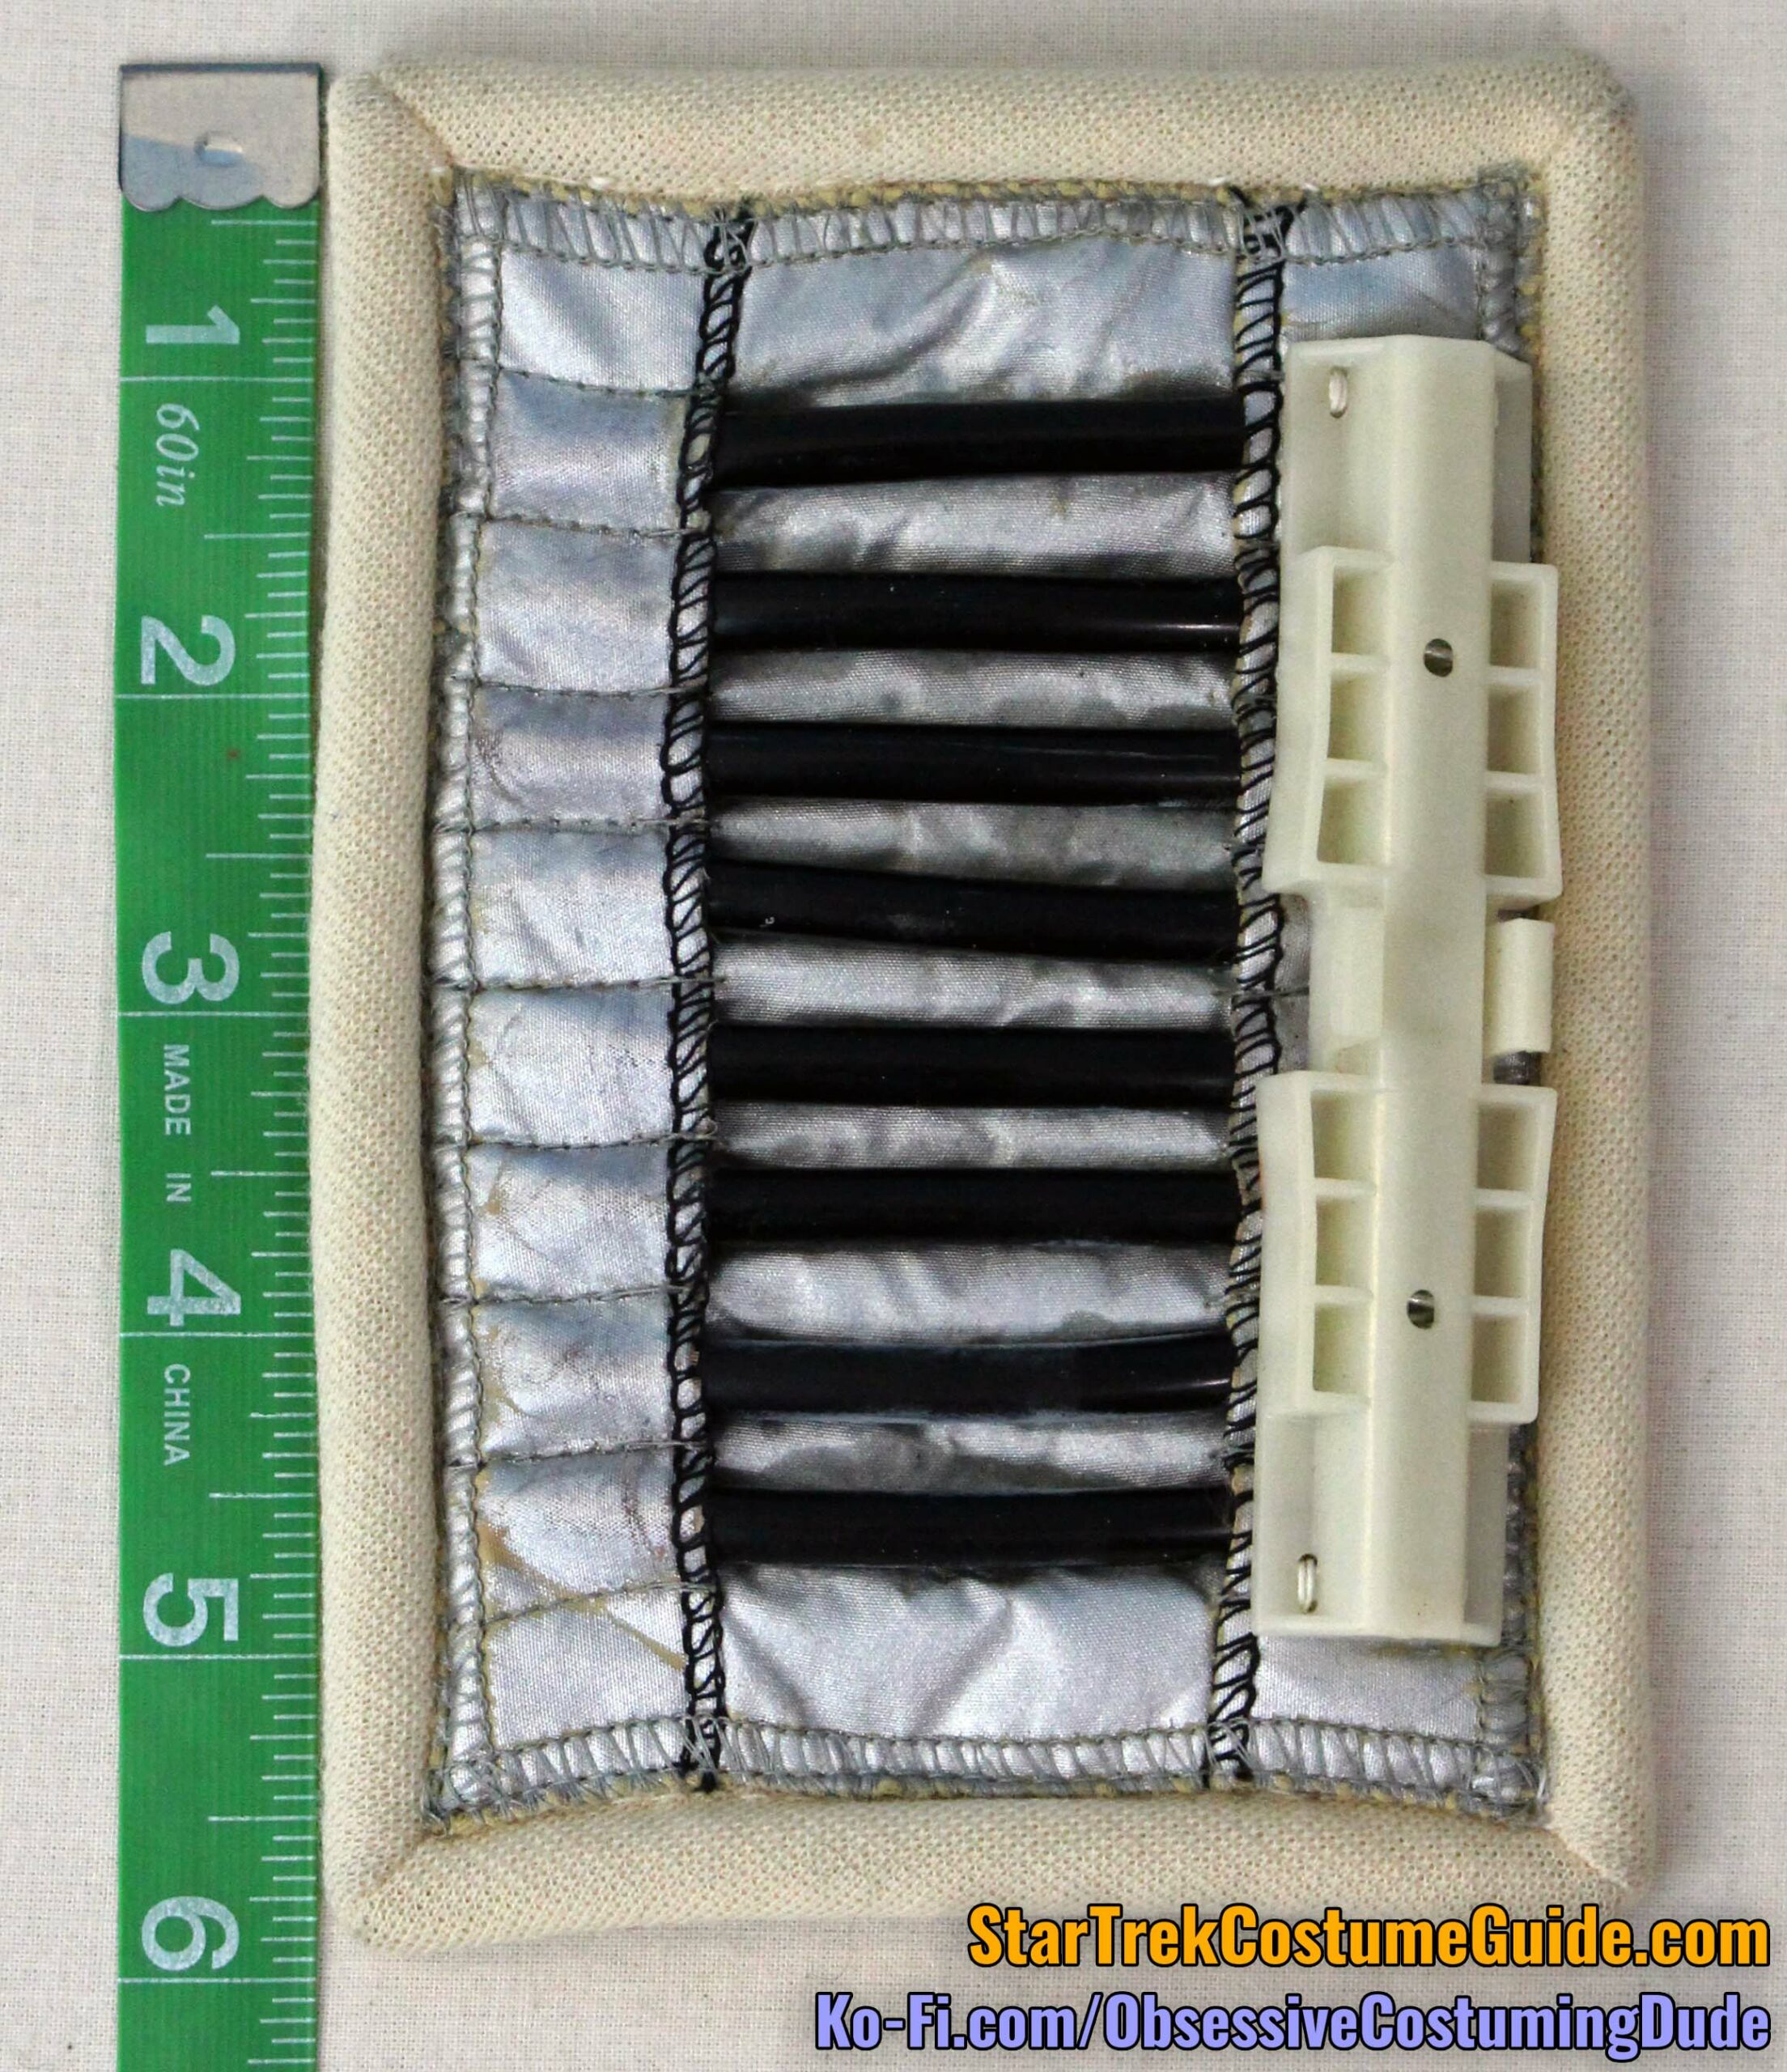
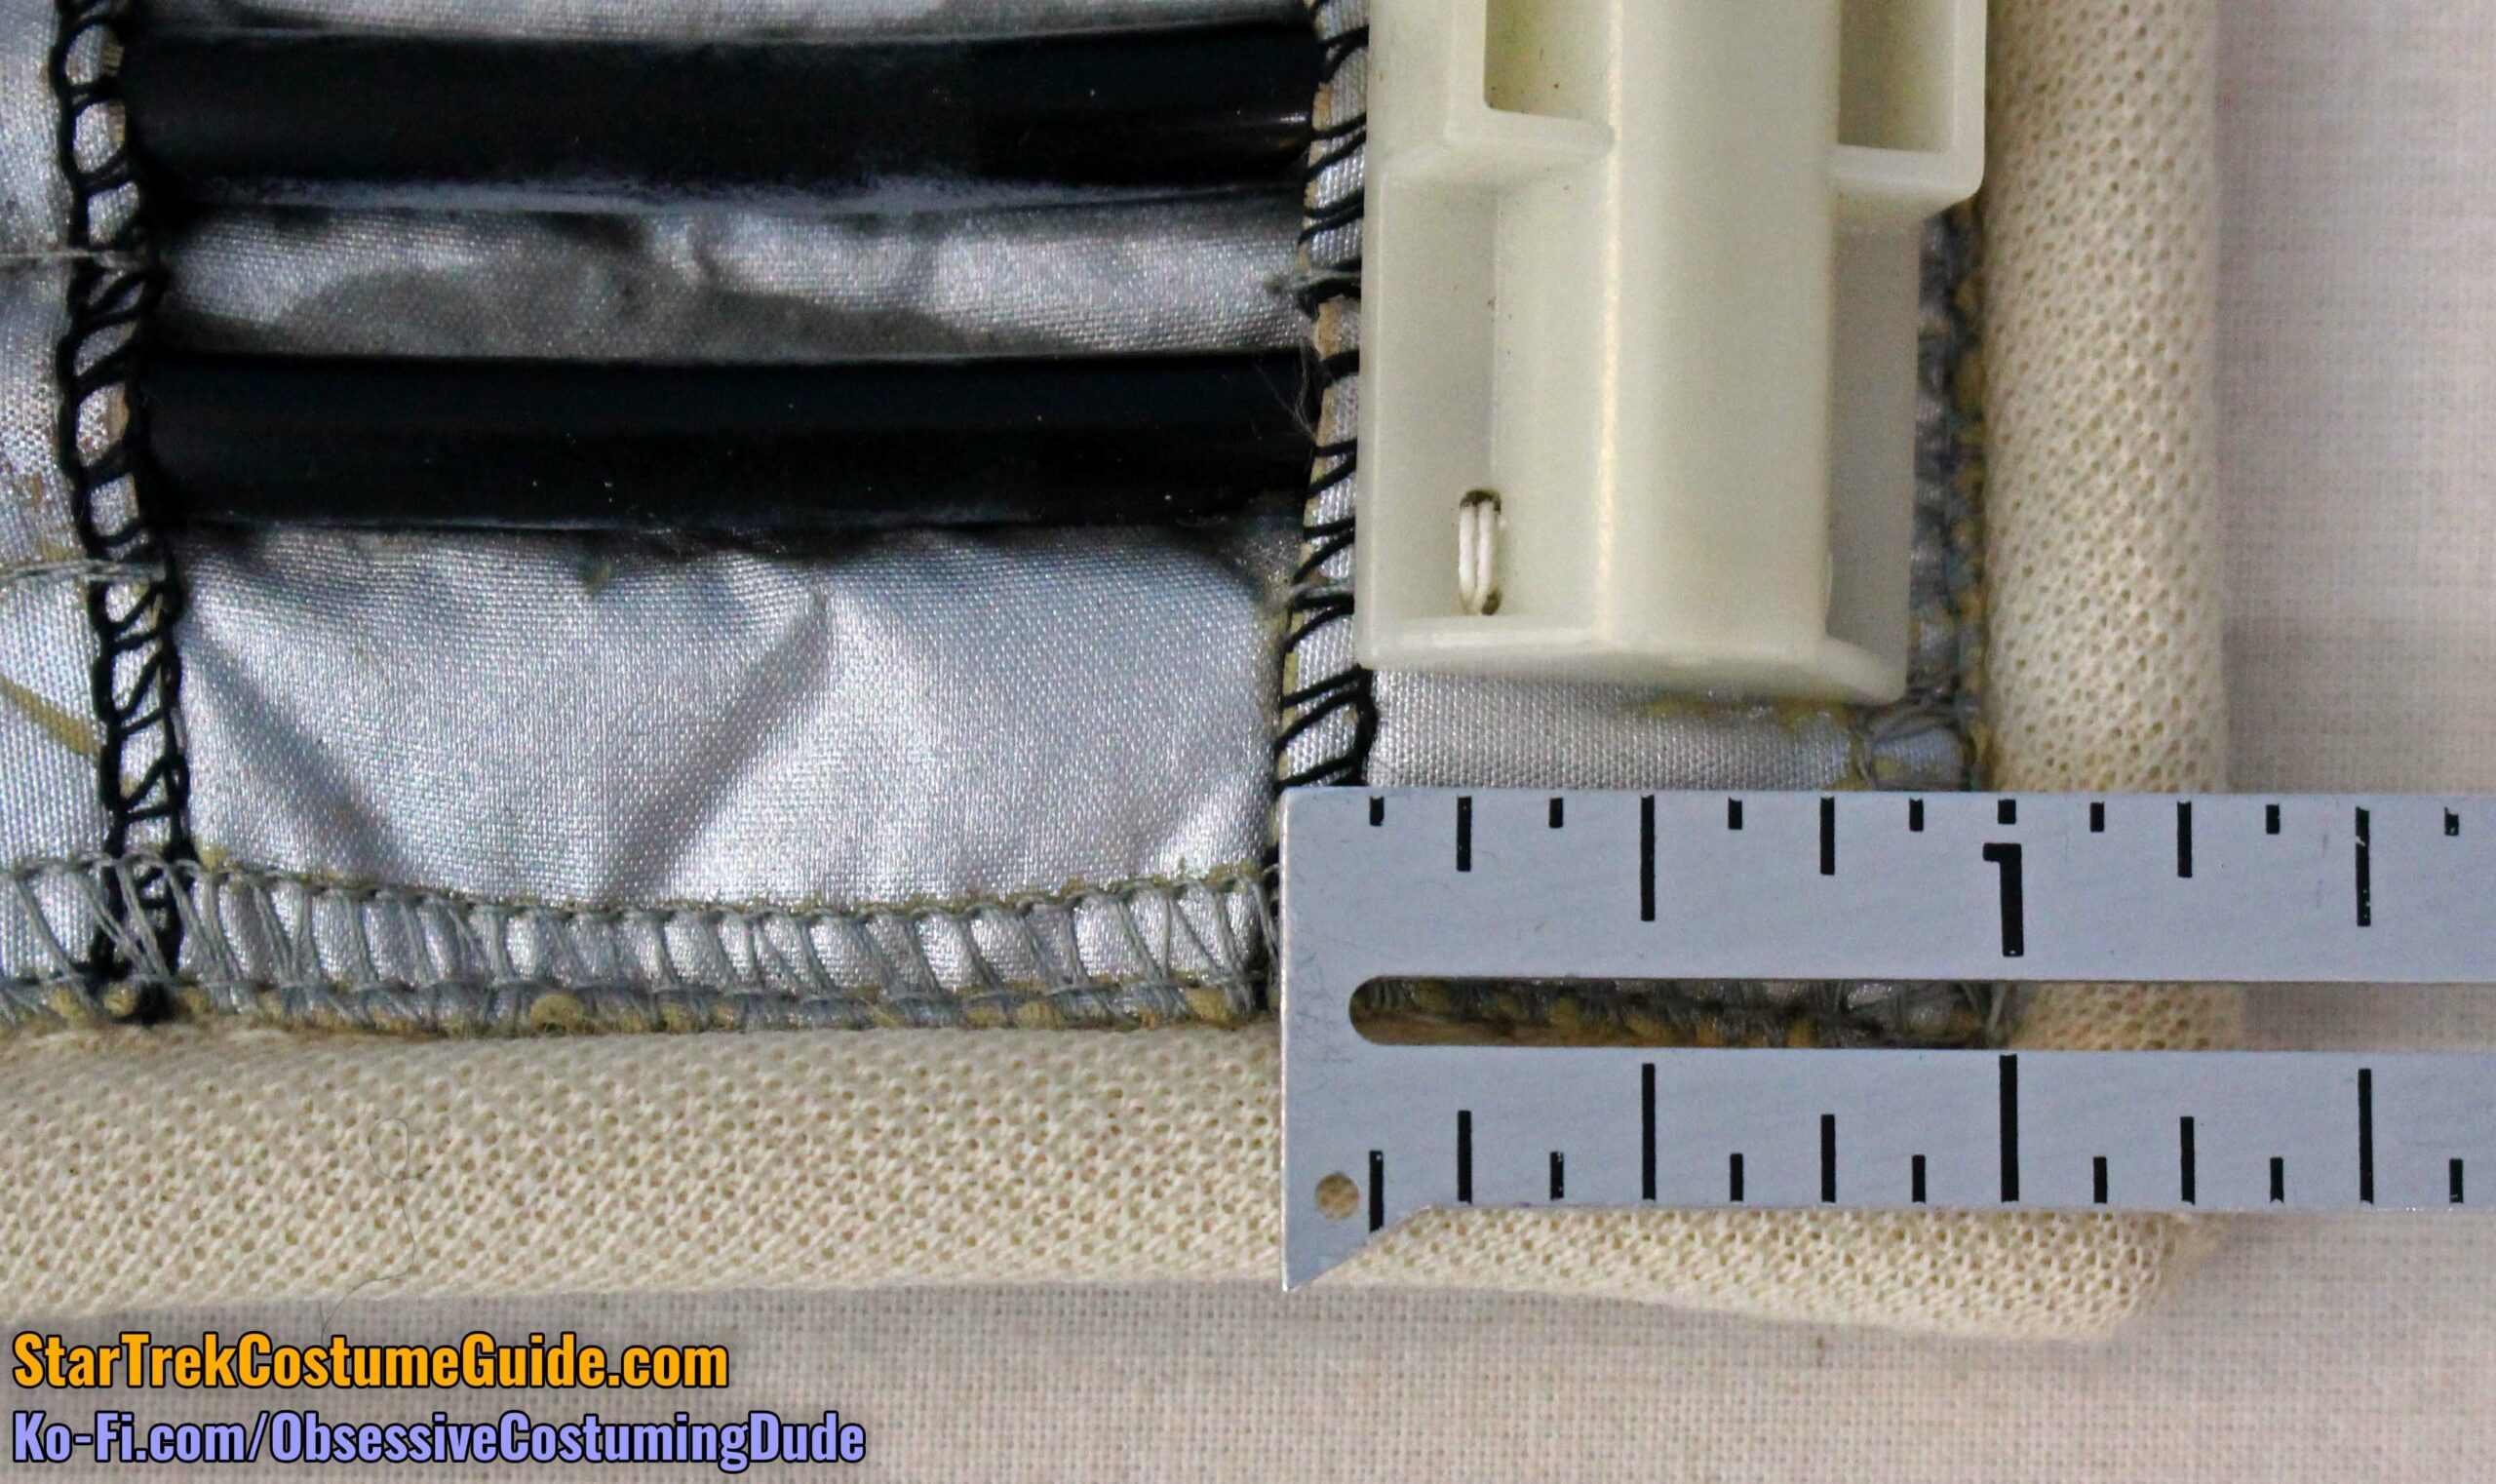
The box itself was 4 ⅞” x 1 ⅞”, and ¾” tall.
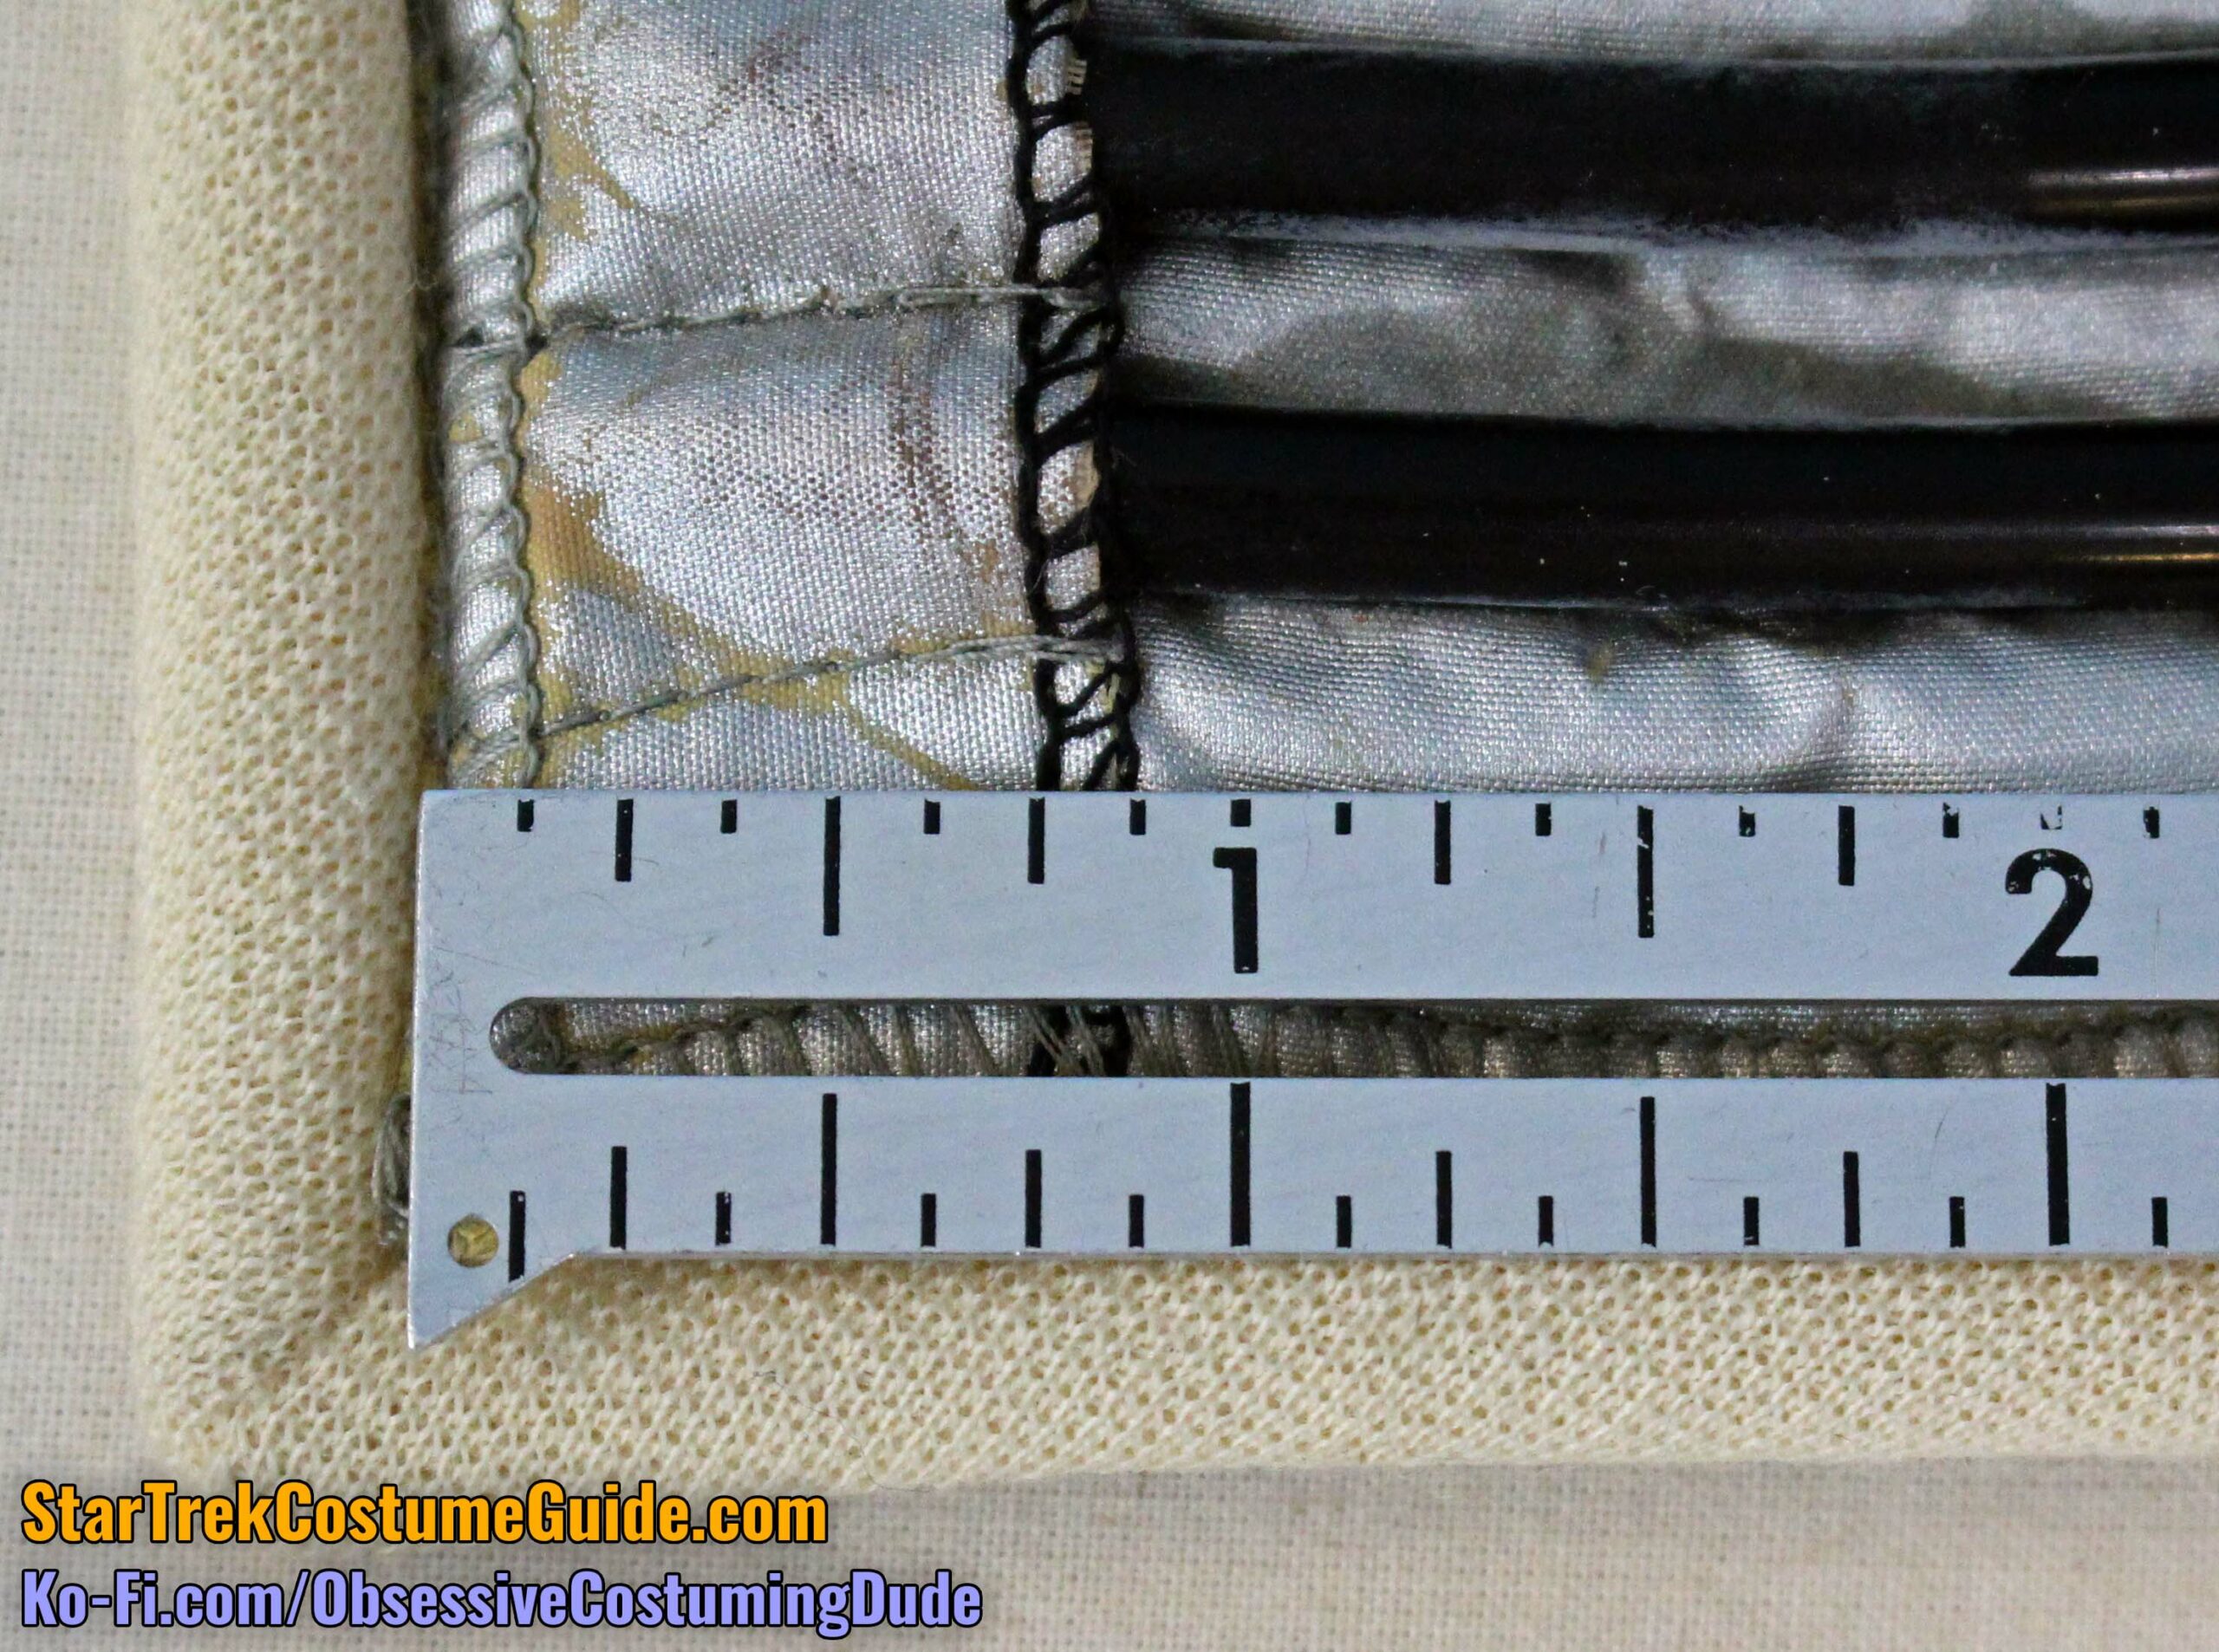
Inside the clear plastic box were fifteen alternating reflective strips, ¼” wide each.
Here you can see the alternating reflective strip shapes; the box was otherwise hollow.
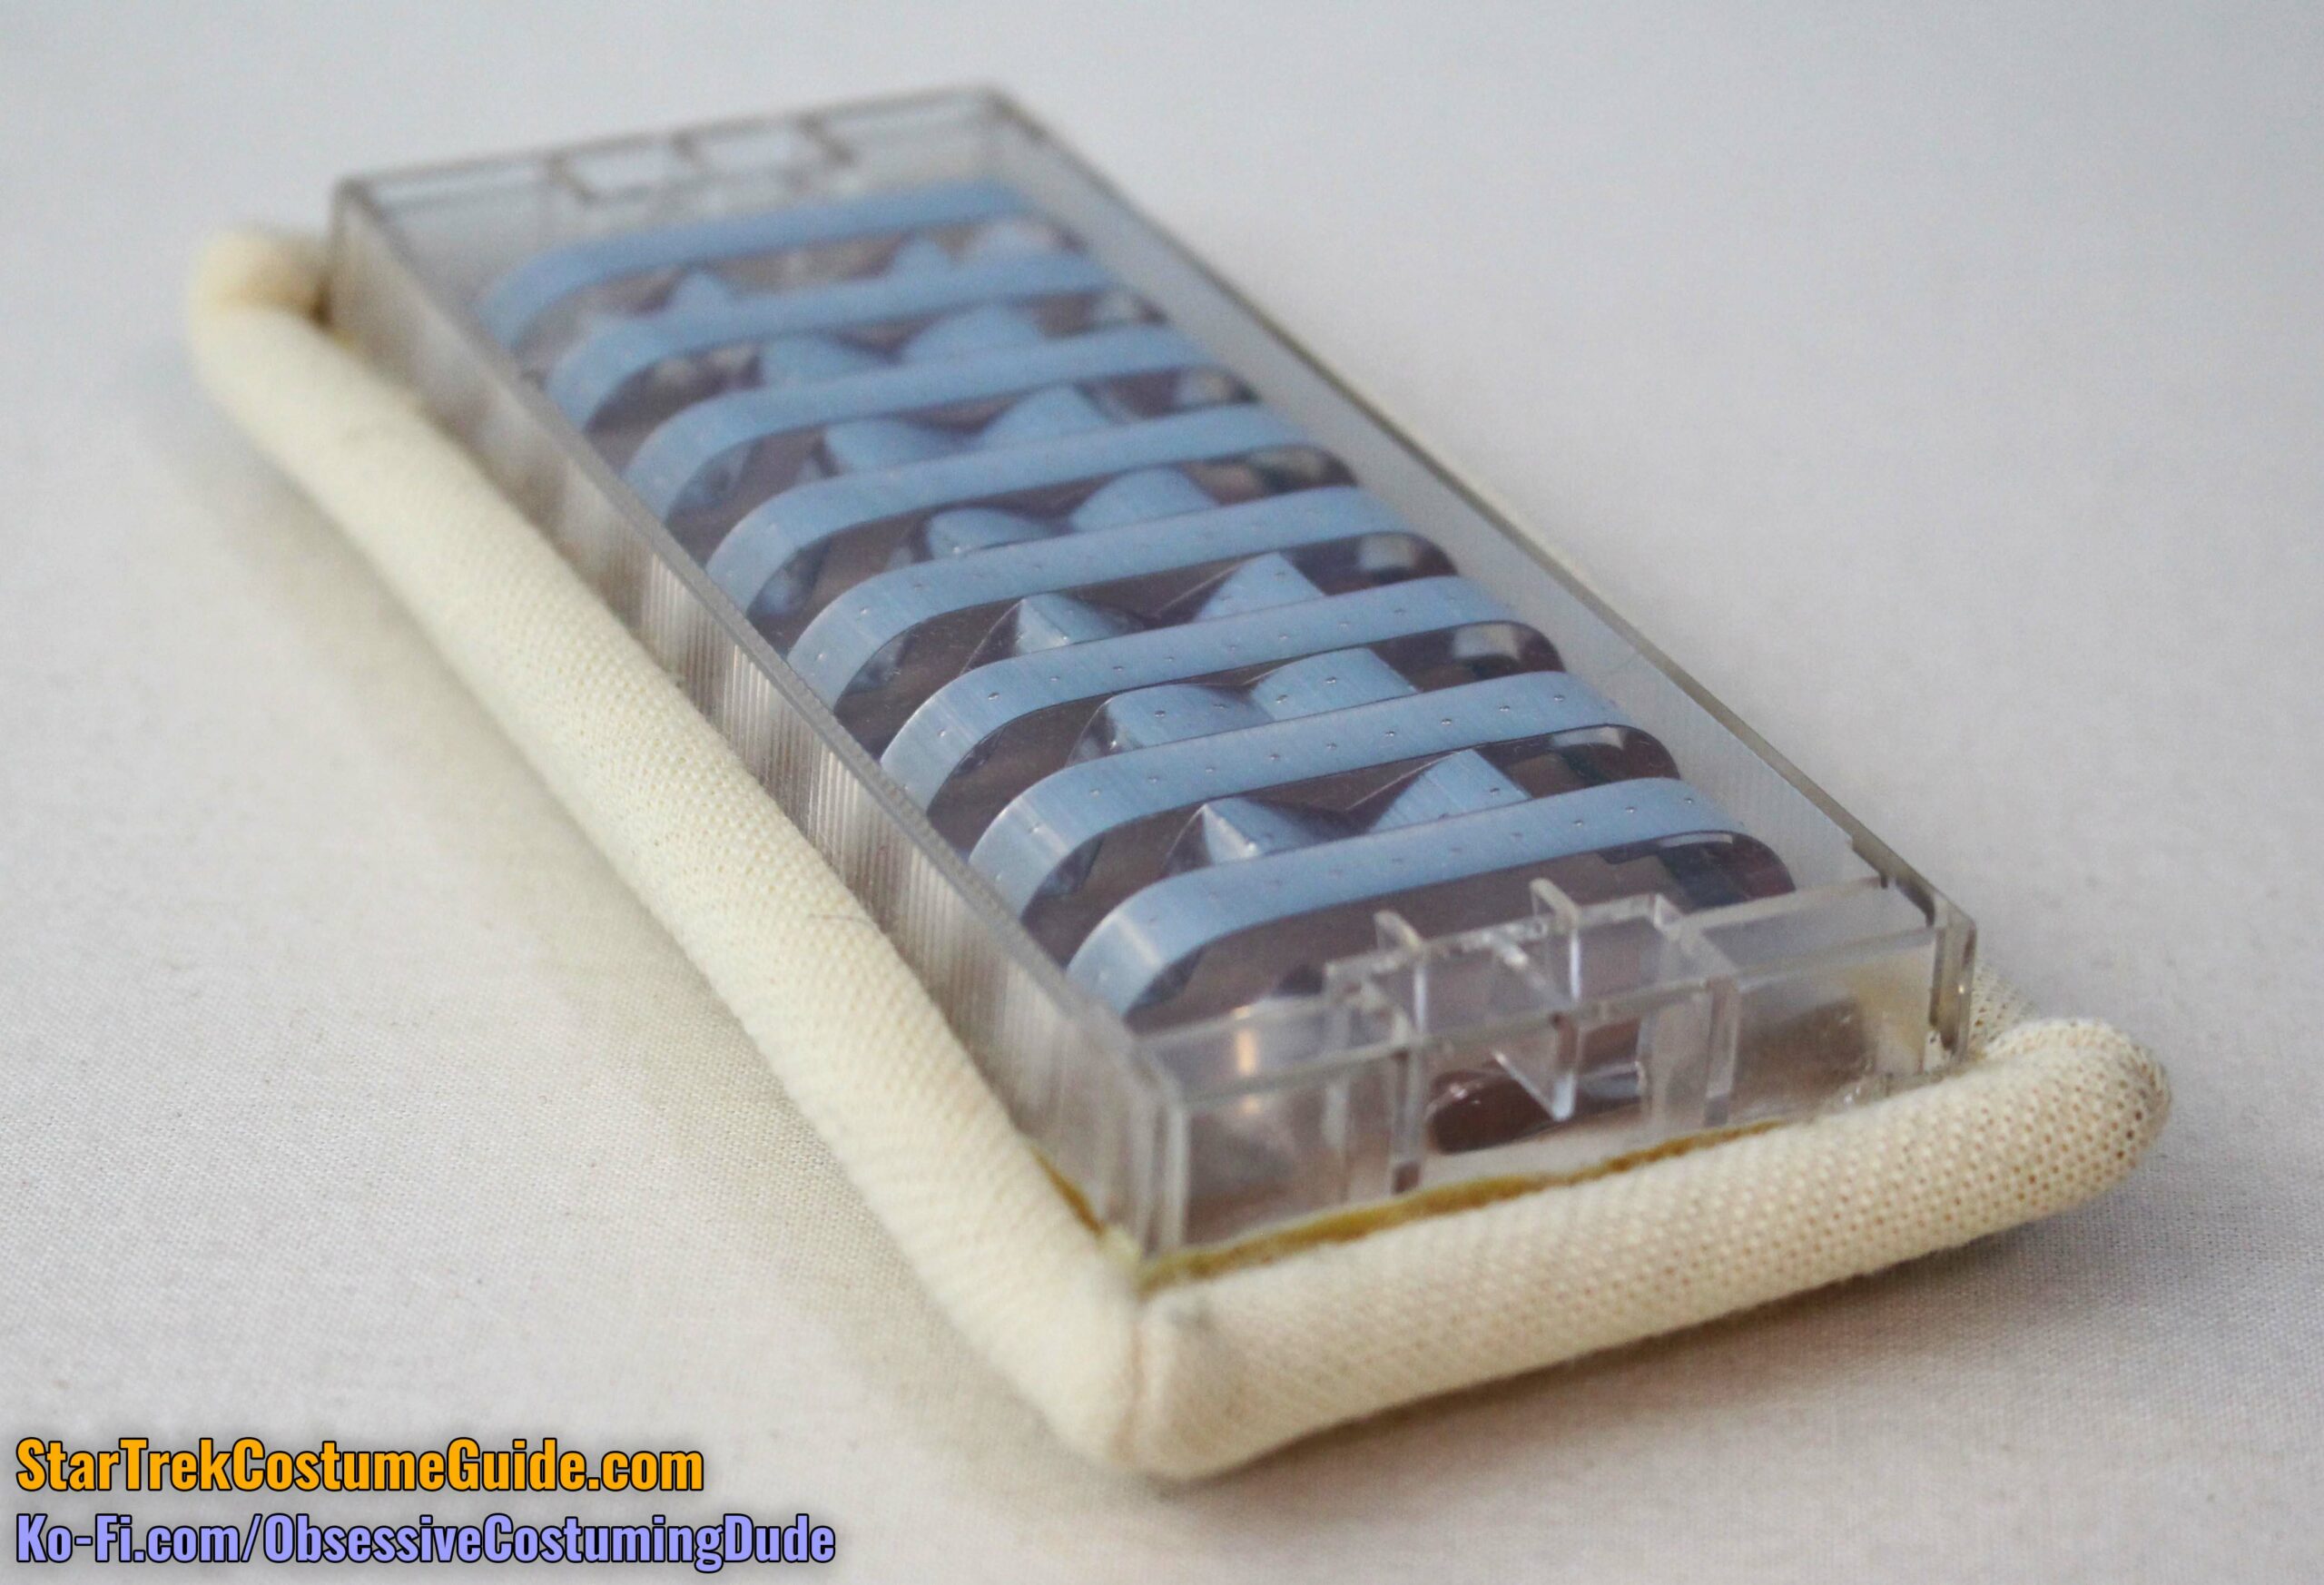
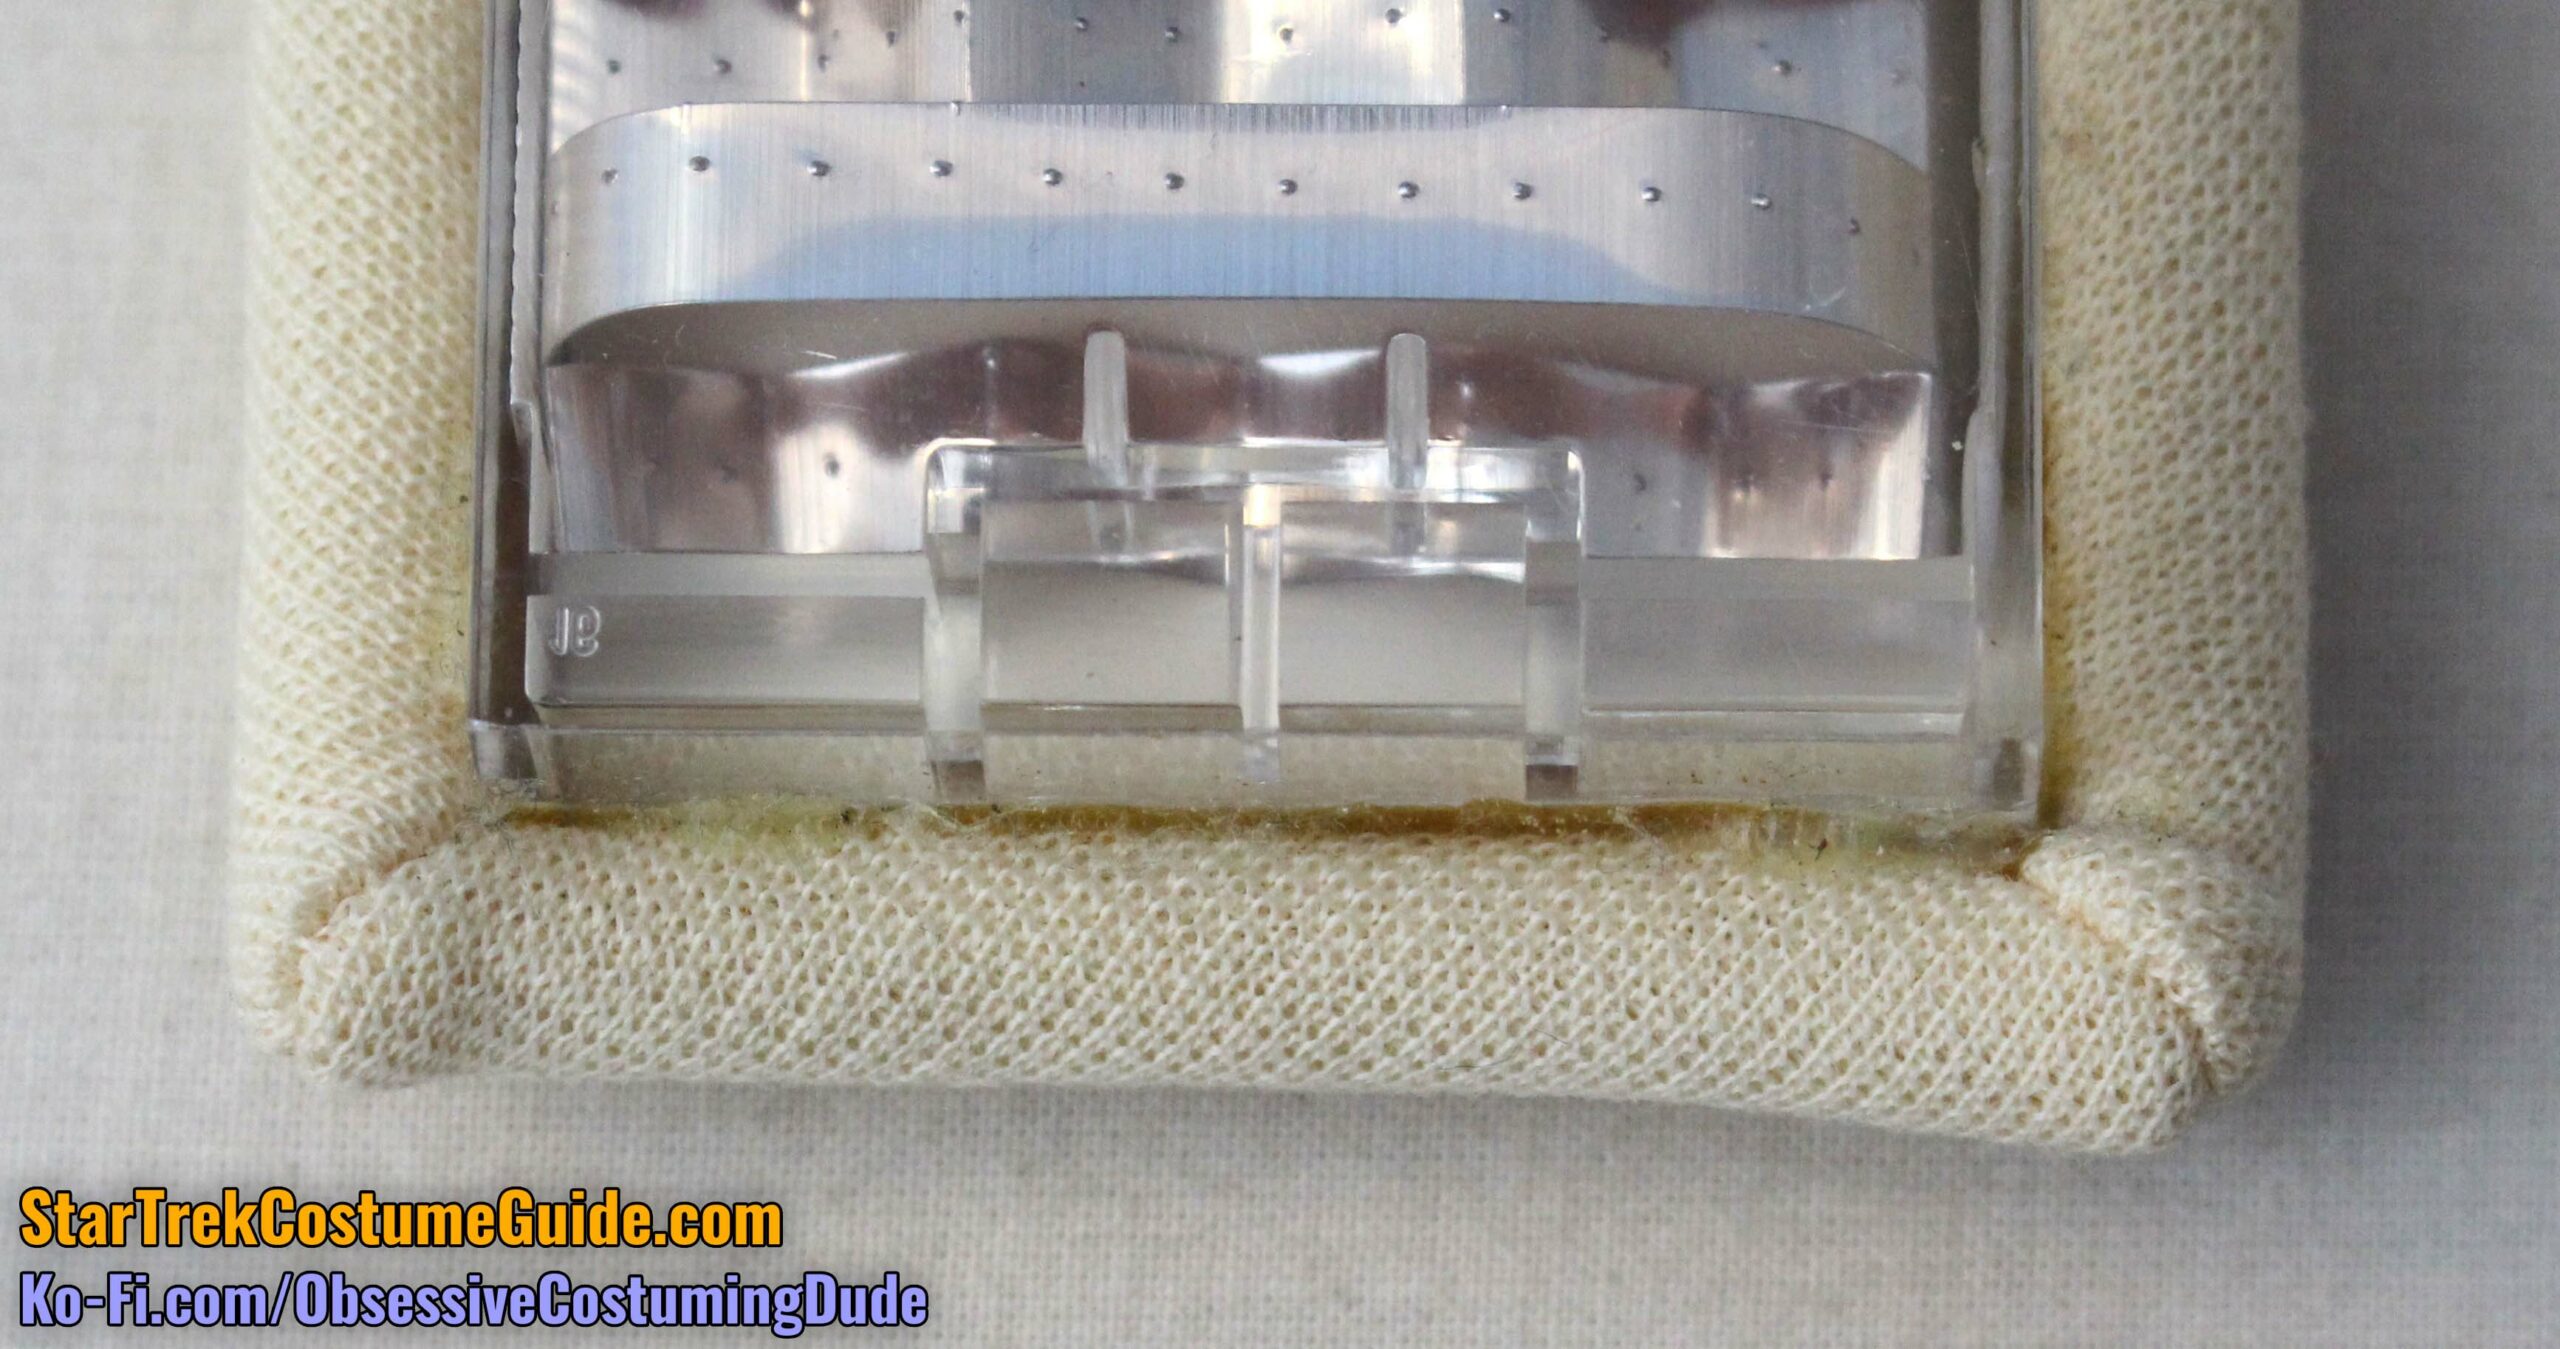
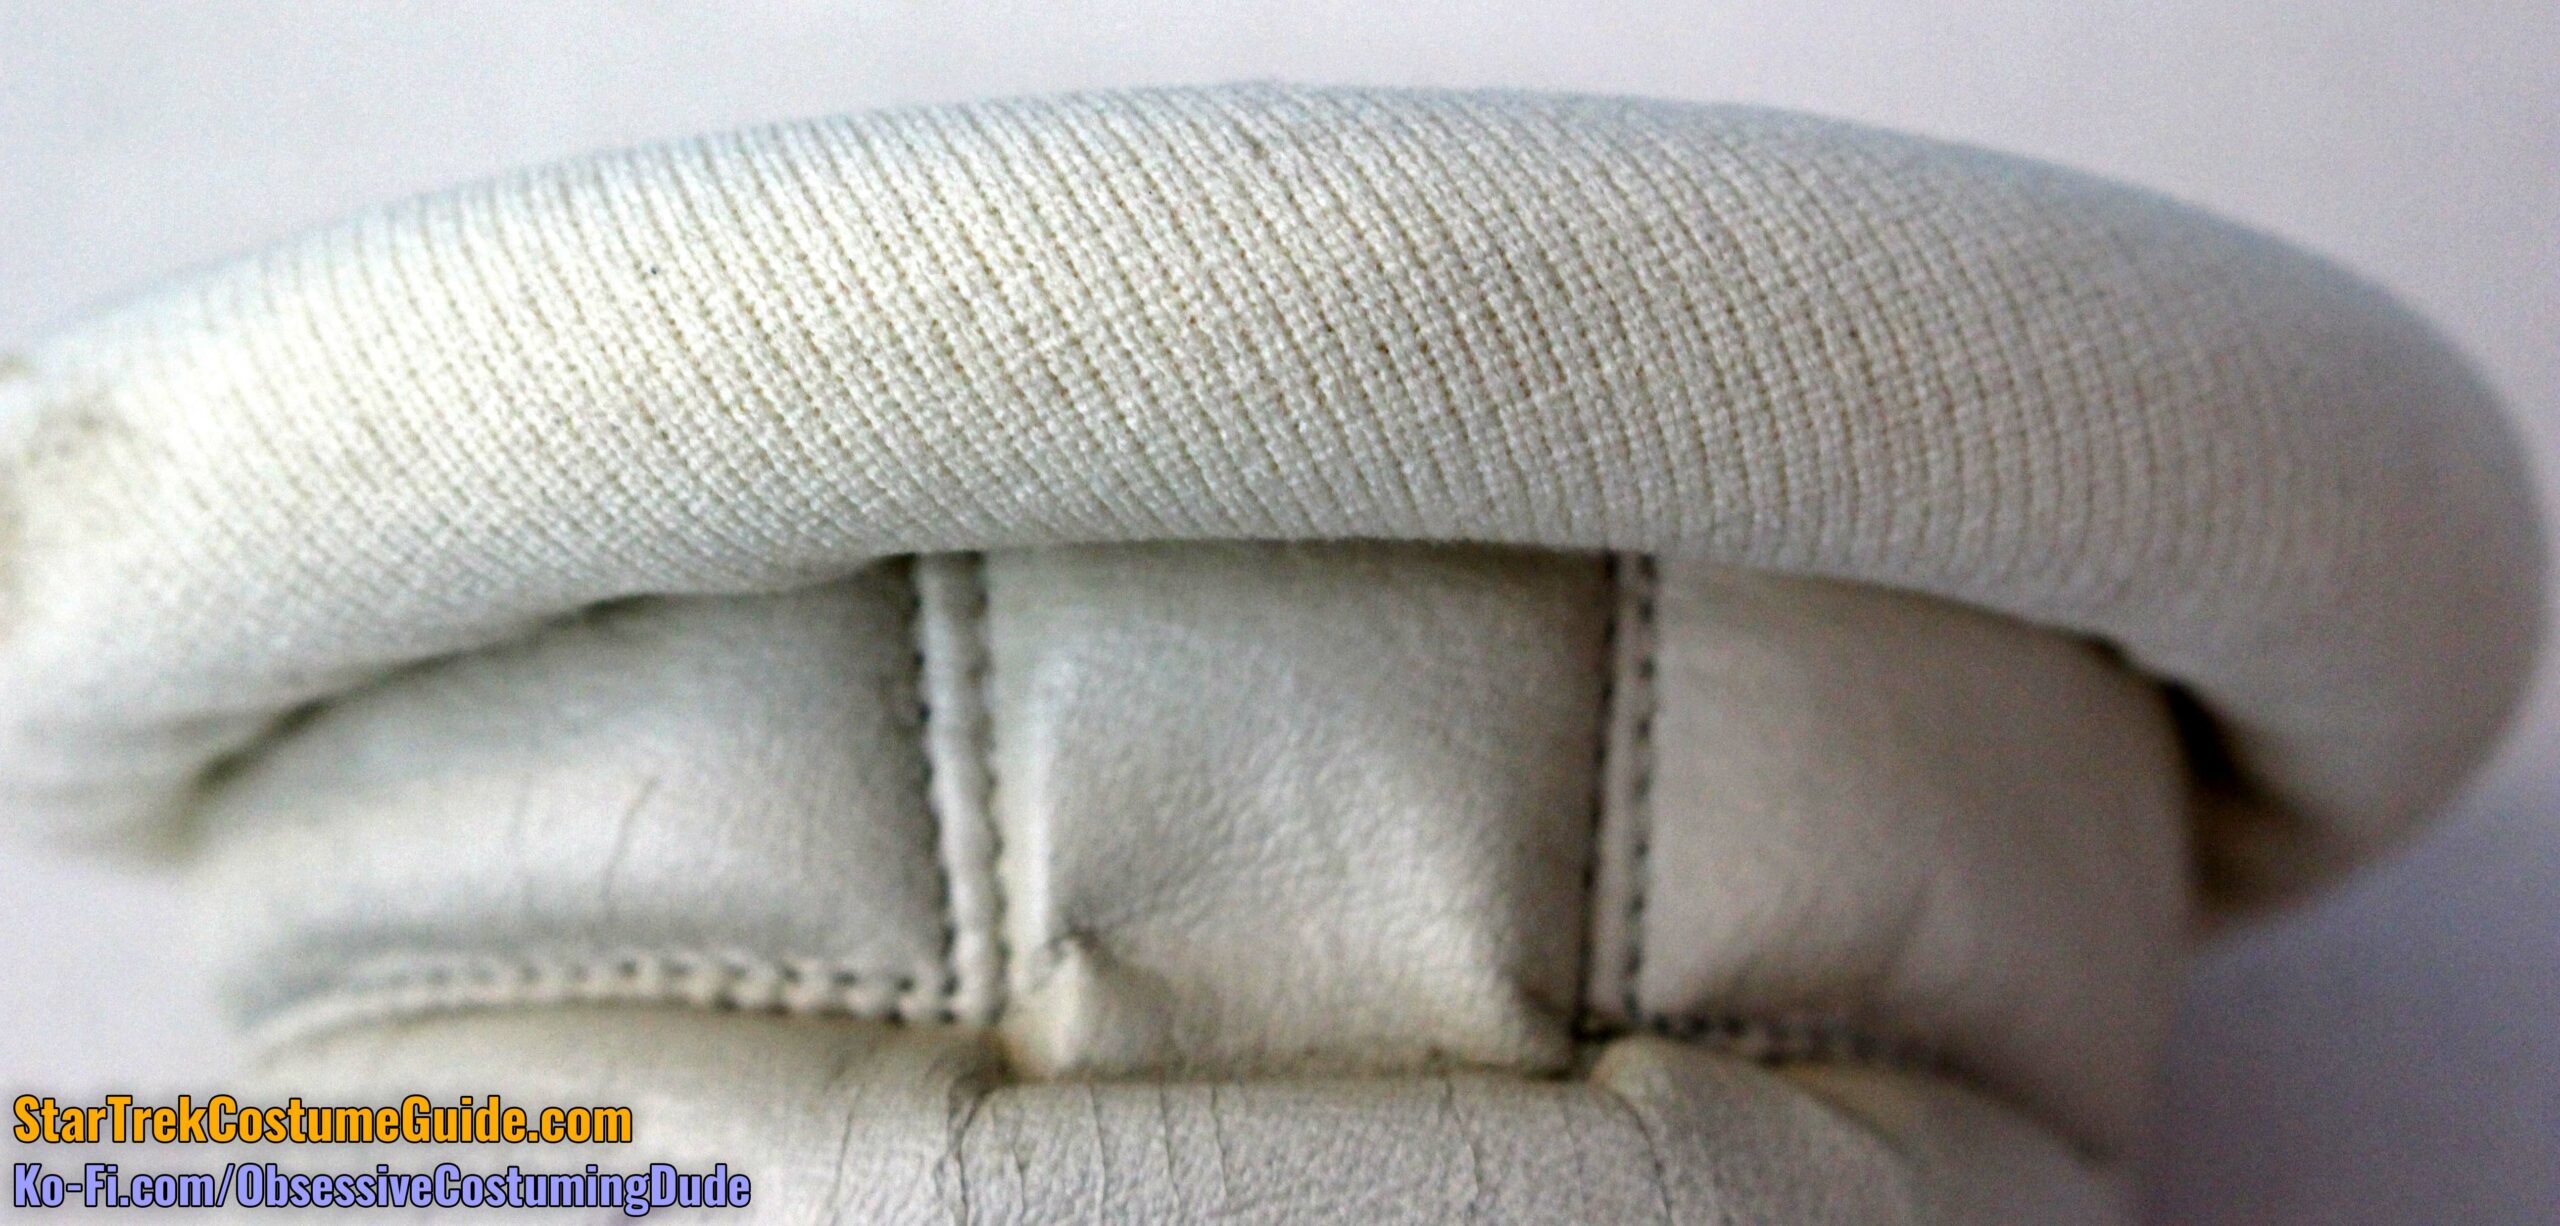
The outer edges of the box were accented with custom-made piping, comprised of off-white bias-cut knit fabric wrapped around ¼” (or possibly 5/16”) cord.
The corners of the piping were mitered.
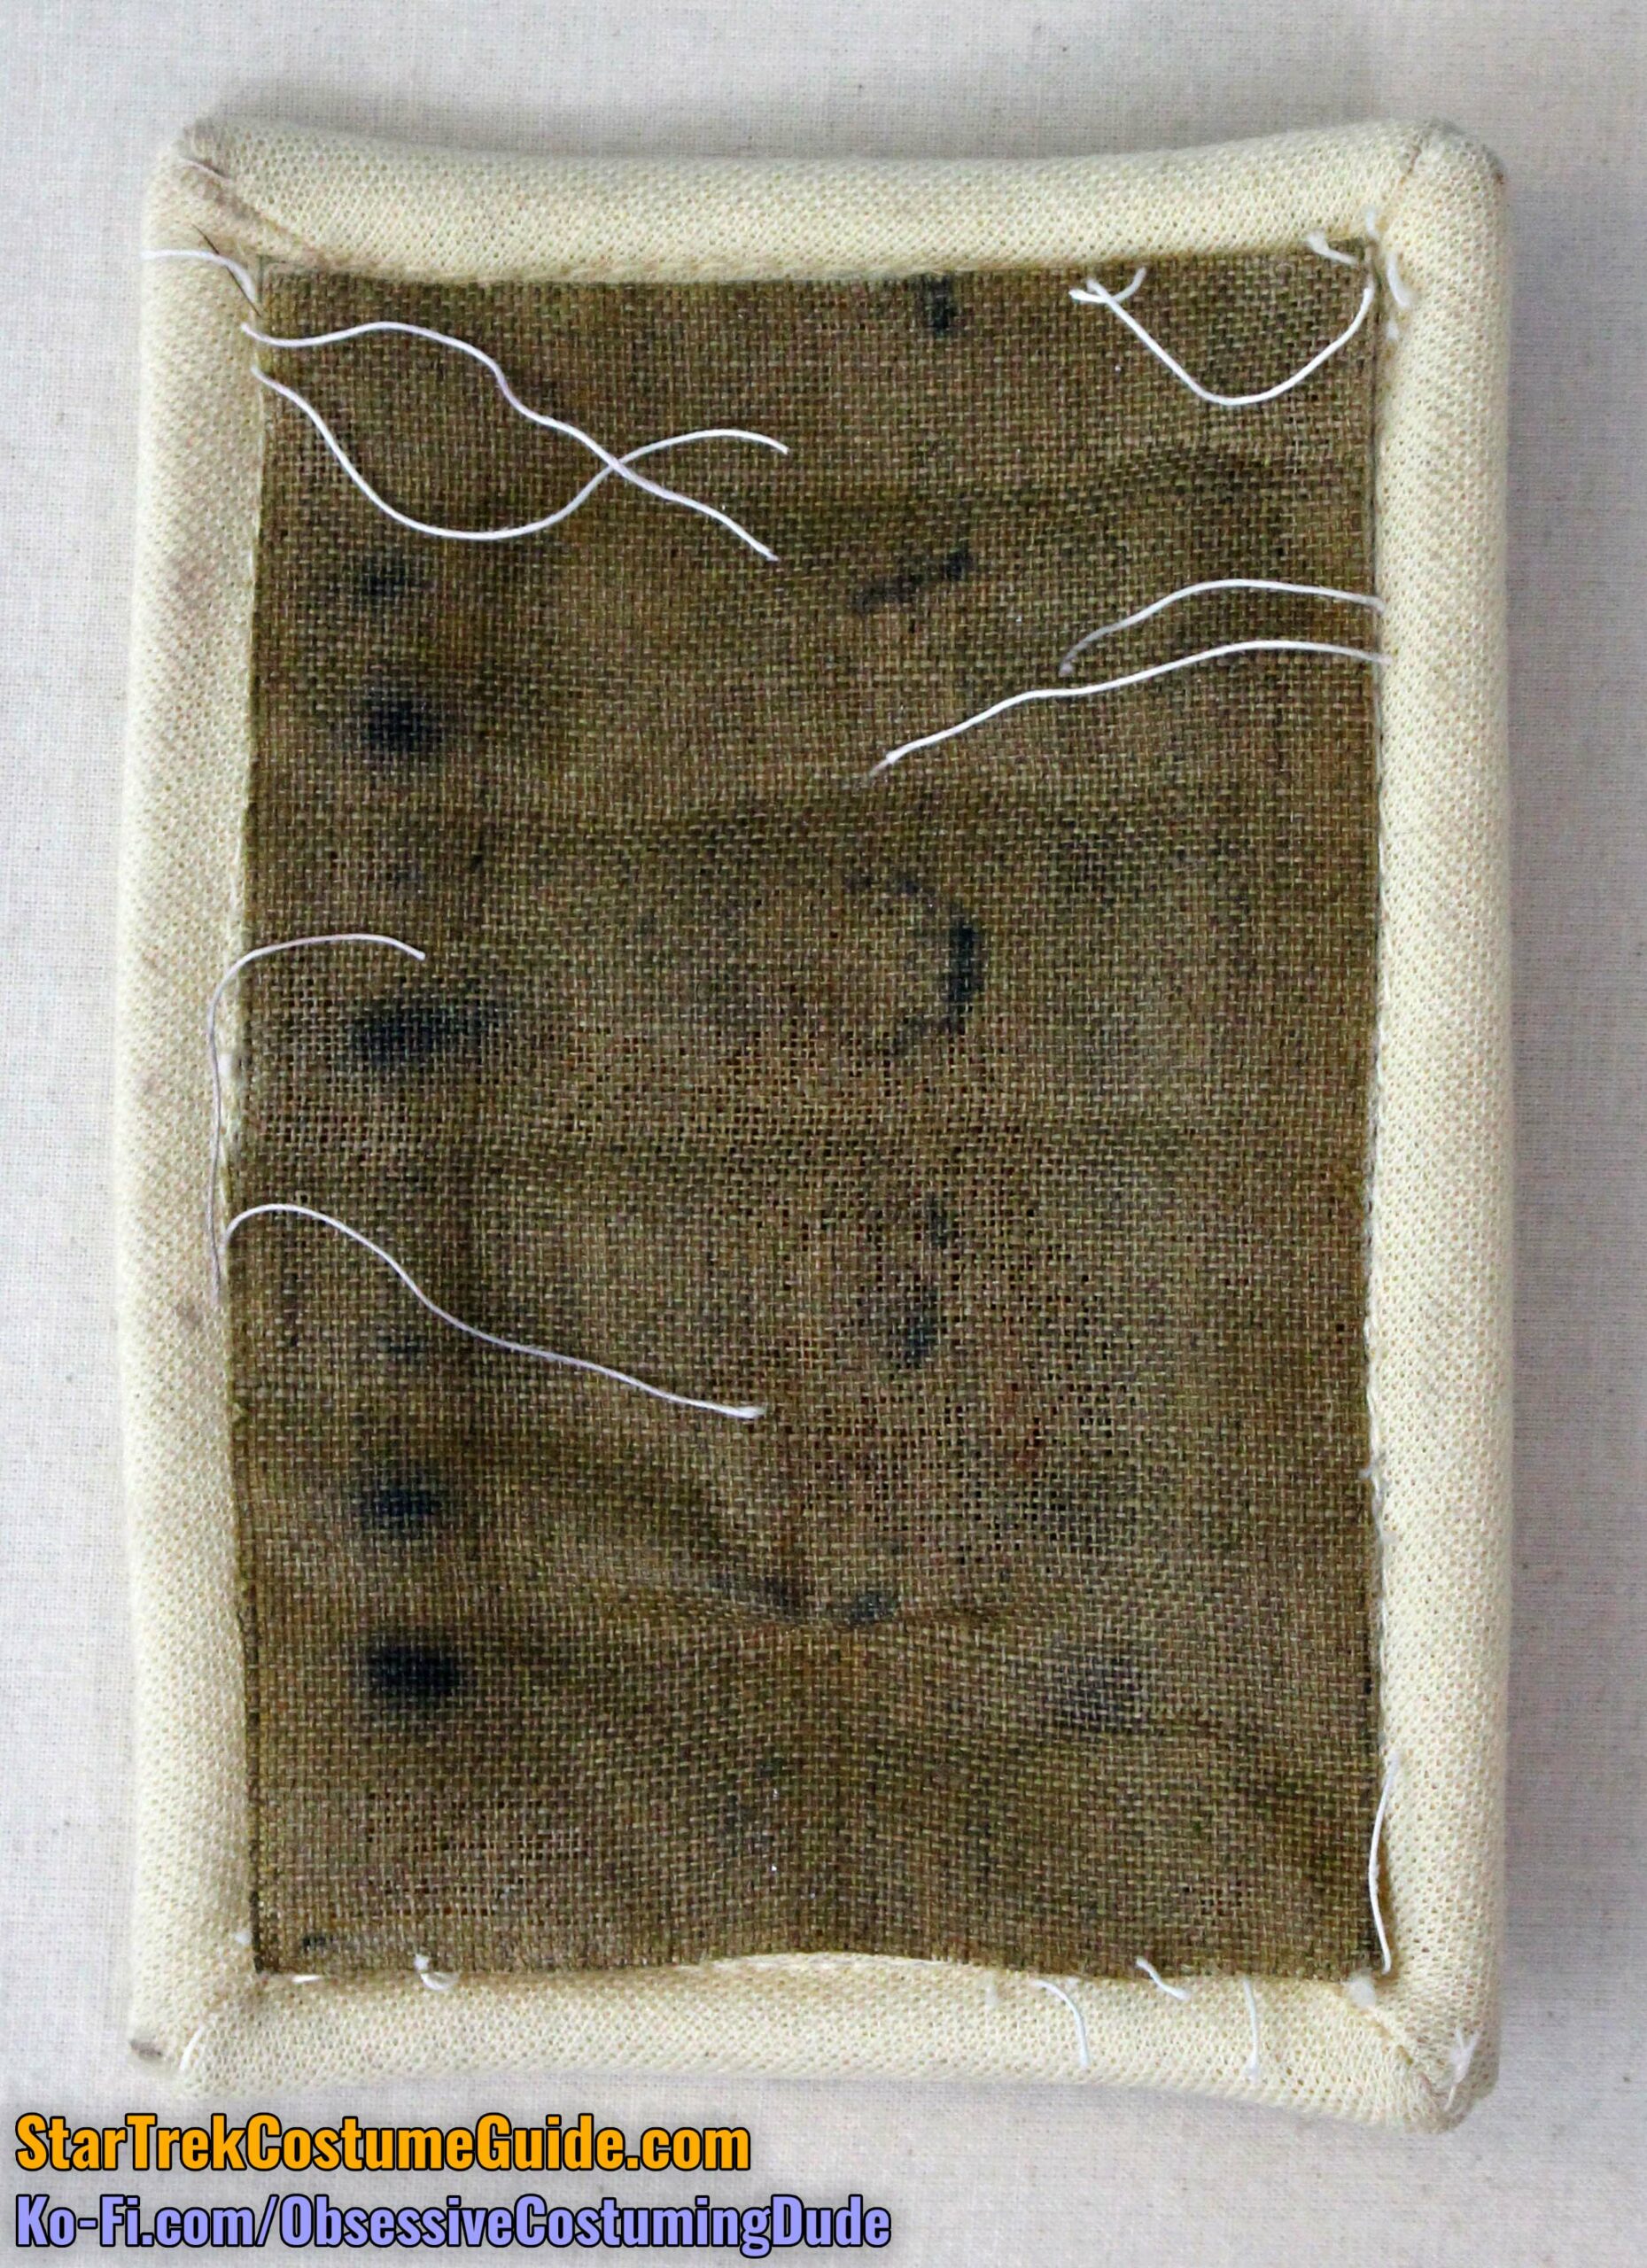
The piping appears to have simply been glued to the underside of the box, which was also backed with a layer of off-white felt.
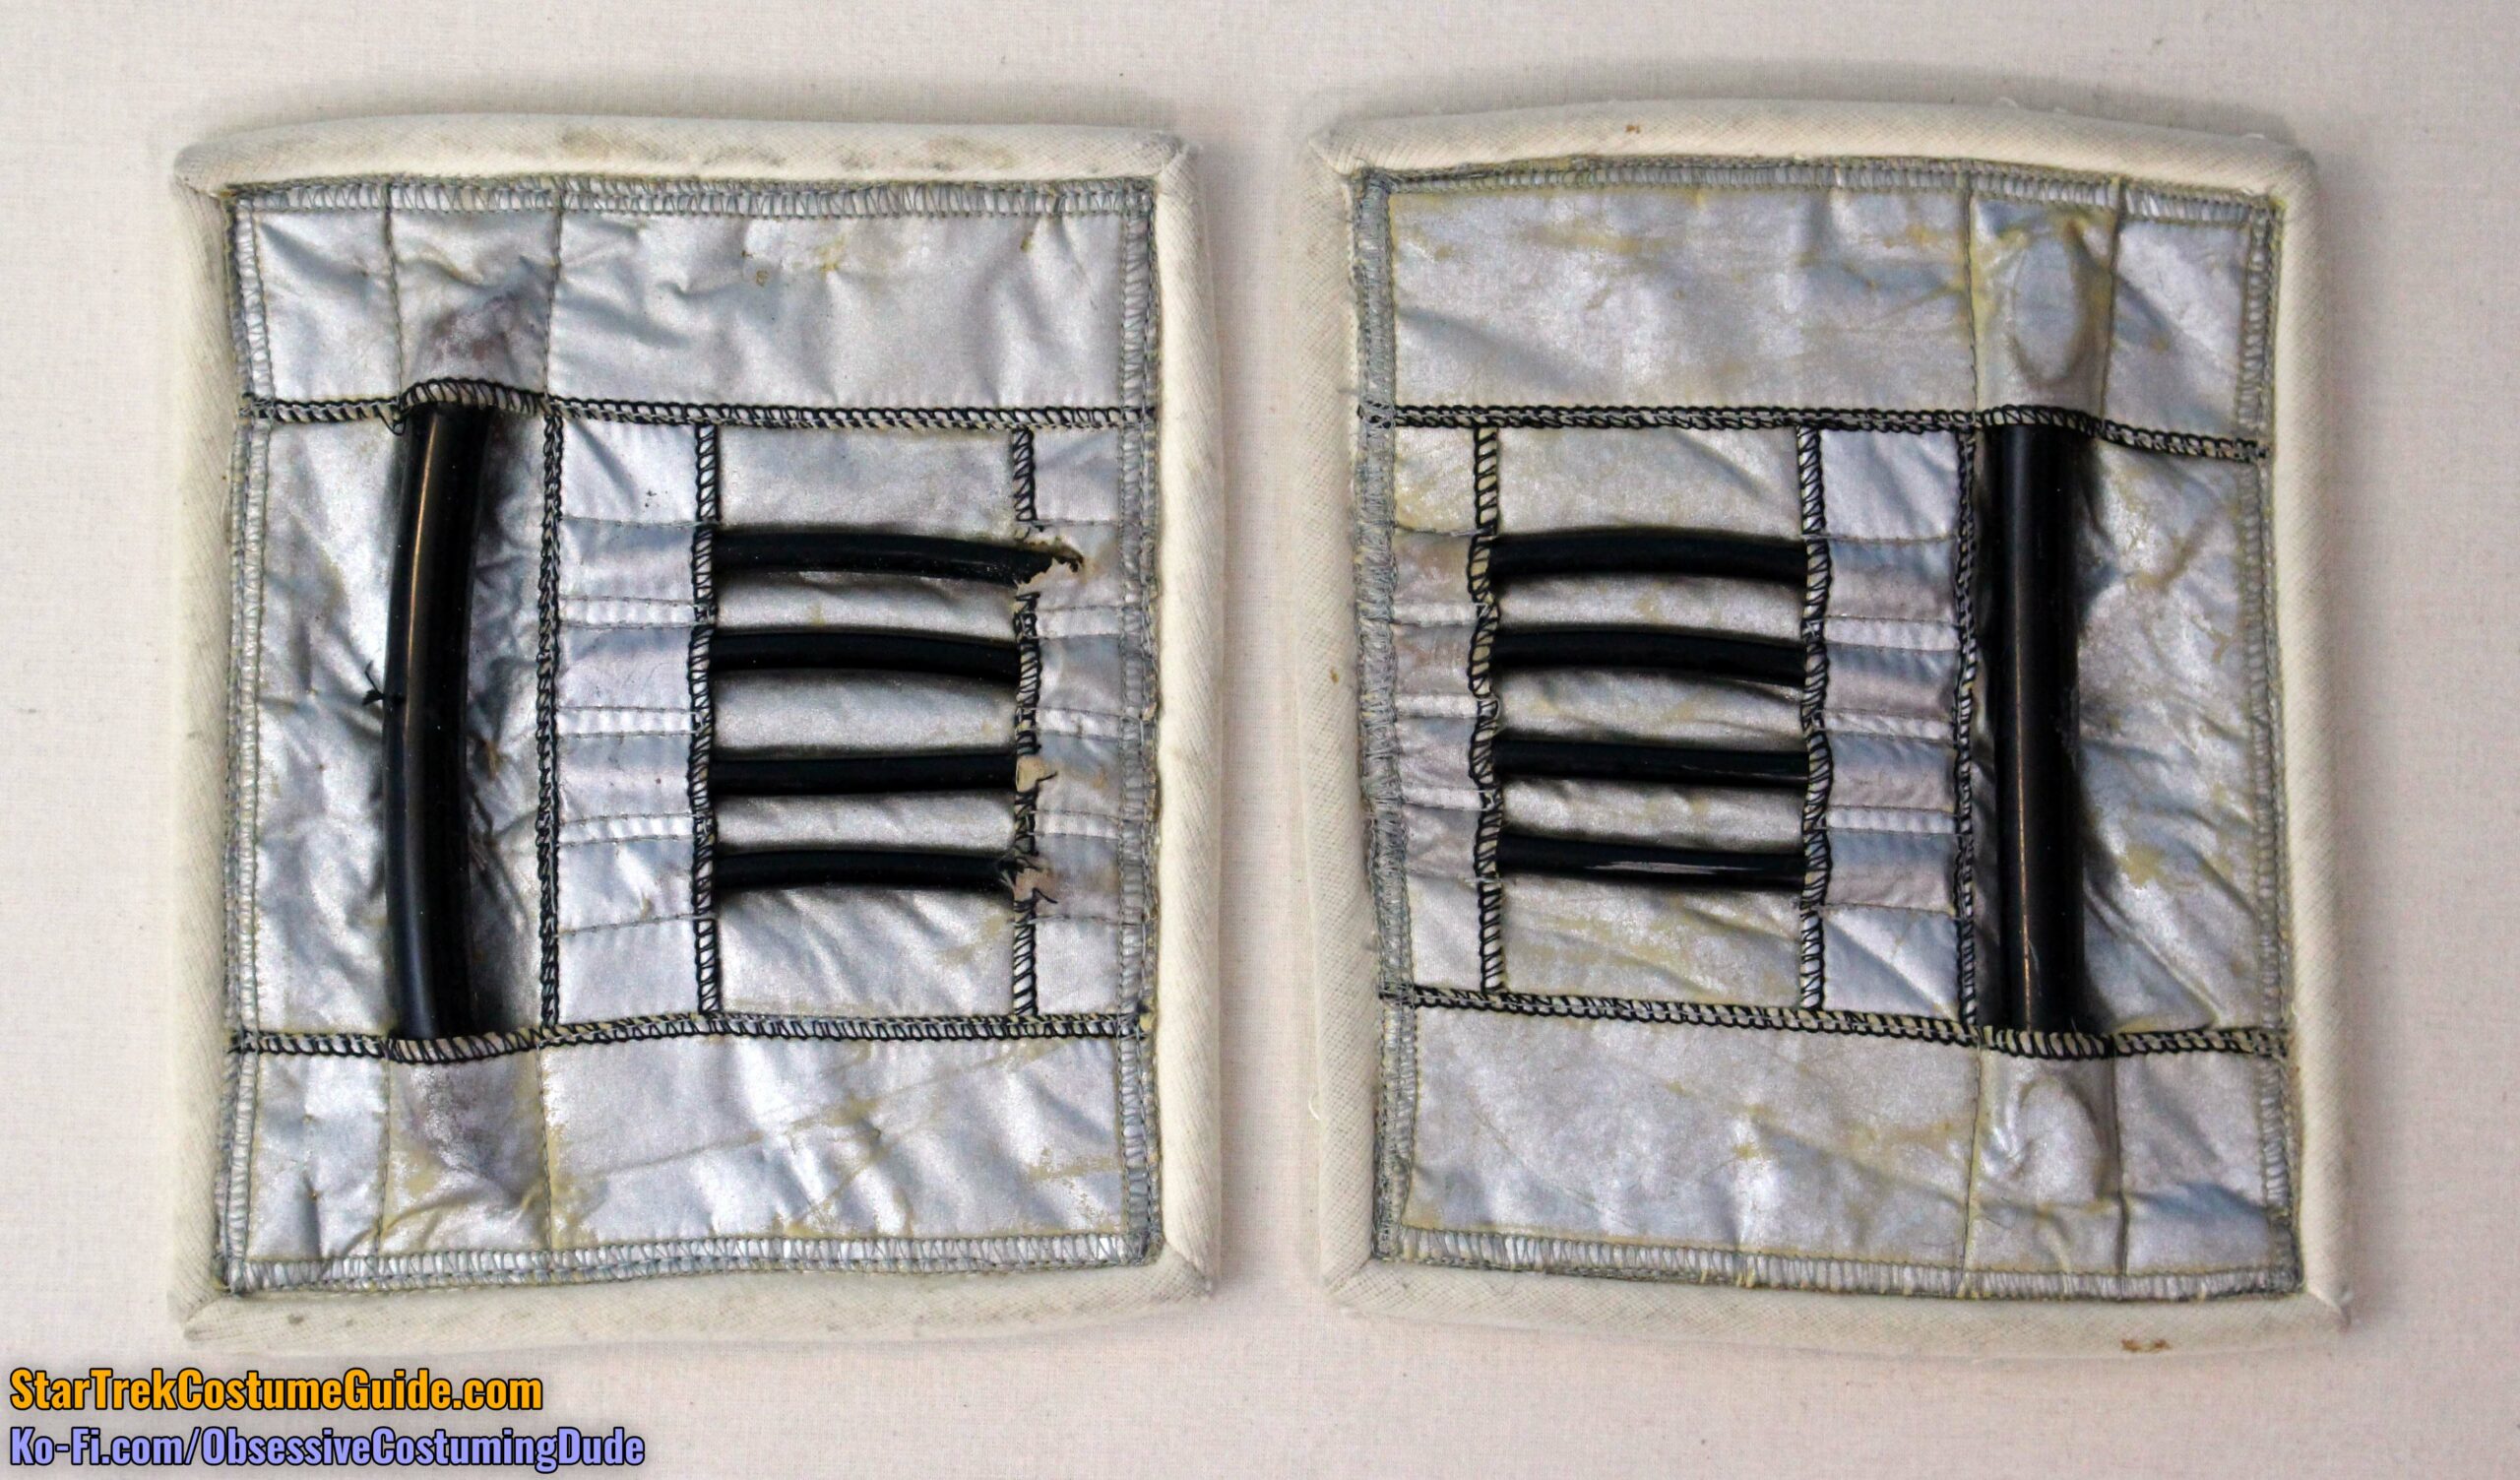
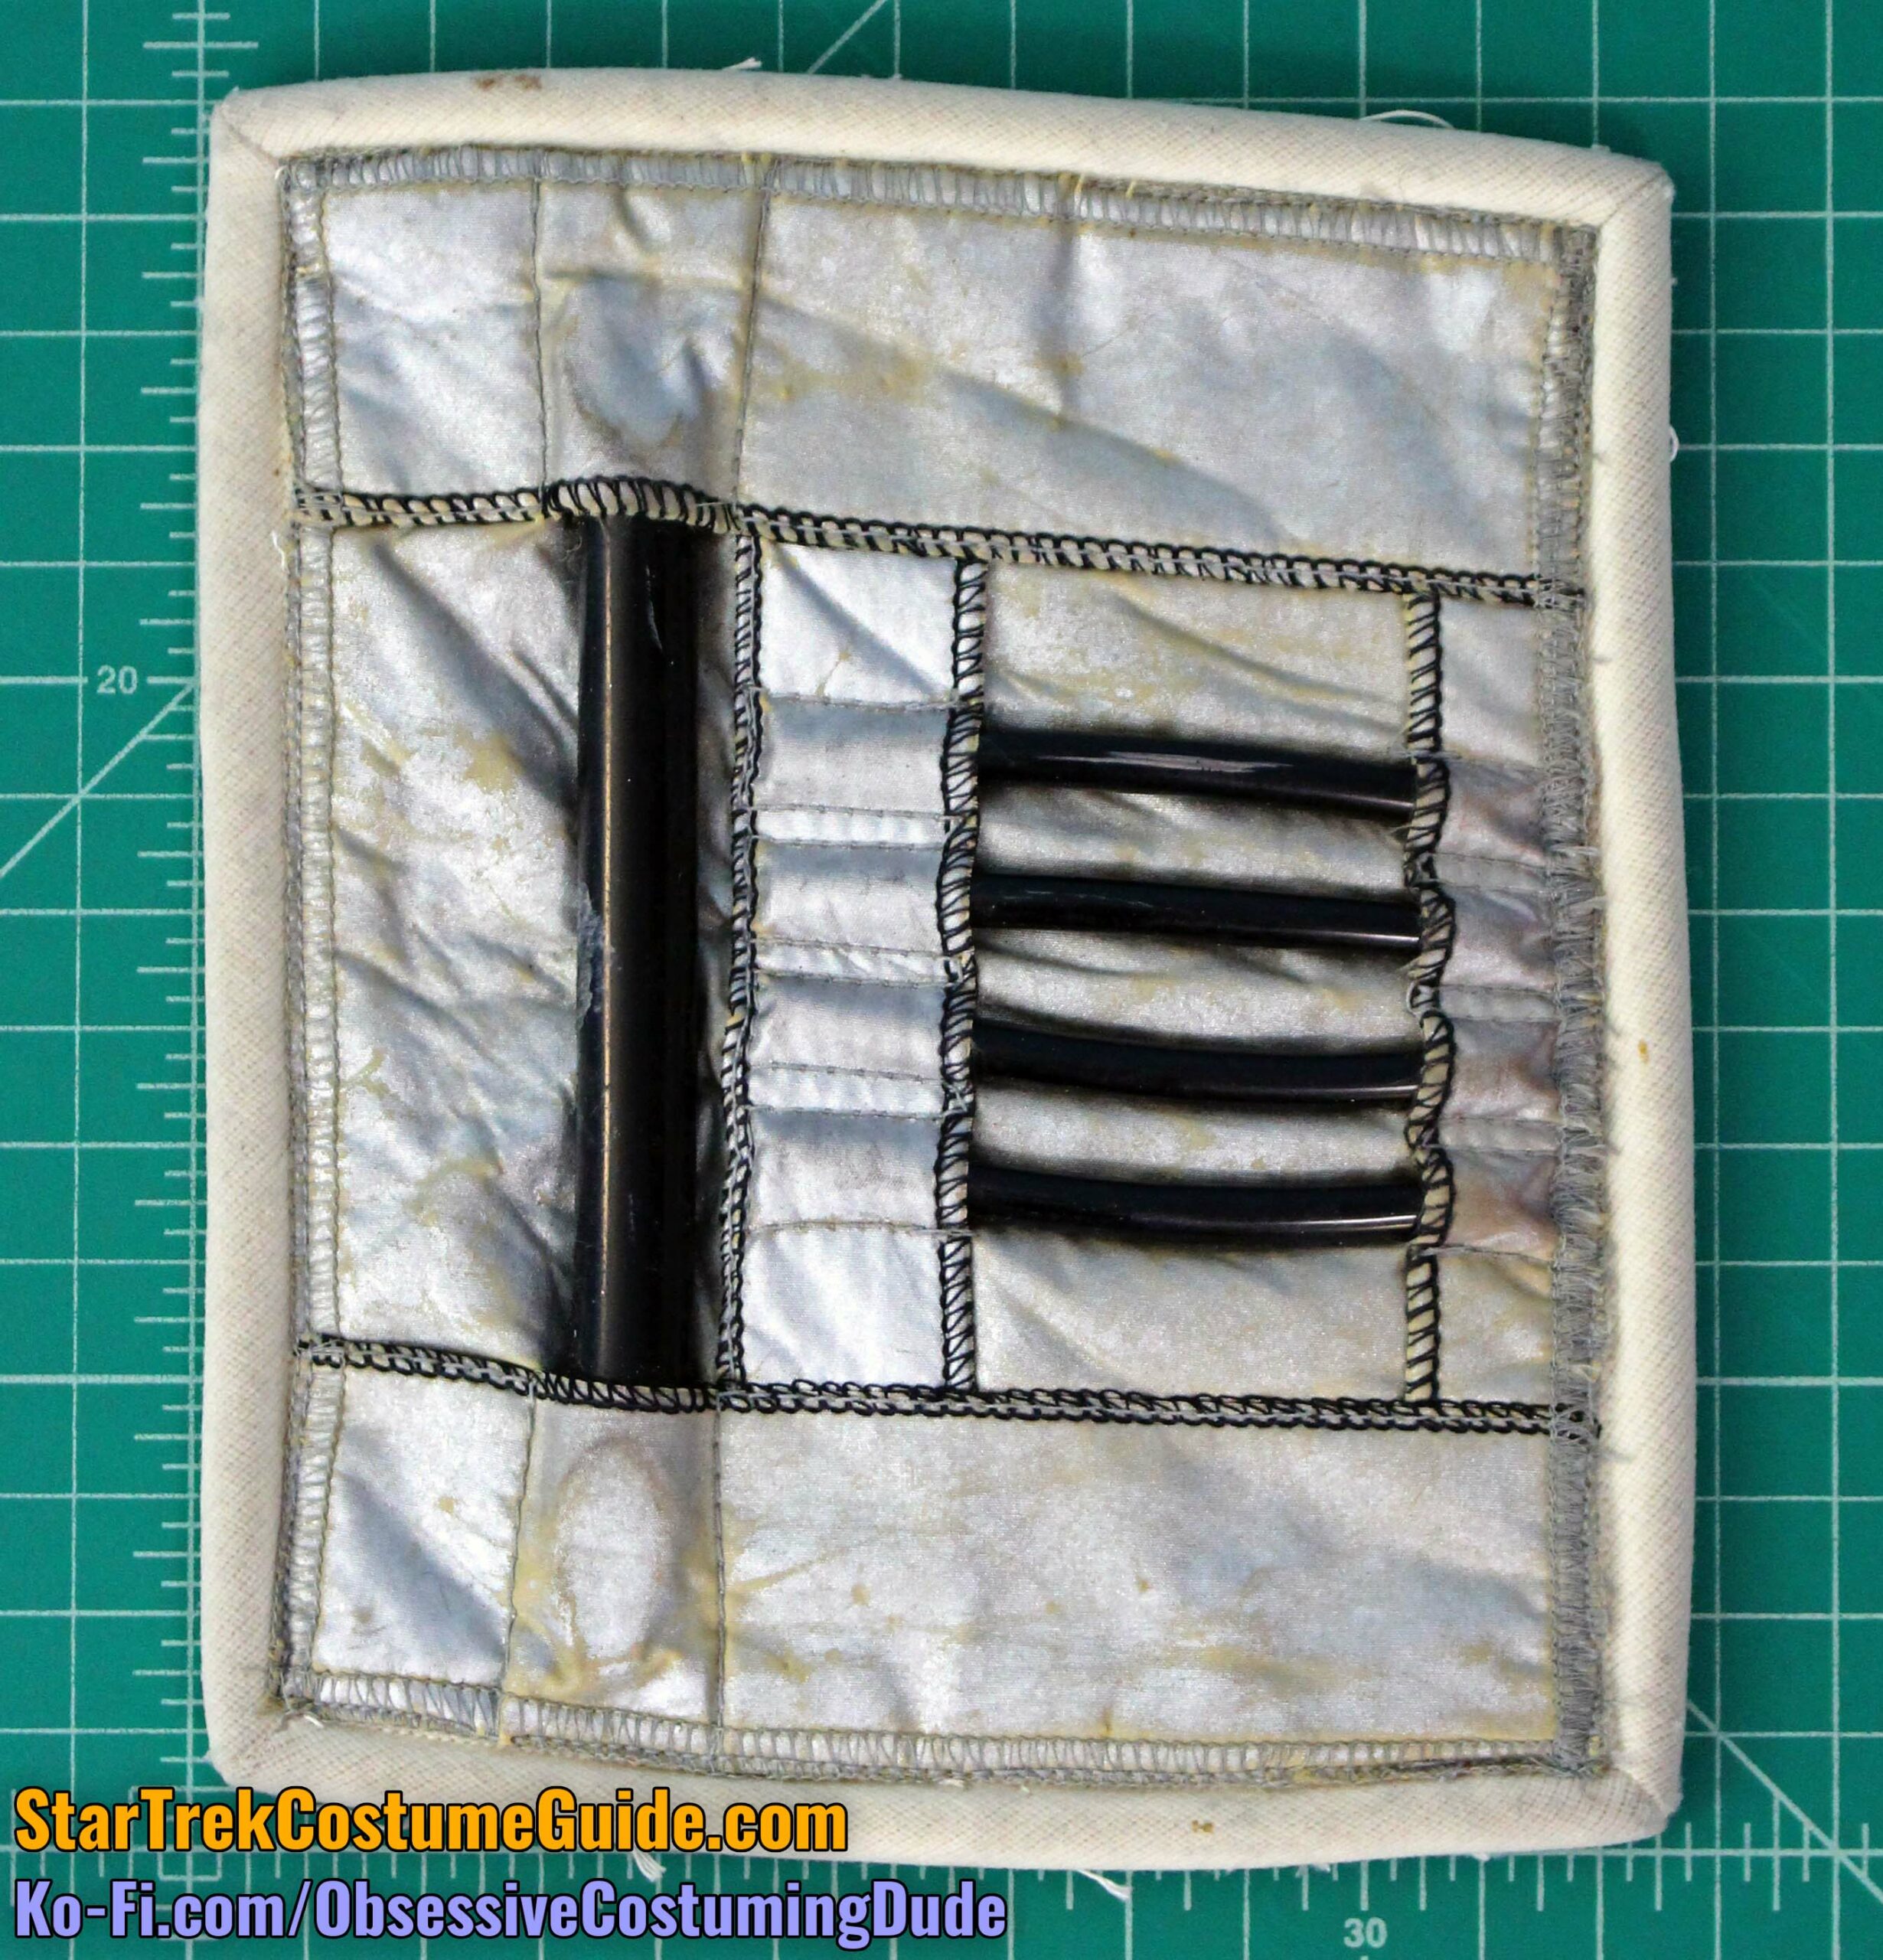
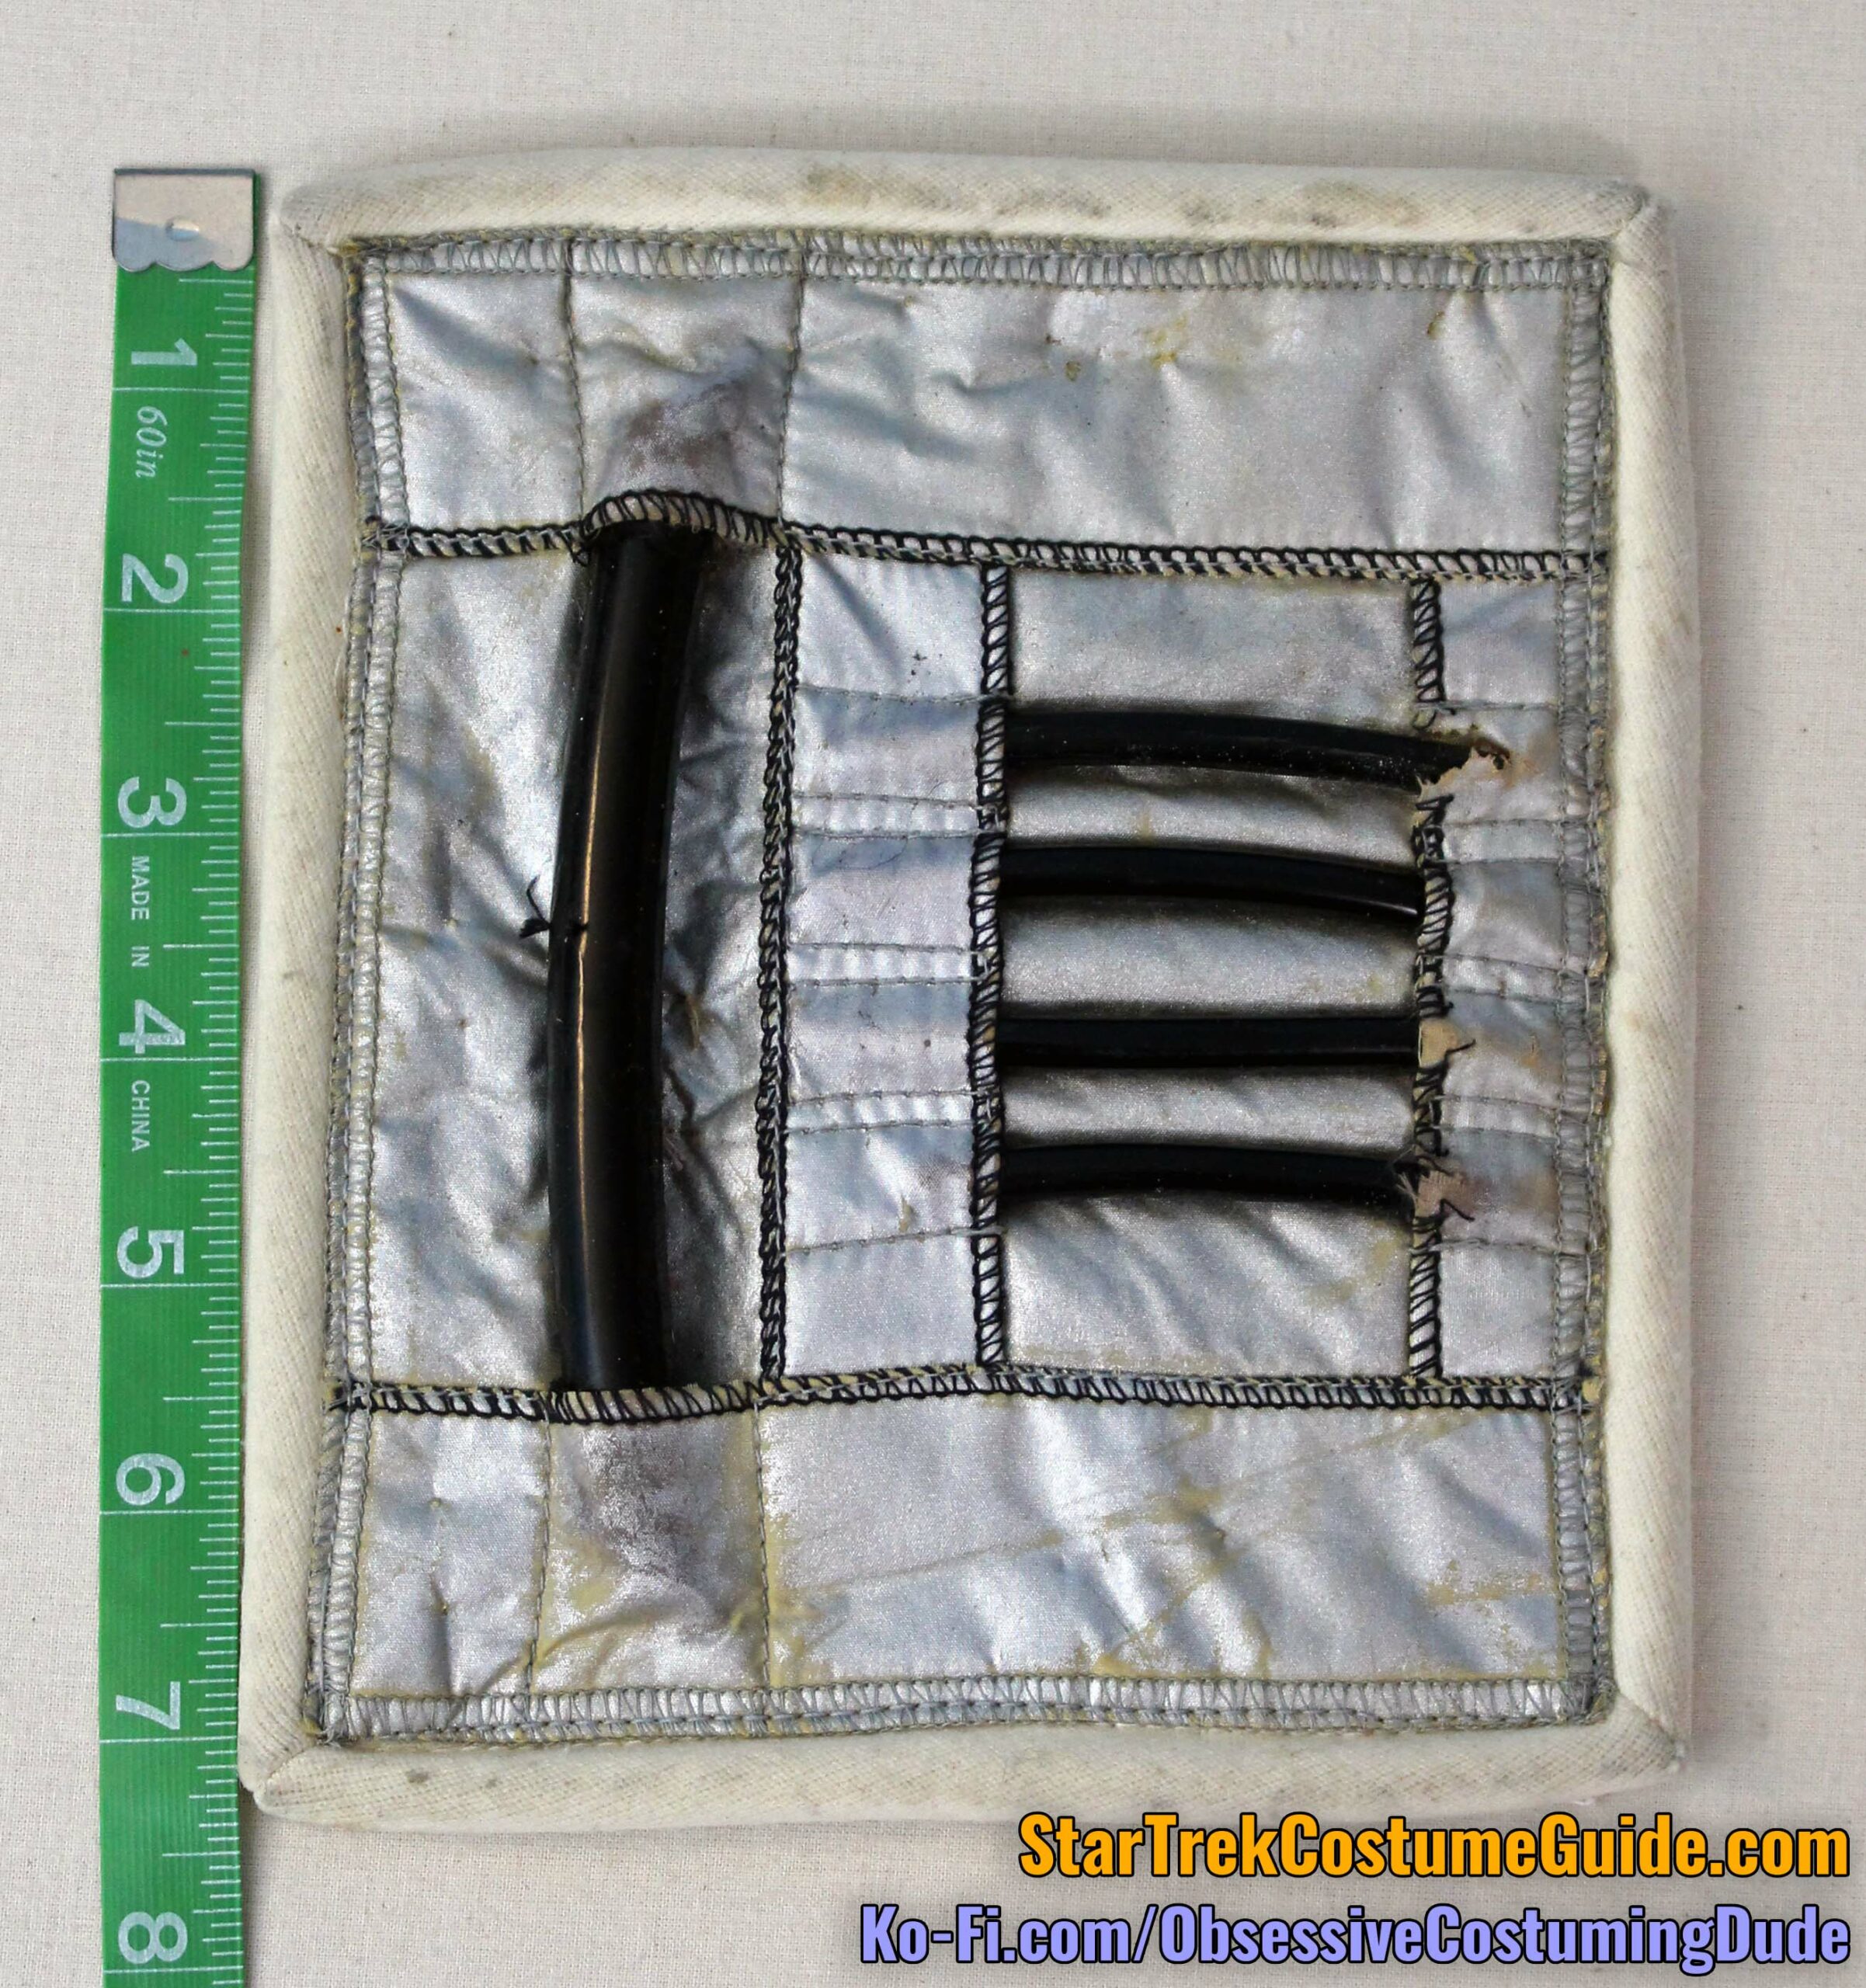
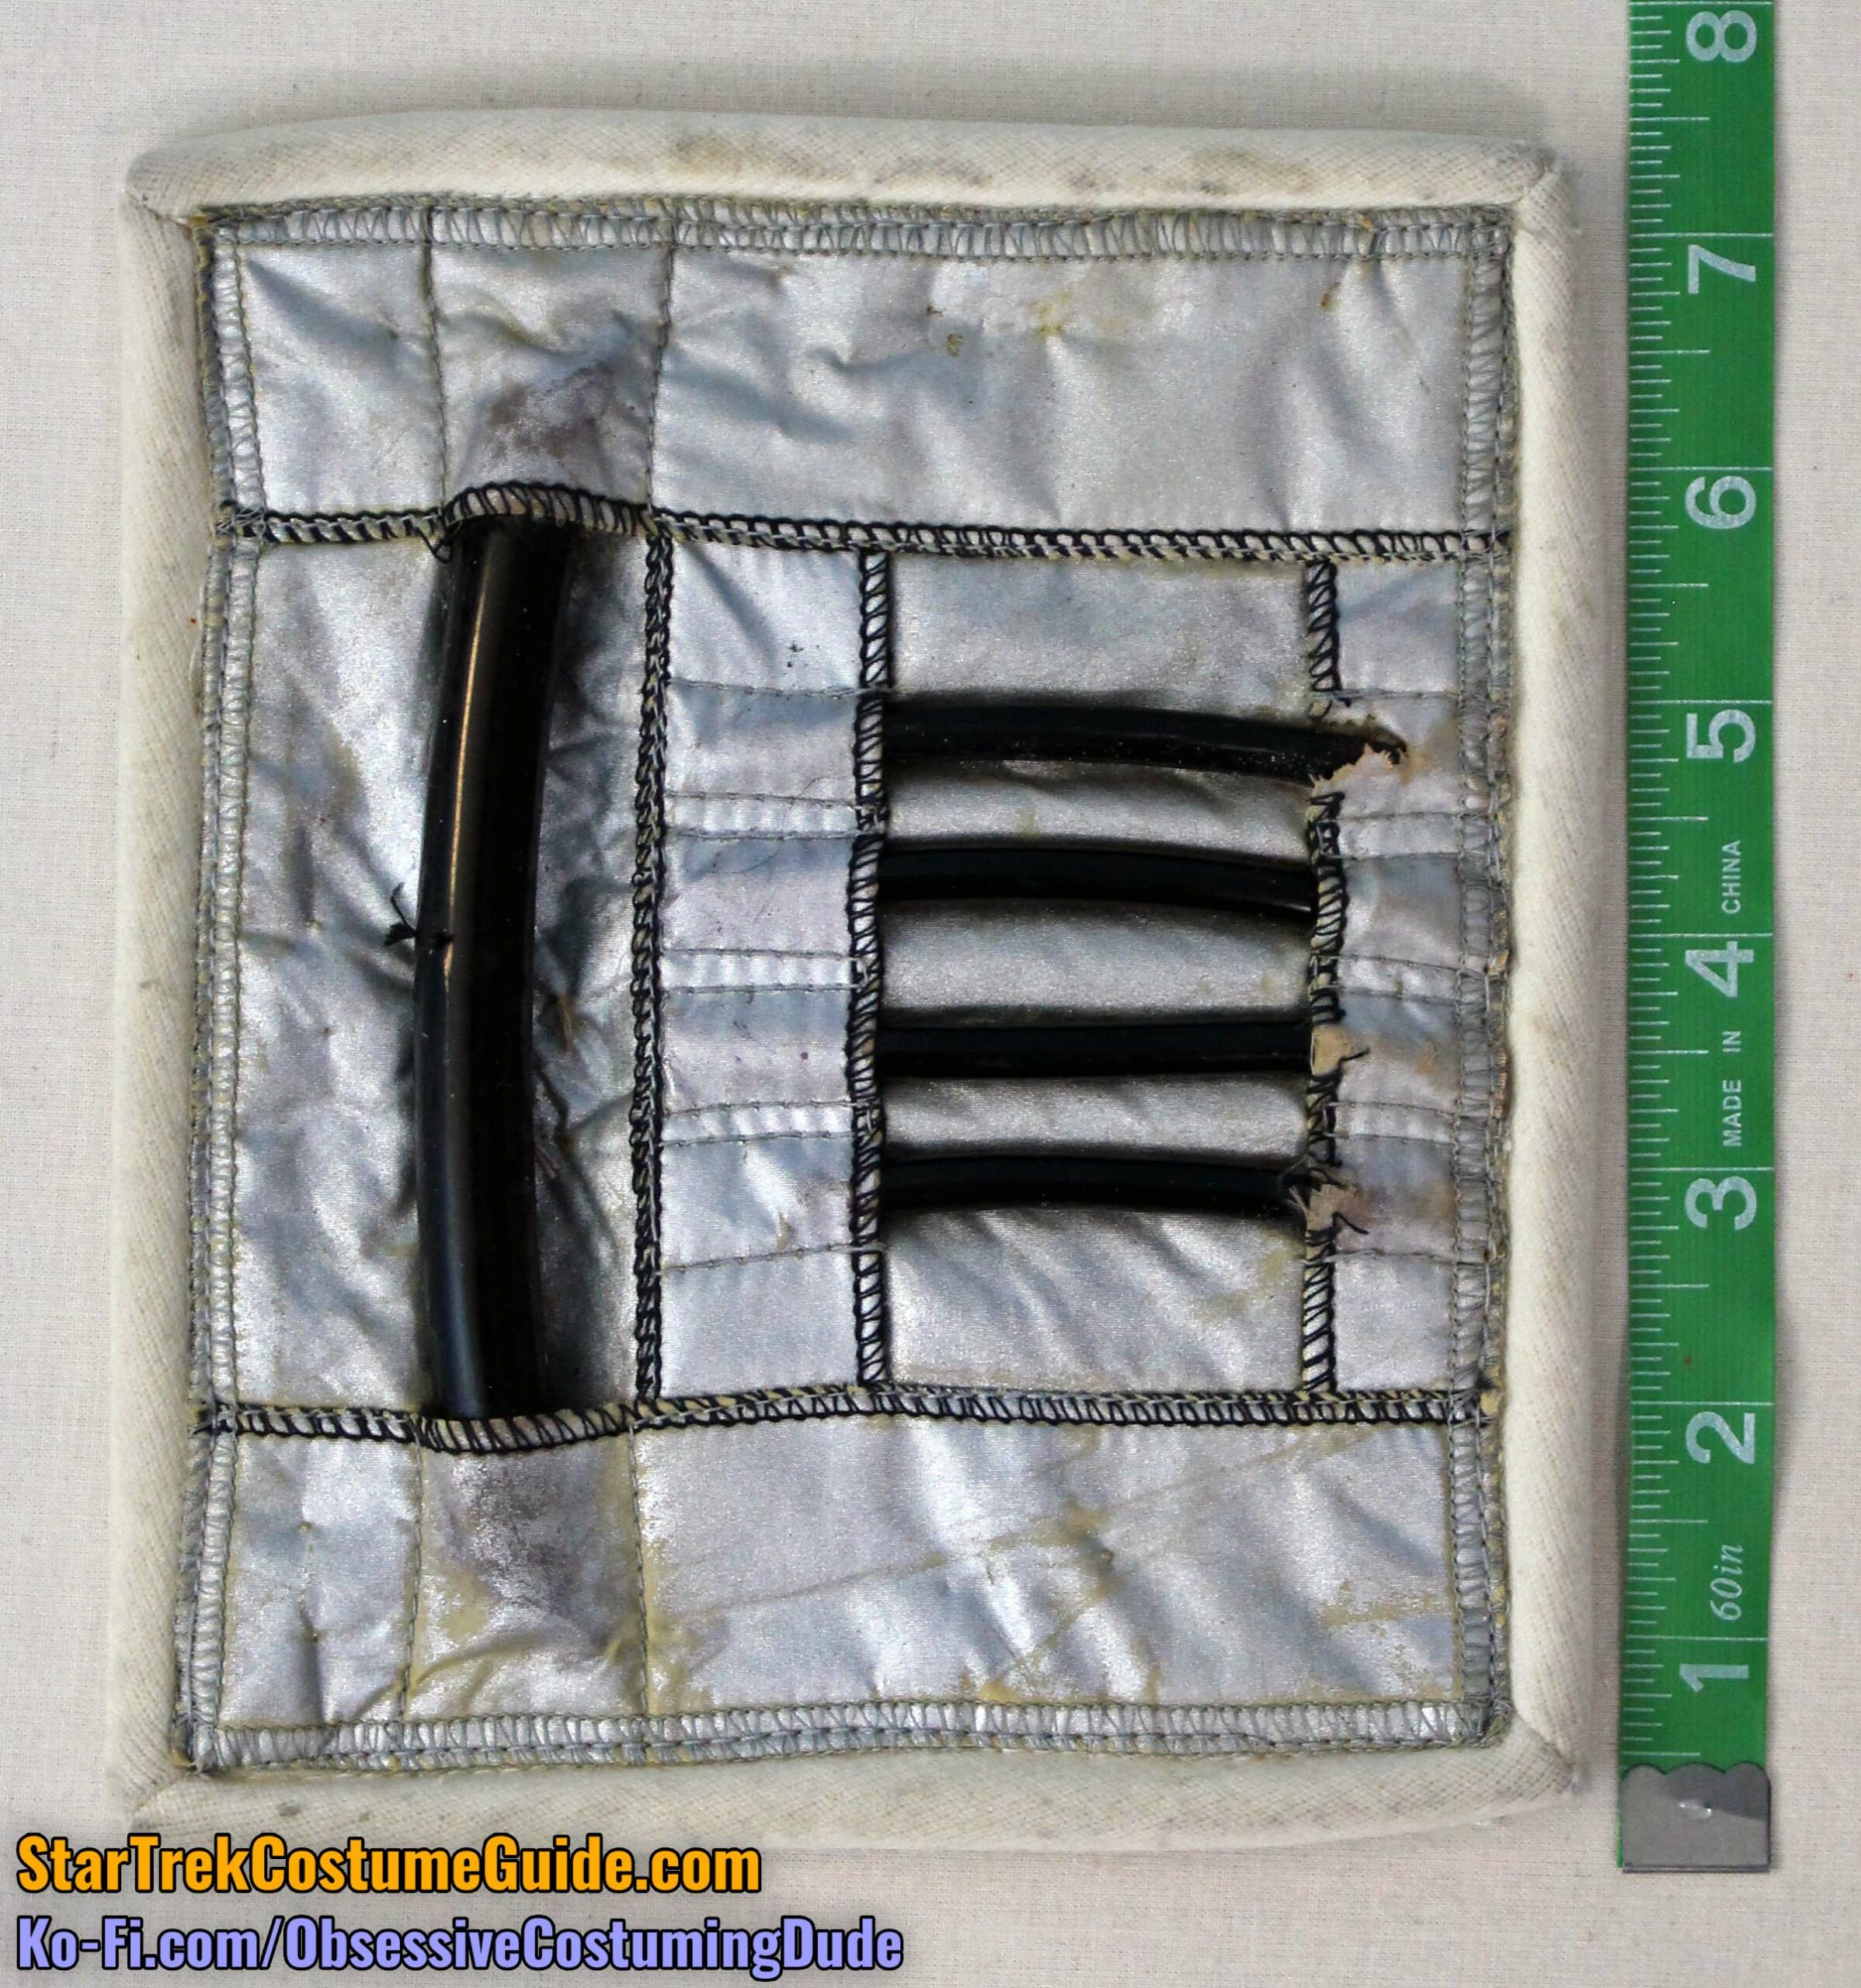
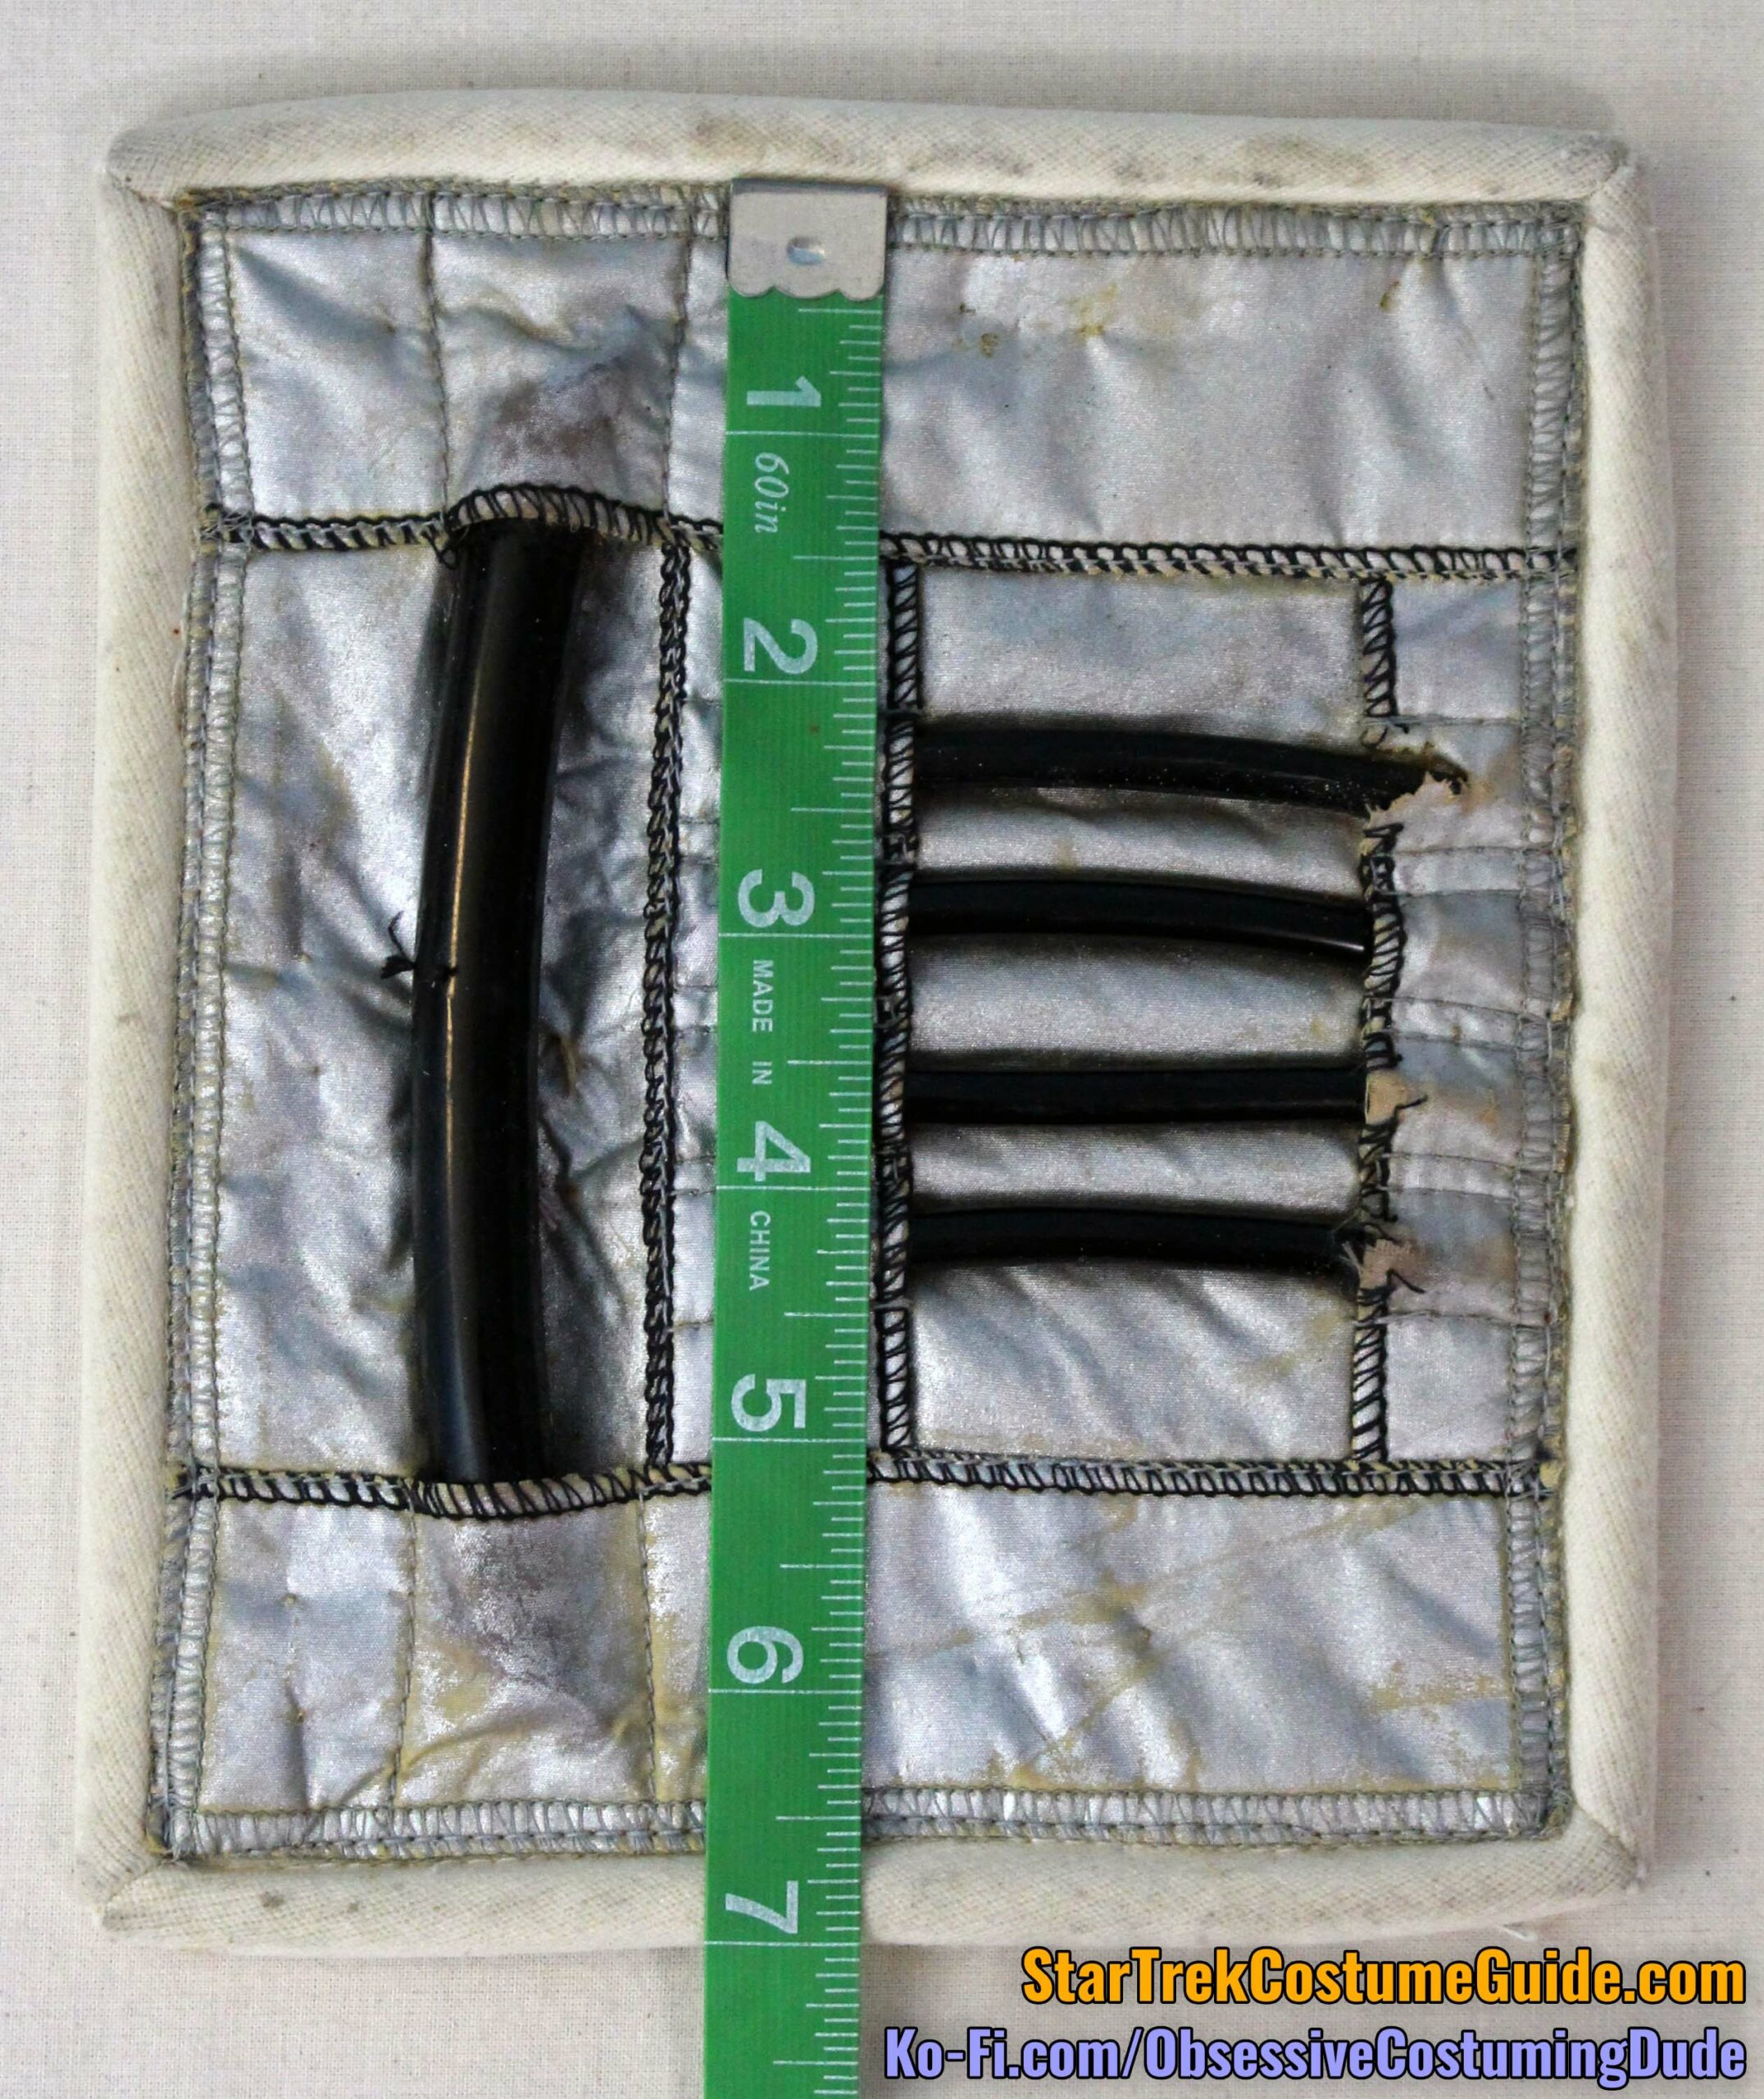
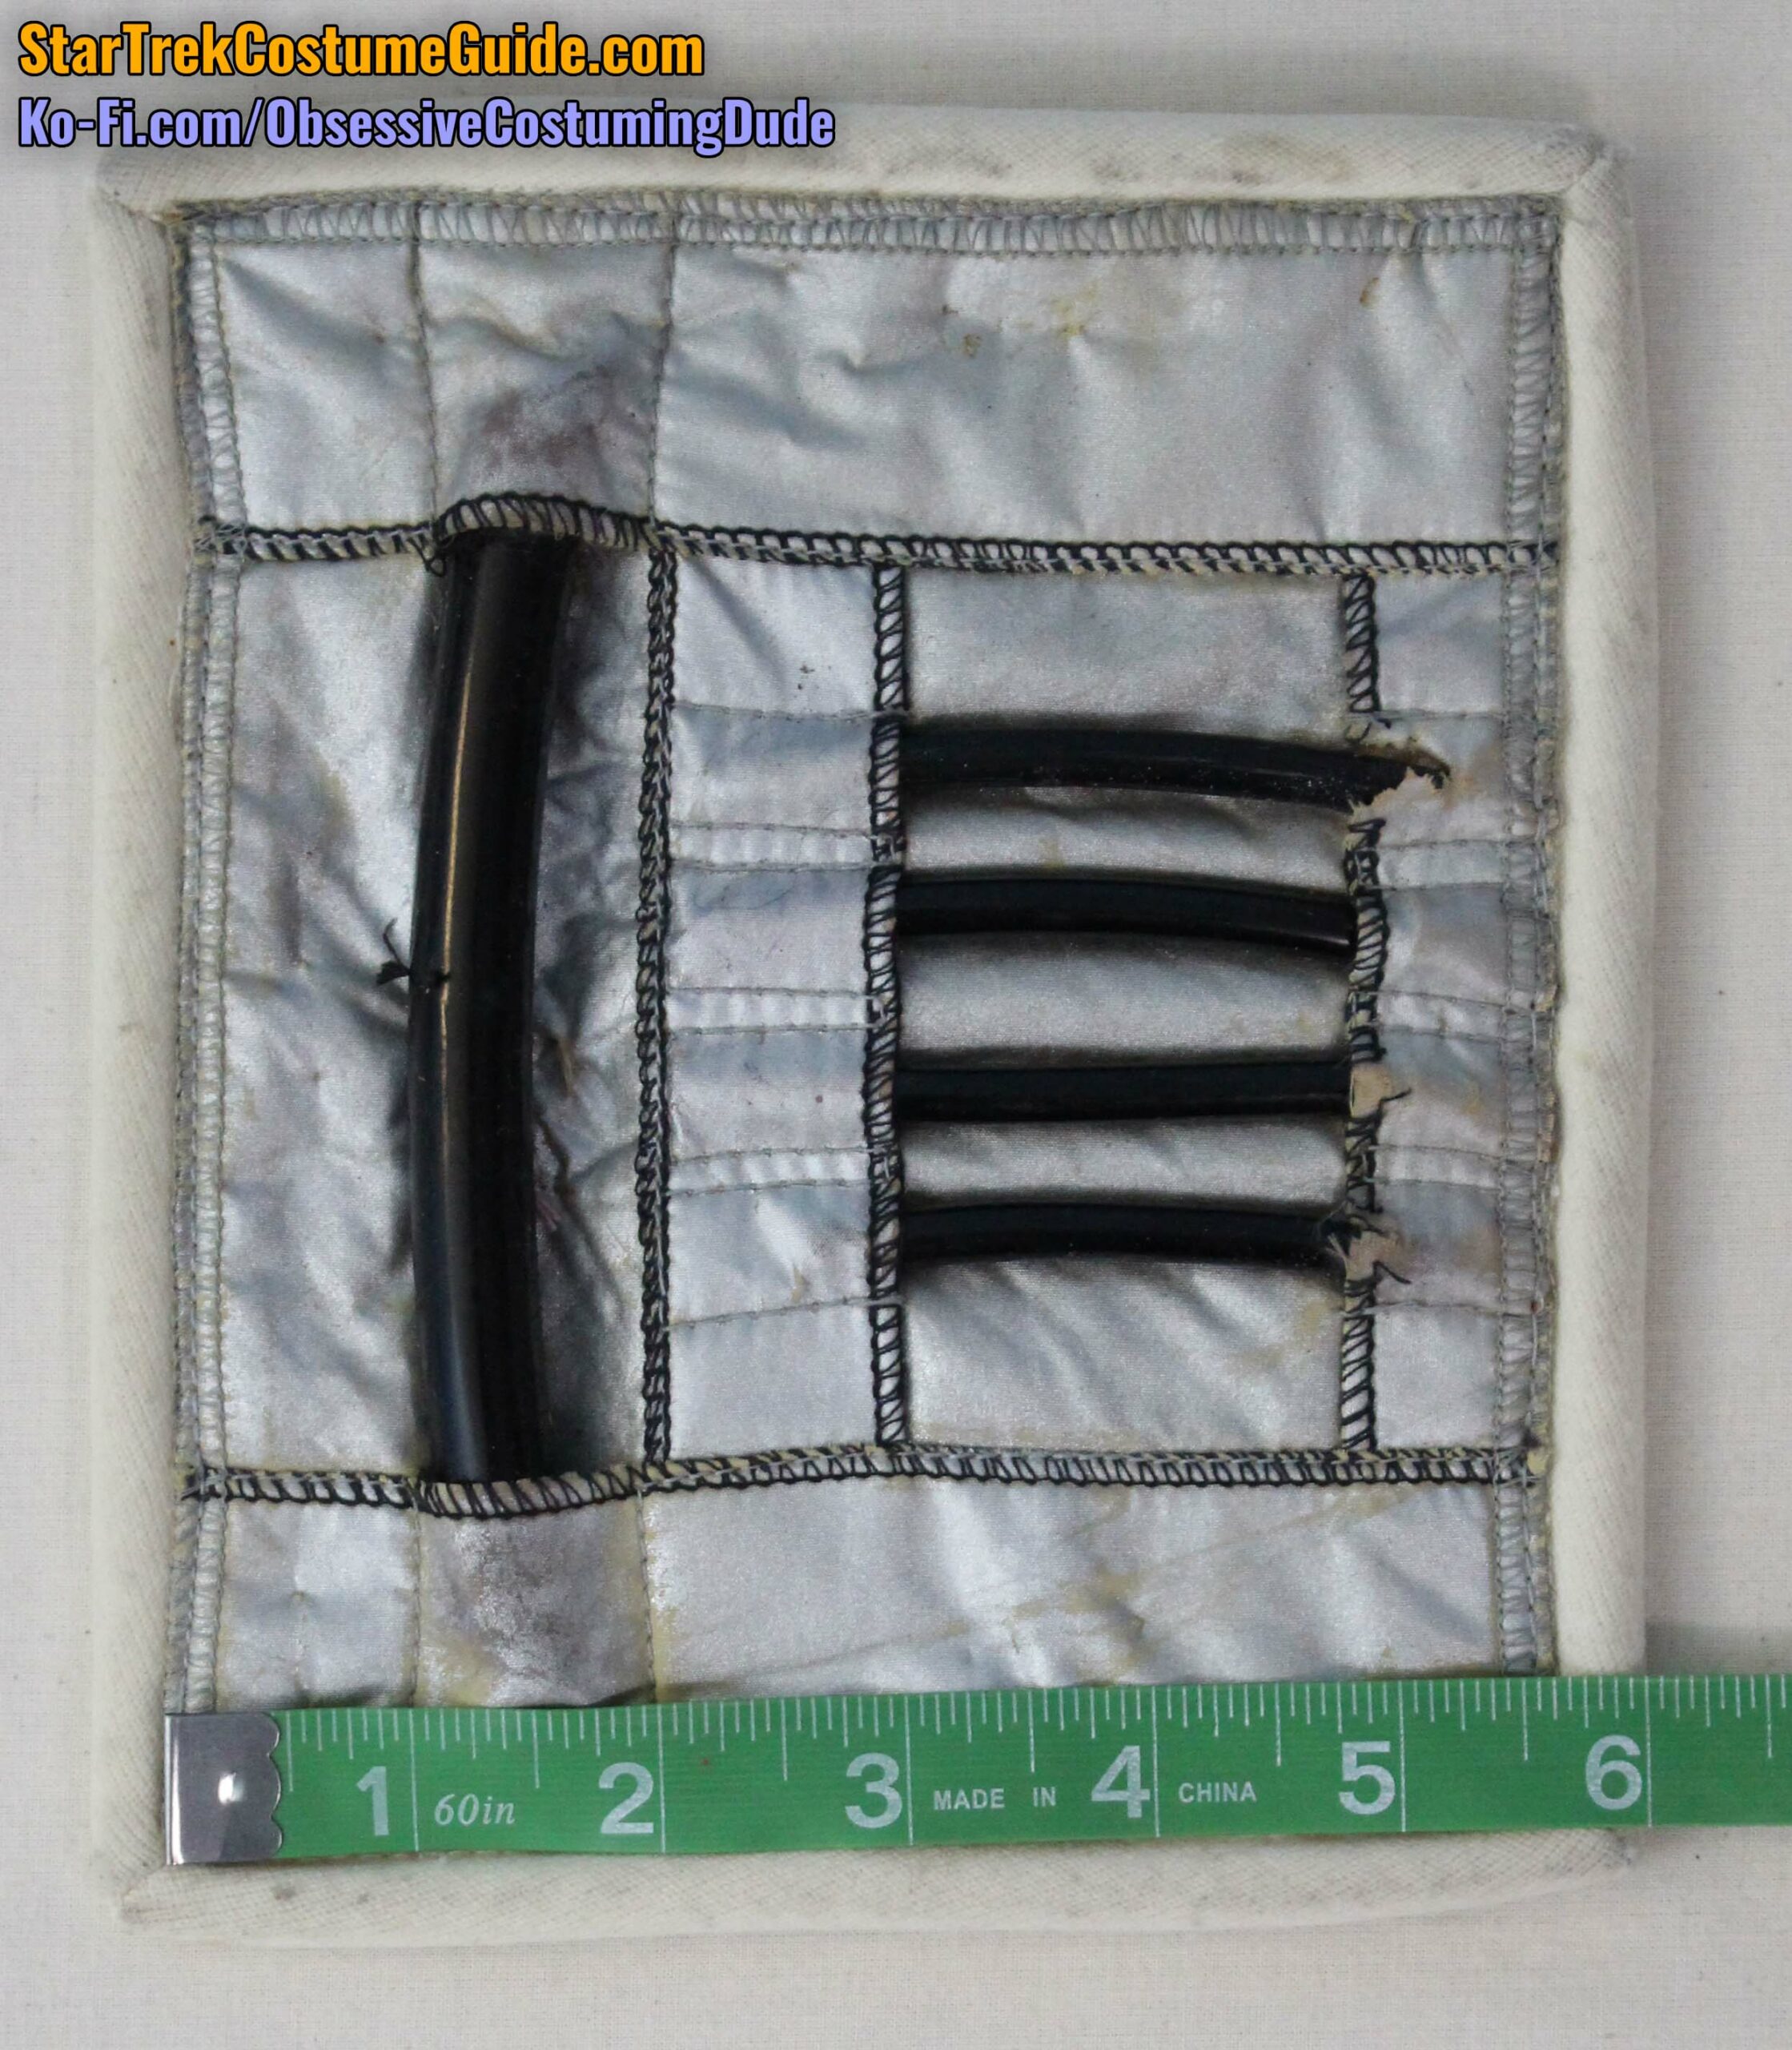
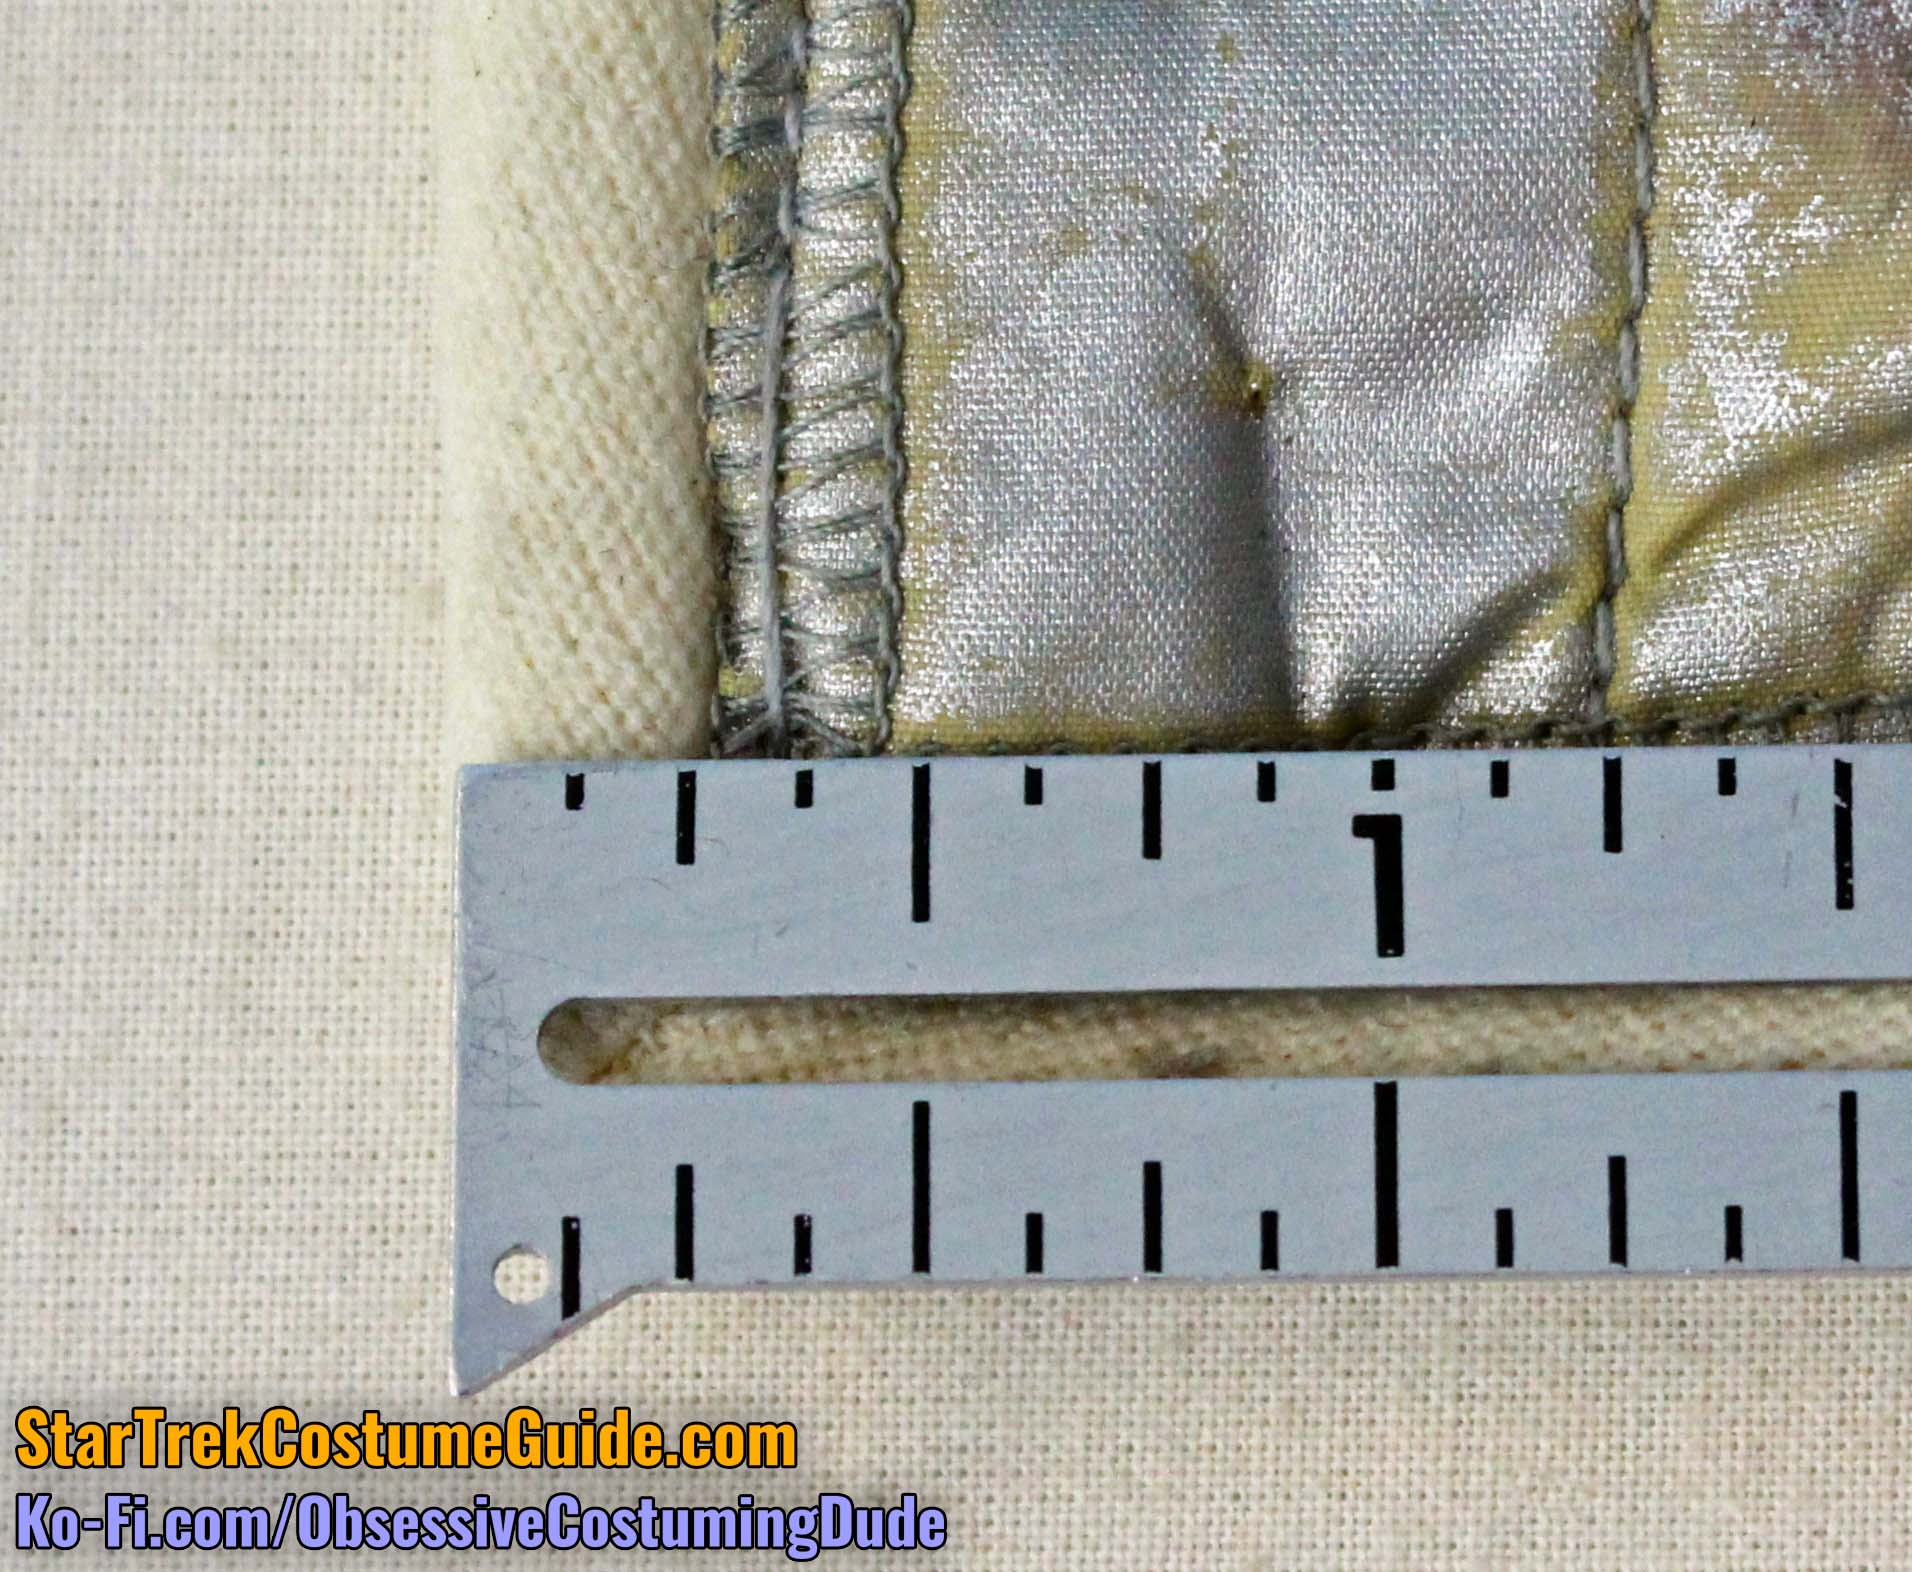
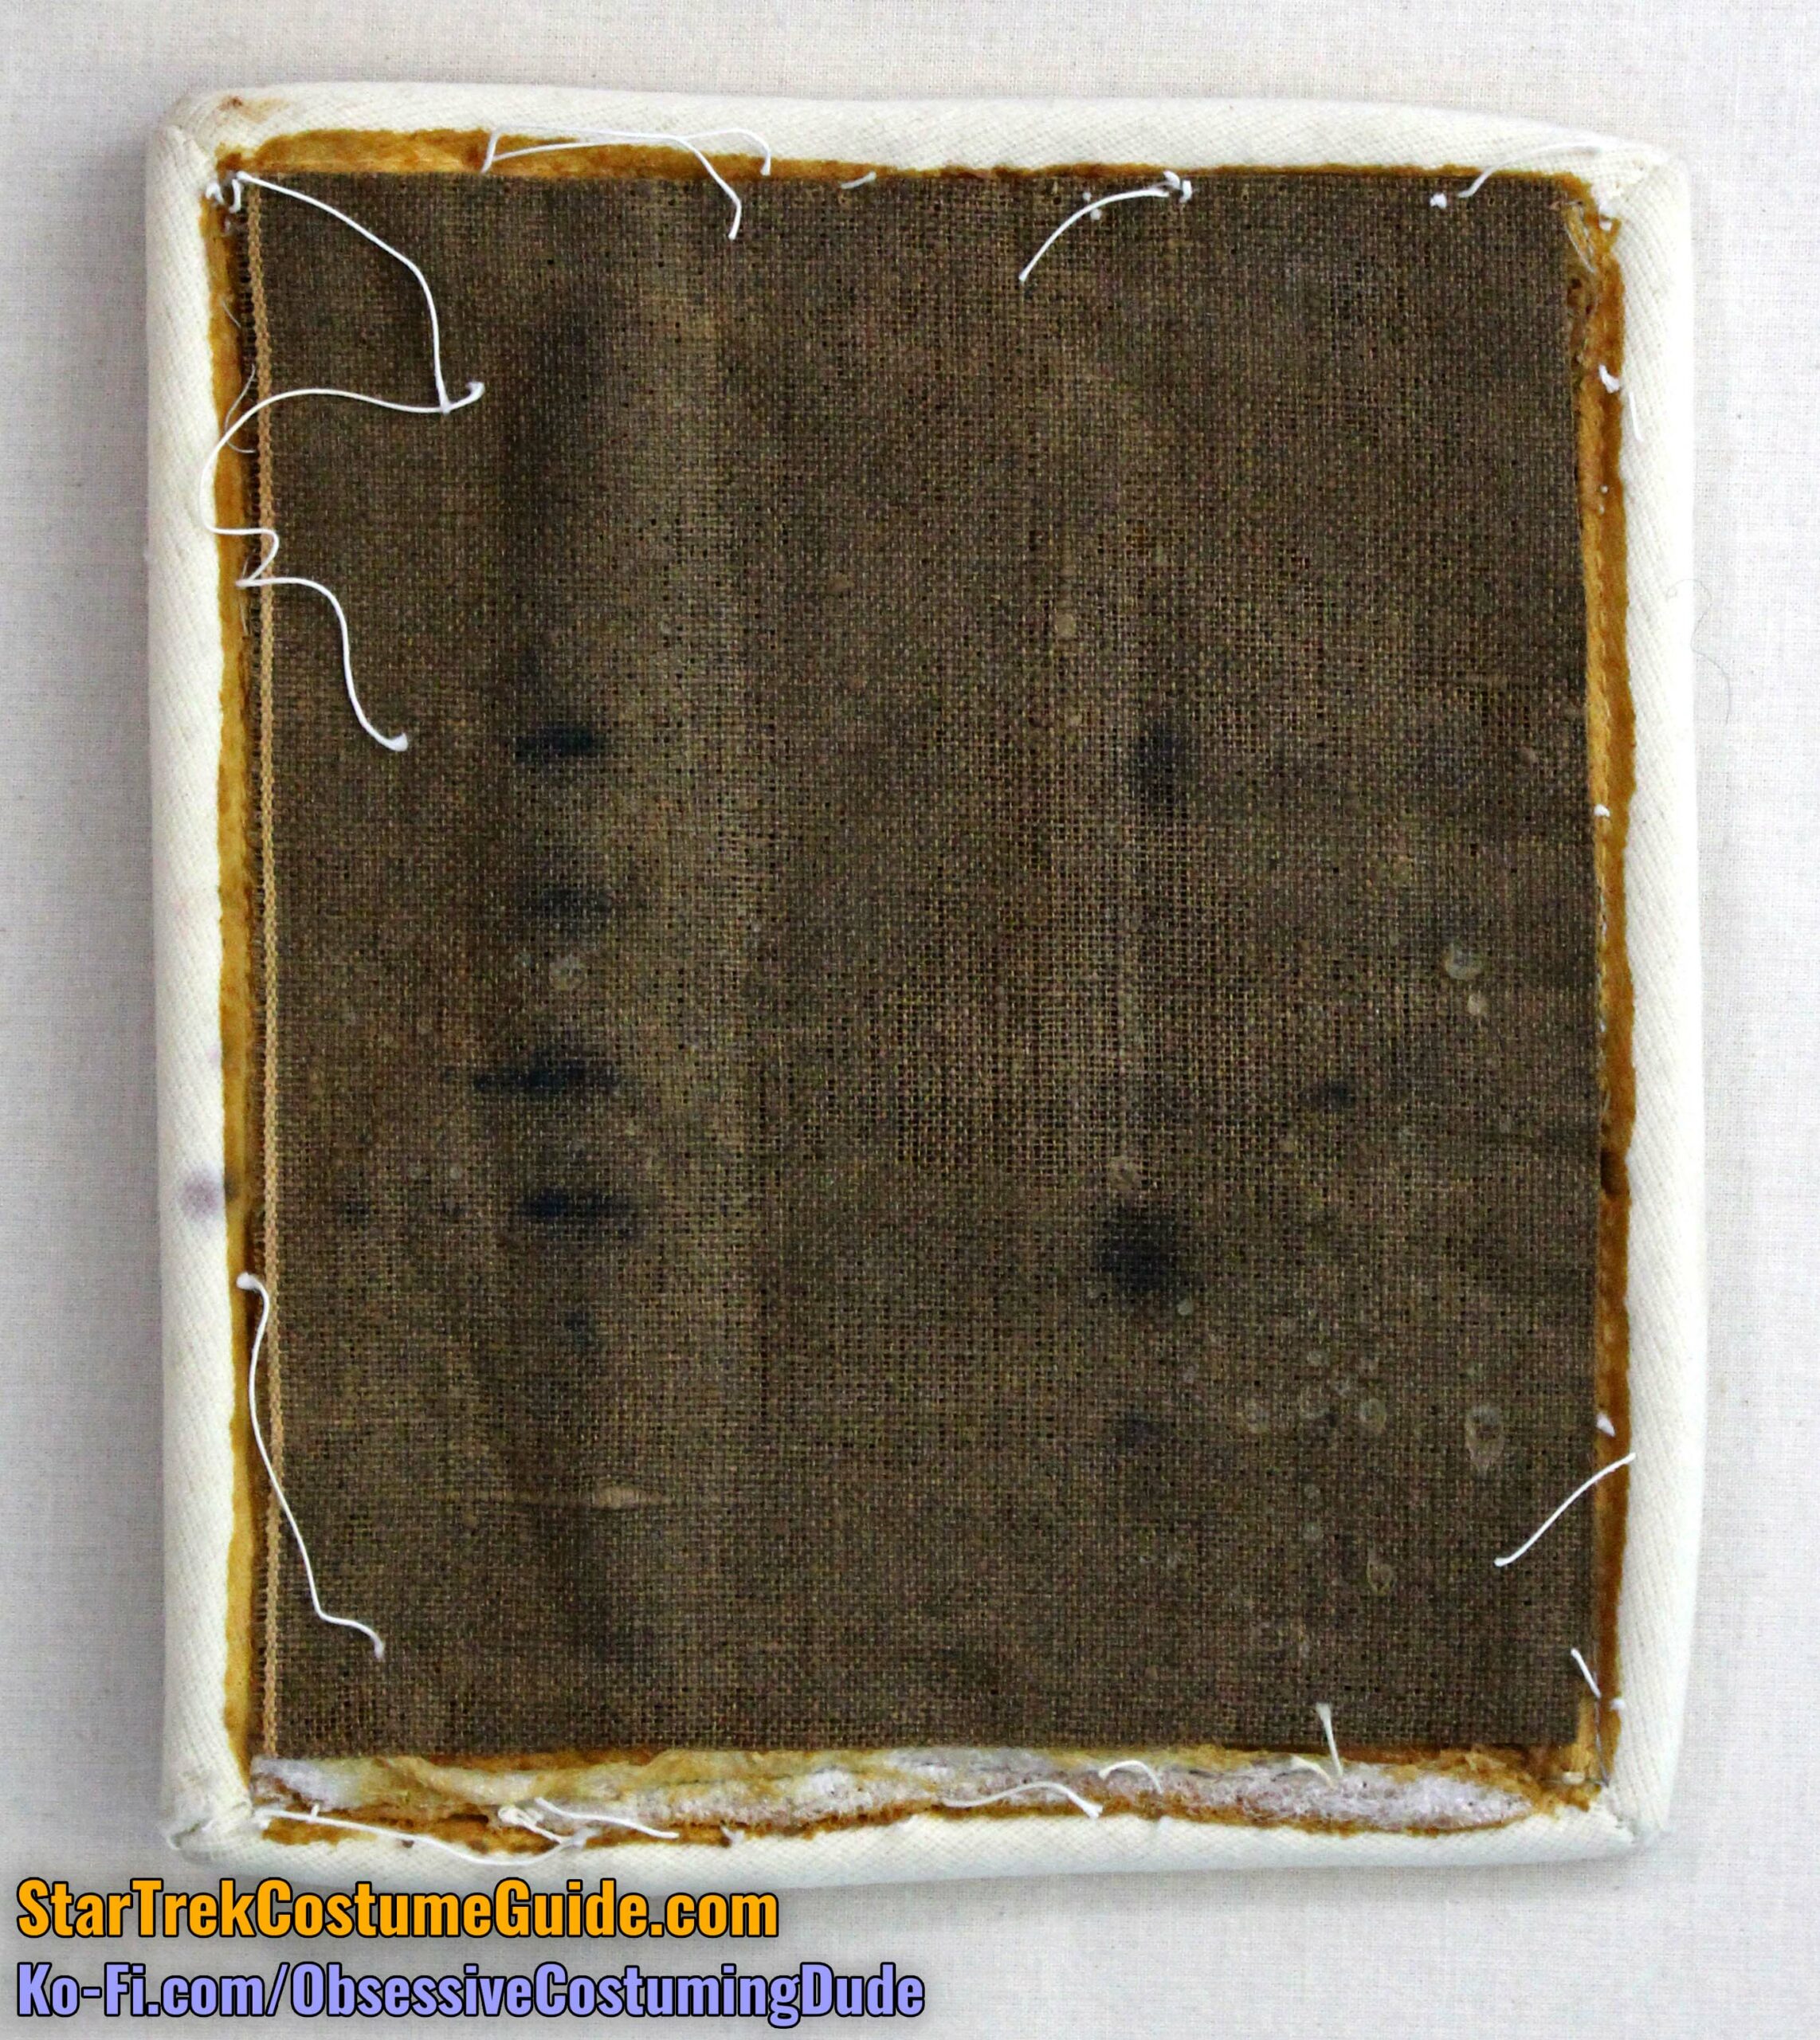
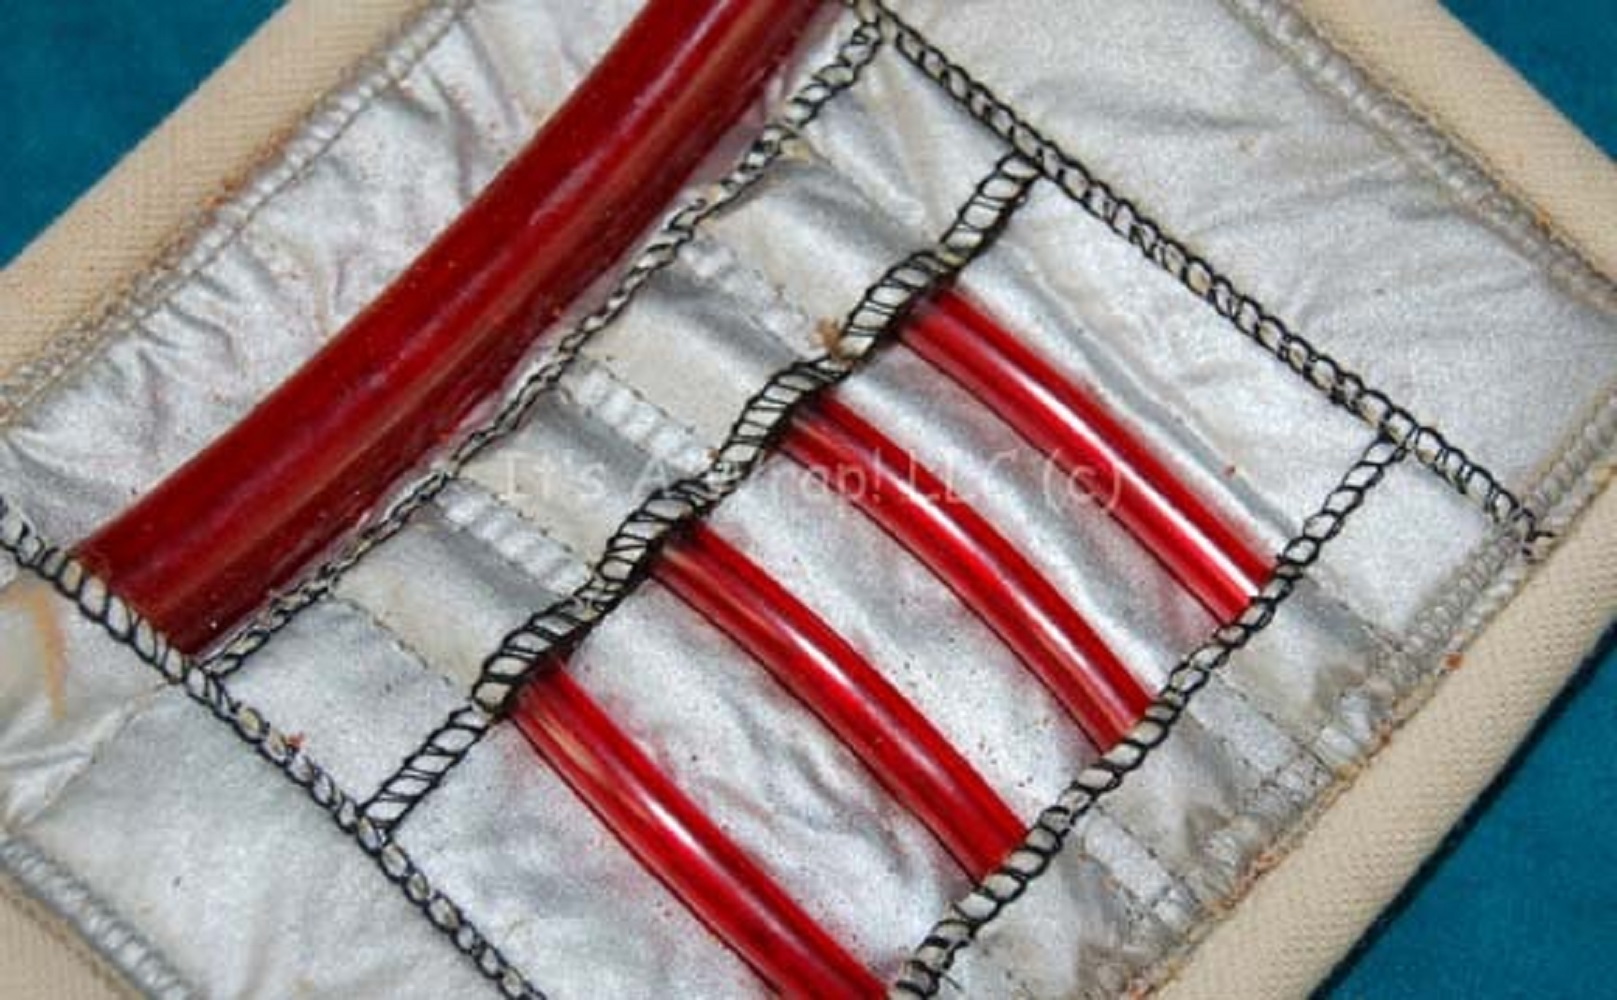
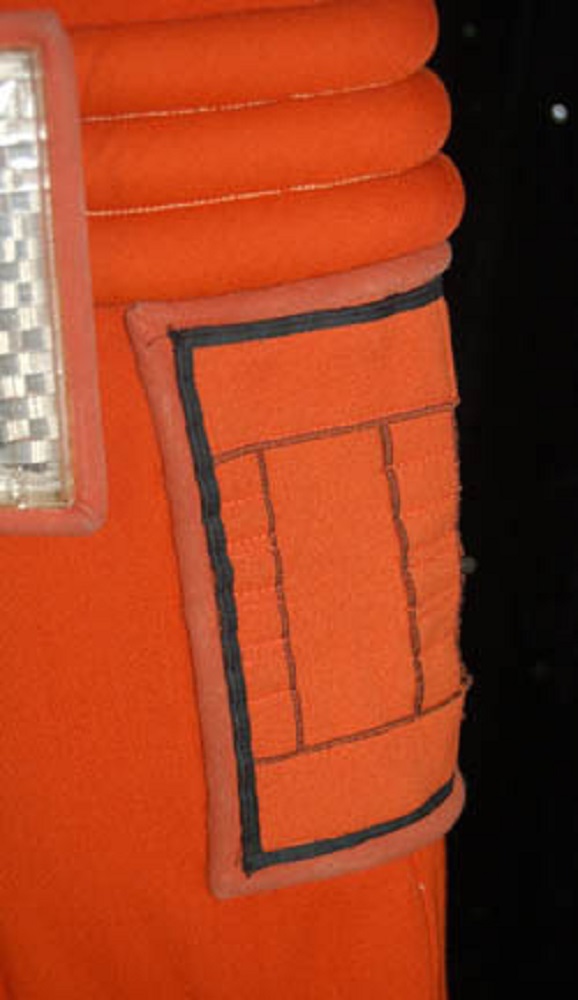
THIGH PANELS
On each of the wearer’s outer thighs, just under the waist bands, was a rectangular panel assembly.
Although both of the panels included with this uniform were slightly warped (one more than the other), they were otherwise identical in their construction, so we’ll just focus on the more rectangular one.
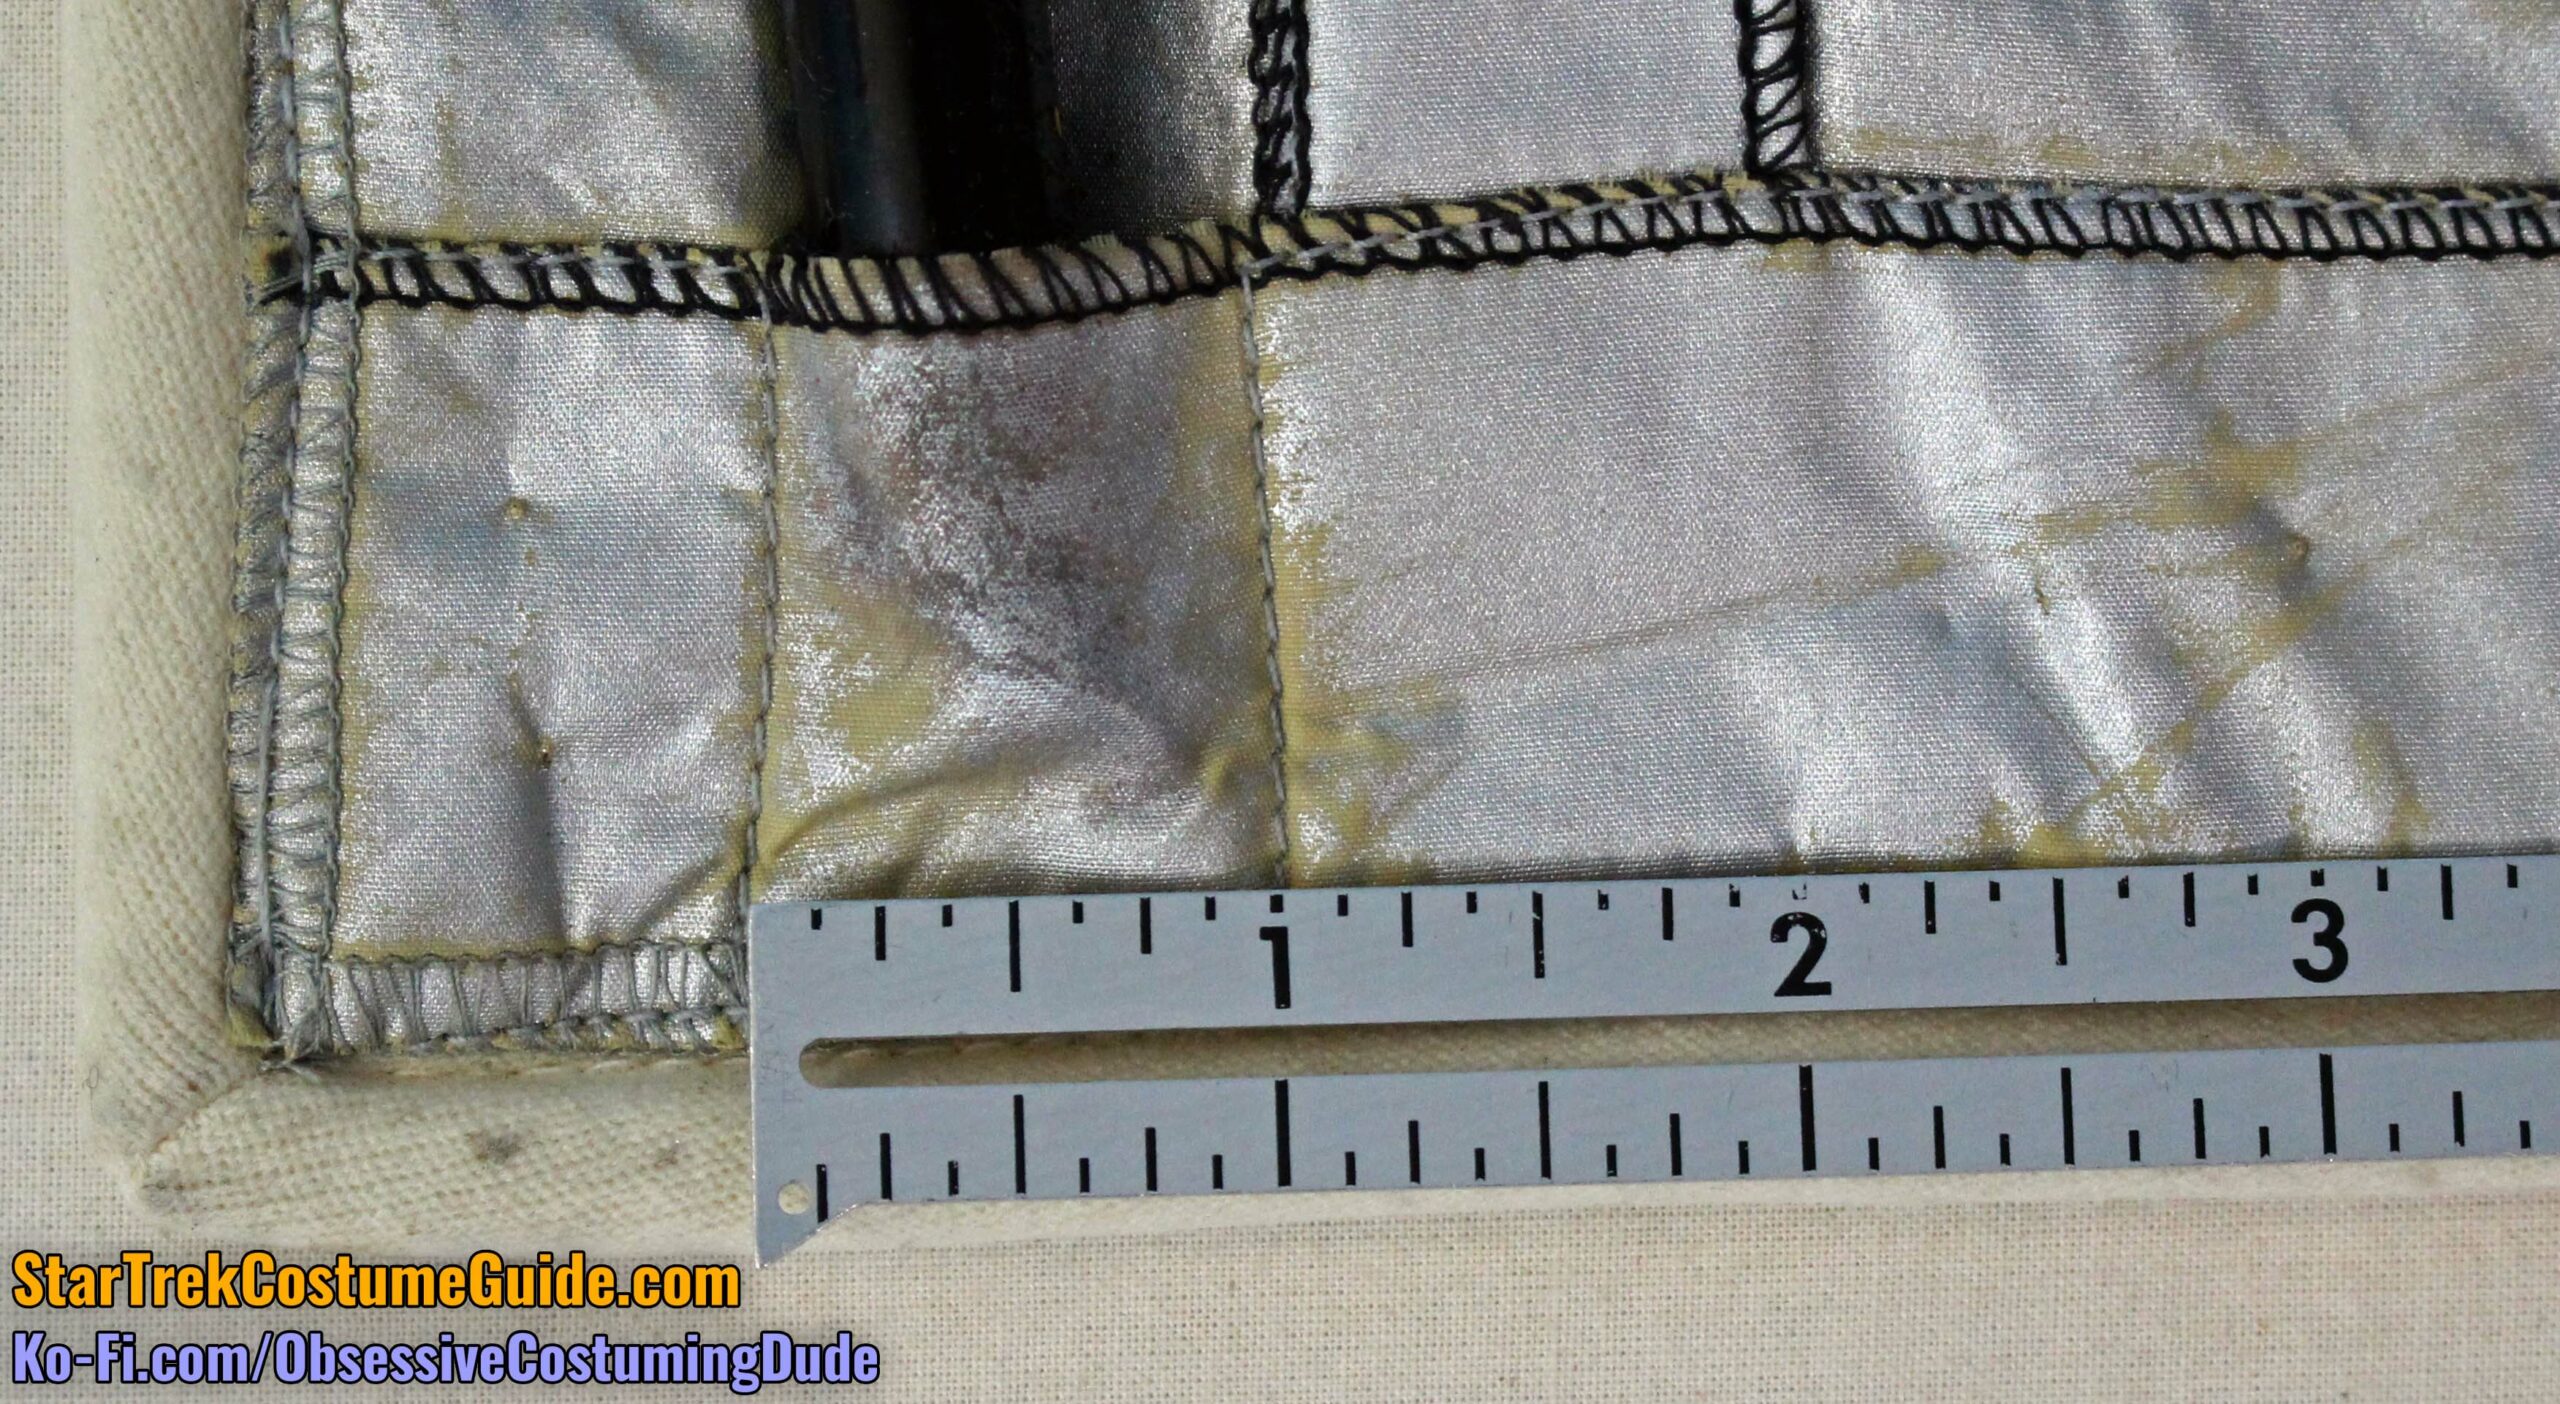
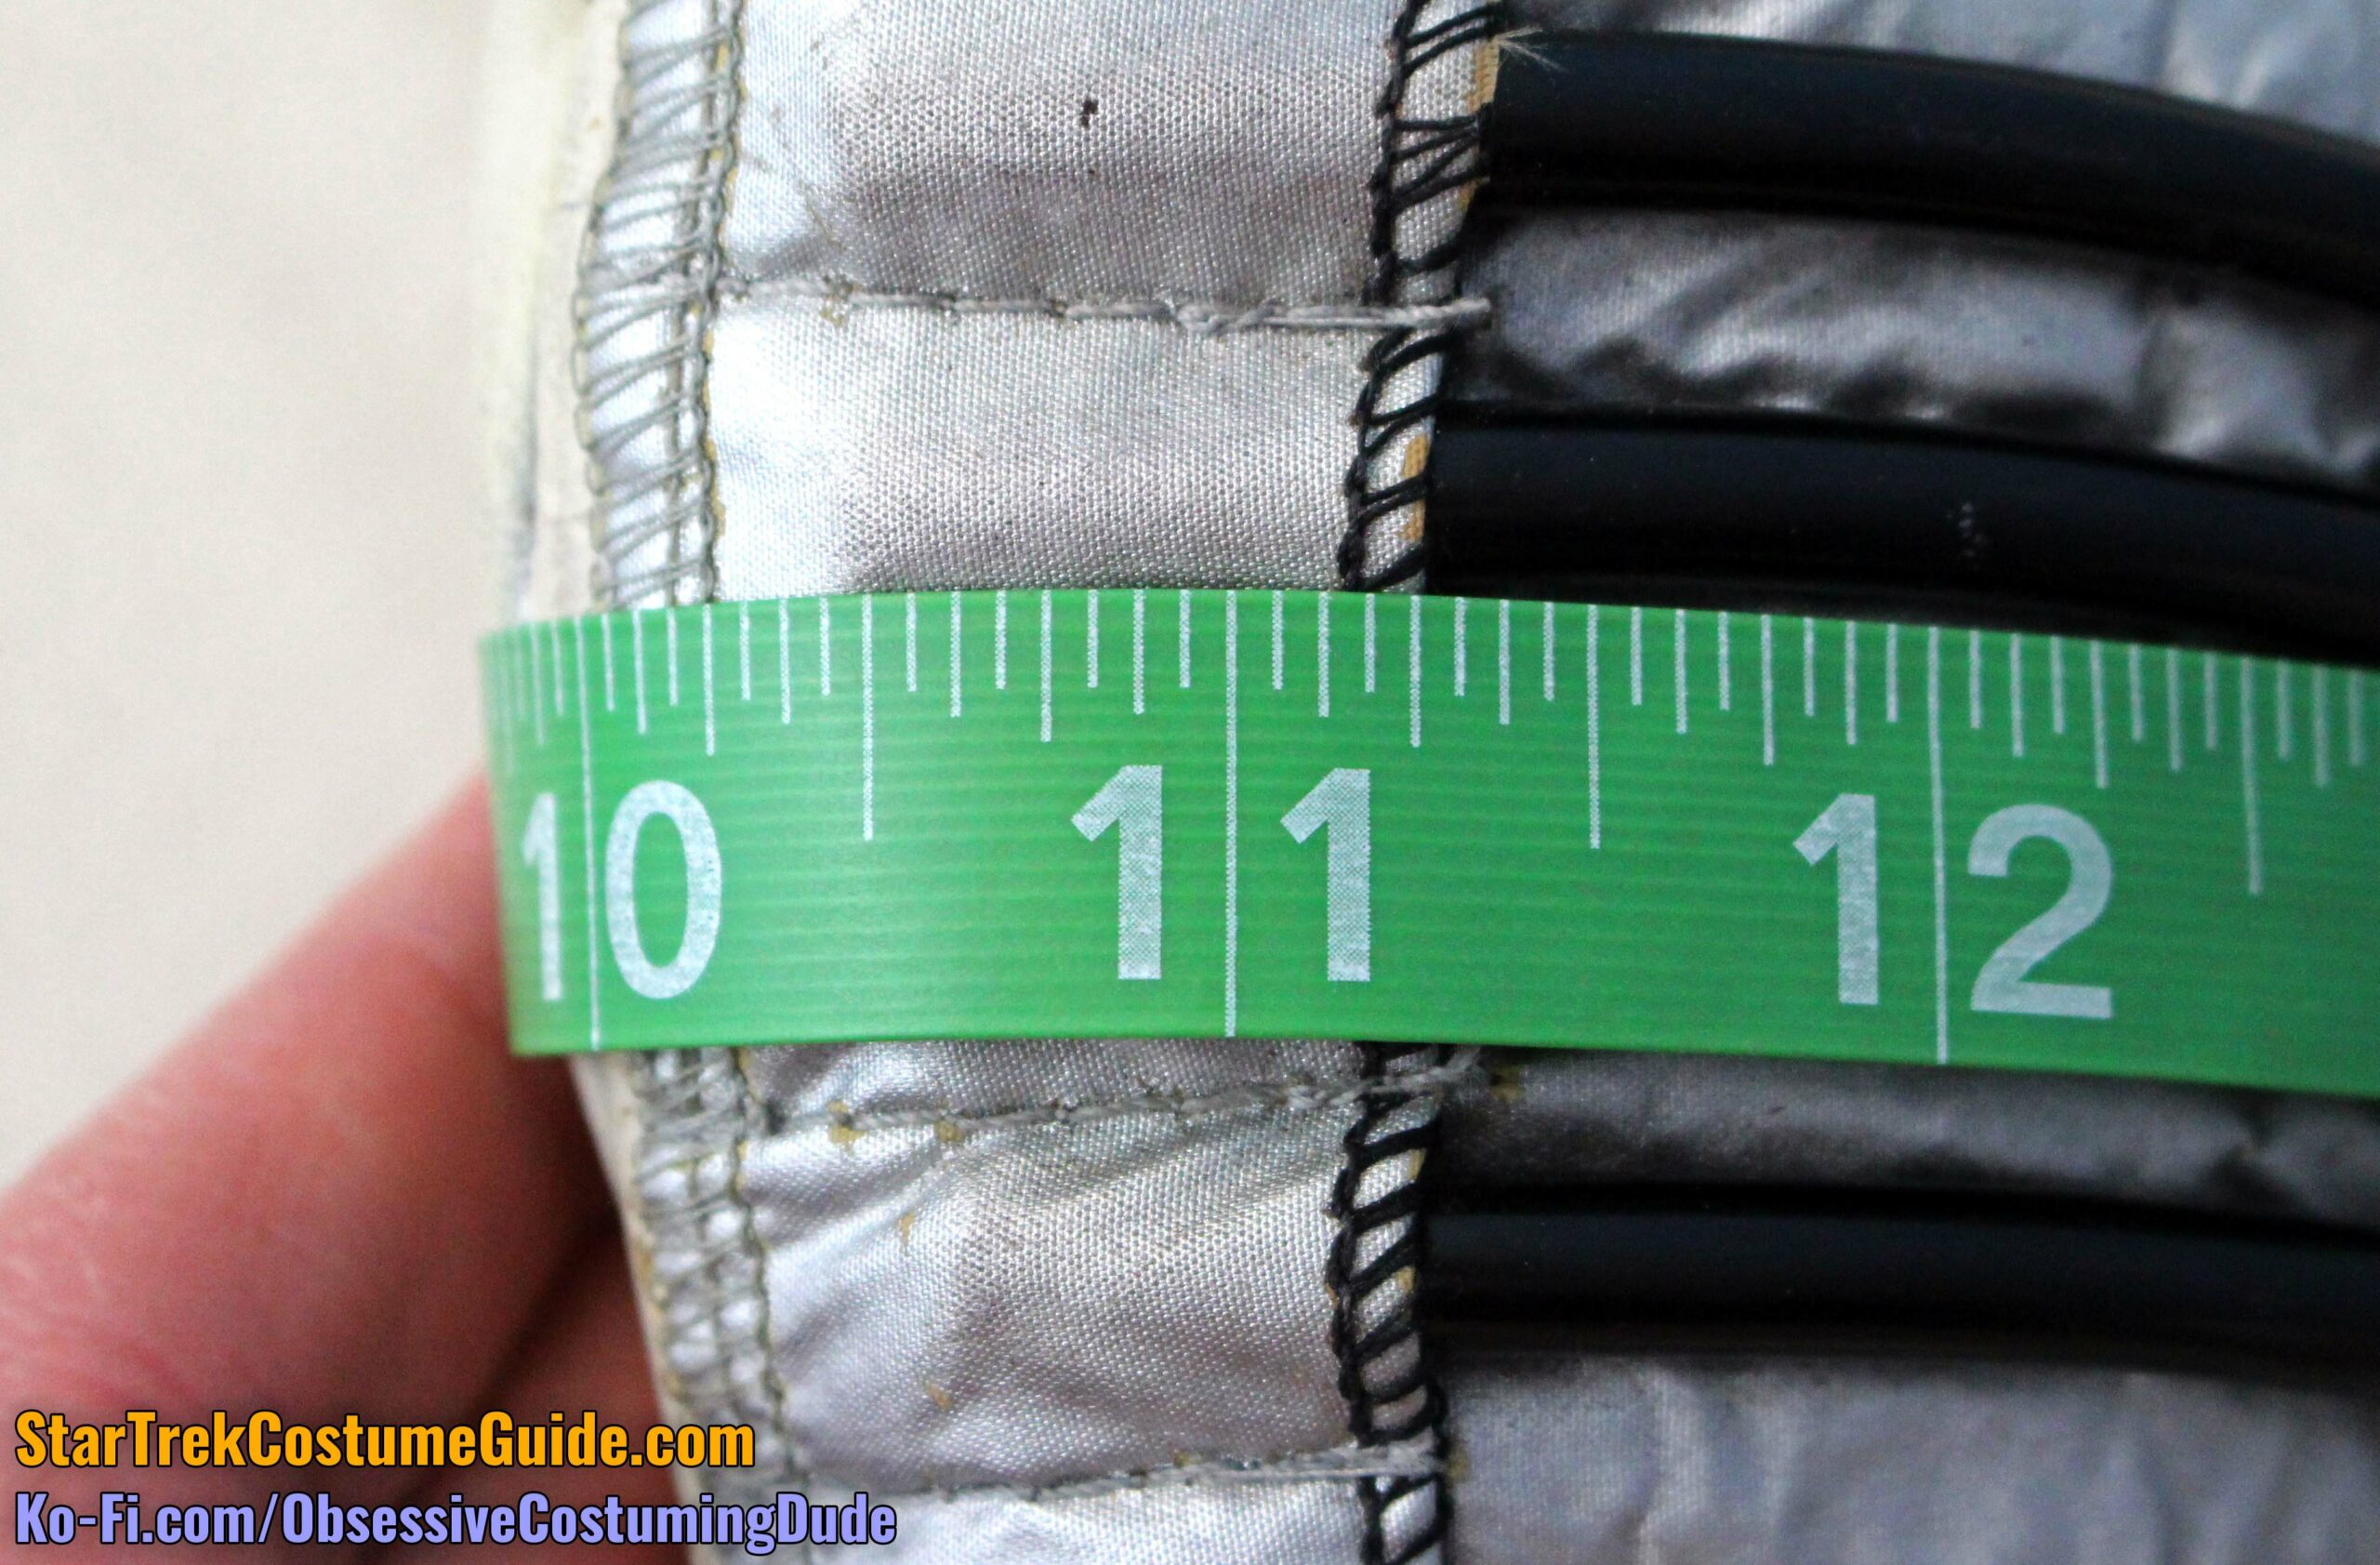
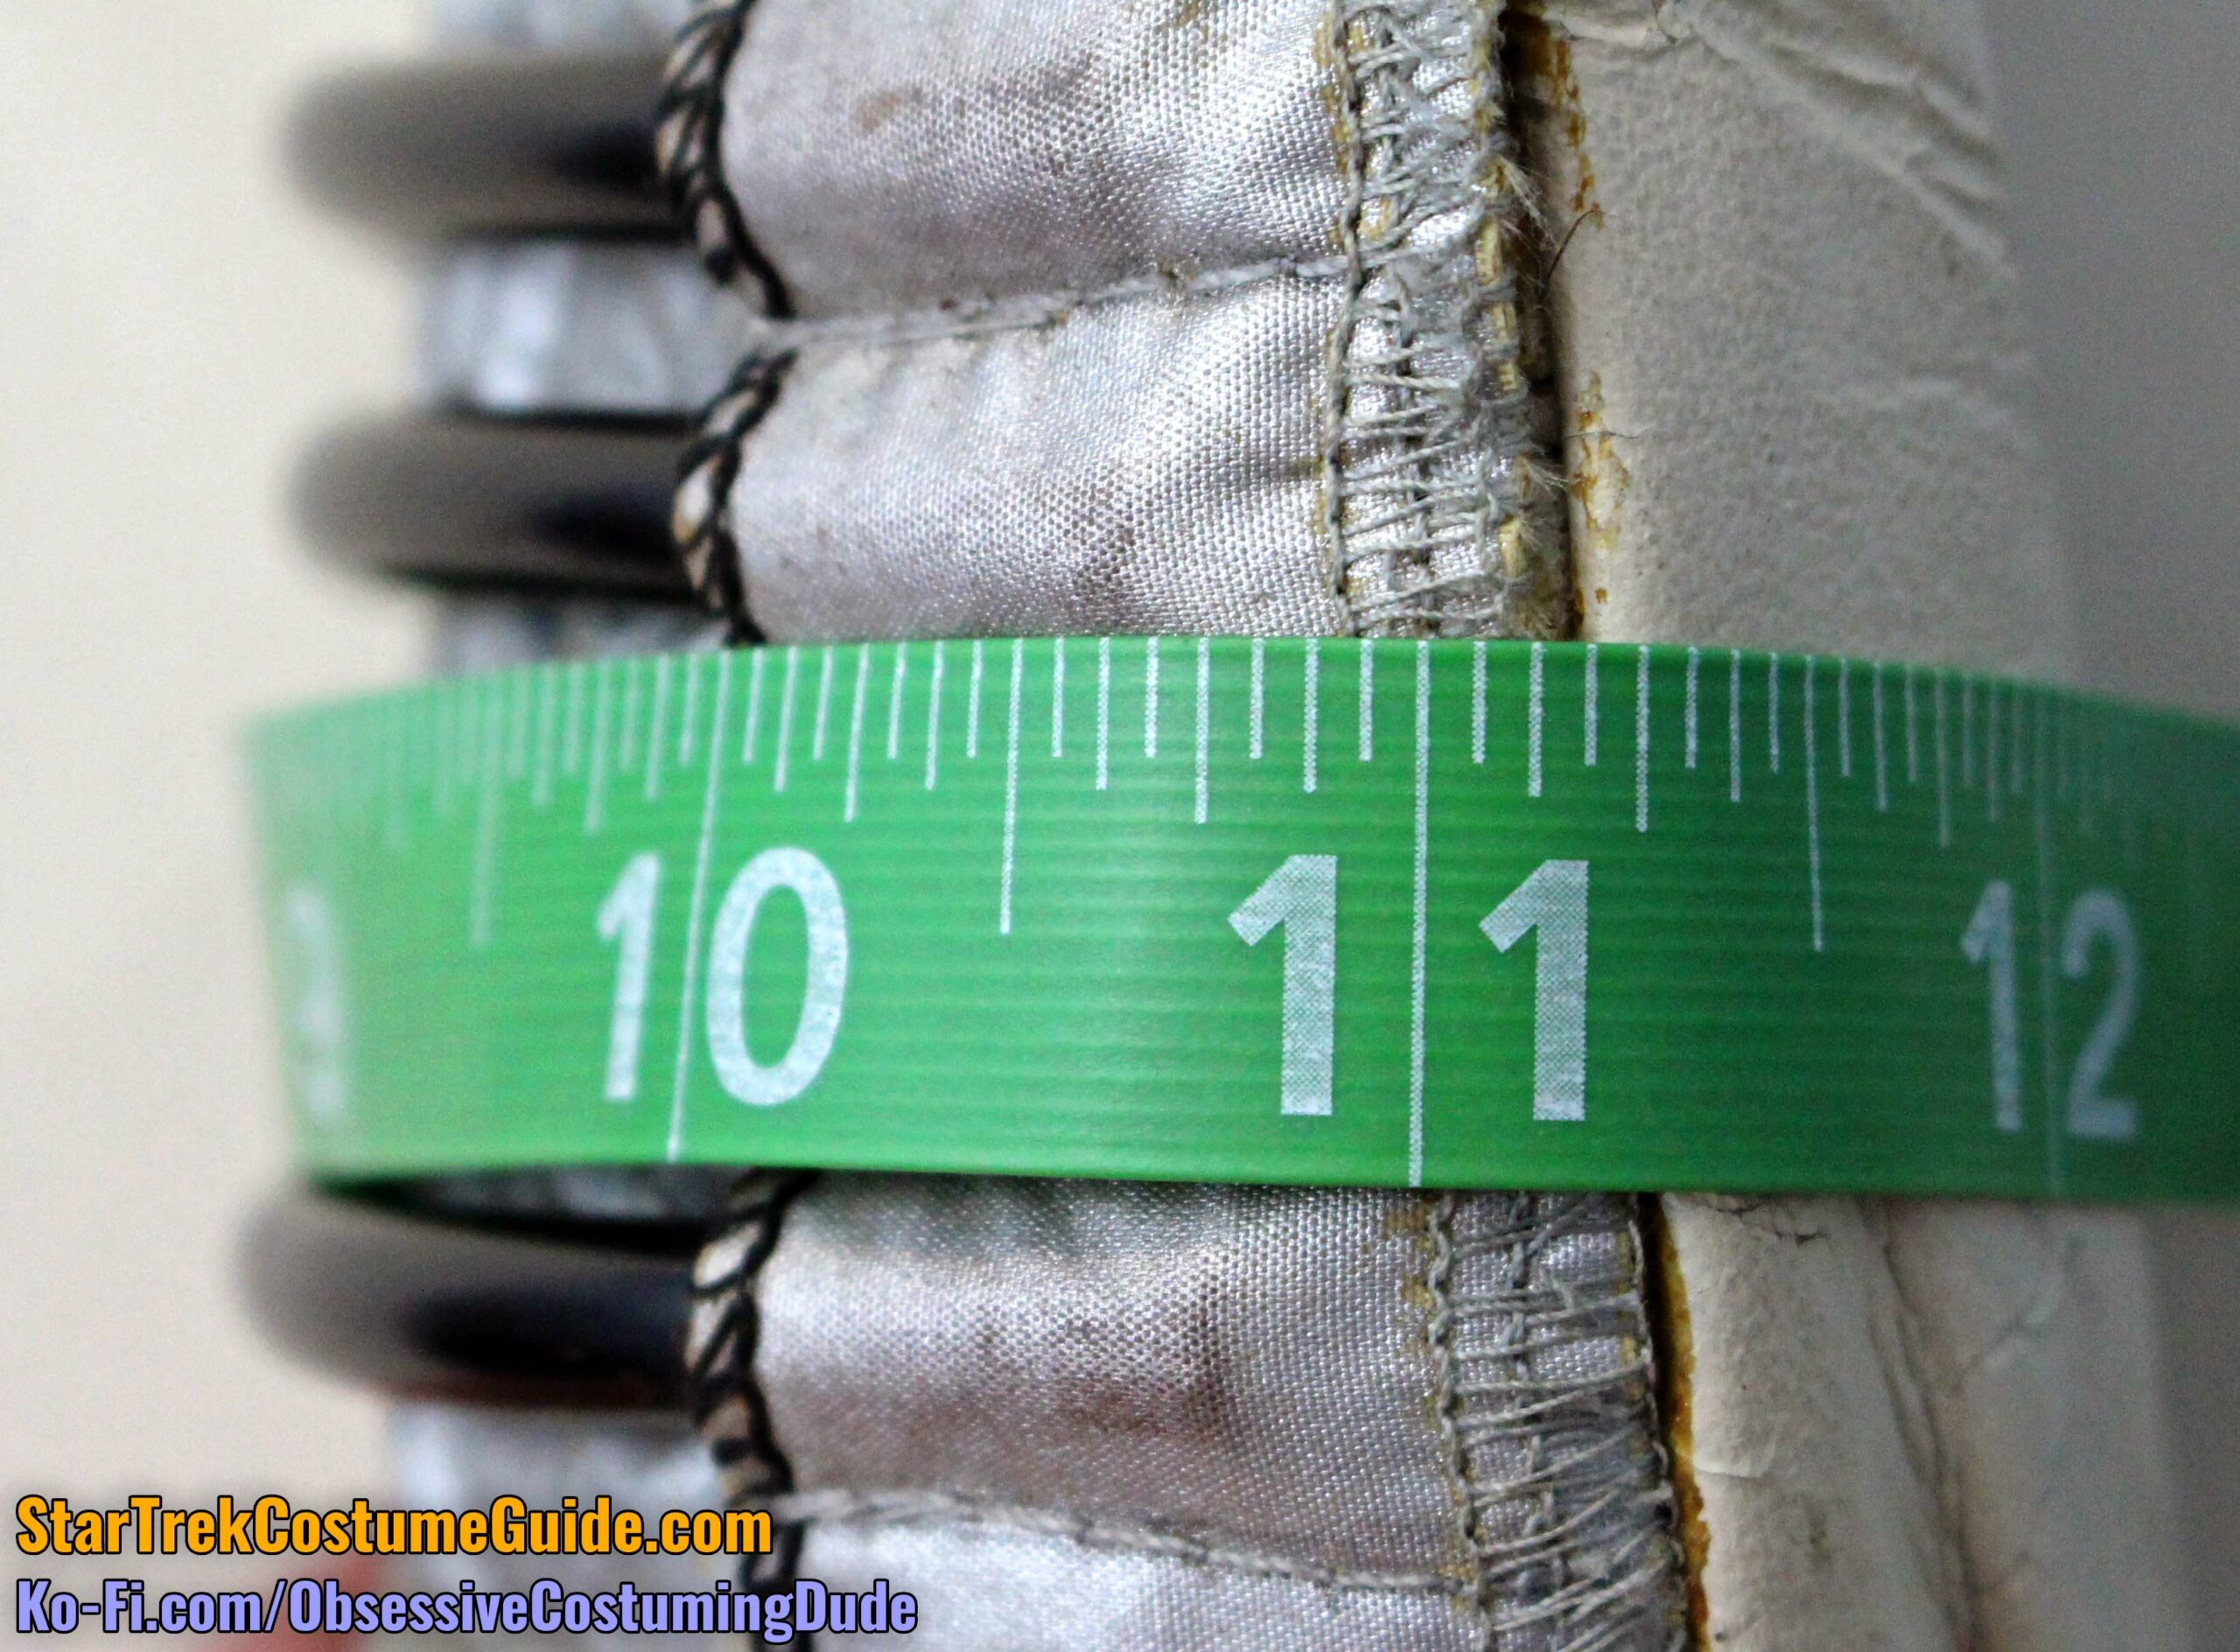
The complete assembly measured approximately 7 ¼” x 6 ¼”.
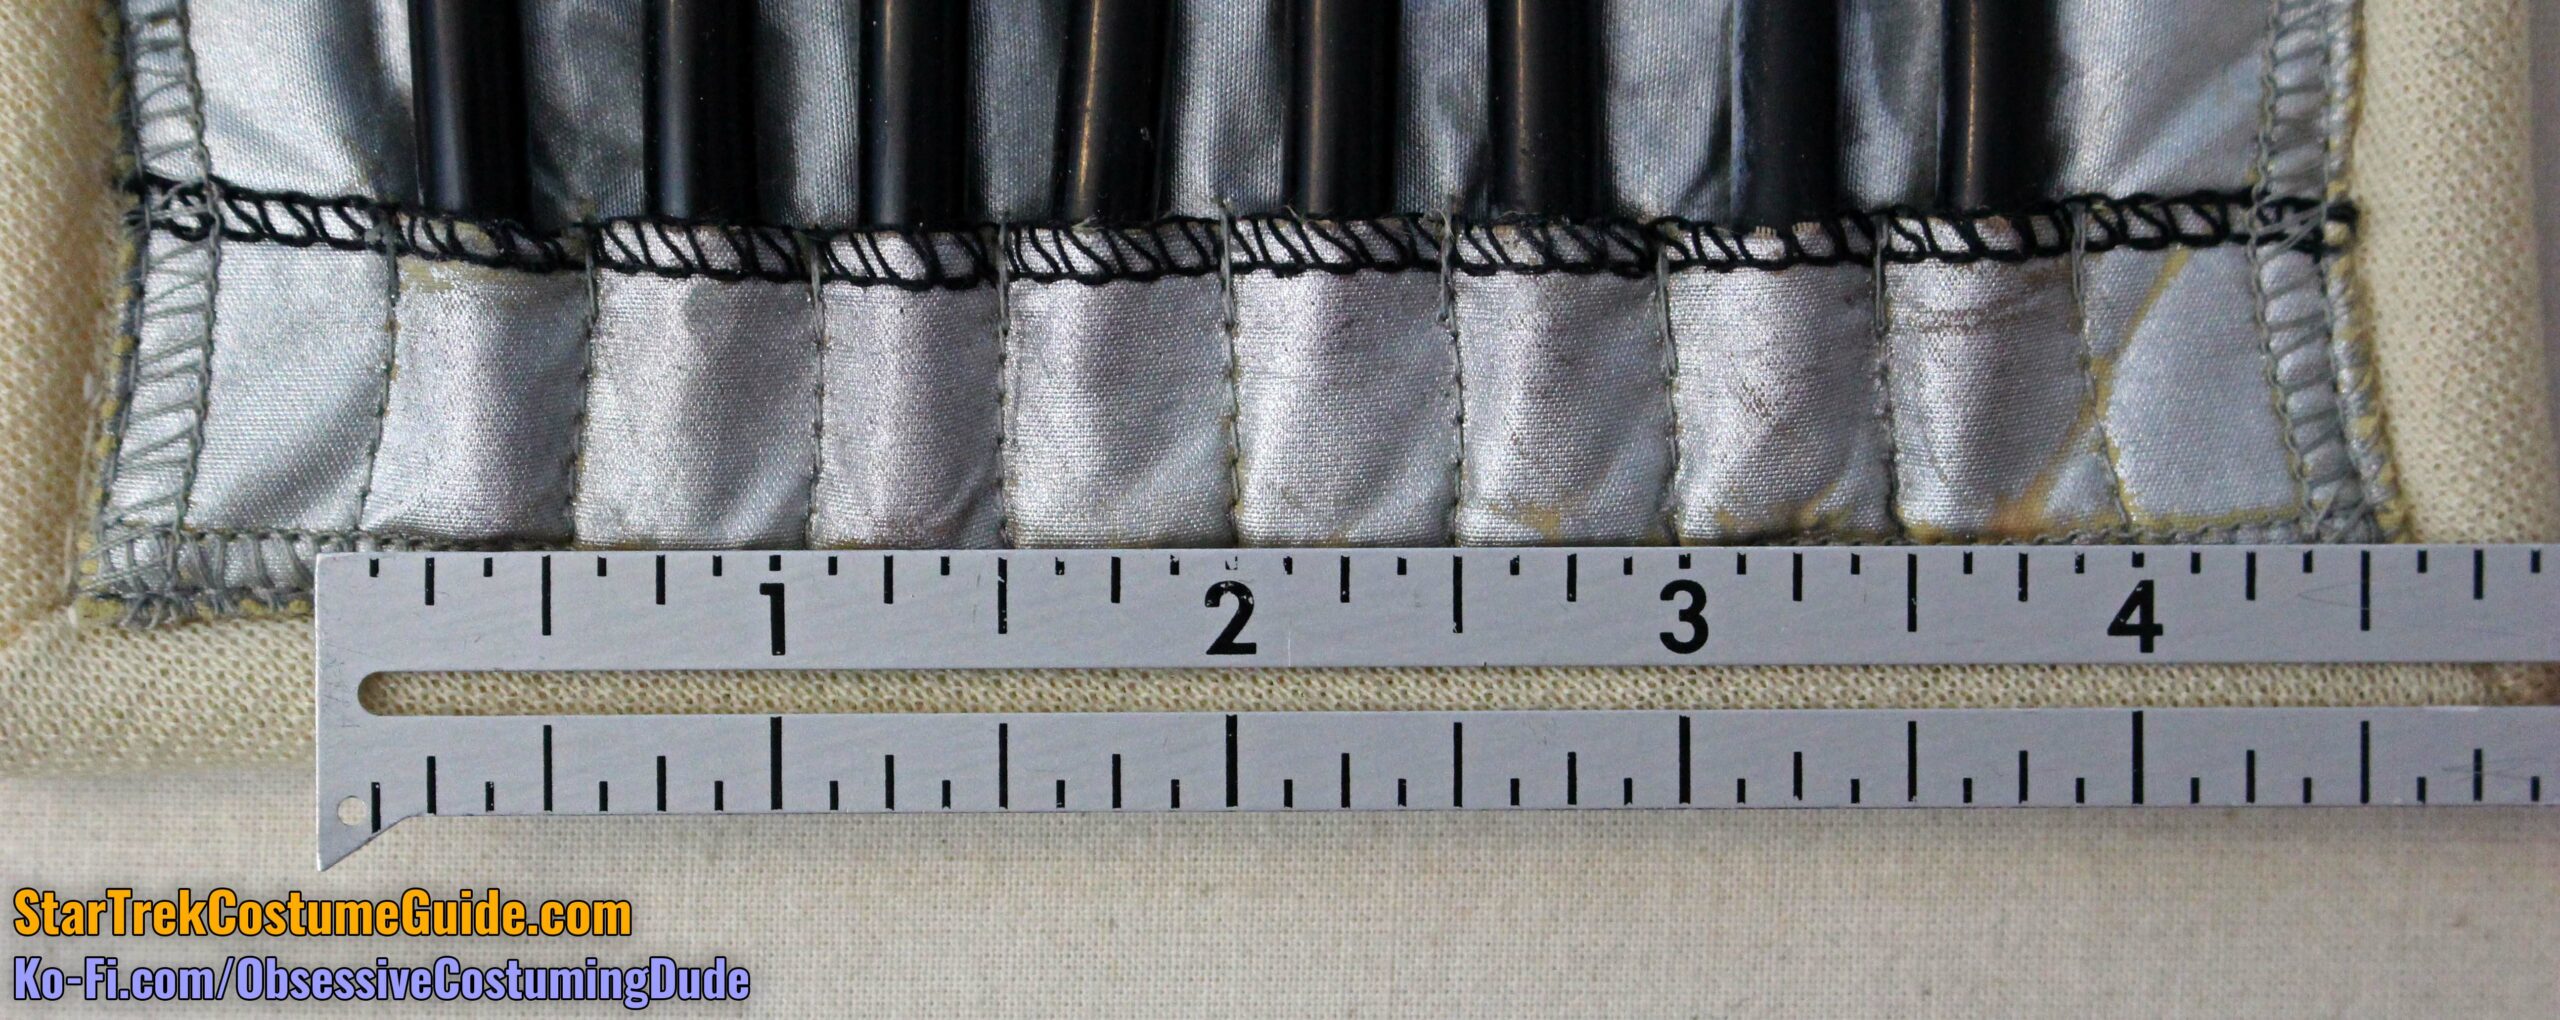
The entire assembly was comprised of a slightly smaller rectangle of silver fabric layers + tubing and custom-made, off-white piping framing the edges (like with the aforementioned reflector box).
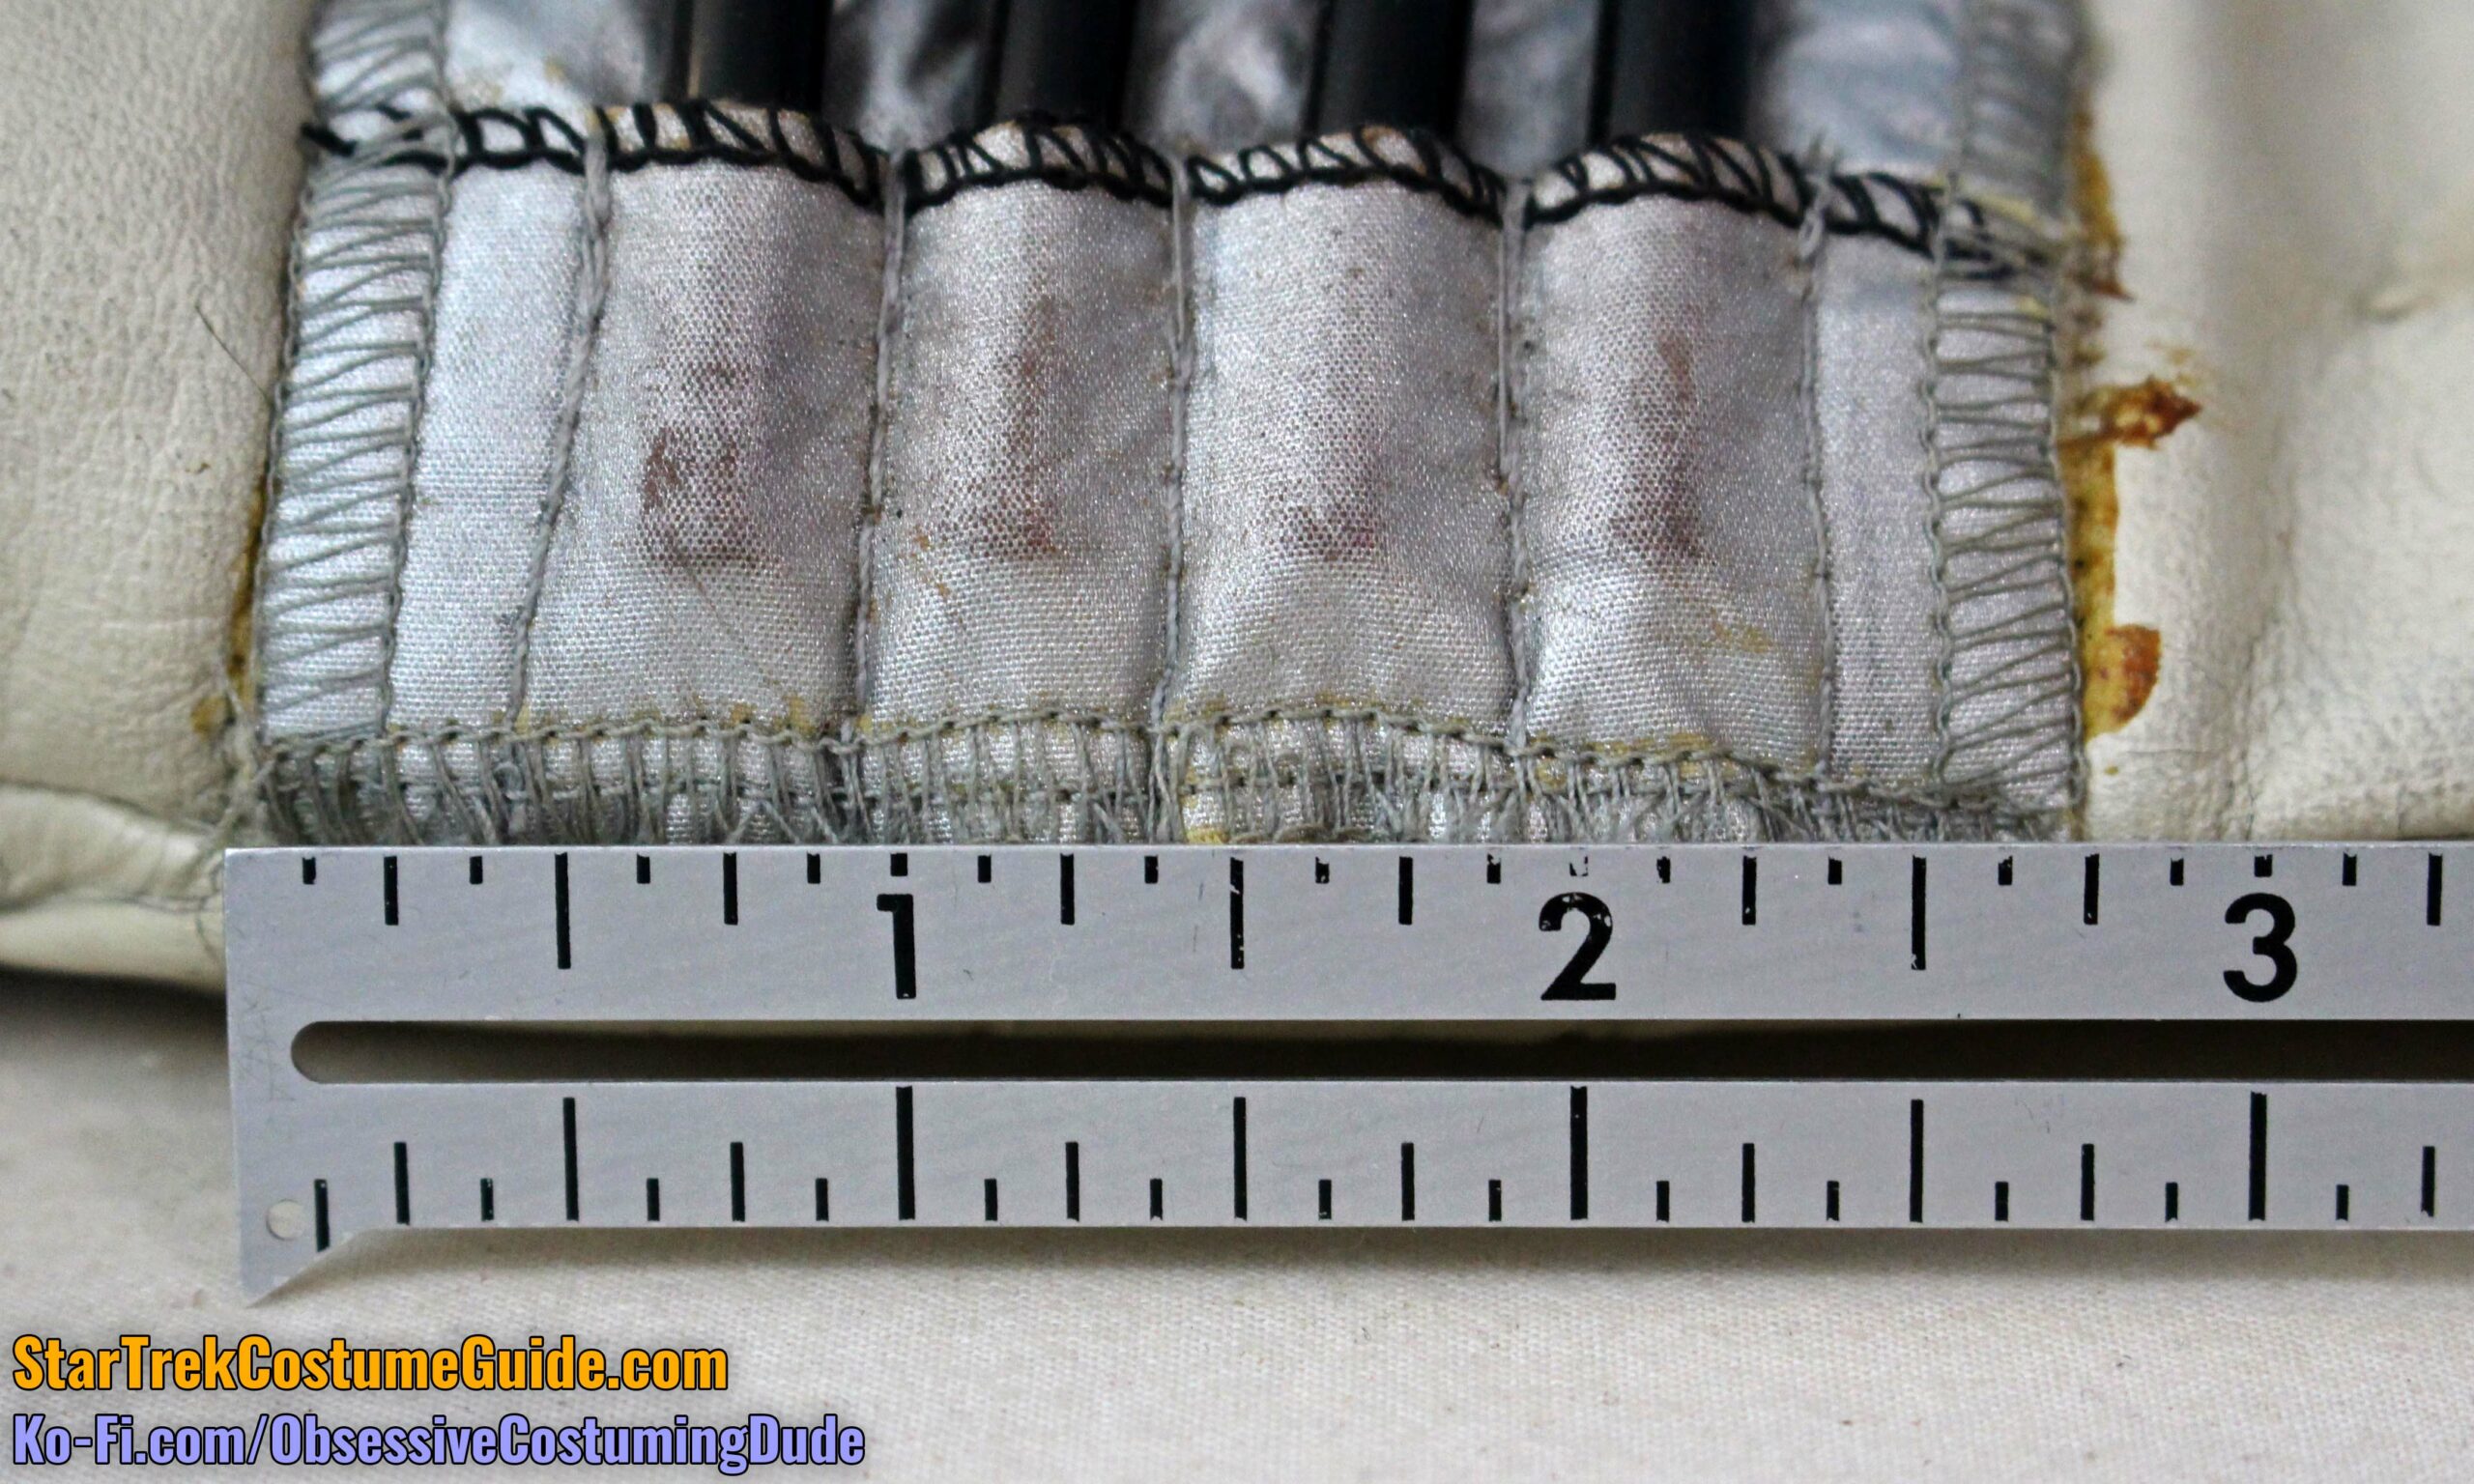
The silver fabric appears to have been ironing table fabric, of all things, and the interior assembly was approximately 6 ⅝” x 5 ⅝”.
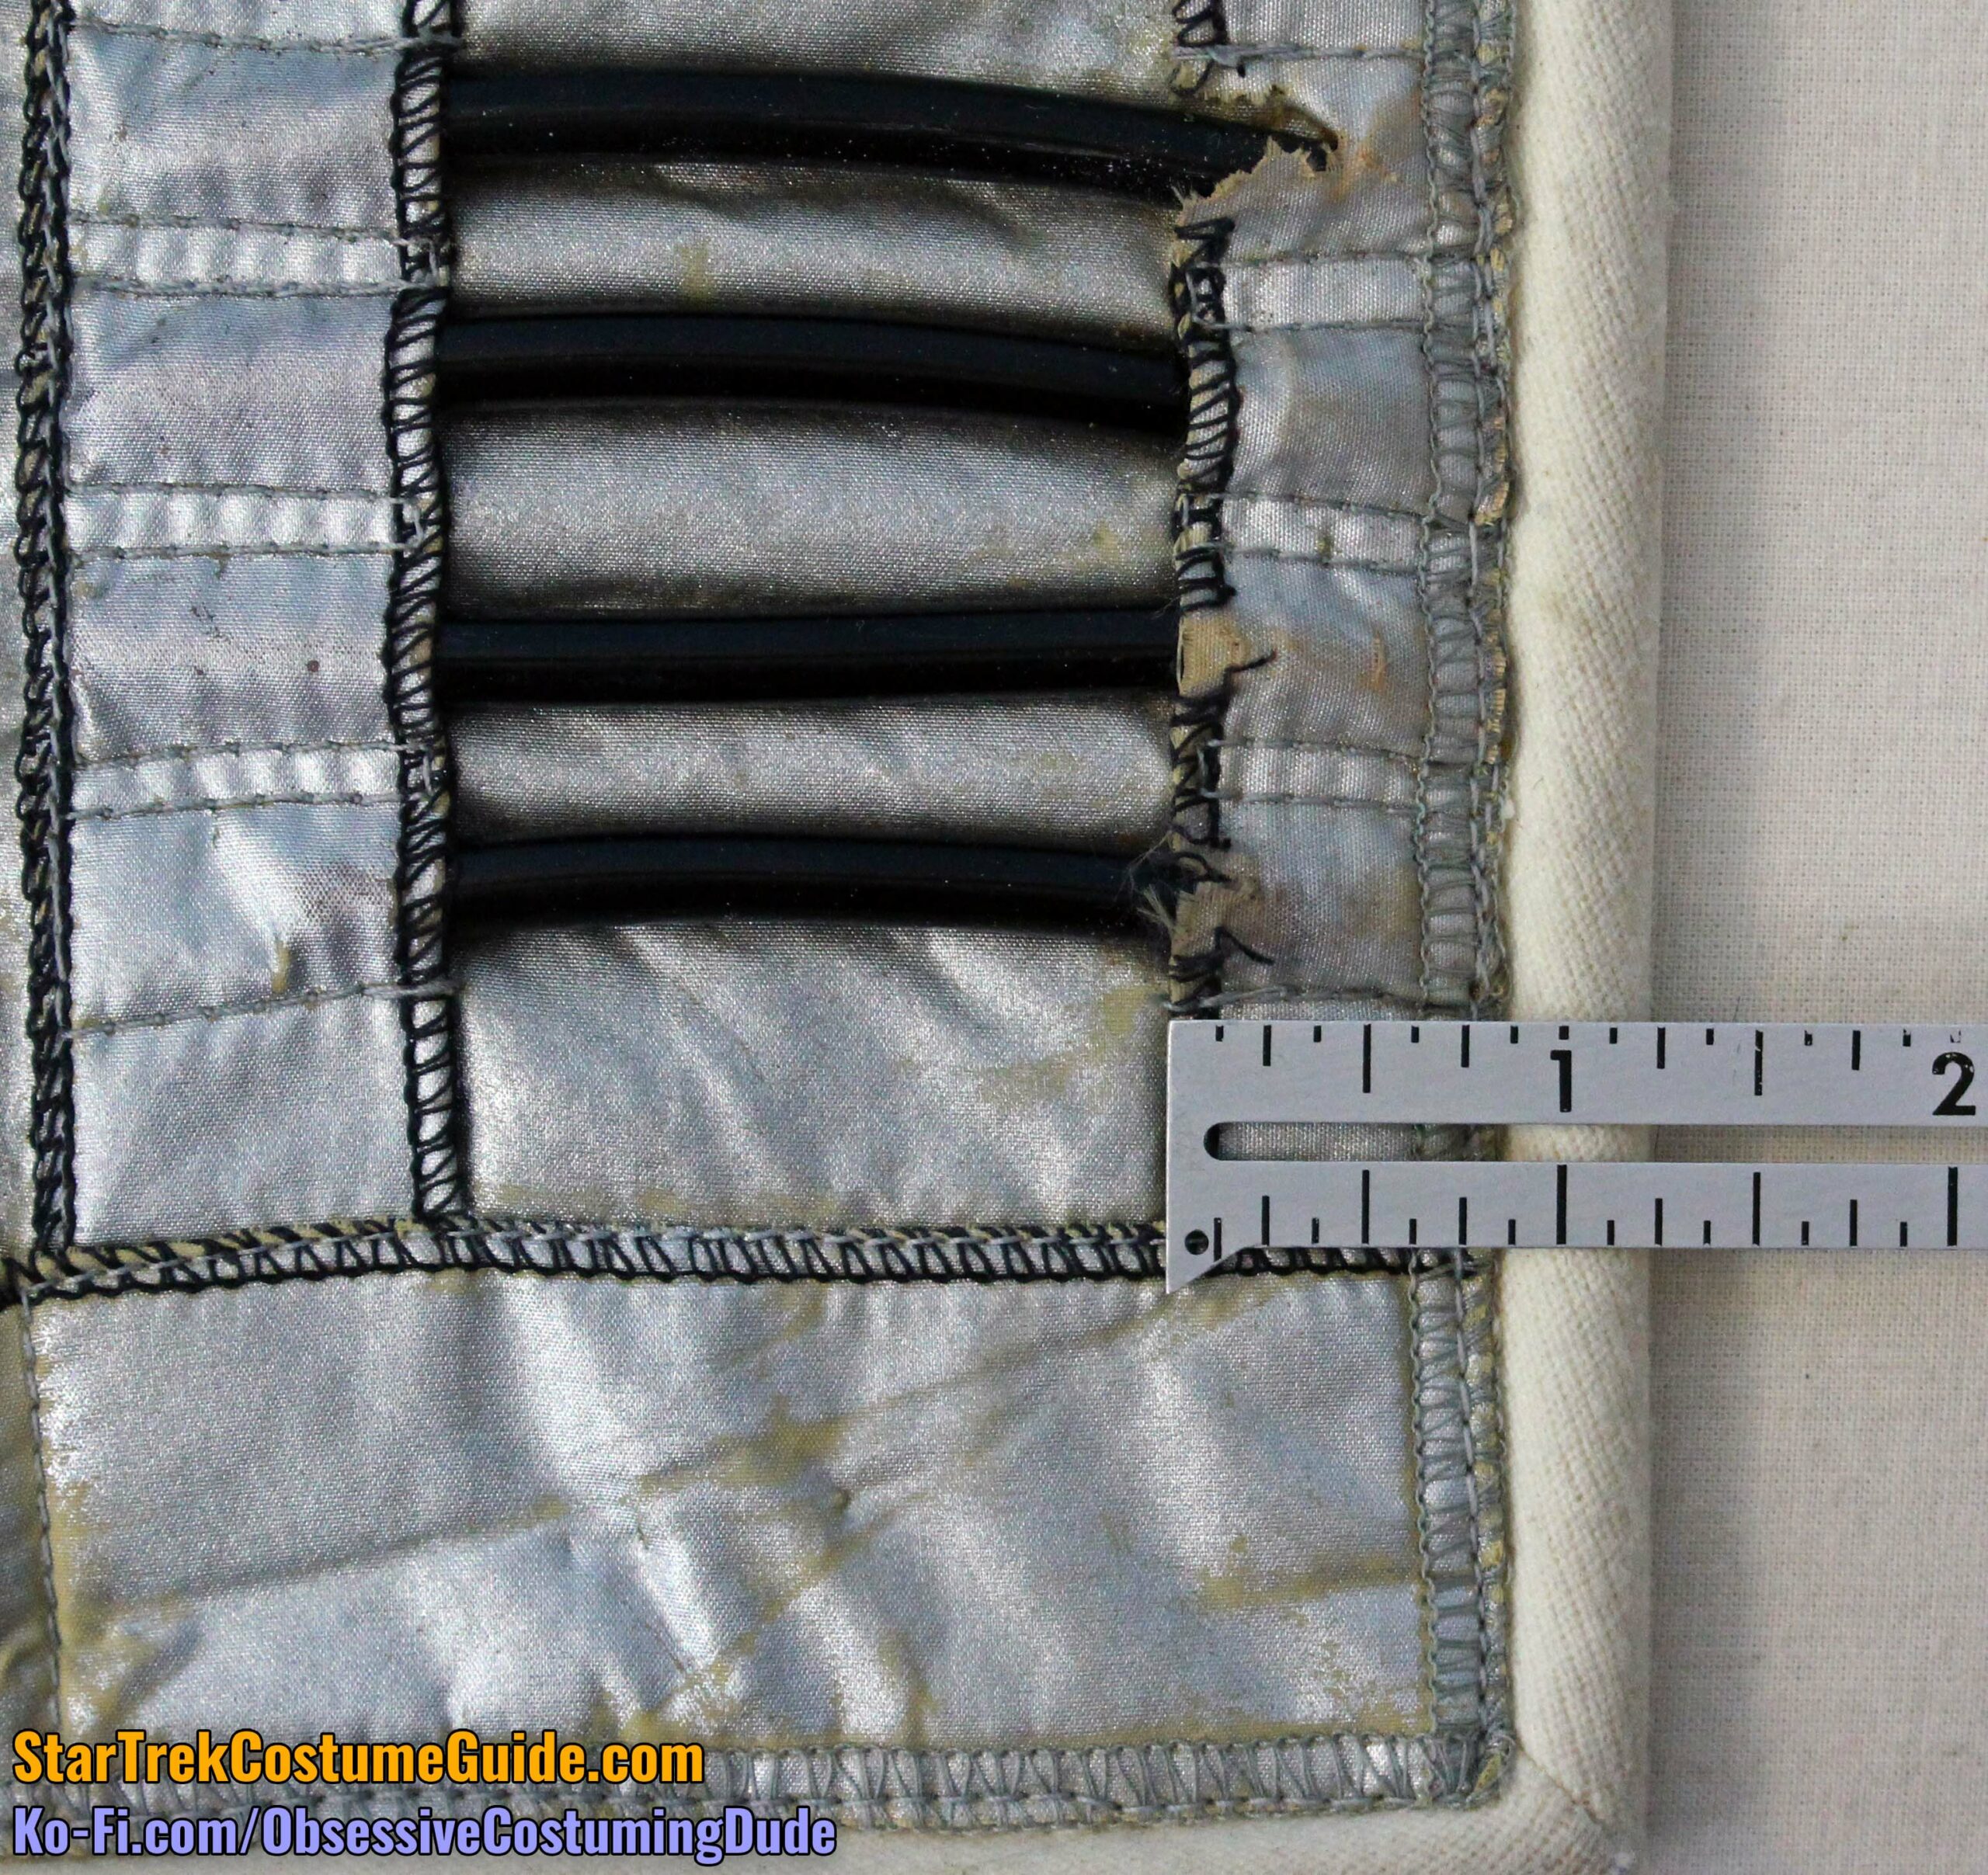
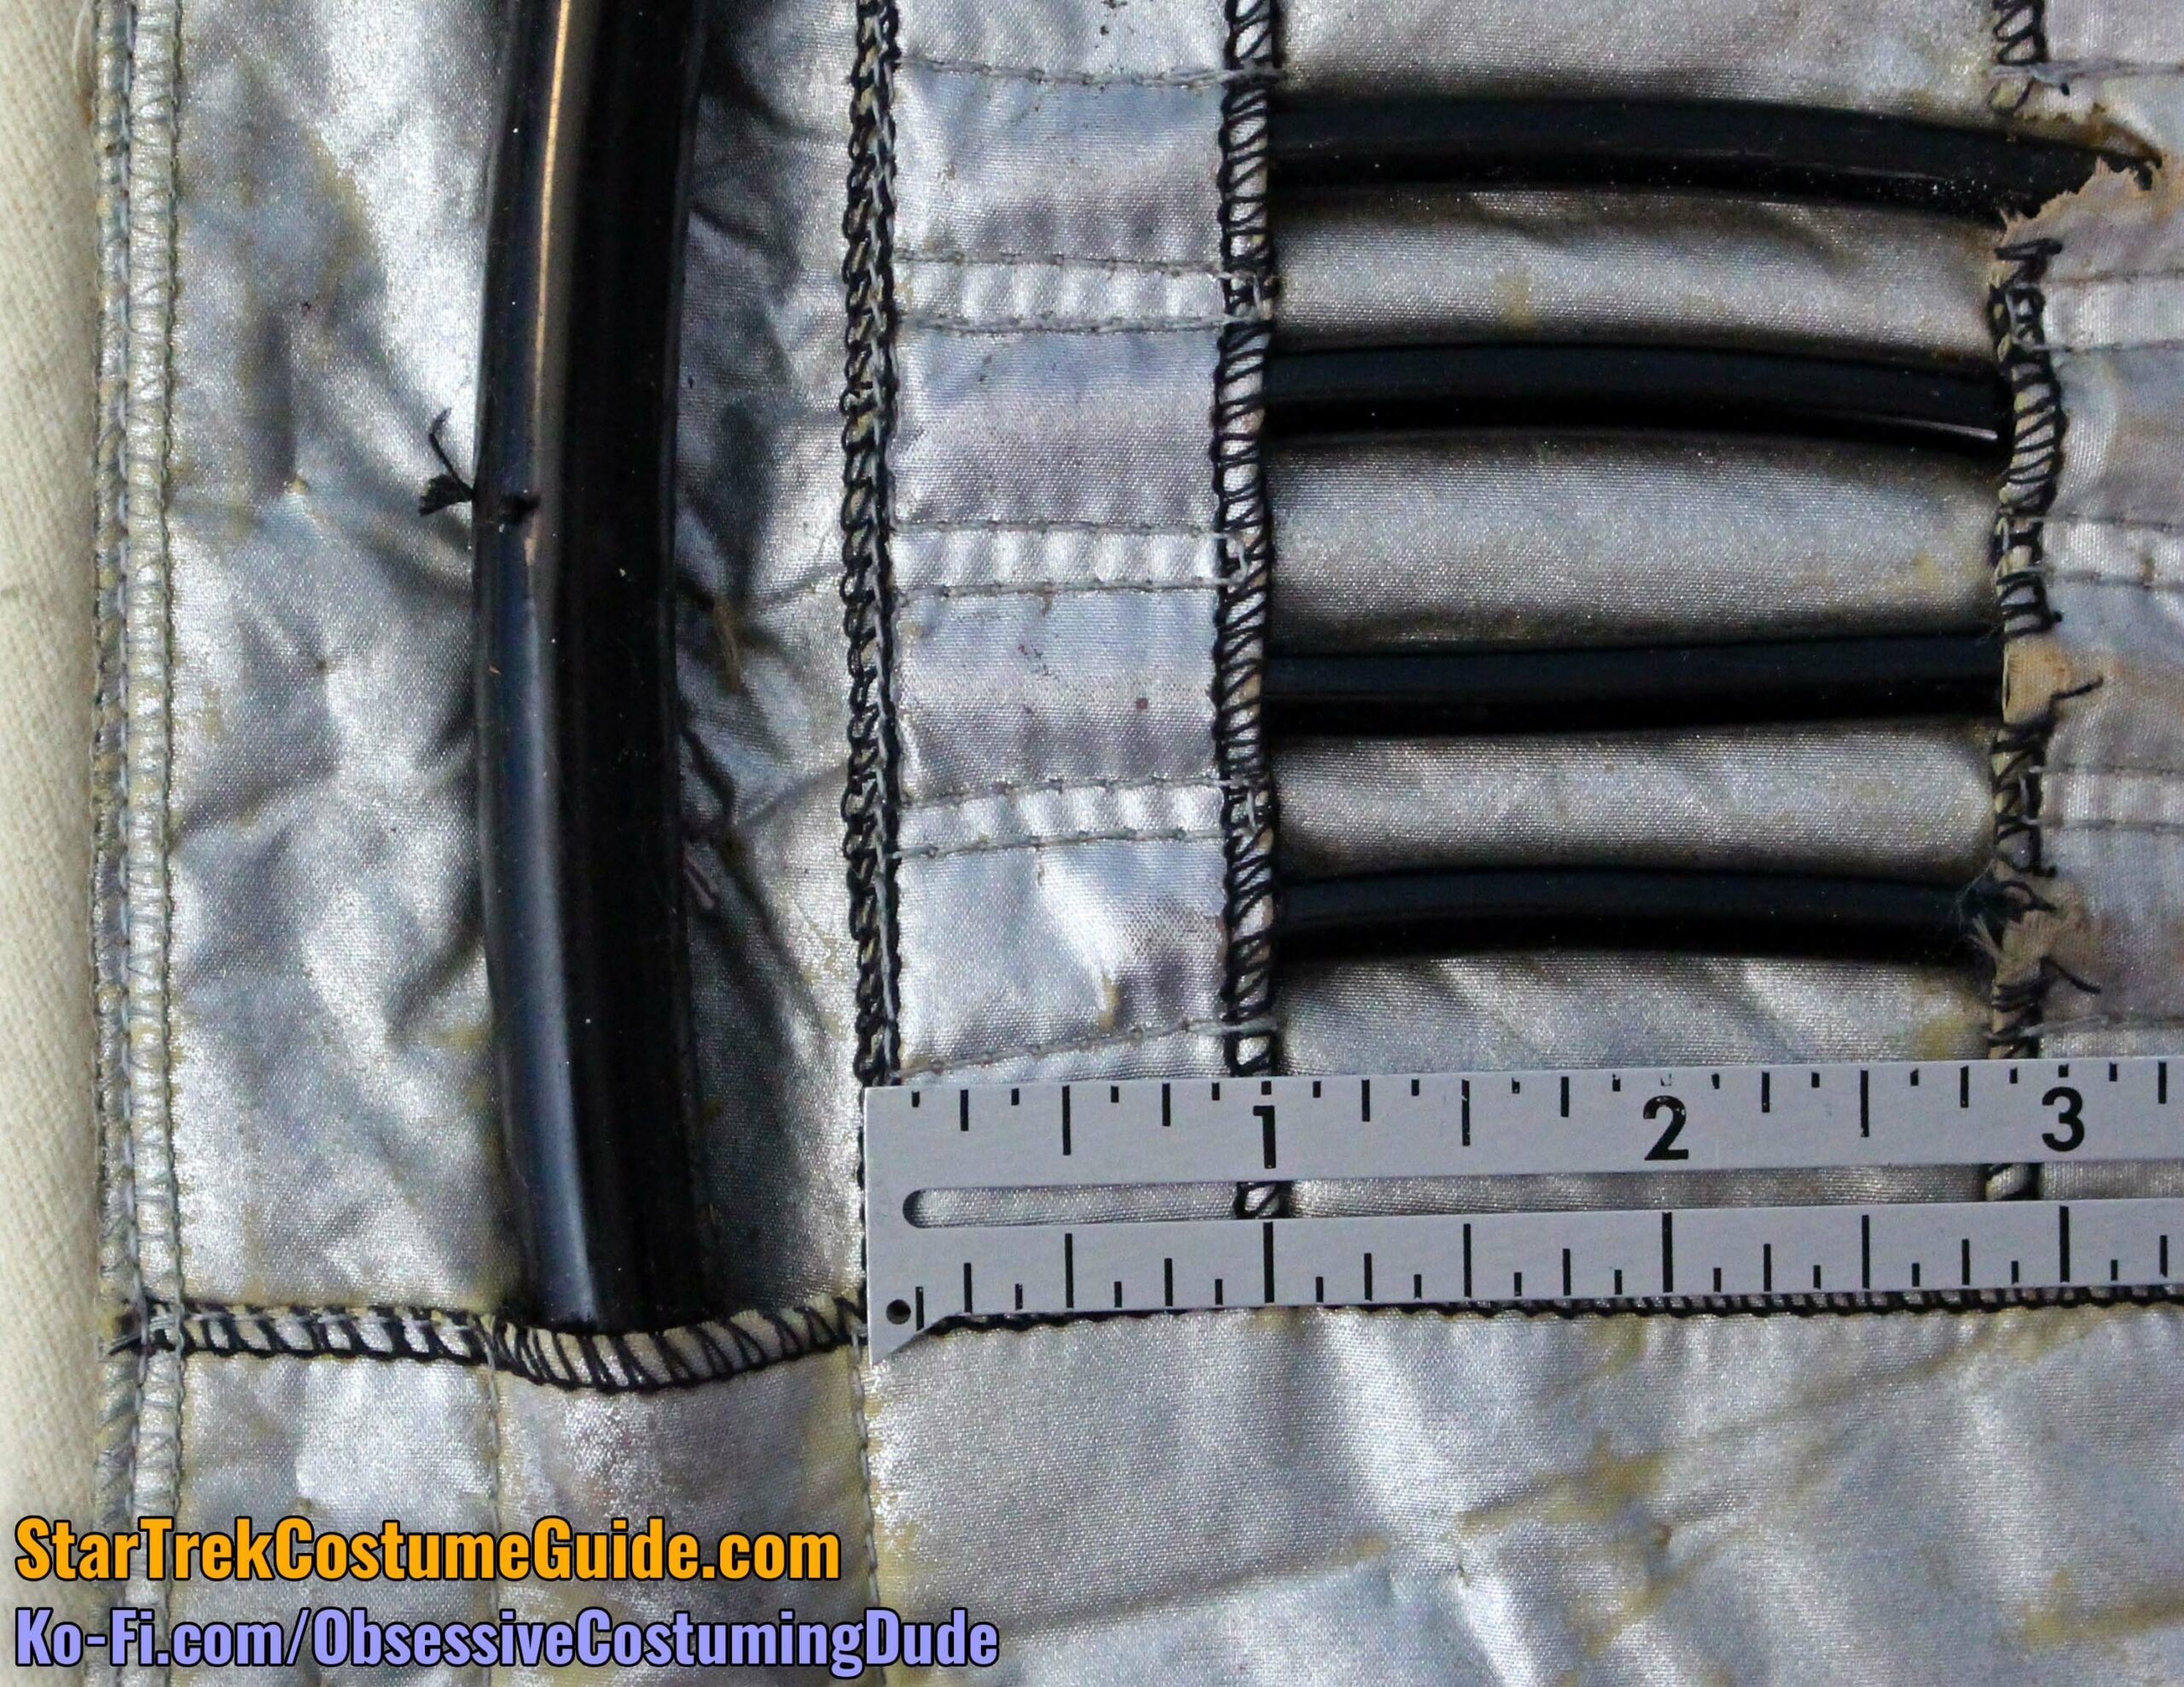
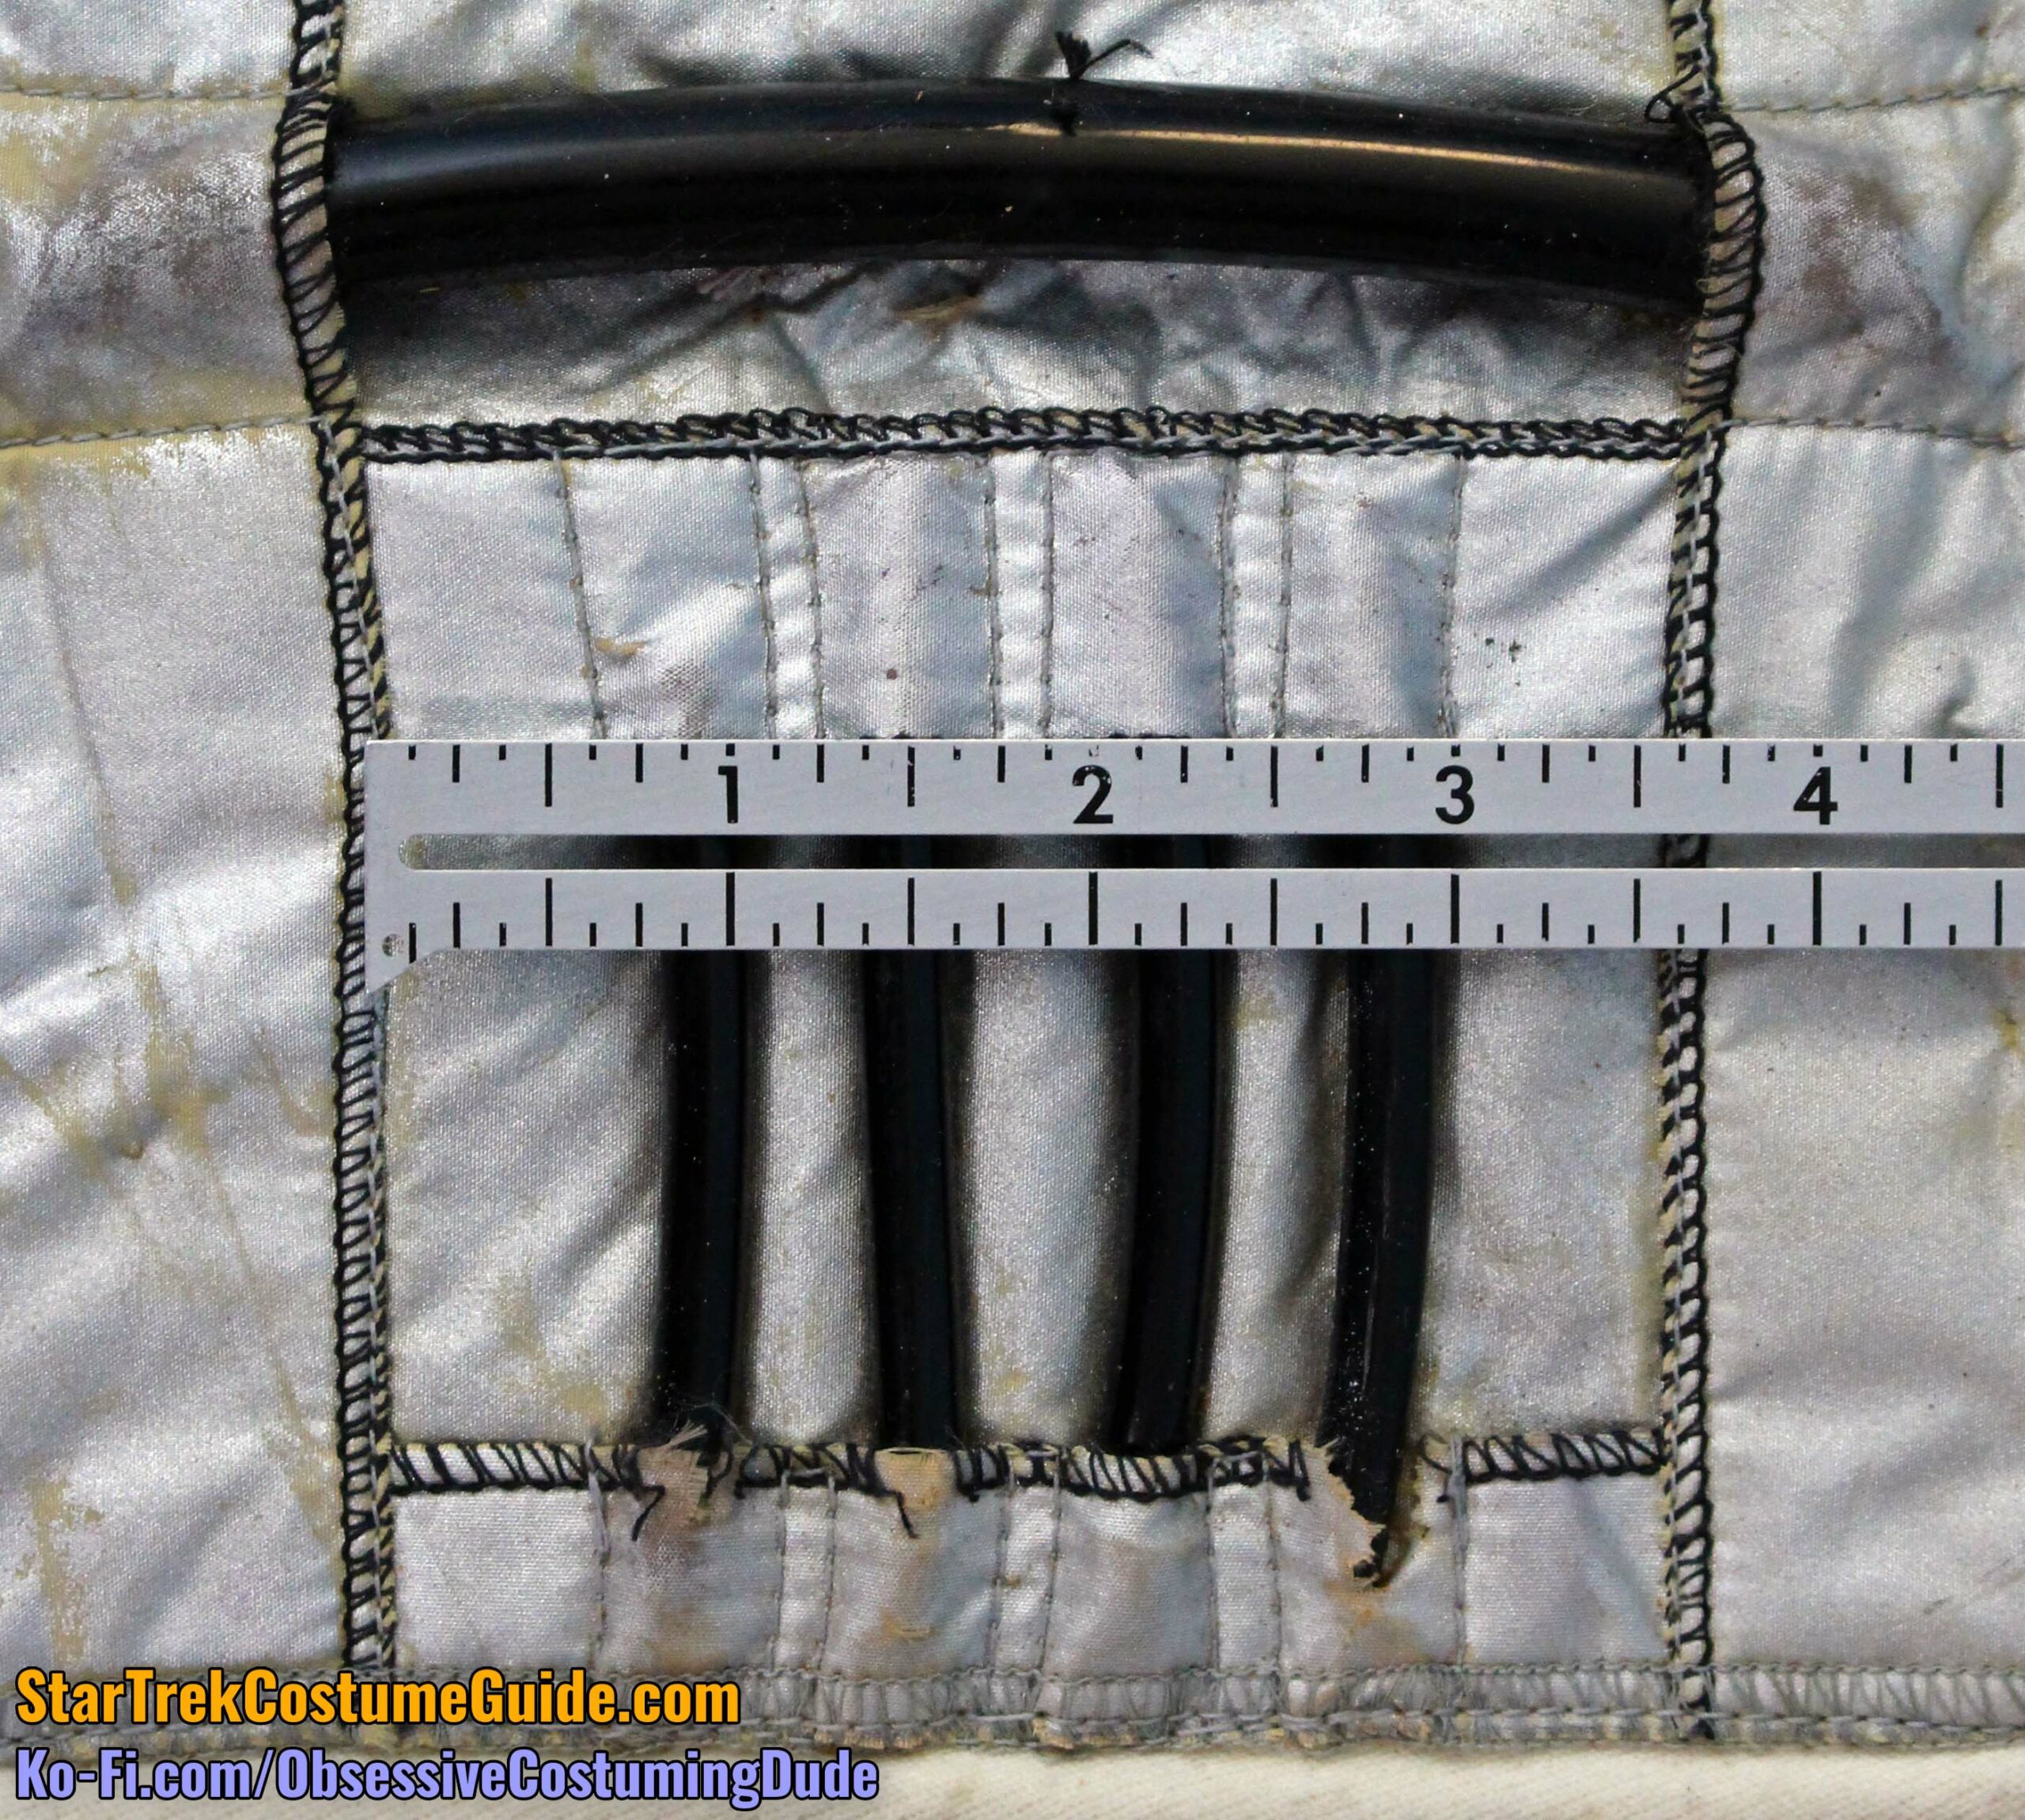
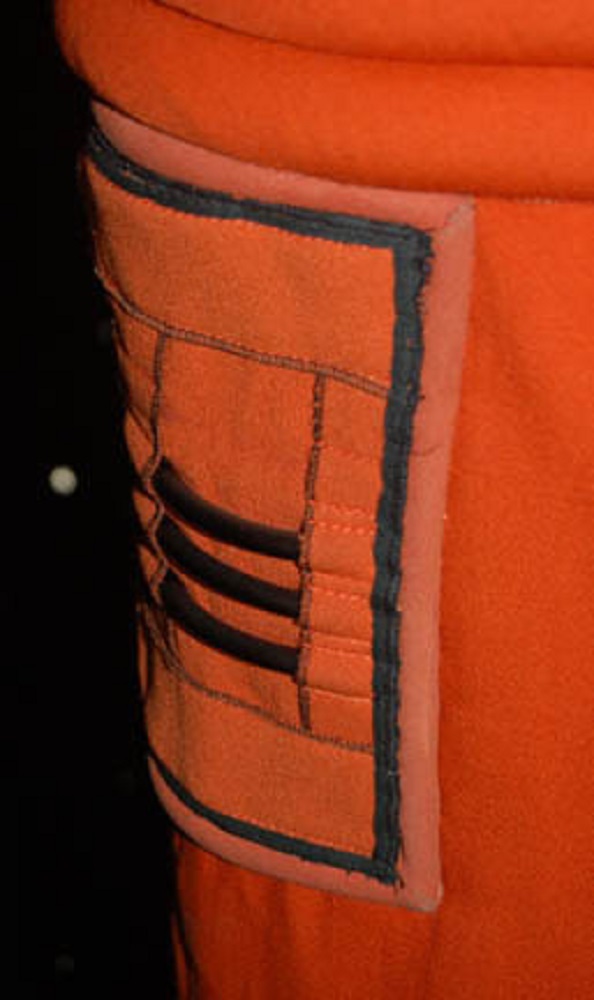
The interior assembly was comprised of a base layer of the silver ironing table fabric and four additional thinner layers topstitched into place on top of it.
Two of the layers formed the channels for the thinner horizontal black tubing, and two more layers formed the channel for the larger vertical black tubing.
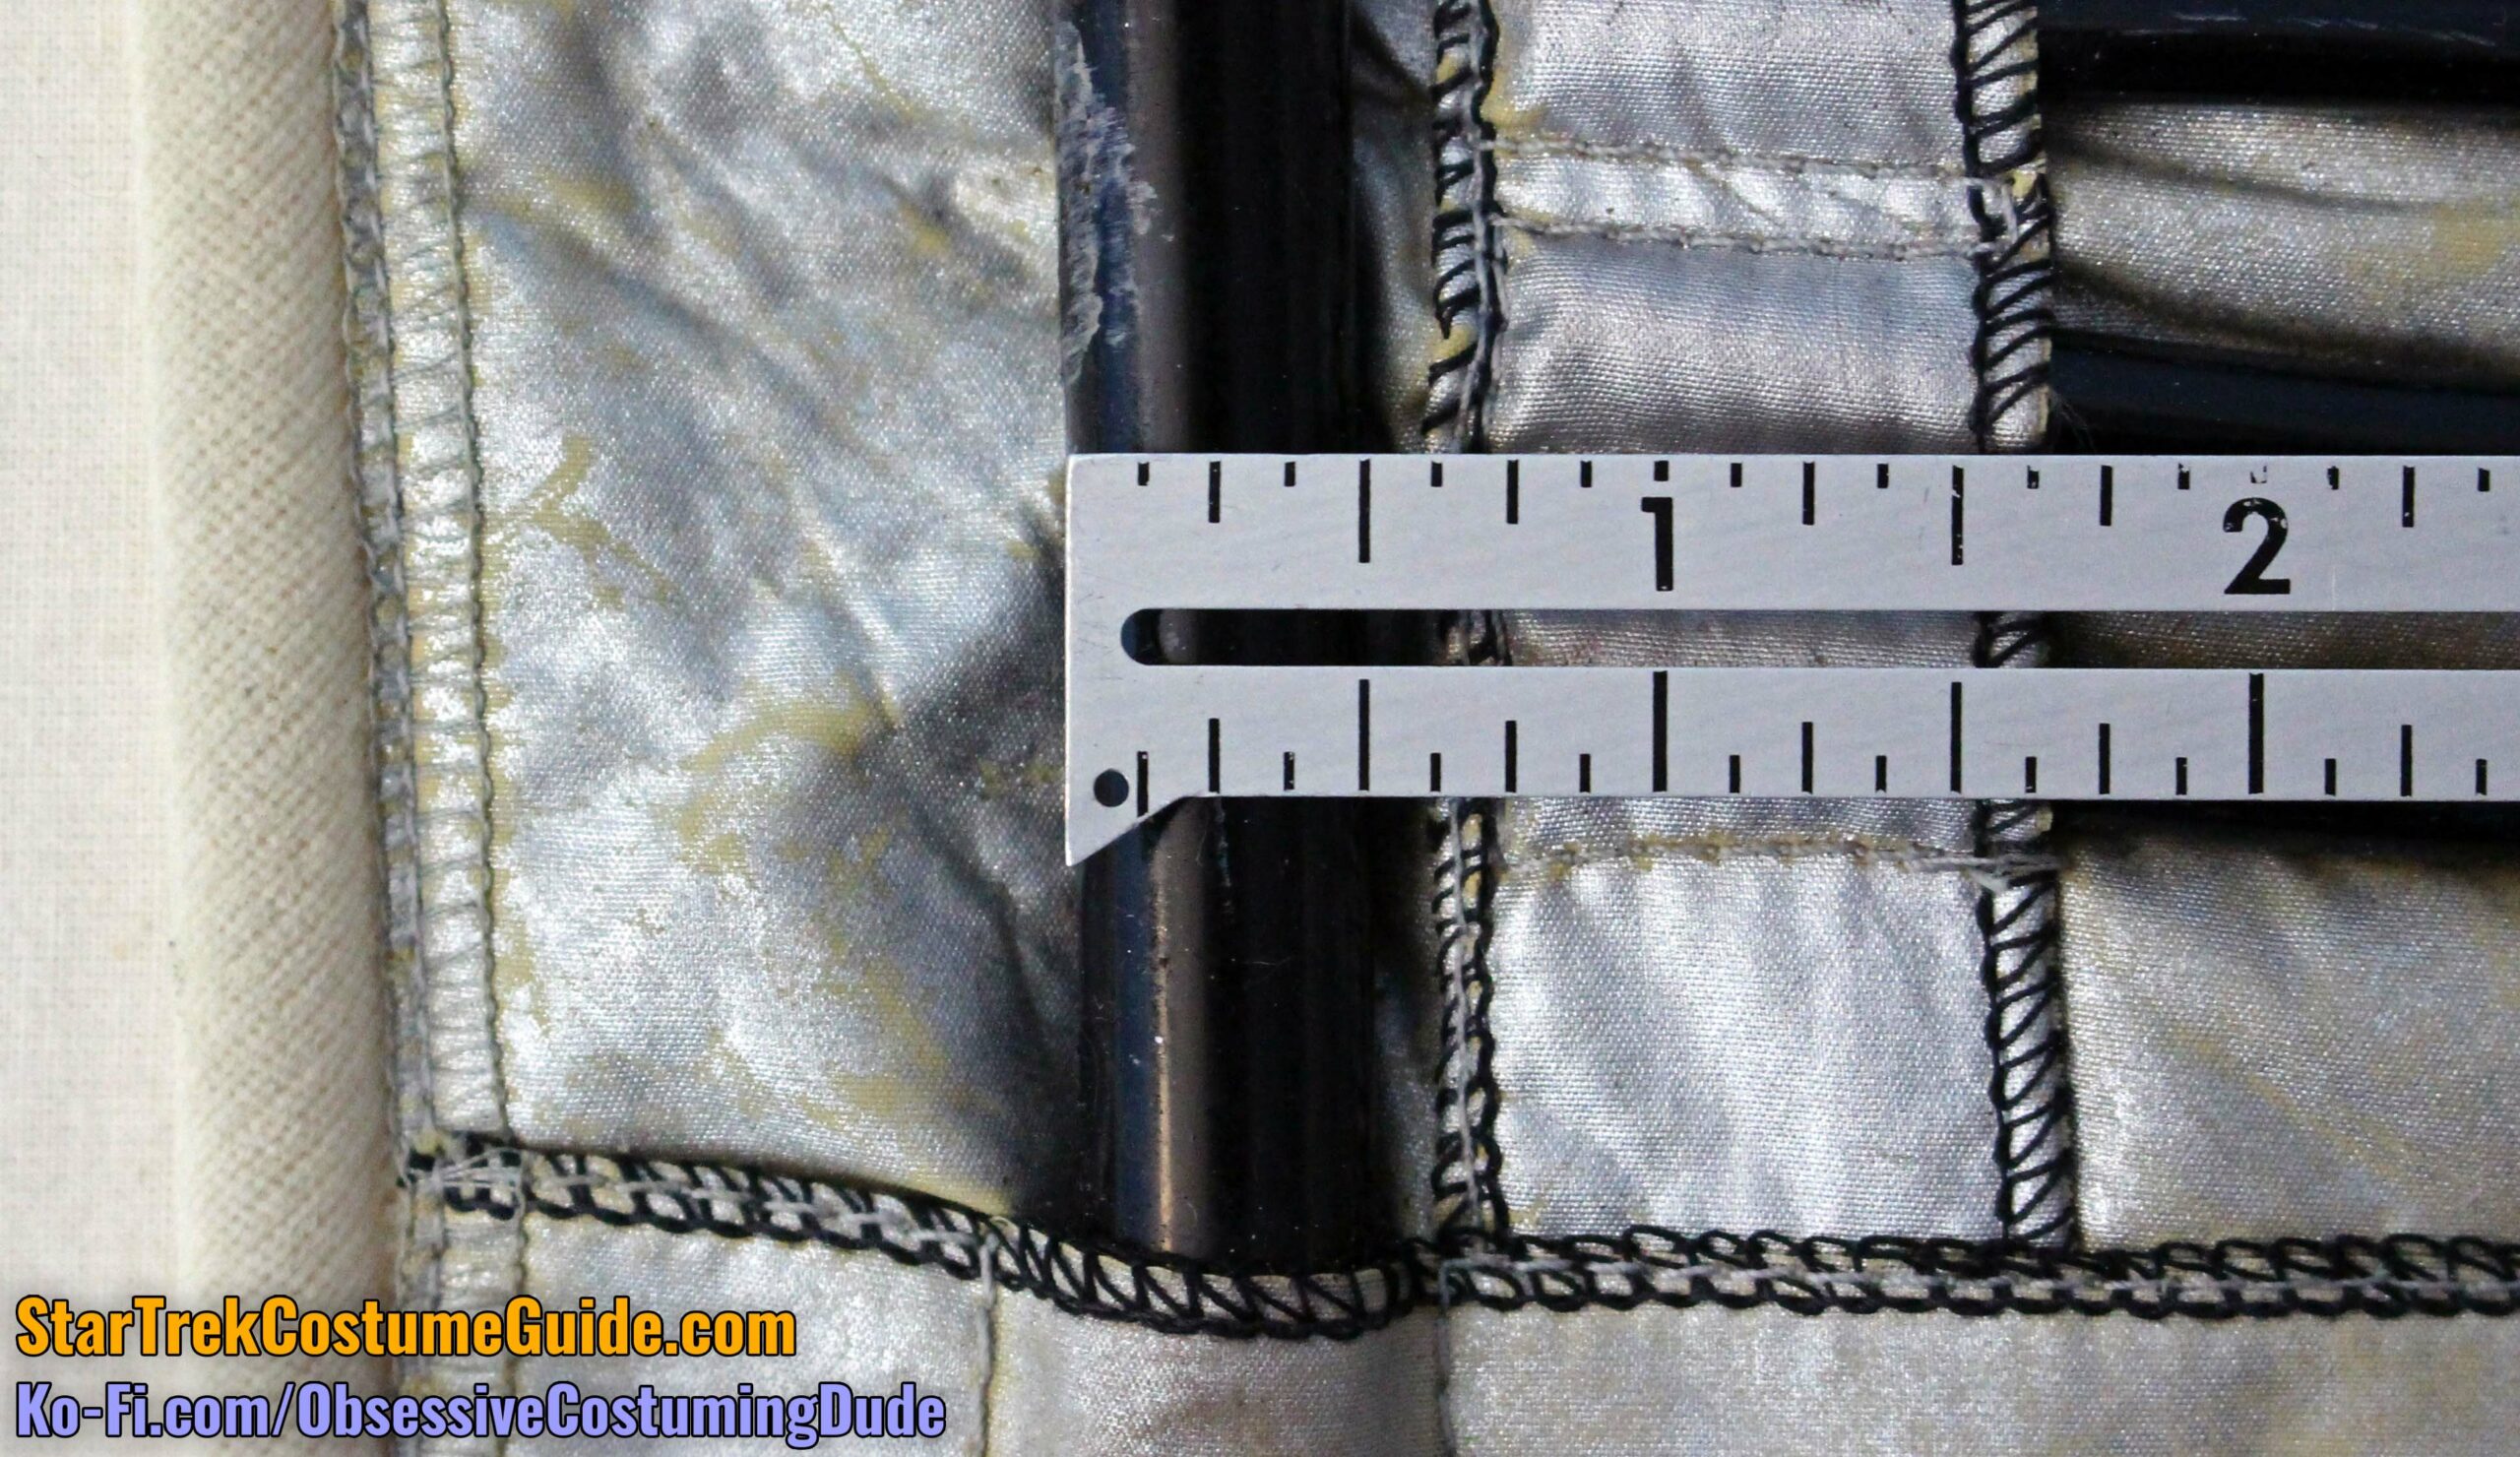
The outer second layer was ¾” wide, and the inner edge was serged in black.
The centermost second layer was a full inch wide, and both edges were serged in black.
This middle area was 3 ⅝” tall (measured from the edges of the third layers).
The tubing channels began ⅝” from the aforementioned edges, were ½” wide, and were topstitched in matching gray thread.
The center layer’s edge opposite of the tubing was also topstitched into place.
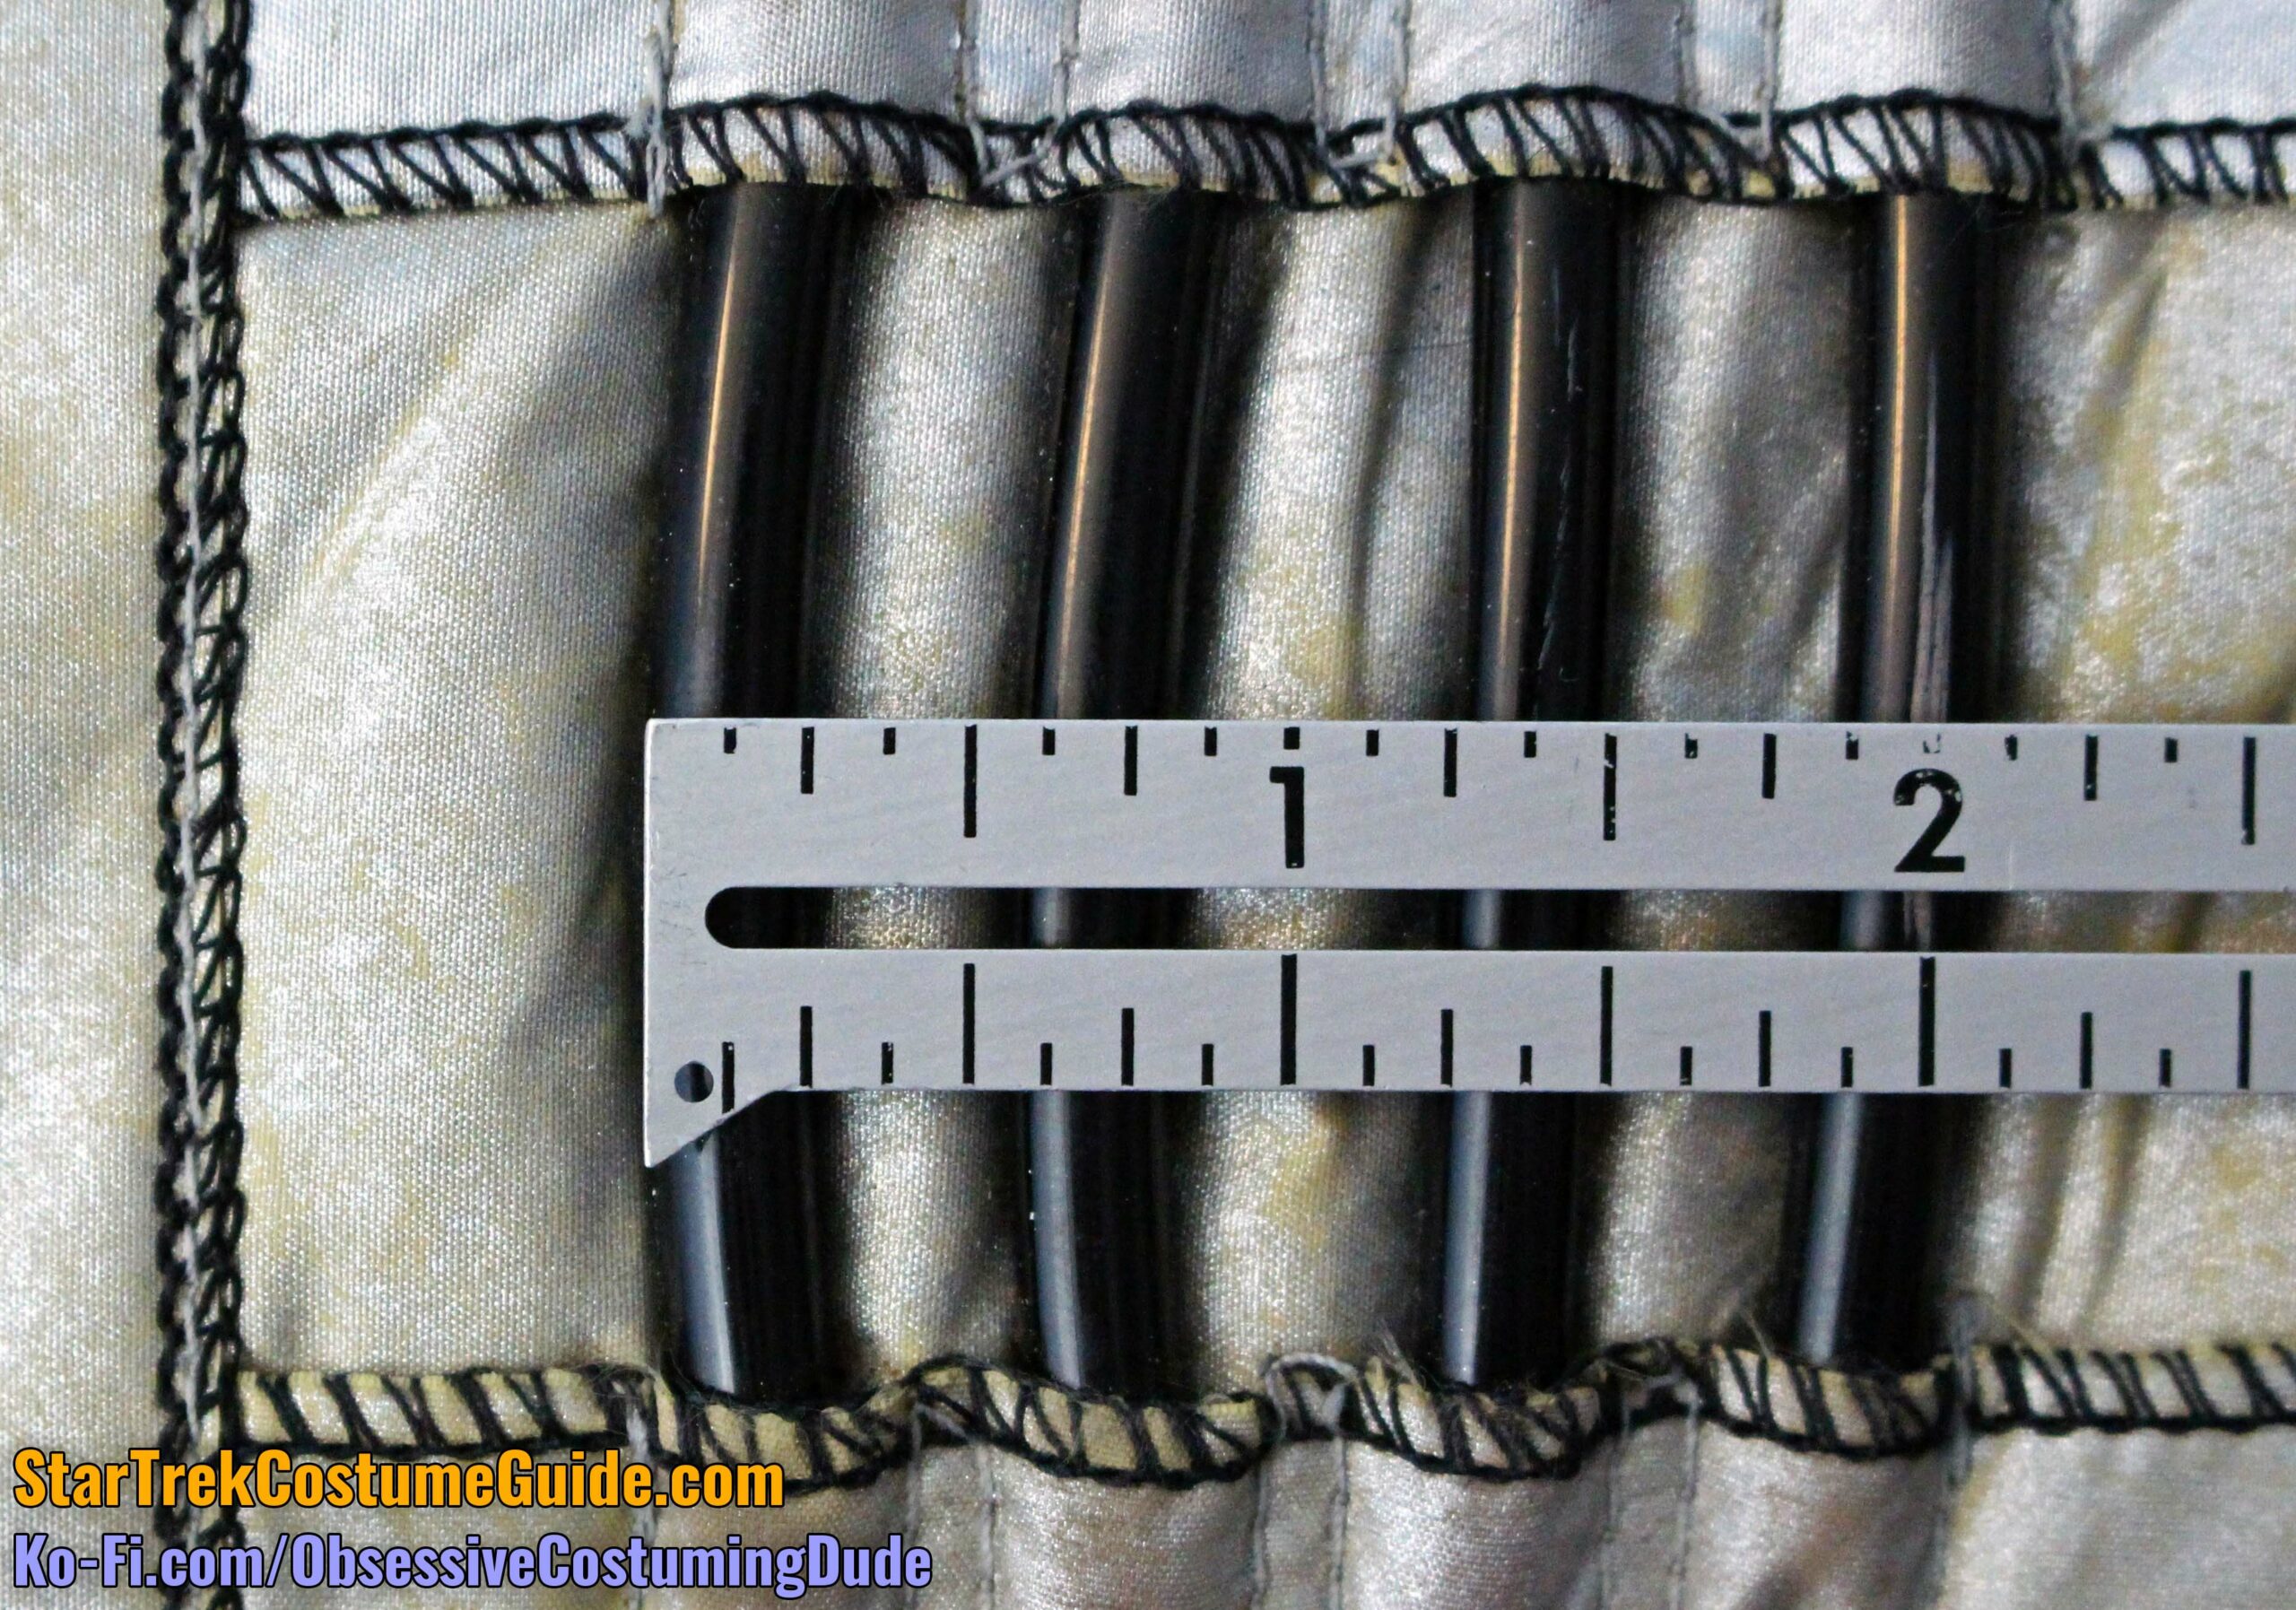
The third layers were both 1 ½” tall, and the inner edges were serged in black.
The channels for the larger black tubing were 1” wide; they were likewise topstitched into place with gray thread, as were the innermost edges outside the channel.
Underneath the silver ironing cover fabric was a backing layer of something no longer recognizable (at least, to me) after the copious amounts of fabric glue, but I think it was probably something akin to cotton flannel or wool felt.
The thinner black tubes were ¼” in diameter, and they appear to have simply been common drainage hose – yet another resourceful, yet economical element of costume design by Robert Fletcher & co. (I can buy 30 feet of black vinyl tubing for less than $7 at my local Lowe’s hardware store.)
The thicker tube was ½” in diameter and also appears to have been drainage hose.
As with the reflector box, the outer edges of this panel assembly were framed with custom-made piping.
However, this piping appears to have been made with off-white cavalry twill (rather than the wool gabardine or knit fabric used on the jumpsuit), and I again had difficulty determining whether the cord diameter was ¼” or 5/16”.
The silver/tubing assembly was serged in gray, then edge-stitched to the piping assembly with gray thread.
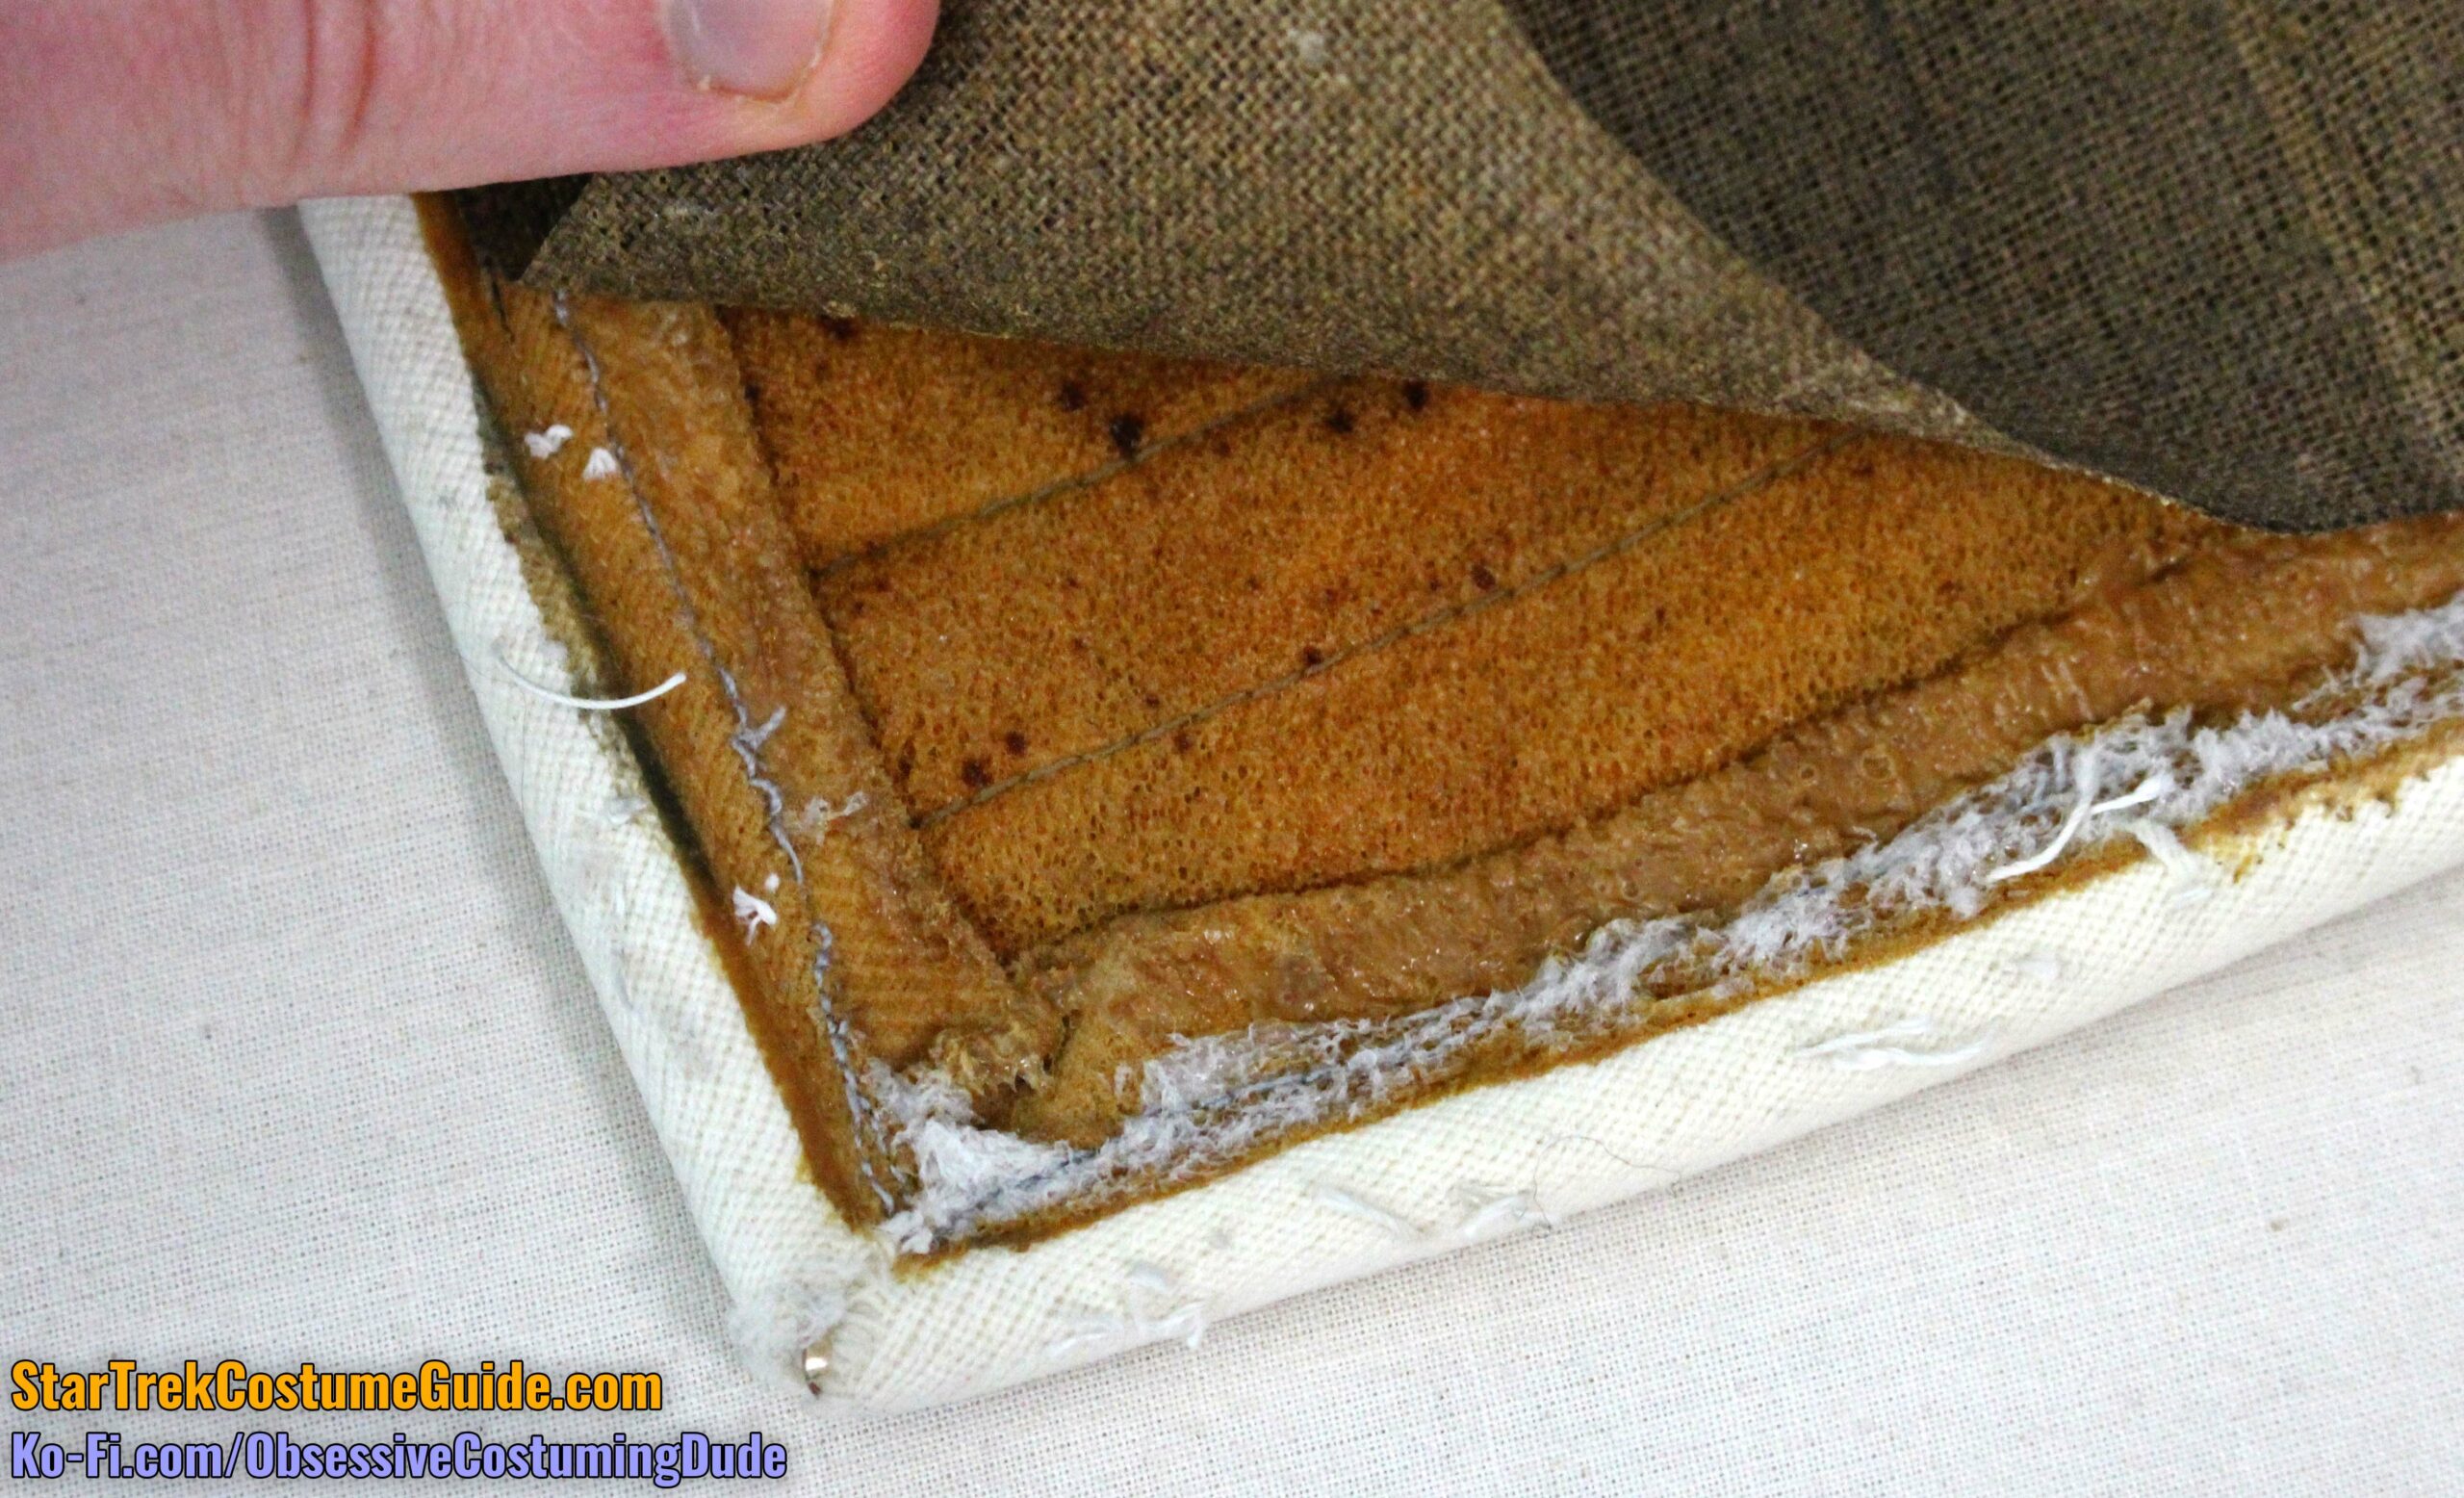
The thigh panel assembly was then backed with what looked and felt like heavy French canvas.
Although these were standard for officers and enlisted crew from The Wrath of Khan onward, for The Motion Picture, these thigh panels appear to have been far lighter and plainer.
Unfortunately, I was never able to get as detailed a look at them as I’d prefer (either in the movie or in costume auction listings), they appear to have been generally analogous to the left sleeve panels, which we’ll examine shortly.
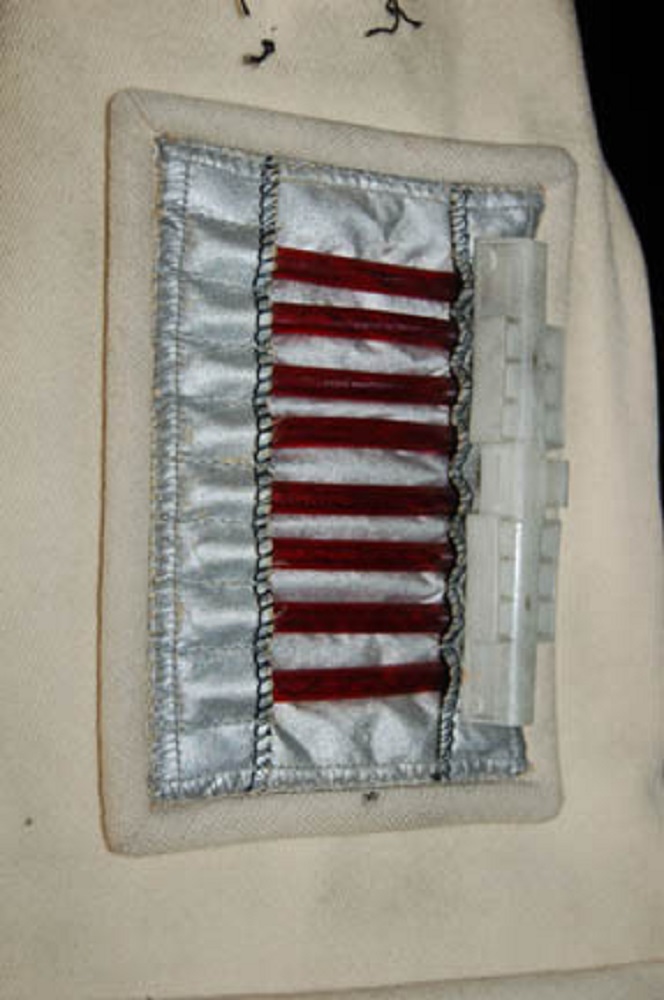
And as with the red collars I mentioned earlier, trainee radiation suits had translucent red tubing instead of black.
This was the case for the corresponding sleeve and glove panels as well.
Here are some auction photos of trainee uniform elements with the red tubing.
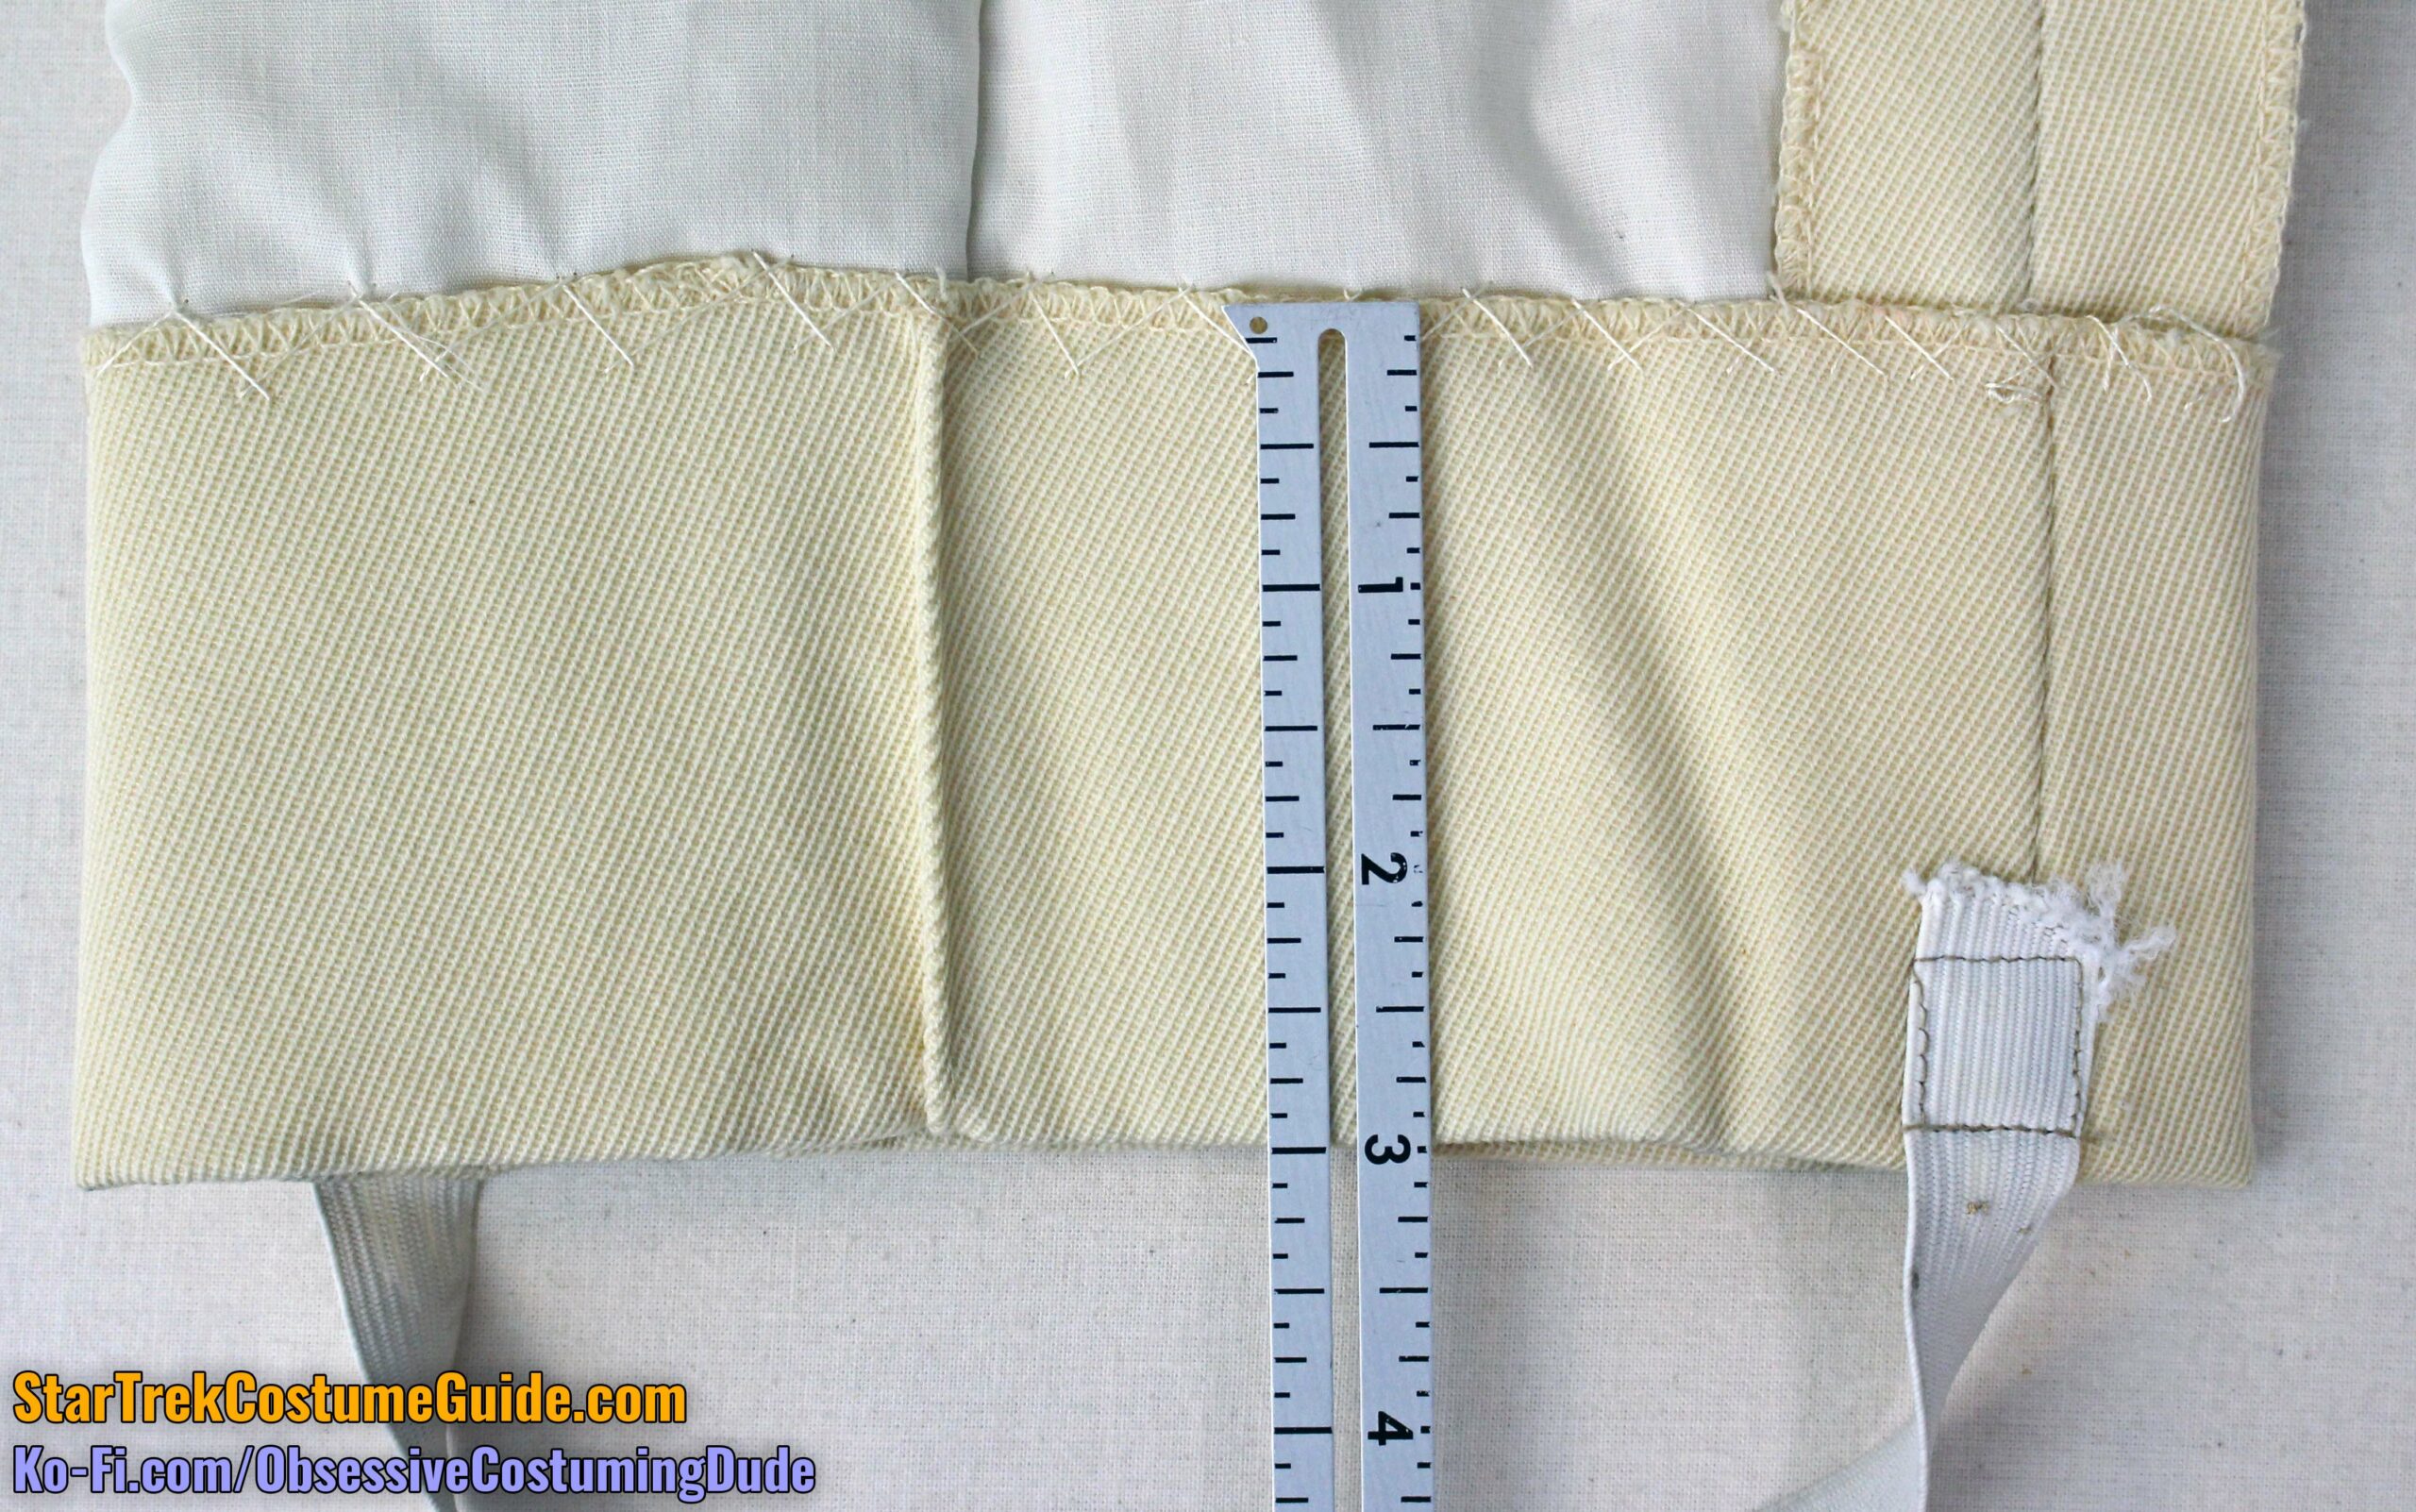
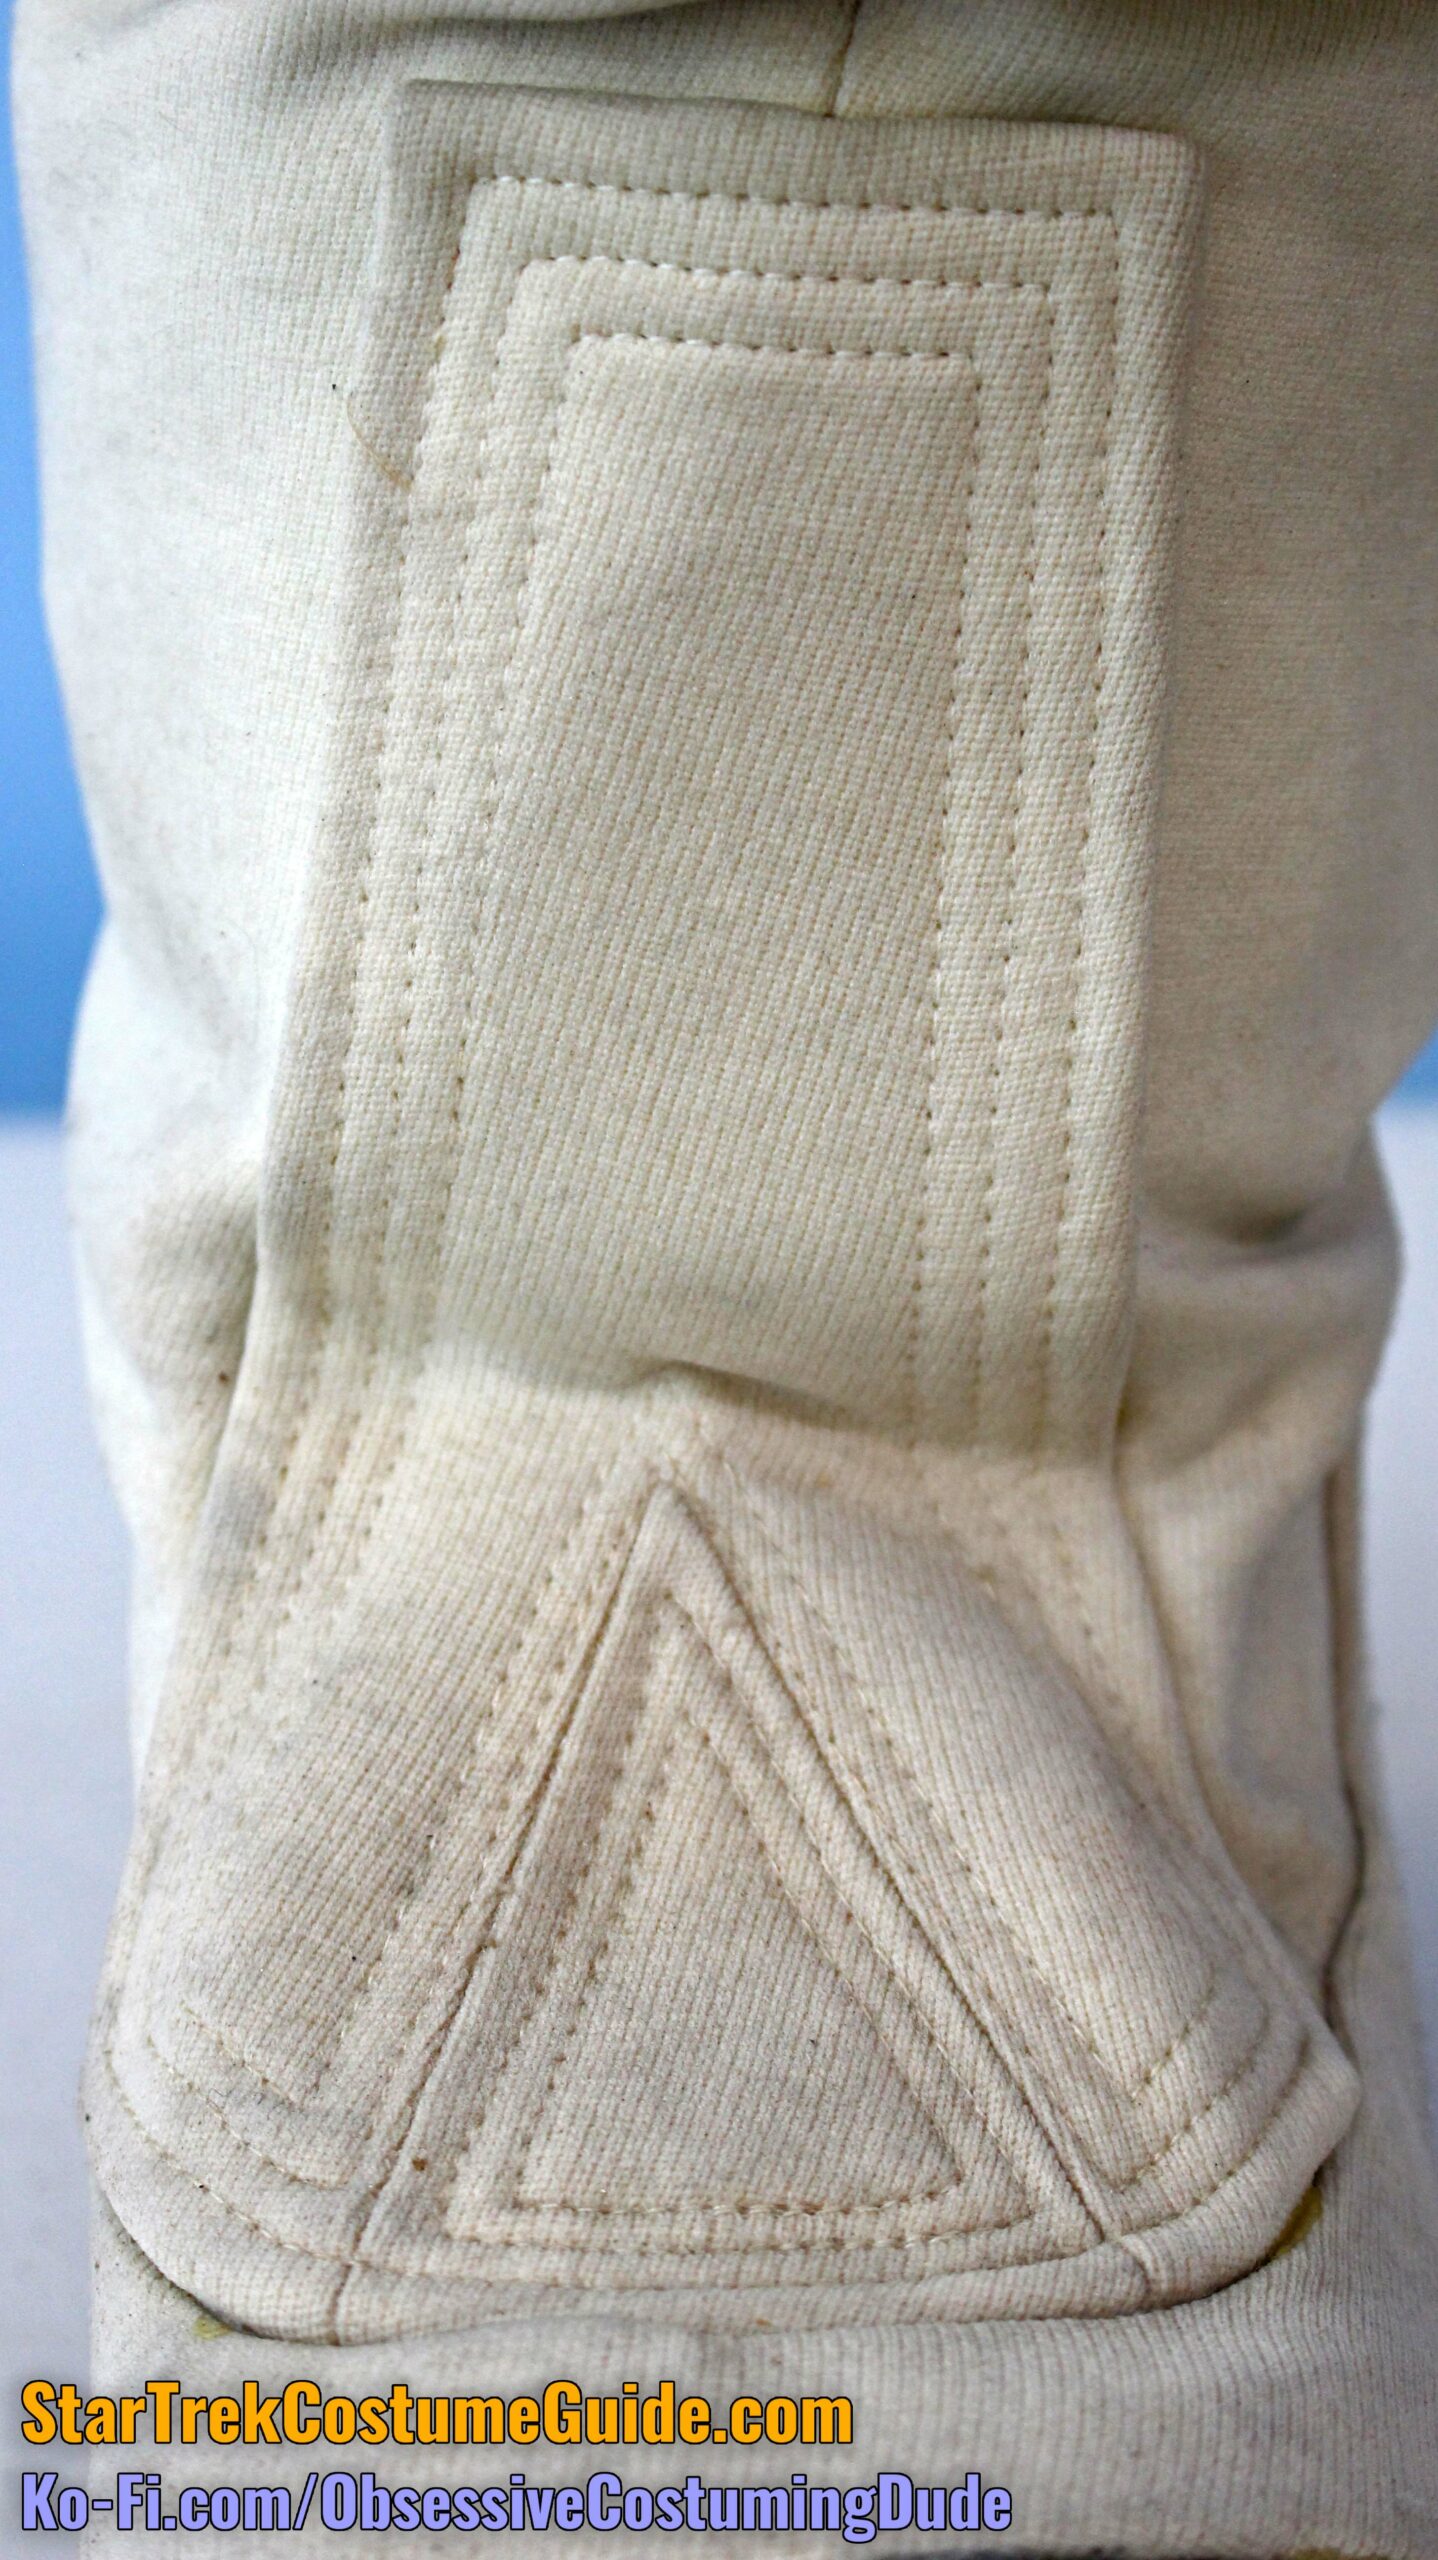
LOWER BACK RECTANGLE
As I mentioned earlier, on the lower back of the jumpsuit was a tall quilted rectangle.
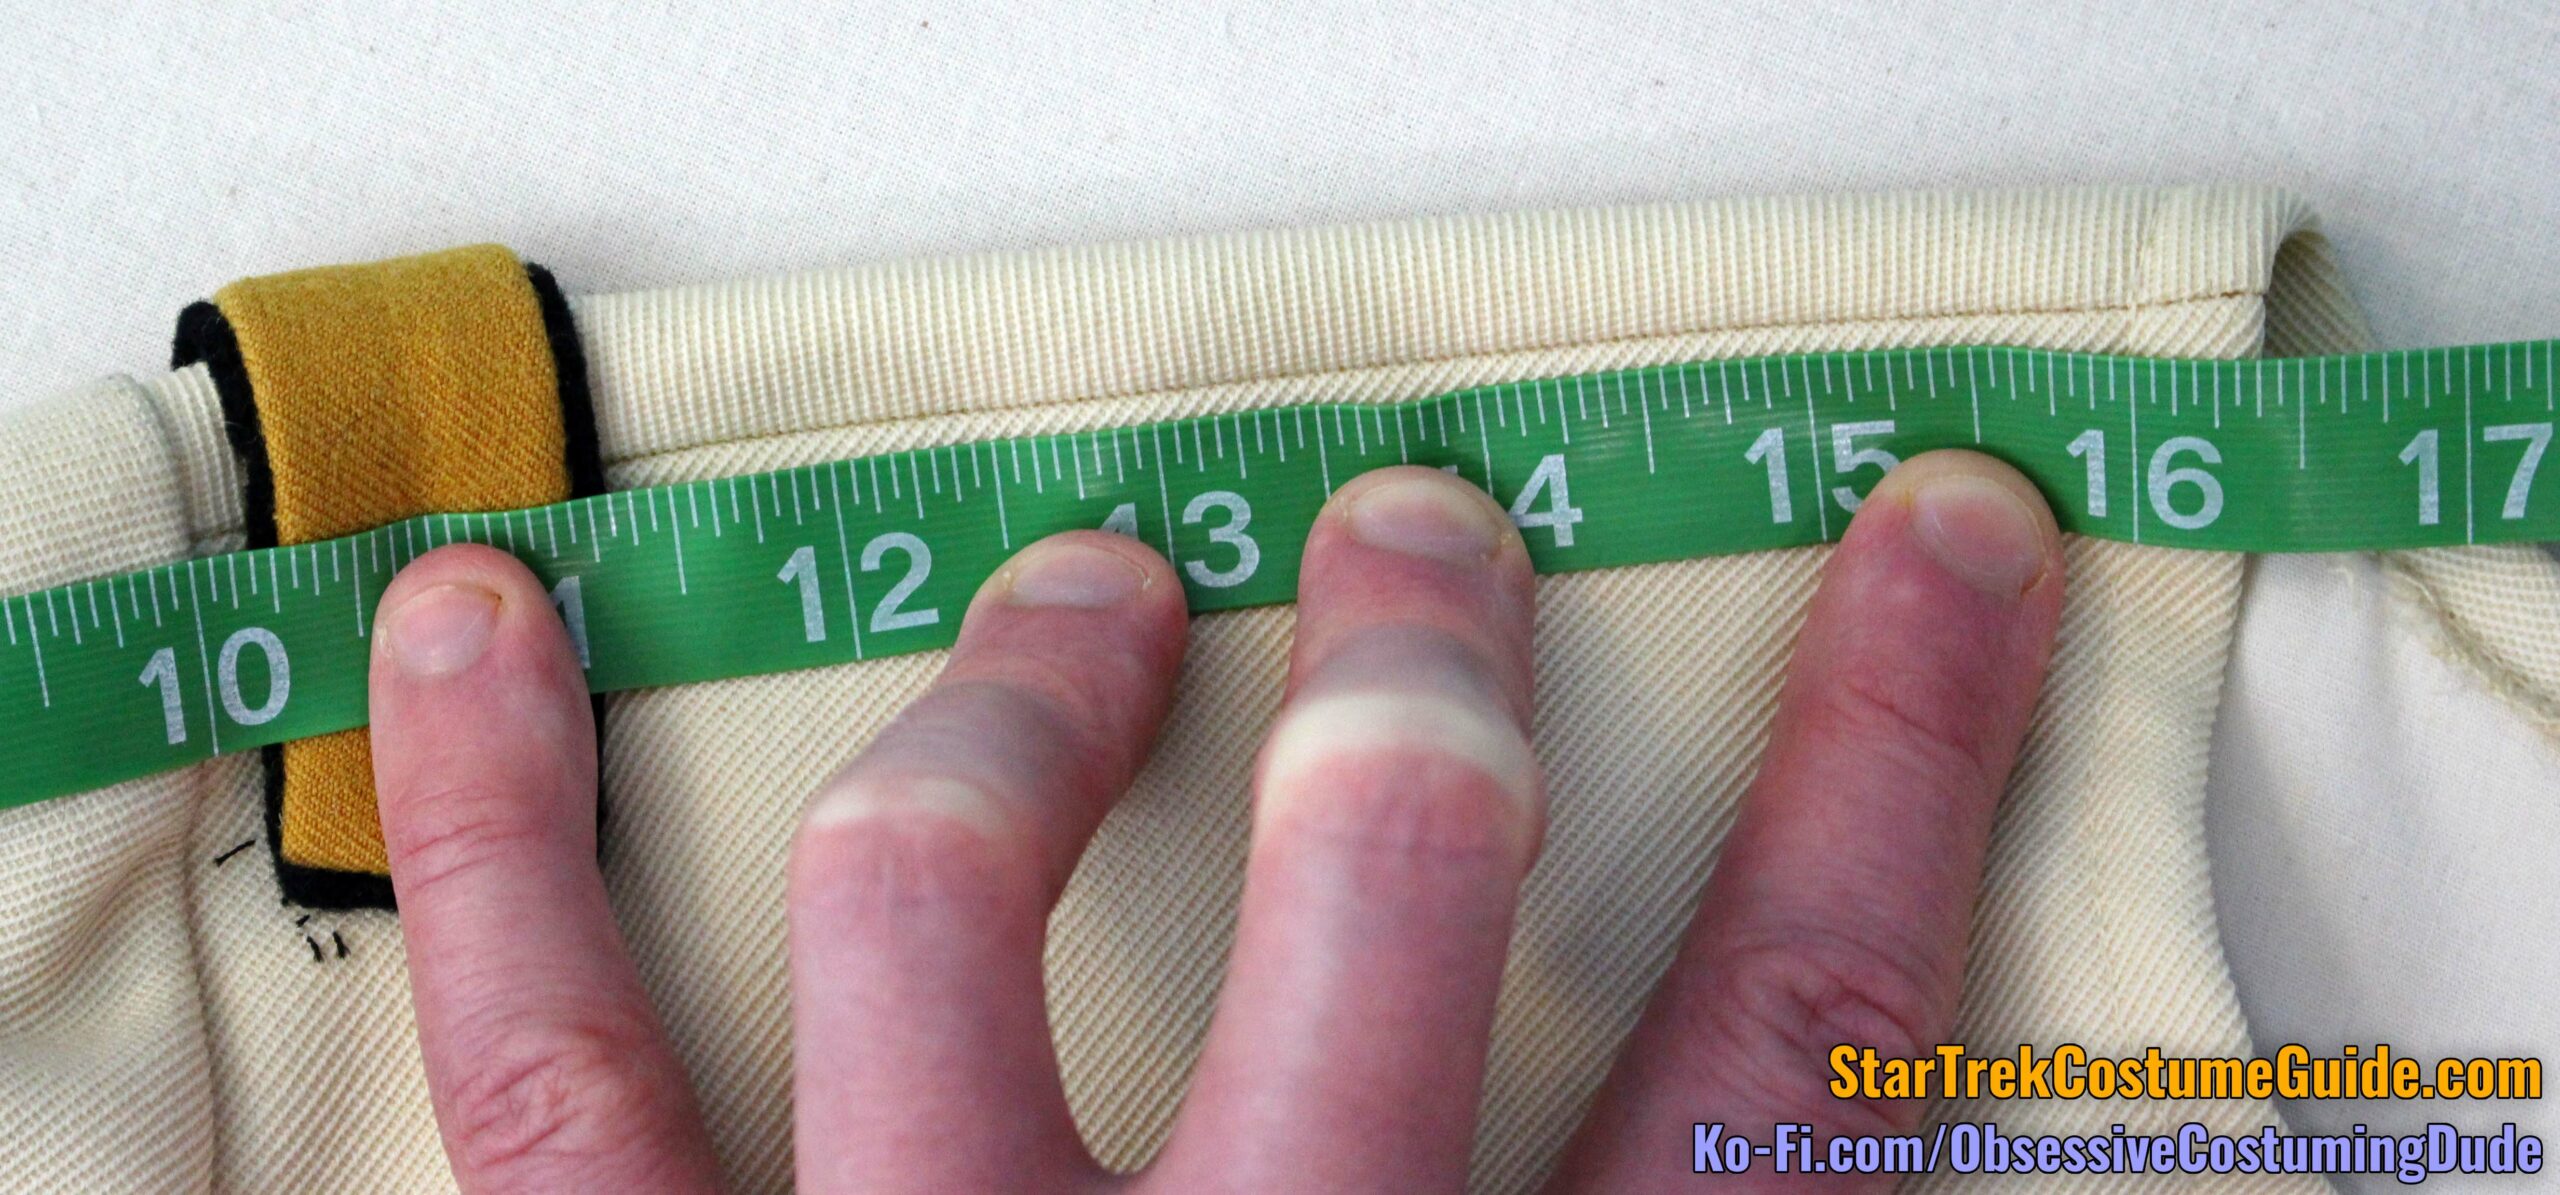
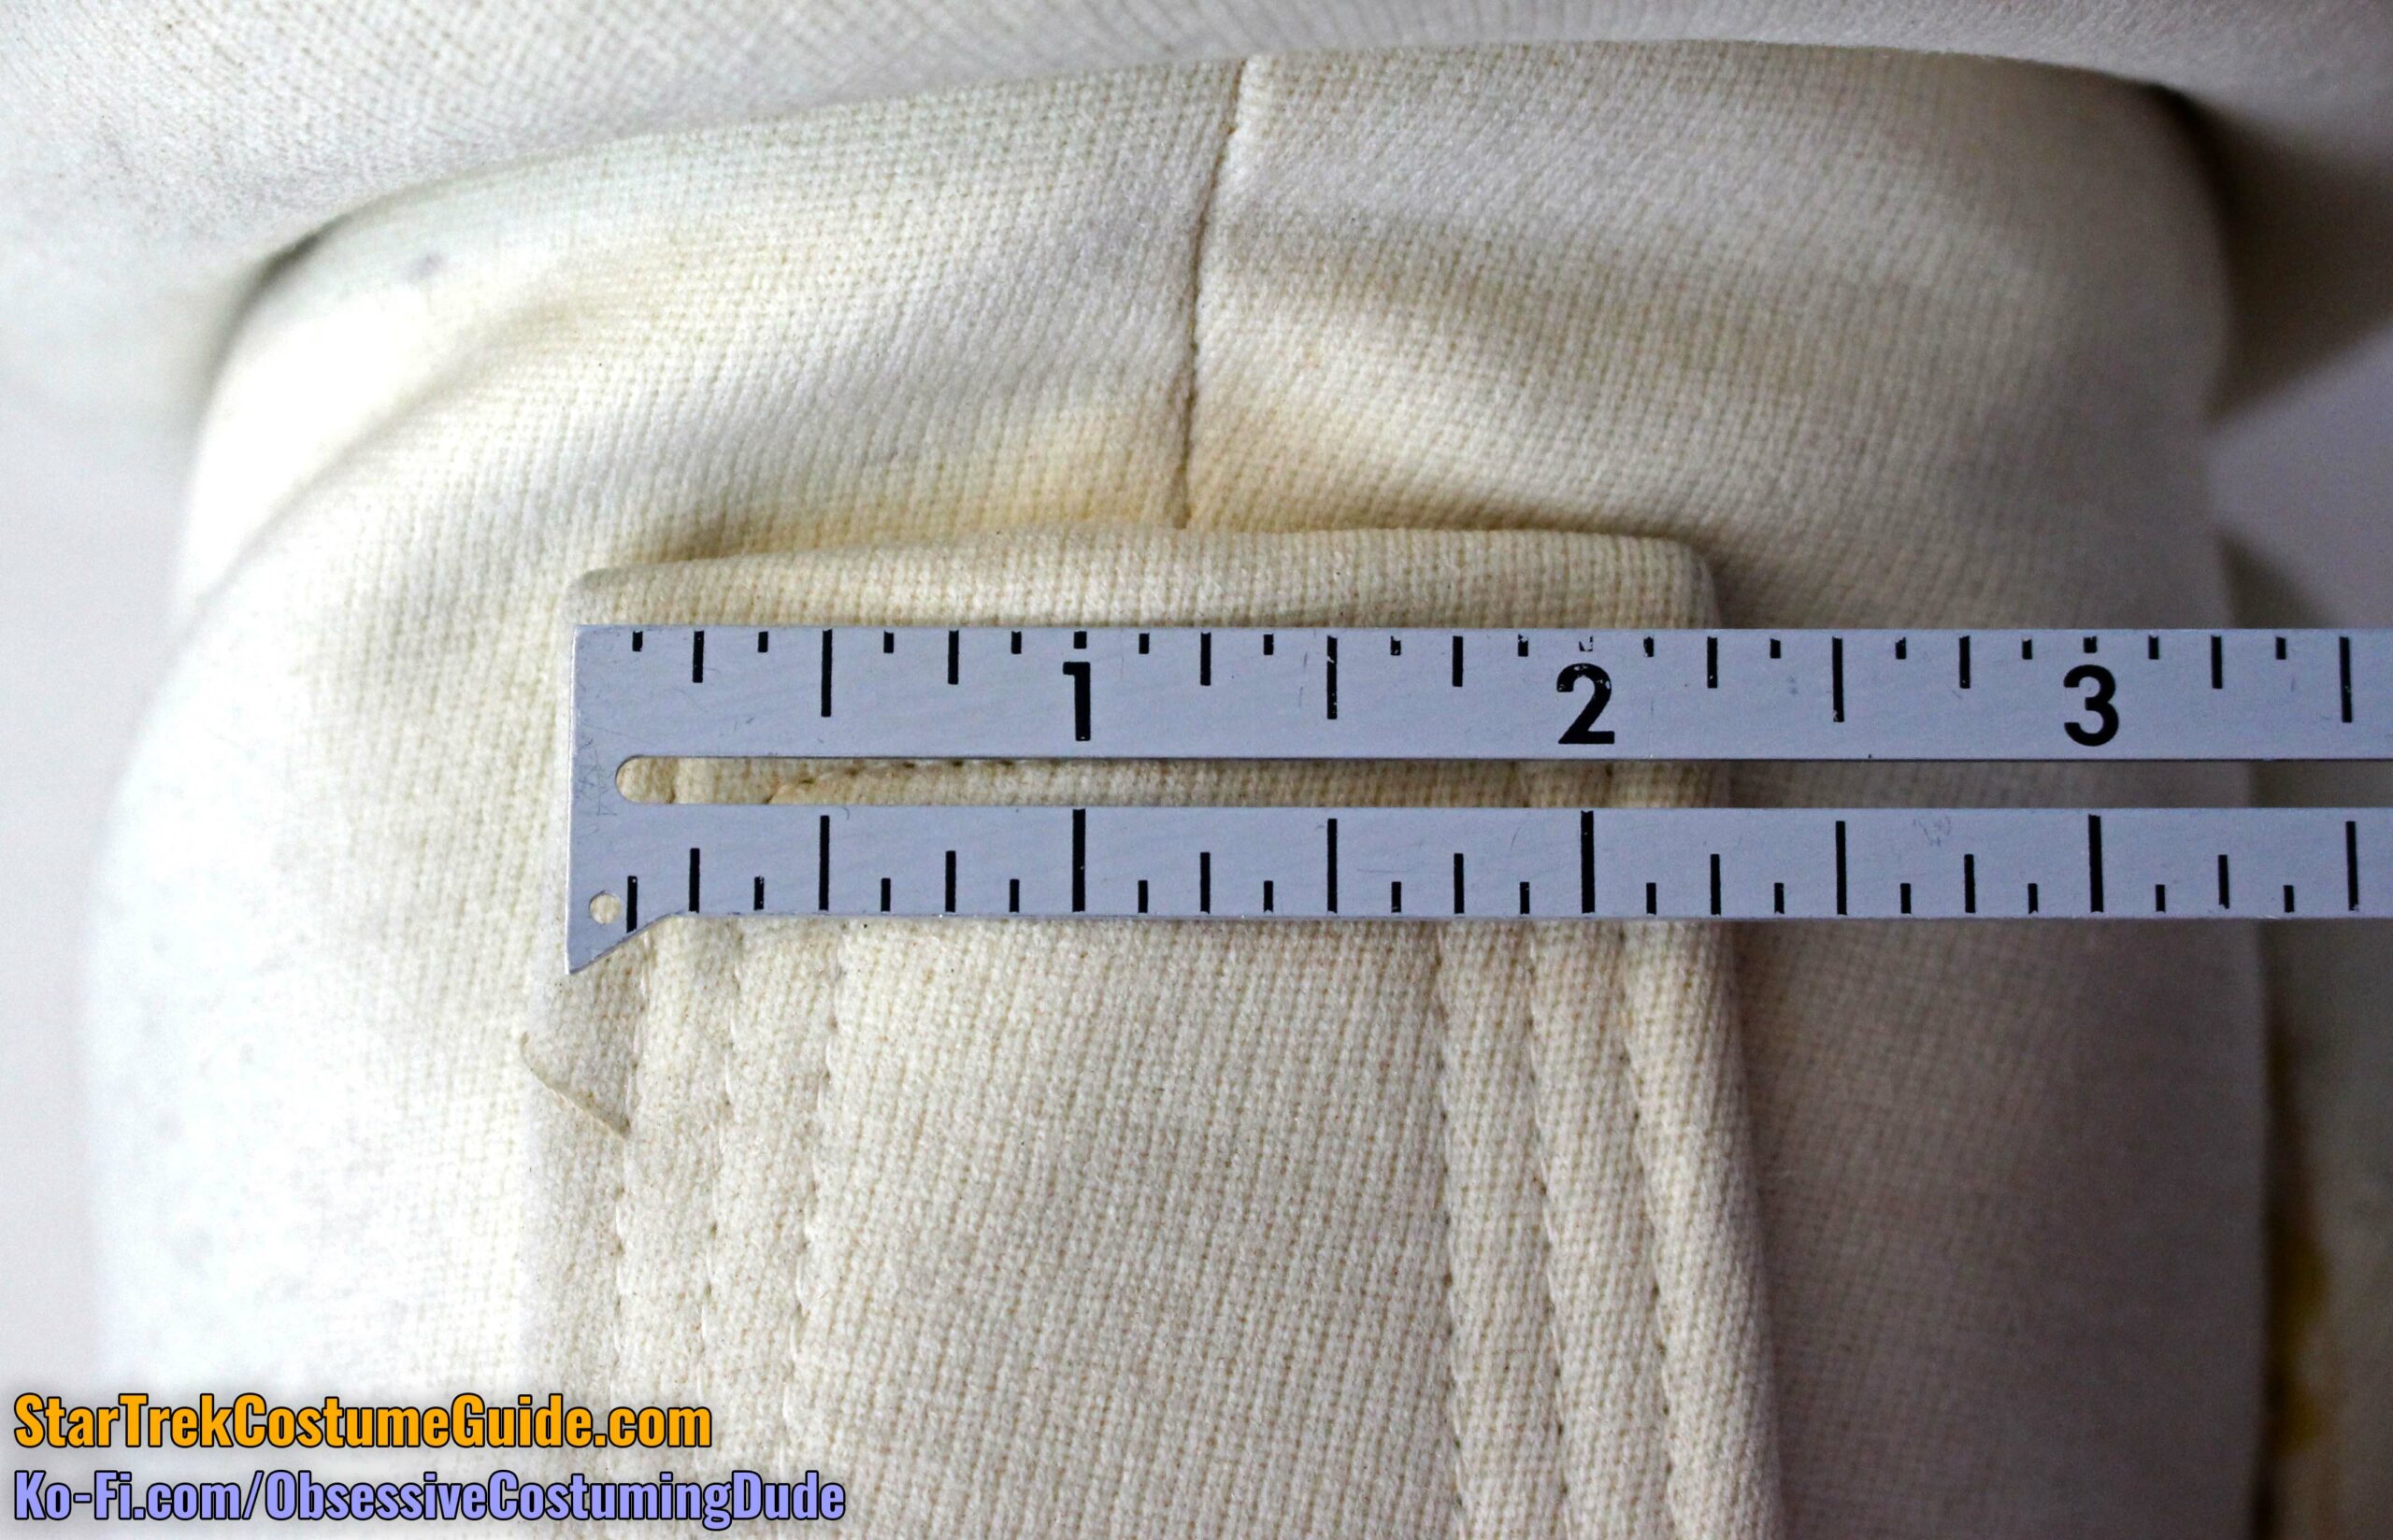
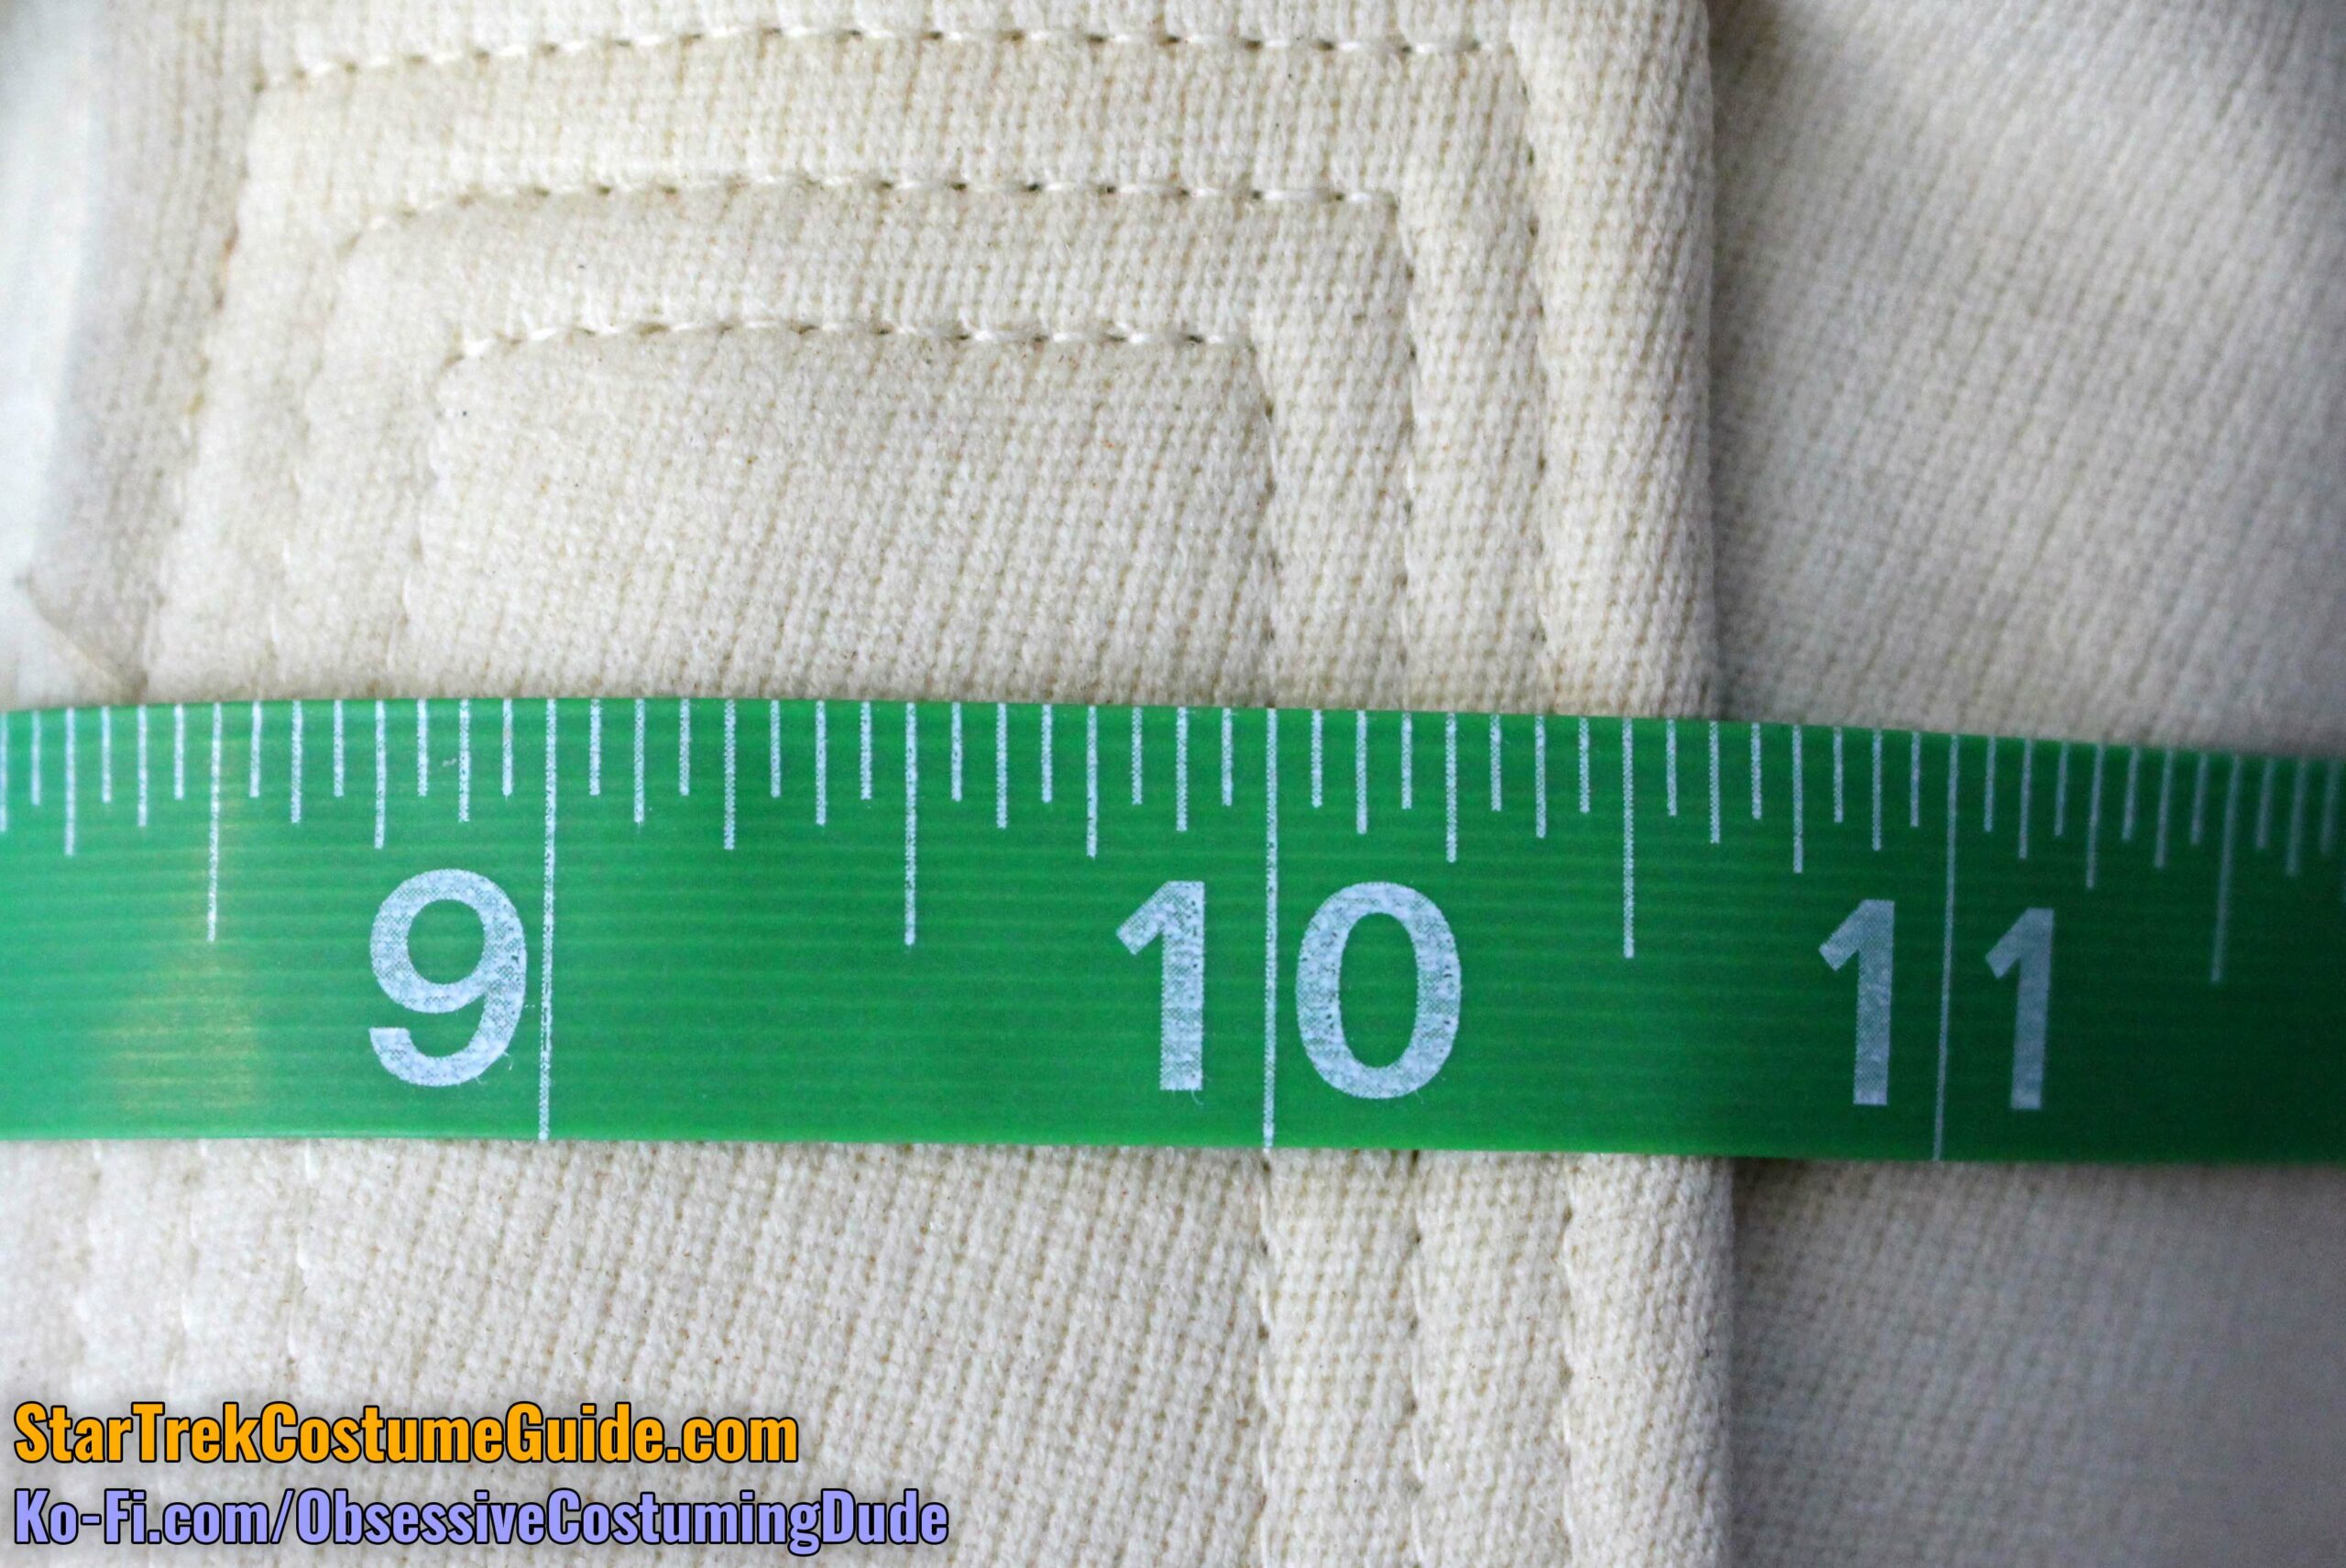
This accent was 9 ¼” tall, although the width varied a bit from top to bottom.
At the top, it was 3 ½” wide; this tapered down to 3 ¼” wide around the middle, and back up to 3 ⅜” wide at the bottom.
(I’m not sure to what degree (if any) this was an intentional creative decision, or if it was simply a result of “sewing by the seat of your pants” under a time crunch.)
Regardless, the assembly seems to have been quilted with high-loft batting, with the lighter off-white cotton (muslin?) as backing.
There were three interior “rectangles” of topstitching: one about ¼” from the outer edges, one about ⅝” inside that, and innermost about ½” inside the second.
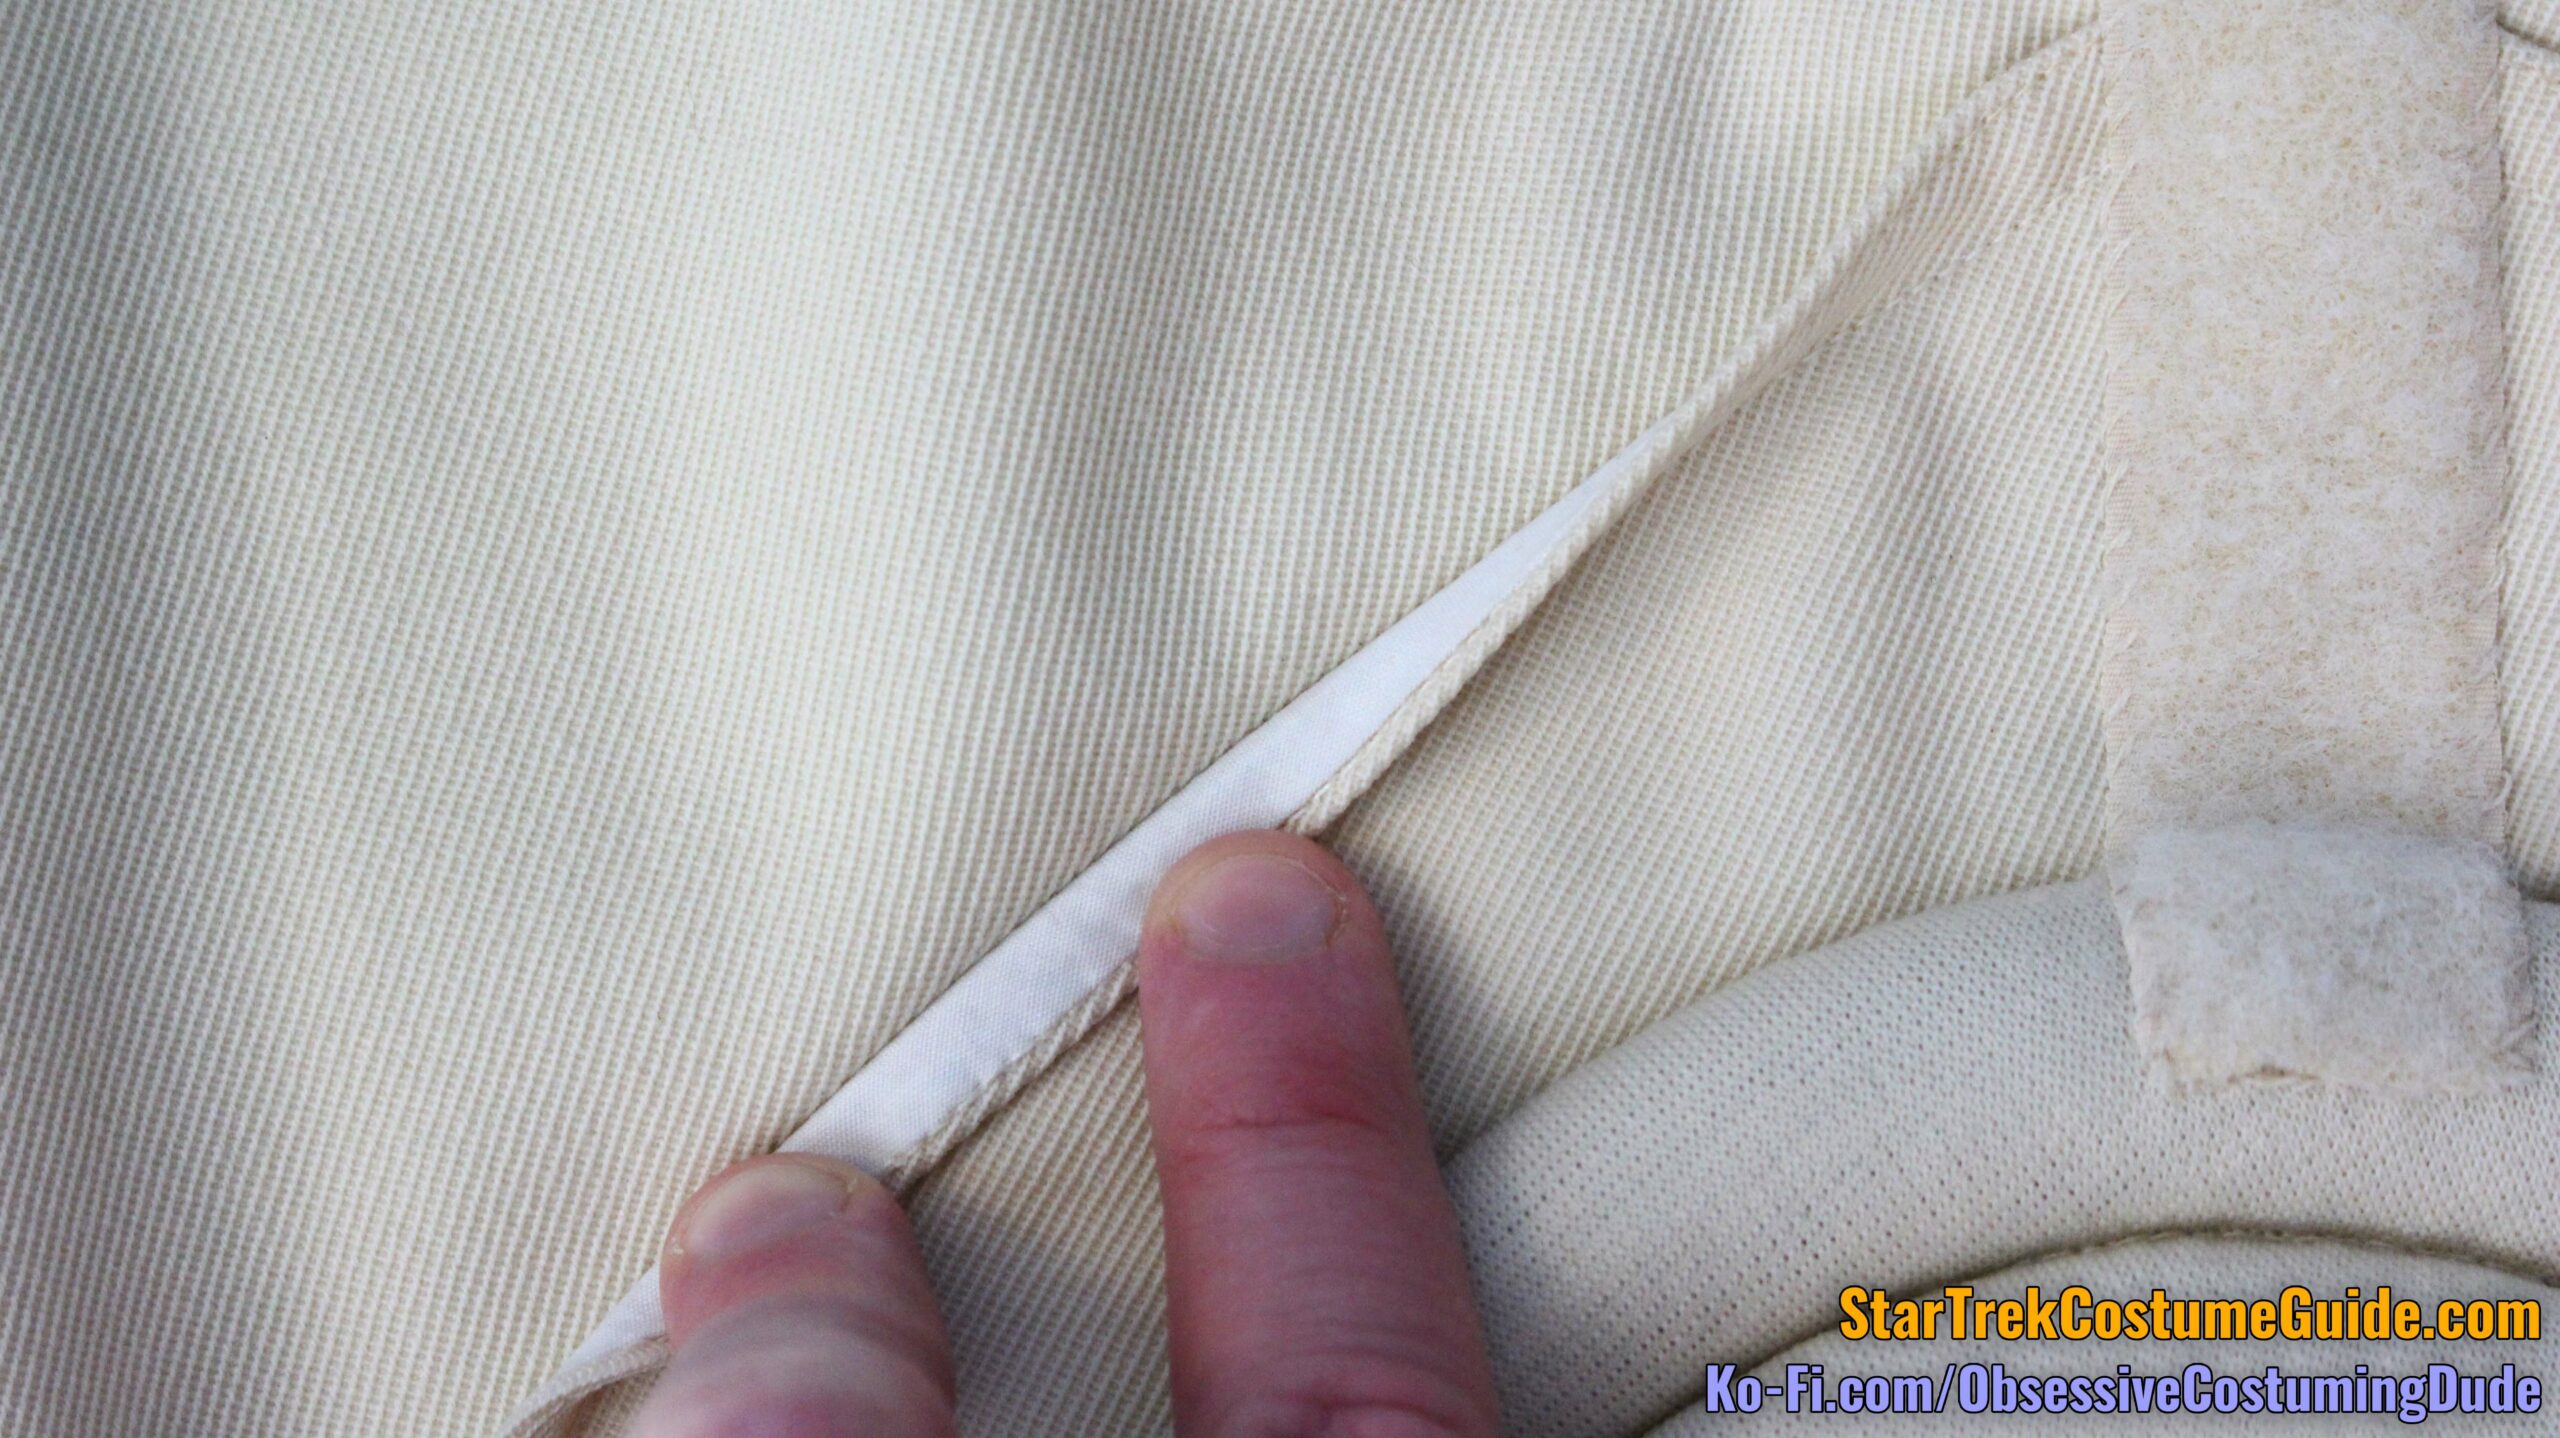
The outer vertical edges of the rectangular assembly pulled away from the jumpsuit via off-white hook-and-loop tape fastened to the underside, although beneath the waist bands it was sewn closed.
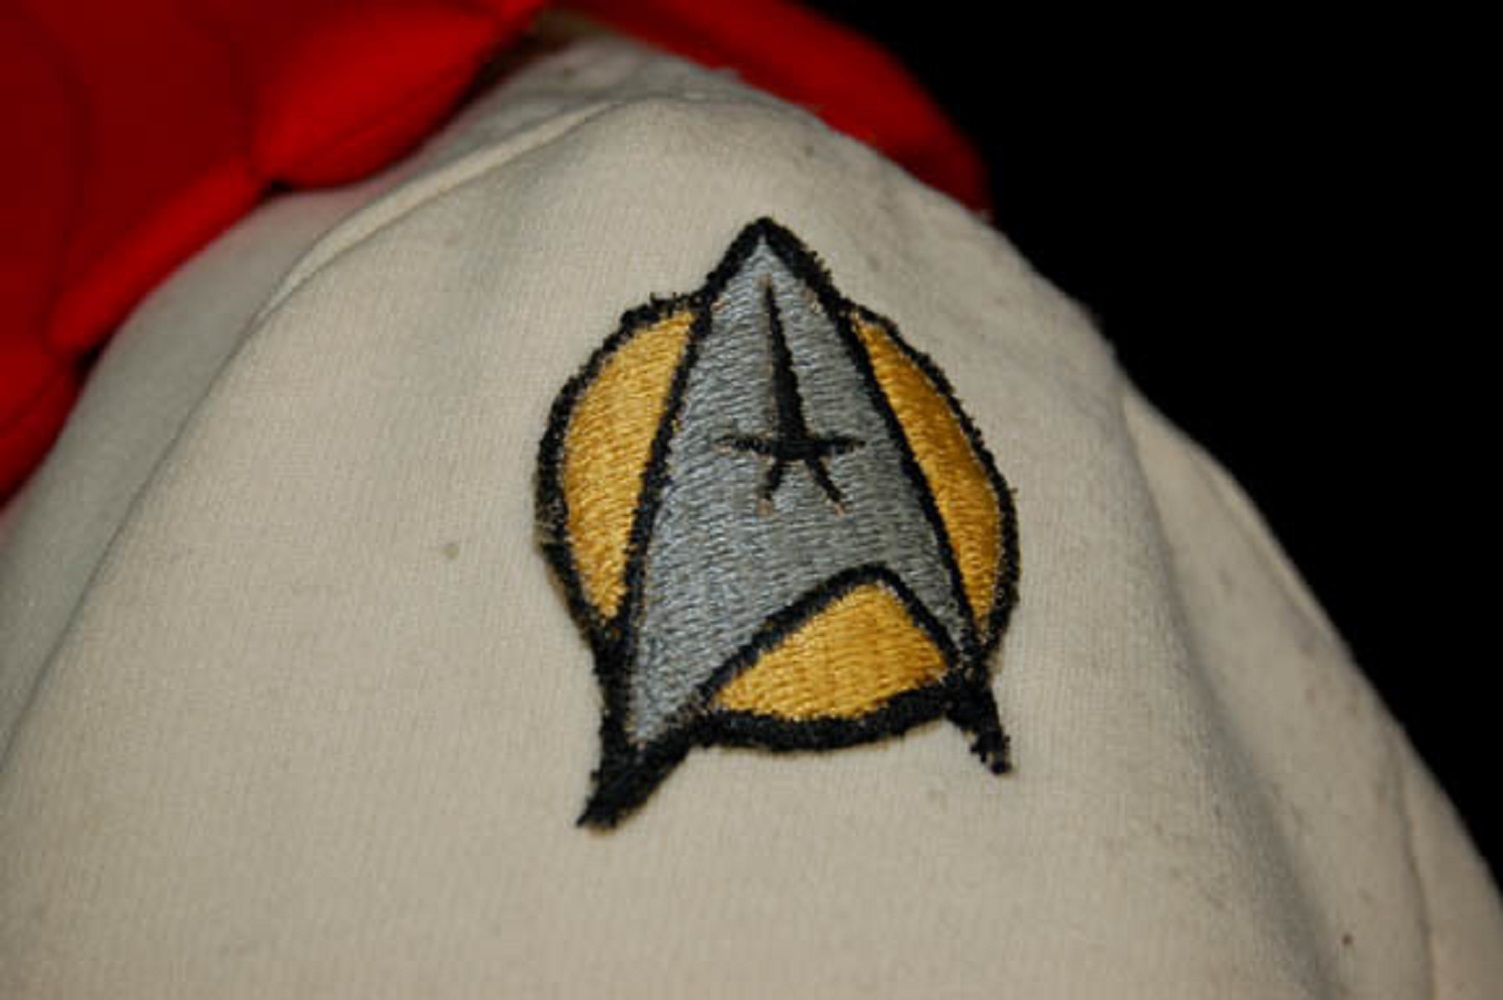
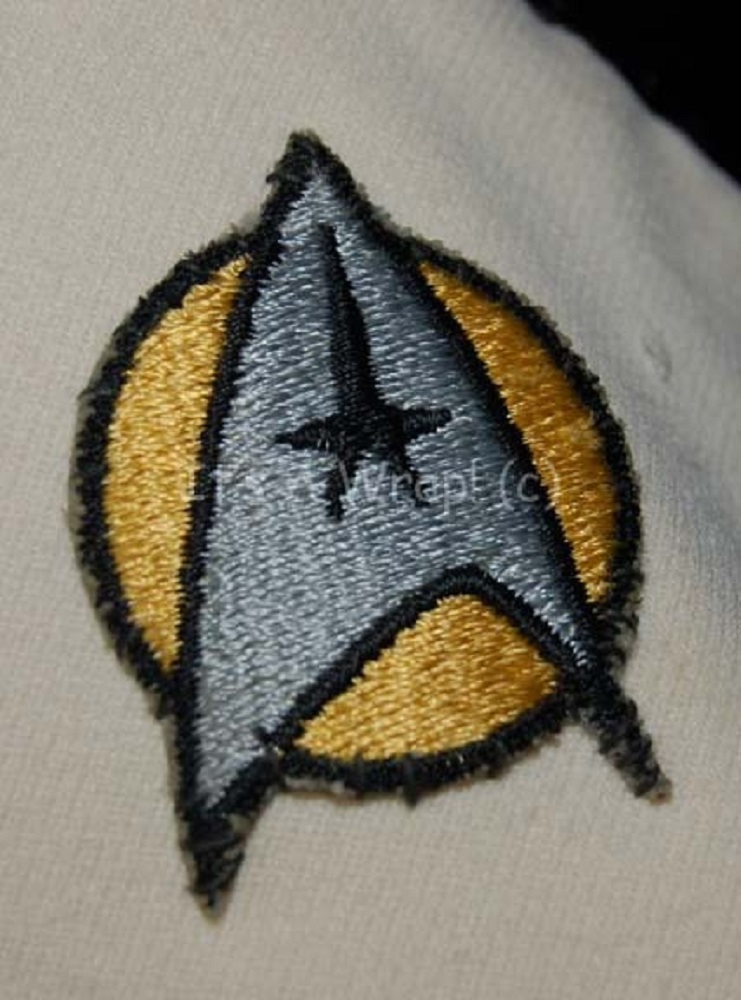
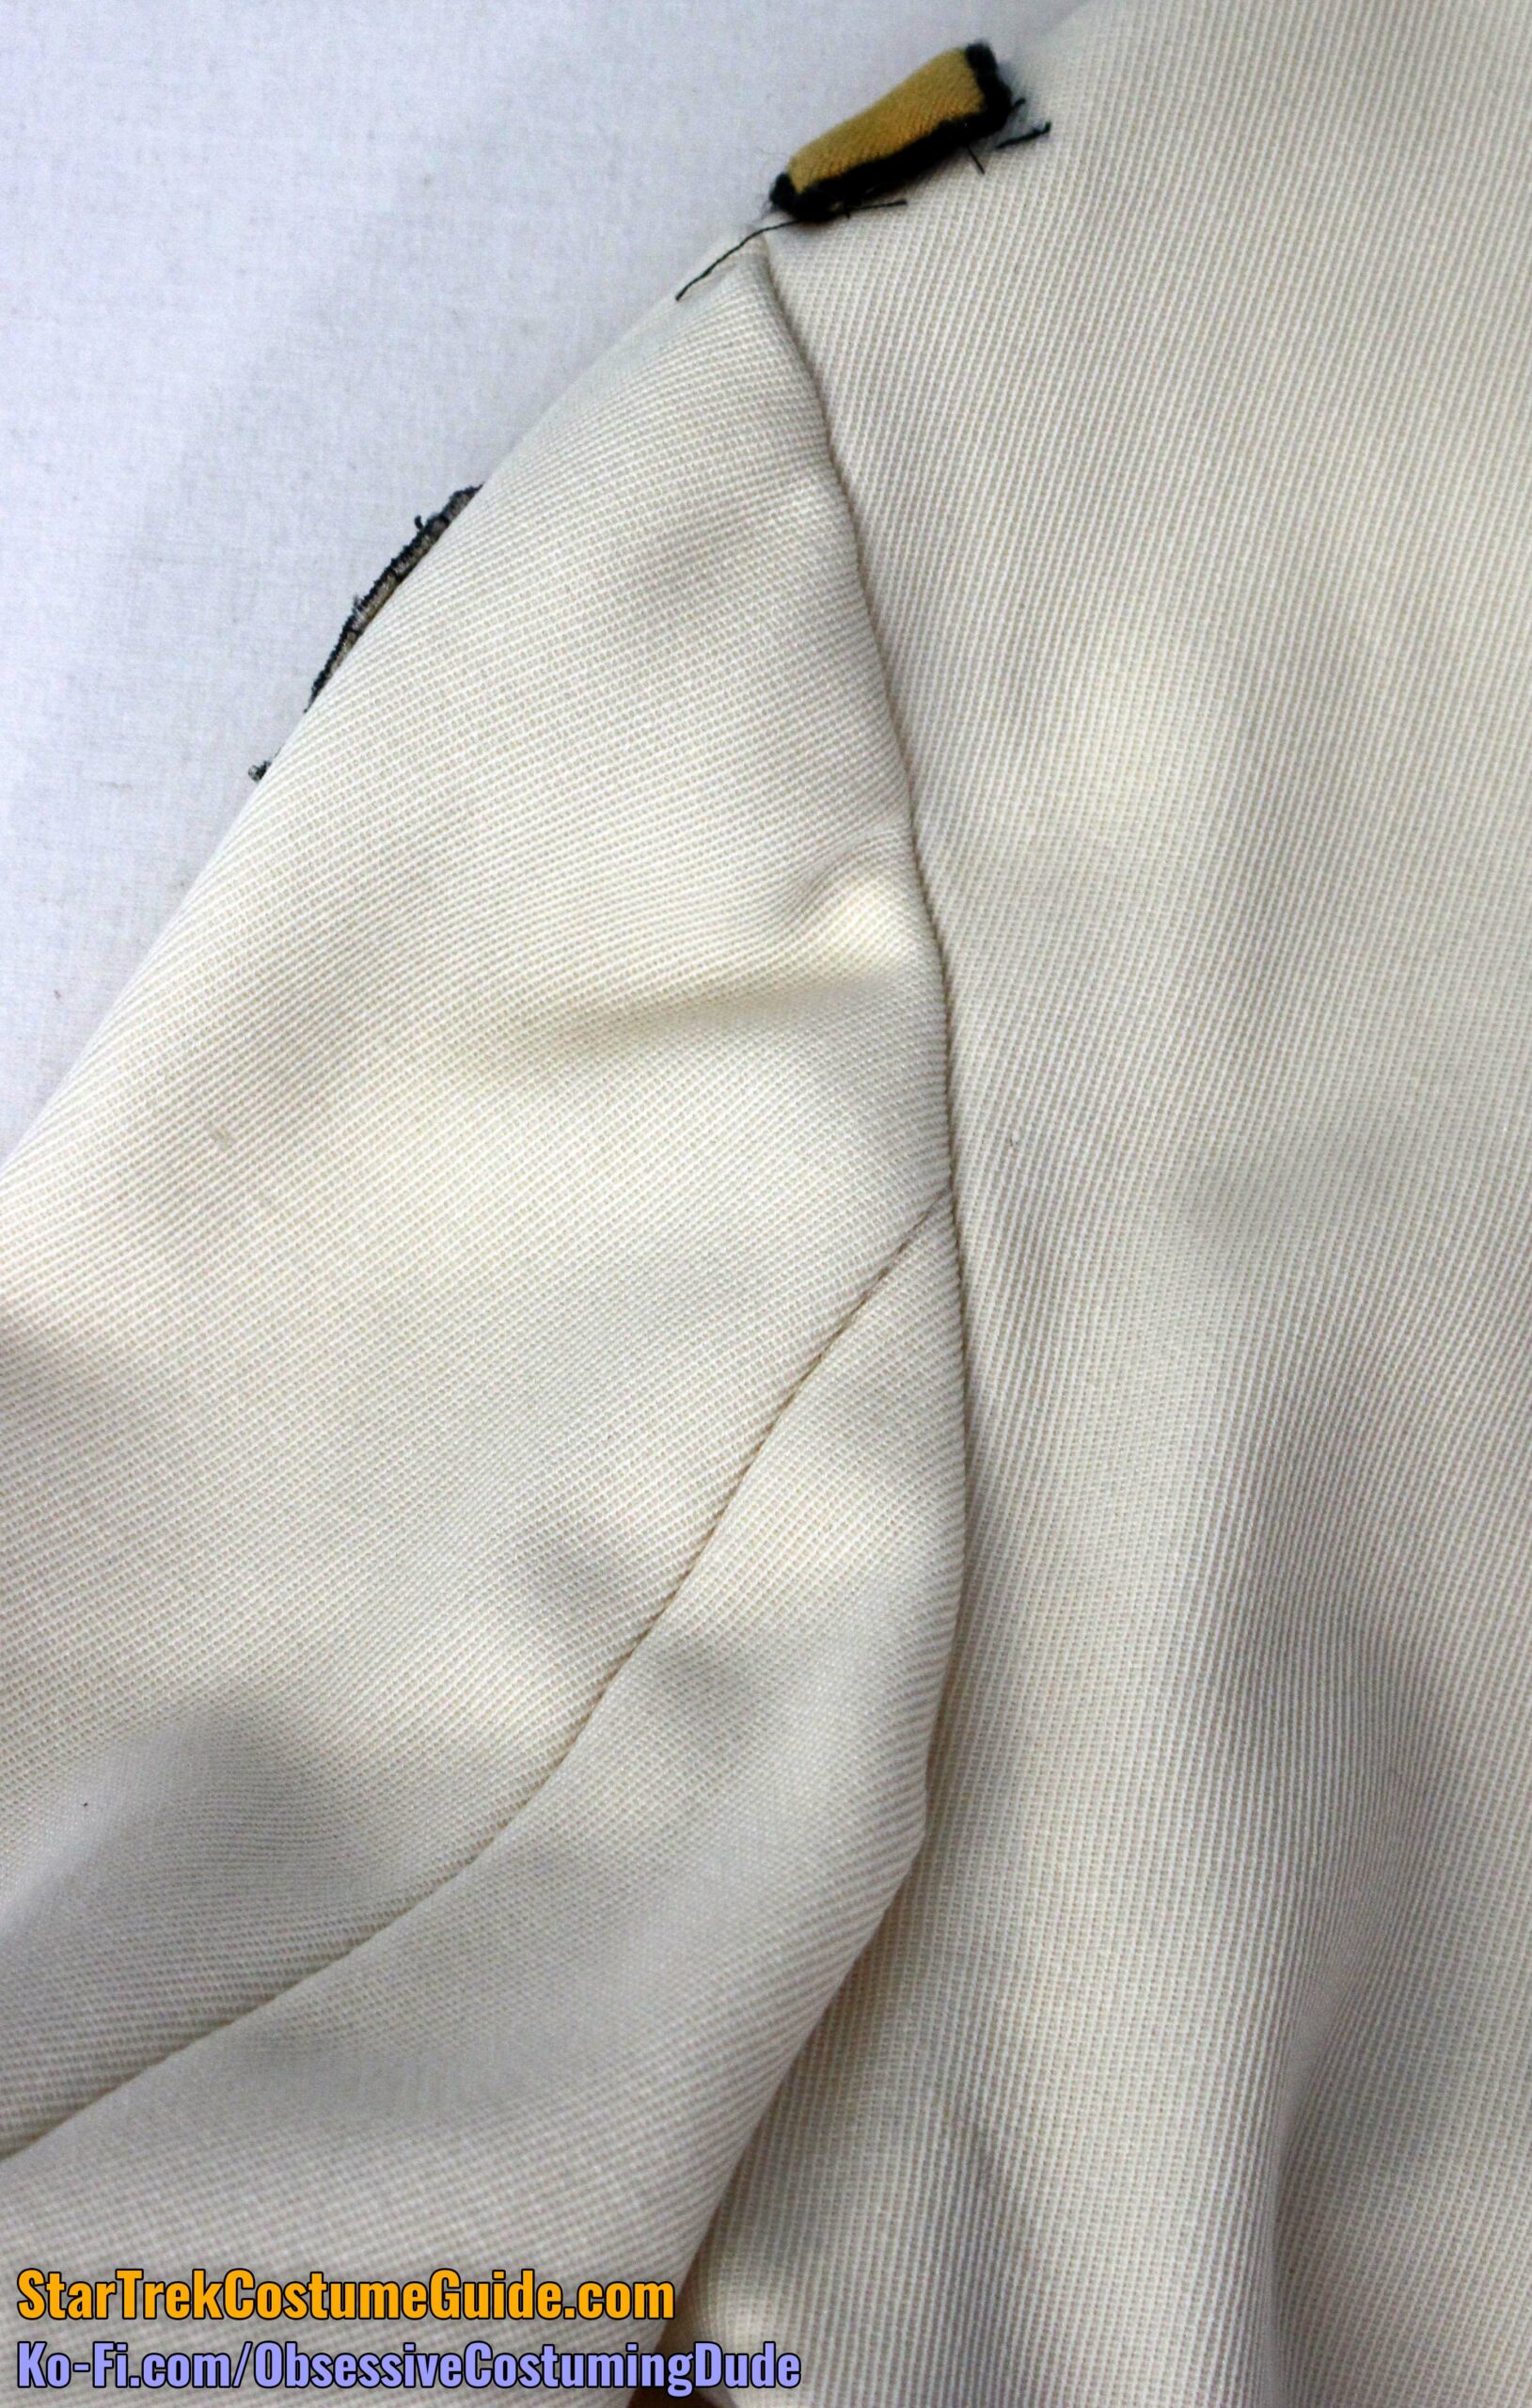
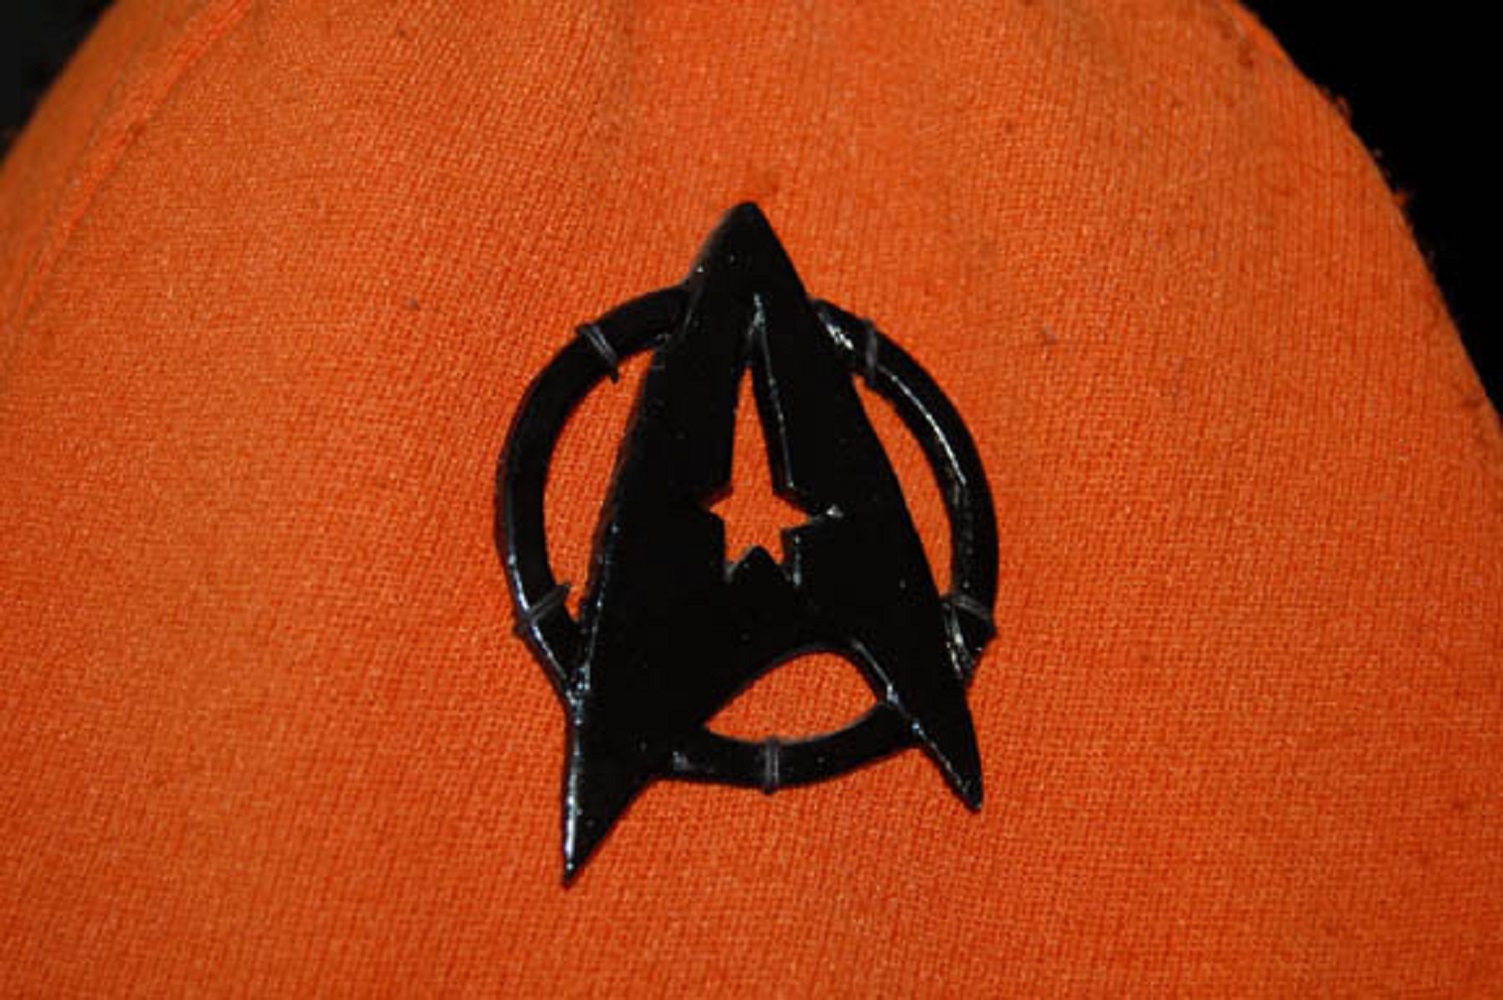
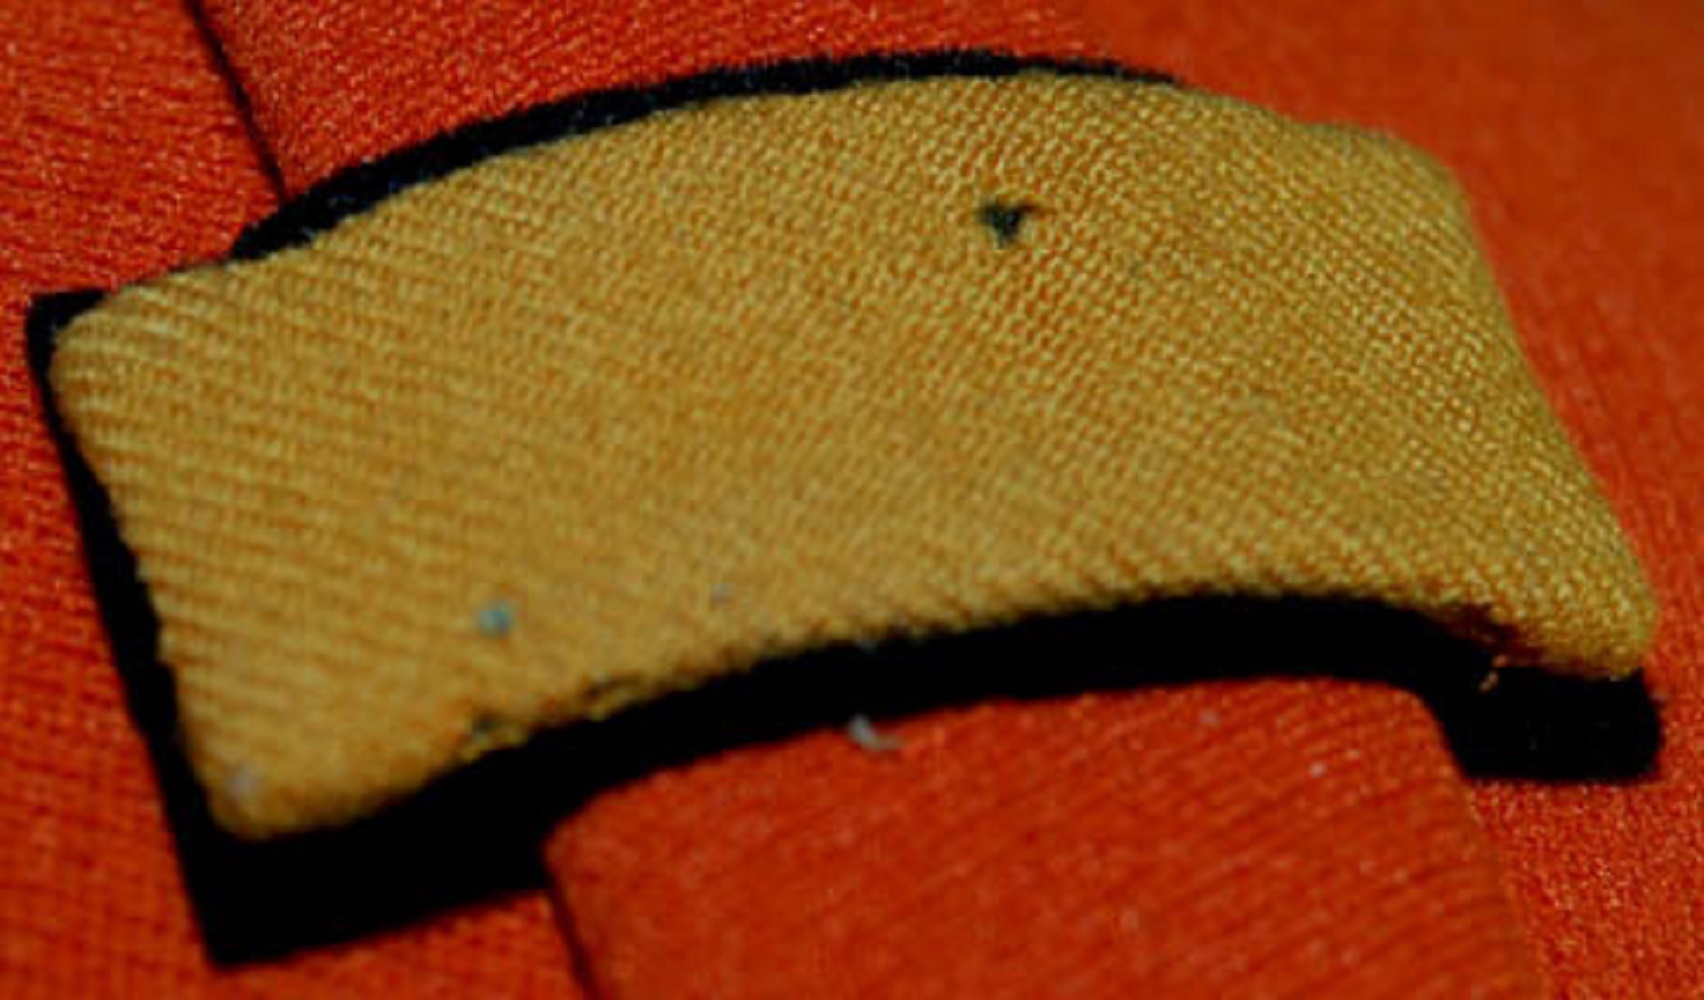
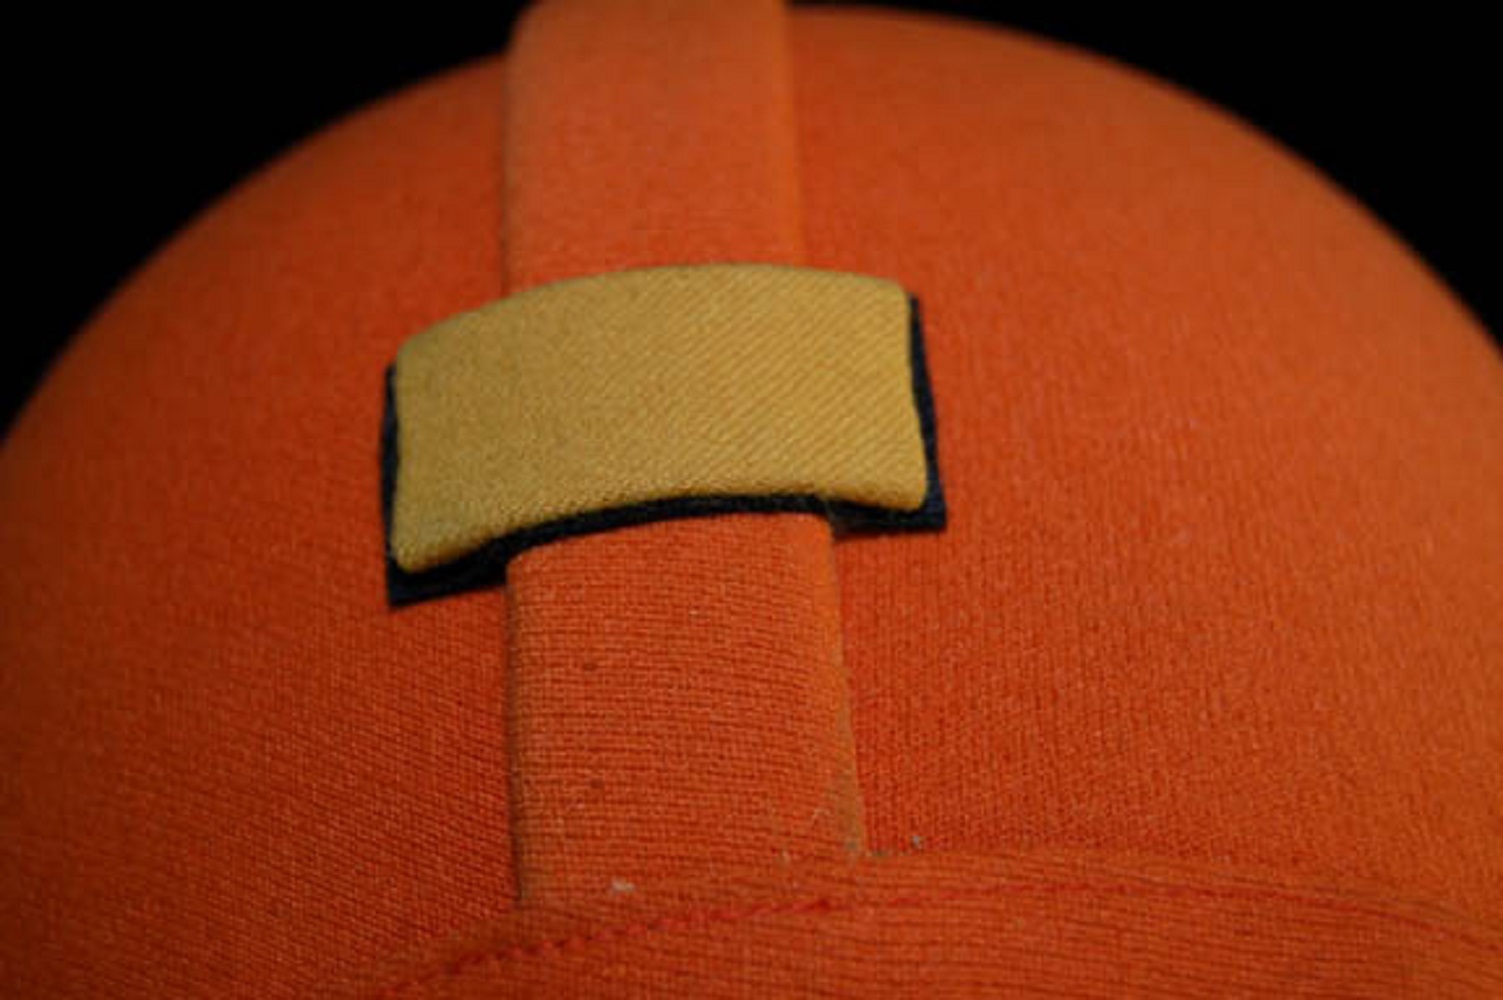
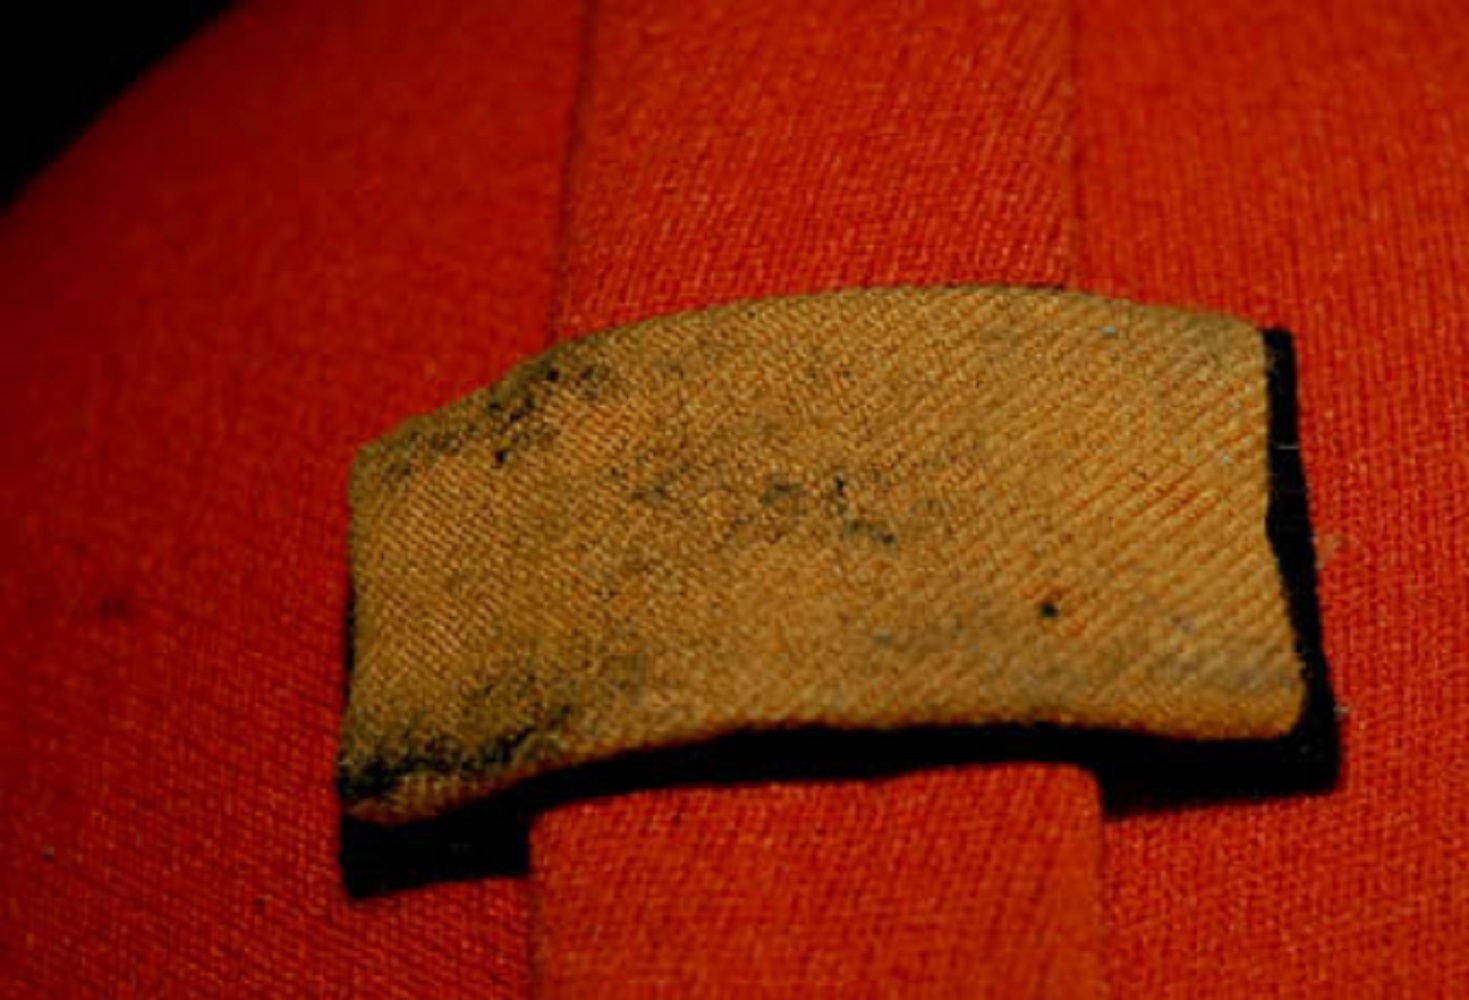
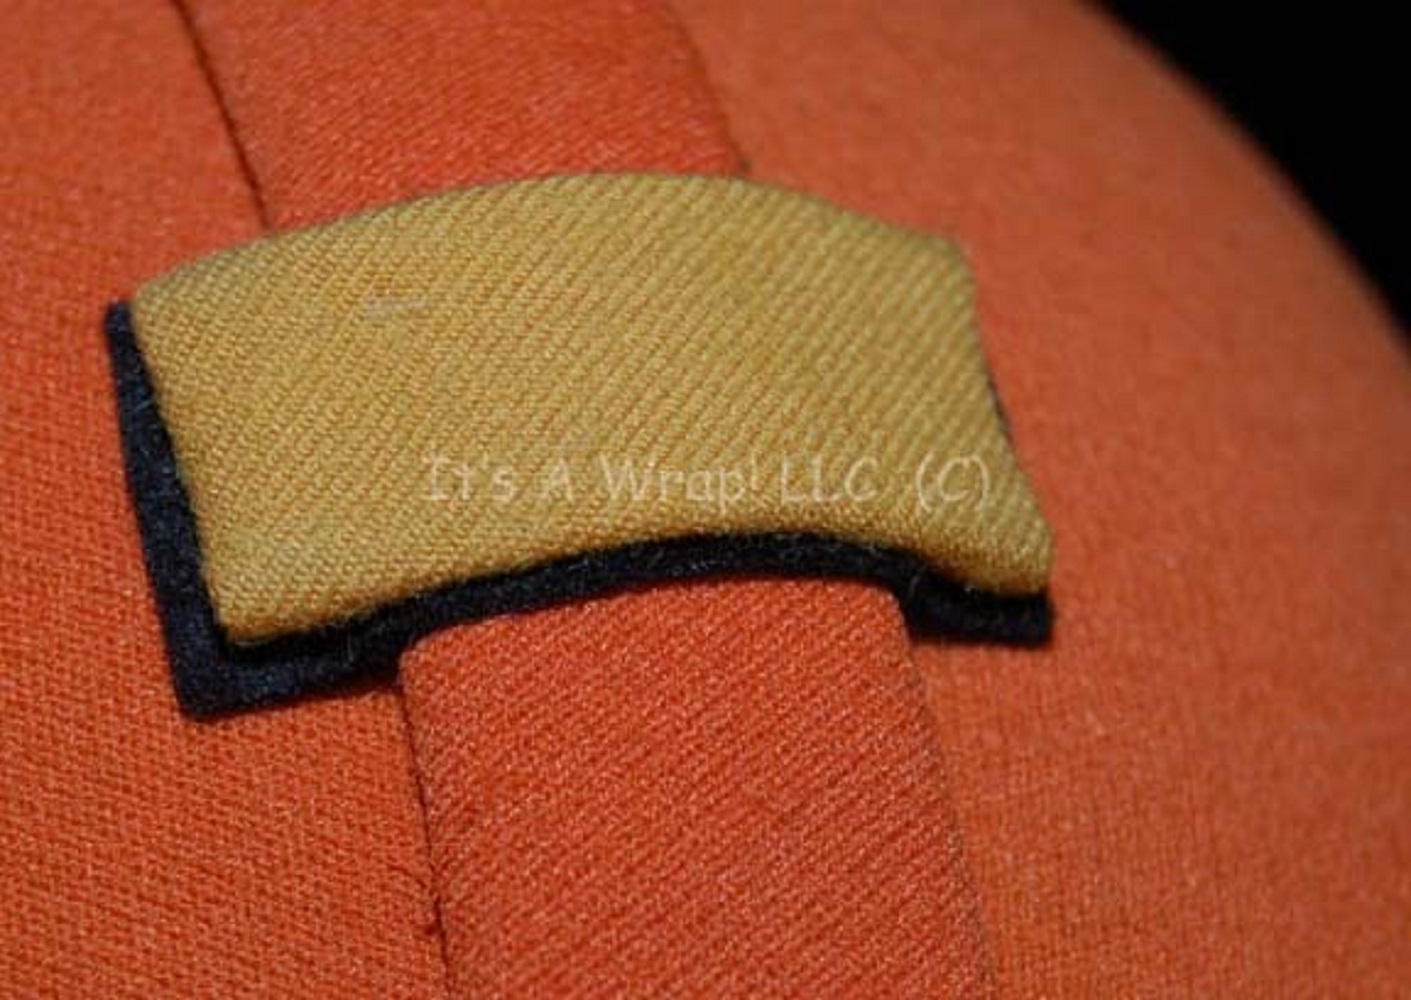
SLEEVE PATCH
On the upper left sleeve was a yellow division patch, and it was a noticeably different color than the gold shoulder accents.
The color difference was observable in the movies too, if one knows to look for it …
In The Motion Picture, the division patch was positioned on the forearm instead (and as I mentioned earlier, in that movie the engineering division color was red, not gold).
I believe for The Wrath of Khan onward, in lieu of having a new run of engineering gold patches embroidered, the yellow operations patches from TMP were repurposed for the TWOK-era engineering radiation suits.
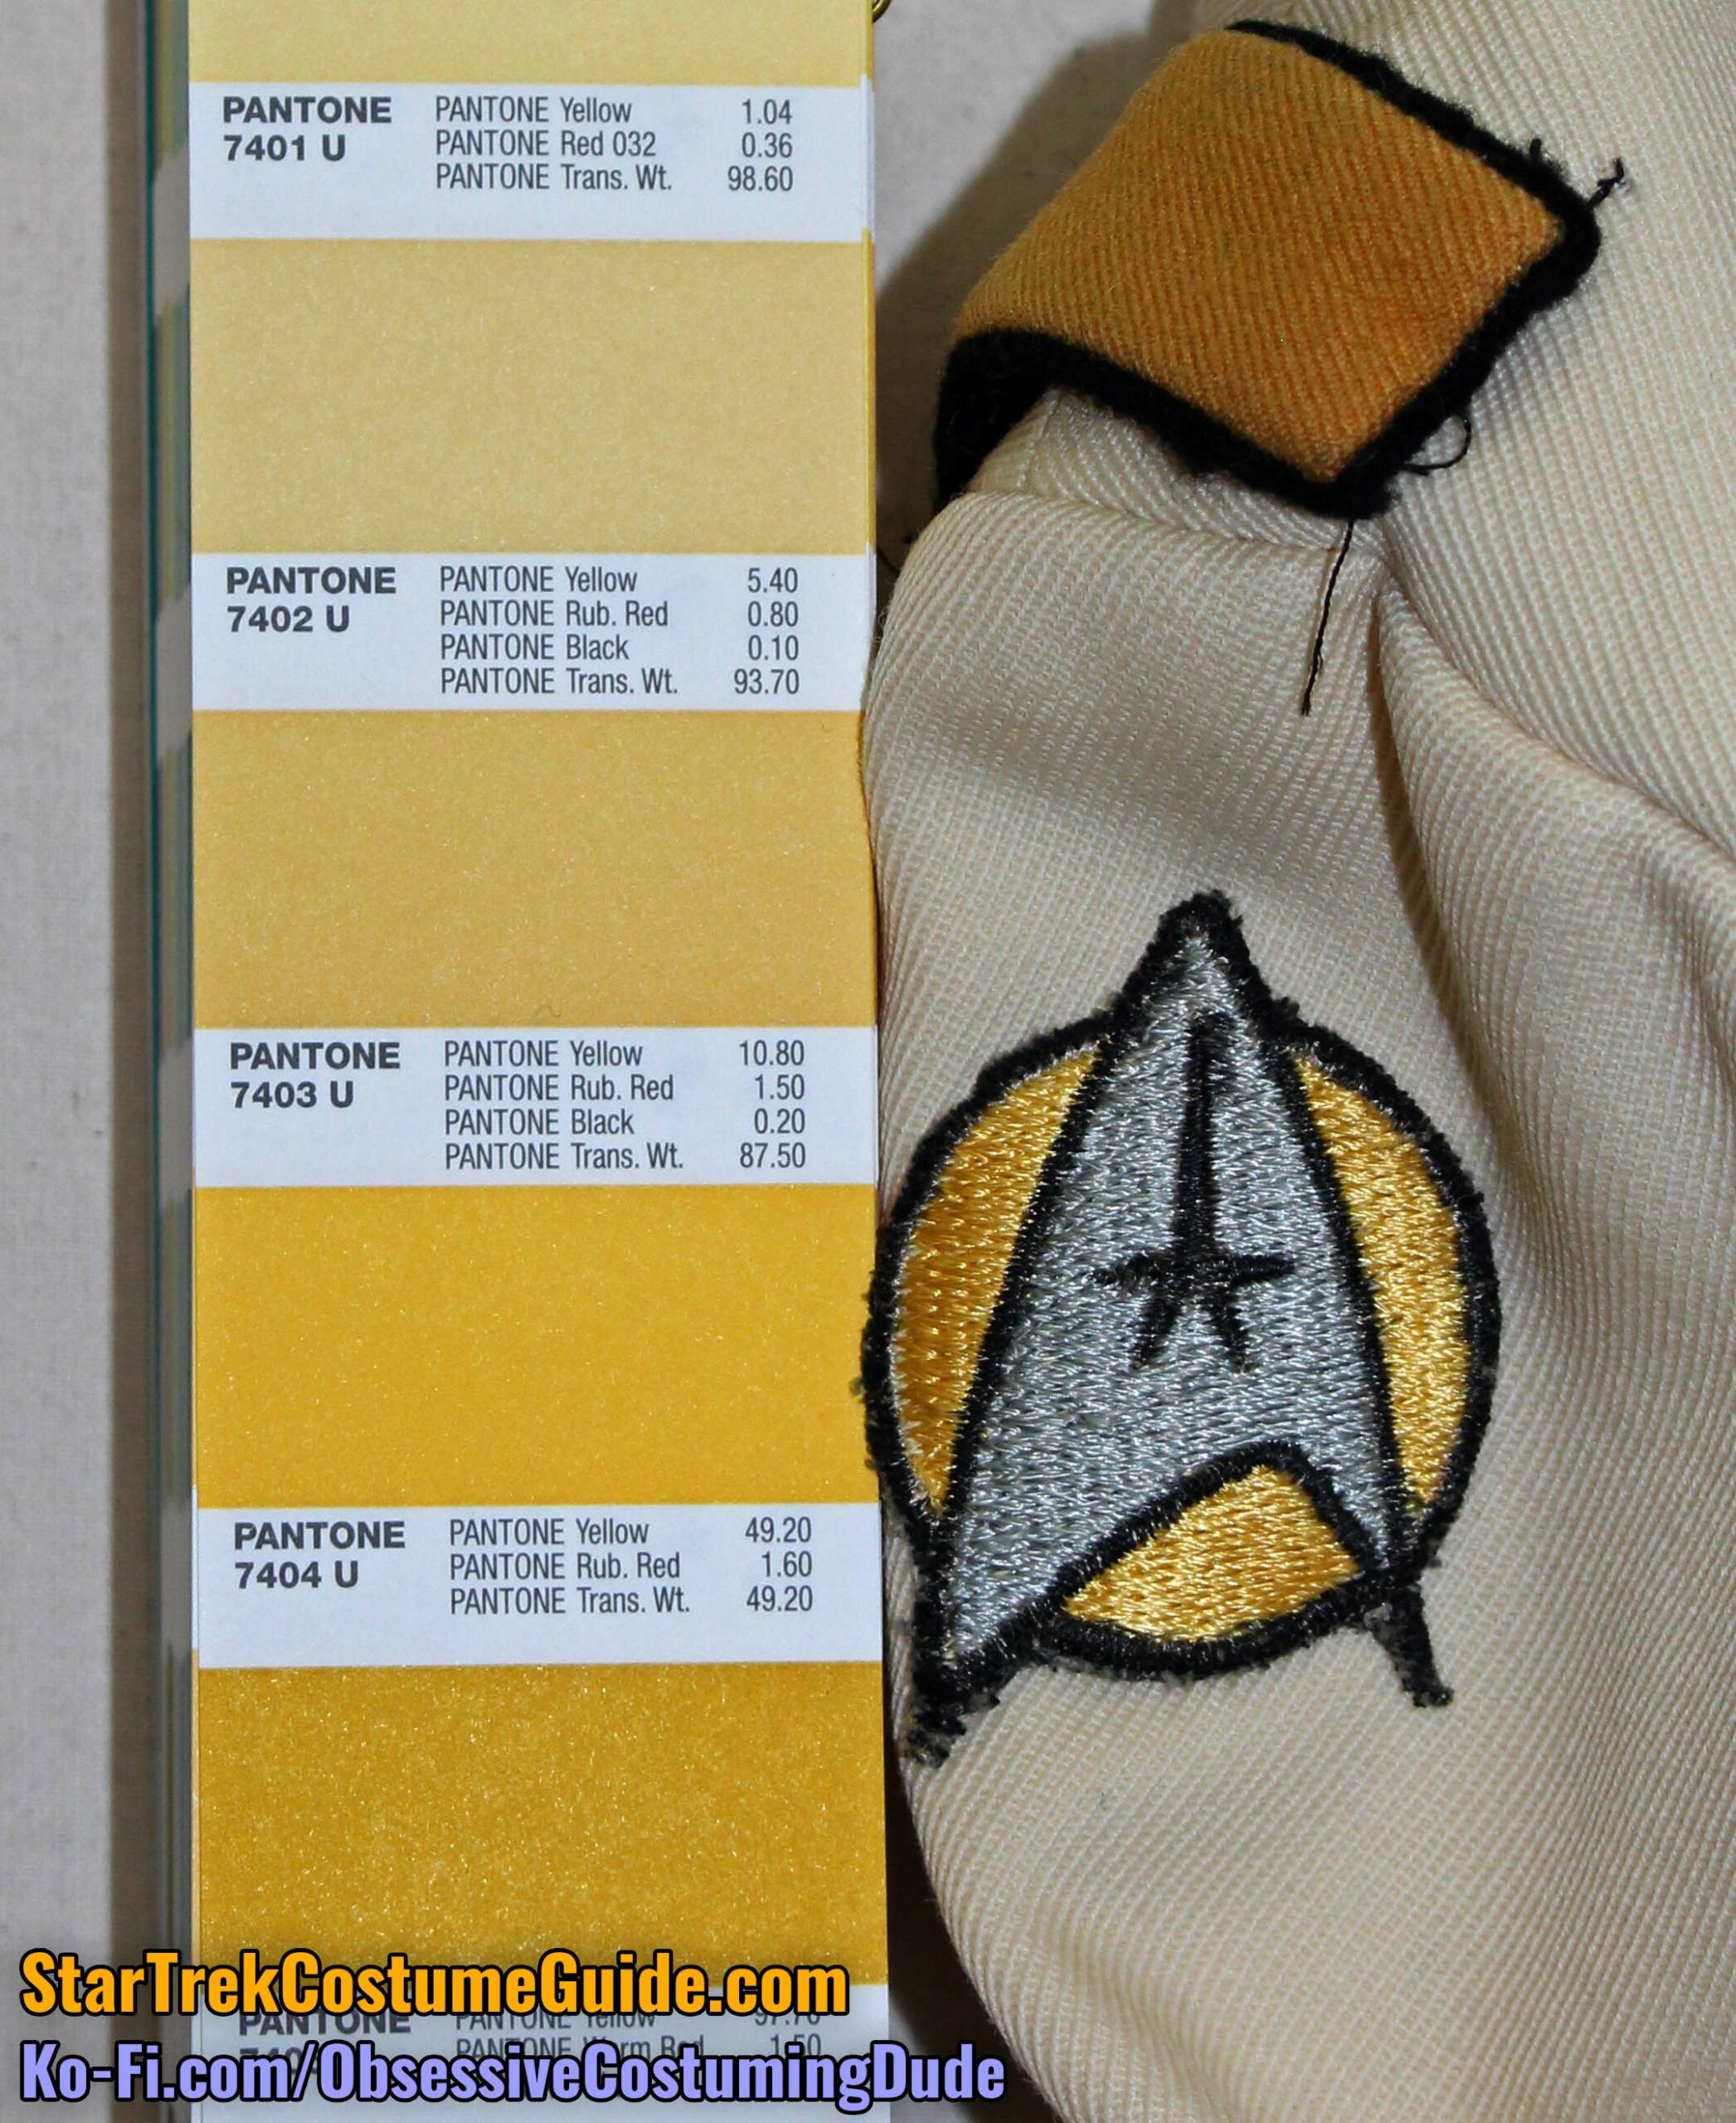
Unlike the gold shoulder tabs, the closest Pantone color I found to the yellow division patch was #7404 U, pictured with and without flash:
With flash
No flash
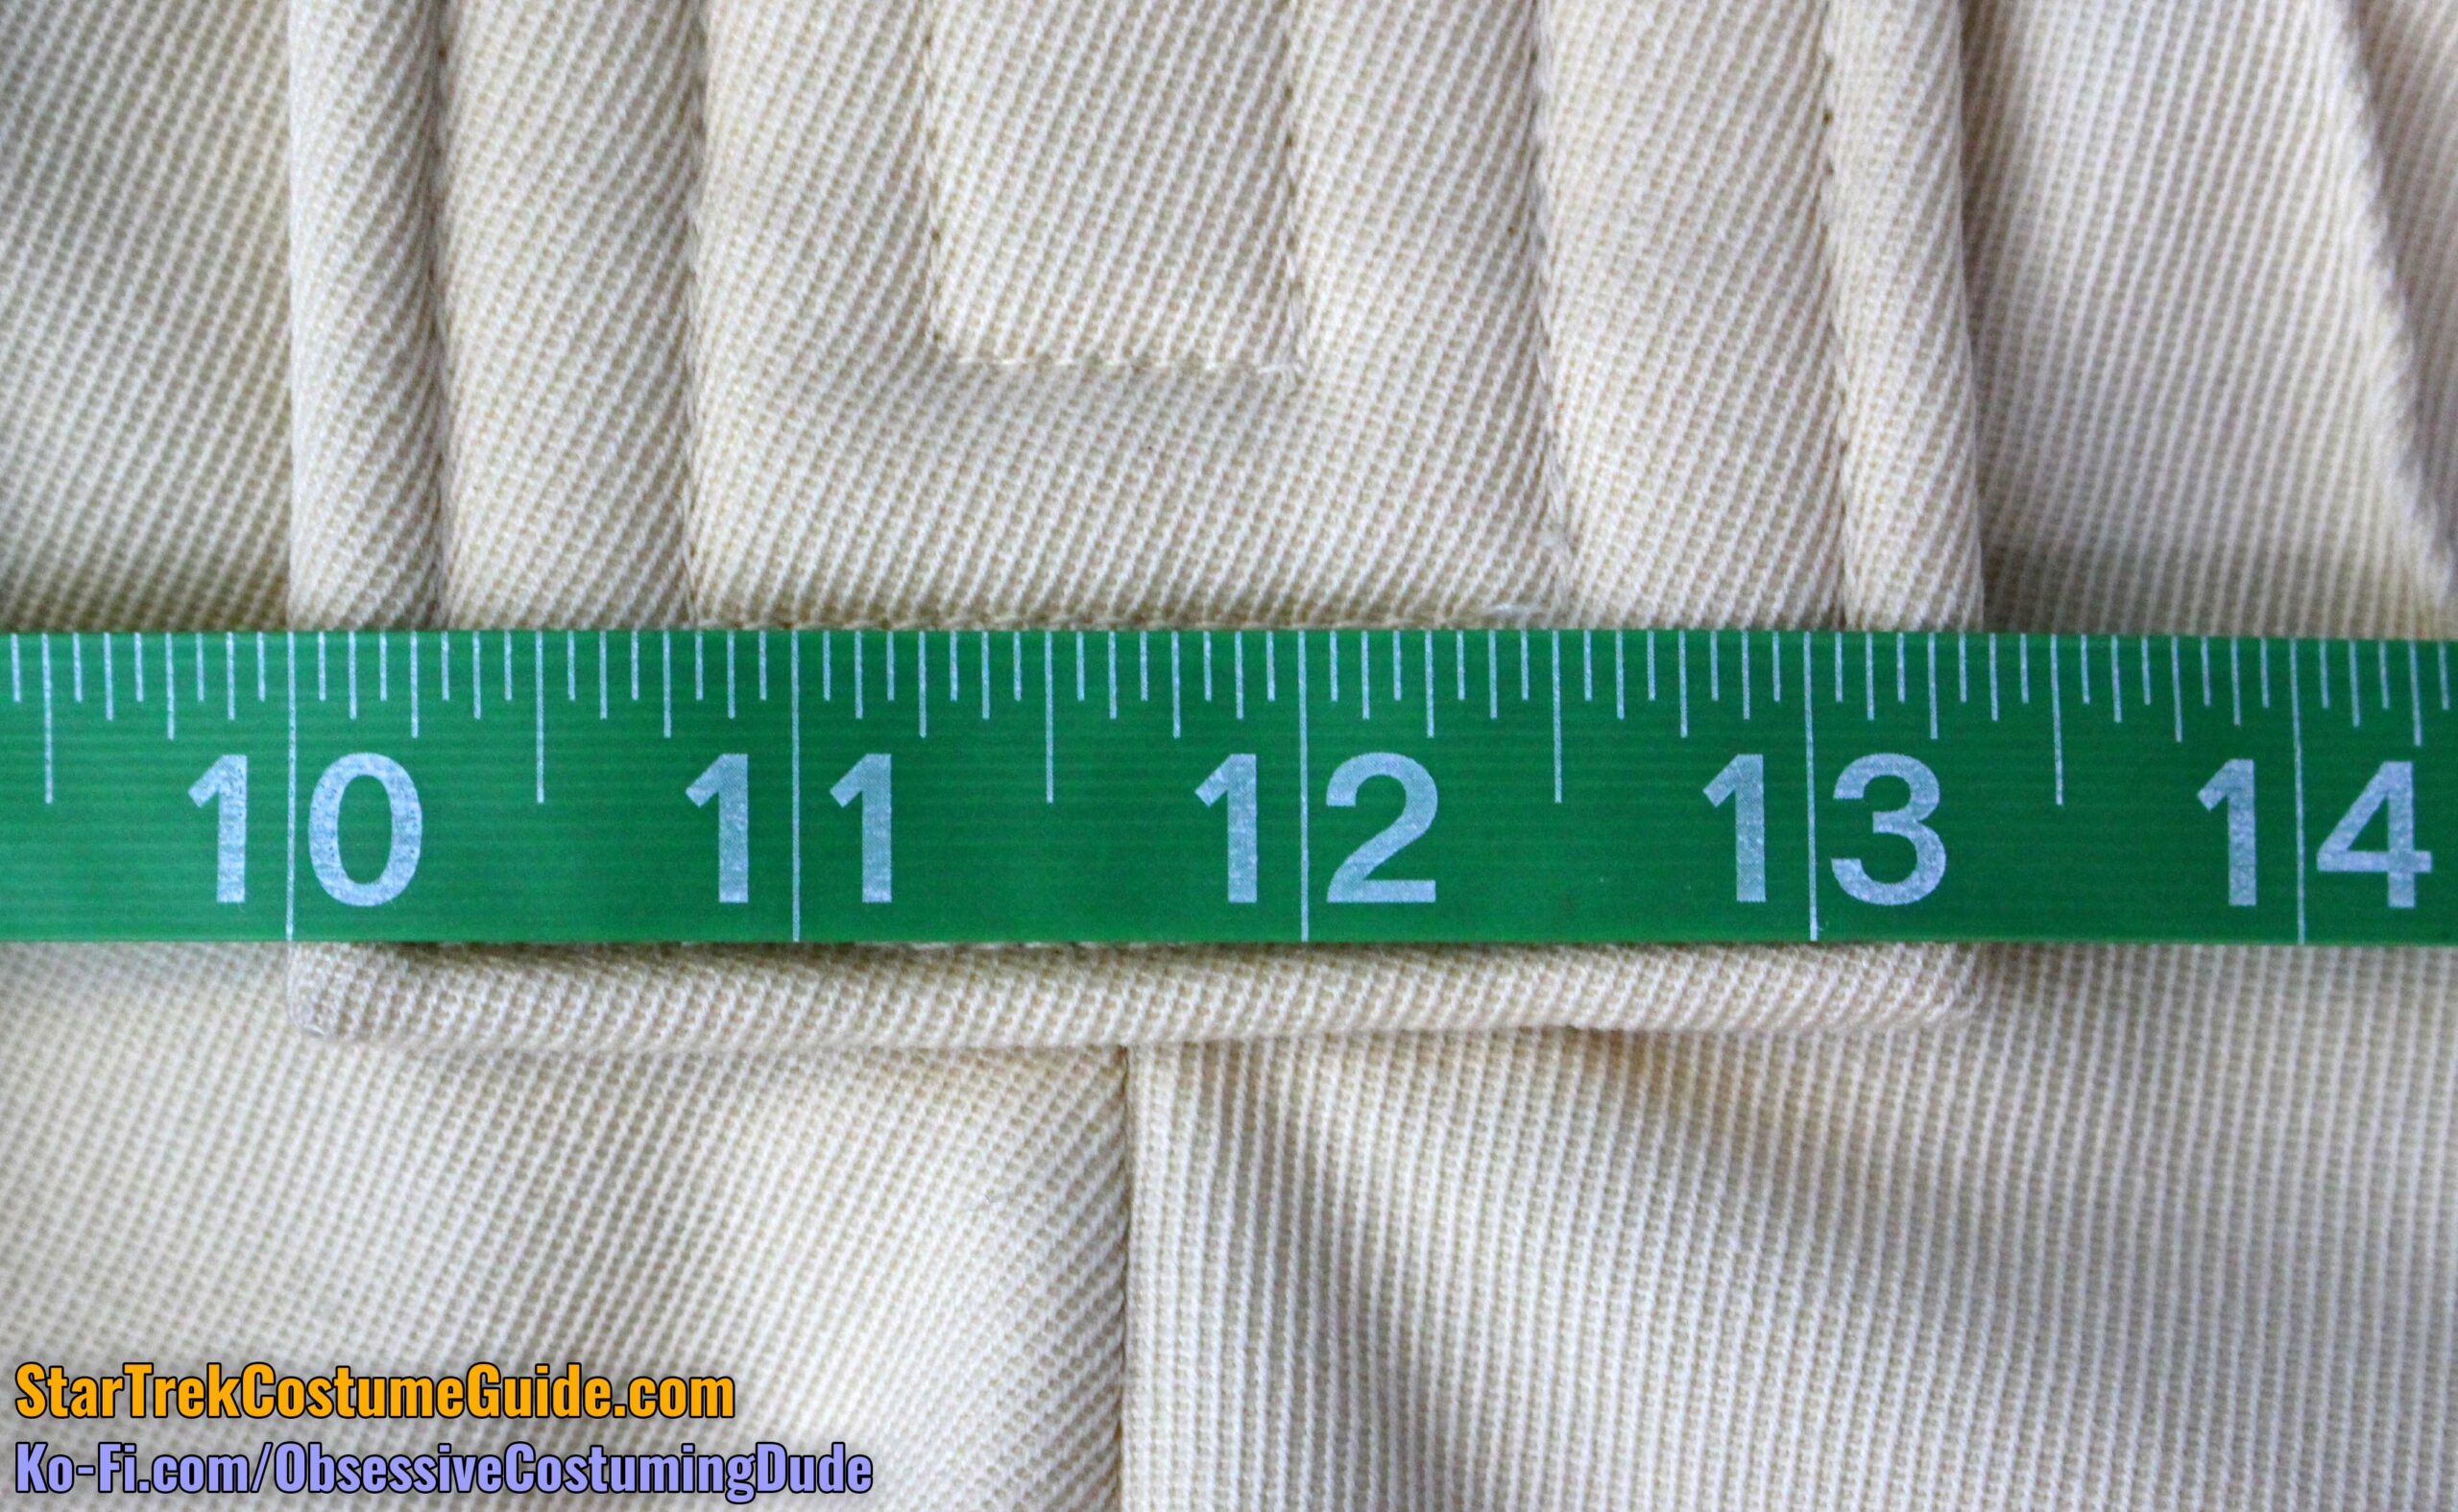
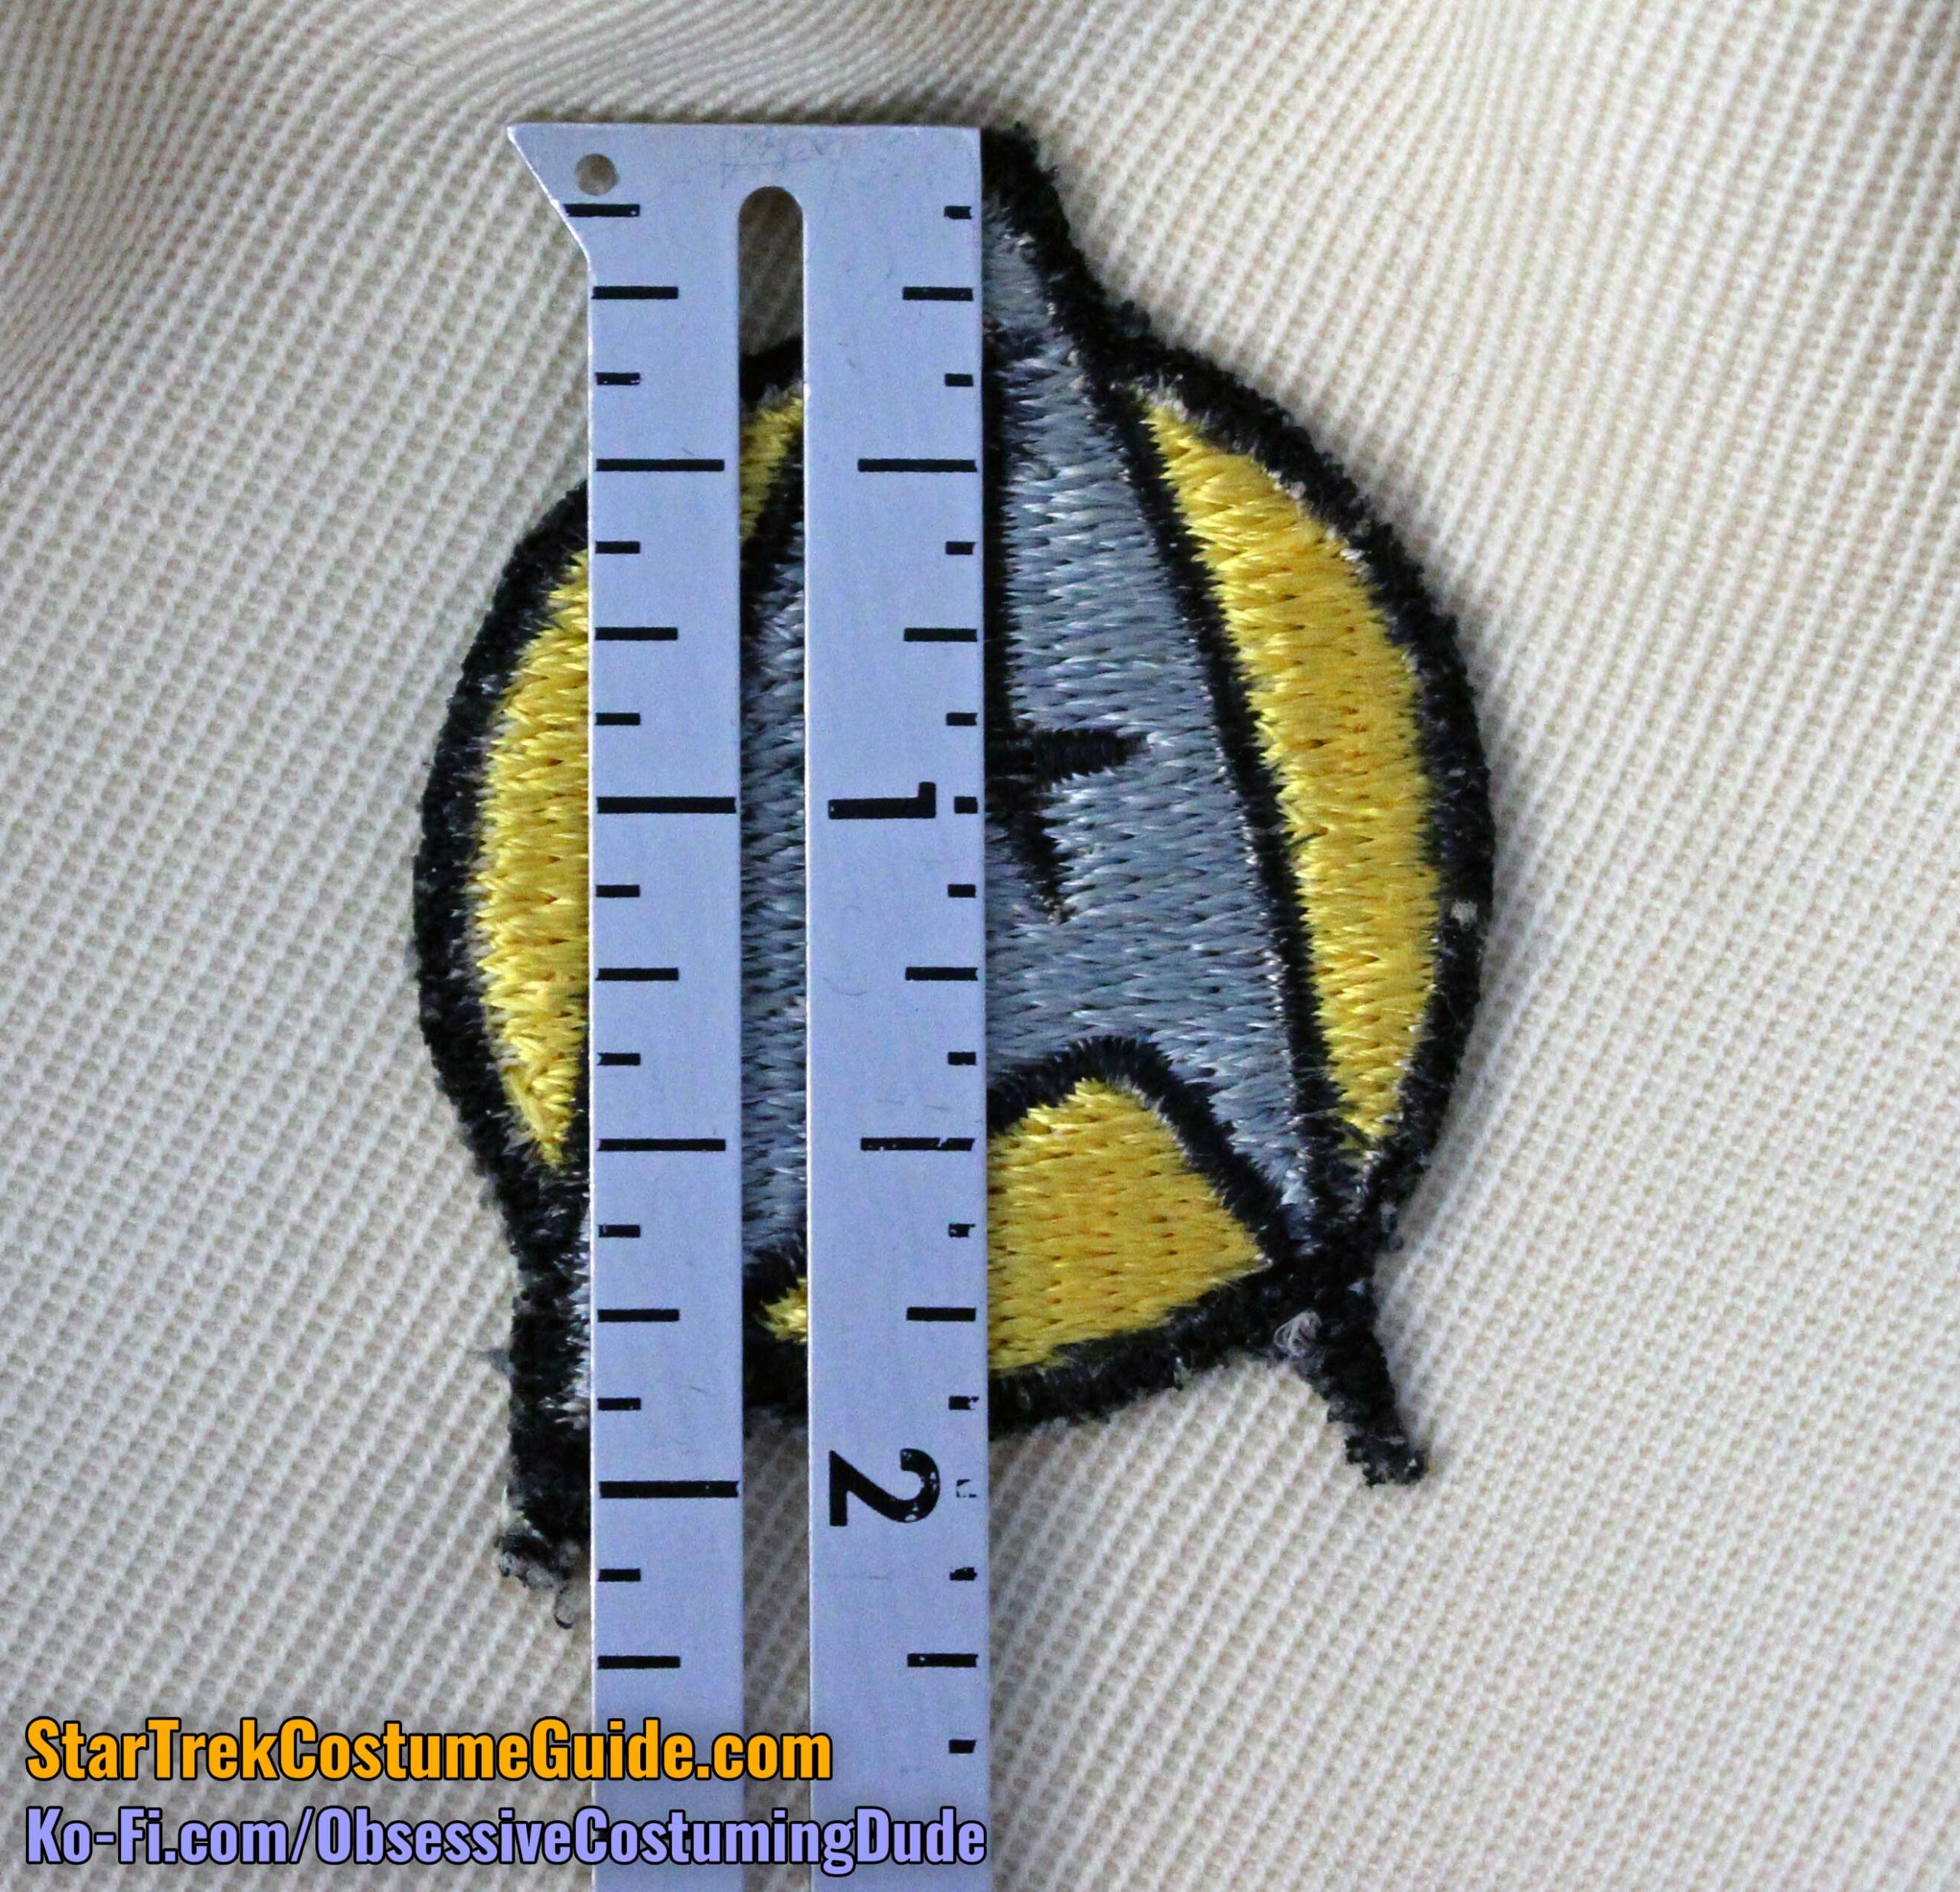
This patch was approximately 2 ⅛” at its tallest, and 1 ⅝” across at its widest.
The patch was hand-sewn to the sleeve with black thread.
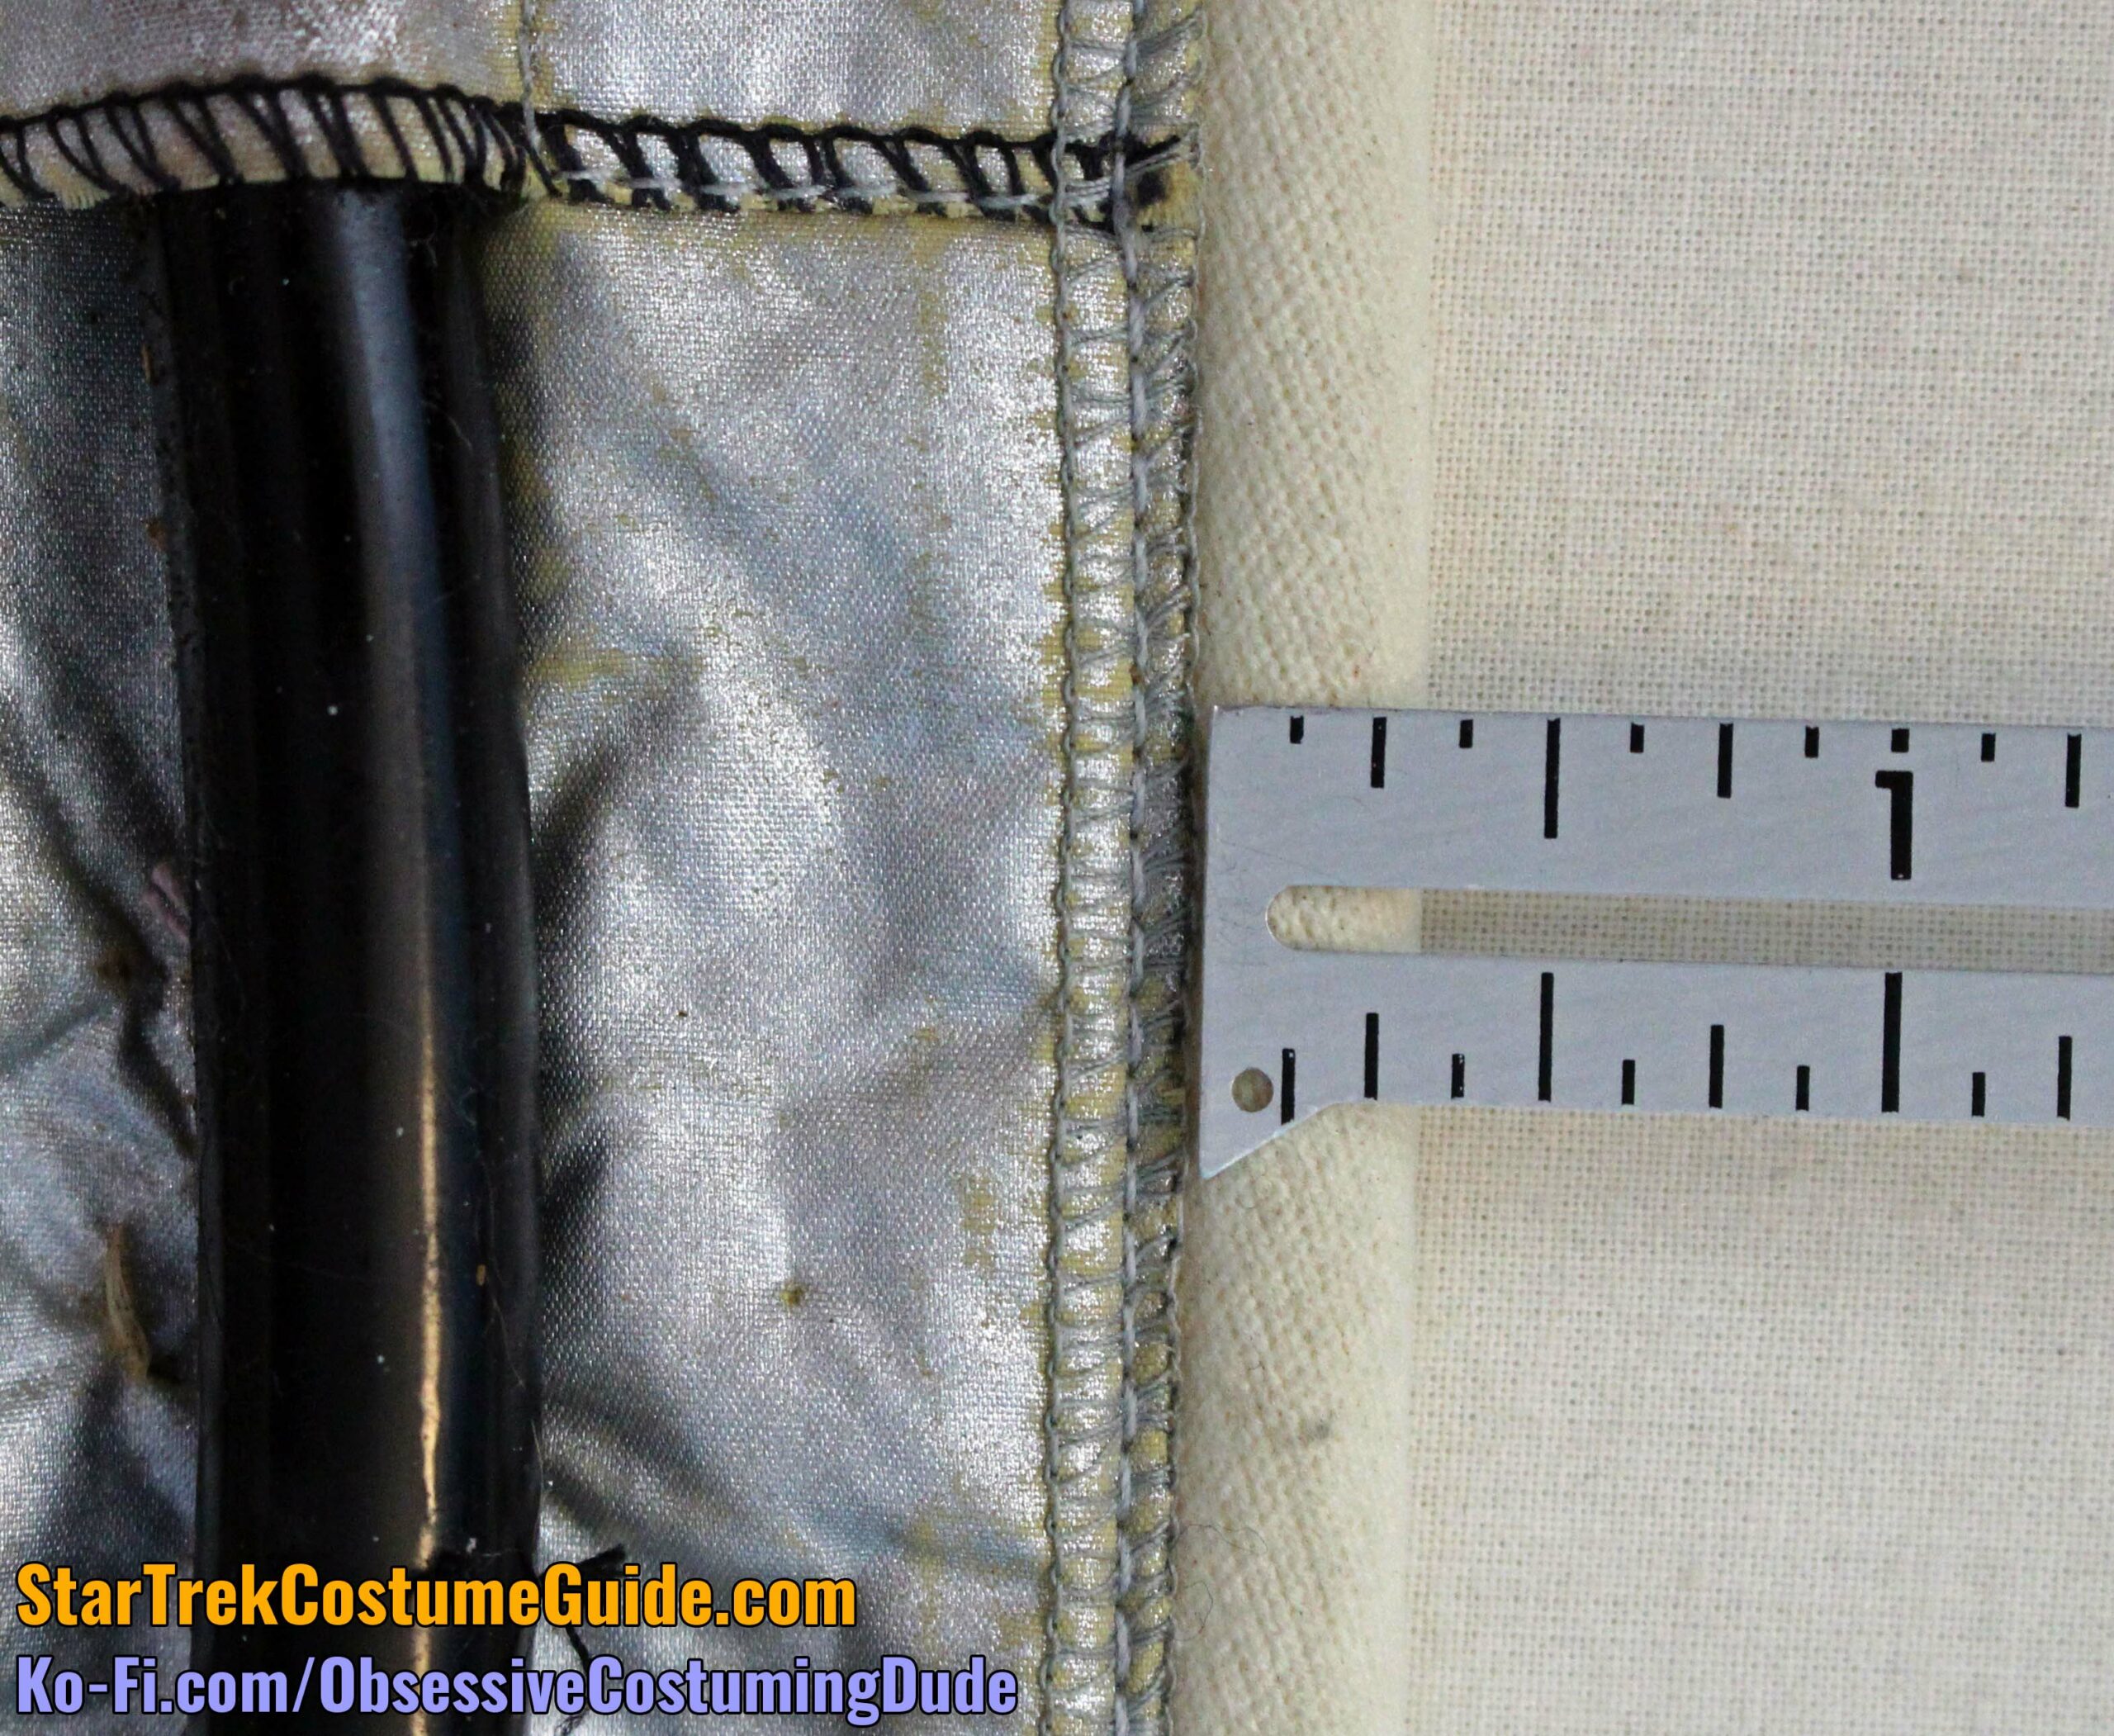
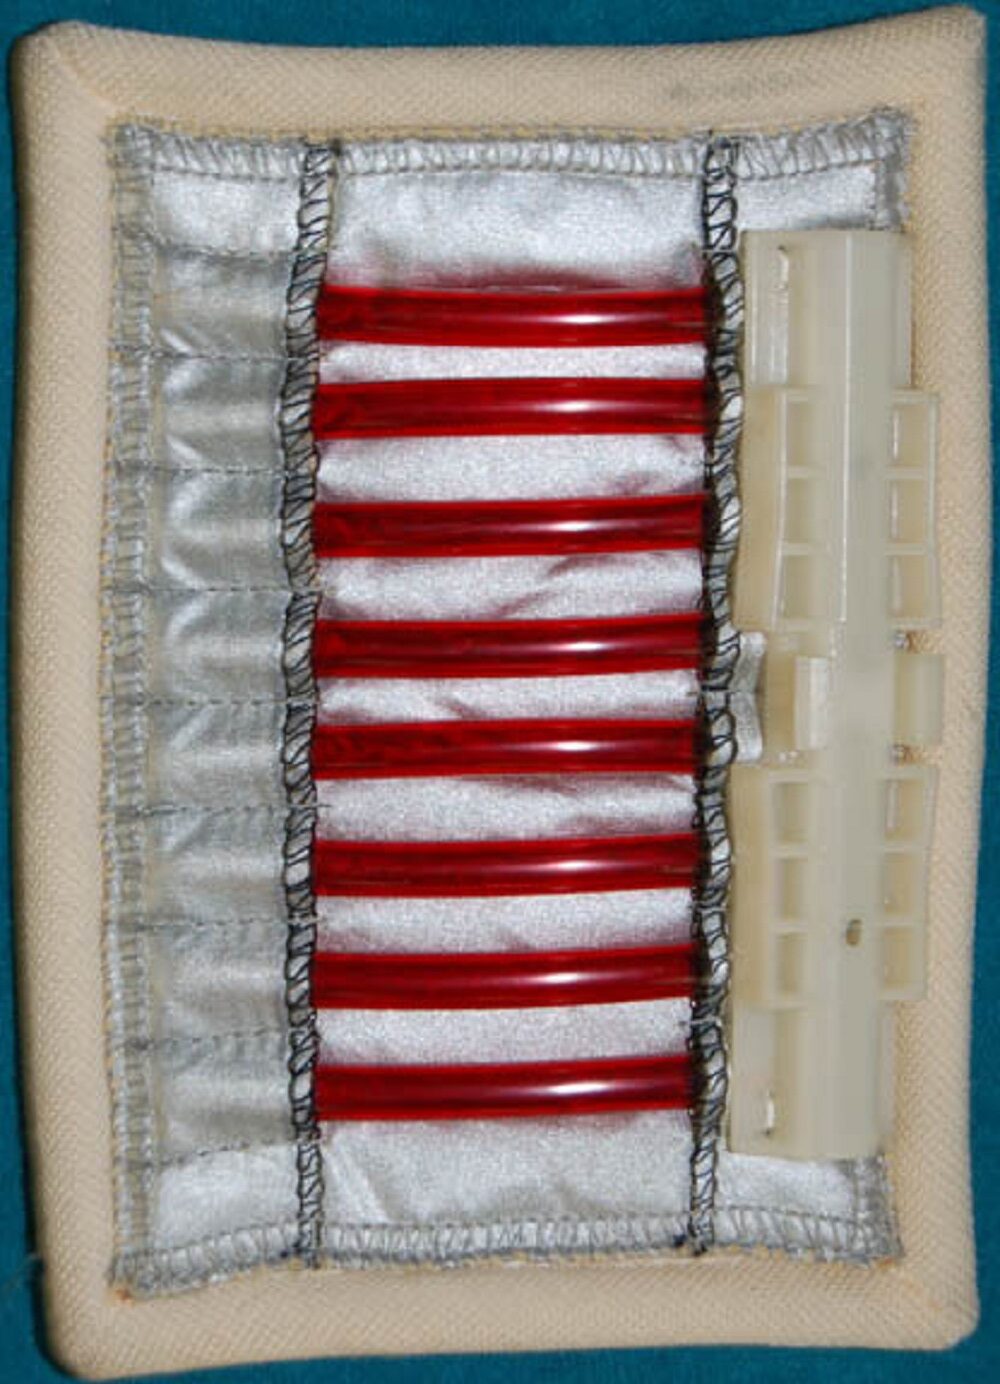
LEFT SLEEVE PANEL
On the wearer’s left sleeve was a rectangular panel assembly, similar in construction to those on the upper thighs.
The entire assembly measured approximately 5 ⅞” tall and 4 ⅛” wide, although it bowed to about 5 ¾” tall toward the middle (possibly as a result of the black tubing warping the assembly a bit.)
The front channel strip was ⅞” wide, and the inner edge was serged with black thread.
The back channel strip was a full inch wide, and the inner edge was likewise serged with black thread.
The tubing channels were all ½” wide and were topstitched into place with gray thread.
On the back of the sleeve assembly was this tall plastic piece, a bi-folding door slide guide (N-6539), with two small holes drilled in each corner, through which it was hand-sewn.
Credit to “tim,” “Flagwaver,” and of course “Felgacarb” on the RPF for correctly identifying this piece over a decade ago!
The interior panel assembly was again framed with bias-cut, off-white, knit fabric piping, mitered at the corners.
The assembly was backed with heavy French (?) canvas.
In The Motion Picture, this upper left arm panel looked very different – plainer, shinier, and more minimalist (more in keeping with Robert Wise’s sleek and shiny “refit” universe, as opposed to Nicholas Meyer’s more lived-in feel and mechanical, submarine vibe).
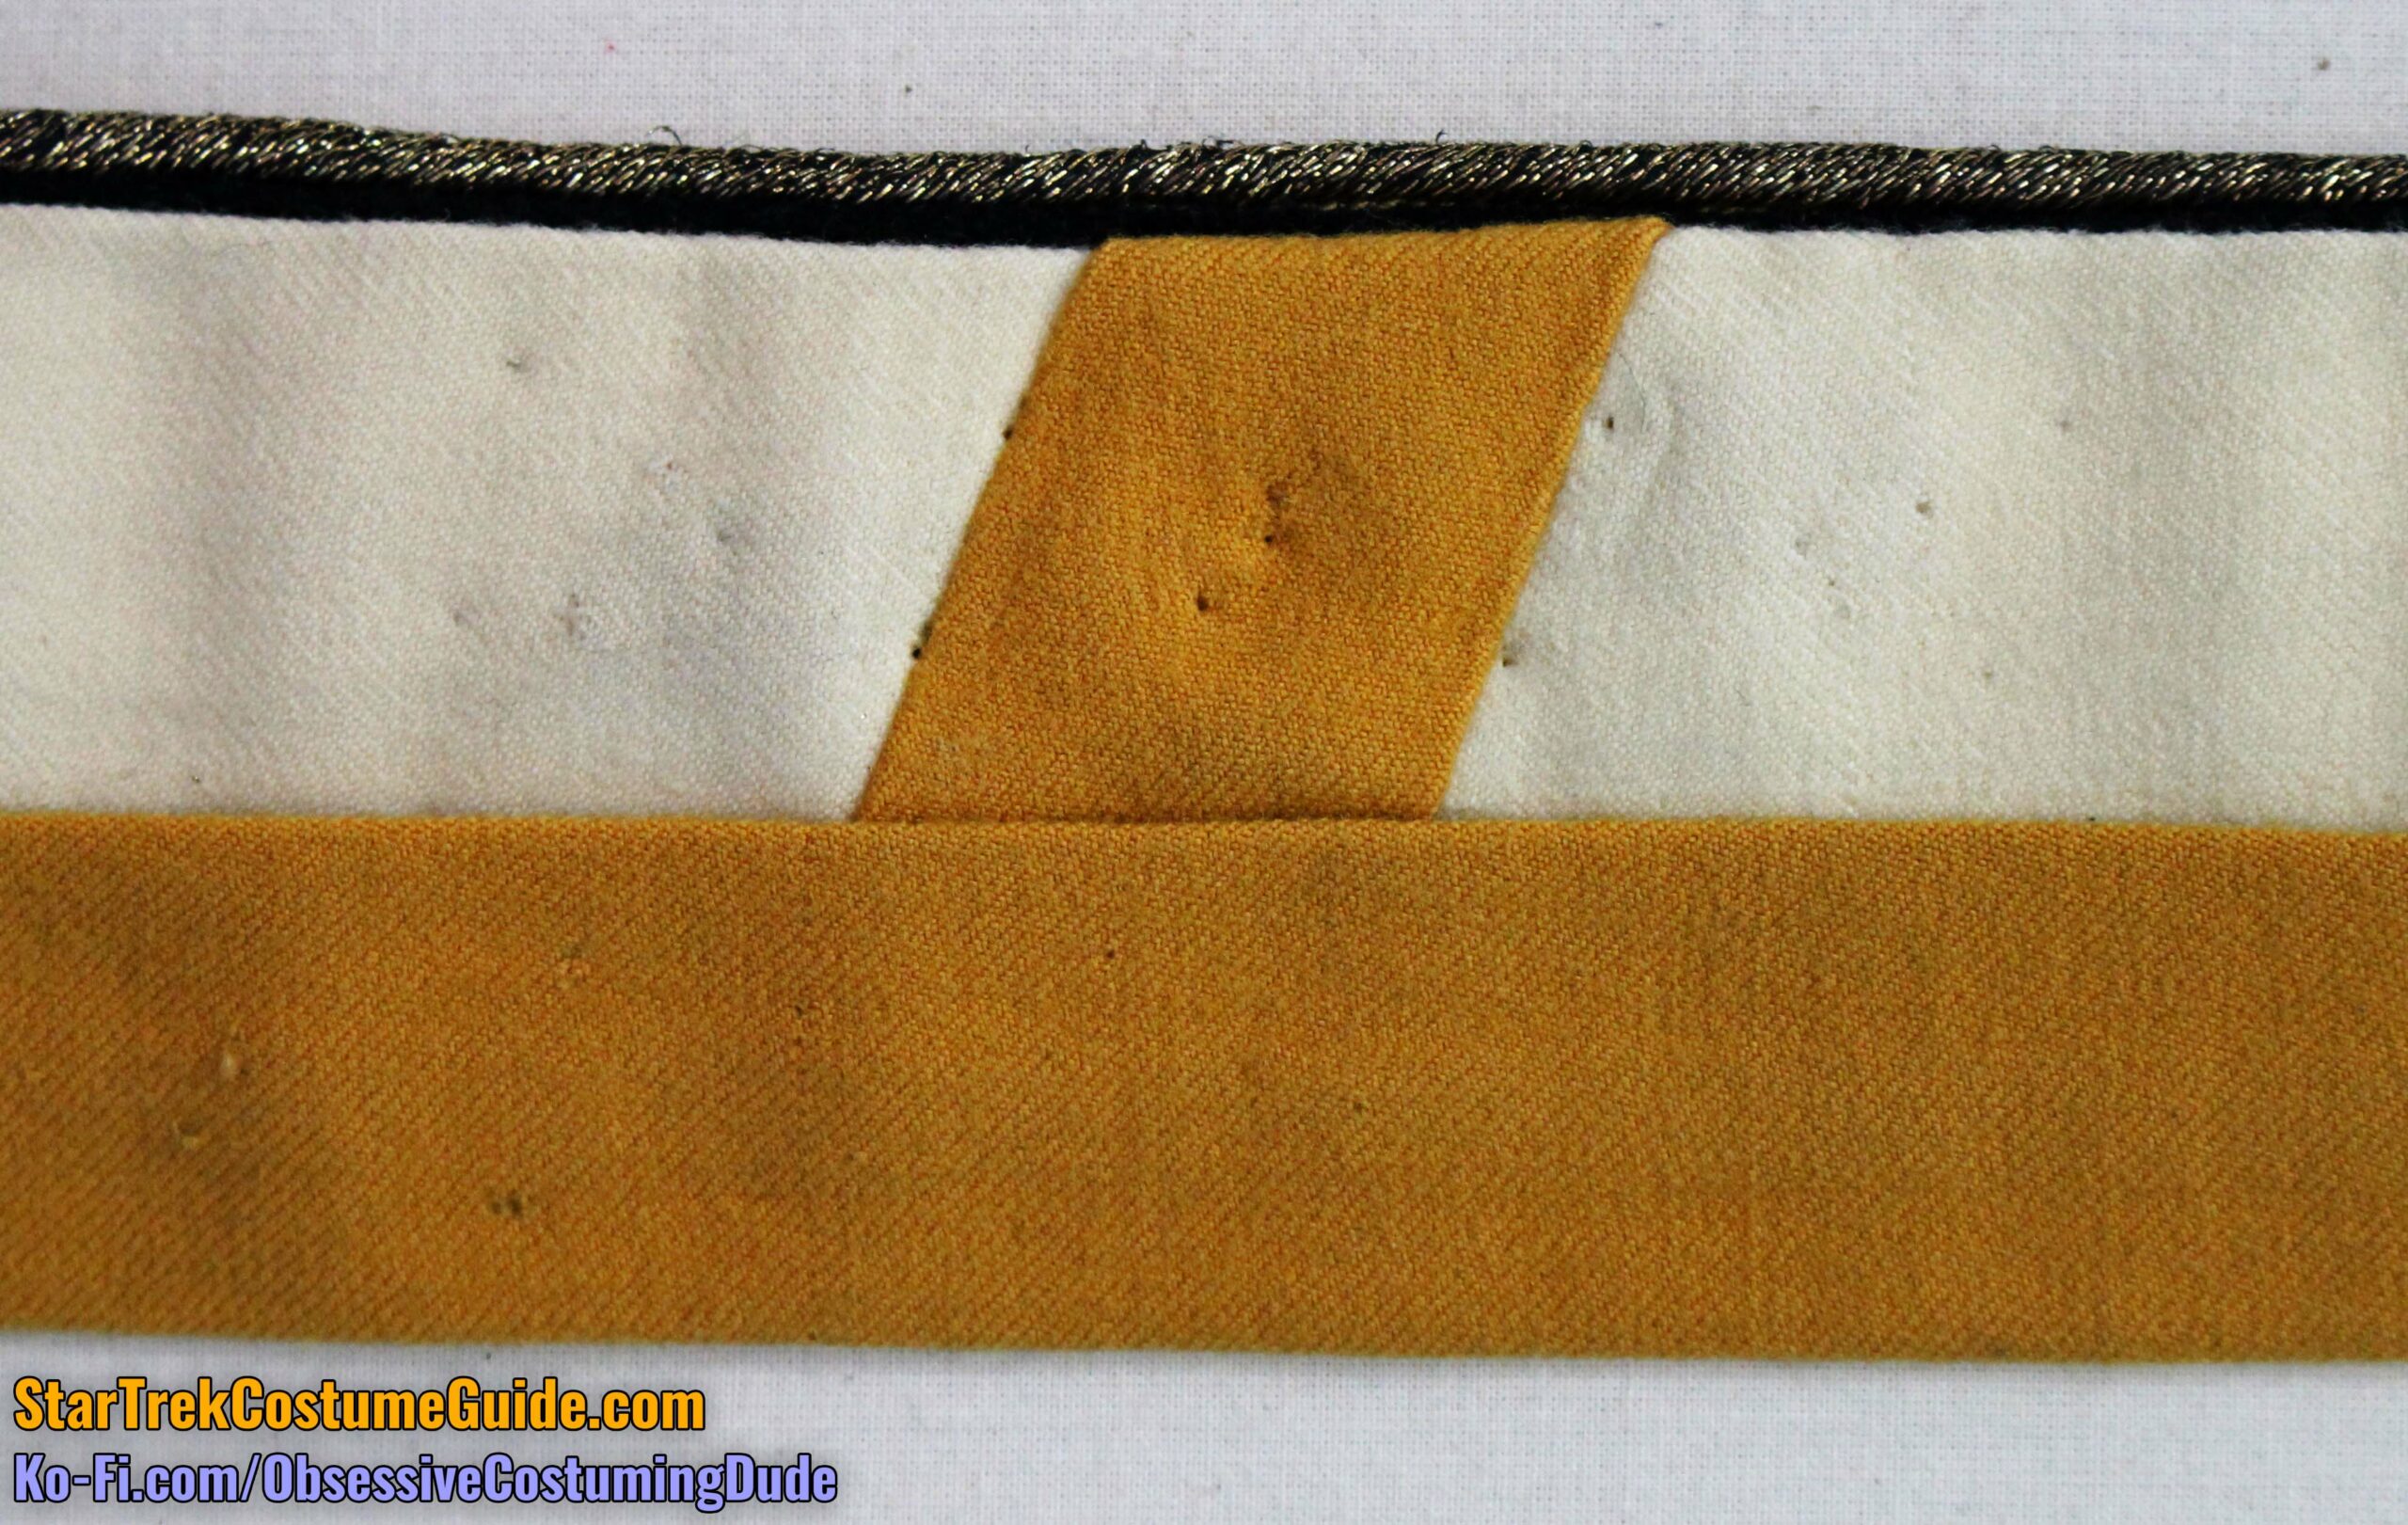
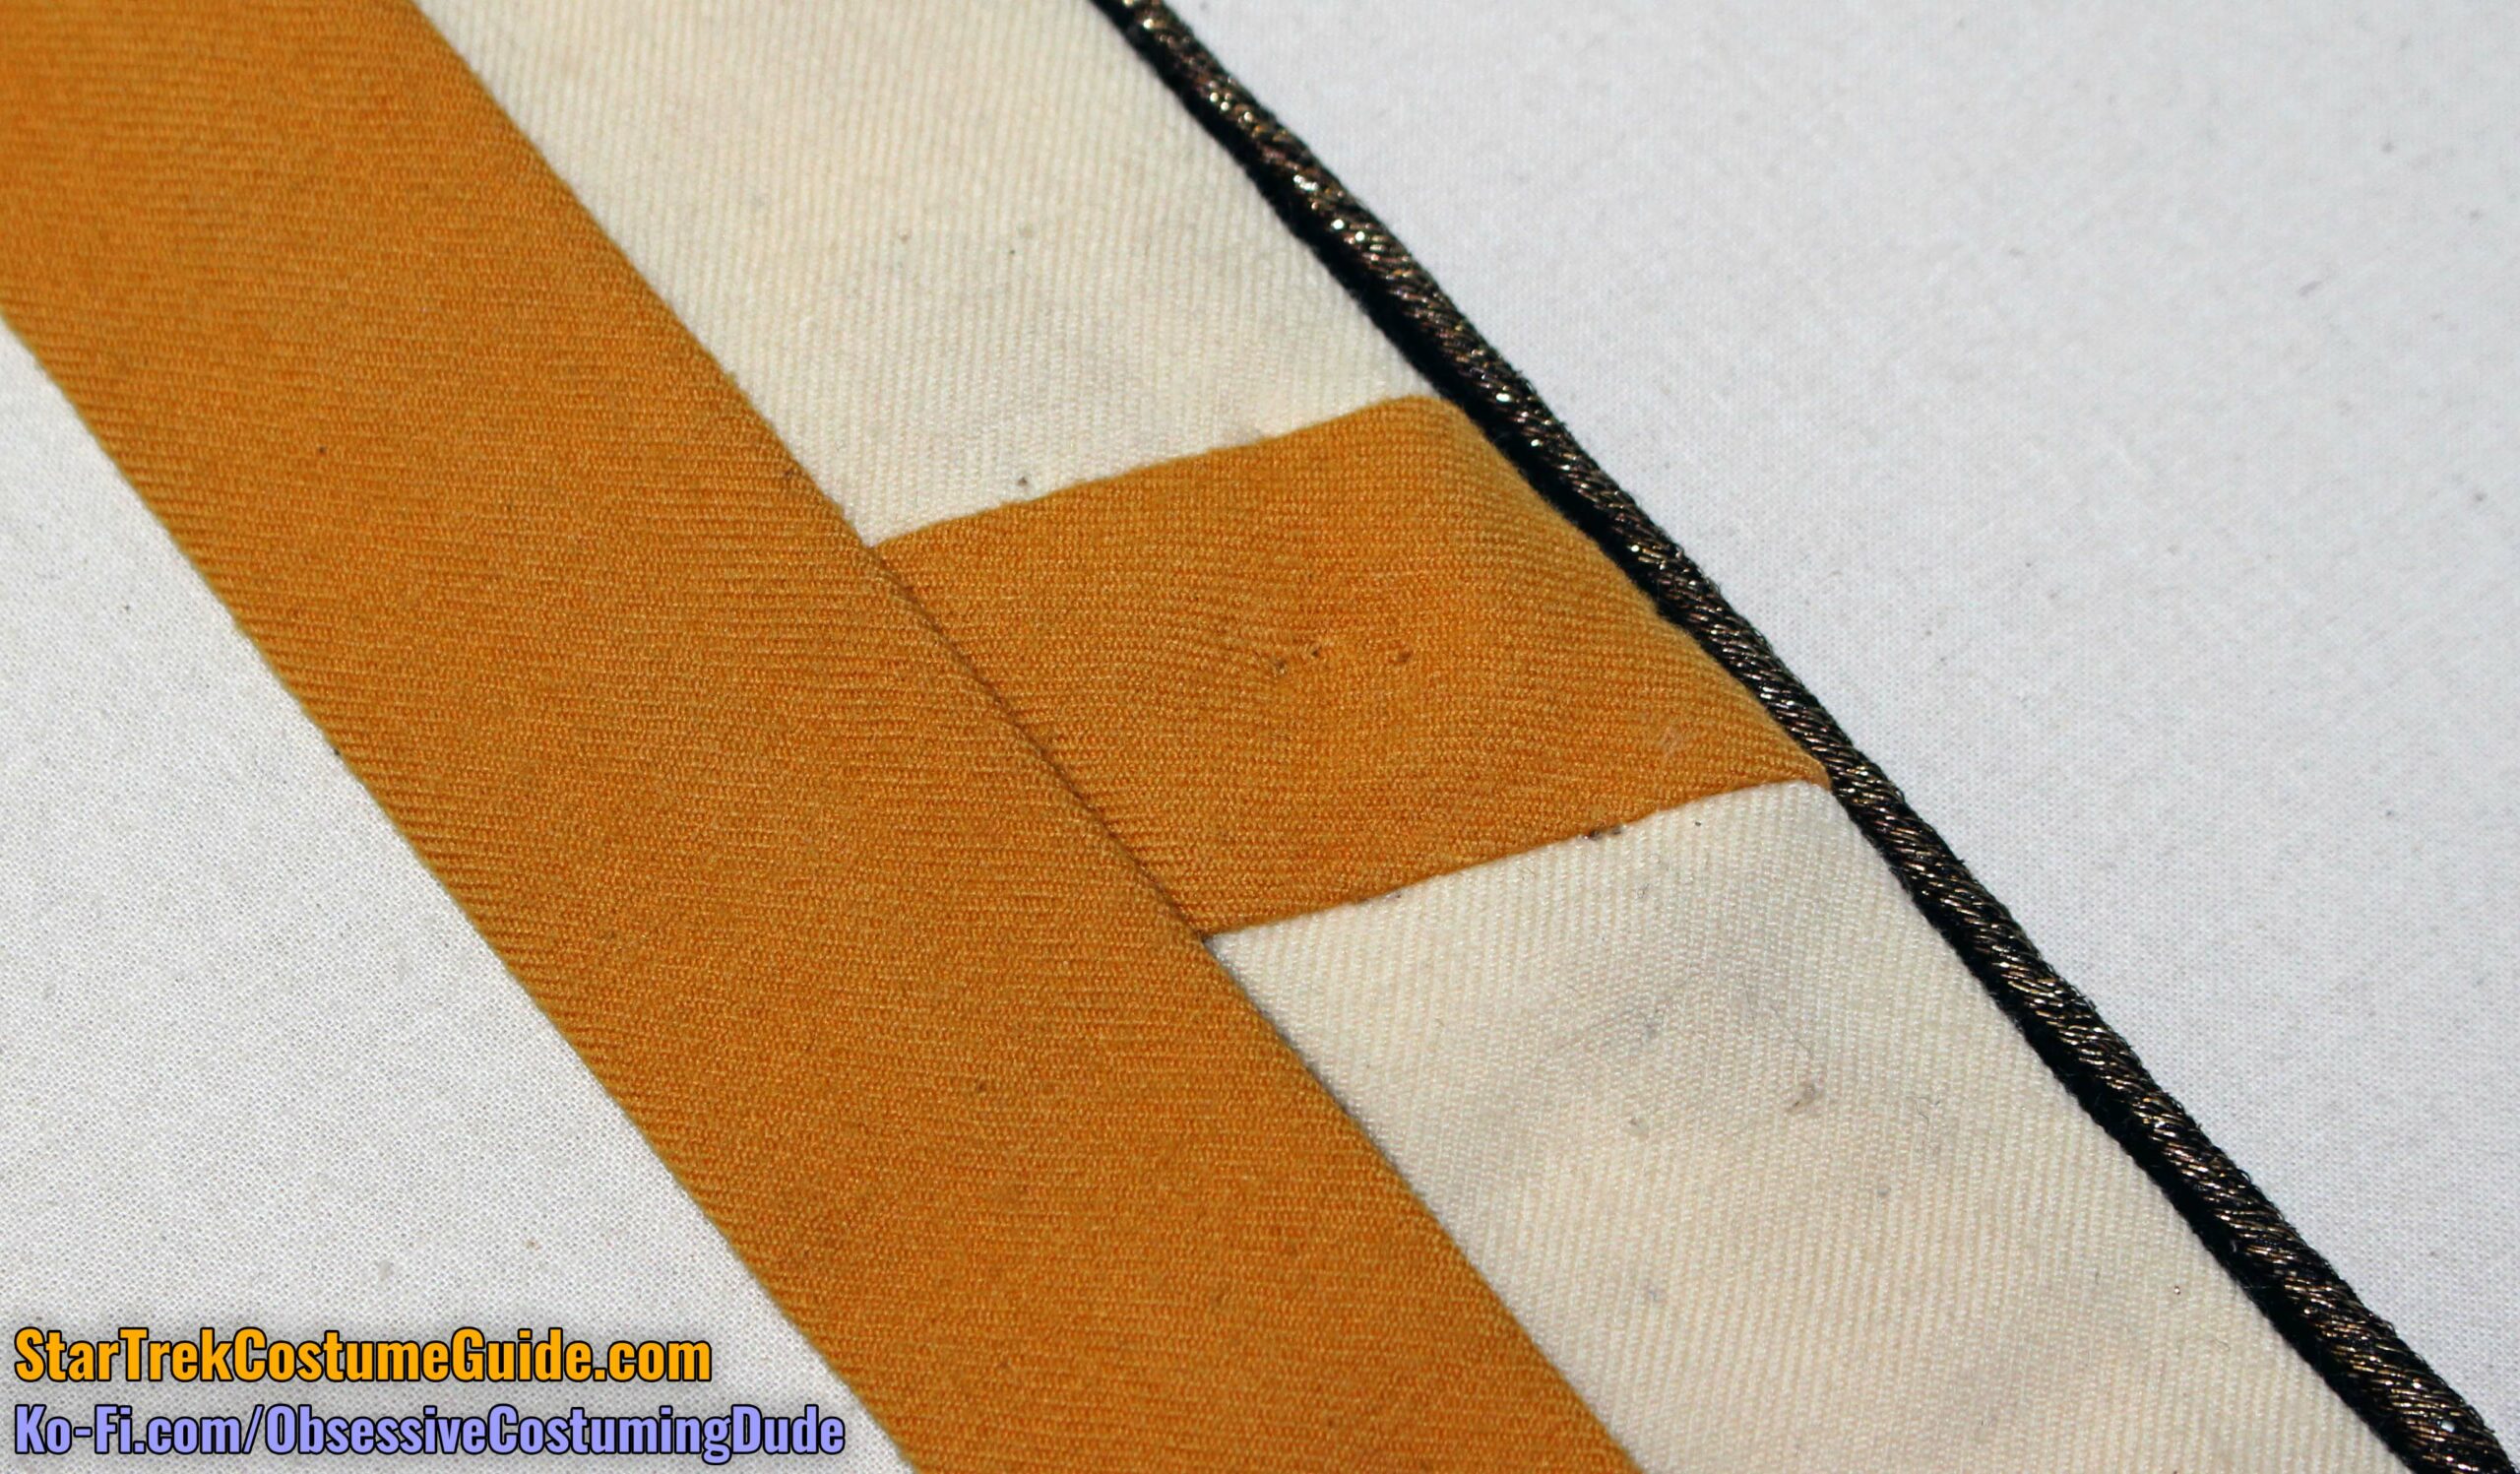
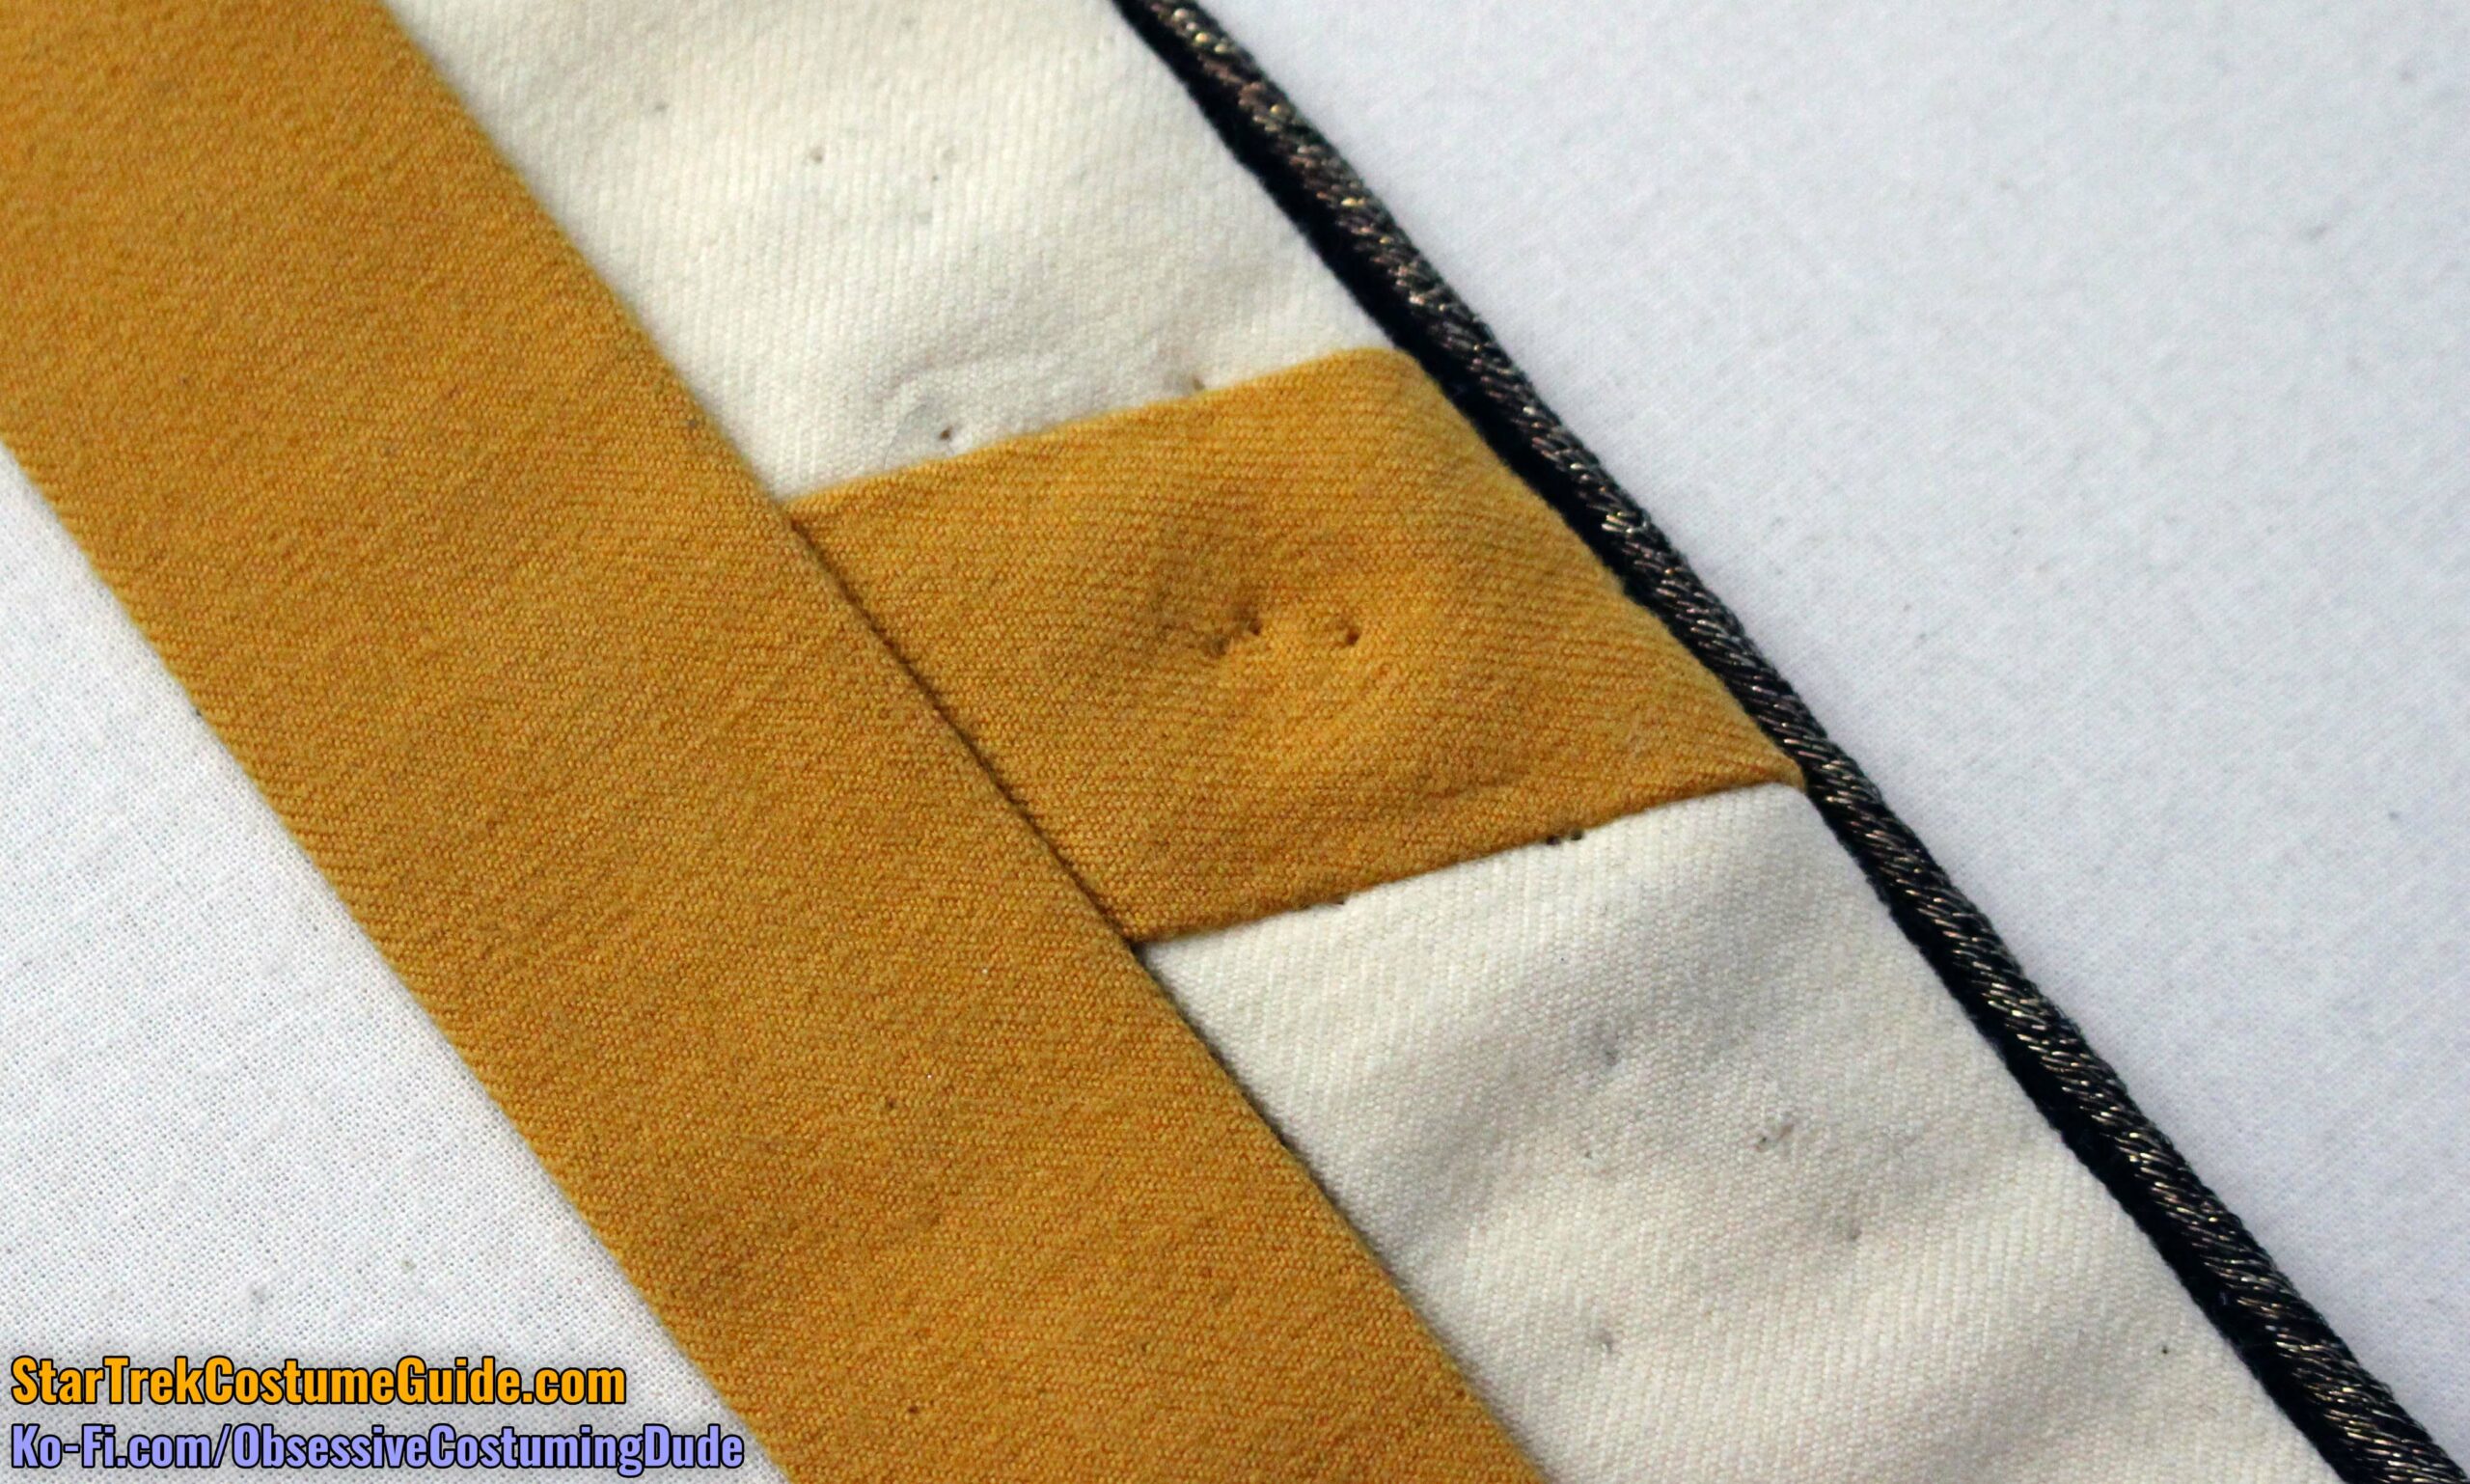
DIVISION SLEEVE BAND
Beneath the large elbow bands was a sleeve band assembly, generally analogous to those on the standard “monster maroon” jackets and enlisted jumpsuits.
As with those garments, trainees wore red (or in this case, red with a diagonal gold stripe), while officers and enlisted personnel wore gold.
These were absent from The Motion Picture but added from The Wrath of Khan onward.
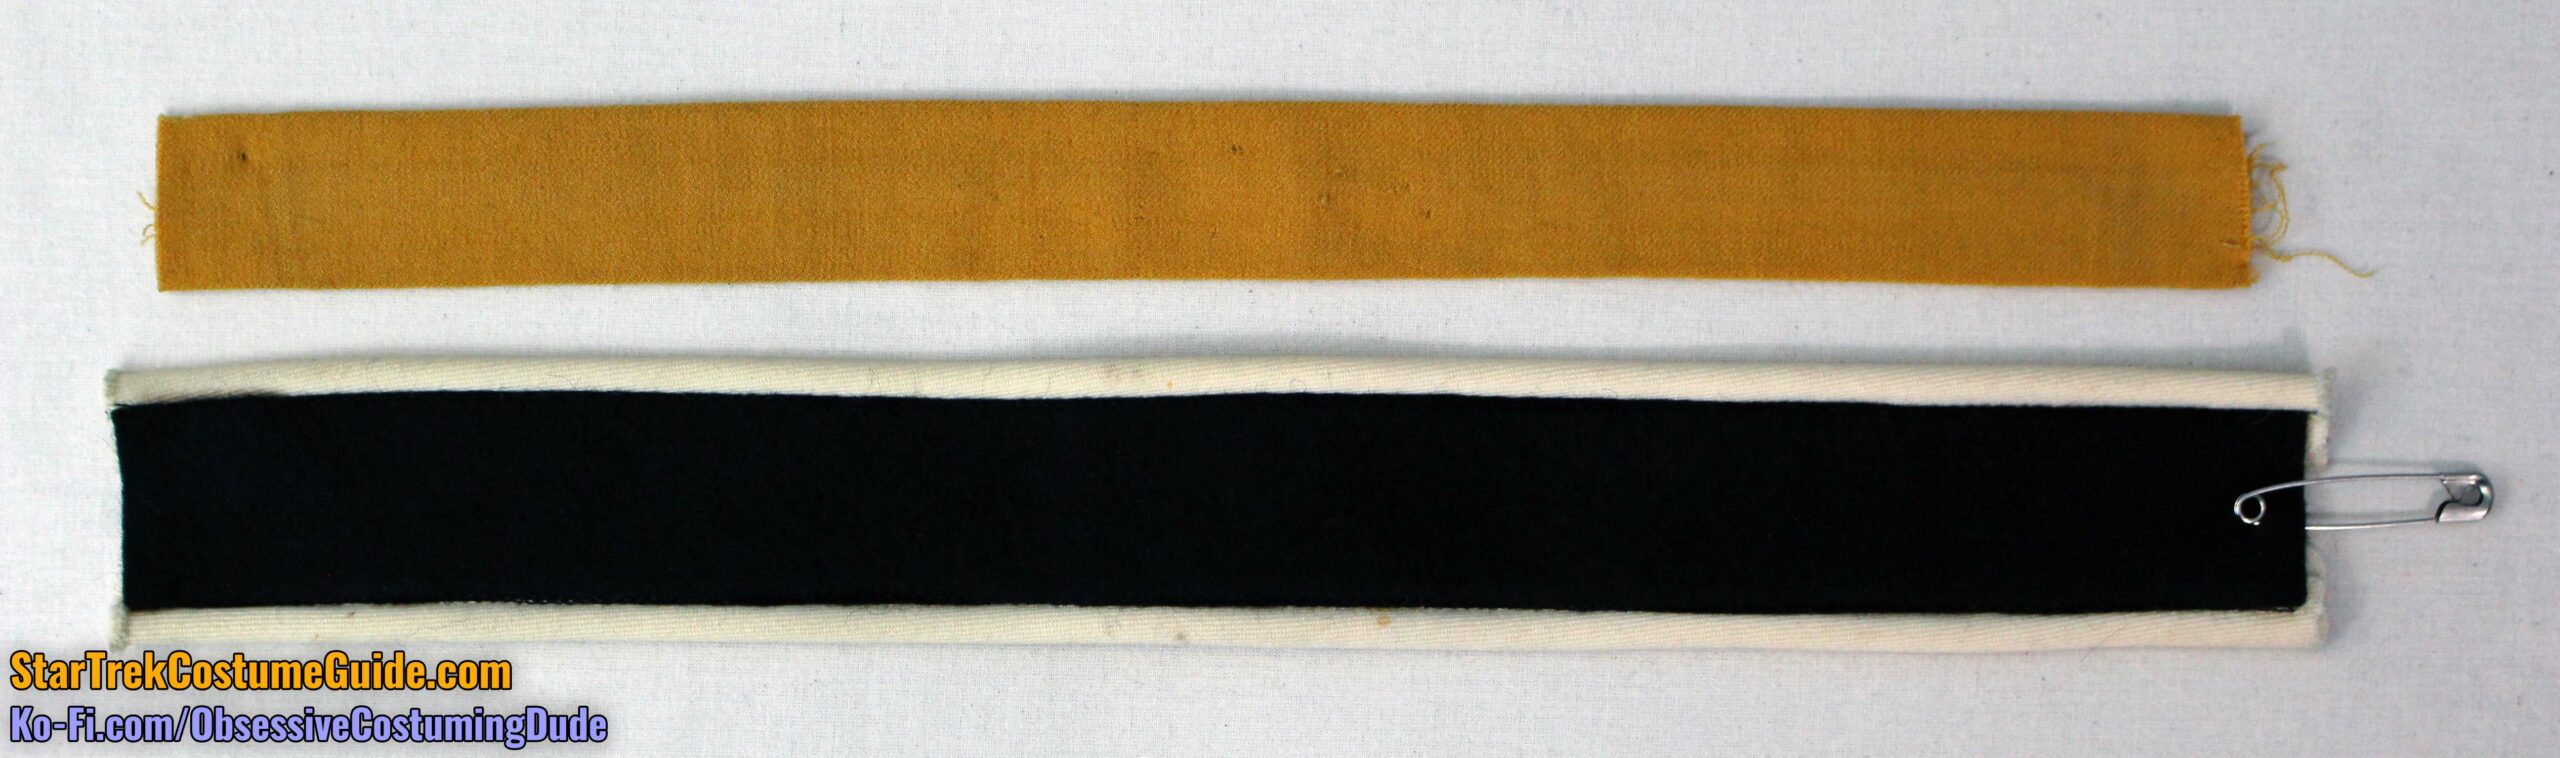
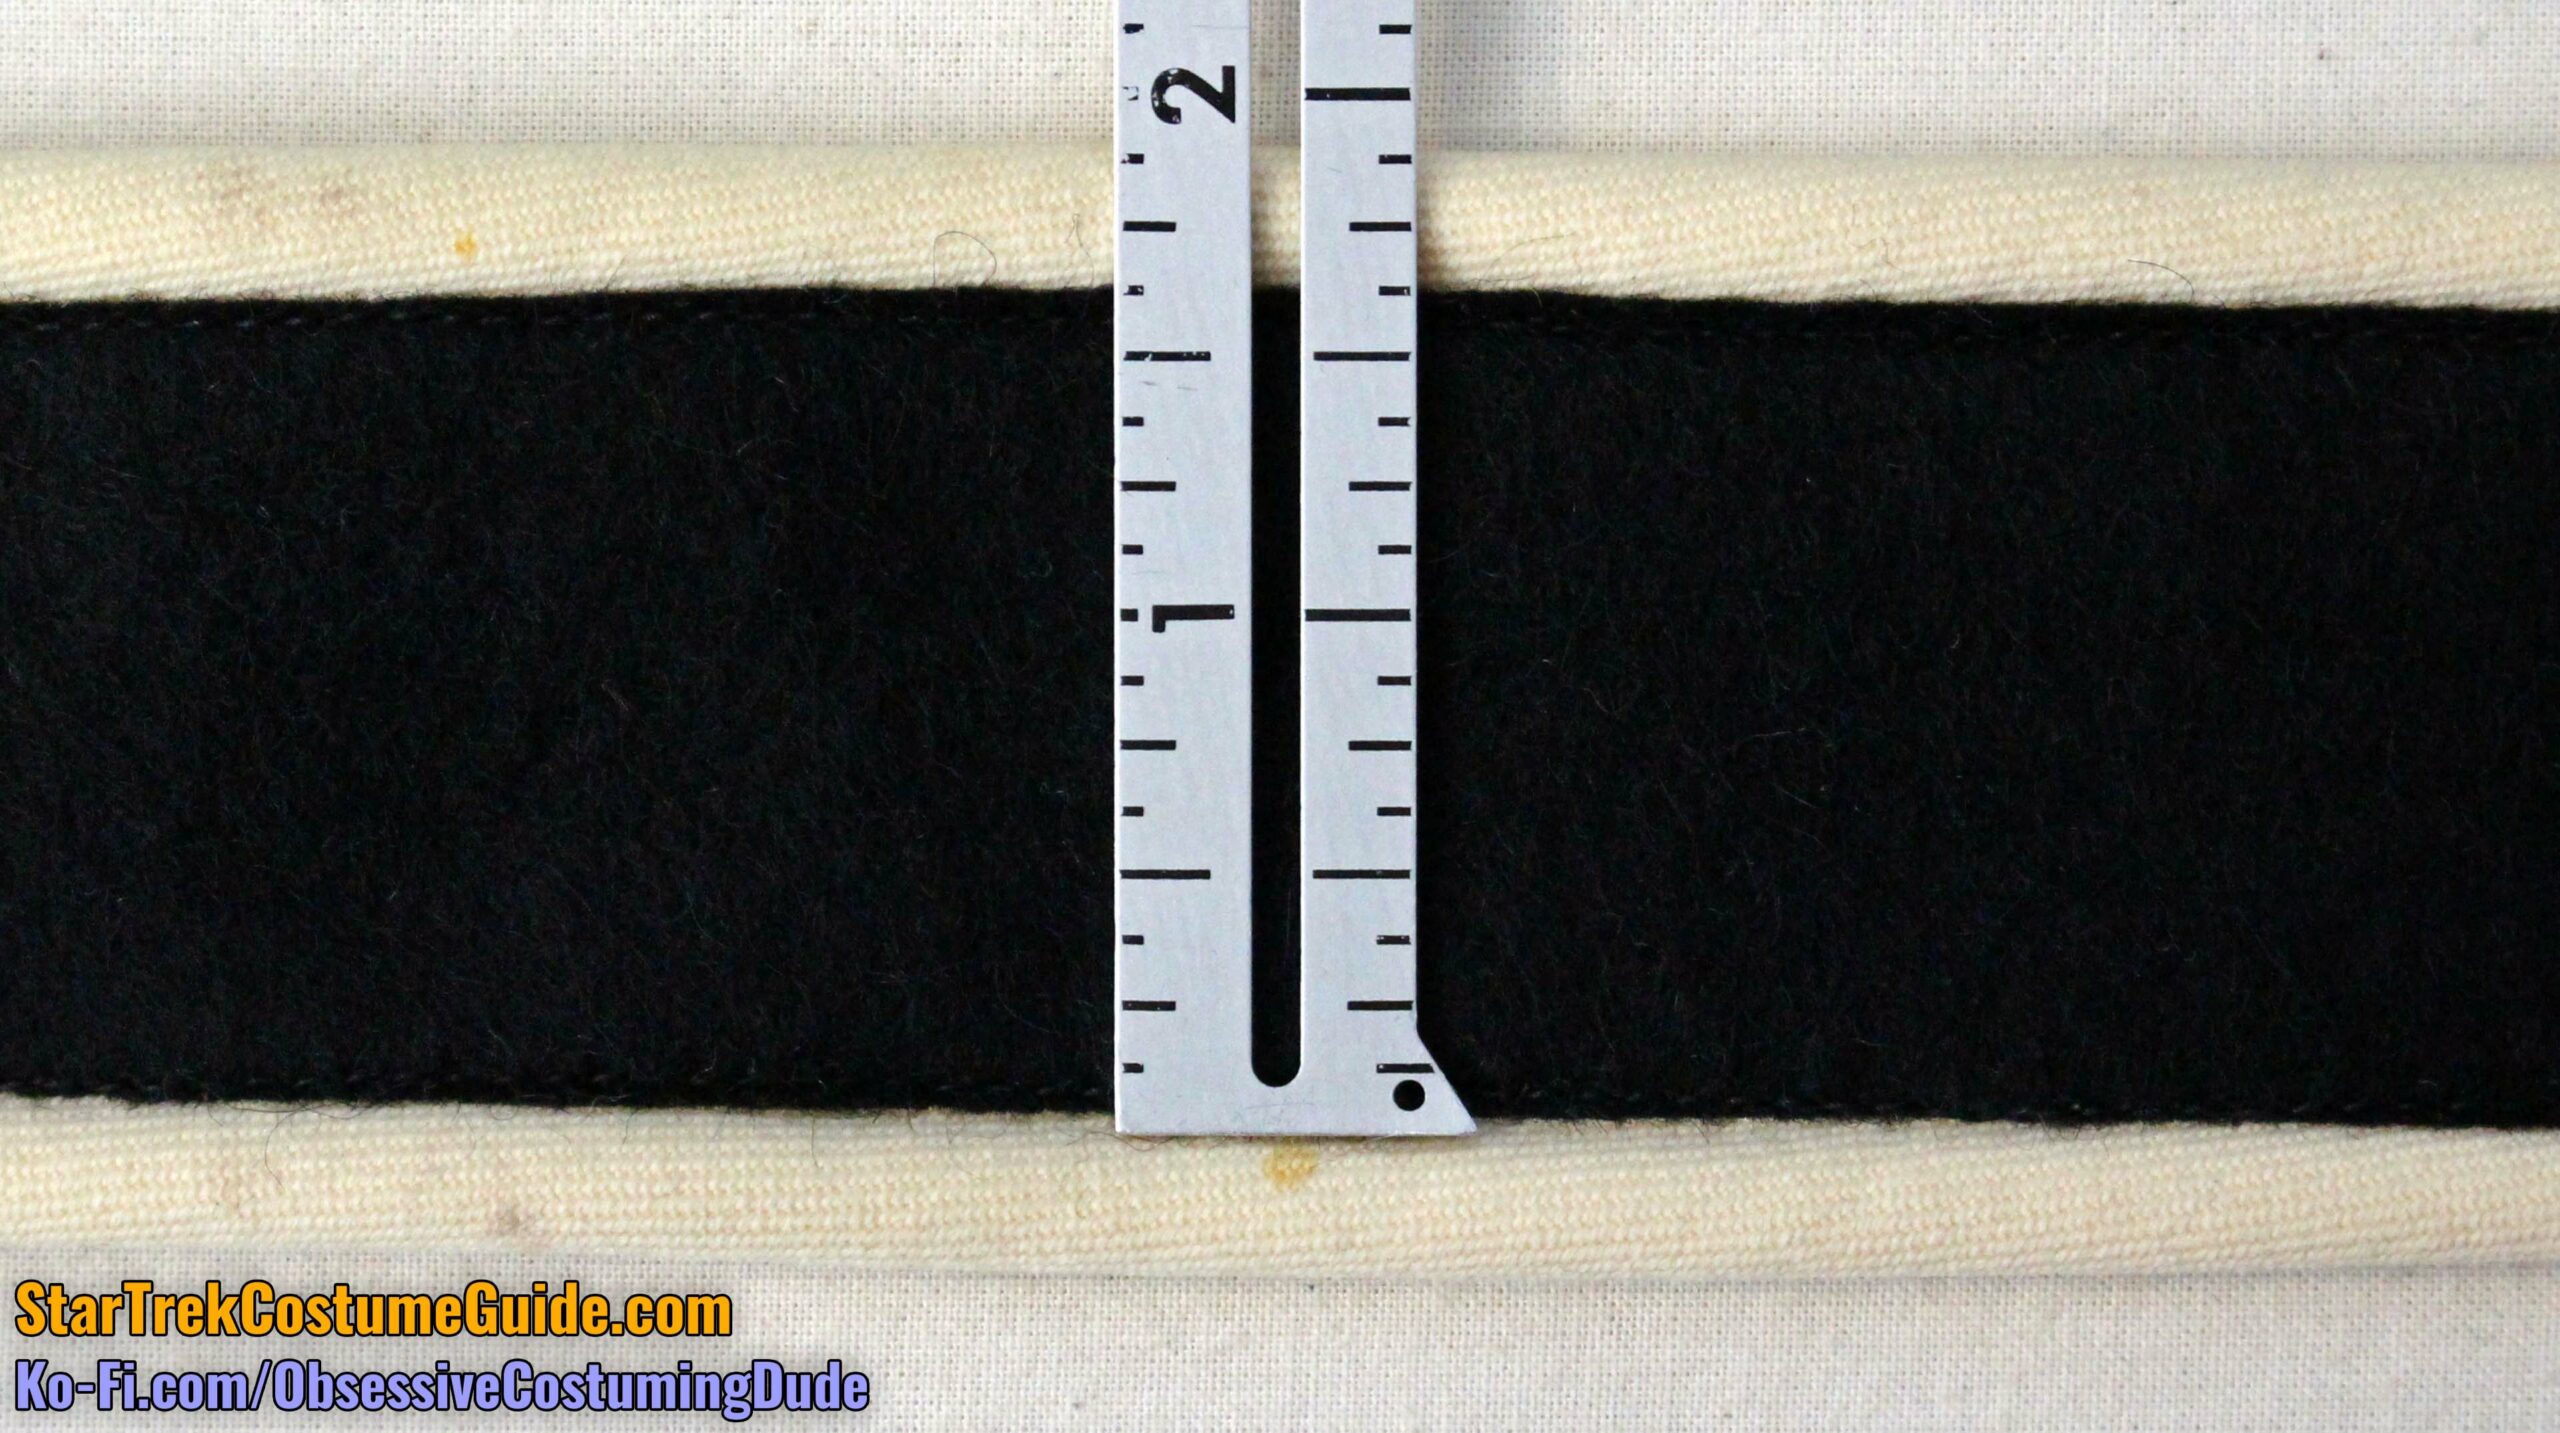
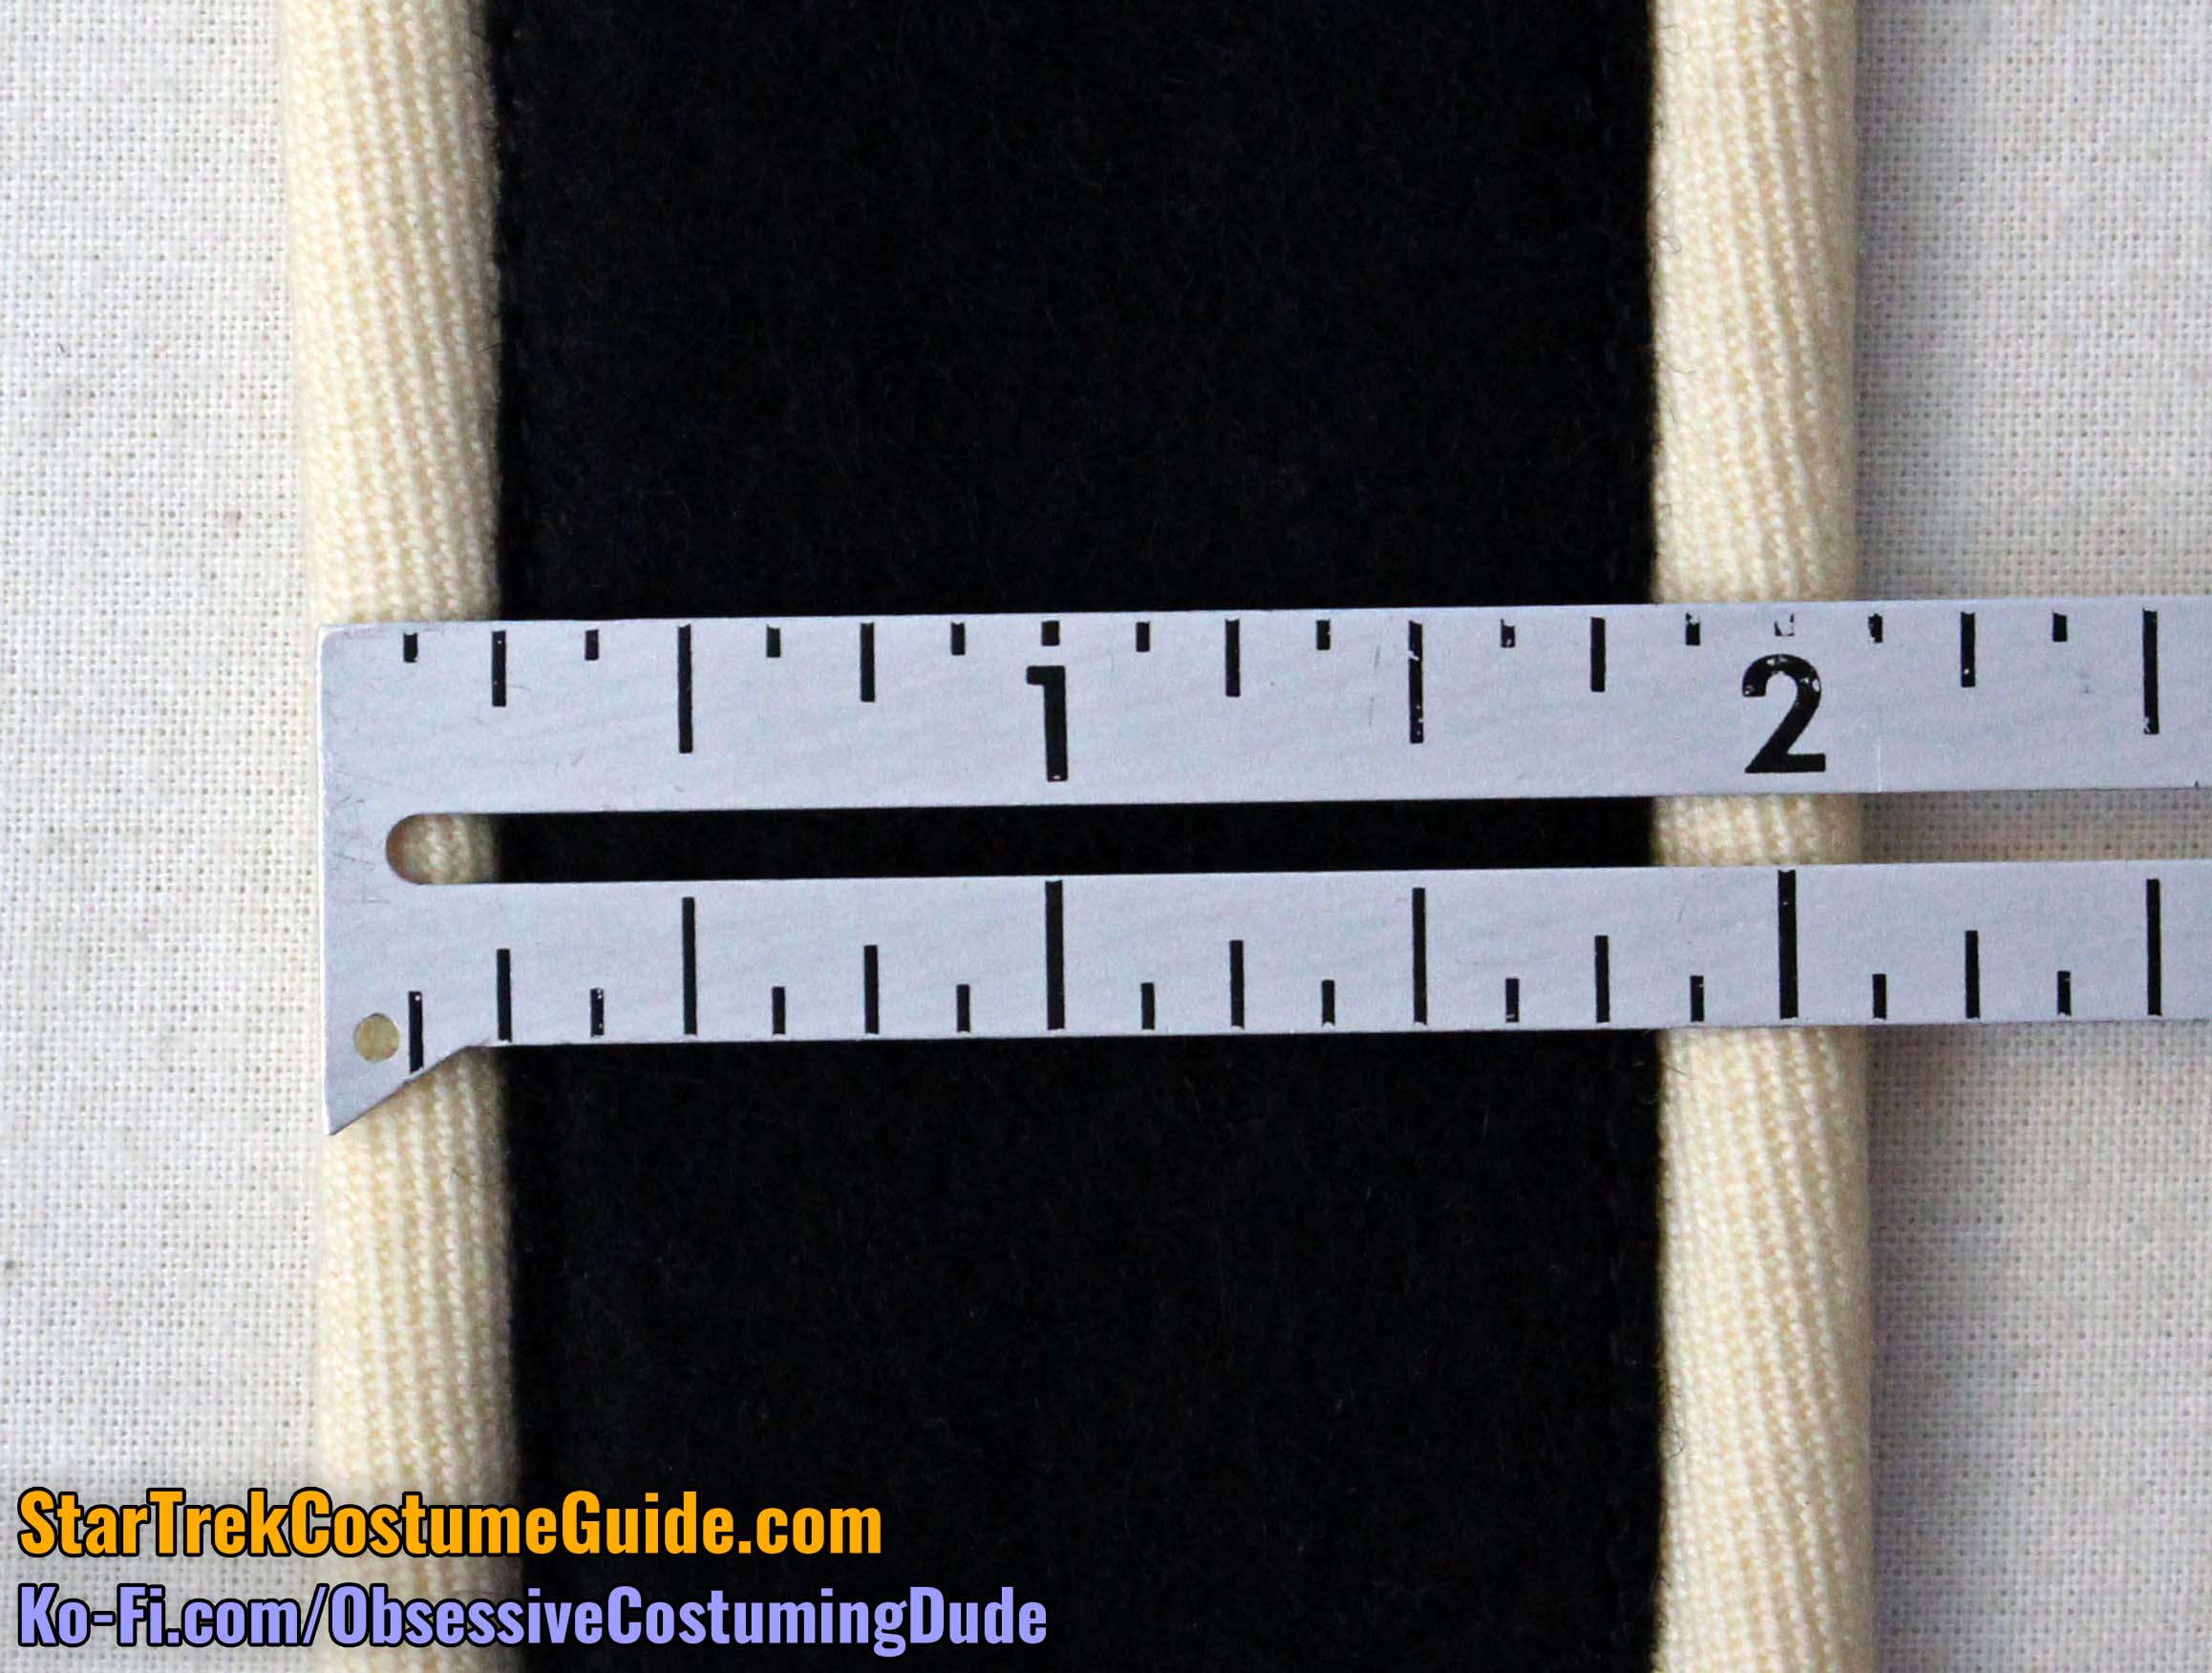
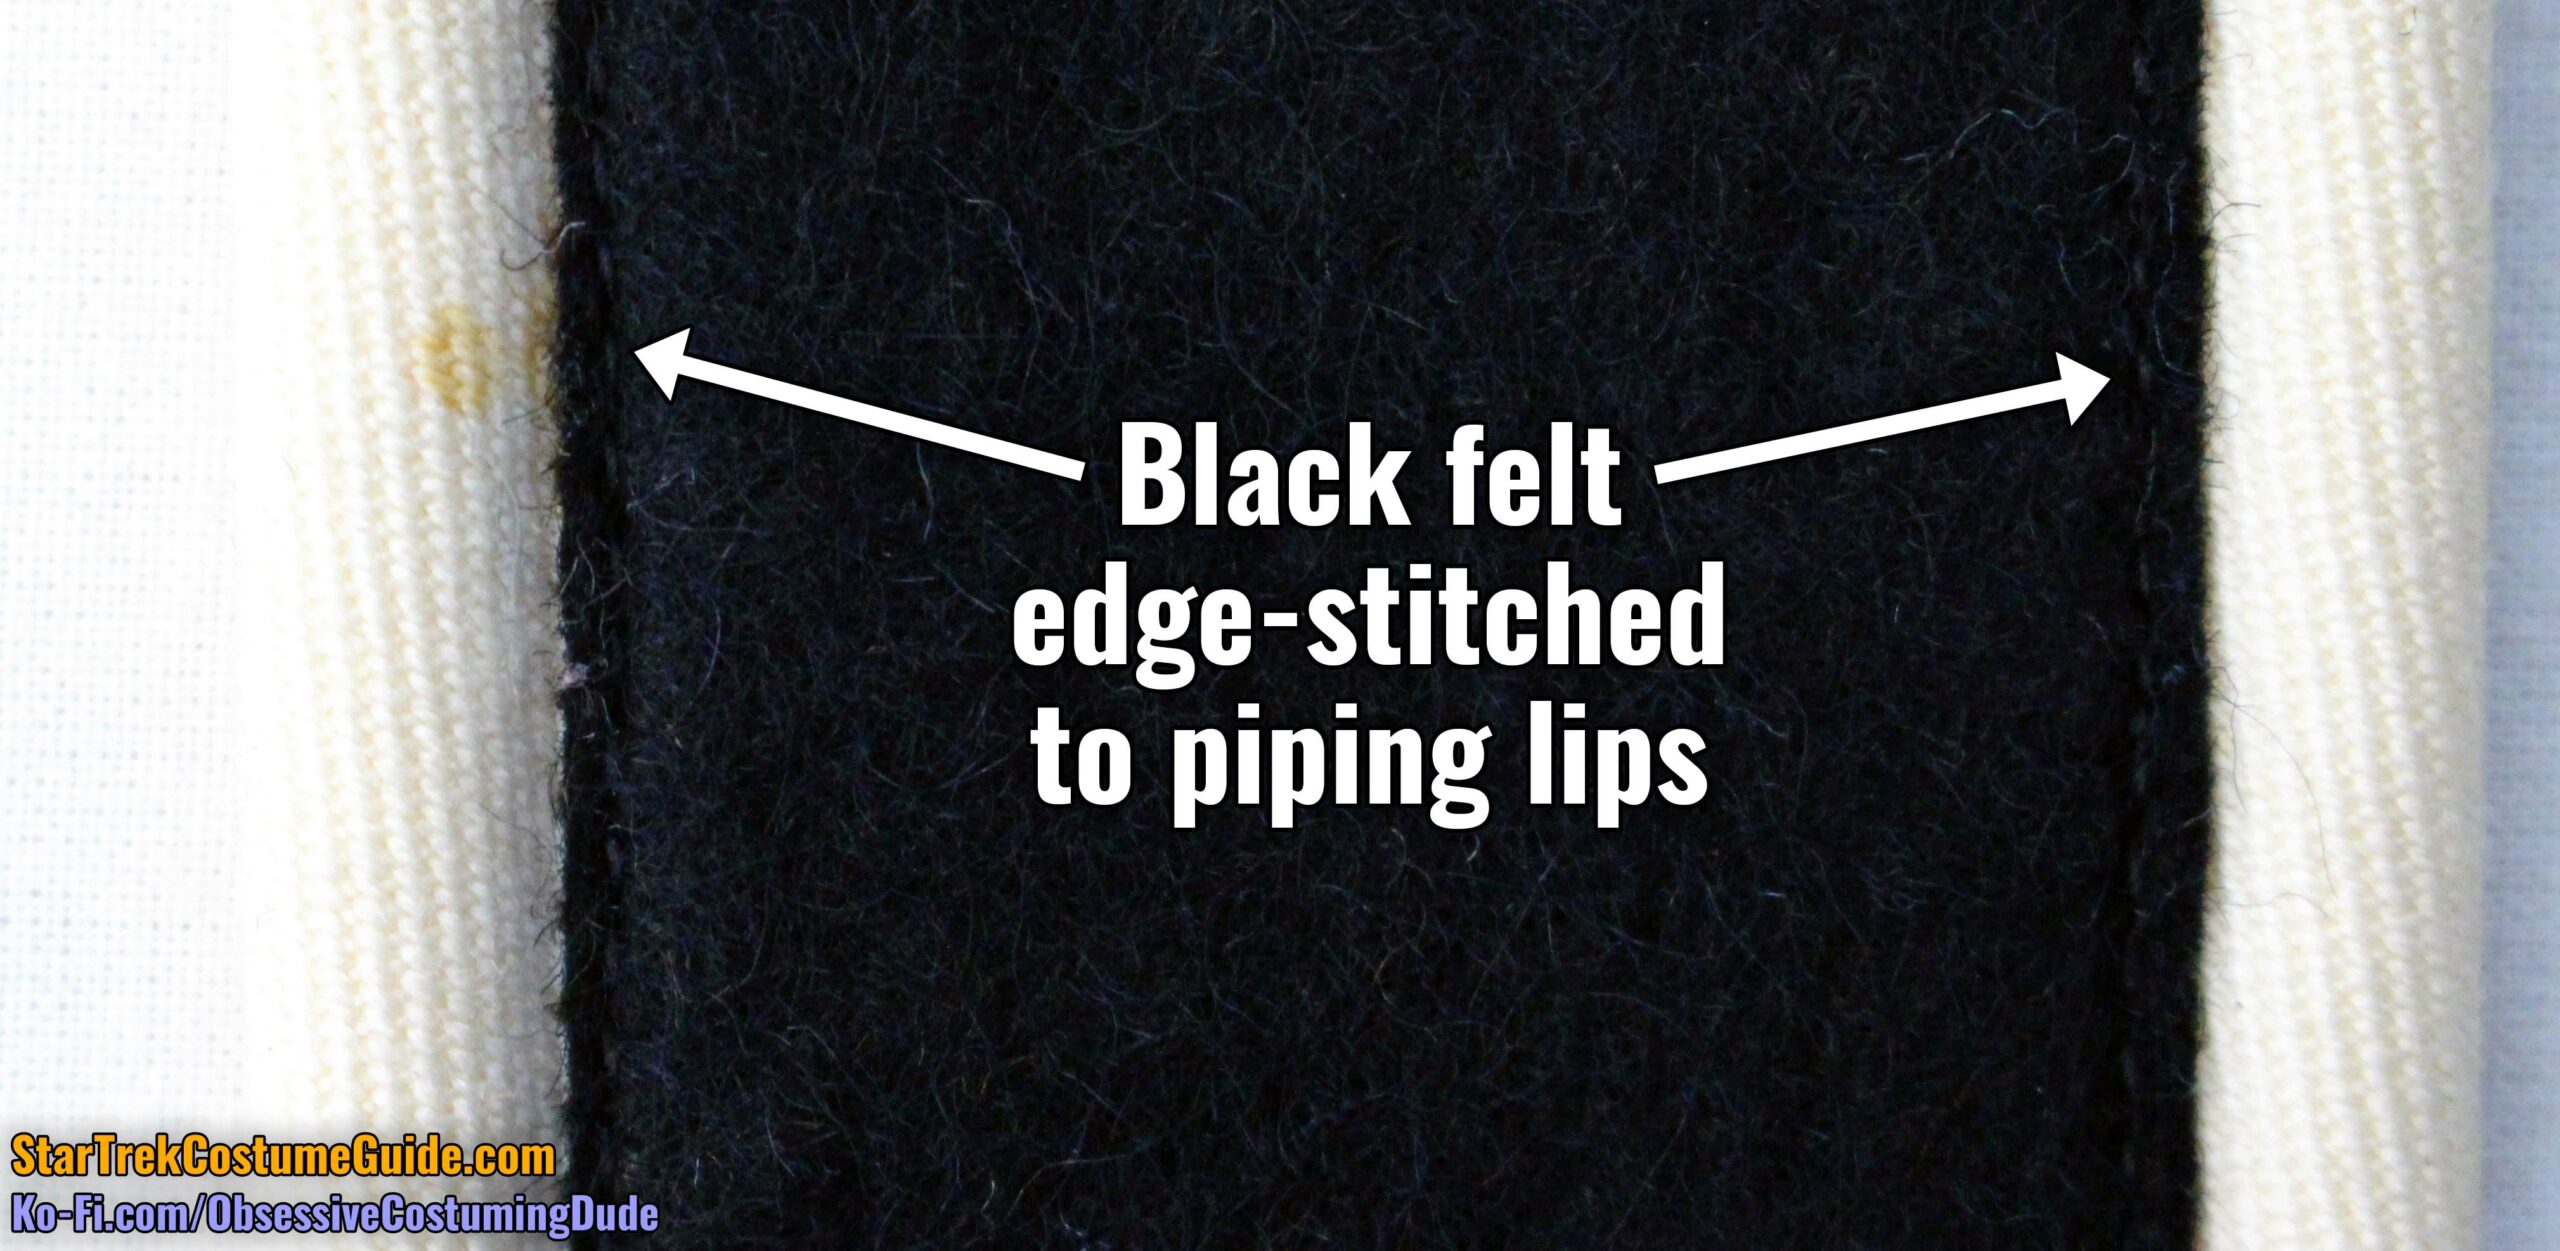
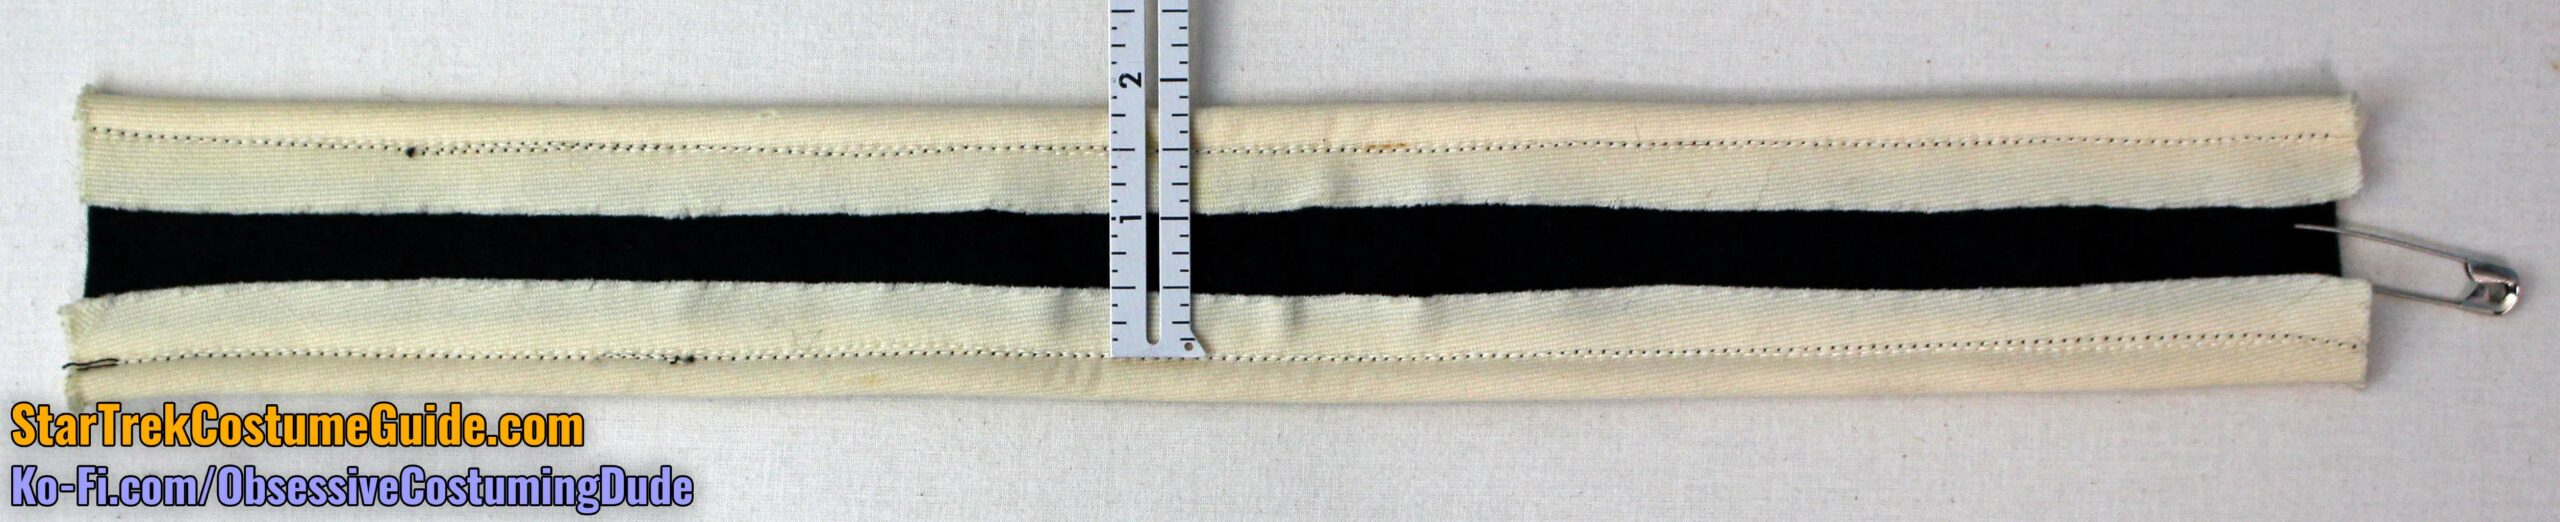
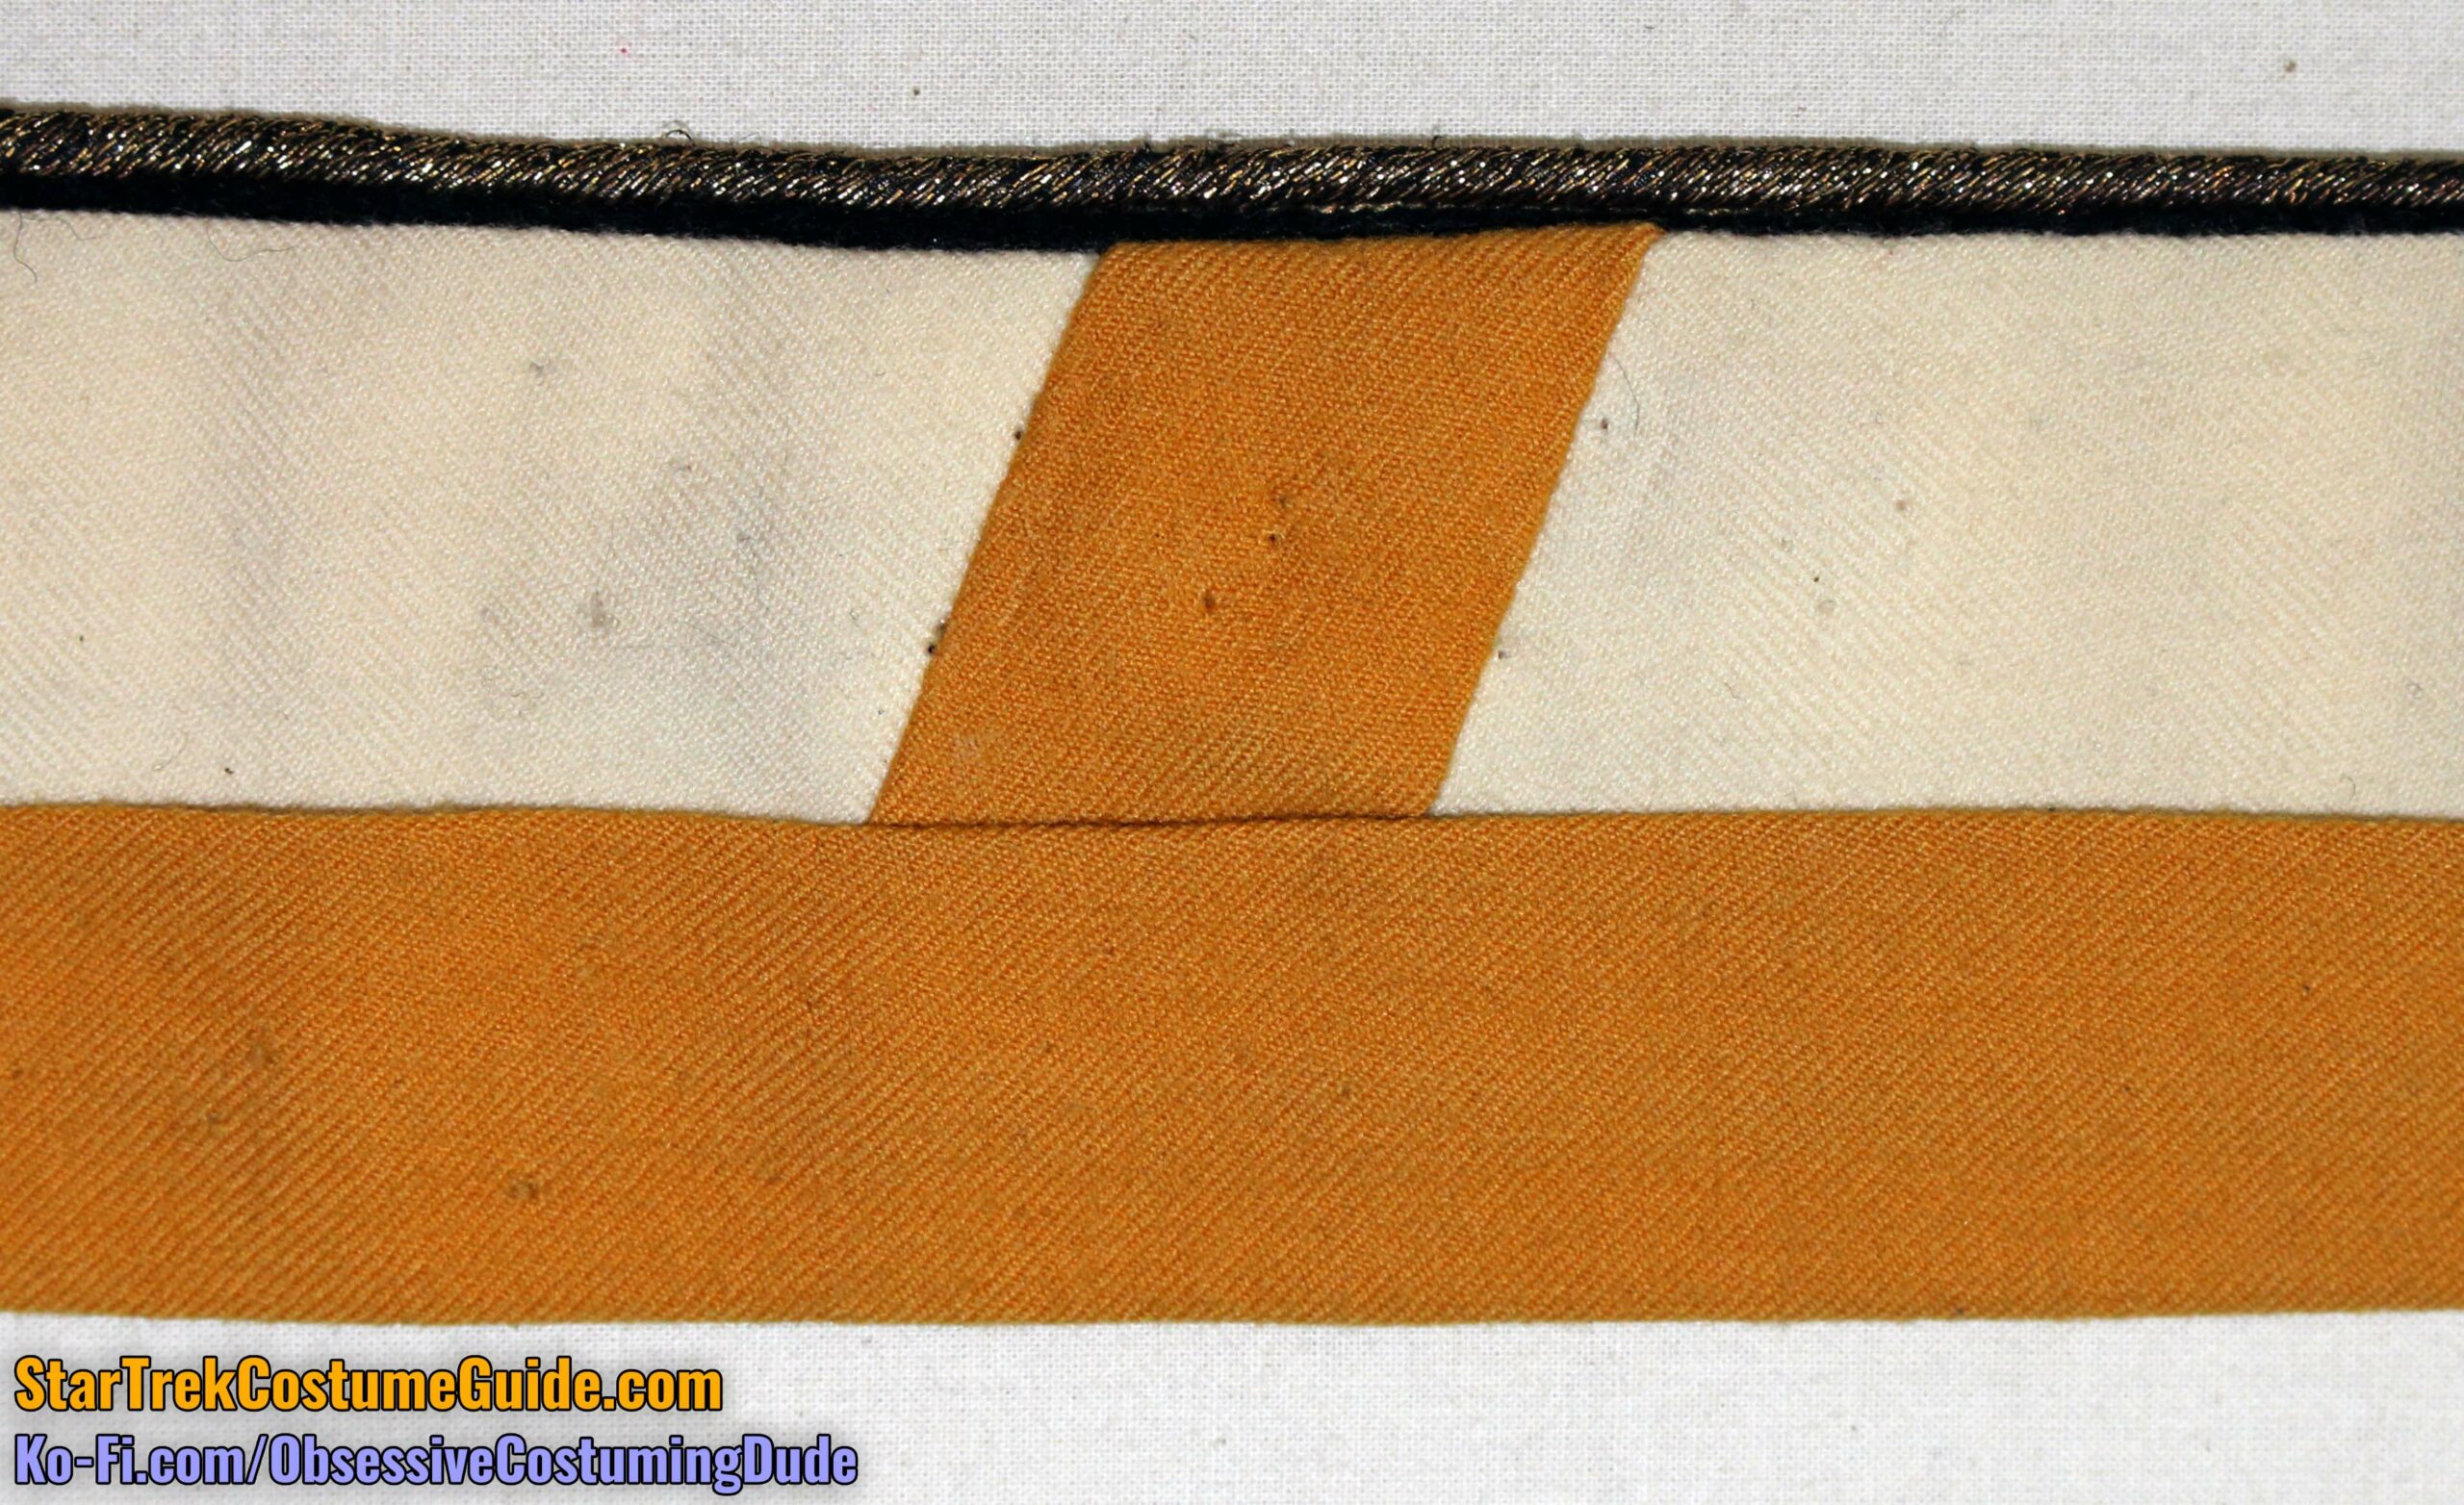
The sleeve band was comprised of a length of gold wool, and a strip of black felt accented with bands of off-white, bias-cut “self” fabric piping along the upper and lower edges.
The black felt strip was 1 ⅝” wide, with ¼” piping along the upper and lower edges, for a total height of 2 ⅛”.
The black felt was edge-stitched to the lips of the piping, with black thread. (The stitching was so dark and buried into the felt as to be almost invisible.)
The piping allowances were about ½” on the underside.
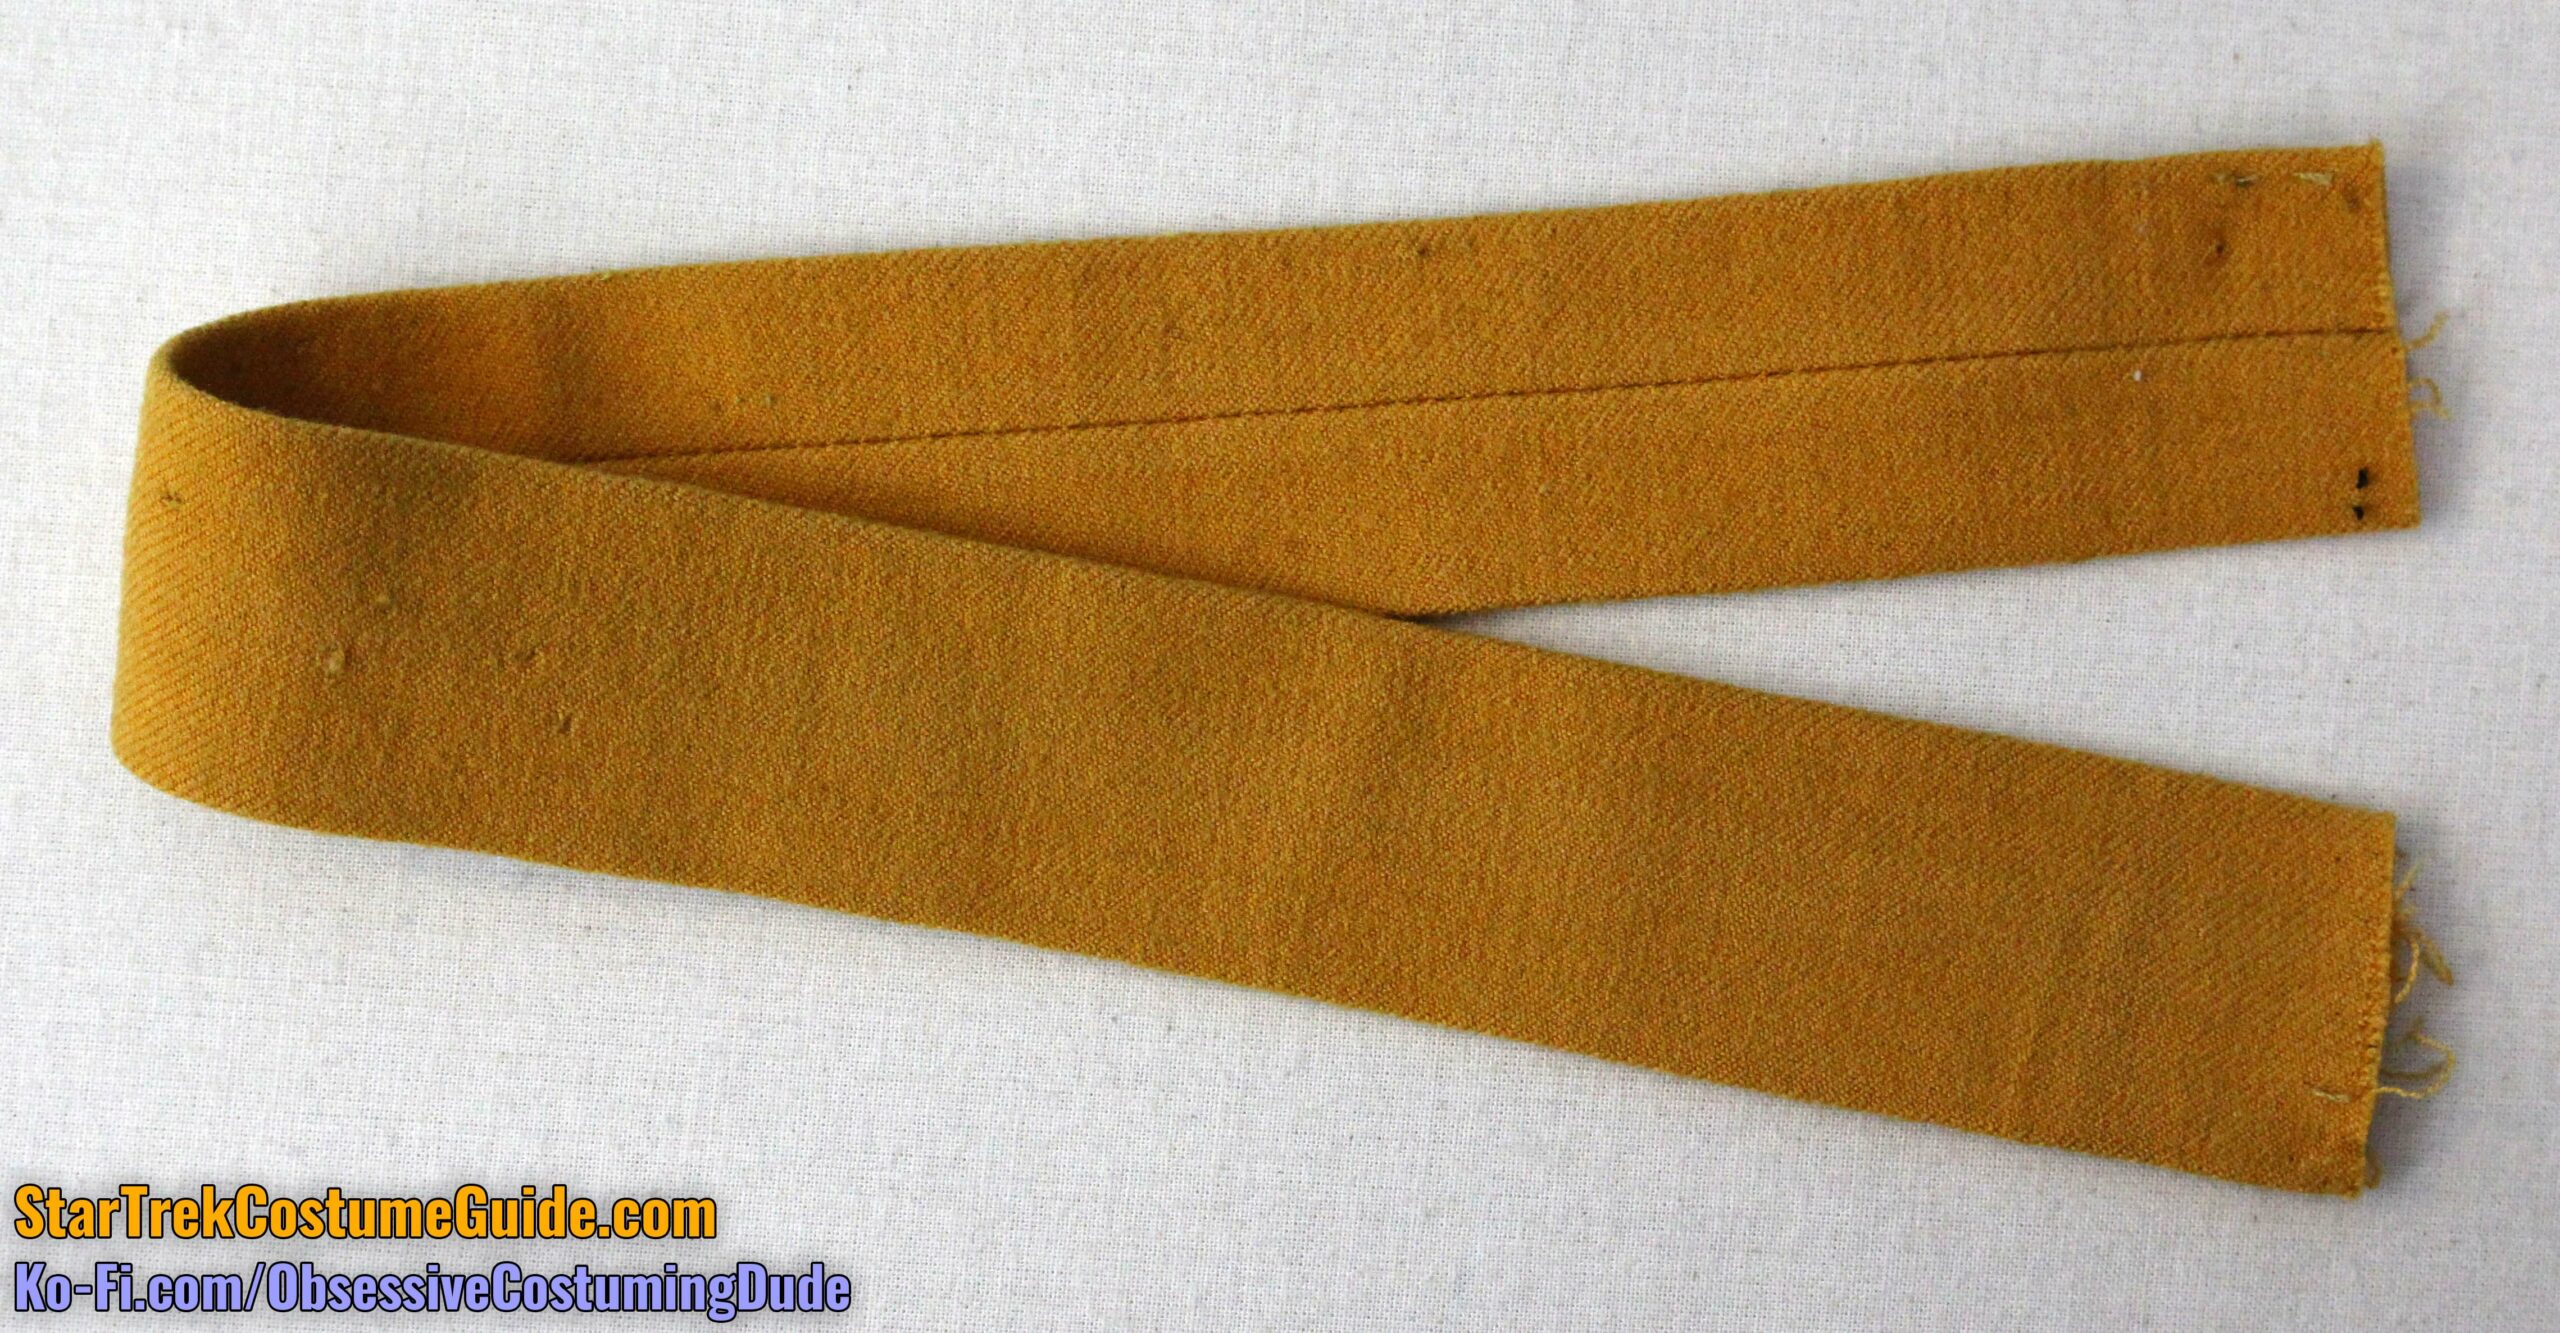
Like the shoulder stripes, the gold sleeve band fabric was wool gabardine – although in this case, it was a long “tube” of fabric sewn with a narrow seam allowance (pressed open), turned outward, and pressed flat.
The finished width of the fabric “tube” was 1 ⅜.”
Here are the same color references as pictured earlier with the shoulder accents, although they’re easier to see with the larger, flatter cut of sleeve band fabric.
Pantone #7550 U, pictured with and without flash:
With flash
No flash
The Valspar paint chip #3003-5A “Amber Sienna” , also pictured with and without flash:
With flash
No flash
And finally, the Coats & Clark thread color #7010 “Cider” thread:
With flash
With flash
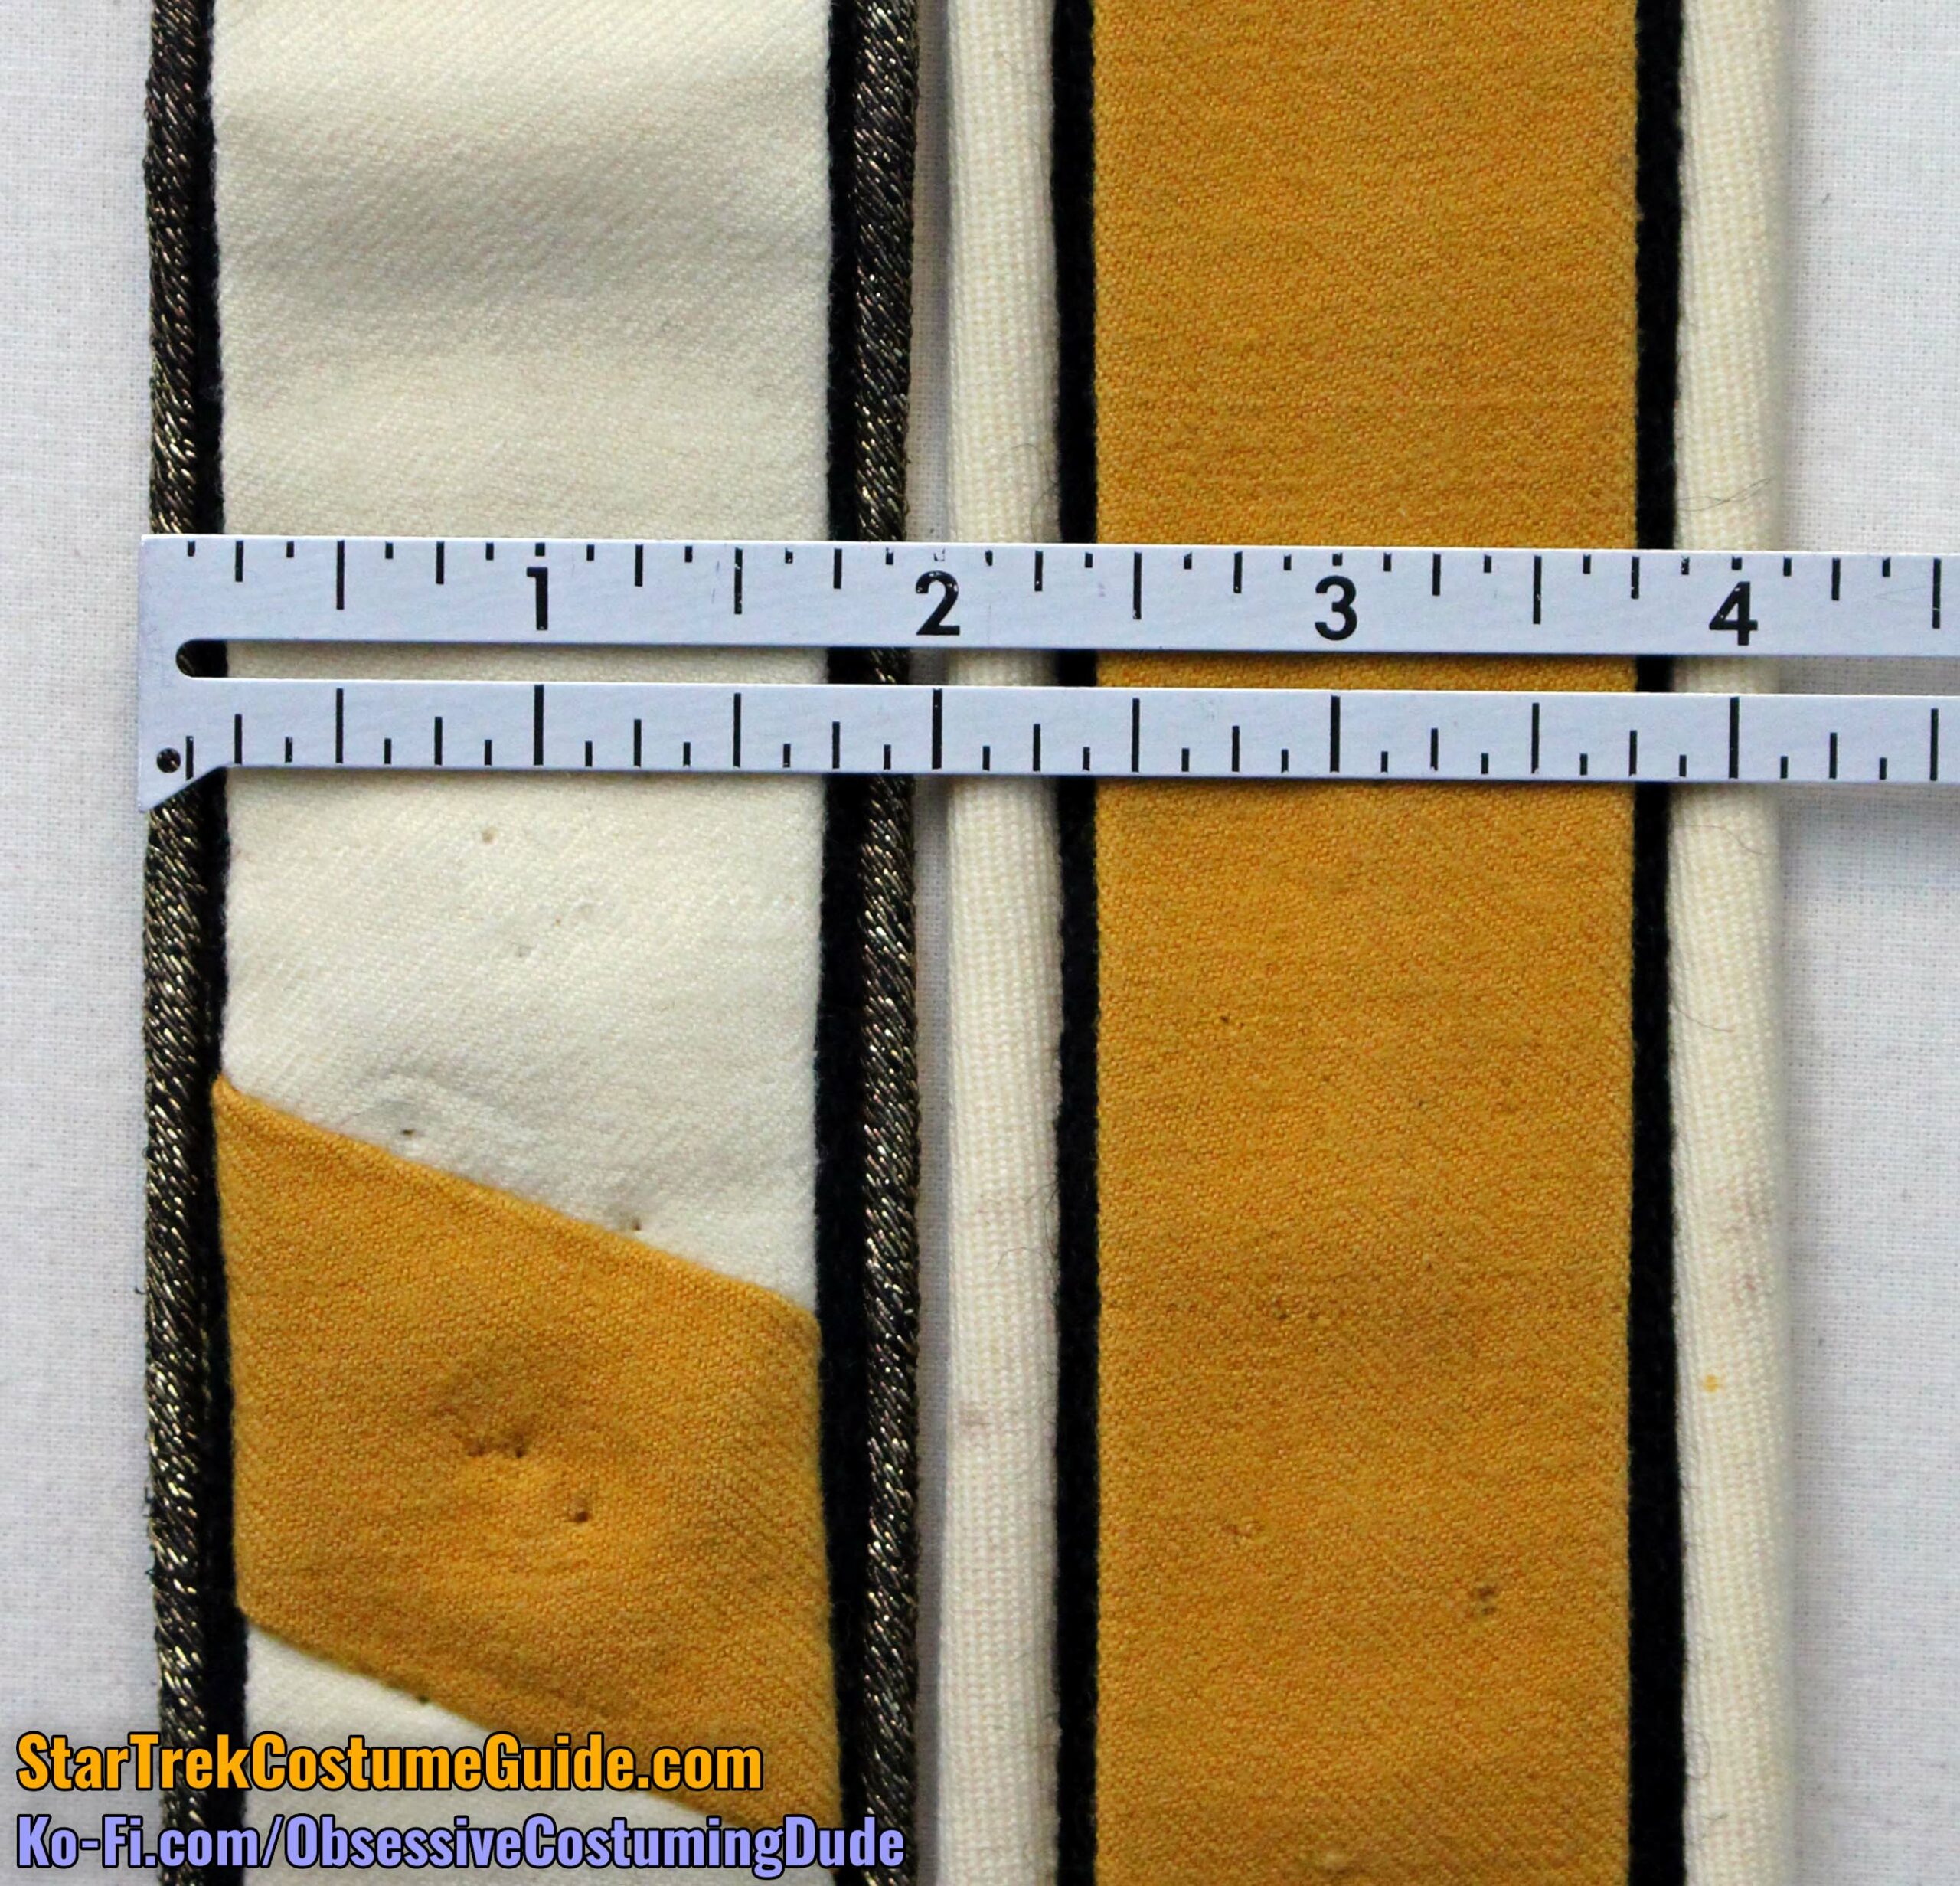
Again for kicks, here’s a comparison between the radiation suit’s sleeve band and the aforementioned screen-used “monster maroon” jacket sleeve band (courtesy of Steve Barnes).
The radiation suit’s sleeve band assembly was ¼” wider (taller) than that of the jacket – 2 ⅛” vs. 1 ⅞”, respectively.
And here are some color comparisons (again without and without flash).
As with the shoulder tabs, the two colors are very close.
With flash
No flash
With flash
No flash
Thanks again to Steve Barnes for the opportunity to do these fabric/color comparisons. 🙂
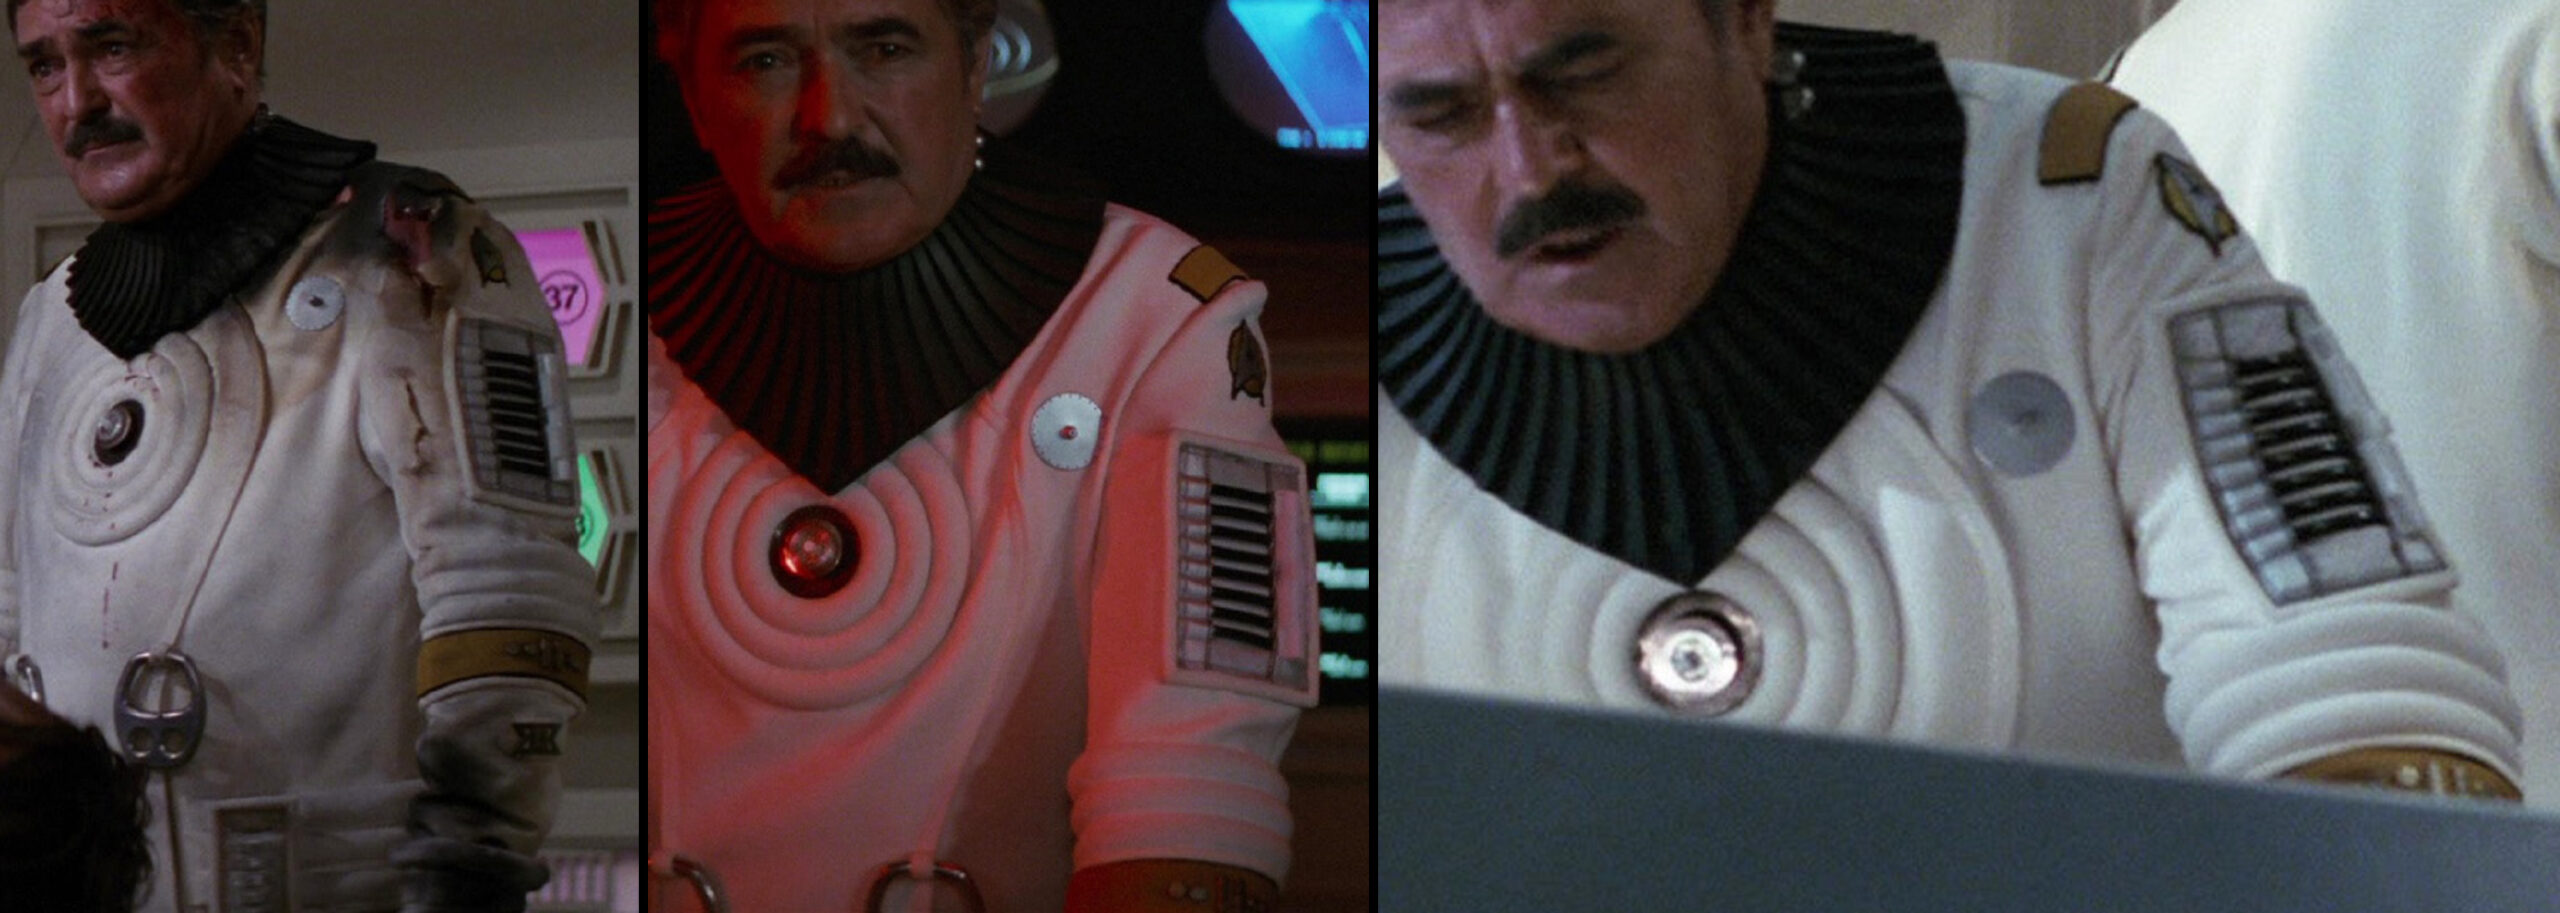
Strangely, Scotty’s engineering radiation suit in TWOK had the appropriate “pips and squeaks” on his division sleeve band …
… but they were mysteriously absent from his costume in ST3.
SLEEVE RANK + MOUNT
Except for trainees, beneath the division sleeve band was the wearer’s rank insignia, which was mounted onto a small “bed” of fabric – again analogous to those on the officer jackets and enlisted jumpsuits.
According to the chart in Robert Fletcher’s notes, this specific rank appears to be for Petty Officer, First Class.
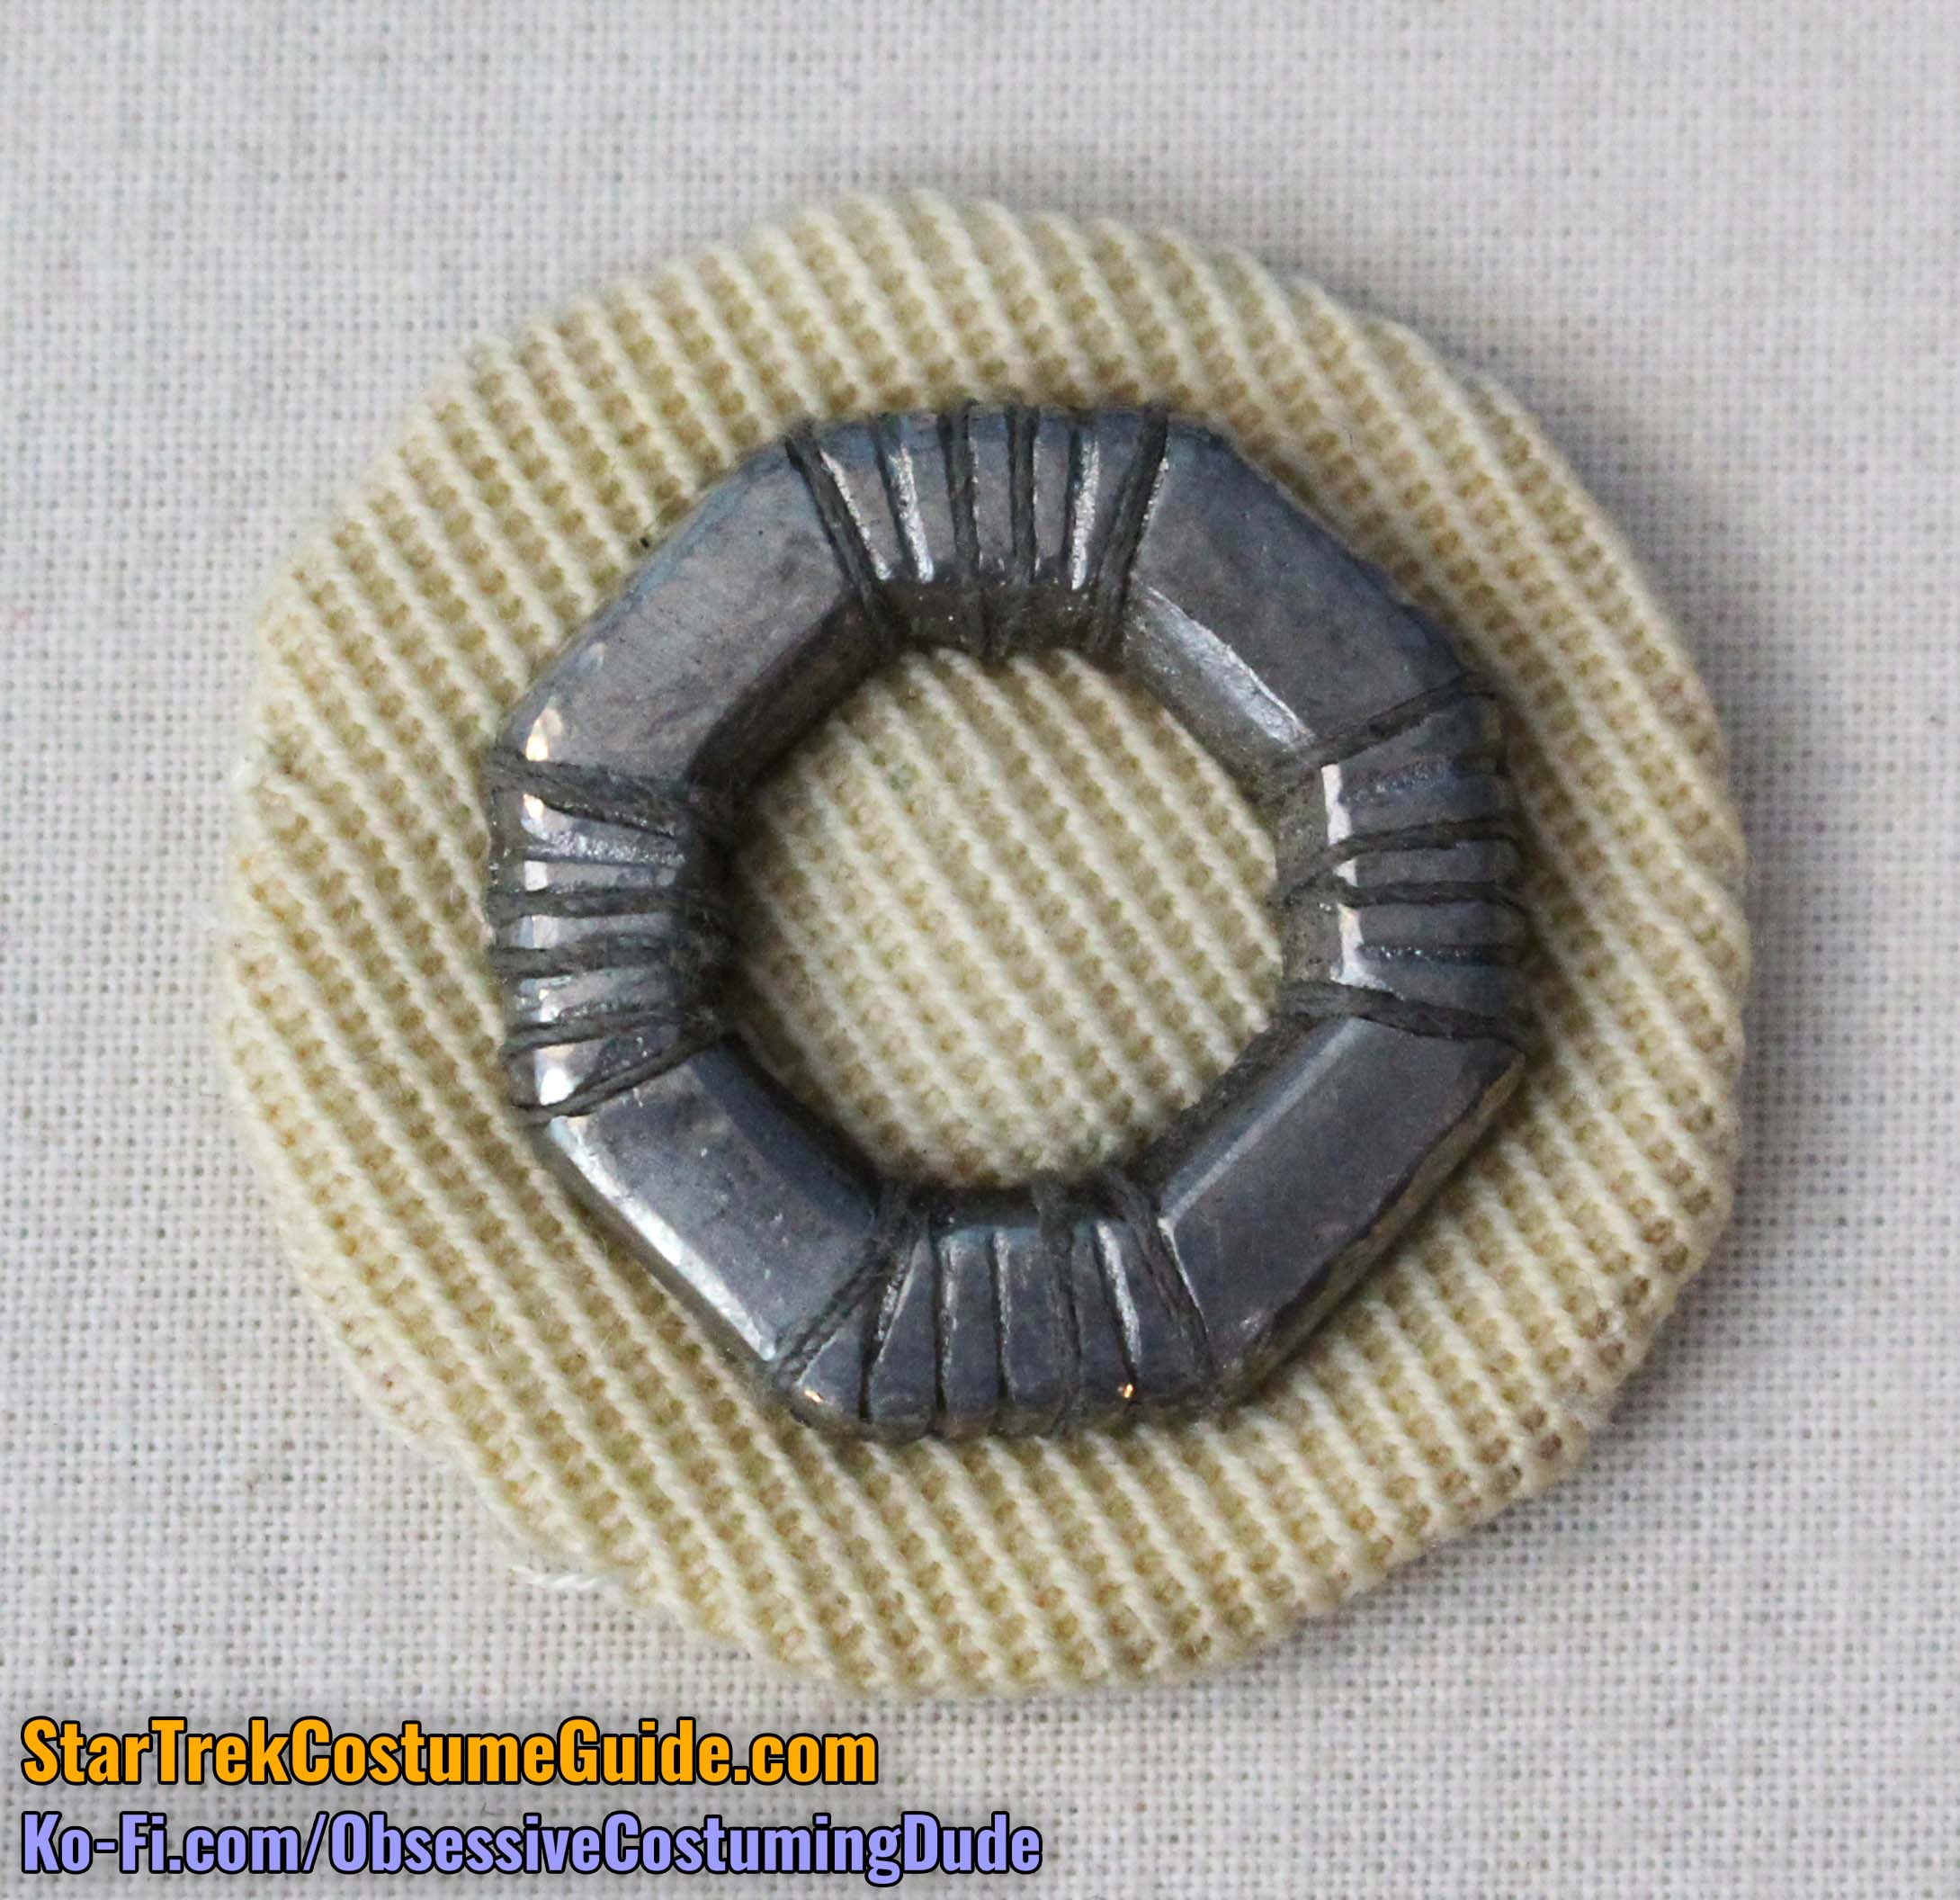
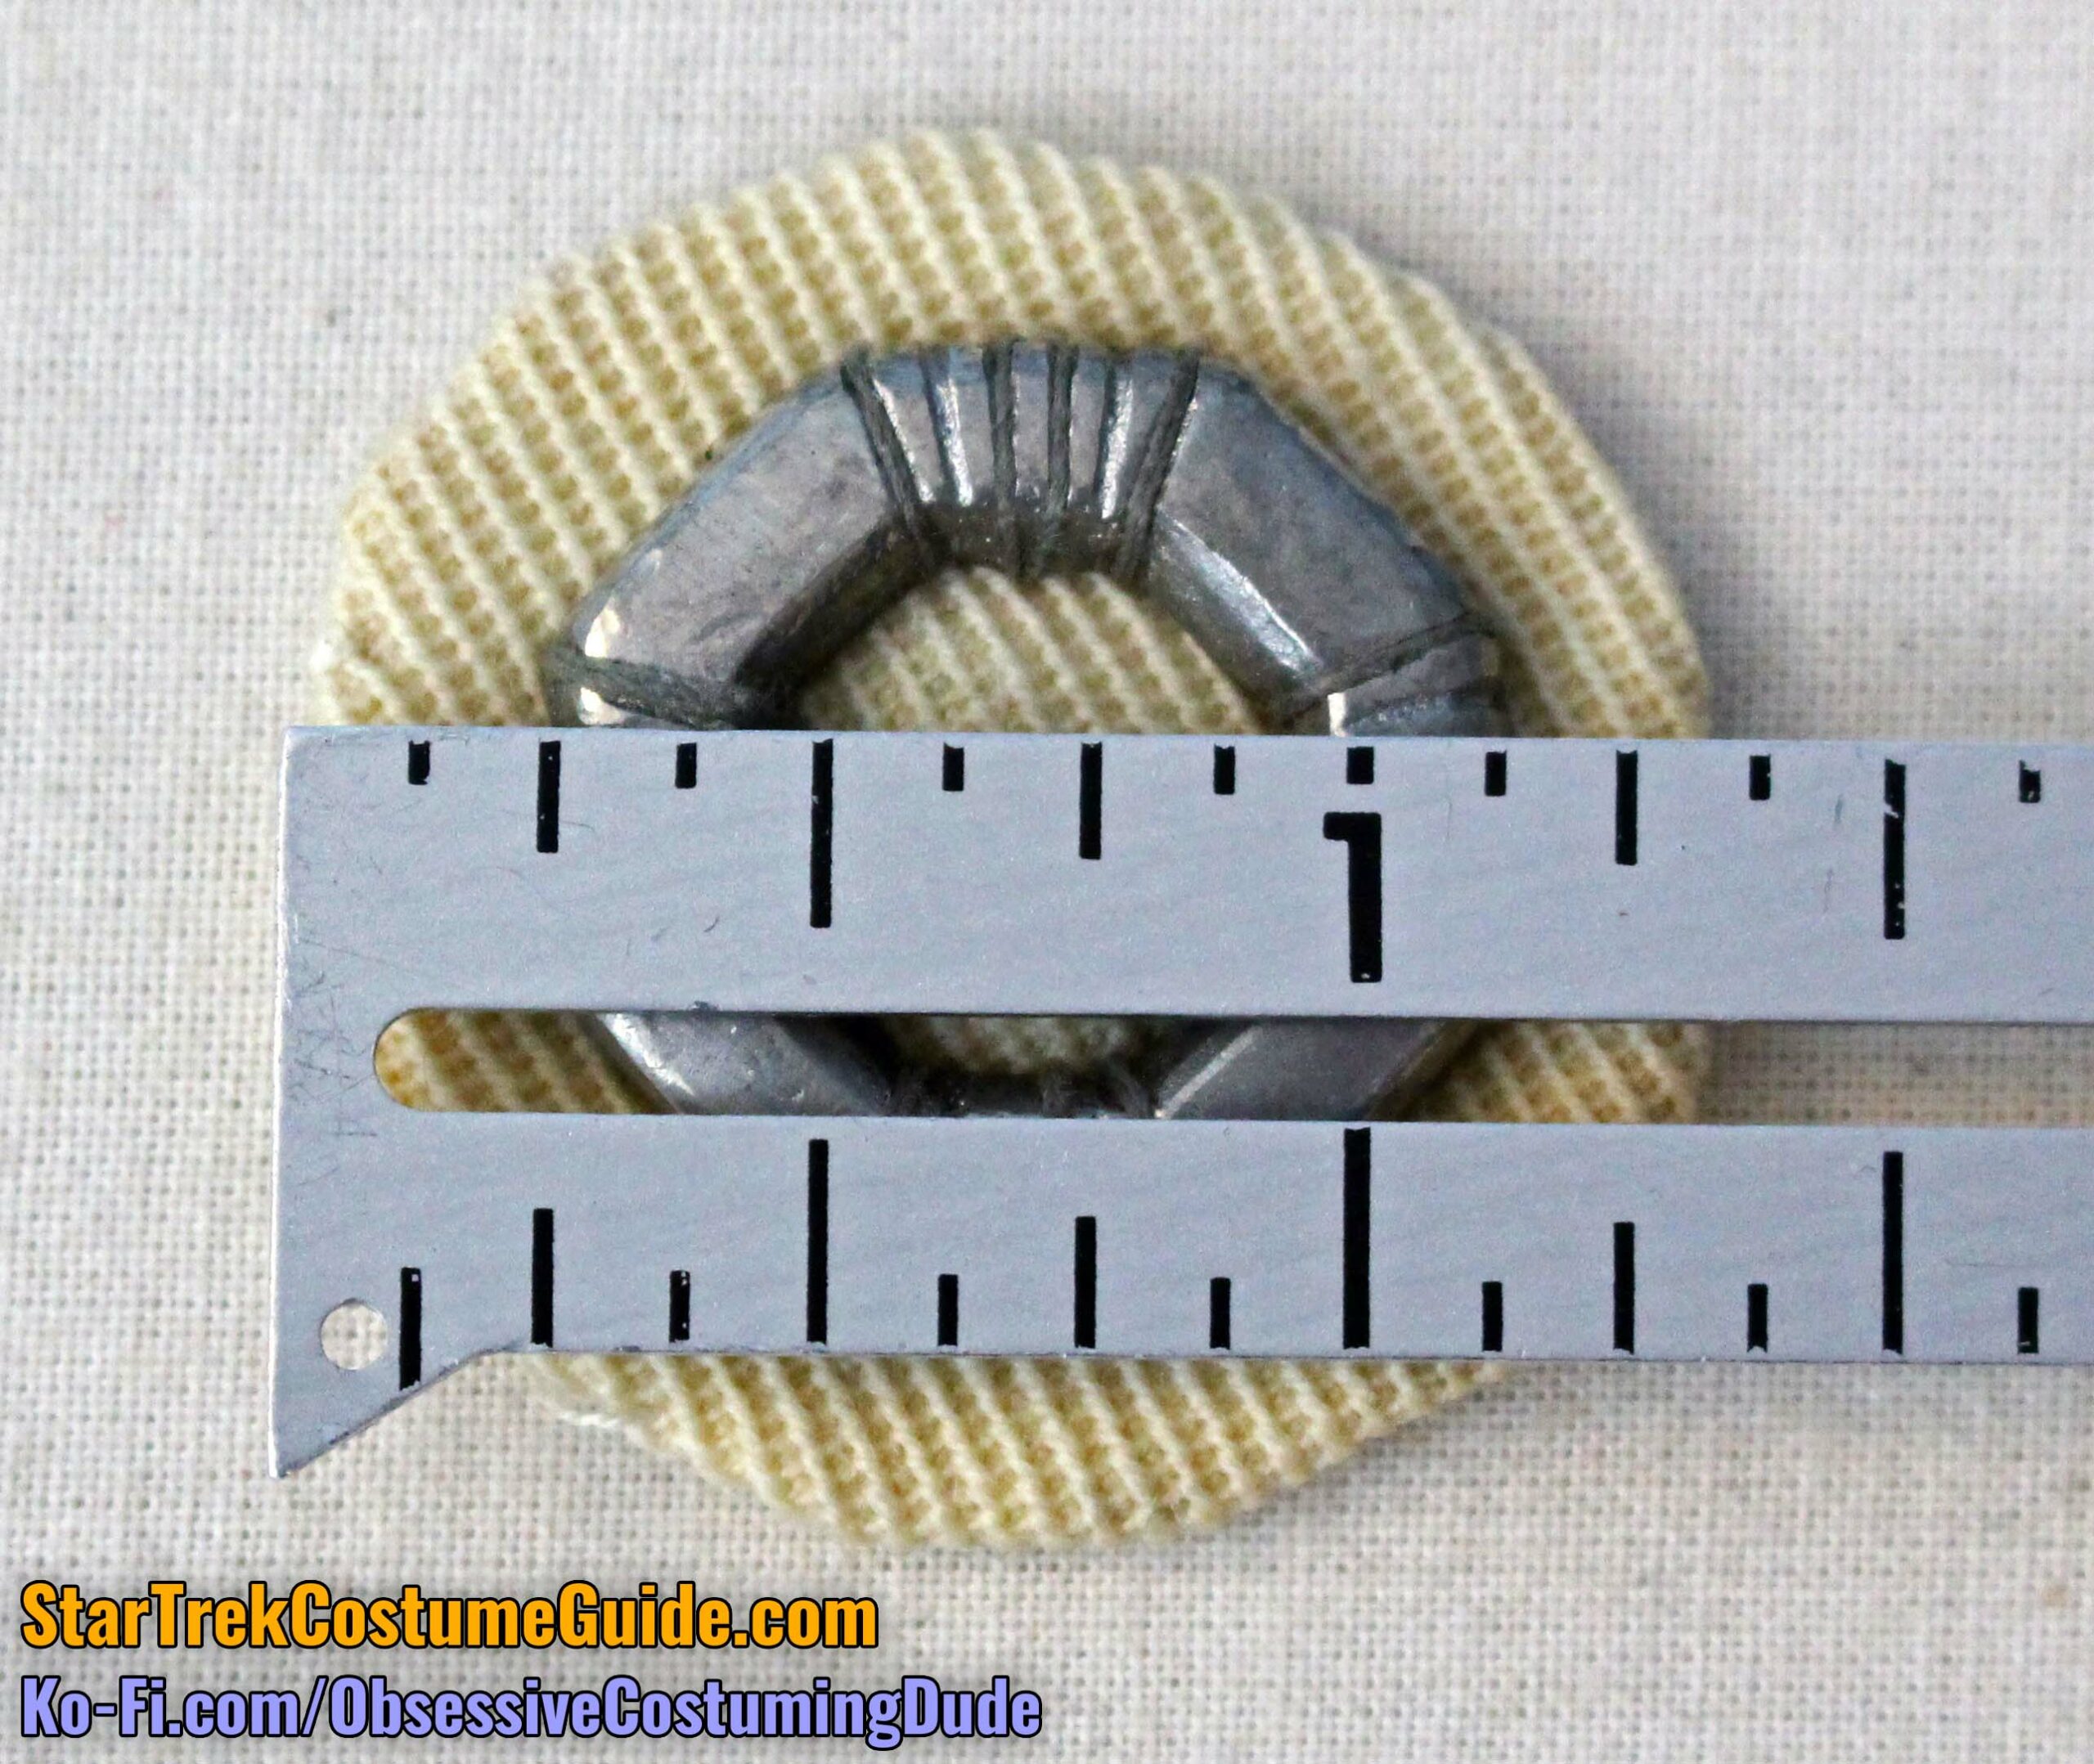
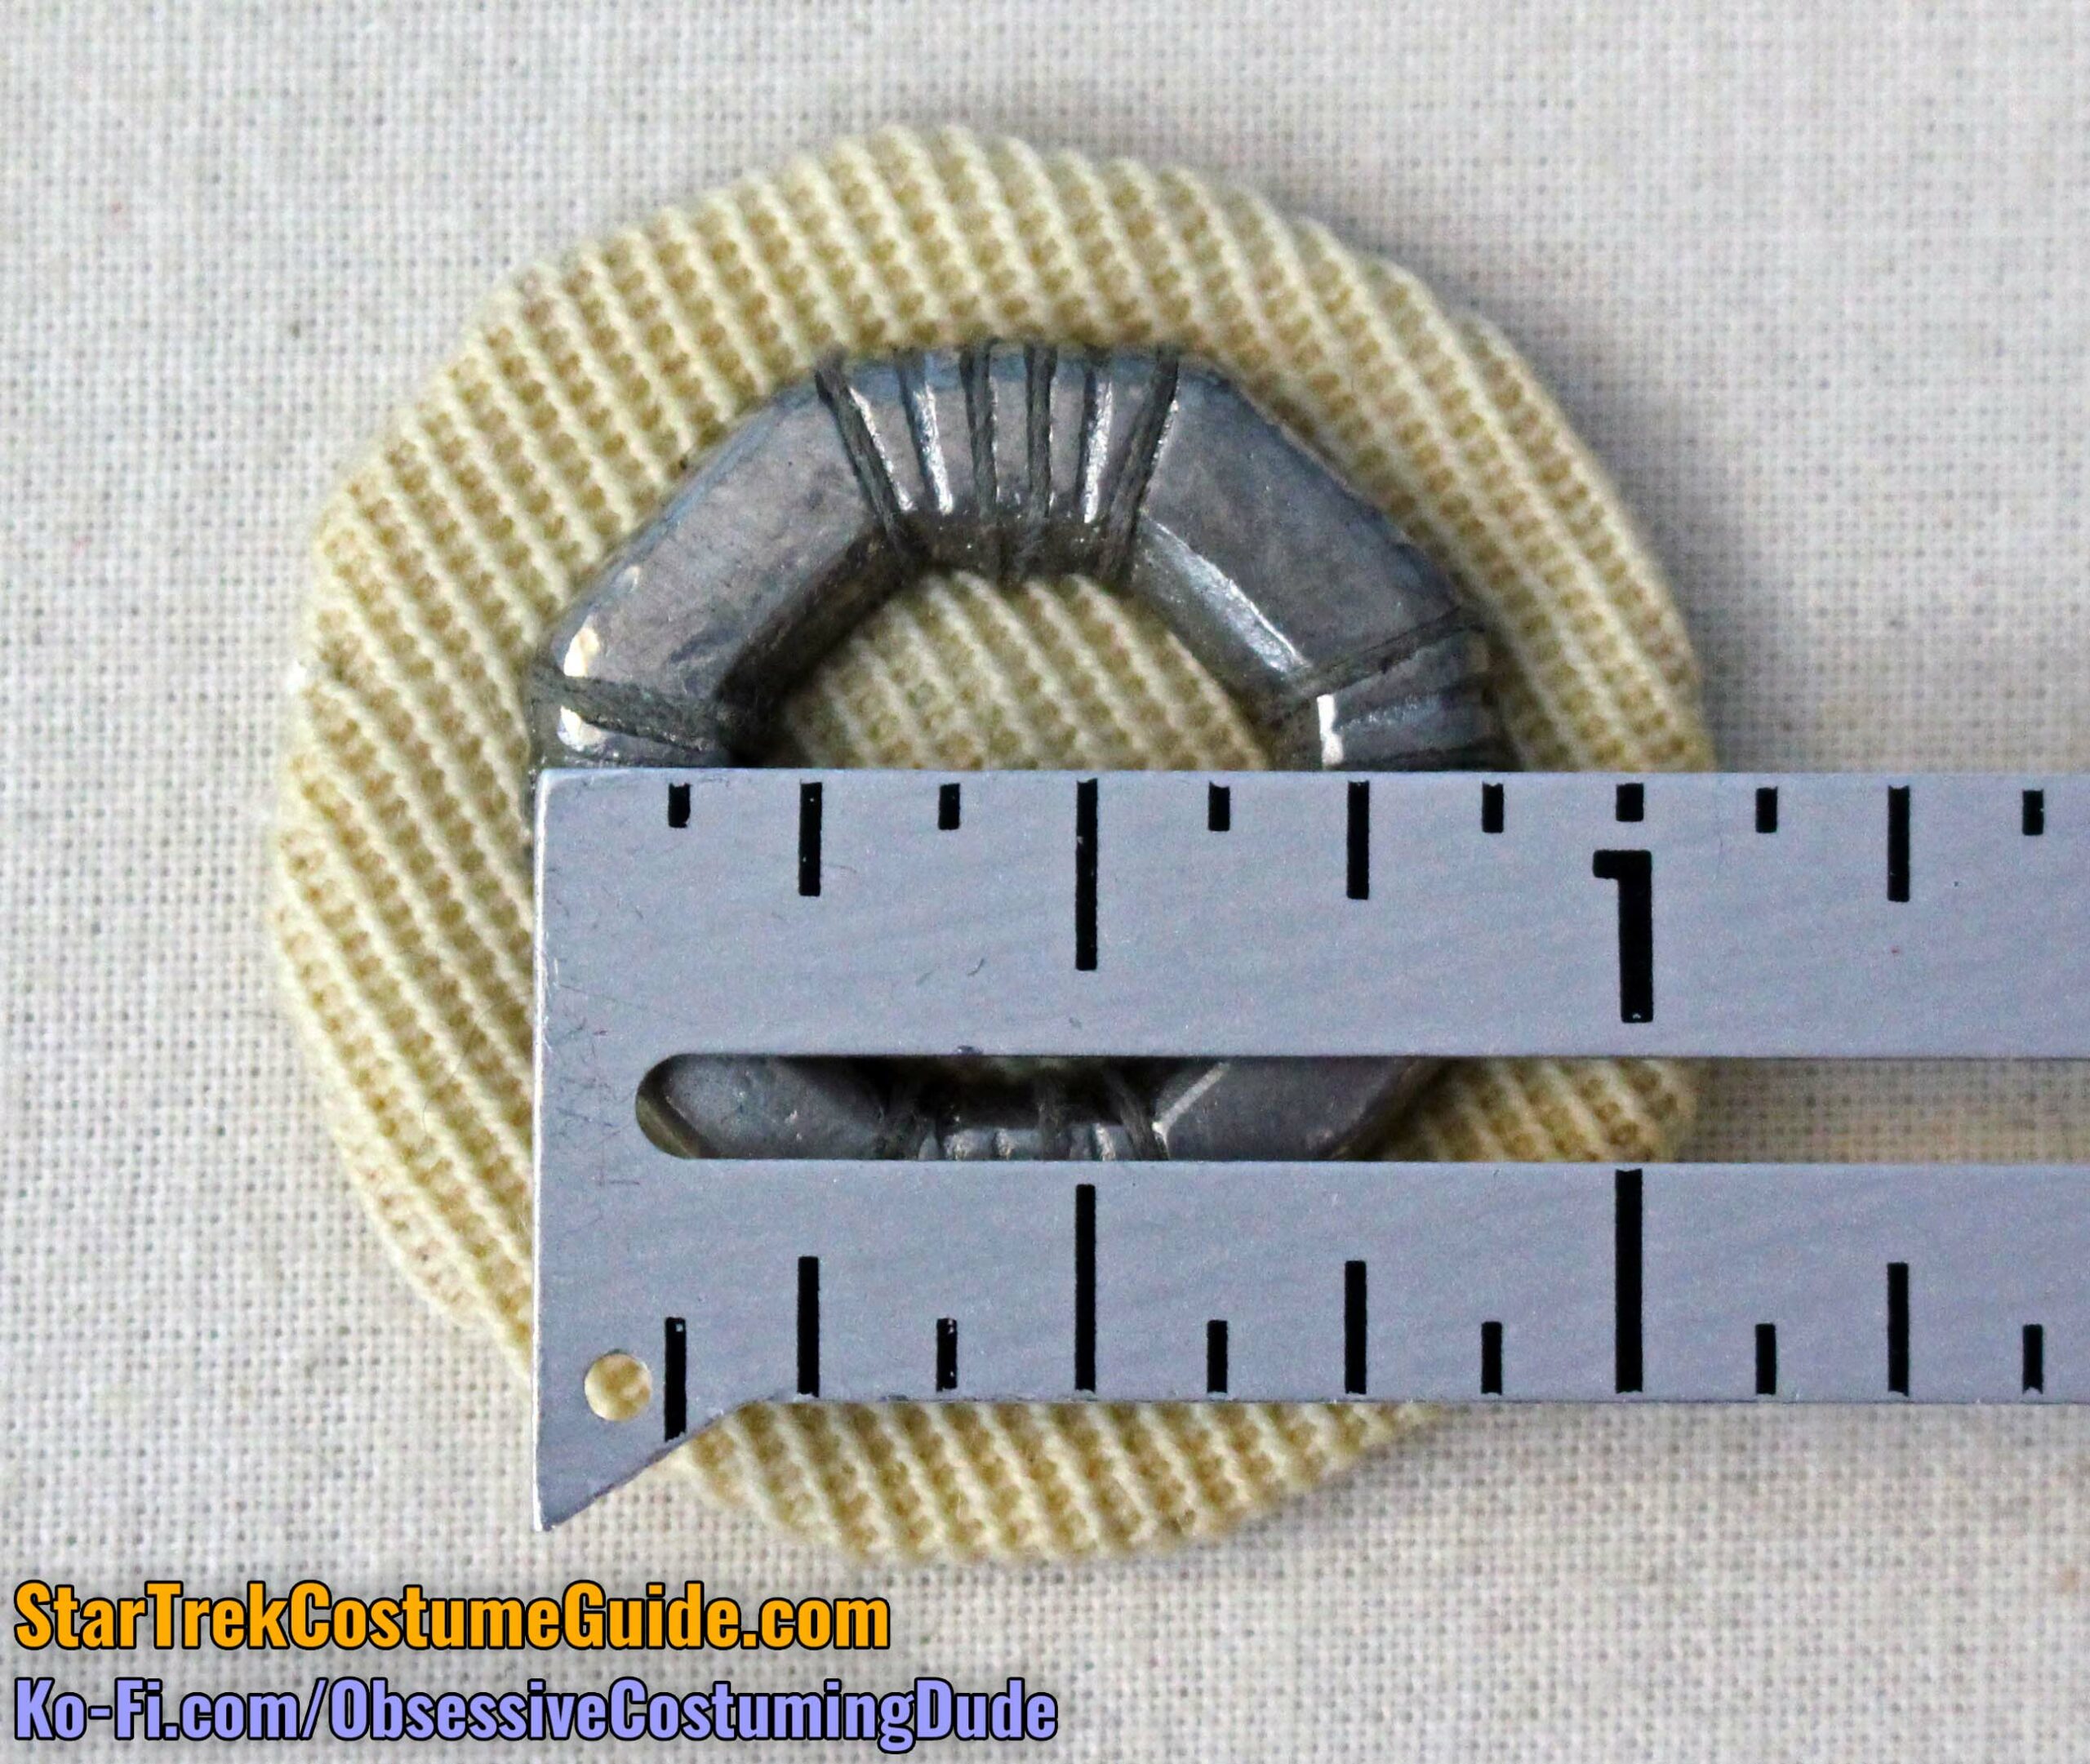
The rank mount was a small circle of “self” fabric (the same wool gabardine as the jumpsuit body), with a finished diameter of just under 1 ⅜”.
The octagonal rank itself measured approximately ⅞” across.
The rank “bed” was backed with a layer of what appeared to be off-white felt, onto which the fabric edges were turned under and hand-sewn.
In addition to the two prongs of the rank itself, a dozen or so loops of gray hand-sewing further secured the rank to the “bed.”
(You can see the gray threads in the grooves of the rank insignia in the first photo.)
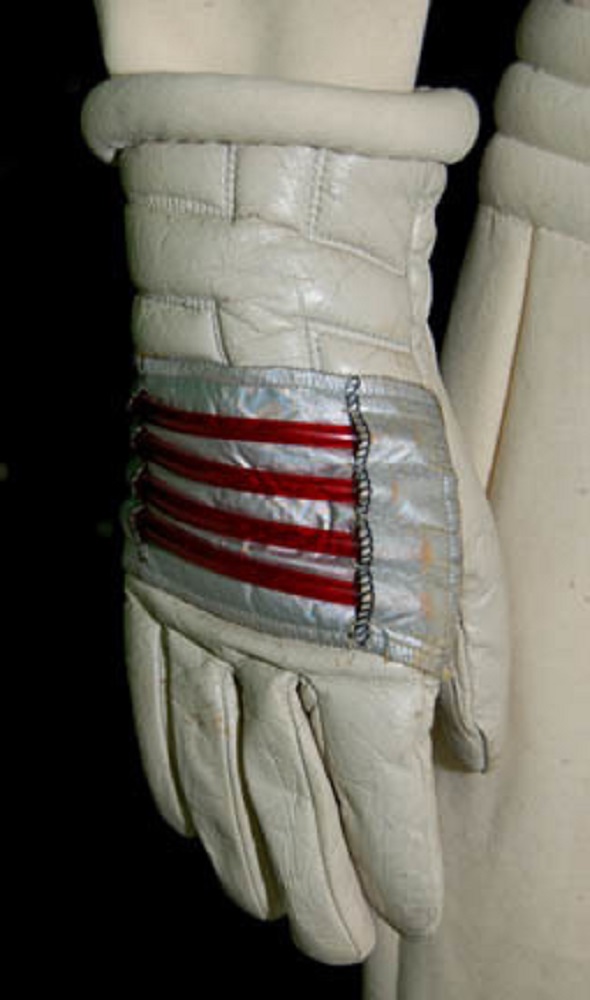
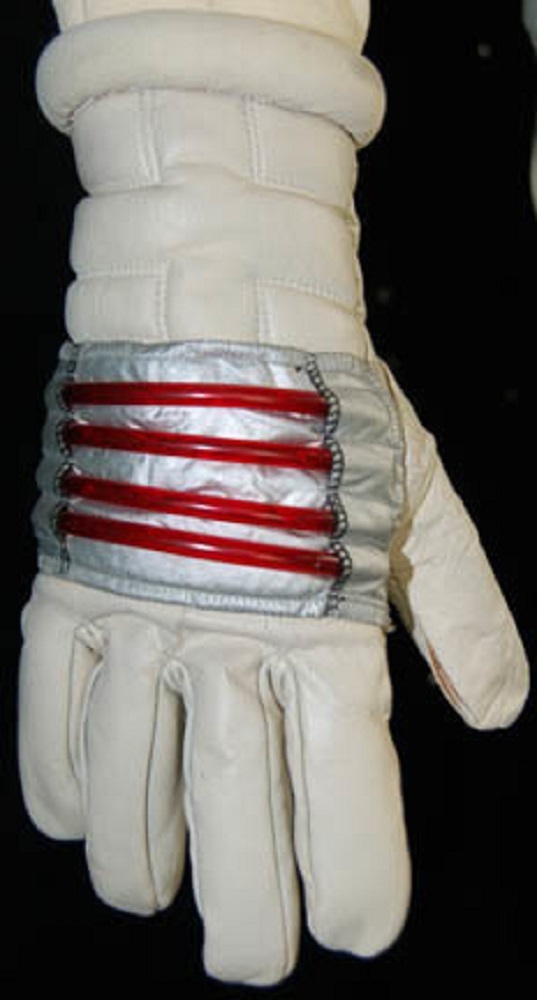
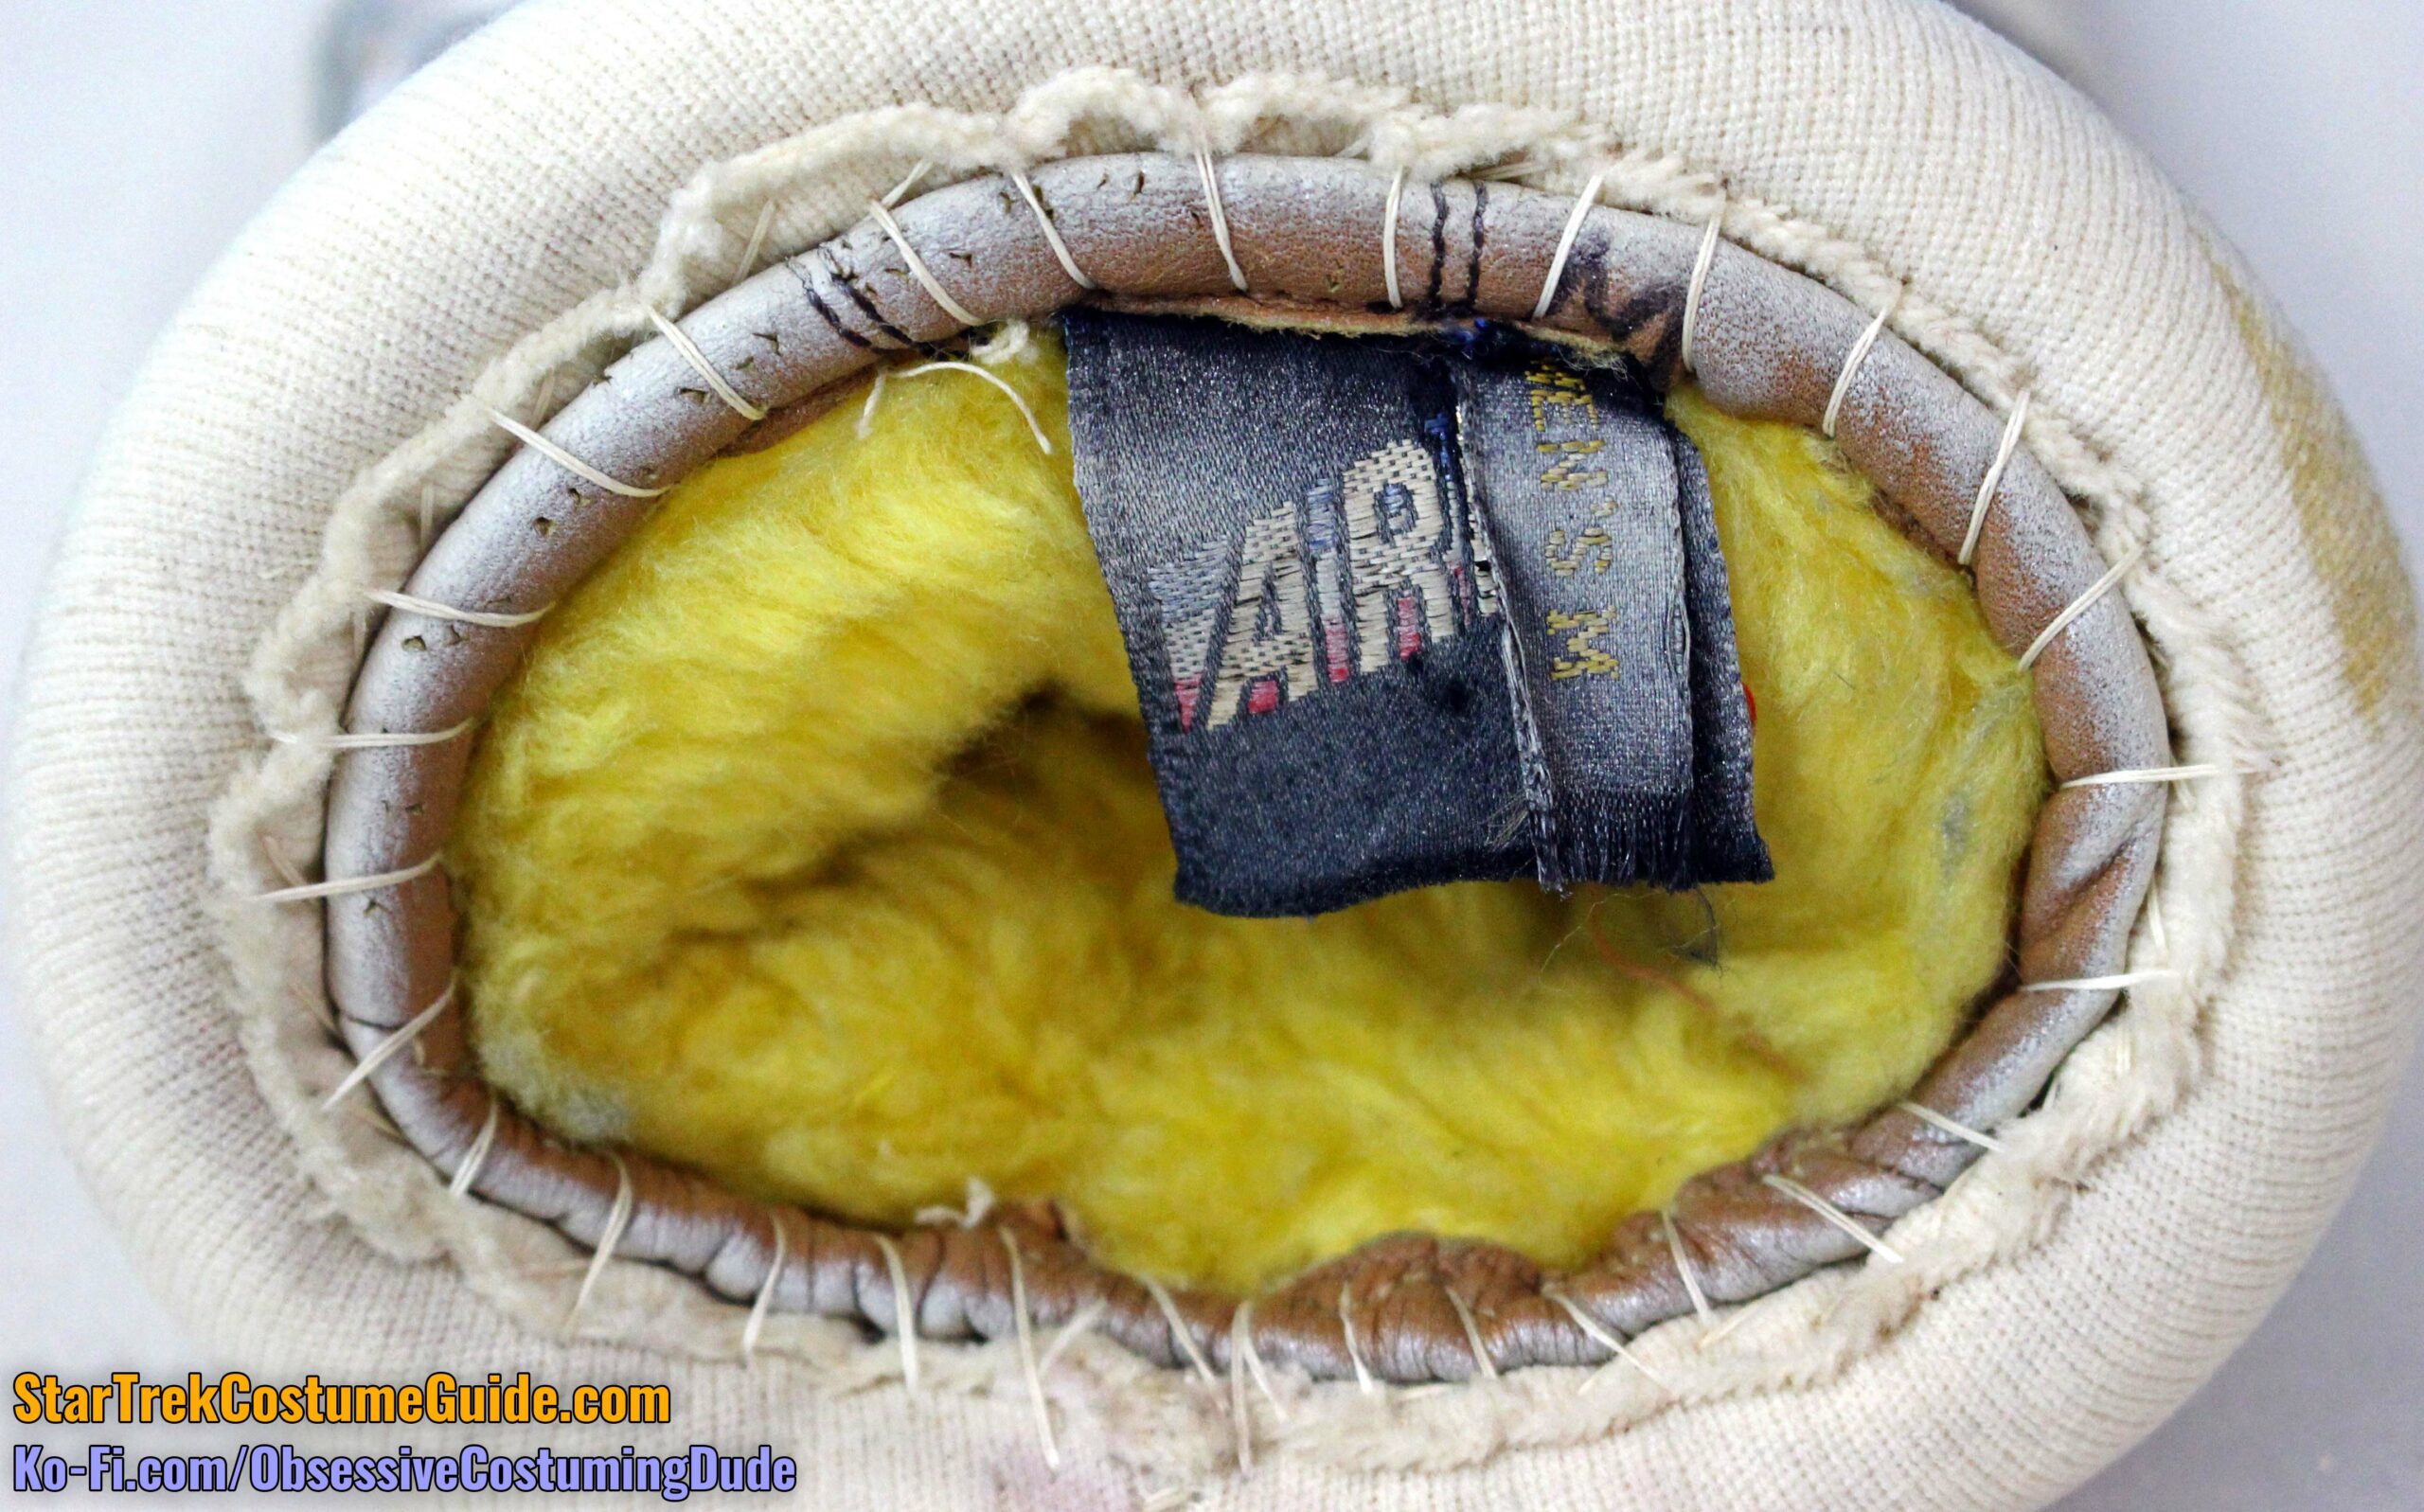
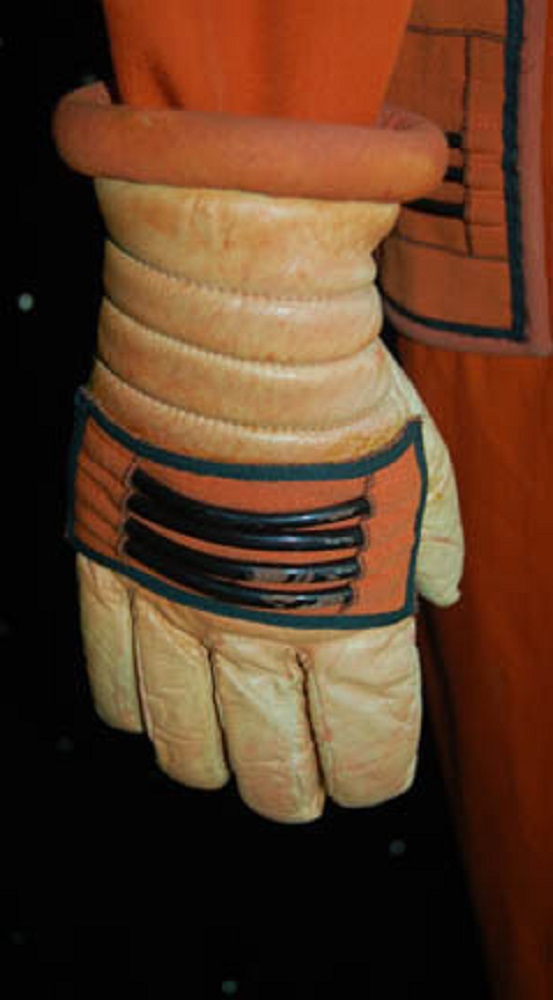
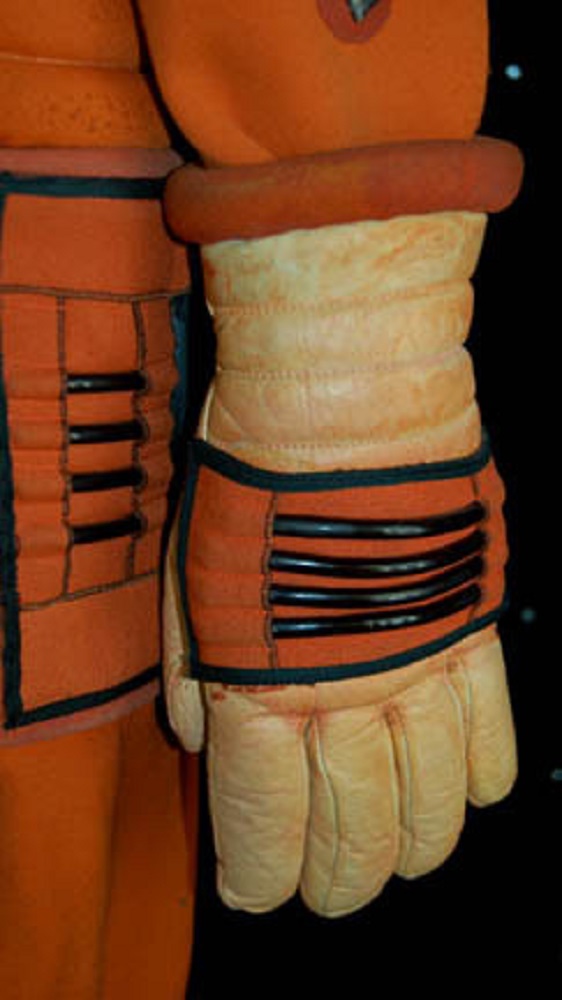
GLOVES
Of course, in addition to the jumpsuit and all its various accents, two separate (but essential) components of the costume ensemble are the gloves and the boots.
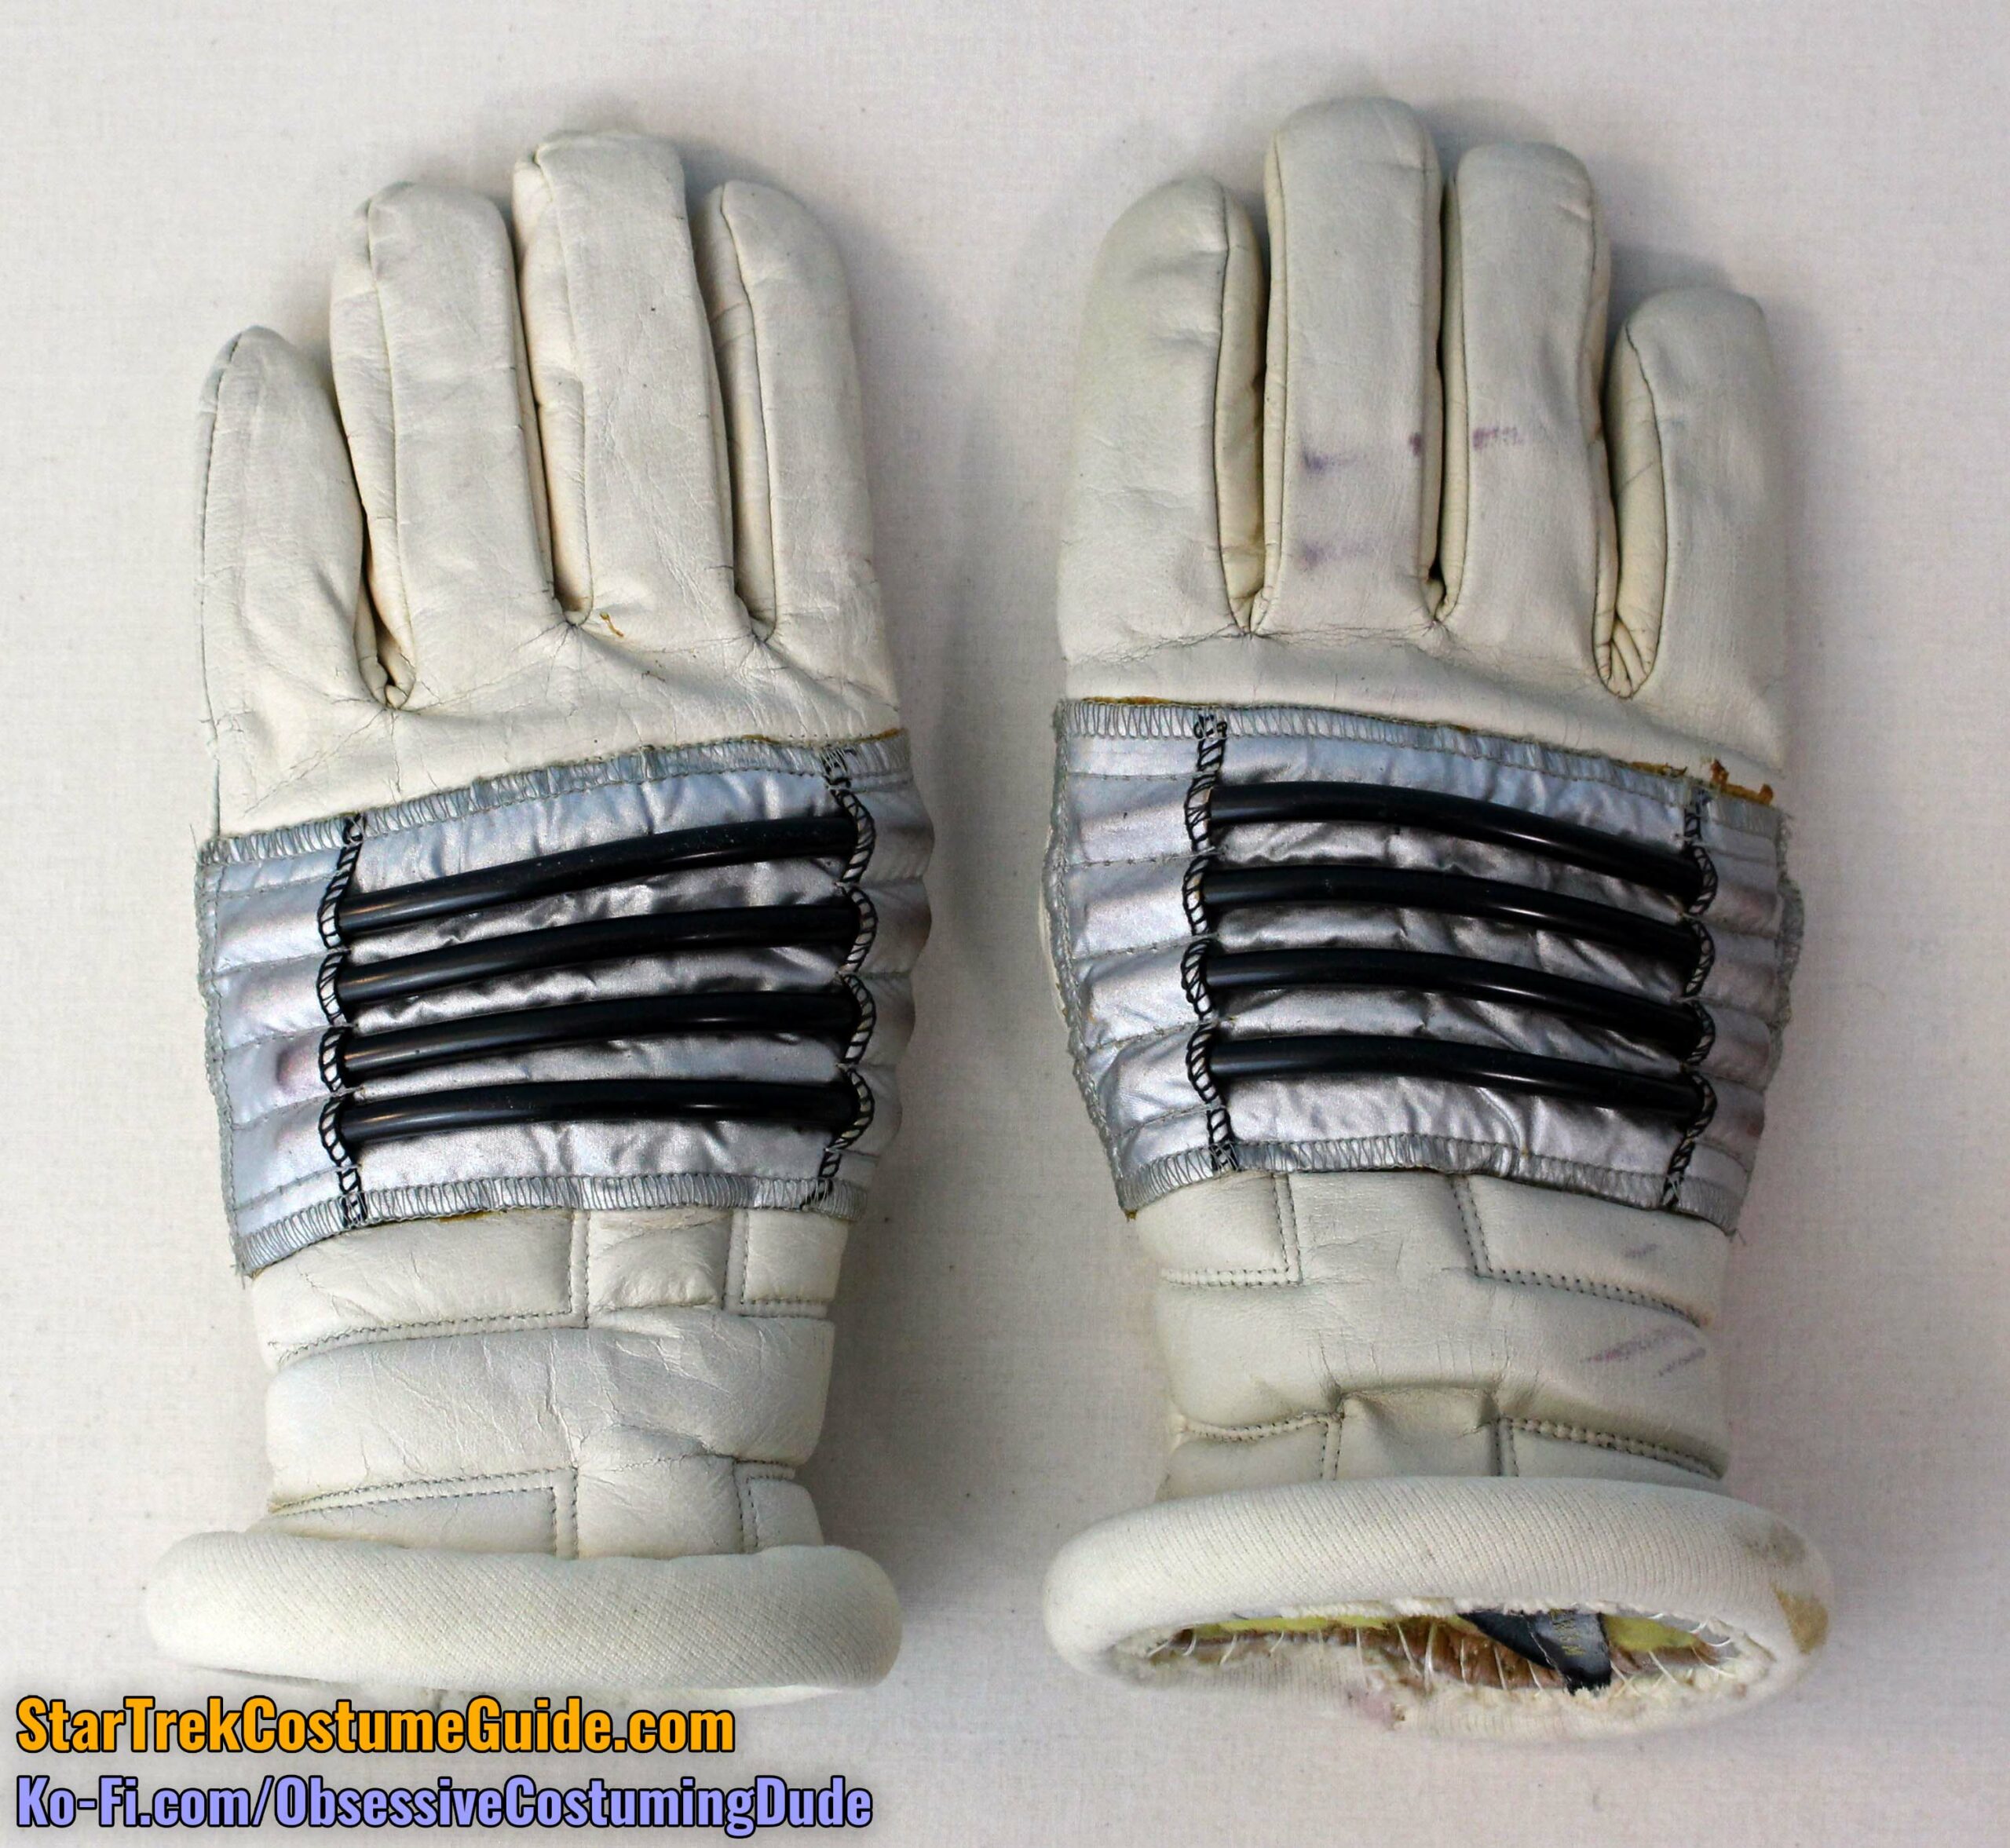
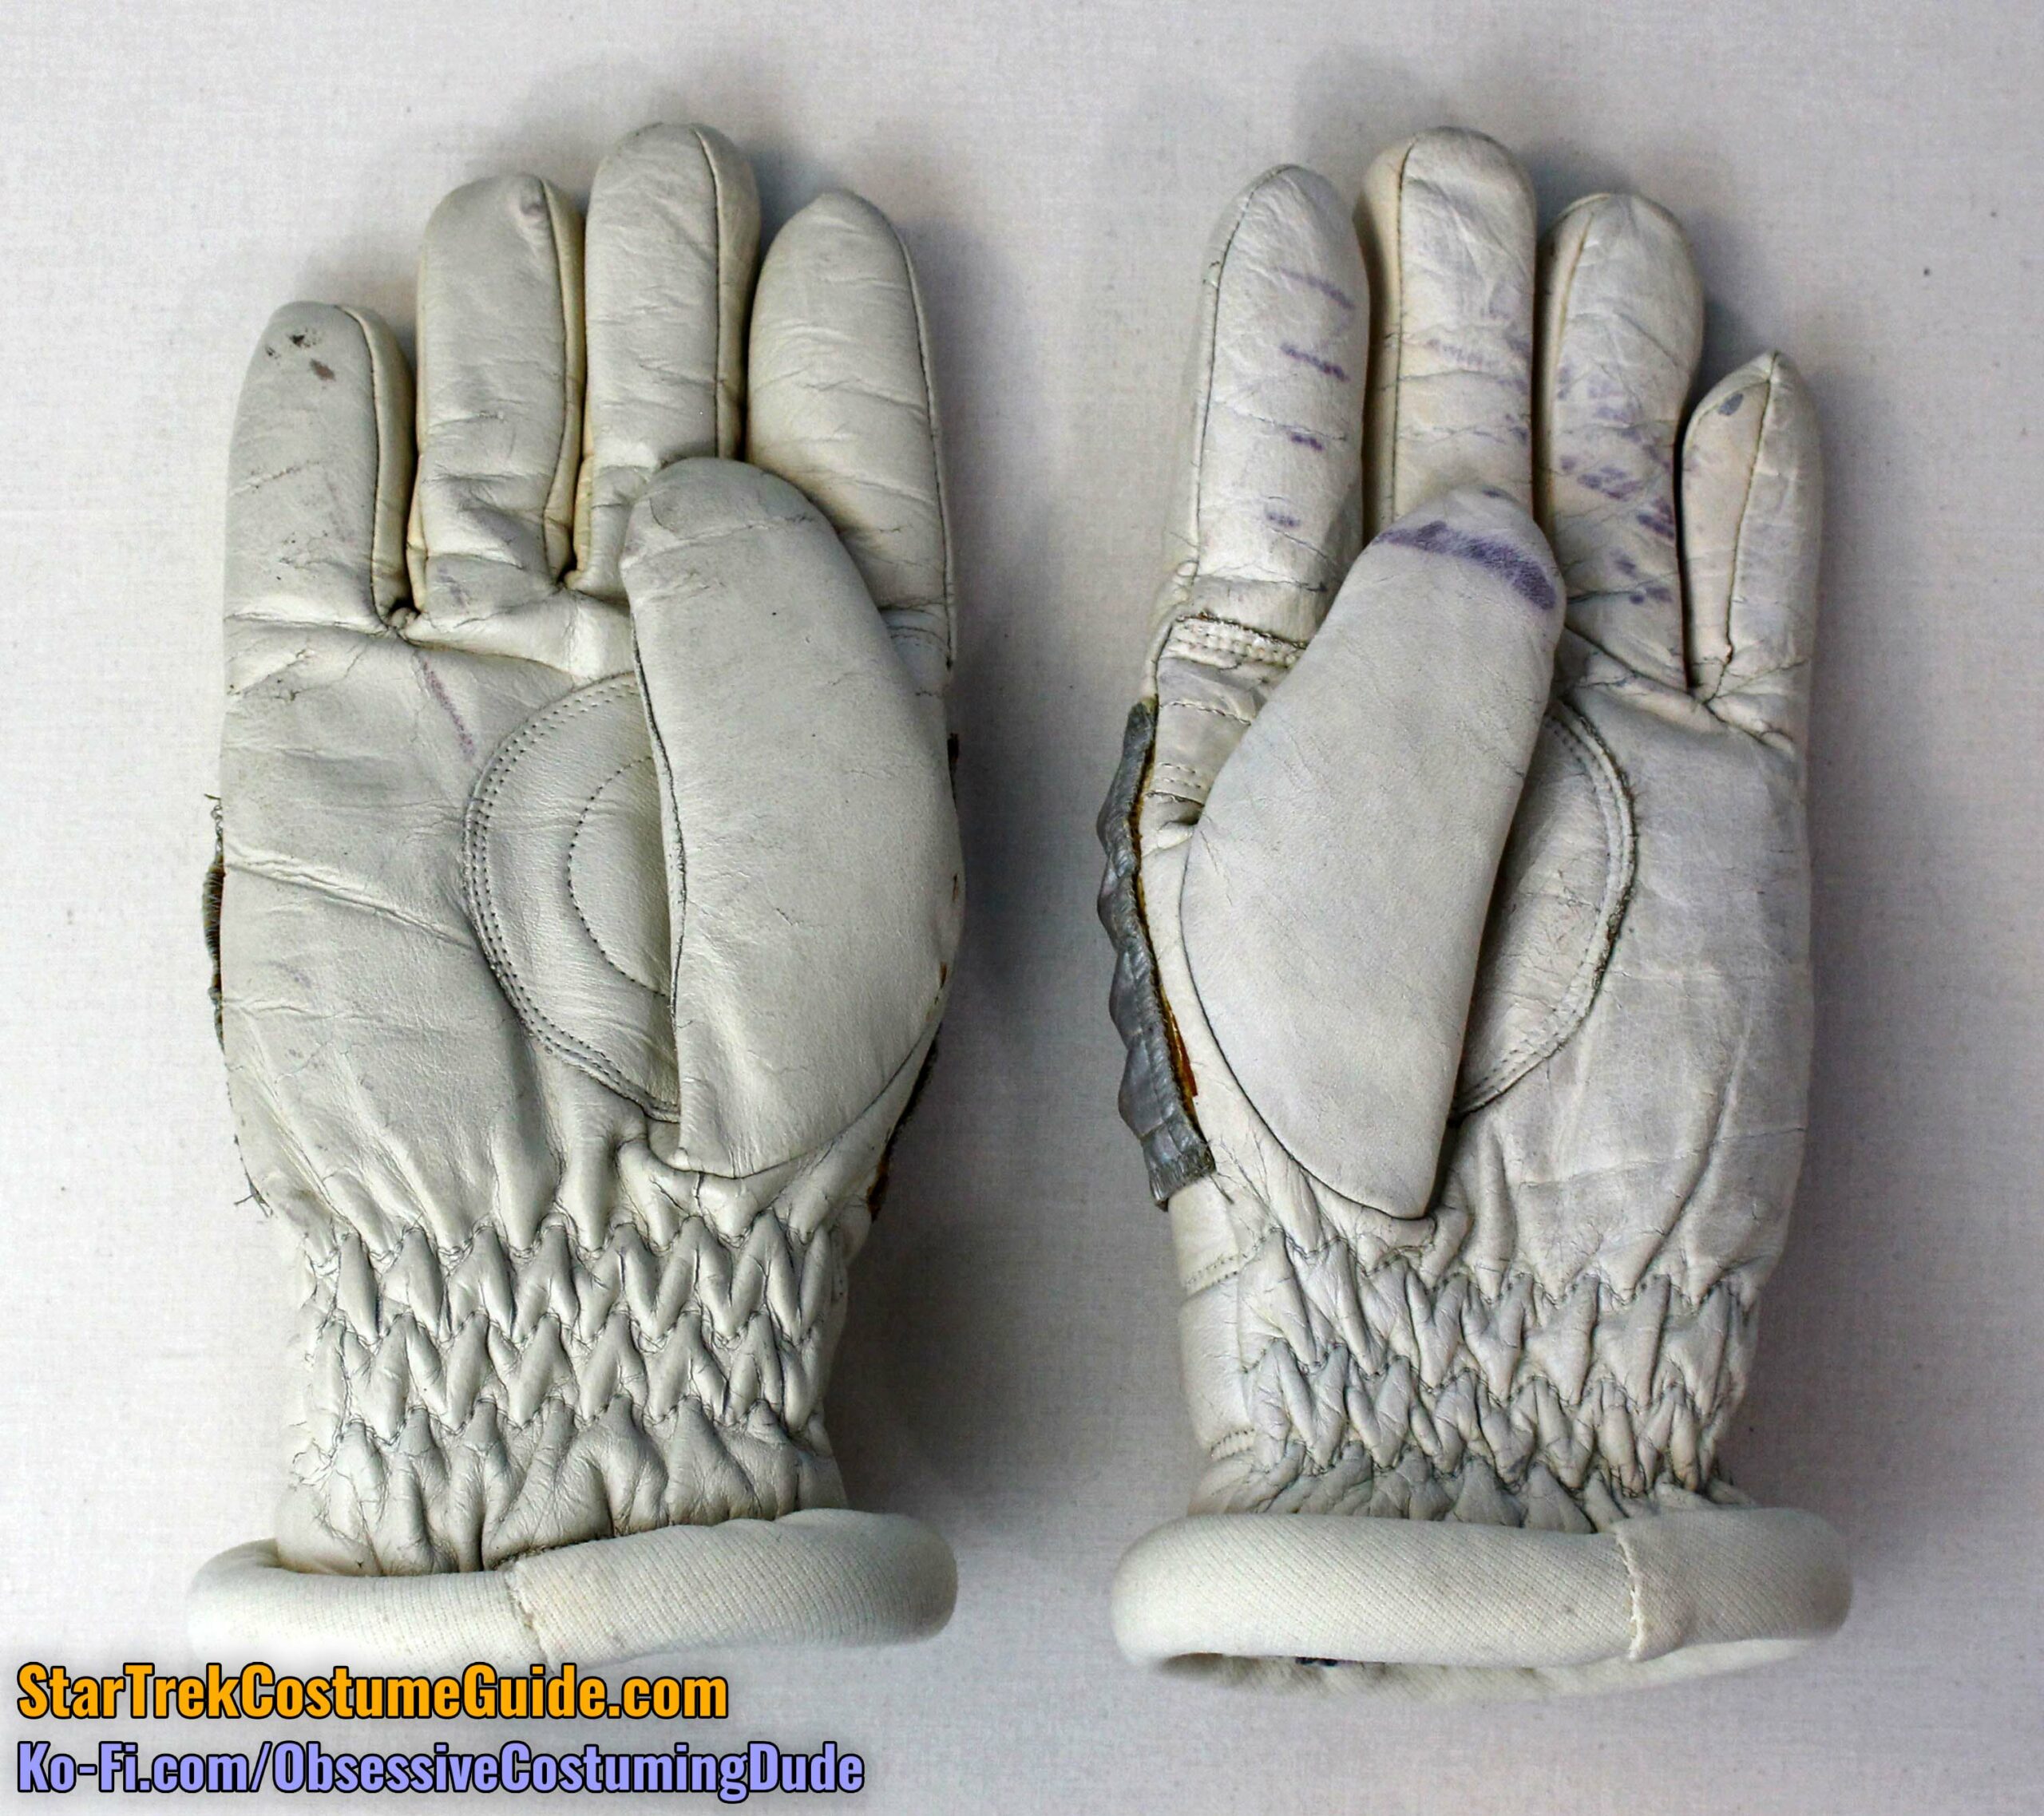
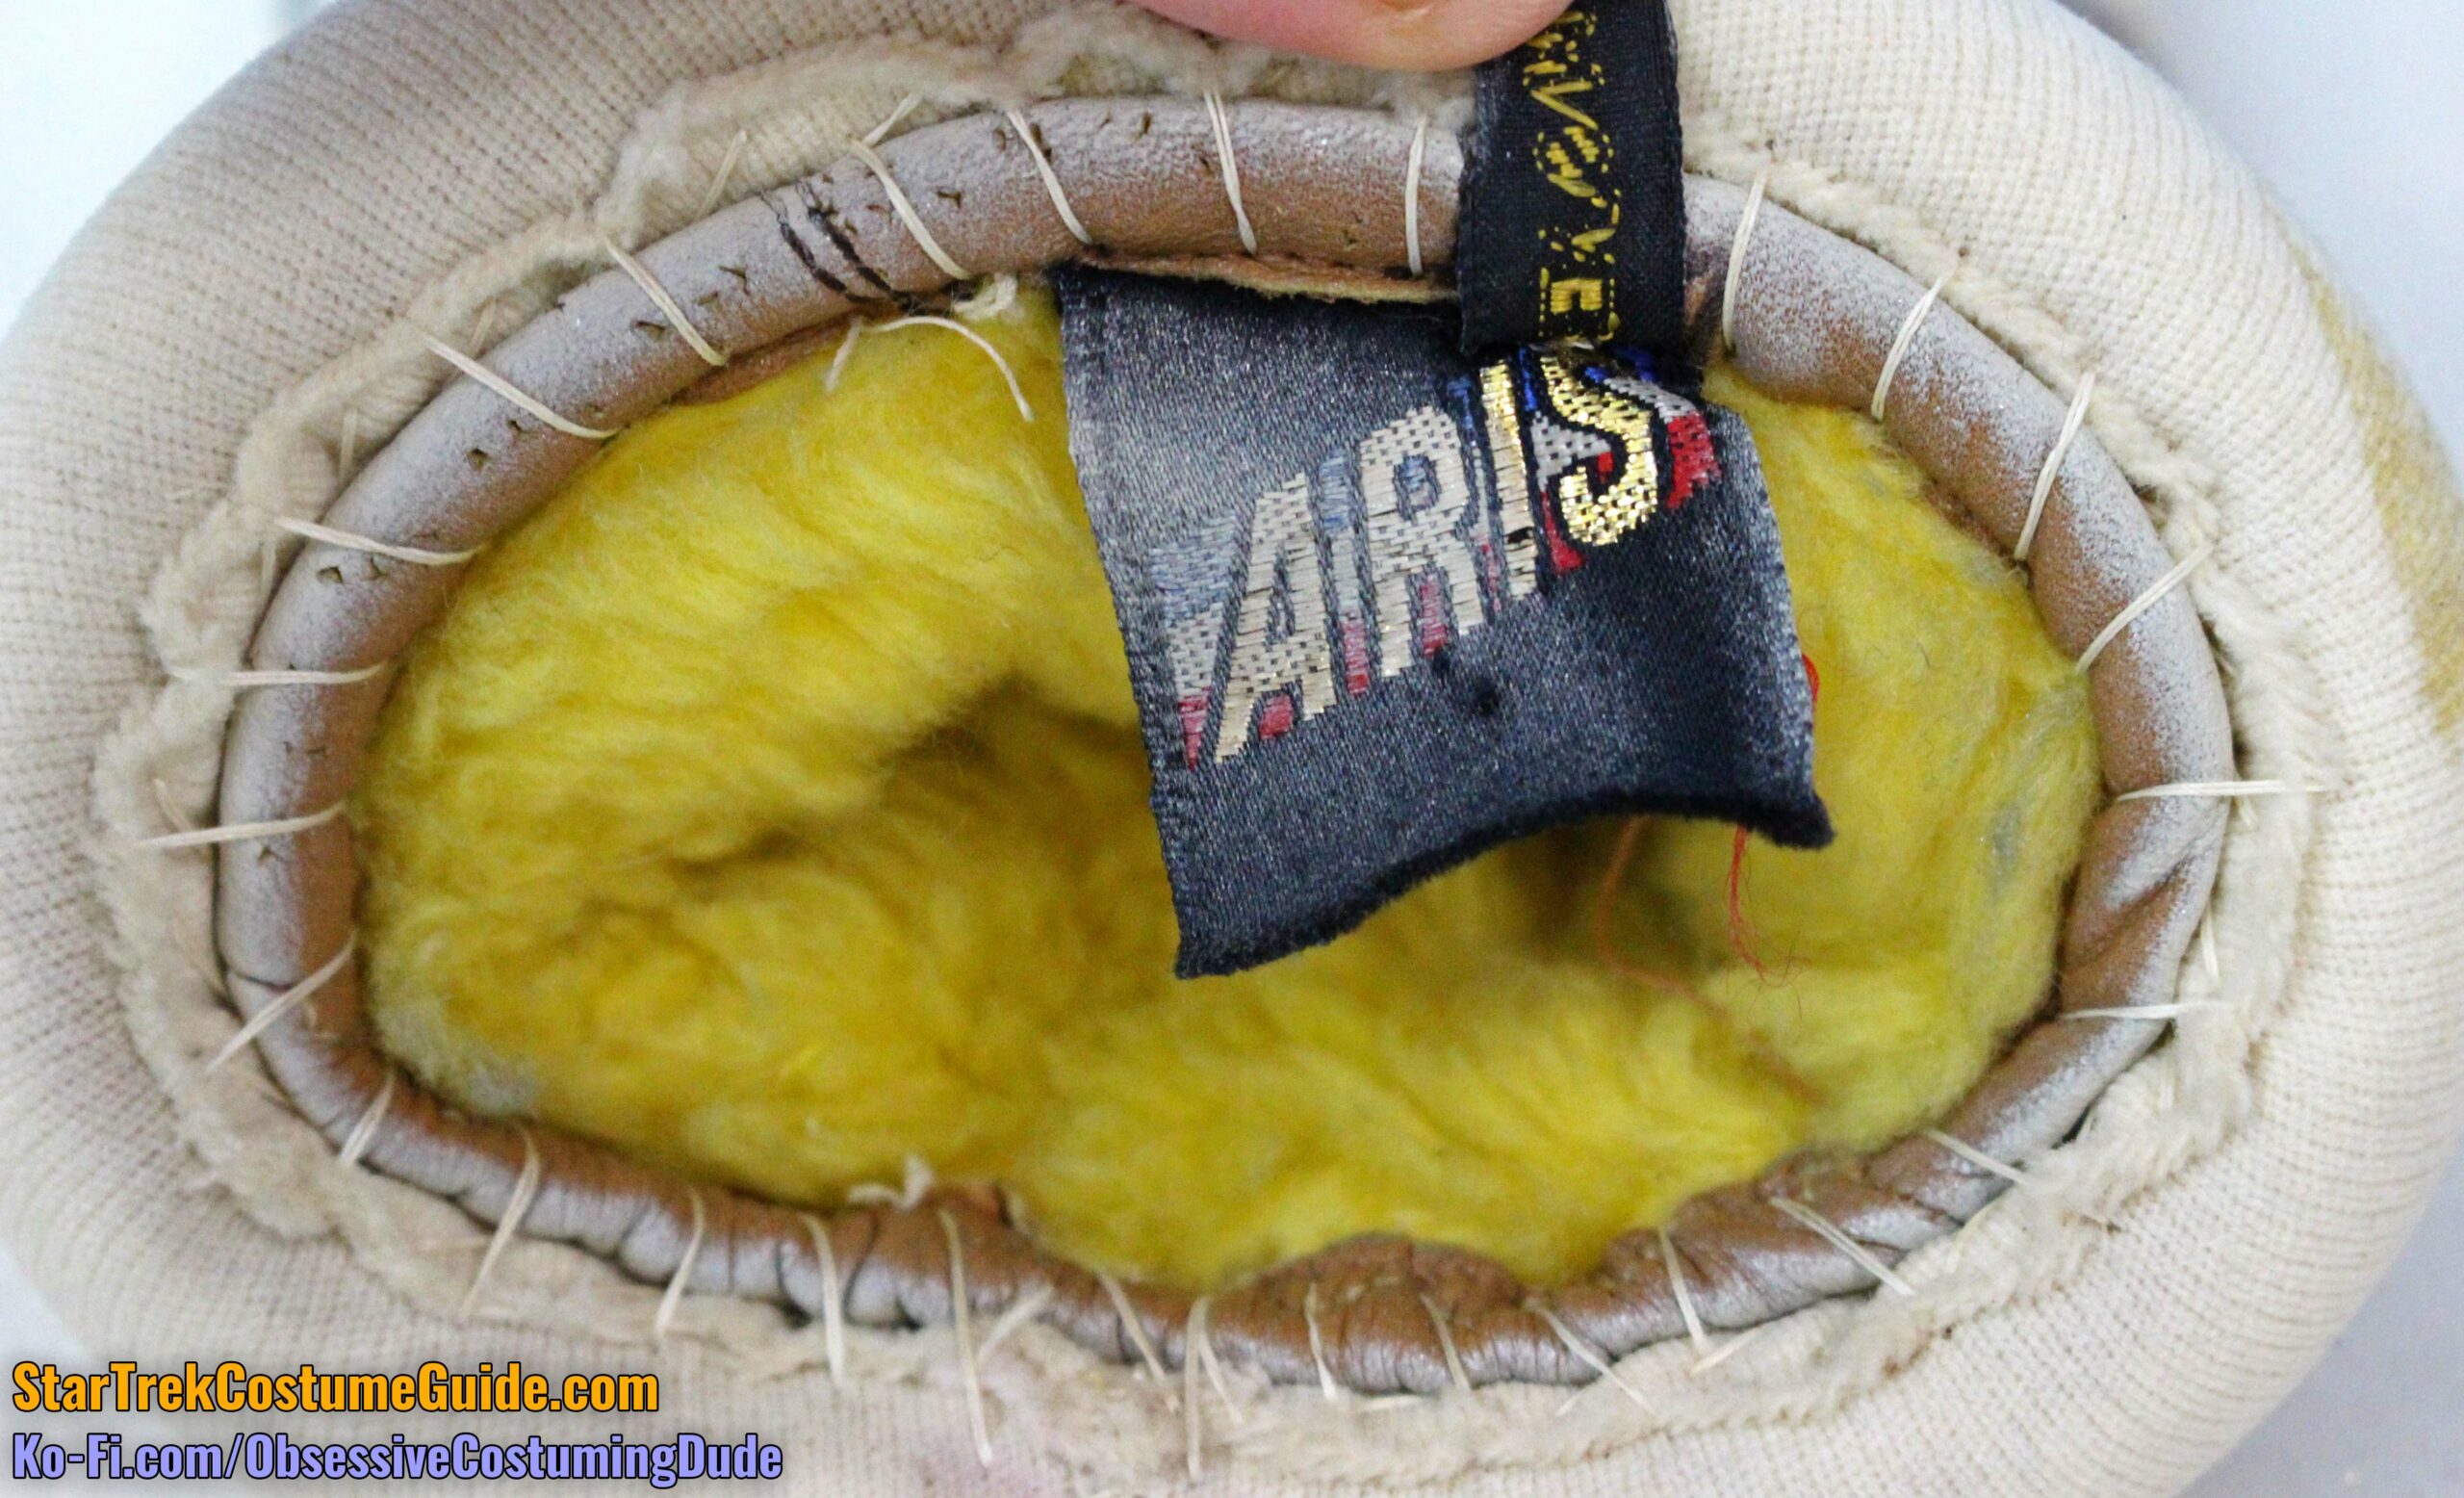
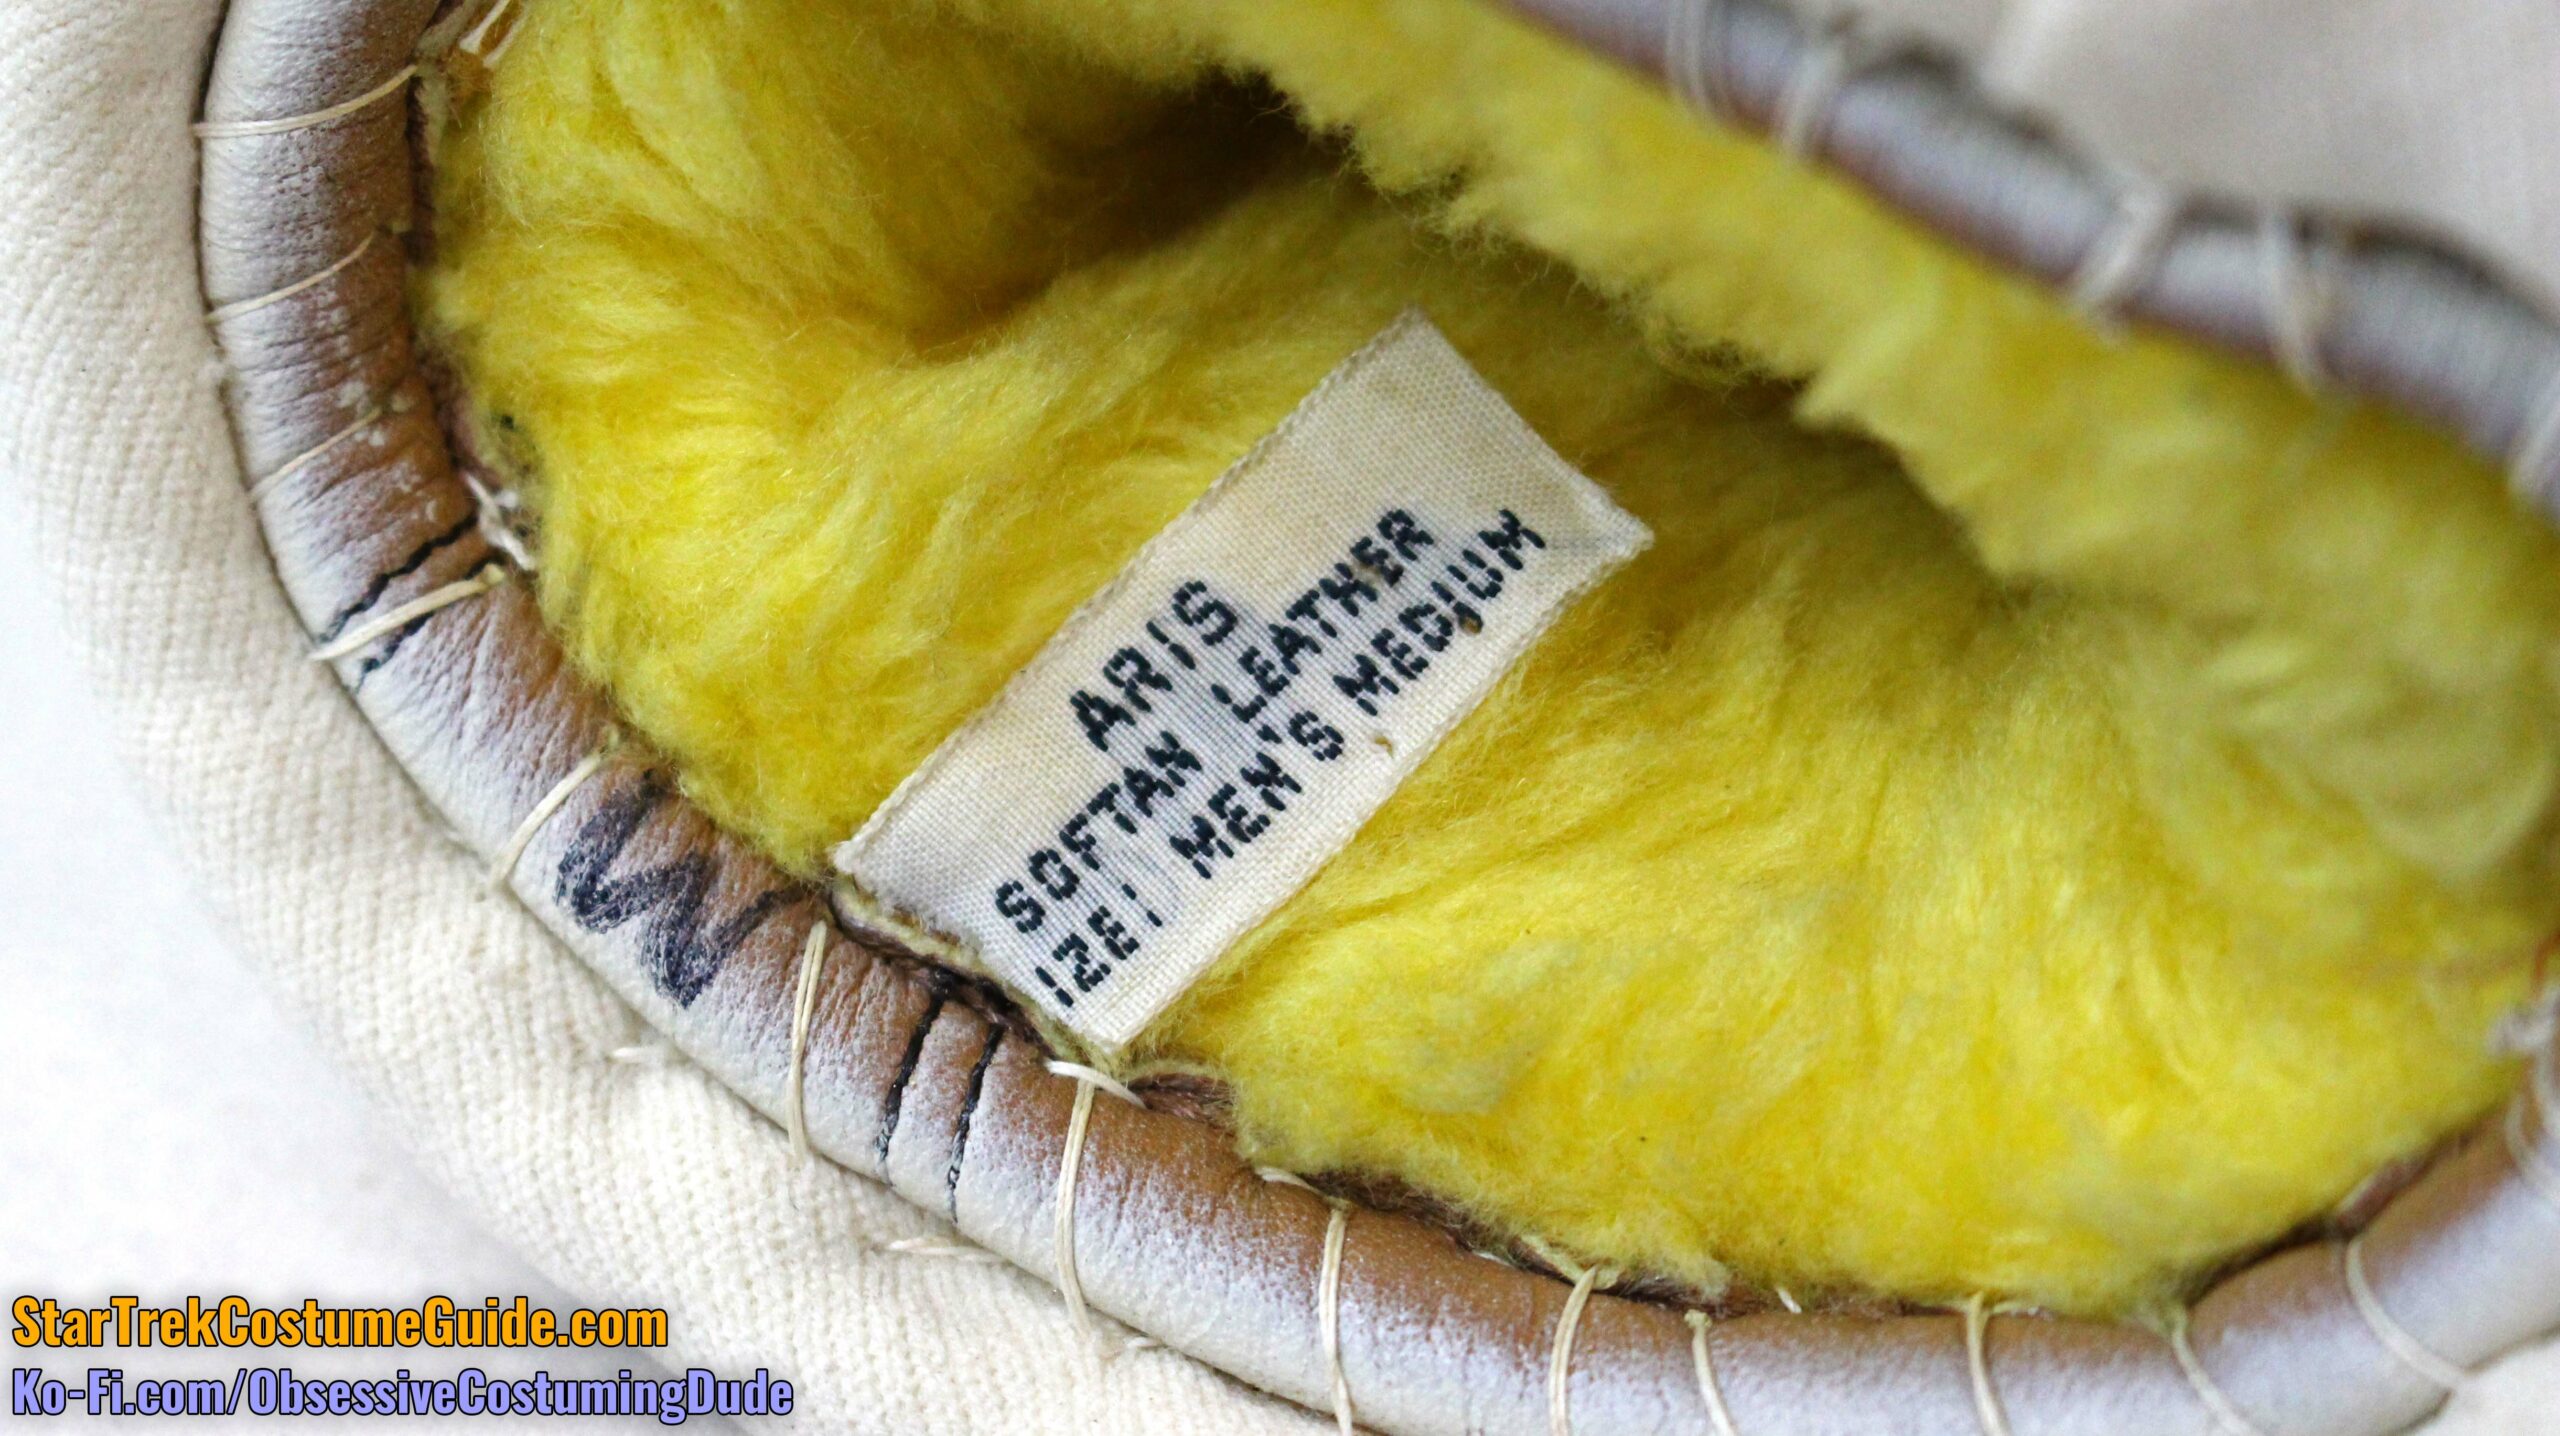
These were originally “Aris” brand, “softan leather” utility gloves, men’s size medium.
However, Fletcher Trek-ified these gloves with three major (but easy) modifications:
First, these gloves were spray-painted (off-)white, as you can see on the tags above.
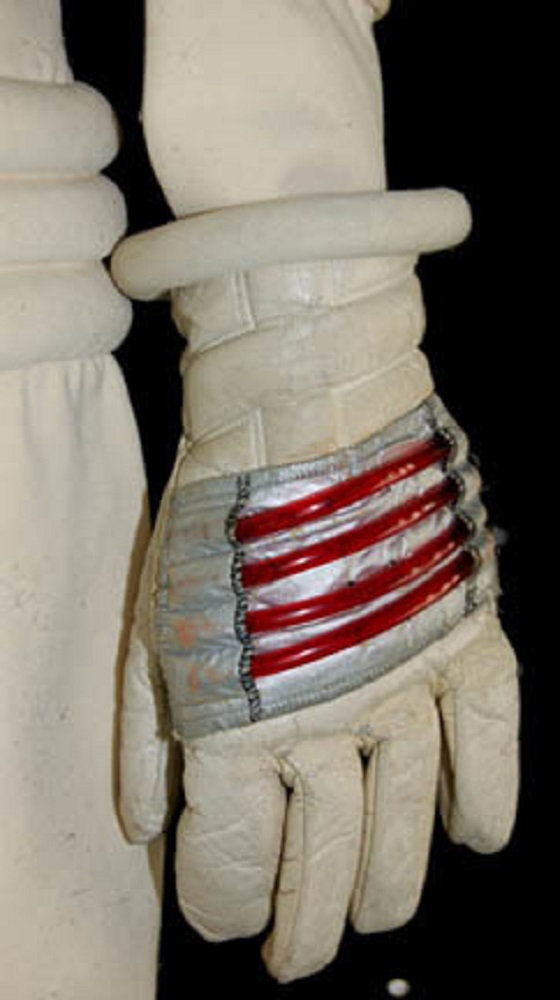
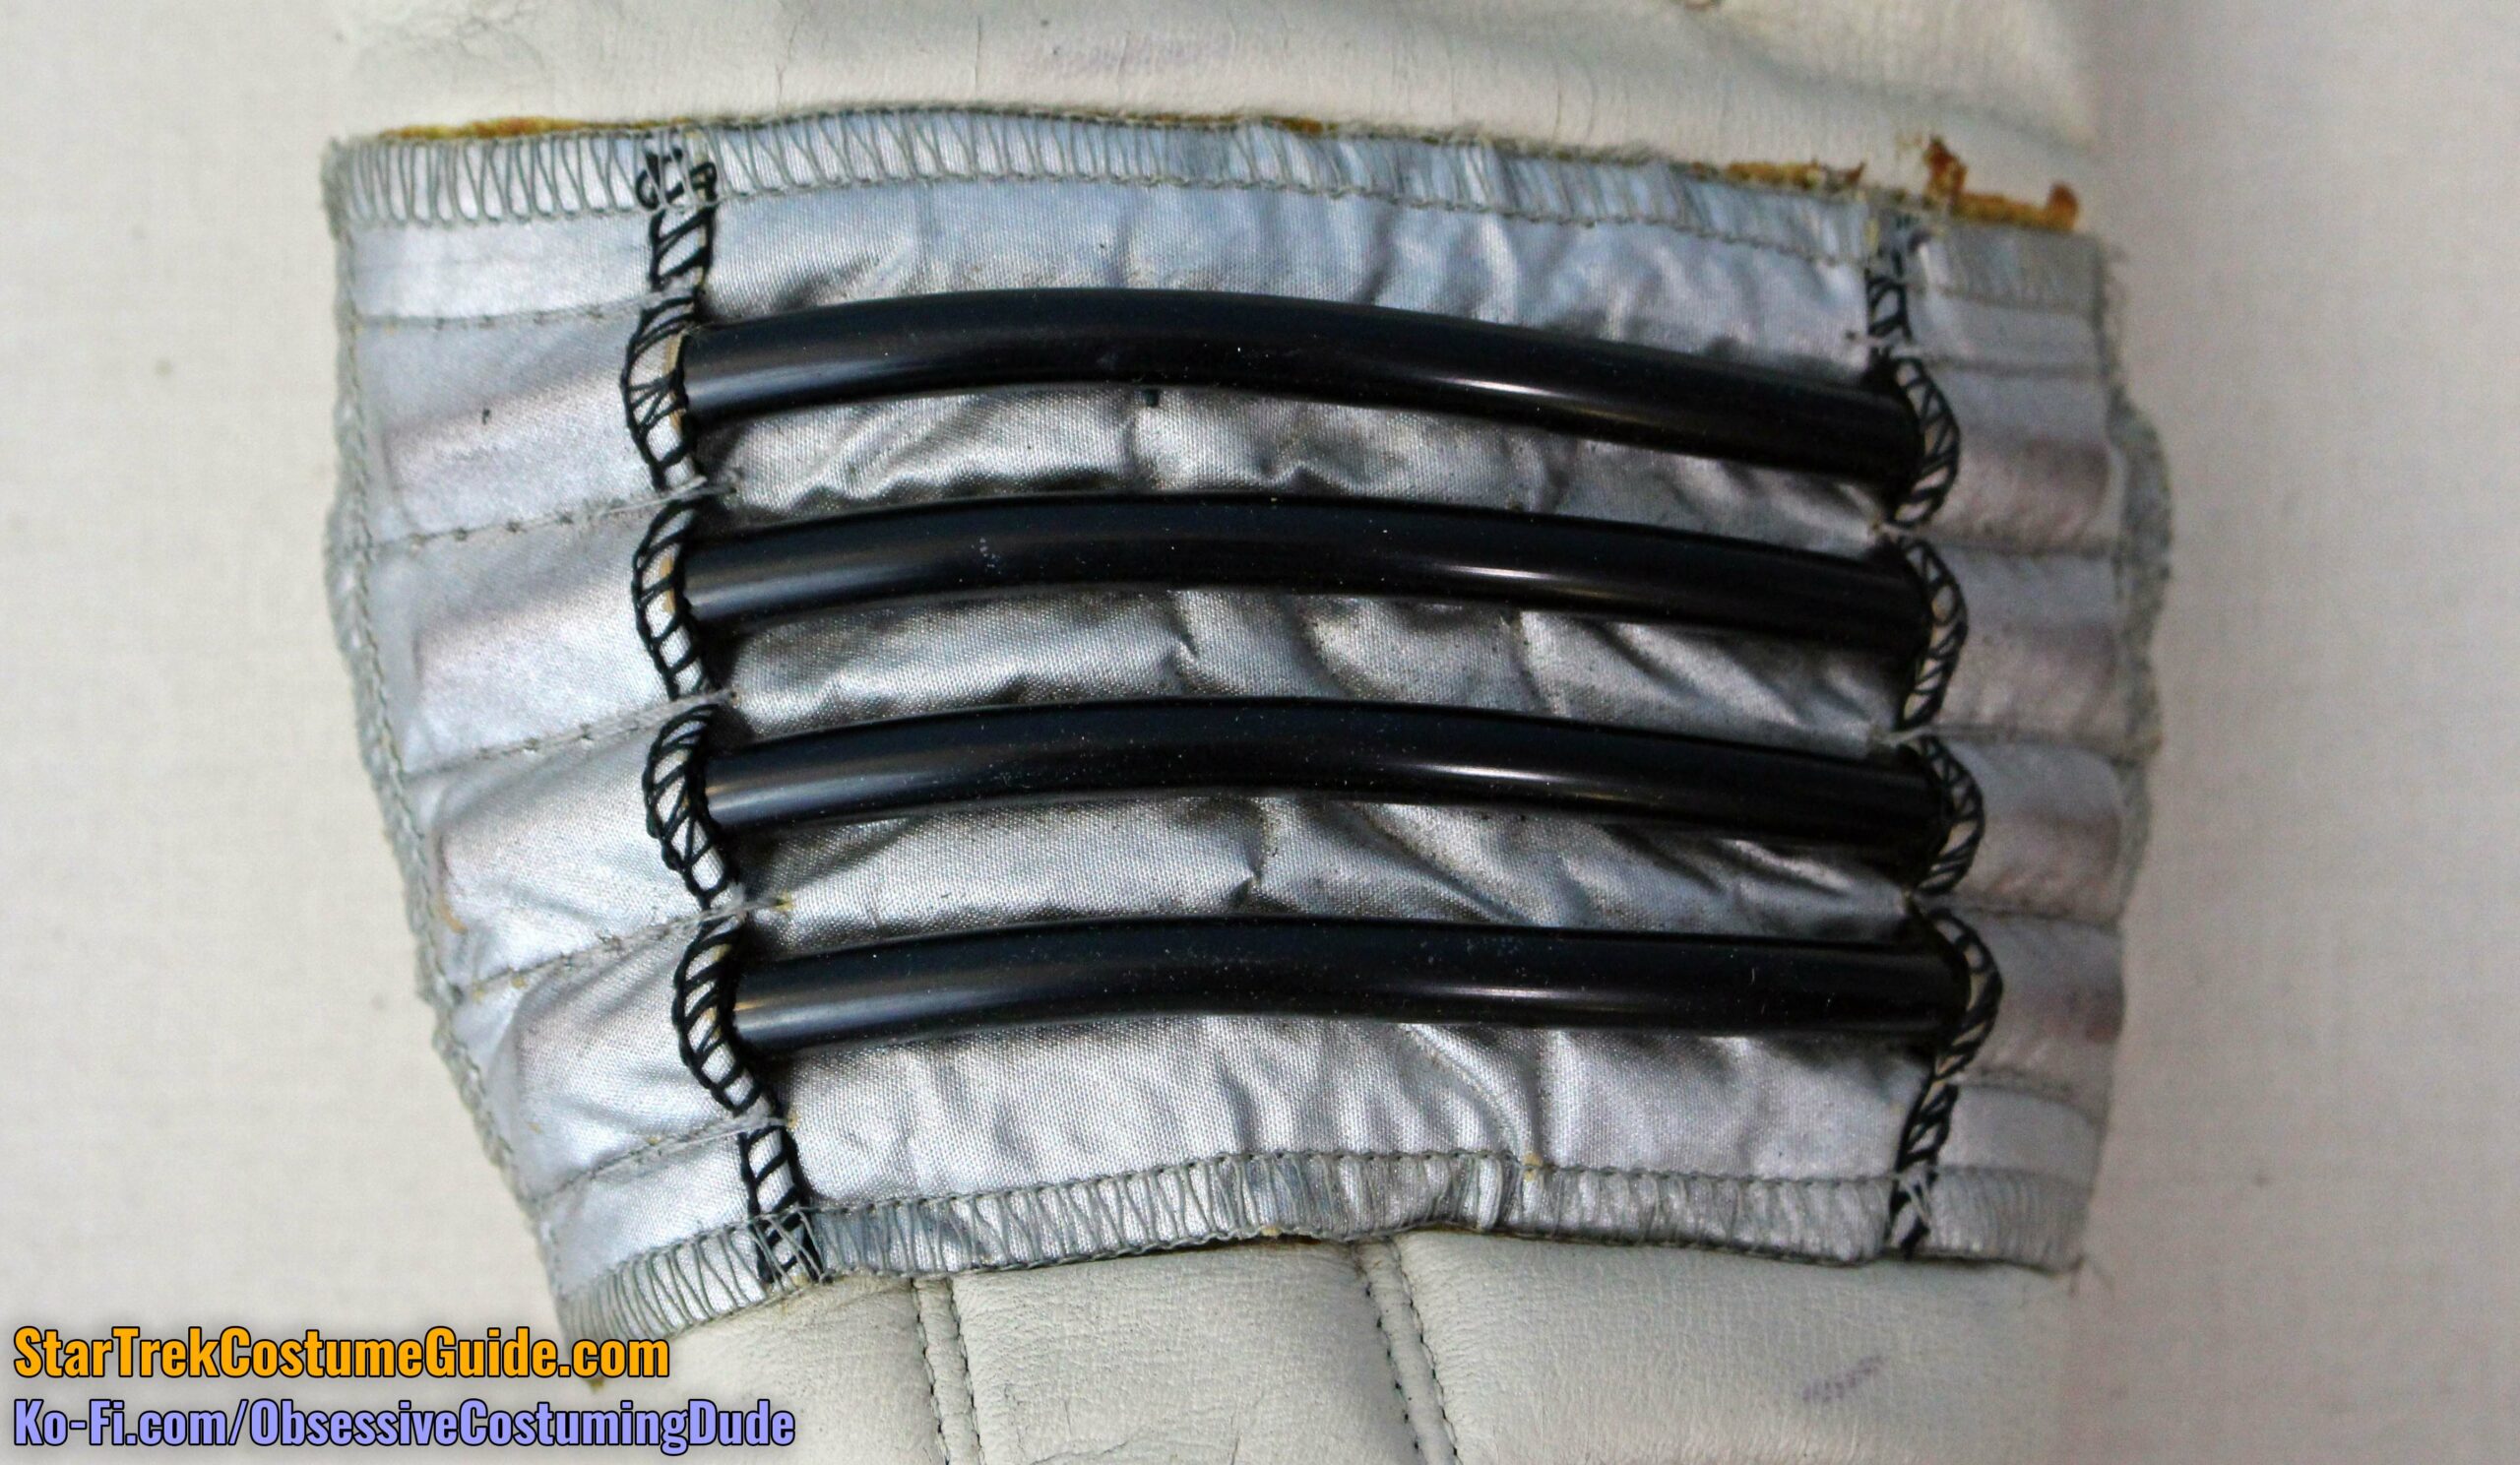
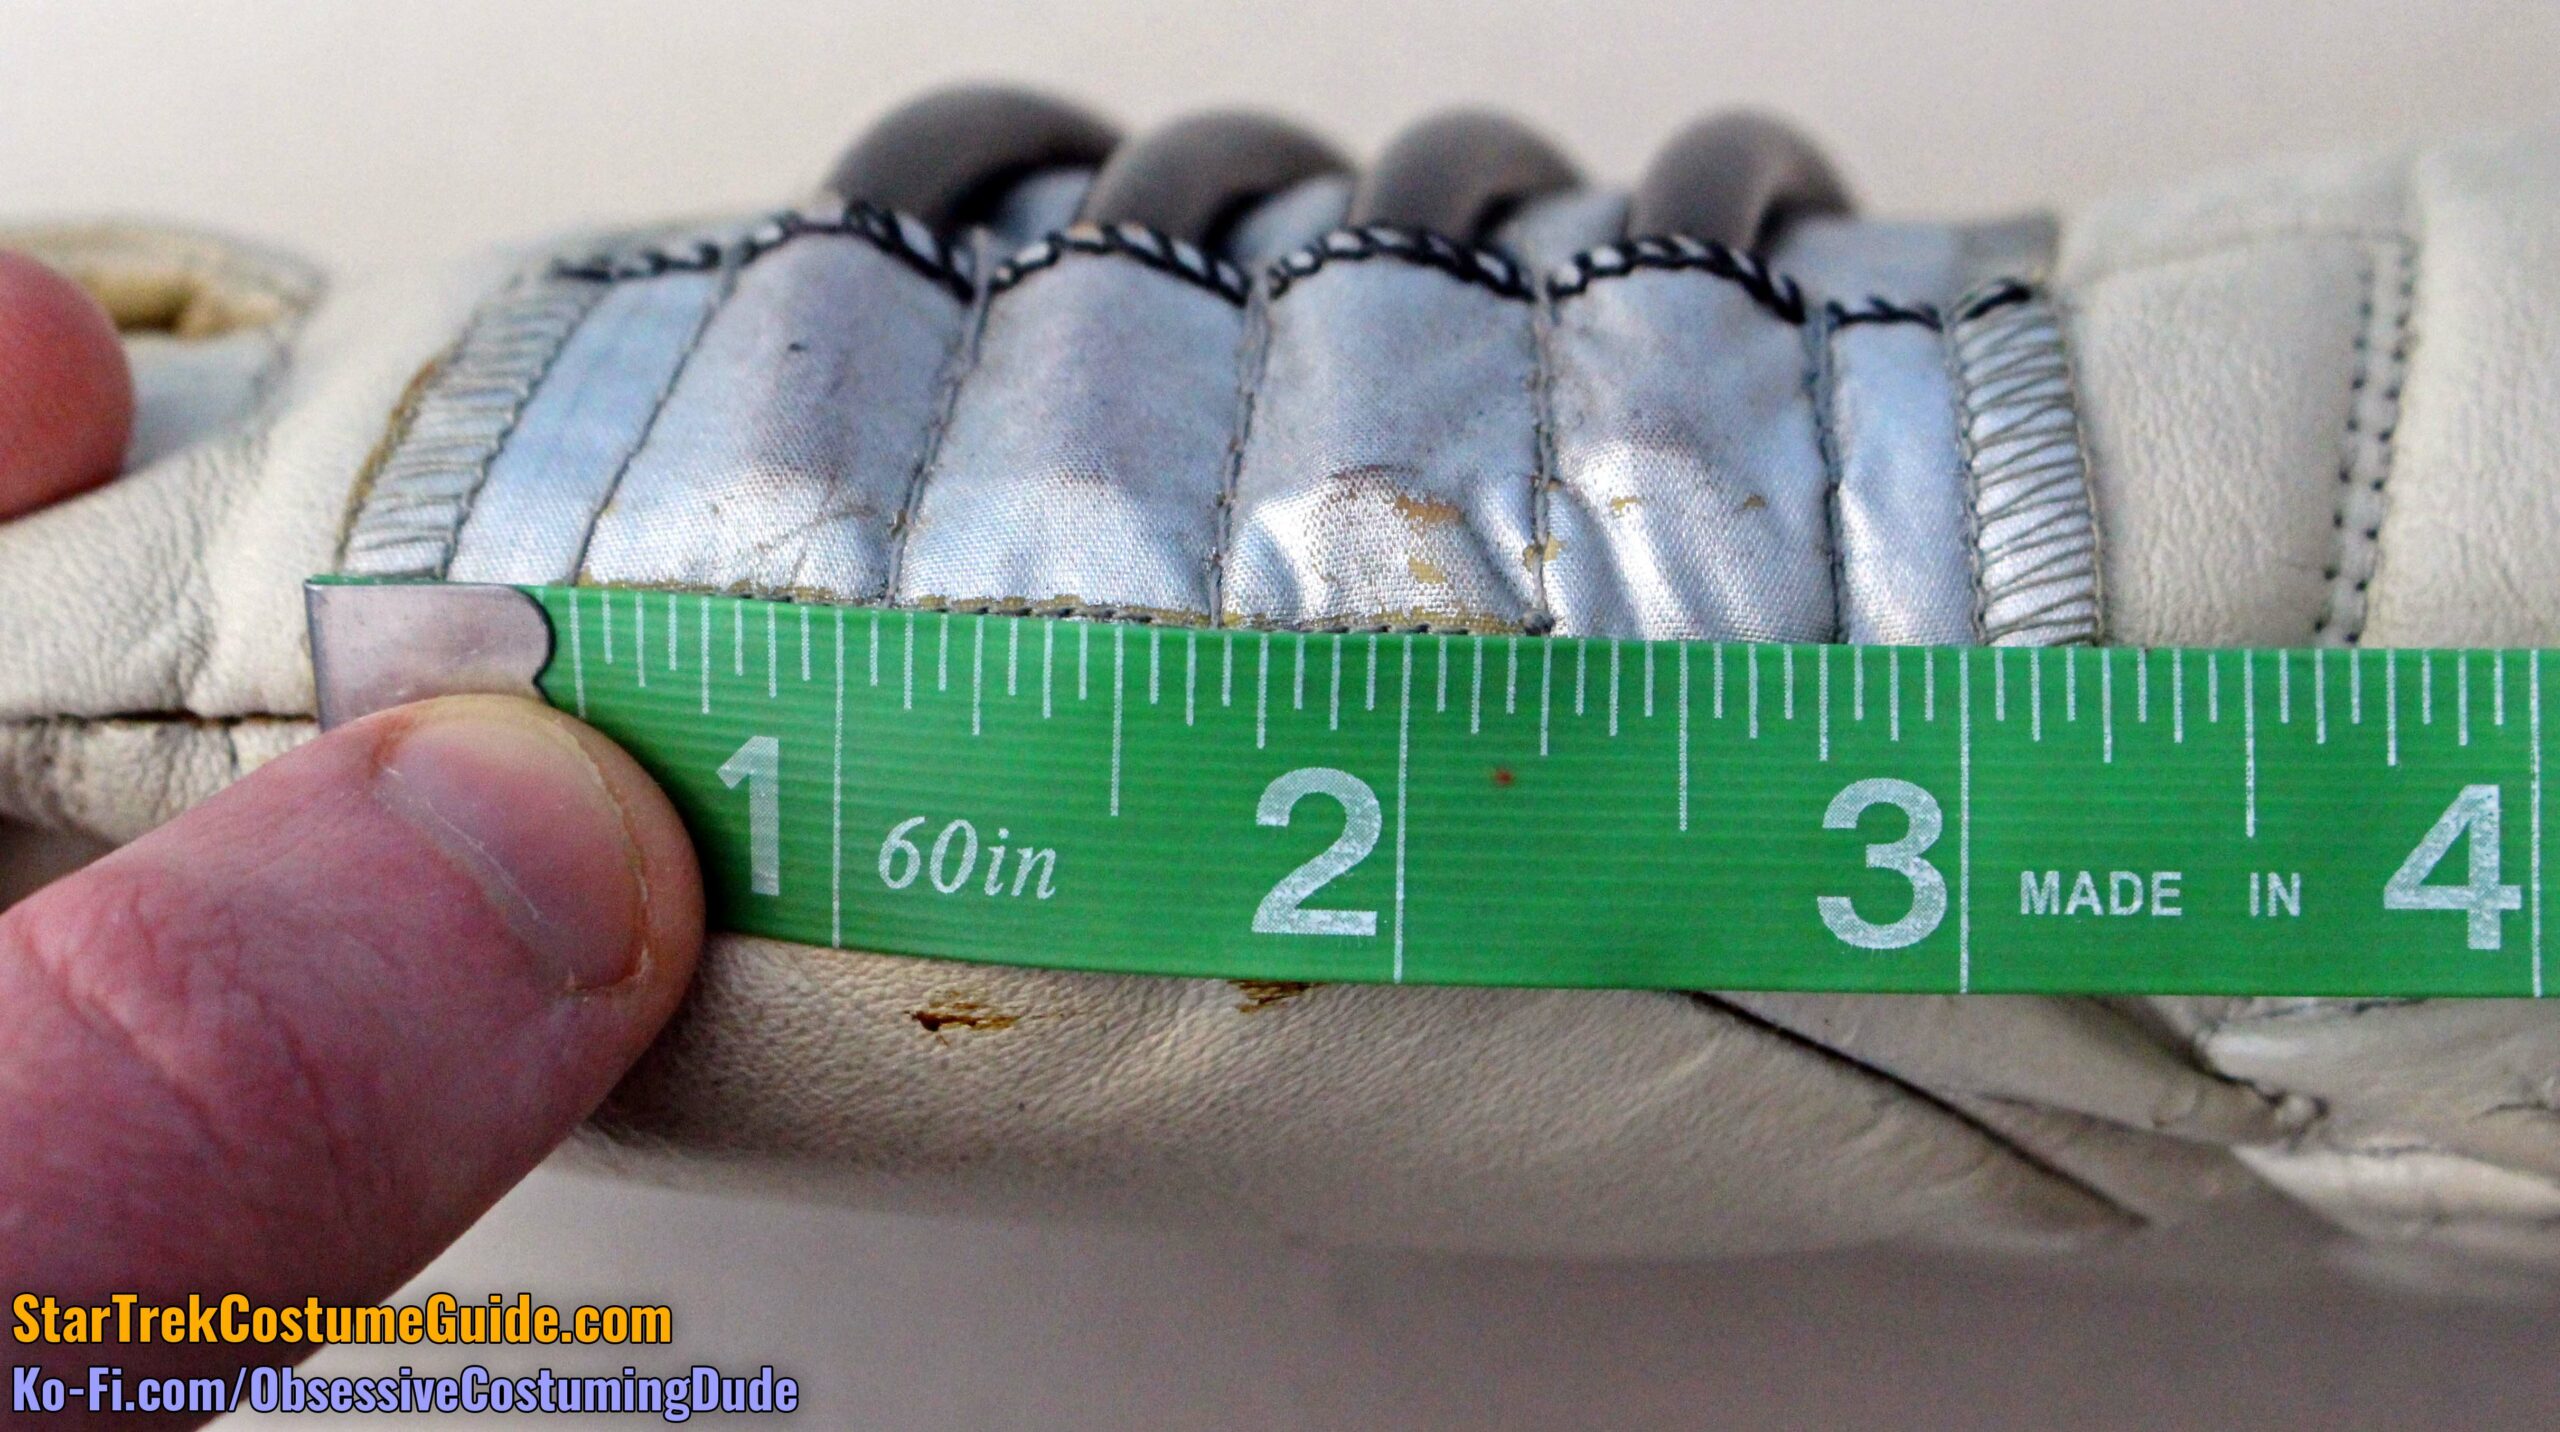
Second, a silver fabric/tubing assembly (similar to those on the thighs and left sleeve) was added onto the outer hand of each glove.
This assembly wasn’t strictly rectangular, but rather slightly trapezoidal; the inner edge (closest to the thumb) was 3 ¼” wide, whereas the outer edge was 2 ¾” wide.
The tubing channels were somewhat irregular, although on the inner edge they appear to have started and ended about ½” from the edges and been about 9/16” wide.
On the outer edge, the spacing was compressed a bit; the channels started and ended approximately ⅜” from the edges and were about ½” wide.
The inner channel strip was 1 ¼” wide, and the interior edge was serged in black.
The outer channel strip was slightly slimmer – only 1 ⅛” wide, and the interior edge was again serged in black.
As with the aforementioned thigh/sleeve panel assemblies, the perimeter of the glove assemblies were serged in gray thread, although in this case they were glued to the finished gloves rather than edge-stitched to piping along the edges.
A finally, a large band of piping was added along the upper lip of each glove.
This piping was ¾” in diameter and appears to have been off-white cavalry twill wrapped around upholstery cording.
The piping seems to have been hand-sewn to the finished gloves, both on the underside and along the upper edge of the glove openings.
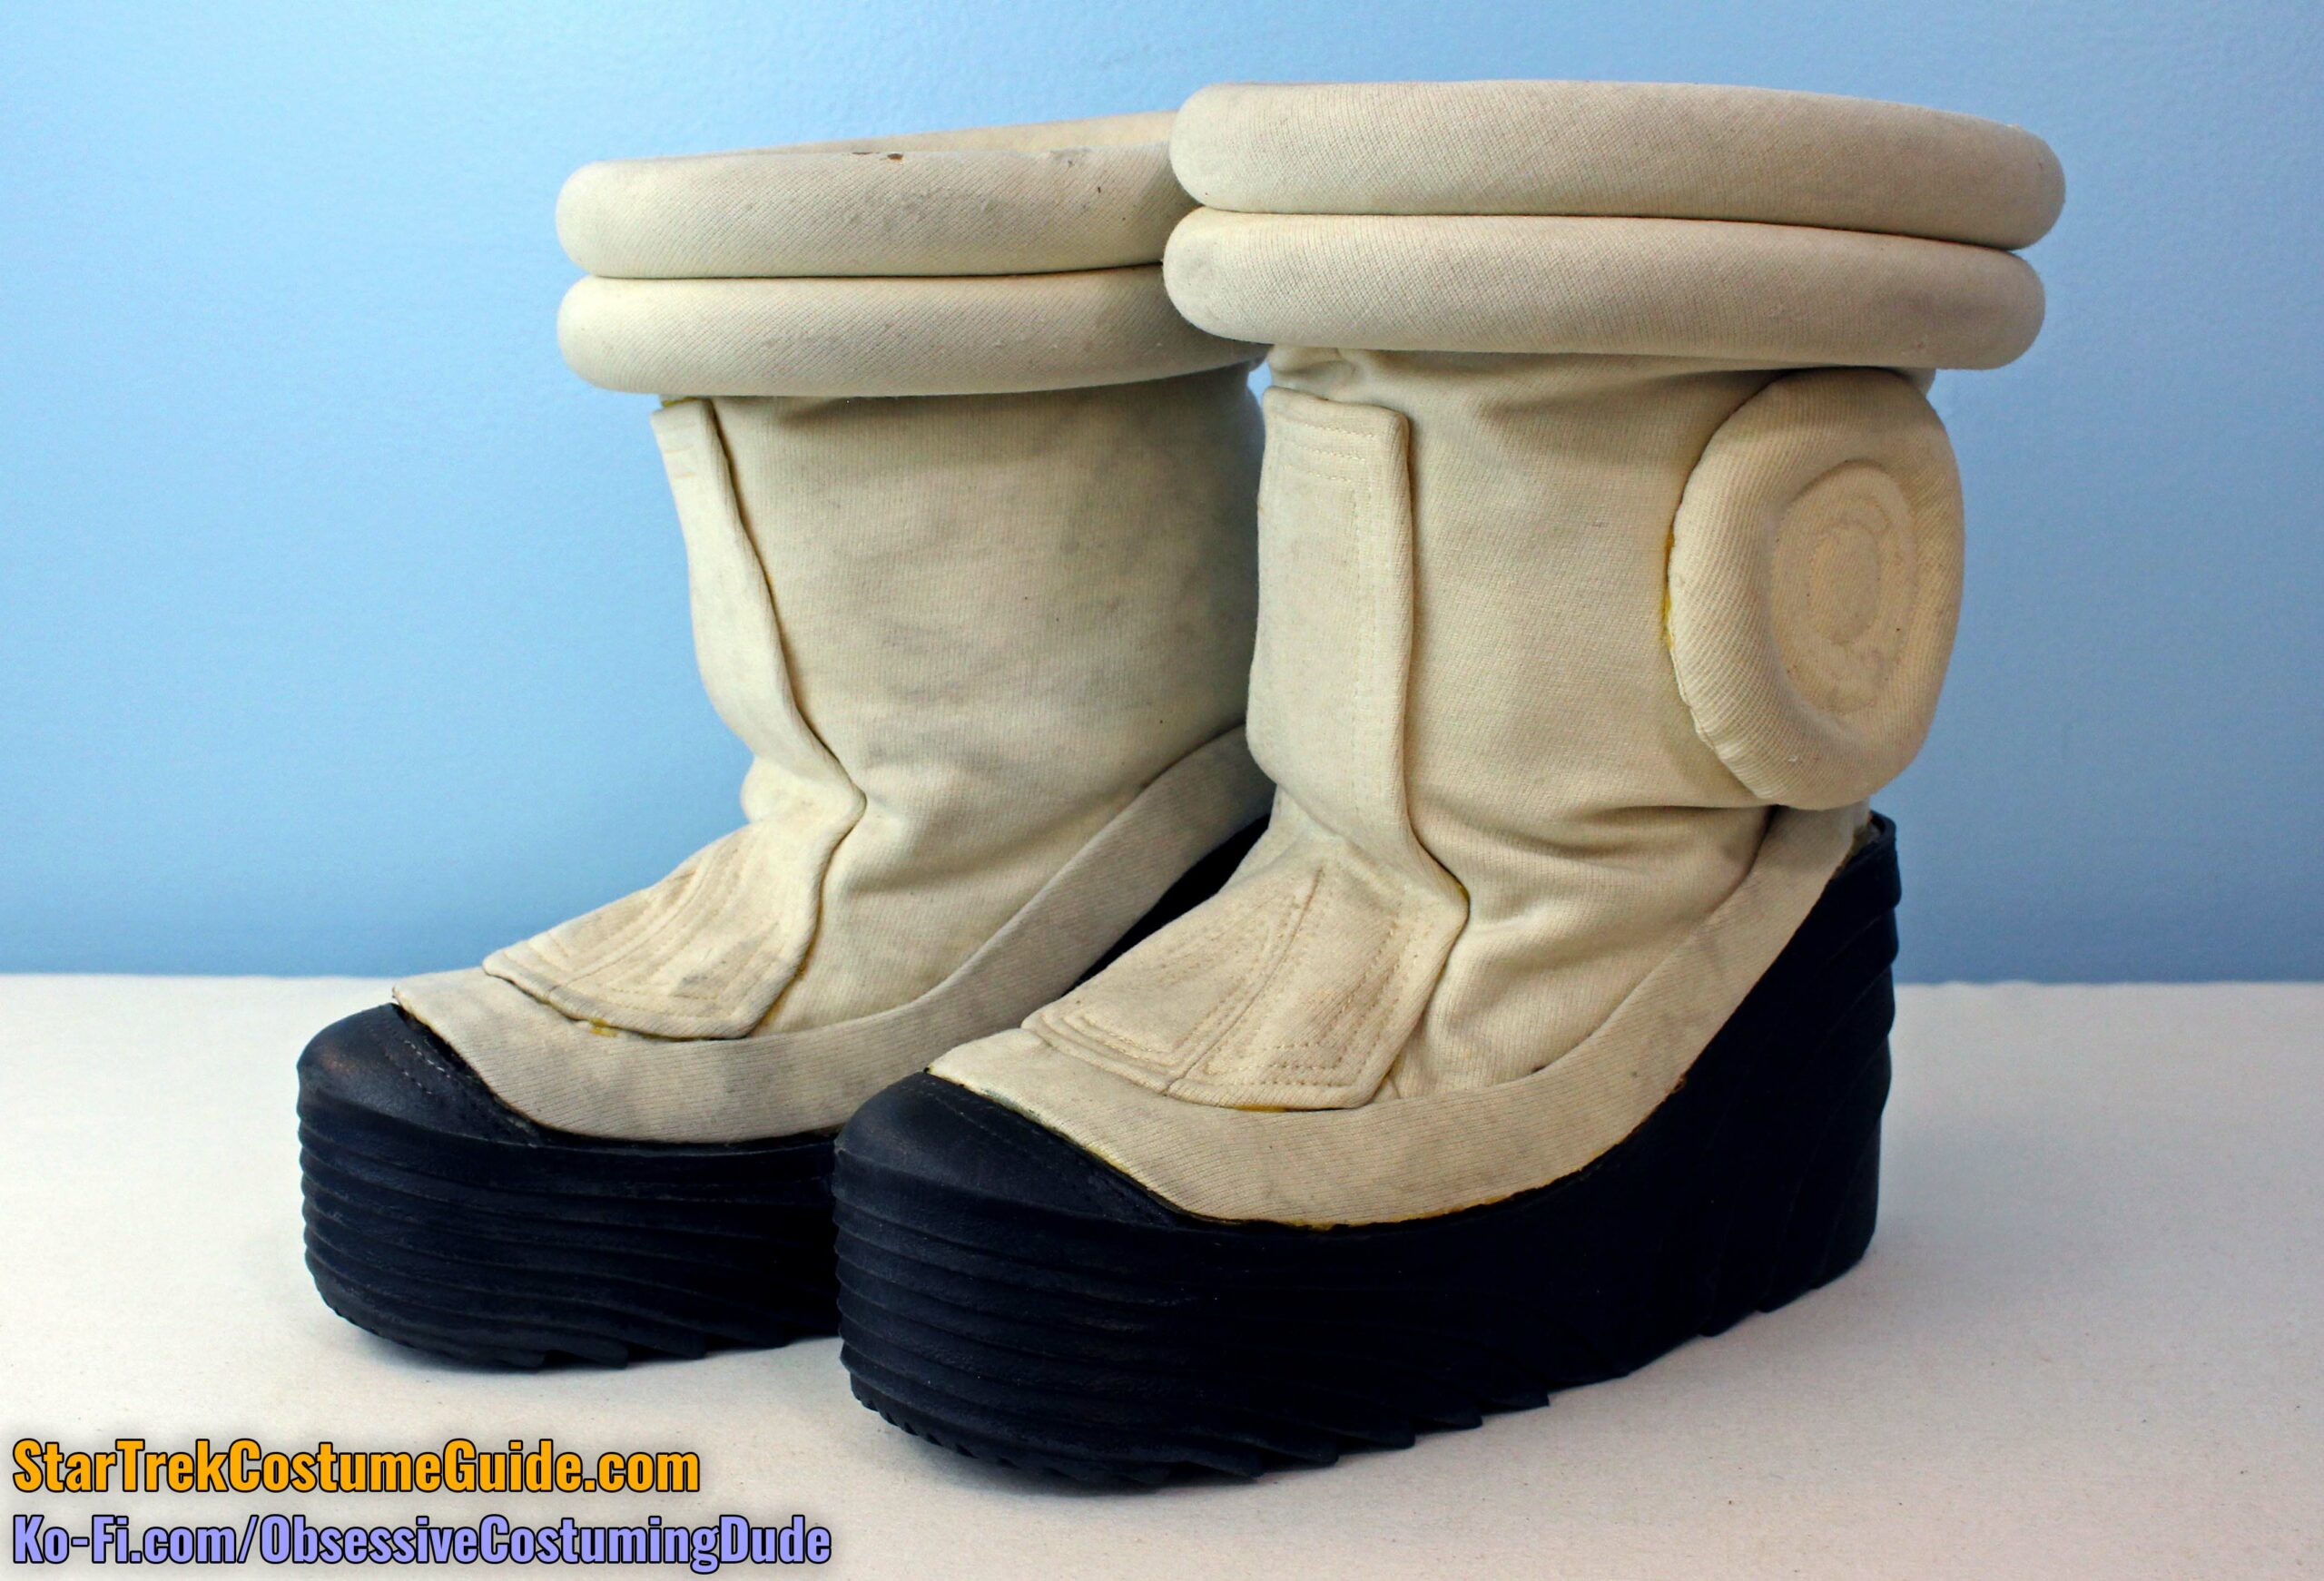
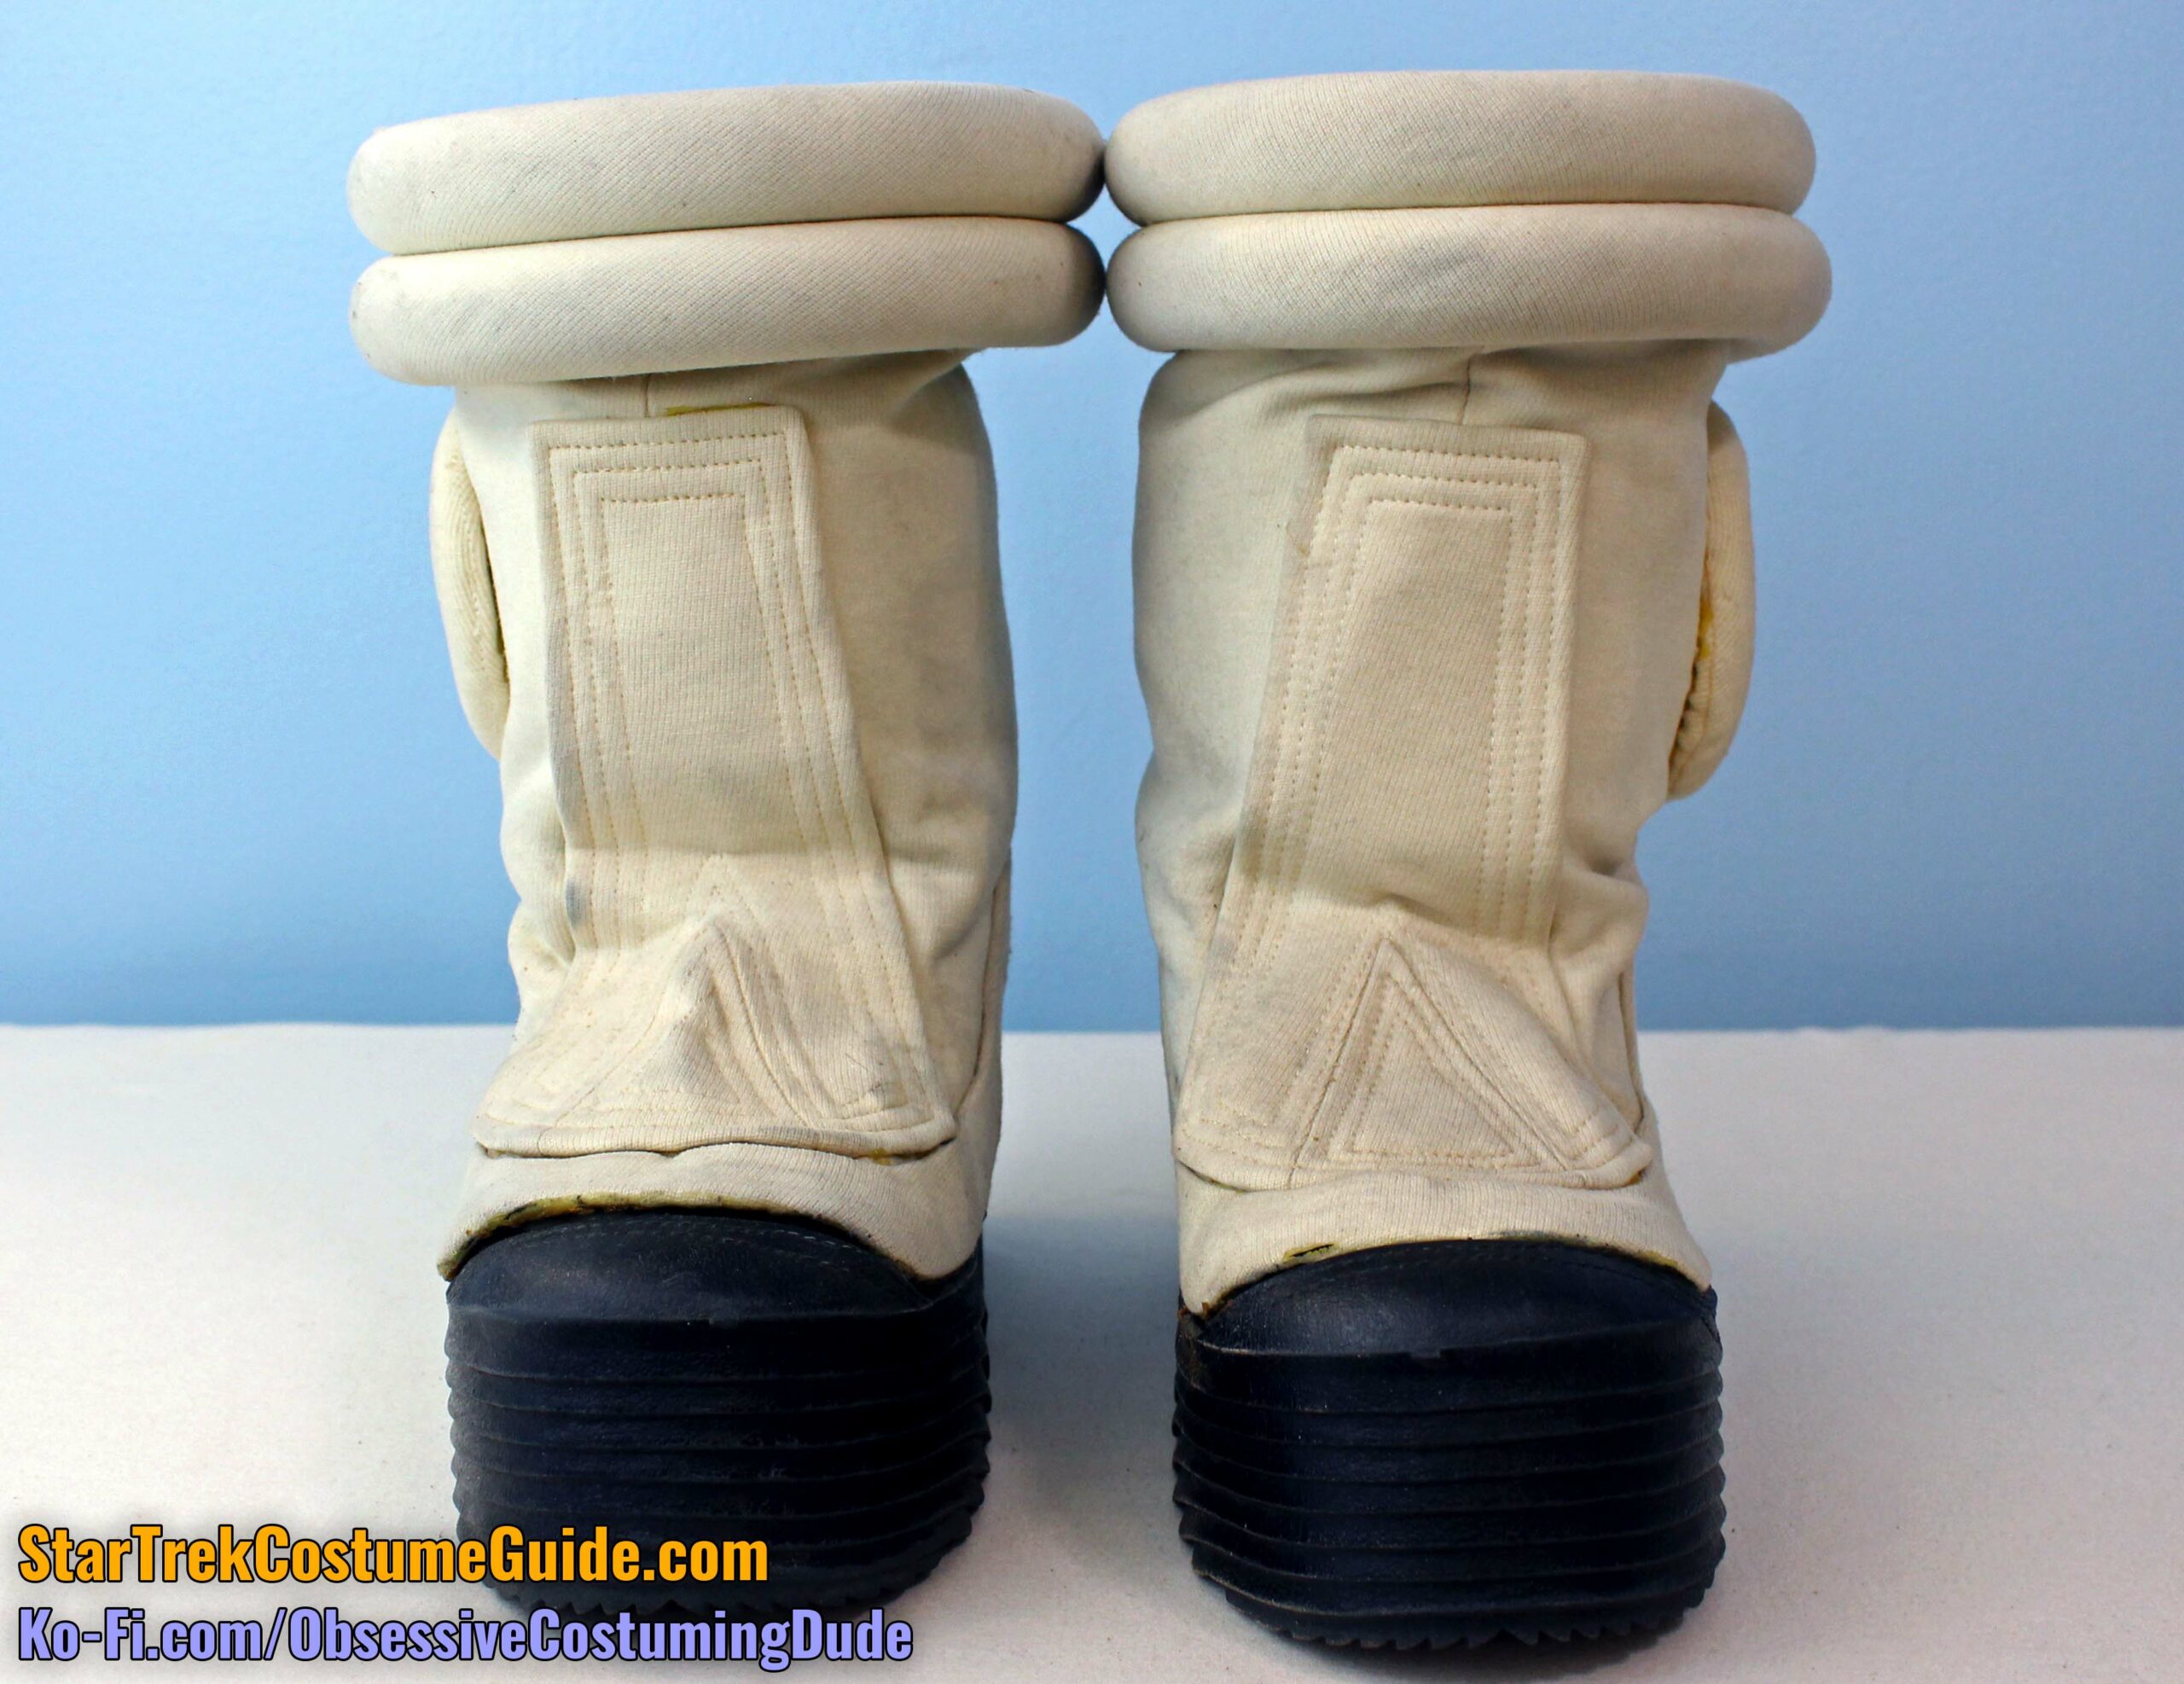
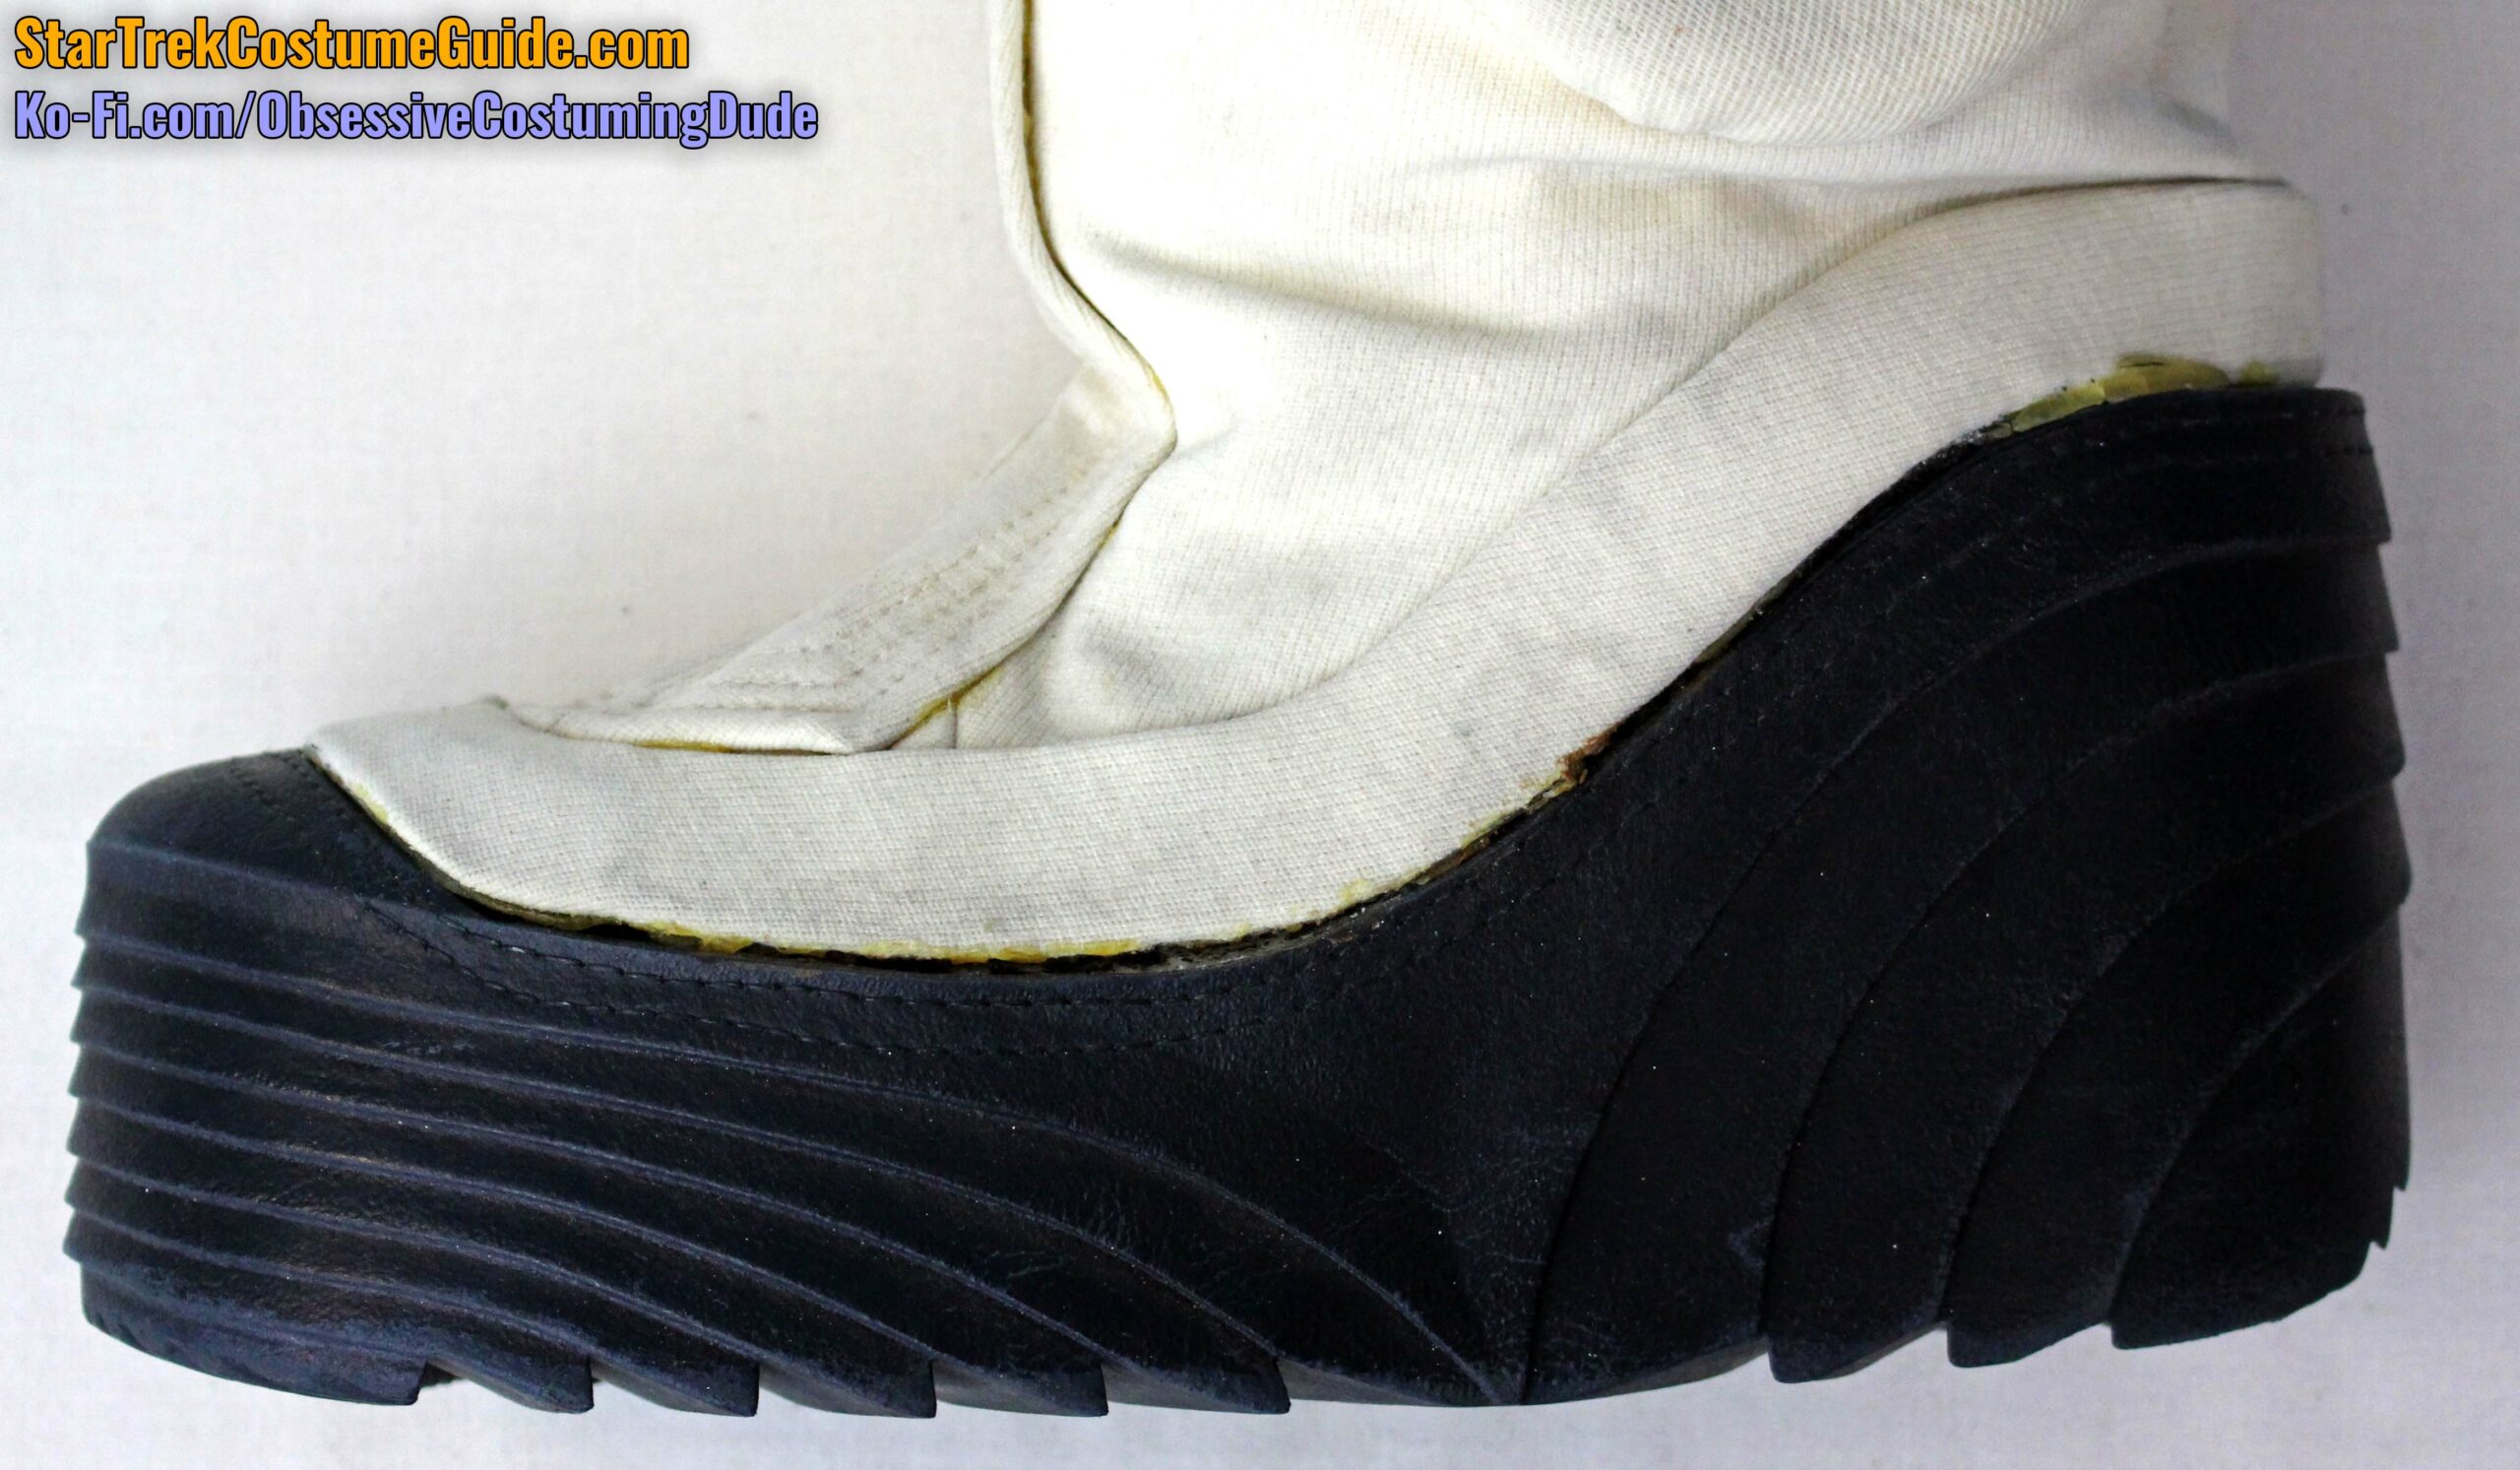
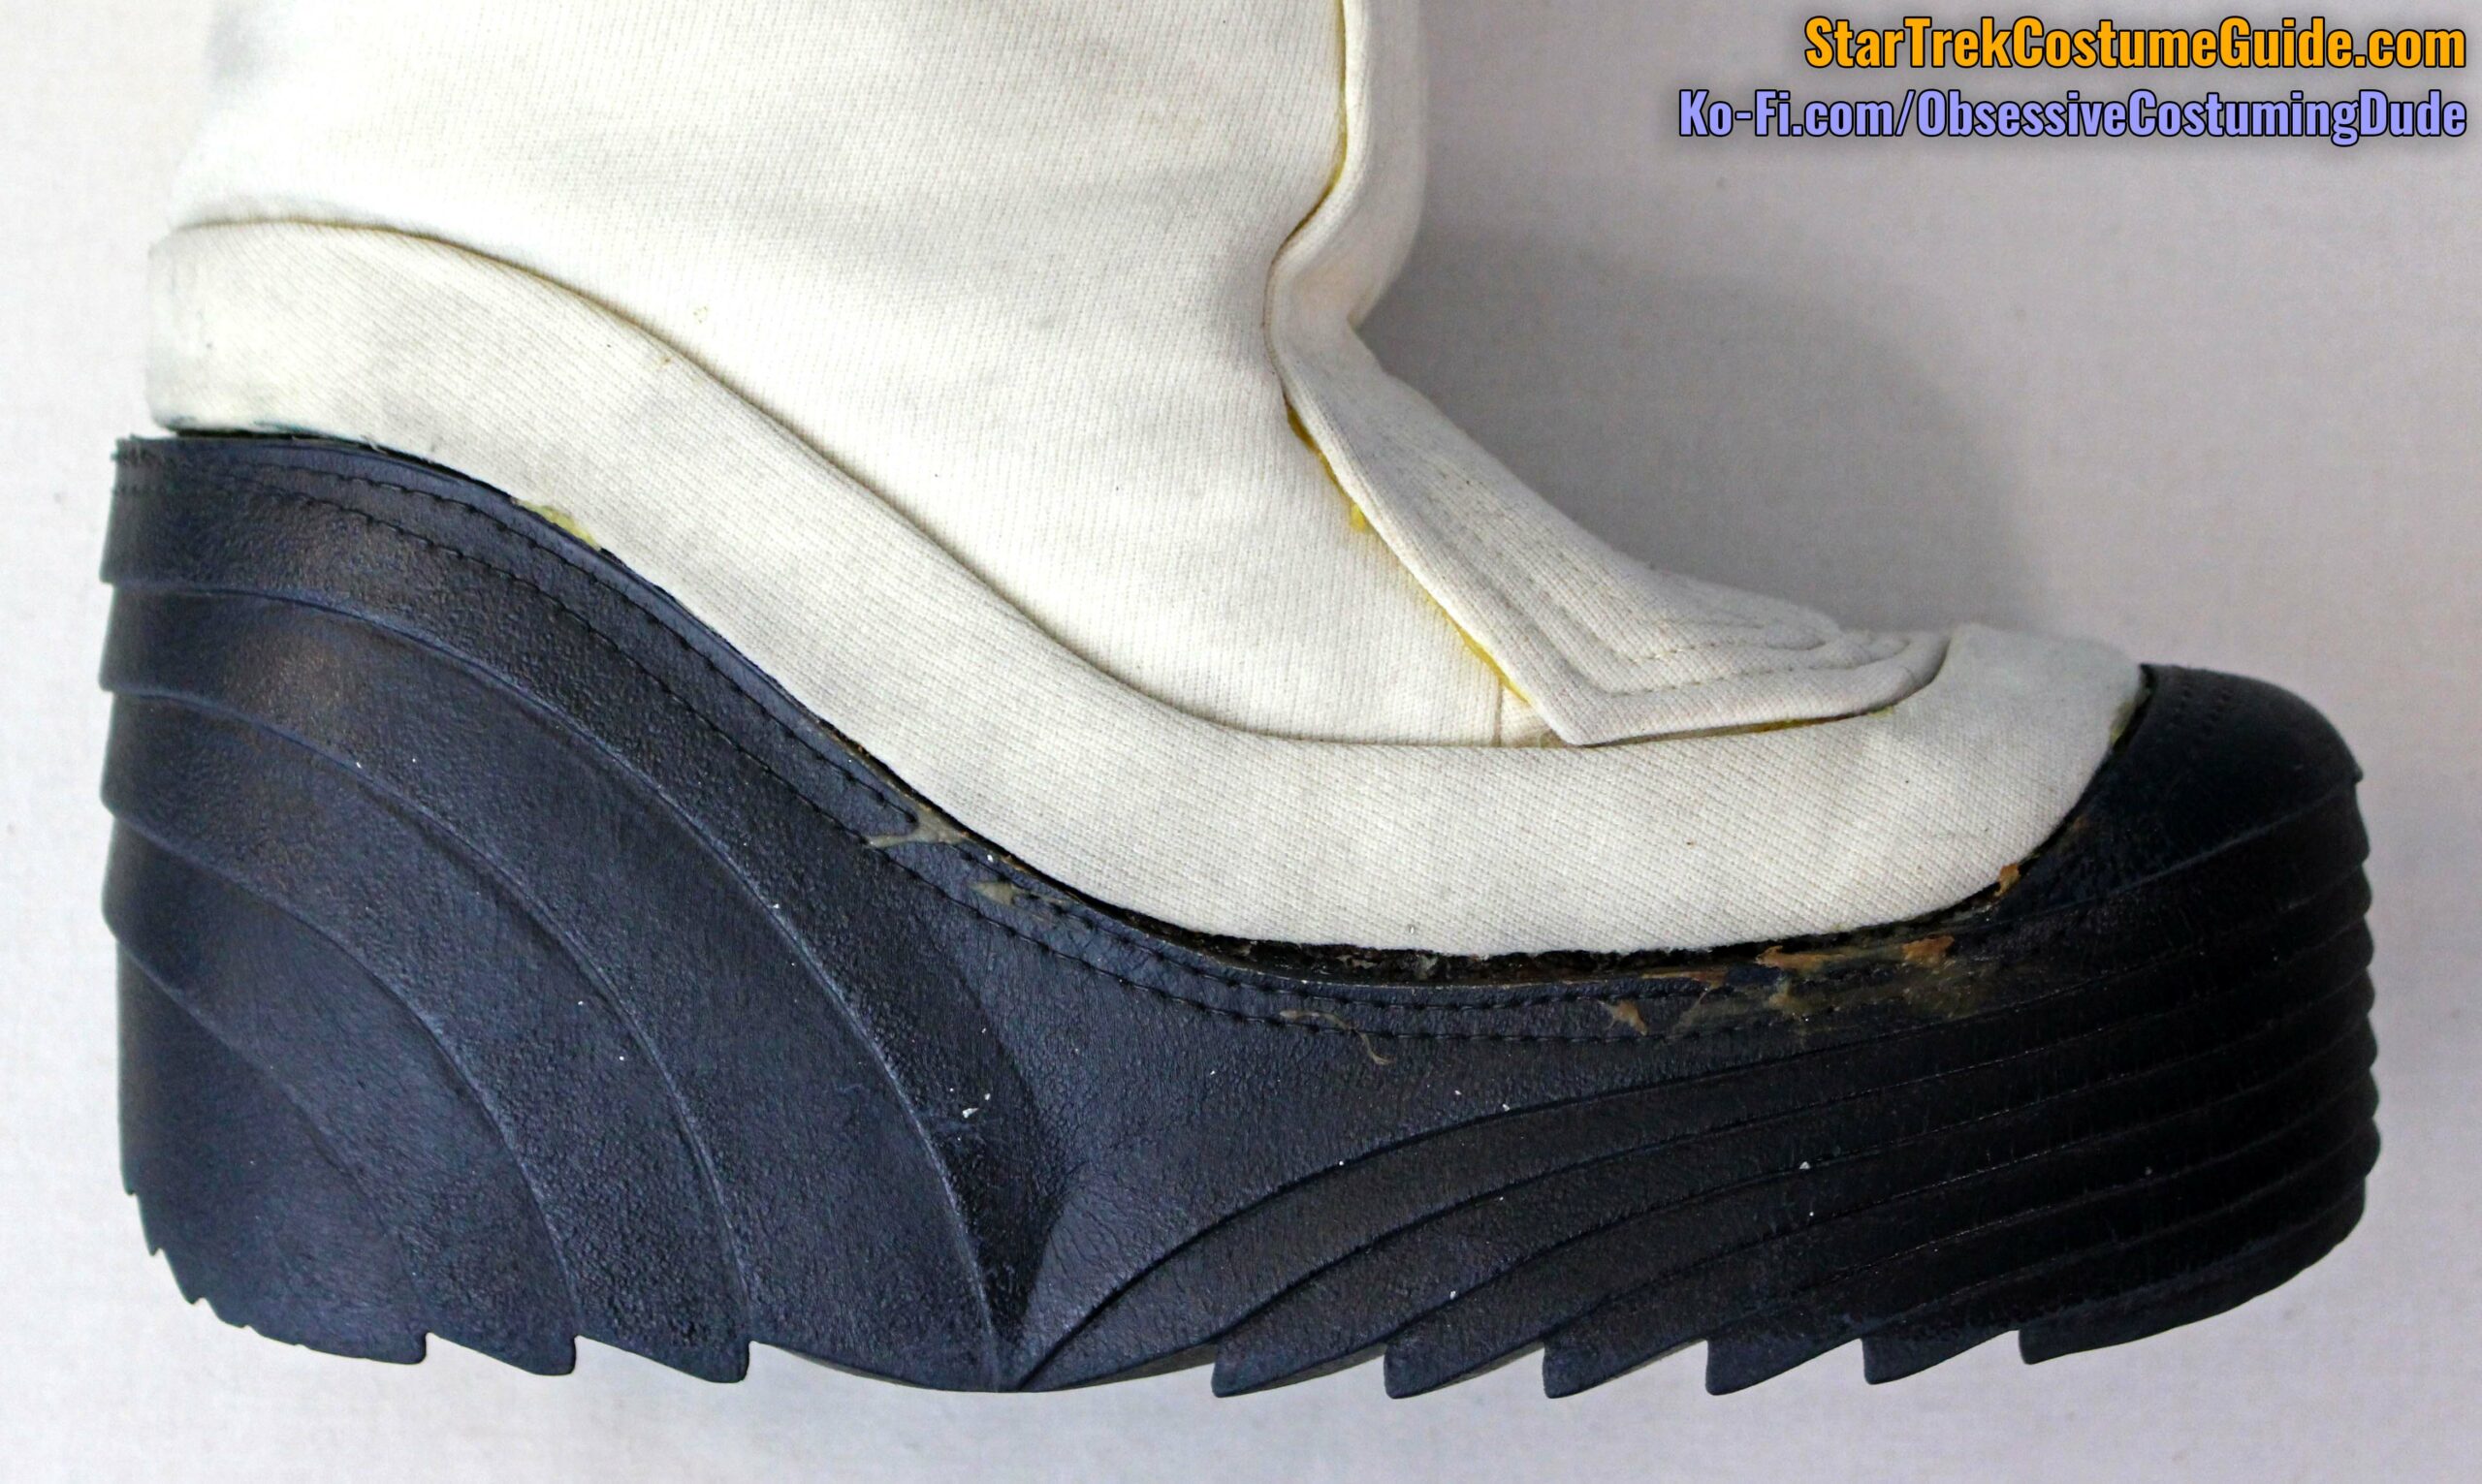
BOOTS
Last but not least, here’s a look at the boots.
I’m not at all an expert in footwear, so I’ve just done the best job I can photographing and describing these boots, and I hope you find it helpful nevertheless. 🙂
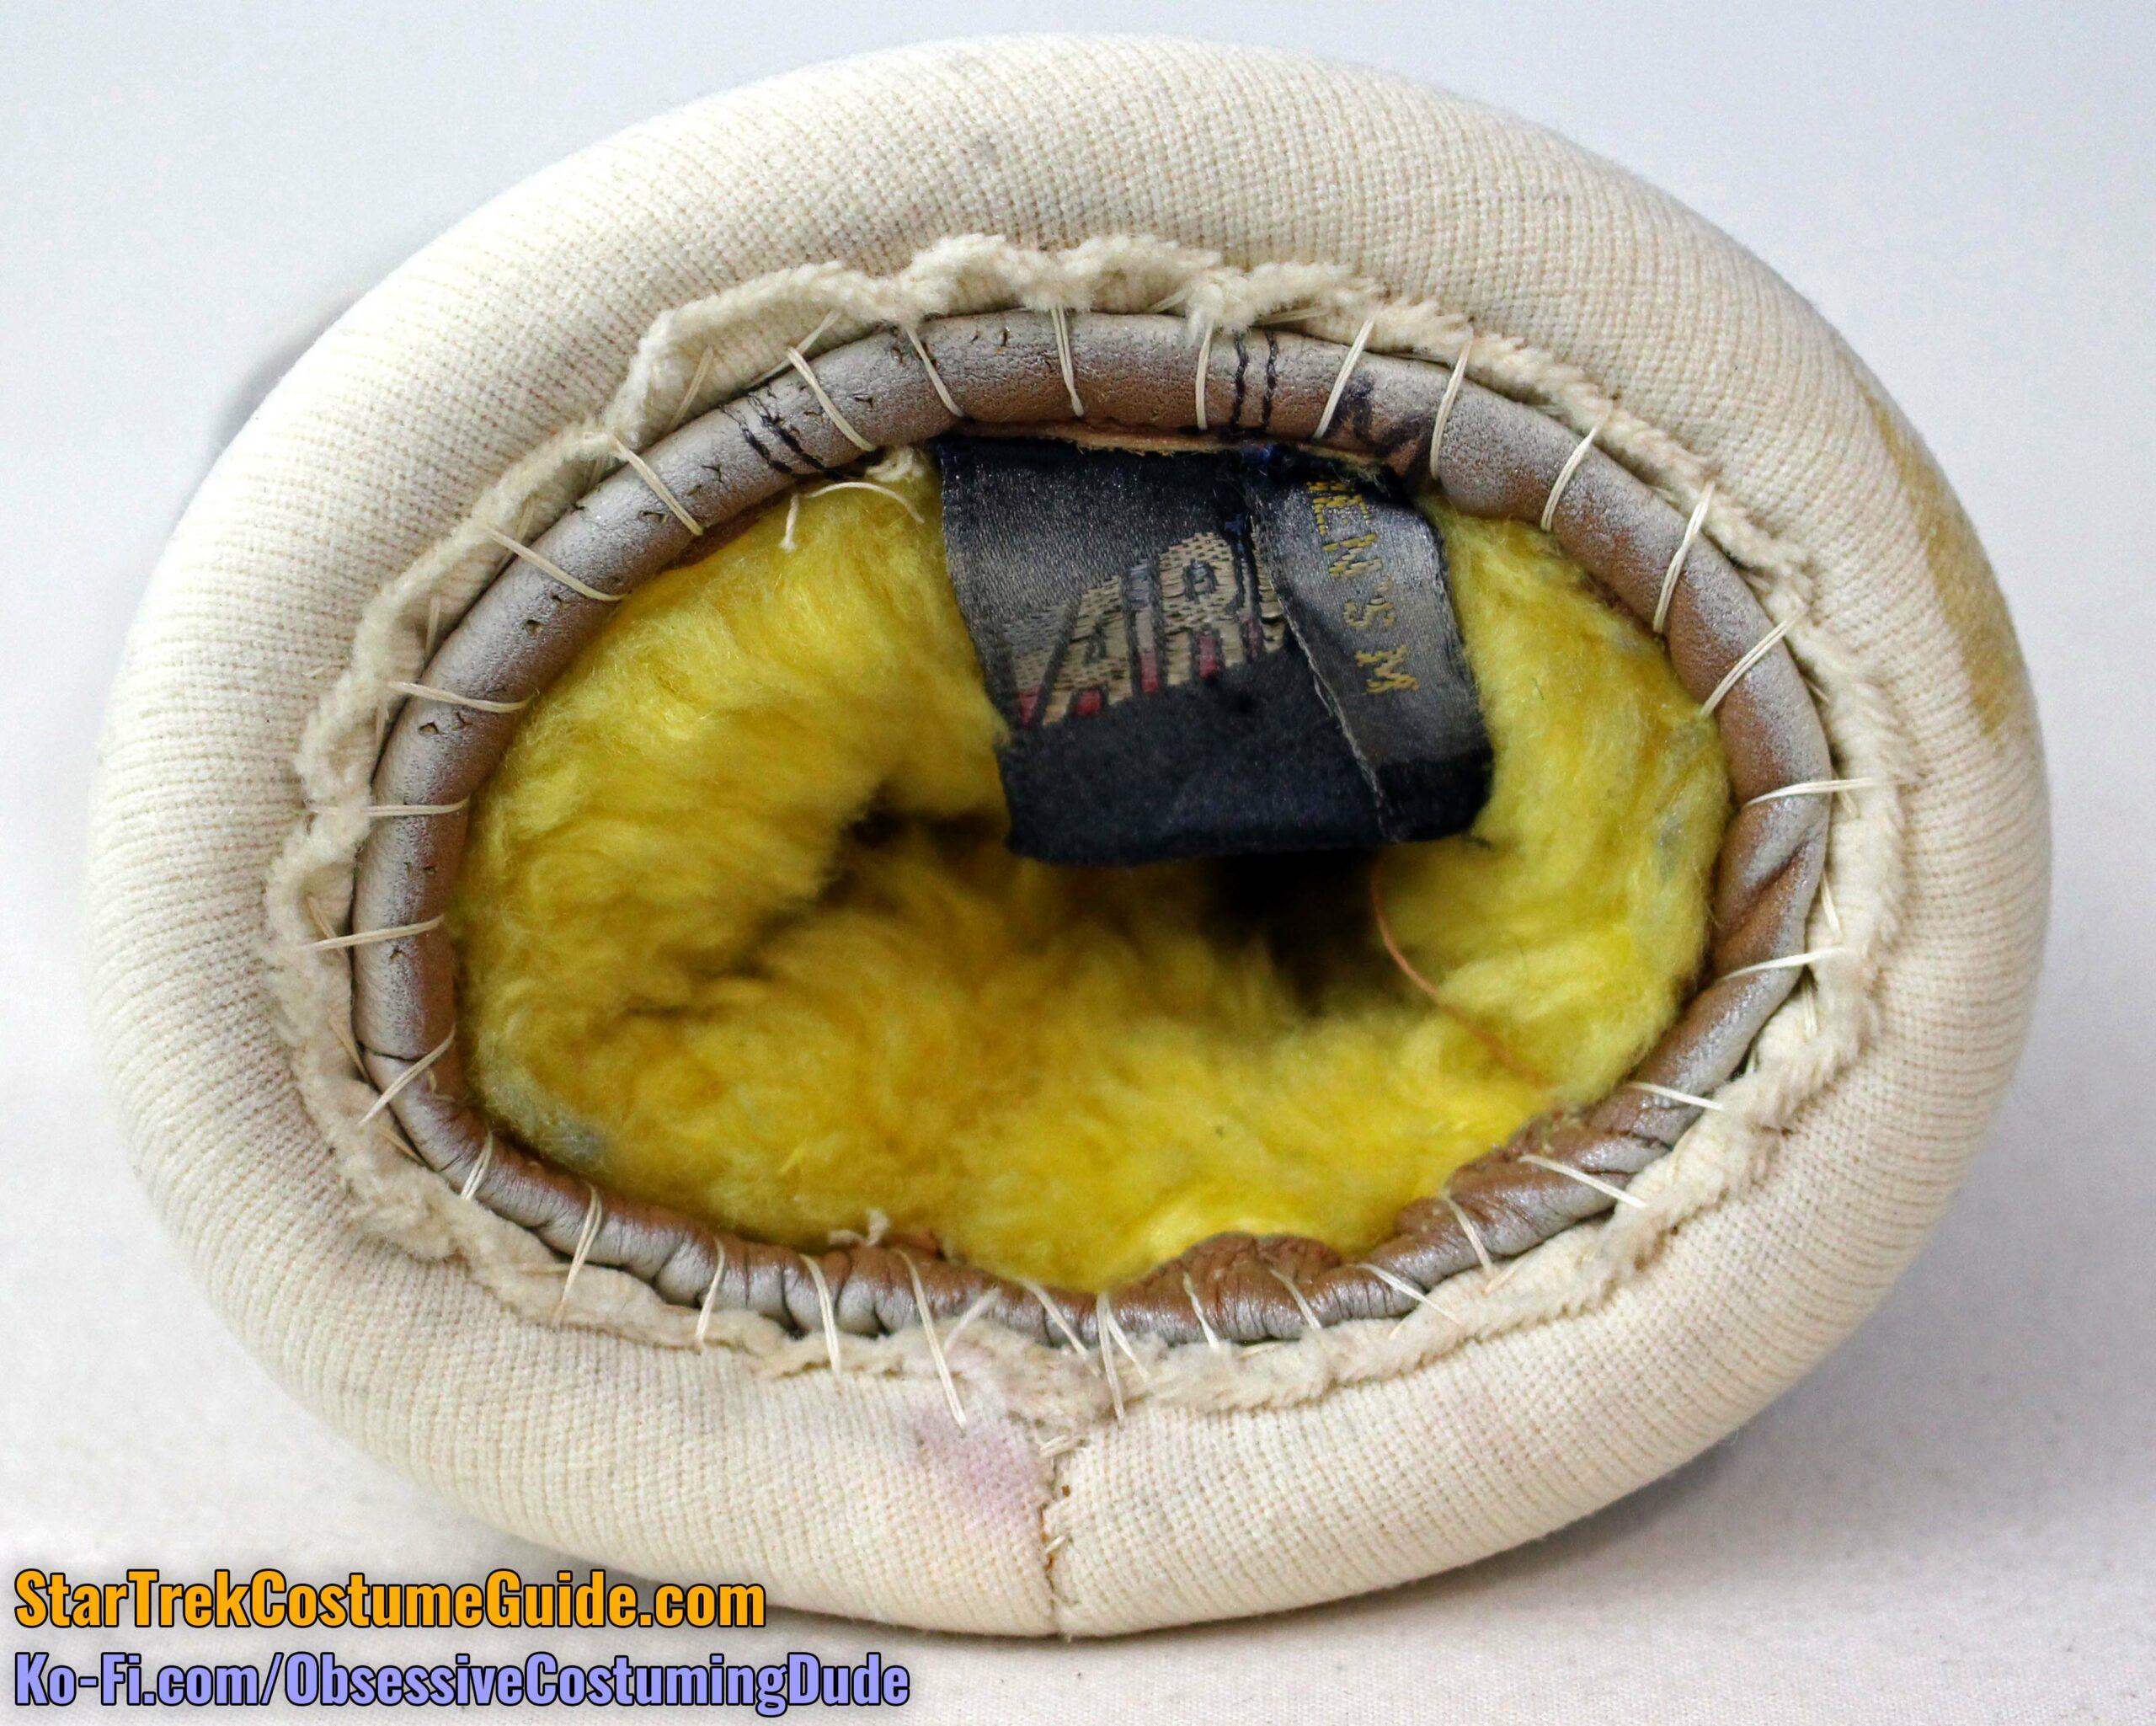
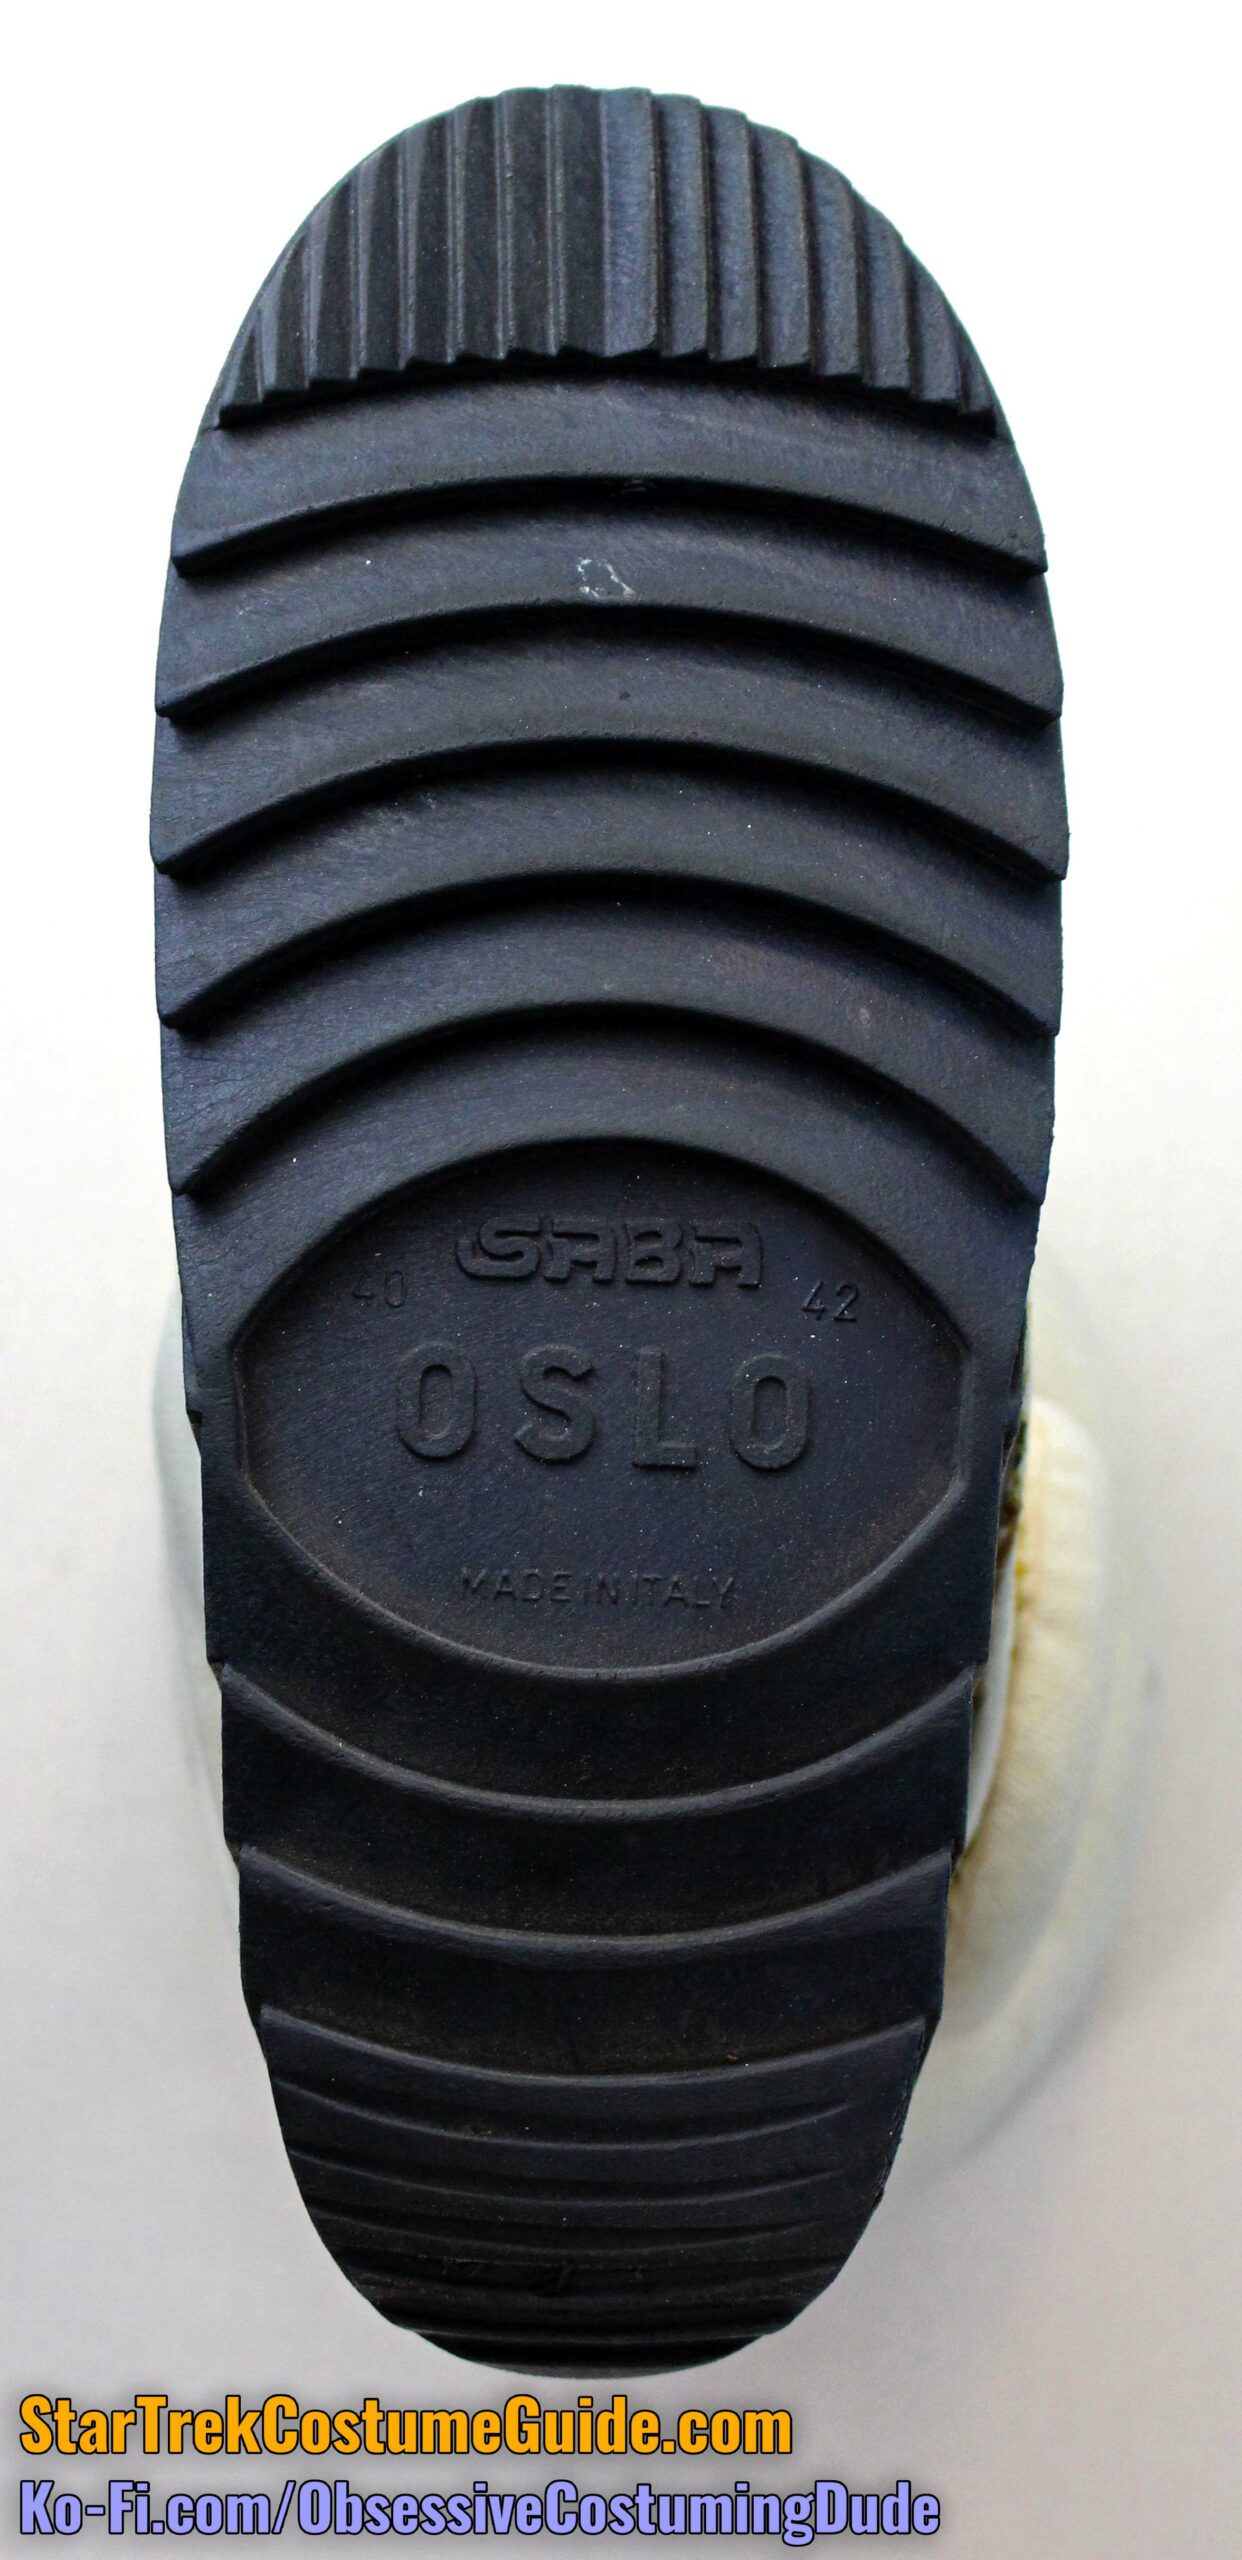
On the bottom of the boot was an embossed label; “Saba” seems to have been the brand name and “Oslo” the type of boot, along with “Made in Italy” and a couple numbers (“40” and “42”) that probably indicate sizing in centimeters.
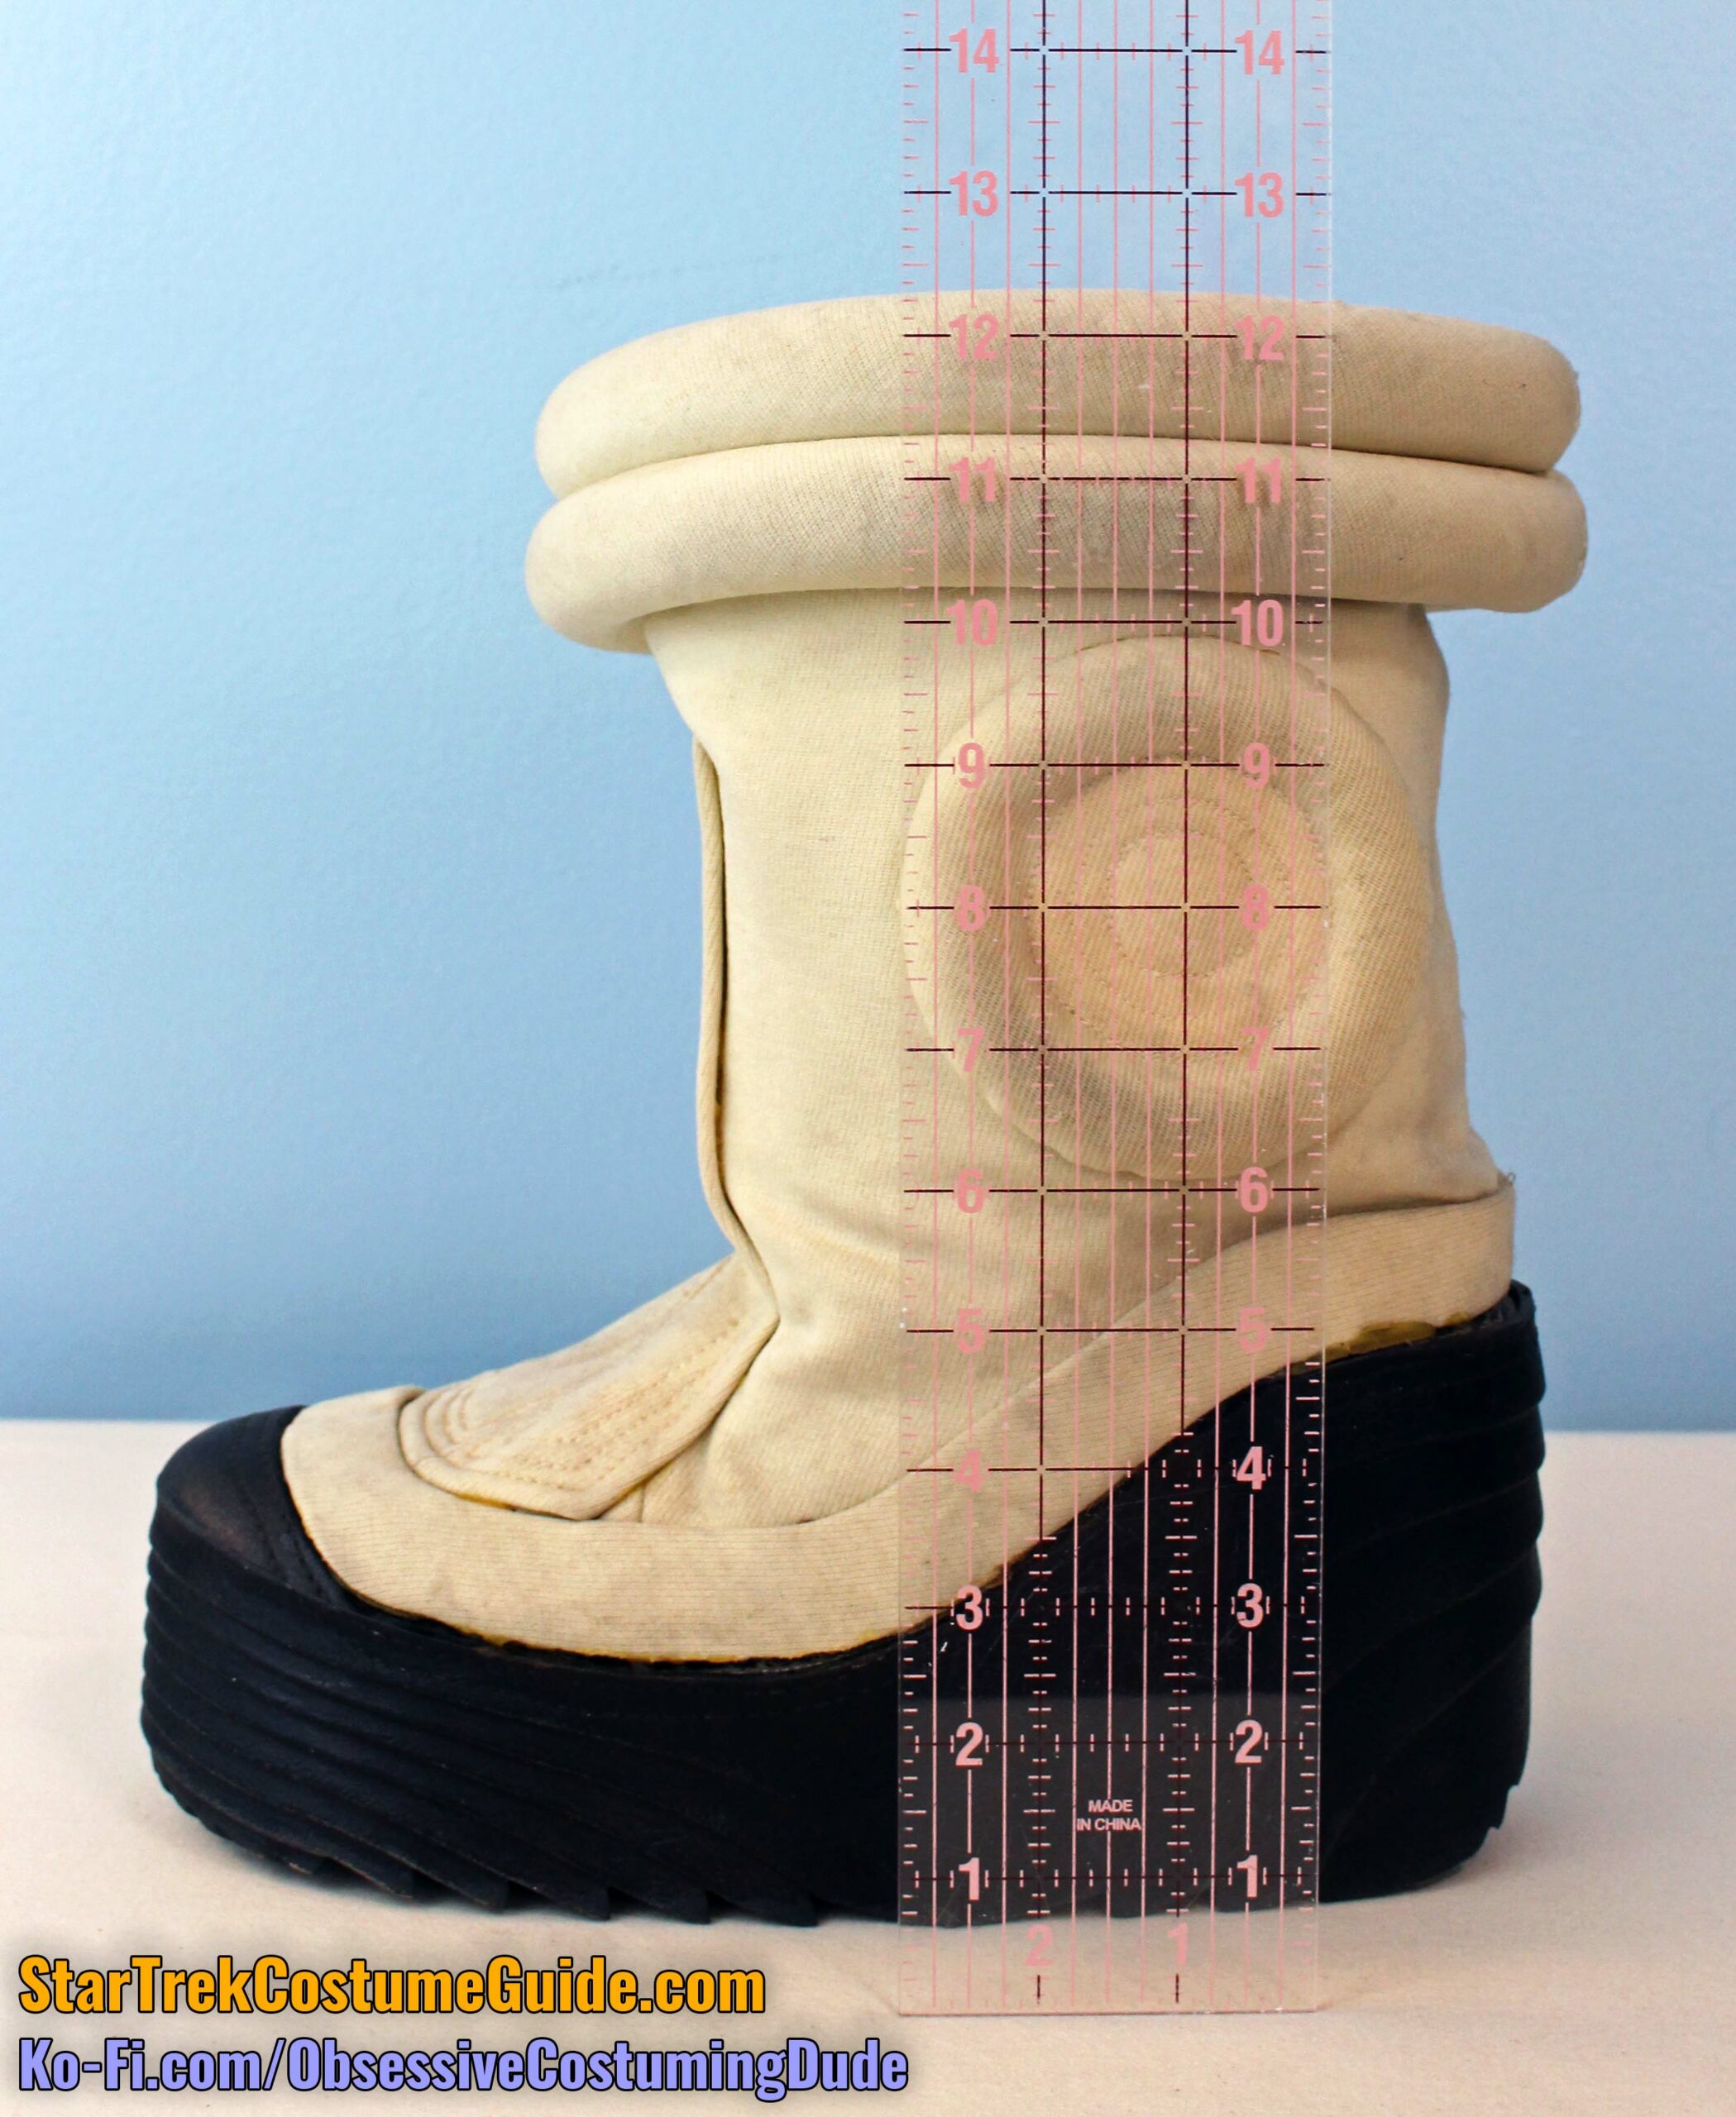
The boots were approximately 12 ⅜” tall.
The boots were either retail boots that (with the exception of the large black soles) were entirely covered with off-white cavalry twill, or they were custom-made to fit the aforementioned soles.
The boots were embellished with four distinctive accents:
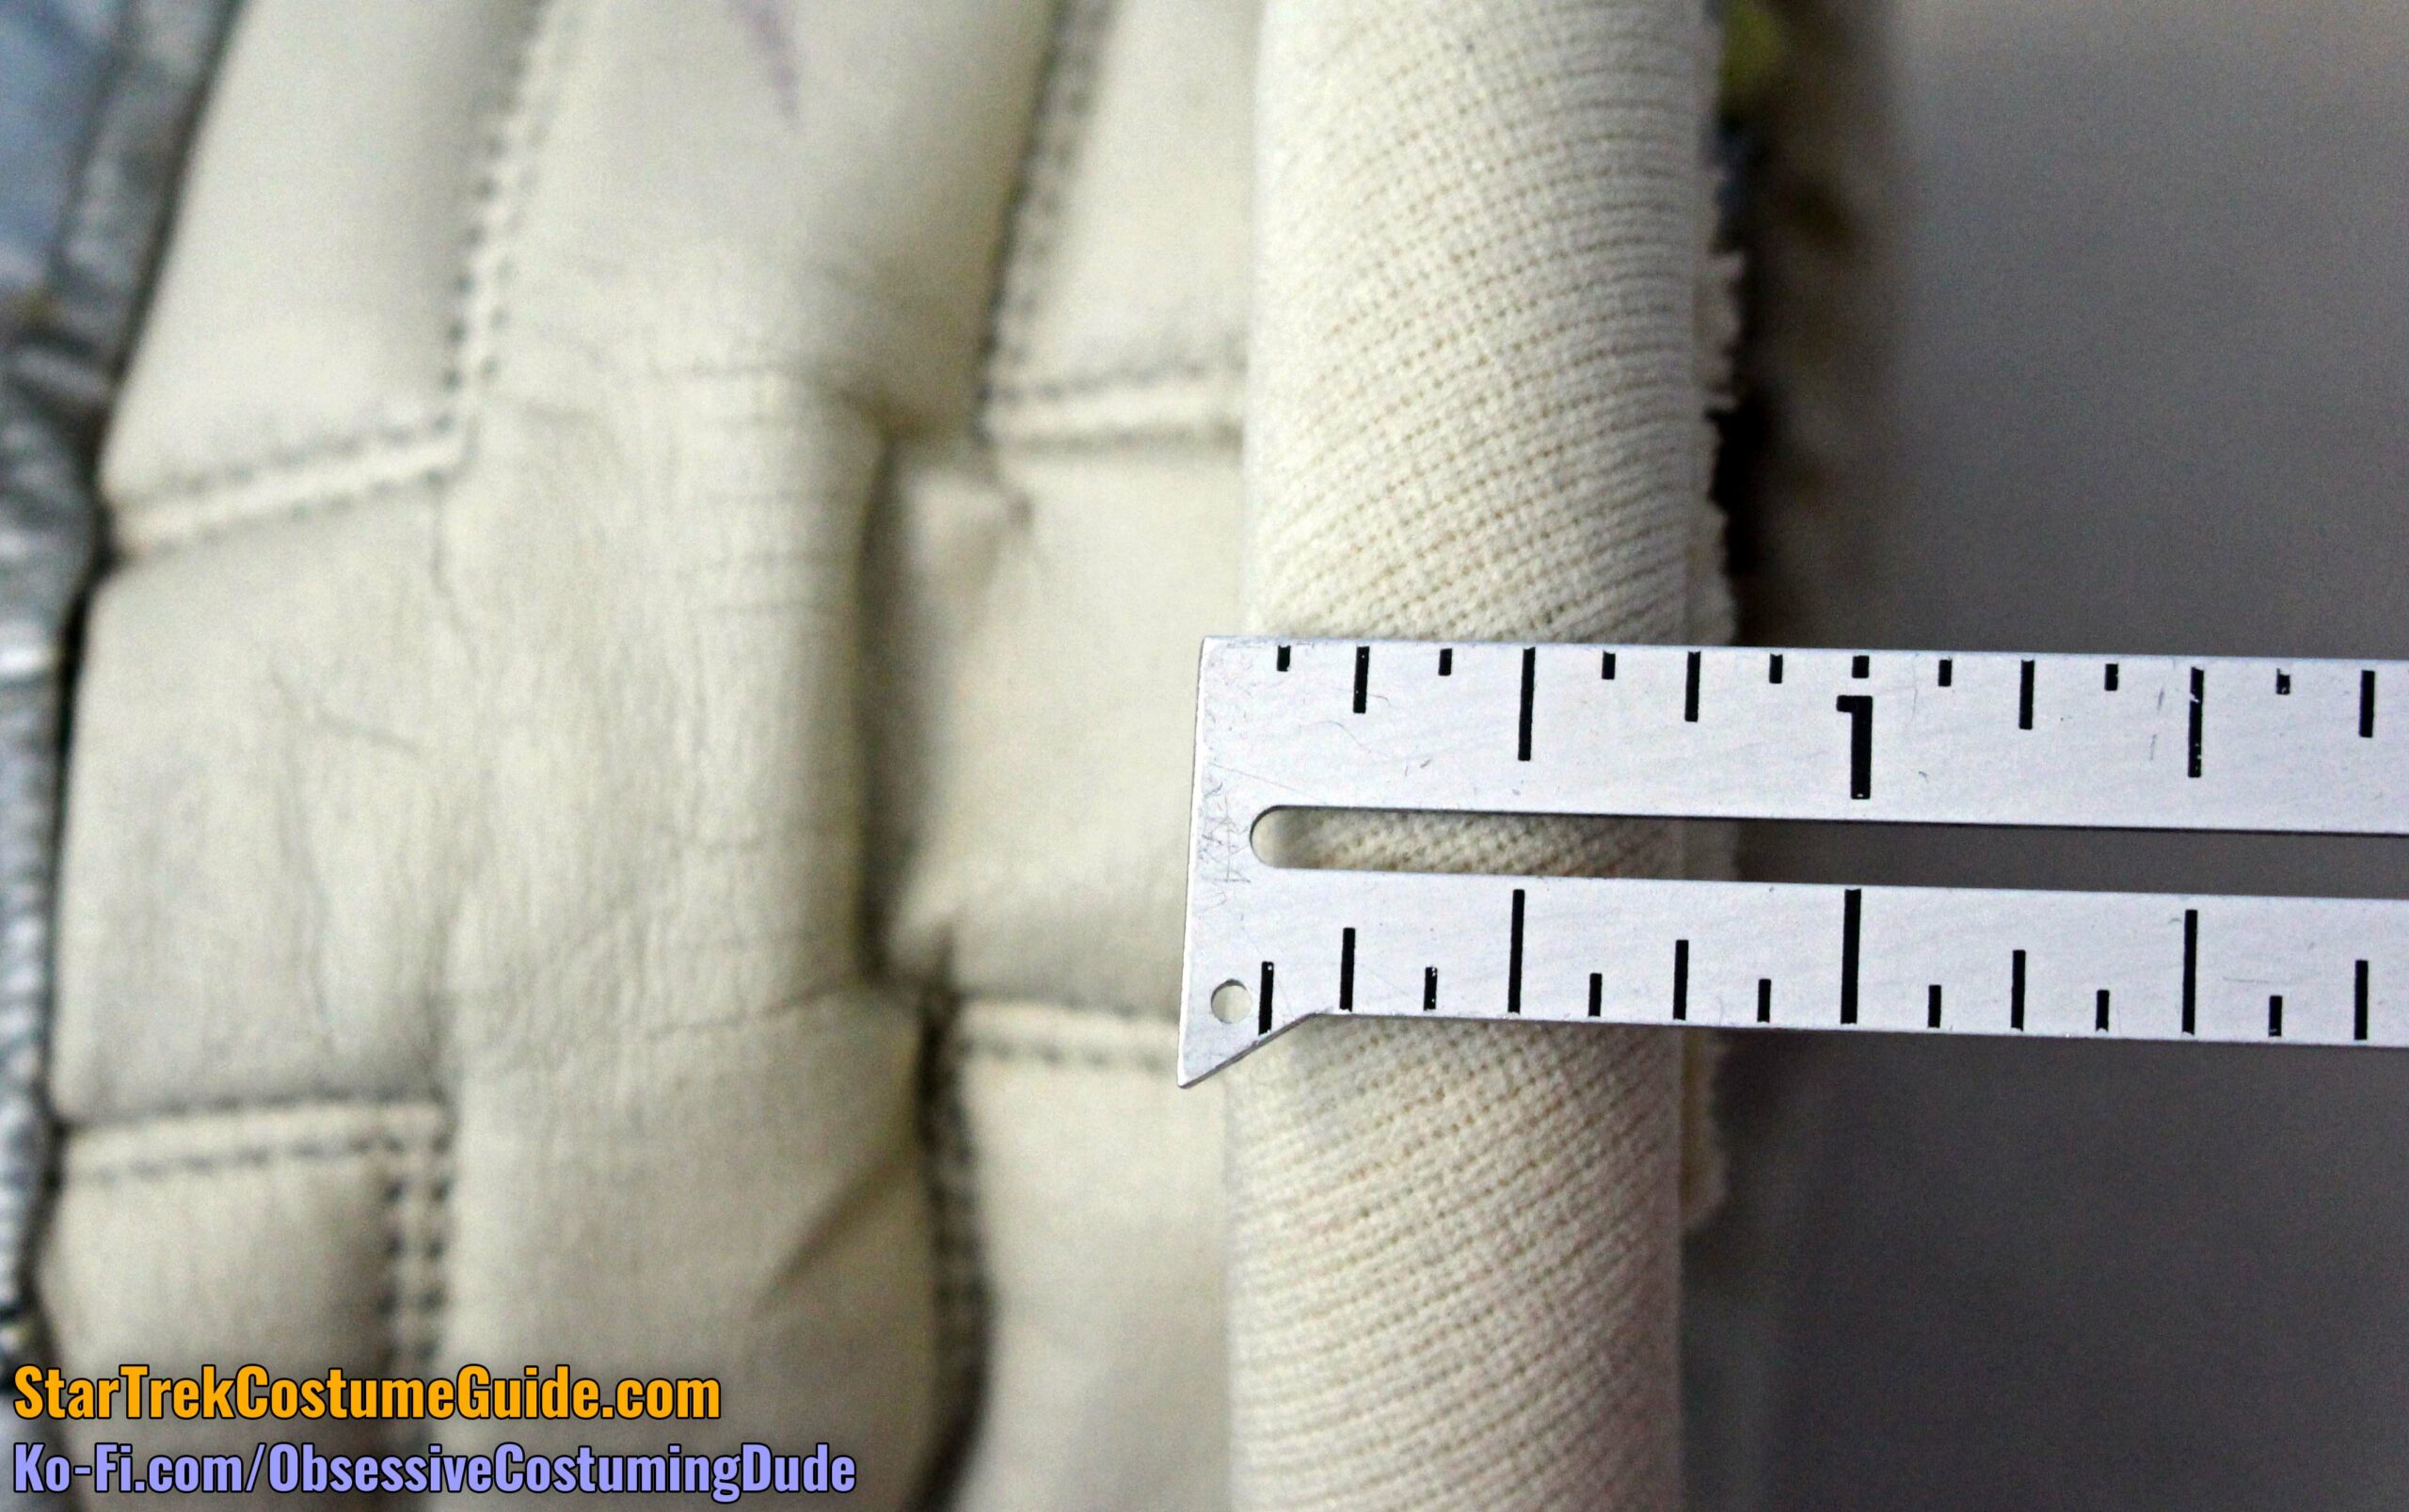
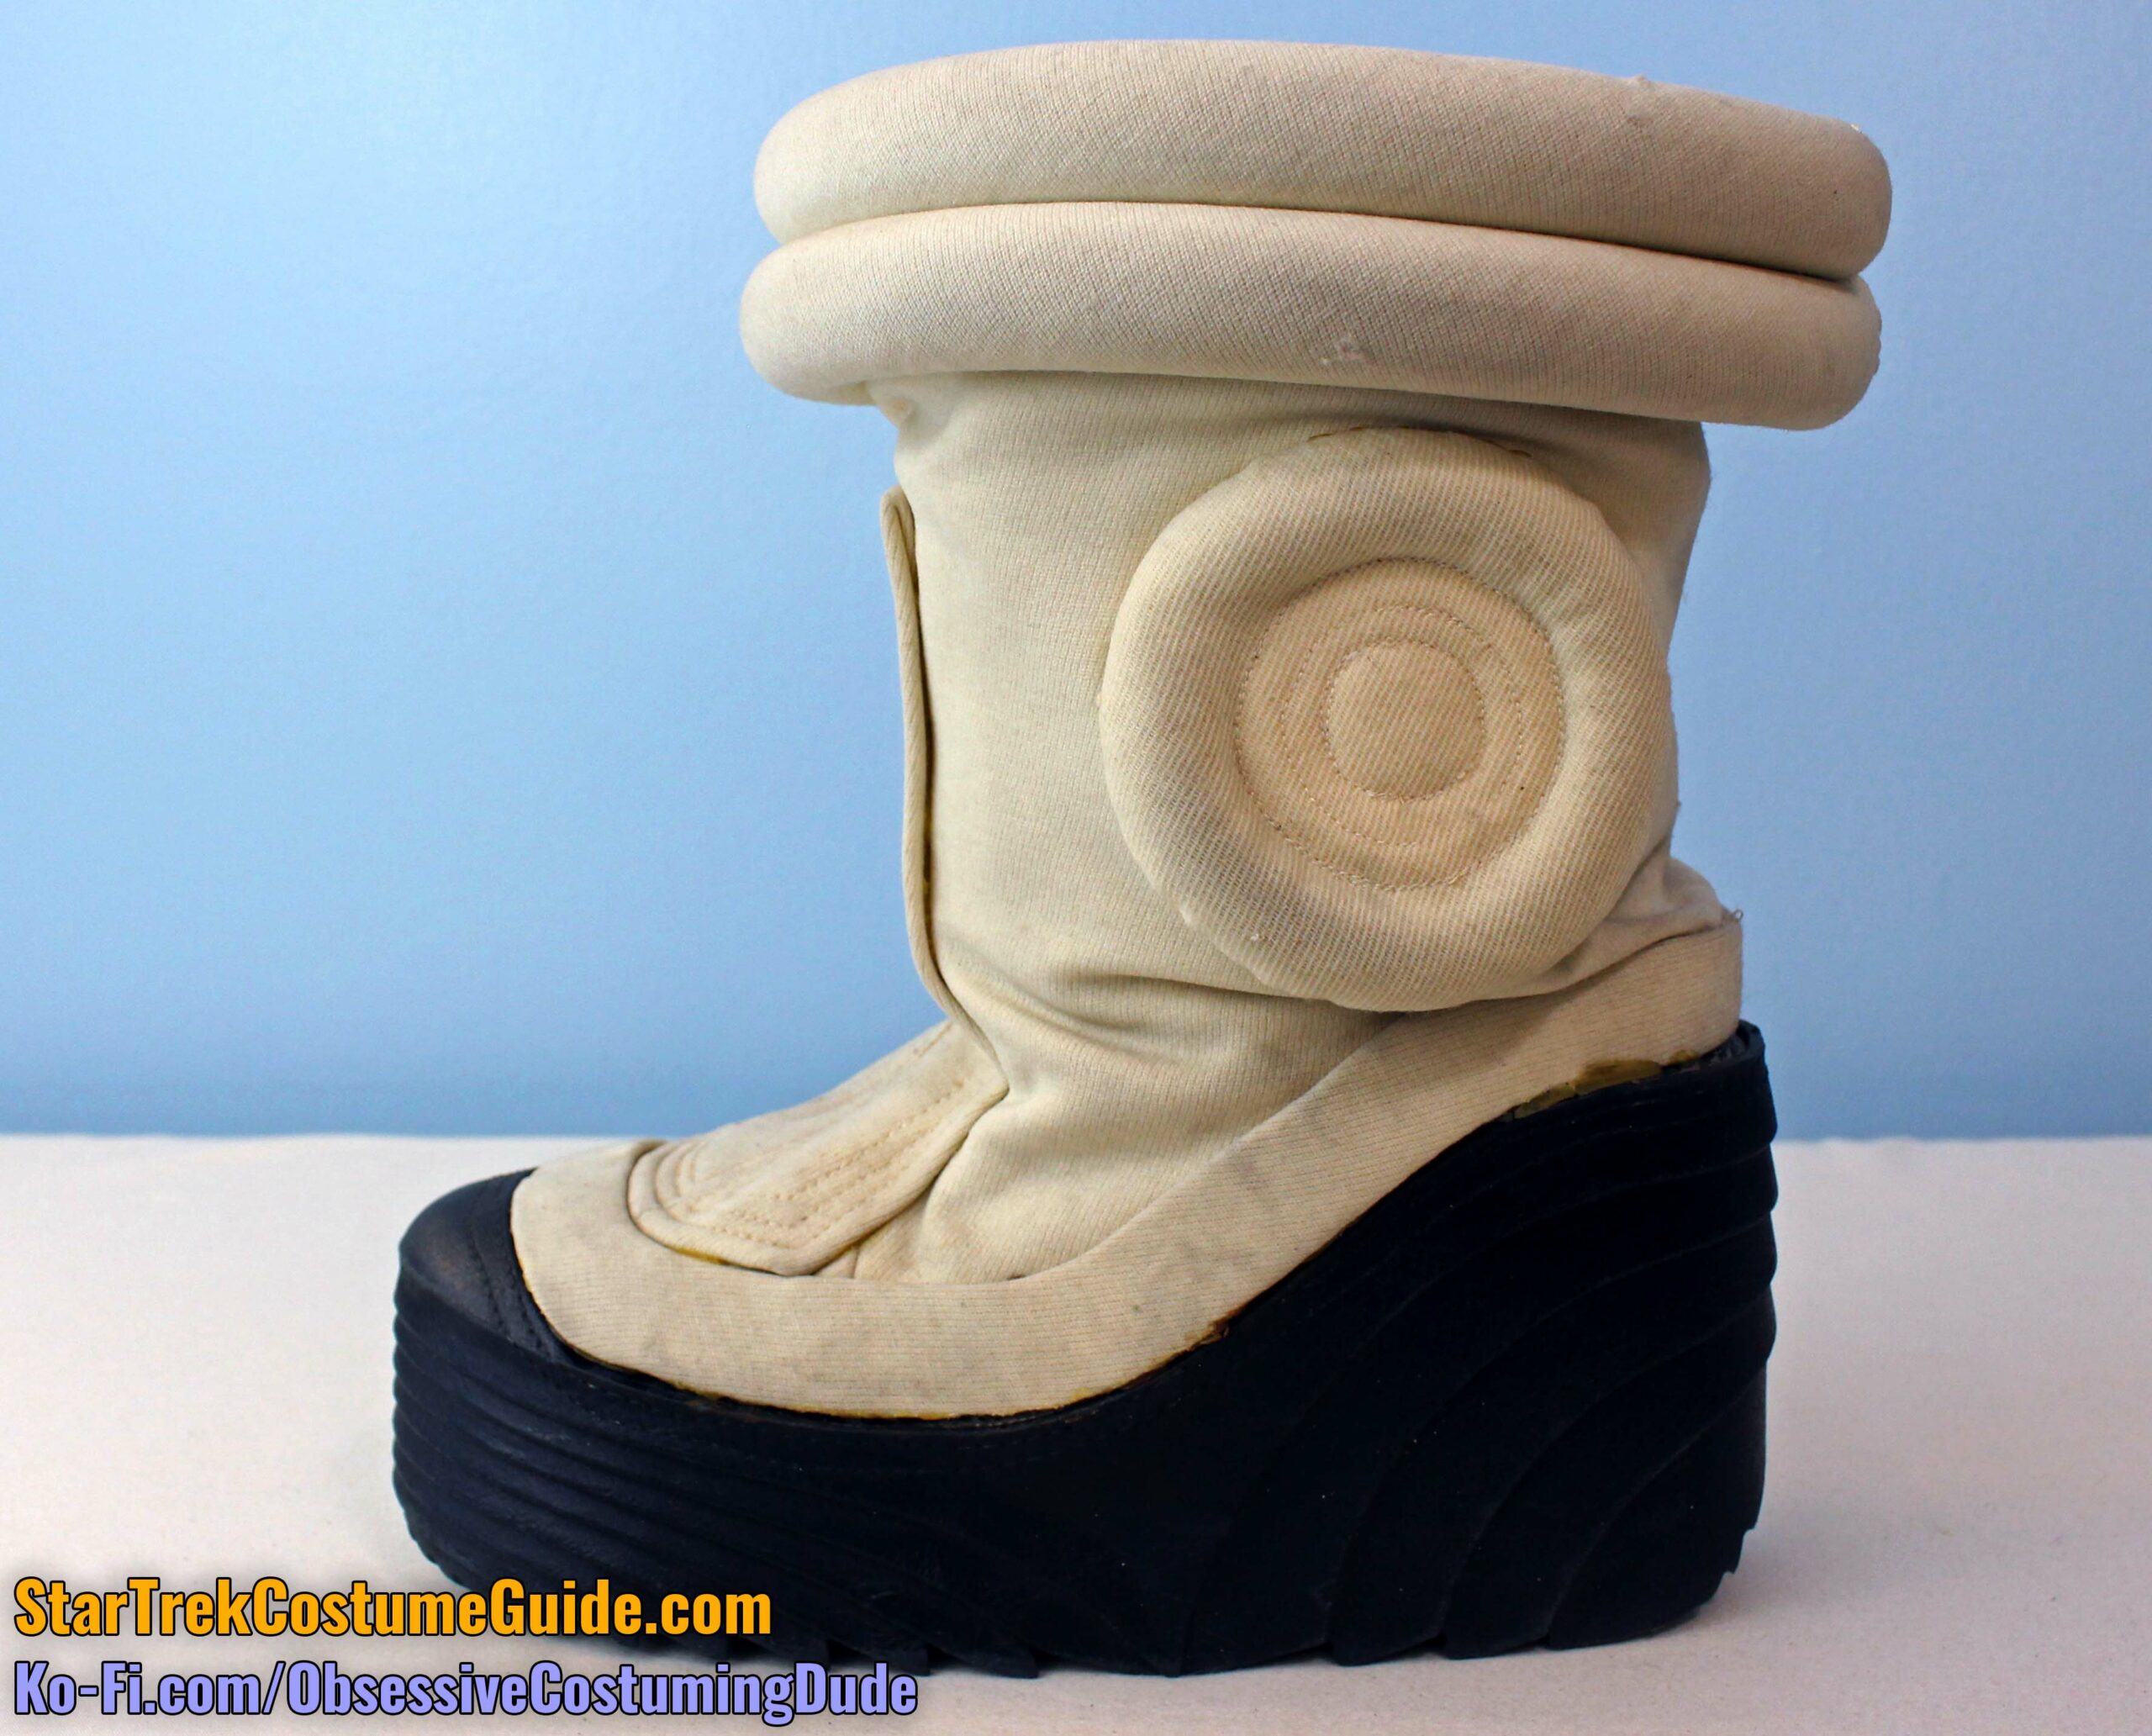
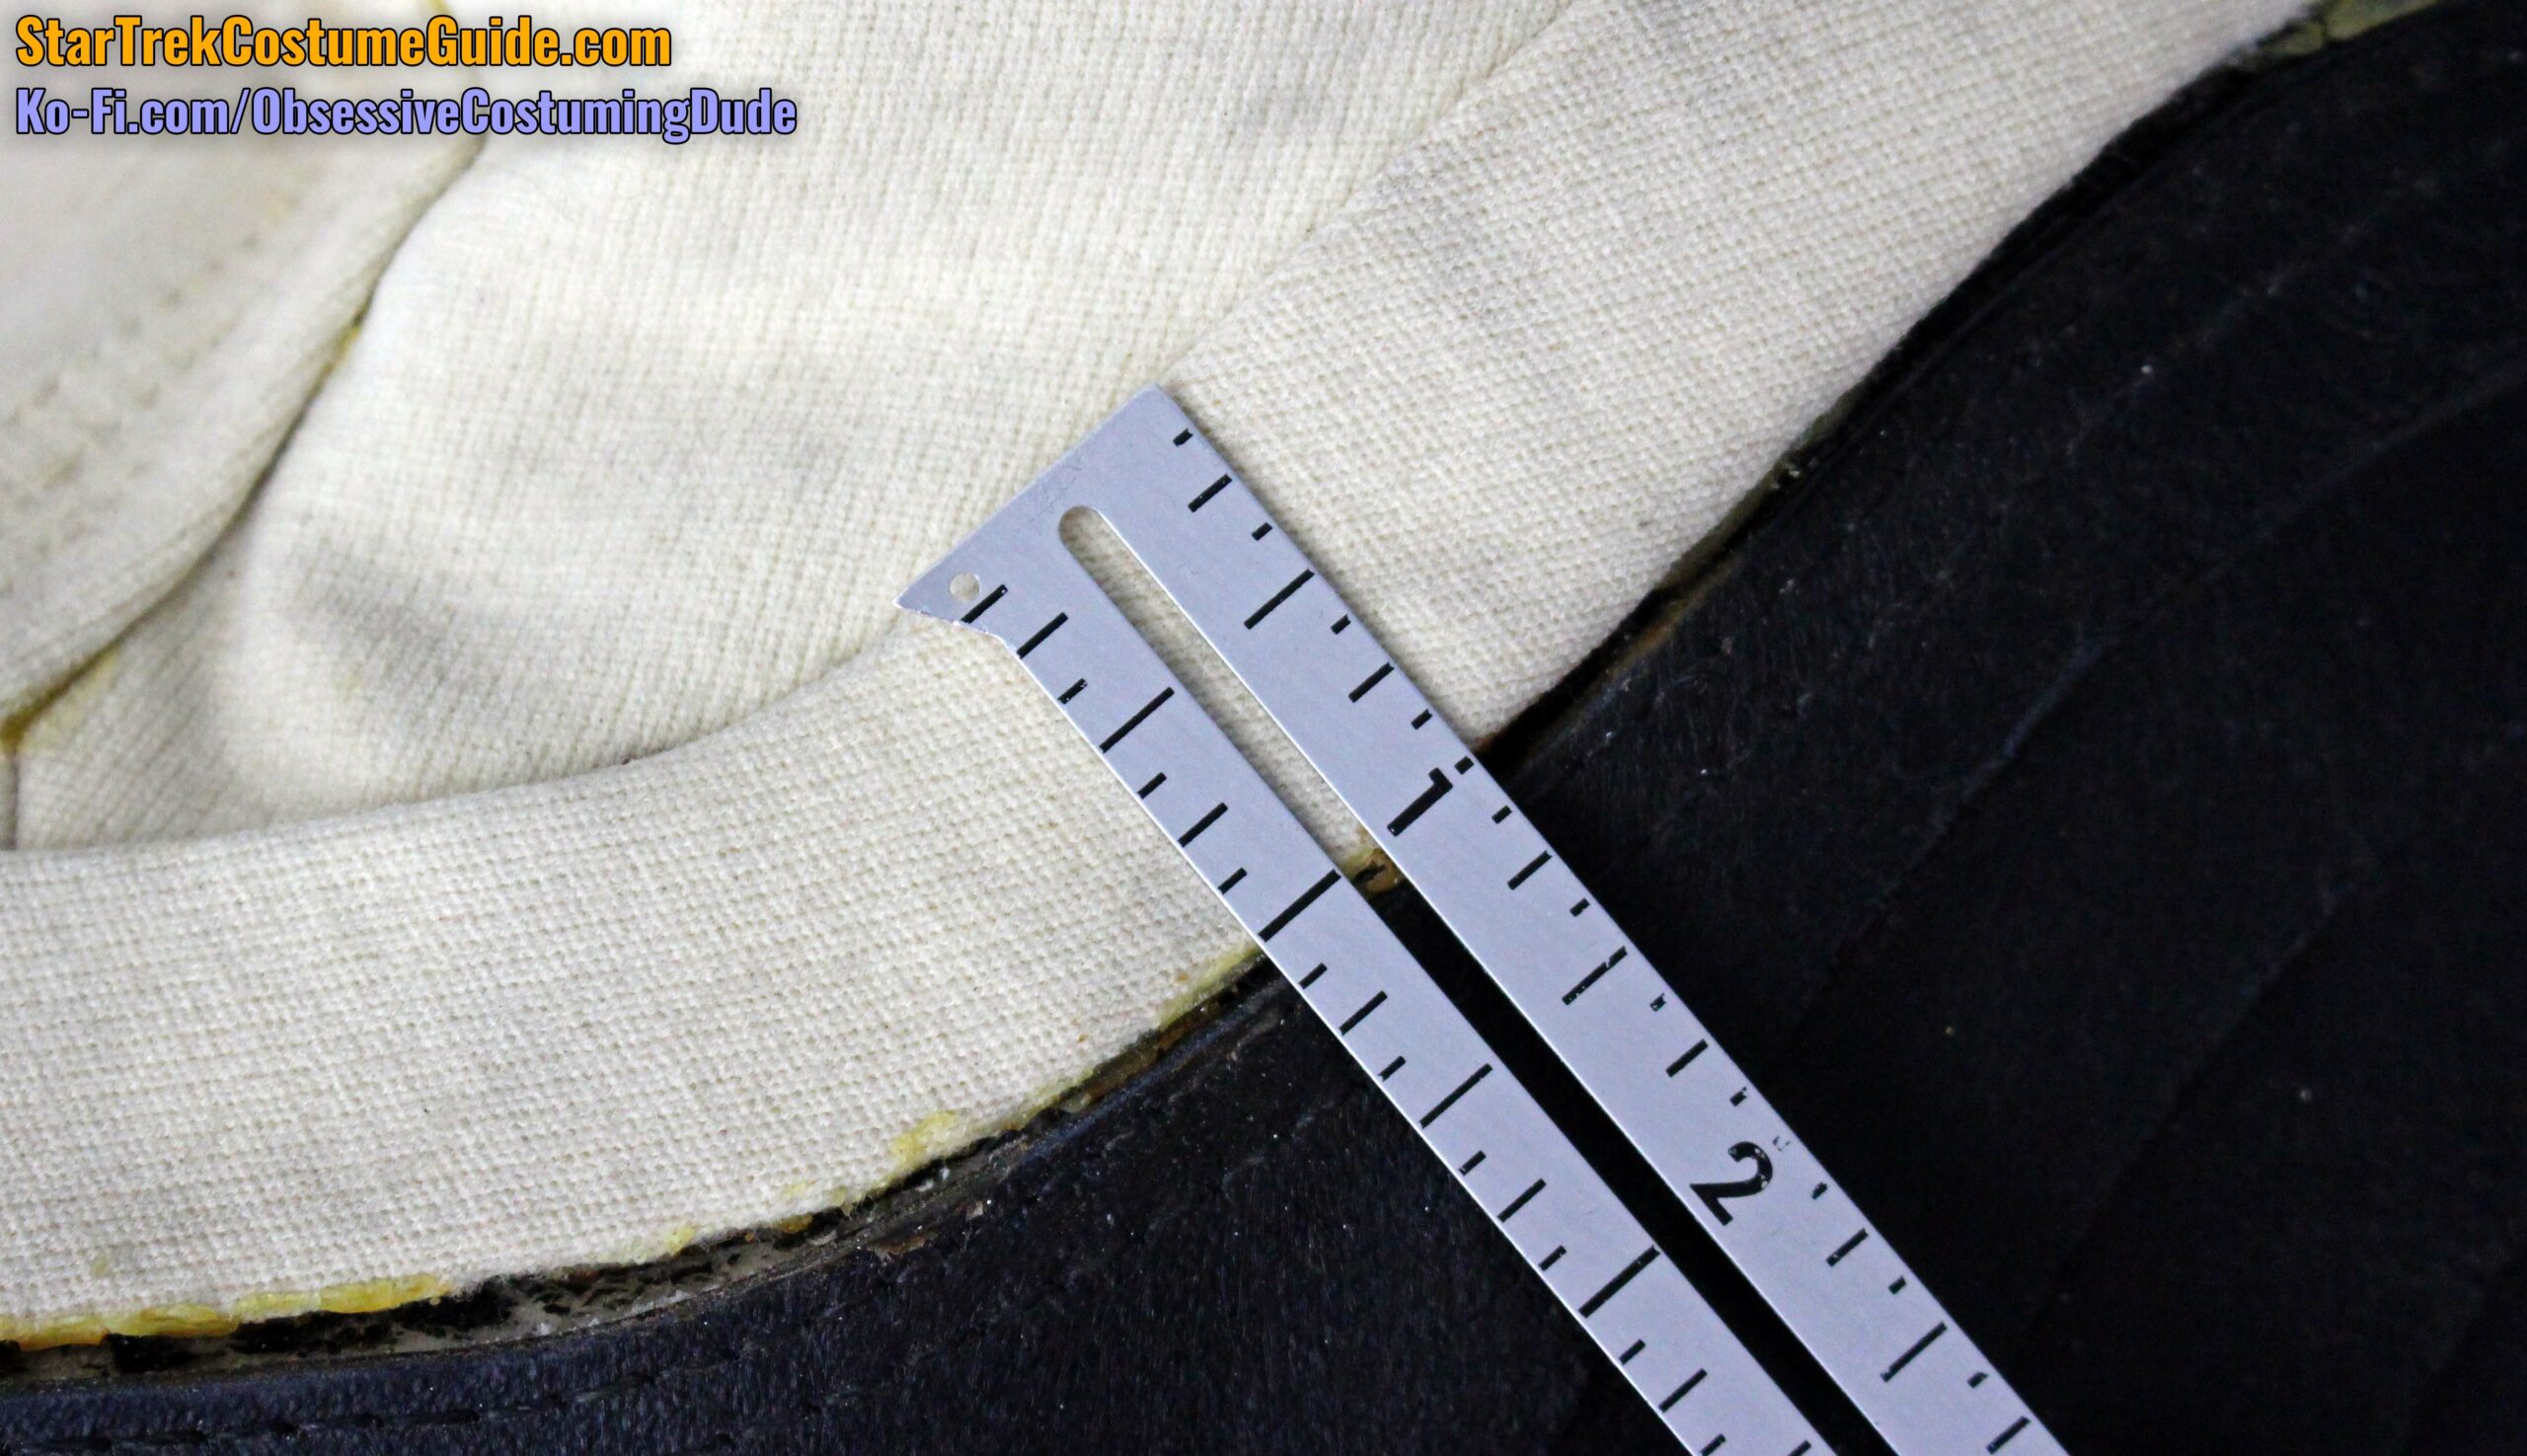
First, two large bands of piping were added around the upper edges of the boots.
These piping bands were both 1” in diameter and again appear to have been the off-white cavalry twill wrapped around cording.
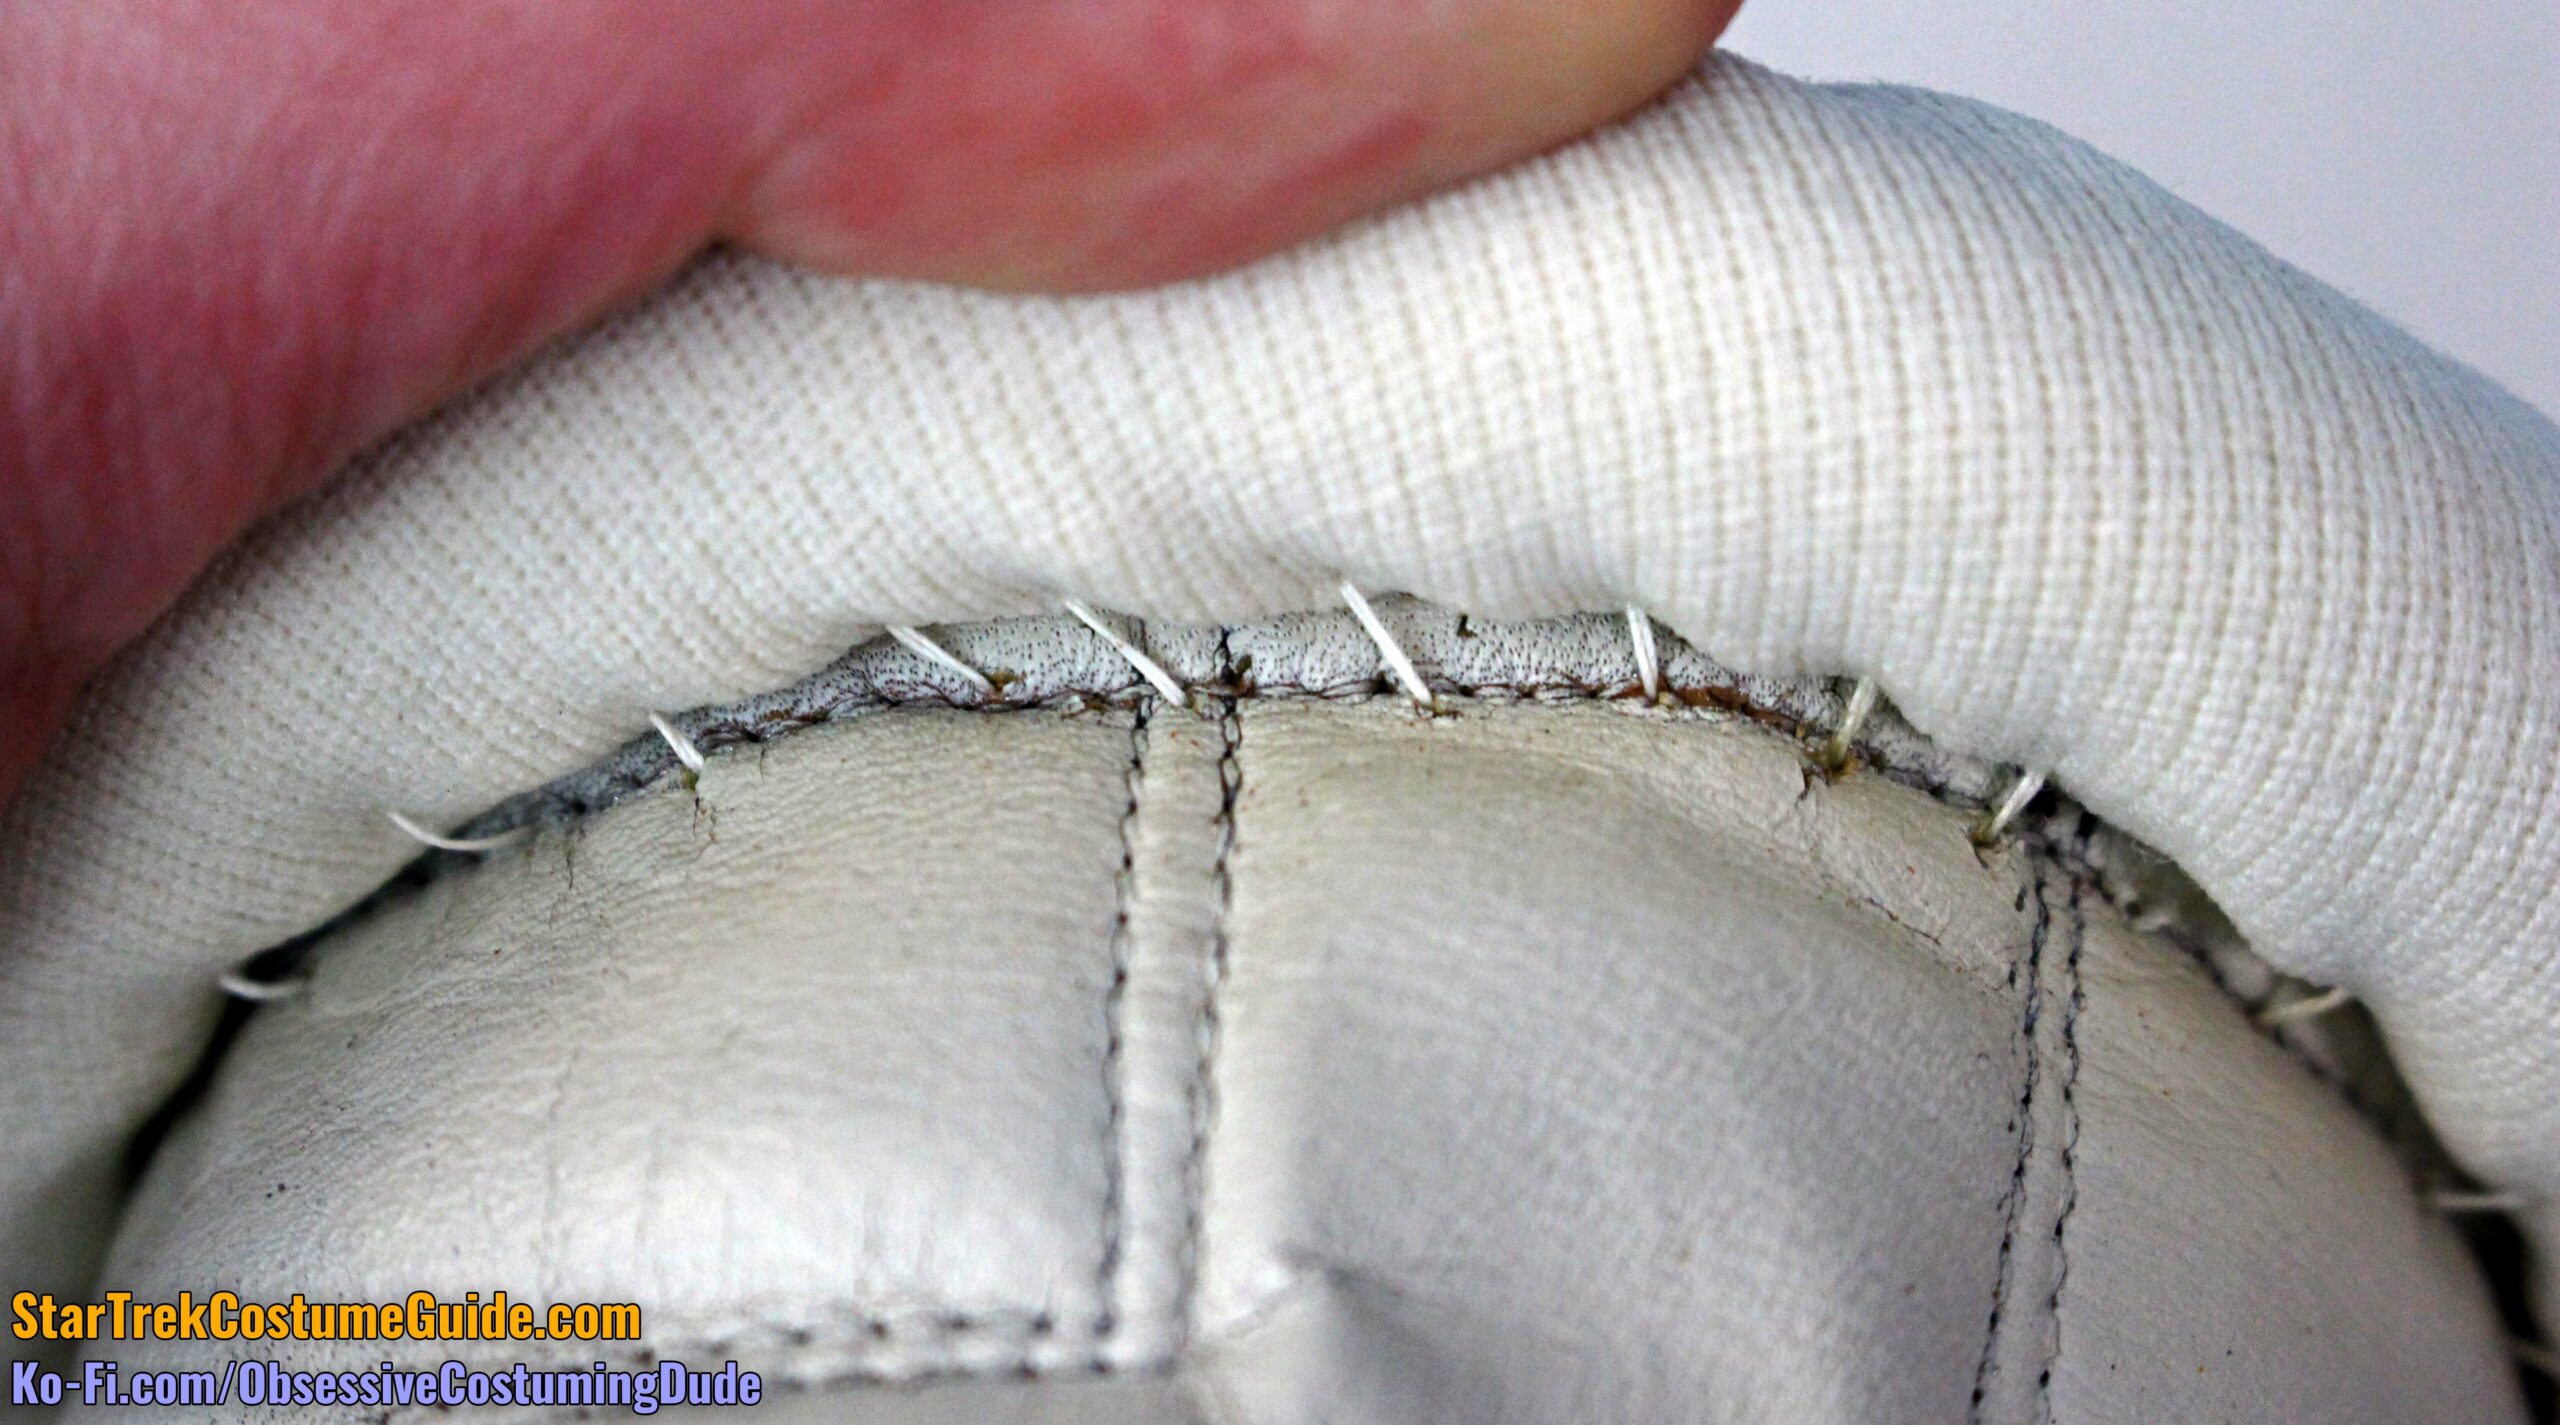
I couldn’t determine for sure, but the piping assembly seems to have been hand-sewn to the boots (or at least the fabric covering the boots).
The extra fabric at the top of the boots was simply turned over and hand-sewn to the interior.
On the outside of the boot was a circular accent, also cavalry twill:
This circular accent was 3 ¾” in diameter.
The outer “ring” appears to have been ¾” upholstery piping cord, while the centermost 2 ¼” was quilted with high-loft batting.
The piping cord was topstitched along its interior edge, and there were two additional circles of topstitching: one about ⅜” inside the cord, and another about ¼” inside the second.
This circular accent was either hand-sewn or glued to the boot; I couldn’t quite tell.
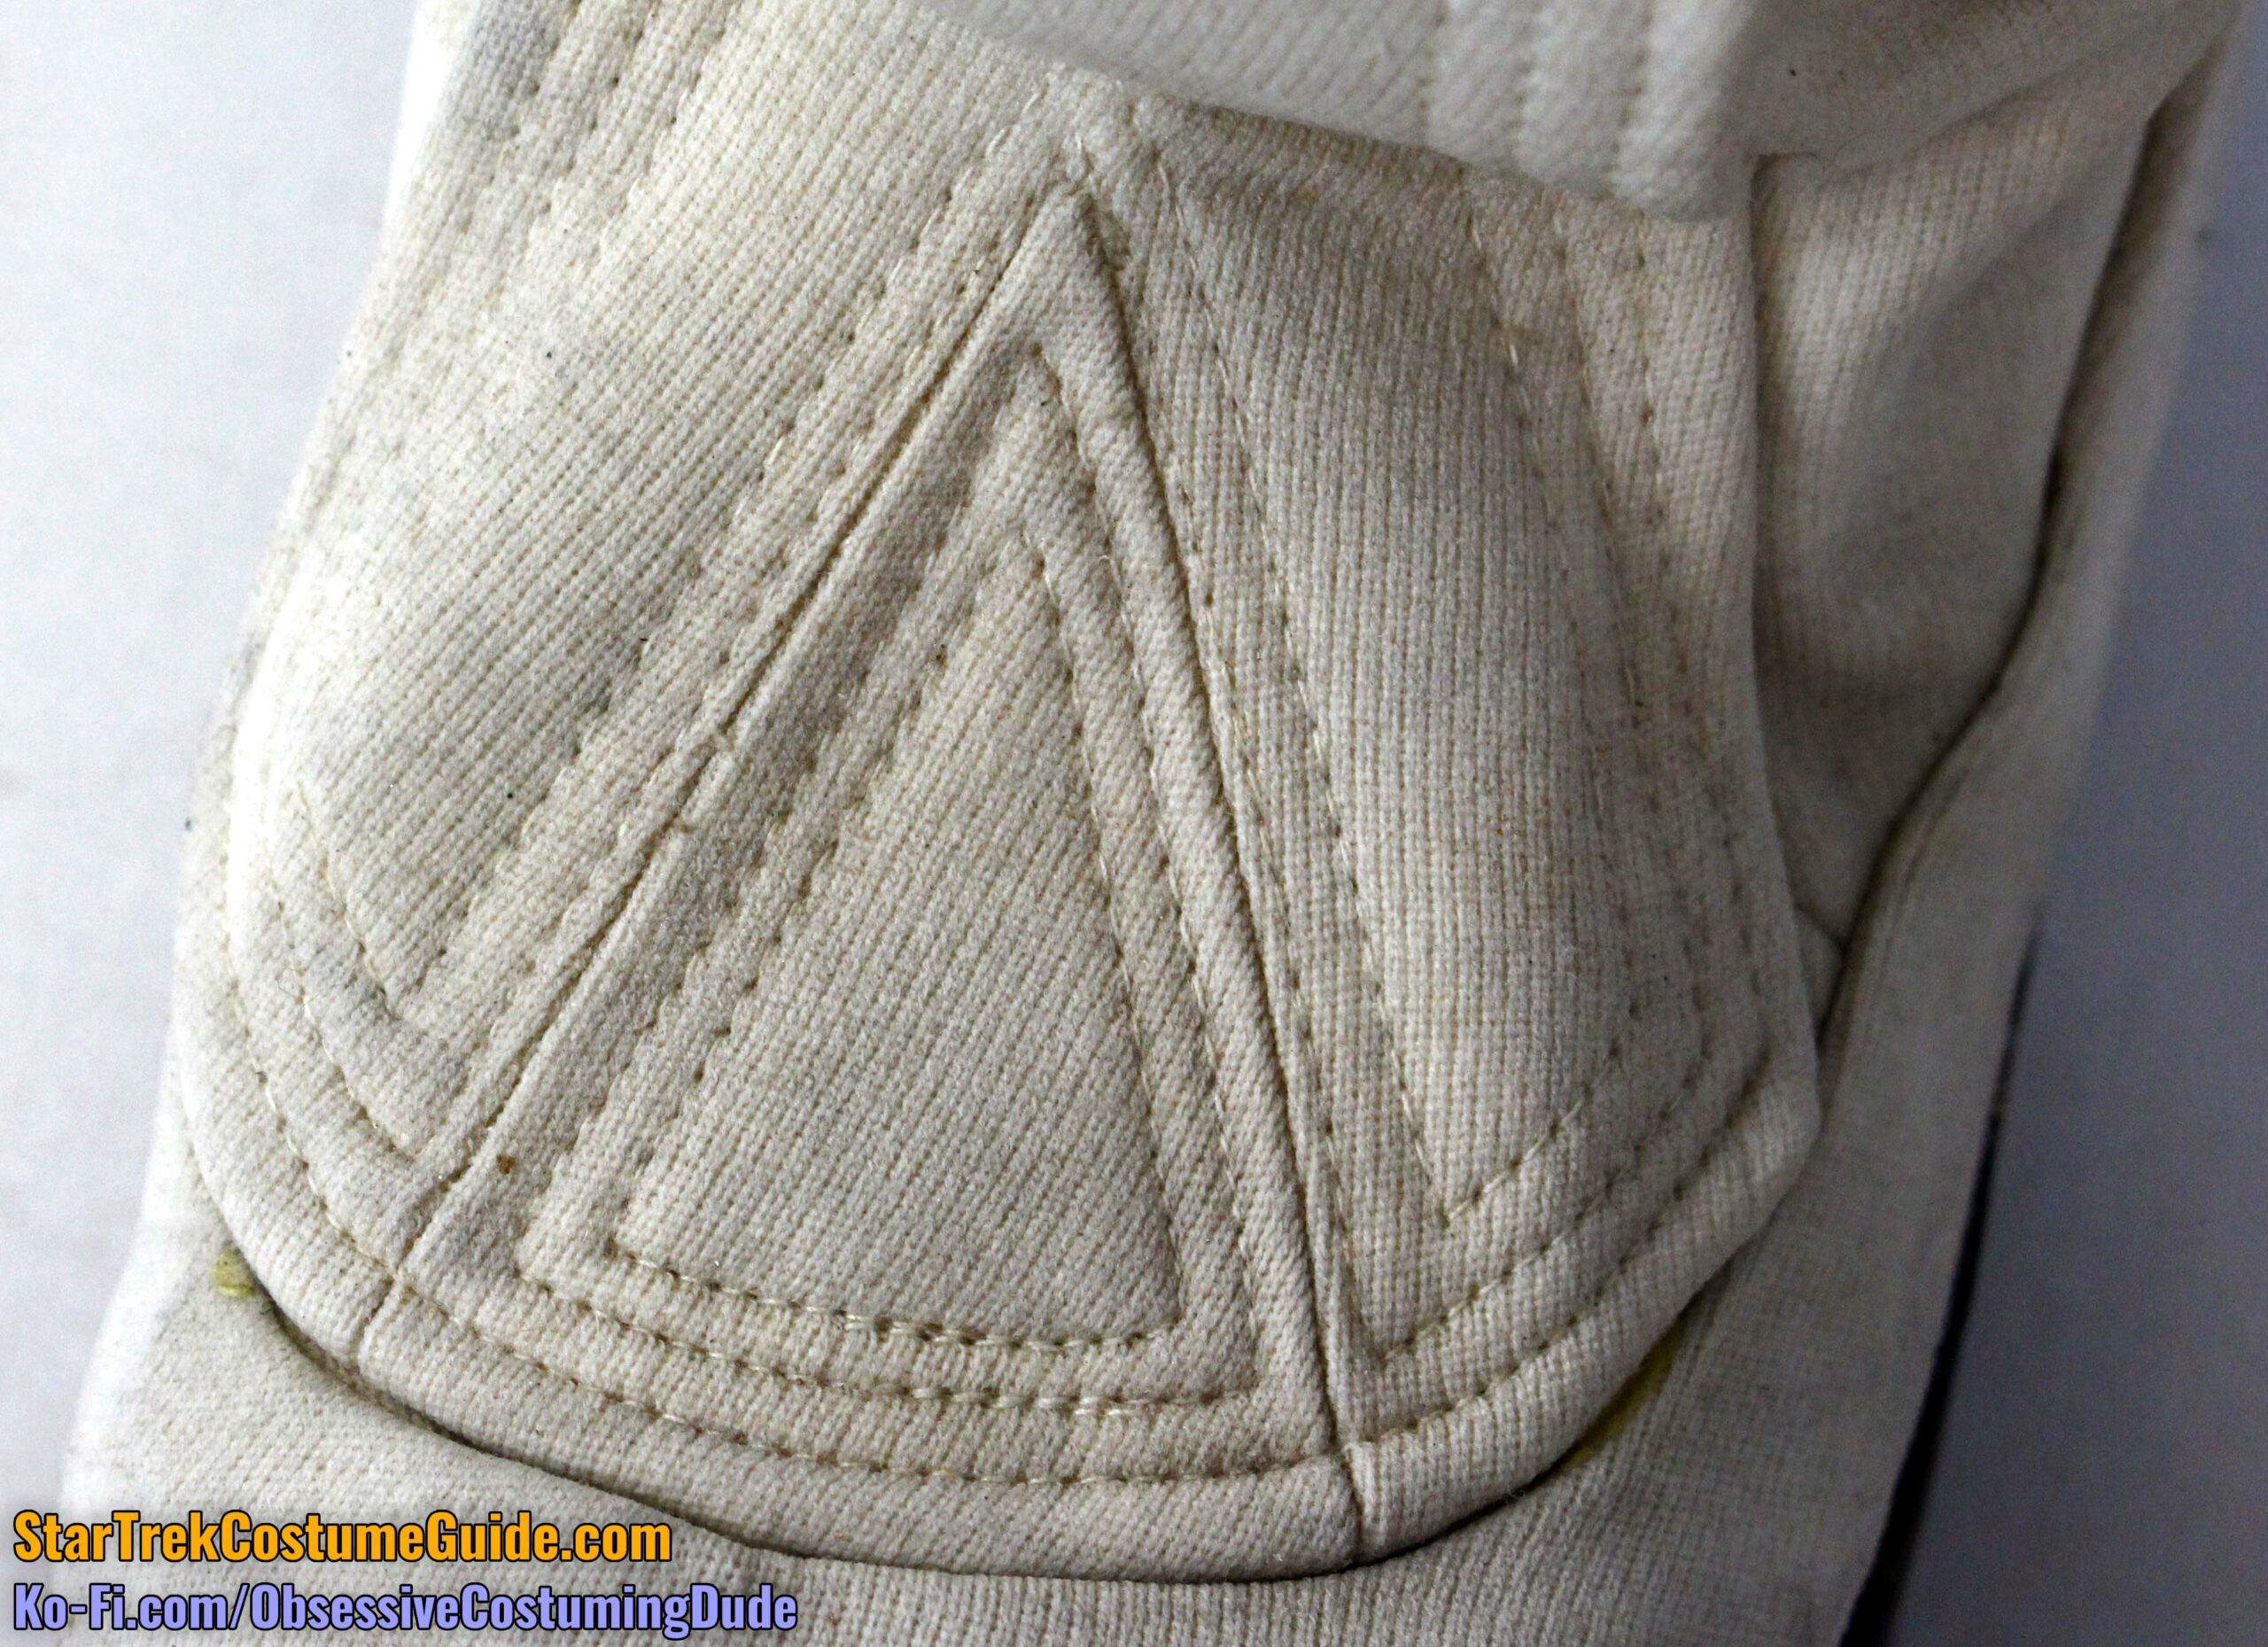
Along the front of the boot was a tall, two-piece accent.
This vaguely Erlenmeyer-flask-shaped fabric panel was the same cavalry twill, but it definitely felt stiffened with something on the underside – perhaps French canvas again?
The upper edge of the panel was approximately 2 ¼” wide, and it widened to about 4 ½” at its widest point near the bottom.
At the bottom was a triangular, wedge-shaped insert.
This insert was about 3 ¼” tall and about 2 ¼” wide at the lower corners.
Both of the aforementioned pieces were topstitched along the edges in approximately 5mm (or 3/16”) increments, although the outermost topstitch continued across both panels at the bottom instead of pivoting.
Along the lower edge of the boot fabric, directly above the large black sole, was a length of bias-cut trim (again the same cavalry twill).
This bias trim was 1” wide and although I again couldn’t tell, I believe it was glued to the boot fabric.
TMP VARIATIONS
There were several other neat variations and oddities with these uniforms over the course of the movies.
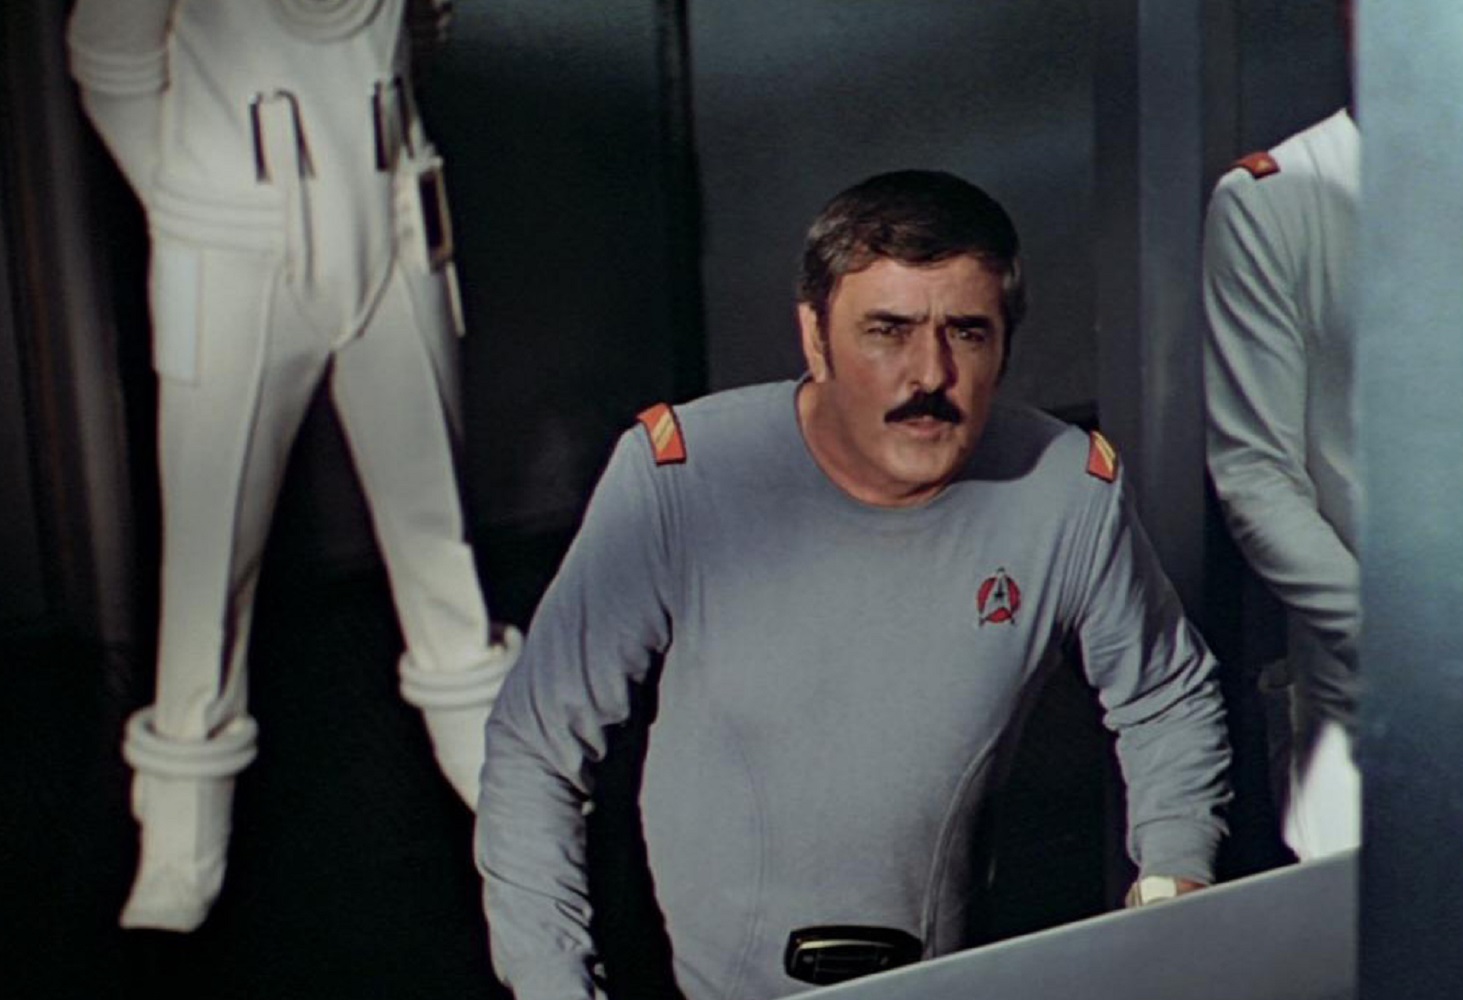
In The Motion Picture, there was a fellow wearing one of the black radiation suit collars, but not with the rest of the suit – just one of the standard gray “class D” jumpsuits.
And there was one extra who wore the white radiation suit boots, but again without the rest of the costume; he too wore a standard jumpsuit.
These two extras straight up left engineering while still wearing their protective suits; maybe it was time for a lunch break and it wasn’t worth the trouble of changing out of them and putting them back on afterward?
(Then again, we did see Scotty do this several times over the subsequent movies, so maybe it’s not really that noteworthy.)
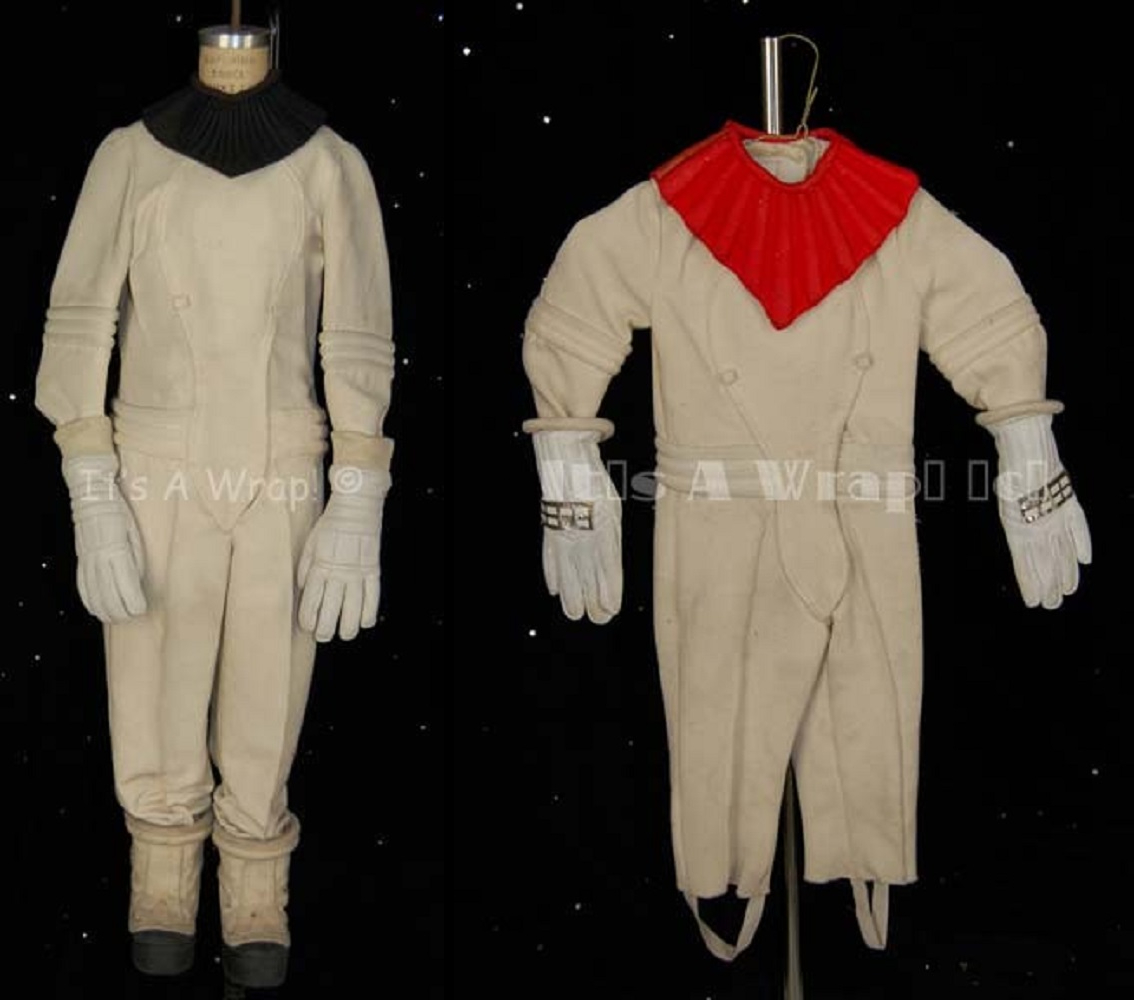
There were also at least a couple miniature costumes made for children to wear for the “forced perspective” shots:
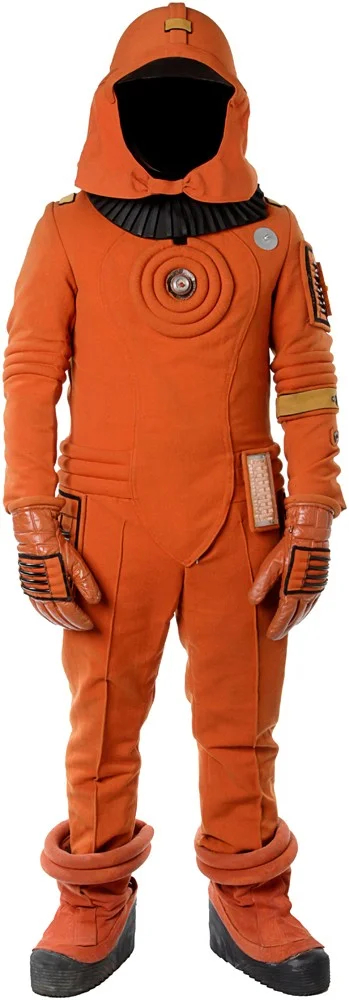
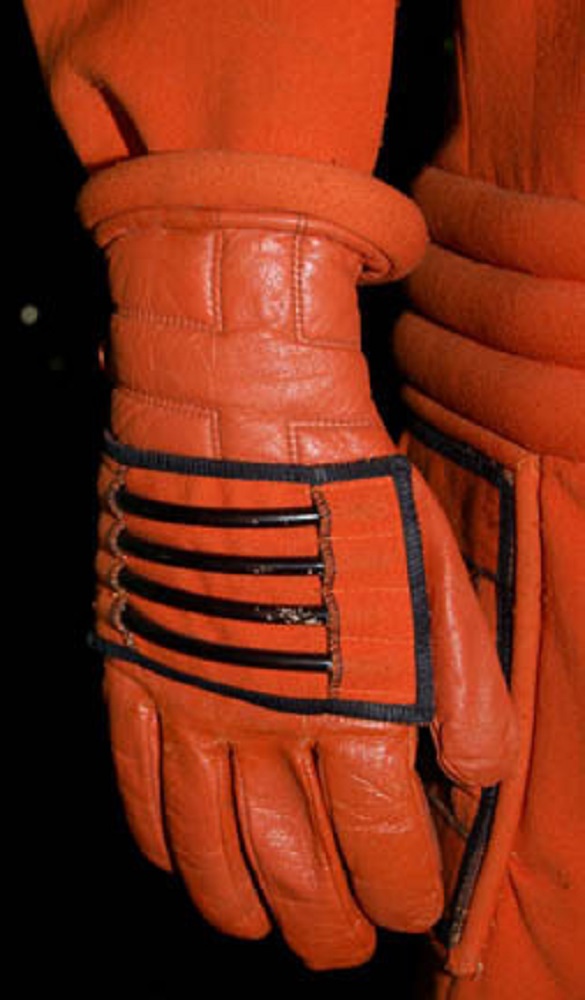
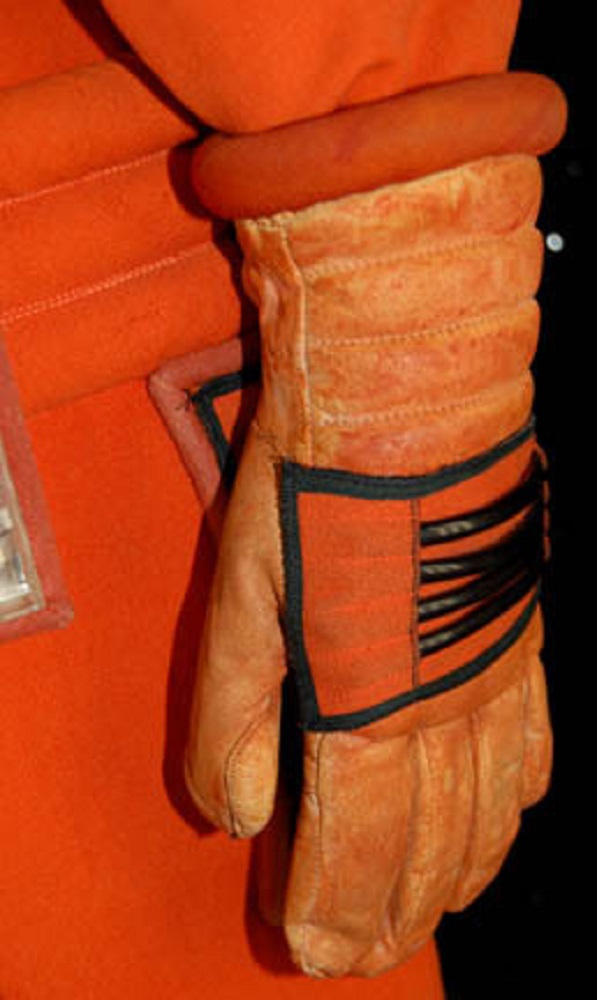
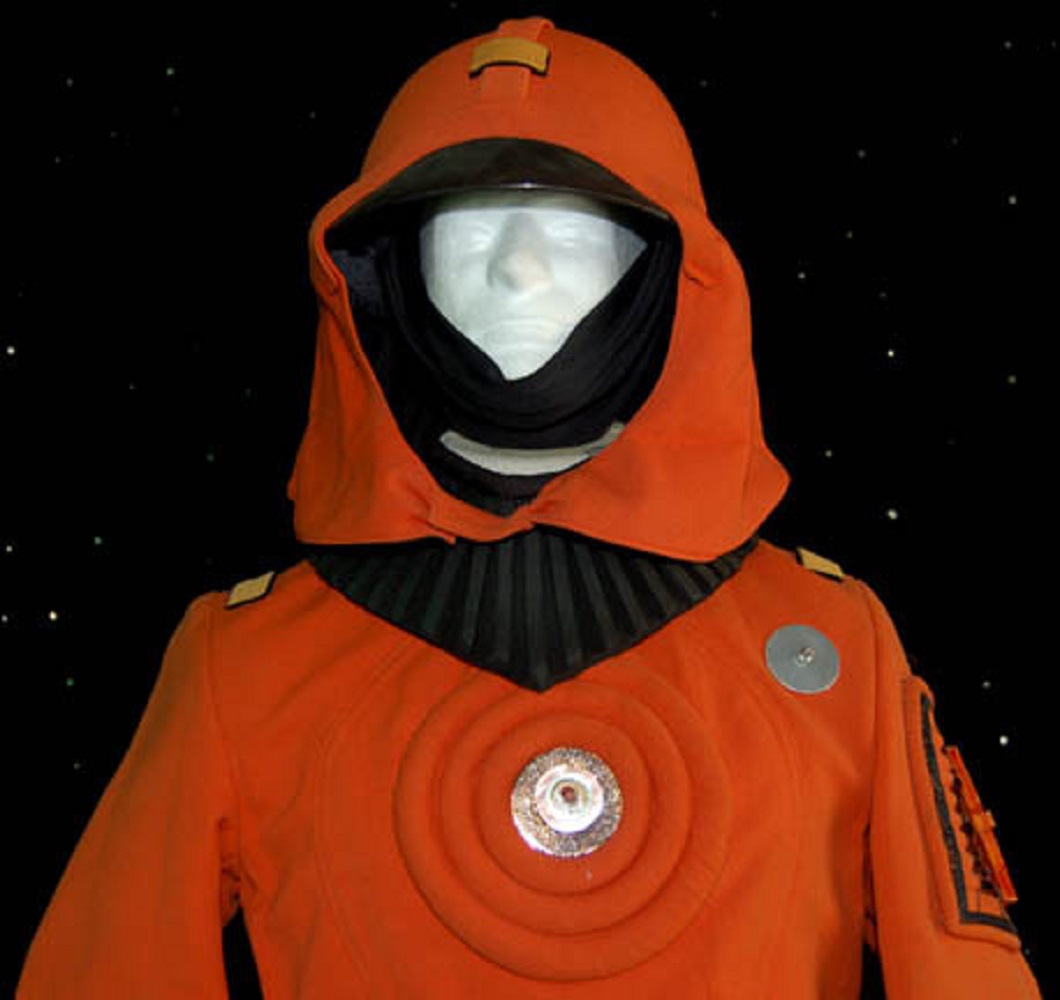
A rather niche variant of this uniform was a version that was nearly identical, but orange!
These briefly appeared in all four of the movies in which Robert Fletcher was costume designer, but not the last two.
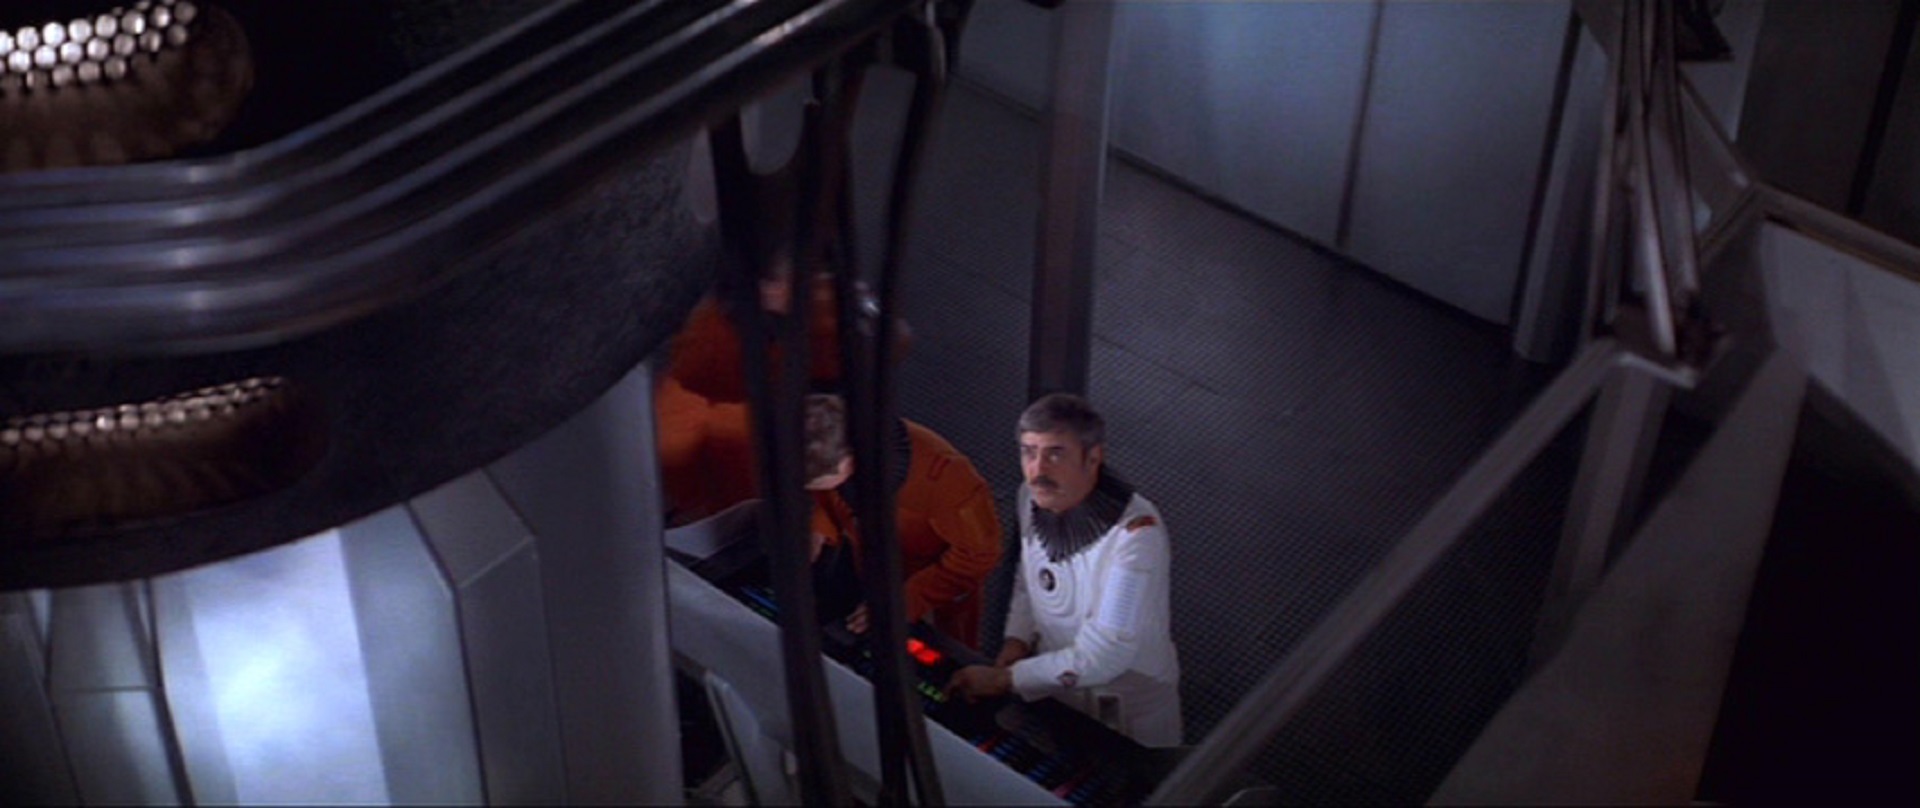
They were first seen in a single shot of TMP, for about 5 seconds in the “Director’s Edition” and about 8 seconds in the theatrical version.
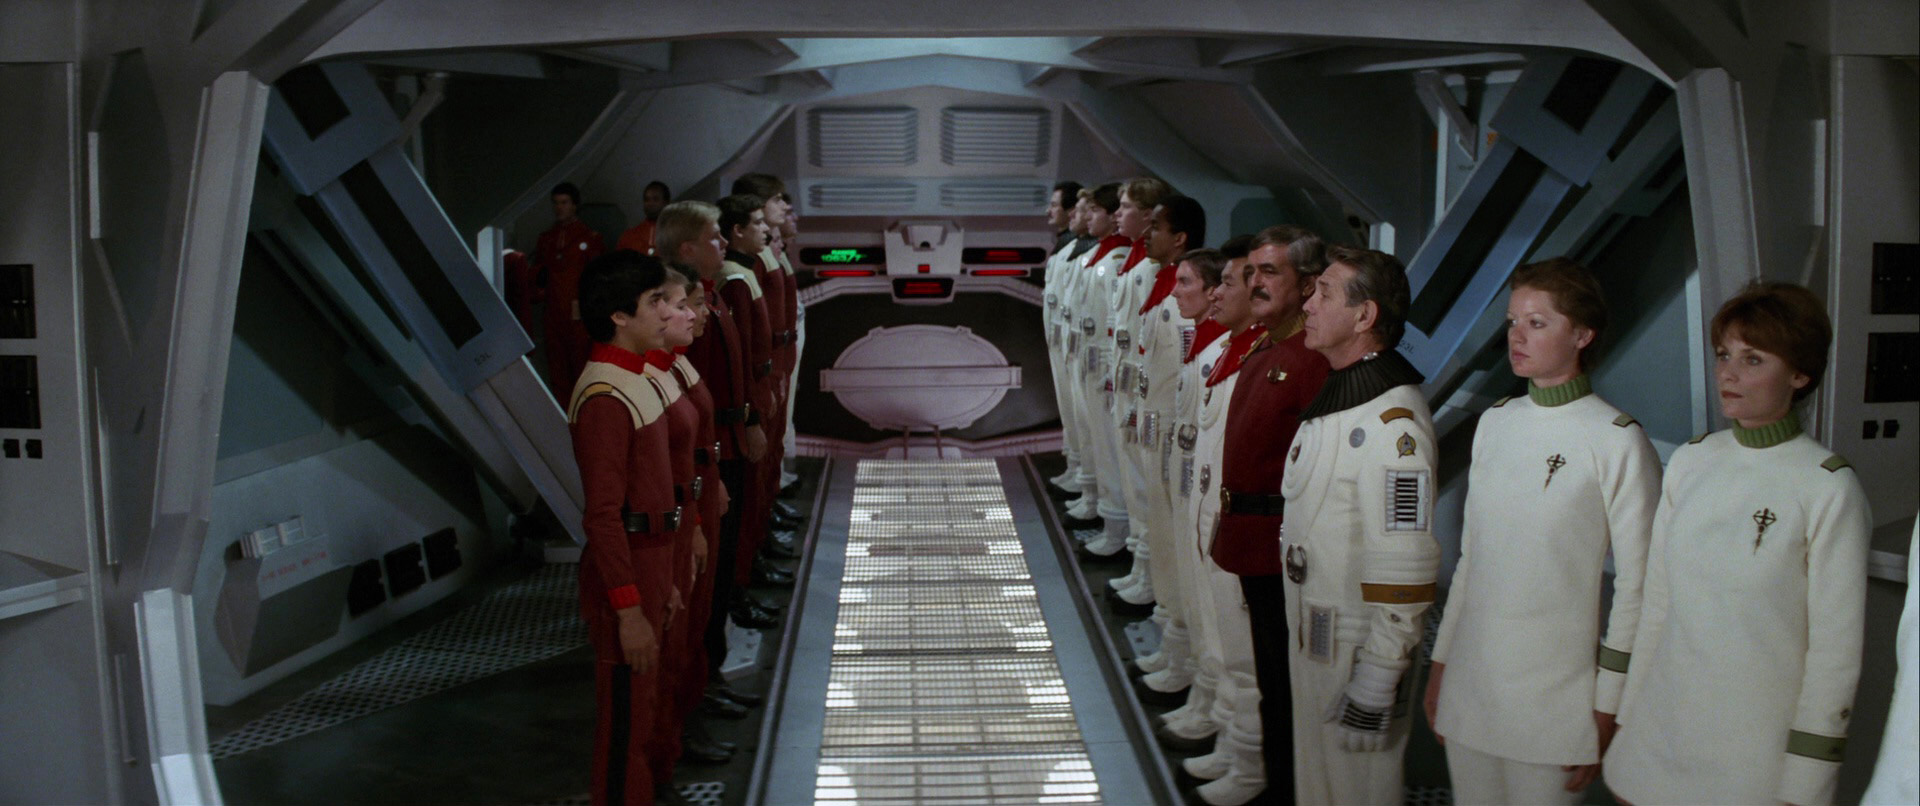
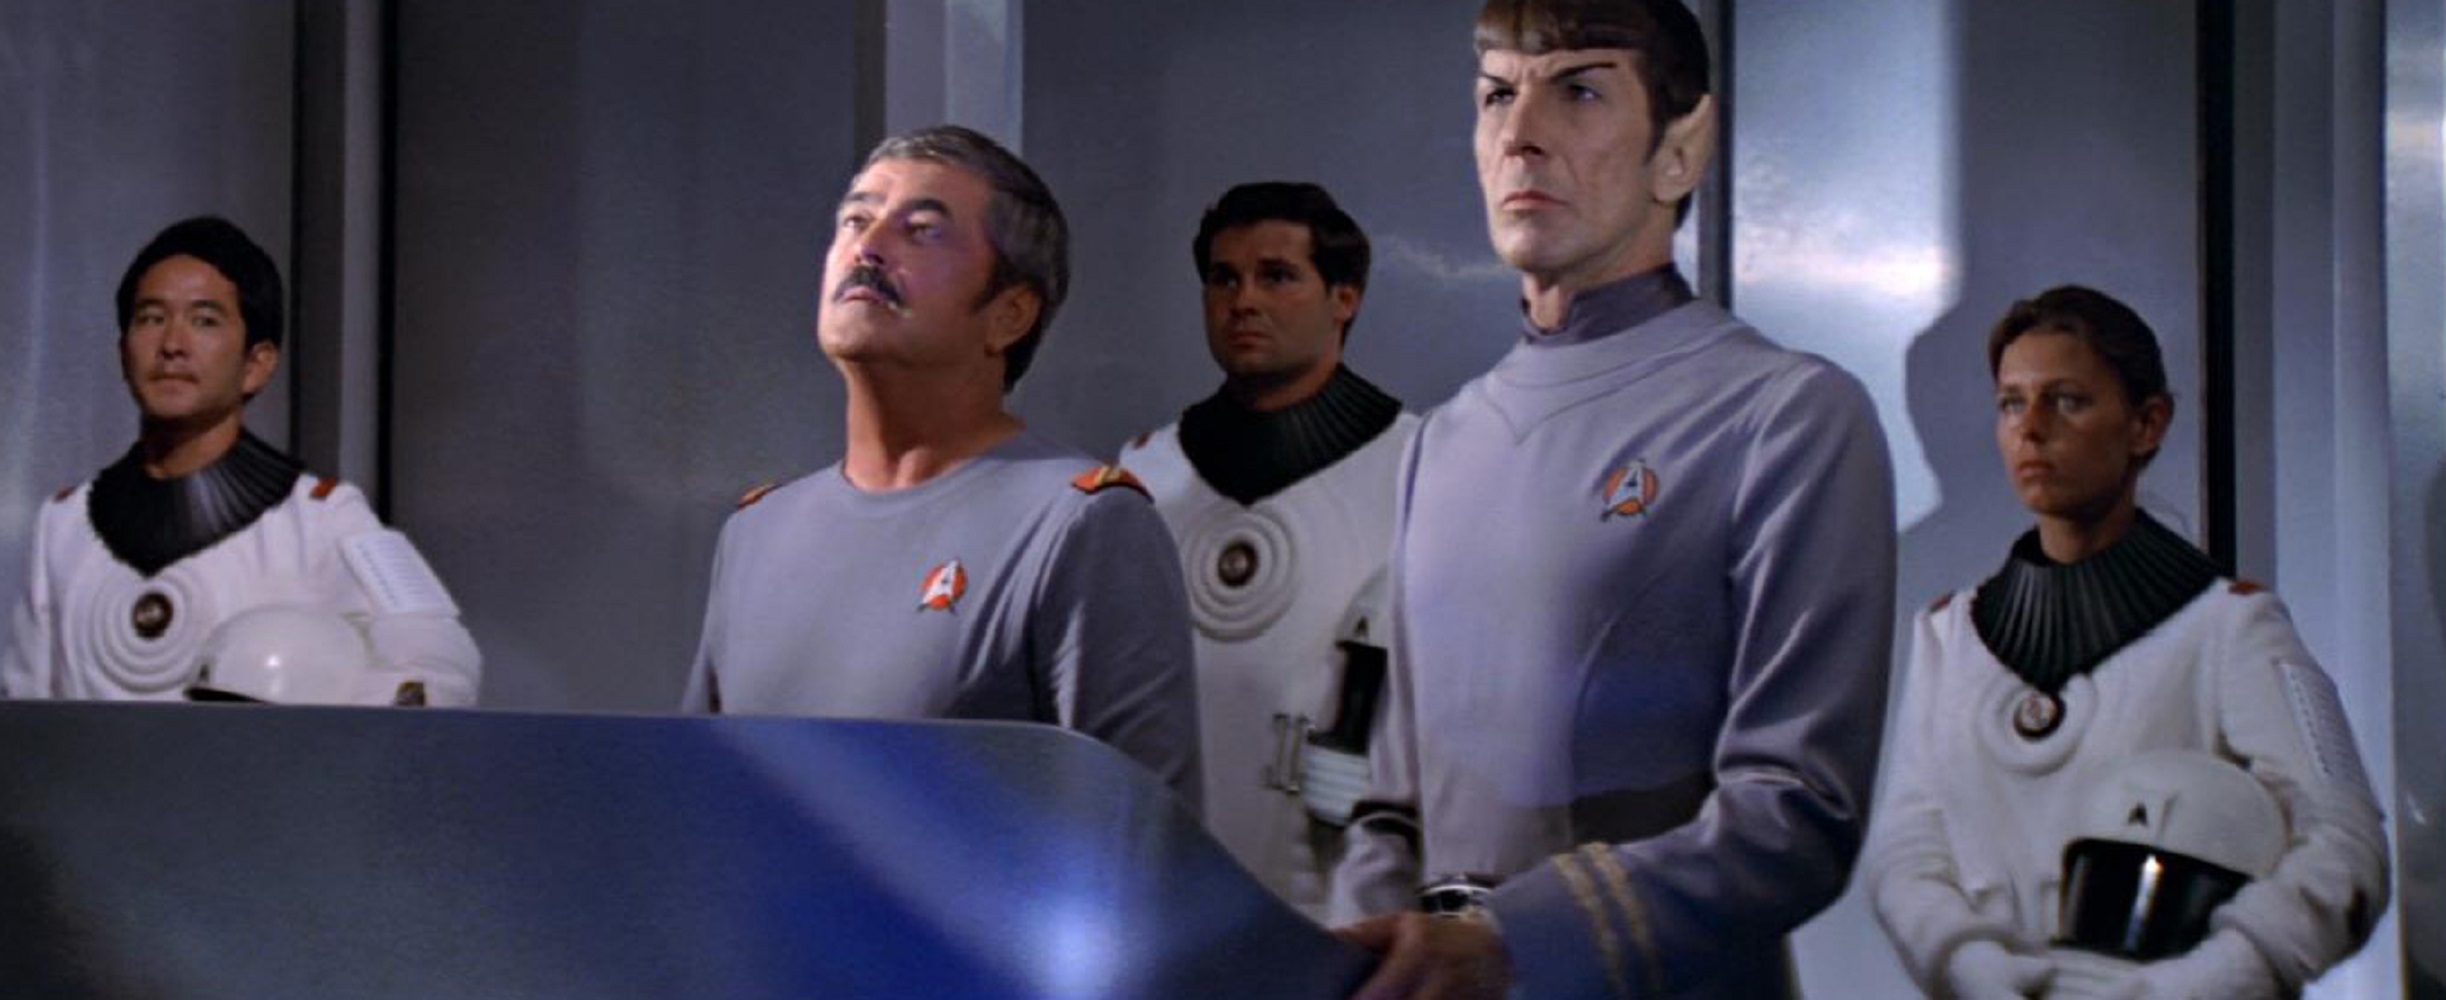
In TWOK, there were a couple in the background during Admiral Kirk’s initial boarding inspection (frame left below):
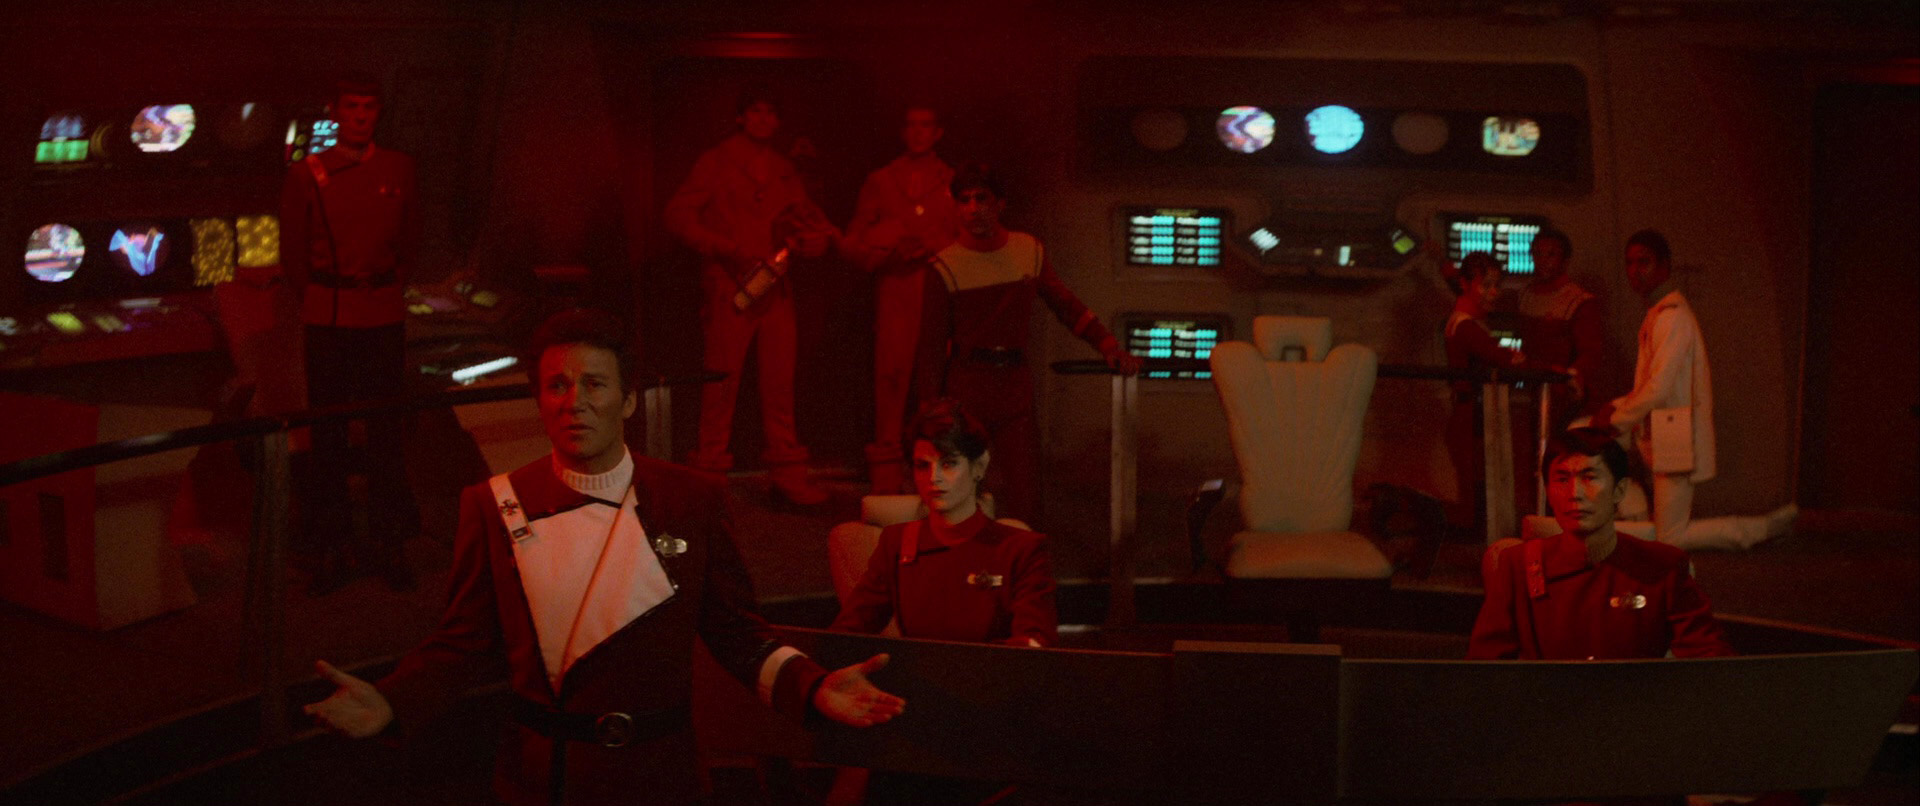
A couple made their way onto the bridge after Khan’s initial attack.
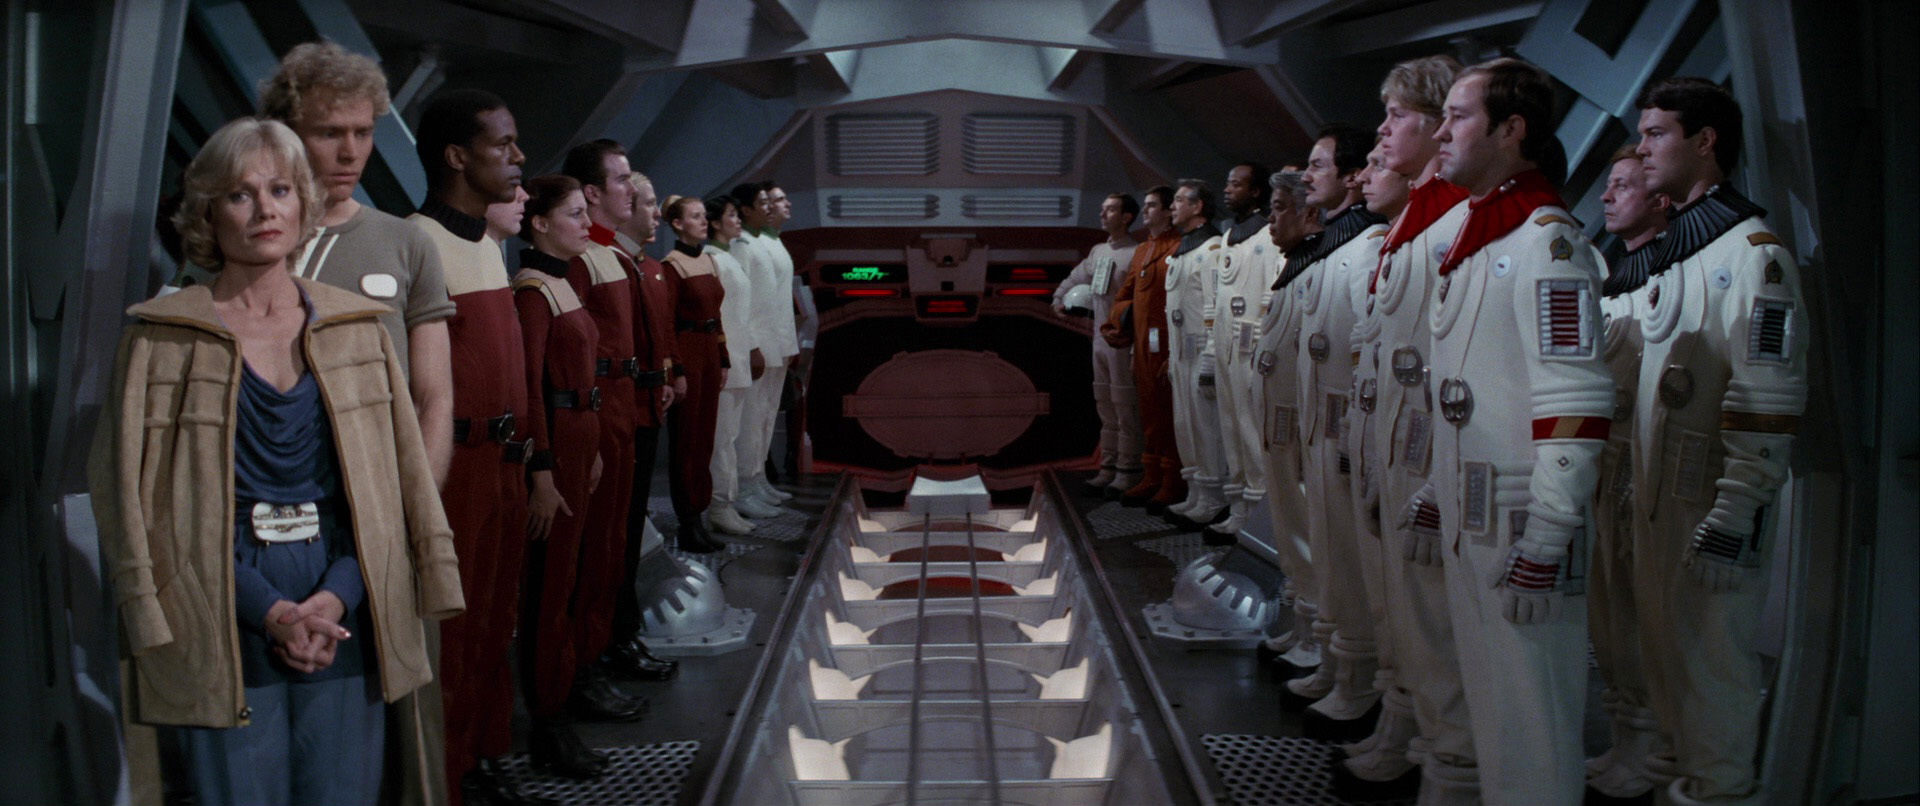
And there was another one at Spock’s funeral (second from last on the right).
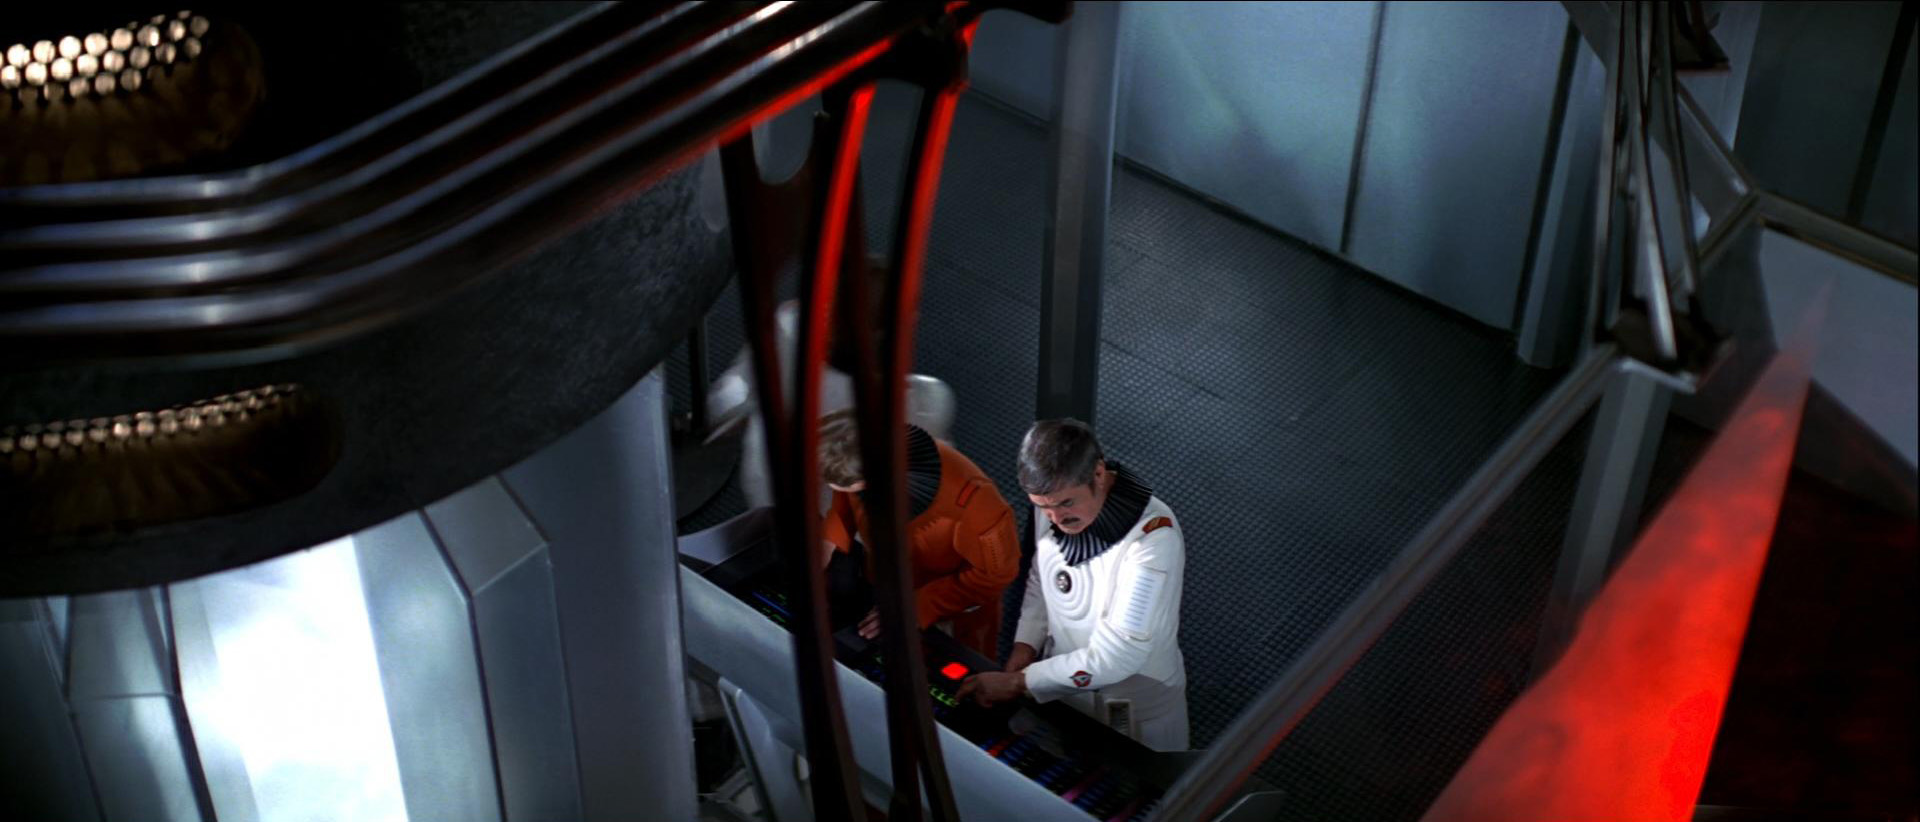
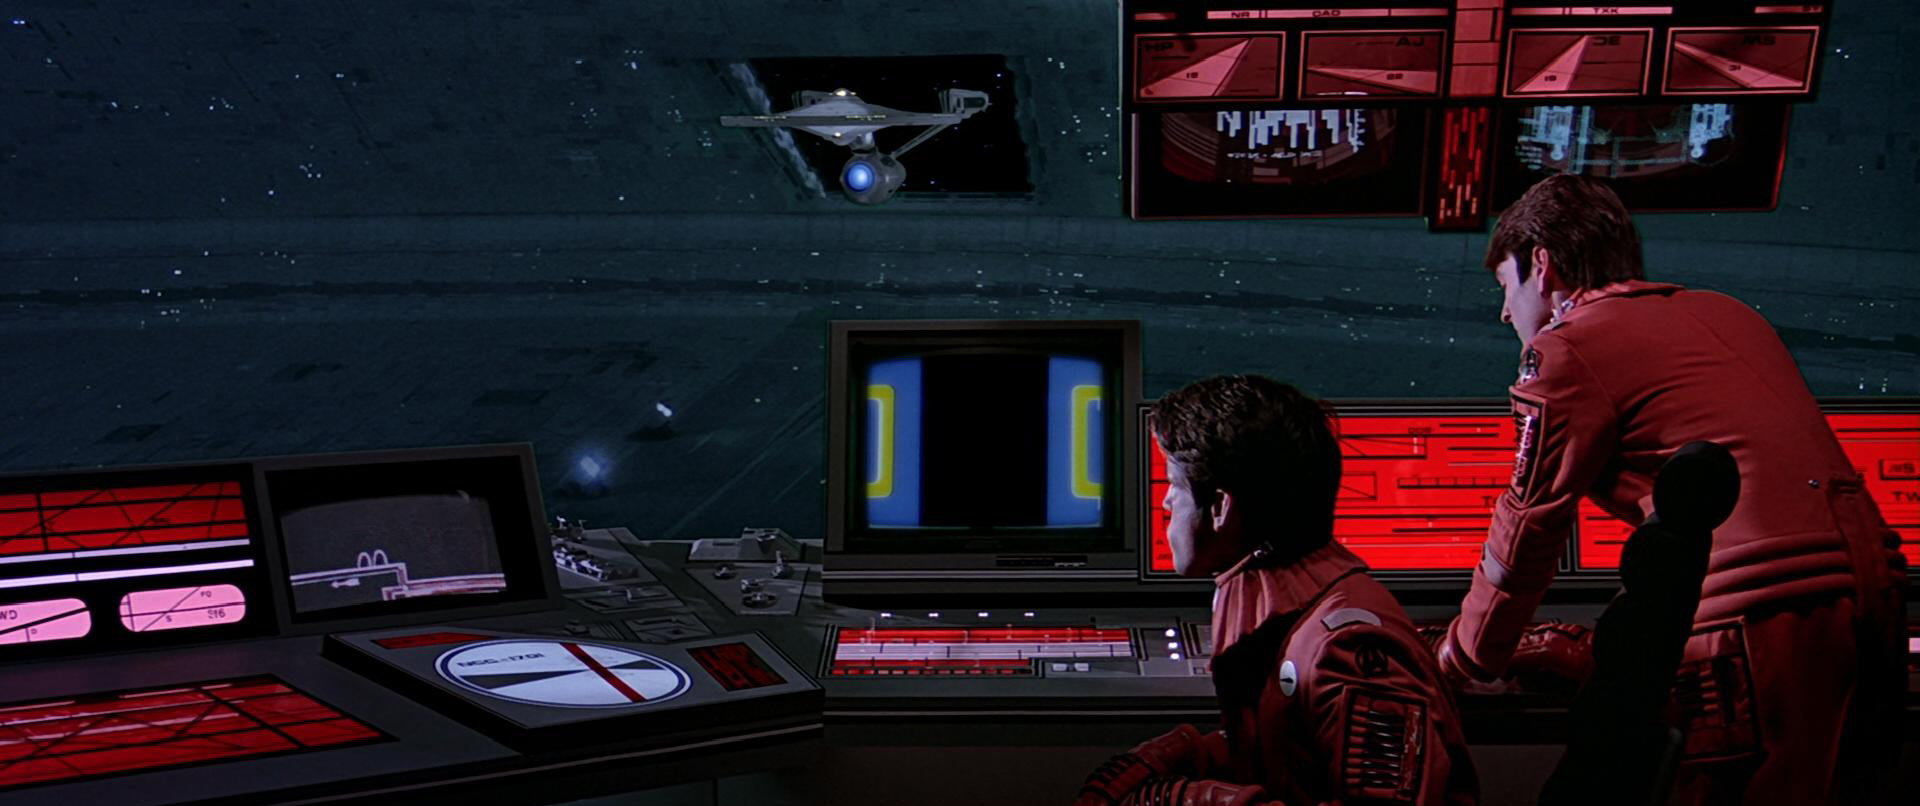
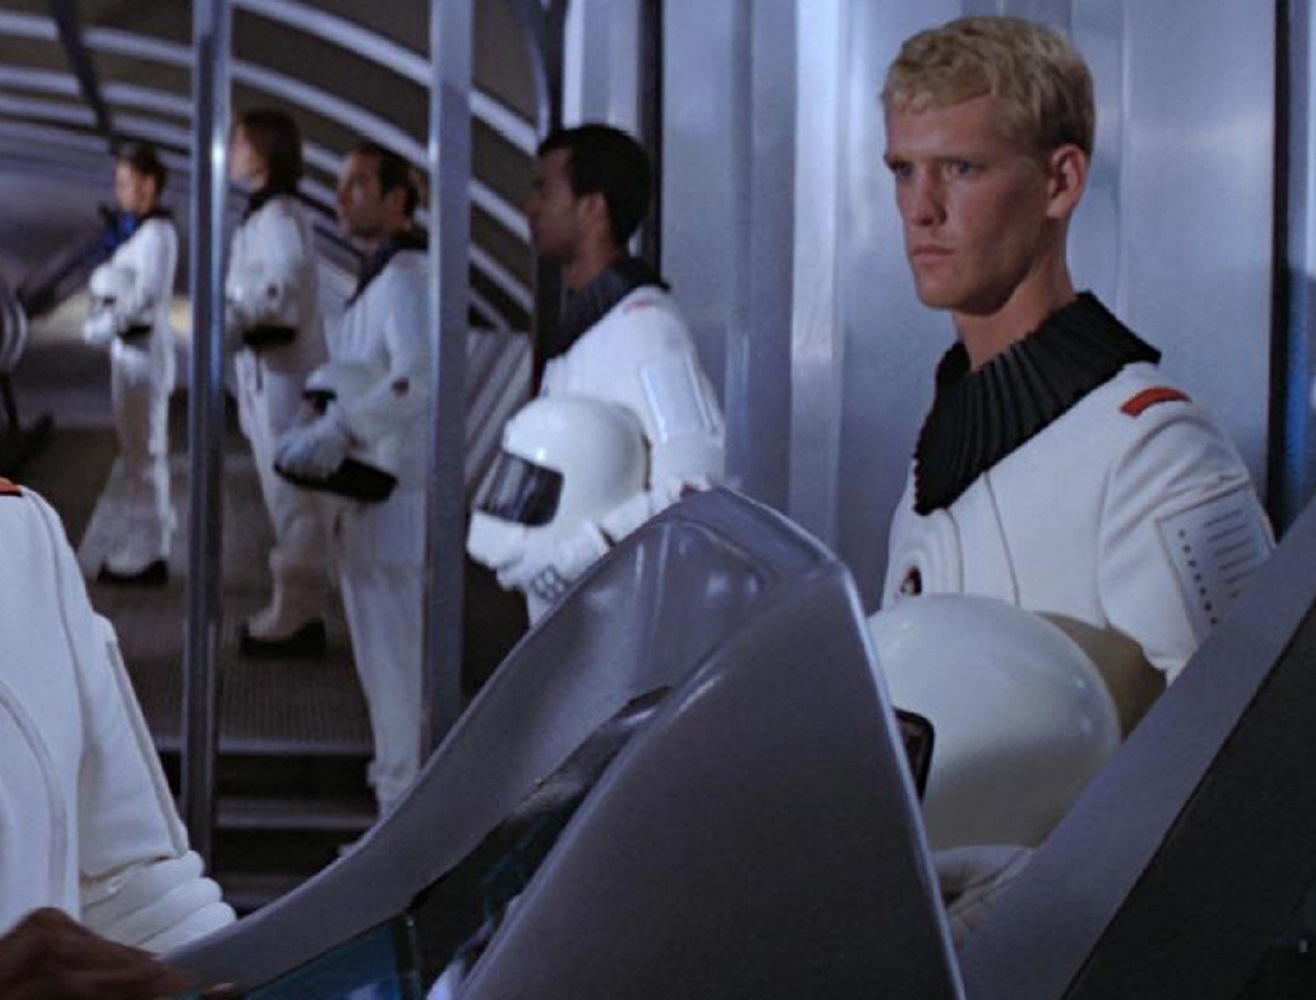
They had another 8 seconds or so of screen time in ST3, when the Enterprise entered Spacedock (apparently worn by two trainees):
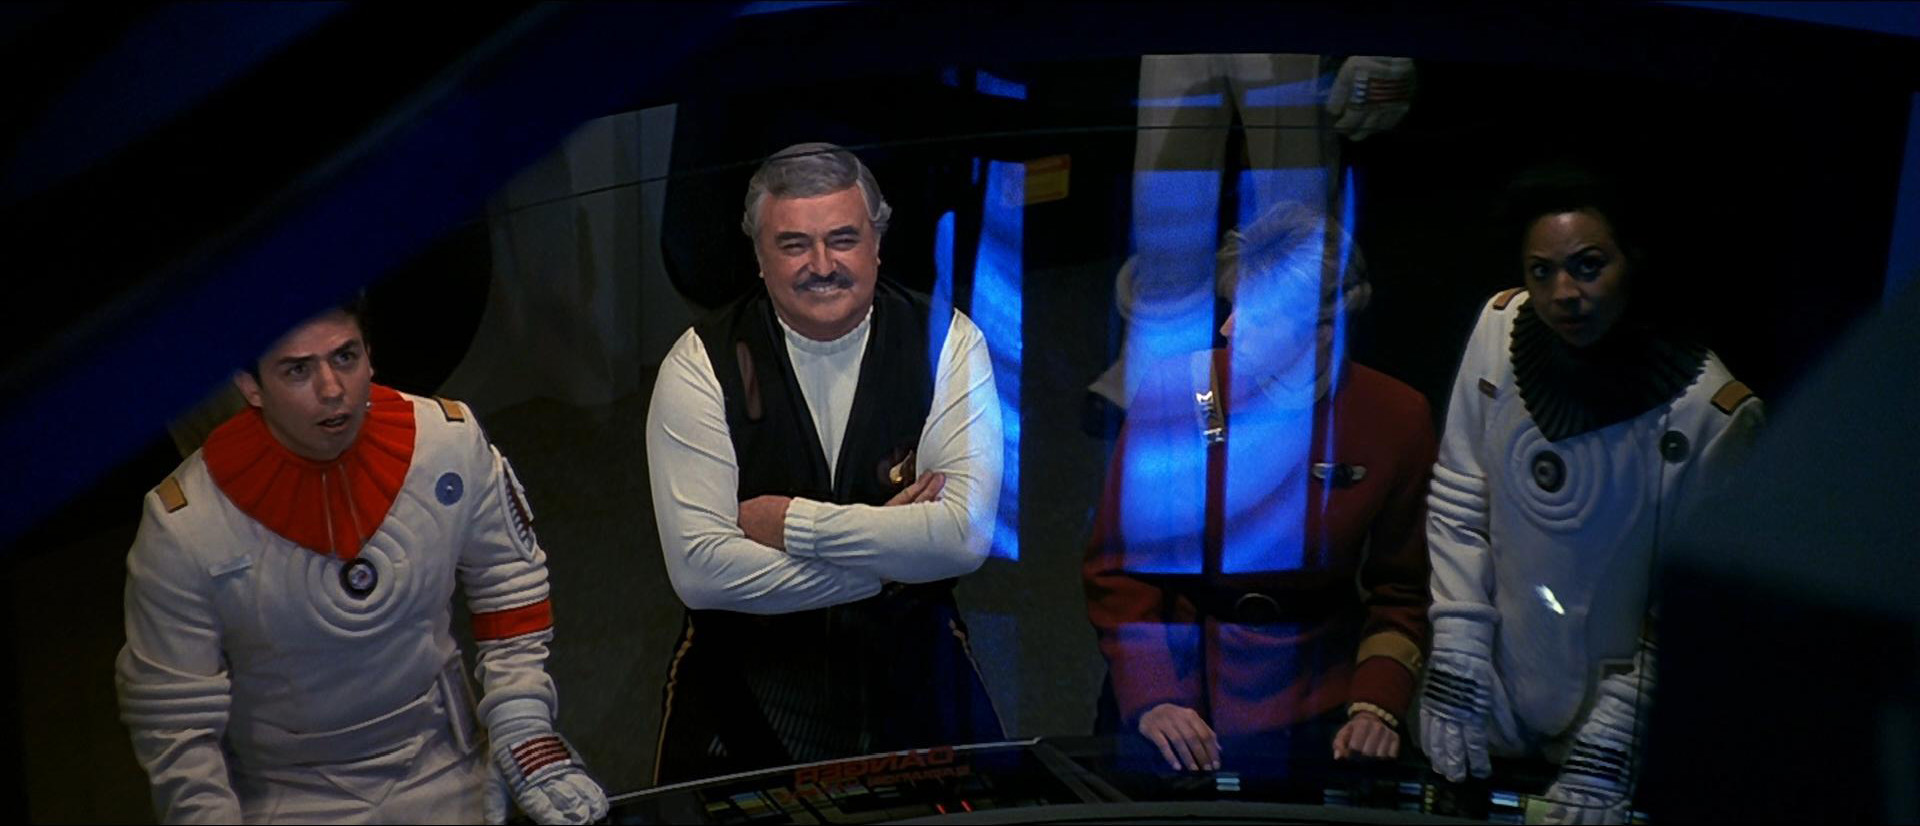
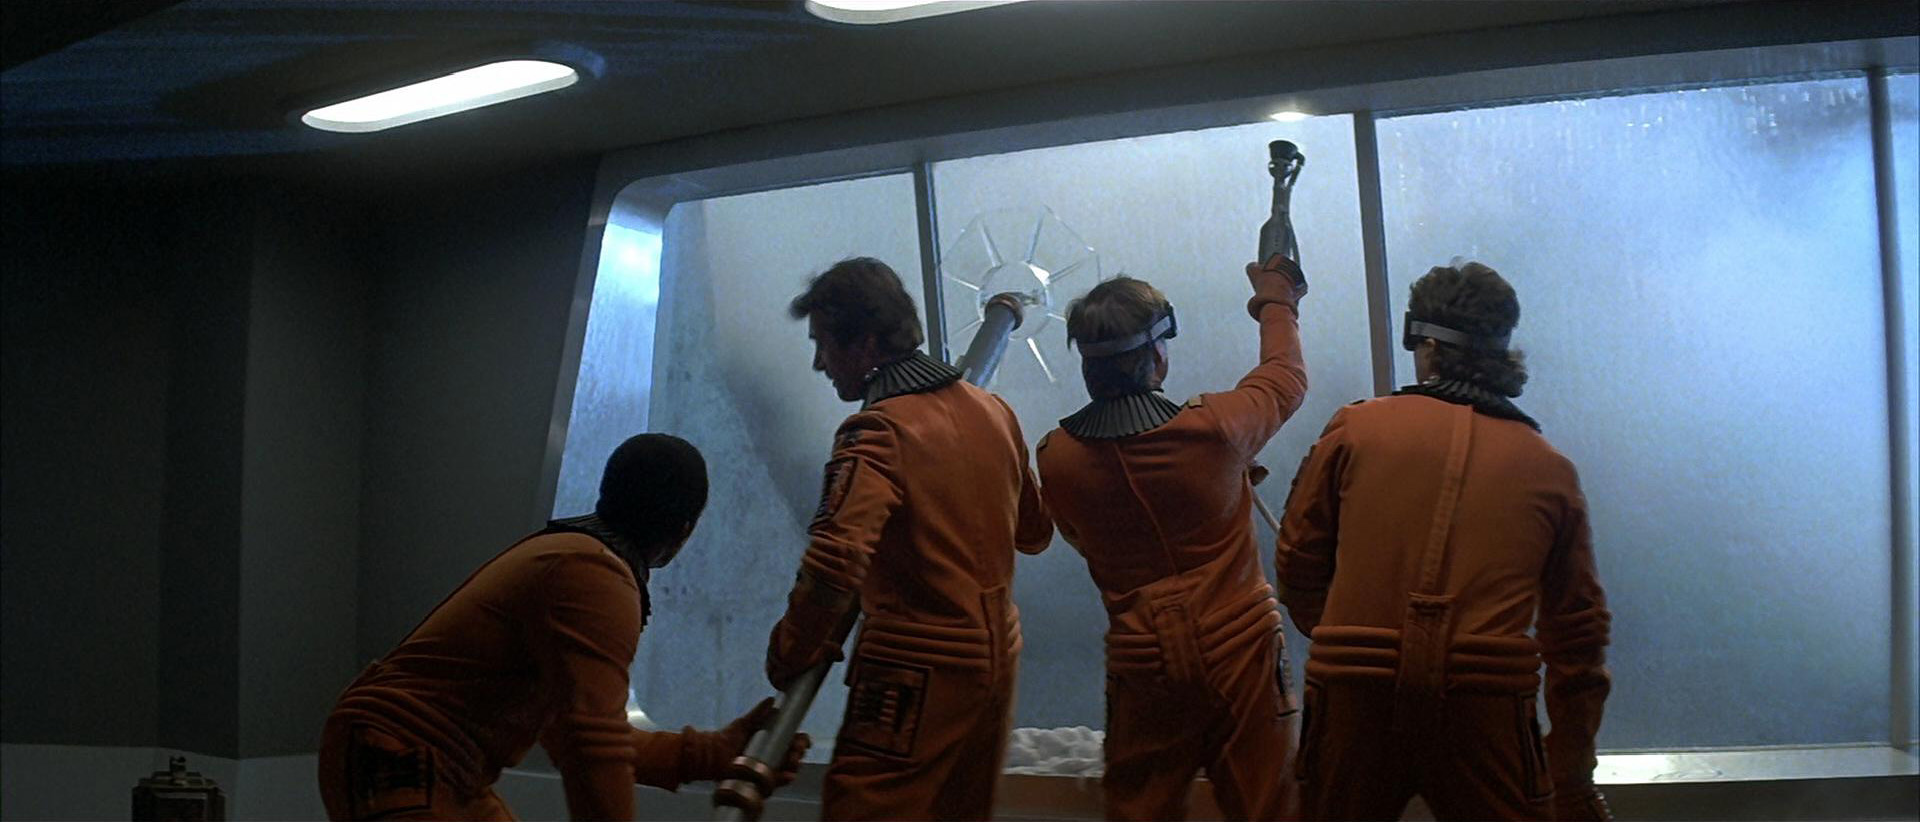
Their brief moment in the spotlight was in The Voyage Home, though; a quartet of them rushed in to try and keep the large window at Starfleet headquarters from shattering.
Like their “white” counterparts, some (but not all) of them appear to have been made out of cavalry twill.
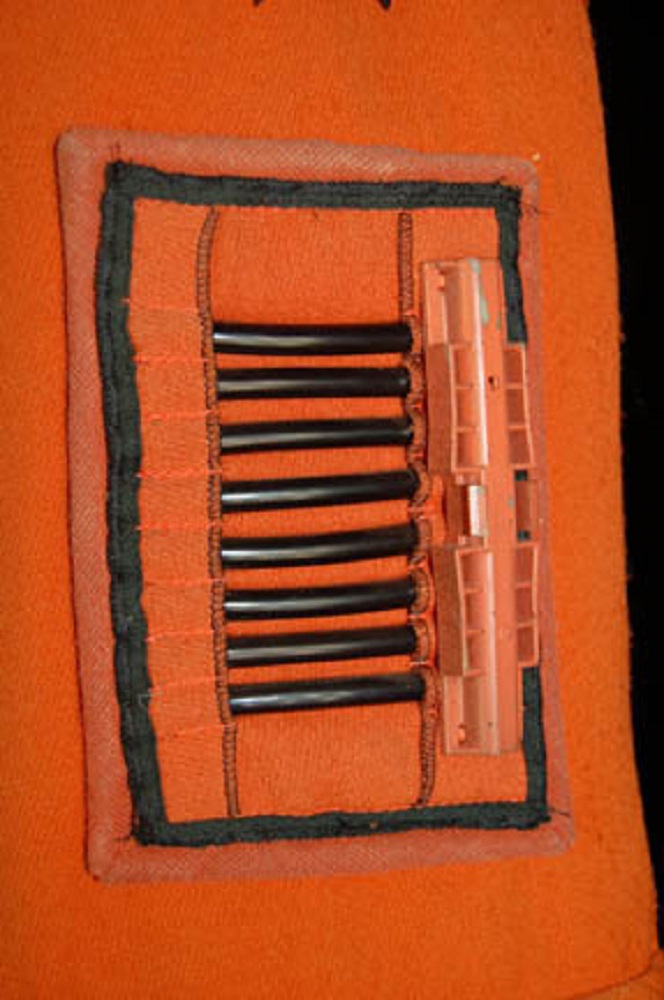
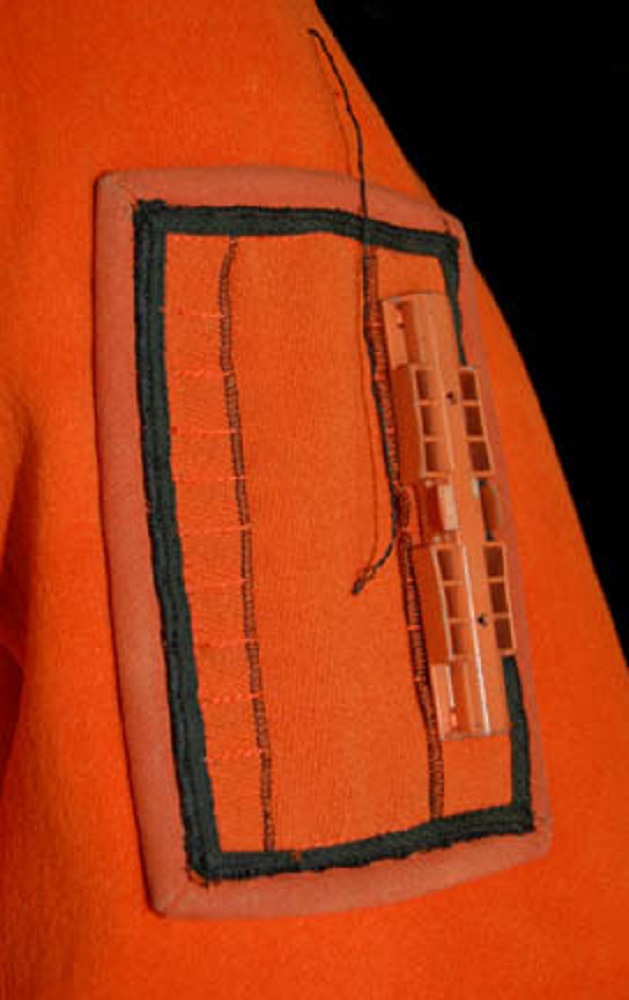
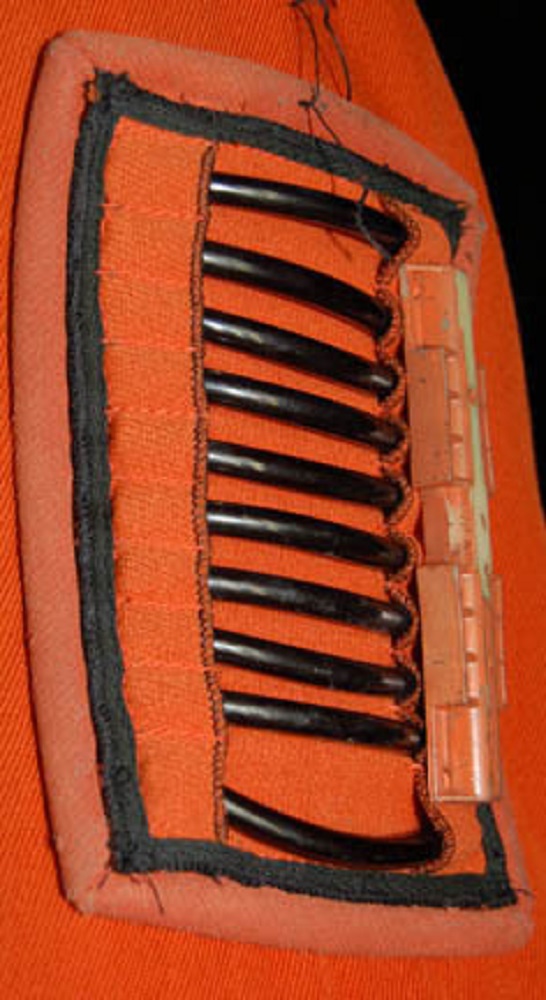
Perhaps the primary difference with these orange variants is that the thigh, sleeve, and glove panel assemblies were also orange (rather than silver ironing table fabric), and the edges were either covered or bound with black trim instead of overlocked in a matching thread color.
The door guide hardware was also painted orange.
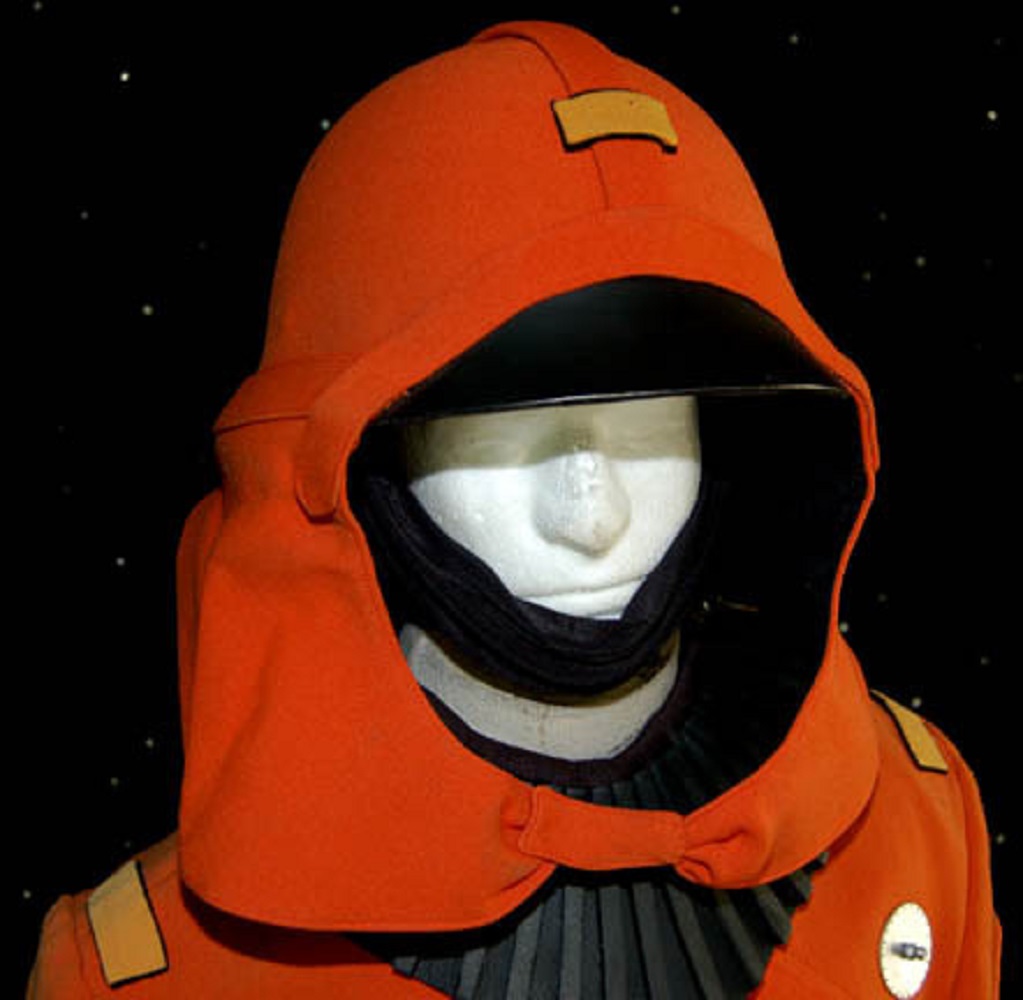
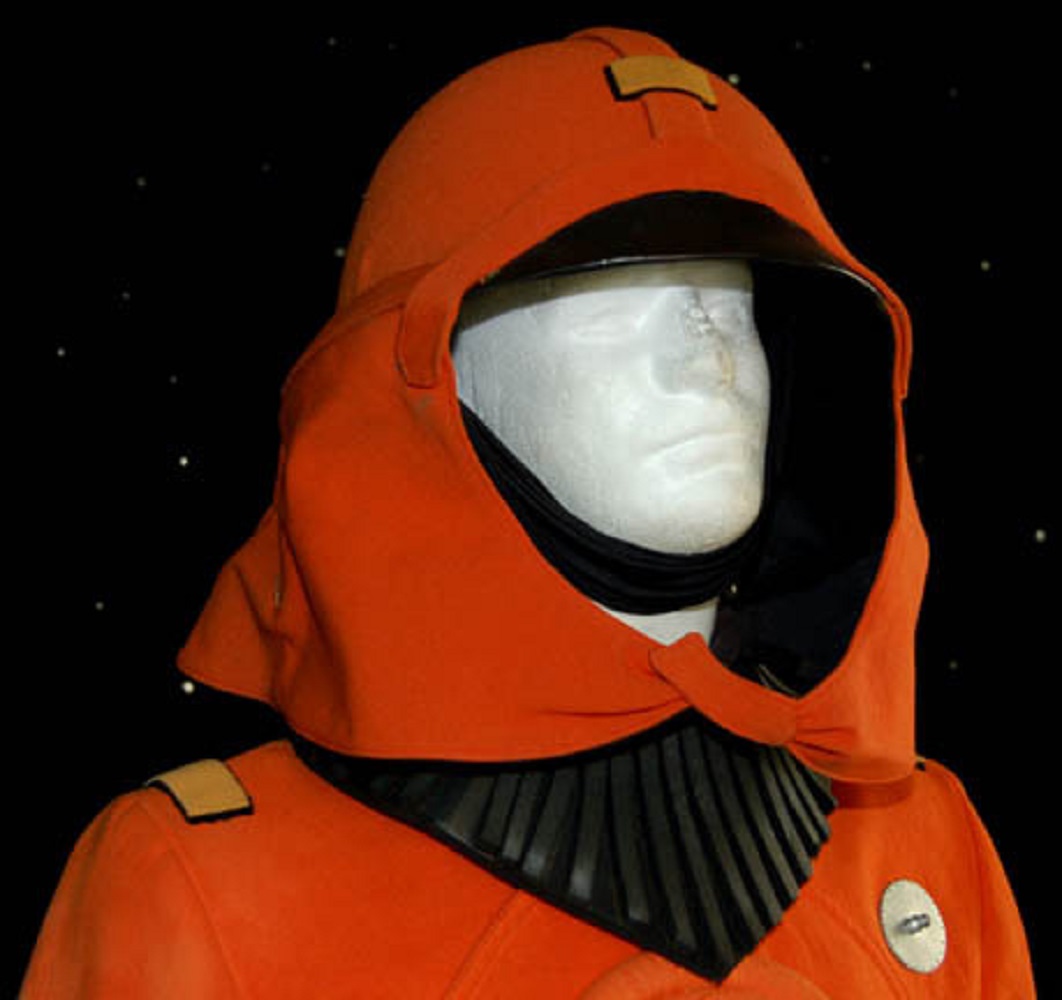
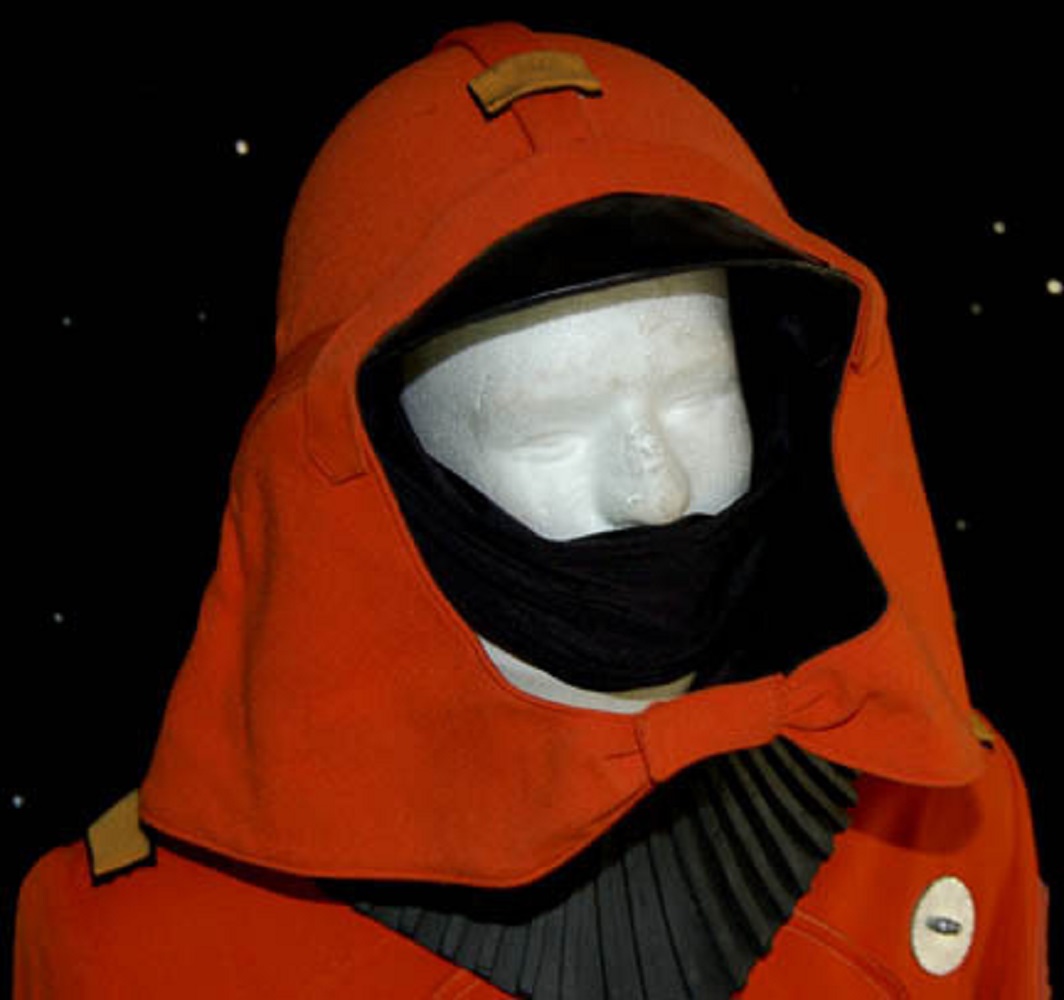
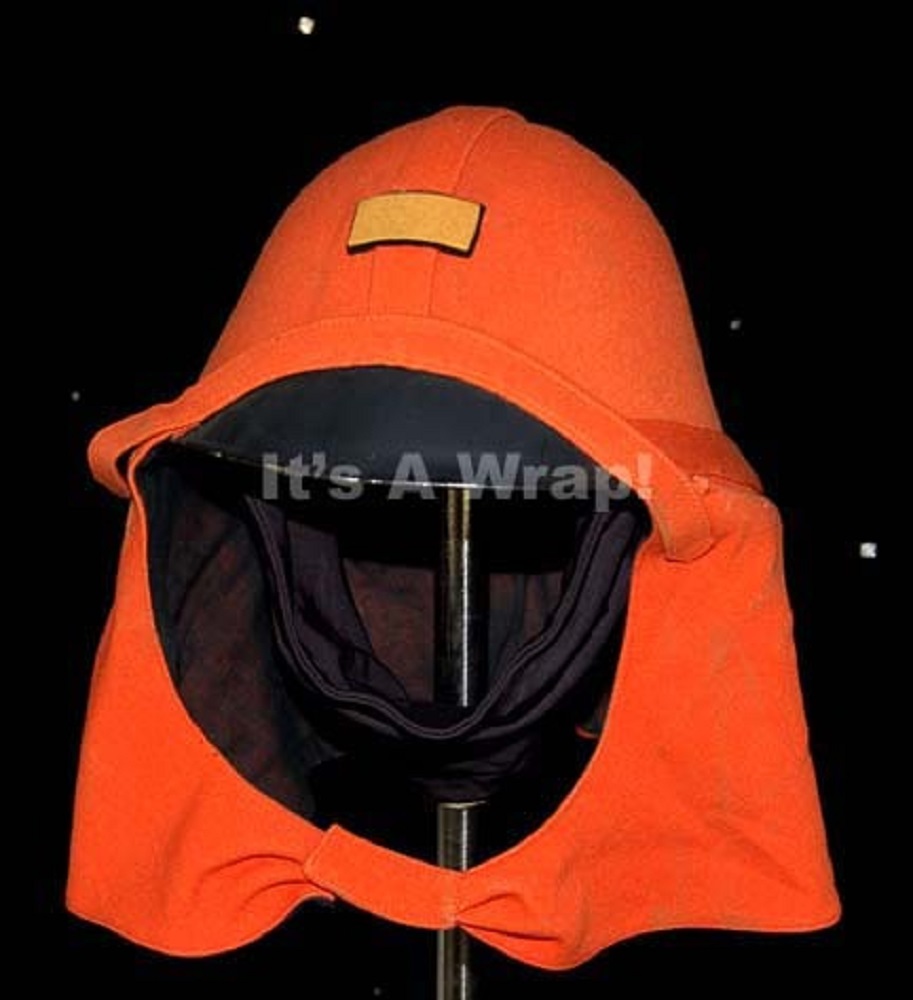
At least some of these orange costume variants had hoods, although I don’t believe they were ever actually worn on-screen, just held.
These hoods appear to have all been made out of cavalry twill.
In the screencaps above, you can see that these orange costume variants were worn with at least four different collar styles:
Black in TMP (presumably without the band of TWOK-era neckline piping + closure)
Orange in TWOK
Trainee red in ST3
Black in ST4 (presumably the same as those worn by officers and enlisted crew)
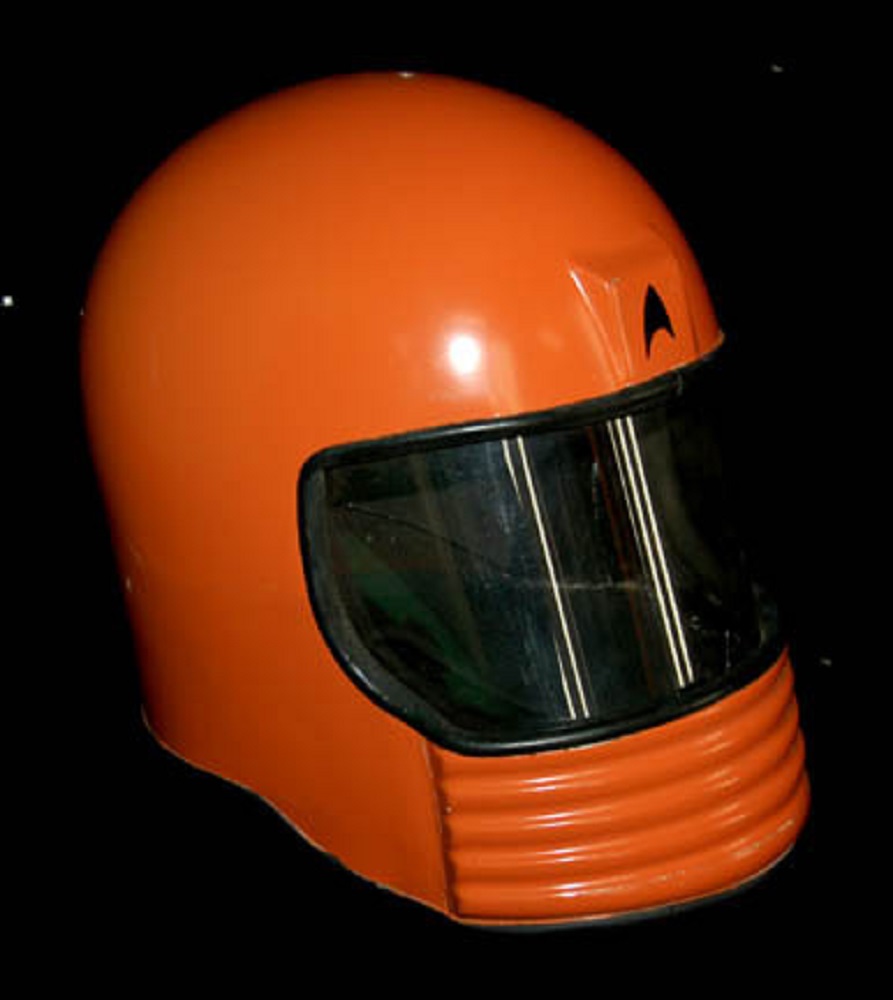
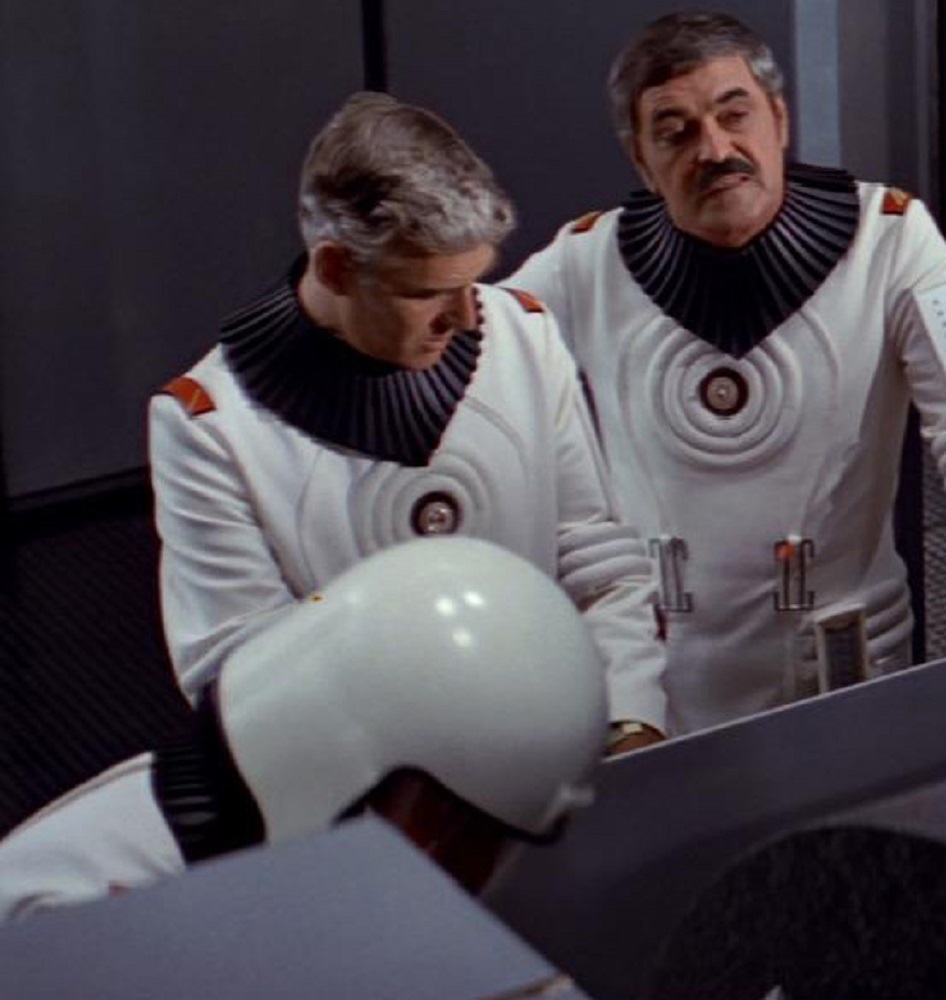
At least one of them appears to have had a corresponding helmet, which had one fleeting moment of screen time during the aforementioned shot in TMP.
(It appears to be the same as the “white” TMP helmets, just orange instead.)
And finally, none of these orange costume variants appear to have had buckles.
THE UNDISCOVERED COSTUME VARIATION
(Not really – I’m pretty sure at least two other people in the world have studied these costumes closely enough to notice this last one!)
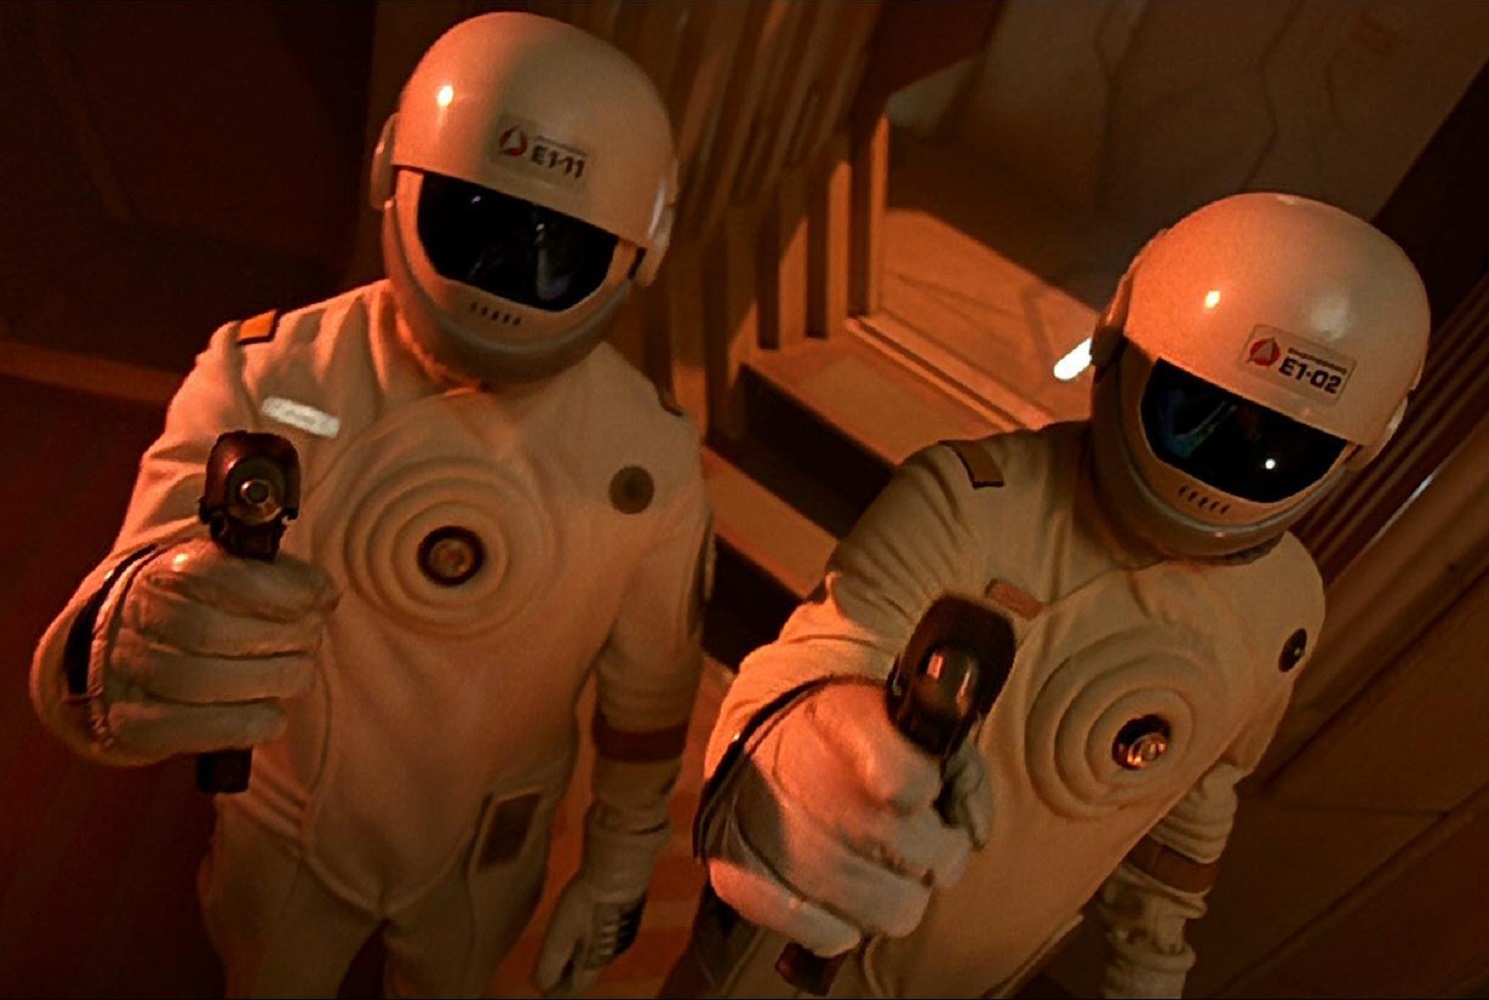
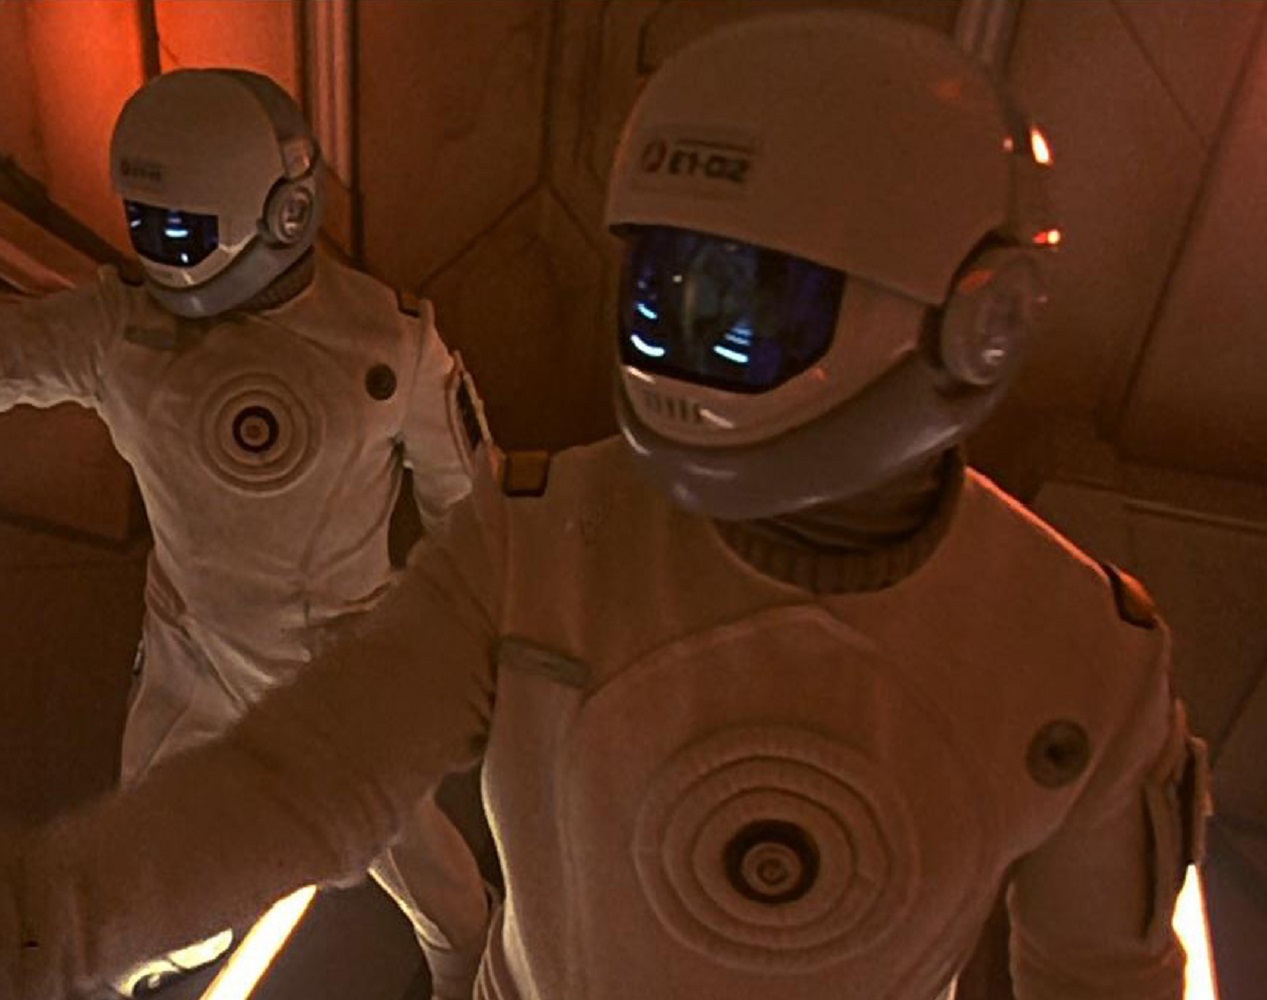
The renegade assassins’ uniforms in The Undiscovered Country were different from all the other radiation suits we saw in three respects:
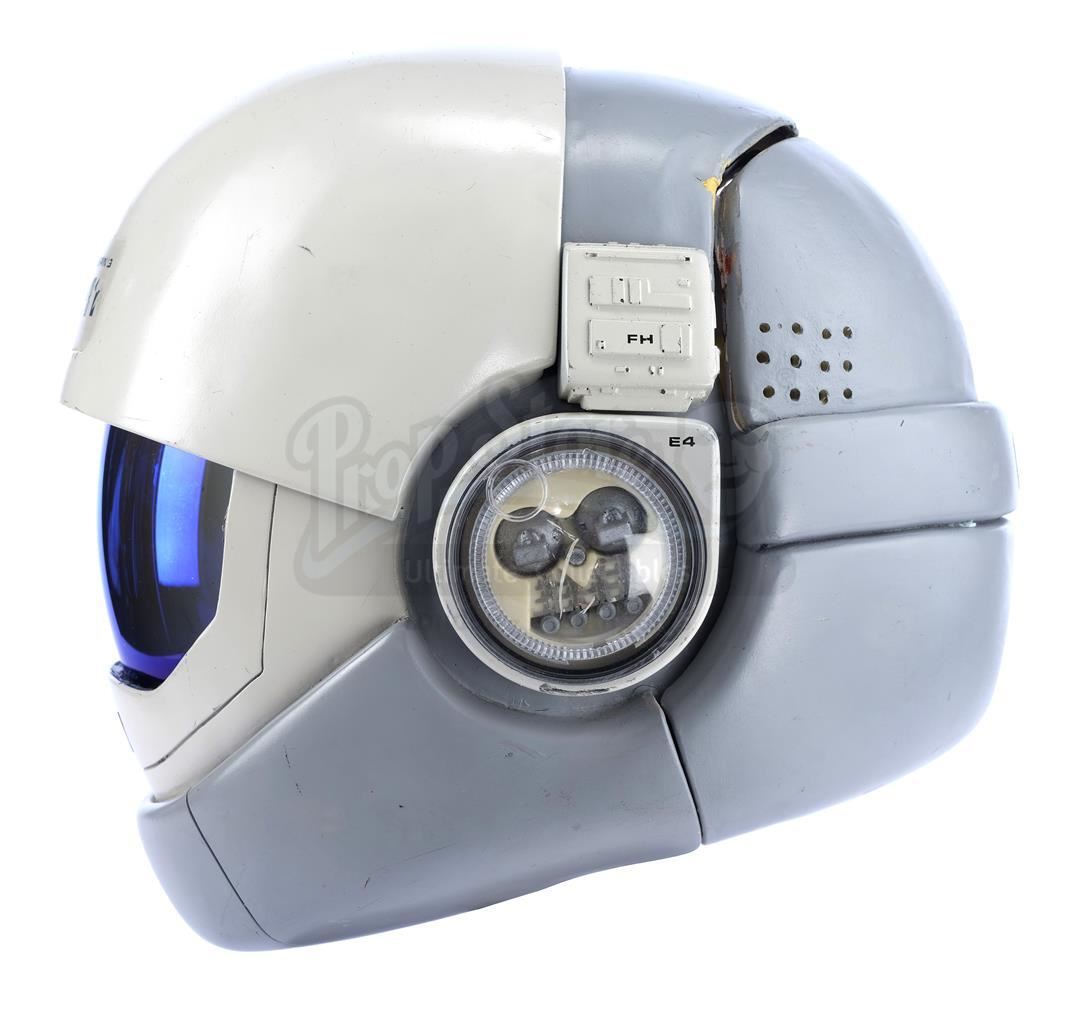
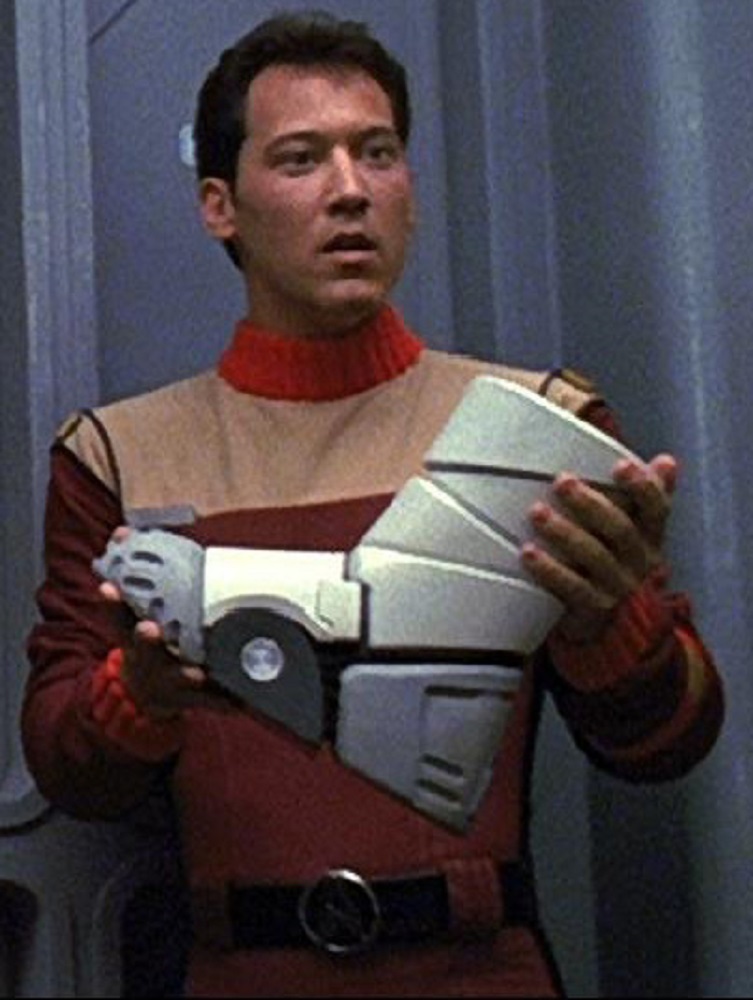
First, they were worn with a pretty sweet helmet.
There were helmets in The Motion Picture, but they were barely seen.
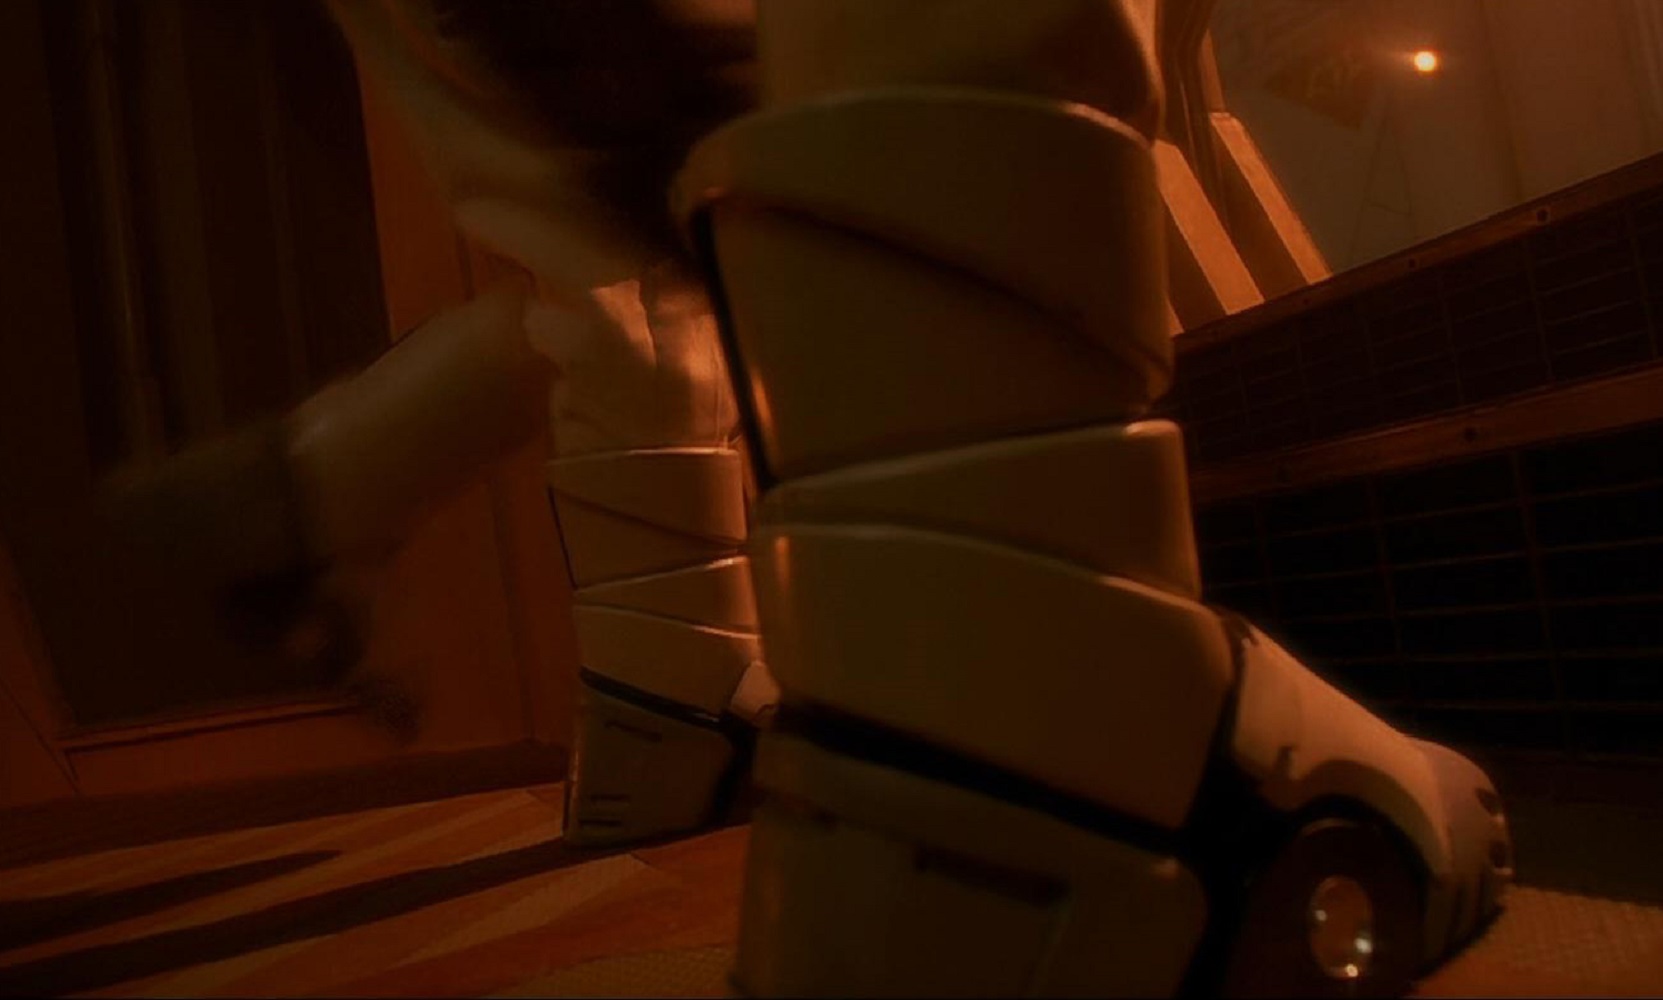
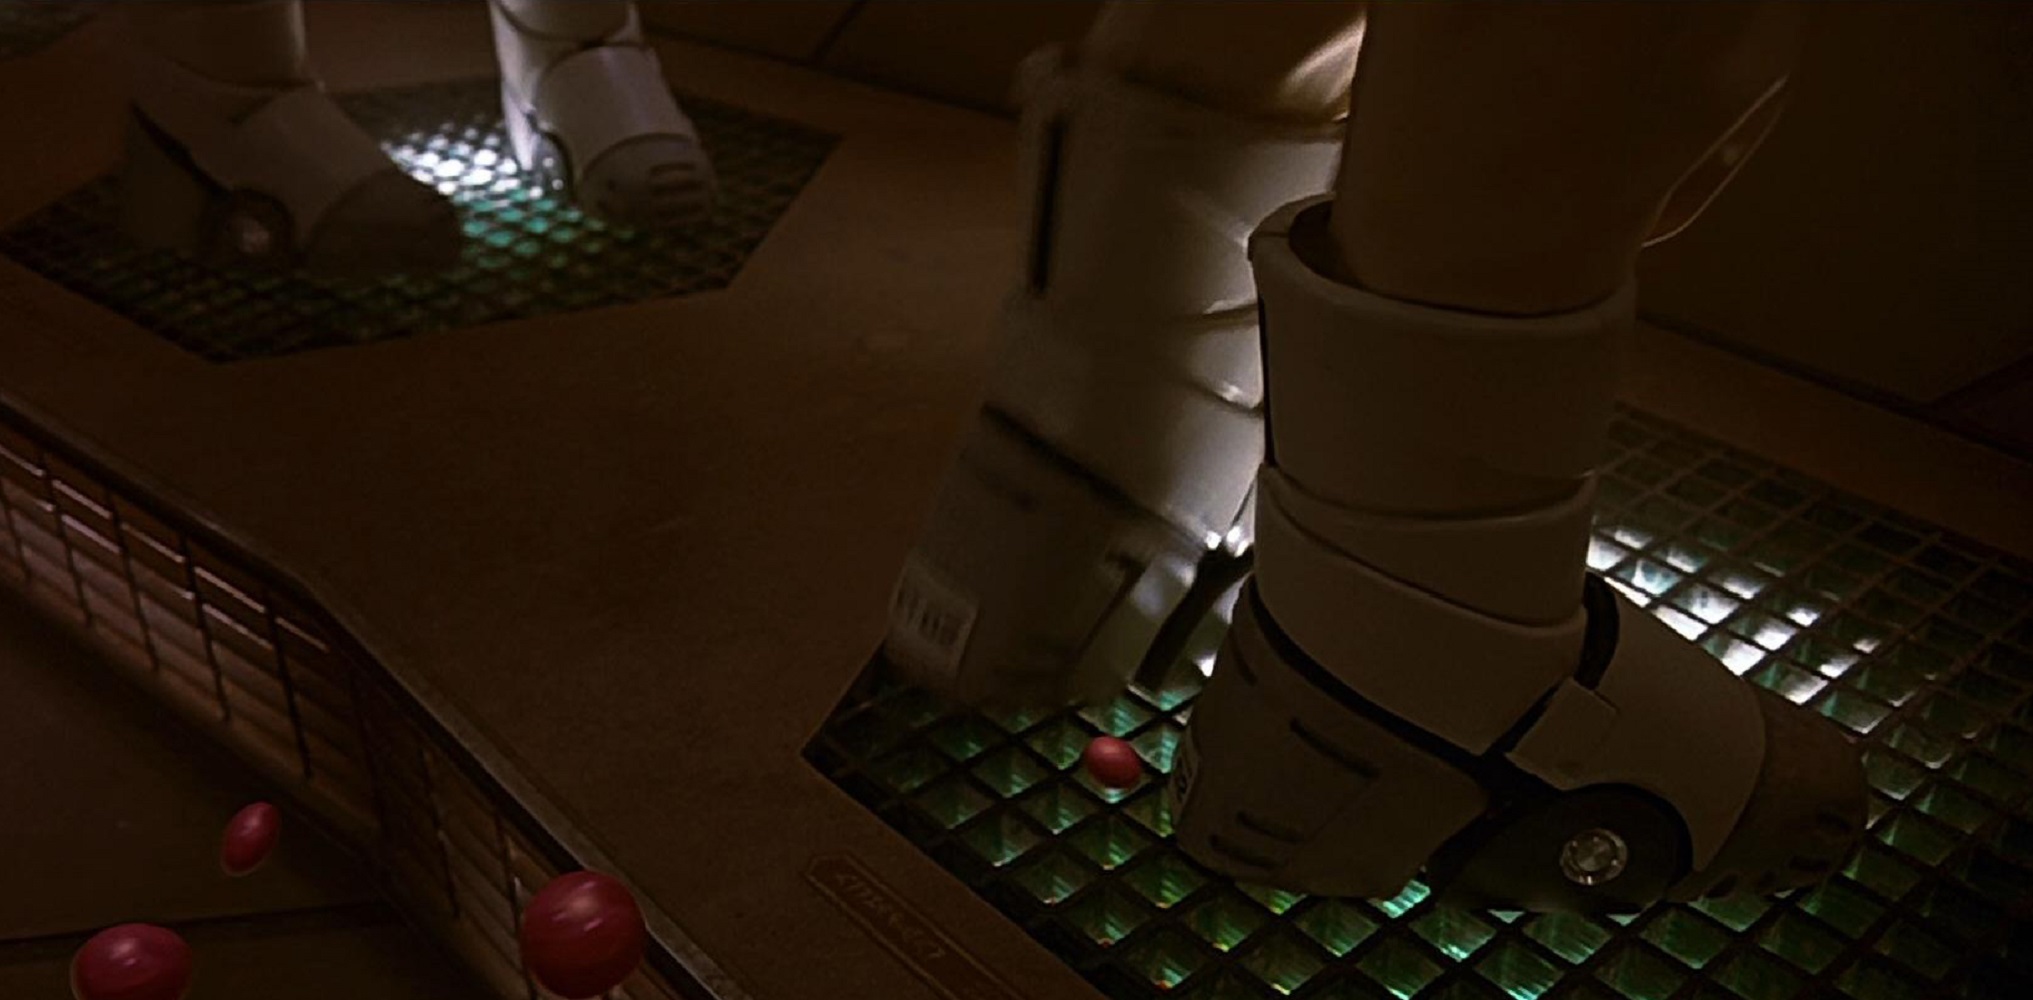
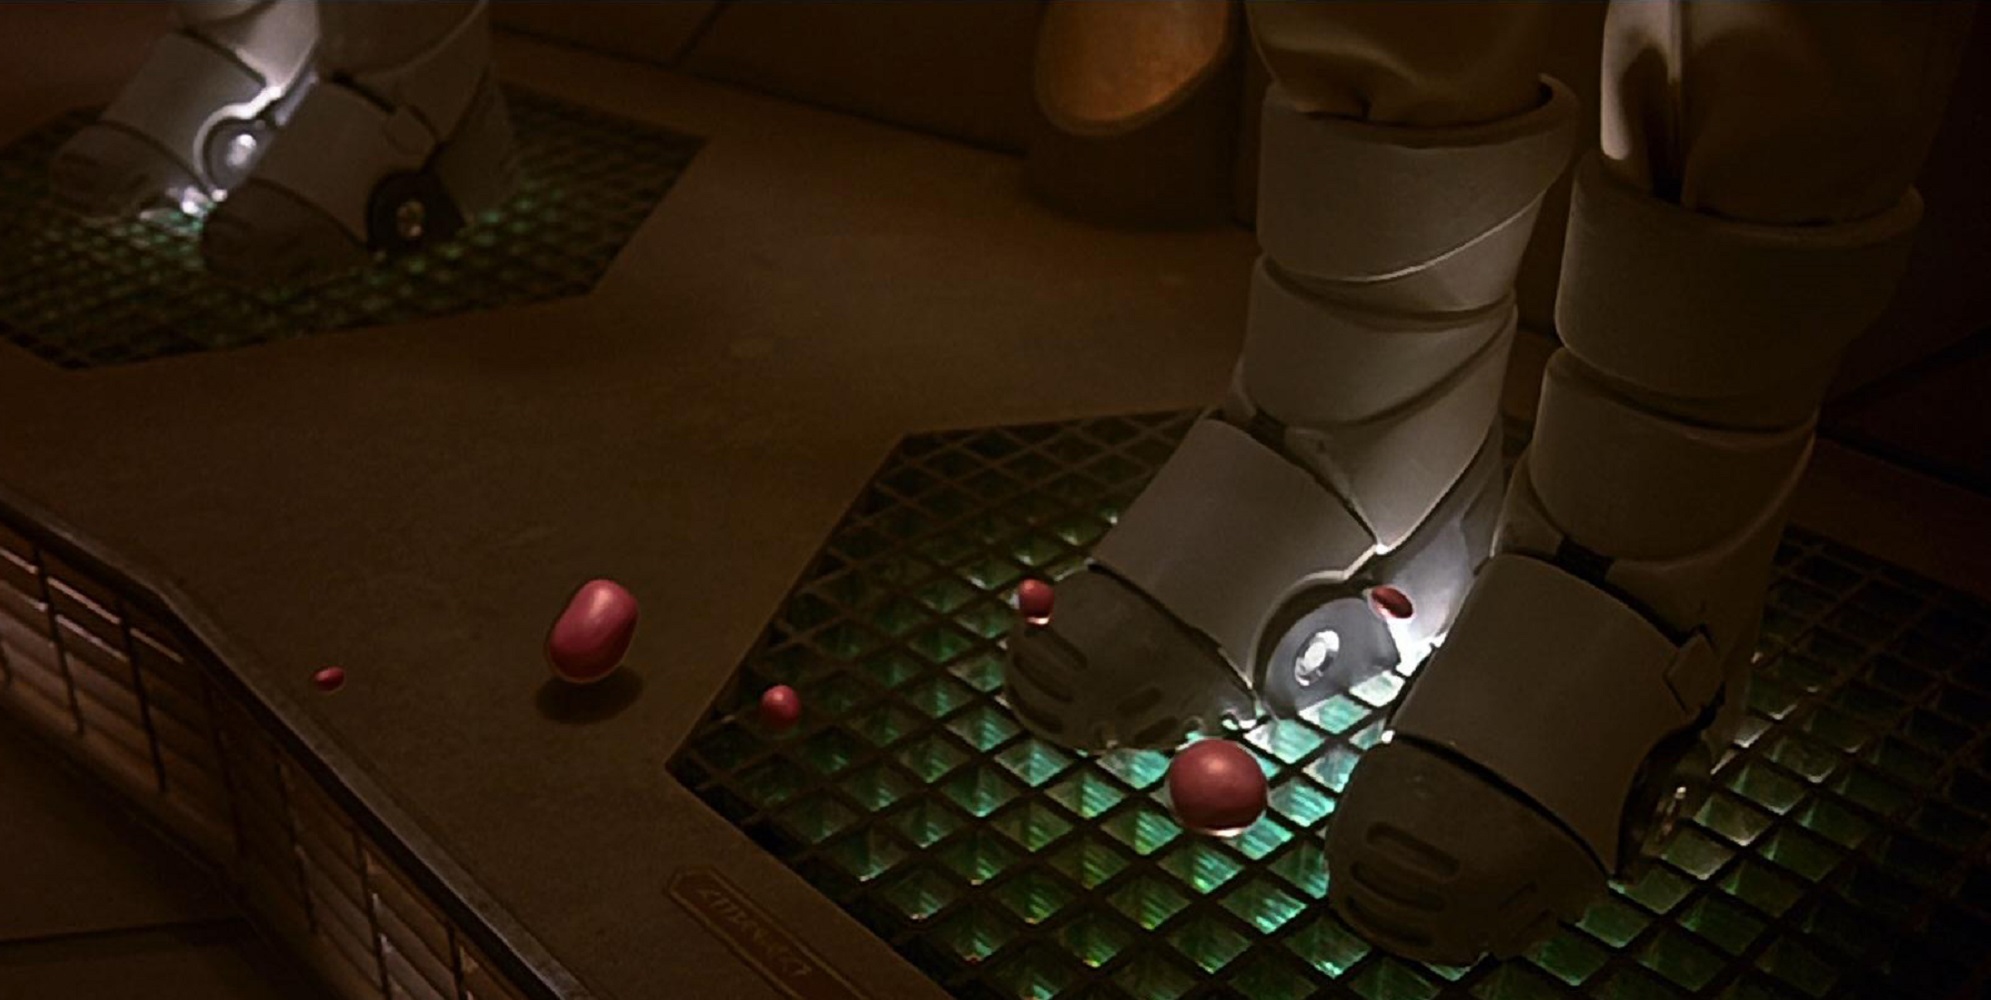
Second, they were, of course, worn with magnetic gravity boots – not the standard ones like we already examined.
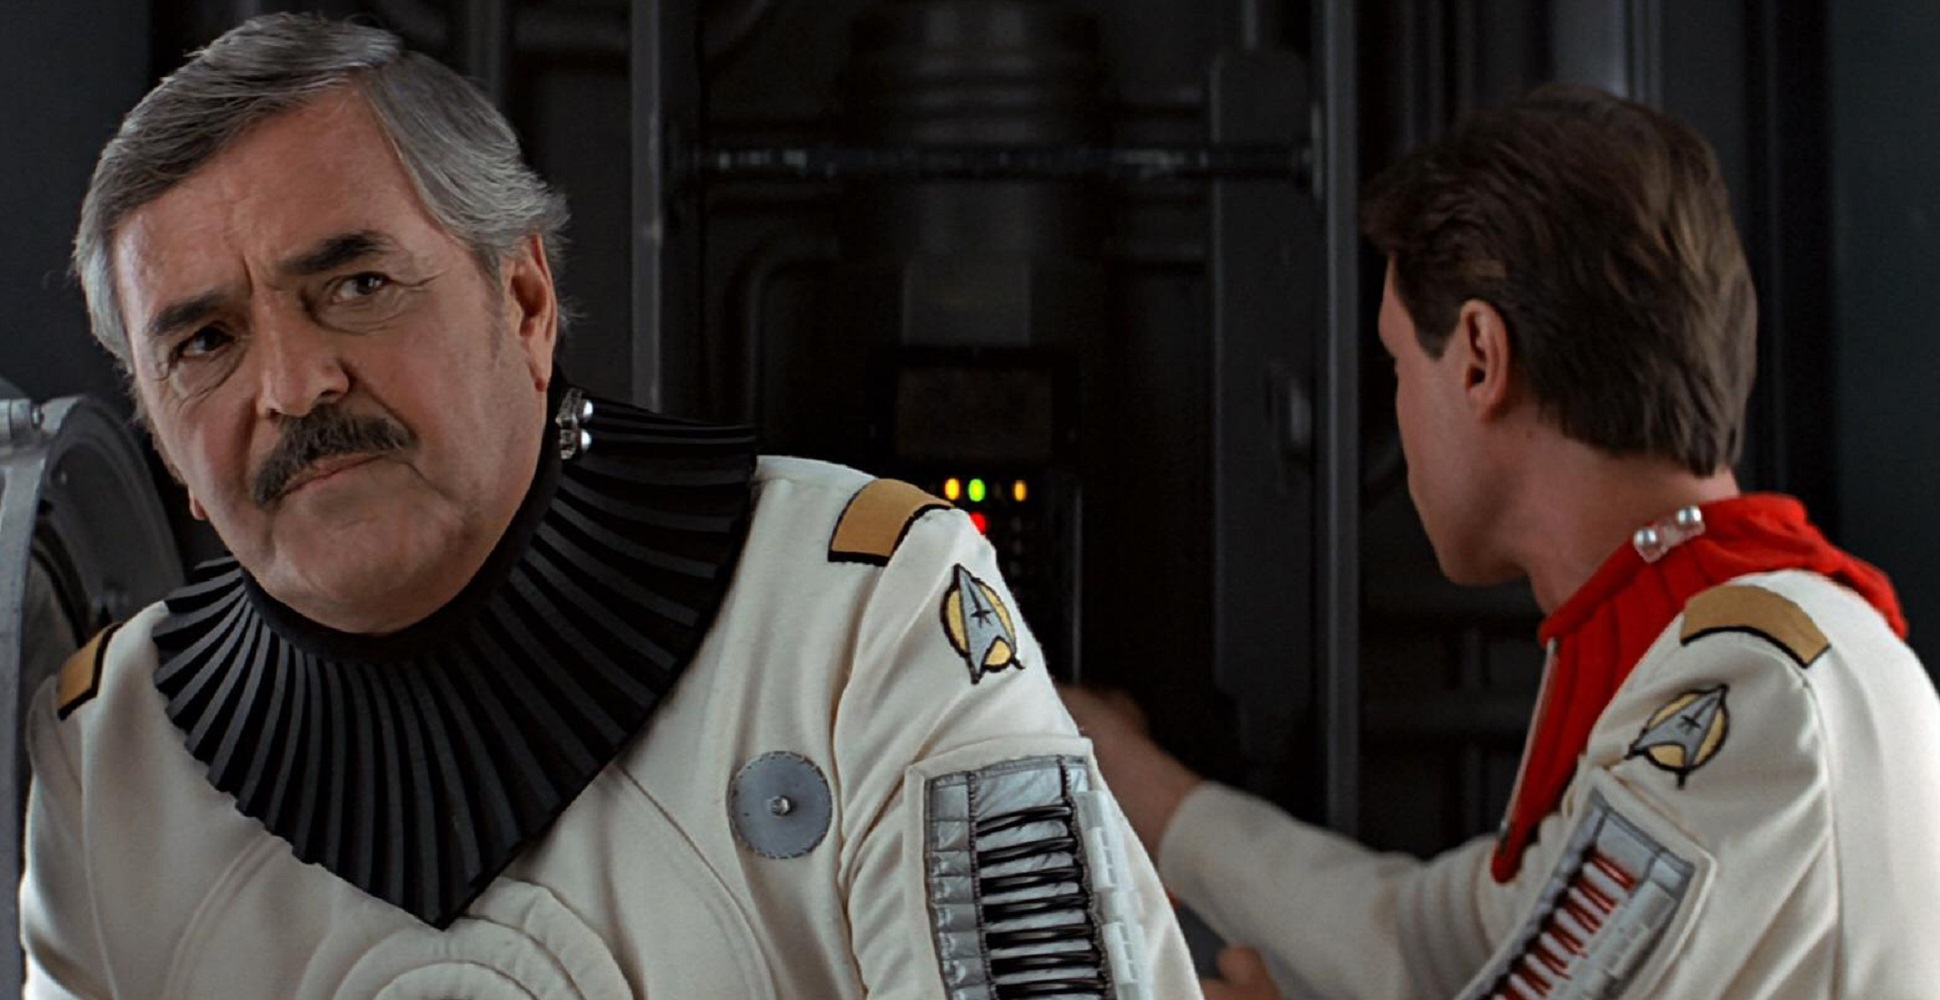
And finally, they had quilted collars, analogous to those on the TWOK-era division shirts.
This wasn’t a case of them wearing a division shirt underneath the radiation suit; the collars were physically attached to the radiation suits’ necklines.
However, I find it curious that these collars were gray, when the engineering suits they wore had gold sleeve bands, and both crew members clearly wore engineering gold with their standard uniforms.
One might conclude that they simply wore other peoples’ uniforms for their covert mission (which would’ve been a smart move and explain the name tags!), but in the movie Scotty clearly said, “The uniforms belong to these two men …” over their bodies later.
Then again, they were taking their orders from Valeris, whose uniform was “wrong” in multiple respects, so perhaps they were following her example of mismatched division colors?
FINAL VARIANT TALLY
For anyone interested in a final tally, there were 23 (!) separate variations of this costume.
That’s 11 specific ensembles in 2 genders, plus the miniature children-sized costumes for the “forced perspective” shots.
The costume ensembles we saw throughout the movies were:
TMP white, with two different buckle styles
TMP orange
TWOK white, officer/enlisted
TWOK white, trainee
TWOK orange, with orange collar
ST3 orange, with trainee collar
ST4 orange, with black collar
ST6 white, officer/enlisted (with nametag, no buckles)
ST6 white, trainee (with nametag, no buckles)
ST6 white, assassin (with nametag and quilted division-colored collar, no buckles)
IN CONCLUSION
I’d again like to thank Ray Minarcik for allowing me to examine this amazing screen-used engineering radiation suit and to share my research with you, as well as Steve Barnes for providing me with the screen-used jacket sleeve band for fabric/color comparisons.
I learned a great deal from the experience, and I hope you did as well!
Every bar of gold-pressed latinum goes toward producing more sewing and costuming resources like this, for everyone interested in Star Trek costumes. 🙂
This is amazing! What about the TNG season 3 uniform analysis, is that still coming?
Thanks! And absolutely. I've been chipping away at that one for a while now, but it will get my full attention once my upcoming sewing/tailoring courses are available. 🙂


This is amazing! What about the TNG season 3 uniform analysis, is that still coming?
Thanks! And absolutely. I've been chipping away at that one for a while now, but it will get my full attention once my upcoming sewing/tailoring courses are available. 🙂